Archives for May 2013

Funky Chicken Quilt Winner Announced

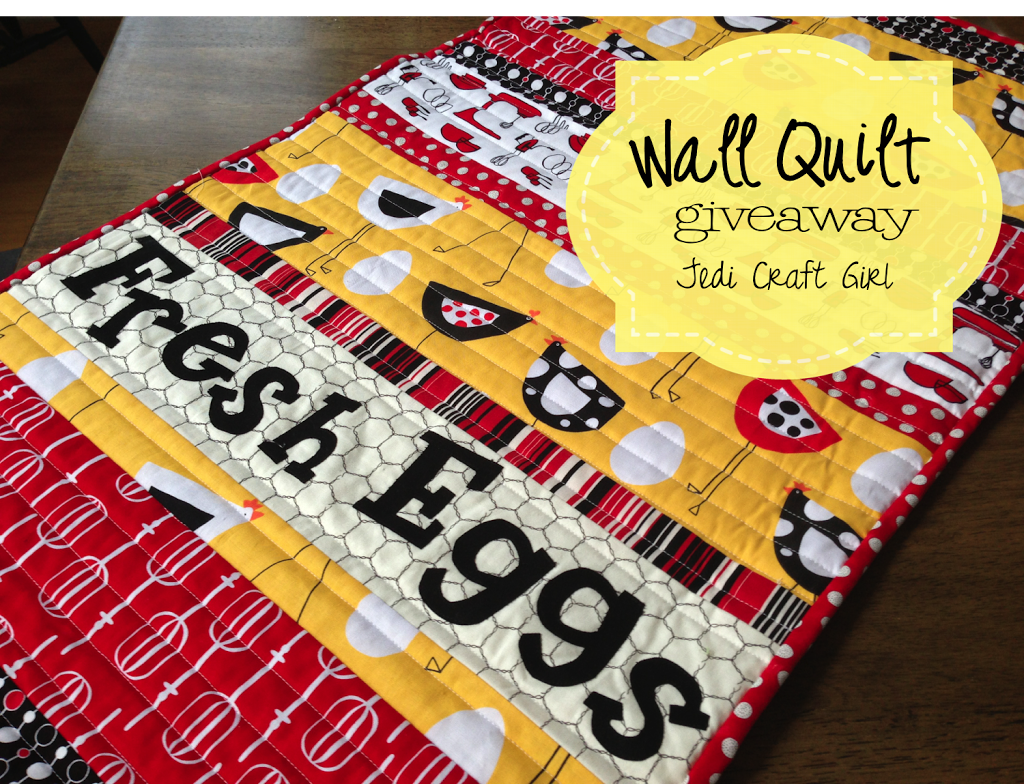
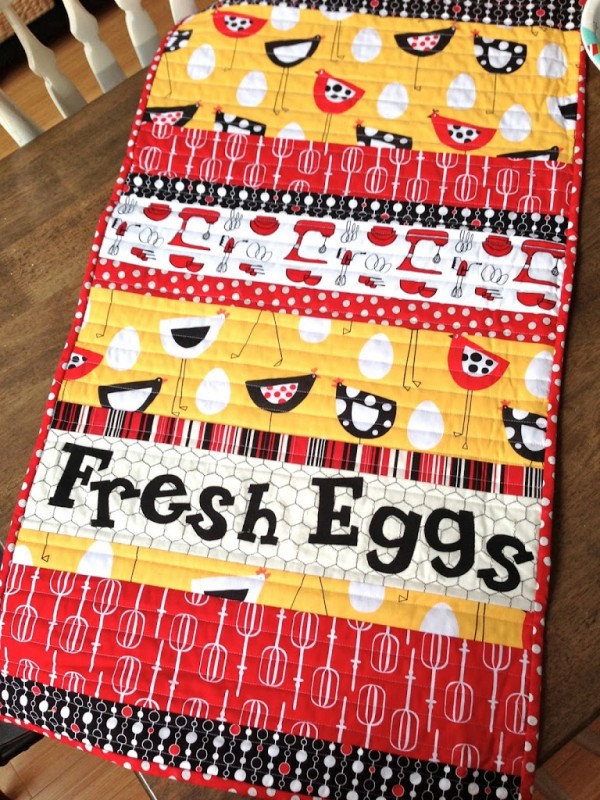
Thank you all for your comments and for stopping by my blog as part of the Sew Mama Sew Giveaway Day.  I wish I had a chicken quilt to give everyone!!  The winner, drawn at random, is Elizabeth who left this comment:
“Oh man! That’s awesome! I have a coworker who has chickens and sells us their eggs. She’d LOVE that as a table runner. She’s also been educating me on all kinds of chicken habits (as well as trying to convince me to get an apartment chicken. Yes, they actually exist somewhere) and I’m trying to convince her to get a silkie.  Thanks for offering such an awesome prize!”

 Thanks everyone for entering!!!

Amanda

Mother’s Day Conversation Jar


 Each year I try and do a Mother’s Day craft in my son’s class.  This year he is in 4th grade.  (Click HERE for last year’s project)   This can be a challenge – something for 28 learners to make in about an hour…..hmmmmm.  I came up with this craft: The Mother’s Day Conversation Jar.  It is a little spin off journal jars.  Here’s how we made them:
 First, I punched out different size circles from tissue paper.  Note: we had to layer a regular piece of paper on the top and bottom of the stack of tissue paper so it wouldn’t rip in the paper punch.  The learners applied Mod Podge to the mason jars, arranged the dots how they wanted and Mod Podged over. 
 
 While the jars were drying, the children cut out conversation starters, folded them and put them in the jars.  Click HERE for the list I put together.  We tied this little tag around the jar:

The idea is that each day, or once a week, or when ever, the child and mother pick a paper out of the jar and have a little conversation about something they might not normally think to talk about – and hopefully learn a little more about each other.  I think it is fun!

When they were all done with the jars, we hot glued a flower to the top of the jar. 


Amanda

Painted Mason Jars

I have seen painted mason jars all over the internet.  Google “Painted Mason Jars” and you will find hundreds of different photos!  I am not taking credit for the idea.  But I have been known to spray paint anything & everything!!   I had a lot of jars, a lot of spray paint, and about 5 minutes – that’s all you need!

I used spray paint to paint the outside of my jars.  I first turned them upside down and painted them, then after they were dry, I turned them right side up and painted them.  I lightly sanded the letters – you could really go crazy on the sanding if you wanted to!

I found this cute wood box at the thrift shop and gave it a coat of spray paint as well.  I love that 3 jars fit perfectly in the box!

Since this is to be an indoor decoration,  I didn’t want to plant a real plant….because, well, I am not the best with real plants!!  I found these cute little greenish plants at Joann’s. 

 You should spray paint some jars today!! 

Amanda

And the winner is…..

Thank you for your comments and following my “Throw Pillow Throw Down”!!!  The winner of the Vintage Tea Towel Pillow is……. Barbara Woods!!  Congratulations!   Don’t forget to comment on my Funky Chicken Quilt giveaway for another chance to win!

Amanda

Wall Quilt Giveaway

If you are new to my blog – I am happy you are here!  I am Amanda aka Jedi Craft Girl.  I love sewing, quilting, crafting, and thrifting.   I hope you enjoy my little piece of blog land!!
I am participating in Sew Mama Sew’s Giveaway Day.  Click on their website to find hundreds of bloggers coming together to give stuff away!!  I am giving away this “Funky Chicken” quilt.  It measures 21″x38″.  It is perfect to hang or even to use as a table runner.  Don’t you just love the chickens!  Kind of a modern twist on the country chicken theme!  
How do you win it?  Easy – just leave a comment telling me where you would put the quilt in your home – or who you would give it to!  That’s it!!  The giveaway will be open until May 10th at 5:00 pm PST.  I will announce the winner on May 12th.  


Amanda

Vintage Tea Towel Pillow Giveaway


I can’t believe it is the last post of my Throw Pillow Throw Down!  It has been so much fun!  I feel like I am just getting going!  I have so many more pillow ideas in my head!  As a thank you for reading my blog, I am giving away this Vintage Tea Towel Pillow Cover.  It fits an 18″ pillow form.  To enter this giveaway, simply leave me a comment telling me your favorite pillow of the week – that’s it!!  The winner will be announced Tuesday Morning, May 7th.

Amanda

Vintage Tea Towel Pillow

 
When I was in Virginia, I found this cute tea towel at the Arlington Flea Market.  I loved it because it had the same design stitched on both ends – now I can make 2 pillows!  I thought it would make a darling pillow!  You can do this with any vintage linen.  


Cut the image how you want.  Mine was an 11″ square.

 Next, cut (2) 2″ strips x WOF for the first border.  Sew the pieces: sides first, press, then top and bottom, press.

 For the 2nd border, cut (2) 3 1/2 inch strips.  Follow the same process, sew the sides, press, sew the top and bottom, press.

 I love it!  I was tempted to turn it into a mini quilt 🙂

 Finish how you would normally finish a pillow.  Can you guess how I finished mine?  Invisible Zipper!  I am a pro now!!

 I love the embroidery work.  And I love that I didn’t have to do it!!

Amanda

Flour Sack Pillow


 When I was out in Lucketts, Virginia, I bought this flour sack pillow case.  I think it was a flour sack first, then someone sewed it into a pillow case.  I don’t have much of a need for pink and aqua roosters in the bedrooms of my house; I do, however,  NEED a THROW PILLOW adorned with pink & aqua roosters in my house – who doesn’t?

I cut the pillow case down, attached some aqua trim, sewed, turned, and stuffed!

Now it is one of my favorite pillows ever!

Amanda

Ruffle Pillow Tutorial

Don’t you love ruffles?  They make everything so happy!  I have seen ruffle pillows all over the internet and I have been wanting to try one.  This is my version; I hope you want to make one too!
Choose your fabrics.  I wanted my pillow colorful, so I choose this aqua, orange & yellow print from xo.gigi fabrics.com.  I love it!  Then I choose a thin white cotton with a textured dot.

This is the fun part because you get to rip your fabric.  I snipped my white fabric every 2 inches then ripped all the way down the width of the fabric.

I used my gathering foot to make the ruffling go really fast.  If you don’t have a ruffling foot, just sew a gathering stitch and gather by hand. (if you like ruffles you must get this foot – it is so much fun!)

My pillow form is 18″ so I cut my front and back piece 19″.  I inserted my invisible zipper before I sewed the ruffles on.  It made it easier.  For my back I choose a piece of neutral colored linen.

 If you are picky you should measure this part, I just eyeballed it.  I placed my ruffles so there was about 1 inch between each row.  I wanted to see the fabric through the ruffles.  If you want a ruffle-only pillow you could use plain fabric and place the ruffles right up next to each other.

This part takes a while because it requires a lot of pinning.  Half way through I was almost temped to get out the hot glue gun and make this project go really fast!

 Once all the ruffles are pinned down, sew along the gathering stitch.

 You can finish this like you would finish any pillow.  You could do an envelope back, stuff it with fiber-fill, or a zipper closure like I did.

Sew & Turn!!
Bottom view of my pillow….I am getting good at those invisible zippers!  Next time I will time myself to see how fast I can sew one!!


I can’t decide if I like the ruffles going horizontal or vertical.  I suppose it doesn’t matter 🙂


Amanda

Chevron Lace Pillow

 I am excited to share this tutorial from Thrifty Modest Threads.  “We are  three sisters-in-law who came together to create a blog where we could post our crafty creations, talk about our adventures in motherhood, and share our thrifty modest finds! We are currently in the process of launching our new blog called “Muddy Toes & Pretty Bows” which will also include crafty projects, sewing, our crazy kids, and just about anything that life throws at us!”
 
 Cut fabric 12in x 16in.  Cut three long strips of lace.  Now get ready for a lot of measuring and marking to make sure the zigzags are equal distance apart from one another.

Pin the lace and sew it on!  Pretty easy!


Thanks so much Thrifty {Modest} Threads for sharing this tutorial!  I am hoping to make one of my very own! 

Amanda