Follow the Bluebird

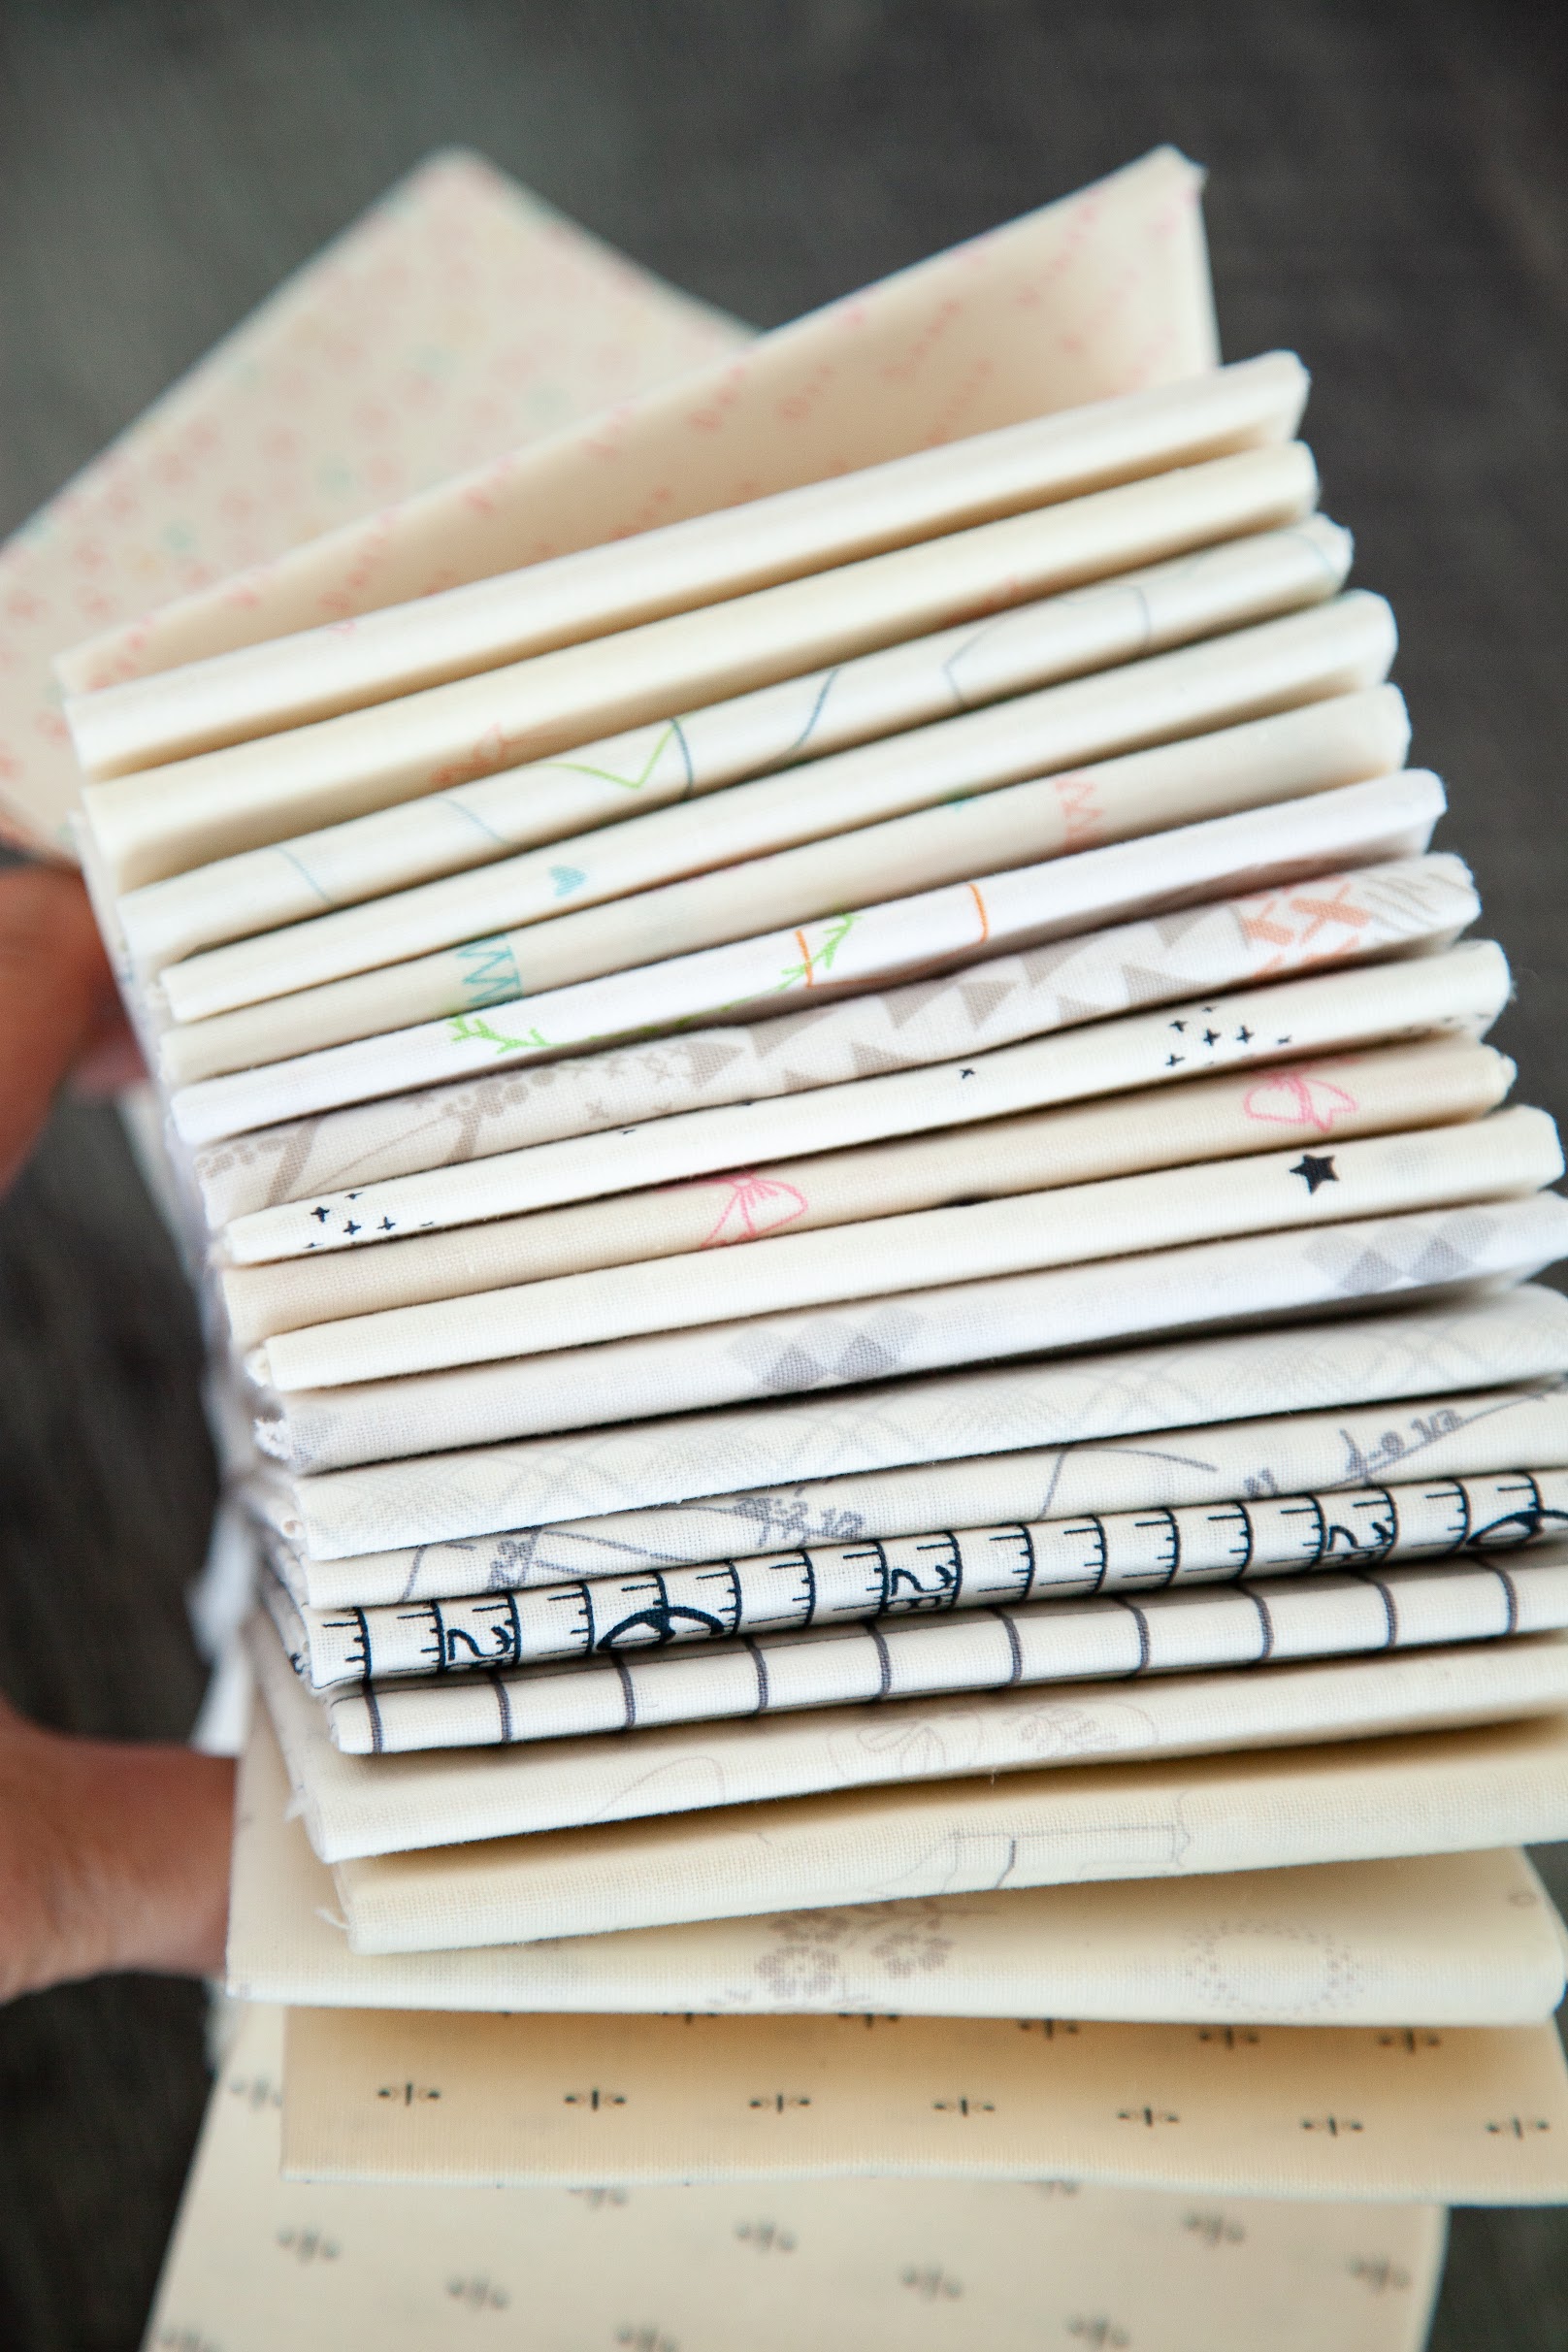
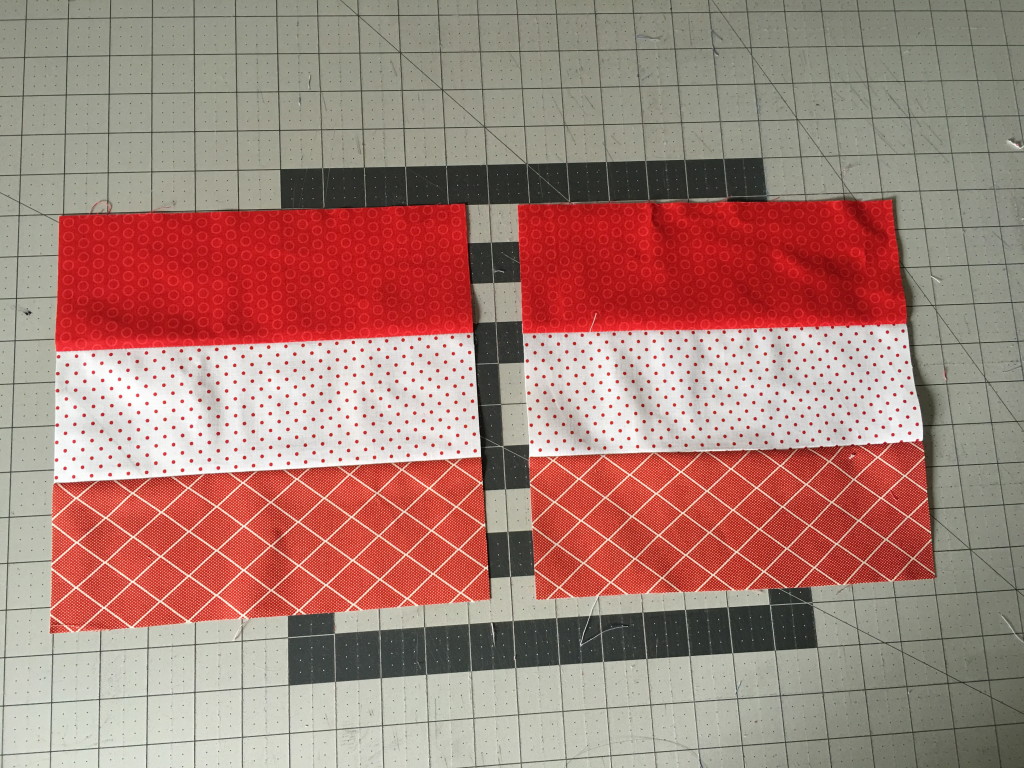
Riley Blake Designs has just released a new fabric collection called Hush Hush. It is made up of 21 different low volume fabrics created and designed by 21 different designers! This collection is a must for your low volume stash!

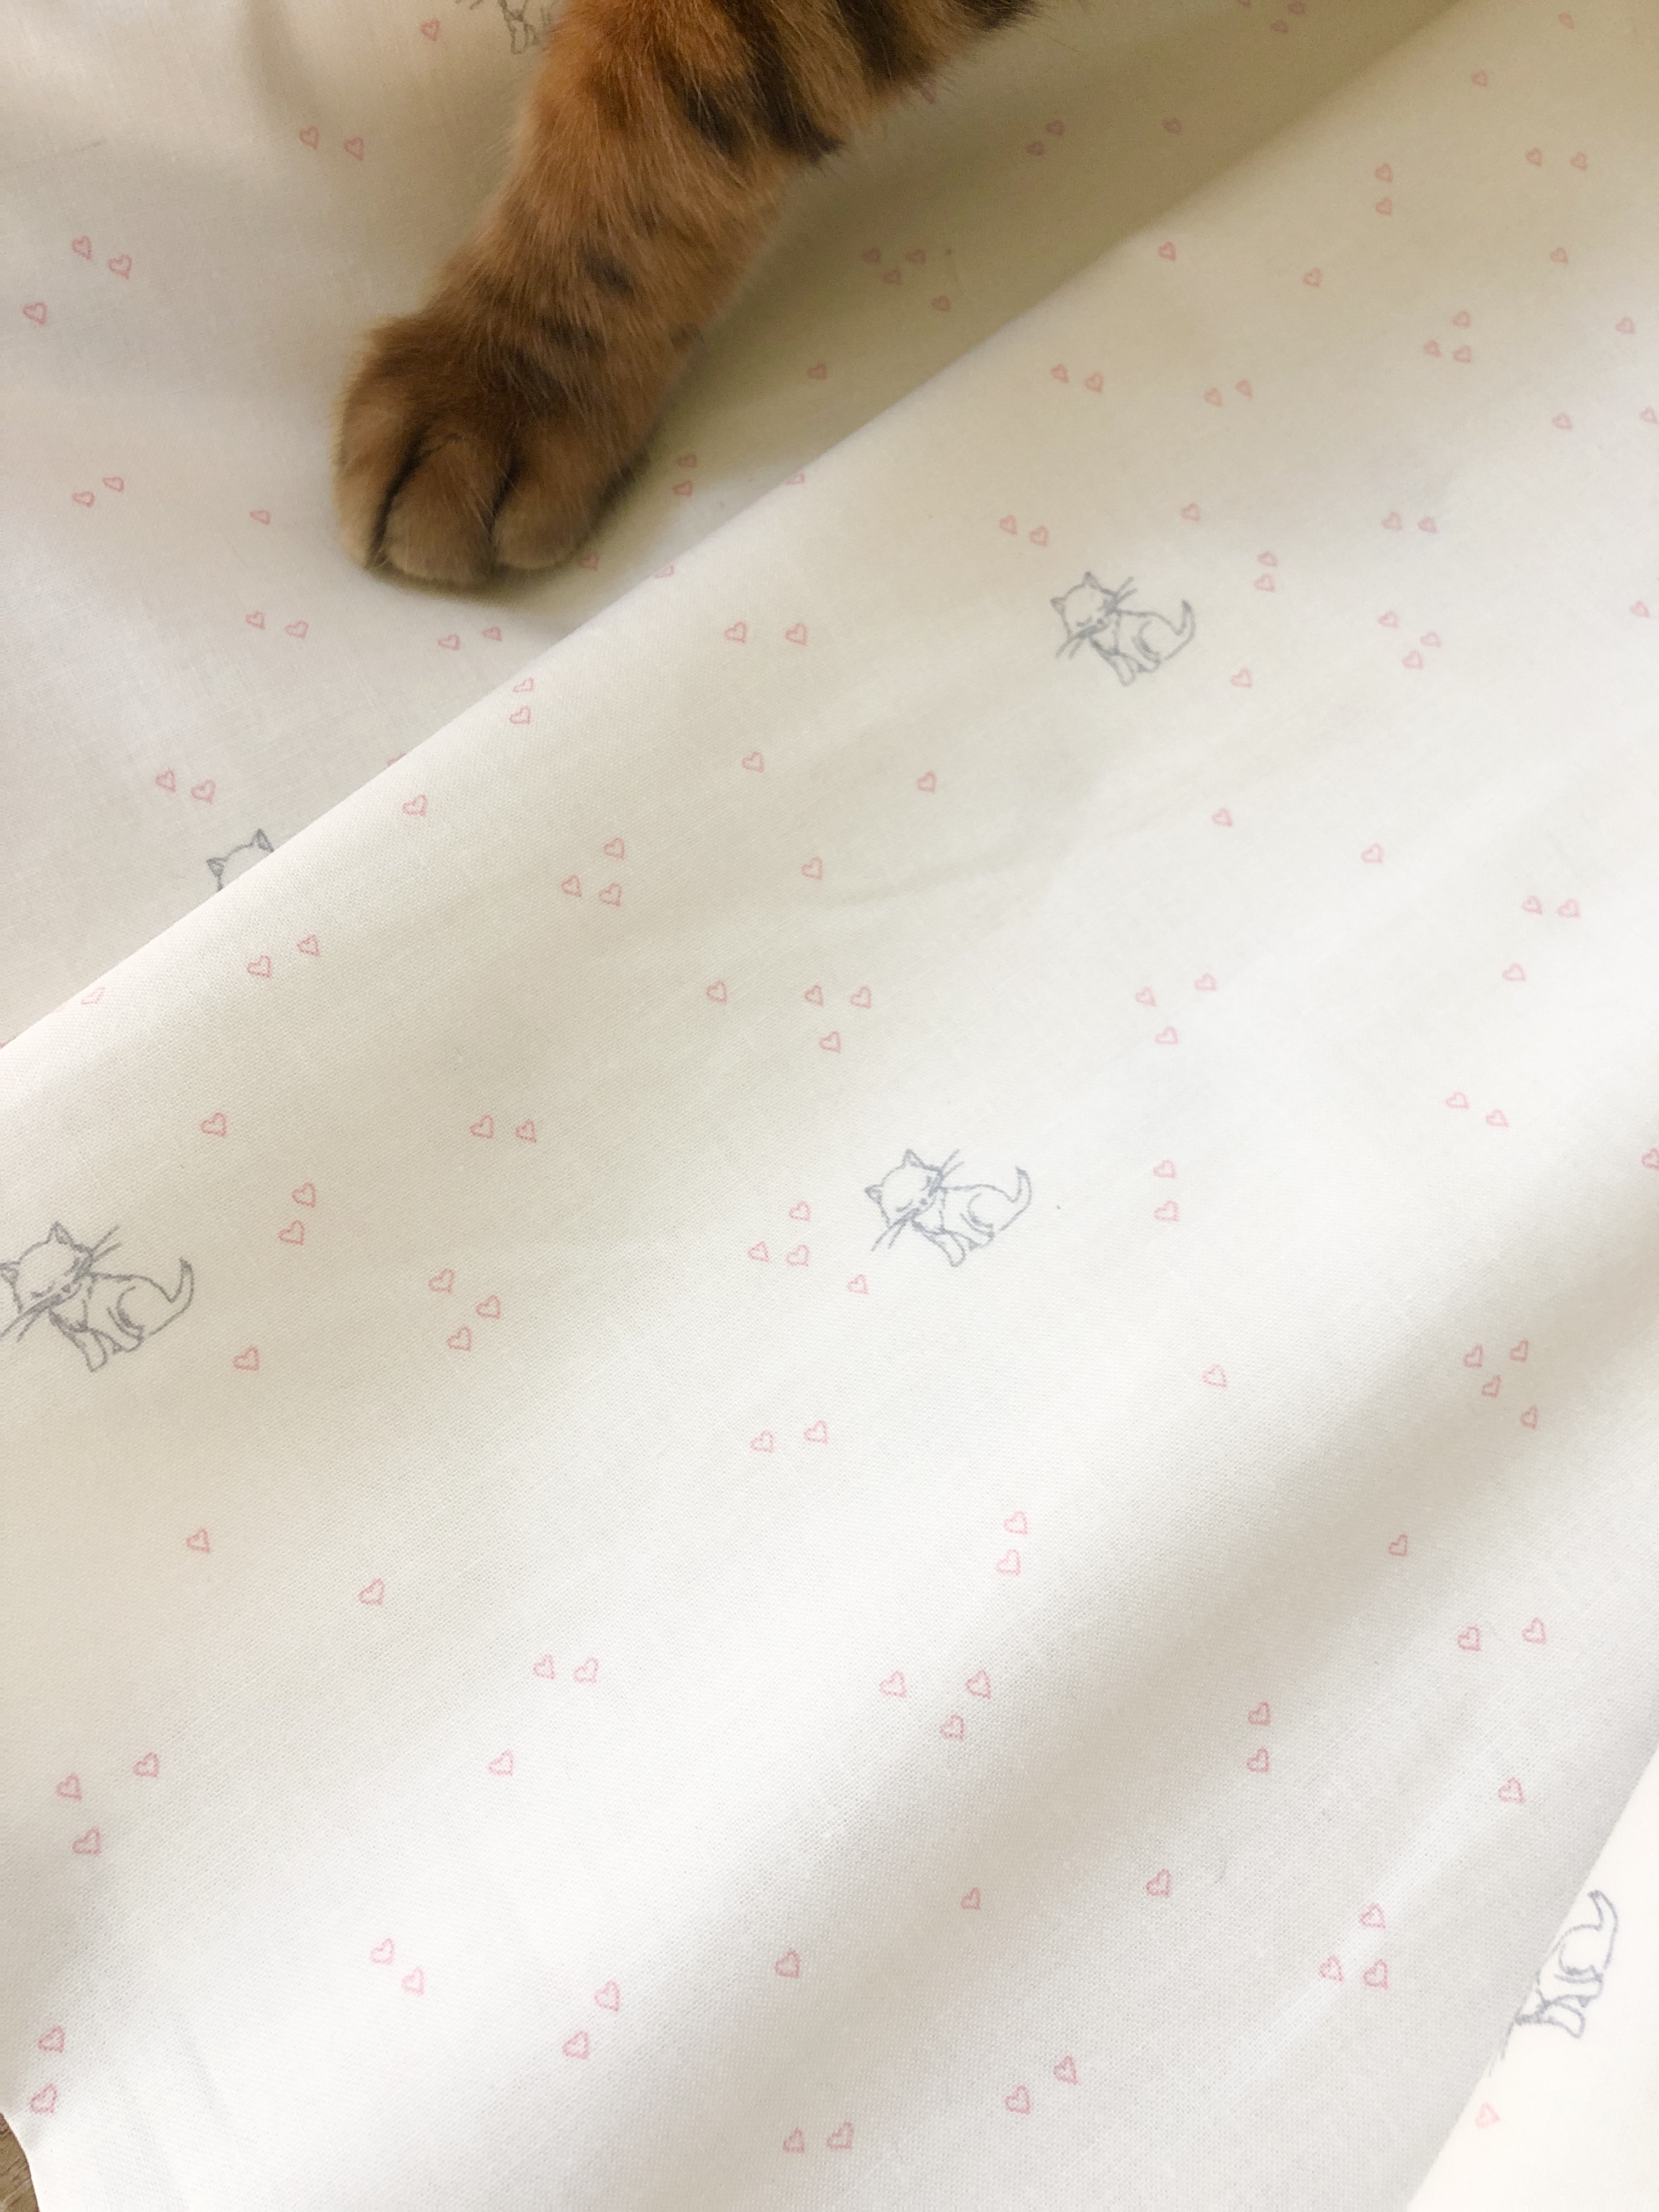
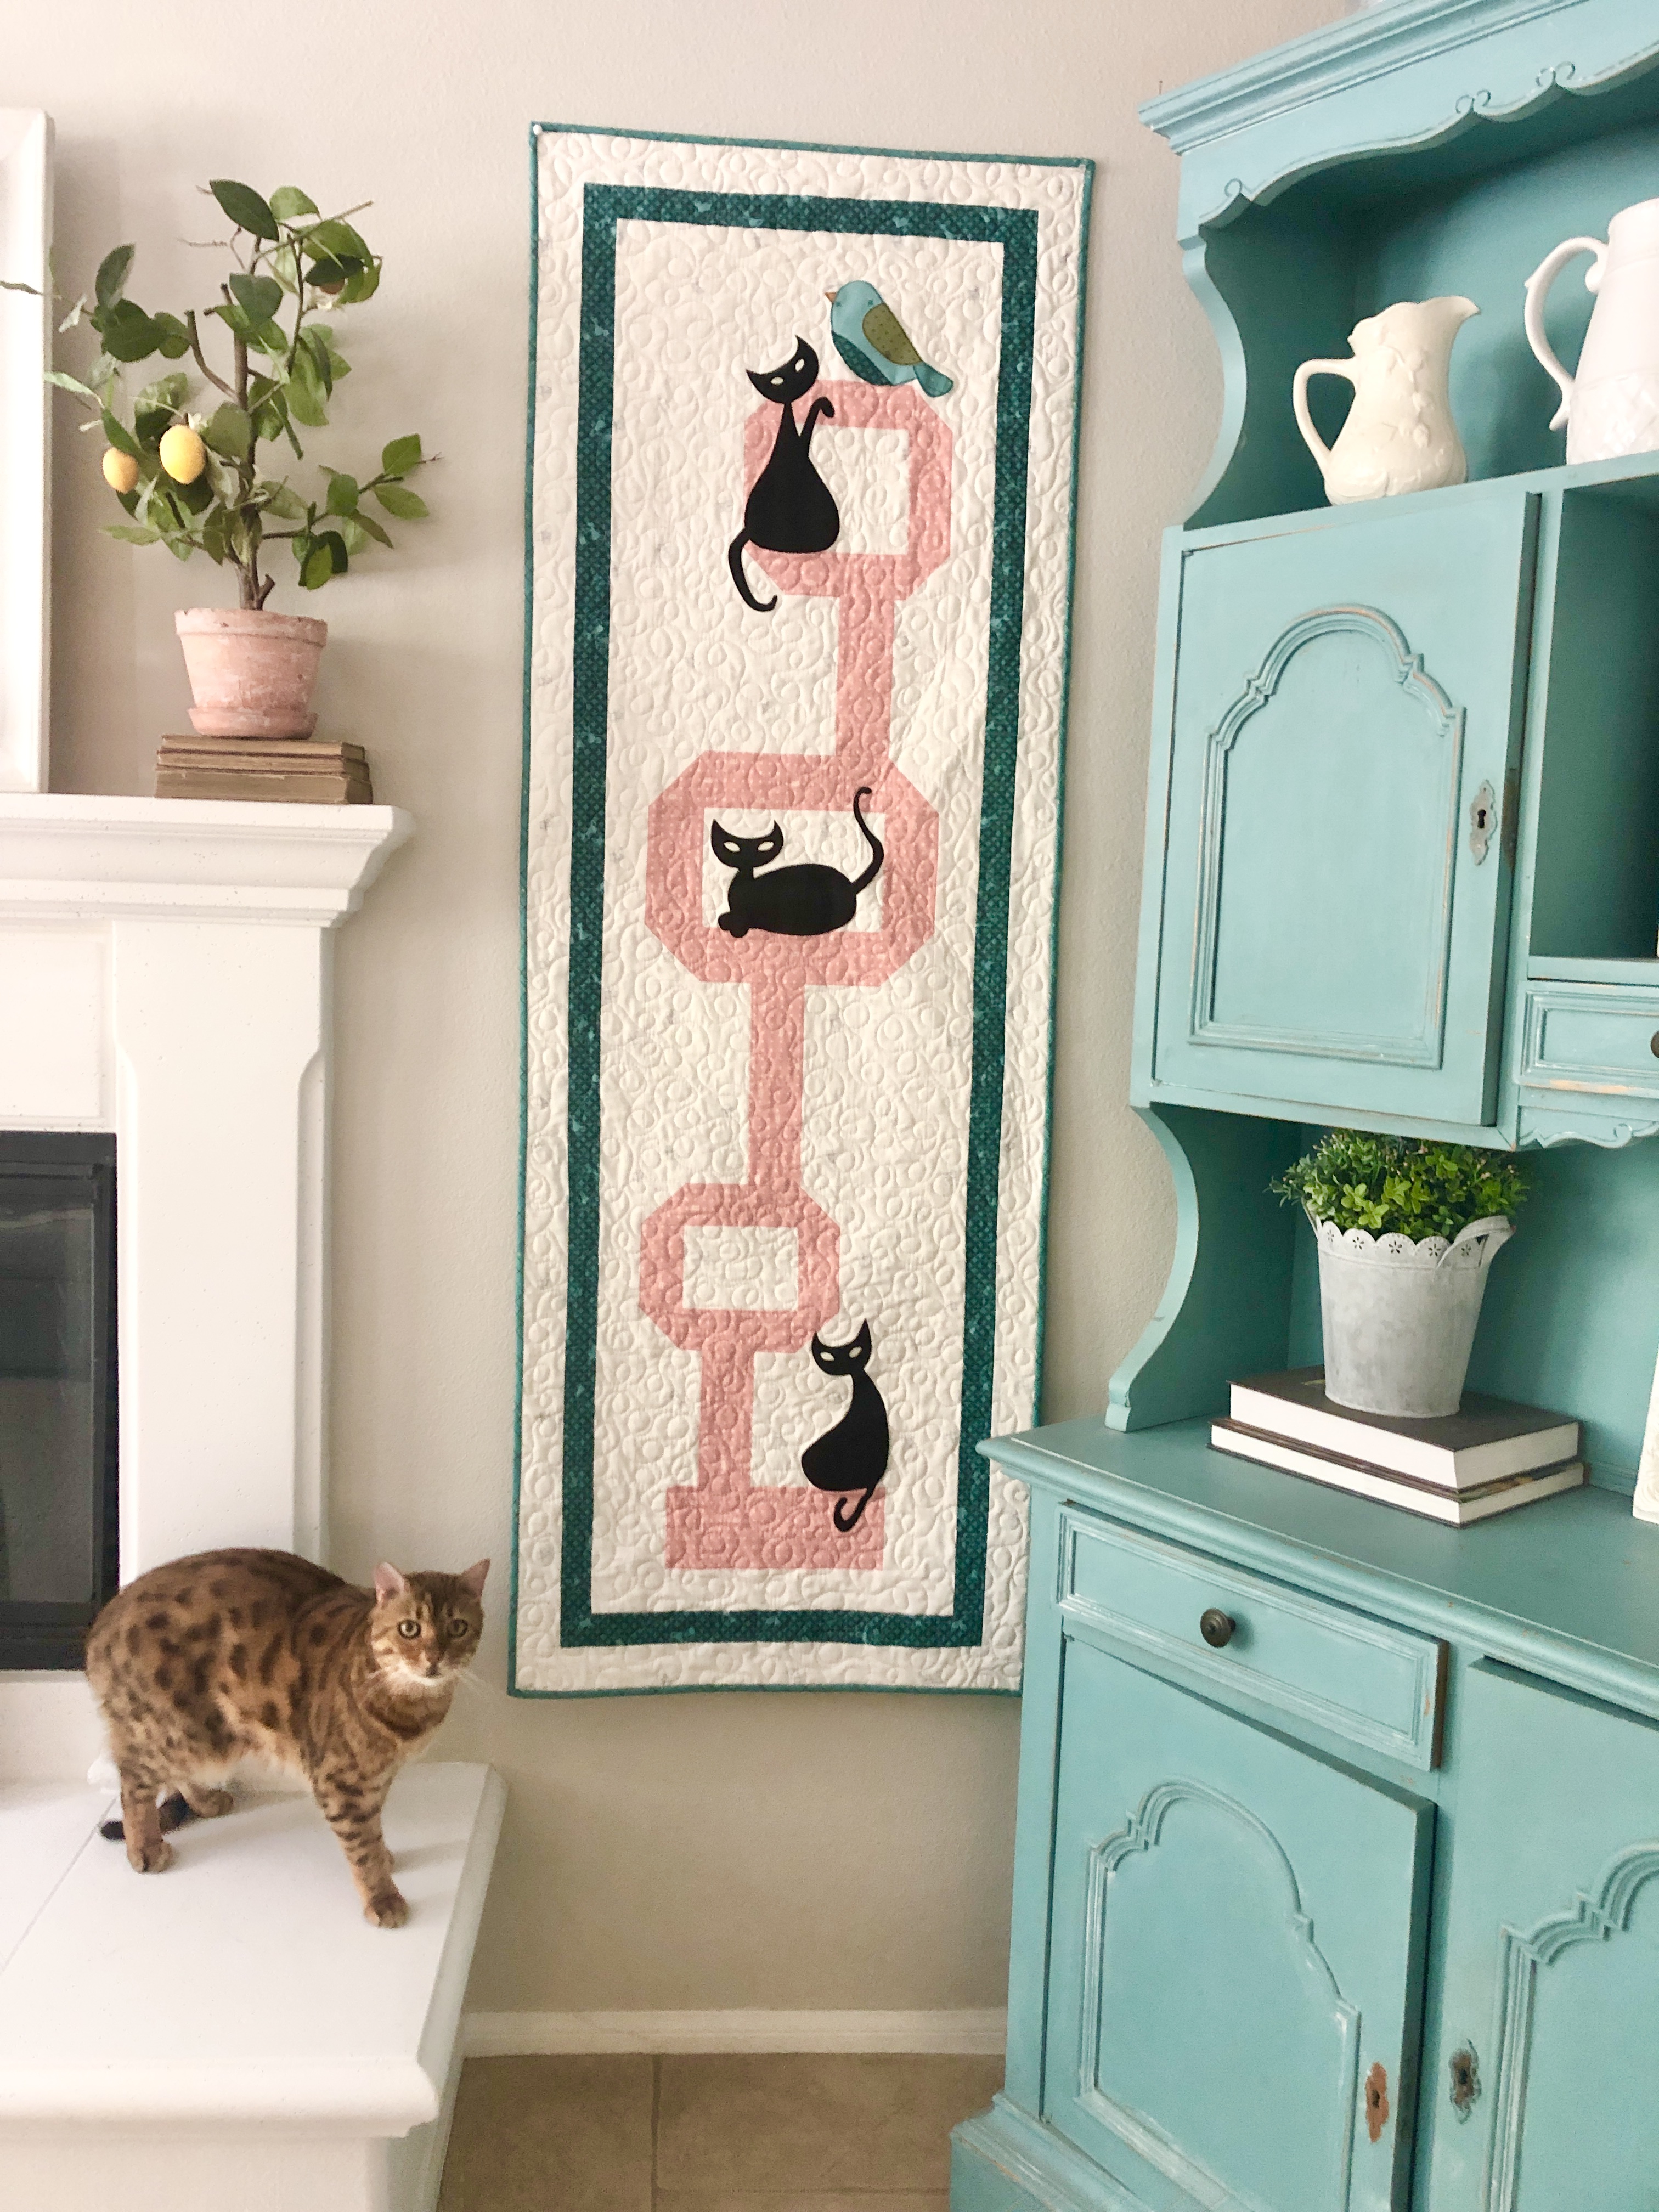
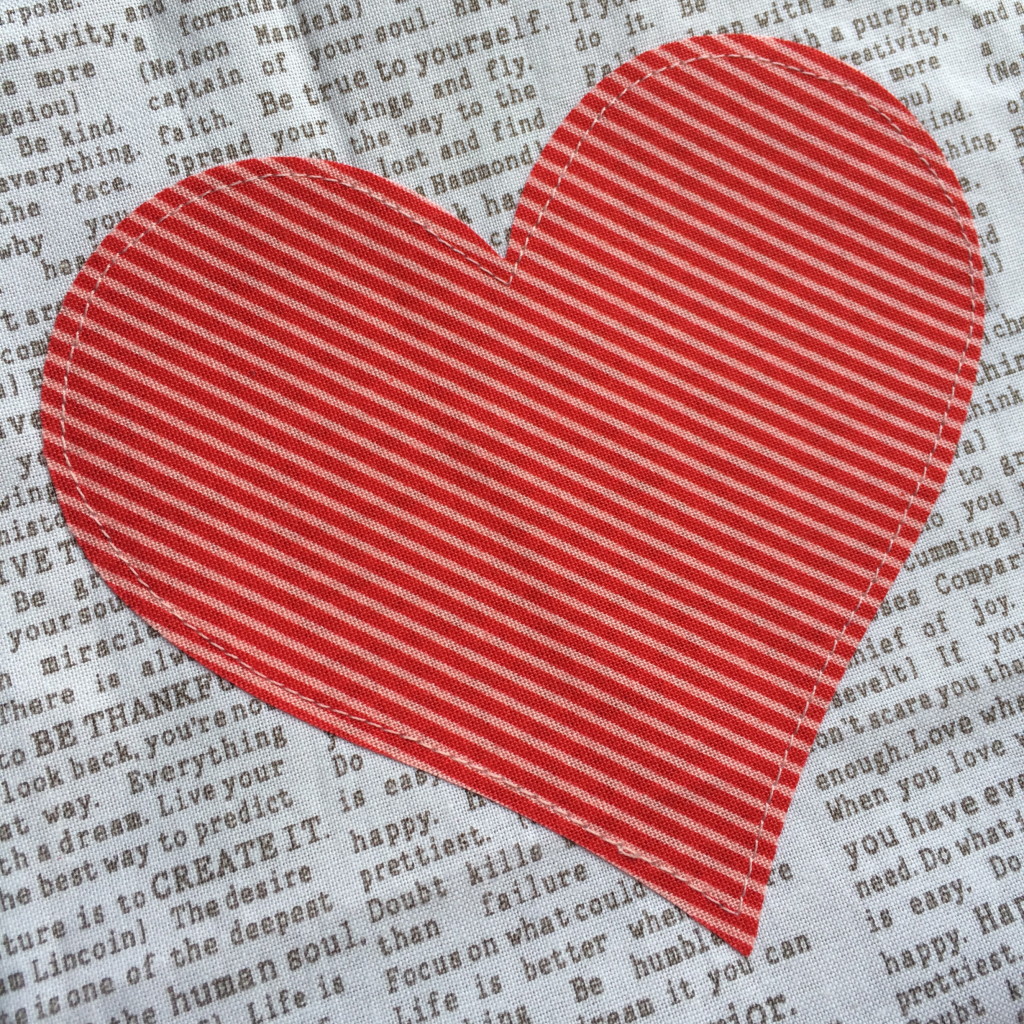
Of course my fabric involves cats! Ella and I worked on this print together and came up with a sweet drawing of a kitty surrounded by little hand drawn hearts. I love it so much!

Riley Blake Designes has released 3 bluebird quilt block designs and challenged the designers to create a project using the Hush Hush collection and a bluebird. So fun right? You can find all the info and the patterns HERE.

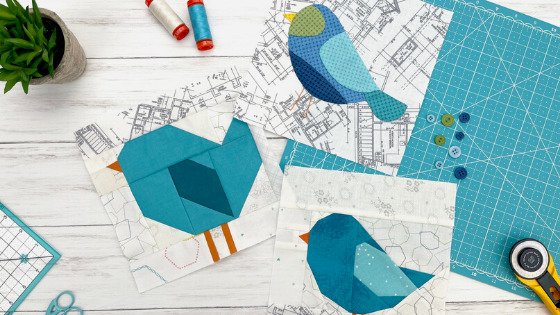
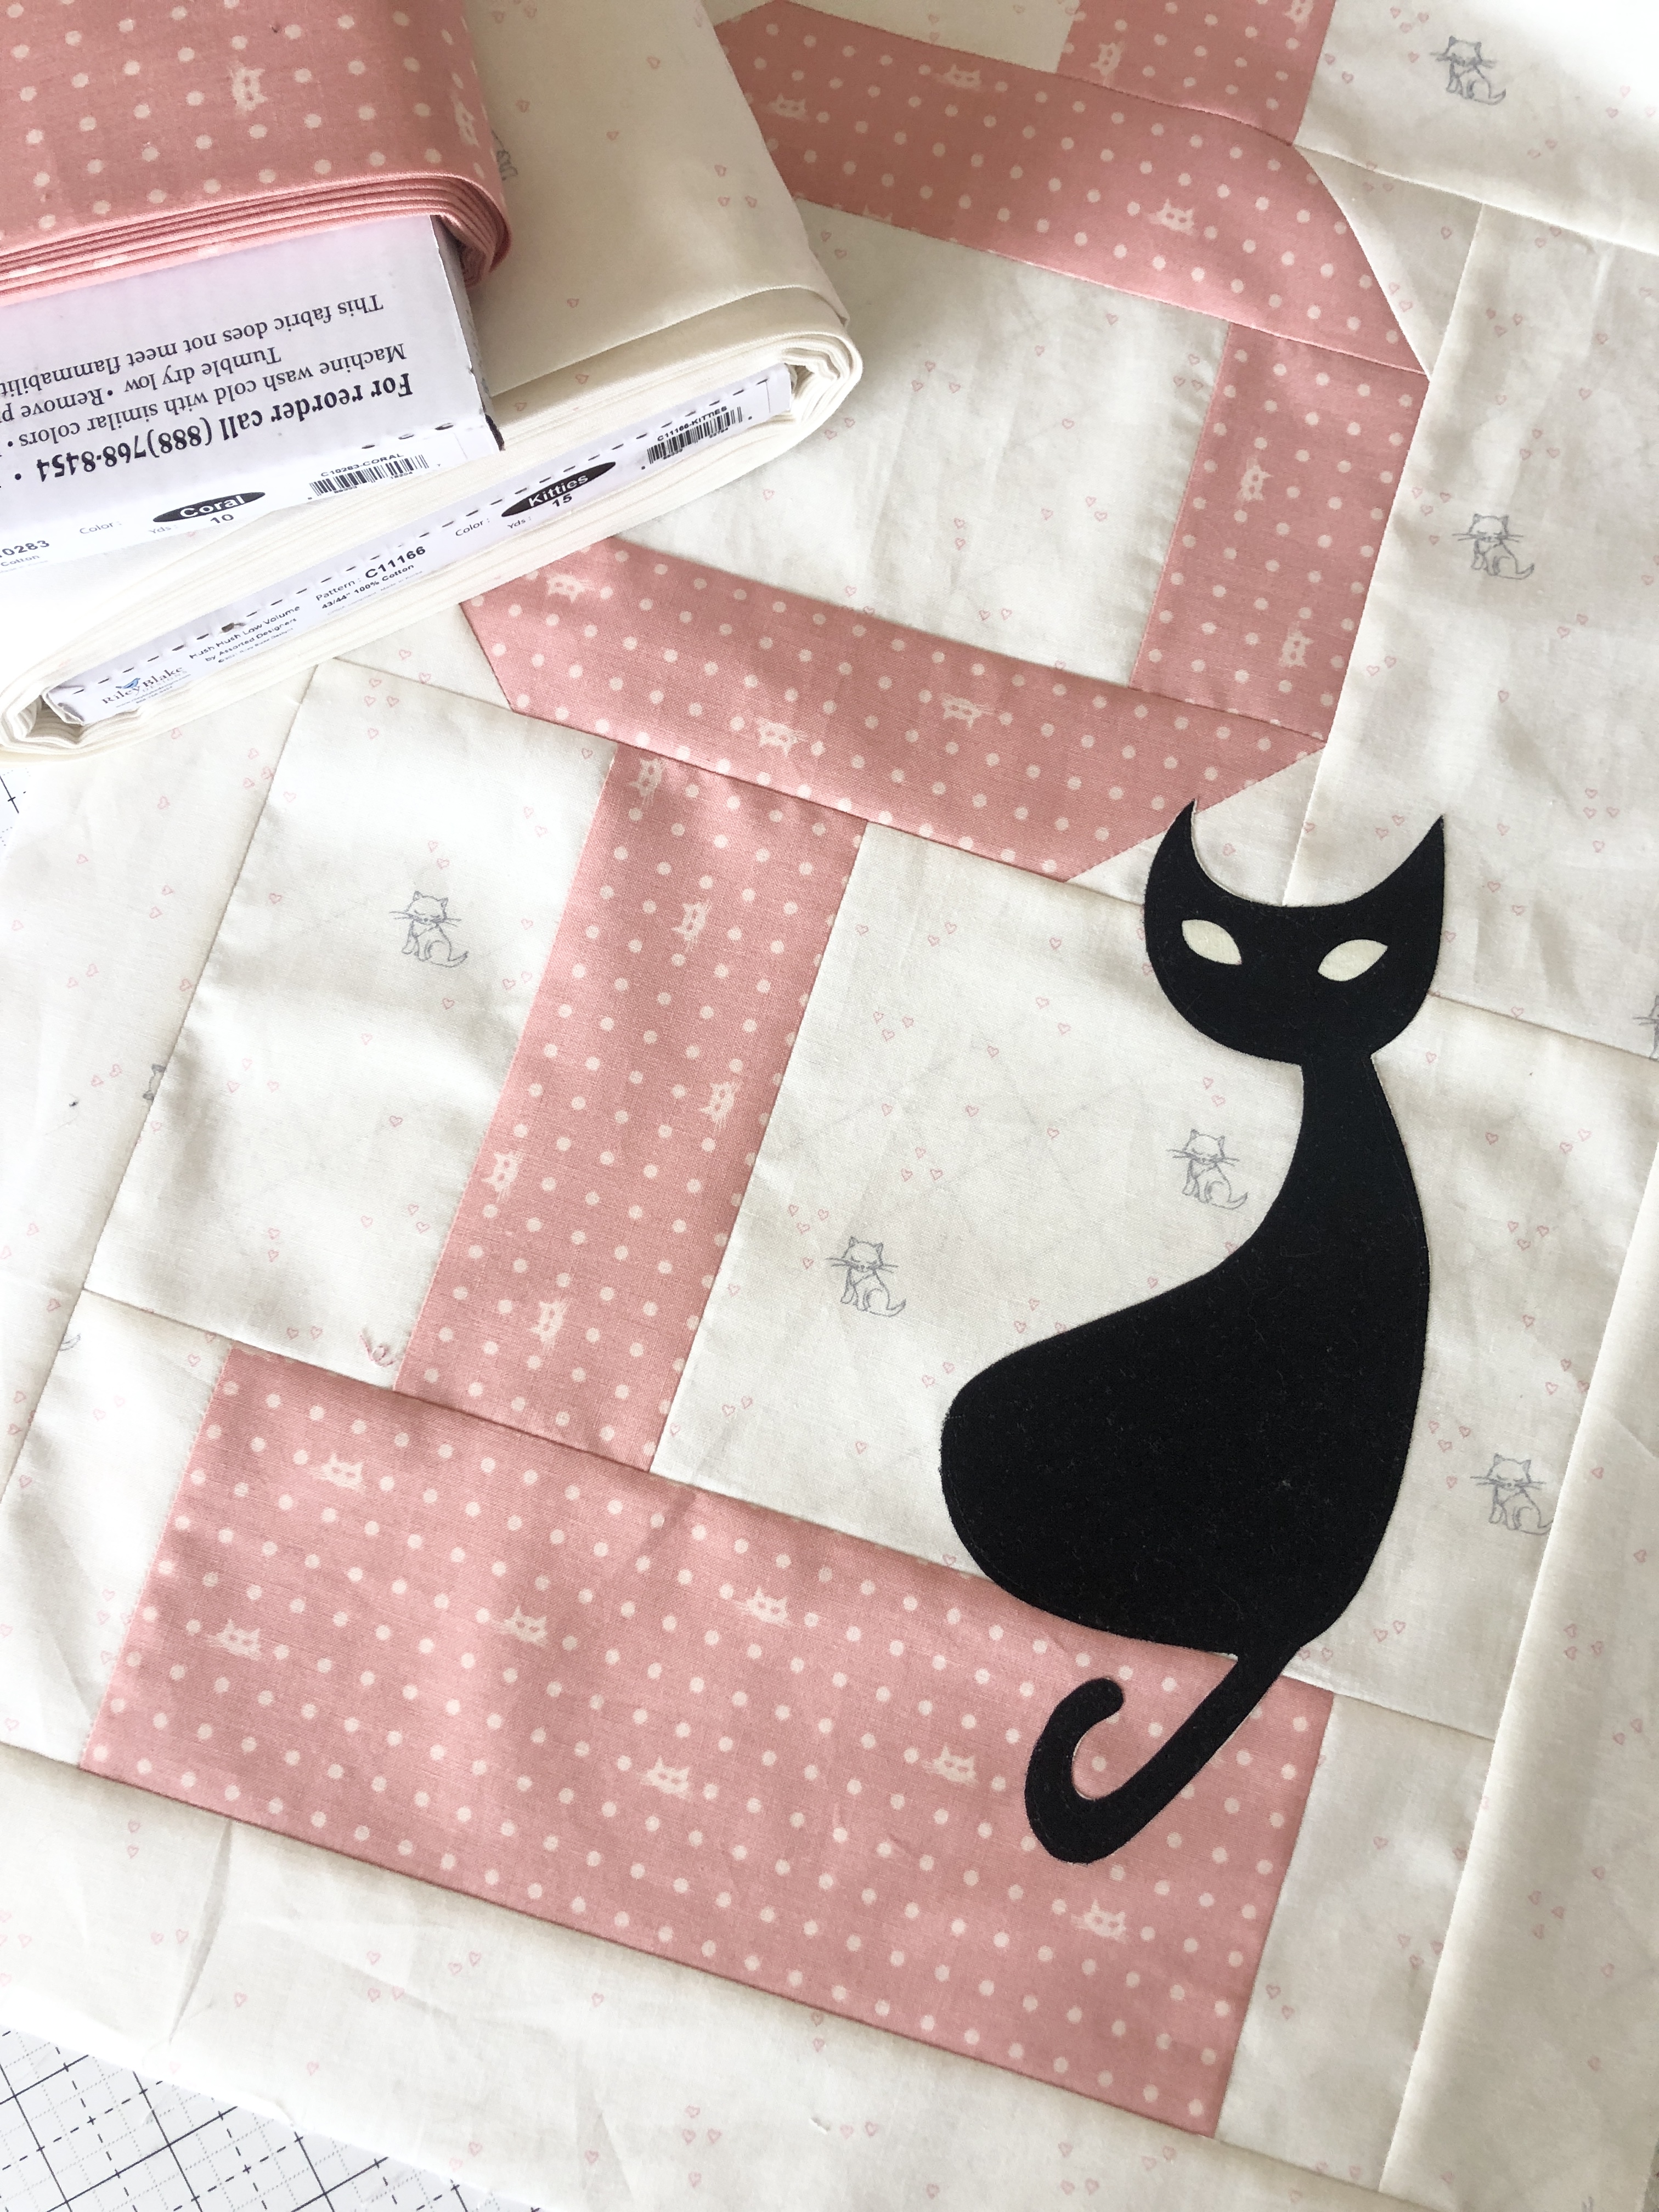
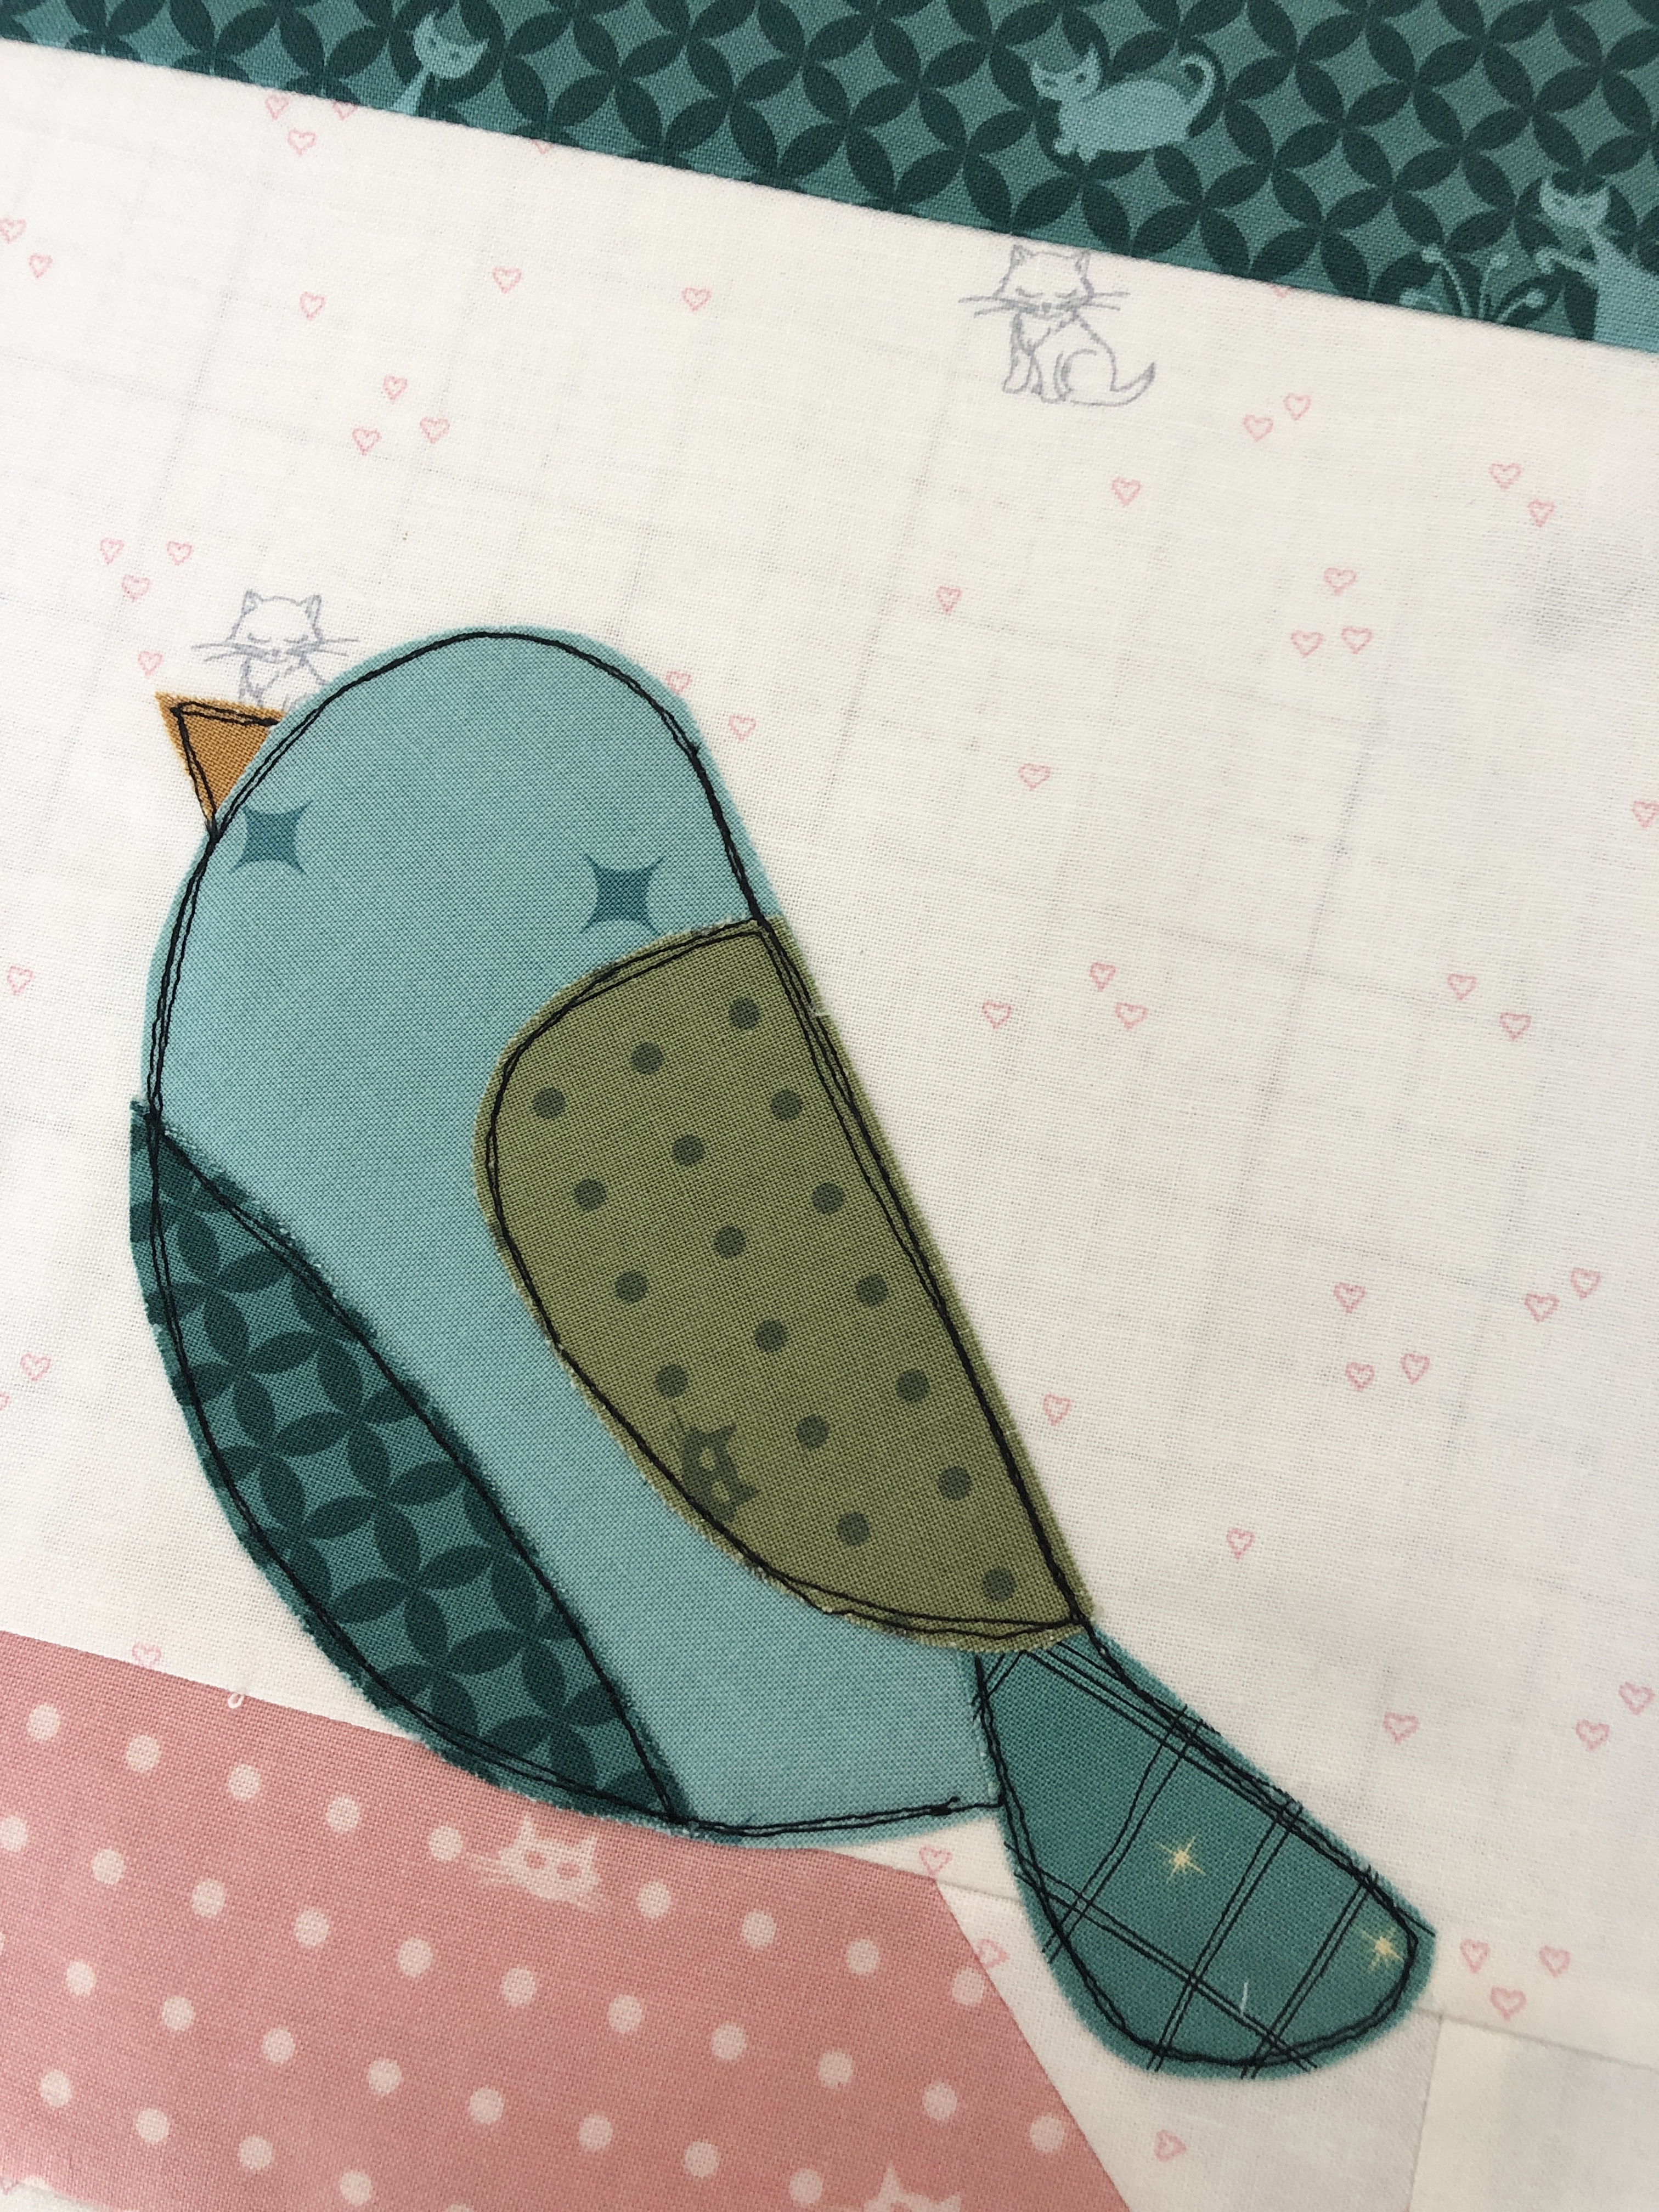
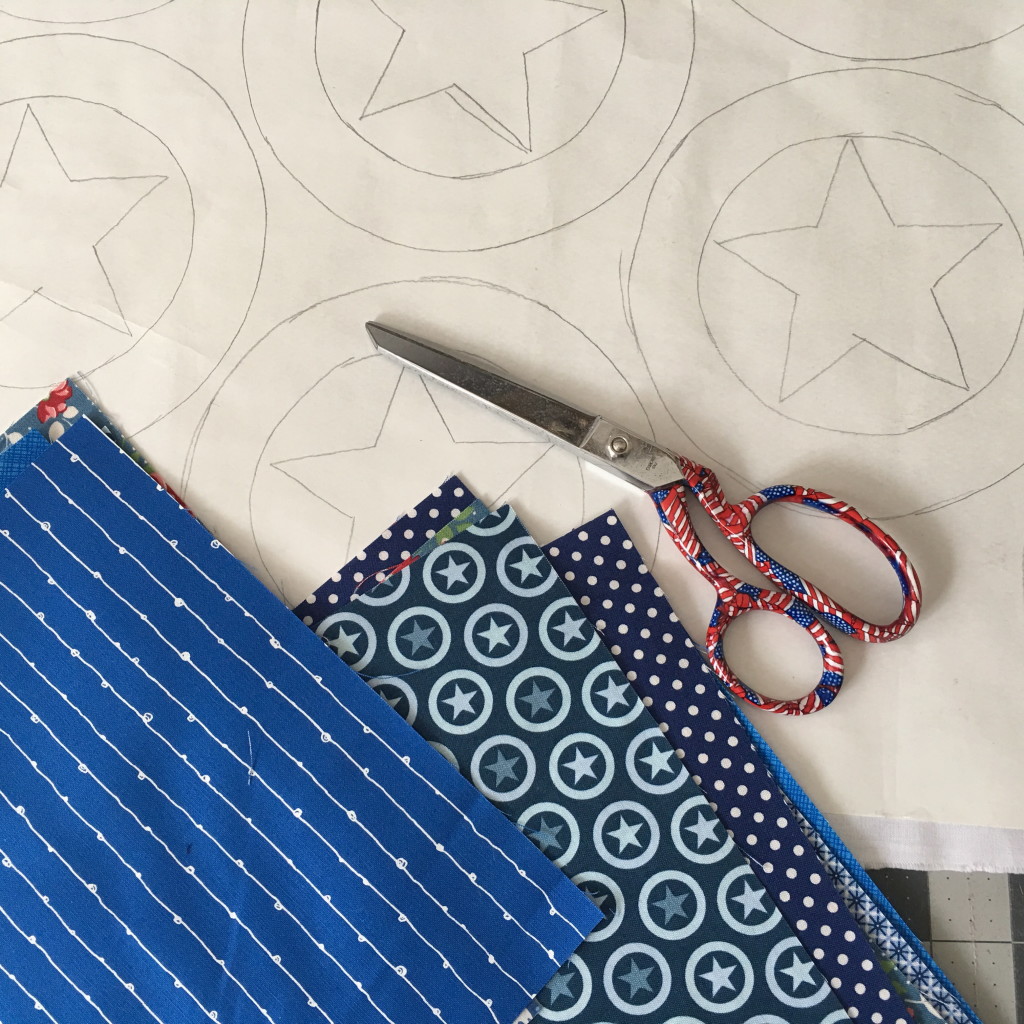
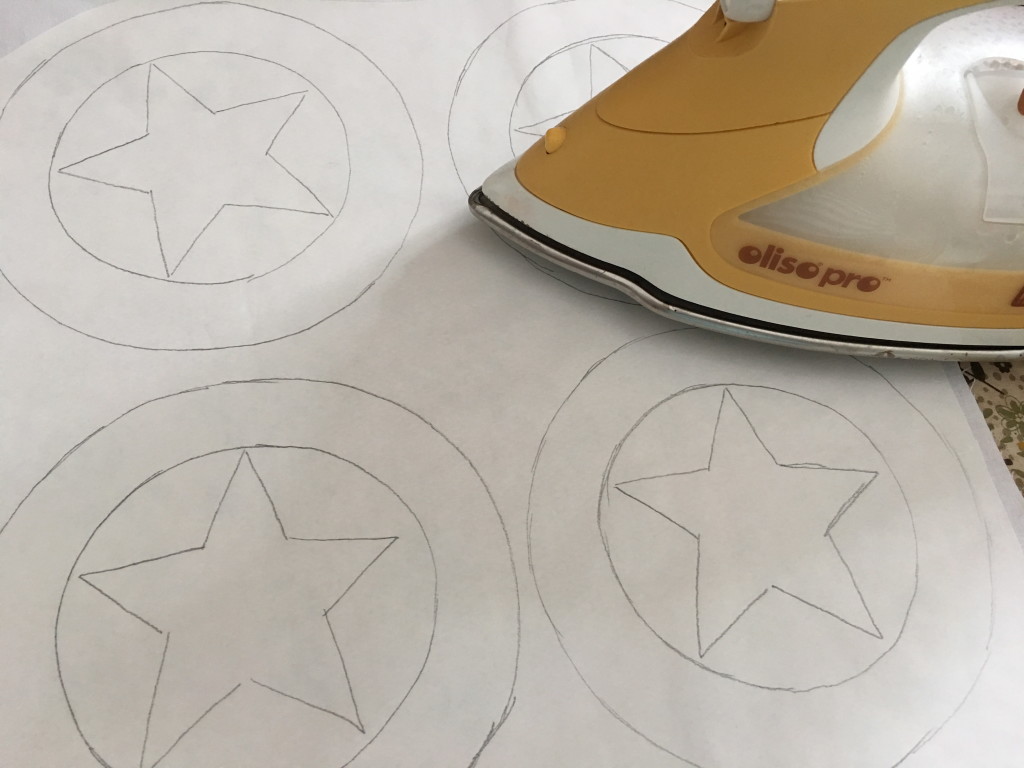
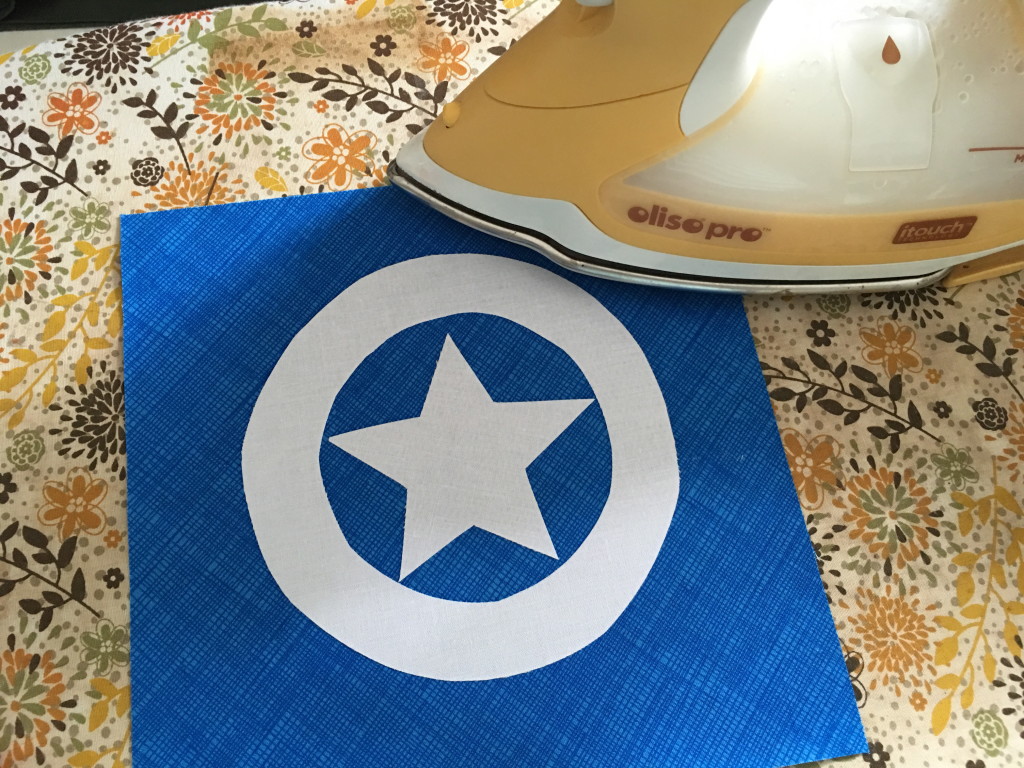
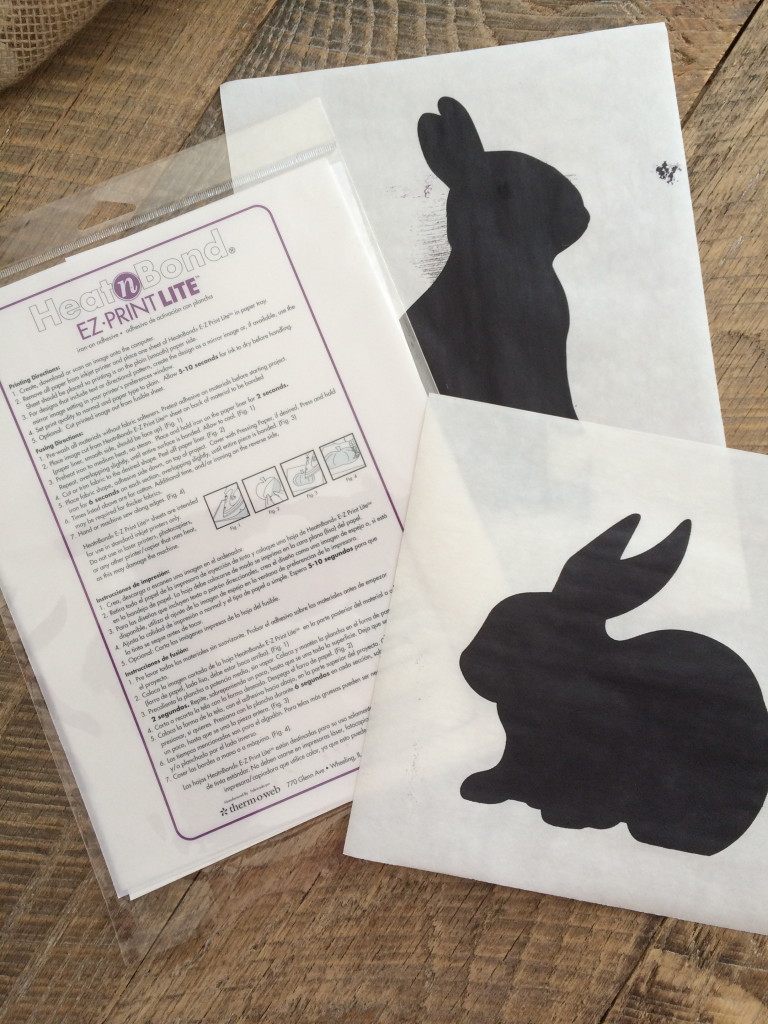
You can make a paper pieced or traditional pieced bluebird or an appliqué one. I choose the appliqué method since the quilt involves some appliqué. And I always use Heat n Bond Lite and machine appliqué in a straight stitch repeated a few times – I like fast!

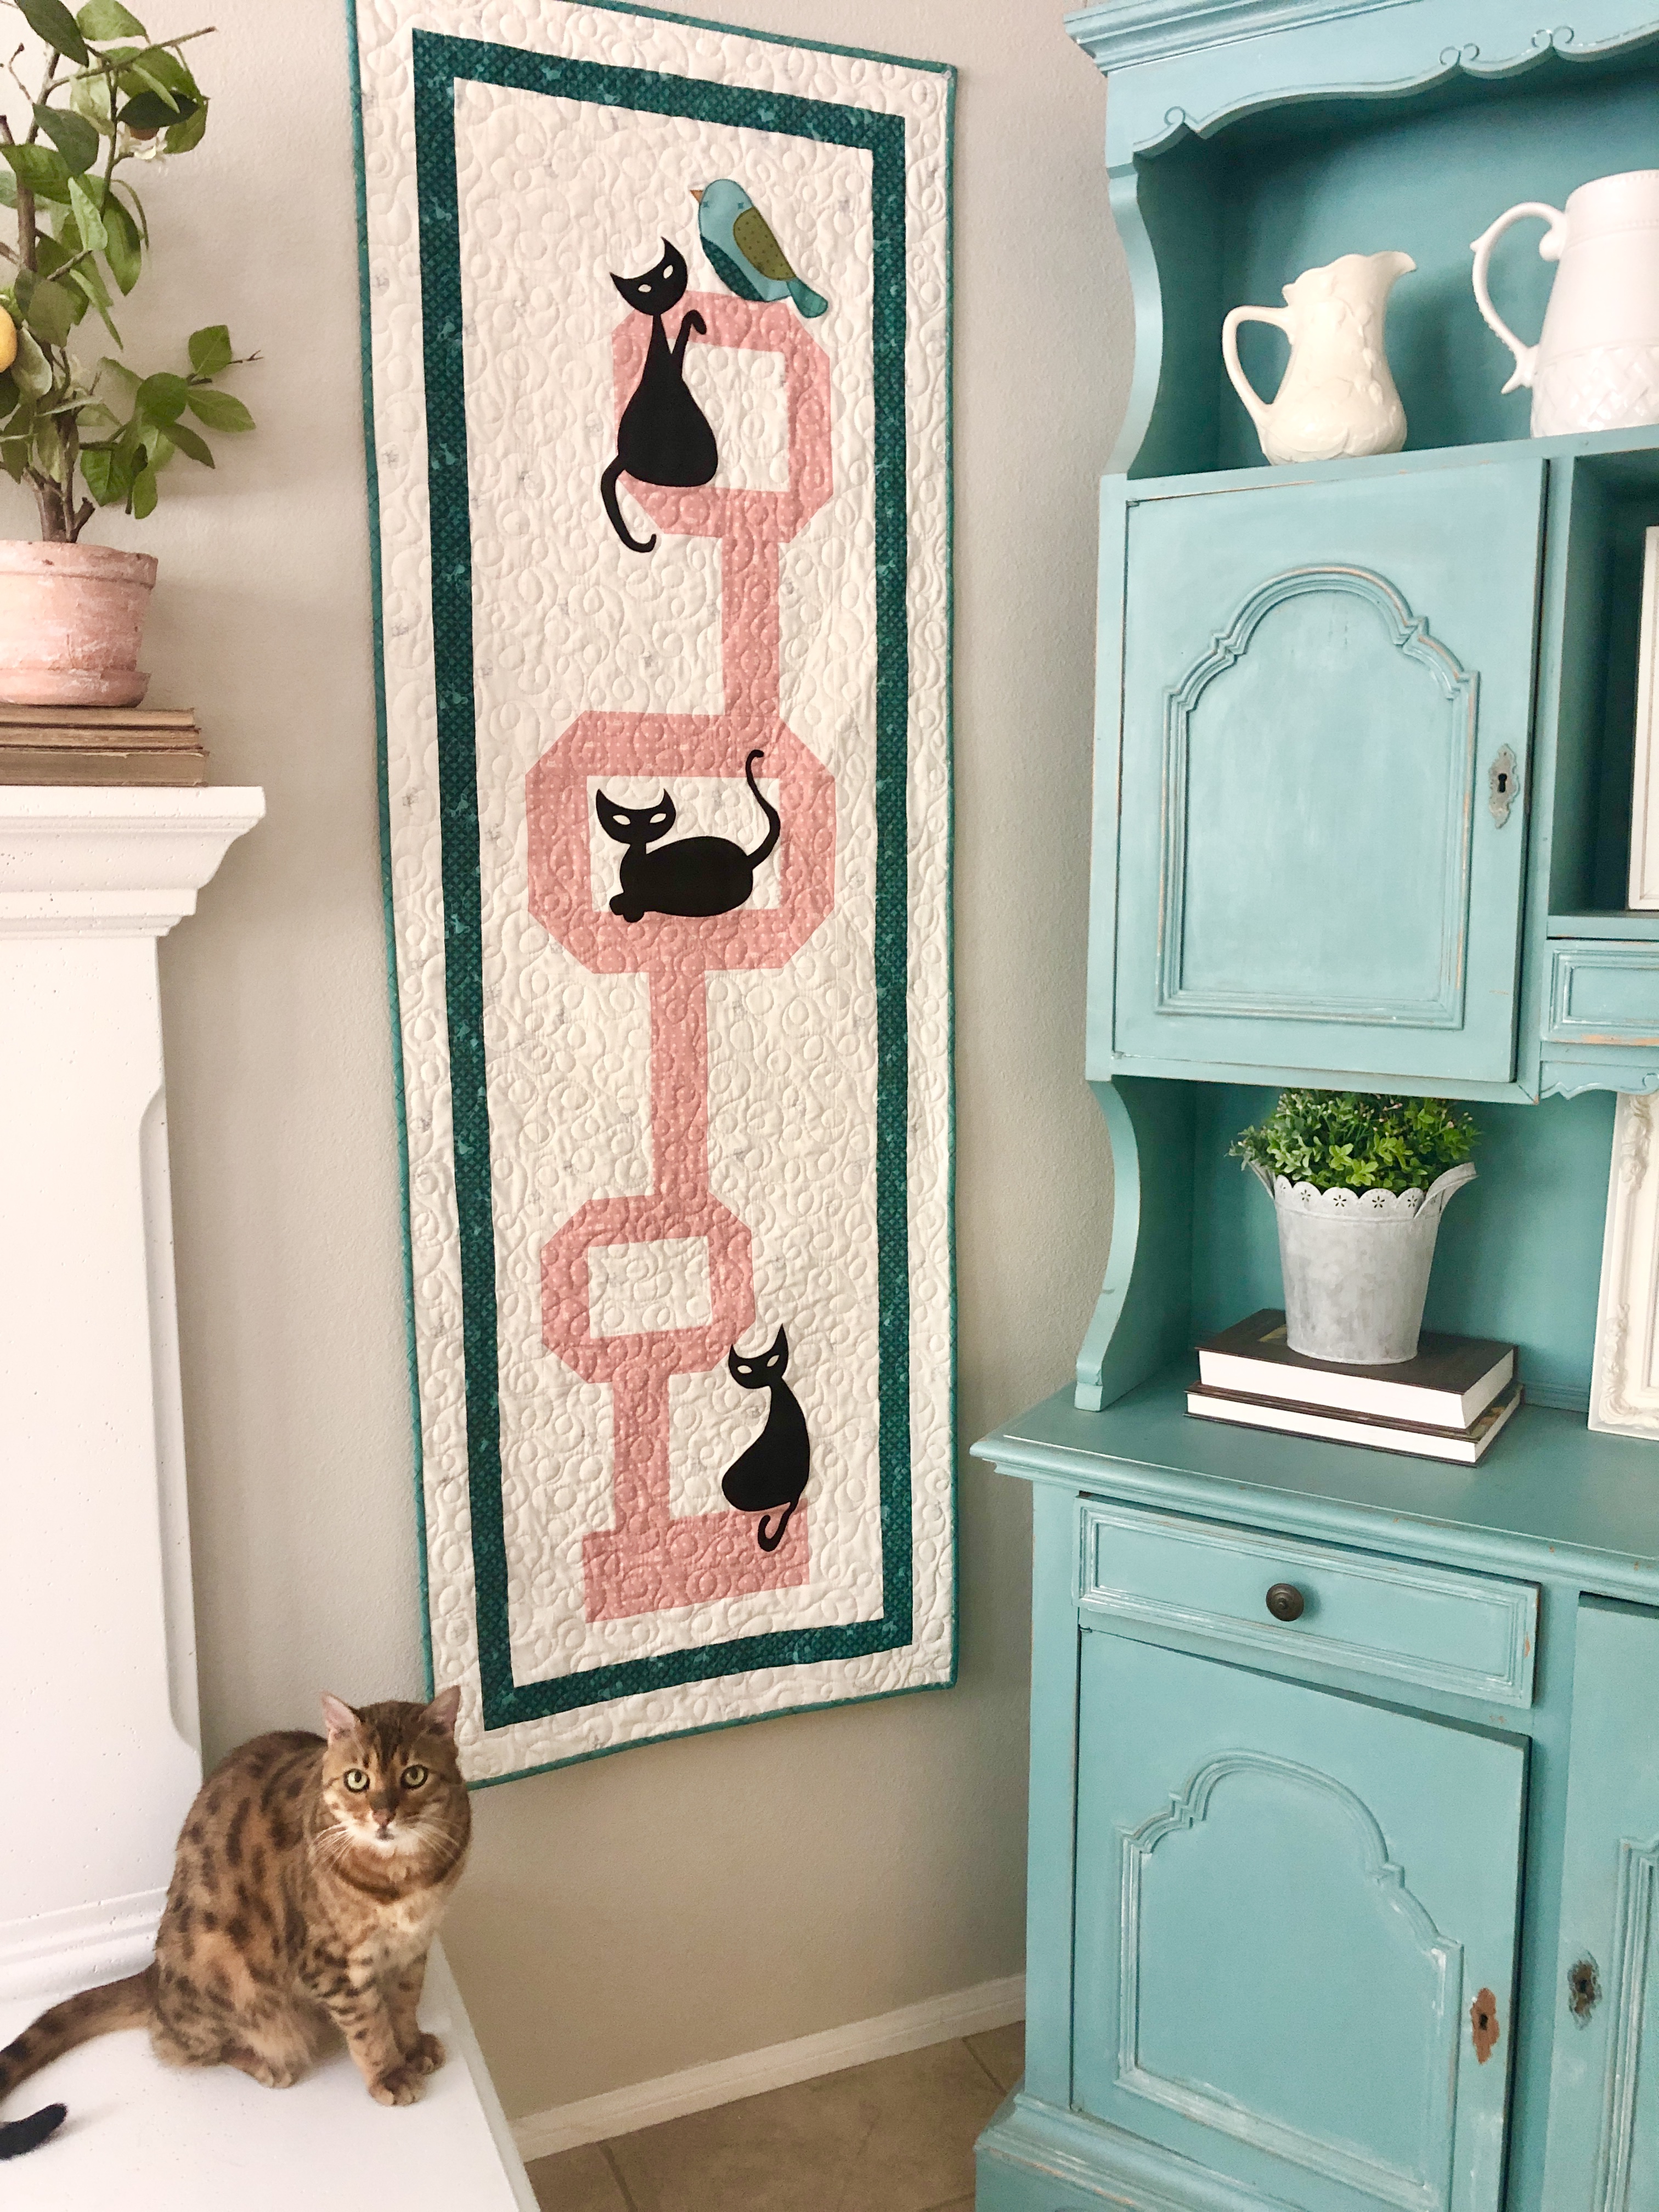
My project of course involved cats! Because you can’t have birds without cats!

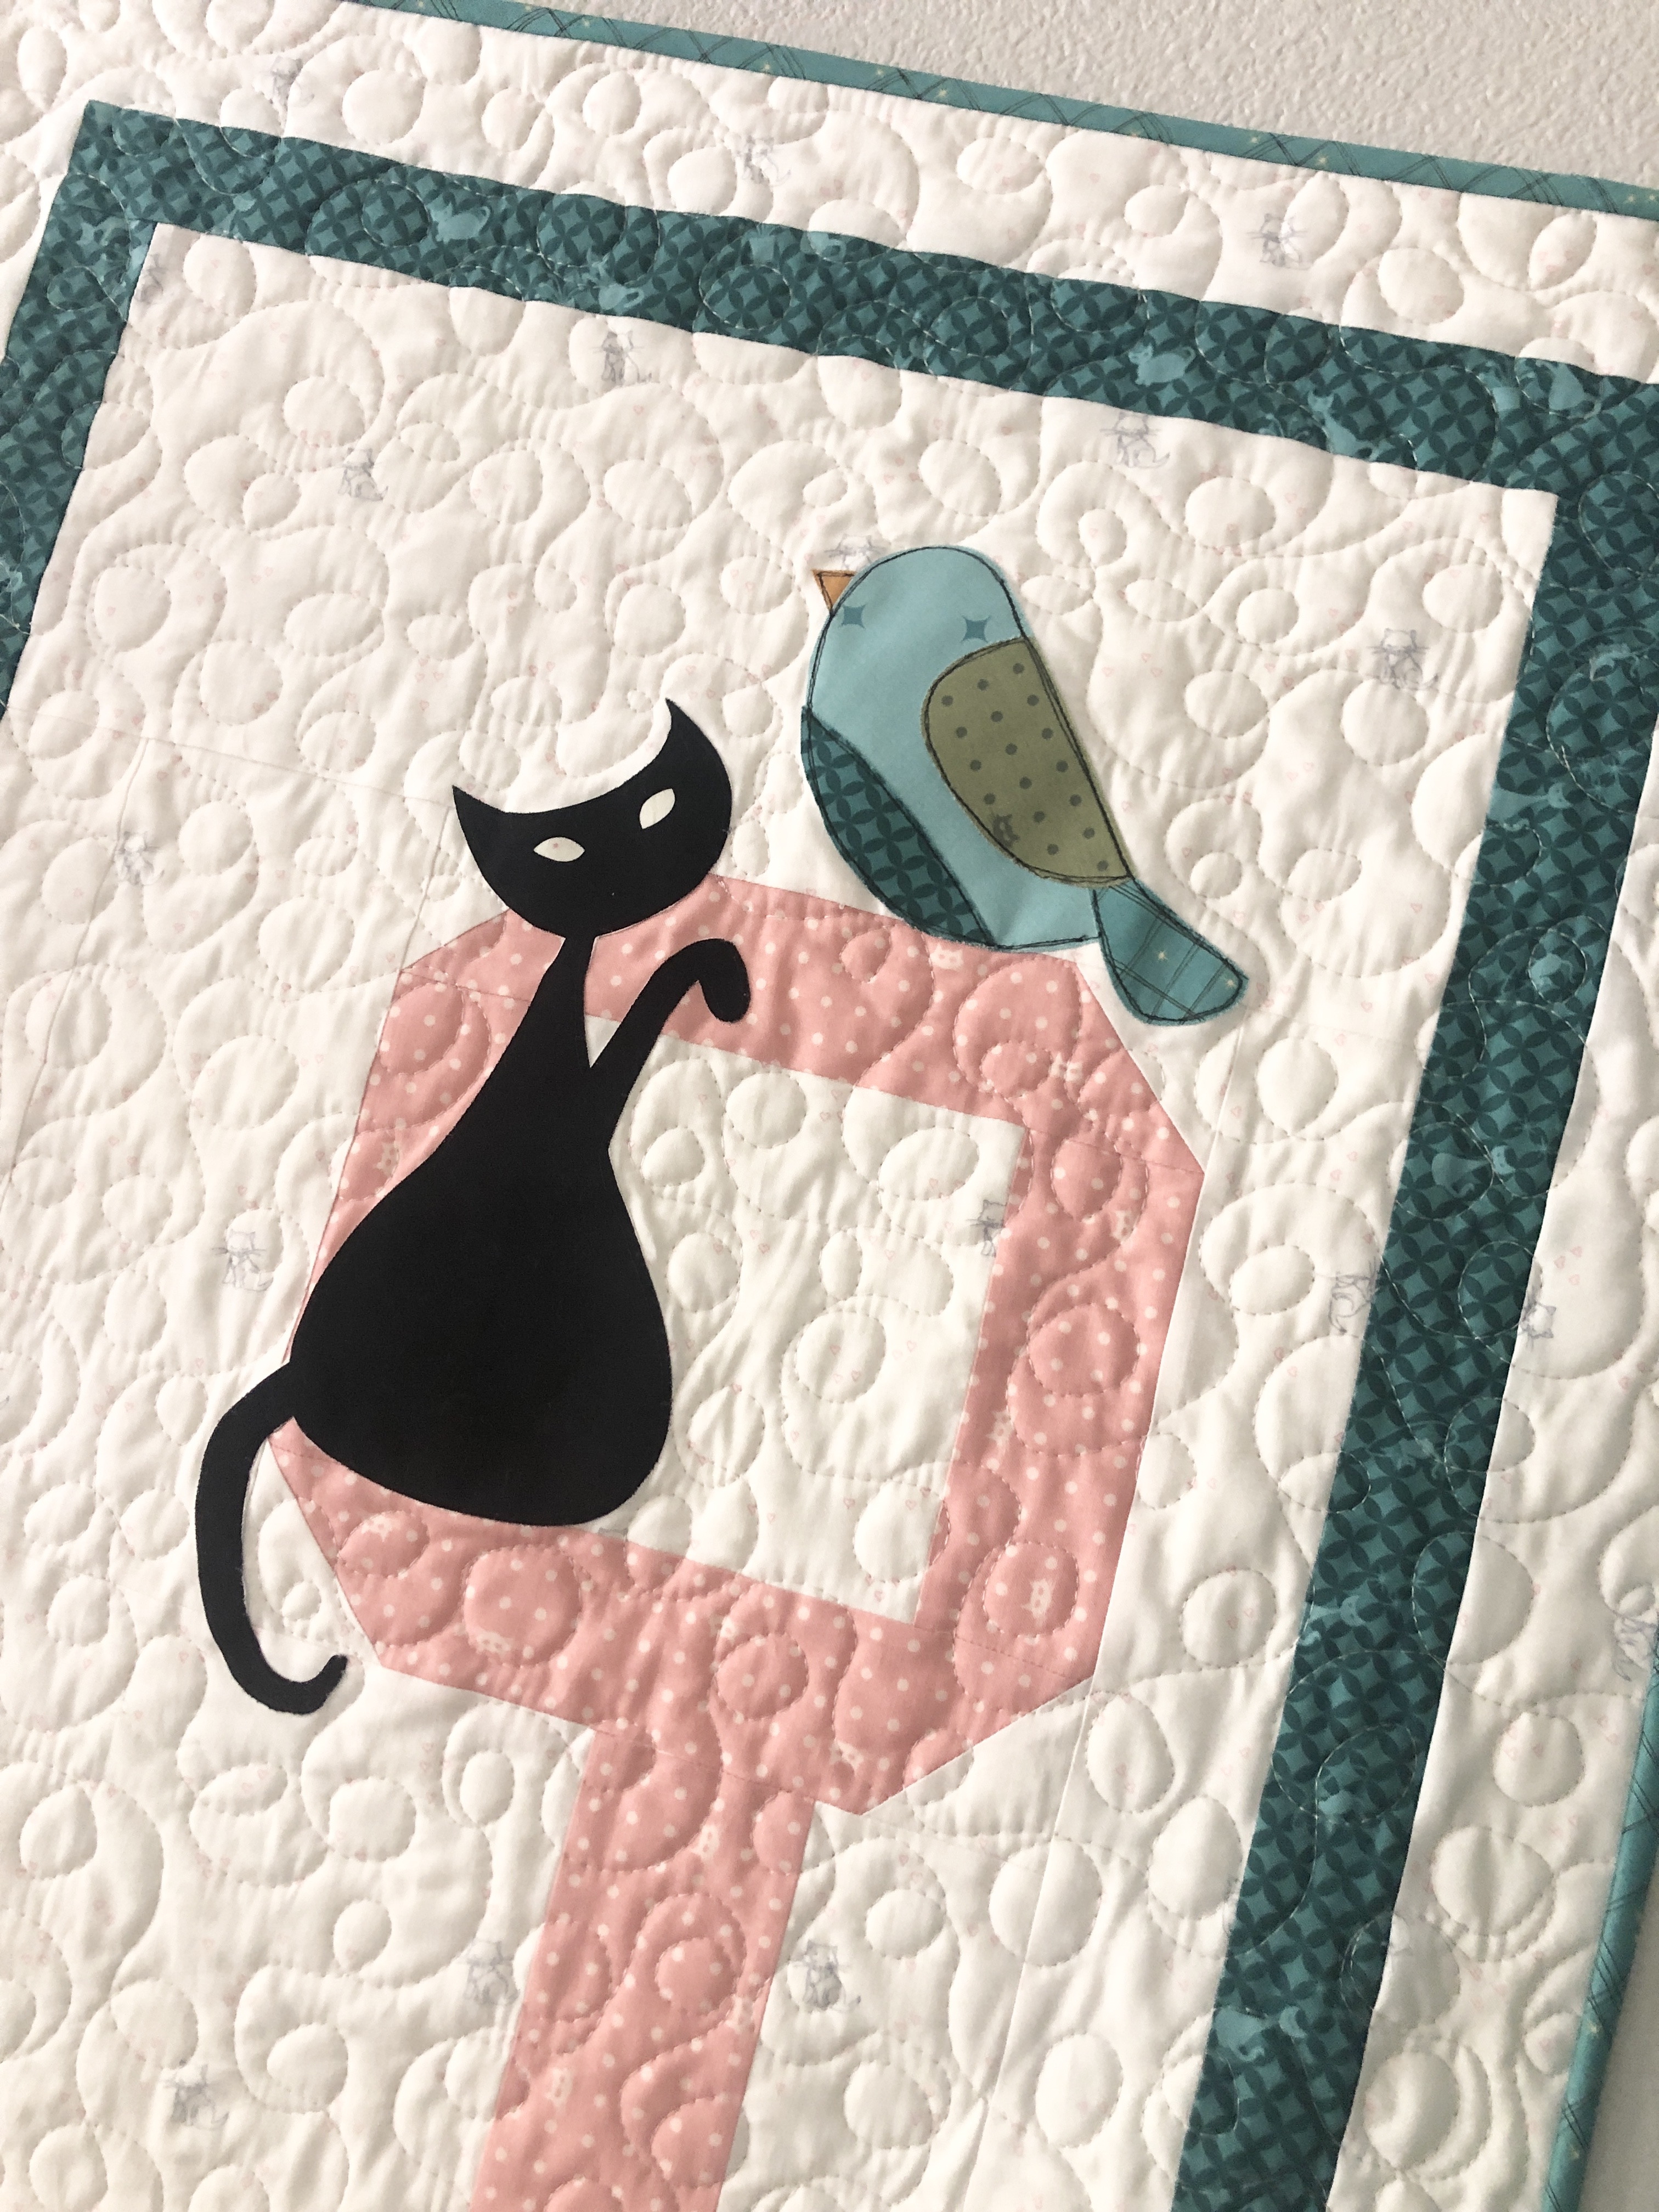
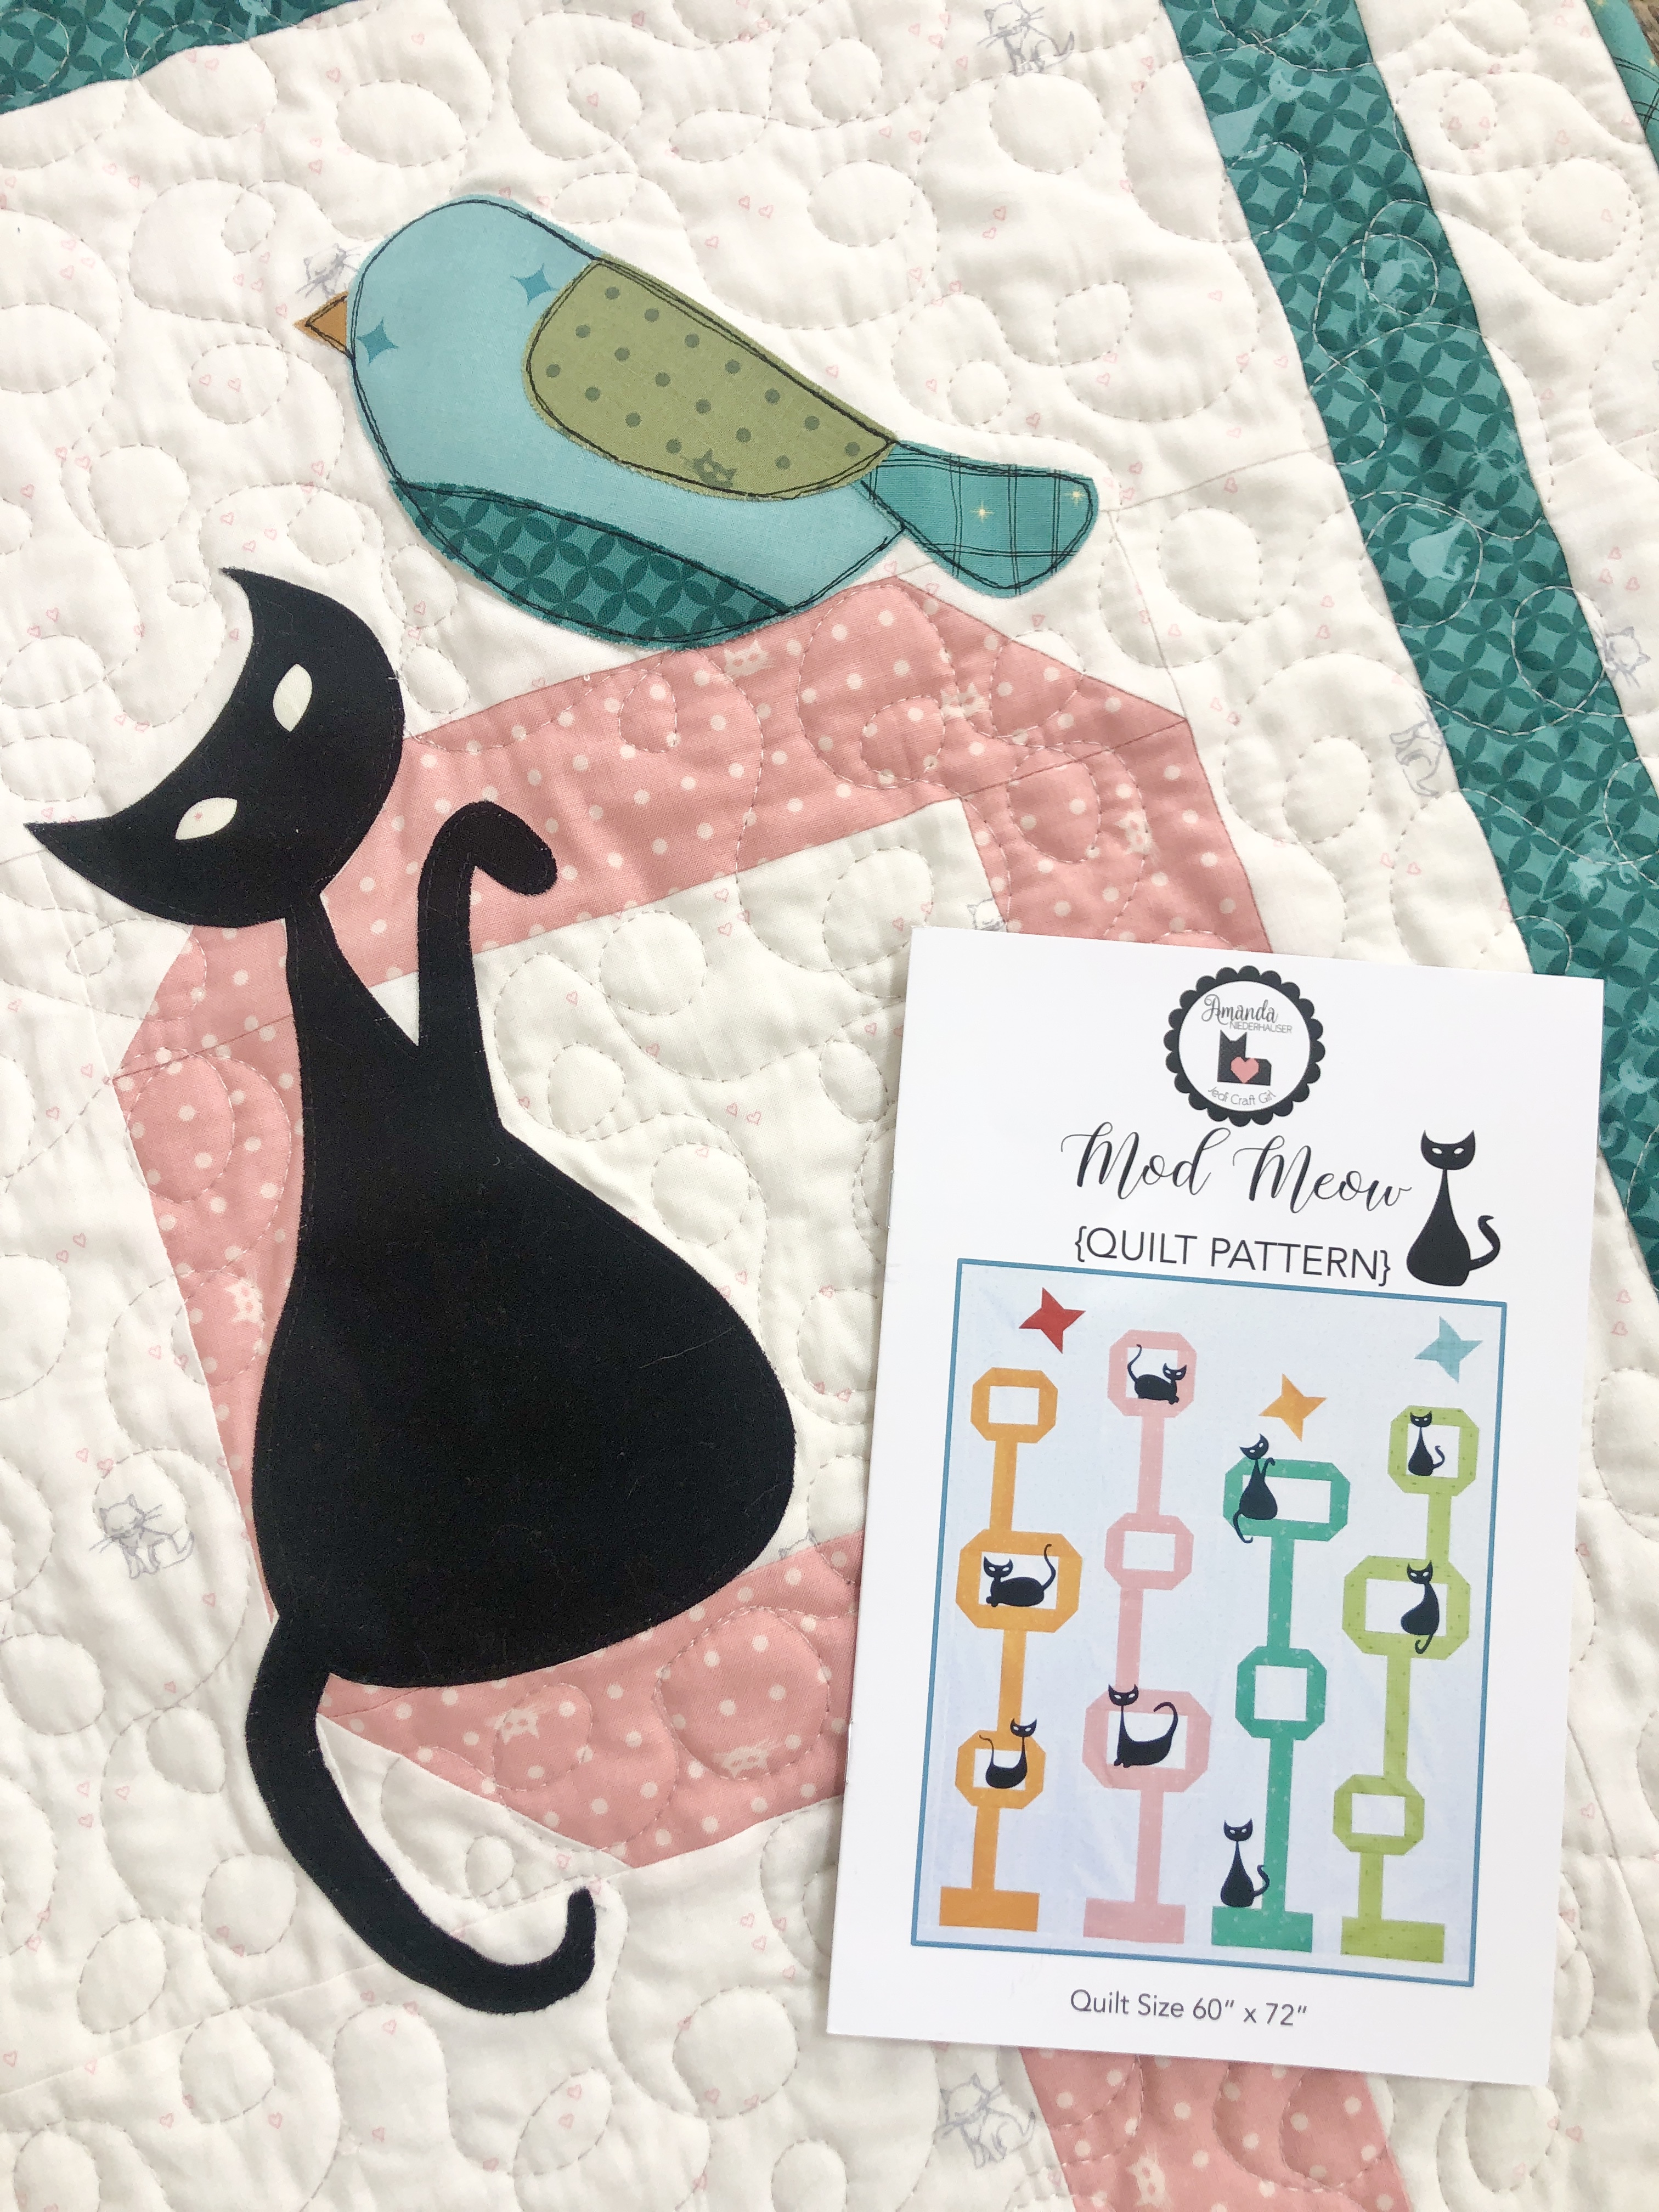
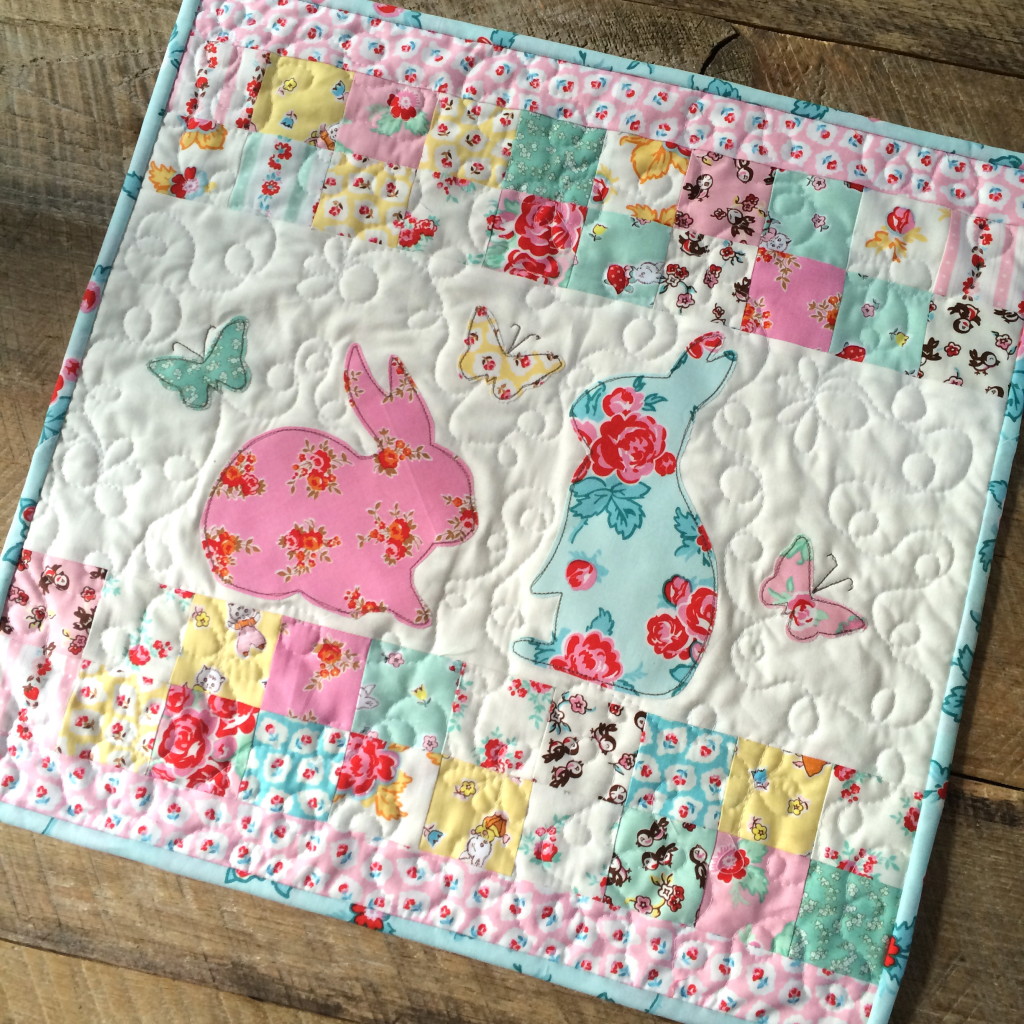
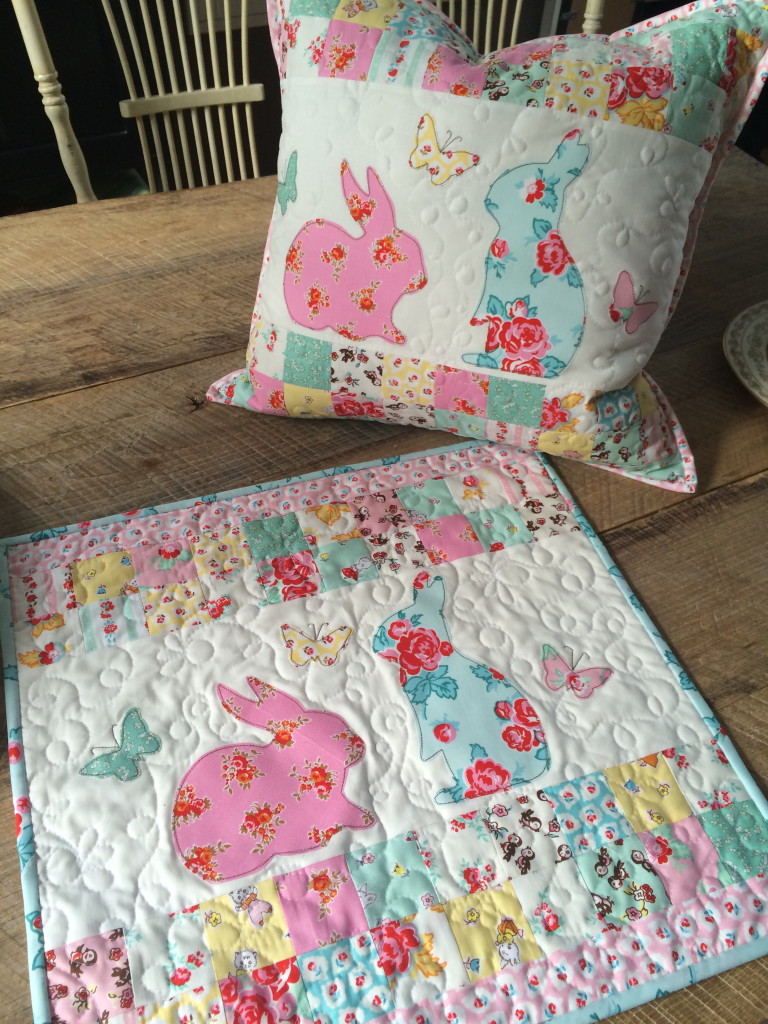
I used my Mod Meow quilt pattern and made only 1 of the cat posts in the pattern. I appliquéd 3 kitties from the Mod Meow fabric panel and 1 little bluebird at the top. I love it so much! For the background fabric I used my print from the Hush Hush collection and the pink hearts match the Mod Meow pink so purrrrfectly!

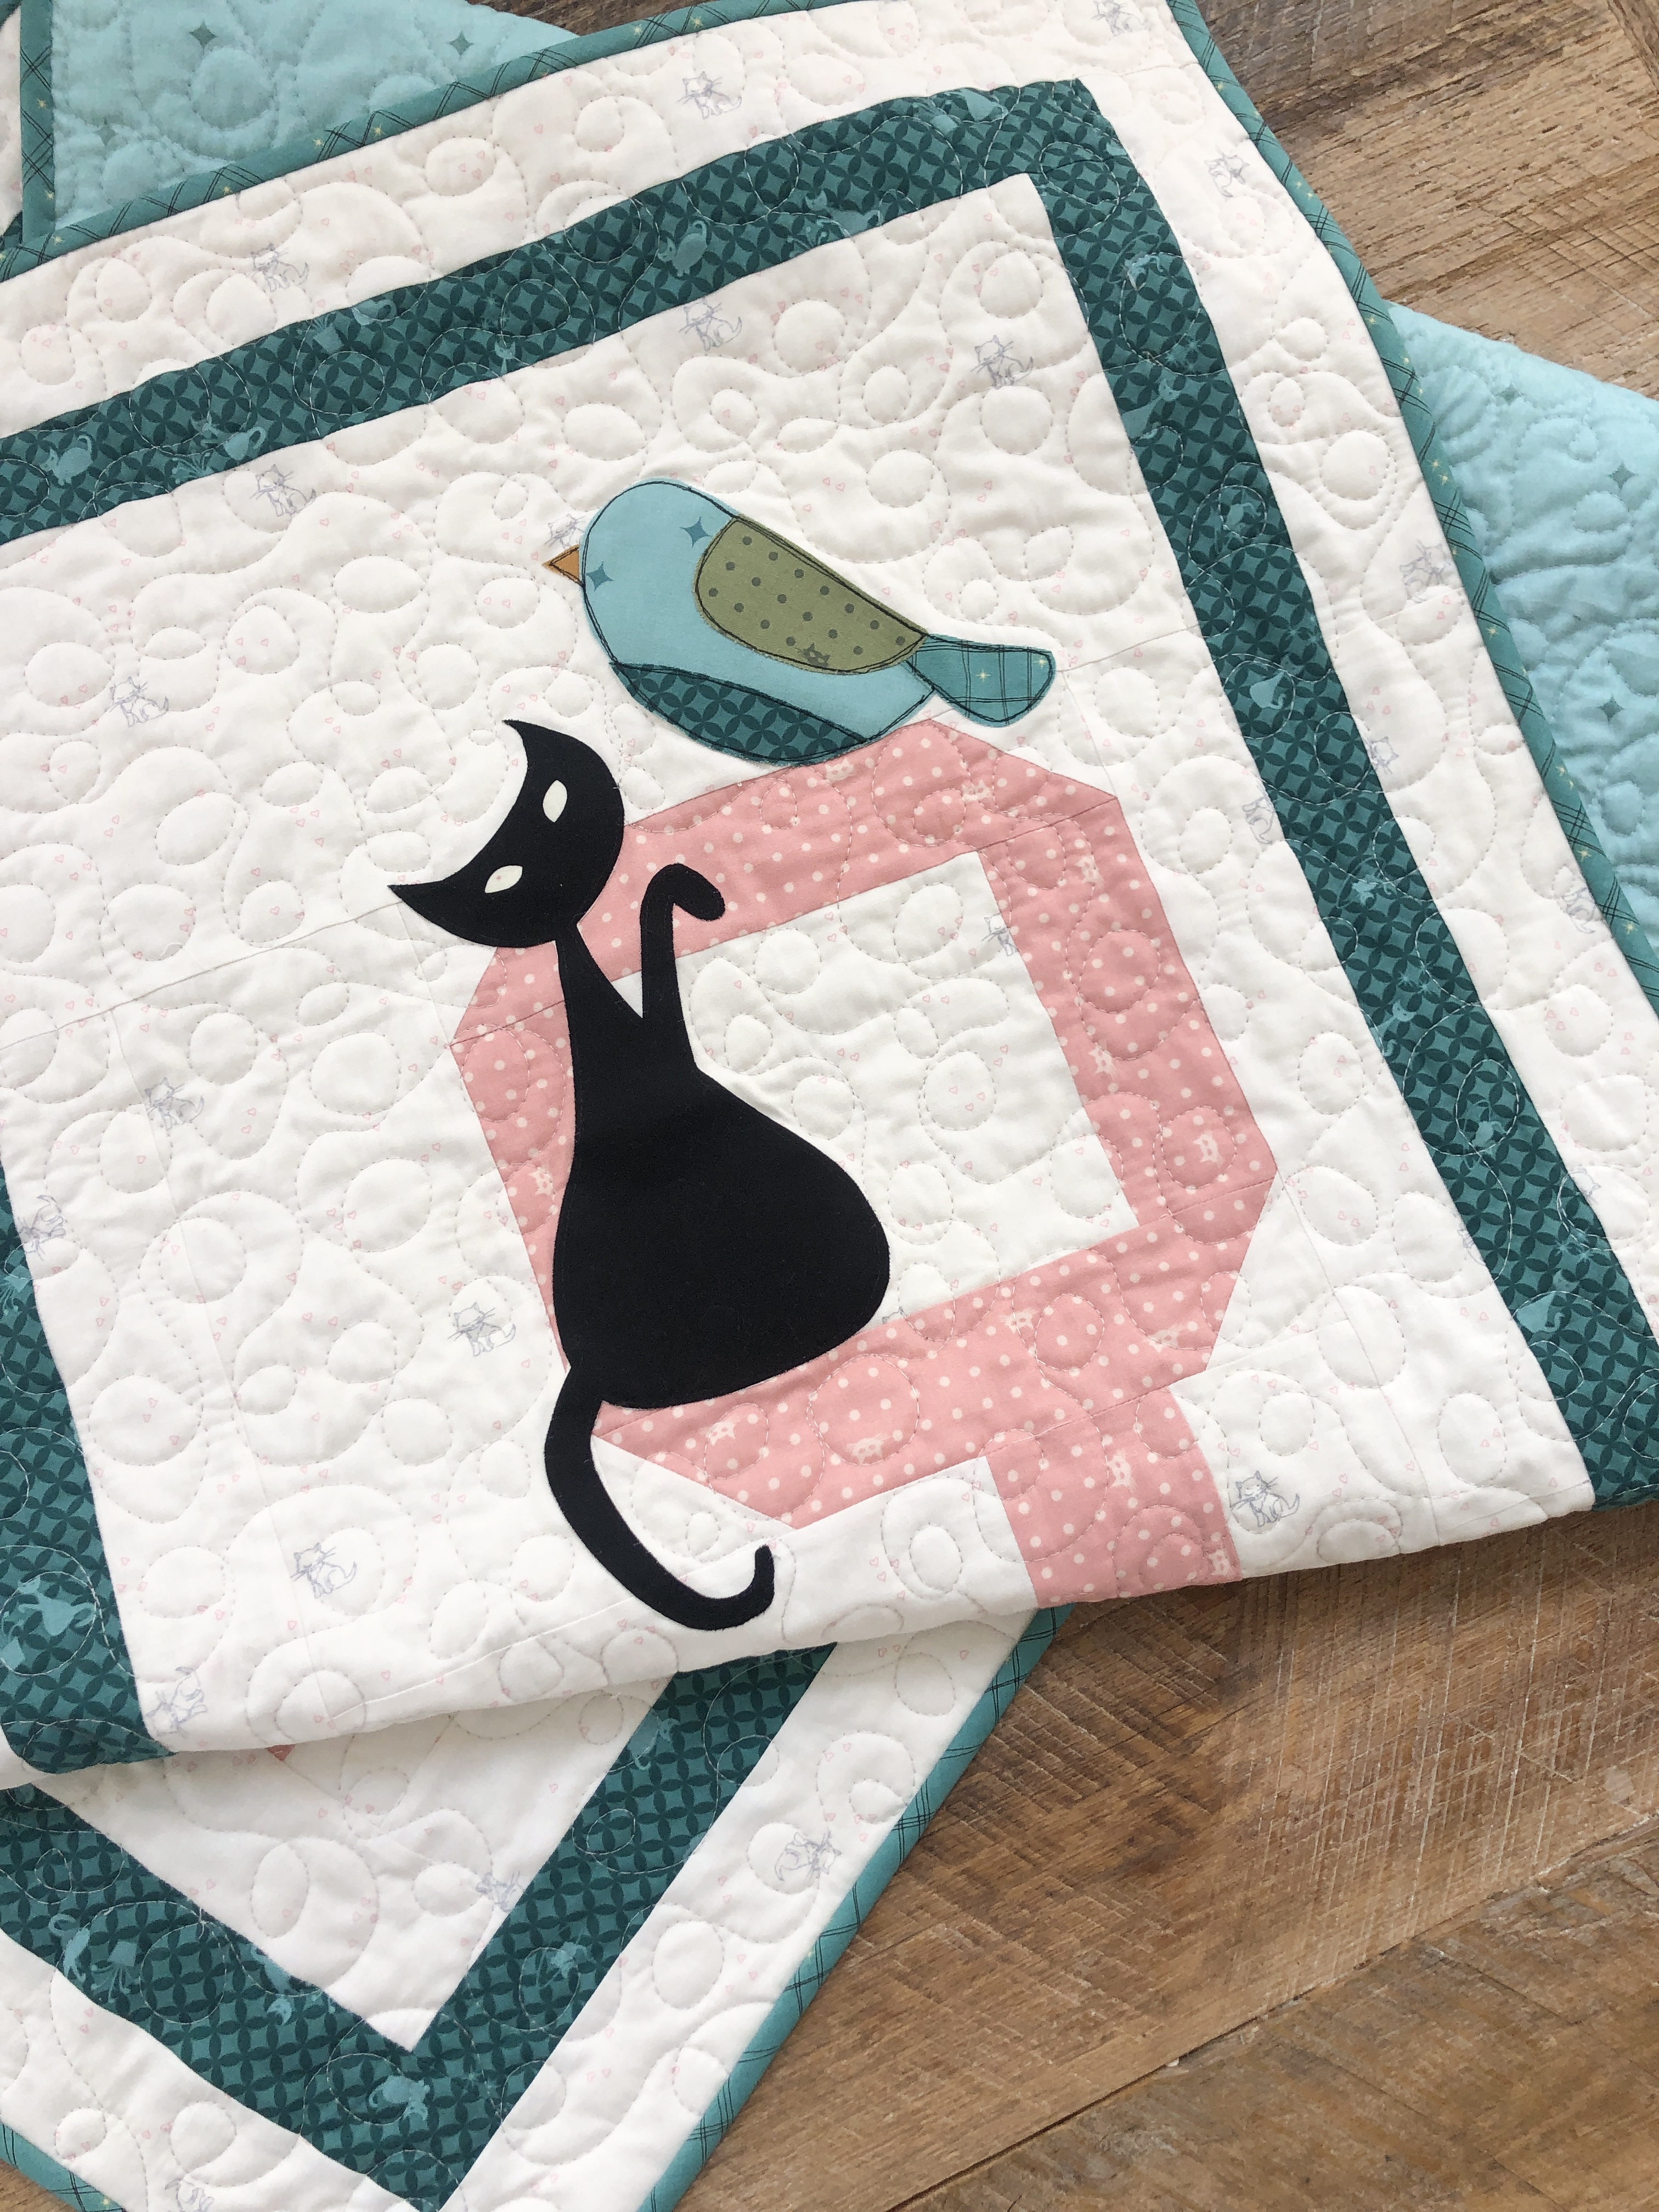
If you want to make a single cat post quilt like I did here are a few things to know – I shortened the “post” part a few inches since it didn’t have to fit next to anything. I added an inner low volume border cut 2.5″ wide, a teal middle border cut 2″ wide, and a low volume outer border cut 2.5″ wide. Then I used blue binding cut on the bias. You can find the Mod Meow pattern in my Etsy shop in PDF or paper. The cat panel is sold seperately.

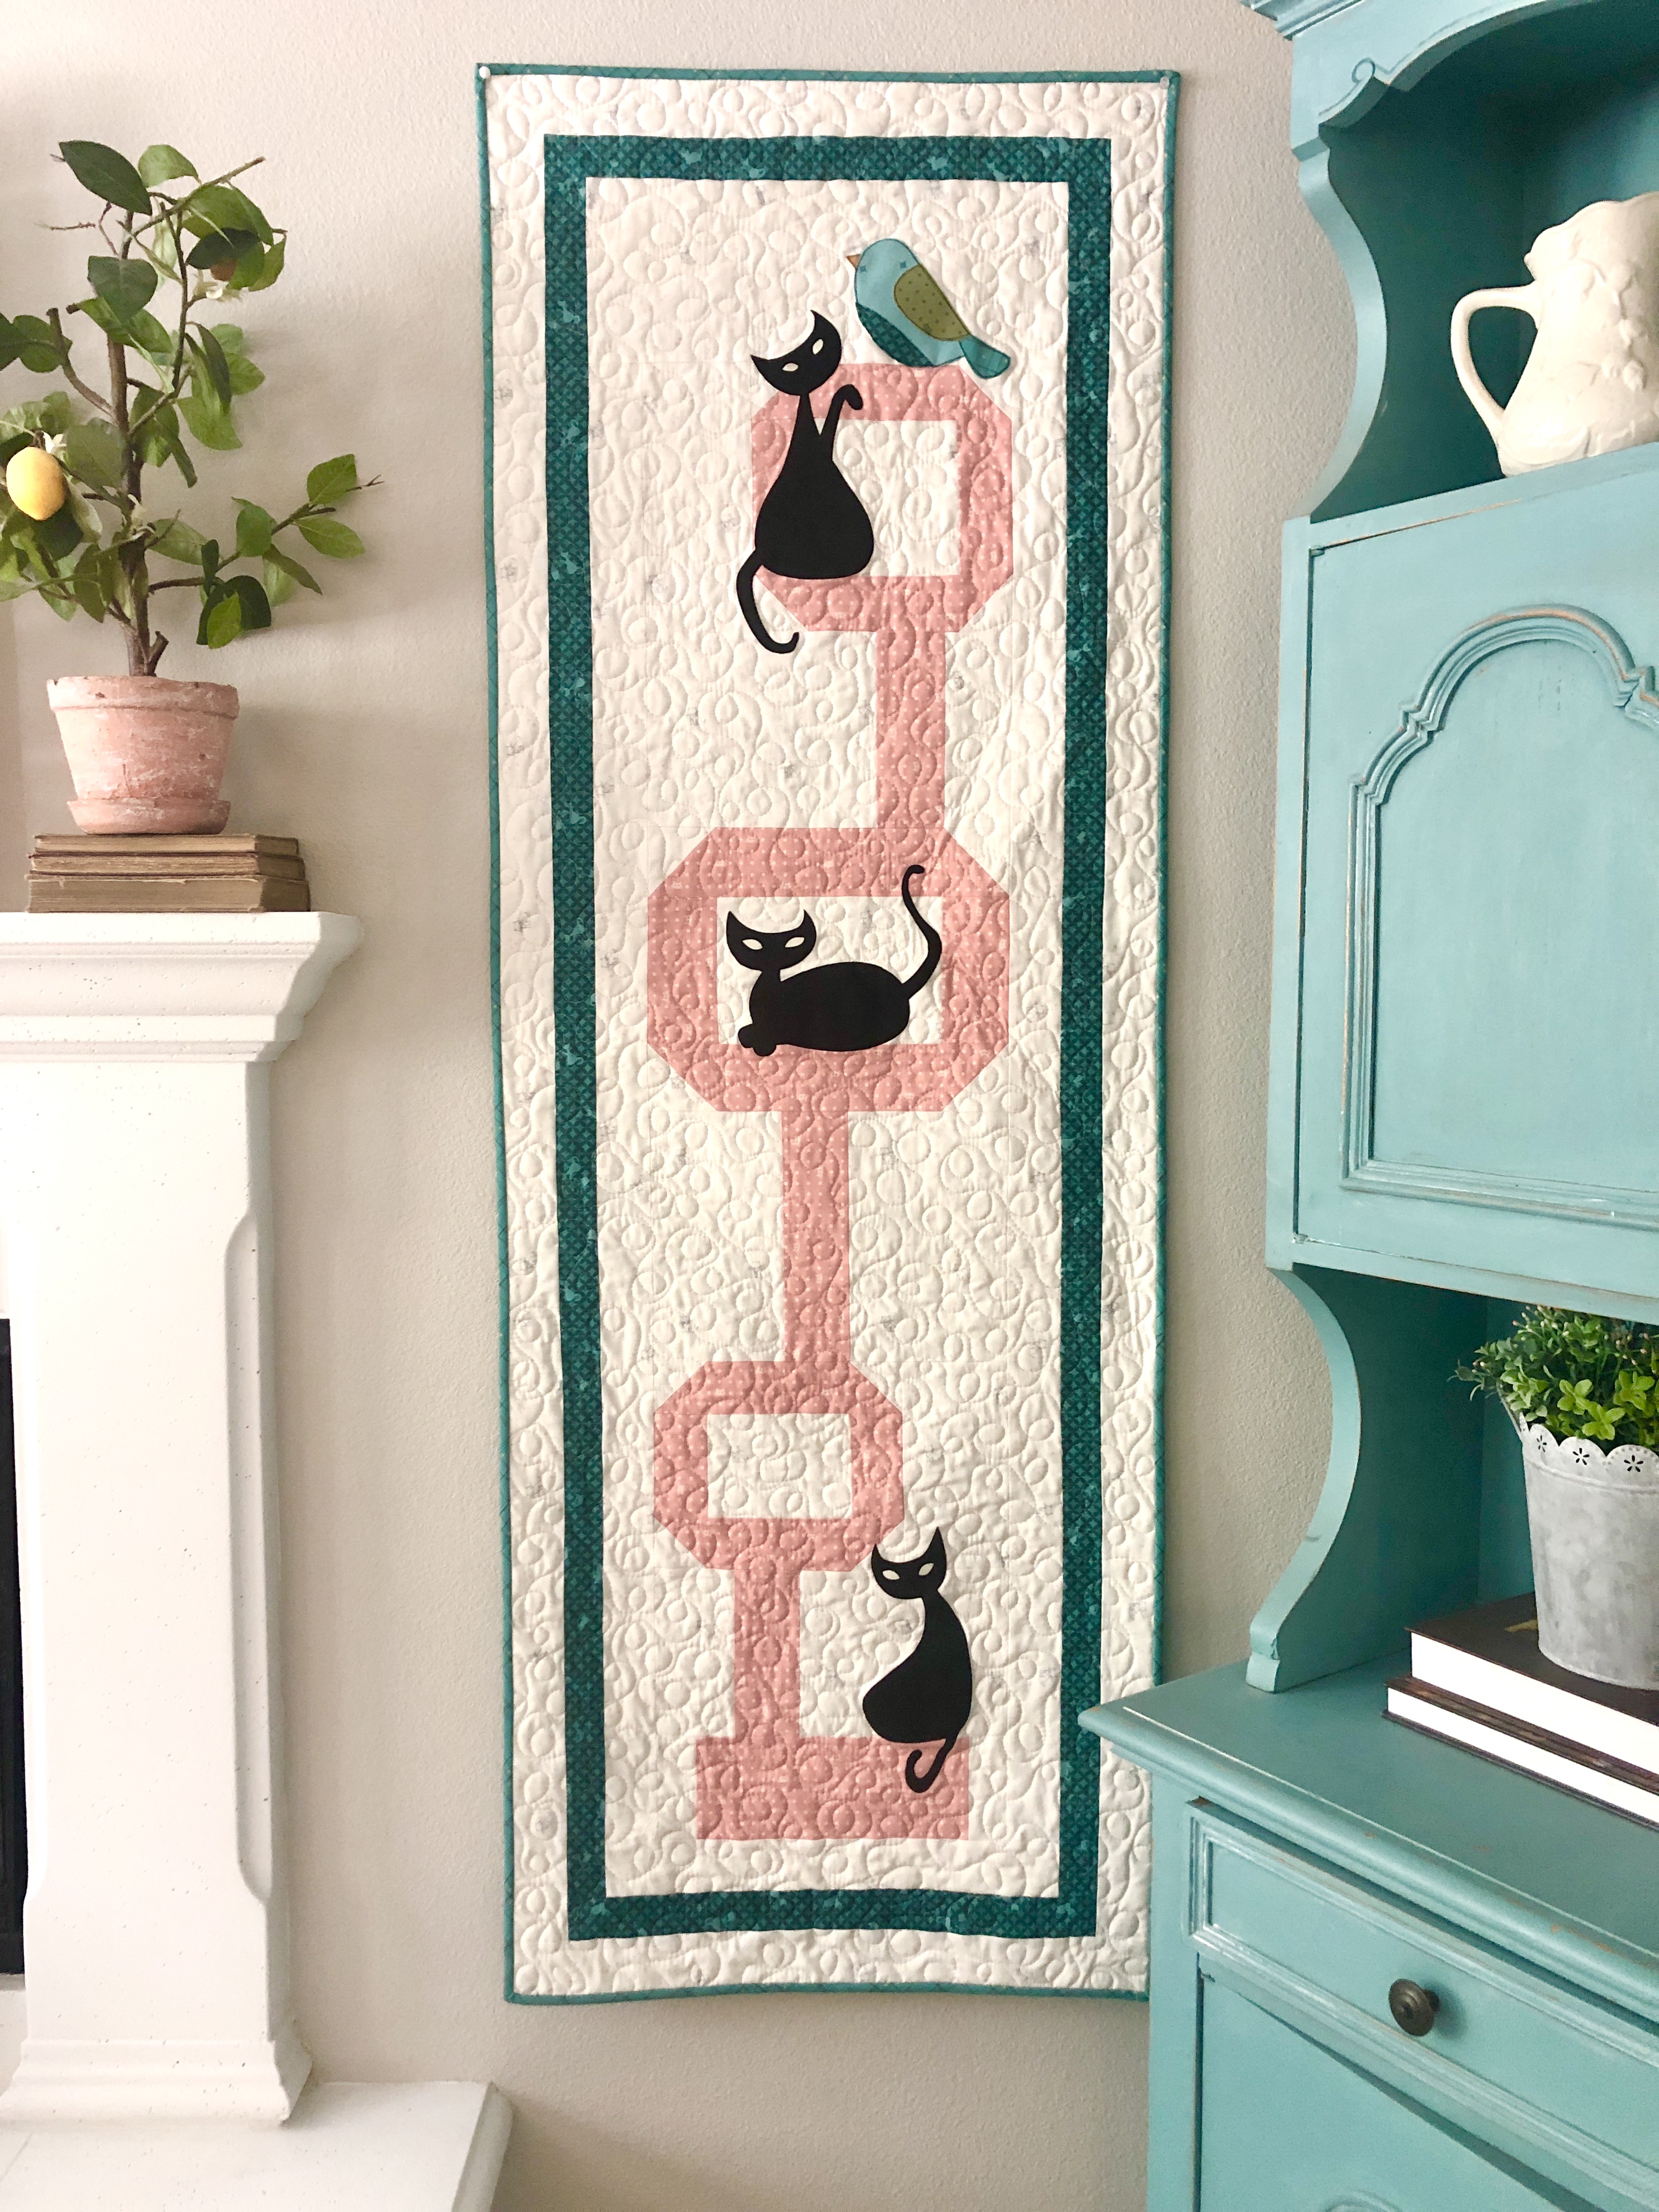
Seriously this make me smile every time I walk by it!

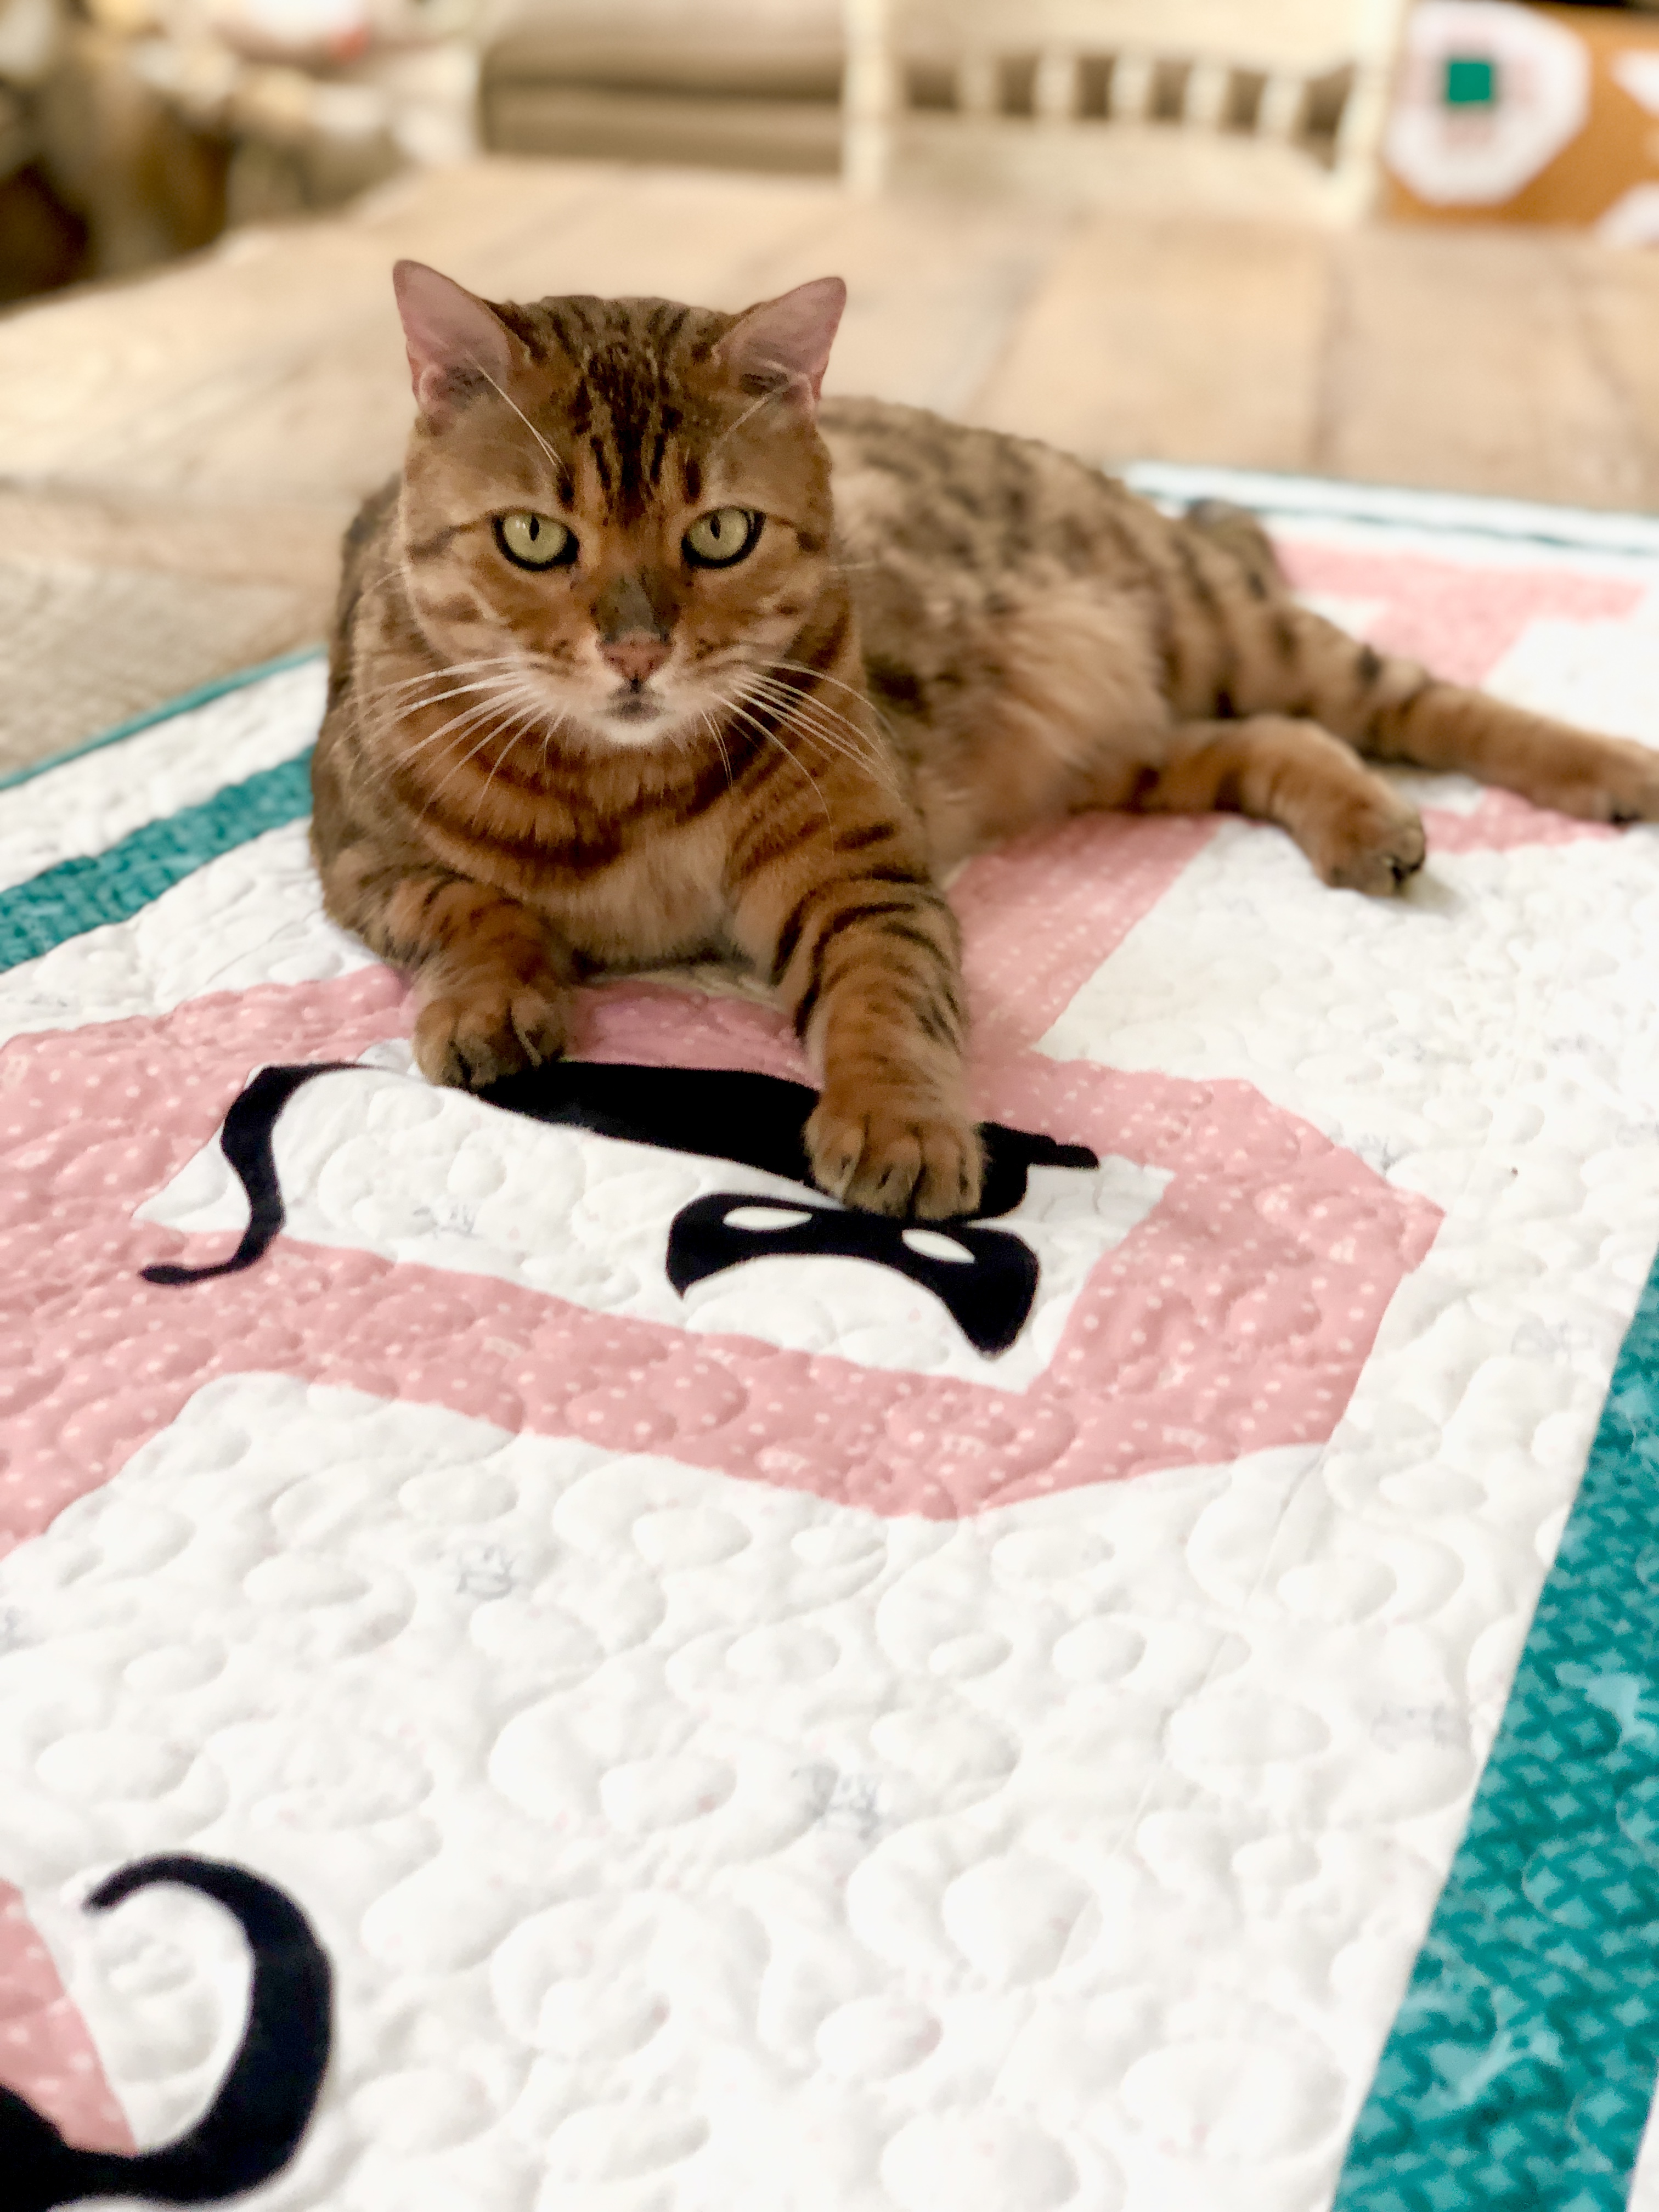
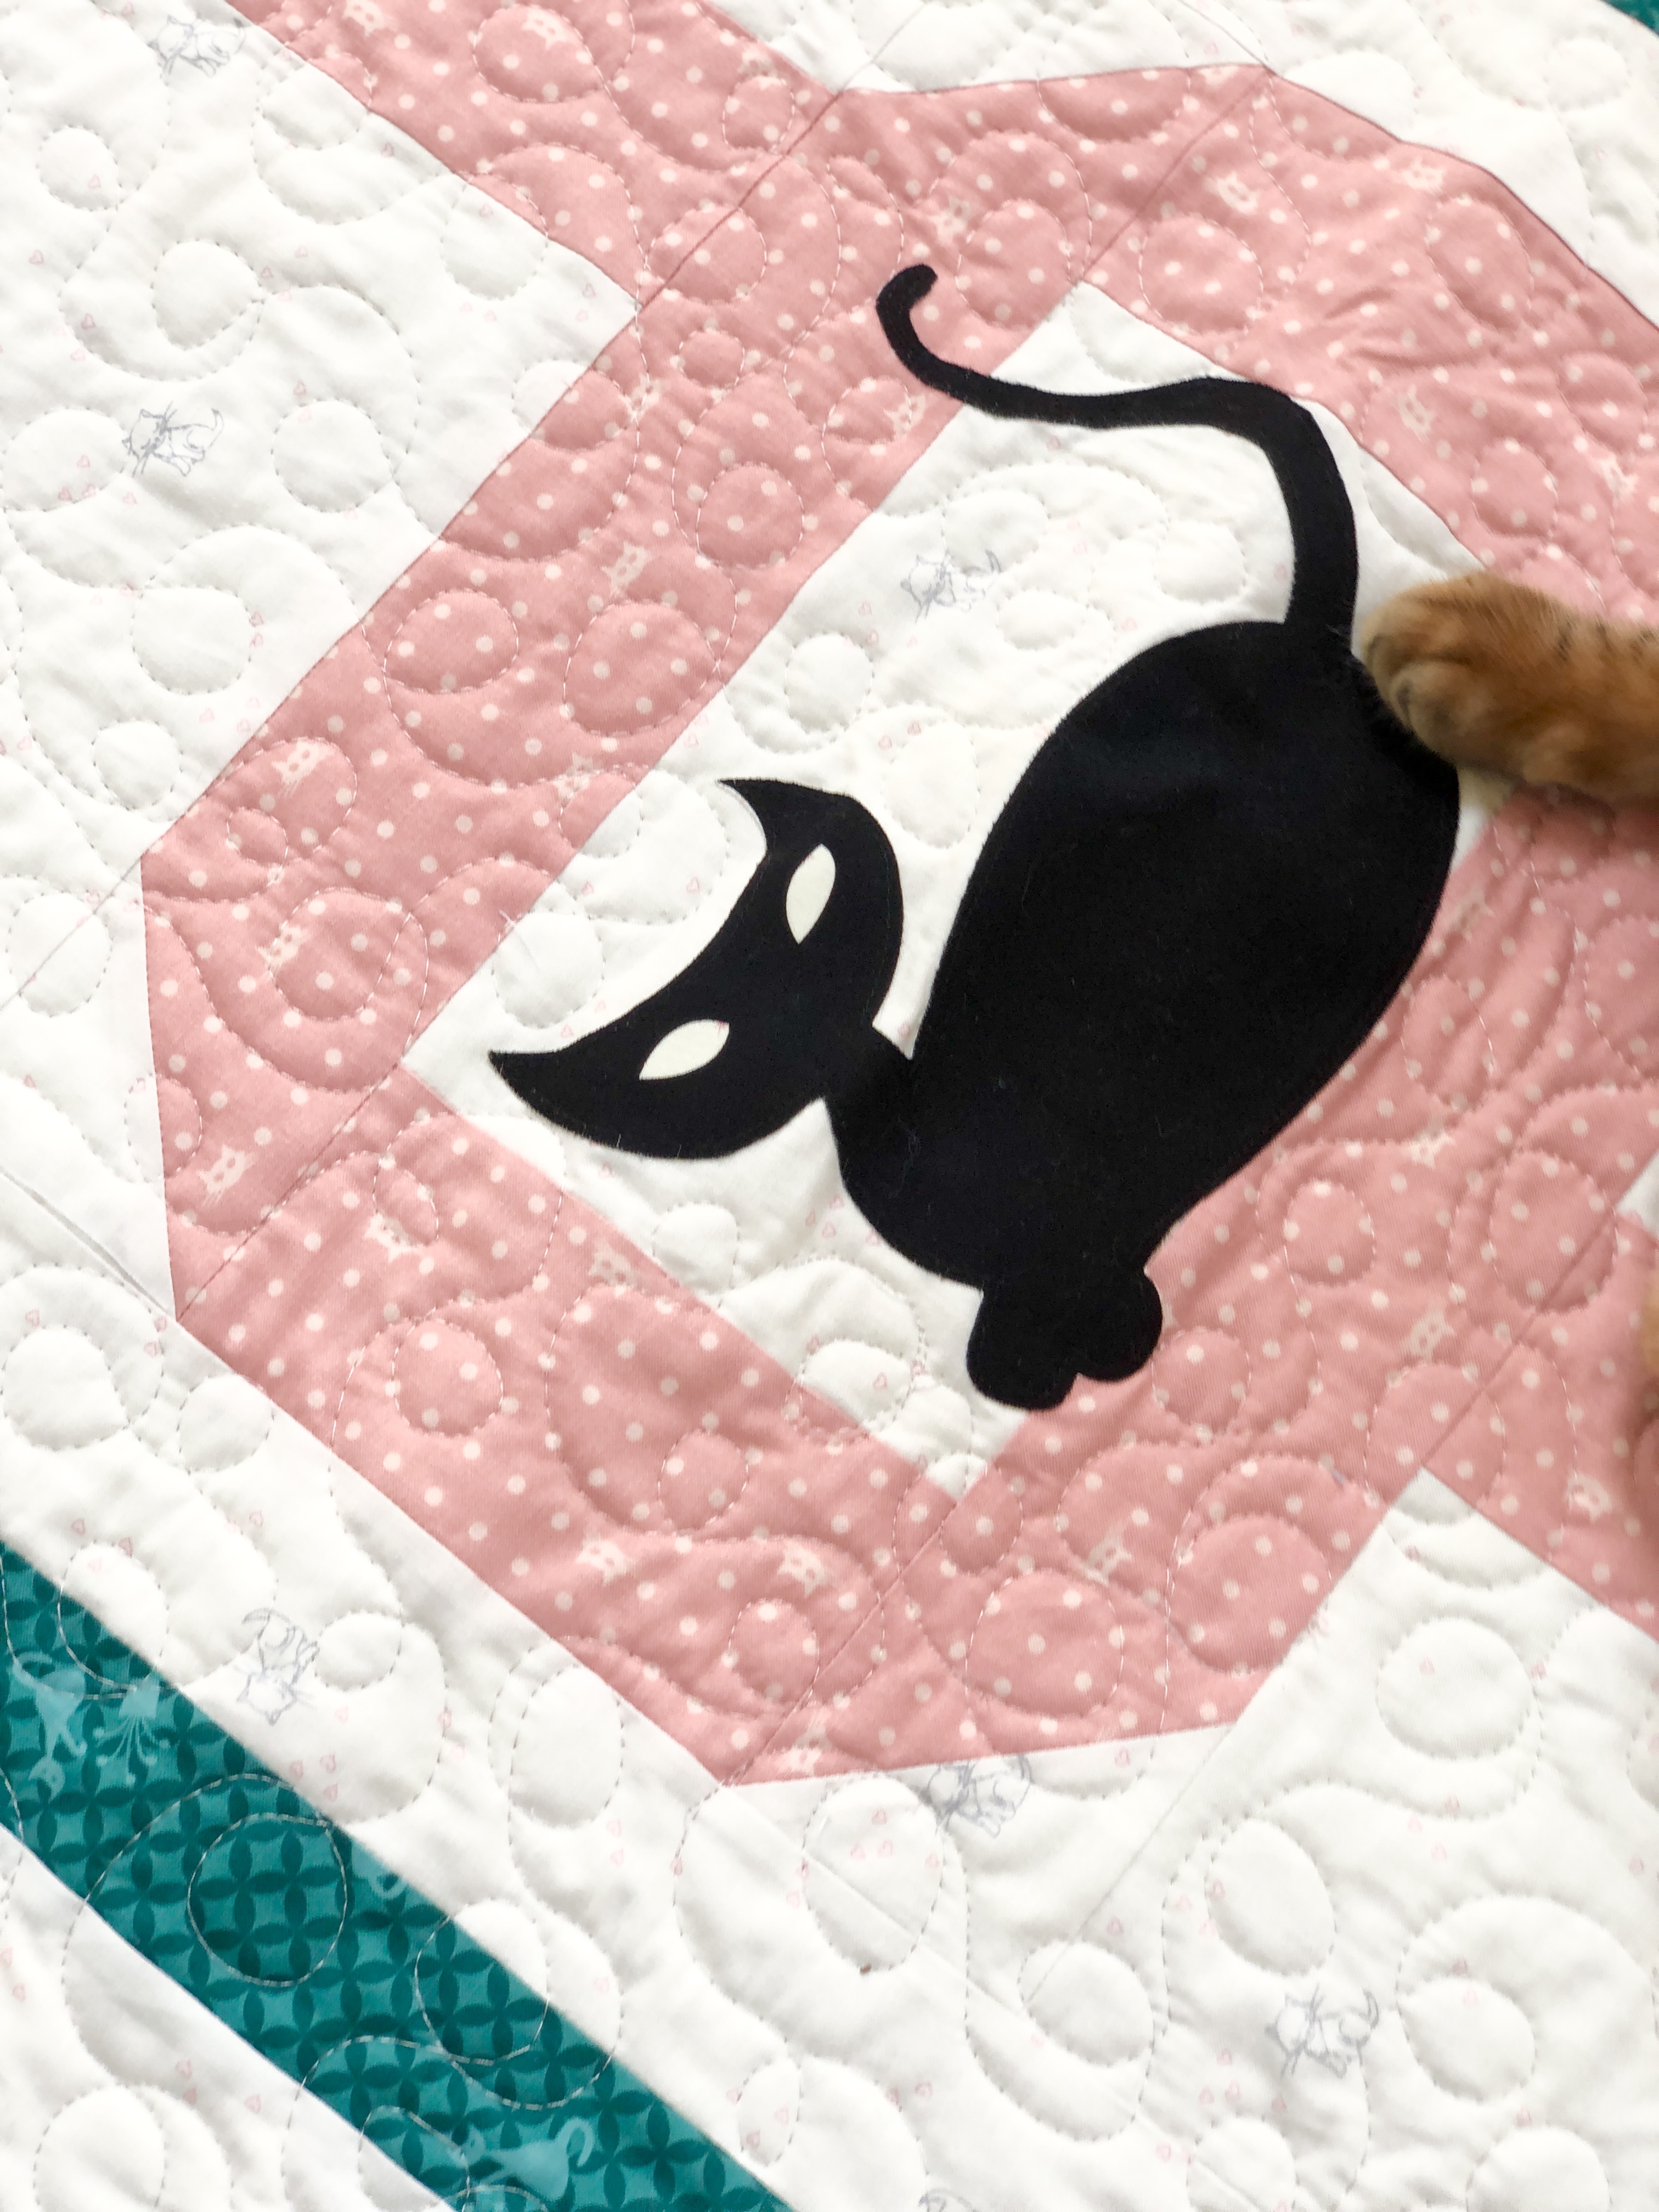
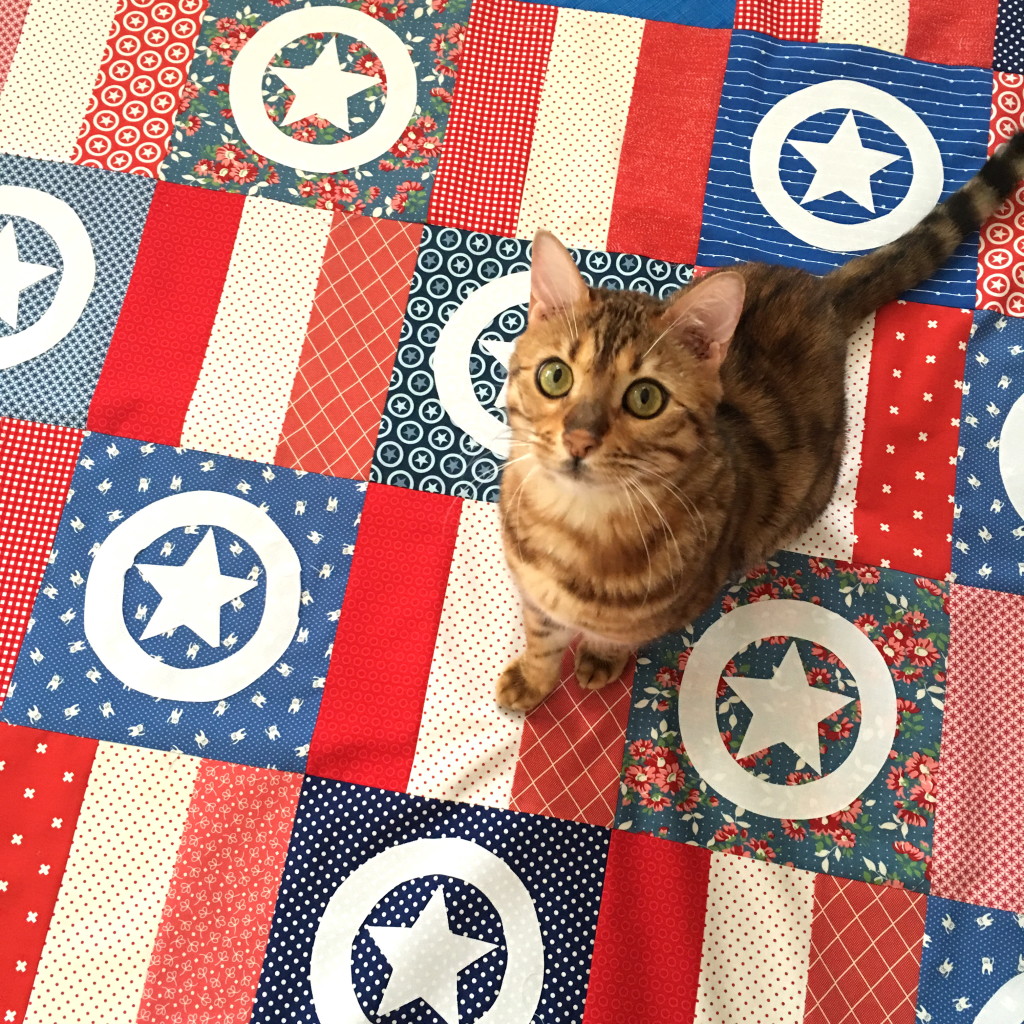
Mufasa totally approves. He prefers the quilt as a table runner instead of a wall hanging so he can lay on it – it’s a cat thing 🙂

Take Me To The Sea Quilt Pattern featuring Seaside by Riley Blake Designs

nautical quilt pattern

Summer is my favorite season of all!  I could live in perpetual June-August!!

take me to the sea quilt pattern
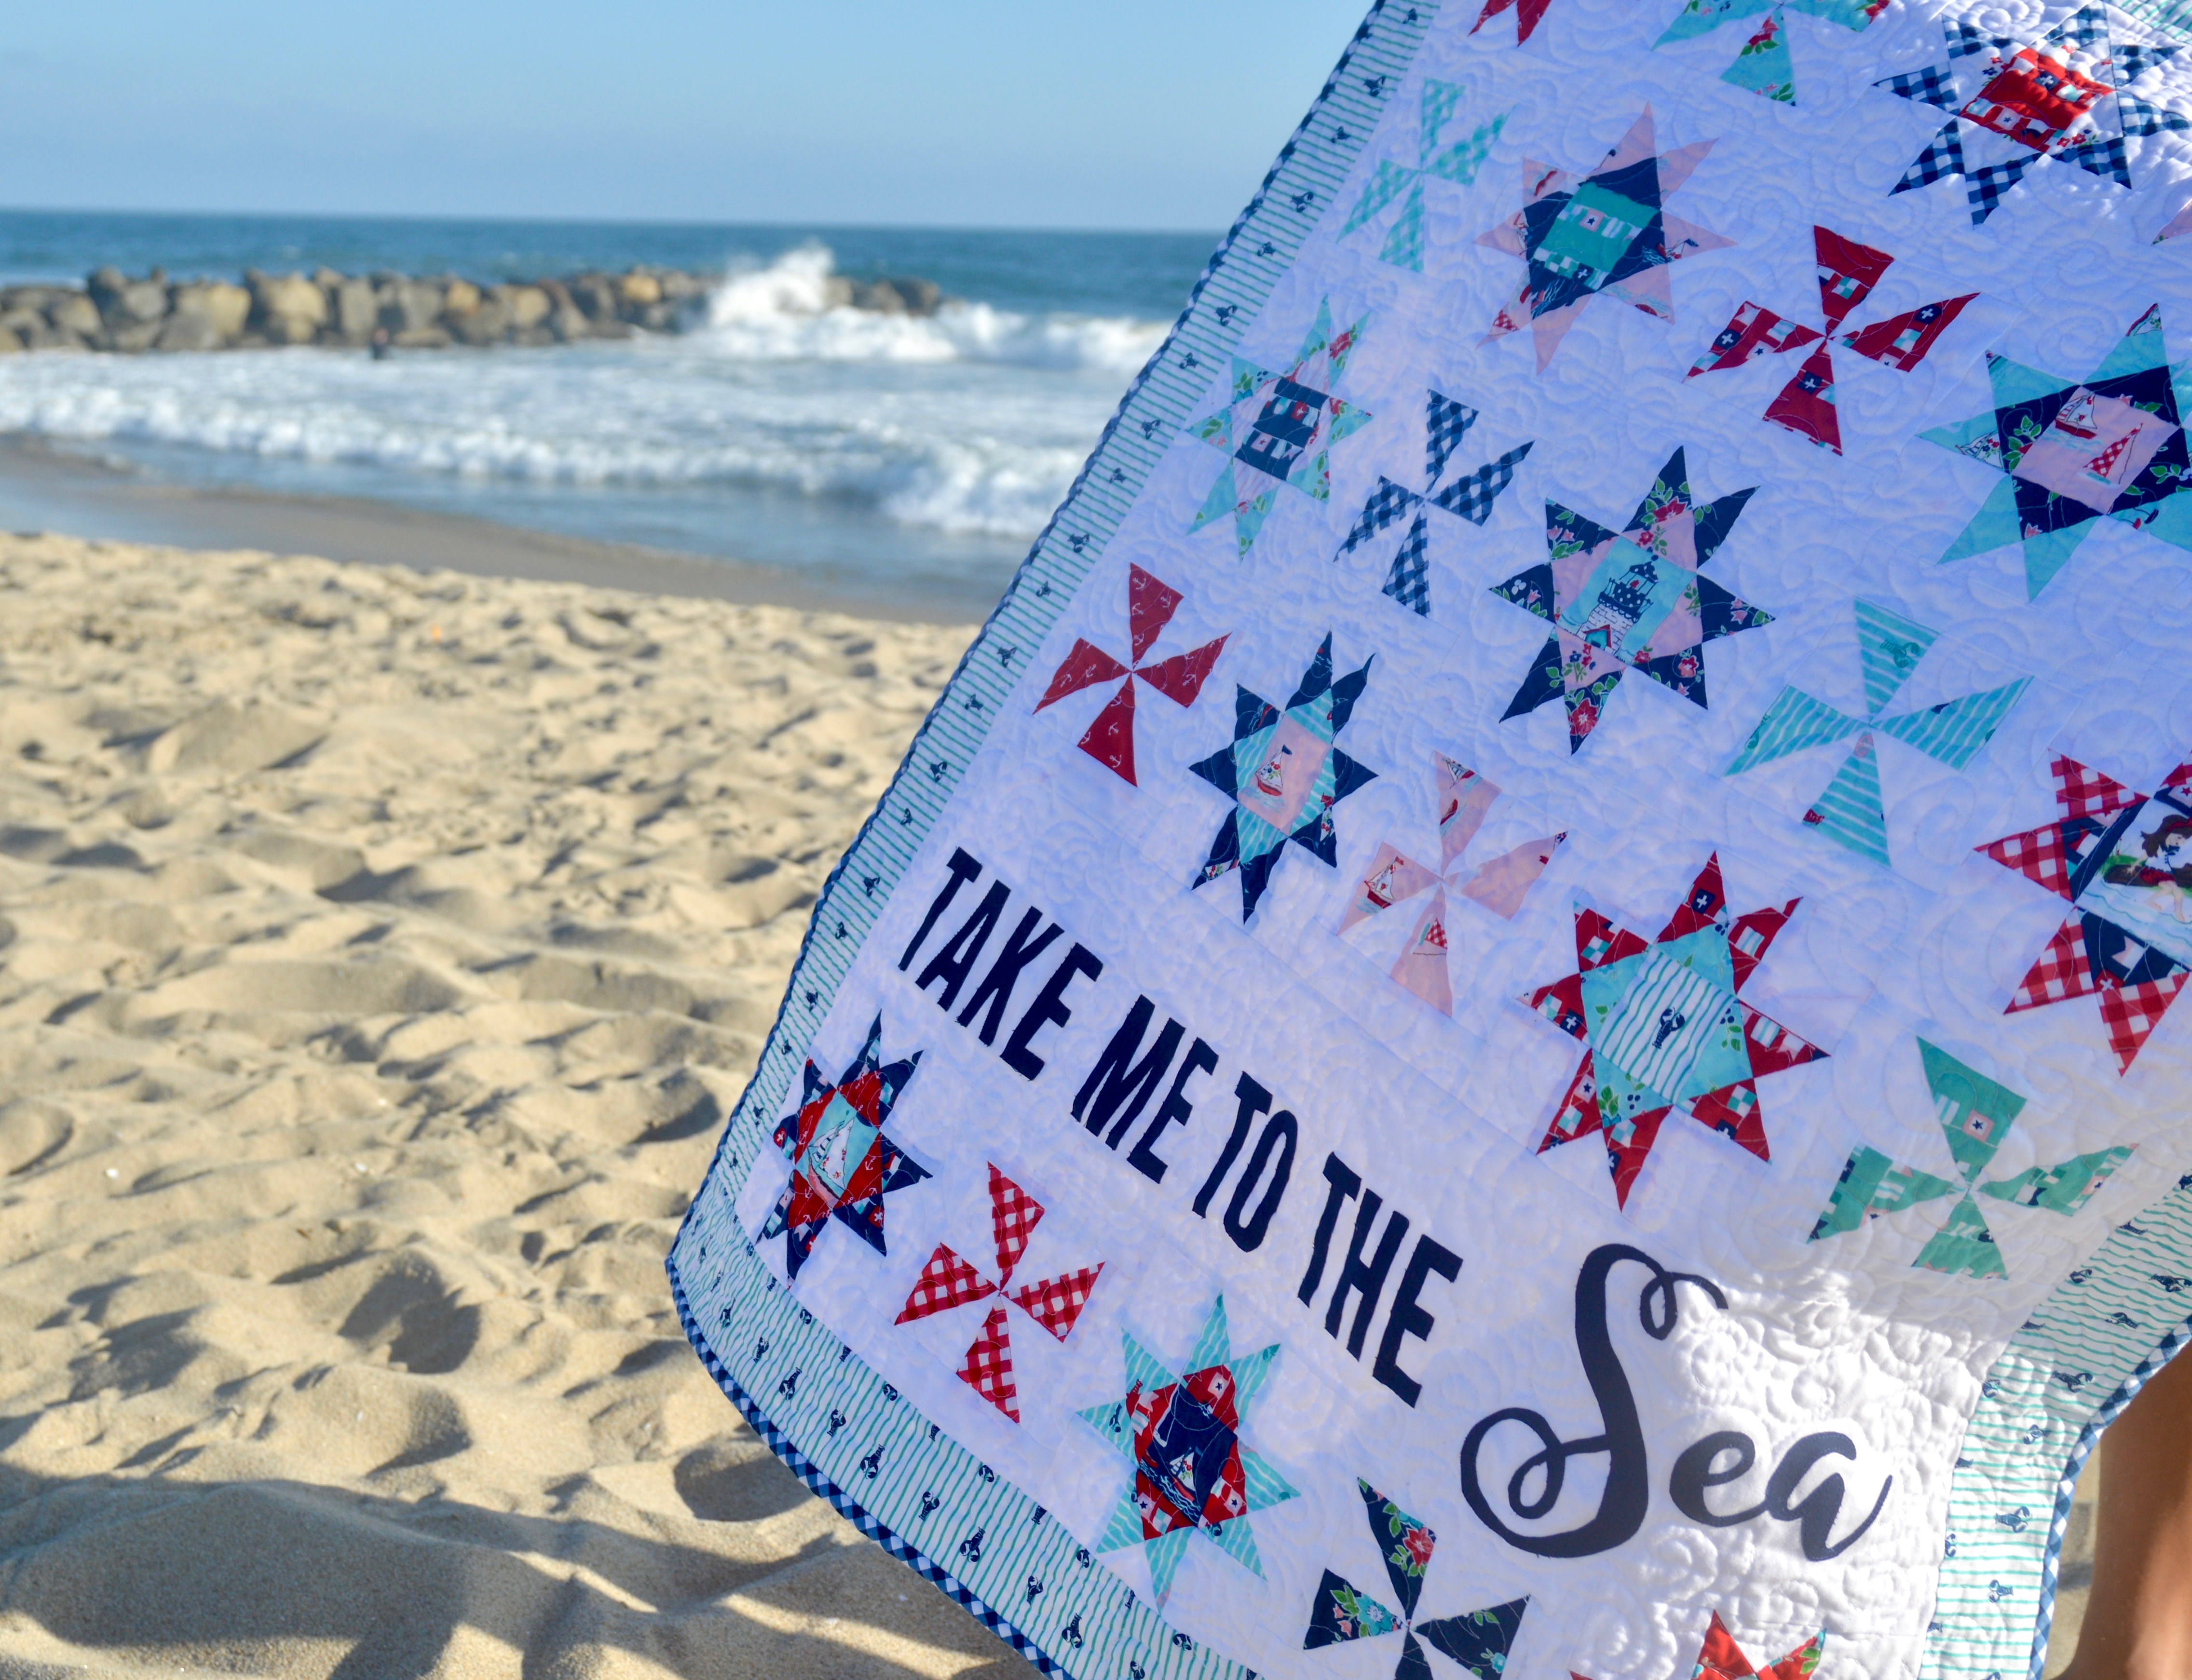
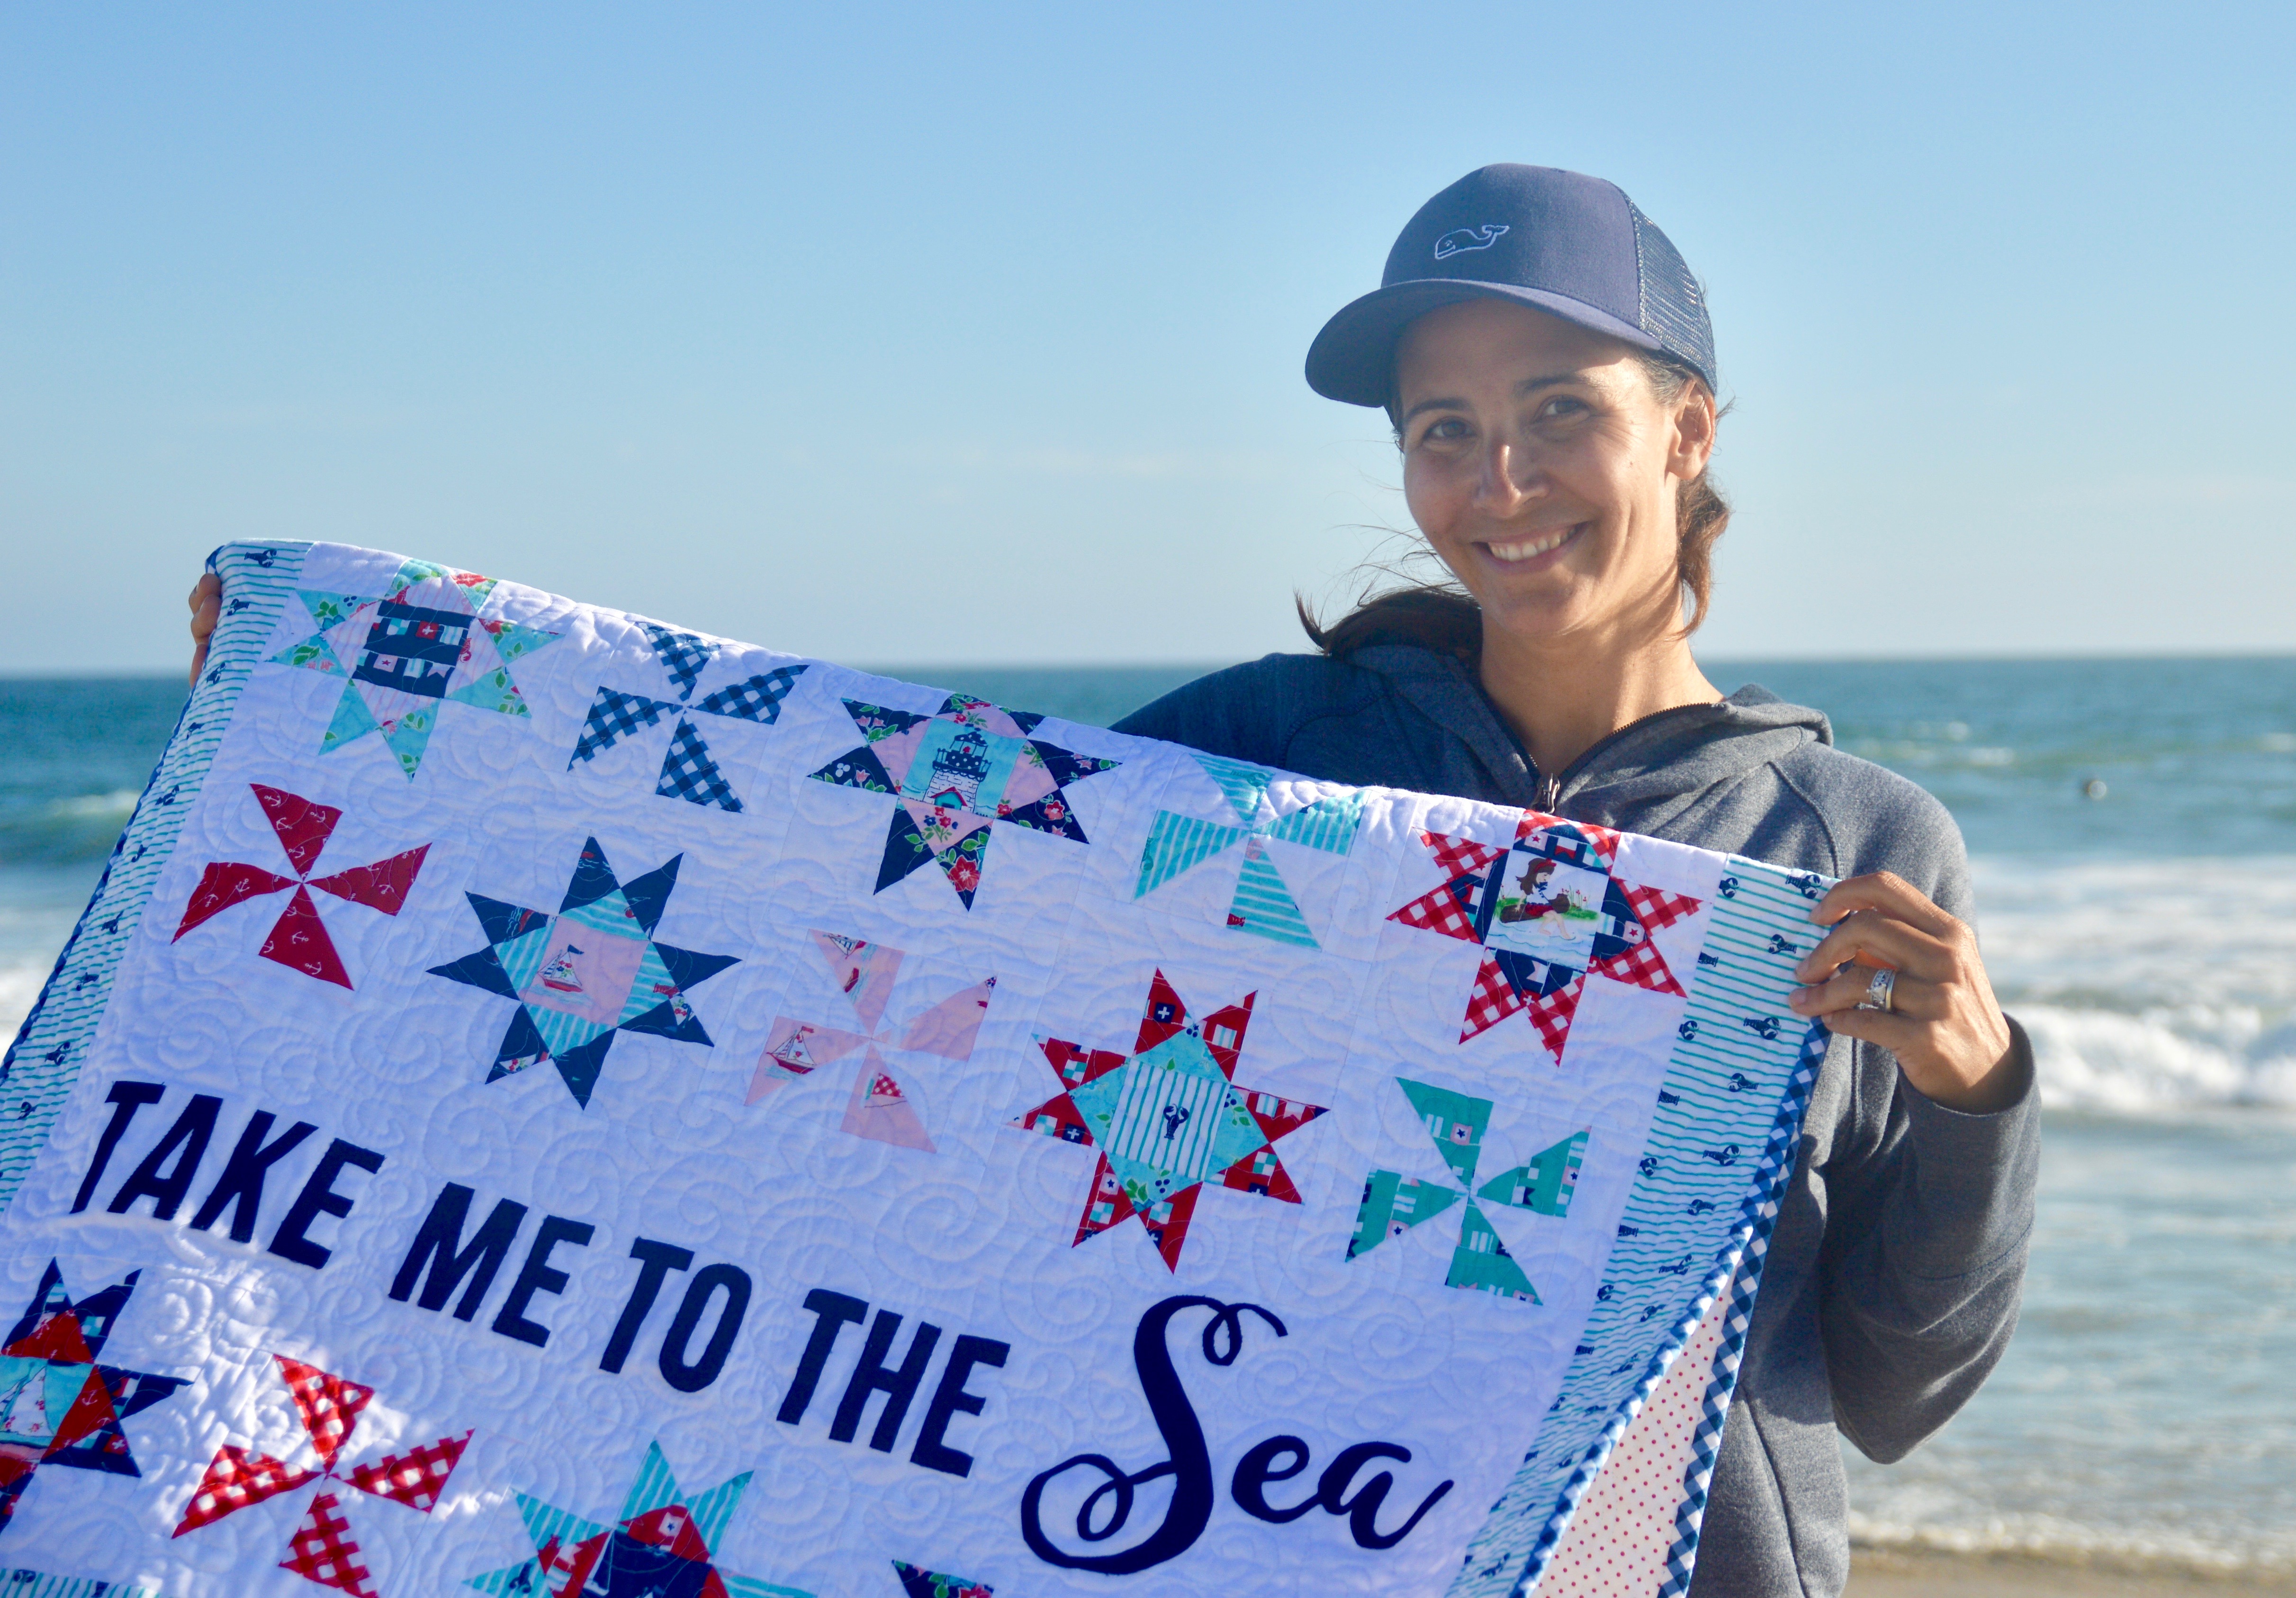
I think the reason I love summer the most is because we get to spend so much time at the beach!  We love whale watching, boogie boarding, diving through the waves, watching for dolphins and seals, getting Balboa Bars, going to Surf Shops, and relaxing!!! As soon as I saw Tasha Noel’s Seaside fabrics I knew they were for me!!  I designed this little quilt to show off all the adorable prints!!

seaside fabric by tasha noel

The quilt measures 35″ x 41″ with each block measuring 6″ square.  It’s perfect to hang on the wall of your beach house (I’m dreaming…..haha!). You can purchase it in my Etsy shop for instant PDF download!

The letters are machine appliquéd using Heat n Bond Lite.  Don’t worry, they don’t take too long to cut out by hand!!

take me to the sea quilt pattern 6

You will love that this quilt is written to accommodate layer cake (10″) squares.  In fact you only NEED 13 squares – but a few extra wouldn’t hurt to add a little variety!!

seaside quilt

I love that there is no sashing the blocks  because it’s built into the pinwheel block!

take me to the sea quilt diagram

It was hard to choose a border print because they are all so amazing!  I went with the lobsters!

seaside quilt pattern 2

You can see the quilting detail in this photos.  I quilted it myself and it always stresses me out!!  From far away it doesn’t look too bad!

take me to the sea quilt pattern 10

I love the surfer in the background of this photo!  We love to go to Newport Beach and watch them surf!!

seaside quilt pattern

I hope you have a great rest of your summer!!!

take me to the sea quilt pattern 8


Circa 1974 Quilt Finish

gingham girls quilt 3

My Circa 1974 quilt is finally finished!!  I live in California and my quilter lives in Utah so I’m not always able to have my quilts quilted and bound as soon as I would like.  But I am super excited that this quilt is finished and is one of my favorite quilt’s I’ve made!!!

gingham girls quilt 6

I love using chambray in my quilts for a super casual feel – perfect for taking on picnics or to the beach!

gingham girls quilt 4

I think the quilting goes perfectly with the 1970’s vibe of the quilt!  I am seriously so in love!!!gingham girls quilt

The pattern available as a PDF download in my Etsy shop.  You can customize the date for a special occasion, or you can omit the date block all together and fill in with more blocks!
gingham girls quilt 2
I love how the little shoes poking out the bottom totally match the quilt!!
gingham girls quilt 5


gingham girls quilt 8

Best of all it is 100% Mufasa approved!

How to Applique Words {LOVE YOU Pillow}

DSC_0197

I am a word-a-holic and I LOVE anything with words: signs, mugs, pillows, t-shirts, you name it!  I love adding words to my sewing projects and today I am going to show you how to do this start to finish! Today I’m sharing this pillow tutorial over at Diary of a Quilter!  Hop over to Amy’s blog to for the full instructions!

DSC_0186

Once the appliqué is finished you can turn it into a pillow using your favorite method; mine is a zipper closure on the back. For more information on inserting a zipper into a pillow, click HERE.

IMG_6995

DSC_0182

Here is another example of a fun word appliqué project! Click HERE for the turorial.

gingham girls zipper pouch 6

The Good in the Good Life Quilt Pattern

the good in the good life quilt

In our family we have a little saying….well actually it’s song lyrics….. “You put the GOOD in the GOOD LIFE.”  I knew I had to use the Good Life fabric from Moda and I knew the quilt had to have words.  So meet my newest quilt pattern!the good life quilt 2

This whimsical quilt measures 37″ square and is perfect to hang on a wall, place on a table, or give as a gift to someone who puts “good” in your life :). The border is made entirely from charm squares, which is super fun because I collect charm packs!  It’s available in my Etsy shop as a PDF download for only $5.00!!the good life quilt pattern 2

The letters are machine appliquéd.  Yes, you have to cut them all by hand, but it’s kind of fun!  I put on a movie, sat down with my scissors, and it went by fast!the good life quilt pattern 4

I thought I would be a nerd and pose with my quilt while my 9 year old took my picture….hahah!the good life quilt pattern 7

The blocks are super fun to make and I love that you can use all the fabrics in a charm pack.the good life quilt pattern 5

the good life quilt pattern 8


Sweetie Pie Sew Along {Strawberry Pie}

IMG_8442

It’s my turn on Lori Holt’s Sweetie Pie Sew Along!  It’s been so much fun to see everyone’s take on these adorable blocks.

IMG_4328

Of course I choose to make the strawberry block because I live in Southern California where we have strawberries all year round!

DSC_0281

Lori’s templates are super easy to use and I love her appliqué method of using sew-in light weight stabilizer.

IMG_4189 IMG_8378

I normally machine appliqué everything, but for Lori, I did the whole thing by hand….which is saying a lot for me.  I loved every minute of it!

IMG_9969
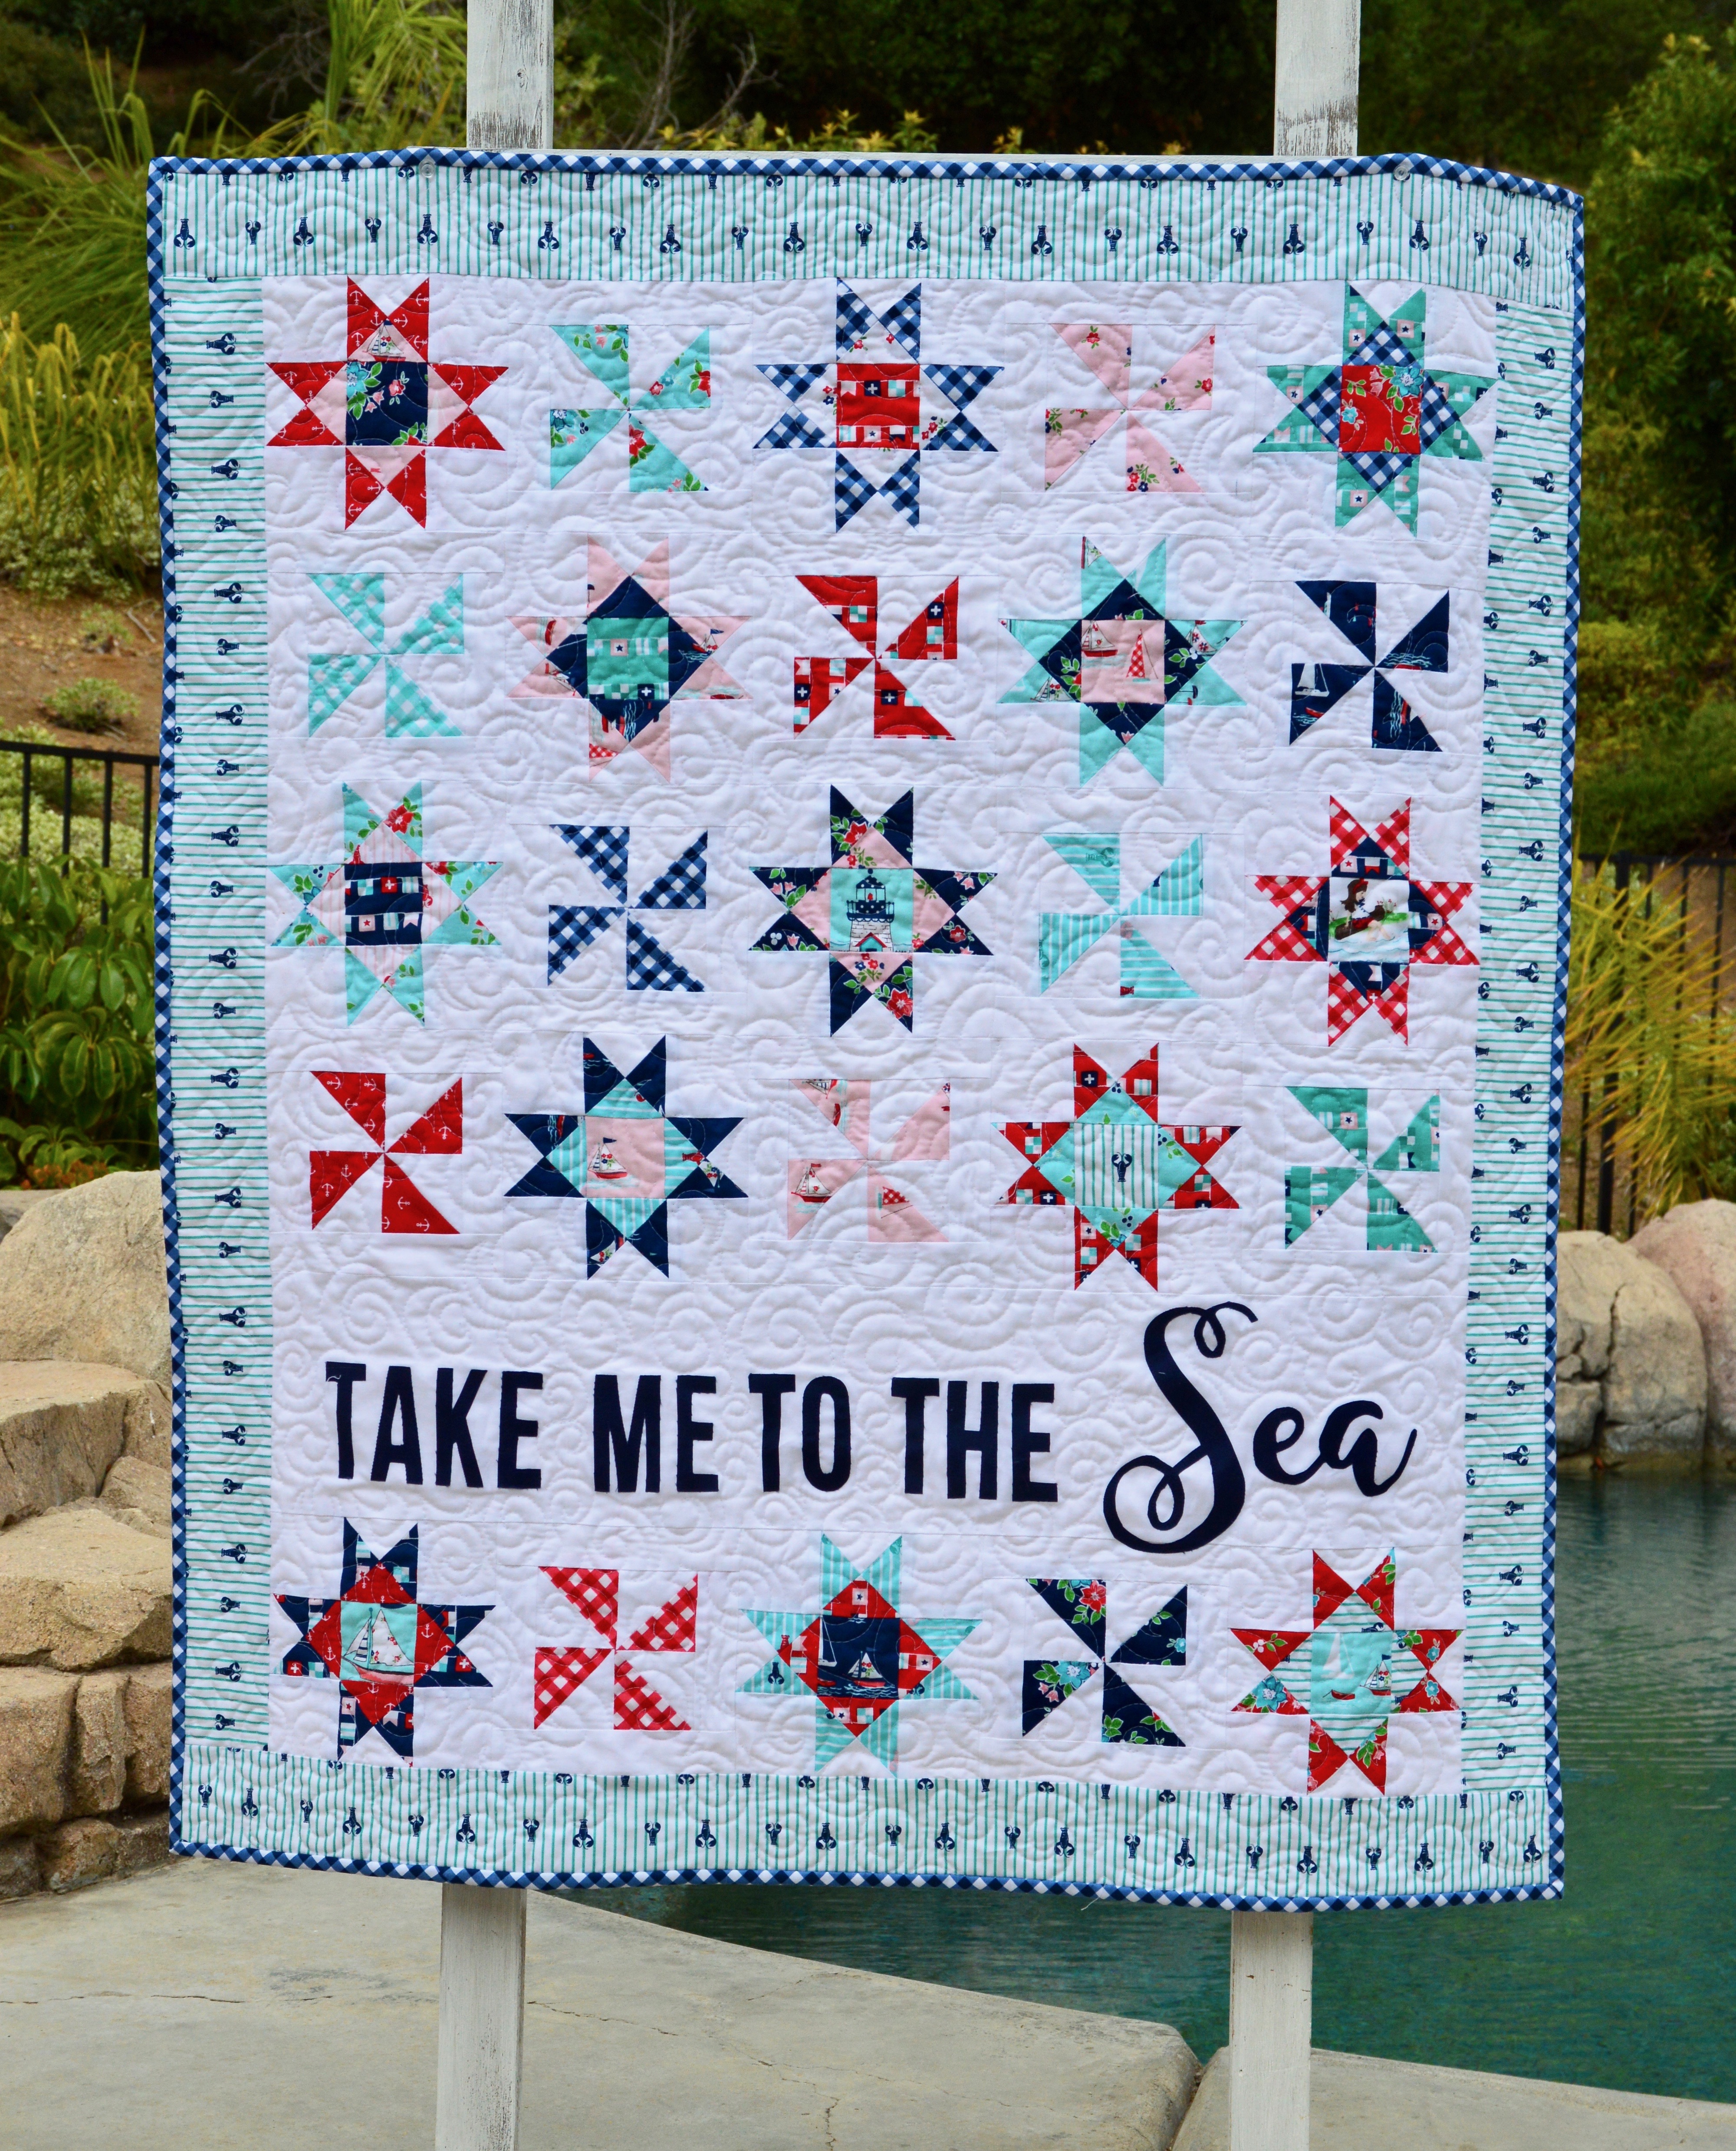
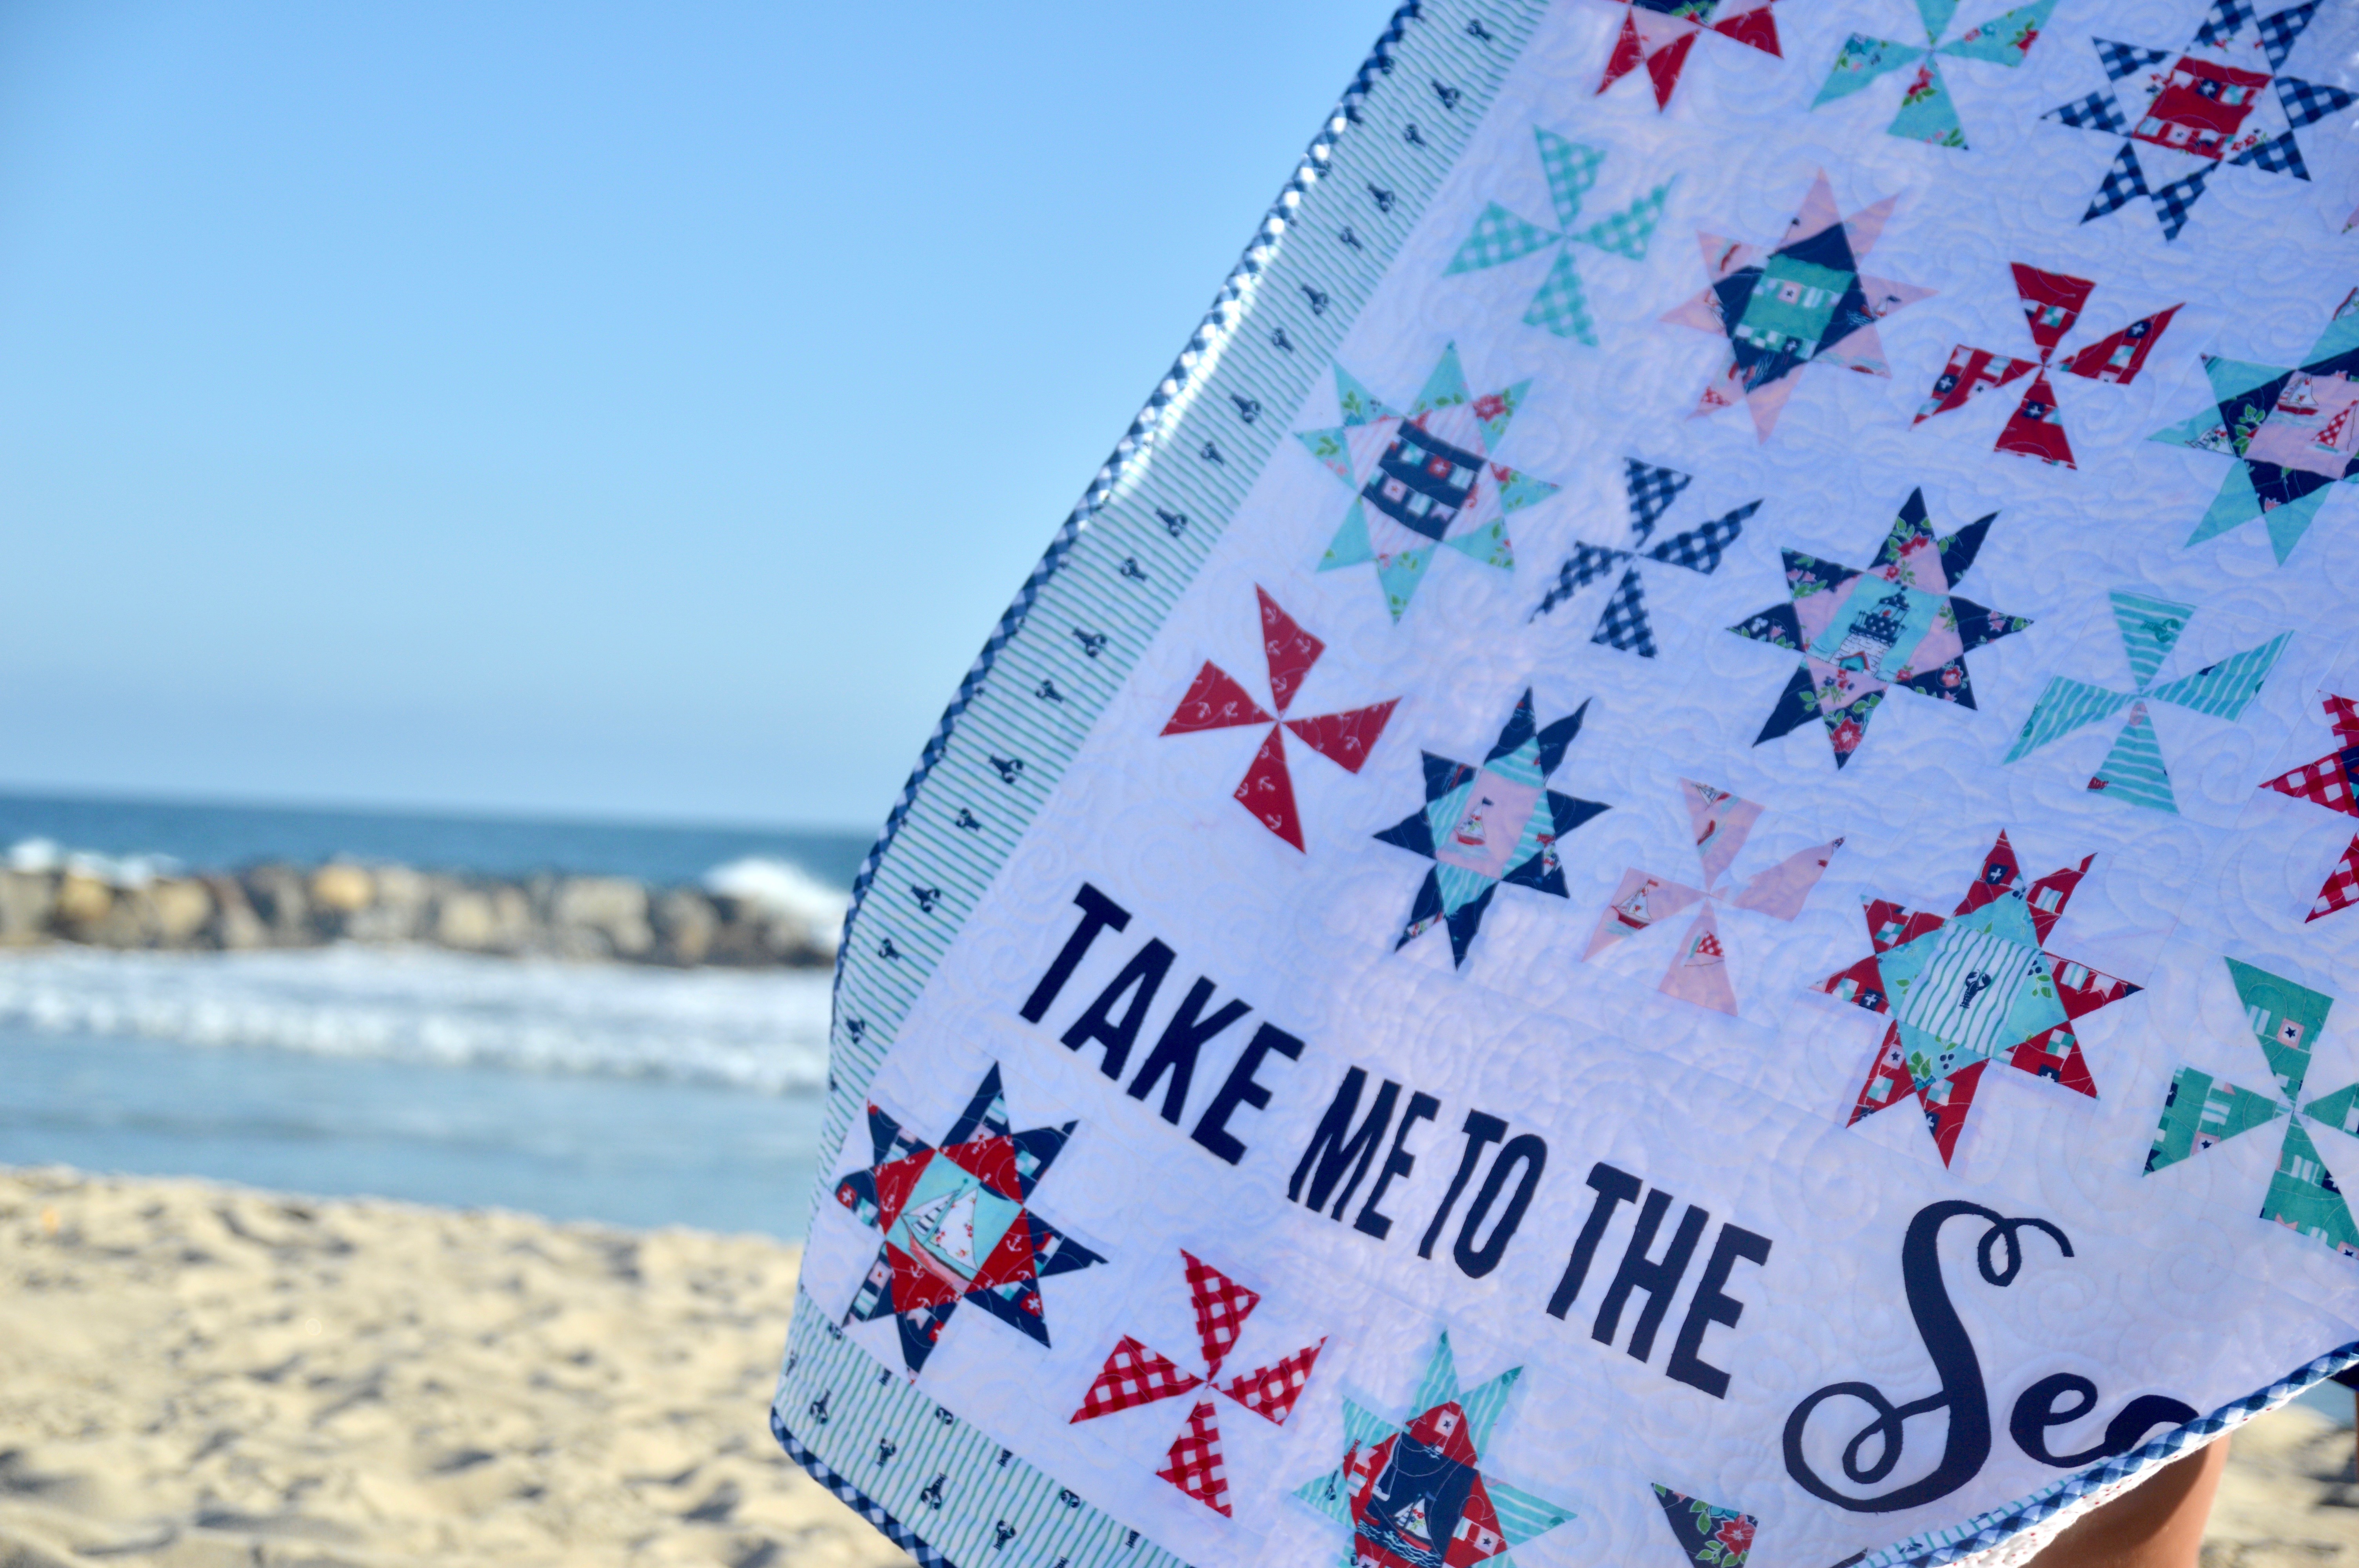
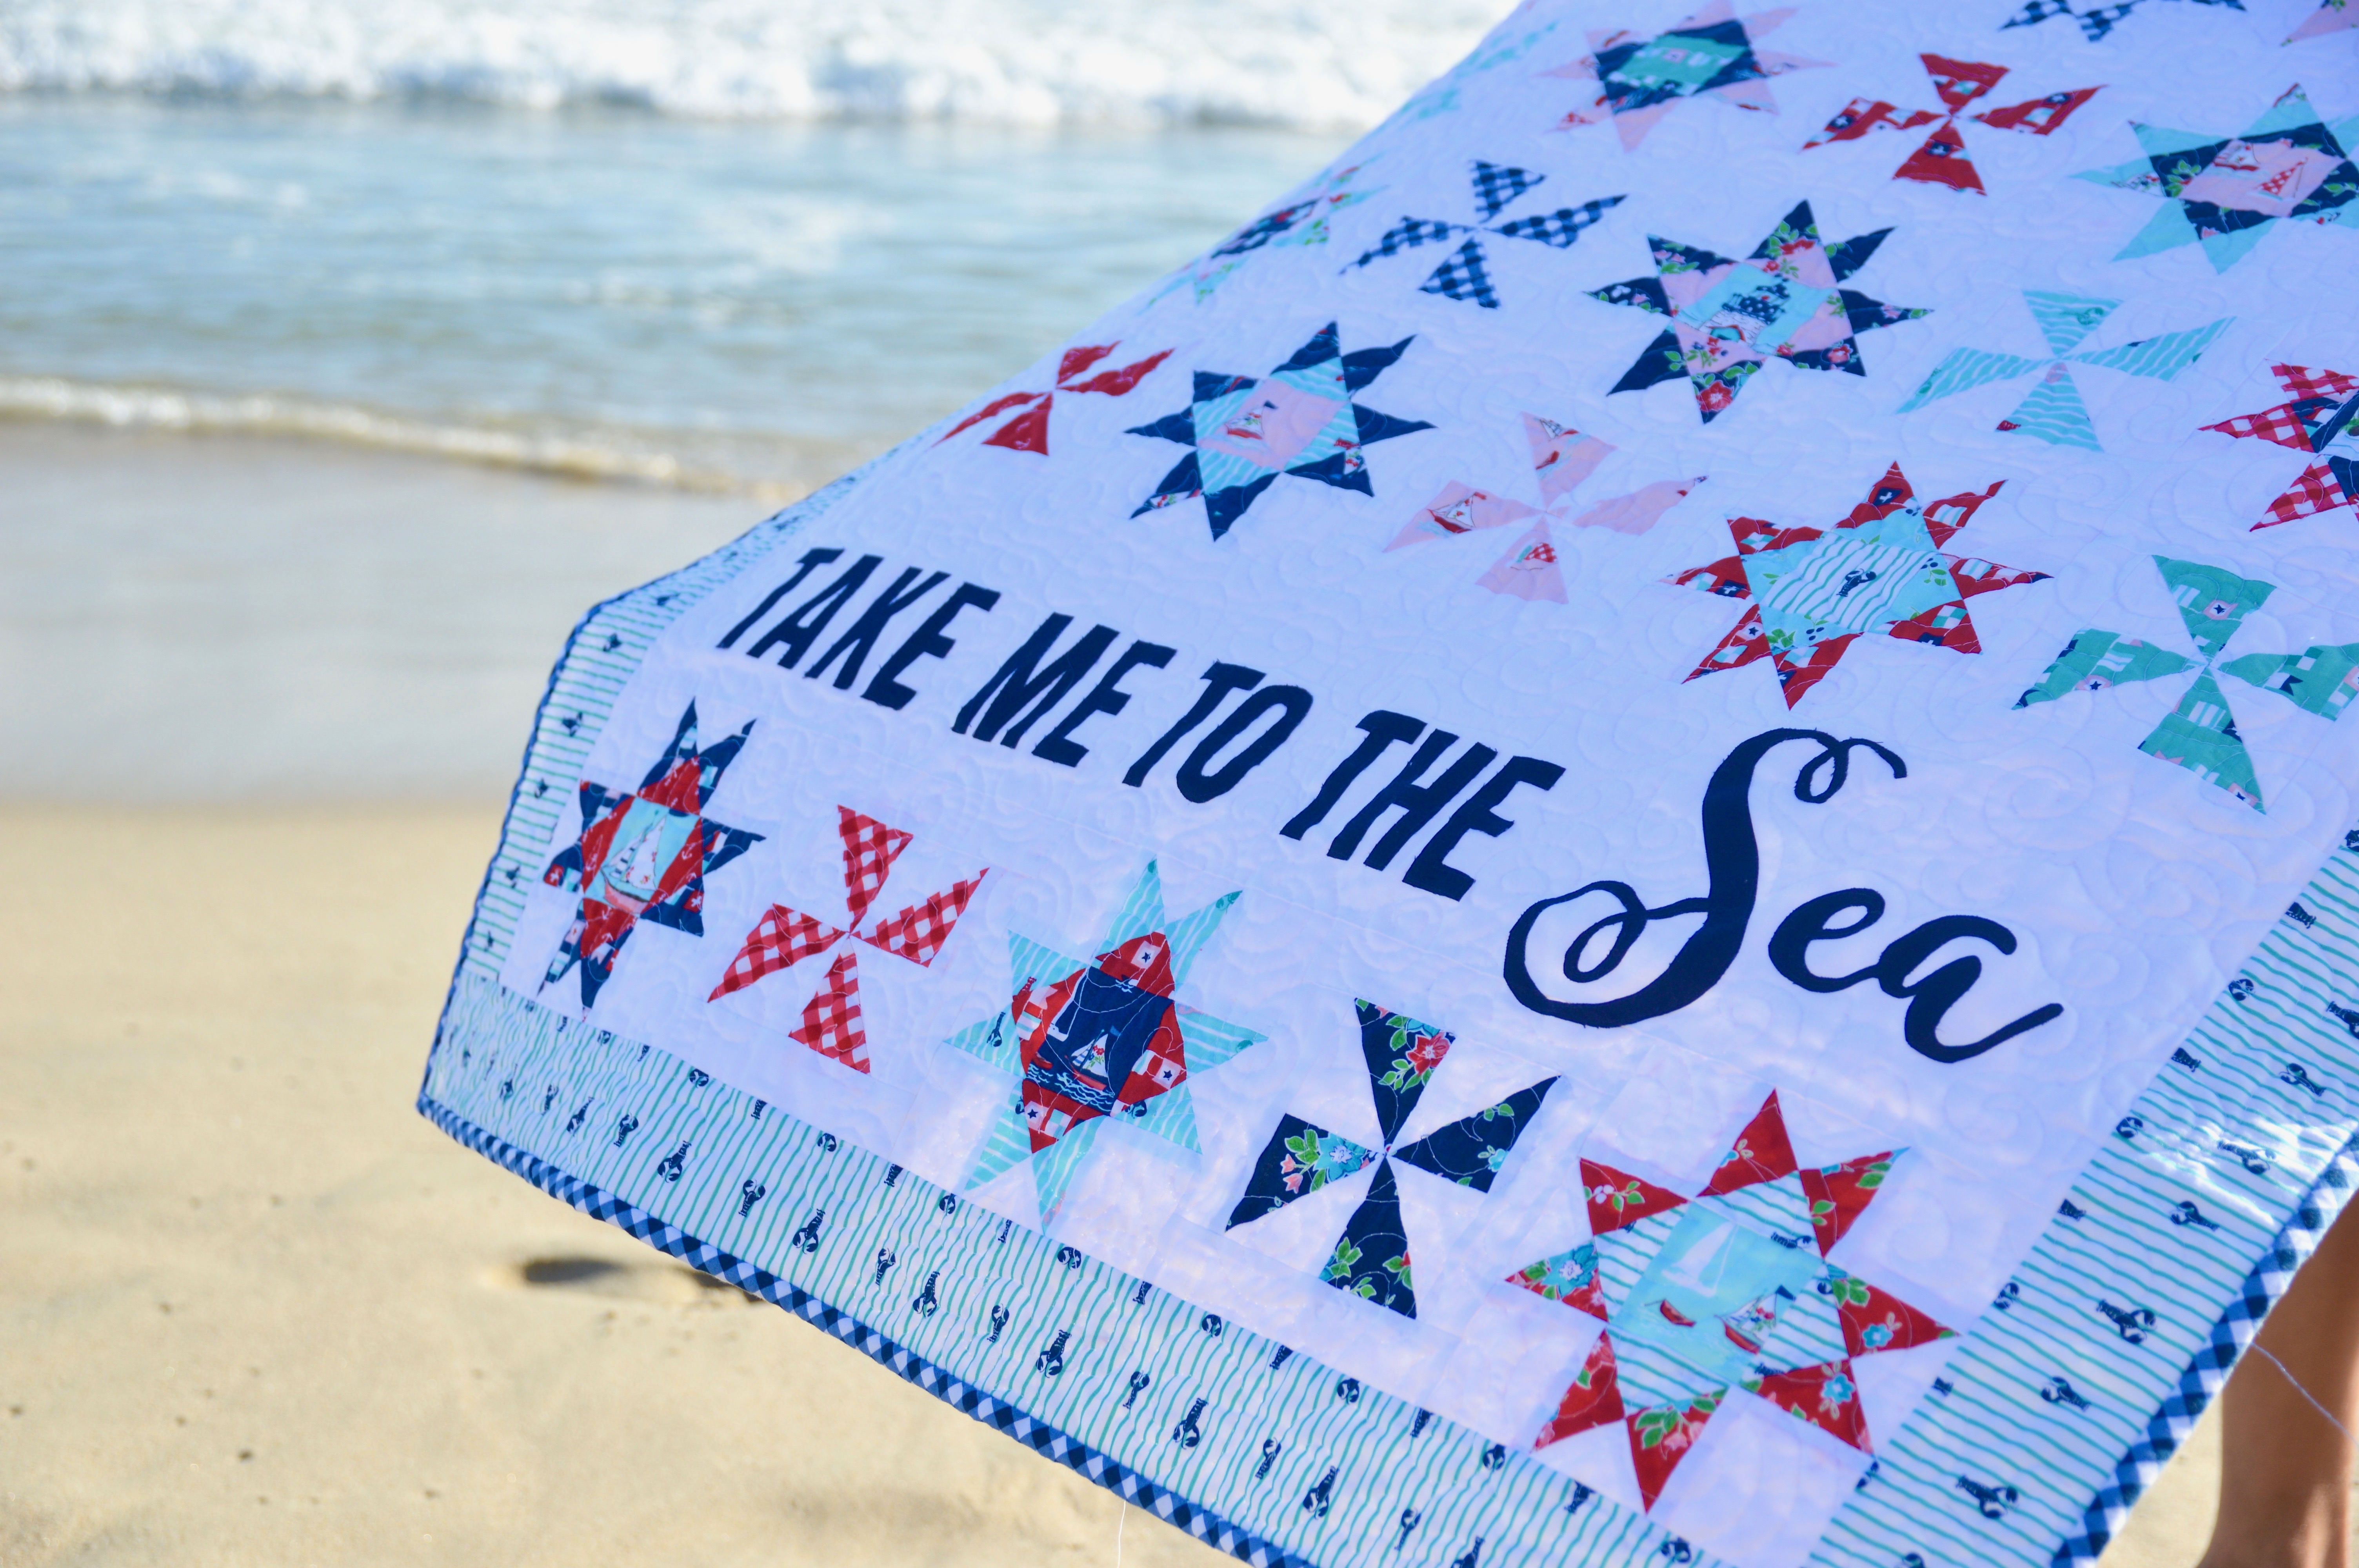
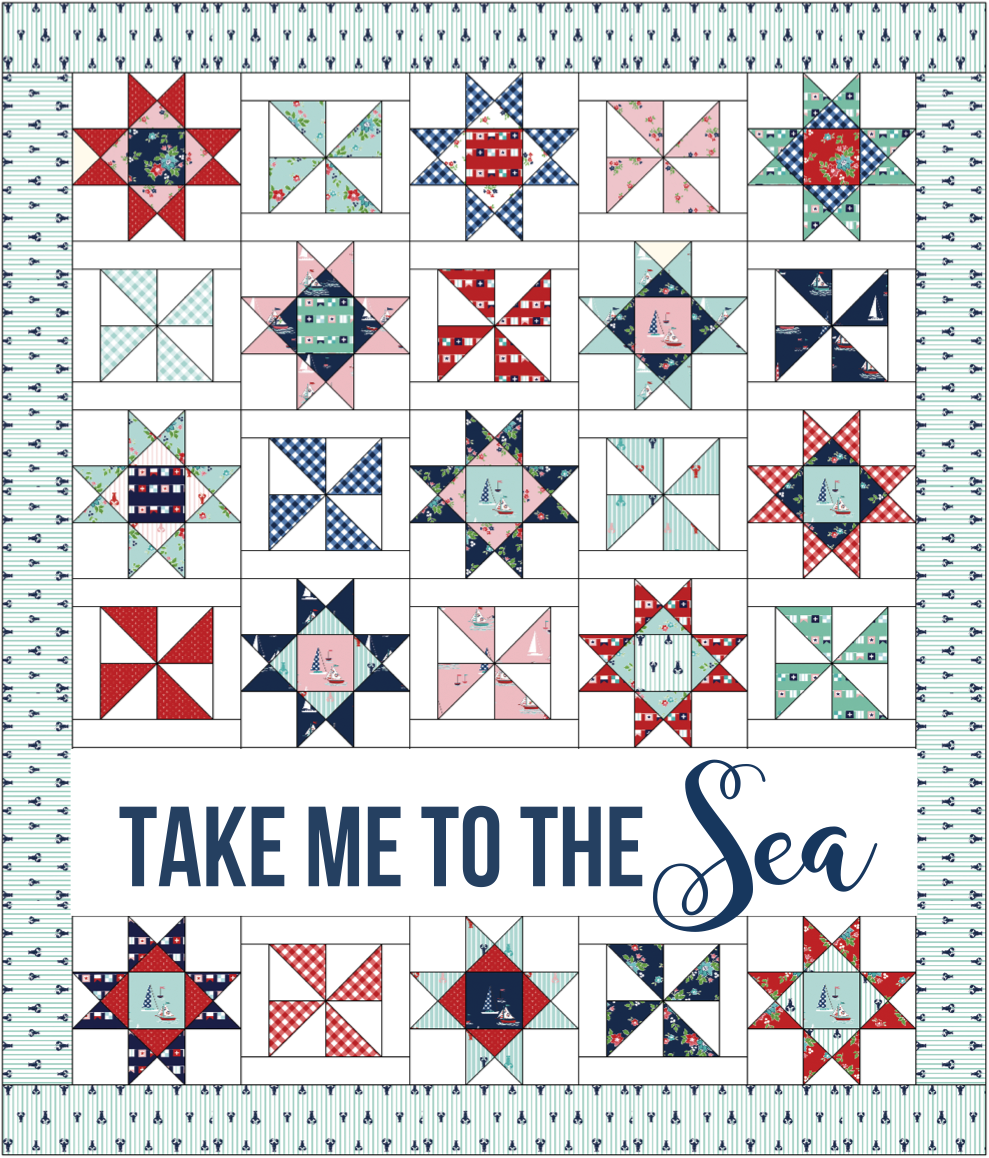
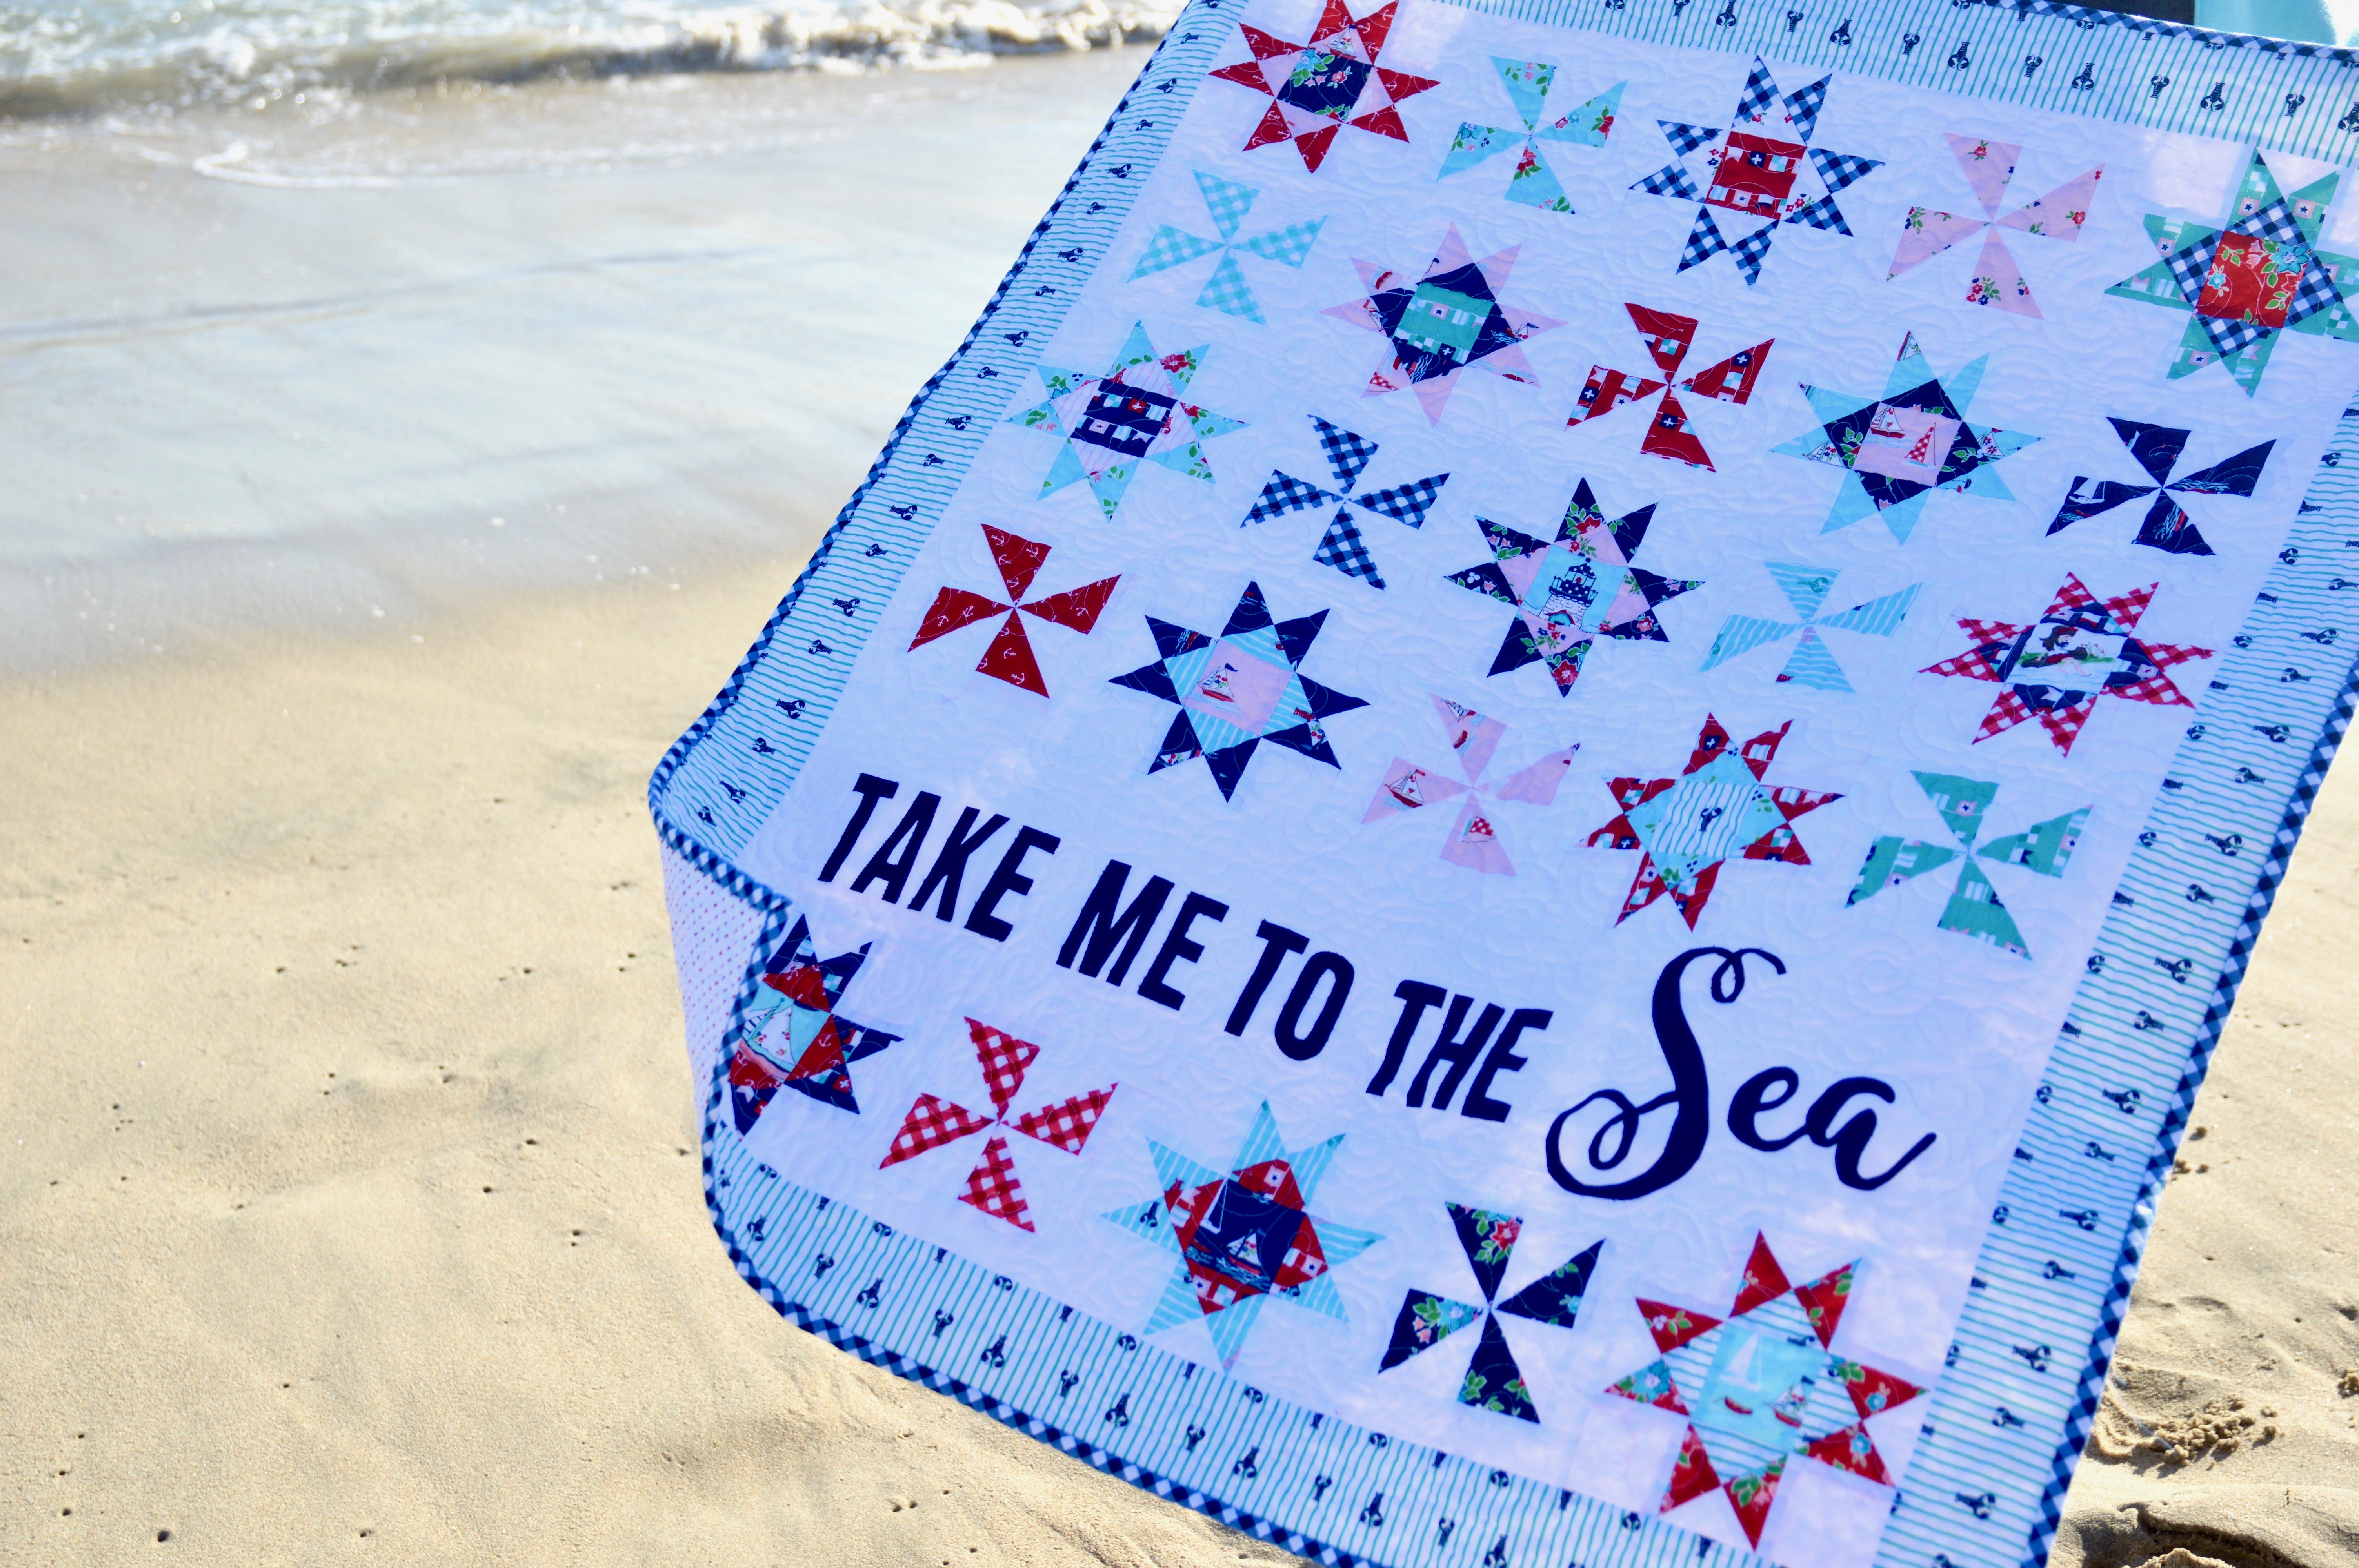
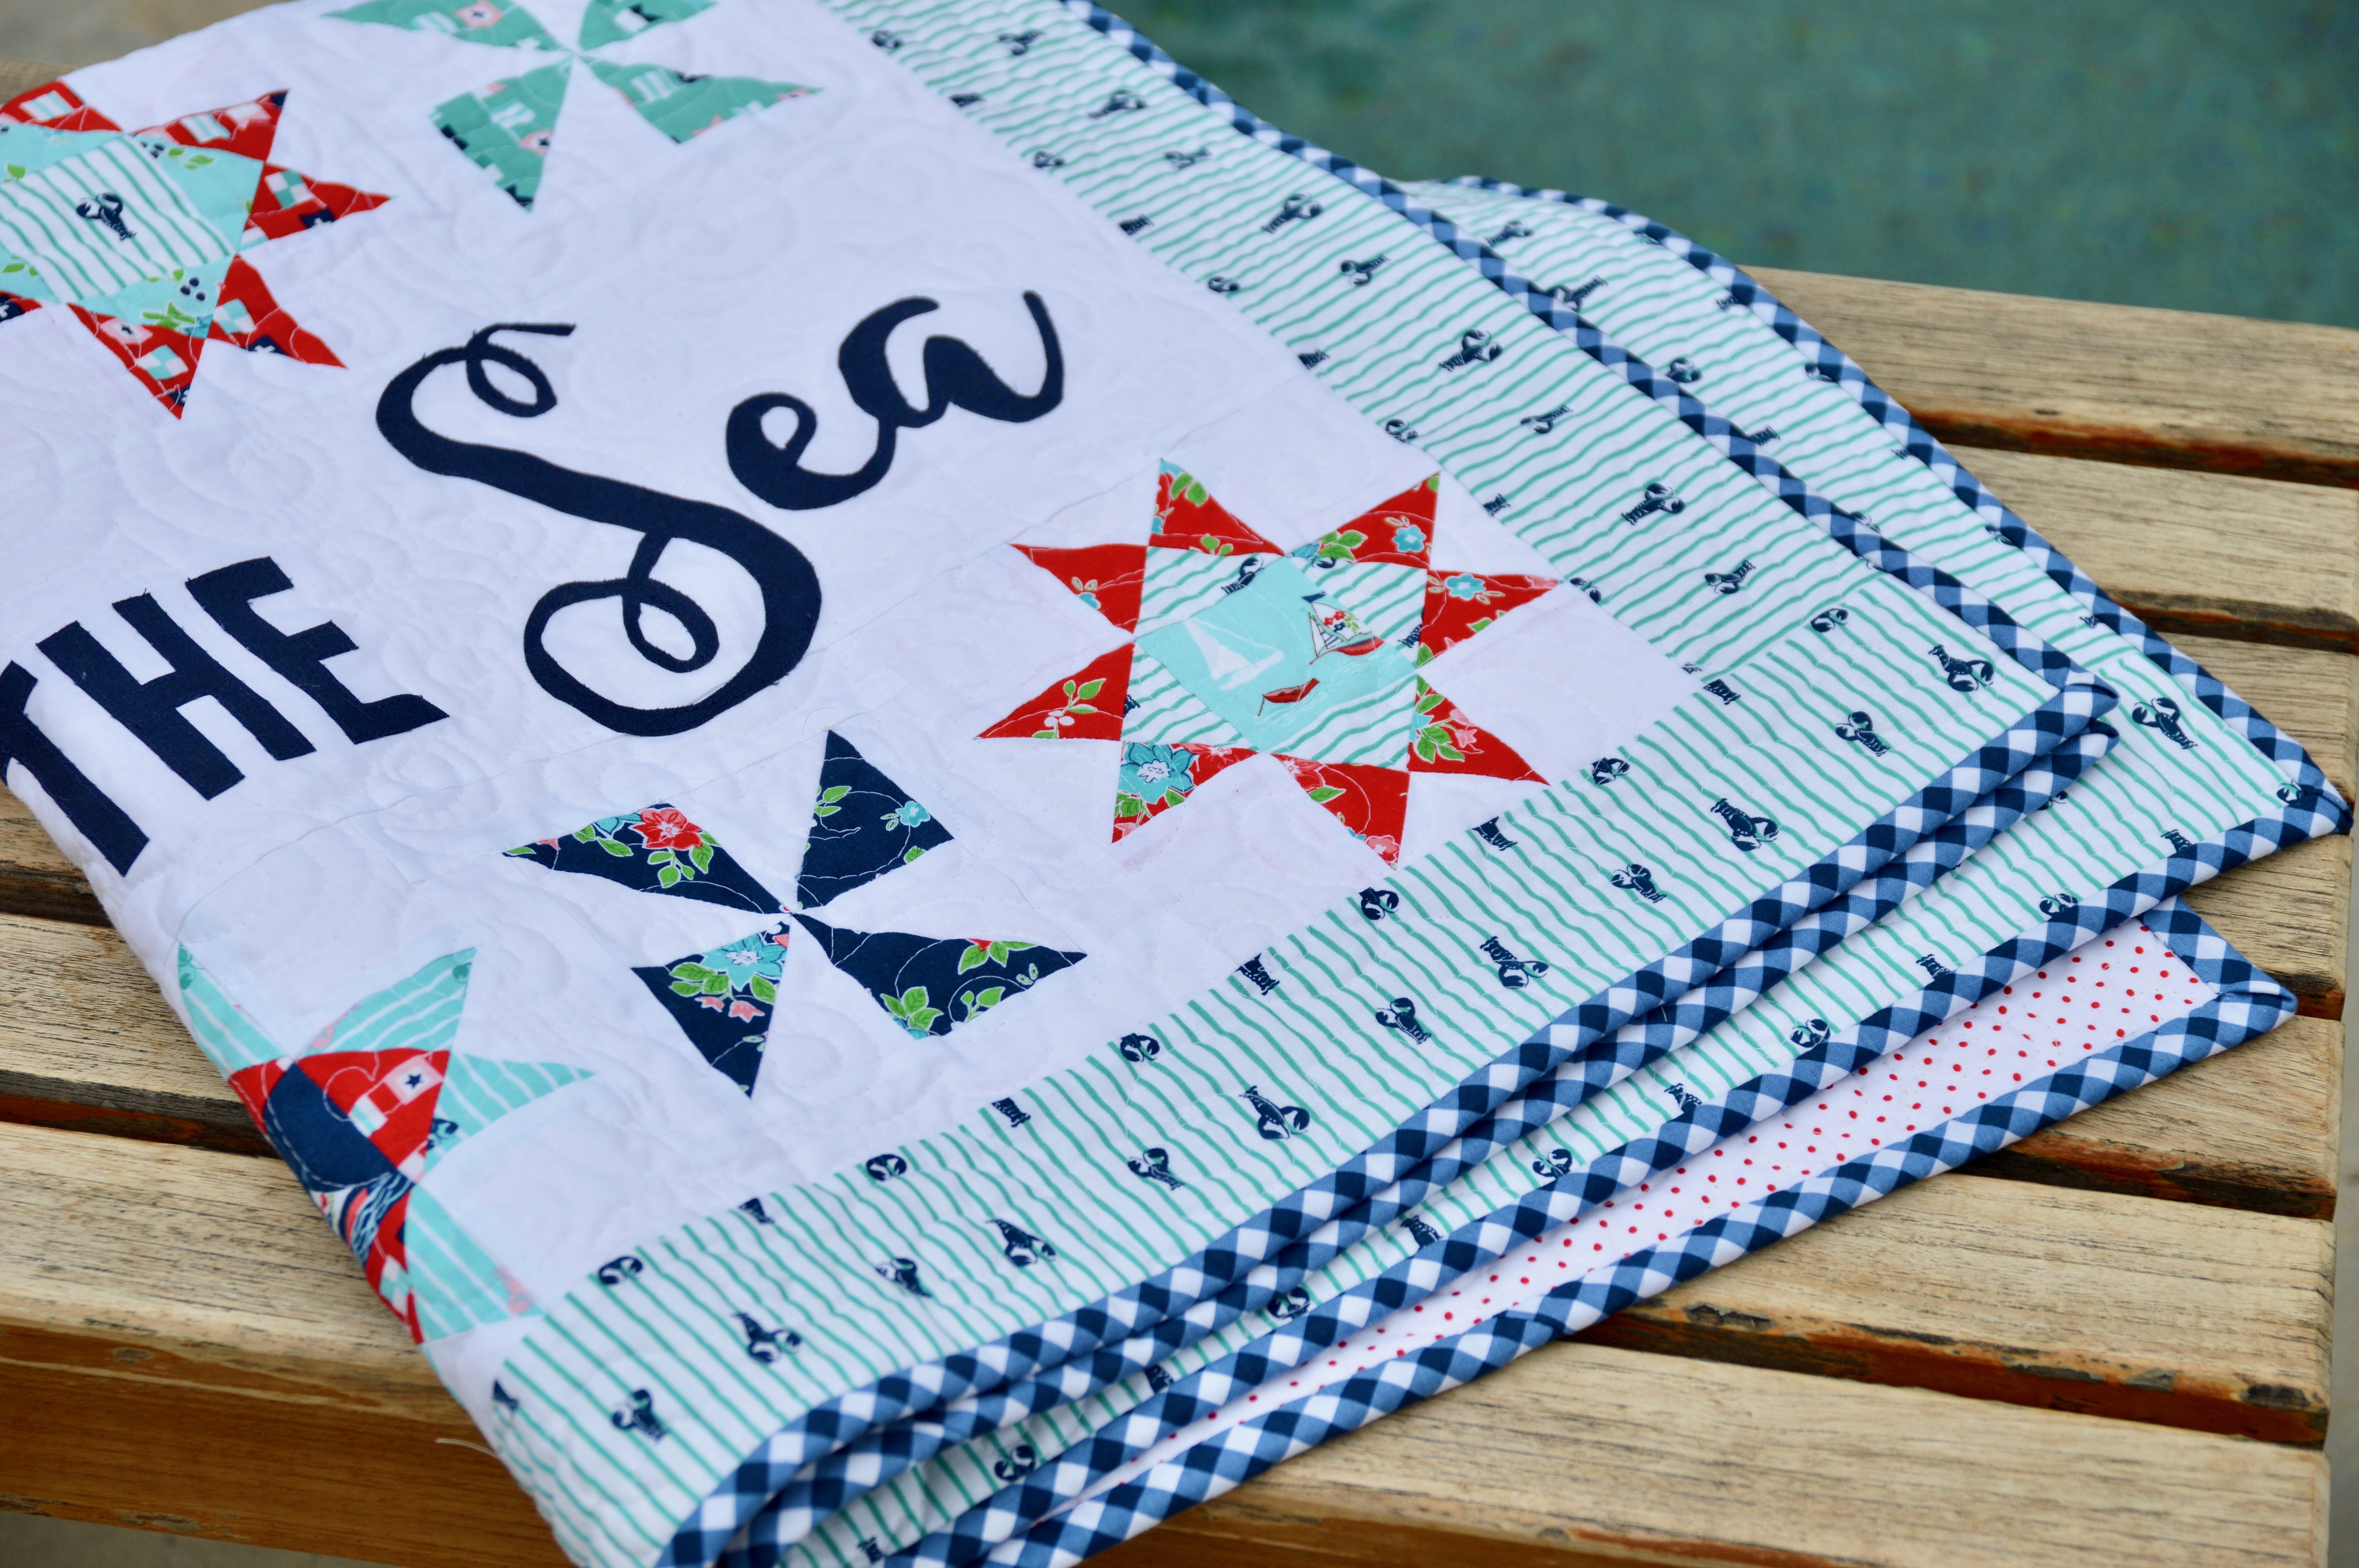
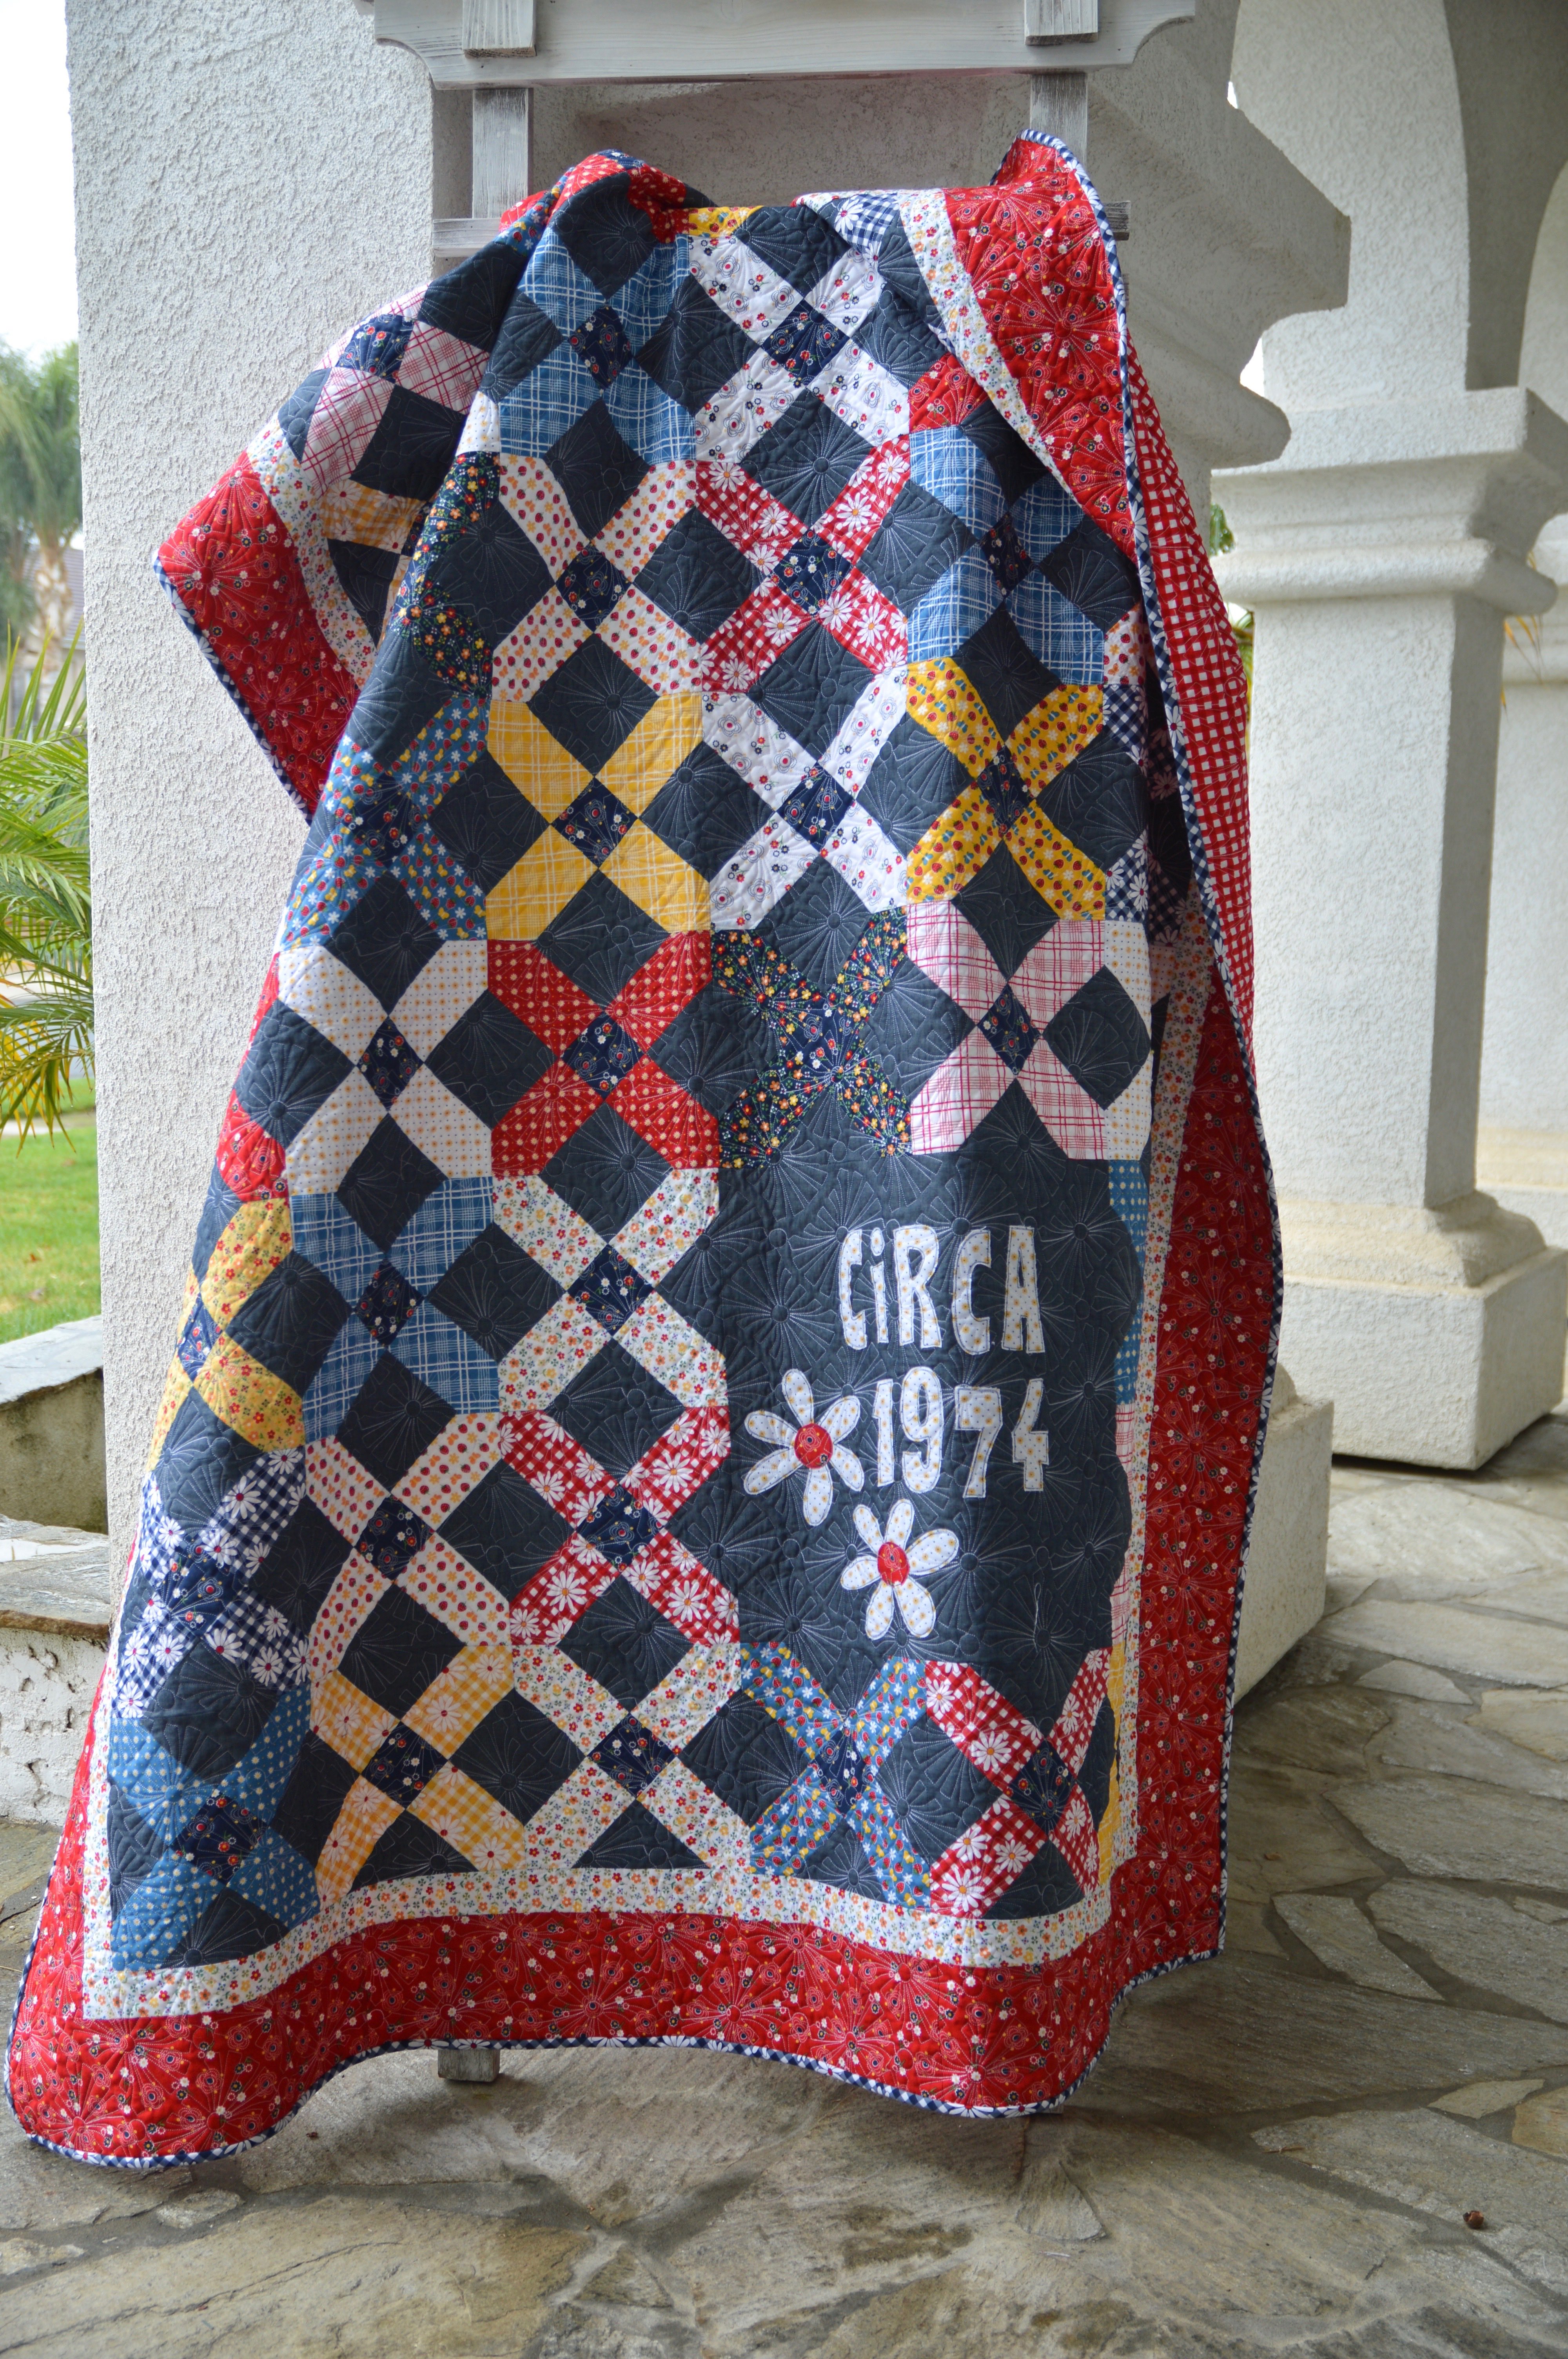
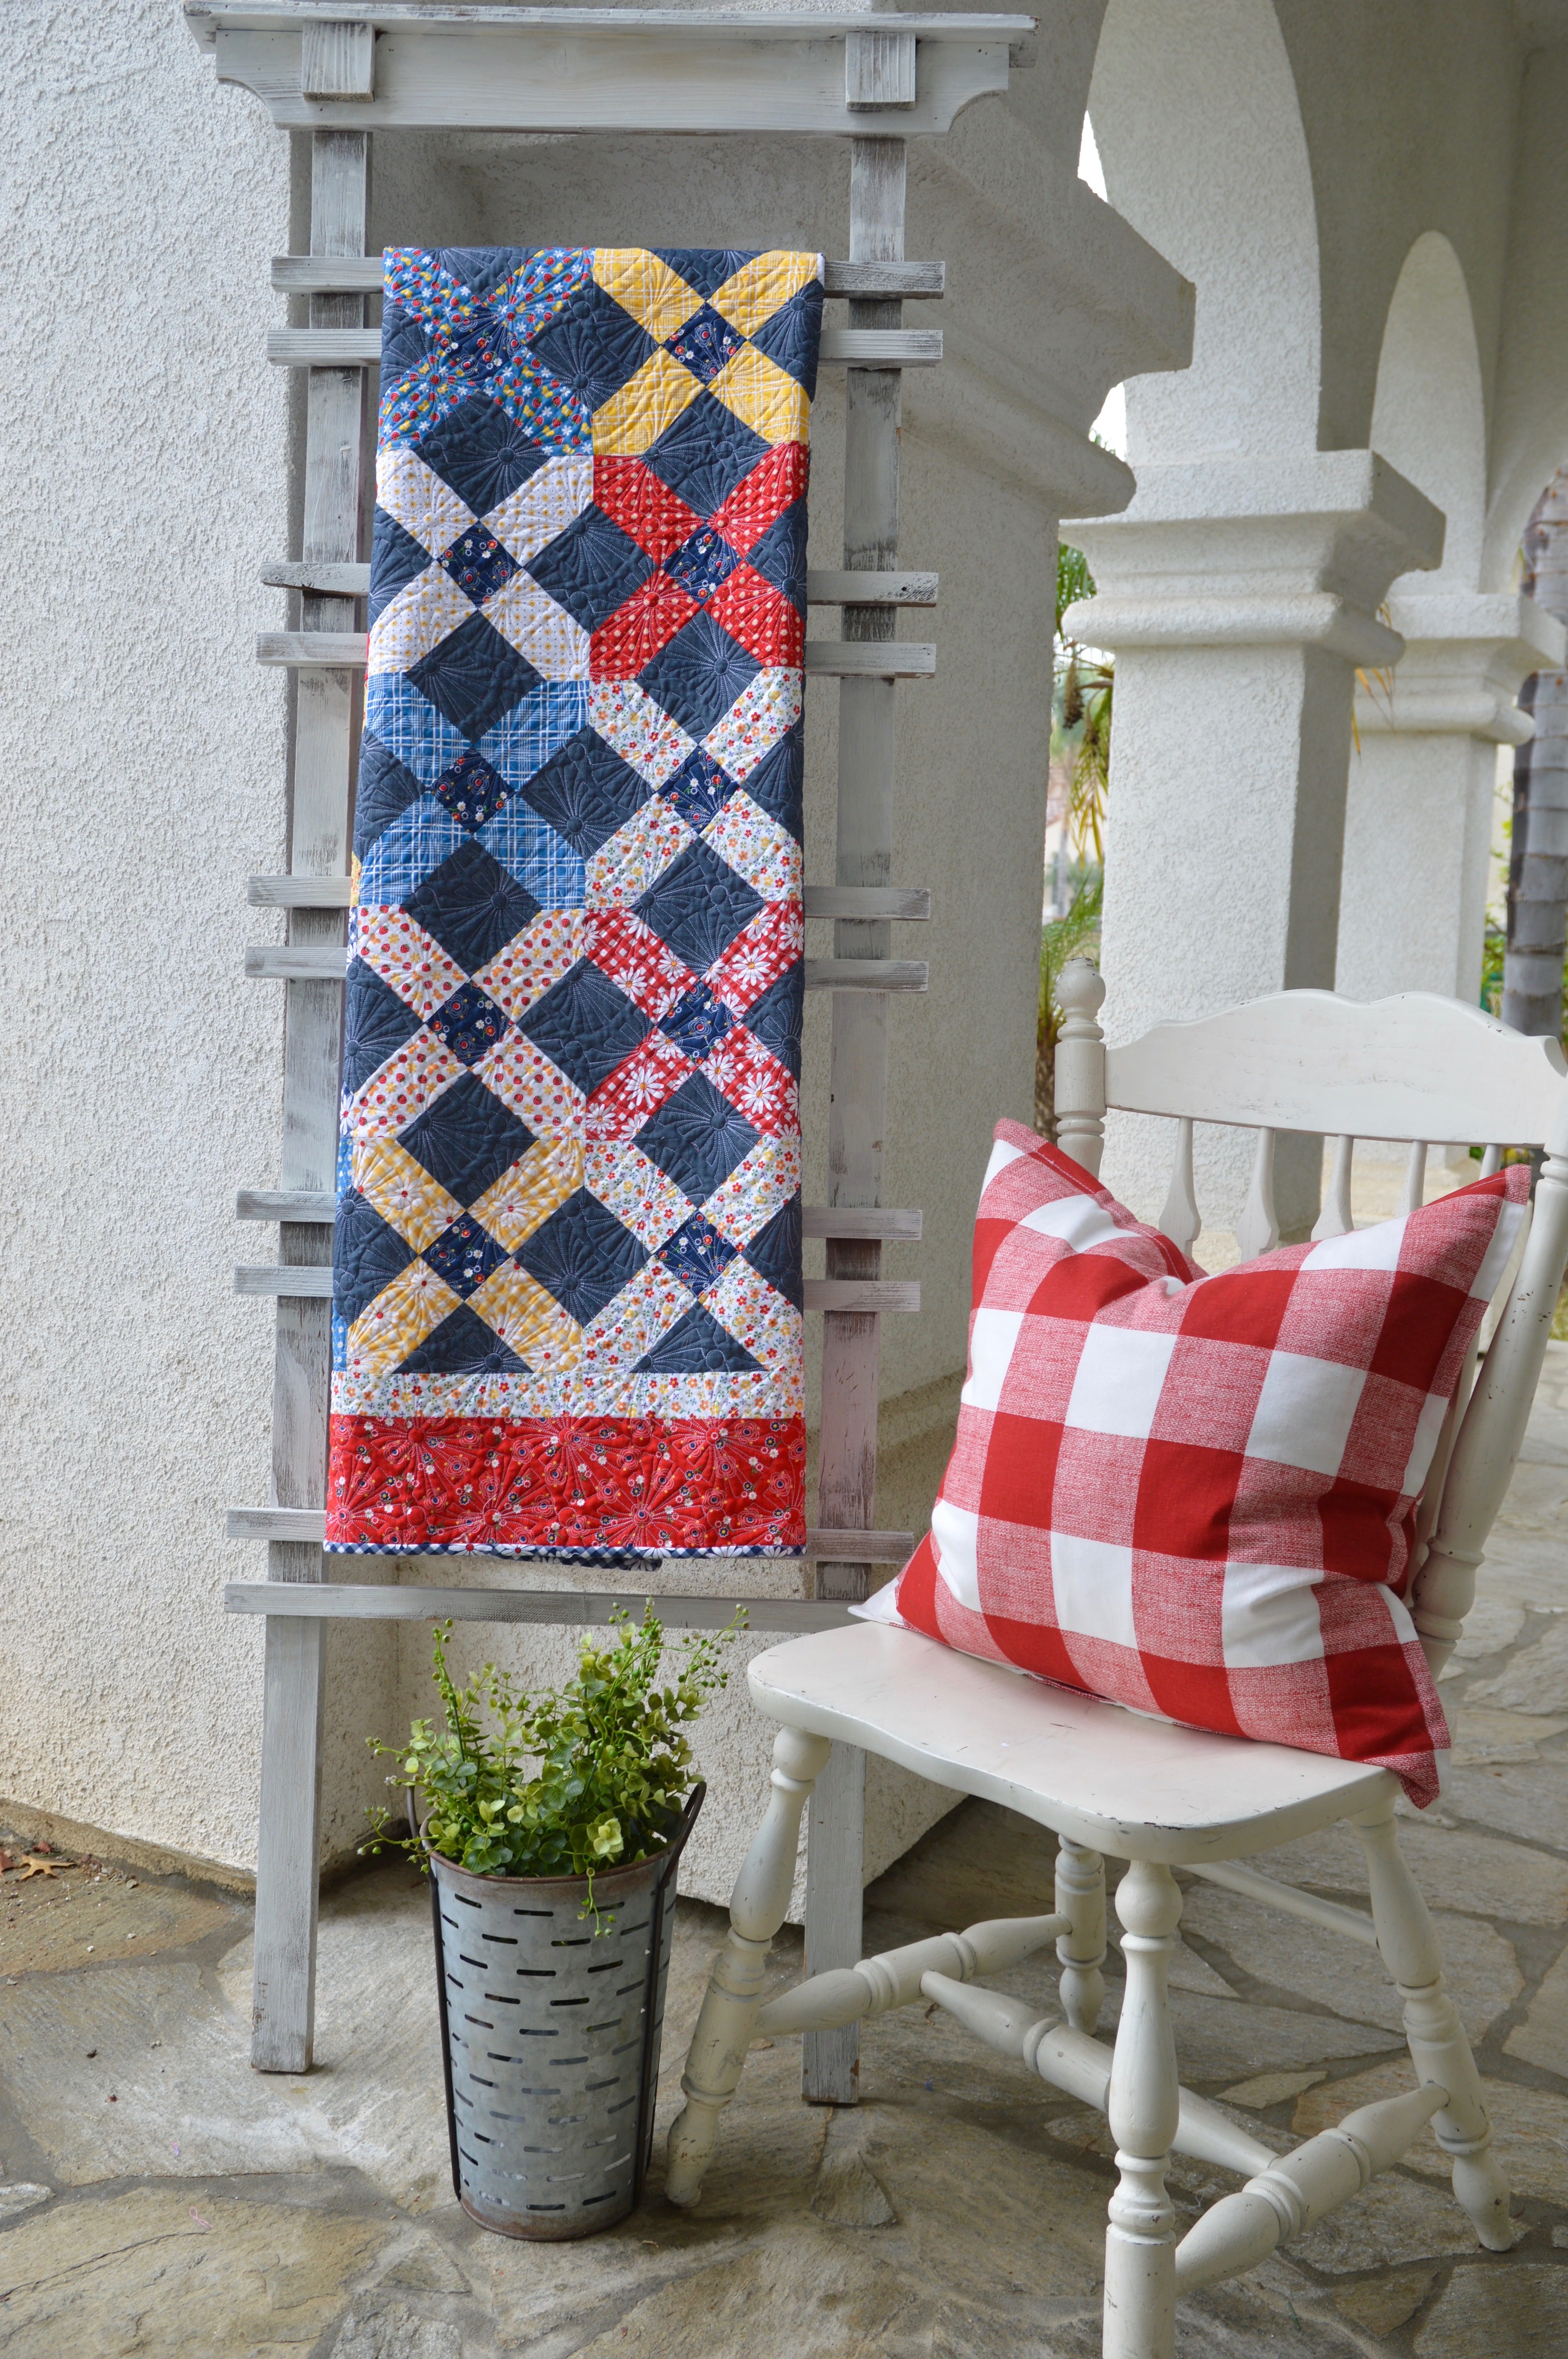
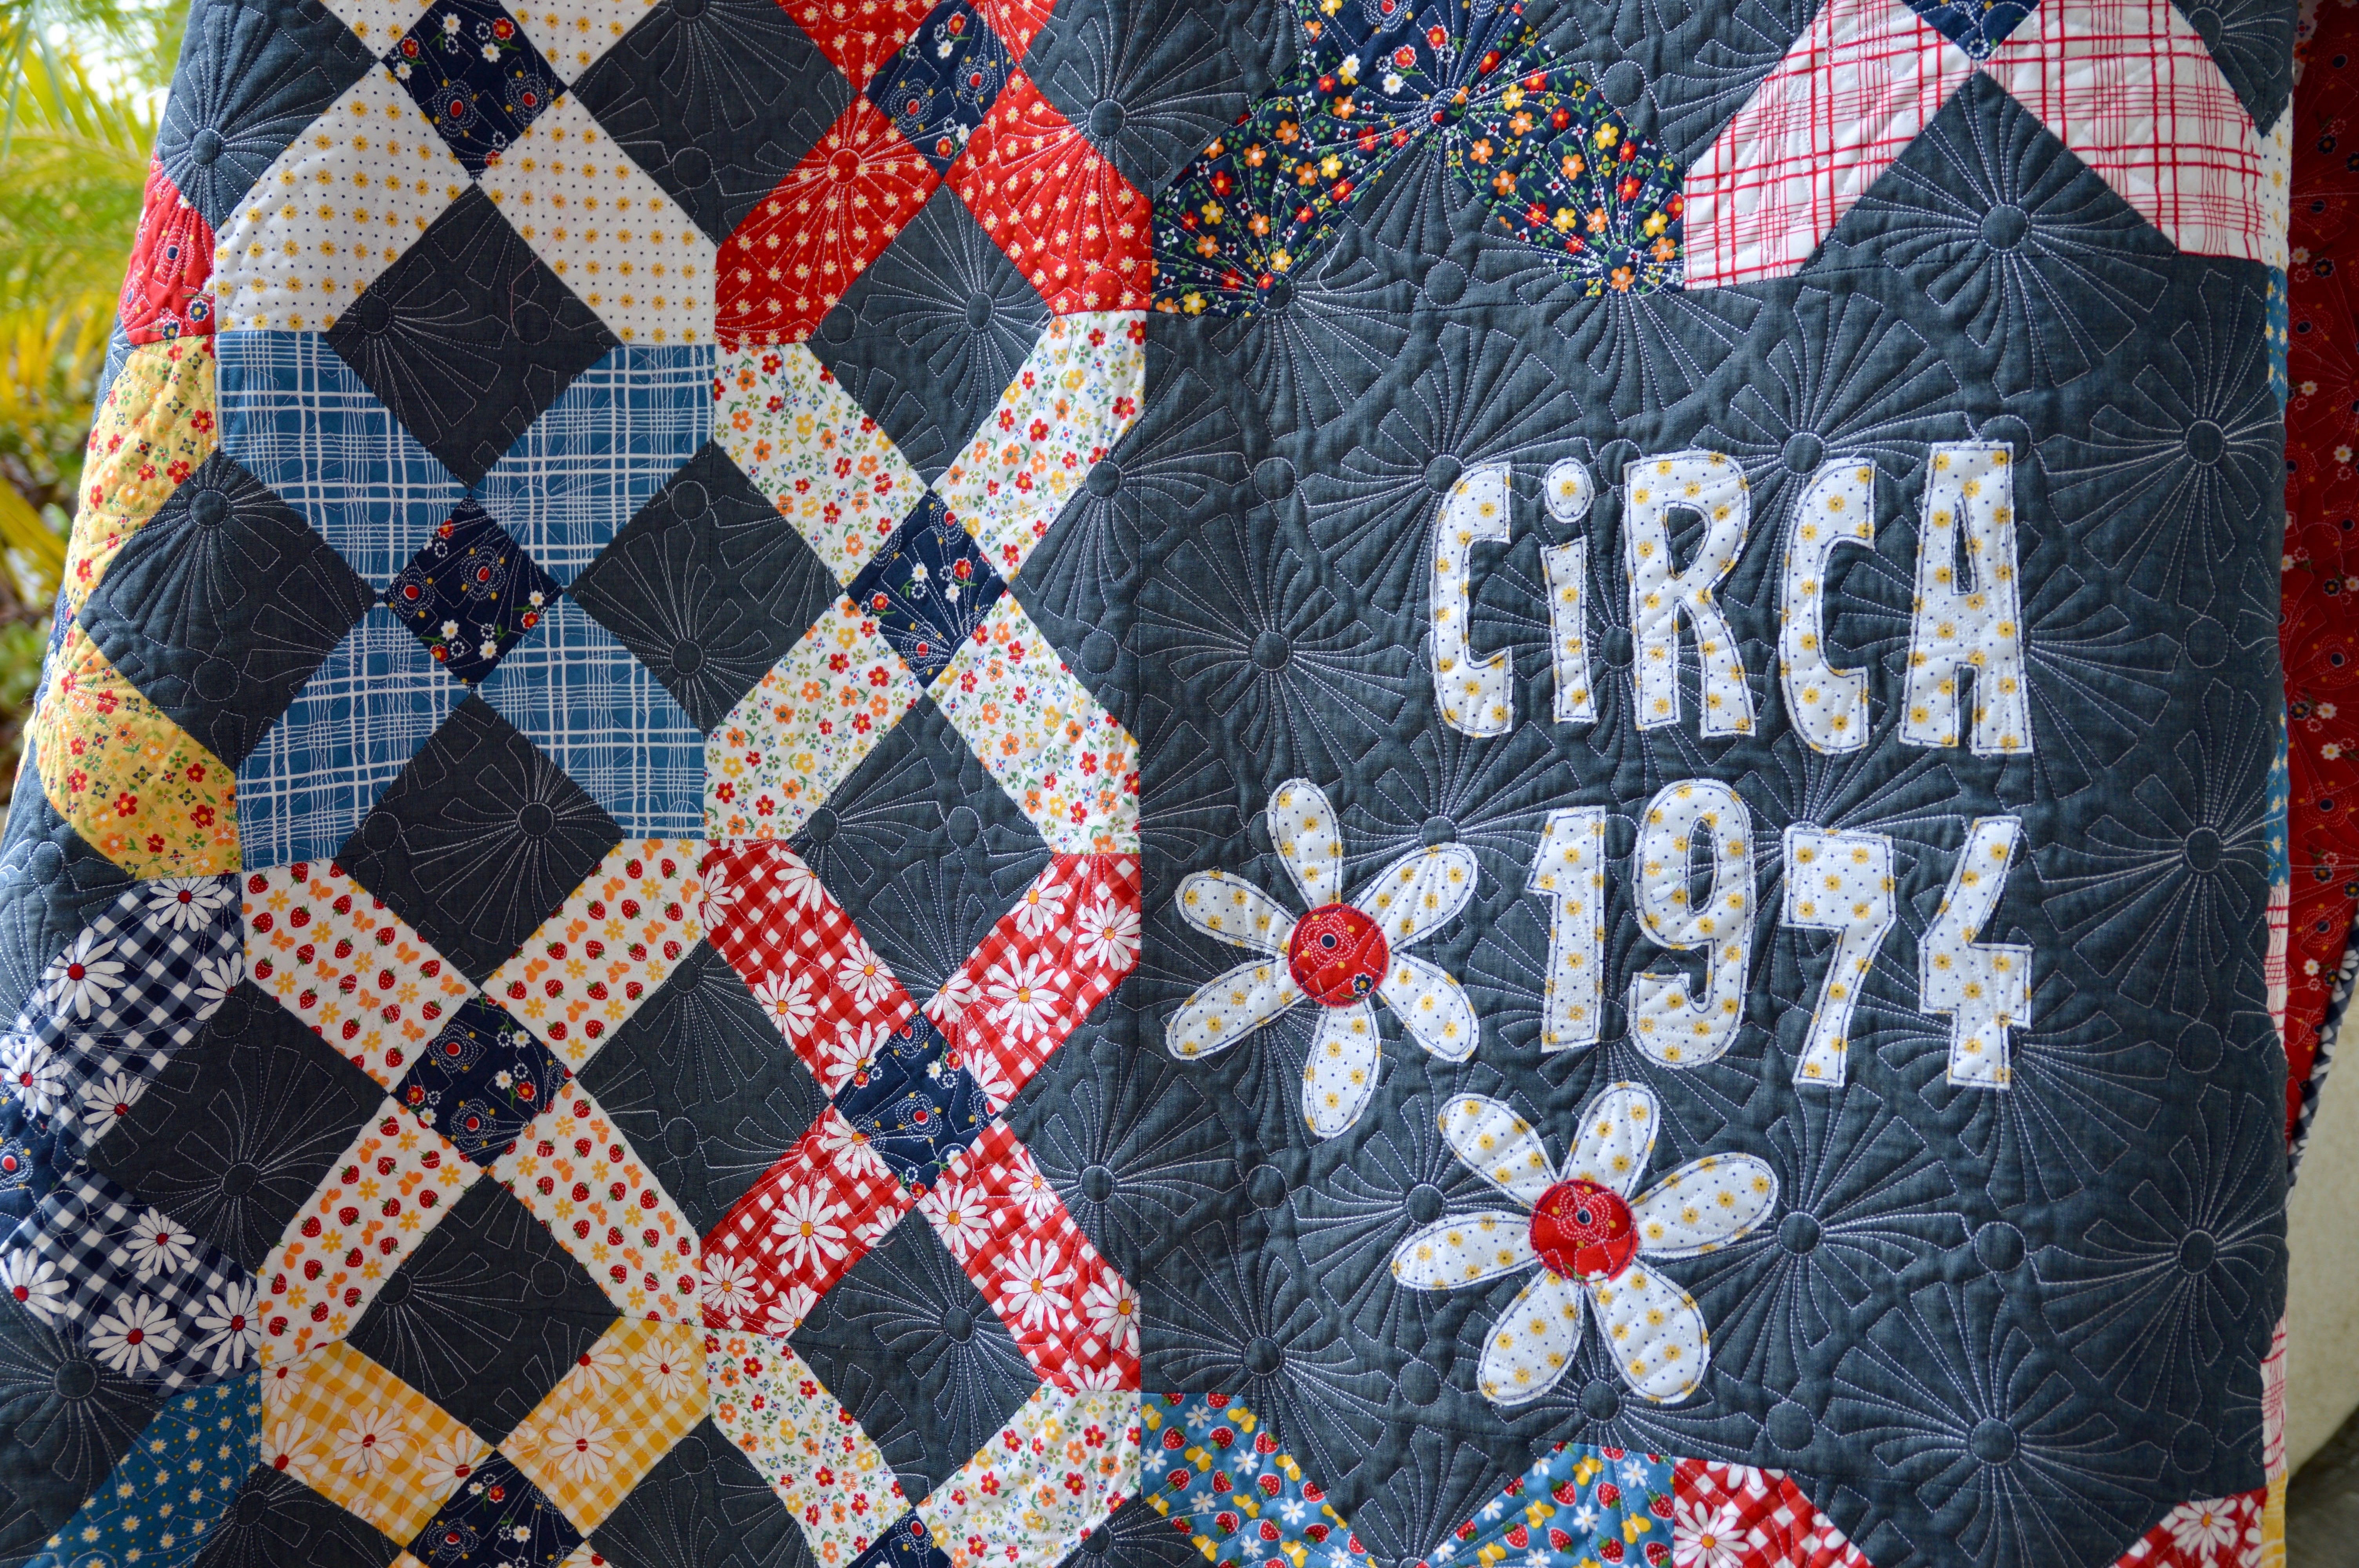
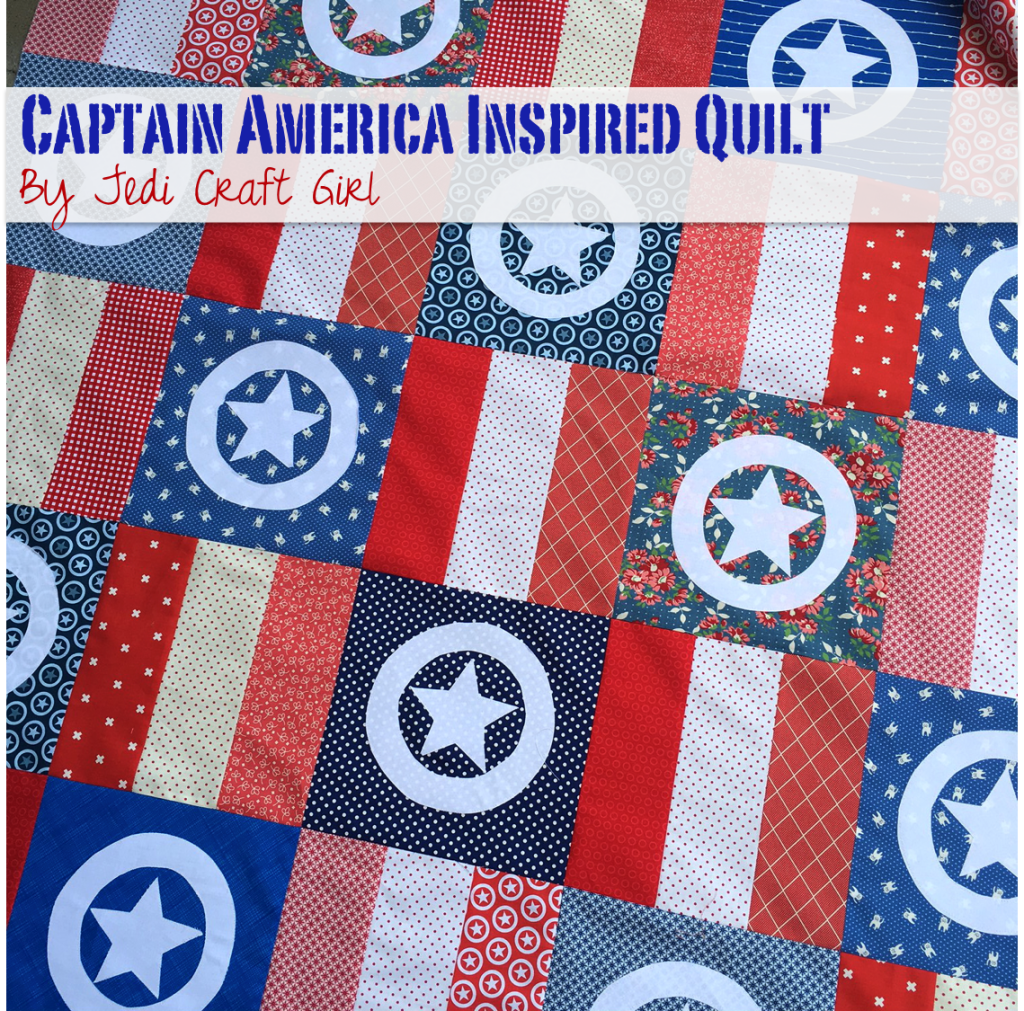
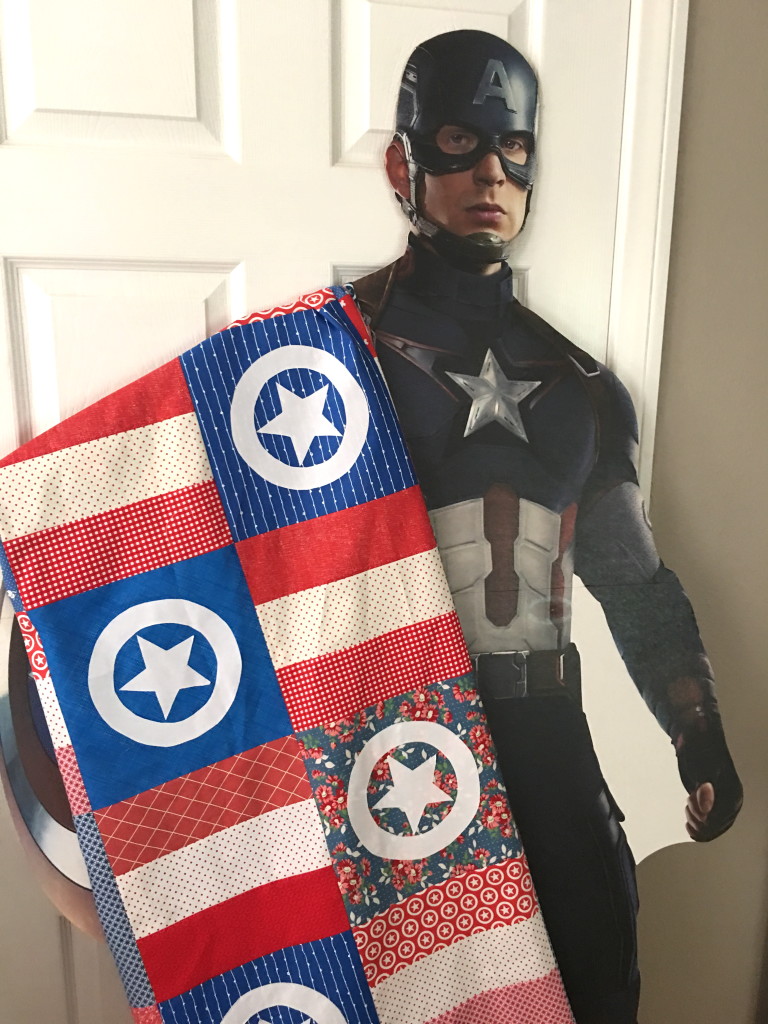
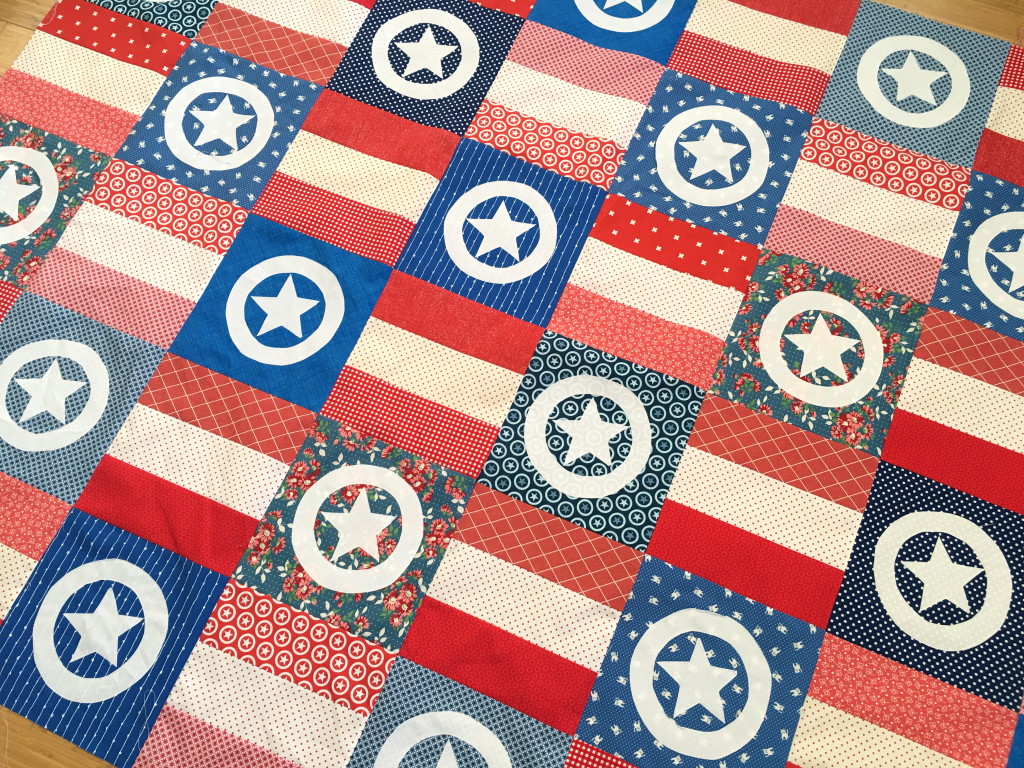
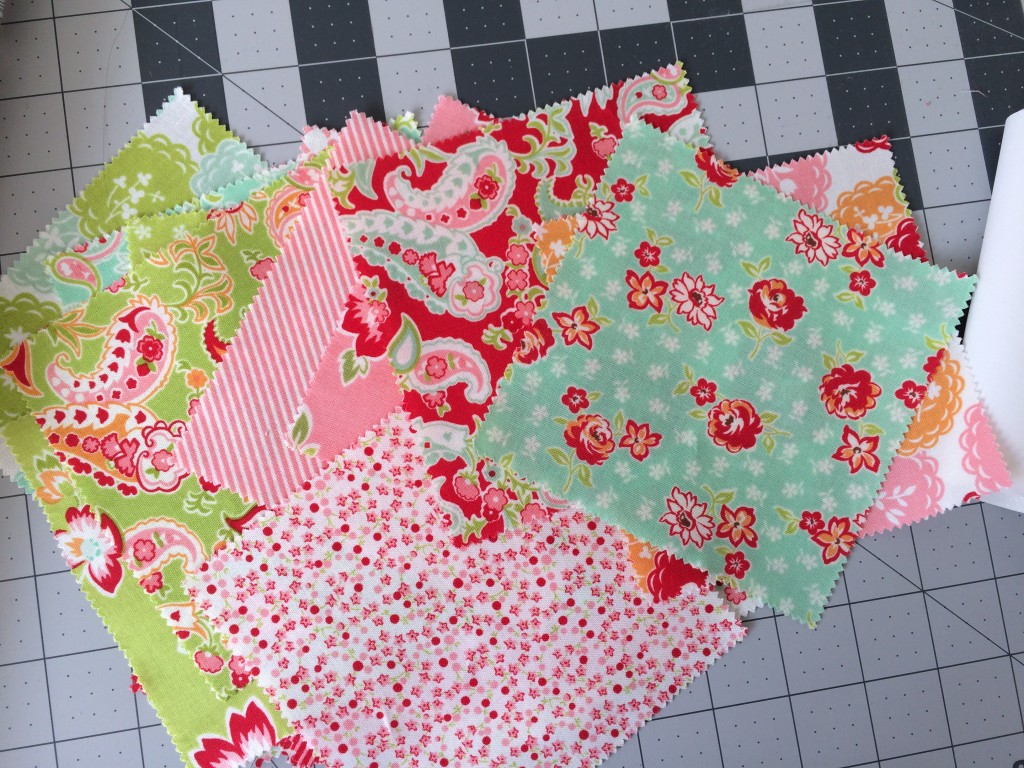
For my fabrics I grabbed a selection of Riley Blake Designs fabrics from all my favorite designers – I tried to get them all in there 🙂

IMG_9917If you haven’t joined in it’s not too late.  The free pattern is on  Lori’s blog and you can hop on over to read more!!

IMG_0029

I made my block into a little wallhanging.  I made 20 hourglass blocks with my Sizzix 4 1/2″ hourglass die (they finish 4″).  You can always make them the traditional way.

Cut the inside pie block 16 1/2″ square.

The hourglass blocks, unfinished are 4 1/2″, finished they are 4″.

The outer border is cut 2 1/2″.  I quilted it and added some red binding.  I LOVE it!!!!!

And since I was making a Quilty Pie, I also needed a real pie to eat!!!!  You can find the recipe of my favorite Fresh Strawberry Pie over at my food blog, The Rounded Teaspoon.

DSC_0300

There is a graham cracker crust with a cream cheese/whip cream filling…..yummmmm!

DSC_0265

DSC_0245 
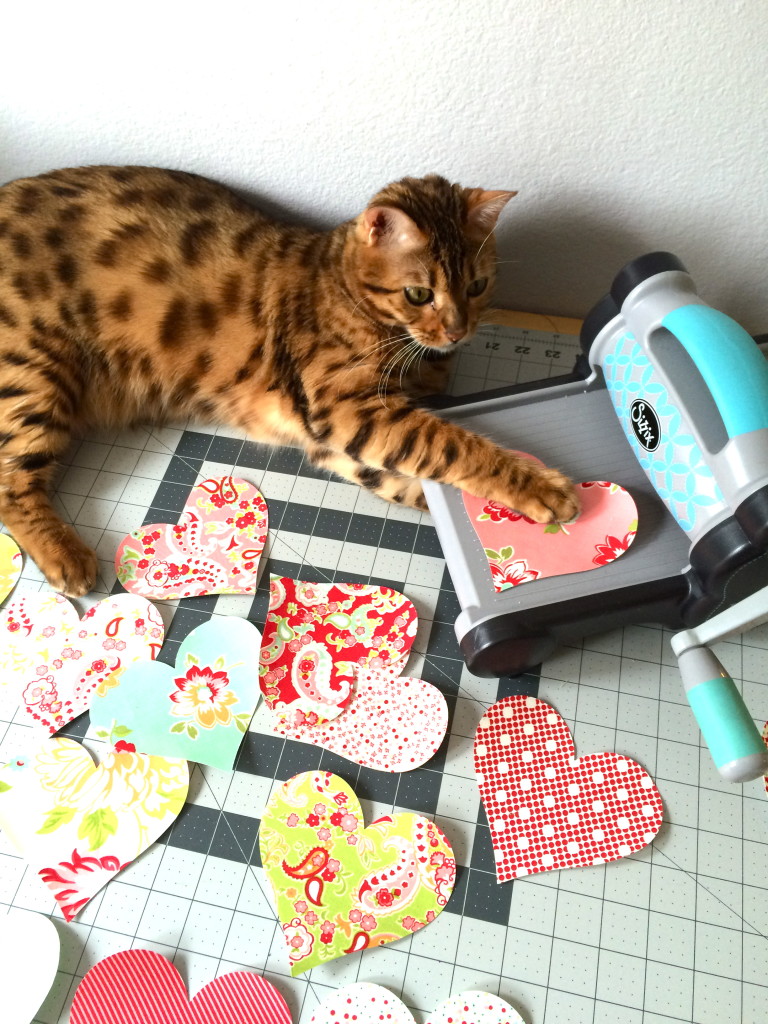
And of course, Mufasa helped 🙂

IMG_0002

Thanks for stopping by!!!!

Captain America Inspired Quilt {a patriotic quilt}

captain america cover

I couldn’t resist putting this quilt together.  My family is totally obsessed with the Avengers, especially  Captain America and Iron Man.  We were so excited for the movie to come out!!!  We went to the first showing at 9:30 pm last night!  I was so much fun.  I love going to movies when the theater is packed with fans who cheer and clap together!

captain america quilt 11

To celebrate this milestone in Marvel history, I created this quilt inspired by Captain America.  My 8 year old daughter is totally in love with him.  I guess we will be fighting over the quilt!

captain america quilt 15

I curated this selection of Fat Quarters from Fat Quarter Shop just for this project.  You can view it here.  I wanted a fun mix of red, white, and blue fabrics.  This quilt totally works for a summer patriotic quilt if you’re not into #teamCap.

Screen Shot 2016-05-06 at 11.30.10 AM

Lets Get Started

Finished block 9″, Finished Quilt 54″x72″

All Seams 1/4″

Supplies:

18 Fat Quarters (I used each one pictured above)

1.5 yards solid white

3 yards Heat n Bond Feather Lite Fusible Applique

Pattern, click HERE

captain america quilt

Make the Stripe Block

Cut the red prints and white prints into 3.5″ strips.  (Since we are using Fat Quarters, they will be half the WOF long)

Sew in strip sets of red, white red.  Press toward the dark.

captain america quilt 3

Cut each strip set in increments of 9.5″.  Each block should measure 9.5″ square.

captain america quilt 4

For the applique block…

Cut 24 blue squares 9.5″

Draw the pattern onto the Heat n Bond Feather Lite.  You will need 24.  I like to used the Feather Lite because it doesn’t add any weight or stiffness to your quilt.  It holds it in place just long enough to cut and sew it.

captain america quilt 9

Press the heat n bond to the wrong side of the white solid fabric.

captain america quilt 2

Put on Captain America I and II and cut out all the circles and stars following the pattern line.

captain america quilt 5

Position the circle and star in the center of each blue block and heat set in place.

captain america quilt 8

Top stitch around each piece with white thread.

***Optional **  “Winter Solider” Block.  My teenage daughter is in love with Bucky the Winter Solider so she insisted we represent him in the quilt.  We switched out one of the blue blocks for a gray block with red star applique.

captain america quilt 13

Now it’s time to have some fun with all the blocks!  I hand them all to my daughter and she lays out the quilt for me.

captain america quilt 7

Sew the quilt together in rows, pressing after each and matching each seam intersection.

captain america quilt 20

This quilt is totally Mufassa approved!

captain america quilt 12

And approved by The Captain himself!  (Yes we have a giant cardboard cut out of Captain Rodgers!!!)

captain america quilt 18

OK, I am seriously in love with it!  It screams summer picnic!!!!

captain america quilt 19                  Screen Shot 2016-05-06 at 11.29.54 AM

Bunny Mini Quilt and Pillow Featuring EZ Print Sheets

bunny applique pillow and quilt 2

I am so in love with bunnies and springtime!  My whole house is starting to look like a rabbit hutch!  (hahaha!!) I am sharing this pattern over on the Therm O Web blog today!  You can choose to make a mini quilt or a pillow!  The fabrics are from Penny Rose Fabrics designed by Elea Lutz called Milk, Sugar, Flower.bunny applique pillow and quilt 4

The pillow is made just like you would a quilt, only you add a zippered pillow back before you sew the binding!bunny applique pillow and quilt 8

See the zipper?  It’s hiding under an accent strip of cute fabric!

bunny applique pillow and quilt 9

I’m keeping the pillow for myself and giving this mini quilt to a sweet friend!

DSC_0572

Both the quilt and the pillow are 20″ square.bunny applique pillow and quilt 16

Hop over to the Therm o Web blog and you can download the applique pieces and print them directly onto Heat n Bond Lite EZ Print sheets!

bunny applique pillow and quilt 14

bunny applique pillow and quilt 11

Sizzix Bunny Kitchen Towel

bunny towel

Today, on the Sizzix blog, I am sharing one of my favorite little projects to sew: Kitchen Towels!  Hop on over there for the full tutorial!

sizzix bunny towel 5 
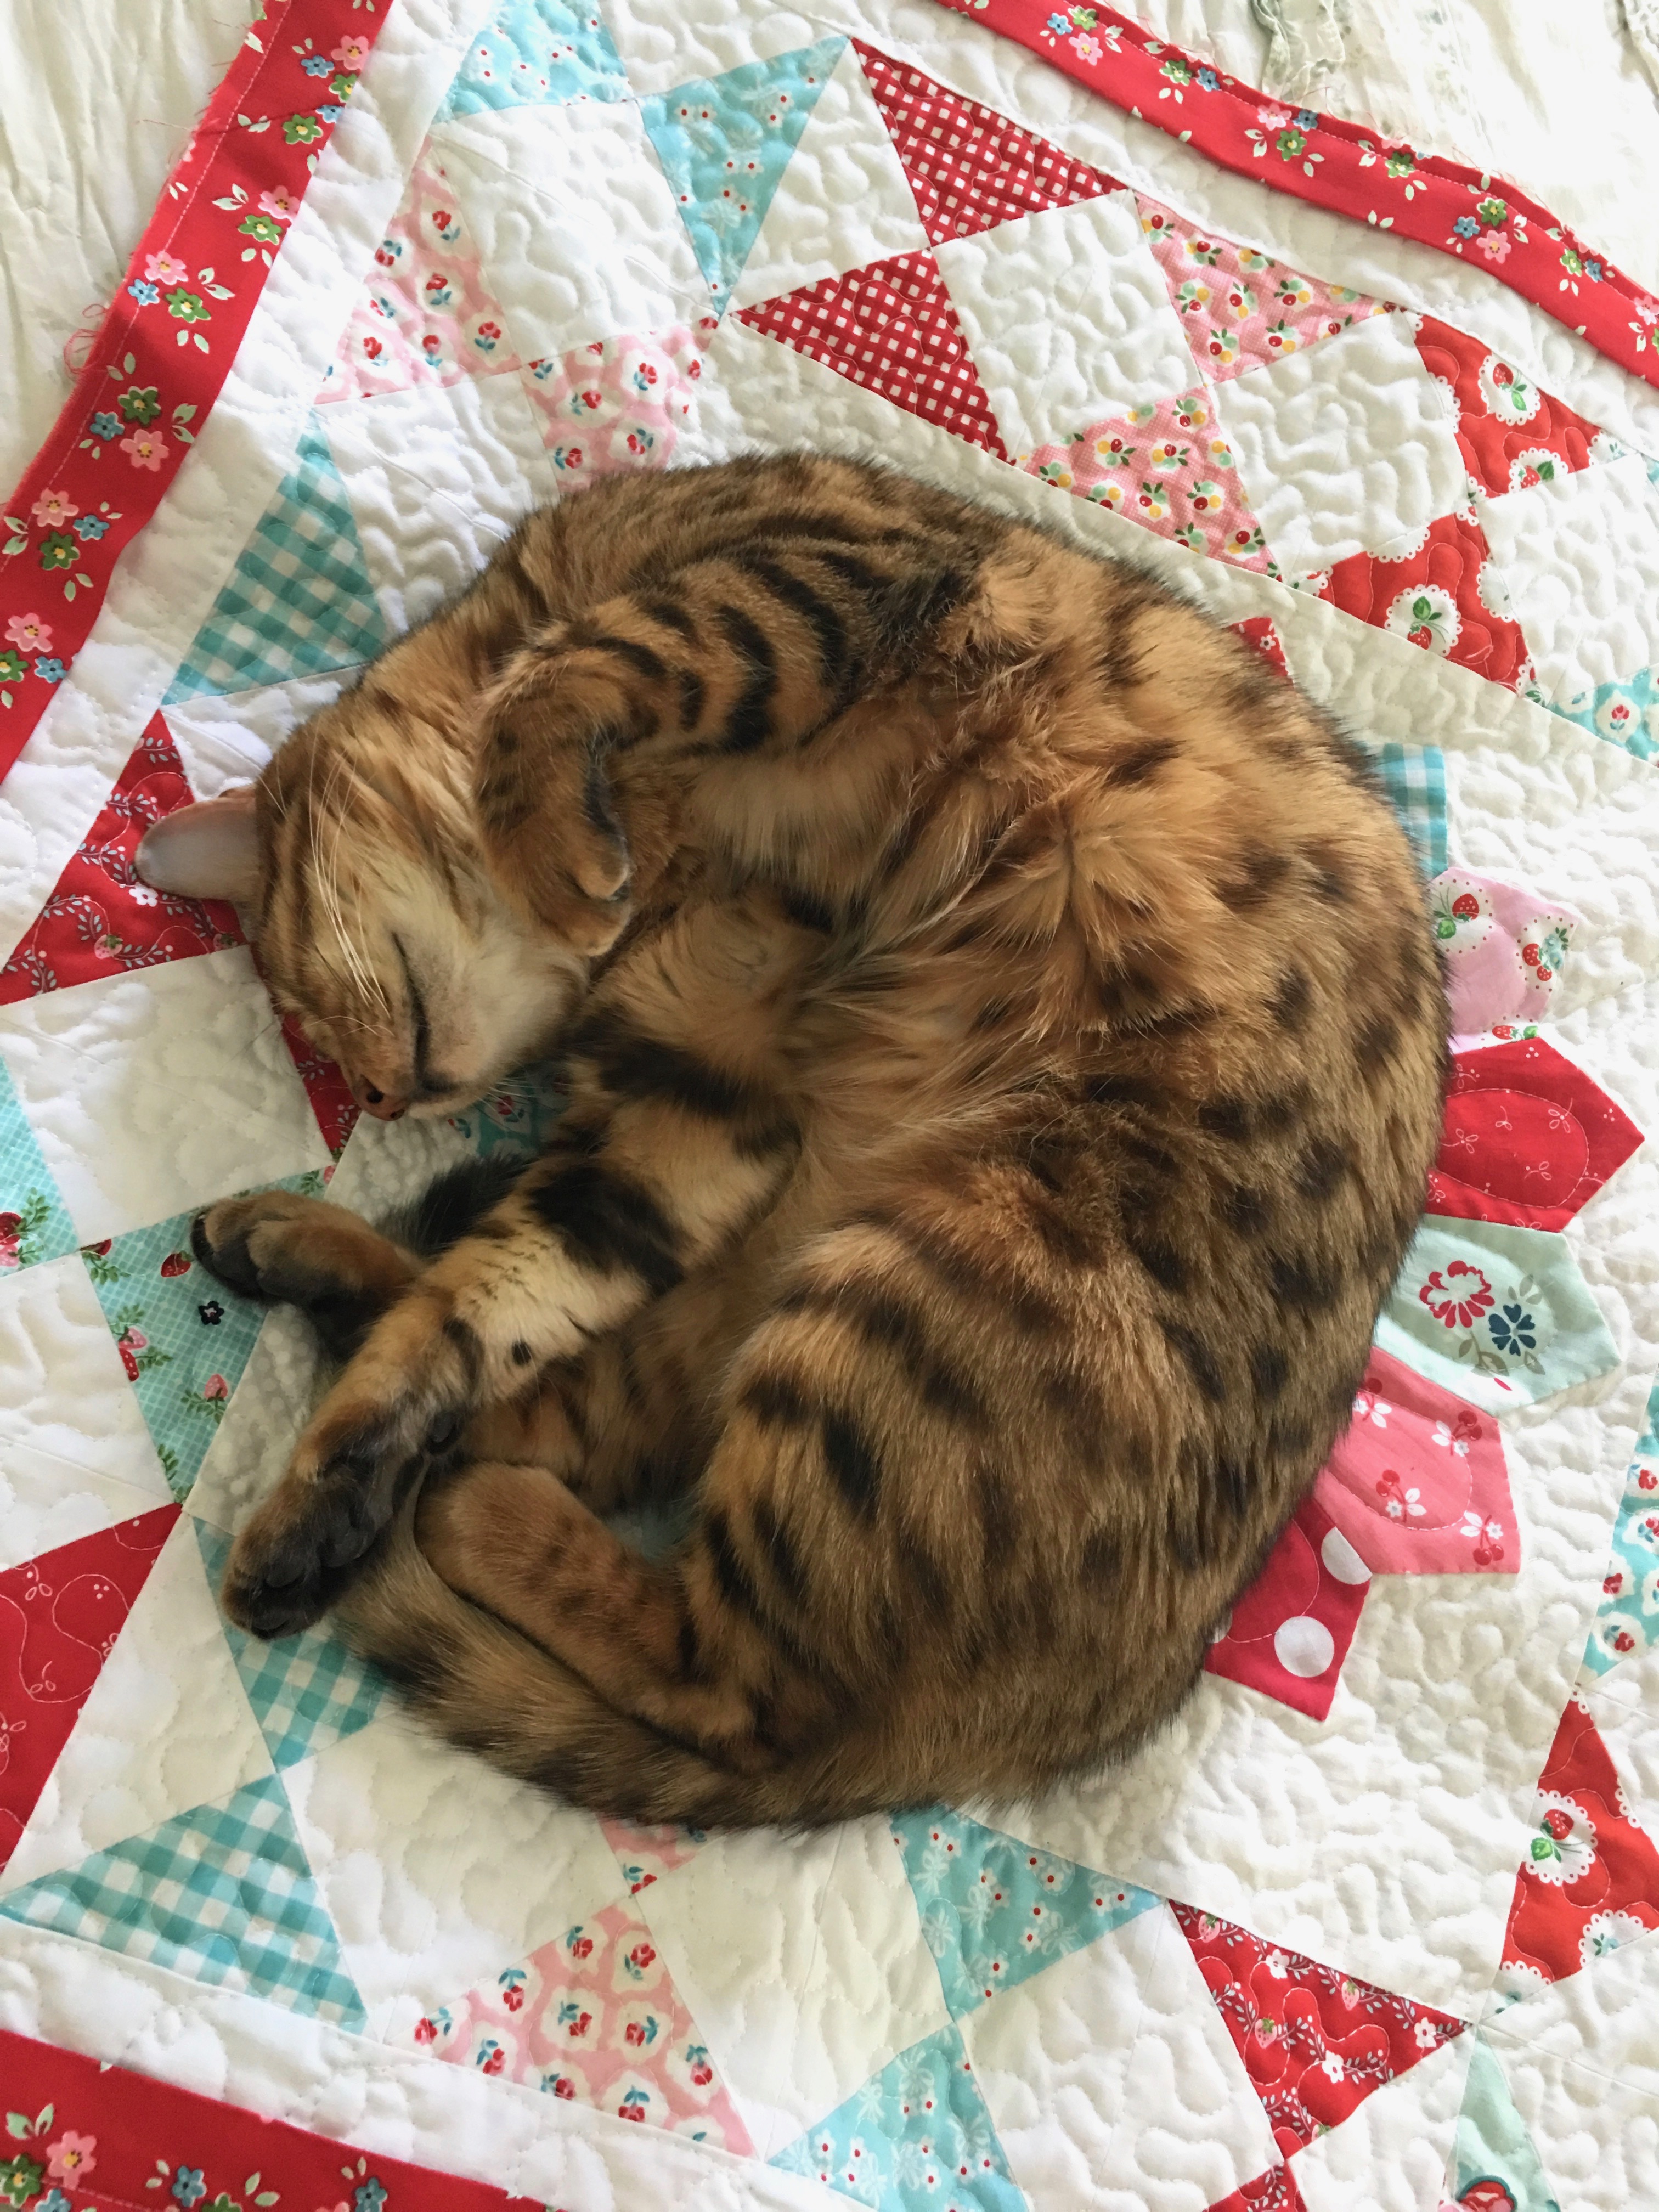
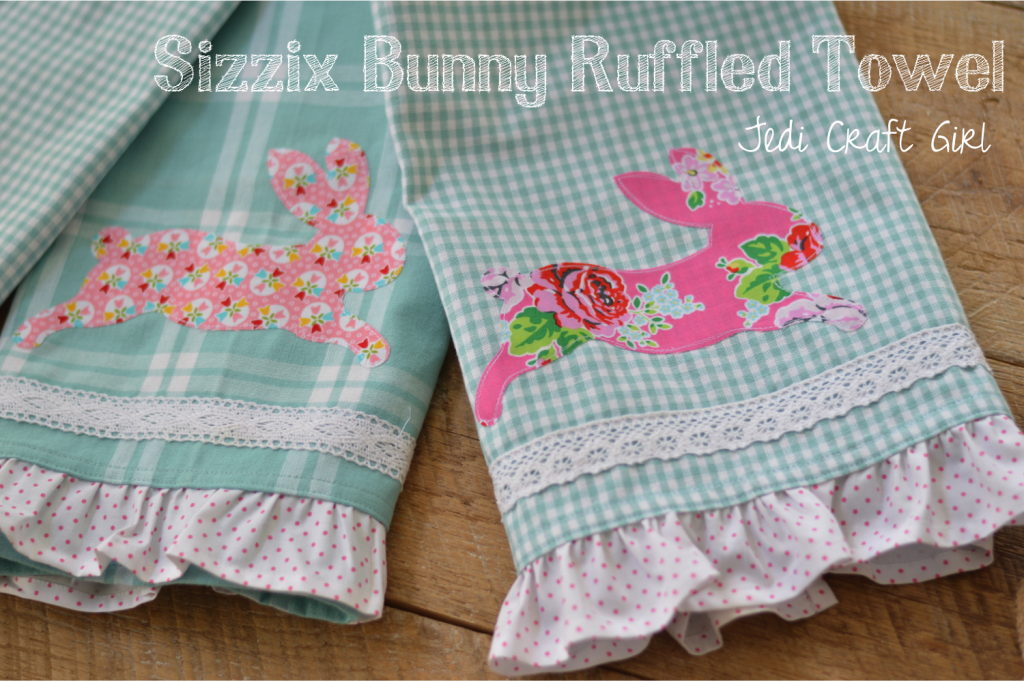
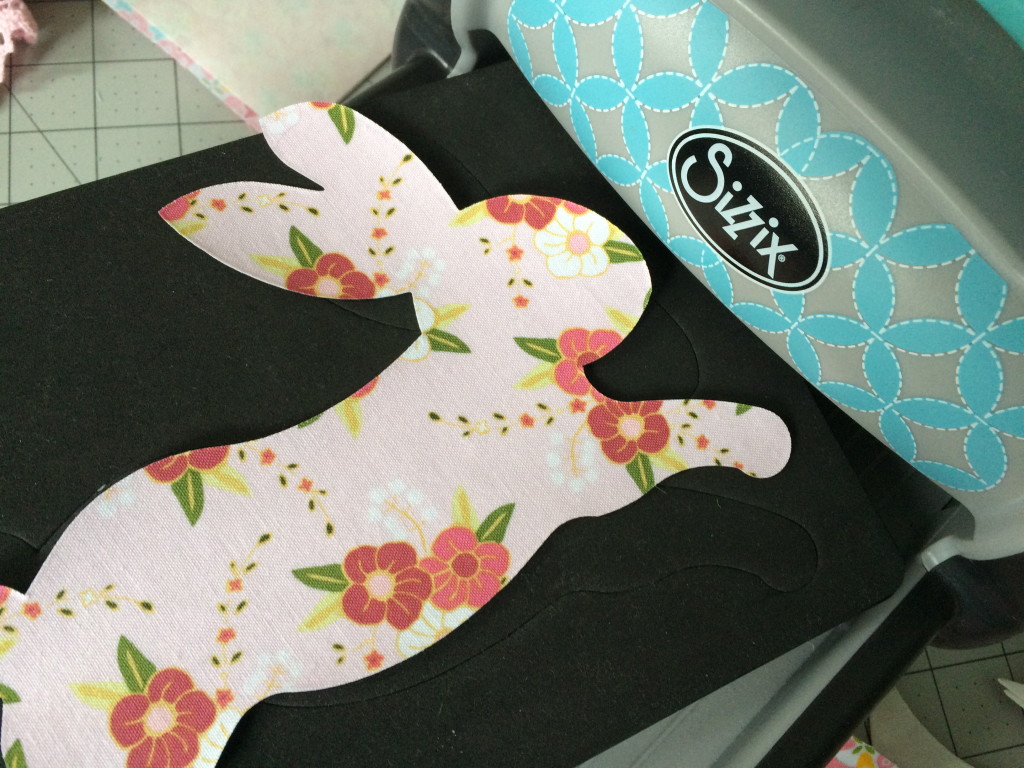
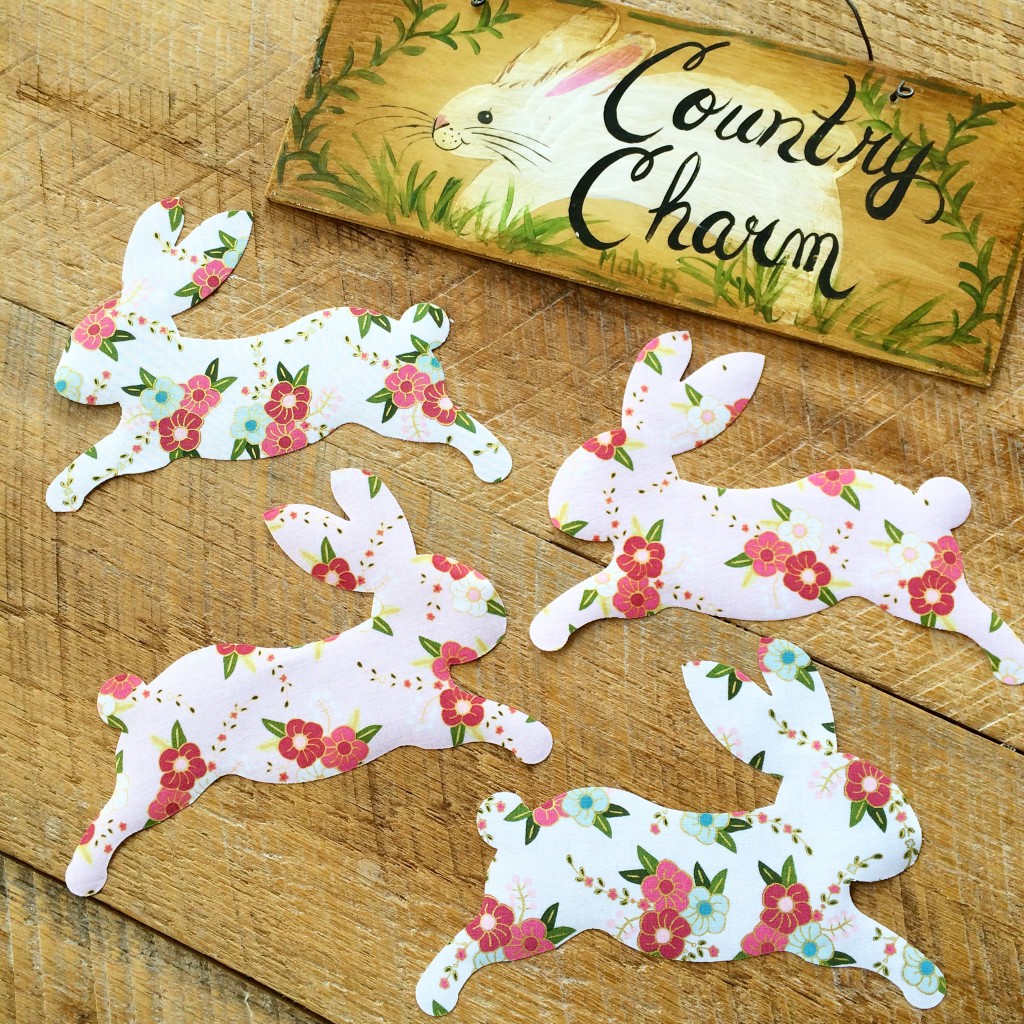
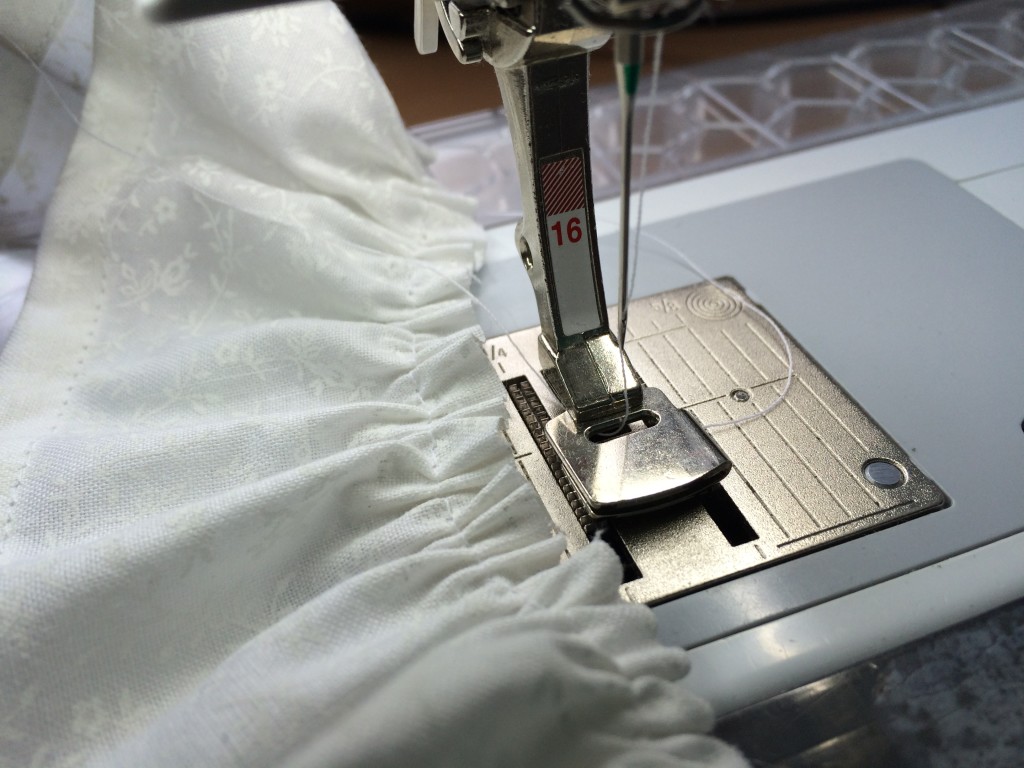
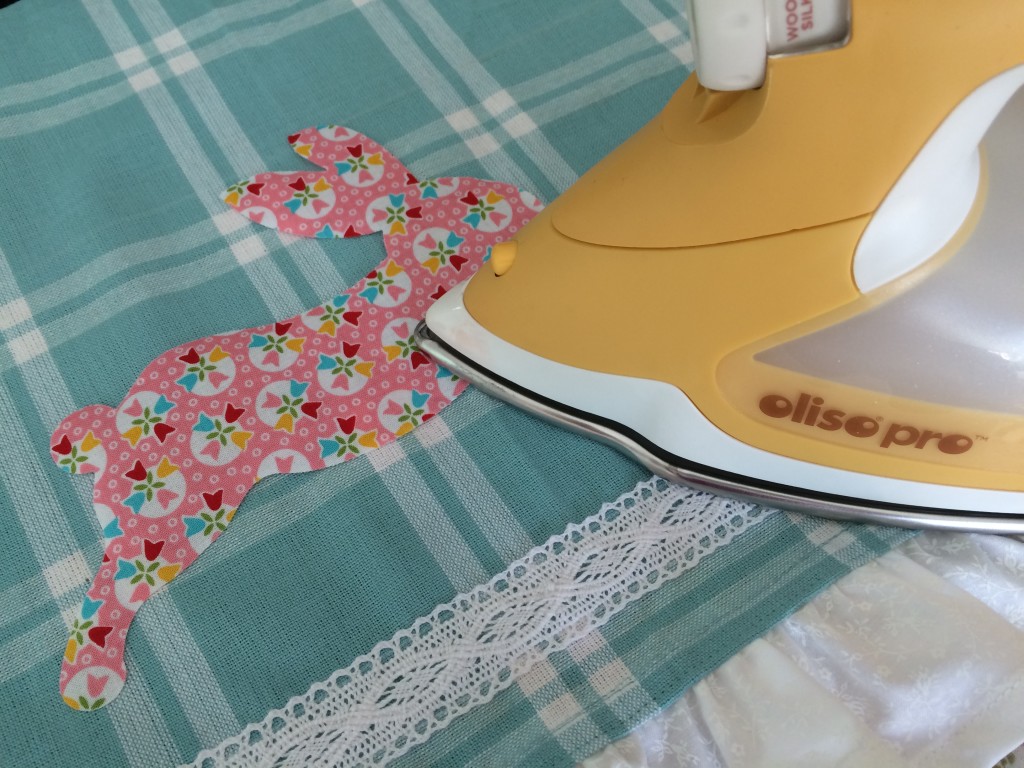
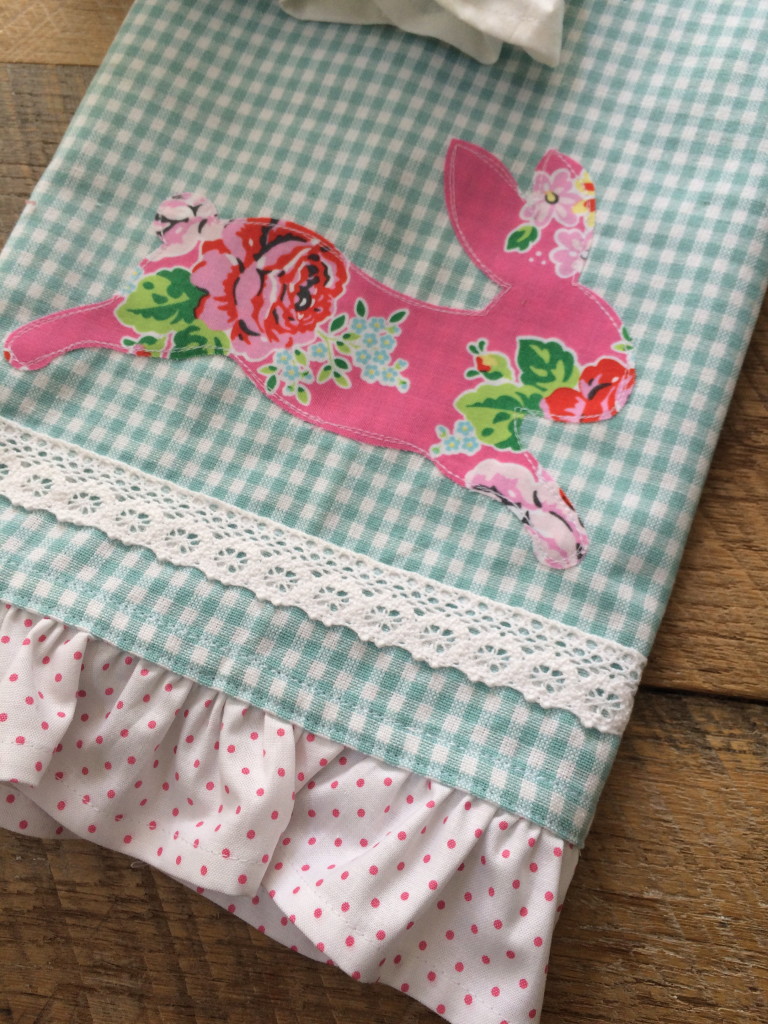
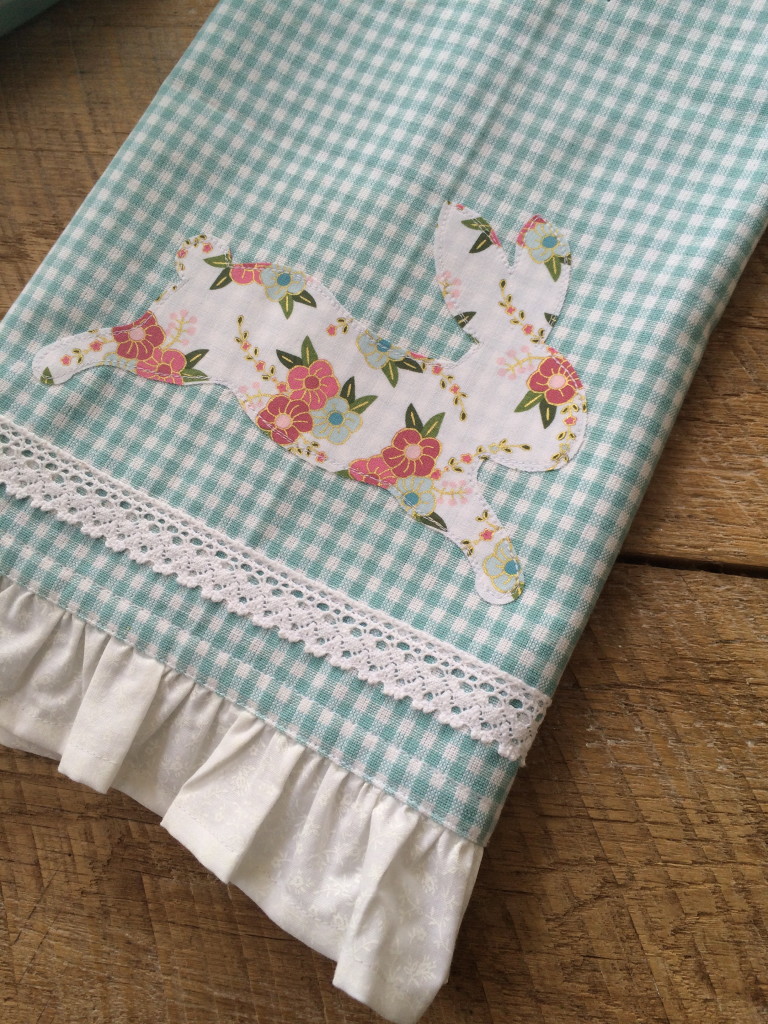
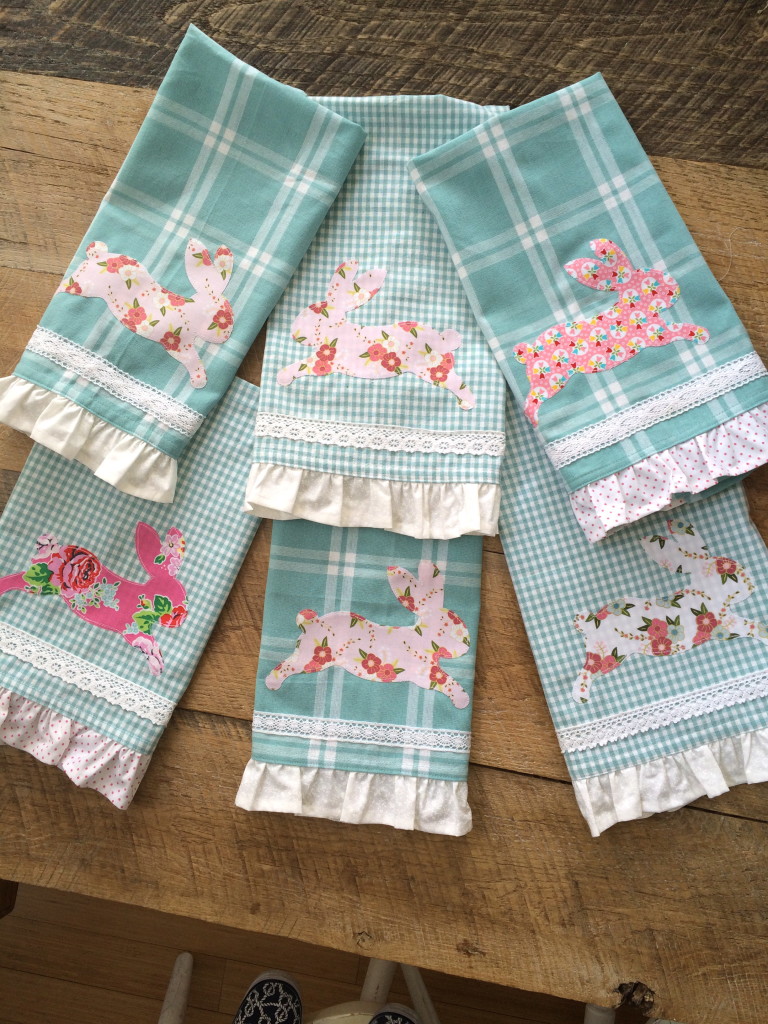
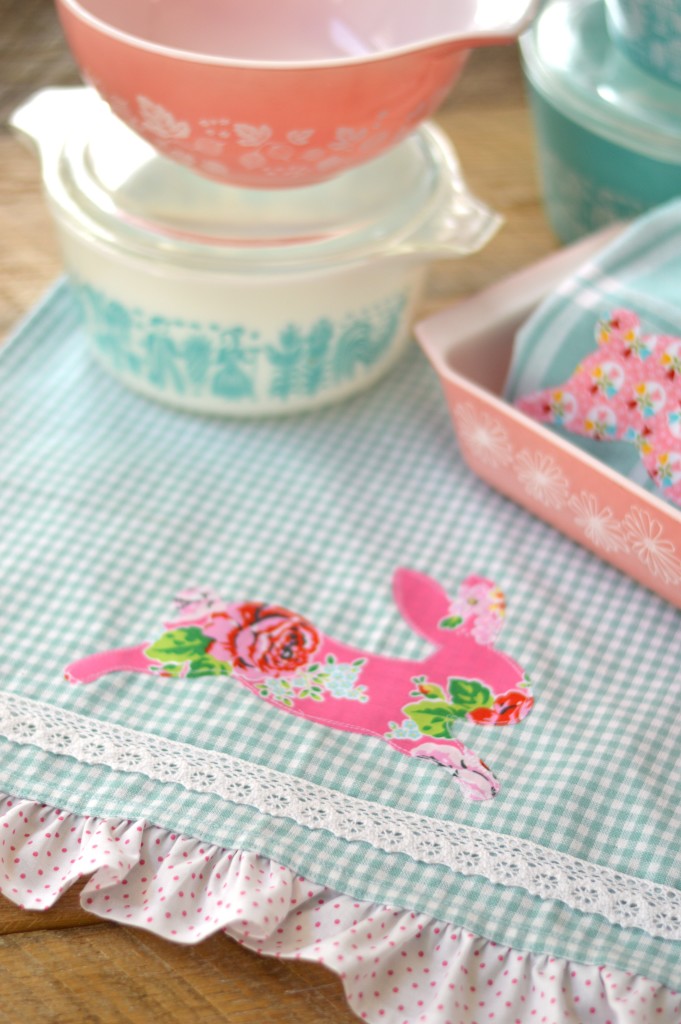
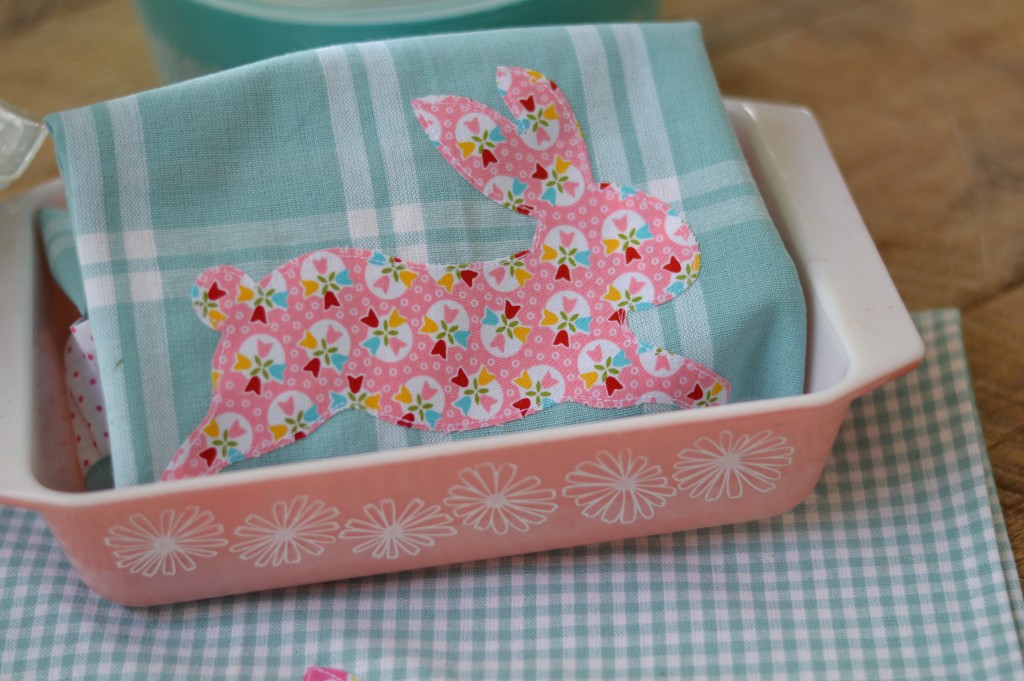
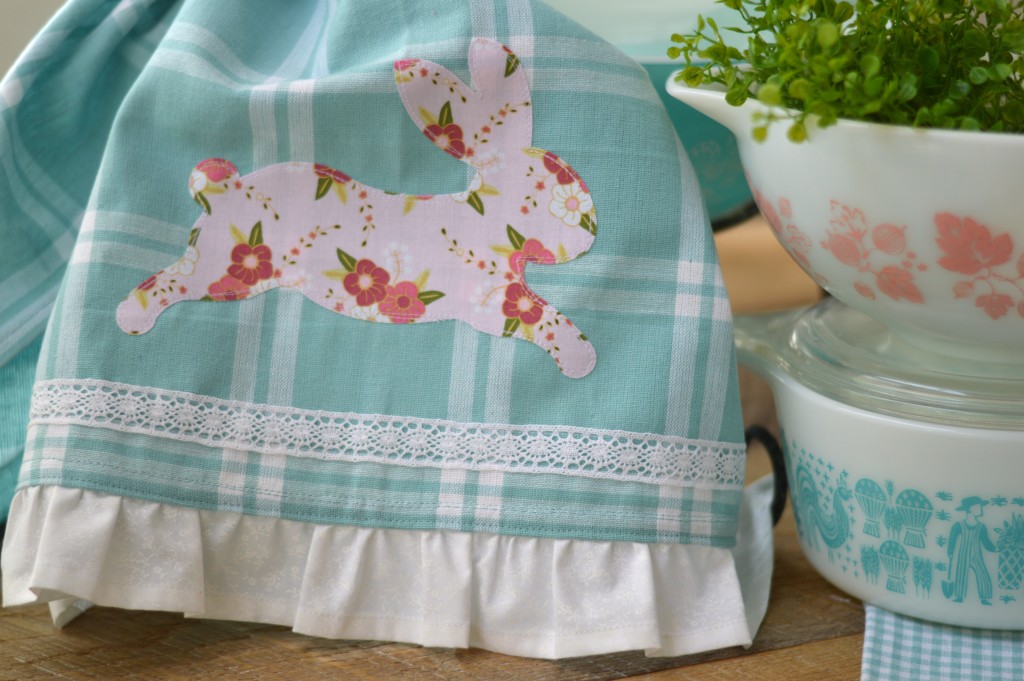
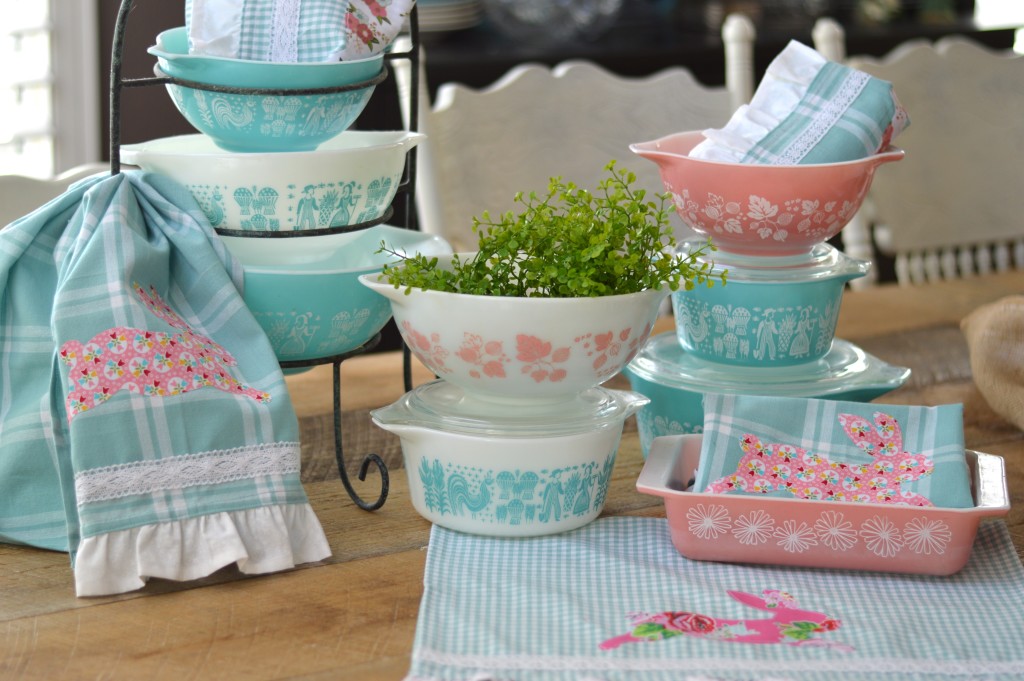
Kitchens usually don’t have a lot of wall space or places to hang quilts or cute crafty projects.  I love hanging home made towels on my oven, it gives the kitchen that cozy feeling!  Theses sweet towels also make the perfect gift!  Who wouldn’t want one of these!  I choose some of my favorite
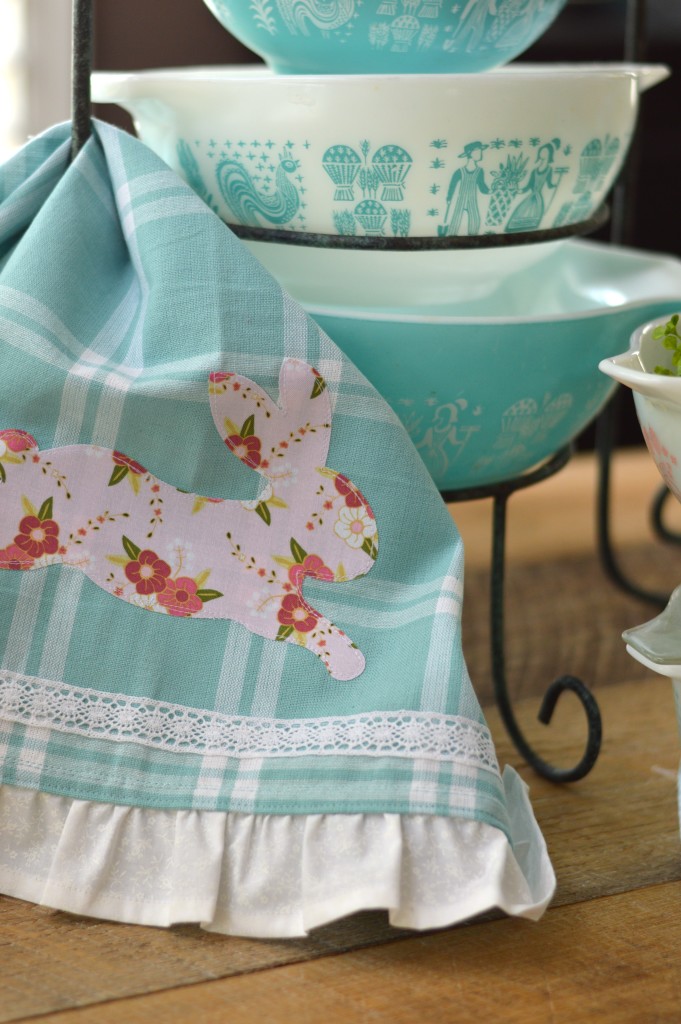
 Riley Blake Fabric Prints from some of my favorite designers.  sizzix bunny towel 10

I am also using my most favorite Sizzix Bunny Die (I’m sure I’ve said that many times!!)  I love using my Sizzix Fabi to cut these bunnies!  It’s so fast and easy!

IMG_4954

And you can die cut several at one time!

IMG_4969

I could cut these bunnies out all day long!  They are so much fun and oh so cute when they are leaping all over!

IMG_4958

I used my ruffling foot to sew the ruffle – this is also a time saver!

IMG_4980

I used Heat n Bond Lite to fuse the bunny.  I also used my new Oliso Pro iron.  It’s a dream!!!

IMG_5041

I love how sweet they are with the soft colors!

IMG_5042

IMG_5039

I want to keep them all for myself!!     I love that these colors are perfect Pyrex colors!  I might just have a slight Pyrex obsession!!sizzix bunny towel 3

sizzix bunny towel 7

sizzix bunny towel 6        sizzix bunny towel 4

Sizzix Heart Quilt

sizzix heart quilt

I think I love Valentine’s Day so much because it pulls me out of the “After Christmas Blues”.  It’s bright, and happy!  I love the simplicity of this quilt – a simple heart applique.  What makes it feel special is that no two hearts are the same and the backgrounds are a variety of low volume prints.  When ever I go to a quilt shop and I’m not sure what to buy, I end up purchasing charm packs.  I had this “Scrumptious” charm pack by Moda tucked away and it was perfect for this project.  sizzix heart quilt 3

DIY Heart Quilt: A Cozy and Sweet Make for Valentine's Day
Heat n Bond Lite by Therm O Web is my go to for any Sizzix applique projects. I love it because it’s light weight, it fuses fast, and peels easy. Cut the Heat n Bond Lite into (25) 5″ squares.
DIY Heart Quilt: A Cozy and Sweet Make for Valentine's Day
Select 25 of your favorite squares from the charm pack.
DIY Heart Quilt: A Cozy and Sweet Make for Valentine's Day
Fuse the Heat n Bond Lite to the wrong side of each of the 25 charm squares. Let cool.
DIY Heart Quilt: A Cozy and Sweet Make for Valentine's Day
Make sure your cat helps with all the die cutting! Die cut each of the 25 squares using the Fabi heart. The squares are just big enough to cover the whole heart.
DIY Heart Quilt: A Cozy and Sweet Make for Valentine's Day
Cut a variety of low volume prints into 7″ squares. You will need 25 total. Peel off the backing paper and position the heart in the center of each of the 7″ squares. Heat set into place. Top stitch around each heart, I used light pink thread.
DIY Heart Quilt: A Cozy and Sweet Make for Valentine's Day
Lay out the blocks as desired. You could easily turn this into a table runner or add more blocks for a baby quilt or throw quilt. Sew each block together in rows using 1/4″ seams. Press each row alternately so it makes it easy to match seams. Sew the rows together and press in one direction. Quilt.
DIY Heart Quilt: A Cozy and Sweet Make for Valentine's Day
I quilted a scallop boarder around each heart to give it a “Valentine” feel. Then 1/4″ straight line seams. Add the binding and you’re done!
DIY Heart Quilt: A Cozy and Sweet Make for Valentine's Day