Patchwork Acorns

patchwork acorn potholders
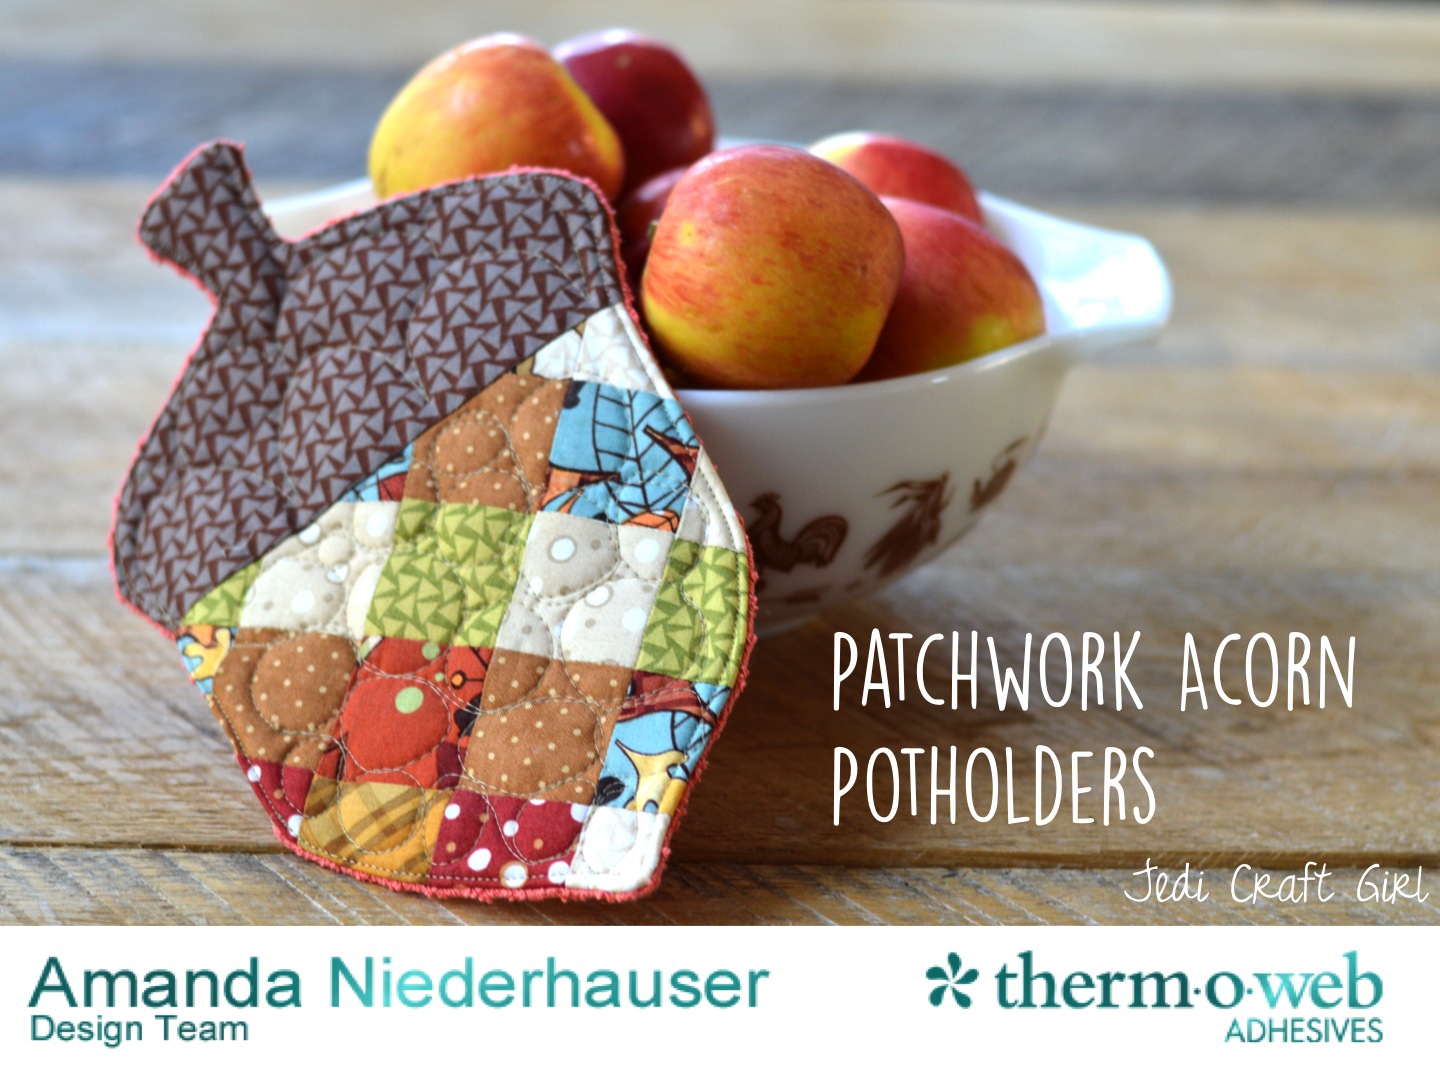
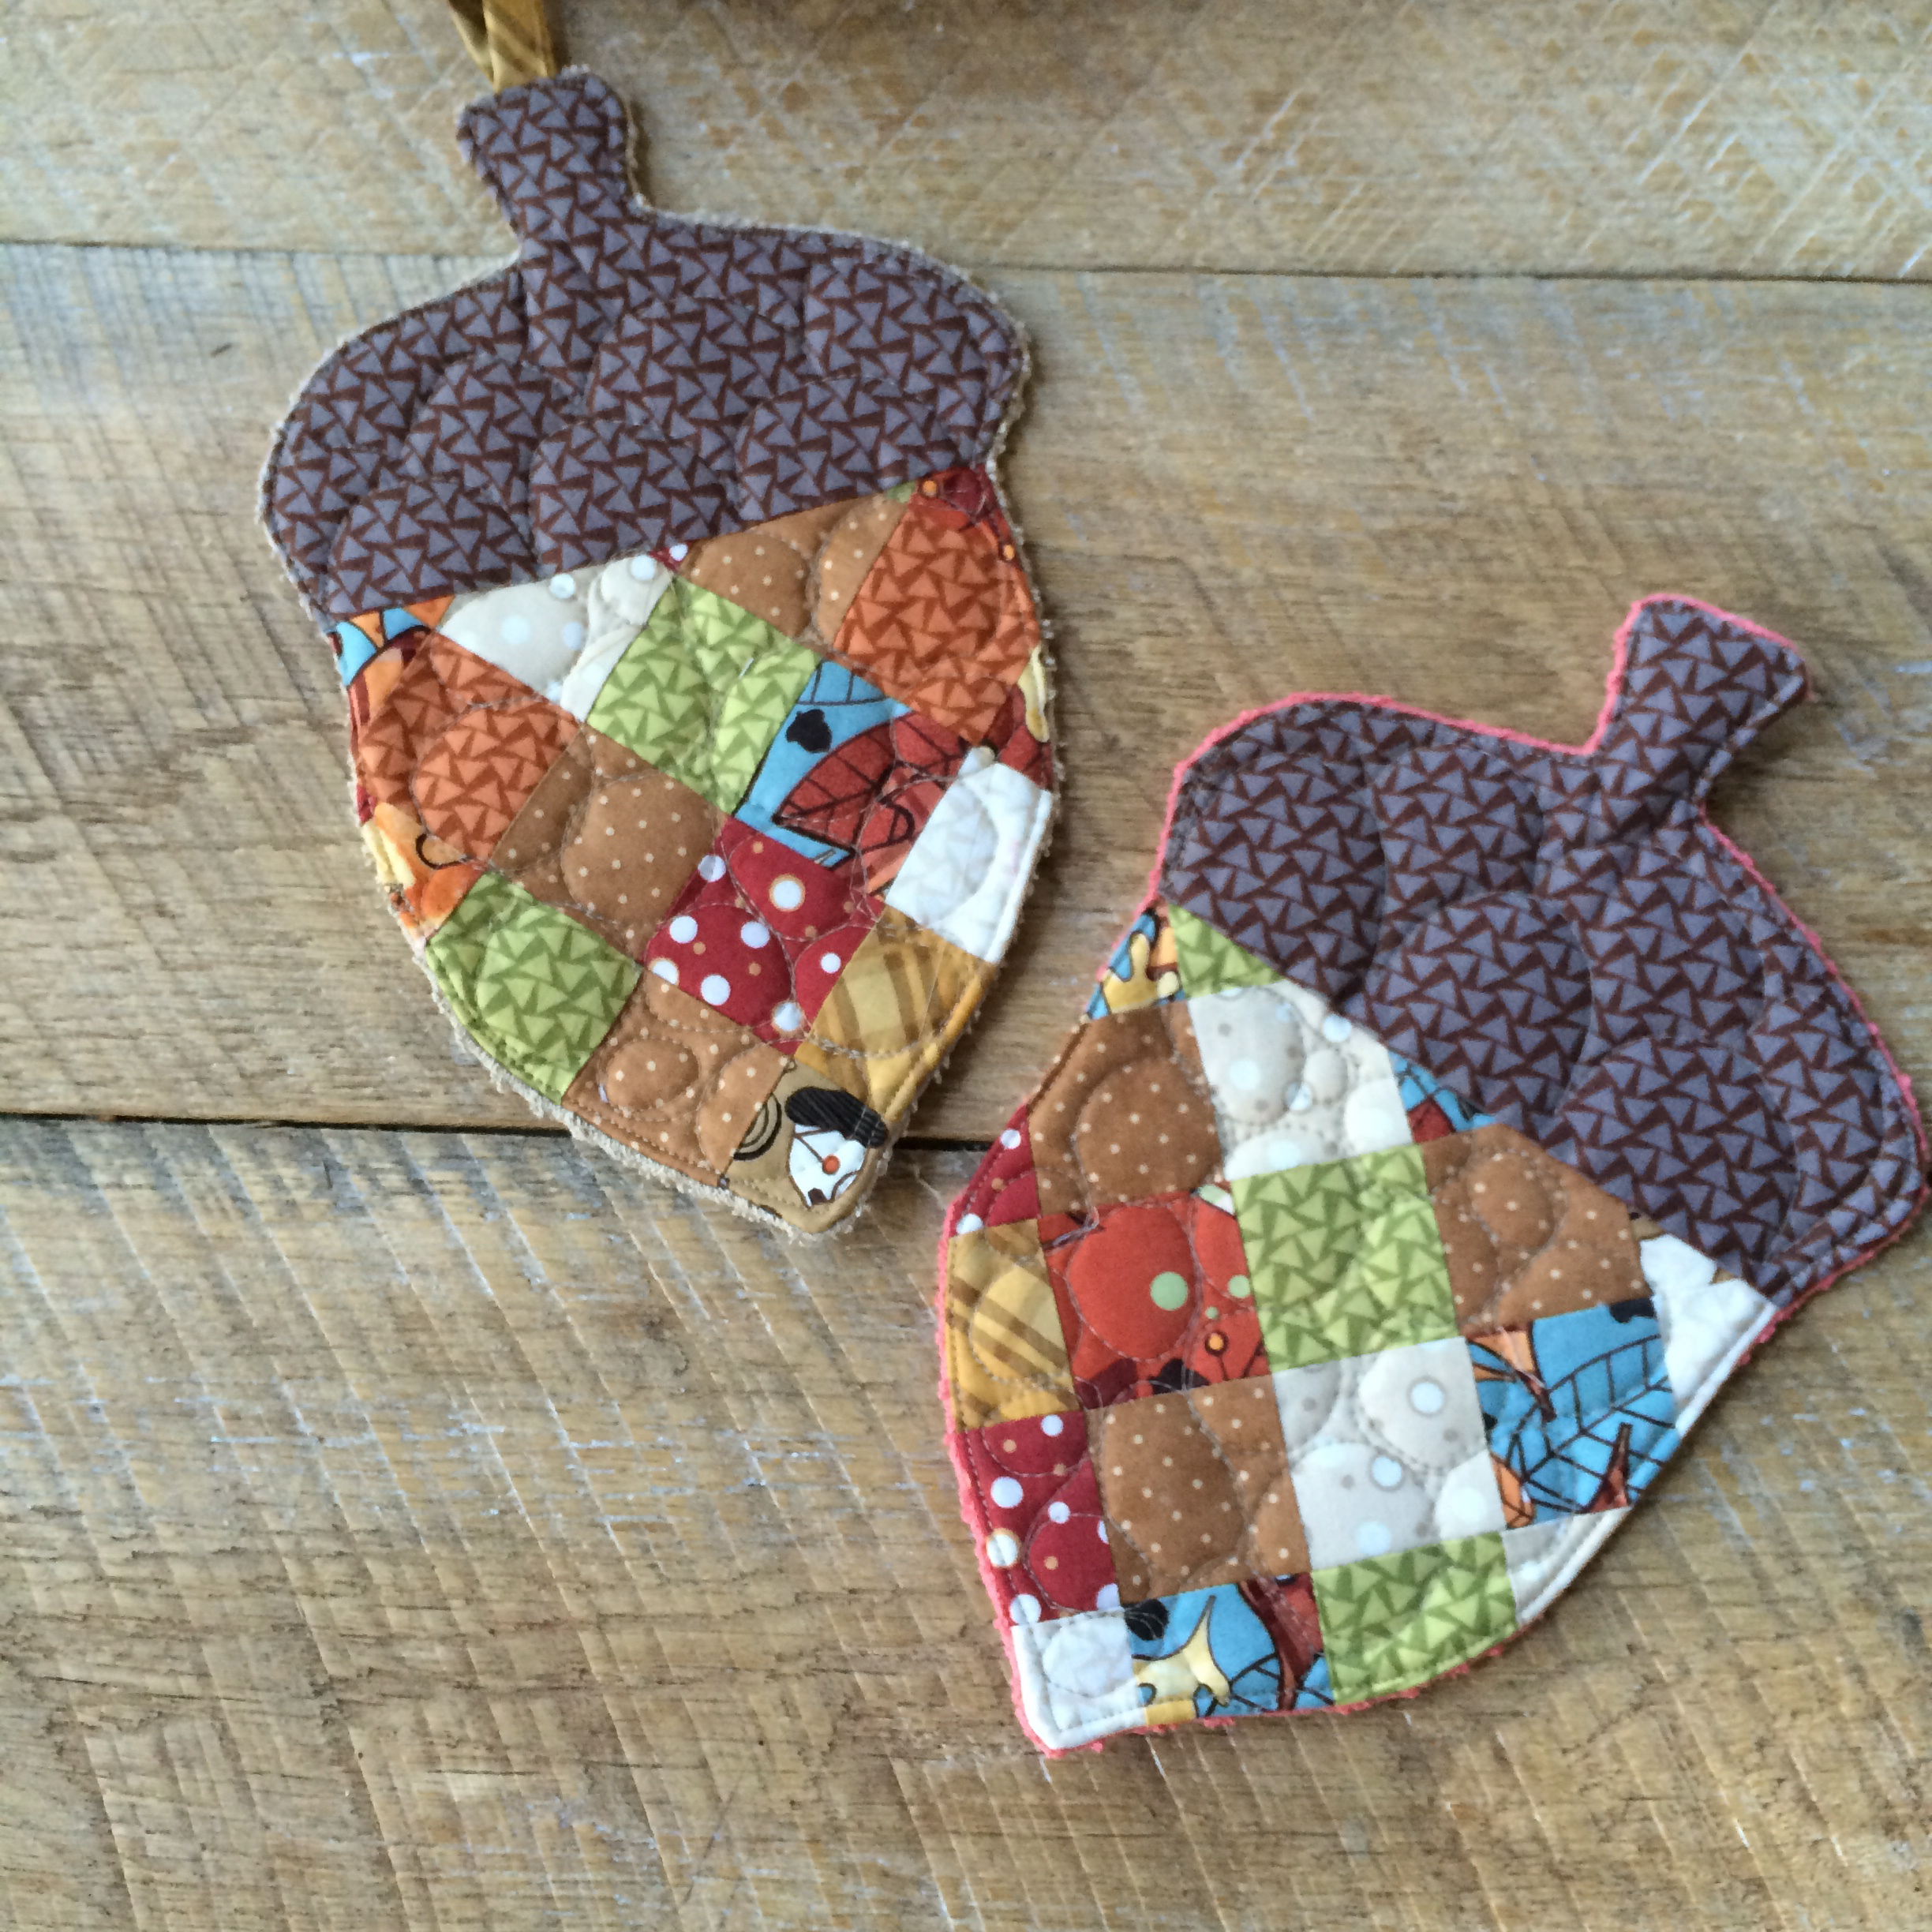
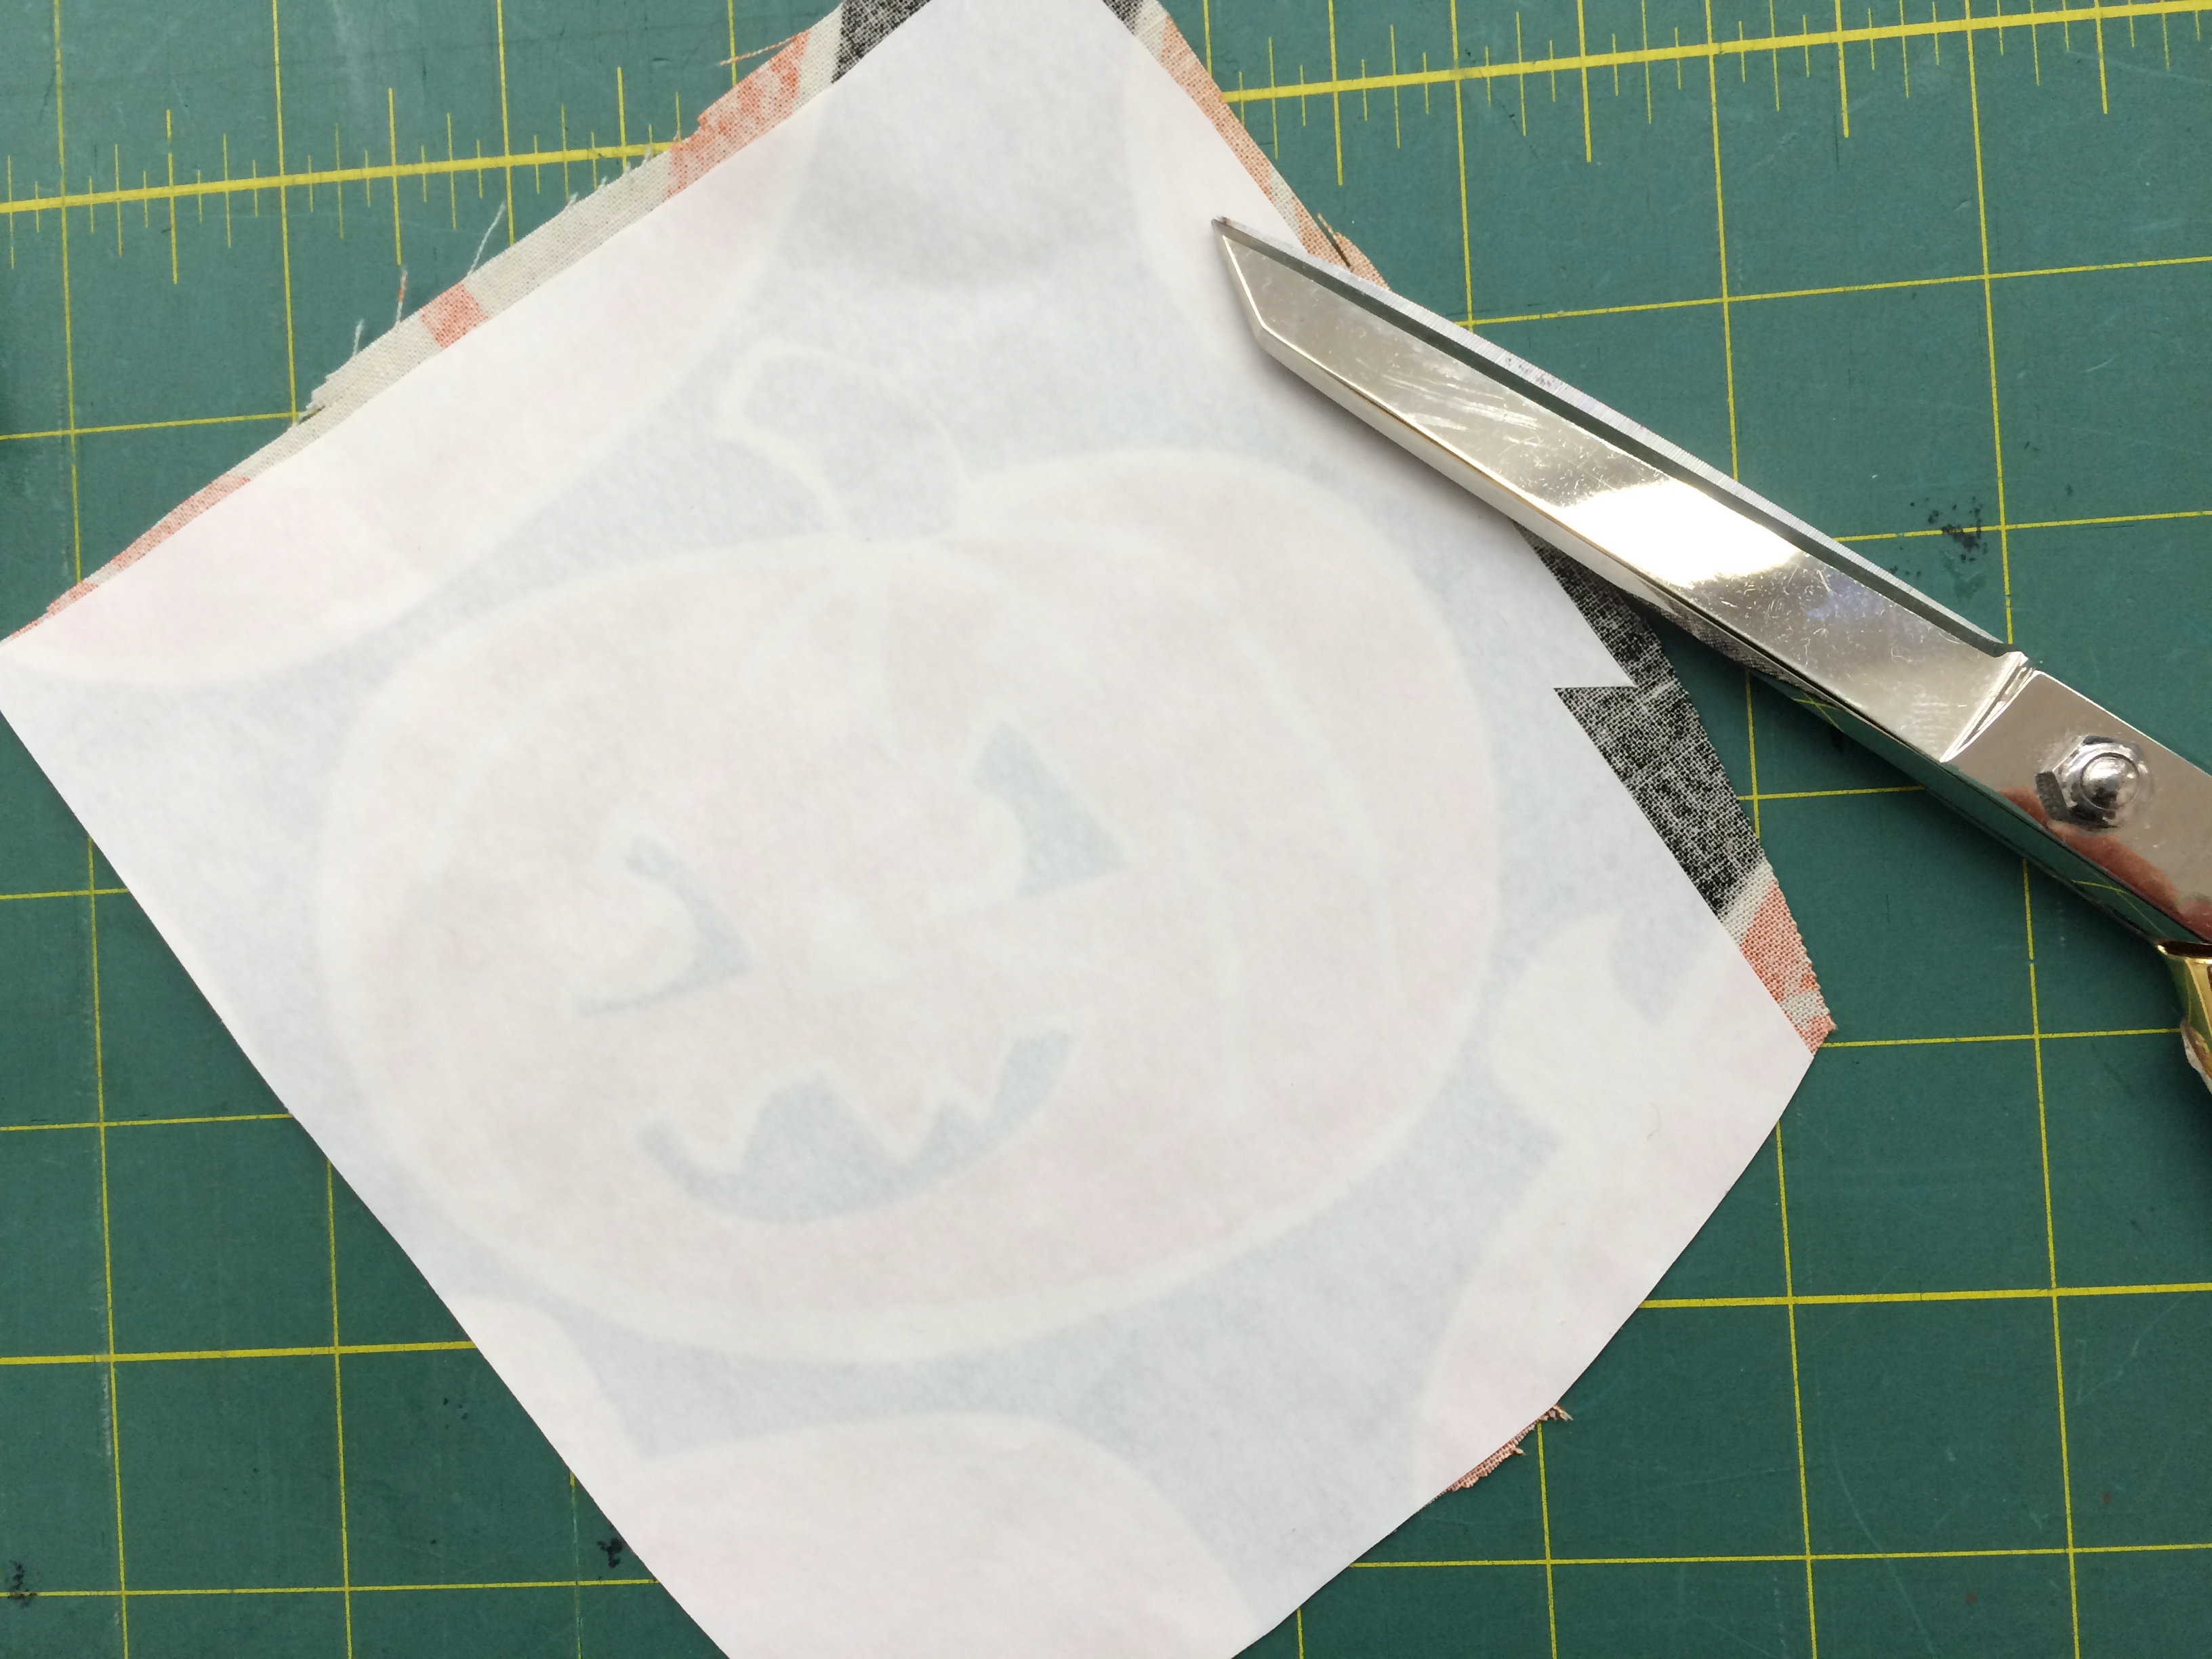
I’m sharing my Patchwork Acorn Potholder tutorial over on the Therm O Web Blog.  You can download the pattern and read the instructions!!patchwork acorn potholder

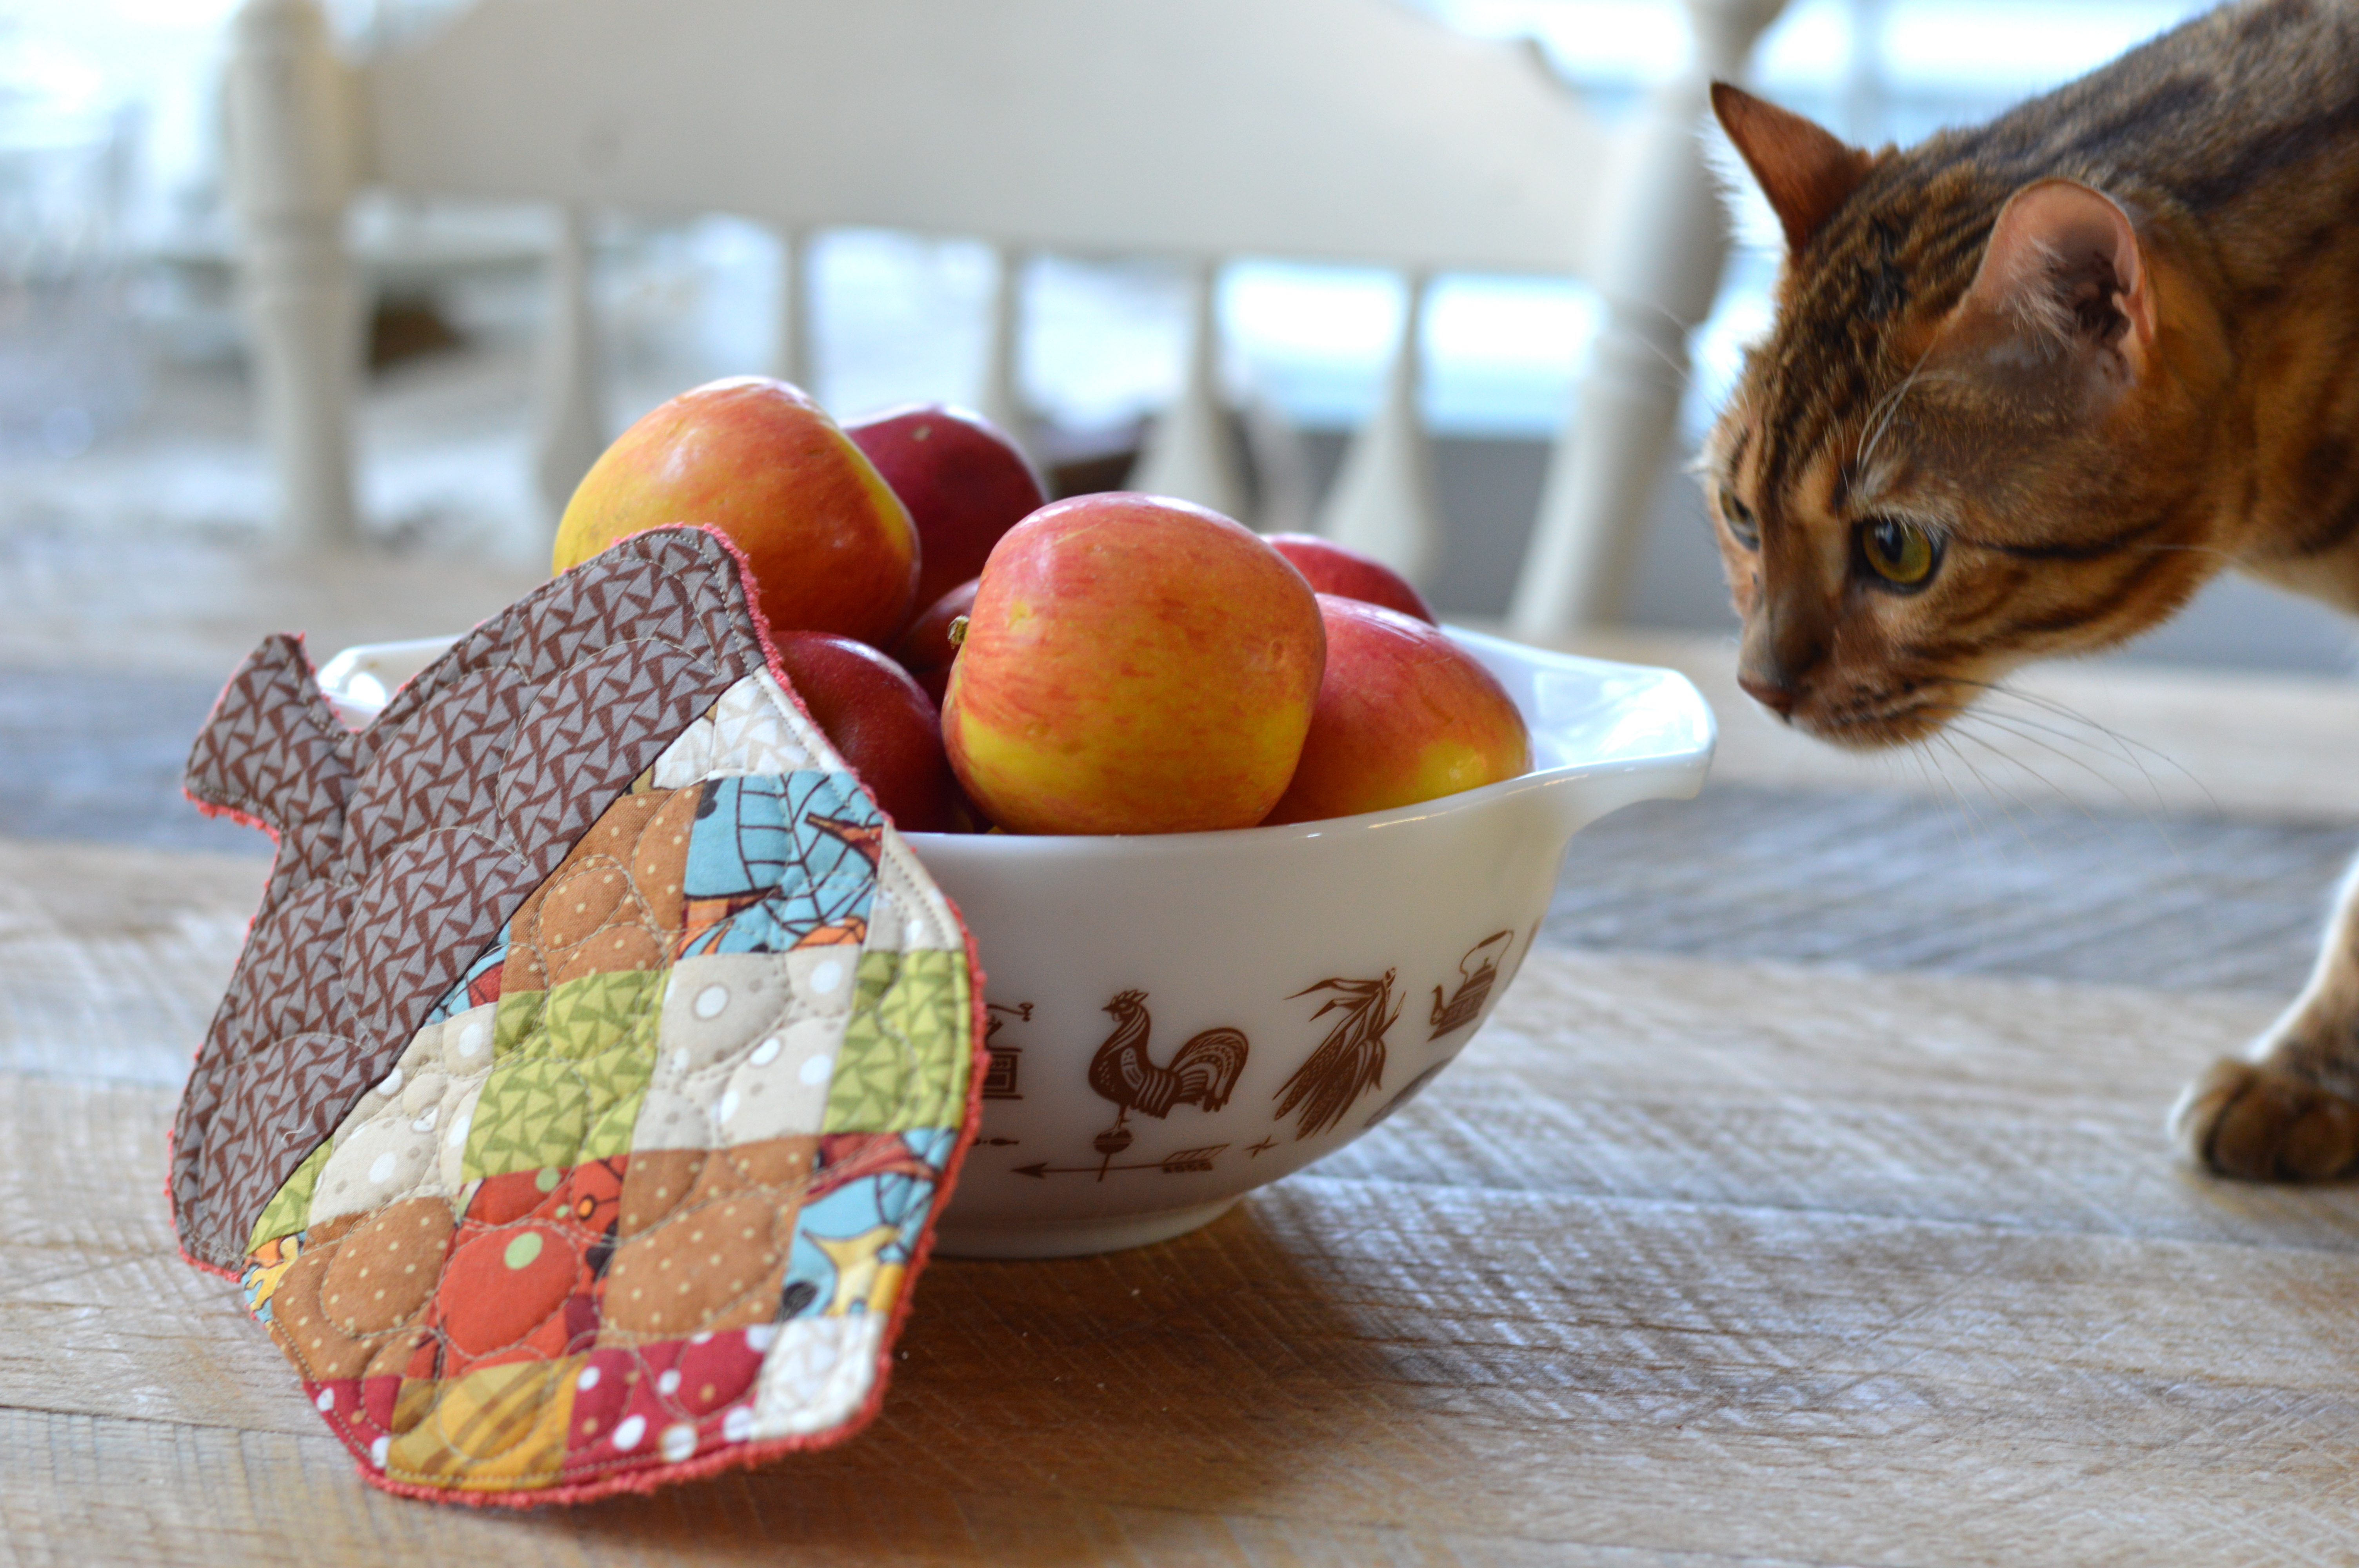
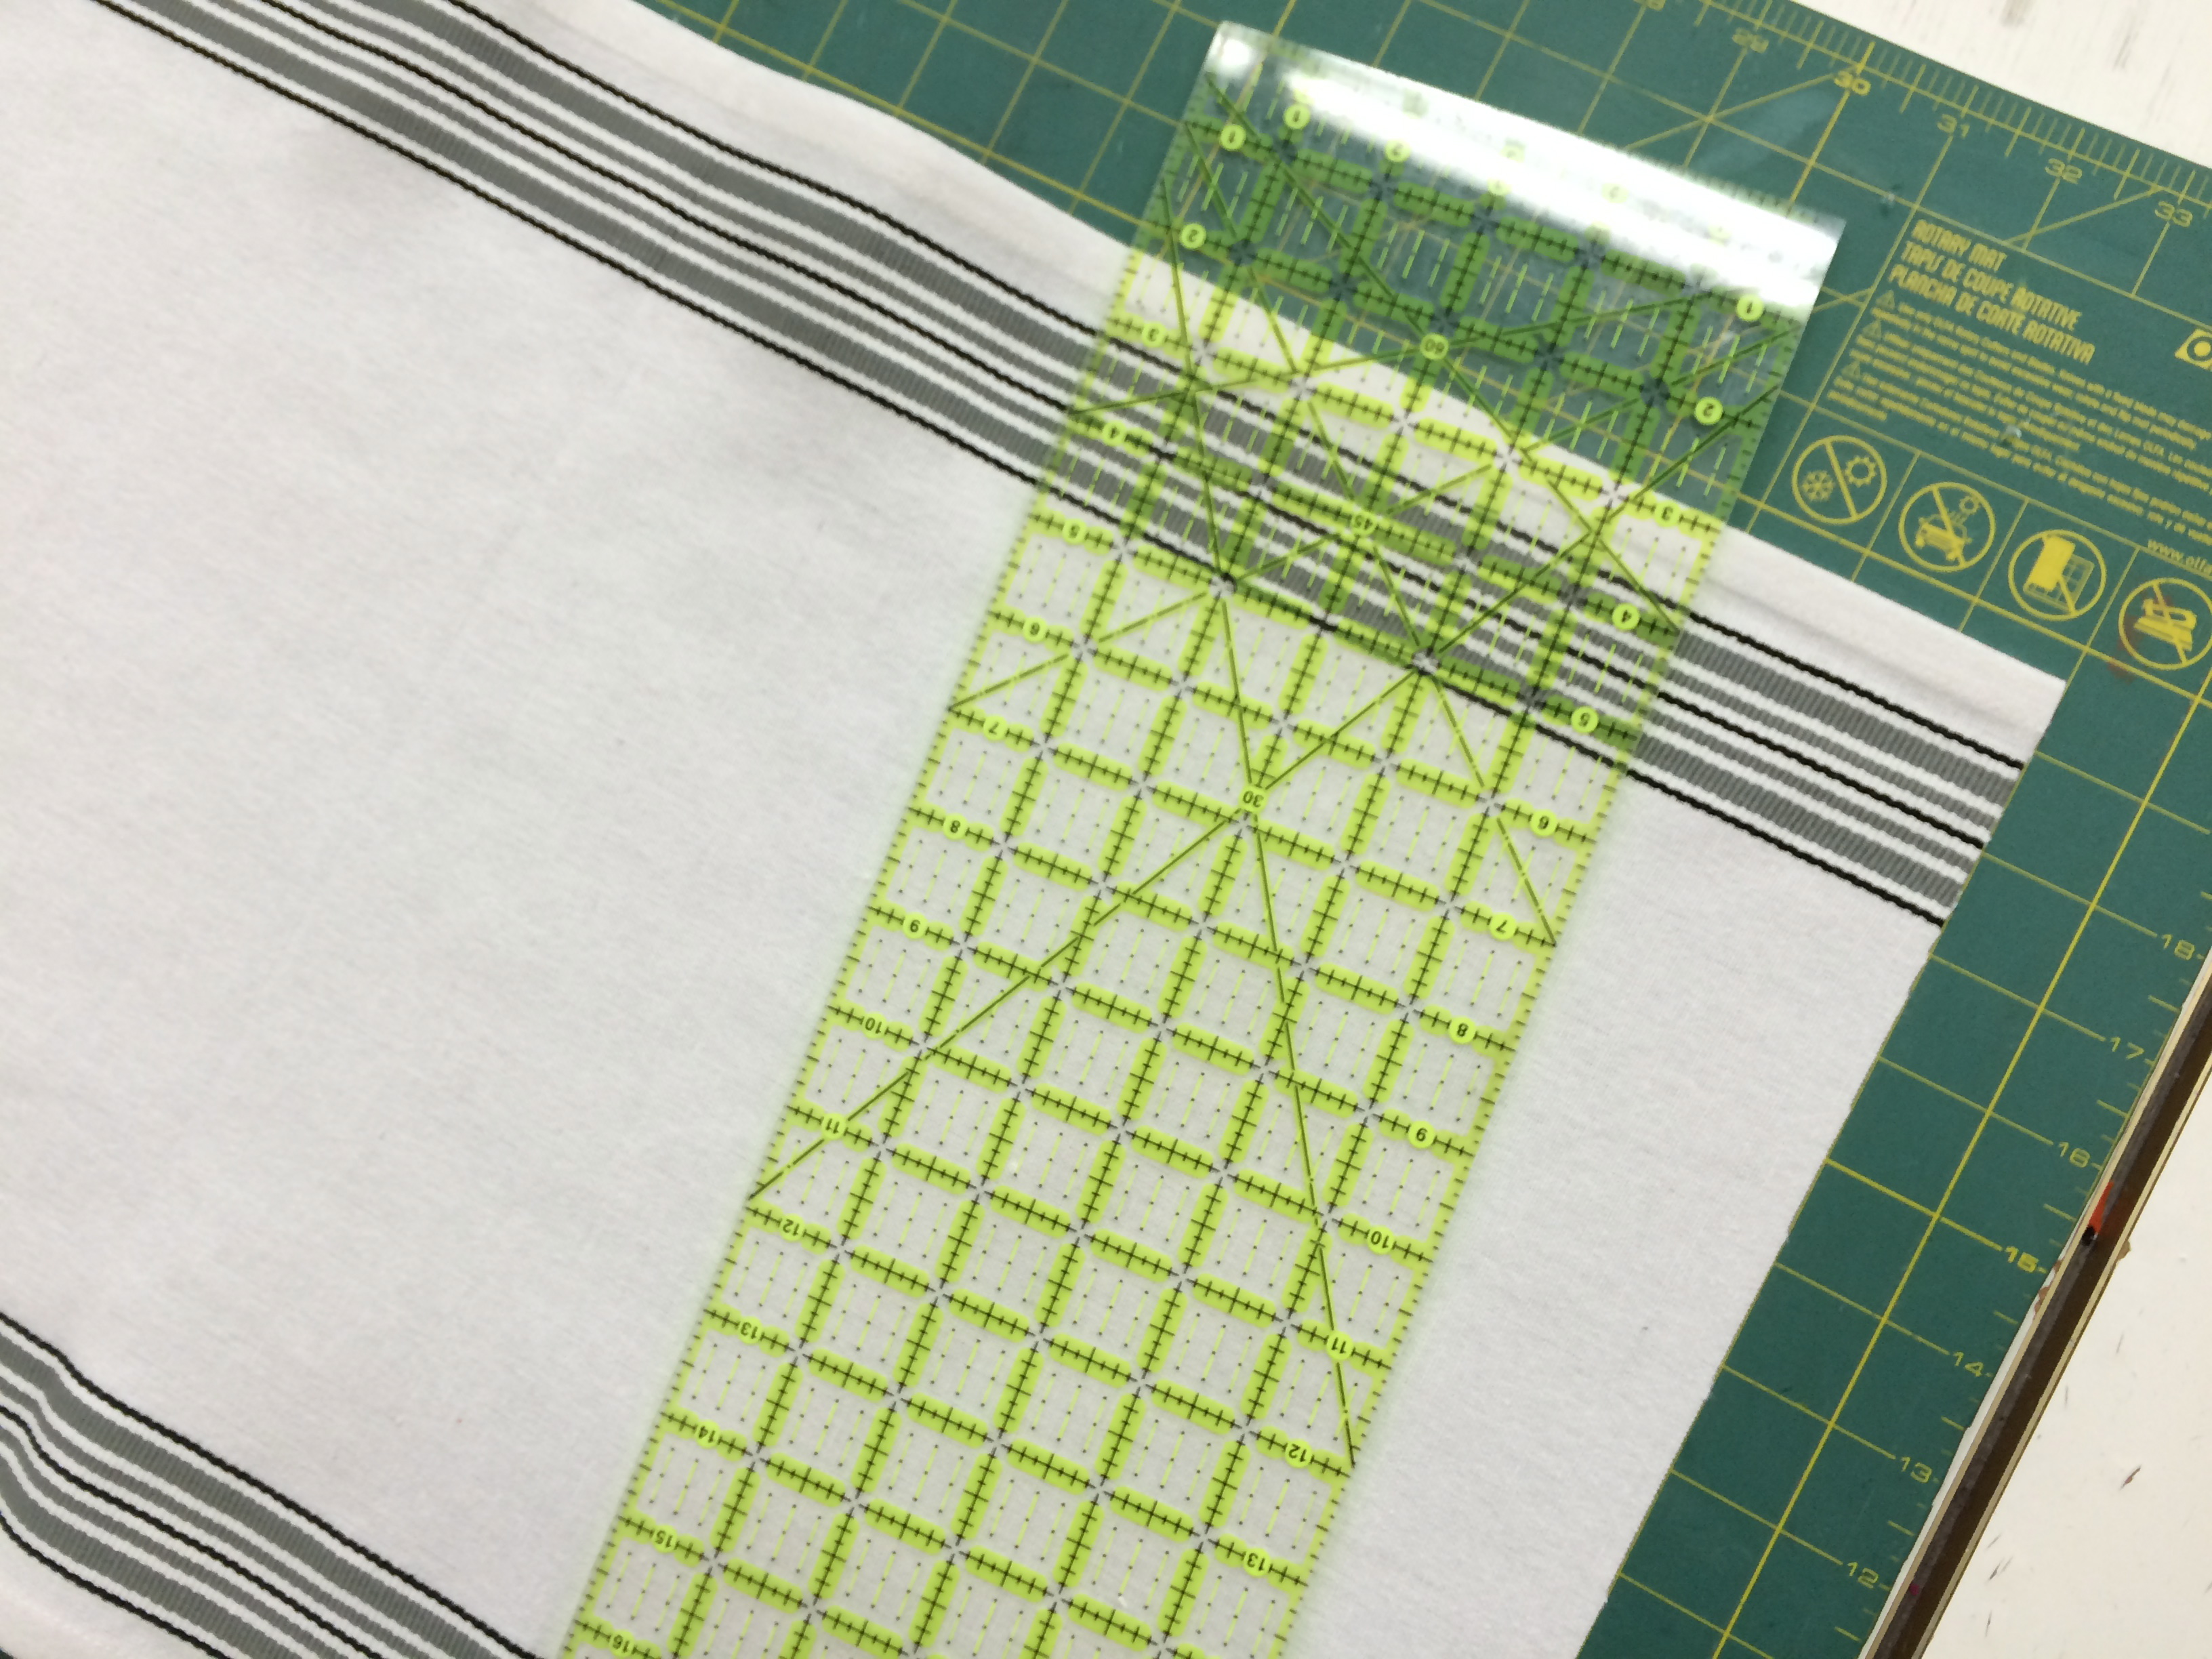
These are cute to use as potholders or as decorations in the kitchen!  I used a kitchen towel for the backing and the inside is fusible fleece.

patchwork acorn potholder 22

I also used the same pattern for the acorn and appliqued it onto burlap for a quick fall pillow!IMG_1846

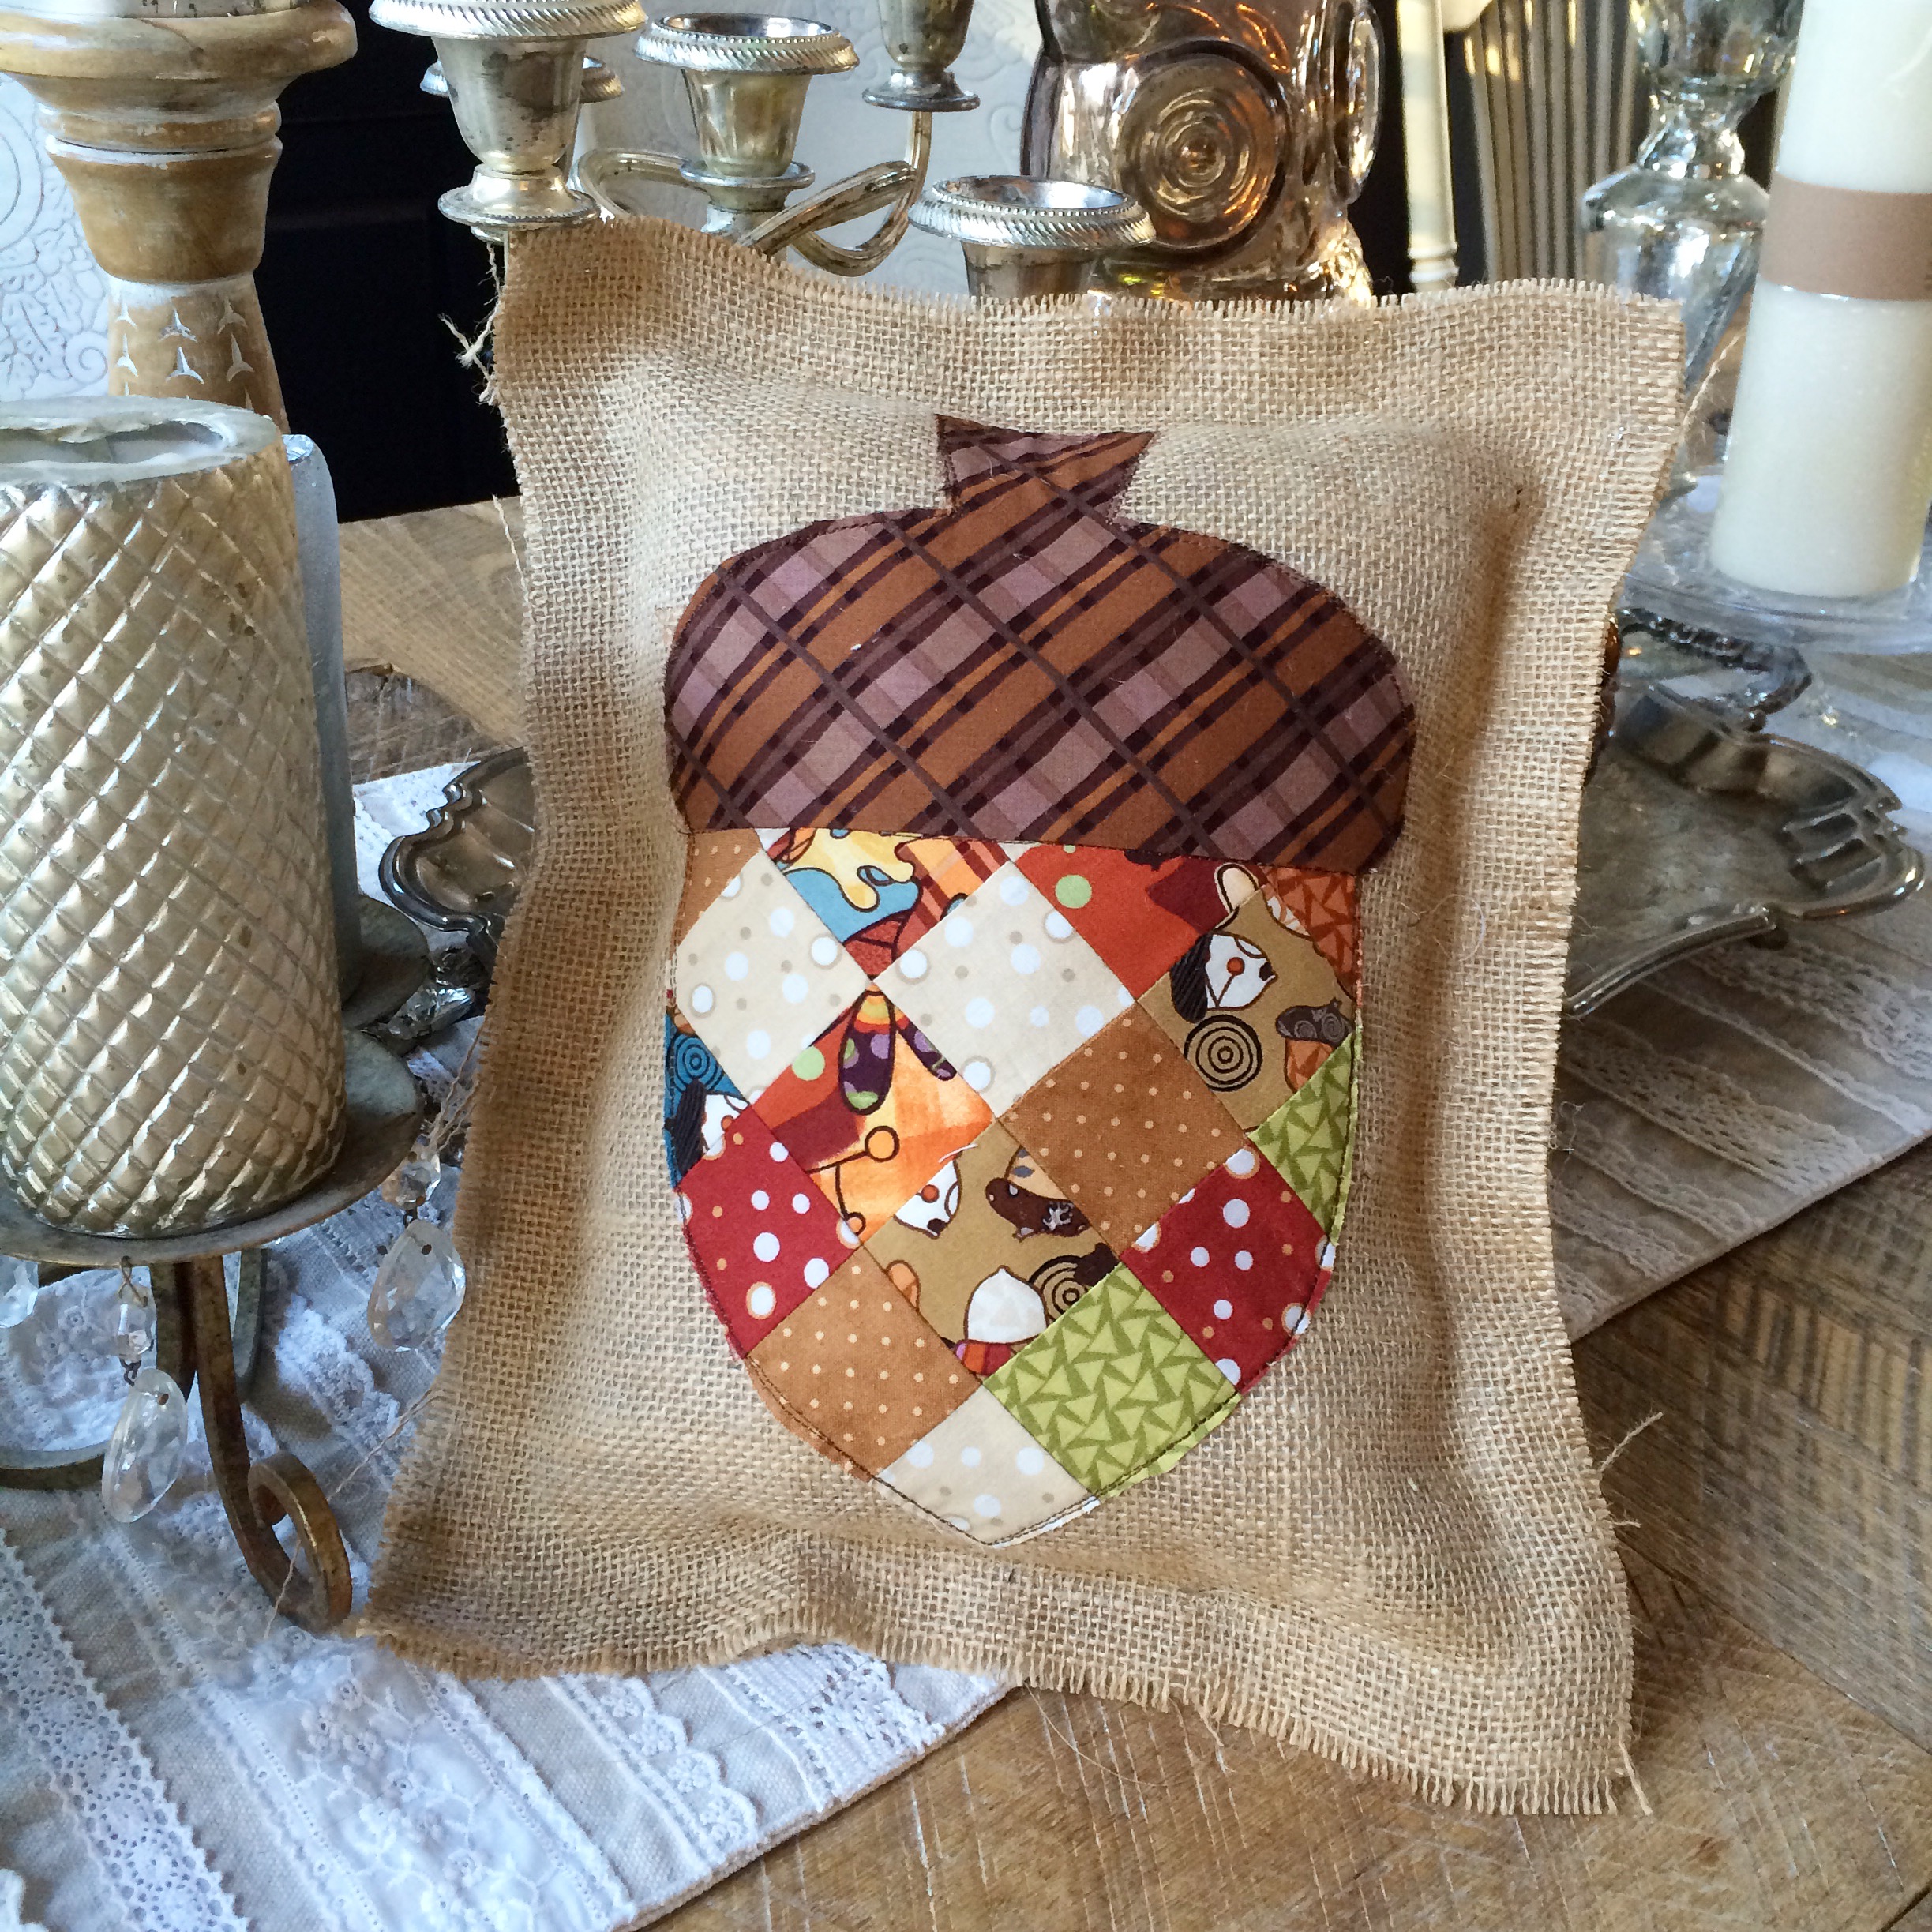
To make the pillow, use spray an bond basting spray to hold the acorn in place.  Top stitch a few times around the acorn.  Then sew a 1″ seam all the way around the pillow leaving an opening for stuffing.  Stuff, then sew closed.  Fray the edges of the burlap as desired.IMG_1836

Caturday Sew Along October

caturday octoberWelcome to the Caturday Sew Along!  I love cats and sewing!!!  I know a lot of you love sewing with your fur babies too!    Each month I will post a cat themed quilting project that we can sew together.  Post your progress on Instagram and tag it with #caturdaysewalong.  For October choose any variation of these three projects that use a cat silhouette and SPOOKY applique.  Click the links for the patterns.

spooky mini quilt tutorialThis Spooky mini quilt measures 20″ square and uses 2.5″ squares to complete.  It’s such a fun way to use up those Halloween scraps you’ve been saving!!  Click HERE for the tutorial.

spooky_quilt_tutorialThis larger version measures 44″ x 60″ and it uses 5″ charm squares for the center.  It’s my favorite Halloween quilt.  Click HERE for the tutorial.

Halloween_quilt_tutorial_1

spooky Halloween pillow_10If you find yourself pressed for time but still want to sew something SPOOKY, try this quick pillow tutorial!  Click HERE

Spooky Mini Quilt

spooky mini quilt tutorialI love Spooky Sewing!  Halloween is such a fun time of year and the fabrics are so amazing!  This mini quilt pattern is inspired from a larger pattern I created.   You can find the pattern for the large version on the Riley Blake Designs website.  The fabrics are from last years and this years Riley Blake Designs Halloween fabrics.  They are purrrrfect for Halloween!Screen Shot 2015-09-30 at 2.46.16 PMSupplies:

scraps of Halloween prints

fat quarter or equivalent for applique

2/3 yard for backing

1/4 yard for binding

batting

Heat n Bond Lite EZ print sheets

This small version measures about 20″ square.  It would make a great pillow too!  Begin by rummaging through all your scraps and cut 2.5″ squares.  You need 100 total.  There are 10 rows of 10.  I did mine totally random.  I just grabbed 2 fabrics and sewed them together.

spooky mini quilt I paired all the fabrics then sewed those pairs with other pairs, leaving 10 pairs out.  Once you sew the 2 sets of 2, you have strips with 4 squares.  Pair those up to give you 10 sets of 8 squares.  Then add the reserved pairs to the ends.  This was the fastest way I found.  I lined up the rows the best I could.  I tried to avoid having 2 like fabrics touching.  Press all seams.spooky mini quilt 3

To add the cat applique, click HERE for the cat and HERE for the Spooky.  Print them in reverse.  I like to use Heat n Bond EZ print sheets – no tracing!!!  Once you’ve got your applique ready, iron it into place and stitch around it with black thread.

spooky mini quilt 2All that’s left is the quilting!  I quilted orange swirls.

IMG_0813Add the binding and its done!  This might take a while if your cat decides to have a nap on it!!!  spooky mini quilt 4
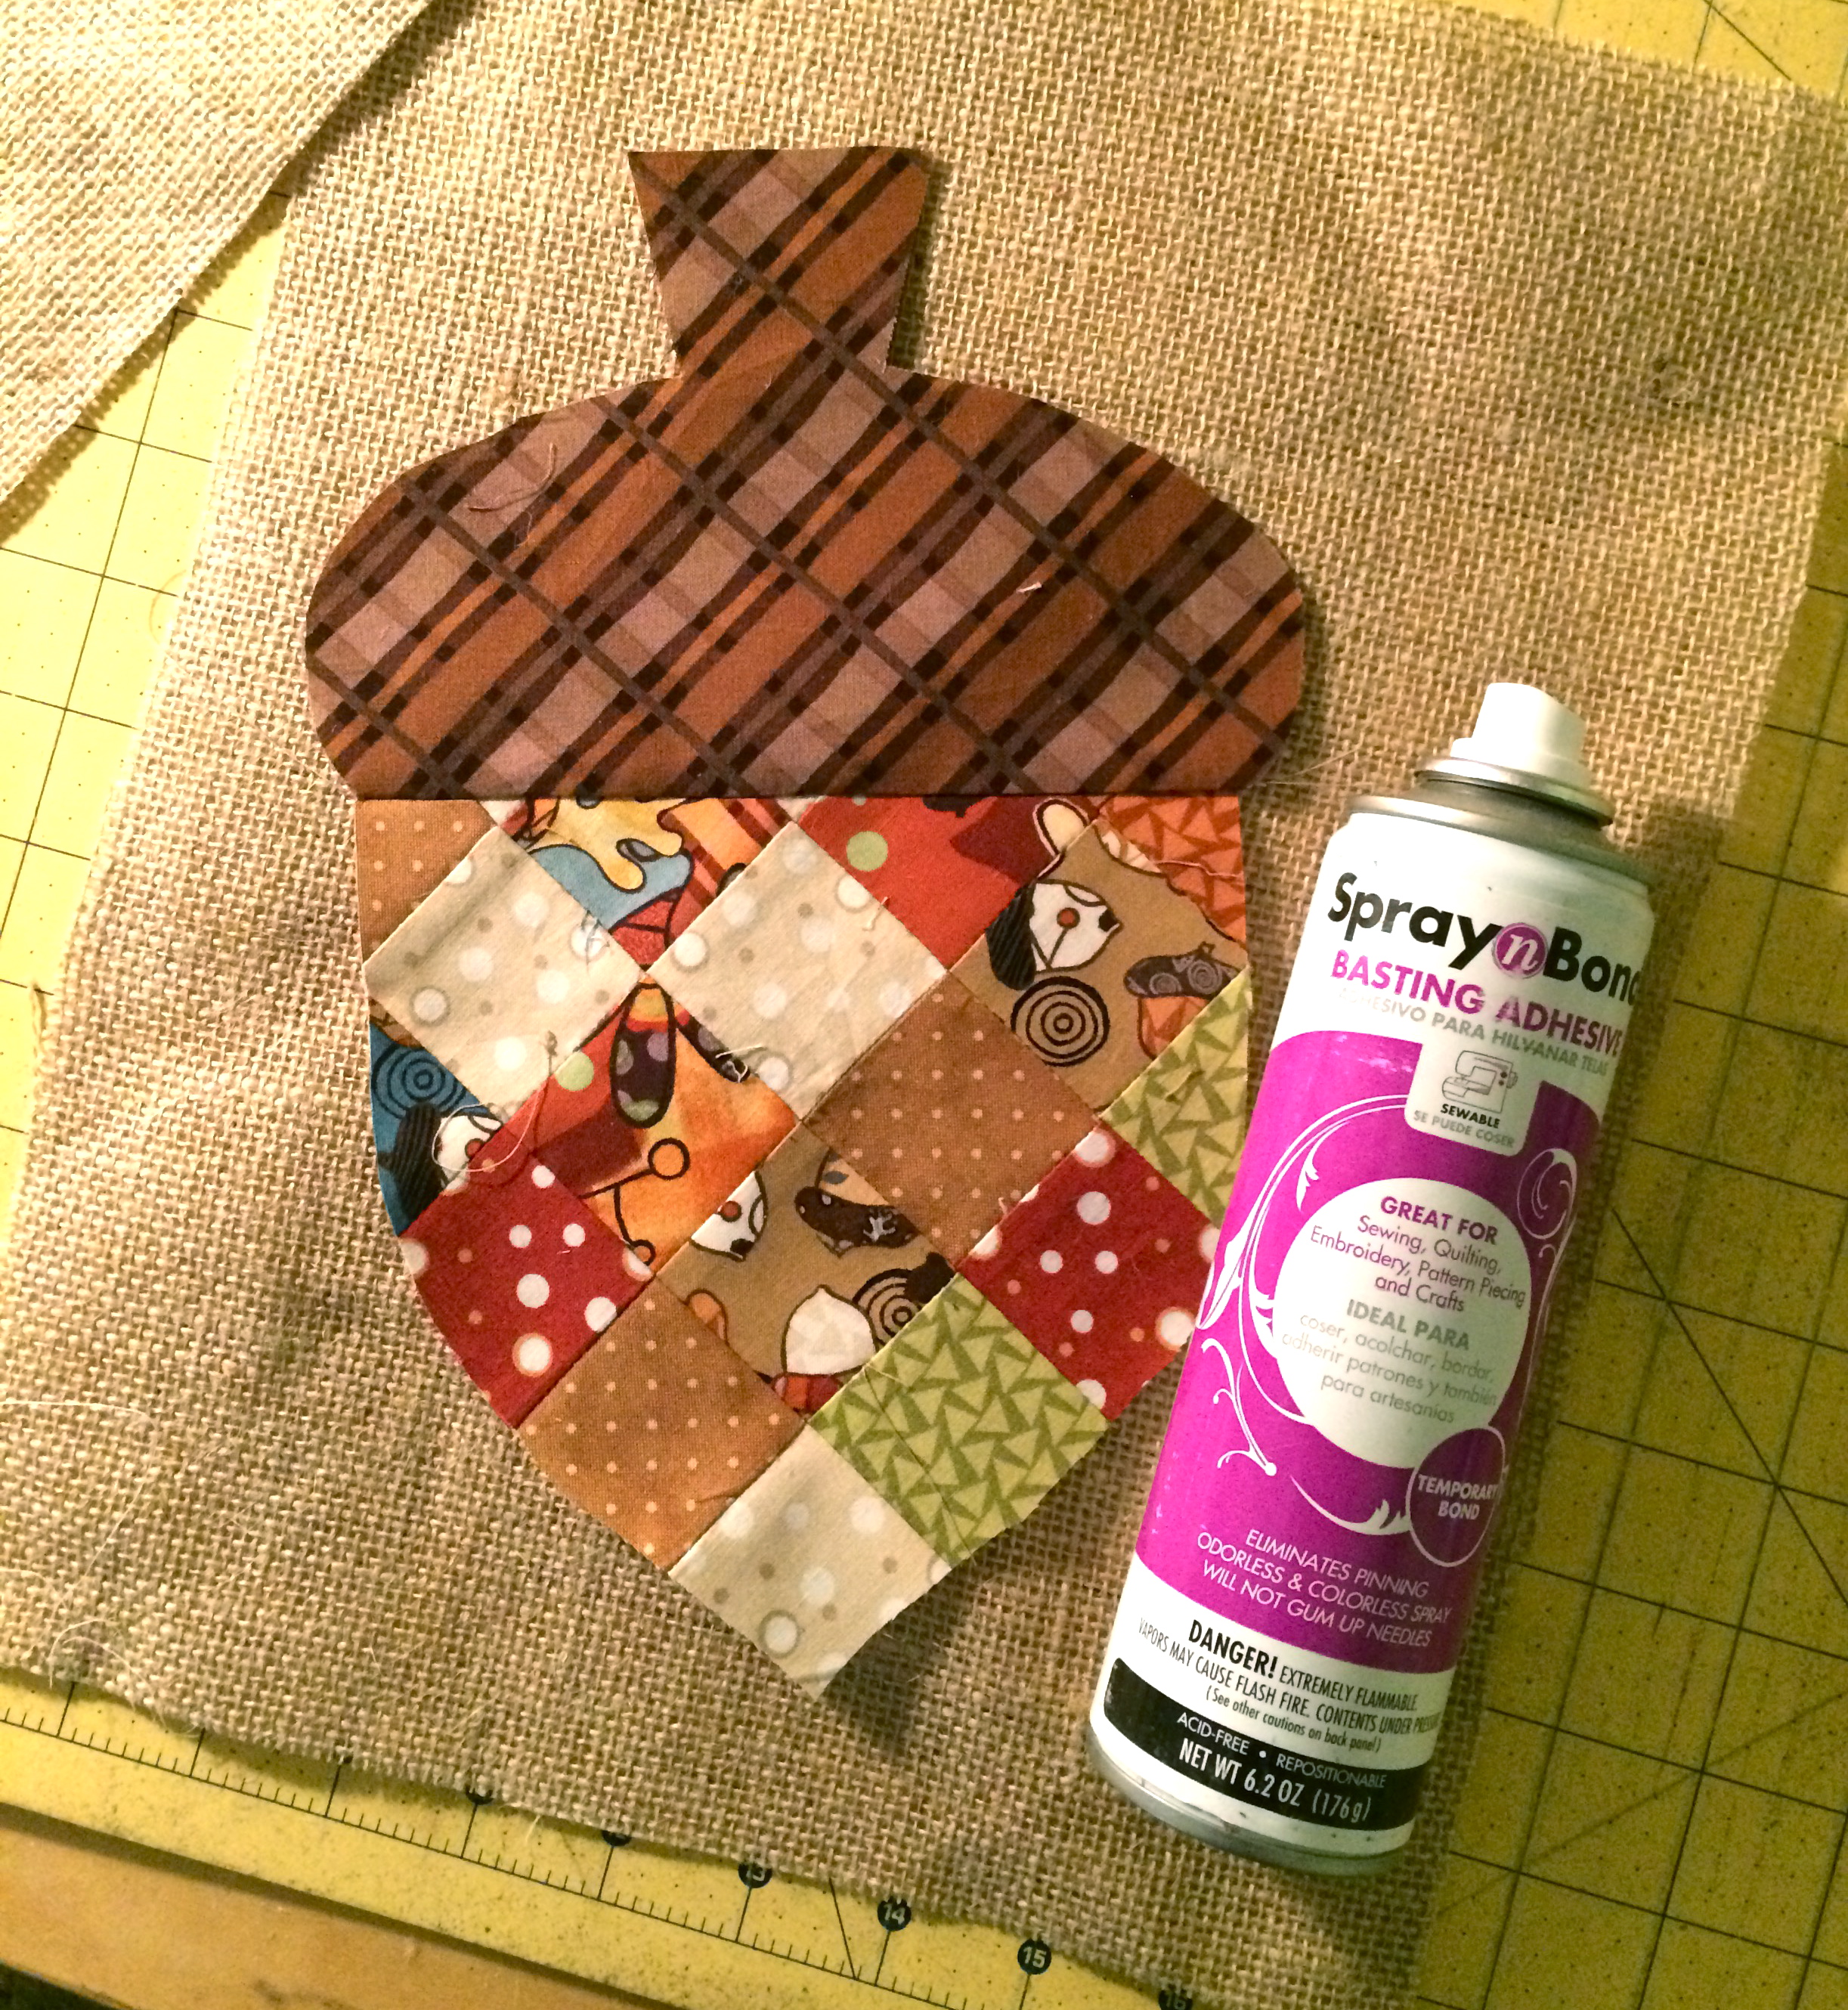
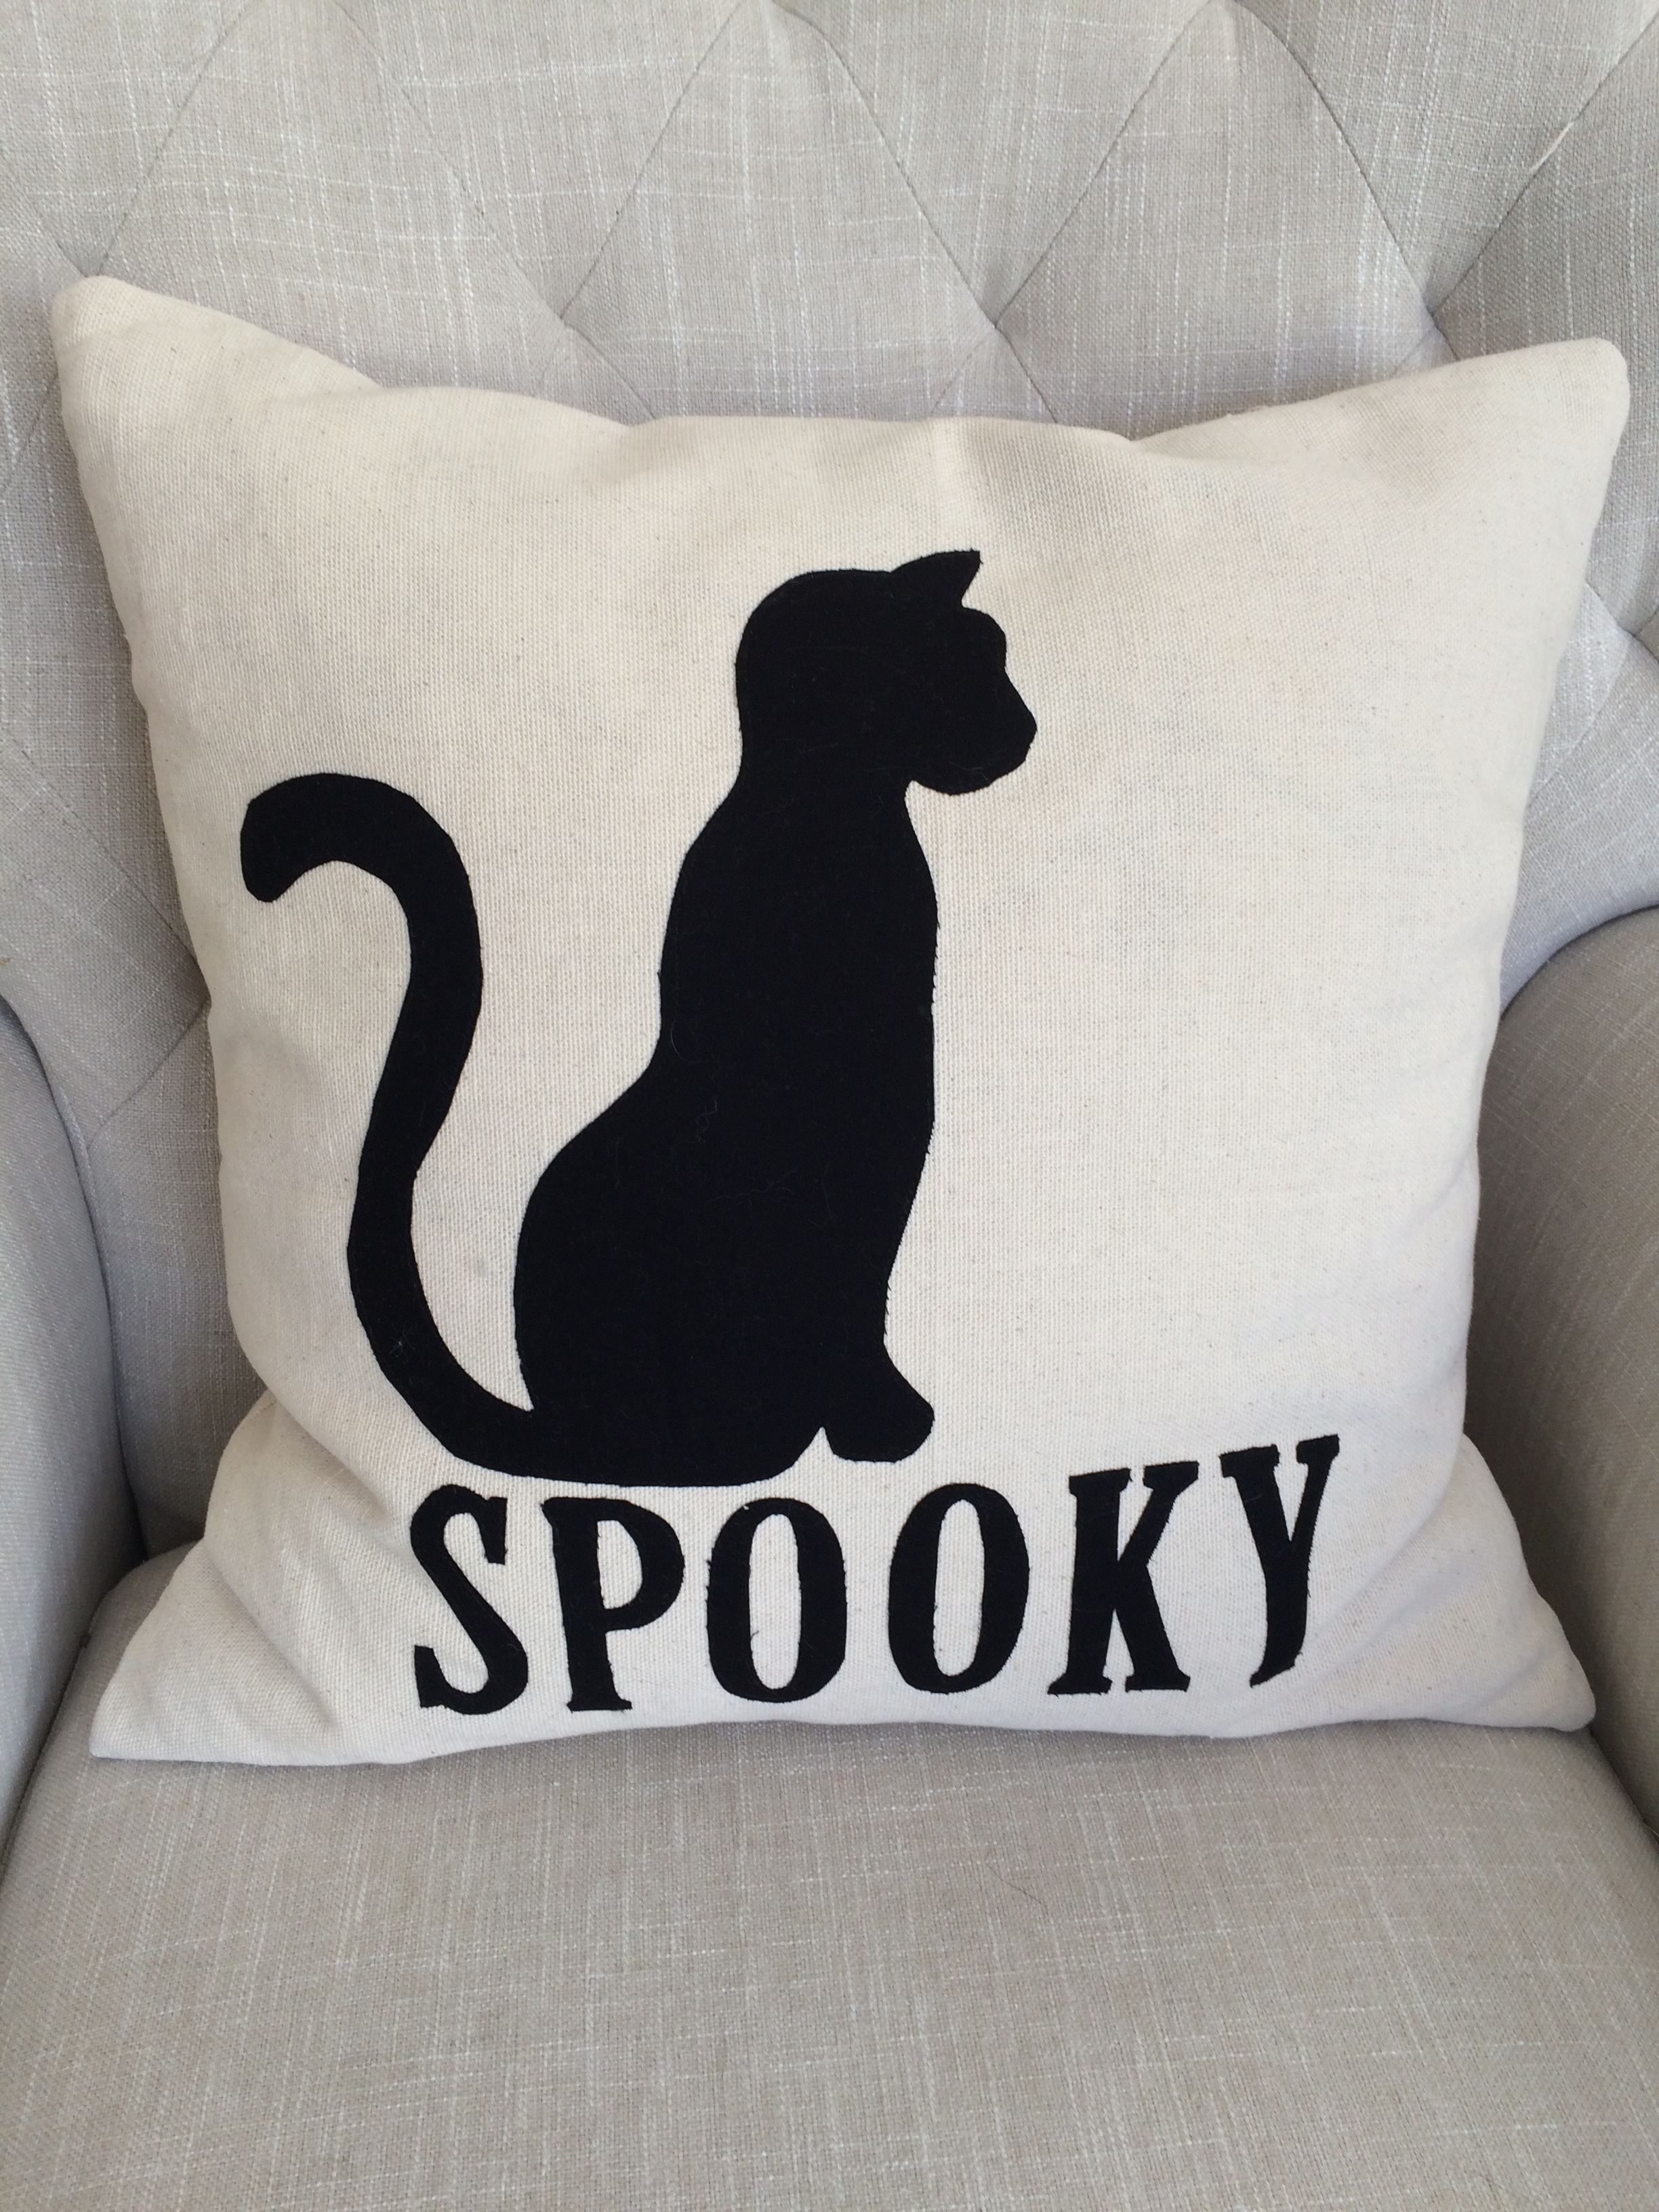
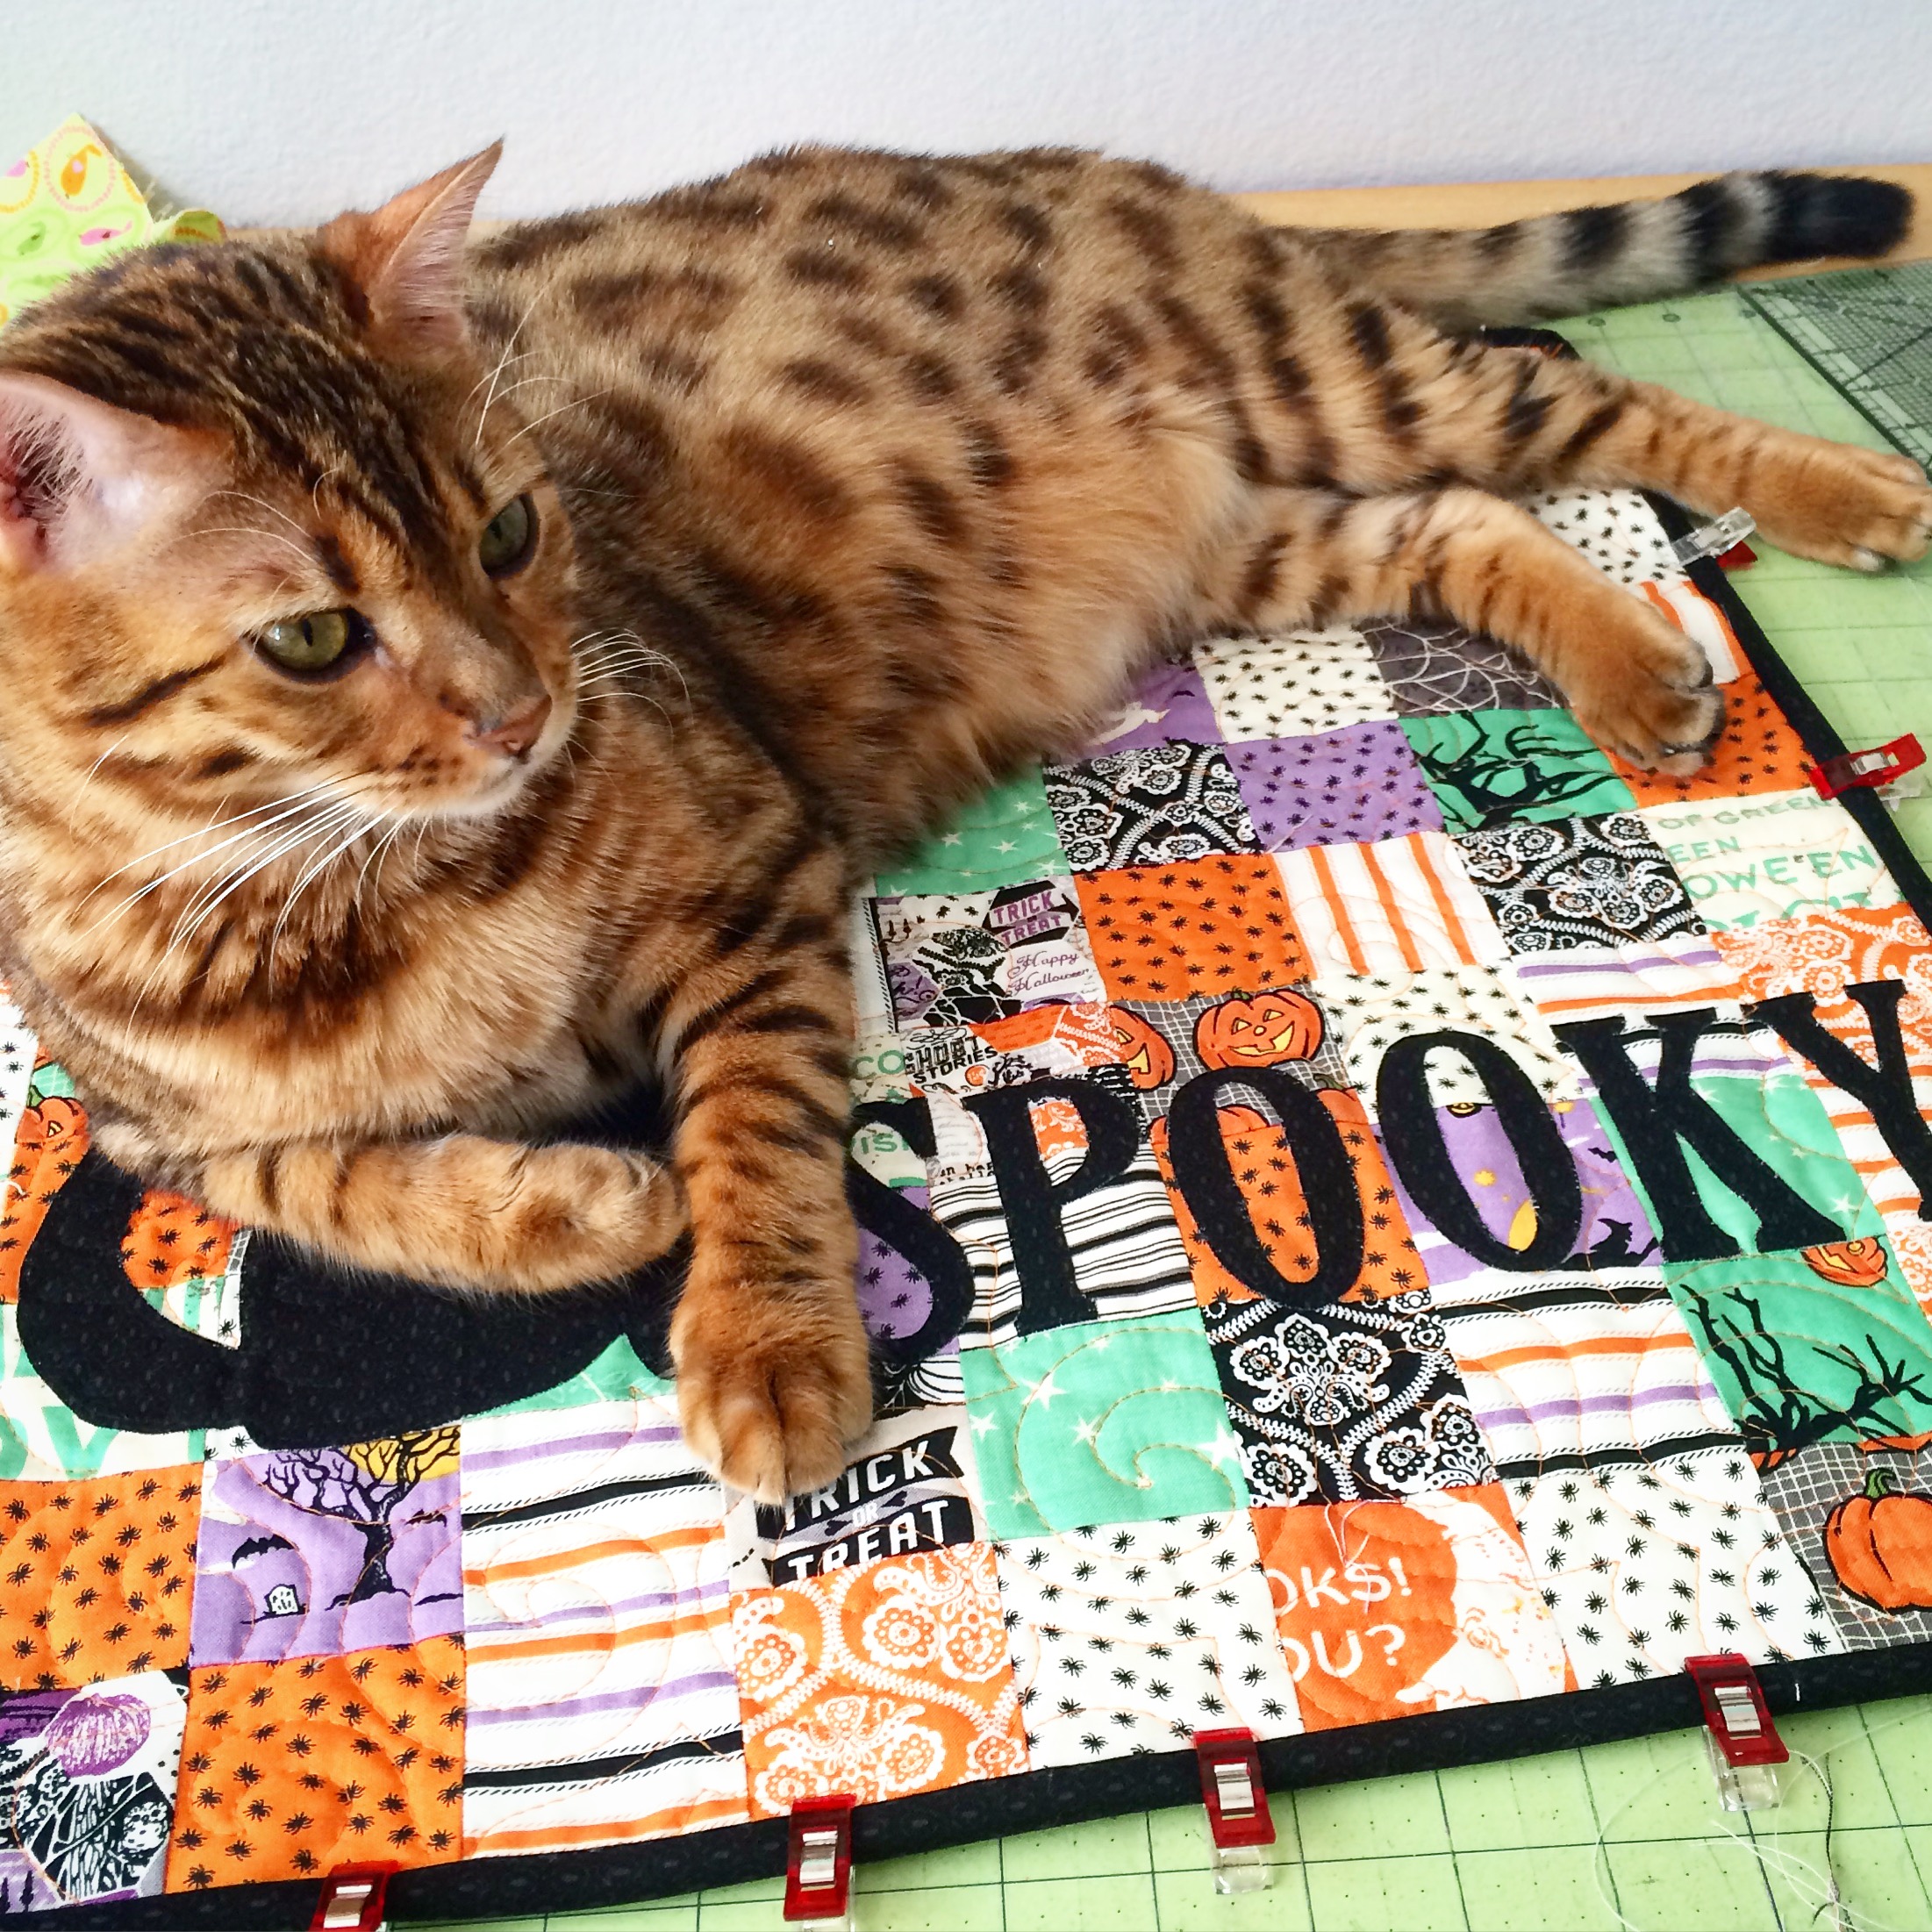
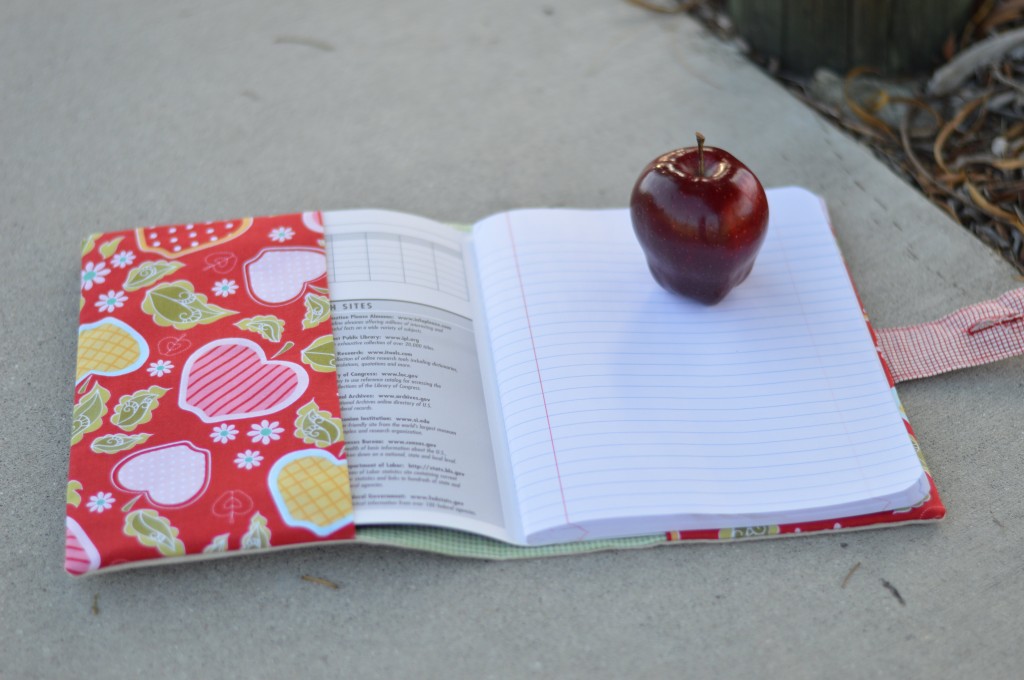
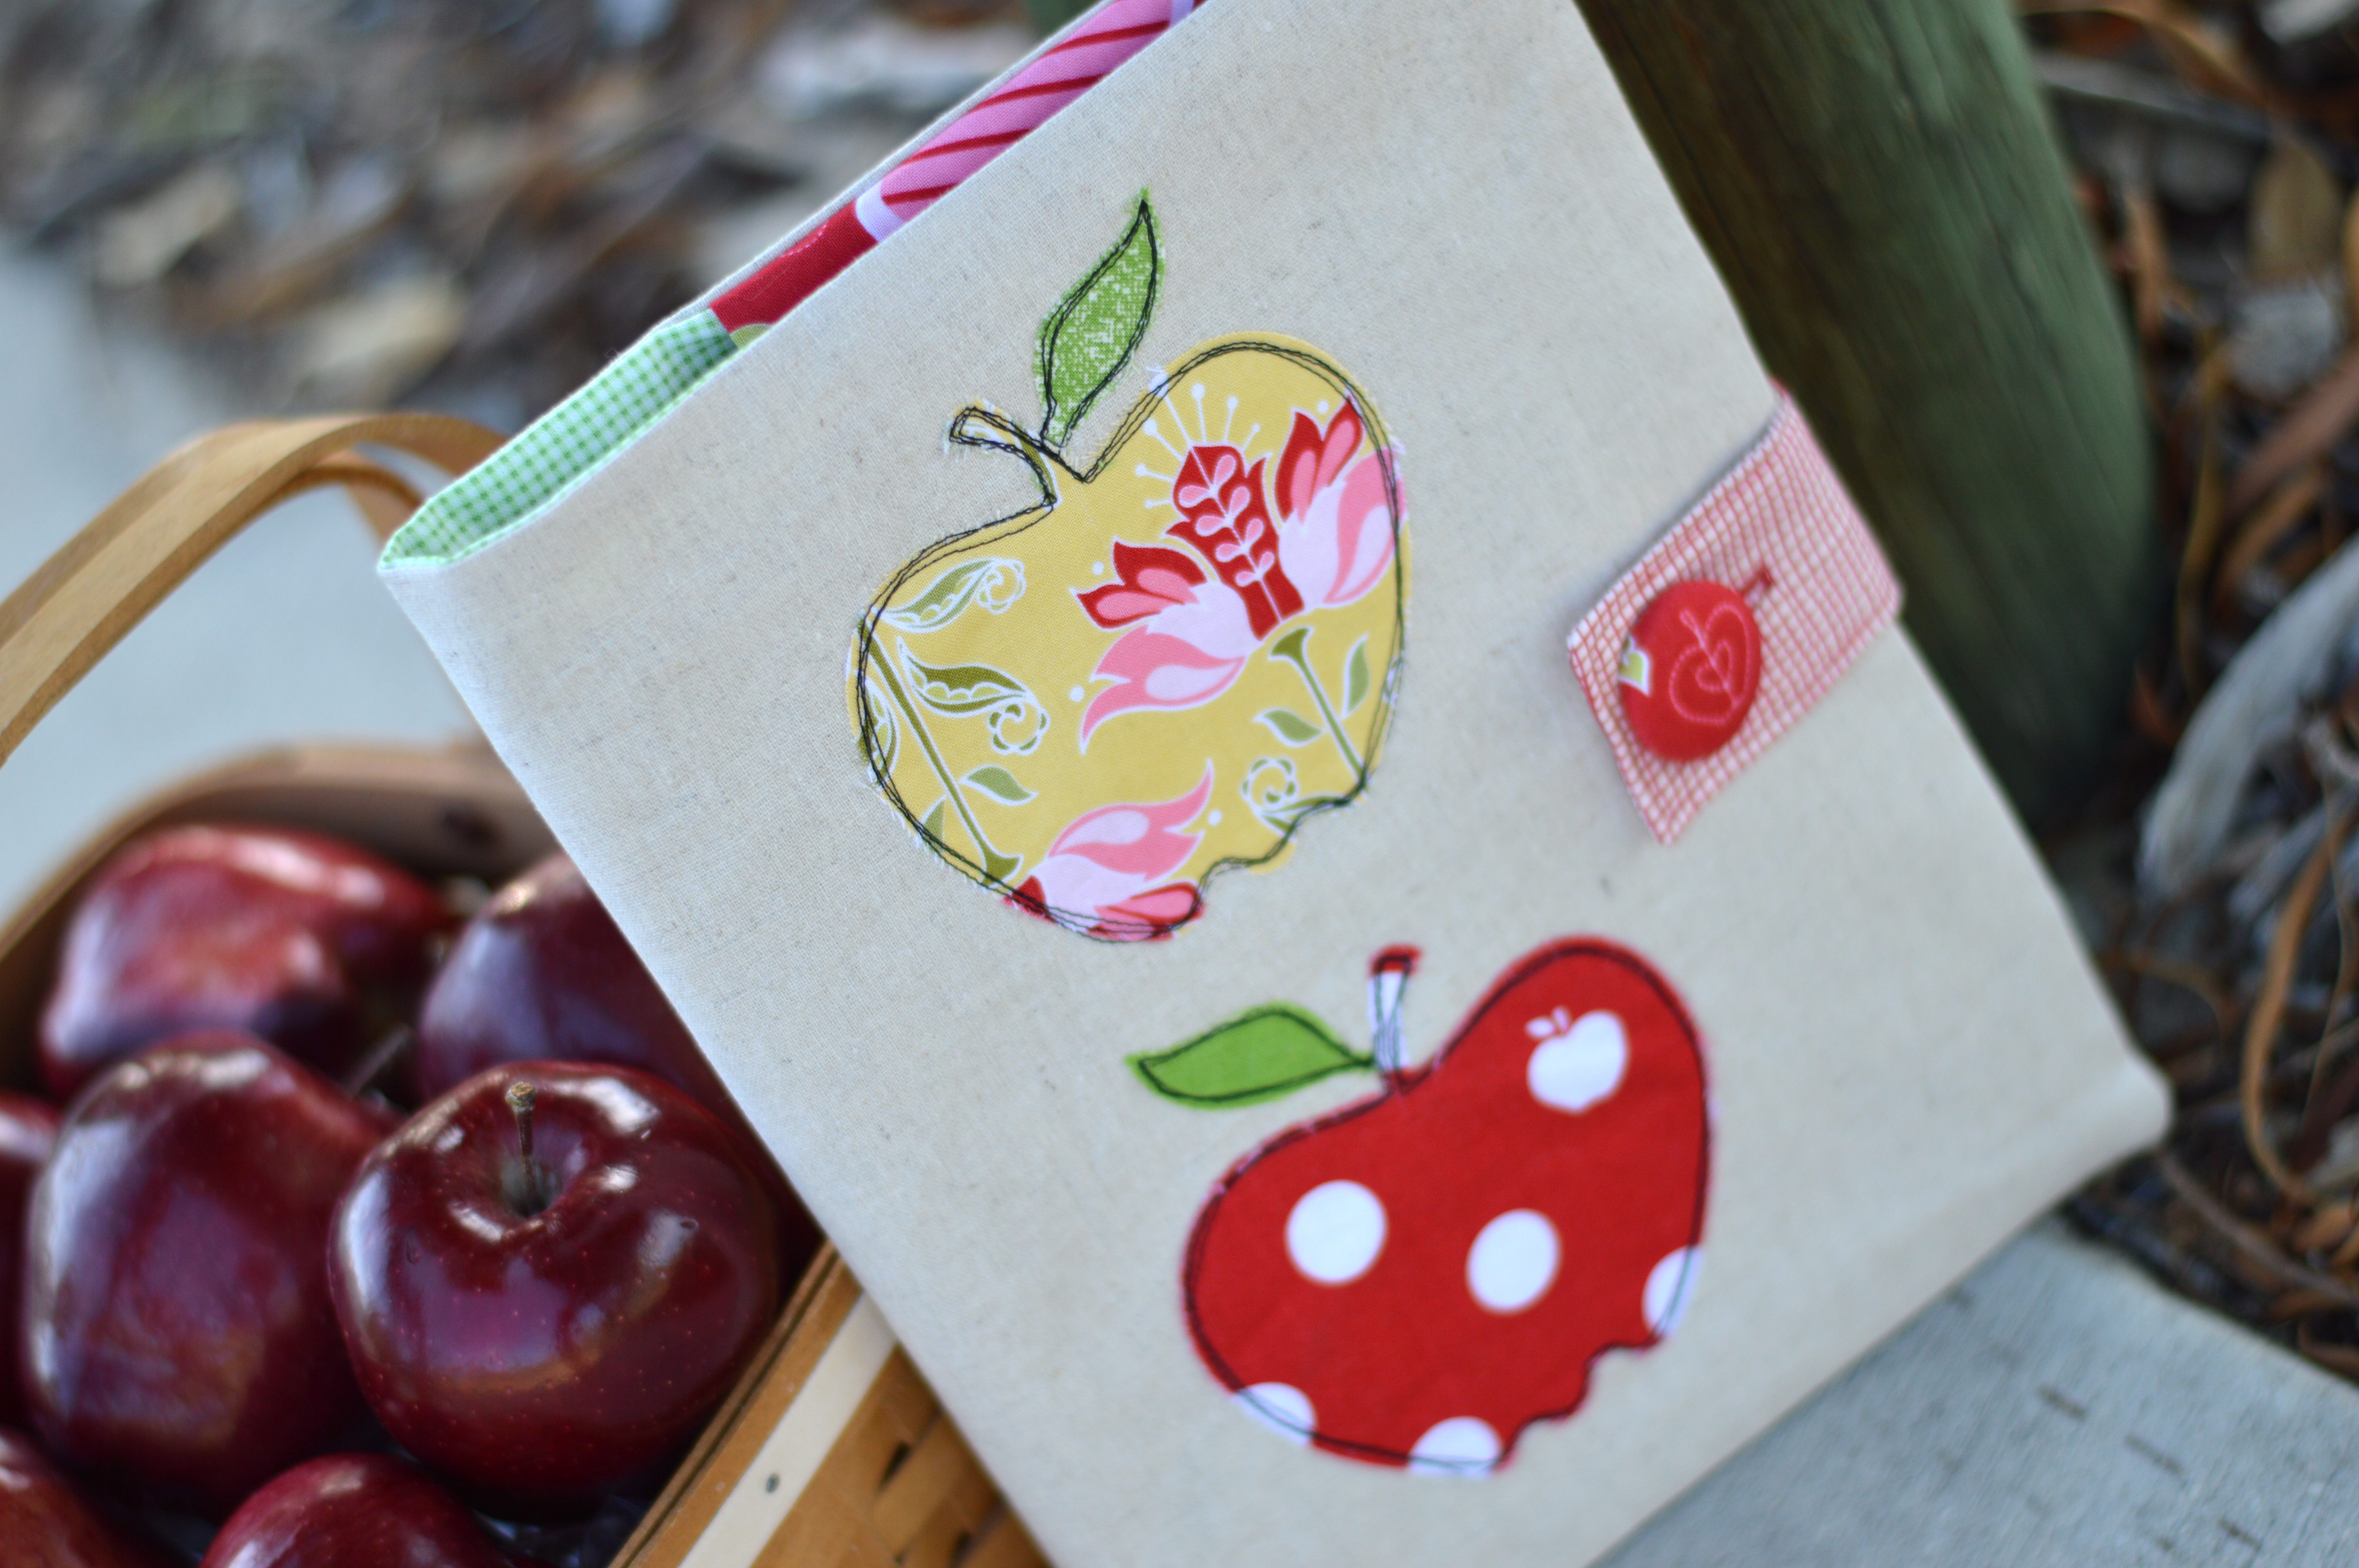
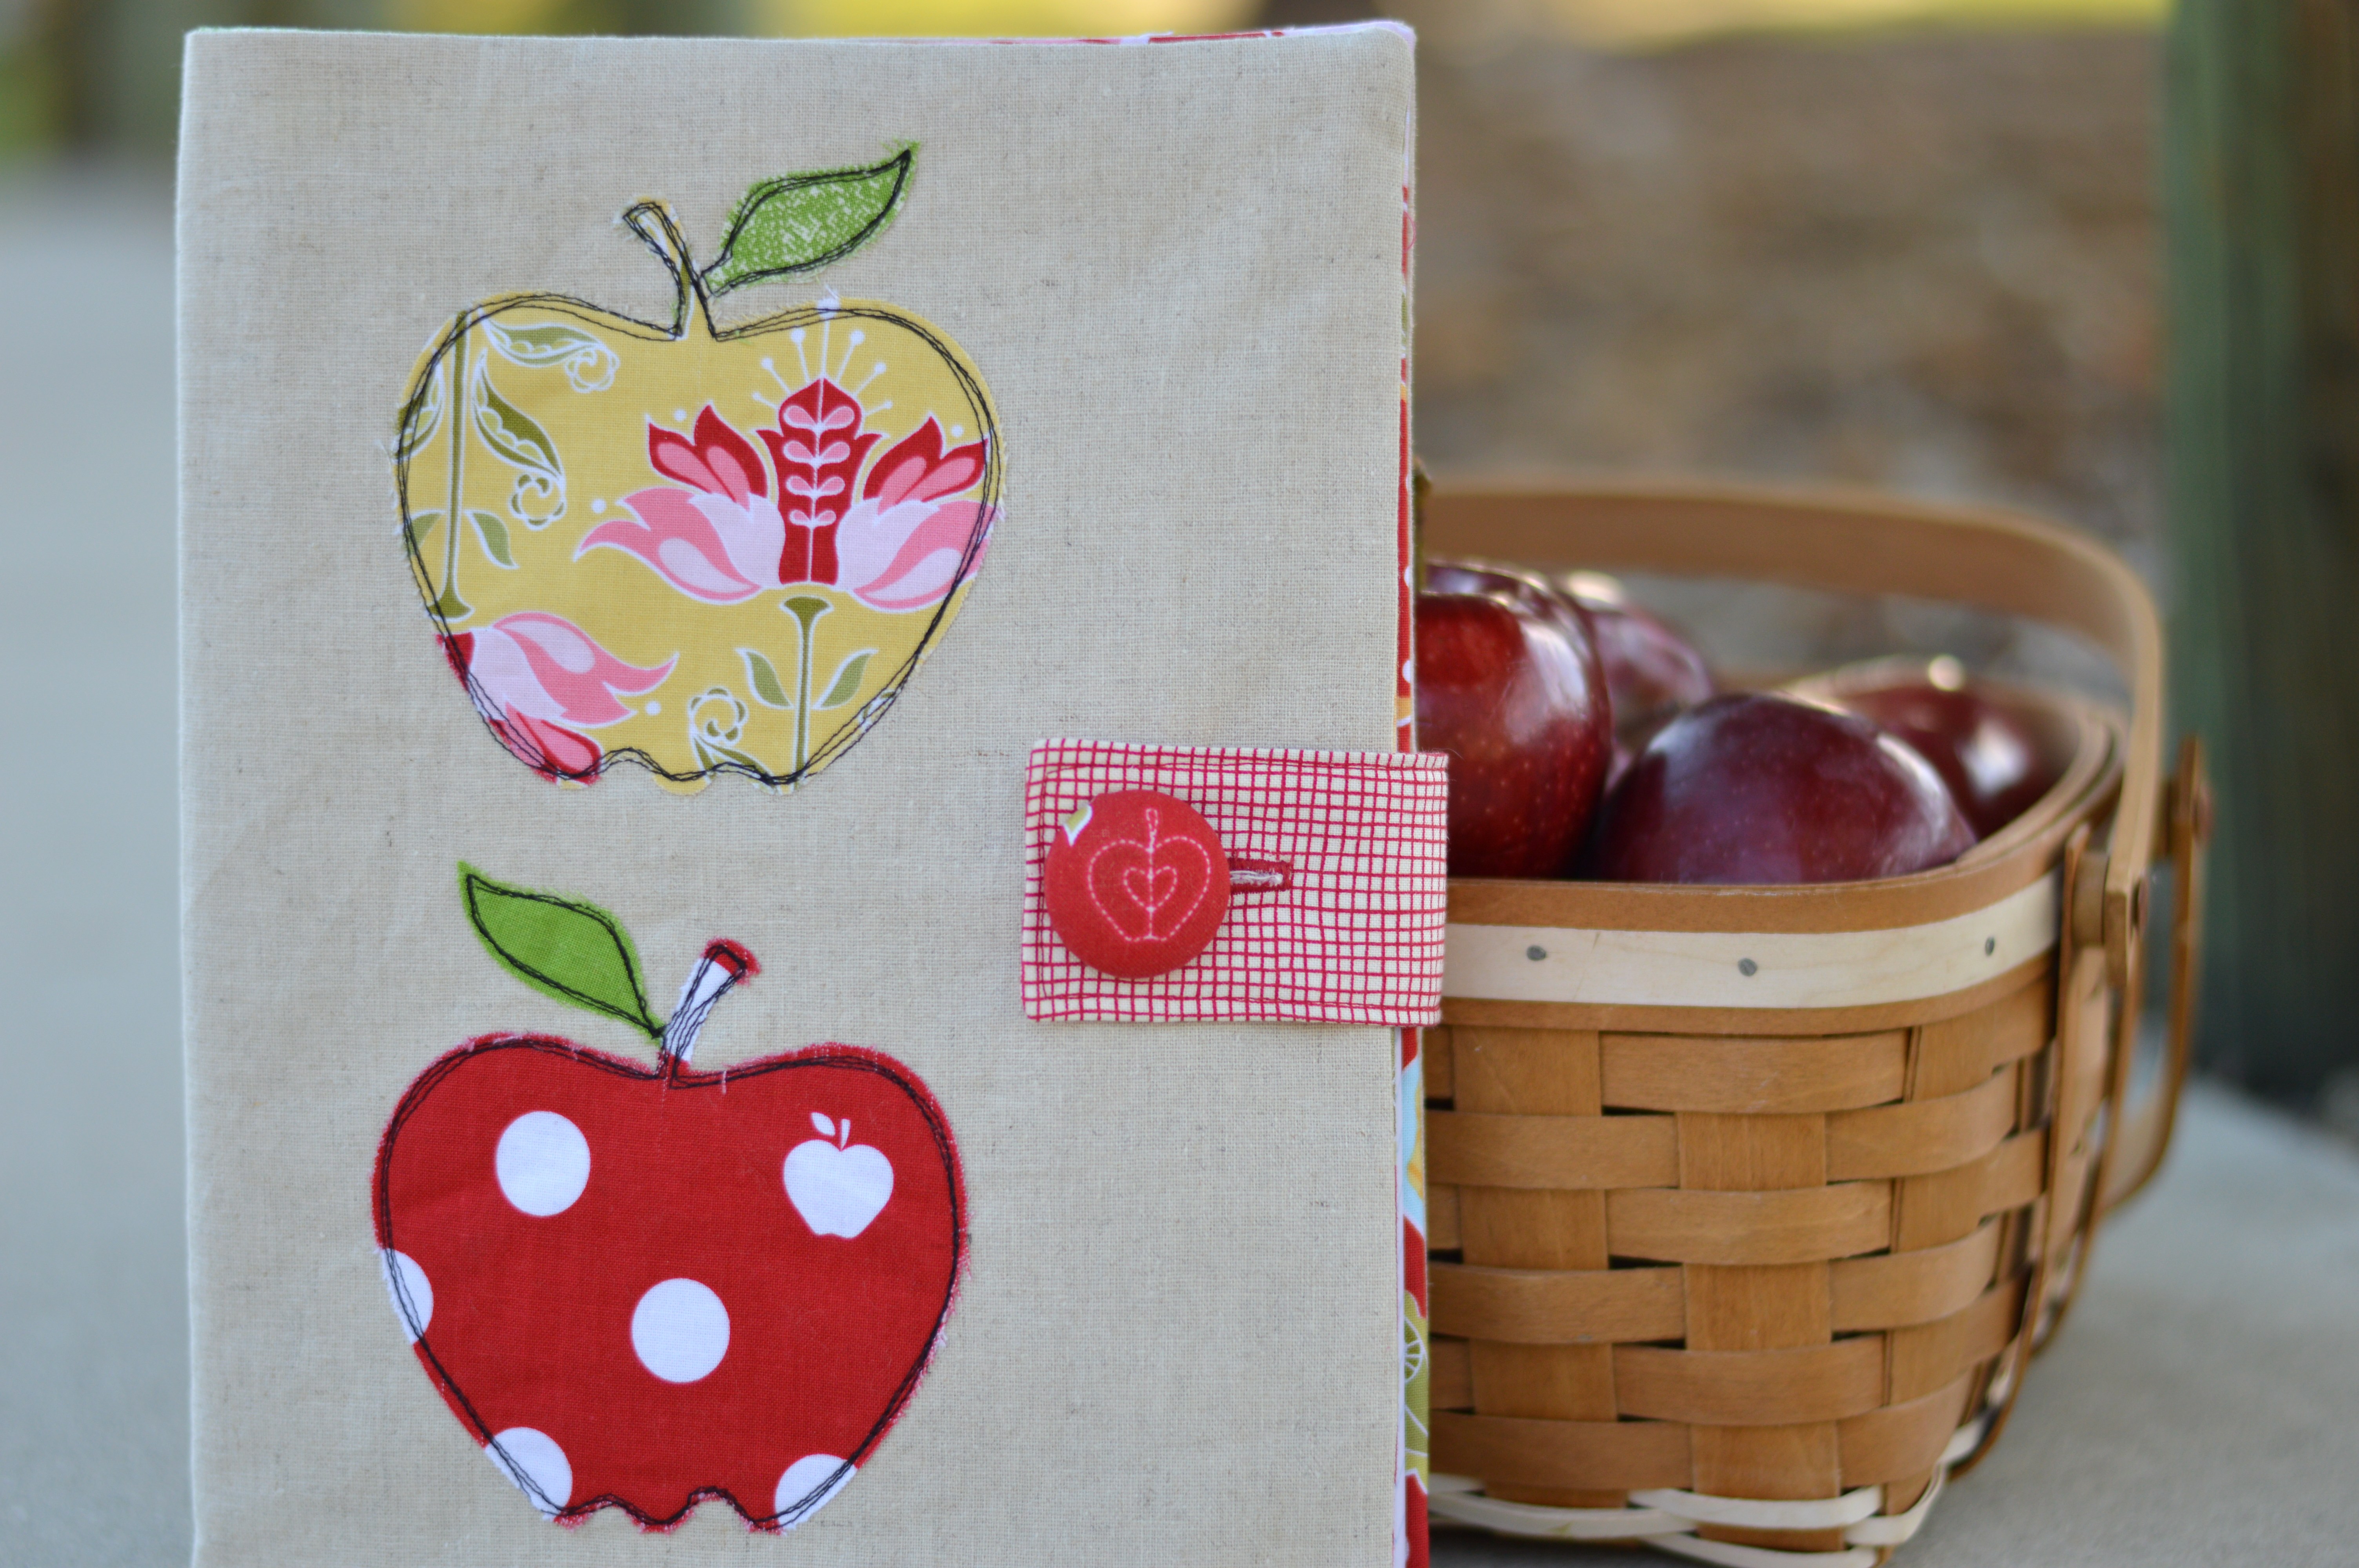
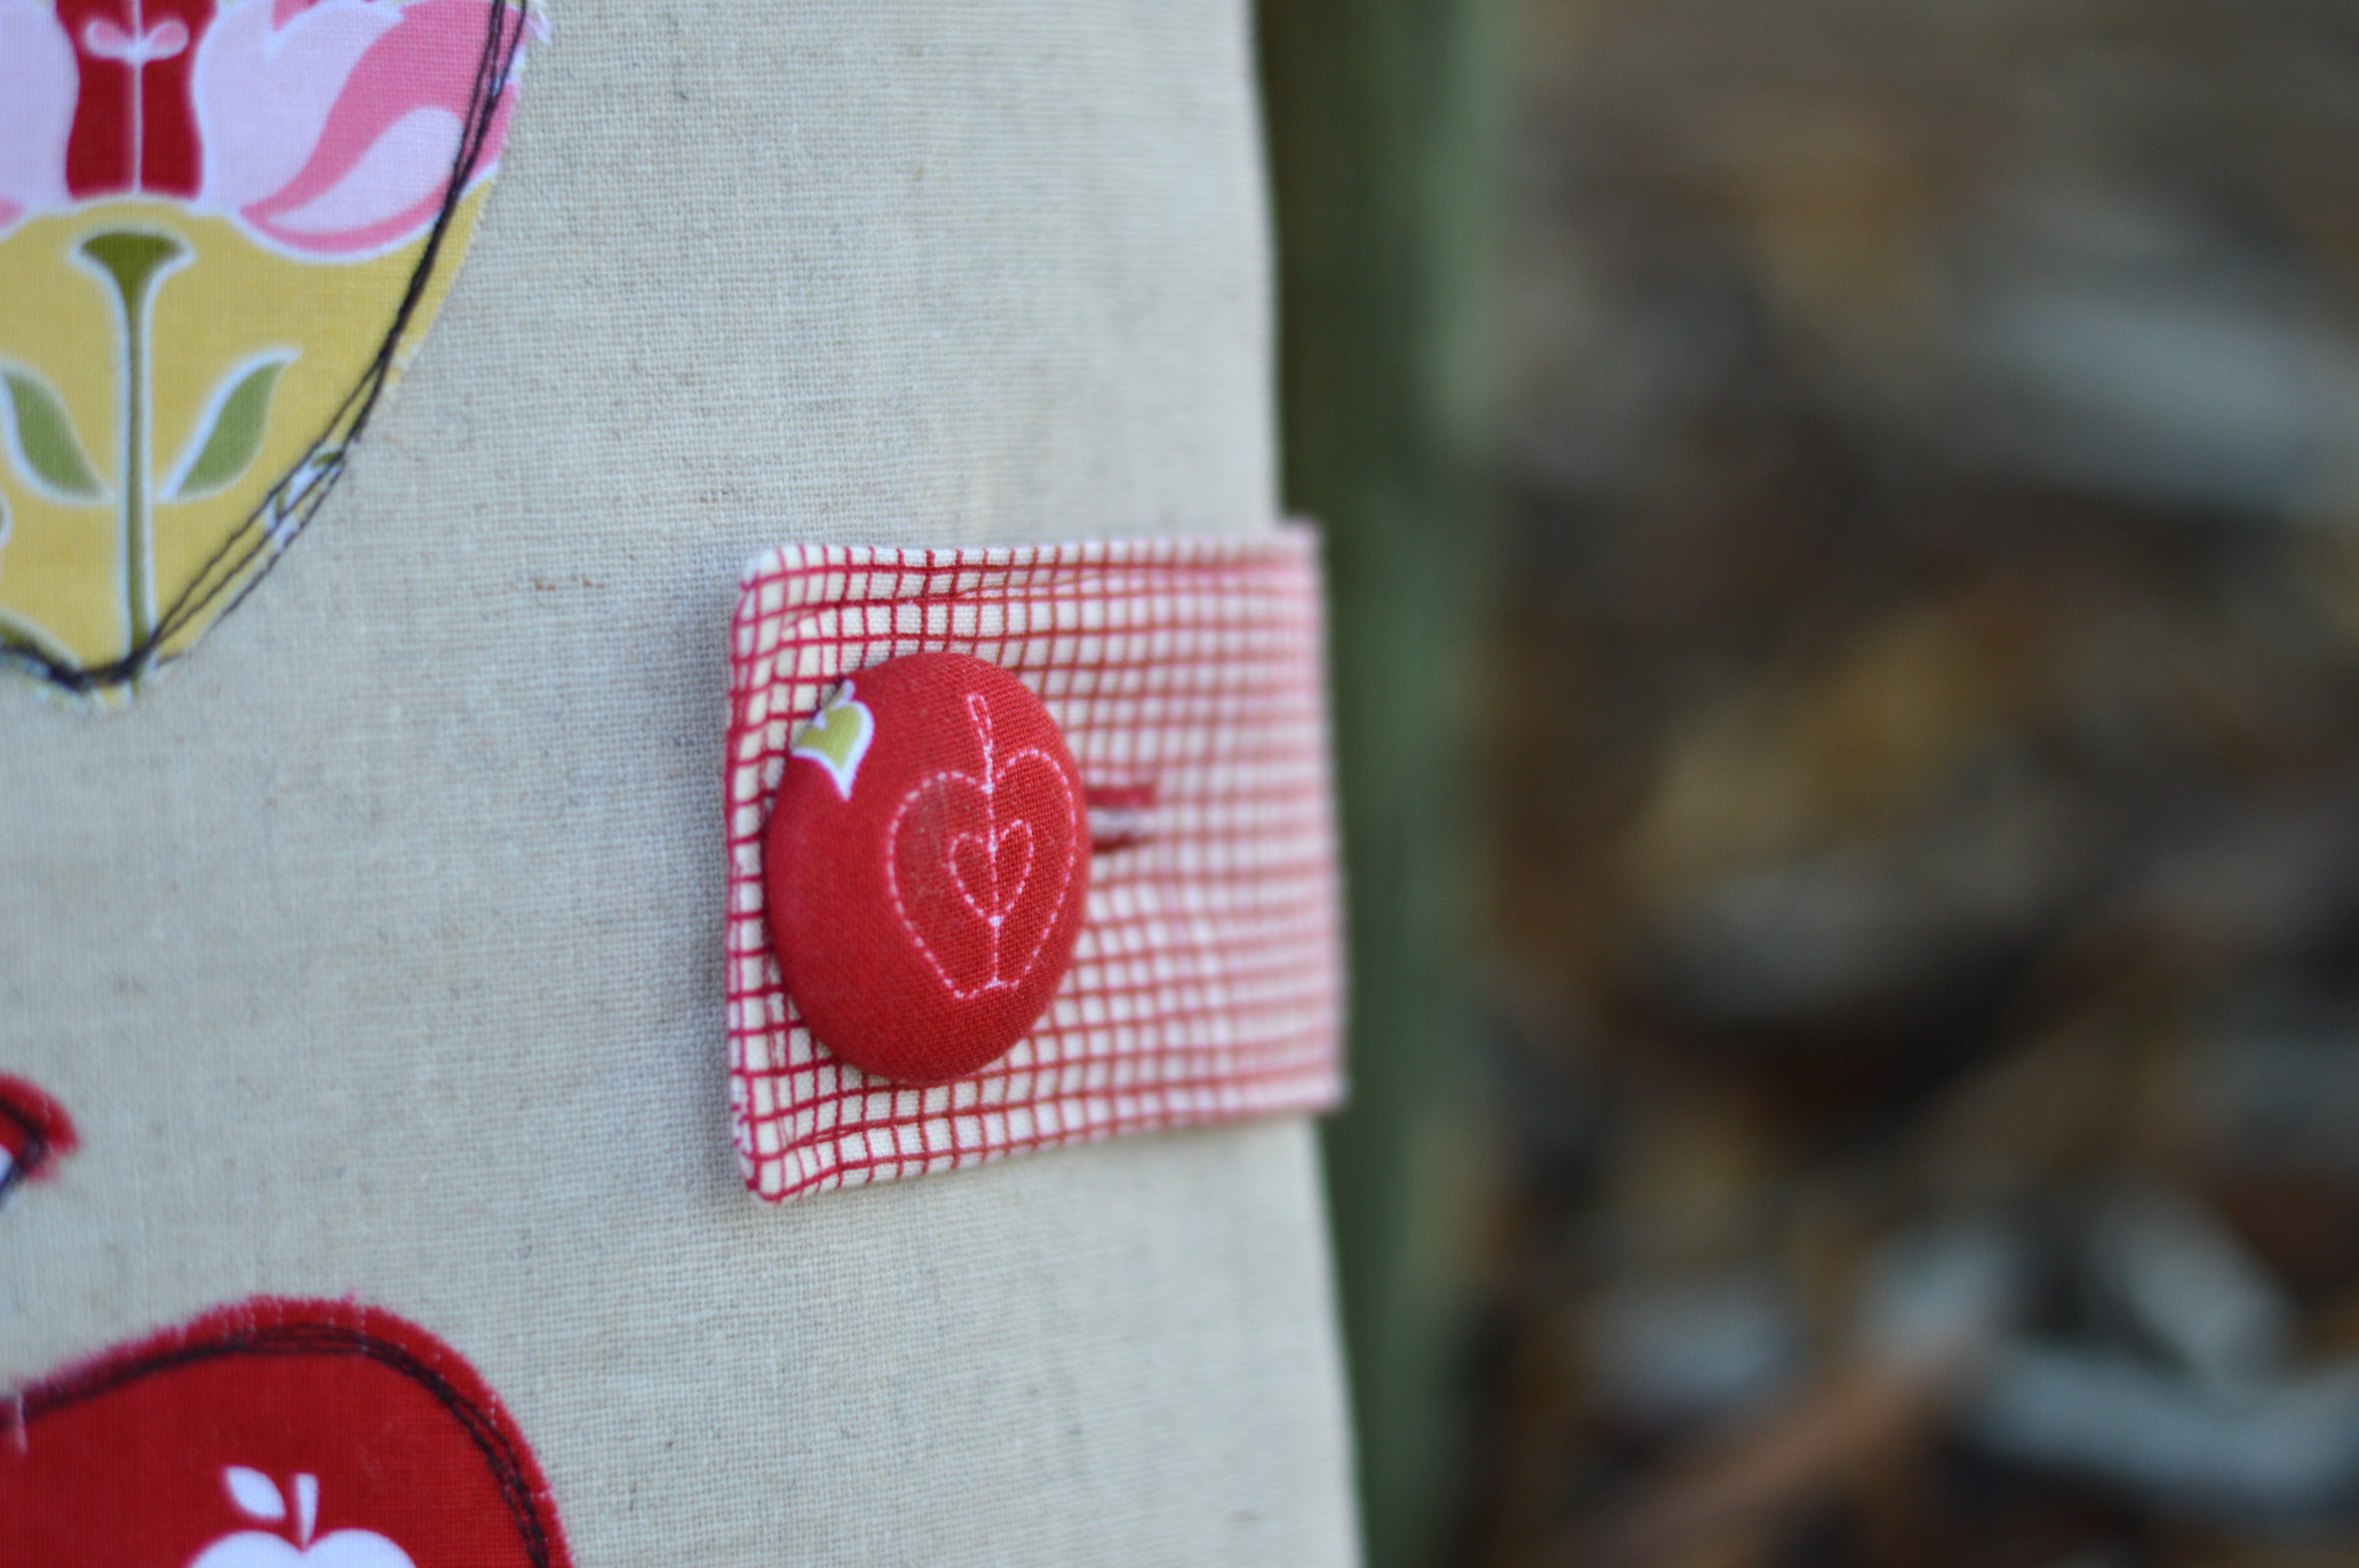
I love it so much!!!!

spooky mini quilt 5

Kids Can Sew! Sizzix Doll Quilt

sizzix doll quilt kids can sewI love getting my girls involved in sewing!  In fact among the requirements for leaving home to go to college are: 1.  you must be able to bake a pie from scratch  2.  you must be able to successfully make the family roll recipe  3.  you must be able to construct a quilt start to finish by yourself!  I’m proud of my teenage daughter as she has mastered all of these skills.  Sally is 7 and we are beginning to sew on the machine.  She LOVES it!  I like projects that she can do most of the work; this one is perfect!

I love using the Sizzix for cutting because she is too young to use the rotary cutter.  This way, she gets to “cut” out her quilt.  She choose all the fabrics and the Sizzix die.  The triangle worked great because it was easy for her to follow.

sizzix doll quilt 6

Once she had chosen all the fabrics, I ironed Heat n Bond Lite to the wrong side of the triangle fabric.  Then I let Sally loose with the Sizzix Fabi.

sizzix doll quilt 5I cut a piece of white fabric the size she wanted.  She positioned the triangles and I pressed them in place.

sizzix doll quilt 3She sat at the machine and I had her practice sewing 1/4″ seams along the triangles.  If she messed up, not to worry, the triangles would be fine.  This was such good experience.  She got to where she could start and stop and lift the presser foot and cut the thread all by herself!

sizzix doll quilt 2Once all the triangles were stitched around, I used Spary n Bond to baste the quilt together.  This allowed for easy quilting and no messing with pins!  sizzix doll quilt 7I wanted her to do all the quilting.  I put the walking foot on and showed her how the machine can “sew by itself” and all she needed to do was steer the fabric, not push or pull it.  Once she saw how fun this was she was off!  I encouraged her to do random lines all over.  I love how it turned out!

sizzix doll quilt 8Mufasa was quite a helper, he slept the entire time behind the sewing machine!sizzix doll quilt 9
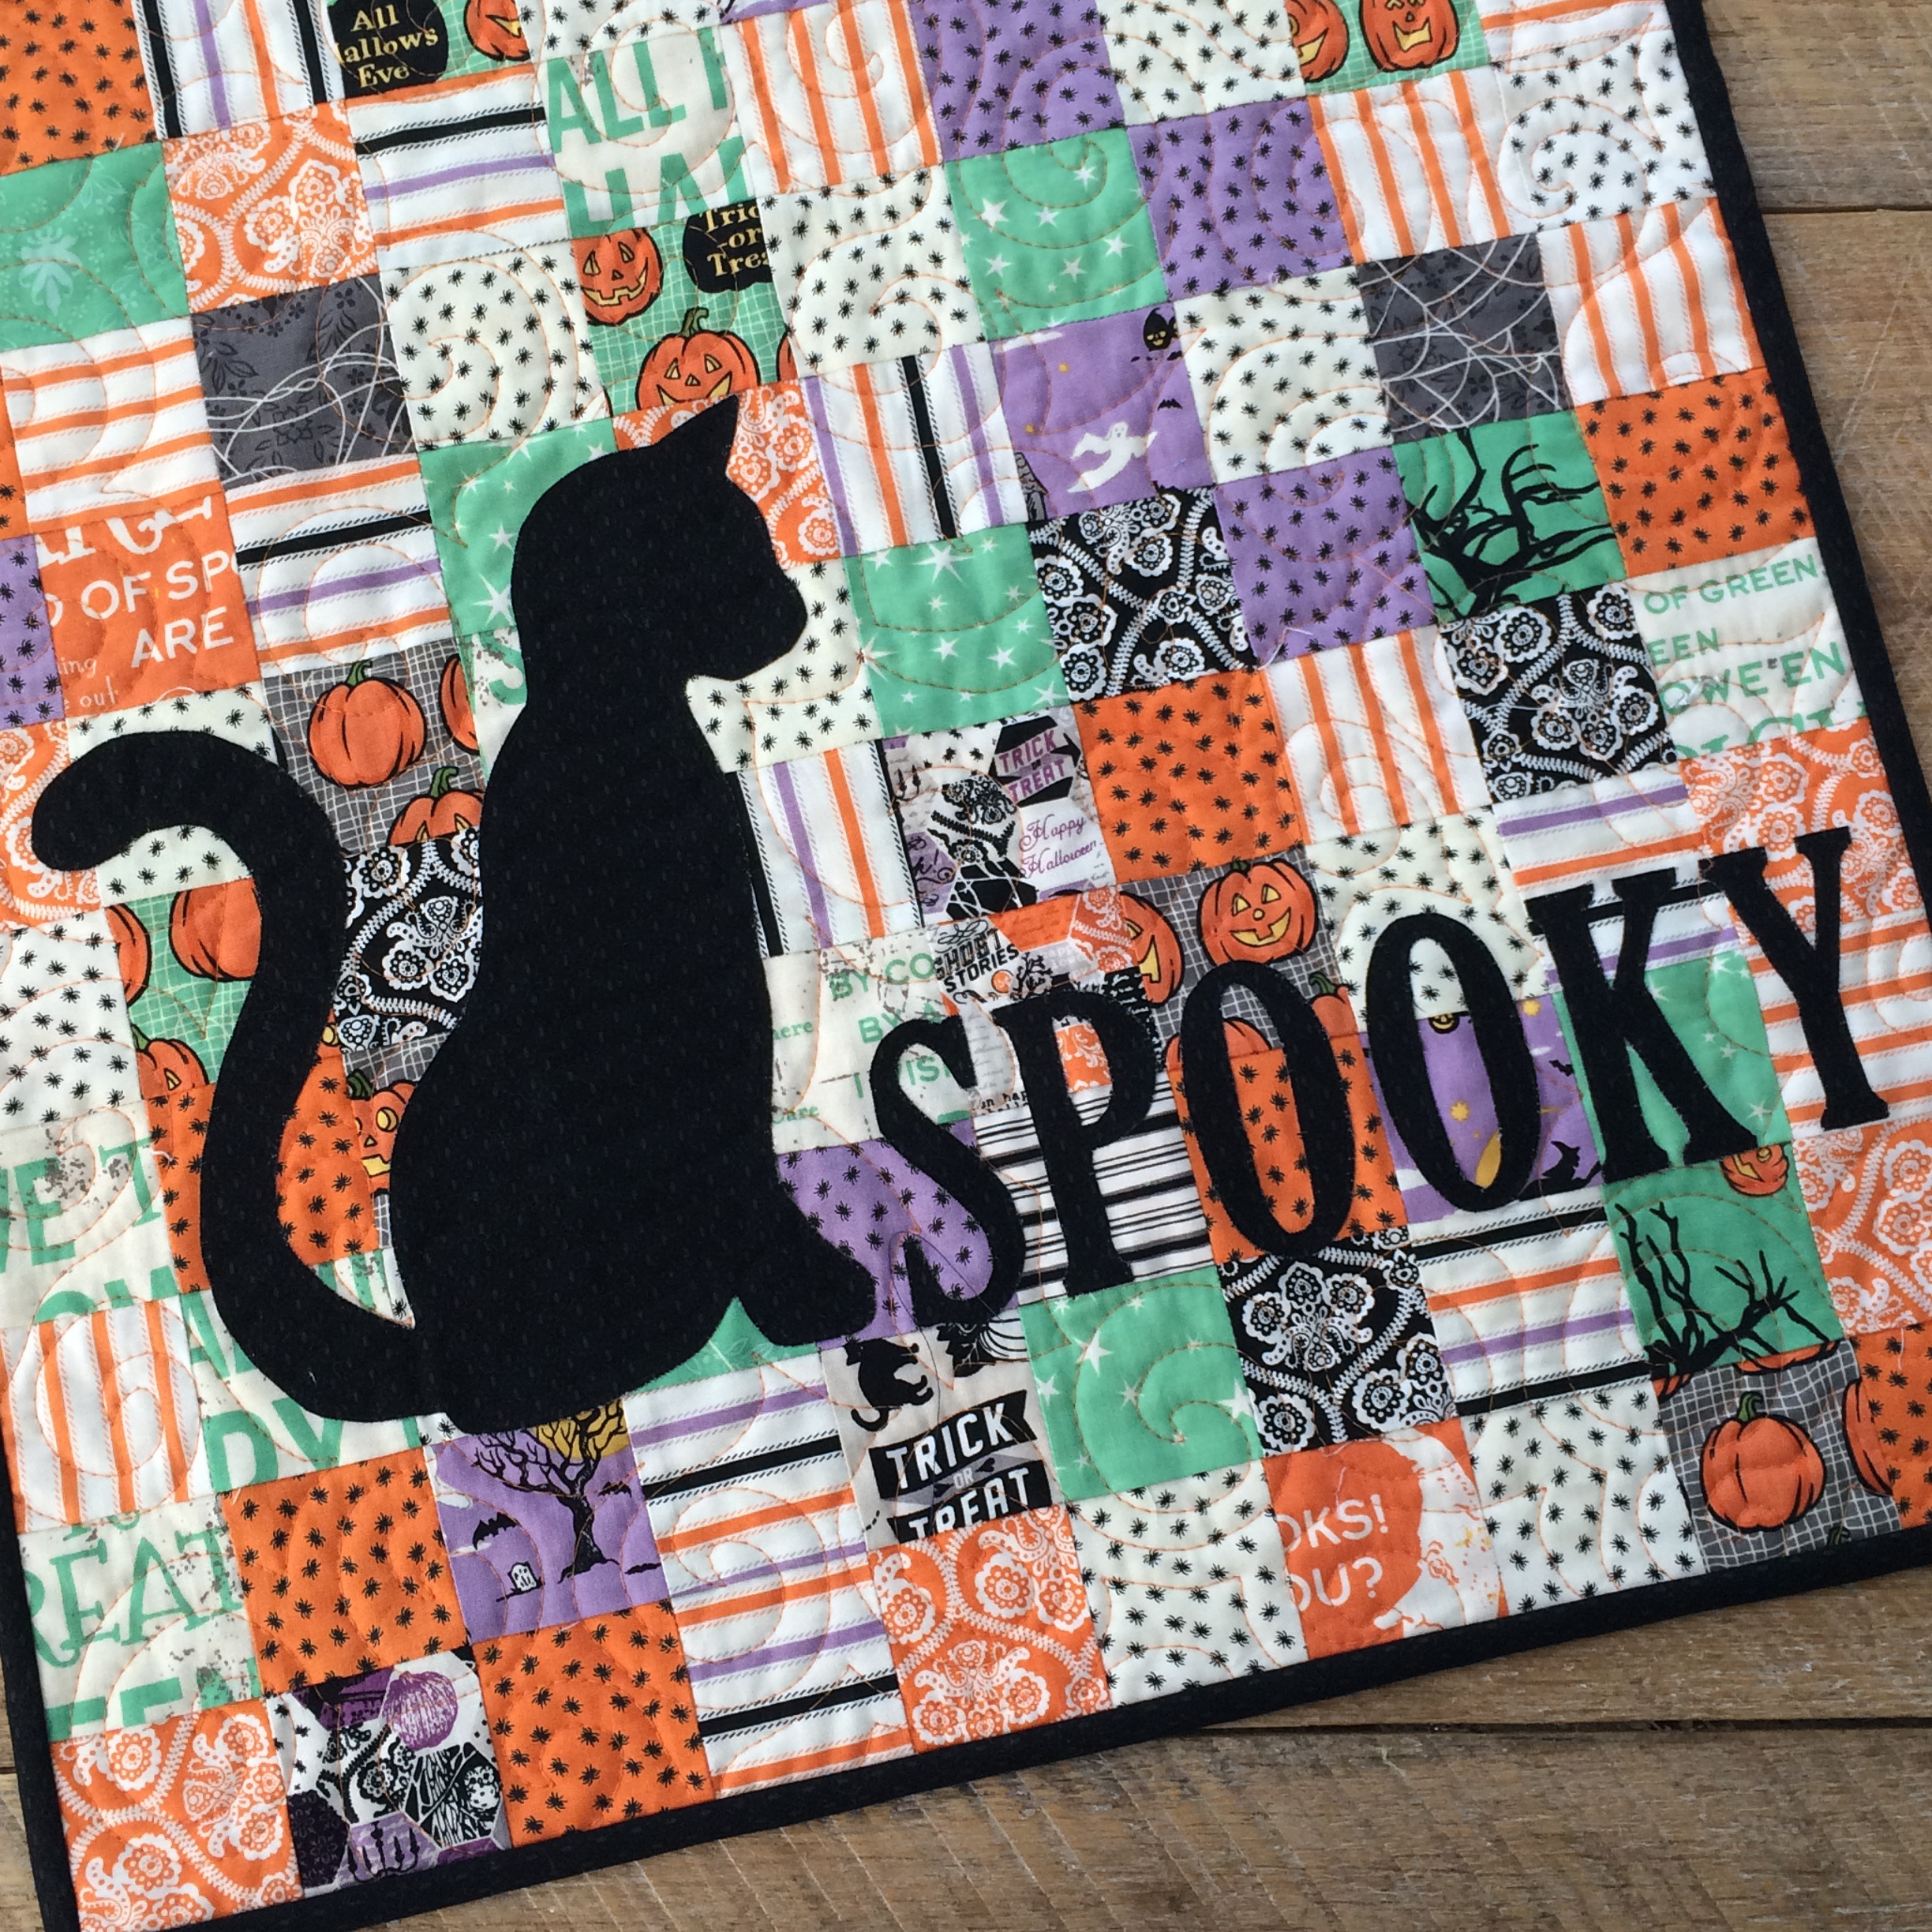
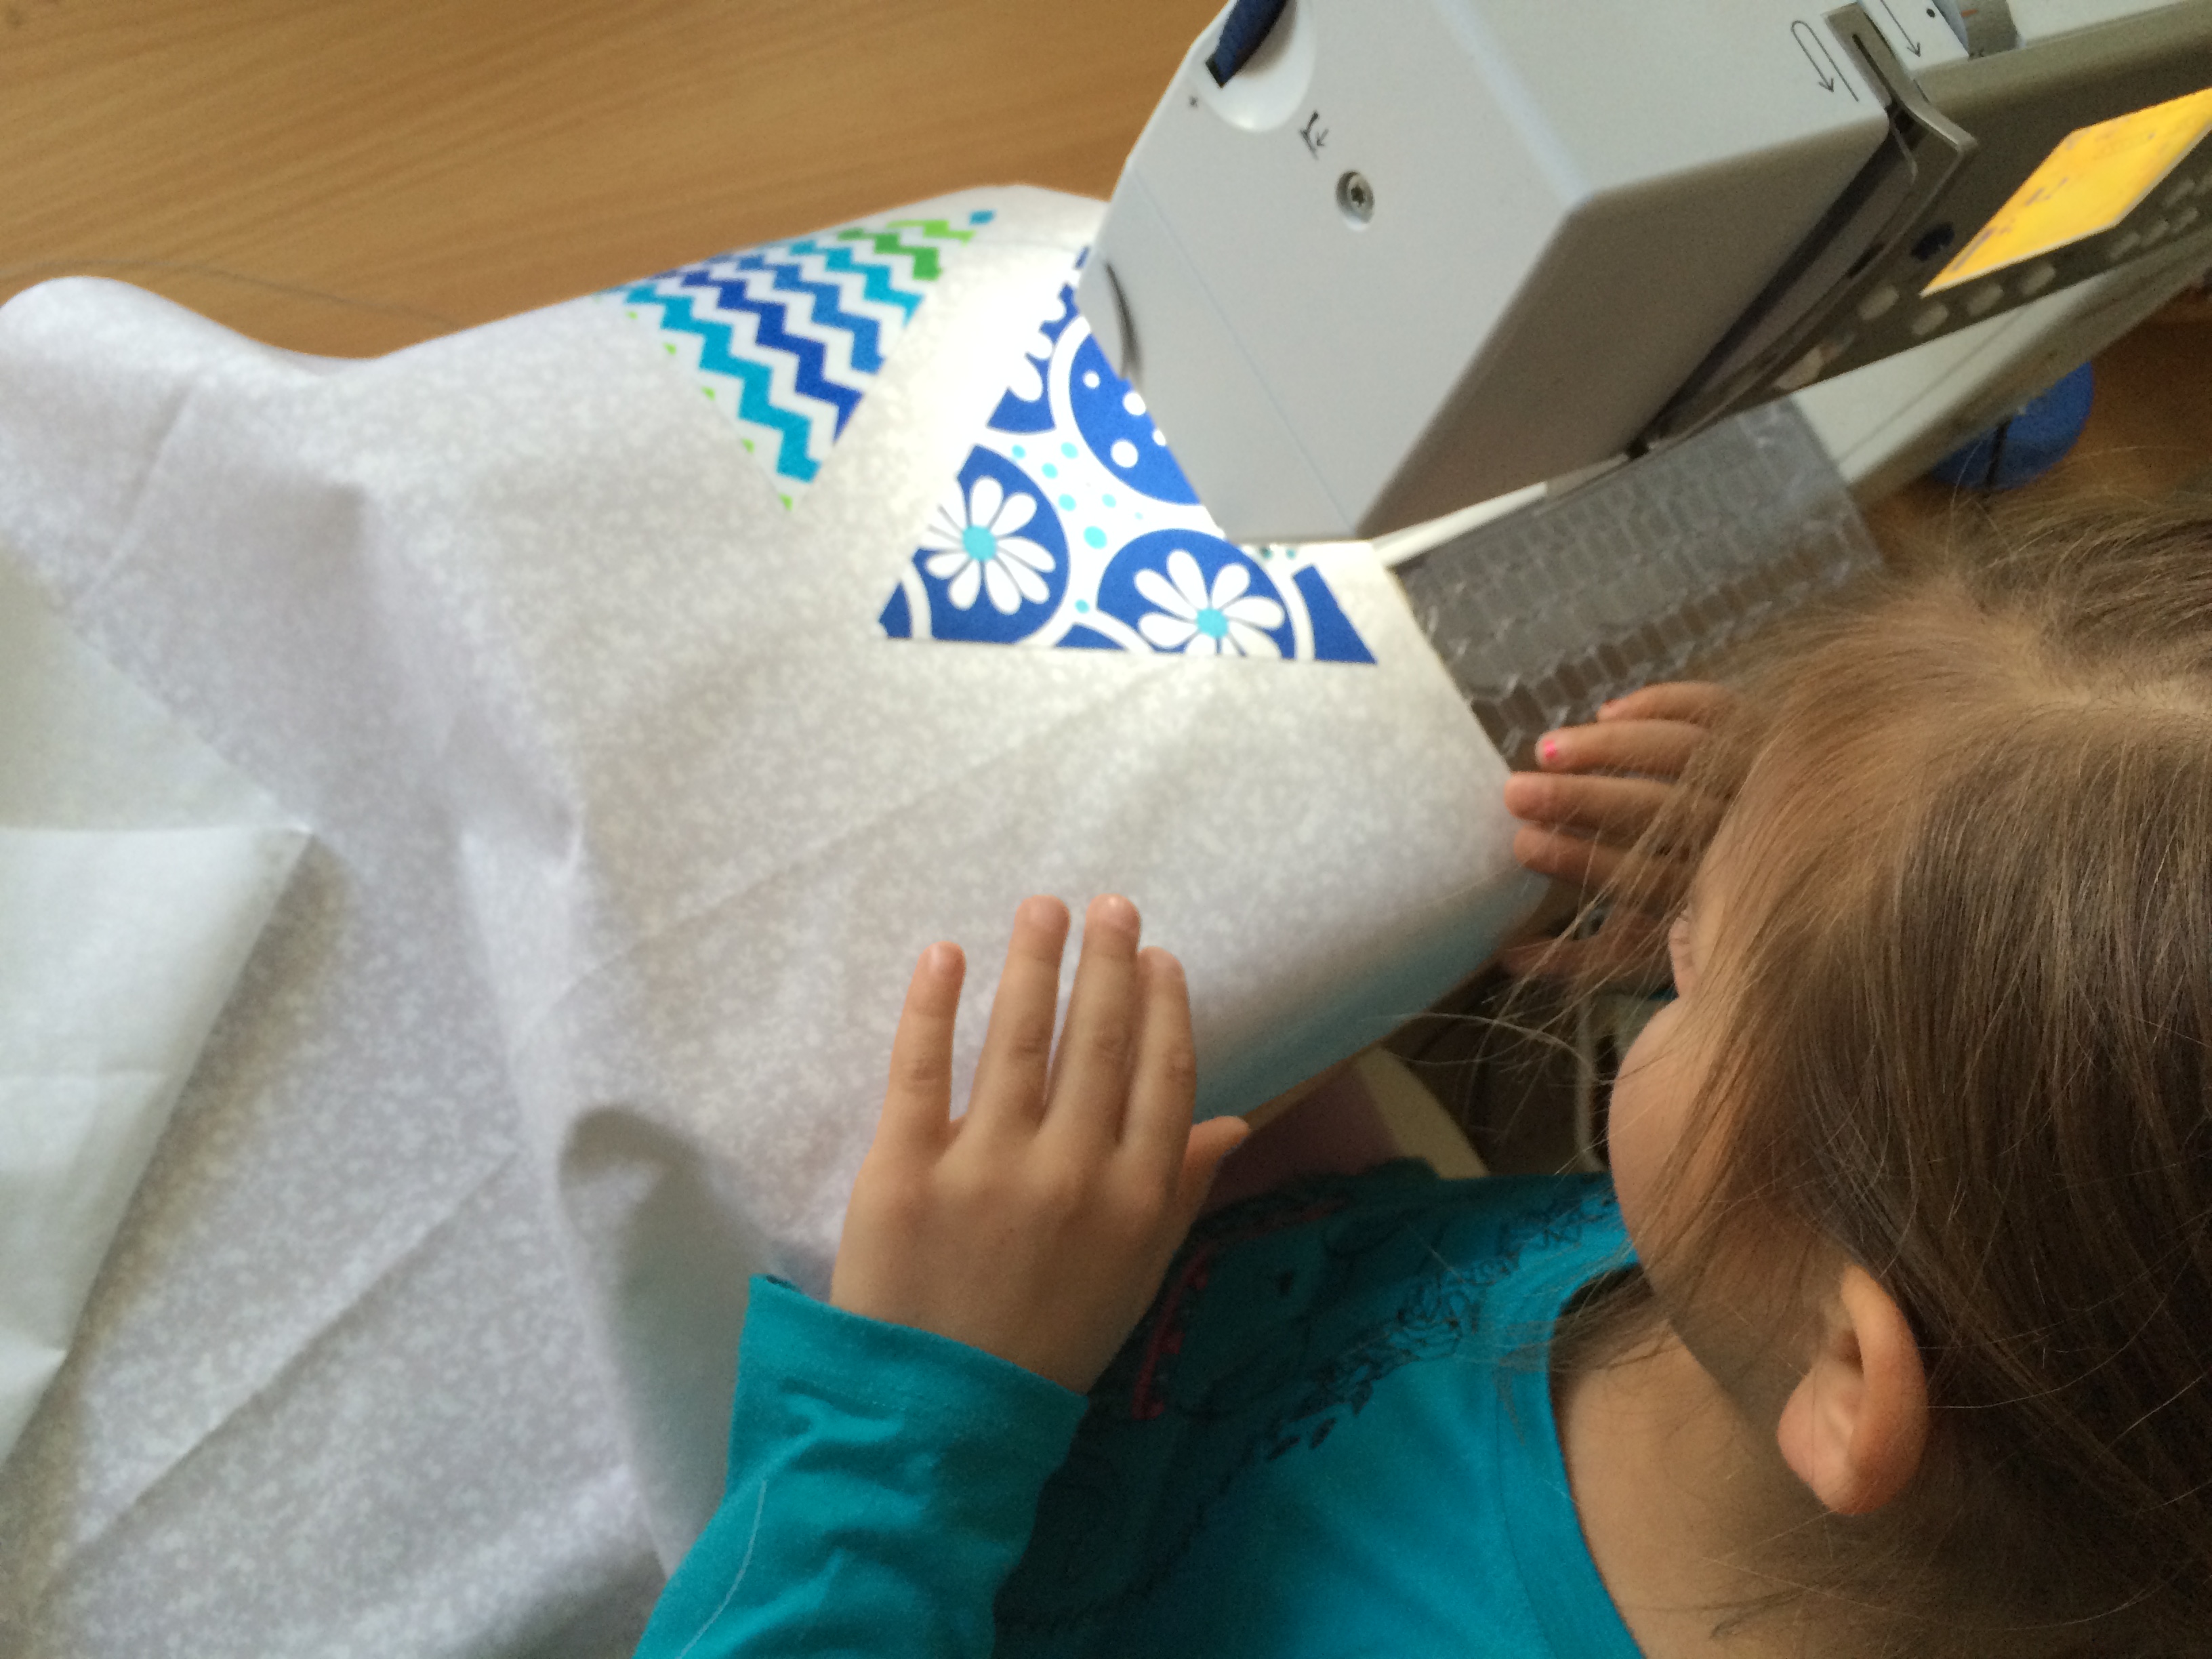
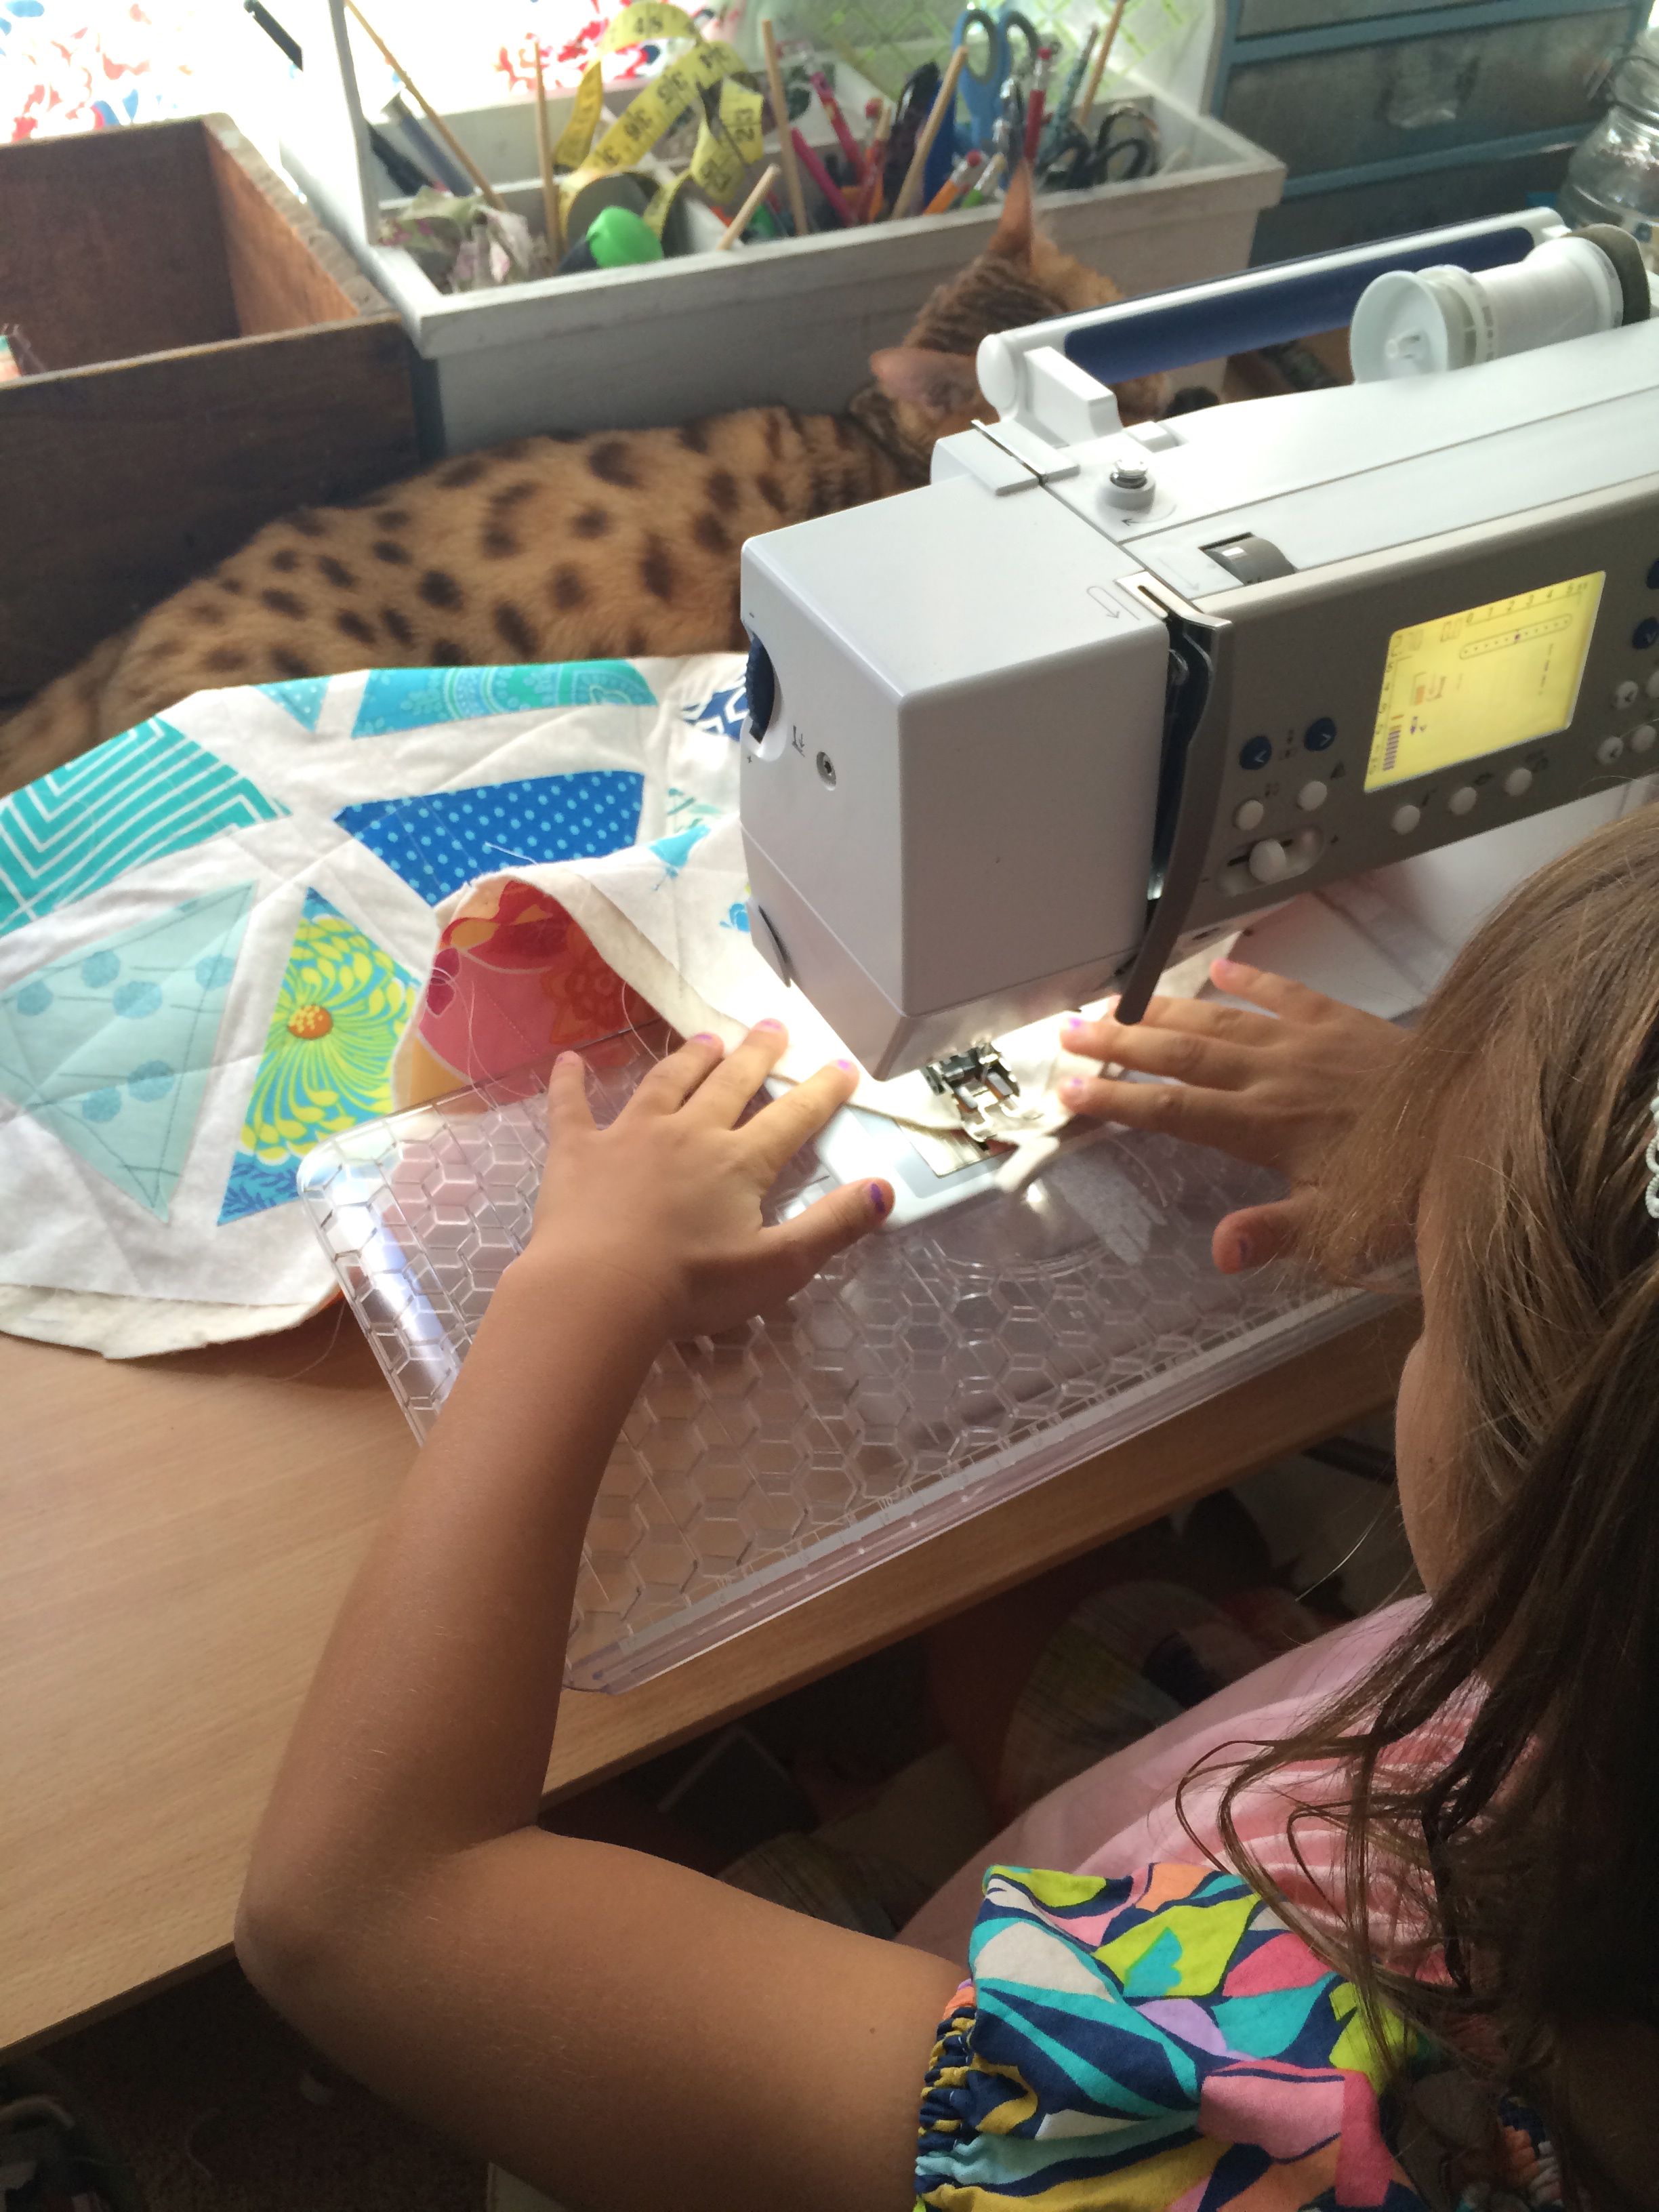
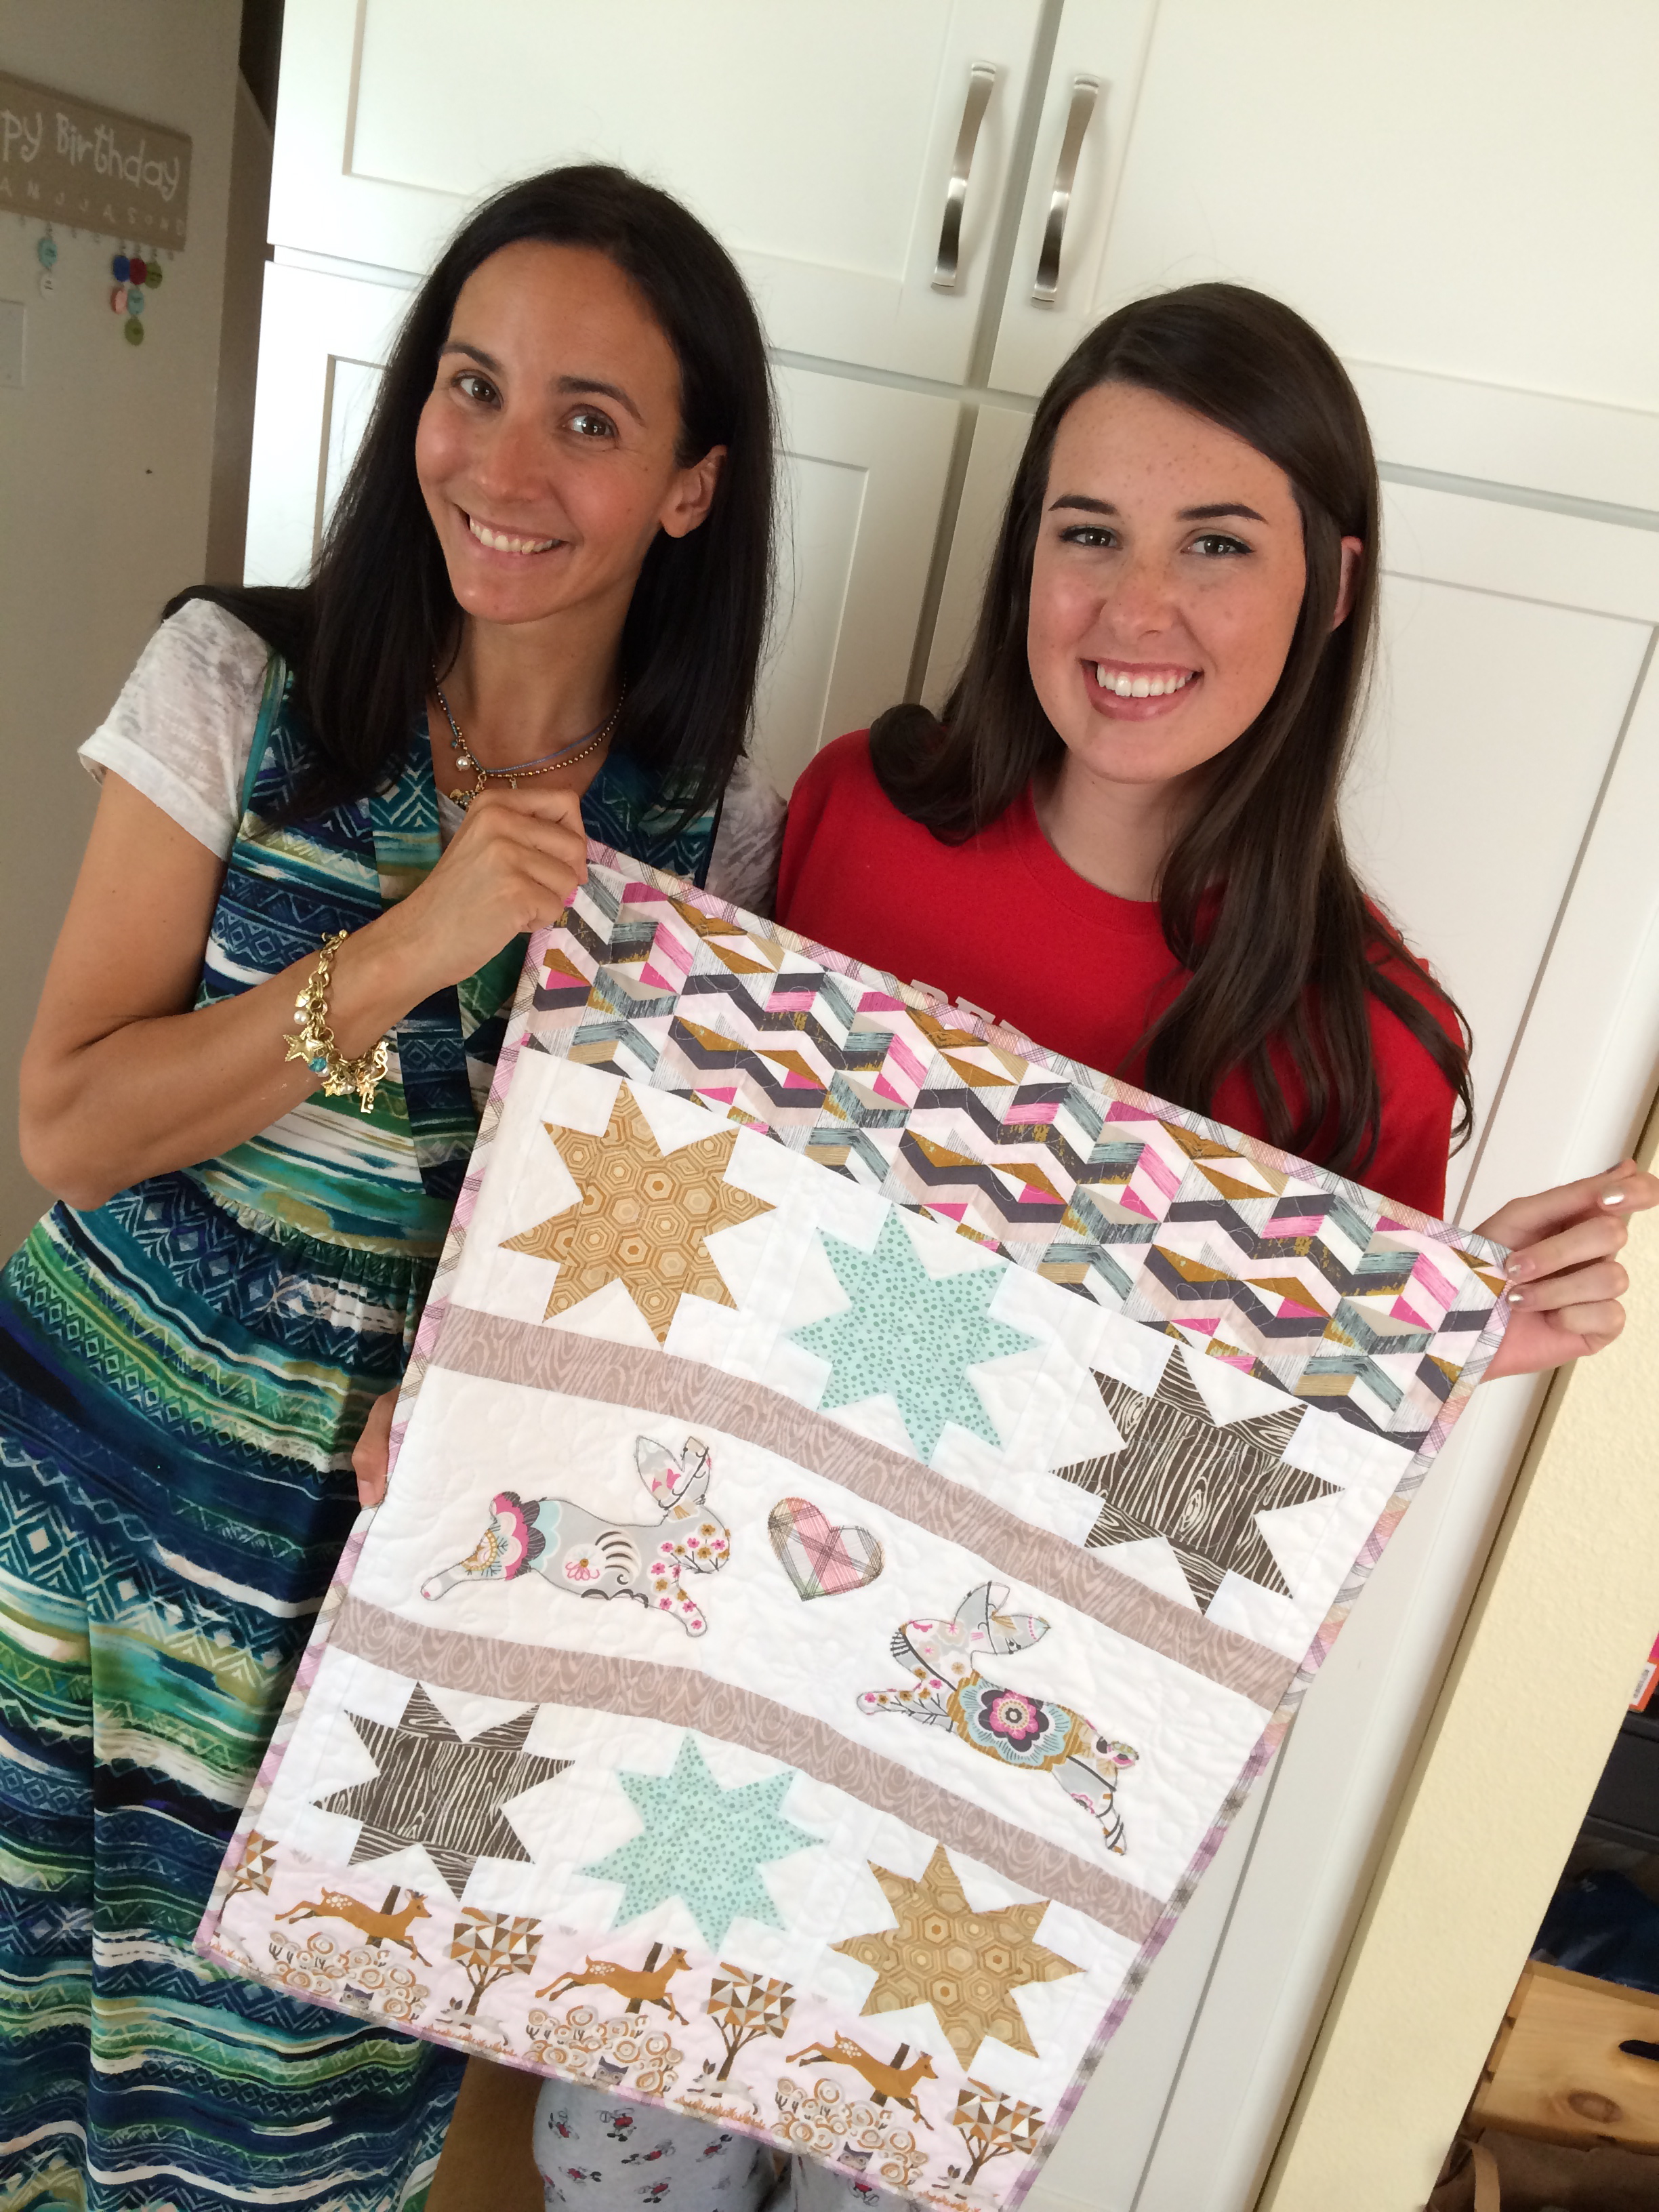
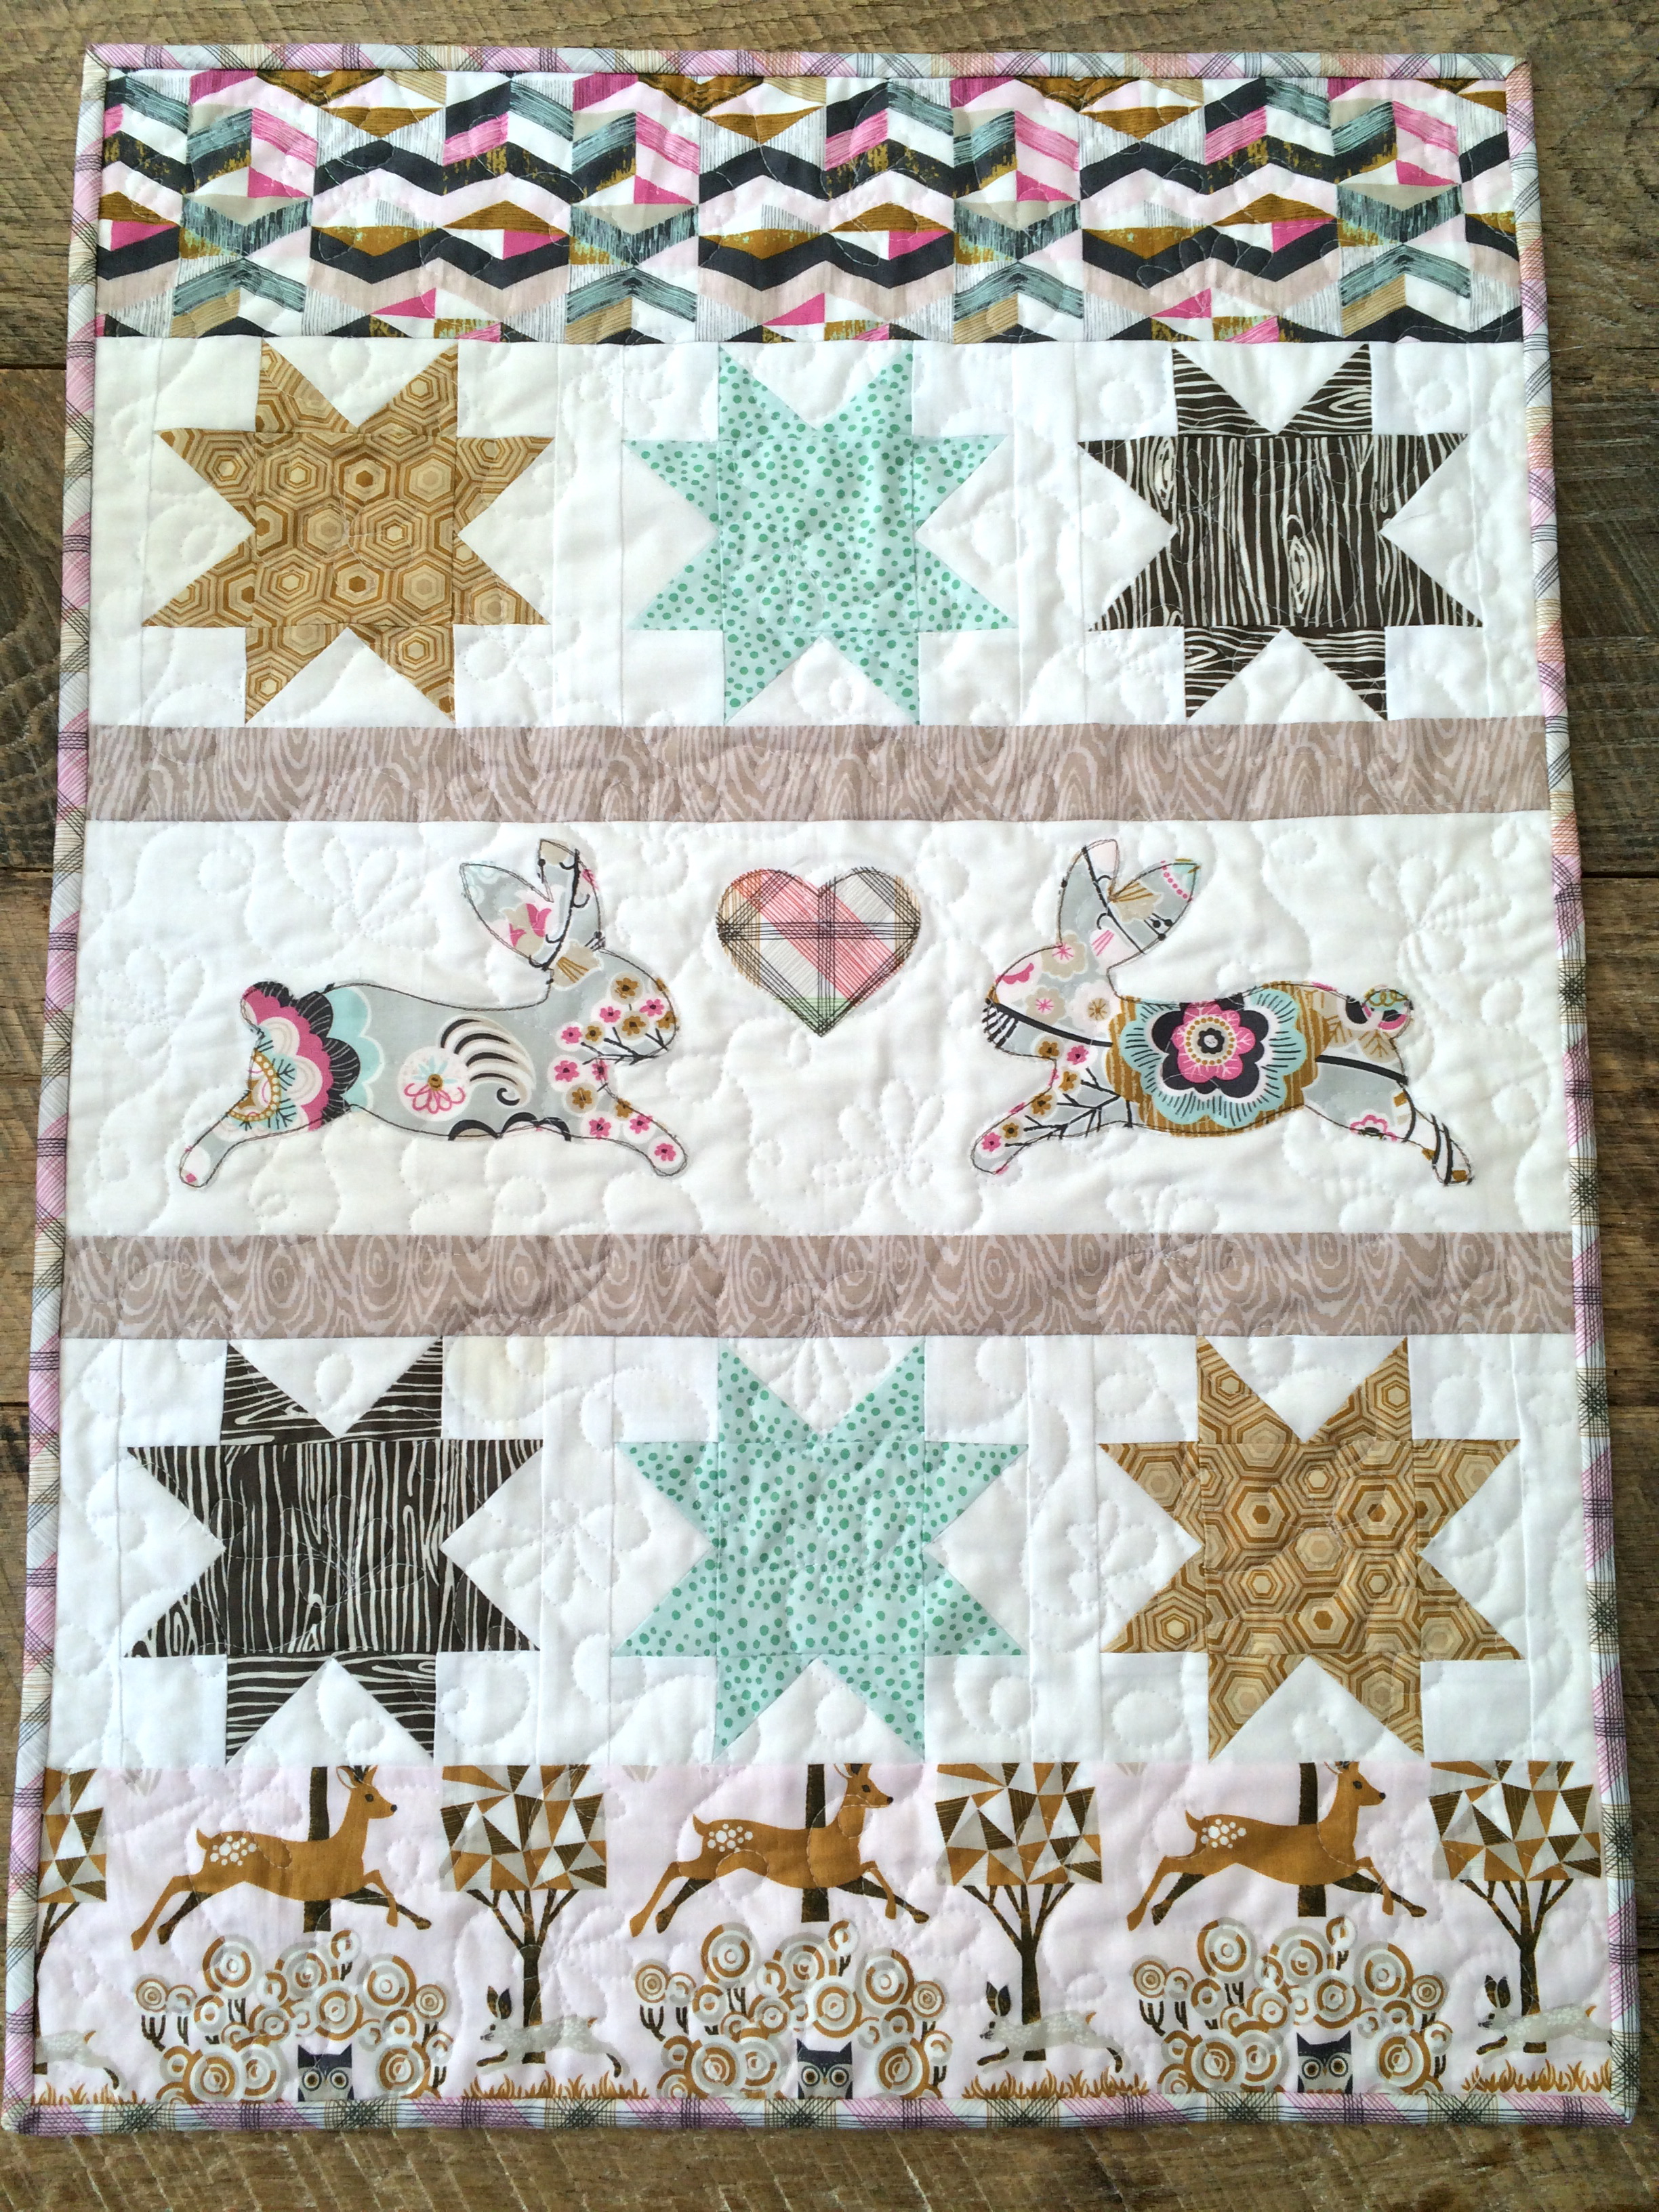
I let her sew the binding on, and I helped with the corners.  I then let her use the binding clips and clip the binding all the way around.  Finally we got out the needle and thread and did some hand sewing.  She did pretty good.  I helped with the hand binding so we could finish sometime this year!IMG_0838

It’s the perfect size for her American Girl dolls and she is thrilled that she made it herself!  Do you sew with your kids?  Sally is excited to begin a new project!

sizzix doll quilt 20


Spooktacular Halloween Towels and Pillow

IMG_9978Kids are in school, mornings are cool and crisp, and I can’t get enough Halloween sewing!!  These projects are super quick and easy.  The images used for the applique are fussy cut from Blend Fabrics Spooktacular fabric line.  I love these big bold Halloween designs!

For the towels…

Supplies

1 yard toweling for each towel, or a finished tea towel

1/2 yard ric rac

Heat n Bond Feather Lite

Desired fabric

spooktacular applique towel 2

Begin by selecting the image you want to applique on the towel.  Cut a piece of Heat n Bond slightly larger than the image.  Iron it to the wrong side of the fabric.

spooktacular applique towel 3Cut out the image.

spooktacular applique towelEven up the toweling and sew a rolled hem on both edges.spooktacular applique towel 4Peel off the backing paper and press into place.  Top stitch around each applique piece.  Add ric rac or other decorative trim.

spooktacular applique towel 5These would make great gifts for friends or teachers!!!

spooktacular applique towel 6 For the pillow….

spooktacular halloween pillow 3

Supplies

quarter yard cuts of the 3 fabrics

1/2 yard ticking for back

Heat n Bond fusible fleece

Zipper

Applique pieces

Heat n Bond Feather Lite

2 .5 yards black pom pom trim

20″ Pillow Form

spooktacular halloween pillow 2Begin by using the method explained above to fussy cut each of the potion bottles.  Use the cutting guide below to cut each of the 3 fabrics.

spooktacular pillow cutting guideApplique the bottles to the center piece

spooktacular halloween pillowNext, sew the strips together using 1/4″seam allowance.  Press seams to one direction.

Cut a 20″ square of fusible fleece and iron it to the wrong side of the pillow front.  You can quilt the pillow at this point.  I added some straight line stitches along both sides of the seams.

Baste the pom pom trim around the pillow, starting and stopping at the bottom center of the pillow and curving the corners.

I like to put zippers in my pillow backs.  For instructions on how to do this, click here.

Sew the pillow front to the pillow back, right sides together. making sure to leave the zipper partially open.  Turn right side out and insert pillow form.

spooktacular halloween pillow 4

spooktacular halloween pillow 5
spooktacular halloween pillow 6

Apple Applique Composition Book Cover Tutorial

apple applique coverBack to School, Apples, Reading & Writing, School Supplies, the smell of pink erasers, lunchboxes, and alarm clocks….

Today I am sharing my tutorial for this applique apple composition book cover.  I have written several composition book cover tutorials, they are my favorite and I can always be found carrying one around.  This one would make the perfect gift to give to a teacher on the first day of school 🙂

apple applique composition book 2

I used the apple die from Sizzix and the fabric is from one of my favorite Riley Blake Designs fabric lines called Apple of my Eye by the quilted fish.  I used Therm o Web Heat n Bond Featherweight and a medium weight stabilizer.  Hop on over to the Therm o Web blog for the full instructions!!

apple applique composition book 7

apple applique composition book 3

apple applique composition book 6


Sizzix Natural Wonder Bunny Mini Quilt


natural wonder bunny mini quilt sizzixI love to give handmade gifts, especially quilts.  My friend recently lost her bunny to a hawk.  I know how much it hurts to loose a beloved pet.  I wanted to make her something to show her I really cared so I created this bunny mini quilt.  She totally LOVED it!!

IMG_8870_2
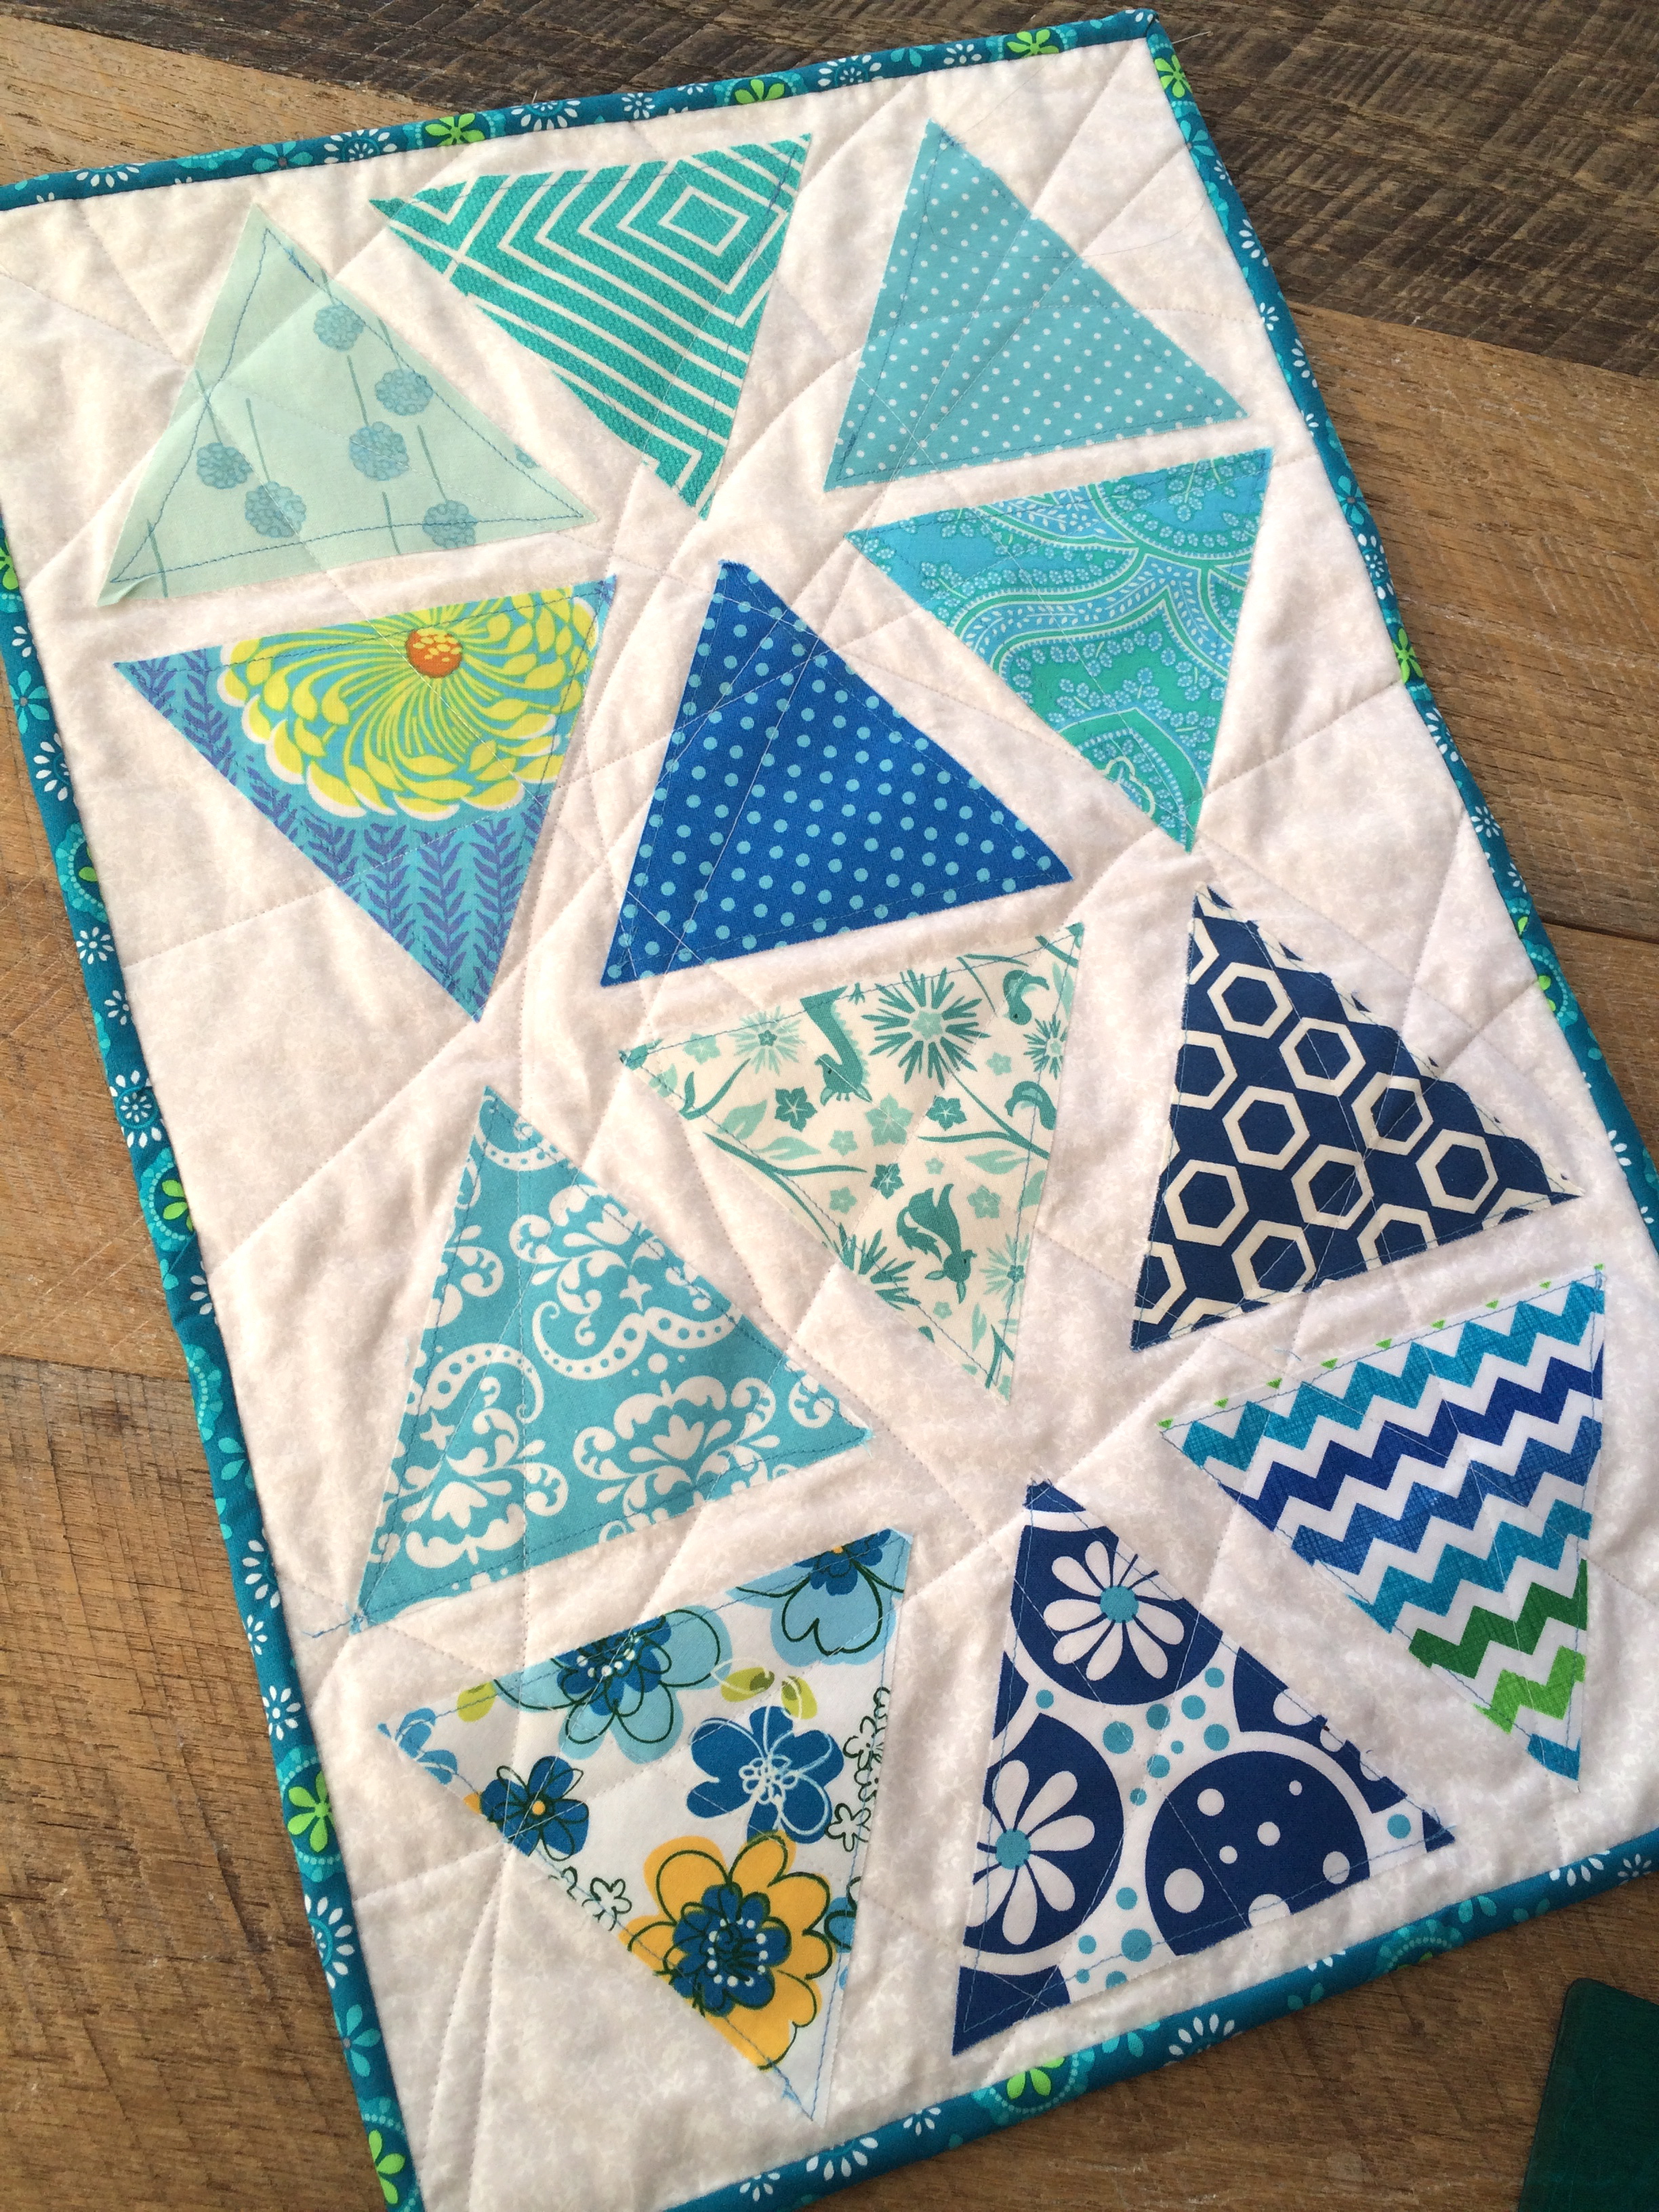
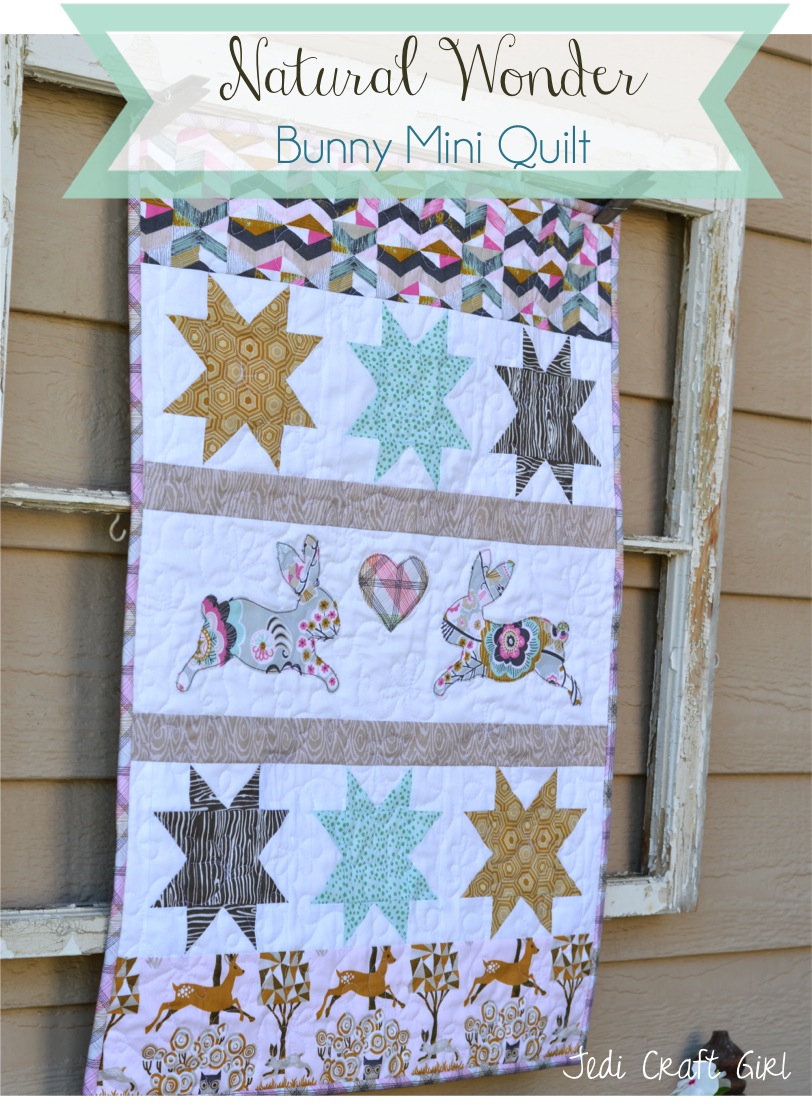
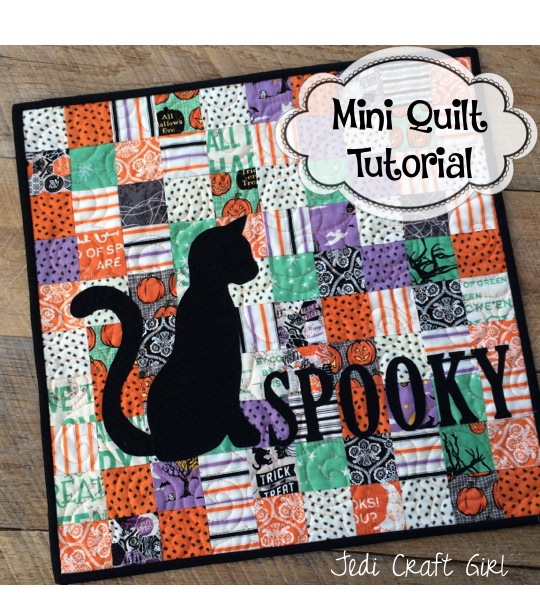
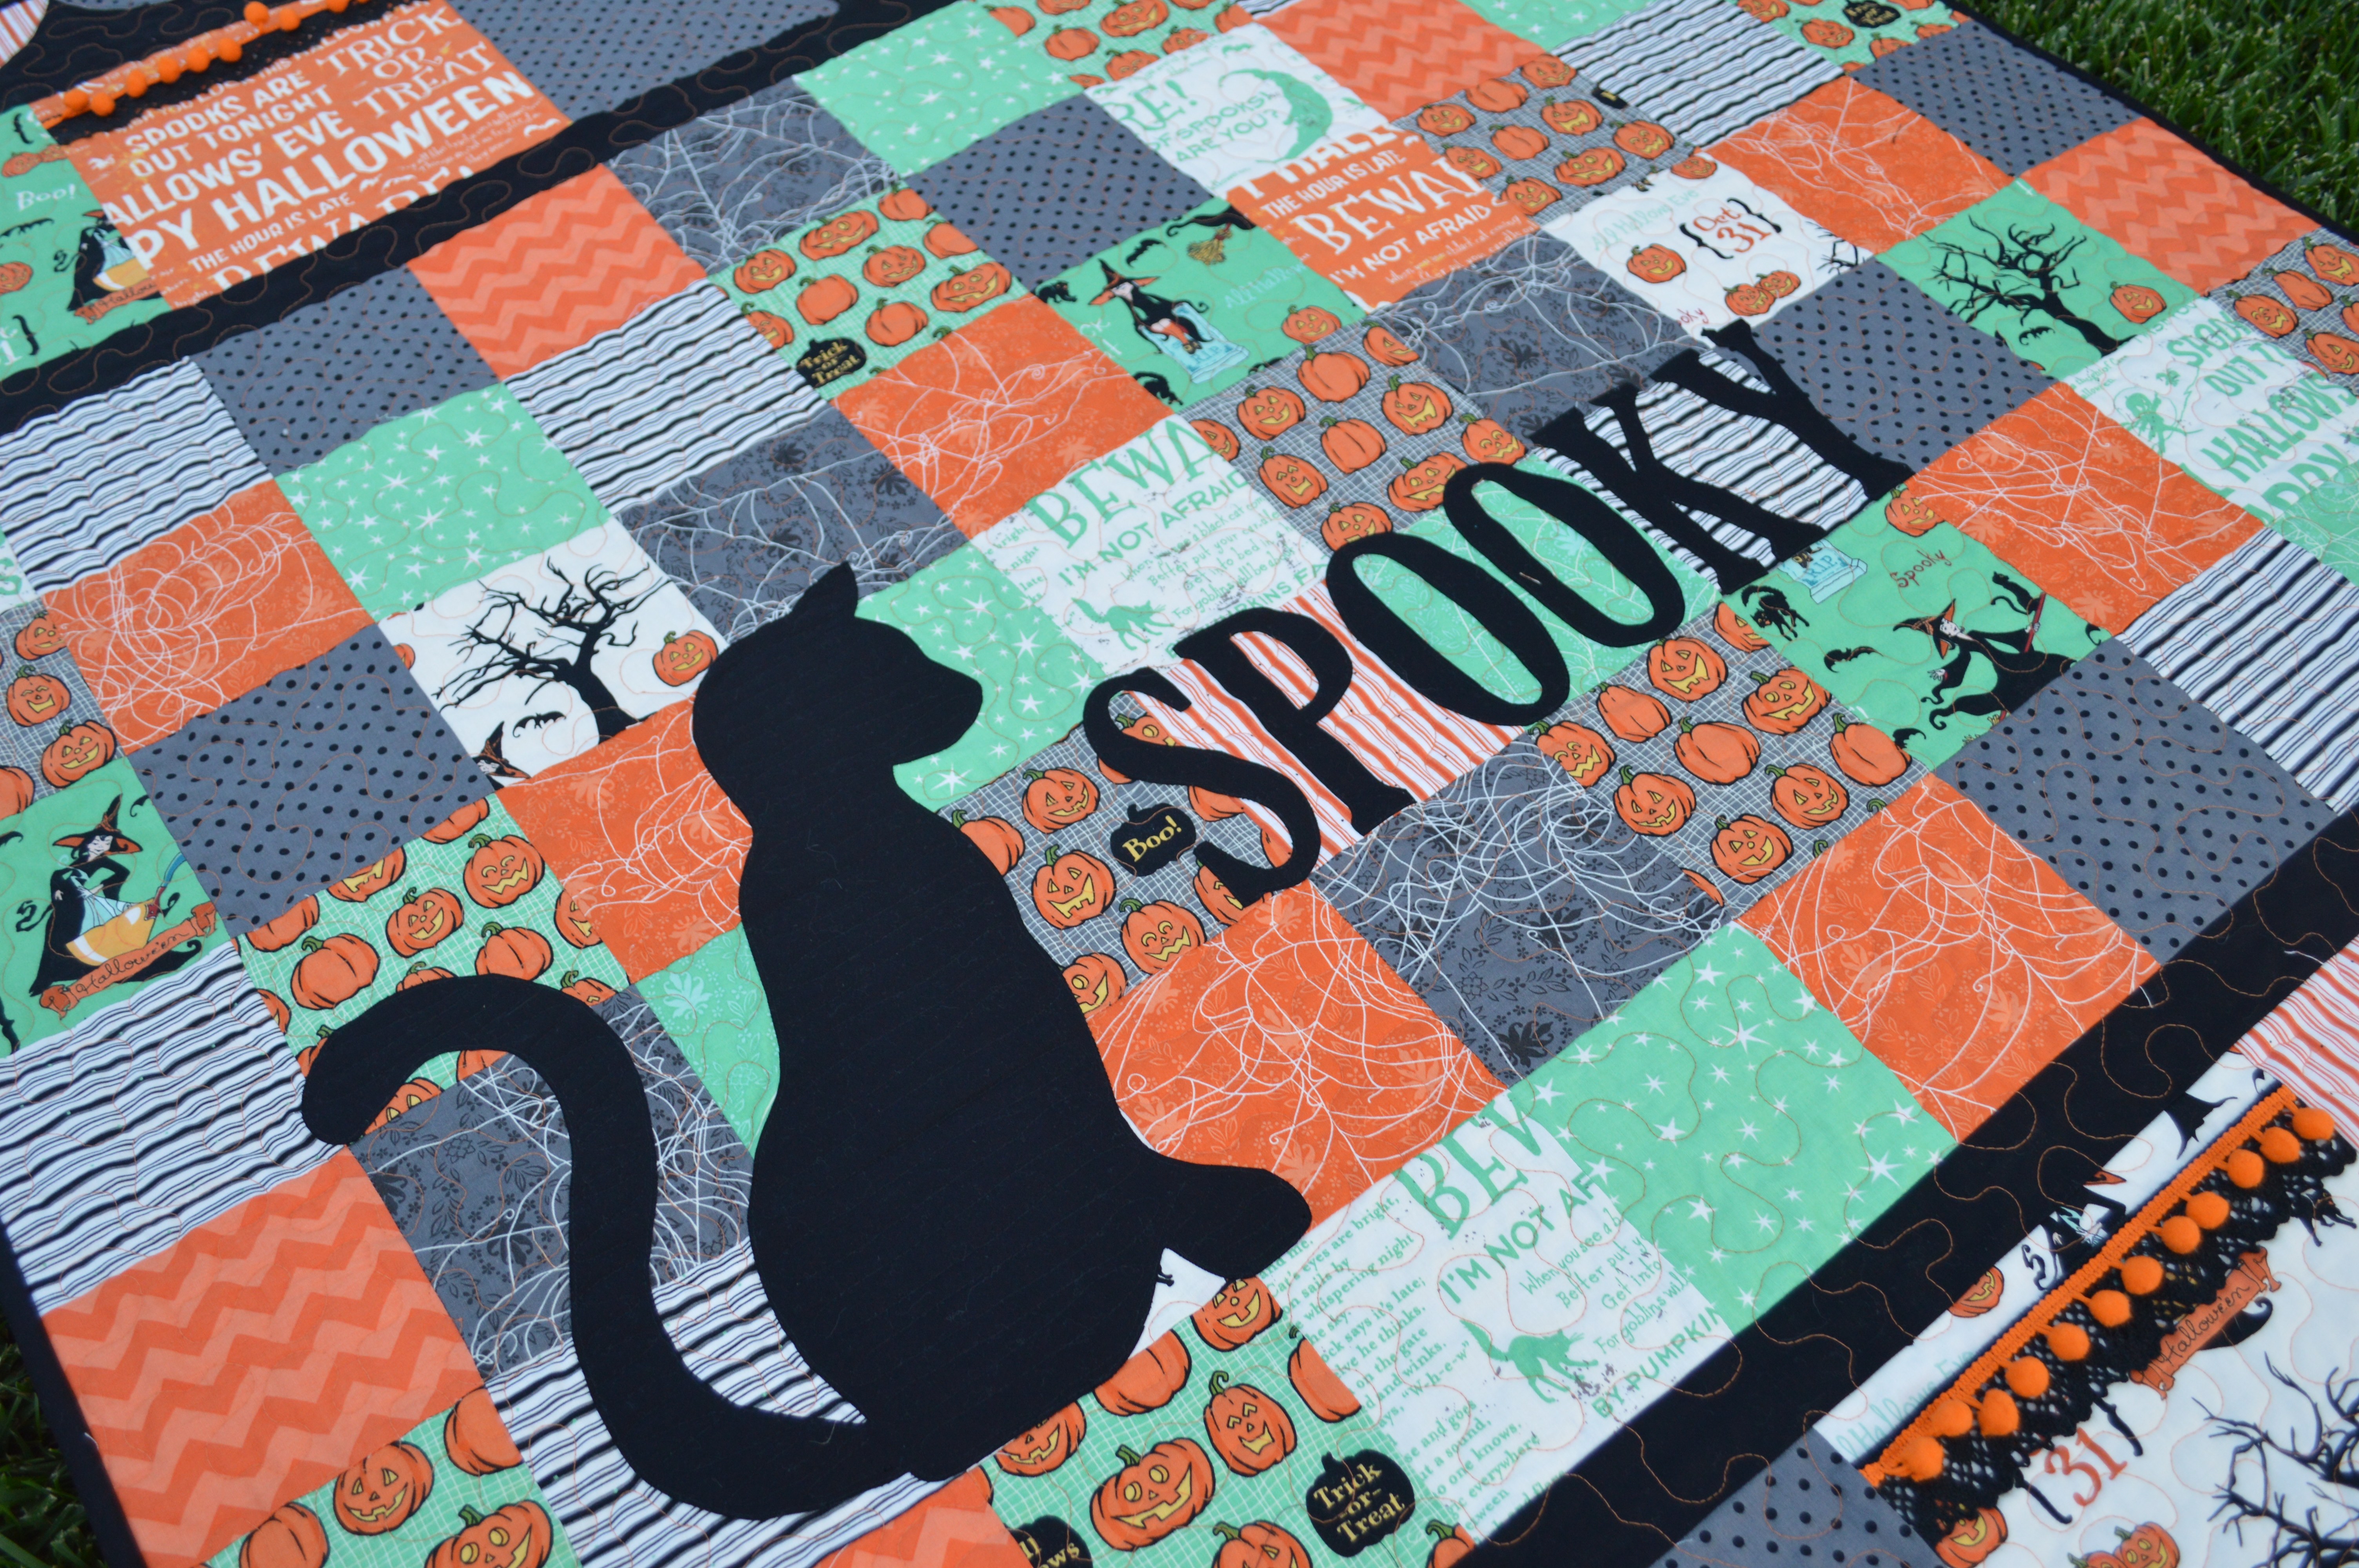
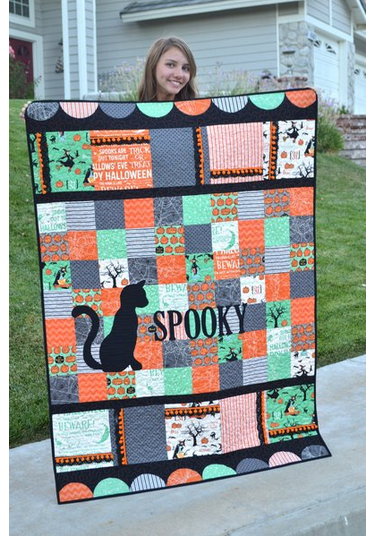
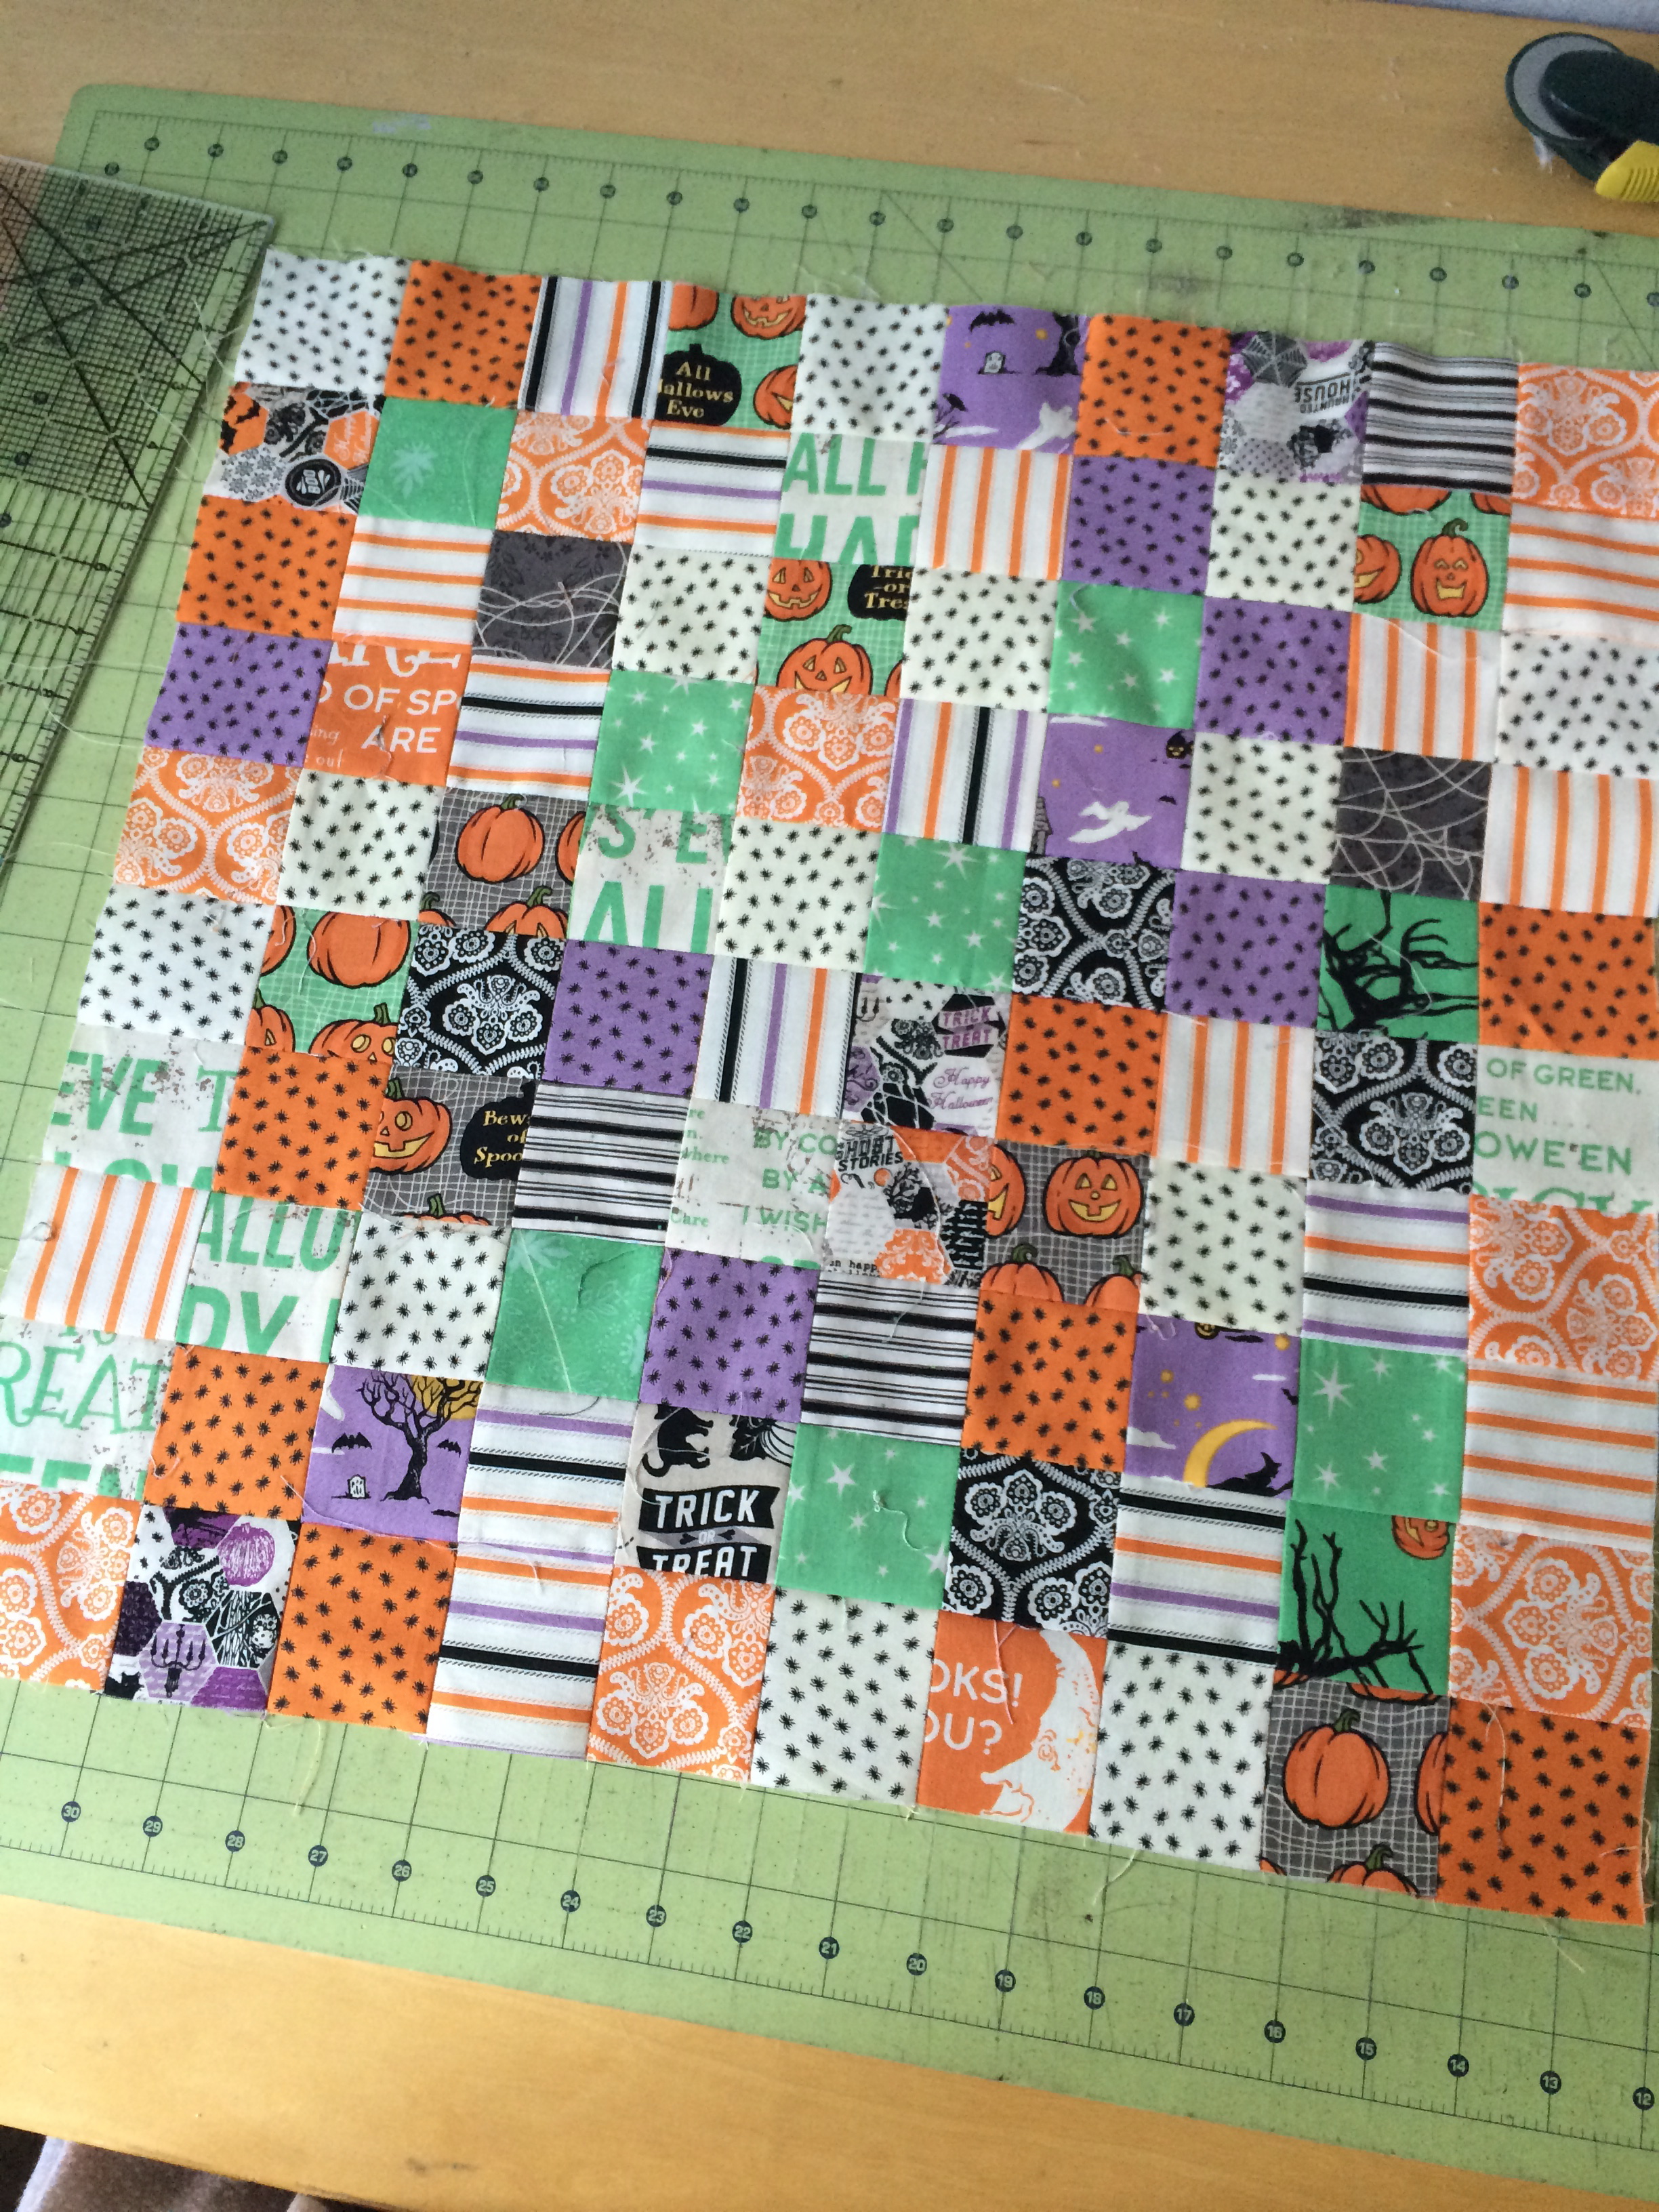
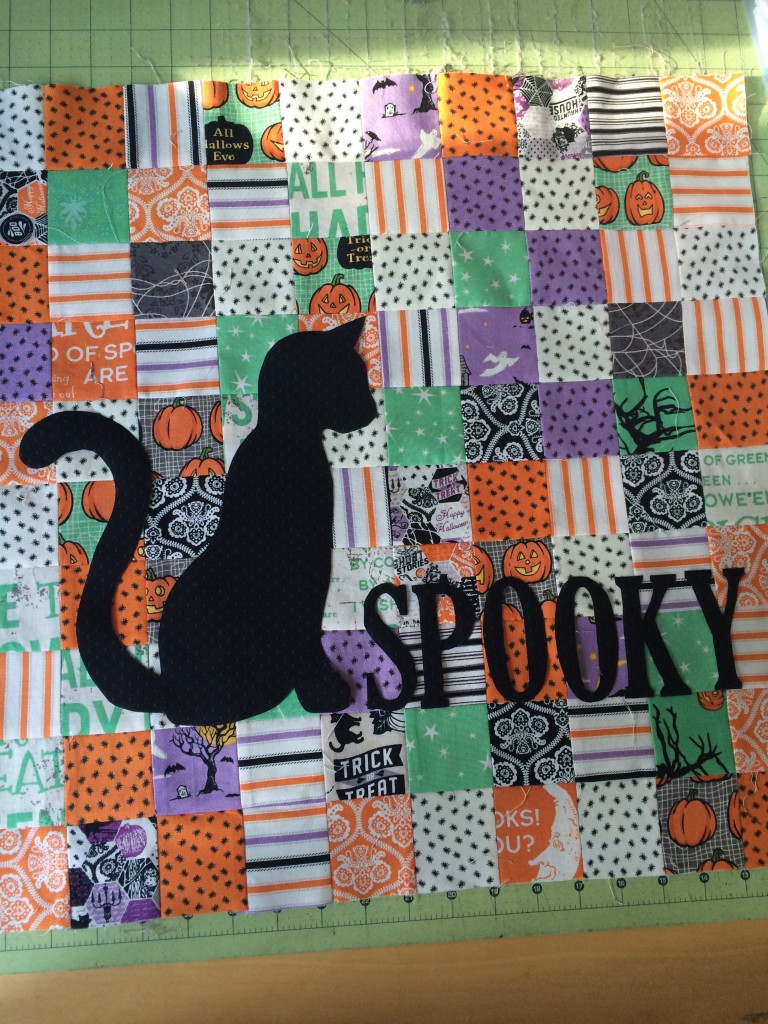
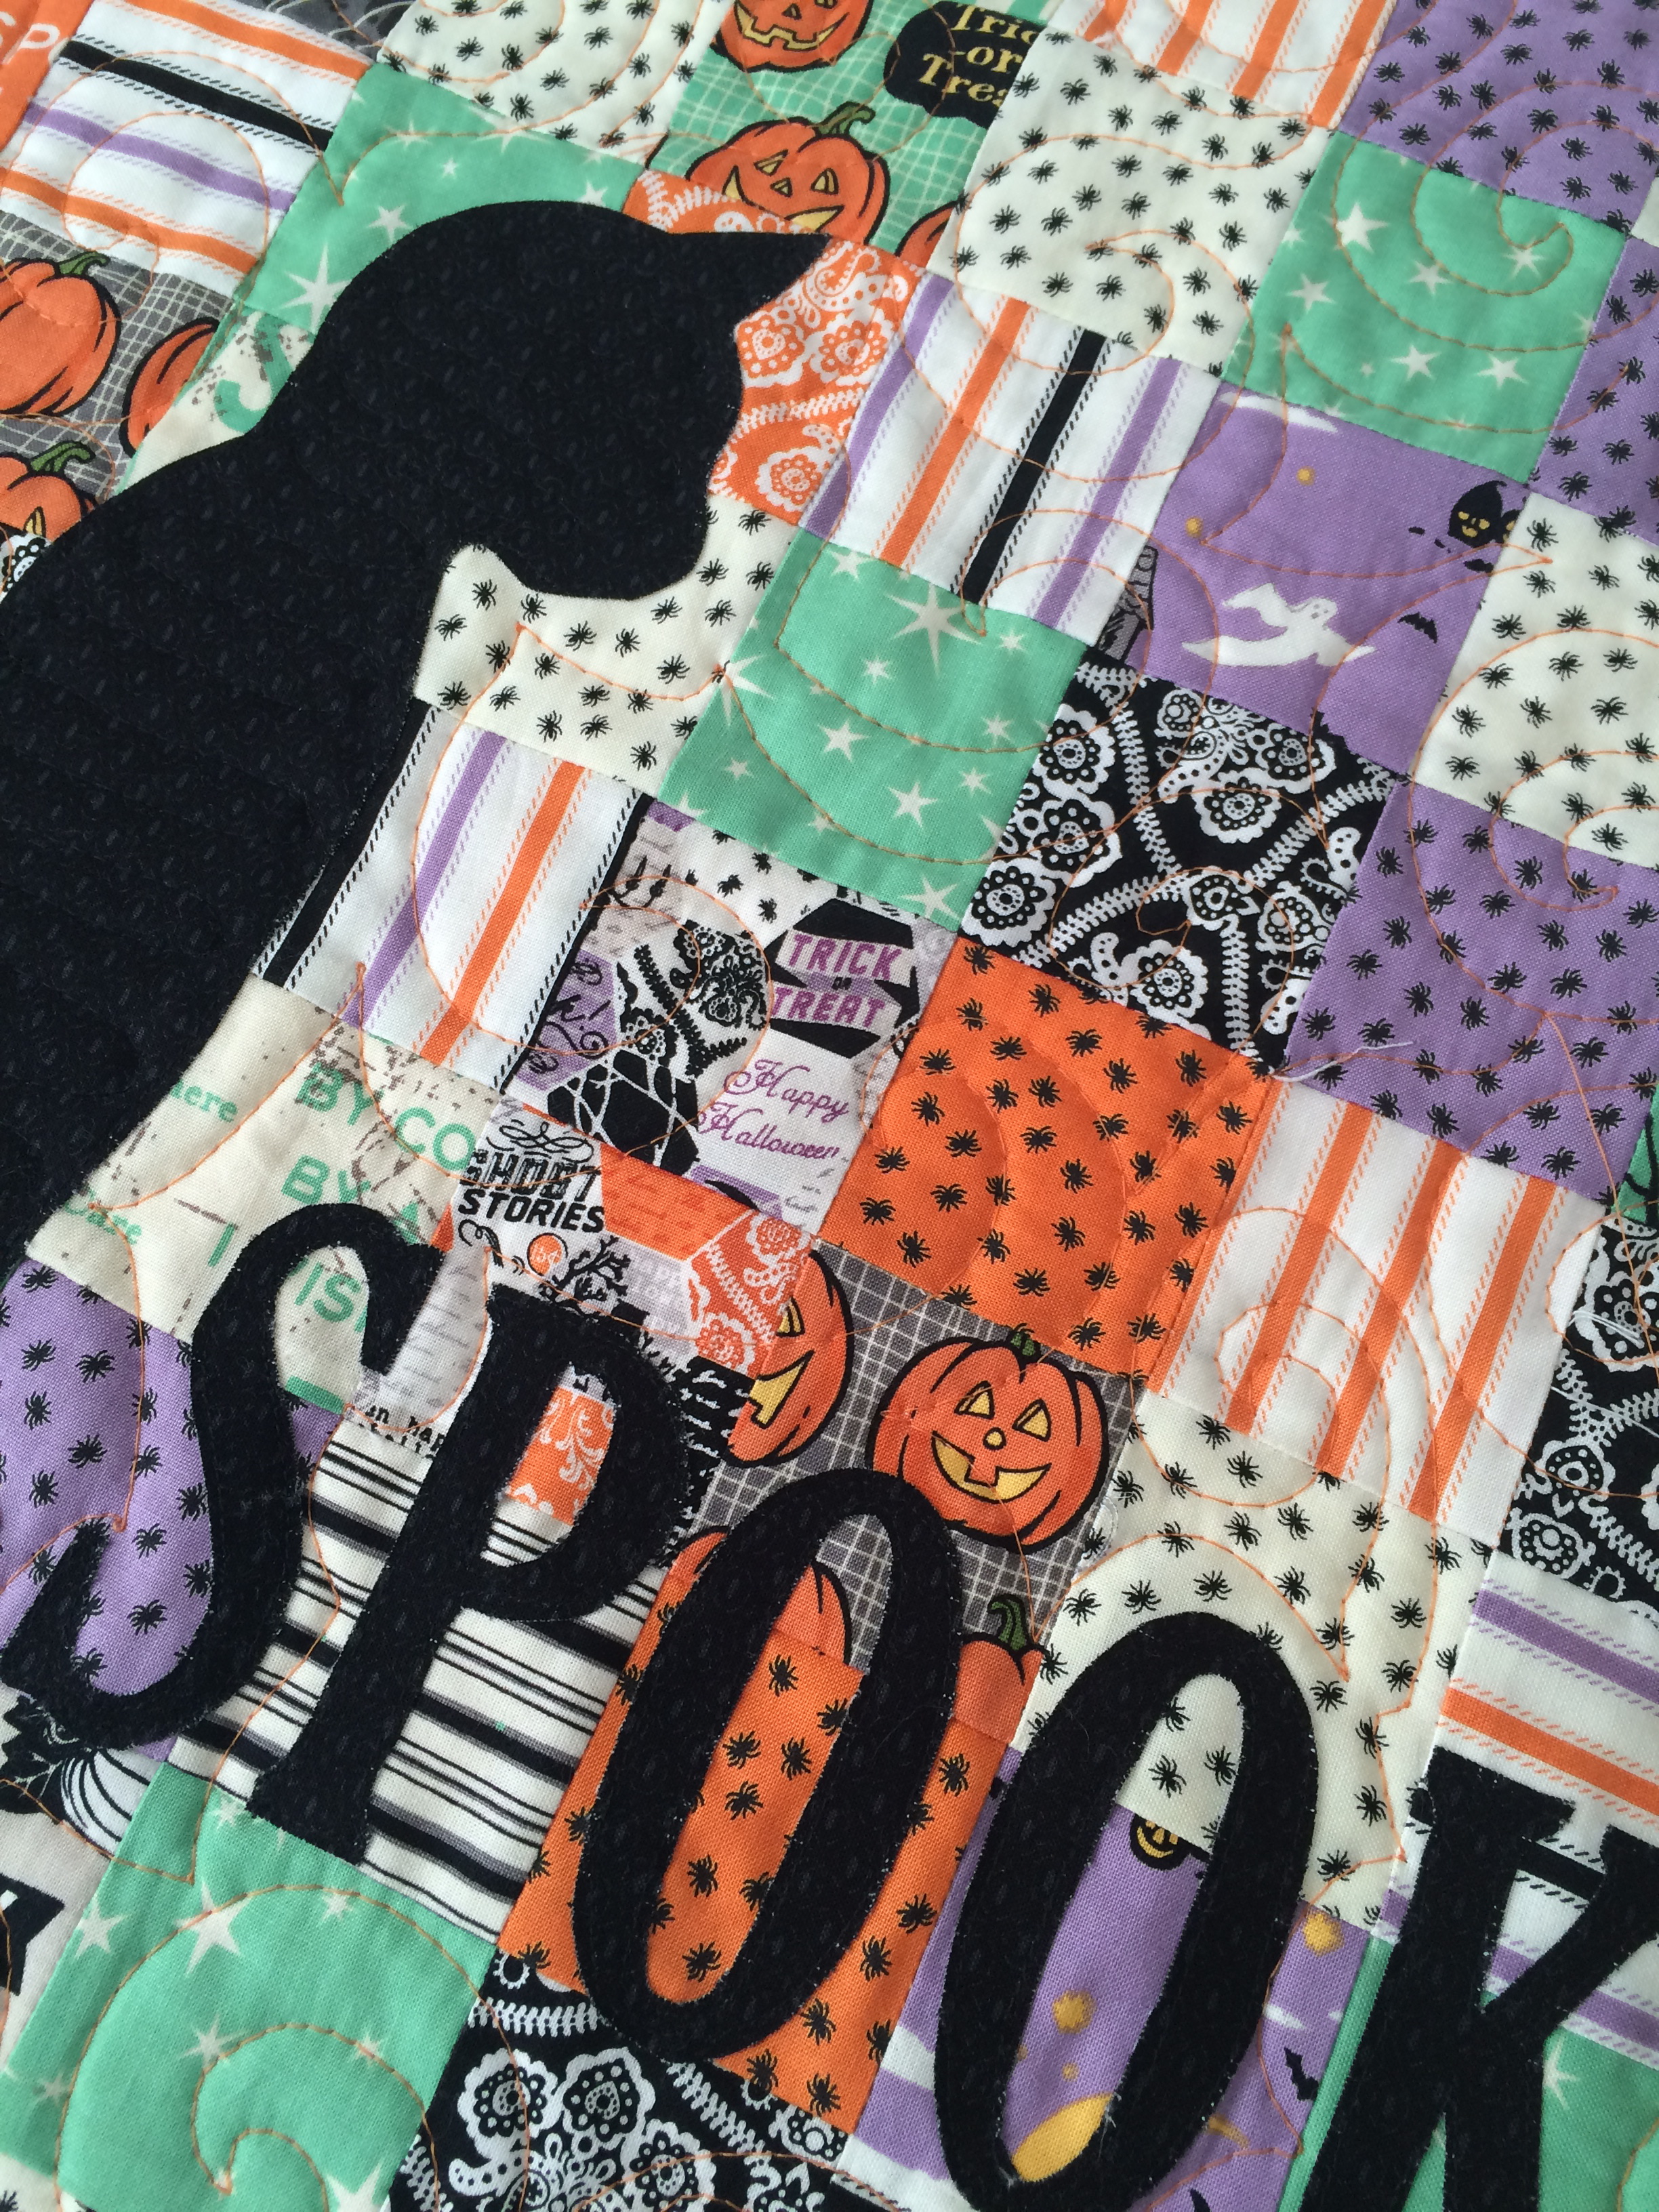
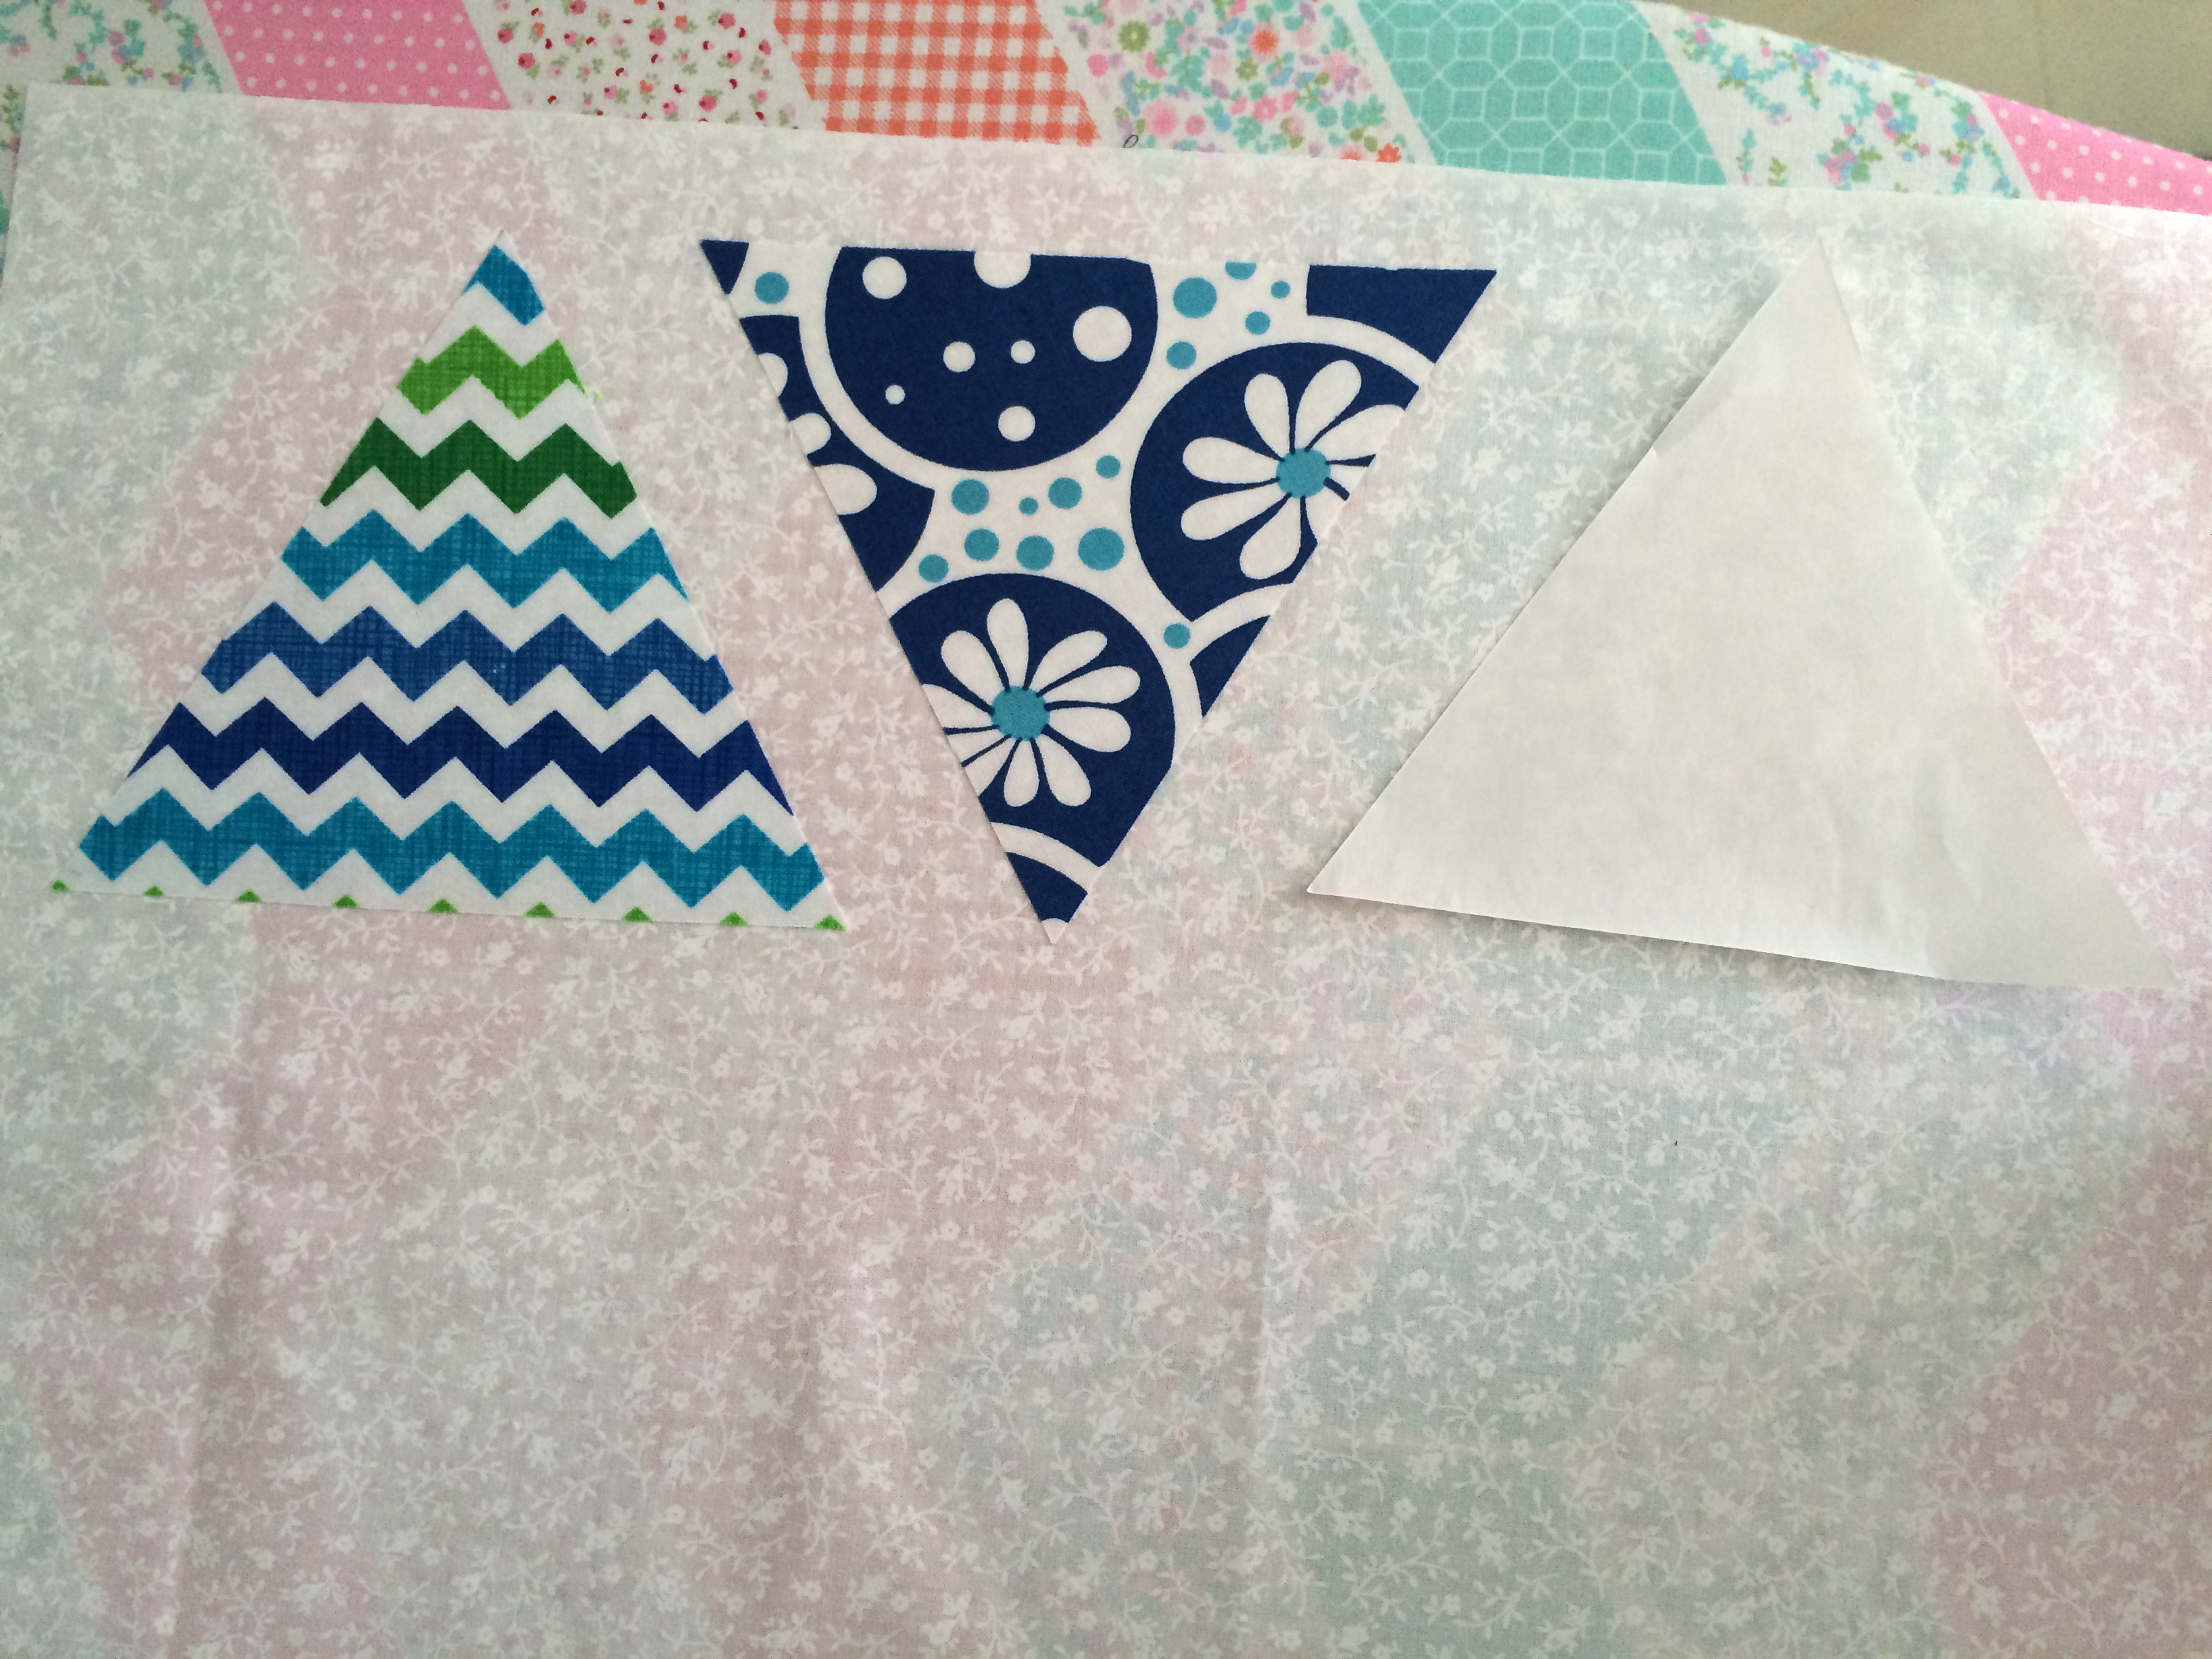
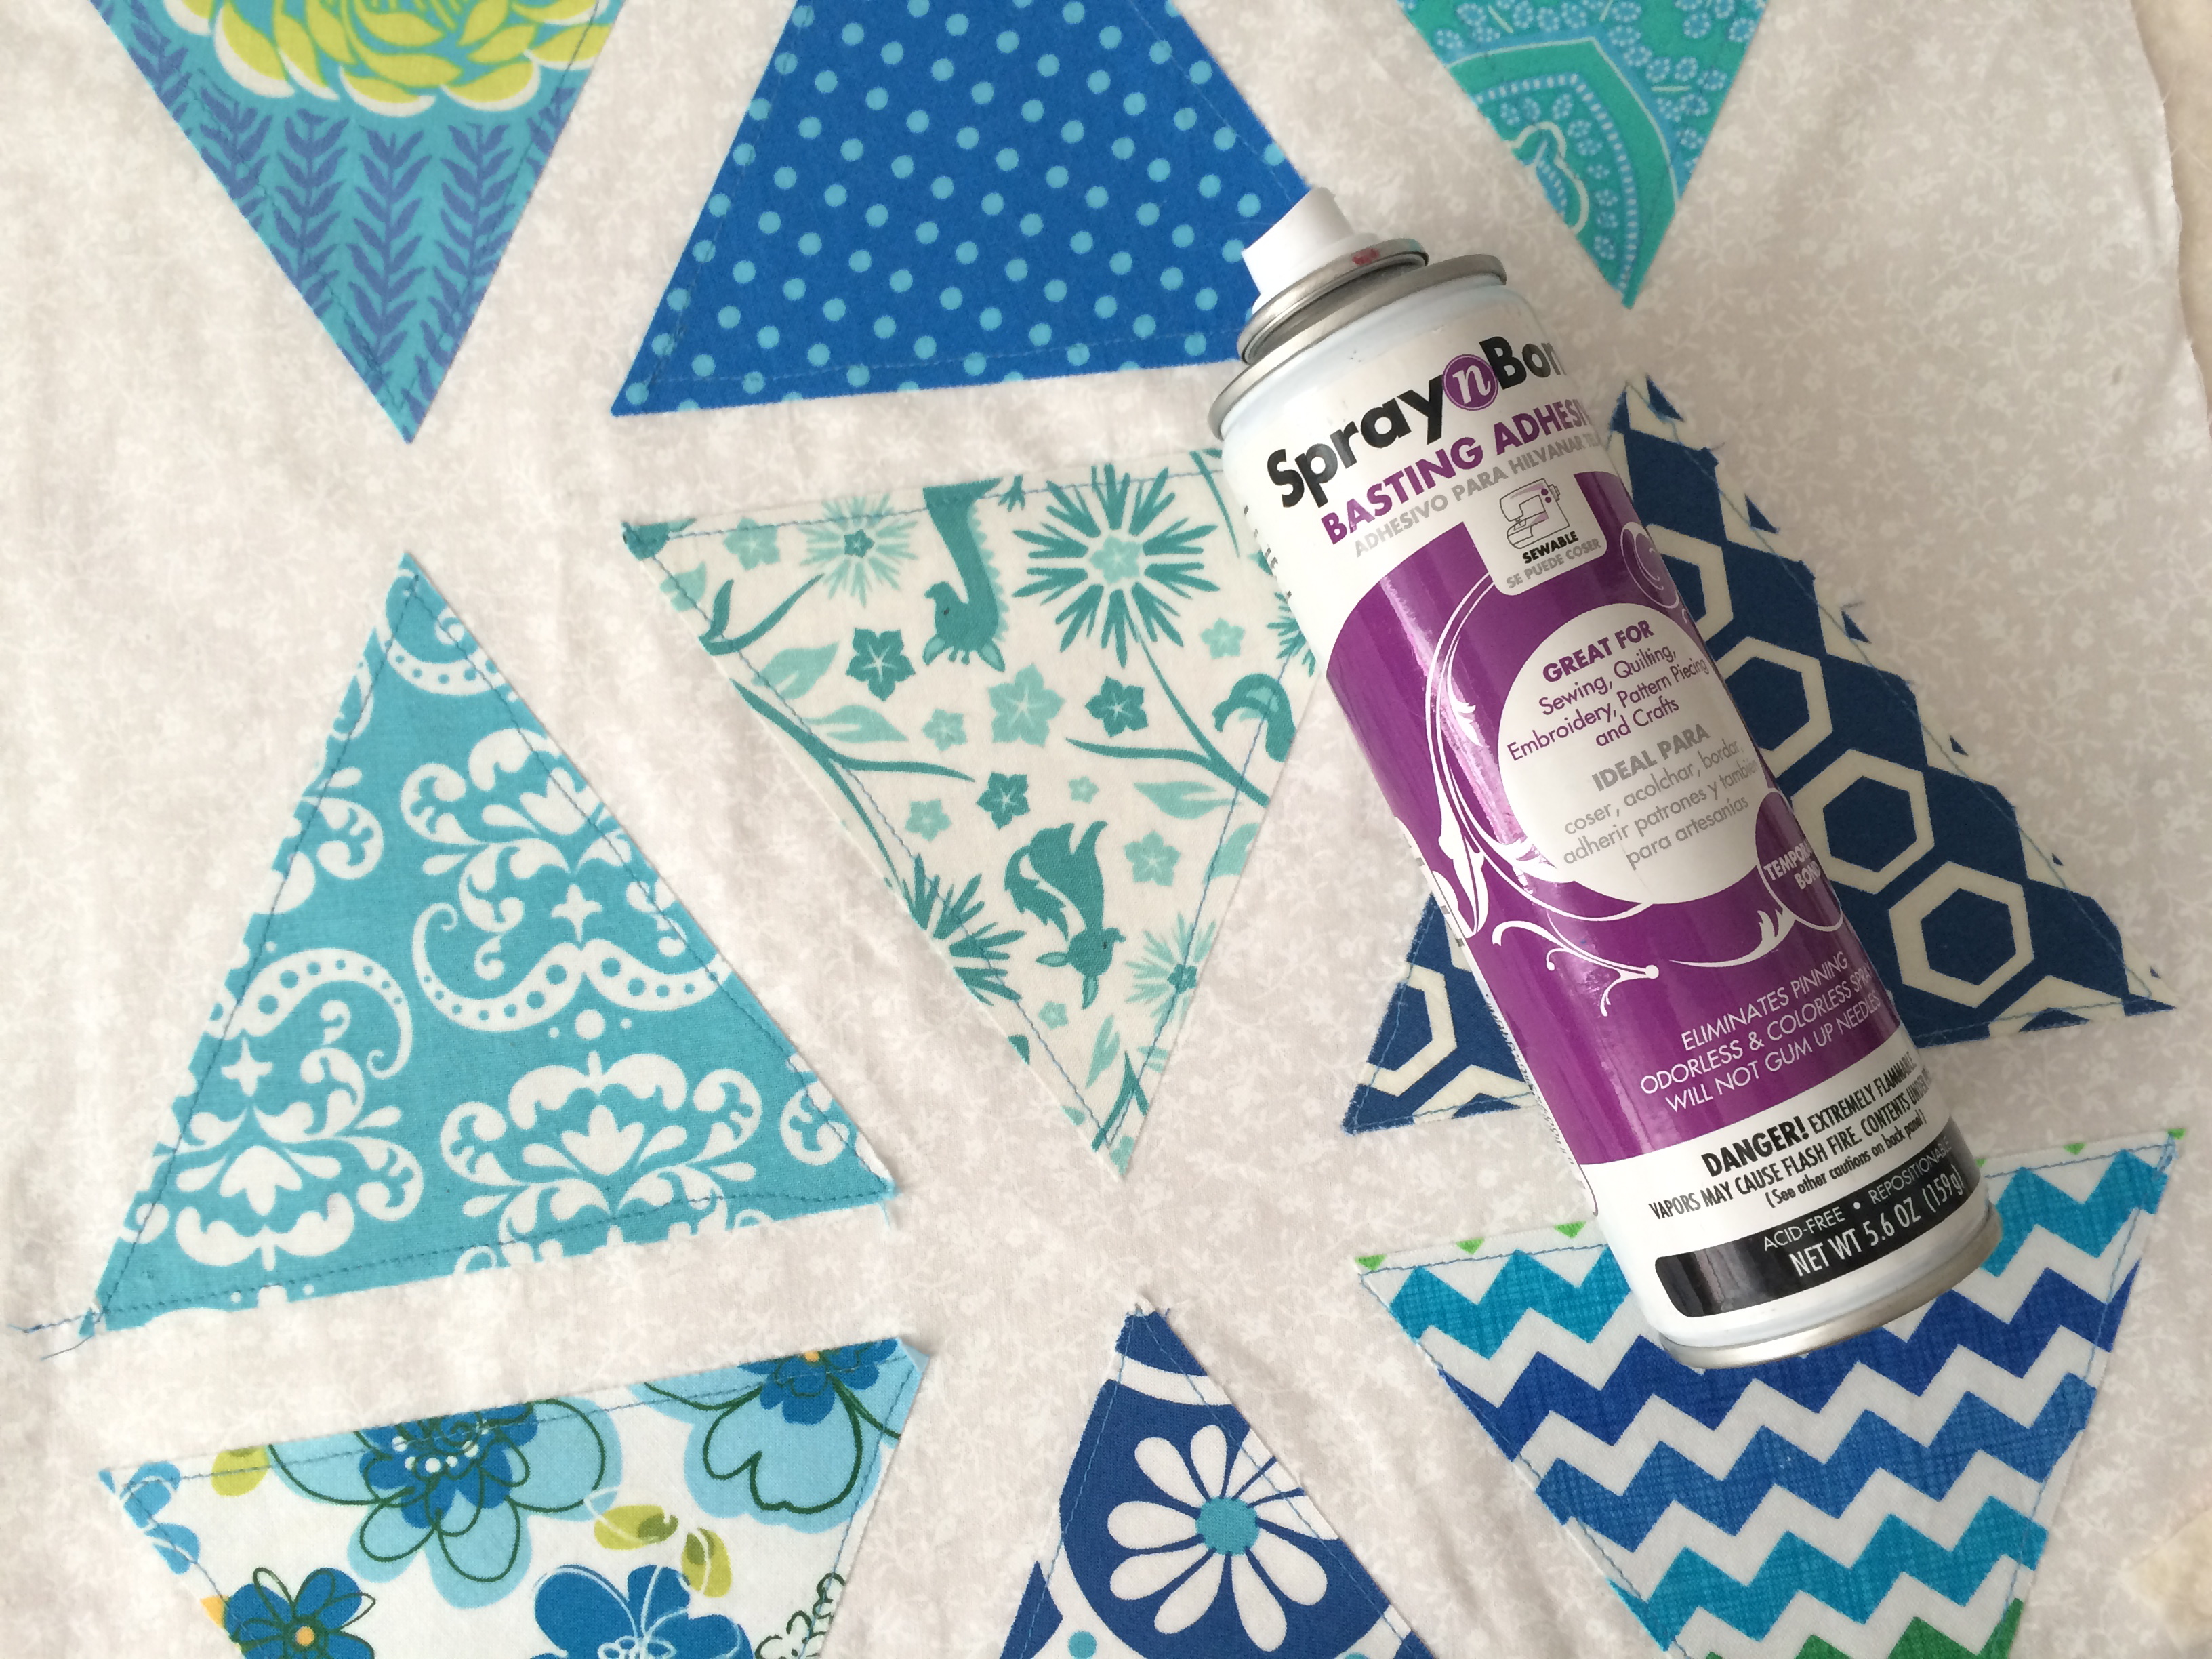
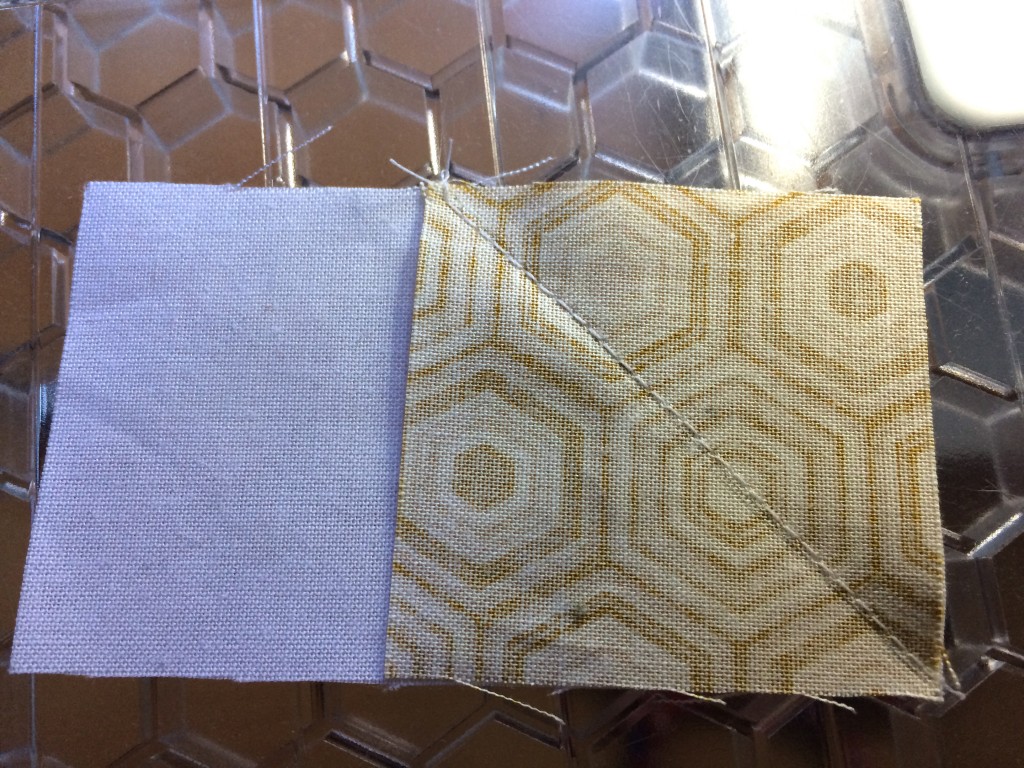
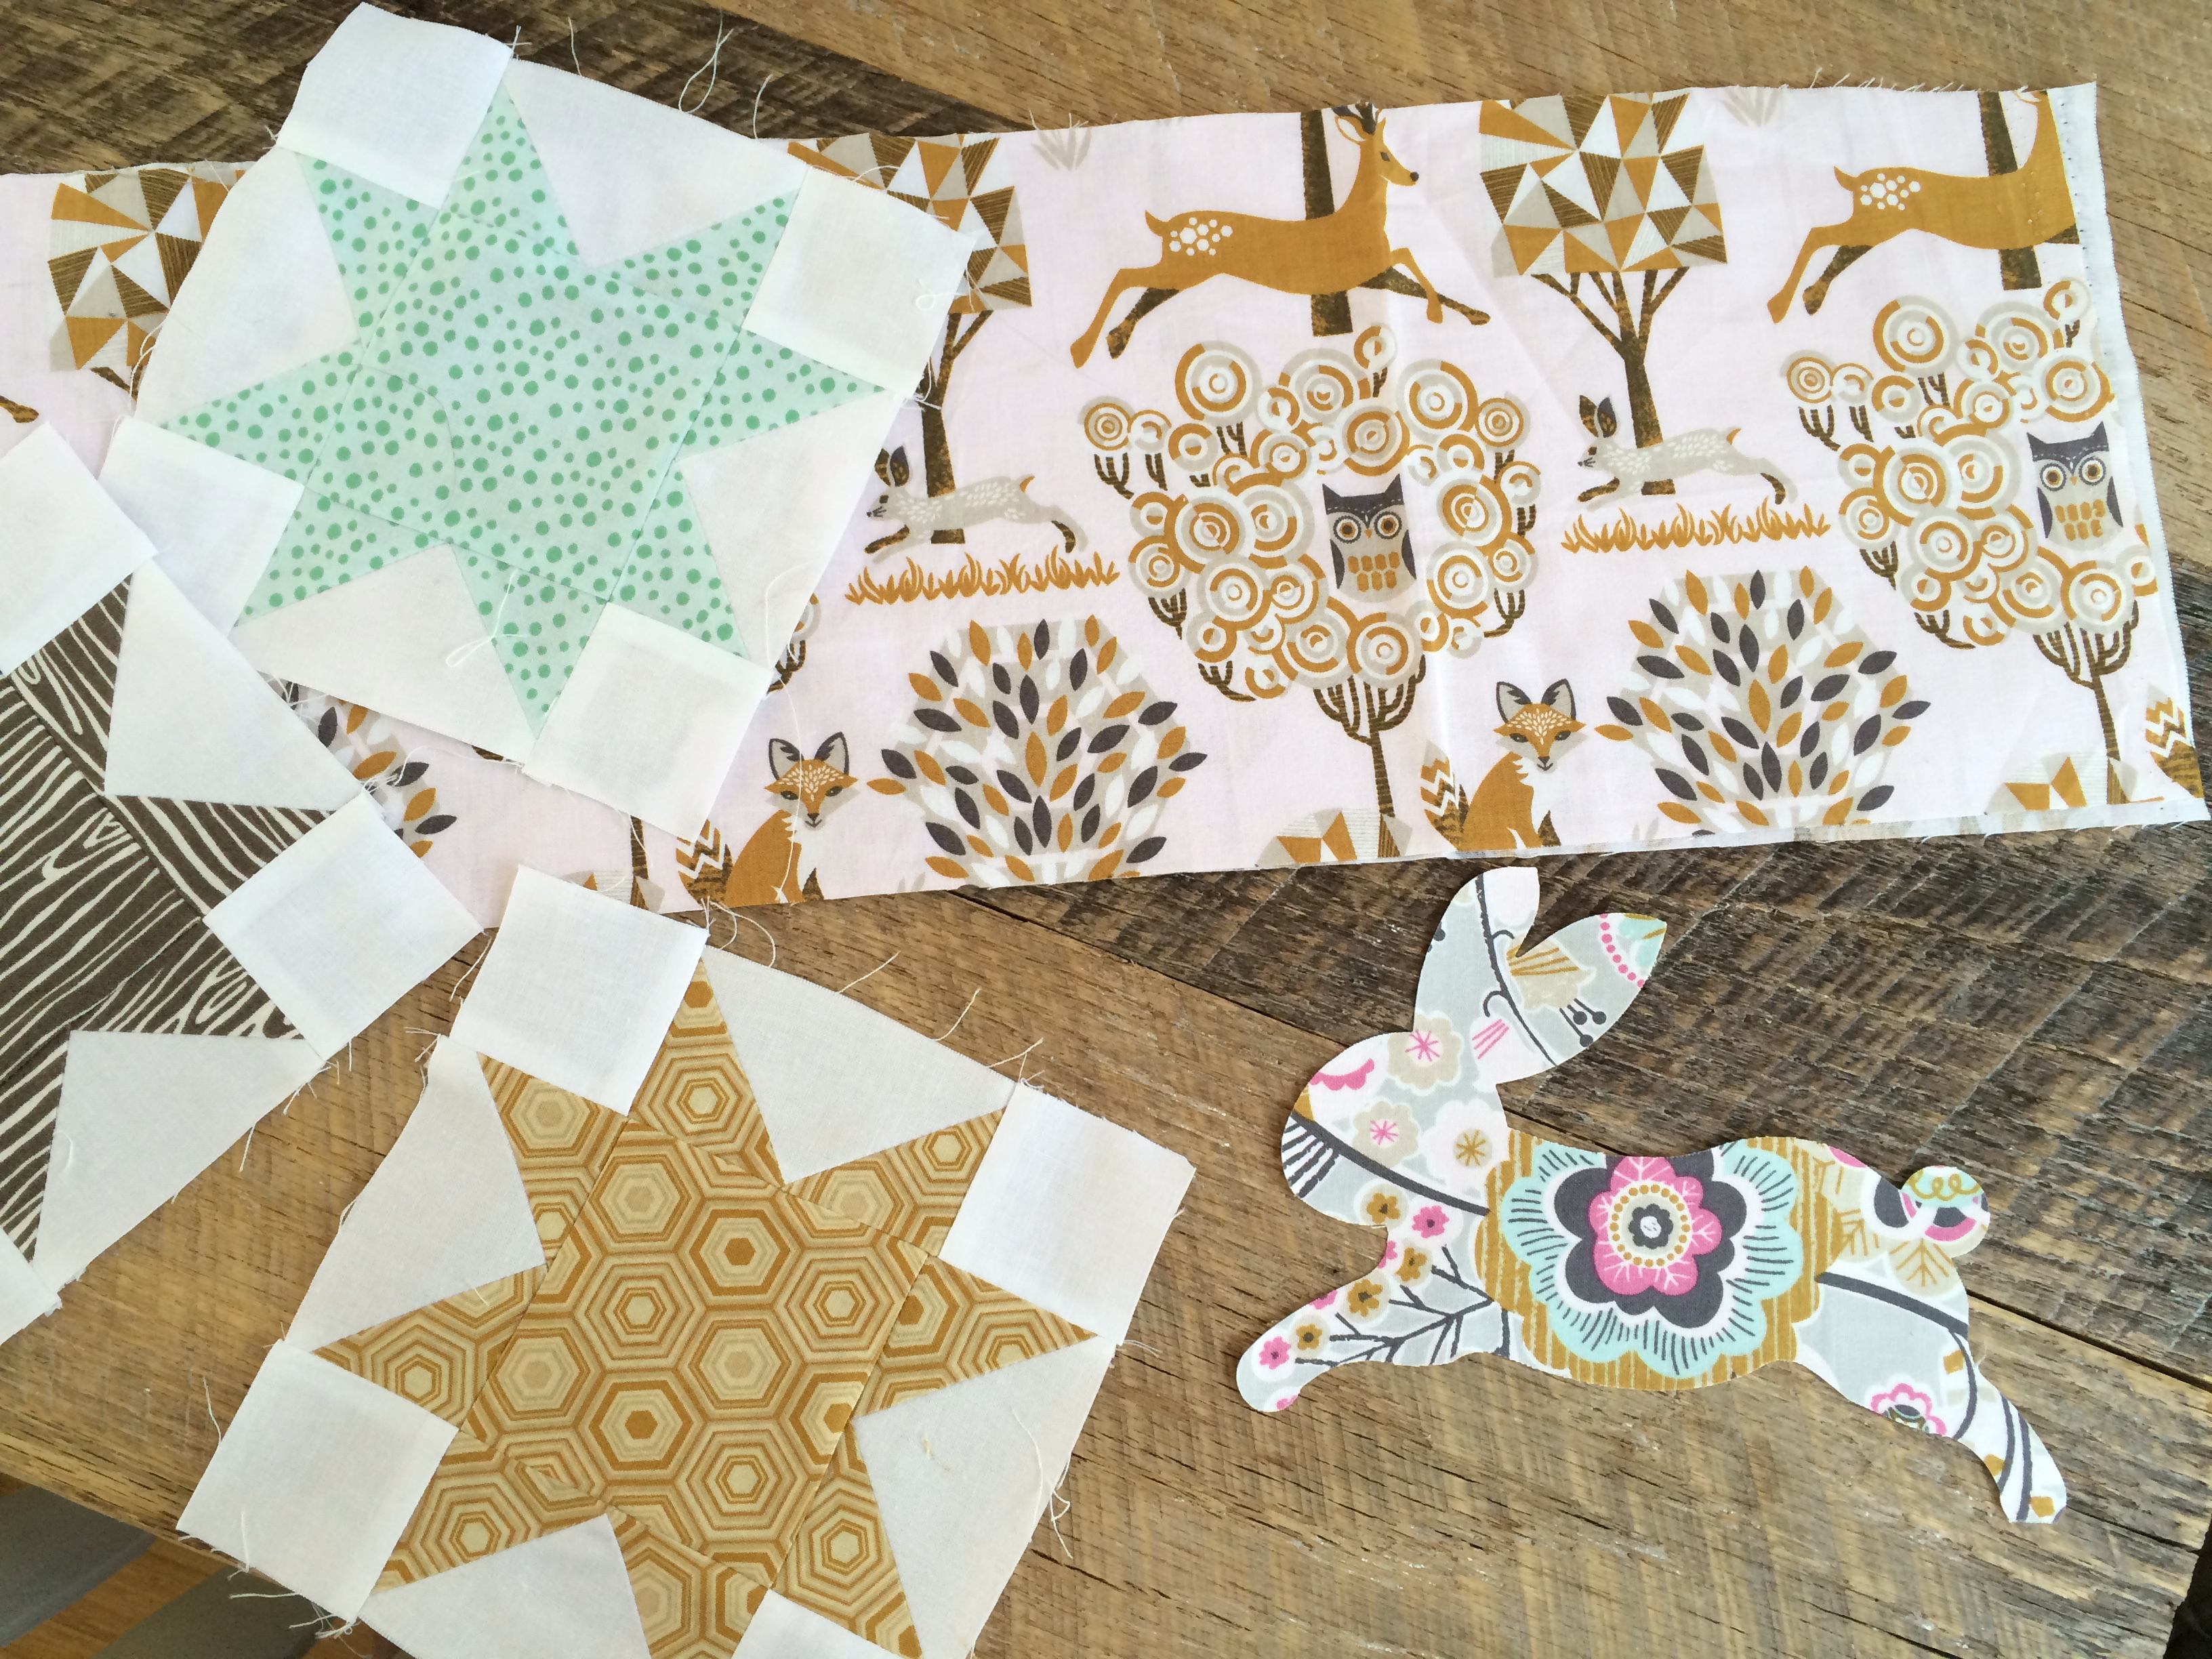
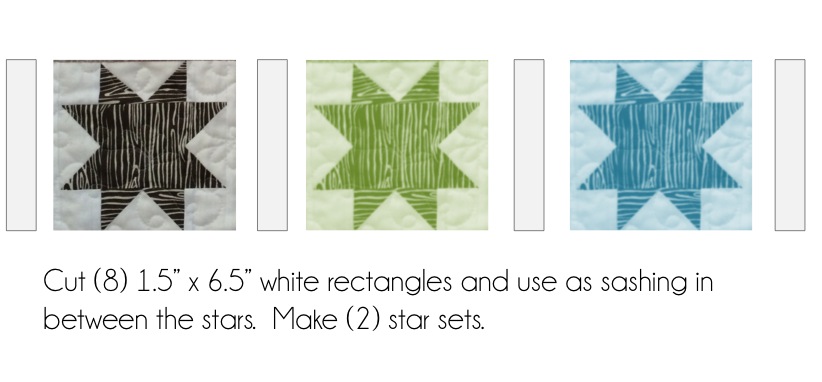
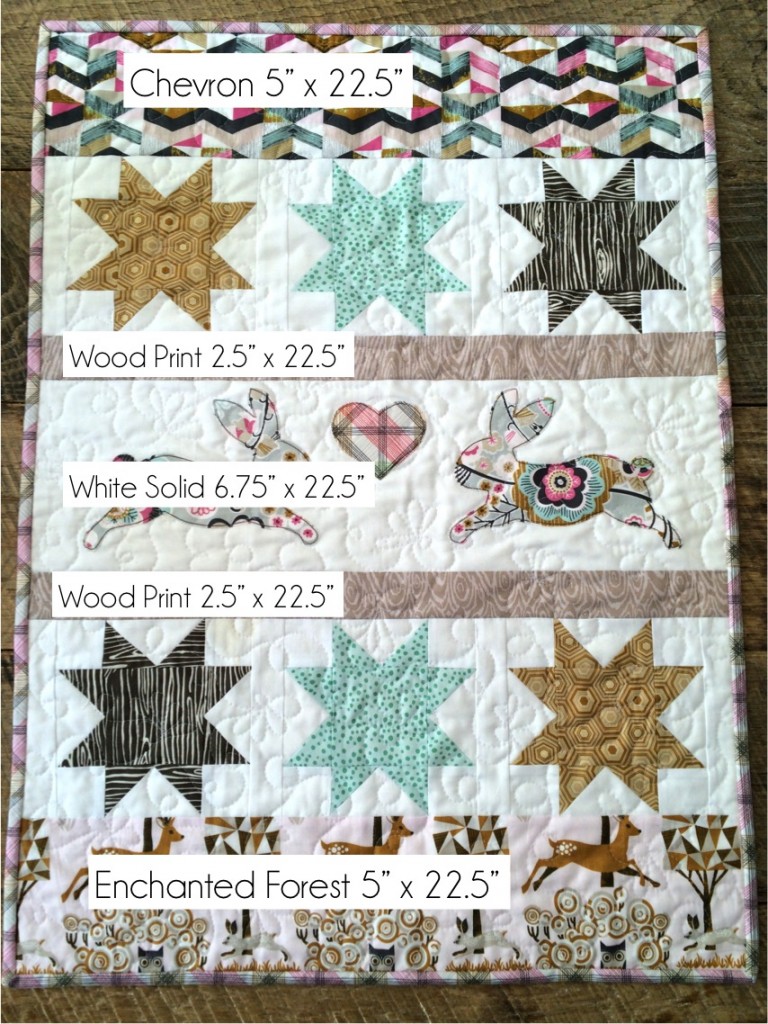
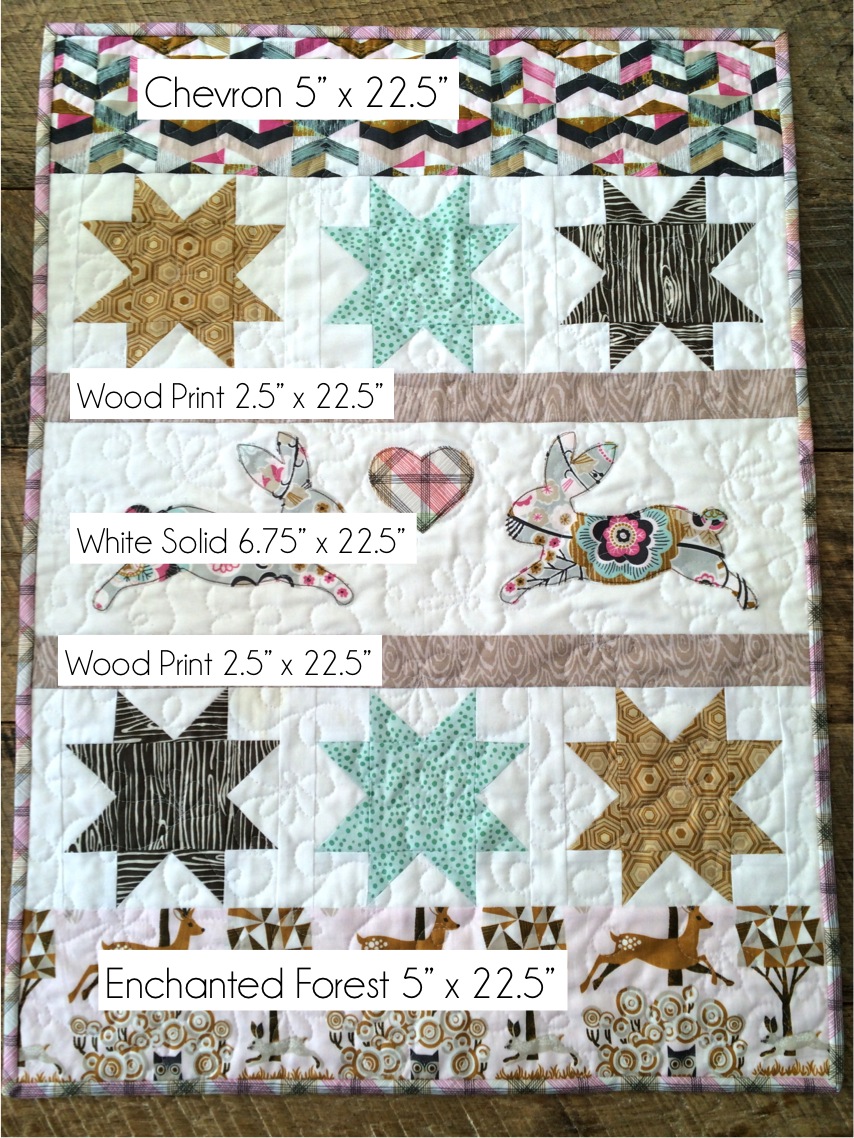
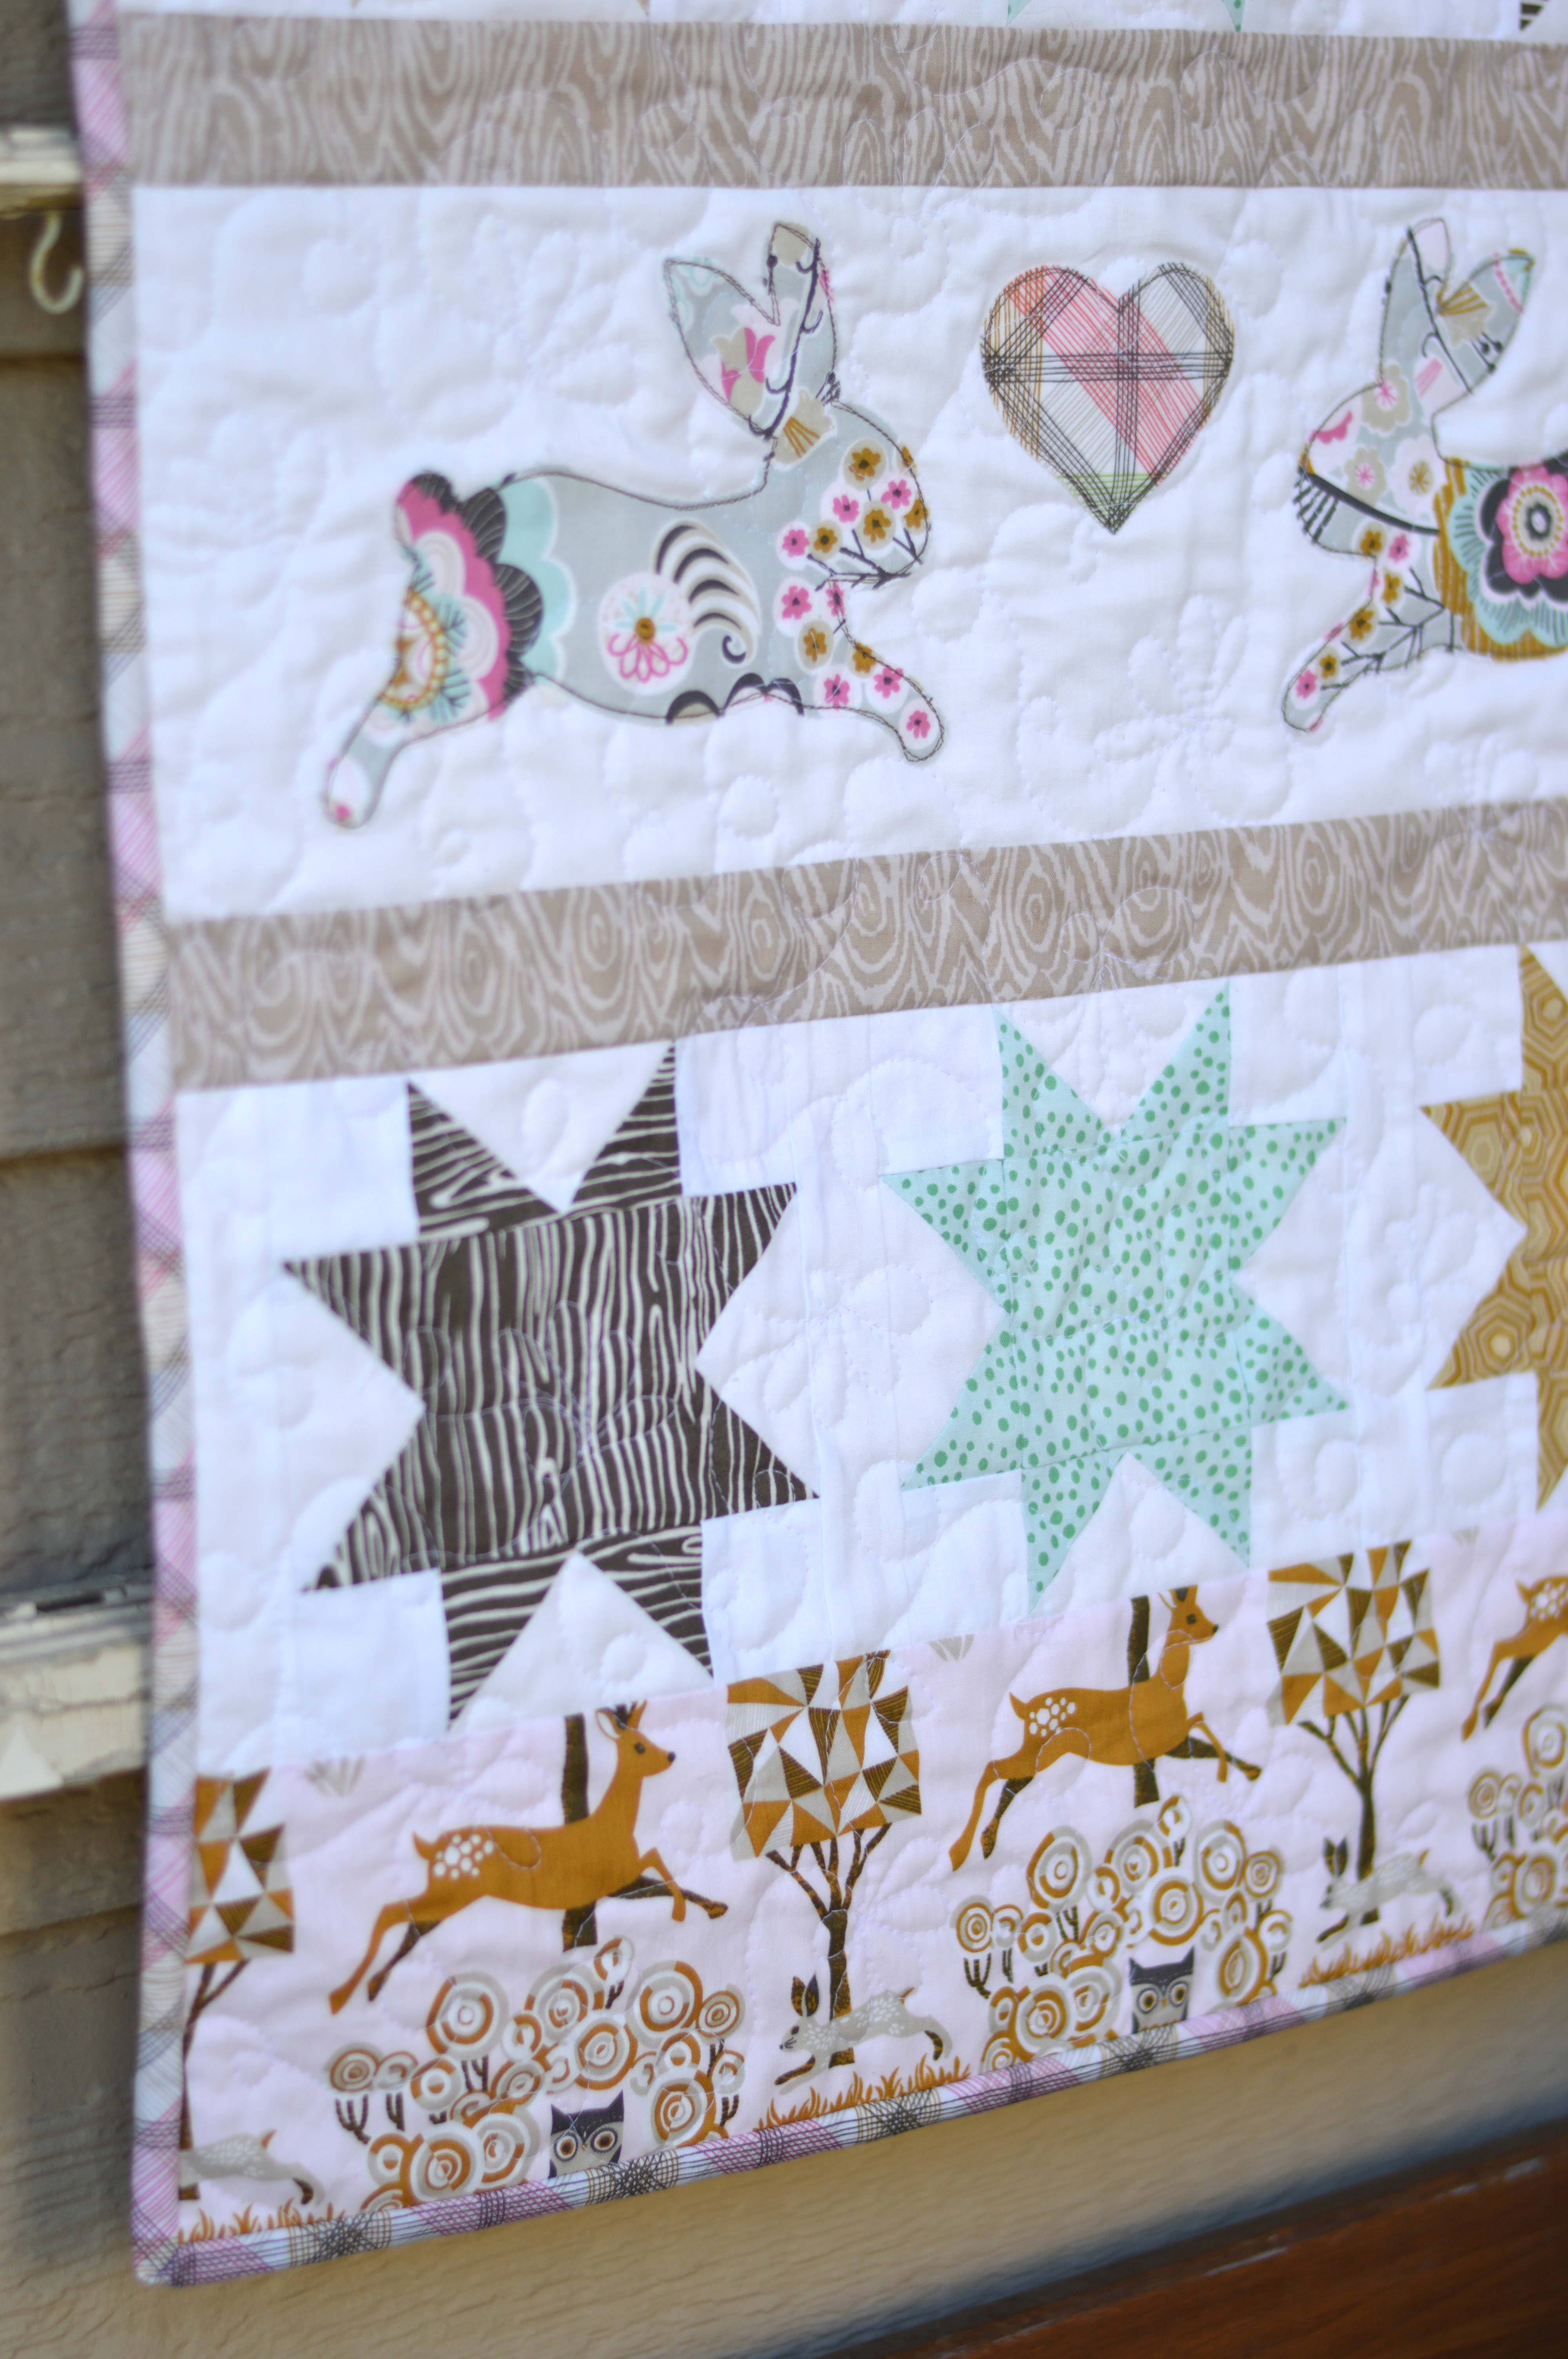
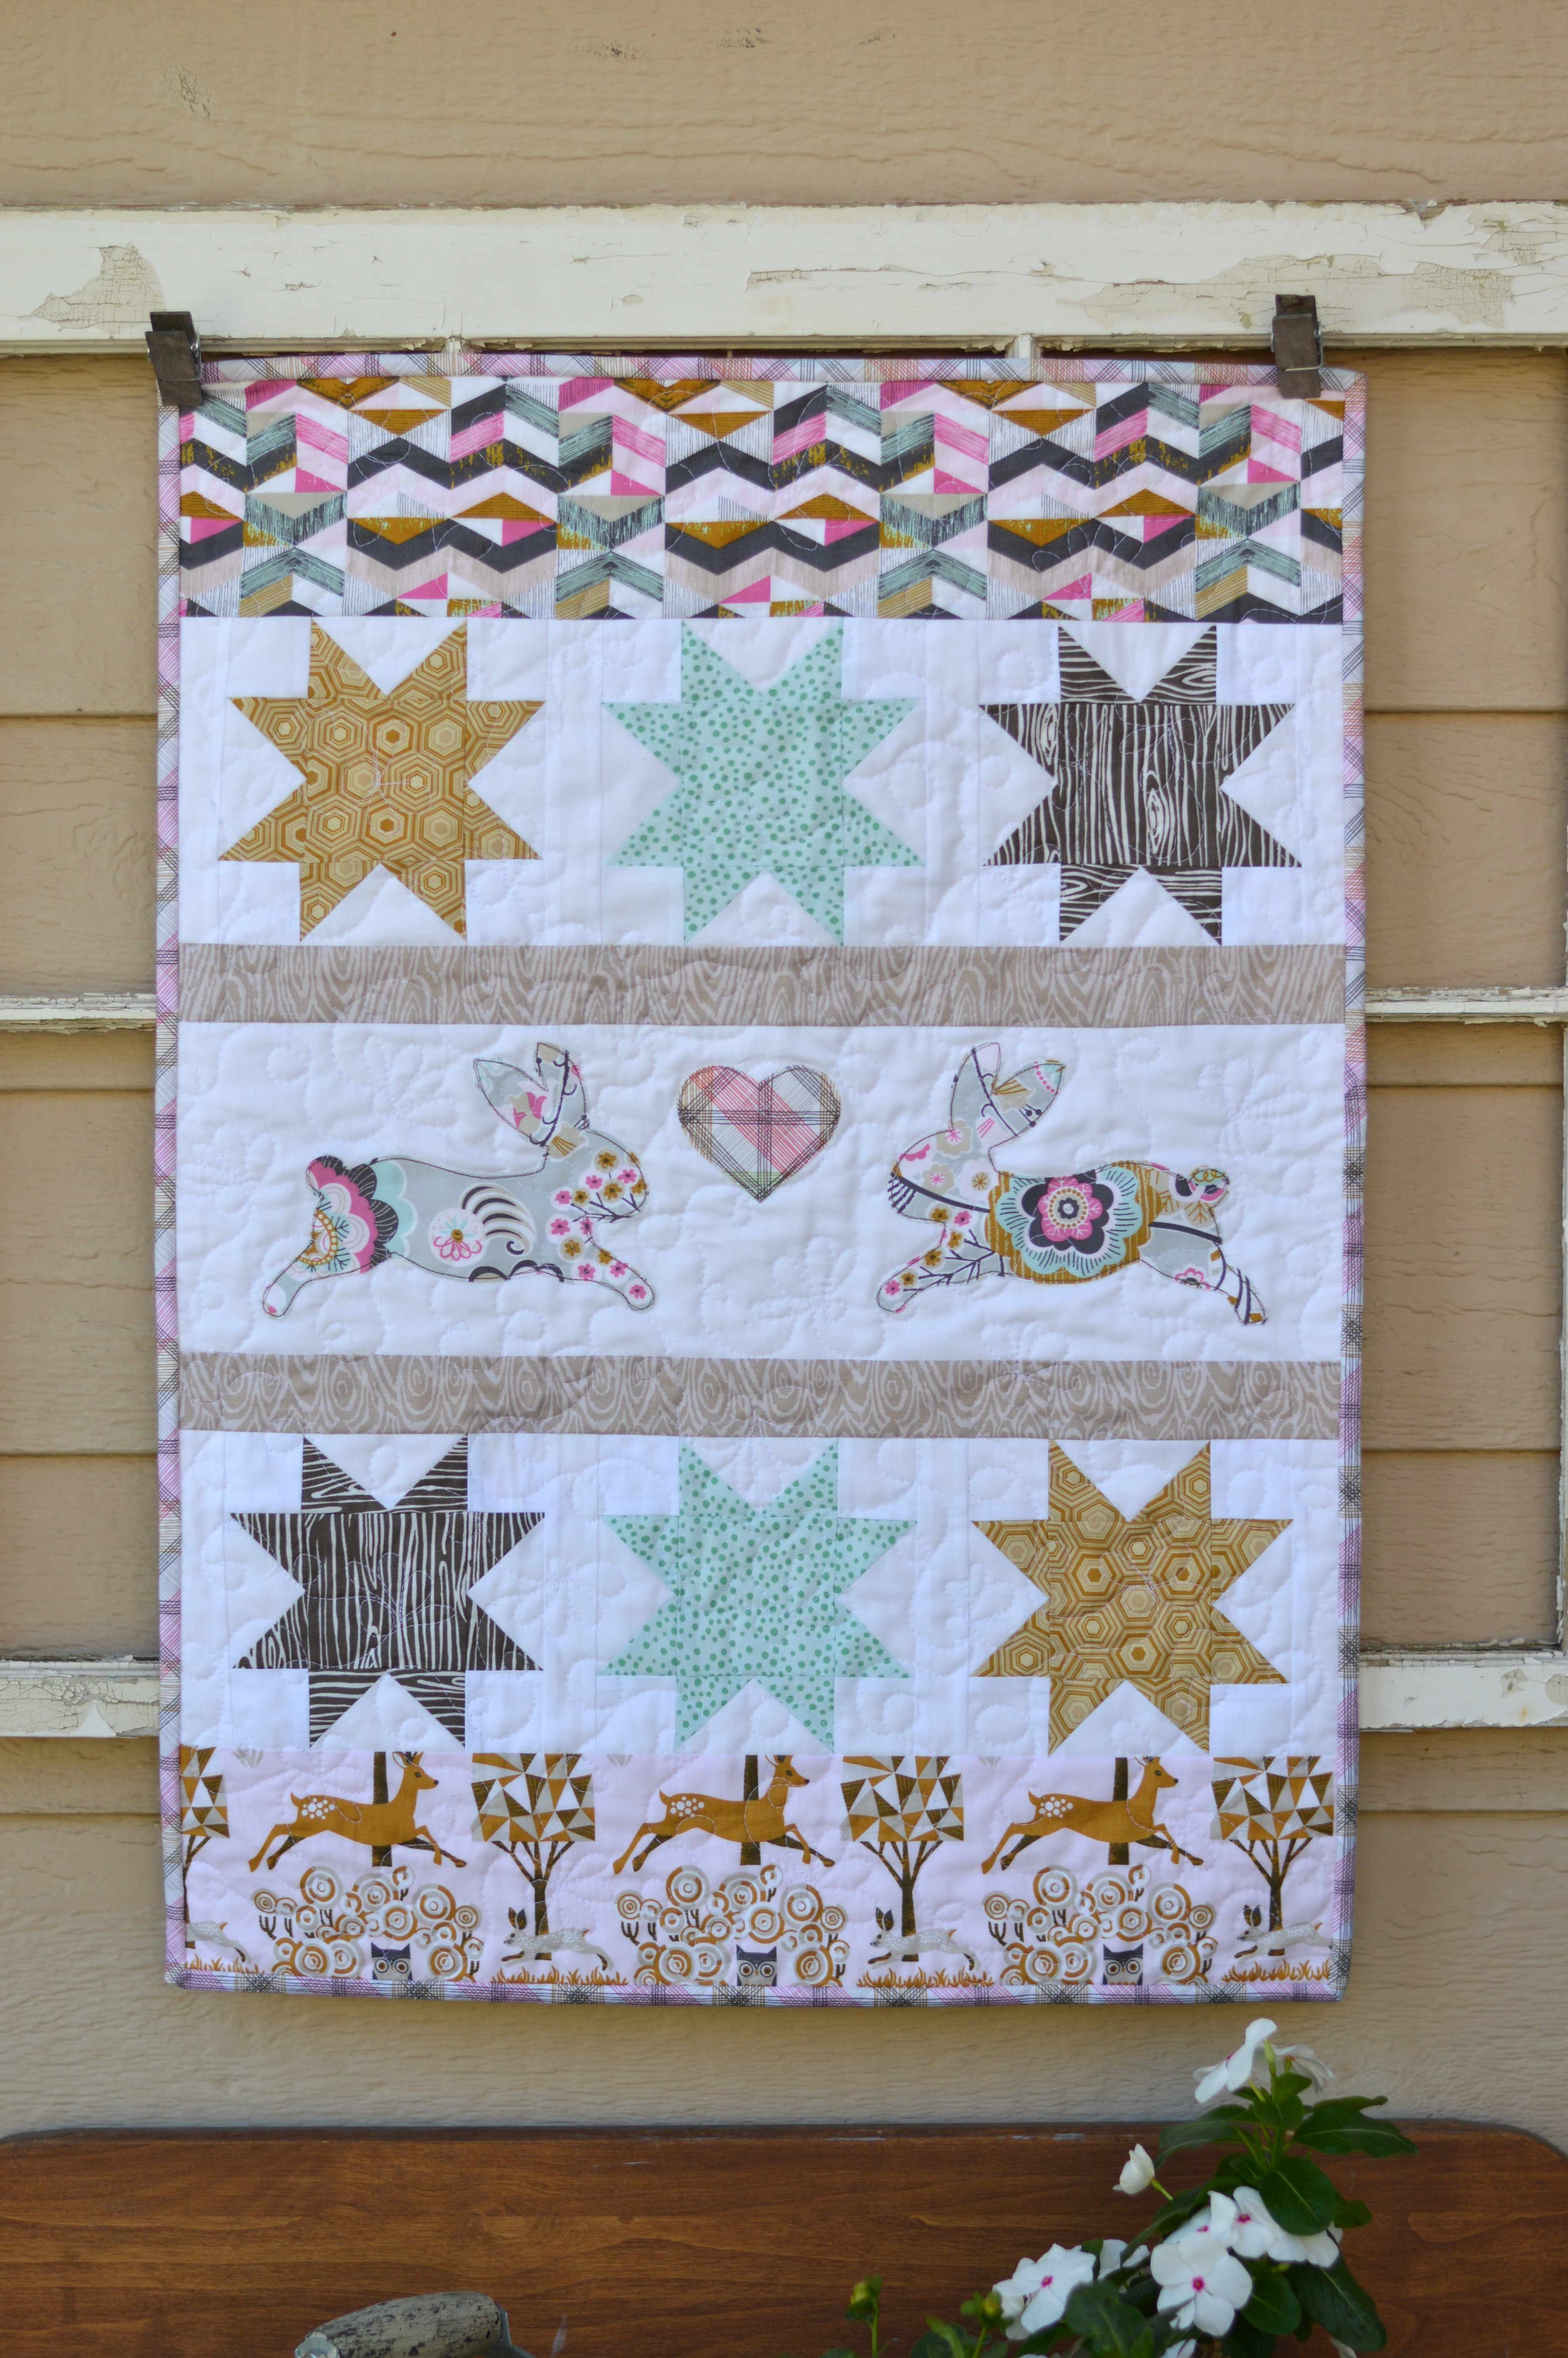
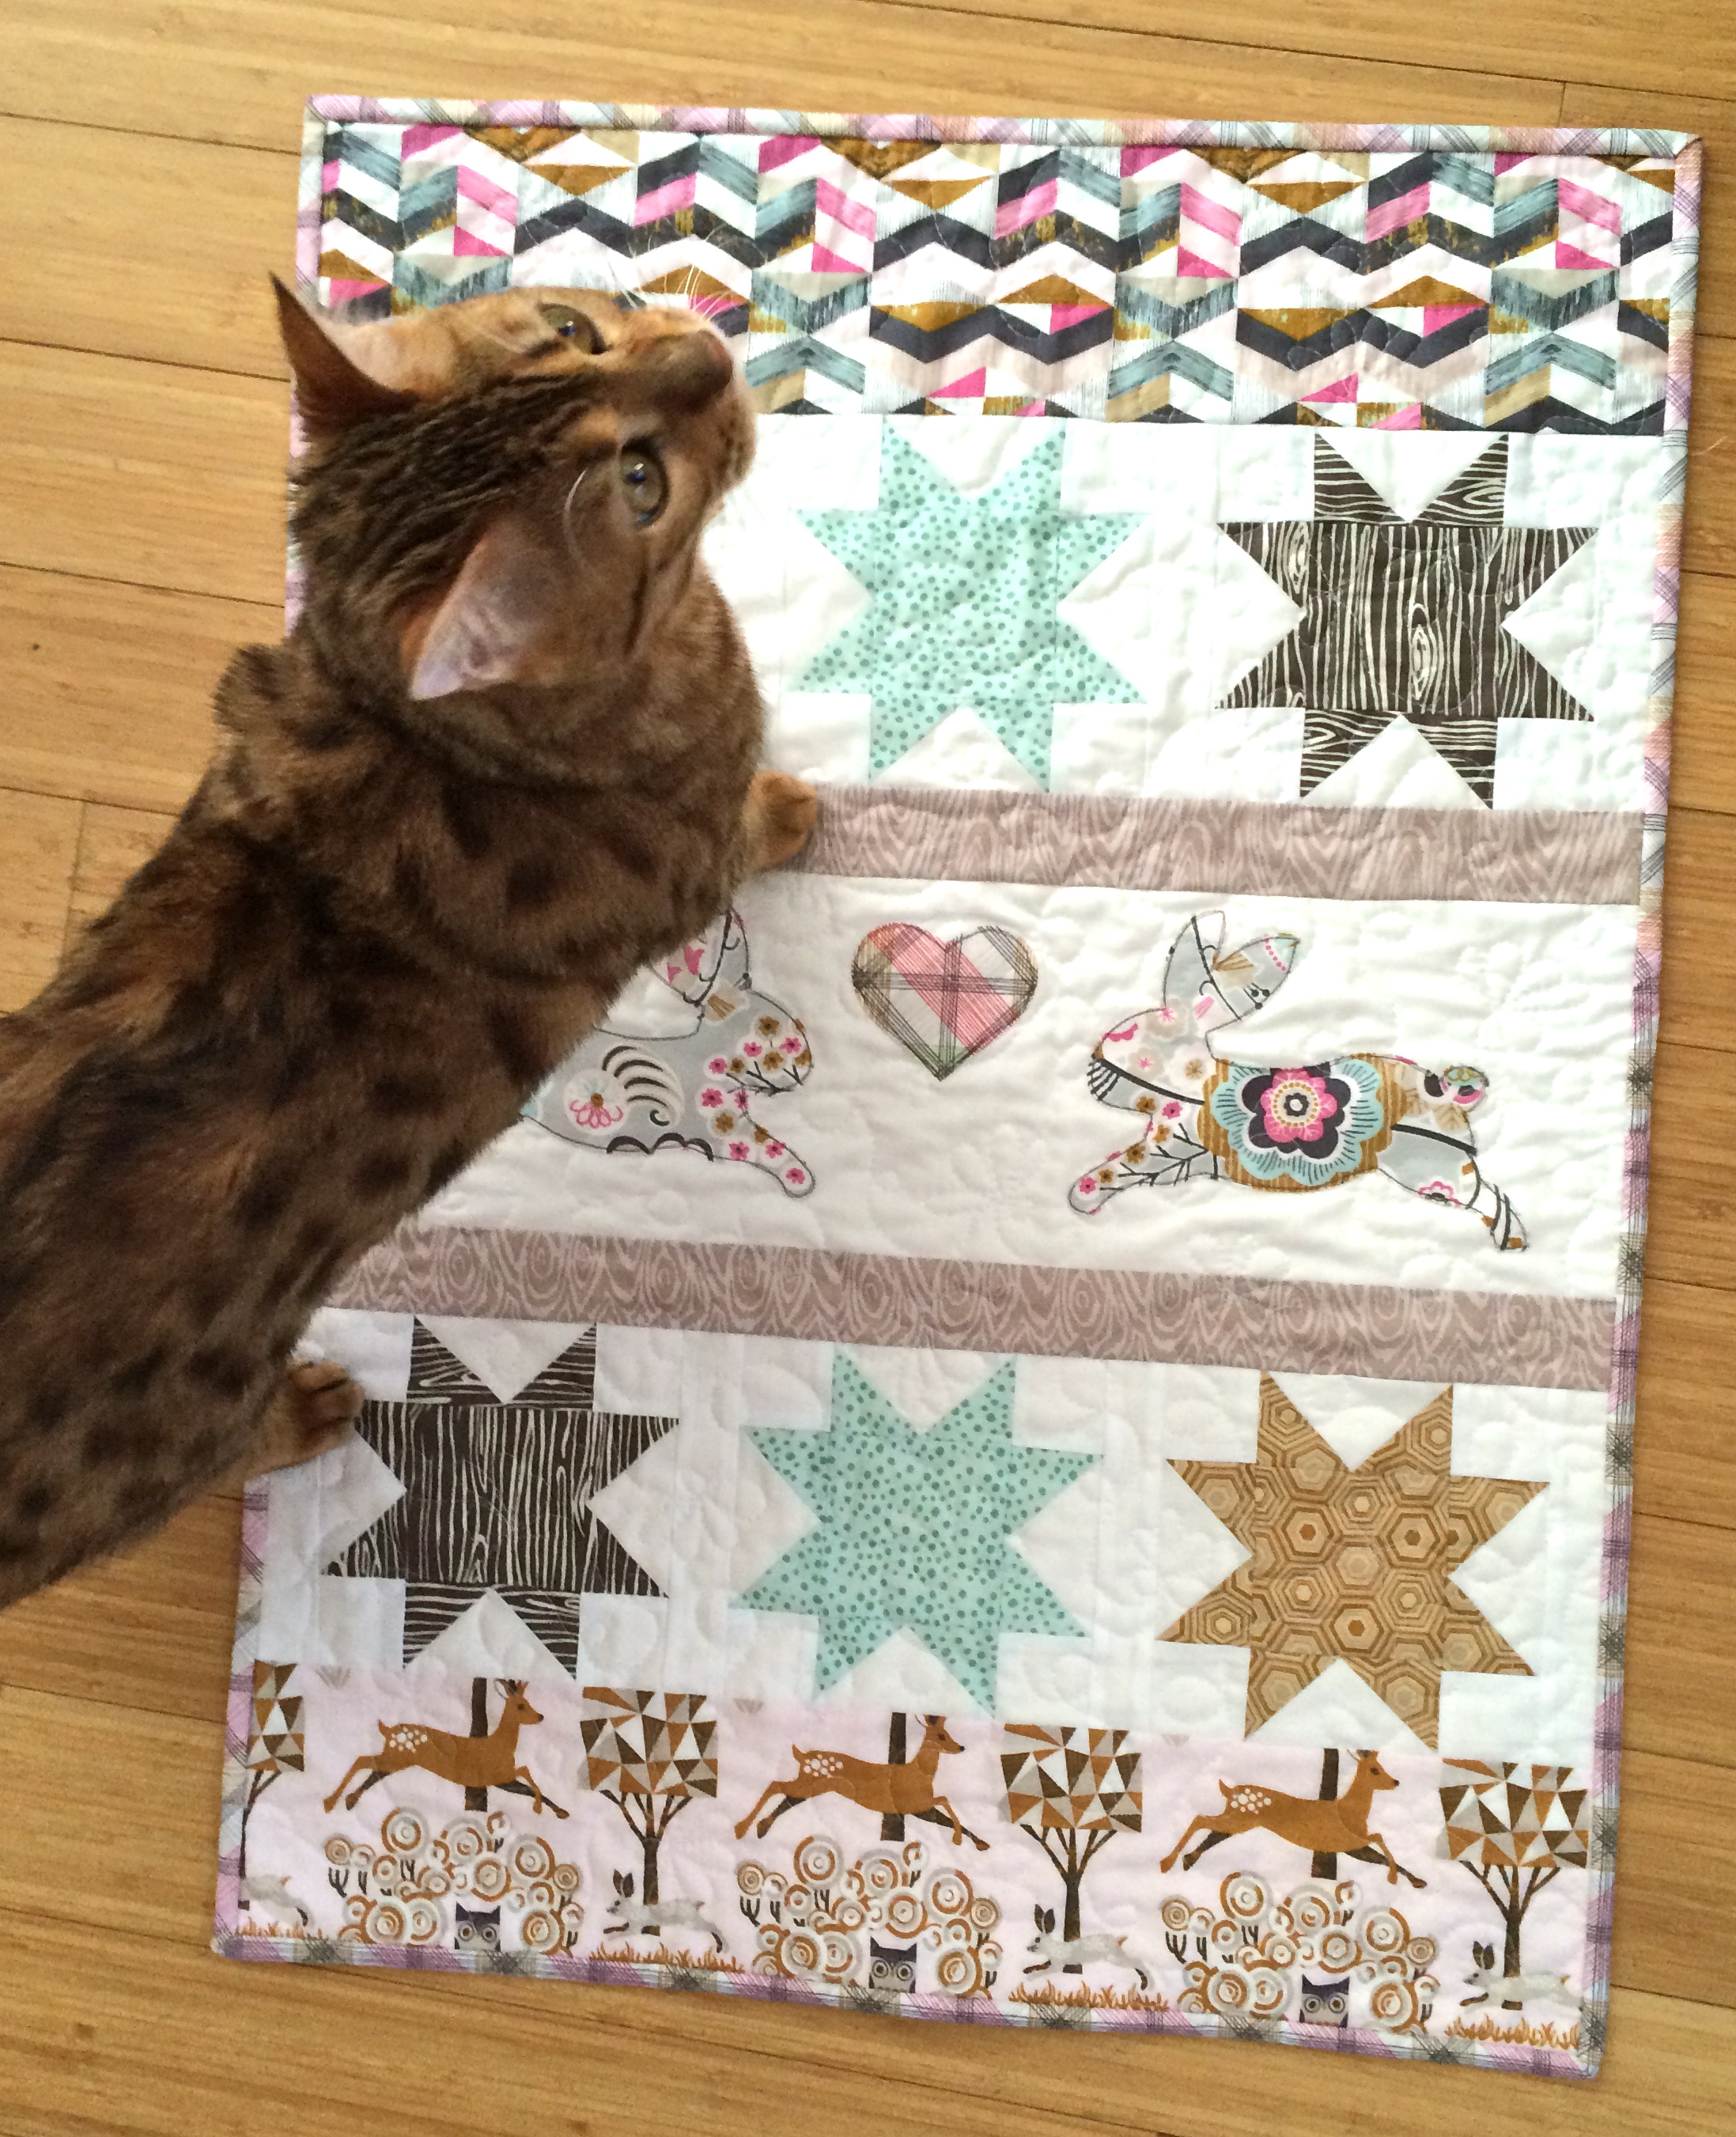
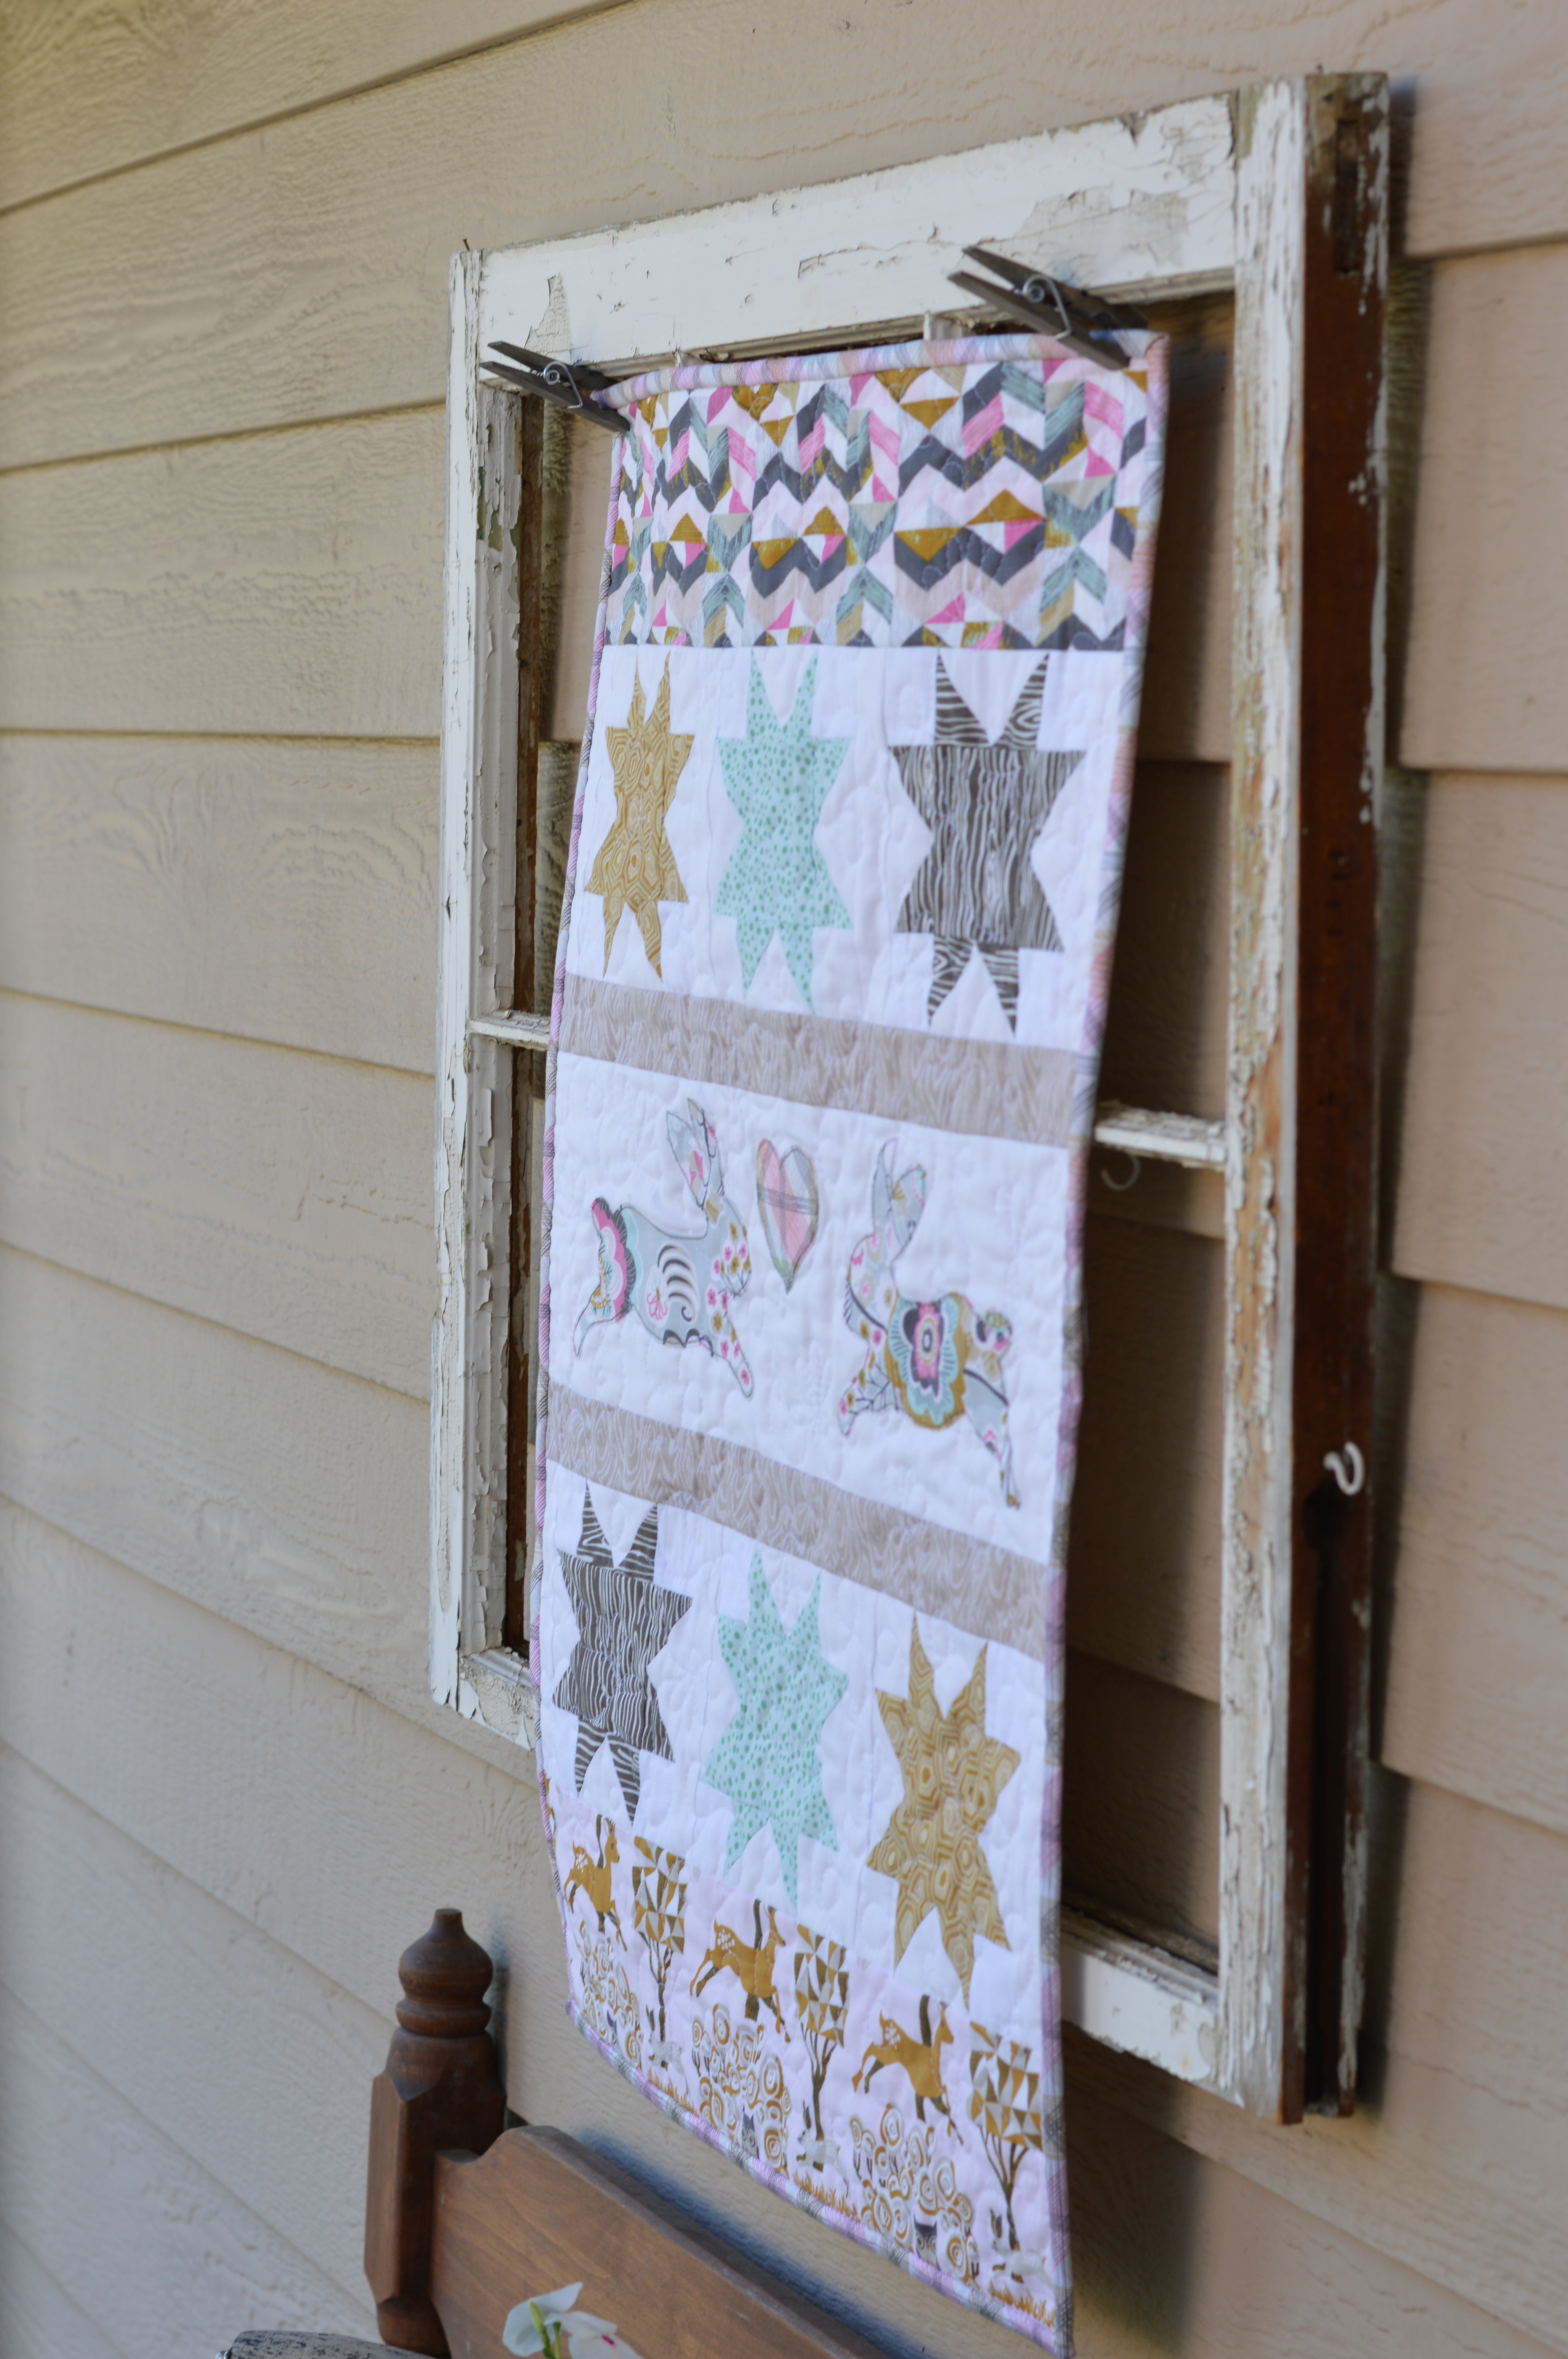
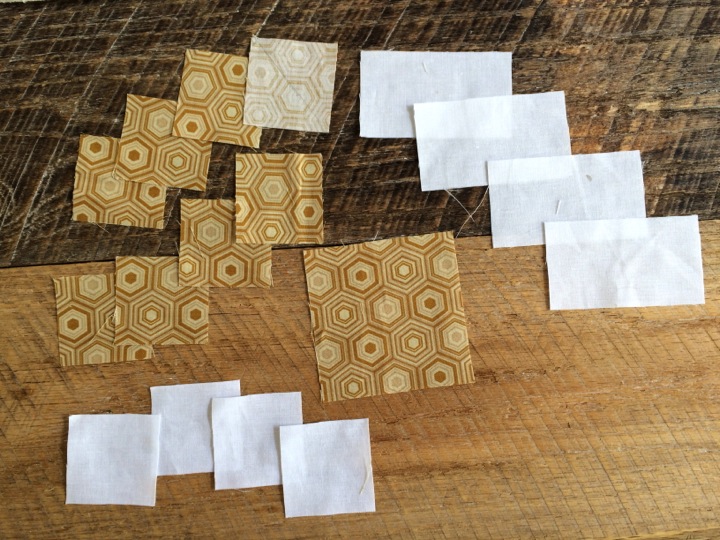
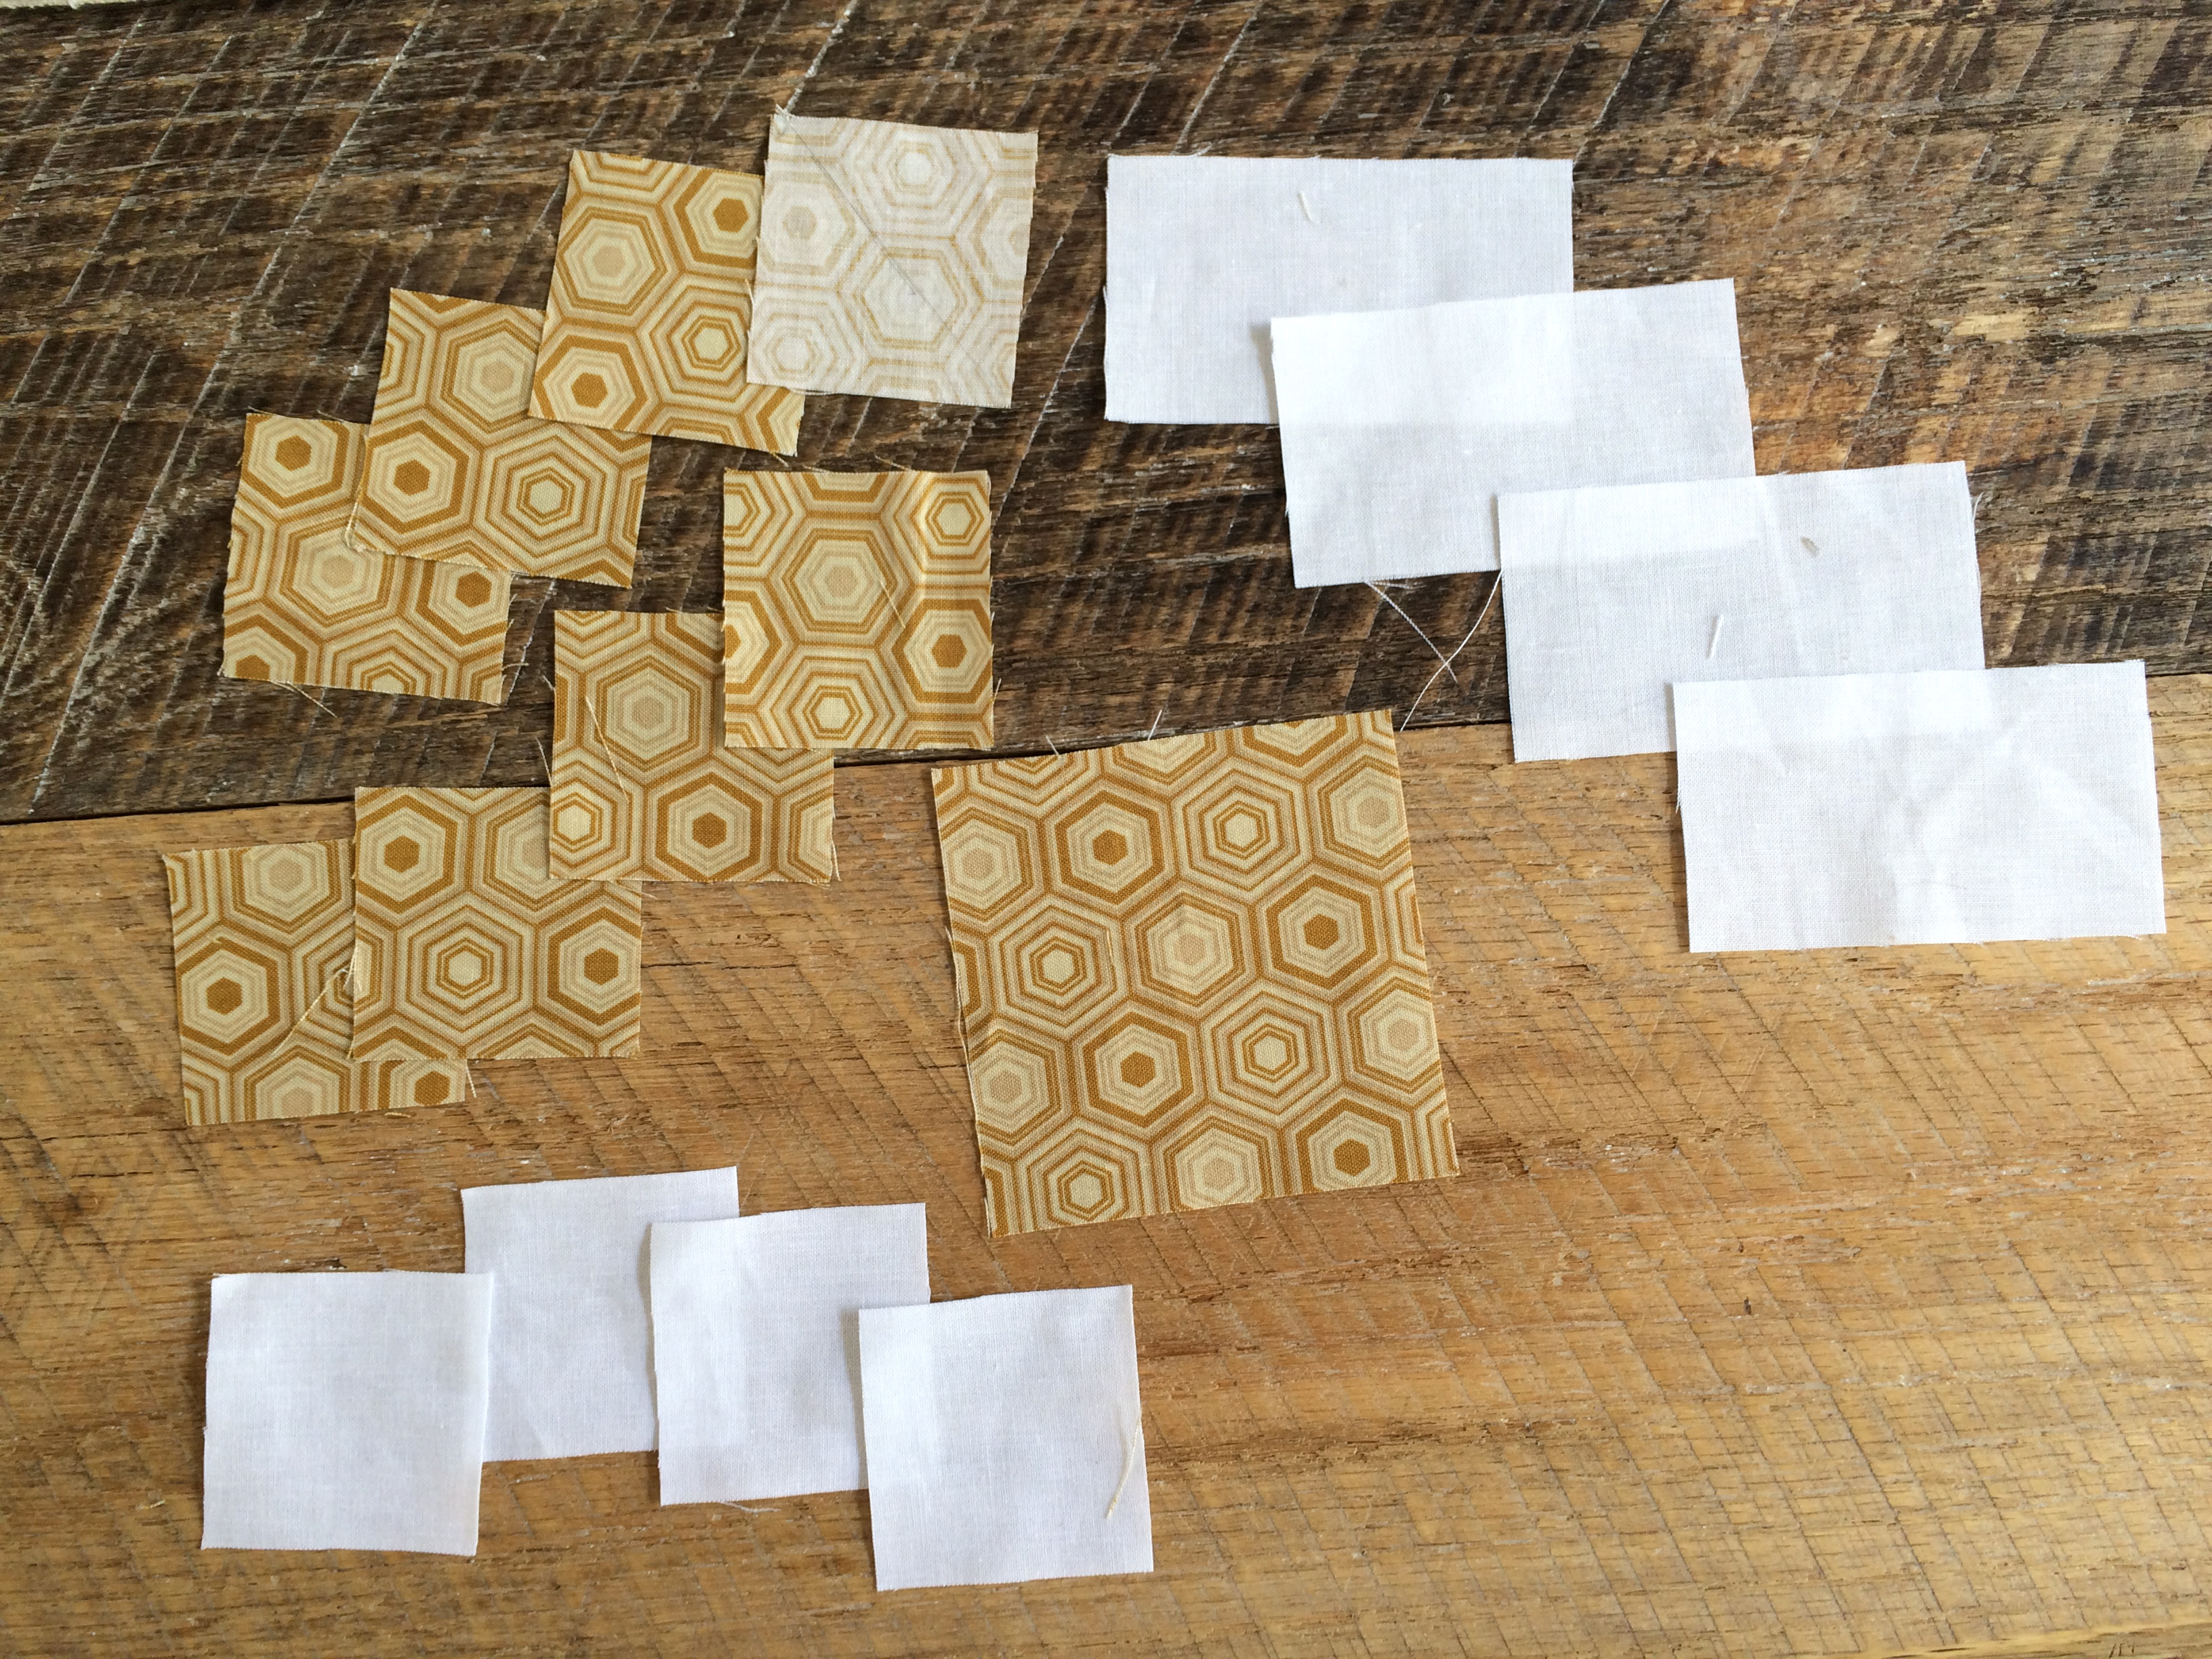
This little quilt features sawtooth blocks and appliqué.  The fabrics are from Blend Fabrics Natural Wonder fabric line.  I love that there are bunnies in the theme fabric.  The colors are soft and natural.  The bunny and hearts are cut with Sizzix dies.  Do you want to make one?  Here’s how!!

sizzix bunny blend natural wonder mini quilt 21/4″ seams used throughout 

Begin by making (6) Sawtooth Star blocks.  

For each block cut the following measurements:
sawtooth instructionsDraw a diagonal line on the back of each of the 2″ x 2″ star points squares.  Position the 2″ x 2″ square a 2″ x 3.5″ background rectangle right sides together.  Sew along the diagonal line as pictured below:

sizzix bunny blend natural wonder mini quilt 5

Trim leaving 1/4″ seam allowance and press toward the dark.  Repeat the process on the other side of the background rectangle including trimming and pressing.
sizzix bunny blend natural wonder mini quilt 4

Lay the star block out like this:

sizzix bunny blend natural wonder mini quilt 3

Sew the pieces together in rows, and then the rows together.  Press seams open.  The finished sawtooth block is 6.5″

star instructions

Sew the sashing strips creating (2) Star Sets.  Press the seams toward the sashing.

Cut the strips for the quilt following the cutting guide:

blend bunny quilt layout

Bunny Applique

Iron Heat n Bond Lite to the back of the floral print fabric (Deco Park Gray).  Using the Sizzix Fabi and the Bunny Die, cut out two bunnies that face each other.  Using the hearts die, cut the larger heart out of coordinating fabric.


sizzix bunny blend natural wonder mini quilt Screen Shot 2015-07-27 at 11.43.43 AMScreen Shot 2015-07-27 at 11.46.12 AM
Peel off the backing paper and press the bunnies and heart onto the white fabric, centering.  Outline stitch two times in dark gray or taupe thread.  Sew the strips together as shown in the picture.  Press seams and quilt as desired.

sizzix bunny blend natural wonder mini quilt 12

I quilted loop de loos and 4-petal clover flowers in an all-over design.

sizzix bunny blend natural wonder mini quilt 10
sizzix bunny blend natural wonder mini quilt 9

sizzix bunny blend natural wonder mini quilt 8

Make sure your #kittyquilter #kittyhelper approves of the finished quilt before you wrap it up!sizzix bunny blend natural wonder mini quilt 11
sizzix bunny blend natural wonder mini quilt 7

Supplies:

Sizzix Fabi

Sizzix Bunny Die

Sizzix Heart Die

Heat n Bond Lite or Featherweight fusible applique

1/4 yard each of the patterned fabrics from Blend Natural Wonder line

1/3 yard white solid fabric

1 yard backing

1/3 yard binding

cotton batting

Birthday Cat-Cake Towel Tutorial

cat cakes

It’s my birthday today!  To celebrate I made this fun appliqué towel with cat cupcakes – or Cat Cakes as I call them!  I bought this toweling by the yard.  It comes in lots of colors and styles.

birthday cat cupcake applique day sail 16

To make this towel you need:

1 towel or 1 yard toweling

6 charm squares for cats and cakes, I used Day Sail by Moda

3 scraps for candles

Heat n Bond Lite cut into 5″ squares

birthday cat cupcake applique day sail 6
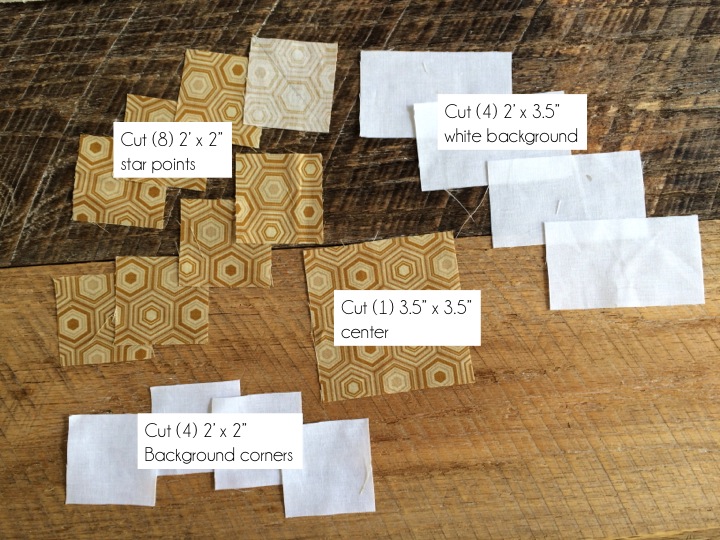
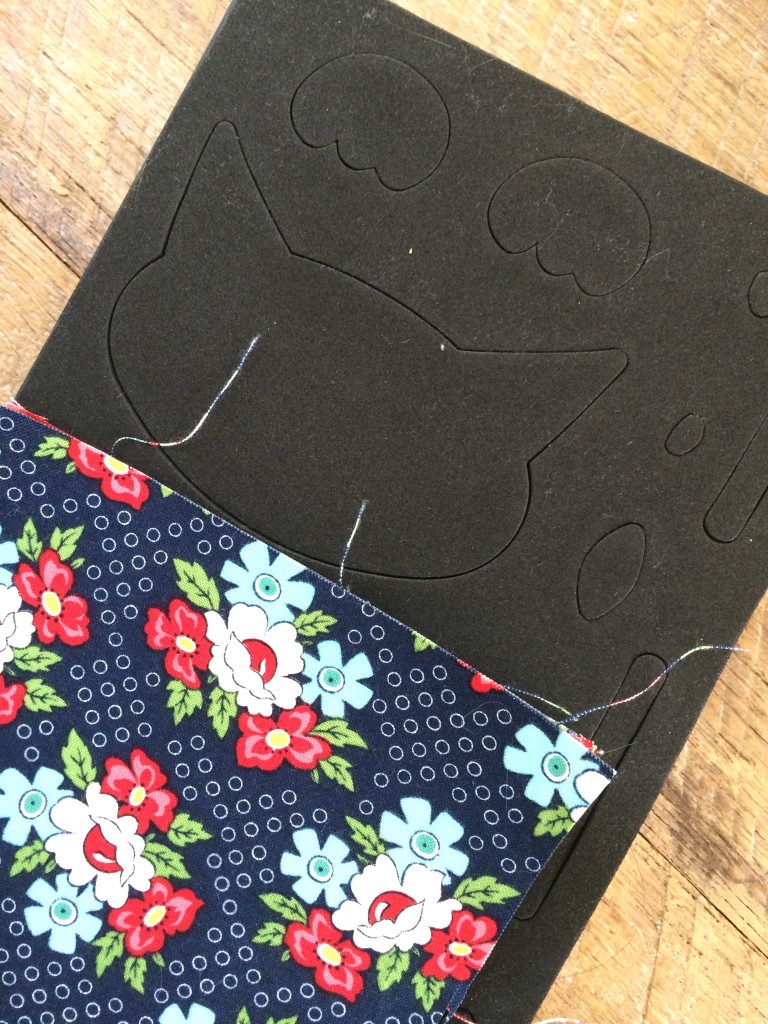
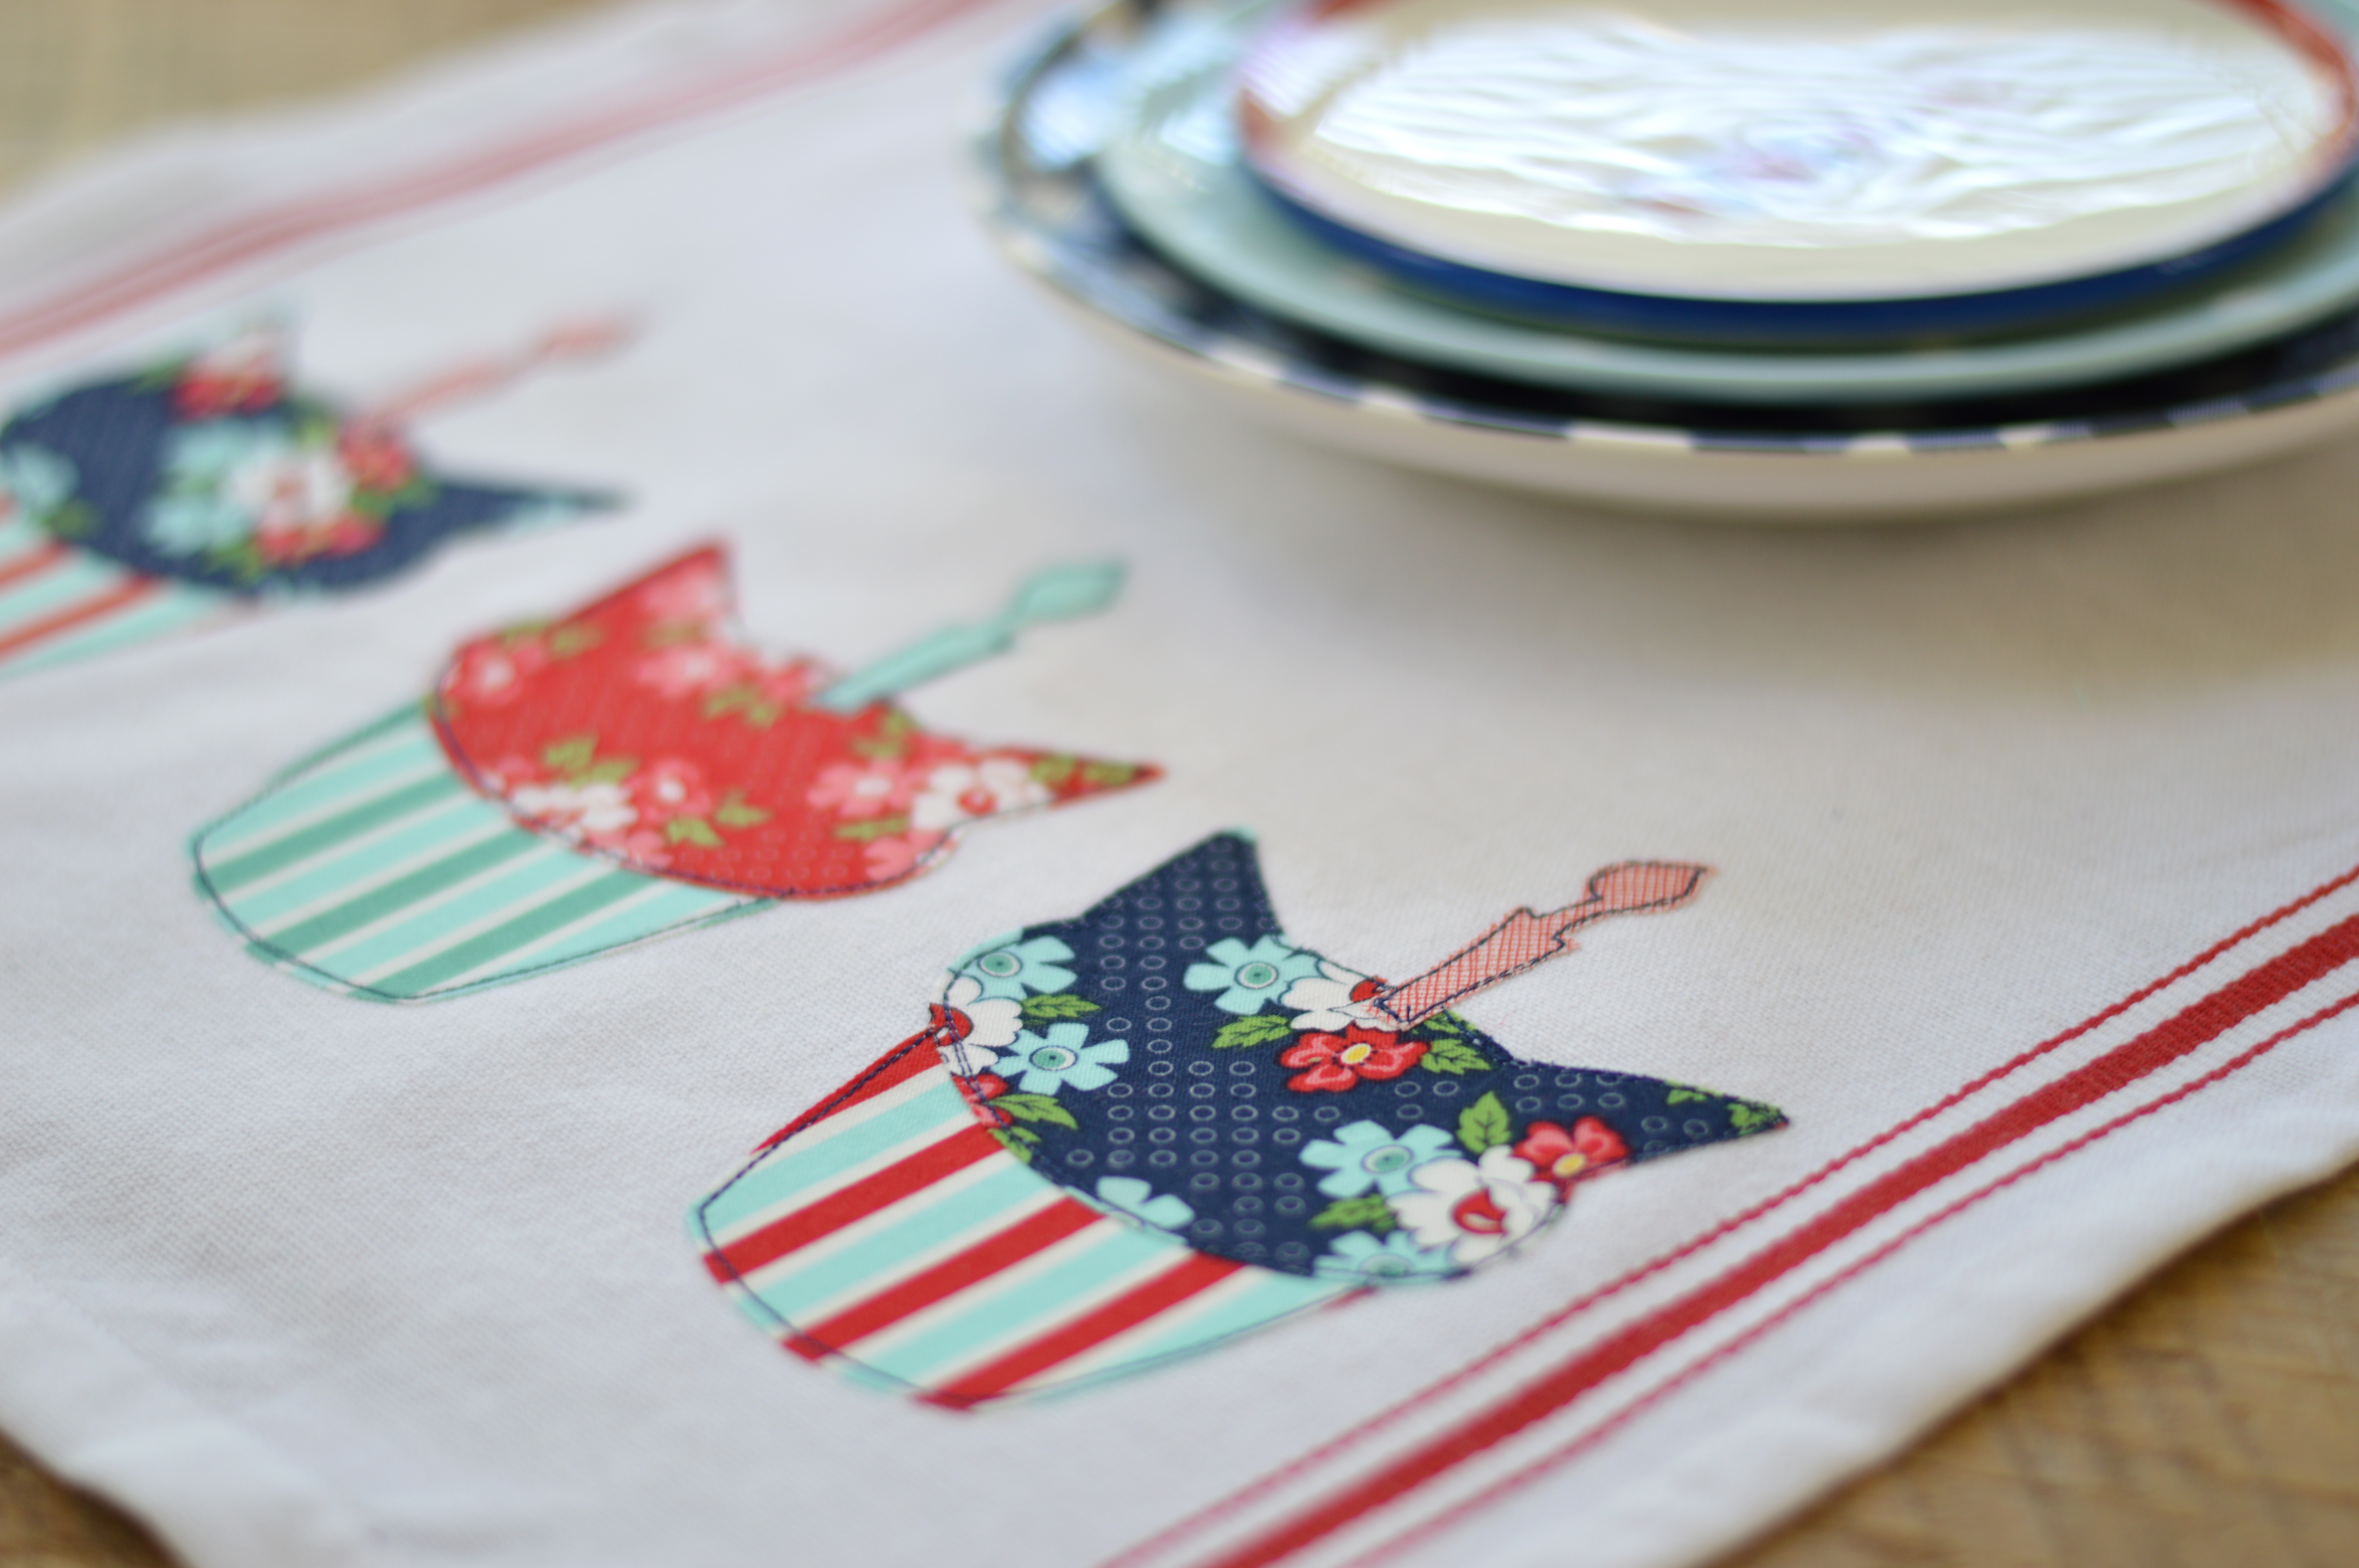
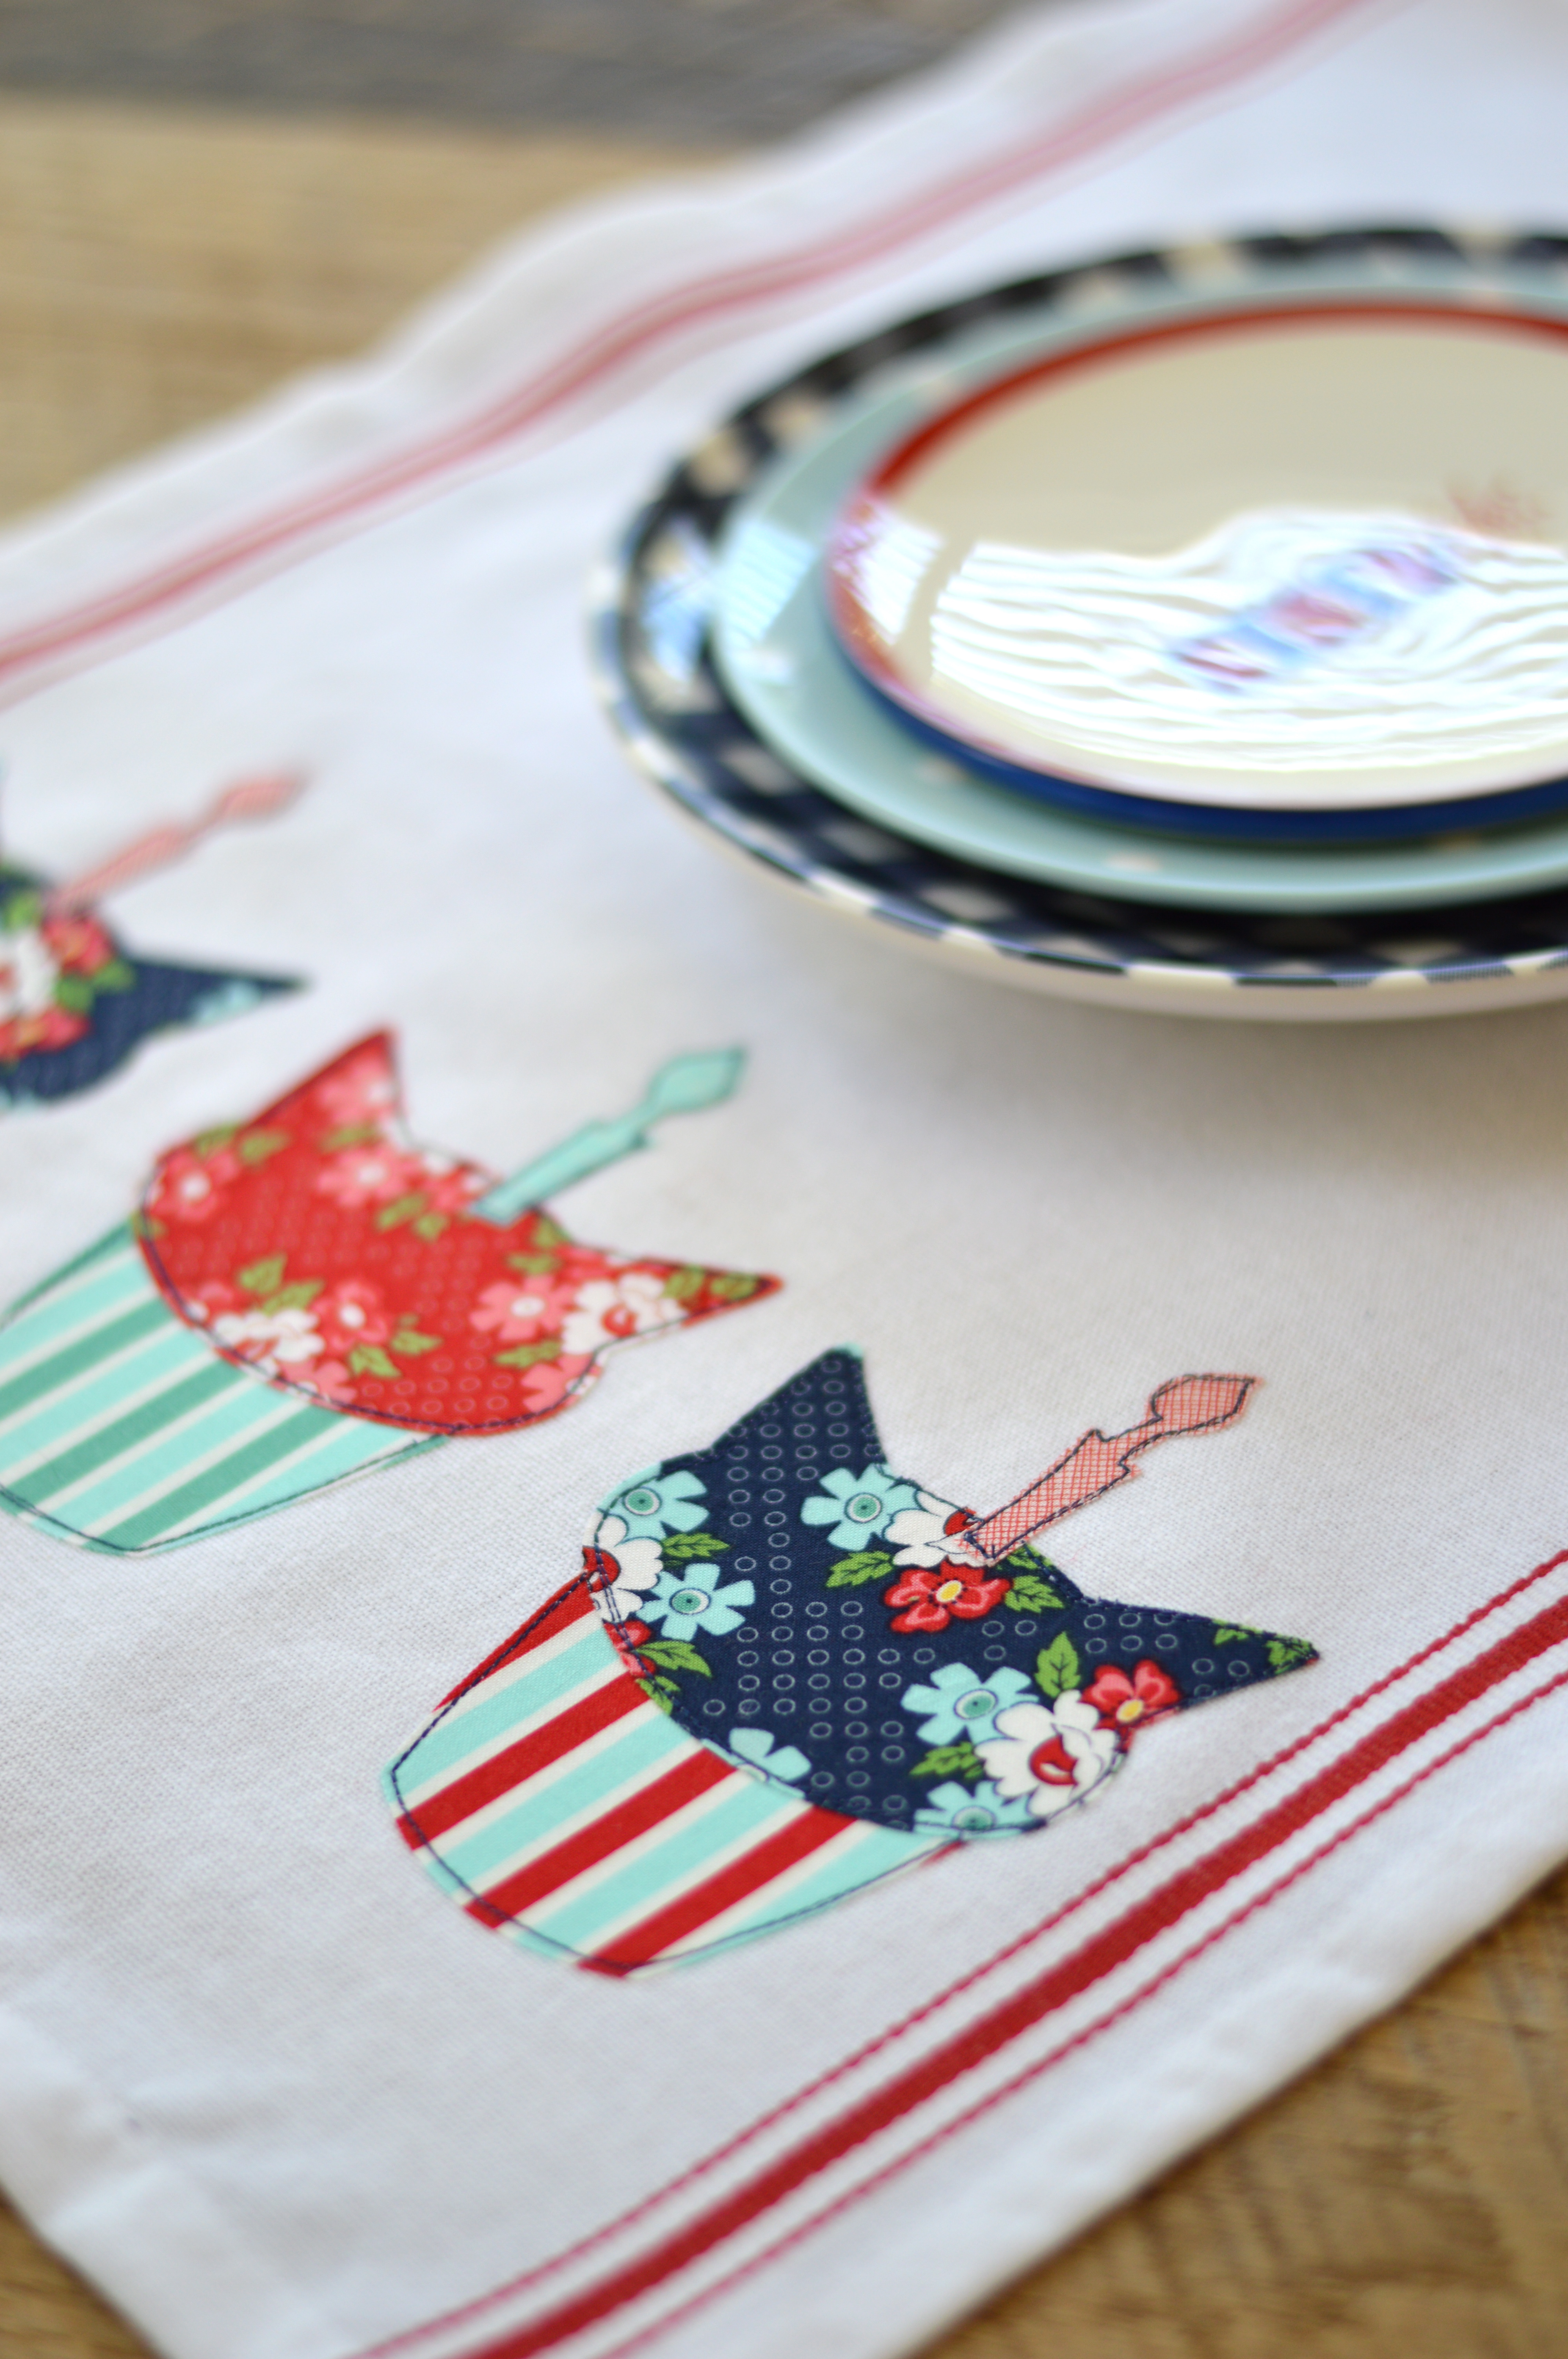
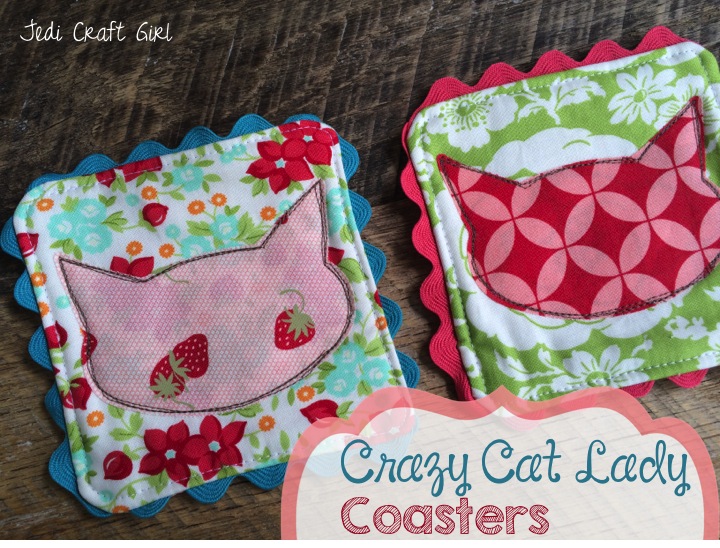
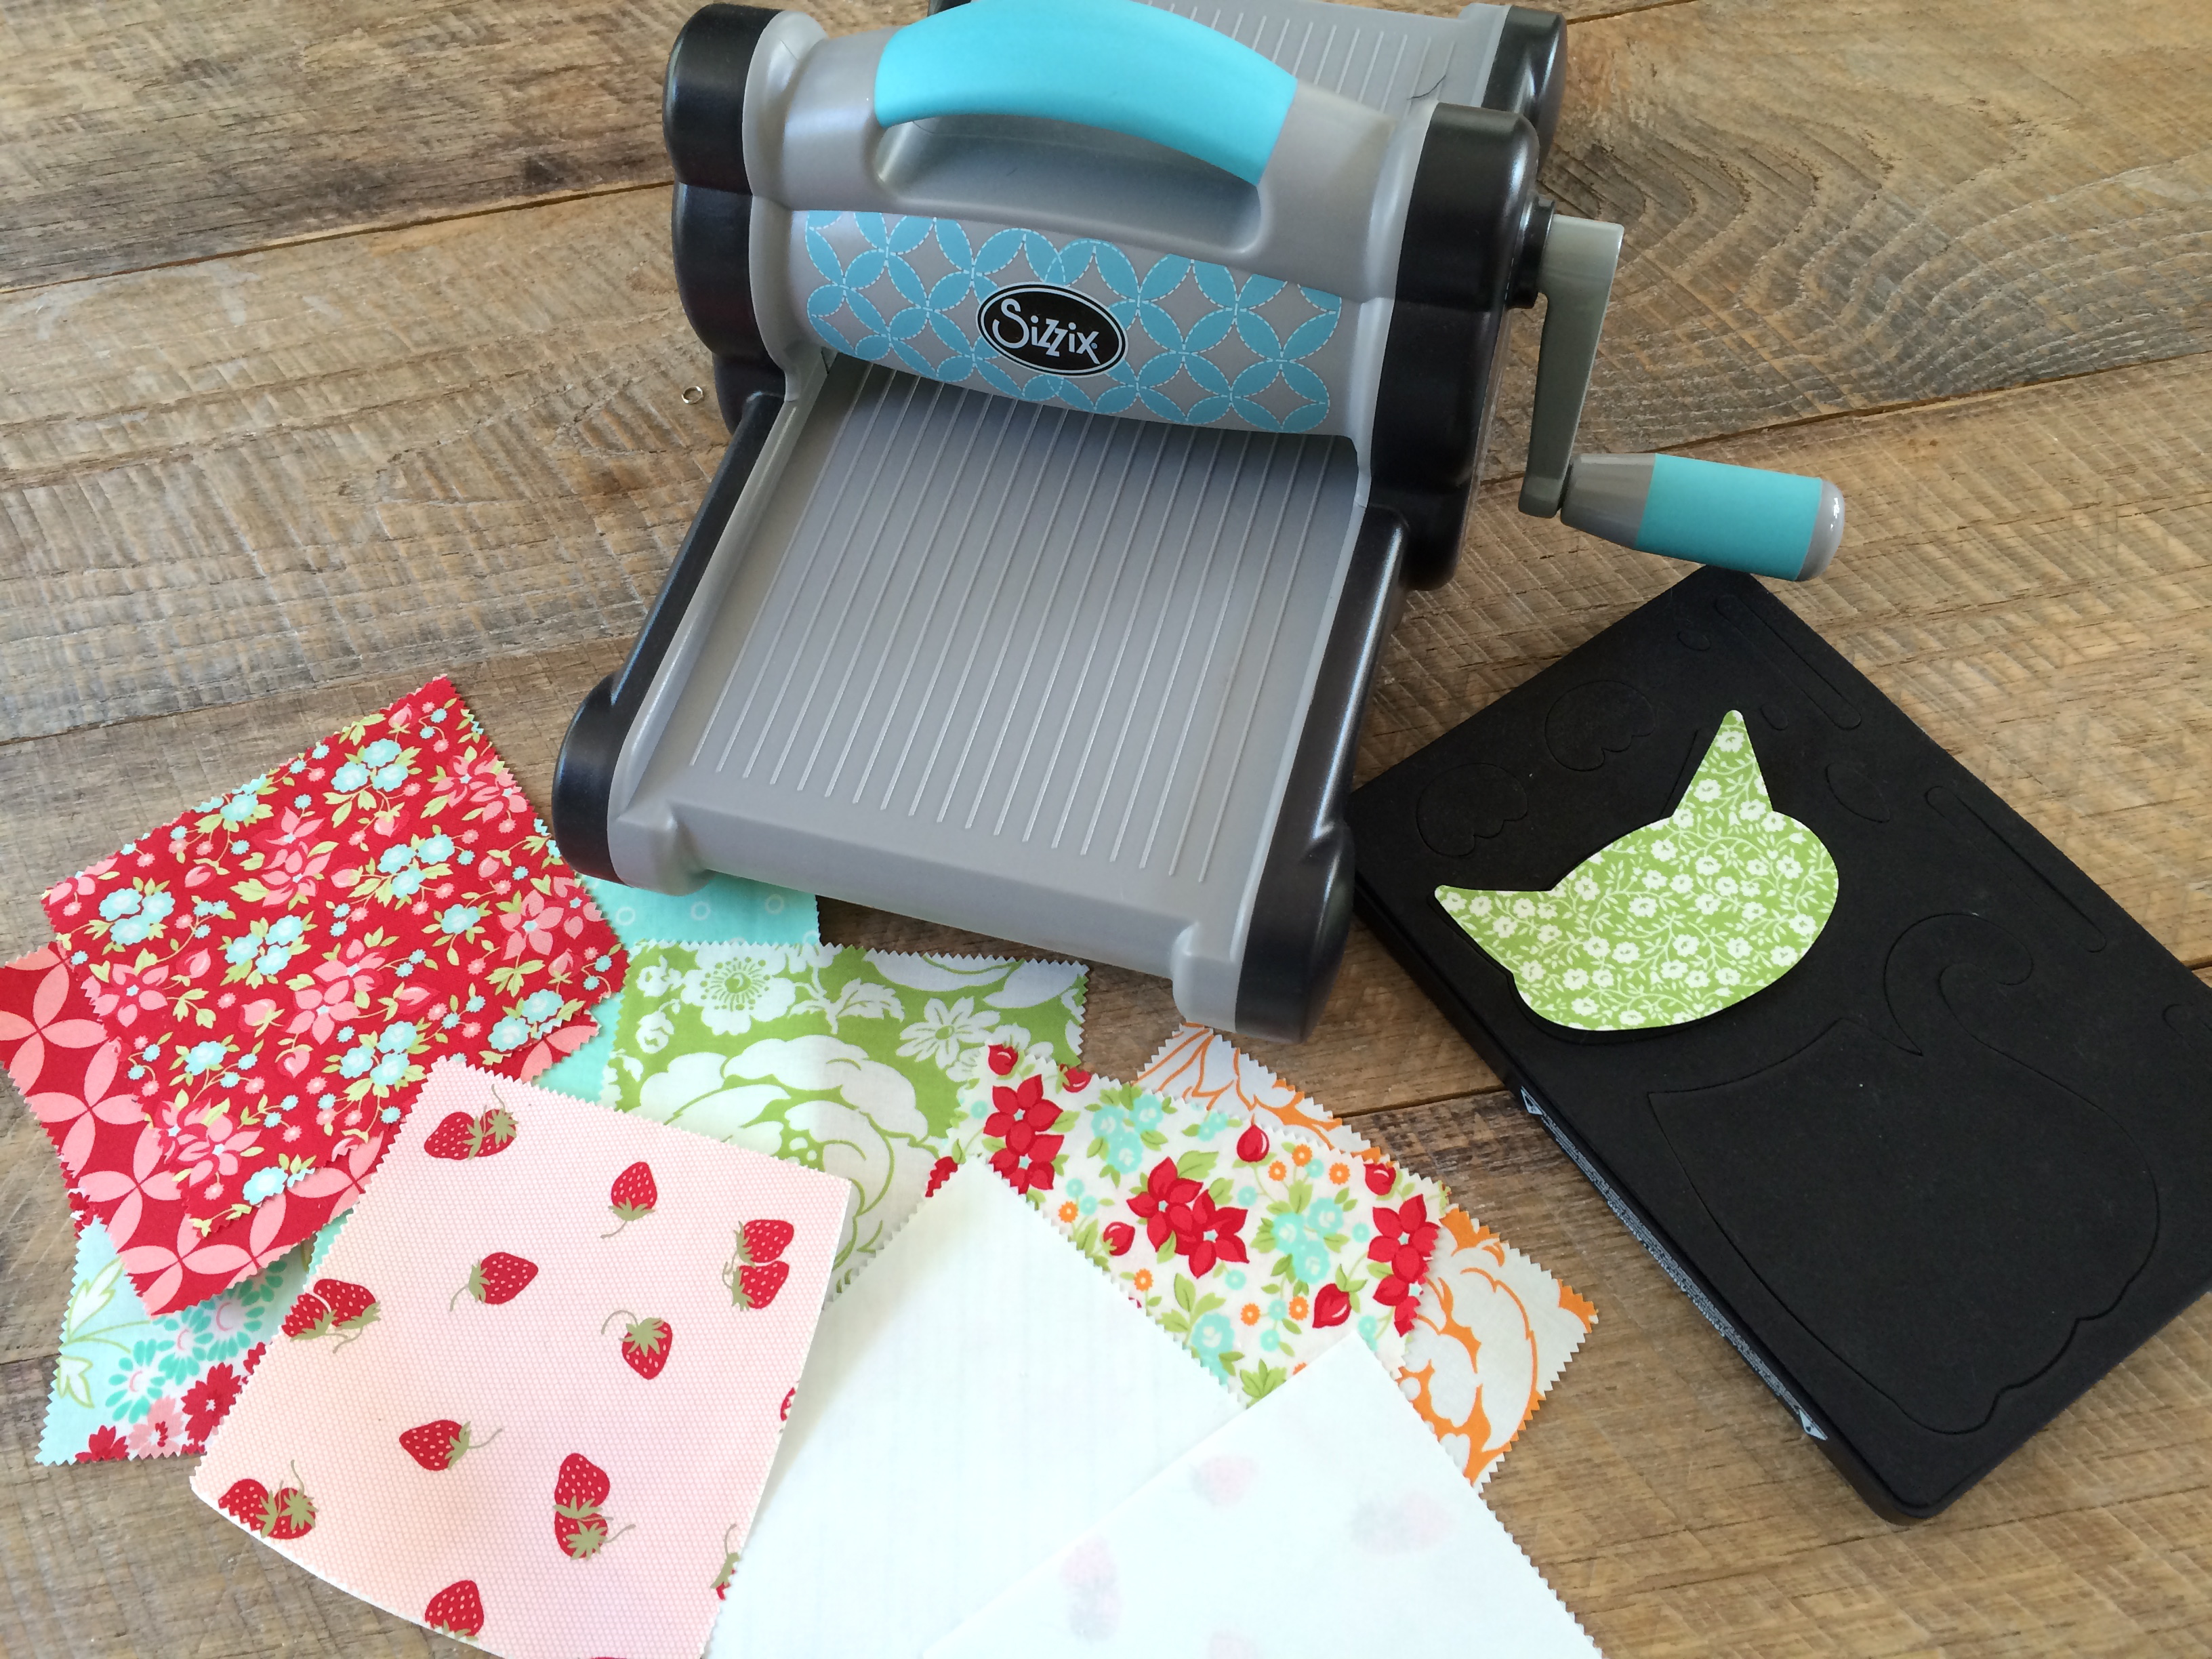
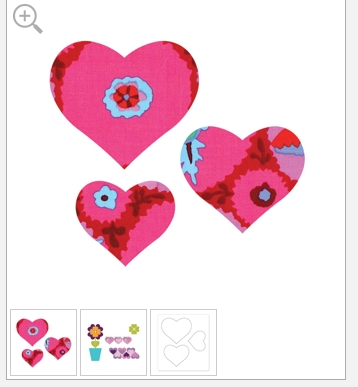
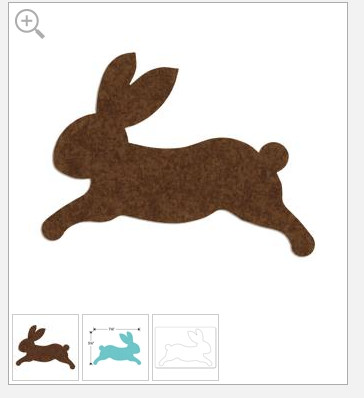
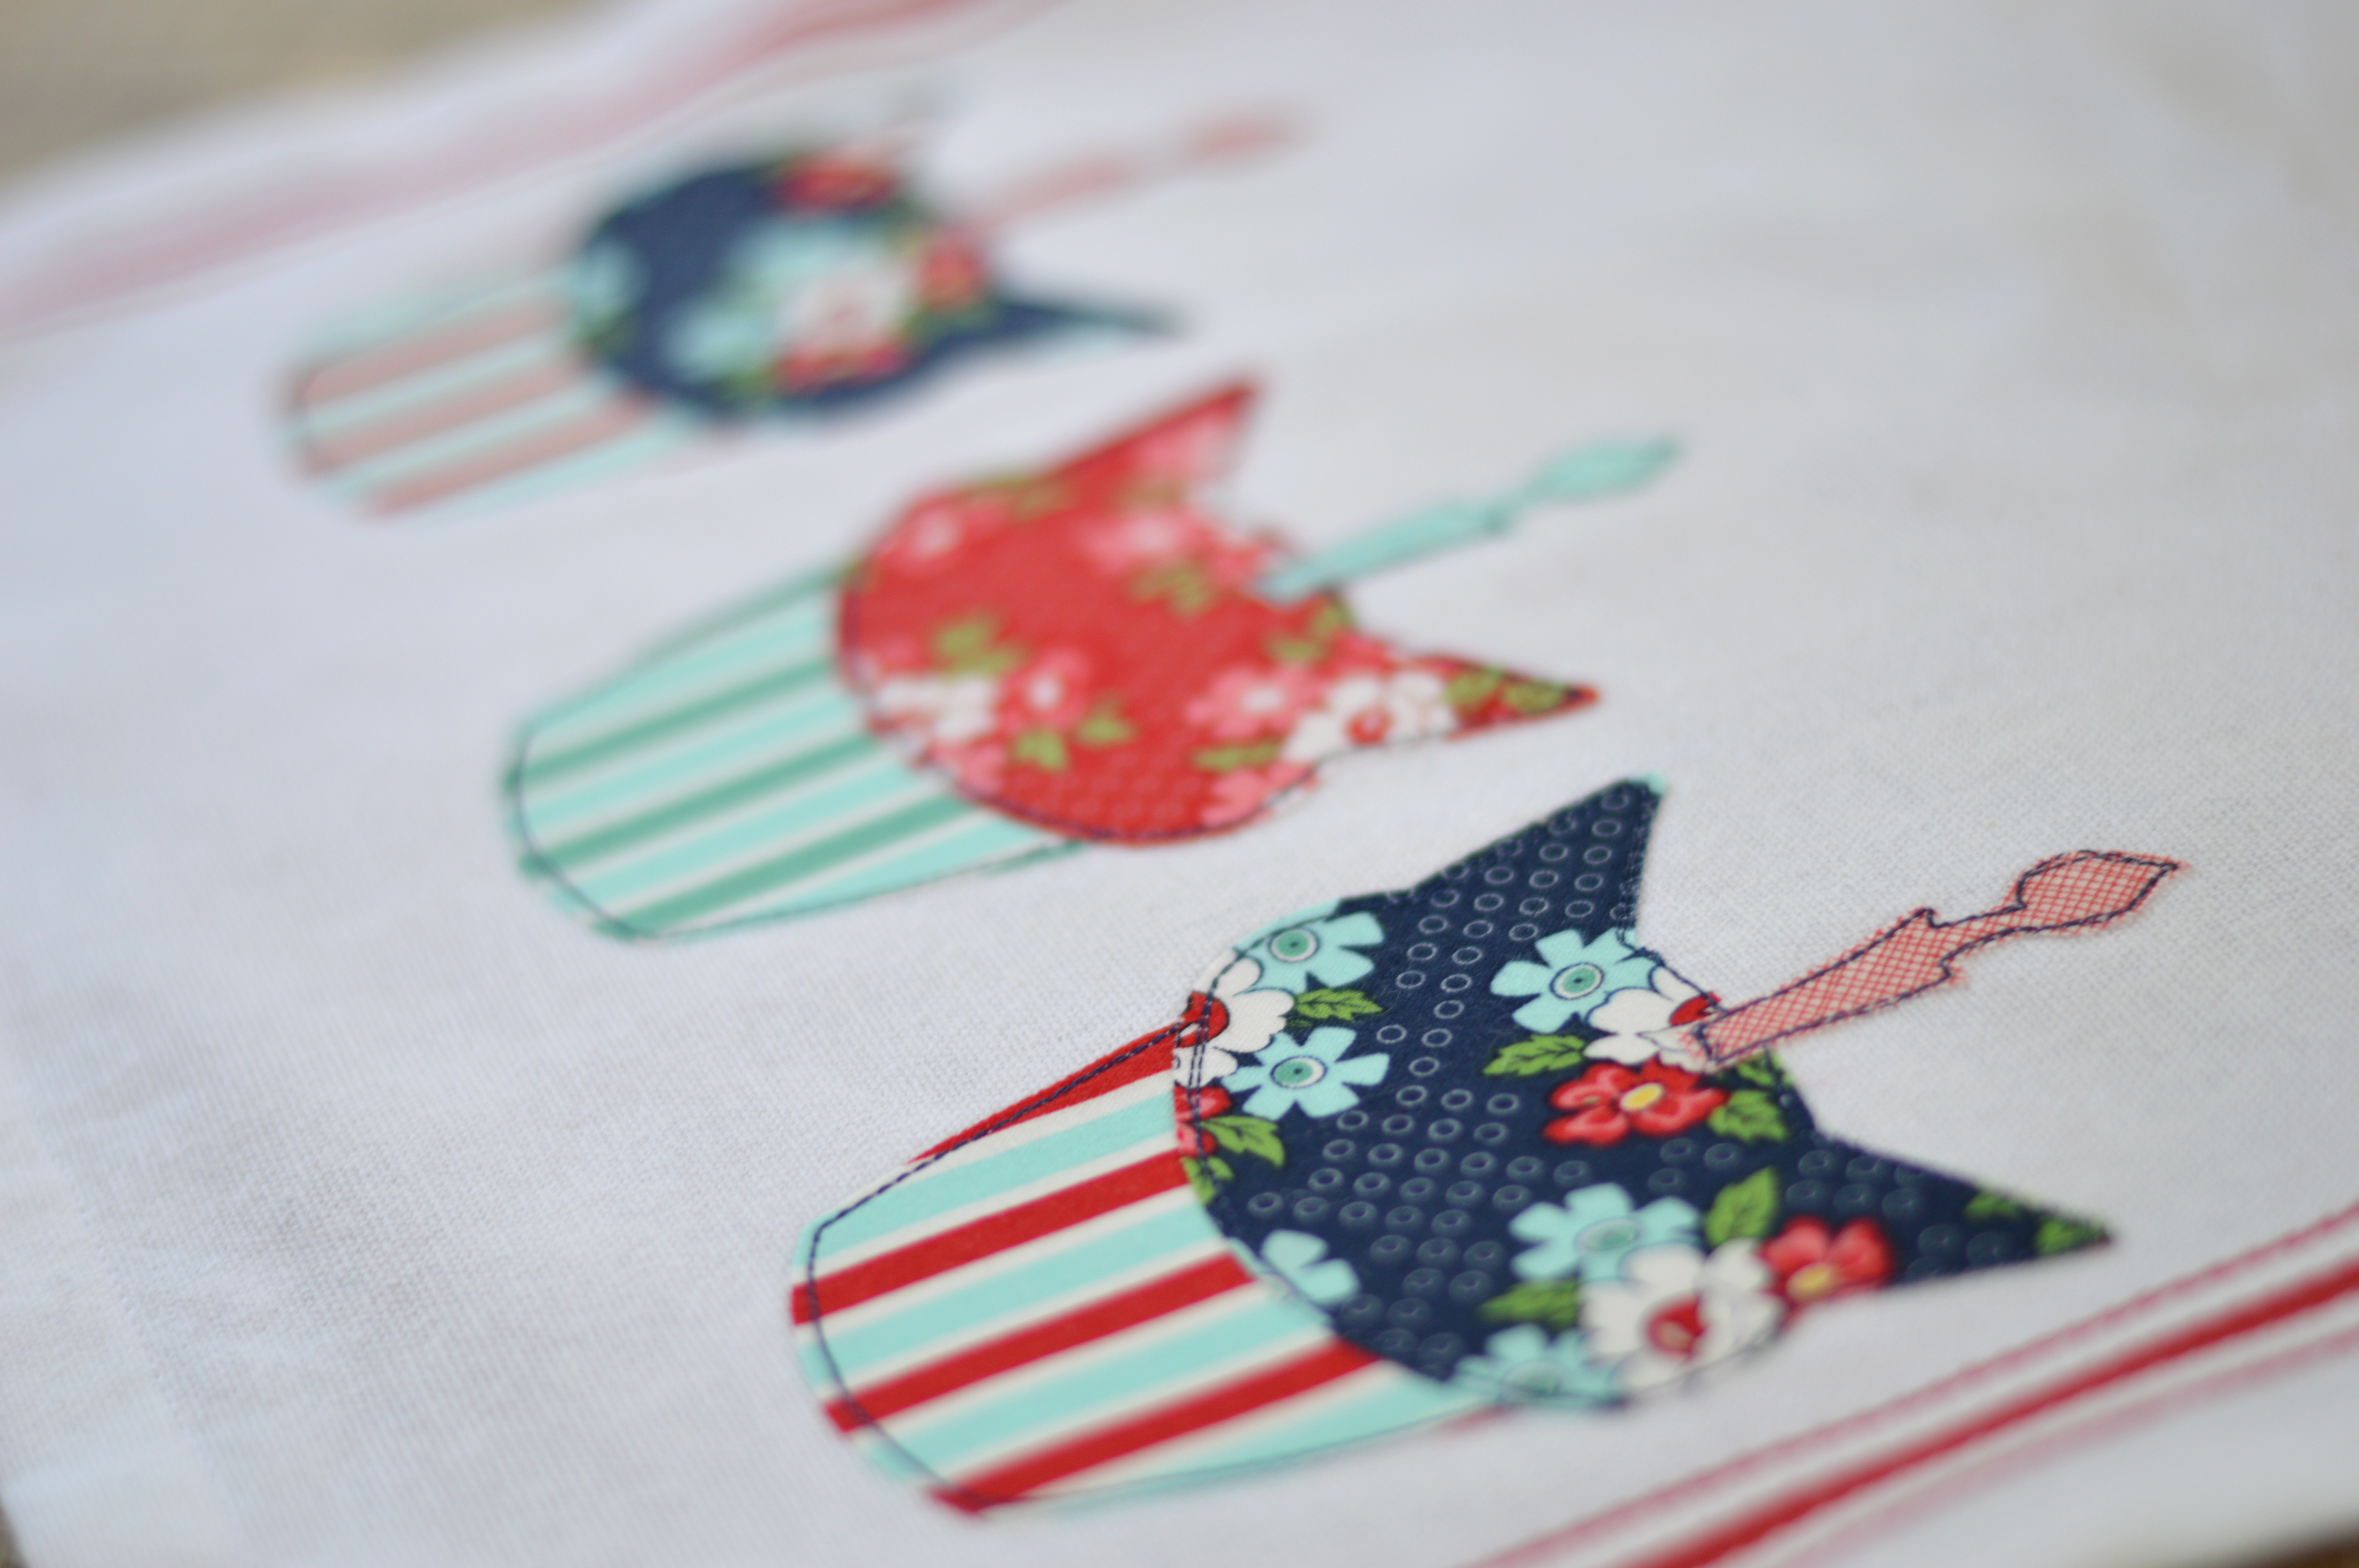
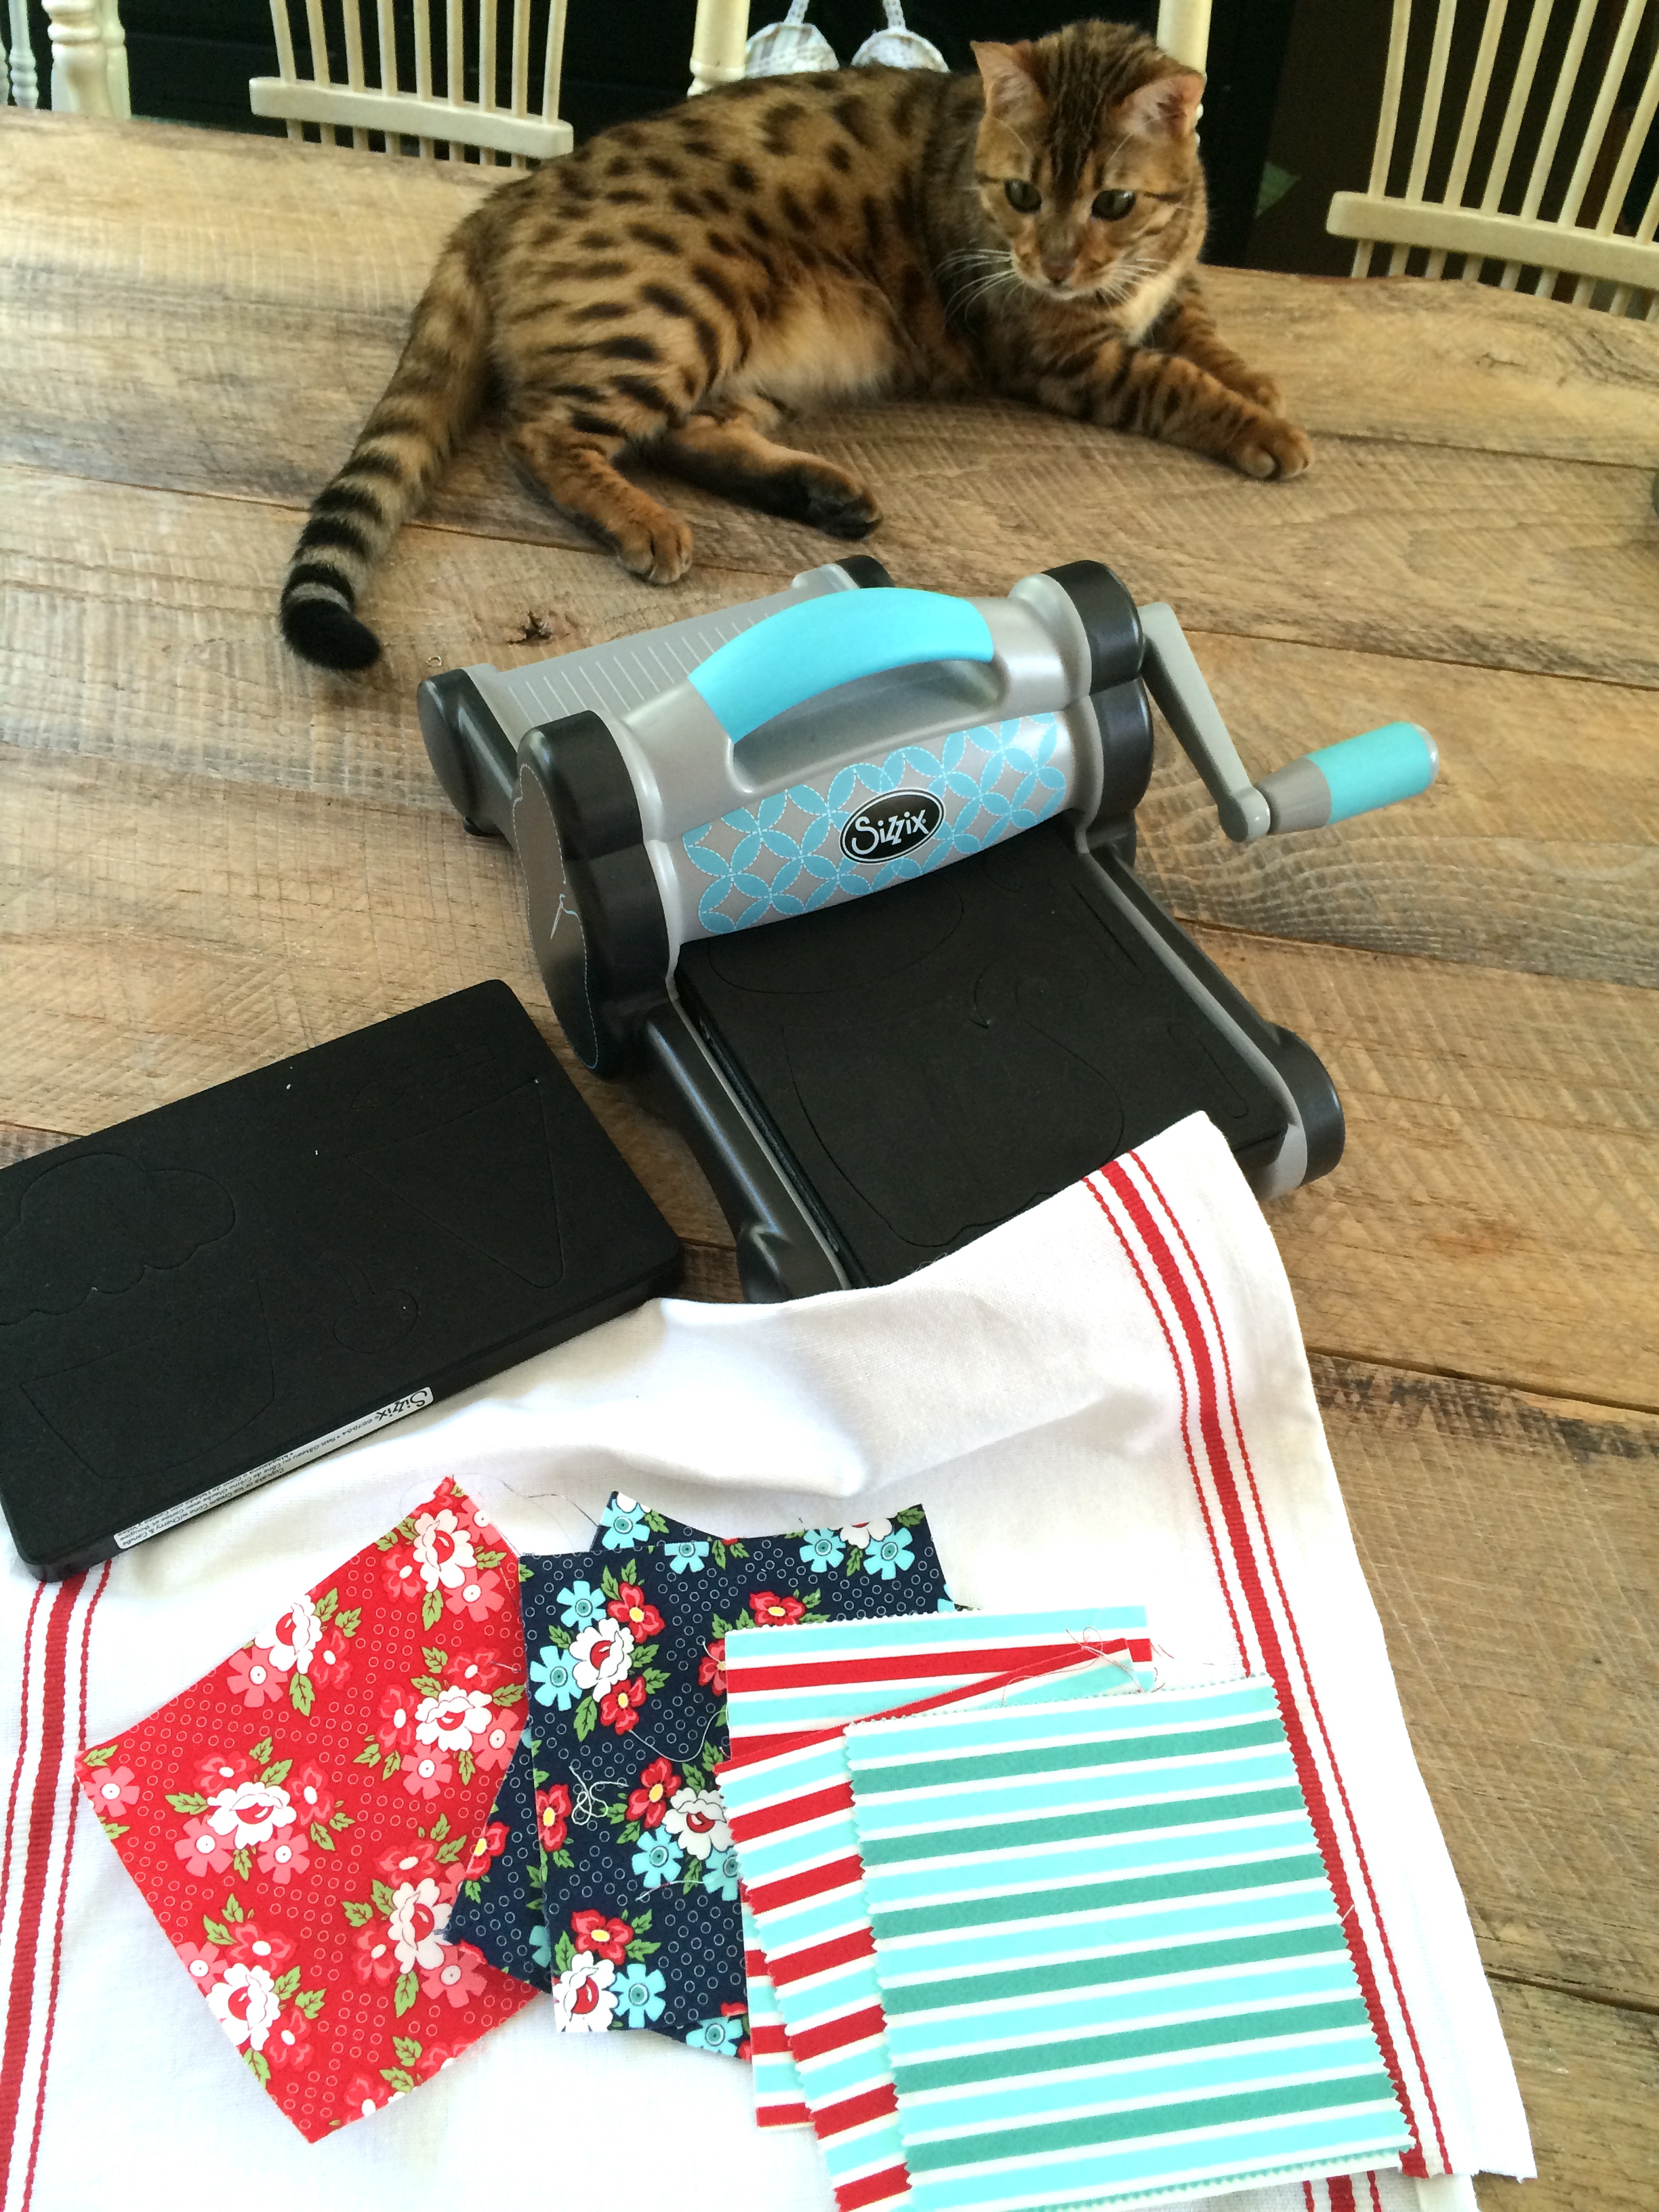
I used the Sizzix cat head and the Sizzix cupcake bottom to create the Cat-Cakes.
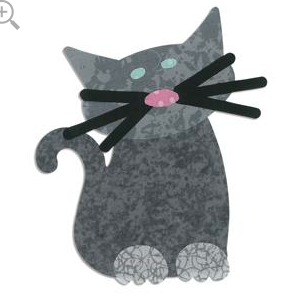
Screen Shot 2015-07-03 at 7.51.52 AMScreen Shot 2015-07-03 at 7.51.21 AMIron the Heat n Bond Lite to the wrong side of the charm squares and run it through the Sizzix Fabi.  Make sure to position the fabric over the desired shape.  I cut out all 3 at once!

birthday cat cupcake applique day sail 9

birthday cat cupcake applique day sail 10


Peel off the backing paper and position the Cat Cakes on the bottom of the towel.  Press to set in place.  Sew around each shape 2 times with navy thread.birthday cat cupcake applique day sail 11

birthday cat cupcake applique day sail 15


Make sure your cat approves 🙂birthday cat cupcake applique day sail 21


If you don’t have a July birthday, make this to celebrate our Nation’s Birthday!!!birthday cat cupcake applique day sail 14


Or make one for your cat’s birthday 🙂birthday cat cupcake applique day sail 2
birthday cat cupcake applique day sail 5

birthday cat cupcake applique day sail 23

Mufasa loves the Sizzix Fabi.  He hears me getting it out and comes running!!!birthday cat cupcake applique day sail 24

Sizzix Crazy Cat Lady Coasters

cat coasters

I am sharing this fun tutorial for “Cat Coasters” over on the Sizzix blog today.  This is a fun project to use up charm squares or other scraps of fabric you have laying around.  Of course you can always change the appliqué to something that reflects you if you are not a crazy cat lady like I am 🙂 cat coasters sizzix. 3

I used the cat head from the “cat die”.  I also used some of my Heat n Bond Lite scraps I had laying around.  I love scrap buster projects!cat coasters sizzix. 5

cat coasters sizzix. 4I

Fast and Easy Sizzix Projects

Much of my life is not magazine -cover picture perfect.  Life is real, my house is messy and I run behind.  I have tried to keep my blog posts authentic to who I am and what I’m doing.   I don’t create for the sake of posting on IG or blogging about it.  Every product or fabric I share is something I truly love.  This summer I have been involved in several major youth activities: a Pioneer Trek Reenactment and a Young Women Camp for girls age 12-18.  Both these experiences were amazing.  I want to share a few projects I made for these activities using my Sizzix Fabi.  It’s my go to creative device, especially when I am in a hurry!

The night before I left for the Pioneer Trek I decided I need to add a little something to this plain muslin cross-body satchel.  I used the Sizzix Large Dresden plate and the 4″ circle.  I put Heat n Bond Ultra on the back of each fabric before die-cutting since I wouldn’t be able to sew the appliqué pieces.

IMG_8031

Here we are in our authentic Pioneer attire.  I took this bag everywhere!!!IMG_8065

For our Young Women Camp I like to have the leaders wear matching shirts – it really makes it easy to find us!  Our theme Anchored in Christ and everything we did had a nautical reference to it.  This fish die is one of my favorites!  I used some fun Riley Blake Designs Prints and Heat n Bond Feather Lite.IMG_8162

I decided to only use 3 fish instead of 4.  You have to be careful on placement 🙂IMG_8165

I appliquéd around each of the fish in navy thread.

IMG_8167


Aren’t we just adorable at camp in our neon pink fish shirts!!!  IMG_8263