Corgi Pillow

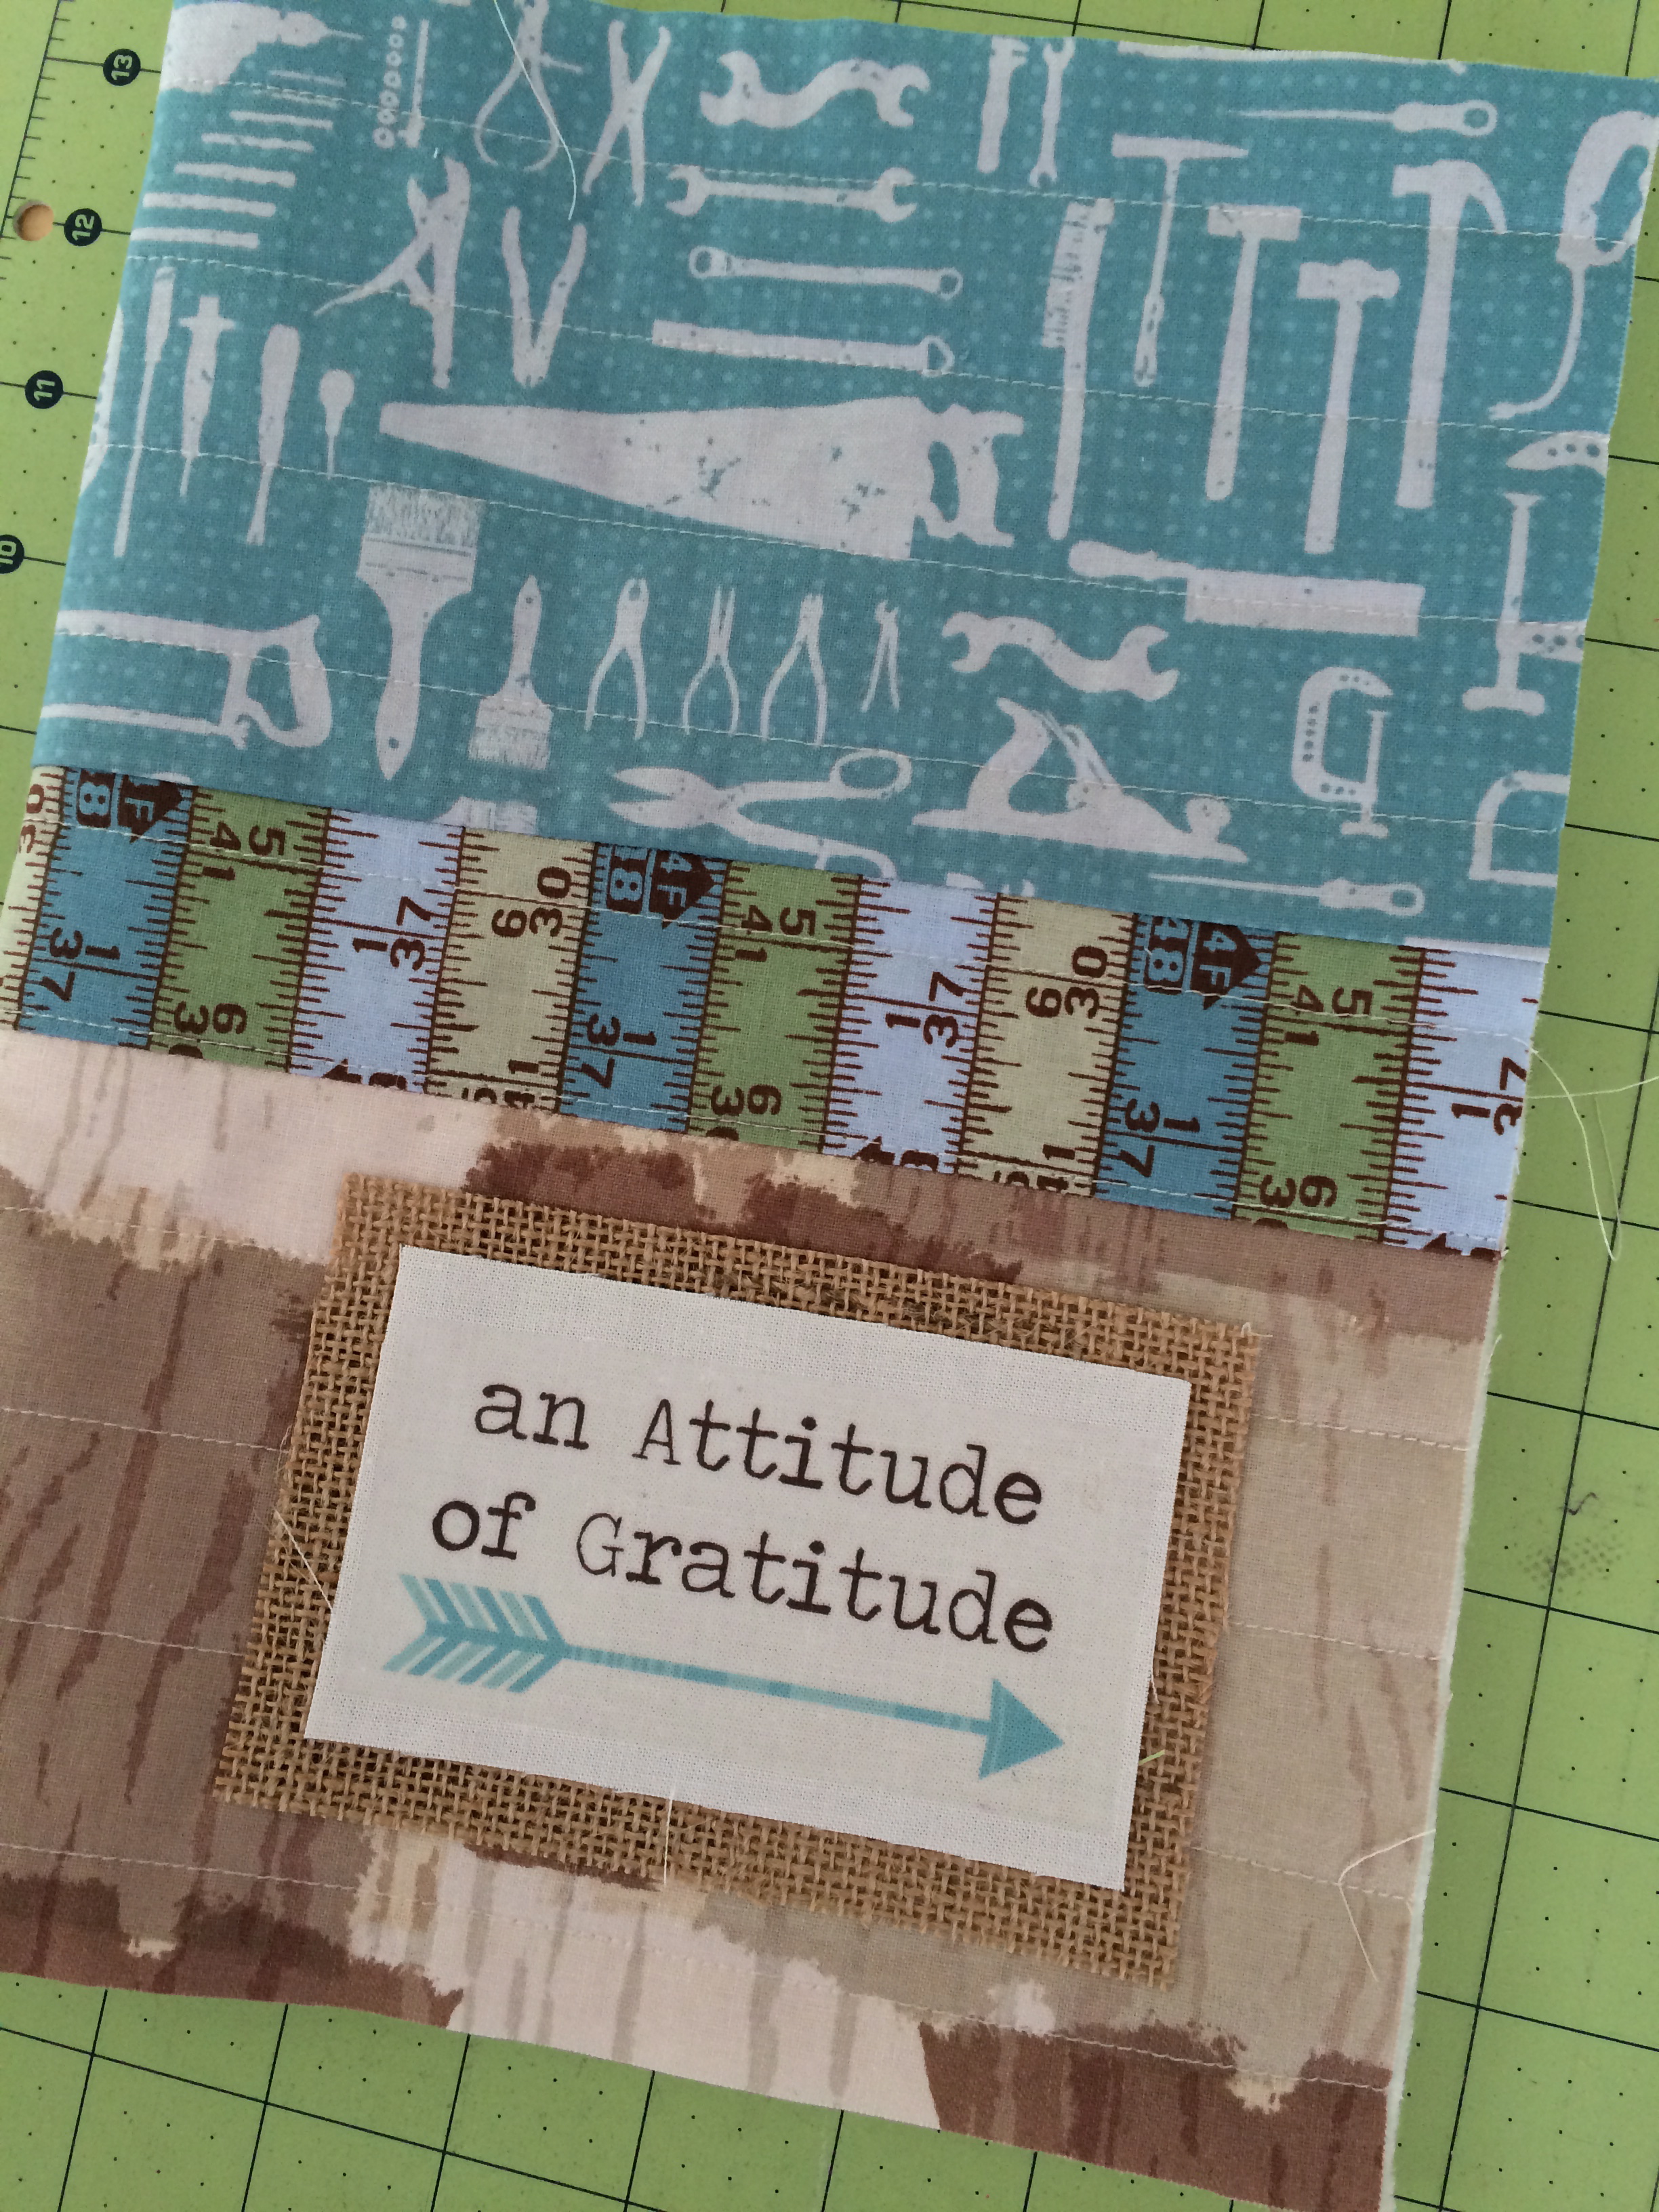
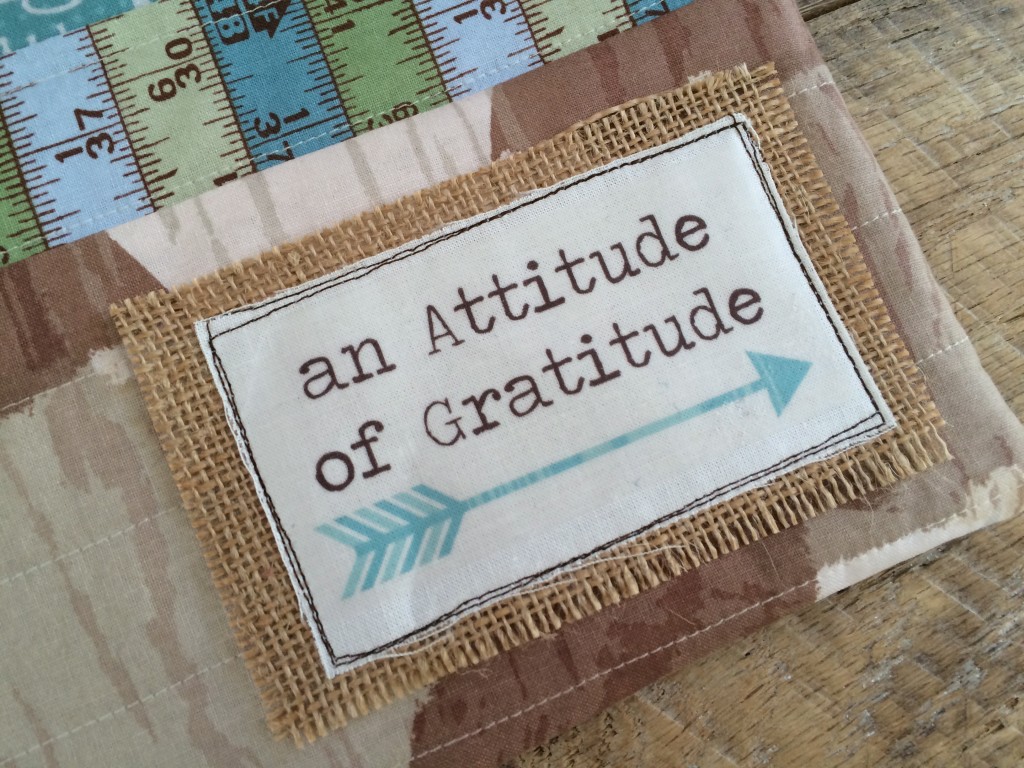
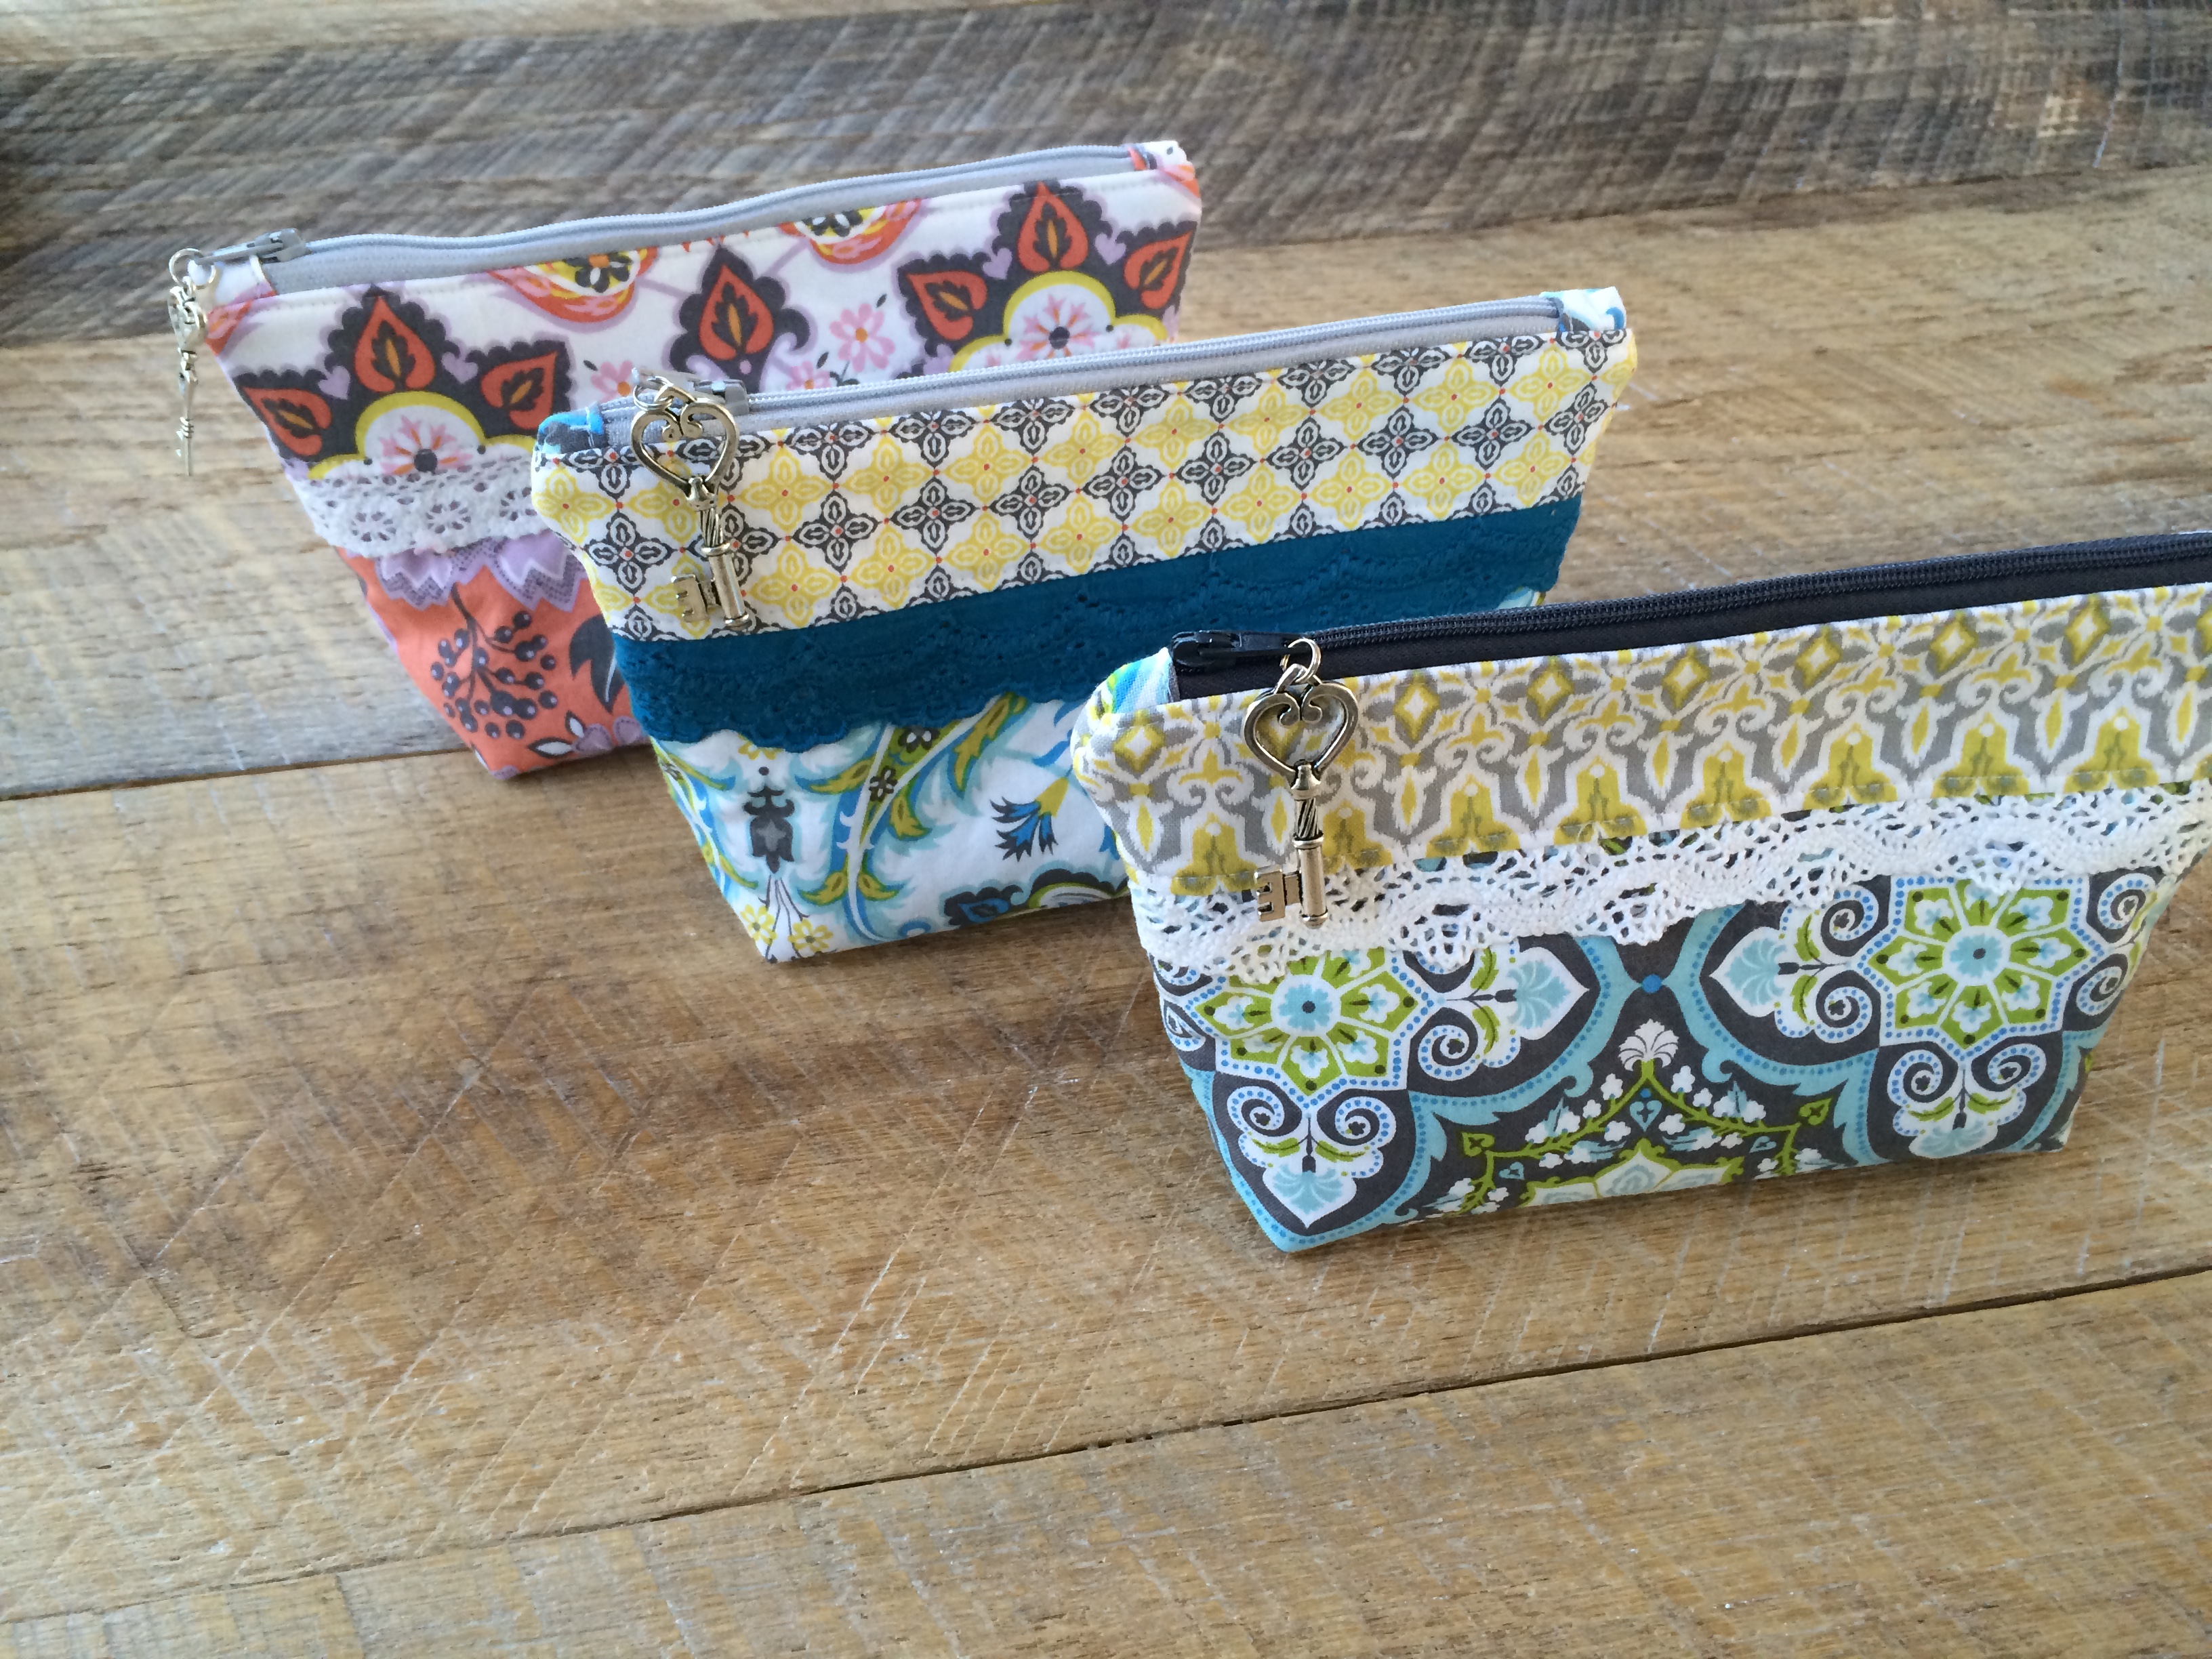
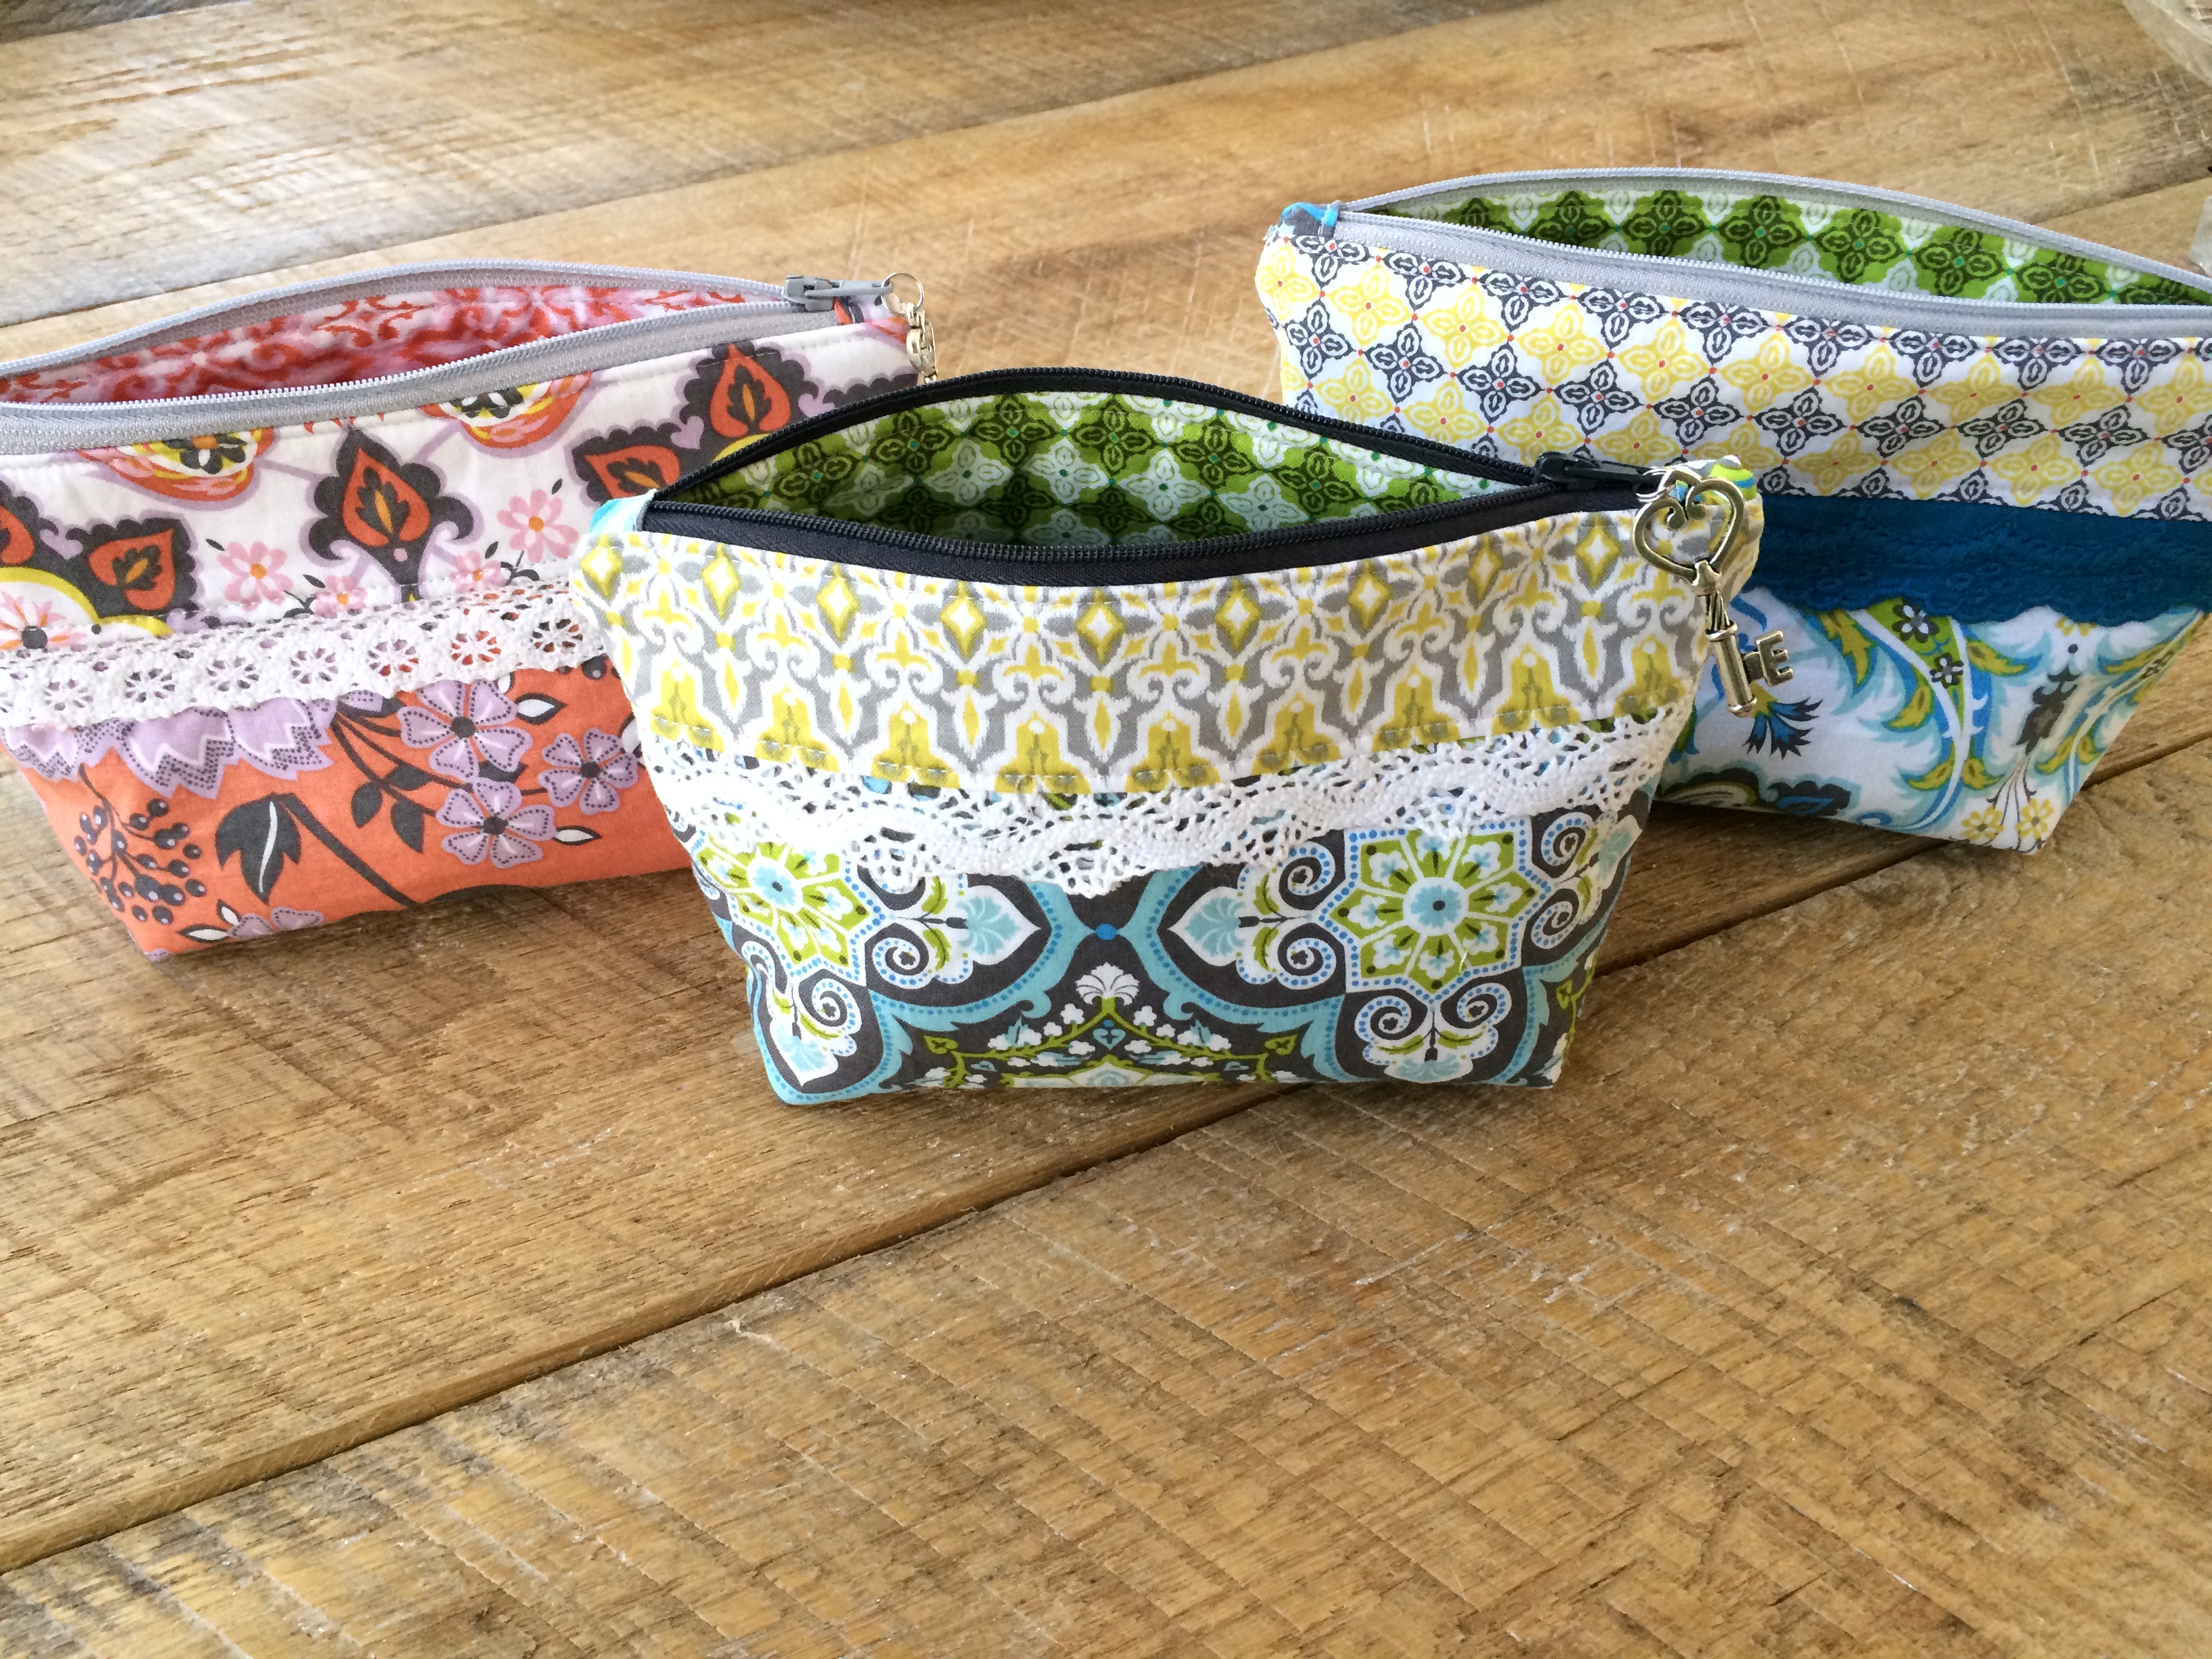
I made this Corgi Pillow for a Christmas gift for friends who have a Corgi.  The wonderful fabric artwork is from Ginger Eyed.  I found her on Etsy and it turns out we live 2 miles apart!  She has lots of other designs with different breeds of dogs.  A few years ago I made this cat pillow from one of her cat designs.corgi pillow


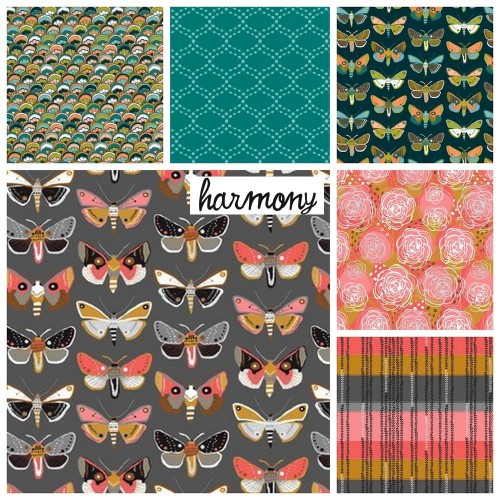
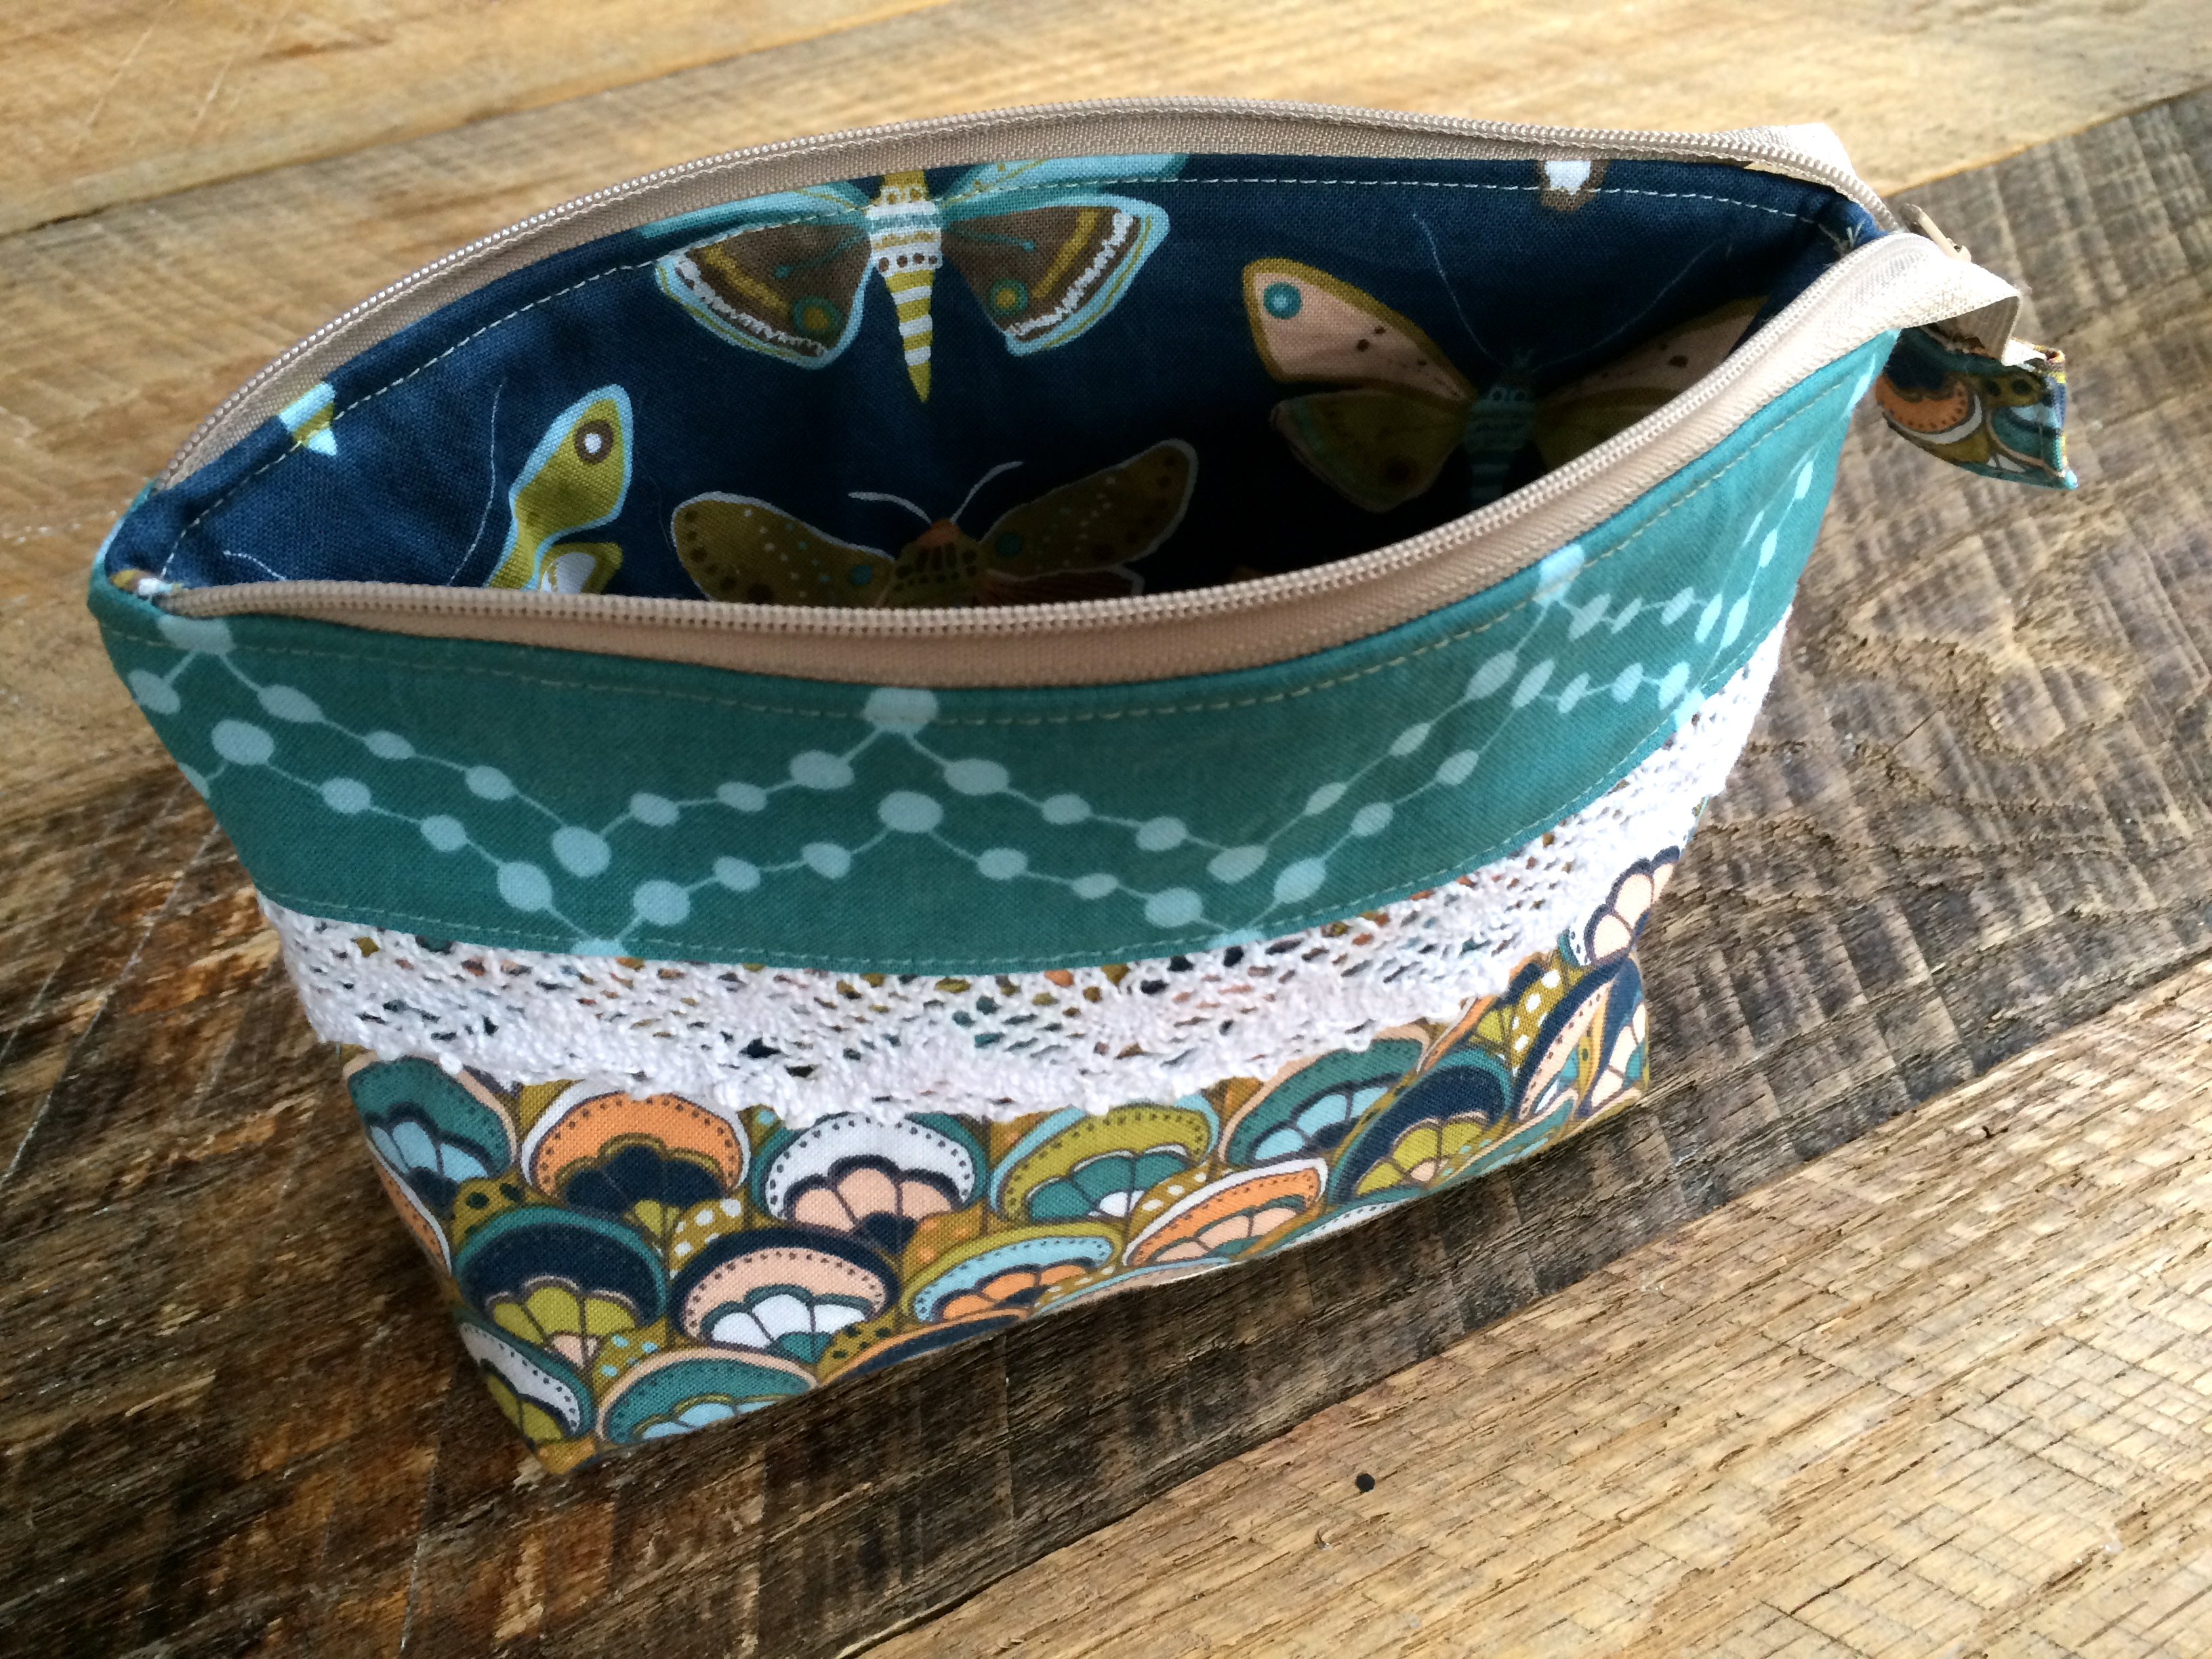
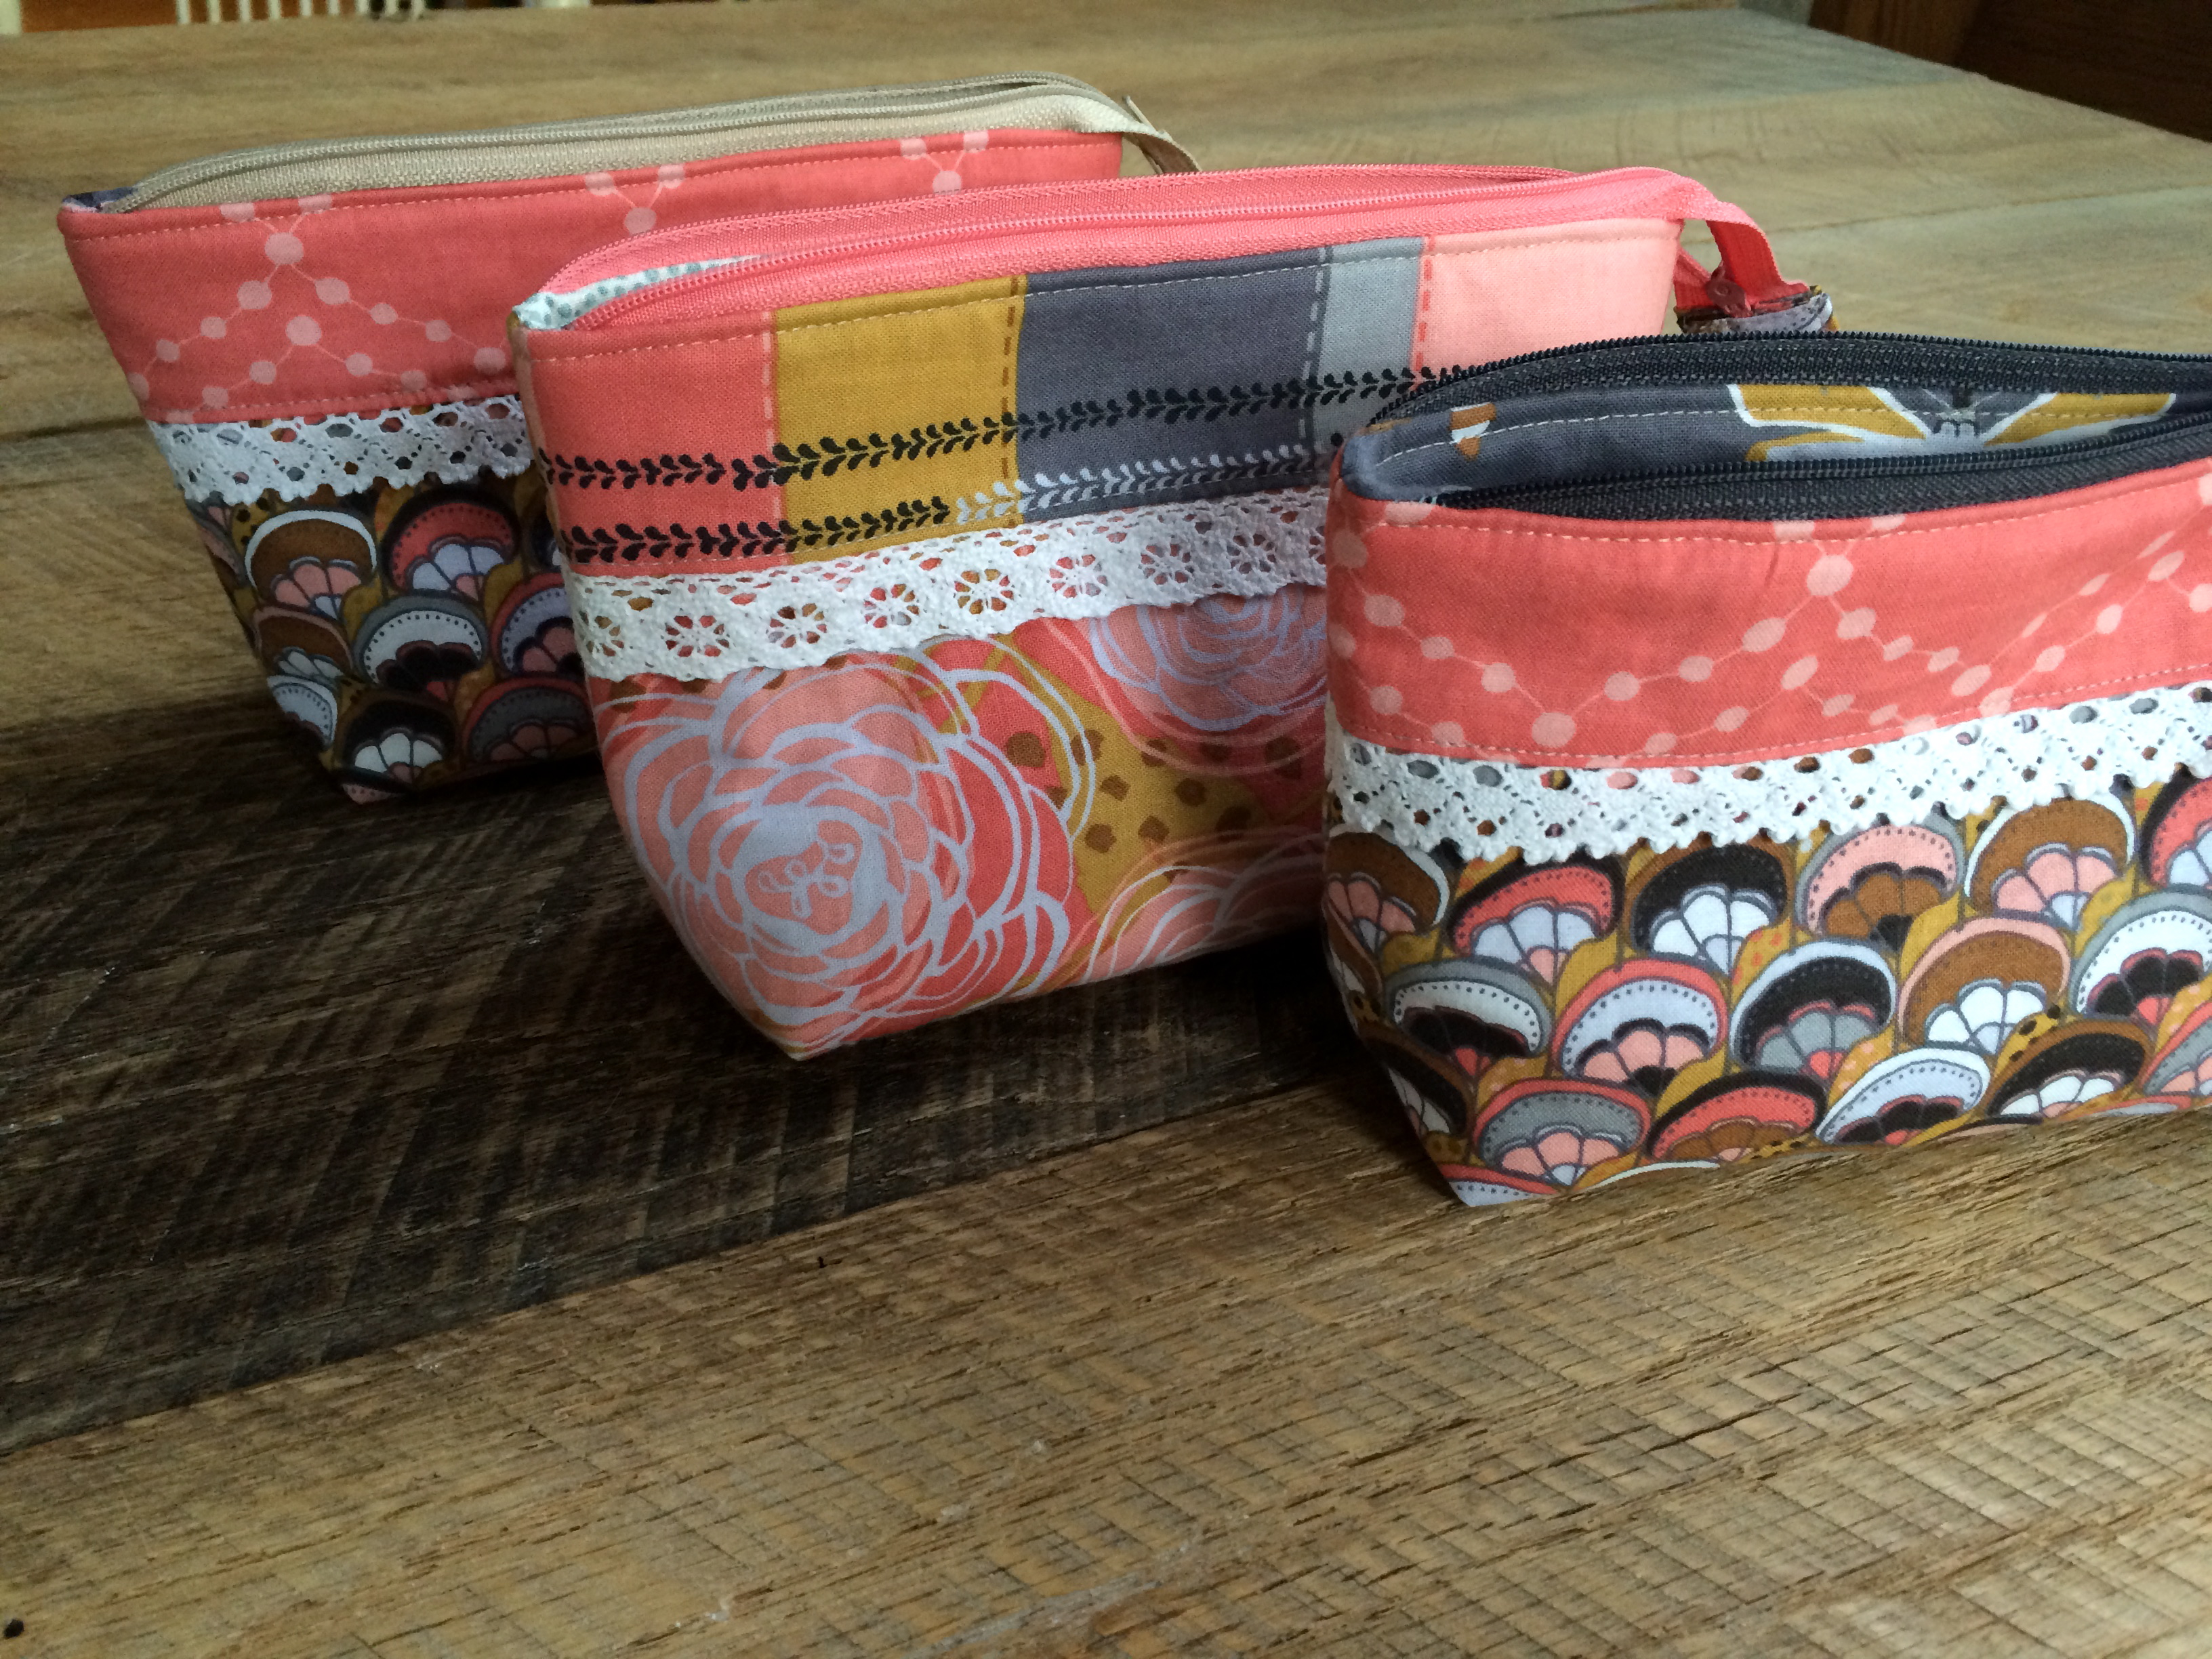
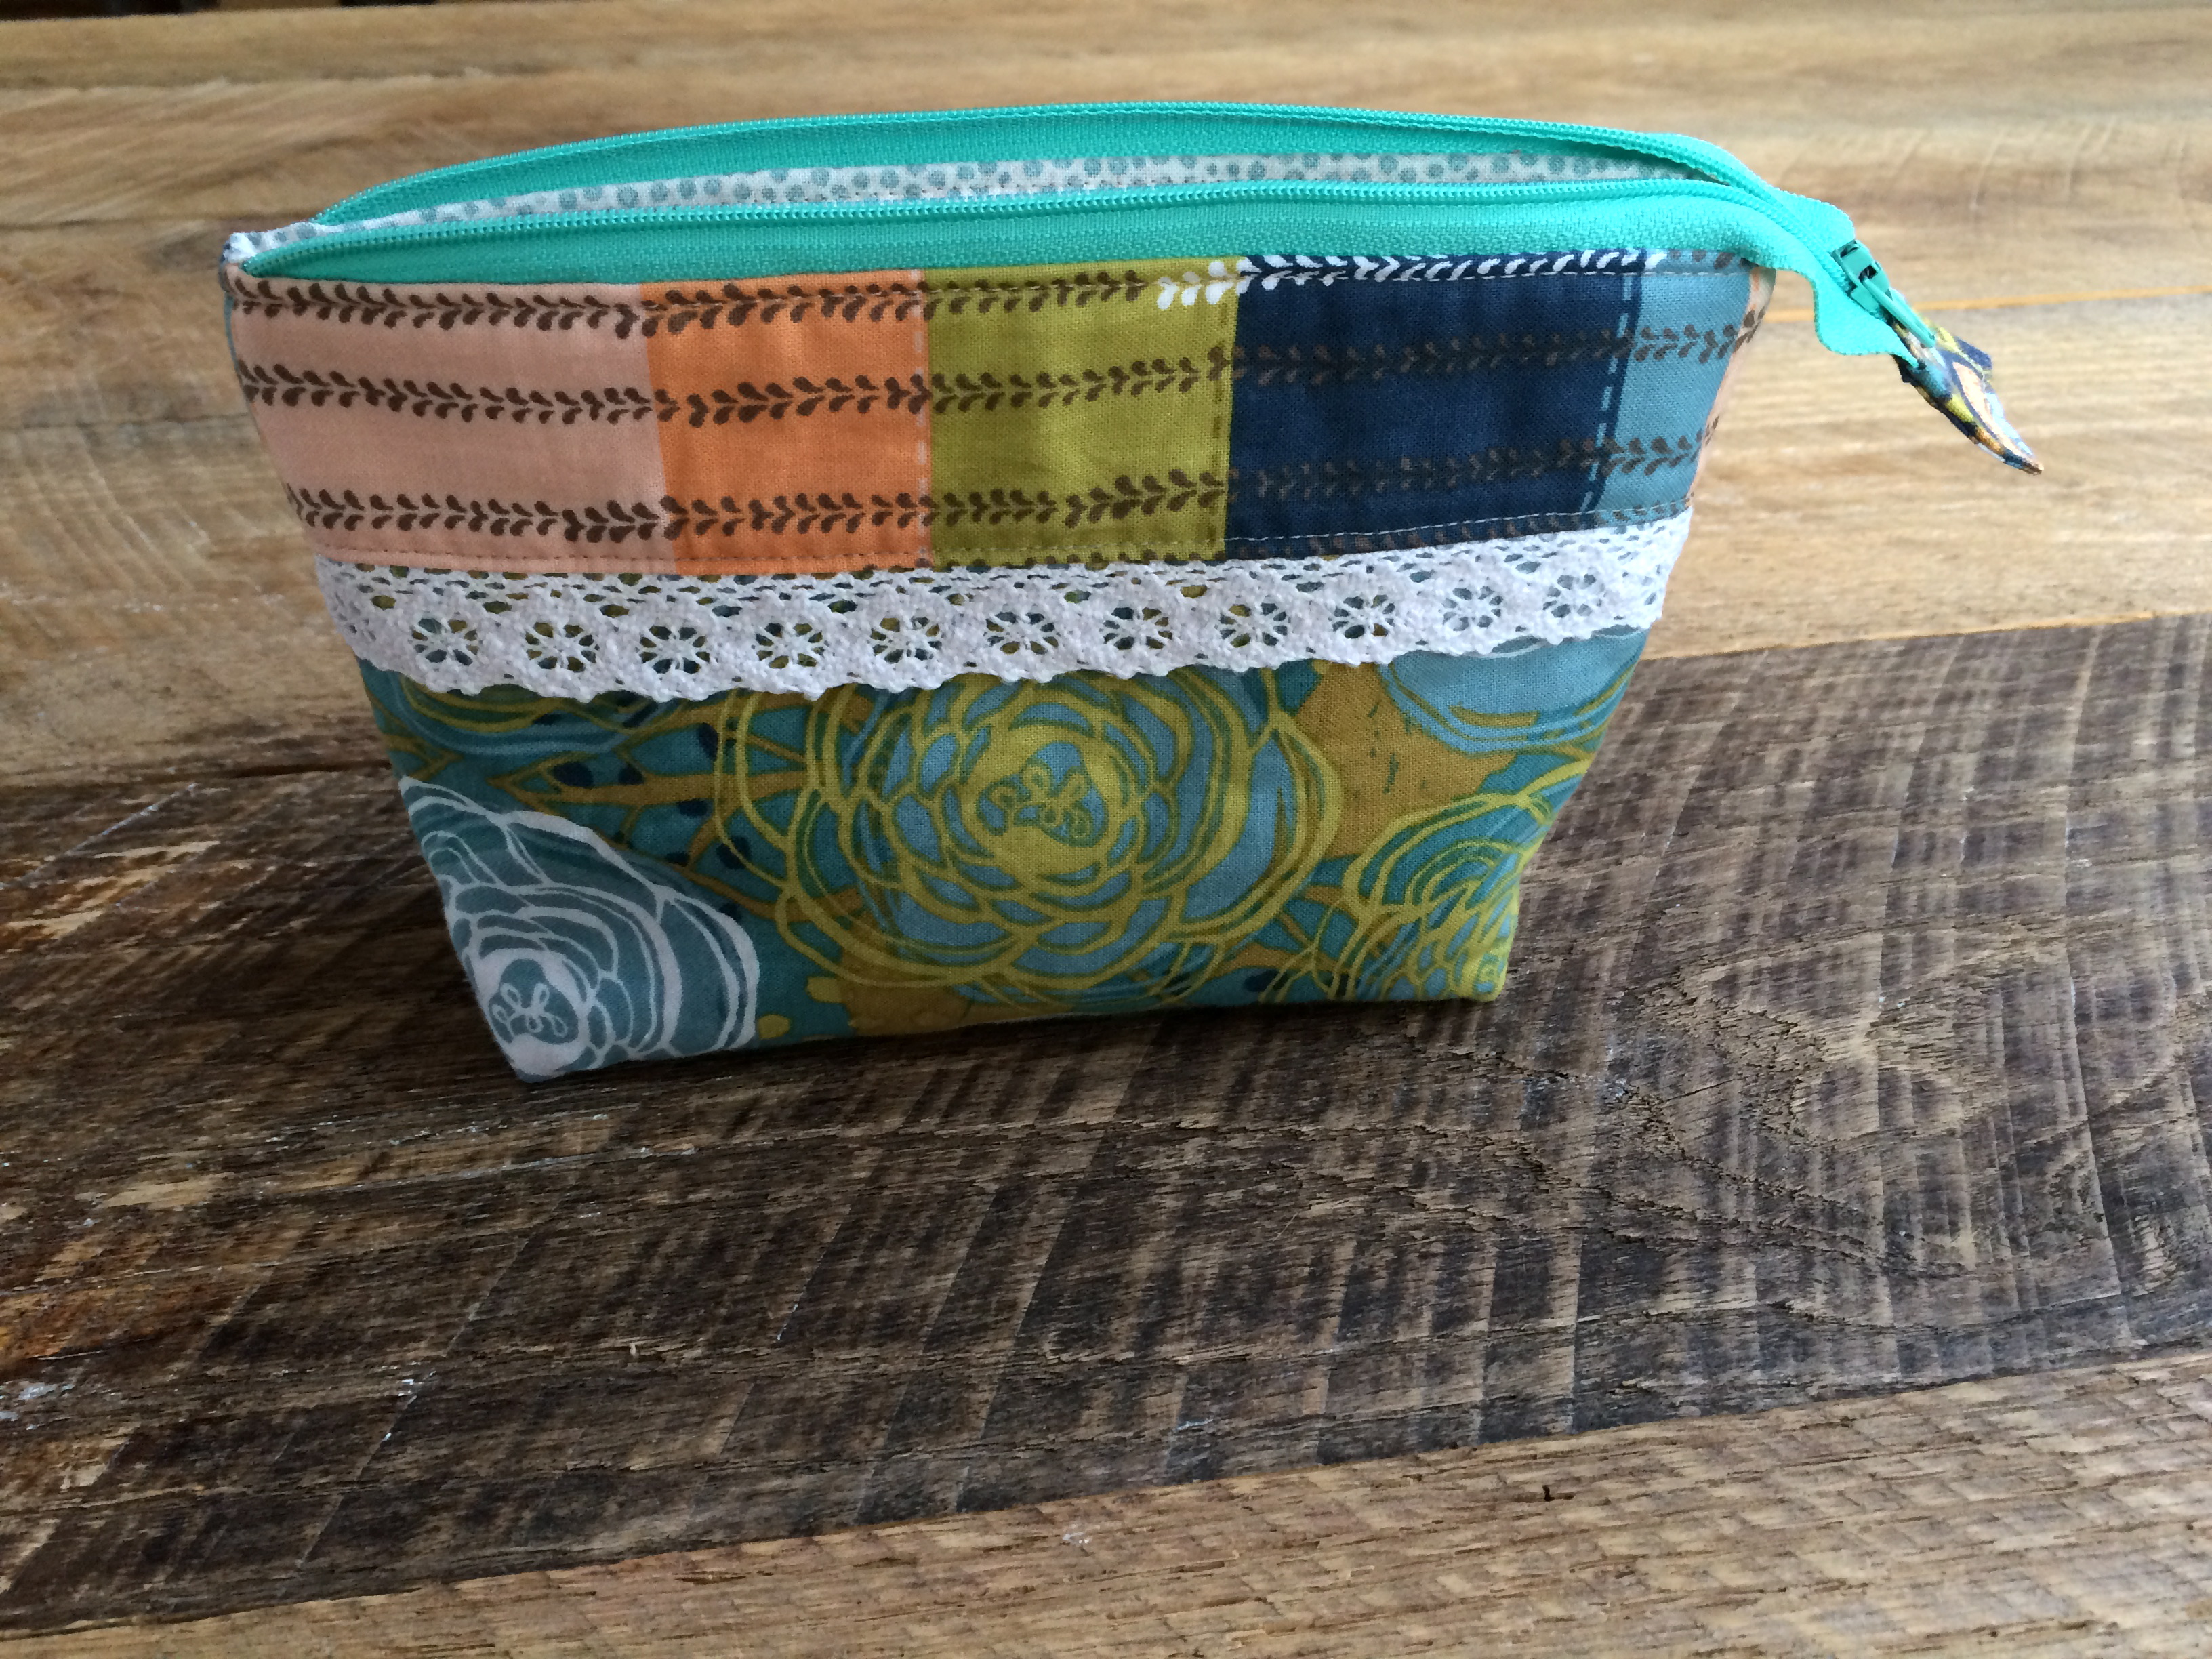
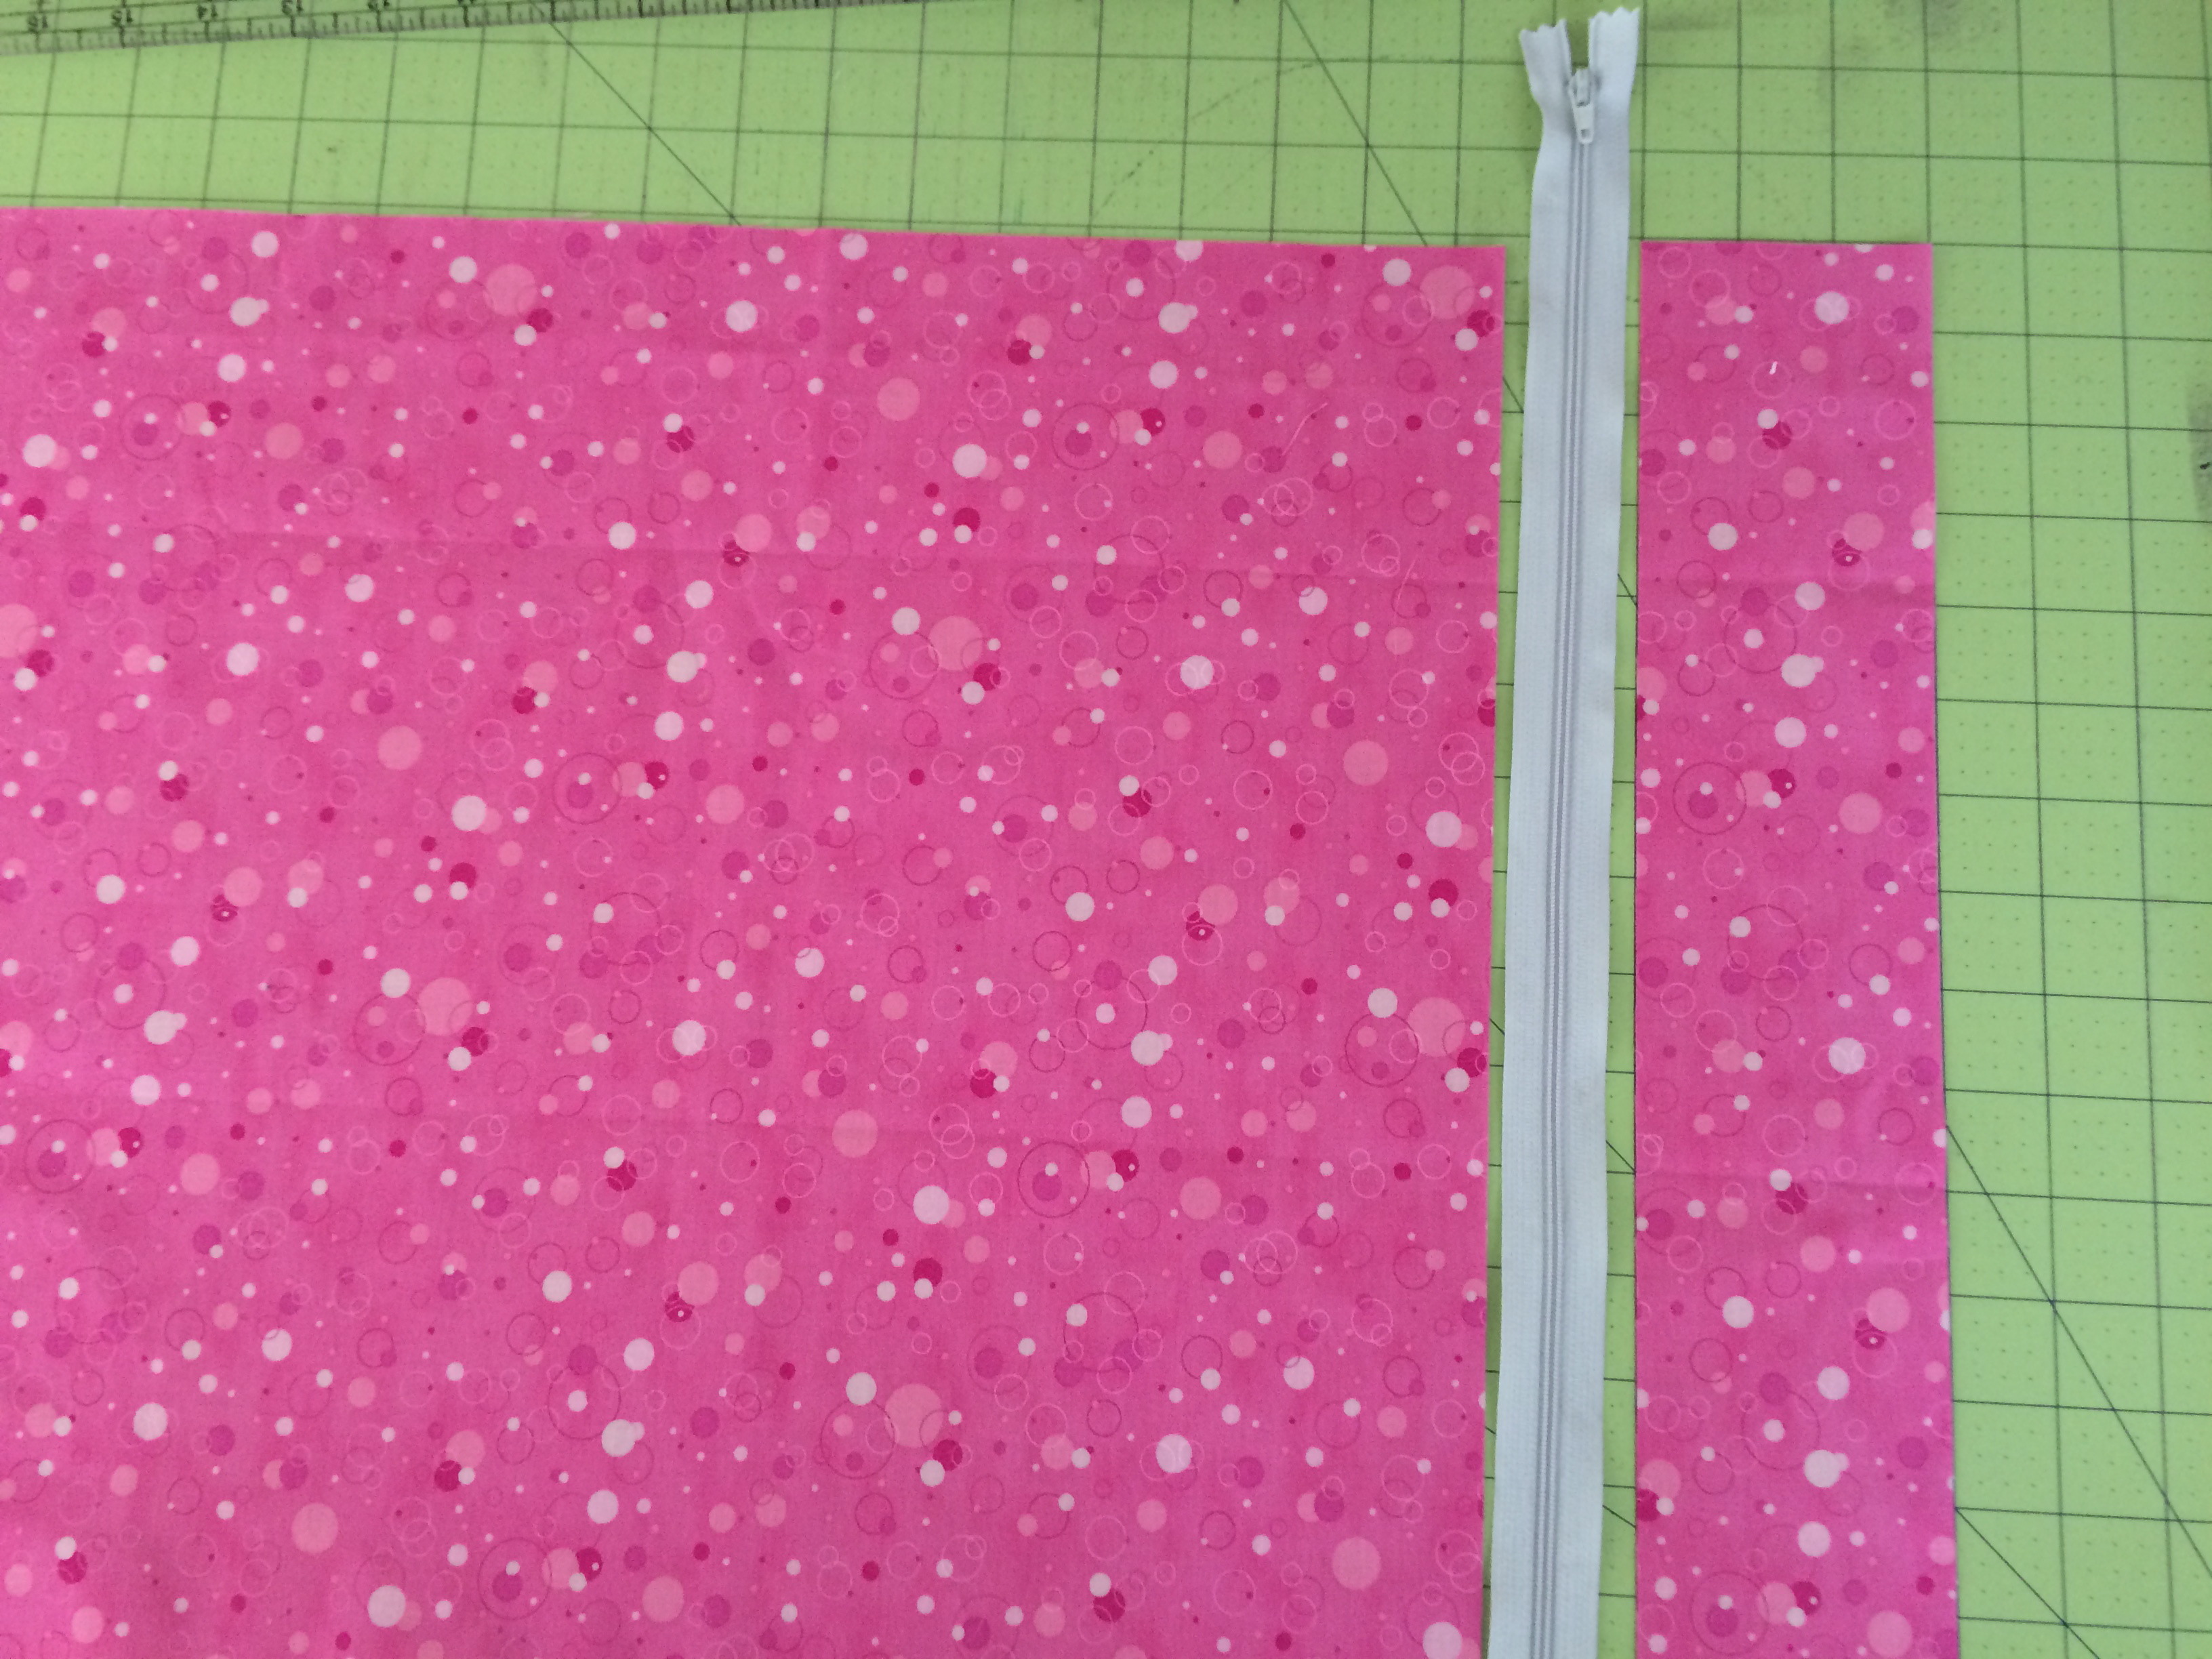
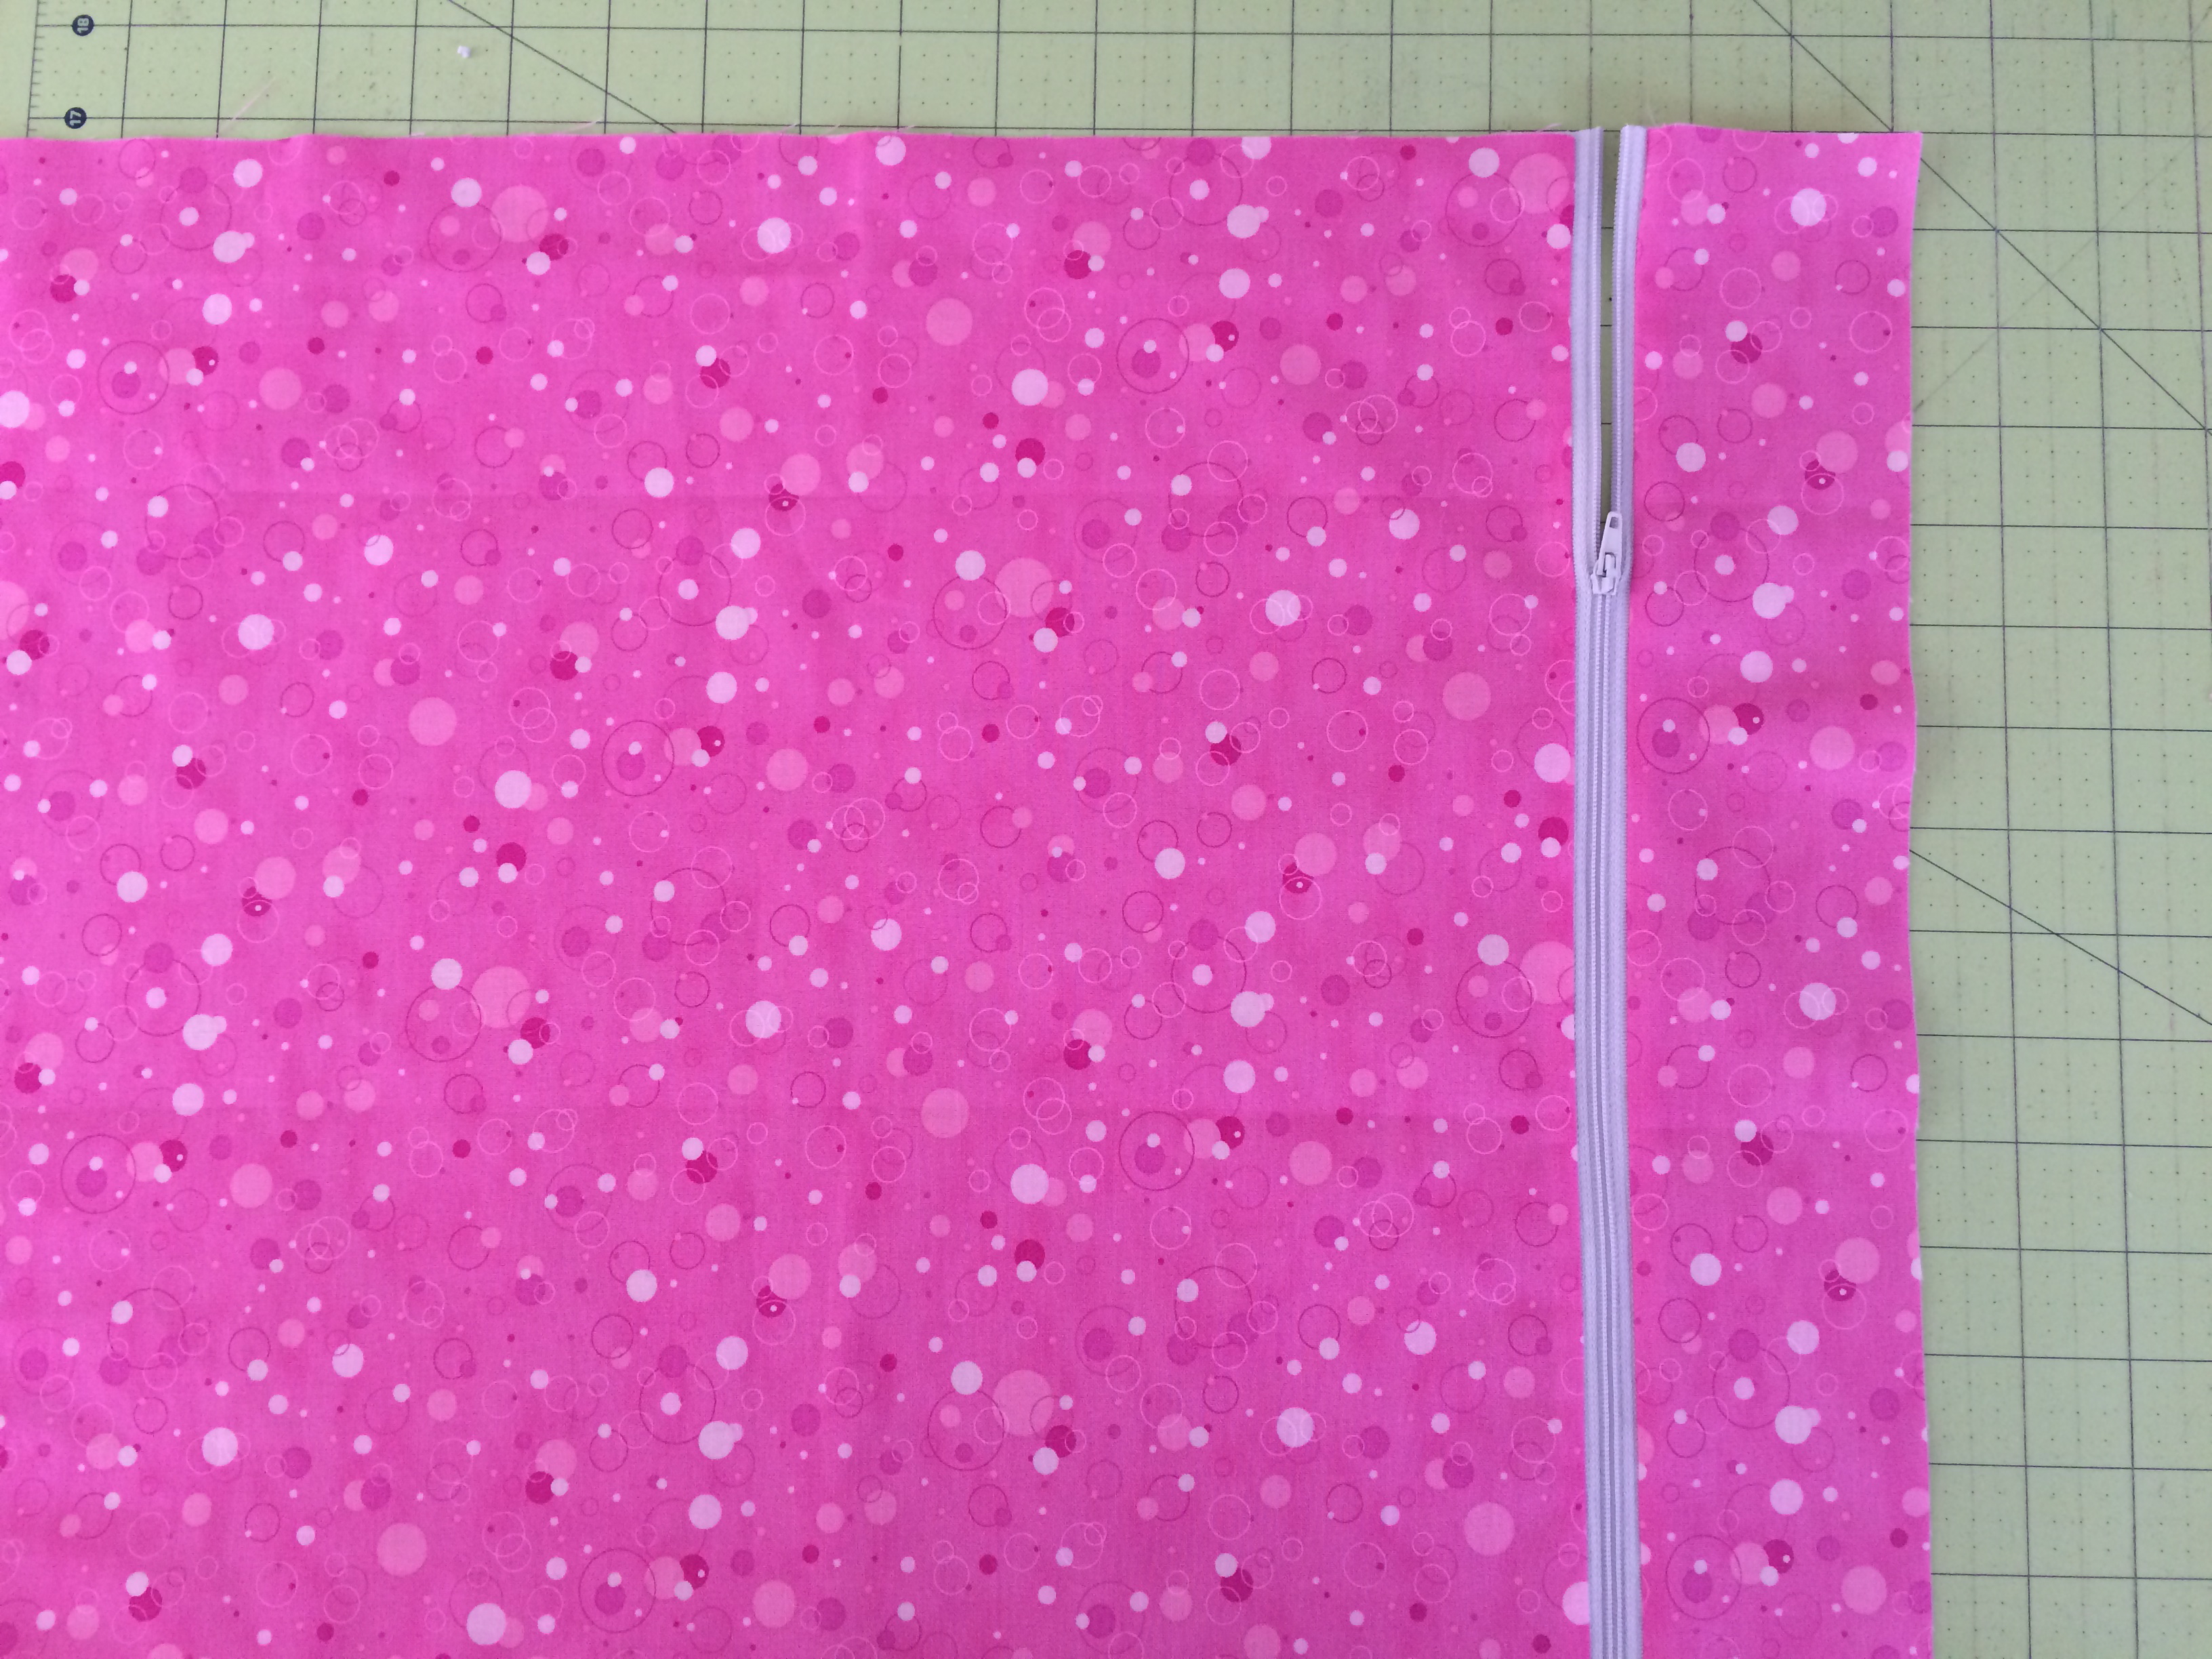
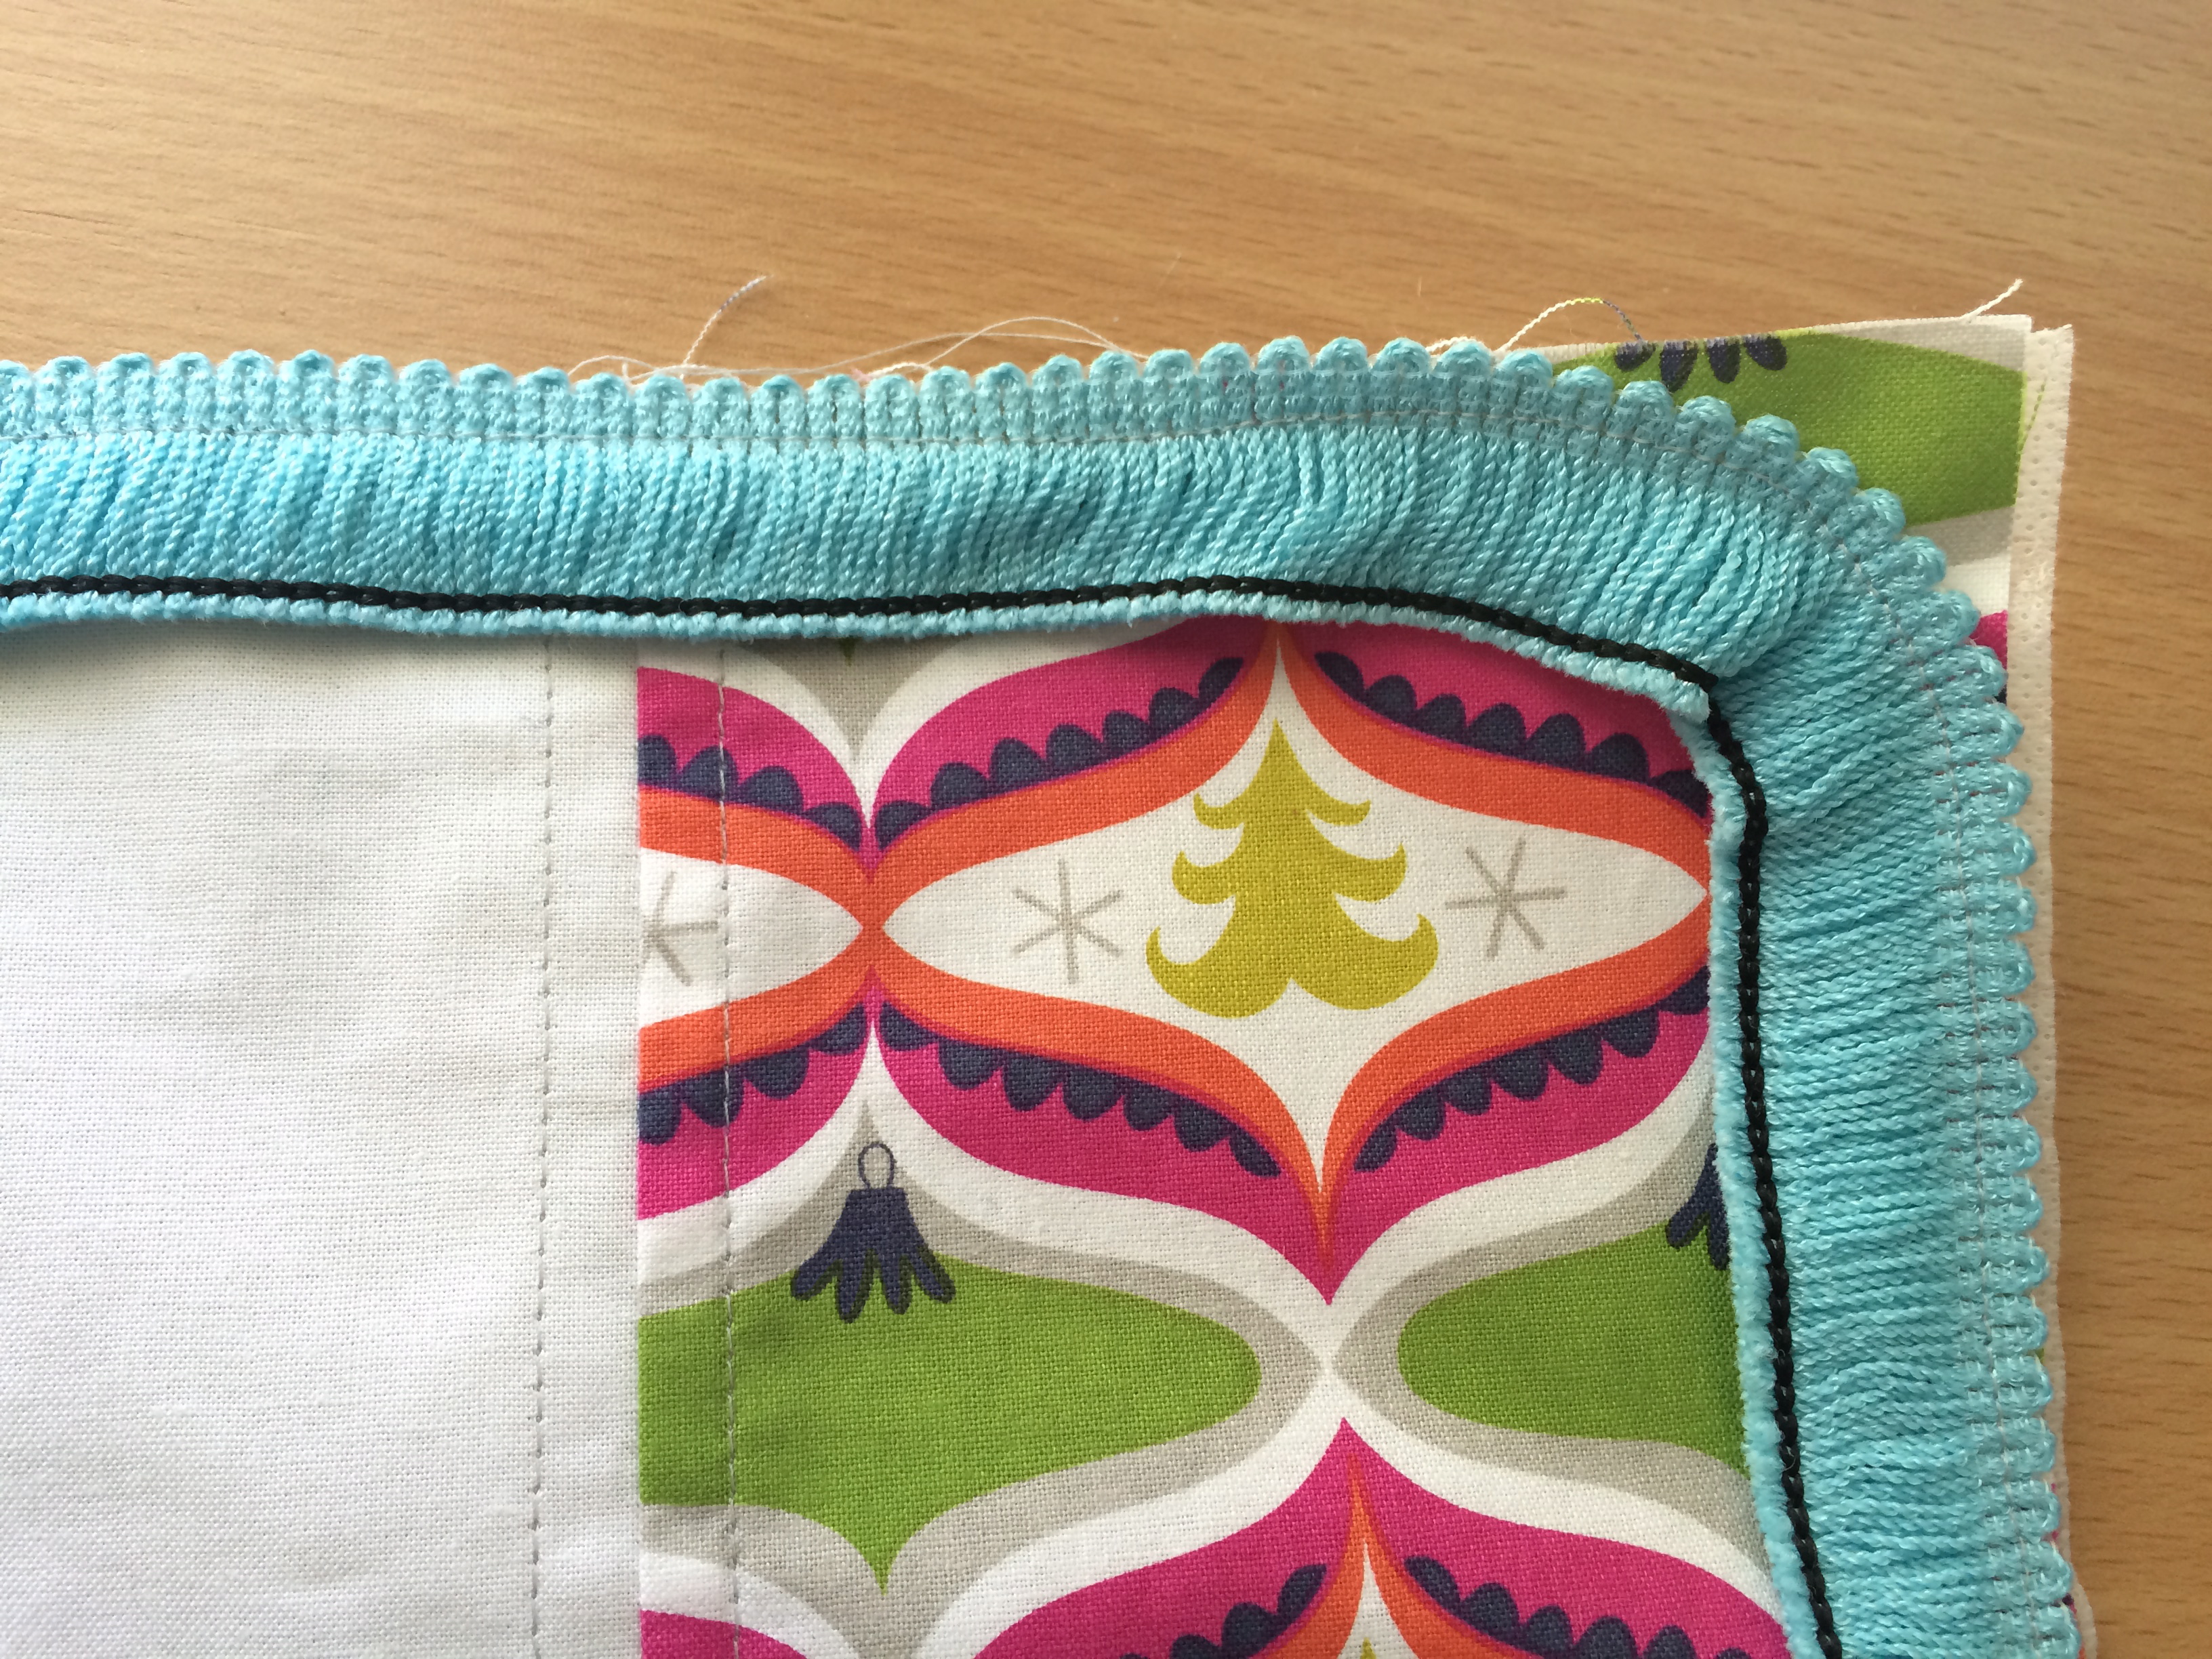
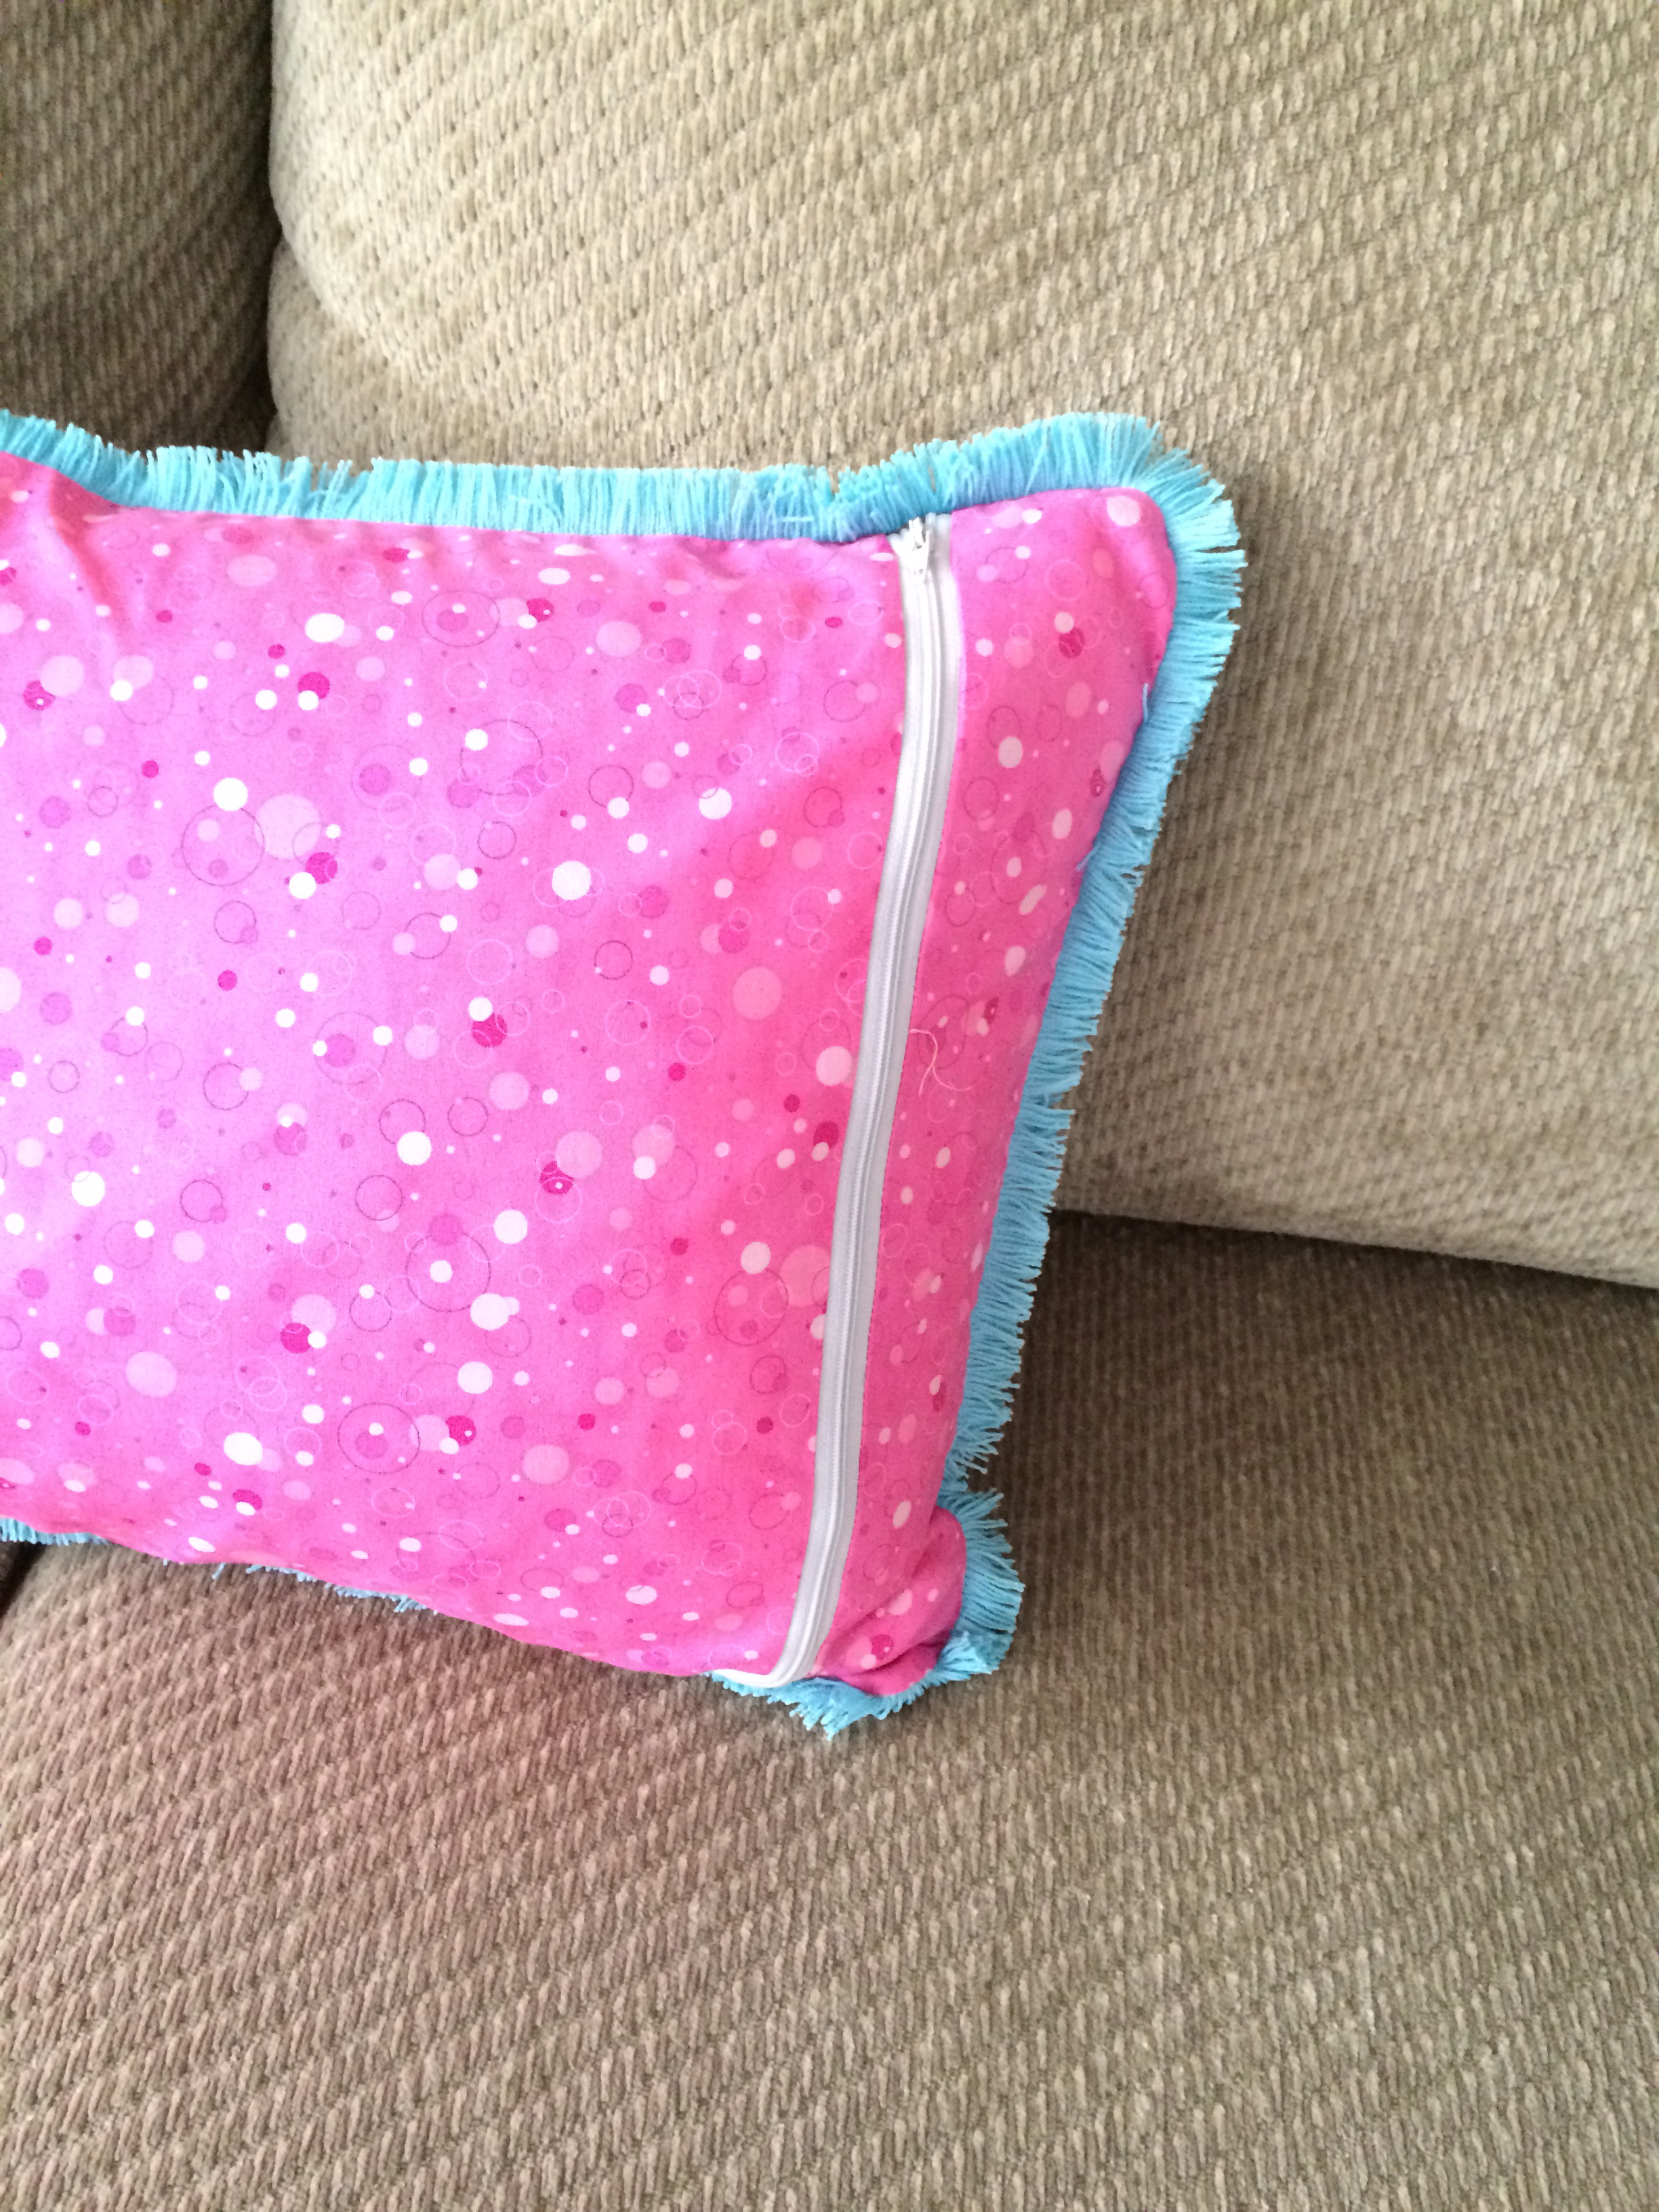
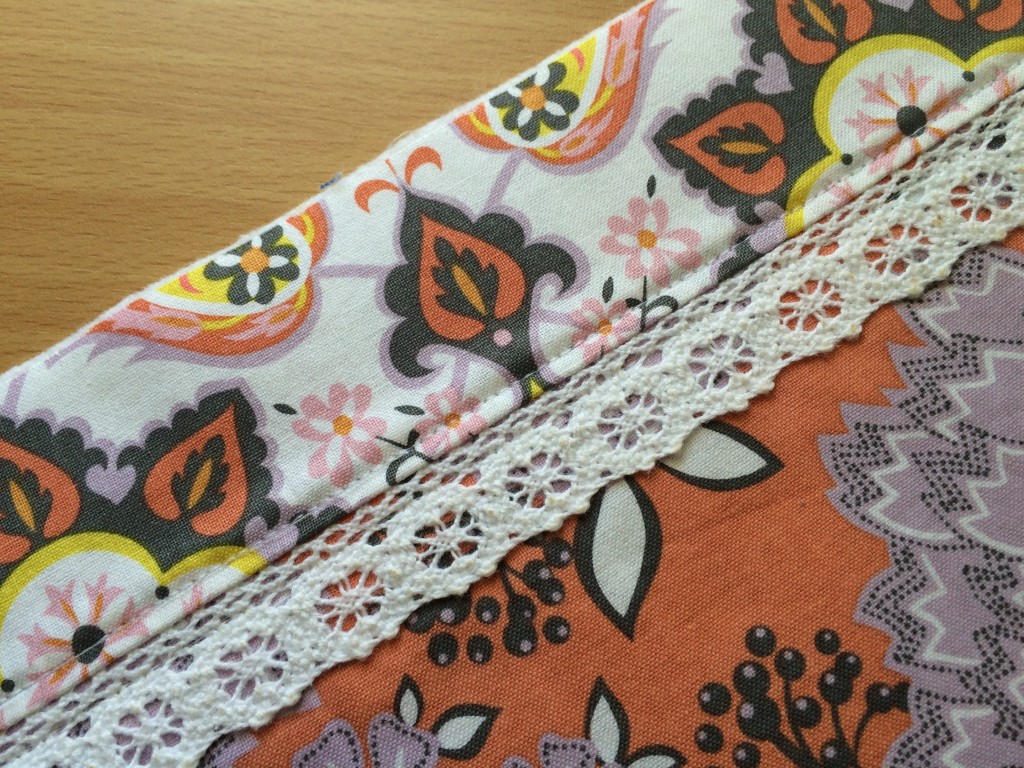
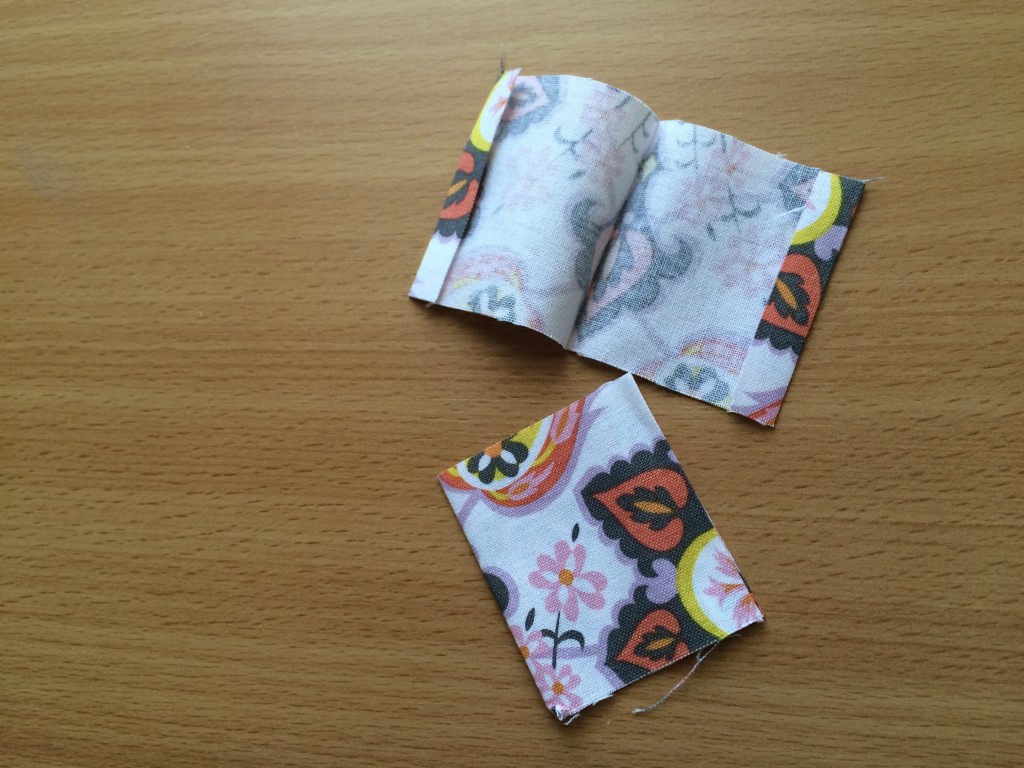
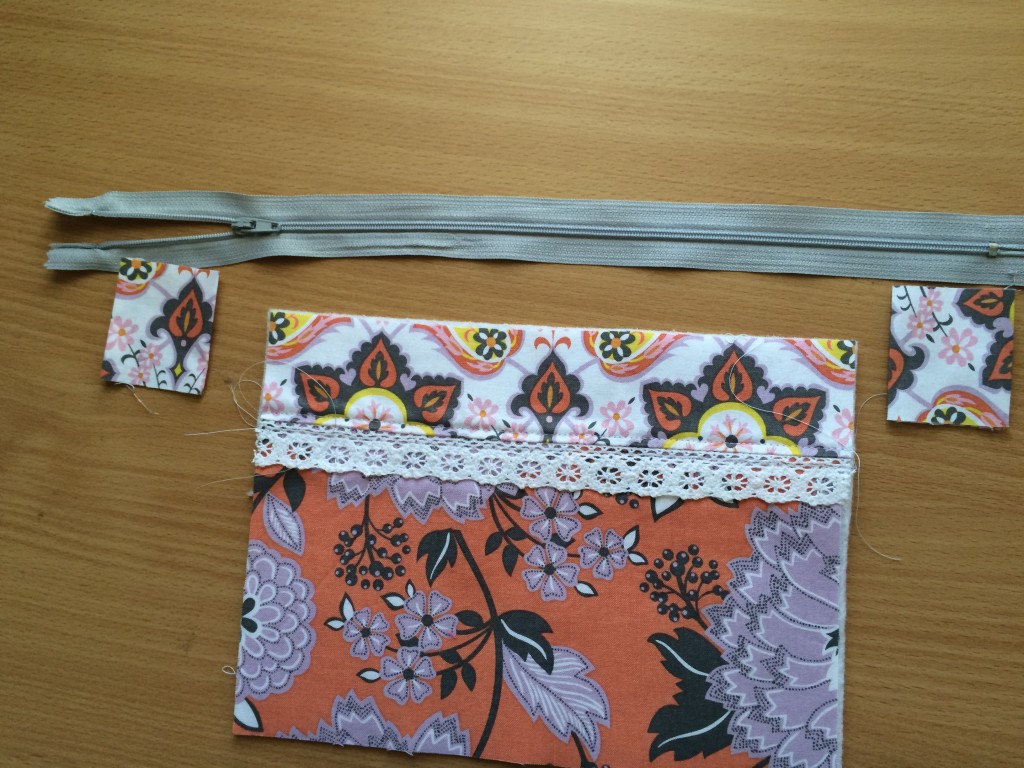
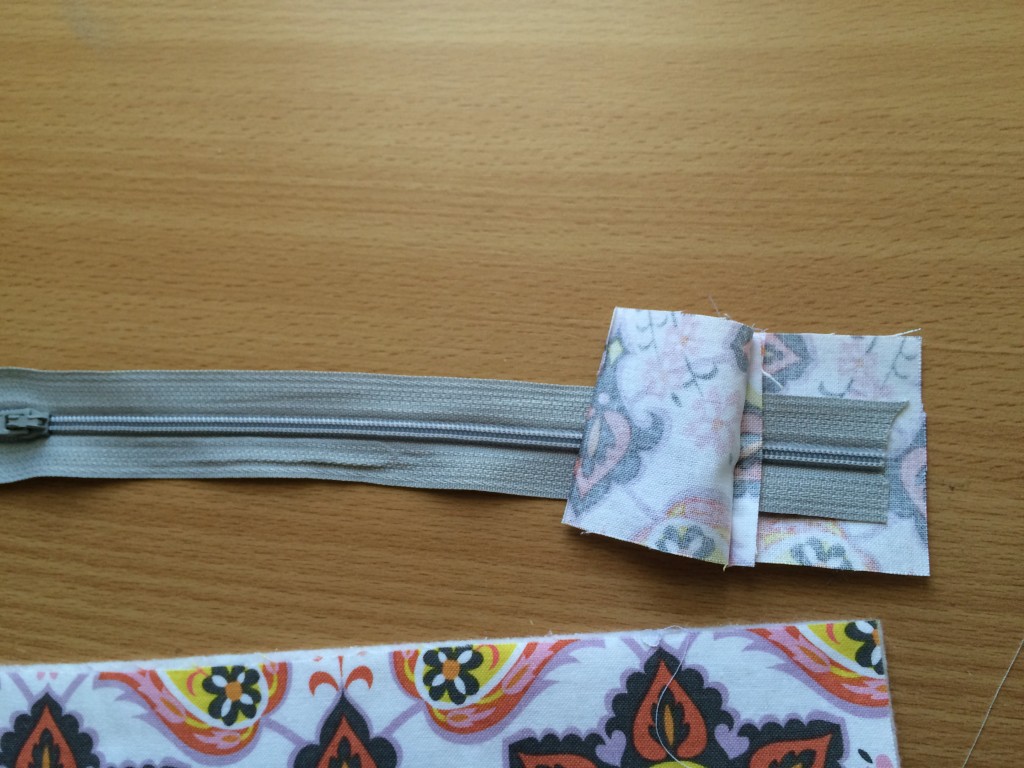
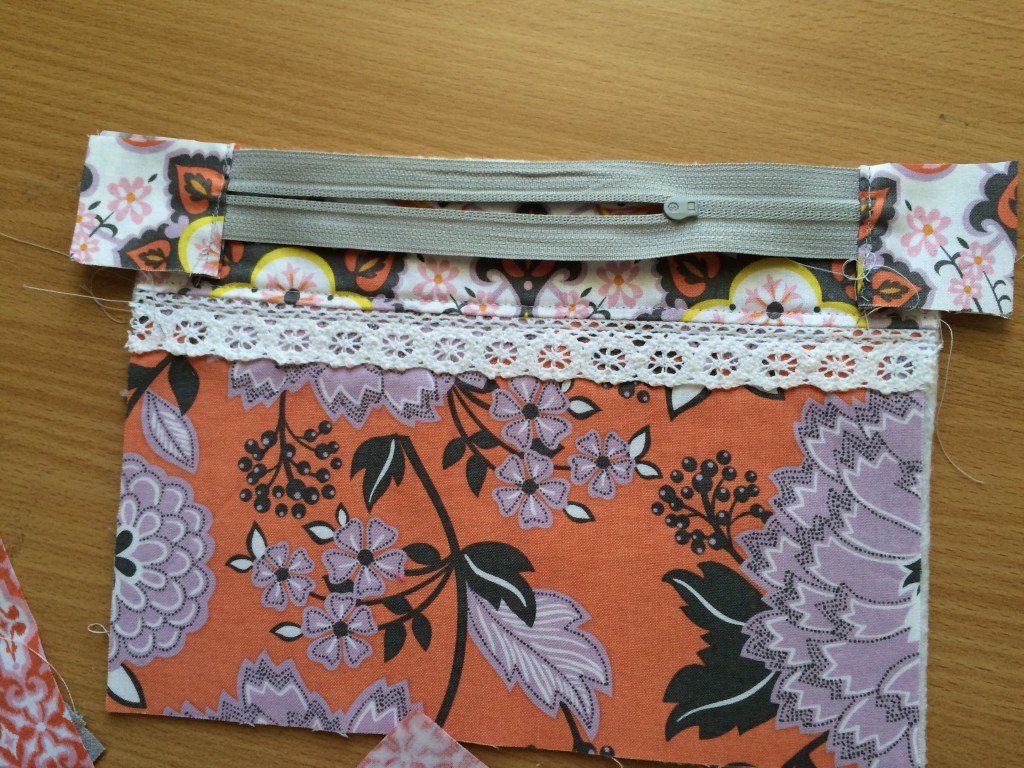
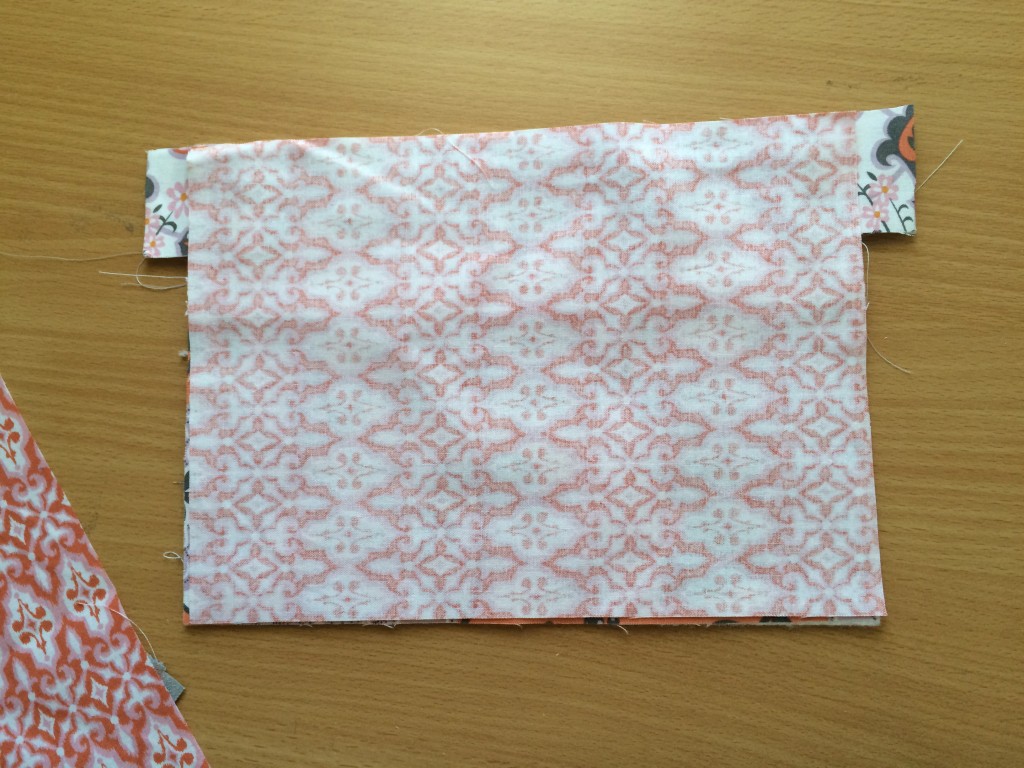
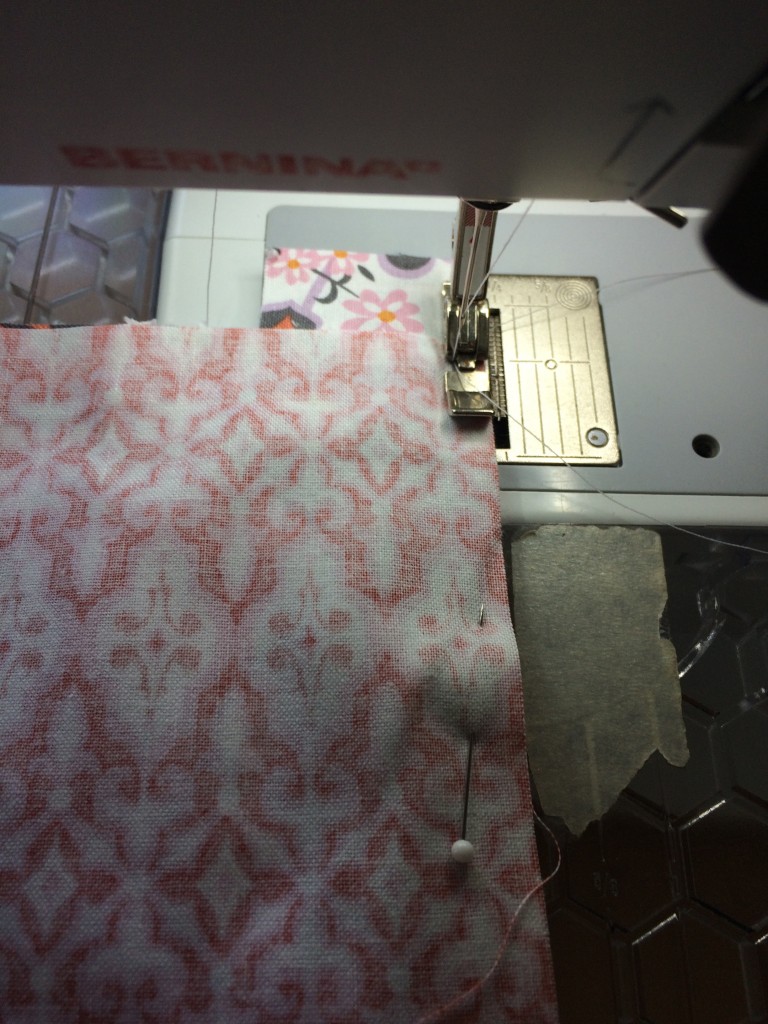
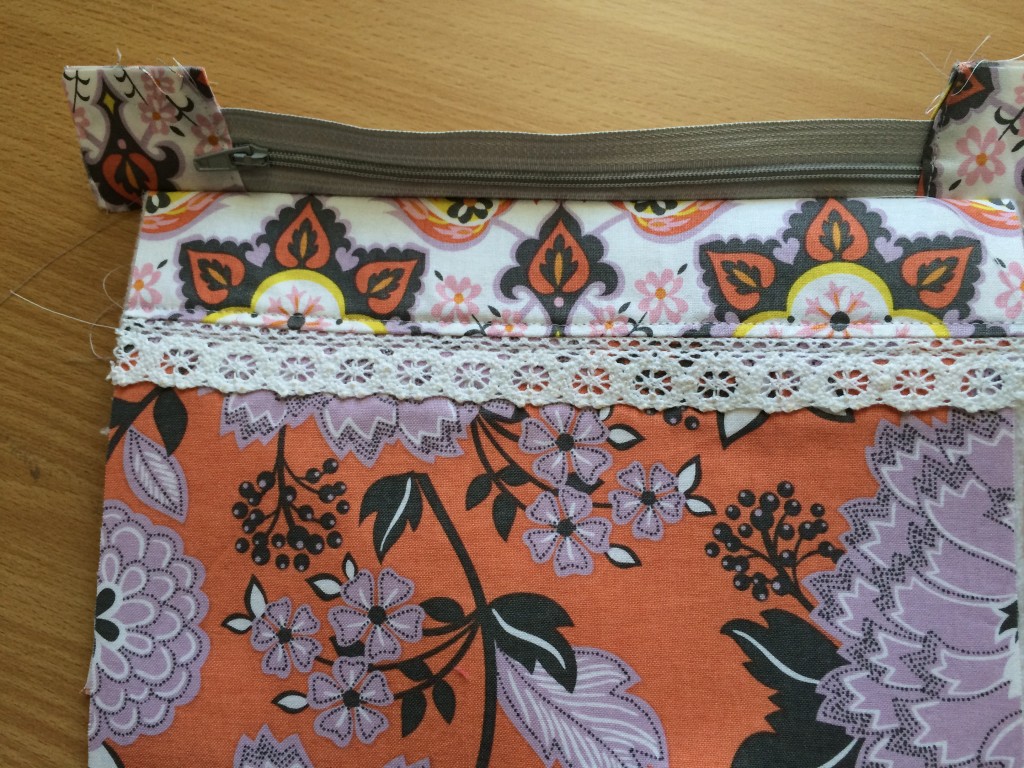
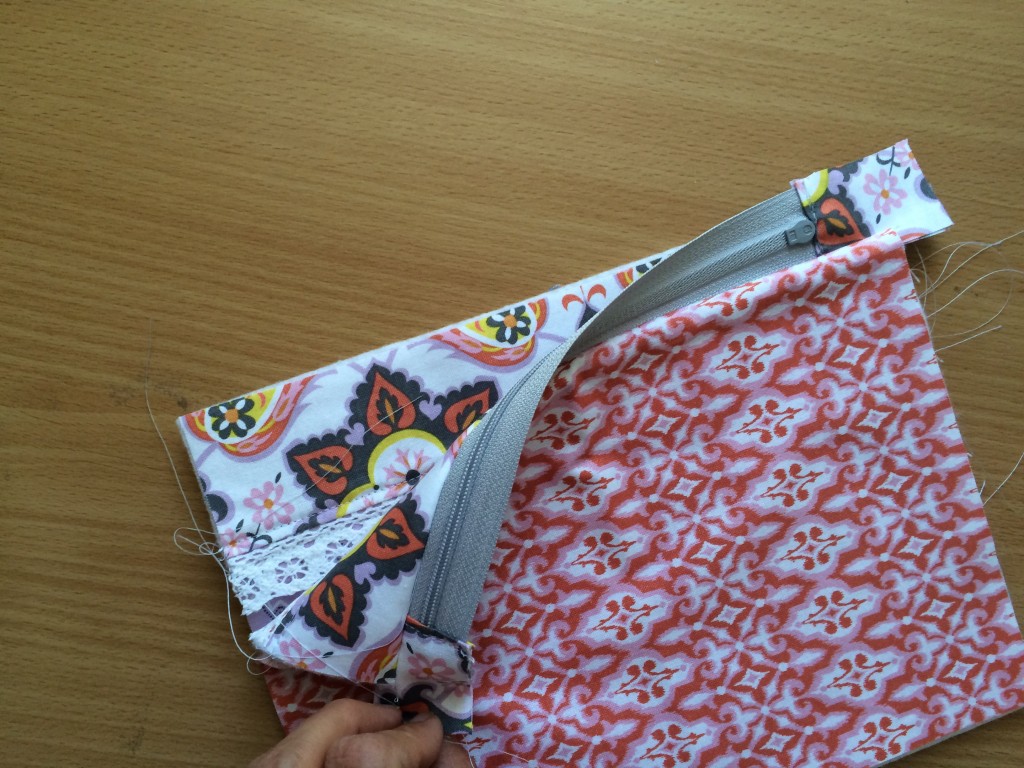
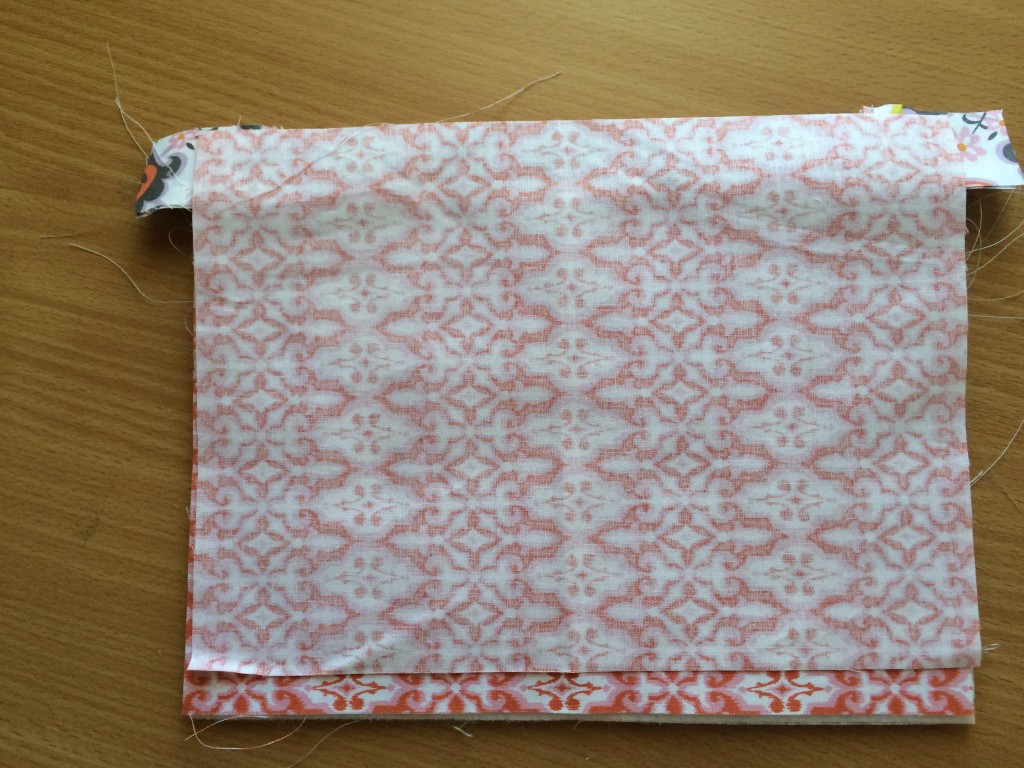
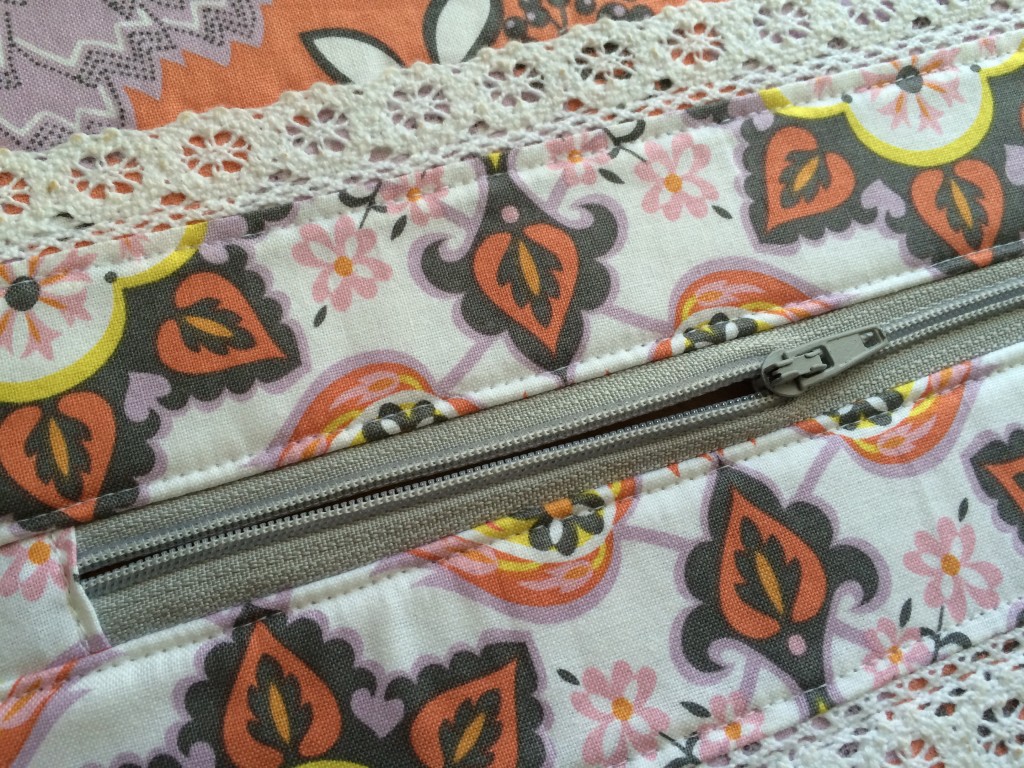
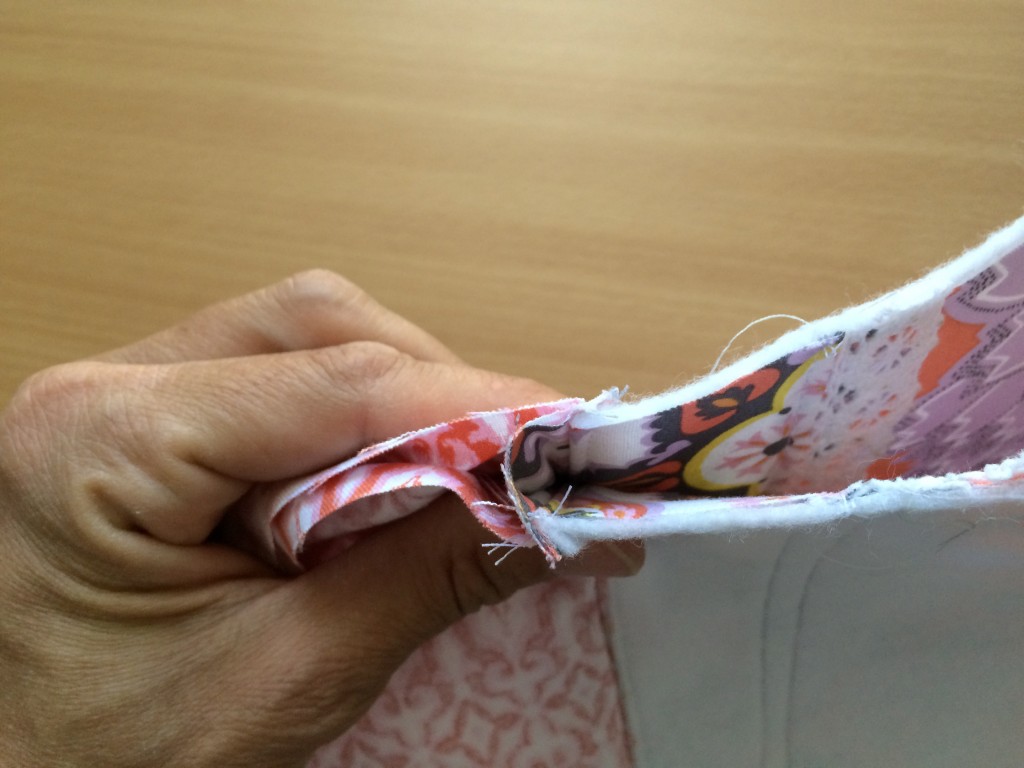
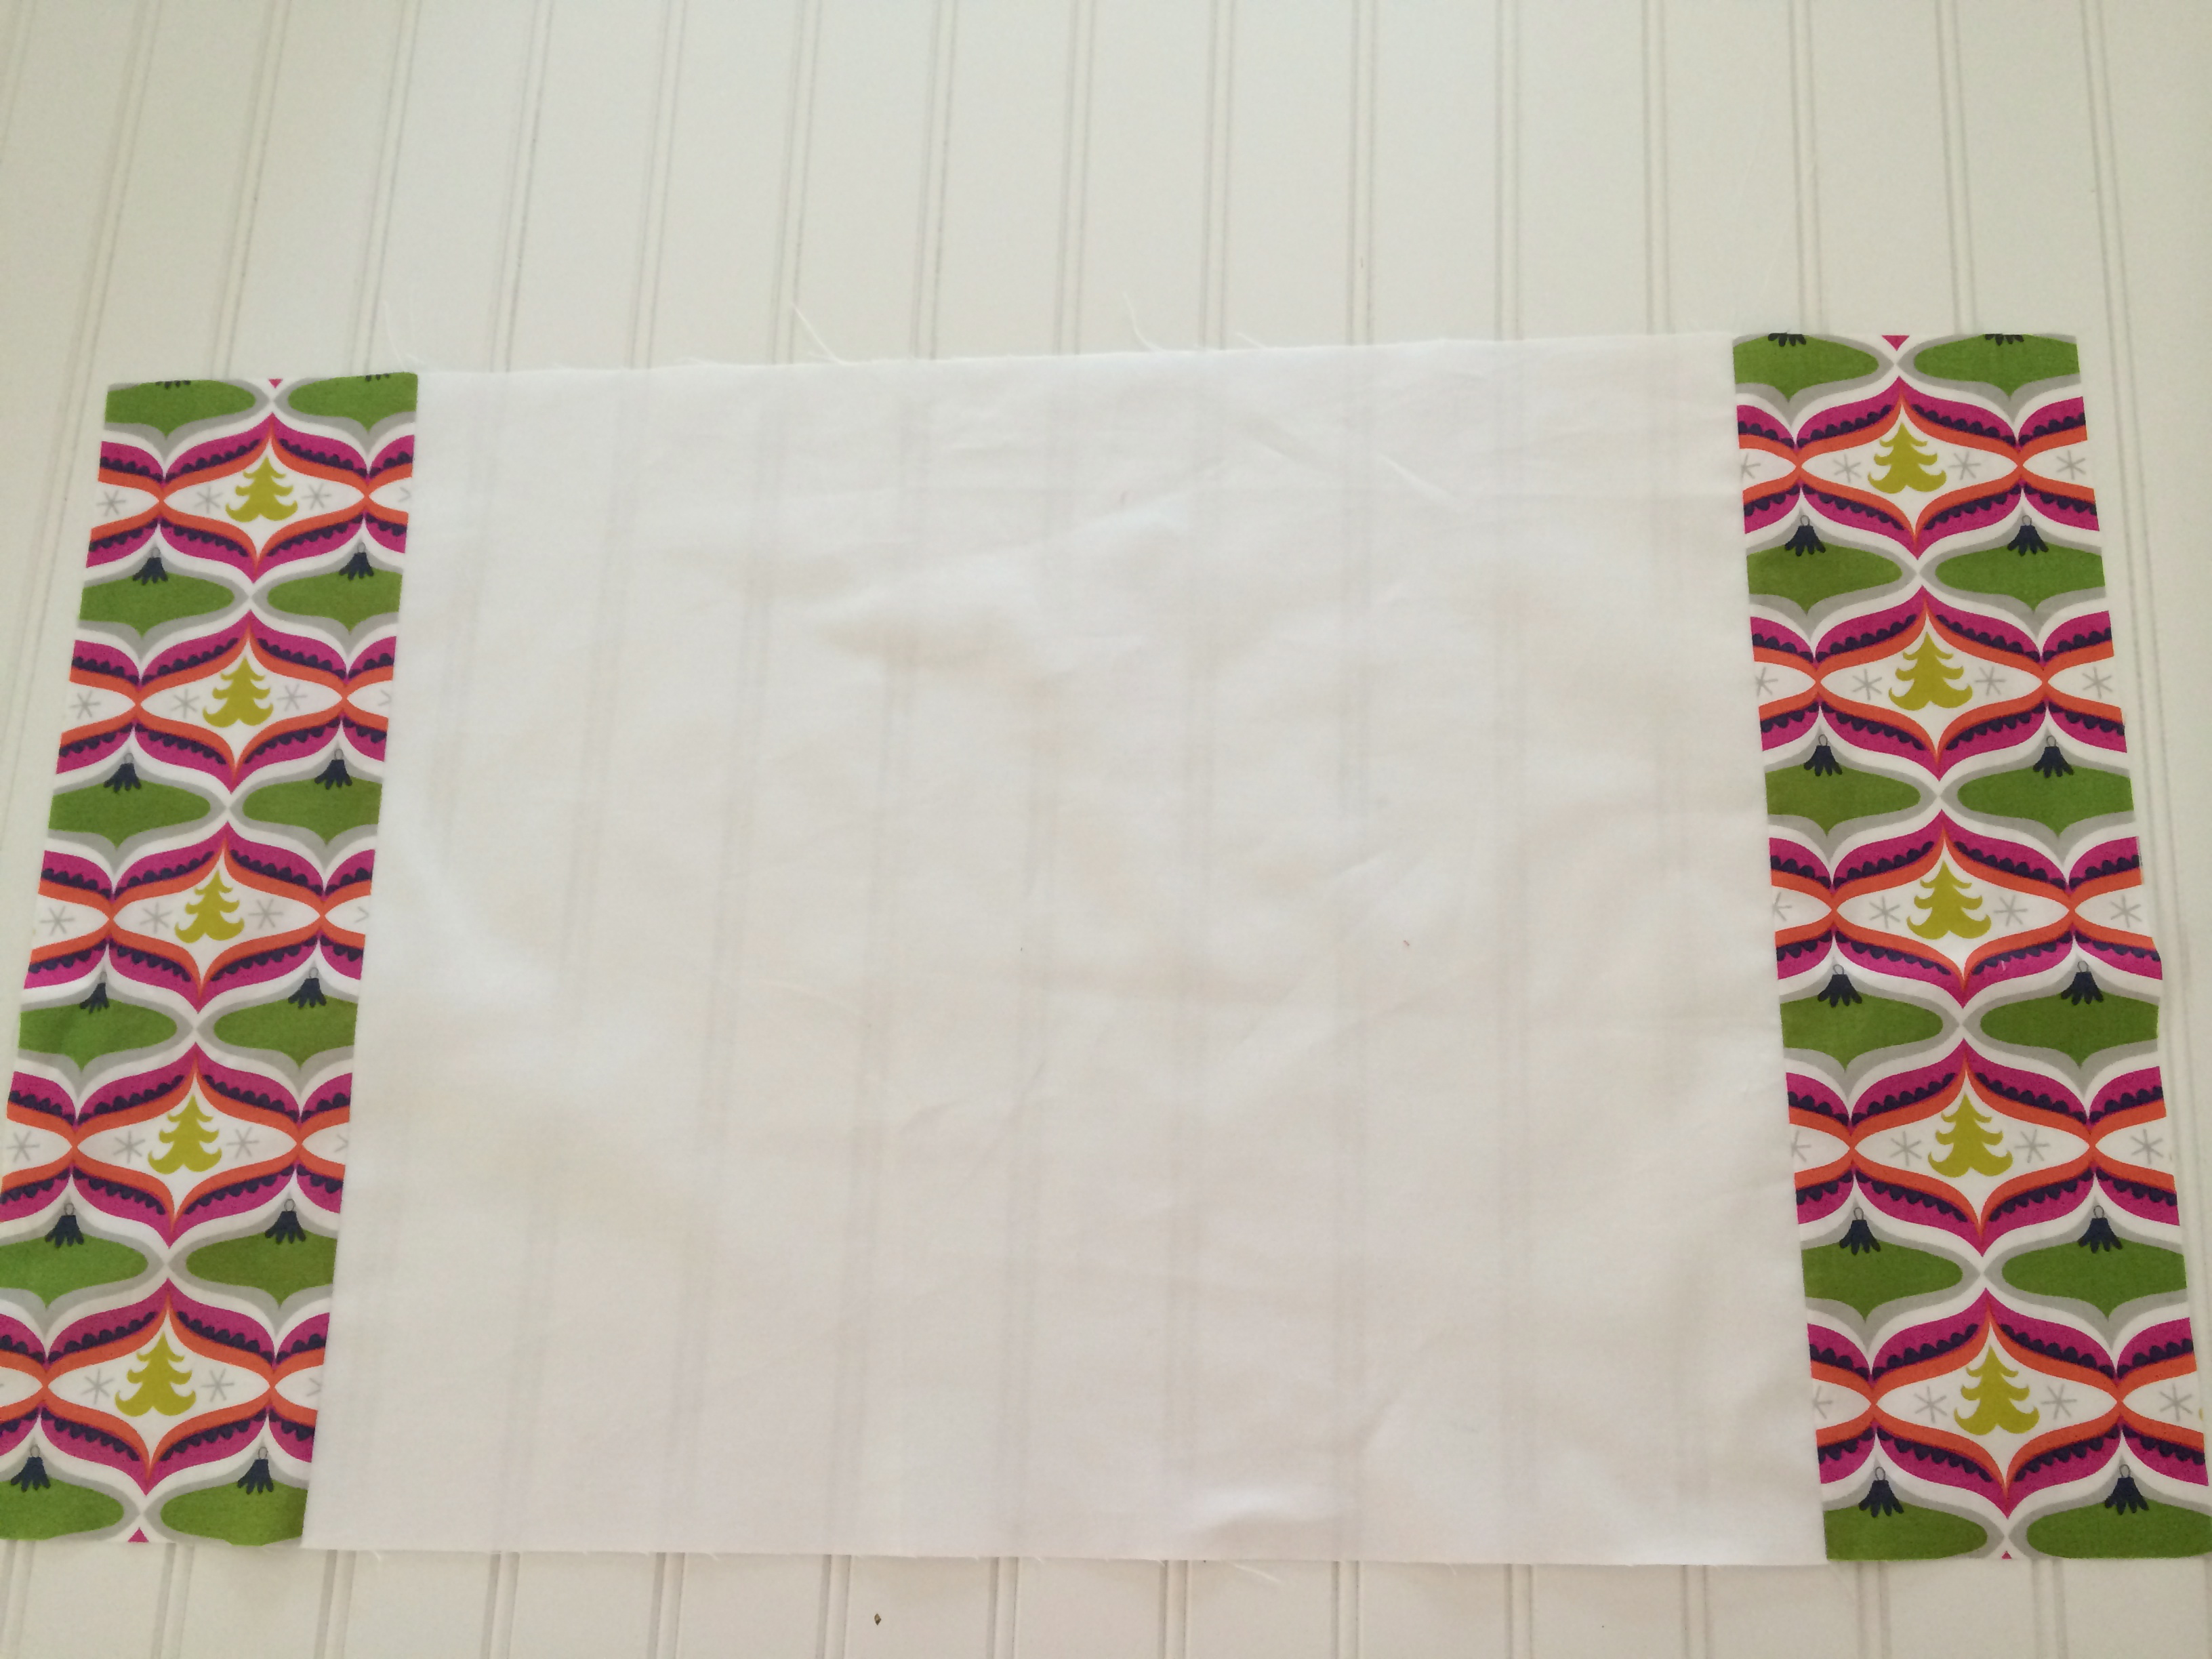
I used some coordinating fabric from Blend’s Harmony line and added borders around the fabric art so it measured 20″.  I used the same fabric to add a zipper flap on the back.  I added some decorative trim and inserted a 20″ down pillow.  Super quick but super cute!corgi pillow 2

More Zipper Pouches

zipper pouch 2
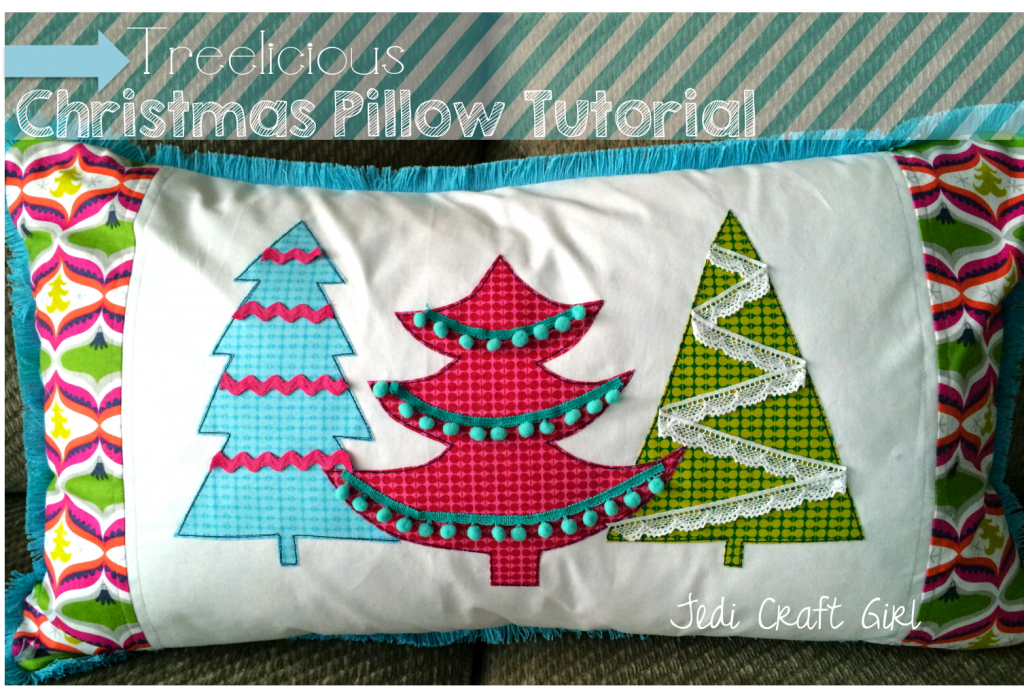
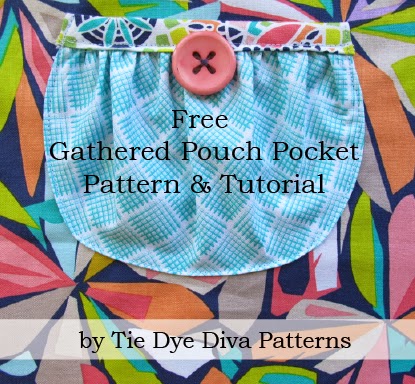
What do you get when you cross “My Favorite Zipper Pouch” with “Full Access Zipper Pouch“?  Last minute Christmas gifts!  I sewed up 6 of these and filled them with some Bath and Body Works goodies.  I think the ladies in my husband’s office will love them!

IMG_2378

I used the dimensions from My Favorite Zipper Pouch and then added the full access zipper using this tutorial.  It’s not to late to sew a few!

zipper pouch


All the fabrics are from Blend’s Harmony collection by Jessica Swift.  They are amazing!!!  This pattern uses Heat n Bond fusible fleece to give the pouch a little stability & softness; add touch of lace and these coordinating fabrics and you’ve got a darling gift.  (I need a few for myself!)
Harmony-by-Jessica-Swift-500x500 zipper pouch3

zipper pouch4

zipper pouch5

zipper pouch6

The Harper Stocking Tutorial

christmas stocking quiltedWhen I was little, my mom made everyone in our family “quilted” stockings with appliqué motifs on them.  To me, all stockings must be quilted 🙂  I made my husband and children these quilted stockings many years ago.

stocking
The fabrics are a little dated but we still love them!  Here are a few more peeks at stockings I have made over the years with this same pattern.

IMG_2199

DSCN5264

DSCN5180


There are so many wonderful fabrics out there to make stockings with.  I love this line from Blend called Treelicious.  I’ve made a few other projects with it, here and here.  Below is the pattern and instructions for making this “Harper” stocking which I made my friend’s baby’s first Christmas.  You can change the fabric piecing to be more intricate or you can use a plain piece of fabric and quilt it.  It’s fun to customize each stocking to your children’s personalities.

Supplies:

fat quarters of 3 fabrics for stocking and stocking tab

1/2 yard for the stocking lining

piece of lace

1/4 yard faux fur, fleece, or I used a type of cloud fleece with a diamond pattern…anything soft and white

Heat n Bond EZ print appliqué sheets or heat n bond appliqué transfer paper

quilt batting

Stocking Pattern, Click HERE

Note – the length of the cutting measurements are approximates, you just need enough to fit the stocking pattern on

Begin by cutting the pink trees 9″ x 12″

Gray deer 5″ x 12″

Pink 8″ x 20″

Piece together using 1/4″ seams, press

Try to place the pieces like this – it’s just rough background to quilt then cut the stocking from.


quilted christmas stocking 2


Using Spray n Bond spray basting (or pins) baste the fabric on a scrap of cotton batting – I love projects like this that use batting scraps!

quilted christmas stocking 4


Quilt as desired – I sewed loop de loos.

Print the pattern out (here).  It’s in 4 pieces.  Assemble them together like this.  I added some dotted lines to help with matching up each piece.  Don’t laugh at how rough my pattern is, it’s the middle of December and who has time for perfection!!  Cut out the pattern.

IMG_2299_2

Next, pin the stocking pattern to the quilted piece and cut out.  If you want the stocking a little larger, cut out 1/4″ away from the pattern and the finished stocking will be the size of the pattern.  Just make sure to cut the same for the lining.quilted christmas stocking 5


You can add some lace embellishment if you want.  Choose a font you like and print it in reverse on the EZ print sheets, or print in reverse and draw onto the Heat n Bond appliqué paper.  Press the letters to the wrong side of the white fabric.  Cut out each letter.  Peel off the backing and press into place.  It’s always a trick to get the letters to fit – I like to make them as big as I possibly can.  Top stitch in gray thread.
quilted christmas stocking 6


Here is a close up of the letters.  You can see my white fabric has a little silver detail in it!quilted christmas stocking 18

Now do the same process with the back of the stocking.  Only remember the stocking will be opposite.

quilted christmas stocking 7


Instead of cutting the stocking out again and trying to match it, I pinned the appliquéd part to the newly quilted piece, matching the seams along the sides.  Sew using 1/4″ seams all the way around the stocking leaving the top open.  Cut around the seam.quilted christmas stocking 8


For the lining of the stocking, cut the same pattern out of a coordinating cotton (2).  Sew right sides together all the way around the stocking.quilted christmas stocking 9


Prepare the fur cuff.  Cut the fur 18.5″ x 11″quilted christmas stocking 10


Fold it in half fat ways, right sides together and sew about 1/2″seam along the side:quilted christmas stocking 11


Turn the cuff right side out like this:
quilted christmas stocking 14


For the stocking holder, cut a strip of fabric 10″ x 3″.  Folding in half lengthwise with right sides together, sew 1/4″ seam and turn right side out.  Press the seam in the center like this:quilted christmas stocking 13


This is how it will look from the outside:quilted christmas stocking 12


Place the stocking lining inside the stocking, just how you want it to look, with the right side of the lining facing out.

Baste the stocking holder by bringing both raw edge ends together and pin it inside the stocking centering on the seam.  Sew about 1/8″ to keep it in place.quilted christmas stocking 16

Next, place the cuff inside the stocking & lining, aligning all raw edges:

quilted christmas stocking 17


Pin all the way around matching the seam in the cuff with the side seam in the stocking.  Sew 1/4″ to 1/2″ seam all the way around using a walking foot – it gets pretty thick by the seams but it will work.  Turn the cuff right side out and it’s done!  Kind of magical!!quilted christmas stocking 23

quilted christmas stocking 21

quilted christmas stocking 20

quilted christmas stocking 1

Christmas Deer Pillow Tutorial


christmas deer pillow

Sometimes fabric is so cute you just don’t want to cut it up!  I love deer and this fabric is one of the cutest deer prints I’ve seen.  I love that it is in a siver/grey color.  I keep my Living Room pretty neutral at Christmas: metallics, grey, cream, white, taupe, and a touch of aqua.  This fabric is perfect!

Supplies

20″ pillow form

20″ square front fabric, I used Rudolph in Grey by Blend

20″ square for the back fabric

1.5 yards grey crochet lace

Spray n Bond Basting Spray

22″ or longer zipper

20″ pillows are my favorite – so I cut a 20″ square of the Rudolph fabric.  I added a strip of grey crochet lace to give it a little texture.  I always use Spray n Bond basting spray when sewing lace – it keeps it from moving when you sew.
christmas deer pillow 2

christmas deer pillow

Since the pillow is pretty plain, I added some white pom pom trim.

christmas deer pillow 3


For the back of the pillow, I cut a 20″ square of the back fabric.  Cut a strip 3″ to add the zipper.  Click HERE for a tutorial on putting a zipper in the back of a pillow.  I used the same lace as a zipper cover.christmas deer pillow 4


christmas deer pillow 6

I love it!  It has such a winter wonderland feel!!  And only took about 30 minutes to make!

christmas deer pillow 8

christmas deer pillow 9


Treelicious Christmas Pillow Tutorial


treelicious applique pillow tutorial

If the Christmas sewing doesn’t get done now, it will never get done!!!  I love this pillow and it is super fast and easy to make!  The fabrics are from Blend’s Treelicious line – which of course I am in LOVE with!  I am so hoping to get a tree skirt made before Christmas gets here.  The inspiration came from this print Tis The Season:

101.112.01.1Web
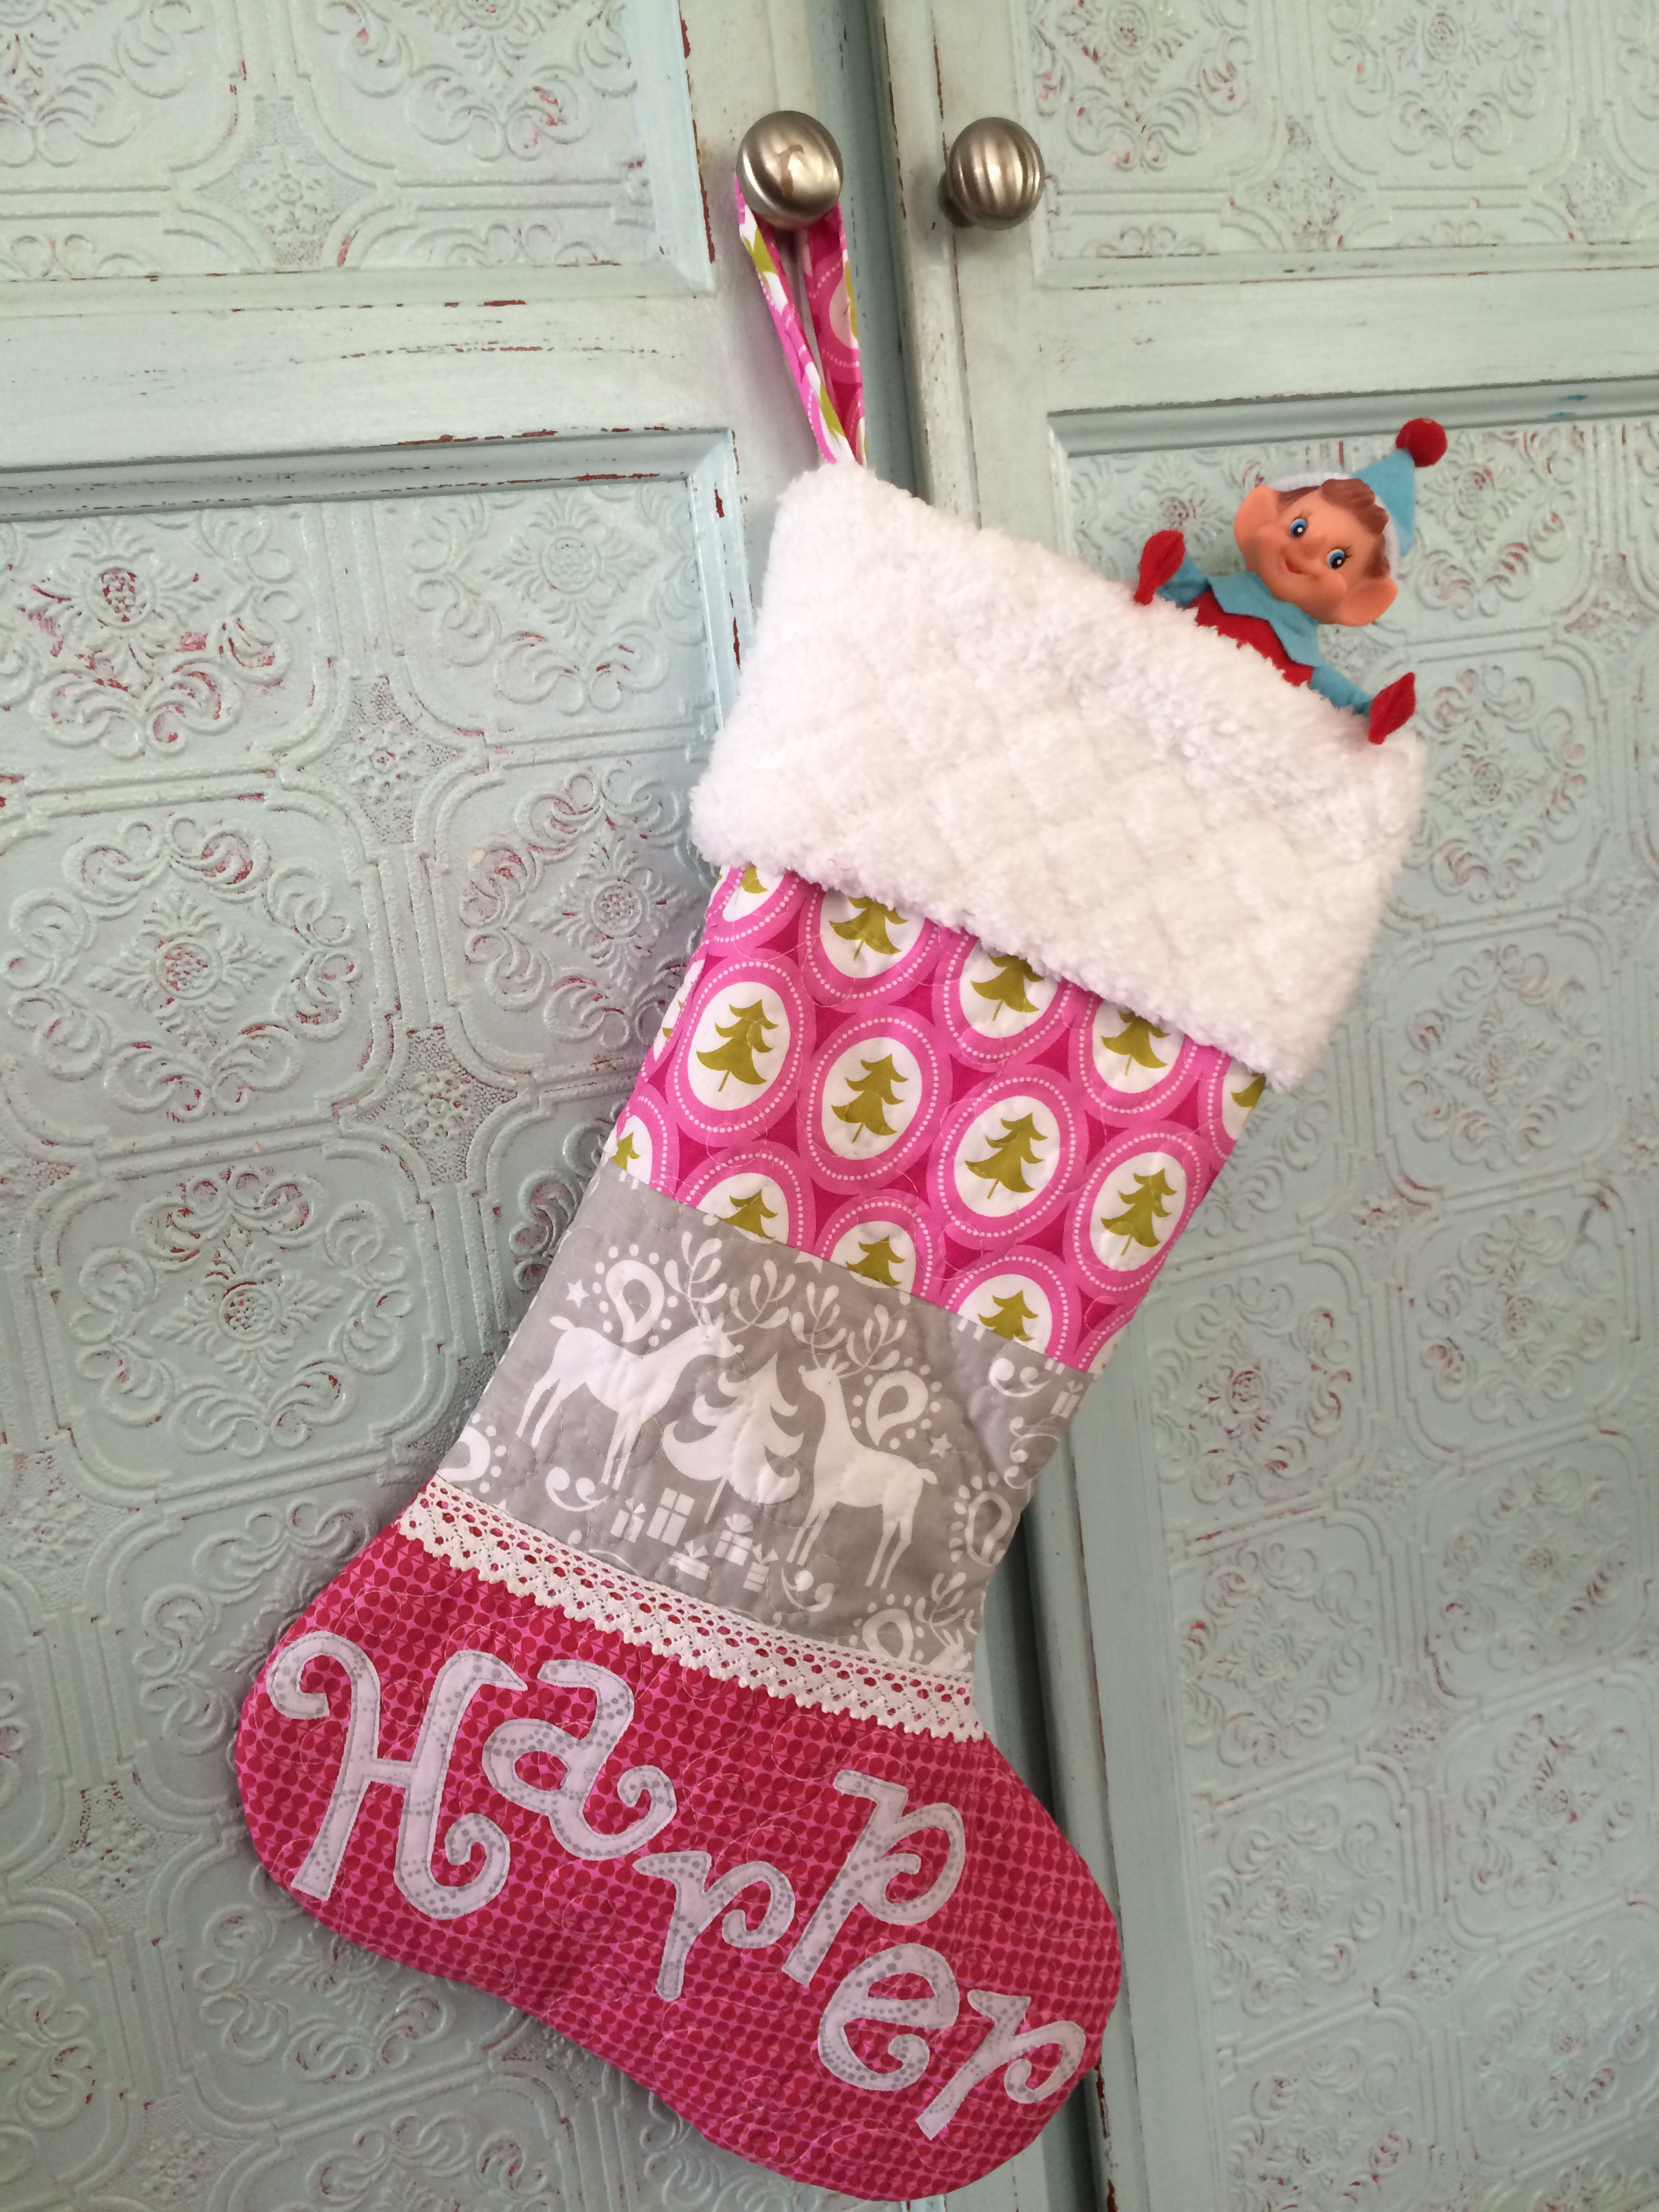
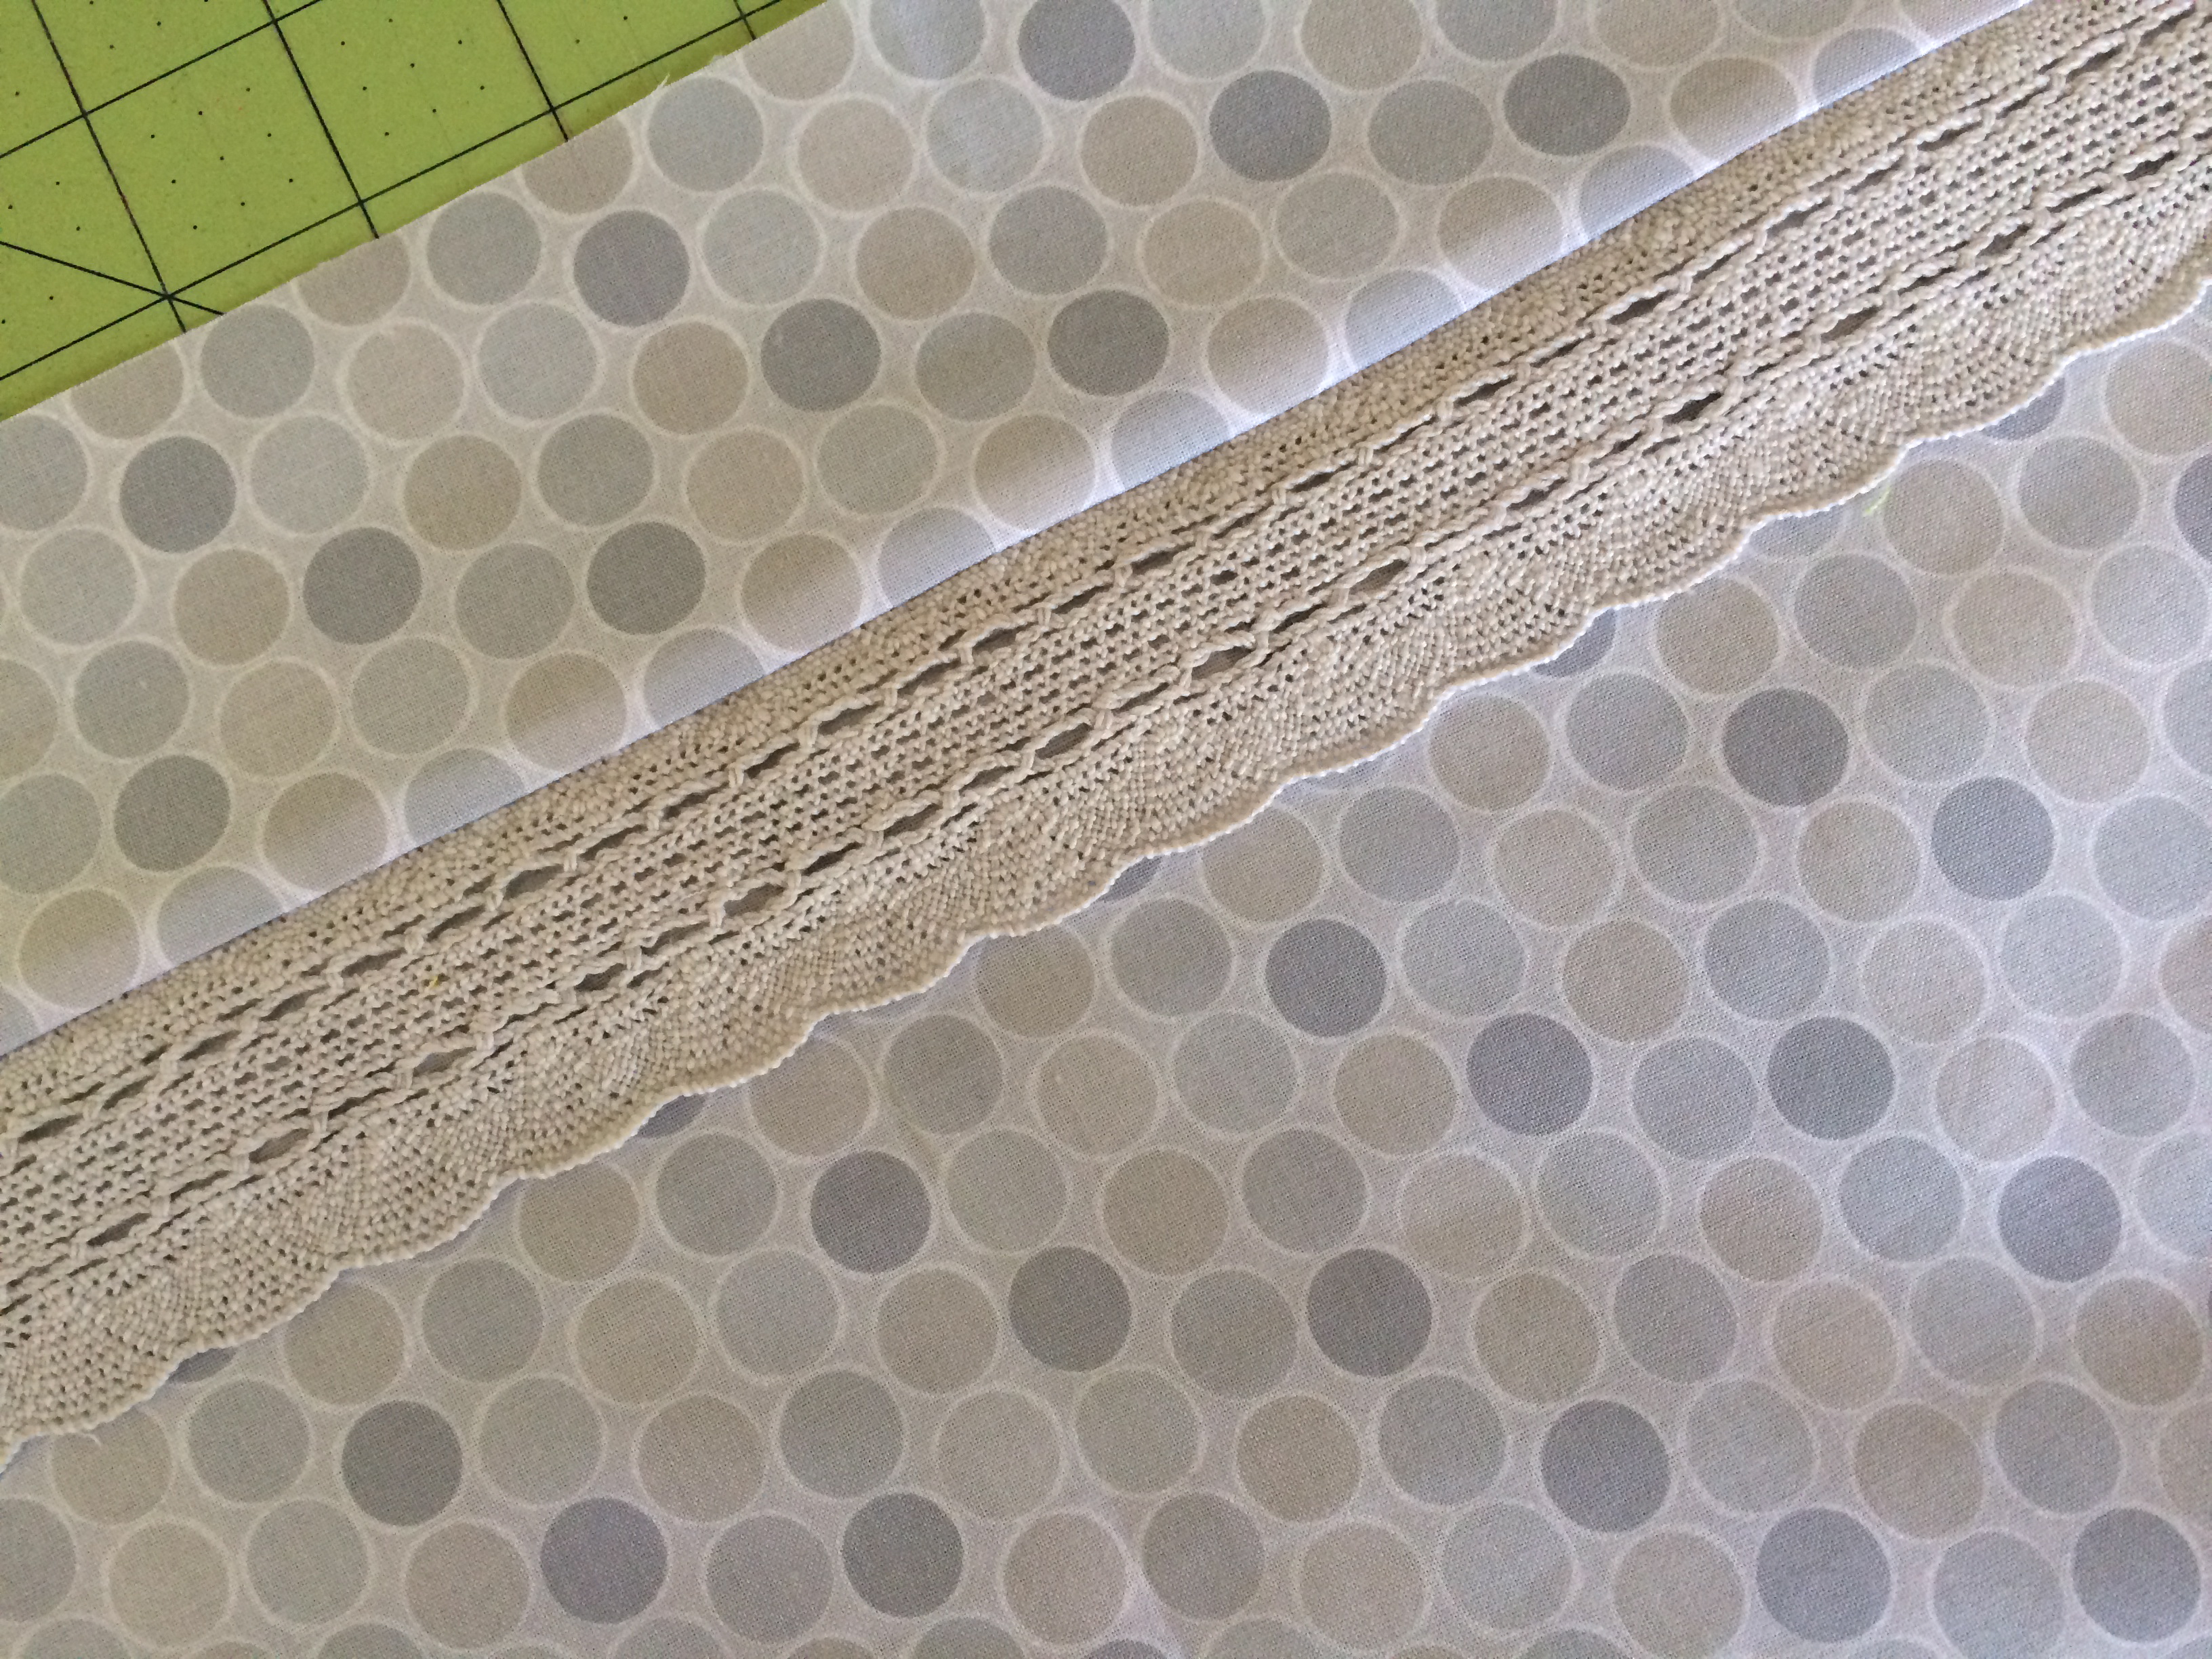
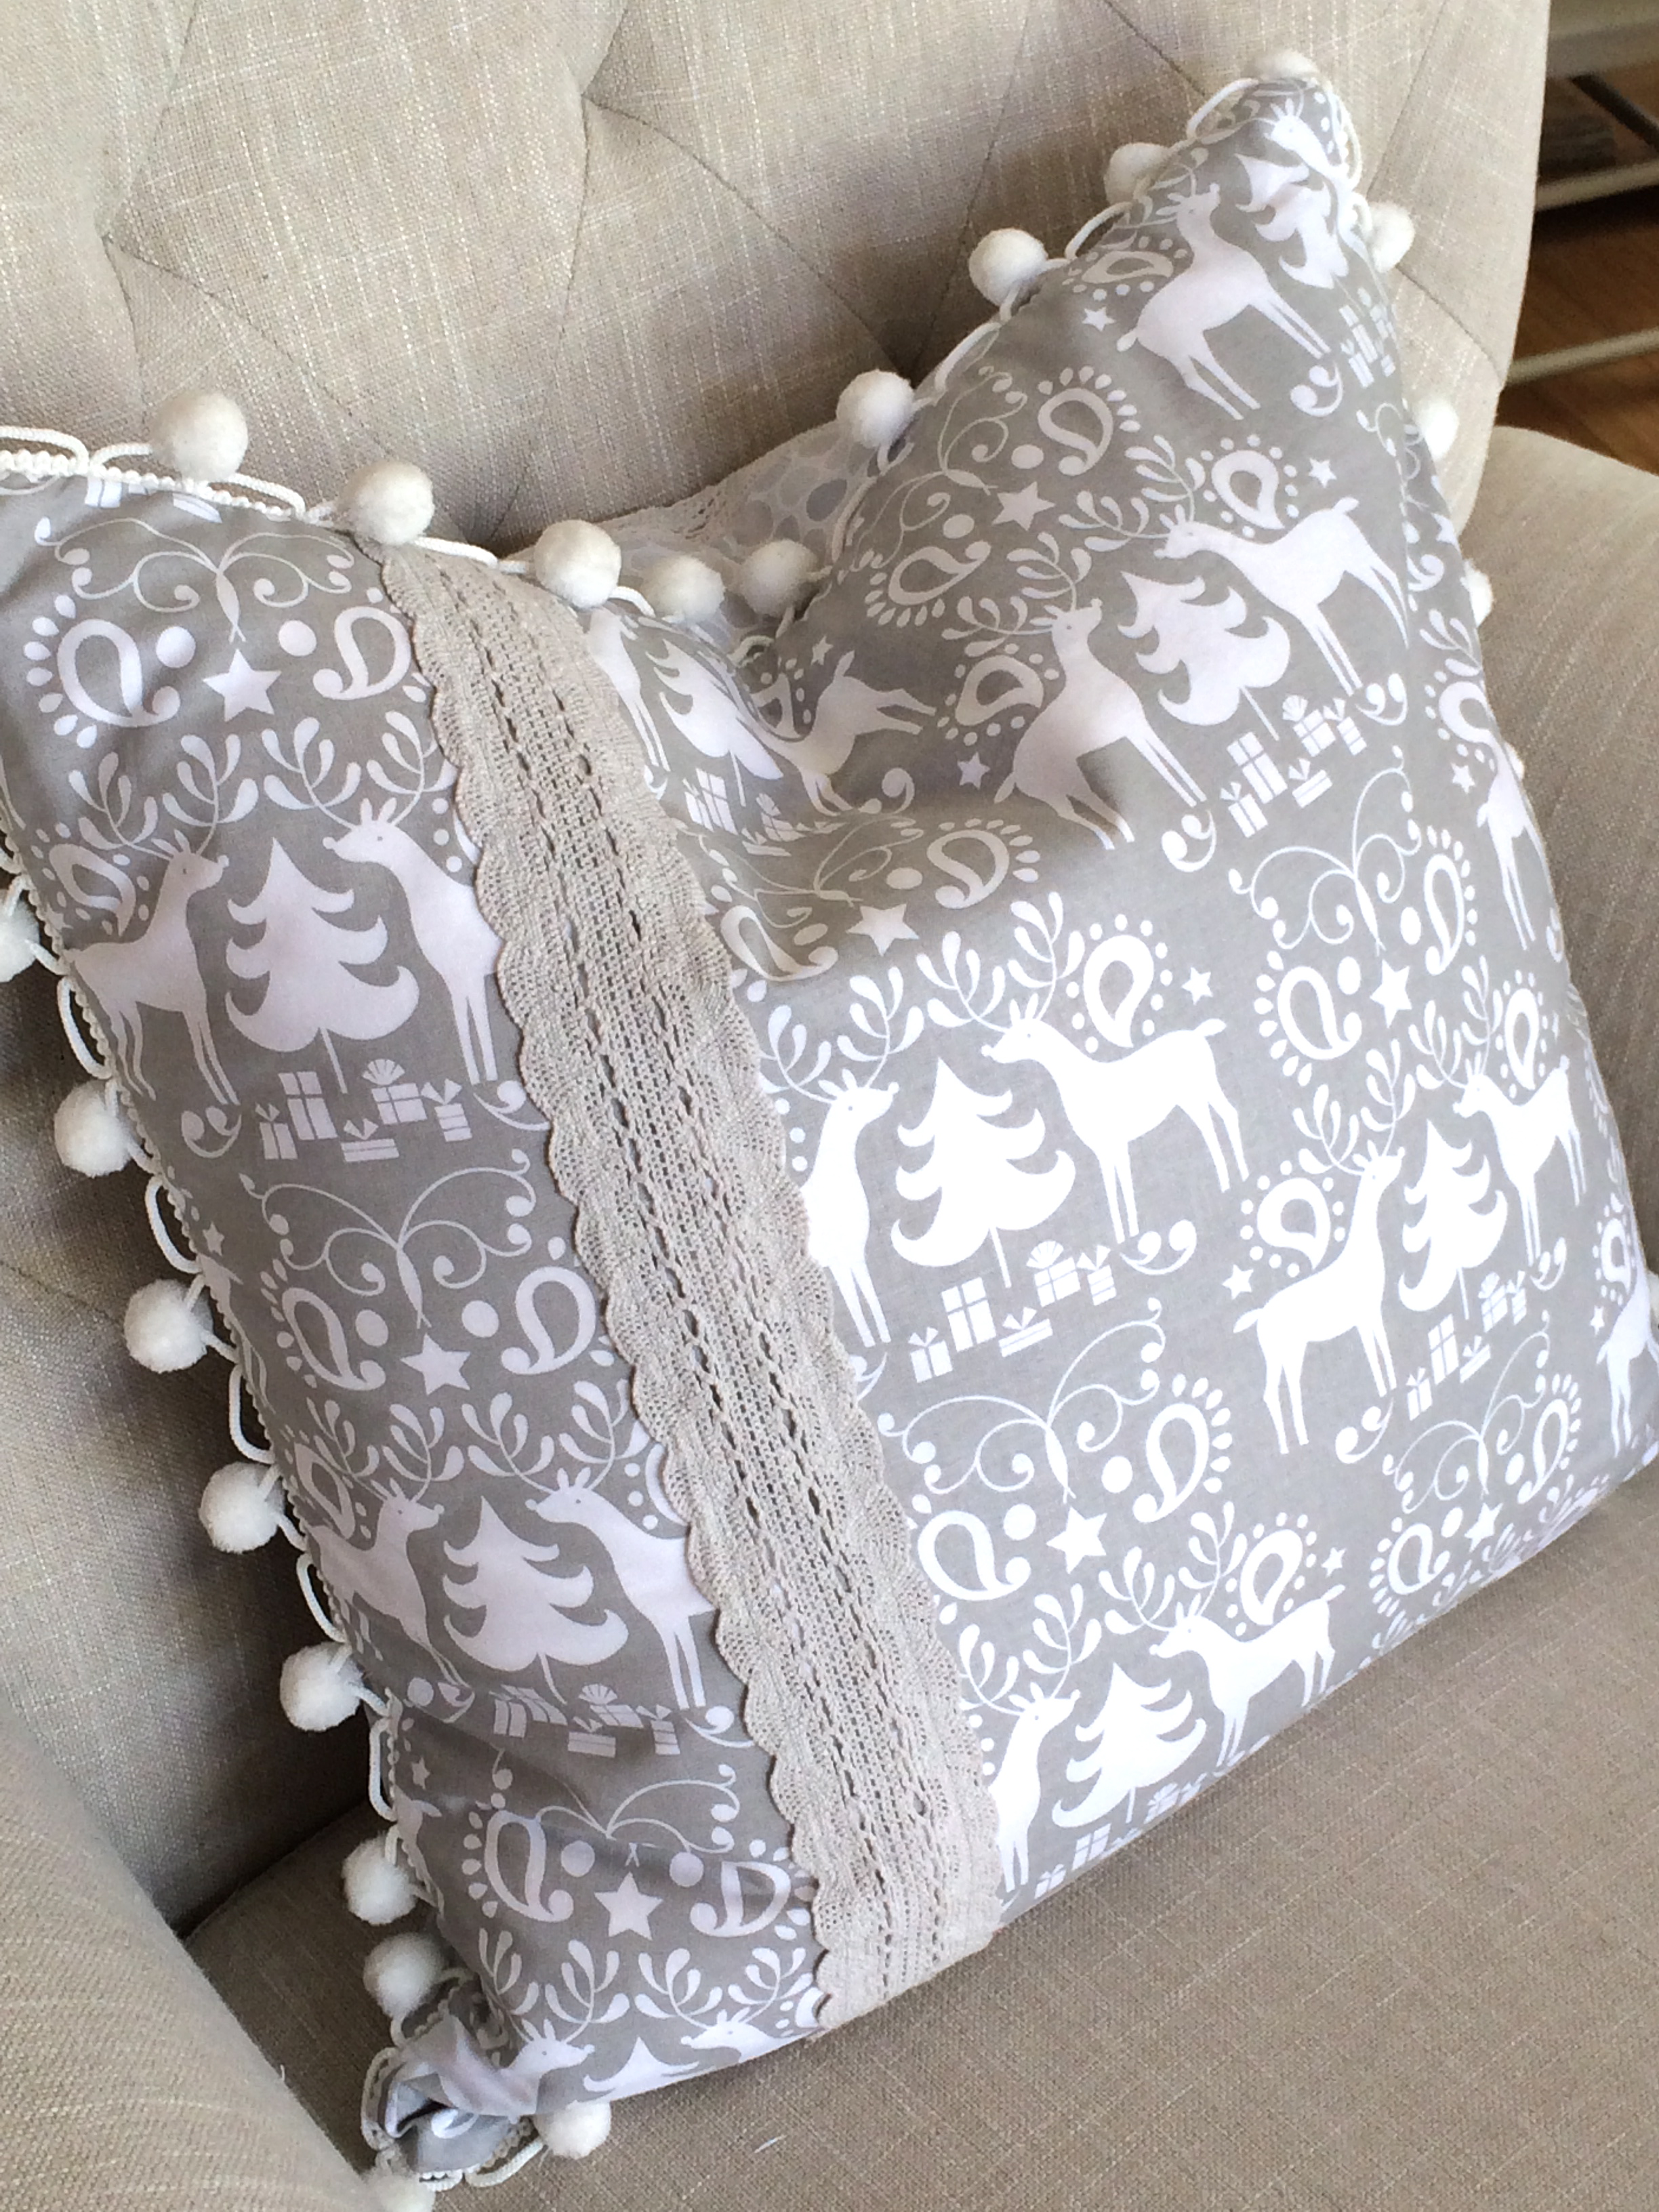
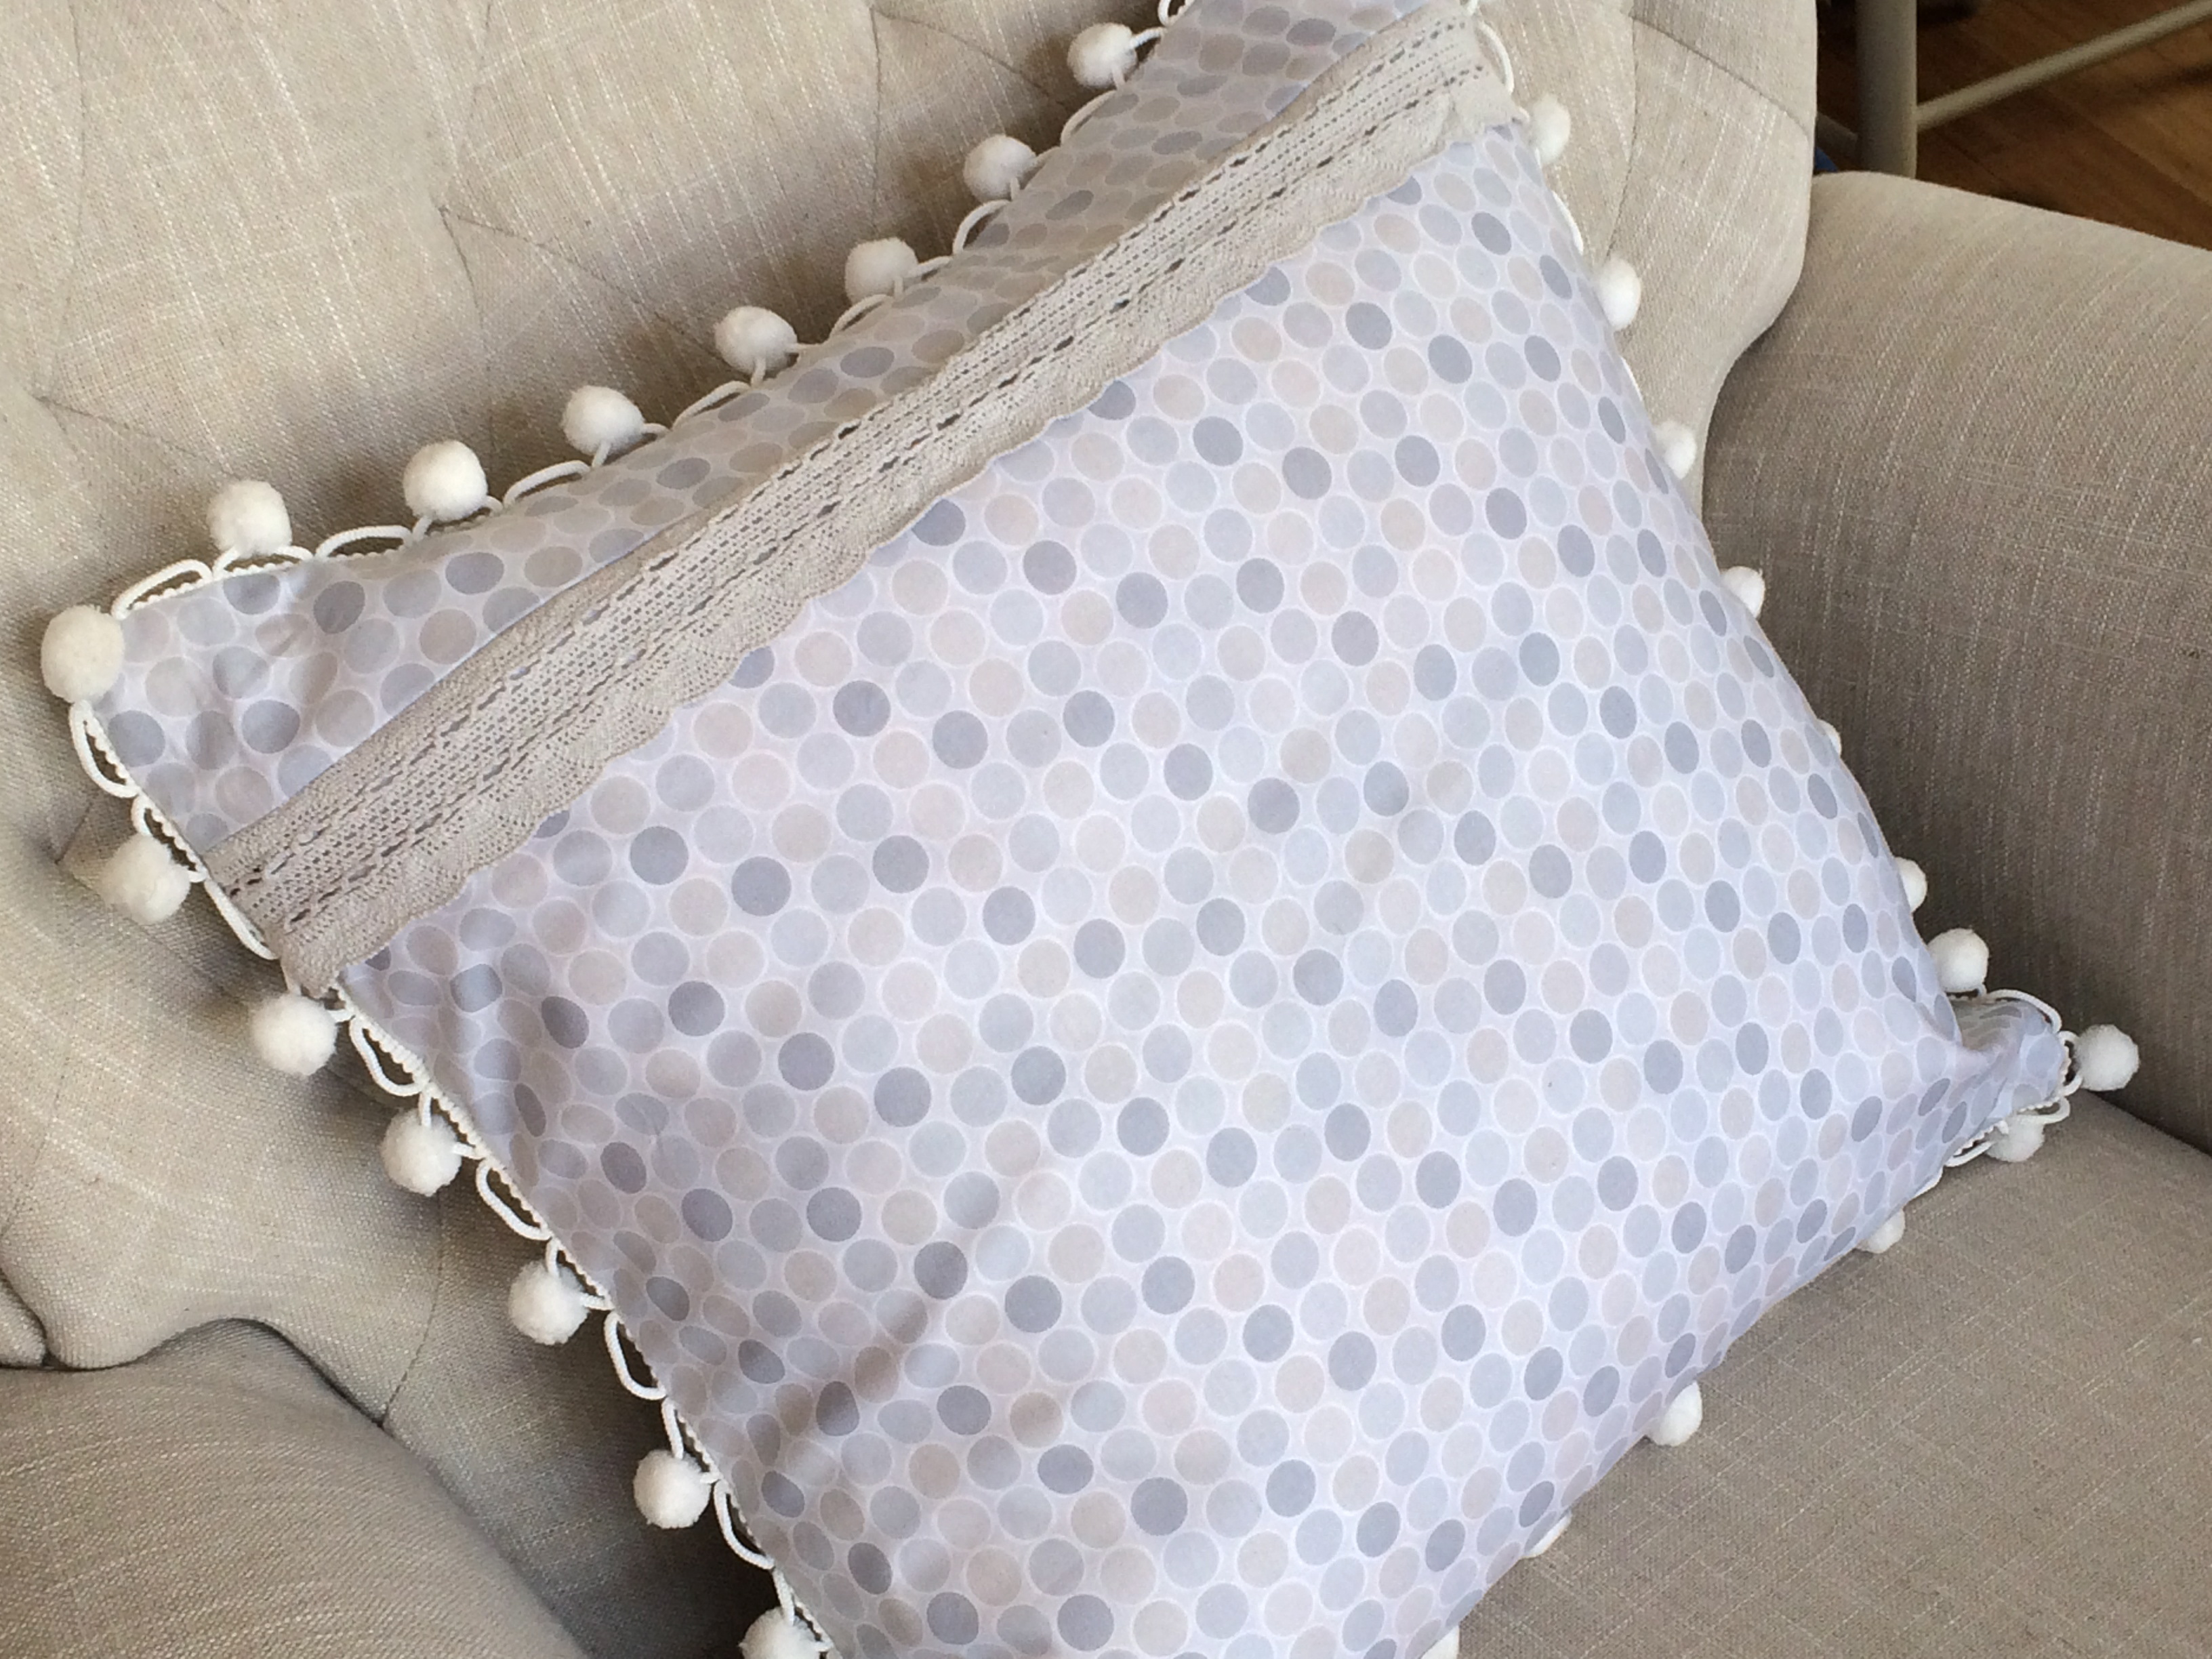
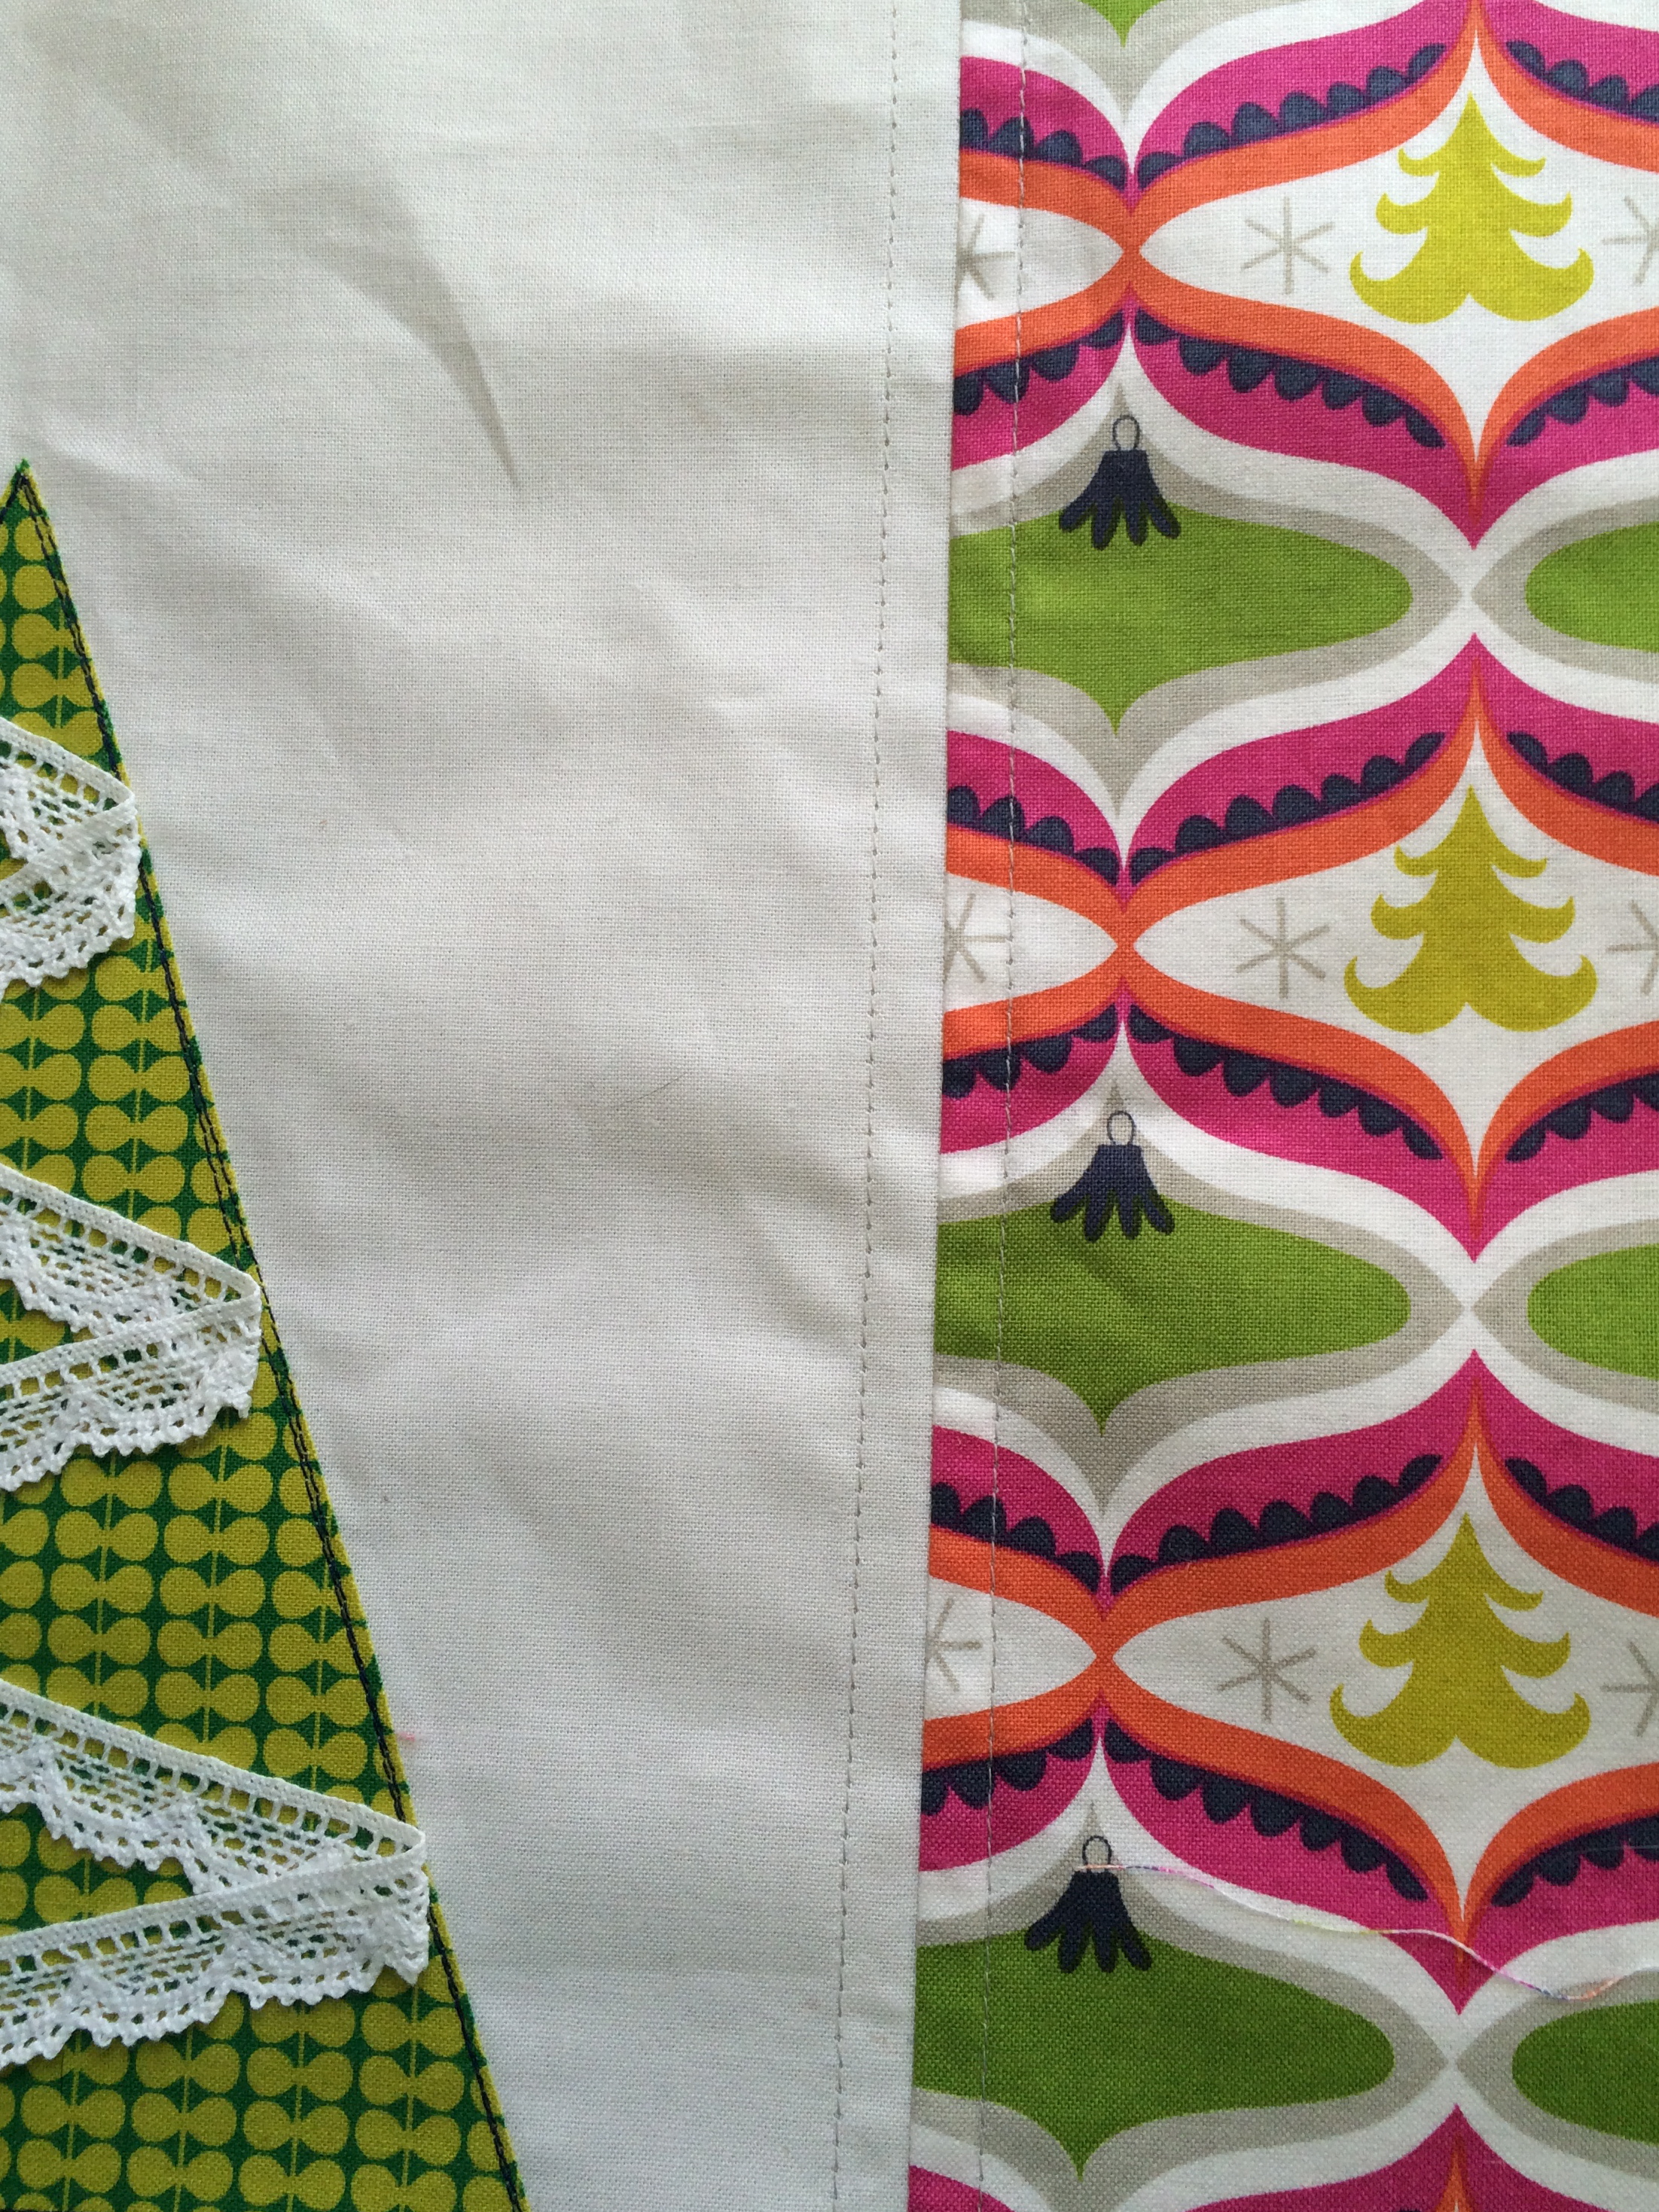
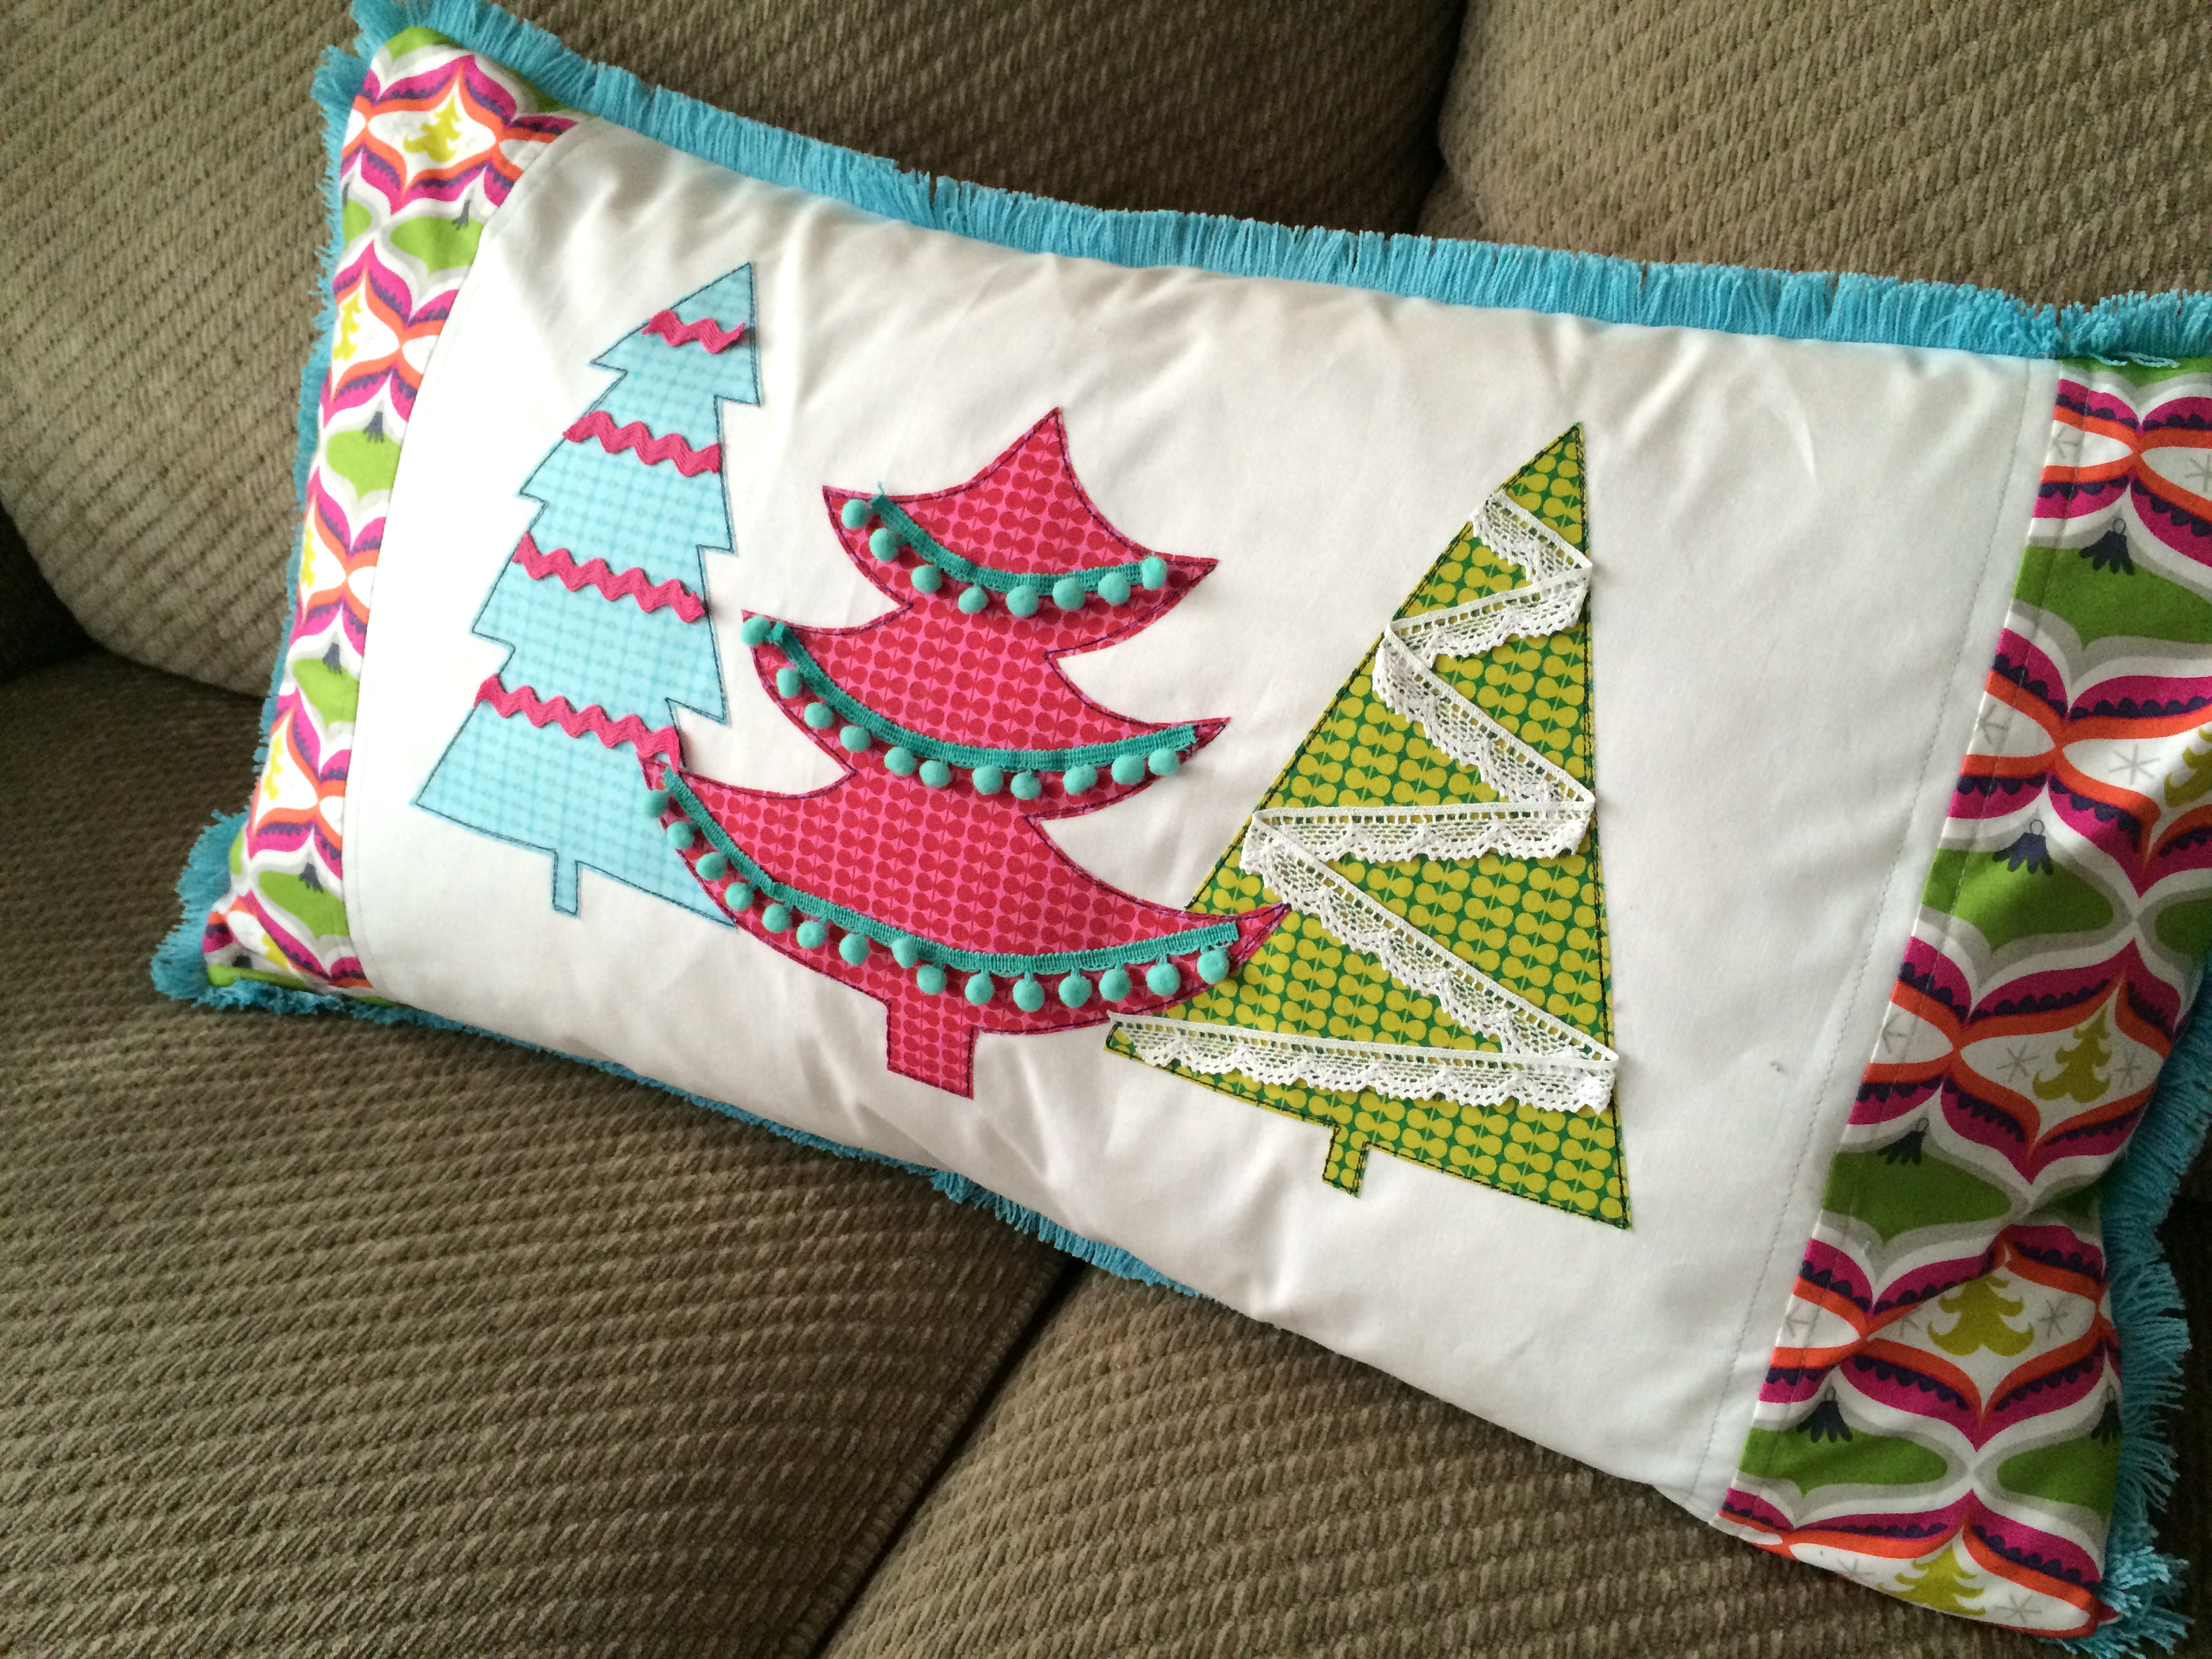
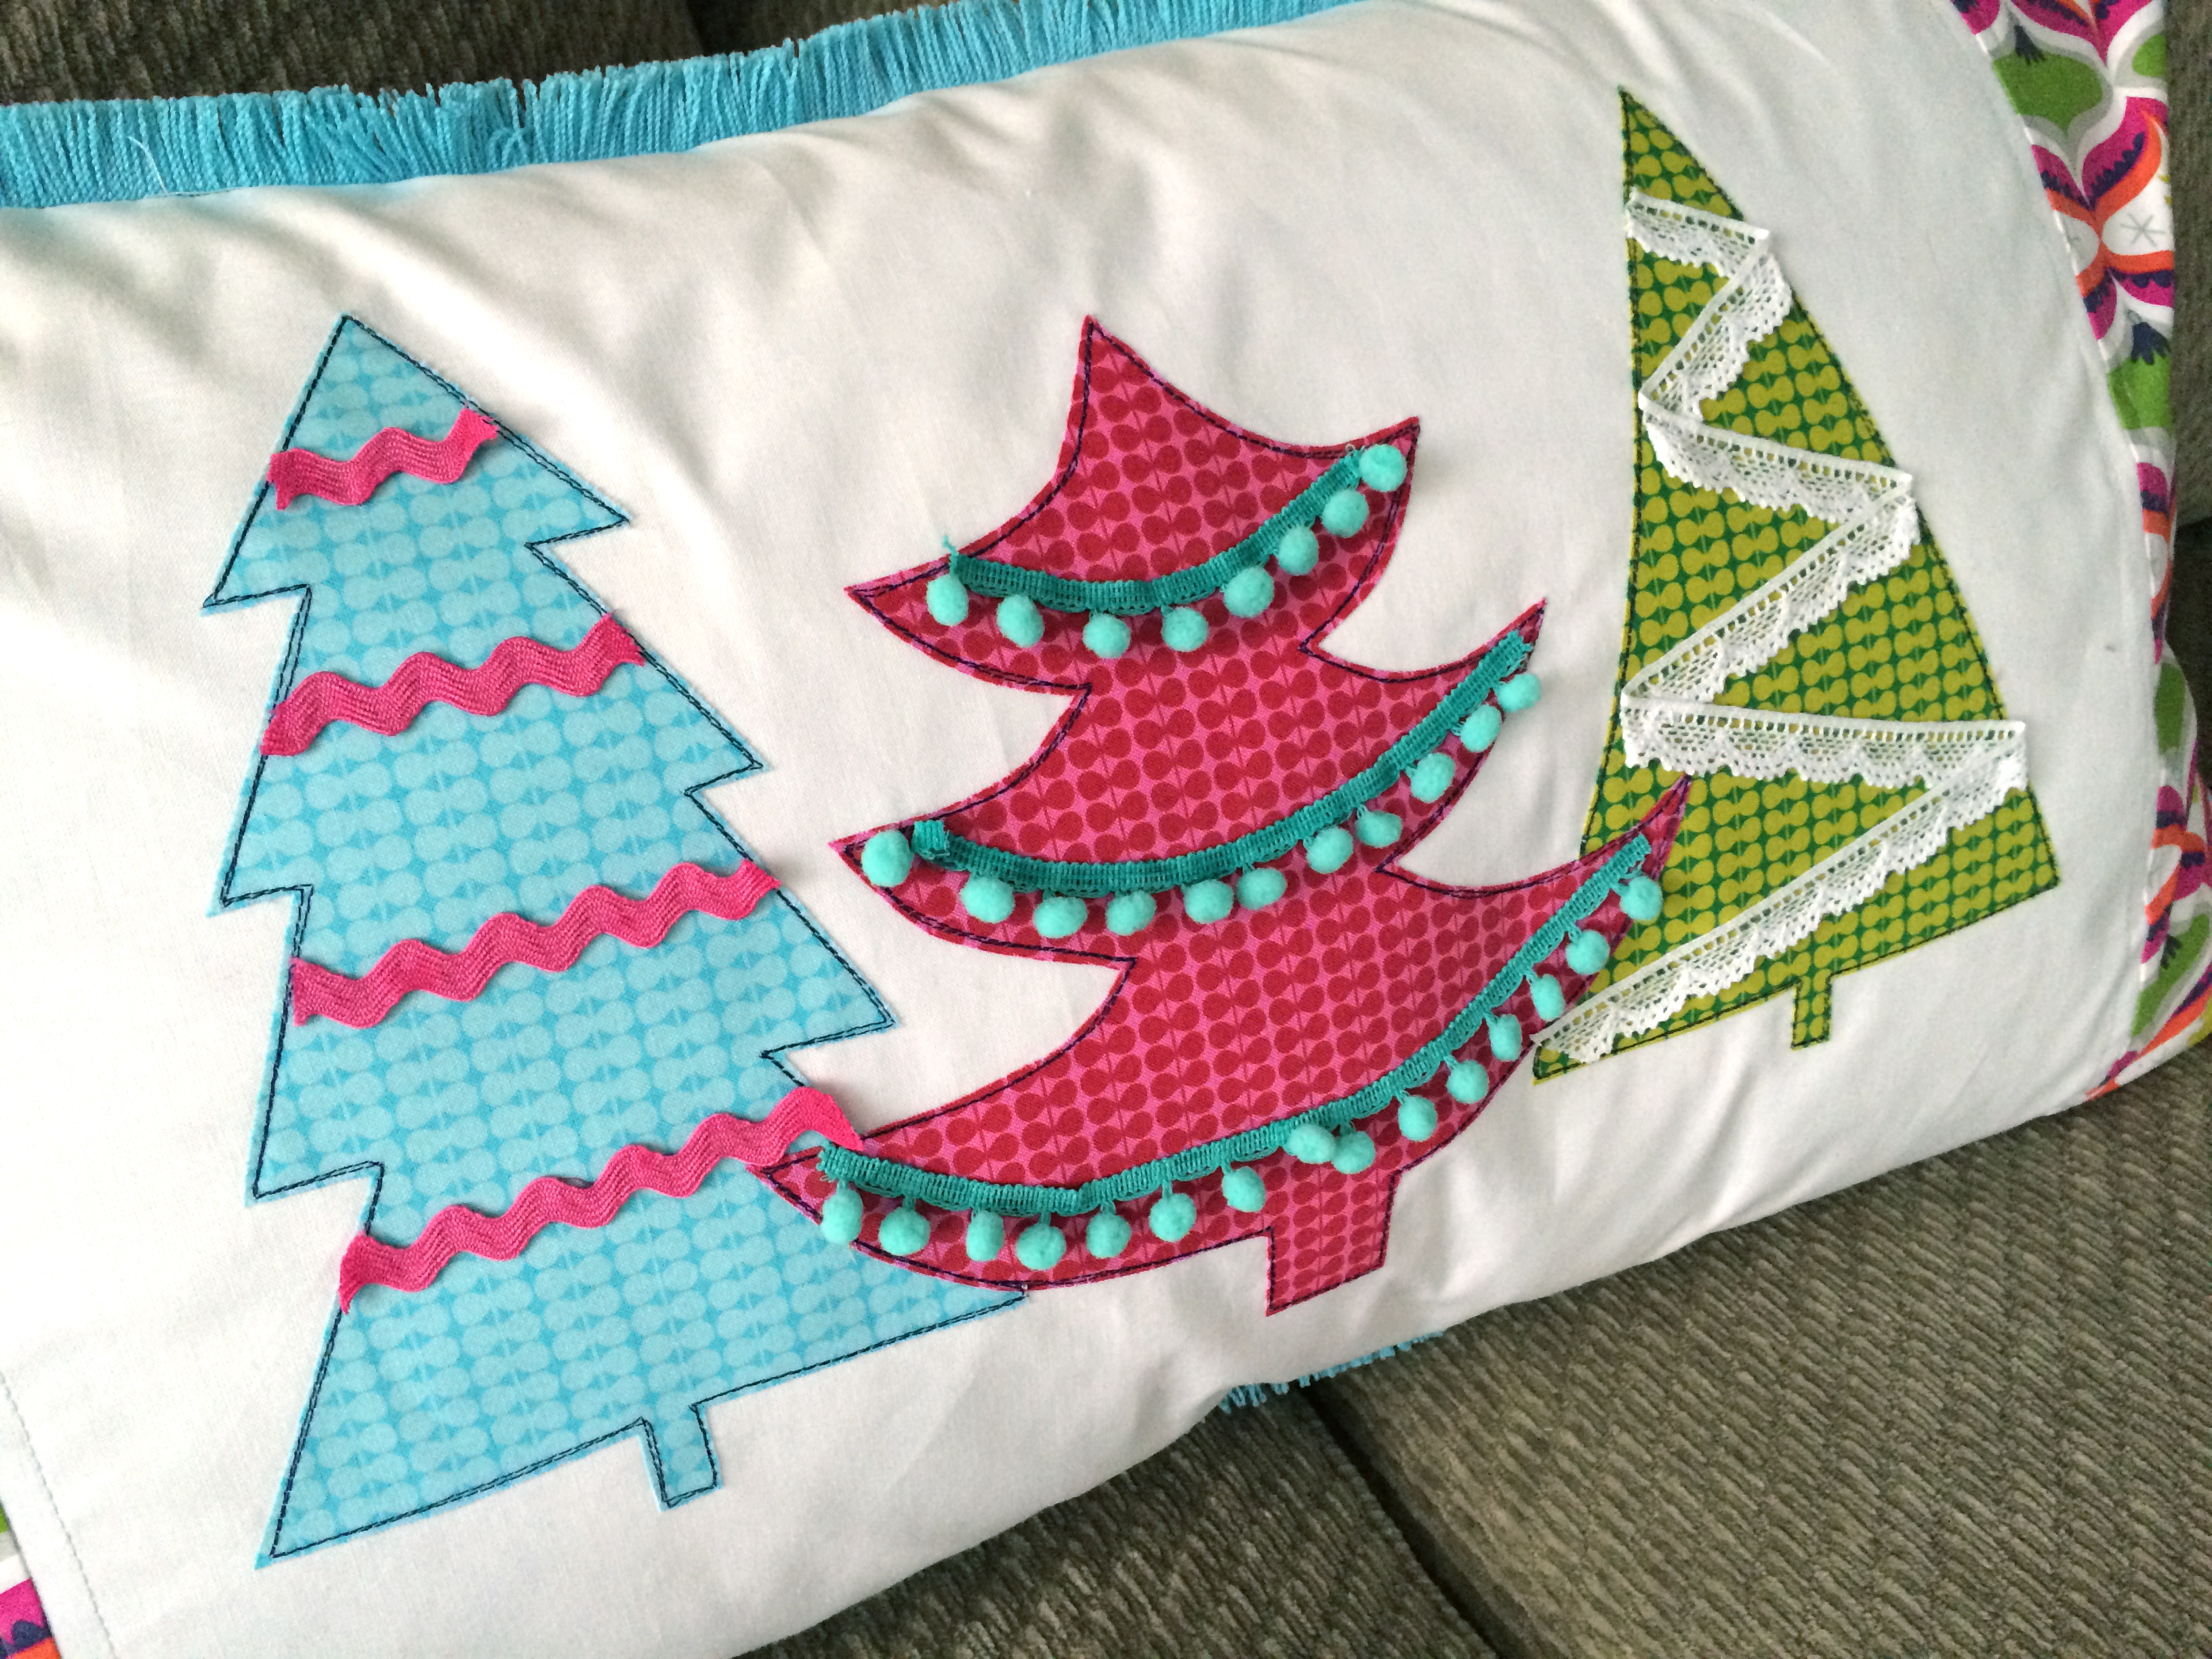
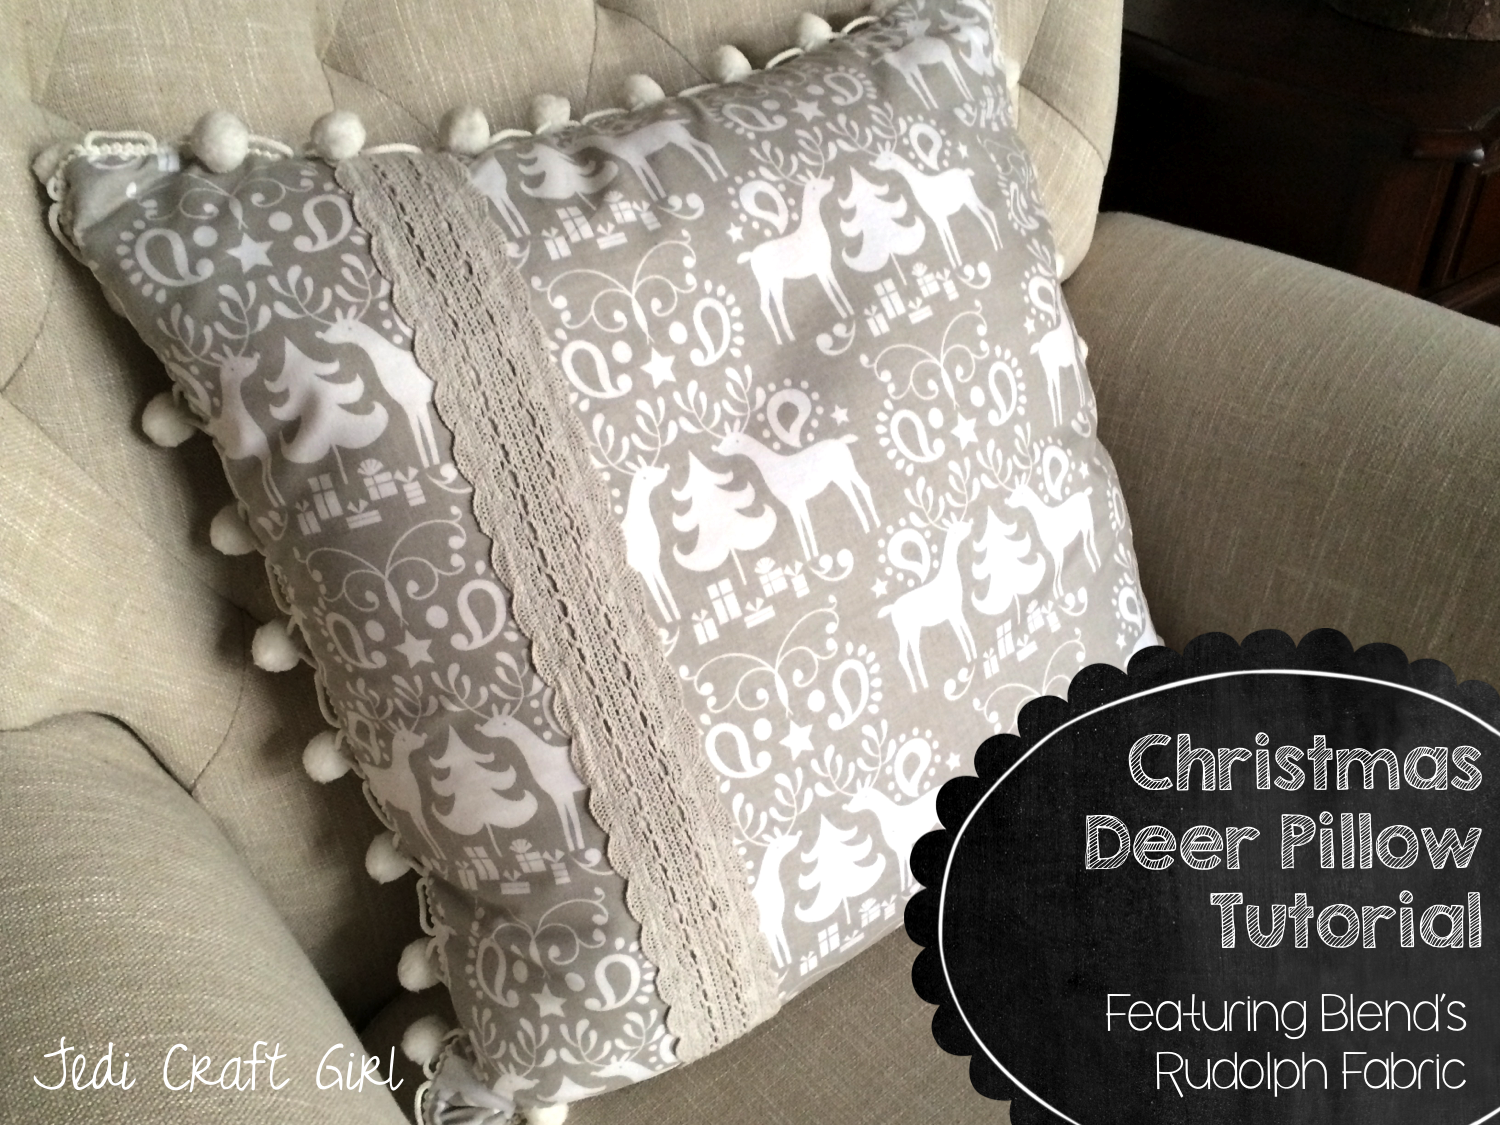
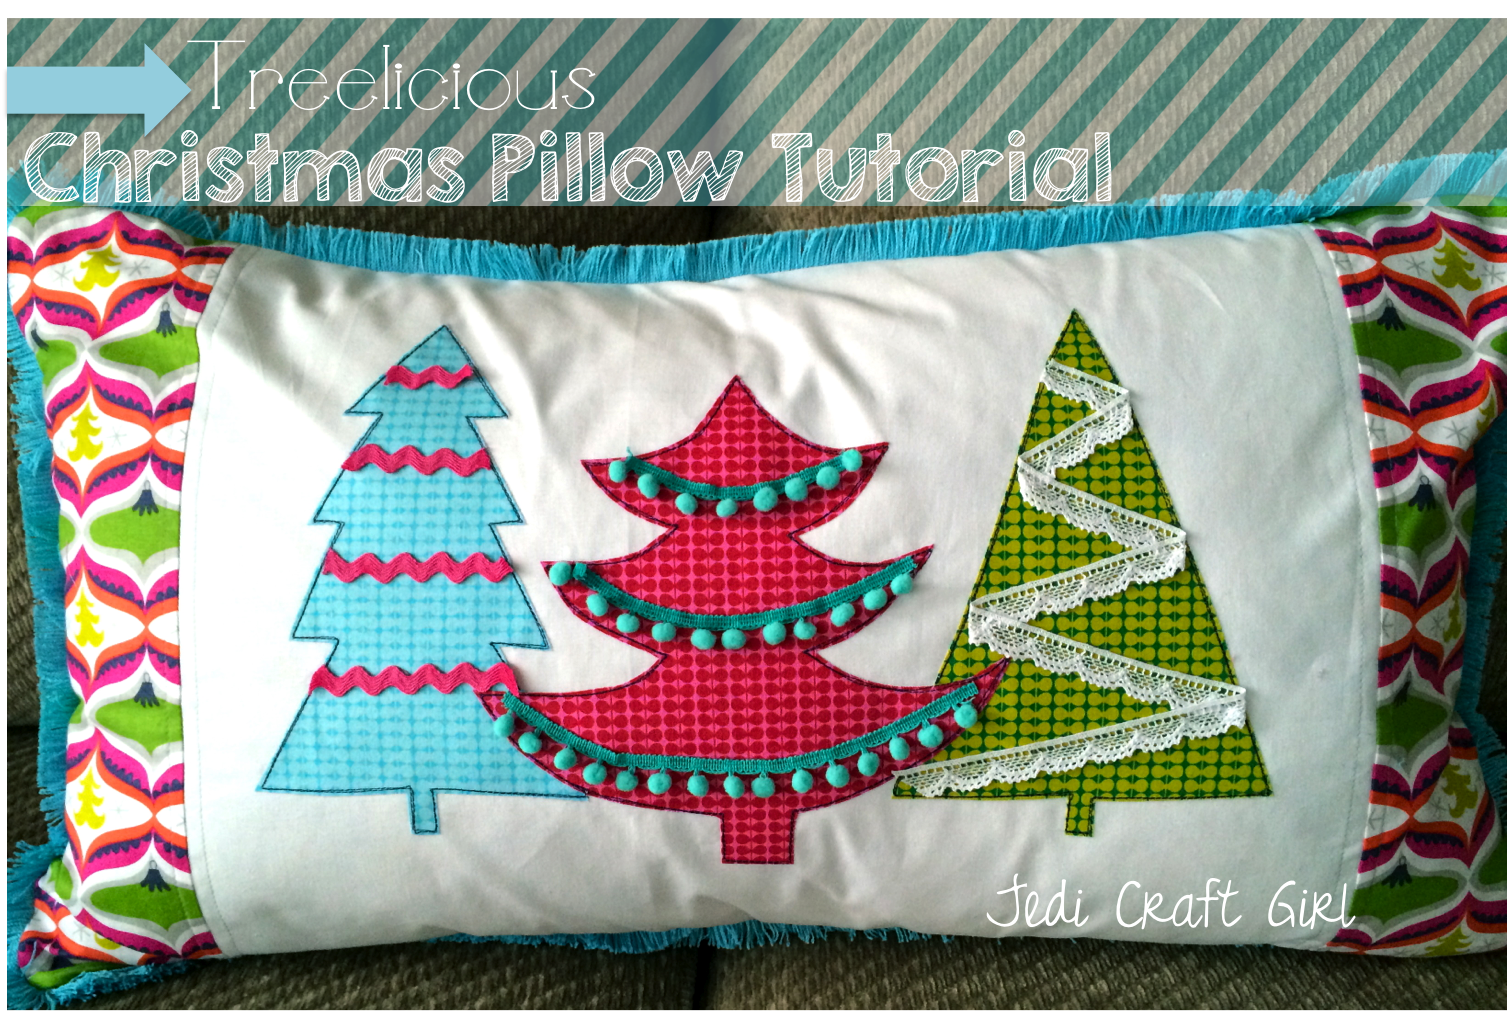
I also think this line goes great with last year’s Hip Holiday Line.  This pillow will be at home with last year’s pillow:

Blend_Hip_Holiday_Throw_Pillow_Christmas_Tutorial

Here’s how you can make one:

Supplies:

fat quarter or
 yard cut of Garland Green Tree Fabric for side strips

1/2 yard solid white fabric

1/2 yard for backing fabric

Small cuts of fabric for the trees

Tree Pattern, click HERE

20″ or longer zipper

3 yards of decorative trim

Fiber fill

Heat n Bond Lite EZ Print Sheets or Heat n Bond Lite

Therm O Web Fabric Fuse

Accent trim for the trees

Begin by cutting (2) side strips of Garland Green Tree Fabric 15.5″ x 4.75″

Cut the white fabric 15.5″ x 18.5″

Sew the side strips to the sides of the white fabric using 1/4″ seams, press toward the dark.  I pressed this piece to Heat n Bond light weight fusible stabilizer to give it a little more strength – it will turn out fine without it.treelicious christmas pillow 3

Prepare the appliqué by printing the pattern on Heat n Bond Lite EZ print sheets or tracing the pattern on Heat n Bond Lite.

treelicious christmas pillow
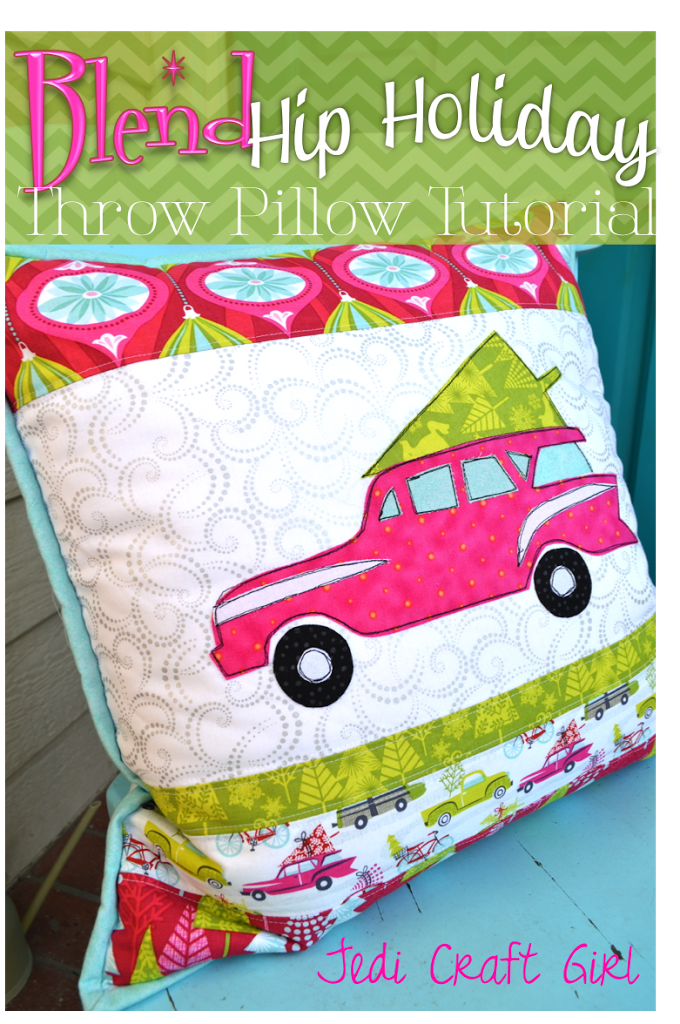
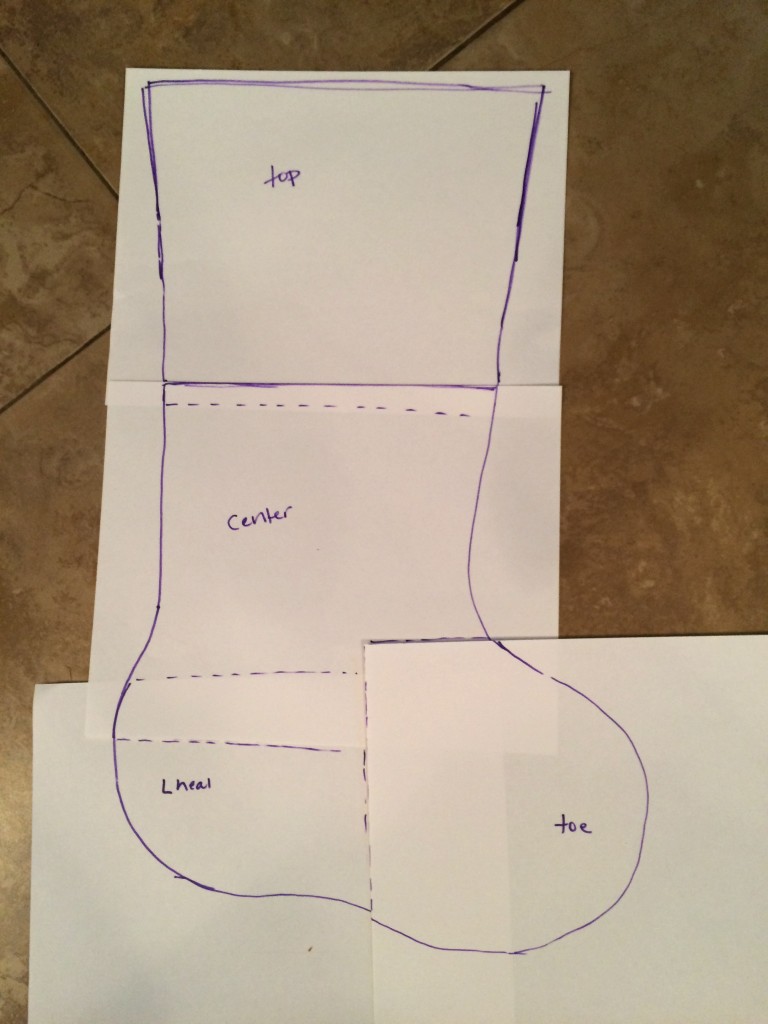
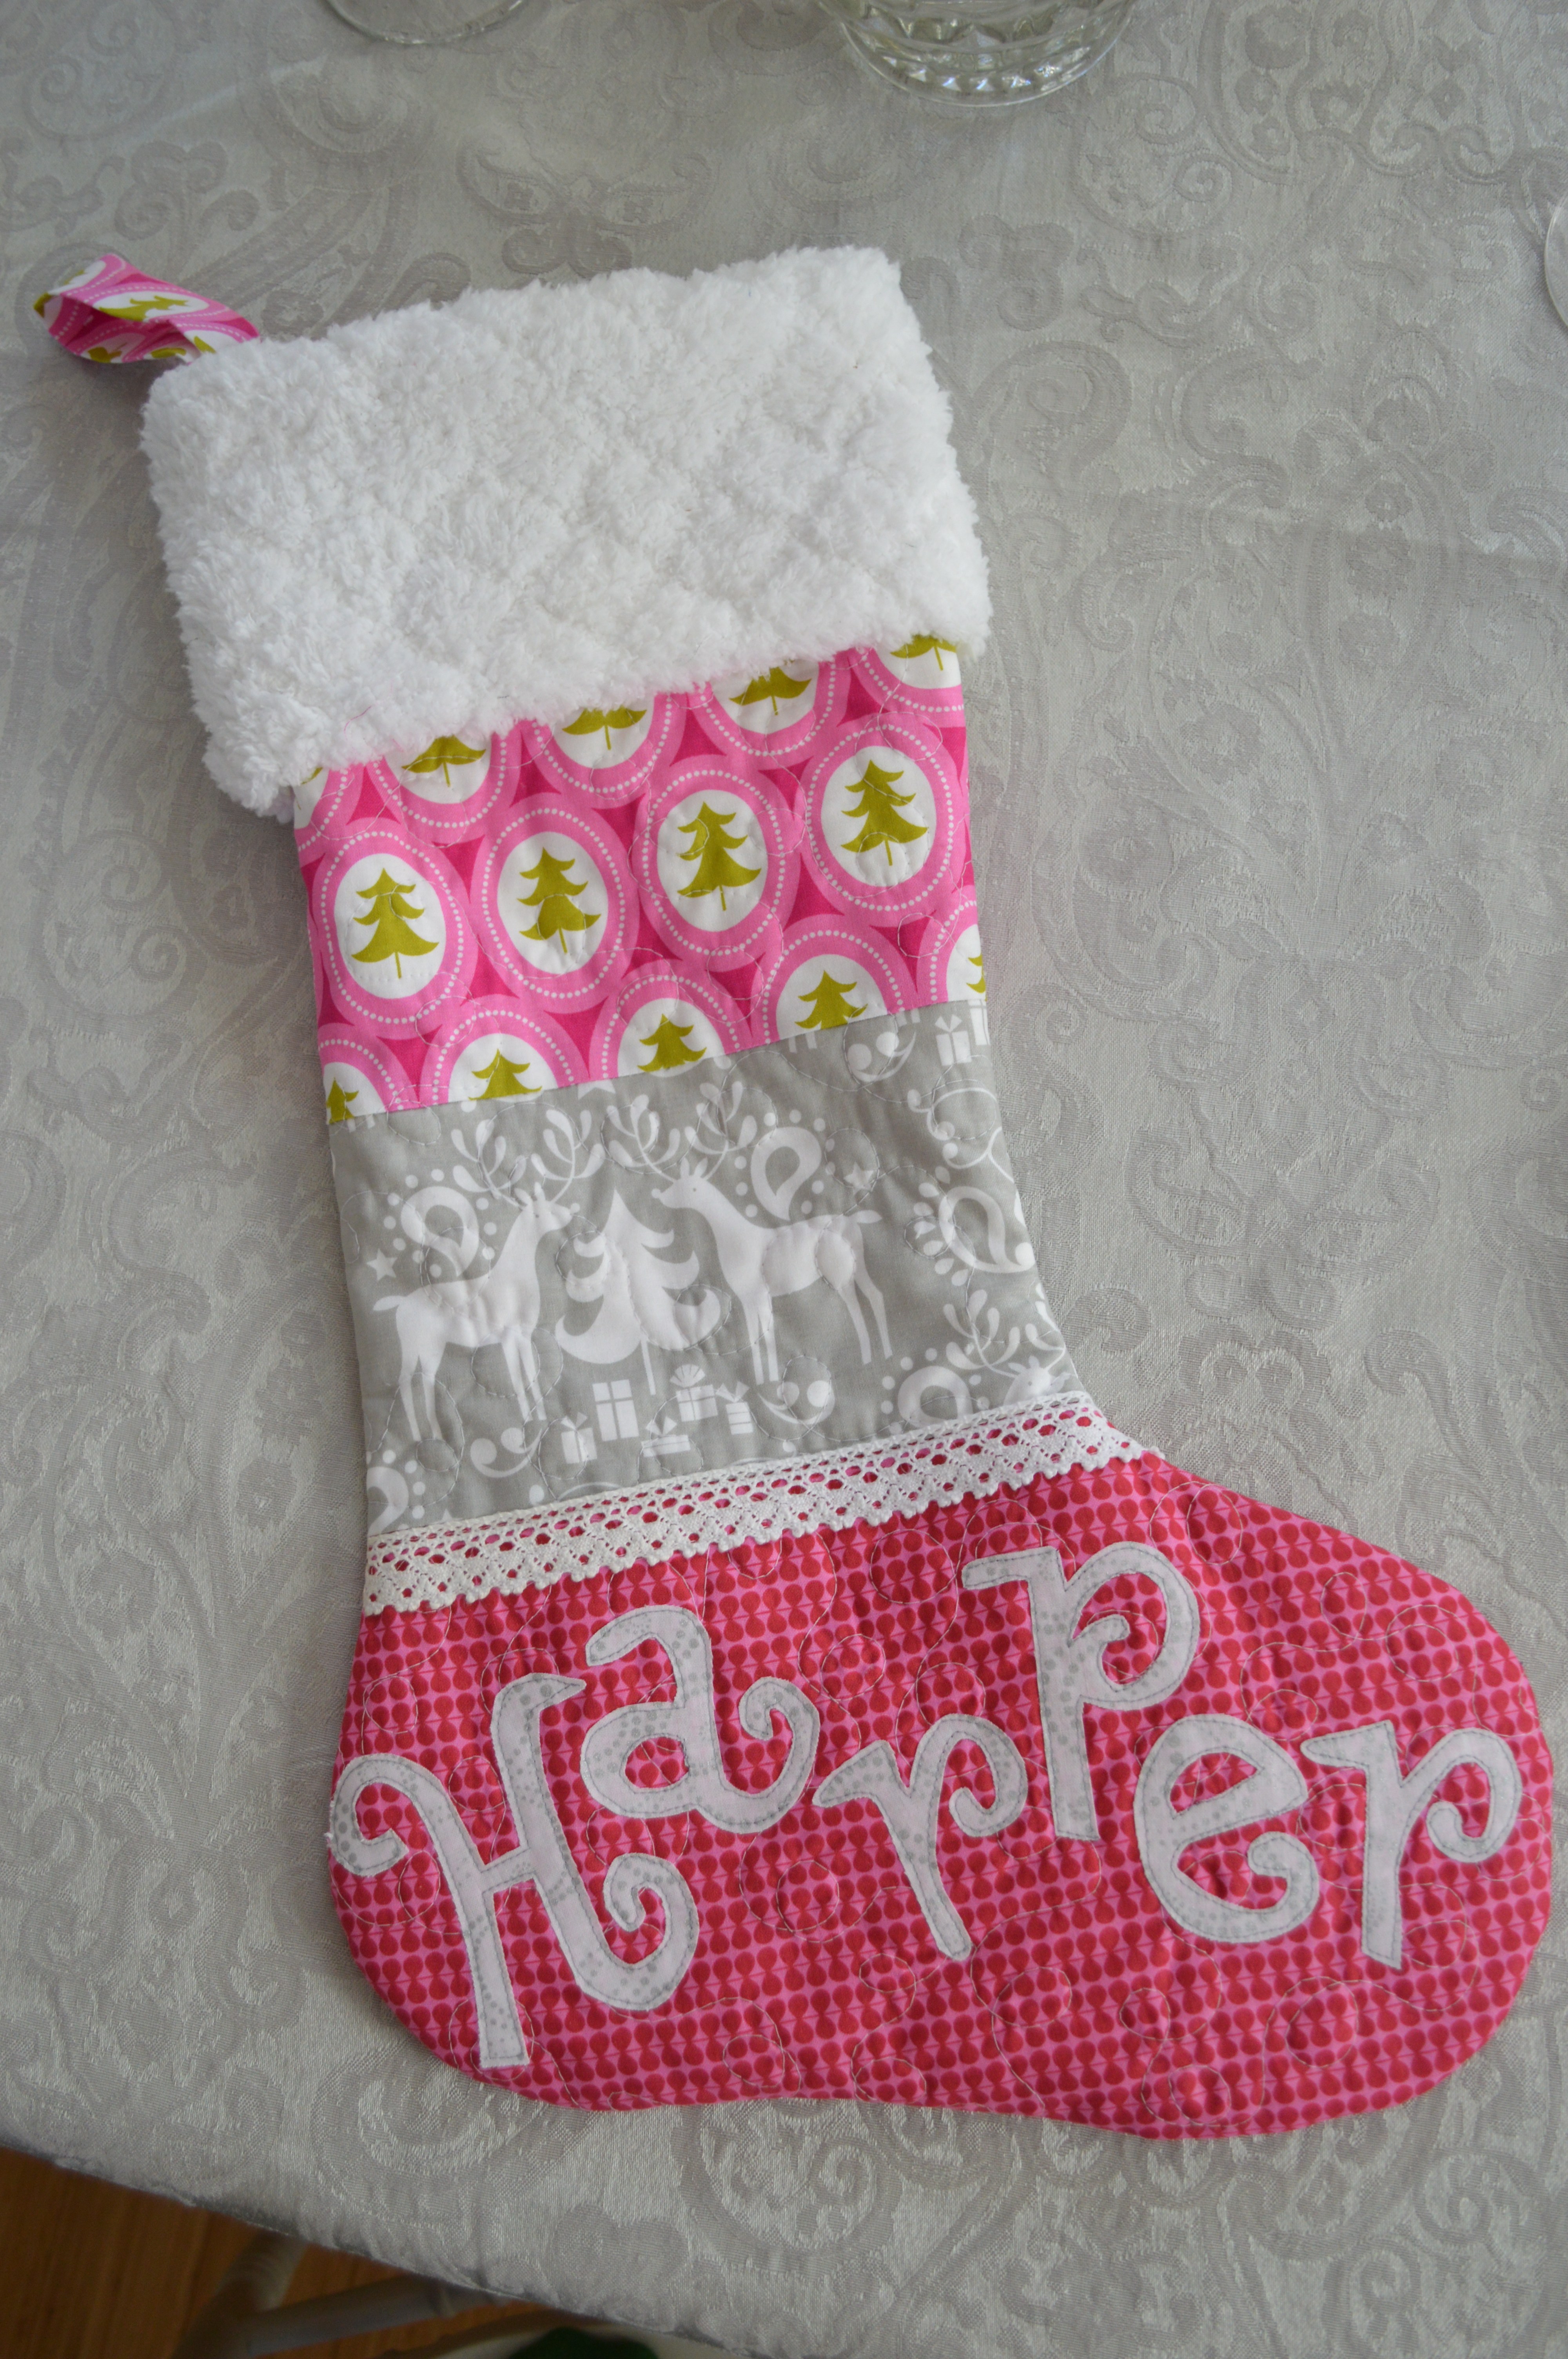
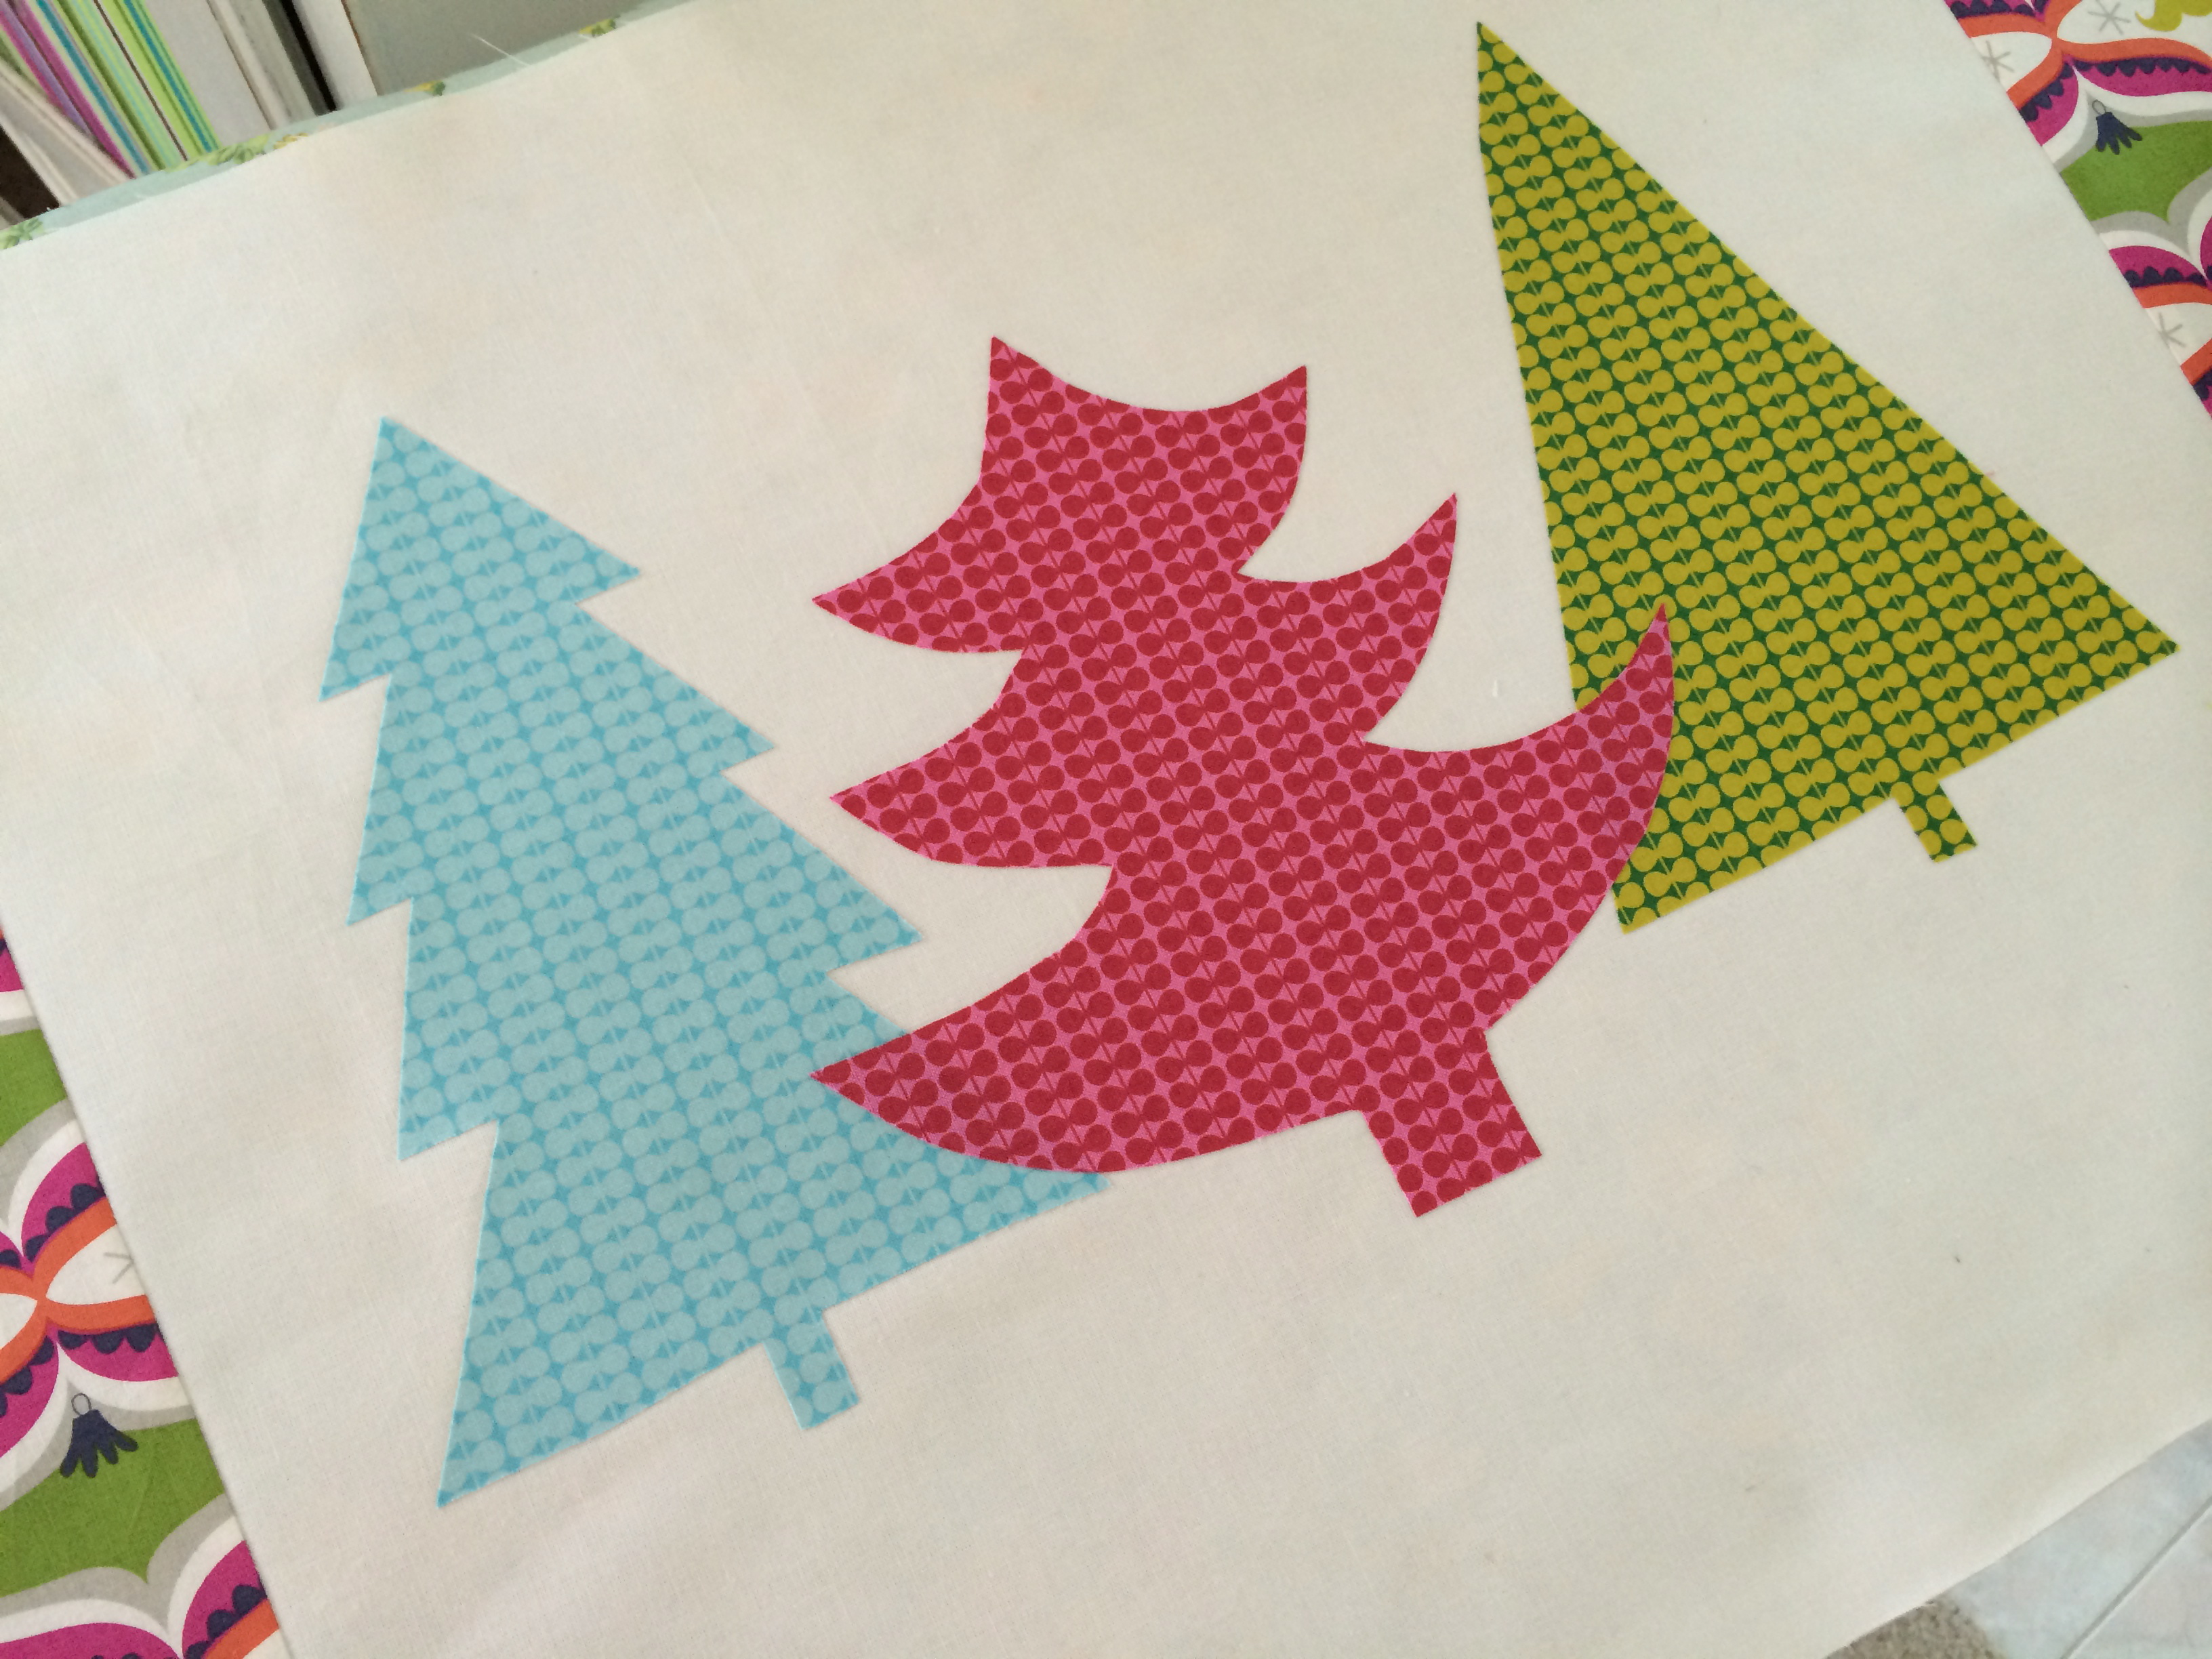
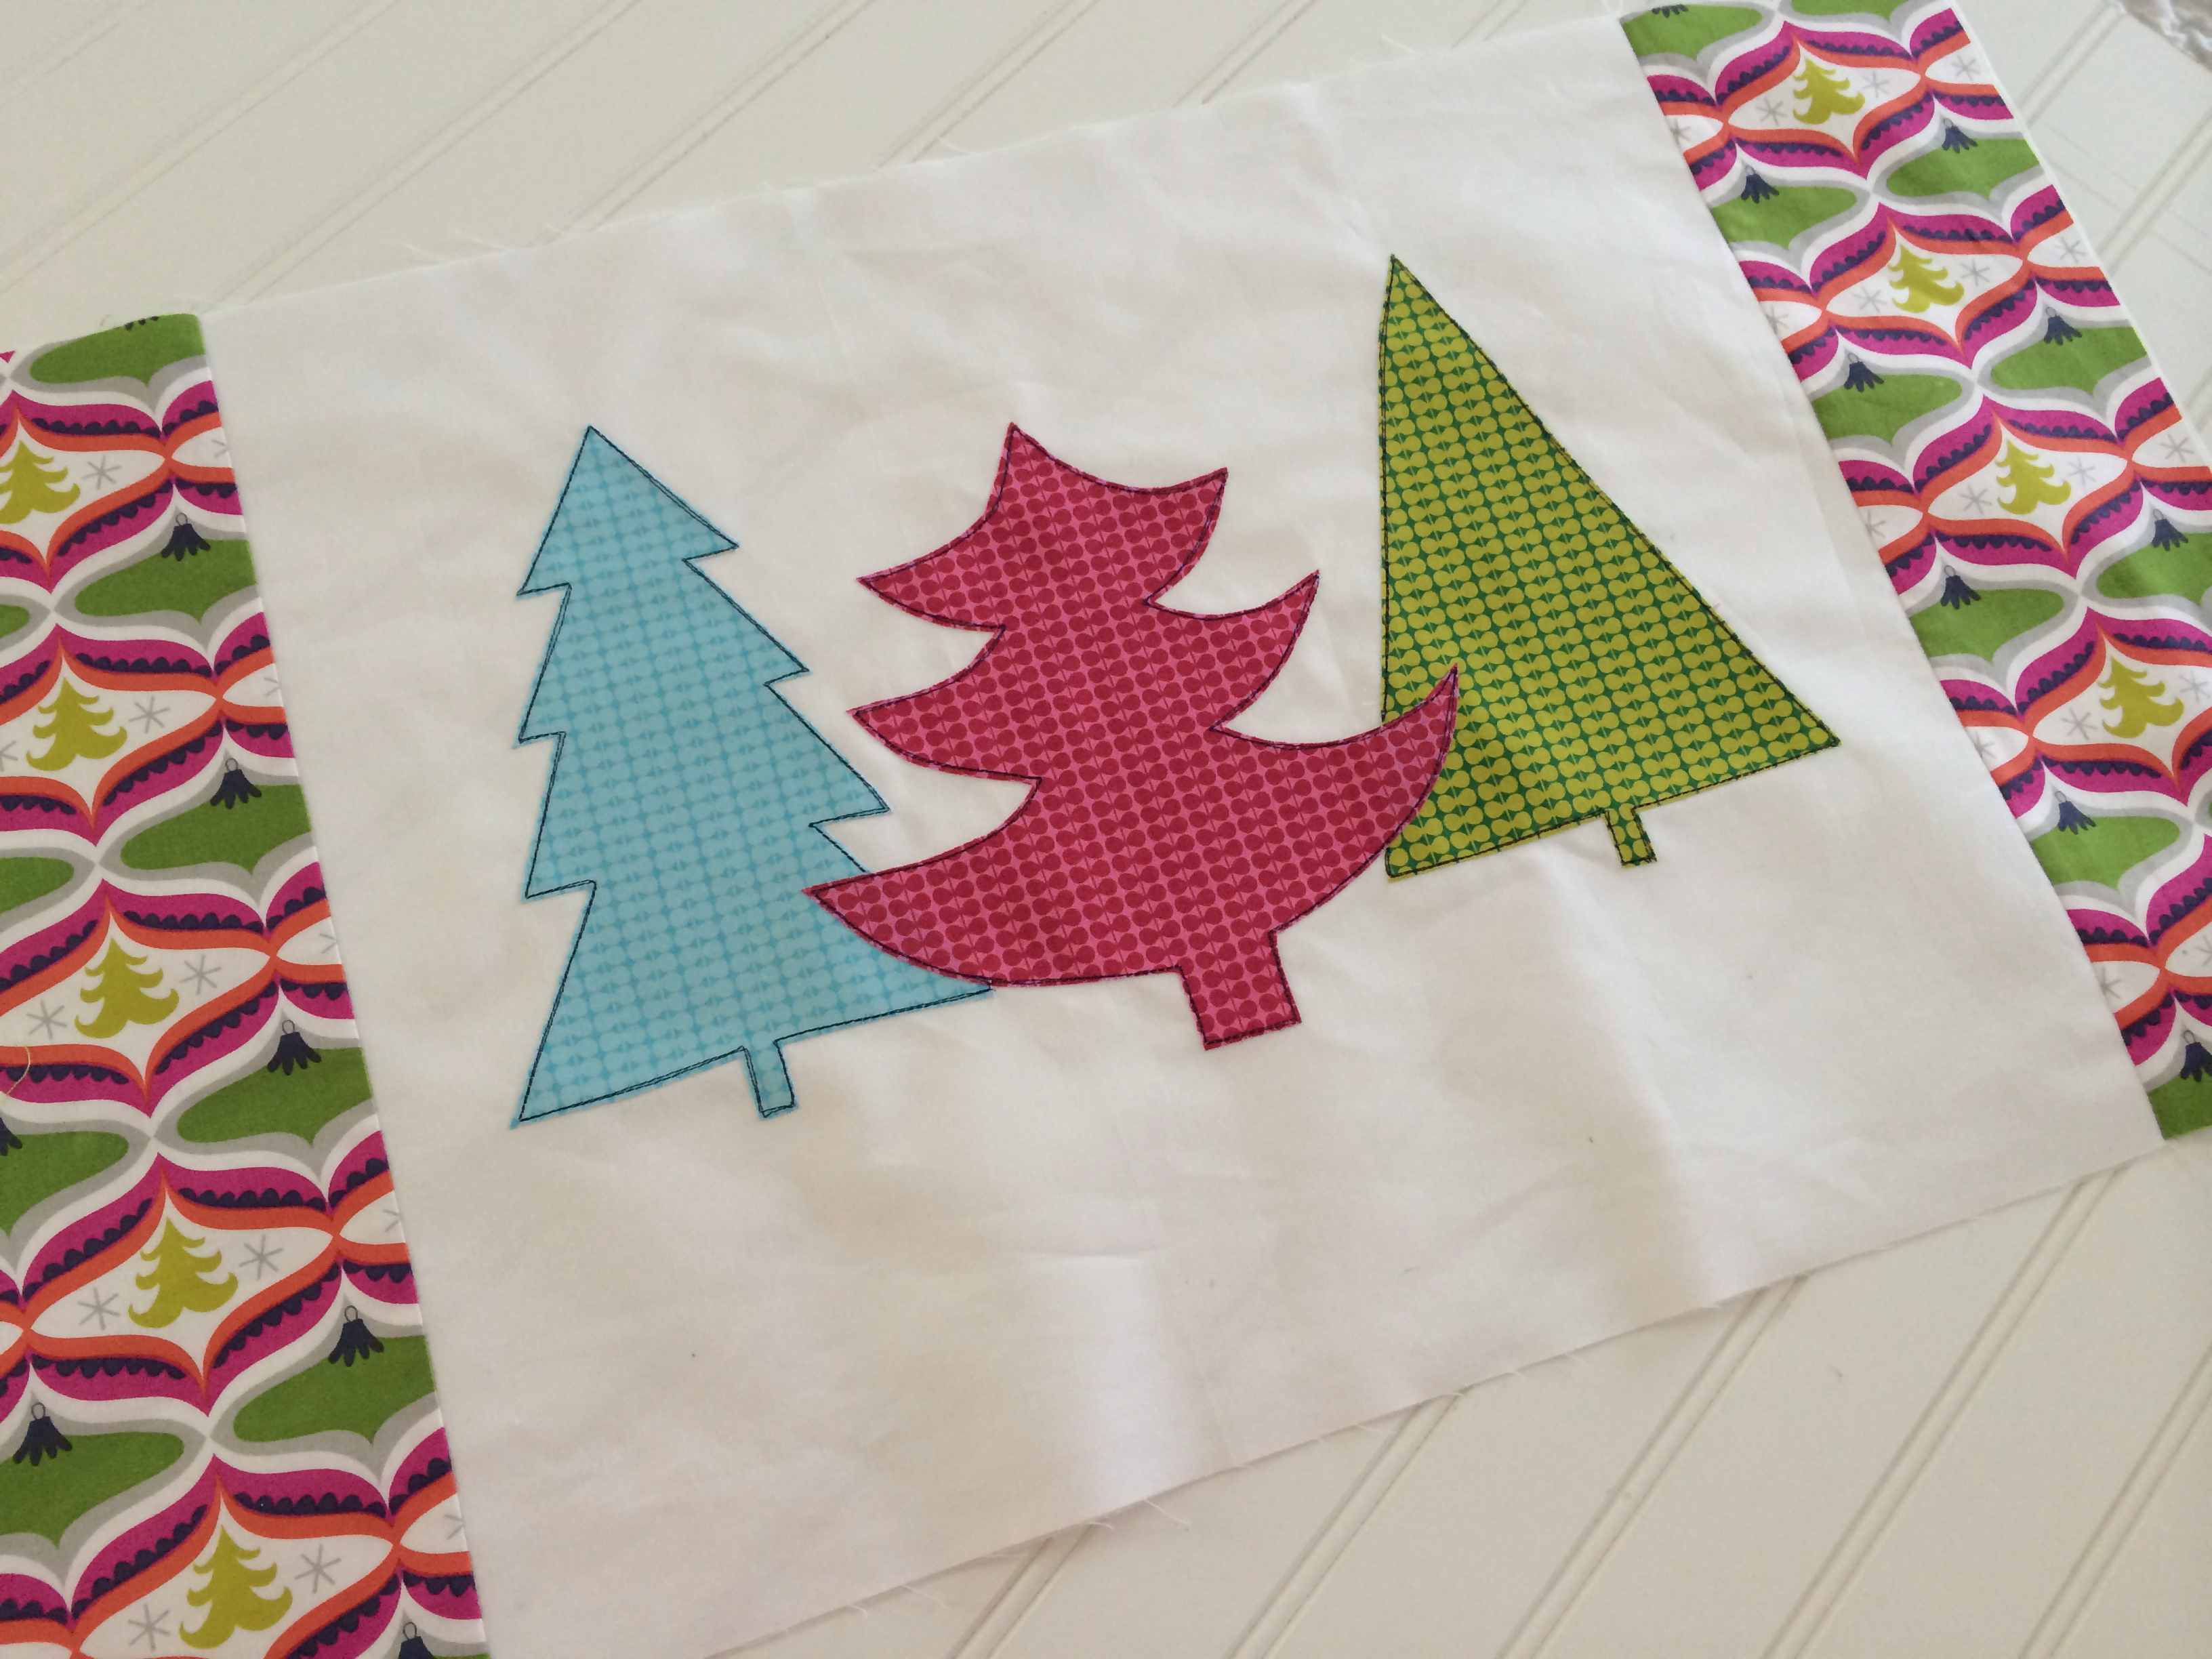
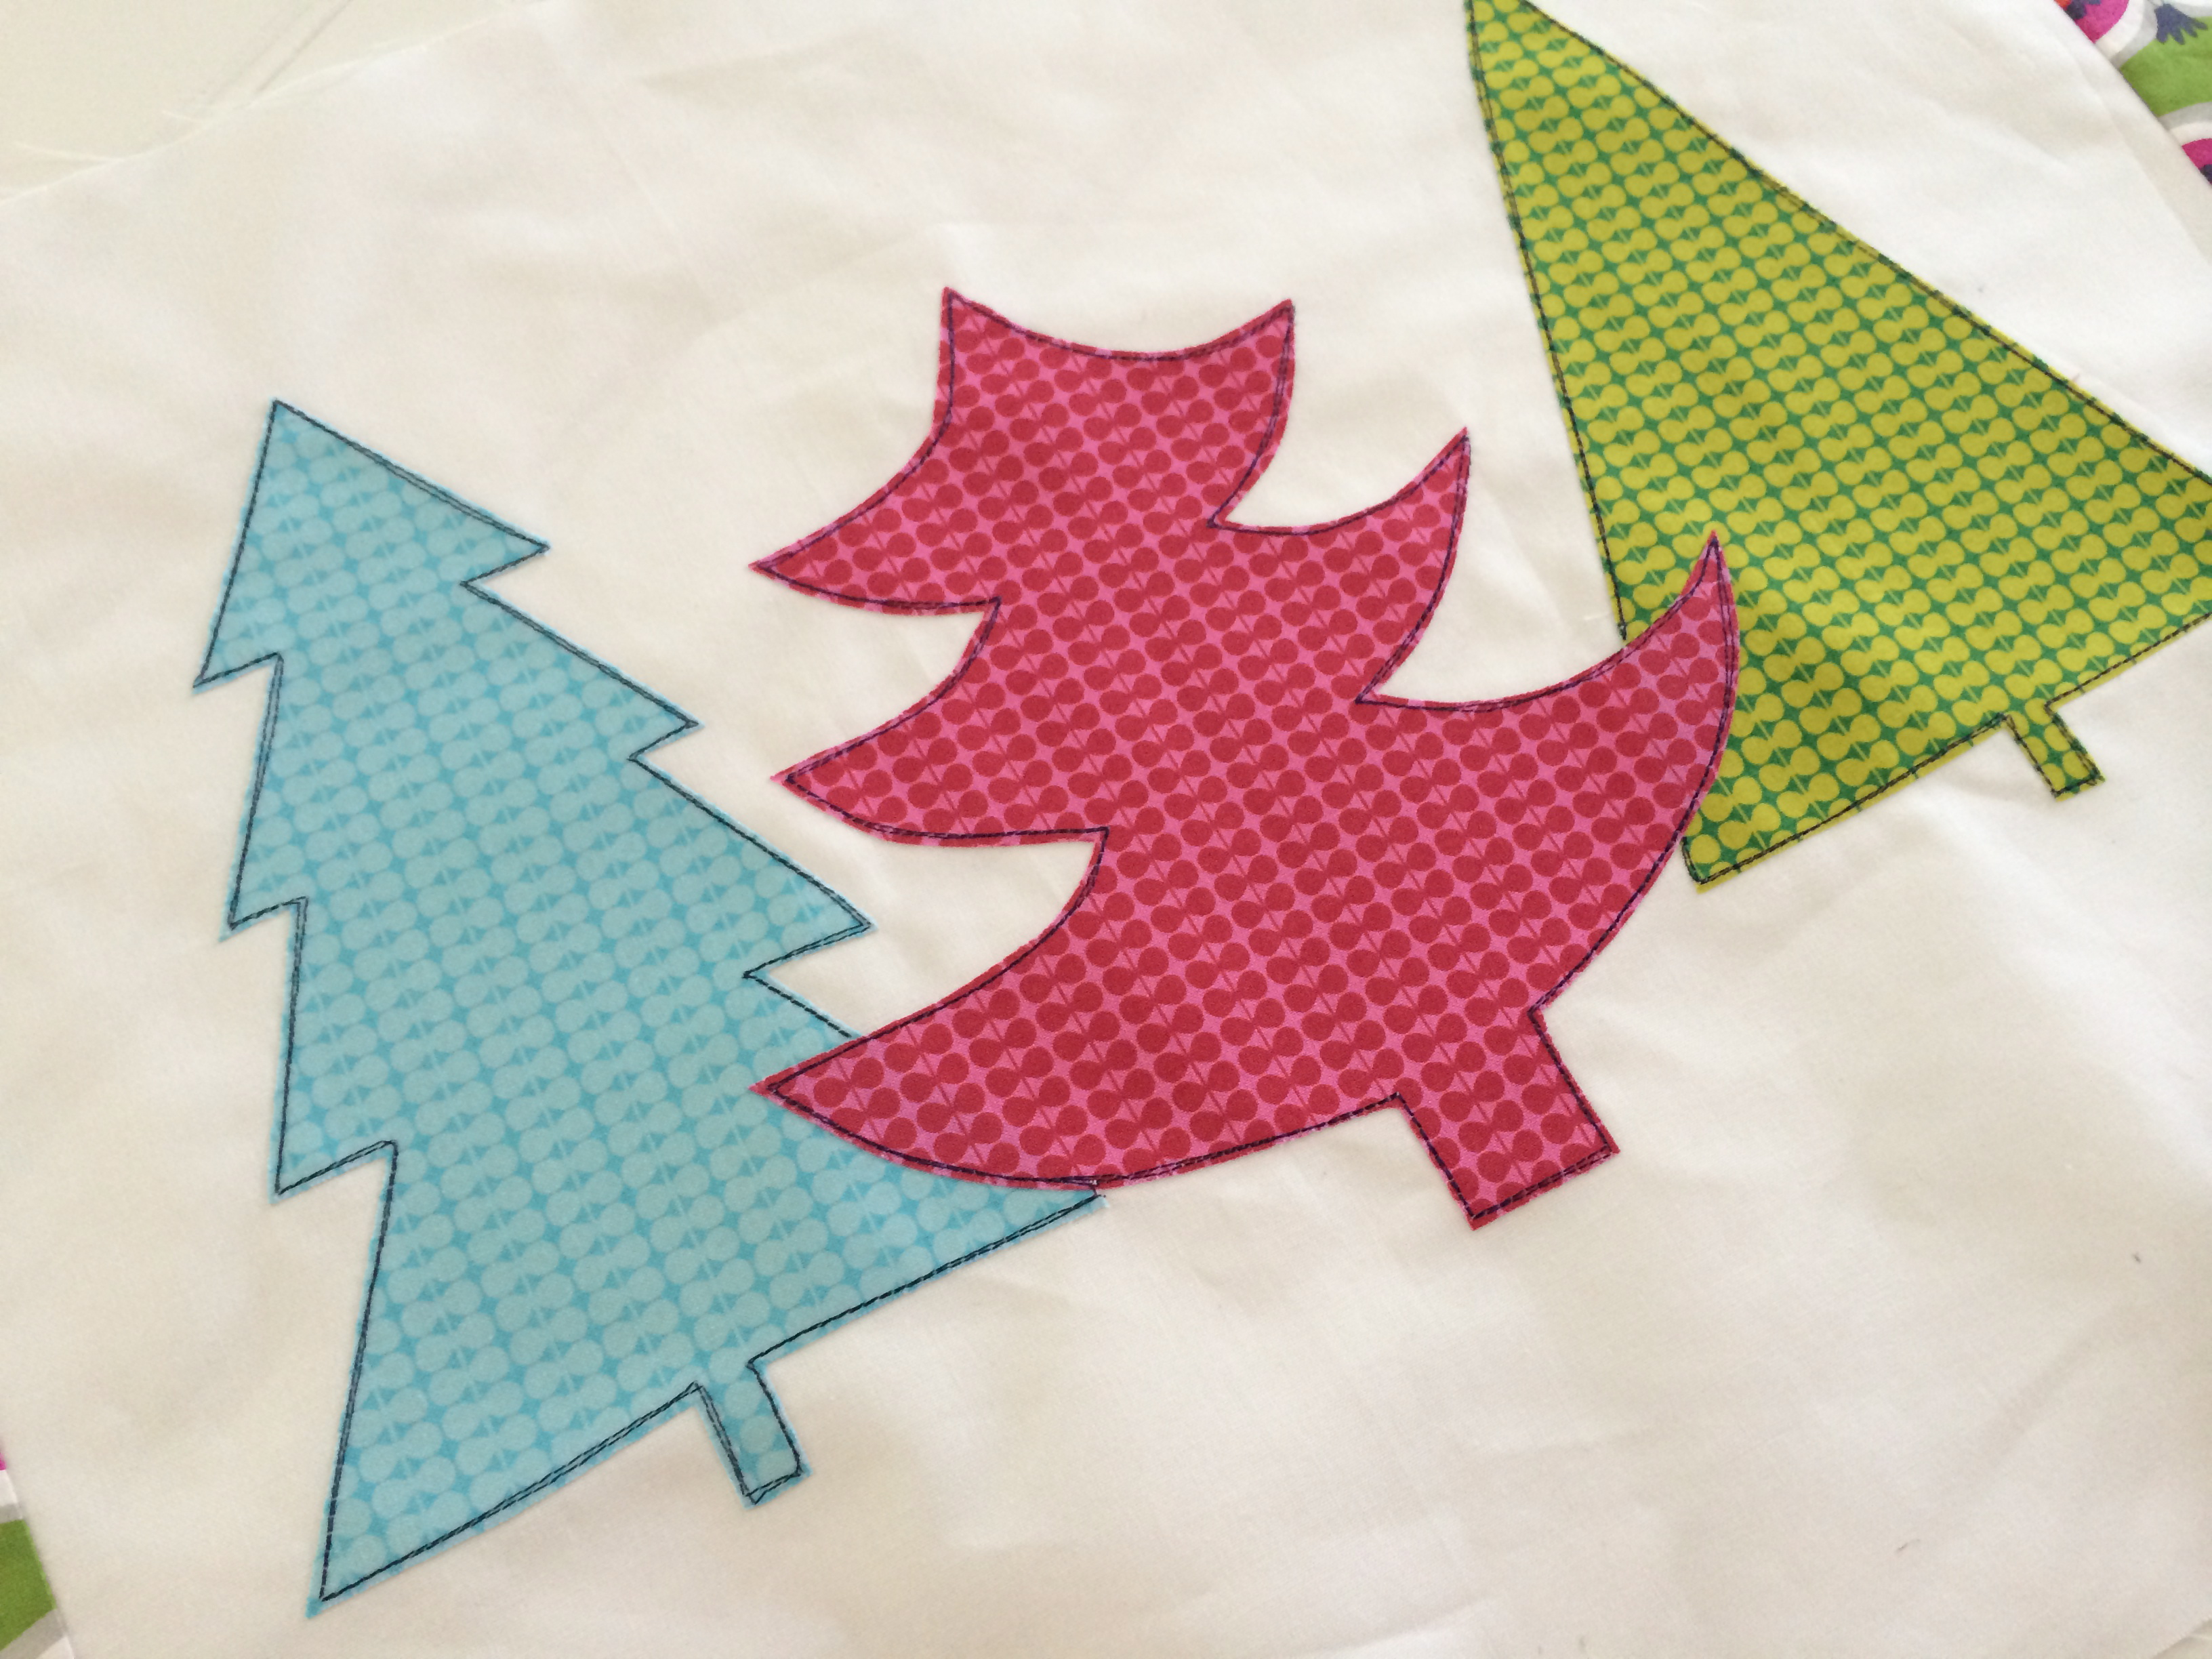
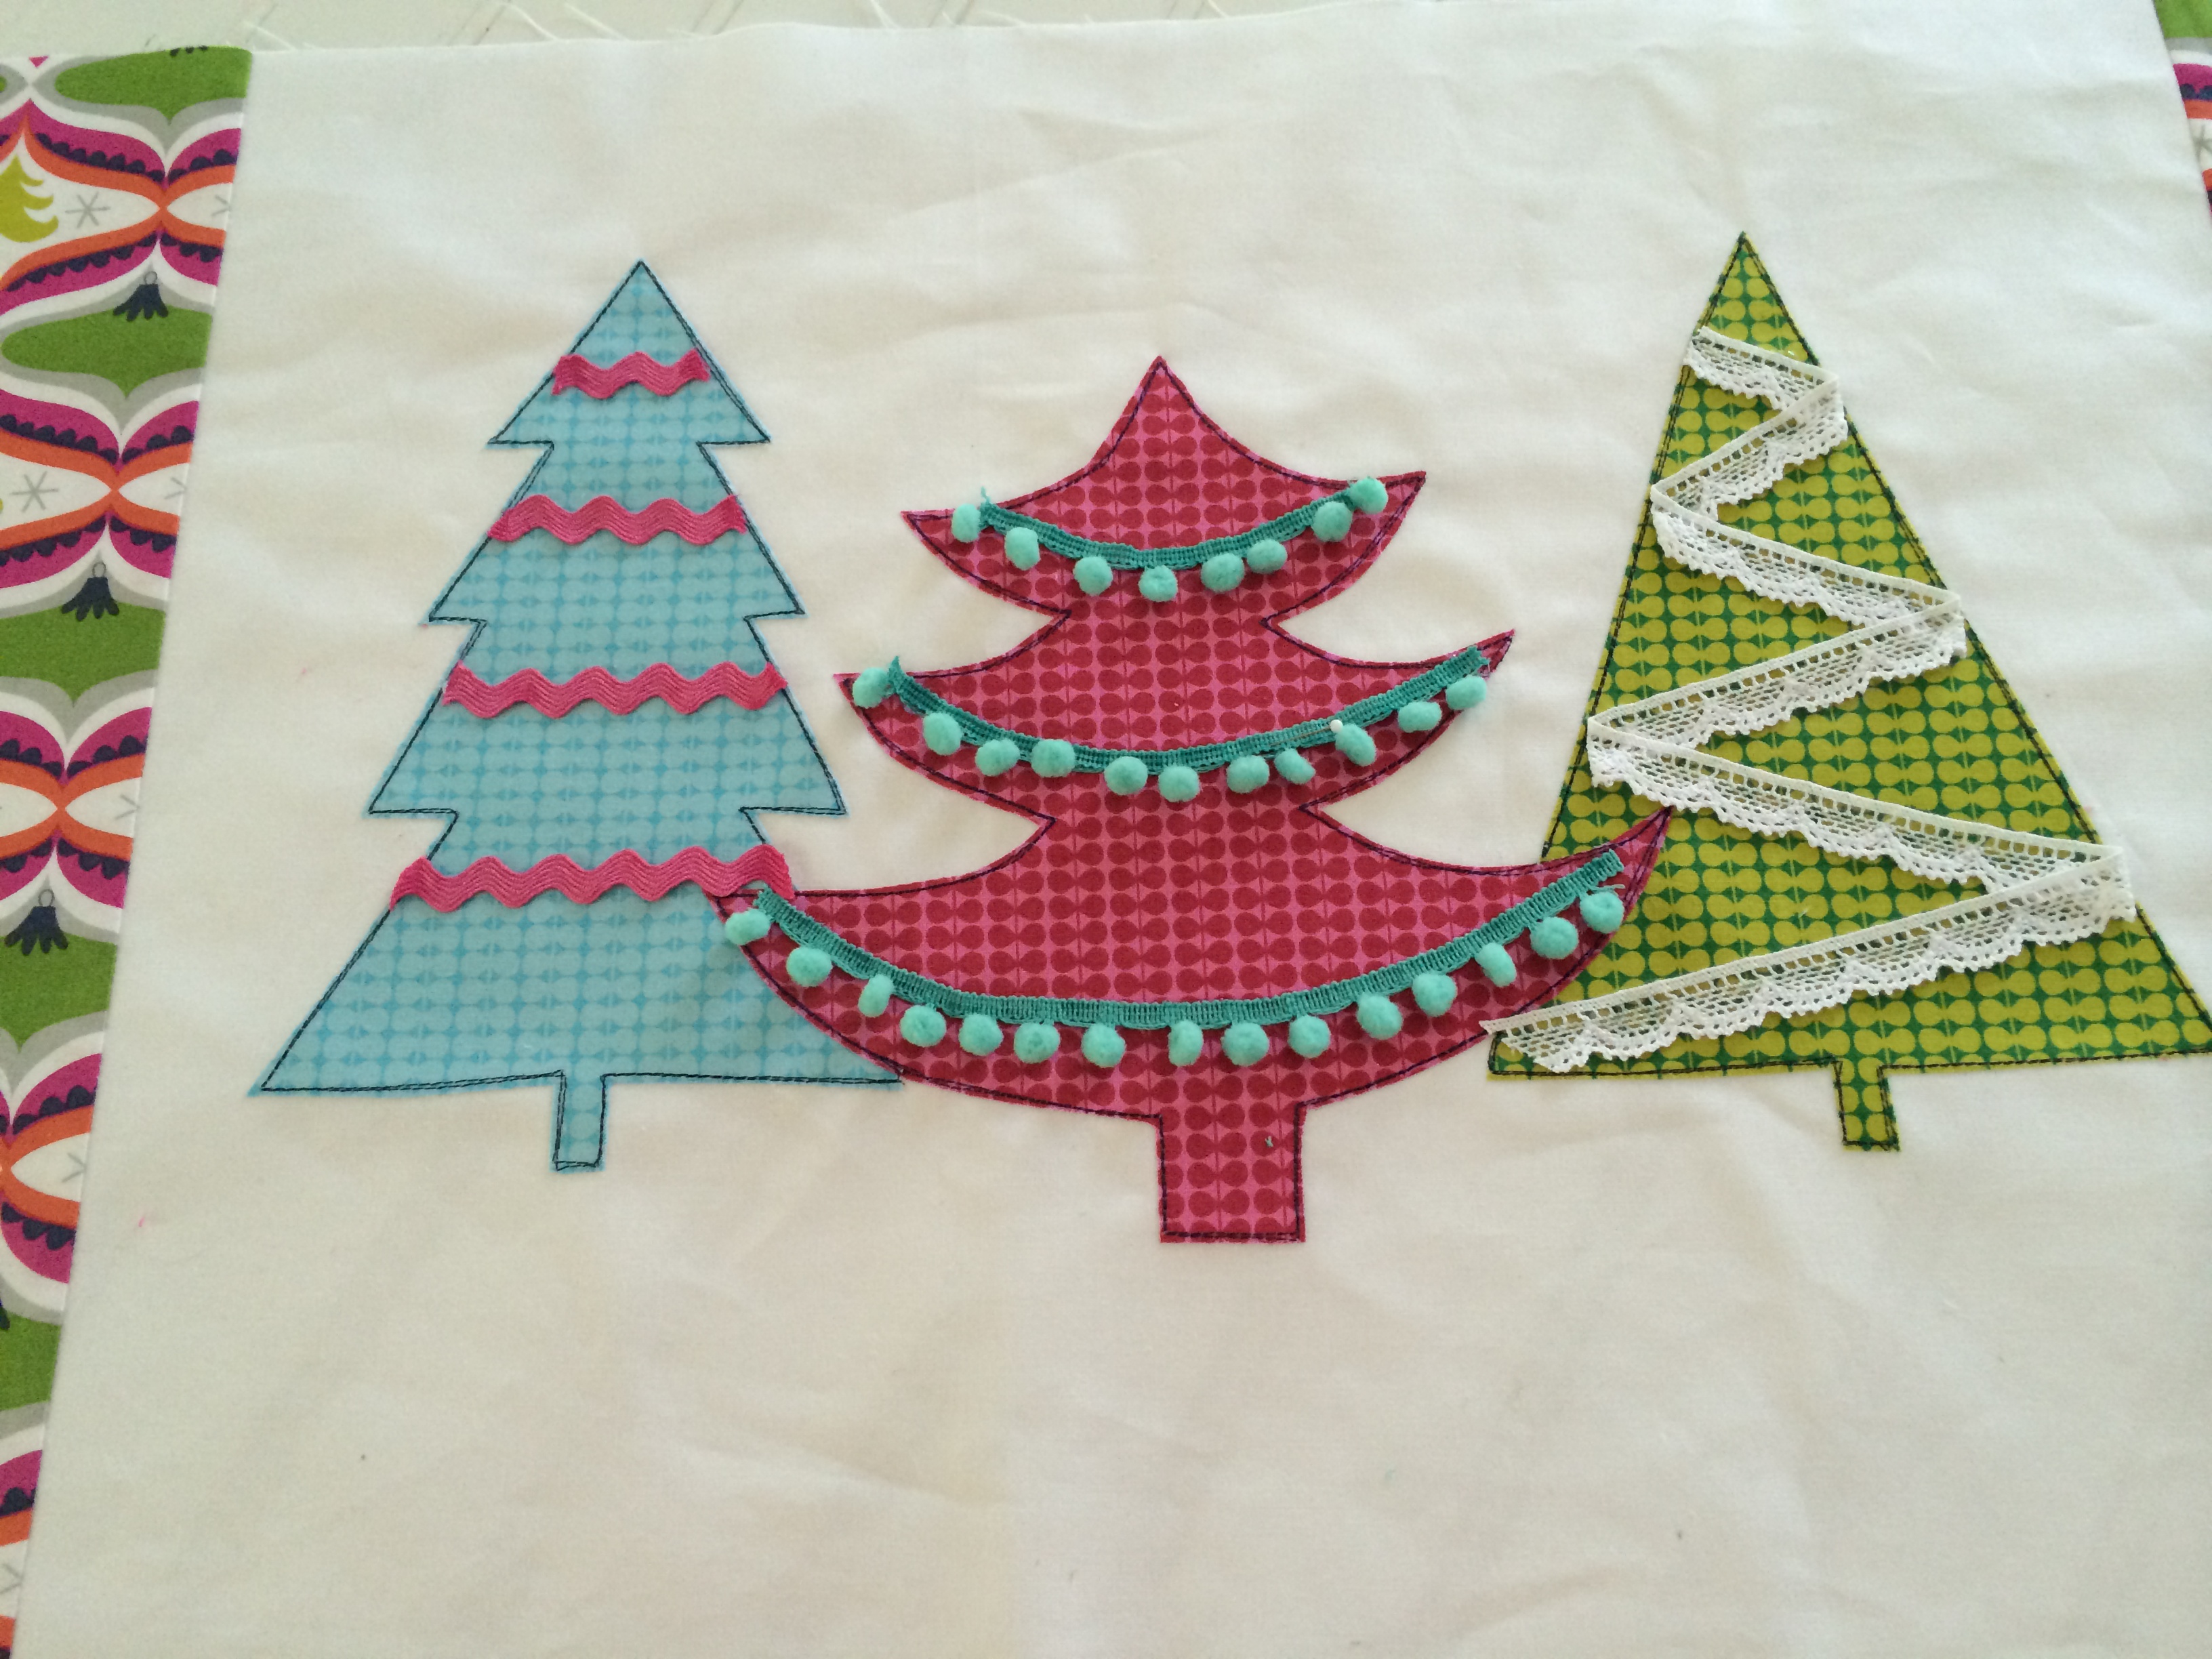
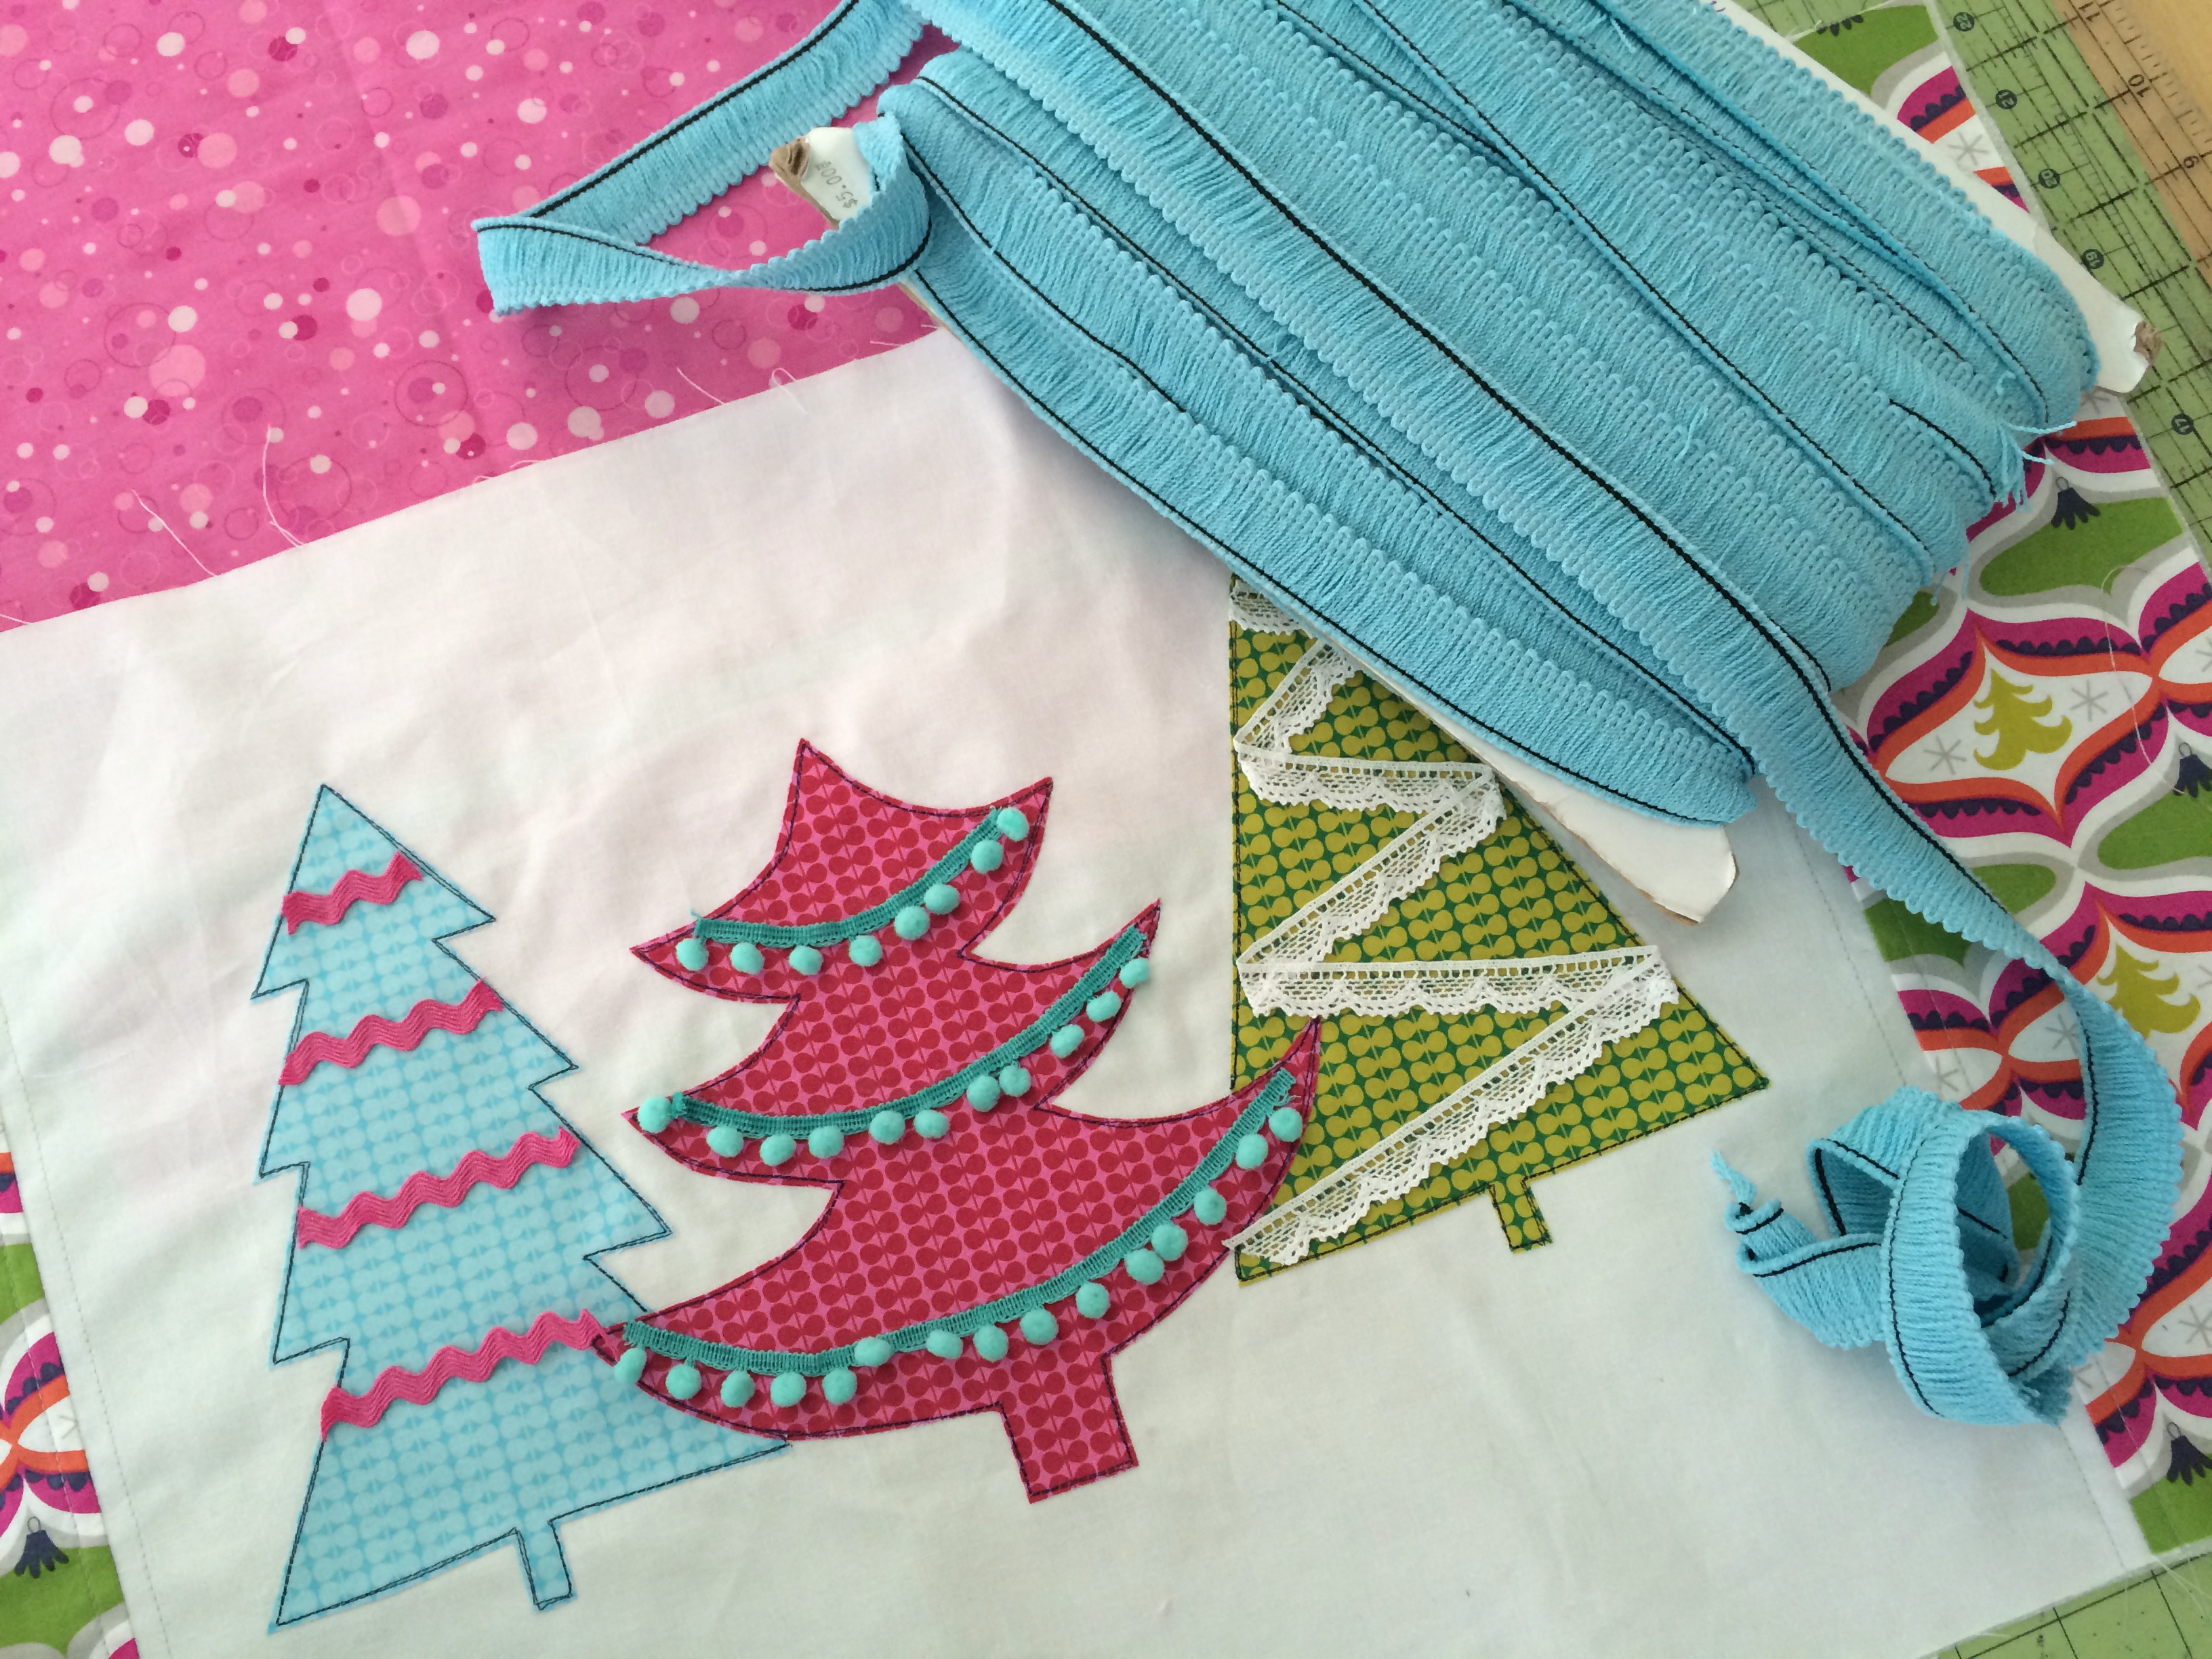
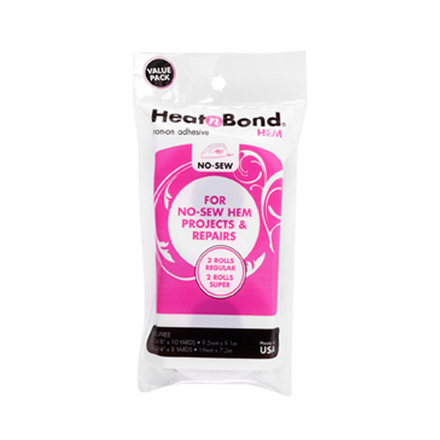
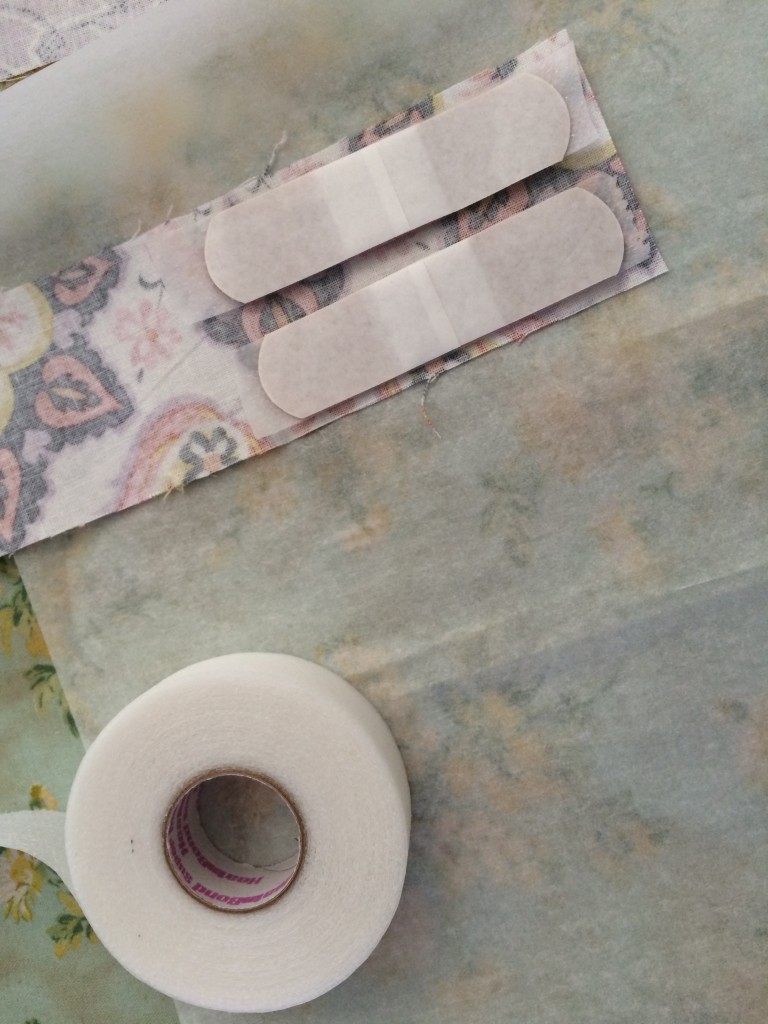
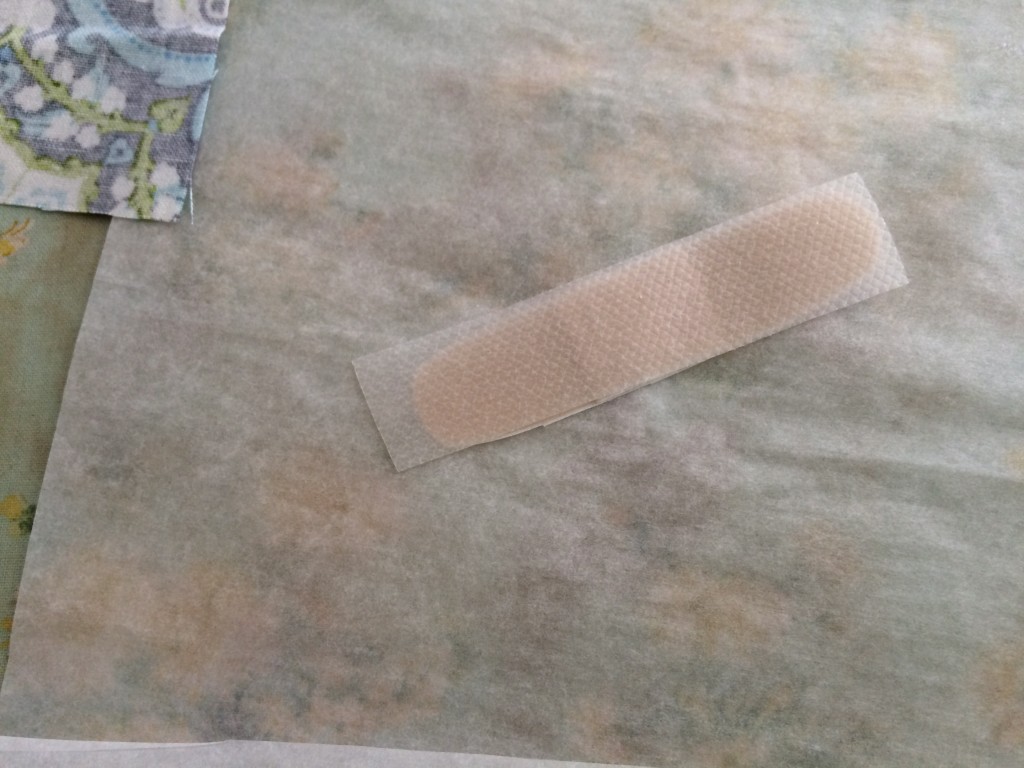
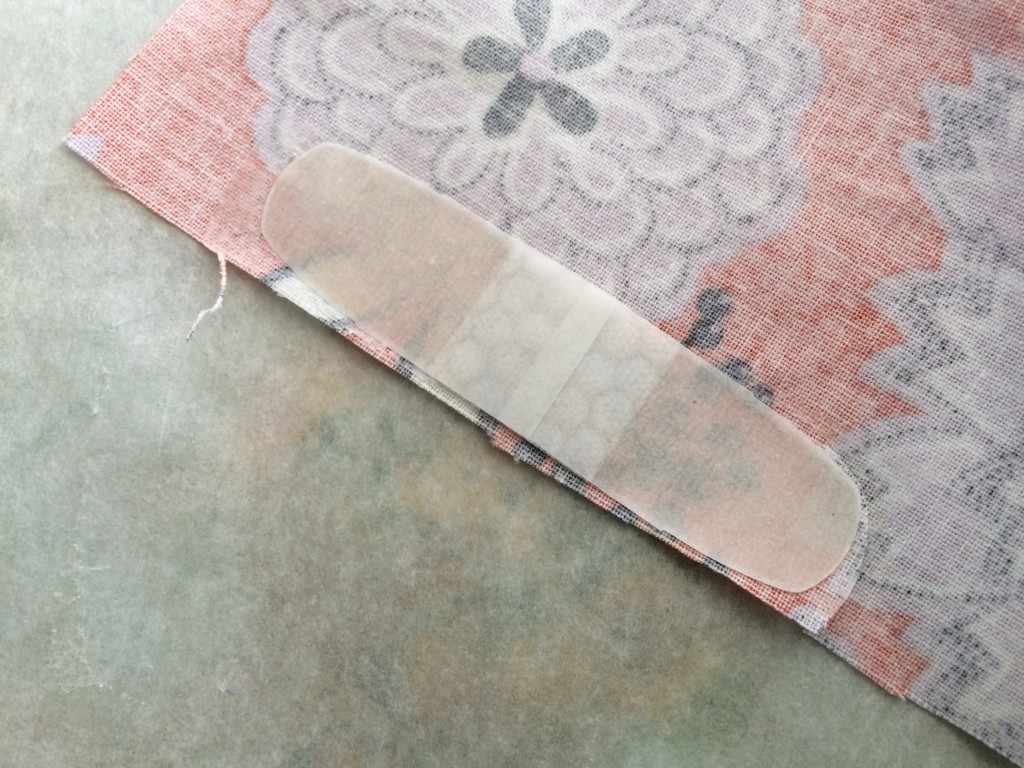
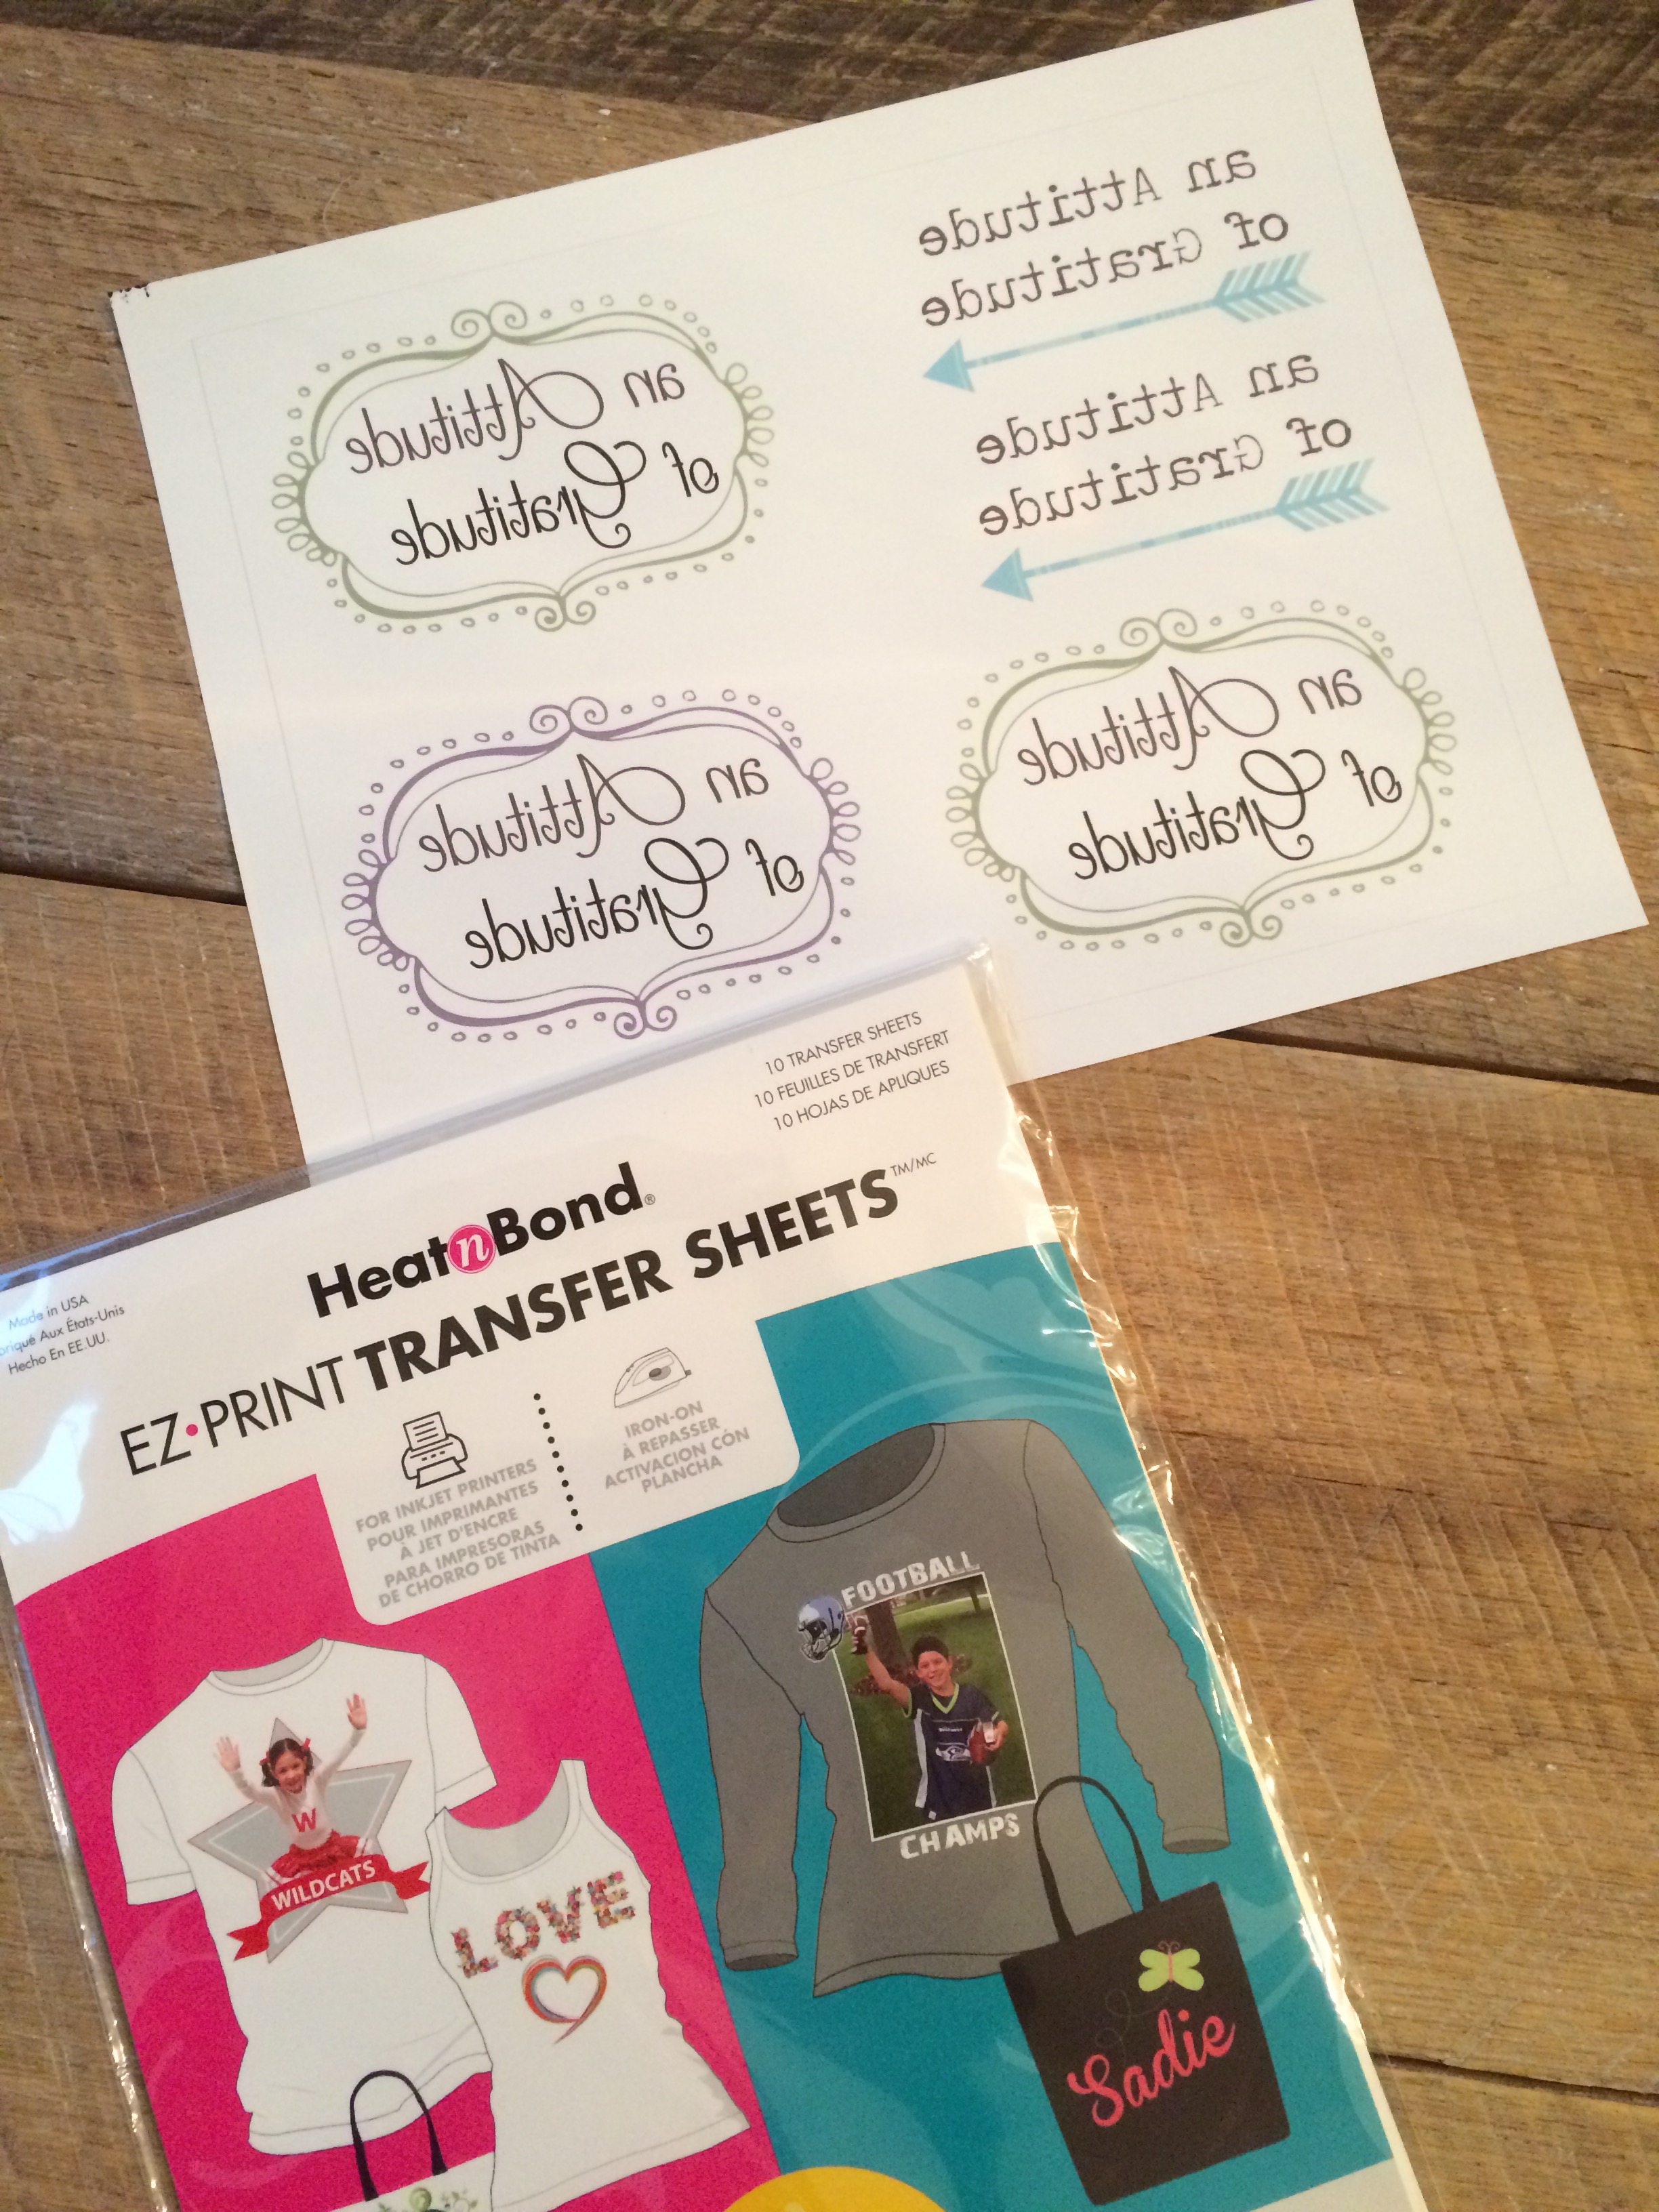
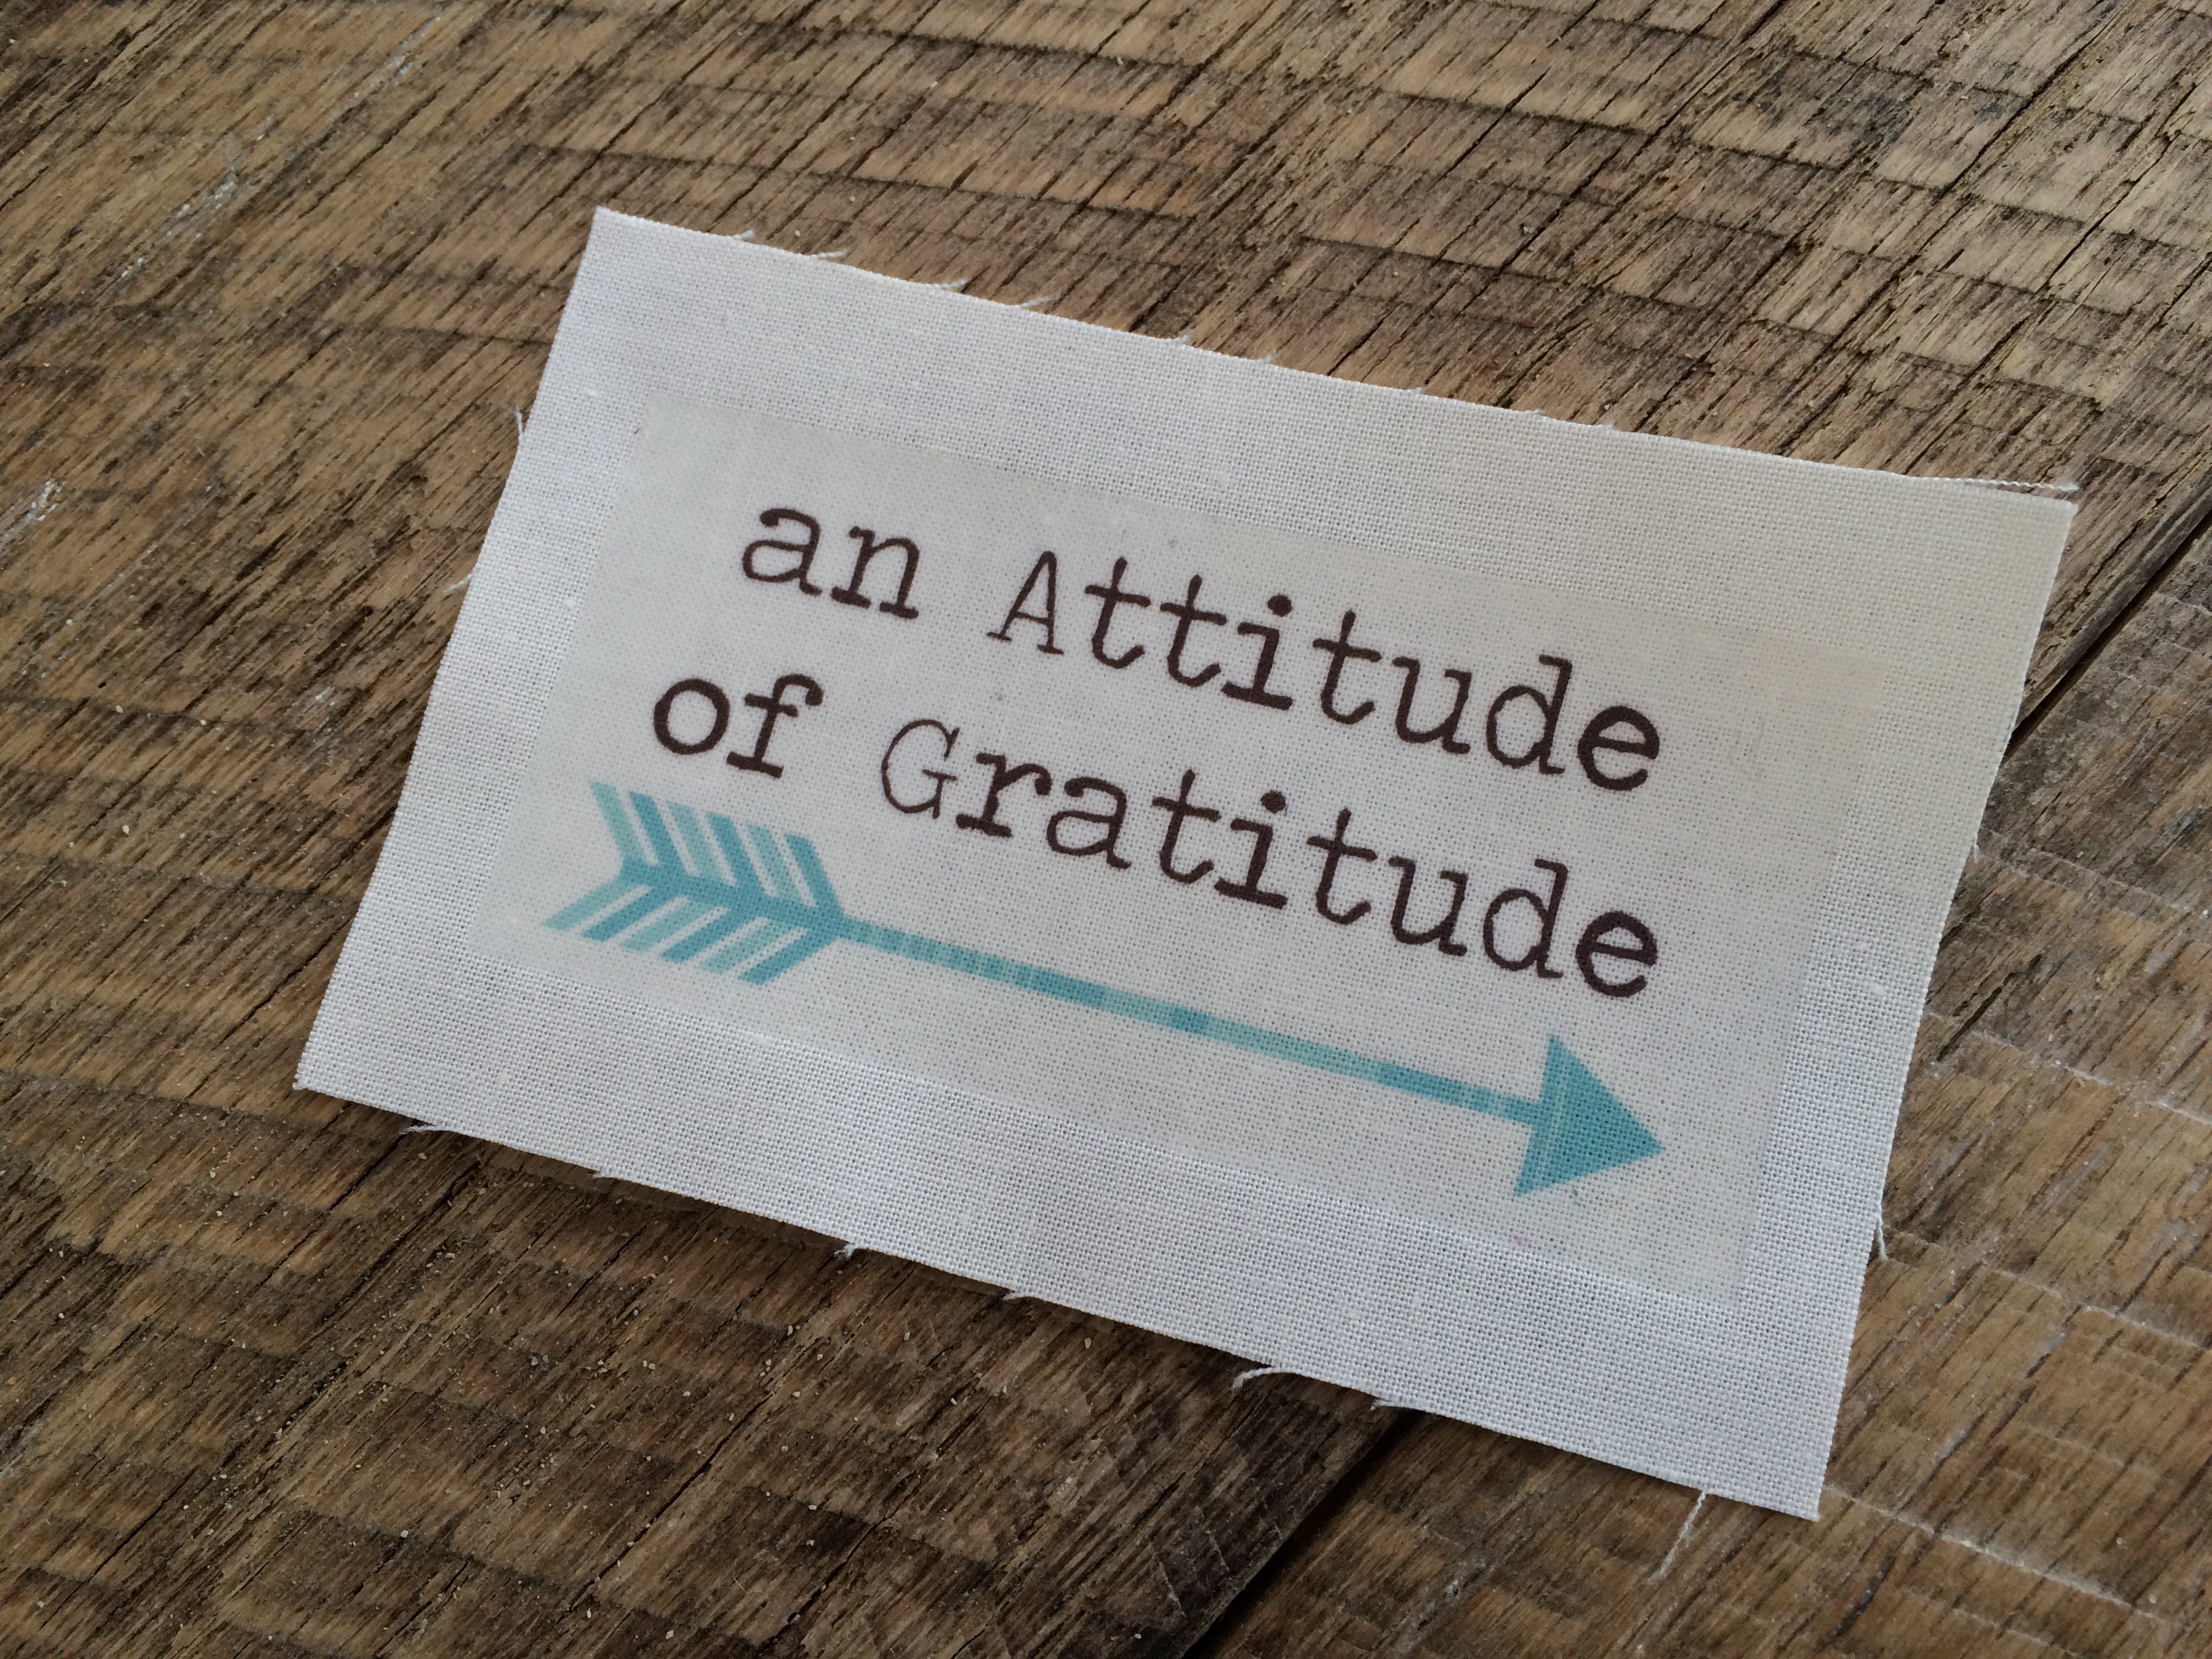
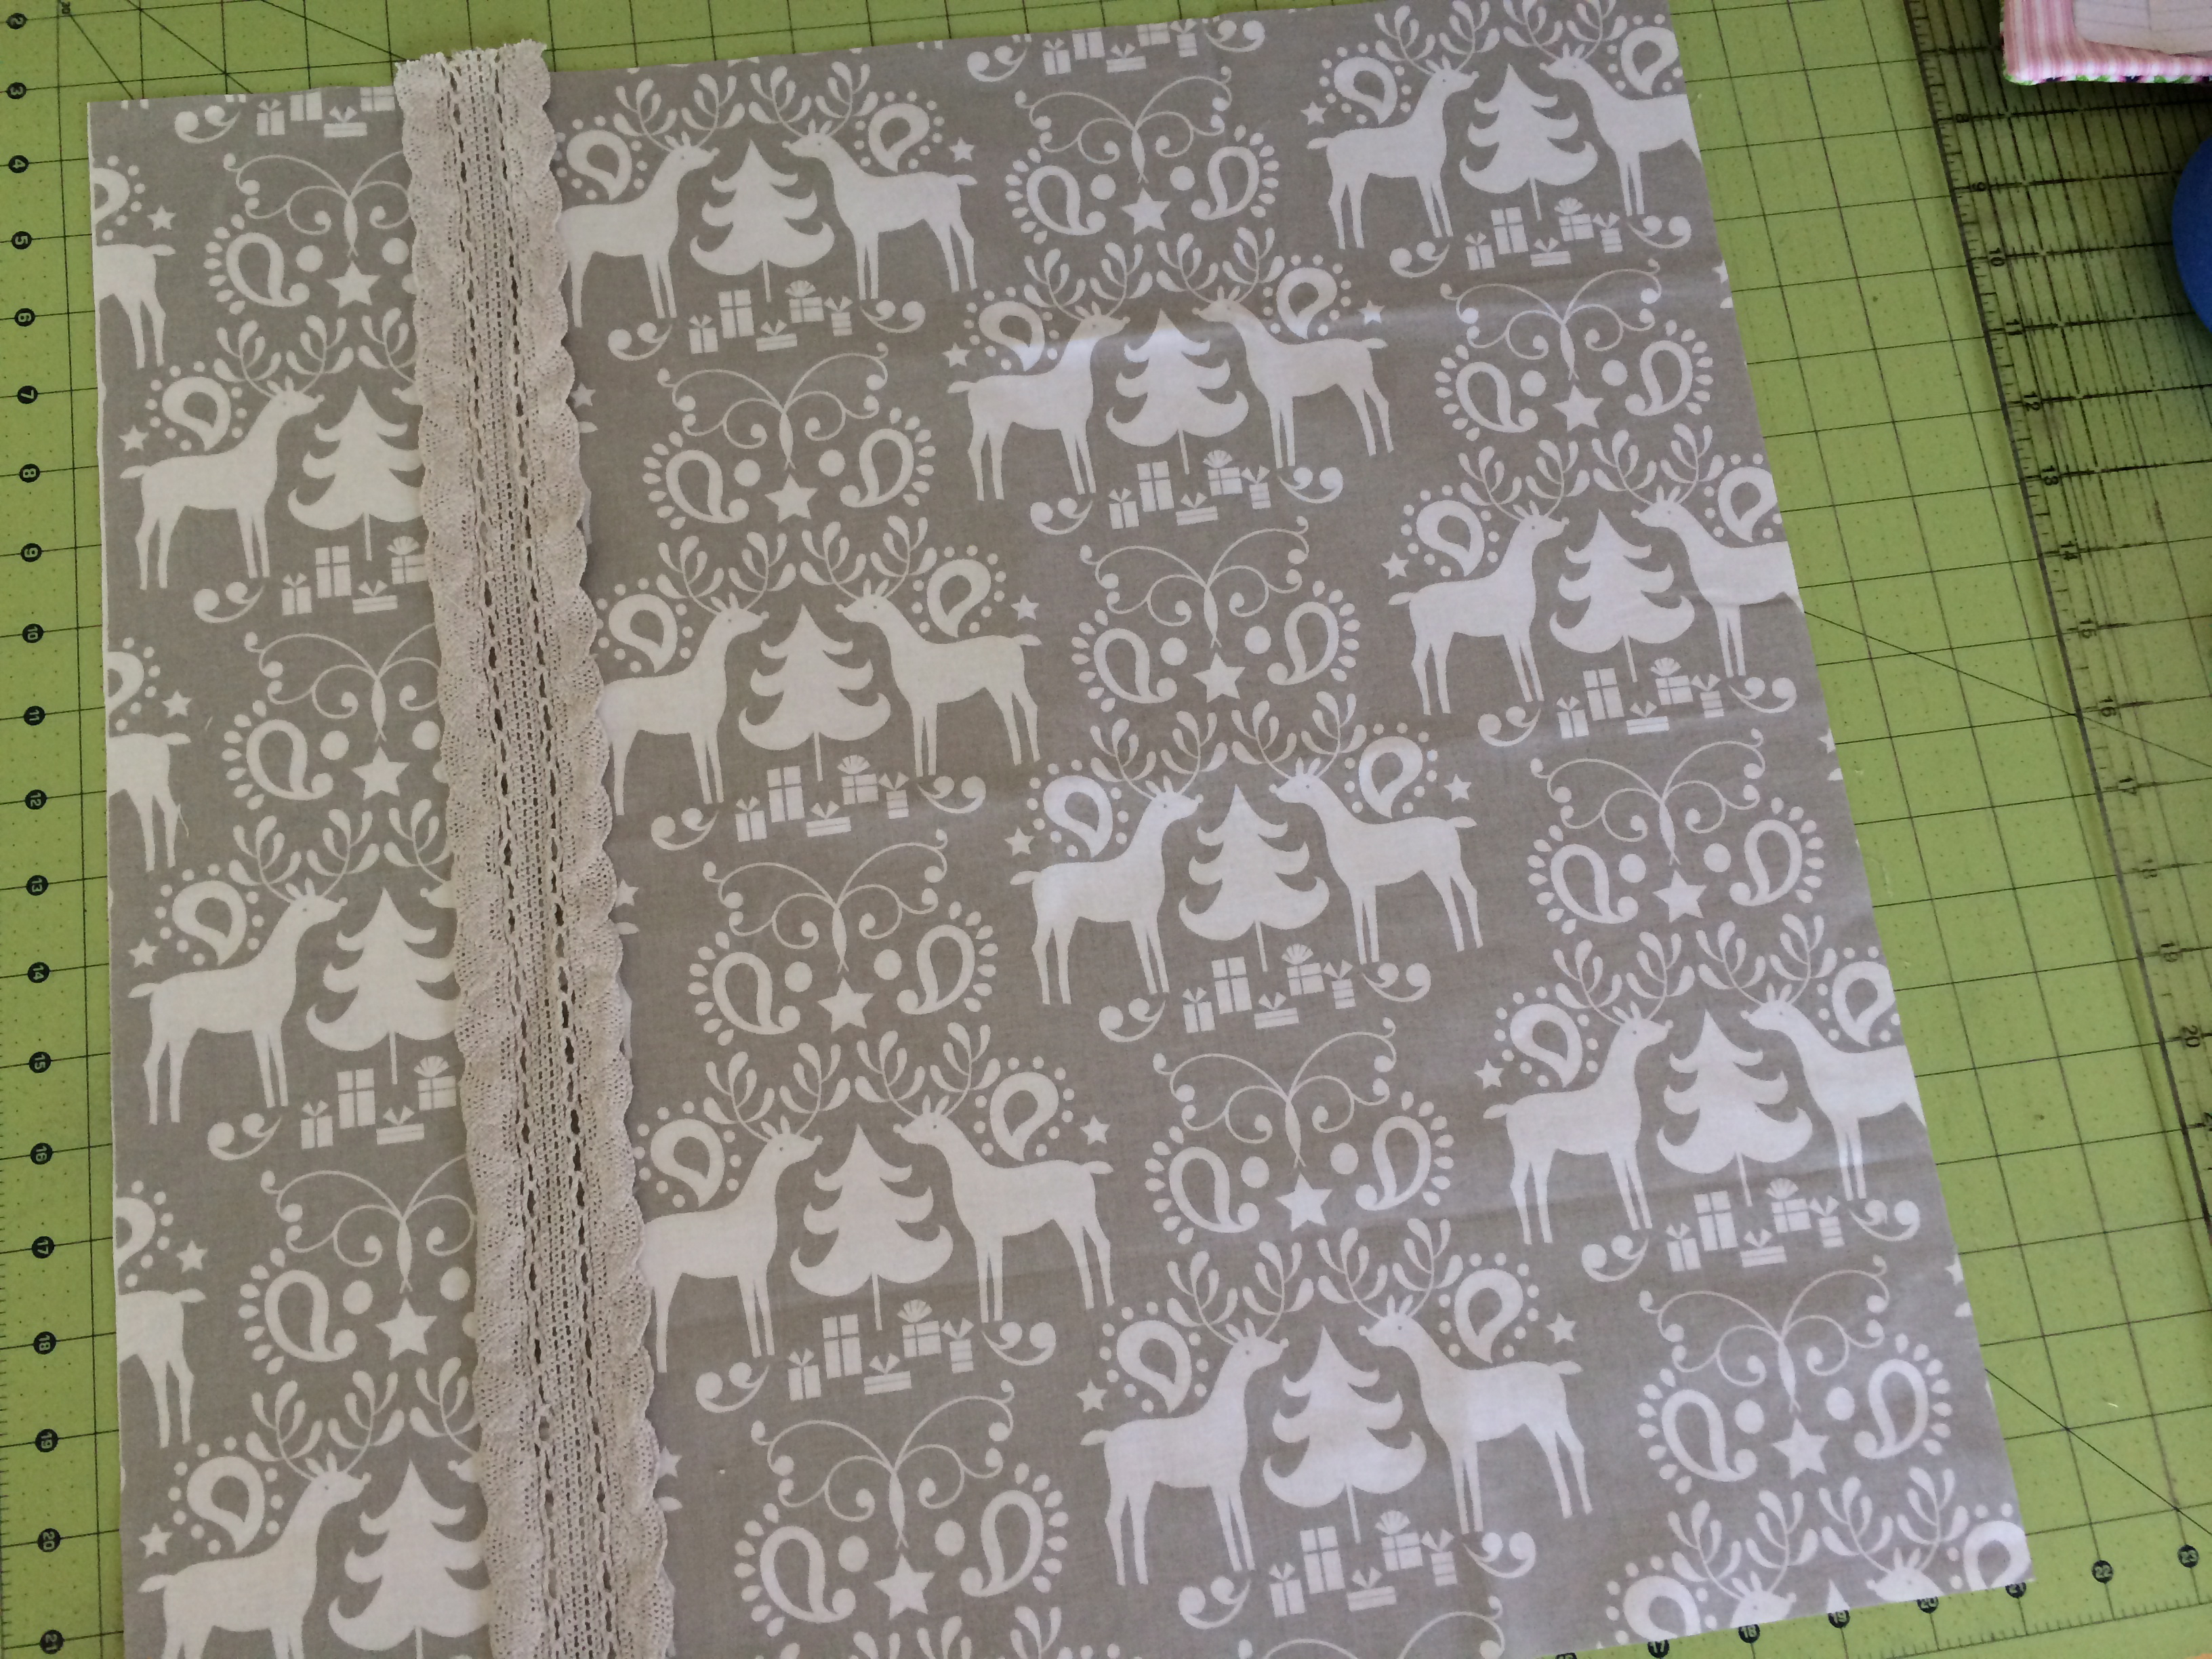
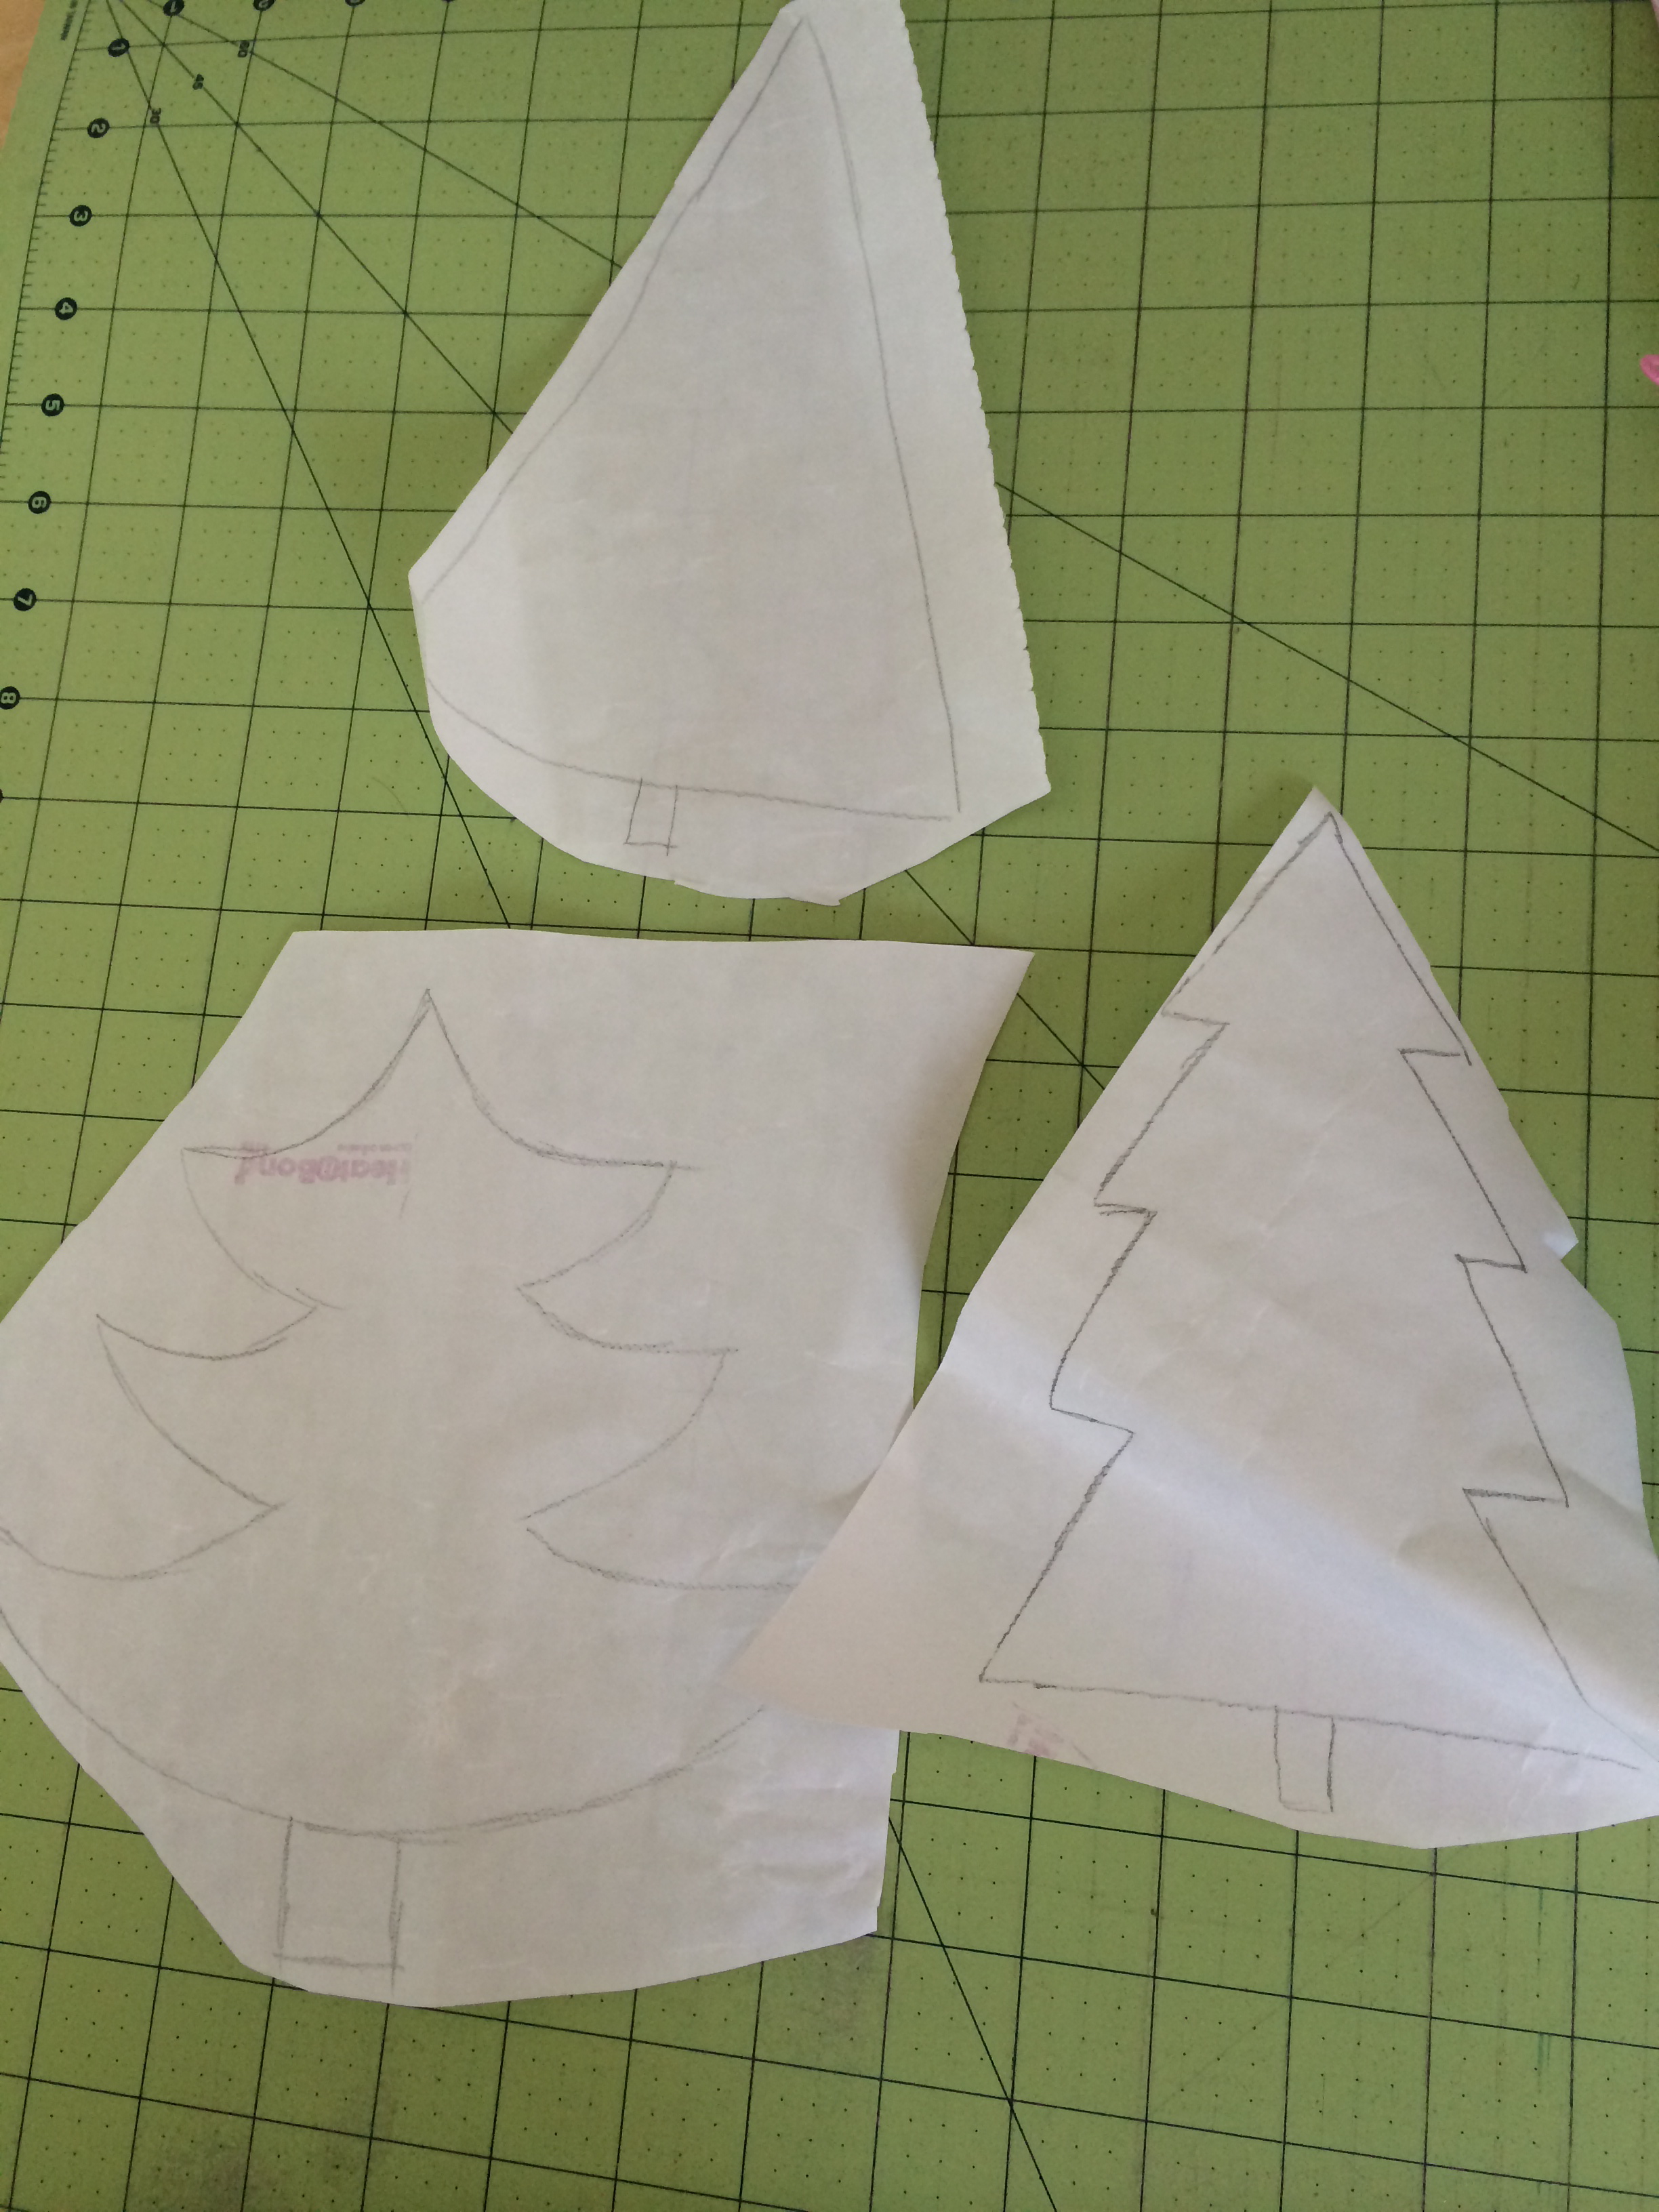
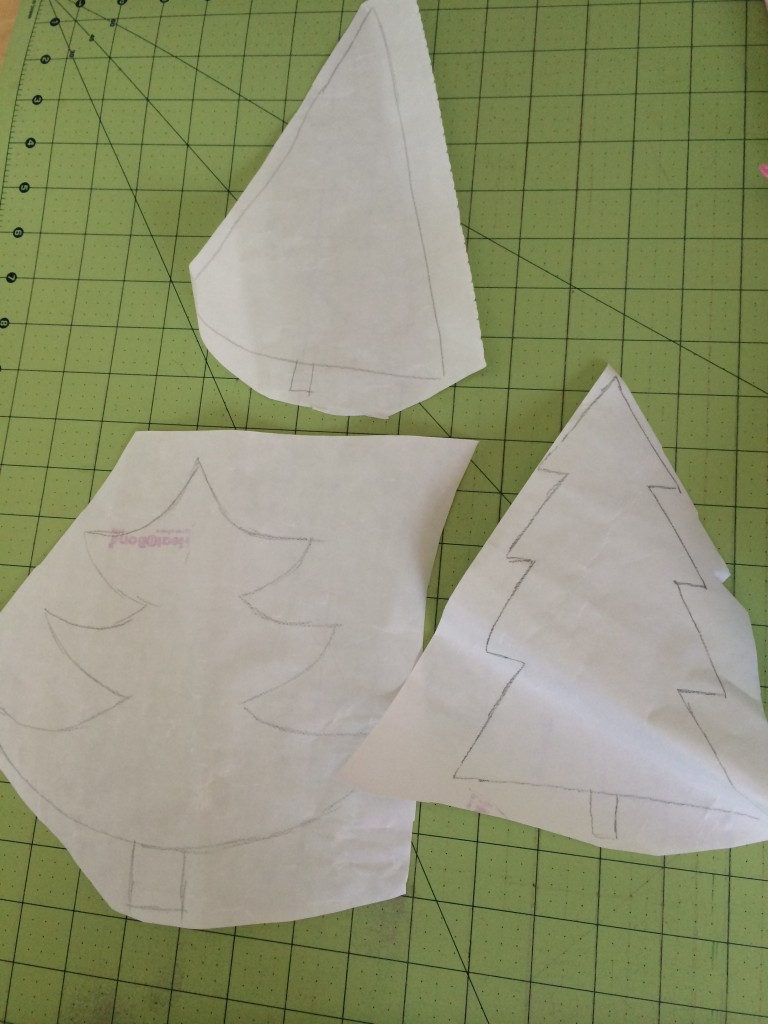
Press it to the wrong side of the tree fabrics and cut out along the pattern lines.  Peel off the appliqué backing.
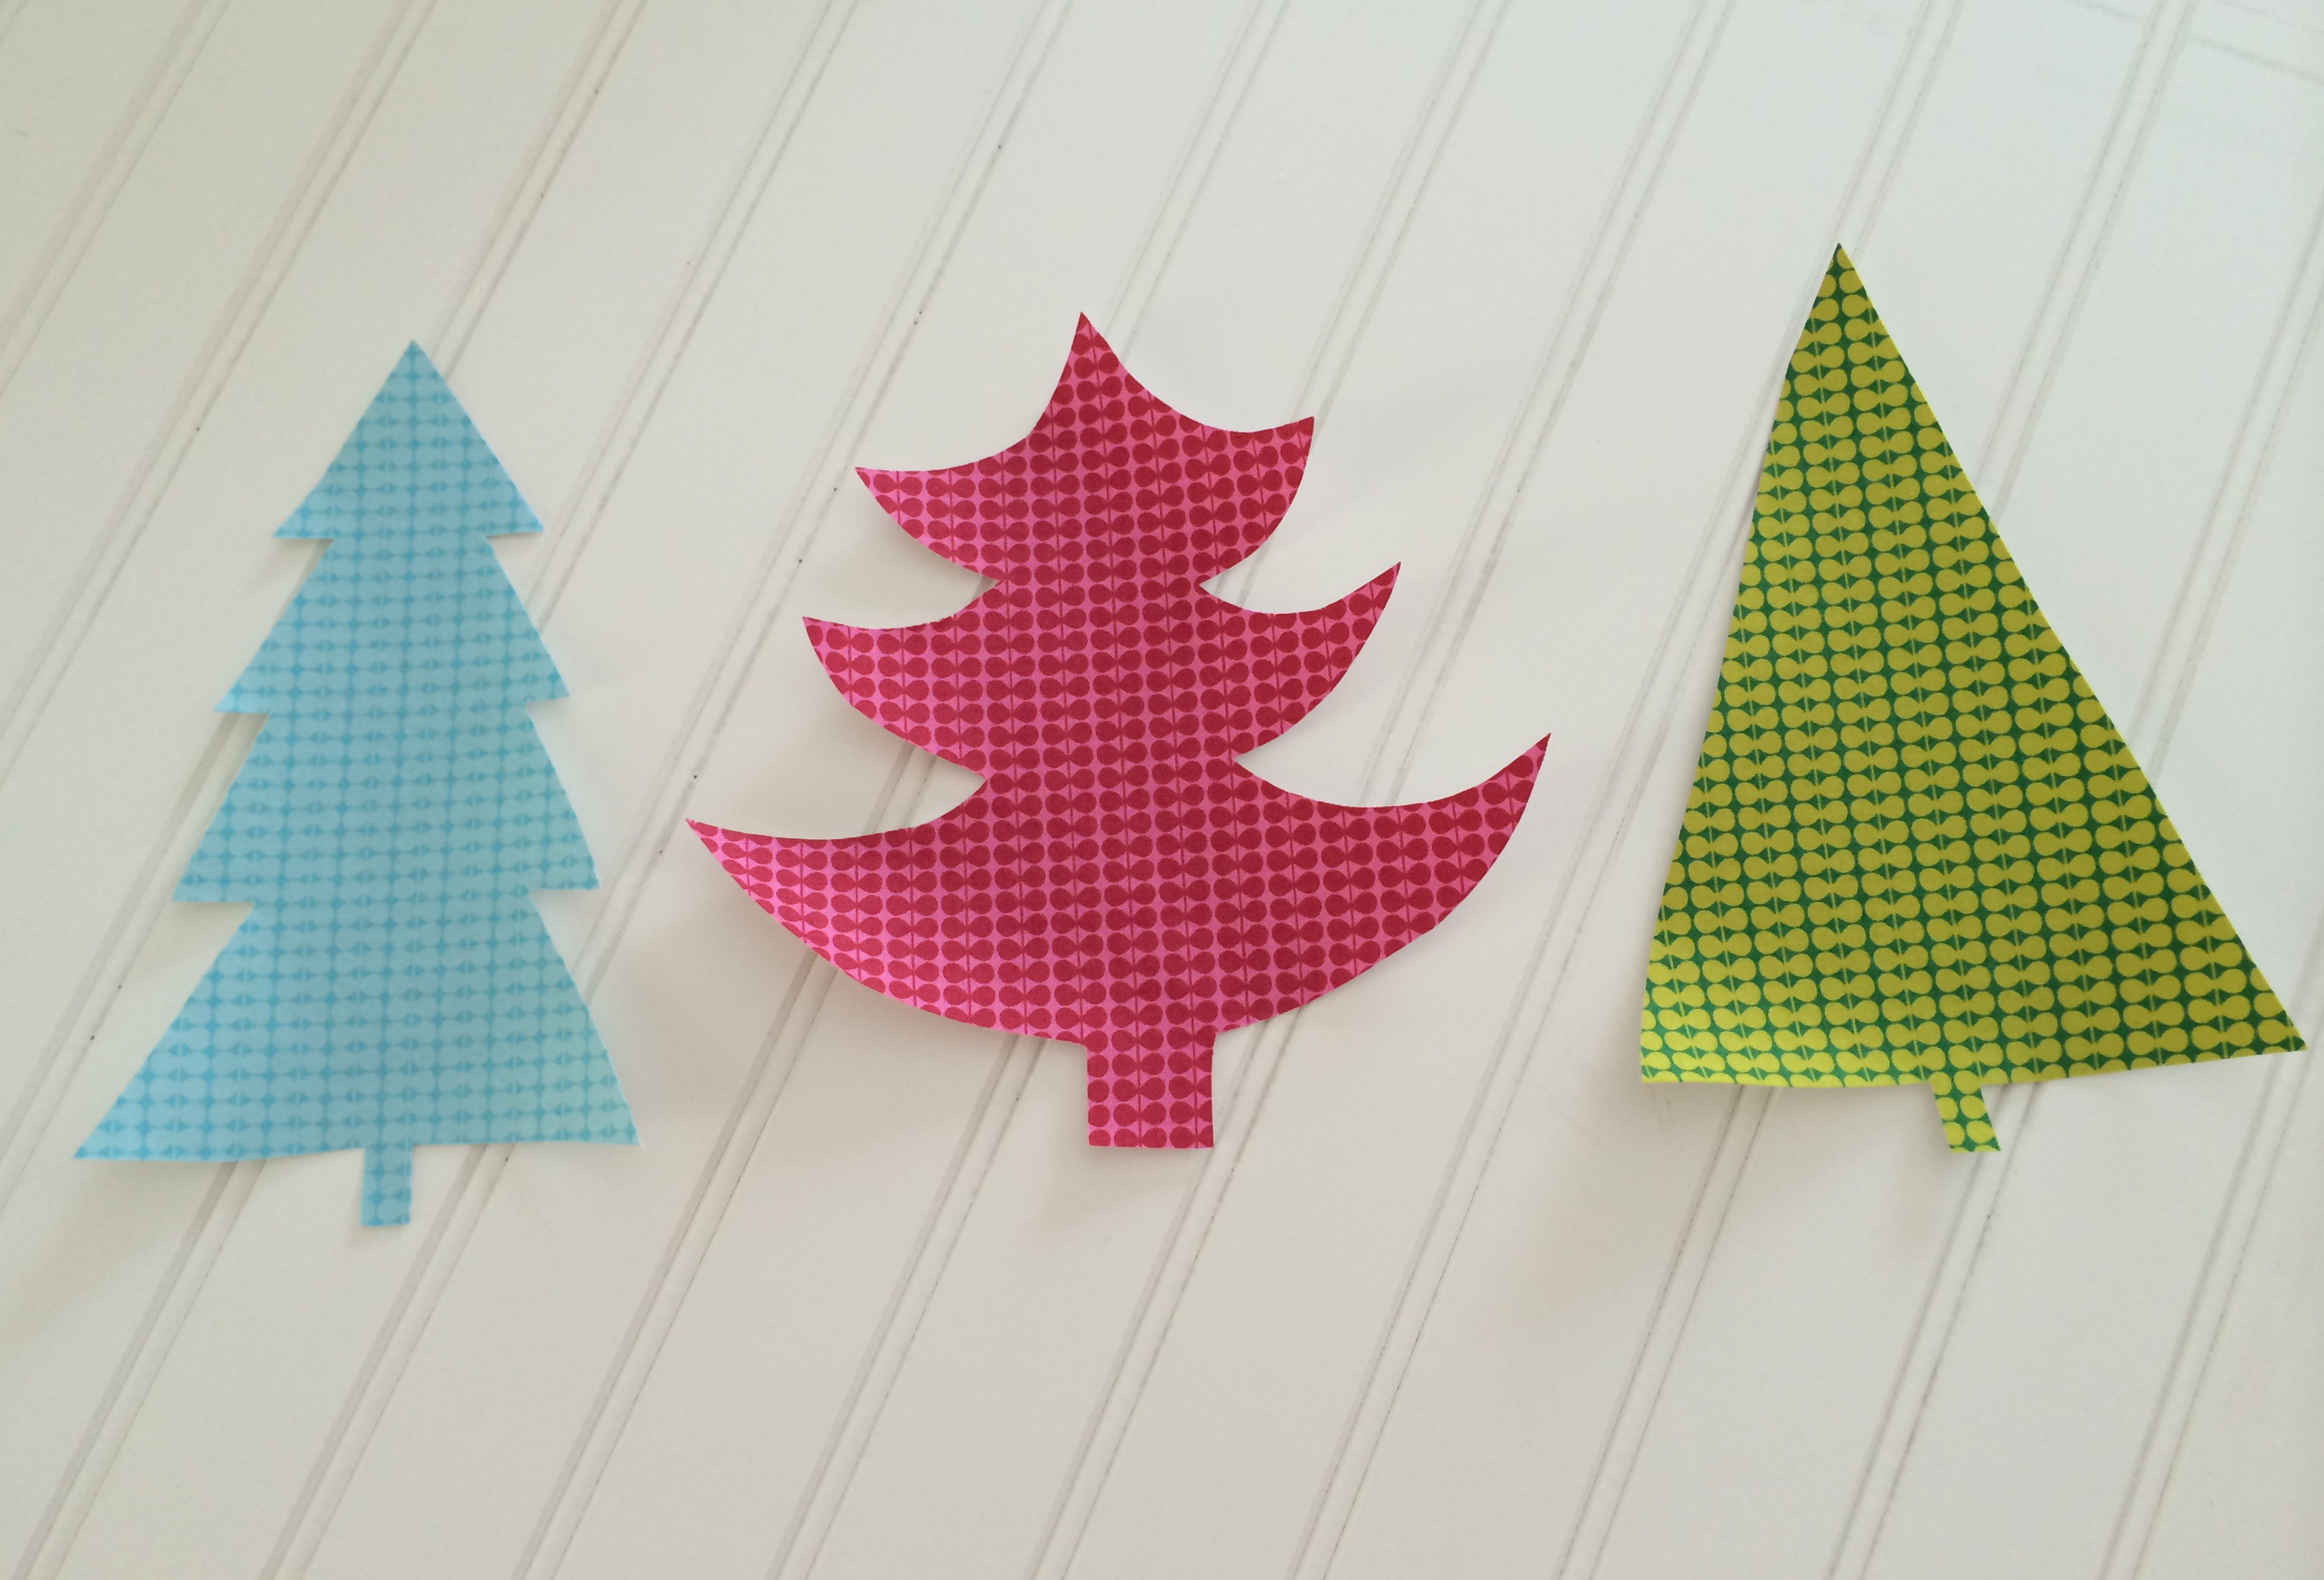
treelicious christmas pillow 2

Position the trees as pictured and press to adhere.
treelicious christmas pillow 4

Using dark thread, outline stitch each of the trees at least twice.treelicious christmas pillow 5

treelicious christmas pillow 6


Using Fabric Fuse glue, adhere the trims on the trees.  You can also sew them if you want.  I was anxious to try out the Fabric Fuse and I really liked how it turned out – it holds great!

treelicious christmas pillow 7

I put a little of the Fabric Fuse on the ends of the Ric Rac to prevent from fraying.treelicious christmas pillow 8

Top stitch 1/4″ on both sides of the side seams for some added detail.

treelicious christmas pillow 9

Prepare the back.  Cut the back fabric 27″ x 15.5″.

treelicious christmas pillow 10

Then make a cut at the 3″ mark.treelicious christmas pillow 11

Sew the zipper in.treelicious christmas pillow 12

Trim off excess zipper.treelicious christmas pillow 13

Select the trim you want and baste it all the way around the pillow front.treelicious christmas pillow 14

Curve the corners so the trim lays nice:treelicious christmas pillow 15

Leaving the zipper open, place the pillow top and the pillow back right sides together and sew using a generous 1/4″ seam all the way around.  Turn right side out.  I know this is an odd size pillow form, but you can just stuff with fiberfill and zip it shut.treelicious christmas pillow 16

treelicious christmas pillow 18

IMG_1699

Handmade Holidays Blog Hop – My Favorite Zipper Pouch

I LOVE zipper pouches!  I have million and I still need more!  I love that all my friends have one of my zipper pouches in their purses.  They are fabulous gifts because you always need another one!  I call this pattern My Favorite Zipper Pouch Version 2.0, click HERE for version 1.0 🙂

my favorite zipper pouch

How cute is it to make one of these pouches and then put a few necessities inside: Kleenex, lip balm, hand sanitizer, gum, a handmade pouch of fabric bandages, and my favorite idea which I got from my friend Jennifer, a hair elastic with safety pins and bobby pins attached to it!  Brilliant!  Below you will find the tutorial for the zipper pouch, fabric bandages, and clear bandage keeper.  I hope you enjoy making these.

zipper pouch tutorial 32

fabric bandages

zipper pouch tutorial 30

Supplies:

Fat Quarters or 1/4 yard cuts assorted fabrics

The fabrics used in this project are from Blend’s Turkish Delight.  I am totally loving every combination in this collection!!!

Therm O Web Fusible Fleece

Therm O Web Spray n Bond Basting Spray

1/2 yard of lace

zipper, at least 12″ – I buy my zippers long and then I can always cut them down

Key charm for the zipper pull

Let’s get started!

Cut the coral floral fabric (2) 5″ x 9″

Cut the white floral fabric (2) 2″ x 9″

IMG_1543

Cut the lining fabric (2) 6.5″ x 9″

Fusible Fleece (2) 6.5″ x 9″zipper pouch tutorial 5

Cut the lace (2) 9″ pieces.  Using the Spray n Bond, spray baste the lace into place, lining the top edge with the top raw edge of the coral floral fabric.  Do this to both pieces.

zipper pouch tutorial 3

Using 1/4 inch seams, sew the white floral to the top of the coral floral.  Press.  Layer this piece on the fusible fleece and press according to the directions.  Do this to both the floral/lace pieces.  Using 1/8″ seam, top stitch next to seam on both pieces:

zipper pouch tutorial 6

For the zipper tabs….Cut (2) strips of fabric 2″ x 4″.  Press in half then press the ends in 1/4″ like this:

zipper pouch tutorial 8

Lay out the zipper, tabs, and one of the floral/lace pieces – note, the zipper tabs are larger than needed, we will cut off the excess

zipper pouch tutorial 9

Open one of the zipper tabs and insert one end of the zipper (cut off metal stop).  Sew 2 times along the edge holding the zipper into place.  Then position the other tab.  There should be about 1″ of tab on each side, the extra will be cut off and discarded.  If your zipper is really long, you will trim down the zipper then place inside the tab.  It should look like this:

zipper pouch tutorial 12

Cut open the folded end of the zipper tabs.  Cut out the zipper so it only about 1/4″ remains.  This photo was taken before the zipper was cut out.  The reason for this is to reduce the bulk in the zipper pouch seams.

zipper pouch tutorial 11

Place the zipper and one of the zipper pouch sides right sides together, aligning the edges.  You can trim off the excess tabs.

zipper pouch tutorial 13

Now place one of the bag lining pieces right side down, lining up the raw edges with the zipper and the zipper pouch front.  Pin into place.  Sew along the edge using a zipper foot.

zipper pouch tutorial 14

zipper pouch tutorial 15

Now that the one side of the zipper is sewn in, press and trim off excess tabs.

zipper pouch tutorial 16

Now it’s time to sew the other side of the zipper pouch to the zipper.  Lay the second floral/lace piece facing up.  Then lay the piece with the zipper on top, matching right sides.  Line up the top edge of the floral piece with the zipper, like this:

zipper pouch tutorial 17

Now lay the second piece of lining fabric right side down and align the top edge as well.  Pin.  Sew using zipper foot.

zipper pouch tutorial 19

Press the second side so the zipper lays flat.  Top stitch 1/8″ next to both sides of the zipper.

zipper pouch tutorial 21

To finish the bag…. MAKE SURE THE ZIPPER IS OPEN  Match right sides together beginning at the zipper.  Match the zipper seams line this and pin:  Do this to both sides.

zipper pouch tutorial 22

Continue pinning all the way around the bag like this:  Then sew 1/4″ all the way around the bag, leaving an opening about 2.5″ on one of the sides of the lining.

zipper pouch tutorial 23

Before turning right side out, cut a 1.25″ square out of each corner.  I use a piece of paper 1.25″ square and cut with scissors.

zipper pouch tutorial 24

This is what it looks like after all 4 corners have been “notched”.

zipper pouch tutorial 25

Open each notched corner and match the seams, pin, sew 1/4″ seam, backstitch to start and stop.  Do this to each corner.

zipper pouch tutorial 27

zipper pouch tutorial 26

Turn the bag right side out, topstitch the opening closed.  I like to add a little charm to the zipper.

zipper pouch tutorial 33

zipper pouch tutorial 31

zipper pouch tutorial 29

Now, to make the Fabric Bandages….

fabric bandages and case tutorial

You can make fabric covered bandages several ways.  I’ve seen some tutorials and they use a double sided permament sticky tape.  I decided to try using iron-on adhesive hem tape, which happens to be the exact width as most bandages, 3/4″!

t440_0d49d7924a1cdbca4333eb01e245ccec

To make the fabric covered bandages, cut a piece of Heat n Bond Hem tape the length of the bandage.  Place it in-between the bandage and the fabric.  Using a pressing paper for protection, press.  TWO IMPORTANT THINGS…. FIRST, make sure you flip the bandage/fabric over to press so the iron hits the fabric first and not the bandage.  SECOND, only iron with hot dry iron for 2-3 seconds max.  If you heat any longer, the heat will melt the bandage adhesive and the bandage won’t be sticky.

Please note, these are just for fun and to be used on minor scratches or “boo boos”.  For serious injuries or wounds, use a real first aid kit and seek medical attention.

fabric bandaids

fabric bandages 2

Once the adhesive has cooled, cut the bandage out.

fabric bandaids 3

To make the bandage “keeper” cut a piece of clear vinyl 2.25″ x 7″.  Fold in half.  Cut a little notch out of the front.  Use a decorative stitch to sew up the sides.

fabric bandaids 4

Place the colorful bandages inside.  I can’t wait to use mine, I guess I should sew some more for gifts!

fabric bandaids 6


IMG_1623


An Attitude of Gratitude Quilted Journals

quilted gratitude journal tutorial


I am so excited it’s November!  Yes, it’s all going a bit too fast, I will admit 🙂  Every year we do a “thankful campaign”  in the month of November.  When my children were small we wrote what we were thankful for on leaves and taped them to a big tree I had placed on the back of the front door.  As the children got a little older, we wrote what we were thankful for everyday and then put it in the “Thankful Bucket”; we read all the thankful papers out loud on Thanksgiving.  This year I want something a little more meaningful and something that can be adopted into a habit.  Gratitude journals are not a new idea, but I decided it’s time every member of my family have a Gratitude Journal and we write each day at least 10 things we are grateful for.  Pretty much, you open the book and you write what ever it is you are thankful for – it can be a word or many paragraphs.

I’ve done a lot of reading on Gratitude and I even have a Pinterest board for all the wonderful Gratitude ideas and quotes there are out there.  My favorite quotes are:

Gratitude Turns What We Have Into Enough and A Thankful Heart is the Parent of All Virtues

I am hoping by helping my family turn our hearts into grateful hearts, we will have more love for each other and for those around us and we will feel closer to God and His Son, Jesus Christ.

Here is how you can make a Quilted Gratitude Journal!!

Supplies:

fat quarters or small cuts of fabric for the pieced journal front

1/3 yard fabric for lining

1/3 yard for journal cover flaps

cotton batting

hair elastic

button

Spray n Bond Basting Spray

Scrap of burlap

“An Attitude of Grattitude” printable, click HERE

For the “boy” journal I used fabric from Blend’s “Hammer and Nails” line – I love finding mature boy fabric – it’s hard to come by, but I thought this was perfect for my 11 year old son and my husband with out being cheesy 🙂

For the “girl” journal I used fabric from Blend’s “Good Company” line – super cute – reminds me of feminine fall fabrics

Therm O Web’s Heat n Bond’s EZ Print Transfer Sheets


Begin by cutting the strips for the outer part of the journal:

For the boy version, cut the blue fabric 5″ x 16.5″, the measuring tape fabric 2″ x 16.5″, and the wood fabric 5″ x 16.5″ .  Sew them together in this order using 1/4″ seams.

quilted gratitude journal tutorial__3

For the girl version, cut the top pink piece 6″ x 16.5″, the owl & squirrel print 4″ x 16.5″, and the blue print 2″ x 16.5″.  Sew together in this order using 1/4″ seams.

quilted gratitude journal tutorial_6

Basically, the final measurement should be 16.5″ x 11″ if you want to design your own pattern.

Using Spray n Bond, baste the journal top to the cotton batting and quilt as desired.

quilted gratitude journal tutorial_7

On the girl journal I quilted loop-de-loos…..

quilted gratitude journal tutorial_8

On the boy journal I quilted straight lines….

quilted gratitude journal tutorial_9

Square up the journal top by trimming the excess batting.  It’s OK if the journal top shrinks a bit due to quilting.

Next, prepare the “gratitude saying” by printing in reverse on the EZ Transfer Sheets.

quilted gratitude journal tutorial_


Cut out a rectangle of  solid cream fabric the size you want it – the girl’s one was 4.75″ x 3.5″ and the boy’s one was 4.75 x 3″quilted gratitude journal tutorial_2


Trim down the EZ transfer sheets and read the directions on the package.  Pretty much you put it face down on the cream fabric and press with a dry hot iron.  Then peel off the backing paper.  I love using these sheets – expect to see more projects with words and quotes 🙂quilted gratitude journal tutorial_4

Cut the burlap so as to “frame” the word square.  Using the basting spray, baste the word piece to the burlap, then the to the journal cover.

quilted gratitude journal tutorial_10


Position as desired.quilted gratitude journal tutorial_11

quilted gratitude journal tutorial_12


Sew around it twice with dark brown thread.quilted gratitude journal tutorial_21

Cut the “flap” fabric (2) 10″ x 11″ squares and press in half lengthways.

quilted gratitude journal tutorial_13


Cut the lining fabric 16.5″ x 11″.  then lay the flaps like this matching raw edges.quilted gratitude journal tutorial_15

Baste the hair elastic in the center of the back of the journal cover:

quilted gratitude journal tutorial_14

Place the journal top right sides together with the lining/flap piece an pin all the way around.  Sew around the whole piece using 1/4″ seams and leaving an opening to turn at the bottom center.  Turn right side out.  Press.  Top stitch the opening closed with matching thread.

quilted gratitude journal tutorial_16

Insert the composition book into the cover and mark where the button should go.  Sew the button on with needle an thread, careful not to catch the flap.

quilted gratitude journal tutorial_18

quilted gratitude journal tutorial_23

I love how they turned out and my children were super excited to receive one of these tonight during our Family Home Evening!!

quilted gratitude journal tutorial_24

quilted gratitude journal tutorial_26


Monogram Peasant Top, a modified tutorial

Geofabulous_Peasant_Top_monogram_8

I am still loving Geofabulous from Blend fabrics!  Here is outfit #3 for Sally!  I followed the peasant shirt pattern in this McCall’s pattern:Geofabulous_Peasant_Top_monogram_9

The front and back pieces are cut out of solid pink cotton and the sleeves are the Stained Glass Navy print.Geofabulous_Peasant_Top_monogram_4

I printed the letter “S” on my computer and traced it to Heat n Bond Lite in reverse.  Iron it to the wrong side of the monogram fabric.  Cut out the letter, peel the back off and press to the front of the peasant top piece.  Top stitch in matching thread.

Geofabulous_Peasant_Top_monogram_2

Follow the instructions in the pattern to complete the top.  I added a ruffle to the bottom.  To do this, cut (2) 5″ x WOF pieces of coordinating fabric, I used Symmetry Pink.

IMG_0738

Sew the (2) strips end to end, forming a big loop.  Sew a rolled hem by folding the bottom edge up 1/4″ and then another 1/4″ and stitch close to the fold.  Gather the top of the ruffle pieces by lengthening the stitch length to the maximum.  Pull up threads and gather by hand.  Match the seams on the ruffle with the side seams on the peasant top.  Pin into place, distributing the ruffles.  Sew along gathering stitching.  Press the seam and top stitch if desired.
Geofabulous_Peasant_Top_monogram_5


Geofabulous_Peasant_Top_monogram_7


Geofabulous_Peasant_Top_monogram_6

Geofabulous Girls Peasant Top

geofabulous_peasant_top_3

I am the world’s most impatient sewer.  It’s a problem of mine I’ve been working on for some time – there are just too many things I want to sew!  I love being able to sew for my daughter and what I love even more is being able to sew her a peasant top in about 30 minutes!!  The fabrics for this top are from Blend’s Geofabulous line – and the fabrics just happen to have every one of Sally’s favorite colors!!  I wish I had a brand new peasant top pattern you can just download for free – but 99 cent patterns at JoAnn Fabrics are the next best thing!  I picked this pattern up not loving it but thinking for 99 cents I can do something with it.  You wouldn’t know it from the picture but there is a pattern for a peasant top and peasant dress (the white clothing worn underneath the jumpers)!!  I followed the pattern, using different fabrics on the sleeves then on the main body, I added lace trim to the bottom and a fabric bow for some detail.  Super quick and easy!!!!!geofabulous_peasant_top_2

…and we do need a nice cool, breezy shirt as it is 110 degrees today!!!  I think I might sew one more of these while I have all the fabric and pattern pieces all over, I mean neatly folded on my cutting table 🙂
geofabulous_peasant_top_4

geofabulous_peasant_top

Blend Geofabulous Skirt & Shirt

No matter how much fall baking or decorating I do it doesn’t change the fact that it’s still over 100 degrees here!  Everything in the stores is long pants, long sleeves and sweaters. I decided to make this fun girl’s outfit – perfect for a HOT September day.  The fabrics are from Blend’s Geofabulous fabric line.  The colors are amazing!

geofabulous_skirt_shirt_4

The tiered skirt pattern is from the Sassy Skirts book, my go-to skirt book for girls.  Super quick & easy!
IMG_0709
sassy skirts

The matching shirt needed a little embellishing.  I decided to try something beyond my standard quick appliqué shirt.  To make a ruffle for a shirt, cut a 3.5″ strip by 2 times the length of the neck from shoulder seam to shoulder seam.  Sew a rolled hem on both lengths of the ruffle.  Then hem the 2 ends.  Sew a gathering stitch down the center and gather.  Fit the ruffle around the neck, pinning as you go.  Then sew along the gathering stitch.  I had plans to add a flower, but I ran out of time.
geofabulous_skirt_shirt_1


Super quick an easy – and better than getting in a hot car and driving to the store to look for a new skirt.  It’s 108 today!
geofabulous_skirt_shirt_2
For some other fun projects using the Gefabulous line, check out these links!

Rail Fence Quilt by Sew Can She

1409374309656

Gathered Pouch Pocket by Tie Die Diva
IMG_0175