I Love Cats {Quilt Pattern}

pumpkin quilt cats

DSC_0676

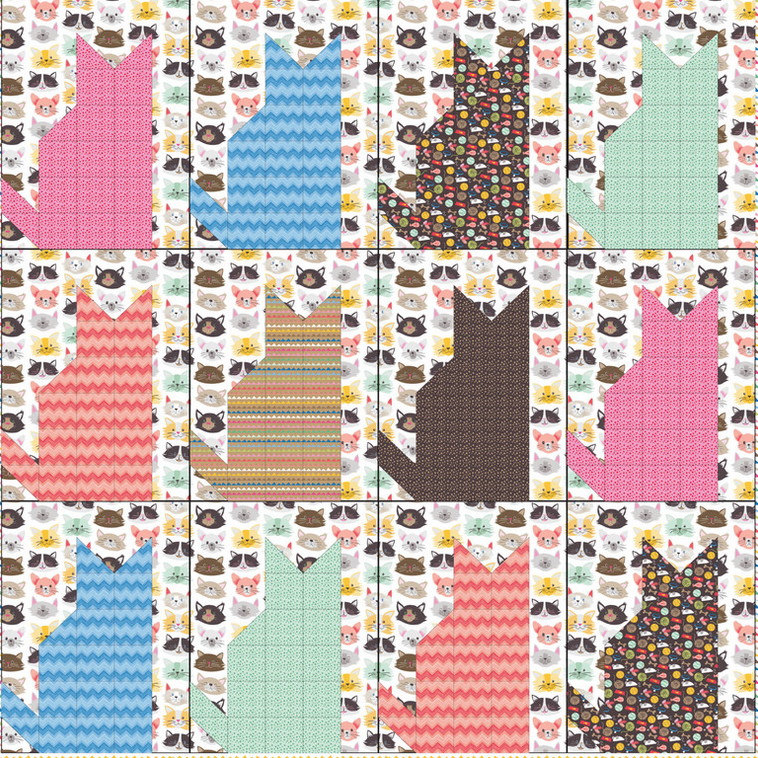
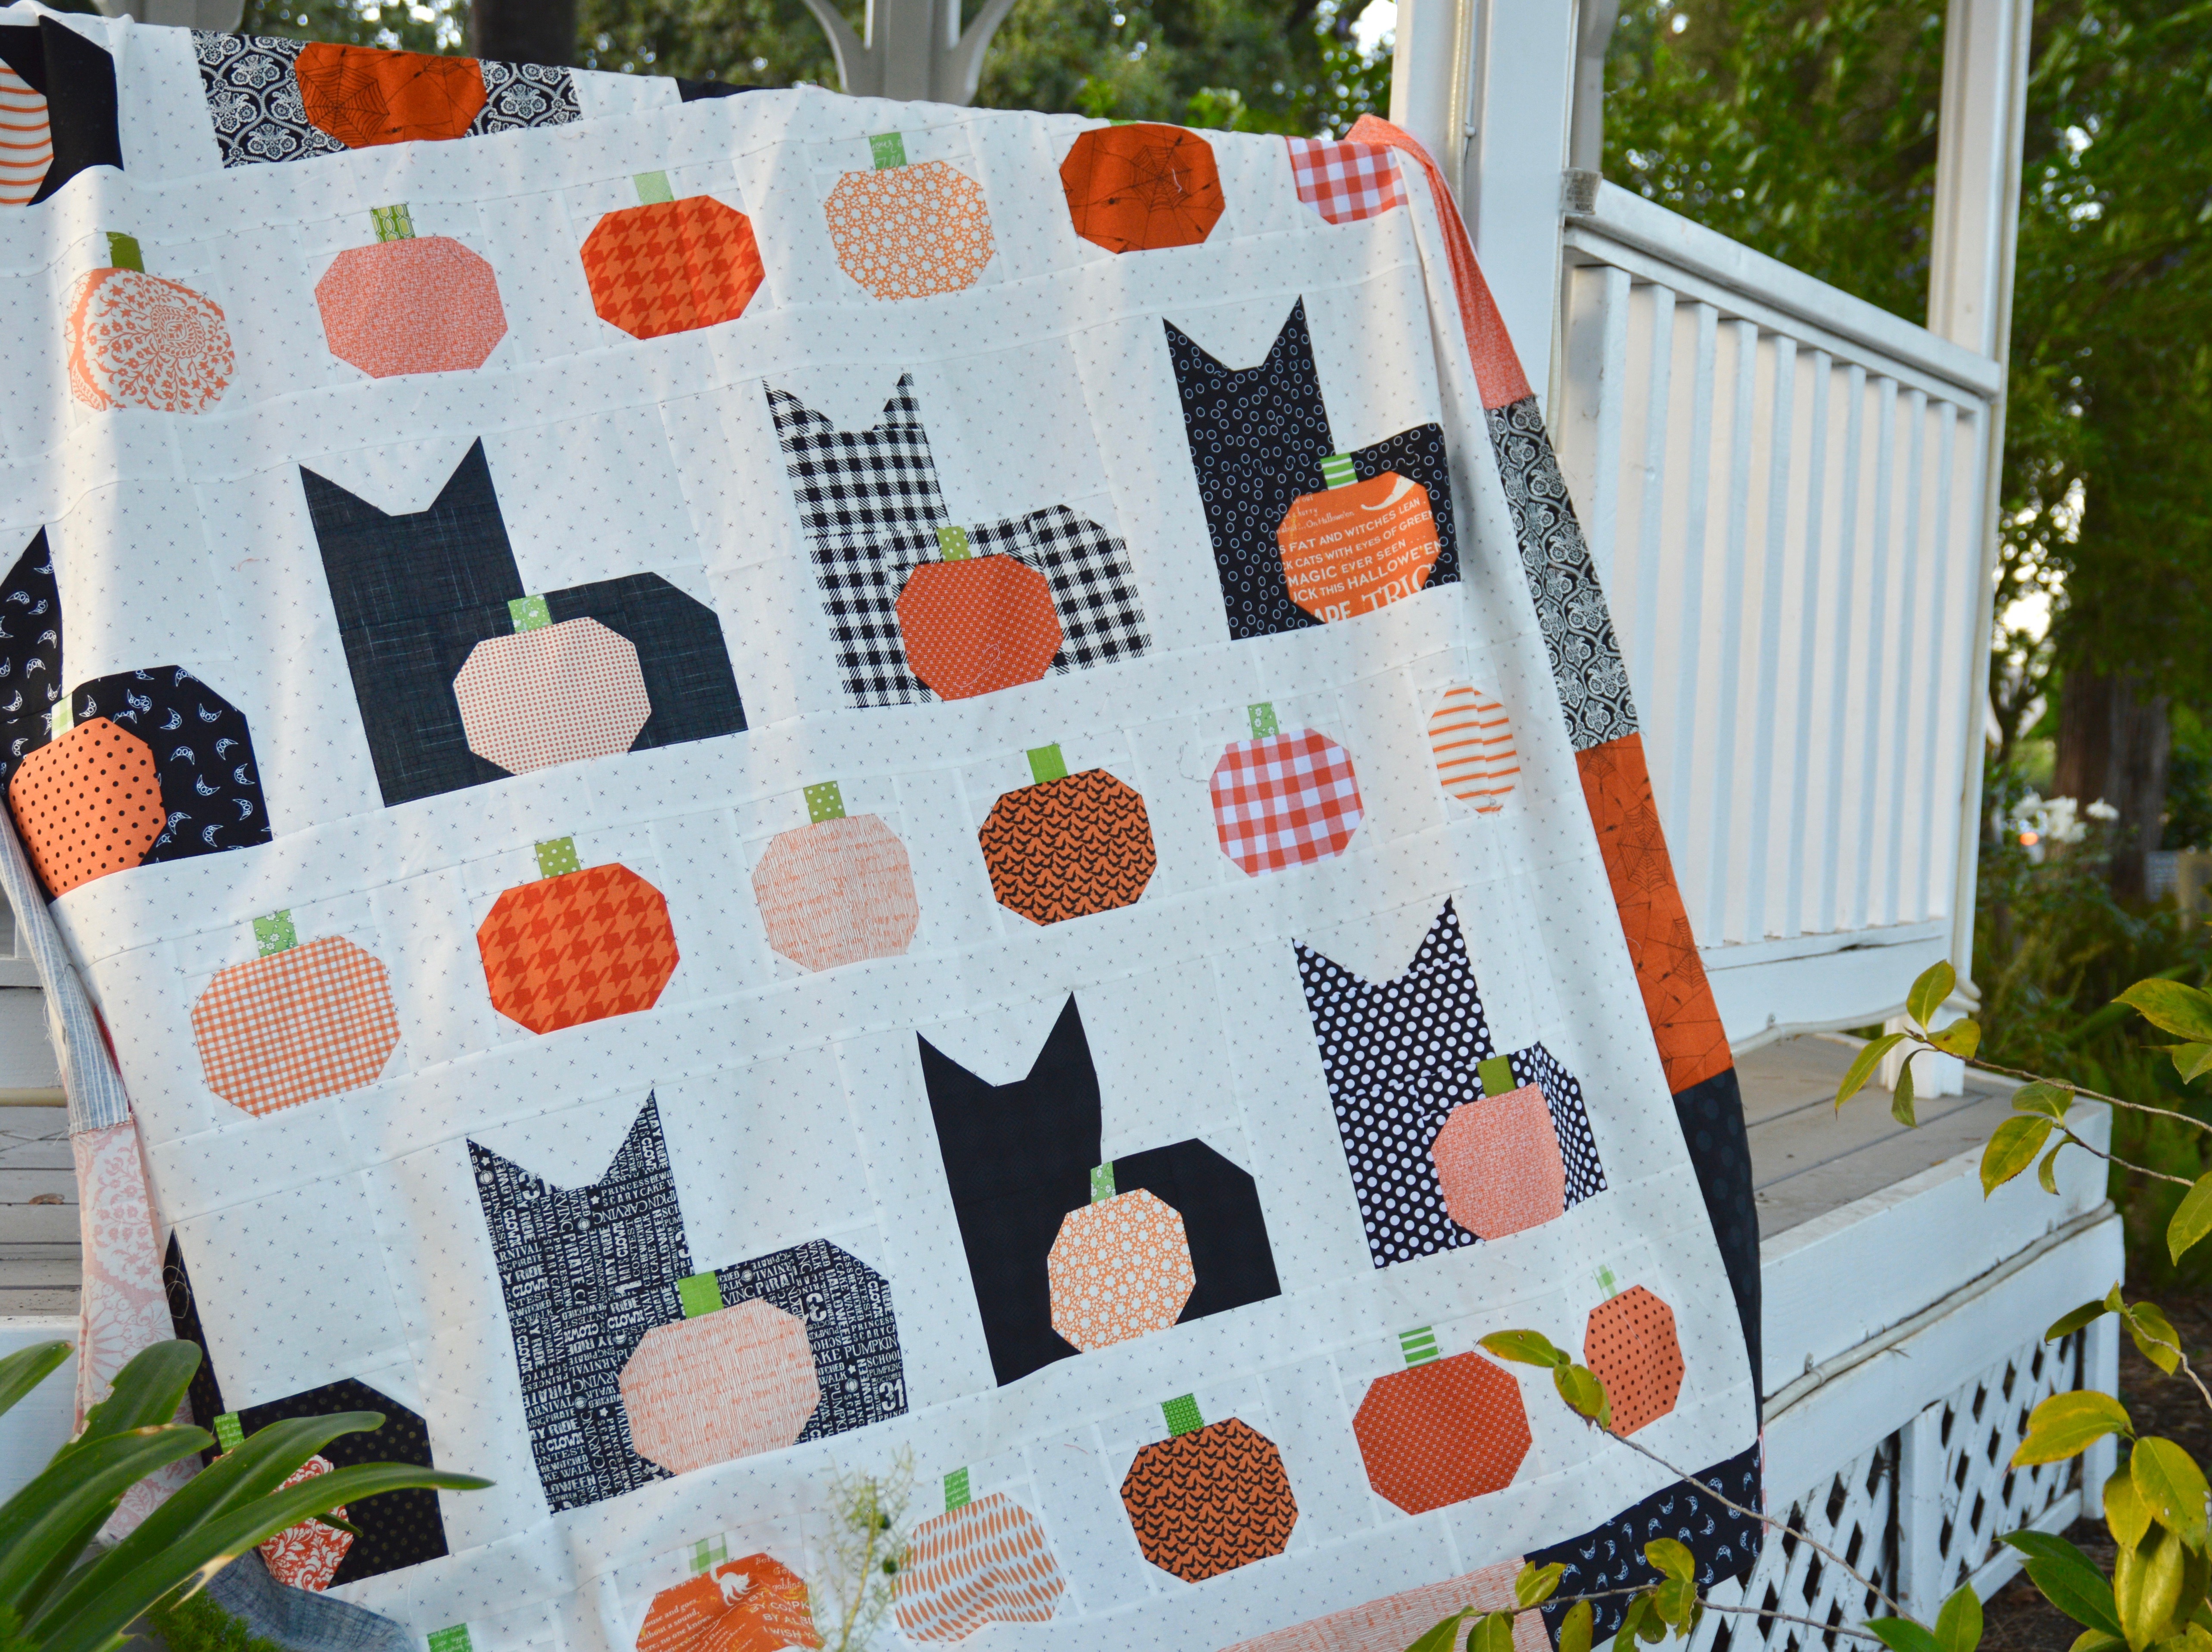
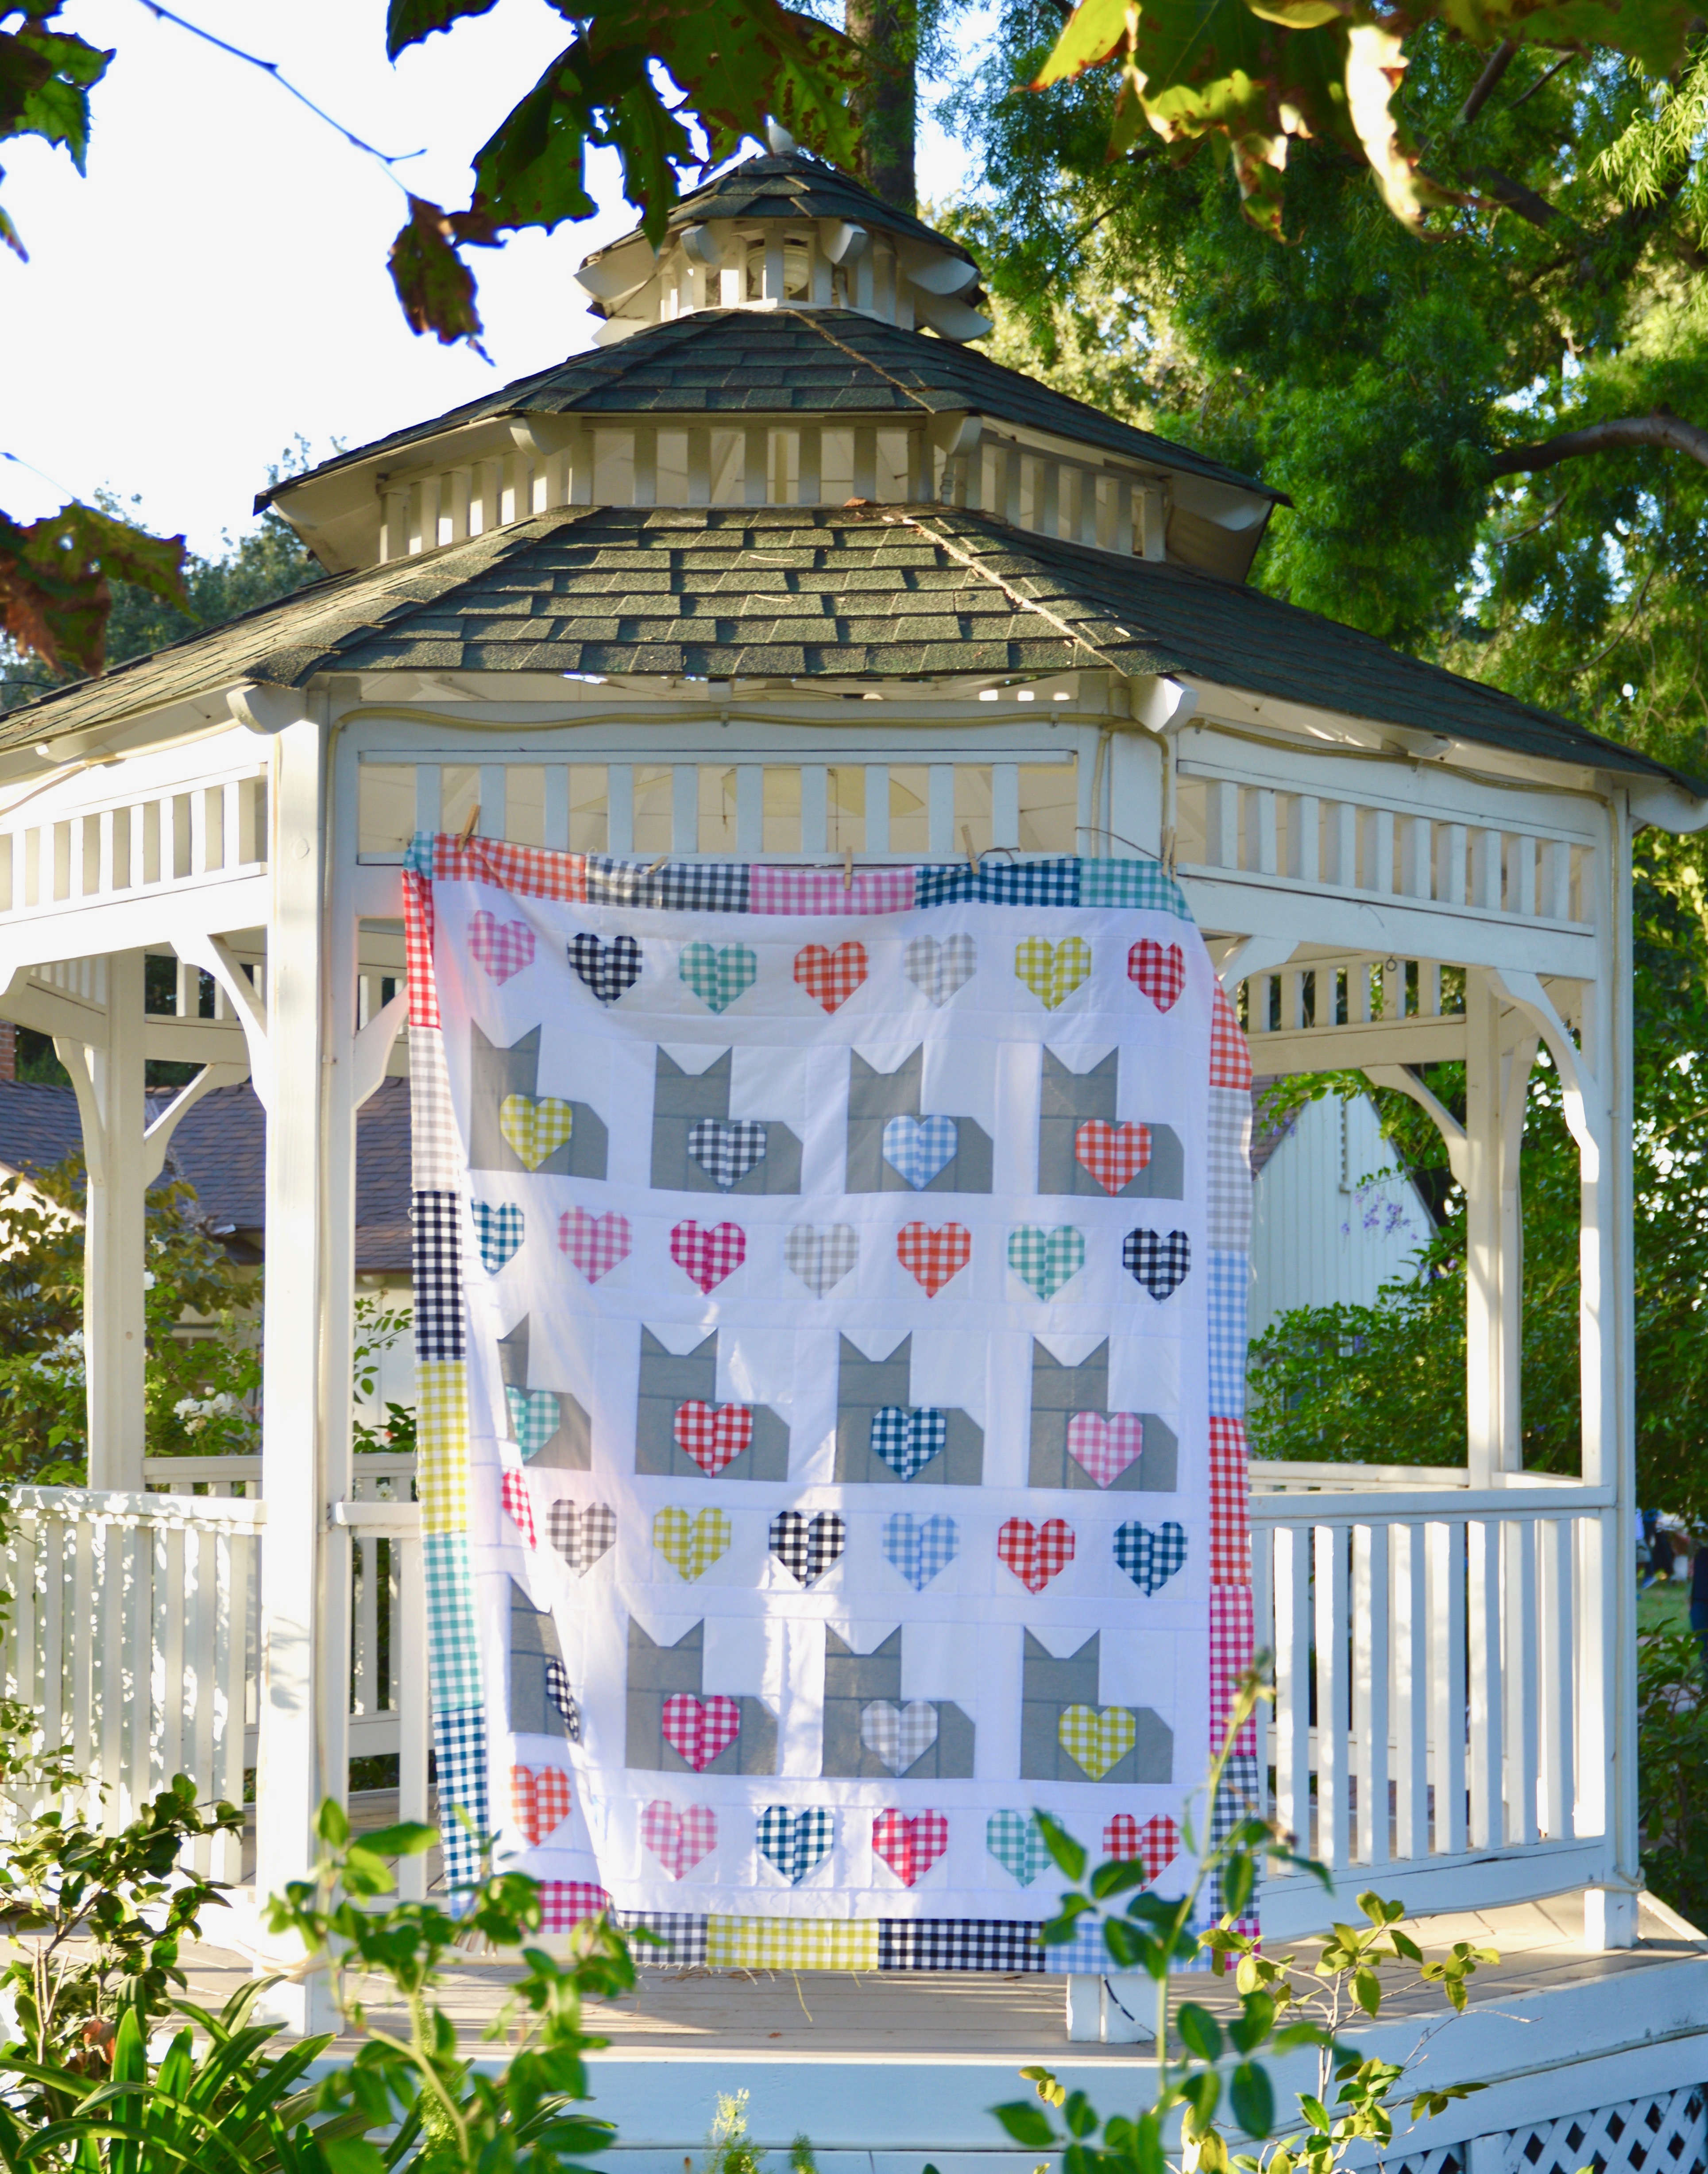
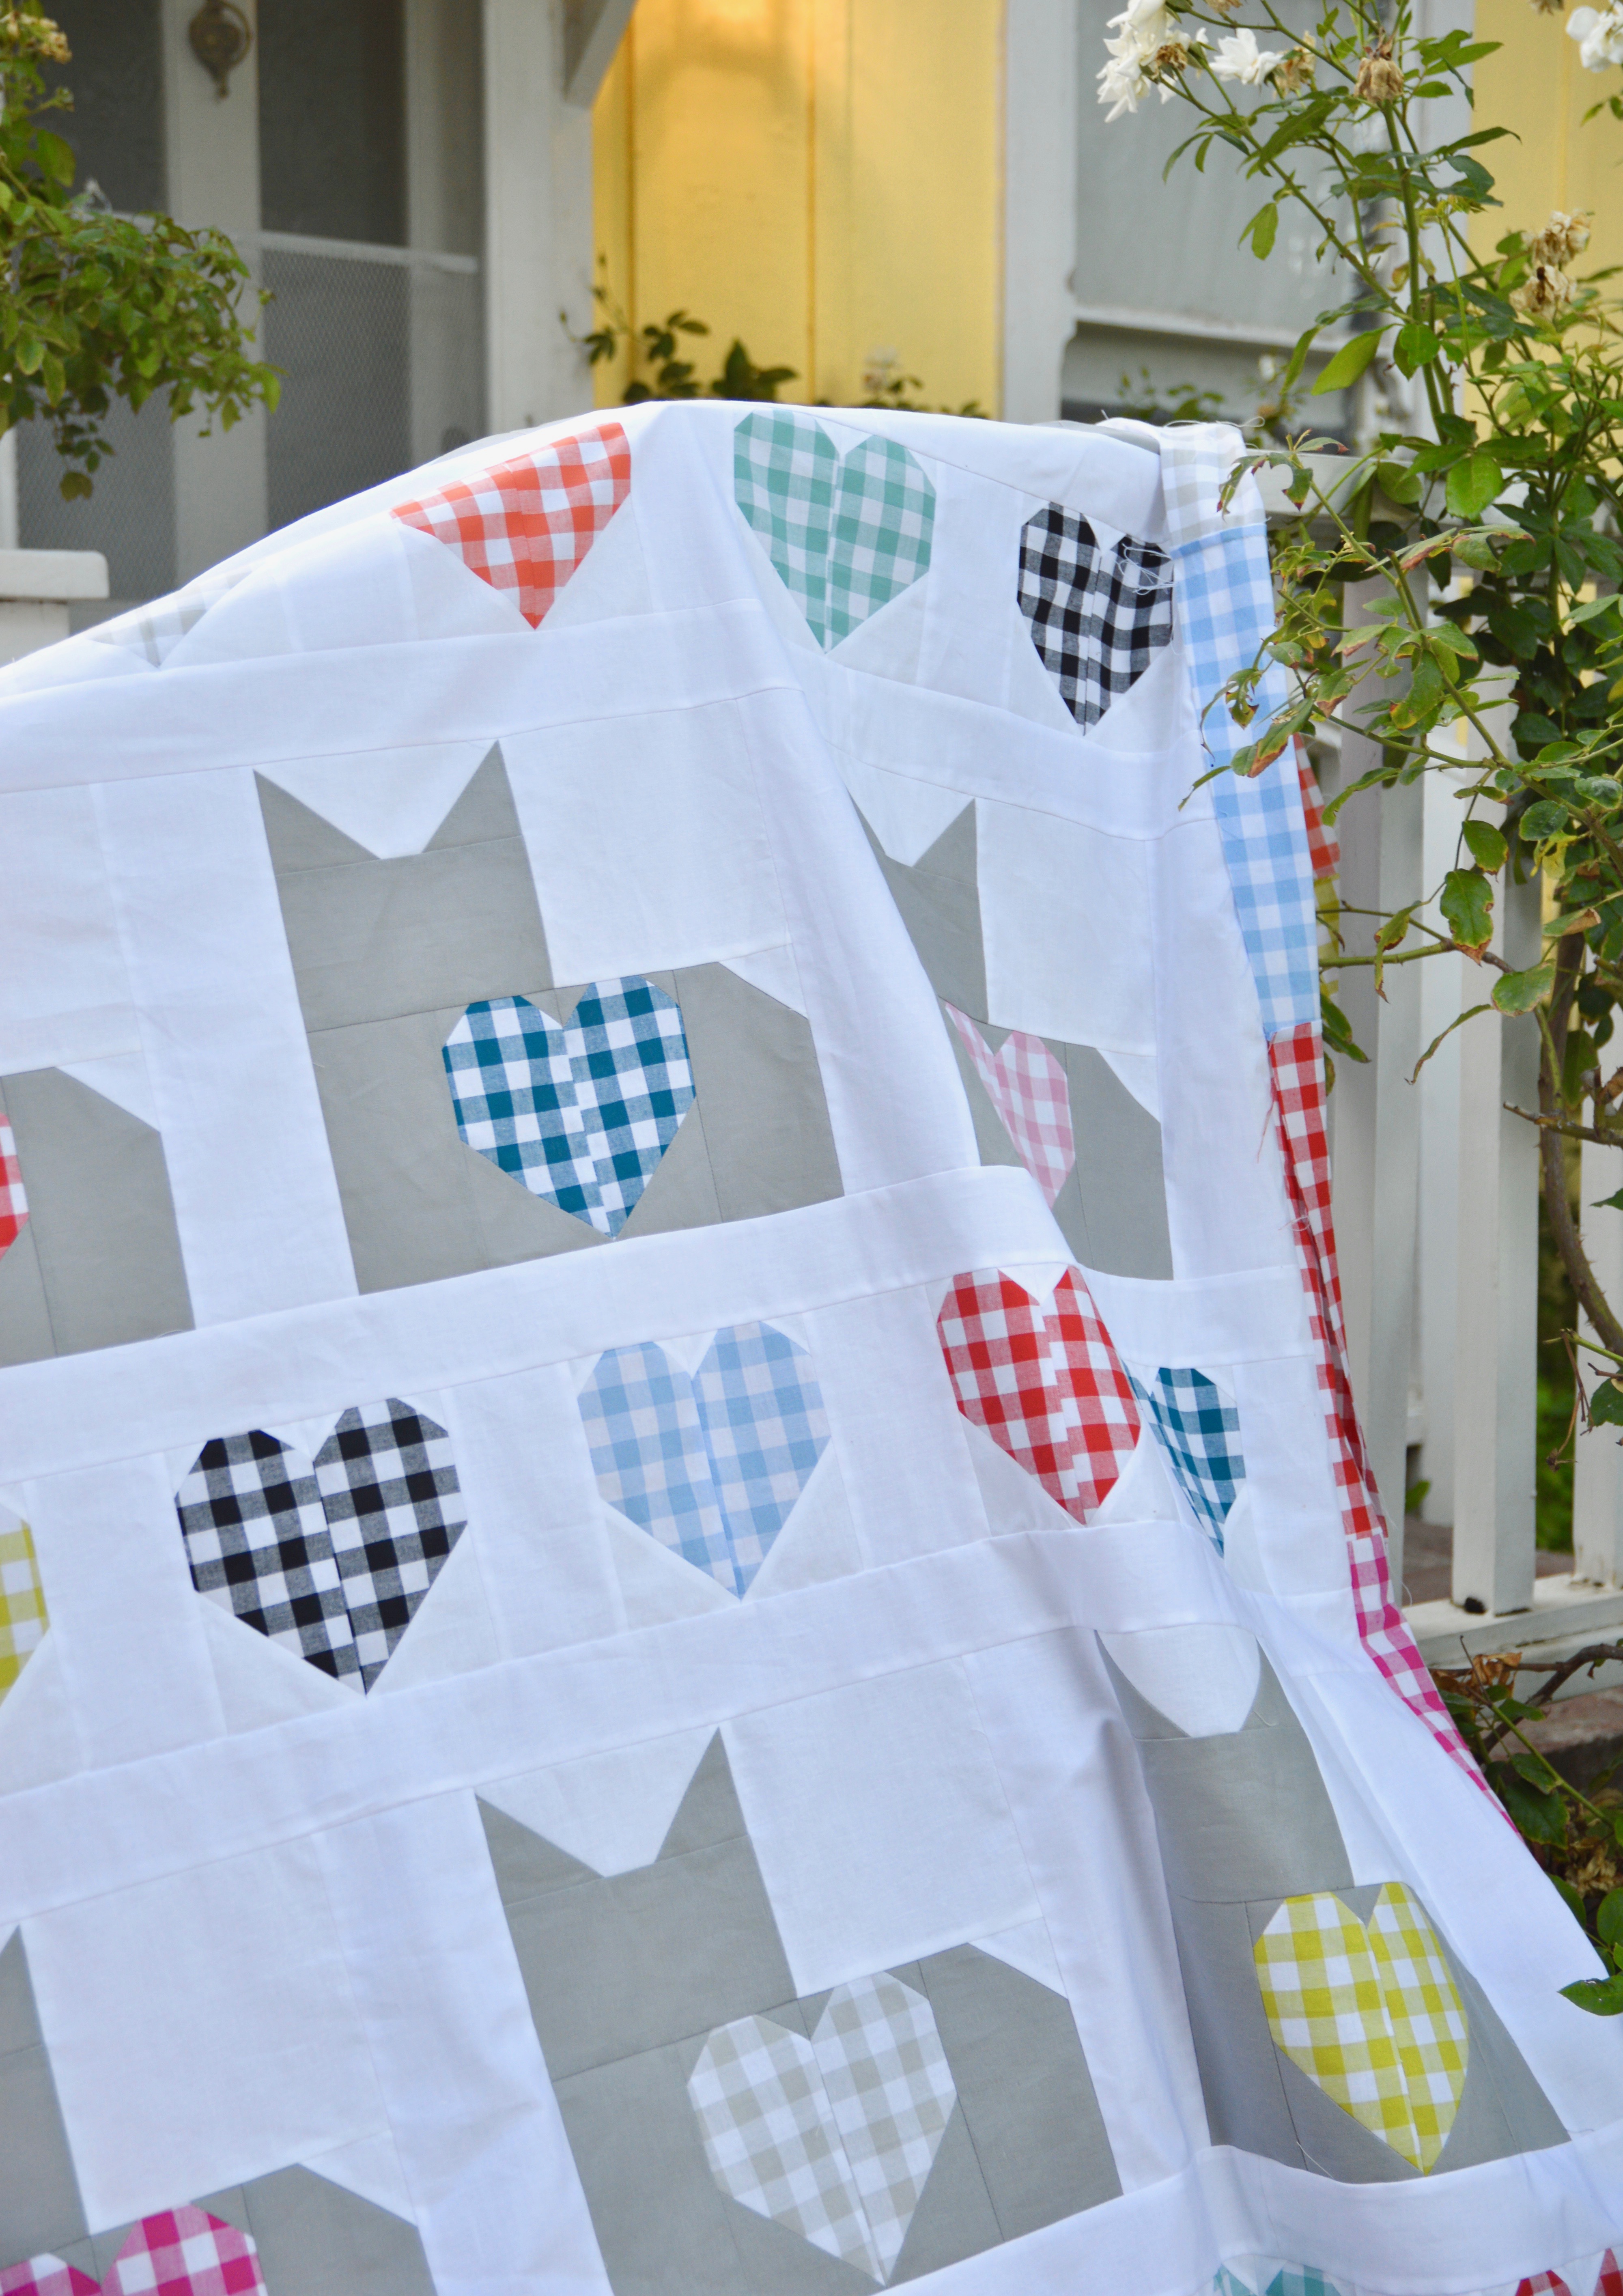
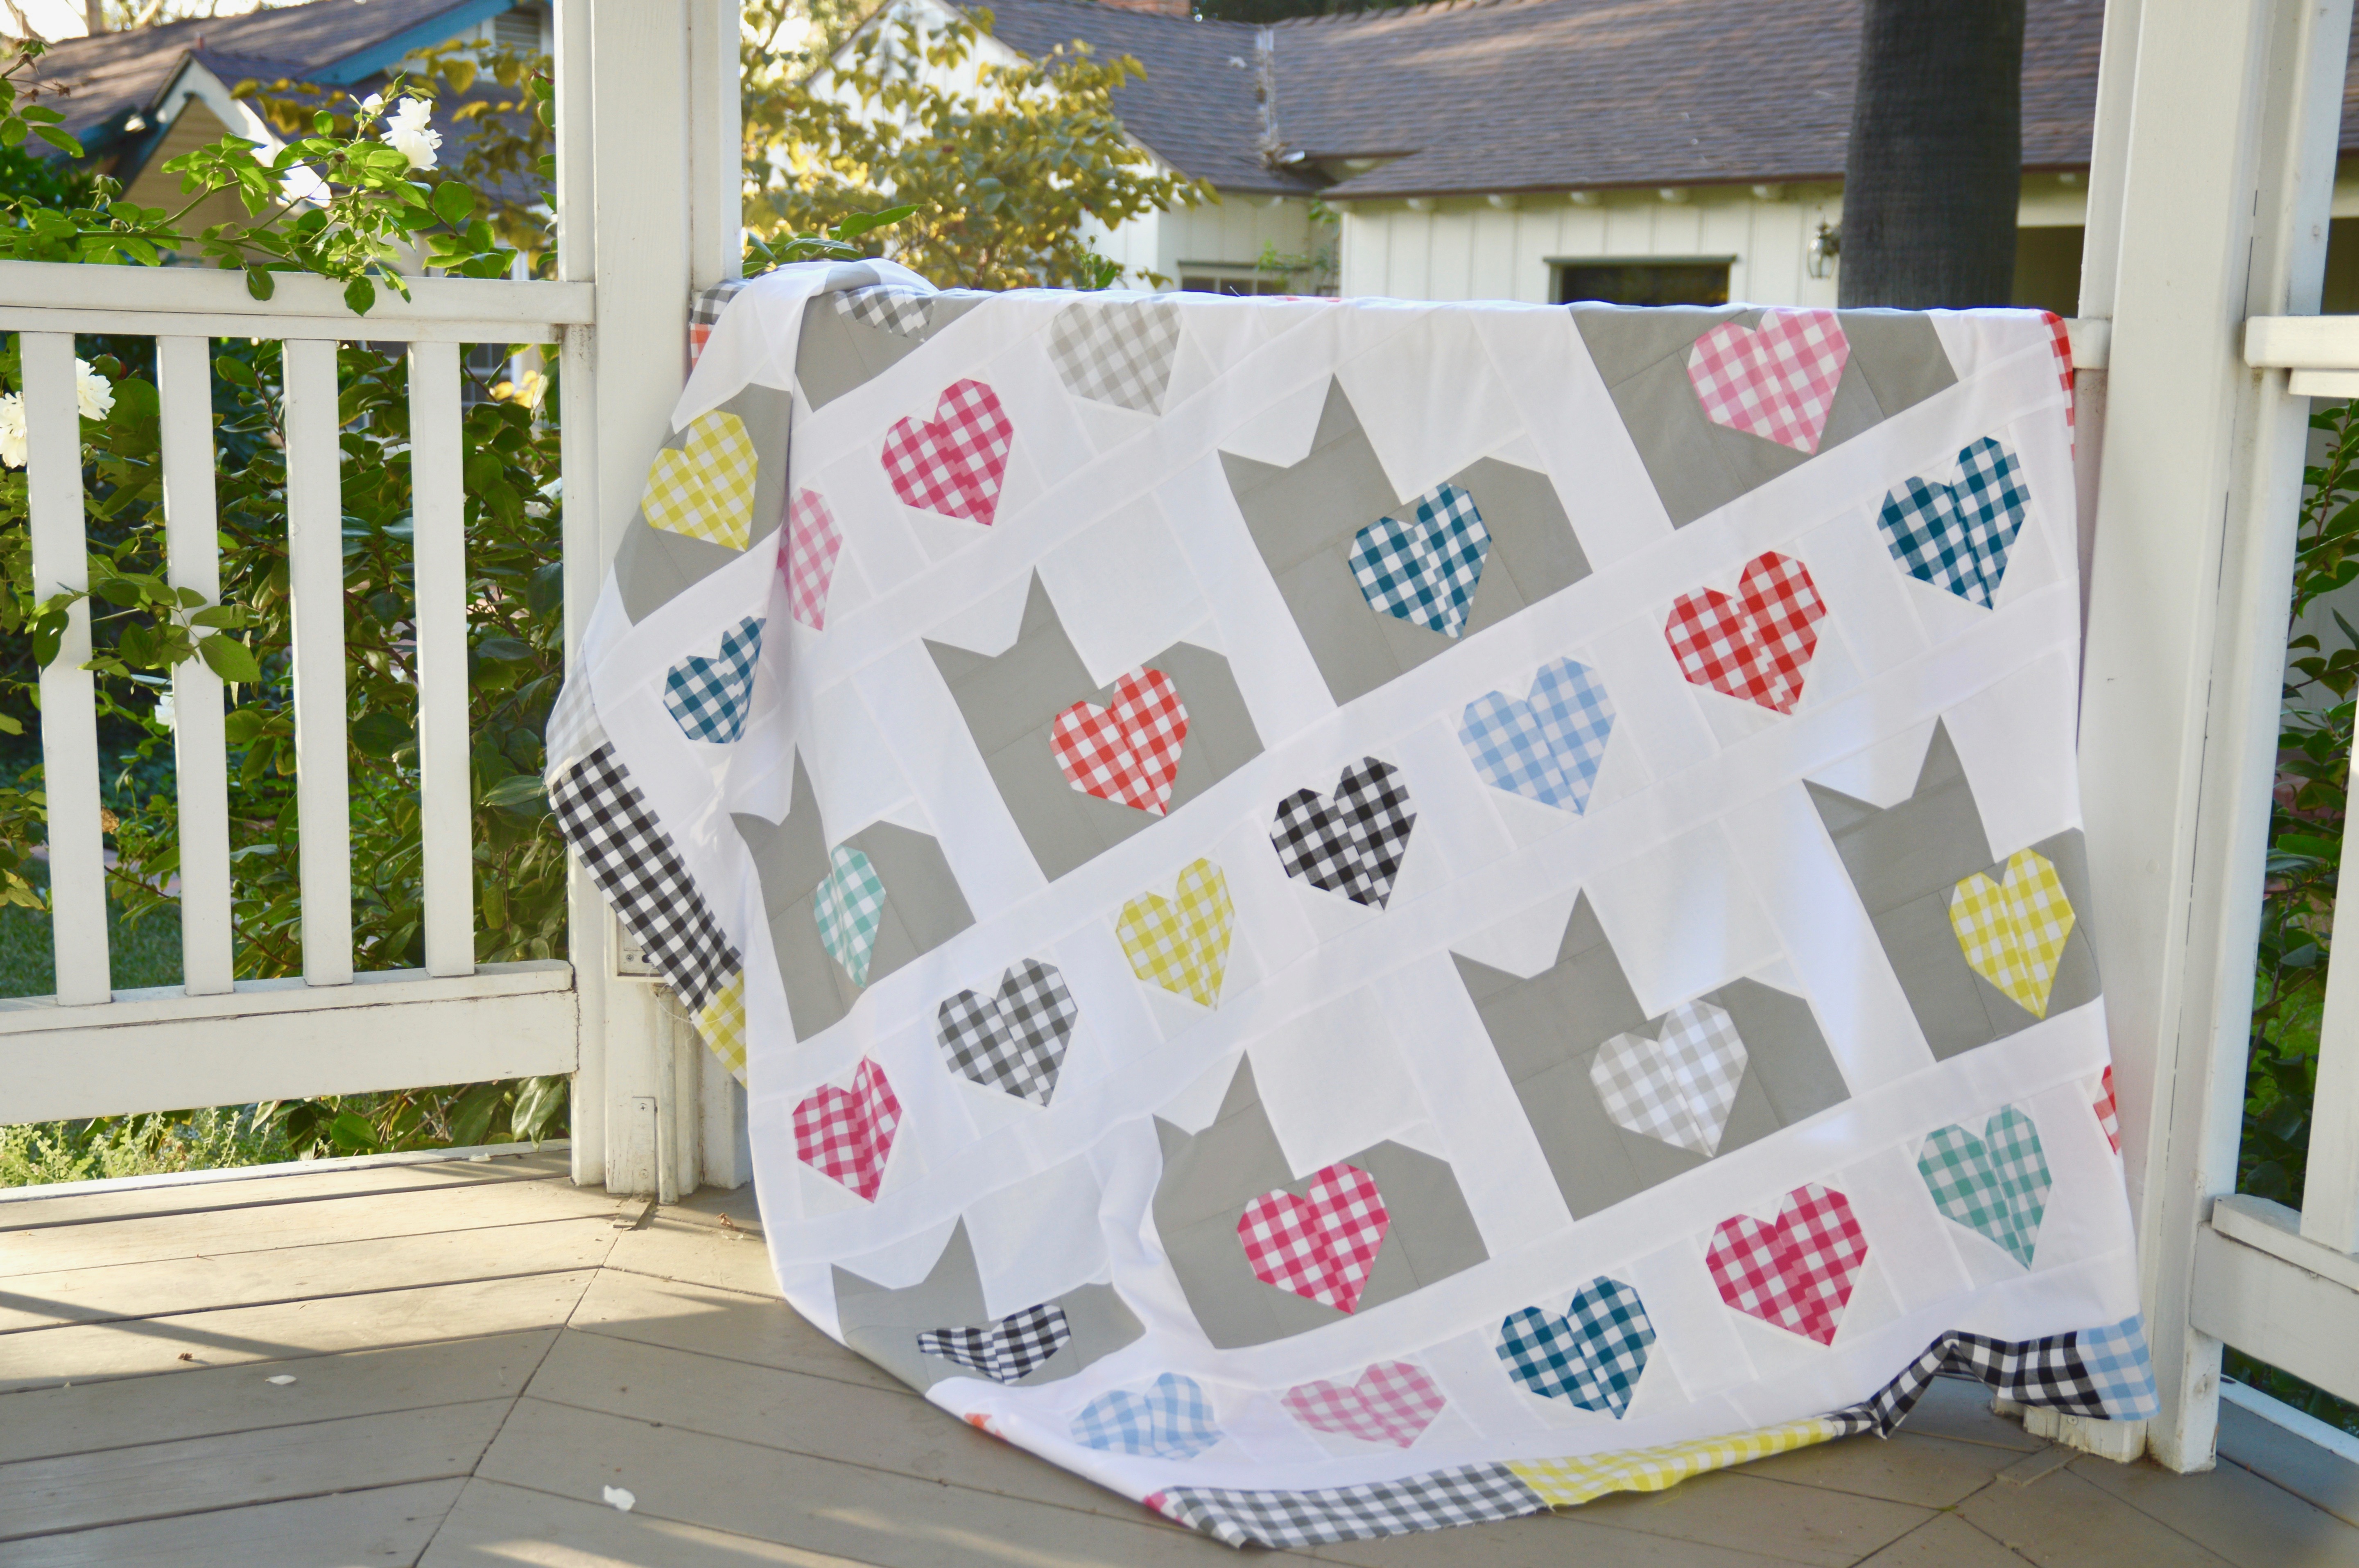
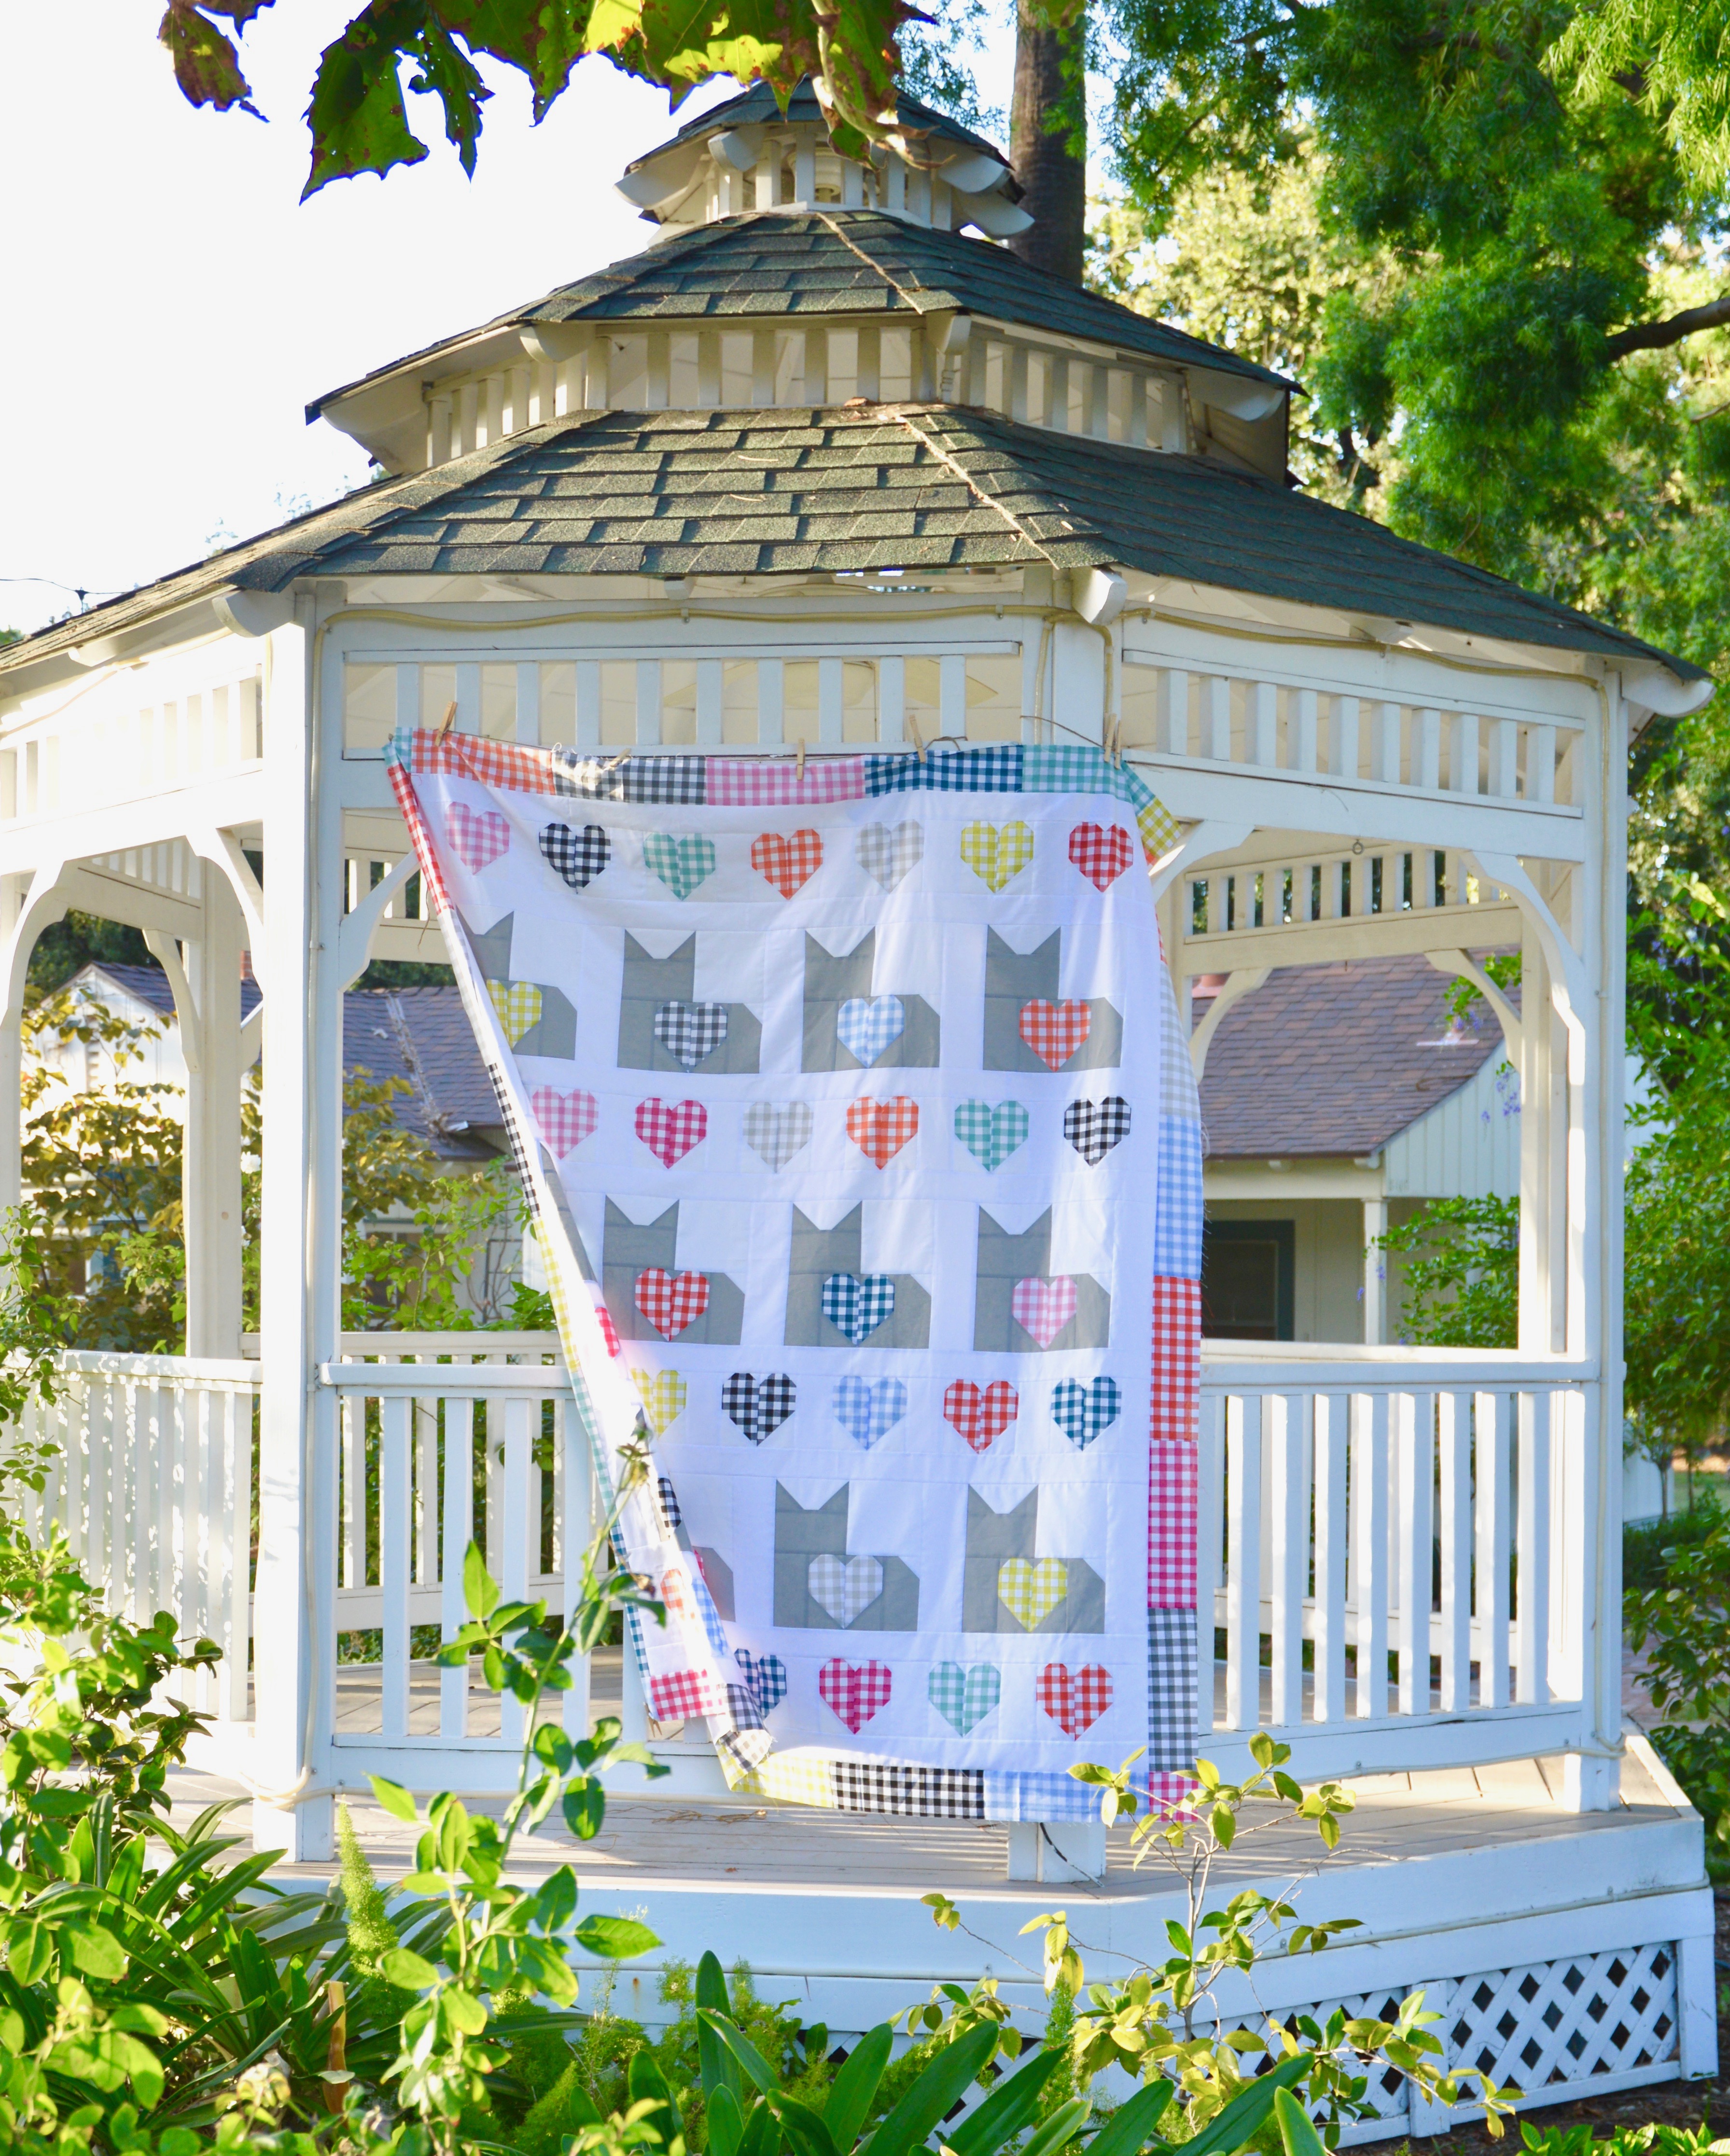
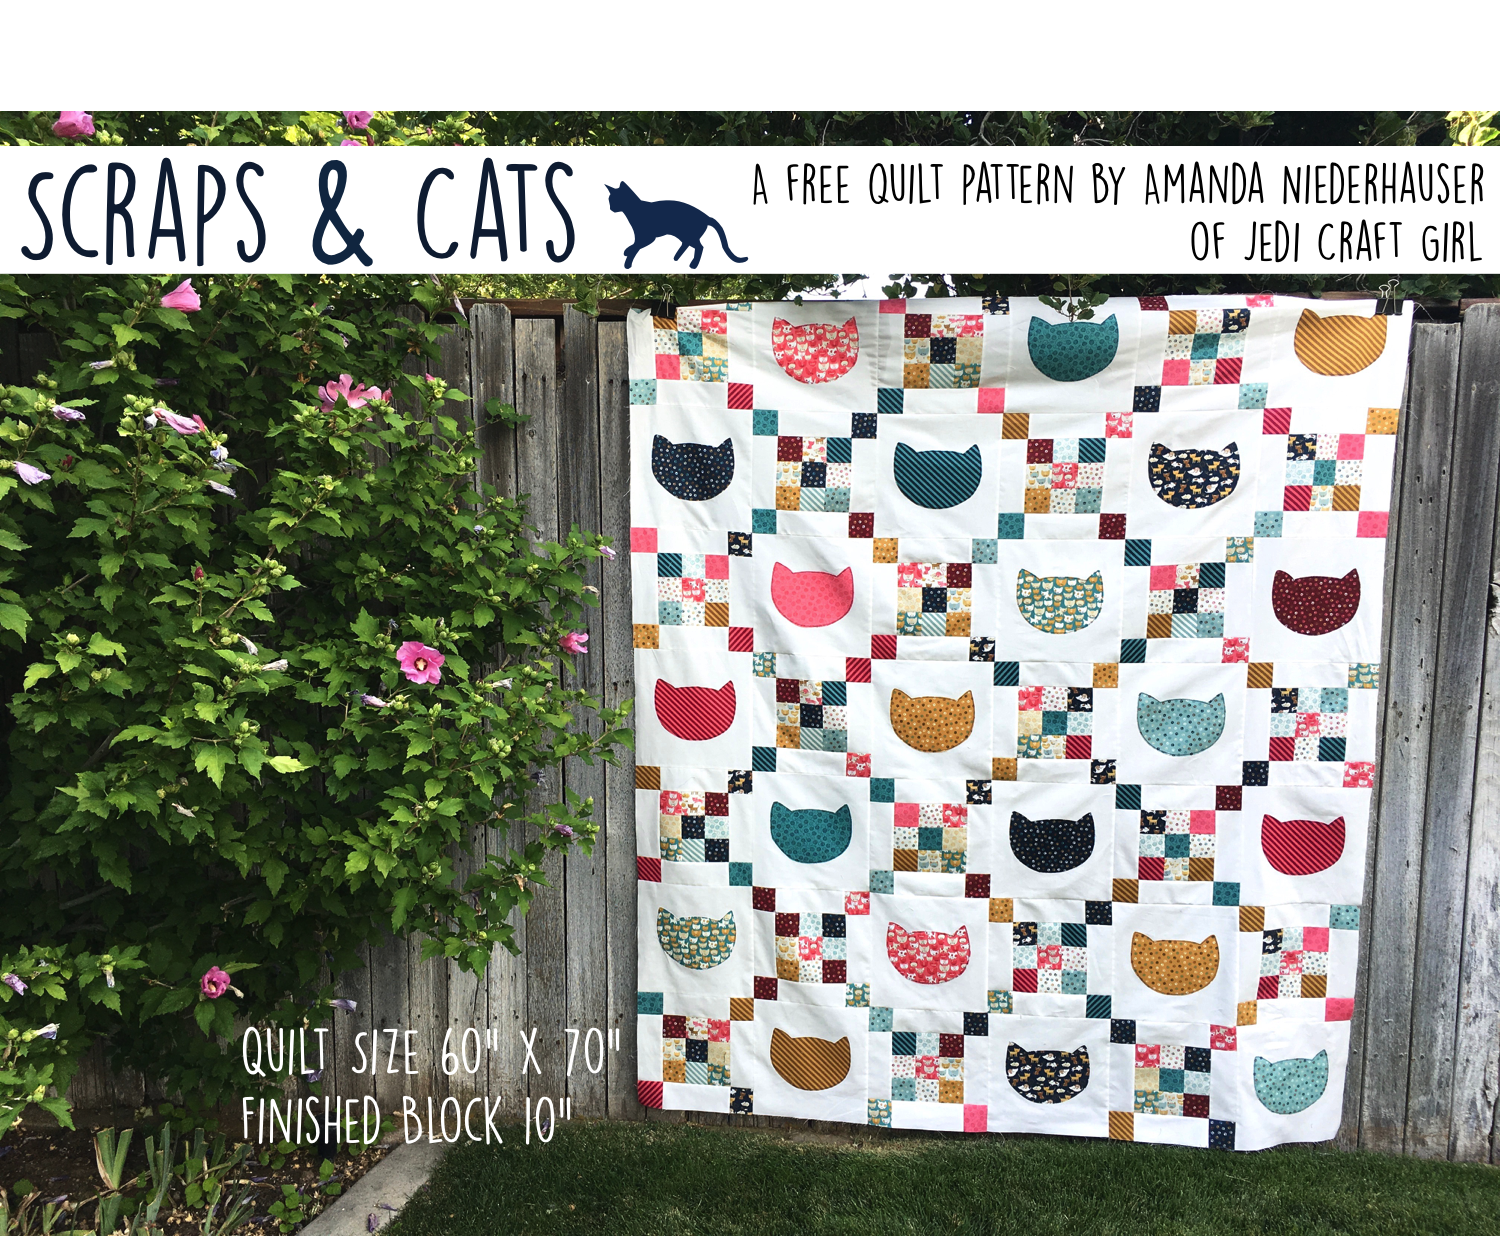
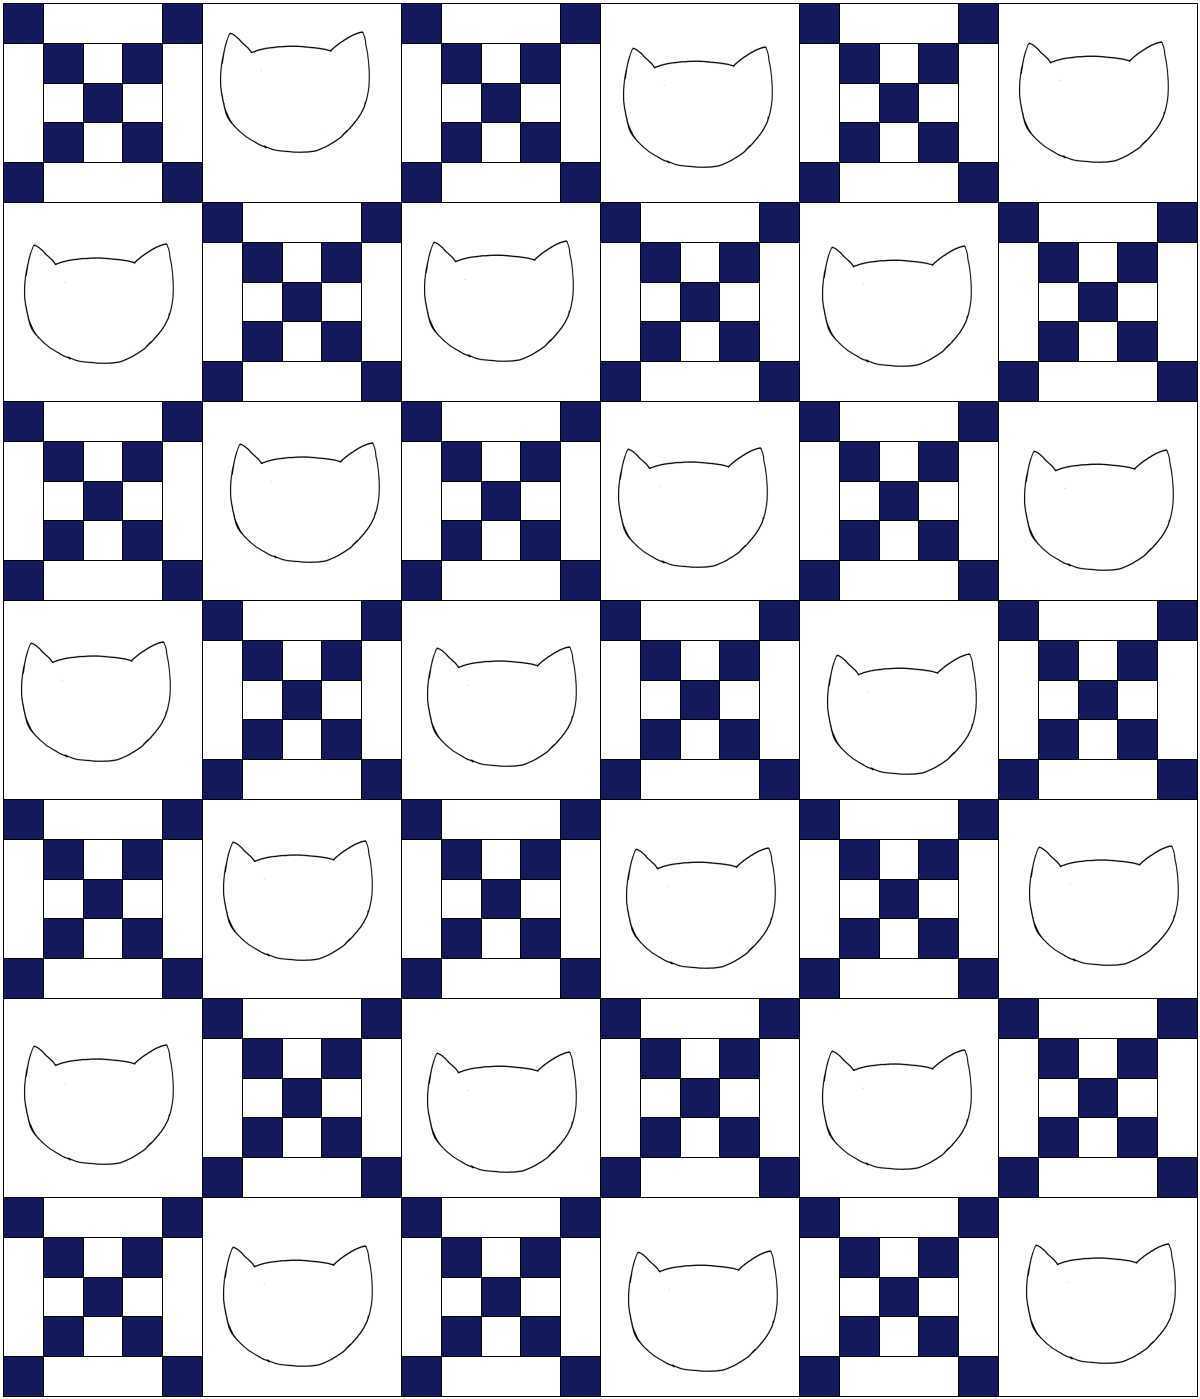
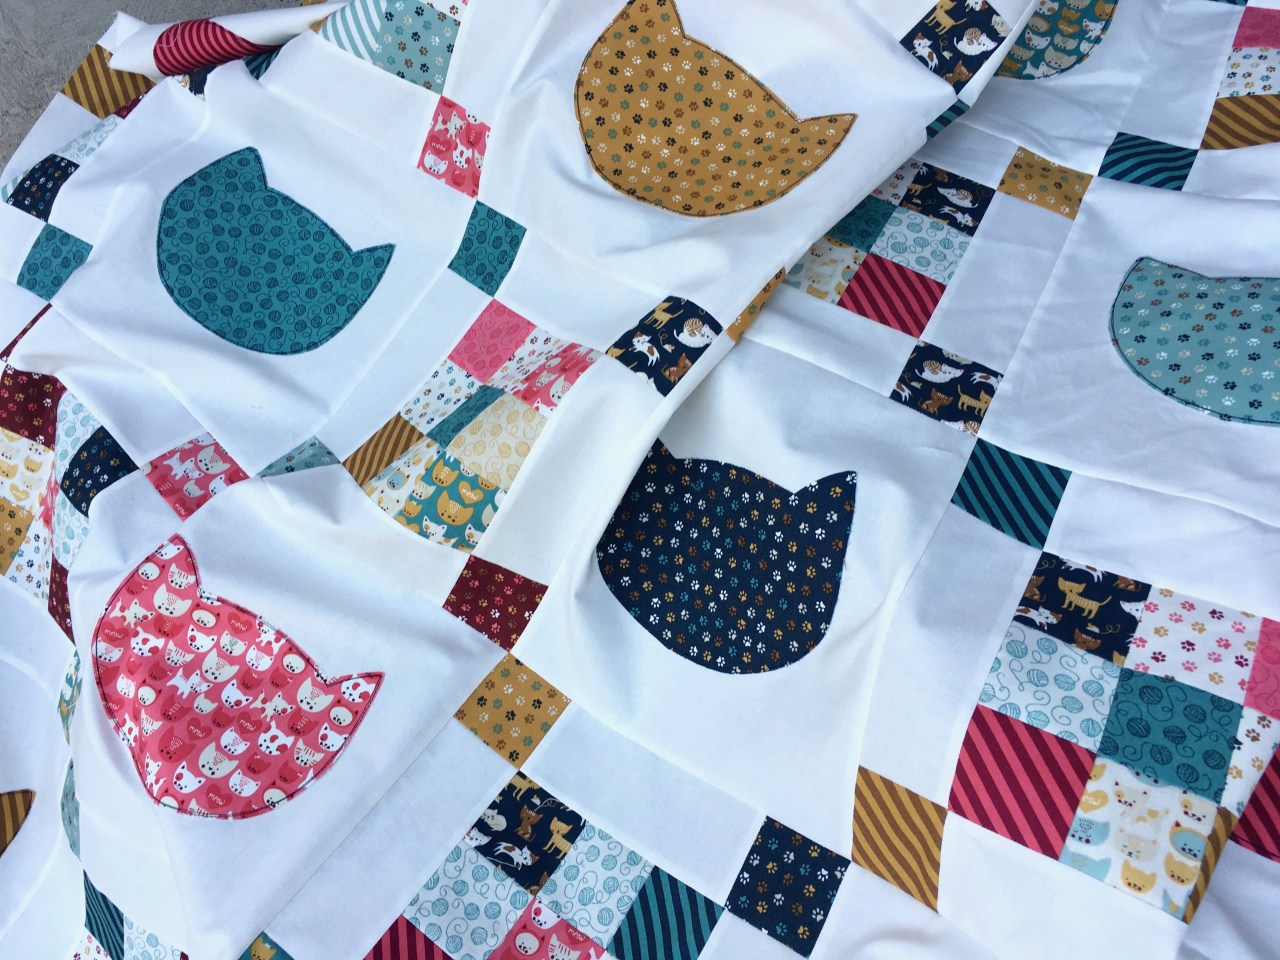
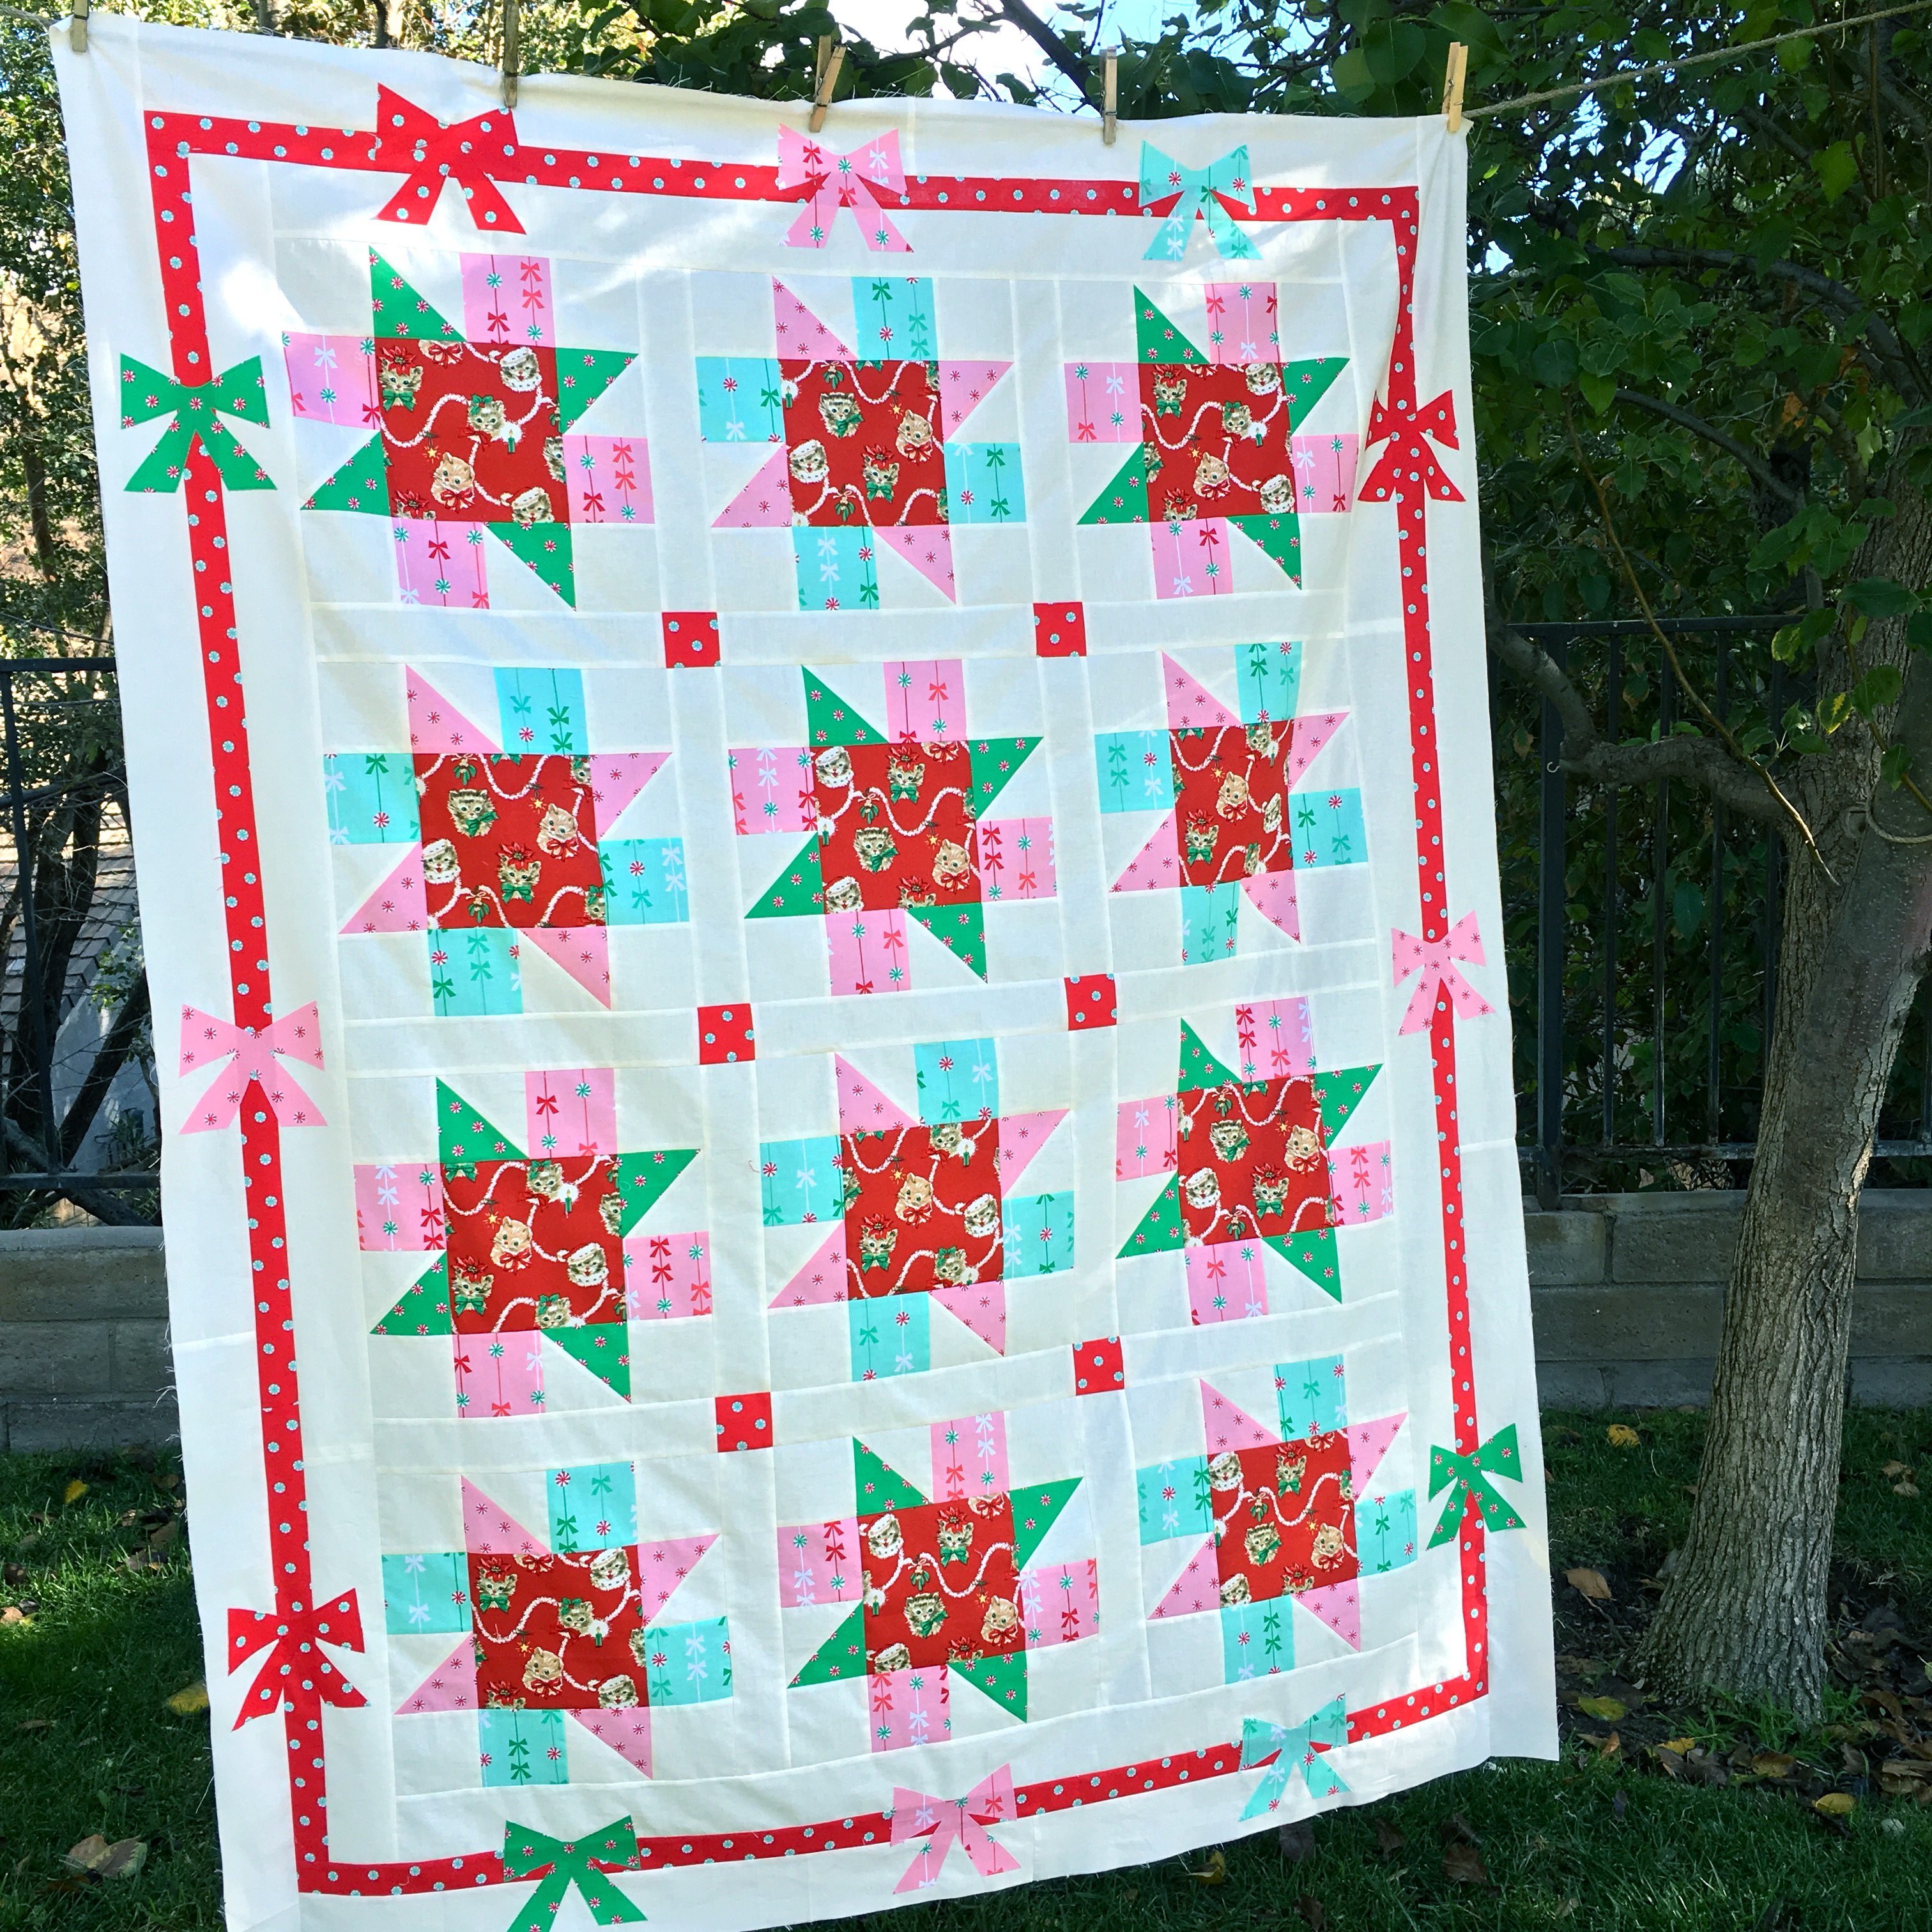
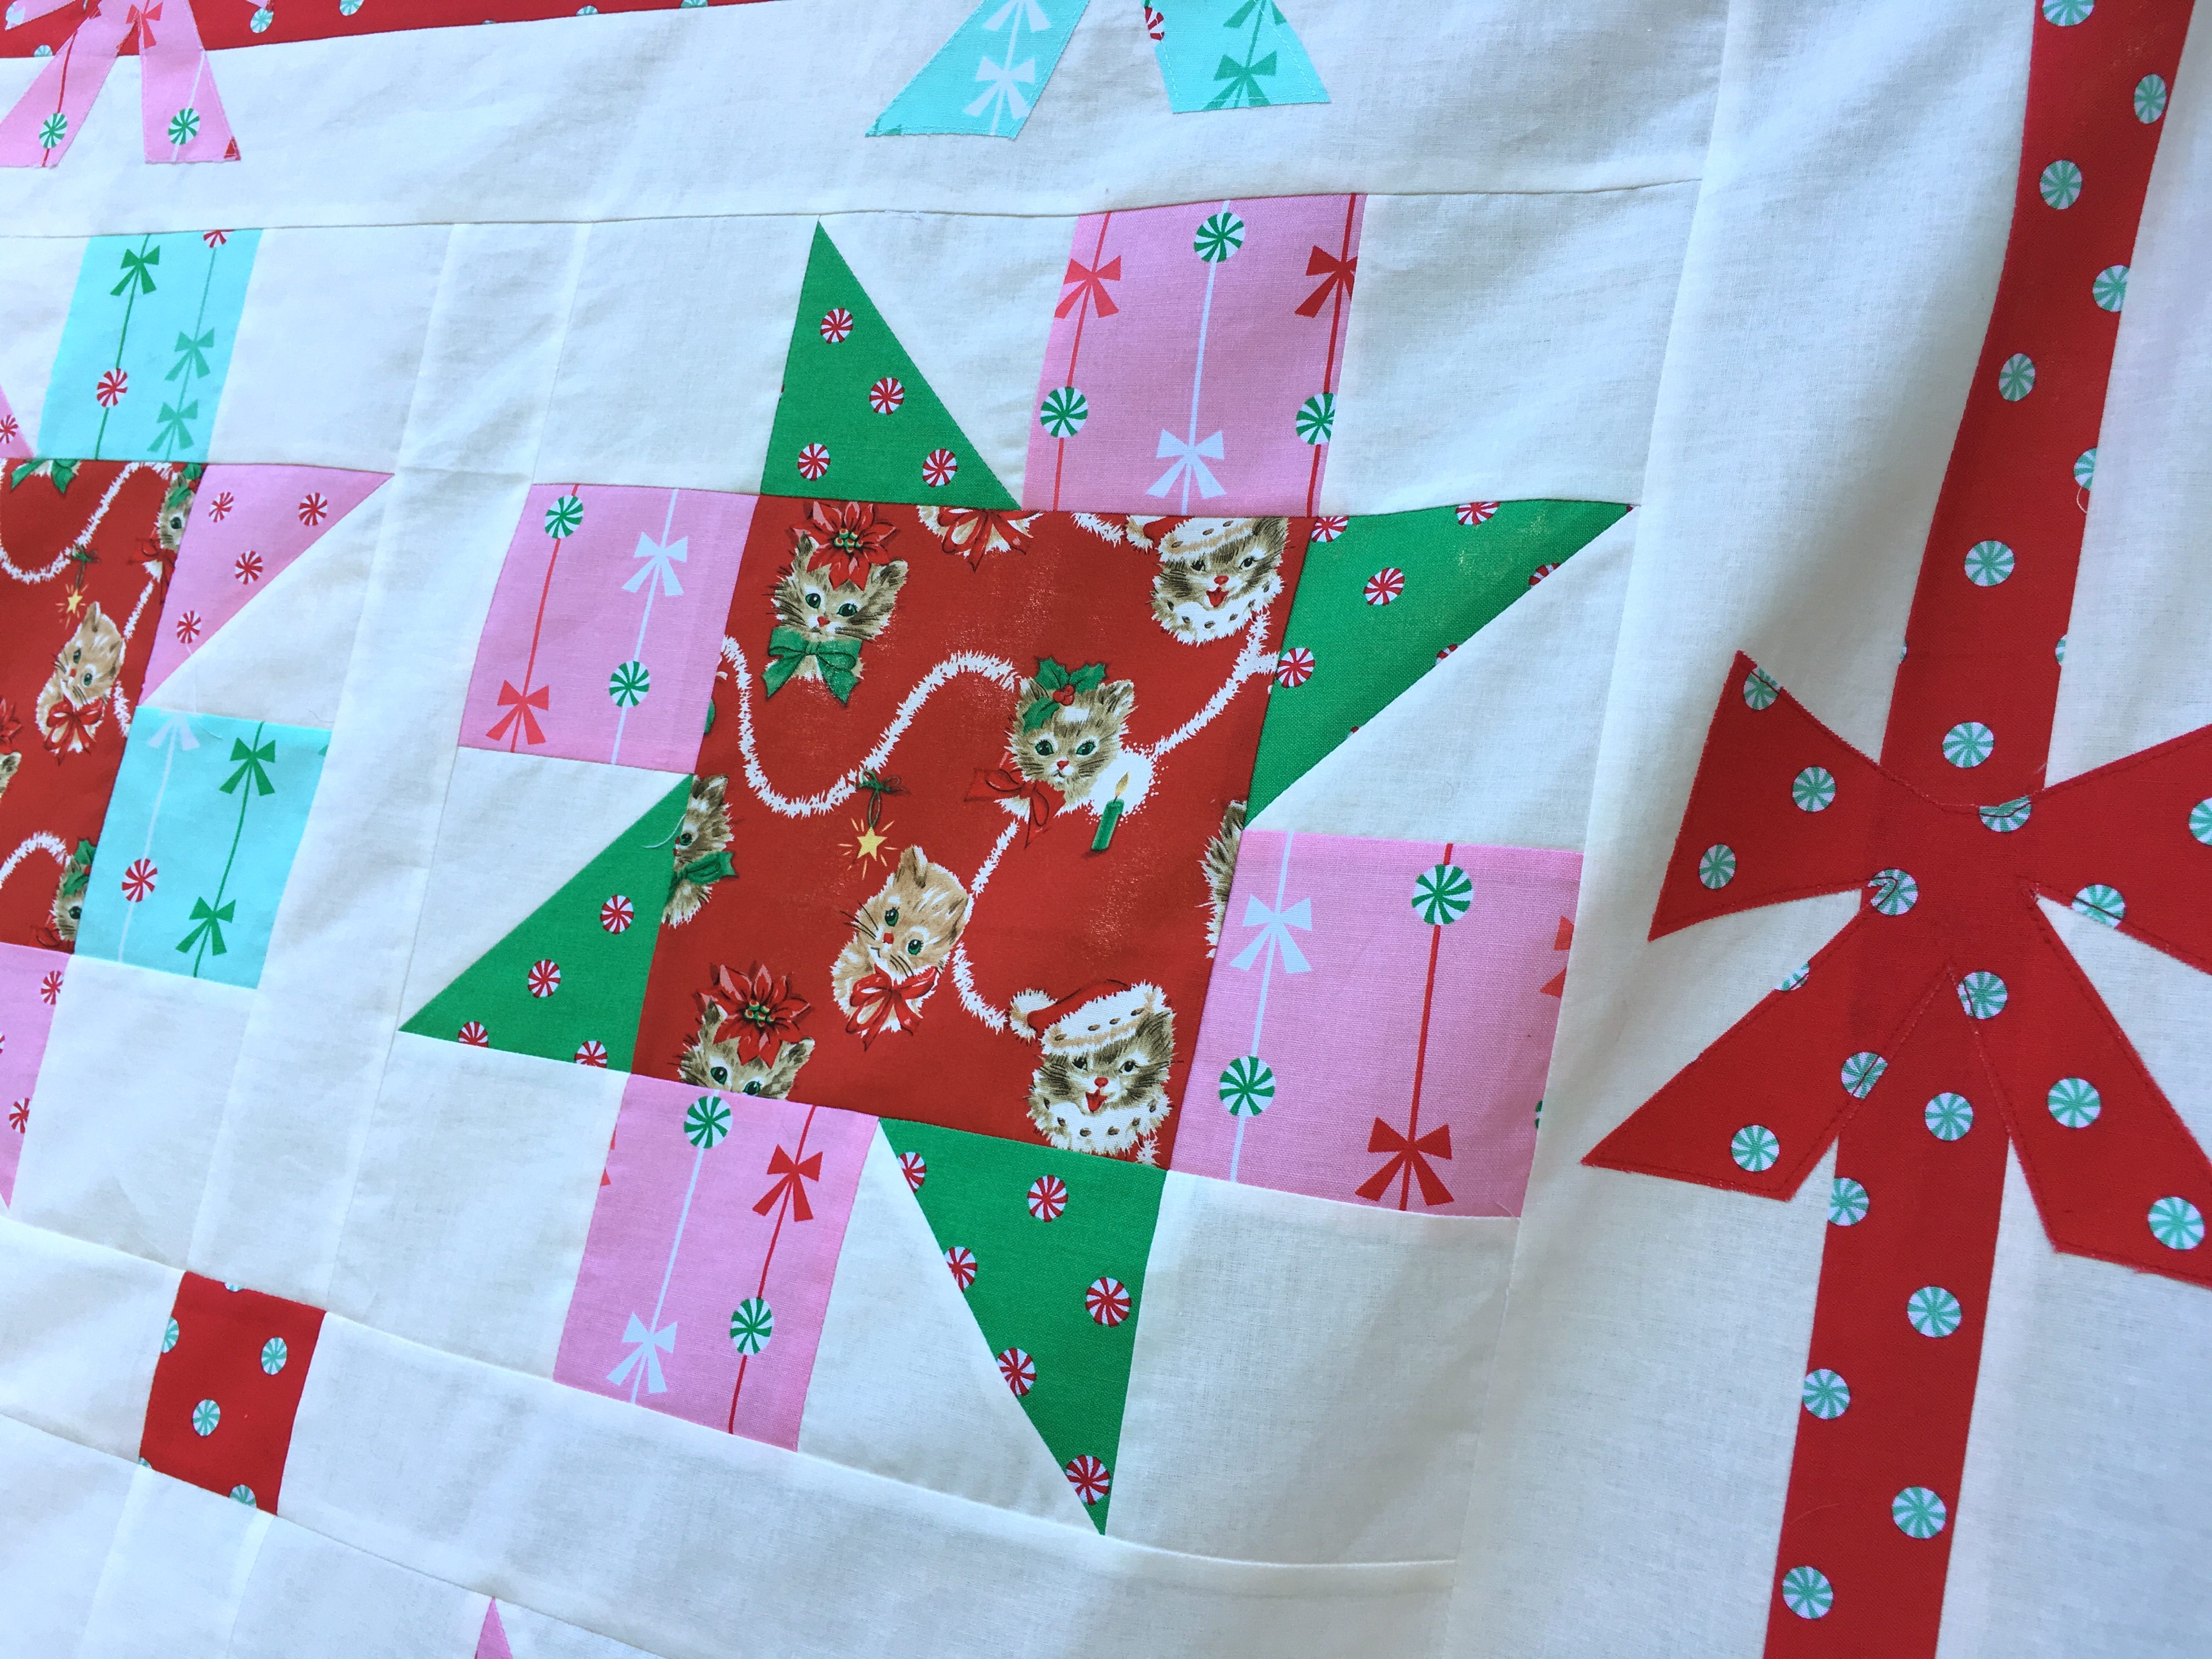
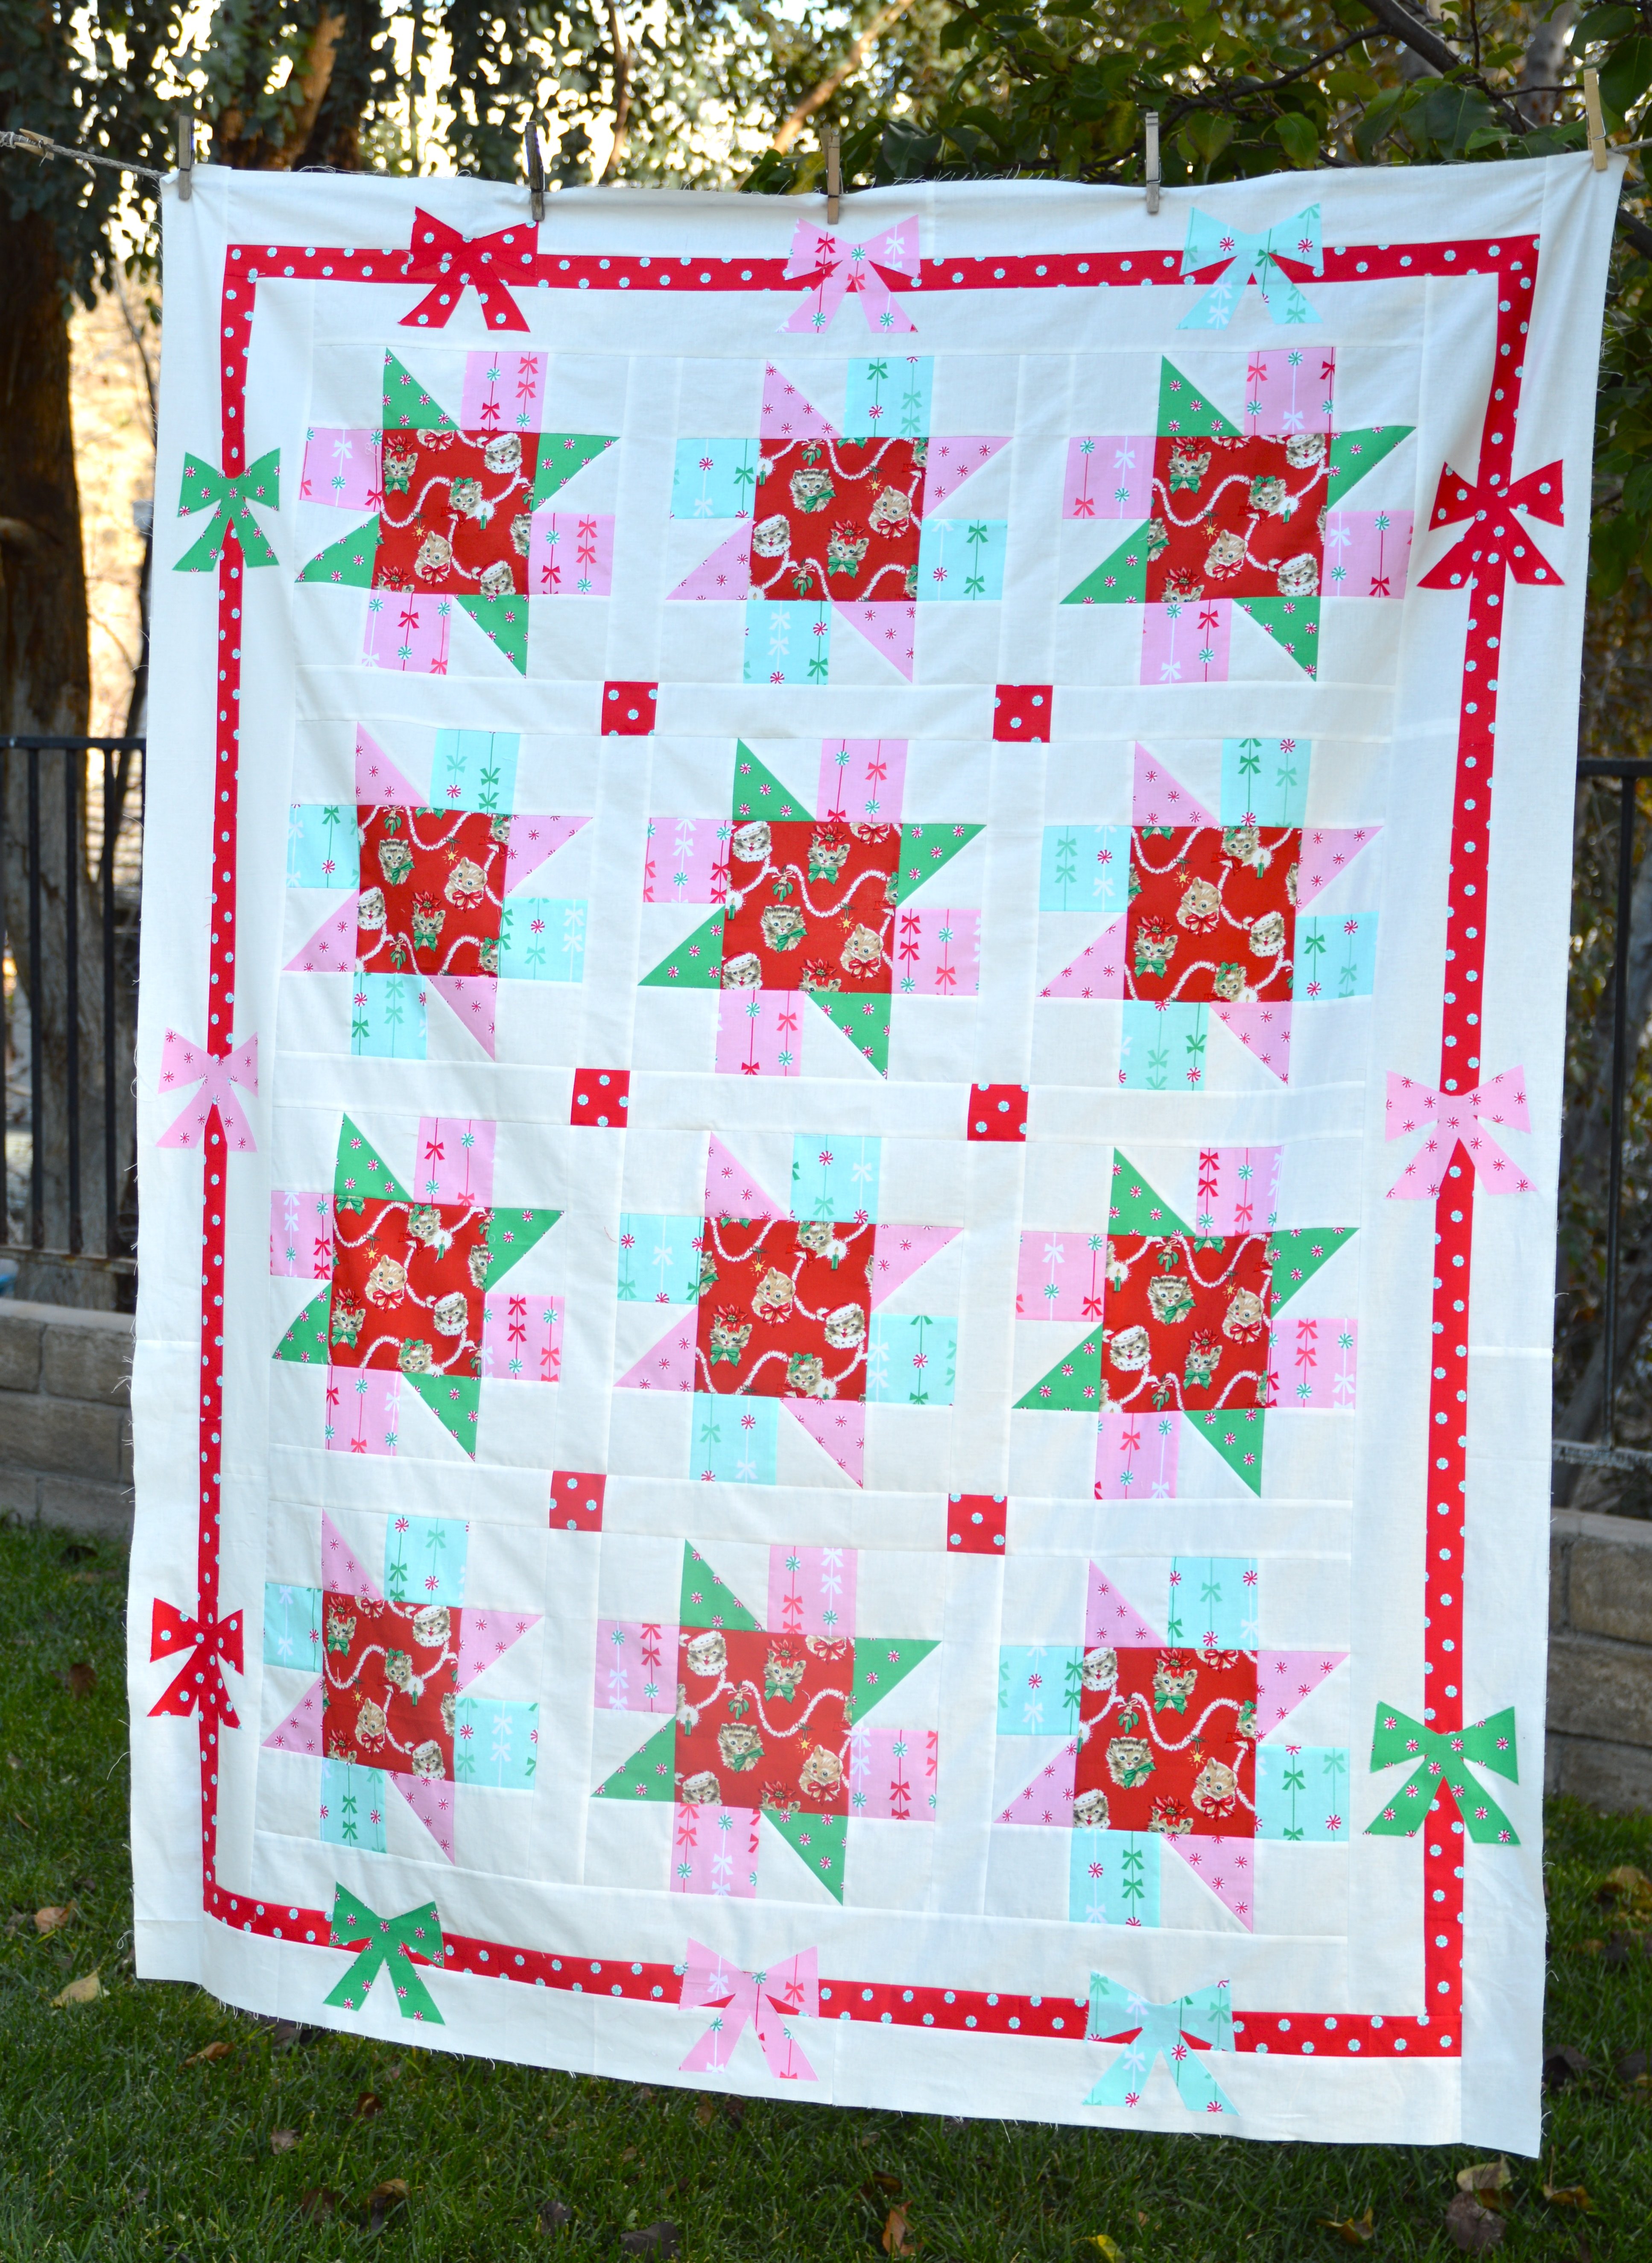
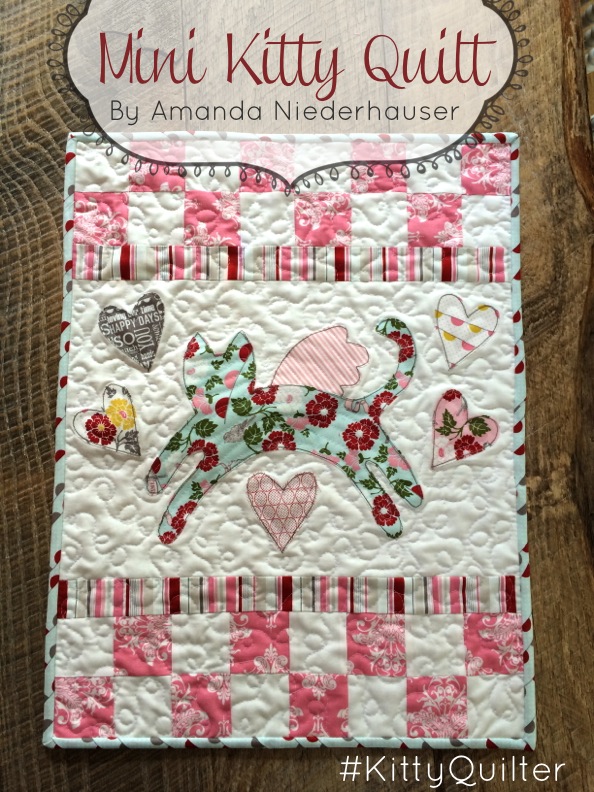
I am so totally super excited to be sharing this pattern today!  Meet “I Love Cats” – the quilt pattern!  This quilt has been a labor of love and has been a long time in the making!  I was first inspired by this amazing bundle of Cotton + Steel woven gingham fat quarters.  I knew I wanted something to totally show my love for gingham.  Then my love for cats creeped in and I knew this was the perfect quilt!IMG_1923

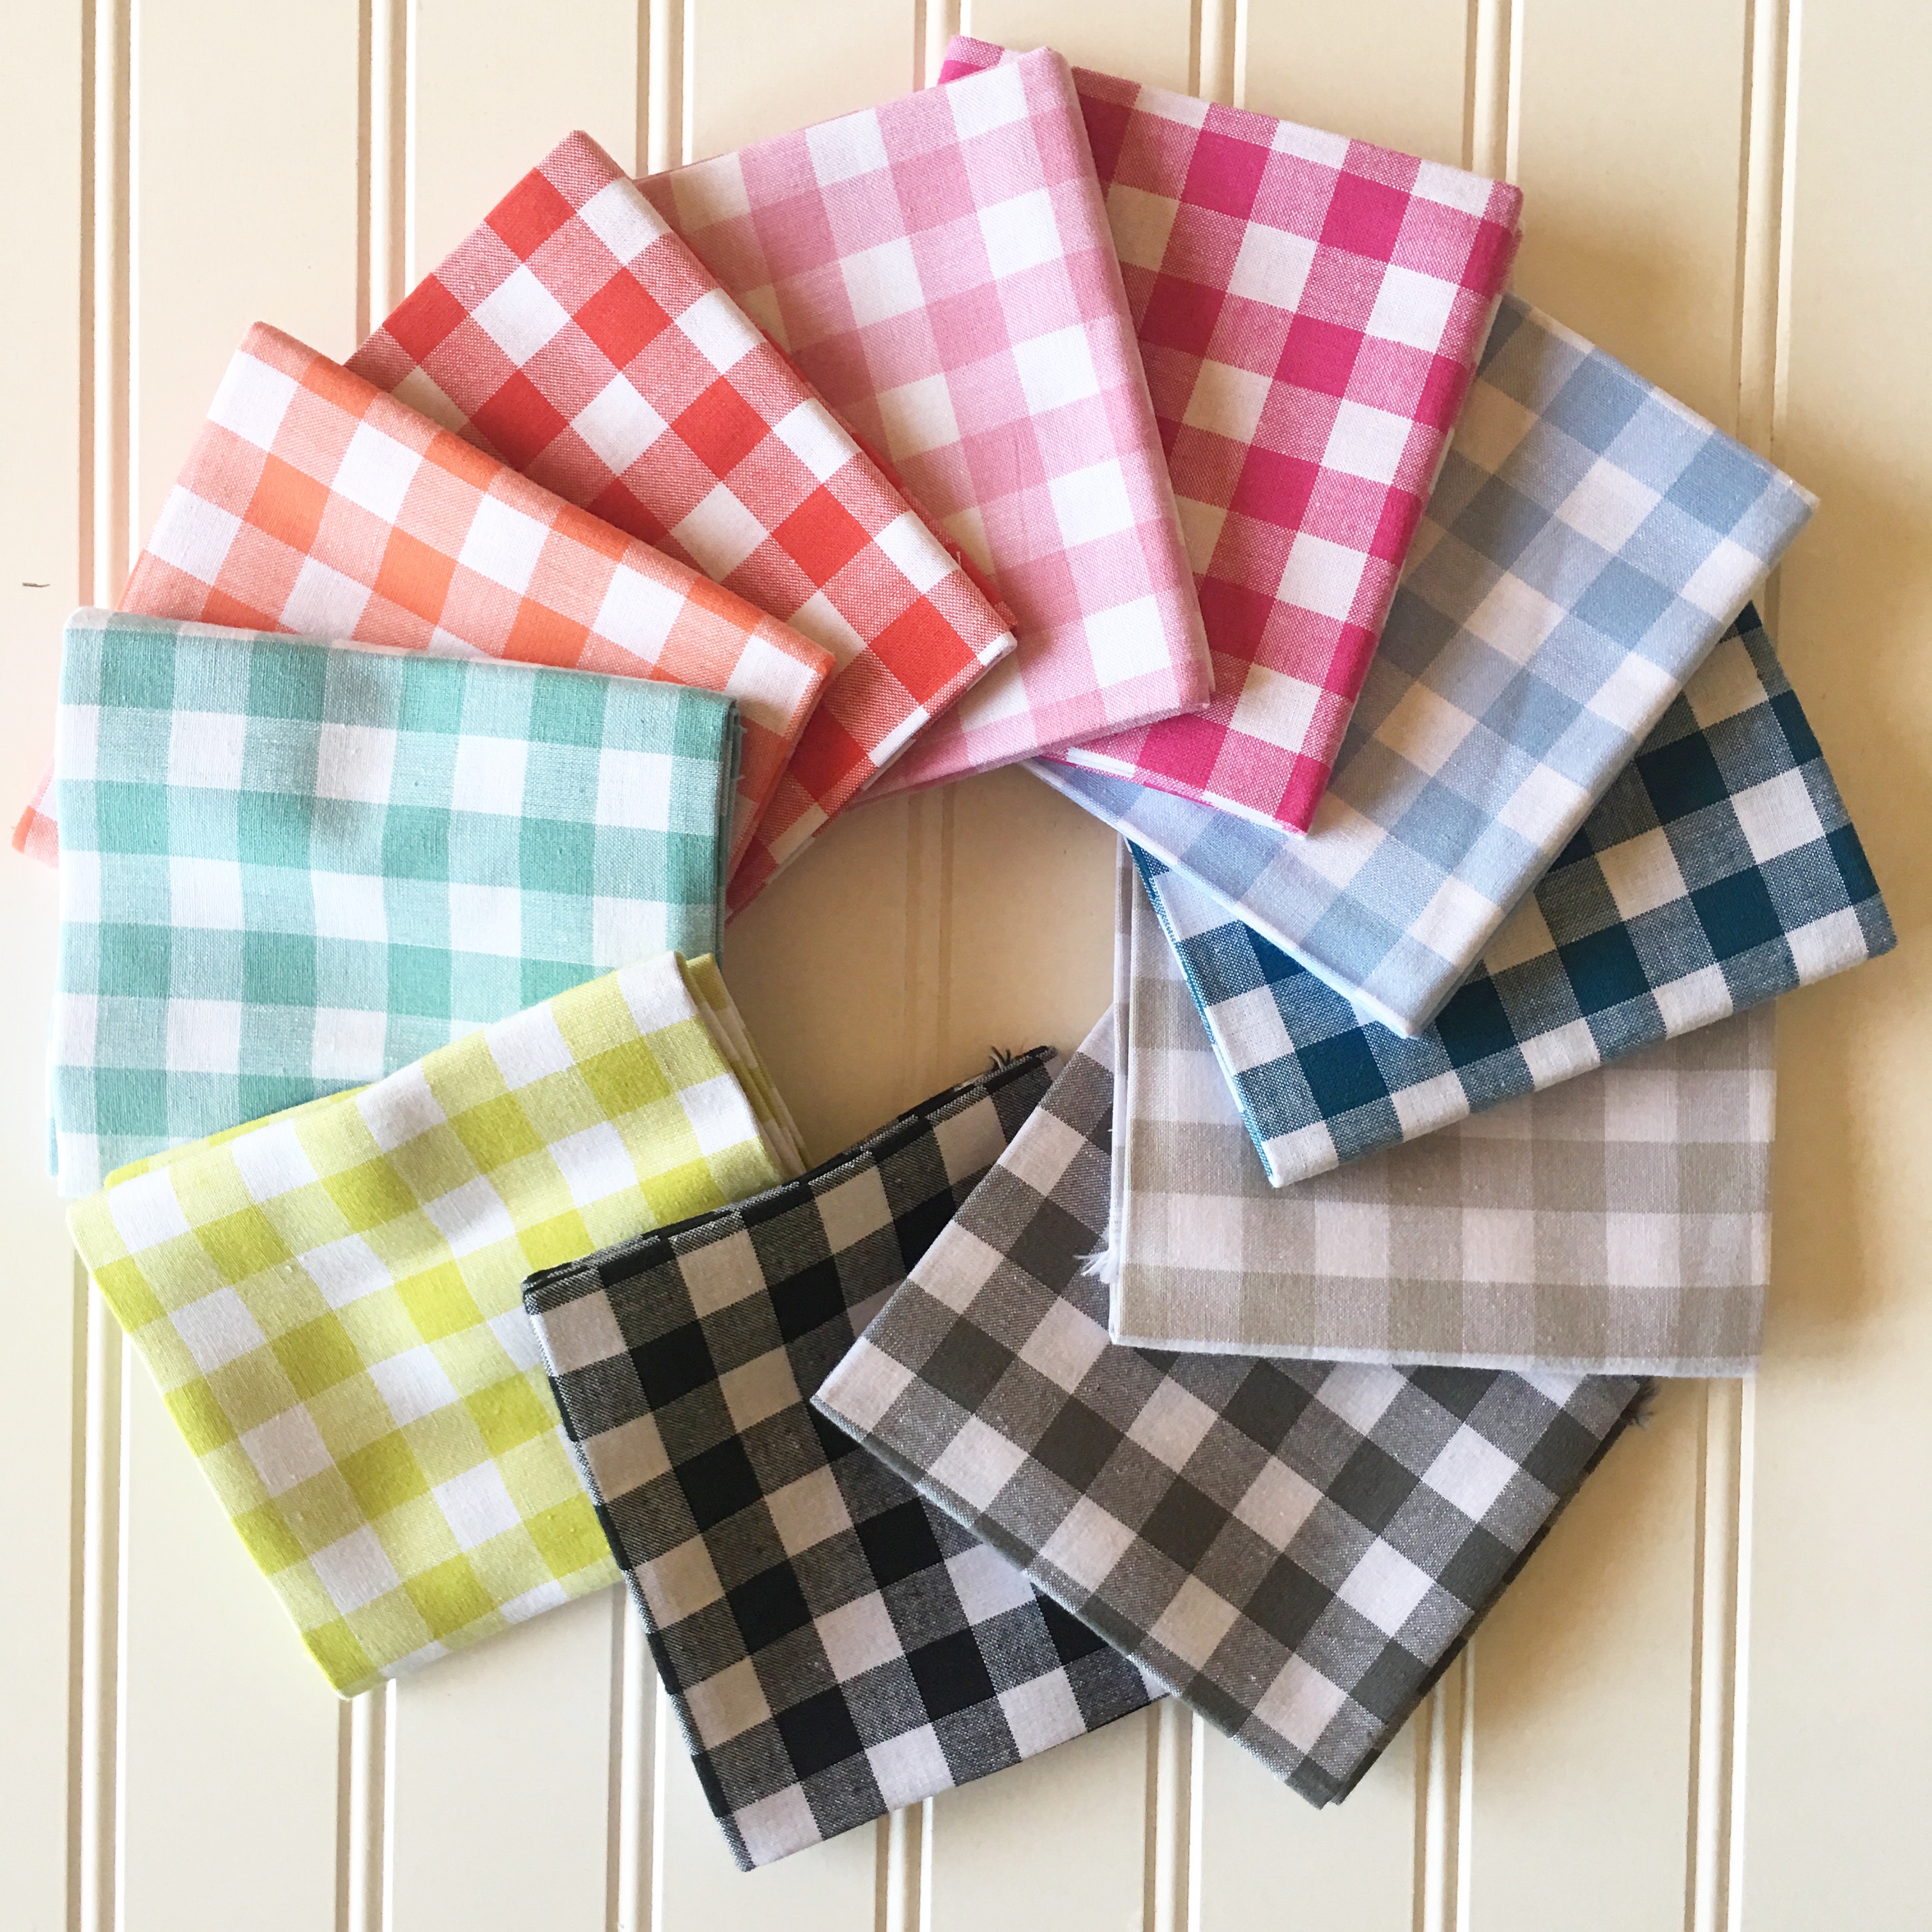
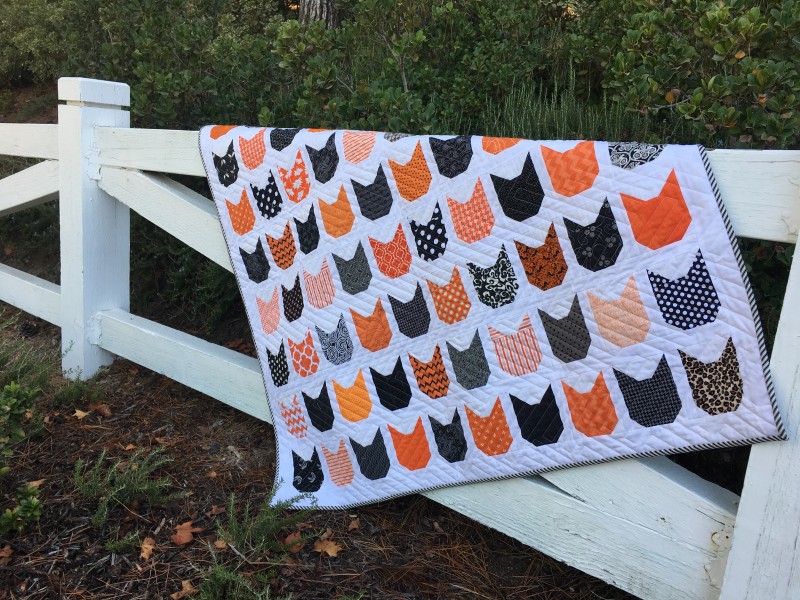
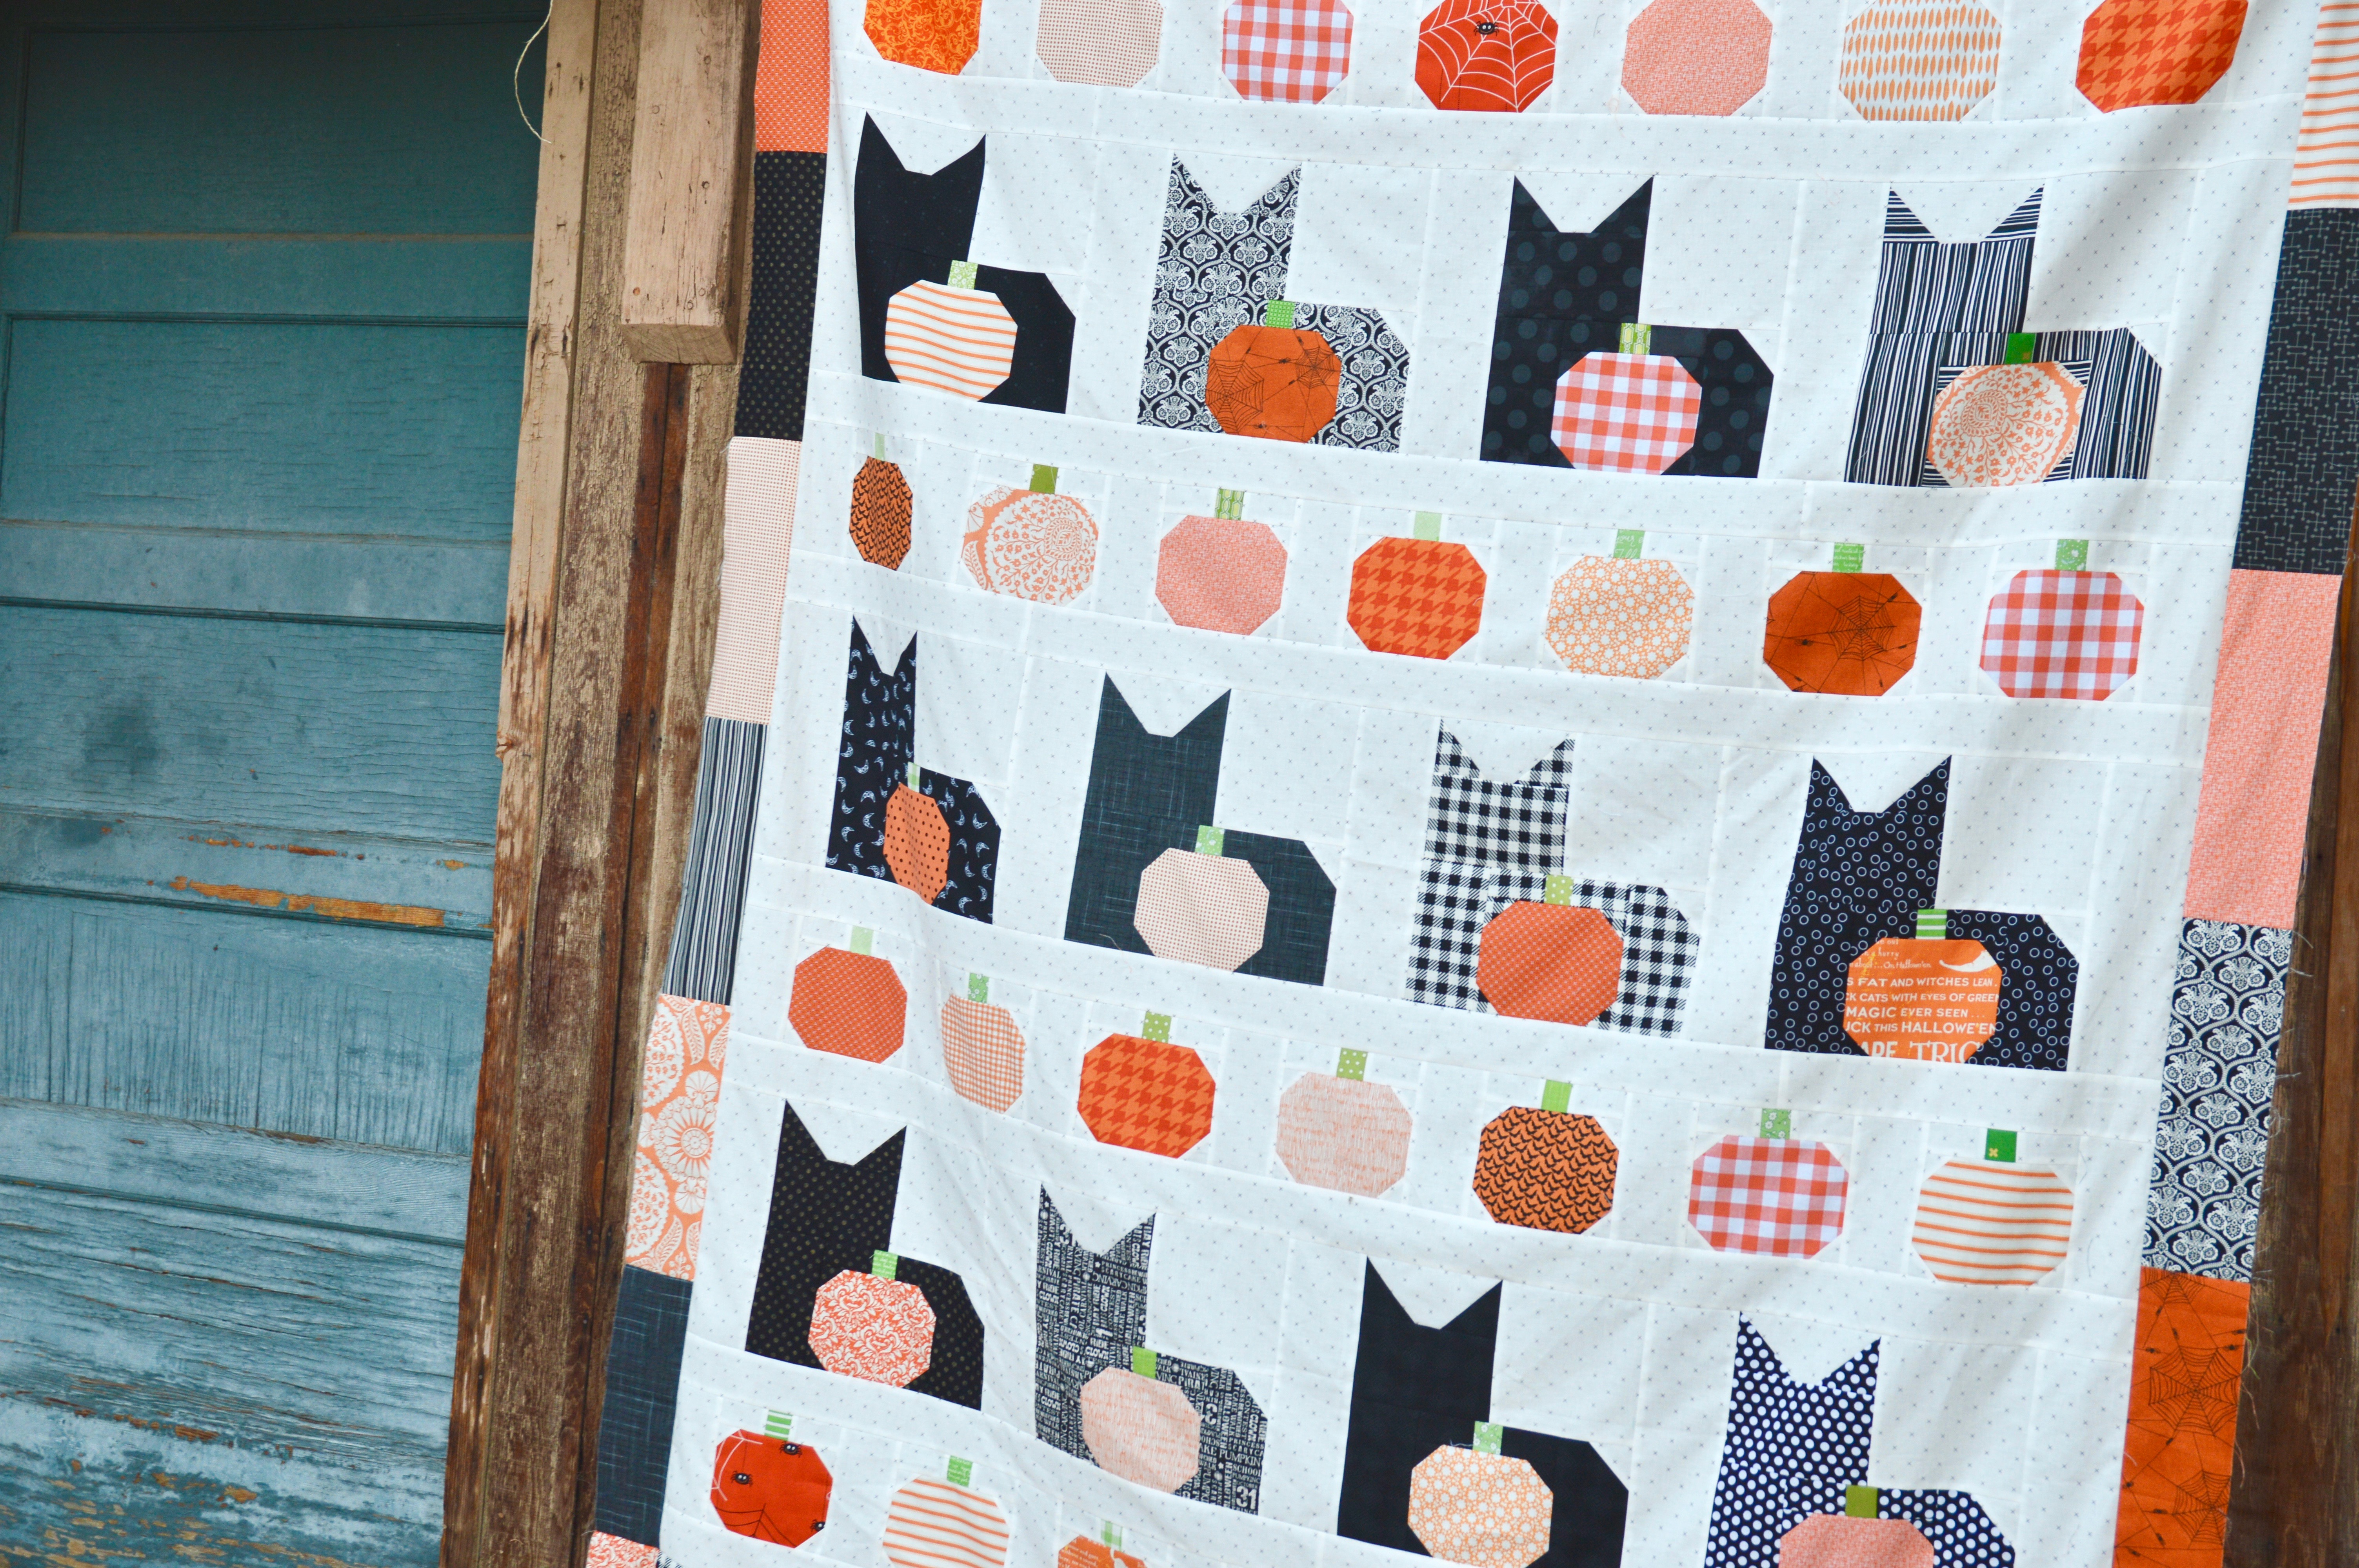
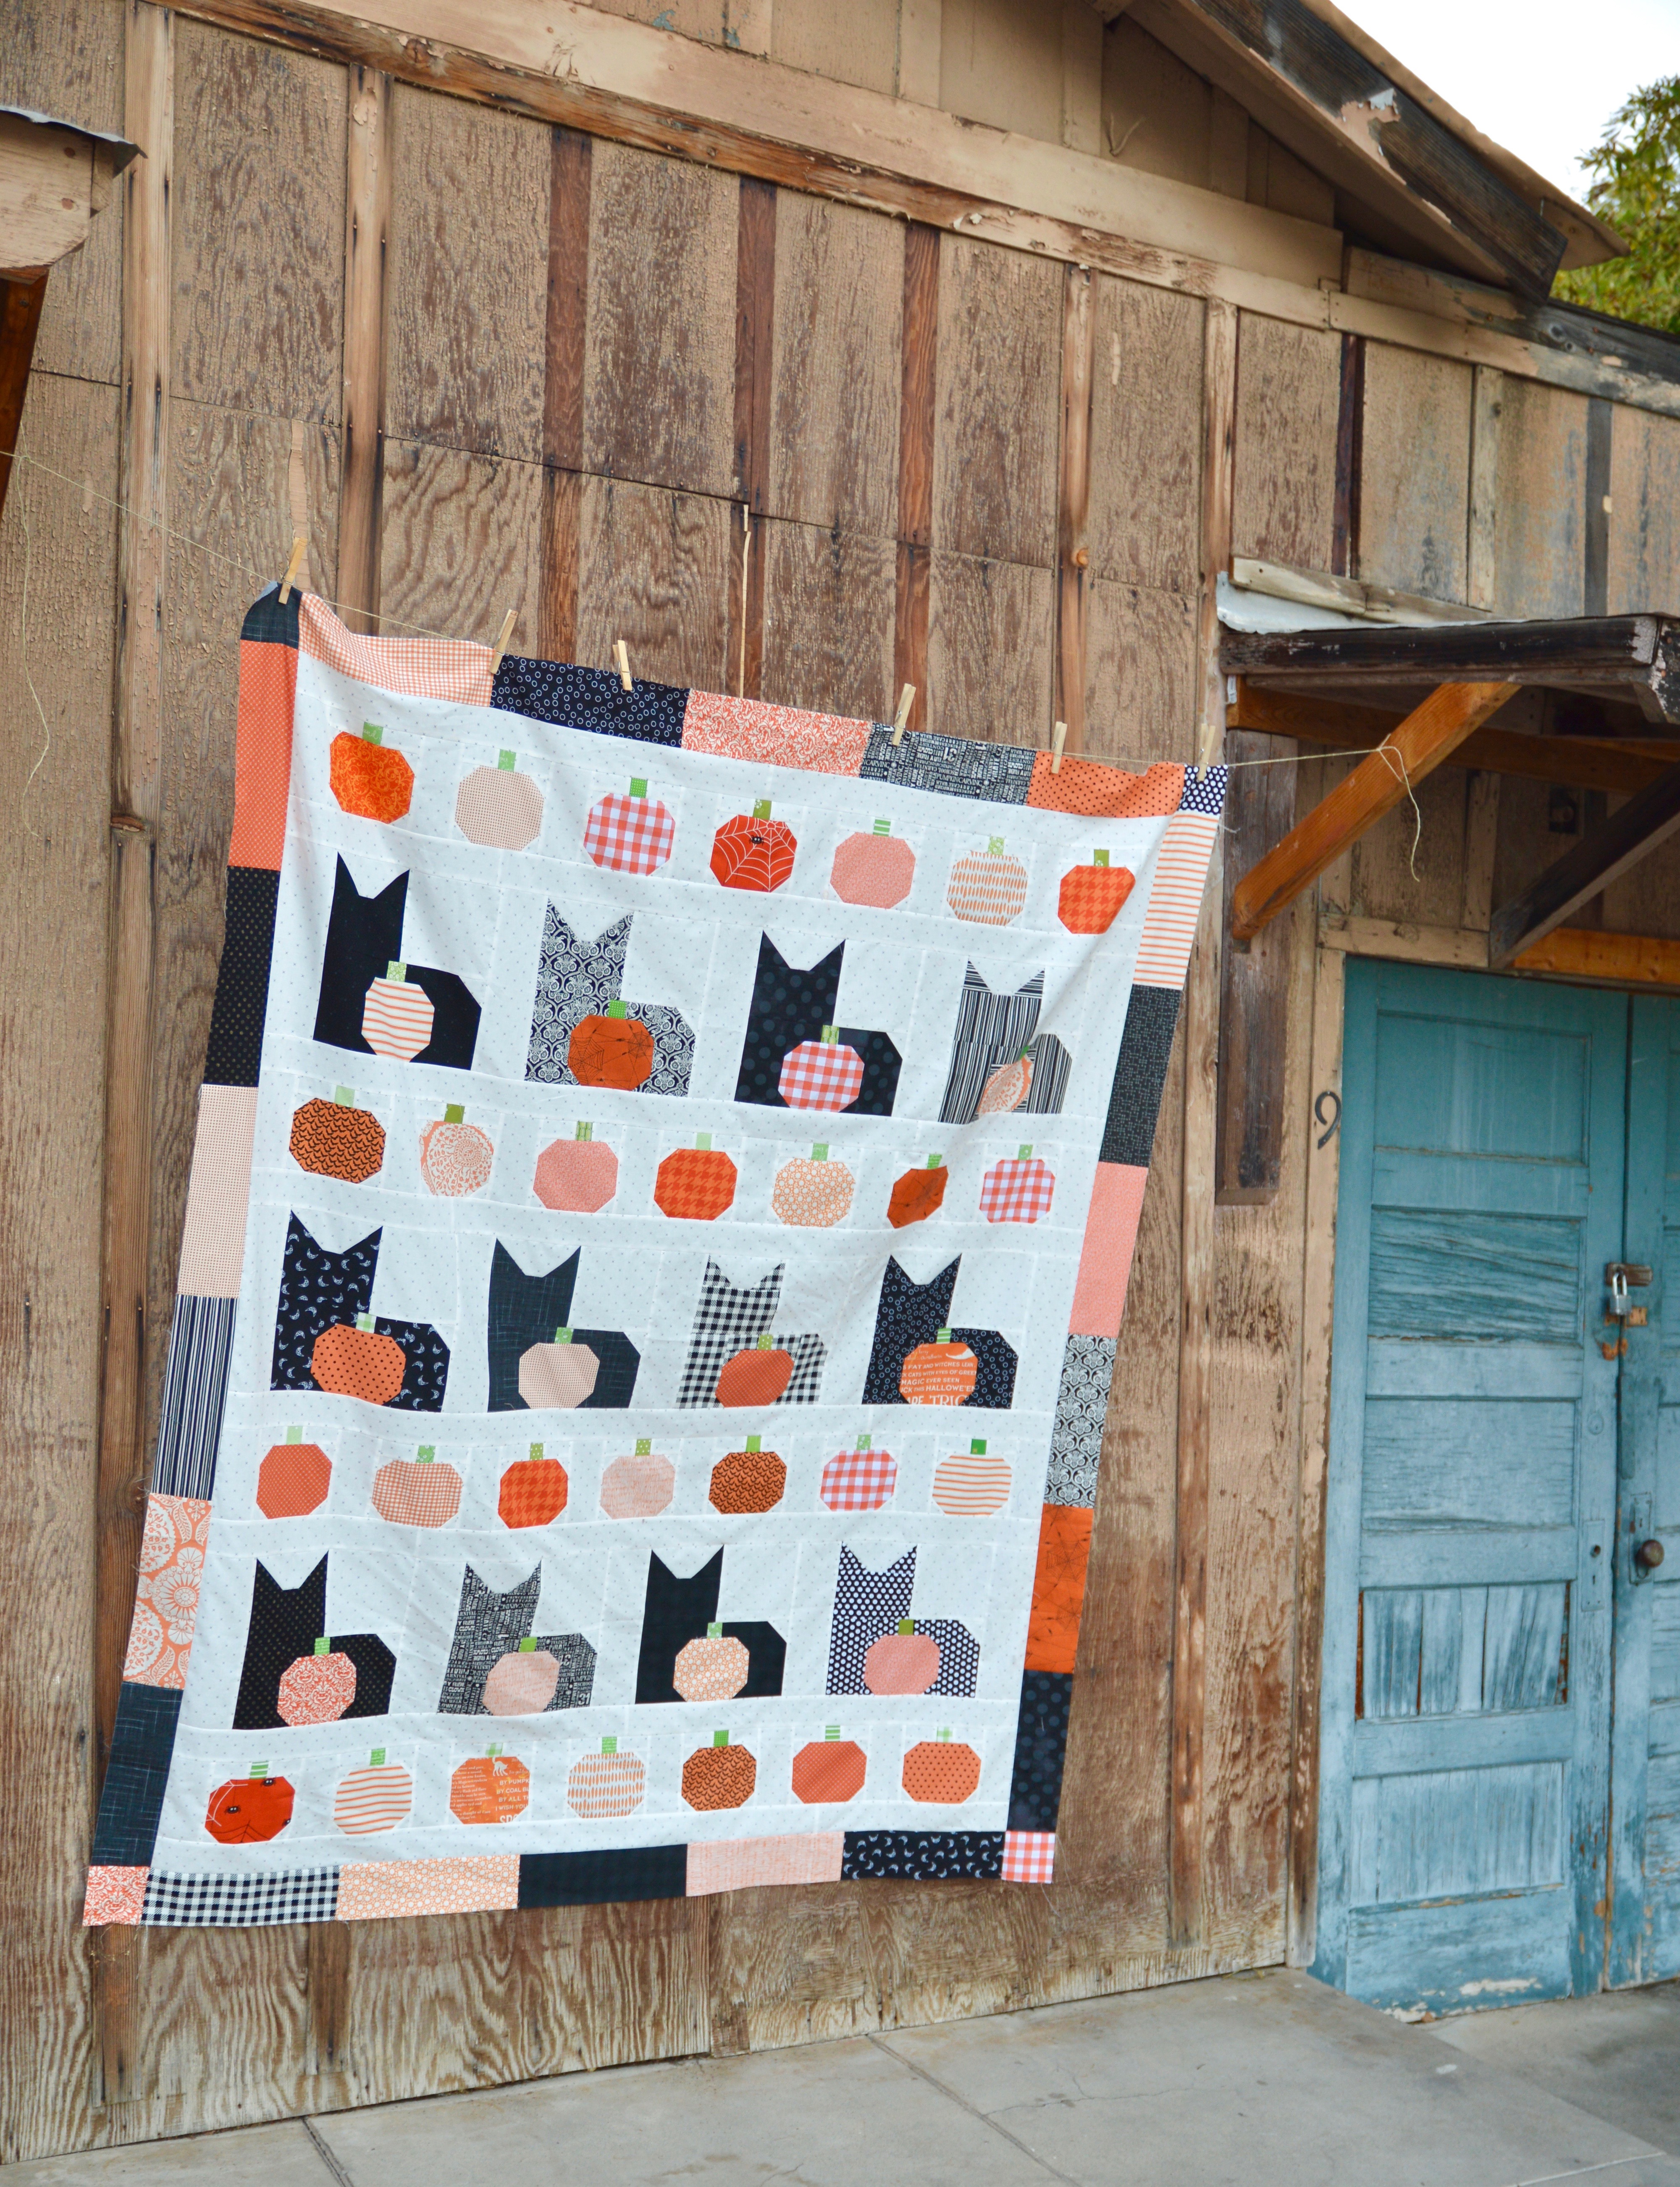
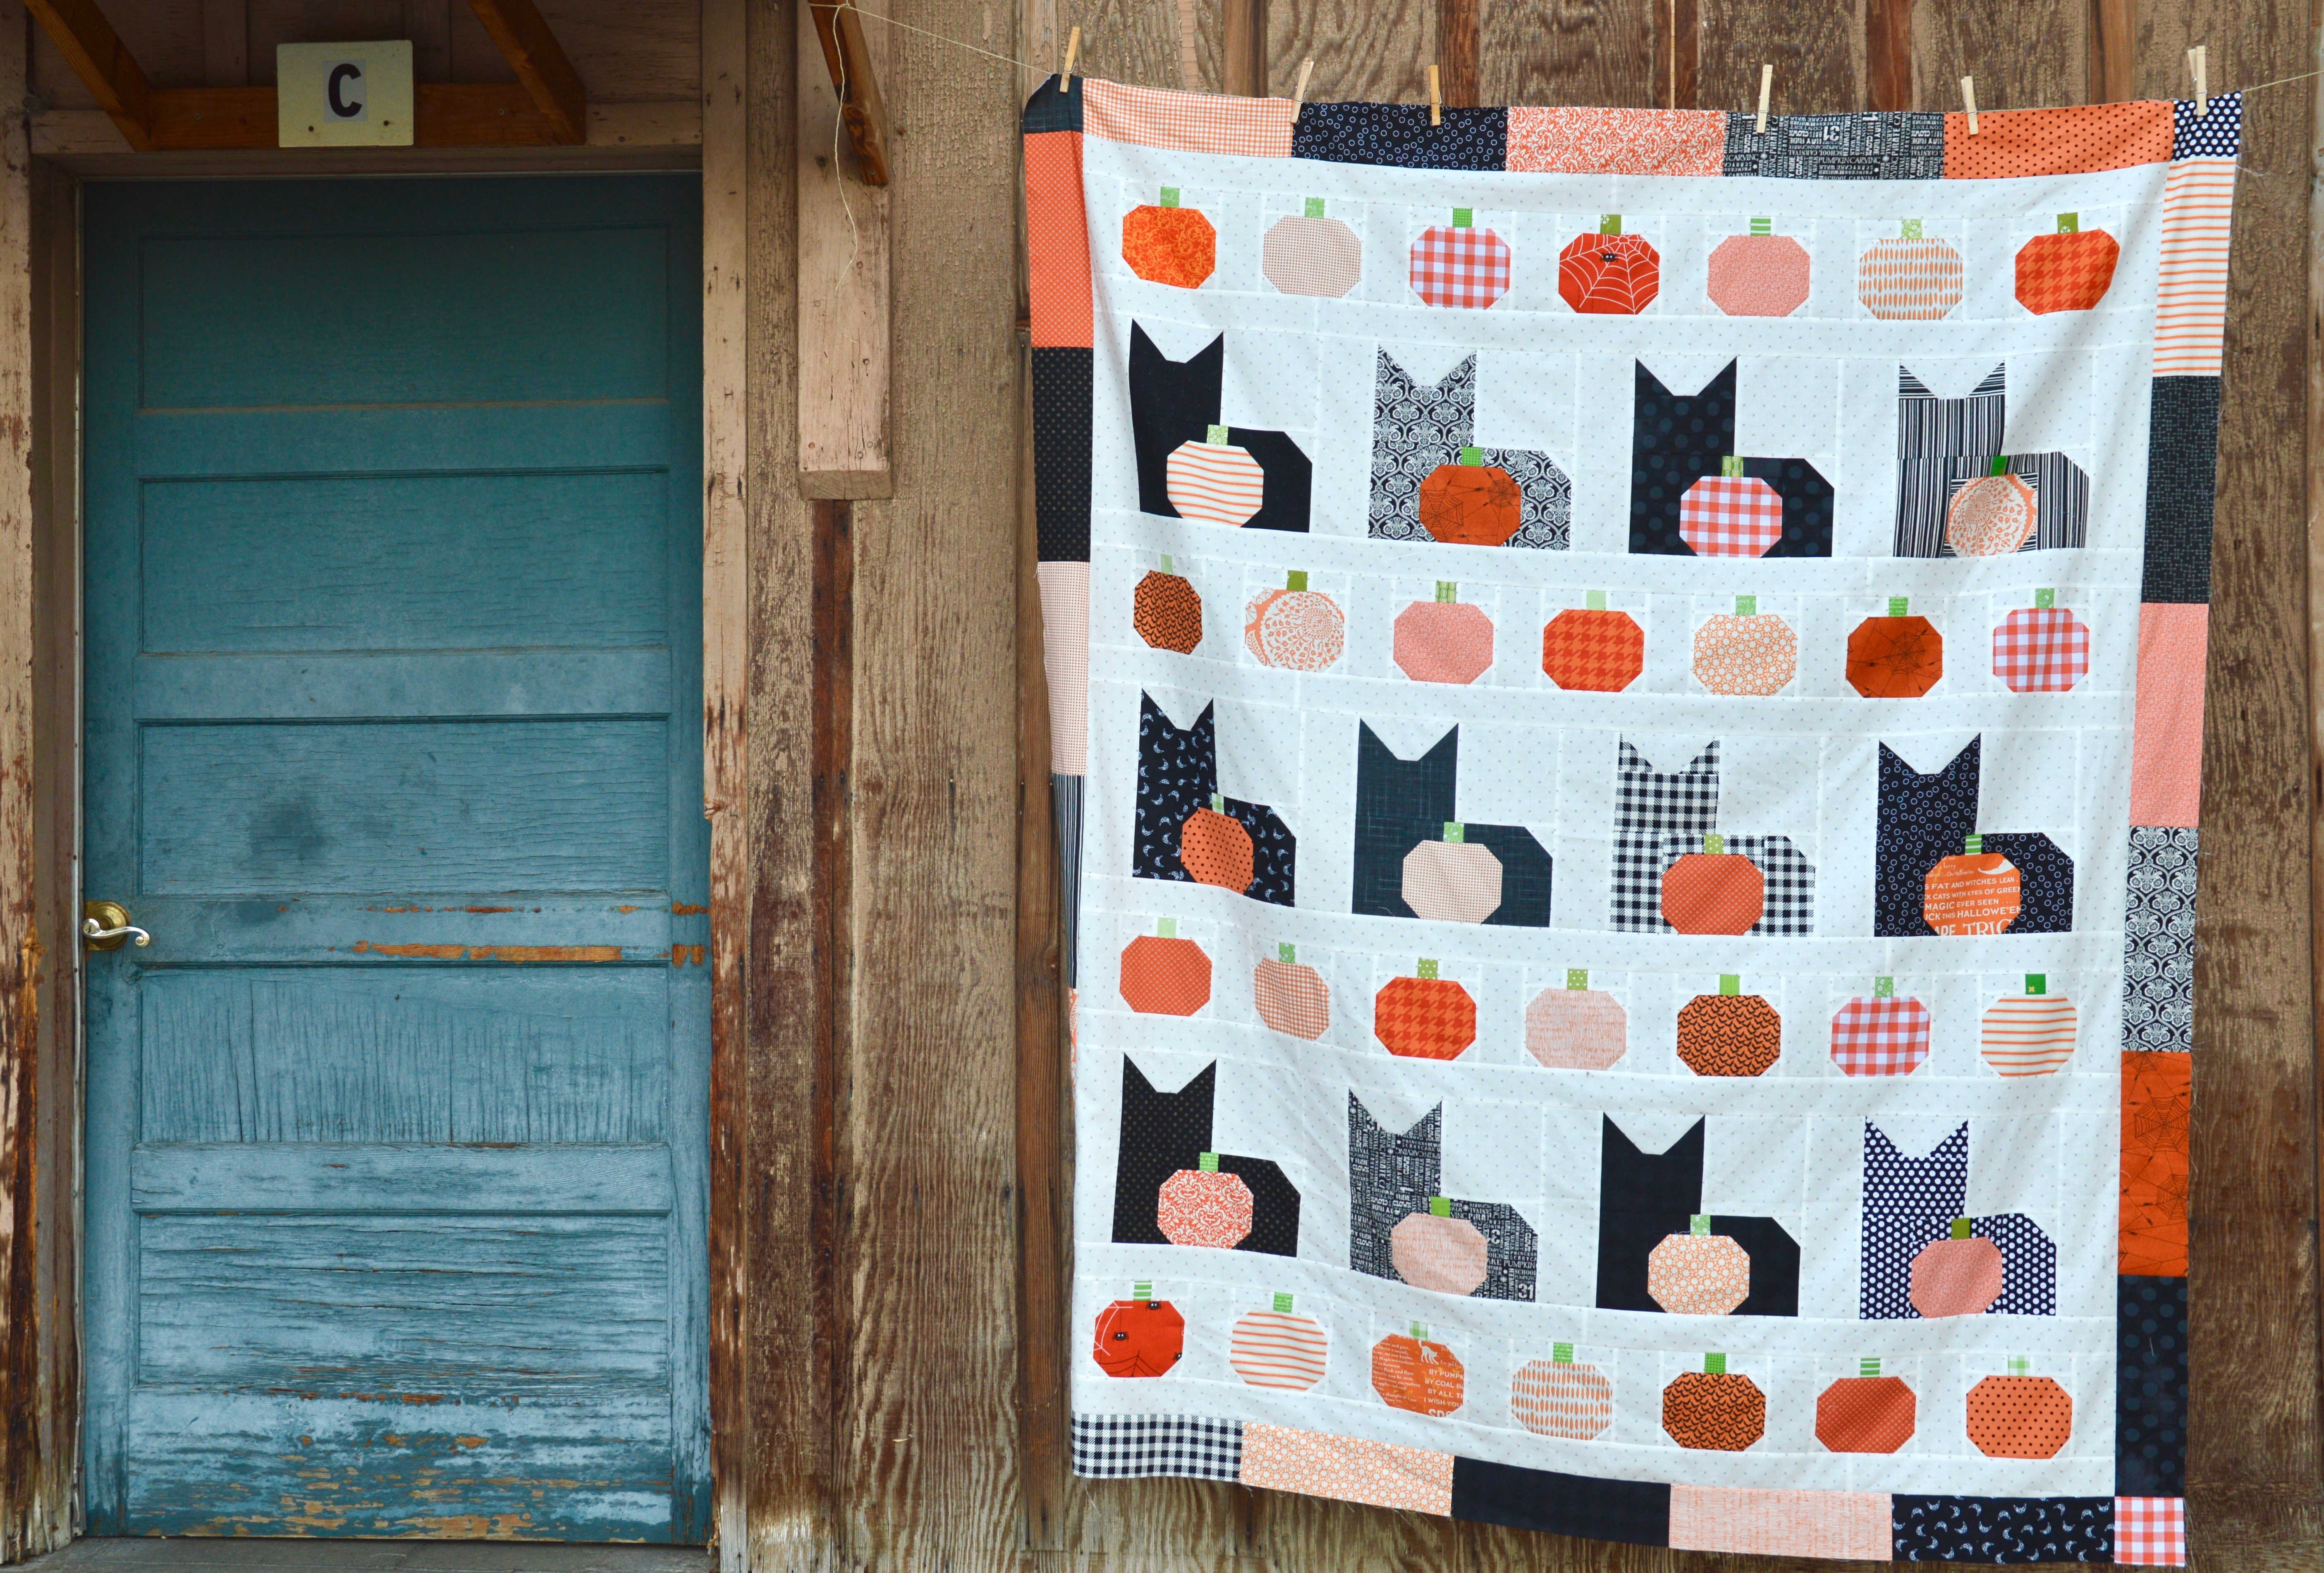
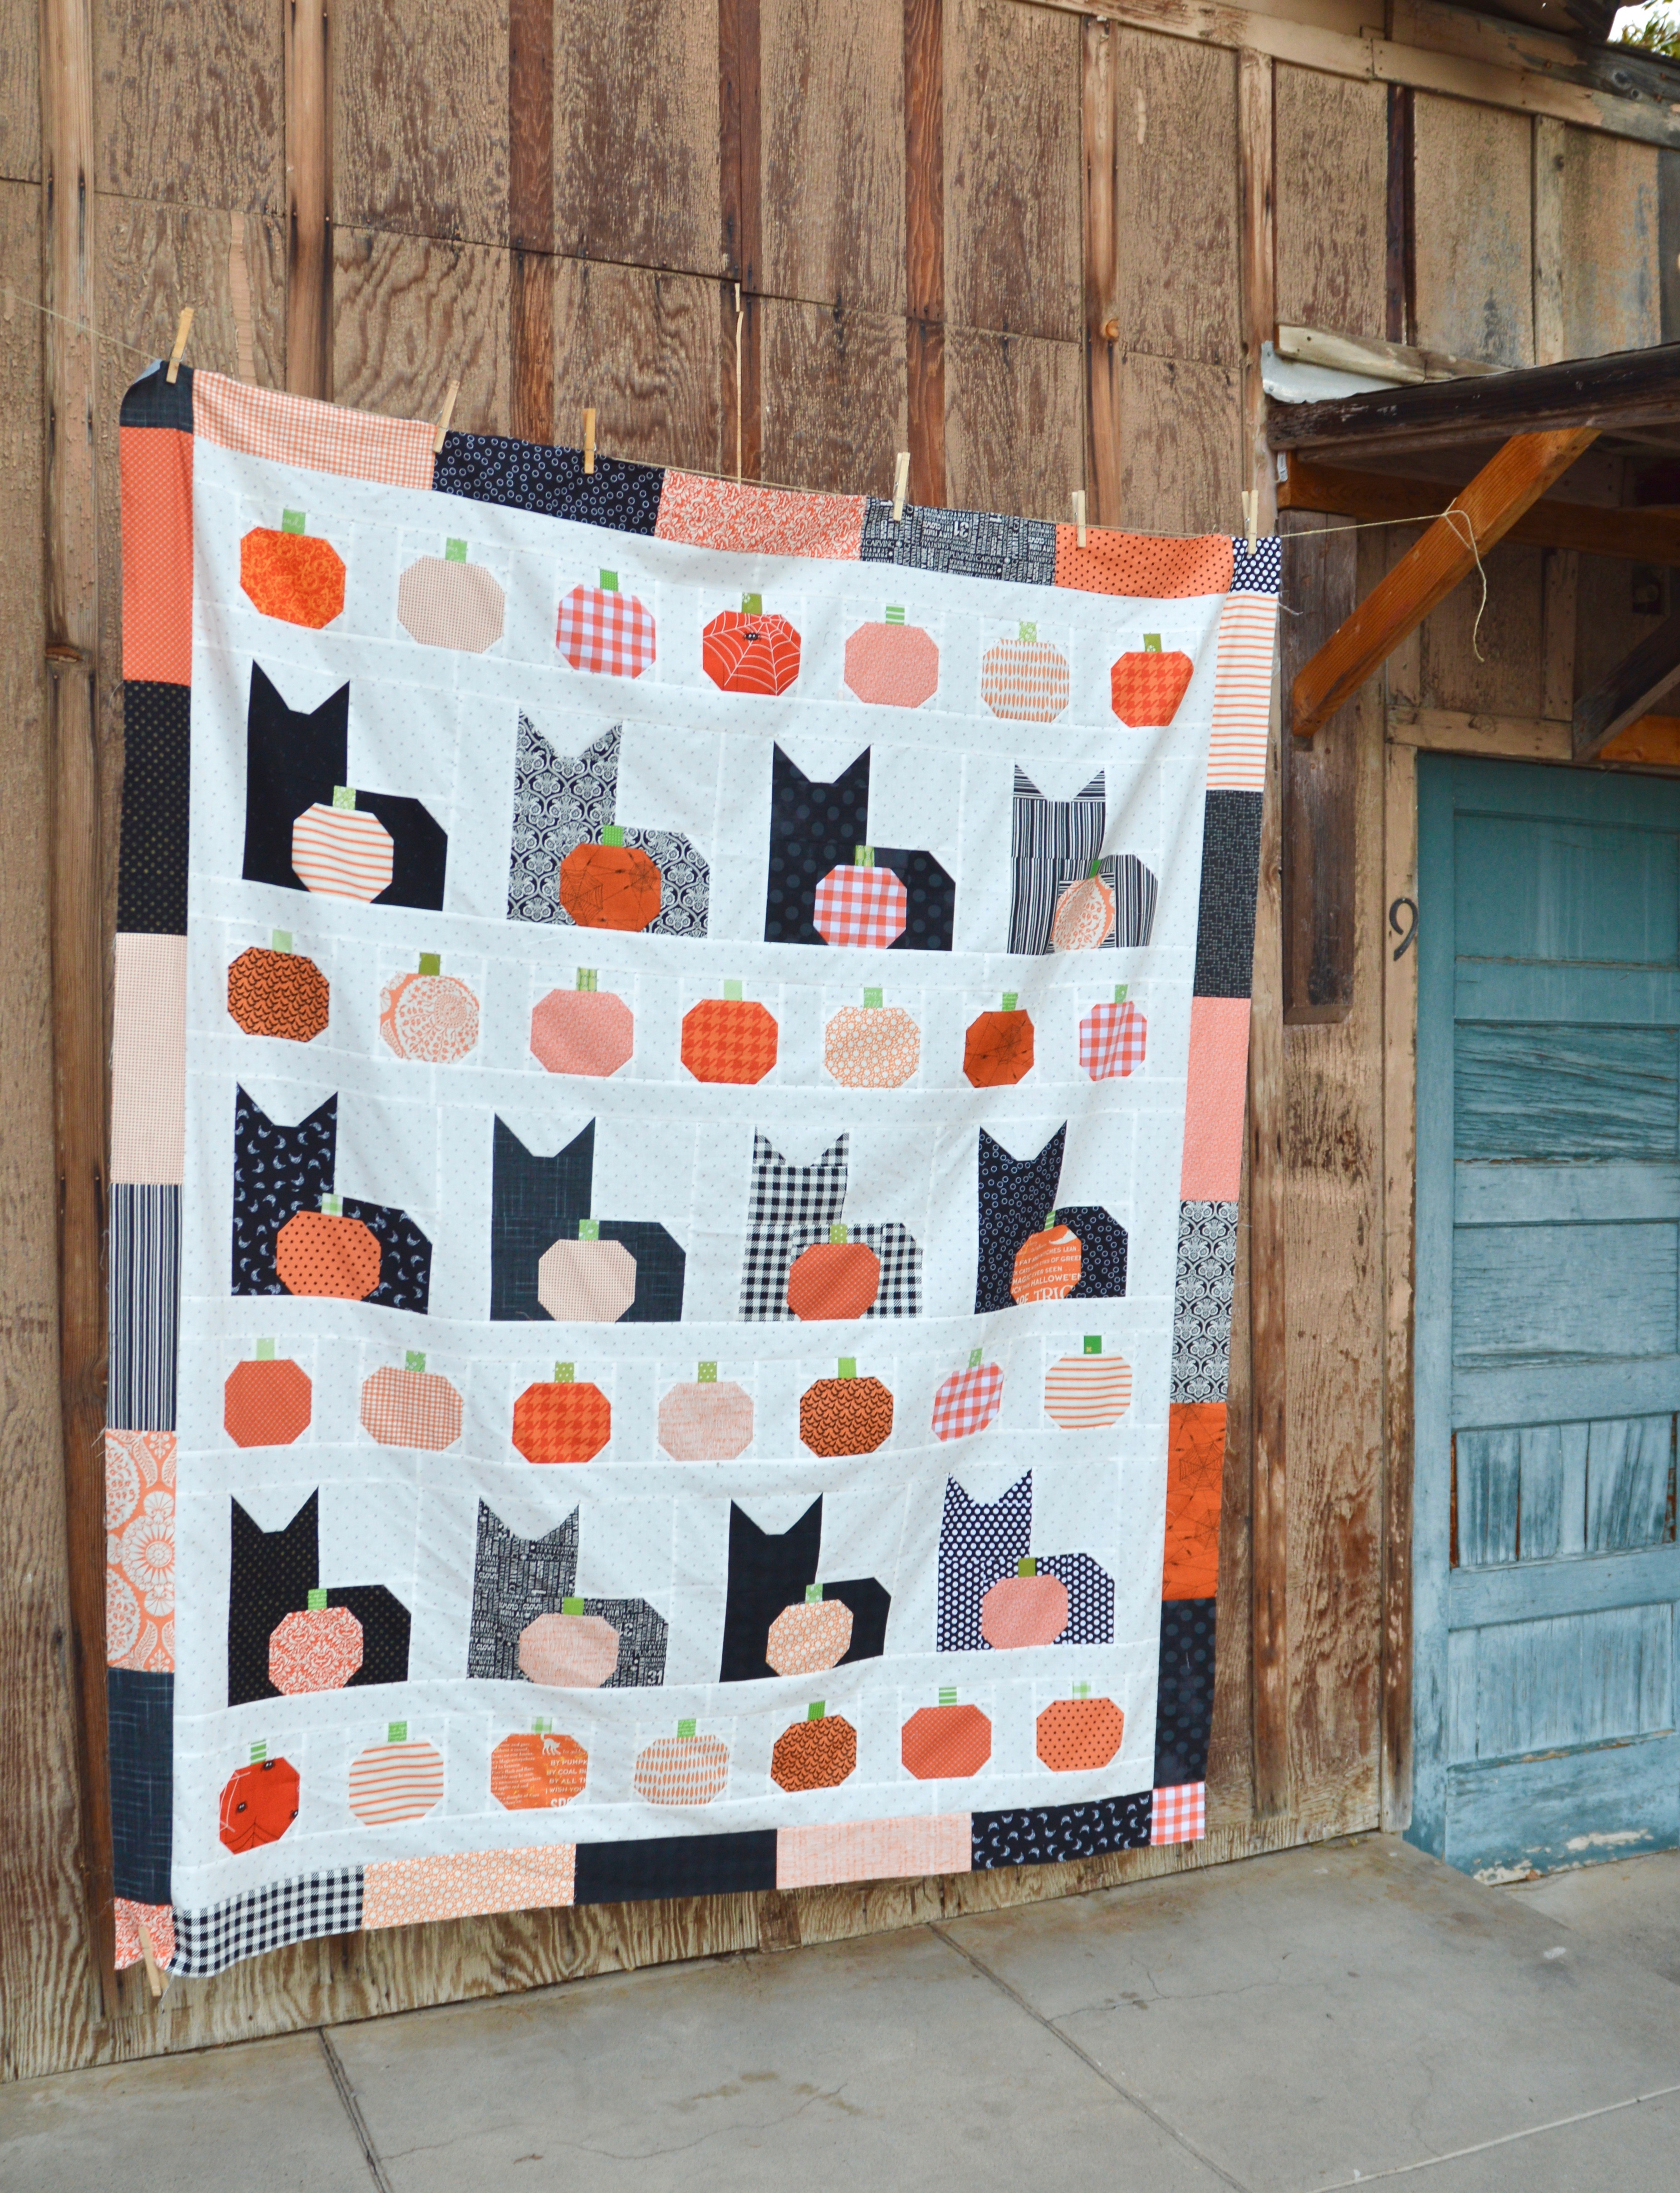
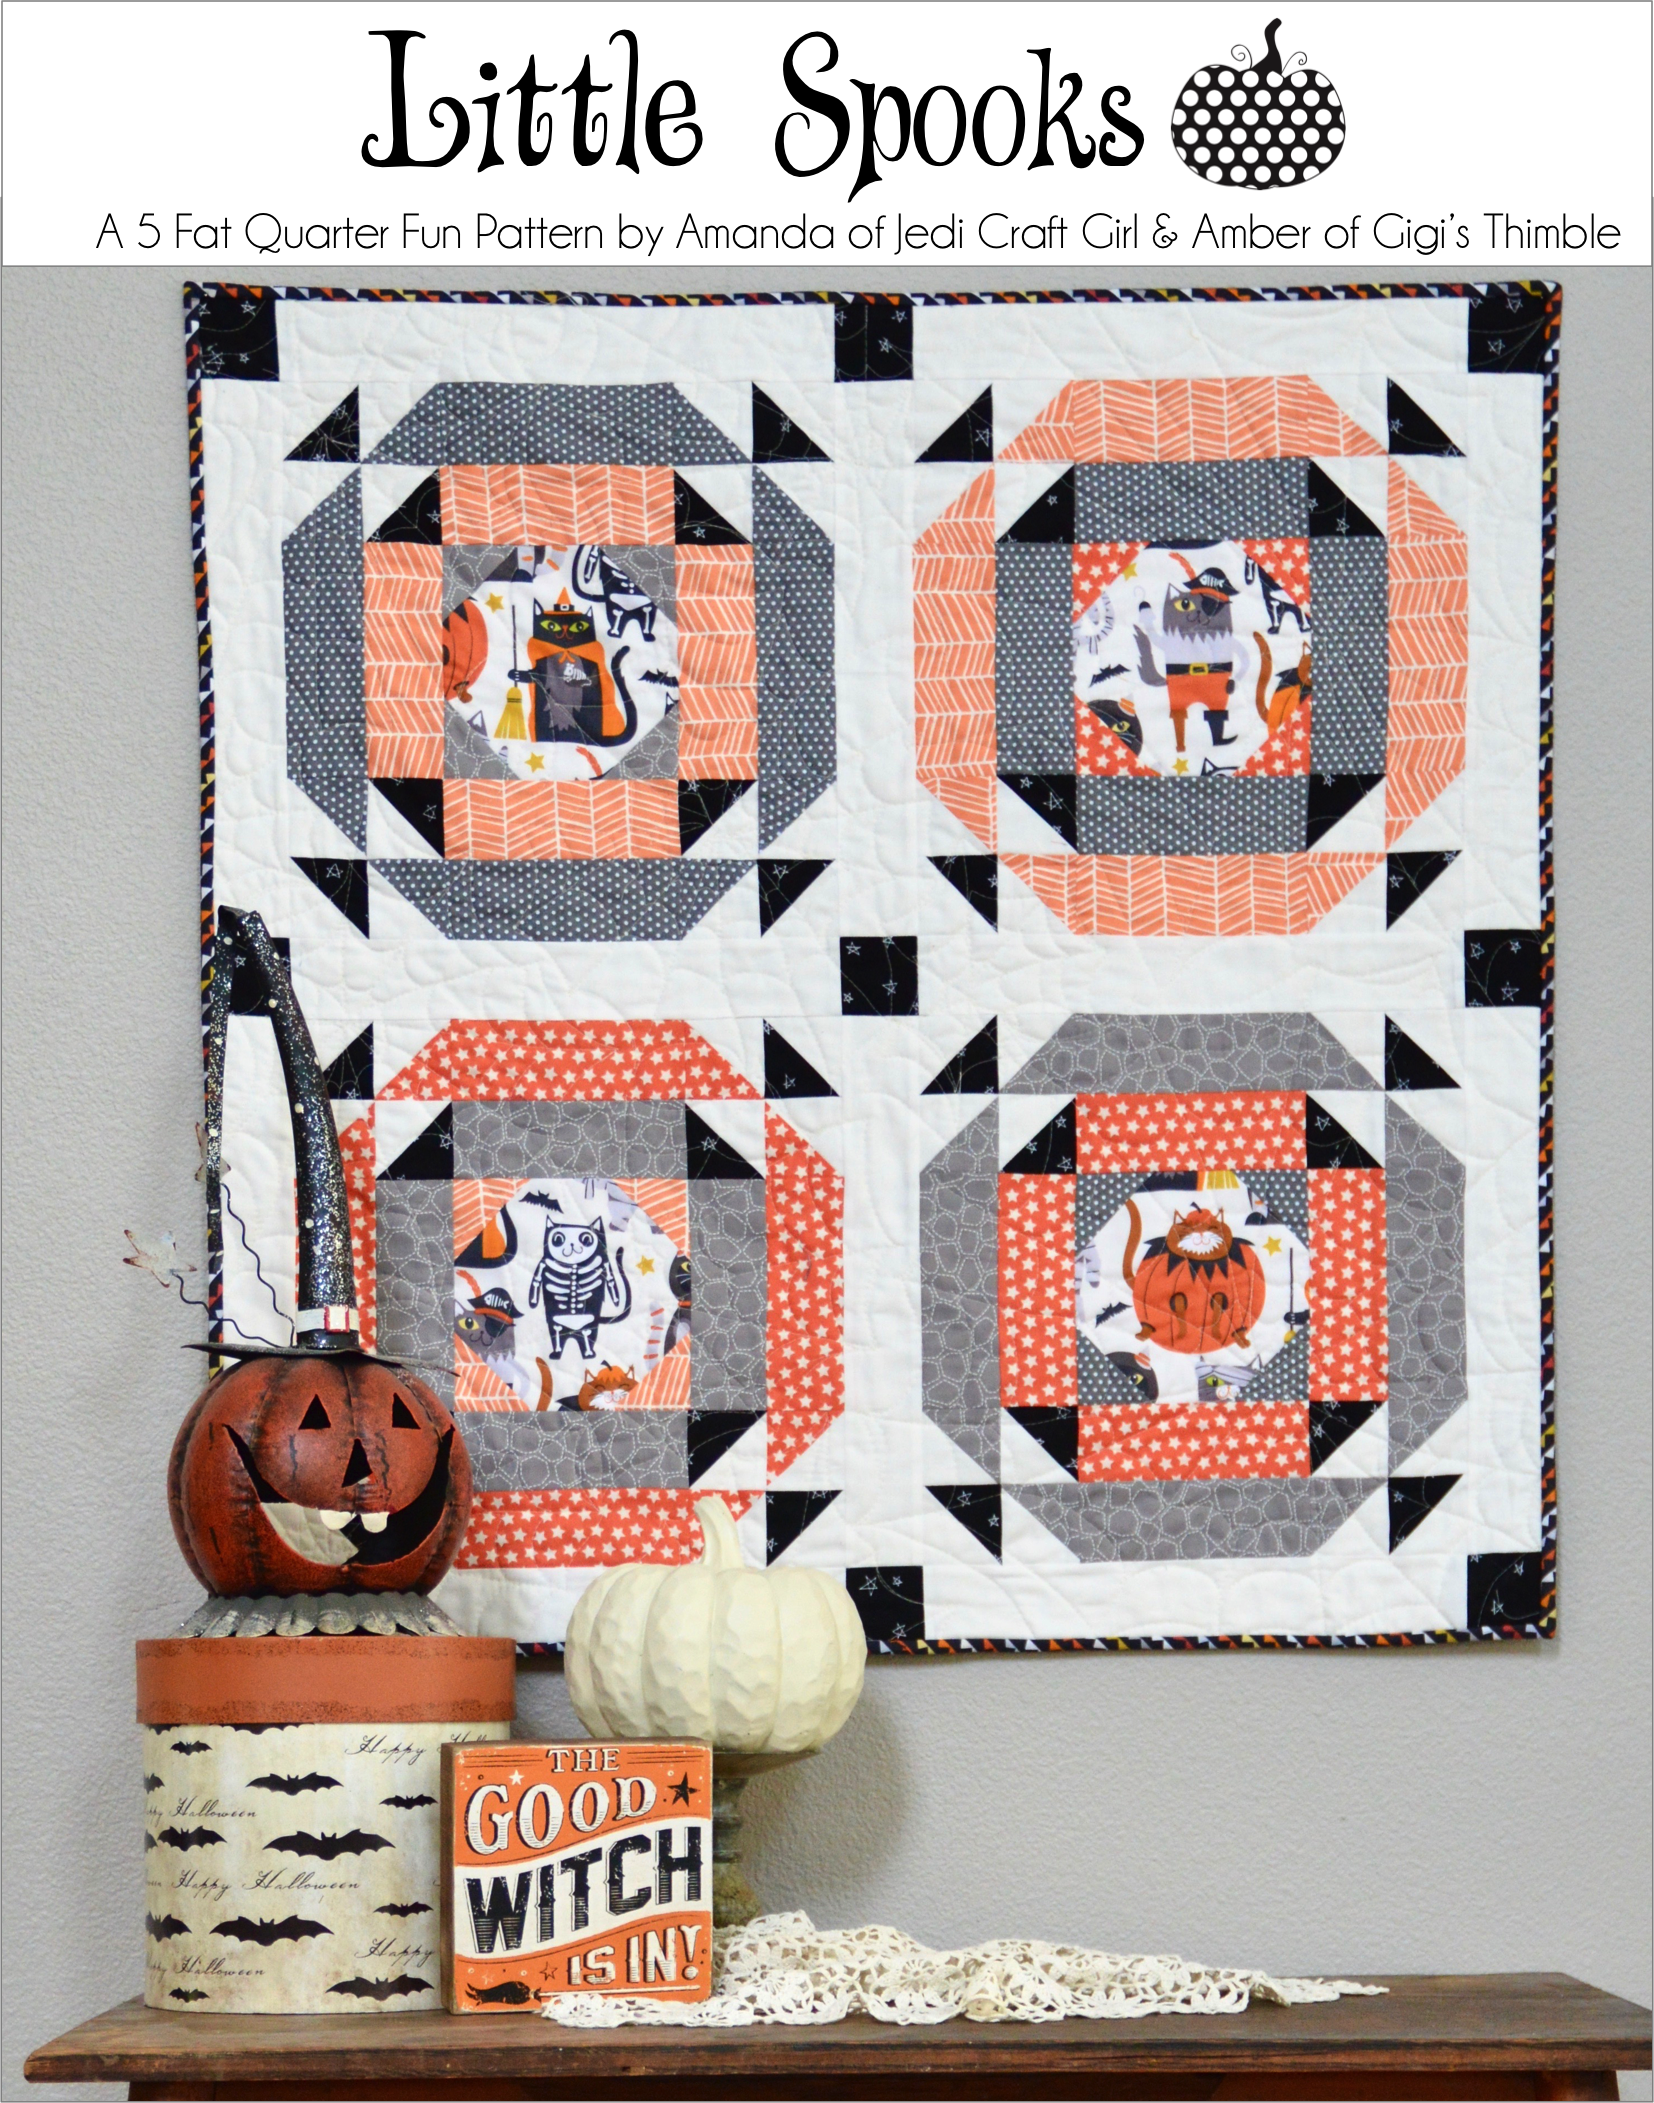
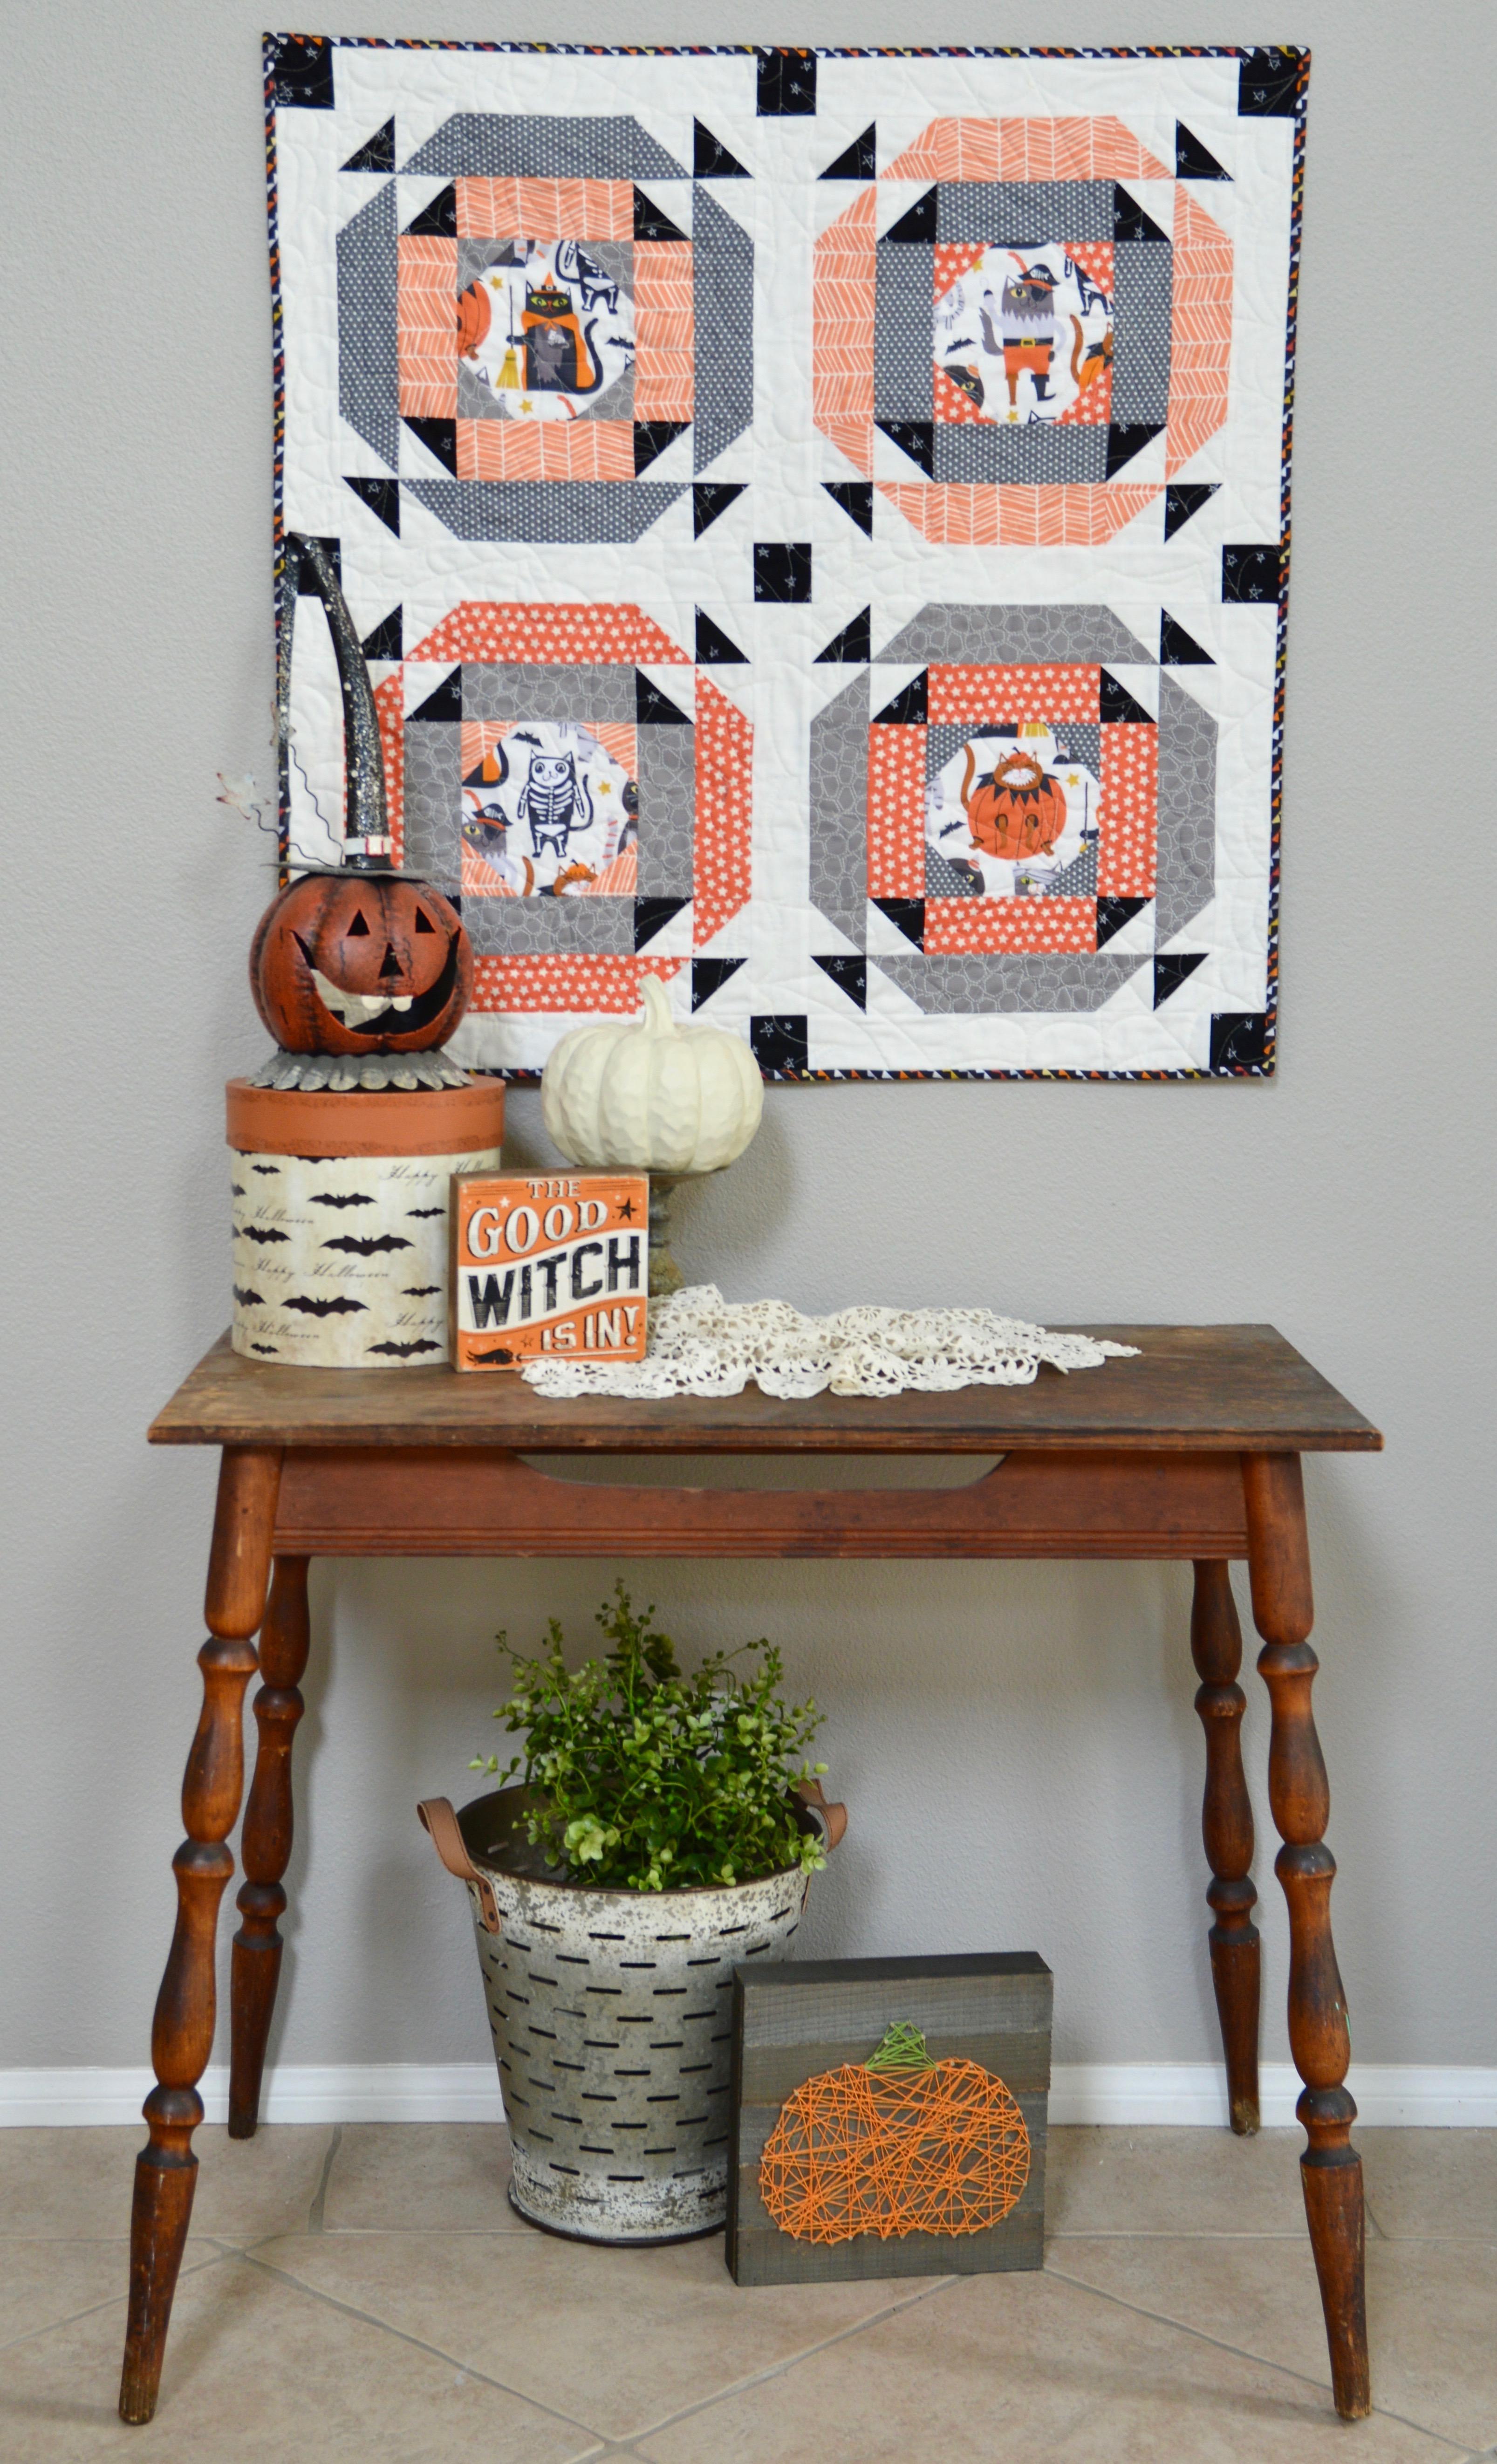
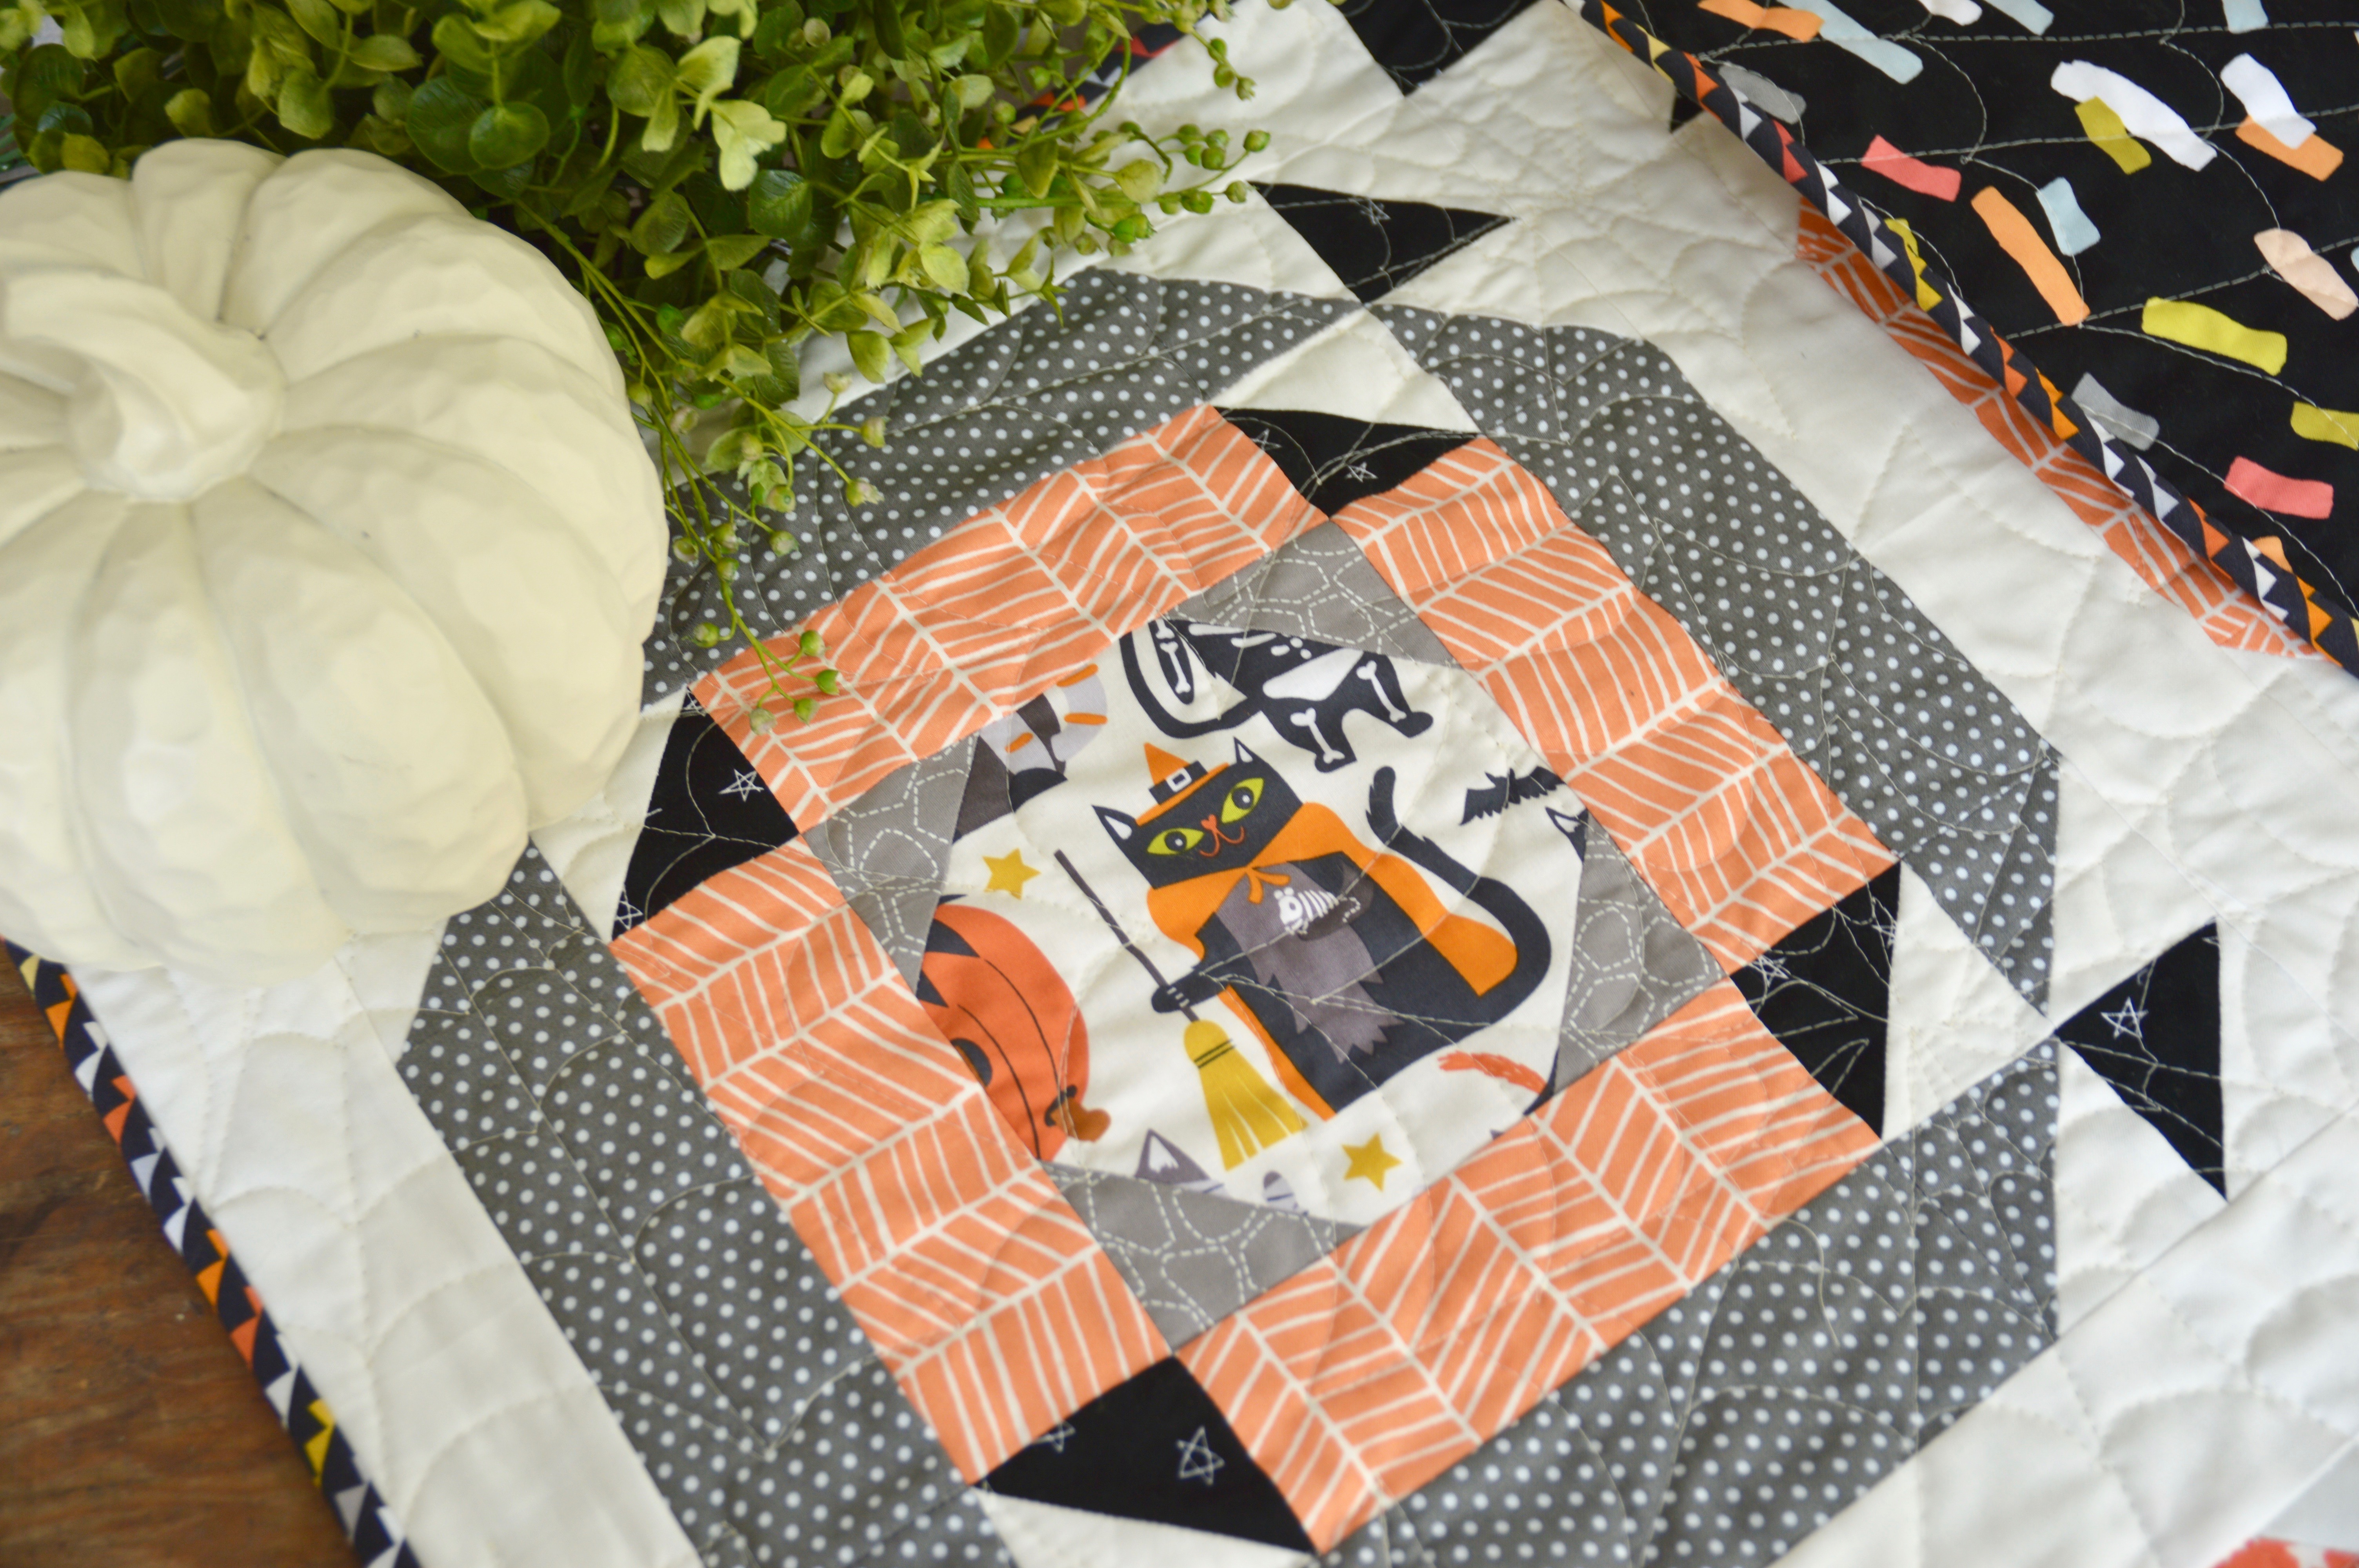
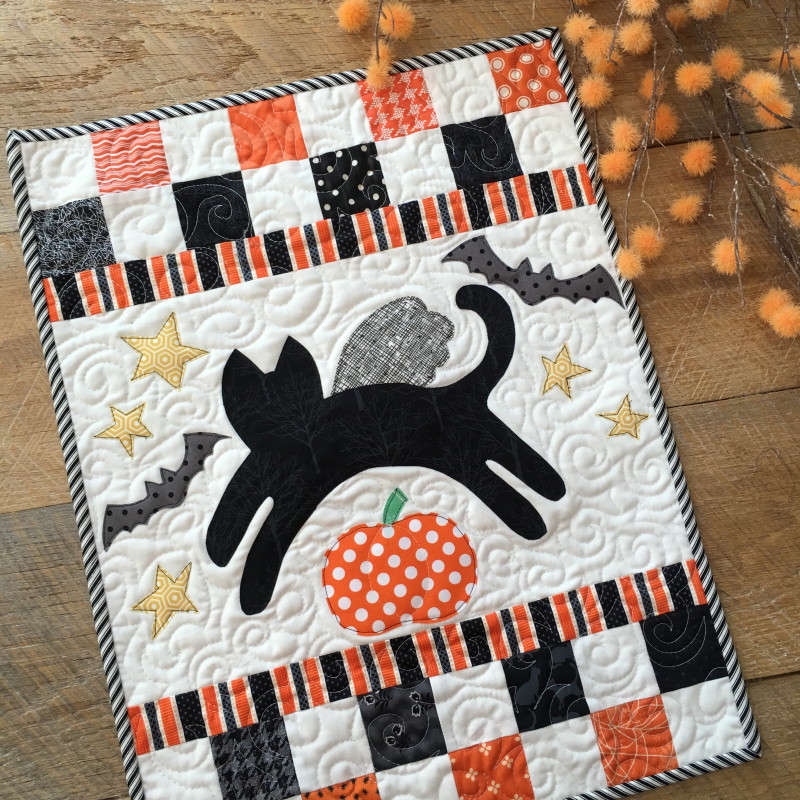
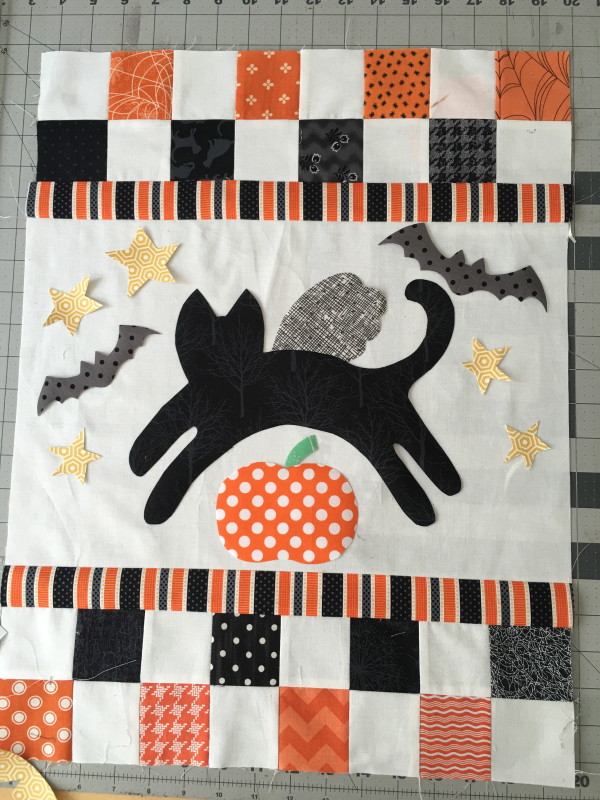
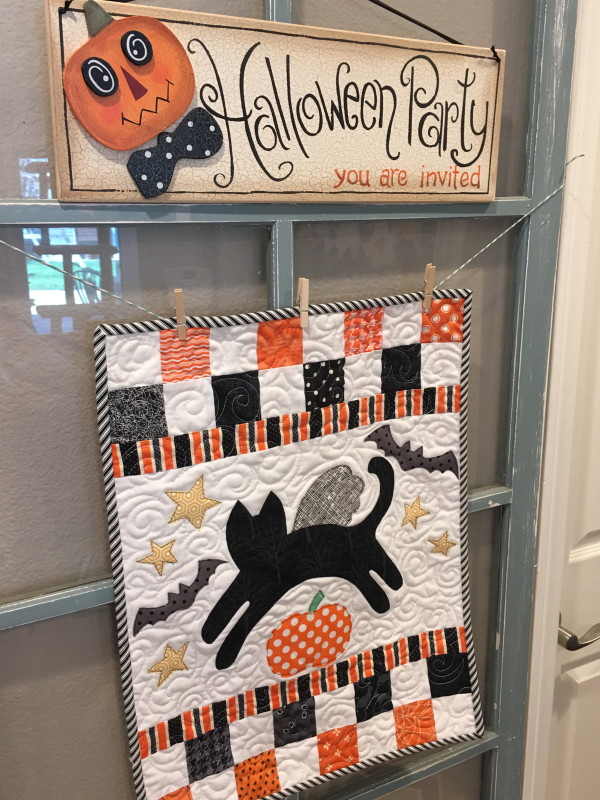
Then I started decorating for fall and I knew this quilt would look amazing in a Halloween version!

black cats and pumpkins quilt

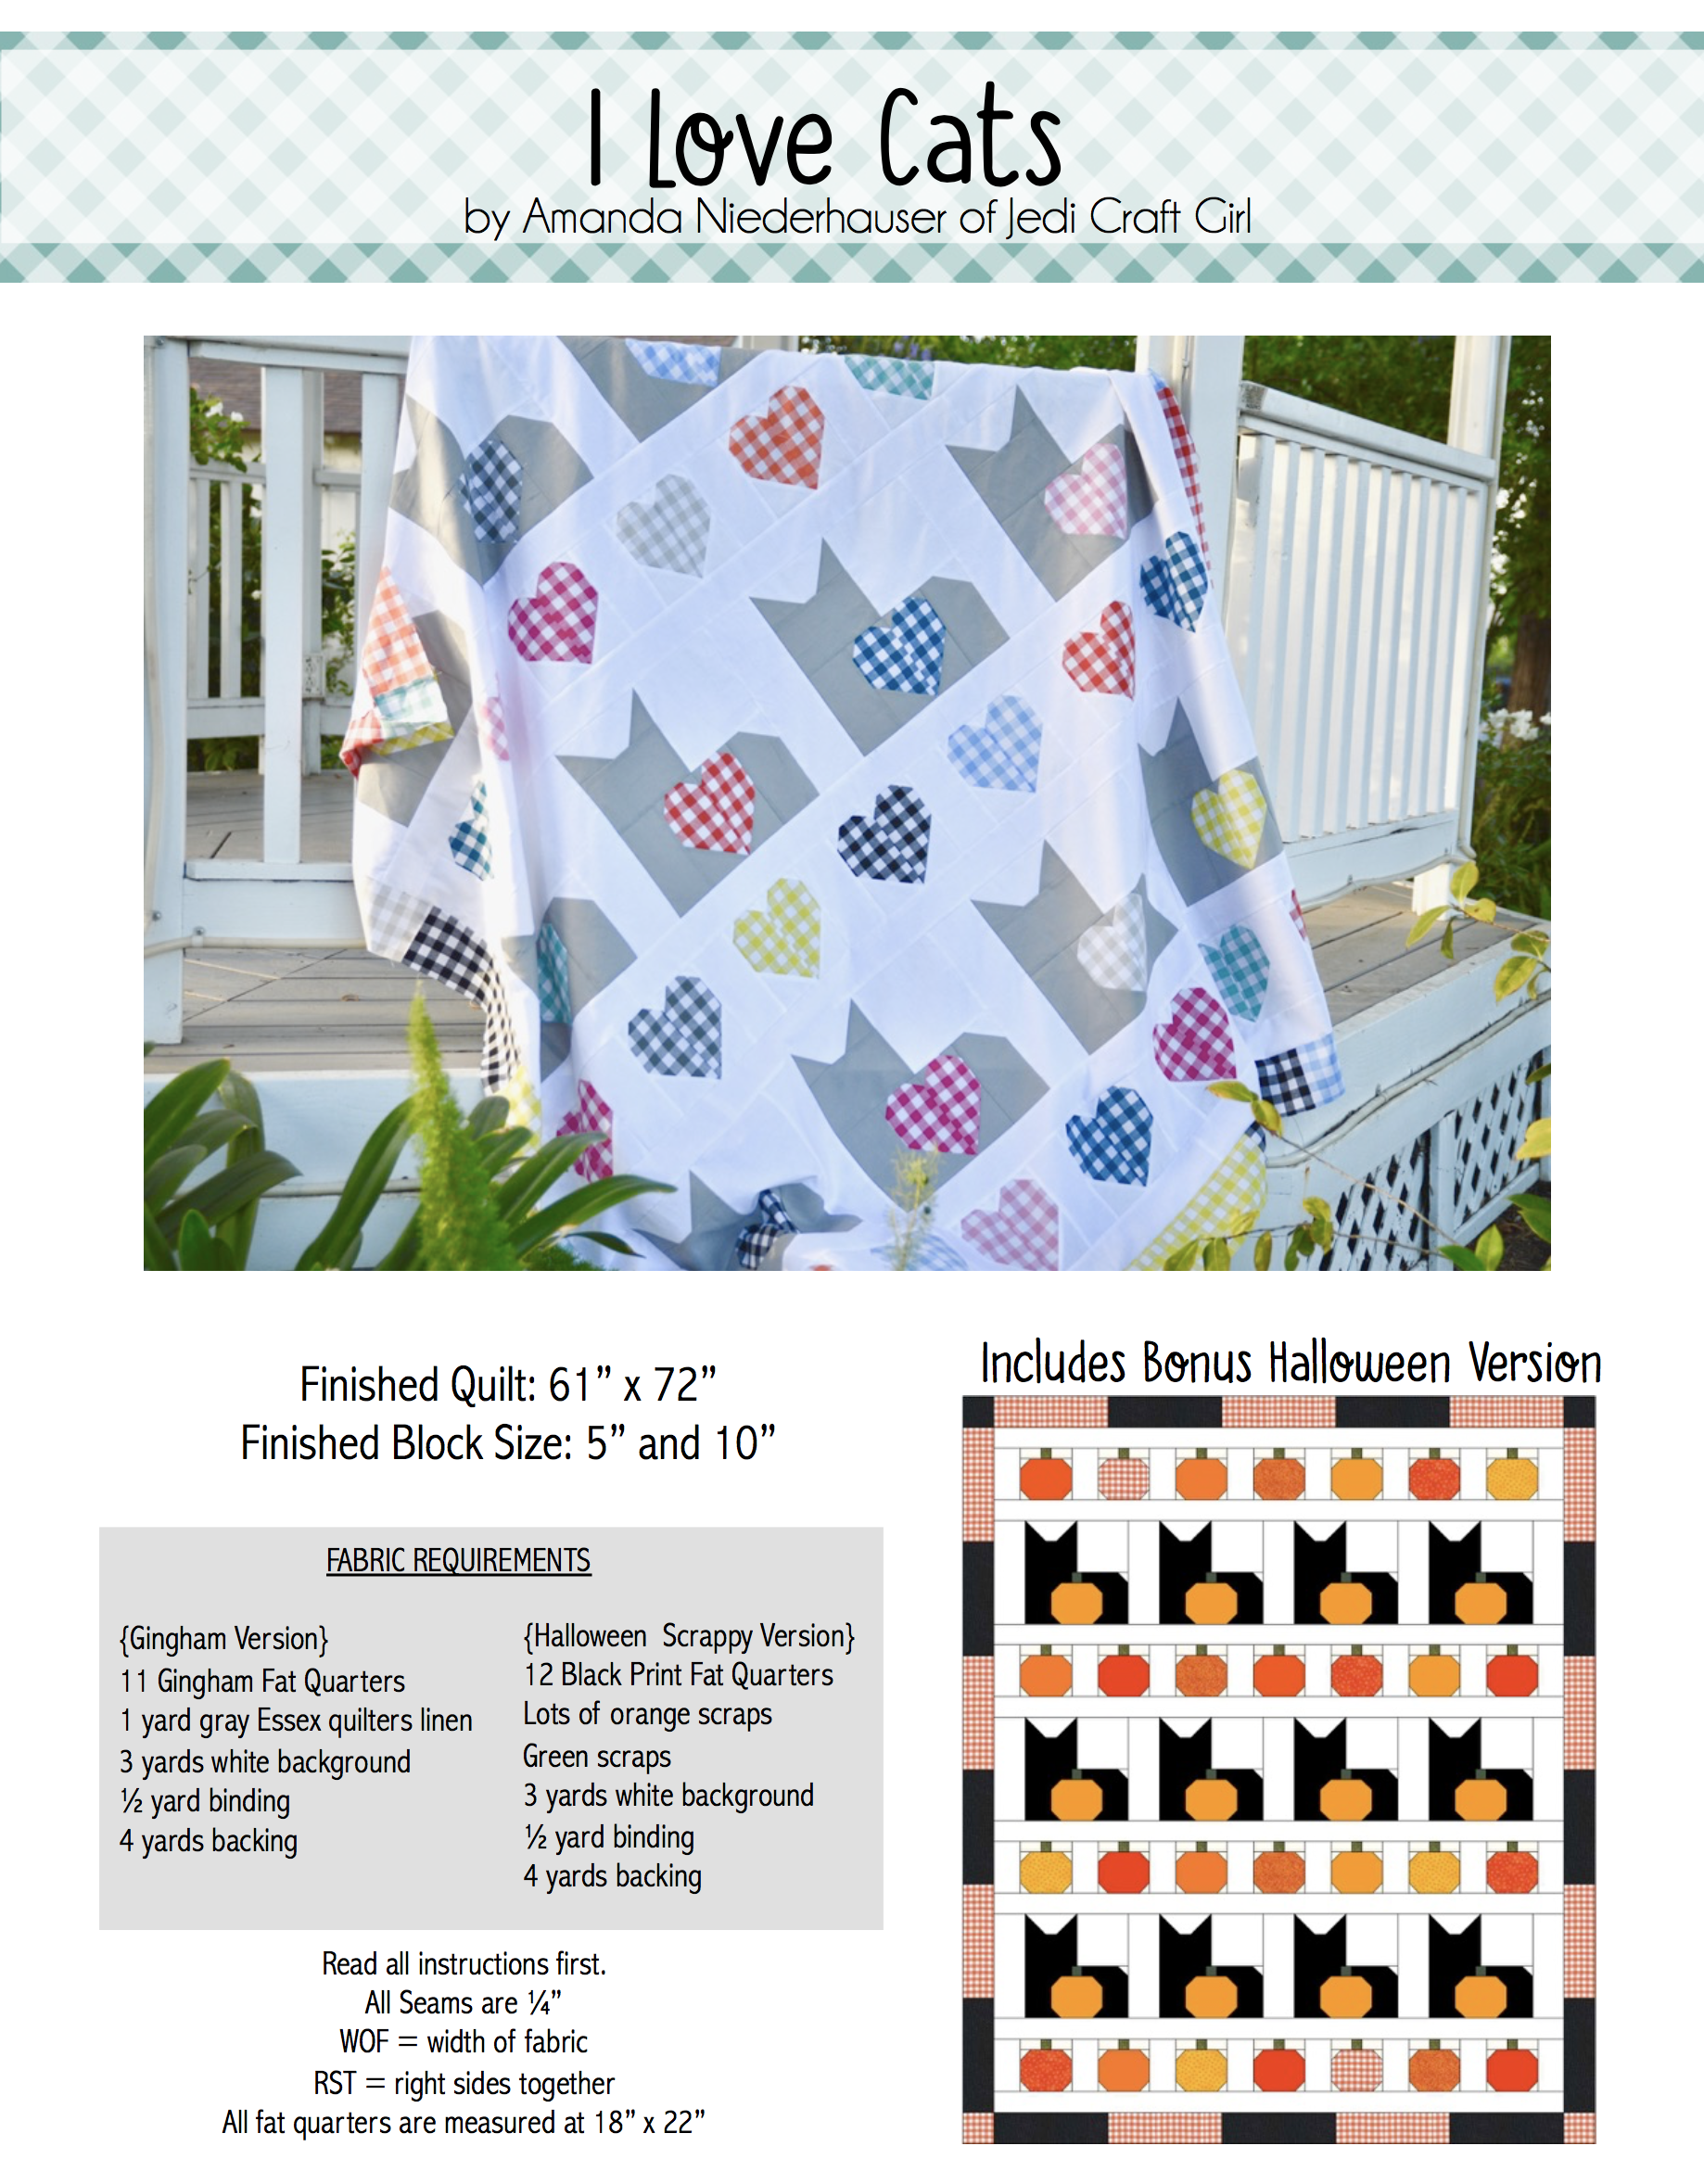
The pattern is available in my Etsy shop and it includes instructions on how to make both versions of the quilt.

Screen Shot 2017-10-03 at 11.24.40 PM


halloween cat quilt 3

I can’t decide which version I like better

cotton and steel gingham

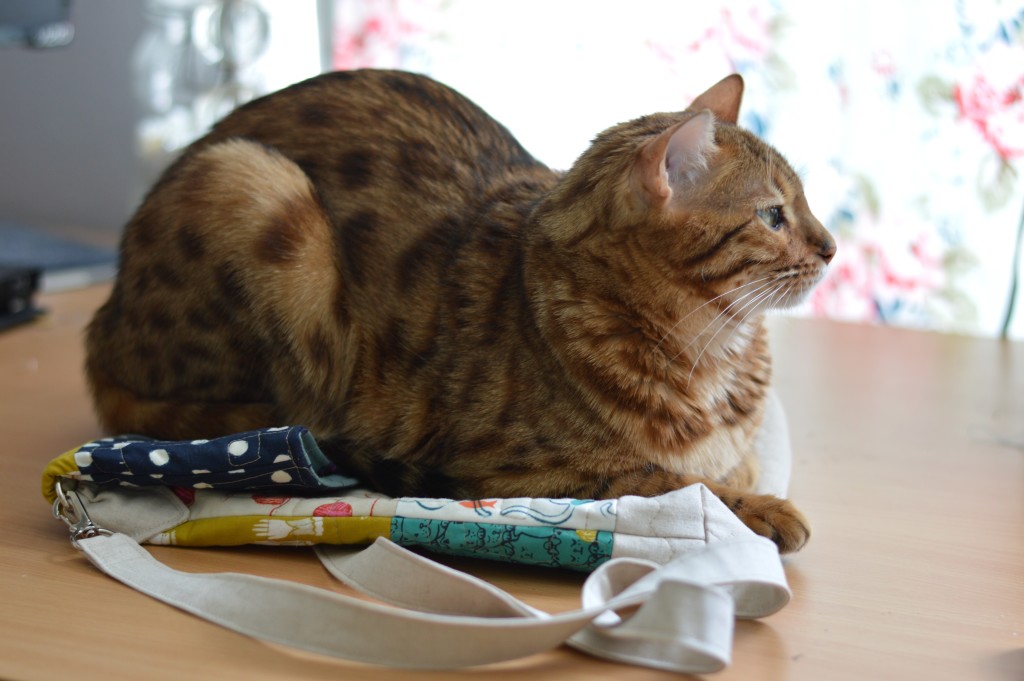
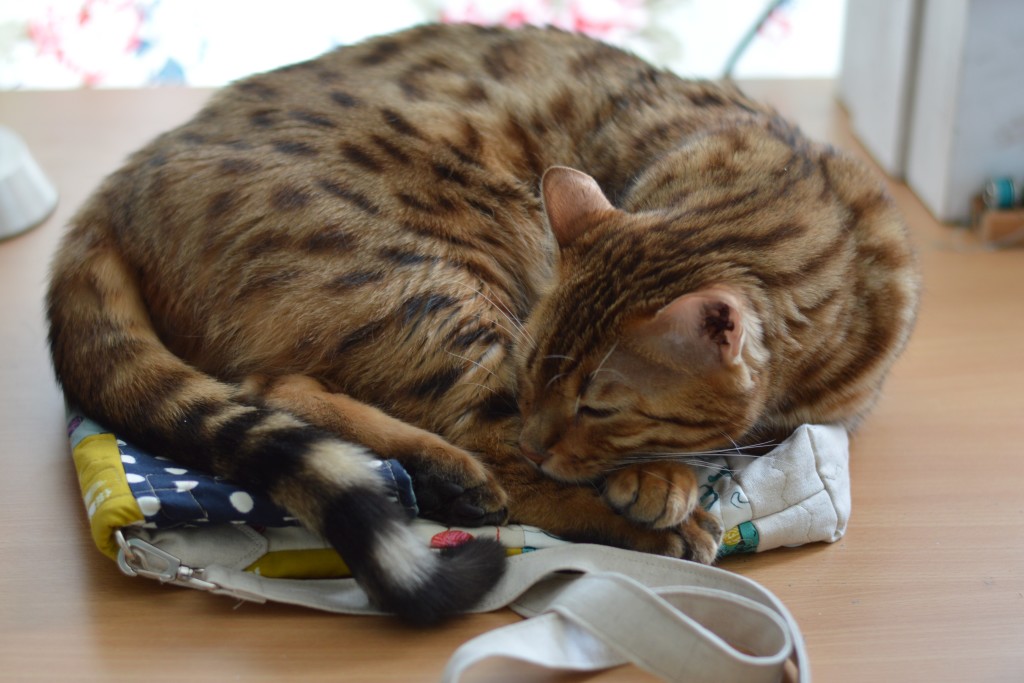
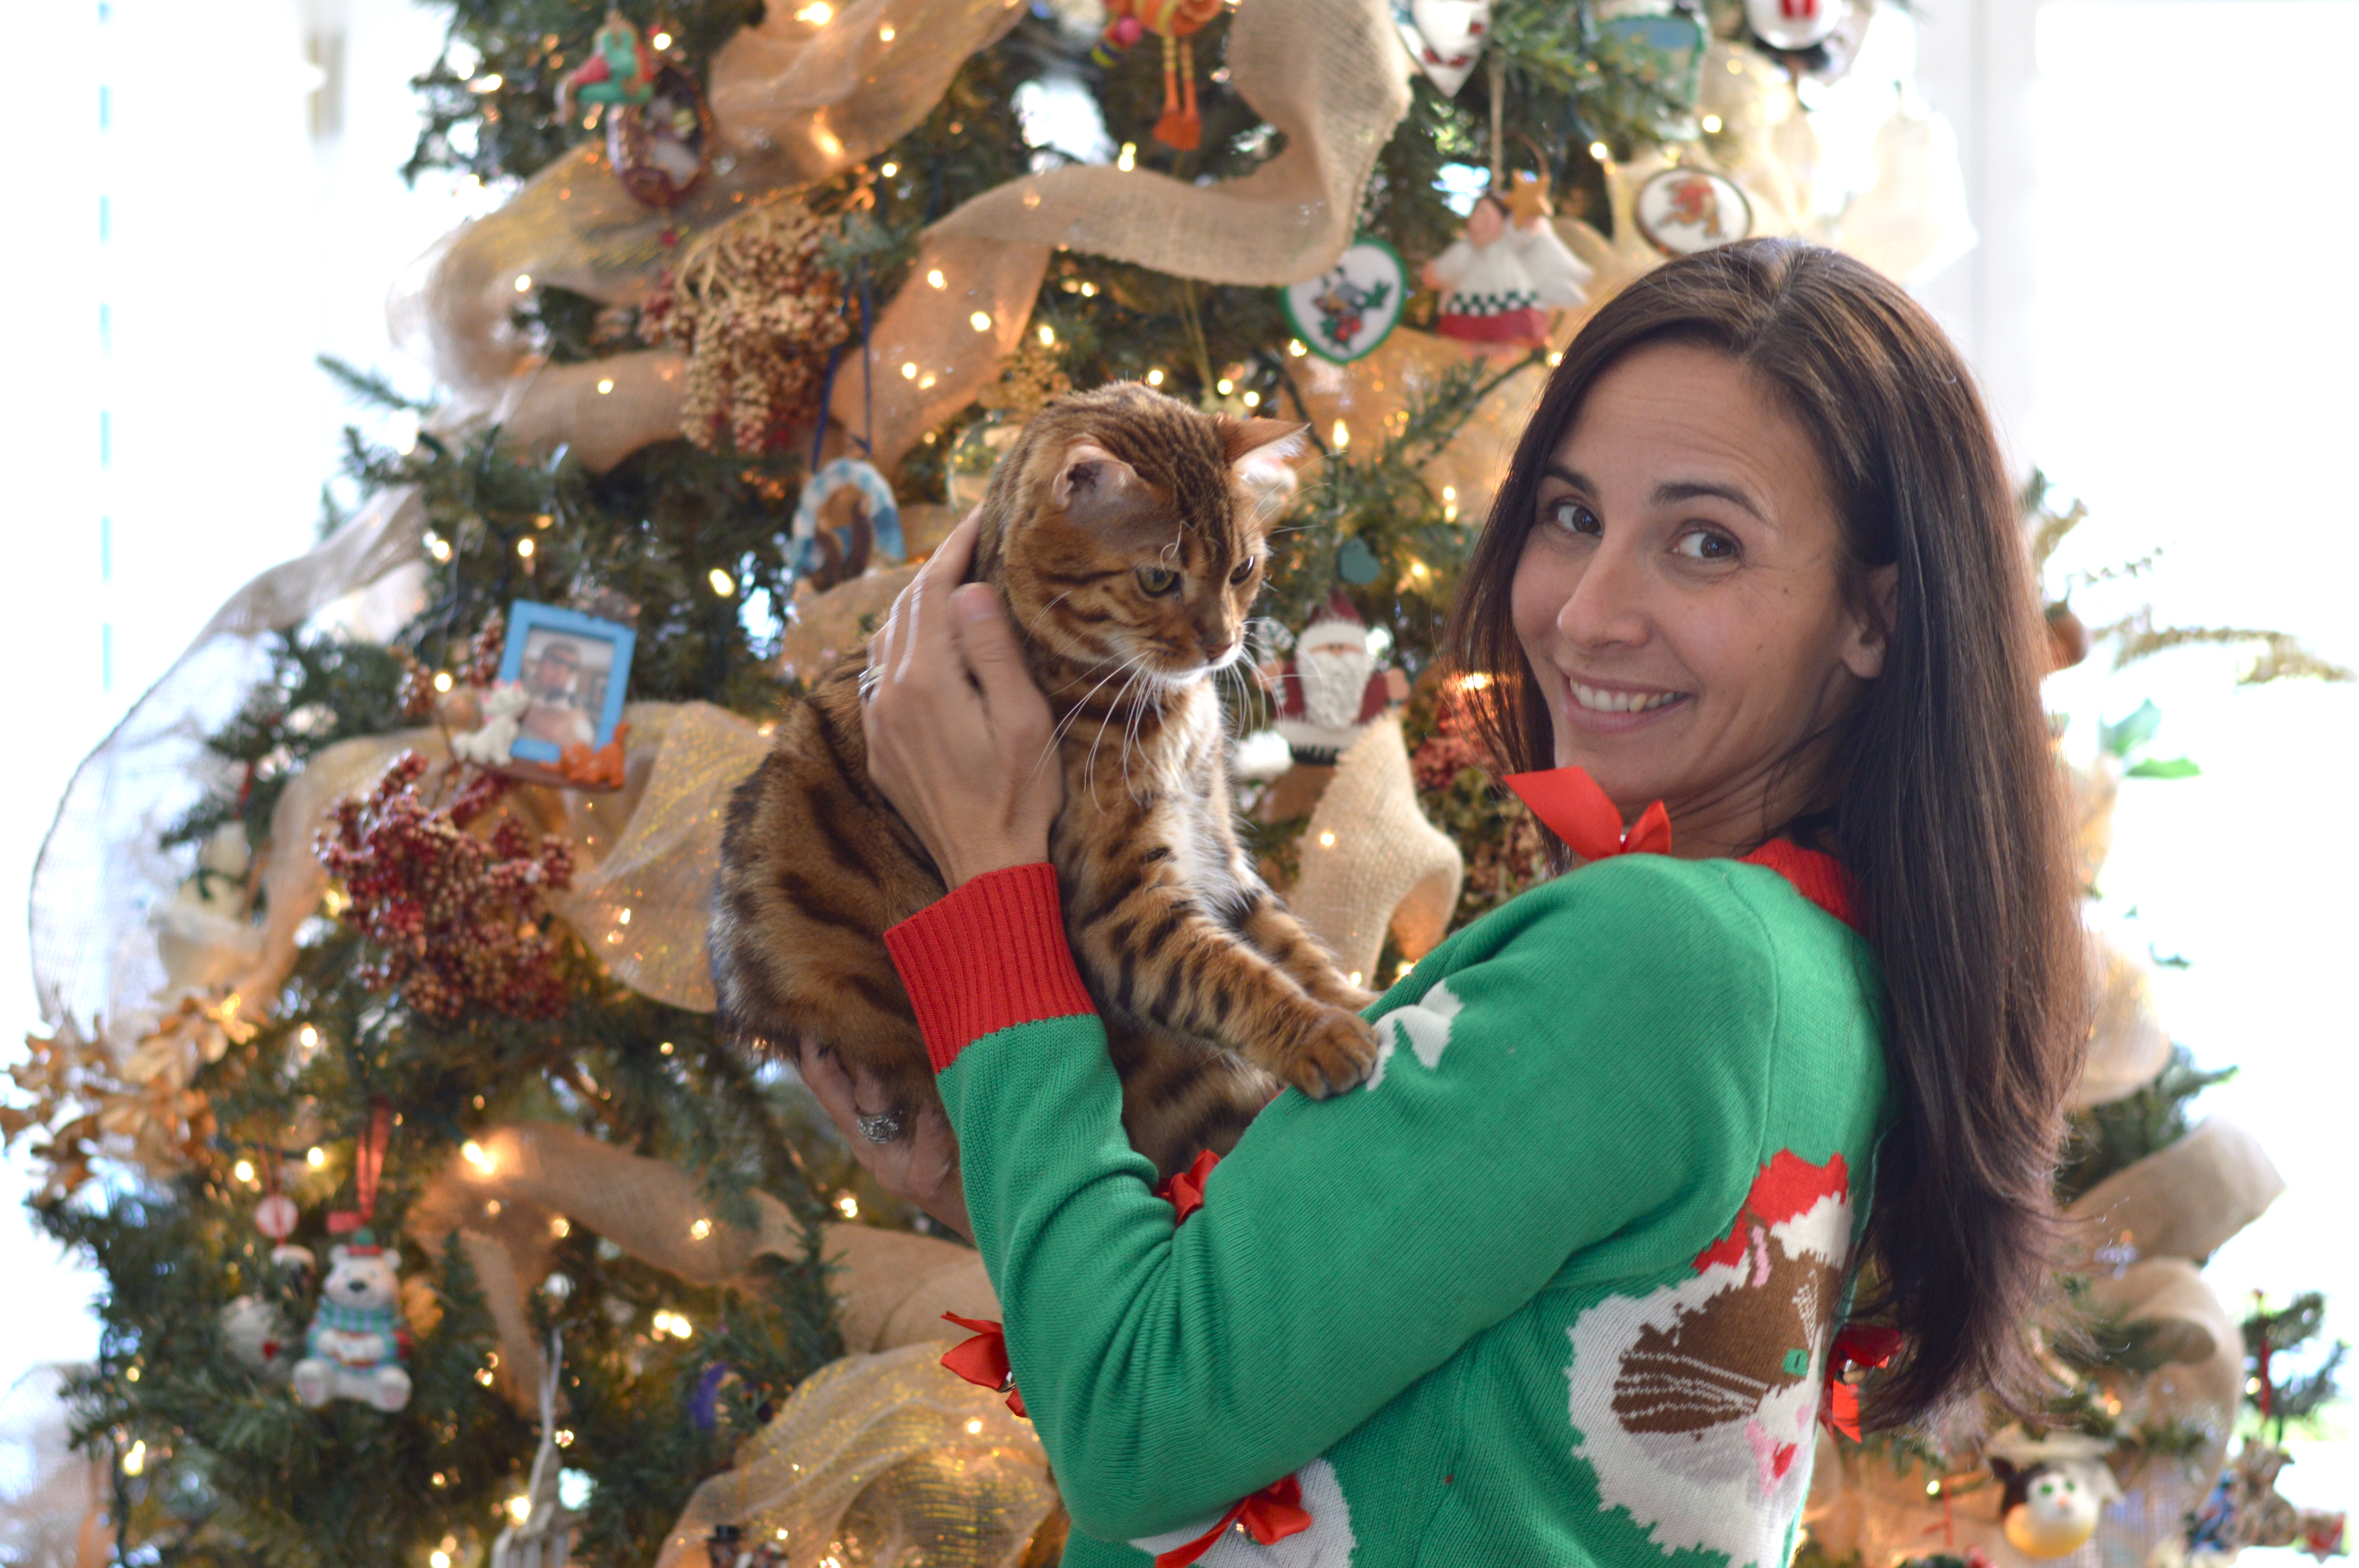
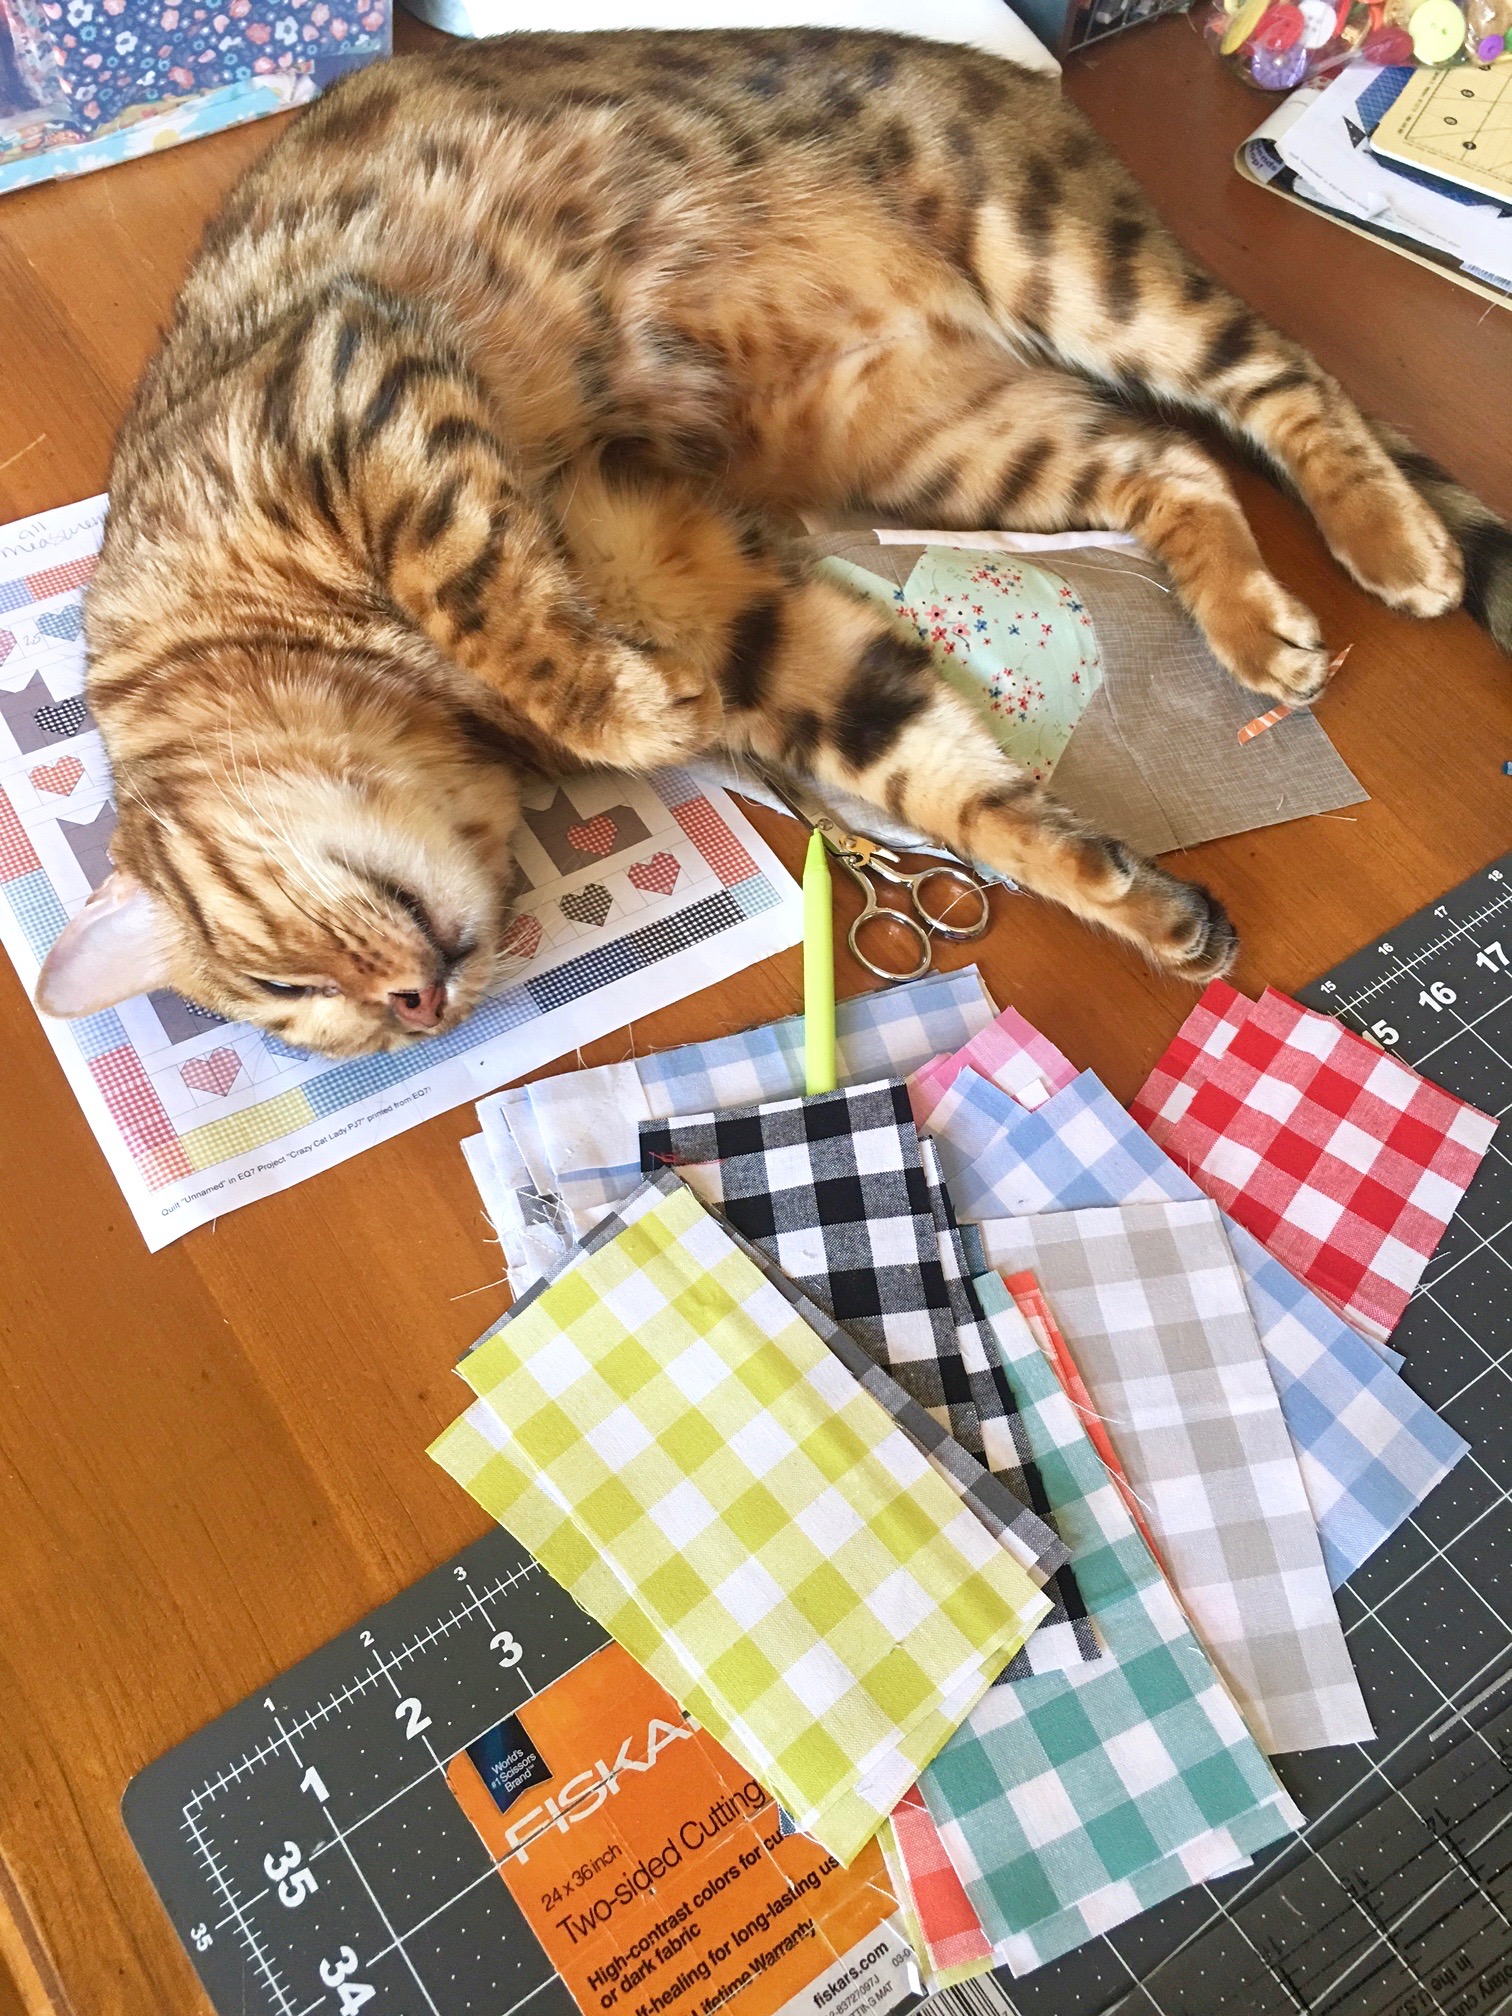
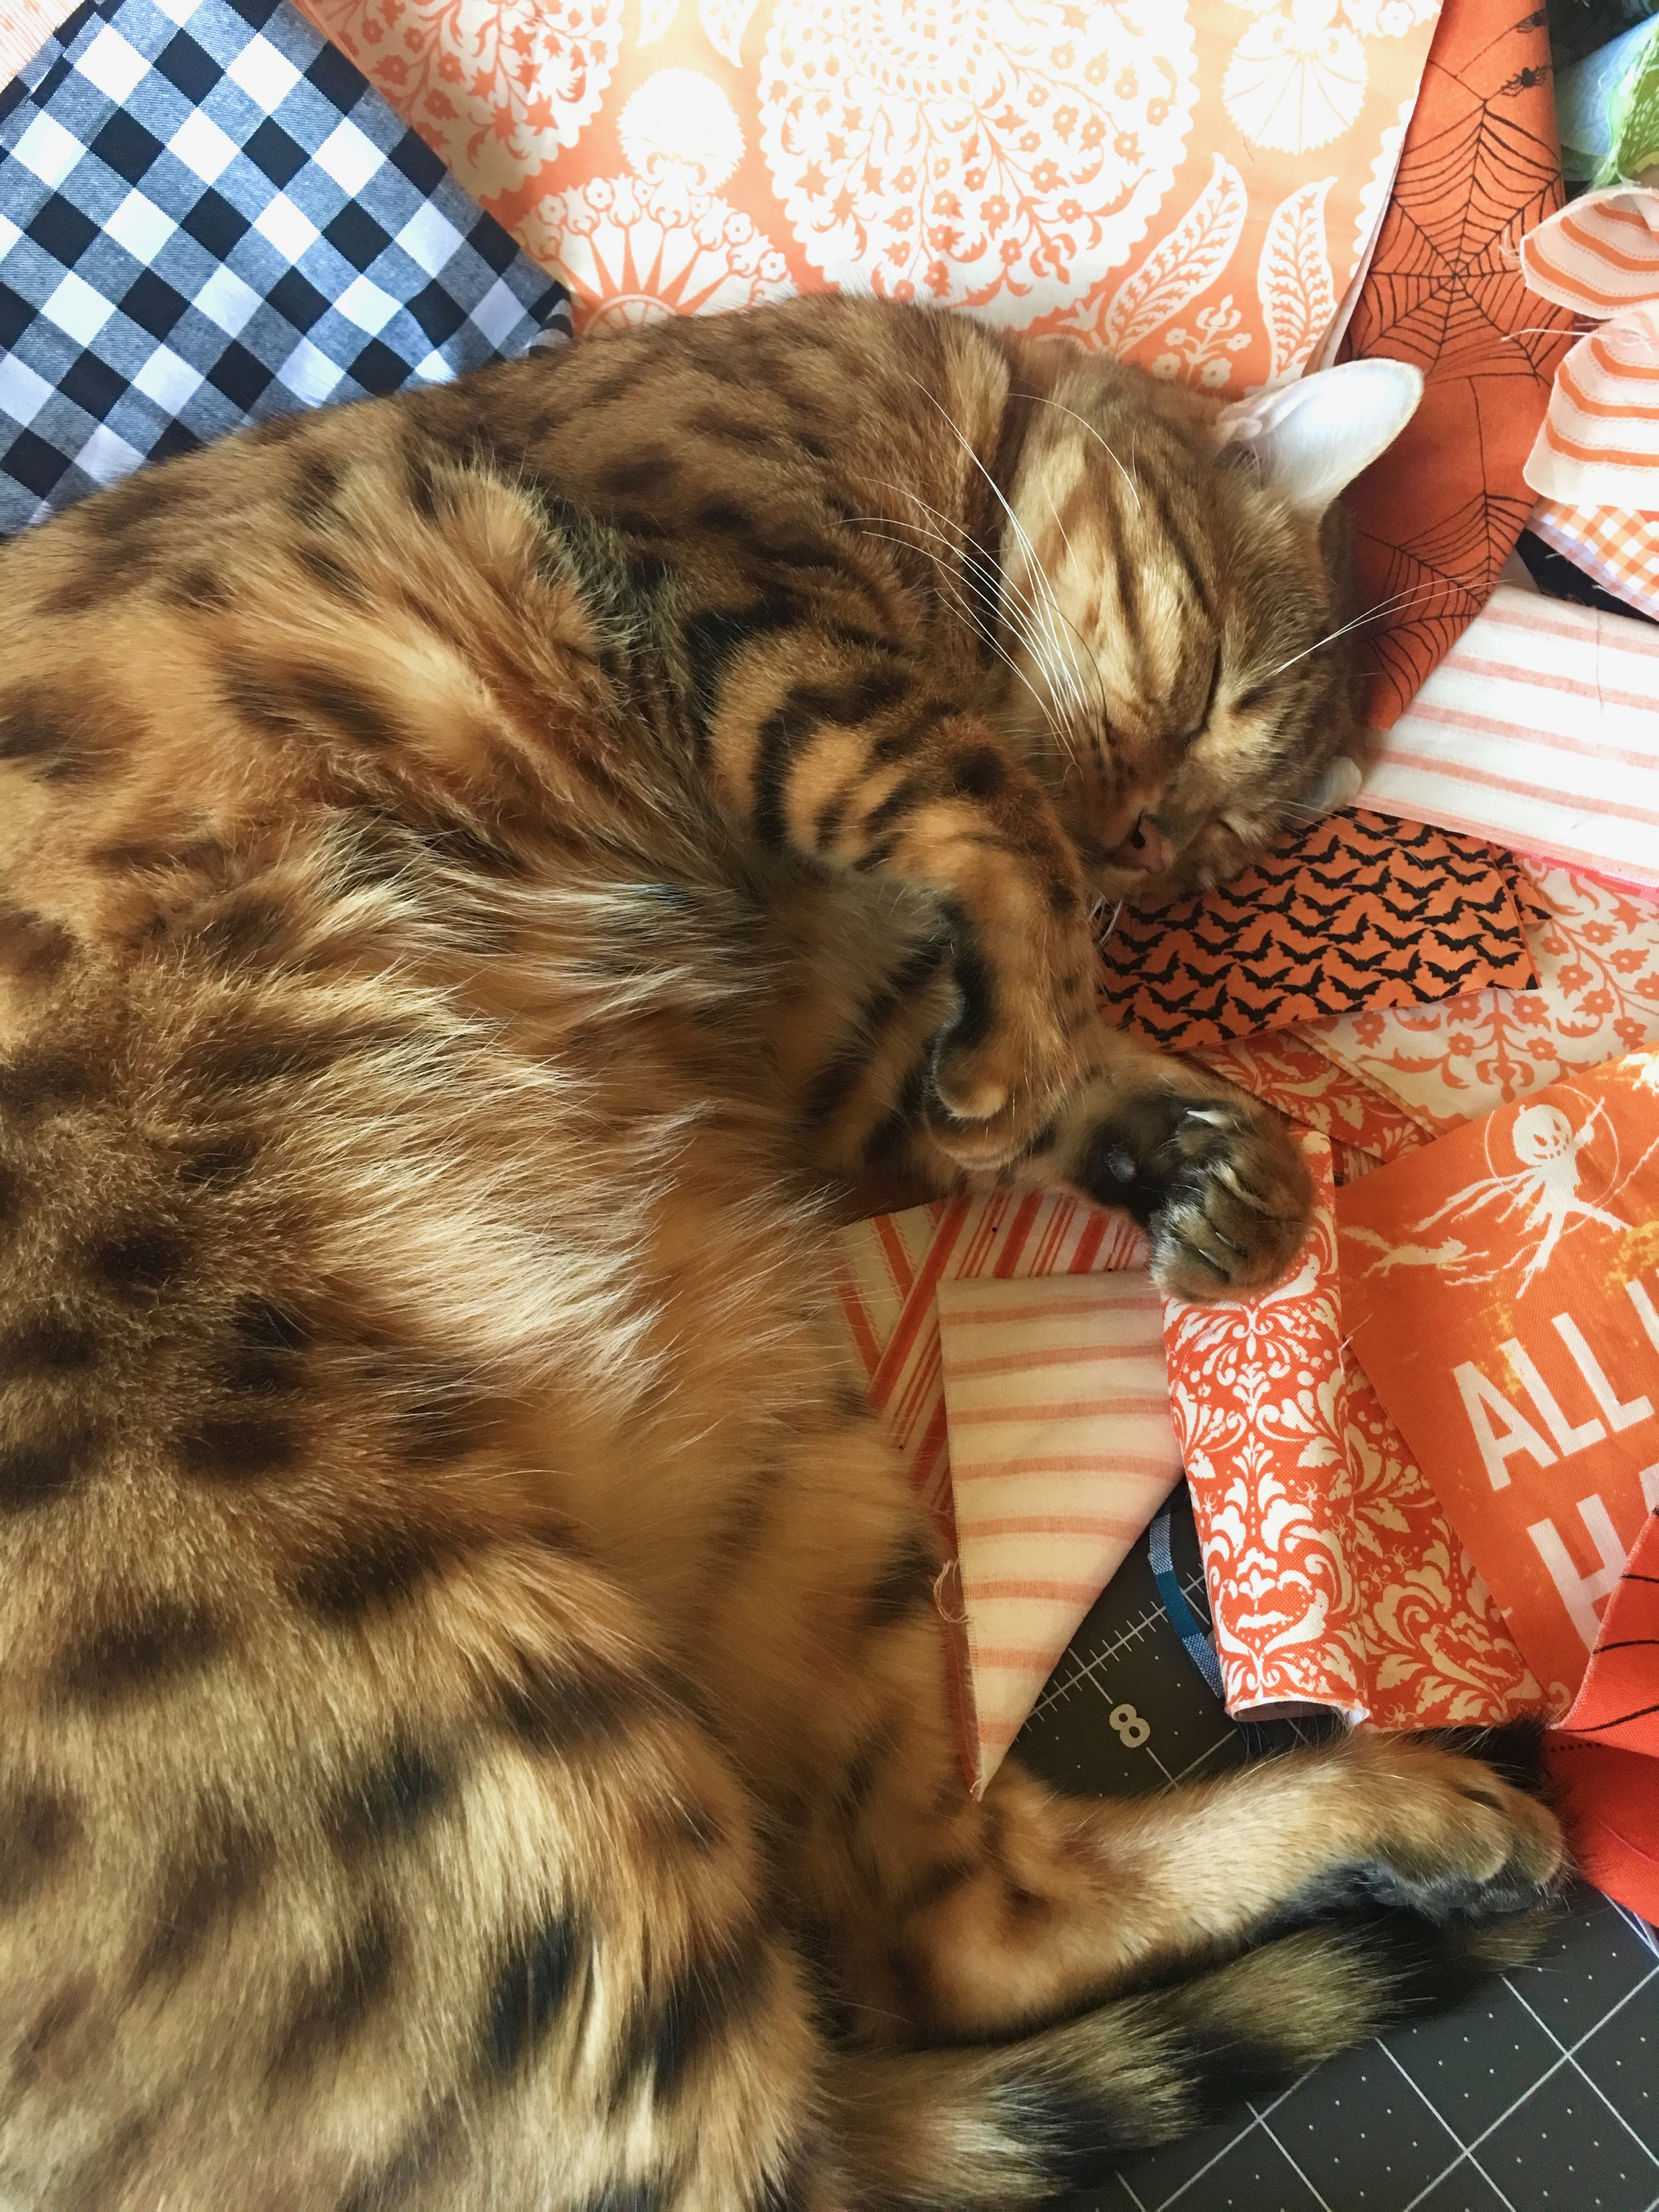
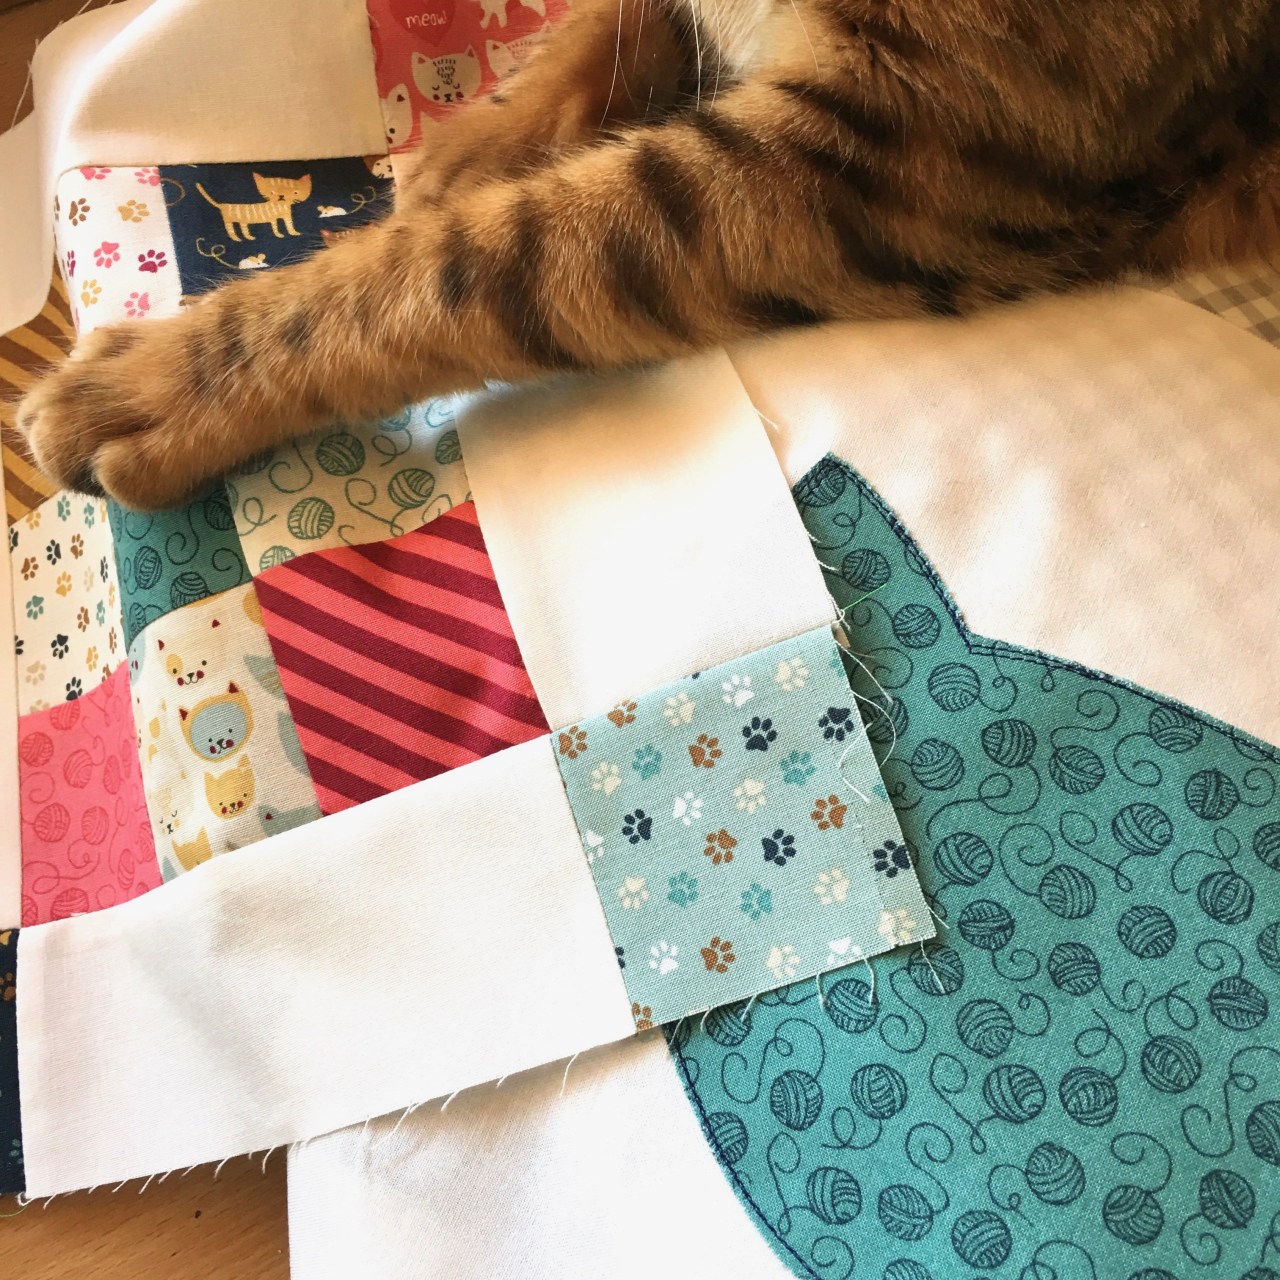
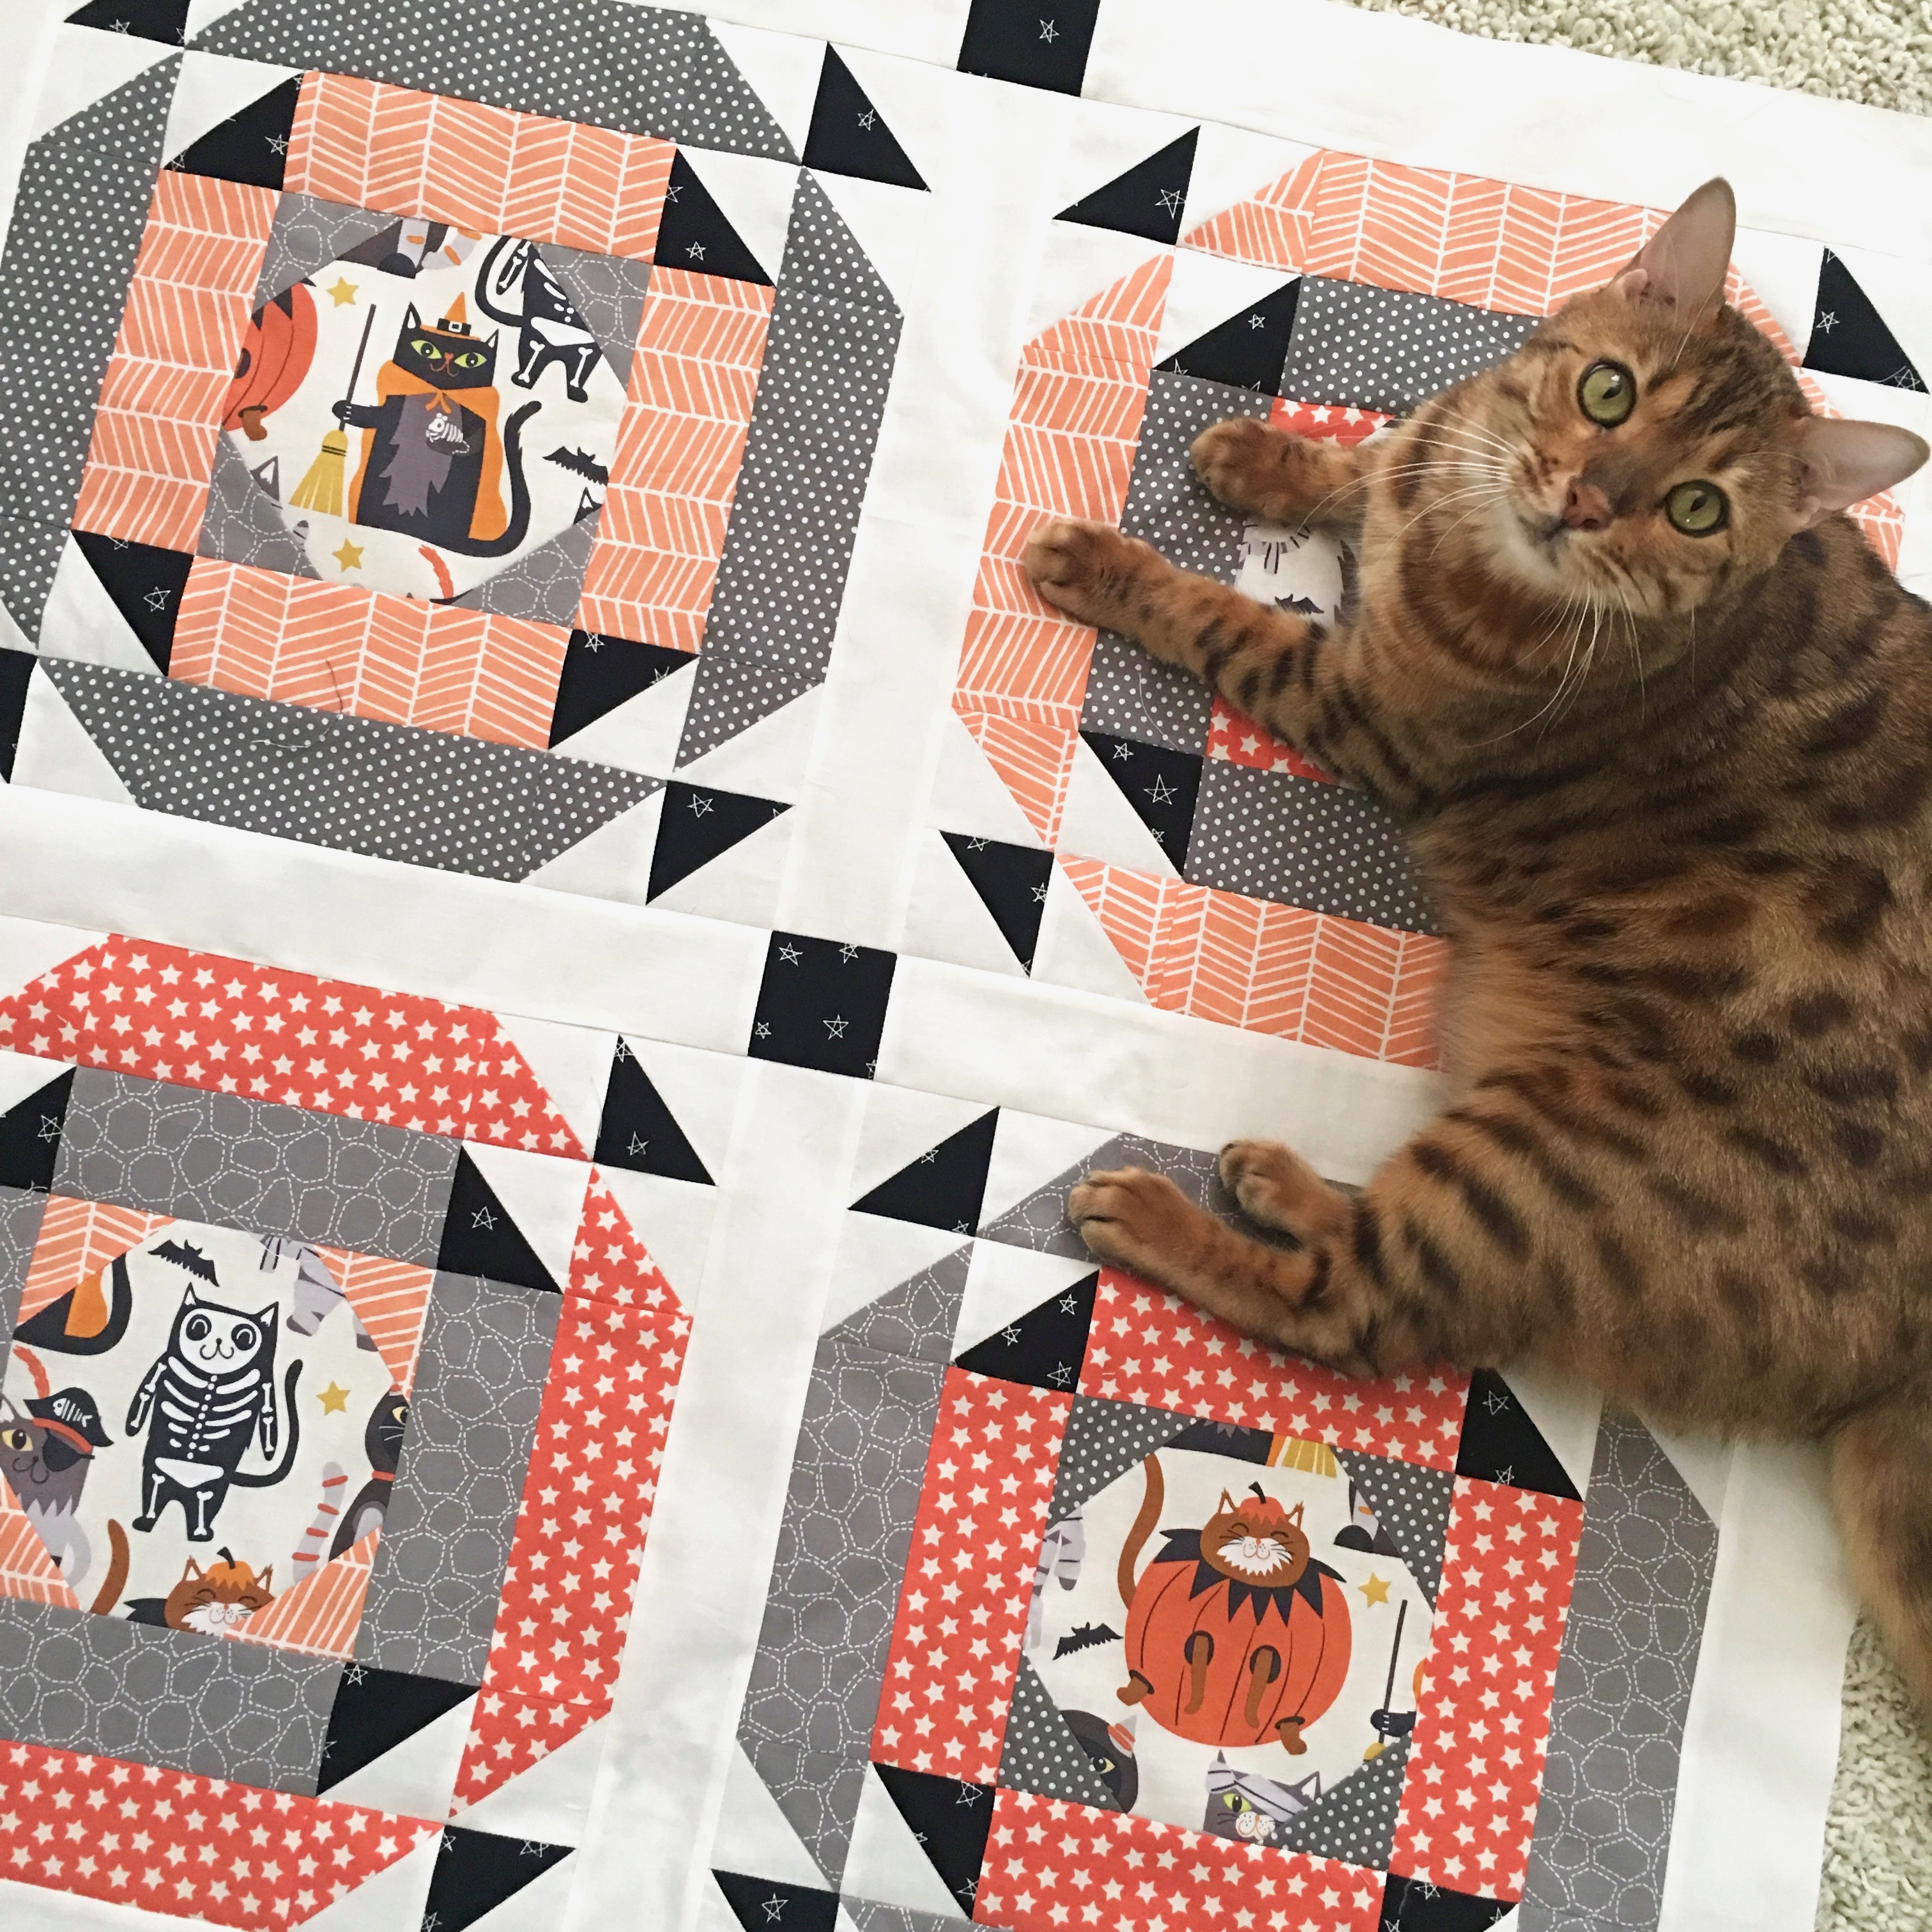
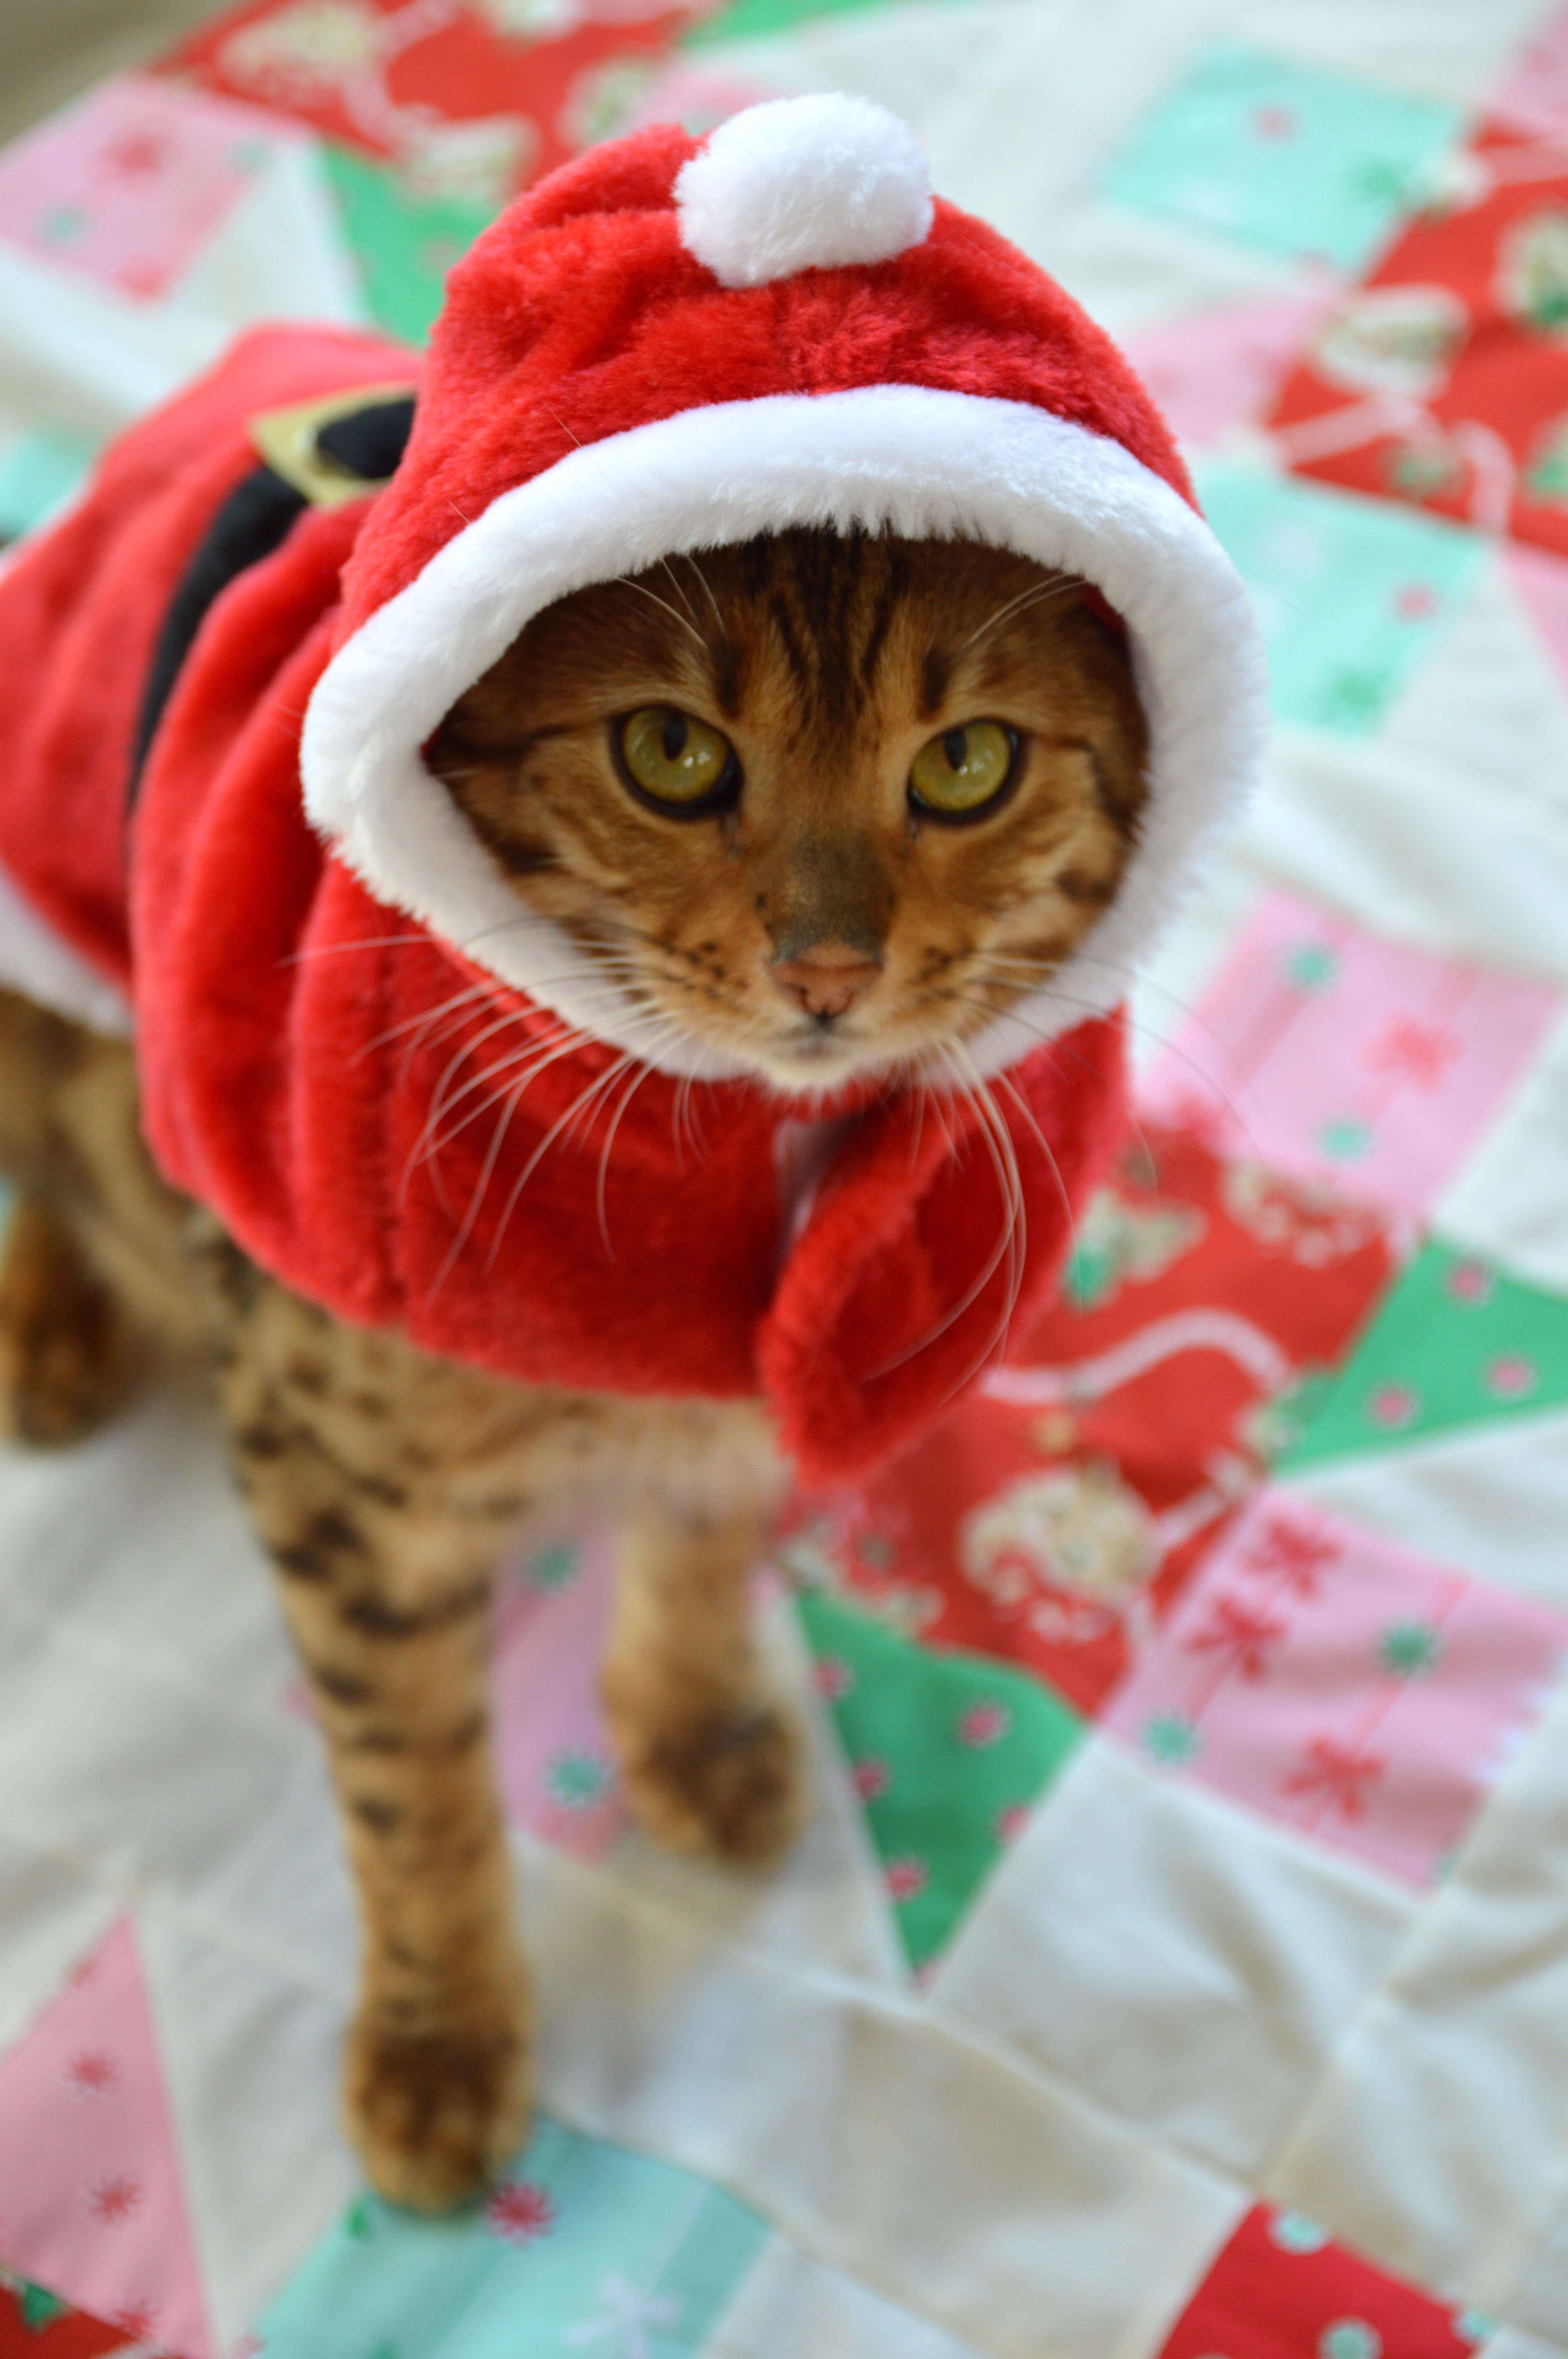
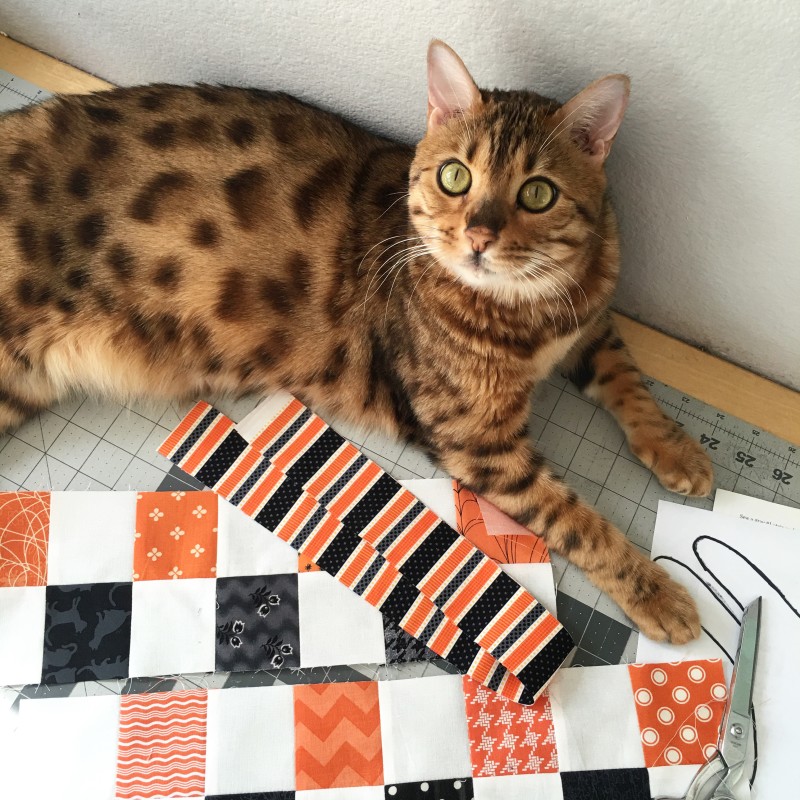
Mufasa was an integral part of the design process, as you can see 🙂

IMG_1961

i love cats quilt 2

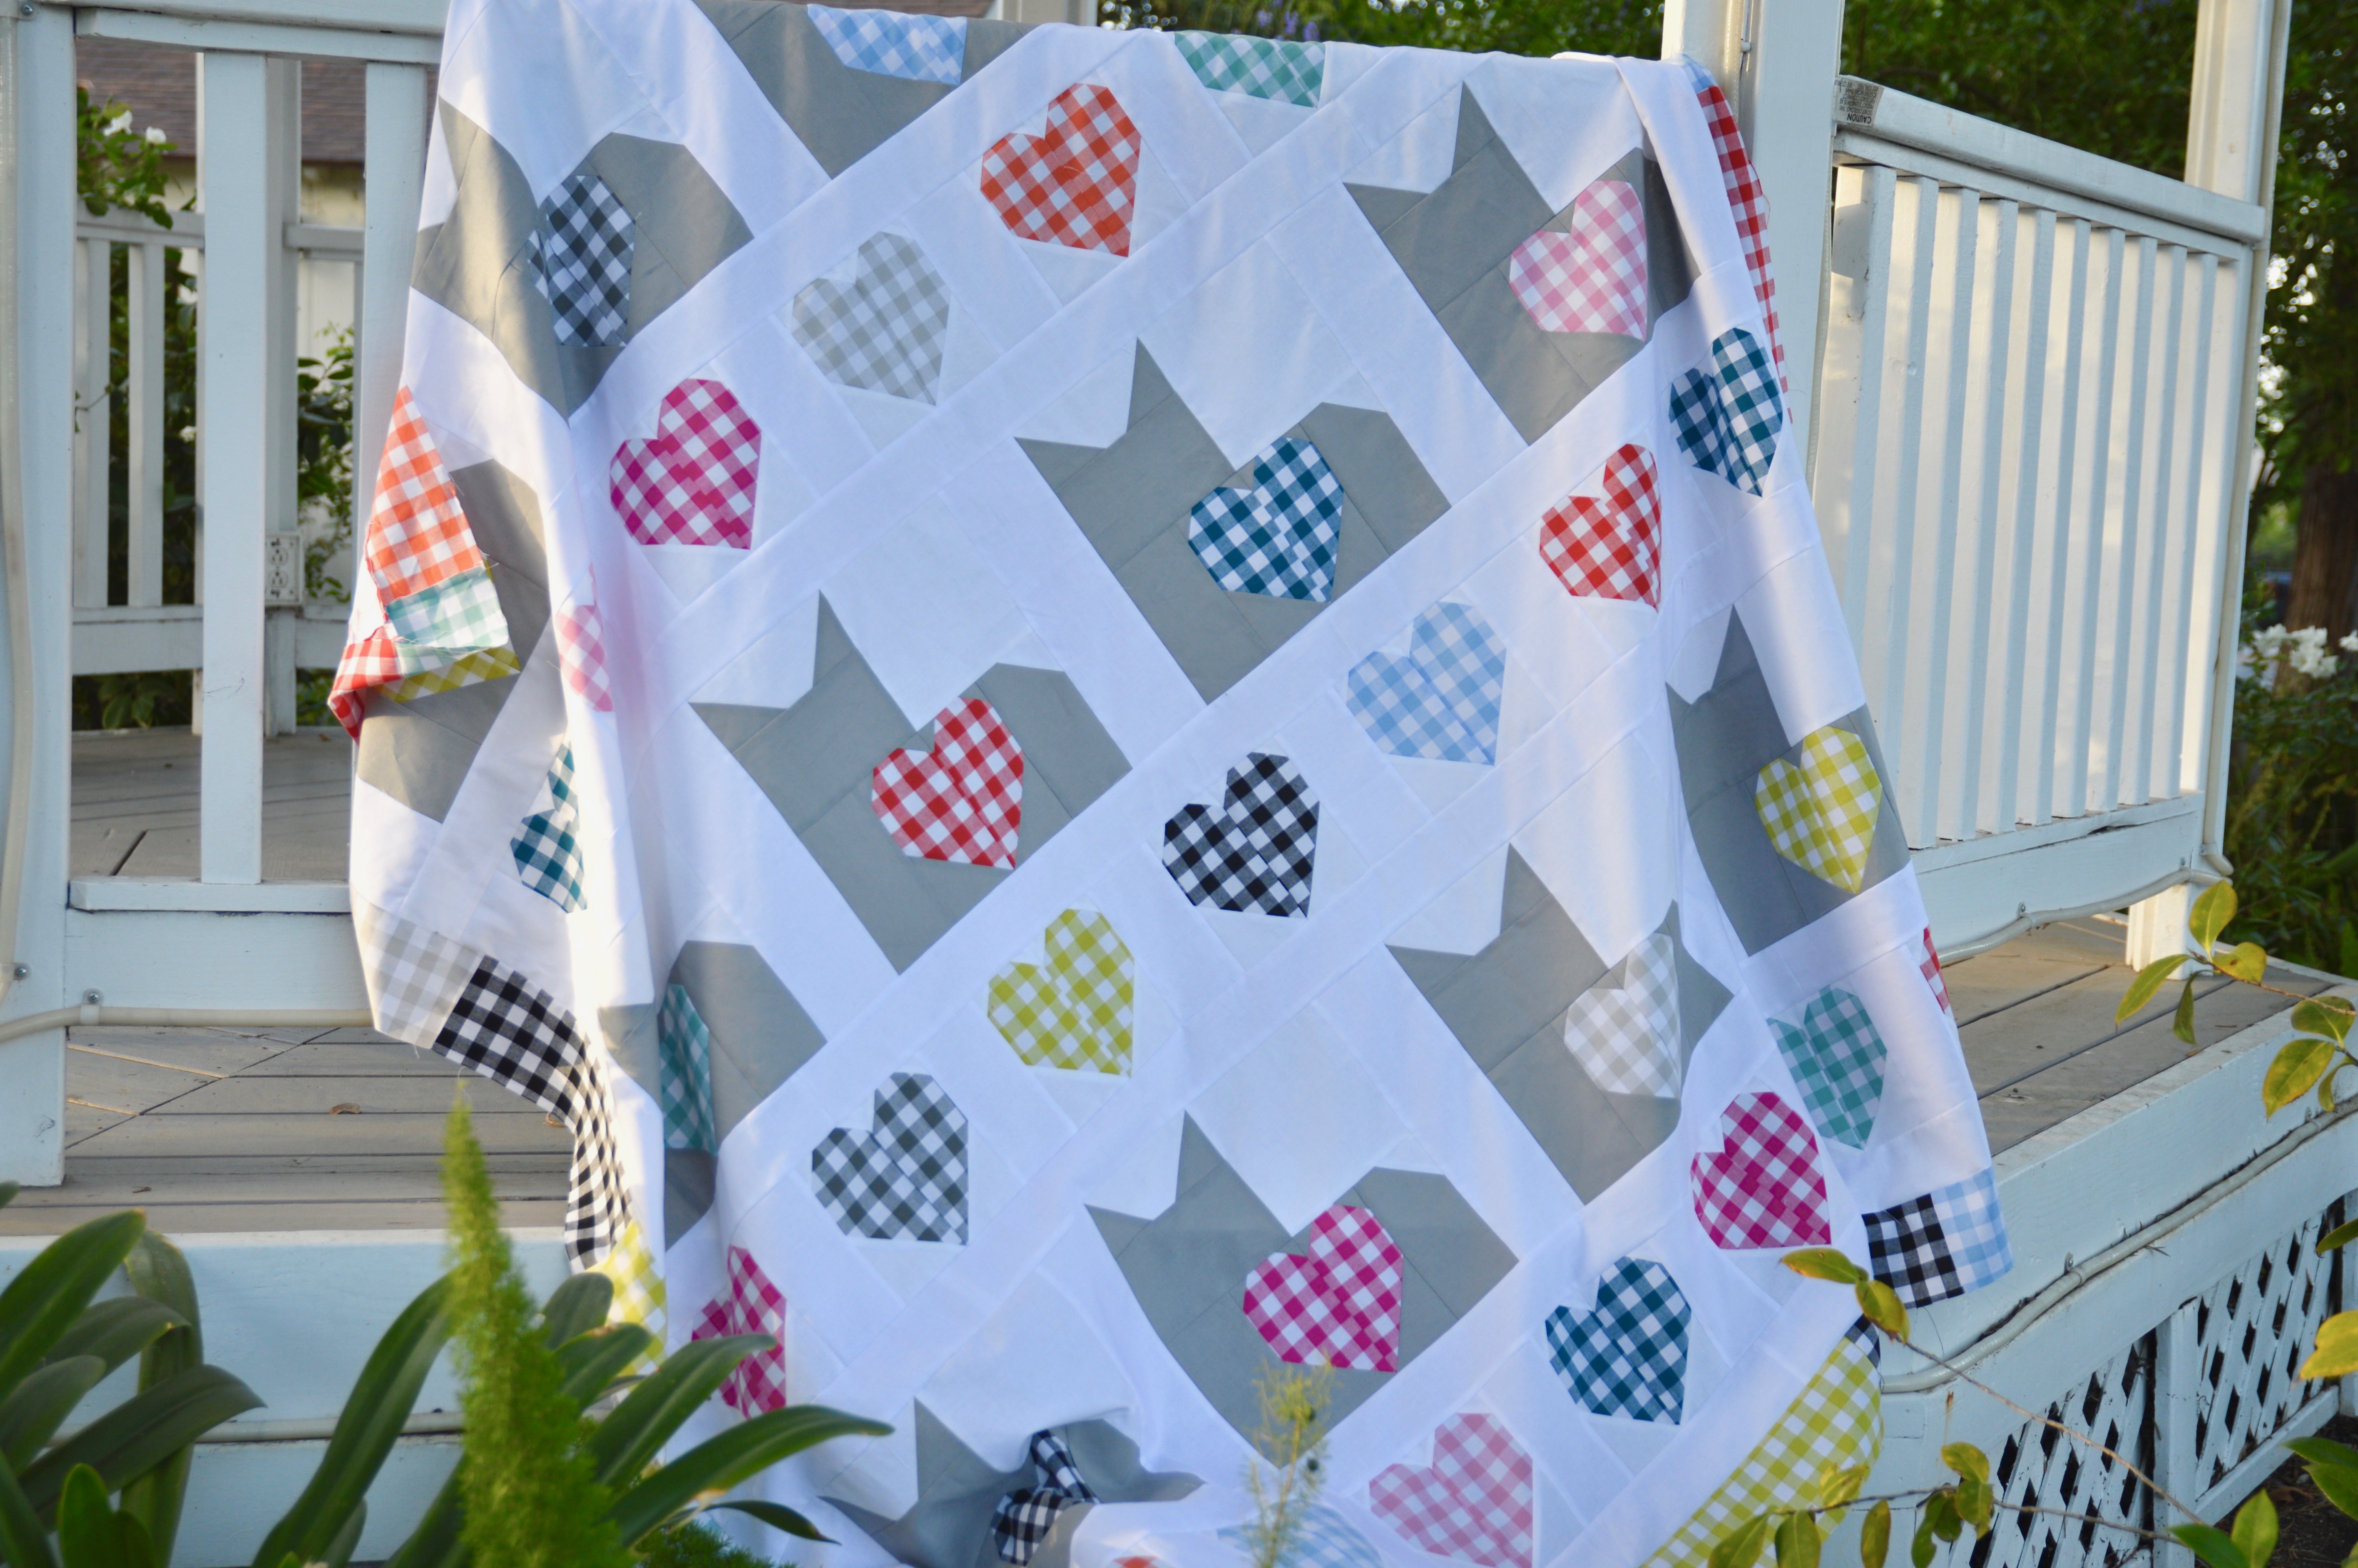
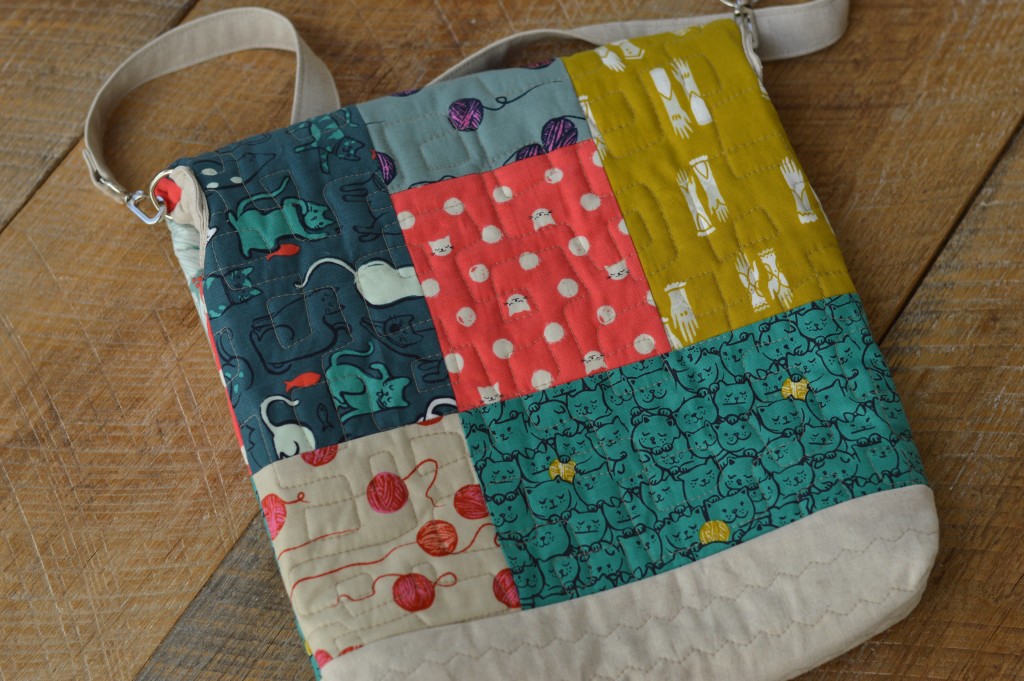
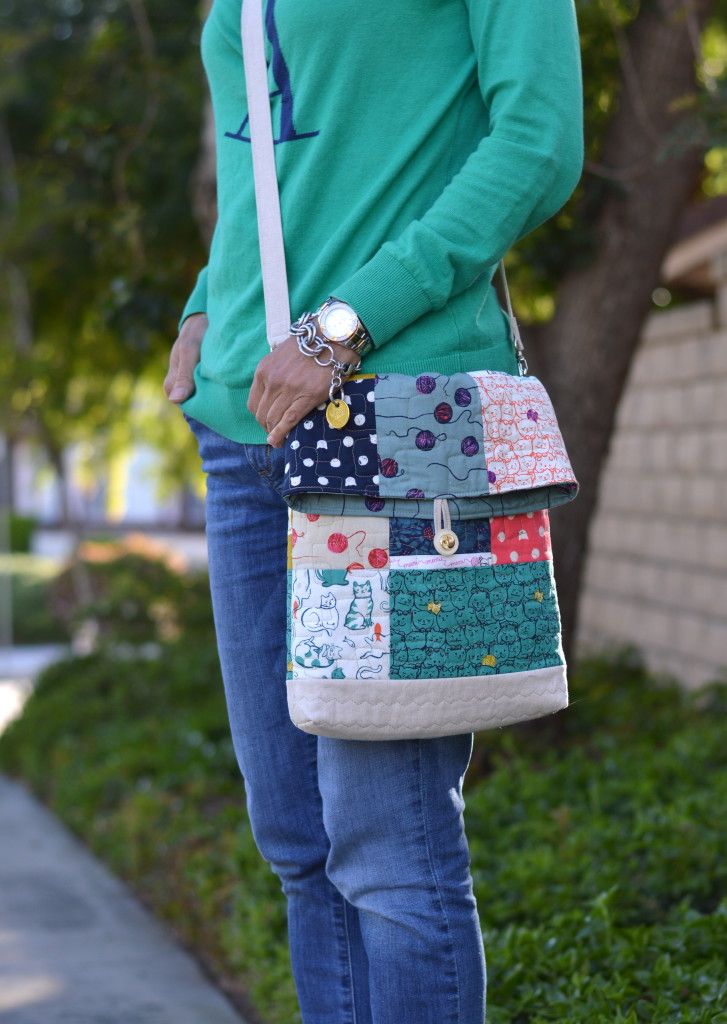
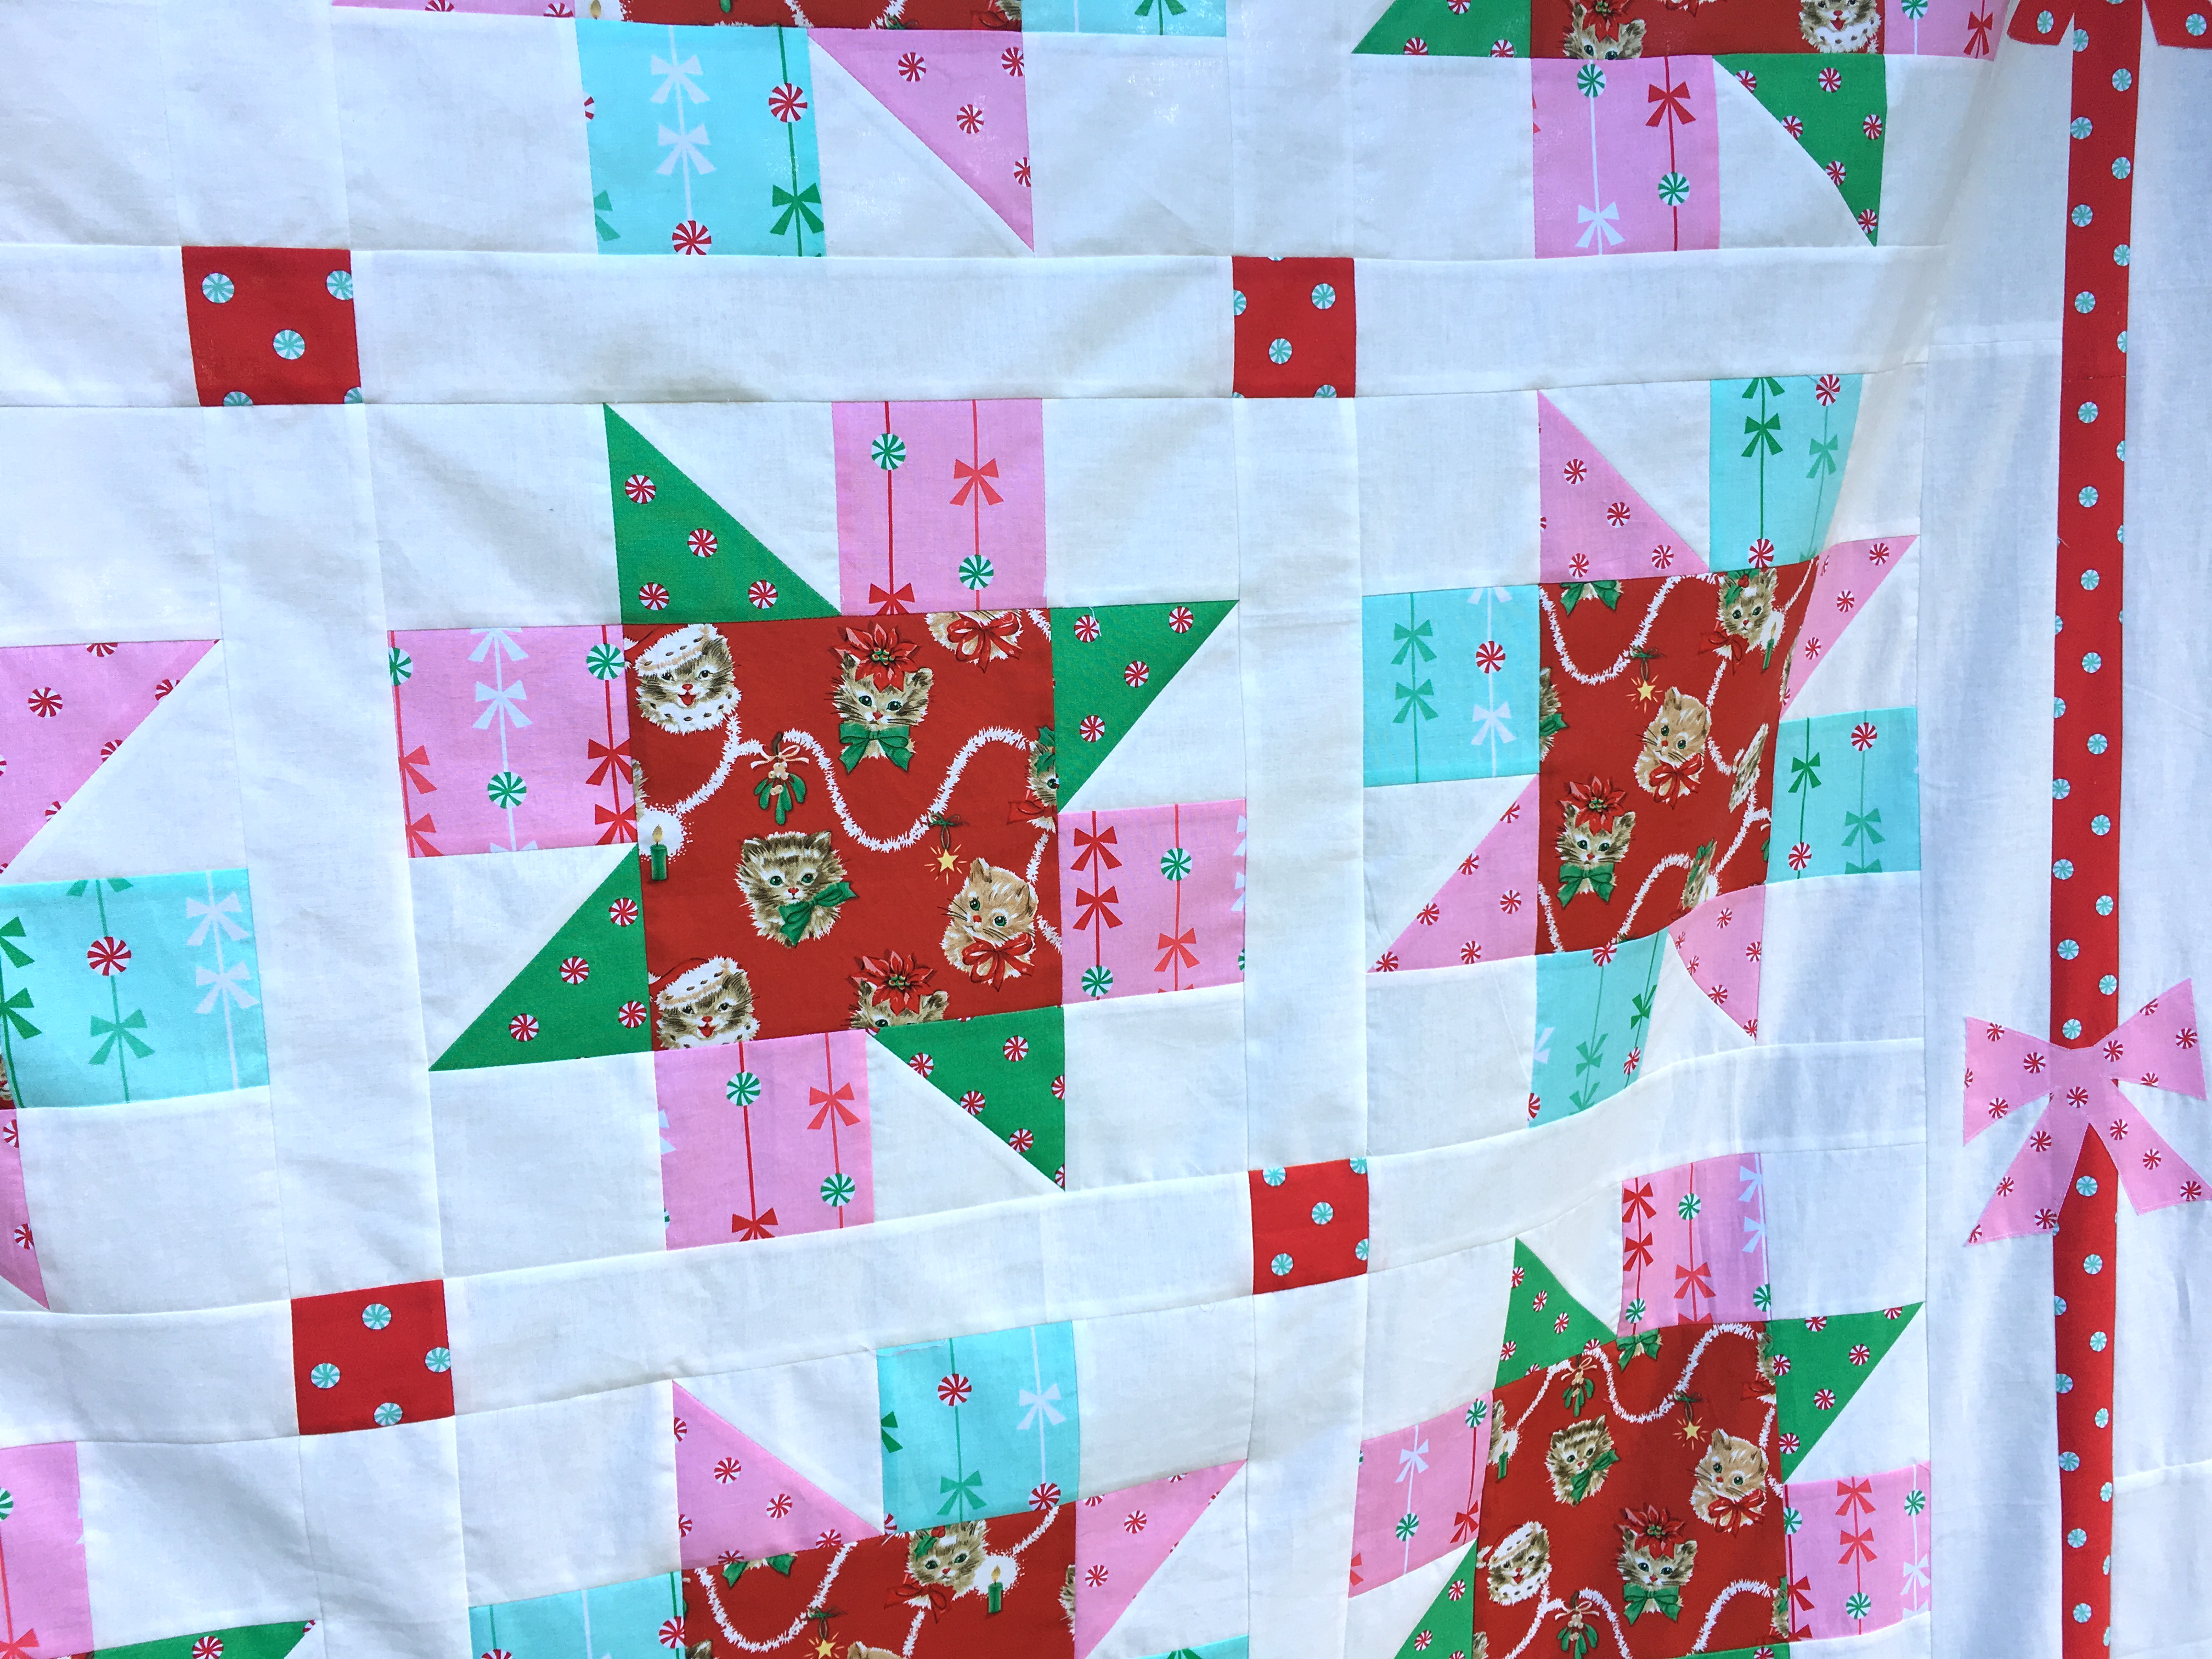
There are 3 rows of cats and 4 rows of hearts.  This is such a fun way to show off your favorite fabrics!  and who doesn’t love gingham!!  More gingham please!!
DSC_0630
DSC_0653

cat quilt
cats and pumpkins quilt

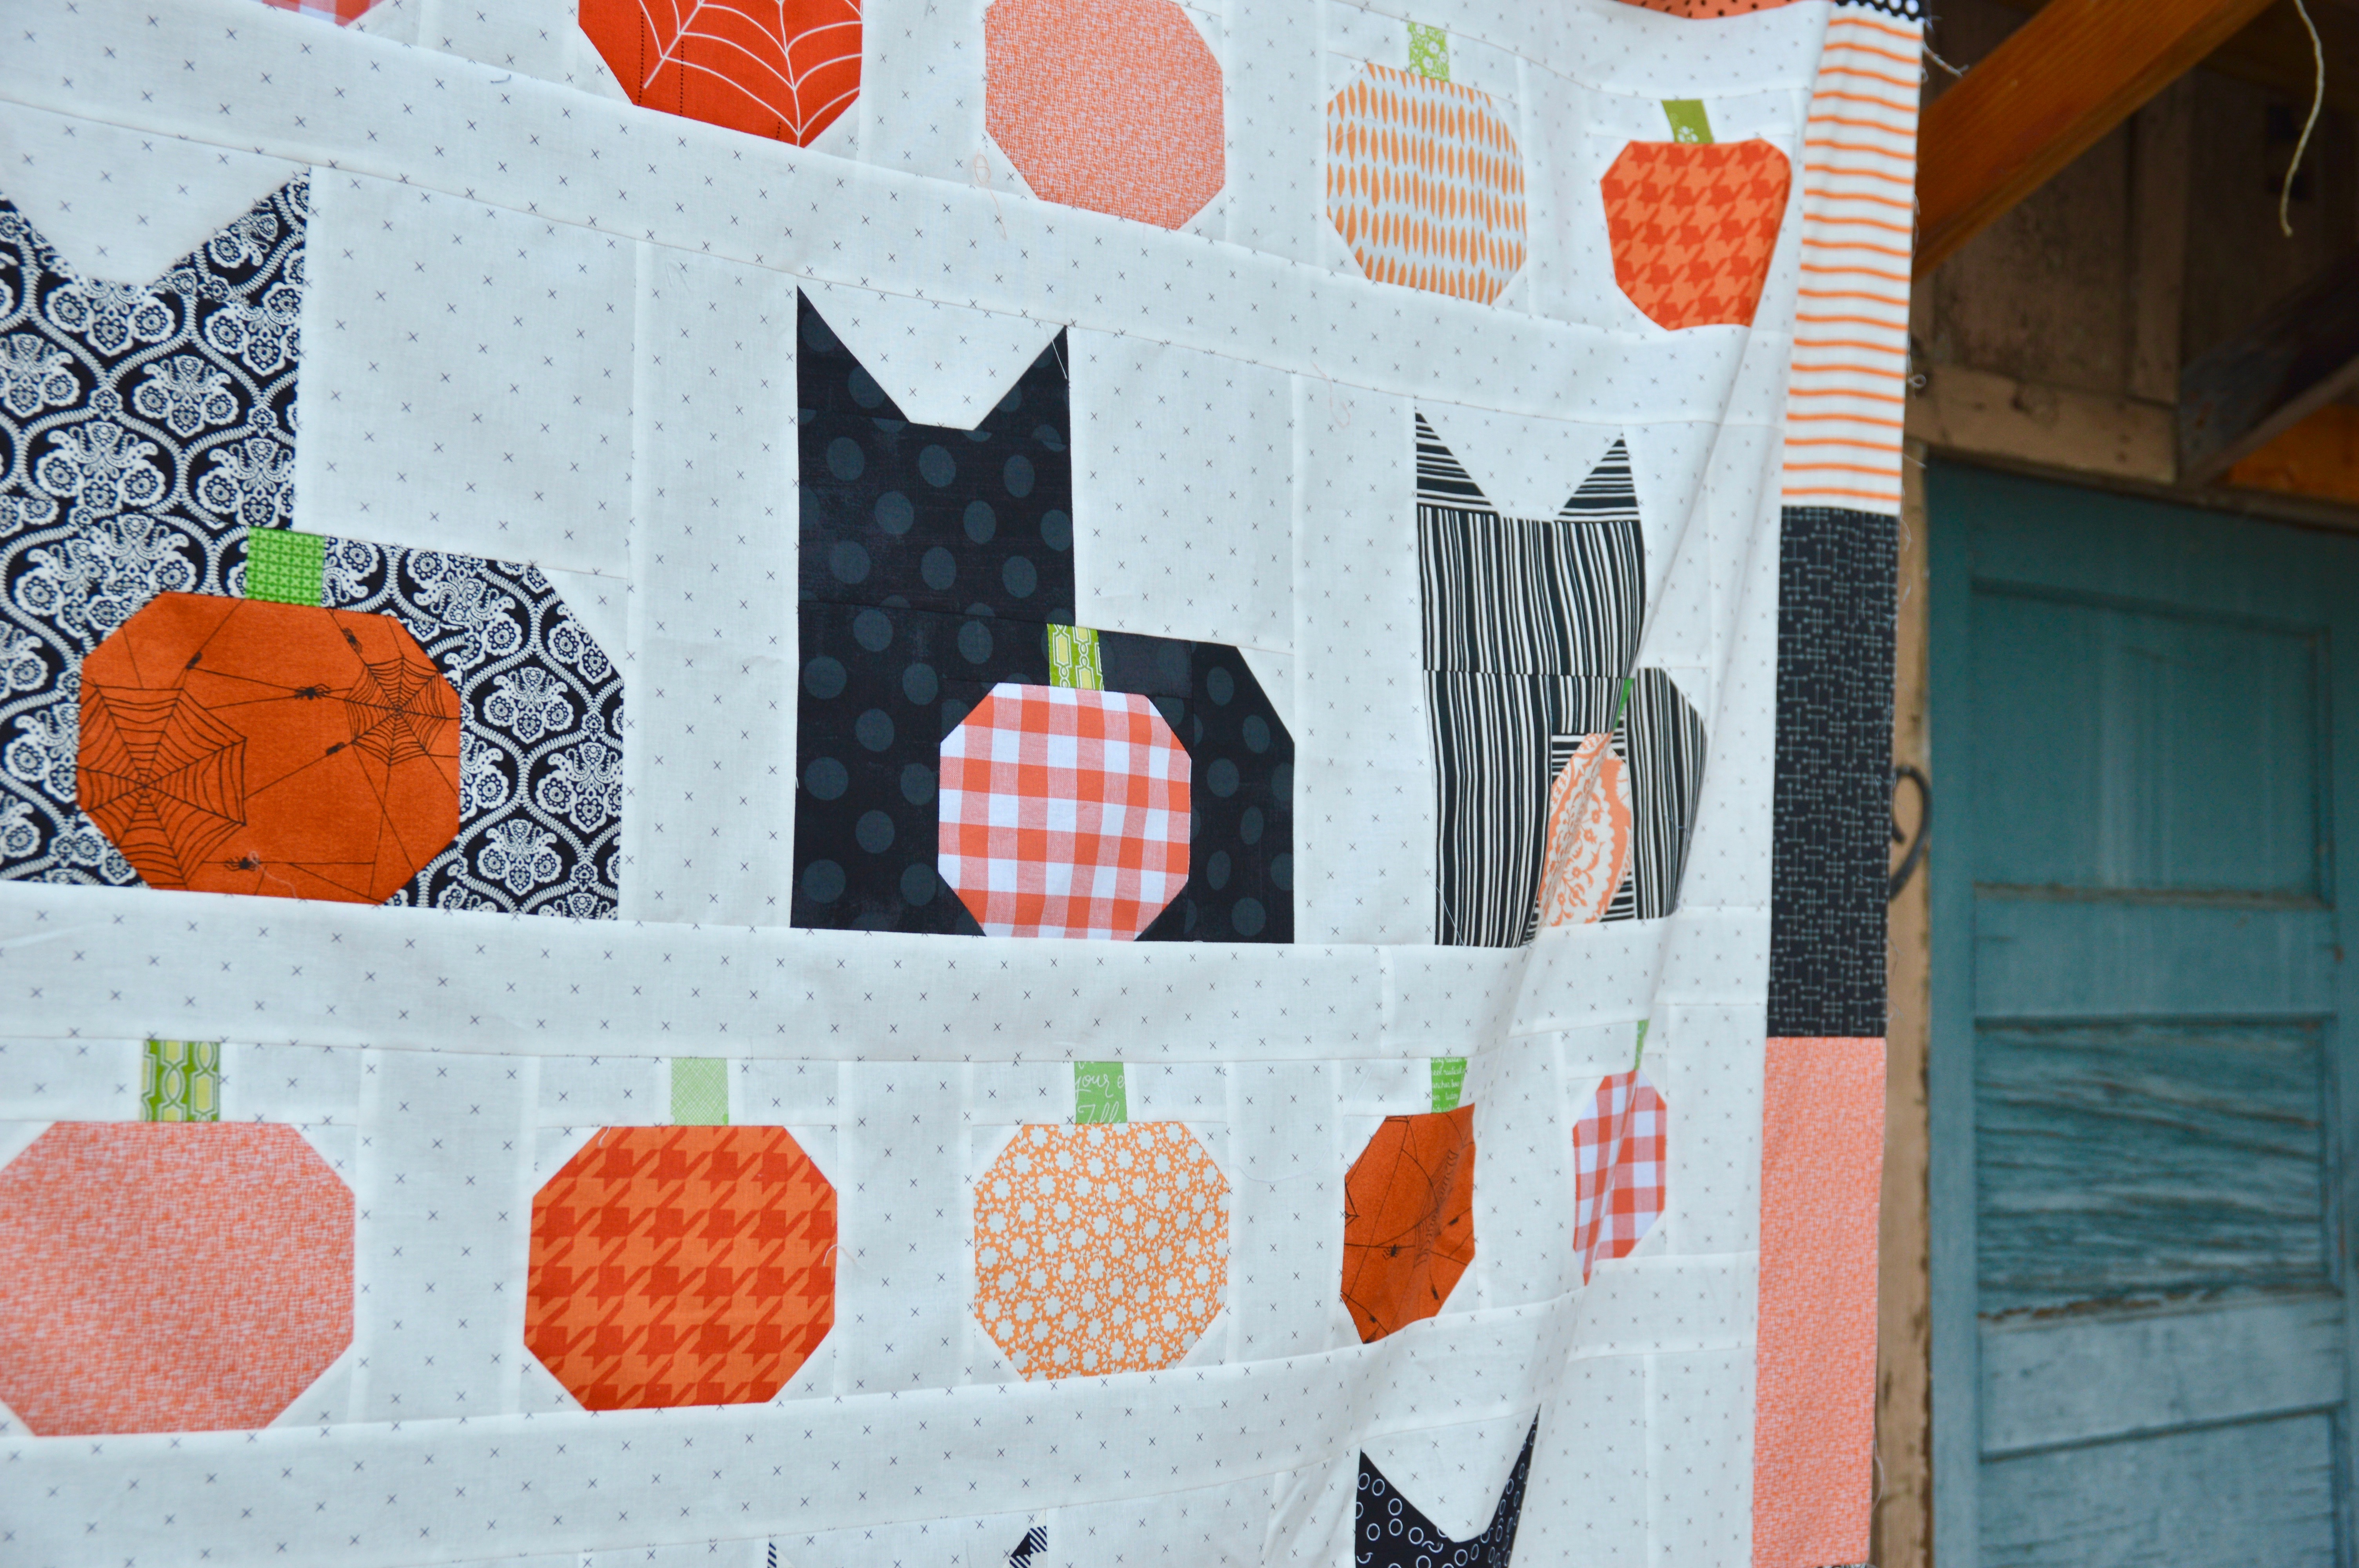
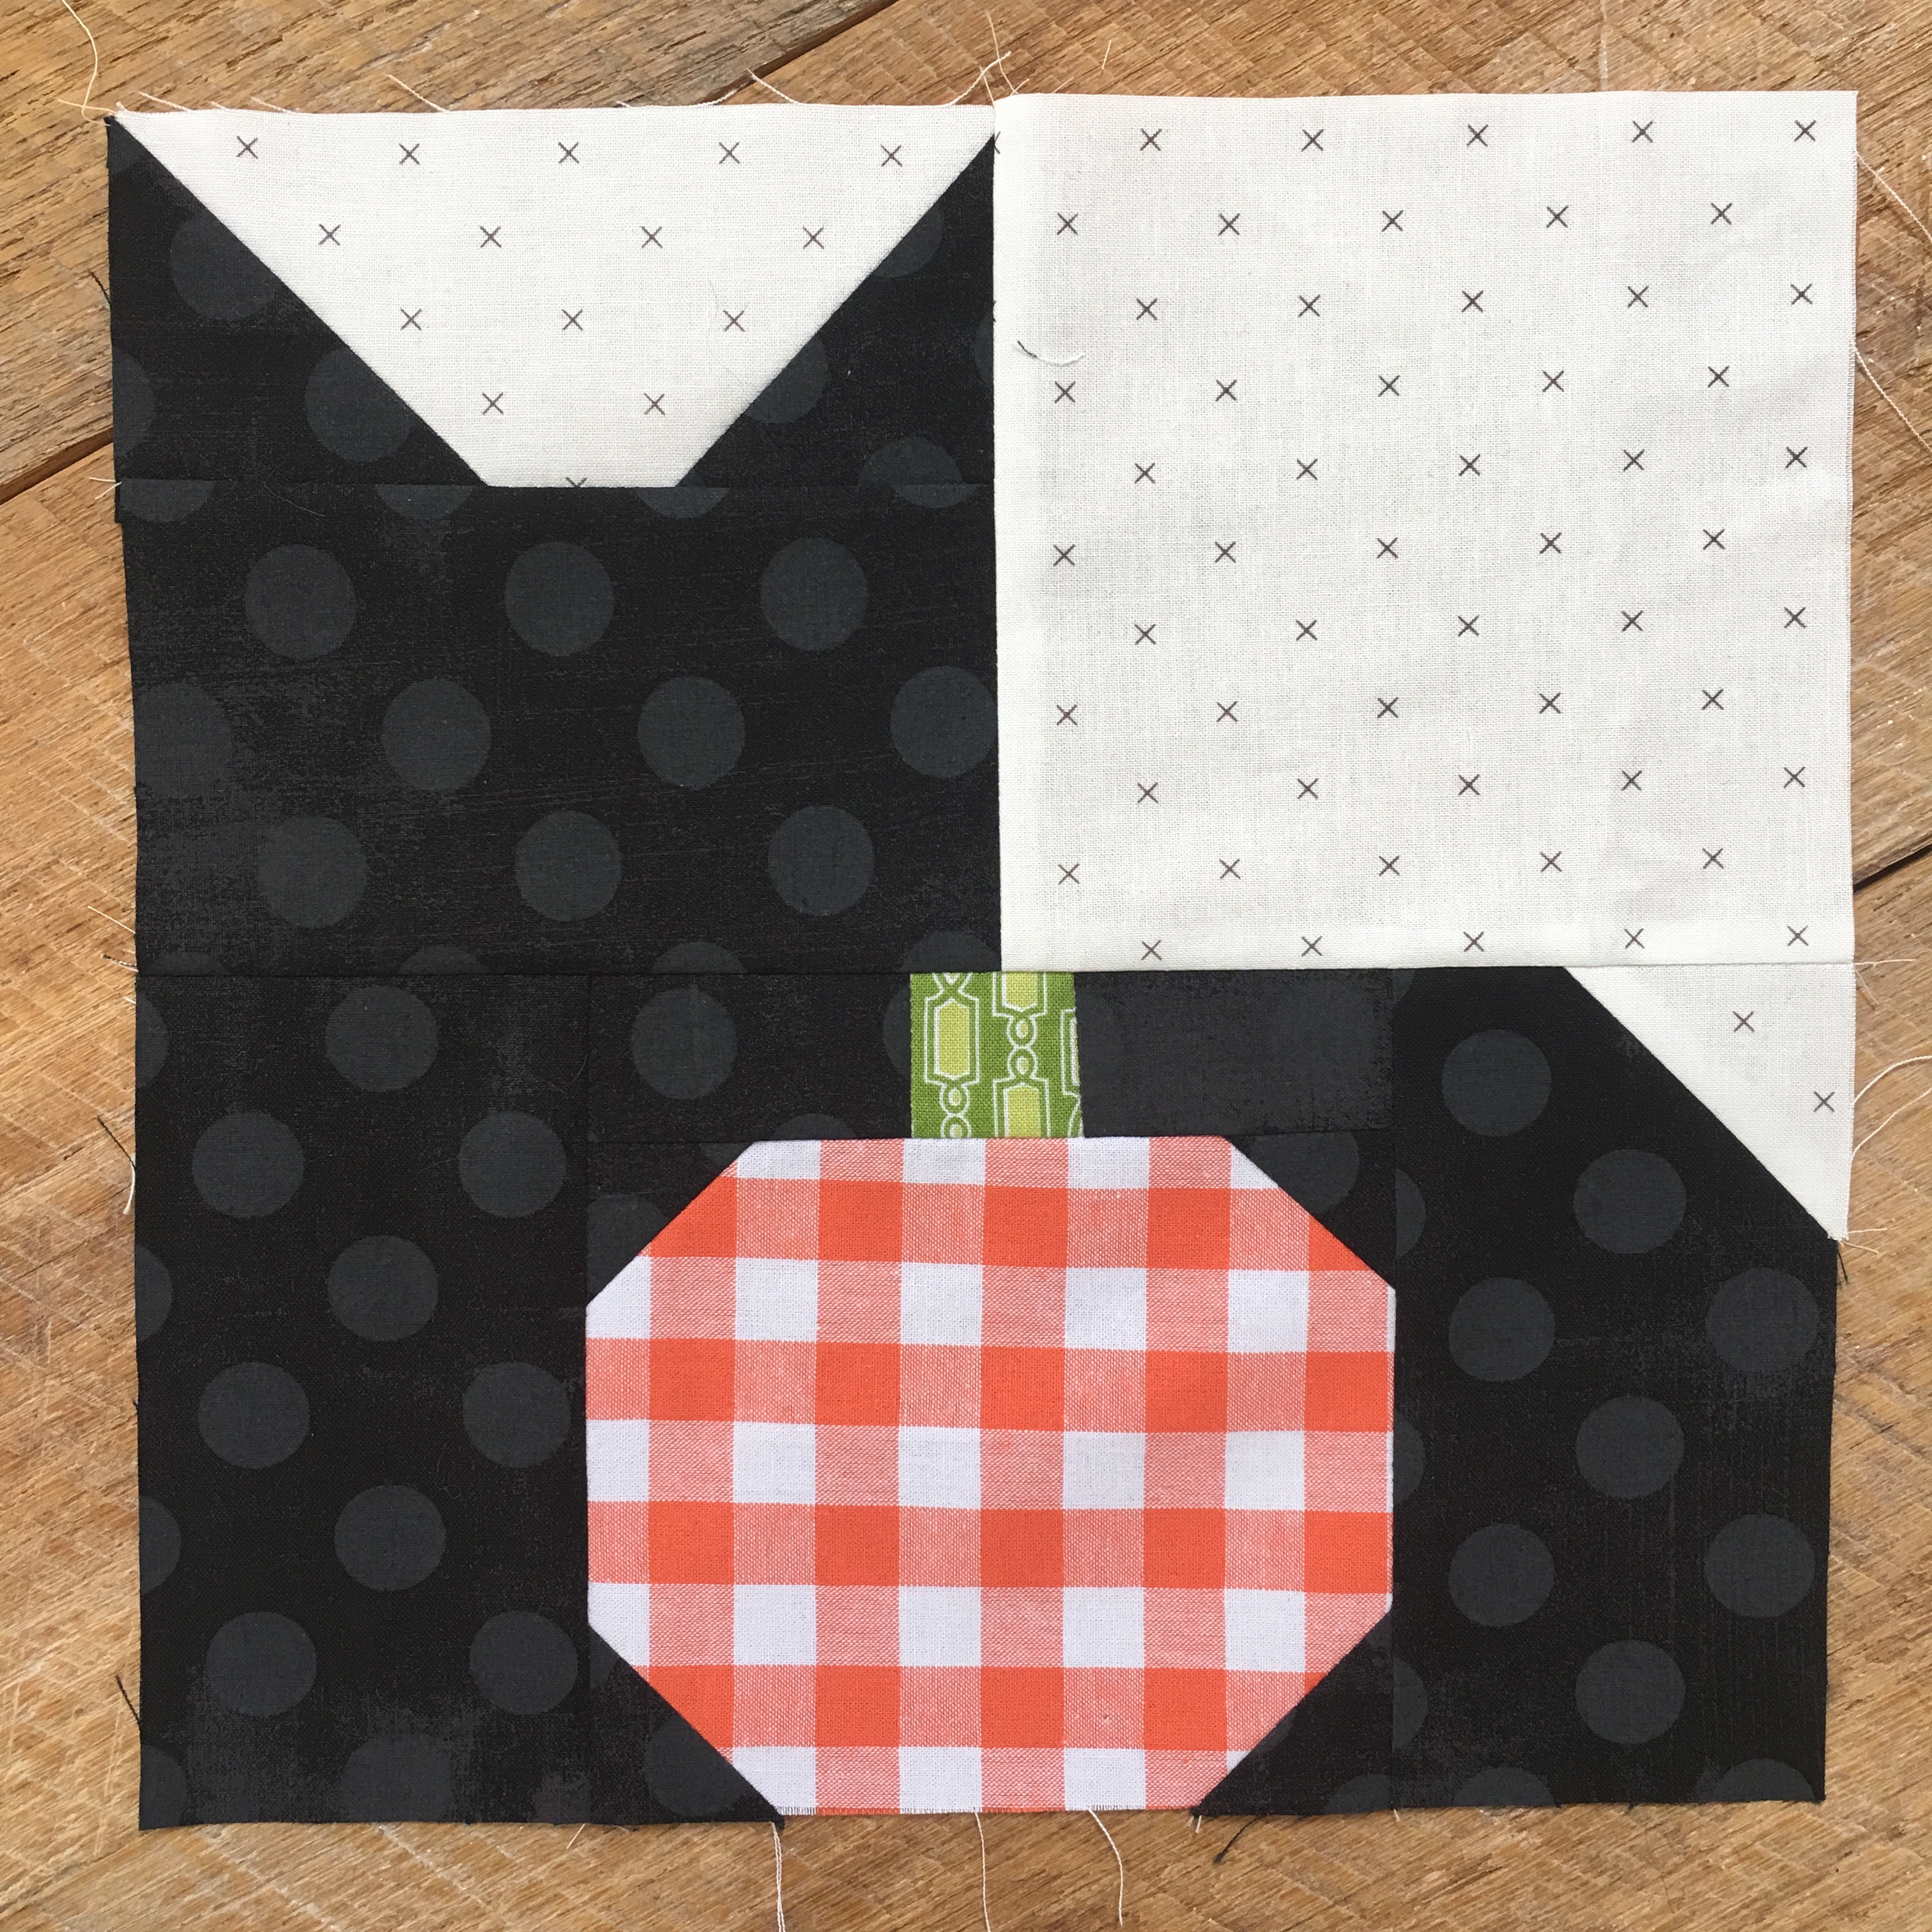
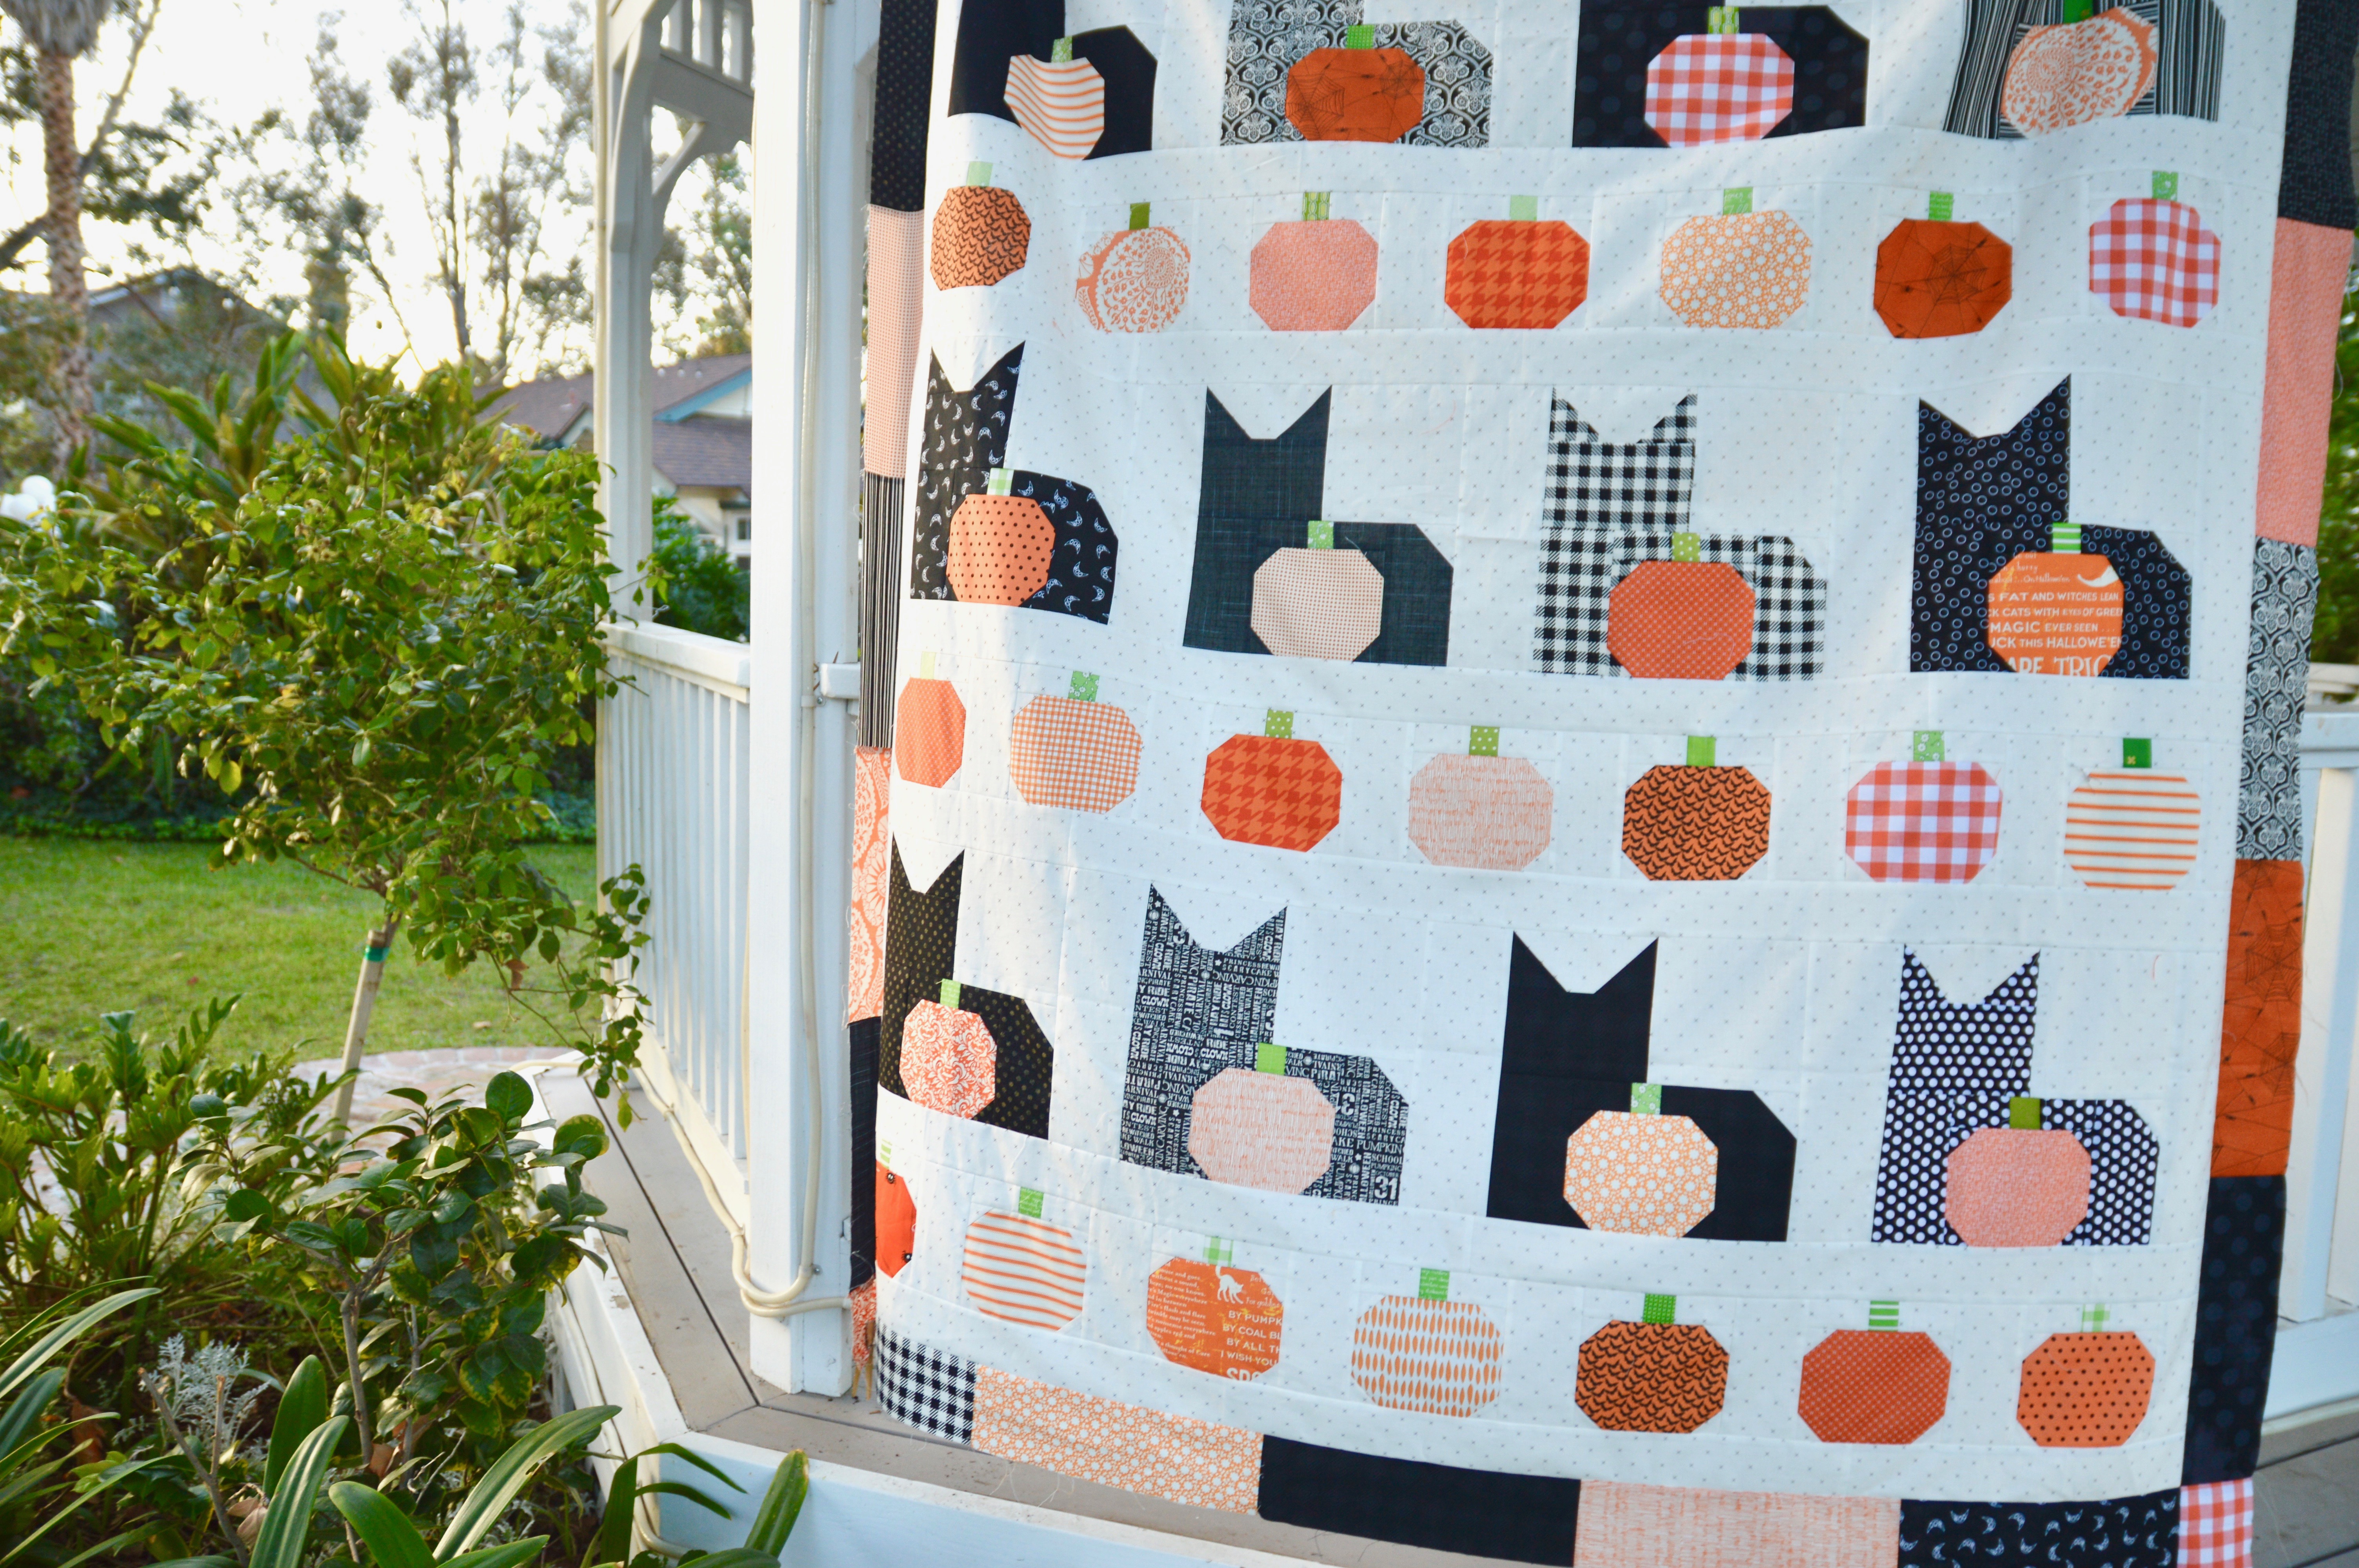
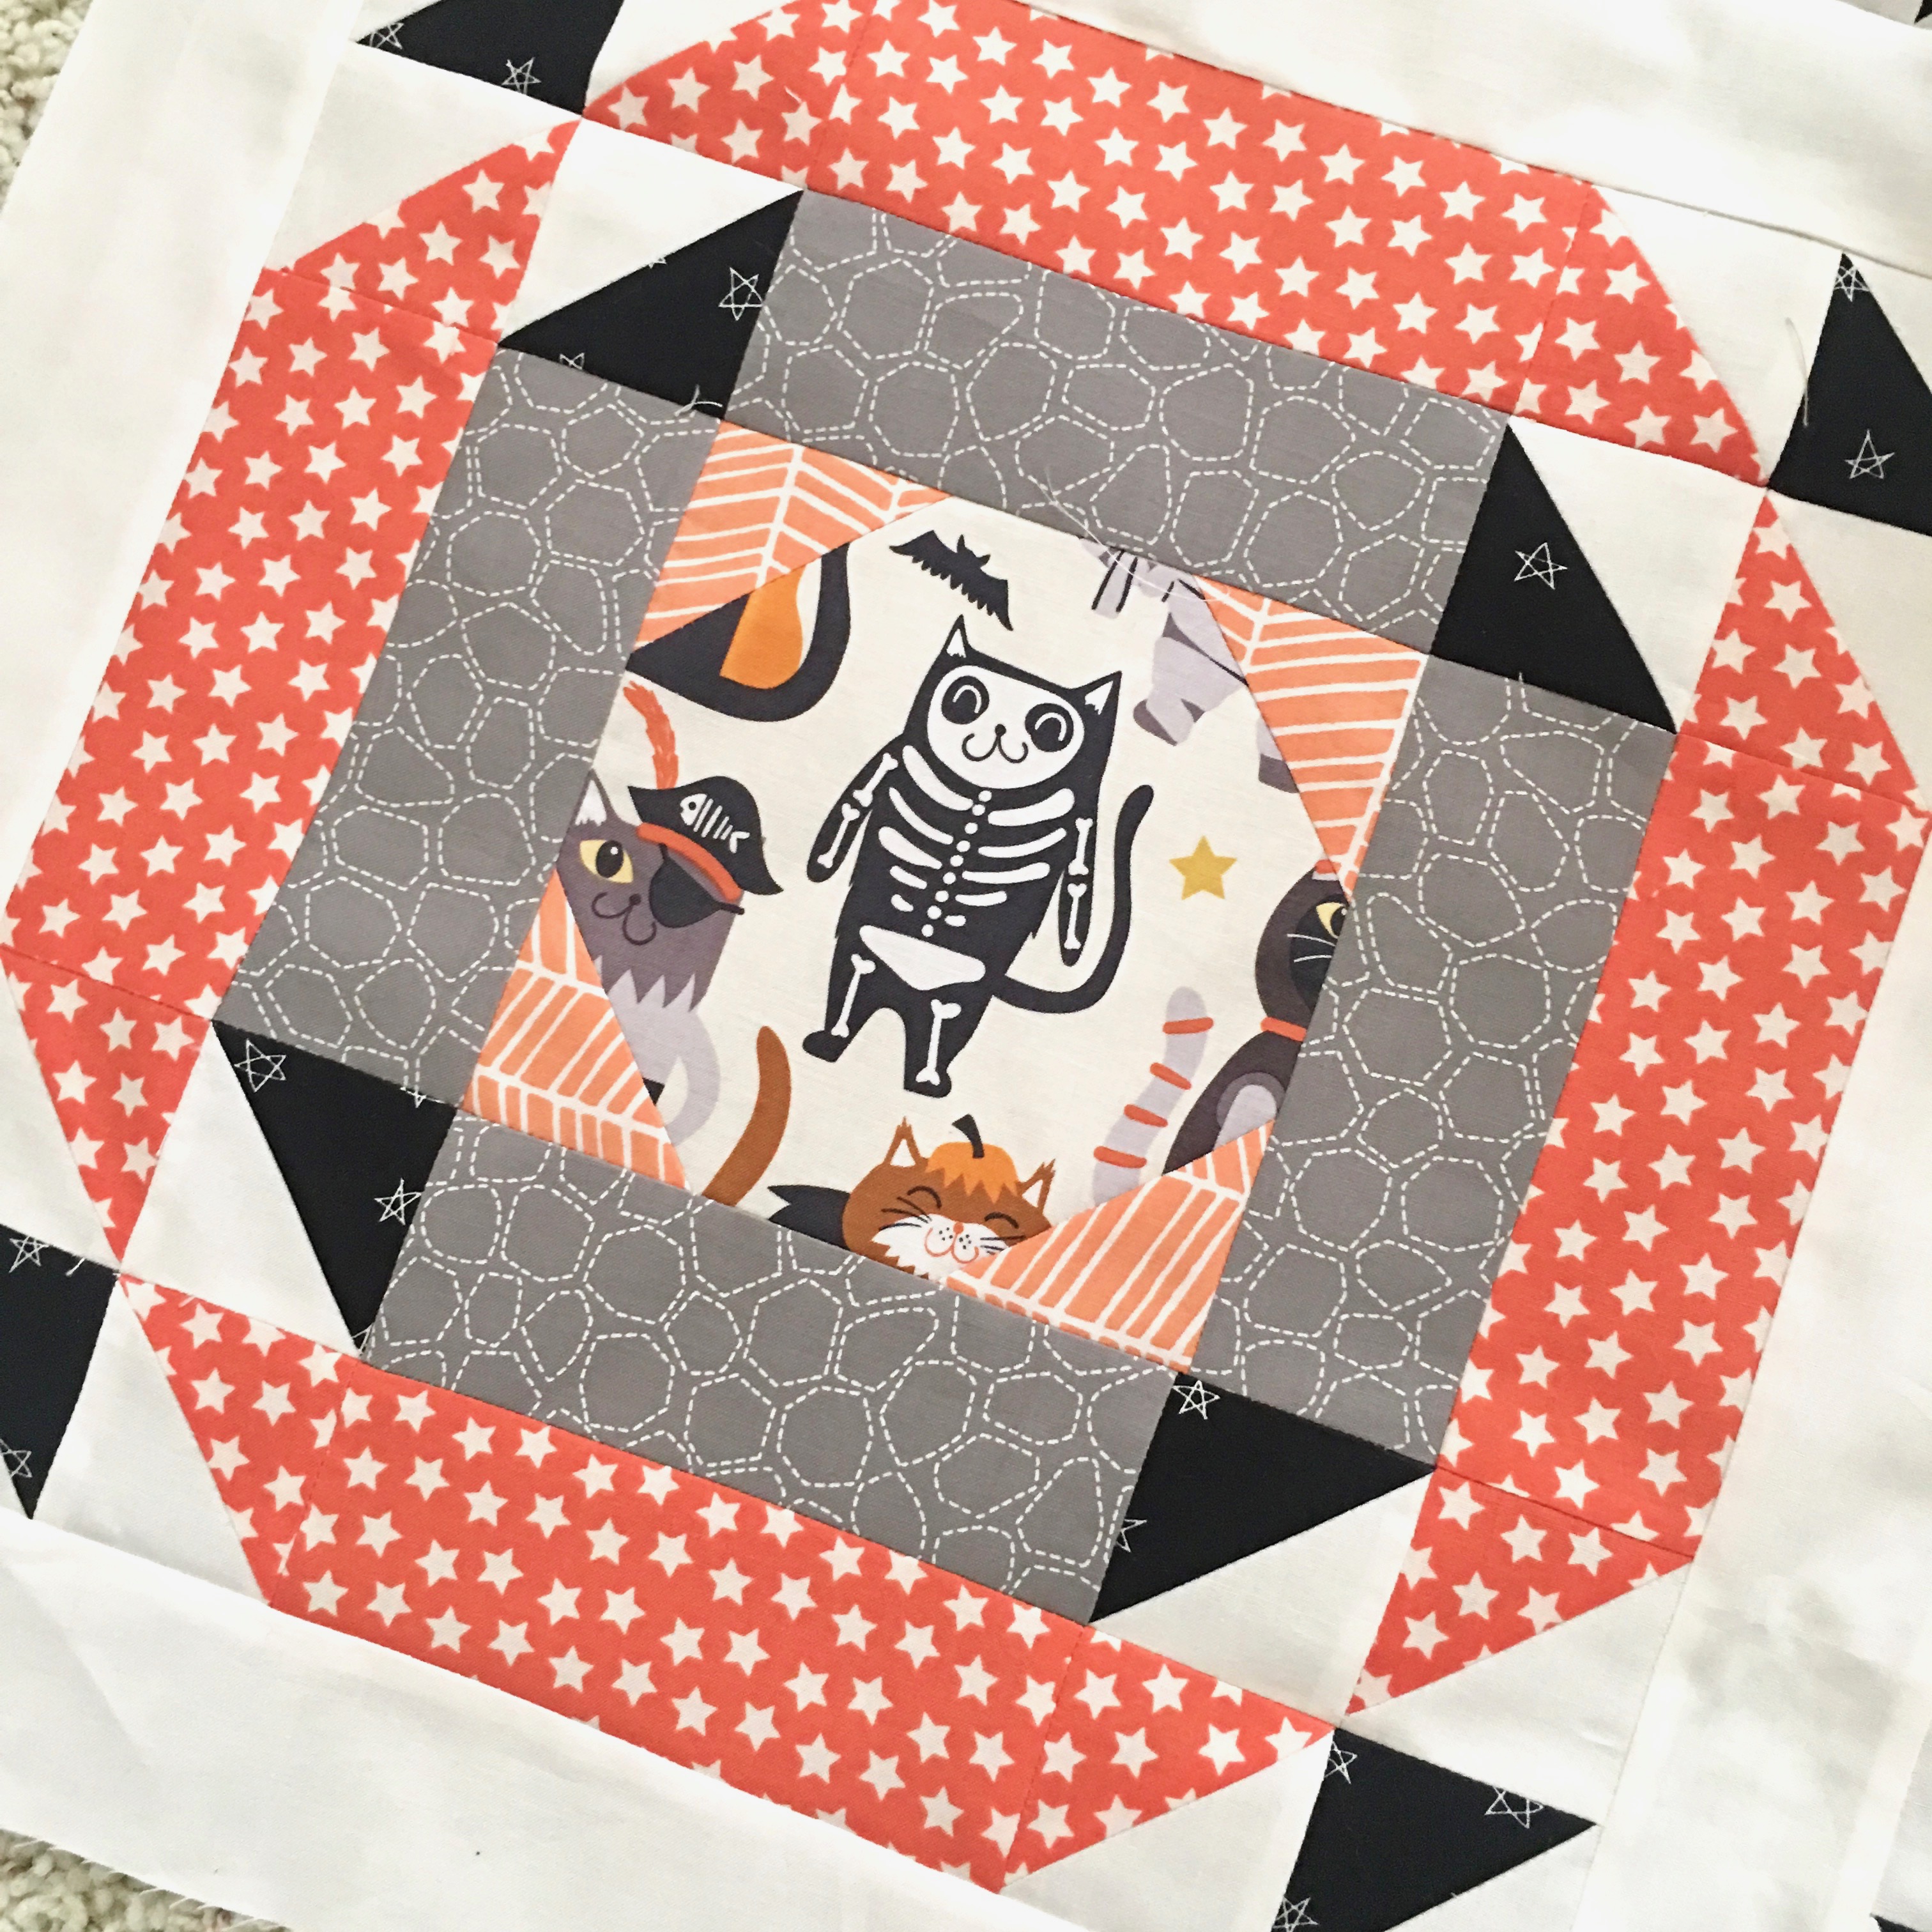
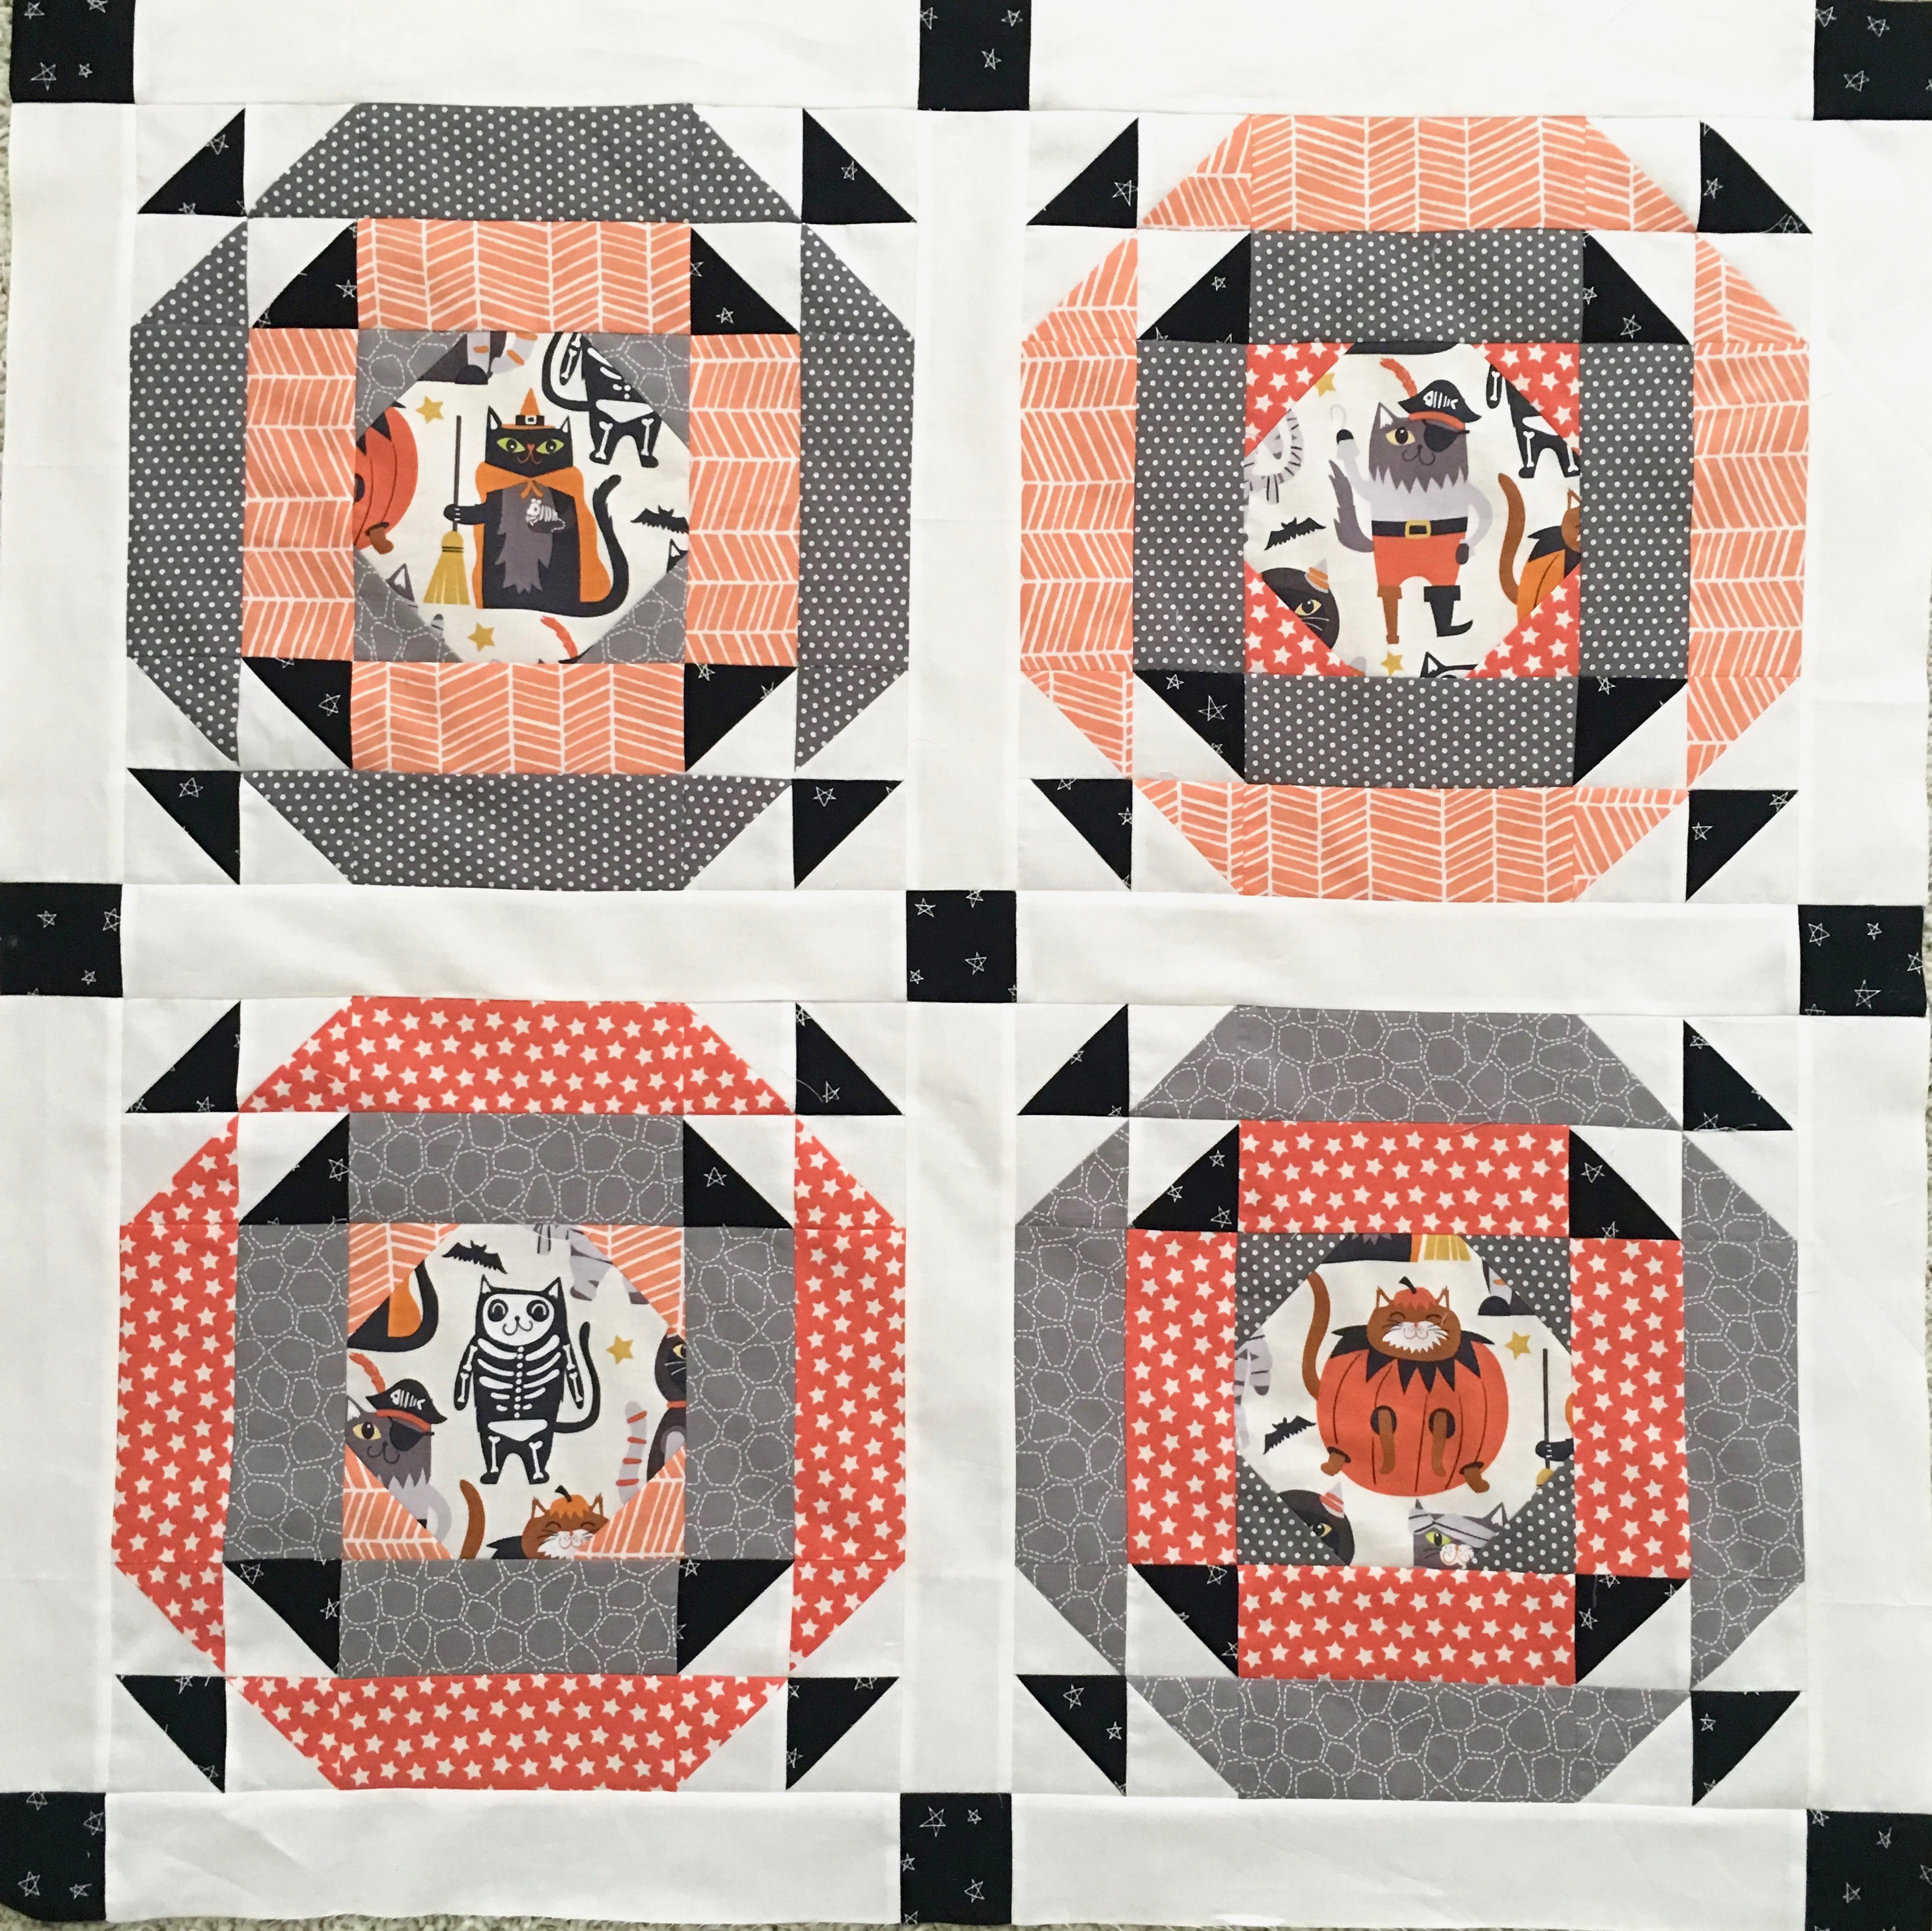
For the Halloween version, I had so much fun making these scrappy pumpkins!

IMG_3593

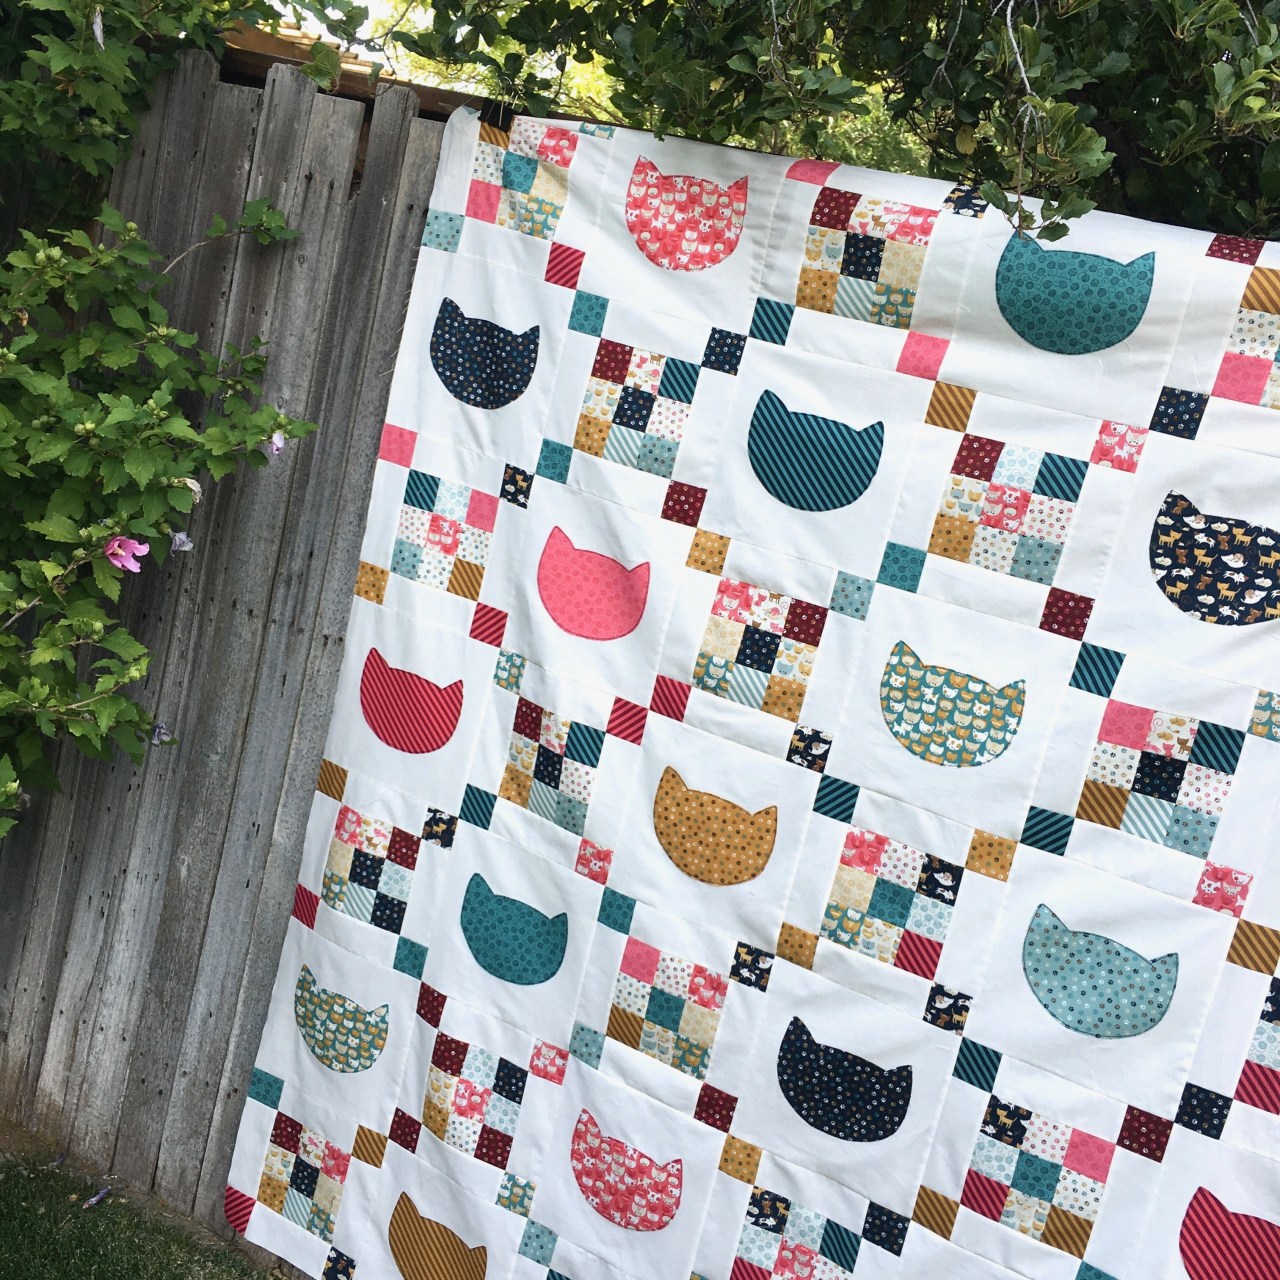
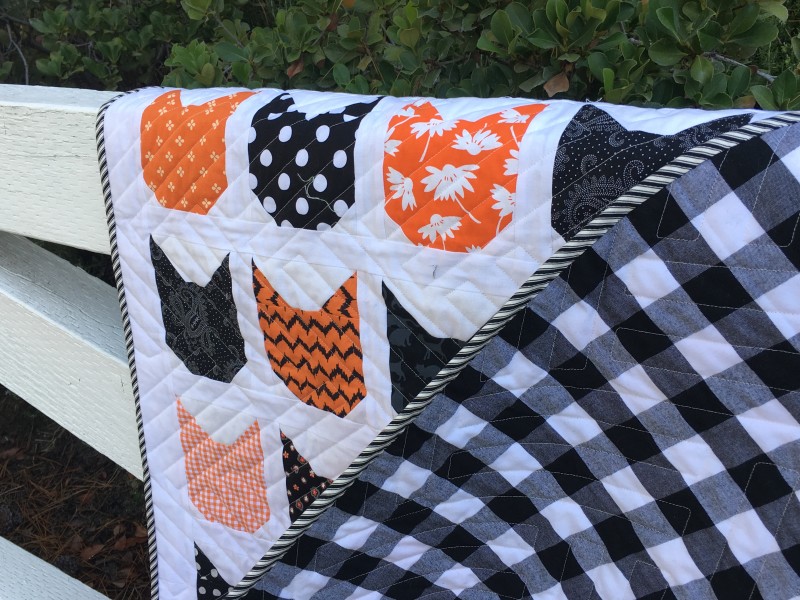
Each black cat is from a different fabric – no two are the same!  I think I will name each one 🙂

IMG_3595

Mufasa, again, always so helpful!

IMG_3576

pumpkin quilt block

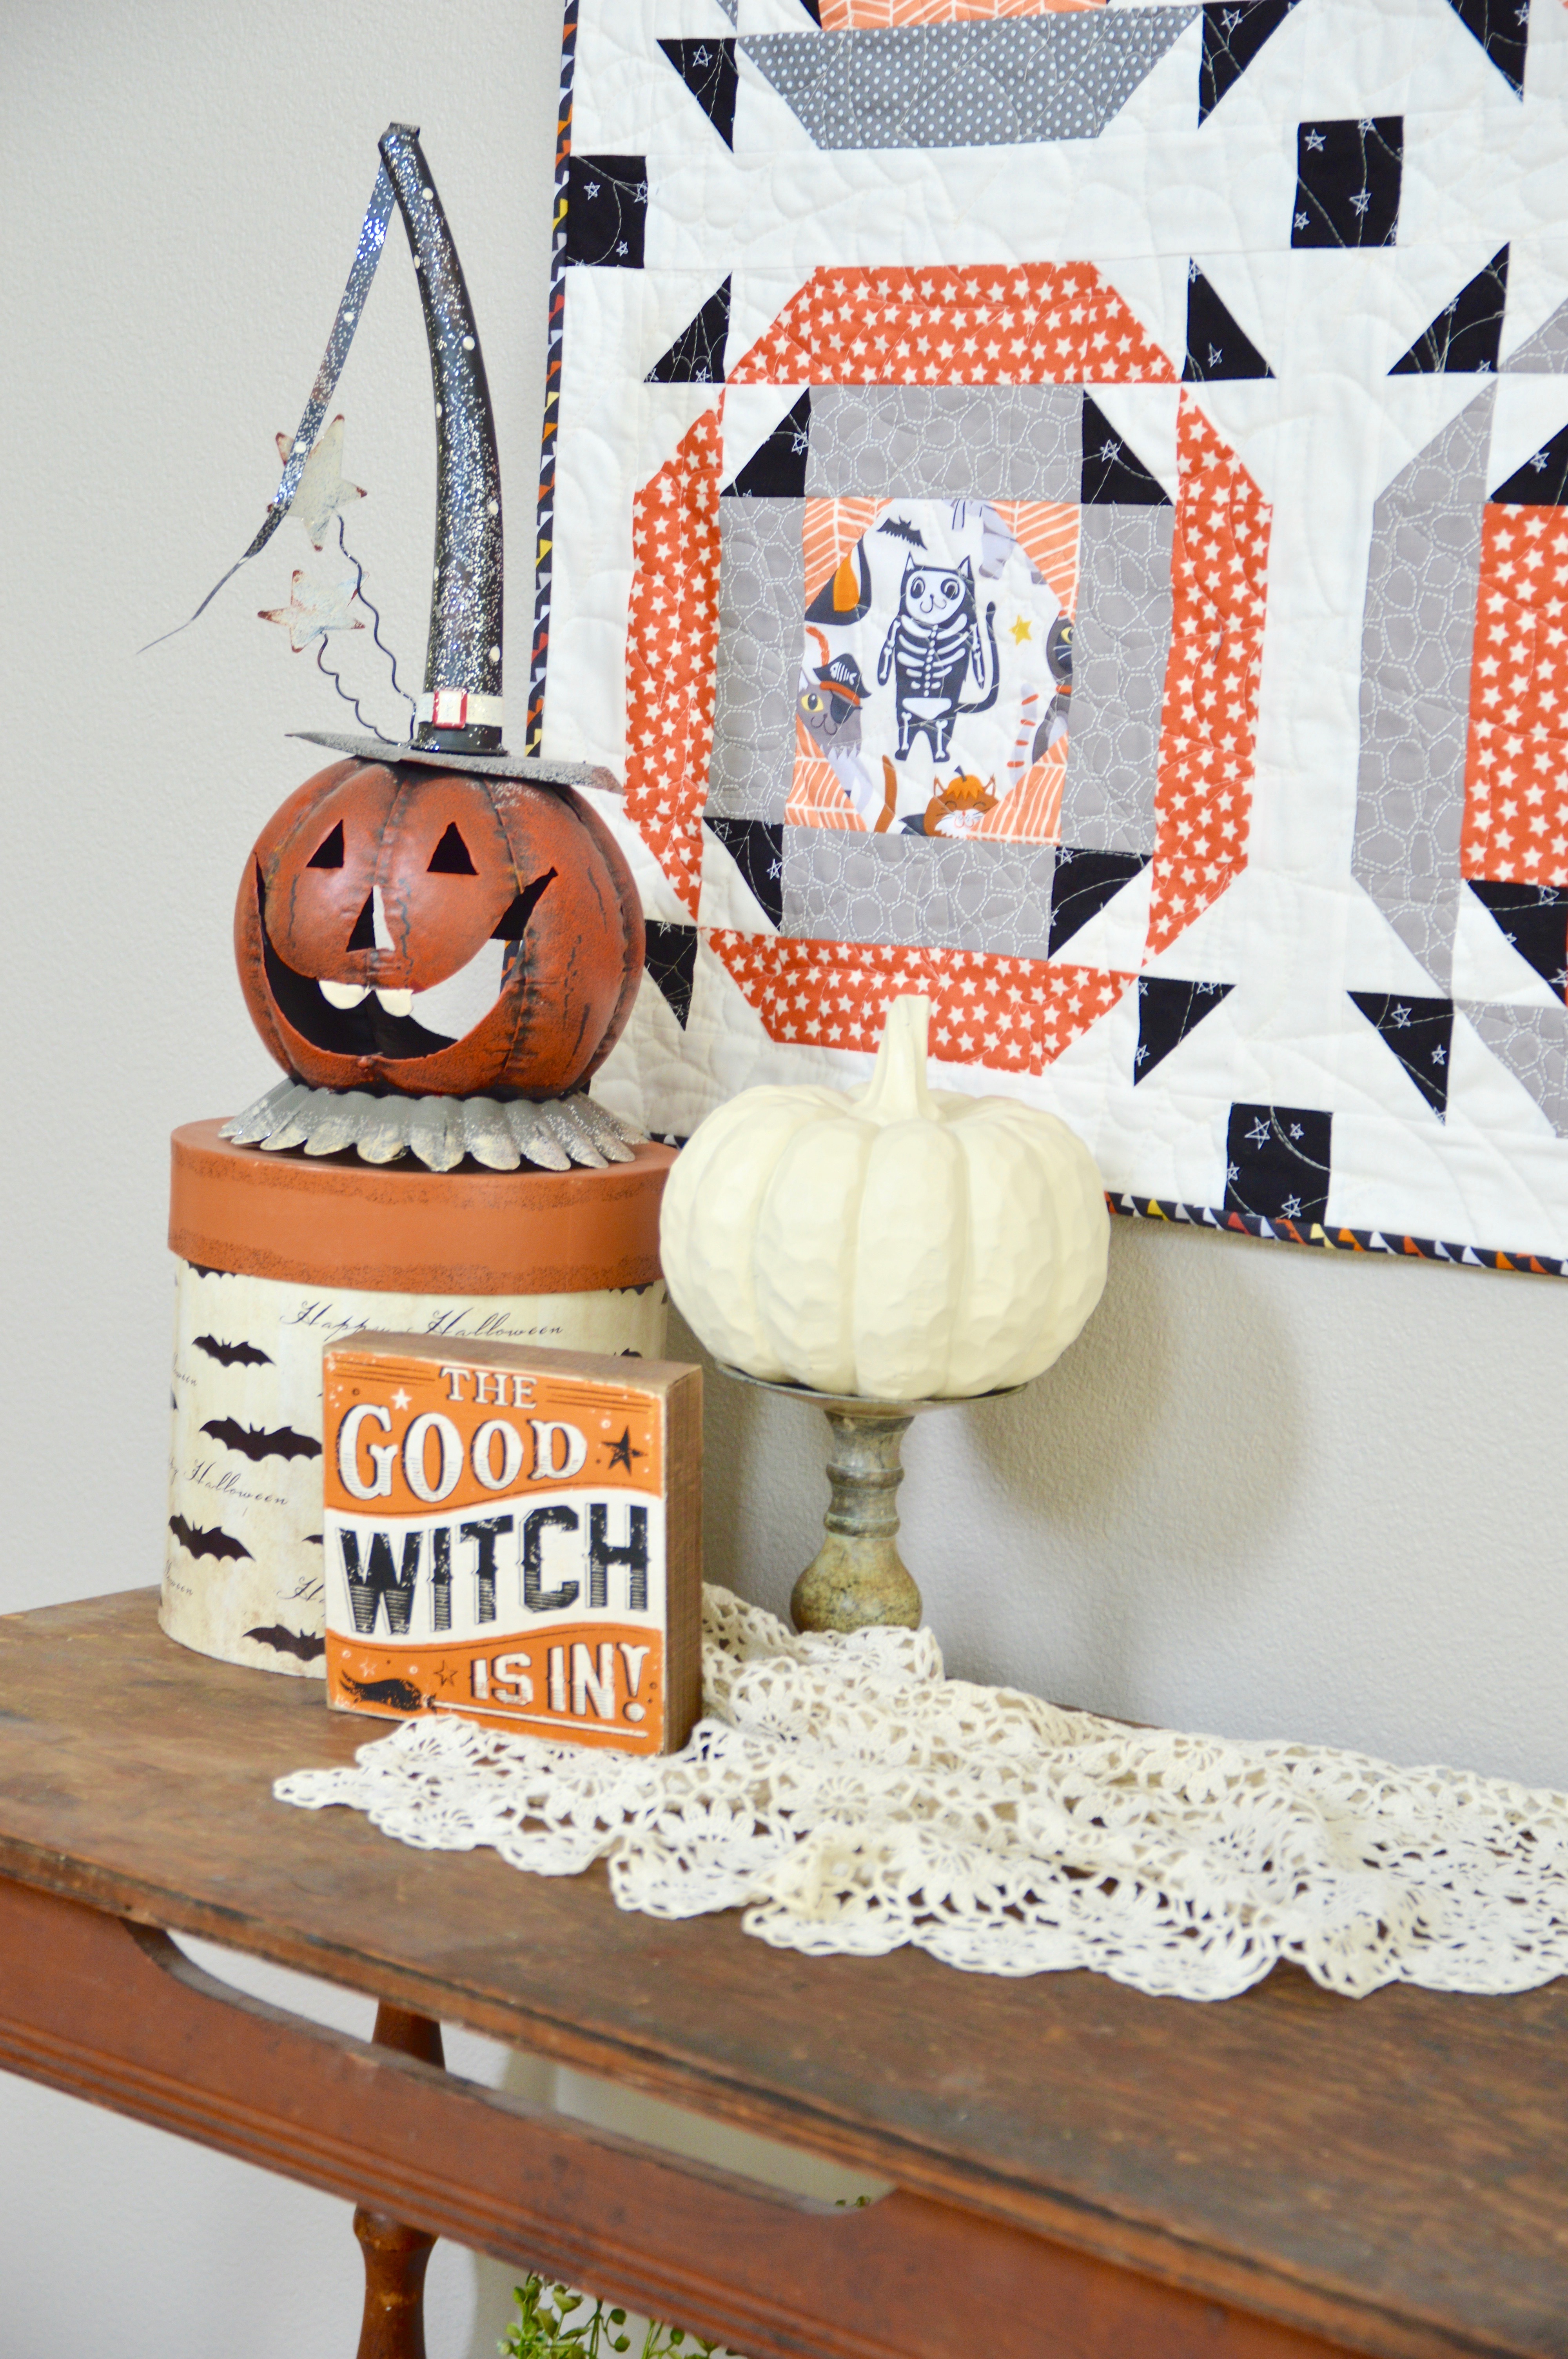
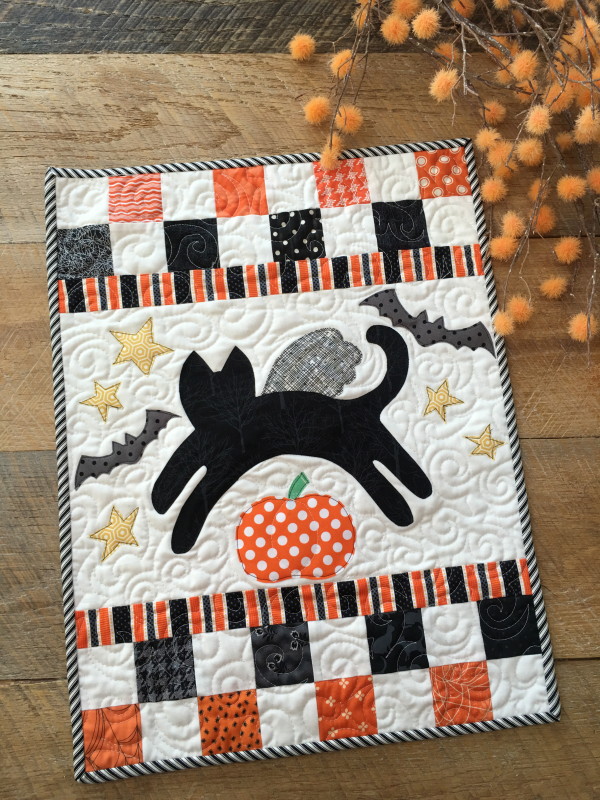
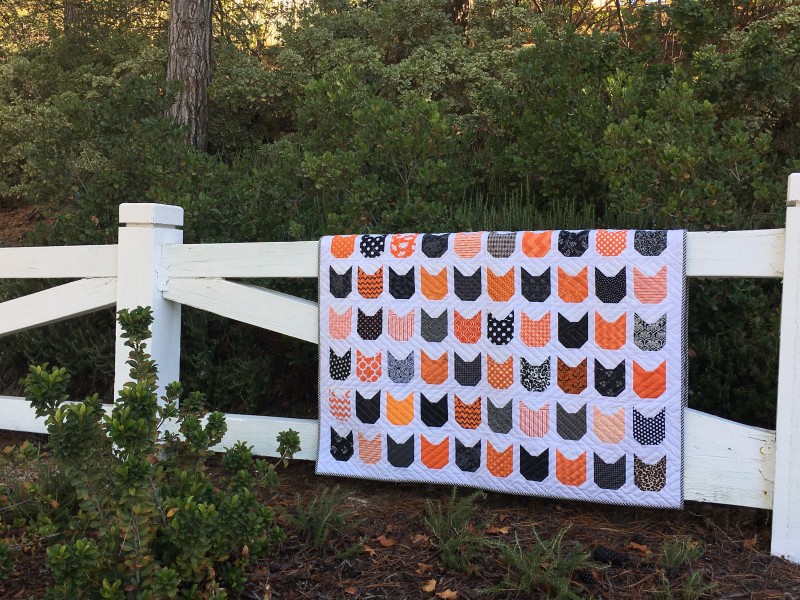
This is my new favorite Halloween quilt!  I can’t wait to get it off to the quilter!

black cats and pumpkins


i love cats quilt halloween

I hope you love this pattern!  Join in the fun on Instagram and use the hashtag #ilovecatsquilt and be sure to tag me @jedicraftgirl!!

heart quilt block

Cats & Scraps {a free quilt pattern}

You will love how easy this quilt comes together and I love the scrappy feel it has!  It’s the purrrrrfect size for you and your fur baby to cuddle with!!

Scraps and Cats

Scraps and Cats Quilt by Amanda Niederhauser

Finished Quilt 60″ x 70″

Block Size 10″

All seams 1/4″

Scraps and Cat Quilt Supplies:

HeatnBond EZ Print Featherlite Adhesive Sheets

3  yard solid white/cream

assortment of 10 or more fat quarters, lights and darks

For the cat head block cut (21) 10 1/2″ squares from the solid white fabric.

For the chain blocks, cut a variety of fabrics (for a scrappy look) into 2 1/2″ squares.   You need:

(84) white low volume print 2 1/2″ squares (I used the low volume prints that were in the fat quarter bundle) for the 9-patch

(189) dark print 2 1/2″ squares

(84) solid white 2 1/2″ x 6 1/2″ rectangles

I choose to use HeatnBond Featherlite for the applique because the cat head appliqué pieces are larger and I didn’t want to add bulk to the quilt.  I love this weight because you can hardly tell it’s there.

You can download the cat head pattern, 2 per sheet by clicking HERE.  Put the HeatnBond EZ Print Featherlite sheets in your printer and no tracing needed!! Or print it on regular paper and trace the cat head onto Heat n Bond Lite.


Scraps and Cats Quilt Instructions:

Cut around the cat heads about 1/4″. Place the cat head on the wrong side of the desired fabric. Press with a hot dry iron. Let cool.  Cut the cat heads out following the pattern line. Peel off the backing paper. Position the cat head in the center of the 10 1/2″ white blocks.  Heat set into place. Sew around each cat head 2 times with dark thread.

Make 21 cat head blocks

Sew the 9-patch unit together.

Then add the borders by sewing a rectangle to each side and pressing.  Sew the corner squares to the ends of the remaining 2 rectangles.  Press.  Sew on to the top and bottom of the 9-patch unit.  Press.  Make 21 blocks.

You might have to wrangle the blocks away from your cat late at night 🙂

Lay out blocks in 6 blocks across by 7 blocks down.  Sew each block together in rows, press toward the cat heads.  Sew the rows together, matching seam intersections.  Press.

Now you’re ready to quilt!  I’m sending mine to the quilter and I’m sure she’ll come up with something purrrrrfect!

Little Spooks Quilt {a Five Fat Quarter Fun Quilt}

5 fat quarter fun logo

It’s September 1st and that means a 5 Fat Quarter Fun Quilt!!!  Yay!!!!

little spooks quilt

Amber and I have been doing some spooky sewing and we are ready to share this fun little quilt with you!  It is a great size for a wall hanging or to put on a table!  Finished it measures 34″ square.  I also love that you can use theme prints in the centers – I’m always looking for ways to use my theme prints….especially HALLOWEEN CAT prints!!  Don’t you love these spooky felines!  The fabric is from Blend Fabric’s Boo Crew line.

IMG_1889

It is highly recommended to sew with your cat…..like you ever have a choice…hehehehe!!!  Mufasa is loving this little quilt – the purrrrrfect size for him!

IMG_1901

The quilt is made of 4 large blocks.  Wouldn’t these blocks be great in a larger quilt!!

IMG_1905

A little sashing and you’re all set!

DSC_0328

You can download the PDF quilt pattern by clicking HERE.  Make sure to tag @gigis_thimbel and @jedicraftgirl and use the hashtag #fivefatquarterfun and #littlespooksquilt so we can see your creations!!

DSC_0319
By the way…..it is so NOT fall here in Southern California….the last 3 days have been 114 degrees!!!!!

DSC_0350

Meowy Christmas Quilt Pattern

cat-quilt

I’m so excited to announce the release of my latest pattern!!  It’s called Meowy Christmas and you can purchase it in my Etsy shop for instant download.  I fell in love with this retro feeling Christmas cat print from Michael Miller.  It was the inspiration for this quilt!  The colors are so nostalgic – red, pink, green and mint green!  There are 12 blocks that measure 12″.  The finished quilt is 52″ x 65″ which is the purrrrfect size to cuddle up with and watch Christmas movies!  Even if you are not a cat lover (gasp) this quilt is a great way to use large prints or theme prints.  cat-block

This quilt even inspired Mufasa to get into the spirit of Christmas!  Doesn’t he look thrilled!!

santa-mufasa

quilt

I love the quilt border!  It has 12 bows that are appliqued on.  This is seriously my new favorite quilt!  I hope you love it too!!!     img_6932


Black Cat Pillow Tutorial

black-cat-pillow-tutorial
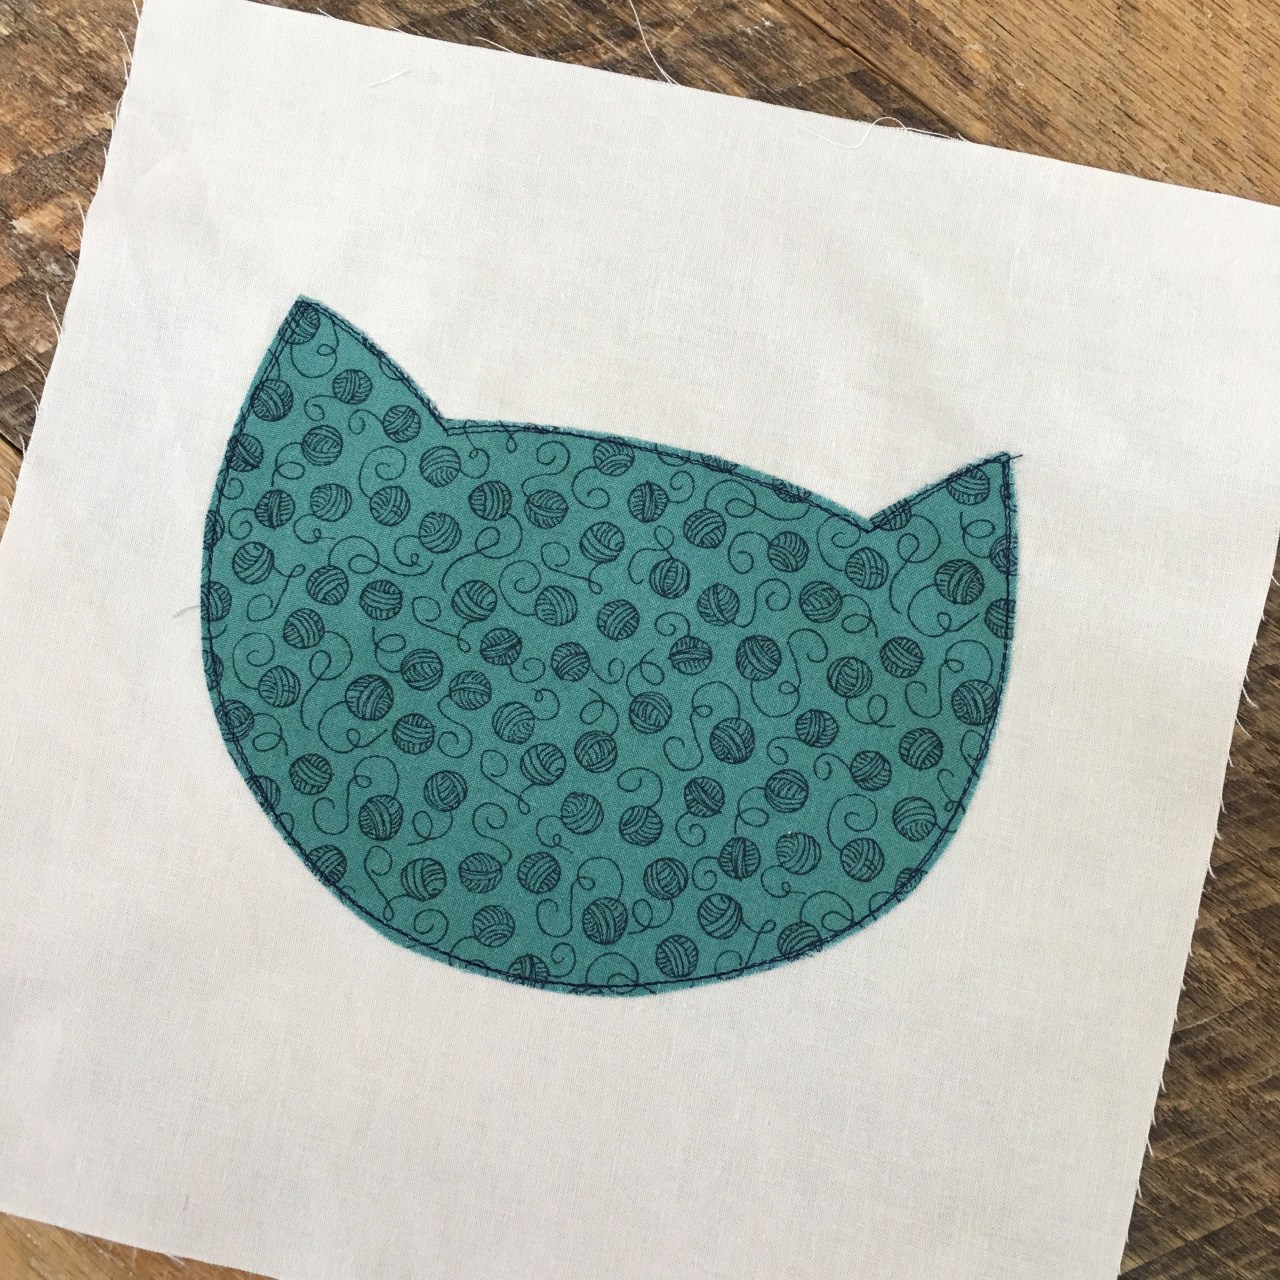
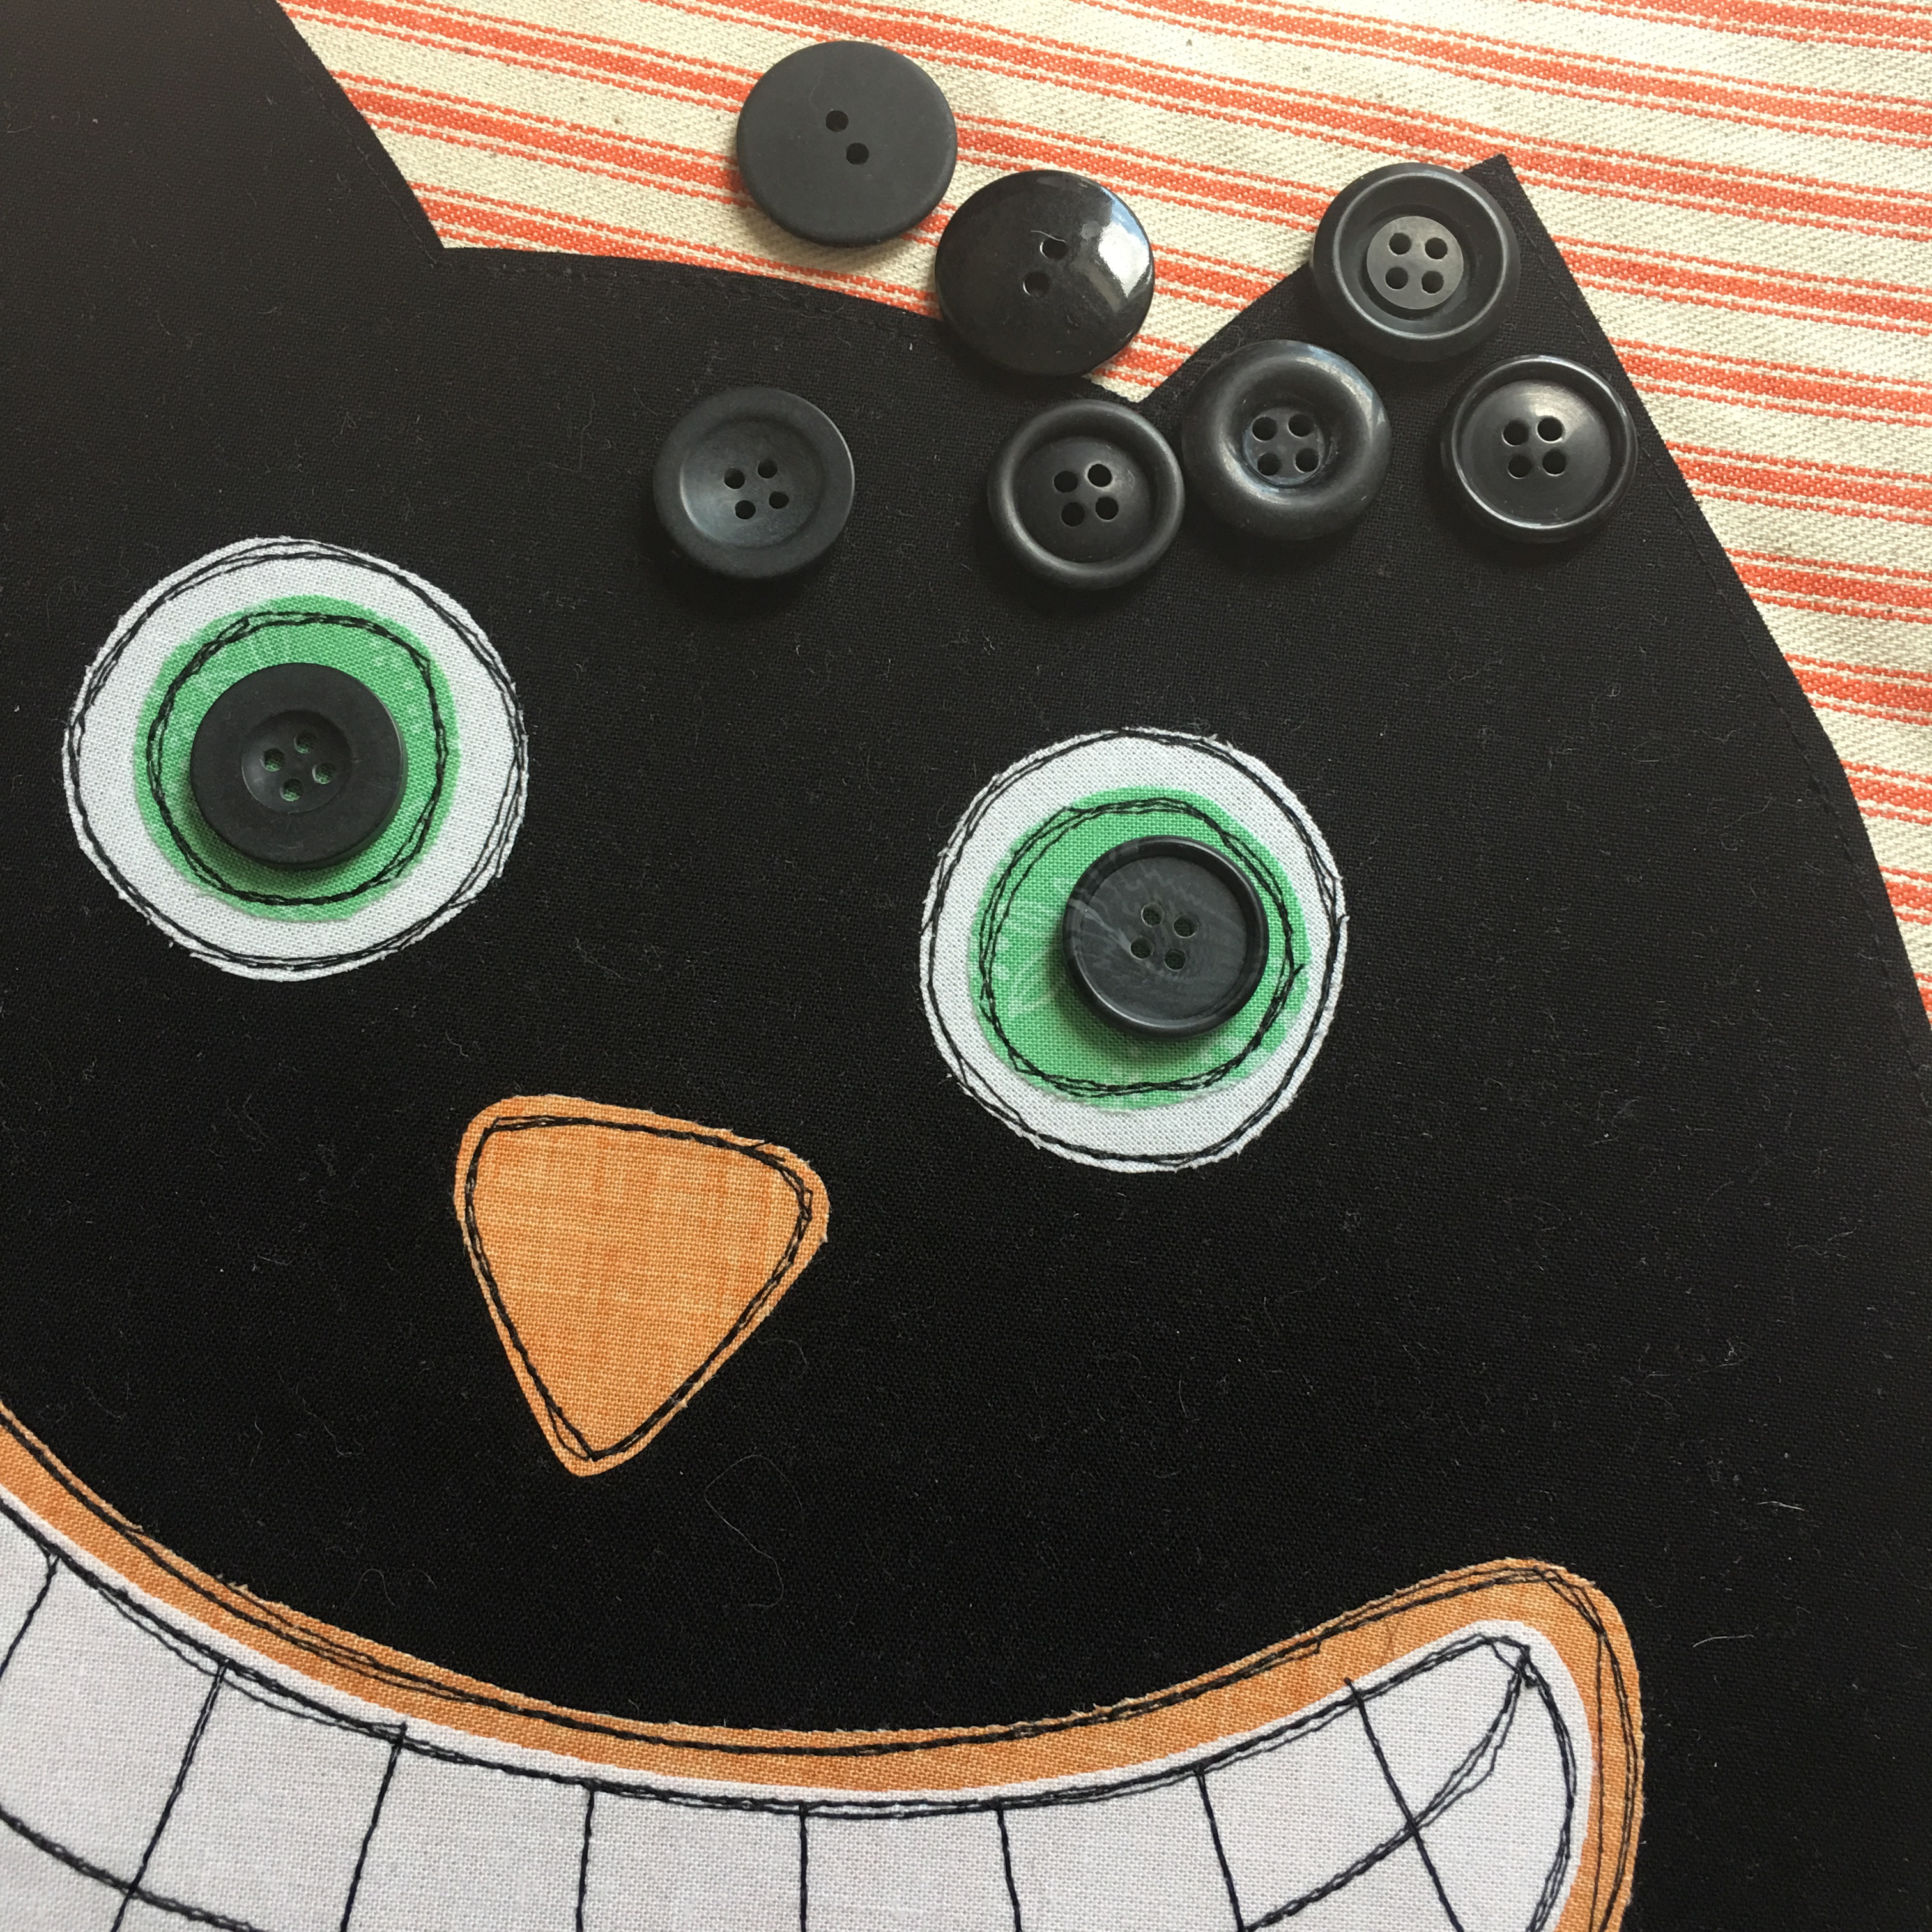
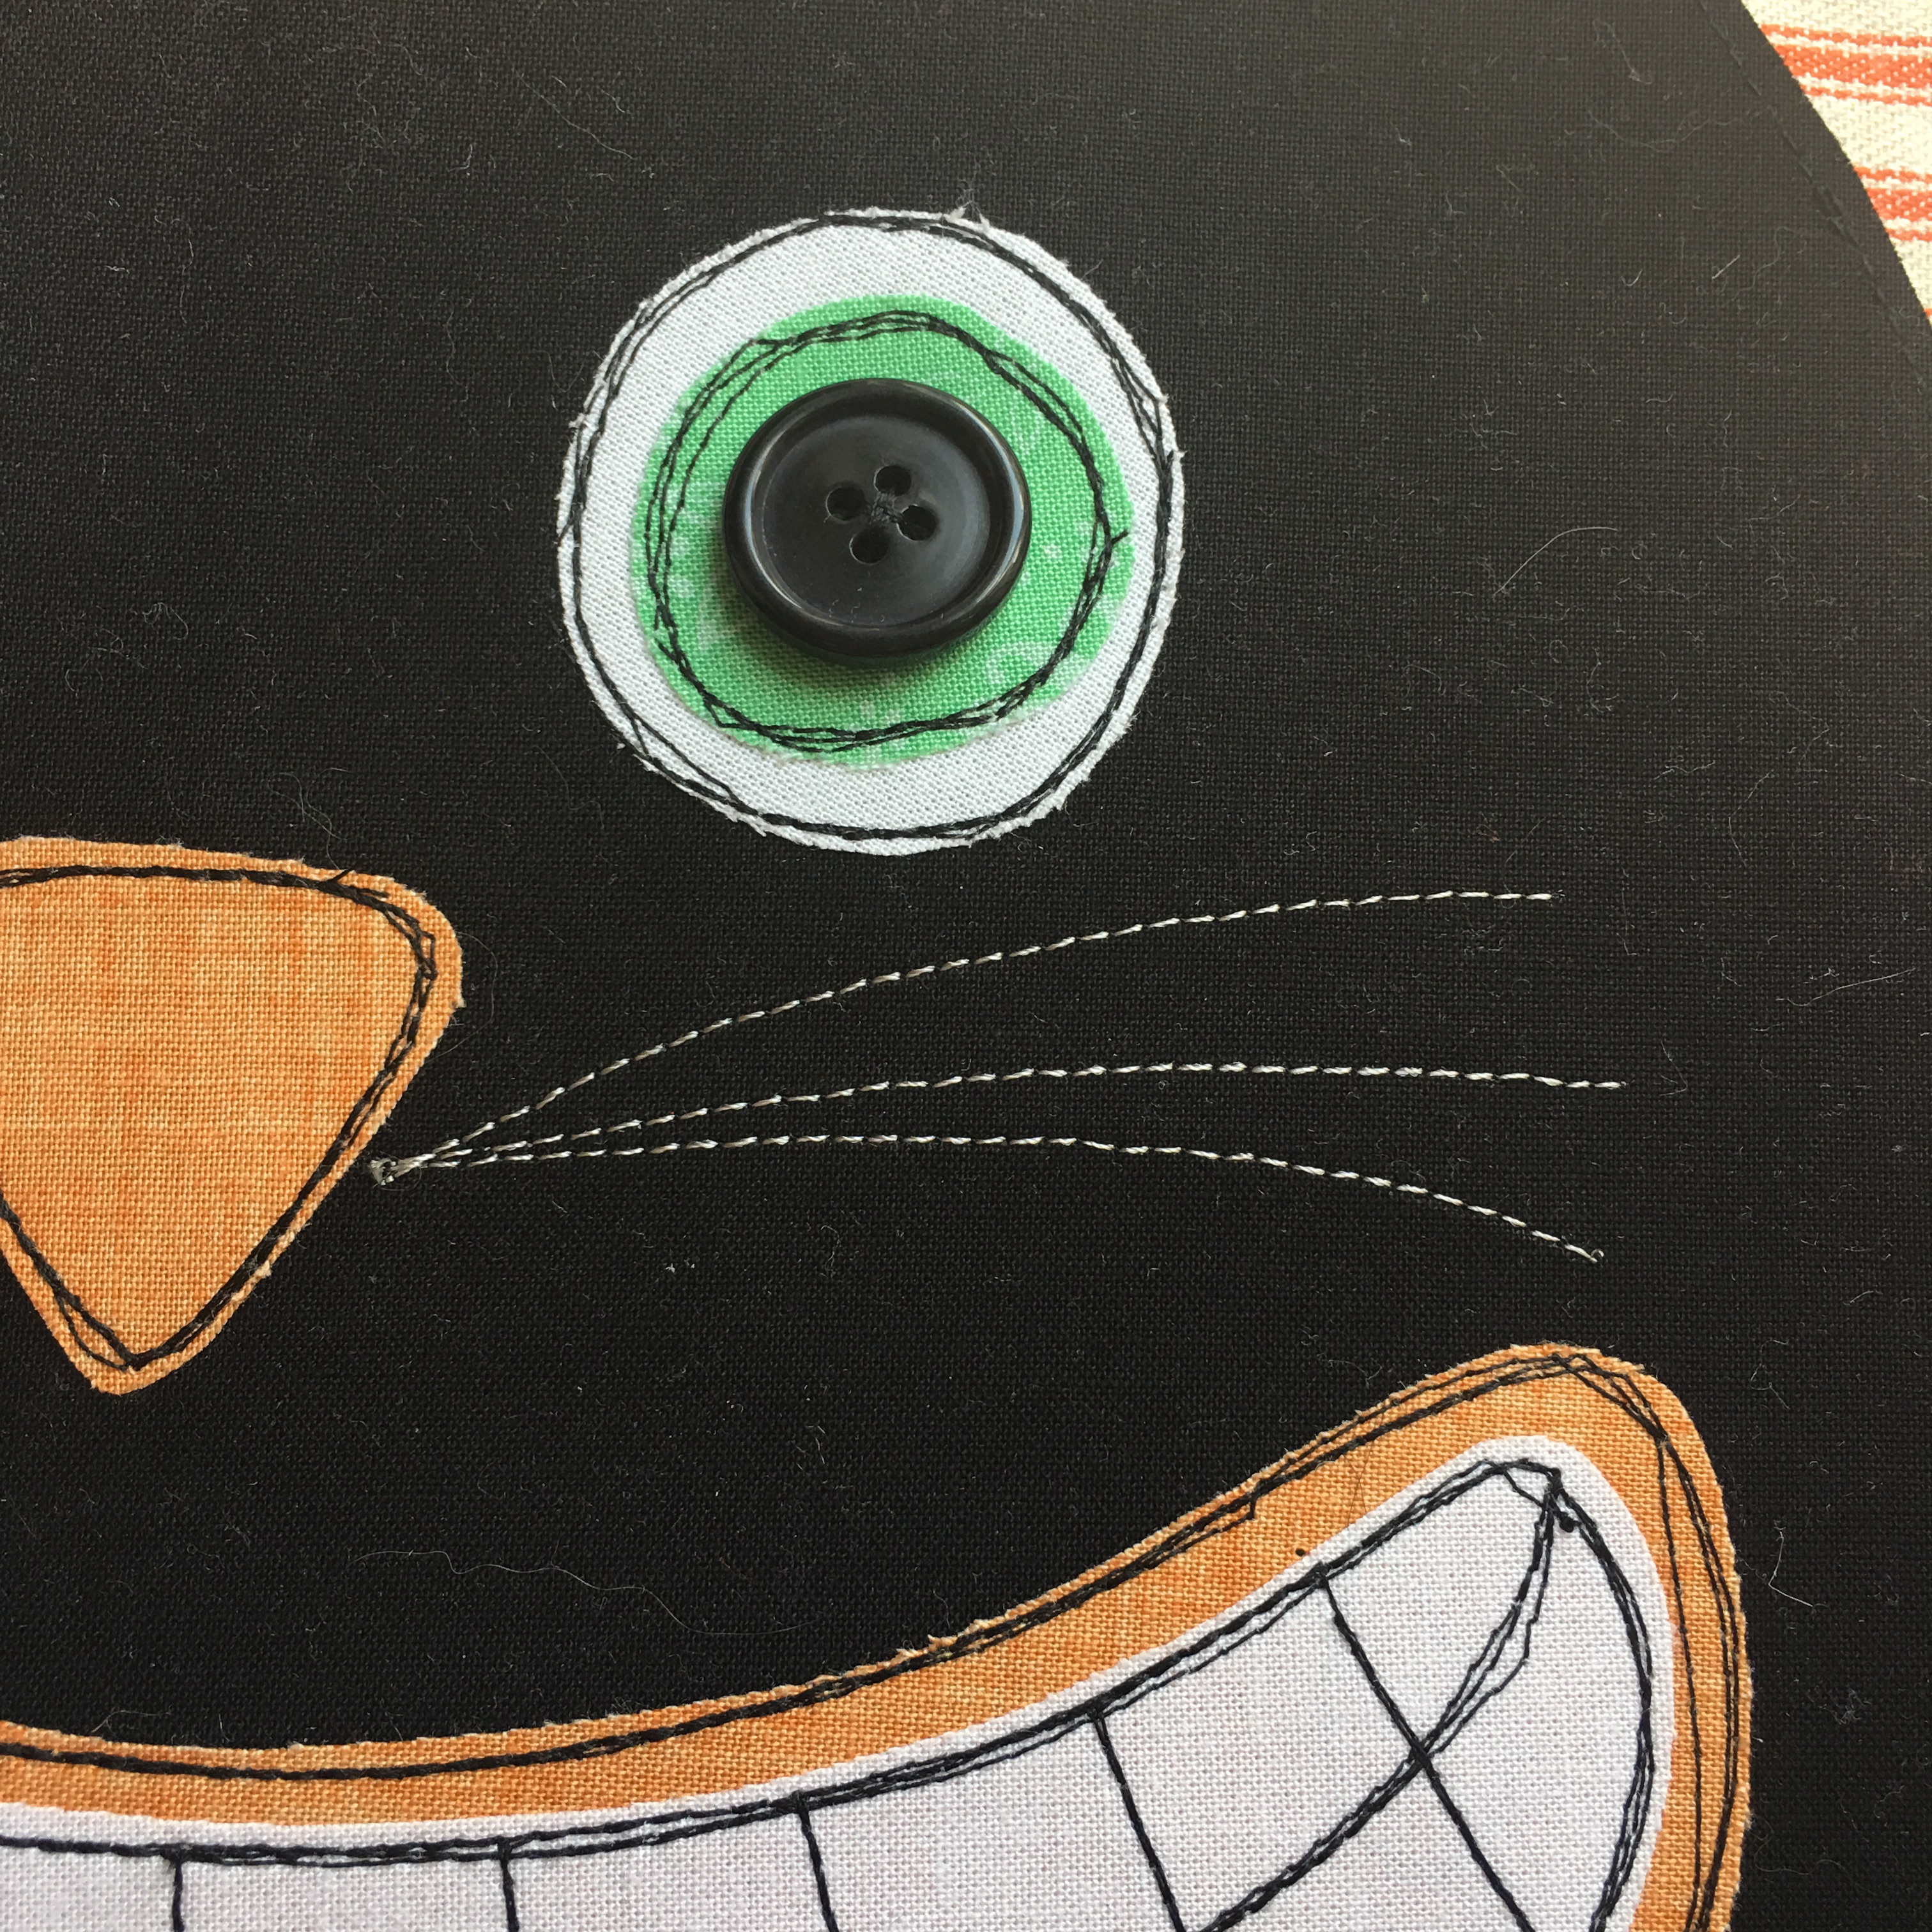
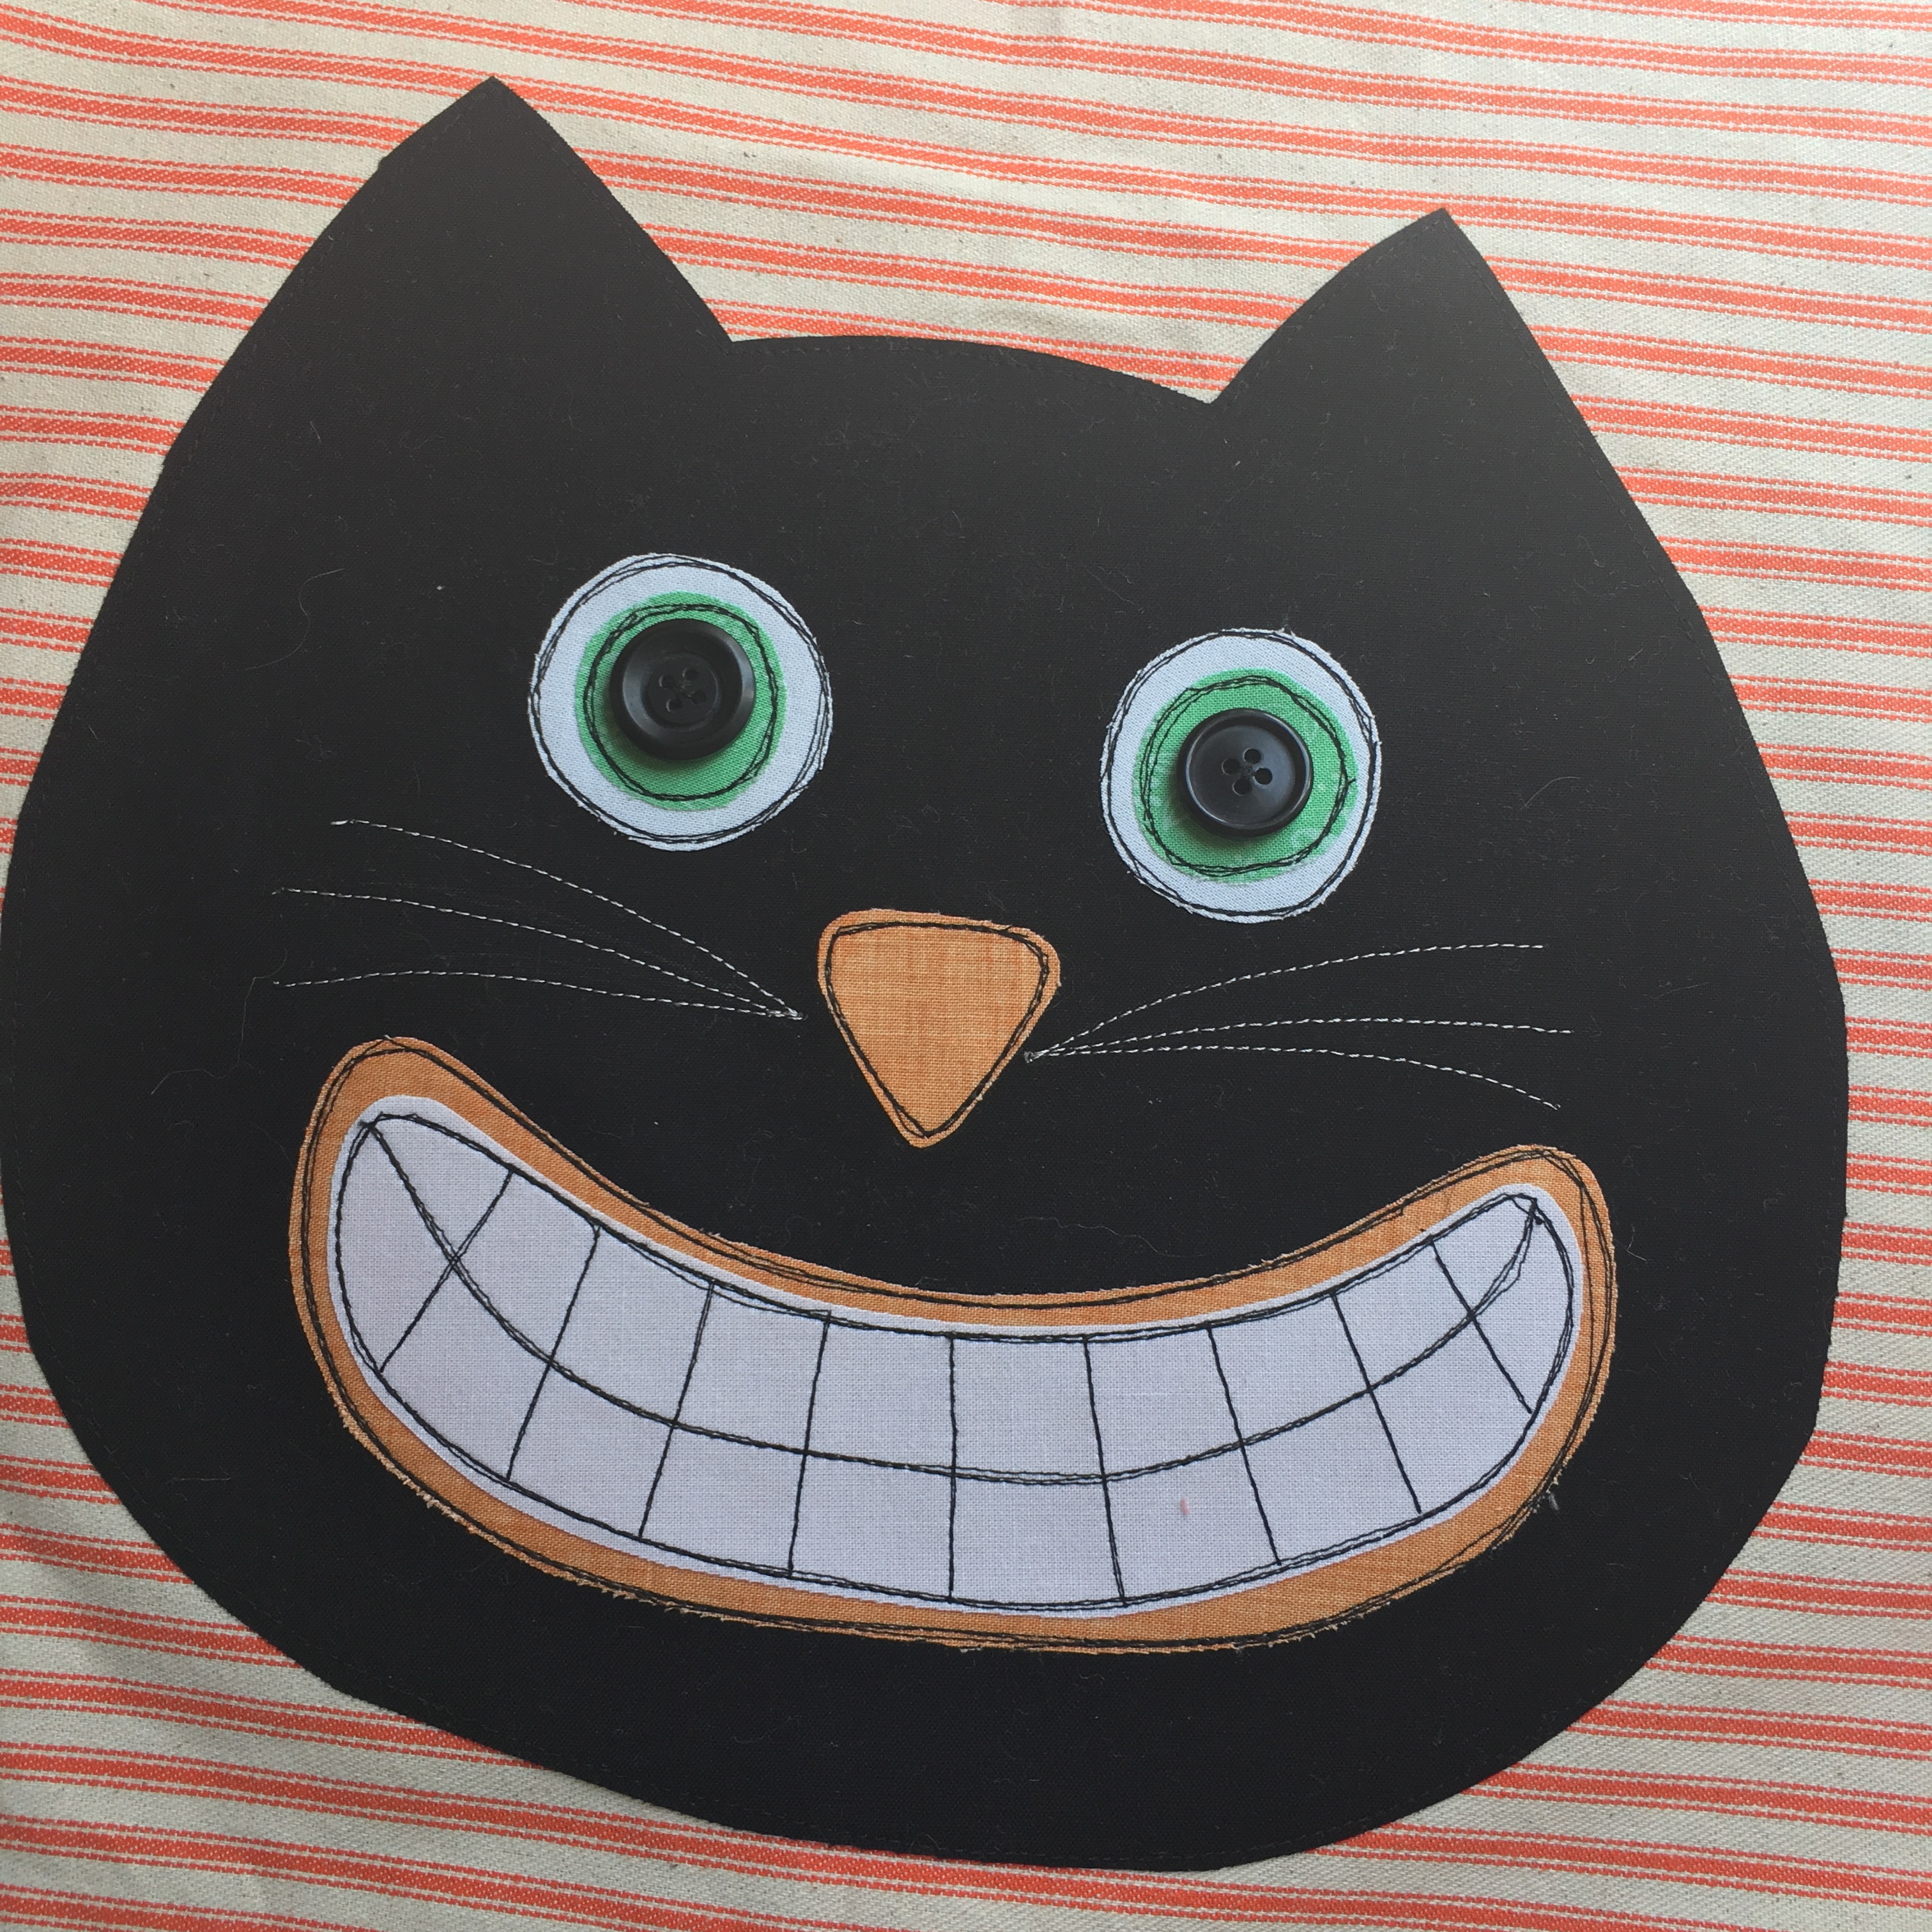
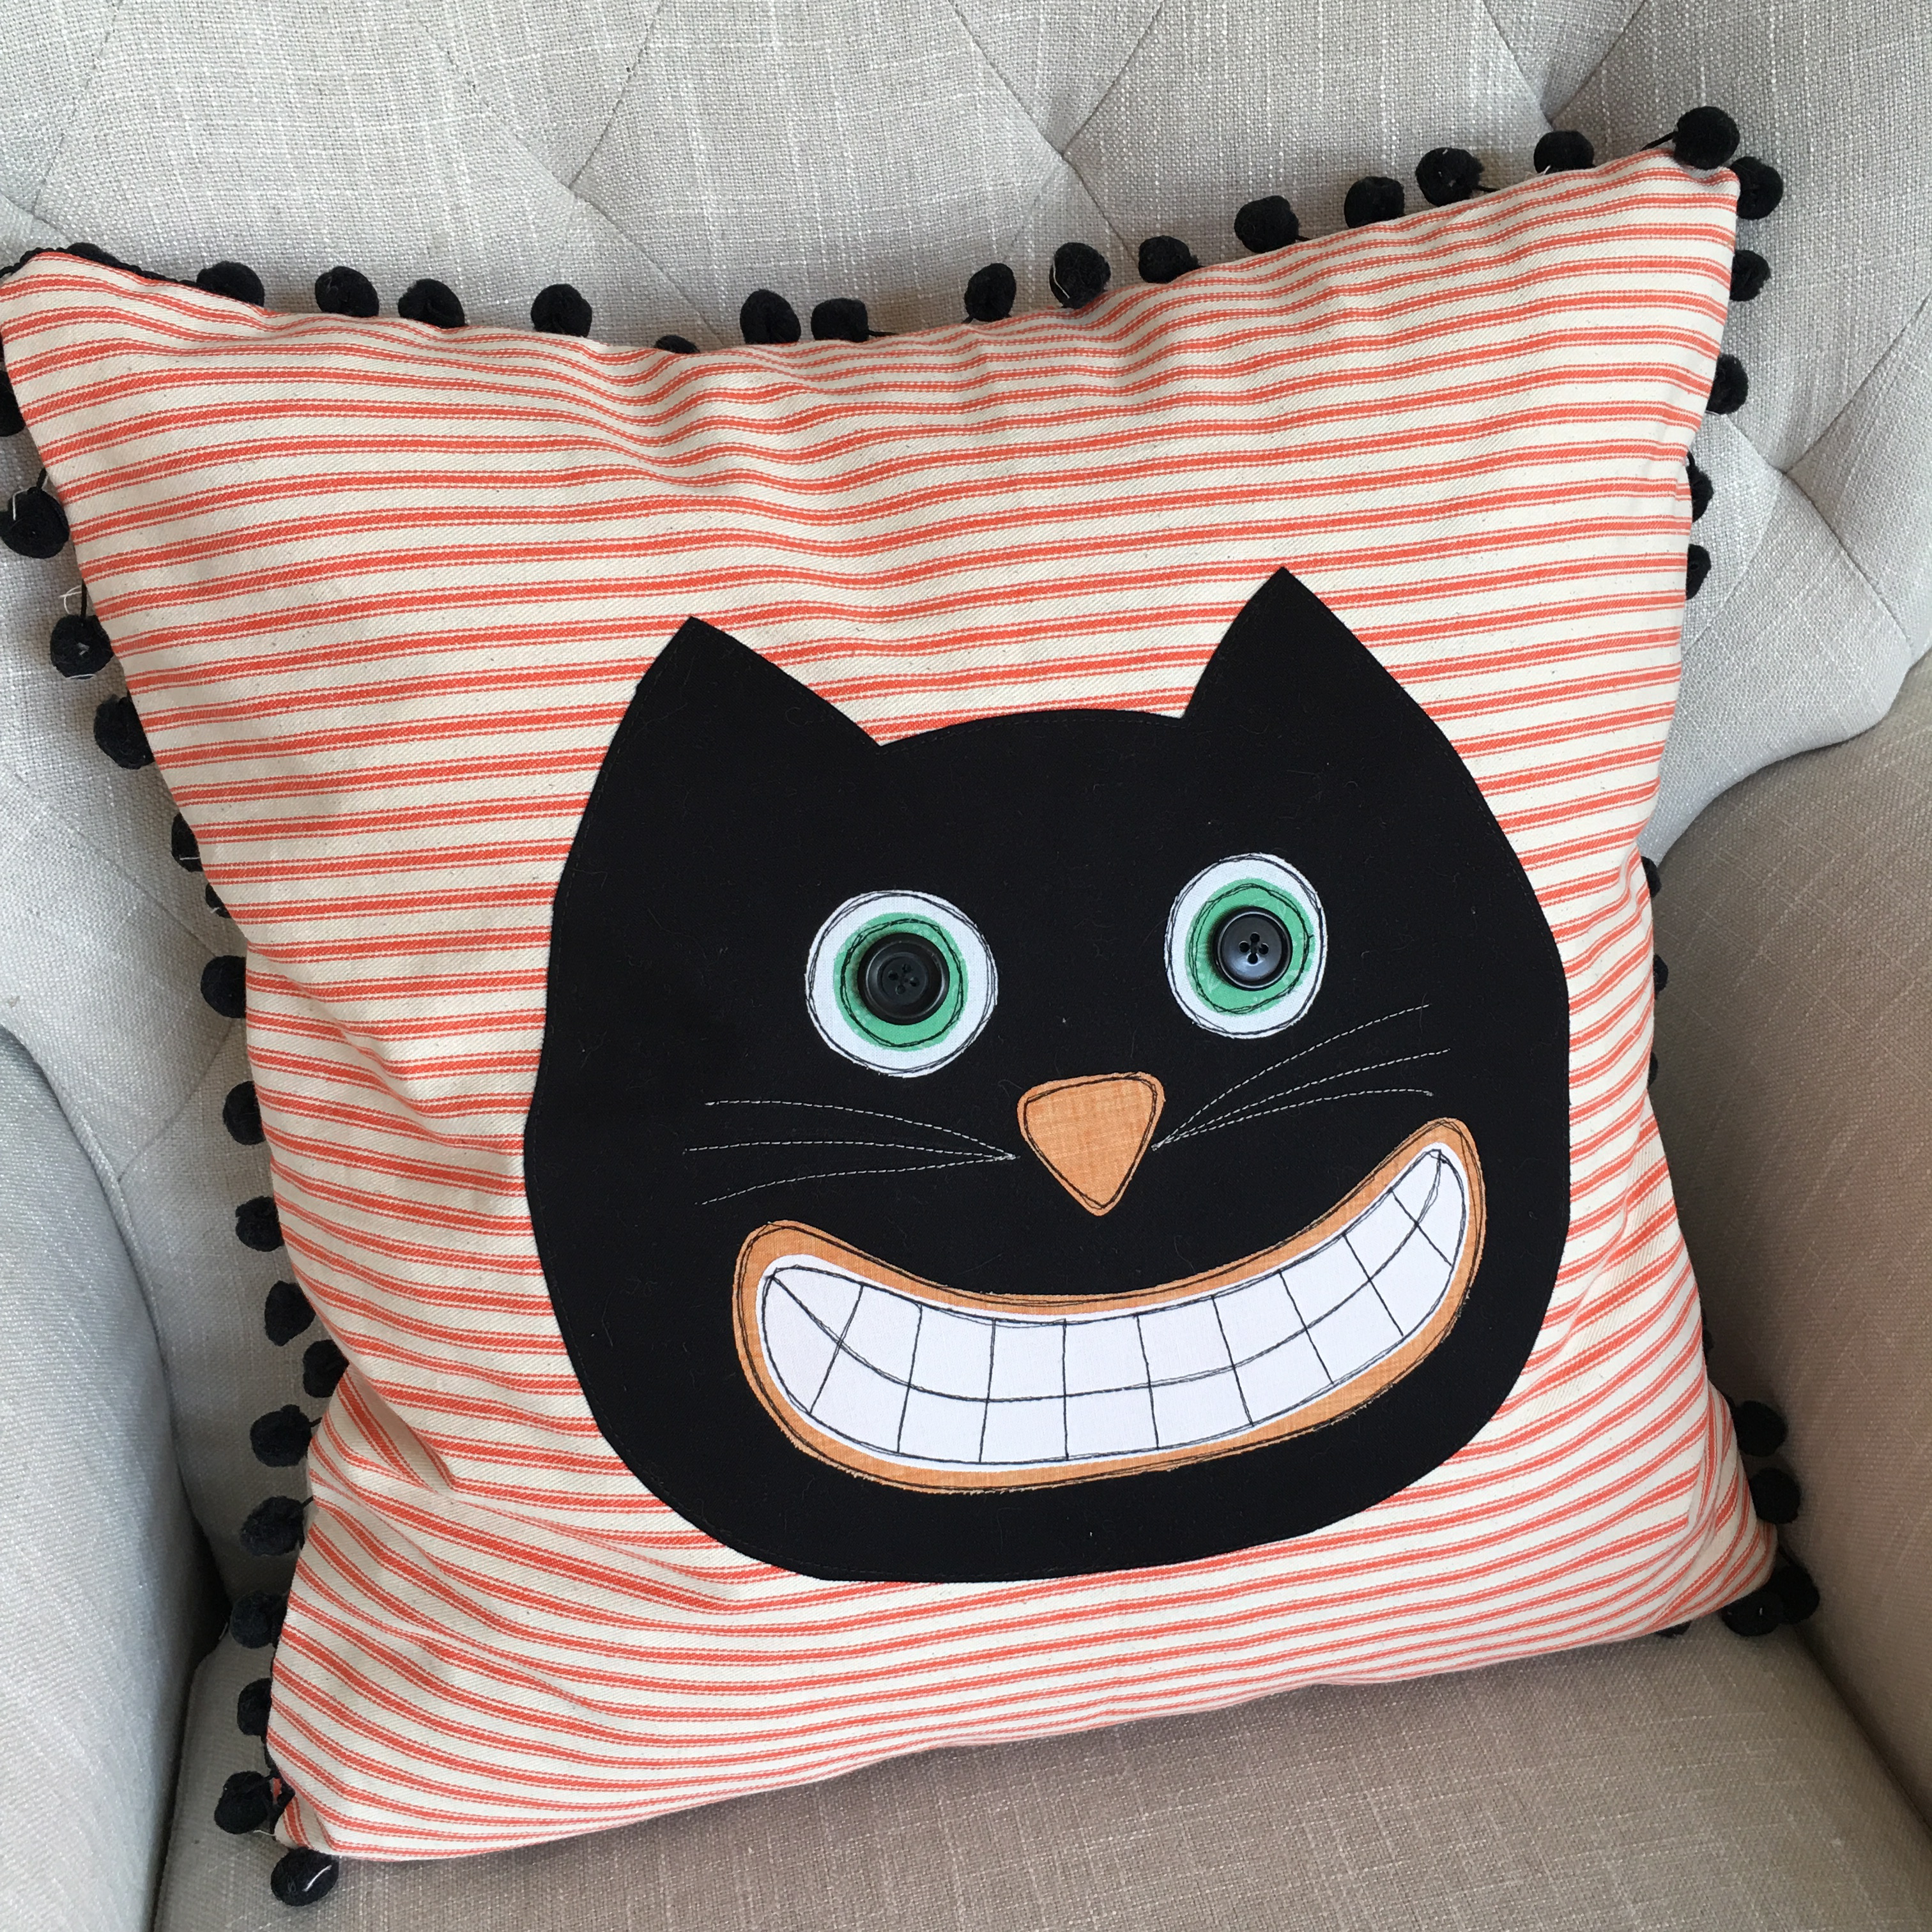
I need another pillow like I need a hole in the head!!  hahahaha!!   Who doesn’t need this silly cat pillow on their couch during the month of October!  I love looking into the family room and this kitty face is always smiling at me 🙂  Want to whip one up?  You only need about 1 hour!!

Supplies:

Heat n Bond® Lite (may use EZ print sheets)

(2) 20″ squares orange ticking for pillow body

Fat quarter solid black

scraps of white fabric, green fabric, and orange fabric

2.5 yards pom pom trim

zipper

20″ pillow form

Cat Pattern, click HERE

Project Instructions:

Begin by printing or tracing each of the pattern pieces to the Heat n Bond® Lite fusible applique. Cut around each piece about 1/4″ away from pattern.   Press the pieces to the wrong side of the desired fabrics with hot, dry iron.

img_4381

Peel off backing paper and position the cat head and face pieces on the right side of one of the 20″ orange ticking squares.  Center the cat.  Heat set in place.

With black thread, straight stitch around each of the applique pieces 3 times.  I only stitched around the cat head once because you can’t see the stitching.  Following the picture, add detail stitching for his teeth.

img_4383

Sew black buttons for the center of his eyes.

img_4389

He needs whiskers!!!!  I used a shiny light gray thread to stitch the whiskers.  You can draw them with a pencil first so you don’t mess up ?

img_4388

I only stitched the whiskers once and used a stay stitch to start and stop.

To finish the pillow, baste the pom pom trim around the pillow front, starting and stopping at the bottom center.

To finish the pillow, cut a 3″ strip off of the remaining 20″ square.

Sizzix Tutorial|Fish Bubbles - Nautical Throw Pillow by Amanda Niederhauser

This is where the zipper will go.  (If zippers make you run for the hills, you can finish this pillow using your favorite method. This just happens to be my favorite way to finish a pillow!)

Simply sew the zipper in and press.  This is now the pillow back!  With the zipper part way open, pin the pillow front to the pillow back, right sides together.  Using a 1/2″ seam, sew around the entire pillow.

IMG_8939

Turn right side out.

img_4405

I love silly black cats!!!

img_4421

Save

Mini Kitty Halloween Quilt Pattern

img_3710

It’s a little SPOOKY around here!  Mini Kitty is getting a Halloween makeover!  I love this little pattern so much and wanted to give it a little pop for the fall.  Mini Kitty is now leaping over a pumpkin with bats and stars in the background.  If you’ve already purchased the pattern you can download the Halloween applique shapes for free HERE.  The Halloween PDF is also included with each Mini Kitty pattern purchase in my Etsy shop.

mini-kitty-cover

The original Mini Kitty pattern was created as a gift for a friend after the loss of a sweet kitten.  You can read more about it HEREimg_3688

Instead of using only 2 colors for the checkerboard border, I used 8 different oranges and 8 different blacks.  I really love the polka dot pumpkin!

img_3686

Mufasa was very helpful on this project and choose the colors all by himself 🙂

img_3706

I love how it turned out and I have the purrrrfect place to hang it!  img_3714

Black and Orange Cat Quilt {Halloween Cats}

FullSizeRender

I am so excited to share the finish of this quilt that has been in the works for the last year!

IMG_3433

I started it last summer, finished piecing the top this last spring, had it quilted in May and just finished the binding!  It is one of my all time FAVORITE quilts!!!!!

IMG_3444
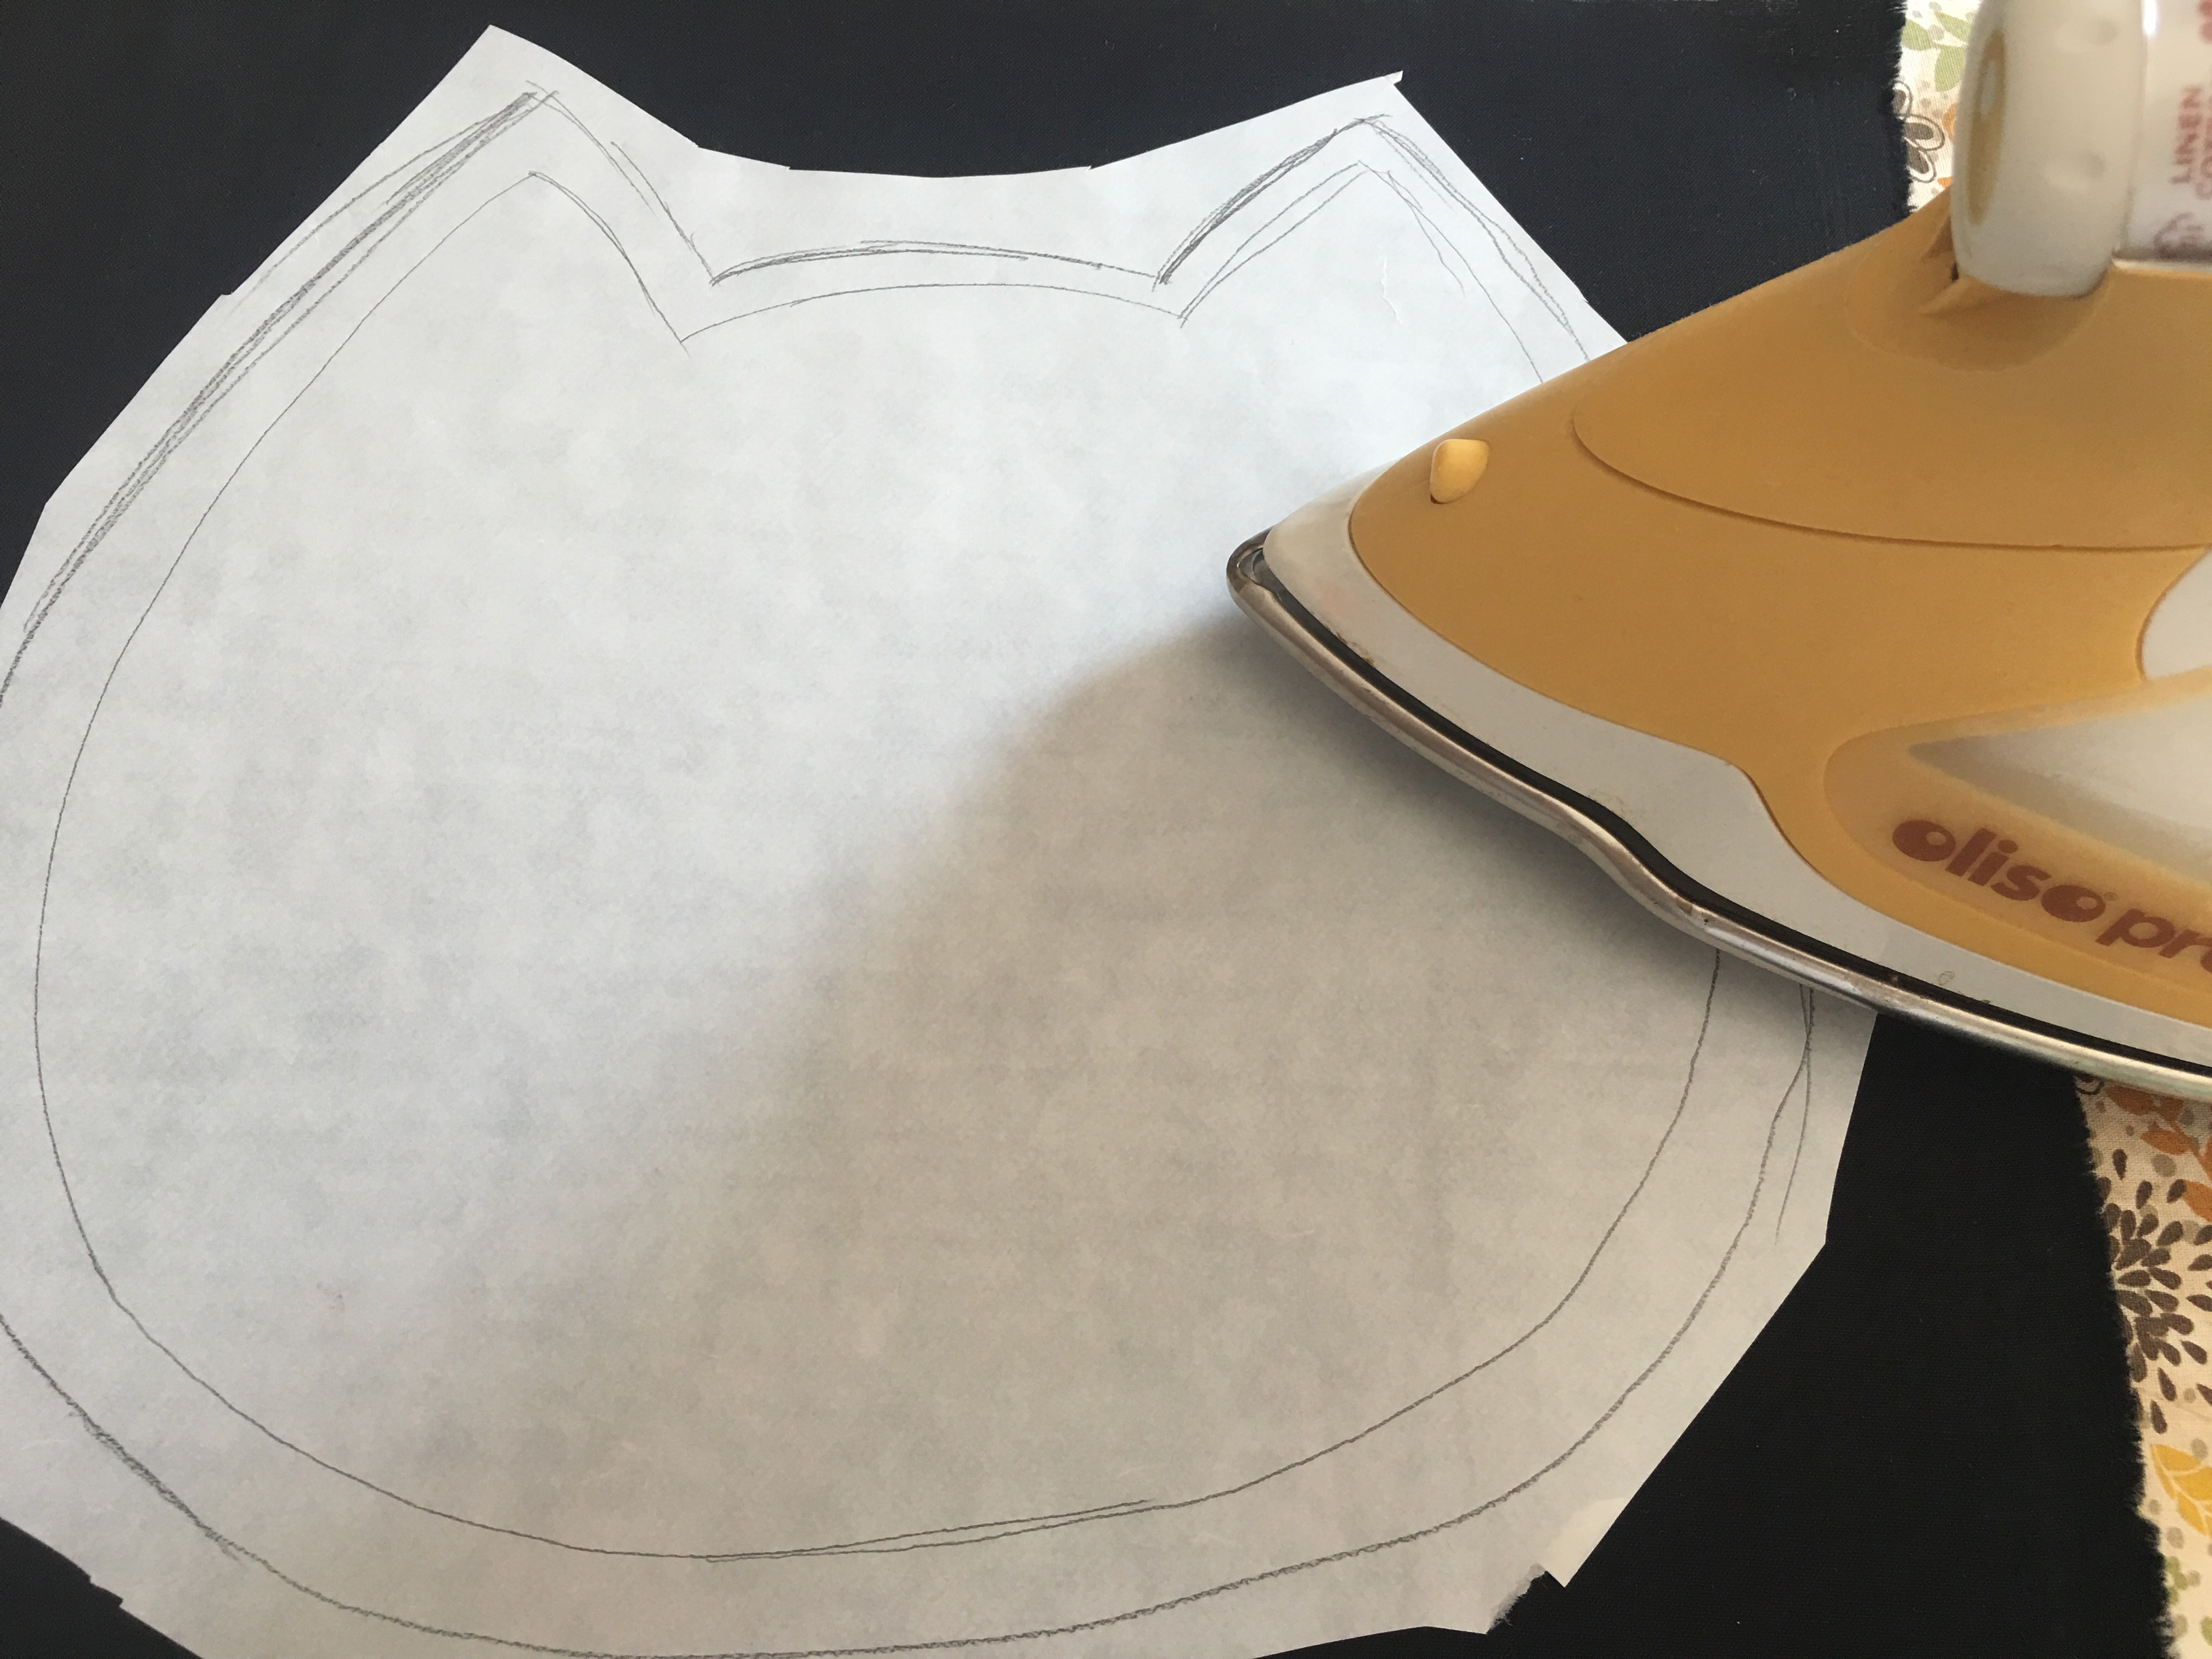
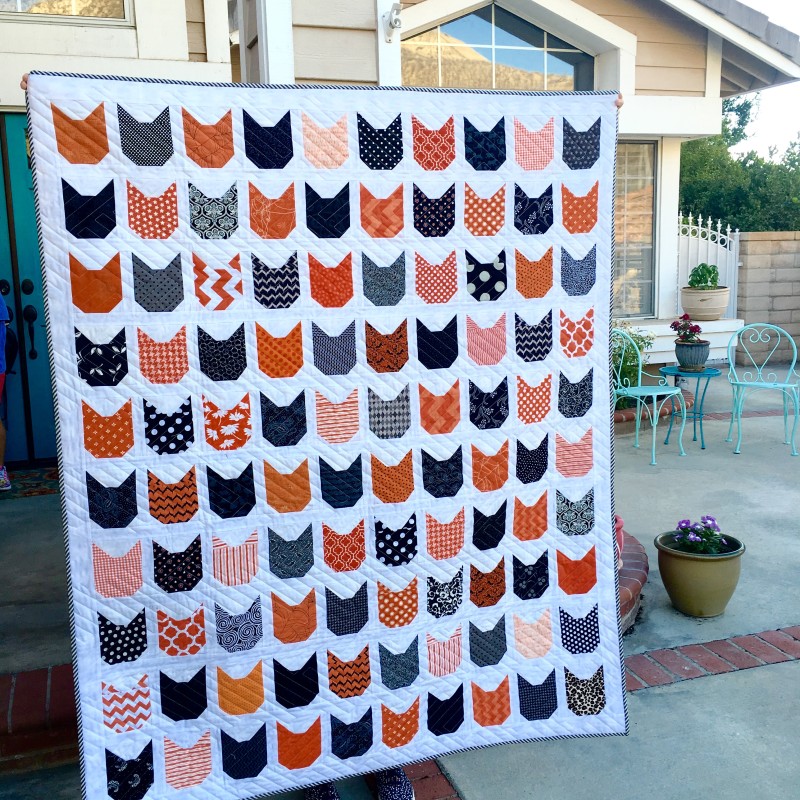
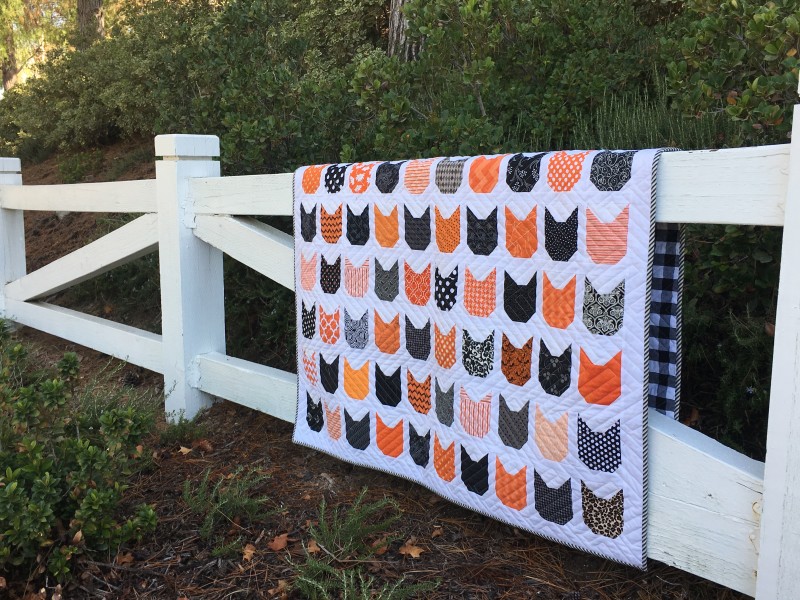
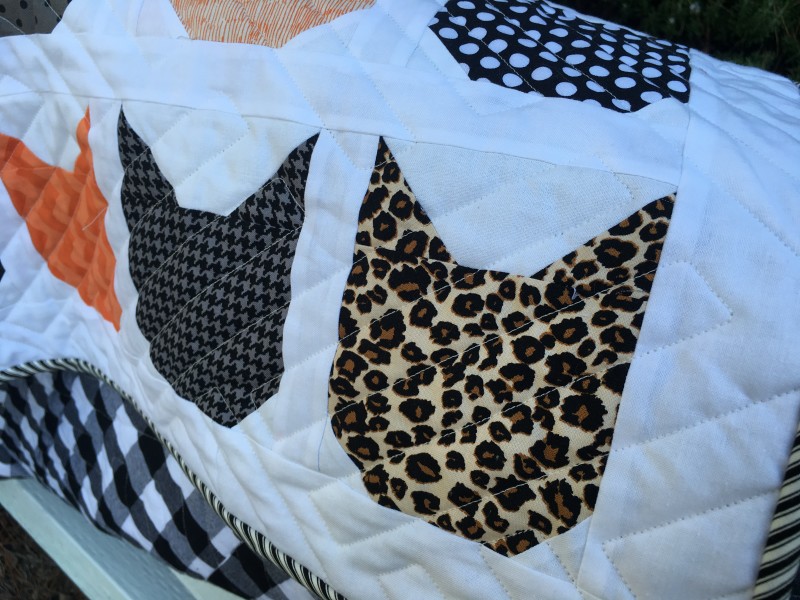
Each cat head is either black or orange print with the exception of the bottom right corner – it’s Mufasa!!!!

IMG_3431

I used Elizabeth Hartman’s cat head block pattern (here).  They are so much fun to sew!!

IMG_3436

Here you can see the fun geometric quilting that Nicole from Kwilt It quilted.  I LOVE it!  I also adore the gingham backing!!!

IMG_3434  
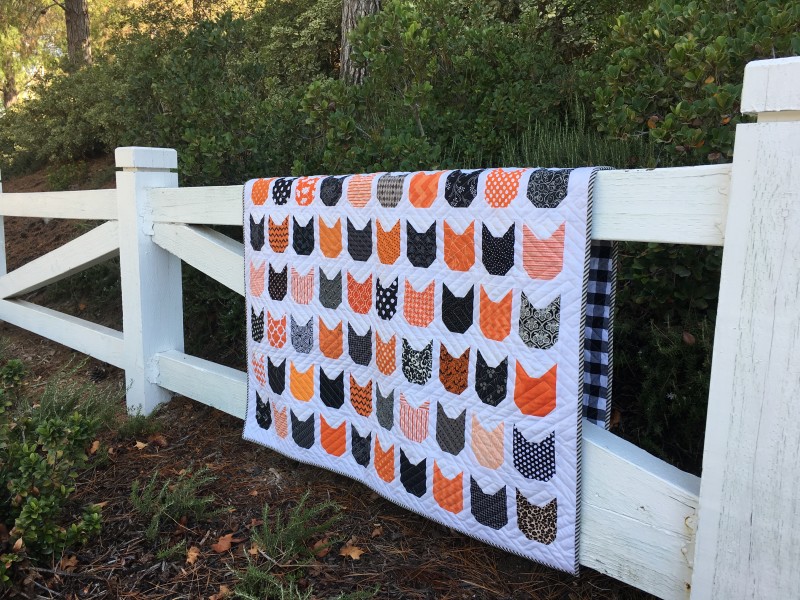
Oh my gosh – it’s too cute!!!!!  100 cat heads!!!

IMG_3429

Kimberly’s Sac Pattern from Fat Quarter Shop

cat lady bag 12

Today I am participating in a blog hop with the Fat Quarter Shop!  We are showing off this super cute, super easy cross-body bag called Kimberly’s Sac.  This bag is so much fun to make that I had to make two of them!  One is for me and one is for my daughter.  There is even a video you can watch to help you as you sew along!                    Screen Shot 2016-03-22 at 6.38.40 PM

This bag is great because it’s comfy and slouchy!  I used quilt batting inside so it feels like a soft quilt.

cat lady 18

I made 2 versions: one is with Cat Lady Fabric by Cotton and Steel and the other, for my daughter, is sewn with the latest Star Wars fabric.

kimberlay sac star wars bag 2

For Star Wars bag, I used only squares for the outer bag.  This was easier for Ella to cut out and design by herself.

DSC_0674

She LOVES it!  This would make the perfect gift for the Star Wars Nerd in your life 🙂

kimberlay sac star wars bag 4

kimberlay sac star wars bag 7

And this Cat Lady version would be the perfect gift for that Crazy Cat Lady in your life (or yourself)…..hahahaha!

cat lady tote bag

I used parts of the selvage in the Cat Lady bag – I love Cotton and Steel’s creative use of fabric selvage!

cat lady bag

cat lady bag 2

Since this bag is soft and cuddly just like a quilt, of course Mufasa sought it out as the perfect place for an afternoon nap 🙂

cat lady bag 6

I suppose it’s fitting that my Cat Lady bag has cat fur on it!!

cat lady bag 5

cat lady bag 3

This is such a fun bag to use!  I can’t wait to make another one!

cat lady bag 14FatQuarterShop-250x250(1)

12 Days of Meowy Christmas {Catch Up}

I’ve gotten a little behind with blogging about the 12 Days of Meowy Christmas!  I’m much better at keeping up on Instagram!  Here goes:

On the 7th day of Meowy Christmas my true love gave to me, a fun excuse to get quilty!  This adorable cat quilt pattern is free from Blend Fabrics.  You can download it here!  I think it would be so cute in Christmas fabrics!  I’m hoping to make it before Christmas 🙂Screen Shot 2015-12-09 at 8.20.54 AM

On the 8th day of Meowy Christmas my true love gave to me, an apron with a had stitched kitty!  Kerri from Sew Deerly Loved is sharing this darling tutorial for a vintage inspired apron with kitty embroidery!  Go check out her blog for full instructions and pattern!!

Screen Shot 2015-12-09 at 8.21.41 AM

On the 9th day of Meowy Christmas my true love gave to me a lion that is soft and cuddly!  Lucy from Lucy Blaire has created this pattern called Lyle the Lion.  You can purchase it on her blog or enter to win one today on Instagram!Screen Shot 2015-12-09 at 8.01.15 AM

Christmas Cat Sweater

typsy elves cat sweater 4I don’t know if I’ve ever posted about an item of clothing that I didn’t sew but I am so in love with my new Christmas sweater that I had to post a few pictures!  The sweater has cats  all over it and bells all over it and bows all over it!  I JINGLE when I walk!!  I got the sweater from Tipsy Elves .com.  I saw them in an episode of Shark Tank – their sweaters are amazing and they even had several cat themed sweaters to choose from!  I wore it to our church Christmas party and i attracted a lot of attention 🙂

typsy elves cat sweater 2I’m not one for a lot of pictures of myself – but if I’m wearing a cat sweater it’s all right!!  typsy elves cat sweater 3It was very difficult to get a picture with Mufasa – he was pushing away from me as I was trying to hug him – he ended up snagging the sweater 🙁  typsy elves cat sweater 5I can’t help but smile when I see this sweater!  I wish it wasn’t 80 degrees today so I could wear it!