Scrappy Charm Christmas Version

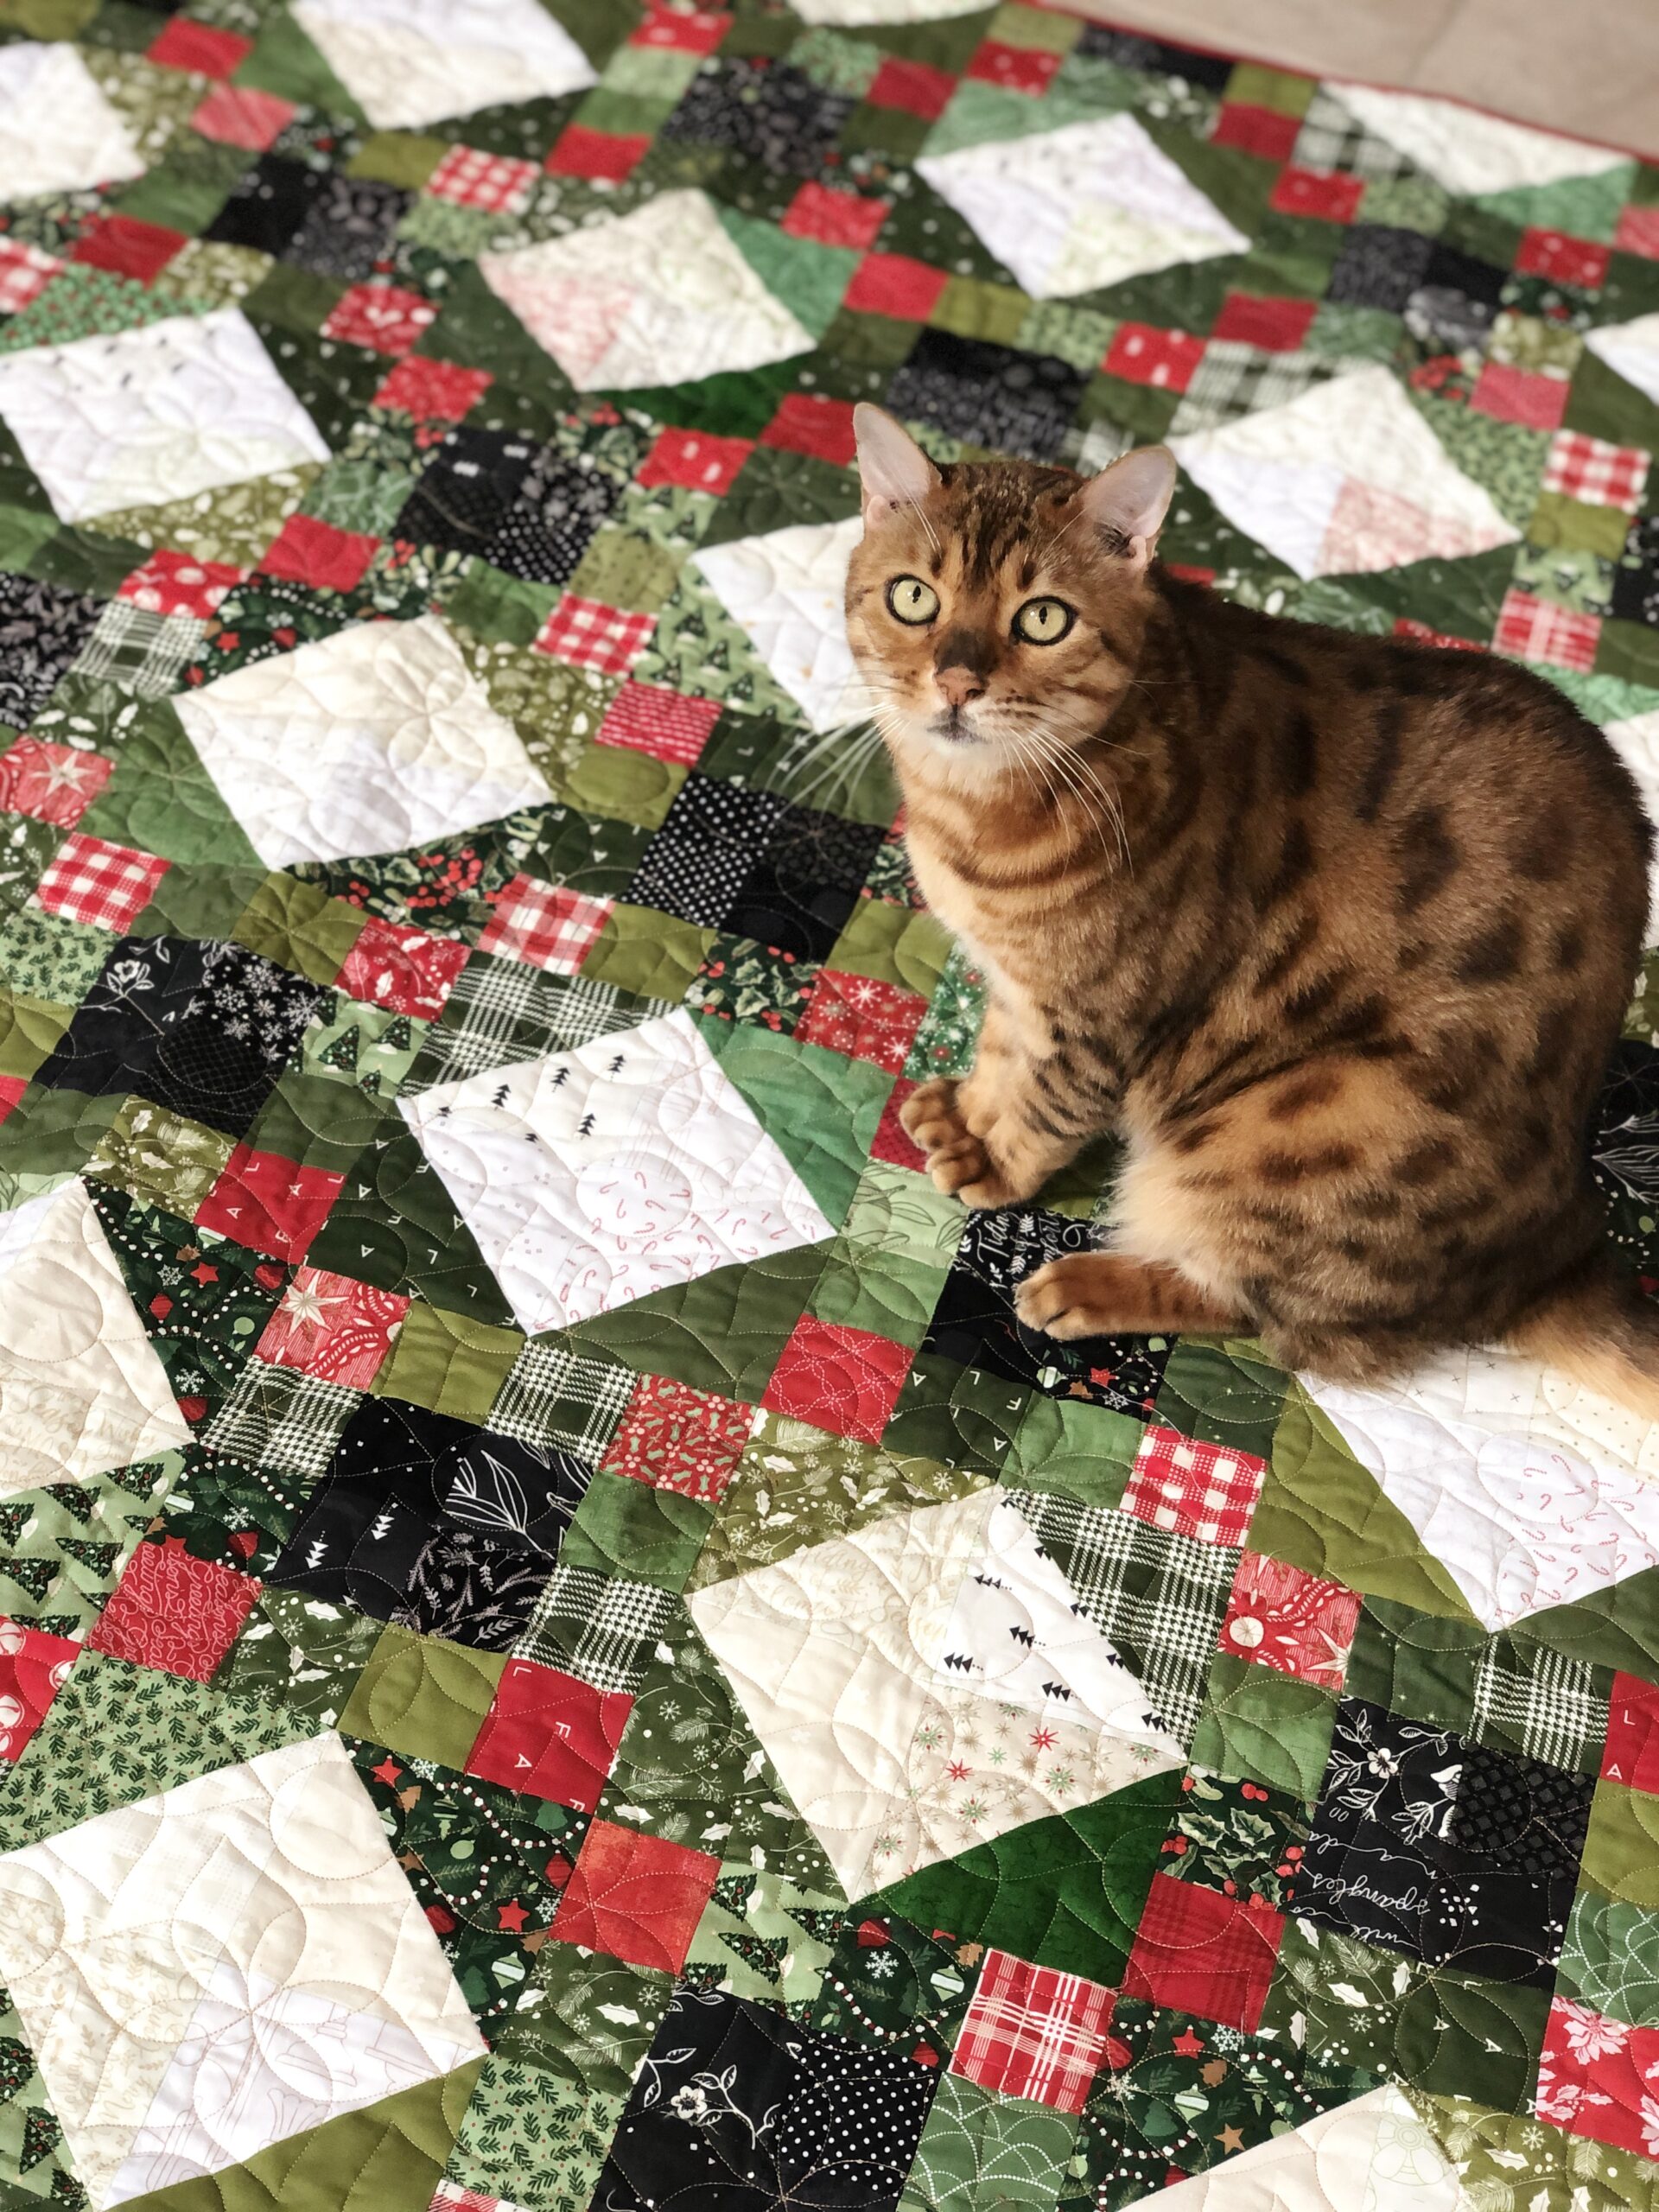
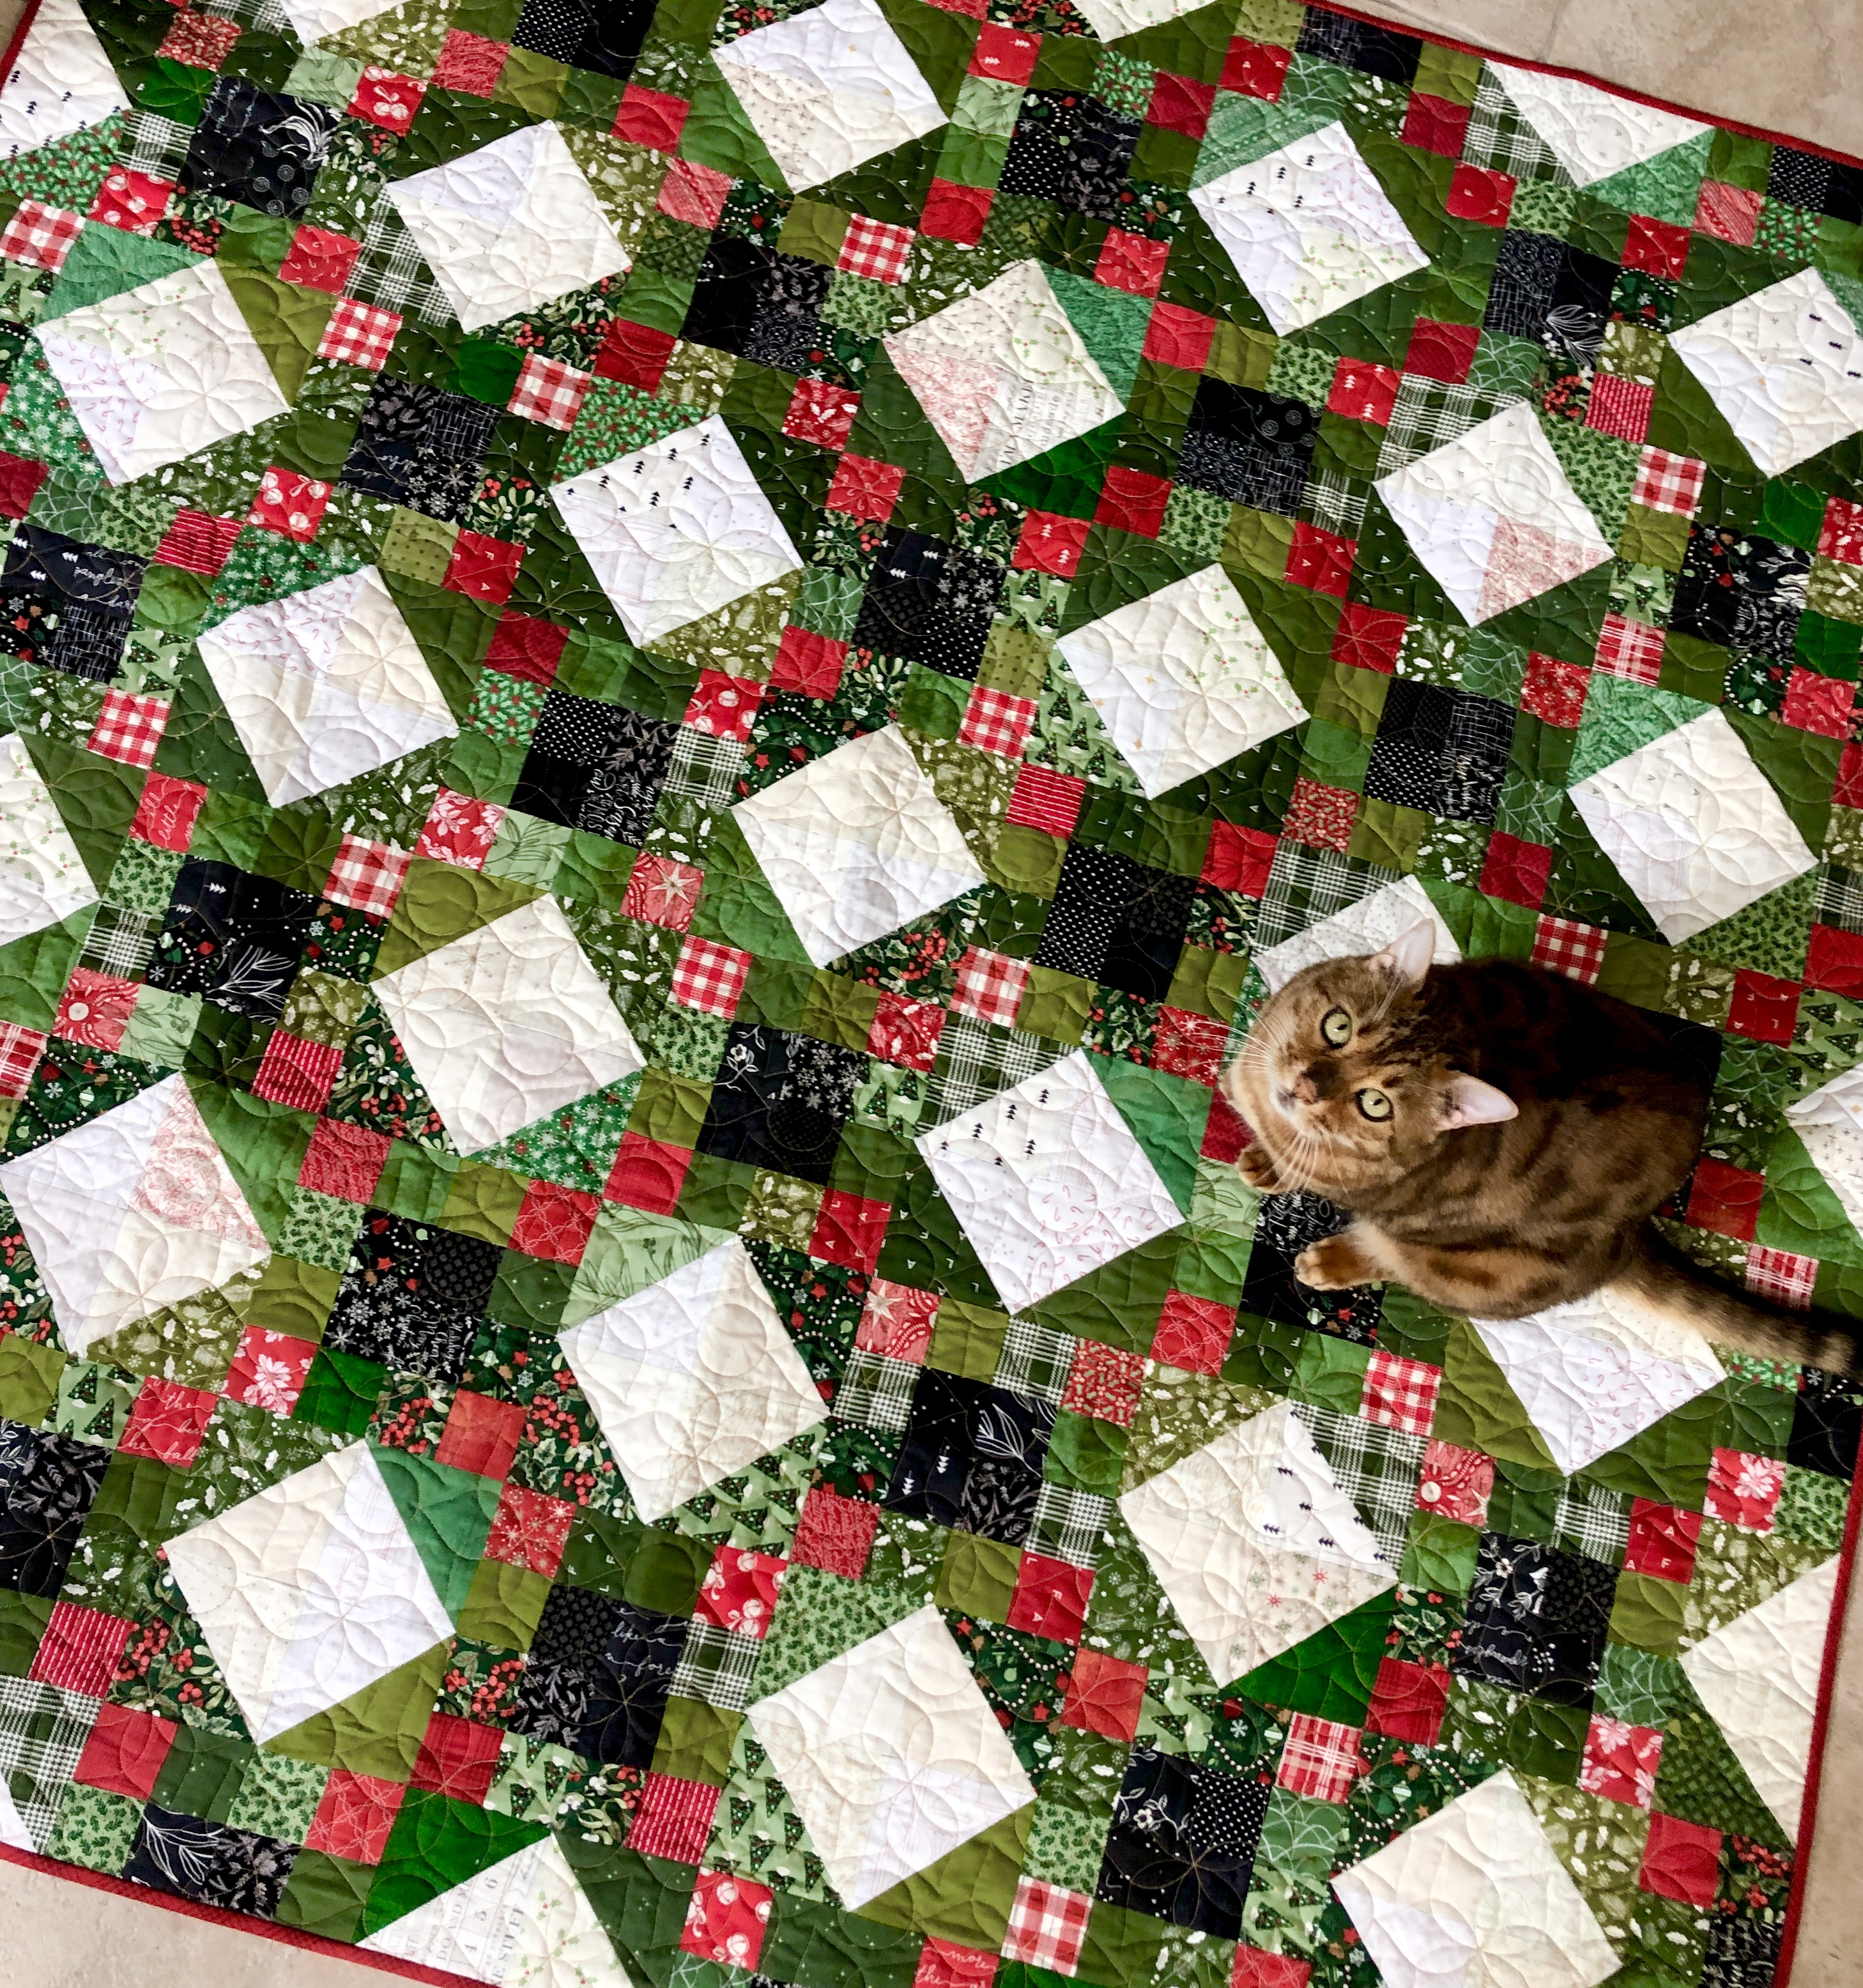
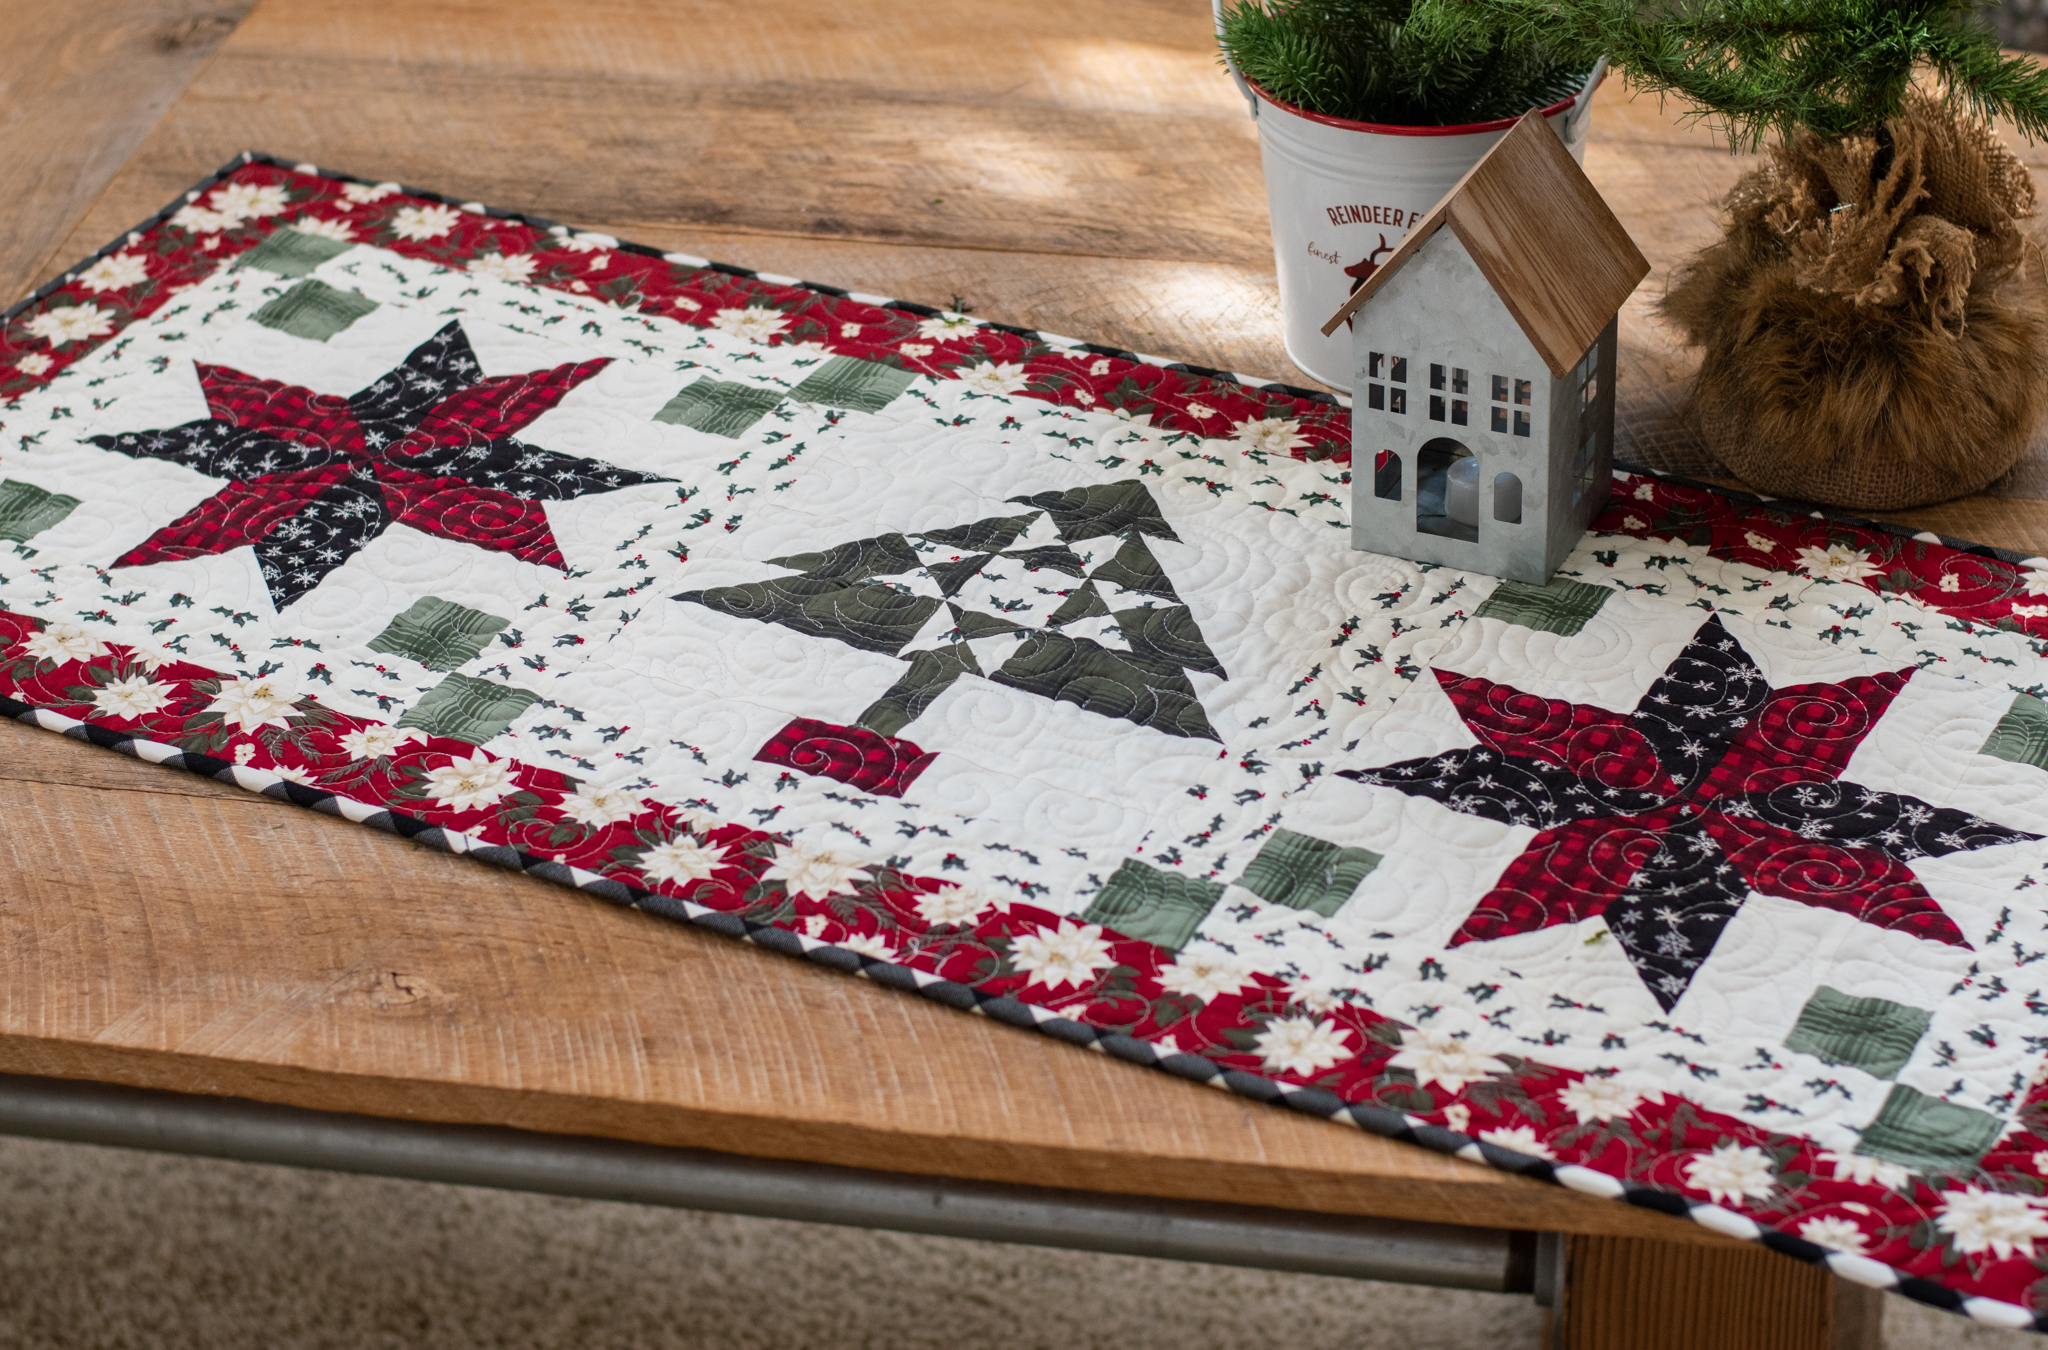
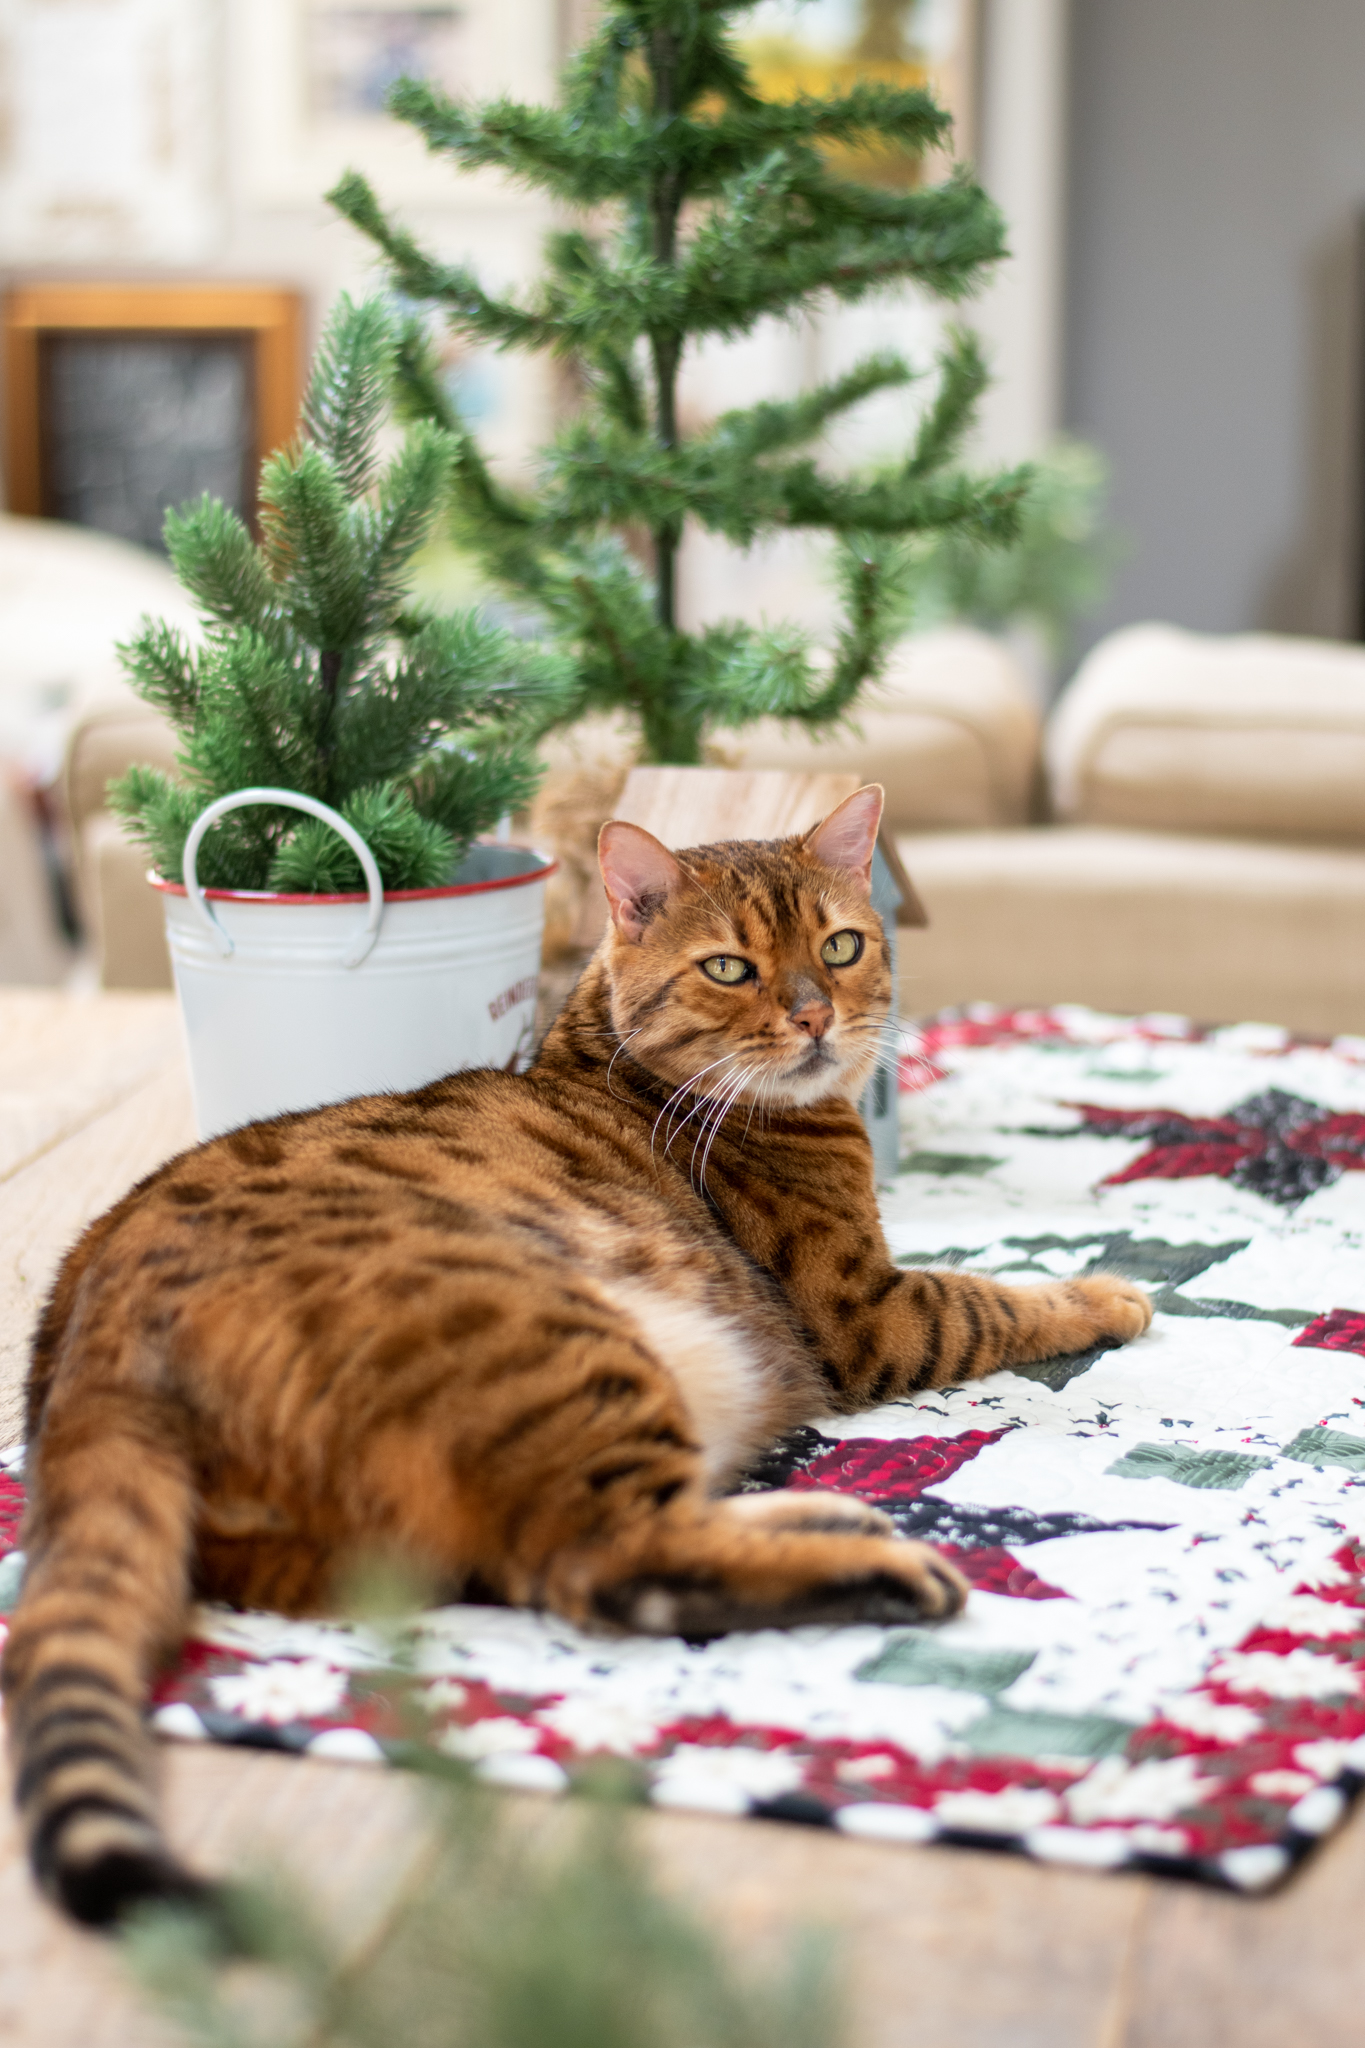
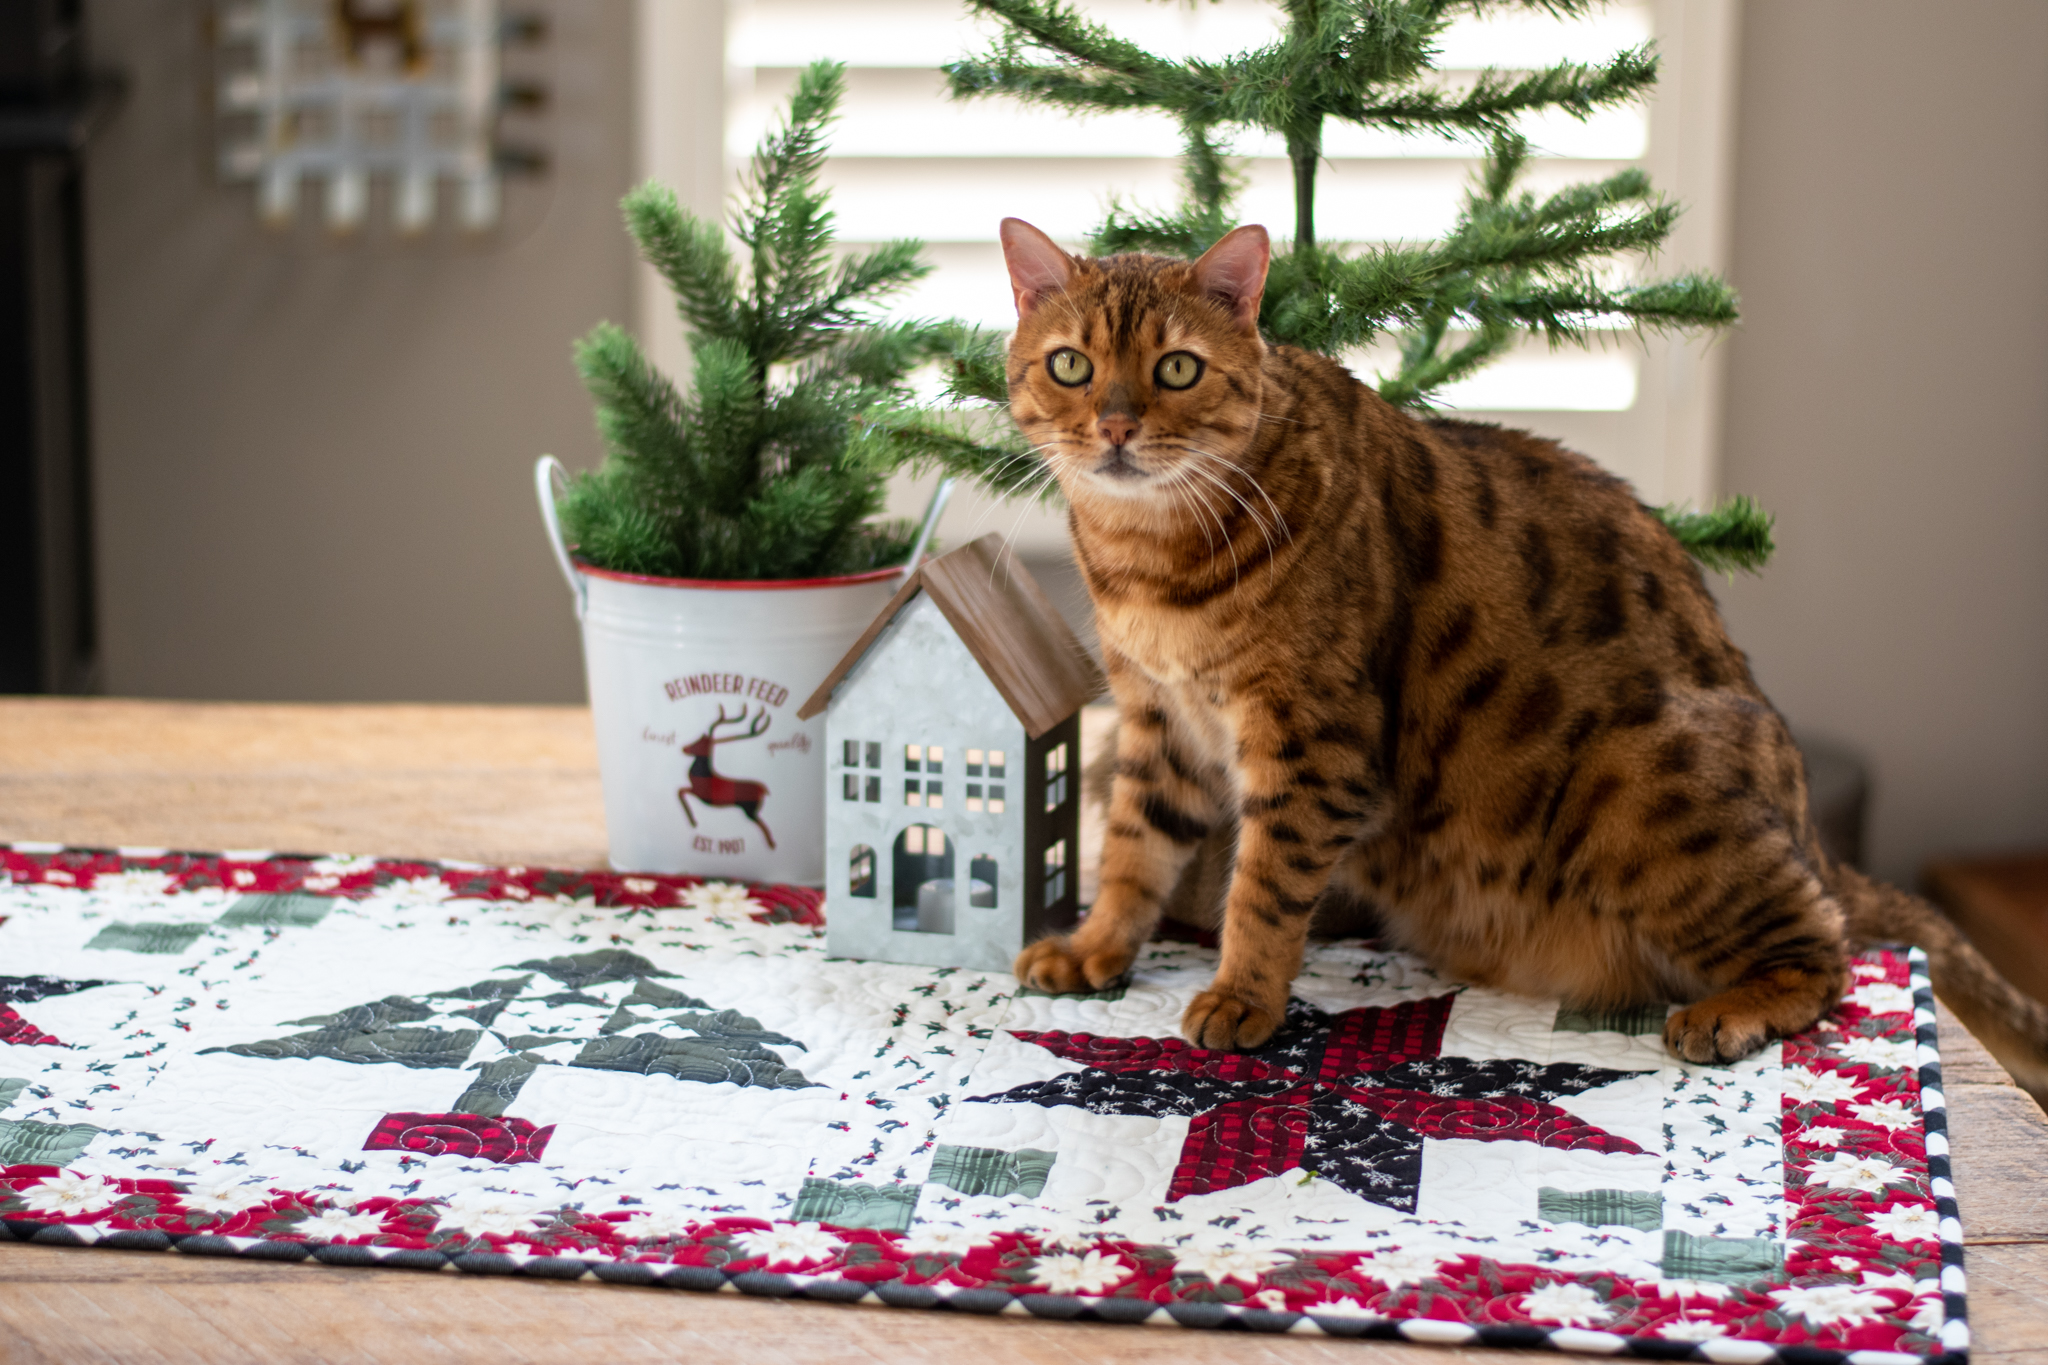
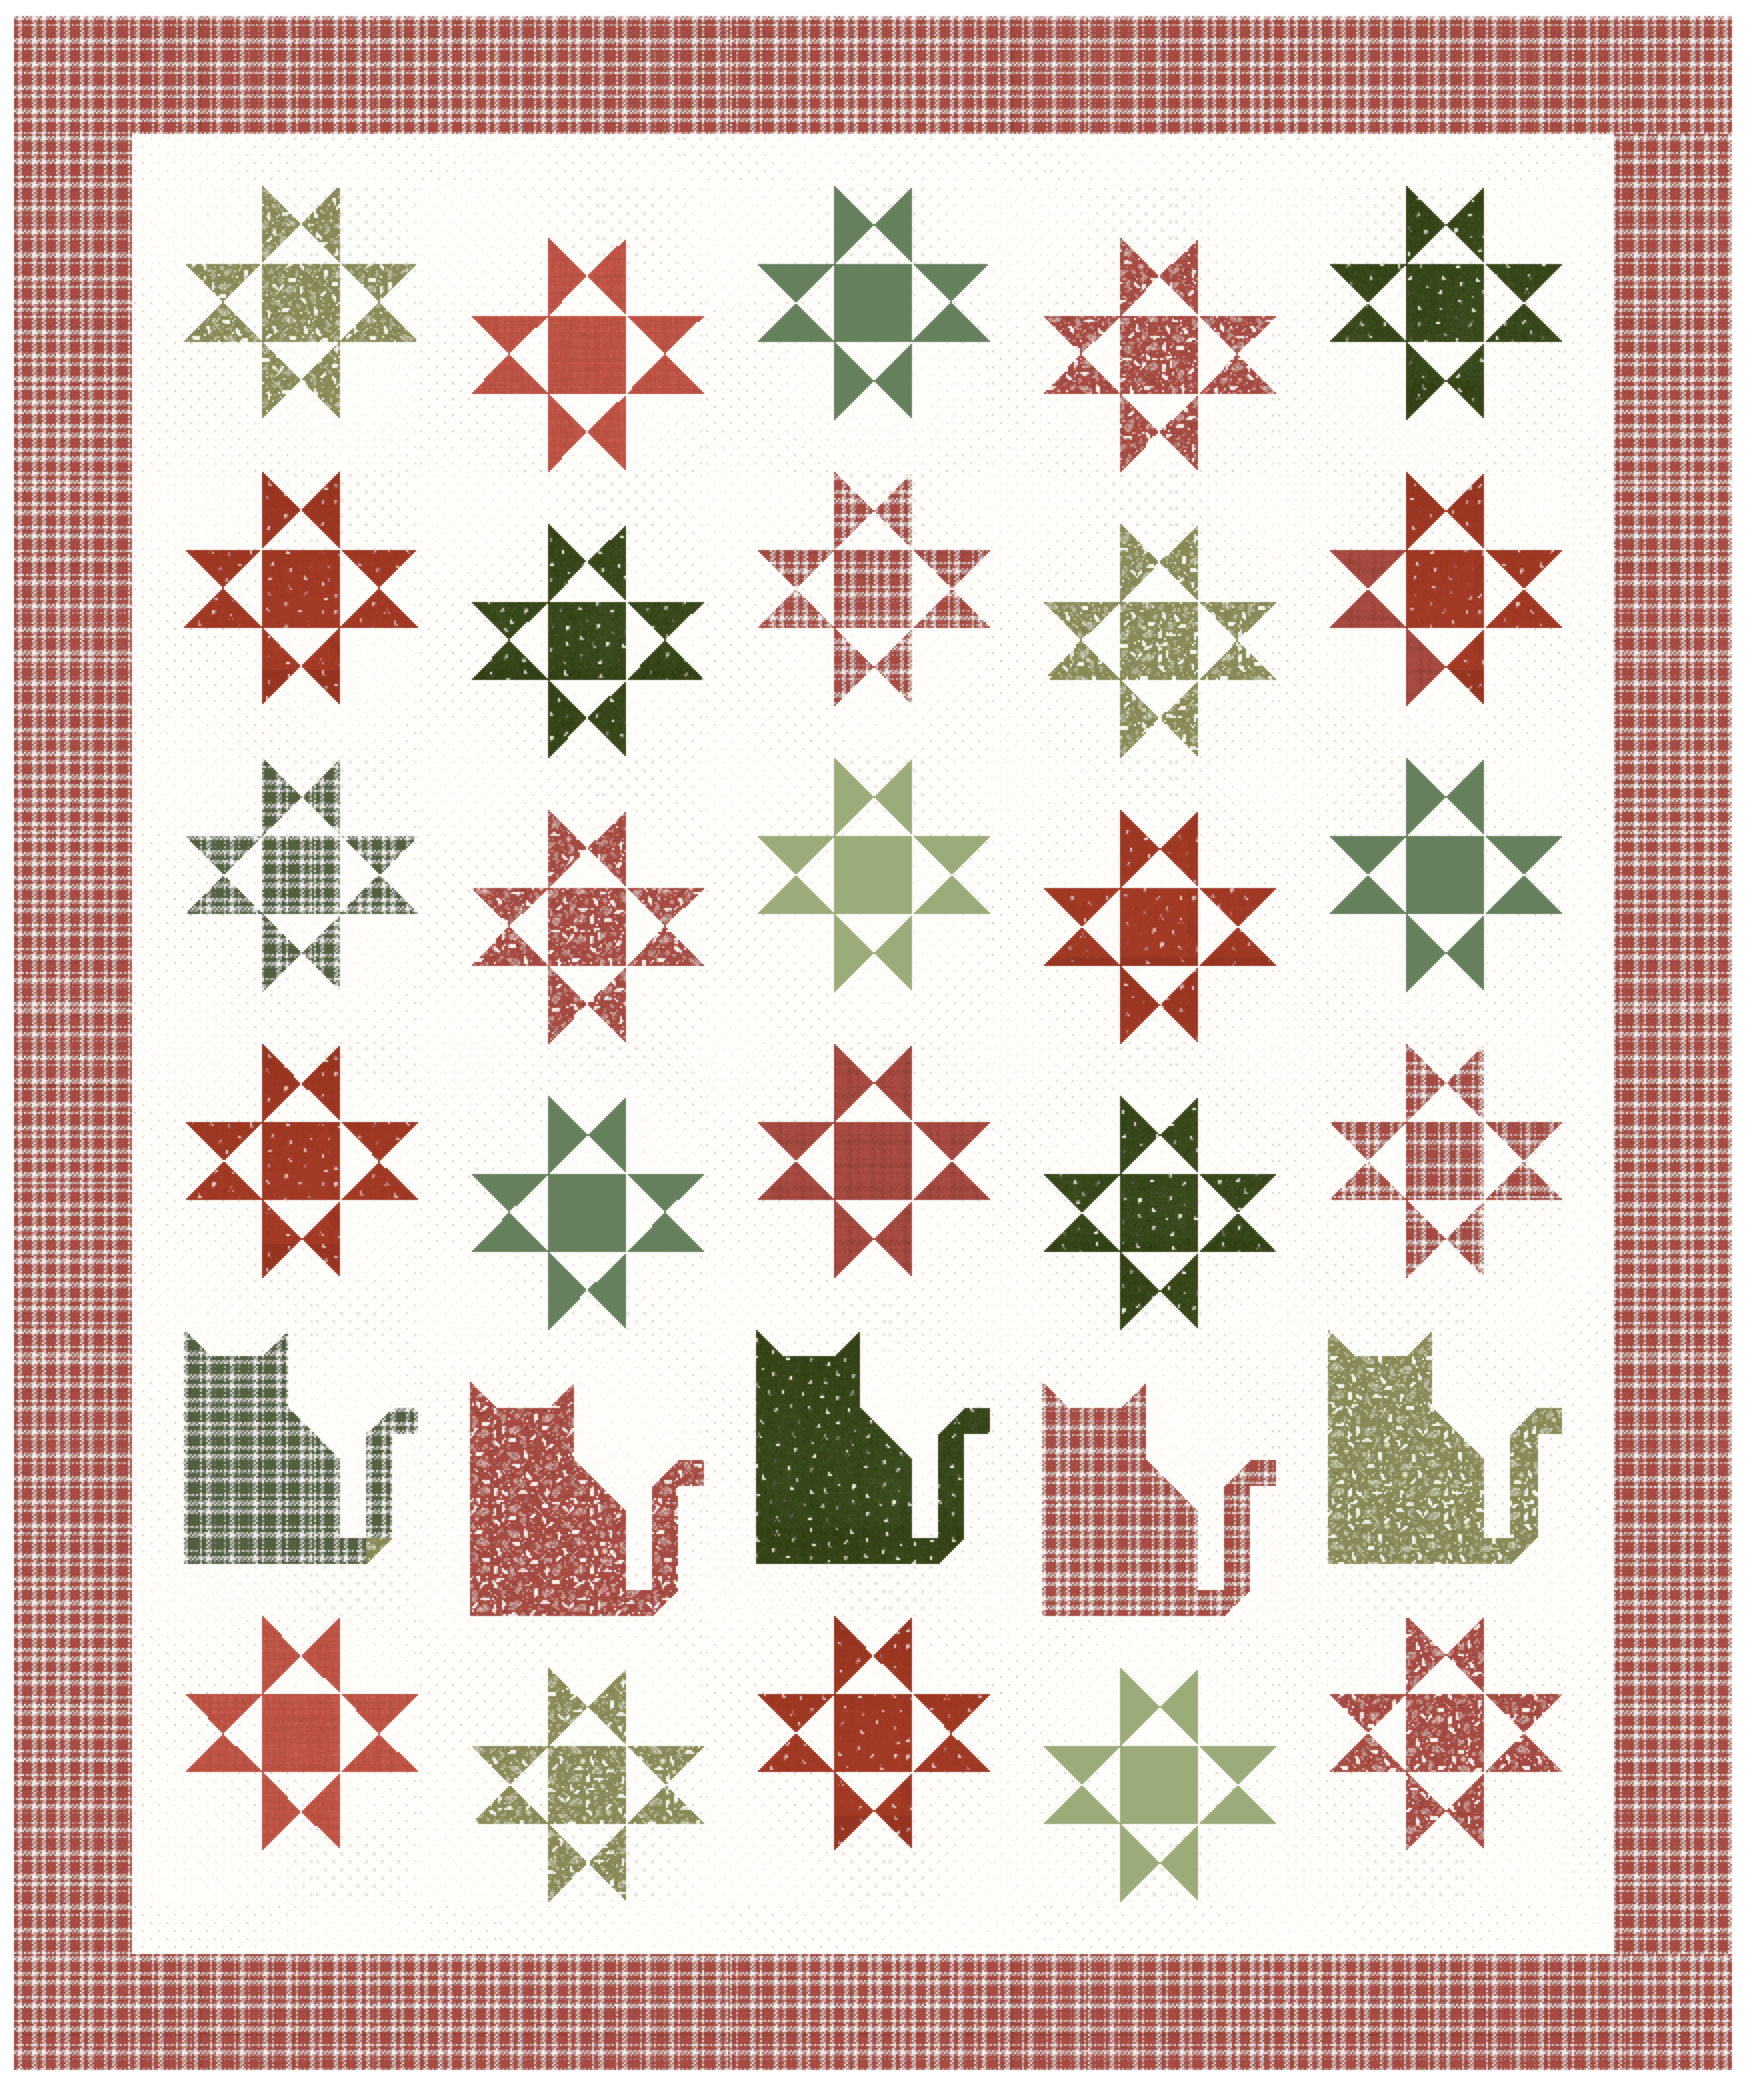
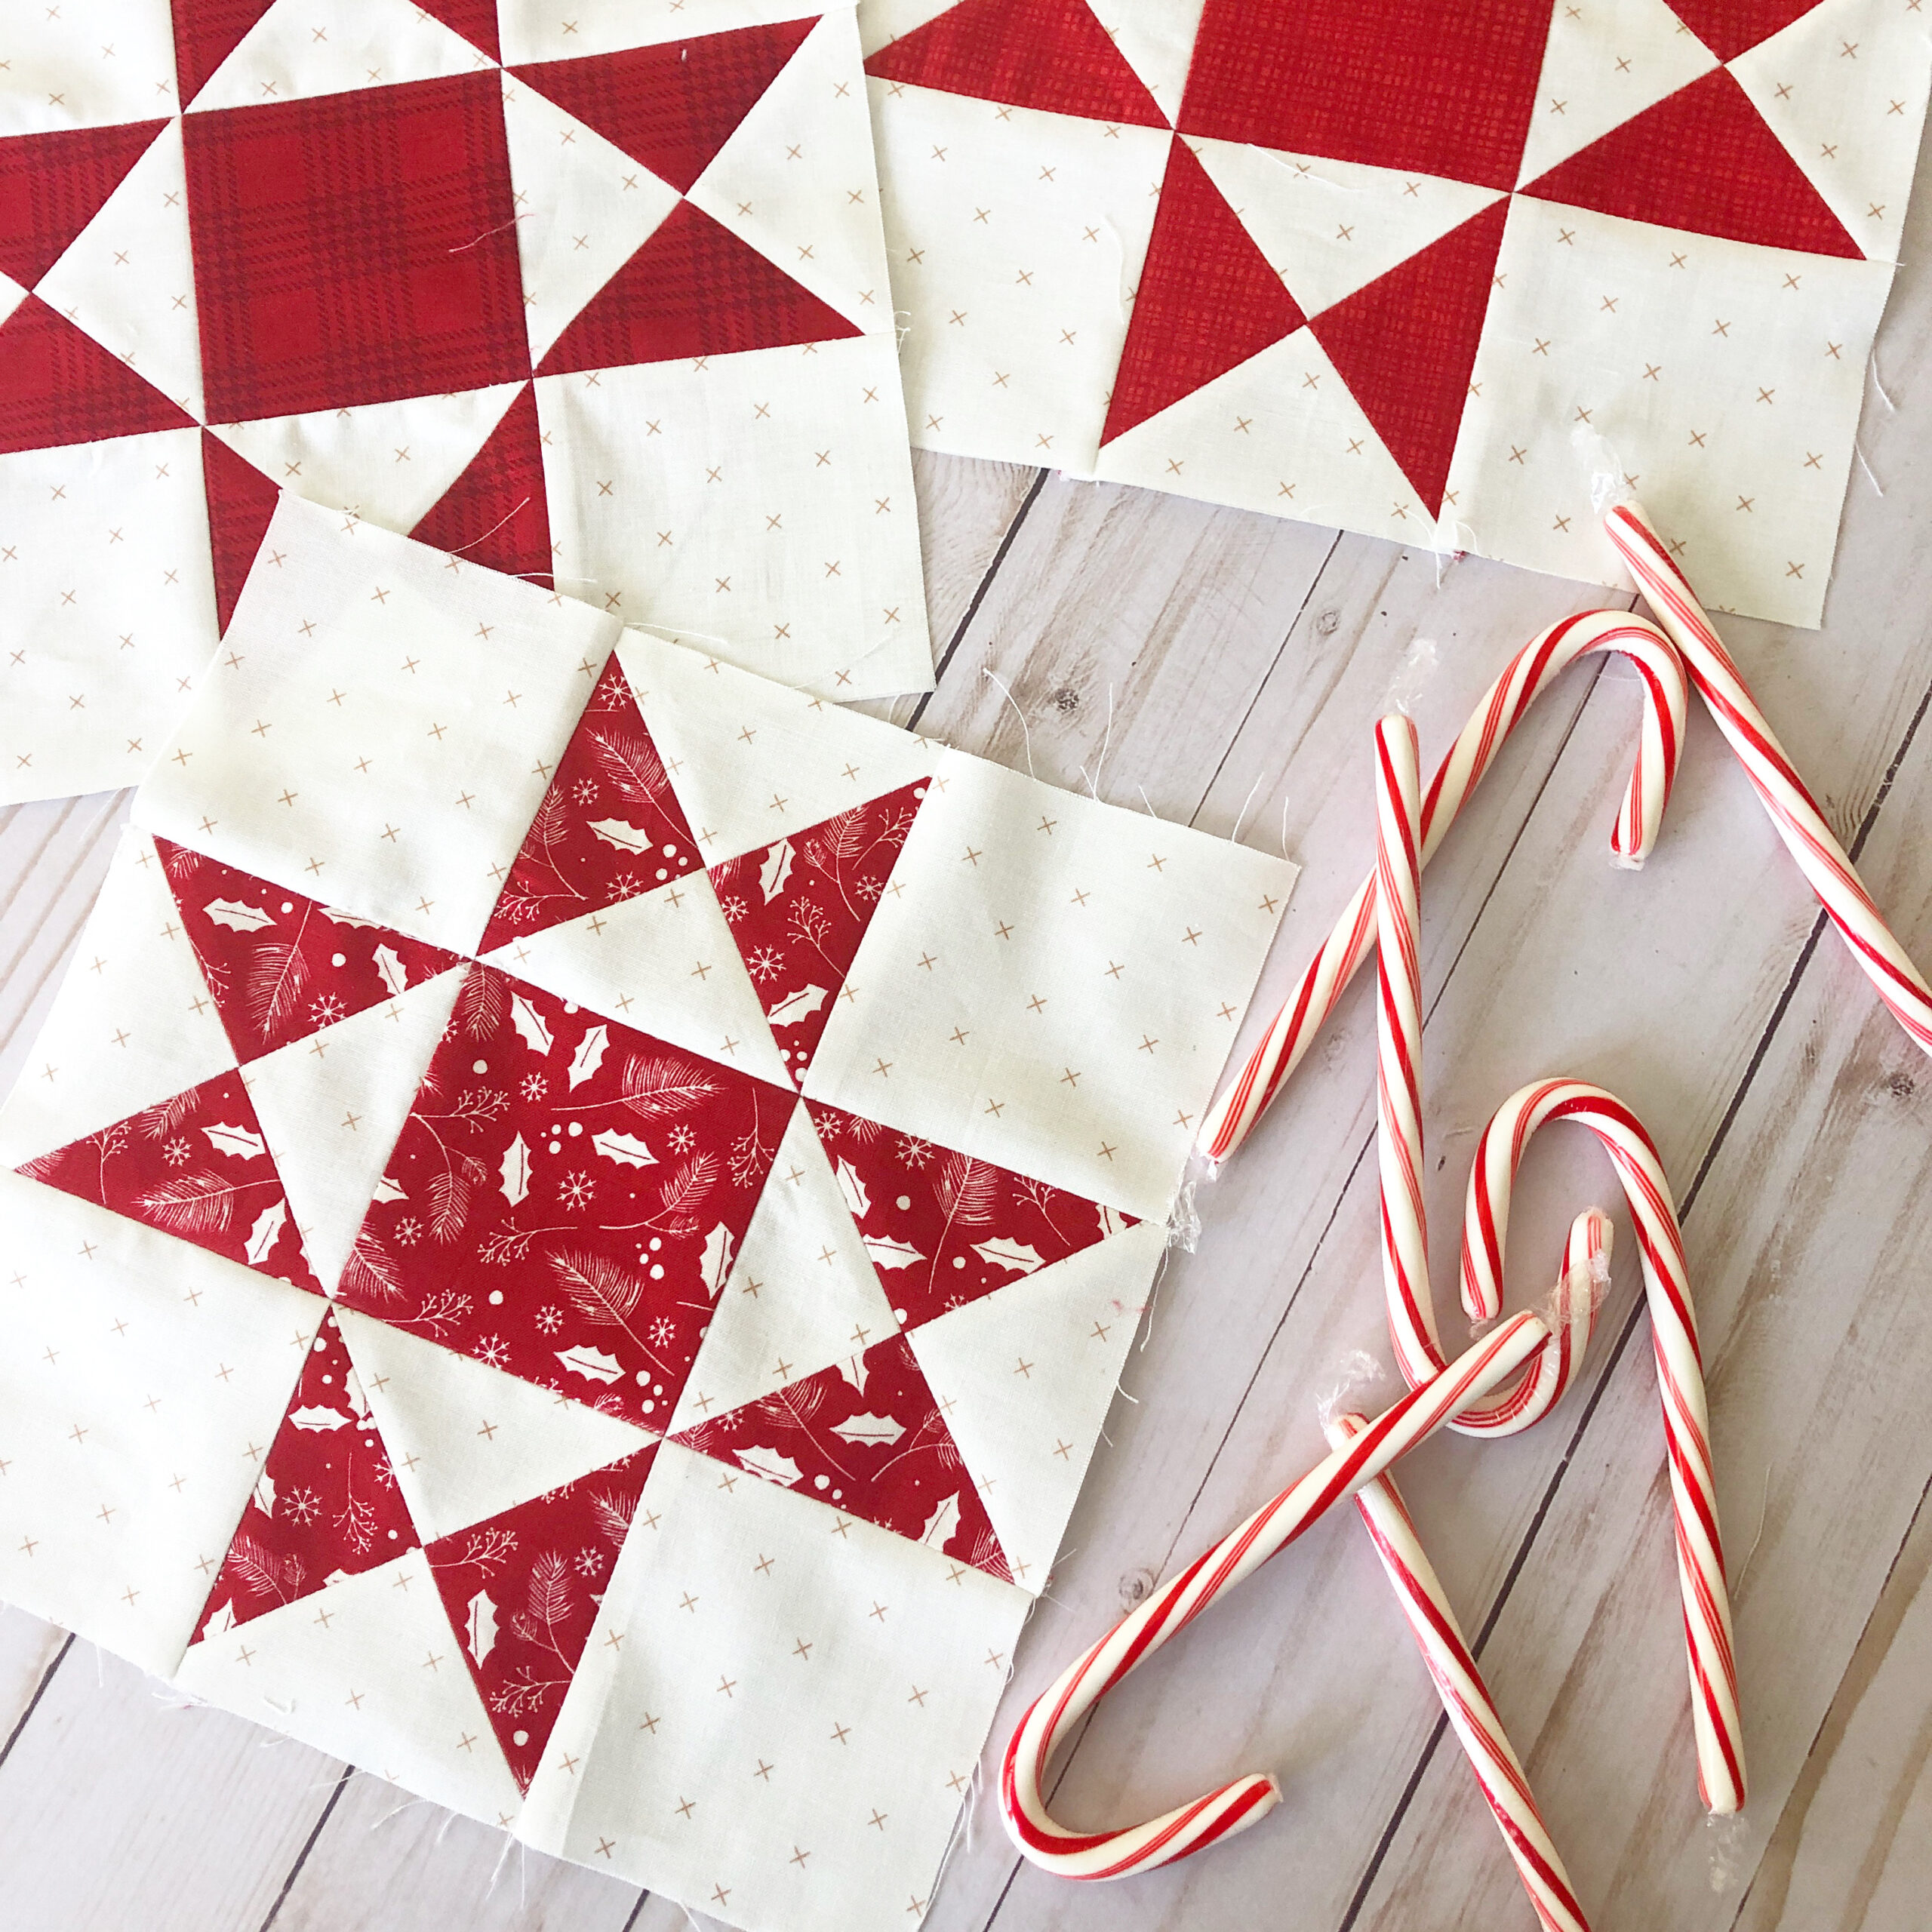
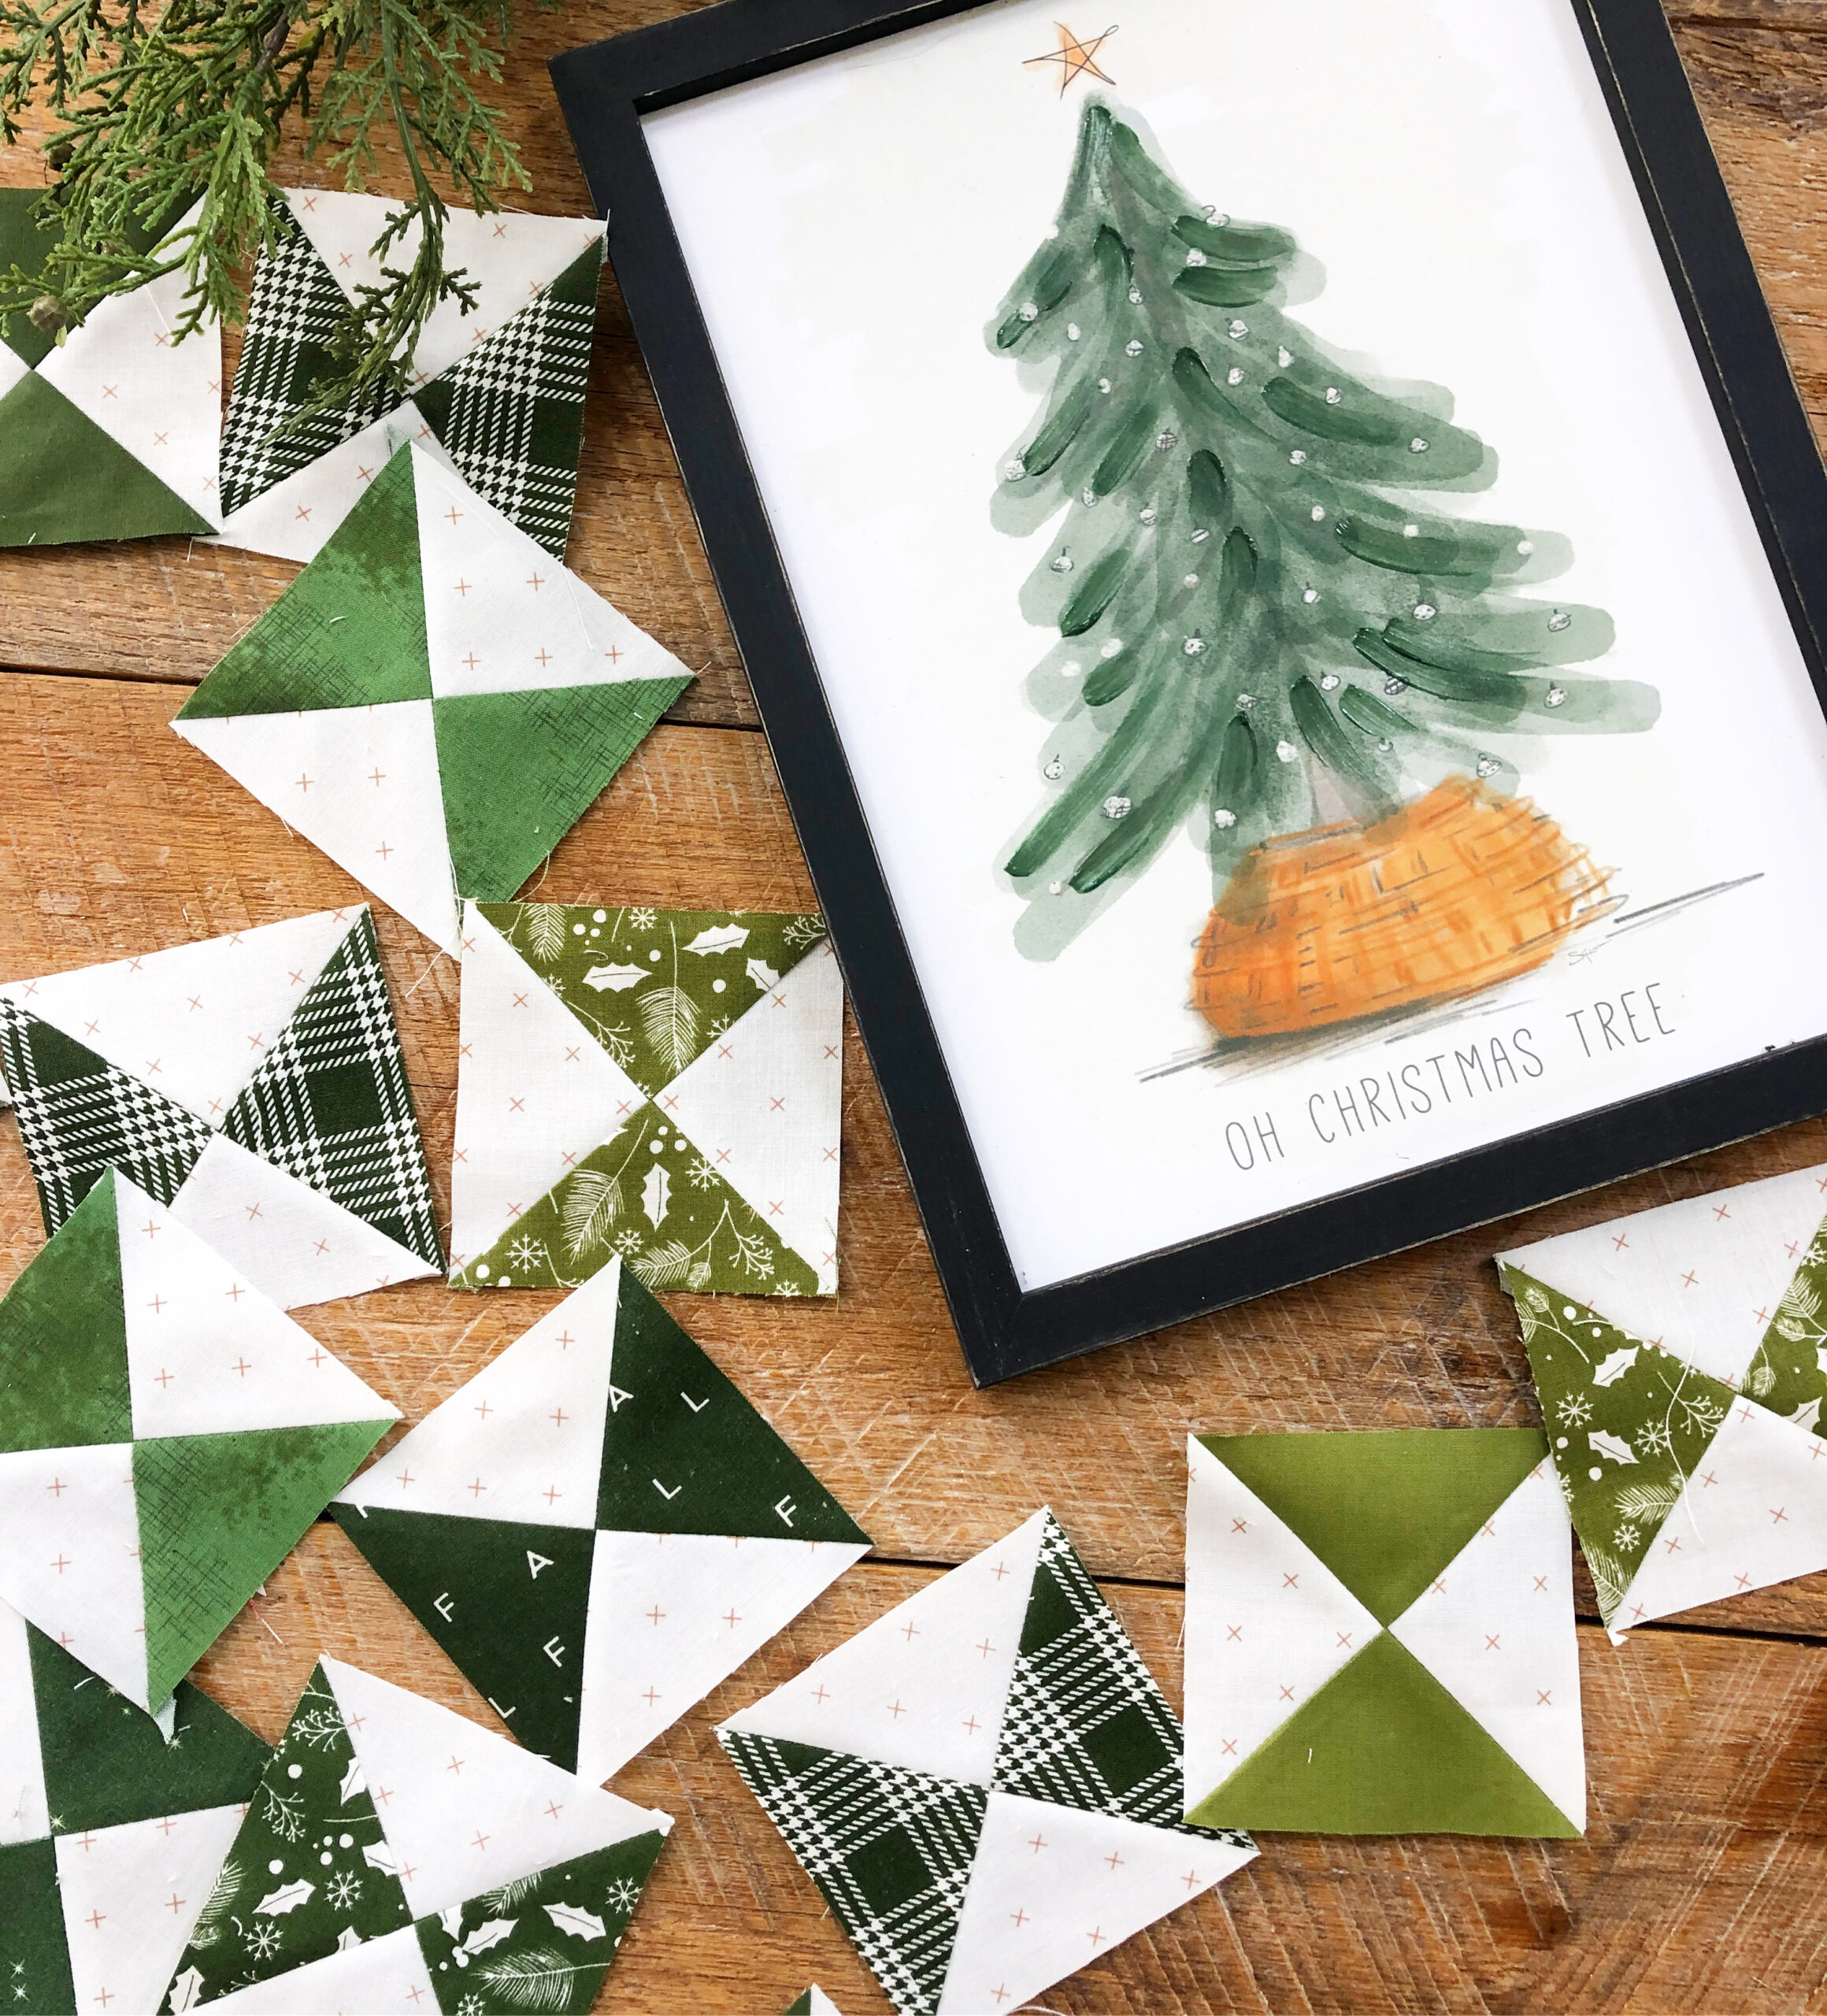
I try and make at least one new Christmas quilt every year. One of my favorite things about decorating is getting out all the Christmas quilts I’ve made over the years!

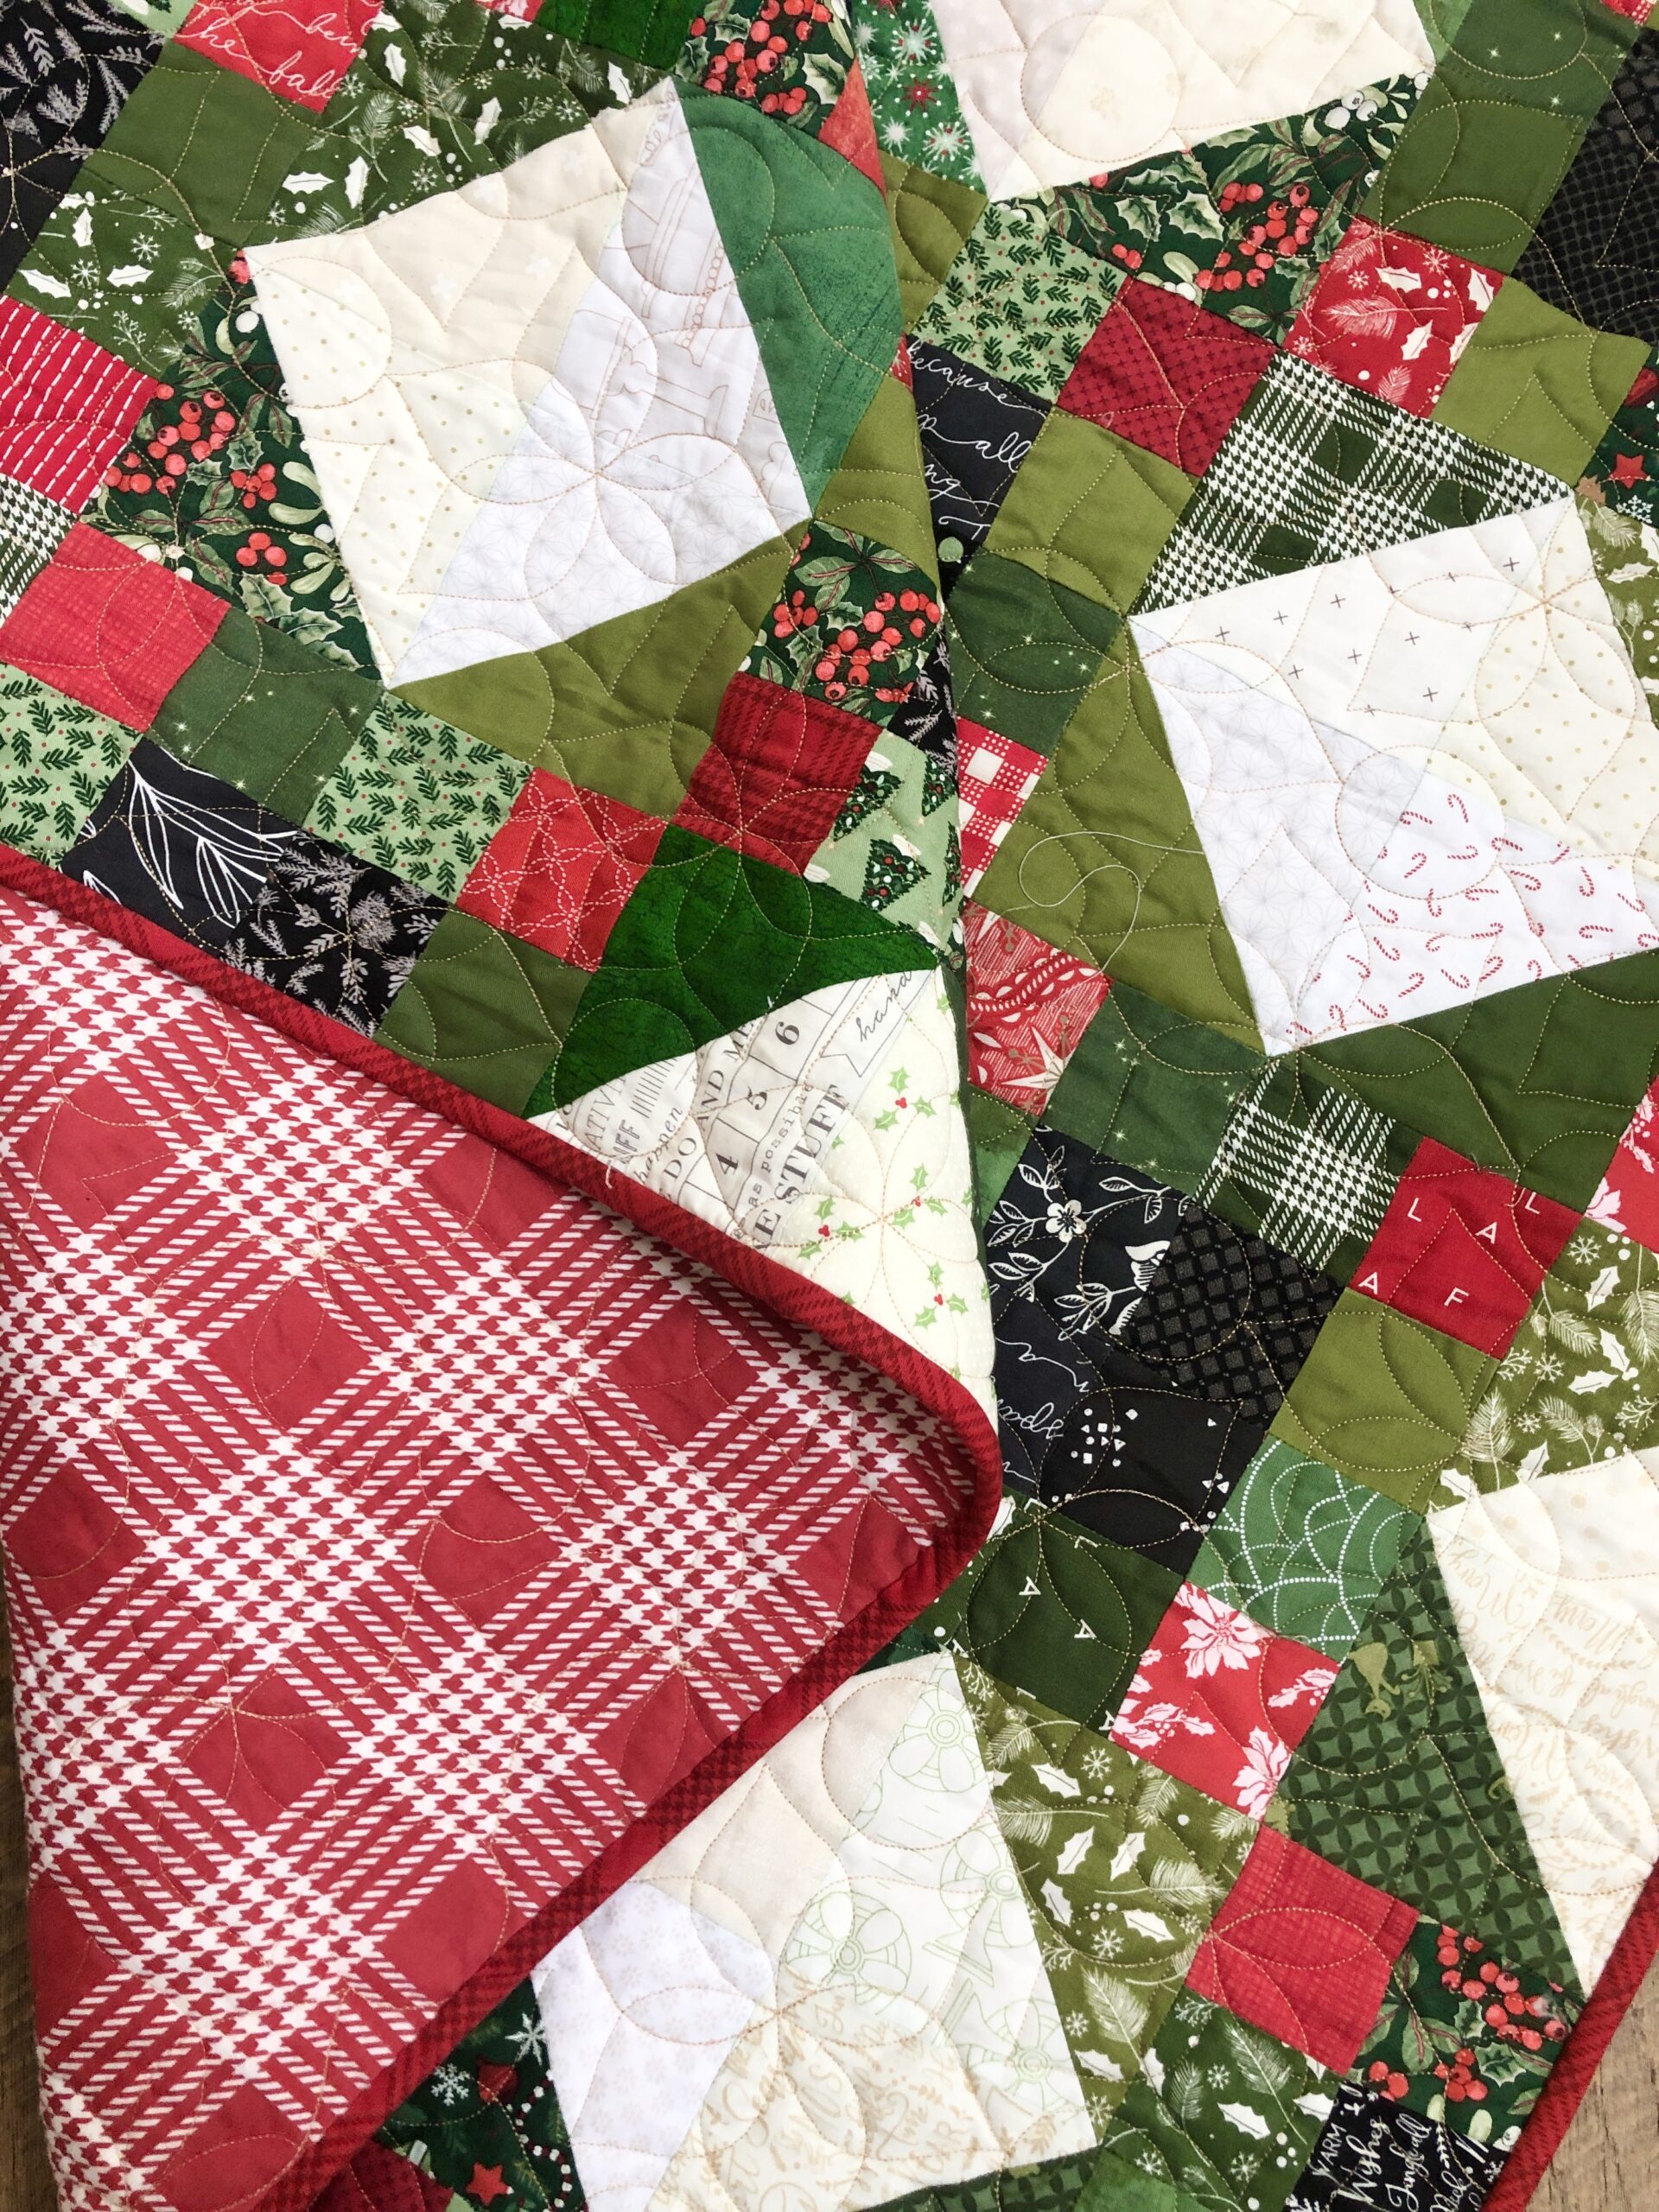
I used my Scrappy Charm quilt pattern and used all my Christmas fabric scraps and made this fun throw quilt! So essentially you can make this with what’s in your stash! The scrappier the happier!!!

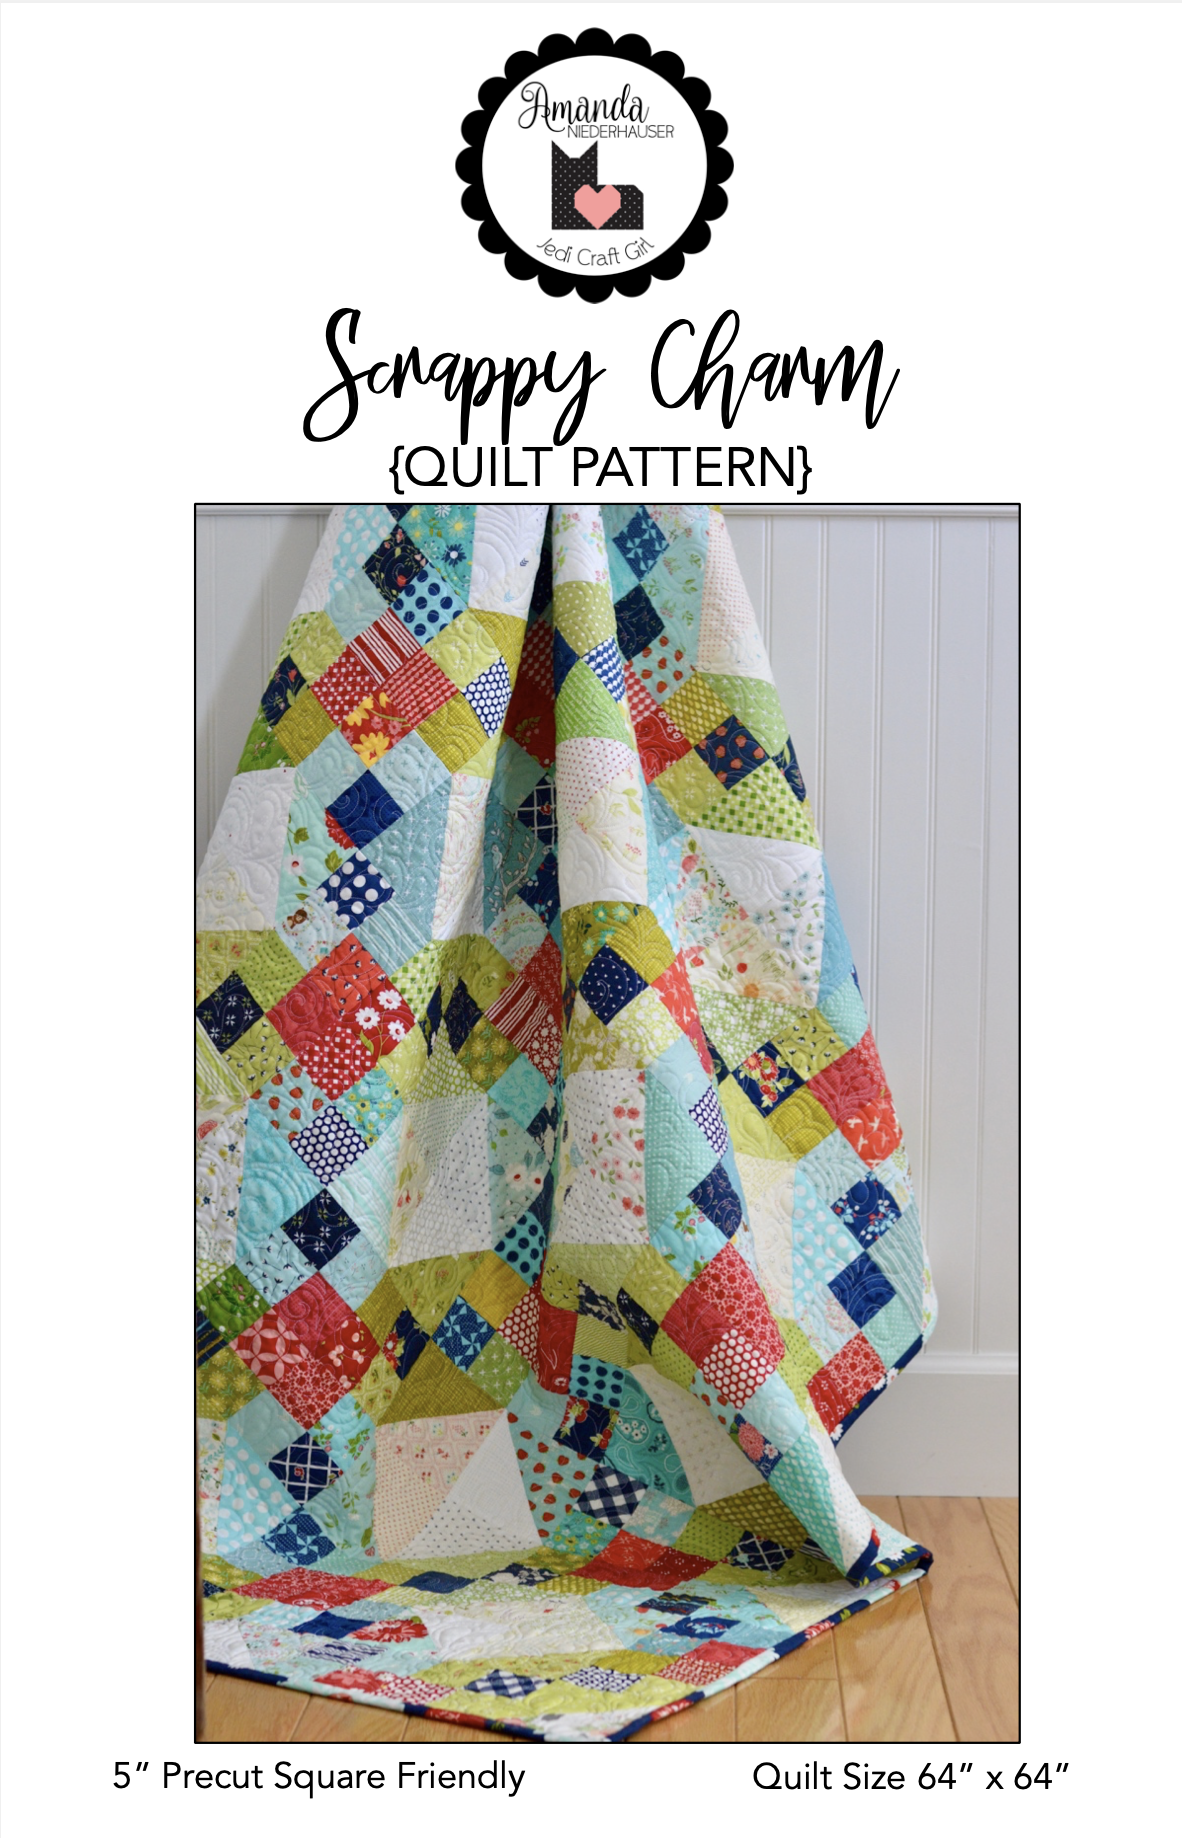
The quilt measures 64″ square but you could easily add more rows to make it larger. I put plaid flannel on the back so it’s super cozy!

You can find the pattern in PDF of Paper in my Etsy shop!

Bird Ornaments

I love making handmade ornaments to give as Christmas gifts. This year I sewed up some Christmas bird ornaments!

You will love how fast they come together – go ahead sew a whole flock!!!

You can download the pattern by clicking HERE.

For the instructions watch this little video tutorial!

Farmhouse Christmas Table Runner

Christmas in July is the best! How fun is it to put on some festive music, bake cookies, and get a jump start on holiday sewing during the summer!! I am always so happy when I get holiday sewing and shopping done early!

Christopher from The Tattooed Quilter, Bev from Flamingo Toes and I teamed up to bring you a weekend of Christmas quilting fun! Each day we will be showing you a new table runner pattern that is totally free – a gift to show we love you!!

My inspiration for the table runner came because I love decorating farmhouse style! I love the casual rustic feel and the neutral color palate.

The classic fir tree green, the neutrals, the pop of black, and the deep cranberry red all give this table runner a farm-y feel.

Also be aware…you may think the table runner is a pretty item to add to your home decor but cats have another purpose for it – a soft and warm place to sleep!!

The fabrics I used are from the collection Farmhouse Christmas by Riley Blake Designs.

This runner uses 12″ blocks and finishes at 49″ x 21″. You could totally make this runner longer by adding more blocks.

You can also turn this runner into a full quilt if you like by adding more blocks and sashing the blocks the same way as the runner. I LOVE it as a quilt and am hoping to make this soon!!!

You can download the patter by clicking HERE.

The Table Runner is 100% Mufasa approved

Also as a bonus Bev designed 3 amazing cross stitch patterns to coordinate with each of our designs! You can get my version by clicking HERE.

These are so darling and are super simple to make! Stitch some up now so you can have them as gifts for Christmas!

One more bonus – my favorite Christmas Cookie recipe – “Cookie Gun Cookies” is what we call them. You use a cookie press and add some sprinkles! They are soooo yummy and go perfectly with Hot Chocolate! We always have a plate of these on the counter all December!

You can find my recipe by clicking HERE.

And now a few more pictures of Baby Mufasa – he’s the best quilt model ever – I don’t even have to tell him what to do!

Deer Christmas Garden Box Quilt

I had so much fun making a Christmas version of my Garden Box Quilt!

I had purchased a fat quarter bundle of Deer Christmas by Urban Chiks and I wasn’t sure what quilt to make! The prints a so cute and vintage-y I didn’t want to cut them up into small pieces!

Garden Box was the perfect quilt: it shows off the fabric nicely, it is super fast to make, and it makes a large throw size which is perfect for Christmas movie watching!!

For the month of November I have the PDF quilt pattern on sale in my Etsy shop for $5.00!!

Mufasa loves helping 🙂

Scaredy Cat Quilt Along

I have always envisioned Scaredy Cat the quilt in Christmas colors!! So I’m inviting you to quilt along with me! Here are the details:

Each week we make a section of the quilt and before Thanksgiving you will have it all put together.

I am using Yuletide from Riley Blake Design – I love the traditional colors, plaids, and holly!

There are 13 red stars and 12 green stars.

There are lots of hourglass blocks in the stars. I’m using the Riley Blake Cute Cuts square up ruler. It saves tons of time!

So join in the fun! You can find the pattern in my Etsy shop.

Peppermint Forest Cross Stitch Patterns

My darling friend Bev from Flamingo Toes designed these adorable cross stitch ornaments to coordinate with my Peppermint Forest Quilt Pattern.

In fact you will want to collect them all – so hop over to her website and also to The Tattooed Quilter!

These stitch up super fast and would make darling gifts for friends. Also now might be a good time to teach your kids how to cross-stitch!! My girls love it!

You can download the PDF pattern by clicking HERE.

Peppermint Forest Table Runner and Quilt Pattern

I know “Christmas in July” is a little cliche but given what’s going on in the world I keep singing “We need a little Christmas…right this very moment!!!”

It feels like everything has been cancelled and its bad news all the time. Christmas cheer might just be what we need!!

My friends Bev from Flamingo Toes and Christopher from the Tattooed Quilter and I decided to do something fun, to spread some early and much needed Christmas Cheer!

So this weekend we are sharing with you 3 patterns for Christmas table runners! Each pattern uses 12″ blocks so they can be interchanged or even made into a quilt! You could also make a small wall hanging or a pillow with the designs! Get creative!

My pattern is called Peppermint Forest. I used Santa Clause Lane by Riley Blake Designs which I’m super in love with!!!

This quilt project comes together super easy! AND if you are super ambitious you can even make a quilt out of the blocks!!

You can download the pattern by clicking HERE.

Mufasa totally approves this project!!

I hope this little project brightens your day!!! Be sure to follow along and post your progress – use the tag #peppermintforestquilt and #needalittlechristmasprojects

Merry and Bright Quilt Pattern

DSC_0695

I’m so happy to be releasing this pattern BEFORE Christmas!  I got home from Quilt Market in October and was completely inspired!  I had this idea to create a new Christmas quilt with lots of fun vintage colors.  I knew I wanted deer in the quilt.  I played around with some ideas and then created this!  I love that it is whimsical and vintage feeling.  It was fun to make a quilt with pinks, reds, greens, and aquas!  All my favorites!Merry and Bright Quilt Pattern PDF

The quilt measures 68″ x 77″ which means its a great throw quilt size!  I think I might hang mine 🙂

The pattern is a PDF download available in my Etsy shop.

The patterns is written in sections: the tree, the larges star, the deer blocks, the small sawtooth blocks, and the twirl star blocks.  This makes it easy to do a quilt along or work on sections.Merry and bright quilt pattern

The deer appliqué is done with Heat n Bond Lite and then a straight stitch around the deer.

The star blocks are fun because you can use fabrics from your stash and make it super scrappy!

The Merry and Bright letters I totally cheated!  It’s December after all – no time for tedious work!  I used Heat n Bond Ultra for the letters which is a little heavier and stiffer than the Lite.  Since the letters were thin I was willing to use the Ultra because that meant no sewing around each letter to secure!  The all over quilting helps the appliqué blend right into the quilt!  So if you’re afraid of letters don’t be!

DSC_0671


I had the quilt quilted with an all over swirl and holly design and I’m super thrilled at how it turned out!!!  I love it so much!!

IMG_3061

Sheep Ornaments

sheep ornament

IMG_1706

I am in a few scripture study groups and I wanted to make something meaningful for all the ladies. The theme of Jesus as our shepherd comes up so much – we are his sheep!  So I knew I wanted to make a sheep ornament (plus I love sheep!). I began to make THESE ornaments, only to realize I made the sheep to big!  The sheep would not fit in the jar lids!  It was midnight so there was no turning back!  This is what they turned into!  And I love them!  Here’s how you can make them:

Supplies:

2 charm squares (5″)

5″ square Heat n Bond Fusible Fleece

Scraps of white and black fabric for the sheep

Heat n Bond Lite

Heat n Bond Ultra

Fiber Fill

Ribbon

Sheep pattern

IMG_1799

Begin by selecting your charm squares – I love projects that use up what I have on hand!

IMG_1802

Trace the sheep body on to Heat n Bond Lite.  Trace the sheep ear, head, and feet onto Heat n Bond Ultra.IMG_1801

Heat set the pieces onto the wrong side of the fabrics.  Let cool.  Cut out each piece.  Peel off backing paper.
IMG_1803

Position the sheep pieces onto the center of one of the charm squares.  Heat set into place.IMG_1804

Sew around the sheep body with a straight stitch.  I used the ultra heat n bond for the feet, ear, and head – which require no sewing.  Of course you could sew around each piece – I had to make a lot and now it was 1:00 am!IMG_1805

Heat set the sheep square to the fusible fleece.  Then layer them together as pictured above.IMG_1806

Cut a template out of cardstock of a circle just under 5″ in diameter.  You can see how it fits right inside of the charm square.  Pin and cut the circle through all 3 layers.IMG_1807

Pin all the layers together and tuck a little hanger in the top.IMG_1808

Sew a scant 1/4″ seam around the circle, leaving a 2″ opening to stuff.  Add a little fiber fill and then sew the opening closed.  Sew around the ornament a second time – I like how it looks when the two seams are a little off – it also helps round out any areas that aren’t perfect!IMG_1809

Tie a little bow and sew into place (or in my case, 1:30 am, hot glue that thing and then go to beed!)IMG_1693

Now go and sew a pasture of sheep! And don’t forget that Jesus loves you 🙂IMG_1694

IMG_1700

Little Joys Quilt Tutorial Updated

little-joys-quilt
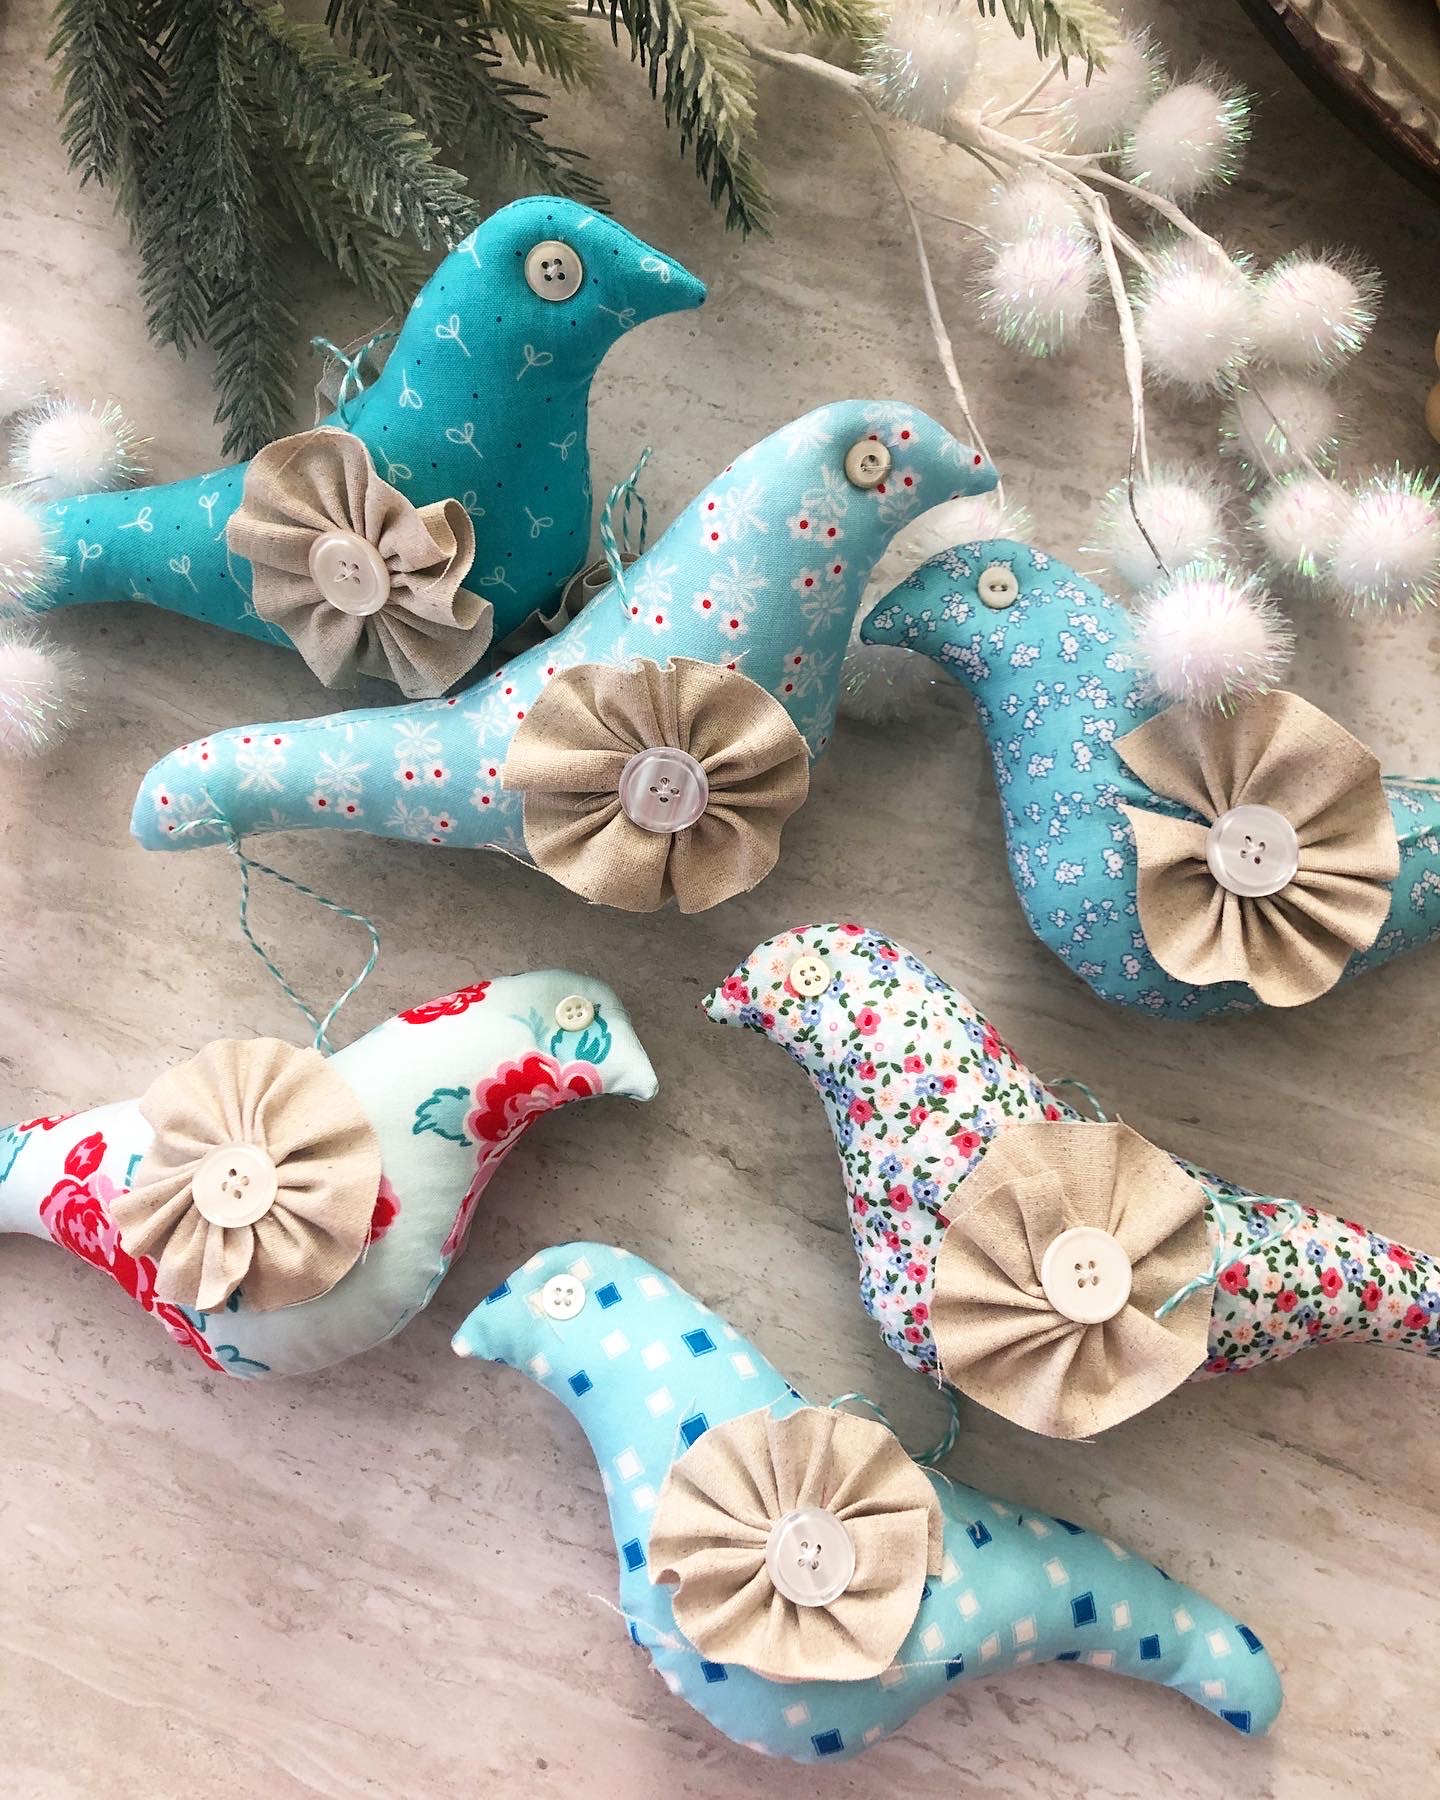
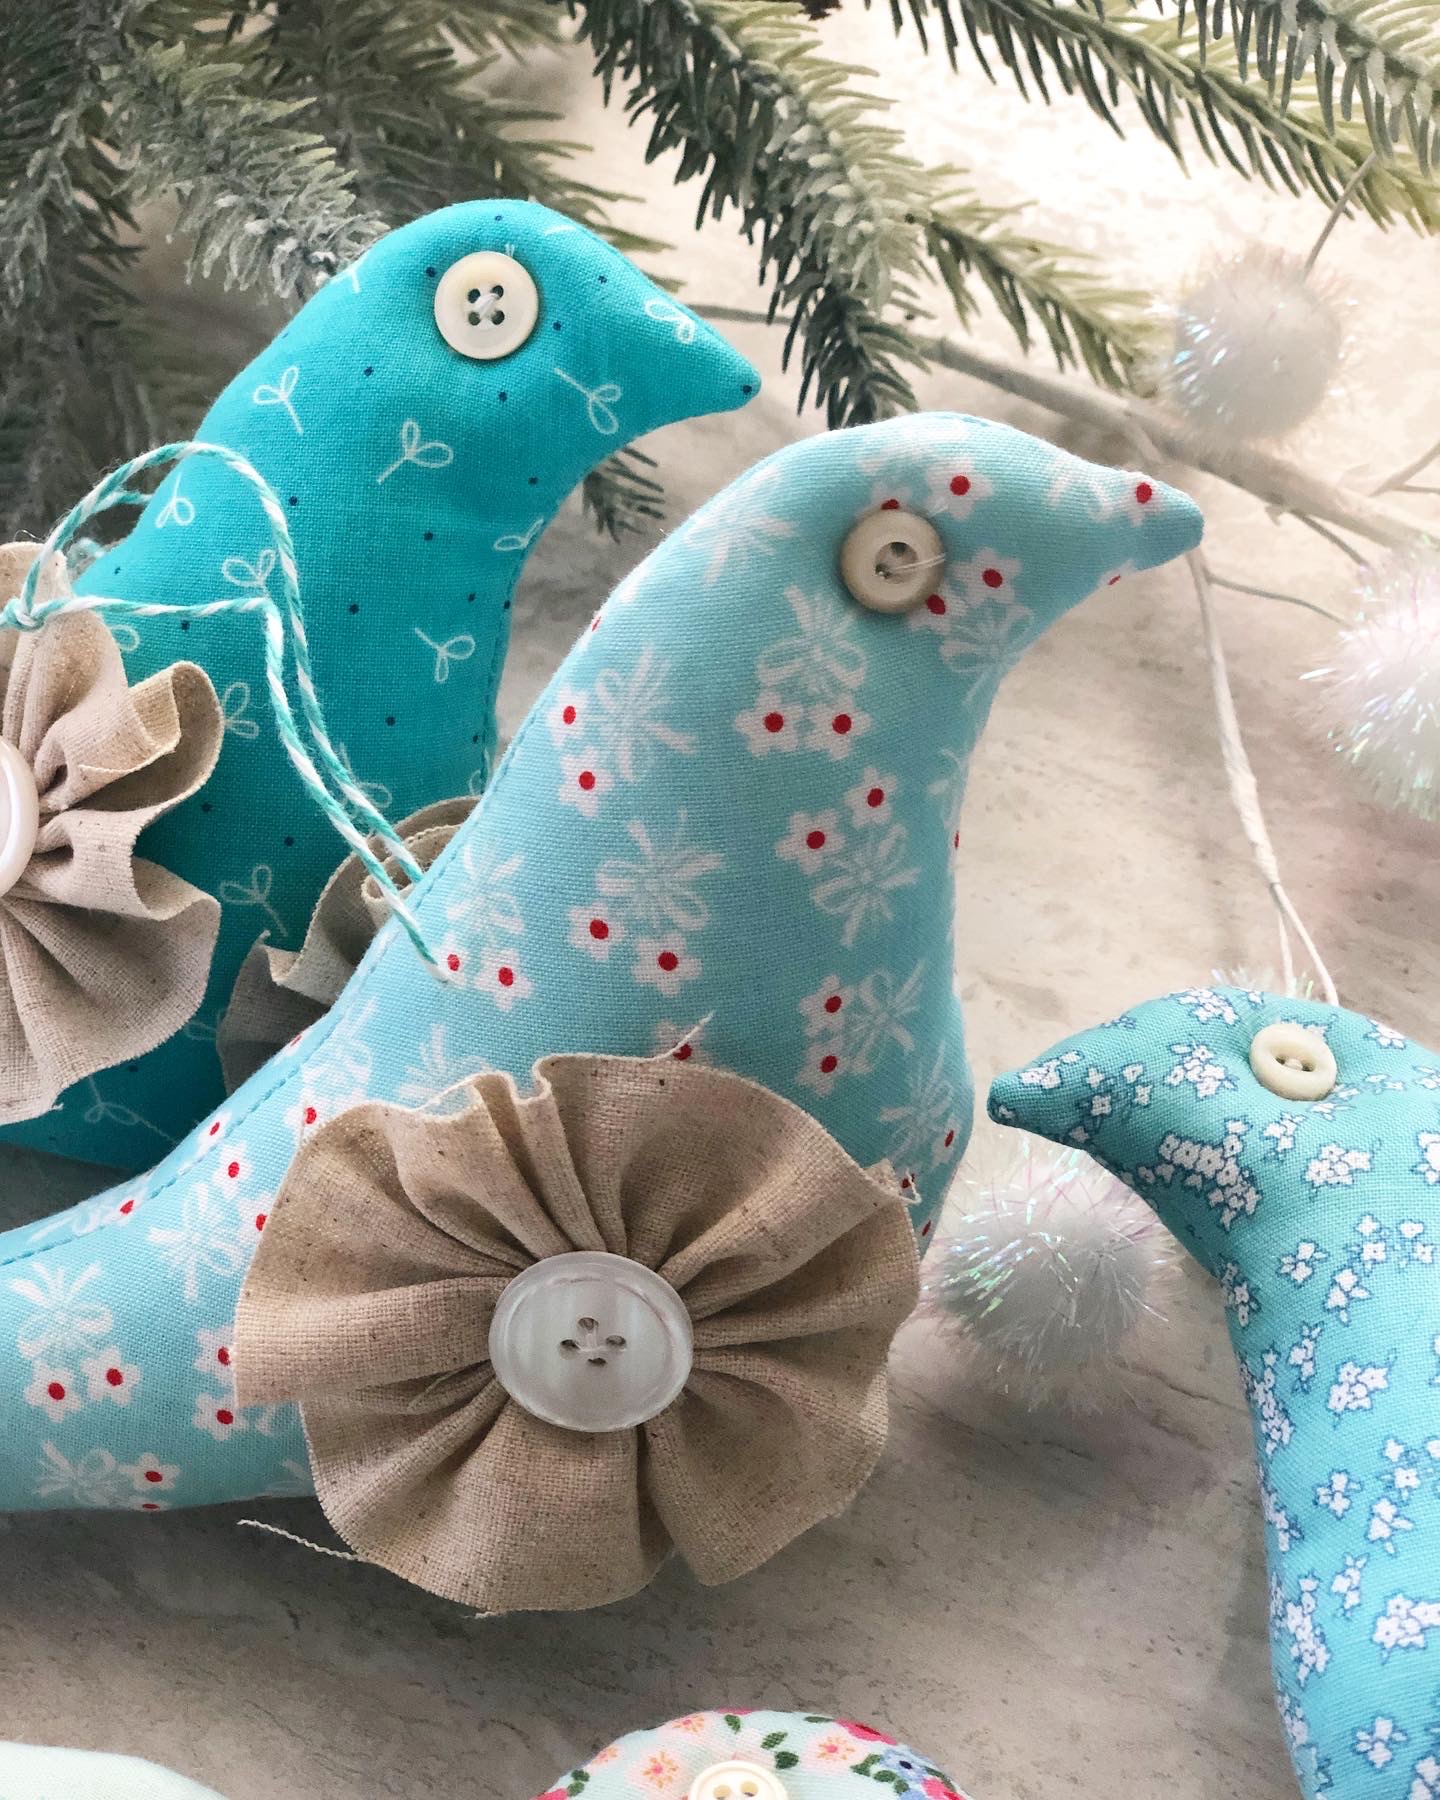
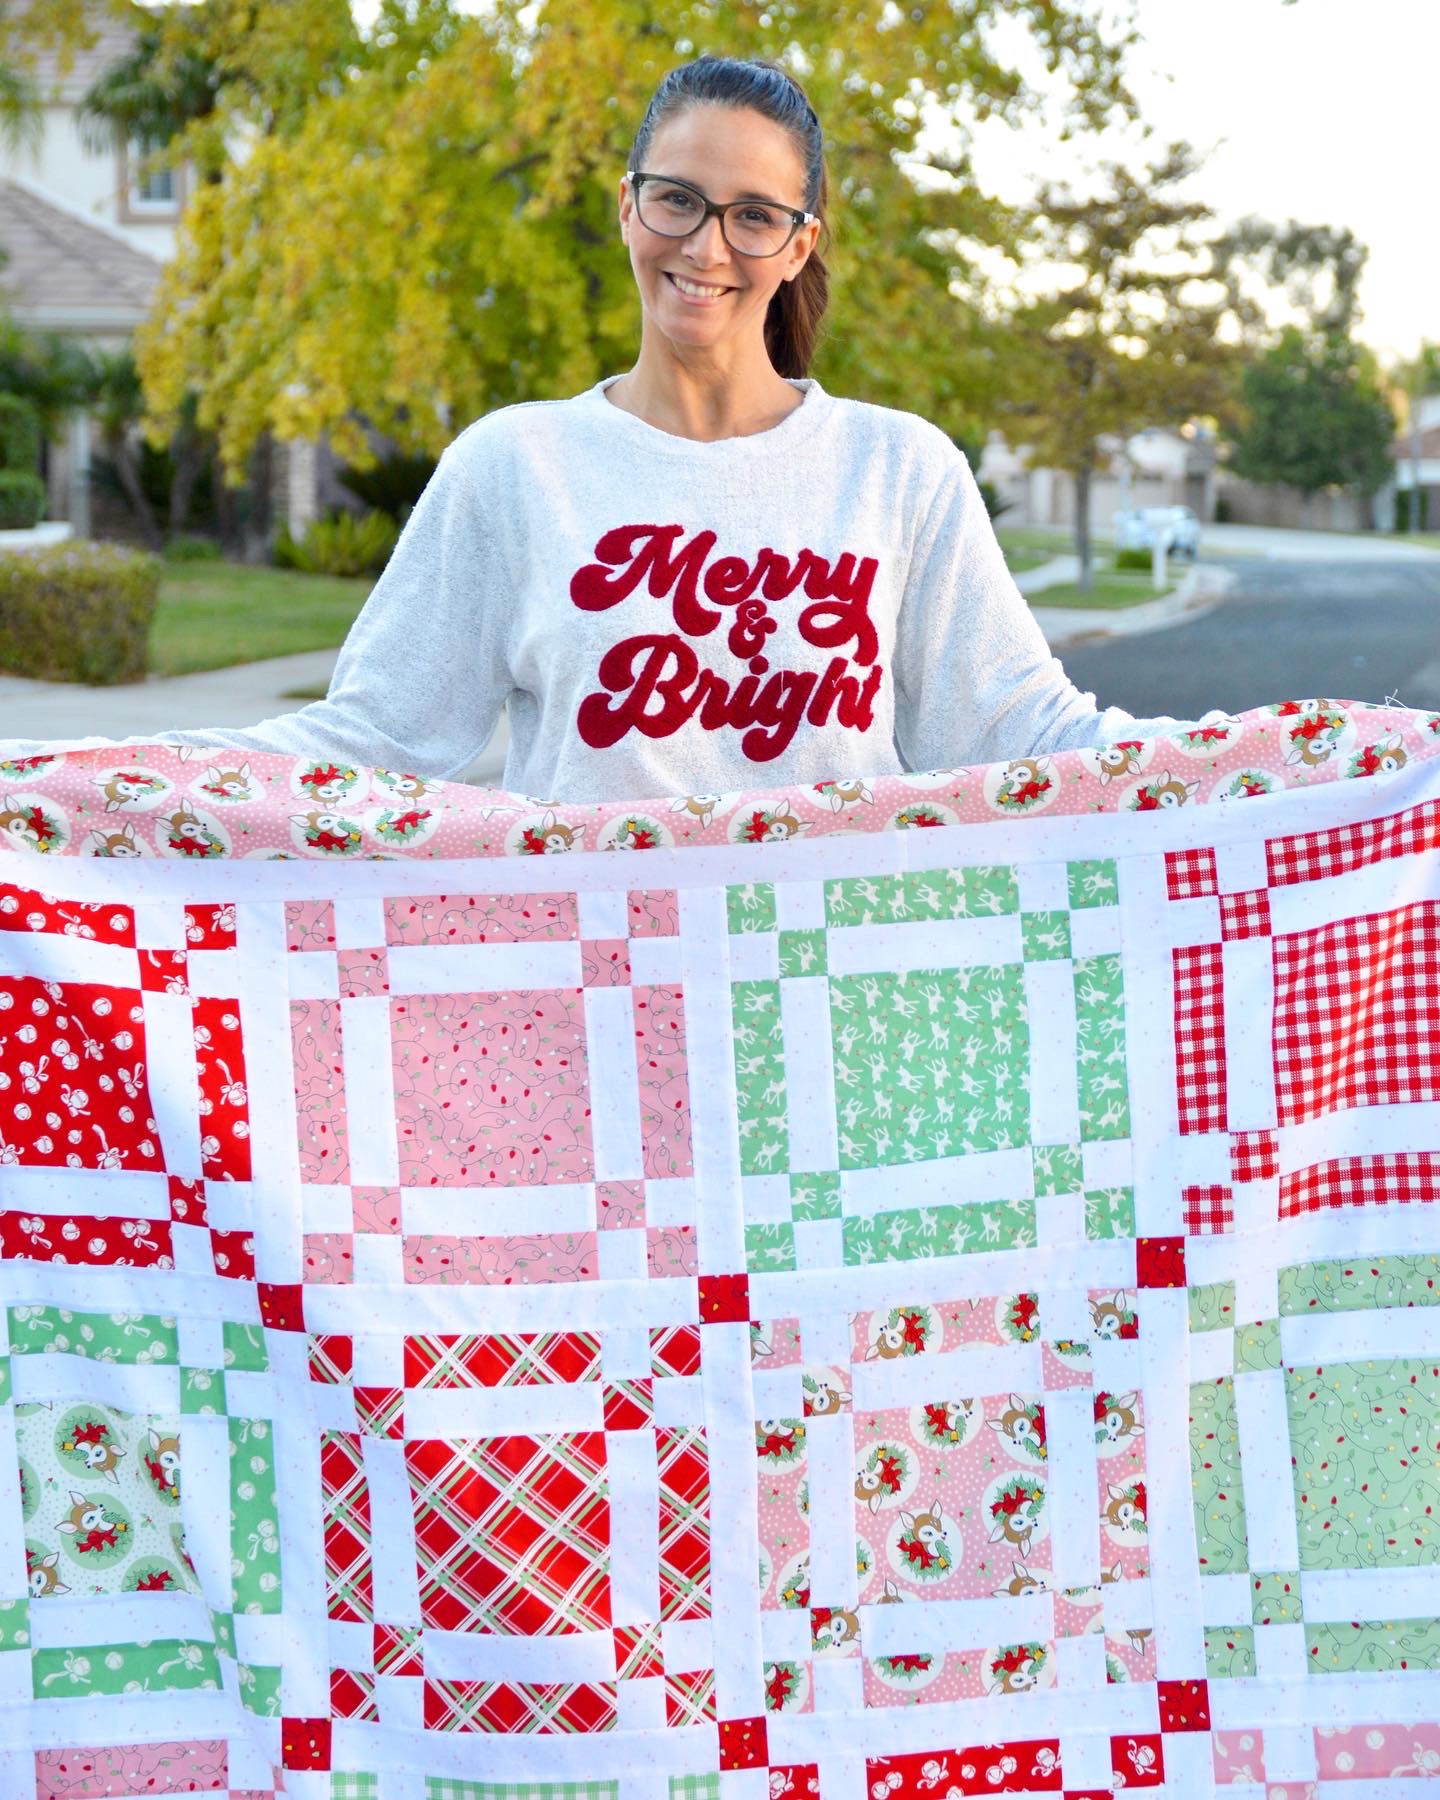
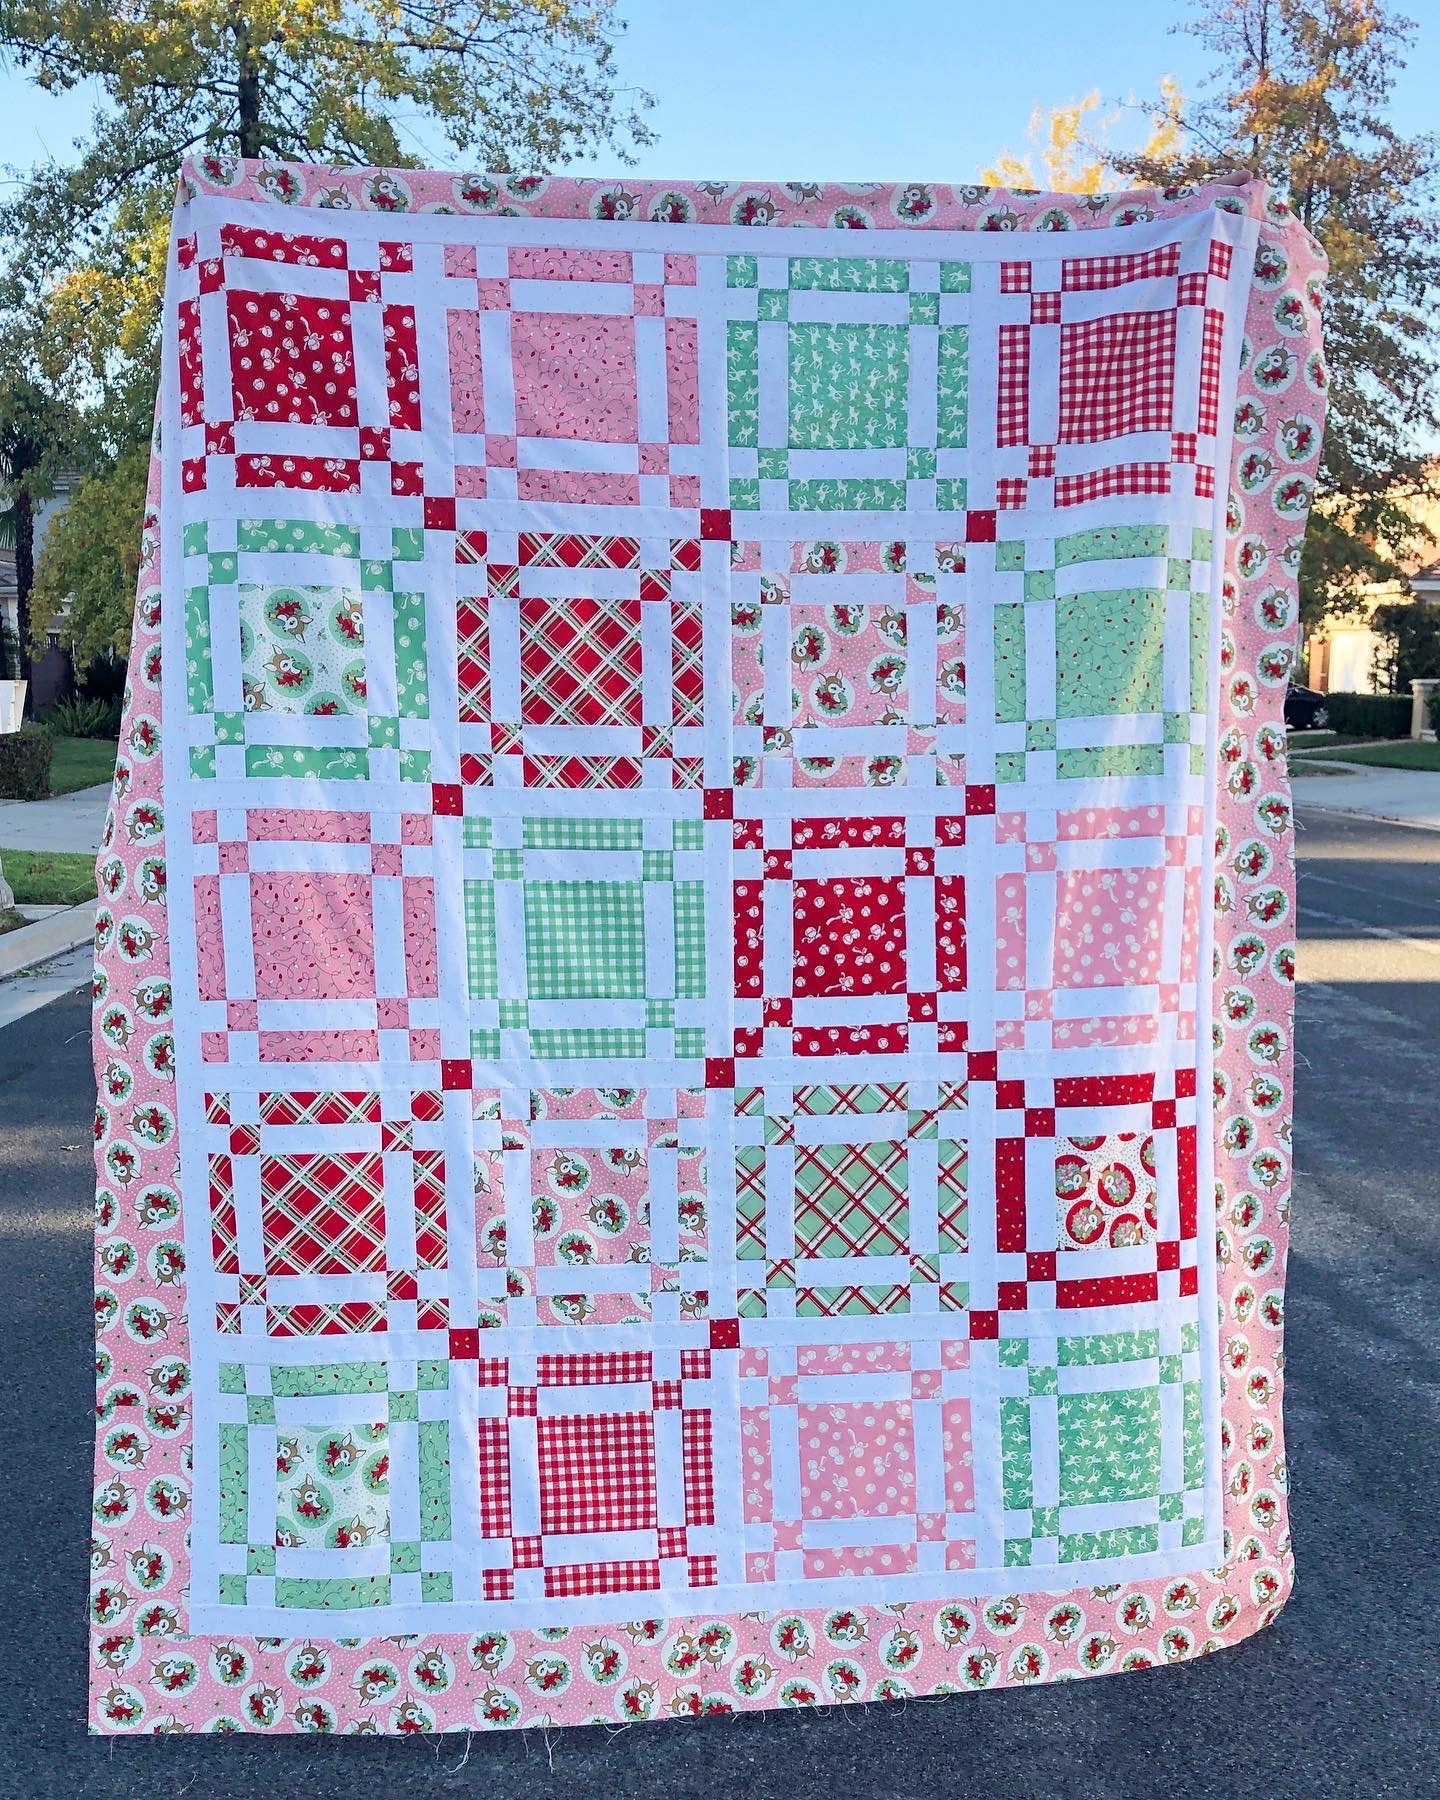
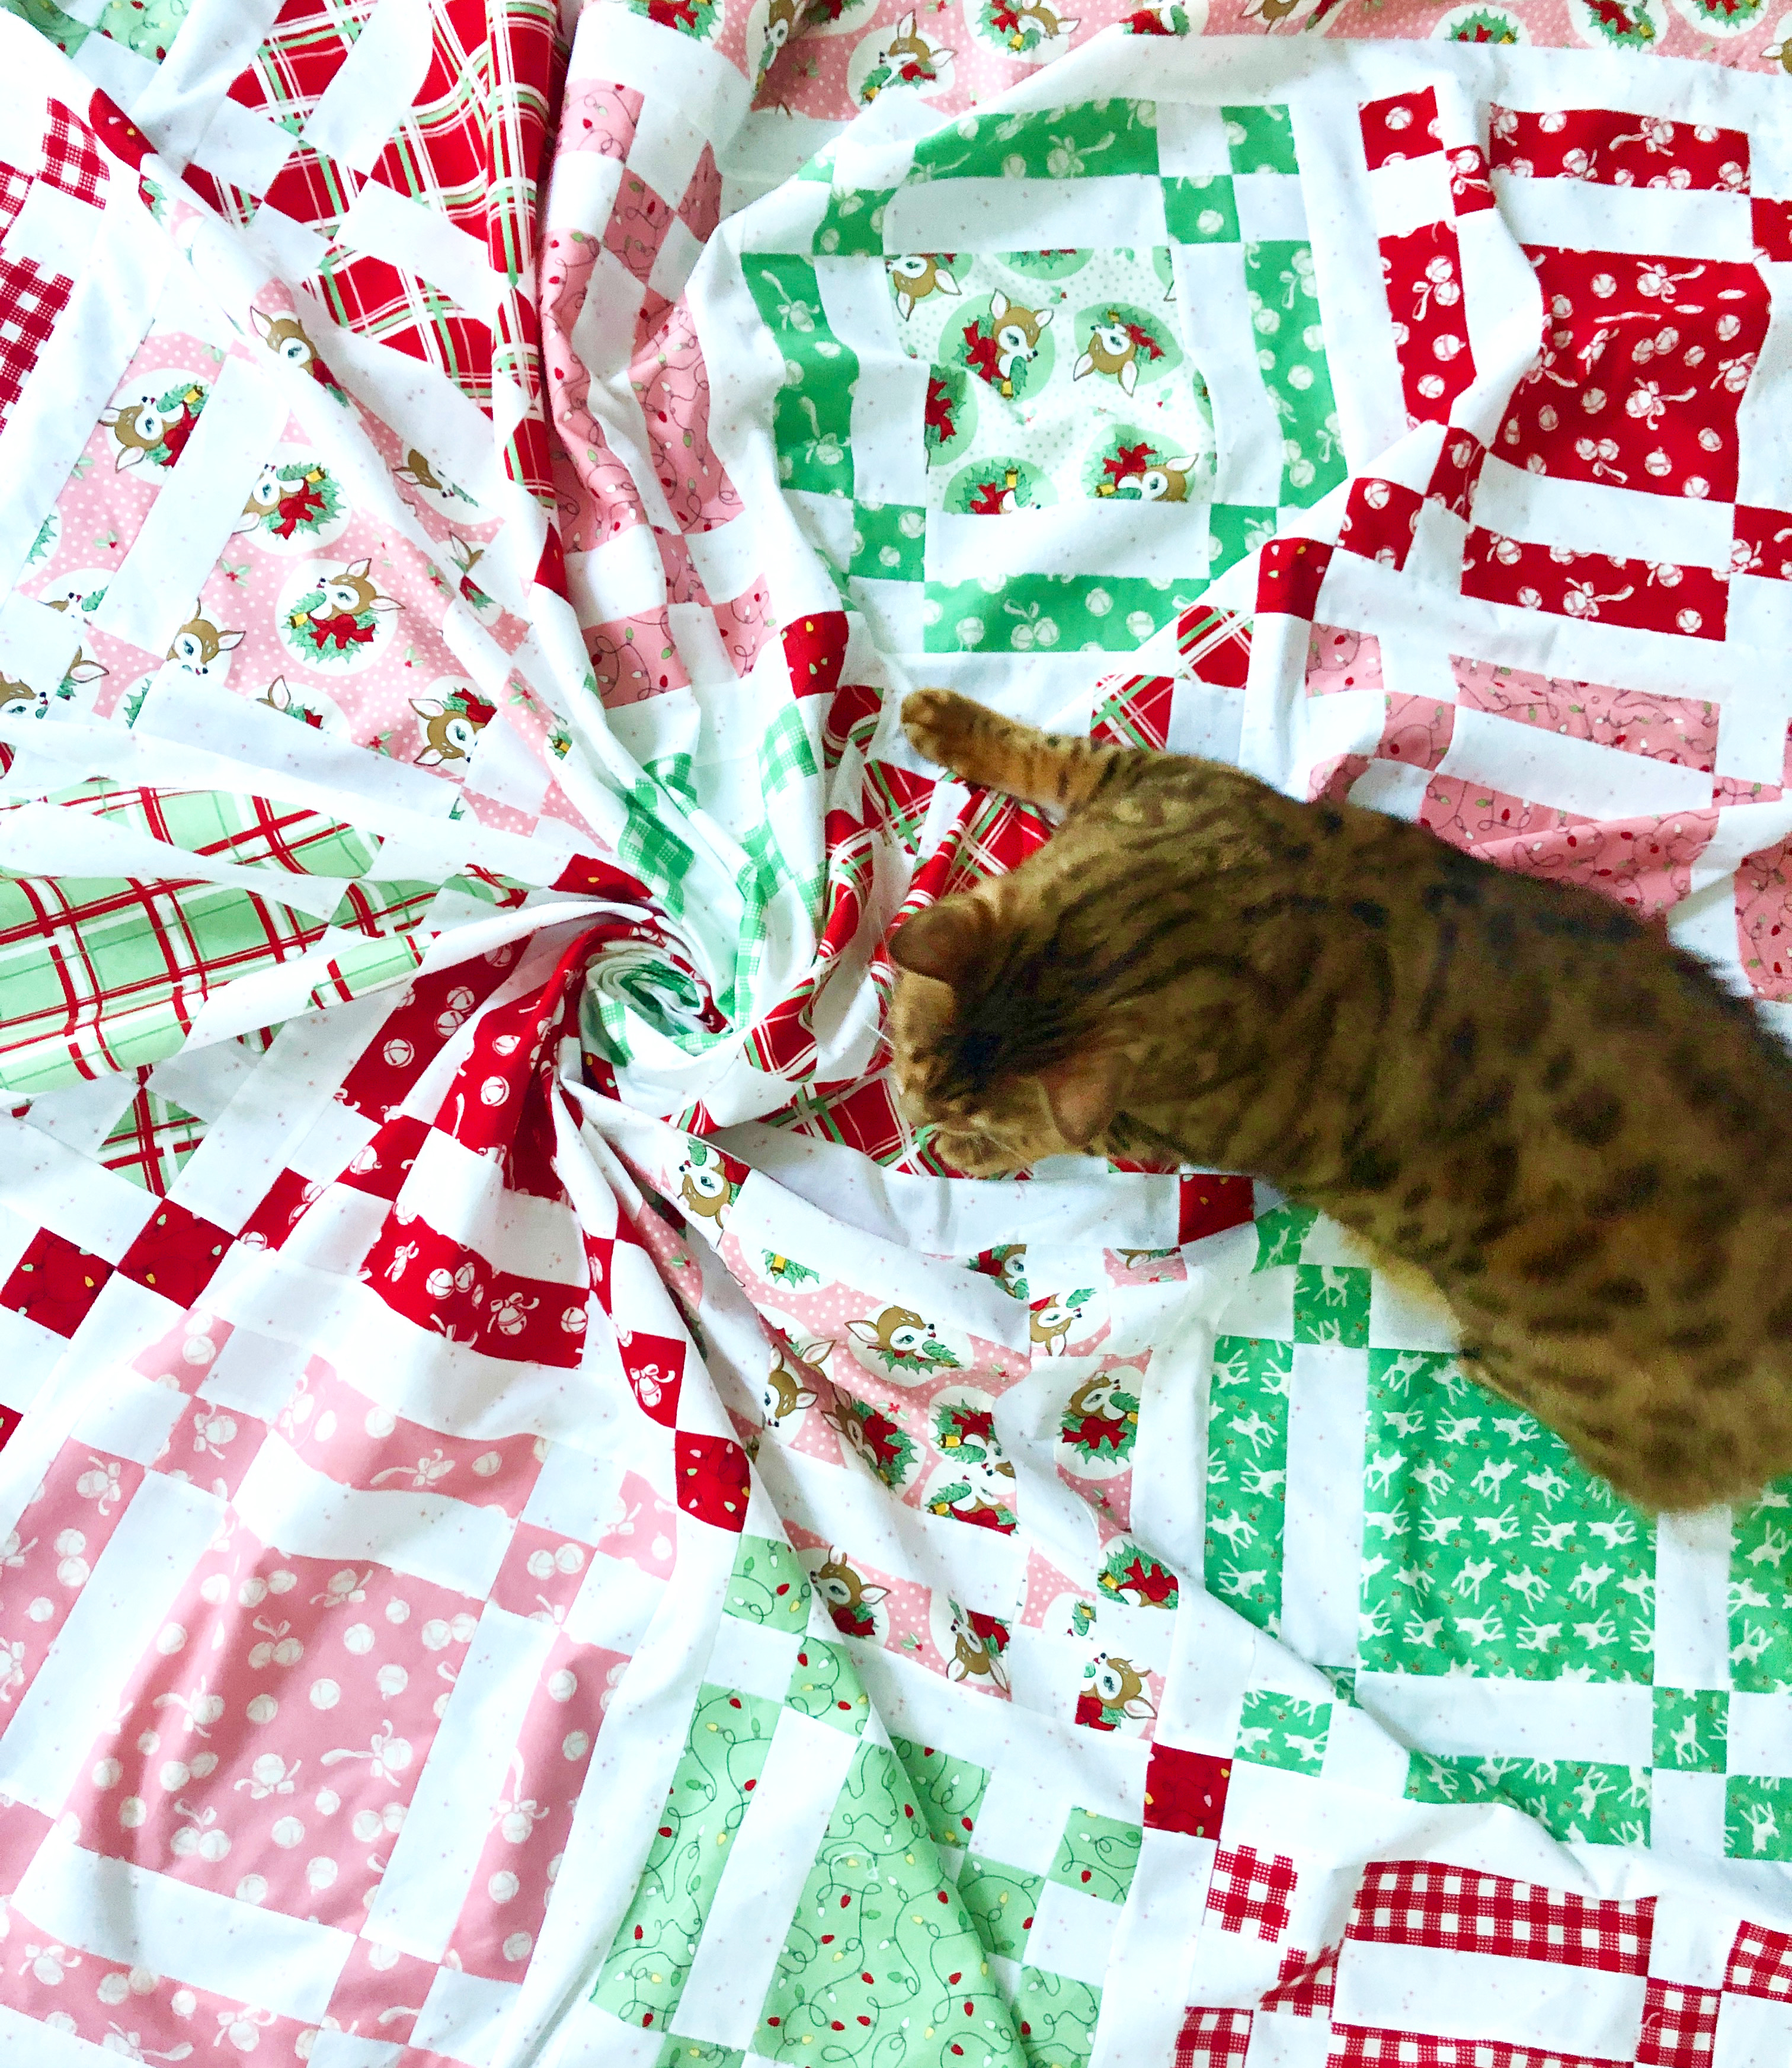
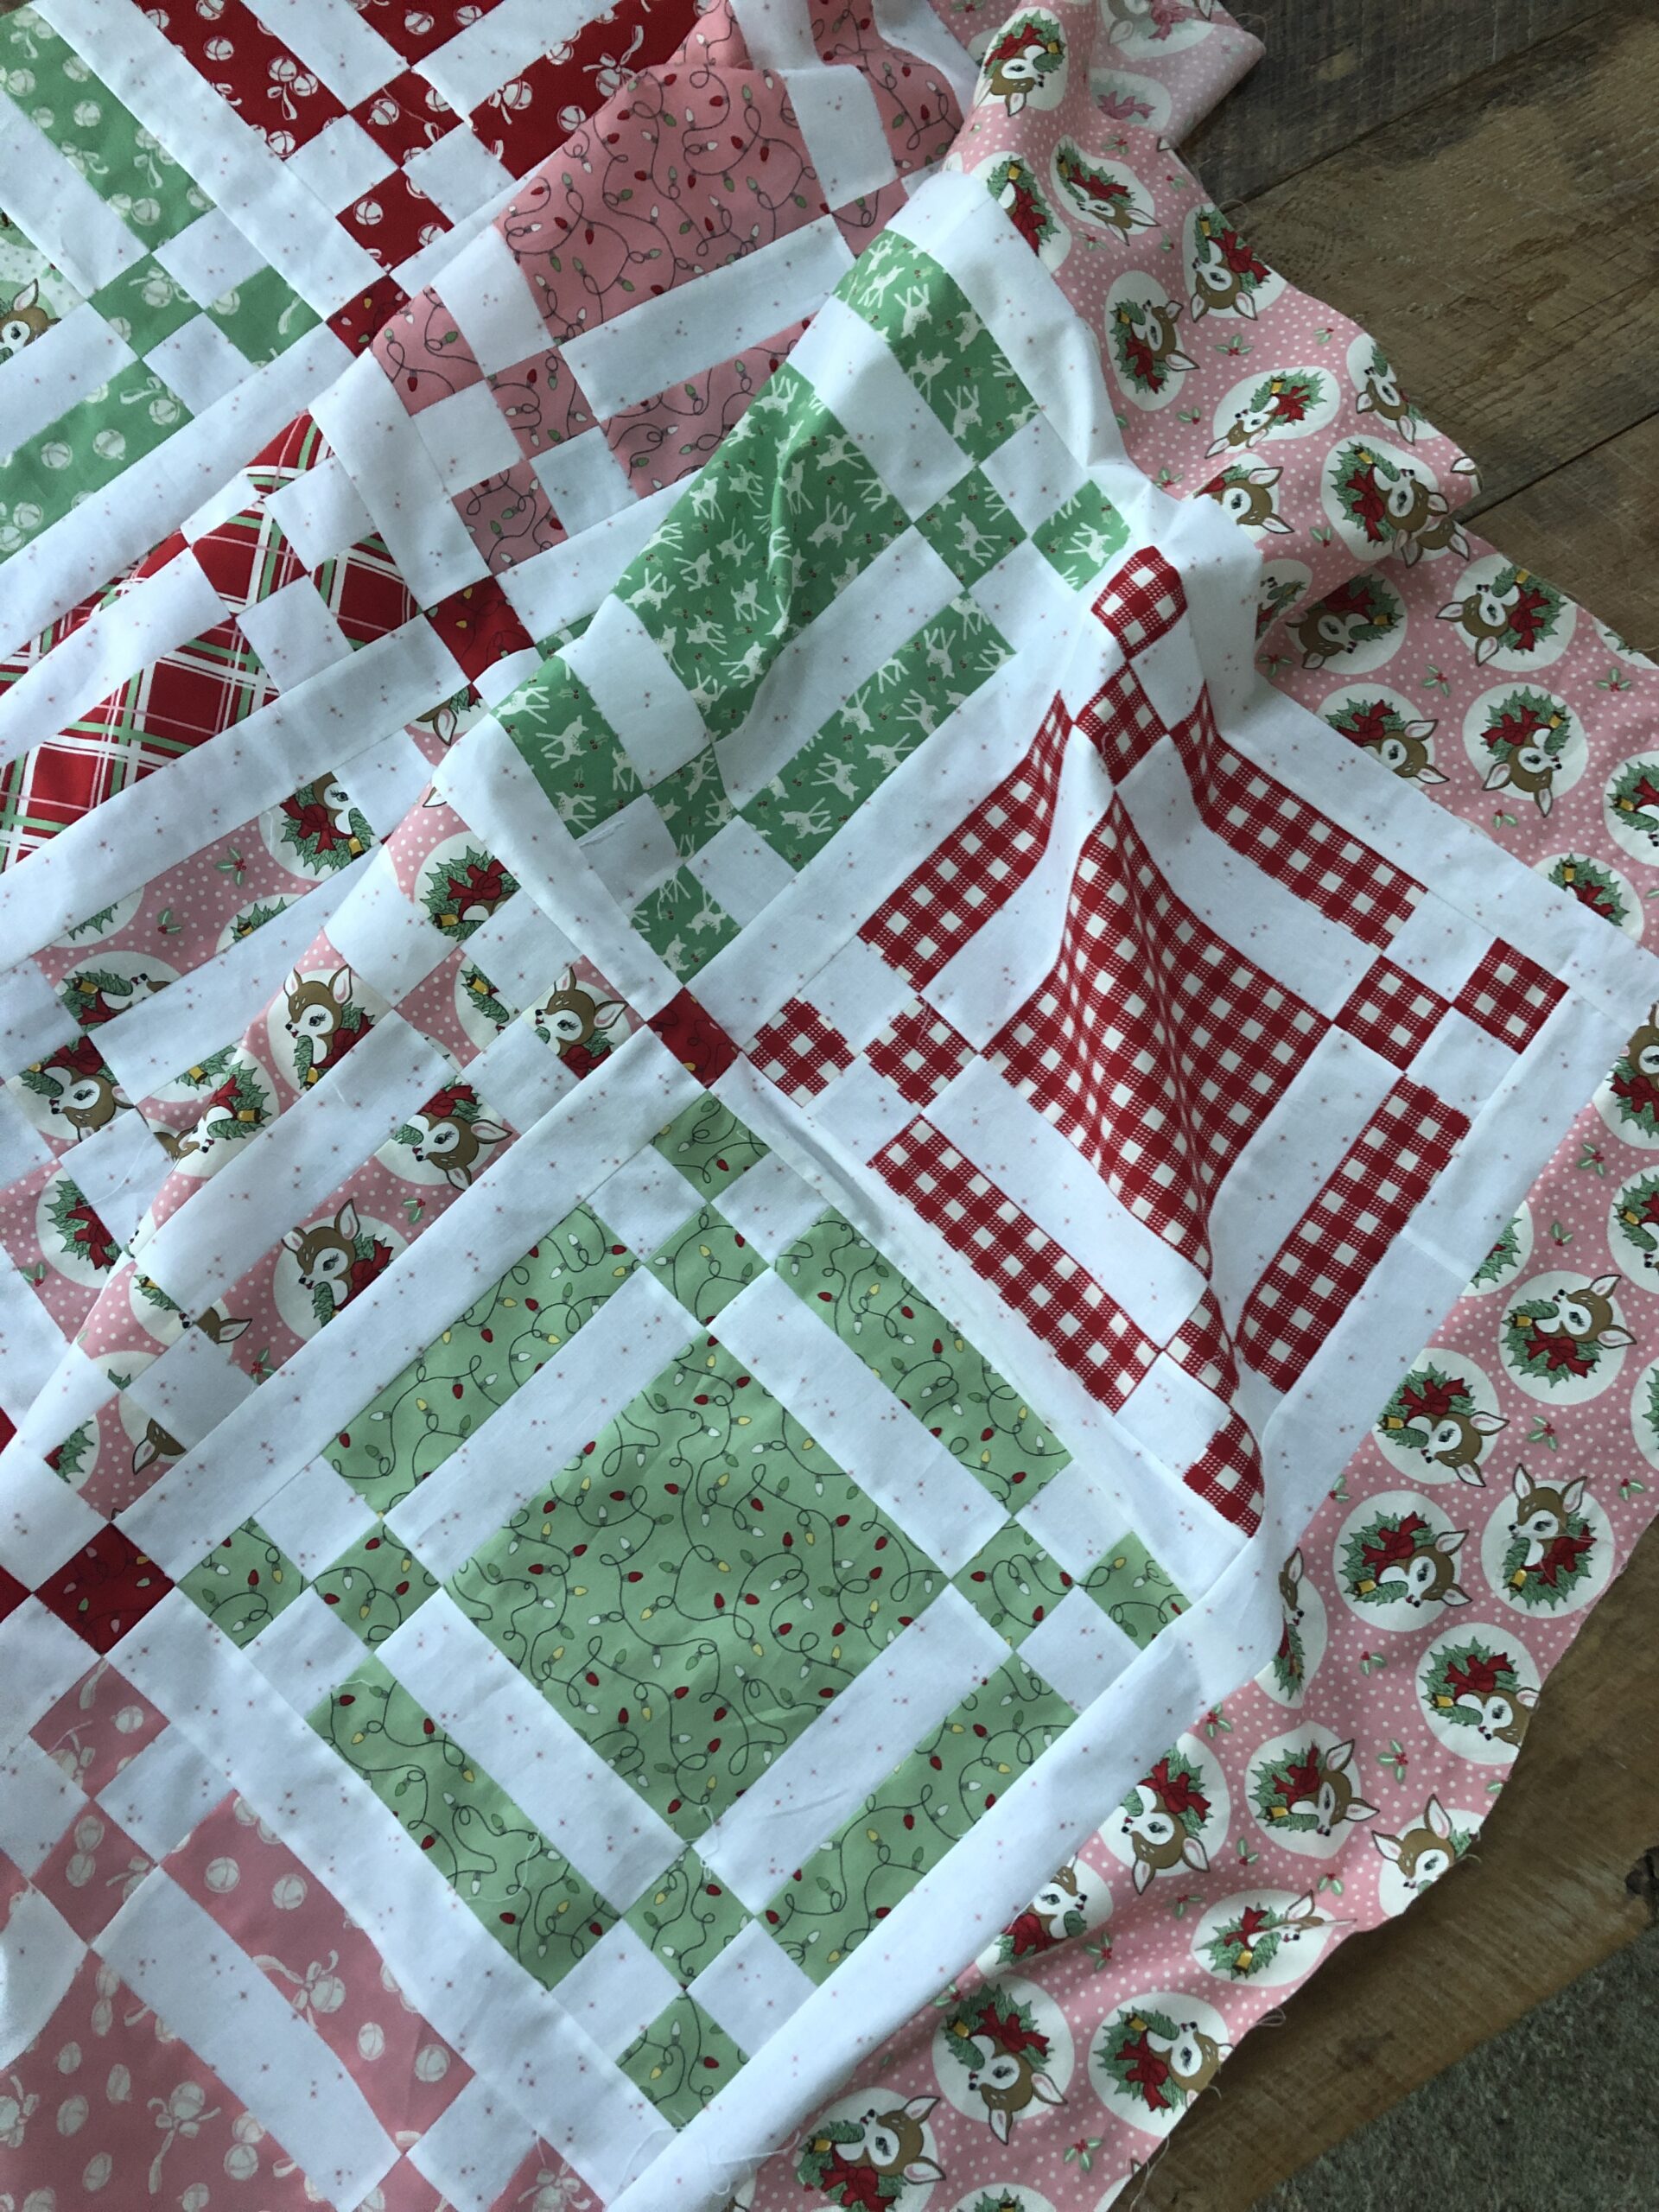
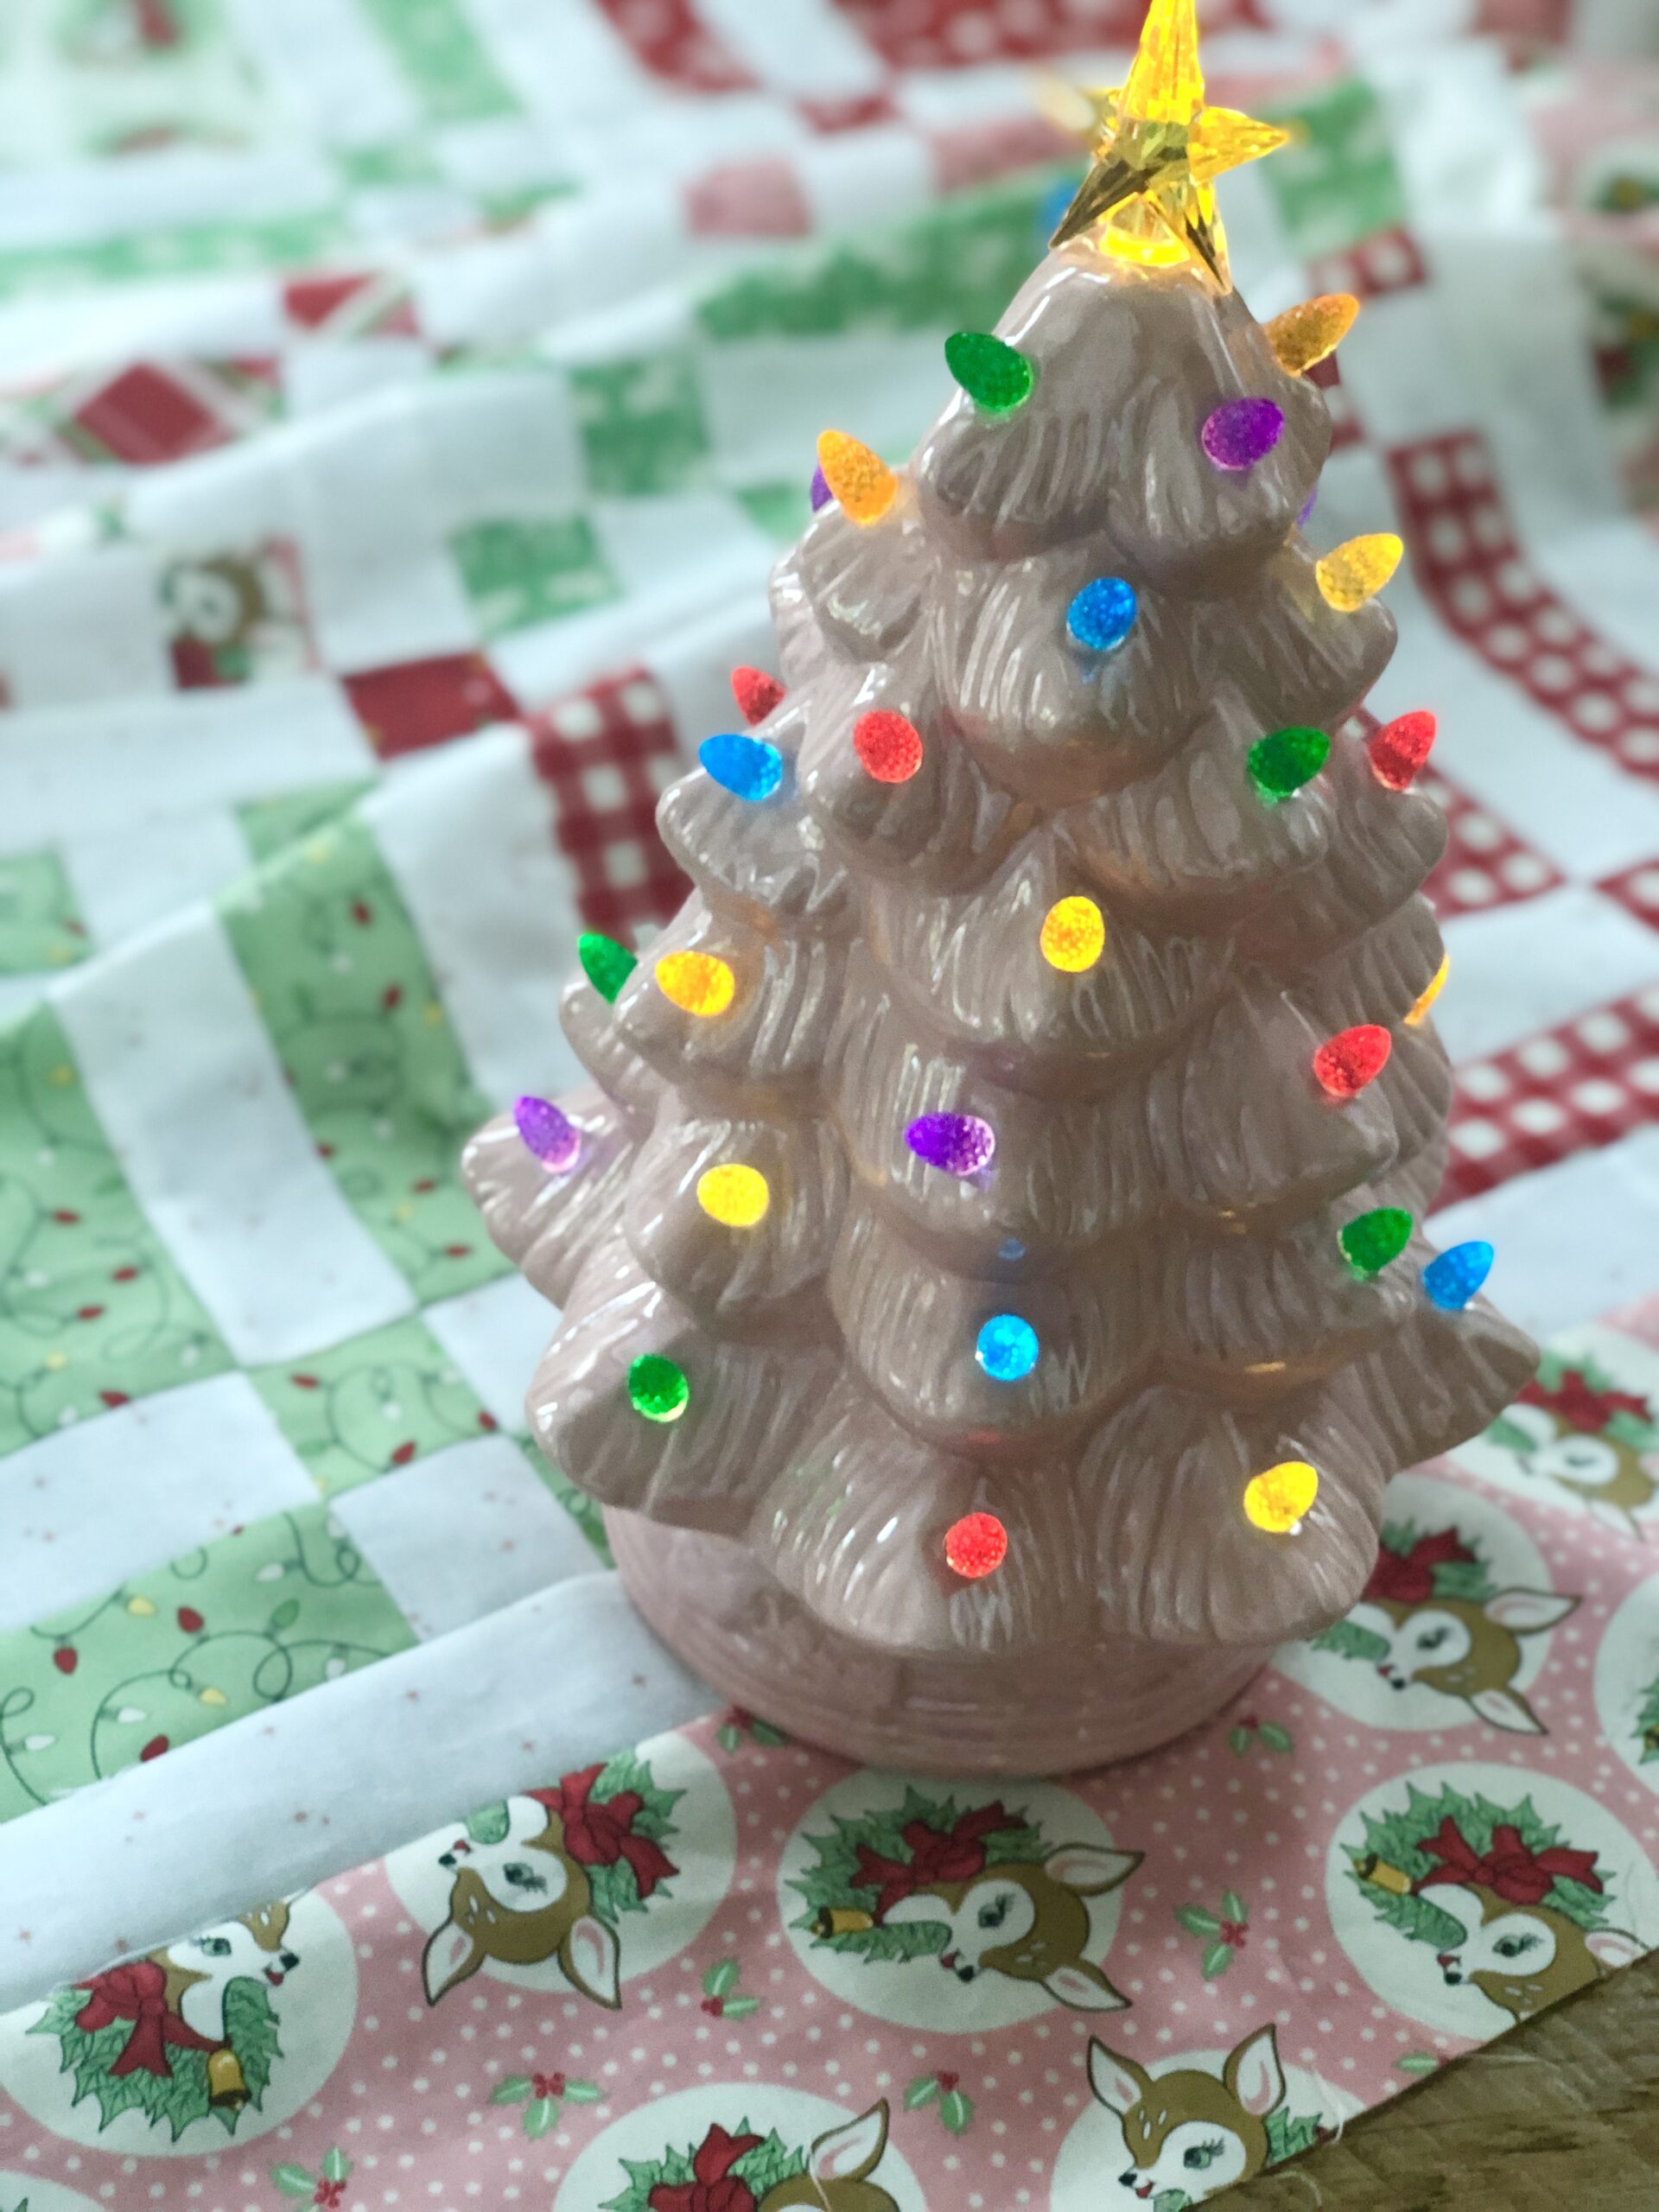
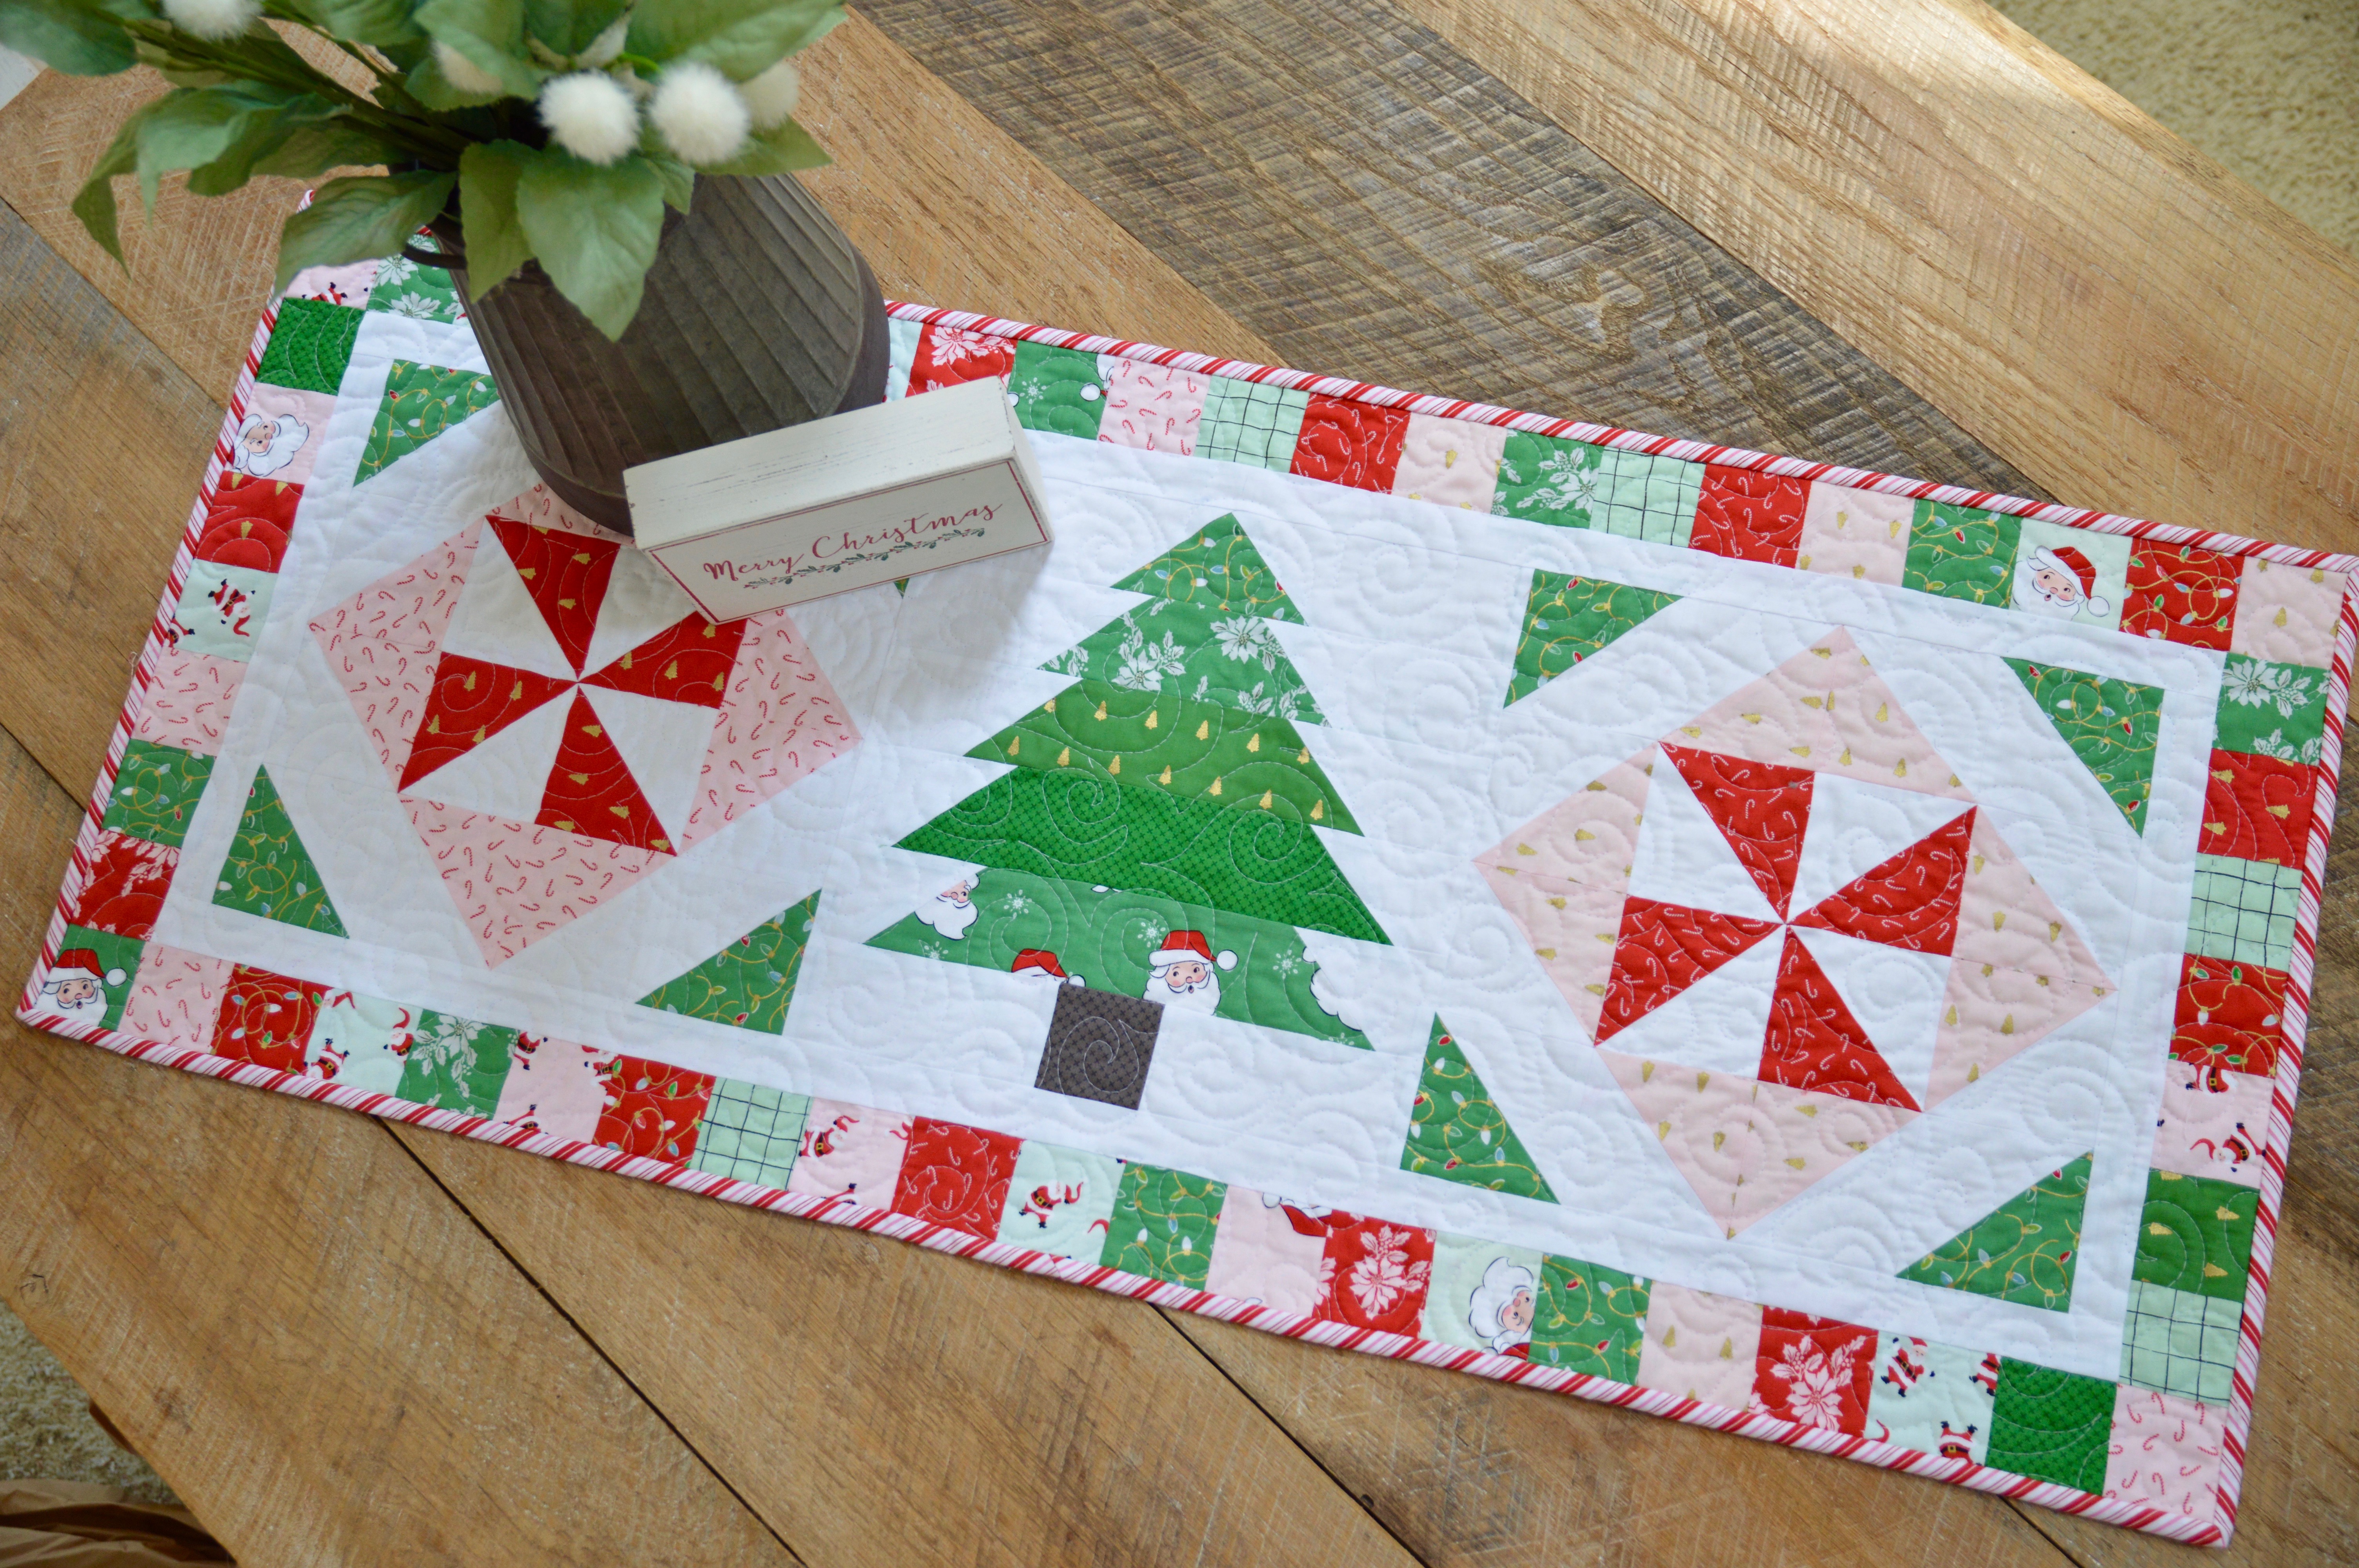
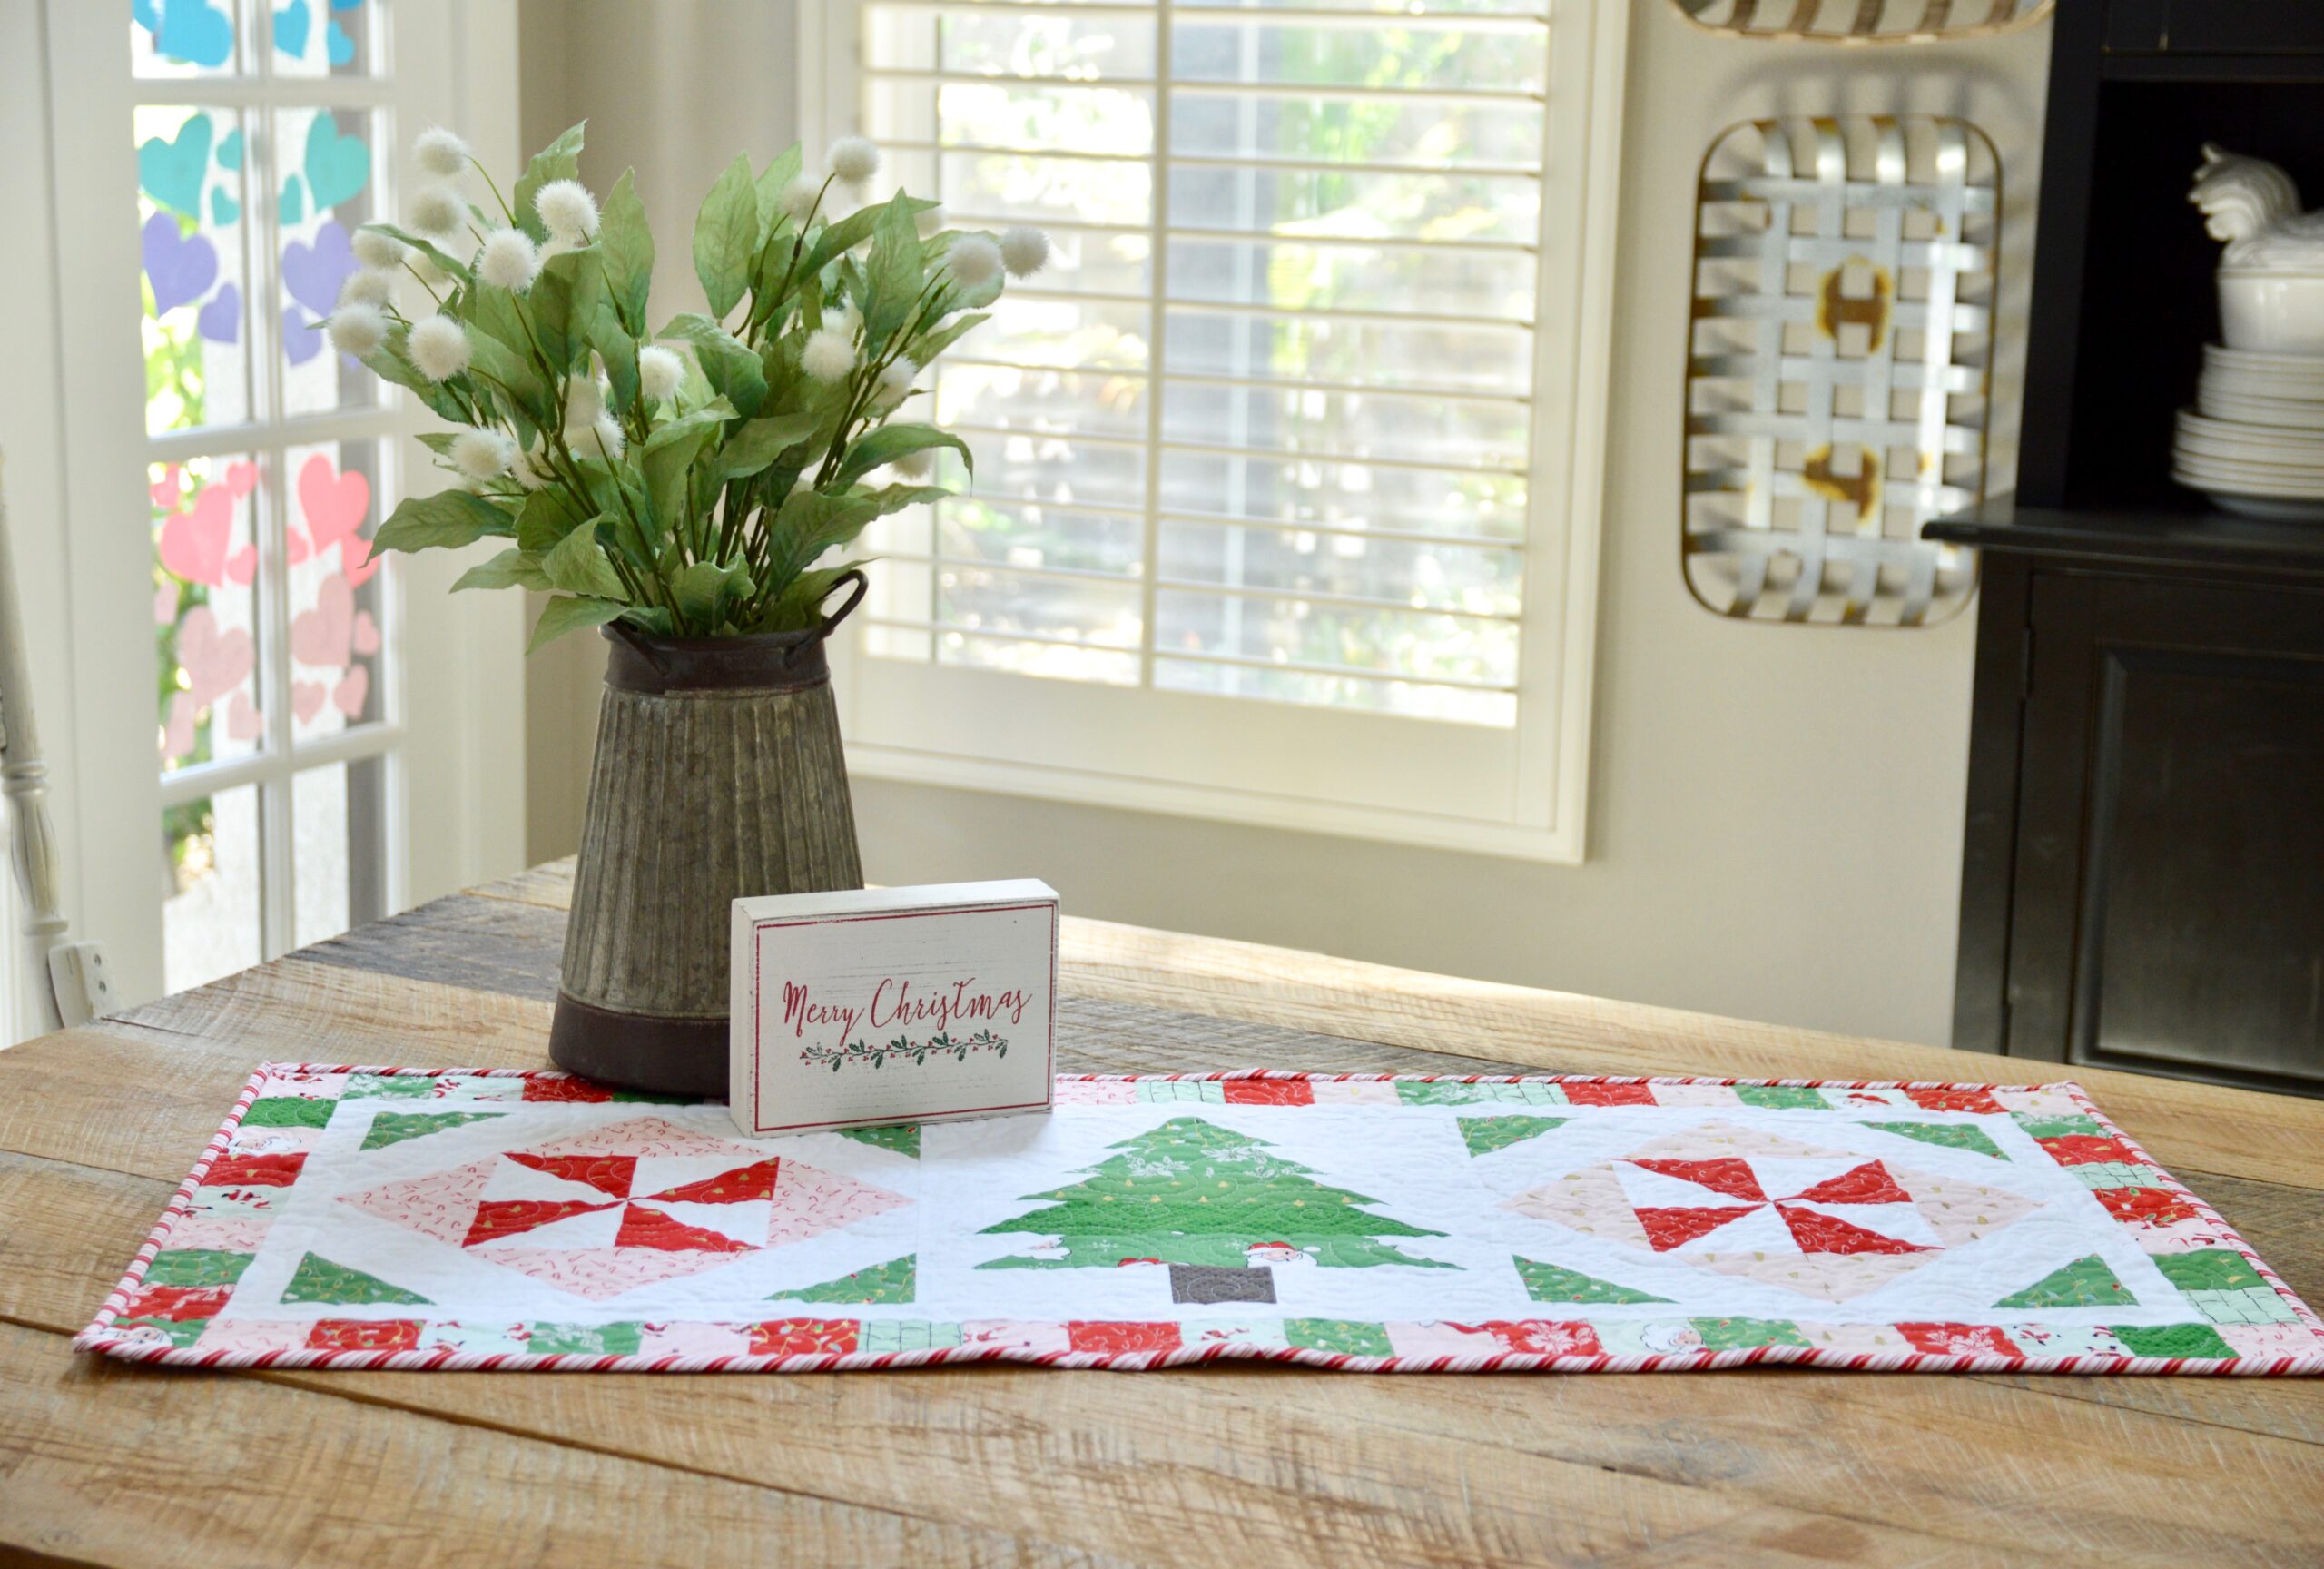
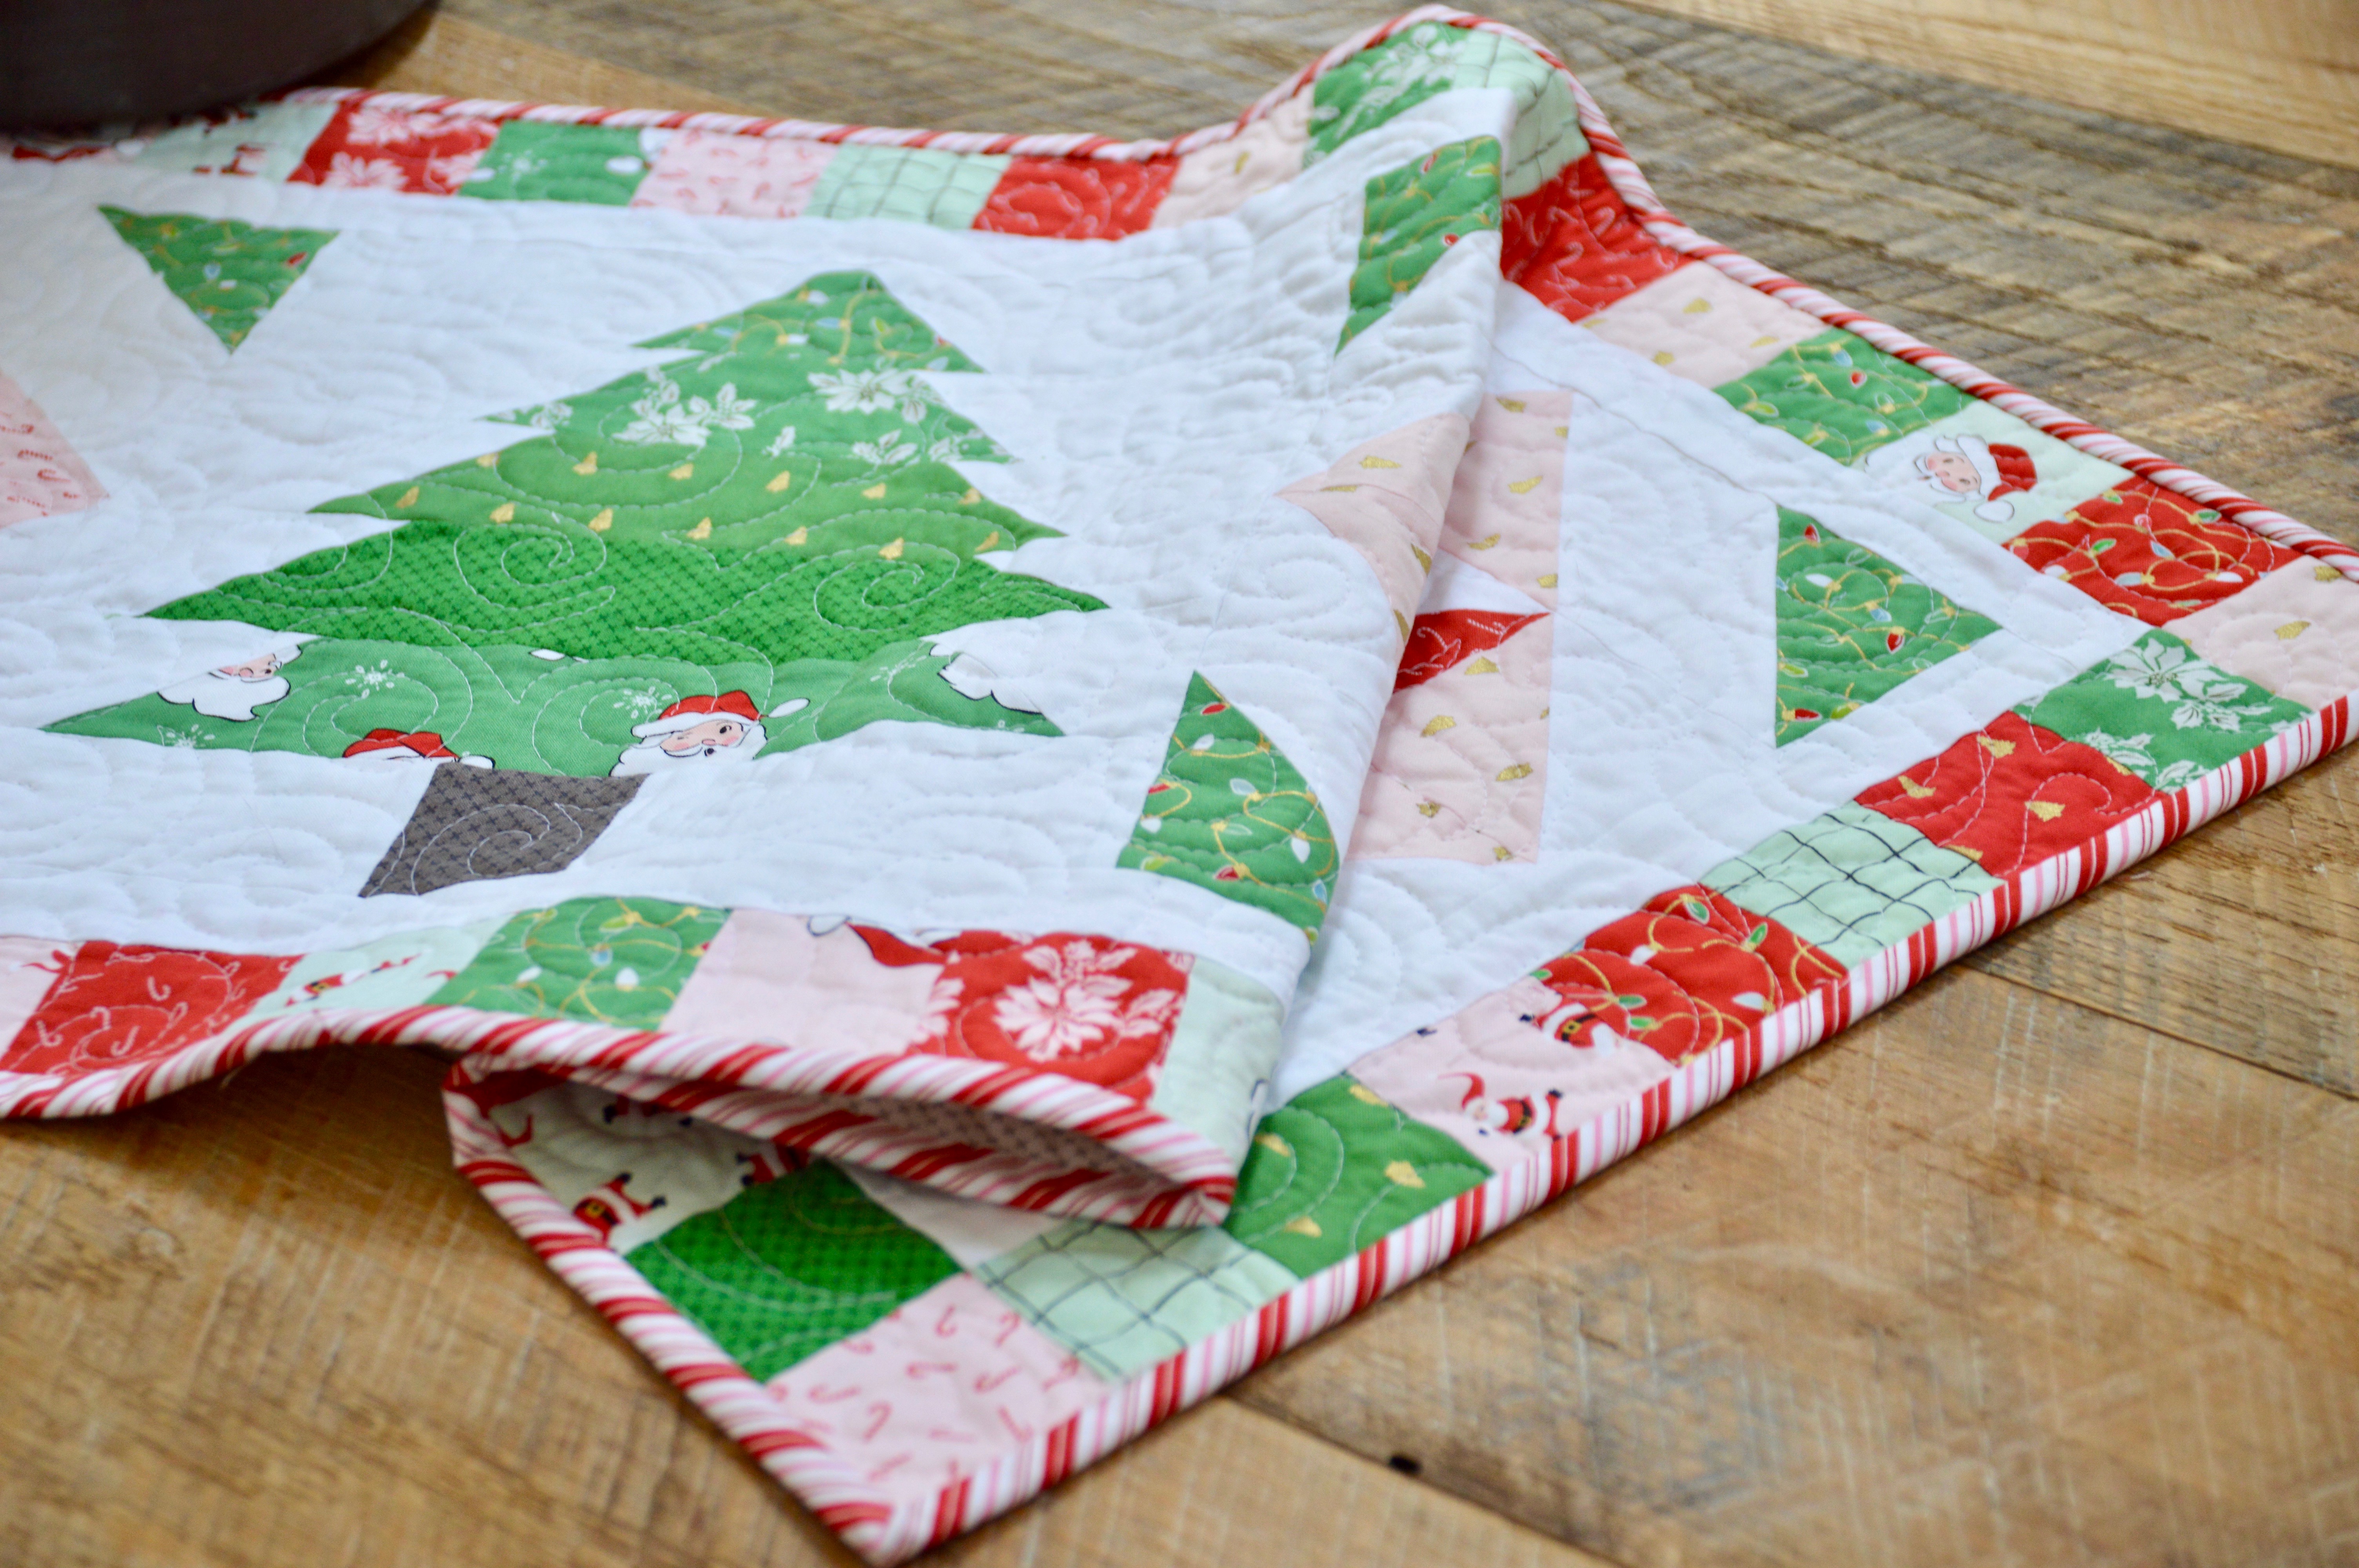
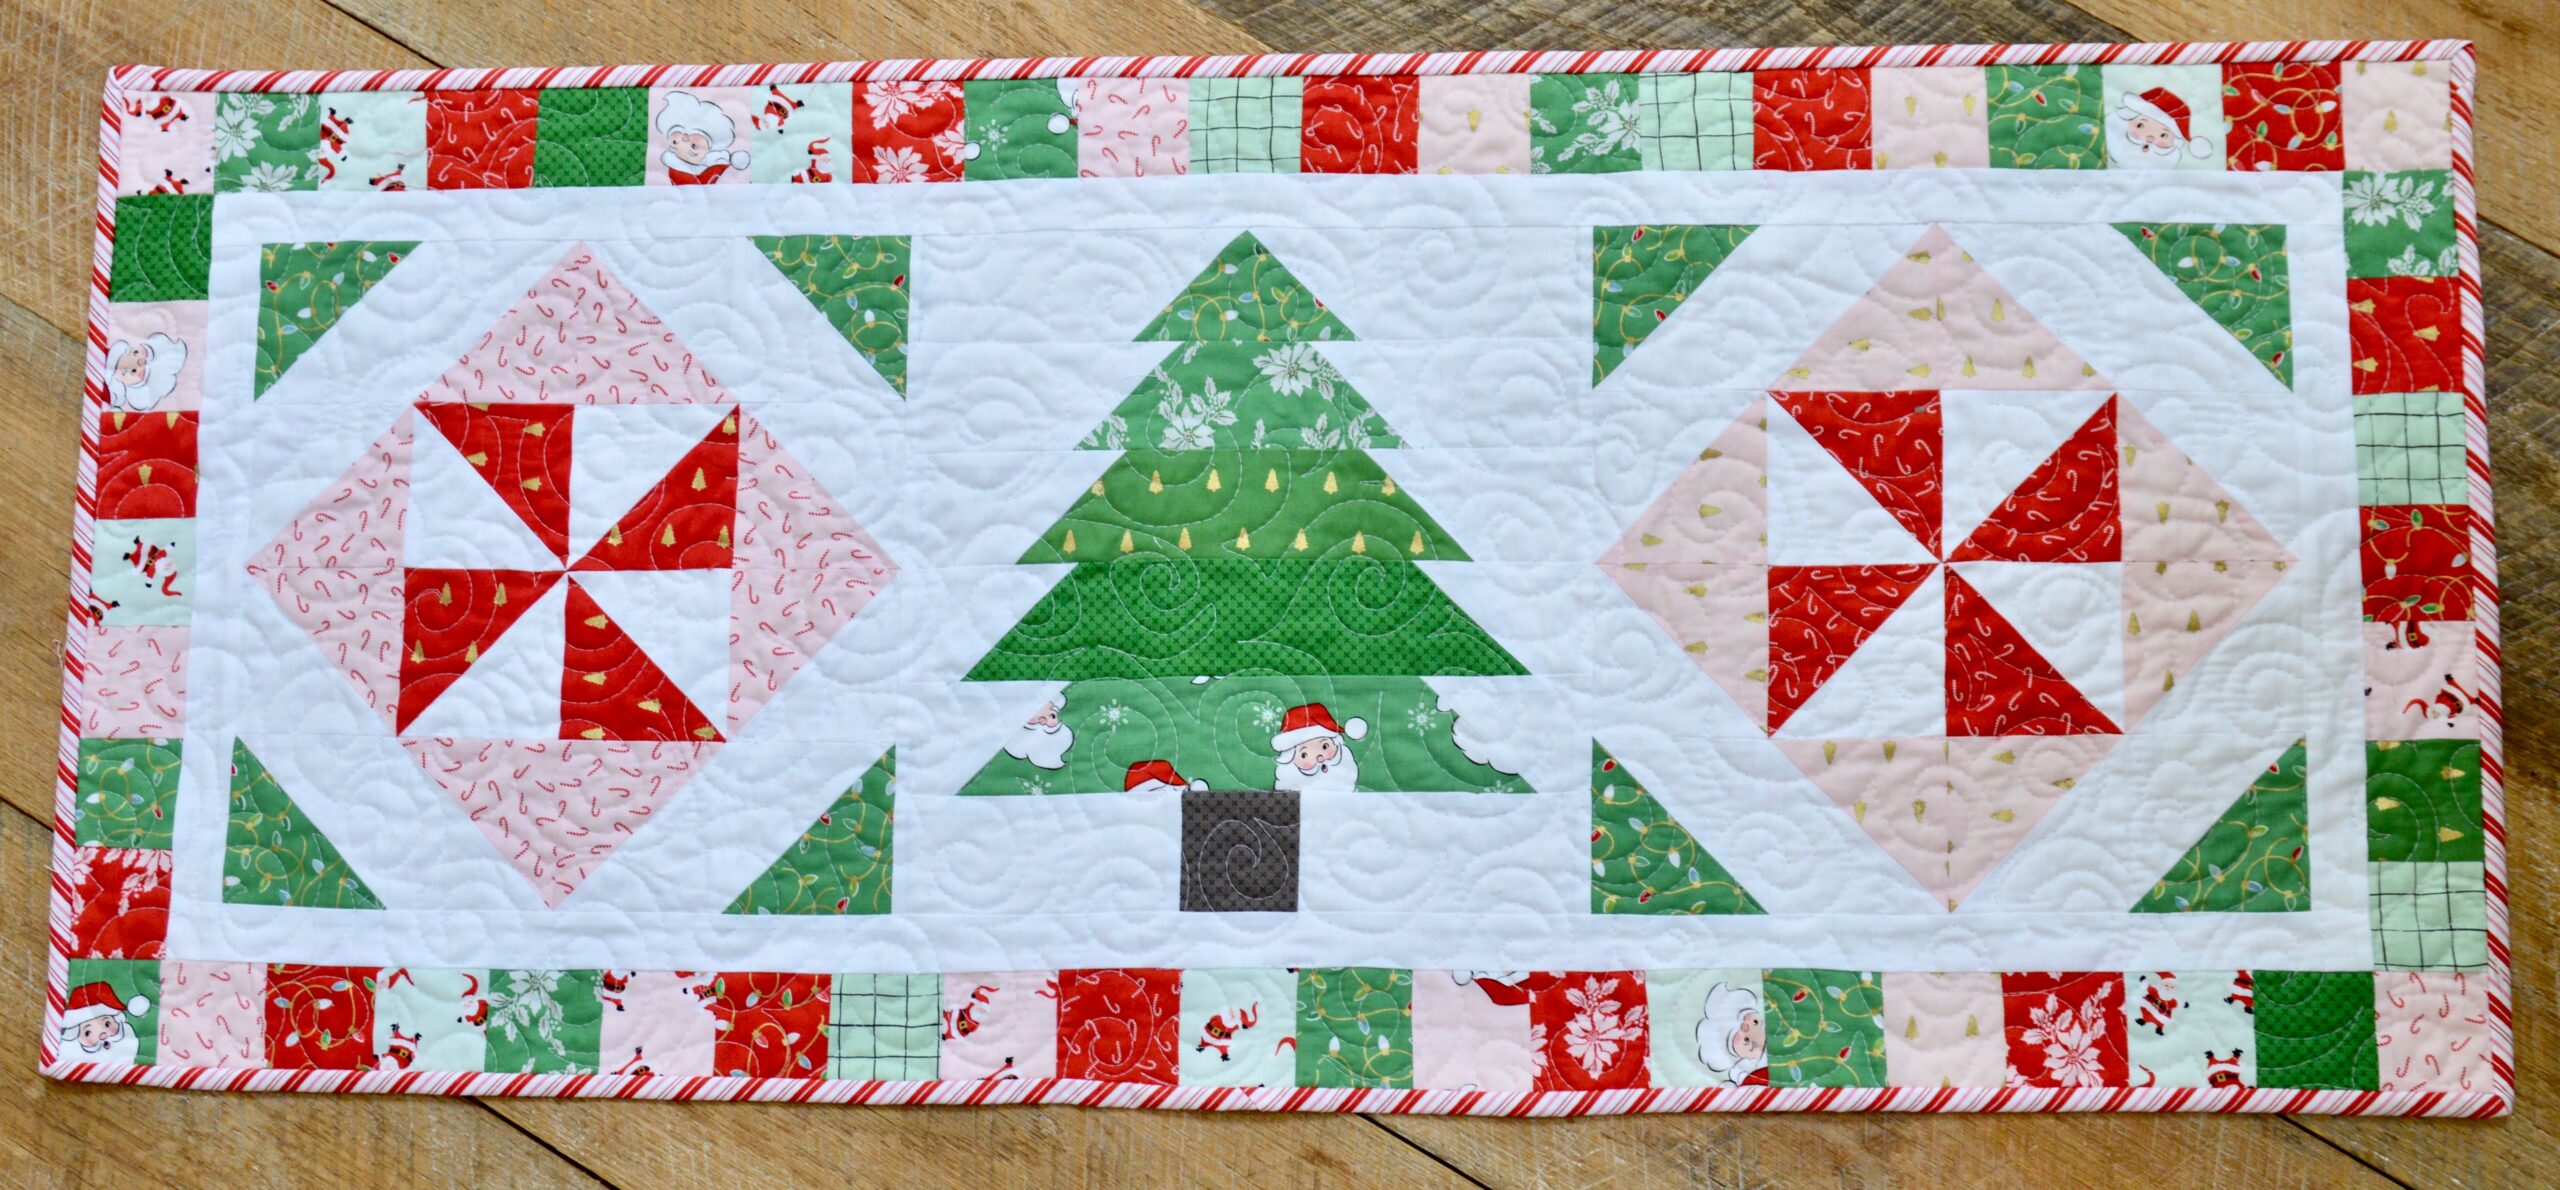
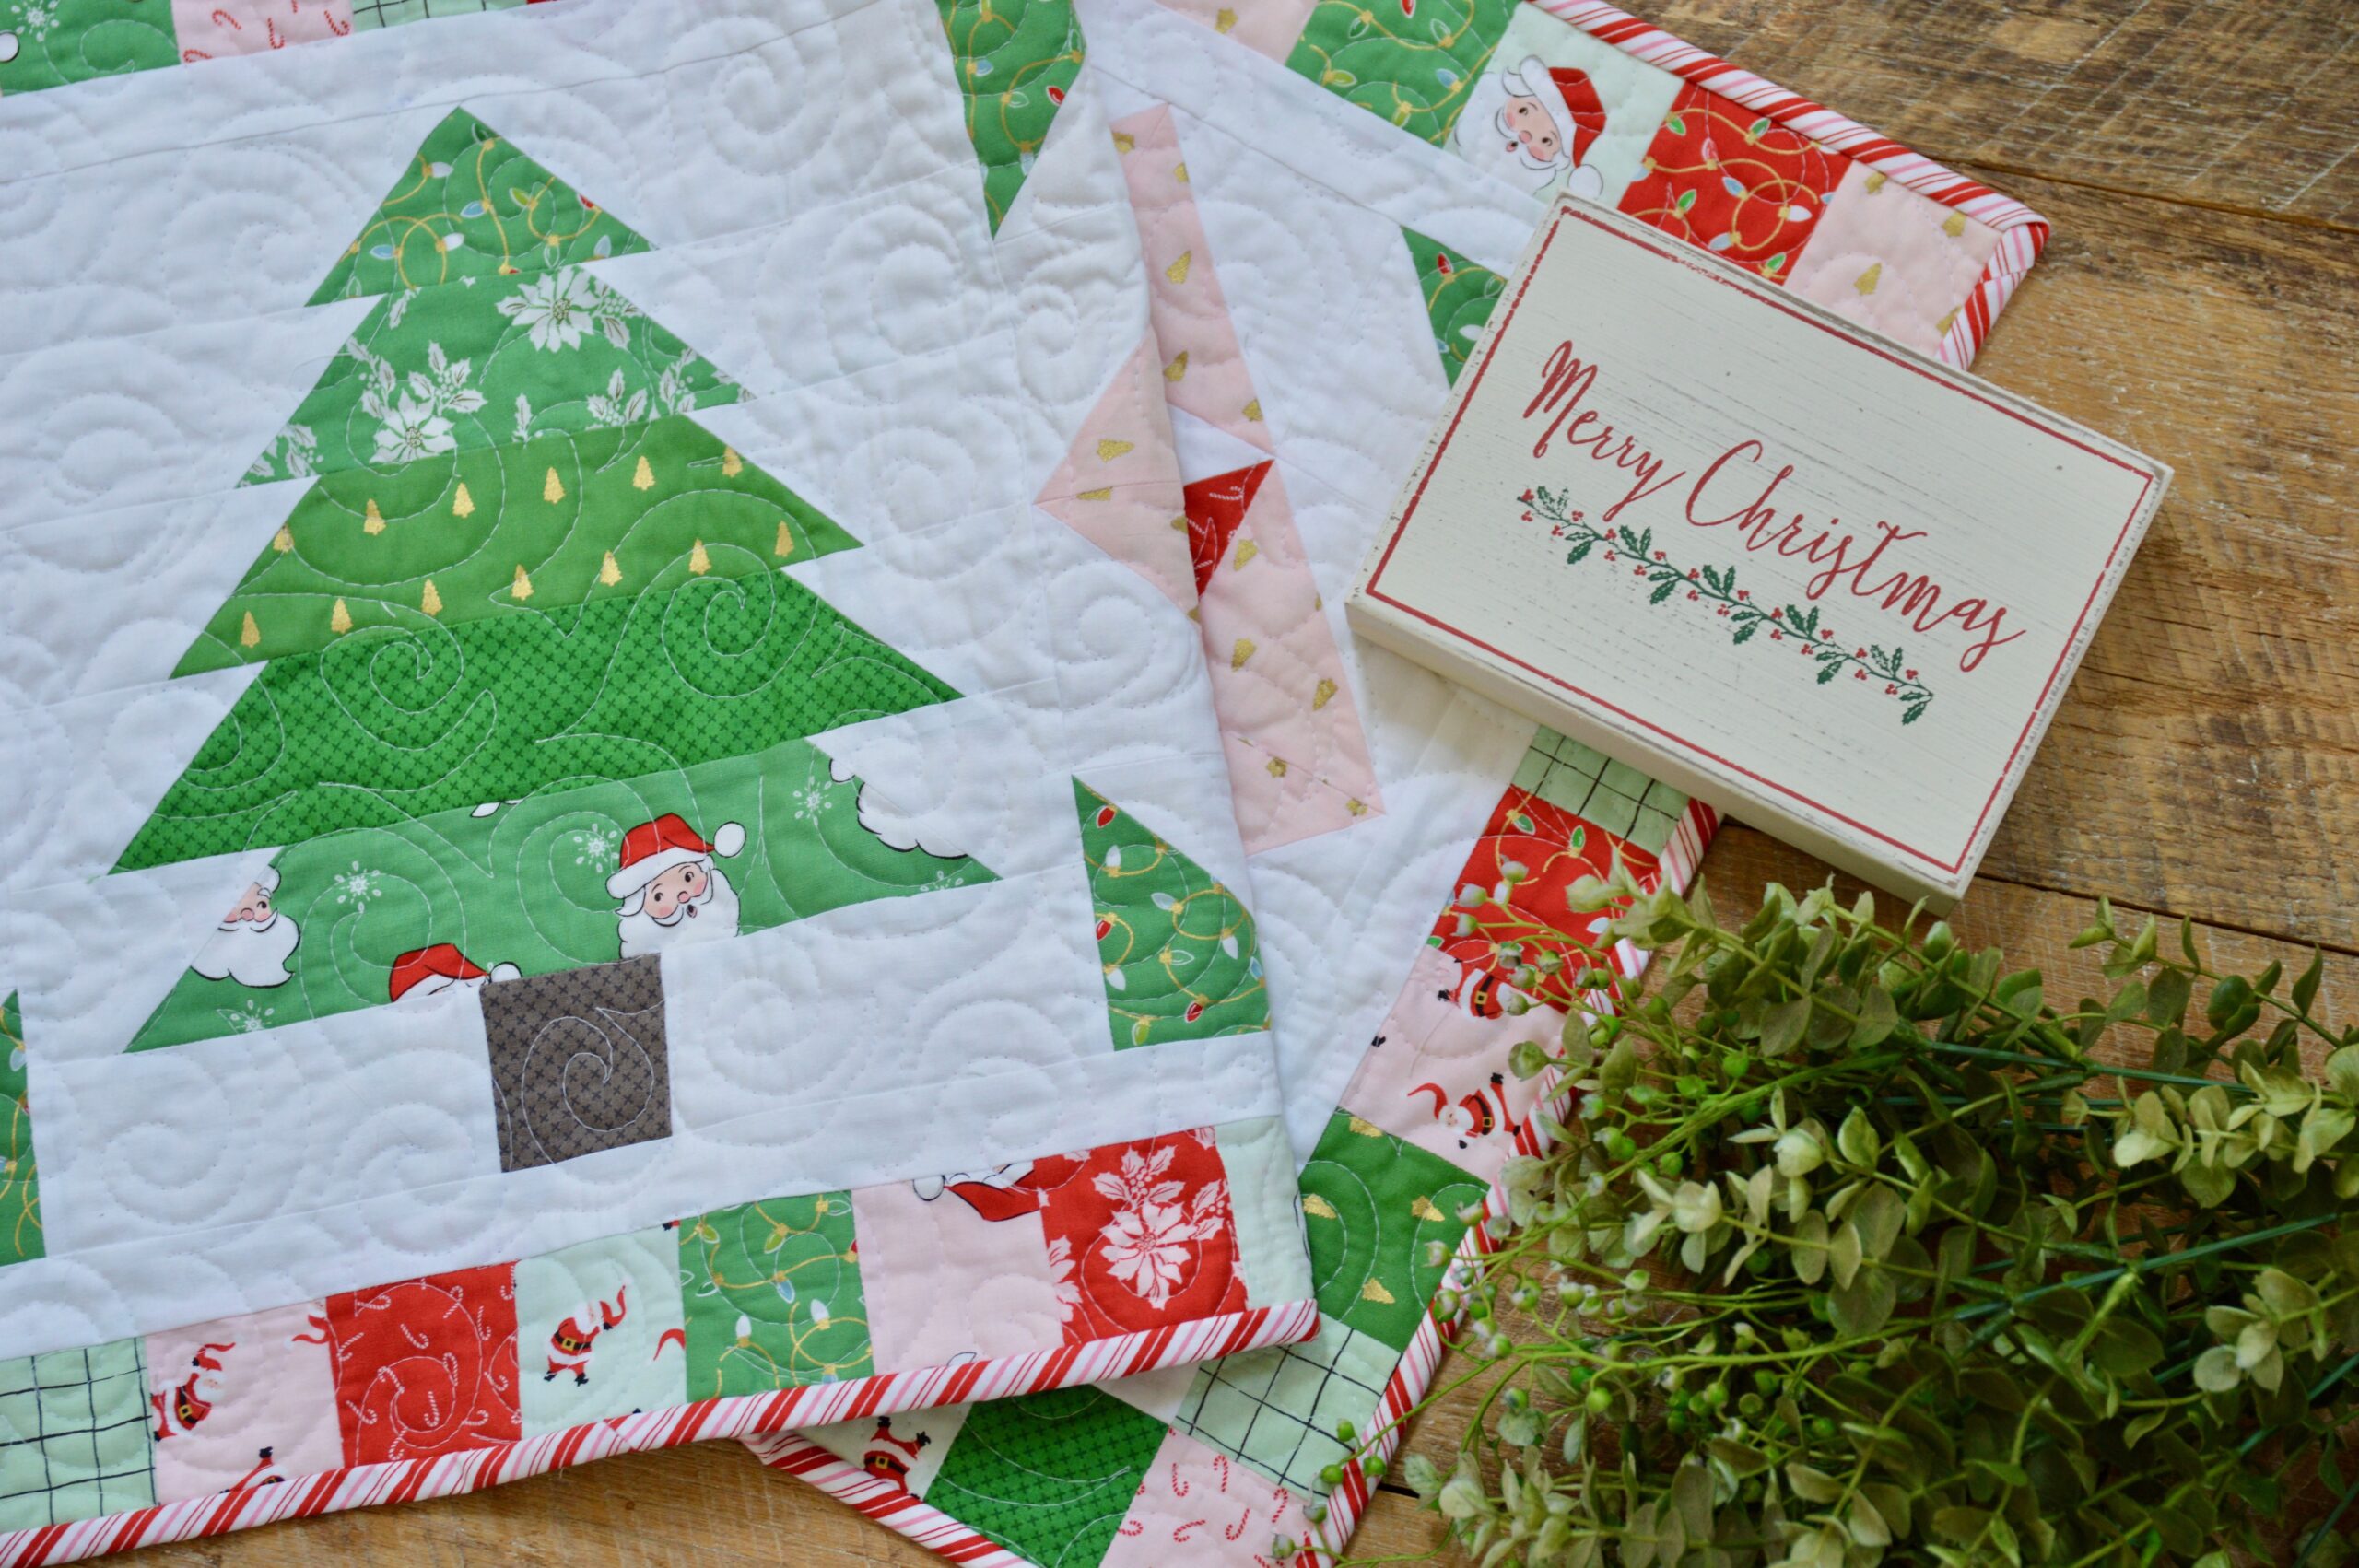
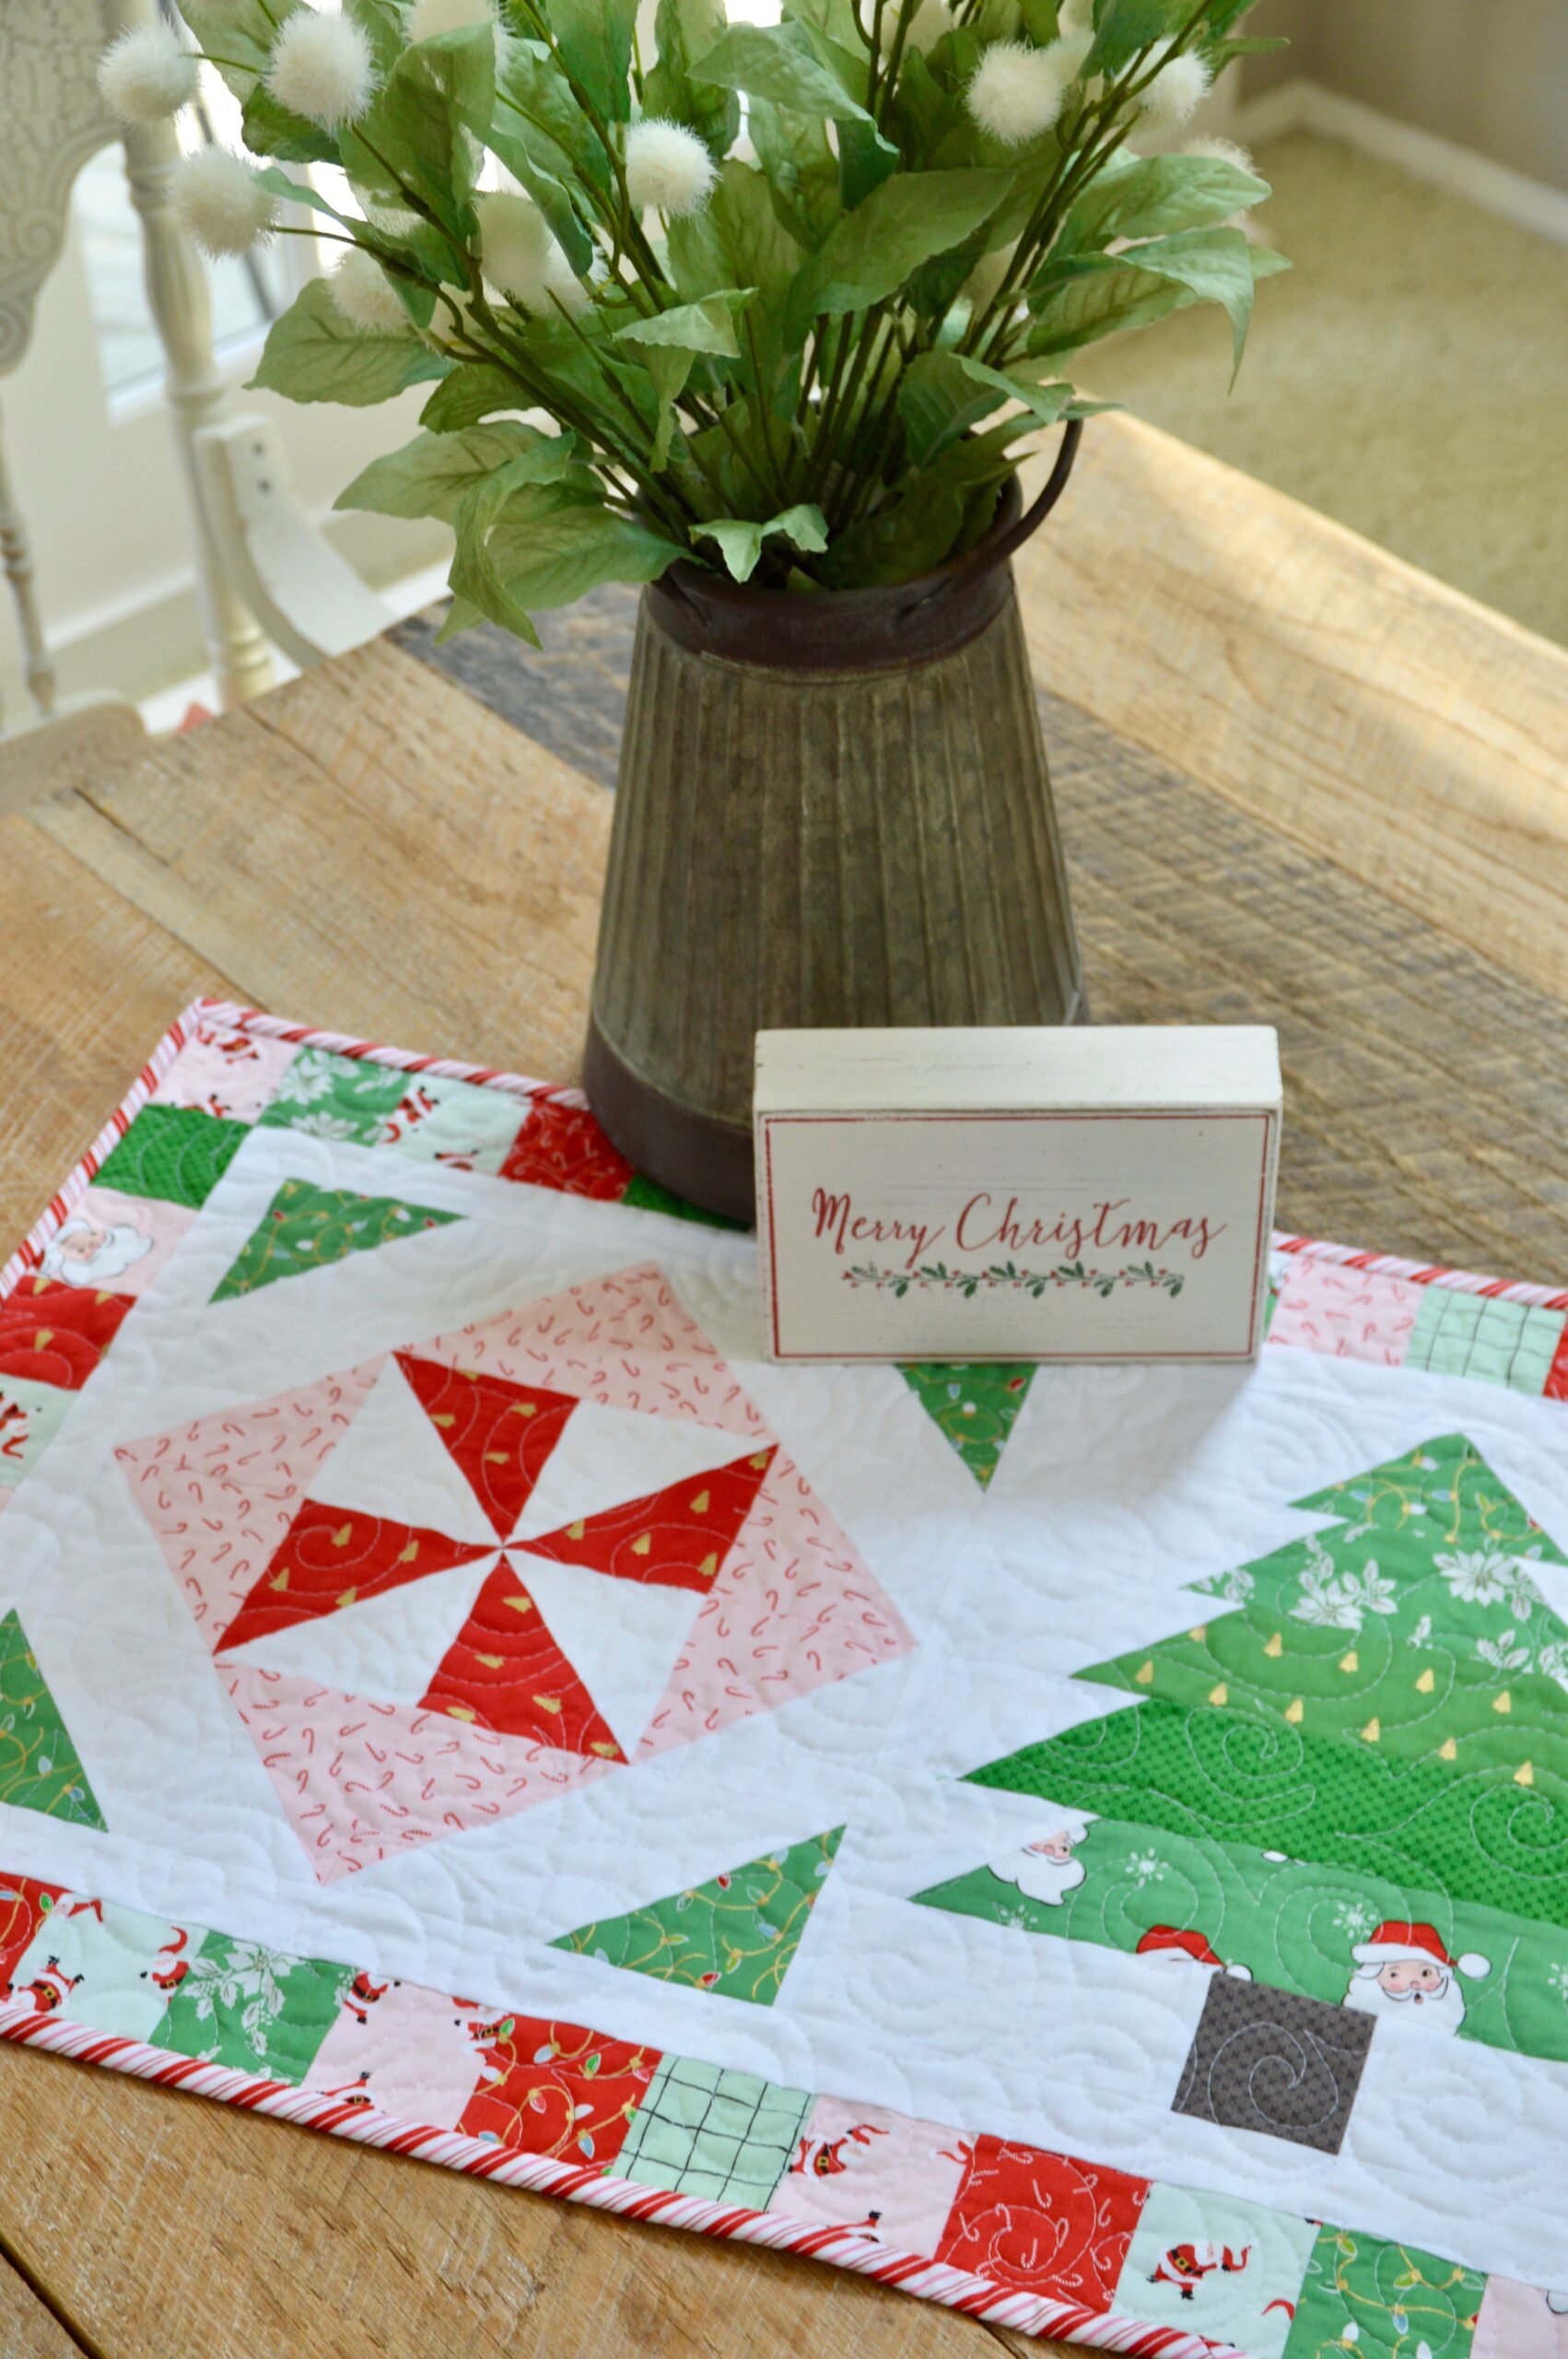
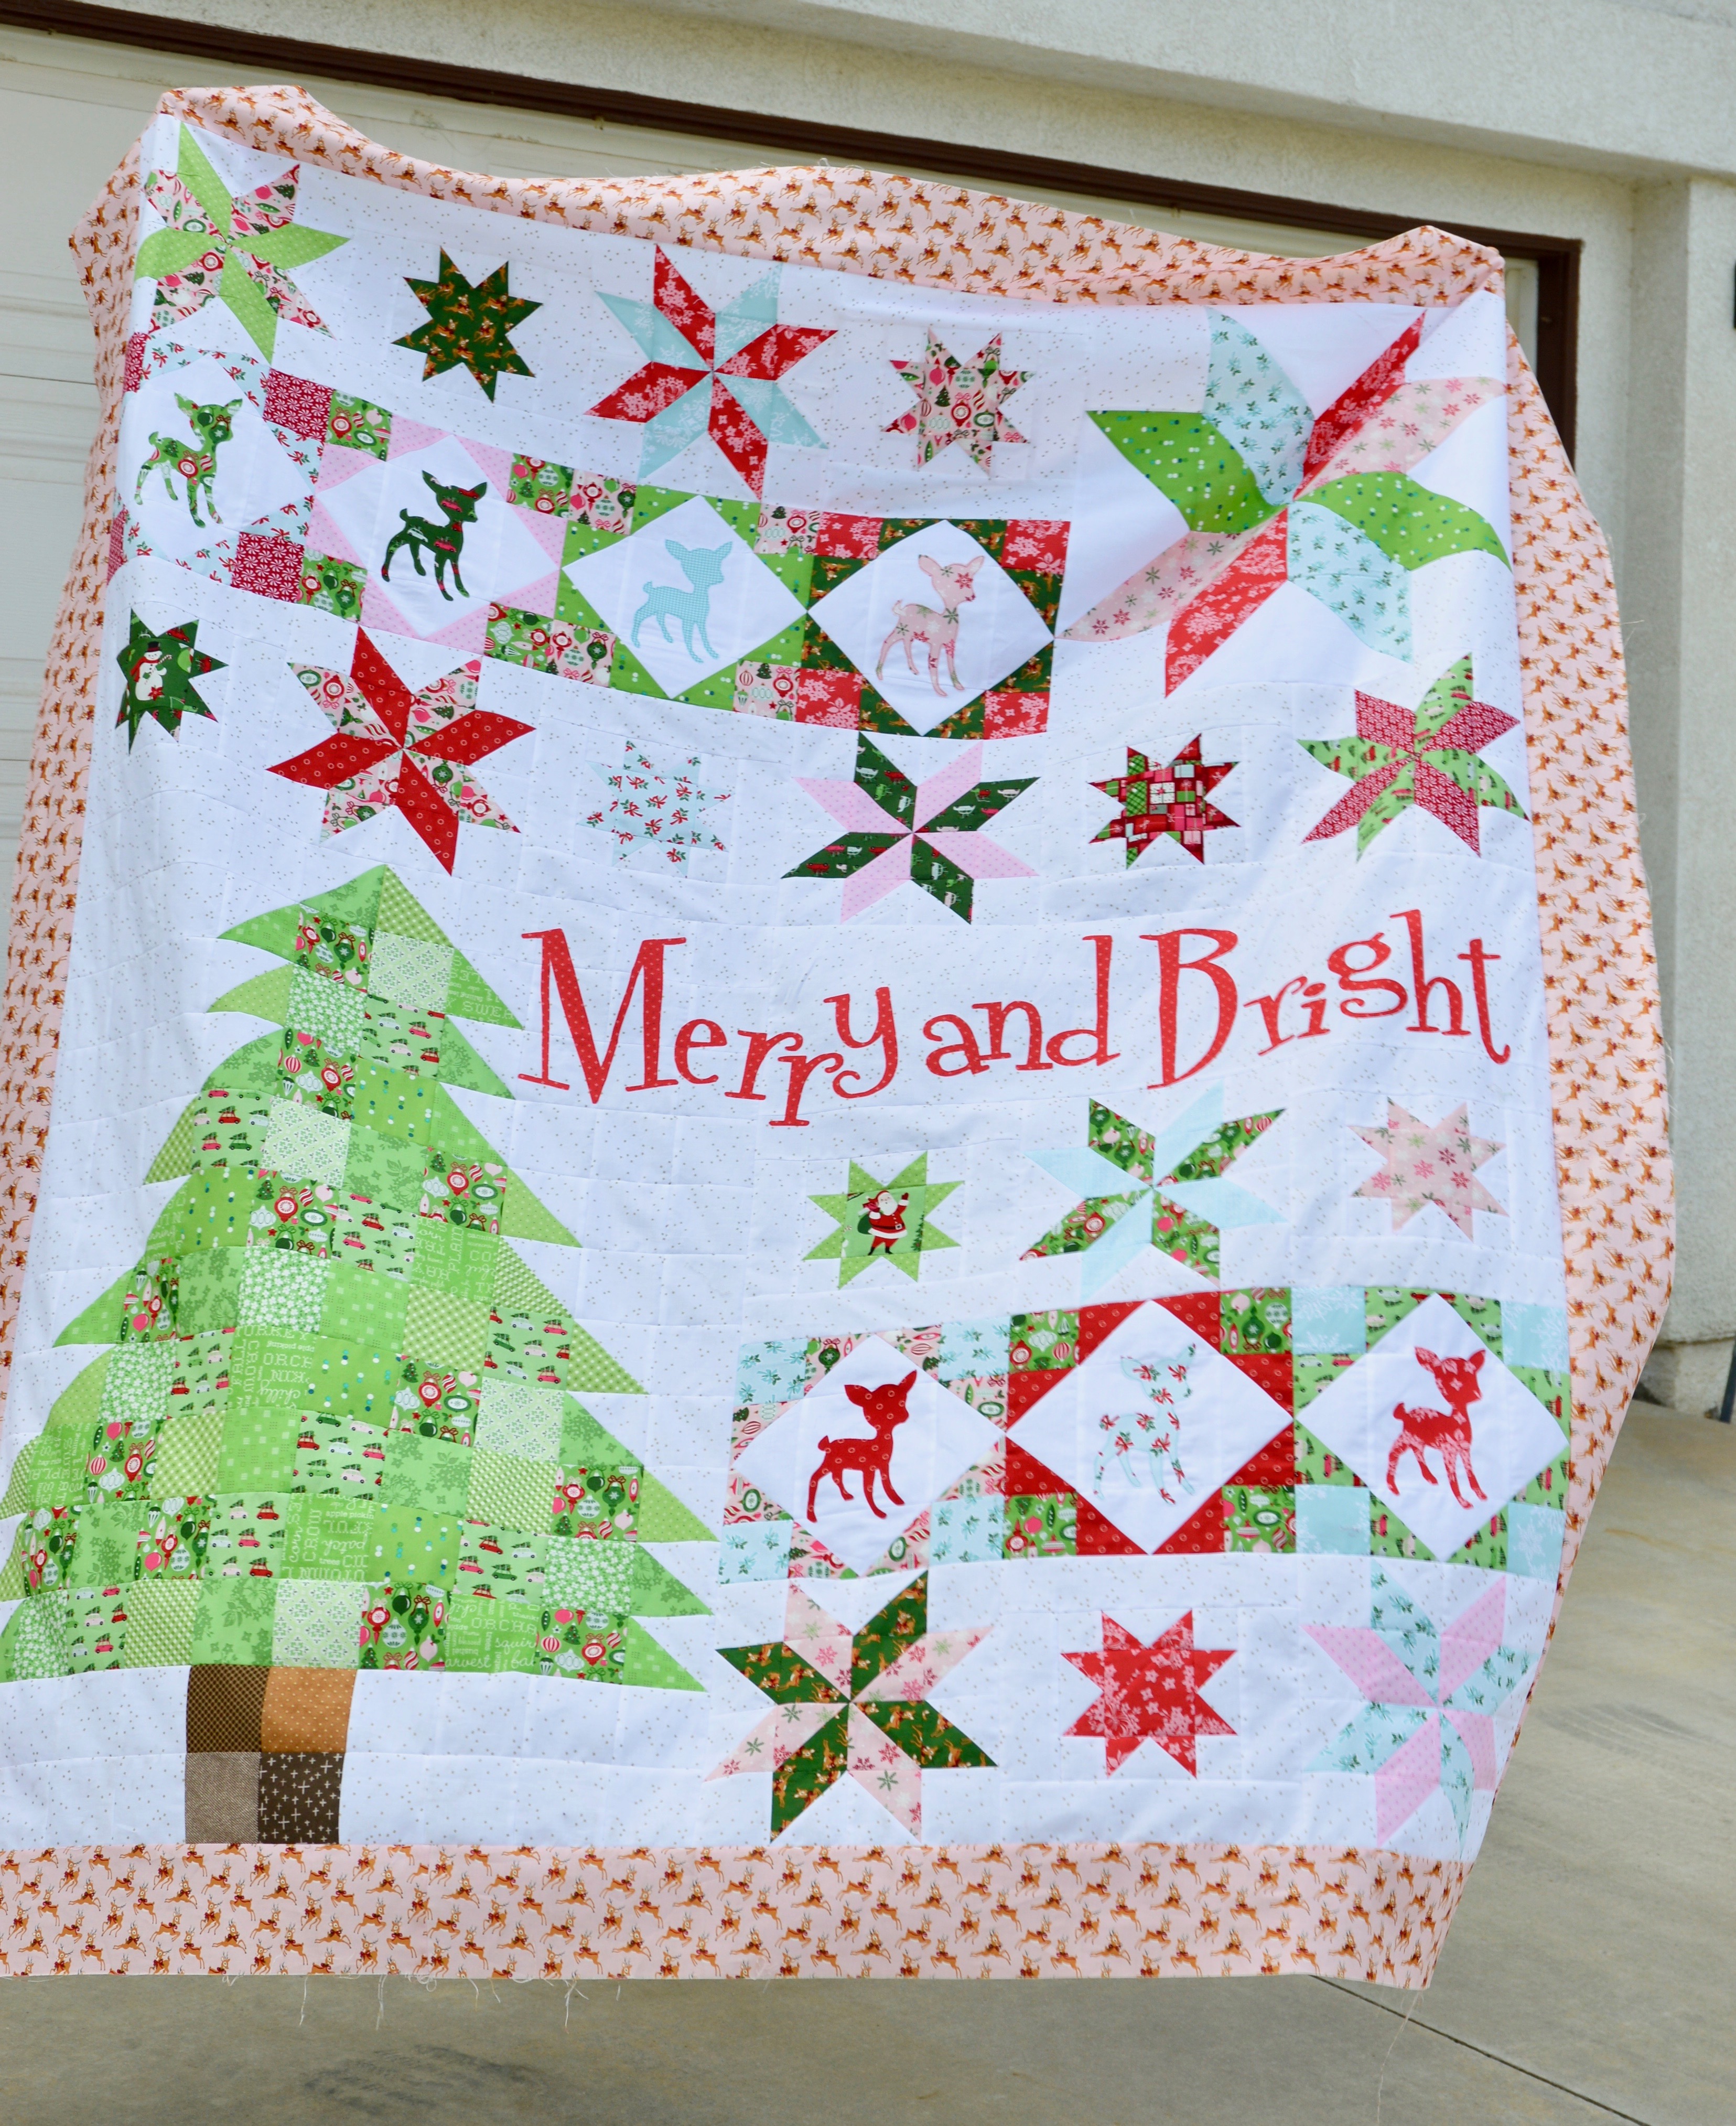
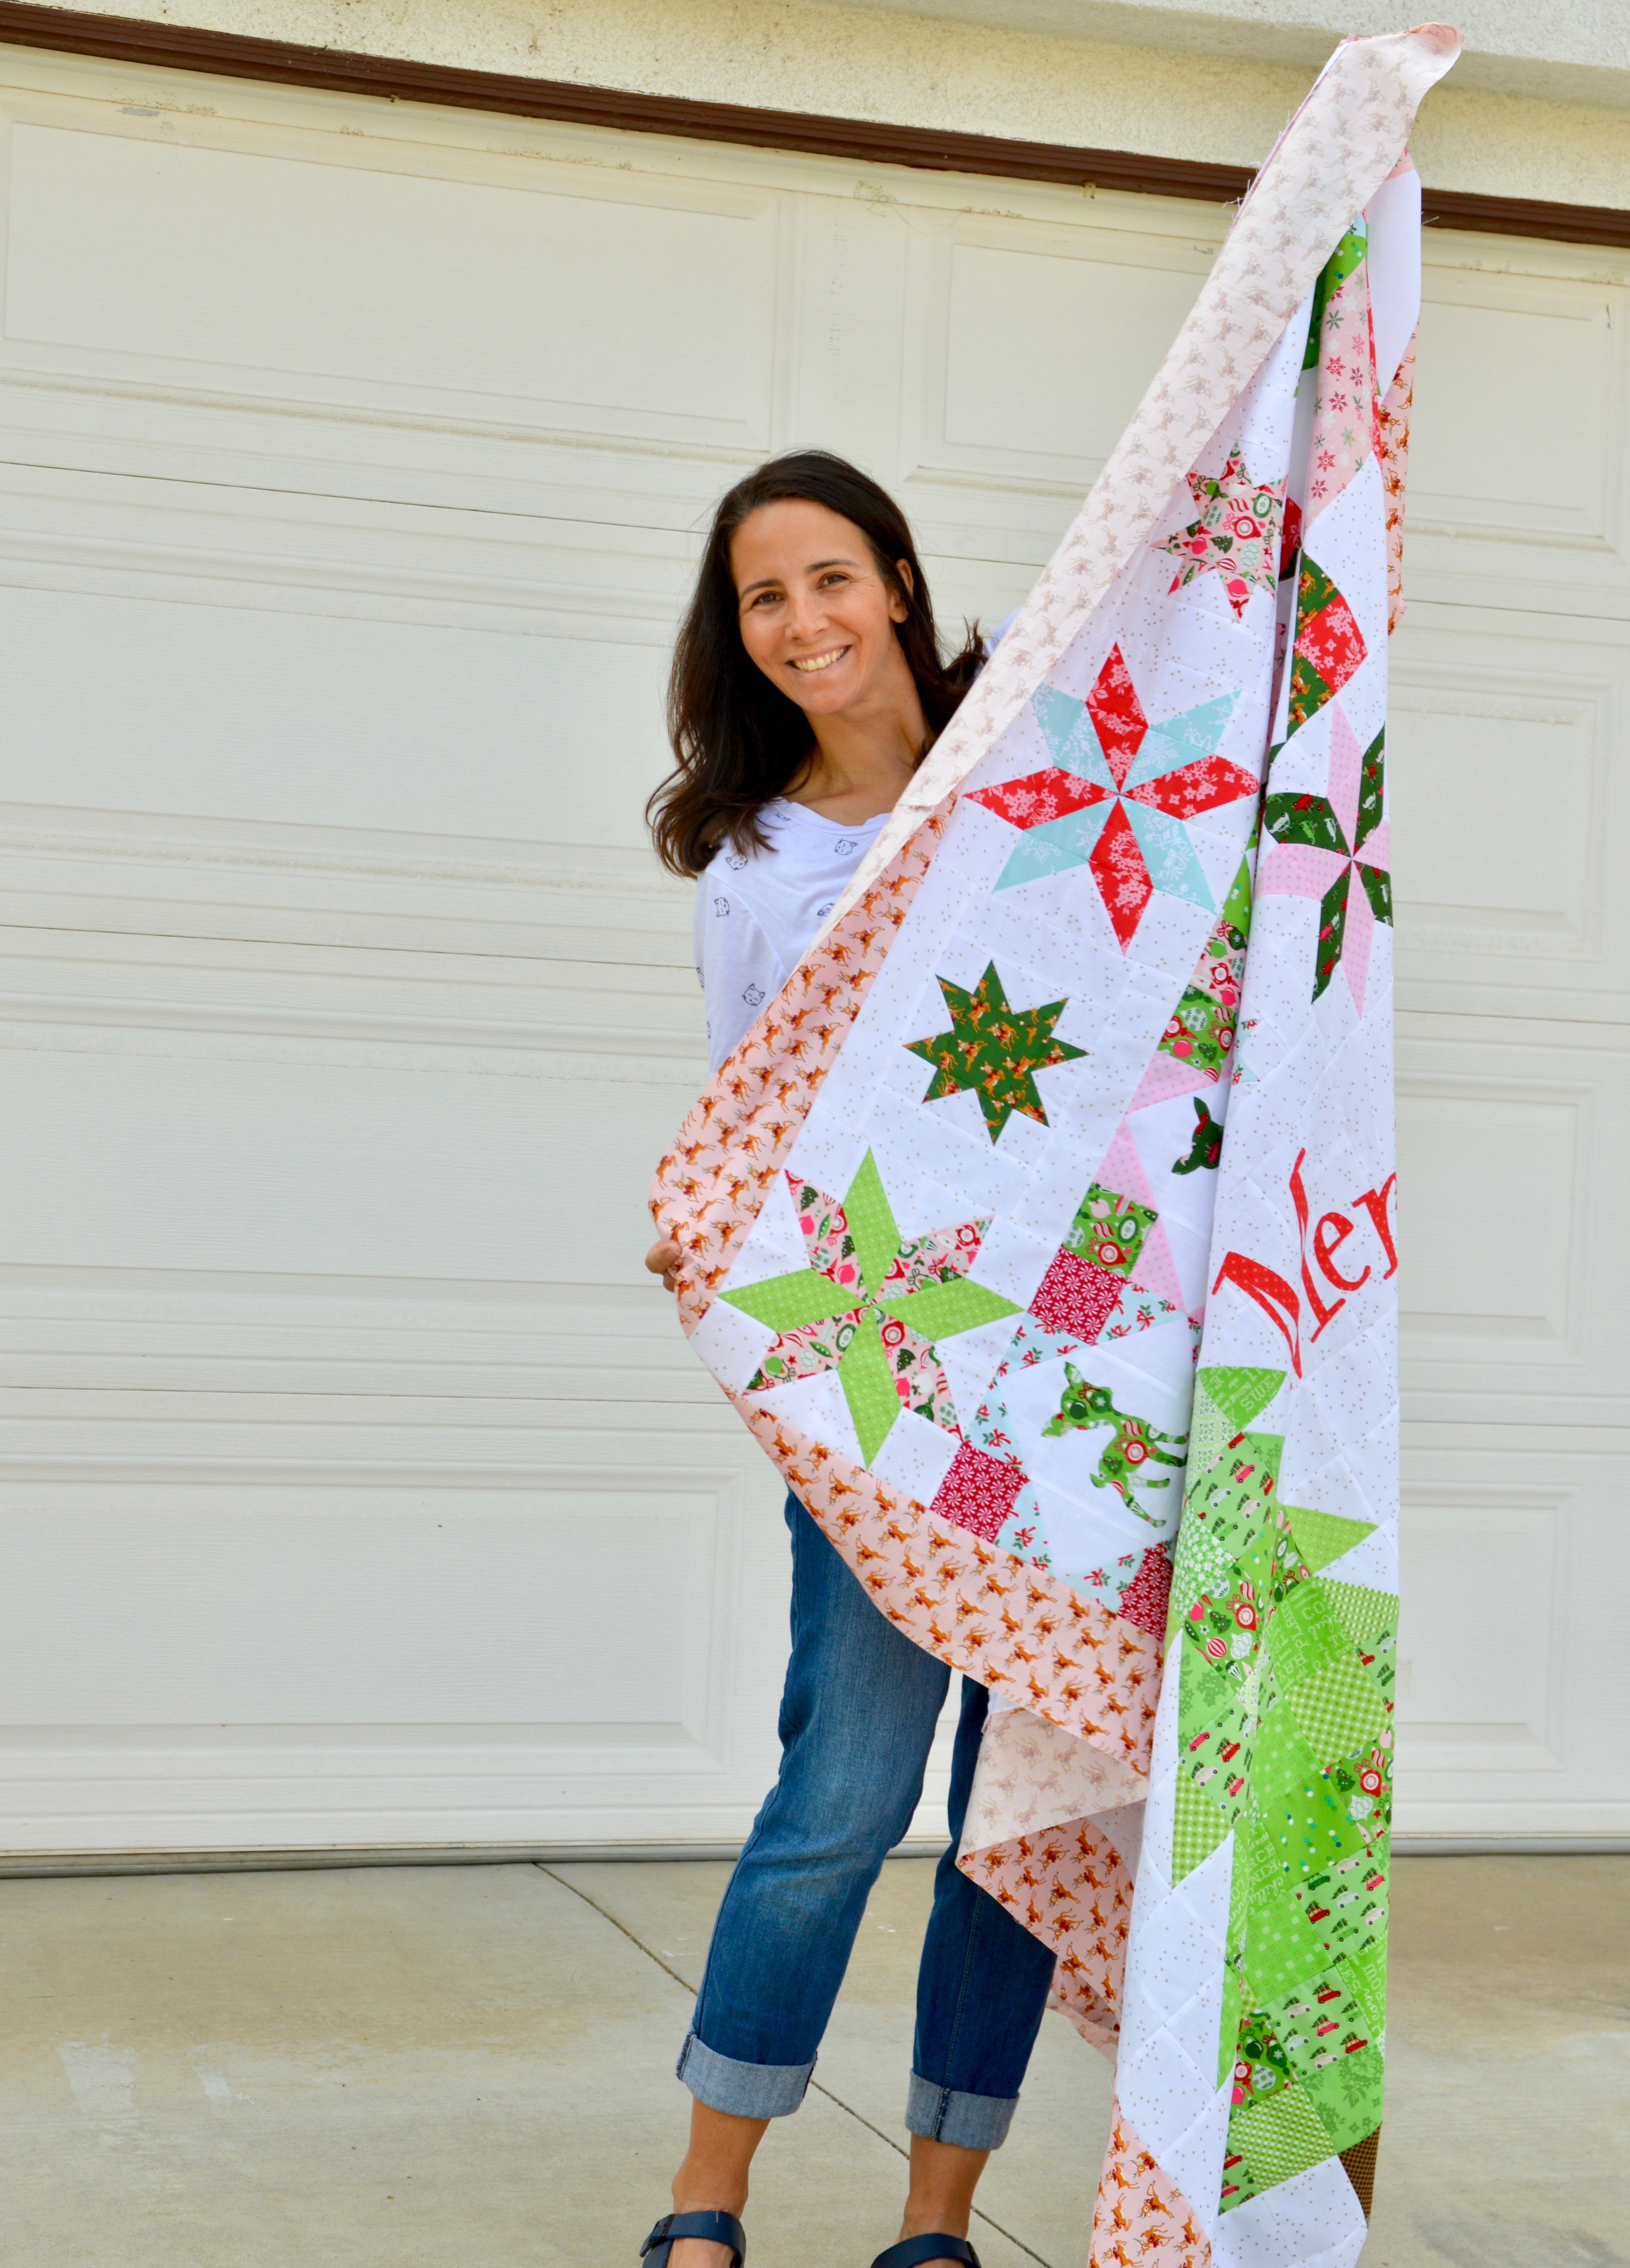
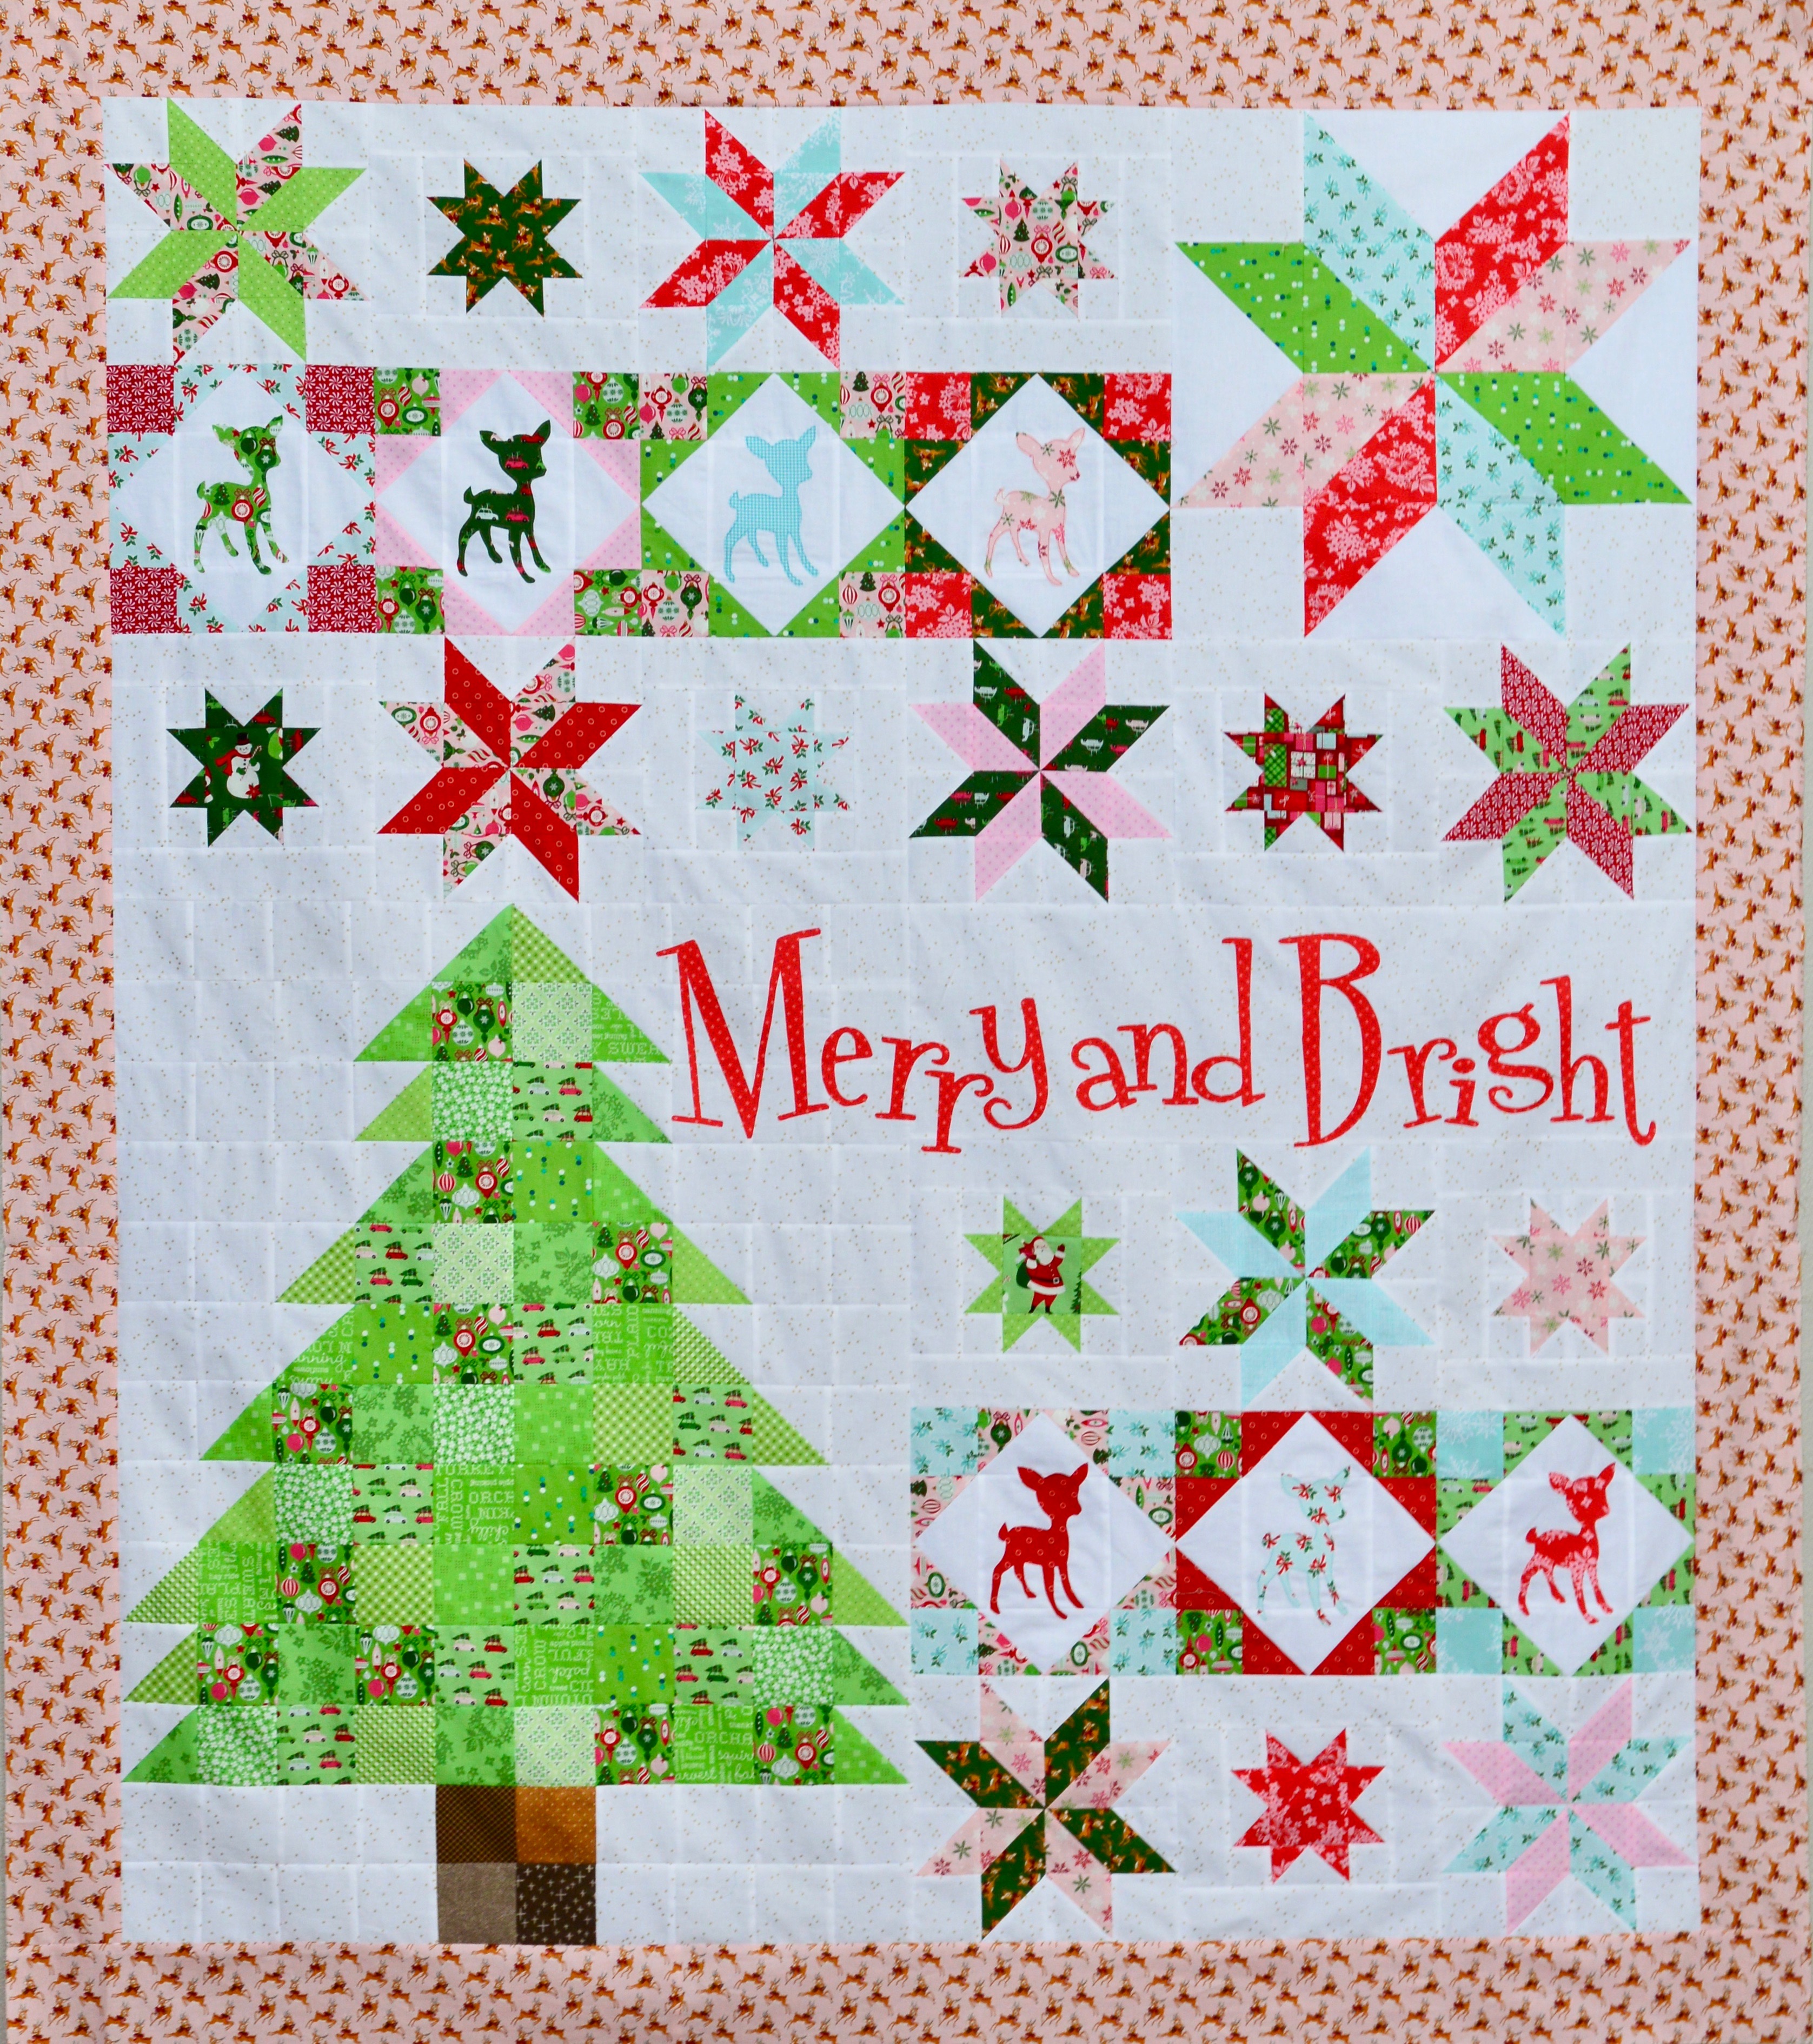
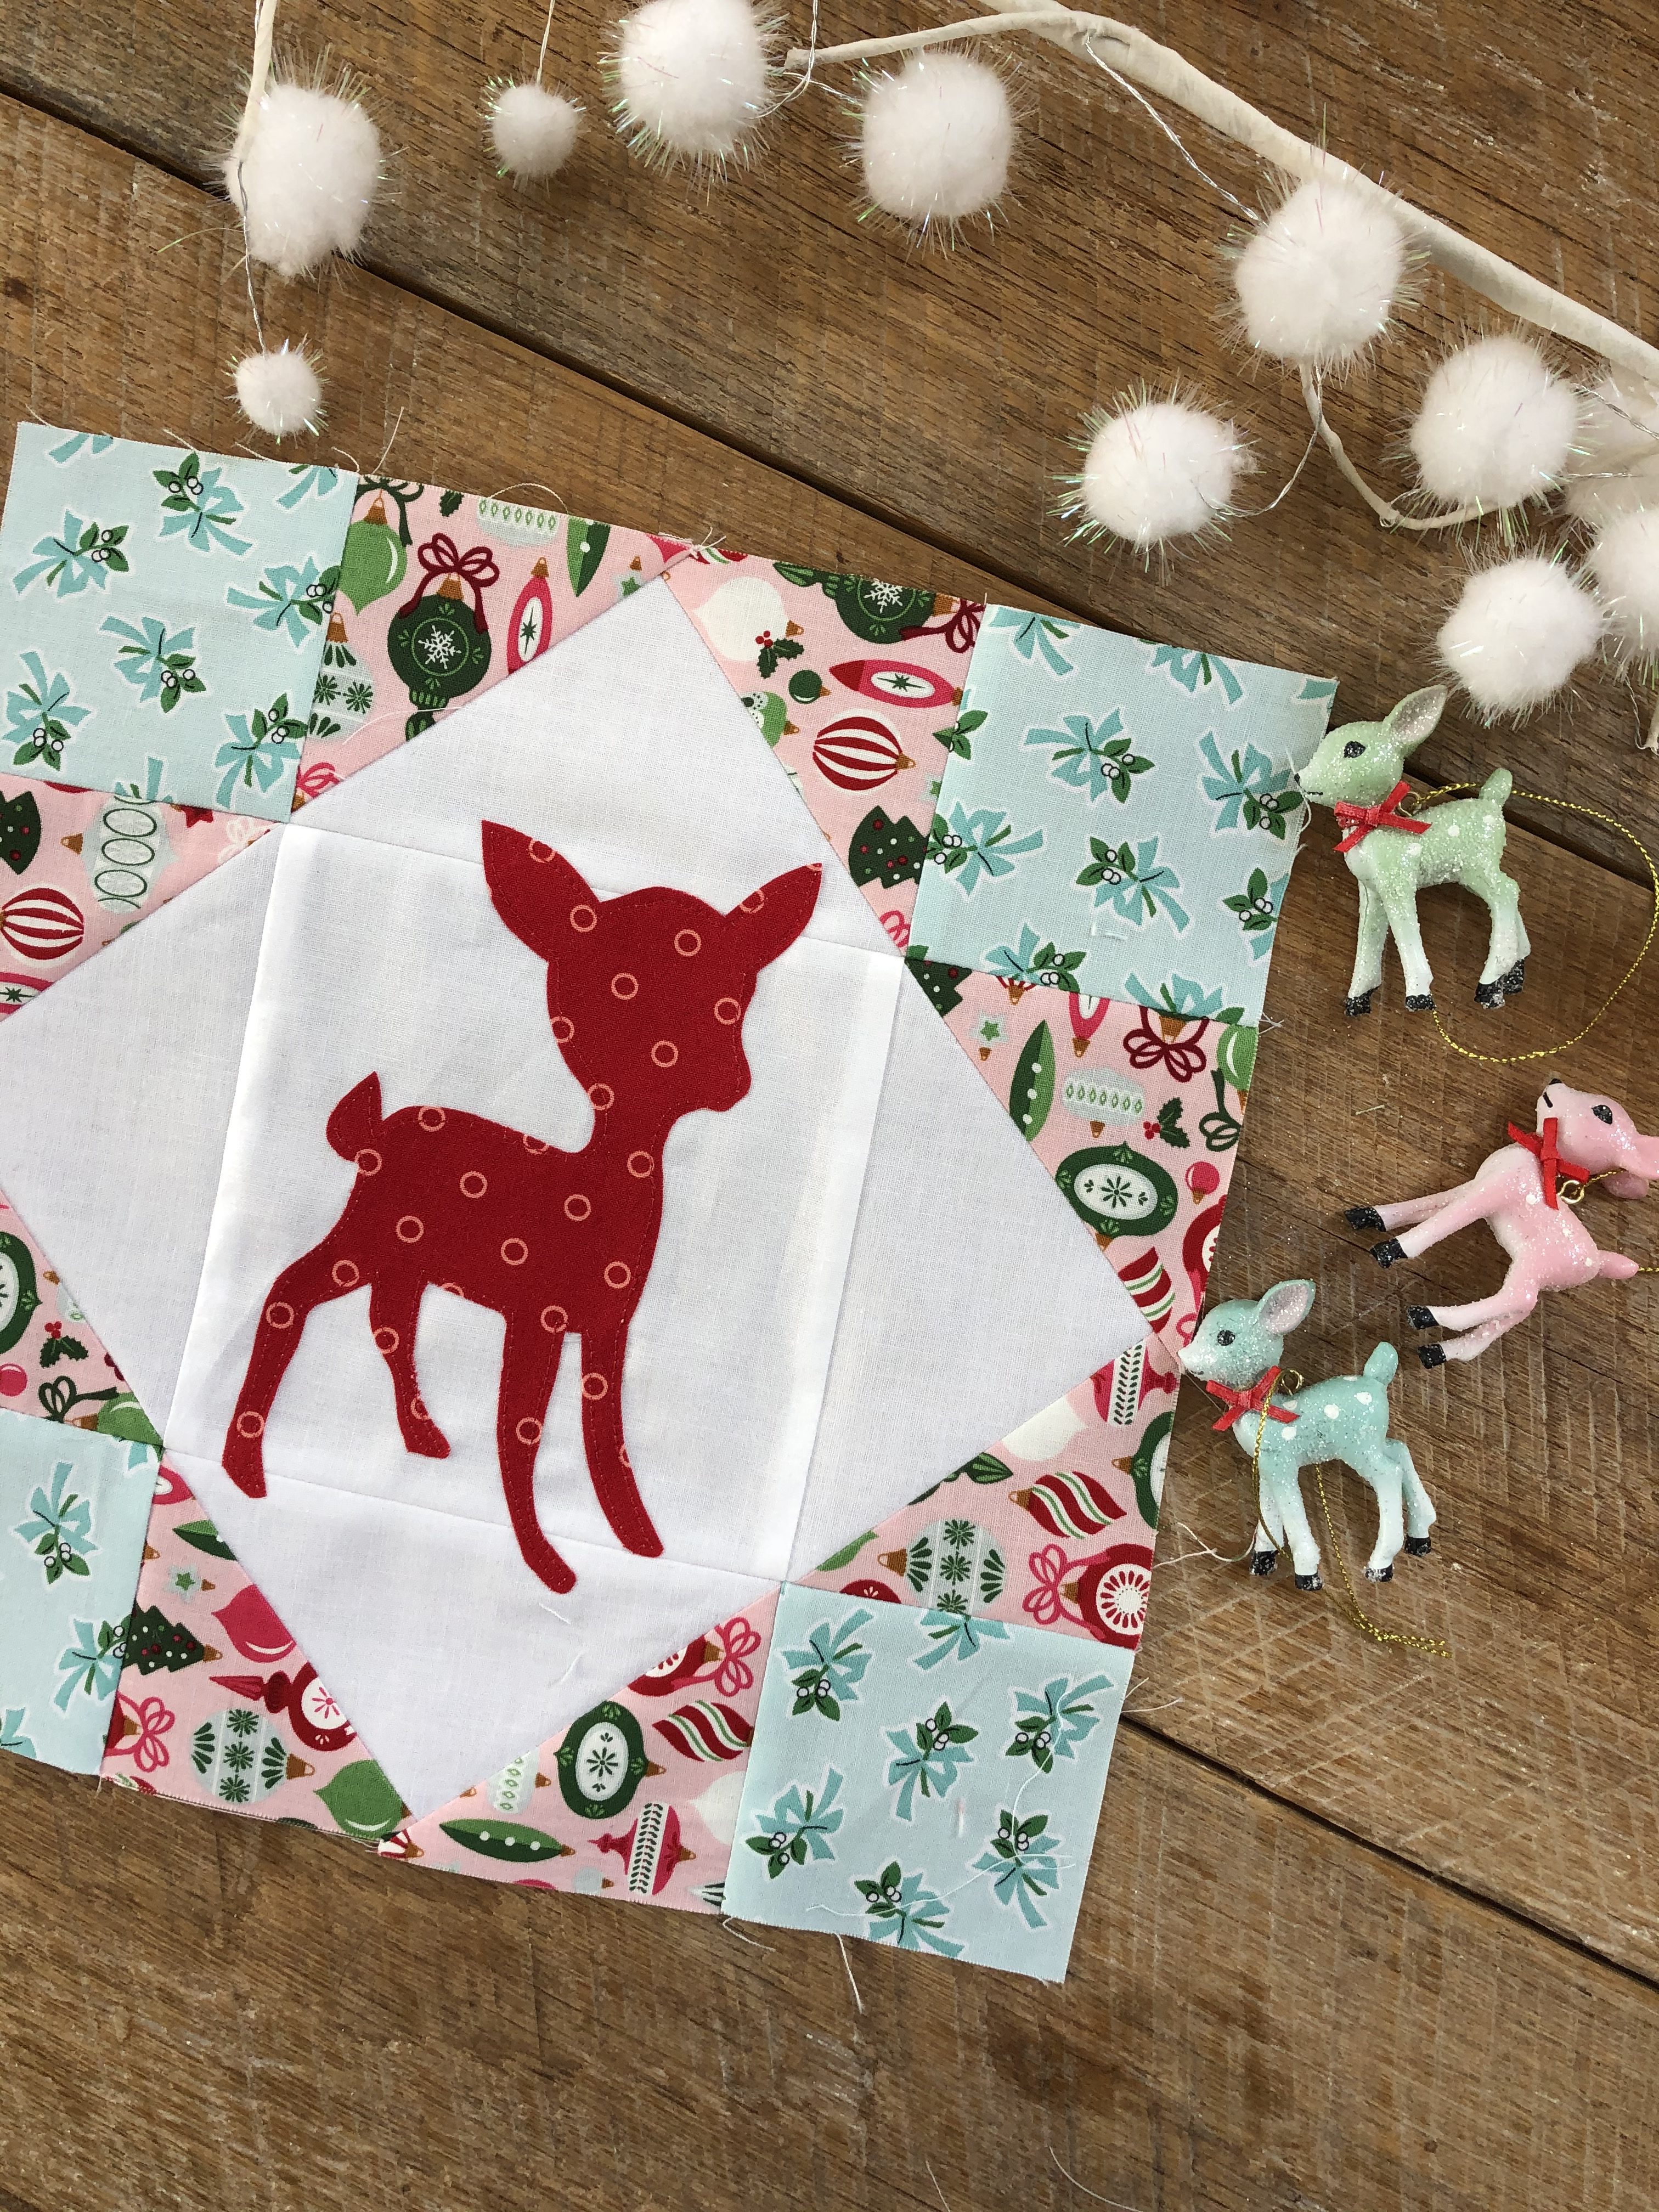
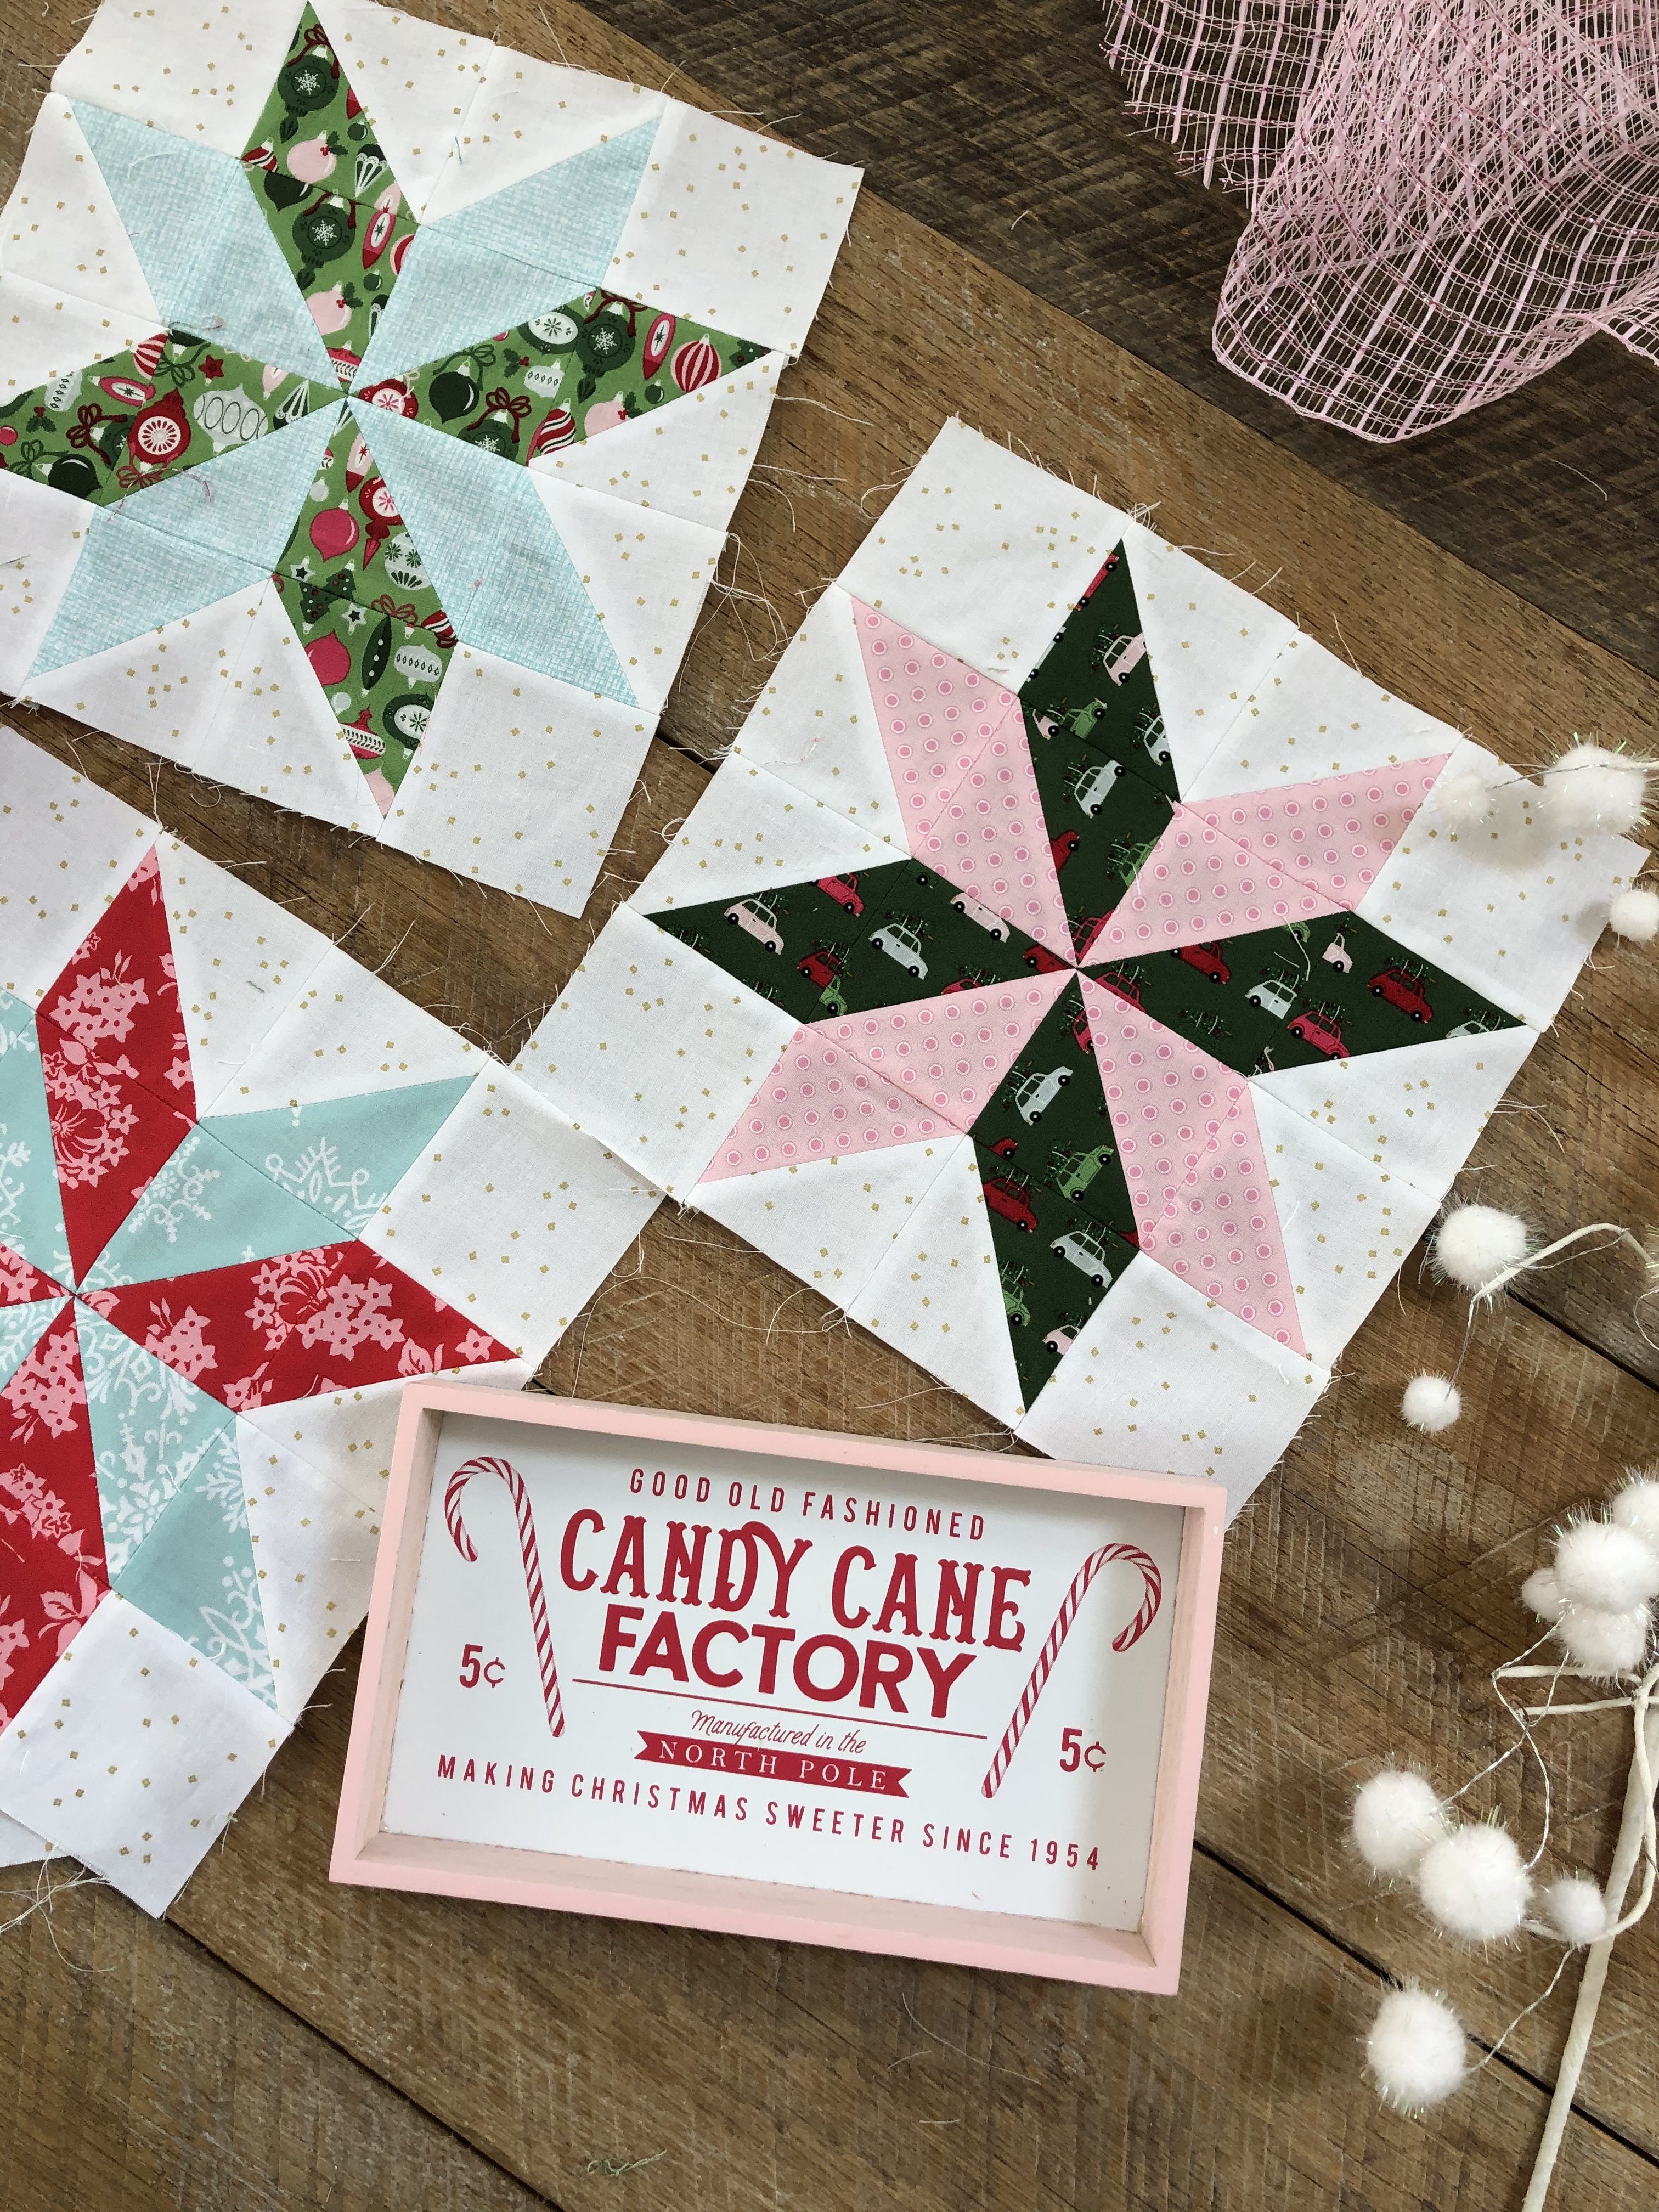
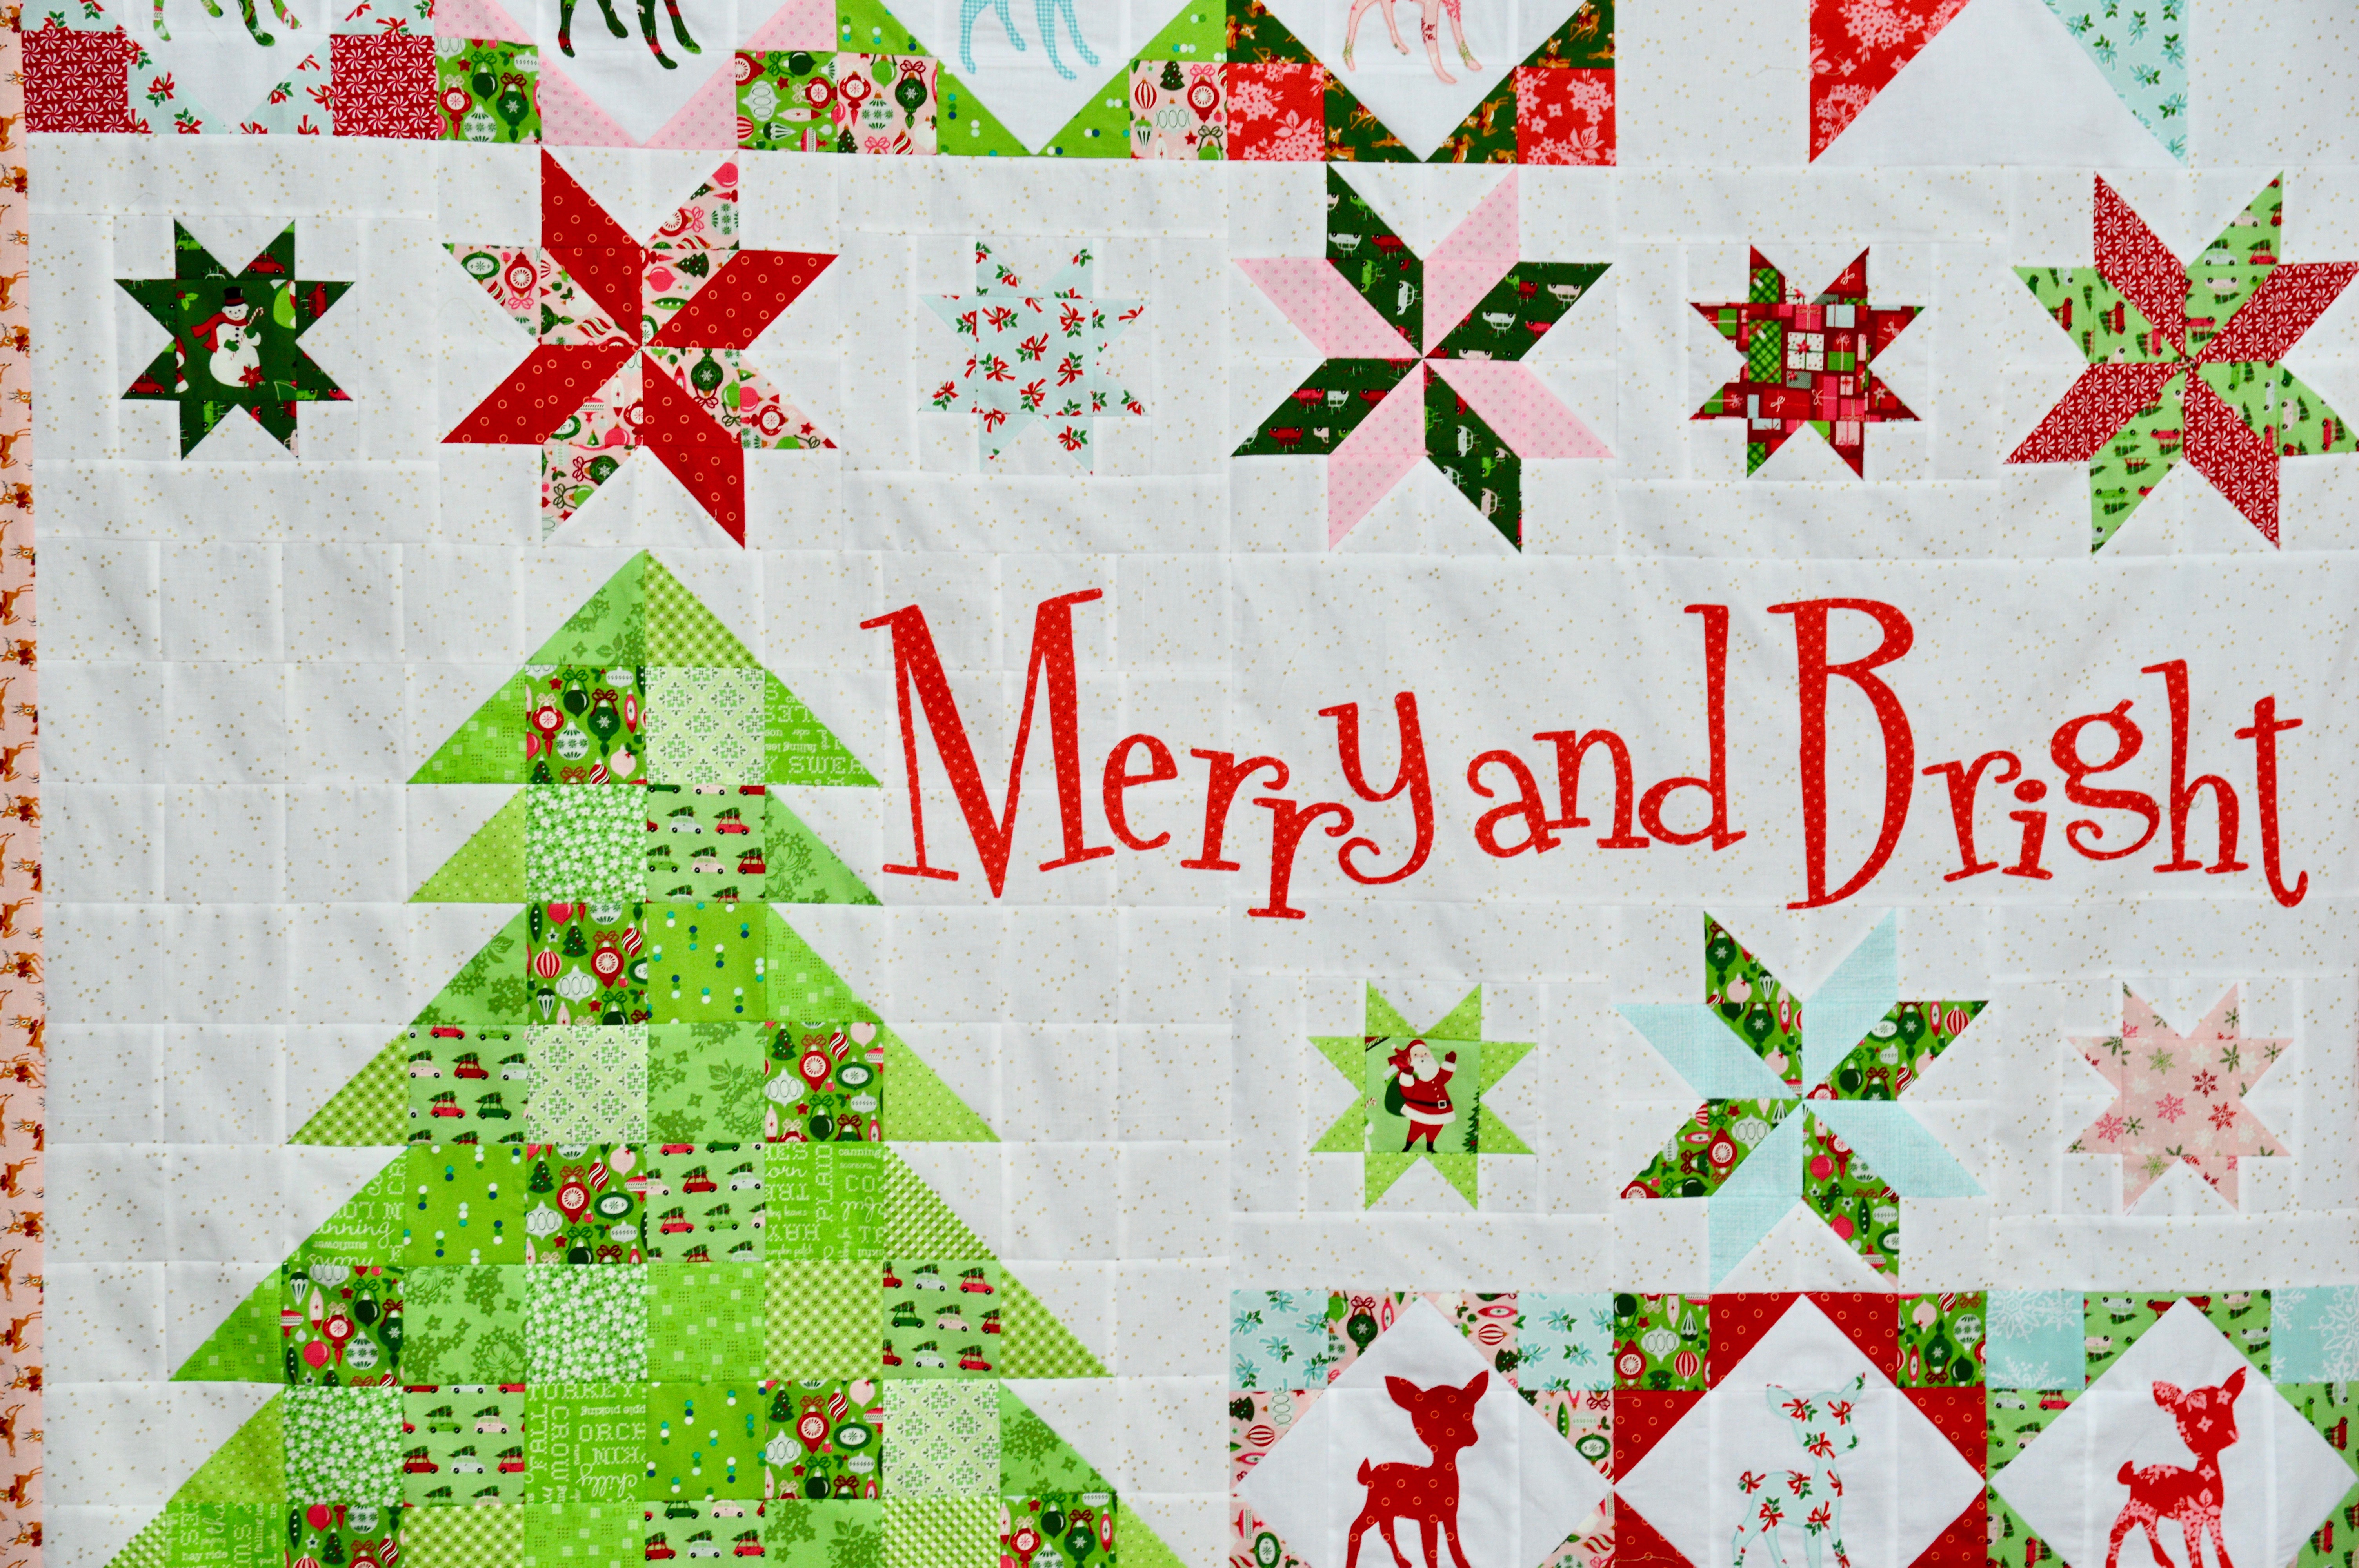
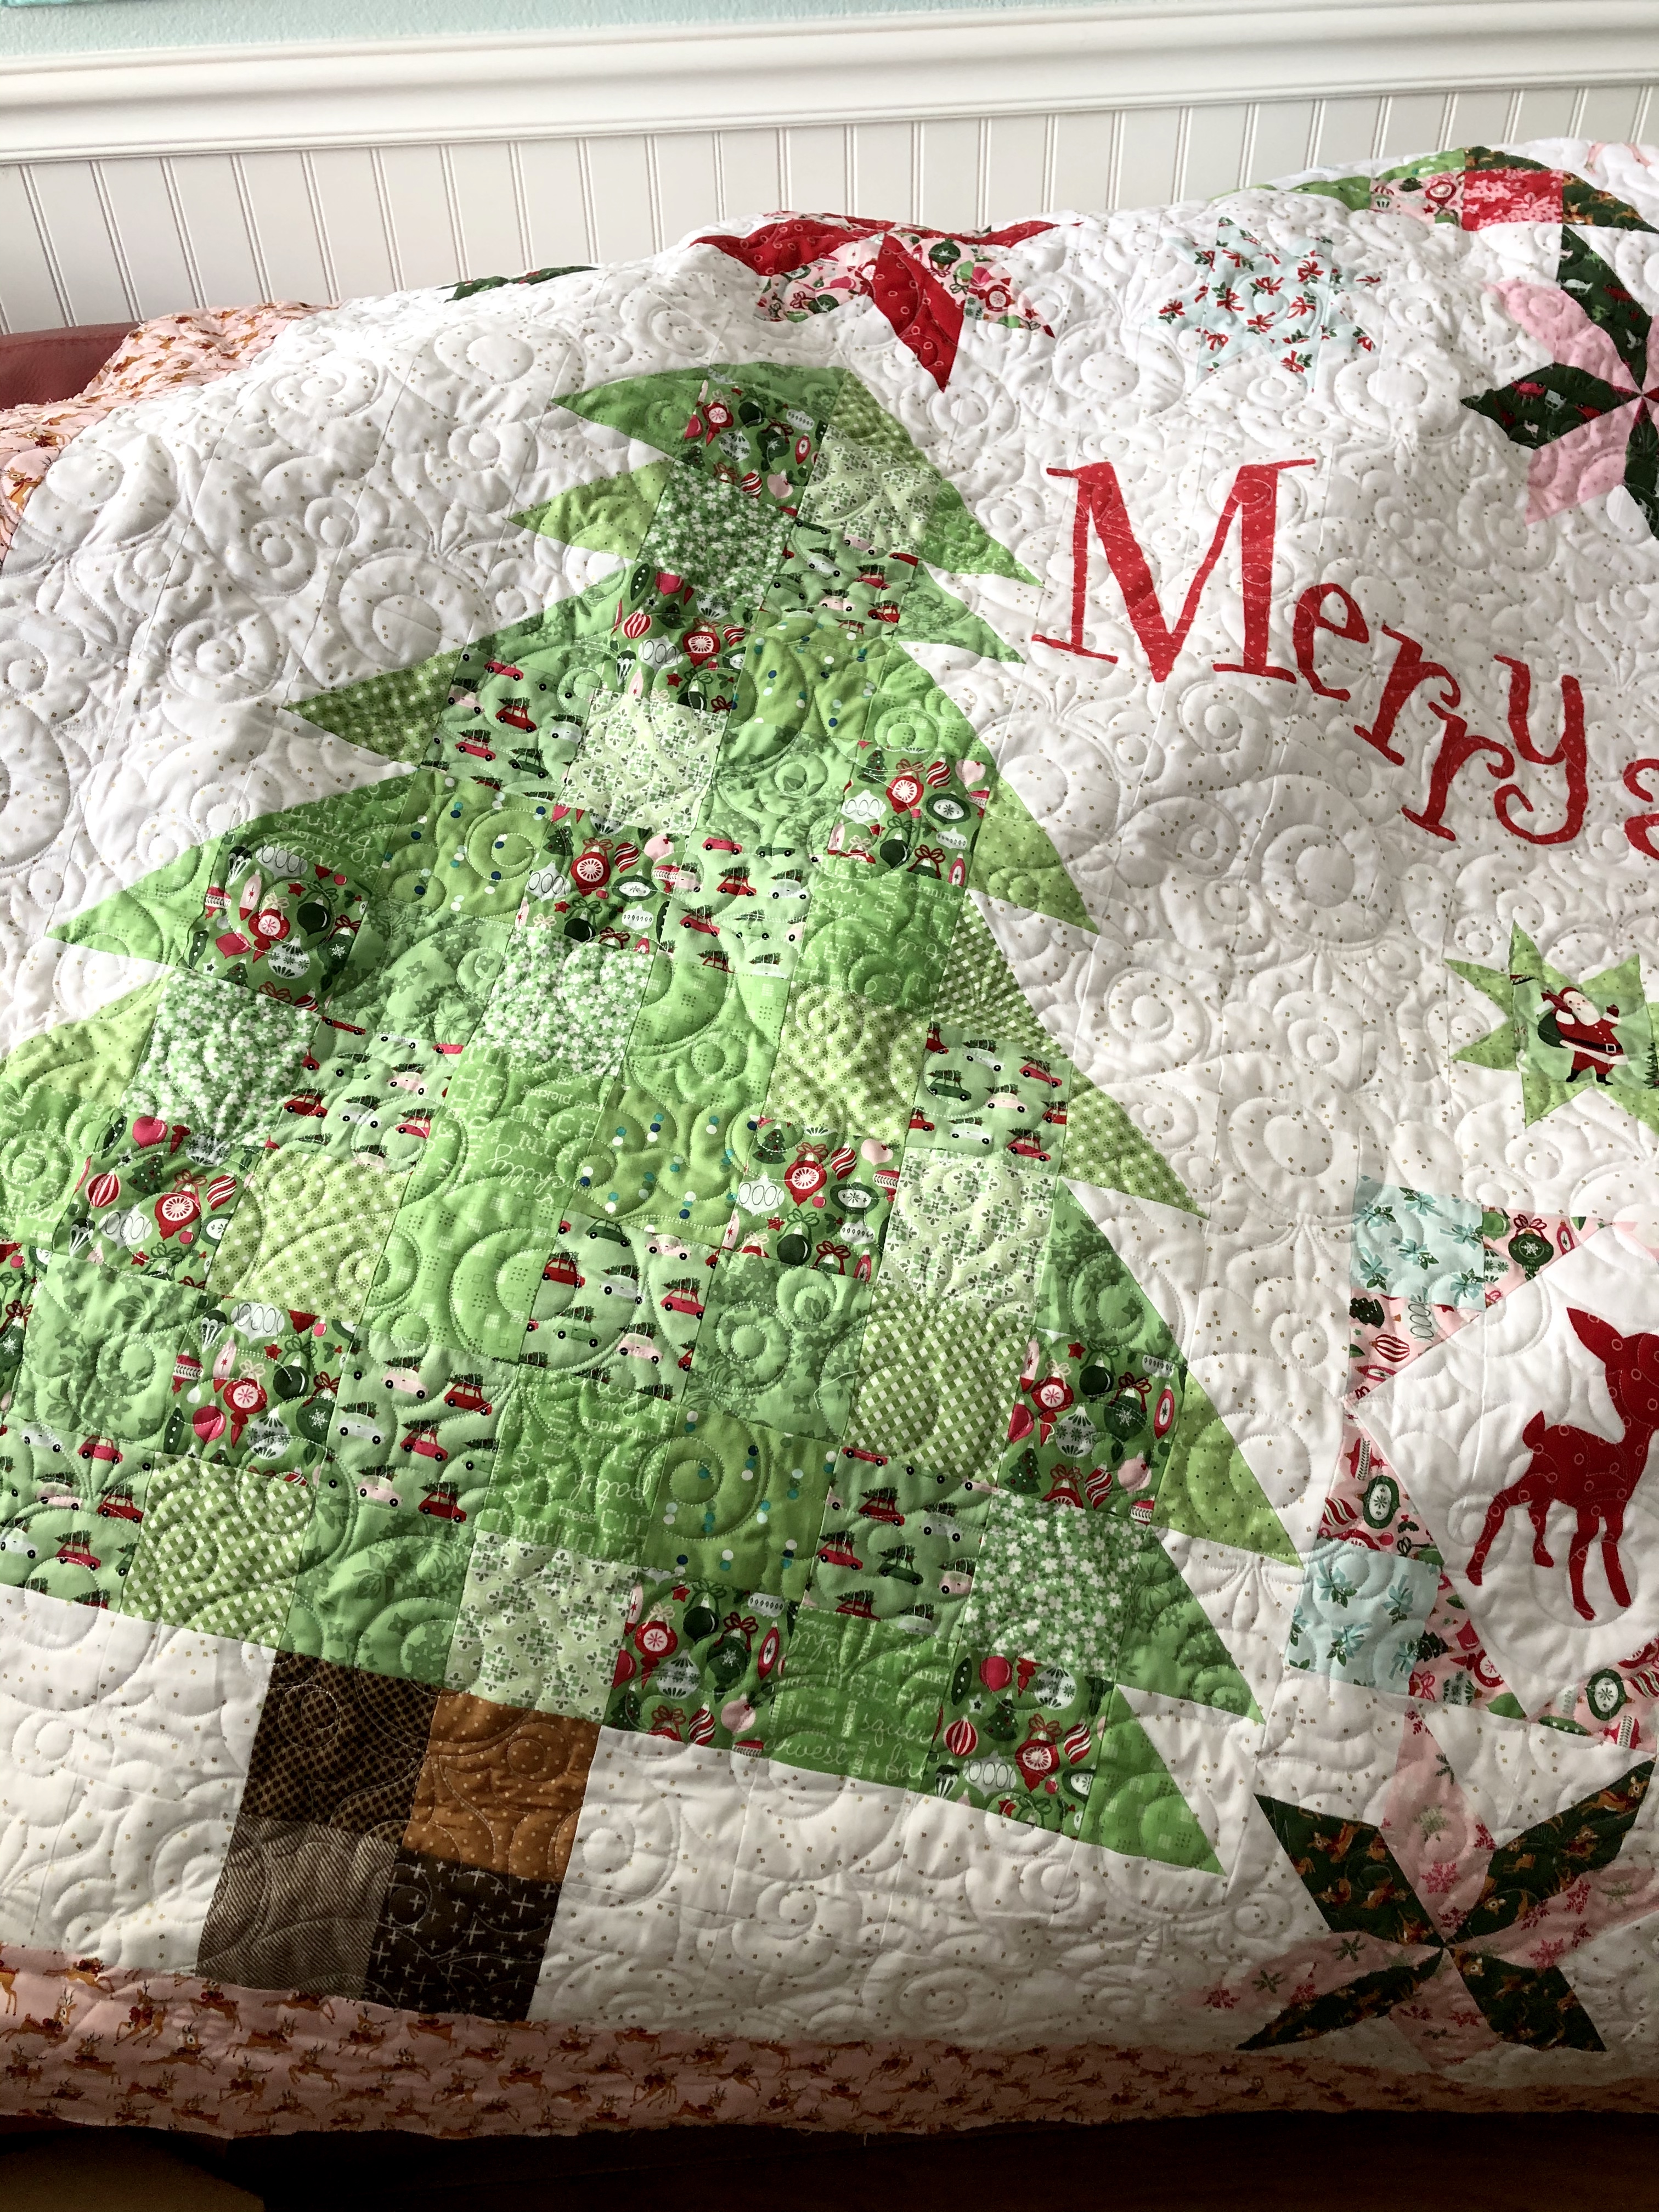
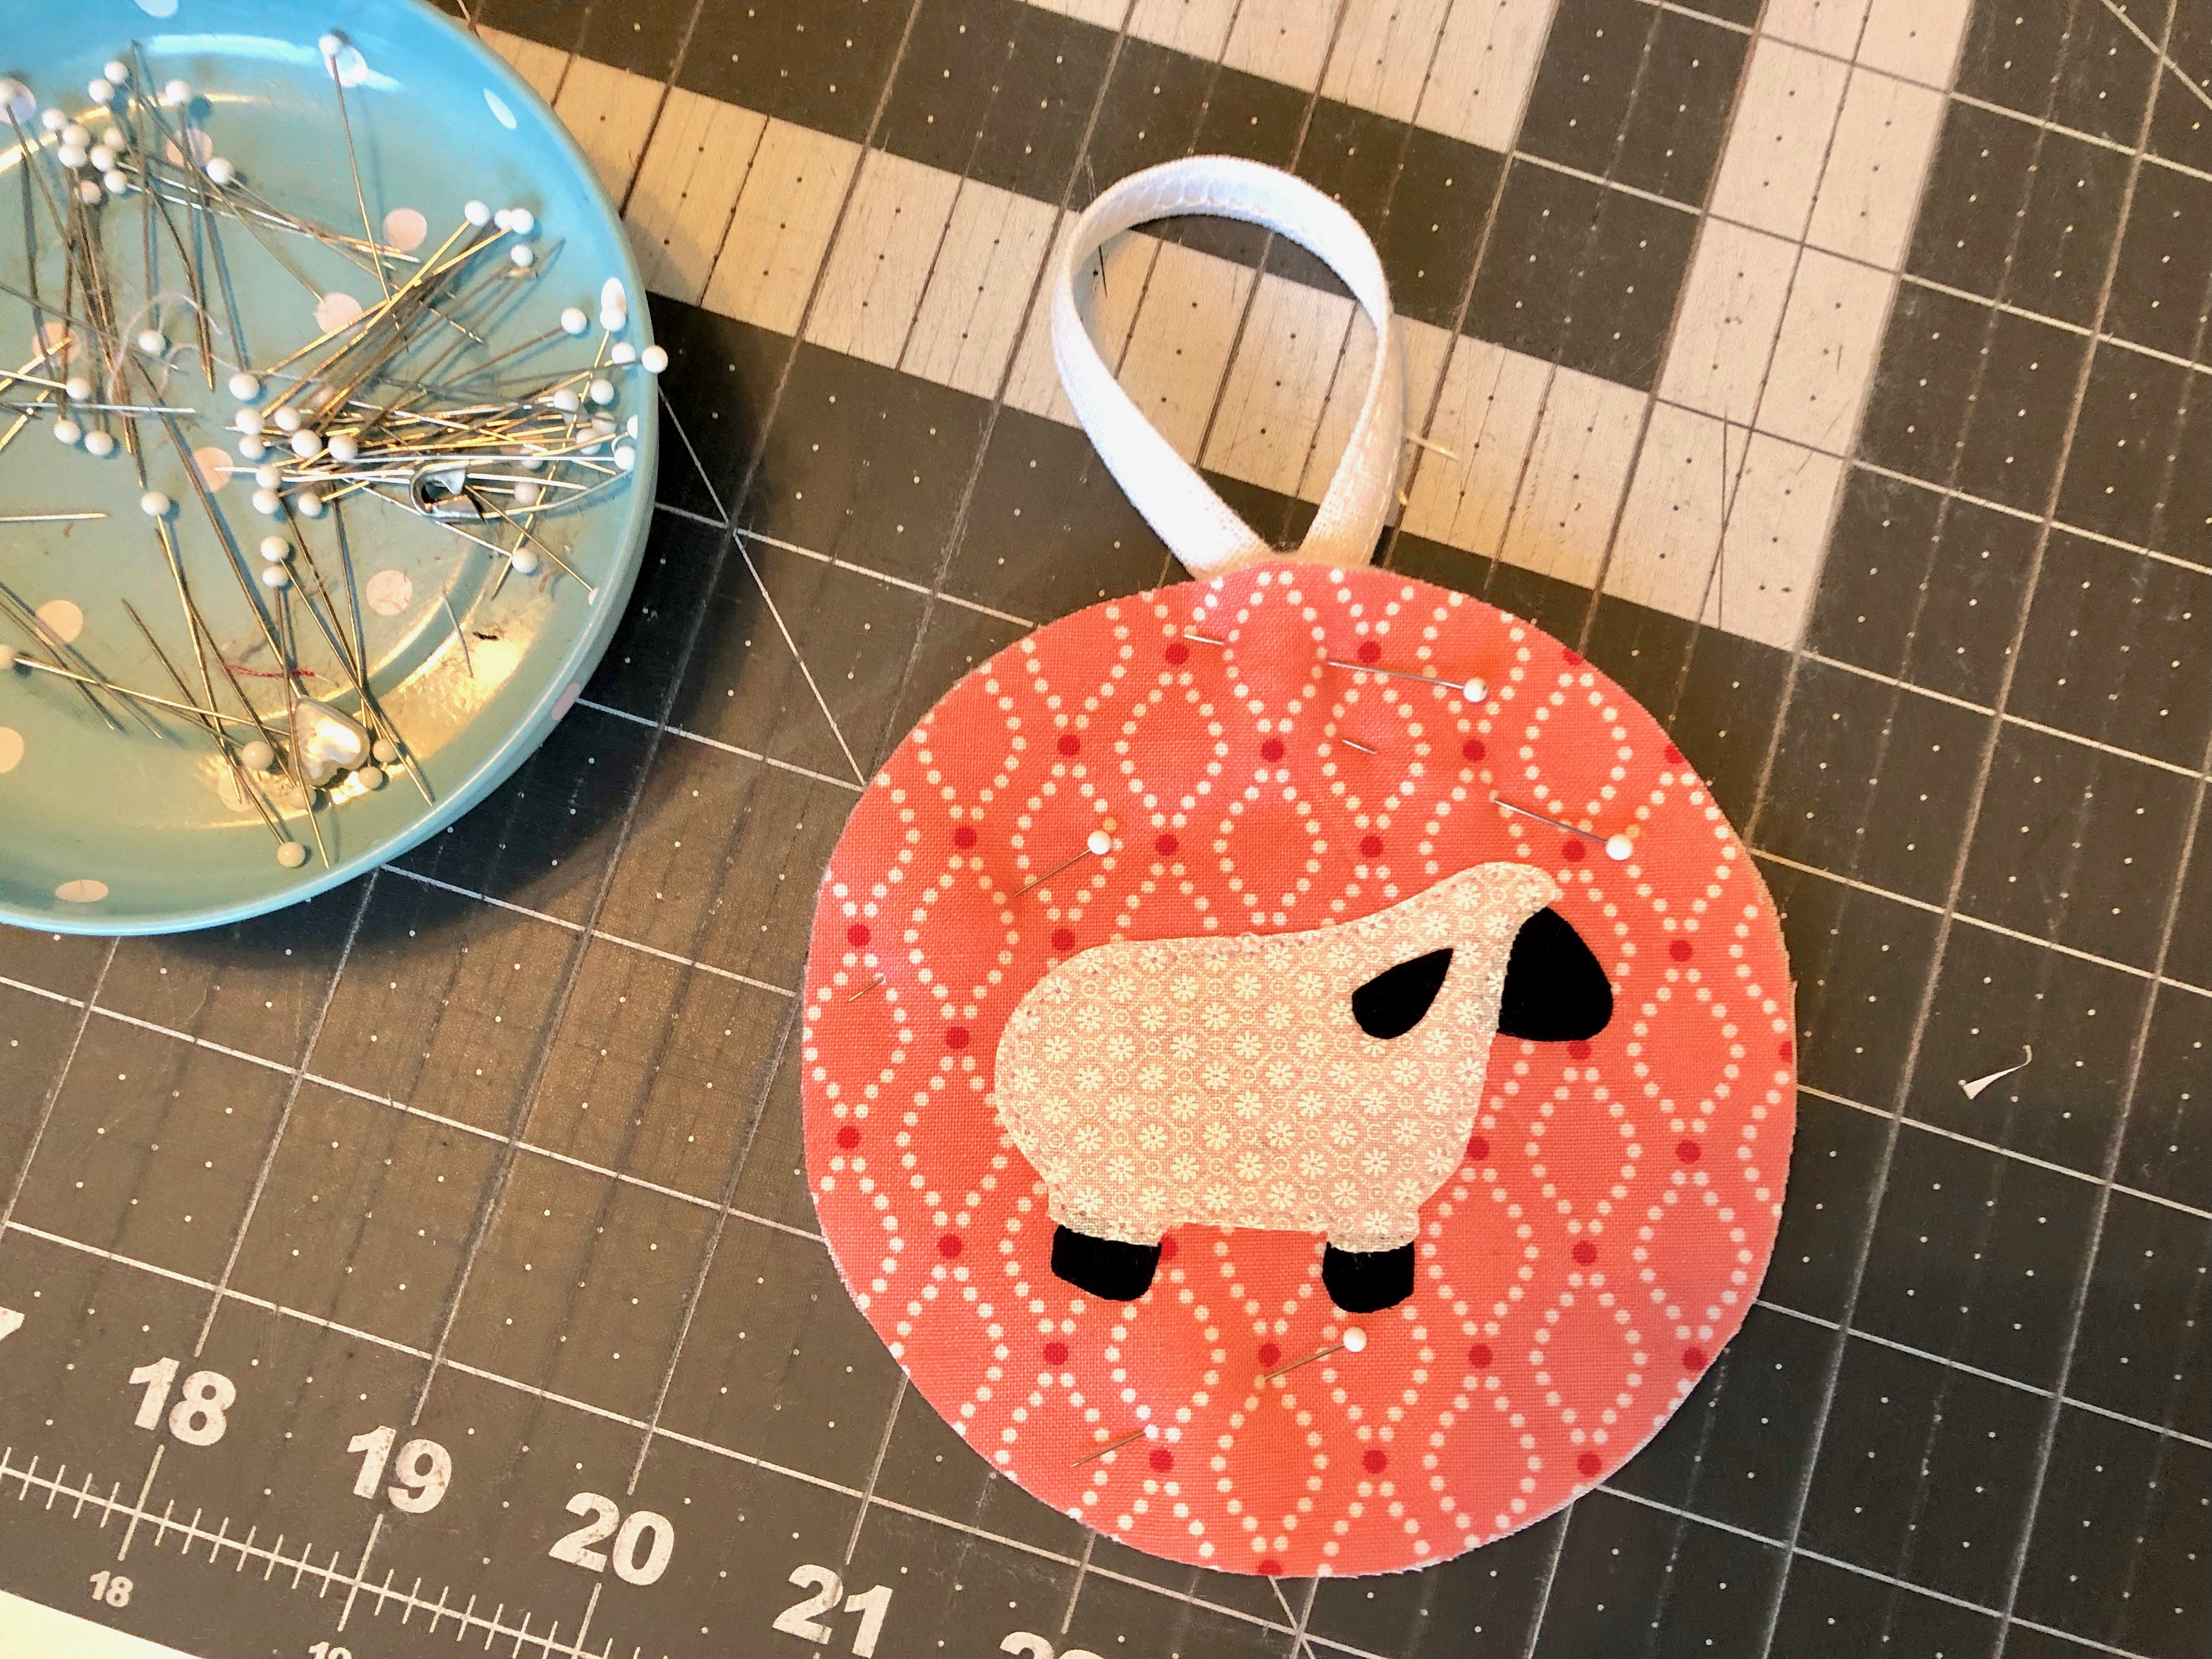
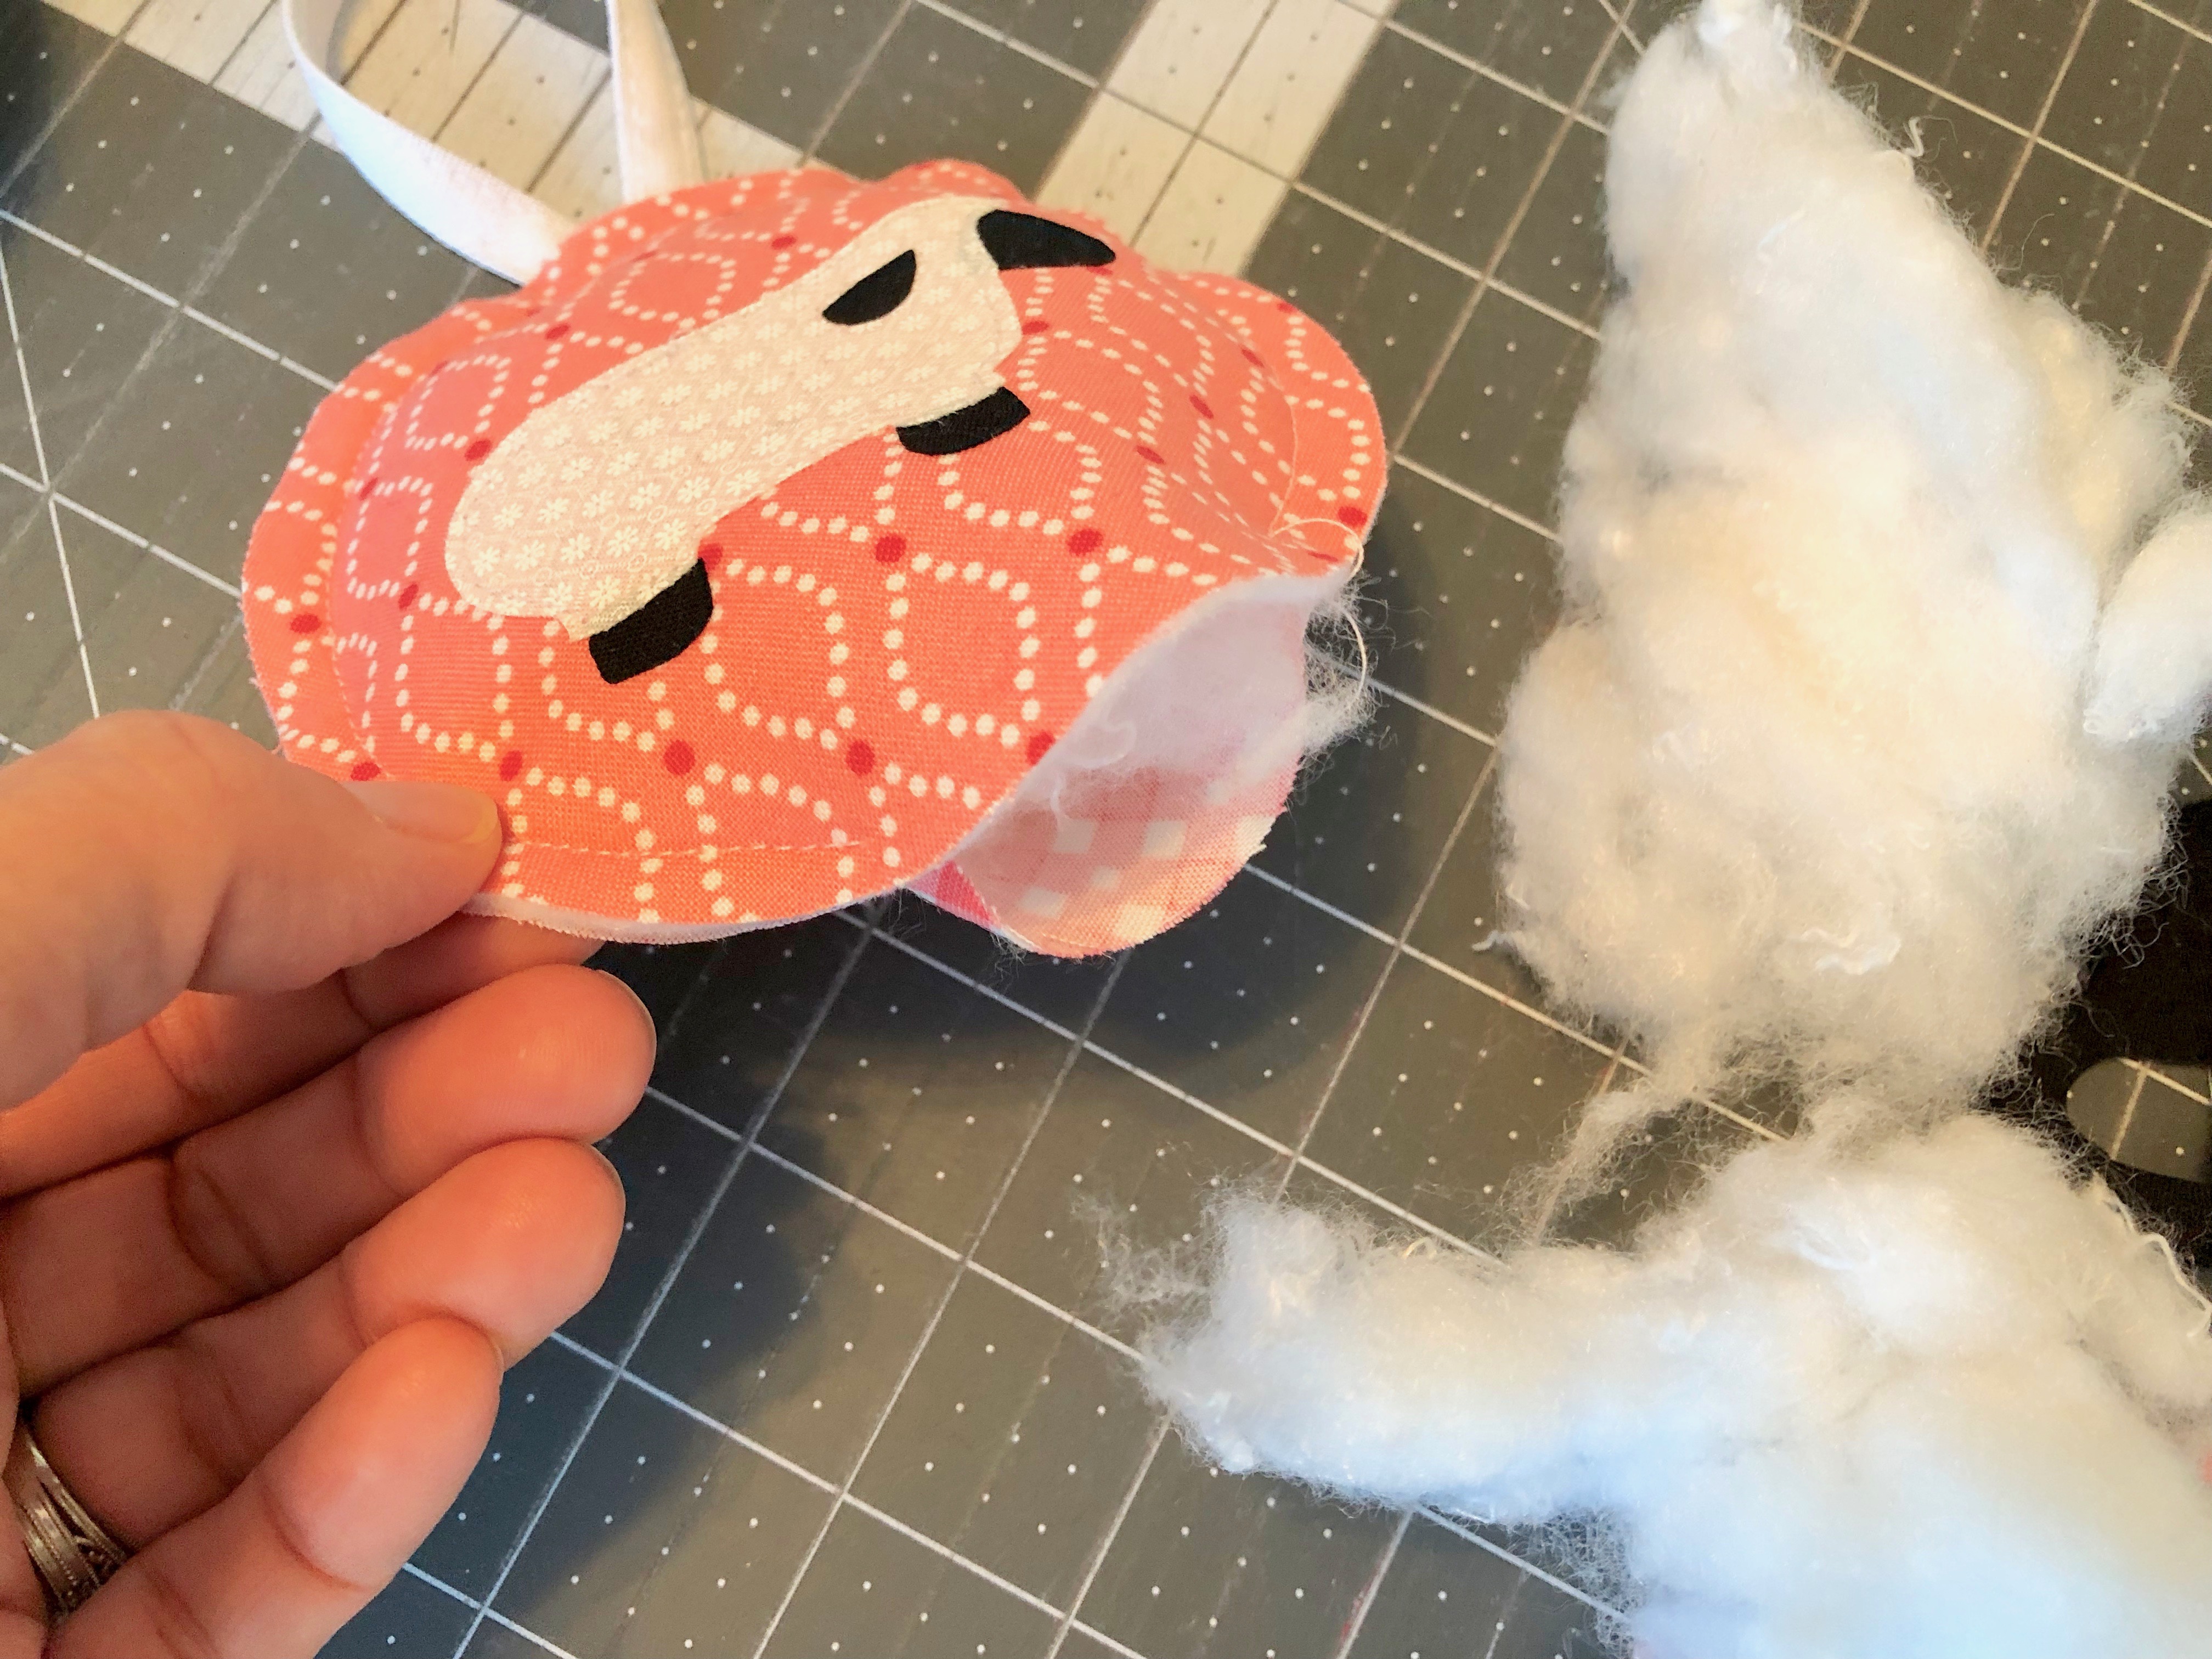
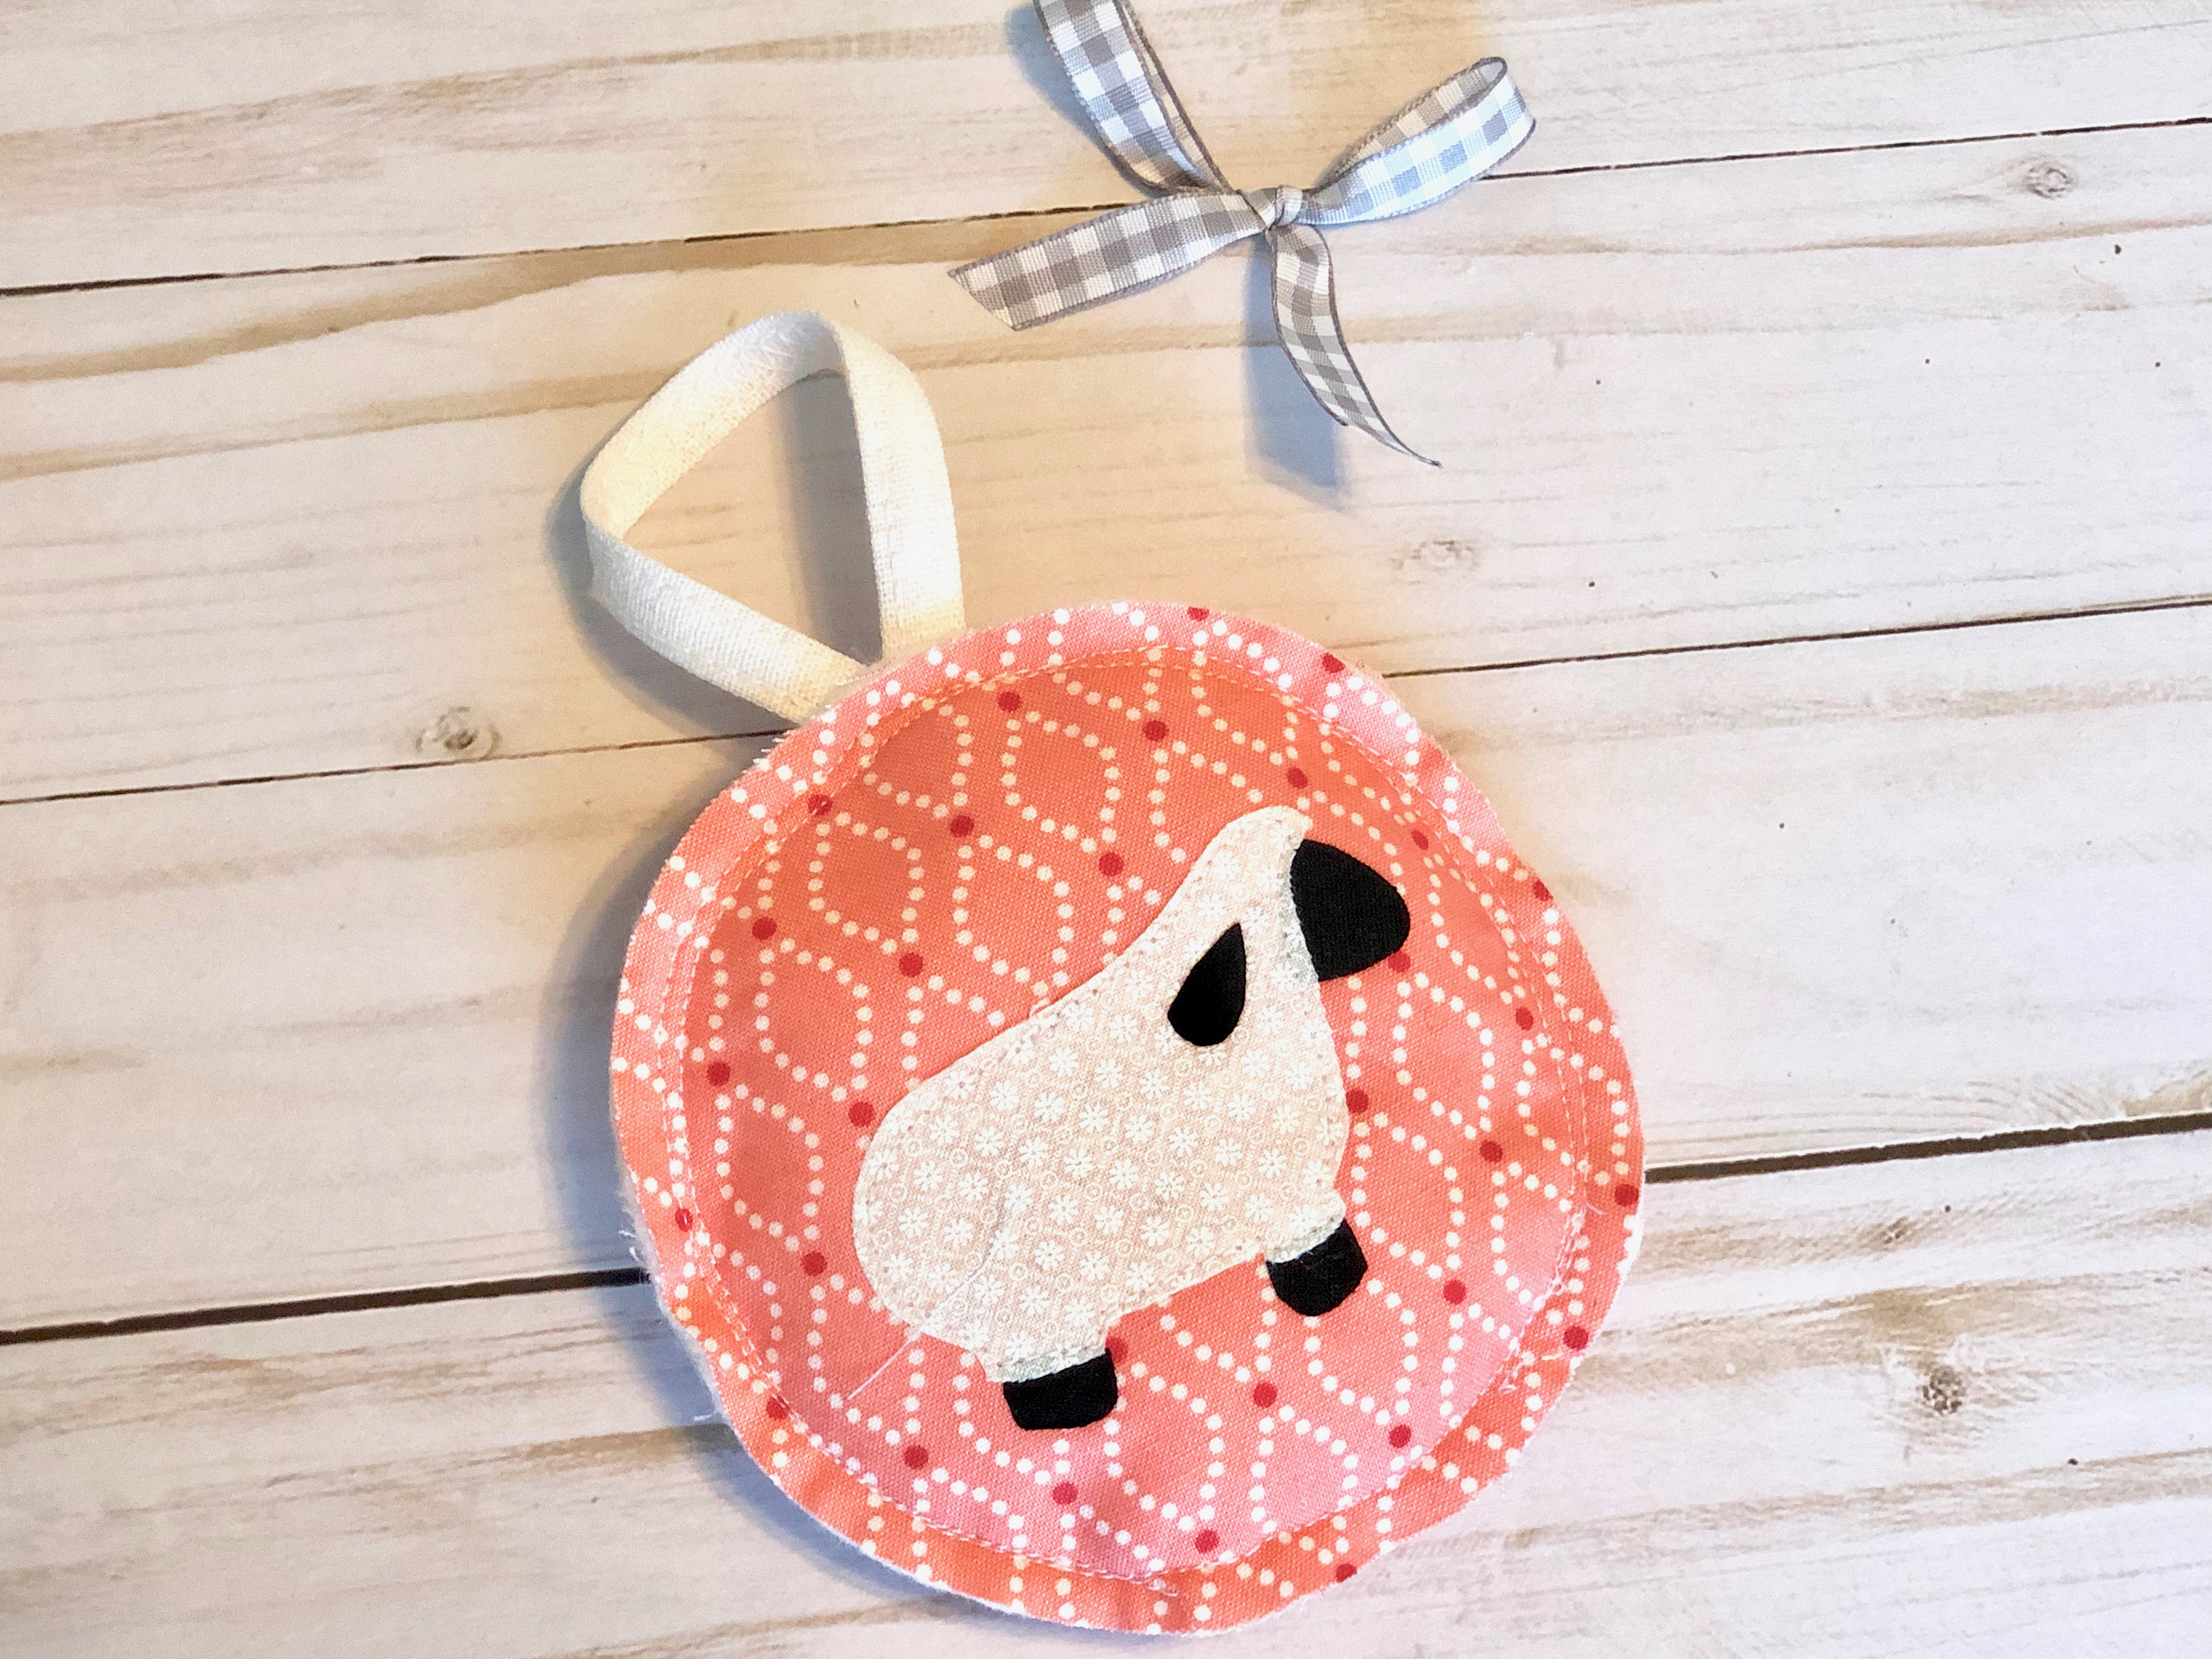
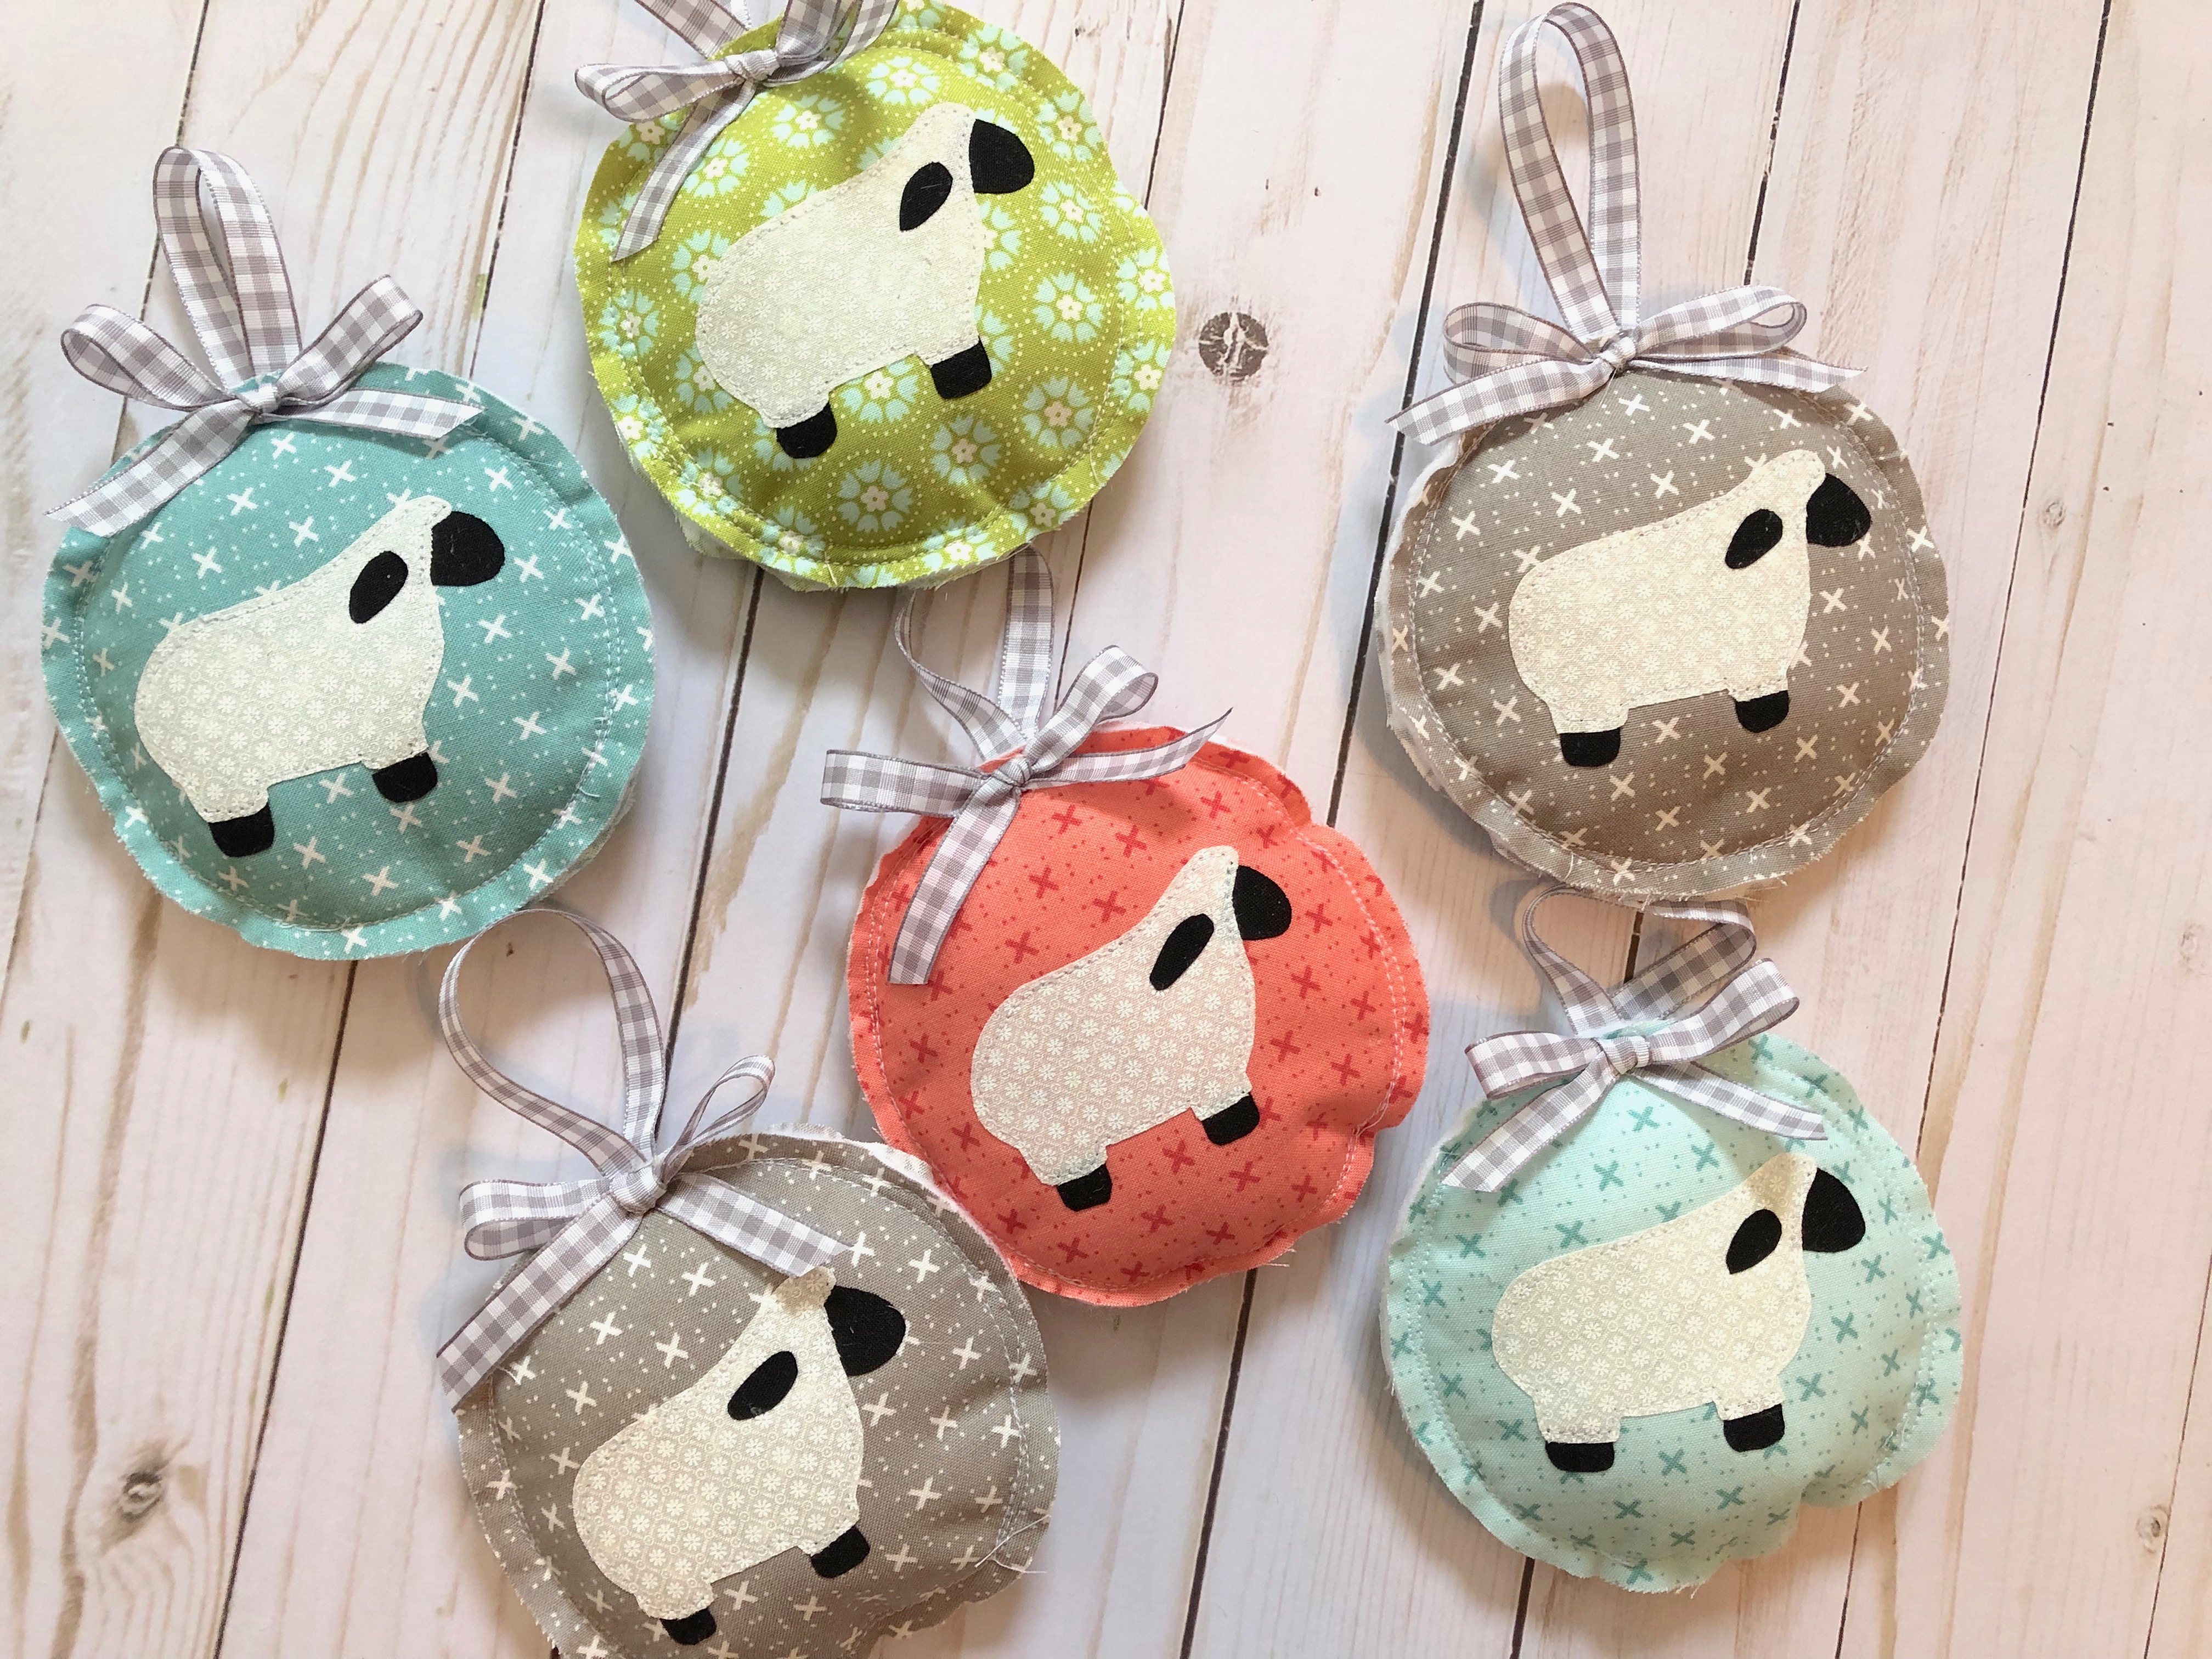
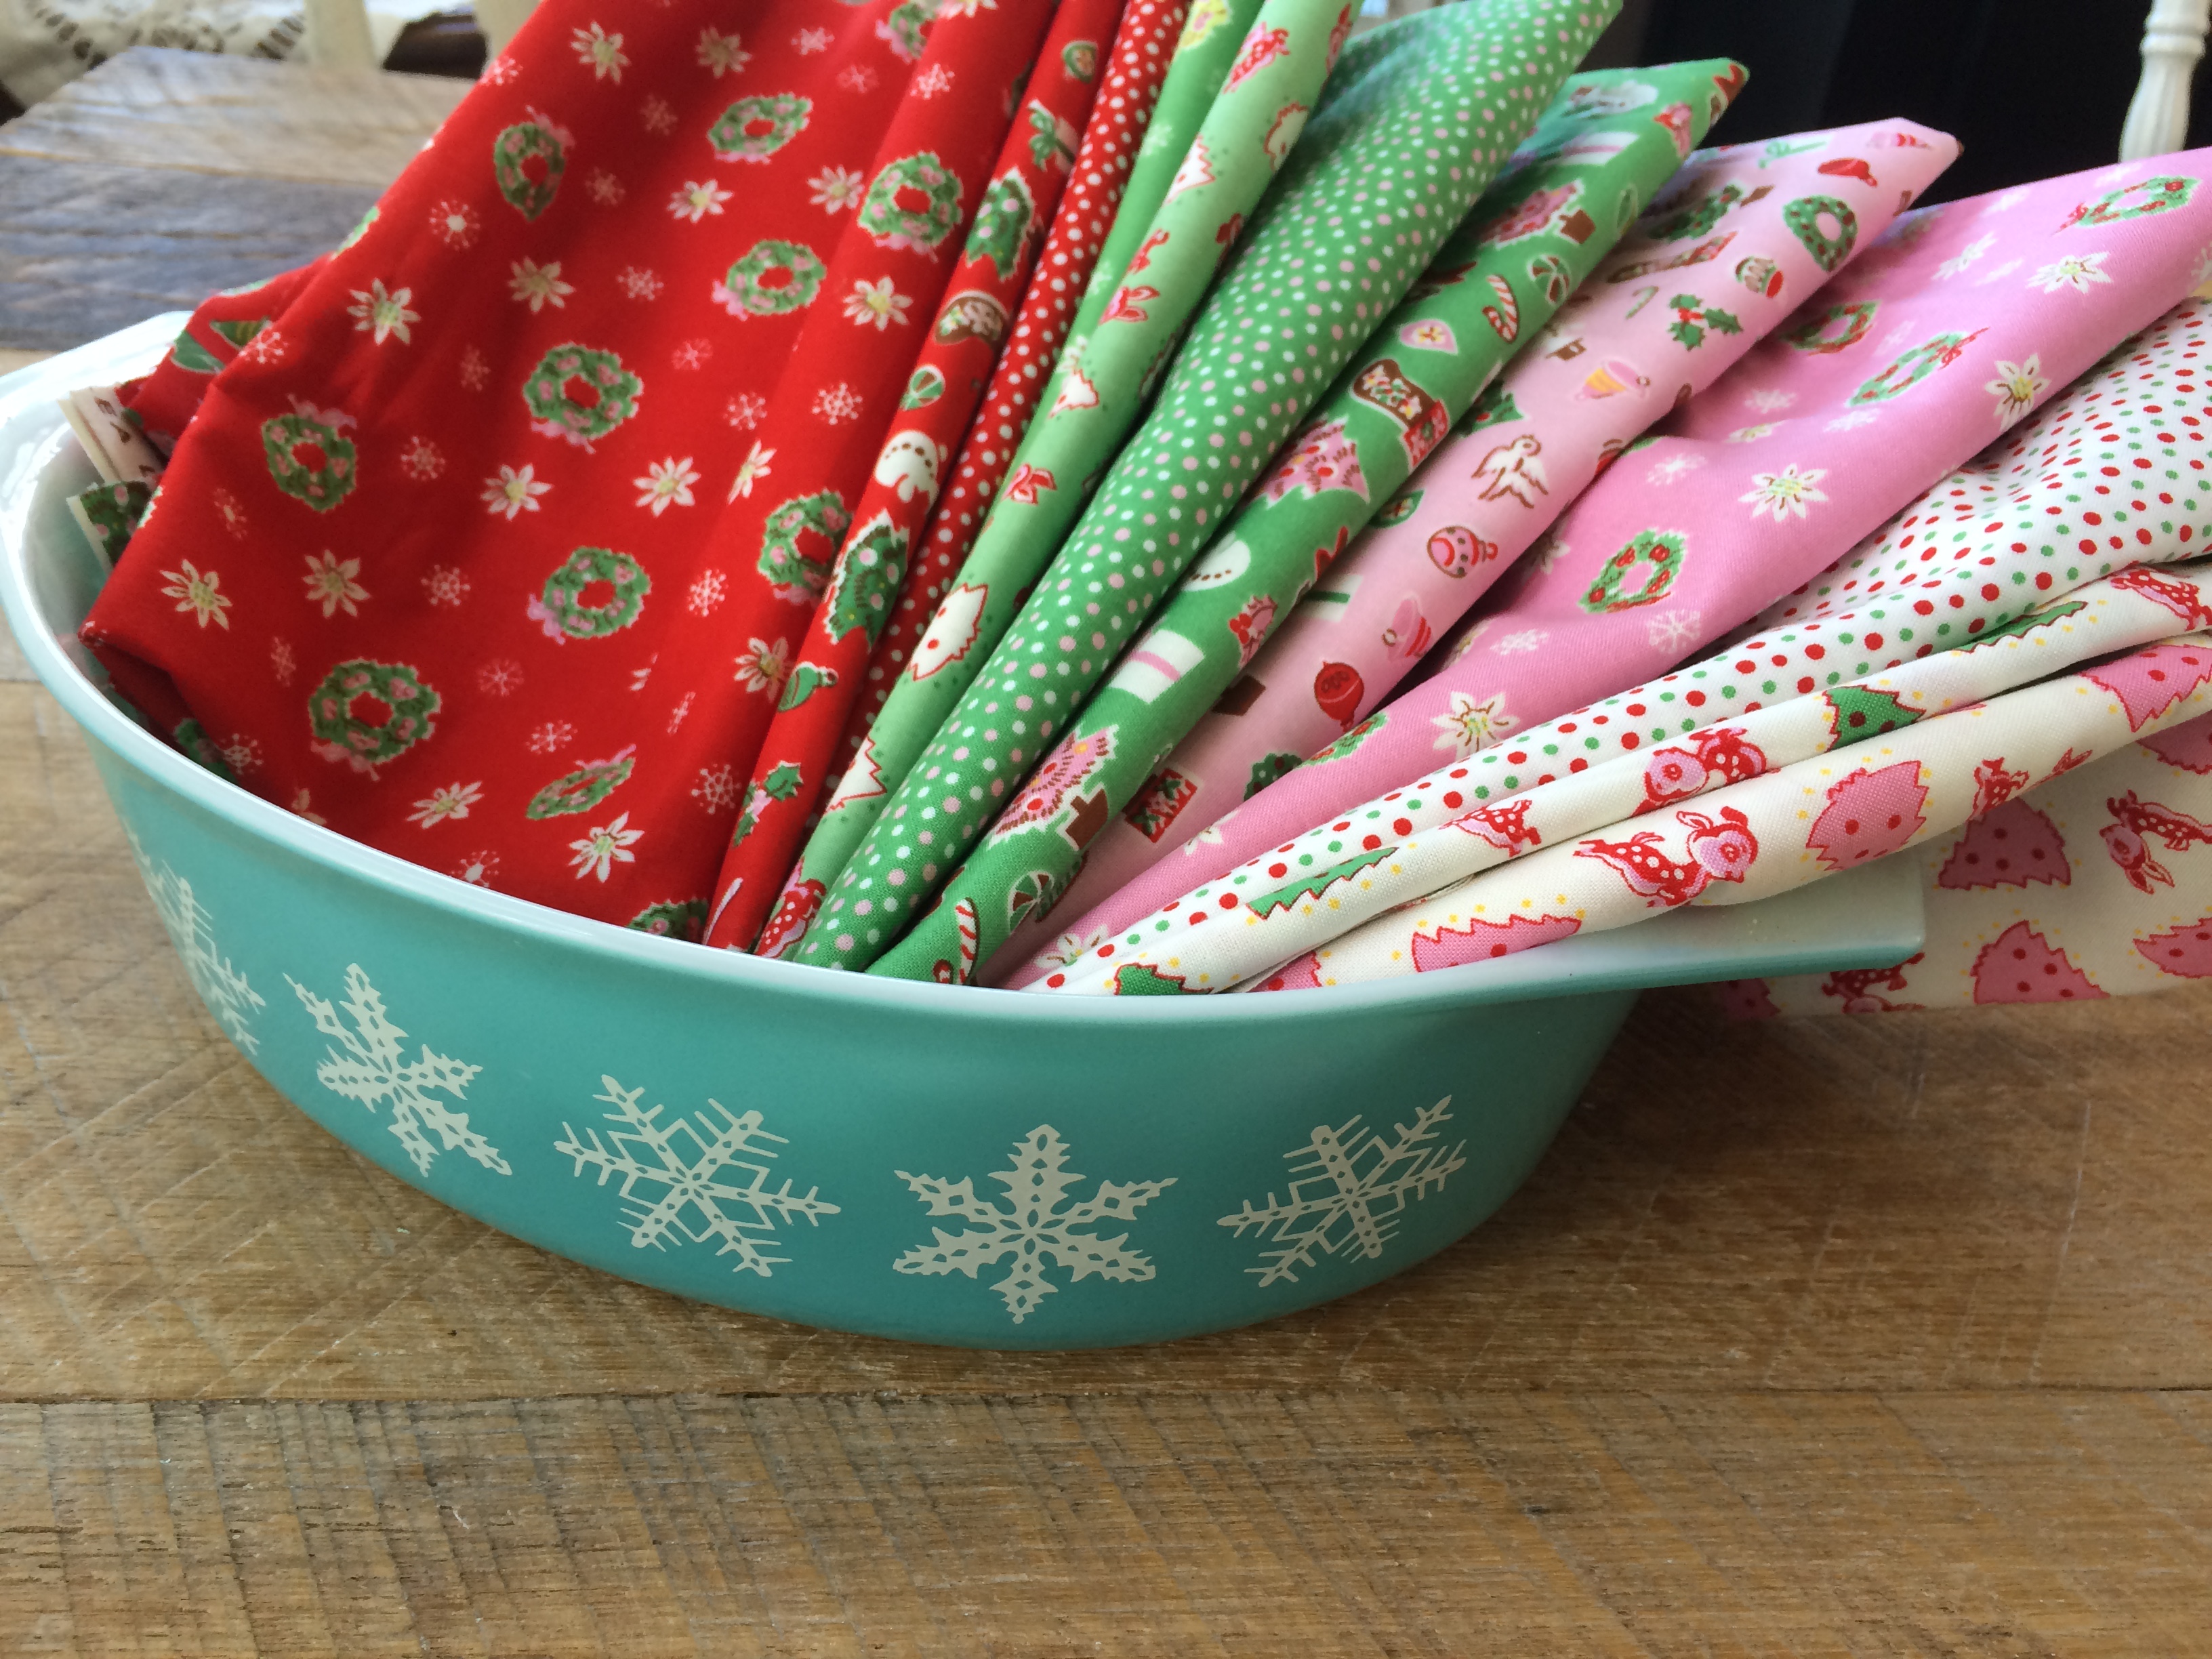
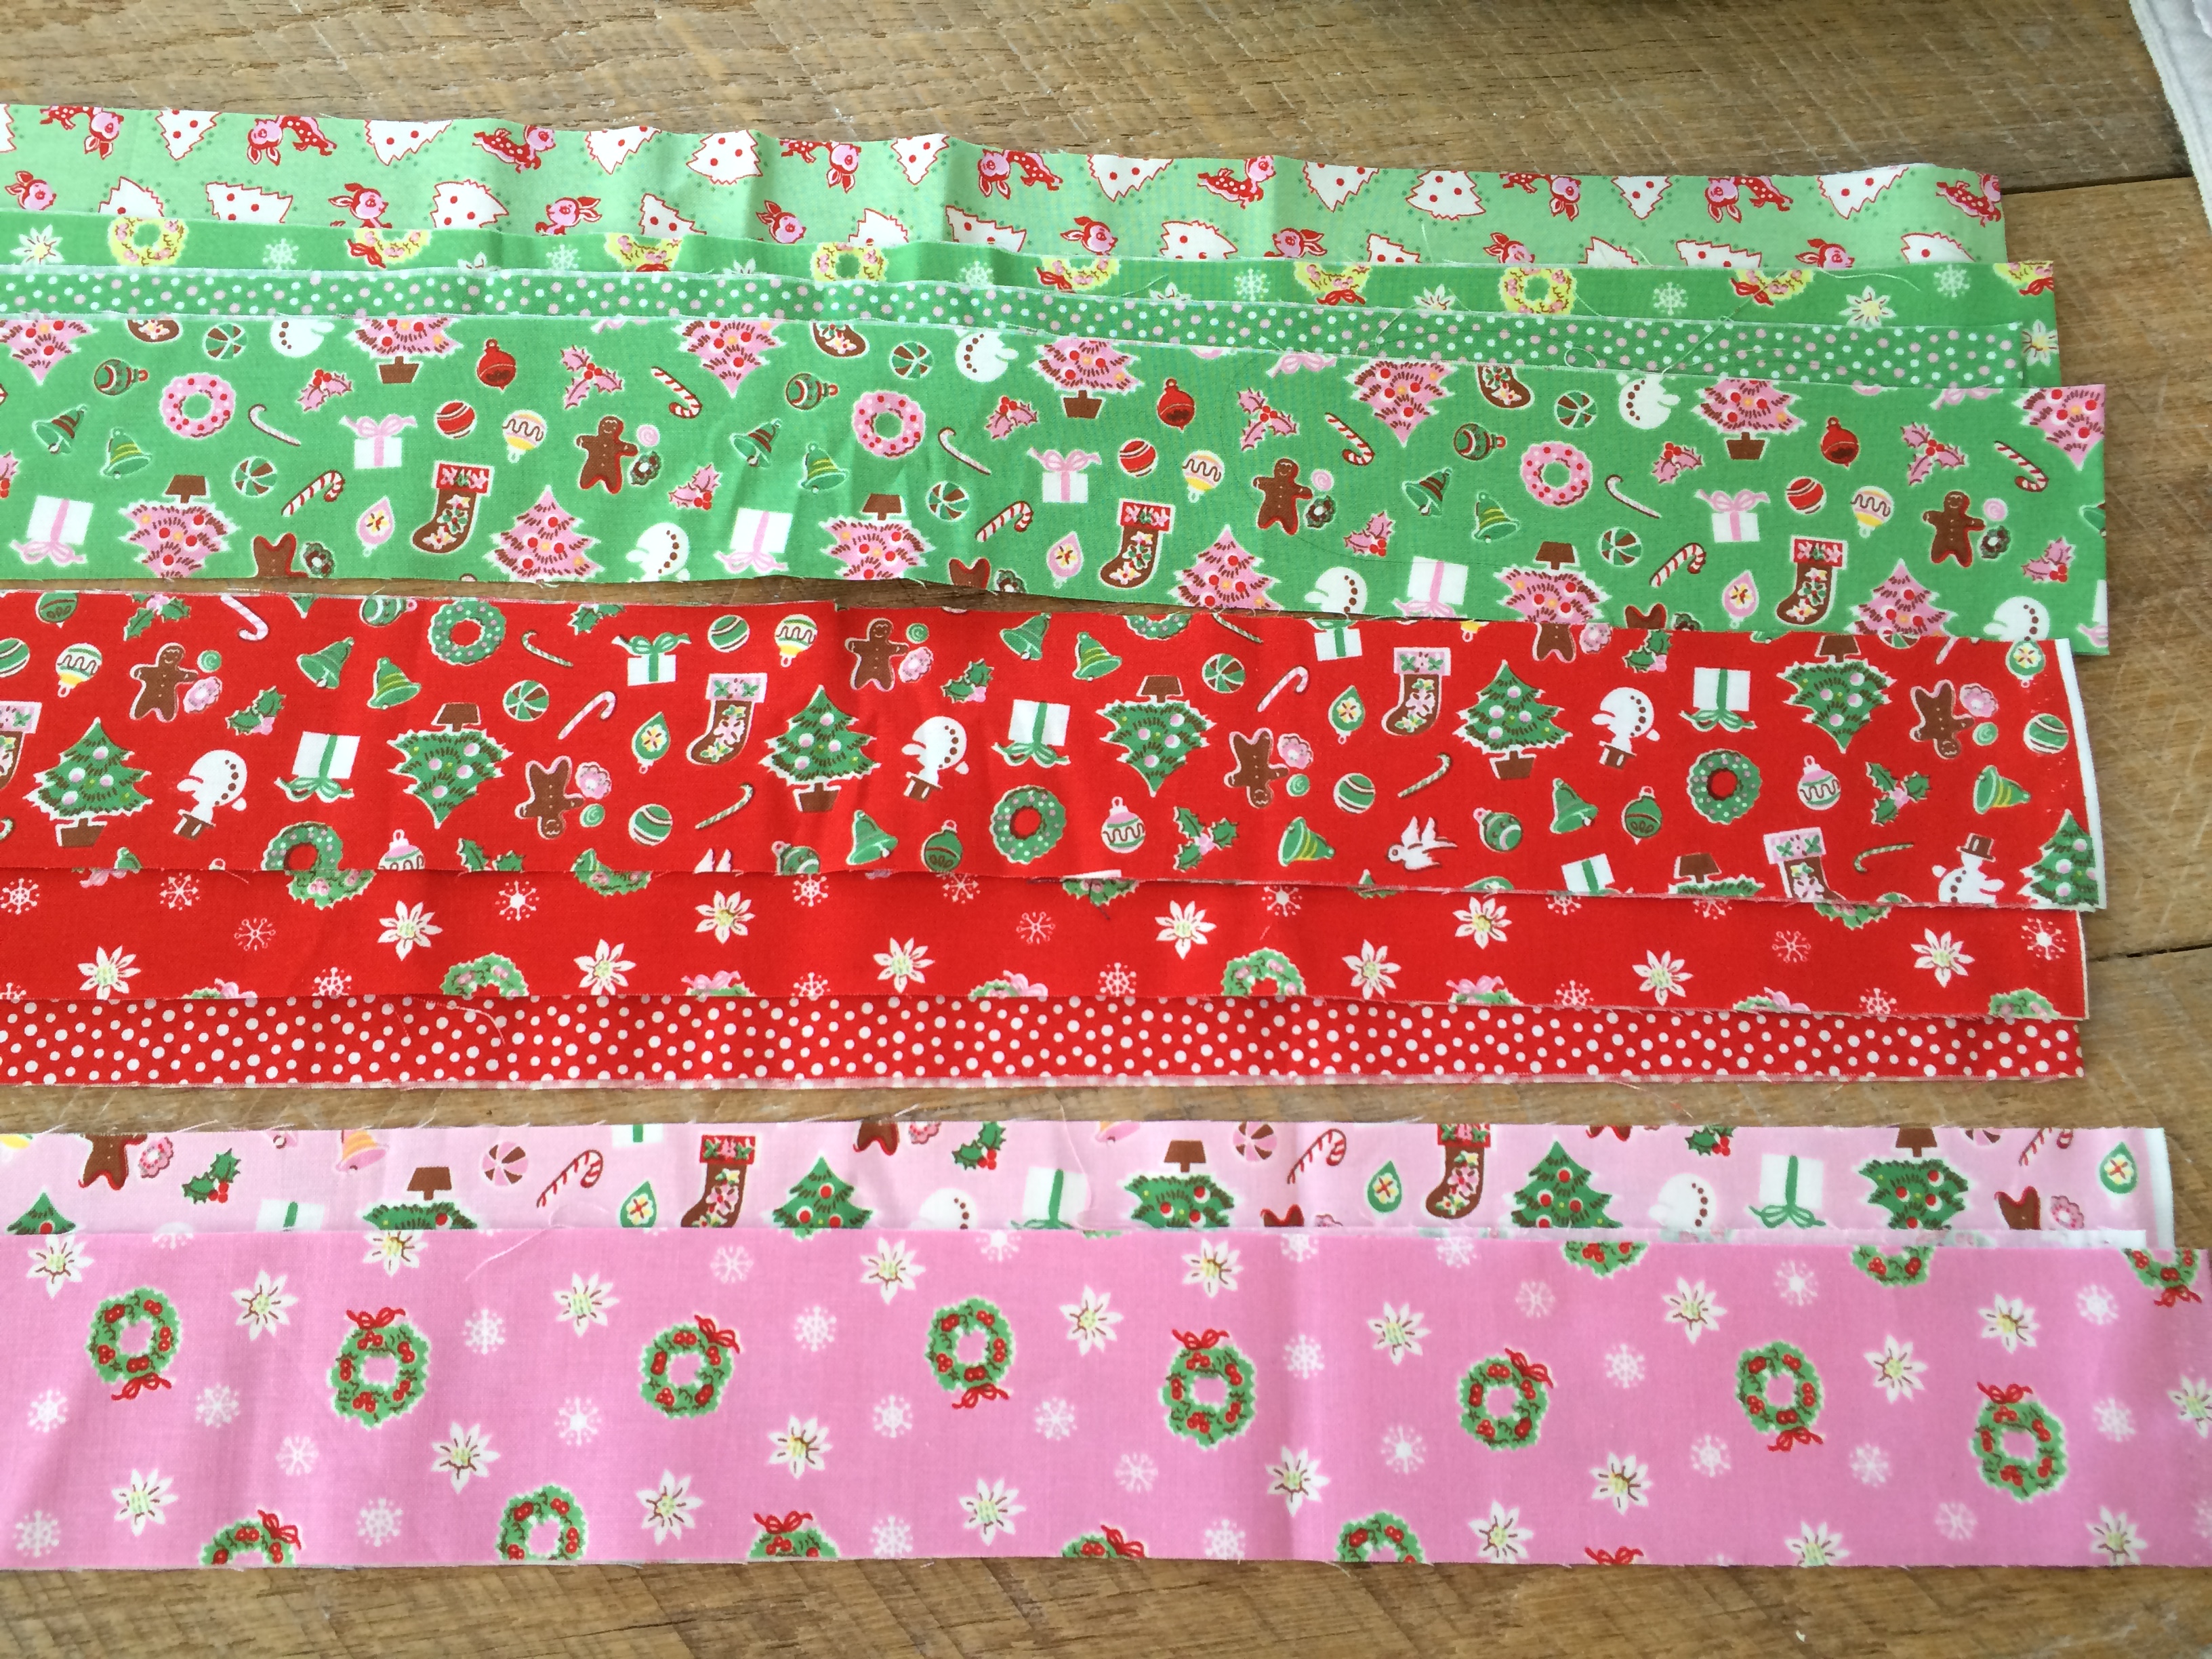
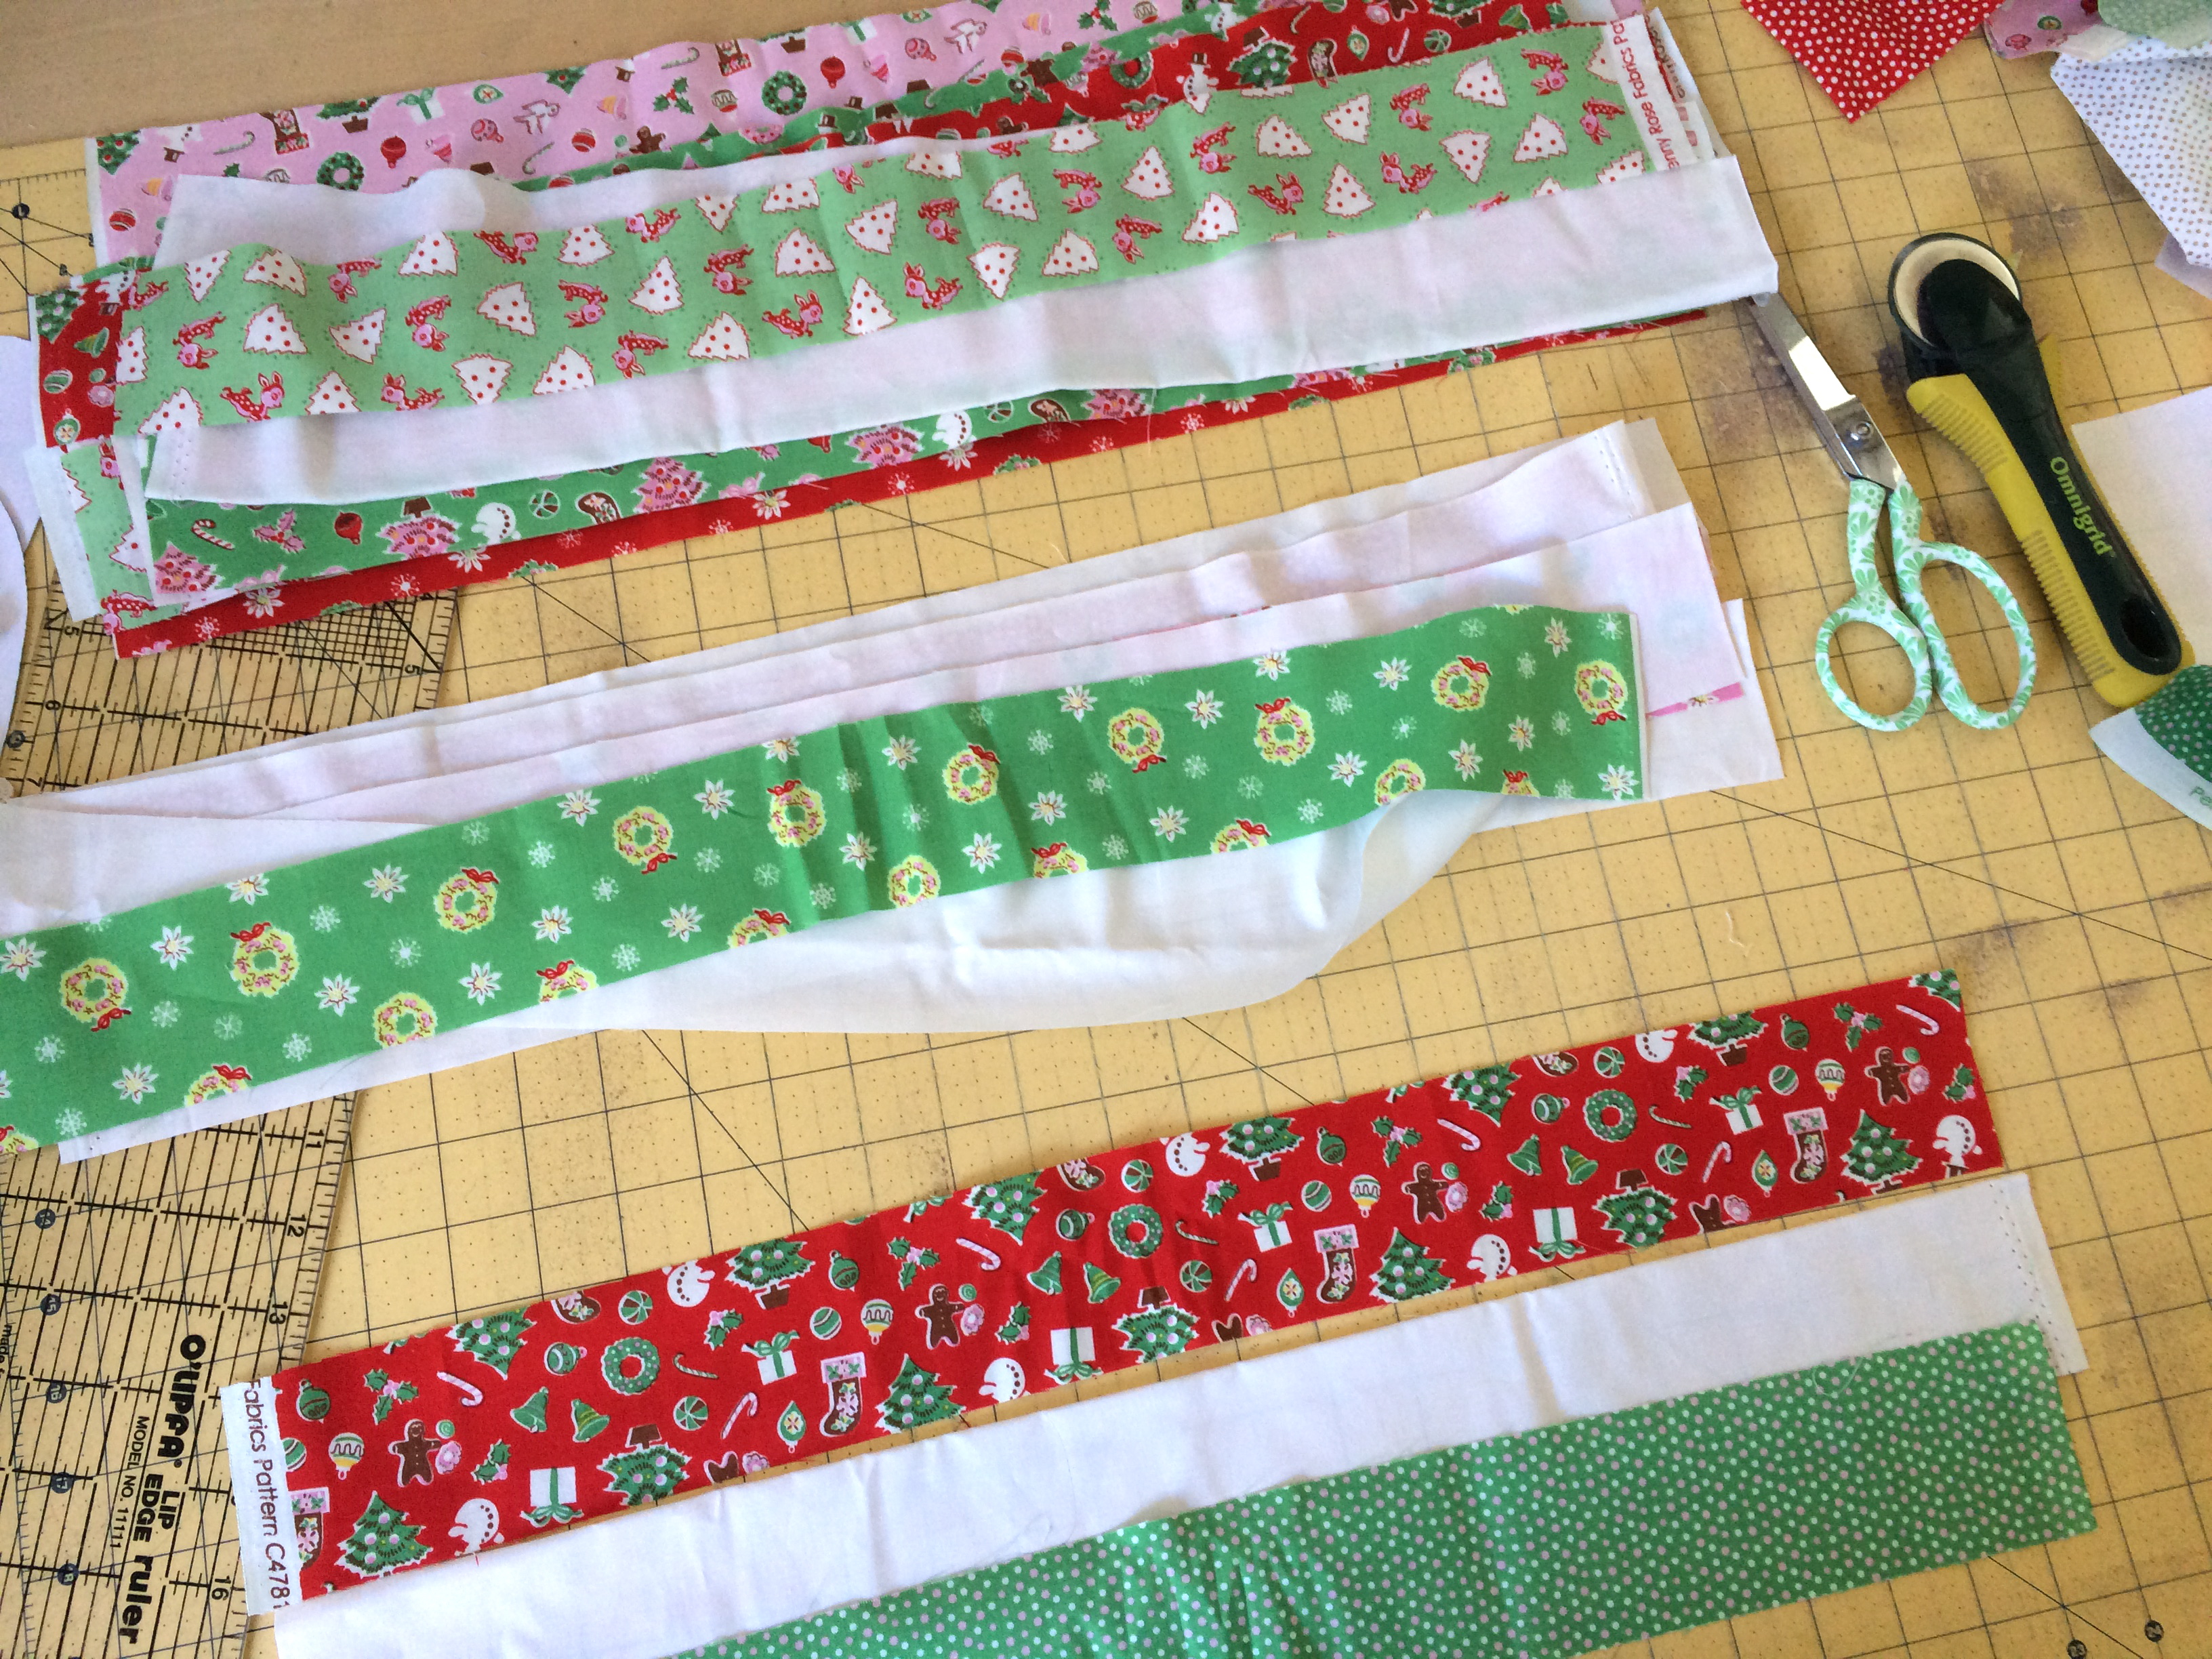
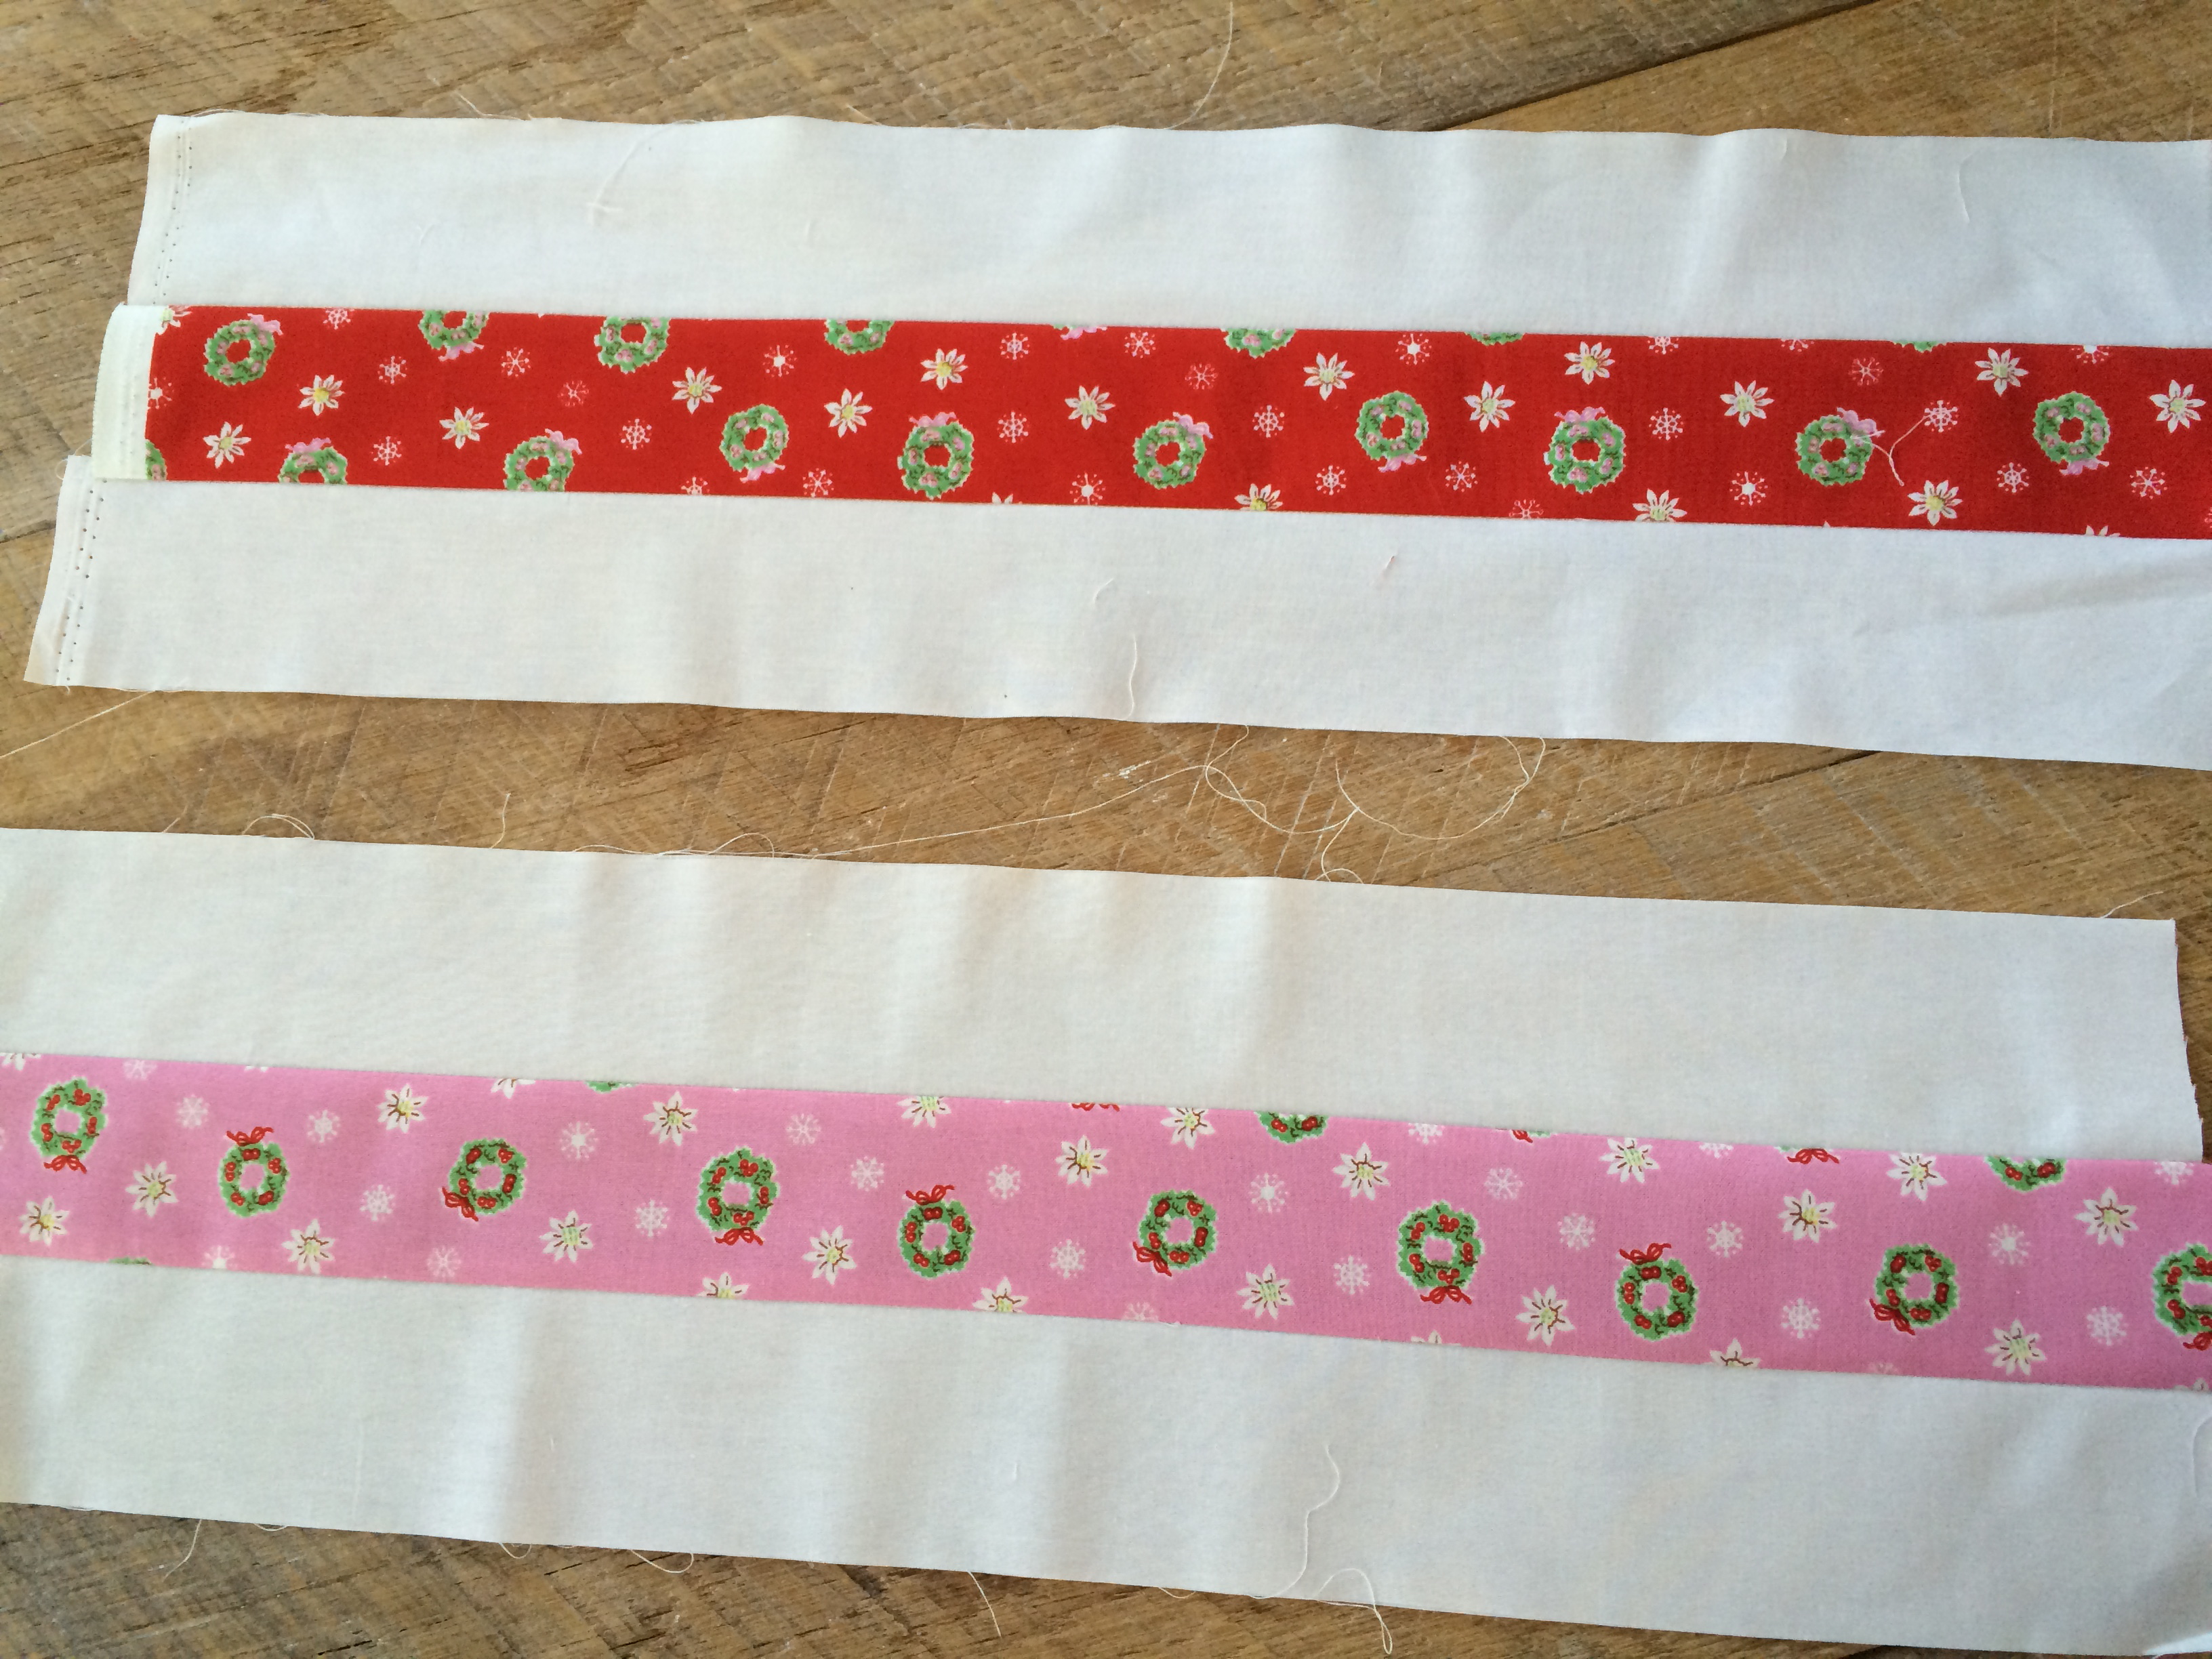
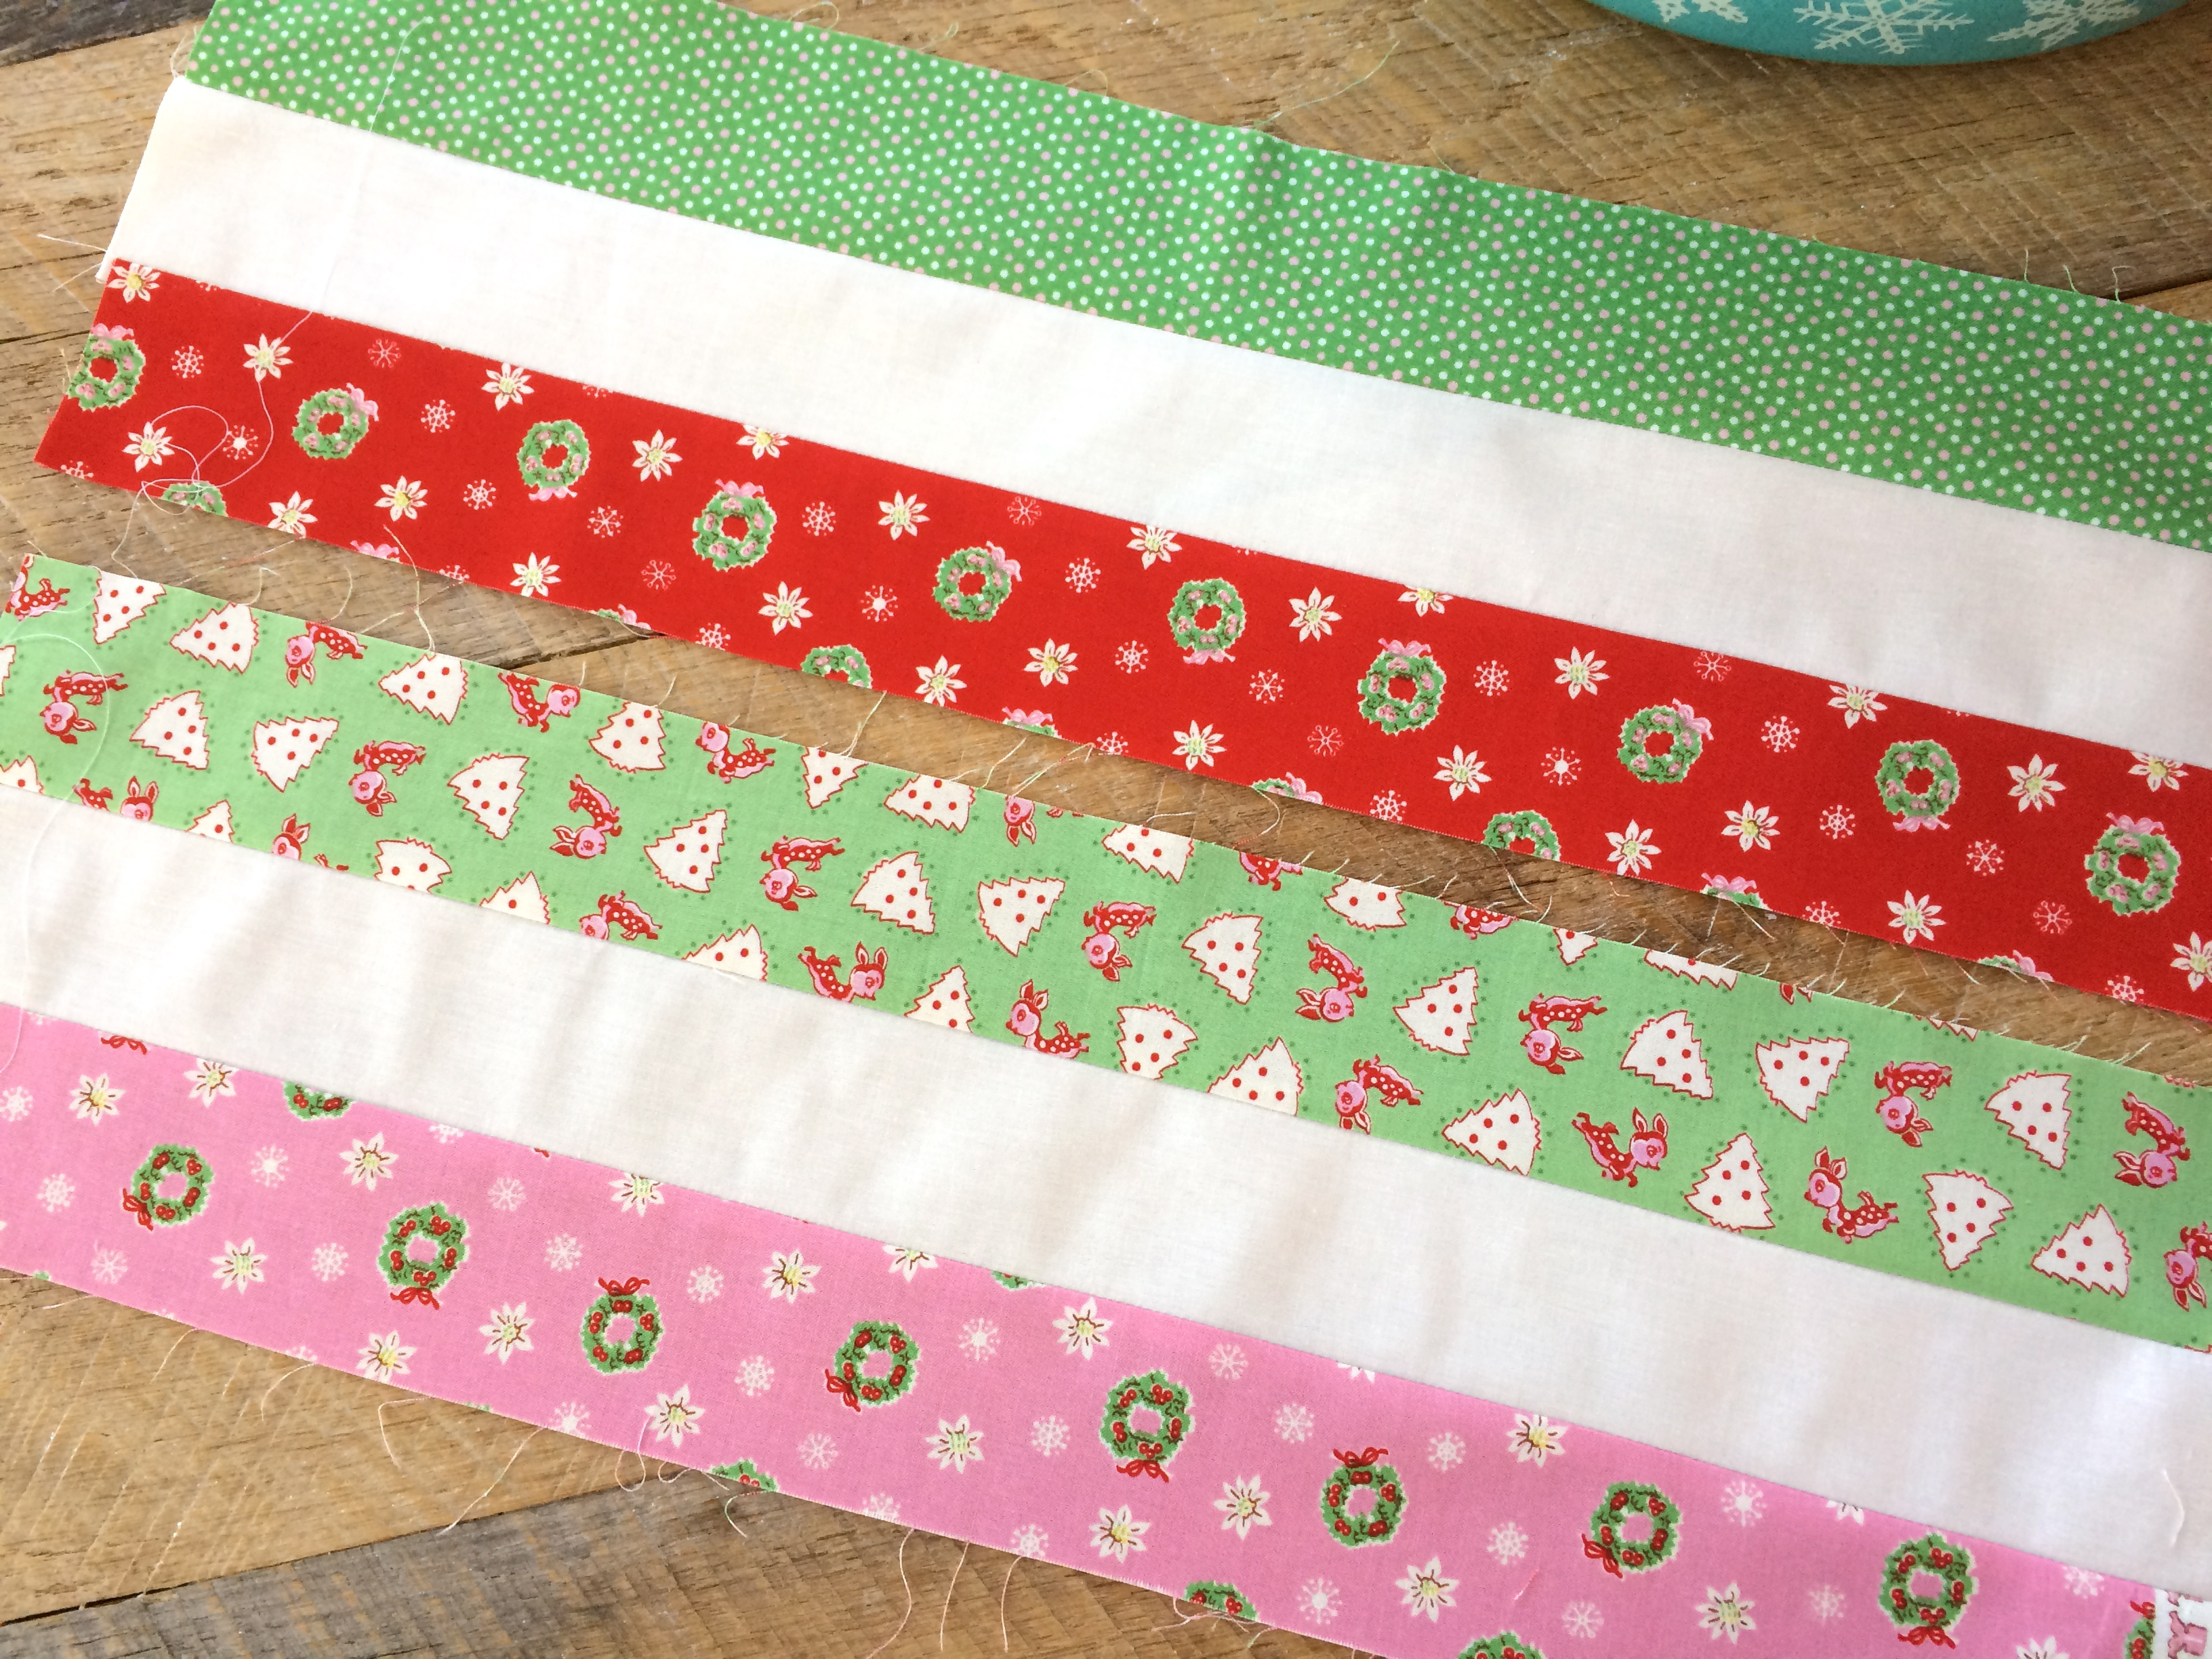
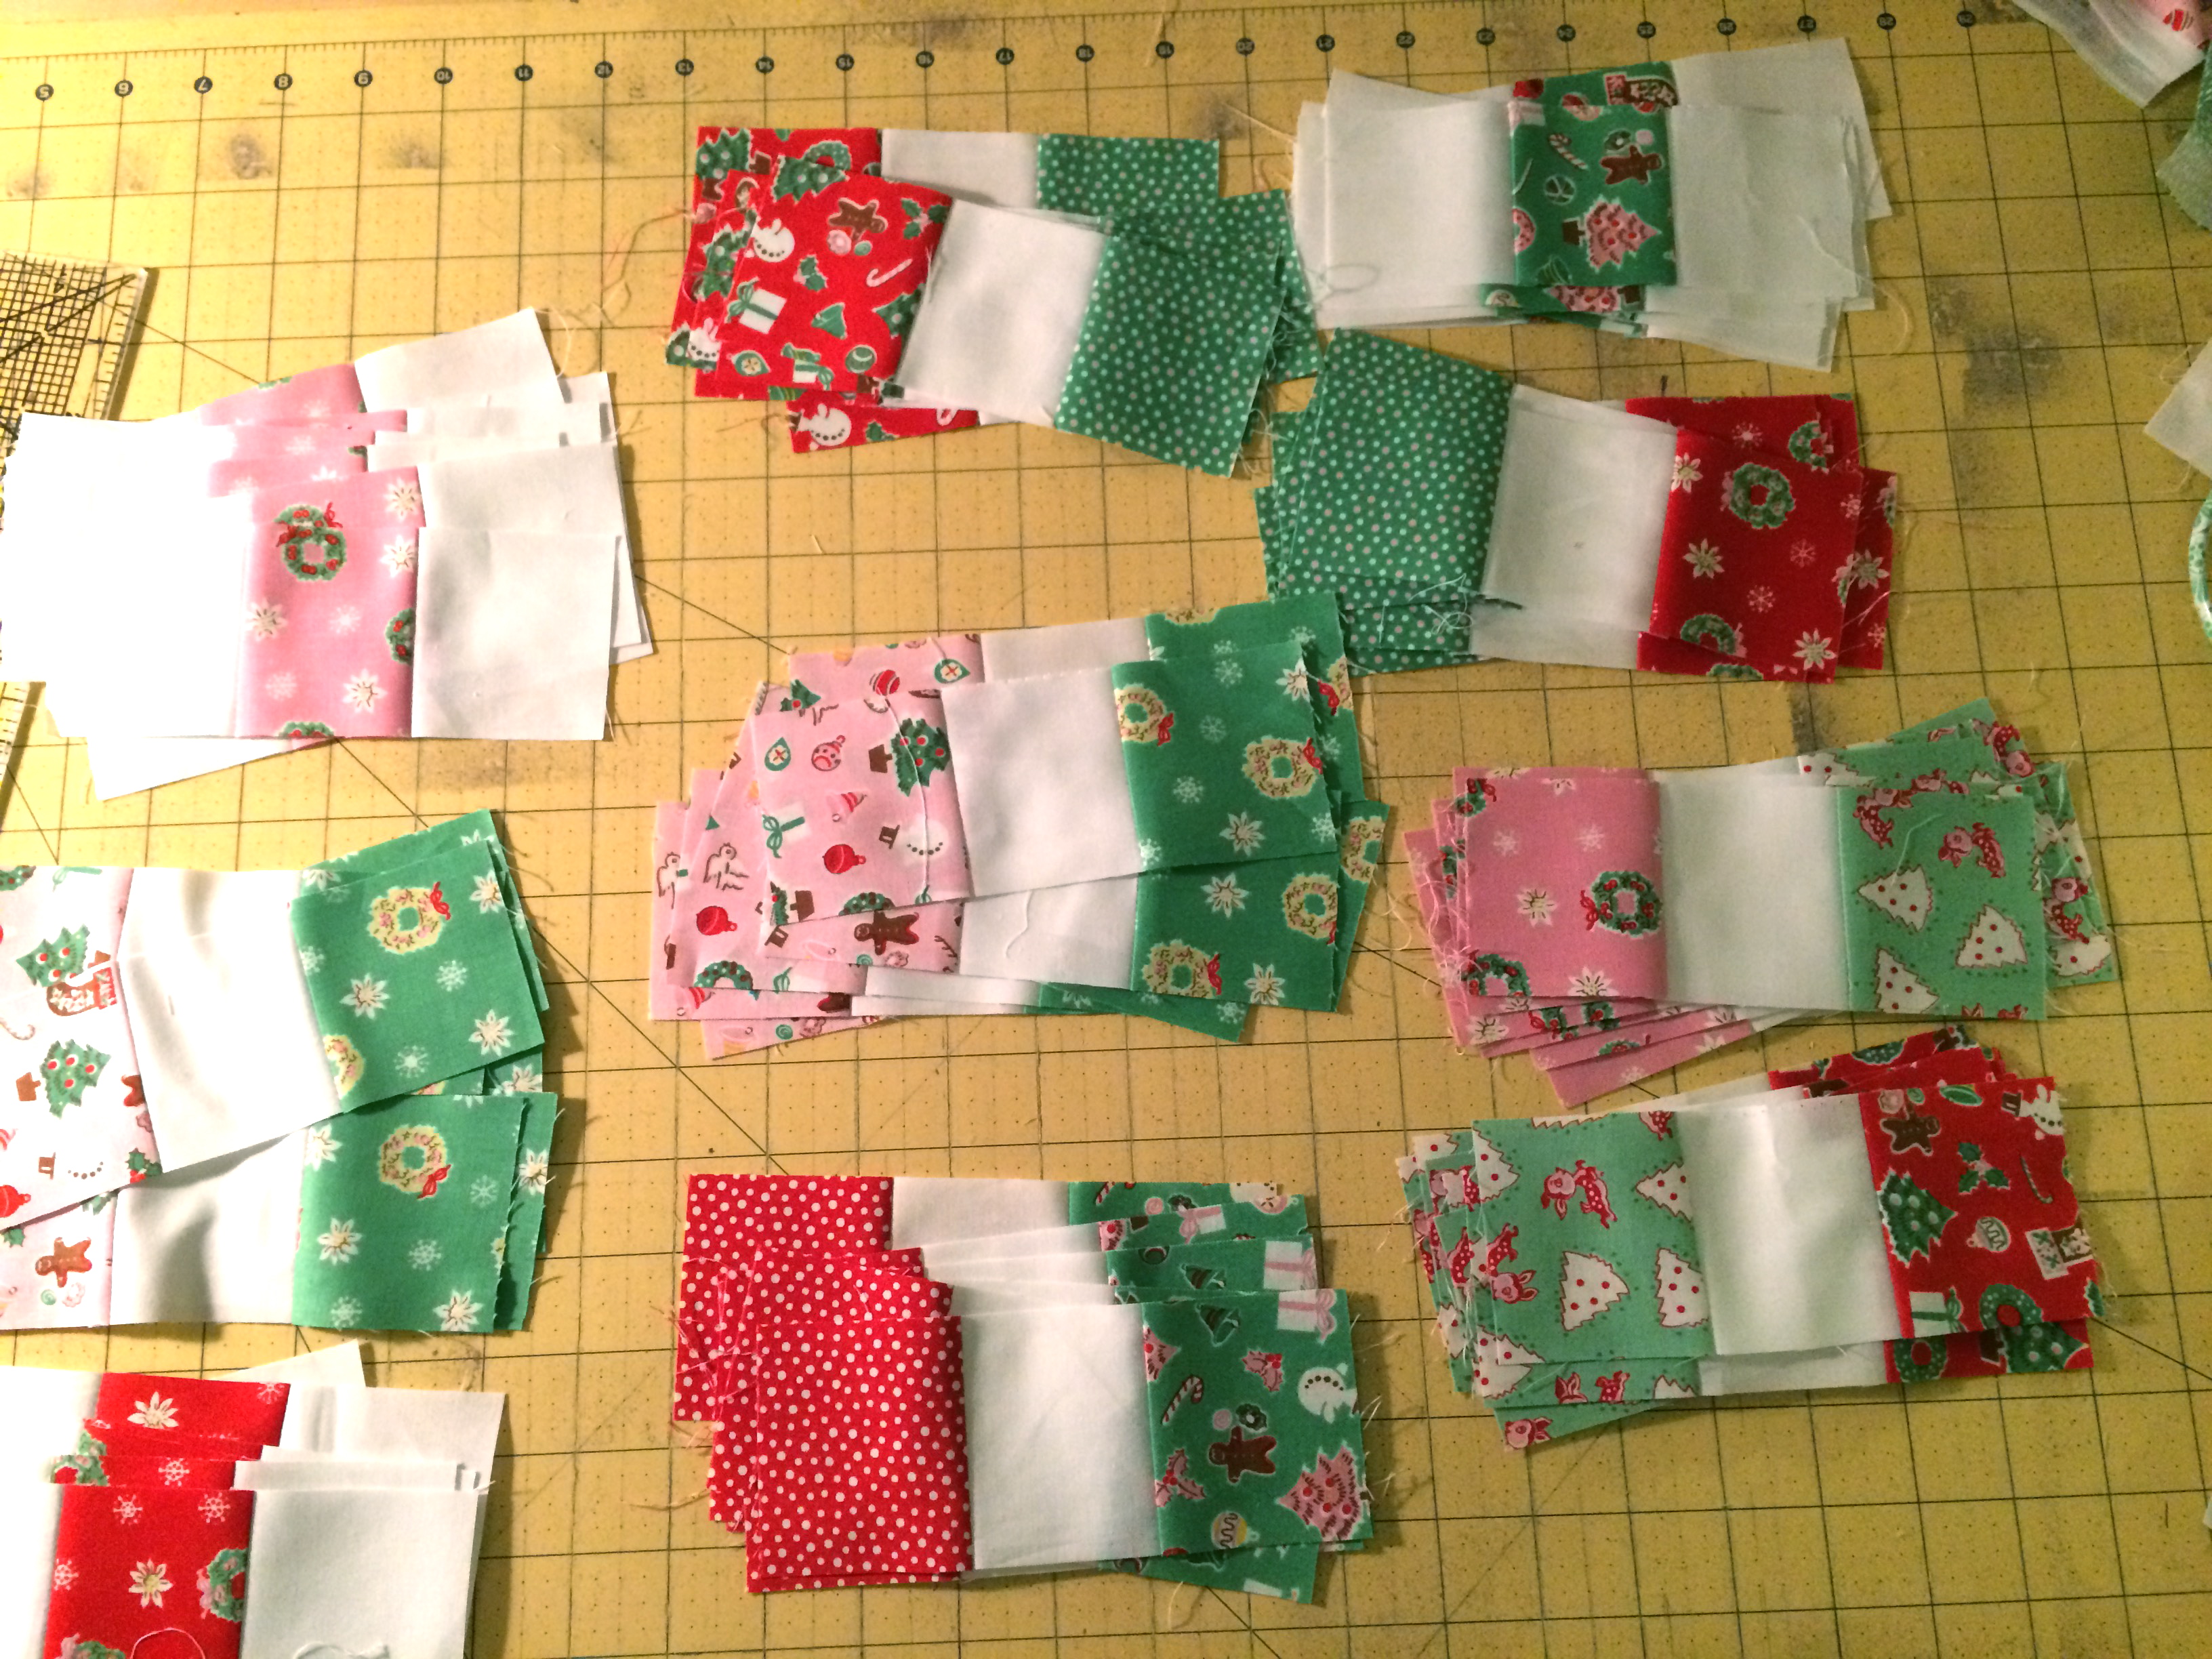
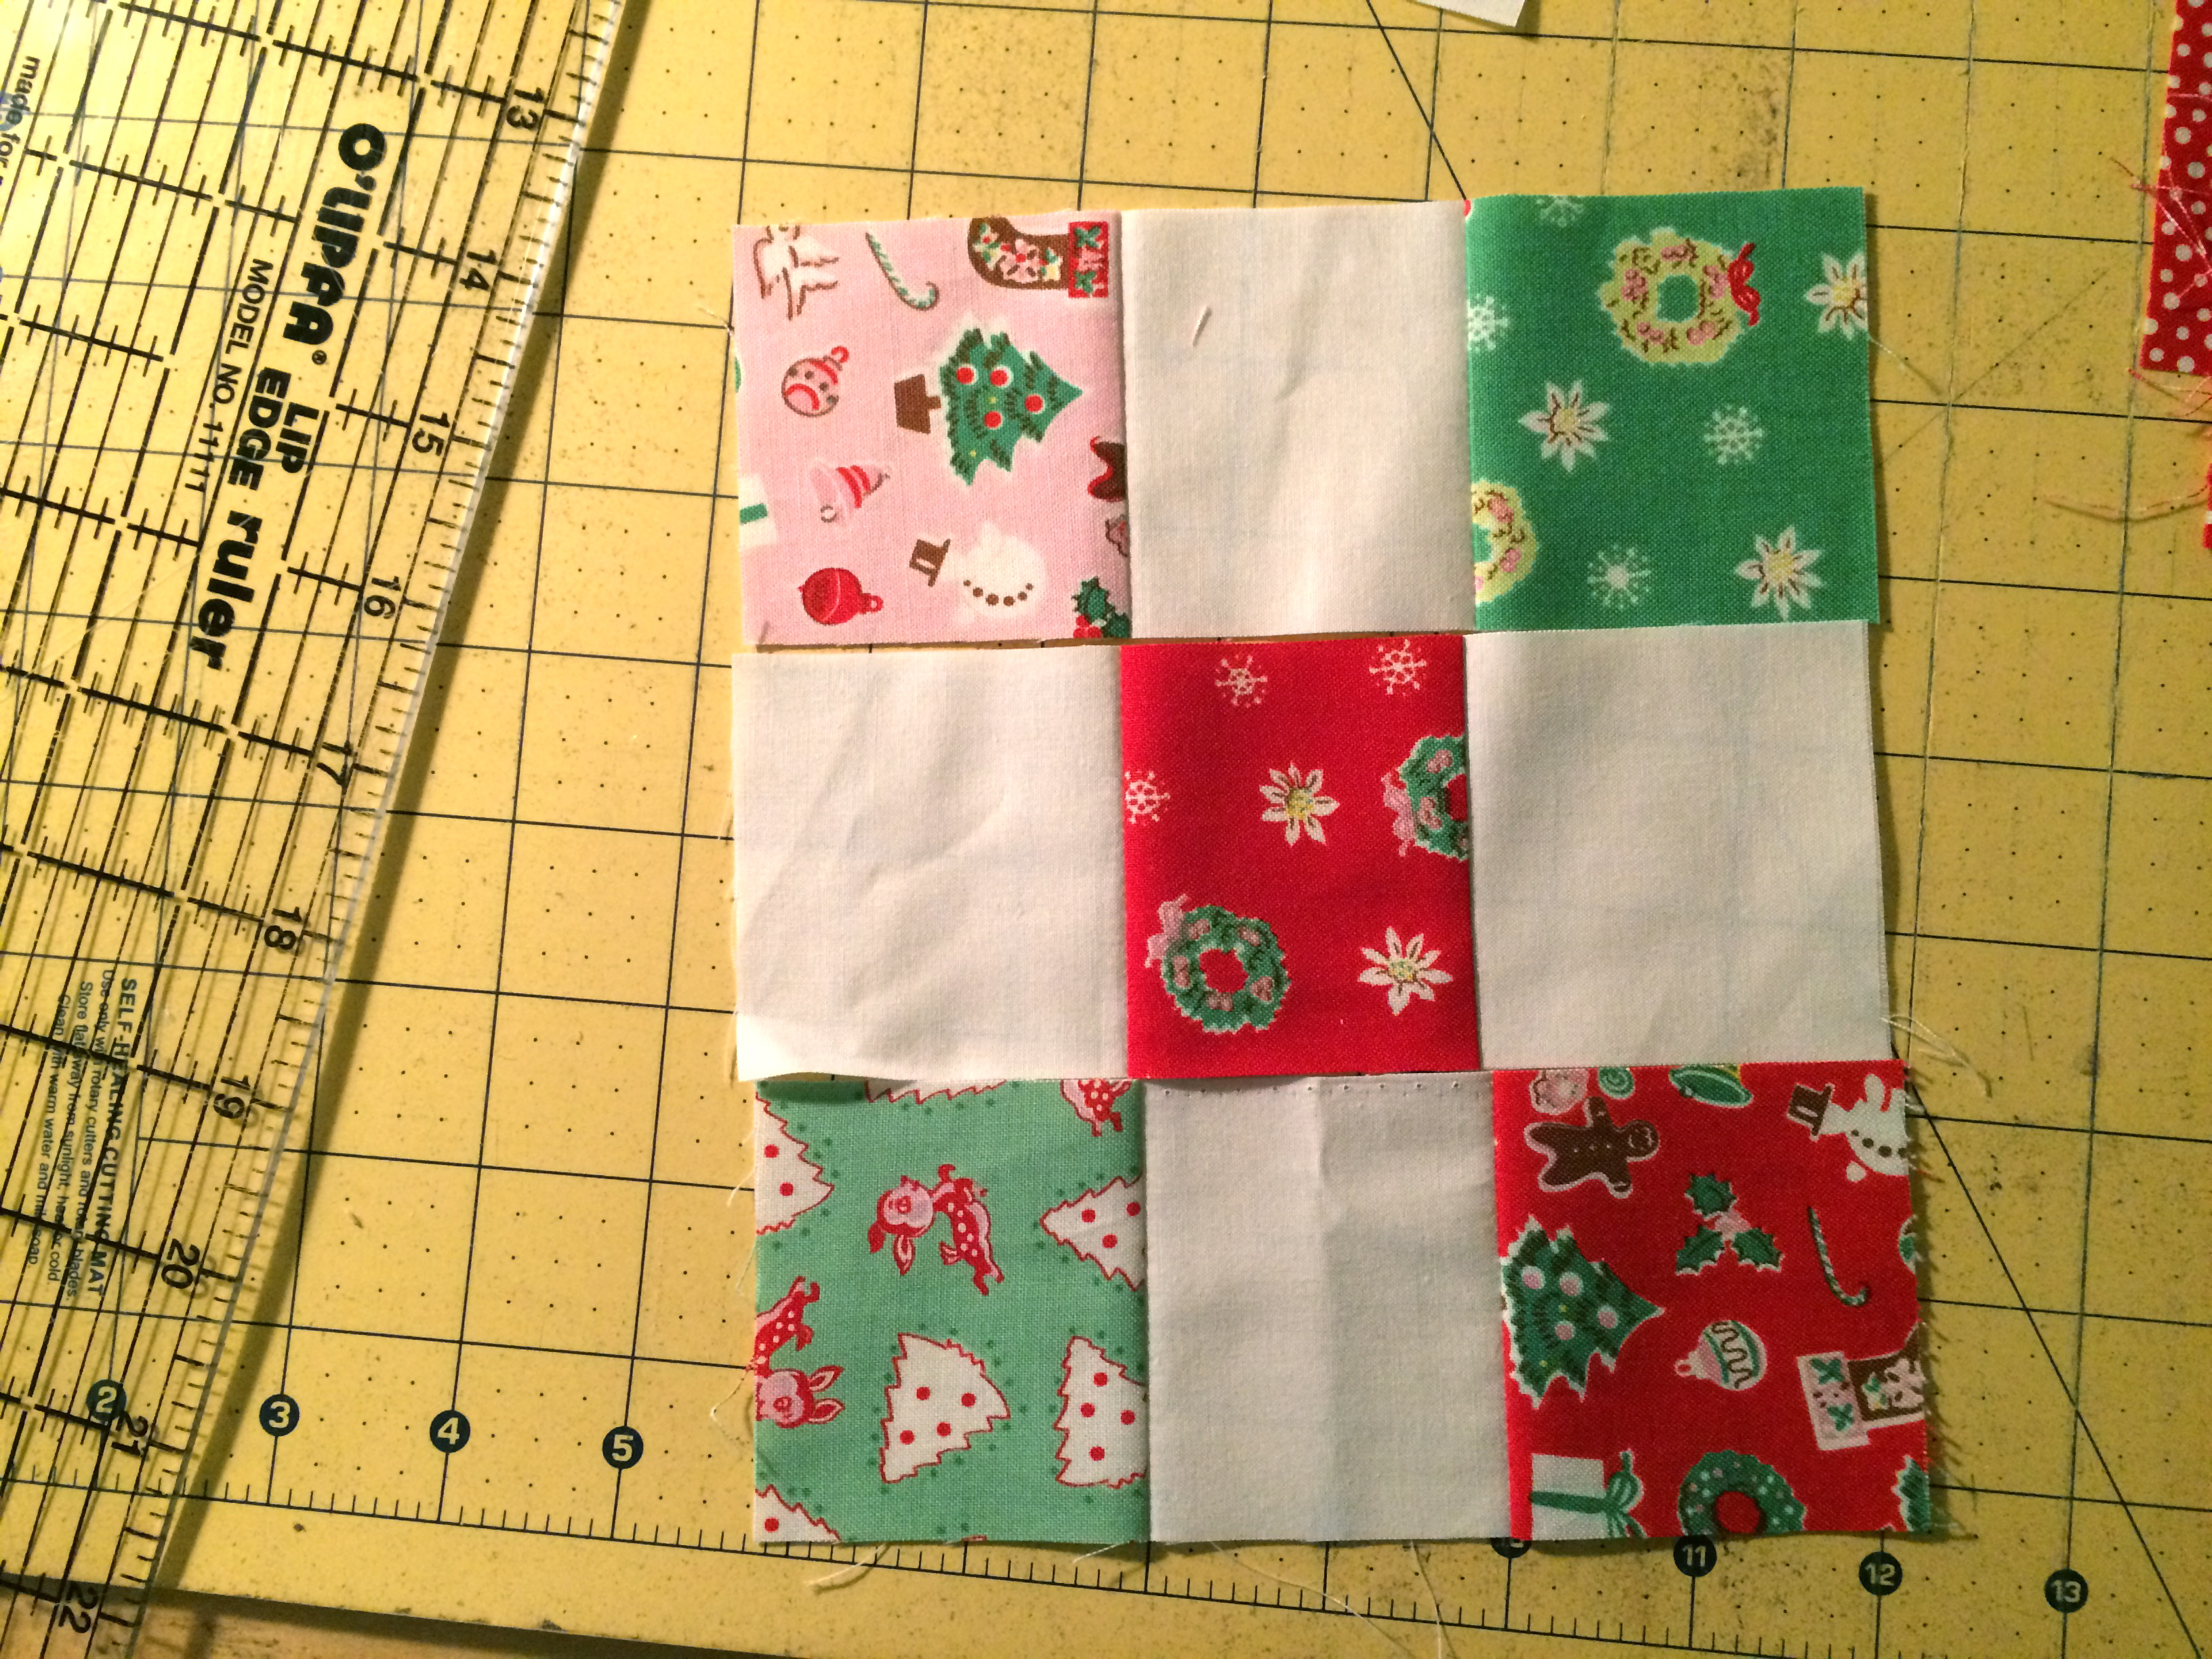
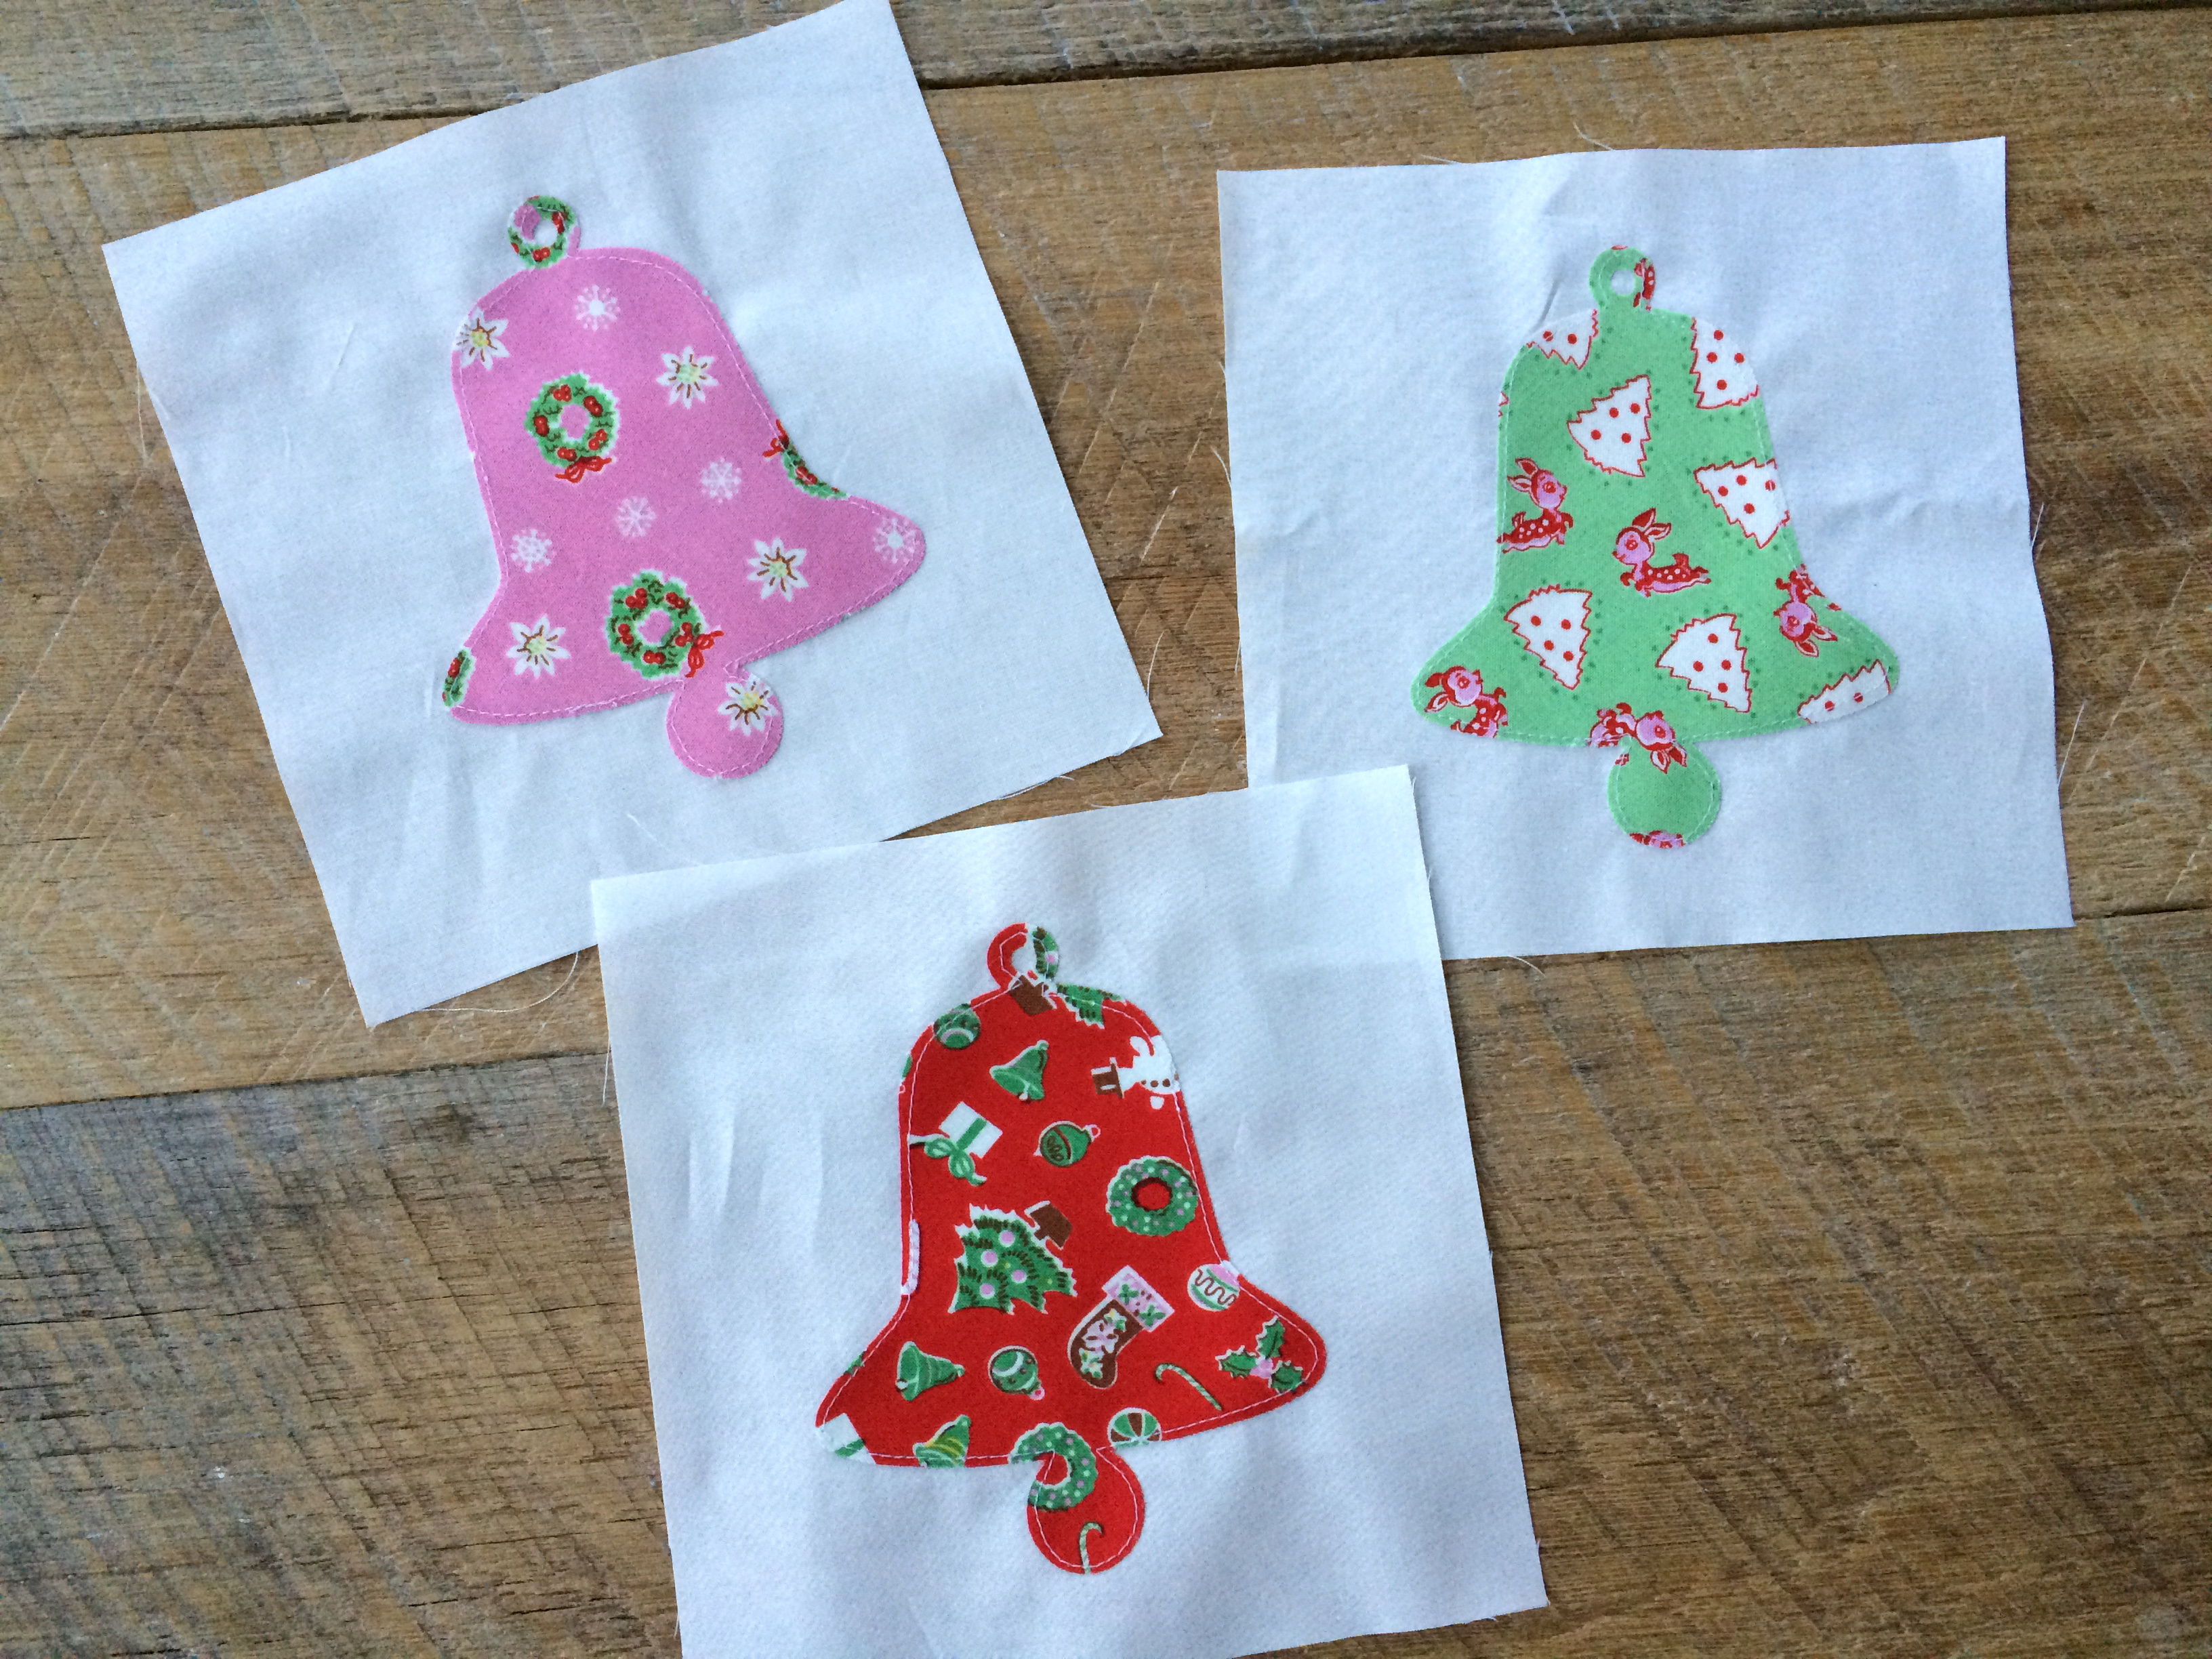
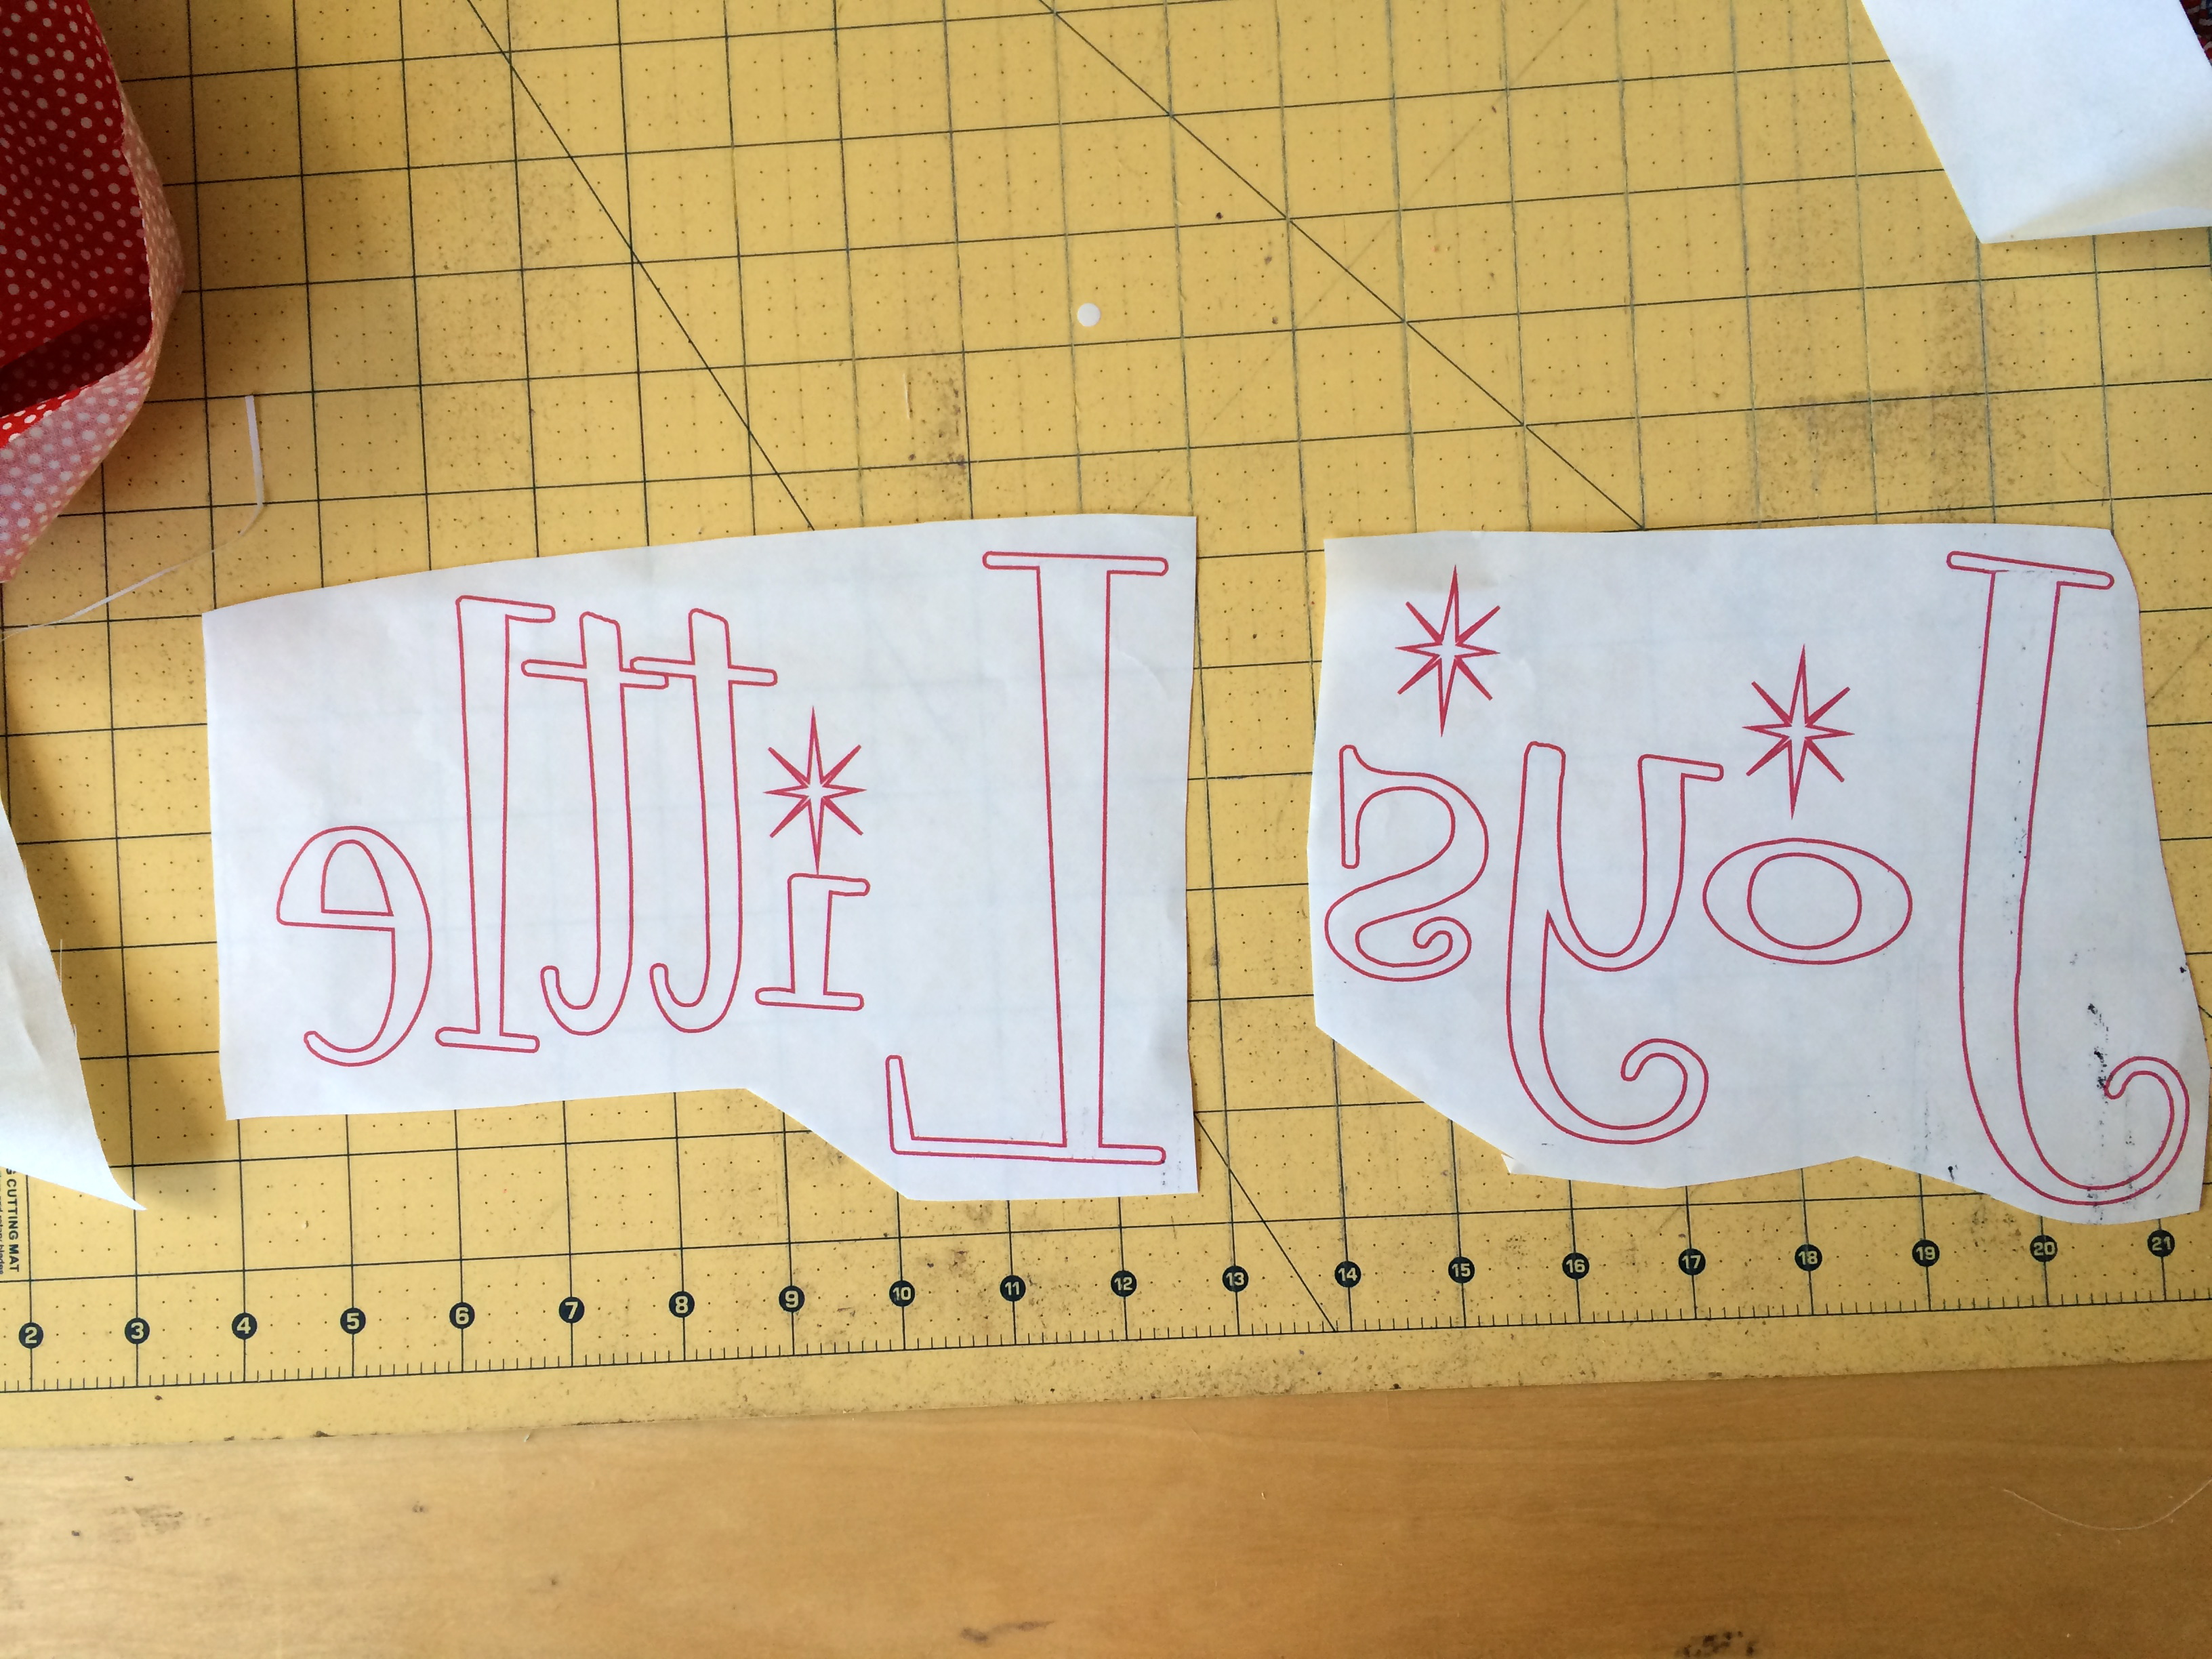
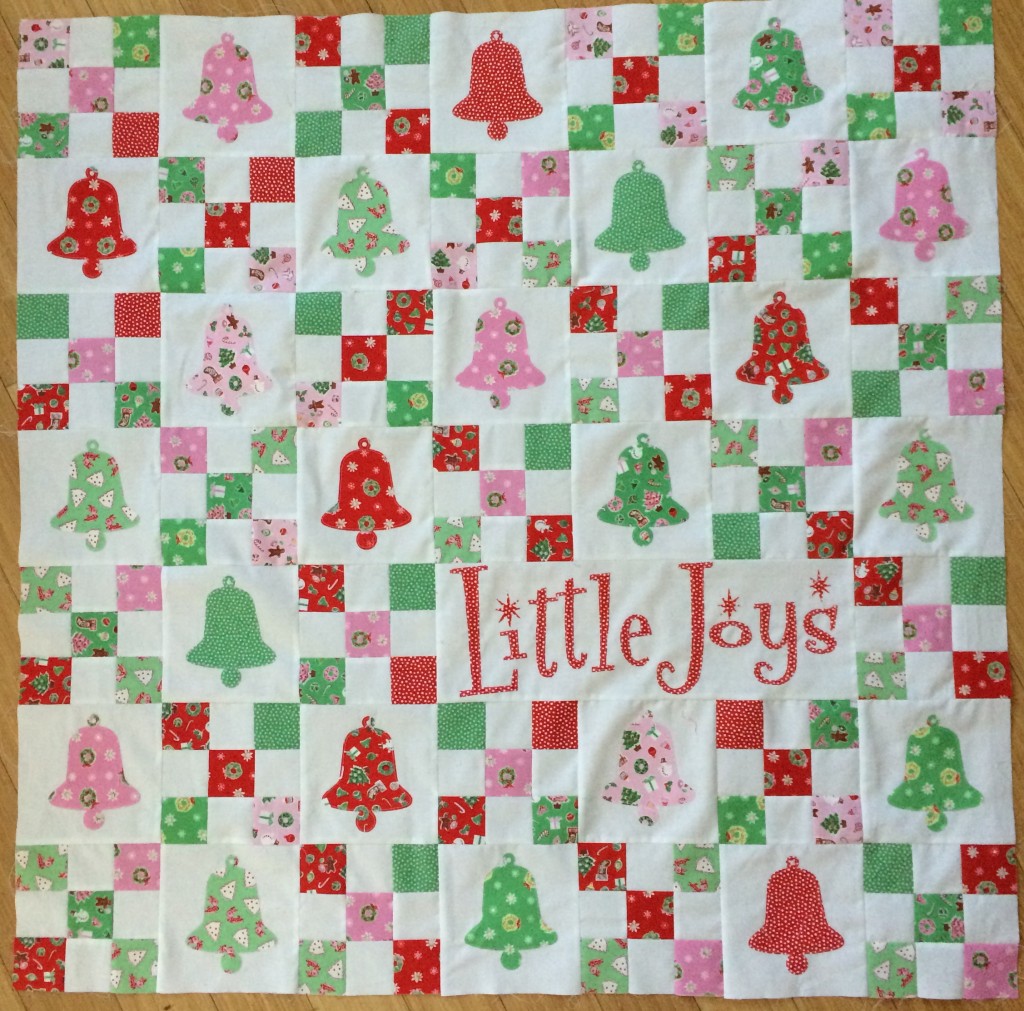
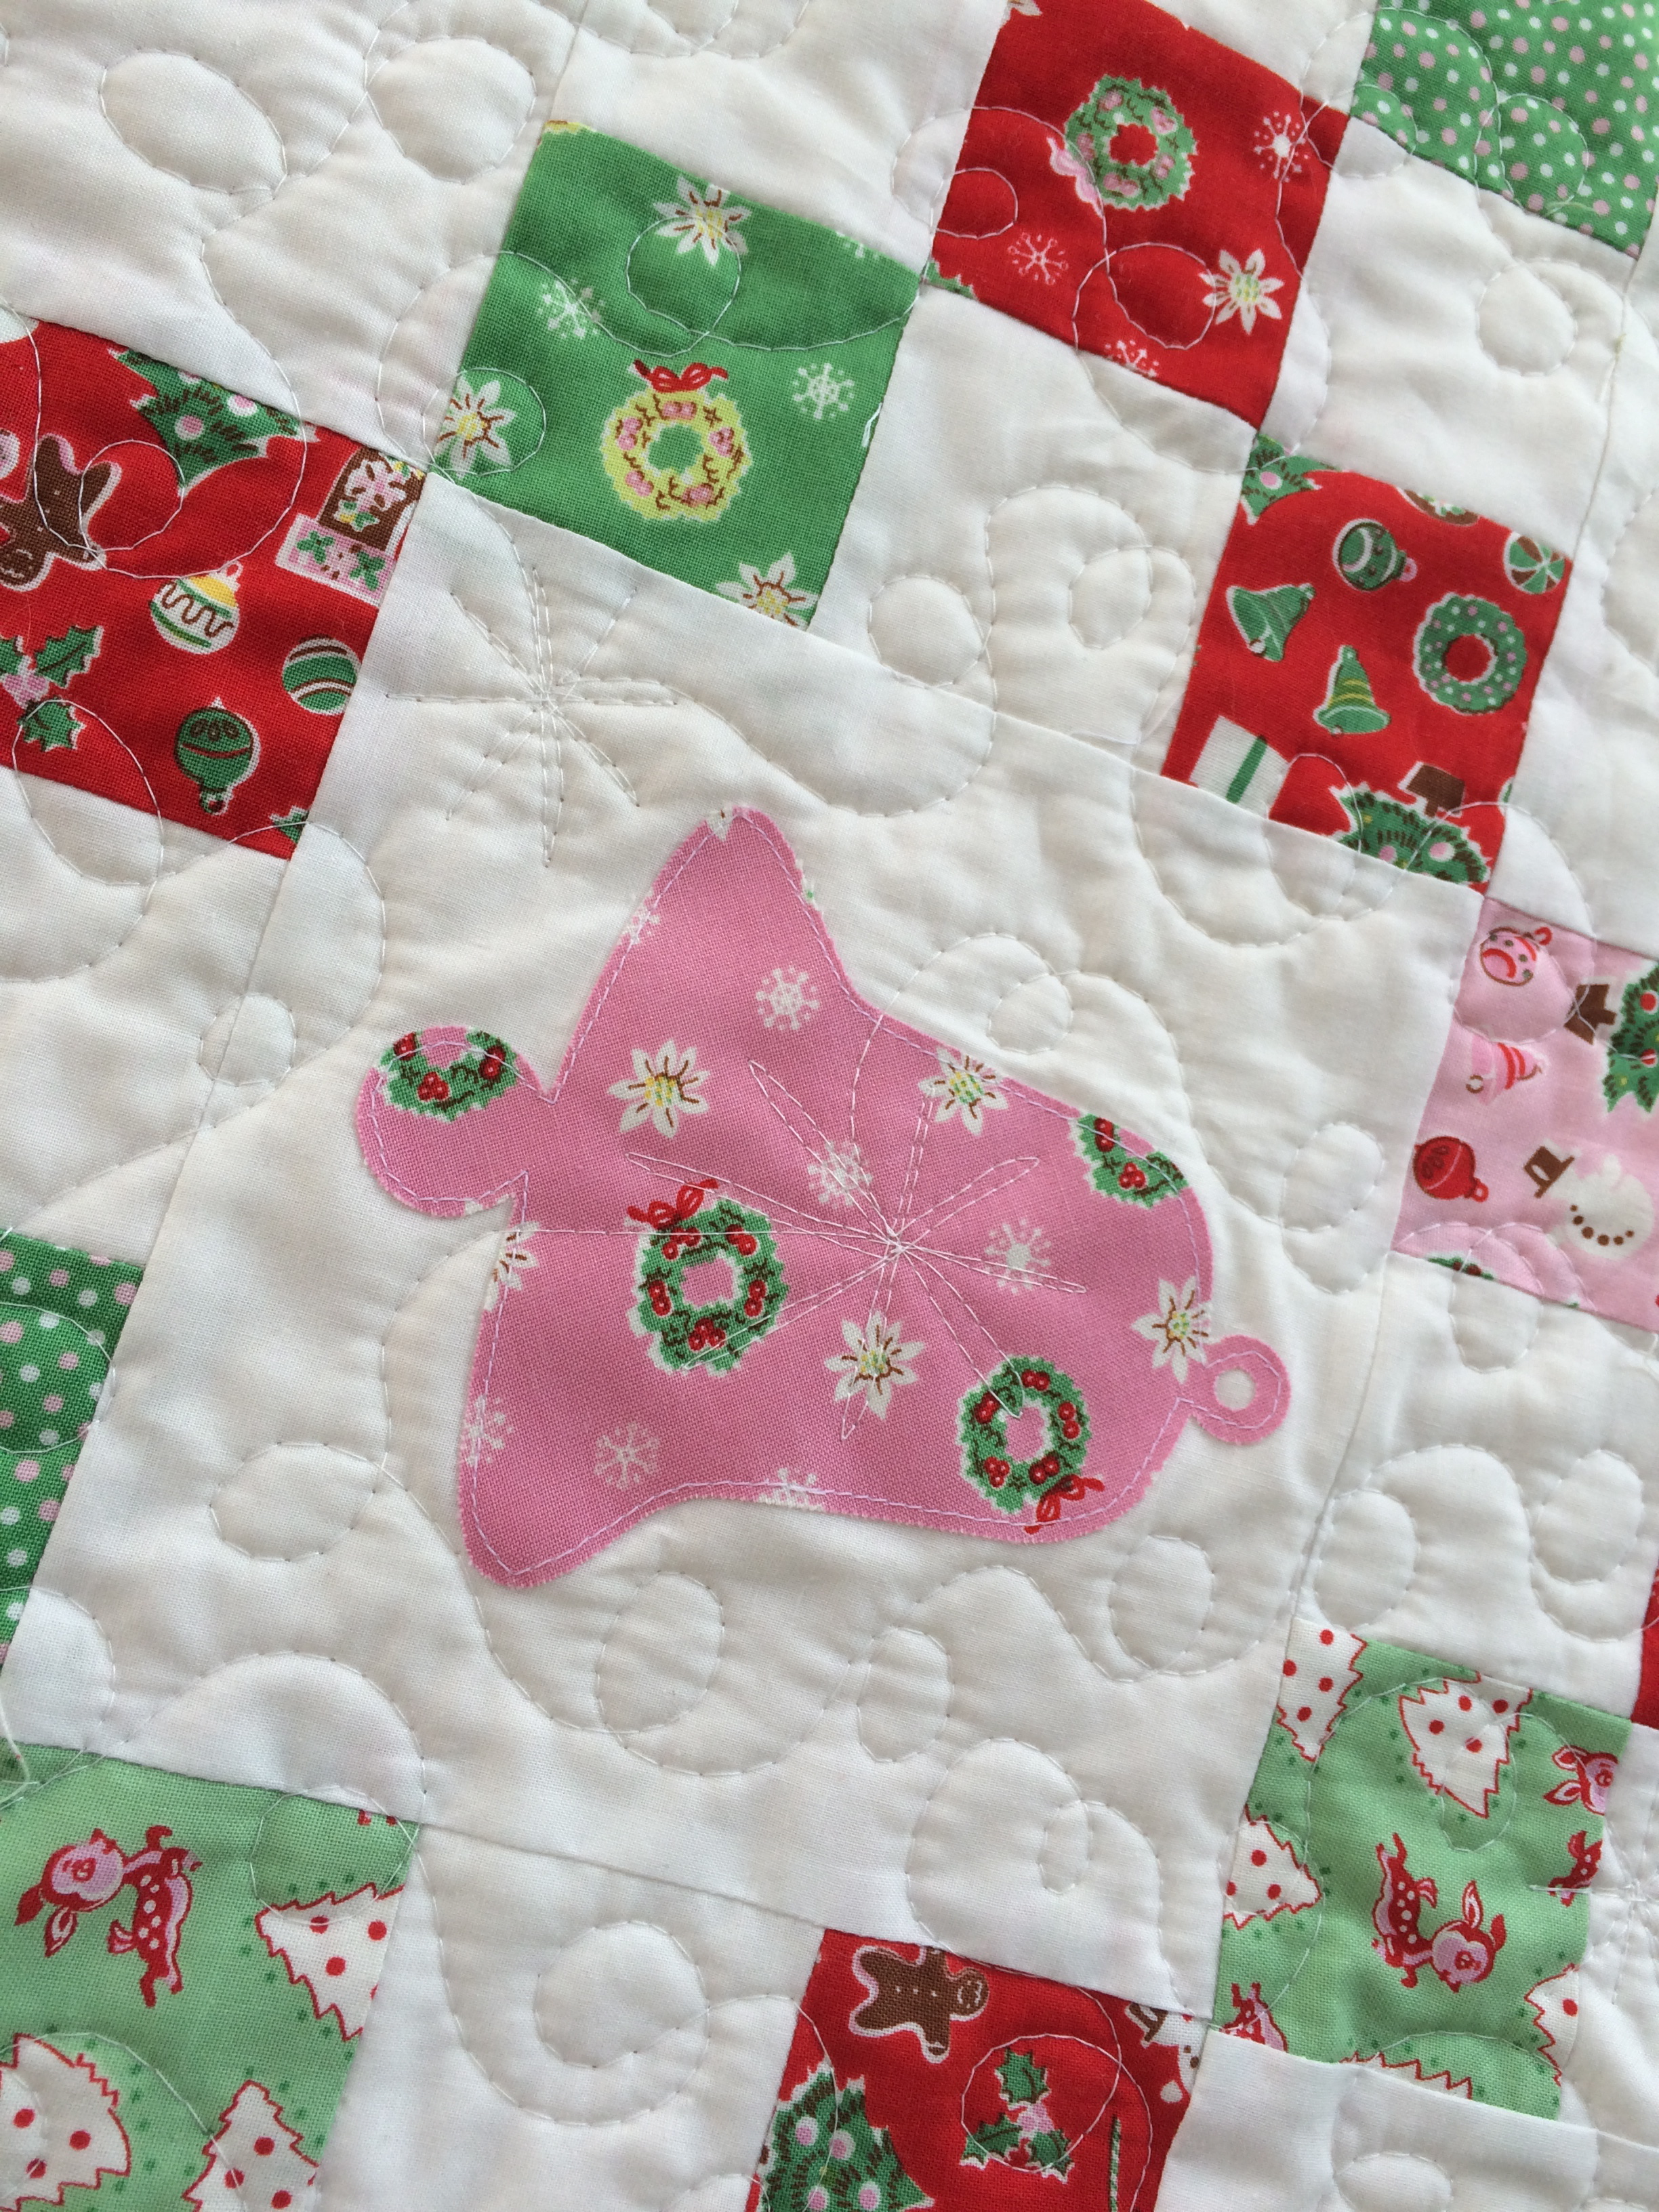
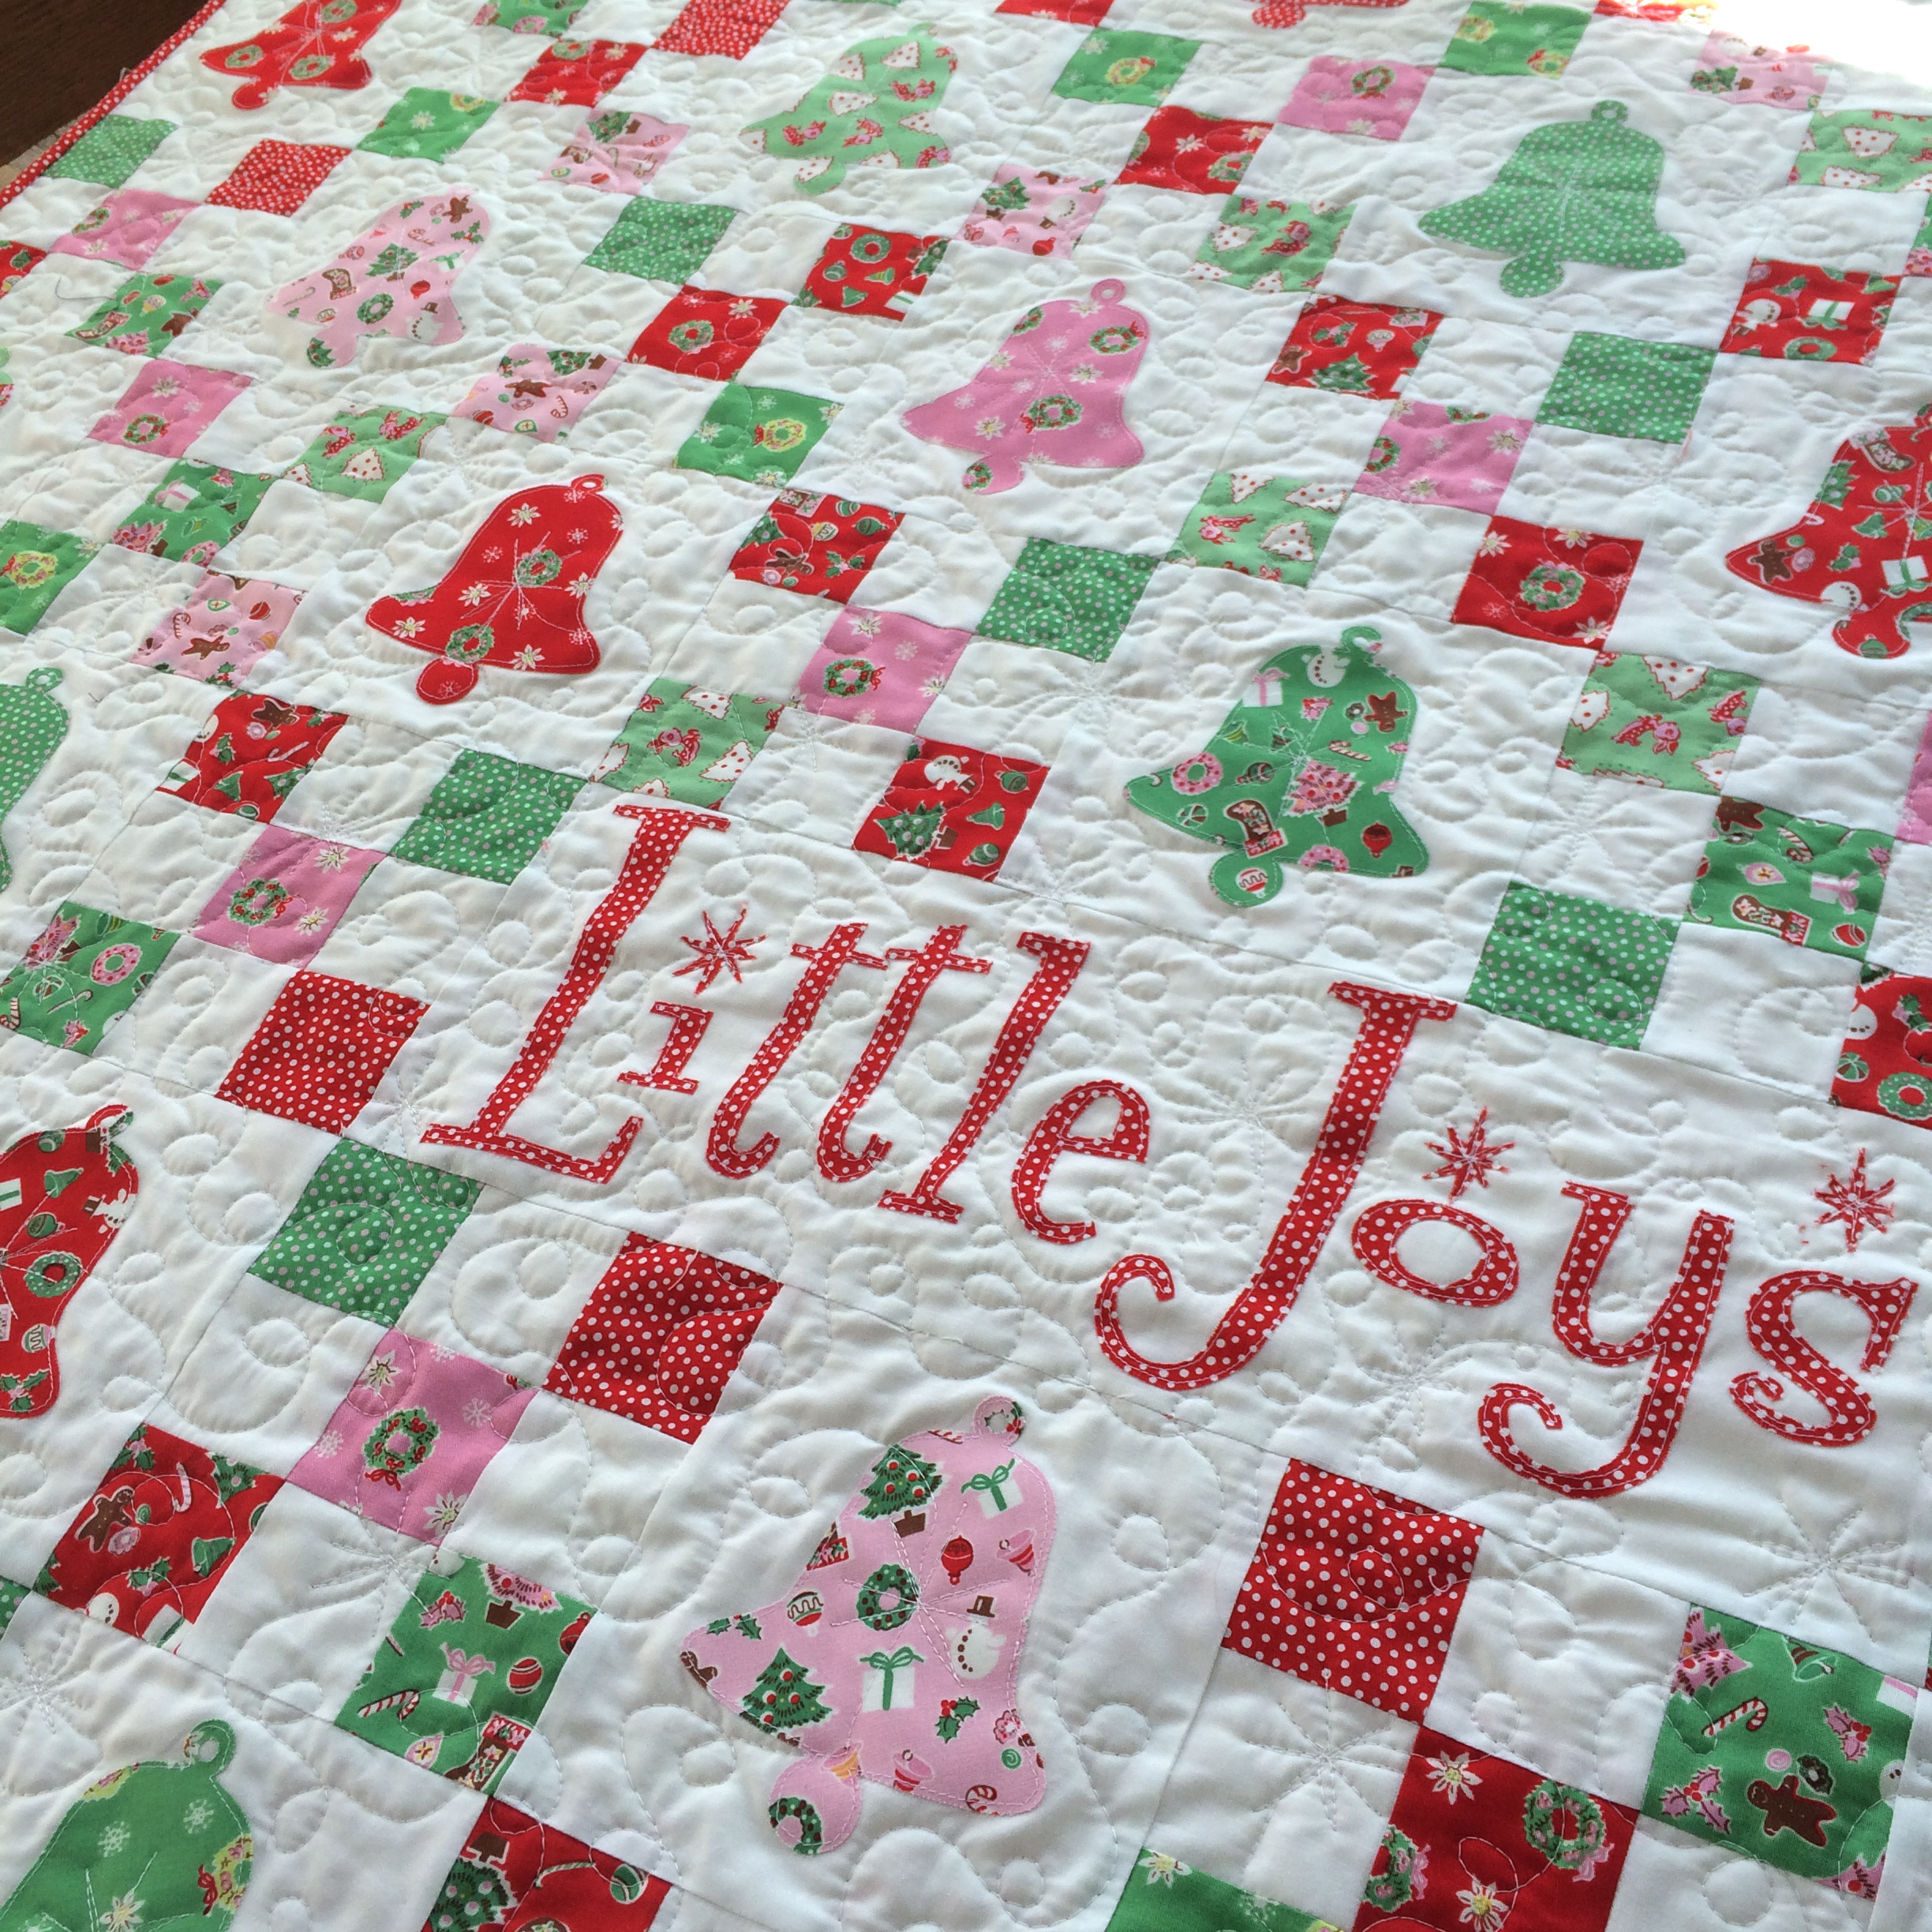
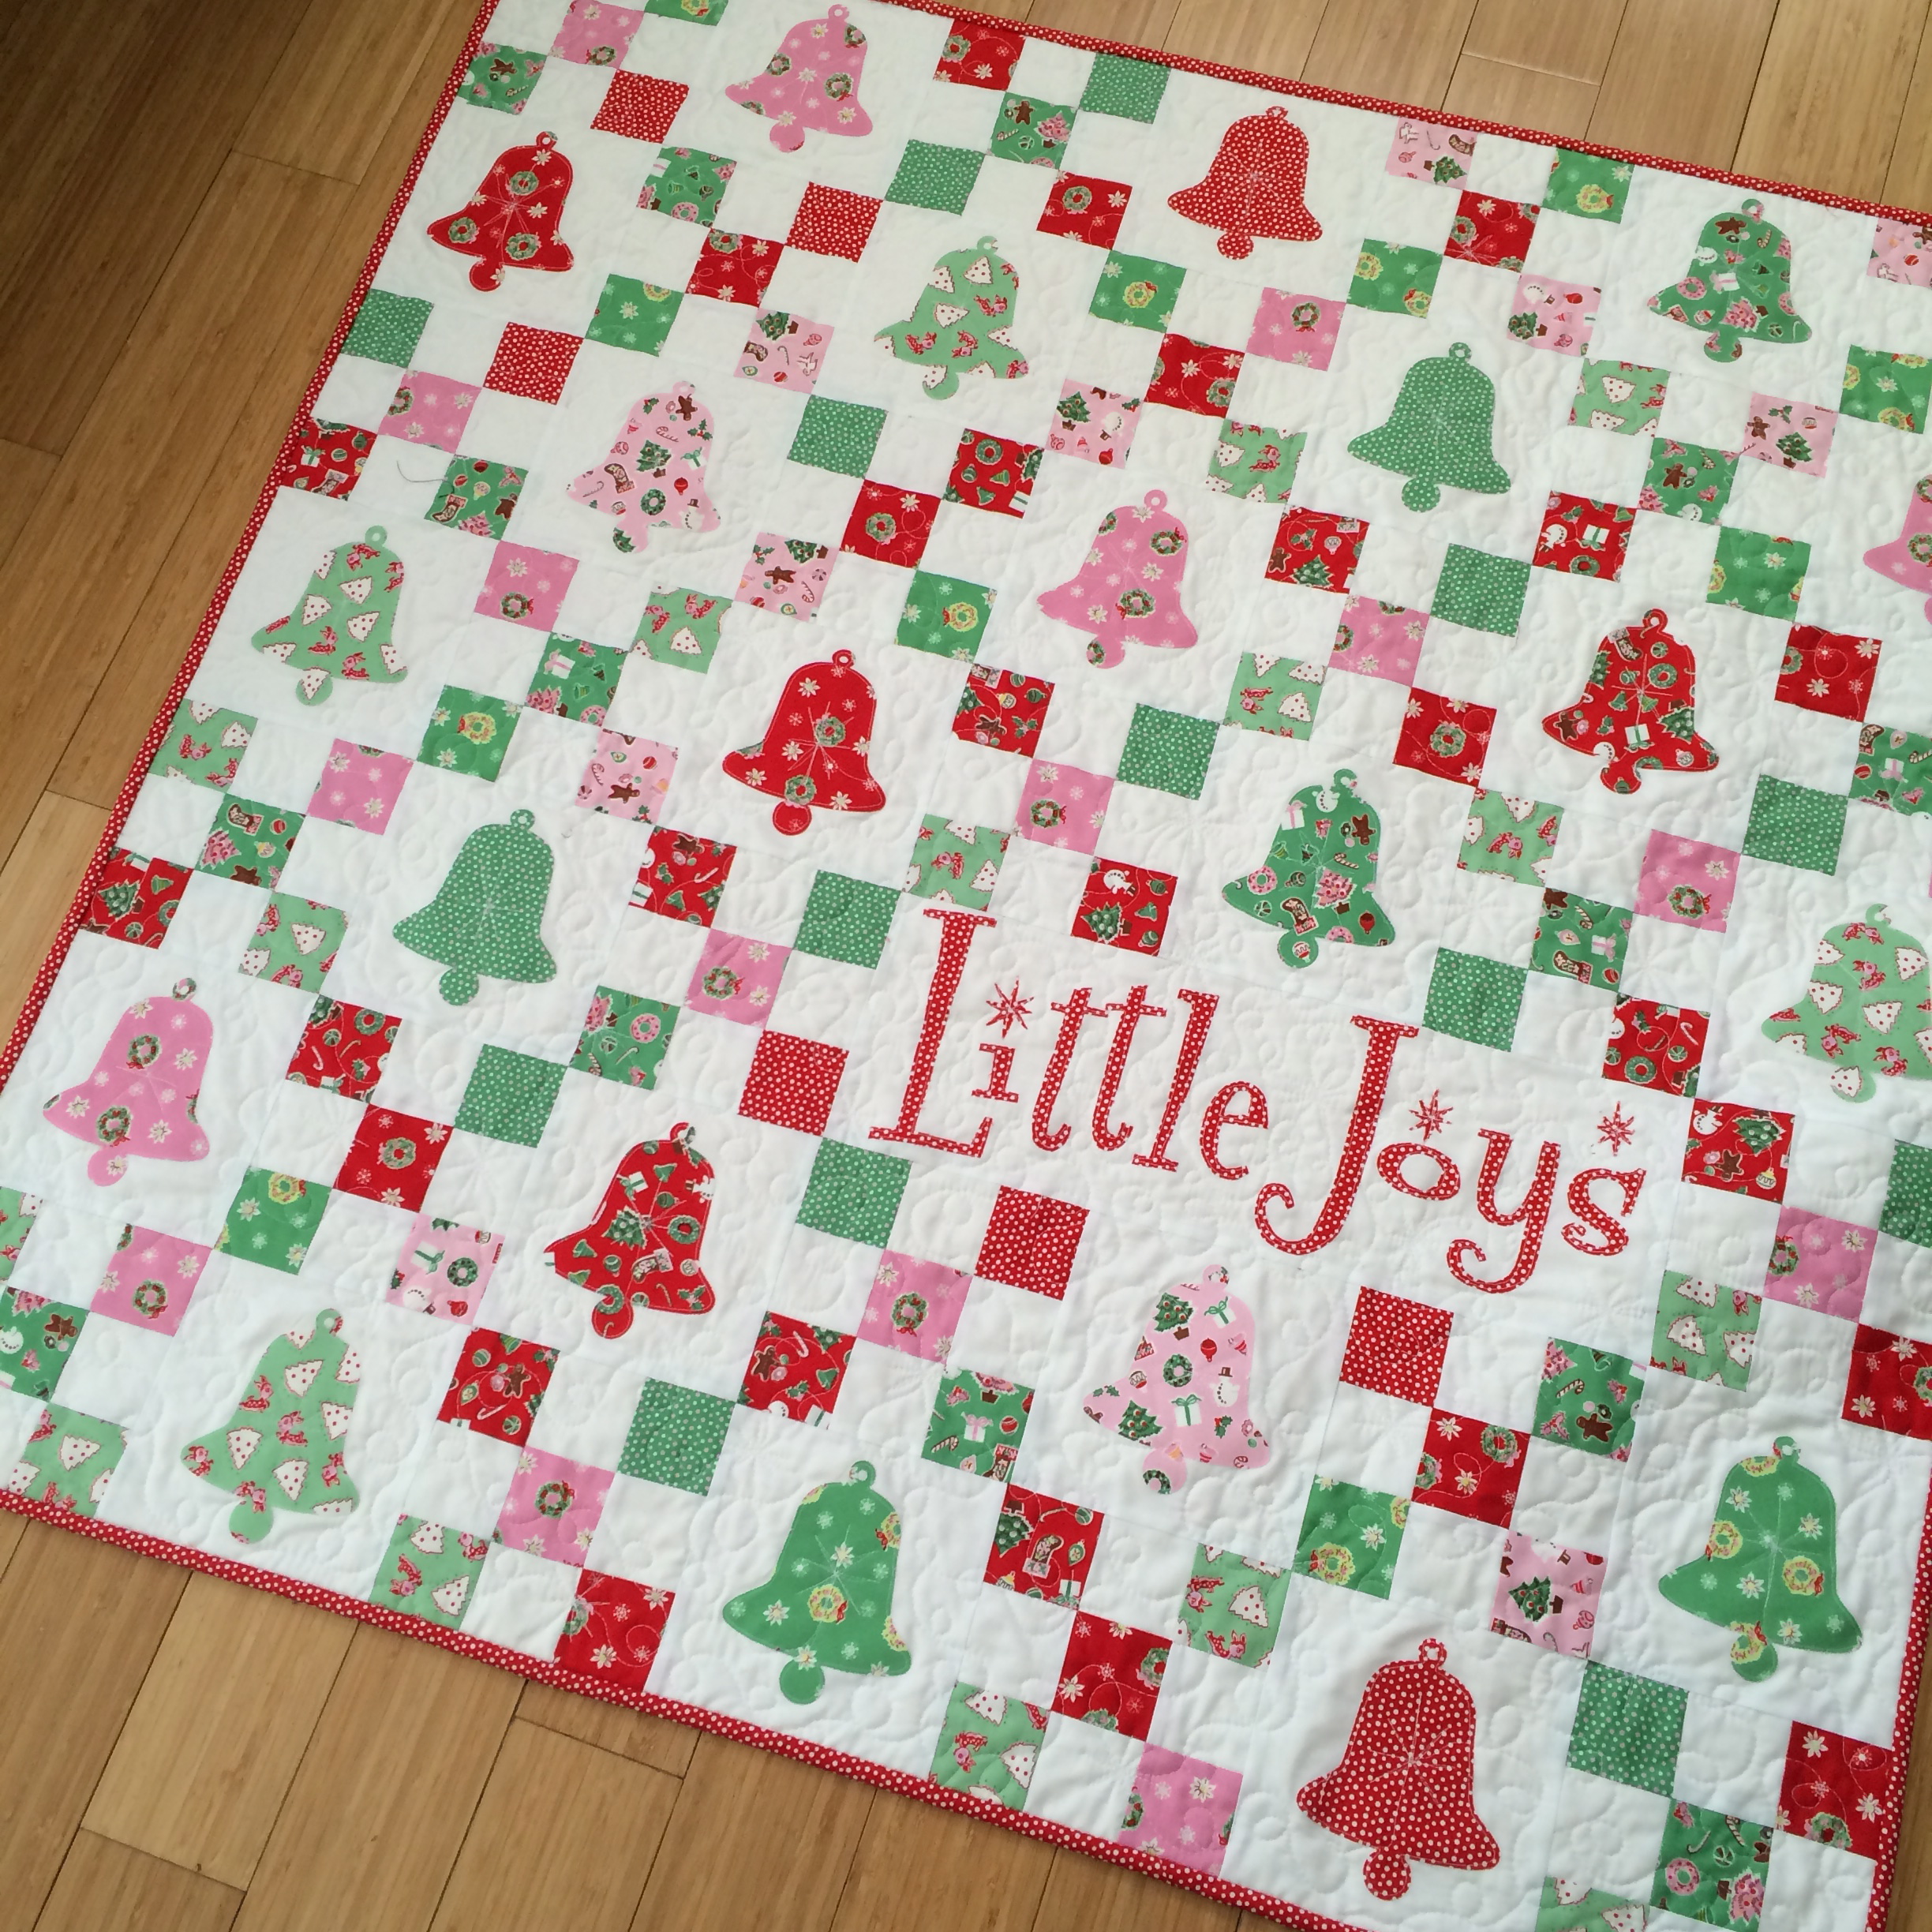
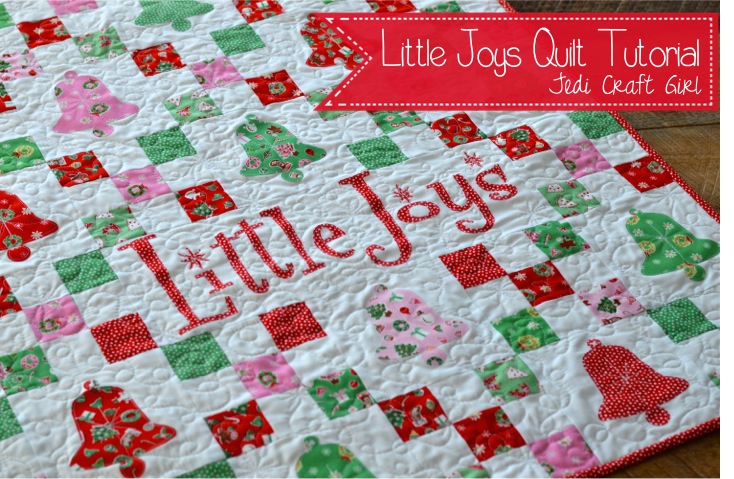
I wrote this pattern a few years ago for Penny Rose Fabrics.  I updated it and have the full tutorial available here!  I have always loved the Penny Rose “Little Joys” Christmas fabrics!  These sweet vintage prints make me think of a simpler time.  I love collecting vintage Christmas ornaments and decorations; this quilt is sure to fit into the mix!
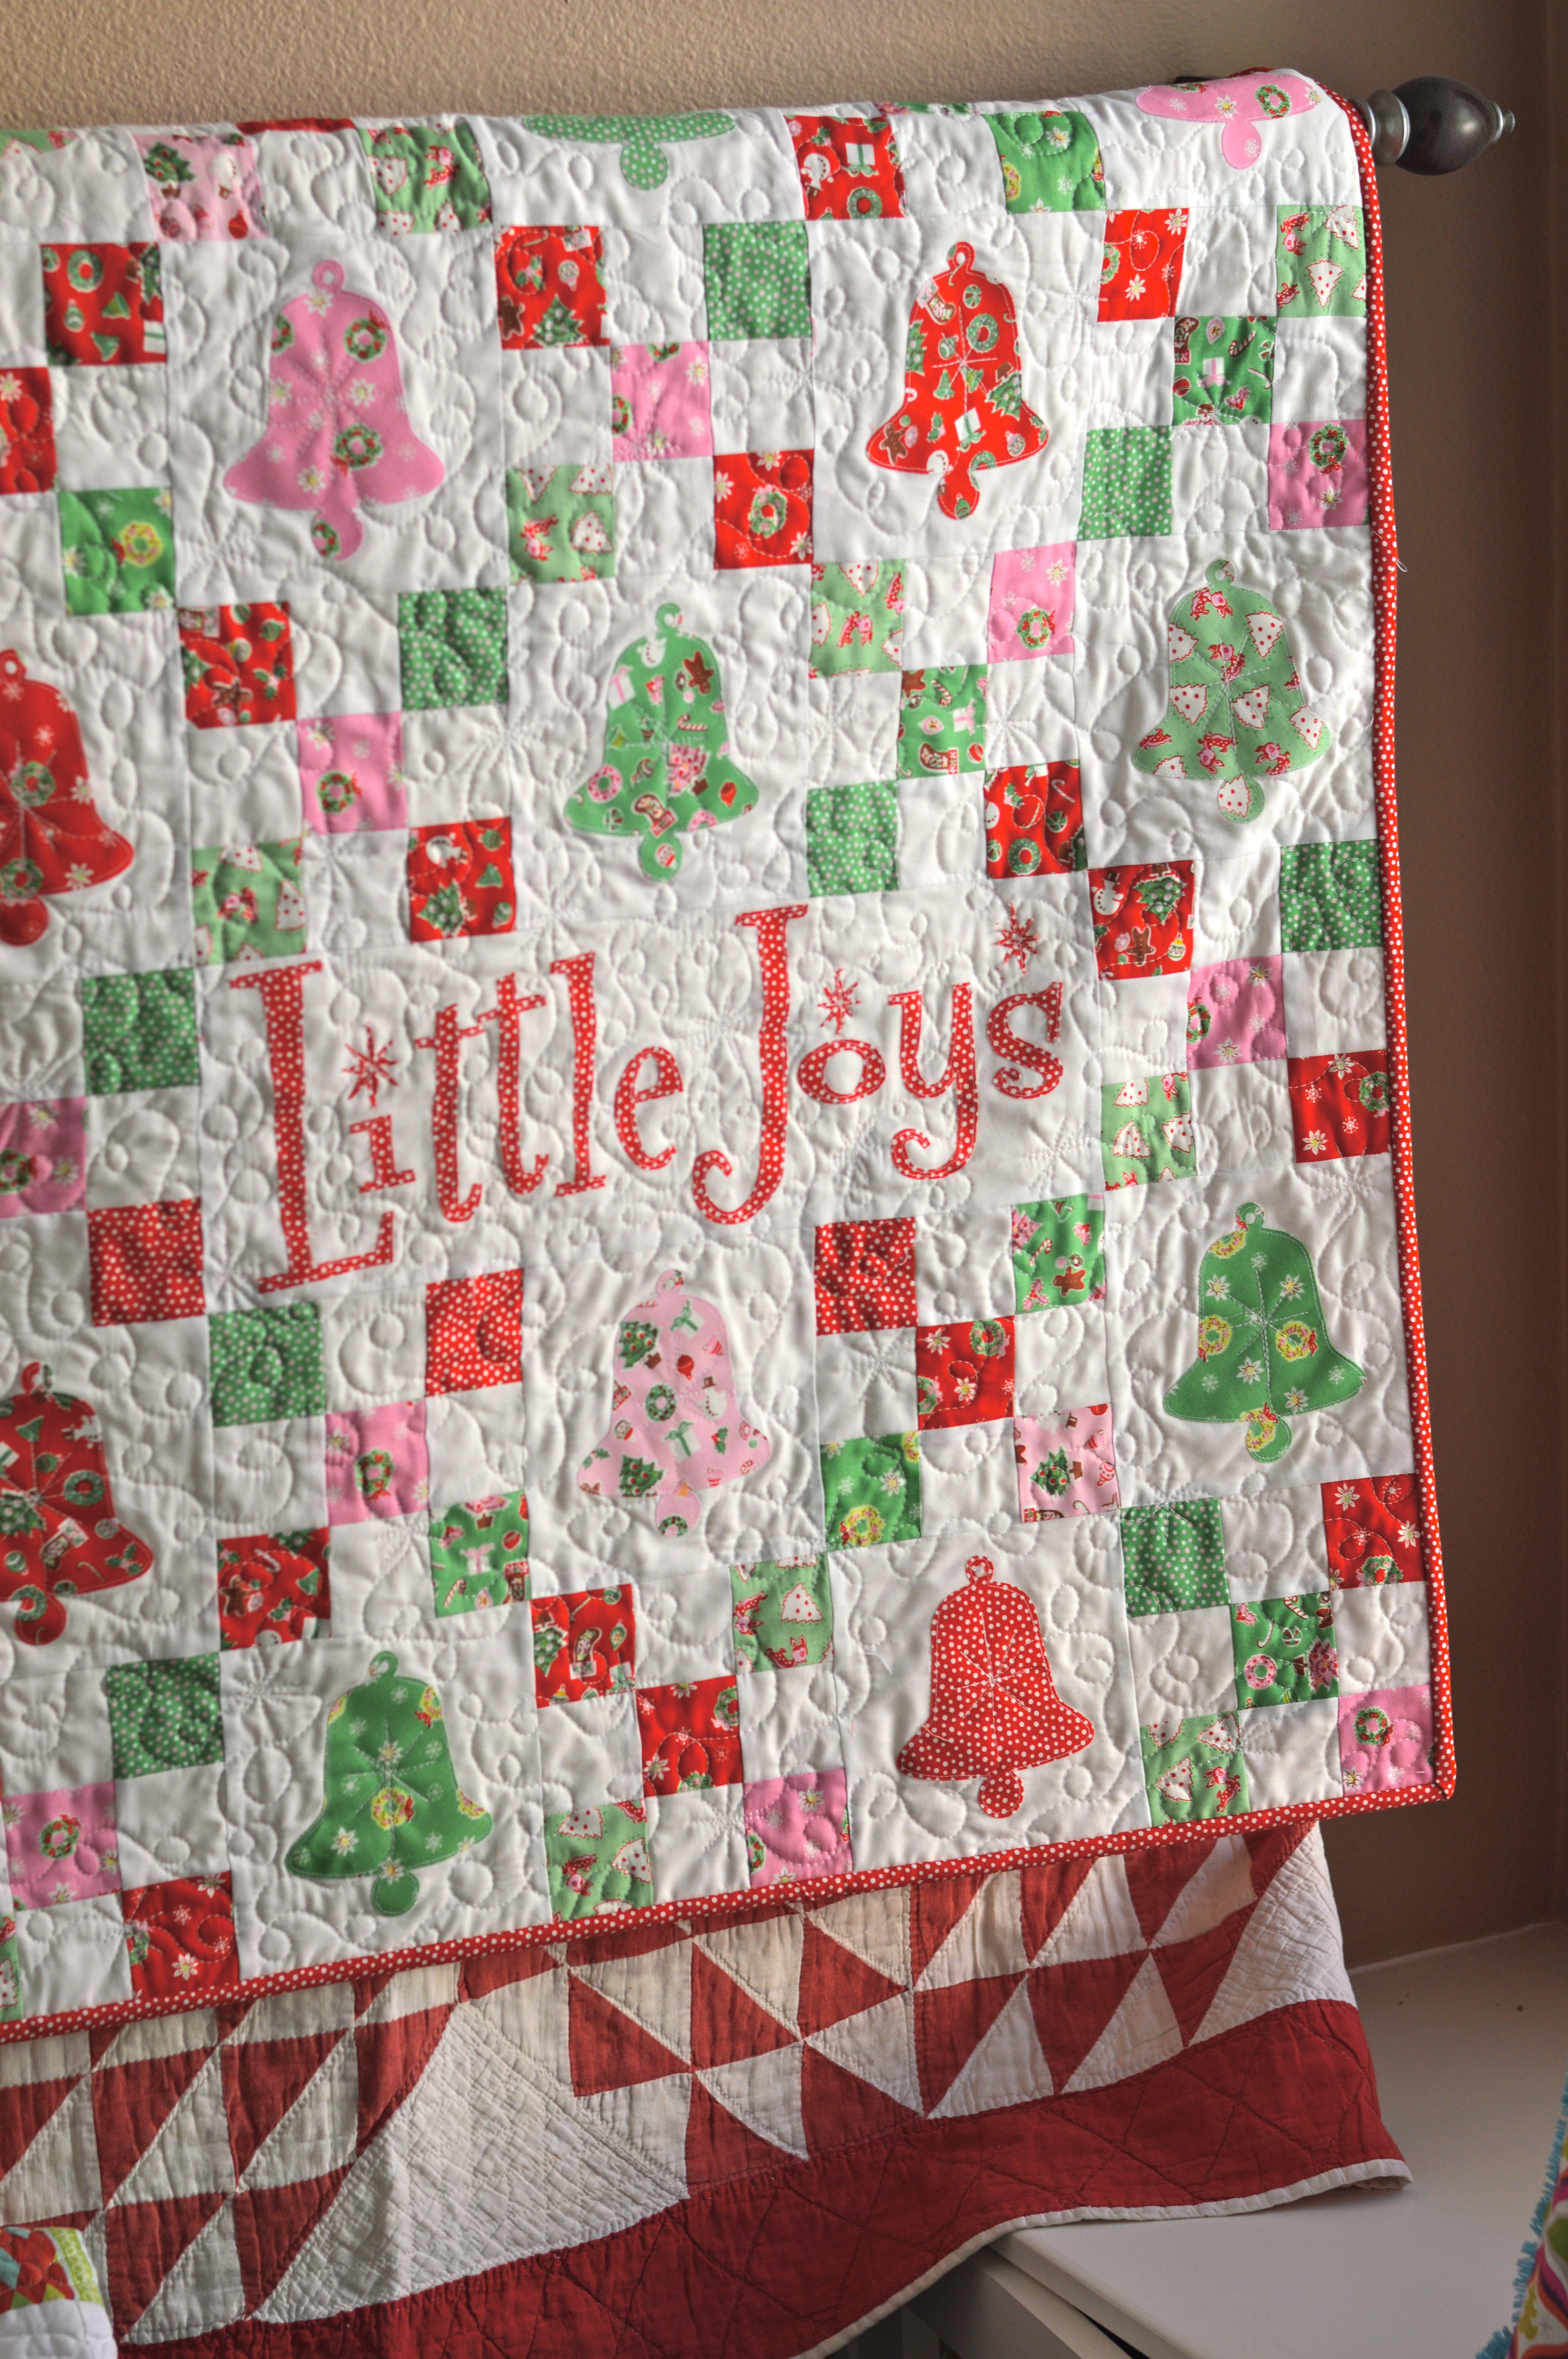
little joys quilt pattern christmas 35This quilt measures 42″ square and is a perfect size to hang on a wall, put at the end of a bed, or center on a table.  The quilt is made up of 6″ solid blocks with bell applique and  6″ nine-patch blocks that form a chain.

Screen Shot 2015-11-30 at 8.08.25 AMI used this Bell from Sizzix.  It is such a versatile die!

little joys quilt pattern christmas 15

Mufasa was all over this project because it involved the Sizzix Fabi – his FAVORITE toy!little joys quilt pattern christmas 20

Fabric Requirements:

9 fat quarters (green, red, and pink) – this is a scrappy little quilt so there are different amounts of each color – the colors don’t form a pattern in this version, but if you would like a pattern it would be easy to do!

1 1/2 yards solid white fabric

Heat n Bond Lite for appliqué

1/2 yard binding

1 1/4 yard backing (the fabric needs to measure at least 43″ wide or you may need to piece it)

Cutting Instructions

Fat Quarters:

Cut (2) 2 1/2″ x WOFQ strips from each fat quarter. You will have a few extra.

Use remaining fabric for bell appliqué and letters

Solid White:

Cut (6) 2 1/2″ x WOF strips, cut them in half to give you (12) 2 1/2″ x 21″ strips.

Cut (5) 6 1/2″ x WOF strips, subcut into (22) 6 1/2″ squares and (1) 6 1/2″ x 18 1/2″ rectangle

little joys quilt pattern christmas 7

2 1/2″ strips are cut from each of the 9 fat quarters.

little joys quilt pattern christmas 3

6 white 2 1/2″ x WOF strips are cut and then cut in half to equal the width of the fat quarter strips.

little joys quilt pattern christmas 16

Sew white, dark, white strip sets together, making 3 strip set units.  Press toward the dark.

little joys quilt pattern christmas 5

Sew 6 strip units of the dark, white, dark pattern (above).  Press toward the dark.

little joys quilt pattern christmas 13

Sub cute each strip set in 2 1/2″ increments.  You should have 8 per strip set.

little joys quilt pattern christmas

Lay out blocks making a checkerboard pattern.  Sew together, matching seams.  Press seams in one direction.  Continue this process making 24 total checkerboard blocks.

little joys quilt pattern christmas 11

Cut the remaining fat quarters into 5″ squares and fuse Heat n Bond Lite to the wrong sides of the fabric (above).  Using the Sizzix Bell die, die cut 22 bell shapes.  Peel off backing paper and heat set to the centers of the 6 1/2″ white squares. Sew around each bell with a straight stitch.

little joys quilt pattern christmas 6

little joys quilt pattern christmas 12For the Little Joys word block I cut the letters by hand.  Download the Little Joys pattern HERE.  I printed the letters on Heat n Bond EZ print sheets.

little joys quilt pattern christmas 17You can also trace onto iron-on transfer paper.  The letters are in reverse.  Iron the heat n bond to the wrong side of the letter fabric.  Cut out by hand around each letter.  Peel off the backing and position on the white rectangle.  Heat set in place.  Sew around each letter.

little joys quilt pattern christmas 19

Now you’re ready to lay out the whole quilt!  Use the above photo as your guide.  Again, my colors are random but you can make a color pattern!

Sew each block together creating rows, pressing toward the applique blocks.  Then sew the rows together, pinning at intersections so seams match up.  Press all seams in one direction.

Baste, Quilt, Bind!

IMG_2019Mufasa also loves the sewing machine!  No animals were harmed in the quilting of this project!


little joys quilt pattern christmas 9Make sure your cat approves 🙂

little joys quilt pattern christmas 2I free motion quilted this with loop de loos and retro style stars.  I love how it turned out!  Add the binding and you’re finished!

little joys quilt pattern christmas 10

little joys quilt pattern christmas 14