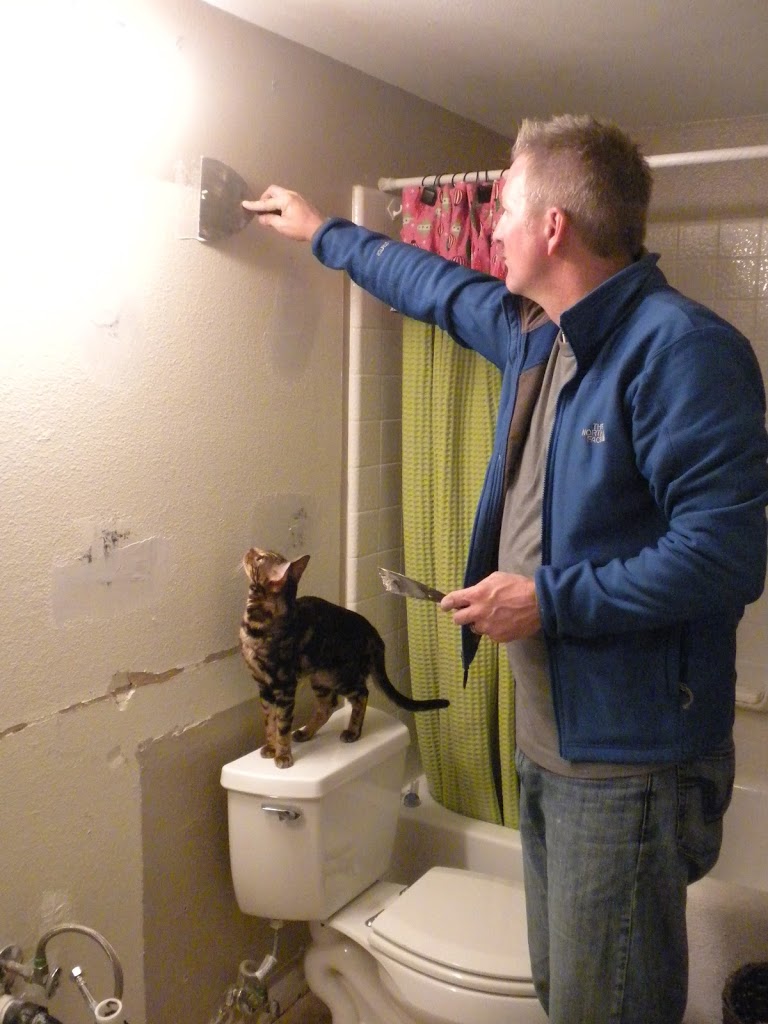
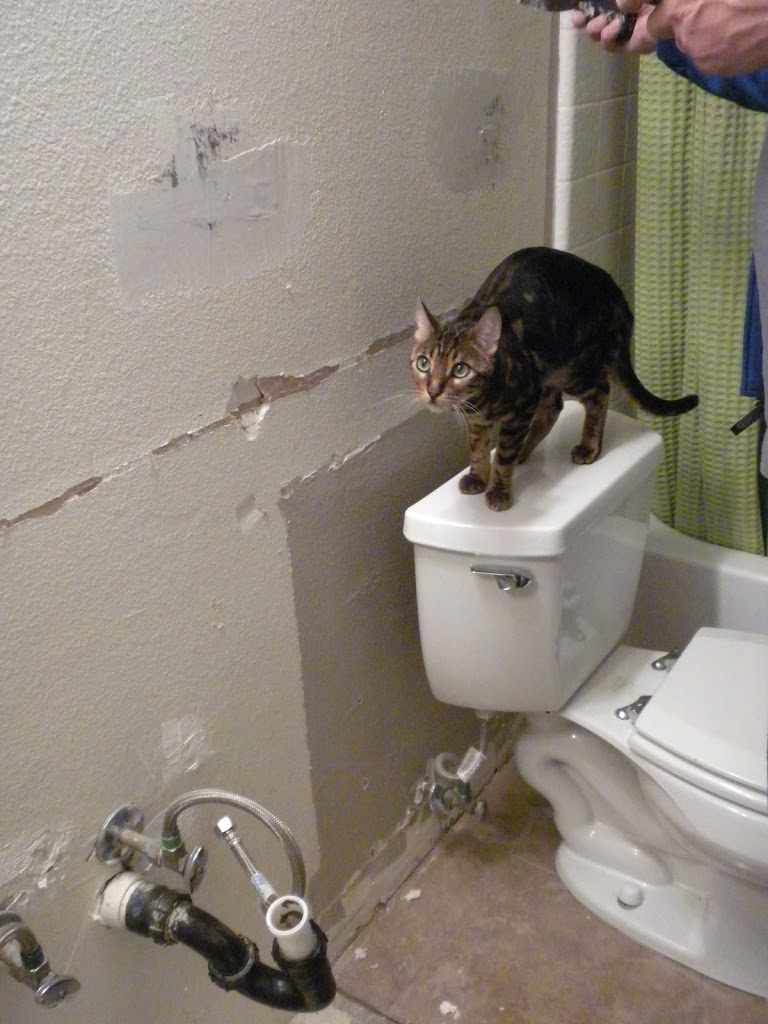
We are fixing up our guest bathroom just in time for Thanksgiving! Marbles has to be in the center of it all!!
This is where our new vanity & counter top are going! Yea! No more 1989 mini-vanity!!

Saving the universe one project at a time!
We are fixing up our guest bathroom just in time for Thanksgiving! Marbles has to be in the center of it all!!
This is where our new vanity & counter top are going! Yea! No more 1989 mini-vanity!!
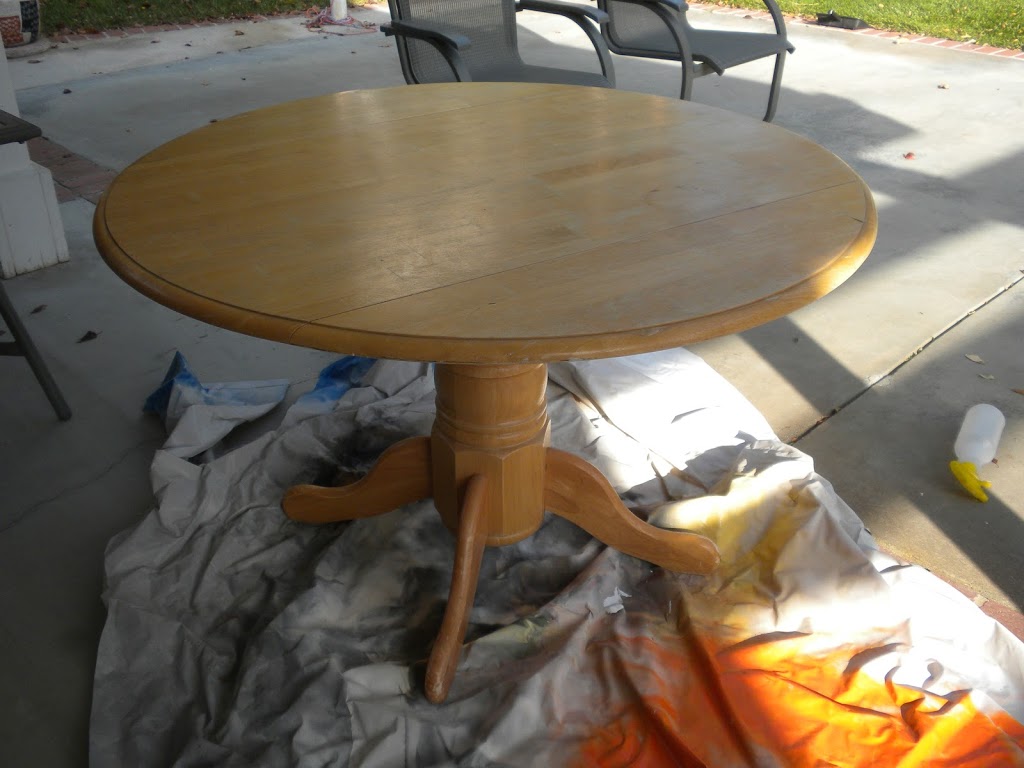
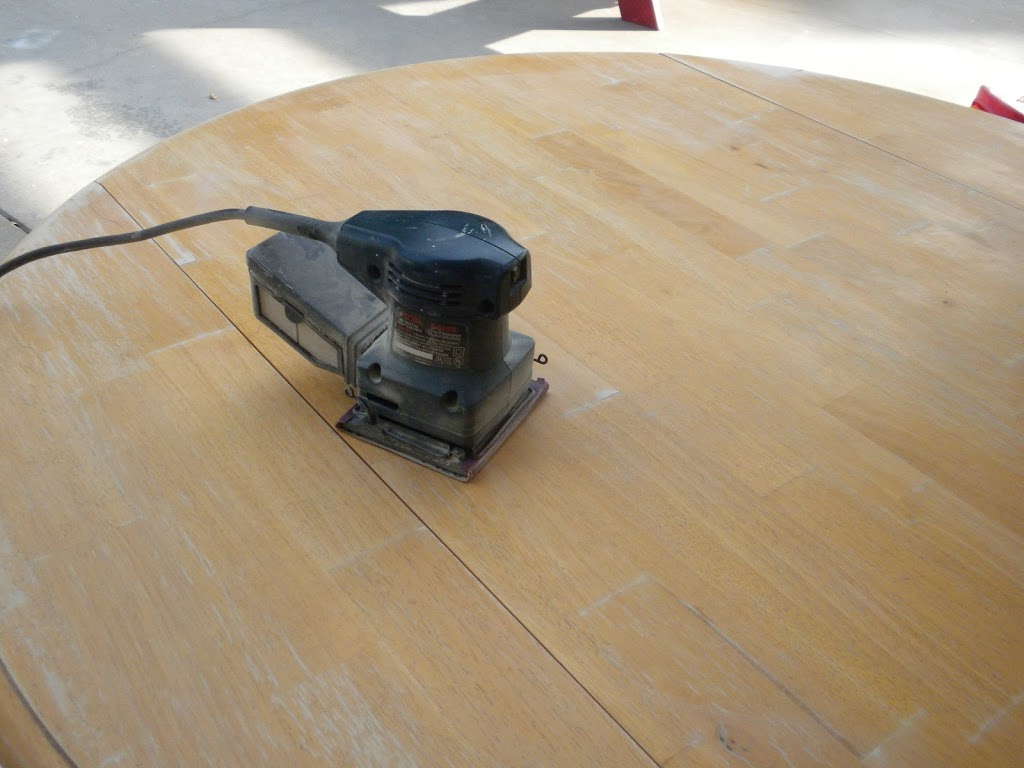
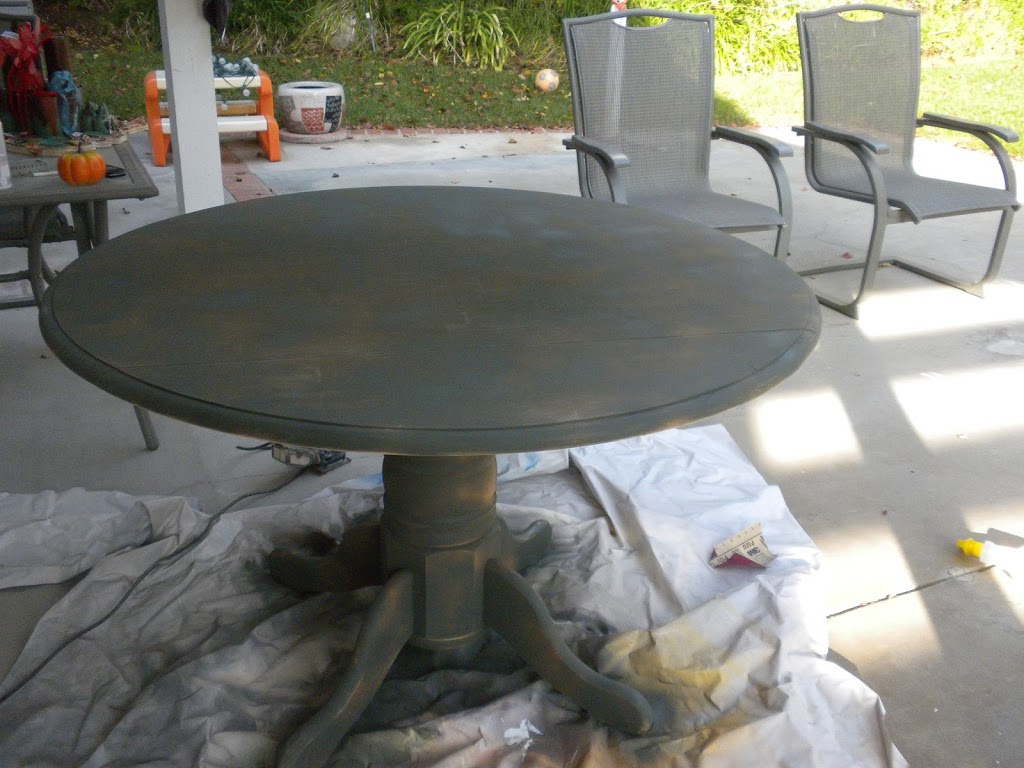
Right away I got to sanding it.
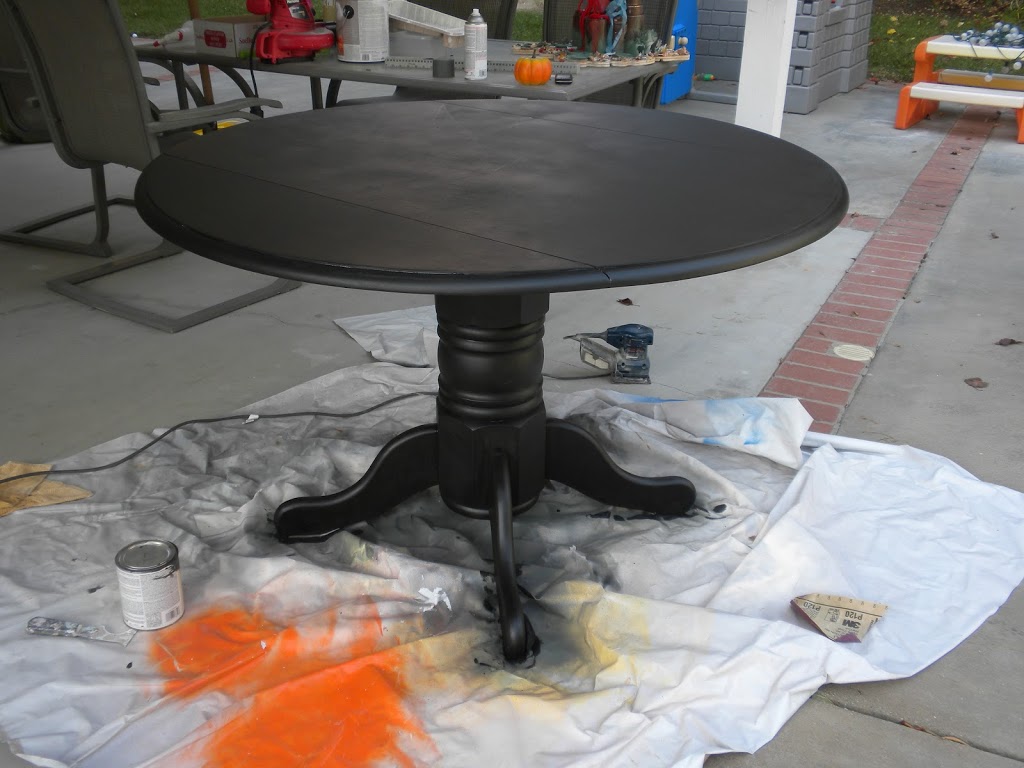
Then I primed it with a dark primer.
I painted it black.

Then I painted over the black with white paint. I used the same chalk paint method as I used on my coffee table. The technique comes from I Heart Naptime. I mixed 5 tablespoons of Plaster of Paris with 2 Tablespoons water. Then added 2 cups of white paint.
My plan was to have the white paint look aged & like it’s chipping off with the black showing through. Only I got so excited to paint I forgot to add Vaseline to parts of the table to make the paint scrape off easier. I would definitely not forget this step!!
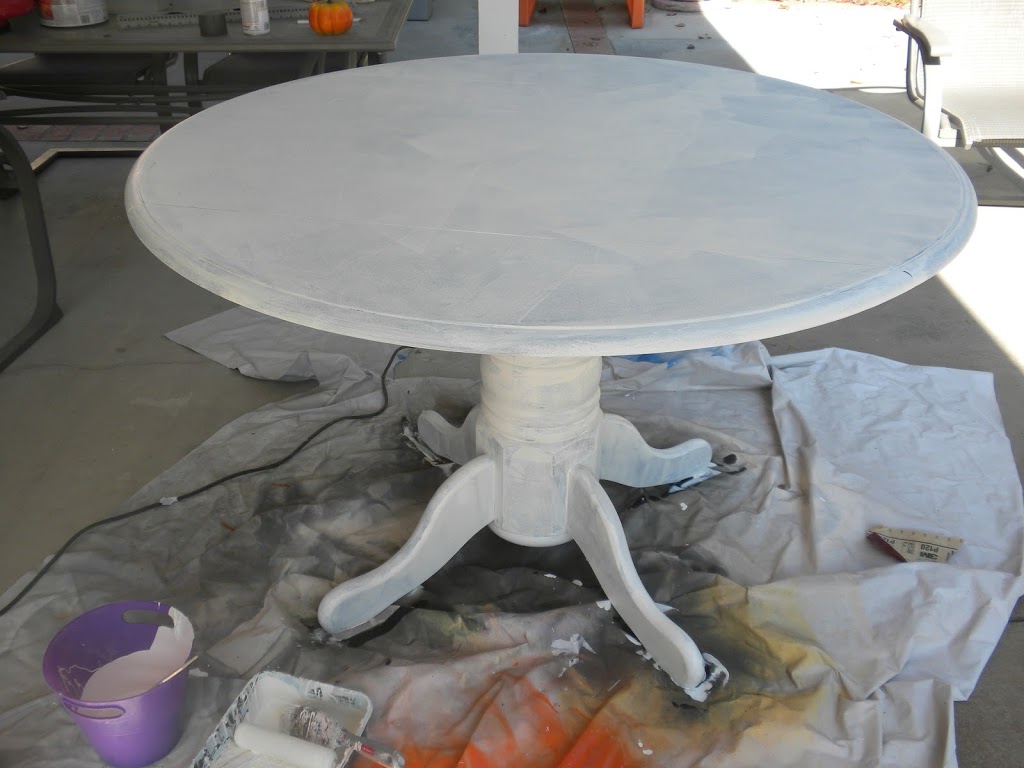
Anyway, I painted 3 coats of white paint to the table.
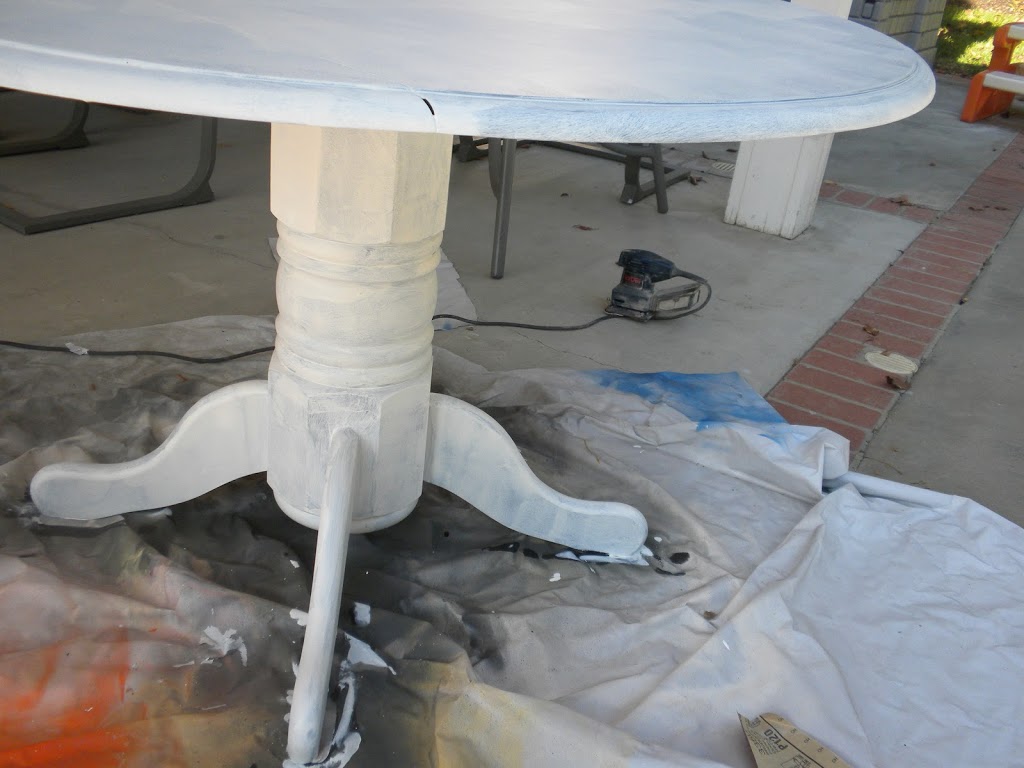
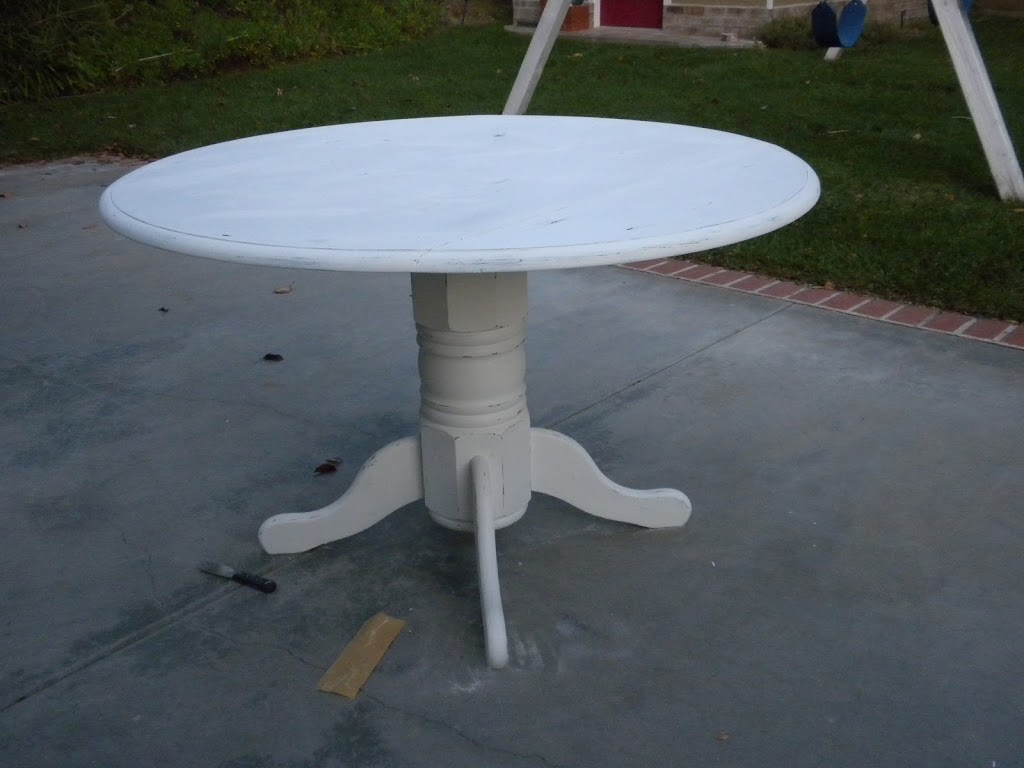
Next I sanded the edges so the black paint would show through & the table would look aged. This is where the Vaseline would have been nice. I didn’t get the big chunky paint chips that I wanted. I am sure they will come over time!!
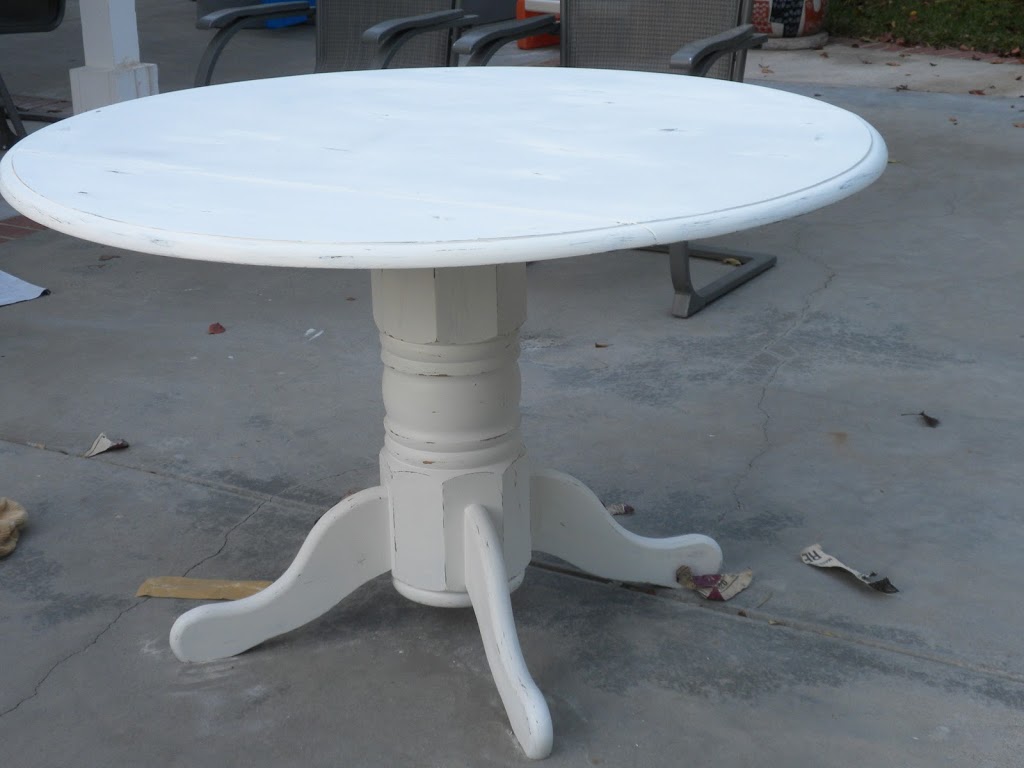

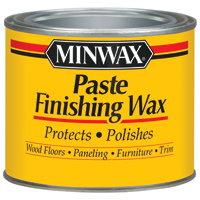
This Minwax Finishing Wax is my favorite stuff!!! It gives such an amazing feel to your furniture – different then polyurethane. You rub the wax on and then in 20 minutes you buff it out with a clean cloth. It makes the paint feel like it’s been there for a long time!! I even used it on my table top. It won’t protect it as good as polyurethane, but I want the table to age naturally.
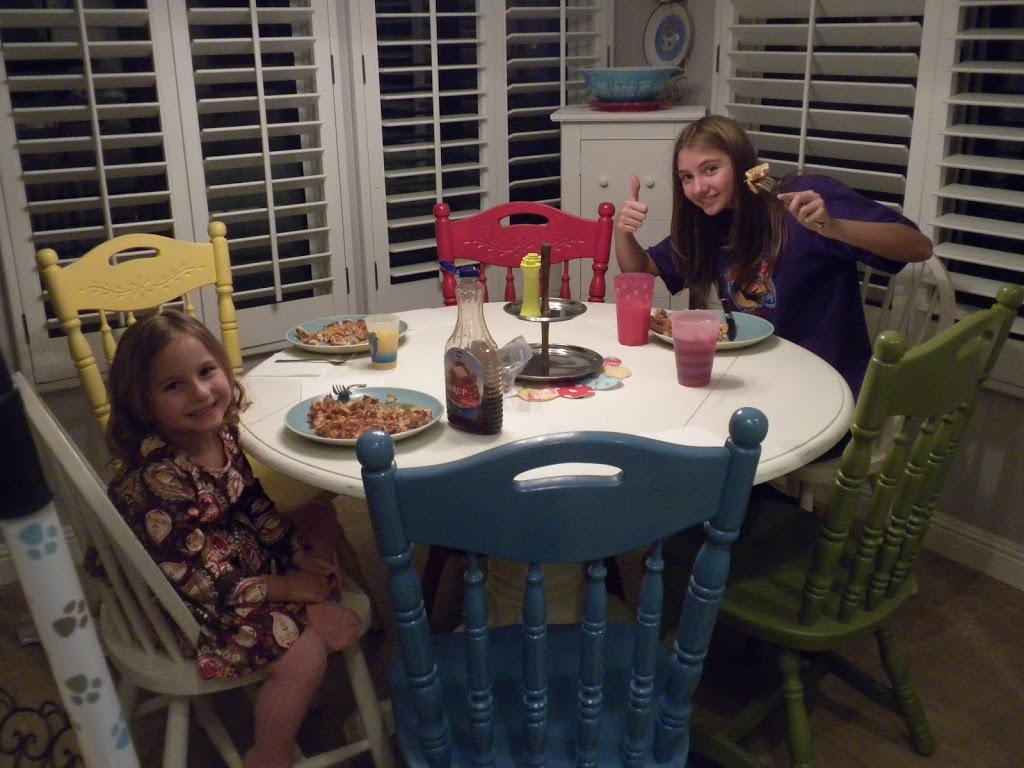
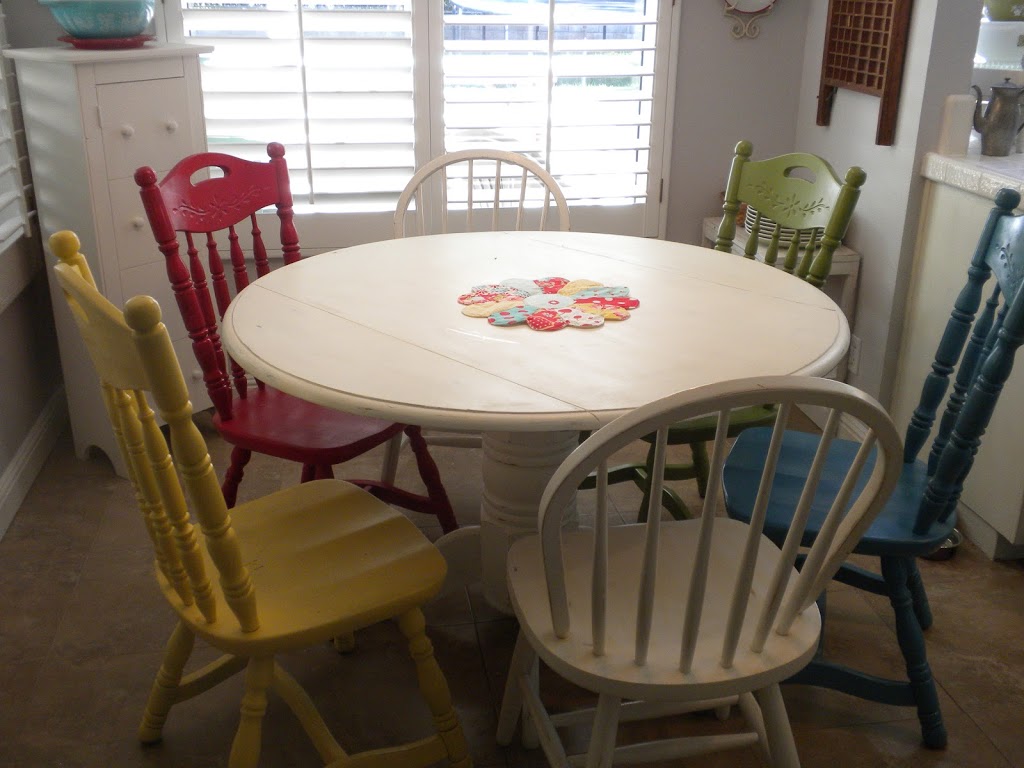
This is our first meal at the table. I love how it fits the space in my kitchen better than my rectangular table.
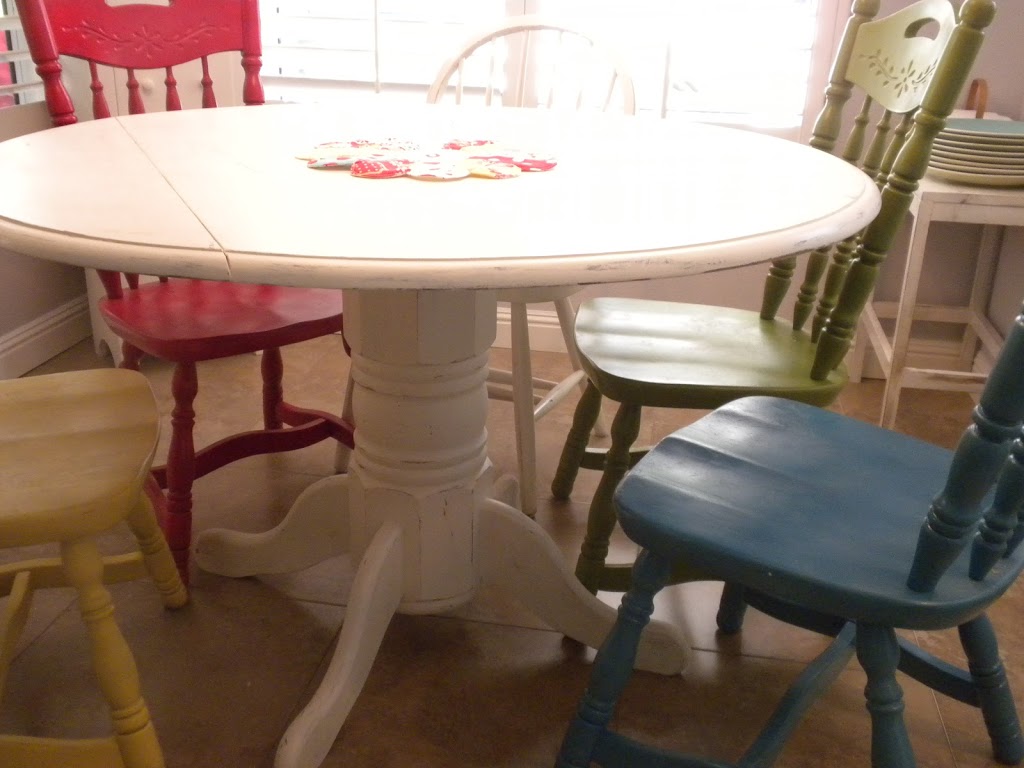
Yea! Now what can I paint next??
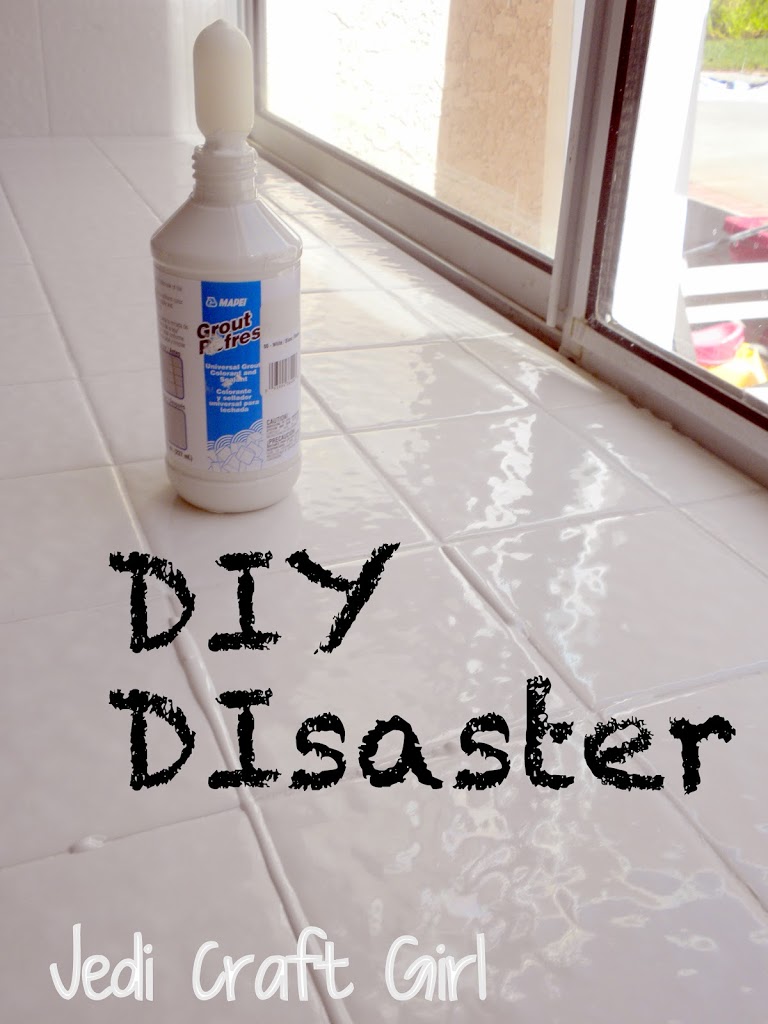
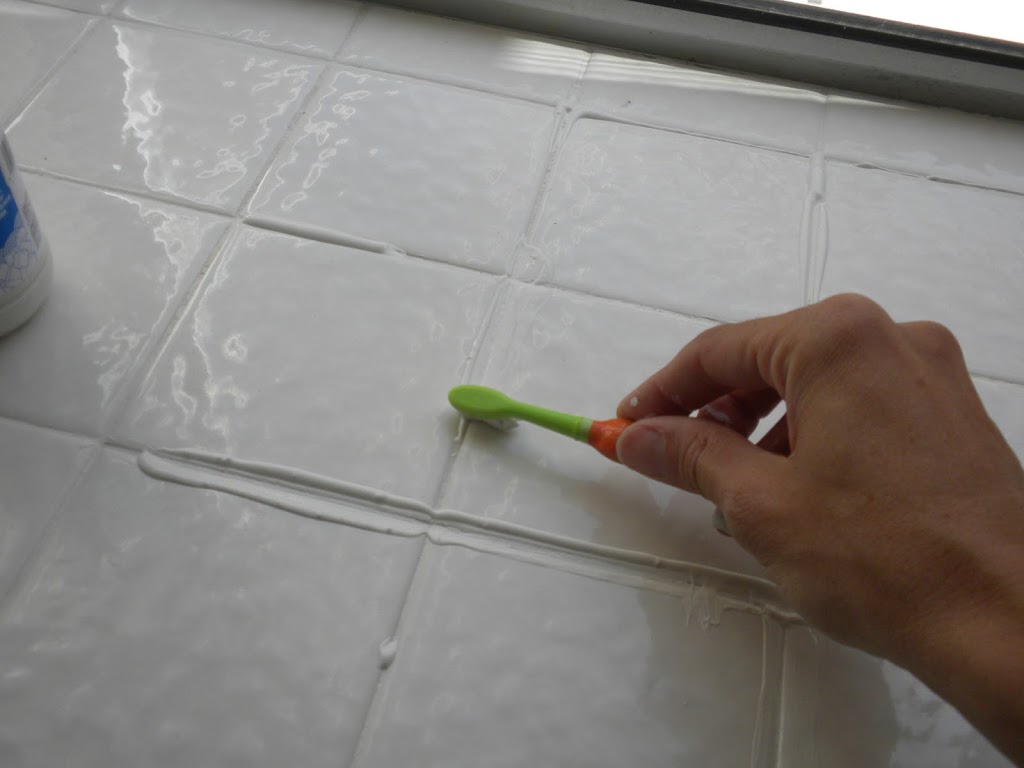
I have been reading about ways to renew or refresh tile grout. After reading several tutorials and seeing successful results, I decided to try it for myself. I have a 1989 kitchen with 1989 tile – I don’t need to go into any more detail – you get the picture! I bought this “Grout Refresh” at Lowes. It is grout colorant and sealer. I read the directions 3 times and started it. You put a little bead of the stuff on the grout & rub it in with a toothbrush.
This part was very successful!
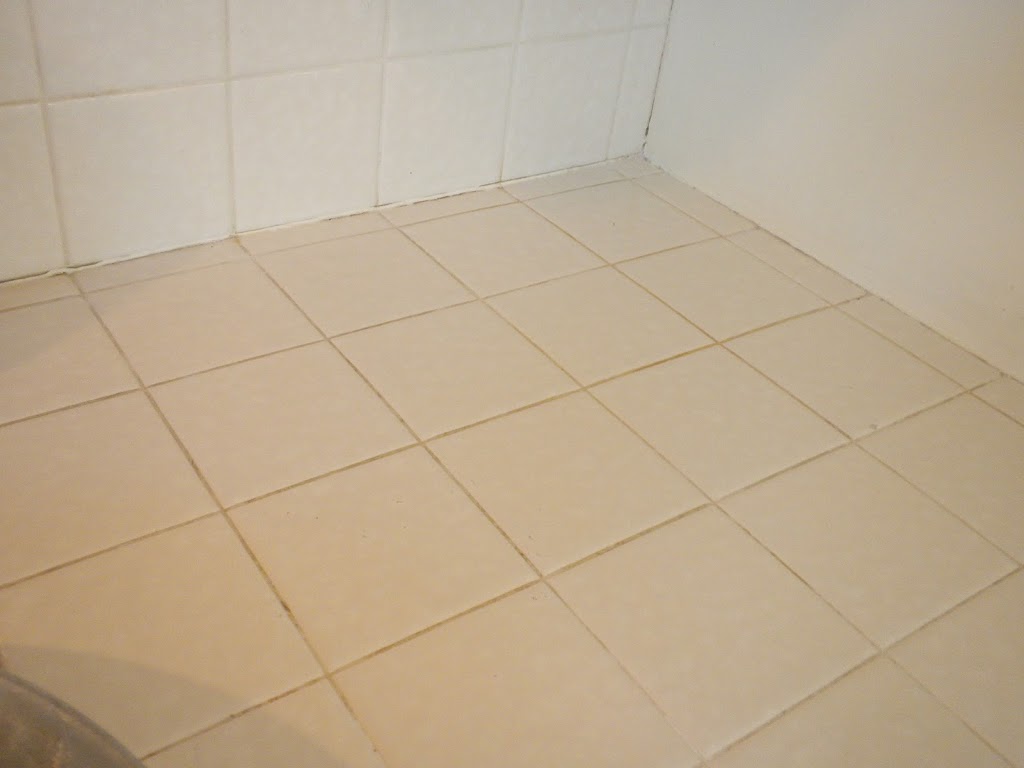
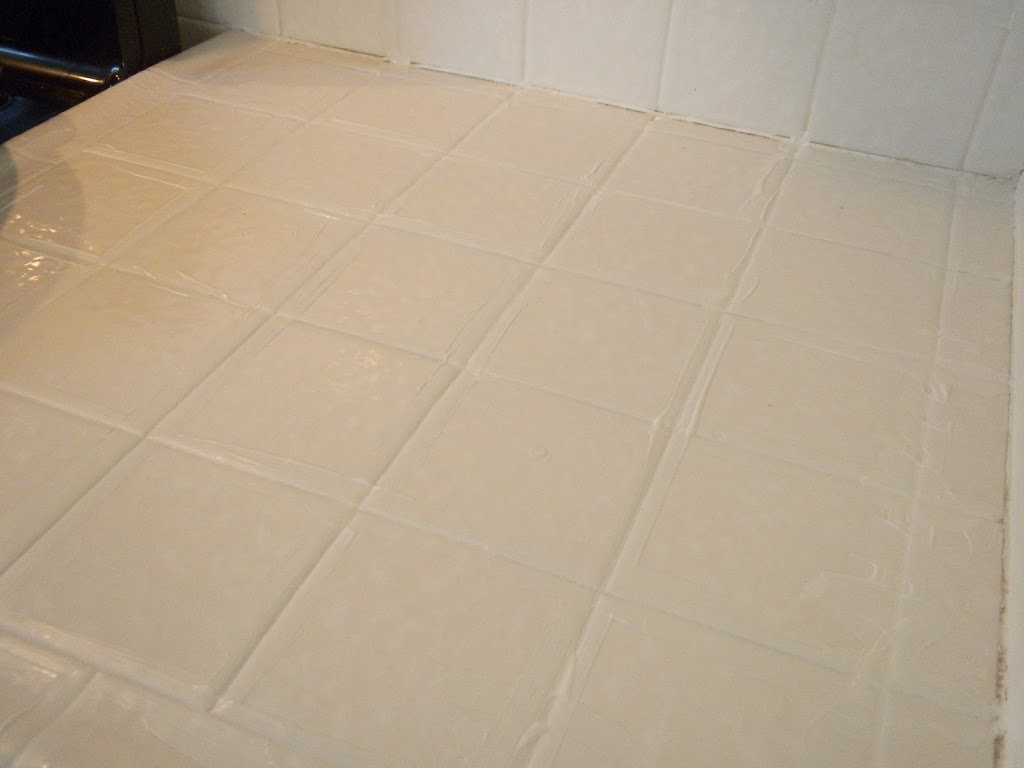
( This is the old grout pictured below)
After painting the stuff on
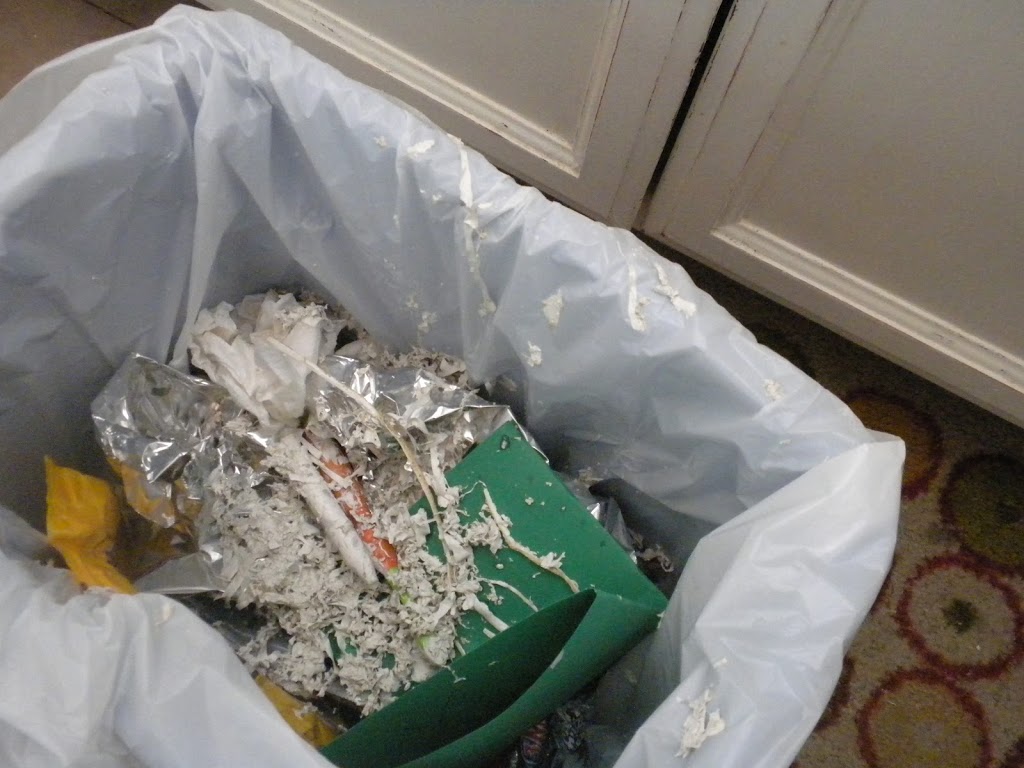
The next step is to let it sit for 30 to 60 minutes. Then spray it with water and clean off the tiles. Here lies the disaster! When I started cleaning off the tile, it pealed the color sealer right out of the grout! DISASTER!!! There was no options left other than scraping it ALL OFF!!! YIKES!!!!! Here is the garbage can with much of the stuff scraped out.
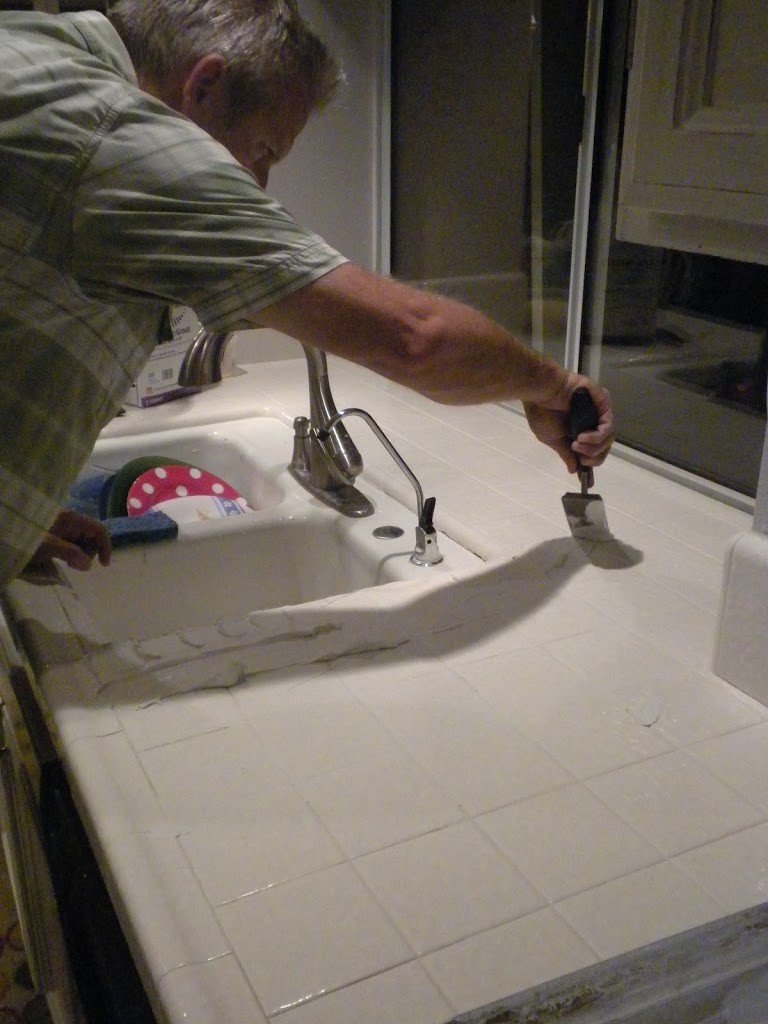
On to plan B (which I never knew I even had!) Scrape out the existing grout & re-grout. My lesson learned is to just do this process first – it is not really that bad.
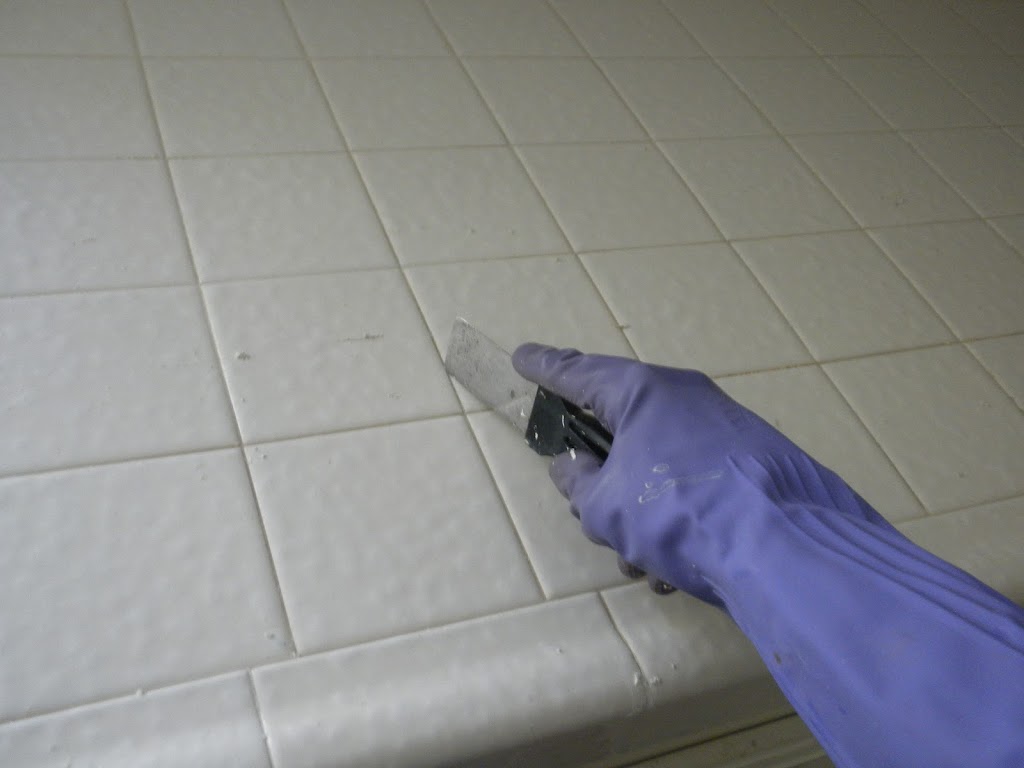
It’s now 9:30 at night and I have enlisted the help of Handy Hubby!! We got all the grout scraped out.
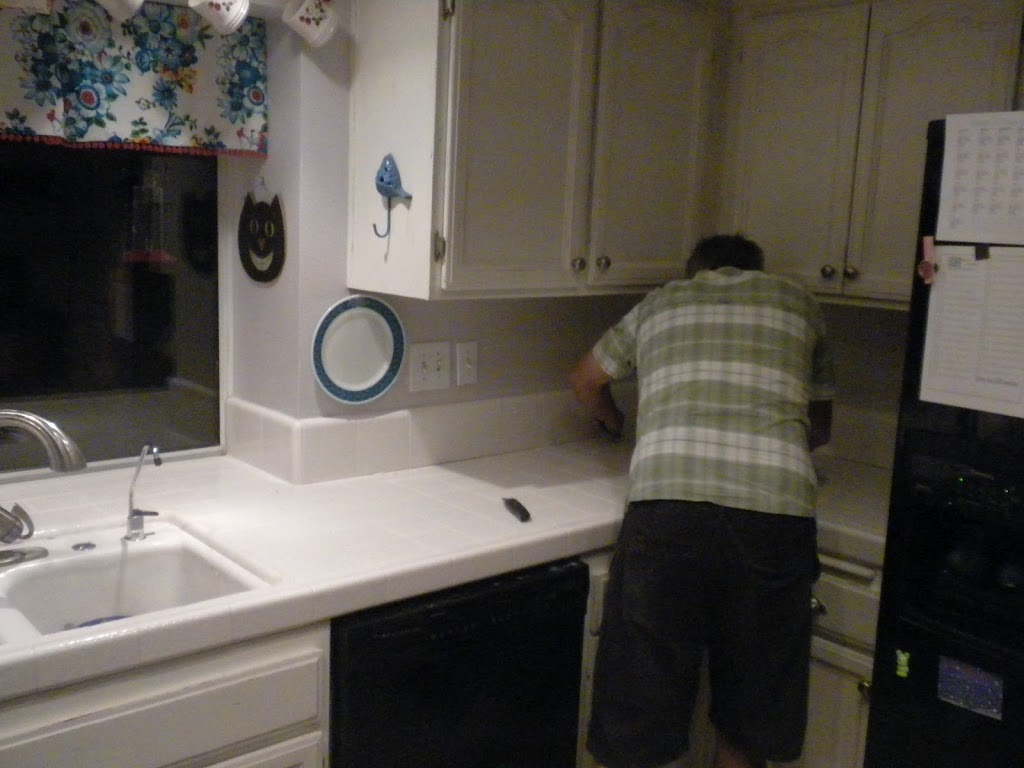
We re-grouted all the counters. Now I just have to seal them. So, my 1 hour project turned into a 2-day project. I should really know better!!

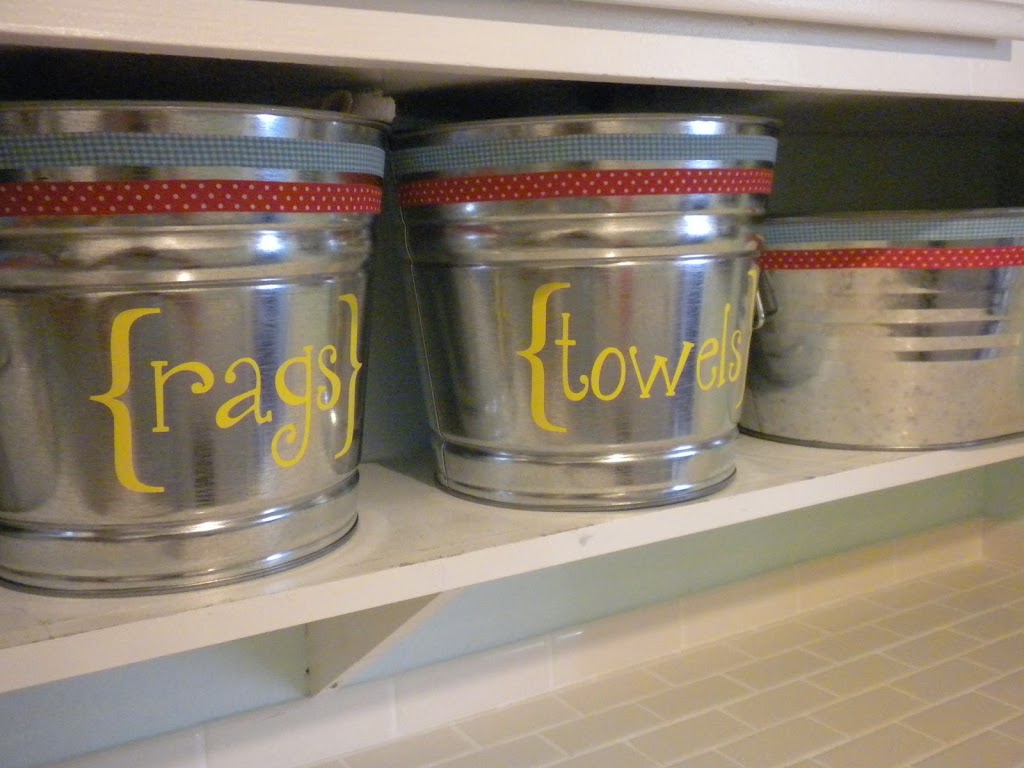
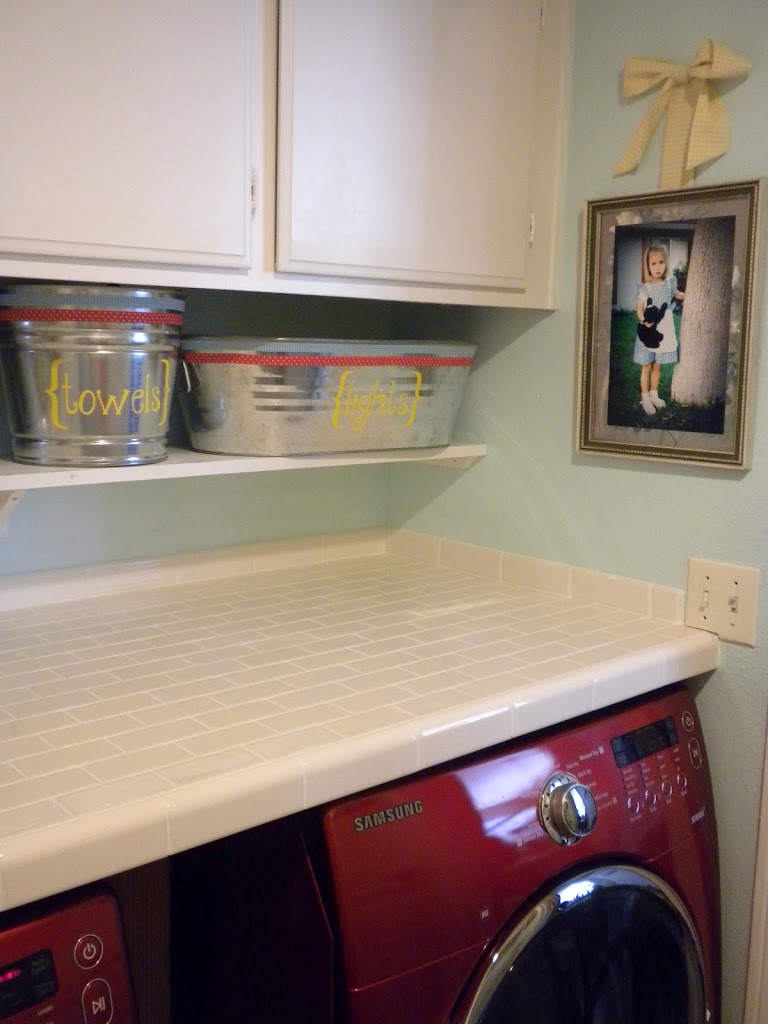
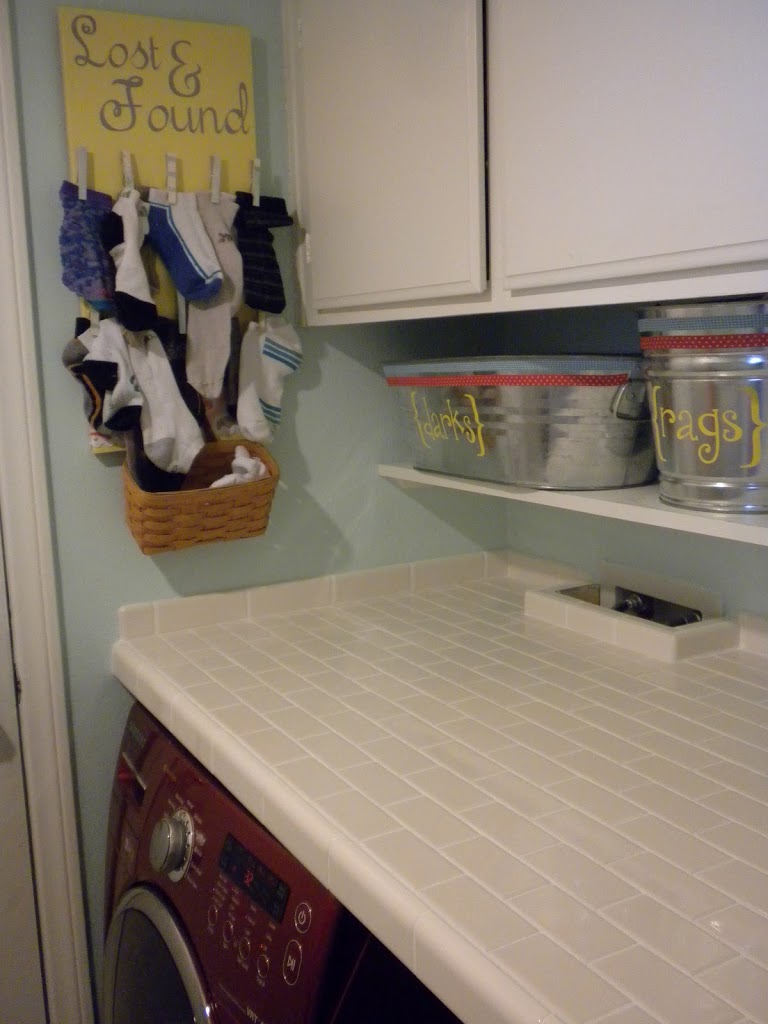
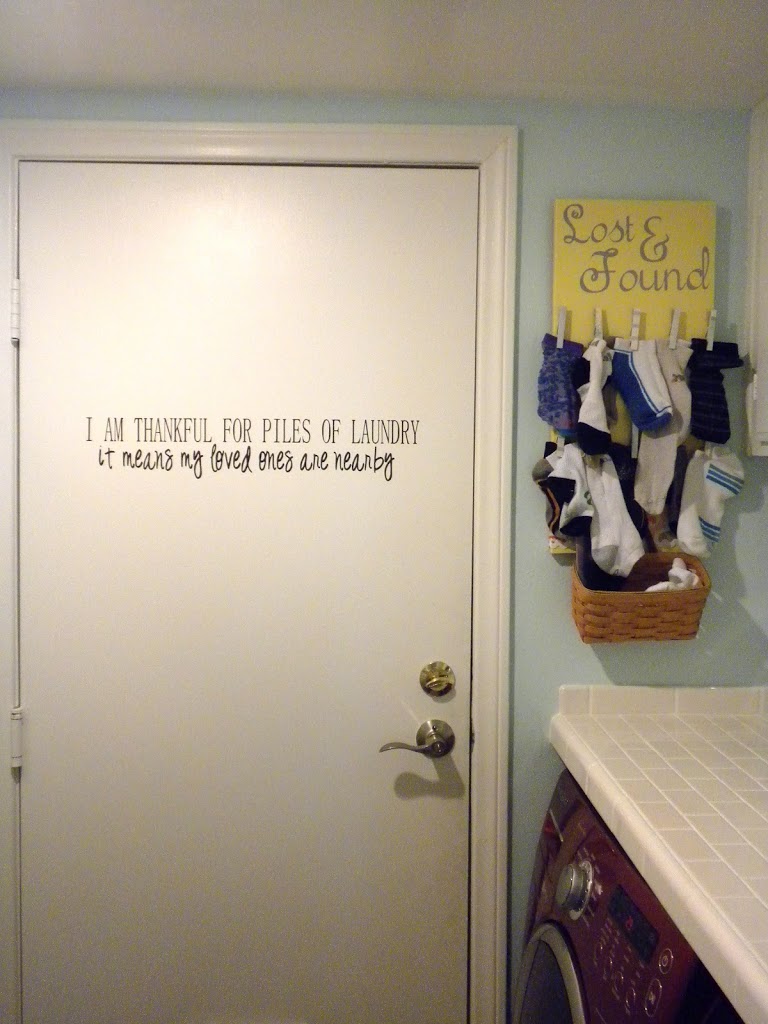
My laundry room is finally coming along. David finished the tile work and built the shelf this past weekend. I decorated the buckets and tubs with fabric tape from my friend Judy at Sprizzie. I love it – she also has lots of fun washi tape! I don’t keep all my laundry in here – there just isn’t room. This is where the stragglers life. The rest is in hampers in everyone’s room.
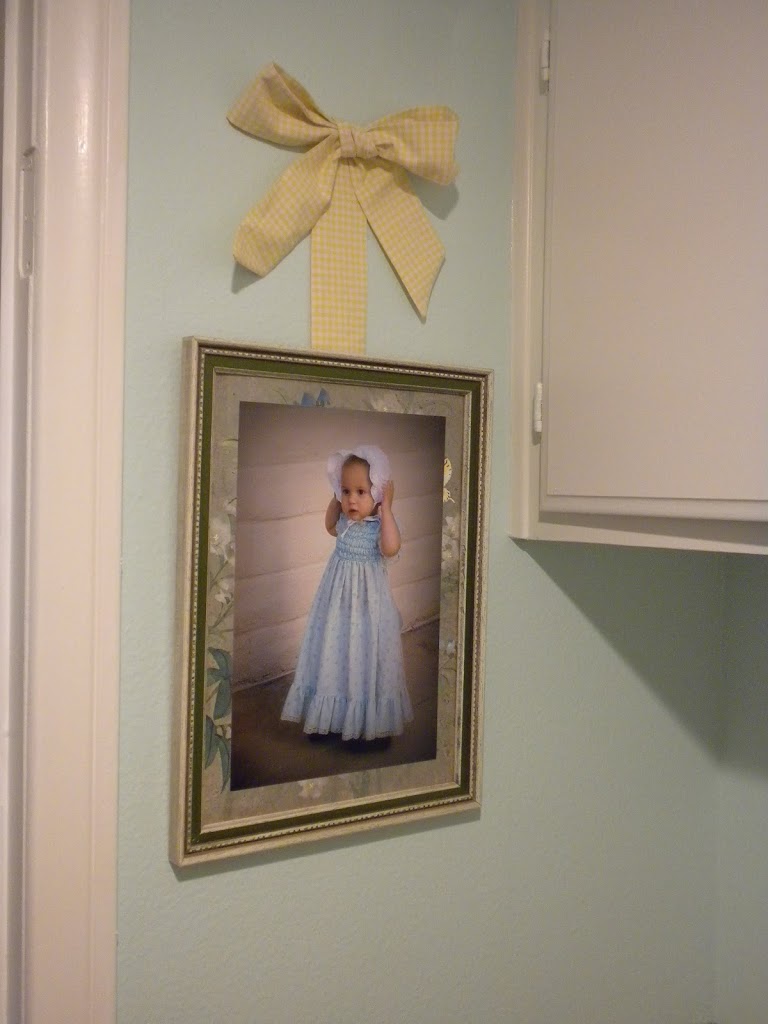
I bought these vintage frames at a garage sale. The art work was a little faded. I printed out photos of my girls wearing clothes I wore when I was little and I mounted them right on top of the vintage prints.
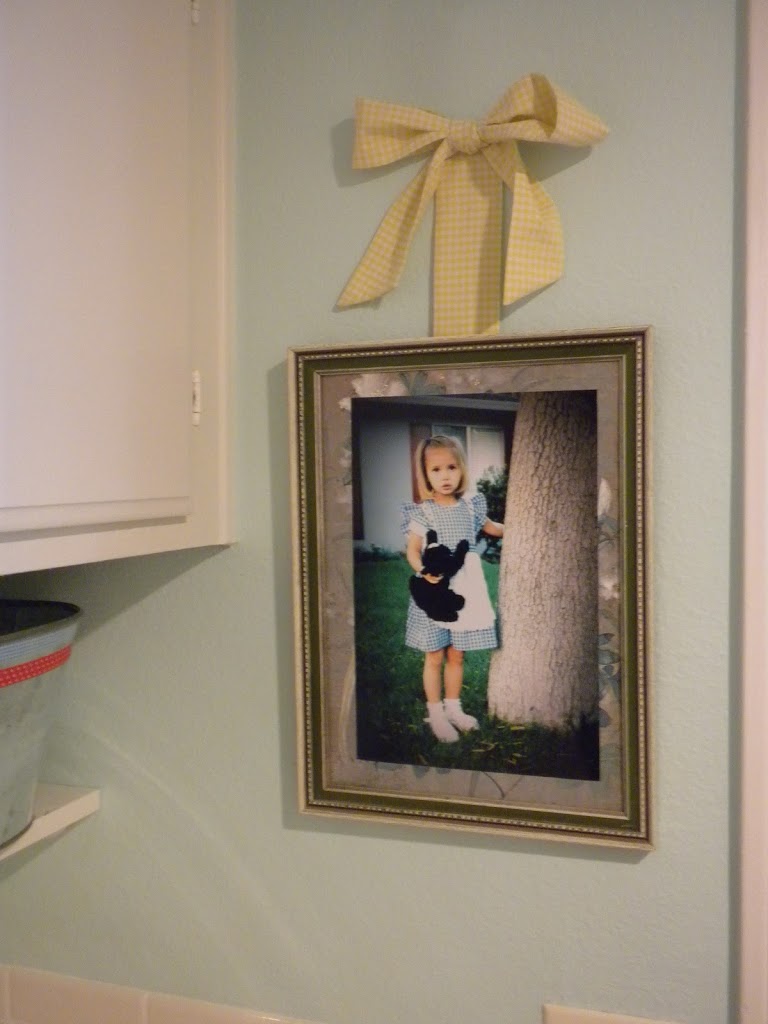
The frames are really hanging on the wall – the fabric bows are made to look like the picture is hanging from them – the bows are actually hot glued on!
Oh yes, the lost and found board is in full use! It’s kind of embarrassing how many missing socks I am responsible for!!
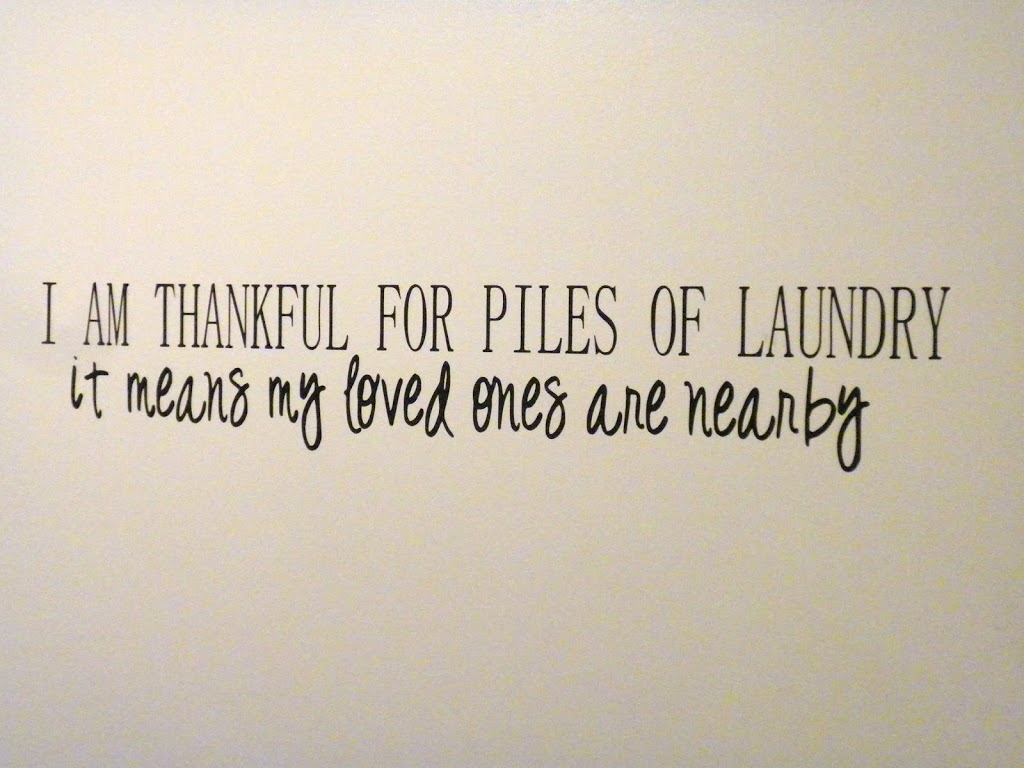
Finally I cut this little phrase out and put it on the door. I found it on the internet somewhere & loved how it turned laundry into something to be thankful for! A nice reminder for sure.
I have a few more things to finish – I am making a little quilt to hang above the backsplash. Hopefully it will get done soon!
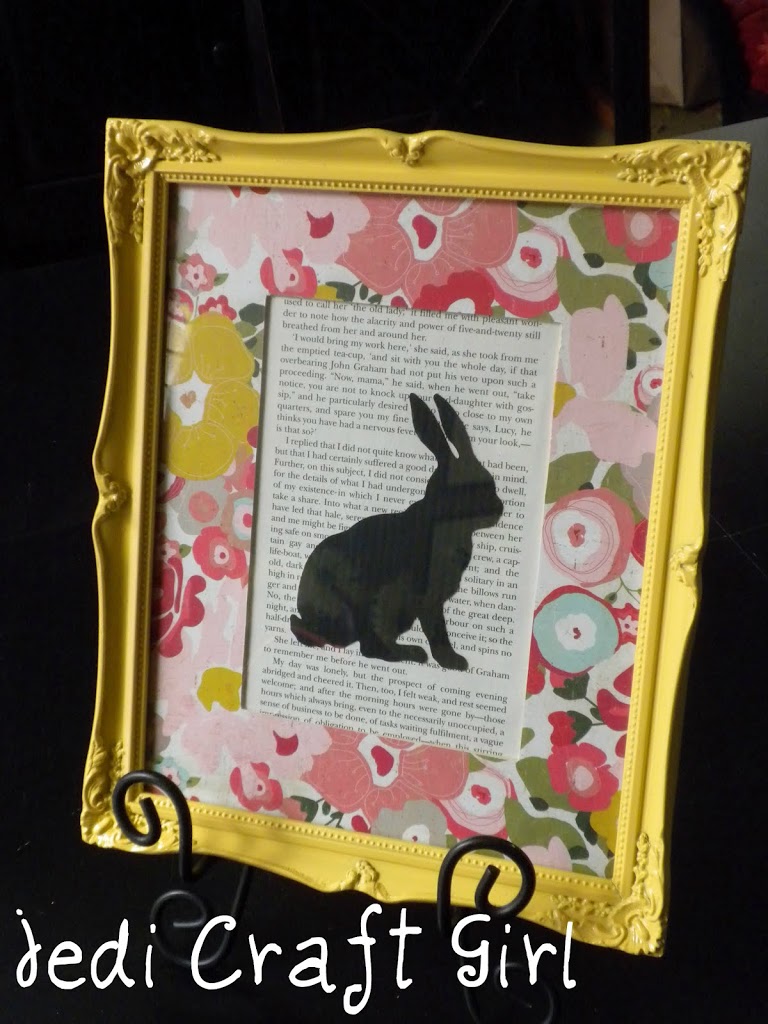
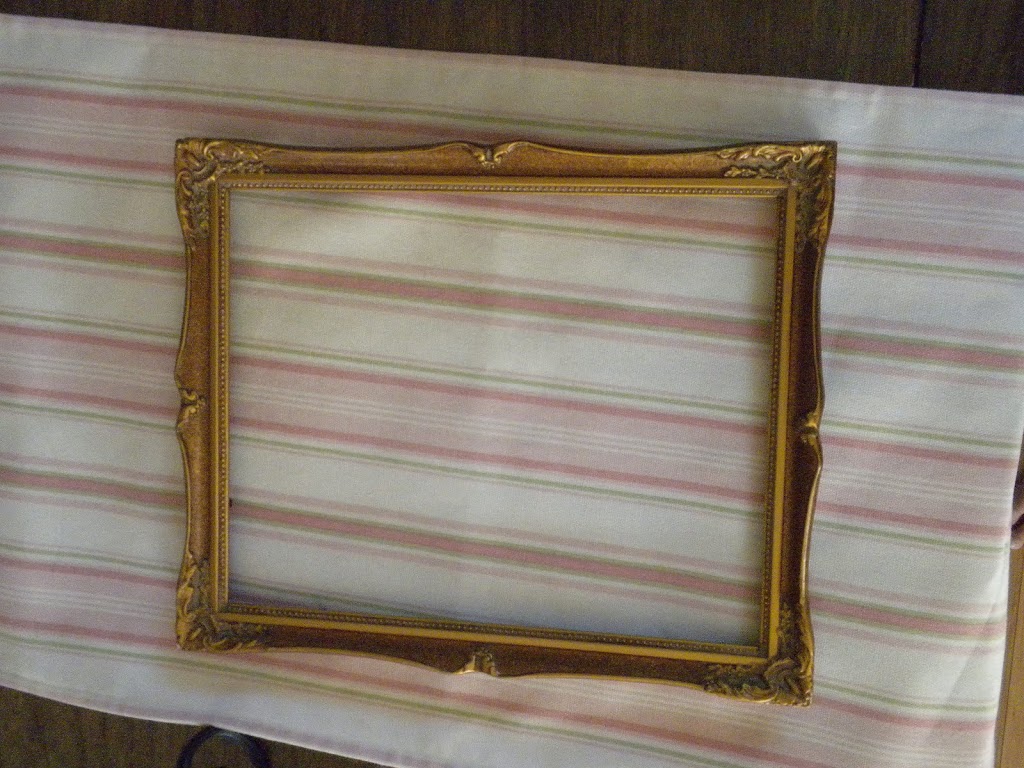
I made this cute bunny picture today. It’s been a while since I spray painted anything so I was looking around my house and found this frame I picked up at a garage sale for $1.
Then went through the scrapbook paper and found this paper. I went through my spray paint collection and found a color that matched. I glued the paper to a matte and then cut the opening with a paper crafting knife. I tore a page out of Charlotte Bronte’s, Villette (I read it and didn’t like it so the 500+ pages are perfect for crafting!) Then I googled bunny silhouette and cut it on the Cricut. Easy peasy!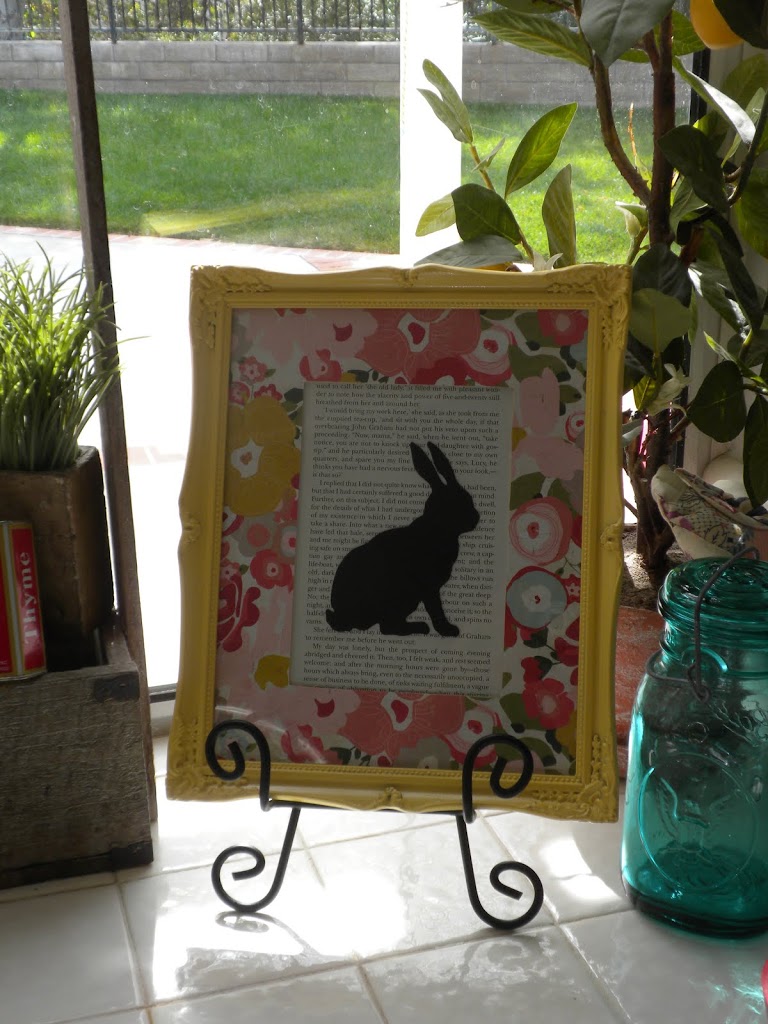
It sits in my kitchen window! Happy Easter to me!!
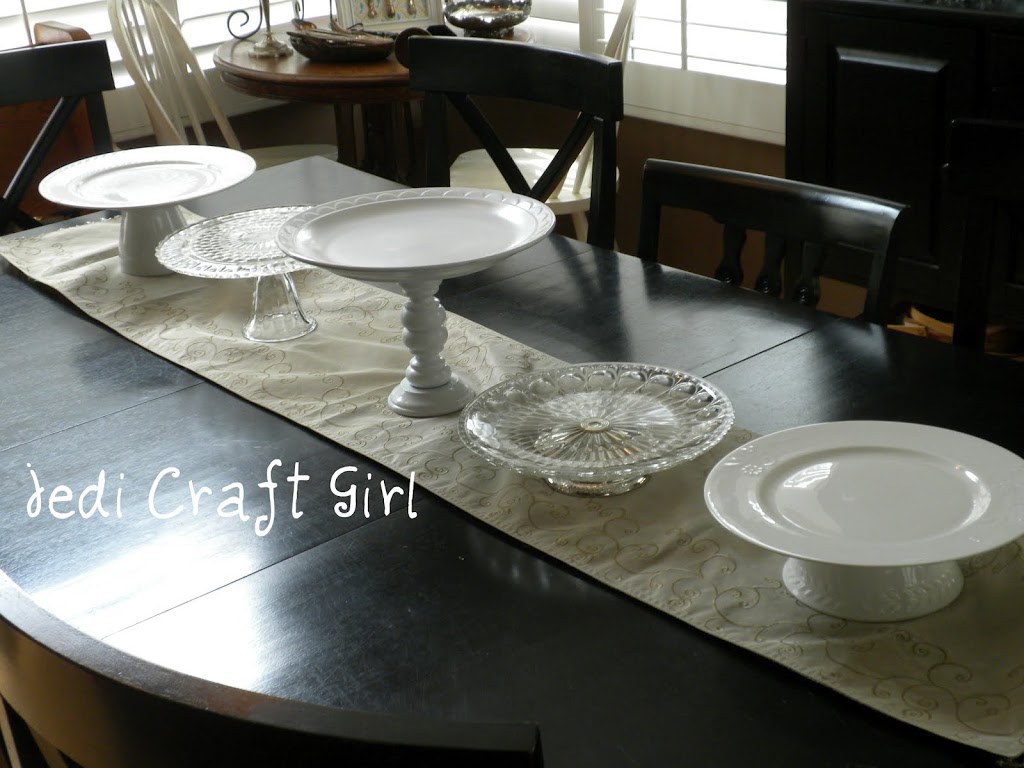
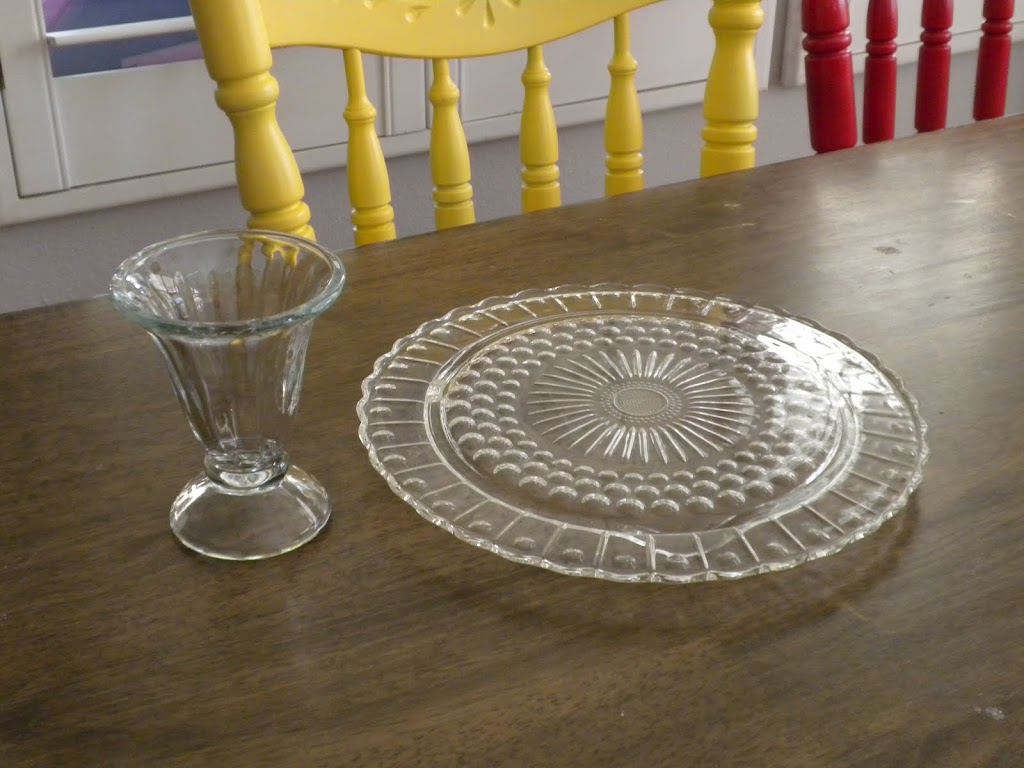
So maybe I am the last person on earth to try a “DIY Cake Plate” – but that’s ok because they are so much fun to make. I collected plates, bowls, candle holders and other odds and ends from thrift stores, garage sales, and my own garage! Here’s how you make them:
#1 – Clean all pieces (get all those impossible-to-remove labels off and any candle wax that has dripped down on candle holders). In this example I made 3 different ones.

#2 – Mix the Epoxy. I just used a small amount at a time because it dries so fast. I love working with epoxy because it makes me feel smart – like I know all about Science!!! I used a toothpick to apply the epoxy to the base of my cake plate (the part you will attach to the plate).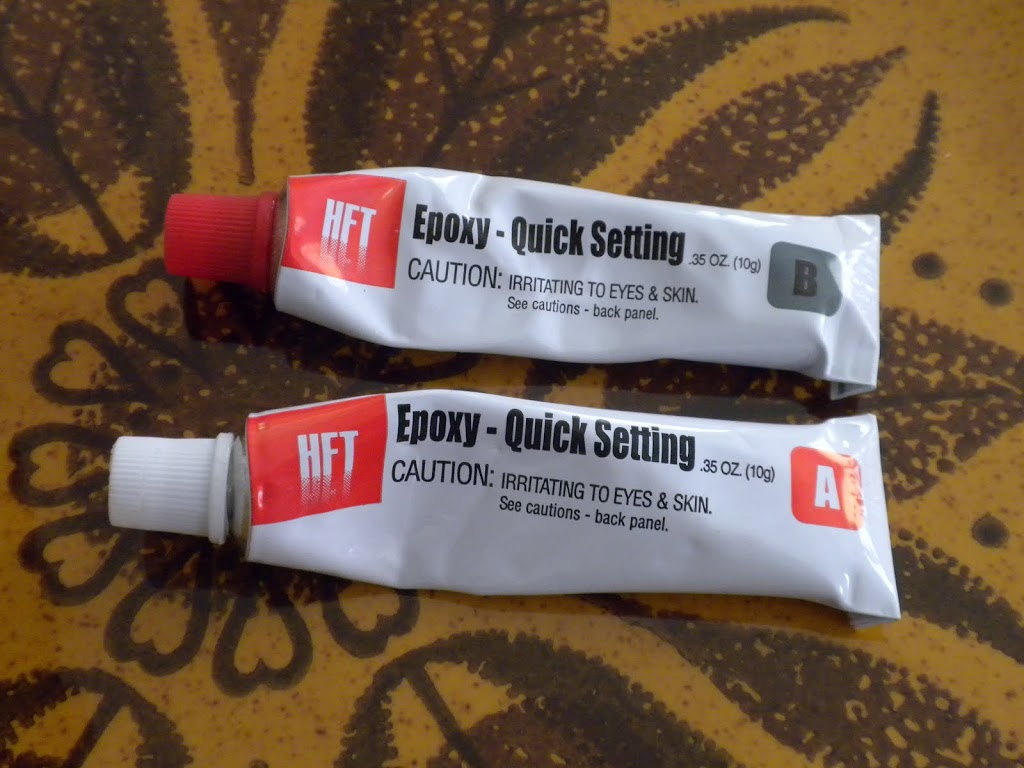
#3 Center the cake plate base onto the bottom of the plate. I placed a book to add some pressure. Let dry.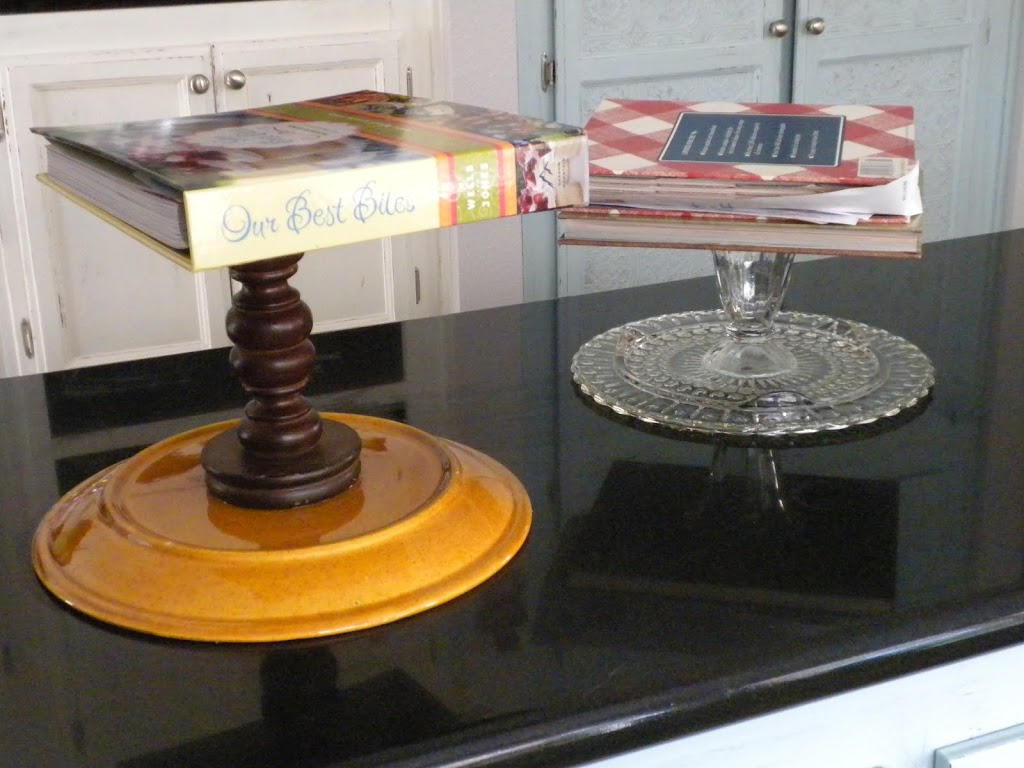
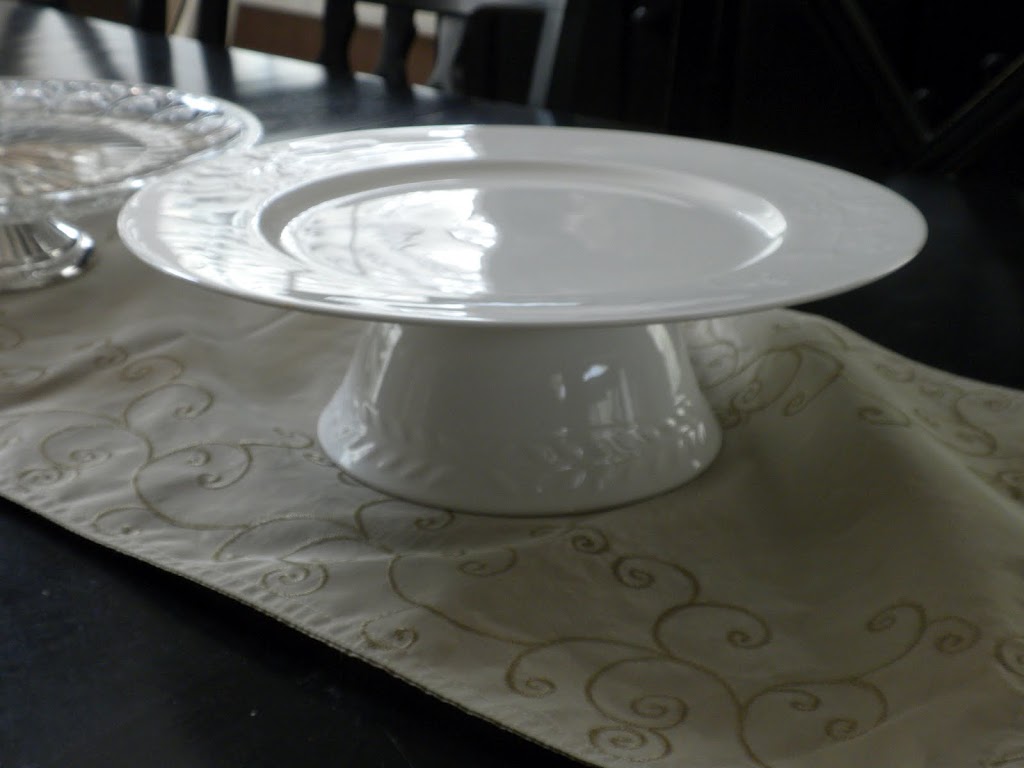
#4 Paint. If you love your plate & stand color & finish then you are done. If you don’t love them (like the gold plate above) then it’s time to spray paint. I primed the entire piece with spray primer then painted my plate gloss white. If you do paint the top of the plate, I don’t suggest placing food directly on the painted surface. Use a cardboard cake board or a doily.
Here are the finished cake plates: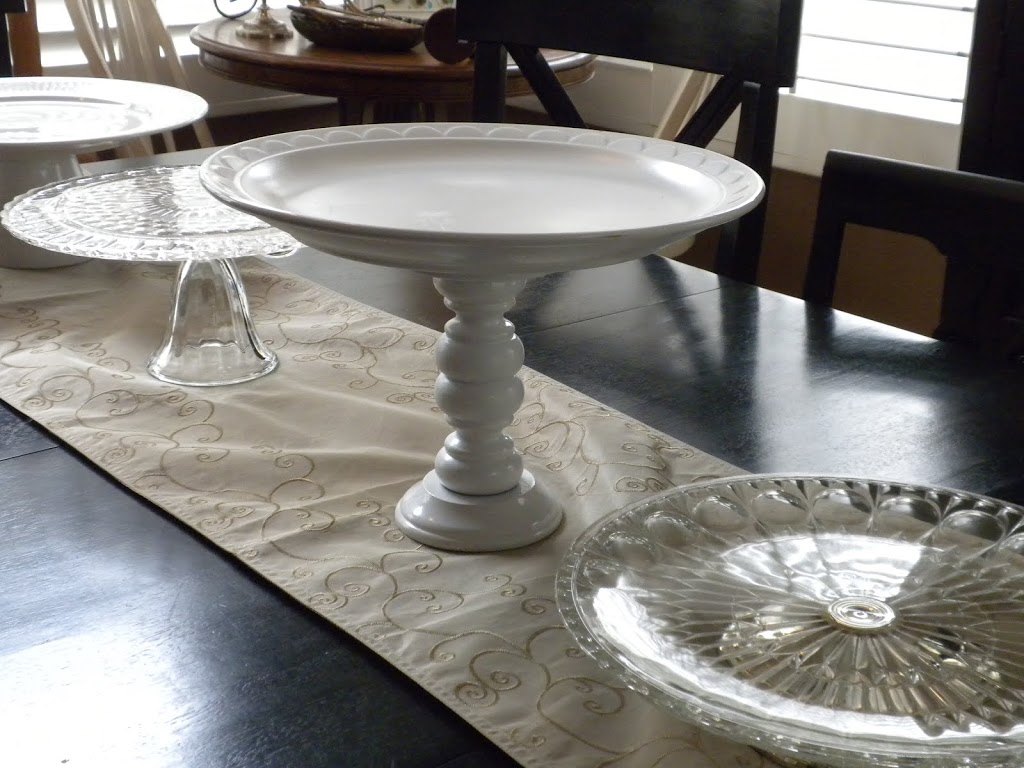
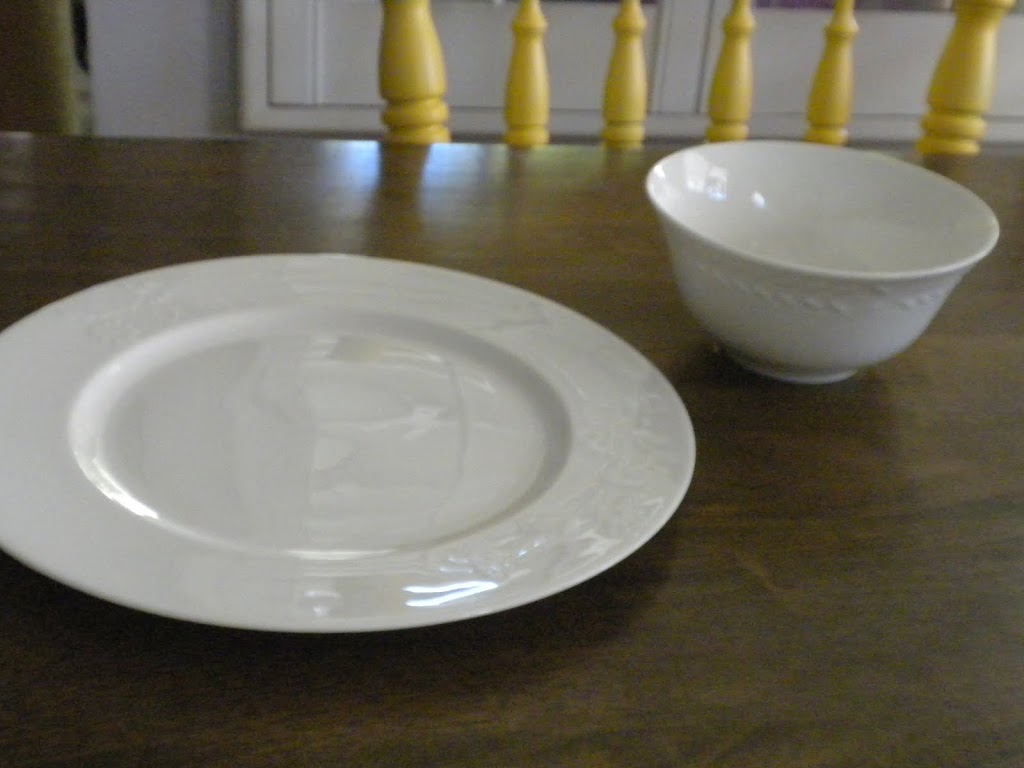
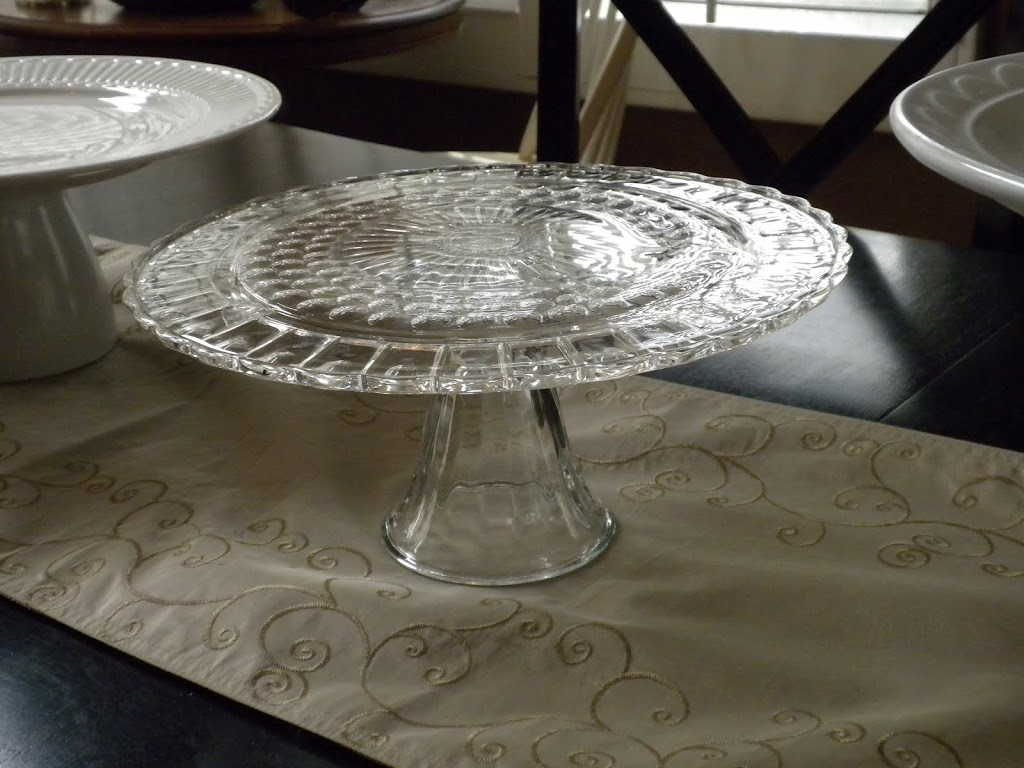 I also found these cute dessert plates at Home Goods in the clearance section. I epoxied cut glass candle holders to the bottom. The possibilities are endless!!!
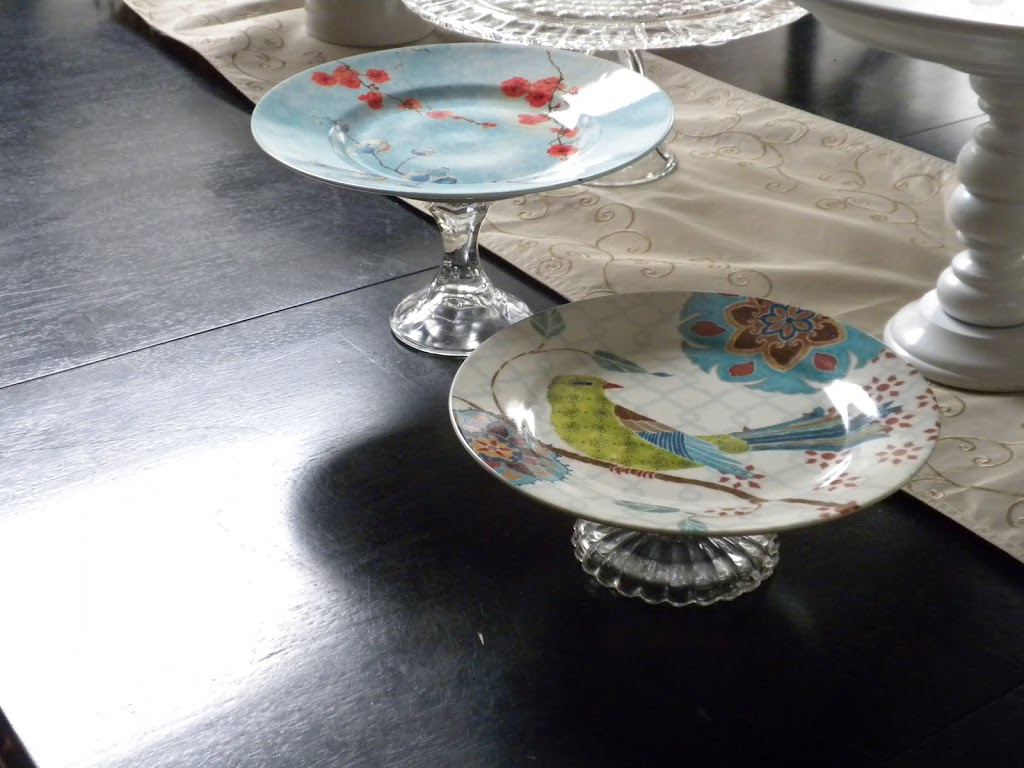
So maybe I am the last person on earth to try a “DIY Cake Plate” – but that’s ok because they are so much fun to make. I collected plates, bowls, candle holders and other odds and ends from thrift stores, garage sales, and my own garage! Here’s how you make them:
#1 – Clean all pieces (get all those impossible-to-remove labels off and any candle wax that has dripped down on candle holders). In this example I made 3 different ones.
#2 – Mix the Epoxy. I just used a small amount at a time because it dries so fast. I love working with epoxy because it makes me feel smart – like I know all about Science!!! I used a toothpick to apply the epoxy to the base of my cake plate (the part you will attach to the plate).
#3 Center the cake plate base onto the bottom of the plate. I placed a book to add some pressure. Let dry.
#4 Paint. If you love your plate & stand color & finish then you are done. If you don’t love them (like the gold plate above) then it’s time to spray paint. I primed the entire piece with spray primer then painted my plate gloss white. If you do paint the top of the plate, I don’t suggest placing food directly on the painted surface. Use a cardboard cake board or a doily.
Here are the finished cake plates:I also found these cute dessert plates at Home Goods in the clearance section. I epoxied cut glass candle holders to the bottom. The possibilities are endless!!!
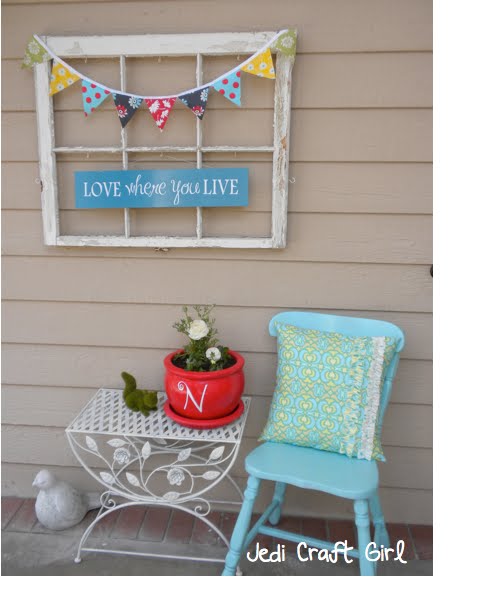
The front porch needed a little fixing up. I sewed a little fabric banner for my old window. I vinyled this sign, “Love where you Live.”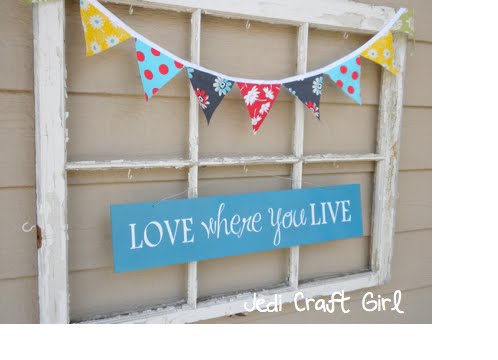 This rustic sign used to be black – I painted it blue. It had a star cut out and I covered it with a spray-painted frame. In the frame is fabric and a fabric bird silhouette. I love how it turned out!
 The milk can is actually a family heirloom. It was from my Great-Grandfather’s farm! I vinyled our street address on it.
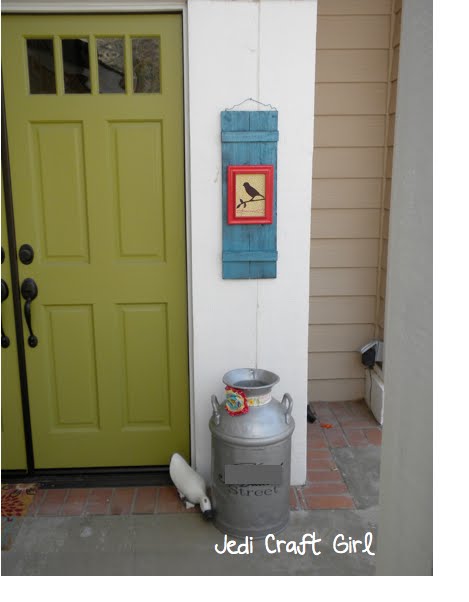 I bought this chair at a garage sale for $2. It was brown before. Not anymore! Aqua spray paint to the rescue! I sewed a little pillow to match out of Amy Butler fabric.
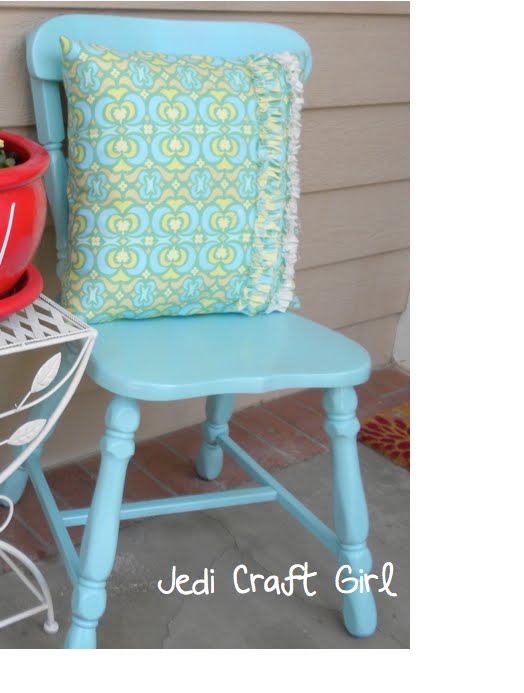
This is how the table used to look – then I spray painted it Heirloom white and now it looks so much happier!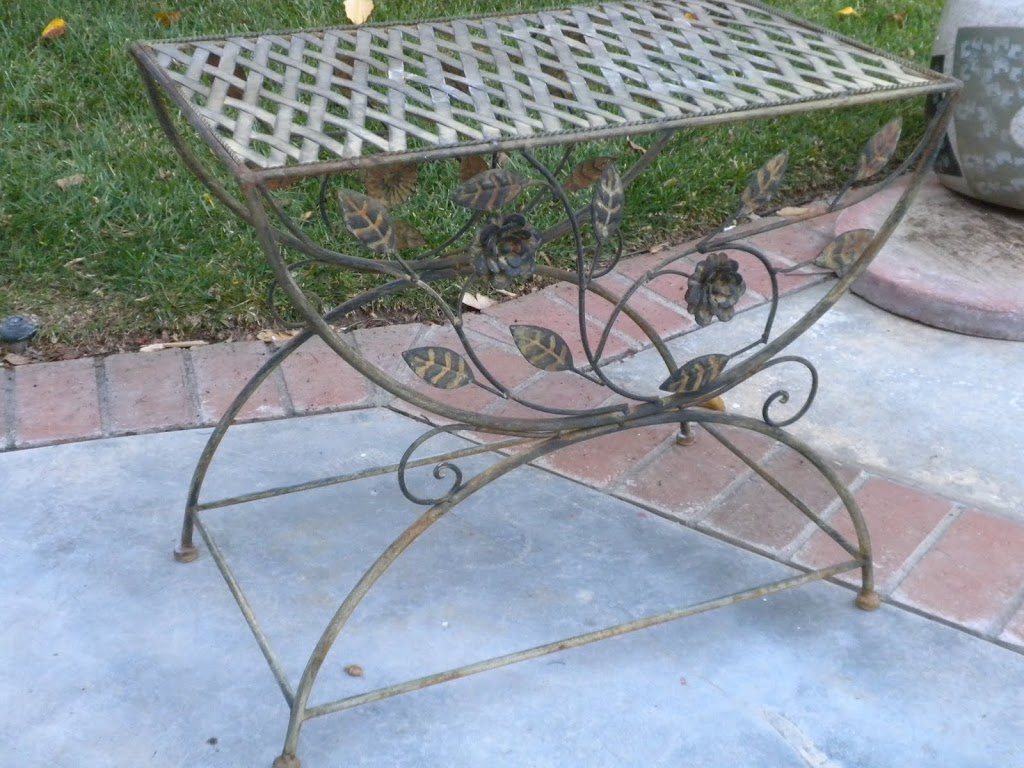
This was a plain walmart special ceramic pot. Now it is darling cherry red with our initial on it!! Love it!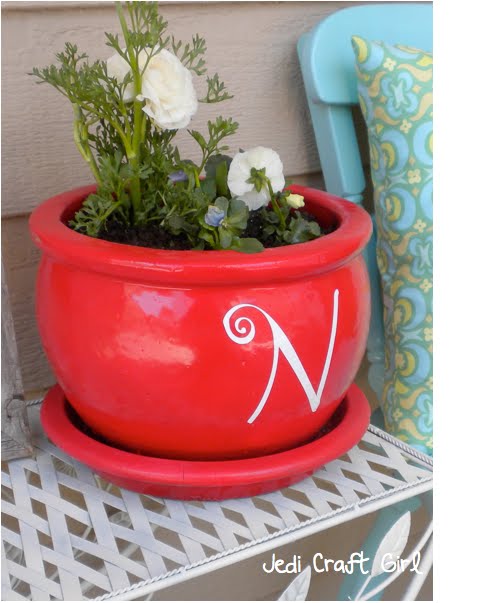
I had this owl and I love him. But he was a little drab.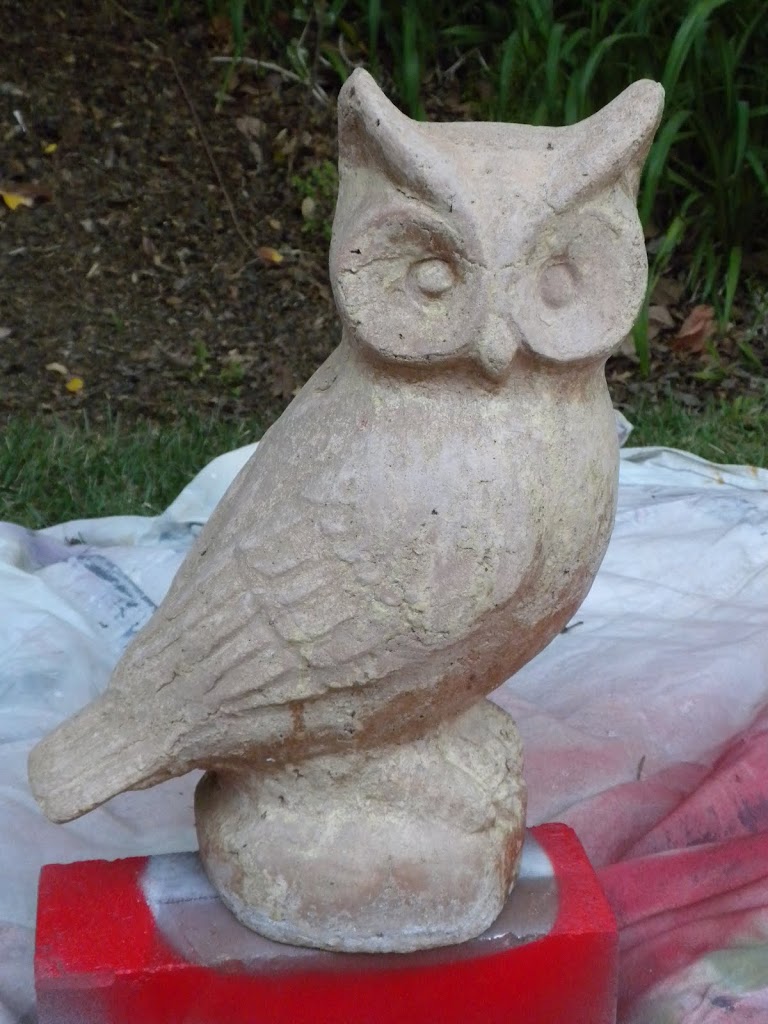
Now he is noticeable!! I think I am addicted to spray paint!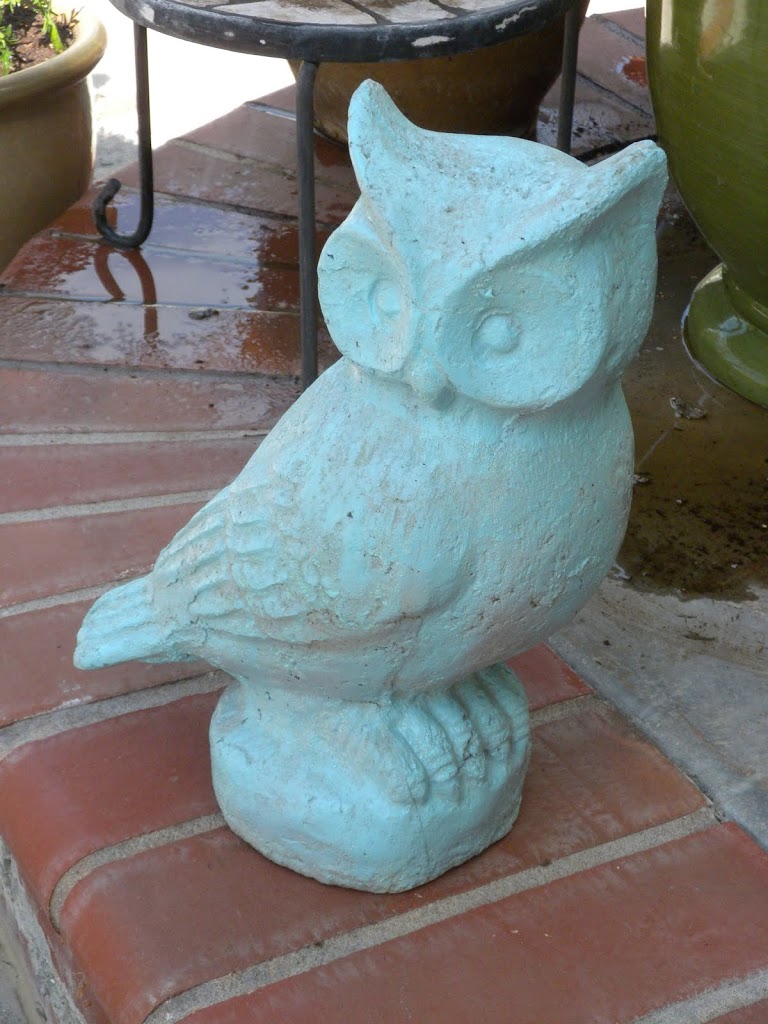
The front porch needed a little fixing up. I sewed a little fabric banner for my old window. I vinyled this sign, “Love where you Live.”This rustic sign used to be black – I painted it blue. It had a star cut out and I covered it with a spray-painted frame. In the frame is fabric and a fabric bird silhouette. I love how it turned out!
The milk can is actually a family heirloom. It was from my Great-Grandfather’s farm! I vinyled our street address on it.I bought this chair at a garage sale for $2. It was brown before. Not anymore! Aqua spray paint to the rescue! I sewed a little pillow to match out of Amy Butler fabric.
This is how the table used to look – then I spray painted it Heirloom white and now it looks so much happier!
This was a plain walmart special ceramic pot. Now it is darling cherry red with our initial on it!! Love it!
I had this owl and I love him. But he was a little drab.
Now he is noticeable!! I think I am addicted to spray paint!


