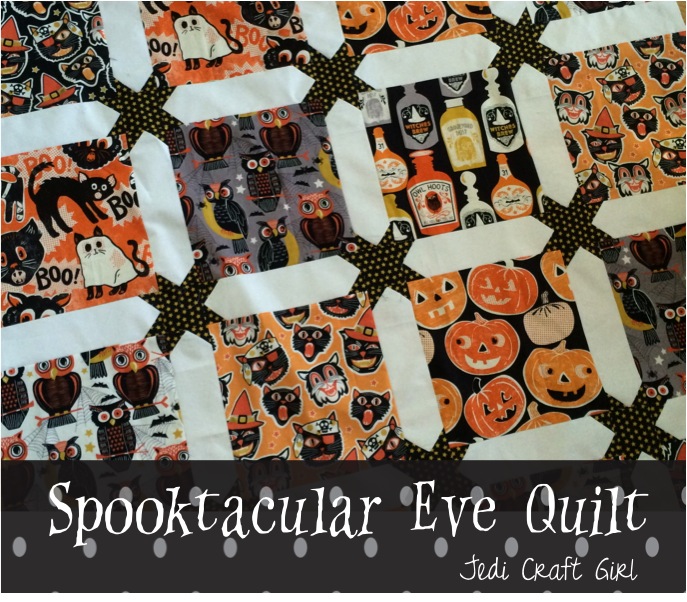
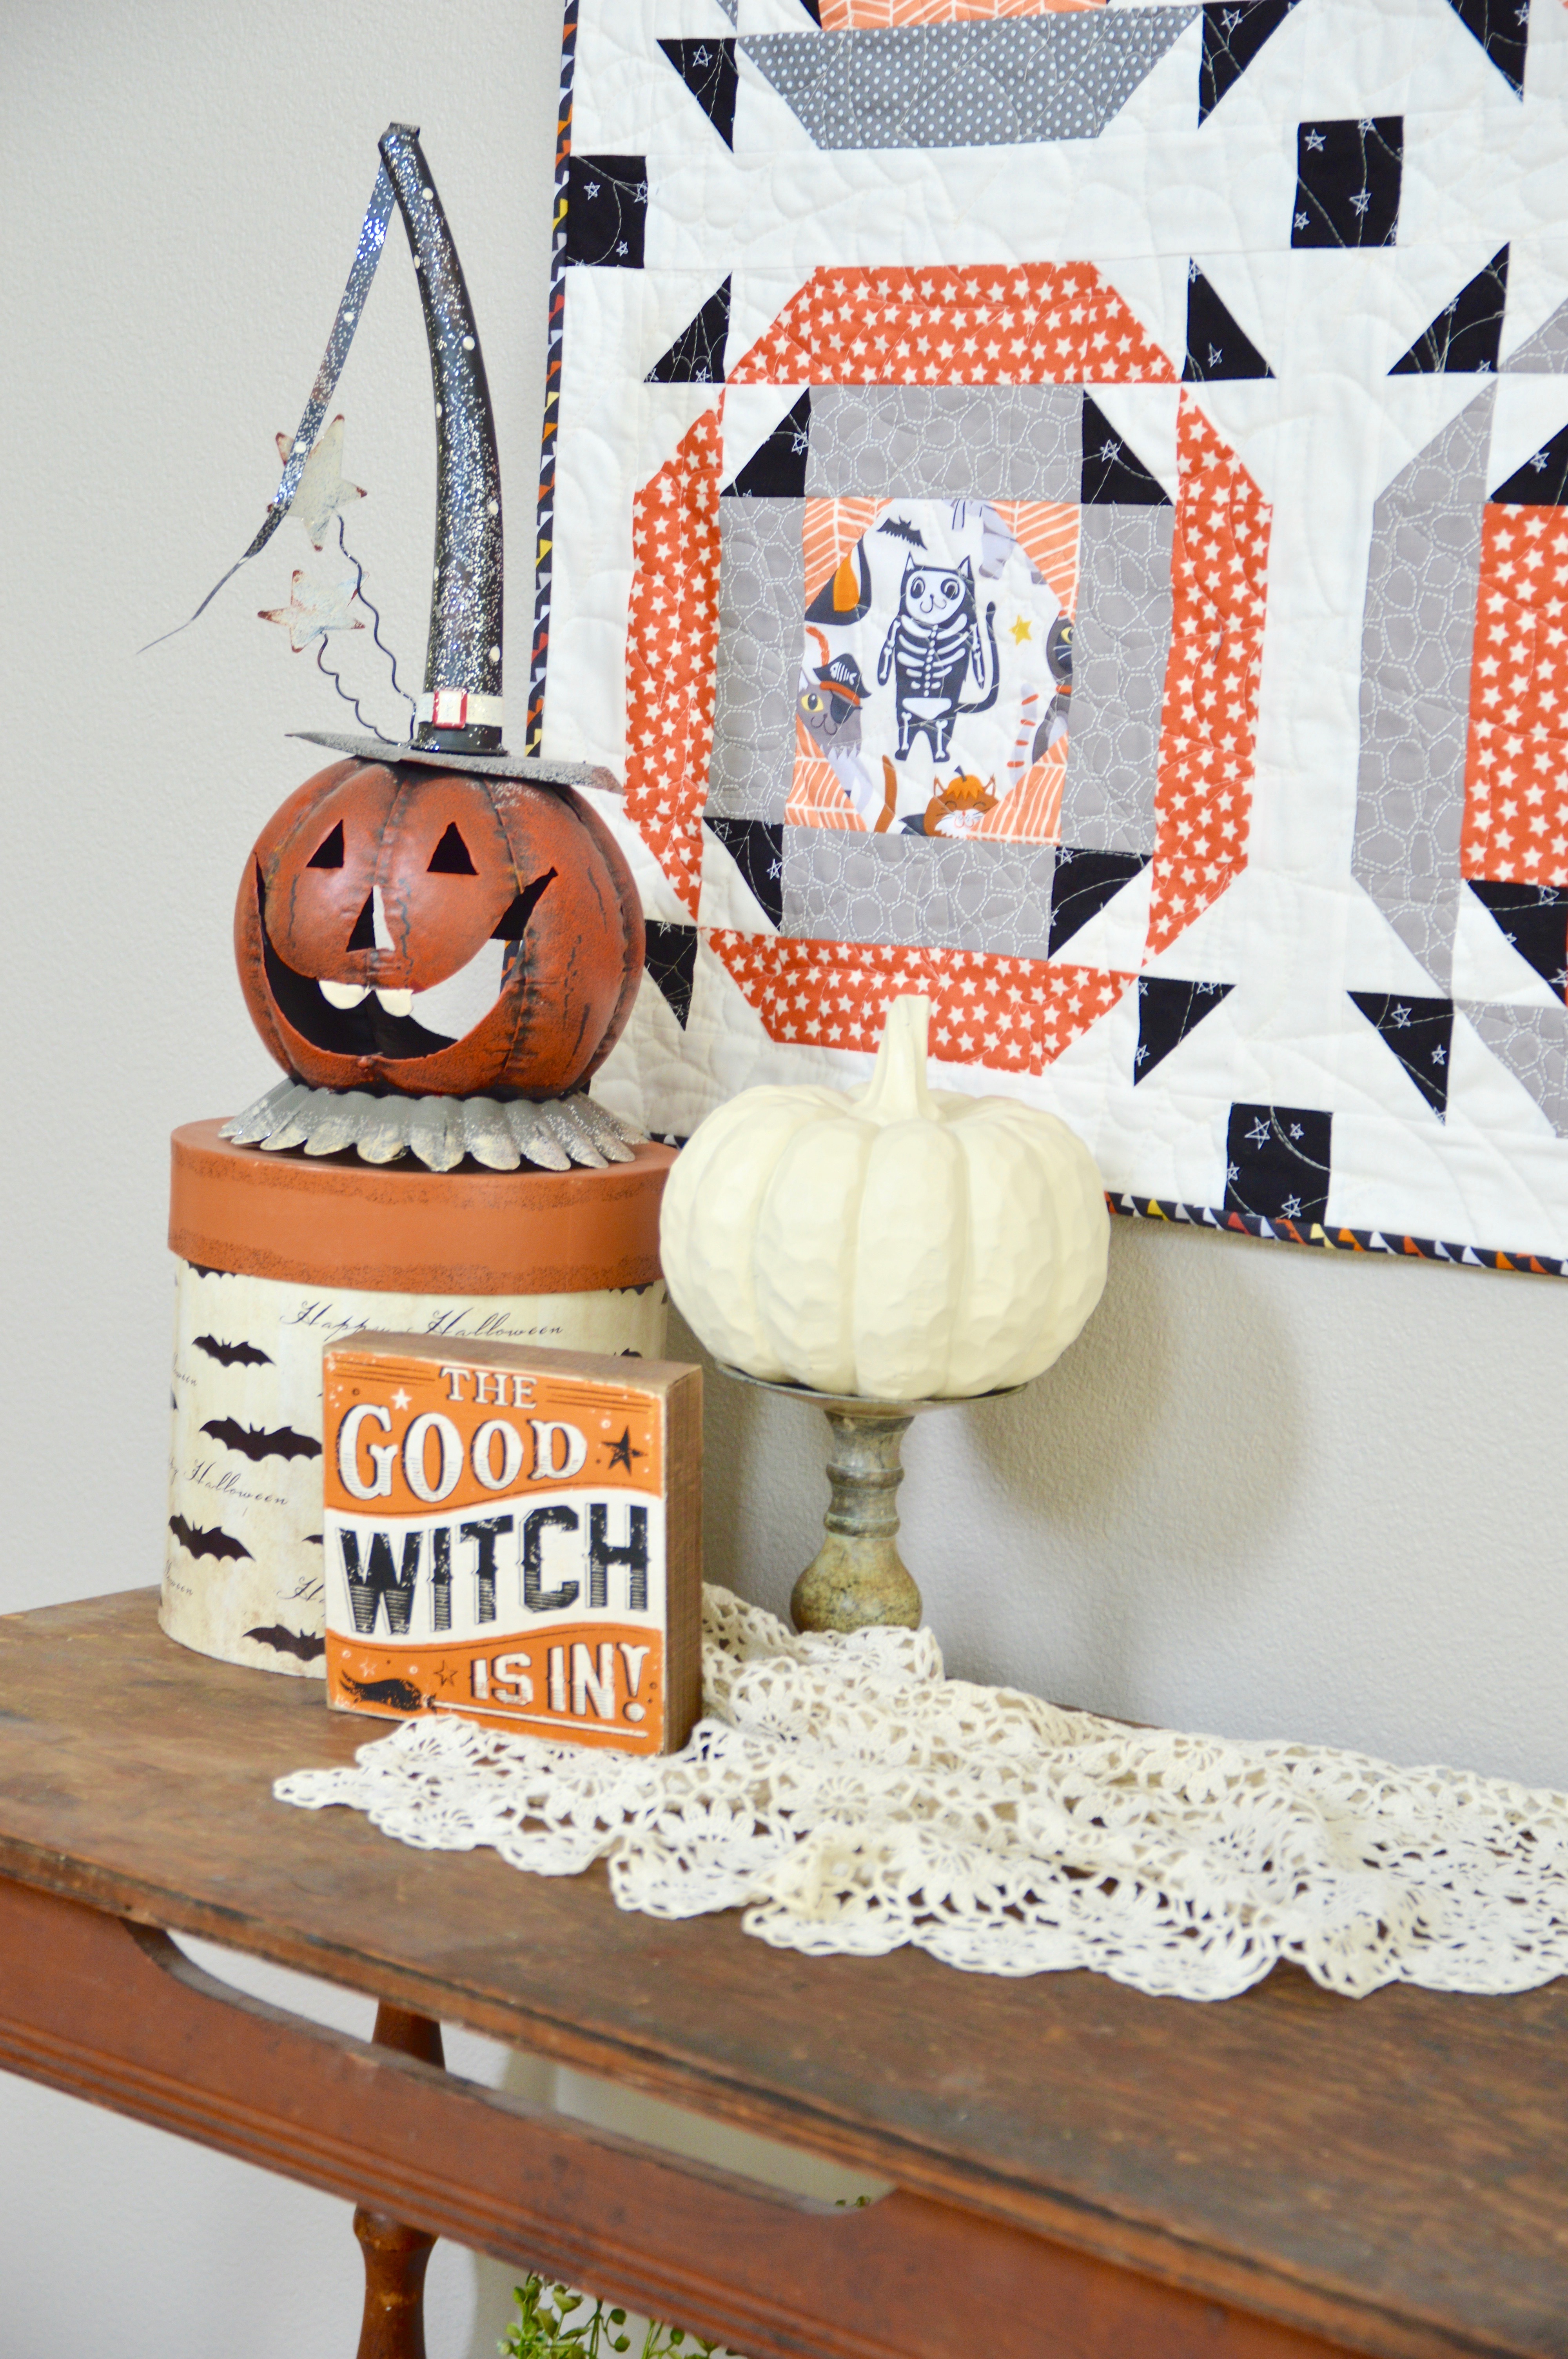
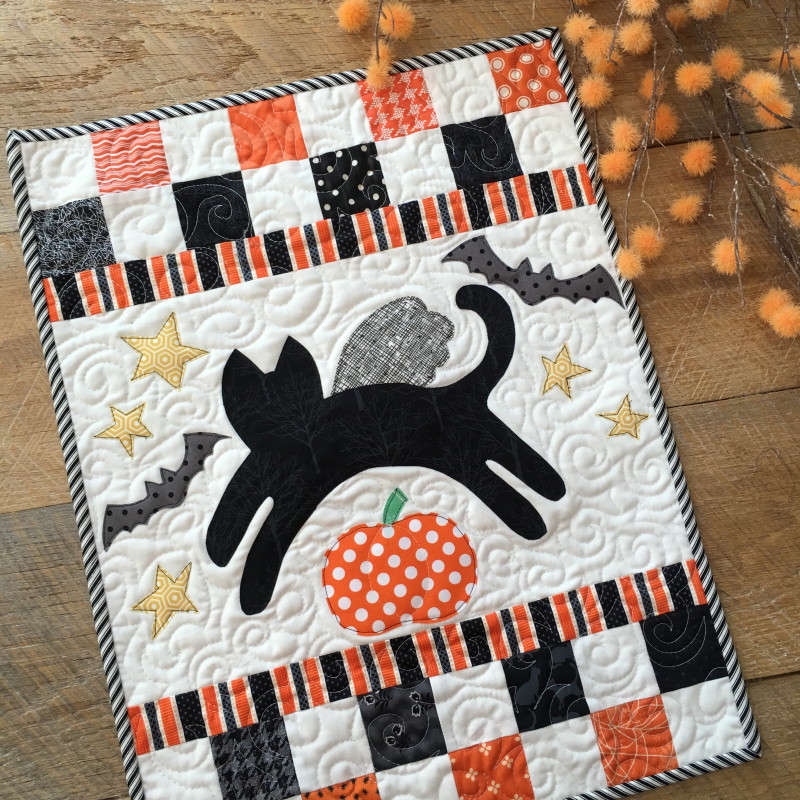
It’s that time of year! I’ve gathered up all my patterns and tutorials that involve black cats so you can find them easier! Click on the photo for the link.


Saving the universe one project at a time!
It’s that time of year! I’ve gathered up all my patterns and tutorials that involve black cats so you can find them easier! Click on the photo for the link.
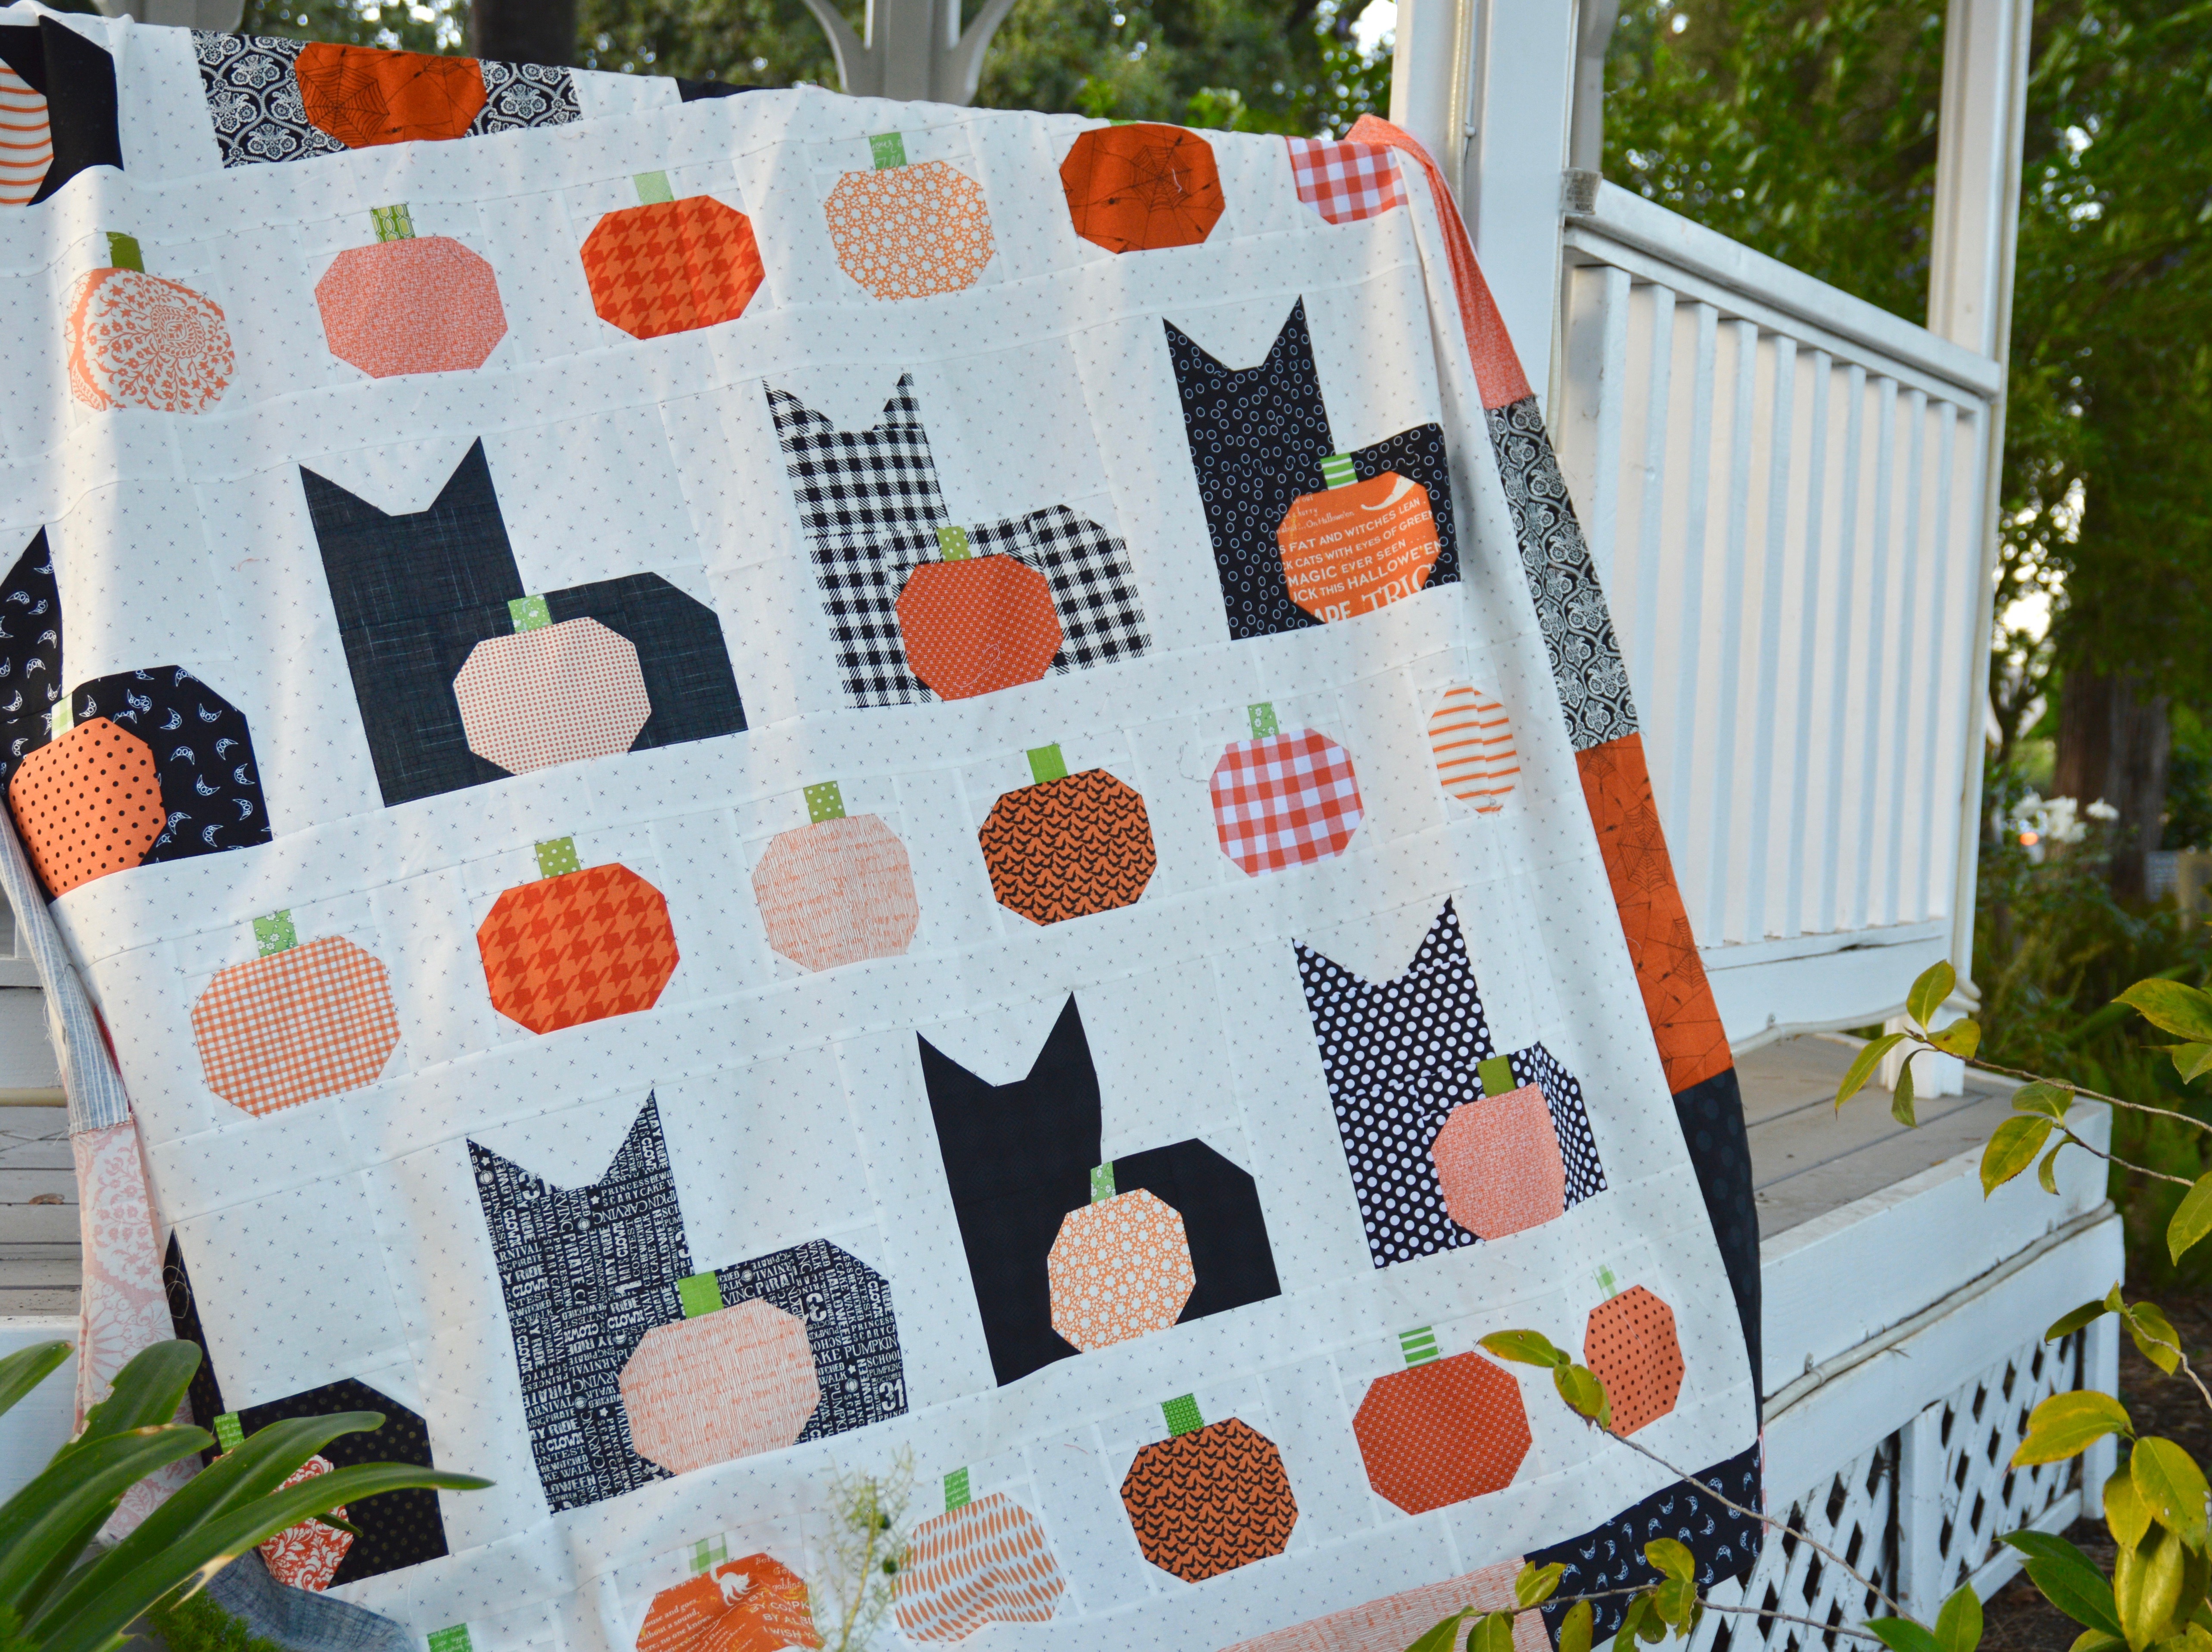
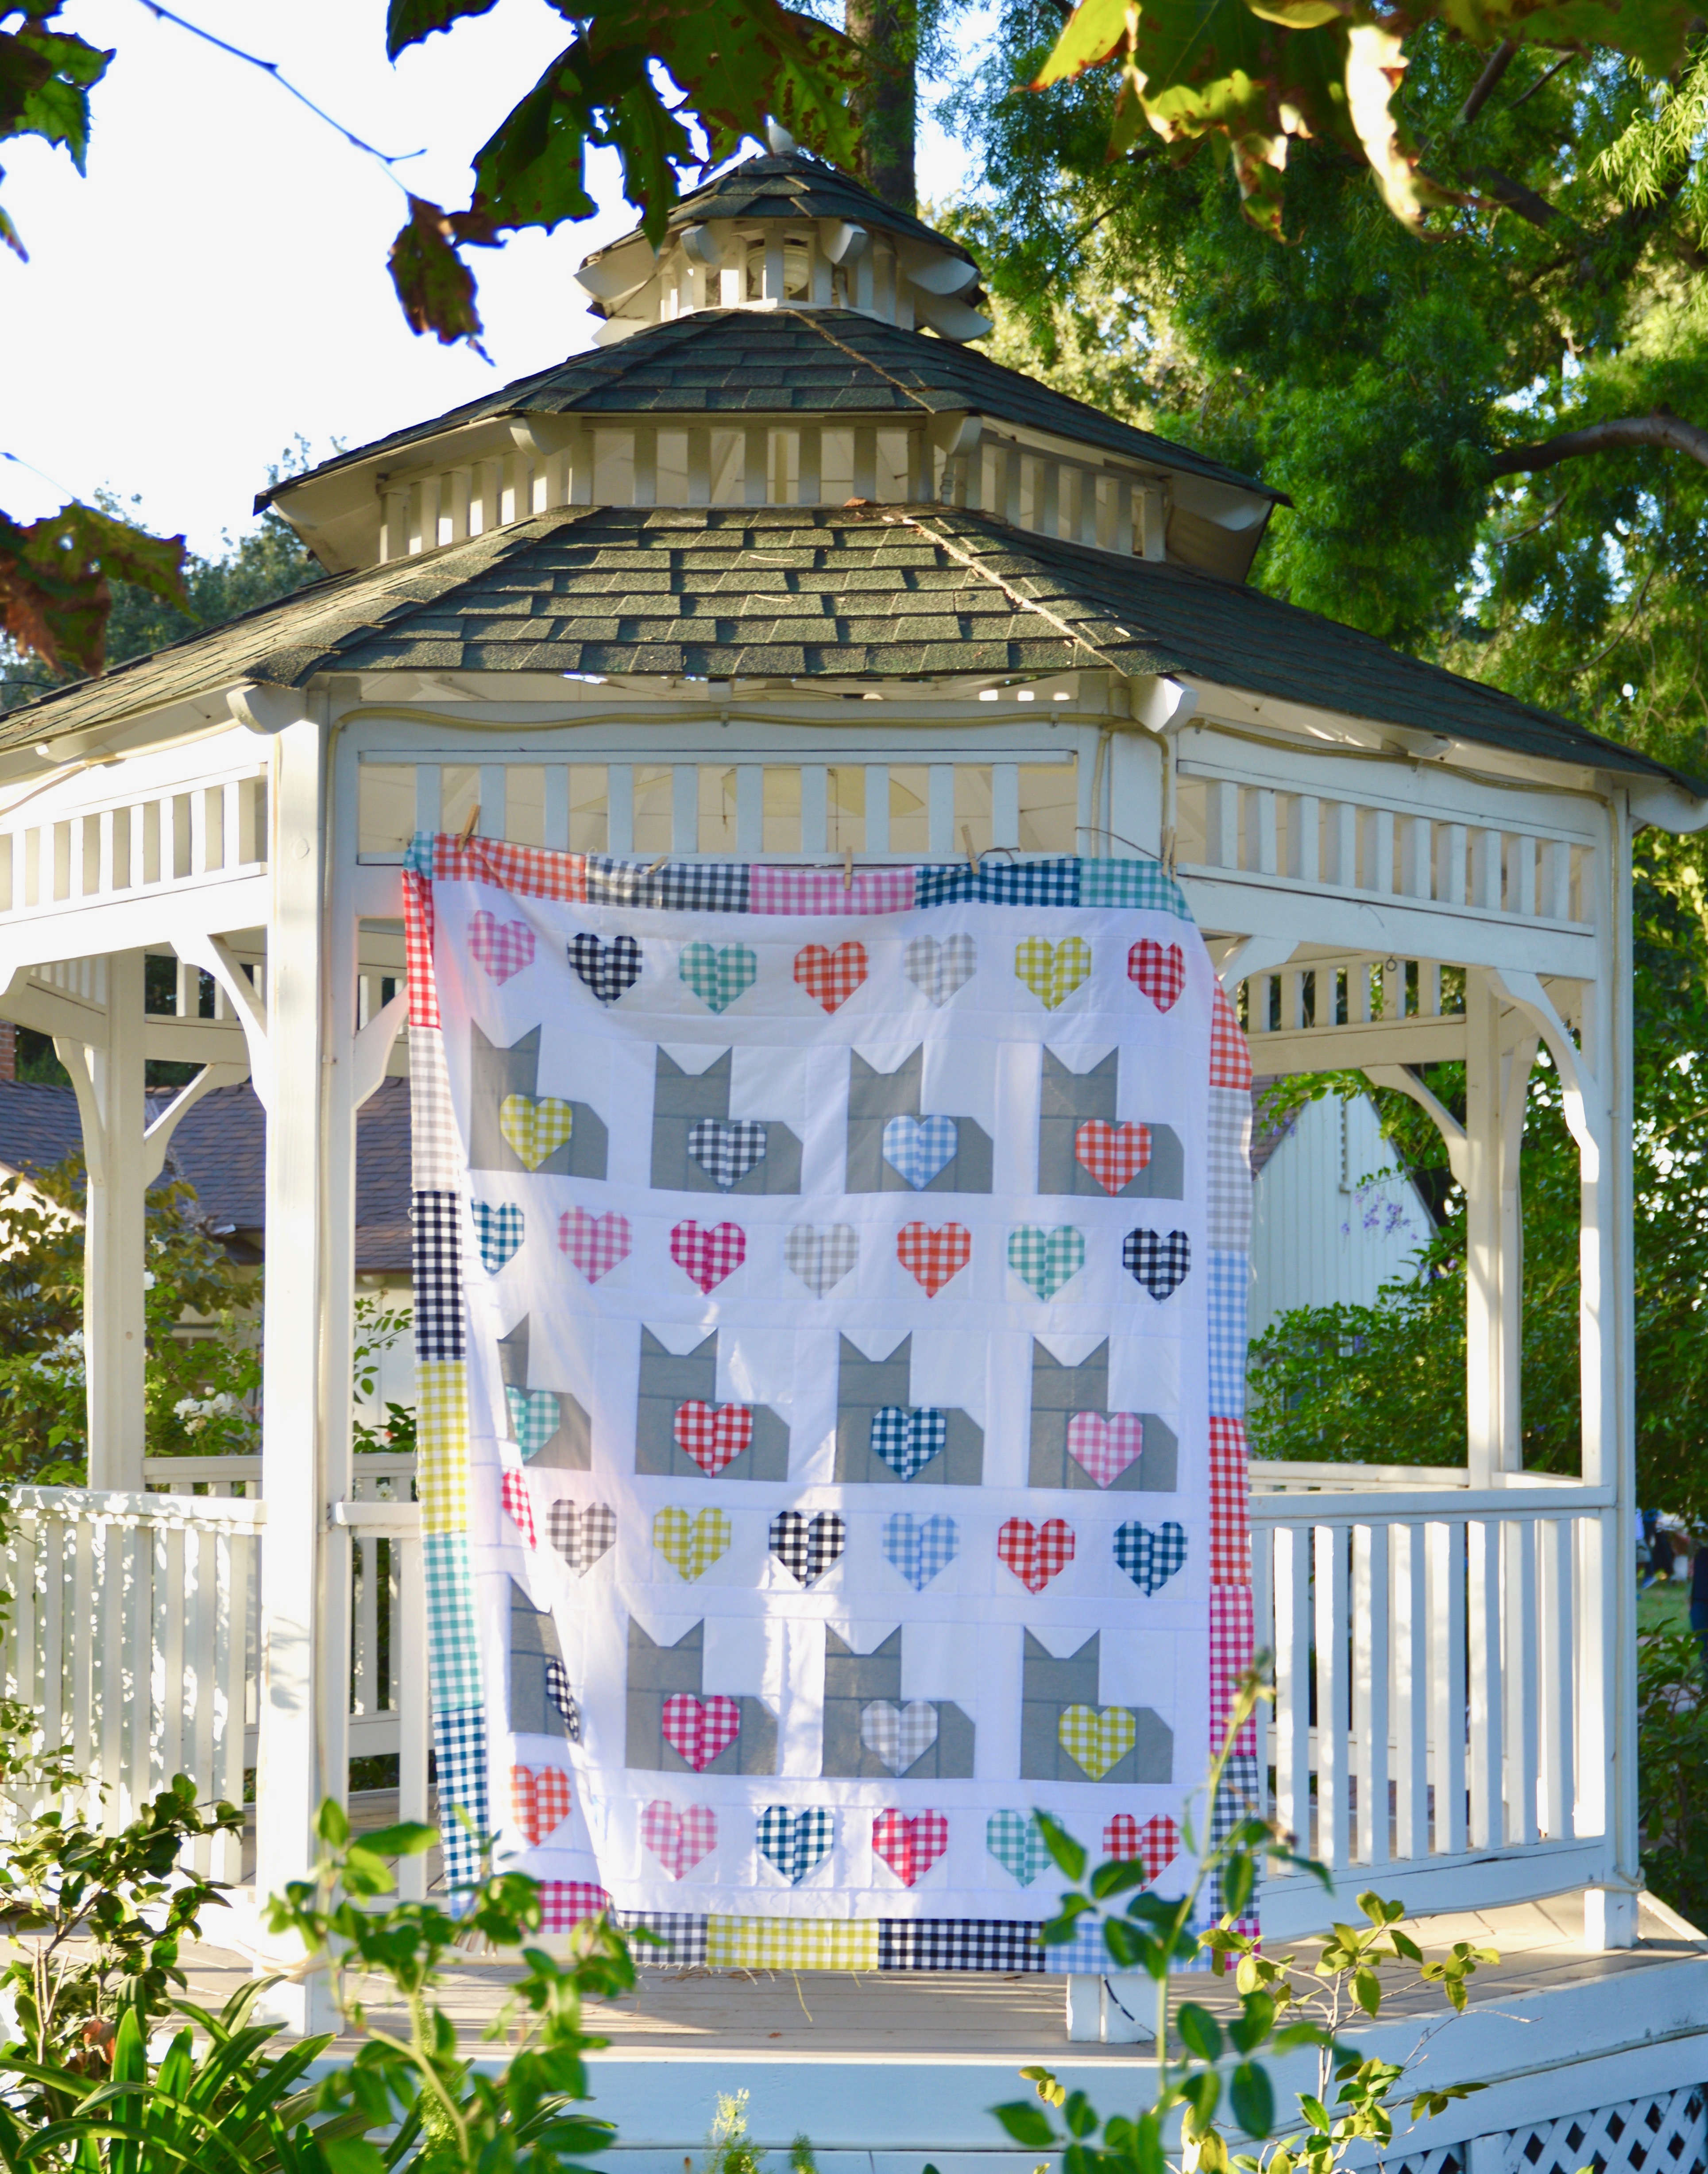
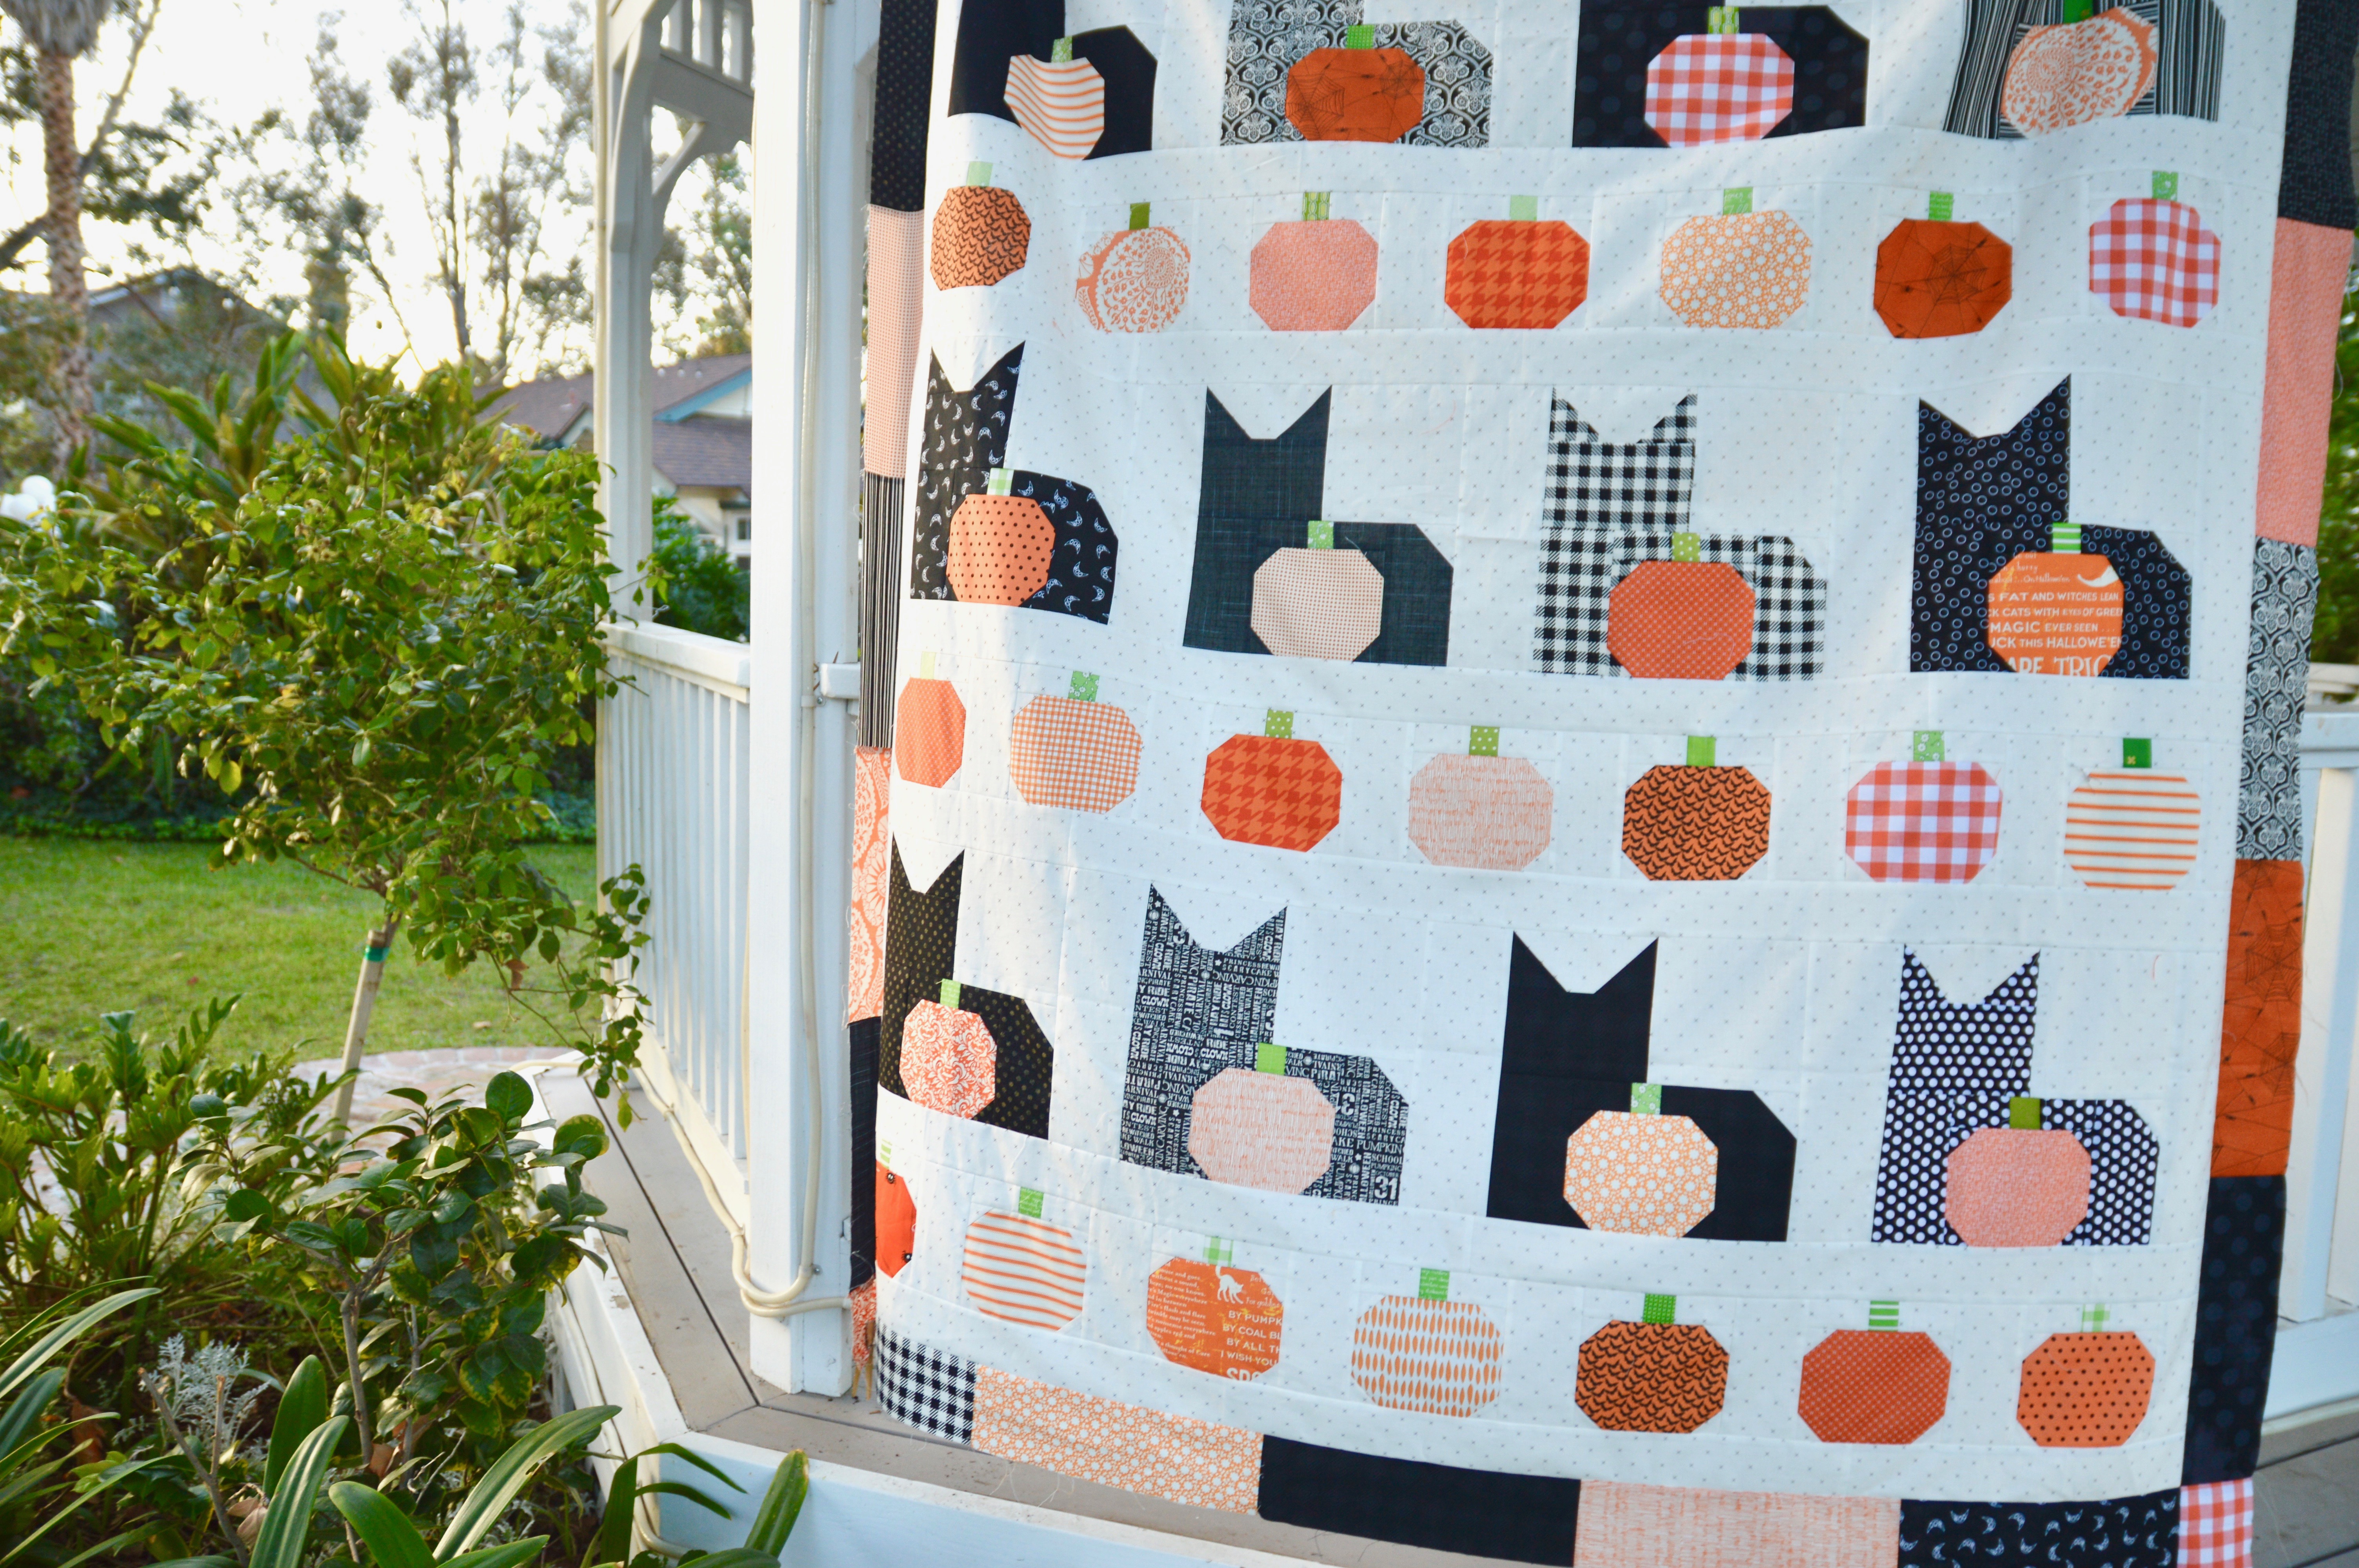
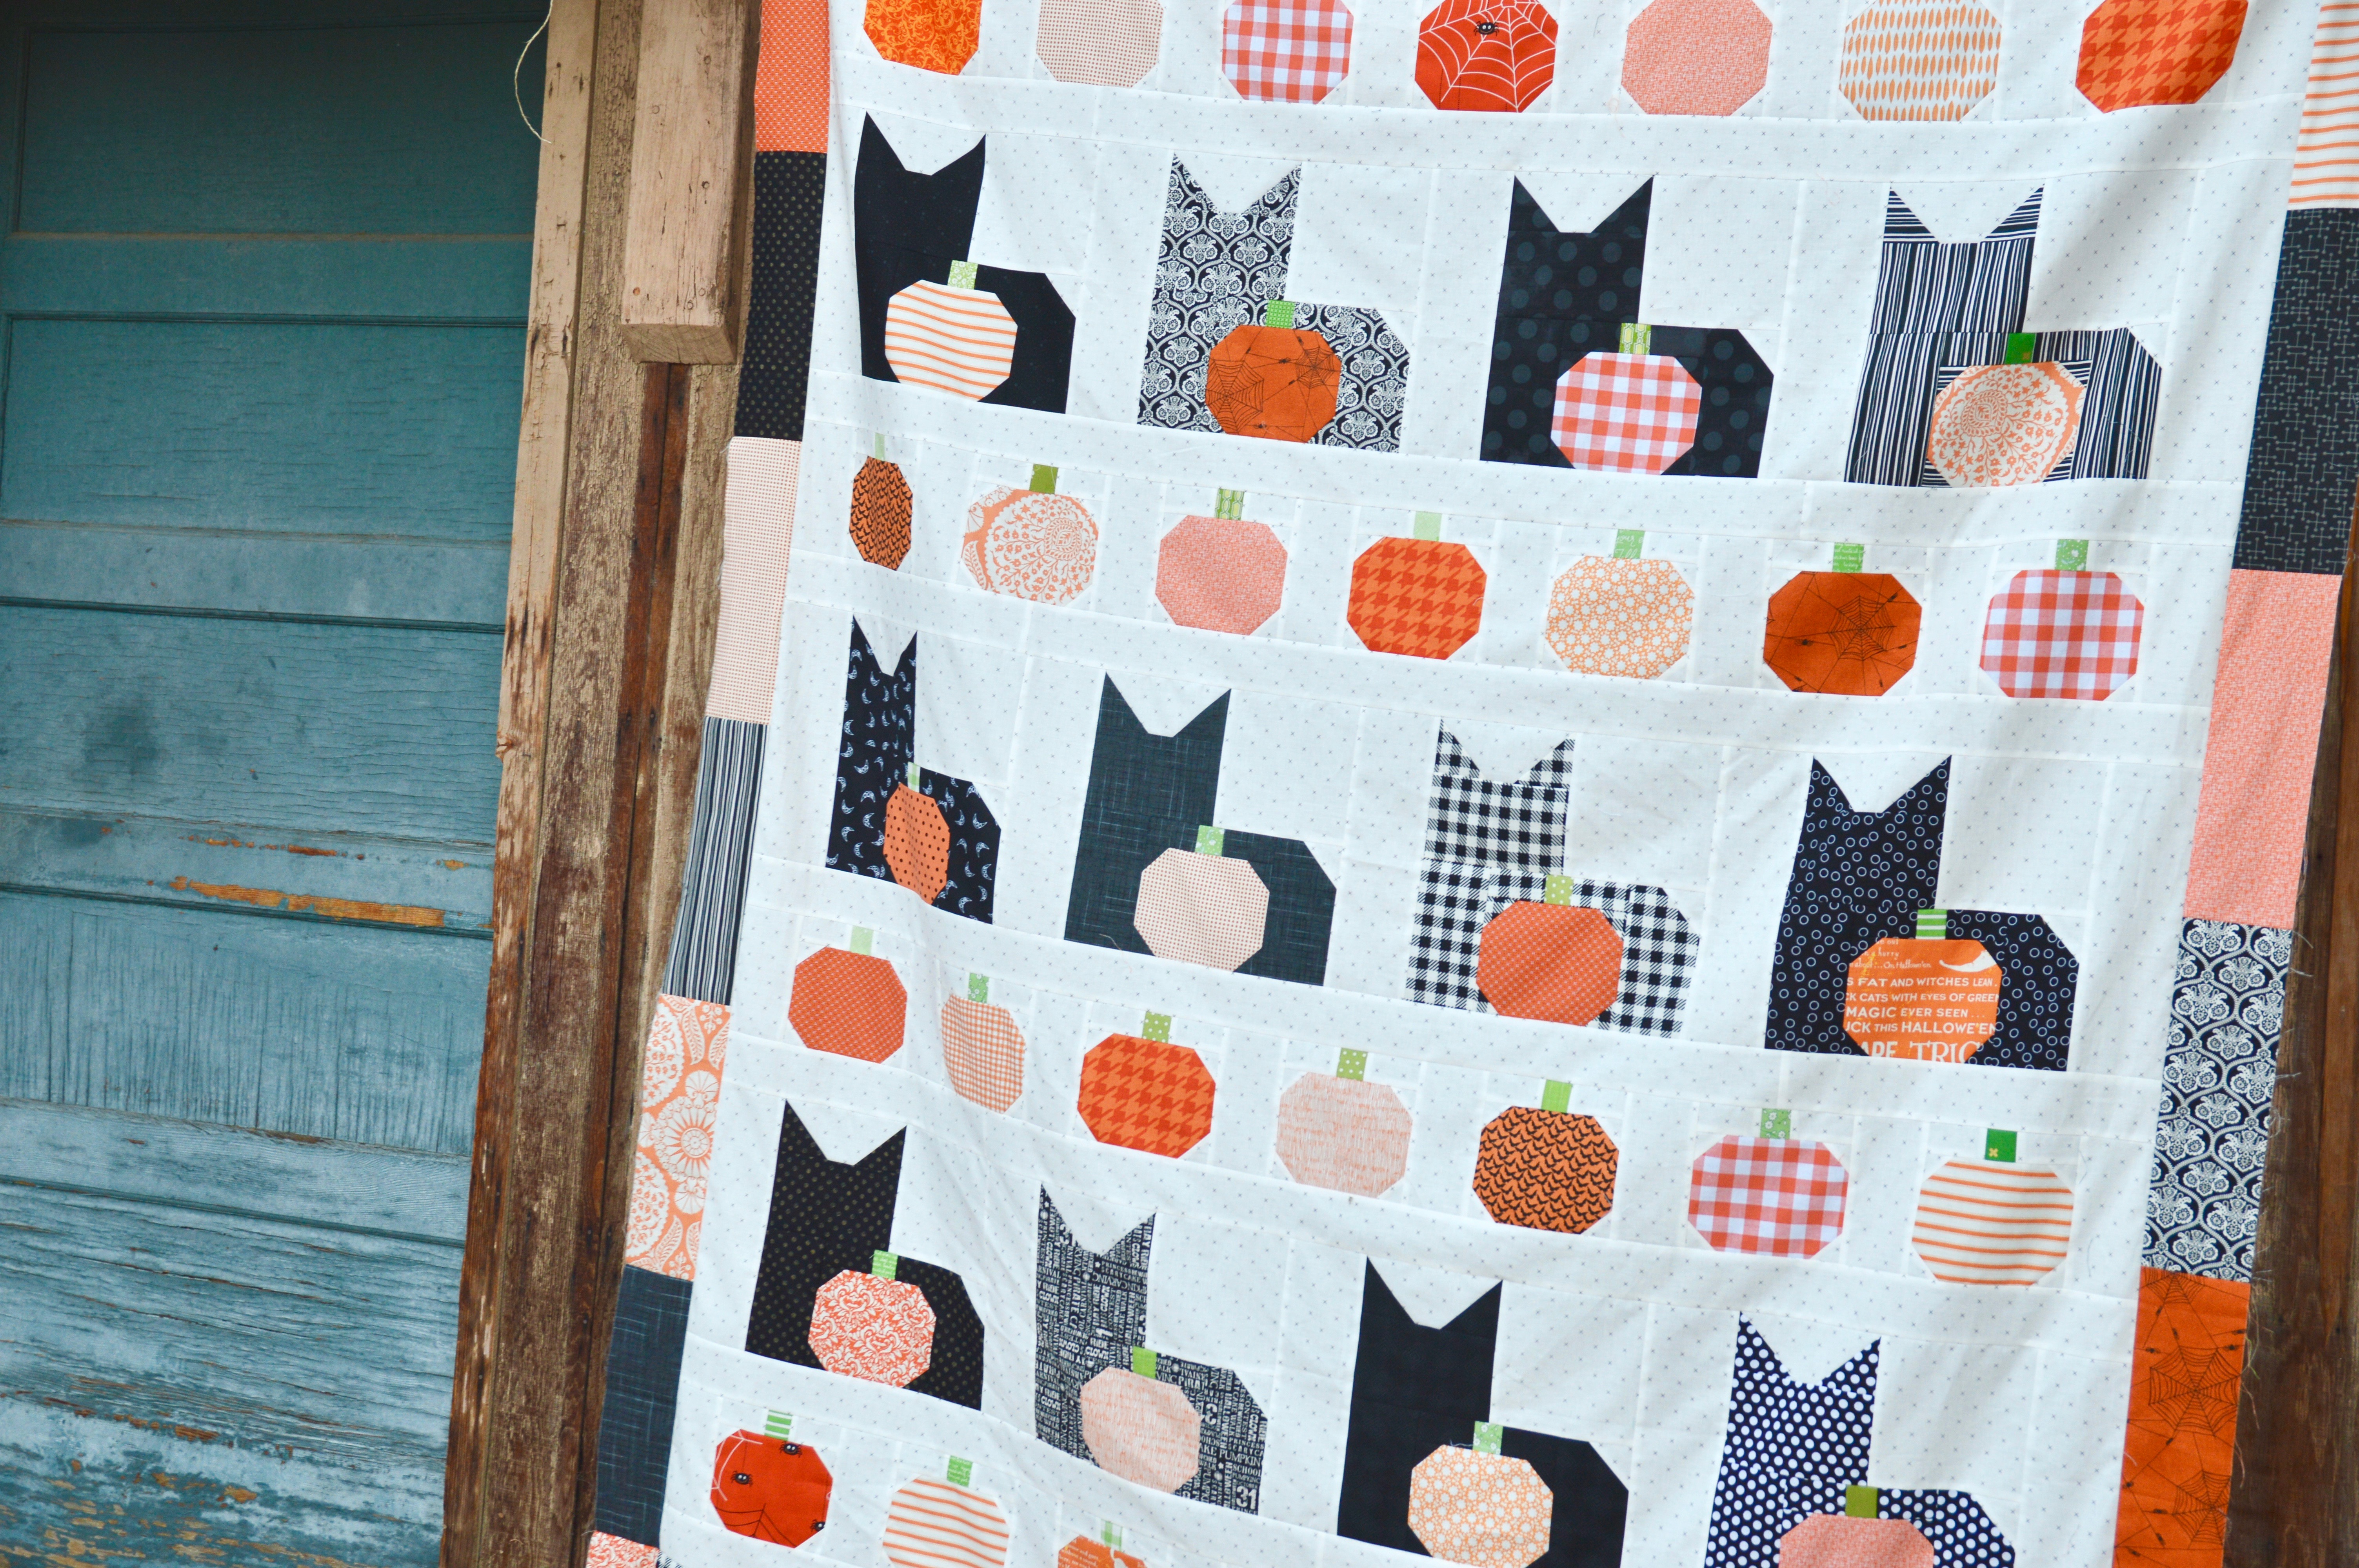
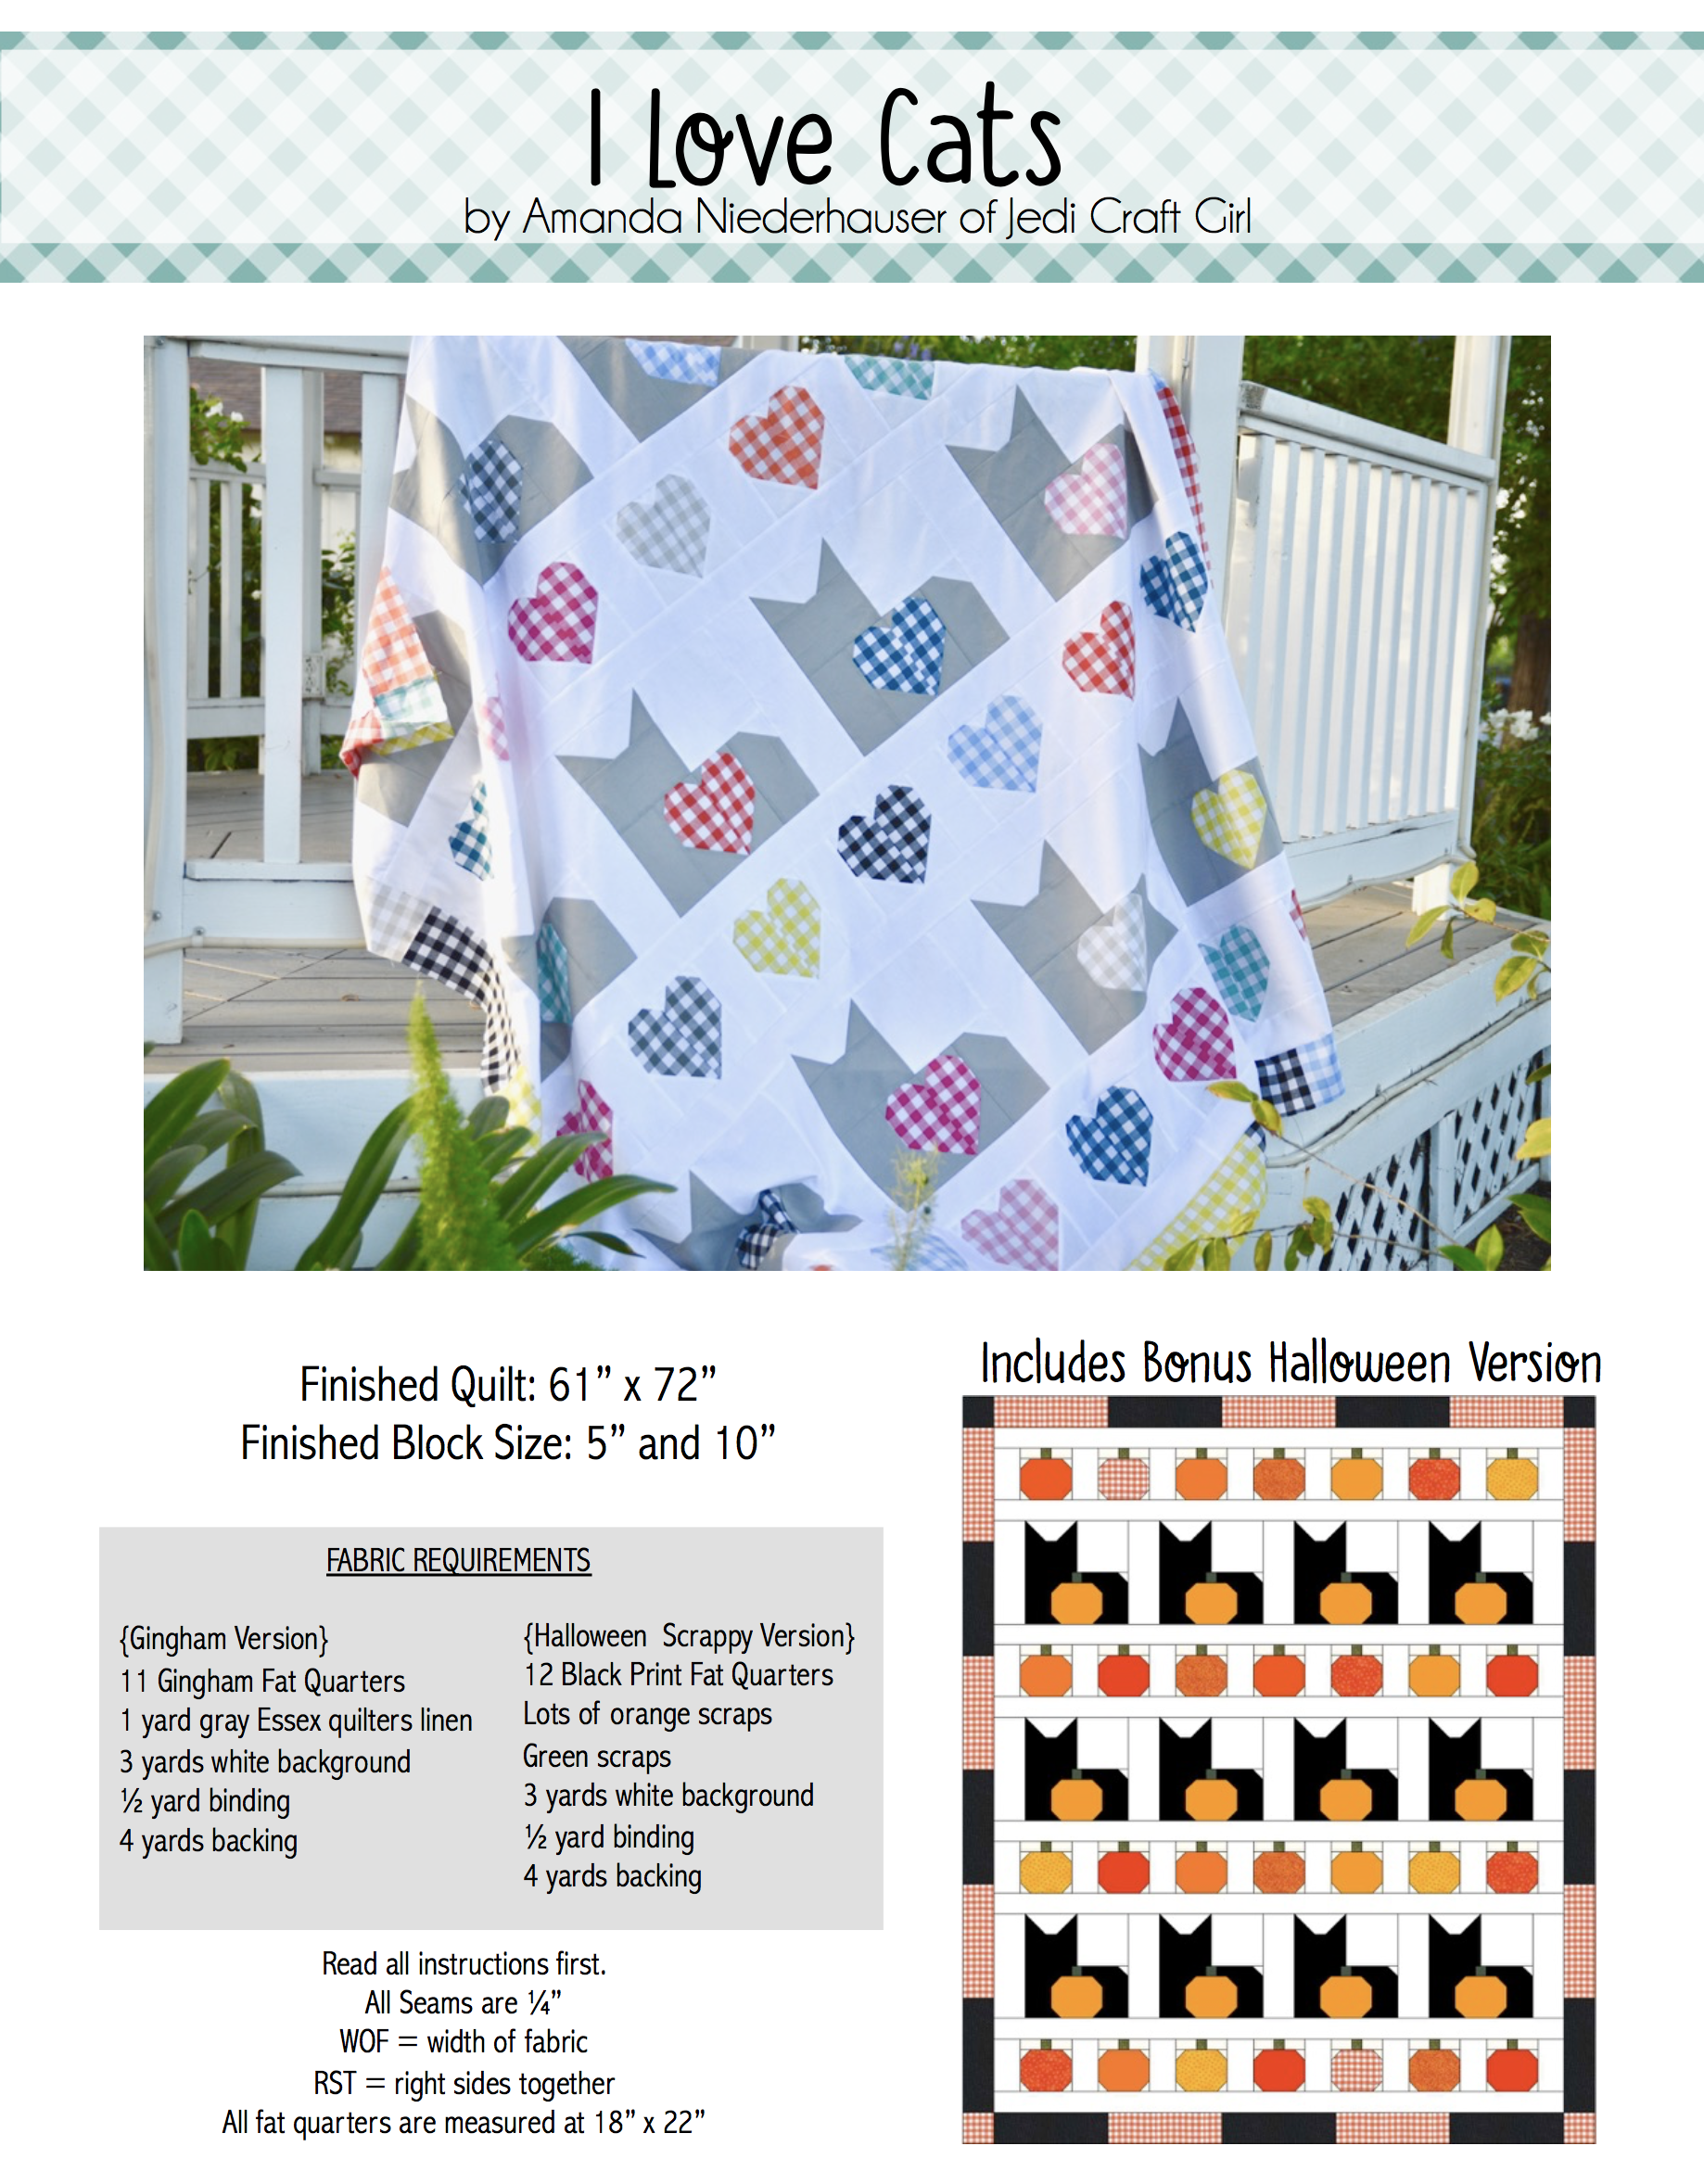
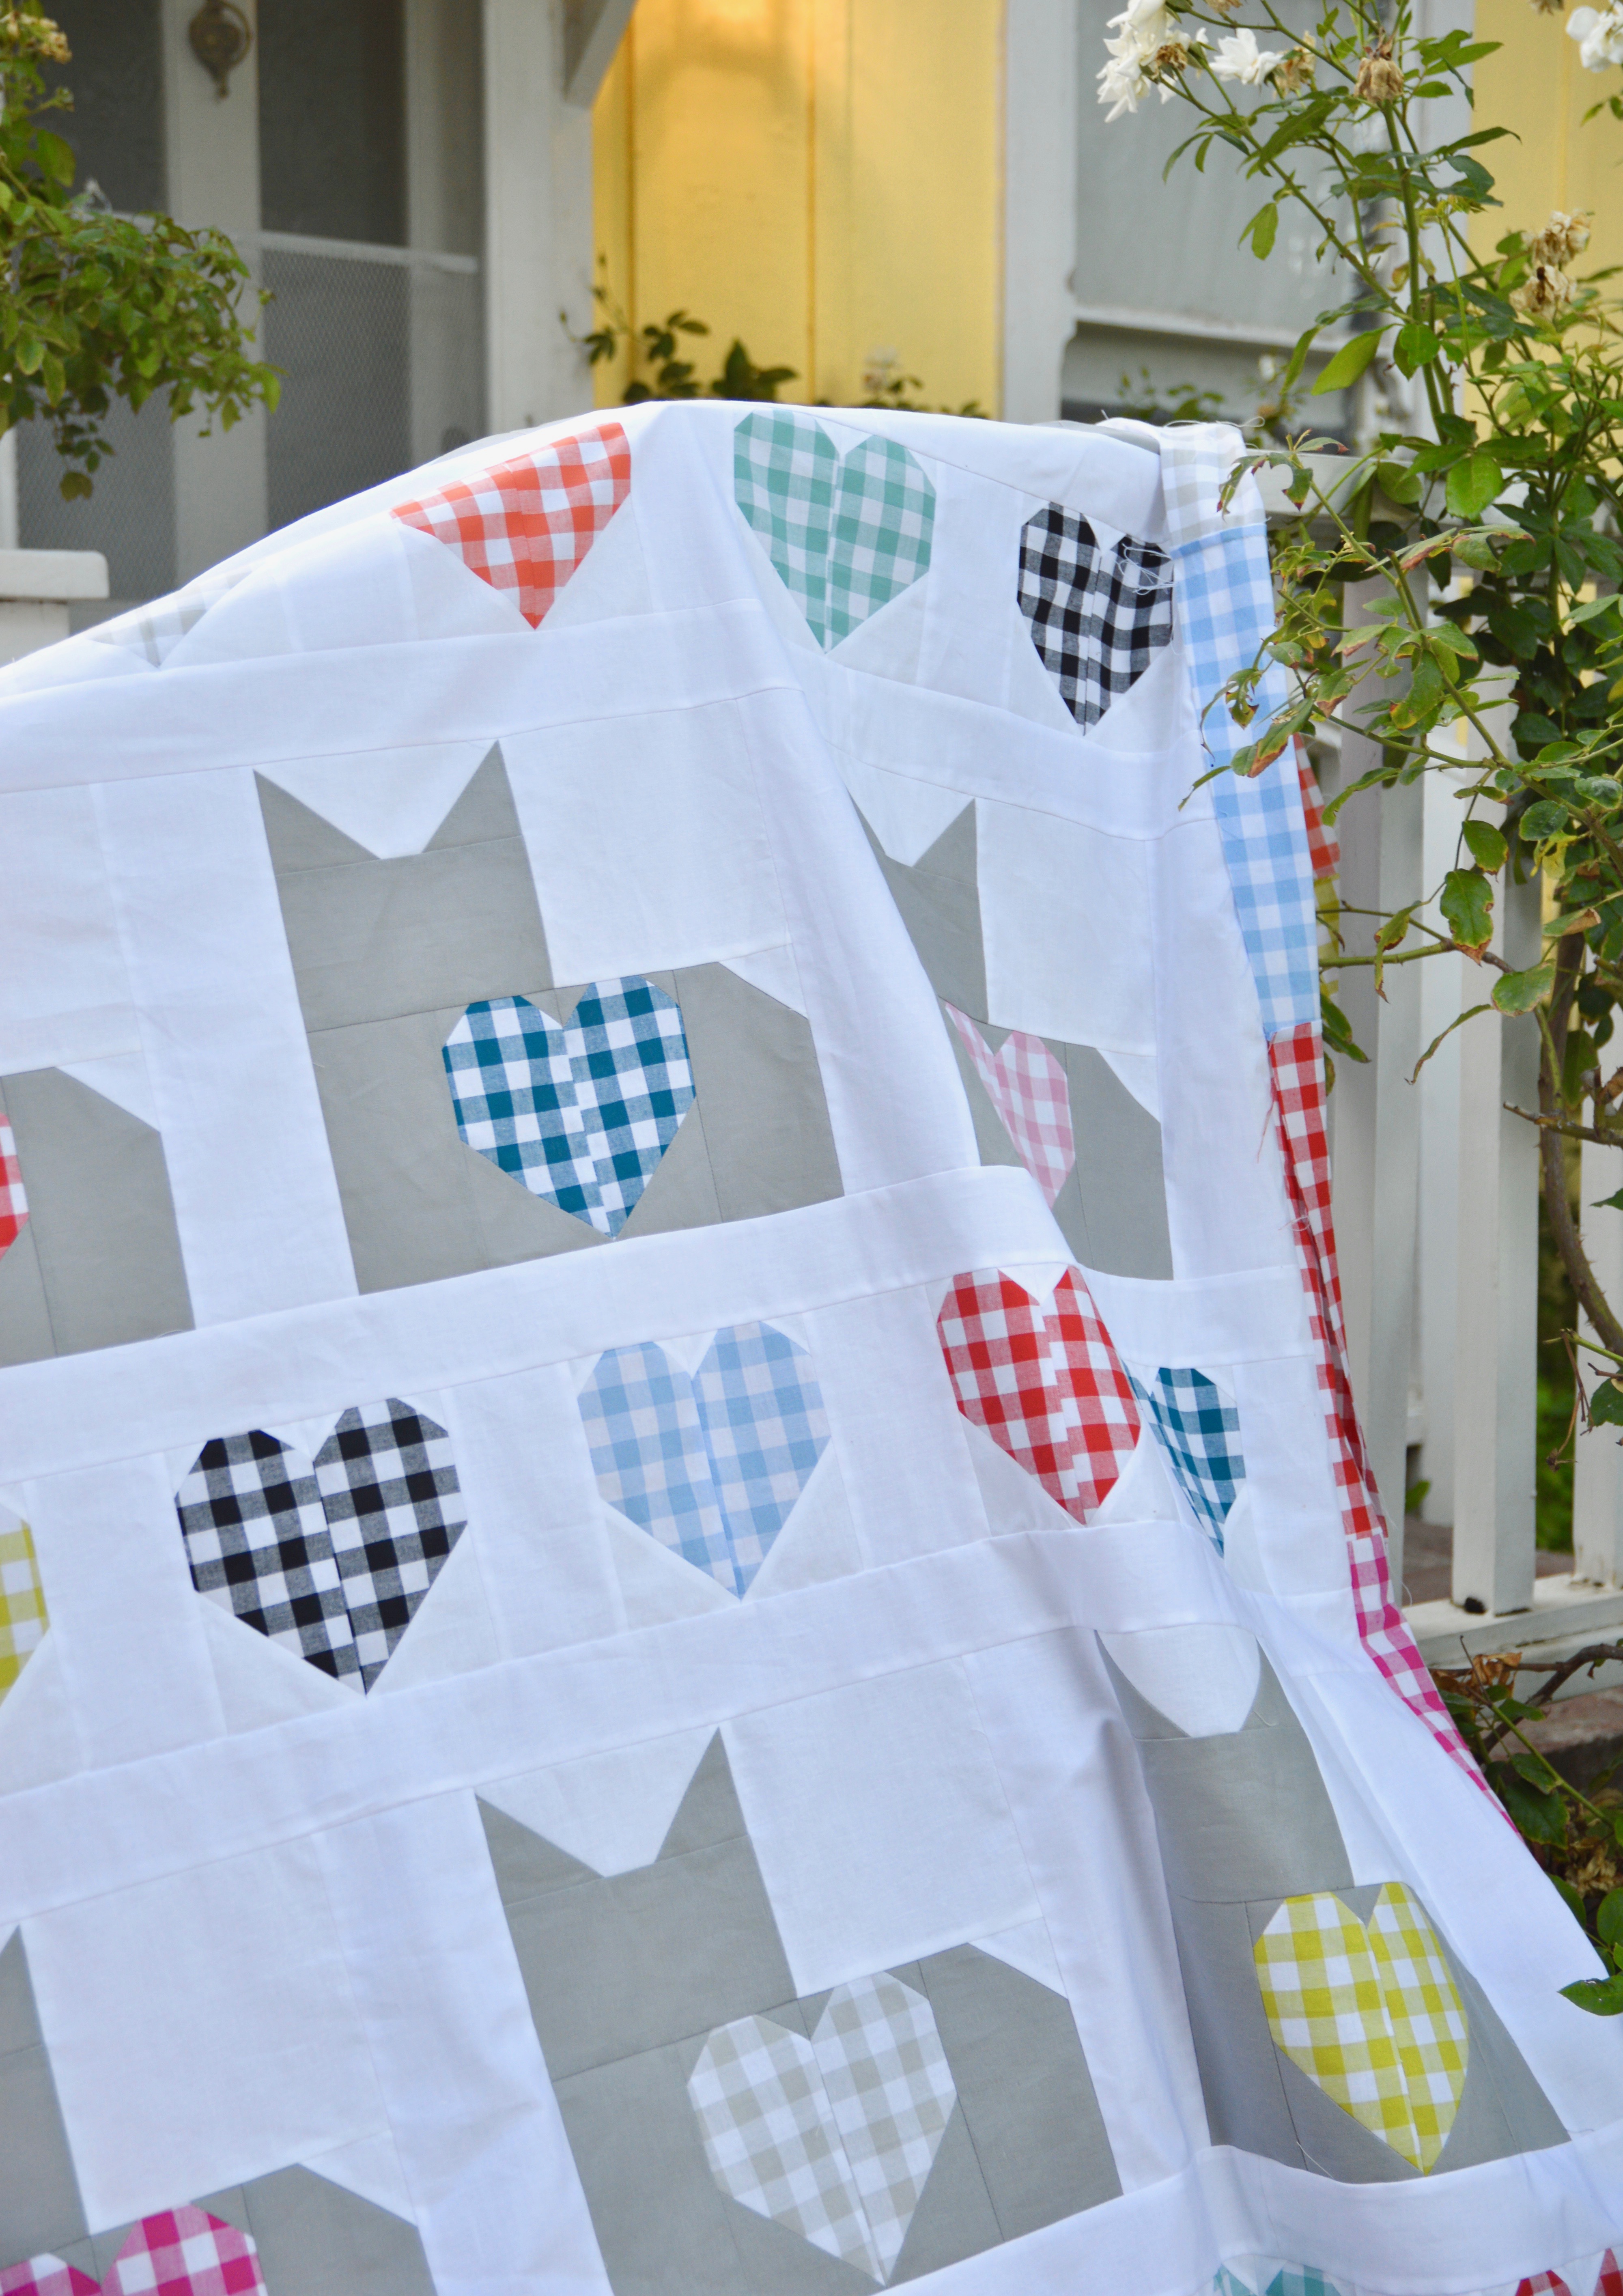
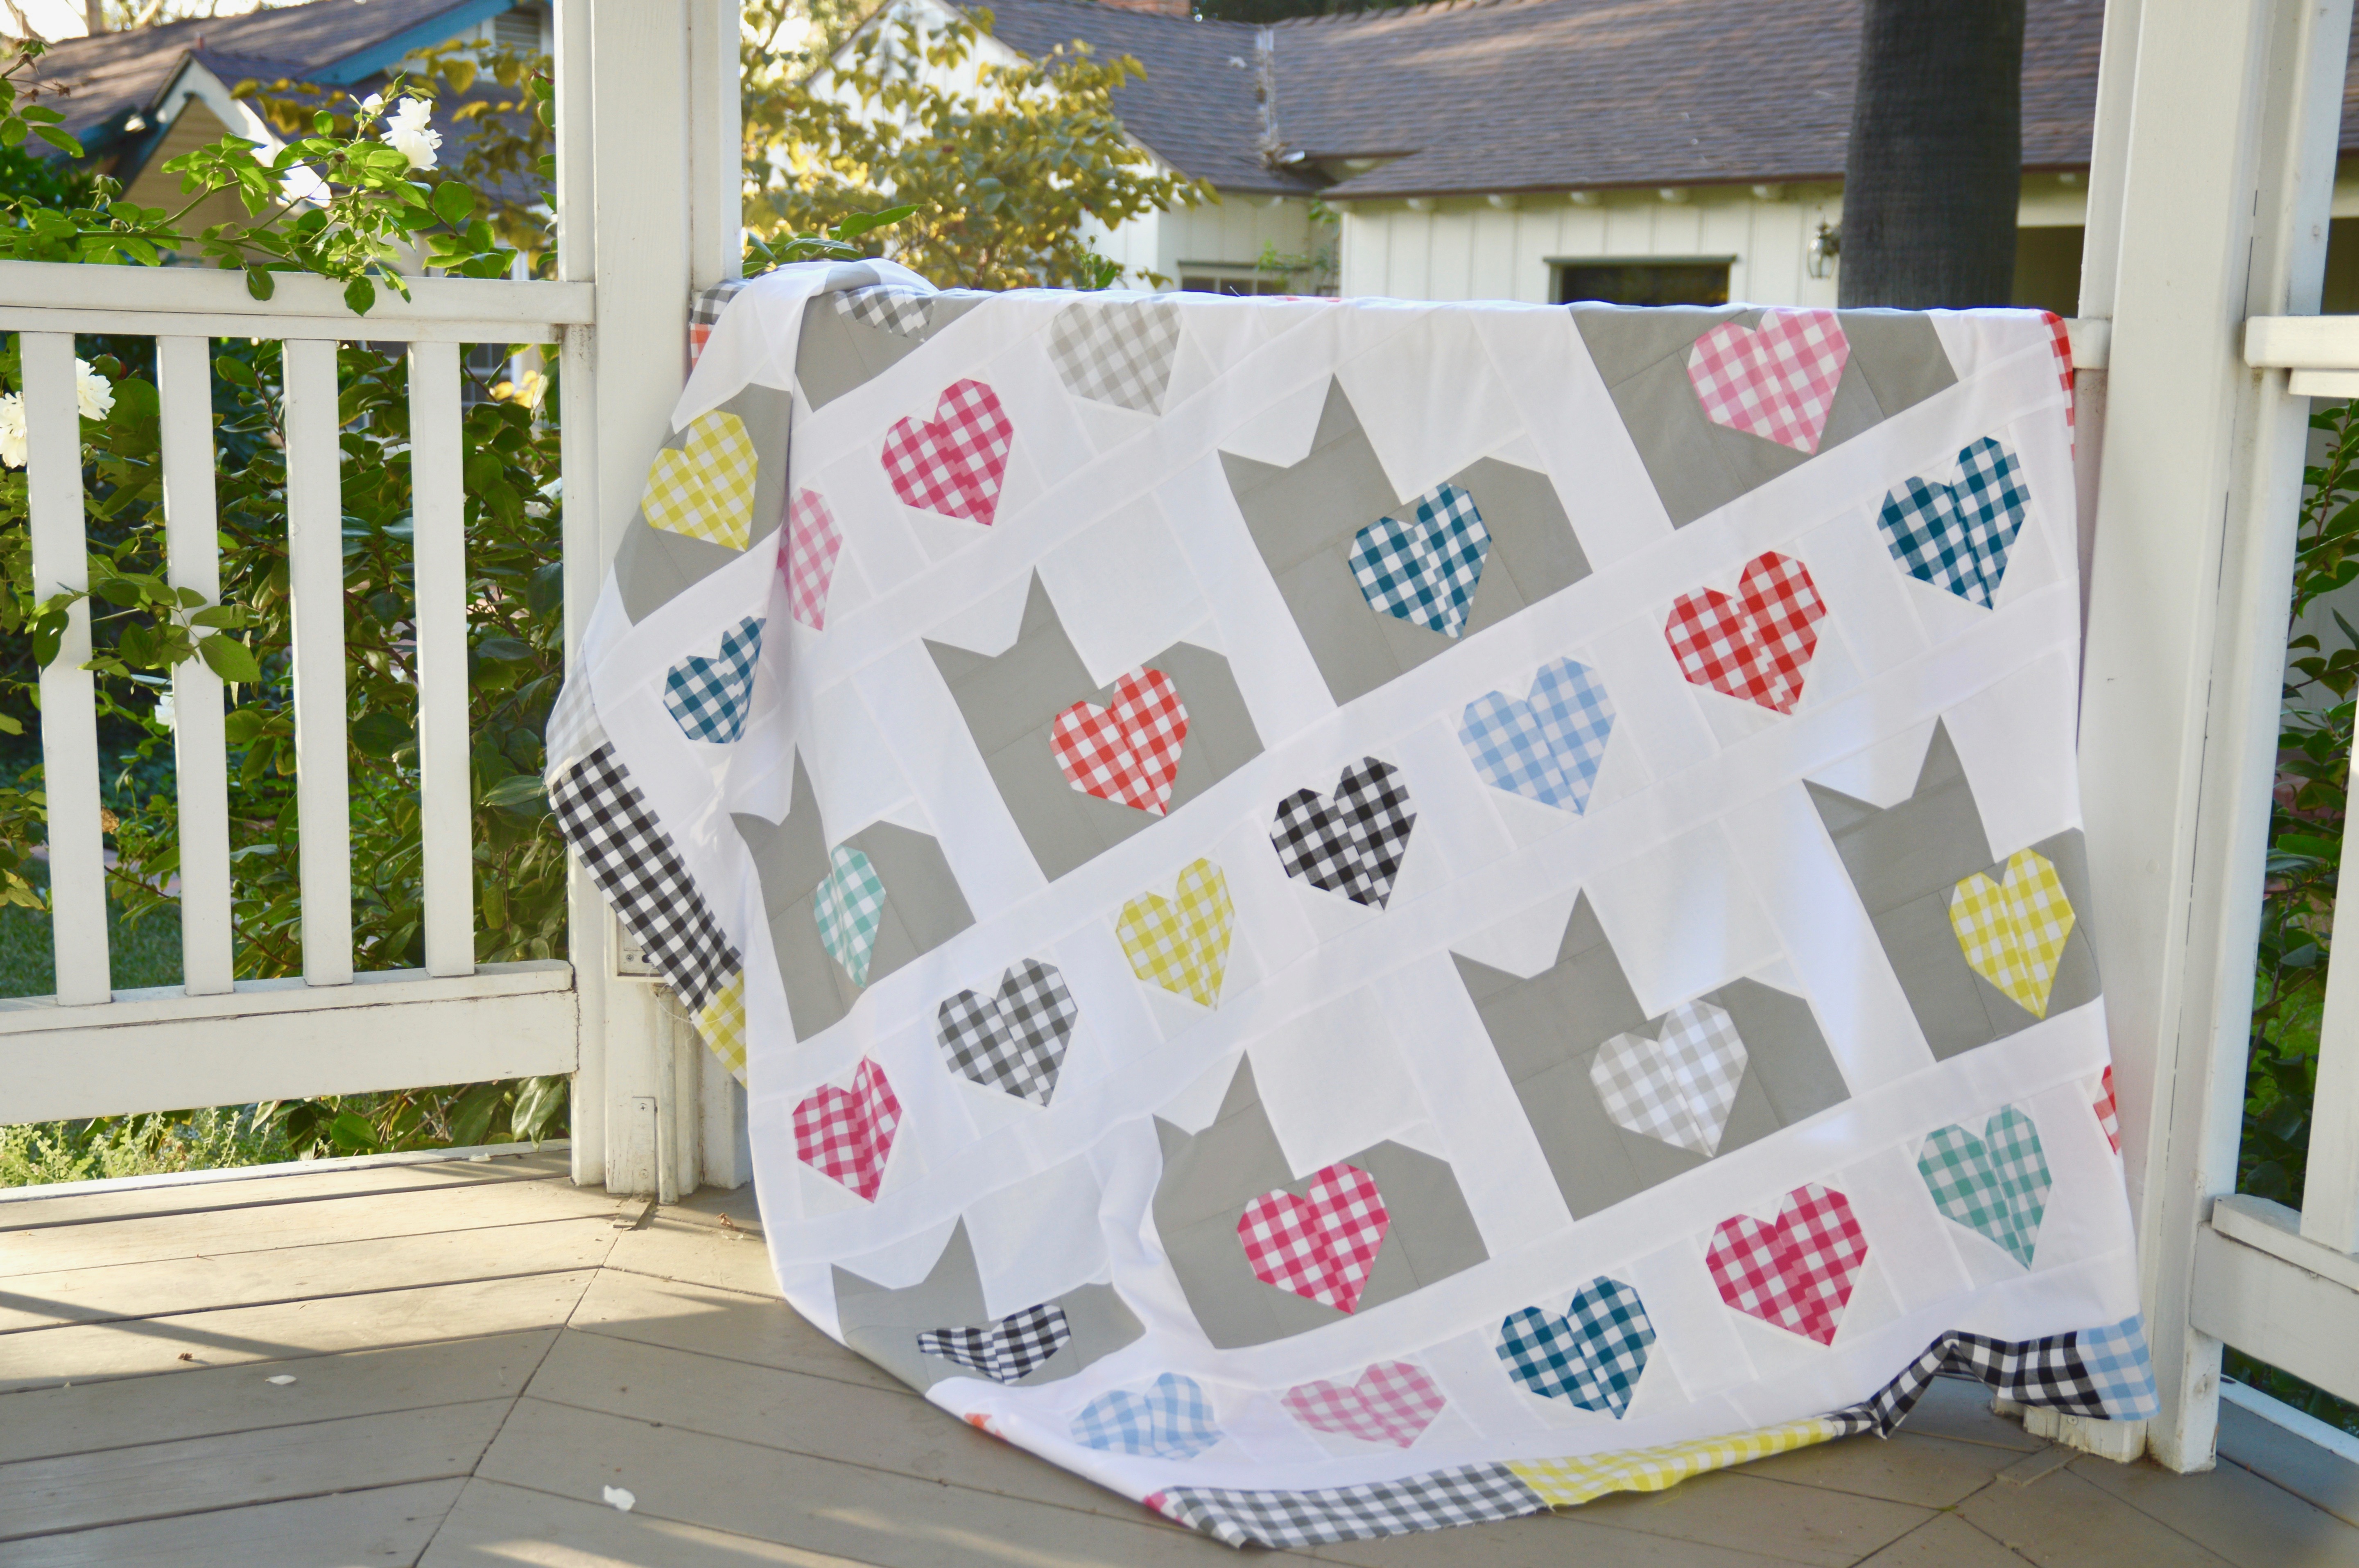
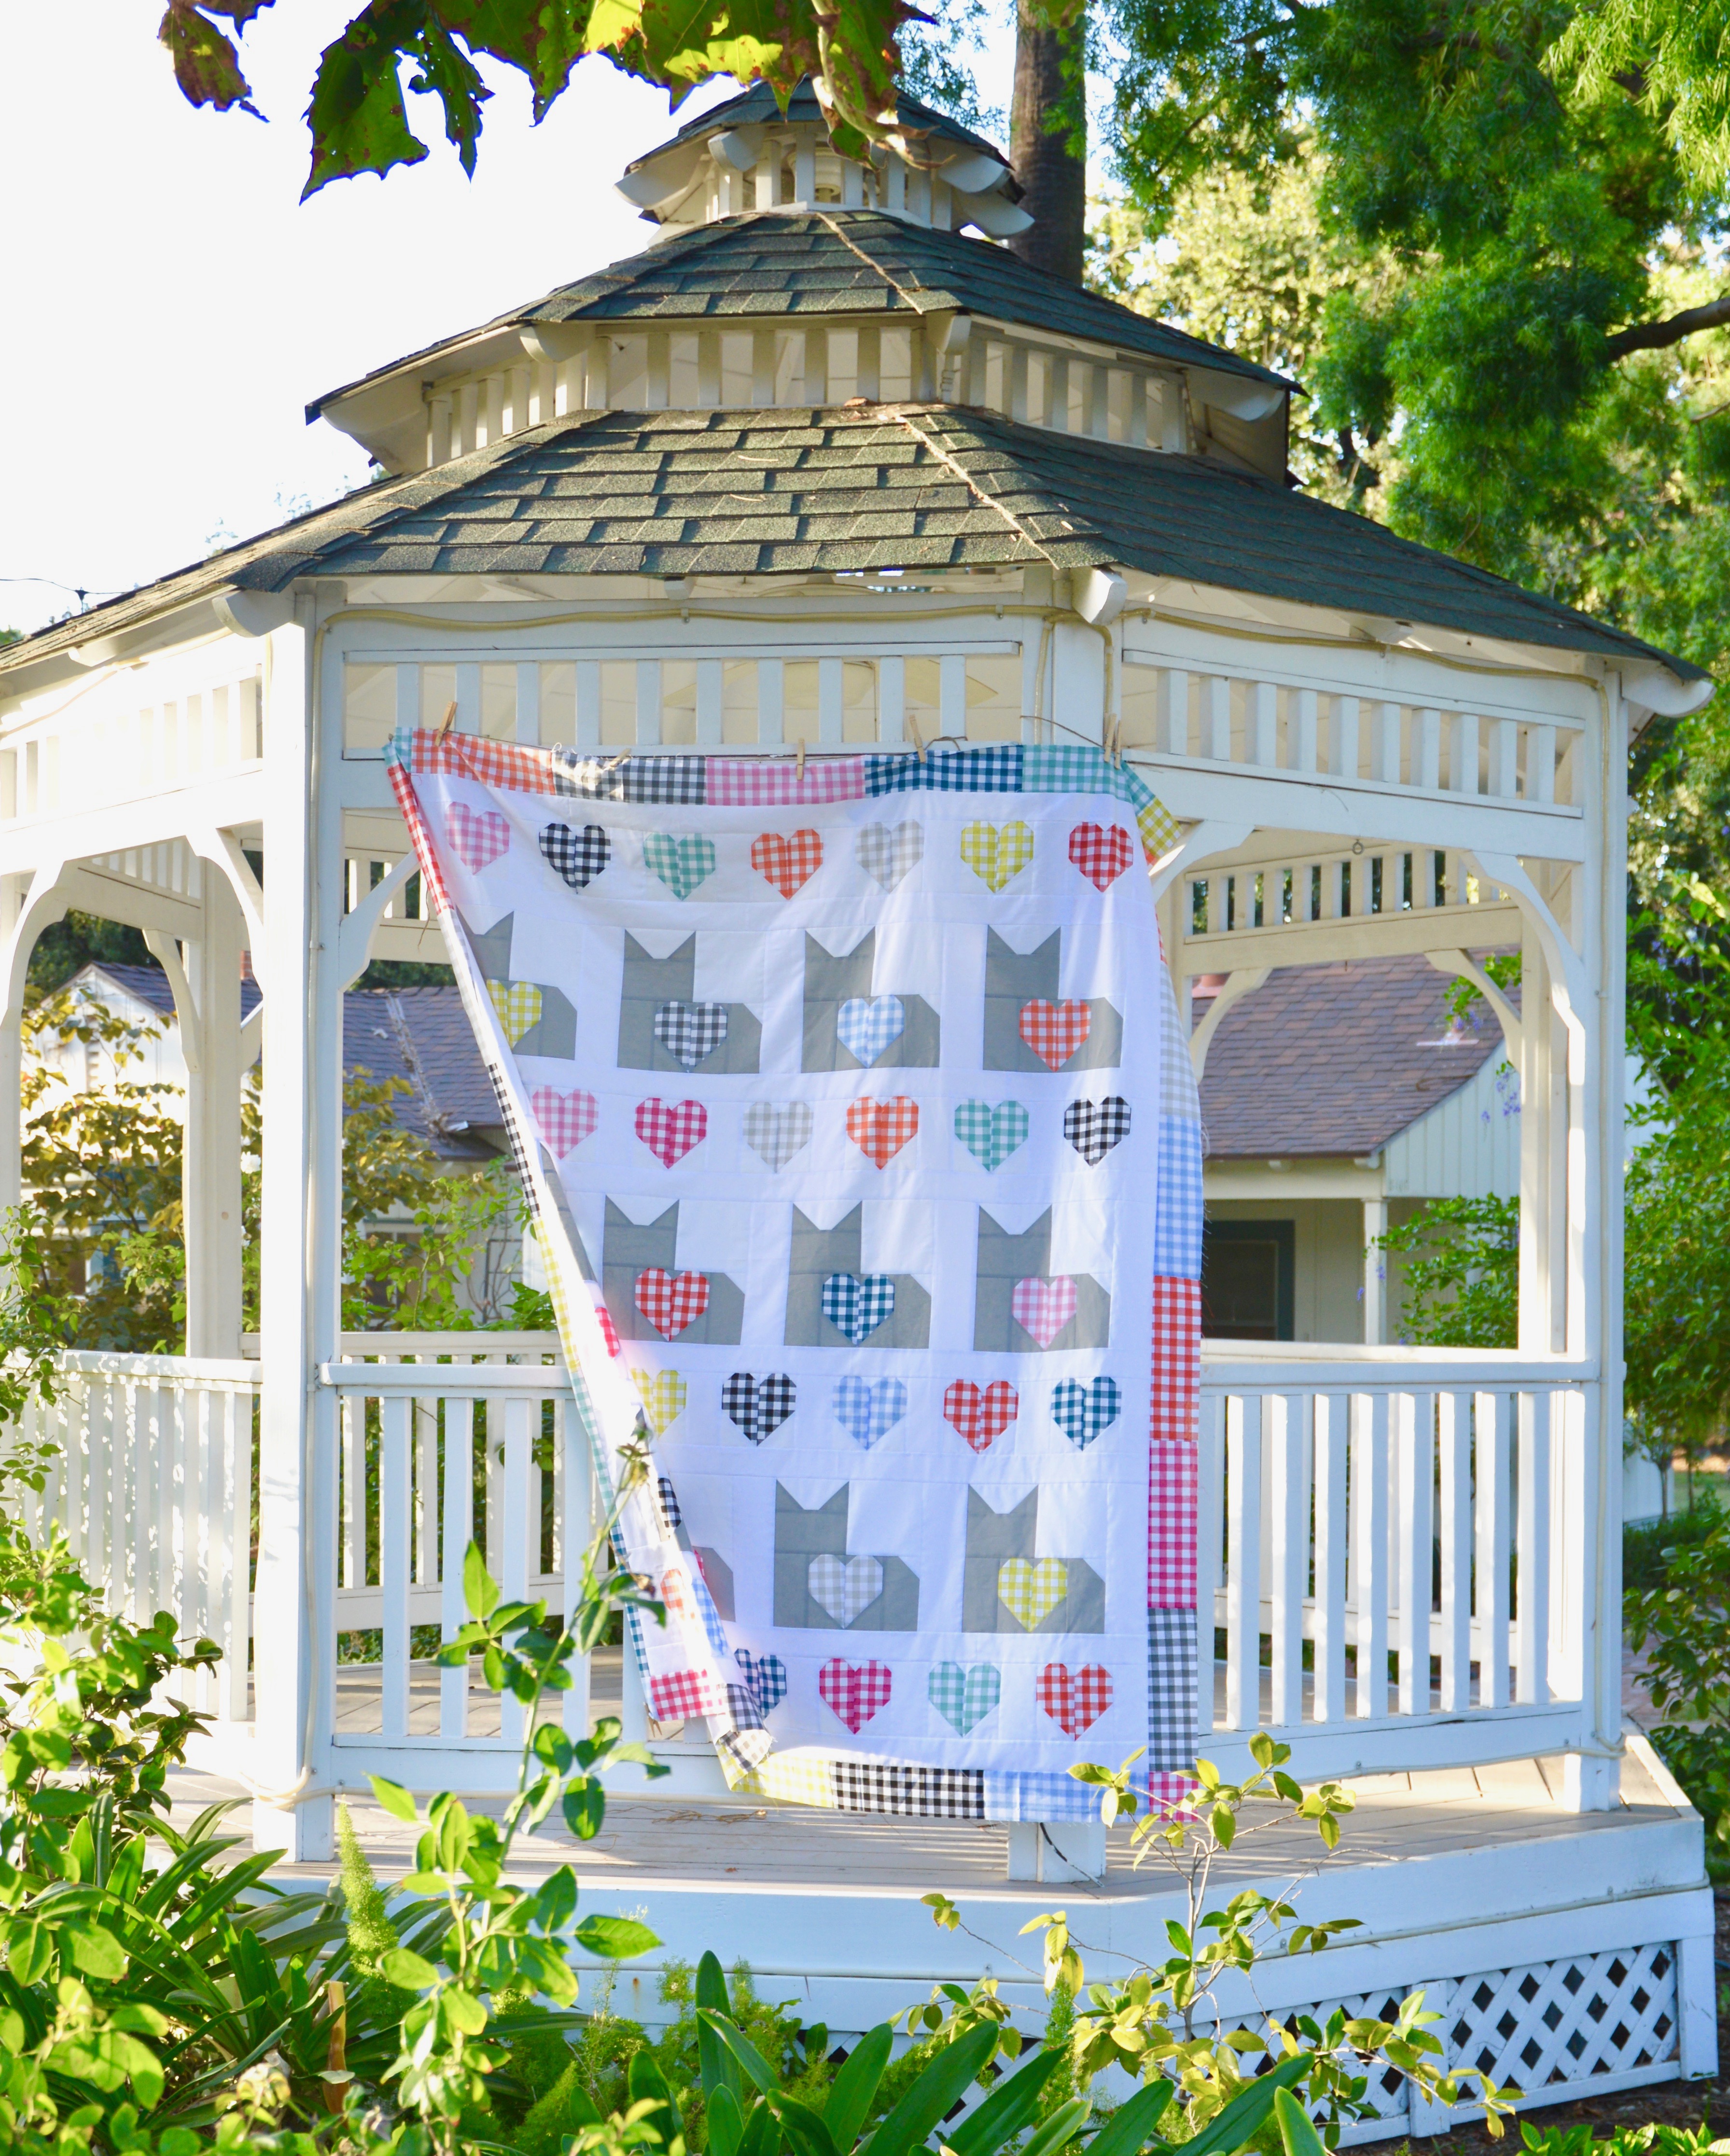
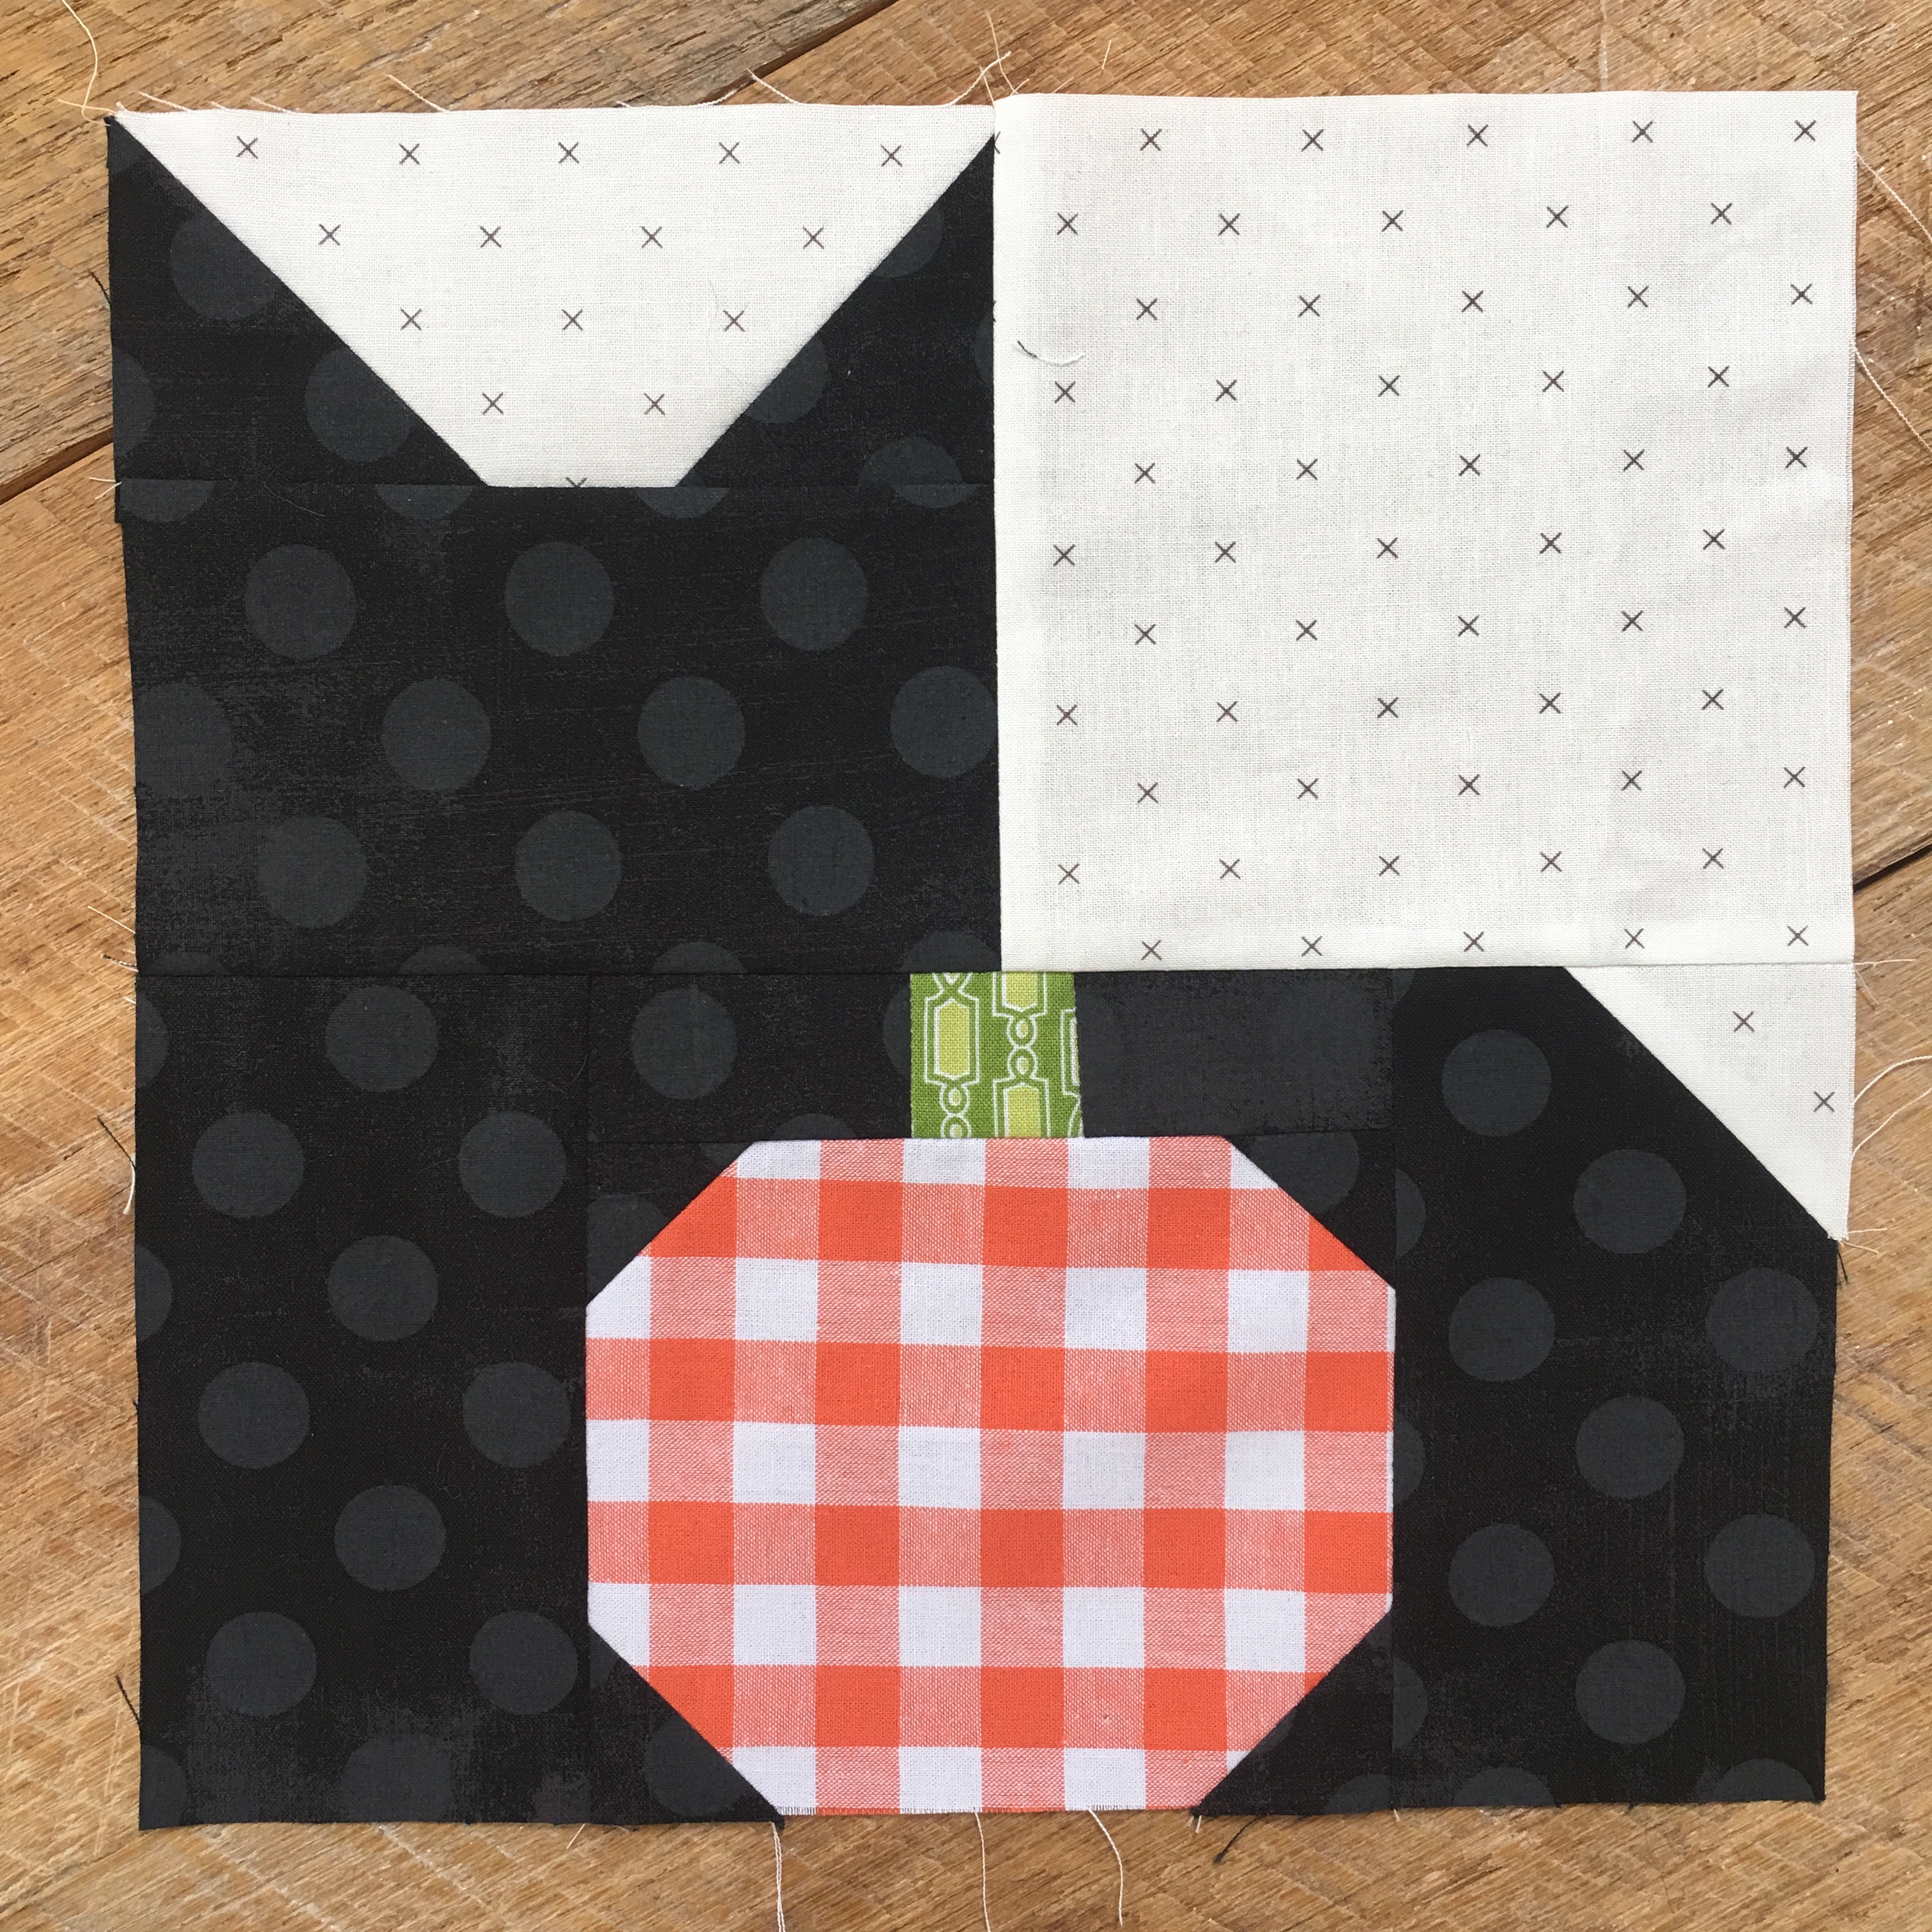
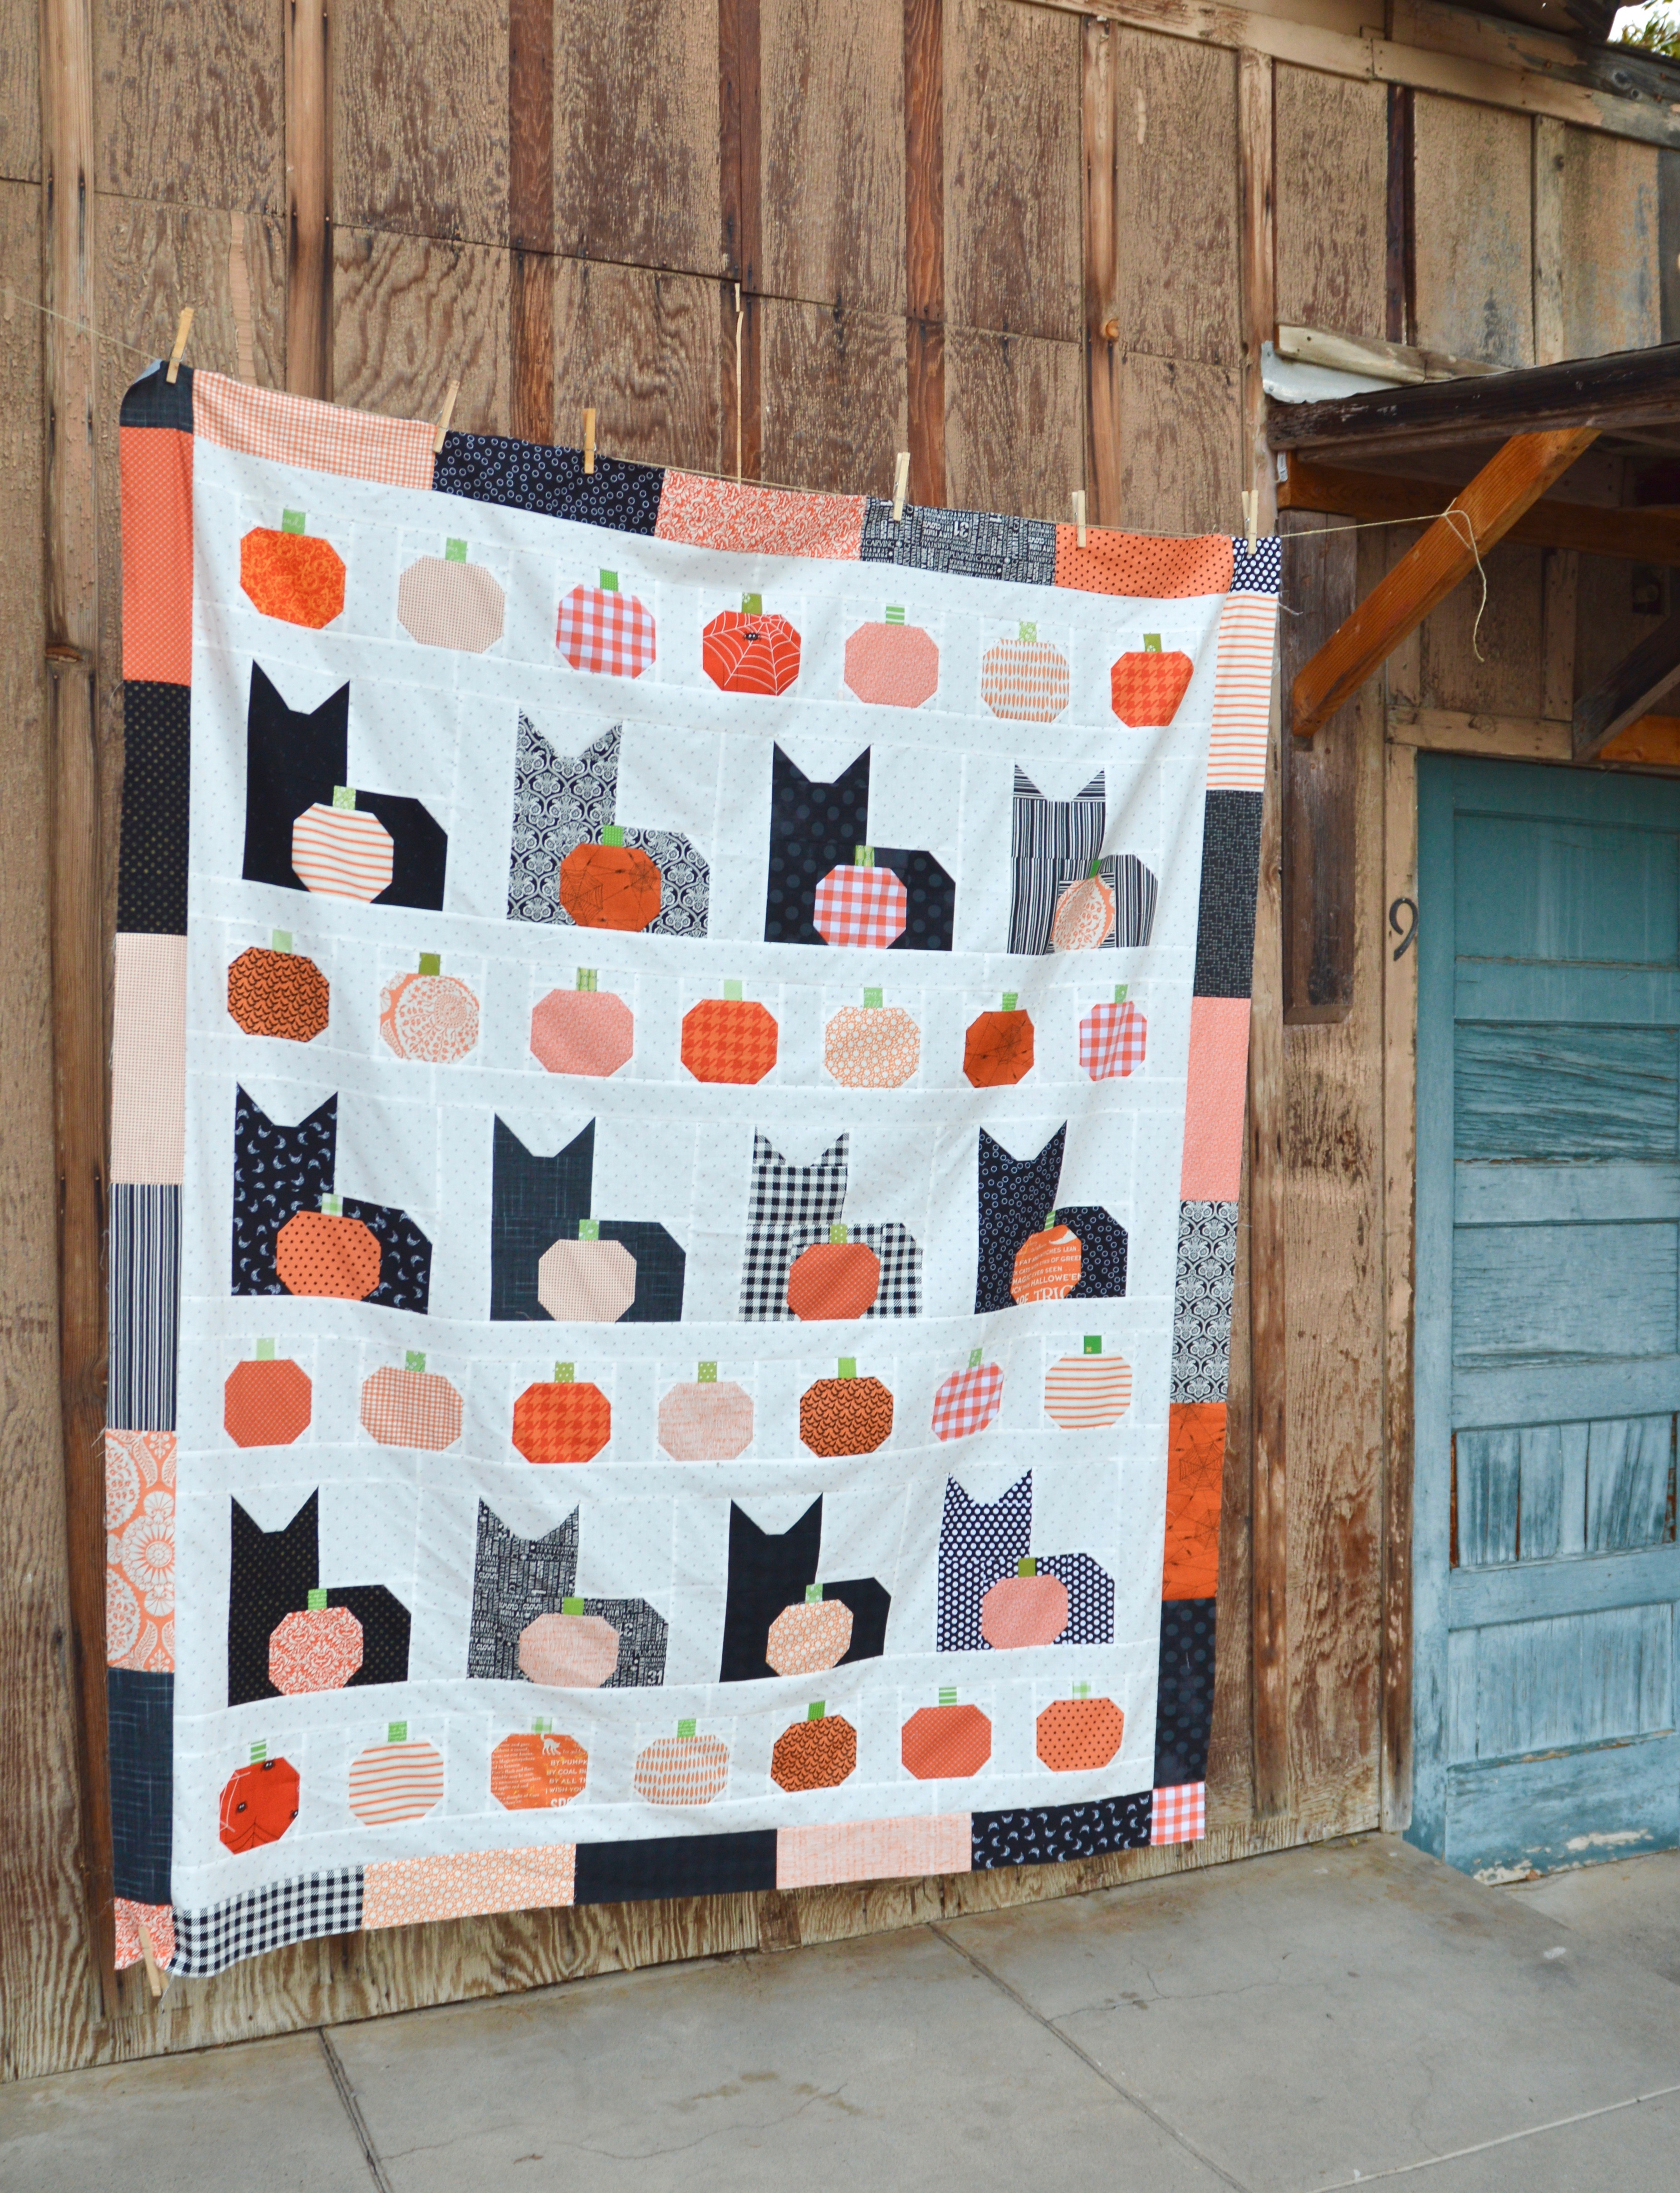
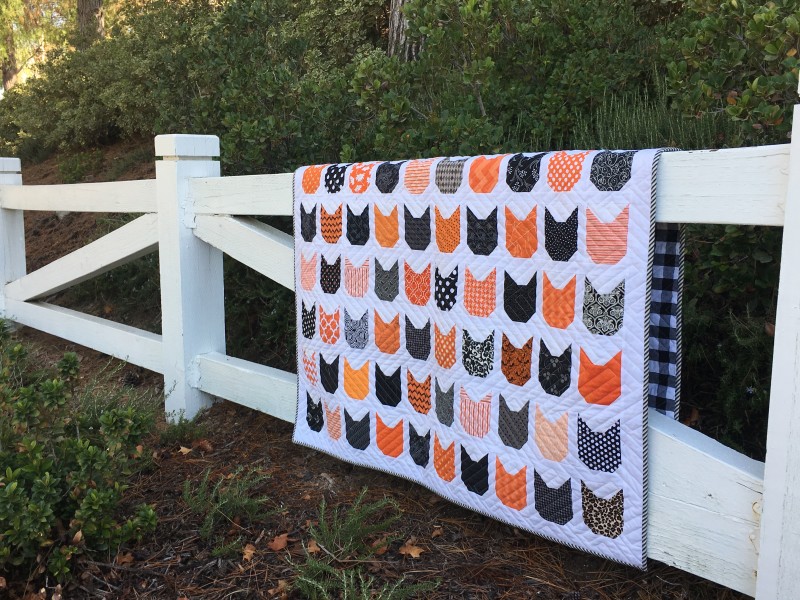
I am so totally super excited to be sharing this pattern today! Meet “I Love Cats” – the quilt pattern! This quilt has been a labor of love and has been a long time in the making! I was first inspired by this amazing bundle of Cotton + Steel woven gingham fat quarters. I knew I wanted something to totally show my love for gingham. Then my love for cats creeped in and I knew this was the perfect quilt!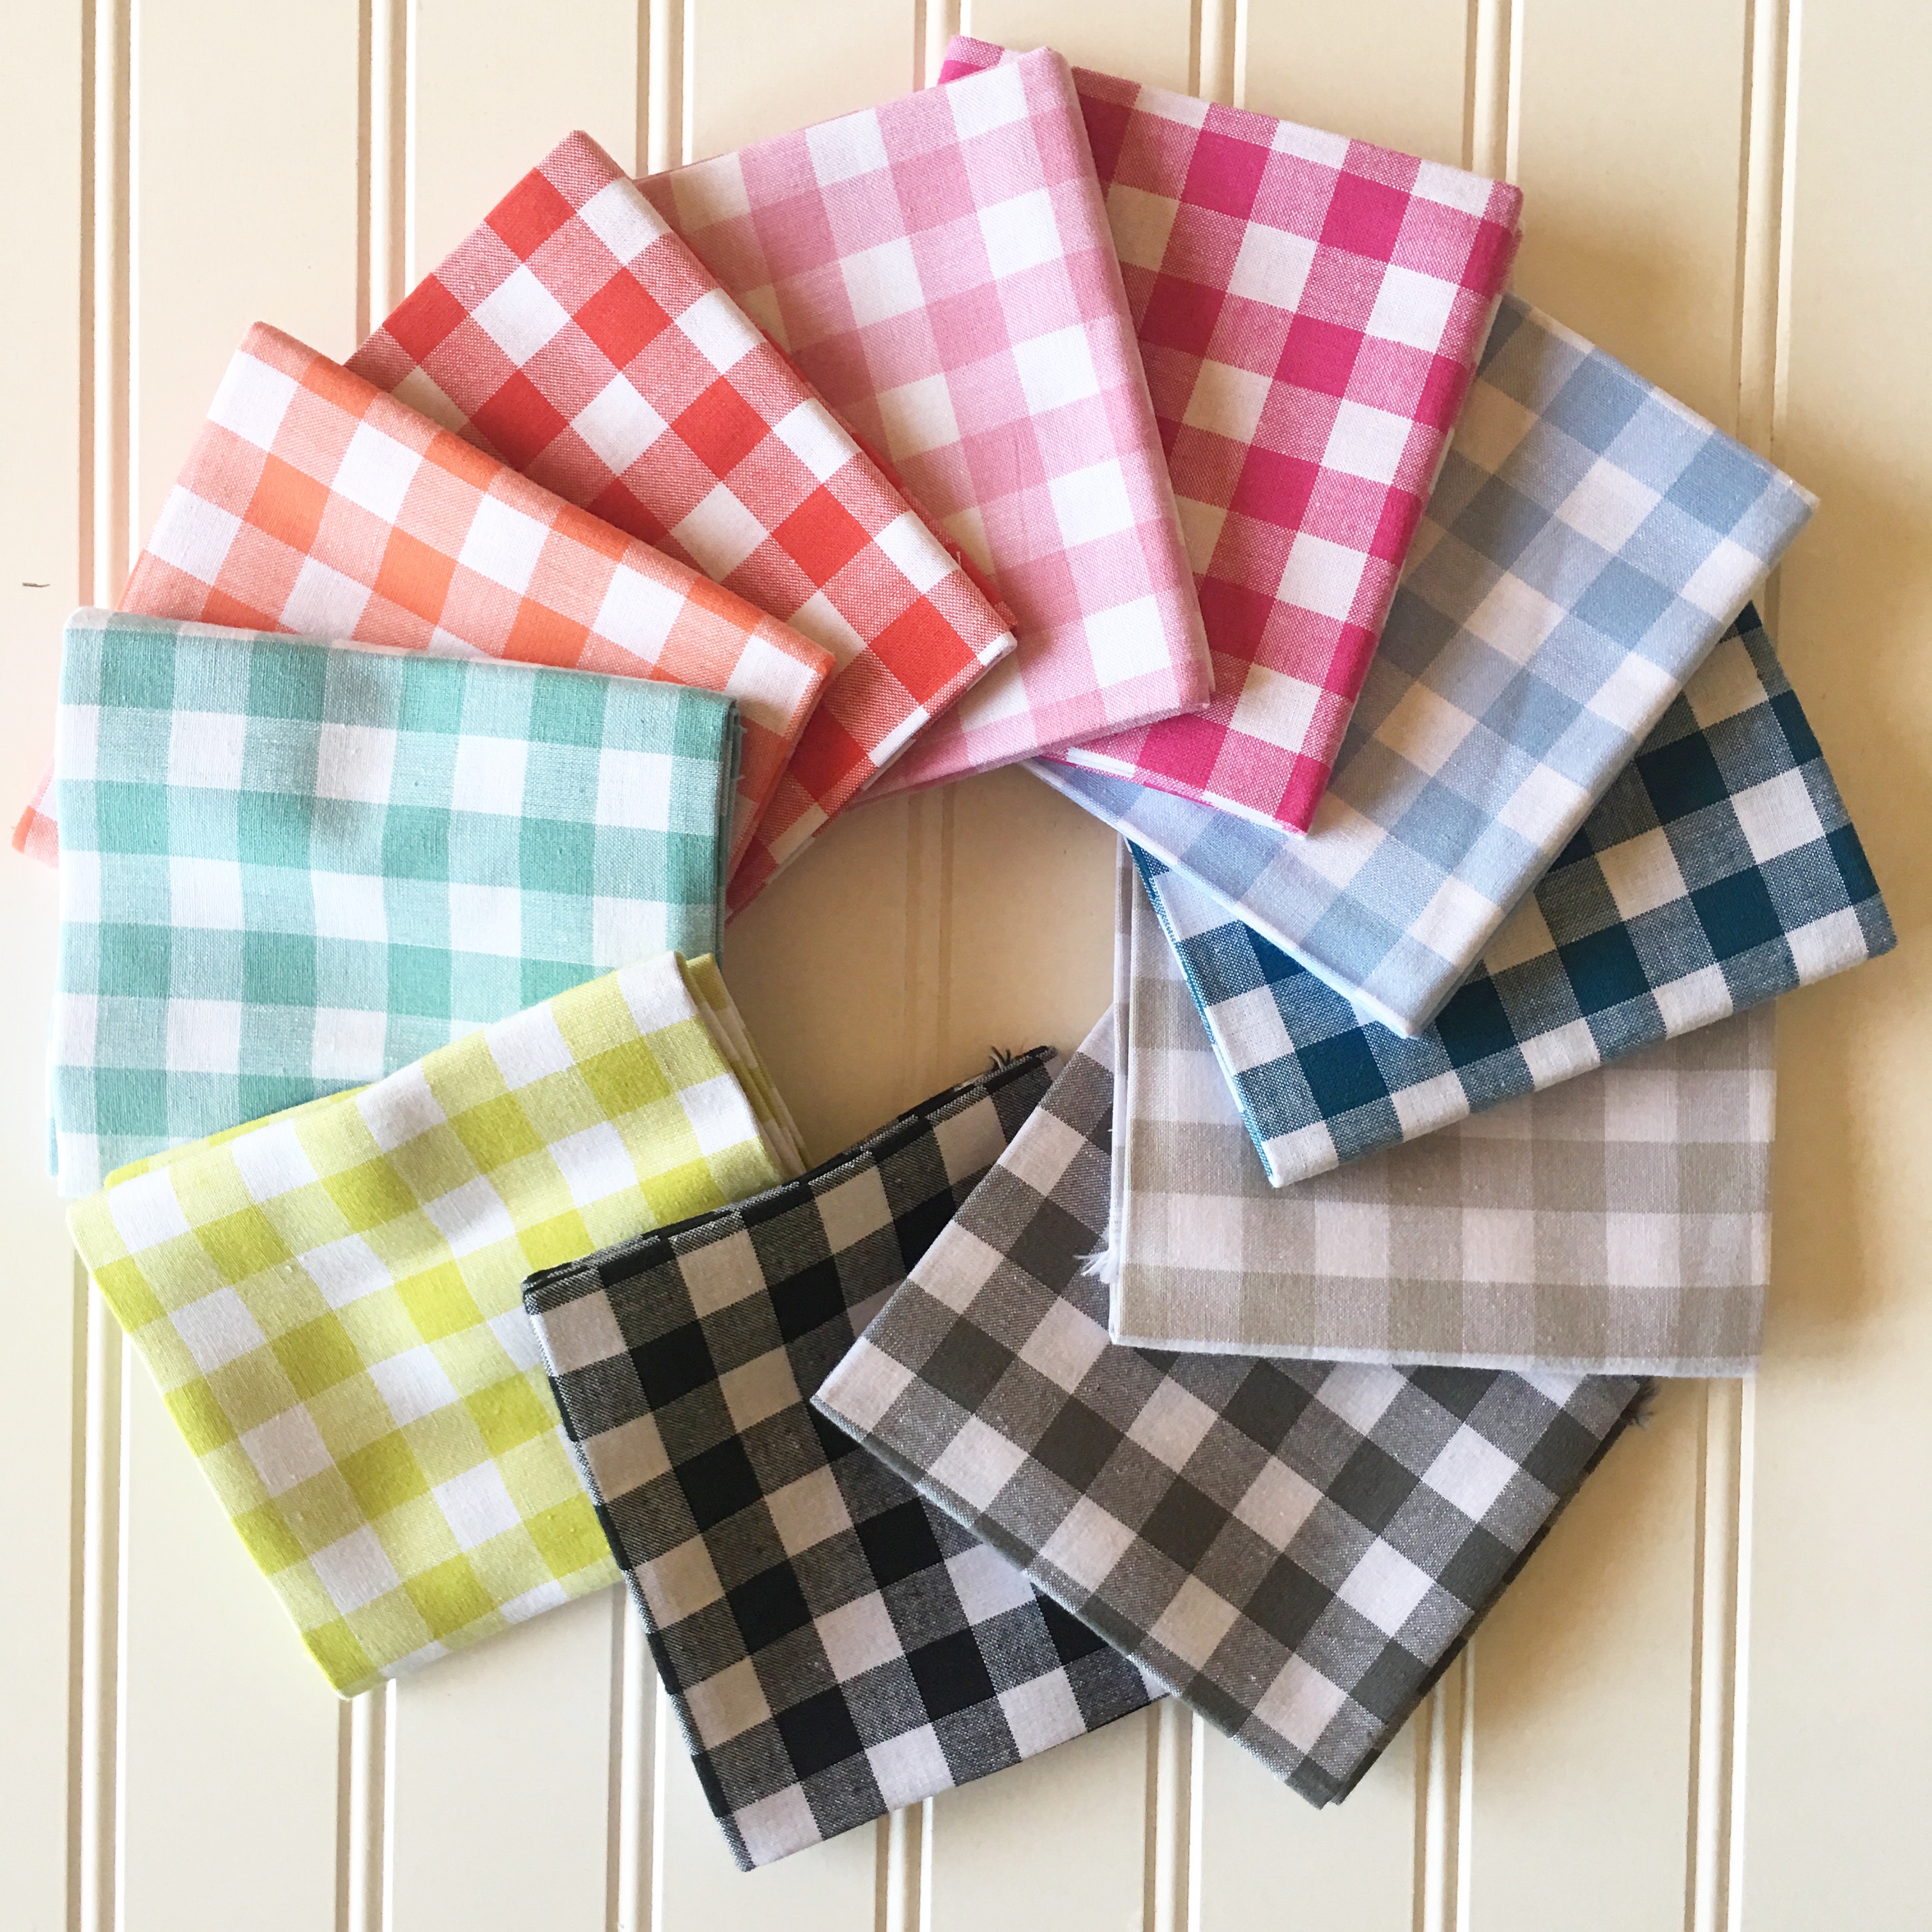
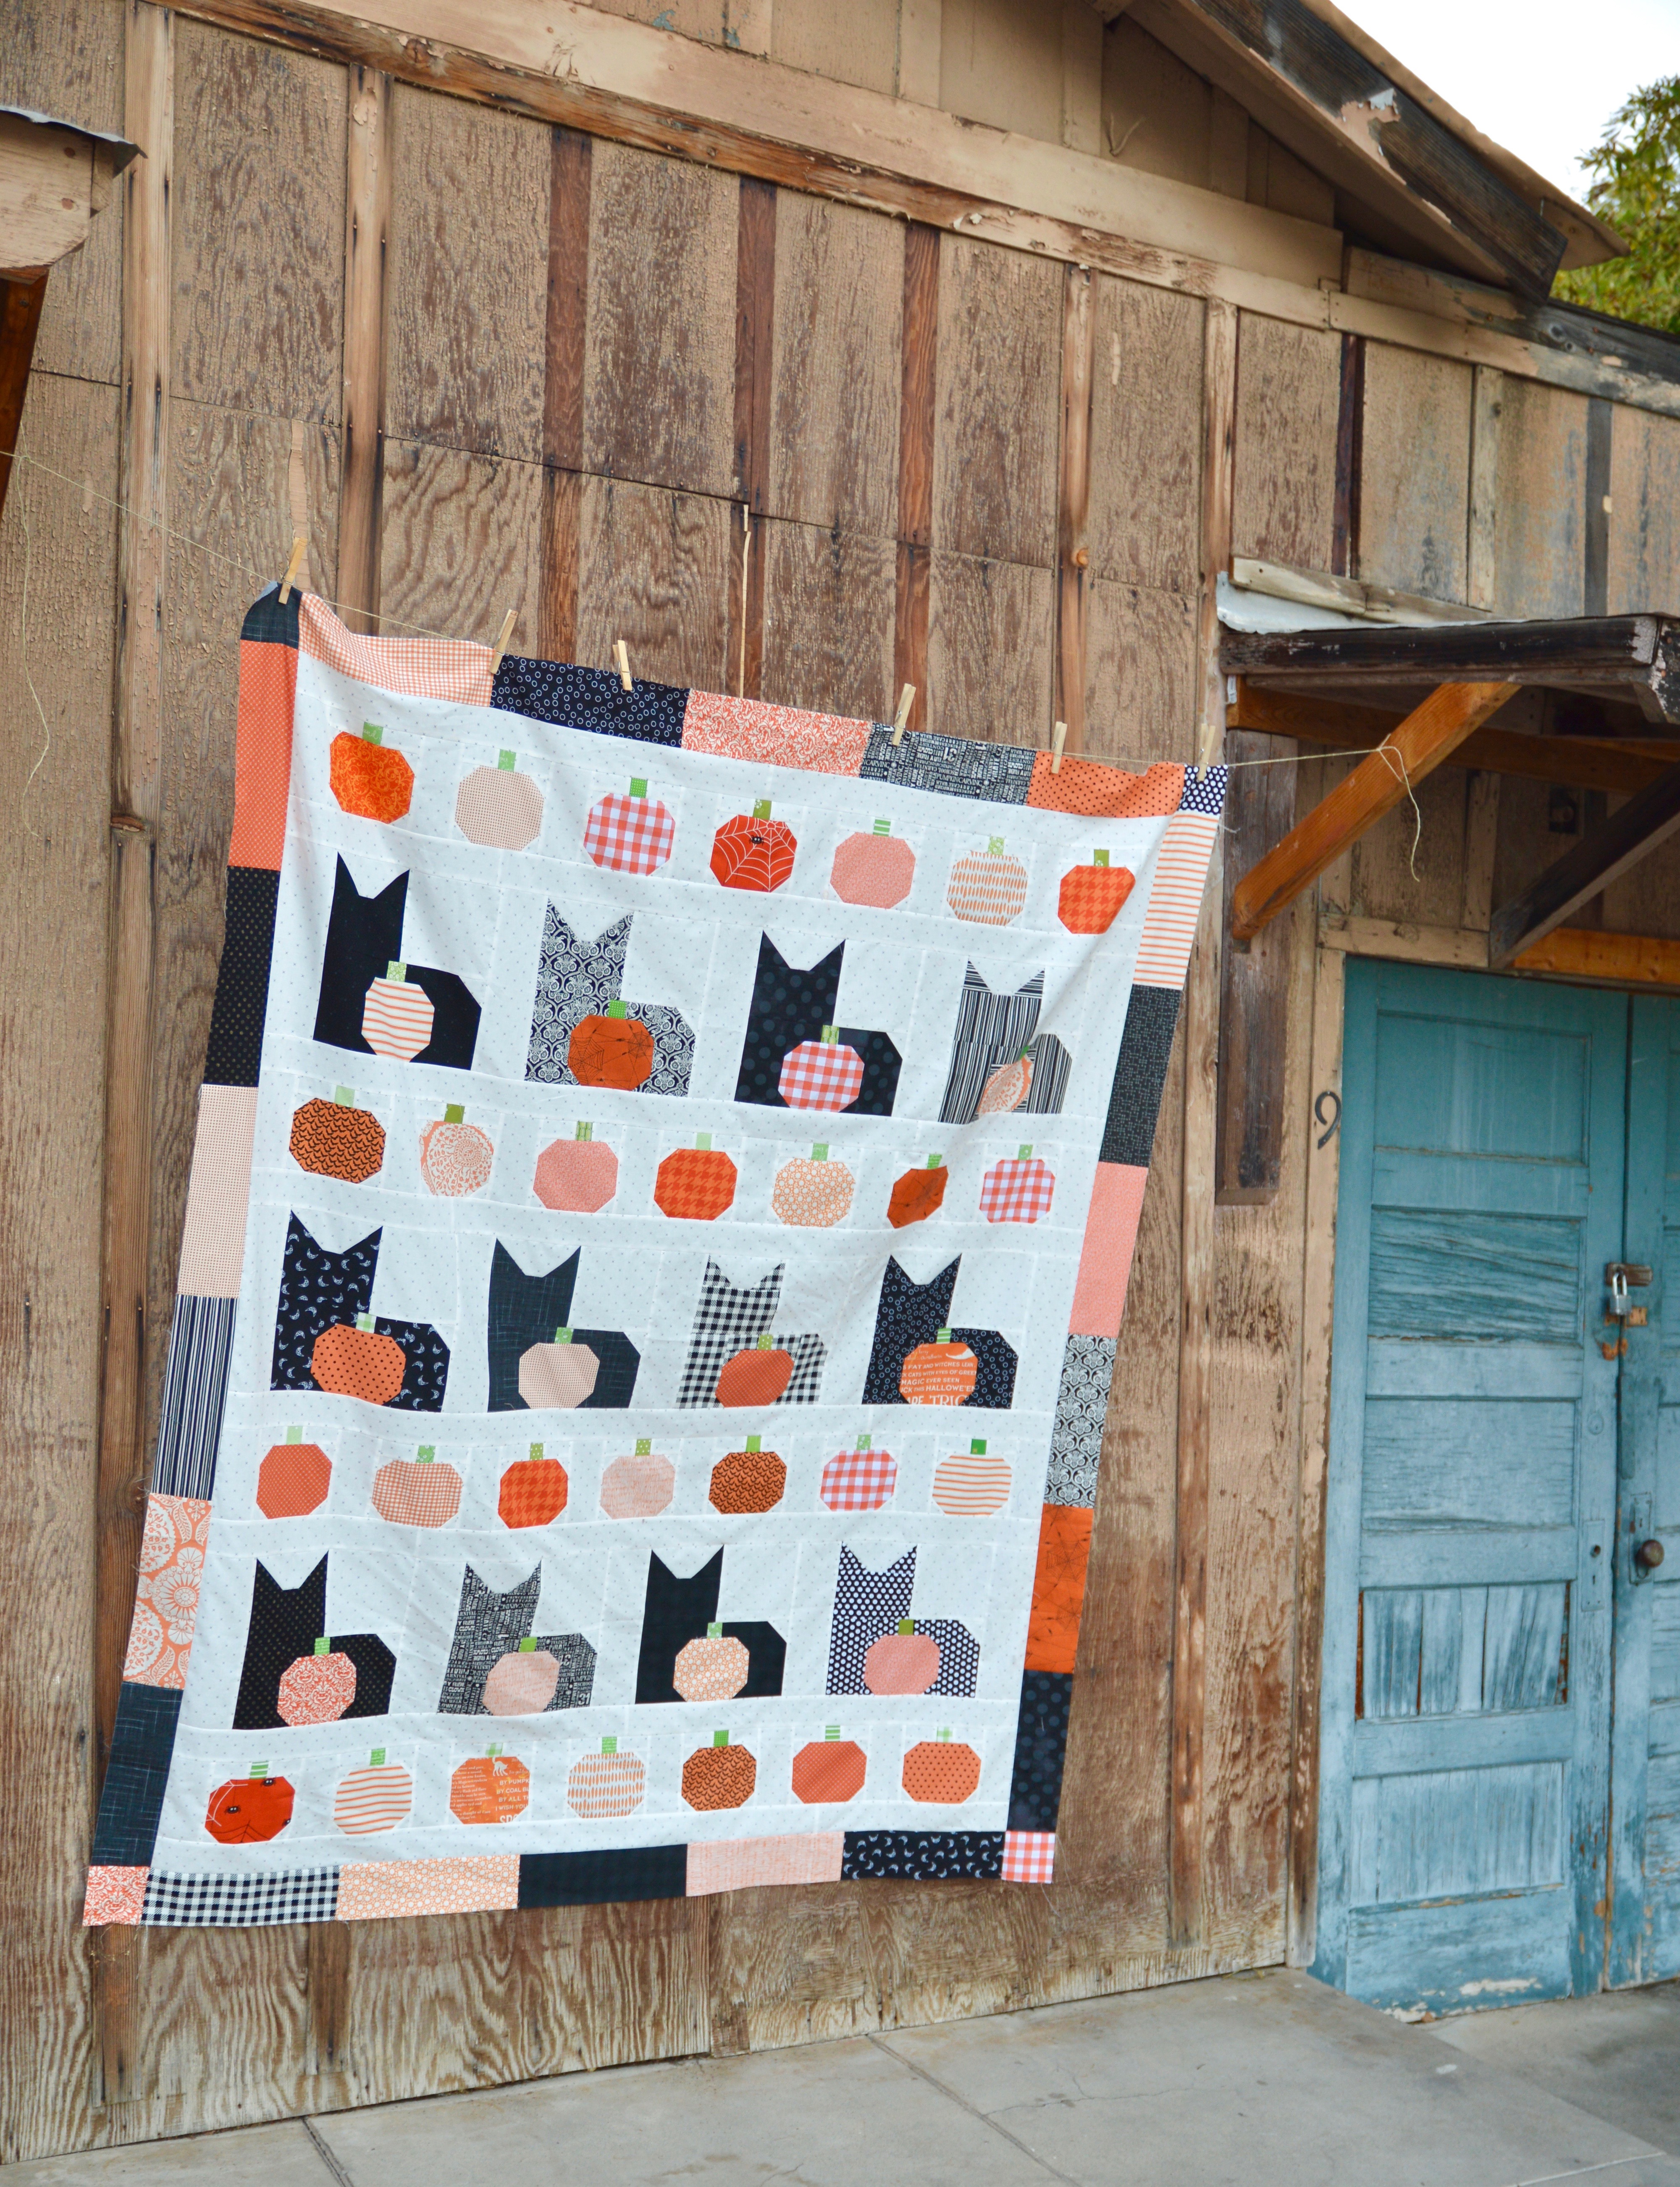
Then I started decorating for fall and I knew this quilt would look amazing in a Halloween version!
The pattern is available in my Etsy shop and it includes instructions on how to make both versions of the quilt.
I can’t decide which version I like better
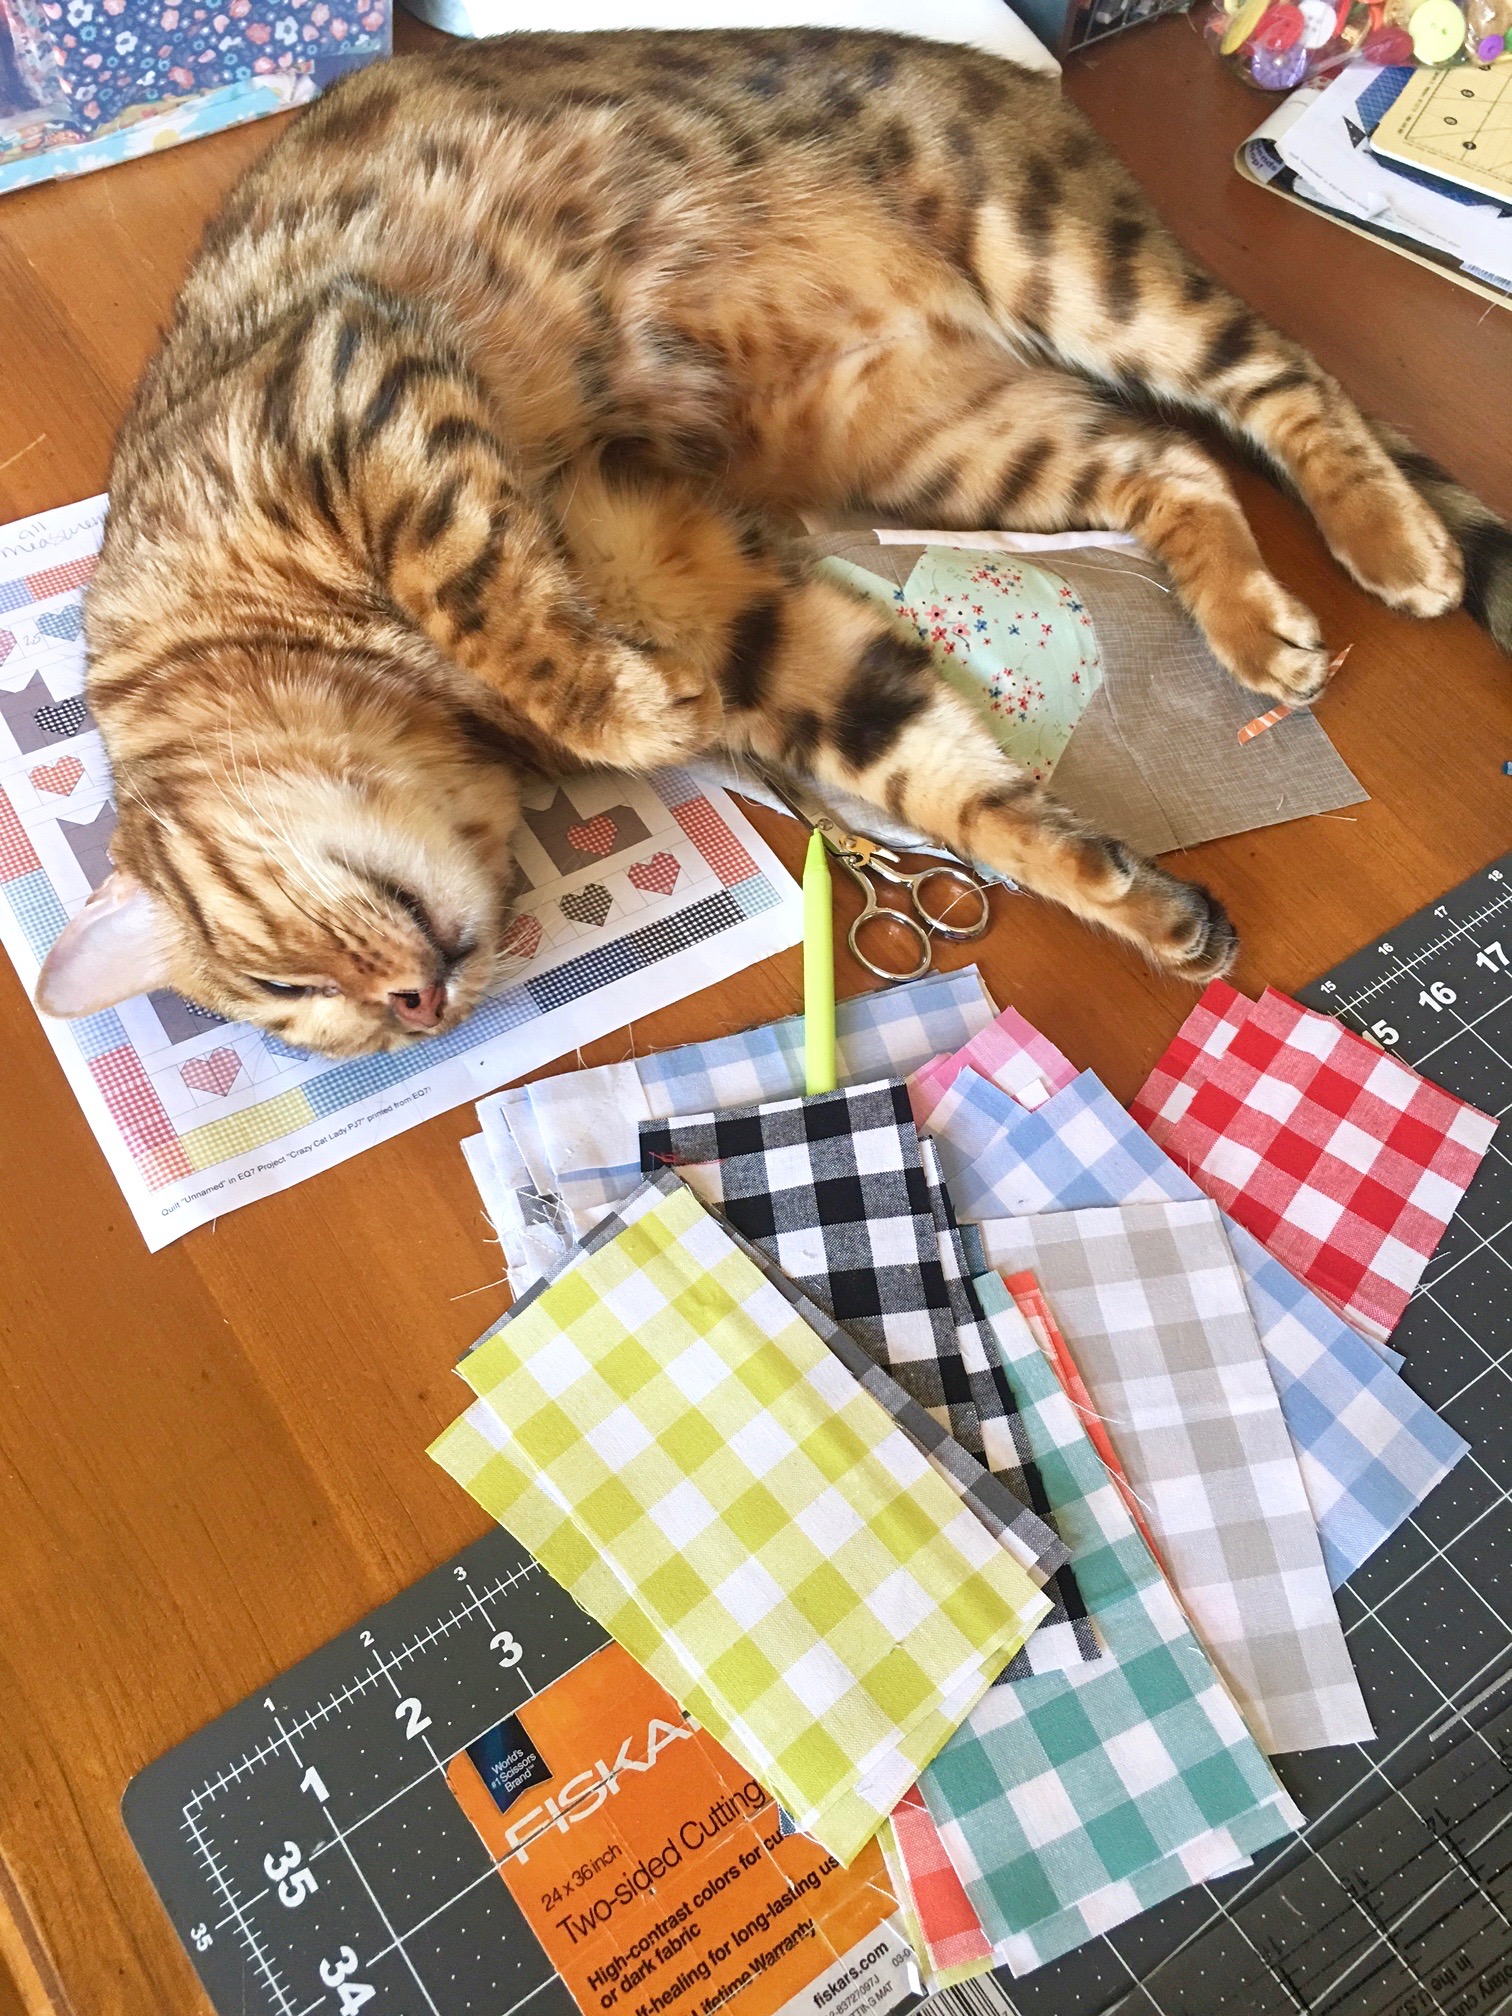
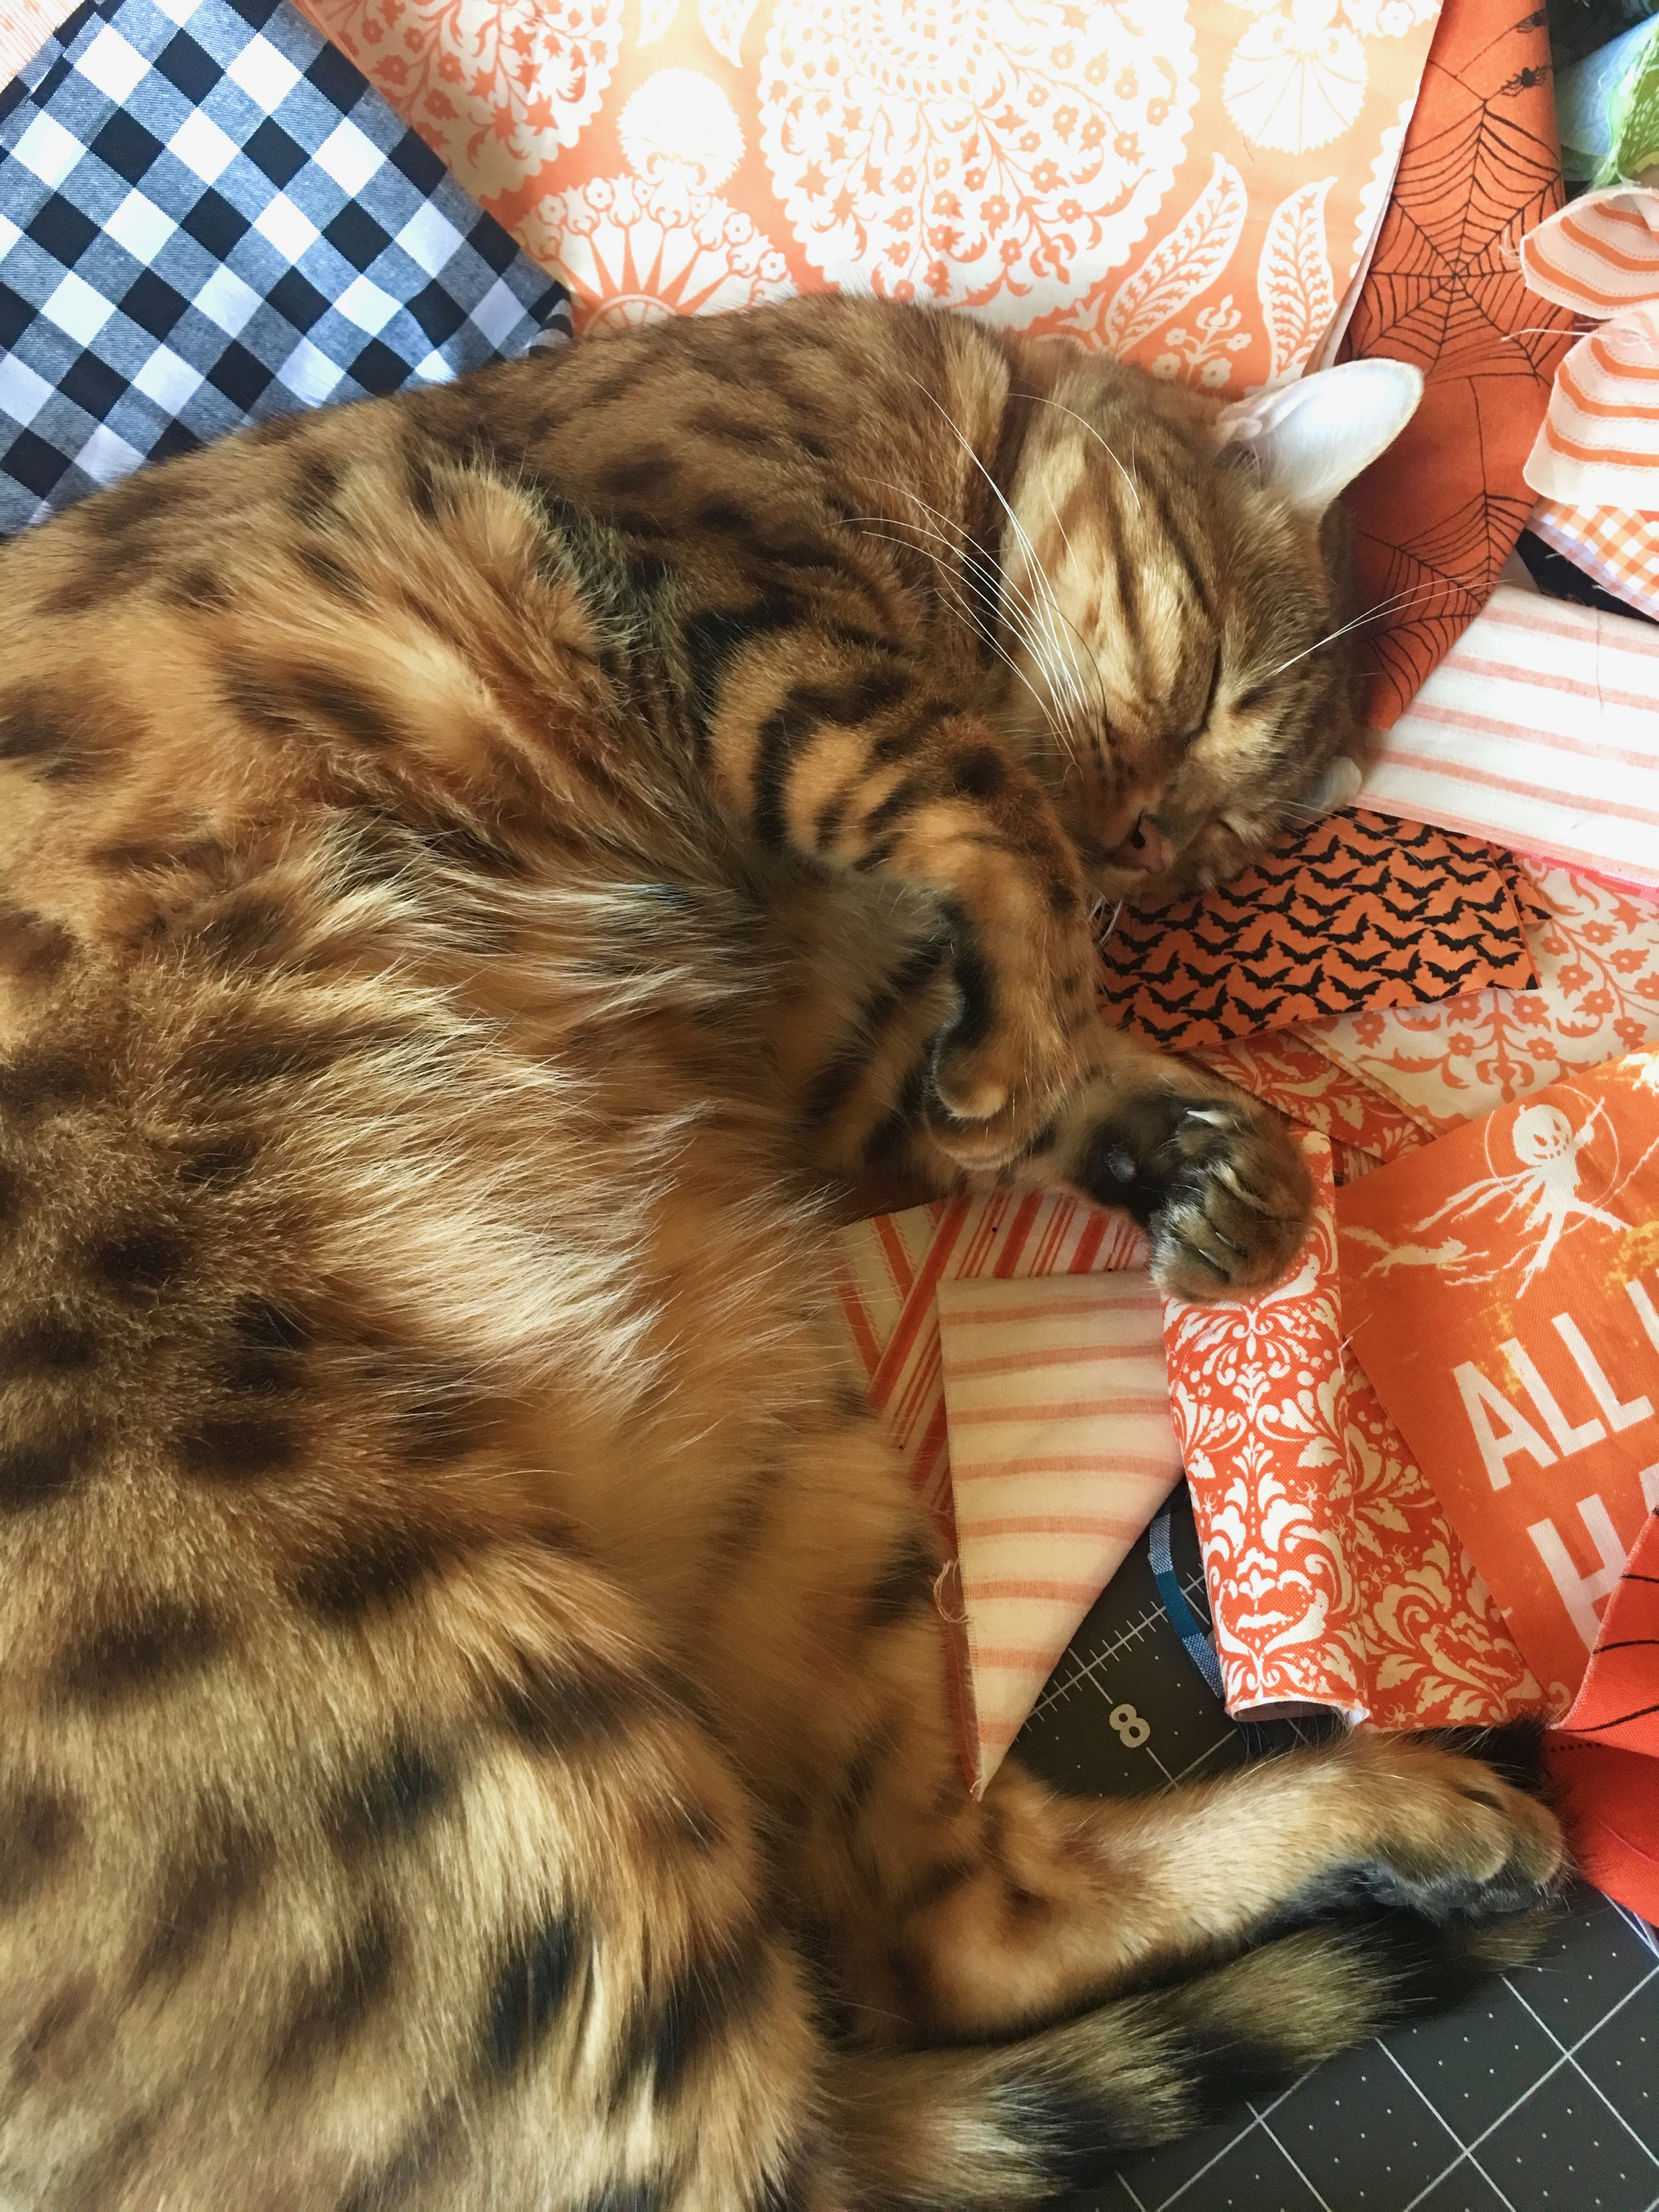
Mufasa was an integral part of the design process, as you can see 🙂
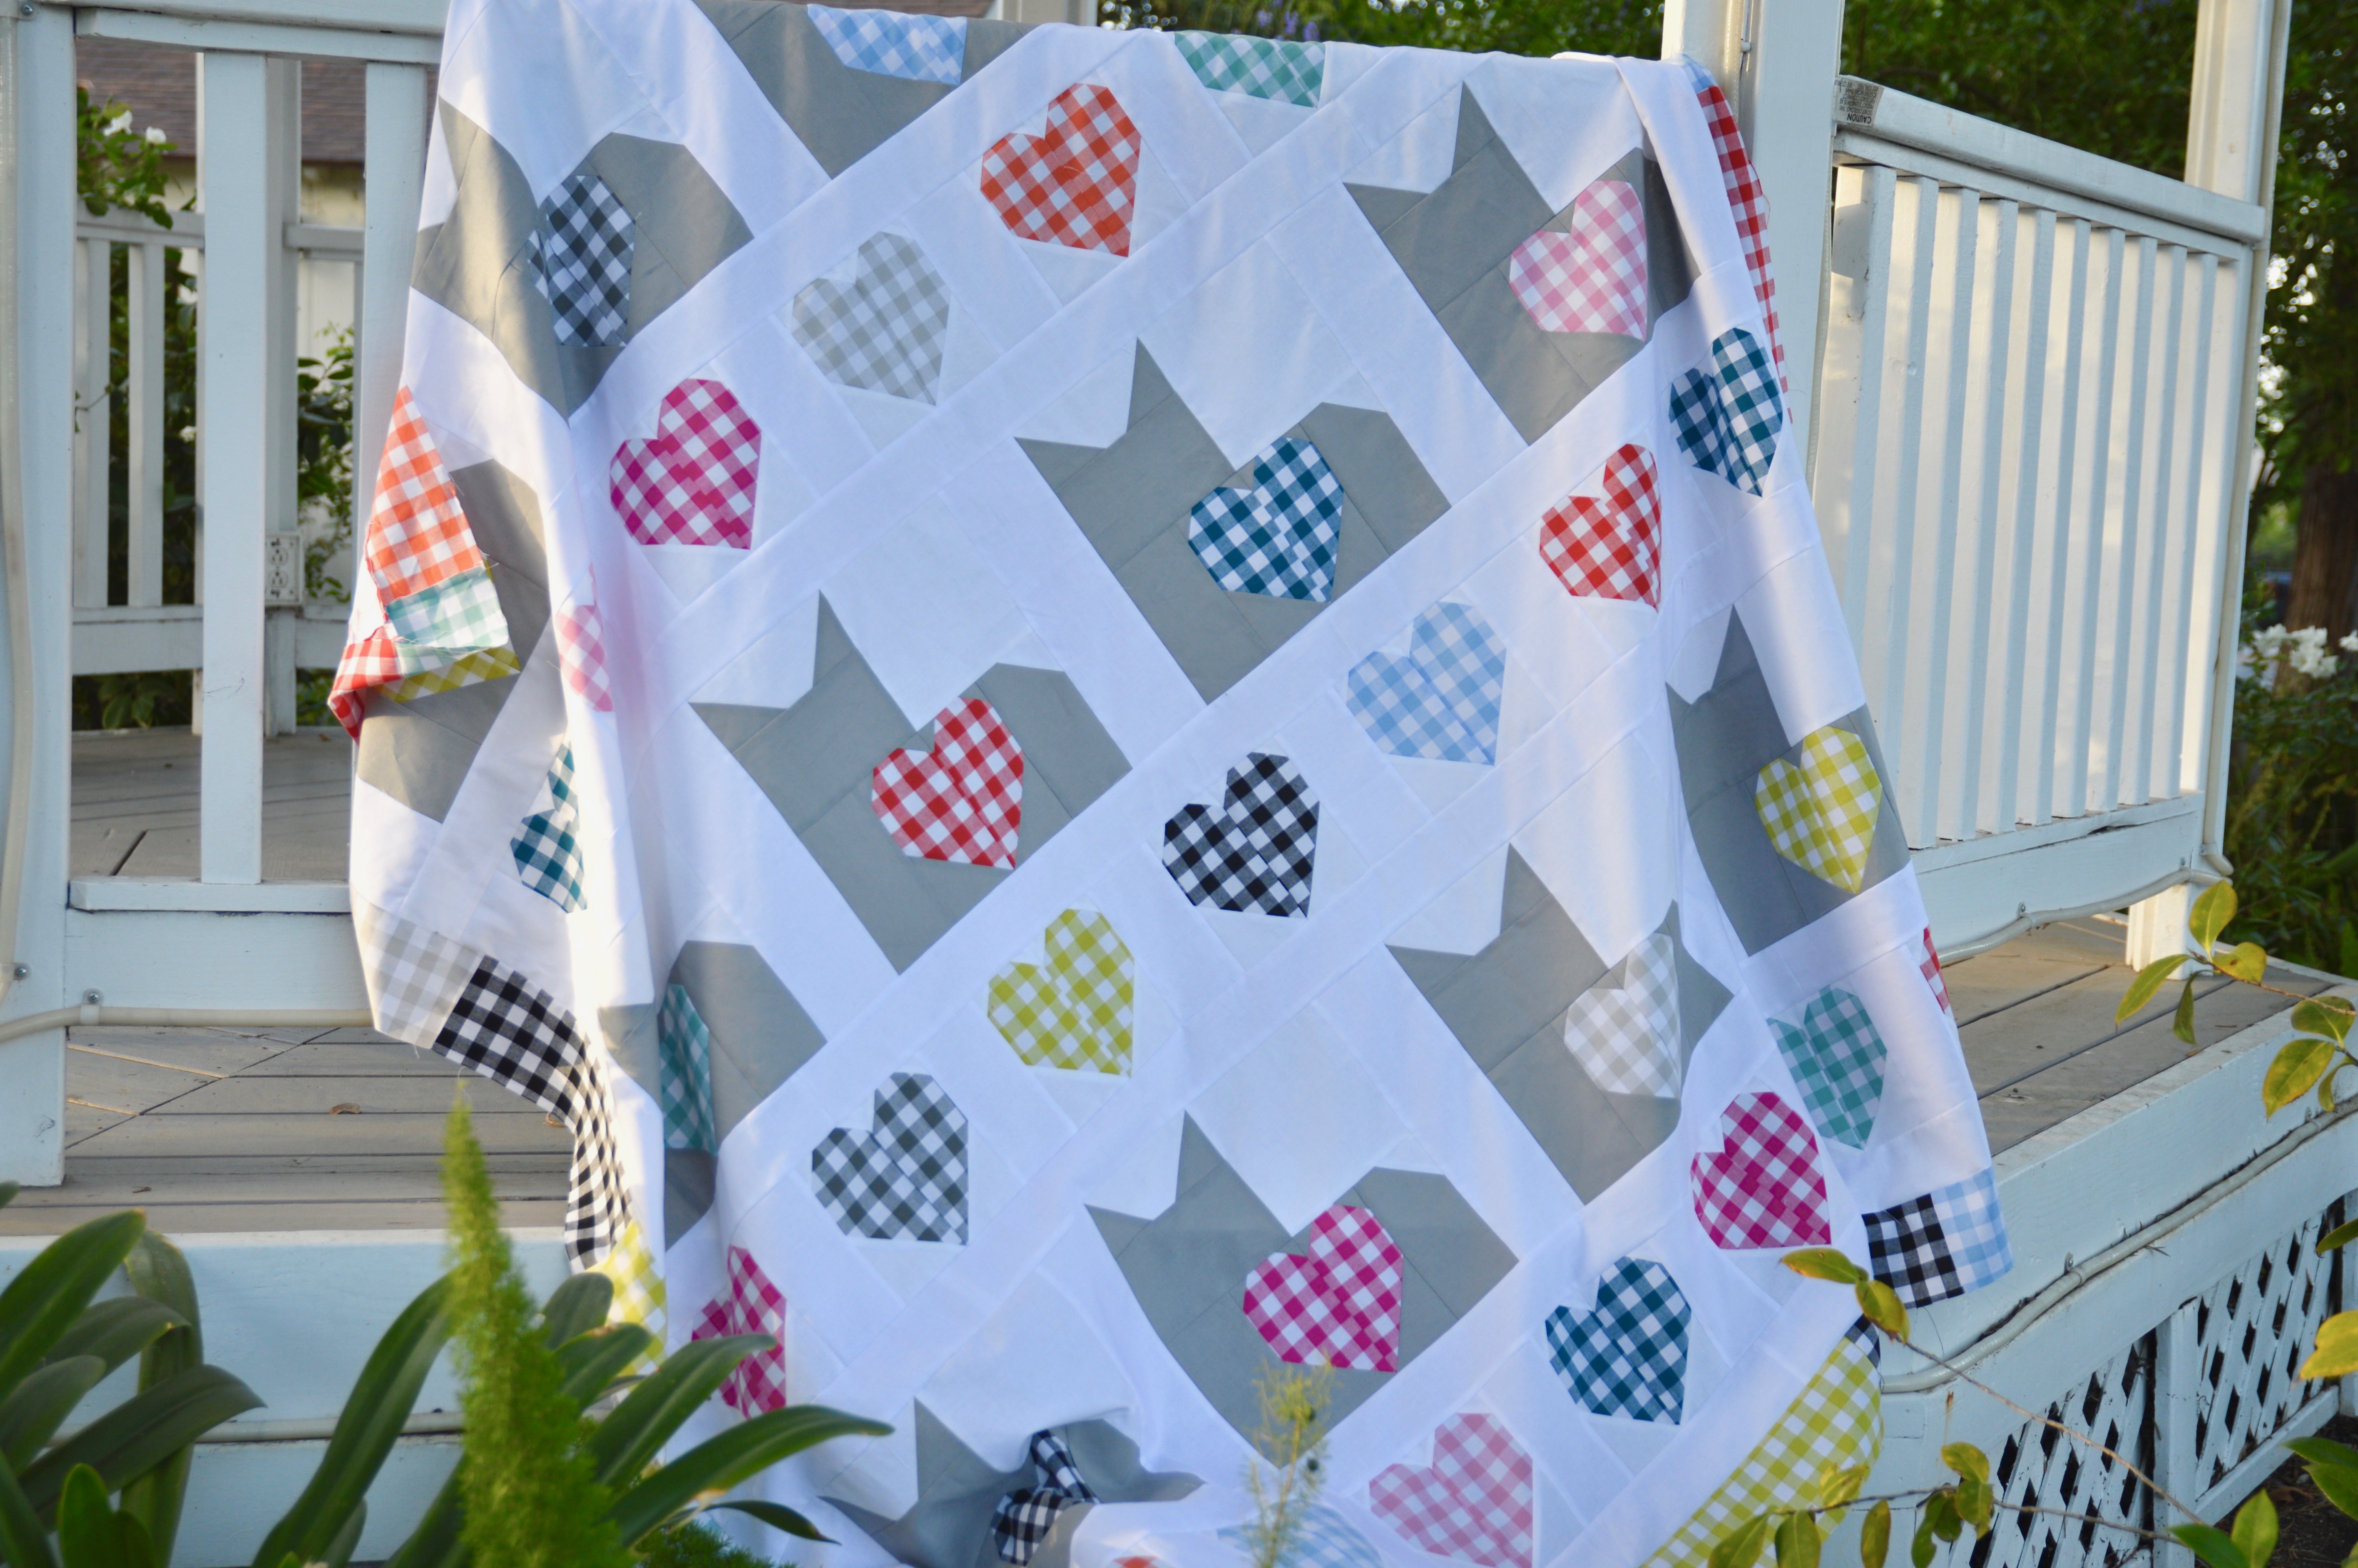
There are 3 rows of cats and 4 rows of hearts. This is such a fun way to show off your favorite fabrics! and who doesn’t love gingham!! More gingham please!!

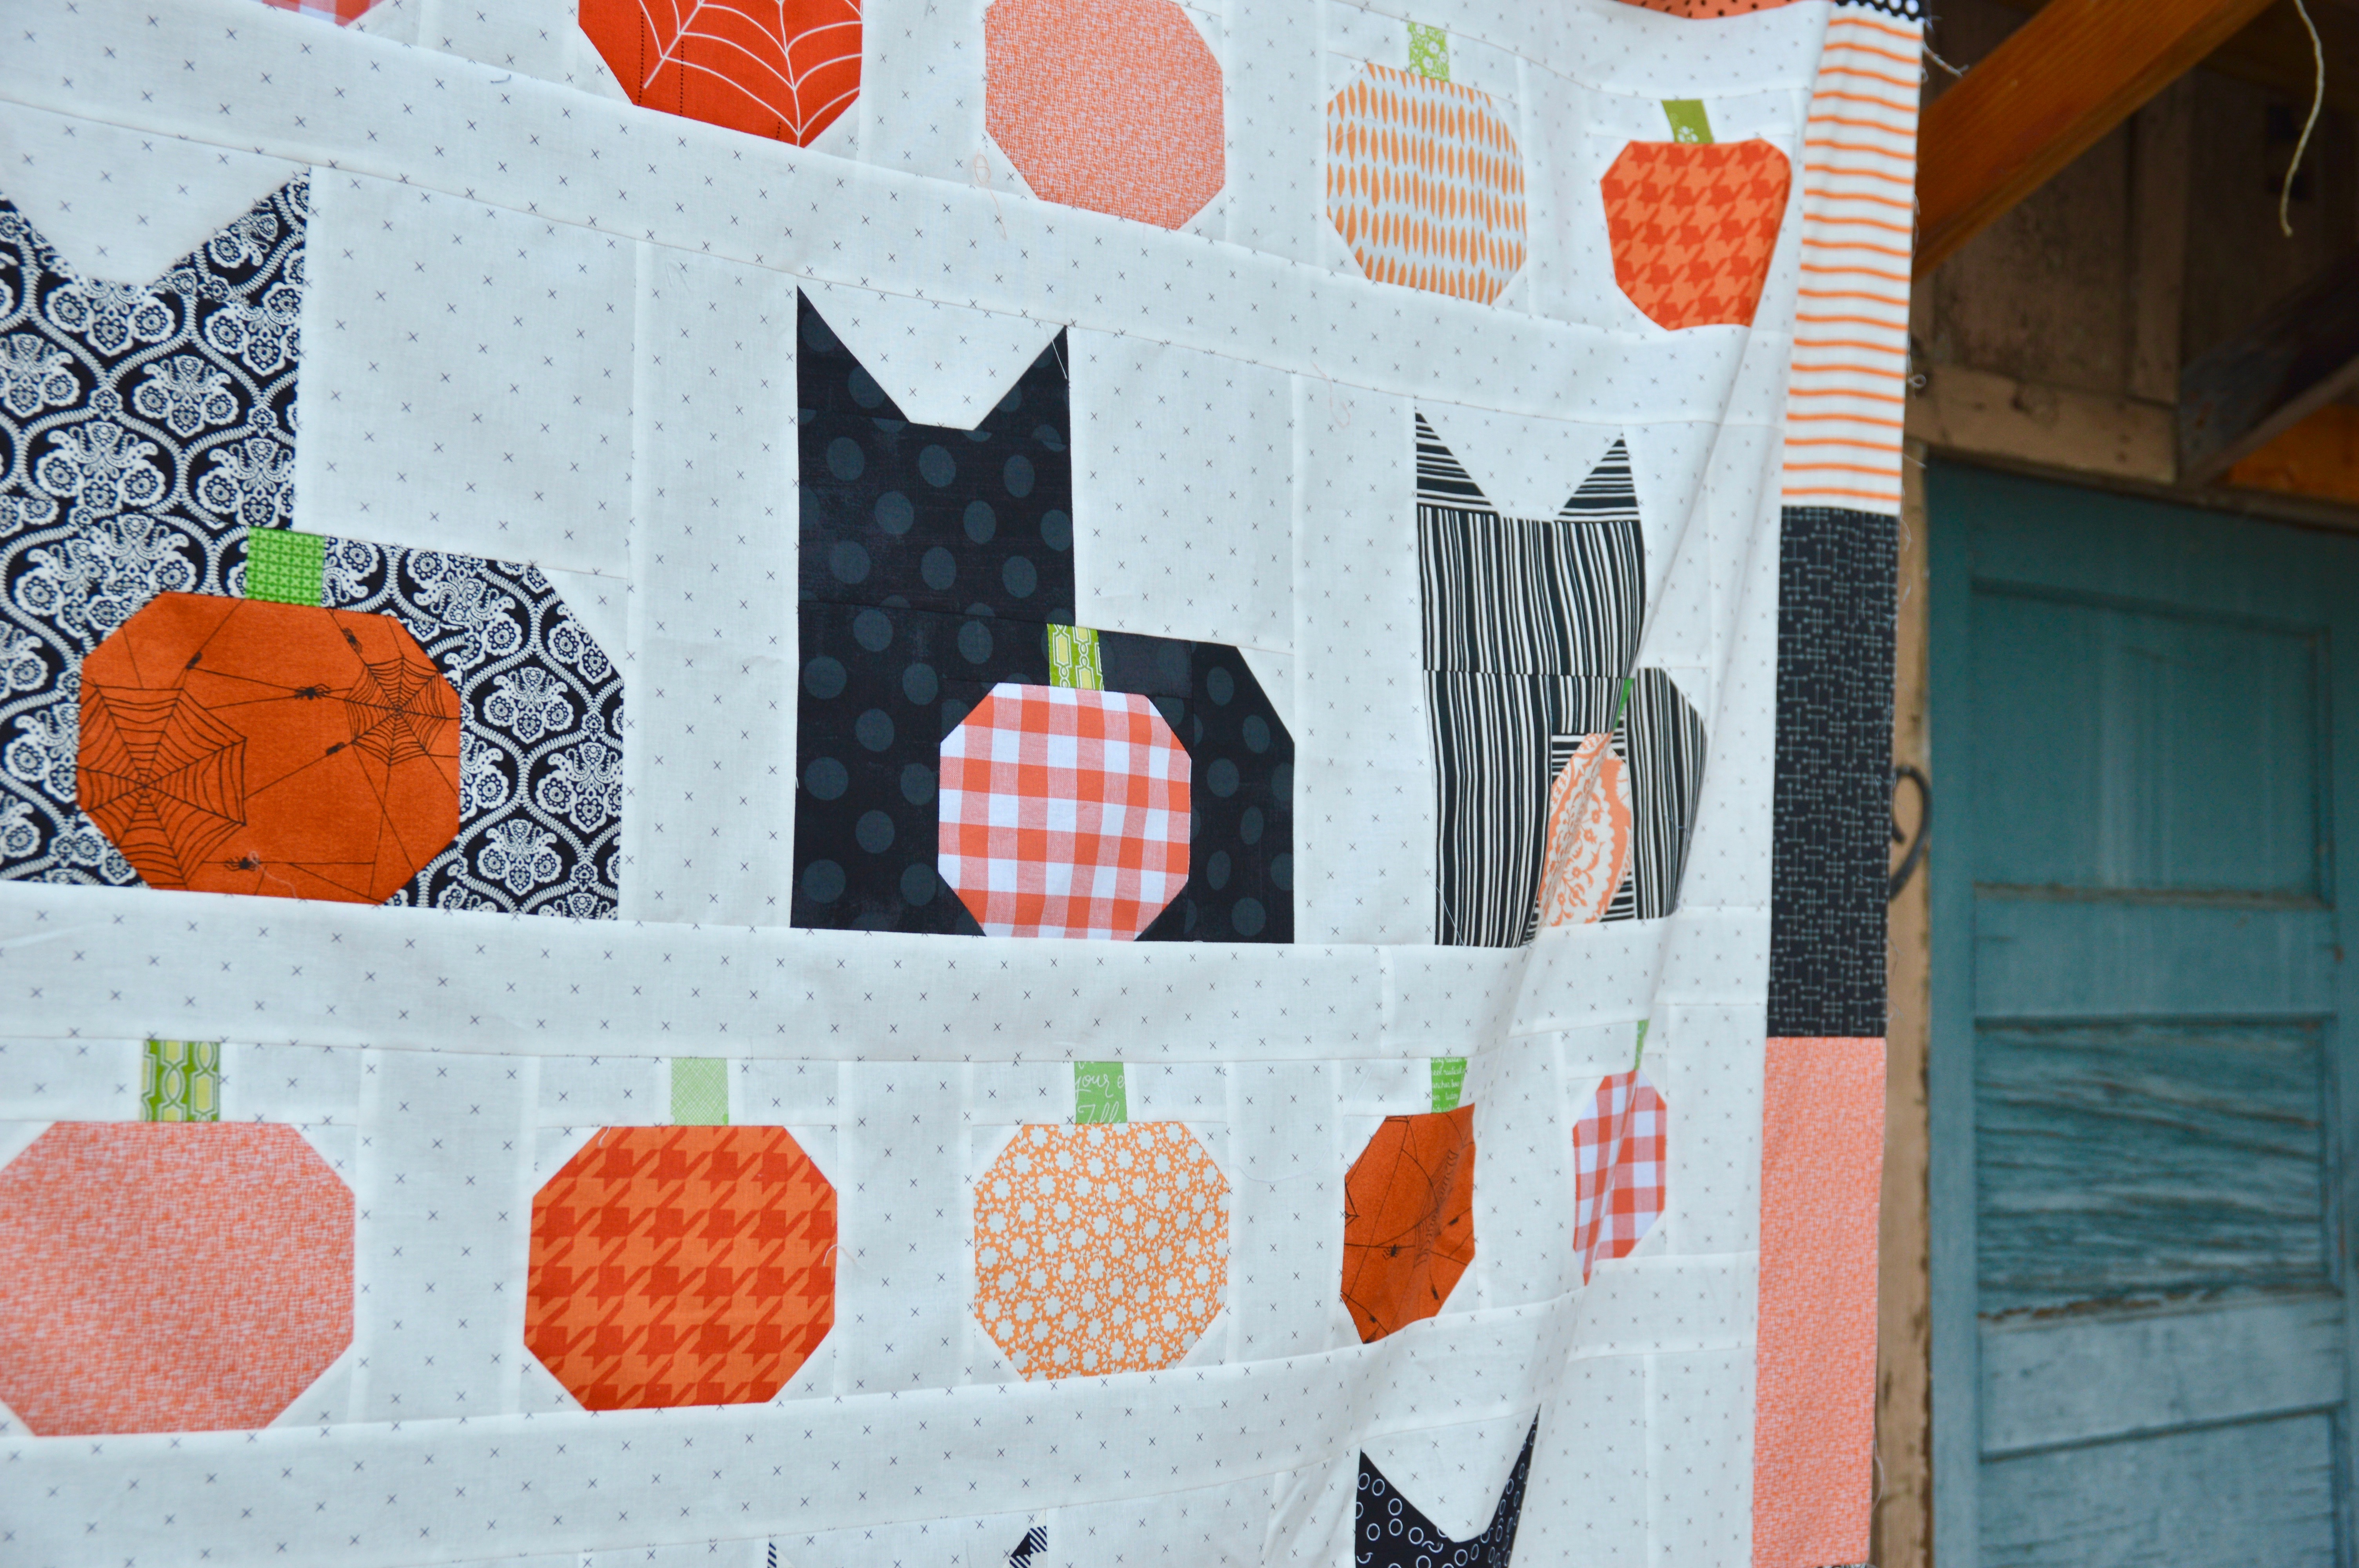
For the Halloween version, I had so much fun making these scrappy pumpkins!

Each black cat is from a different fabric – no two are the same! I think I will name each one 🙂
Mufasa, again, always so helpful!

This is my new favorite Halloween quilt! I can’t wait to get it off to the quilter!
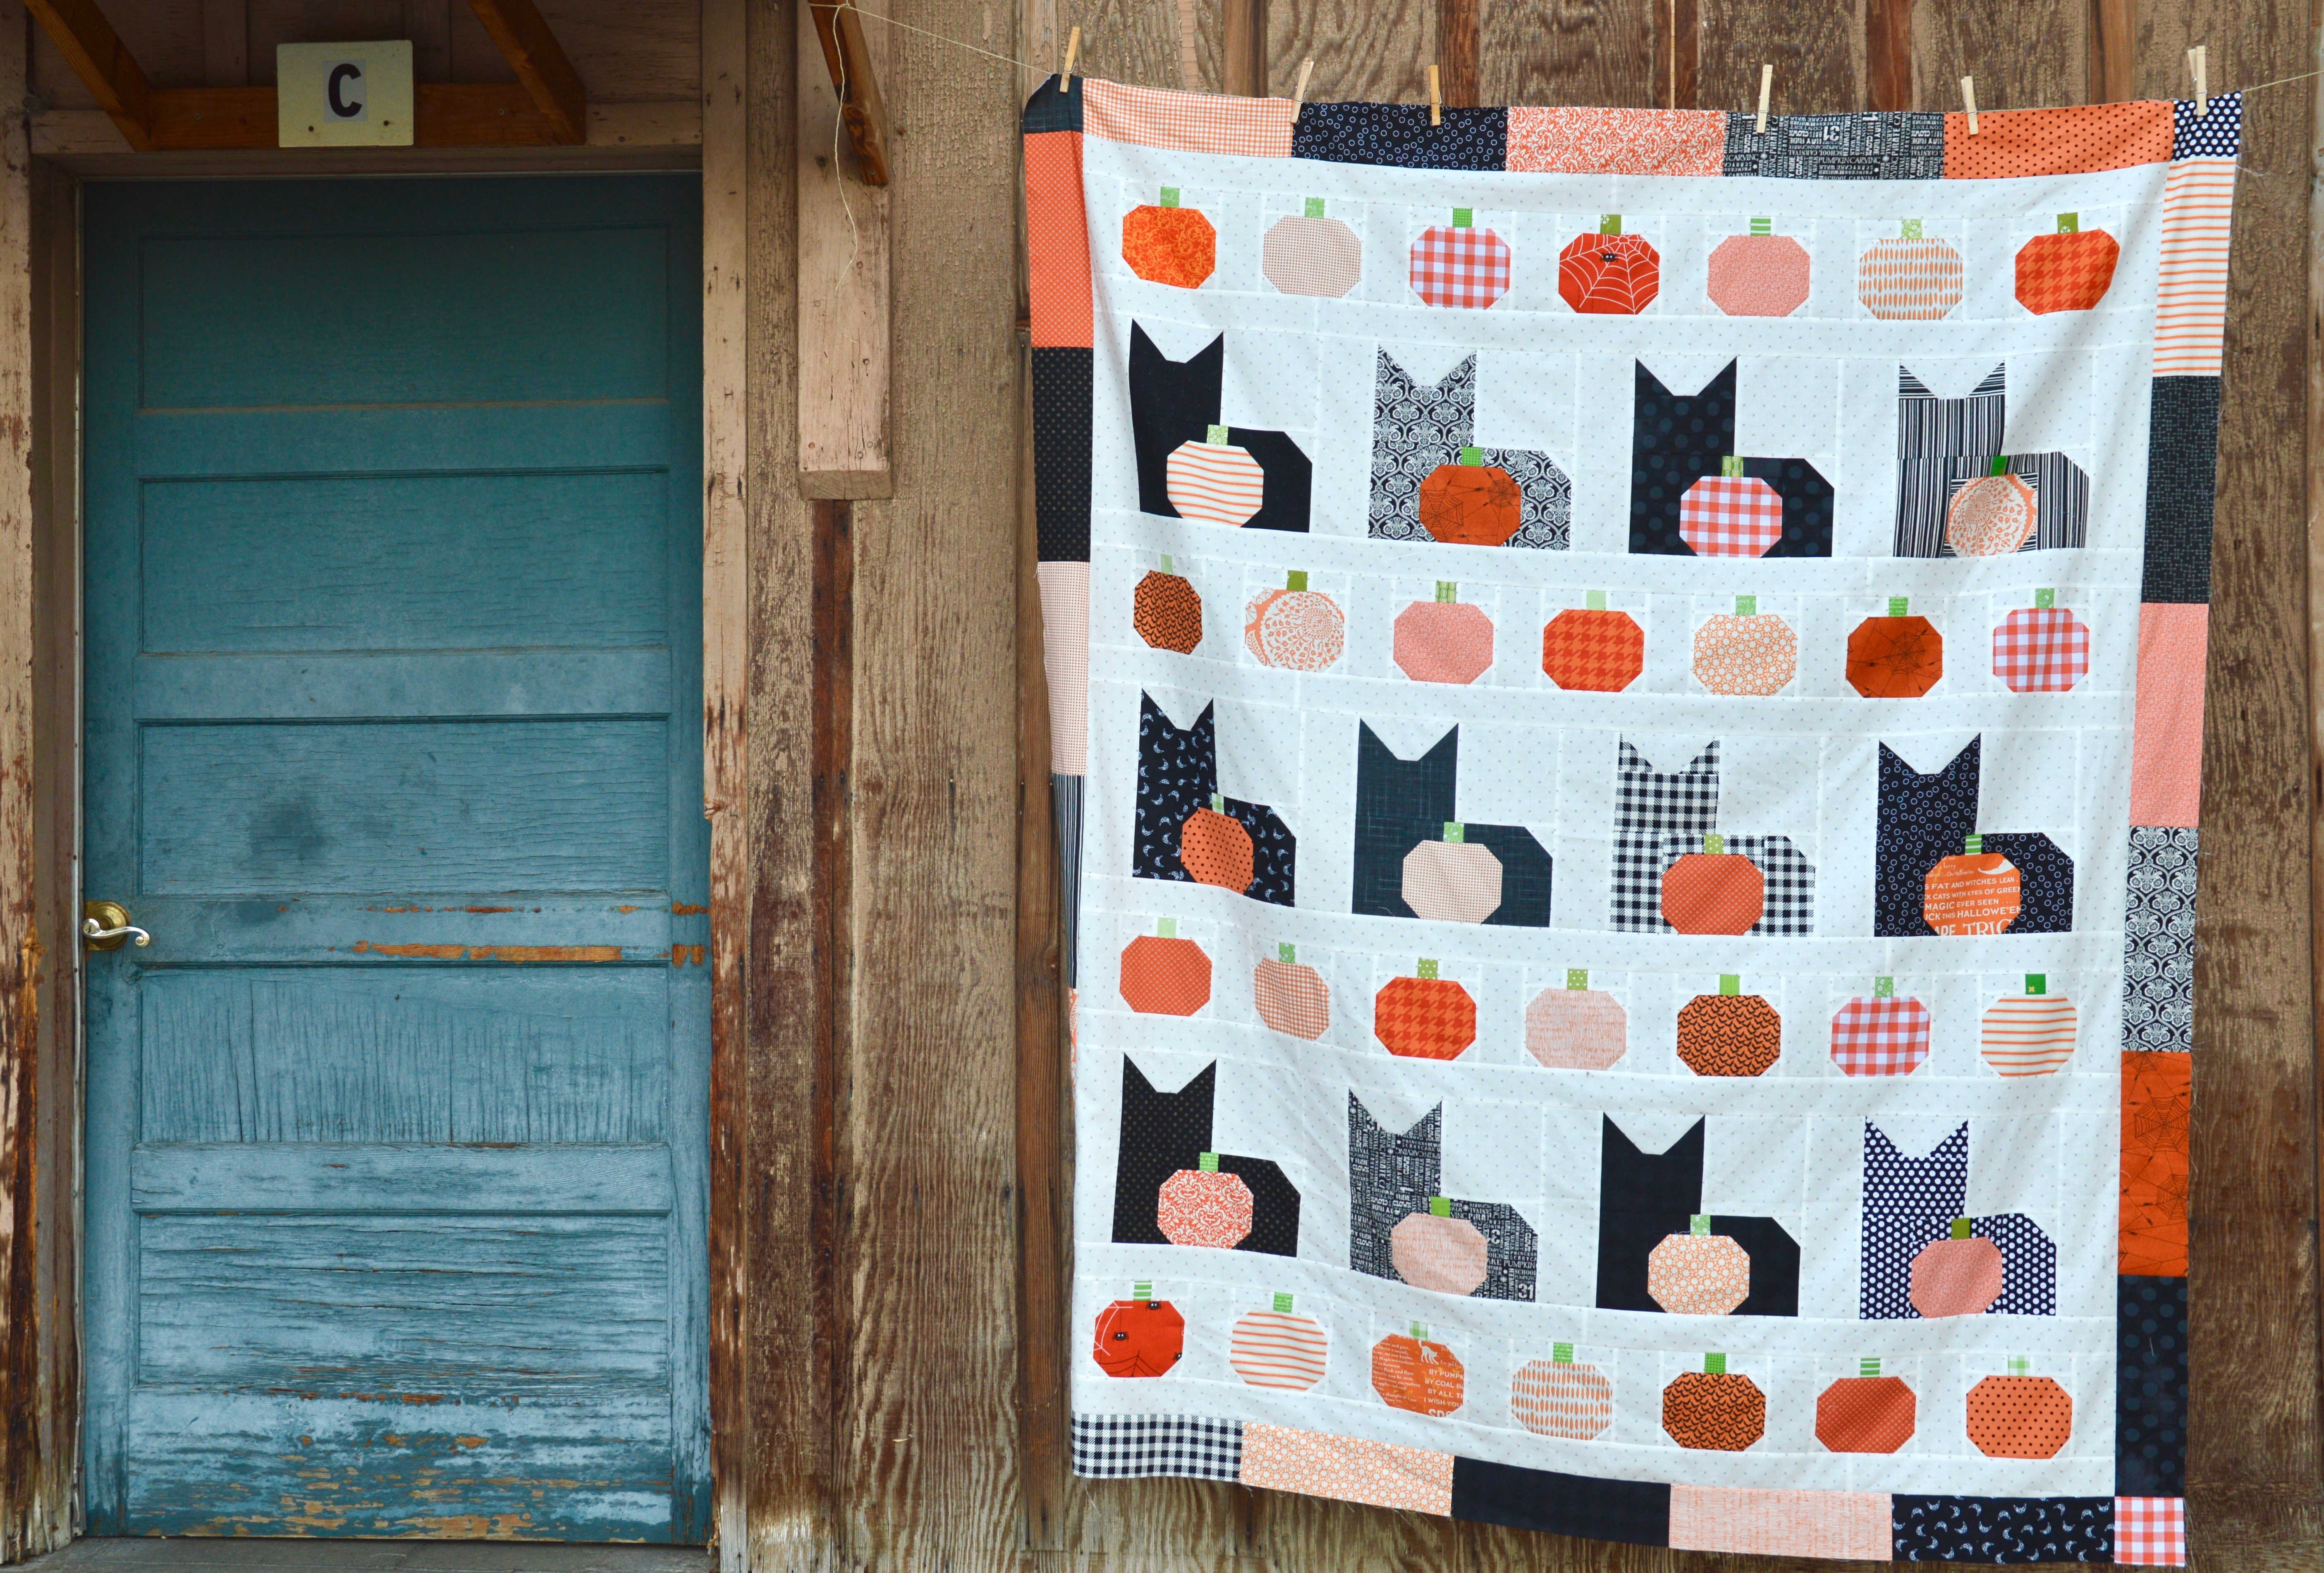
I hope you love this pattern! Join in the fun on Instagram and use the hashtag #ilovecatsquilt and be sure to tag me @jedicraftgirl!!
![]()
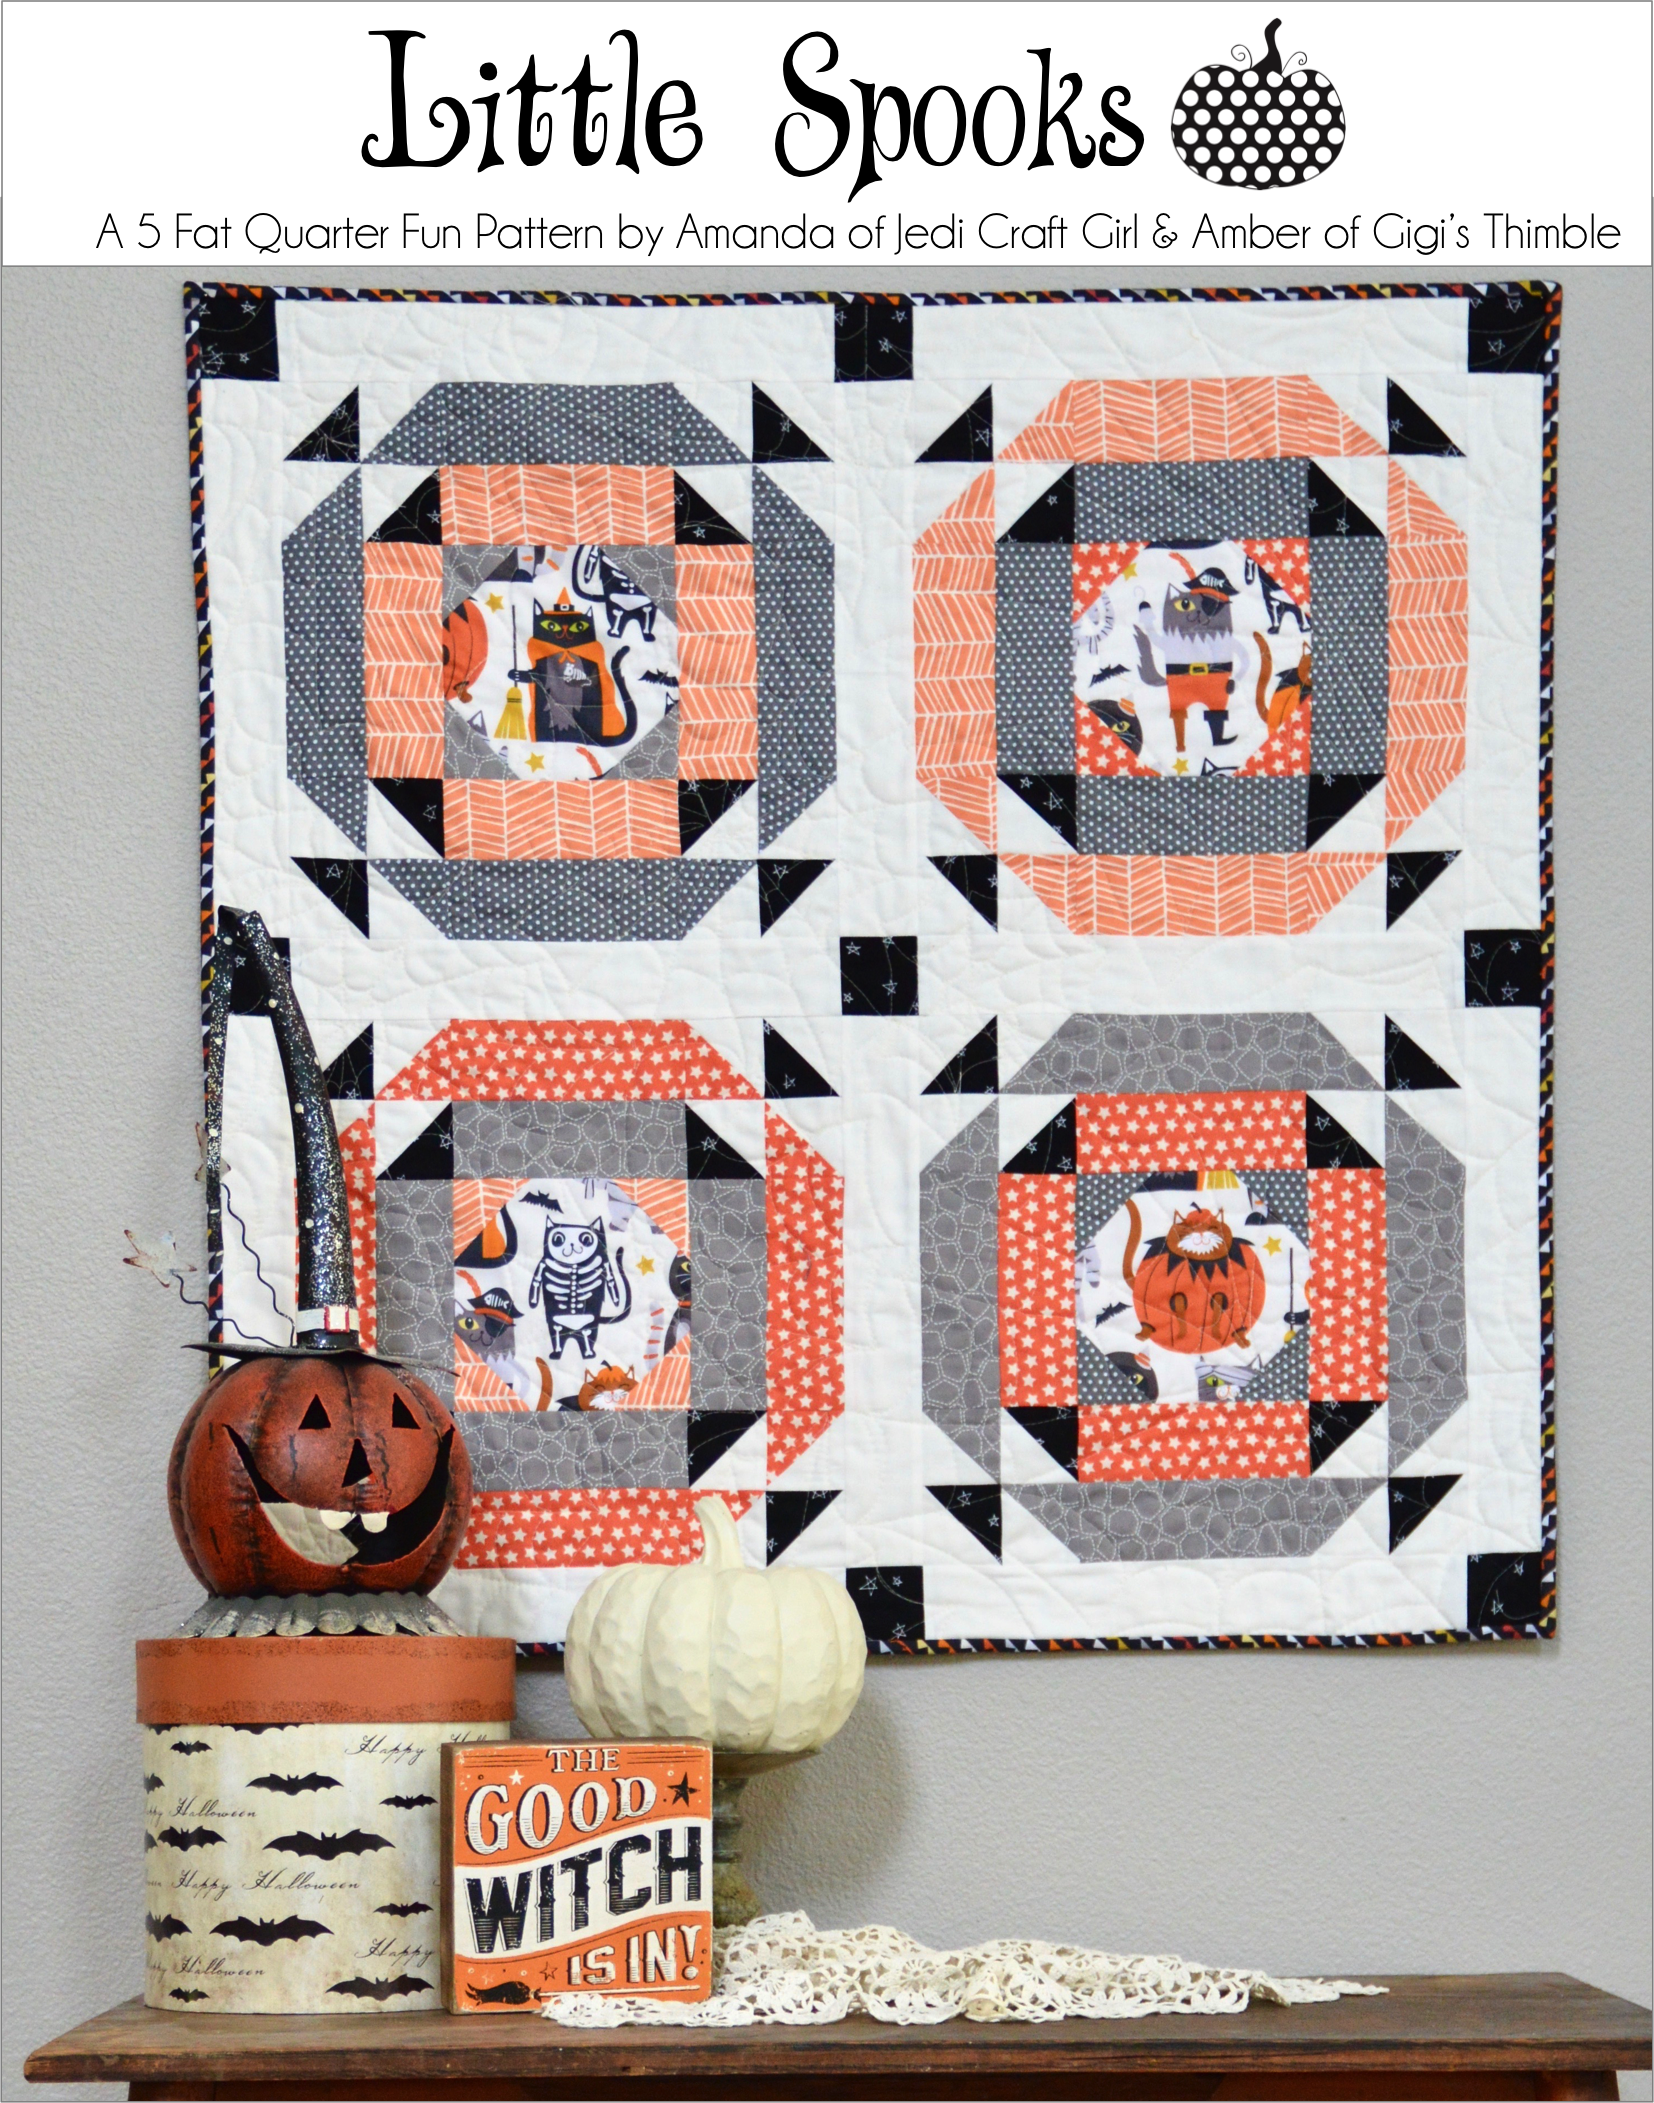
It’s September 1st and that means a 5 Fat Quarter Fun Quilt!!! Yay!!!!
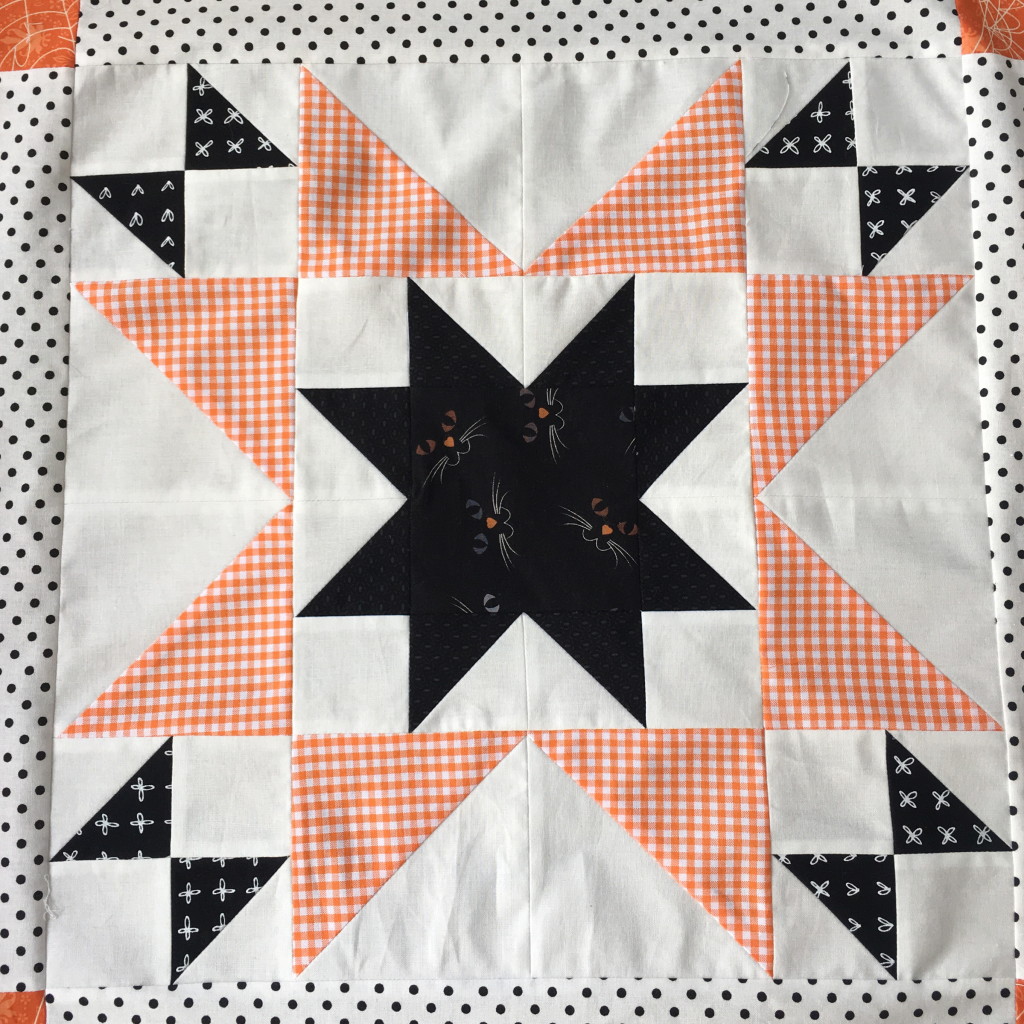
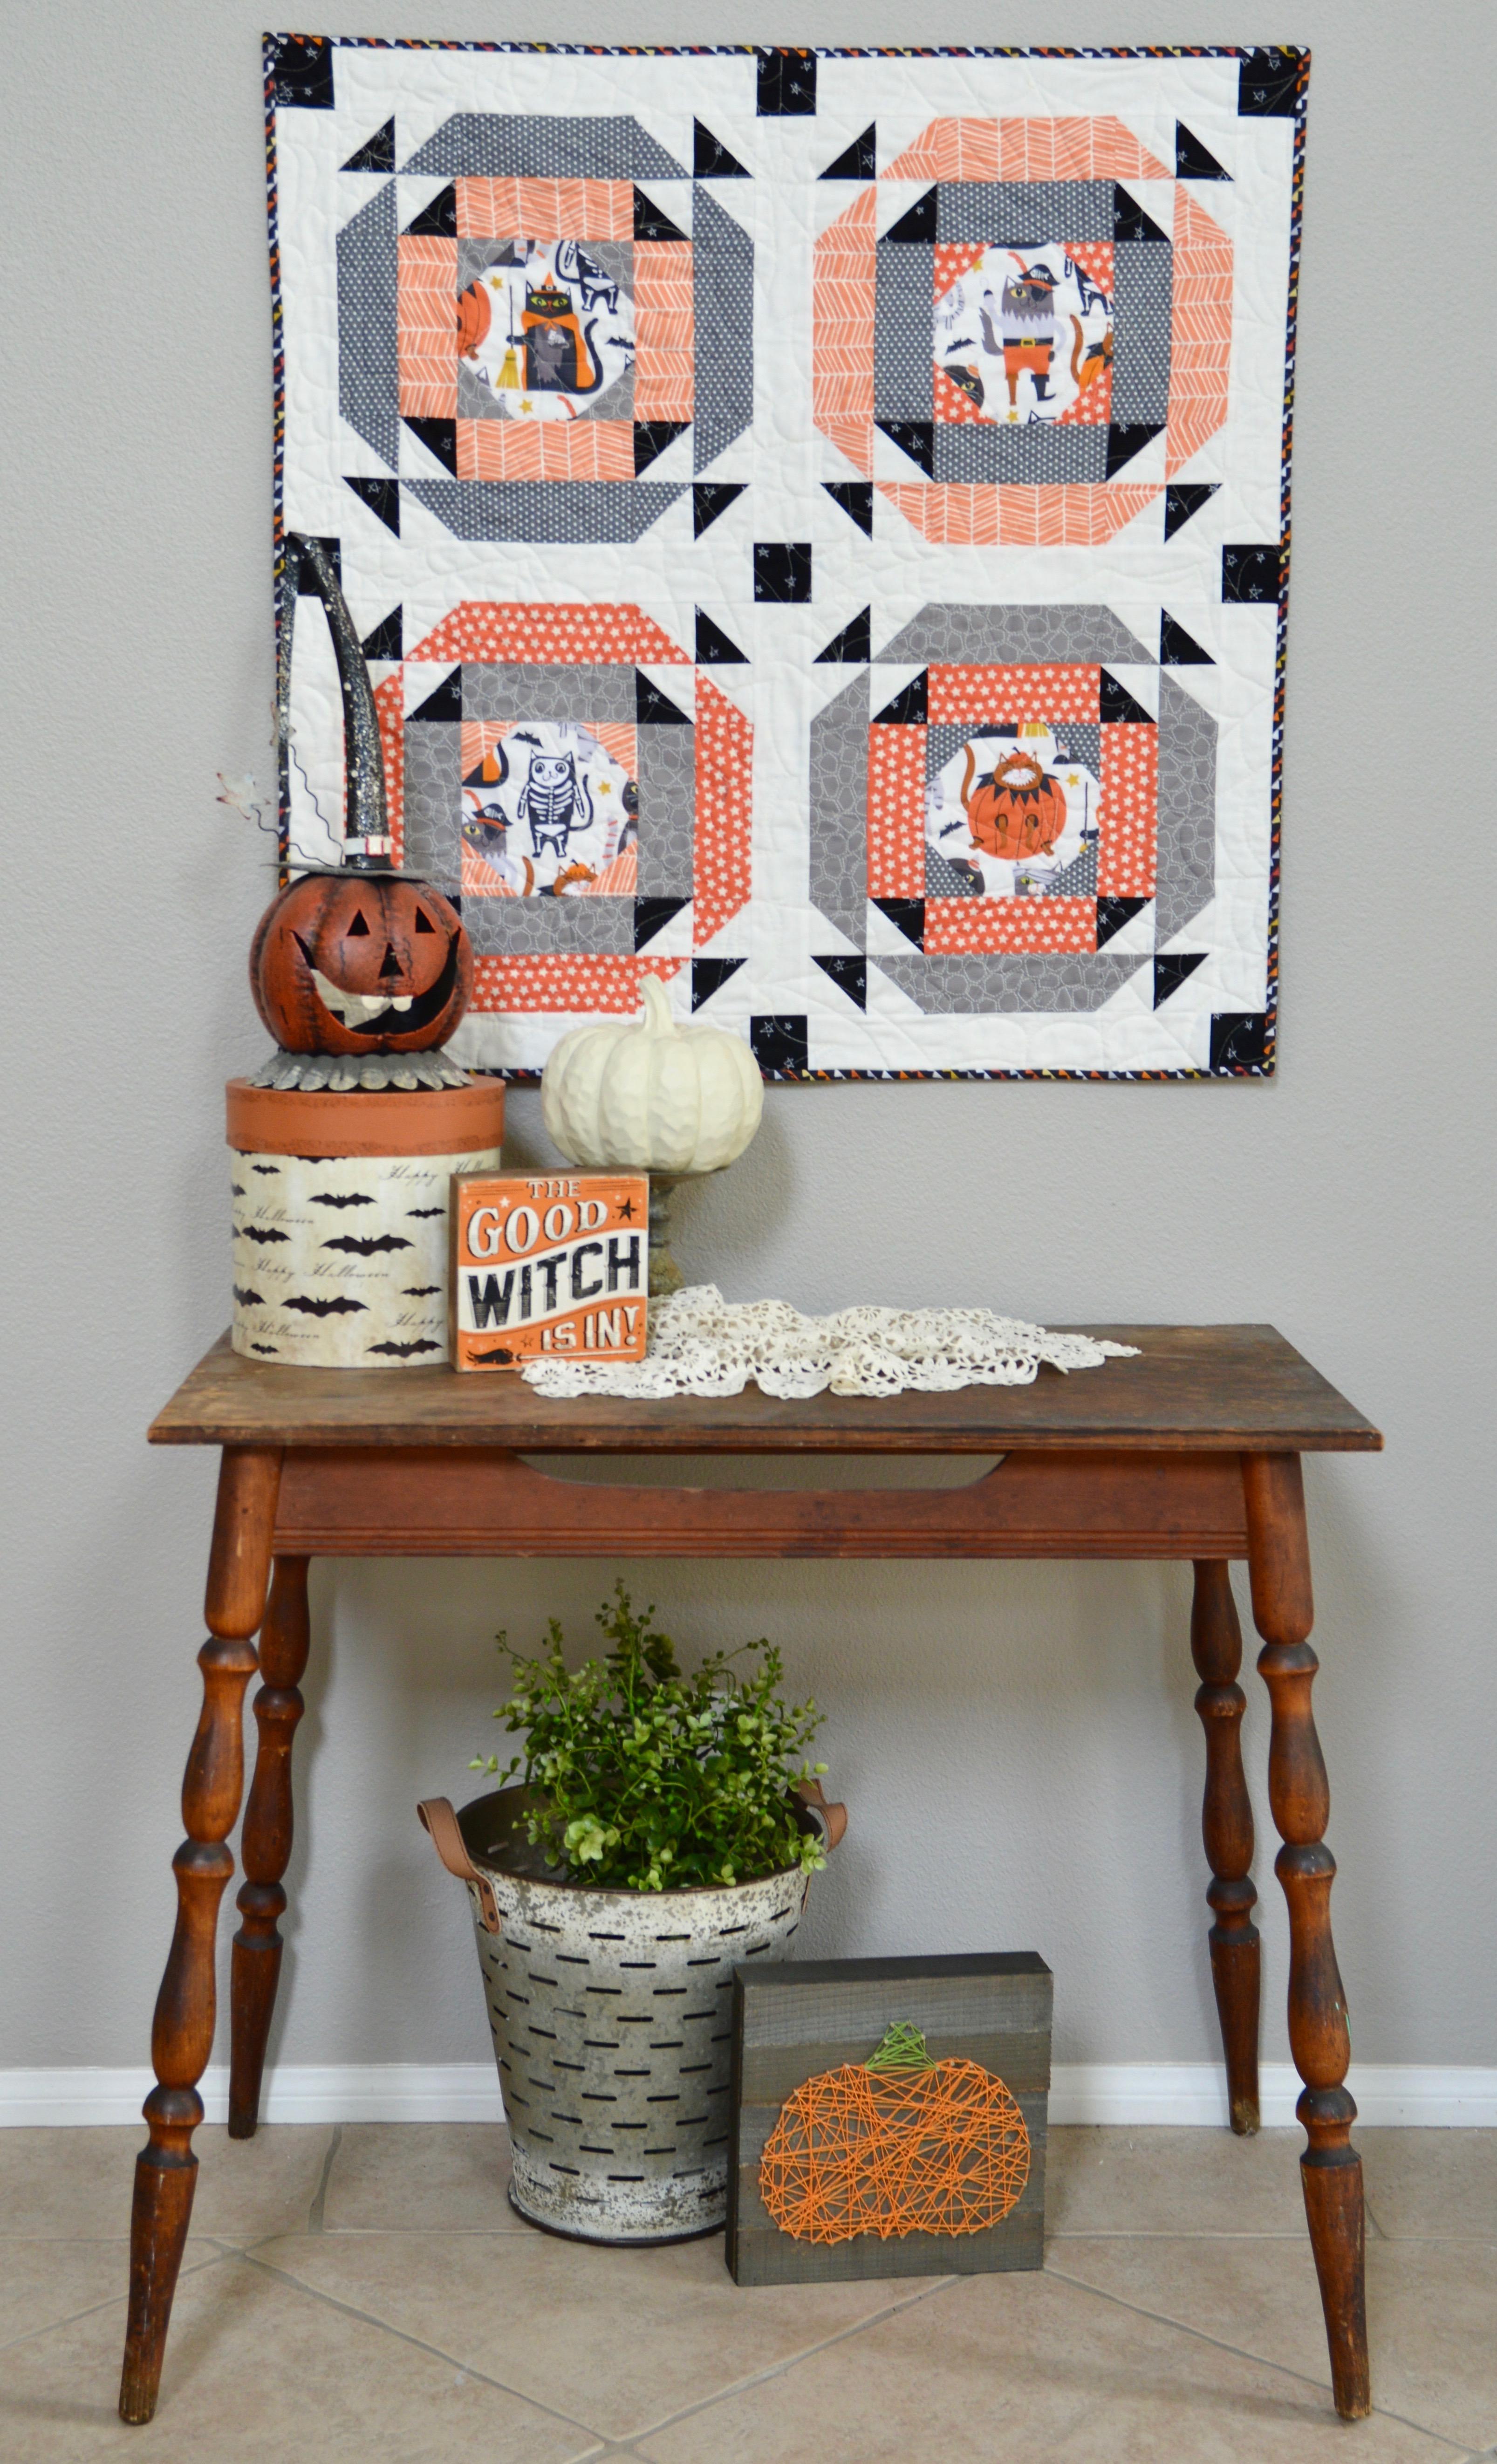
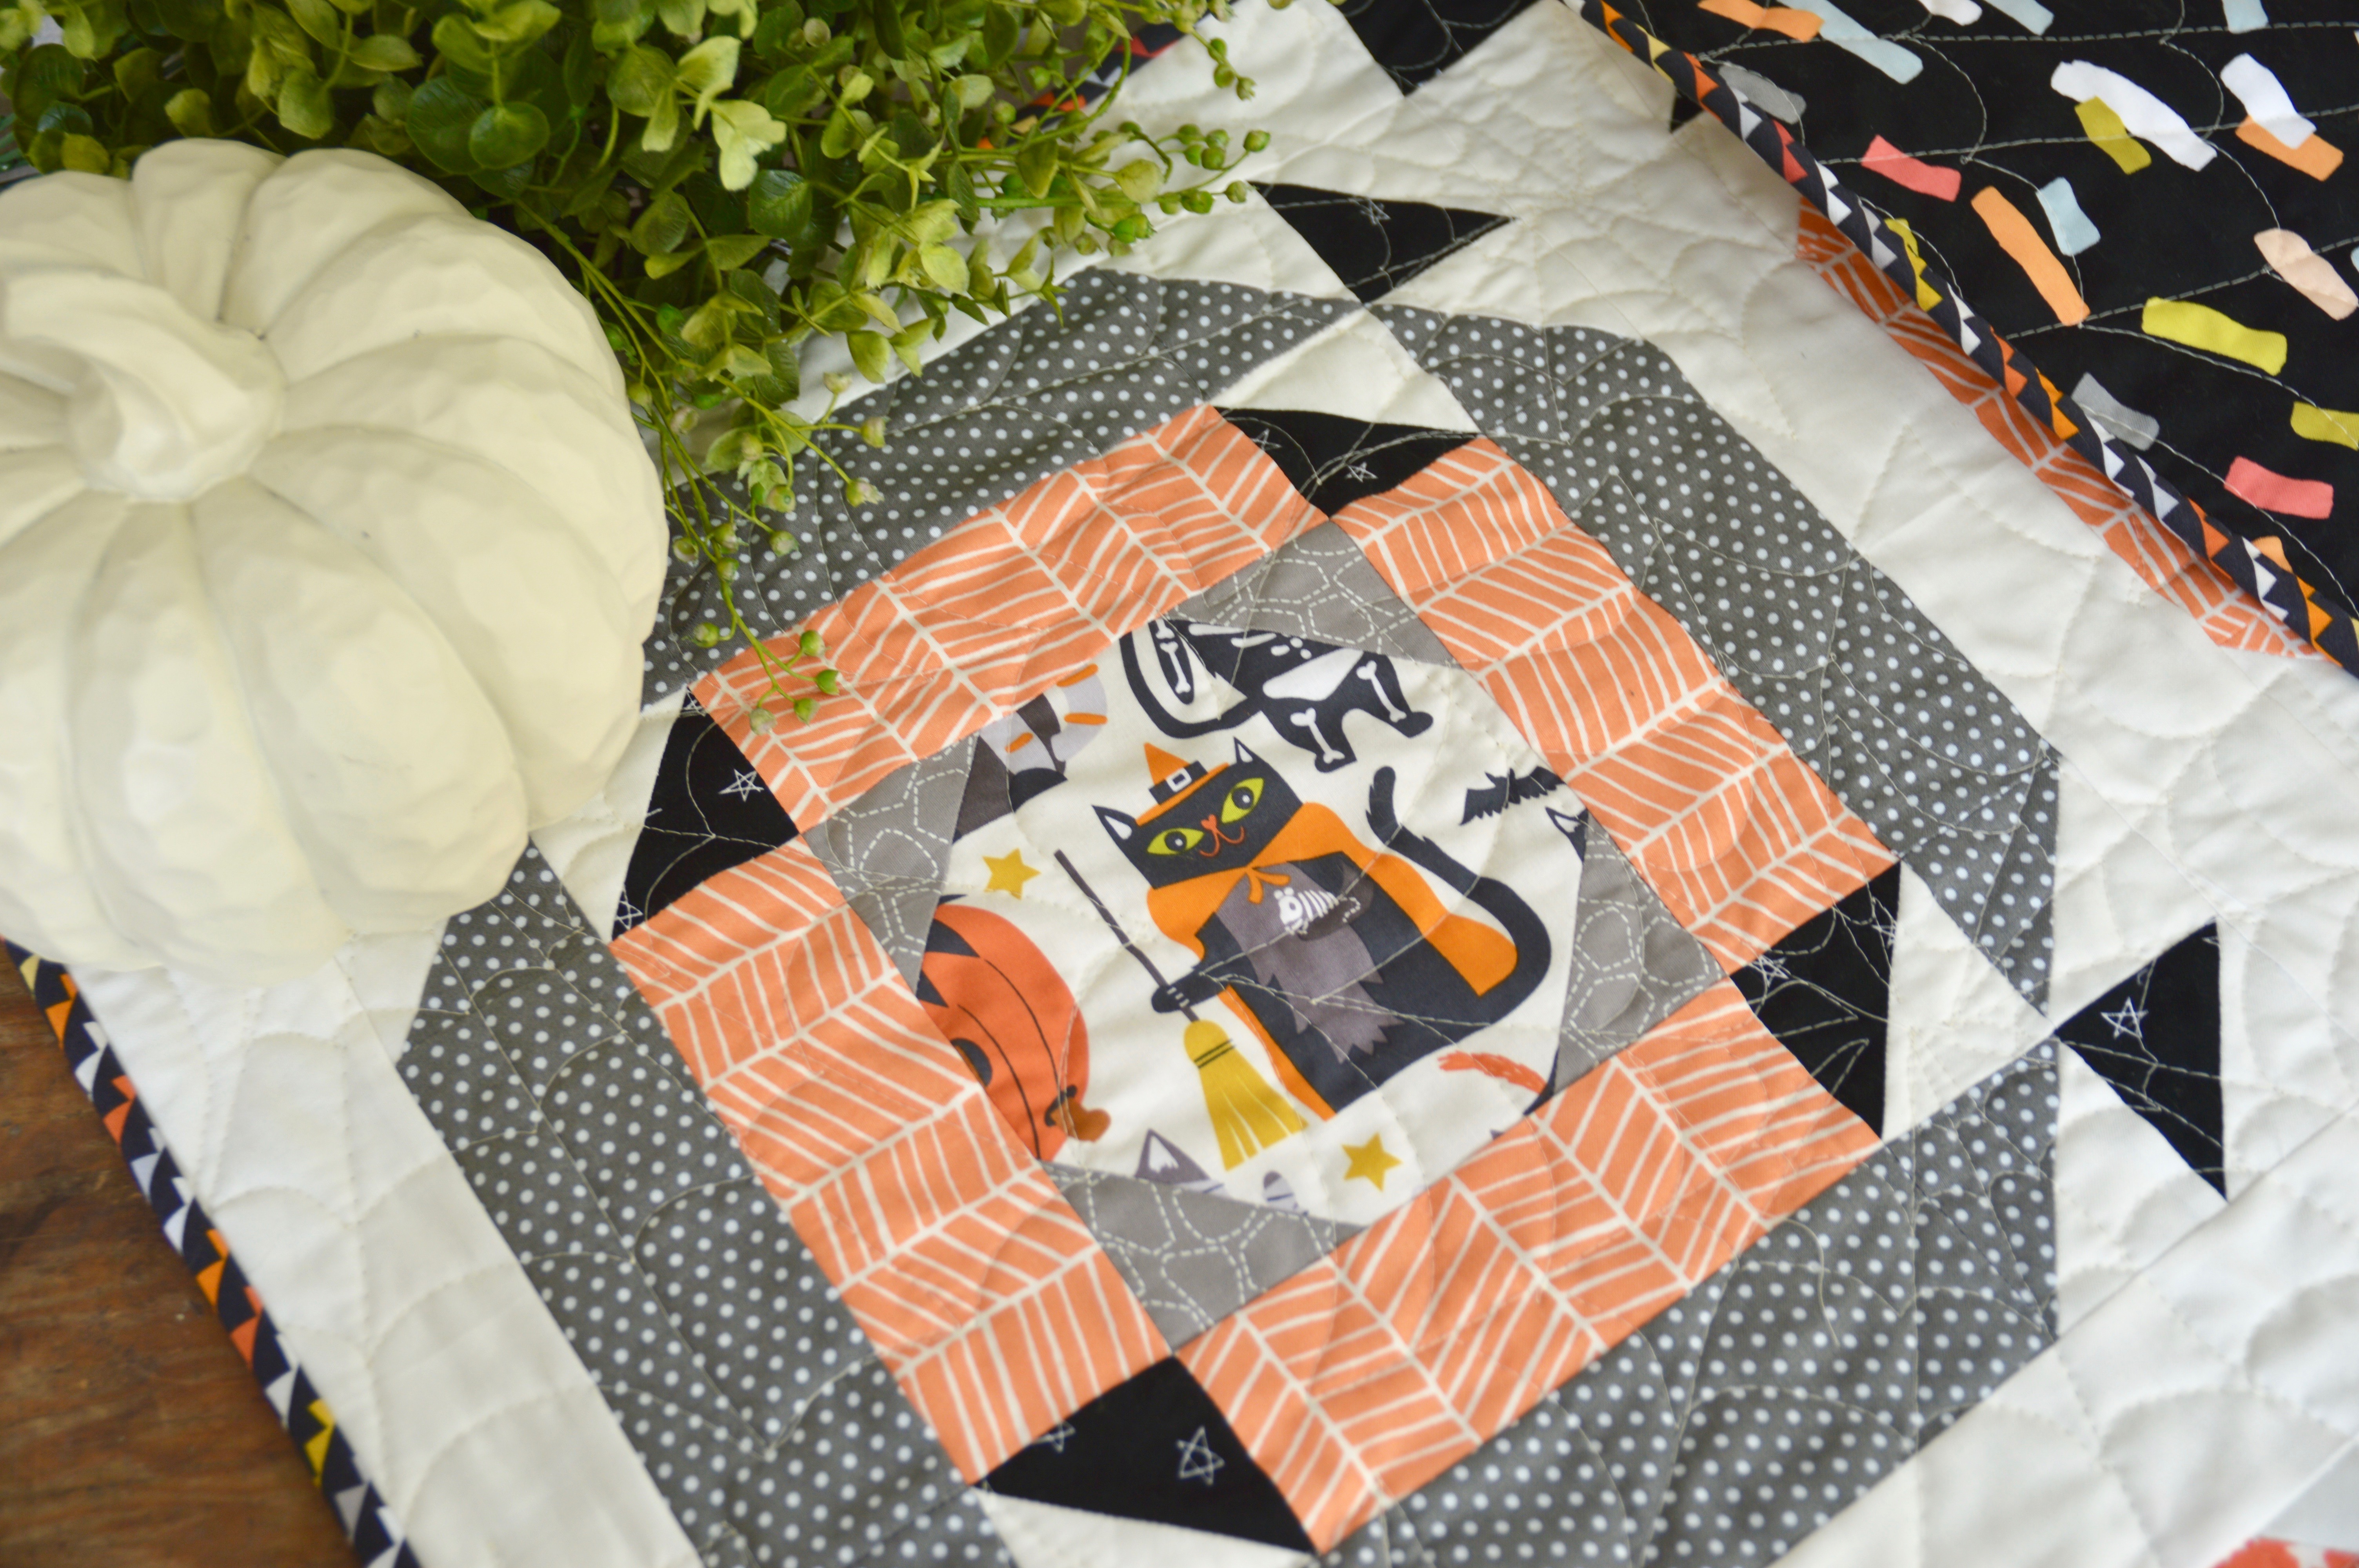
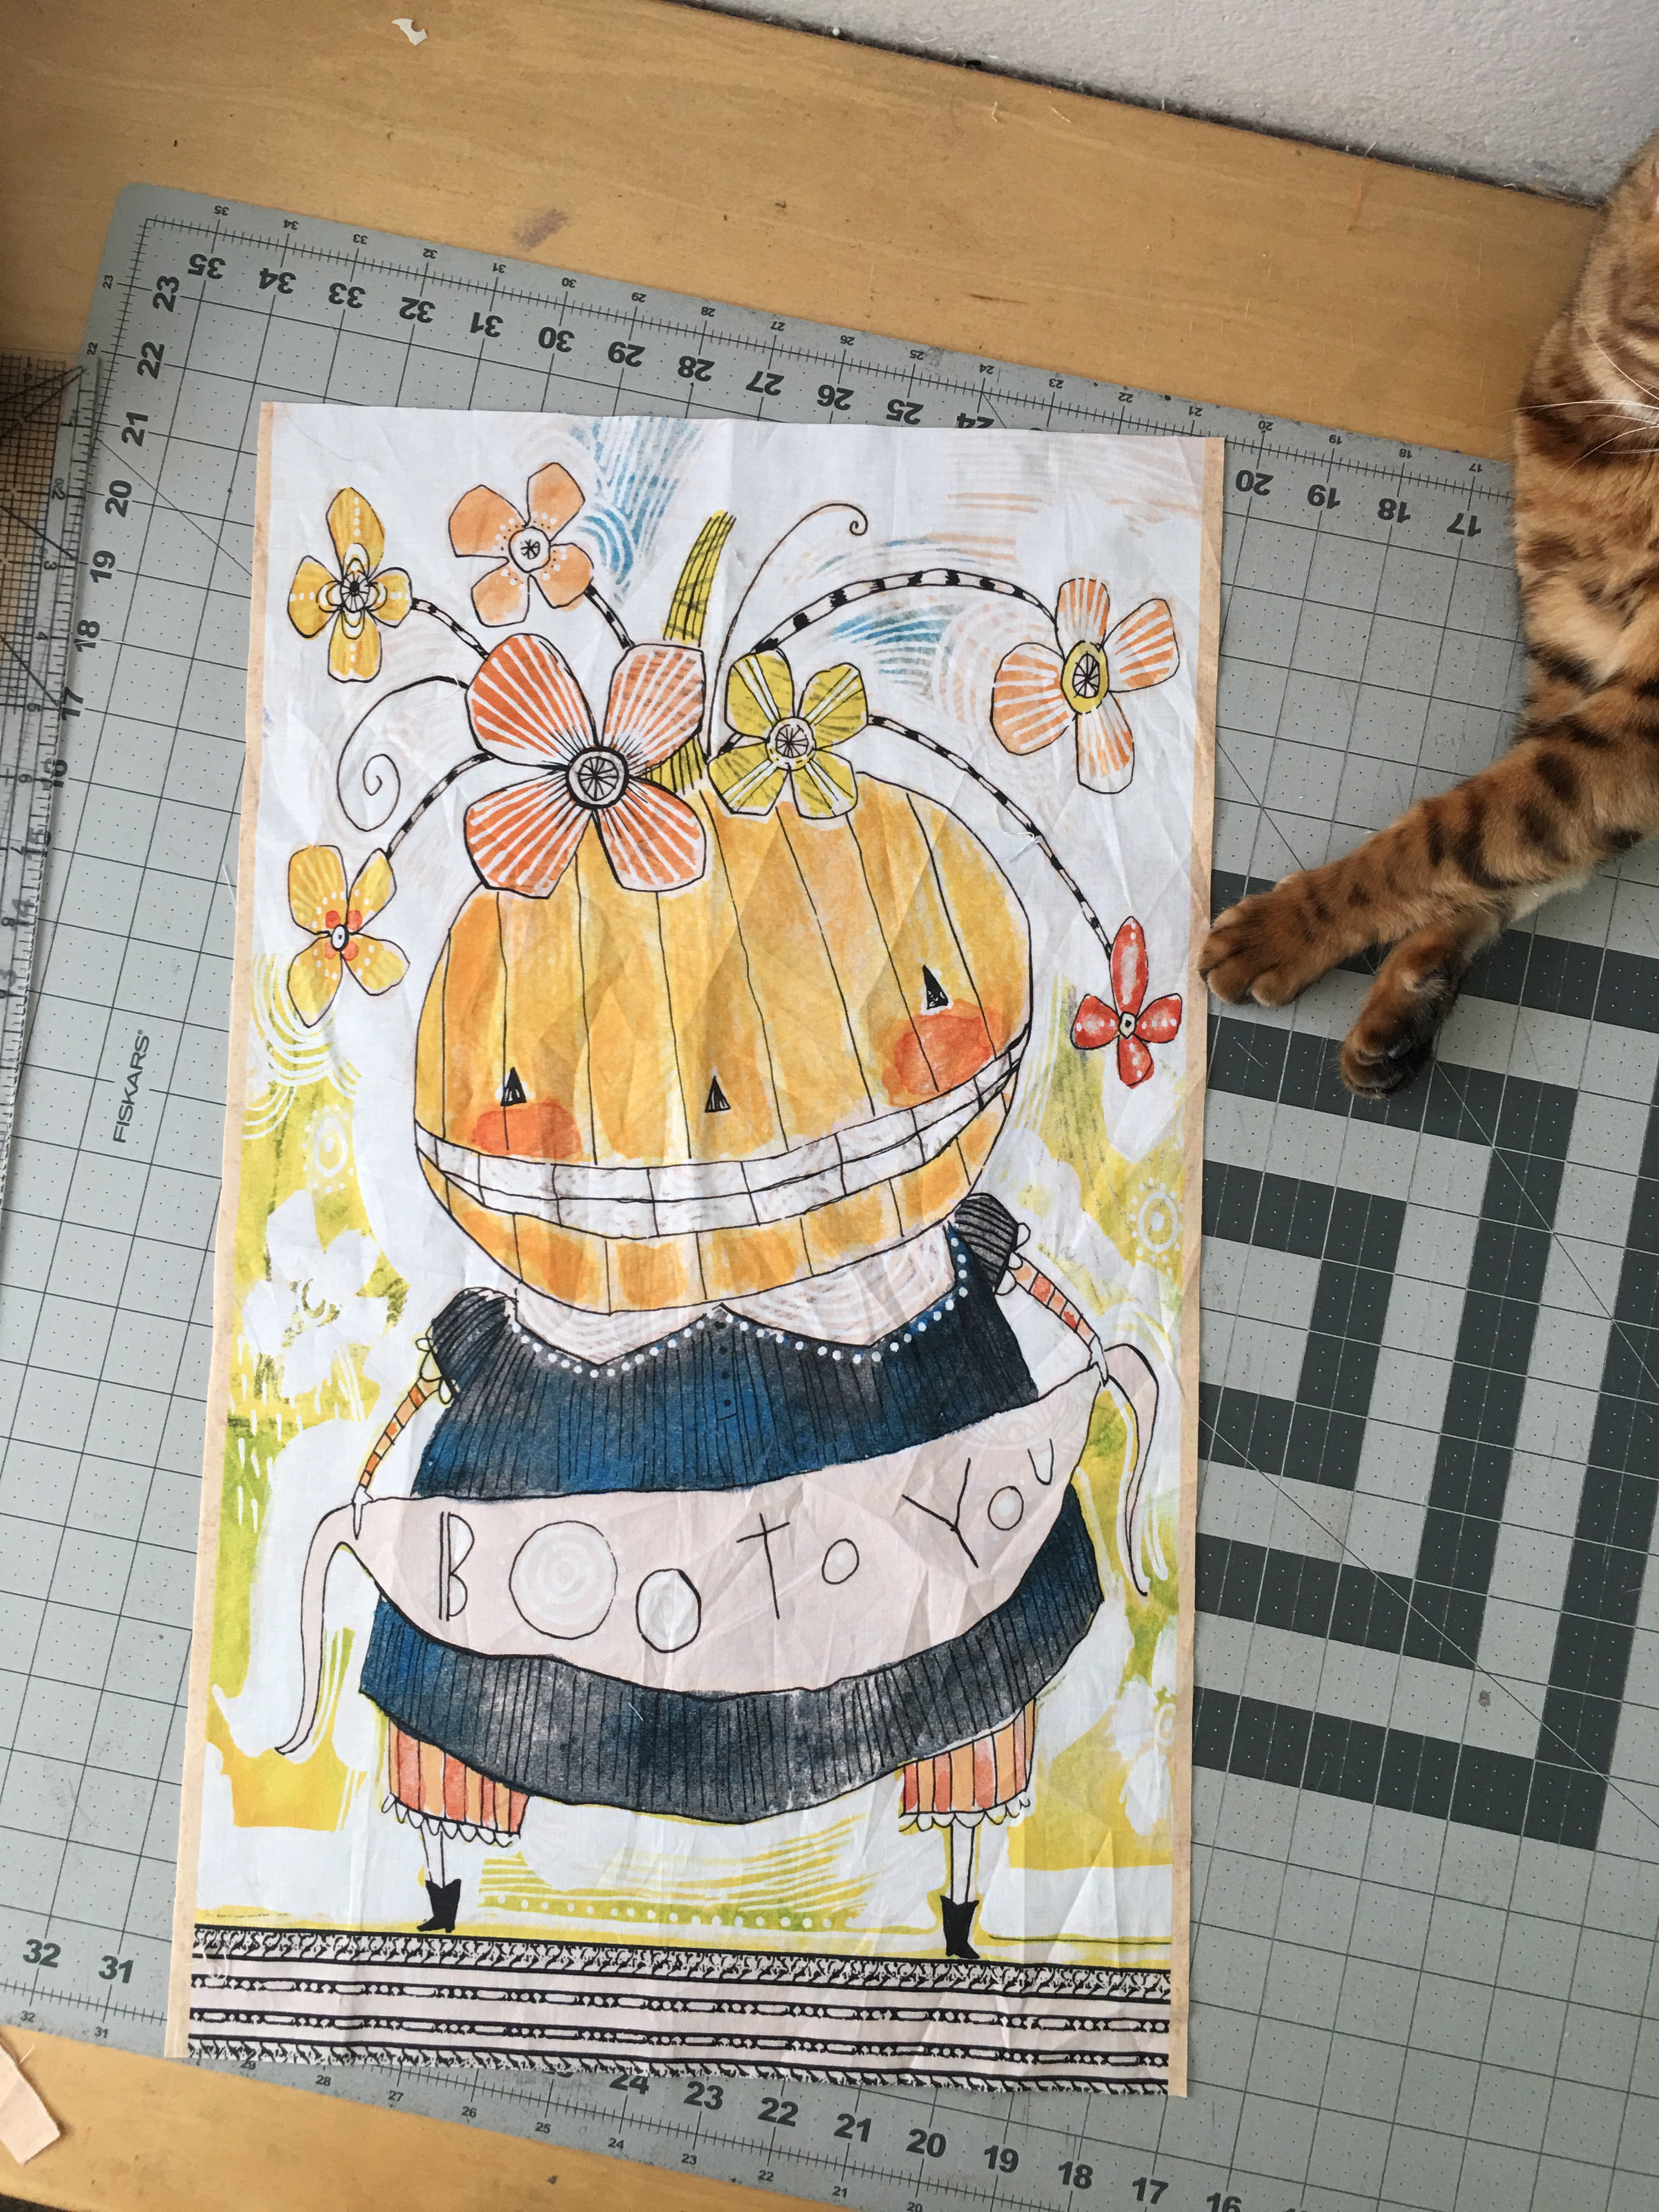
Amber and I have been doing some spooky sewing and we are ready to share this fun little quilt with you! It is a great size for a wall hanging or to put on a table! Finished it measures 34″ square. I also love that you can use theme prints in the centers – I’m always looking for ways to use my theme prints….especially HALLOWEEN CAT prints!! Don’t you love these spooky felines! The fabric is from Blend Fabric’s Boo Crew line.
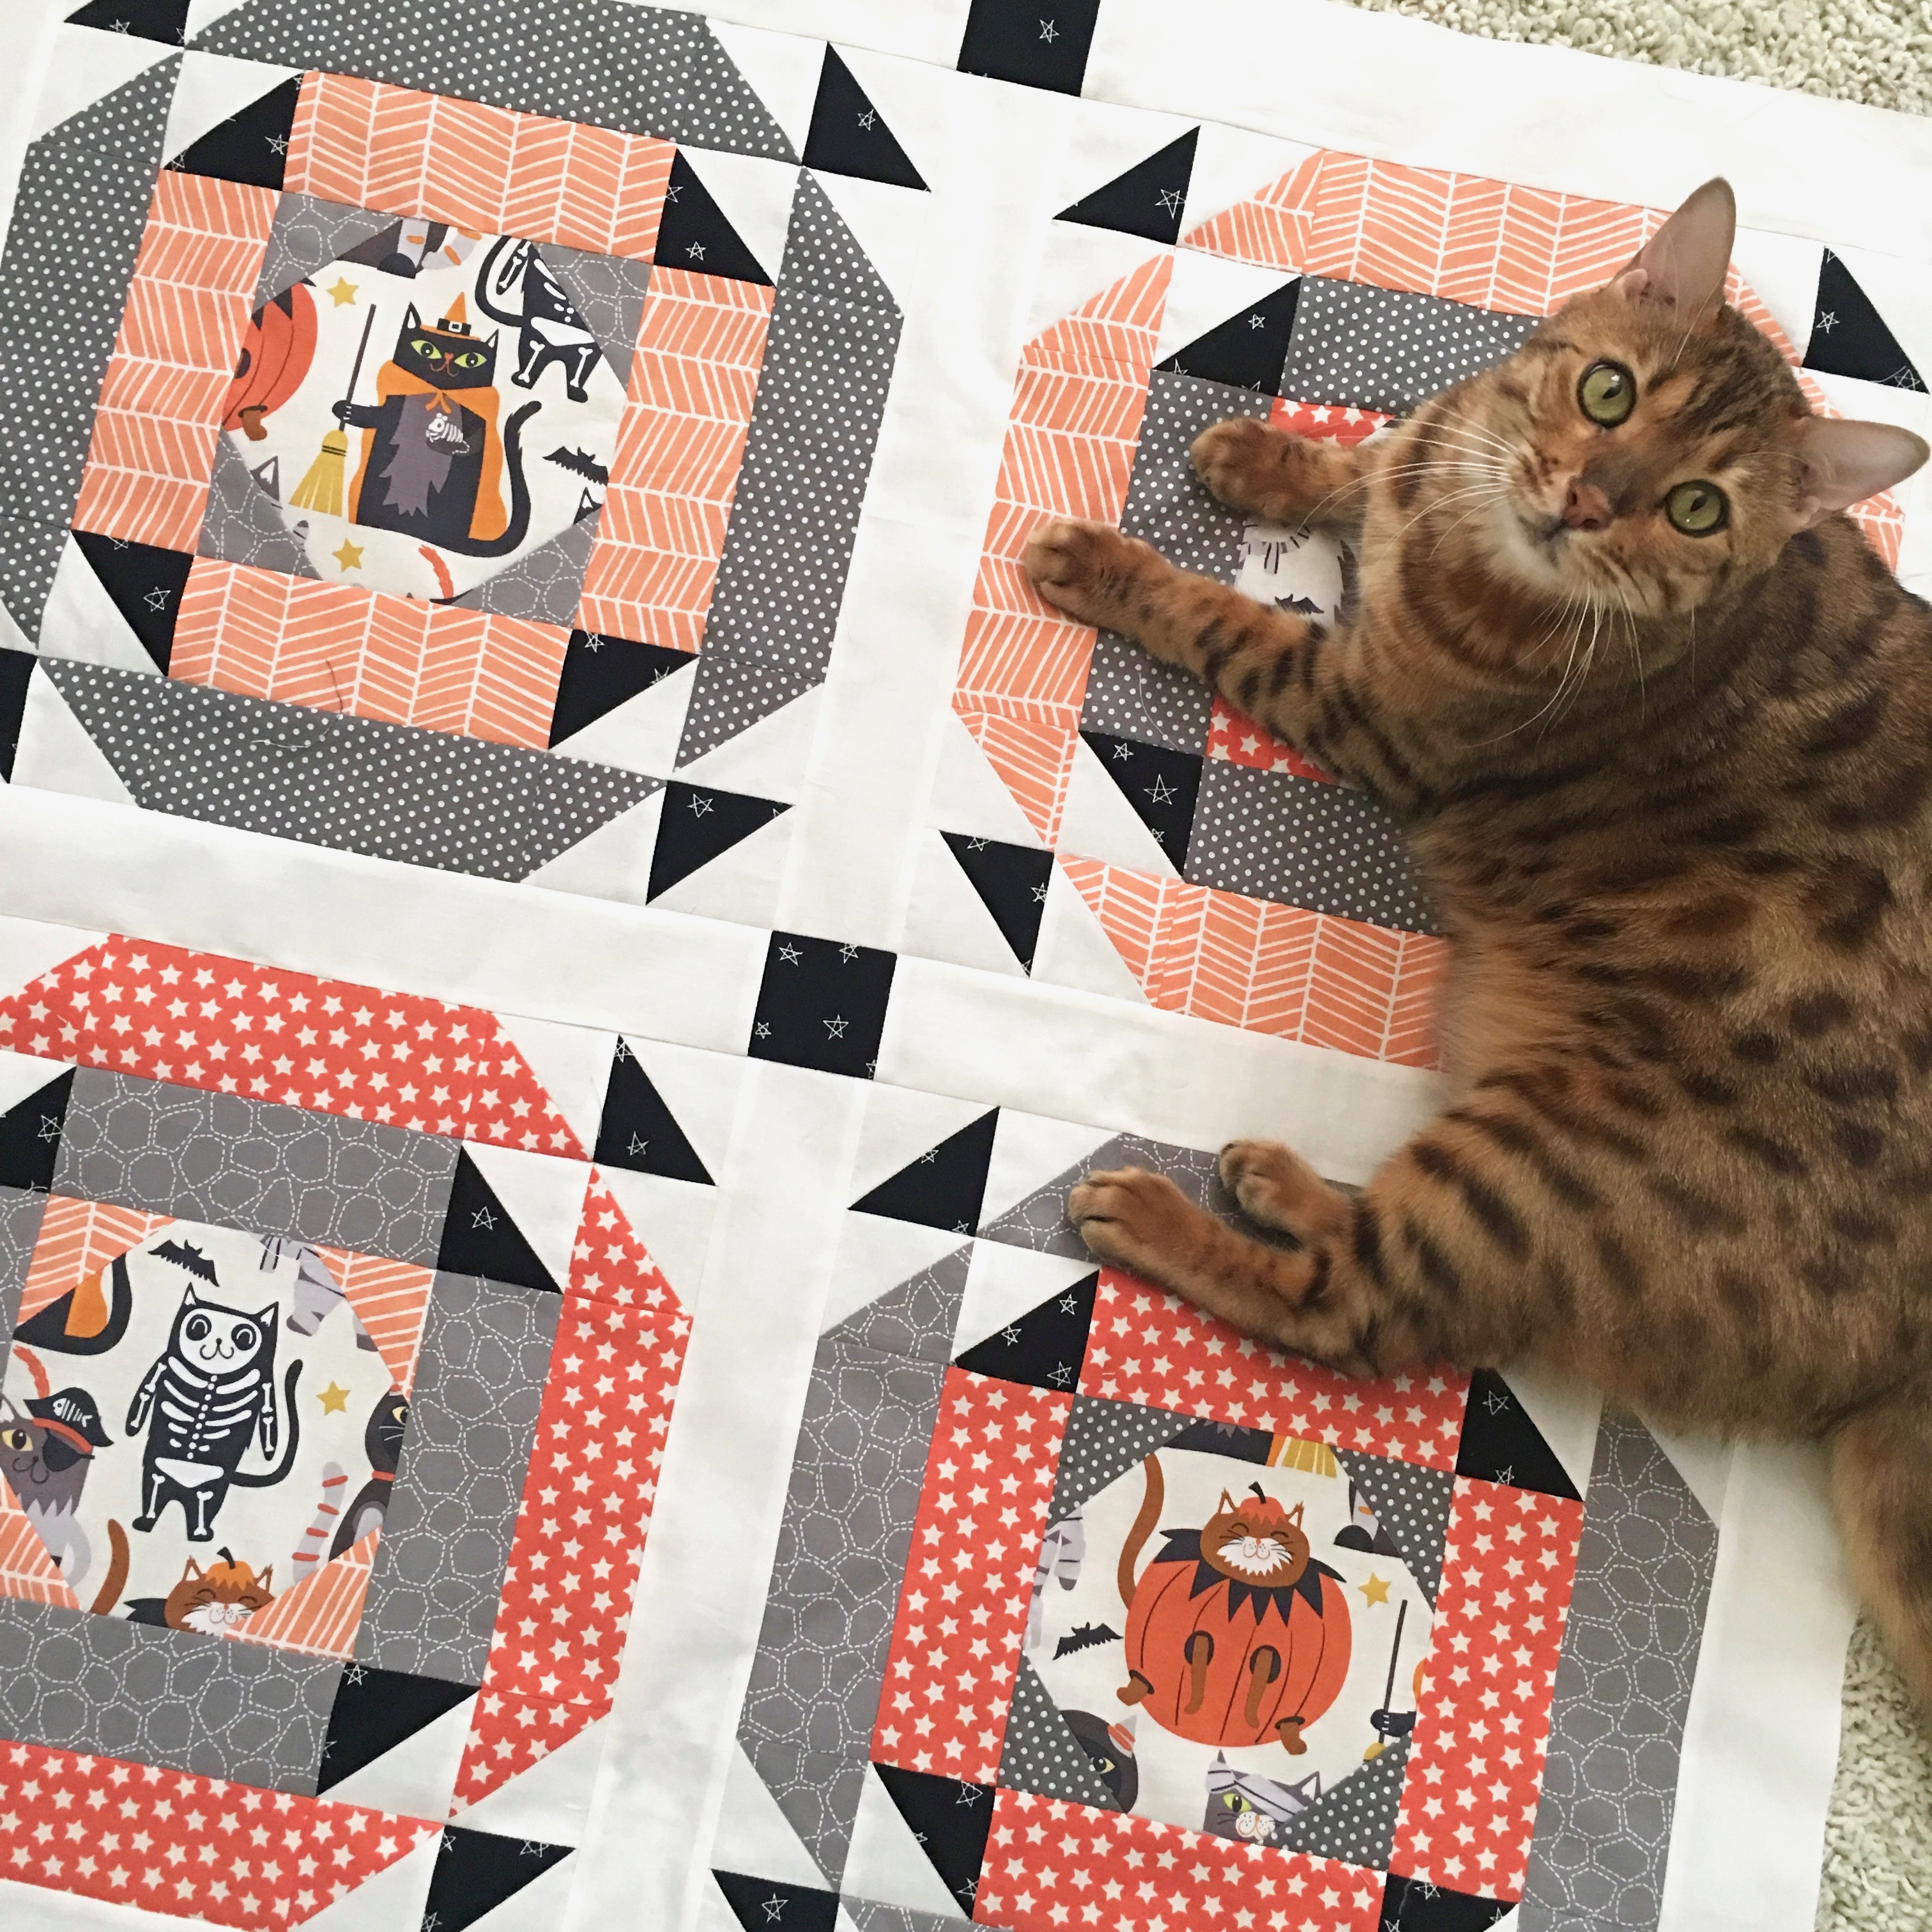
It is highly recommended to sew with your cat…..like you ever have a choice…hehehehe!!! Mufasa is loving this little quilt – the purrrrrfect size for him!
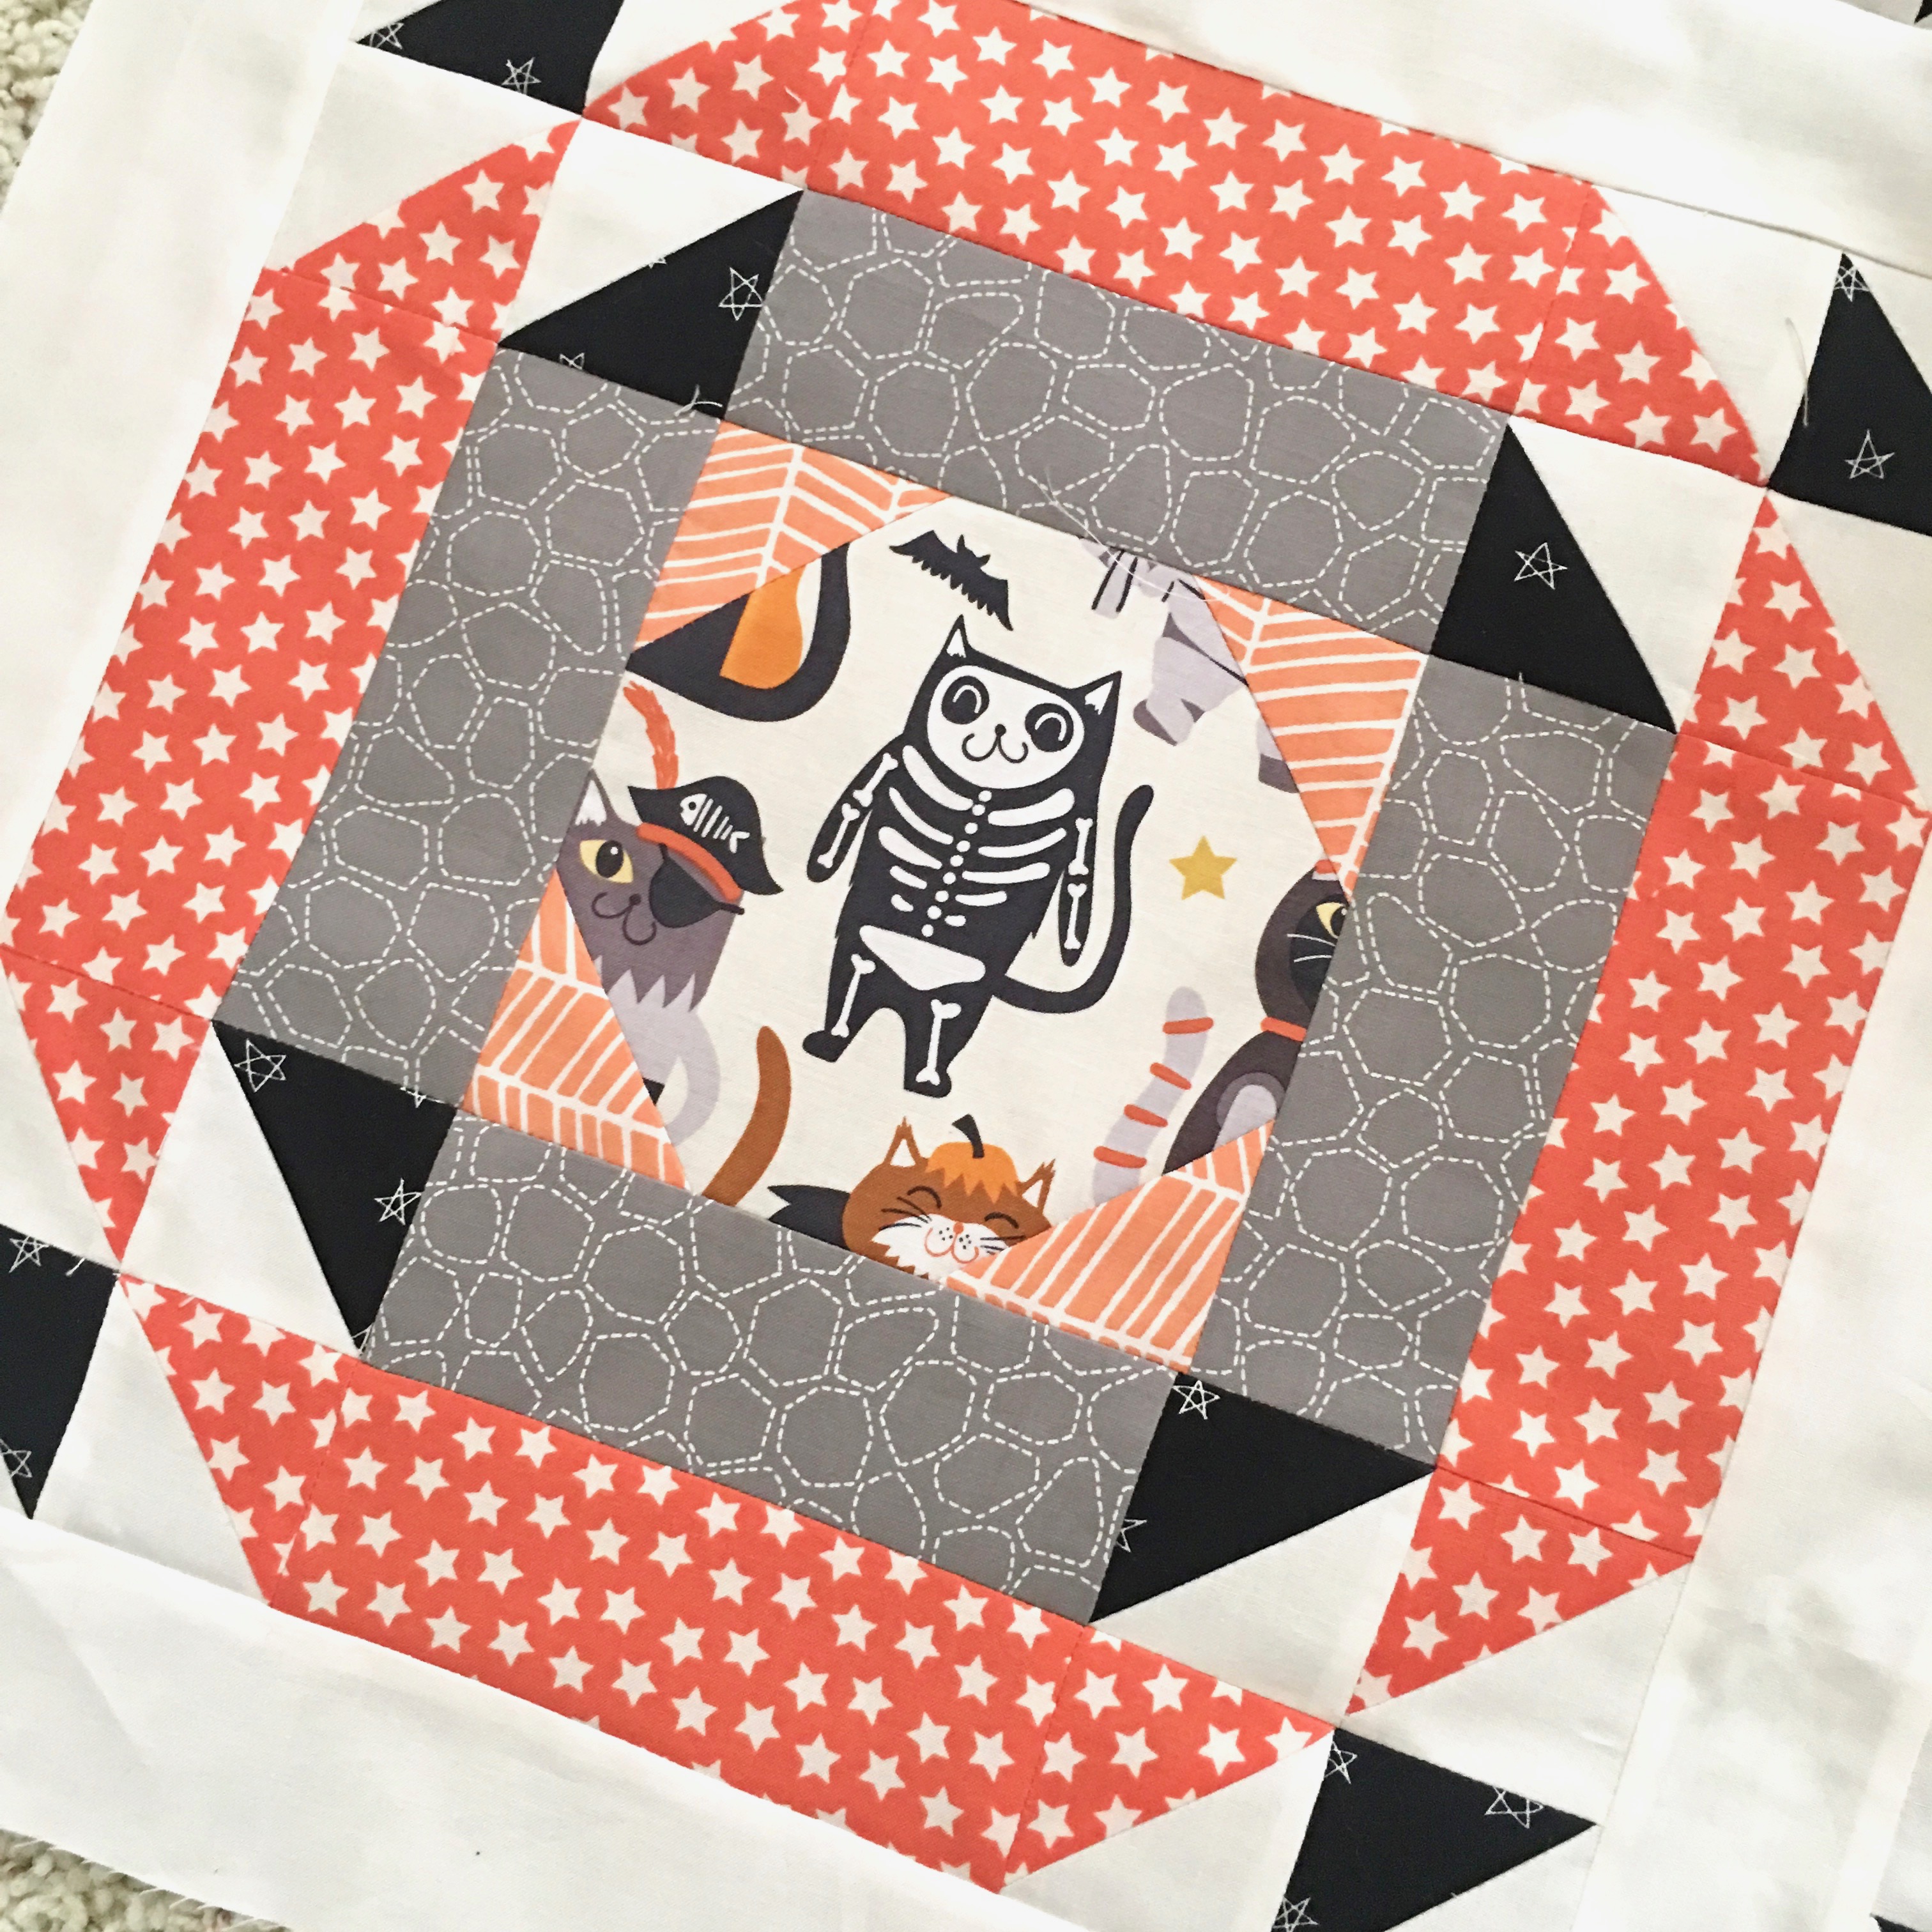
The quilt is made of 4 large blocks. Wouldn’t these blocks be great in a larger quilt!!
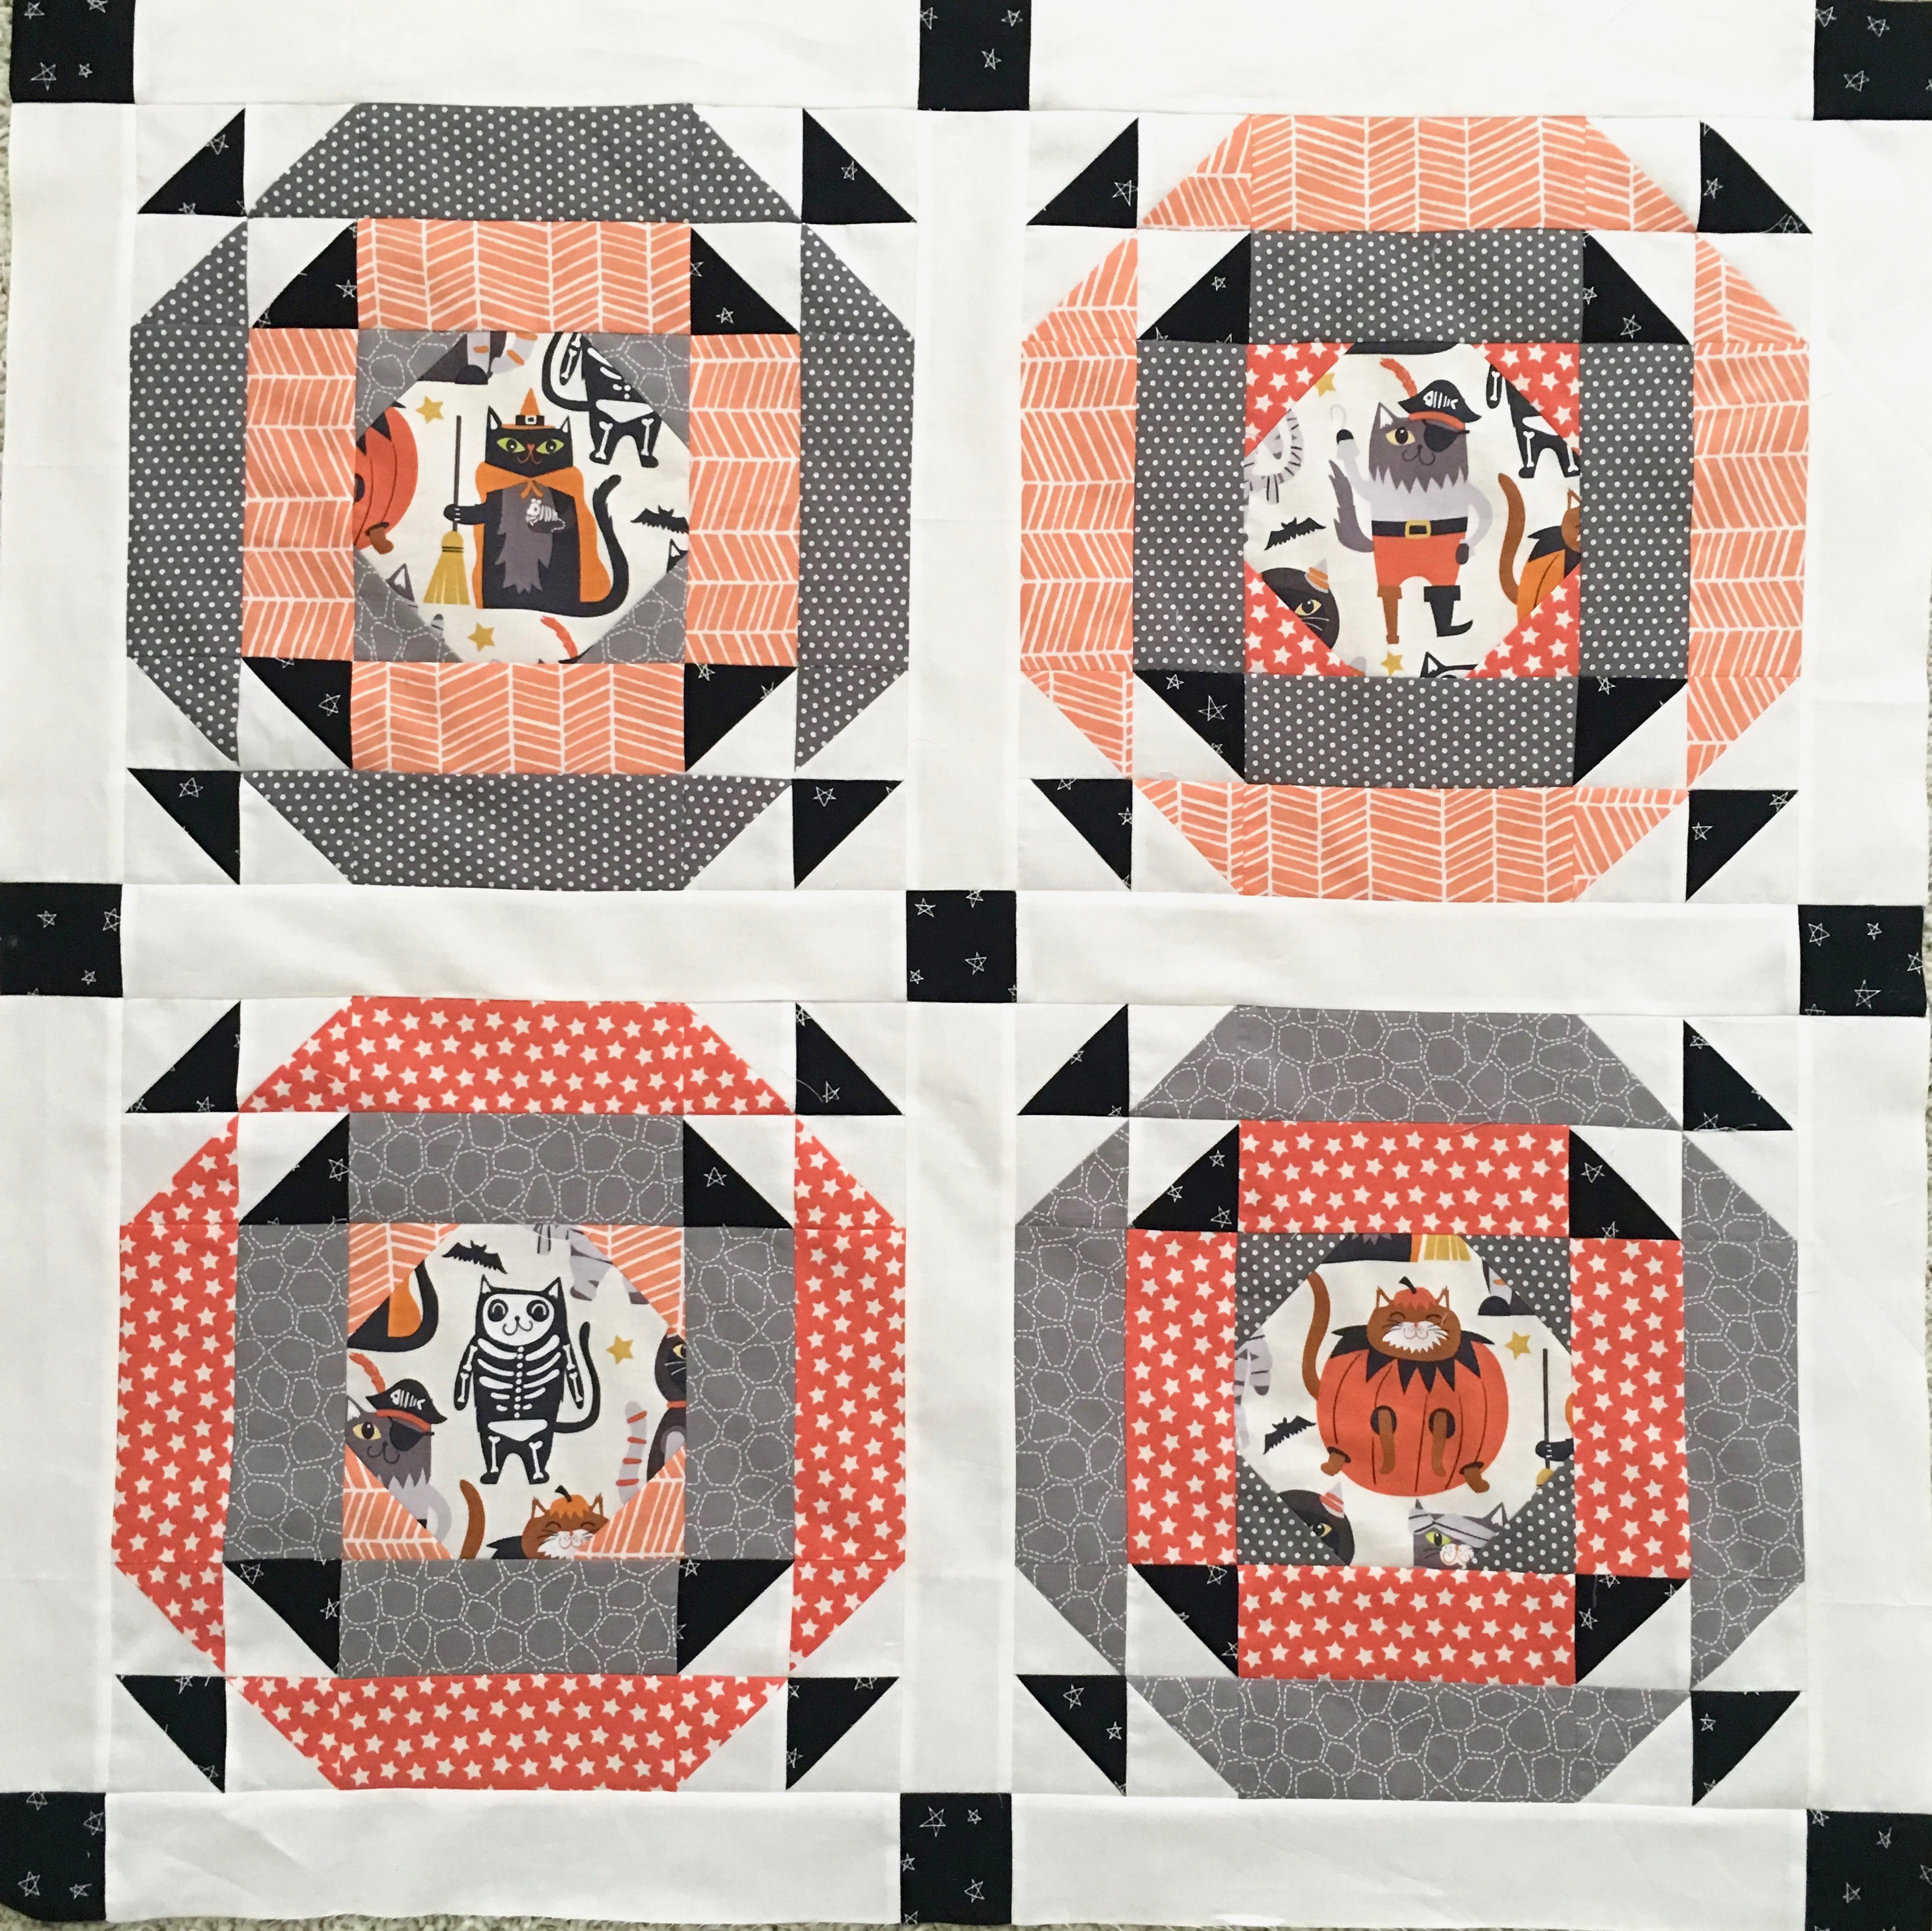
A little sashing and you’re all set!
You can download the PDF quilt pattern by clicking HERE. Make sure to tag @gigis_thimbel and @jedicraftgirl and use the hashtag #fivefatquarterfun and #littlespooksquilt so we can see your creations!!
By the way…..it is so NOT fall here in Southern California….the last 3 days have been 114 degrees!!!!!
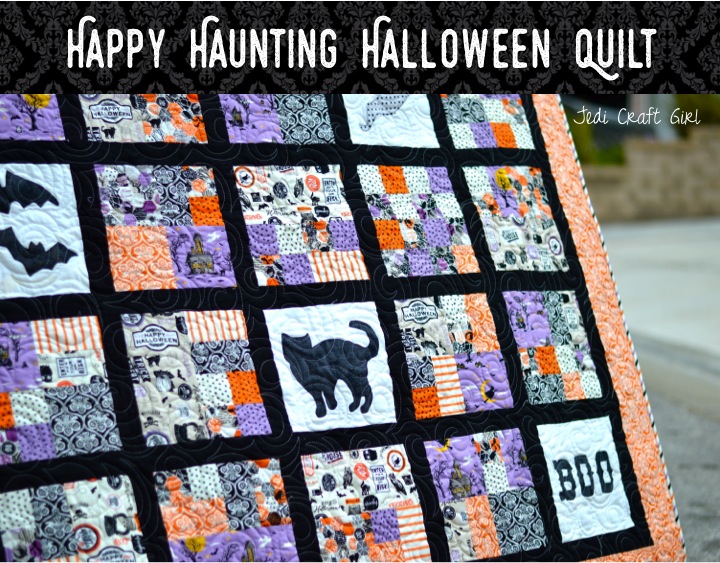
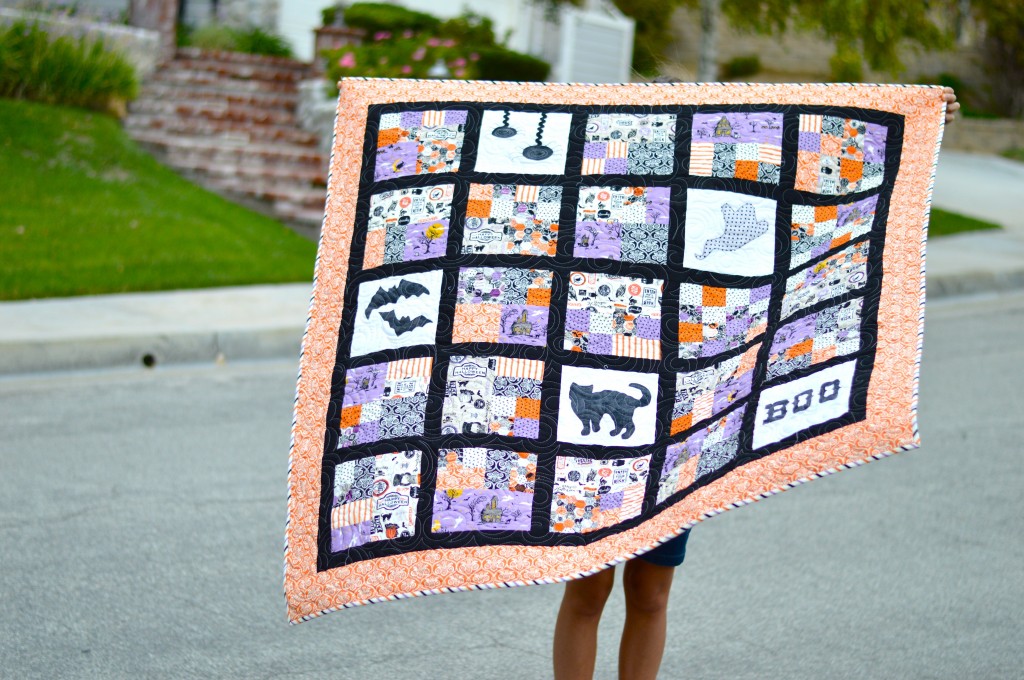
This is one of my most favorite Halloween Quilts and I thought I would give it a little shout out this year! It’s a great pattern to use up all those Halloween scraps you’ve been saving for years. You can find the full pattern HERE.

Mufasa is a huge fan of this quilt too!!
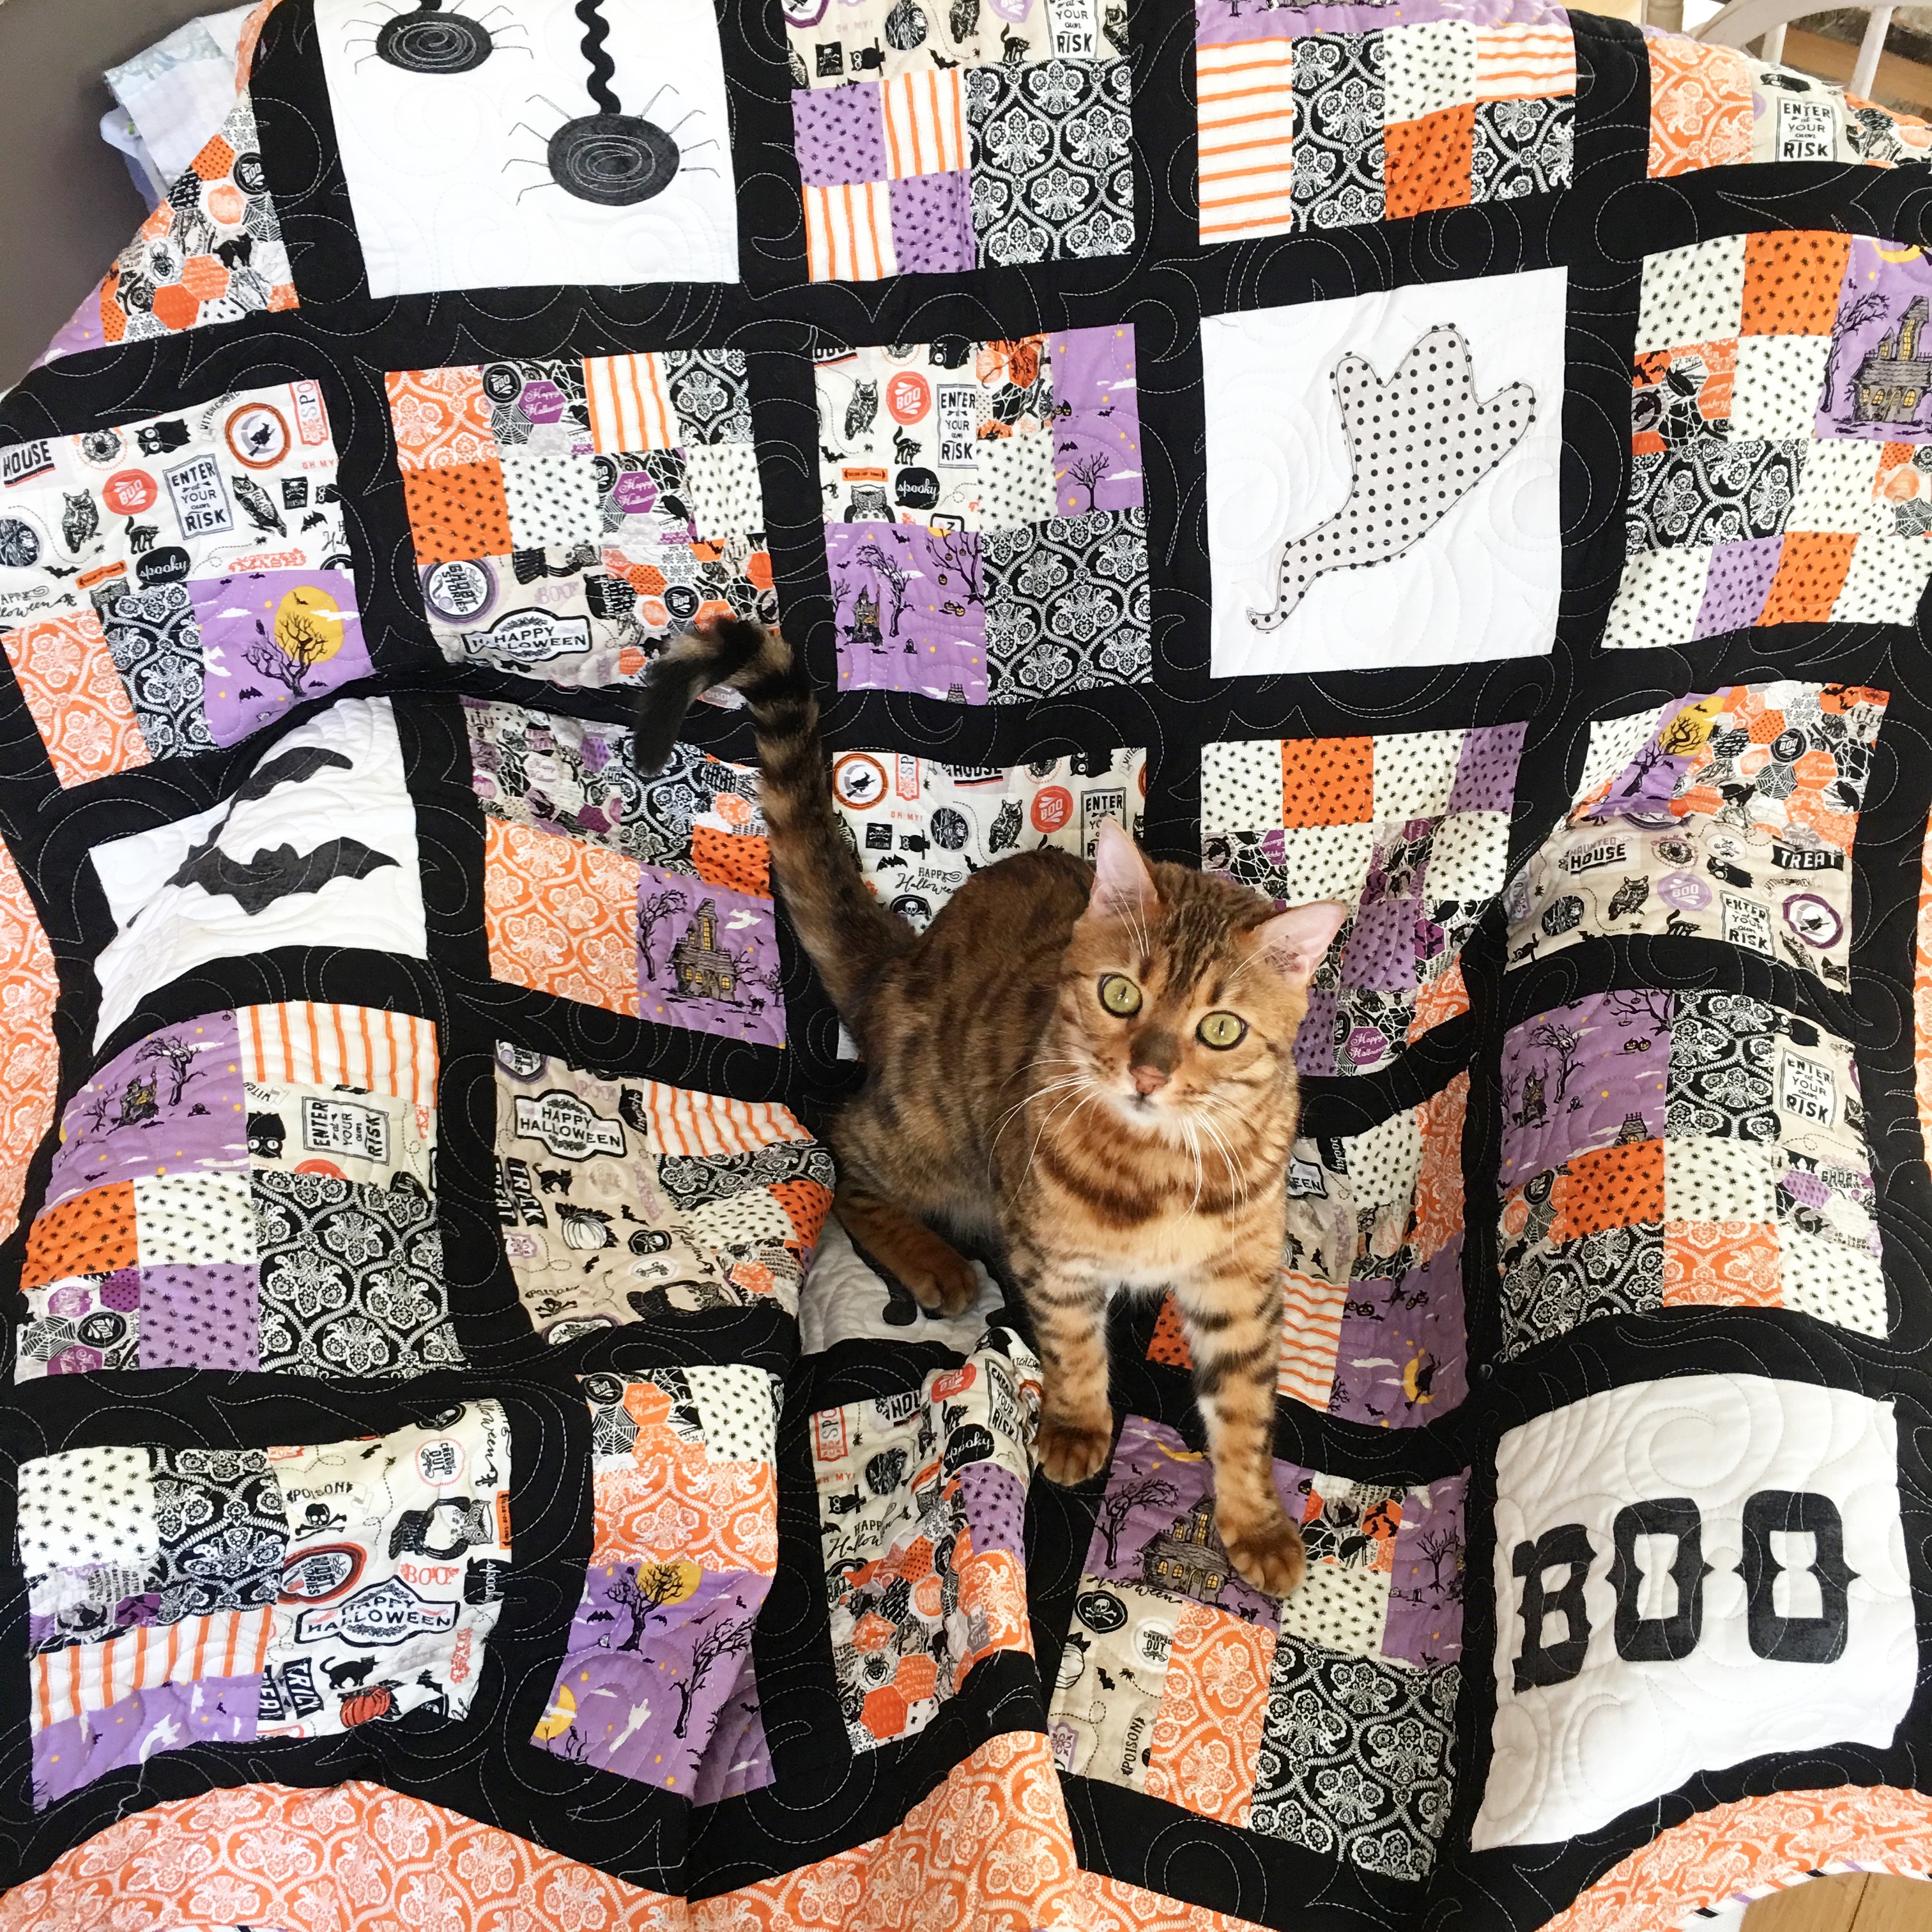
I love how each of the blocks turns out different depending on which version of the block you choose and which fabric you choose. It’s scrappy yet not too scrappy!!
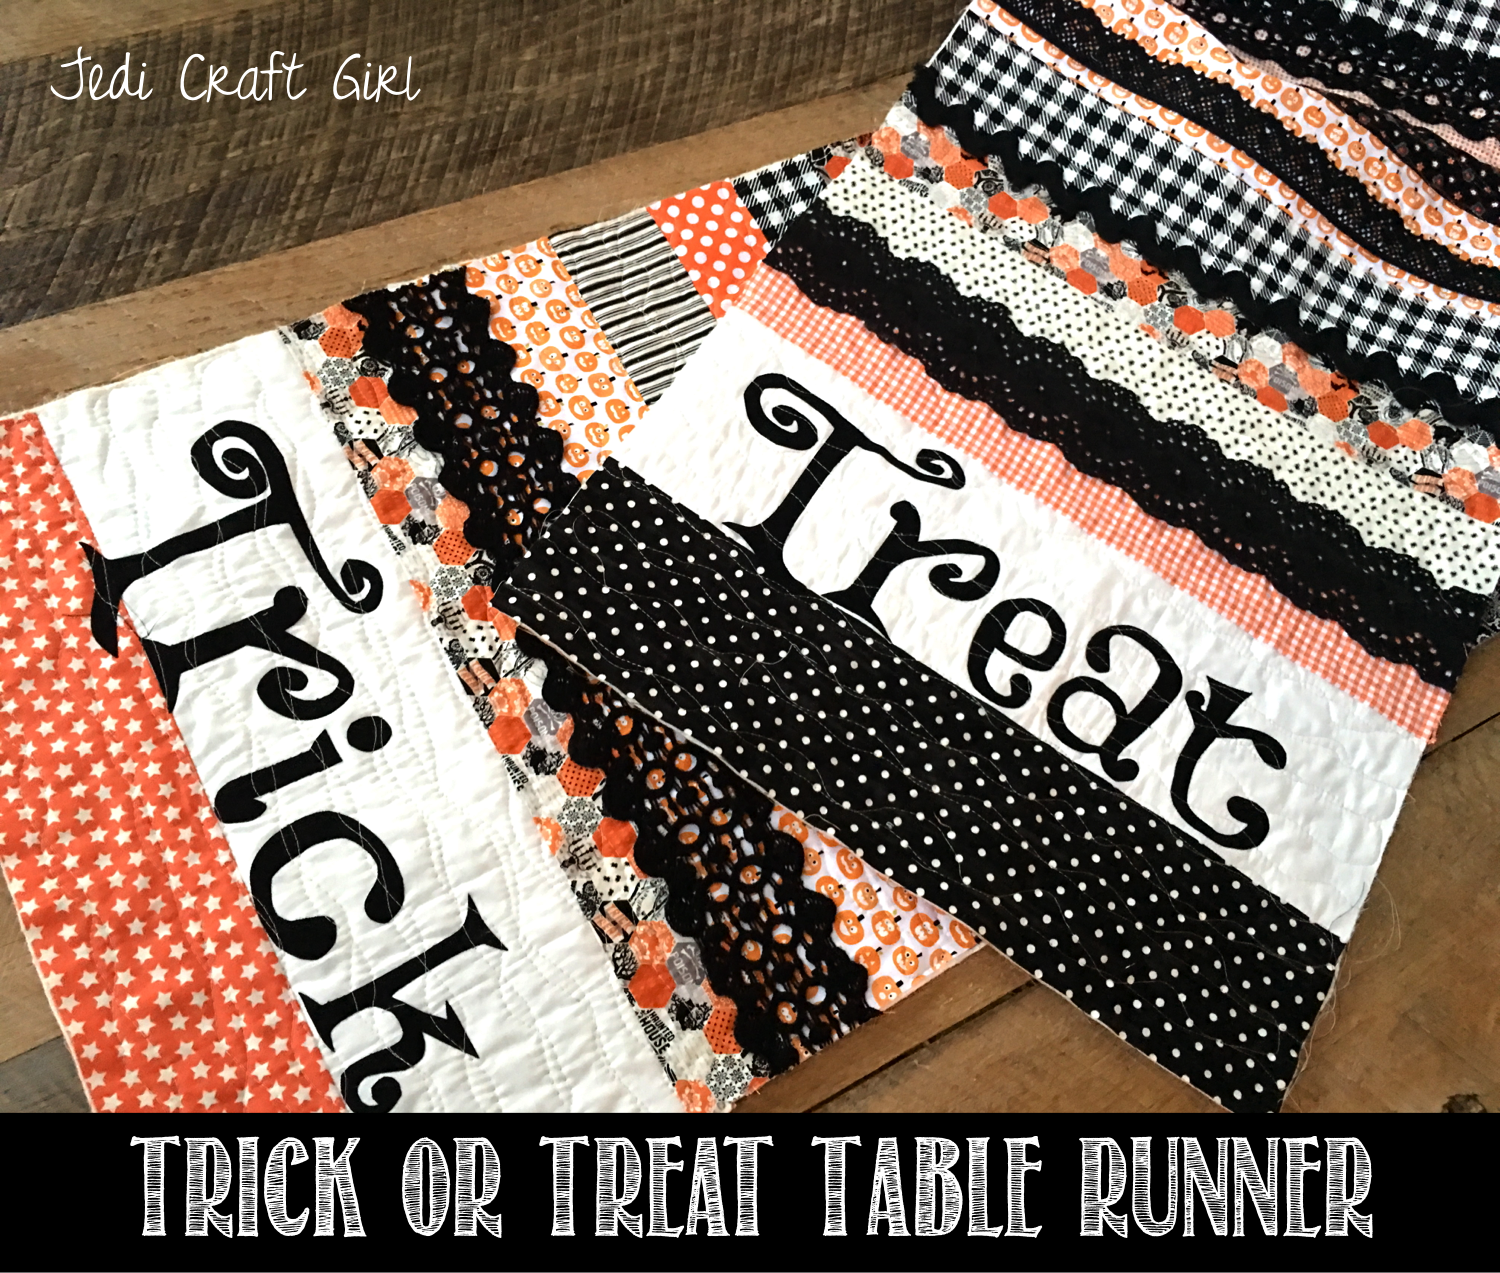
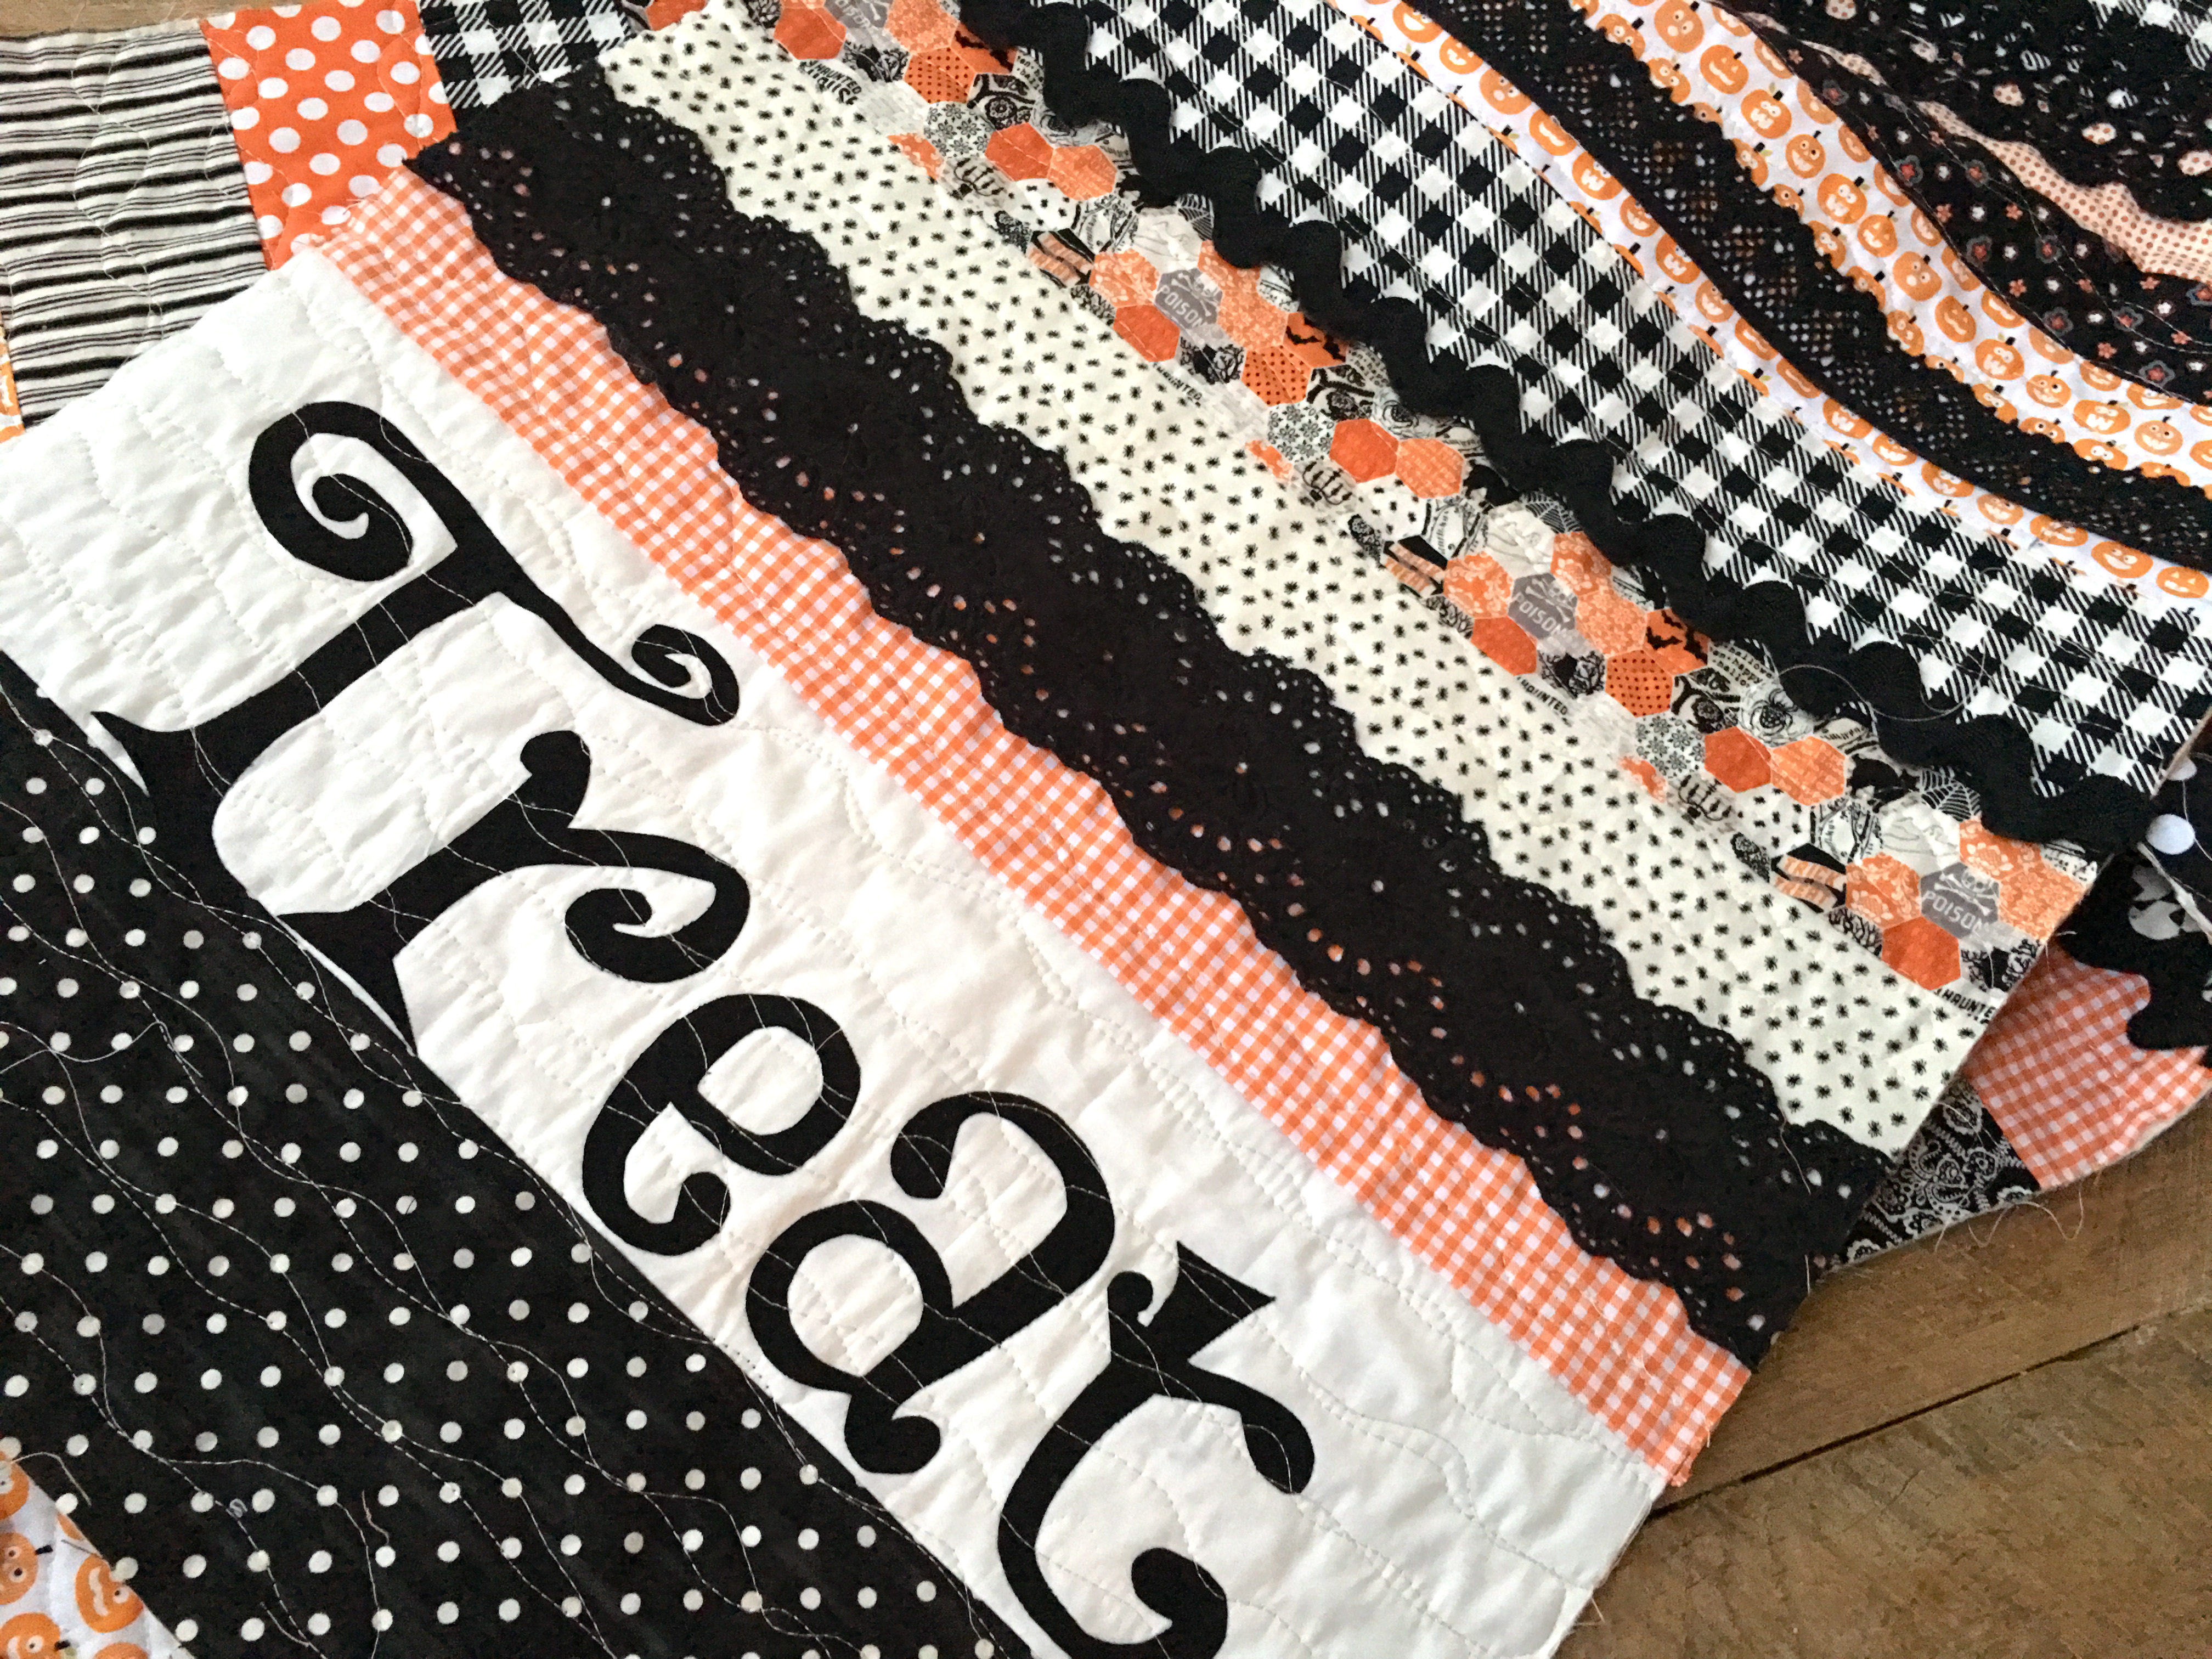
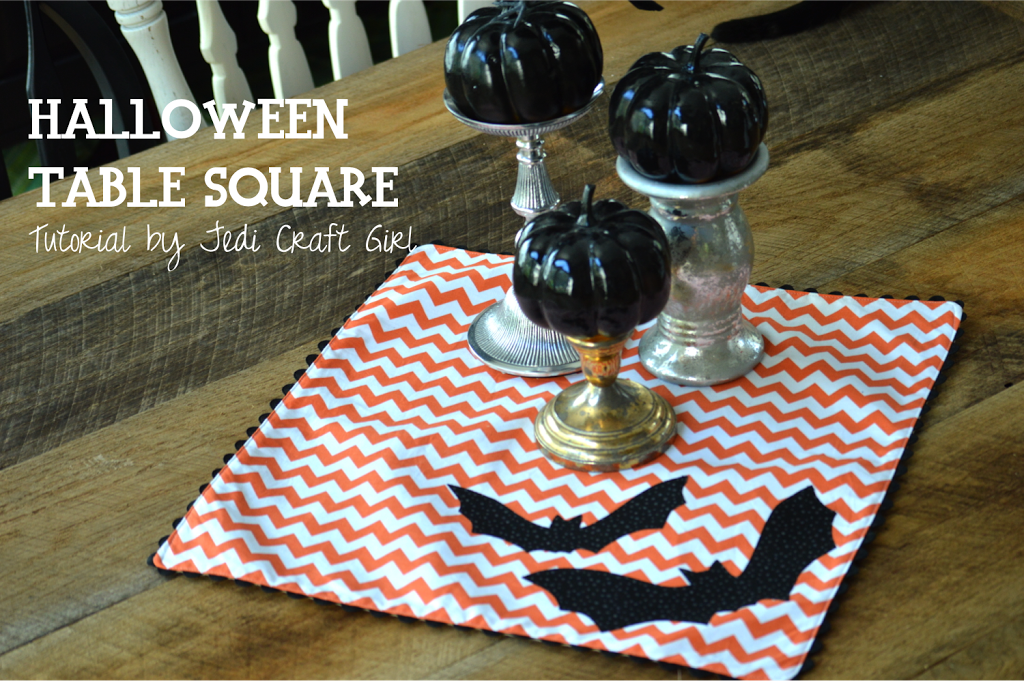
Just when I thought Halloween sewing was over, these cute fabrics jumped into my cart at Michael Levine! I got out all my scraps of Halloween fabric and started cutting! Before I knew it I had made this super fun table runner! I added a variety of black lace and ric rac trim to give it more interest!
Project Supplies:
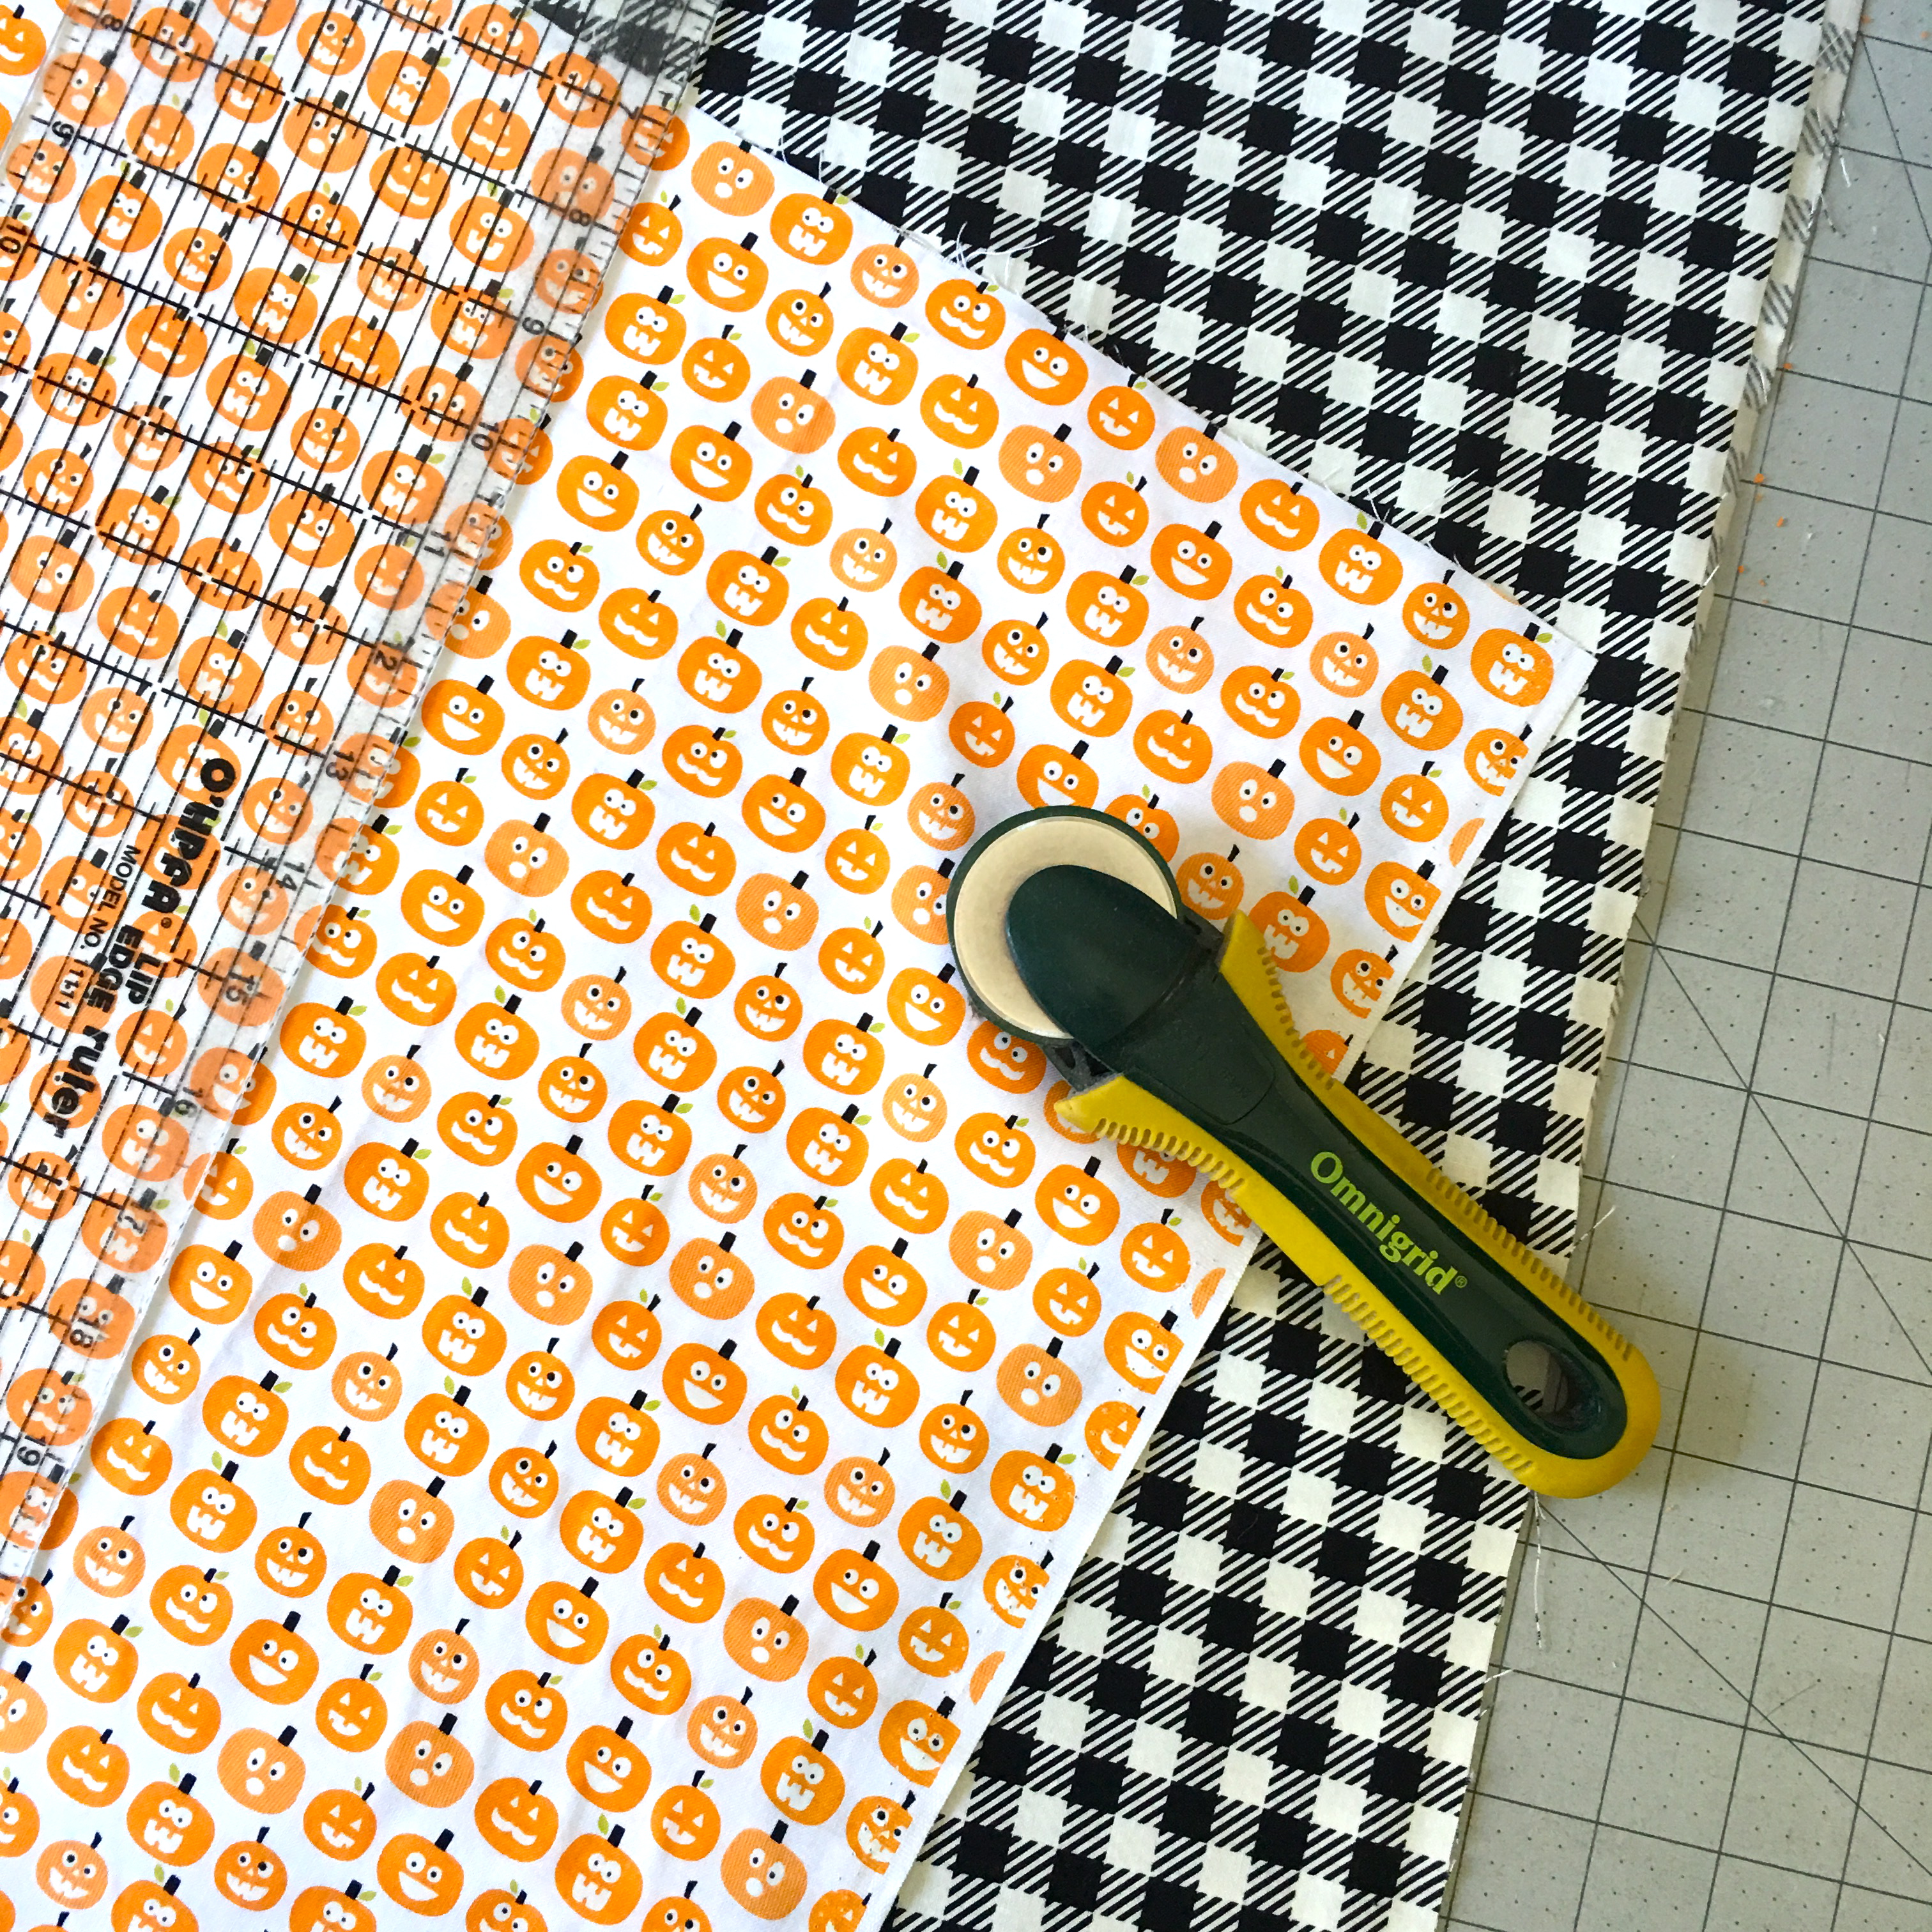
Scraps of orange prints and black prints – at least 20″ long
Black fabric for applique
Scraps of black trim, ric rac, and lace
1 1/2 yards backing
1/2 yard black fabric for binding
batting
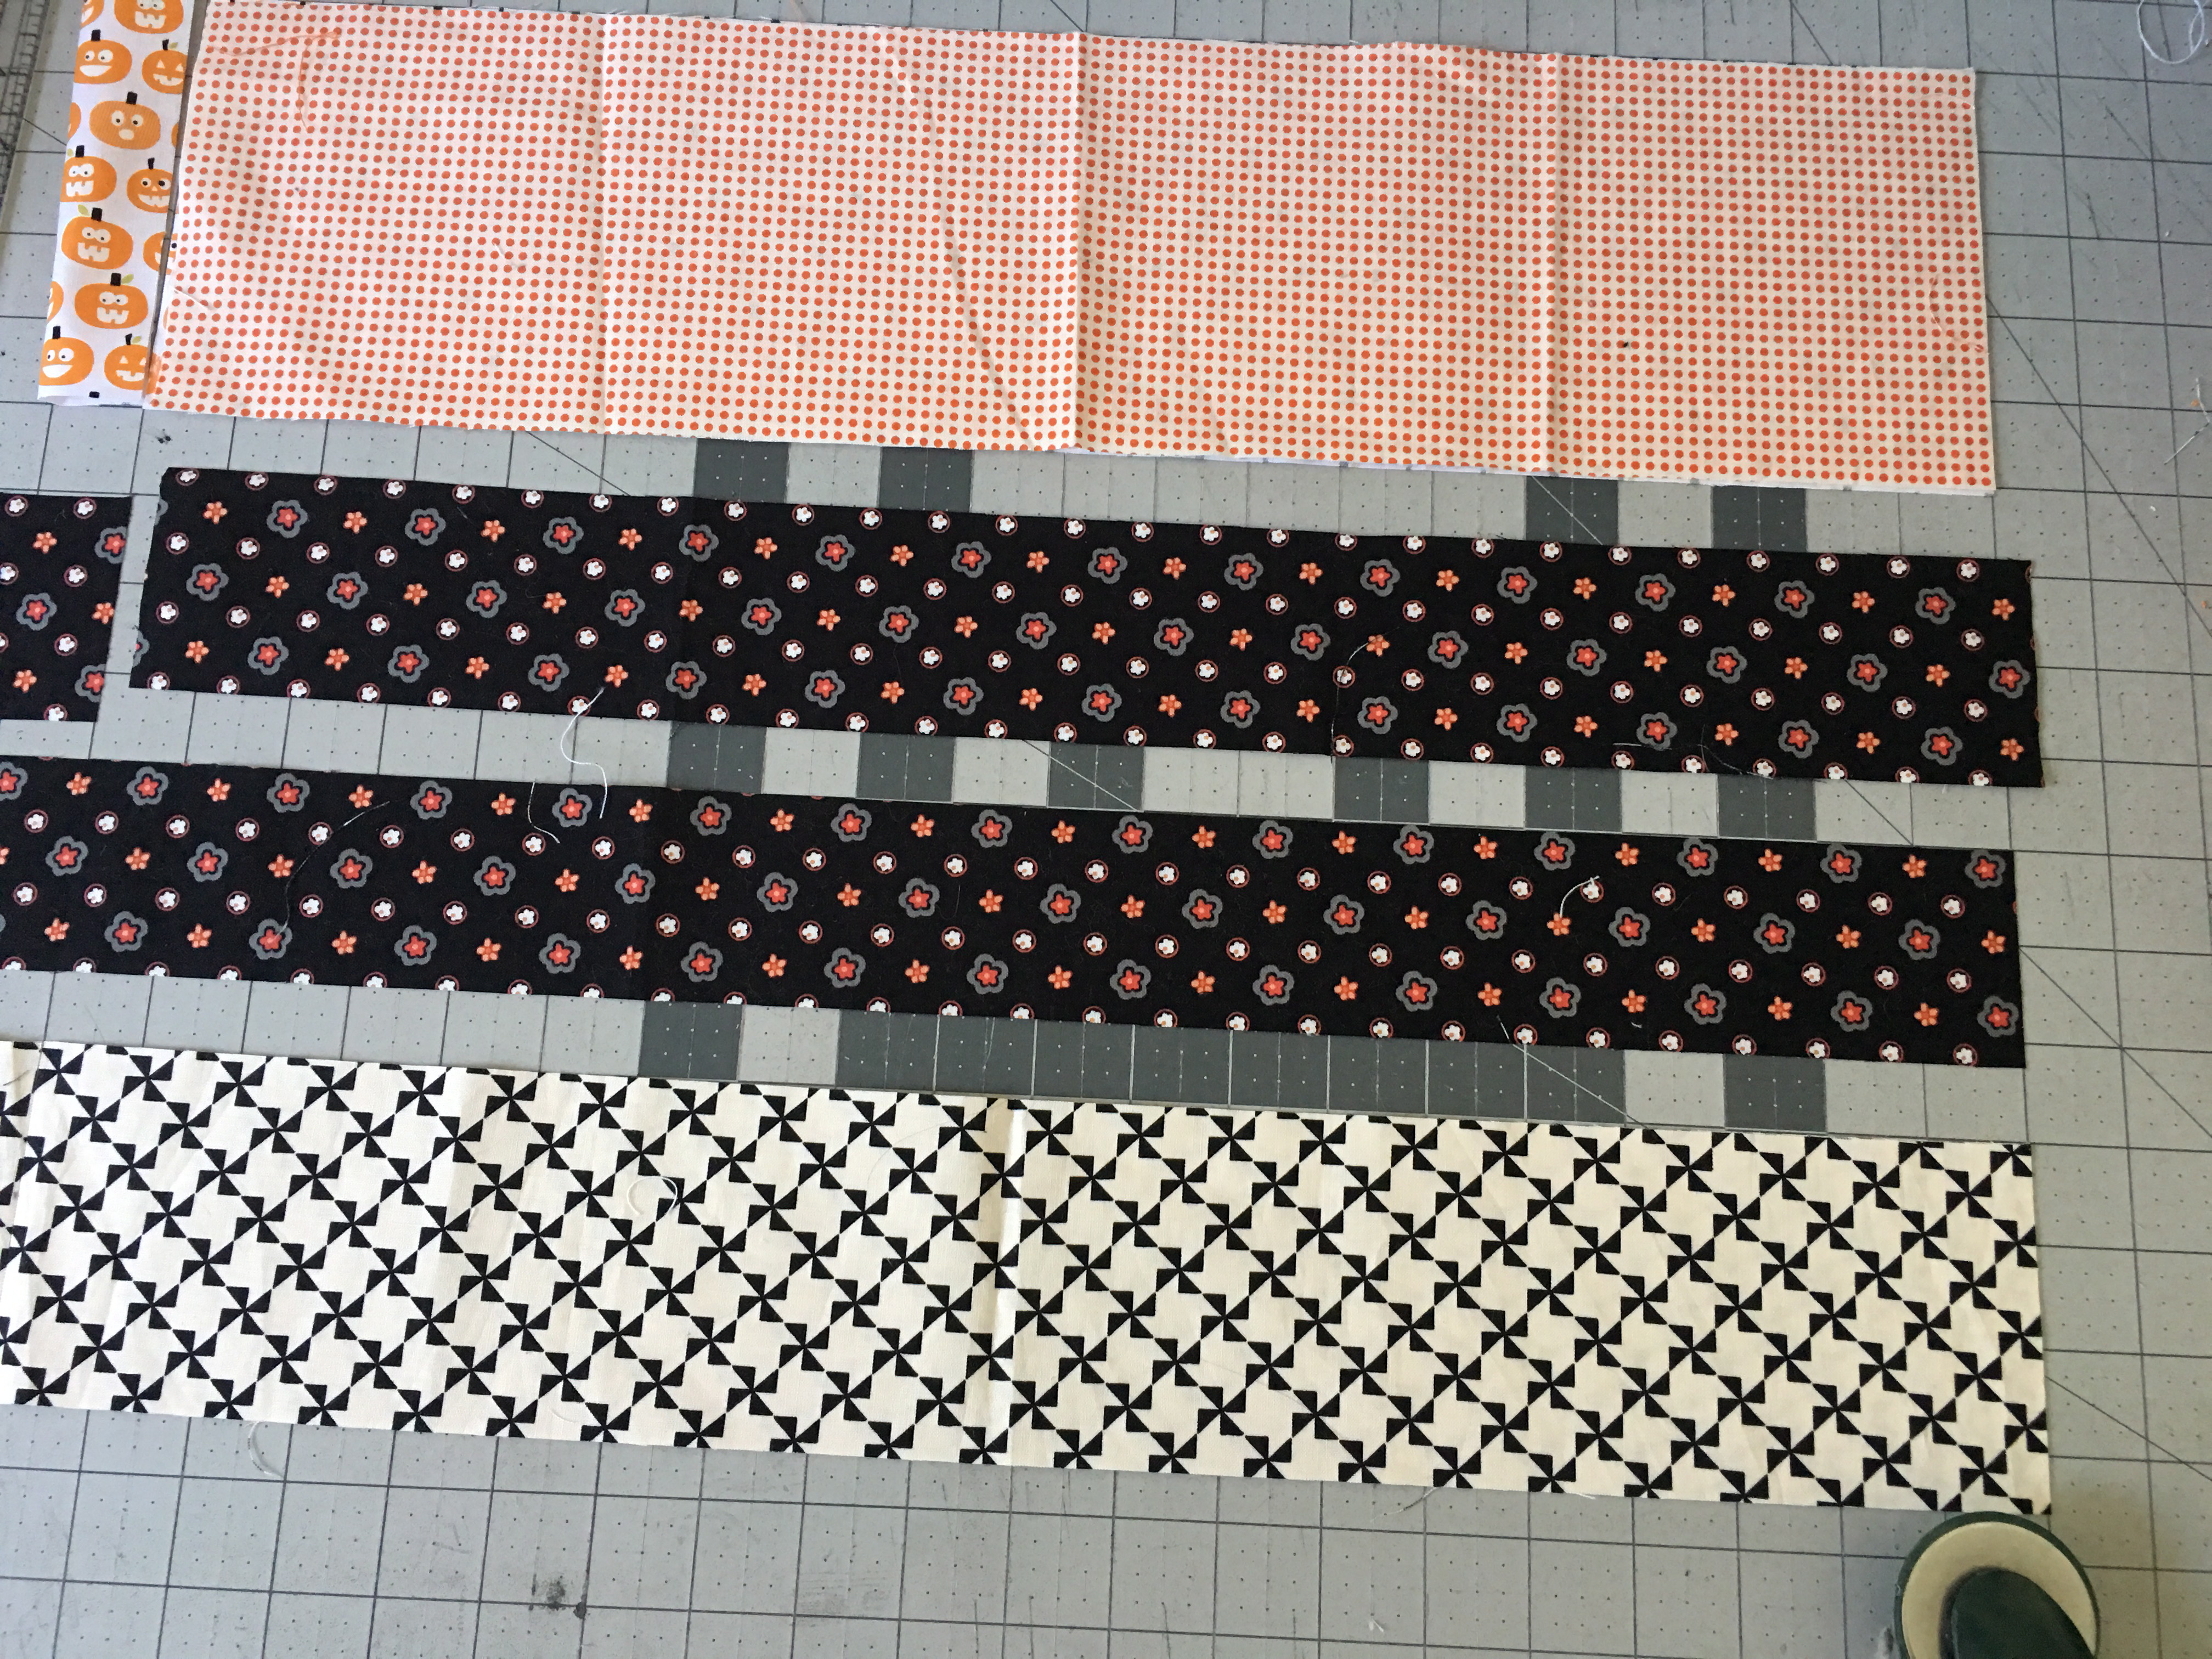
Begin by cutting your strips into random widths: 2″, 2.5″, 3″, 4″, 5″, etc. No need to plan – they are all going to get sewn together. Once you have a nice assortment of fabrics, cut them all to be 20″ long. (If you prefer a narrower runner, you can adjust this measurement.)
Begin sewing the strips together – I didn’t plan it out – I just did the grab and go method – which makes this project super fast. Keep sewing strips until you are happy with the length. I have a super long farm table so mine measures 92″ long!
For the applique section…..
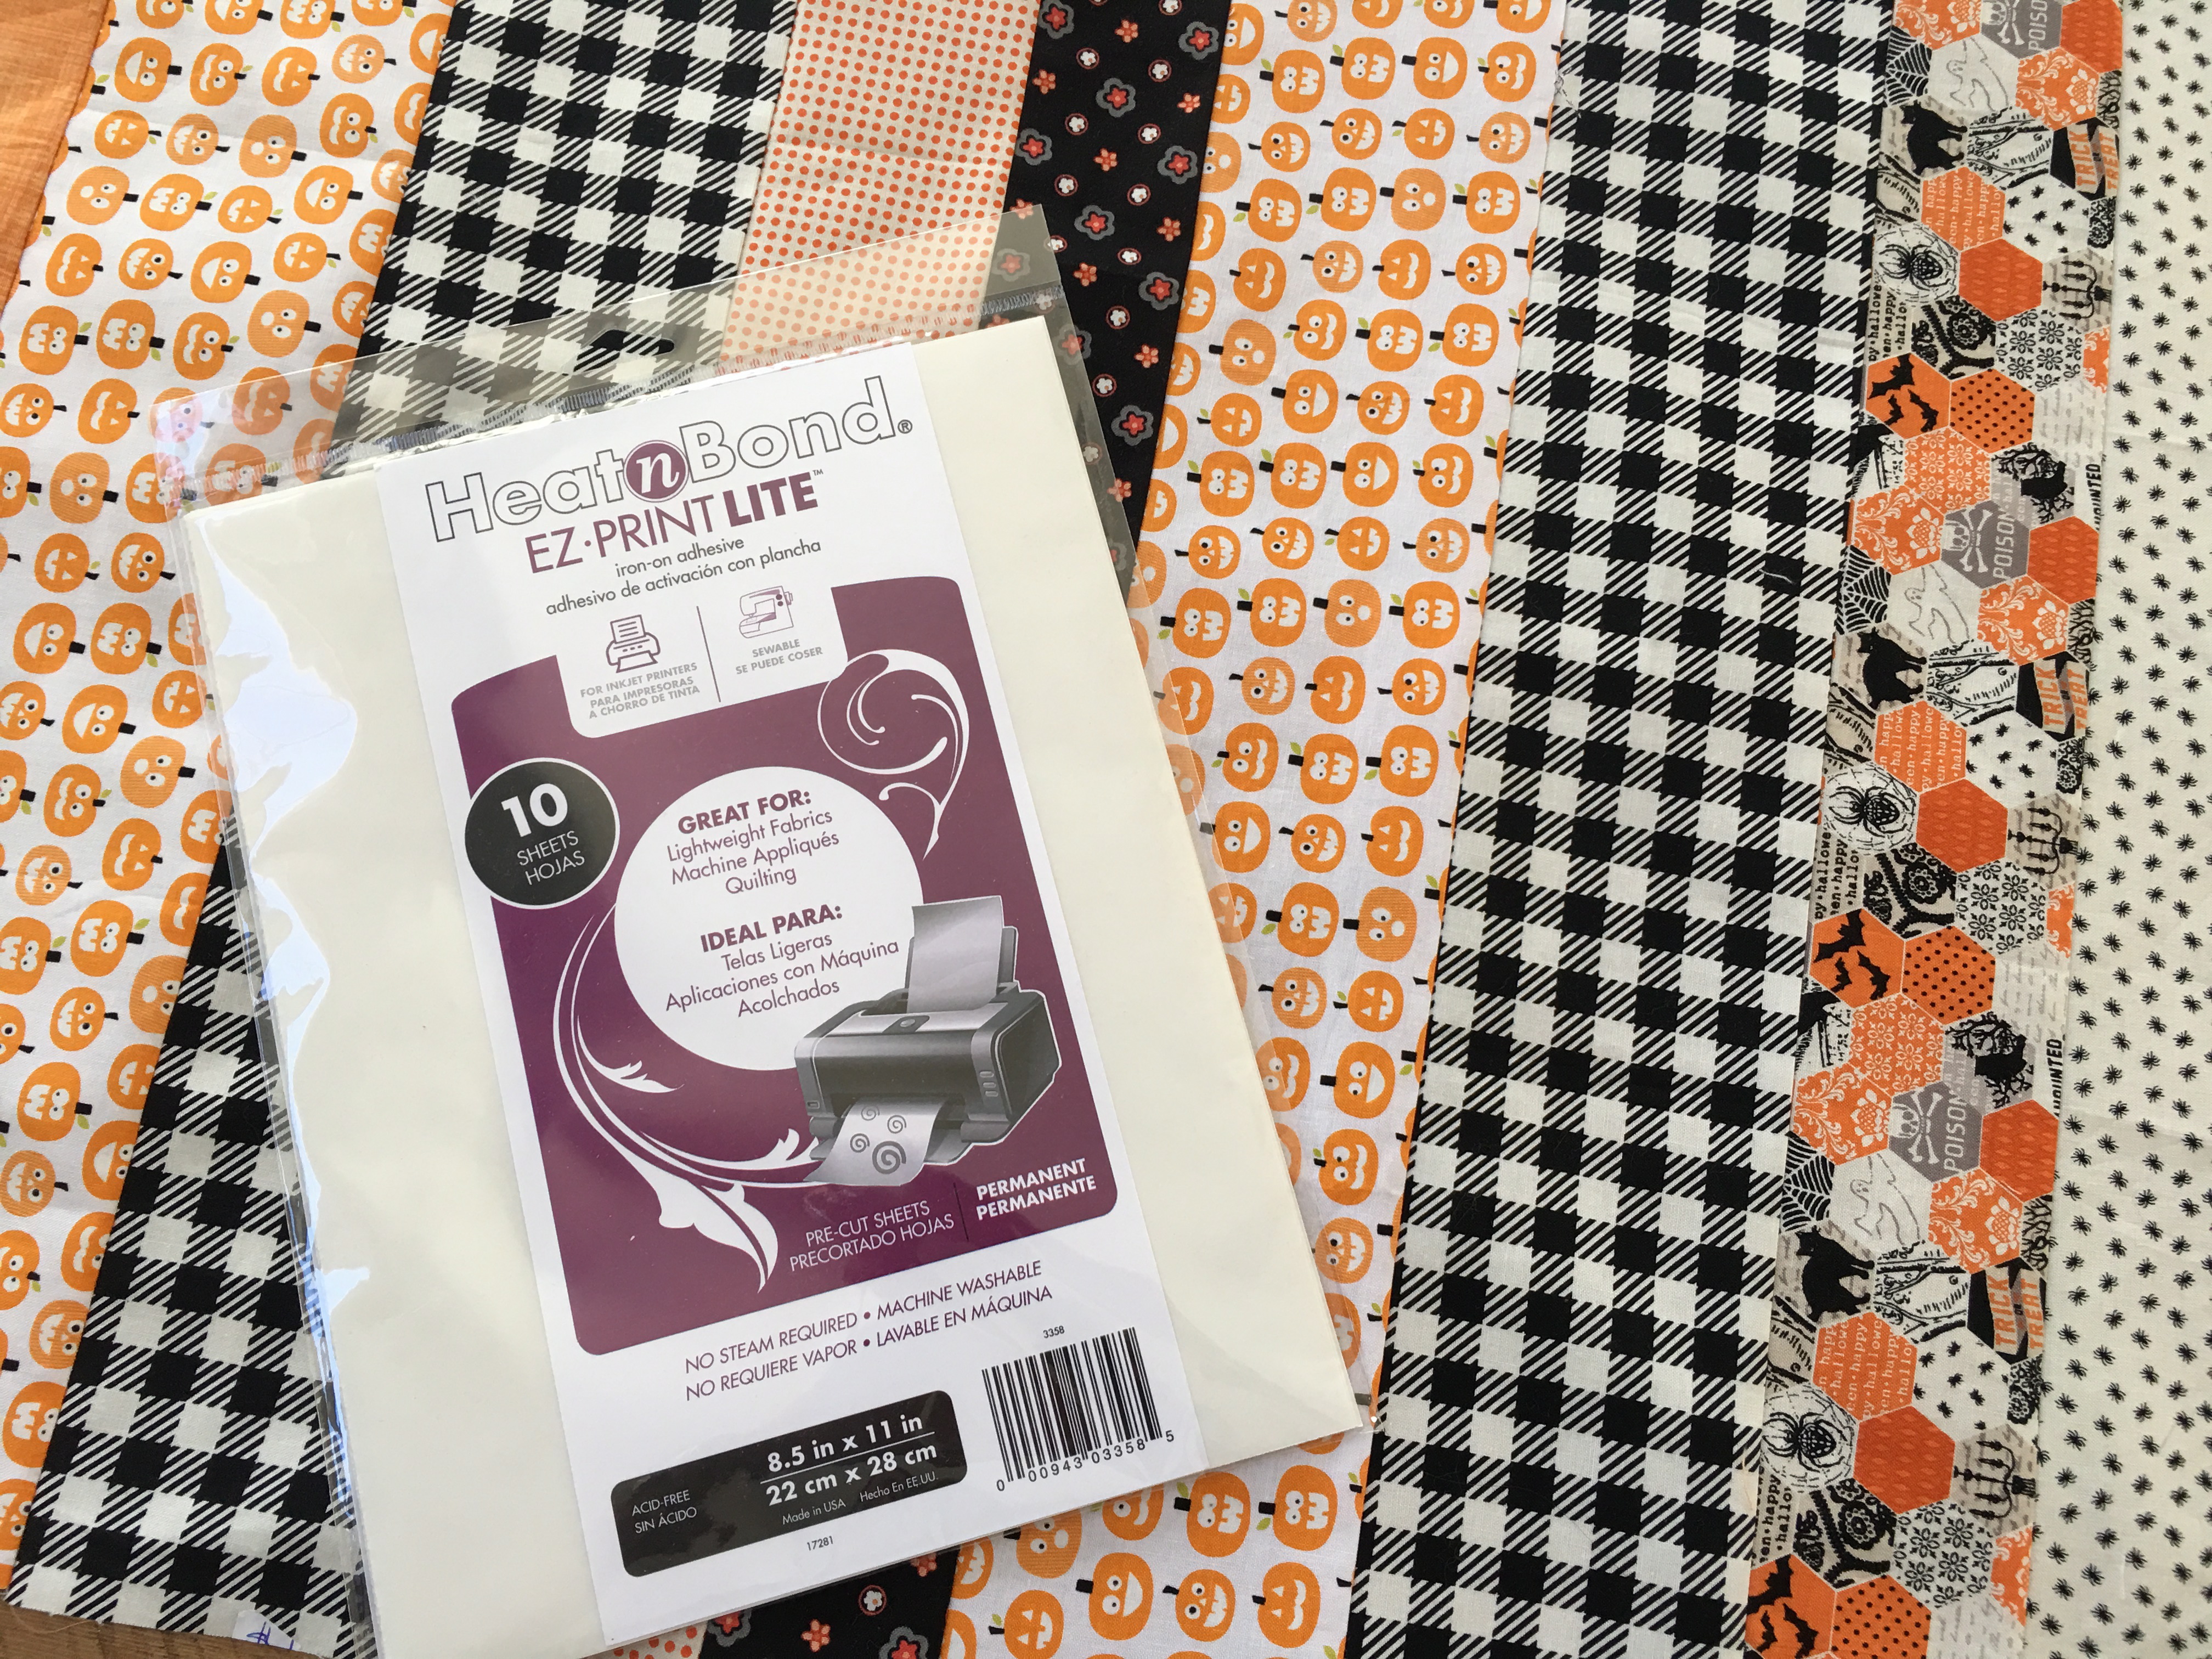
Cut (2) 6.5″ x 20″ white or off-white rectangles.
Sew an orange or black 20″ strip to each white rectangle.
Print out the letters onto the HeatnBond® EZ print sheets.
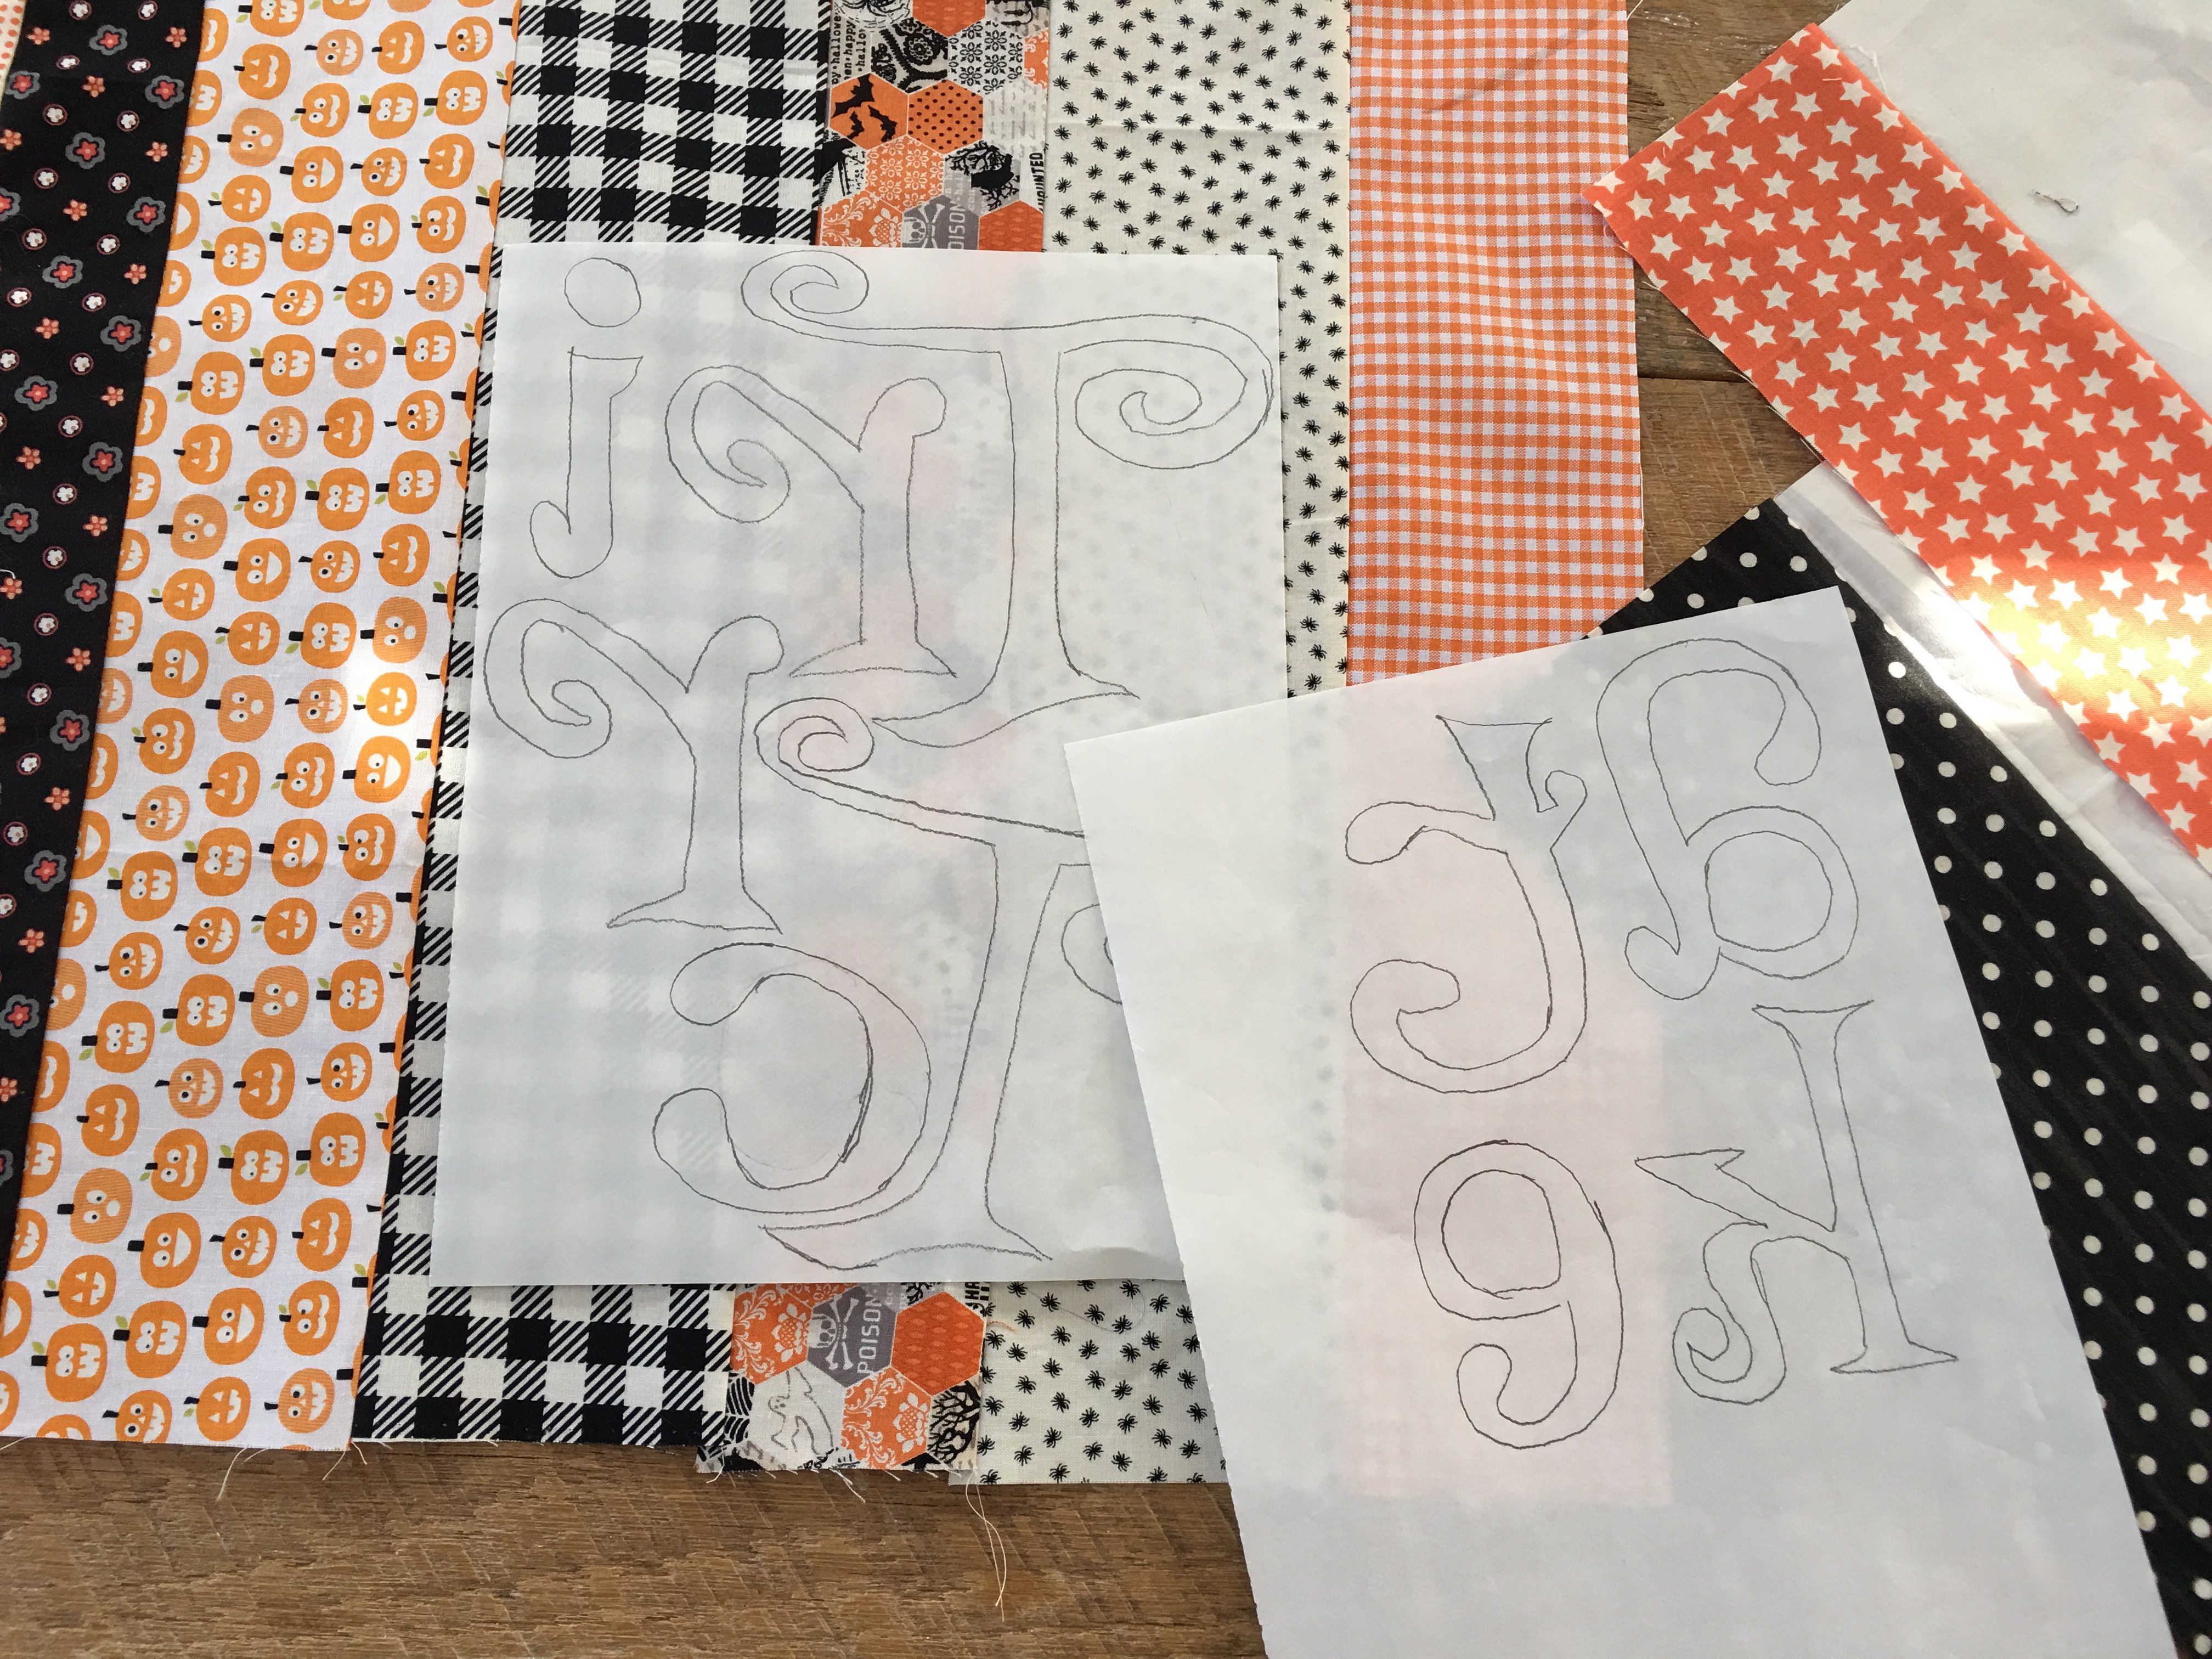
Iron the letters to the wrong side of the black fabric. (The letters will be reverse)
Cut out each letter, peel off the backing paper. Position the letters like this and heat set in place:
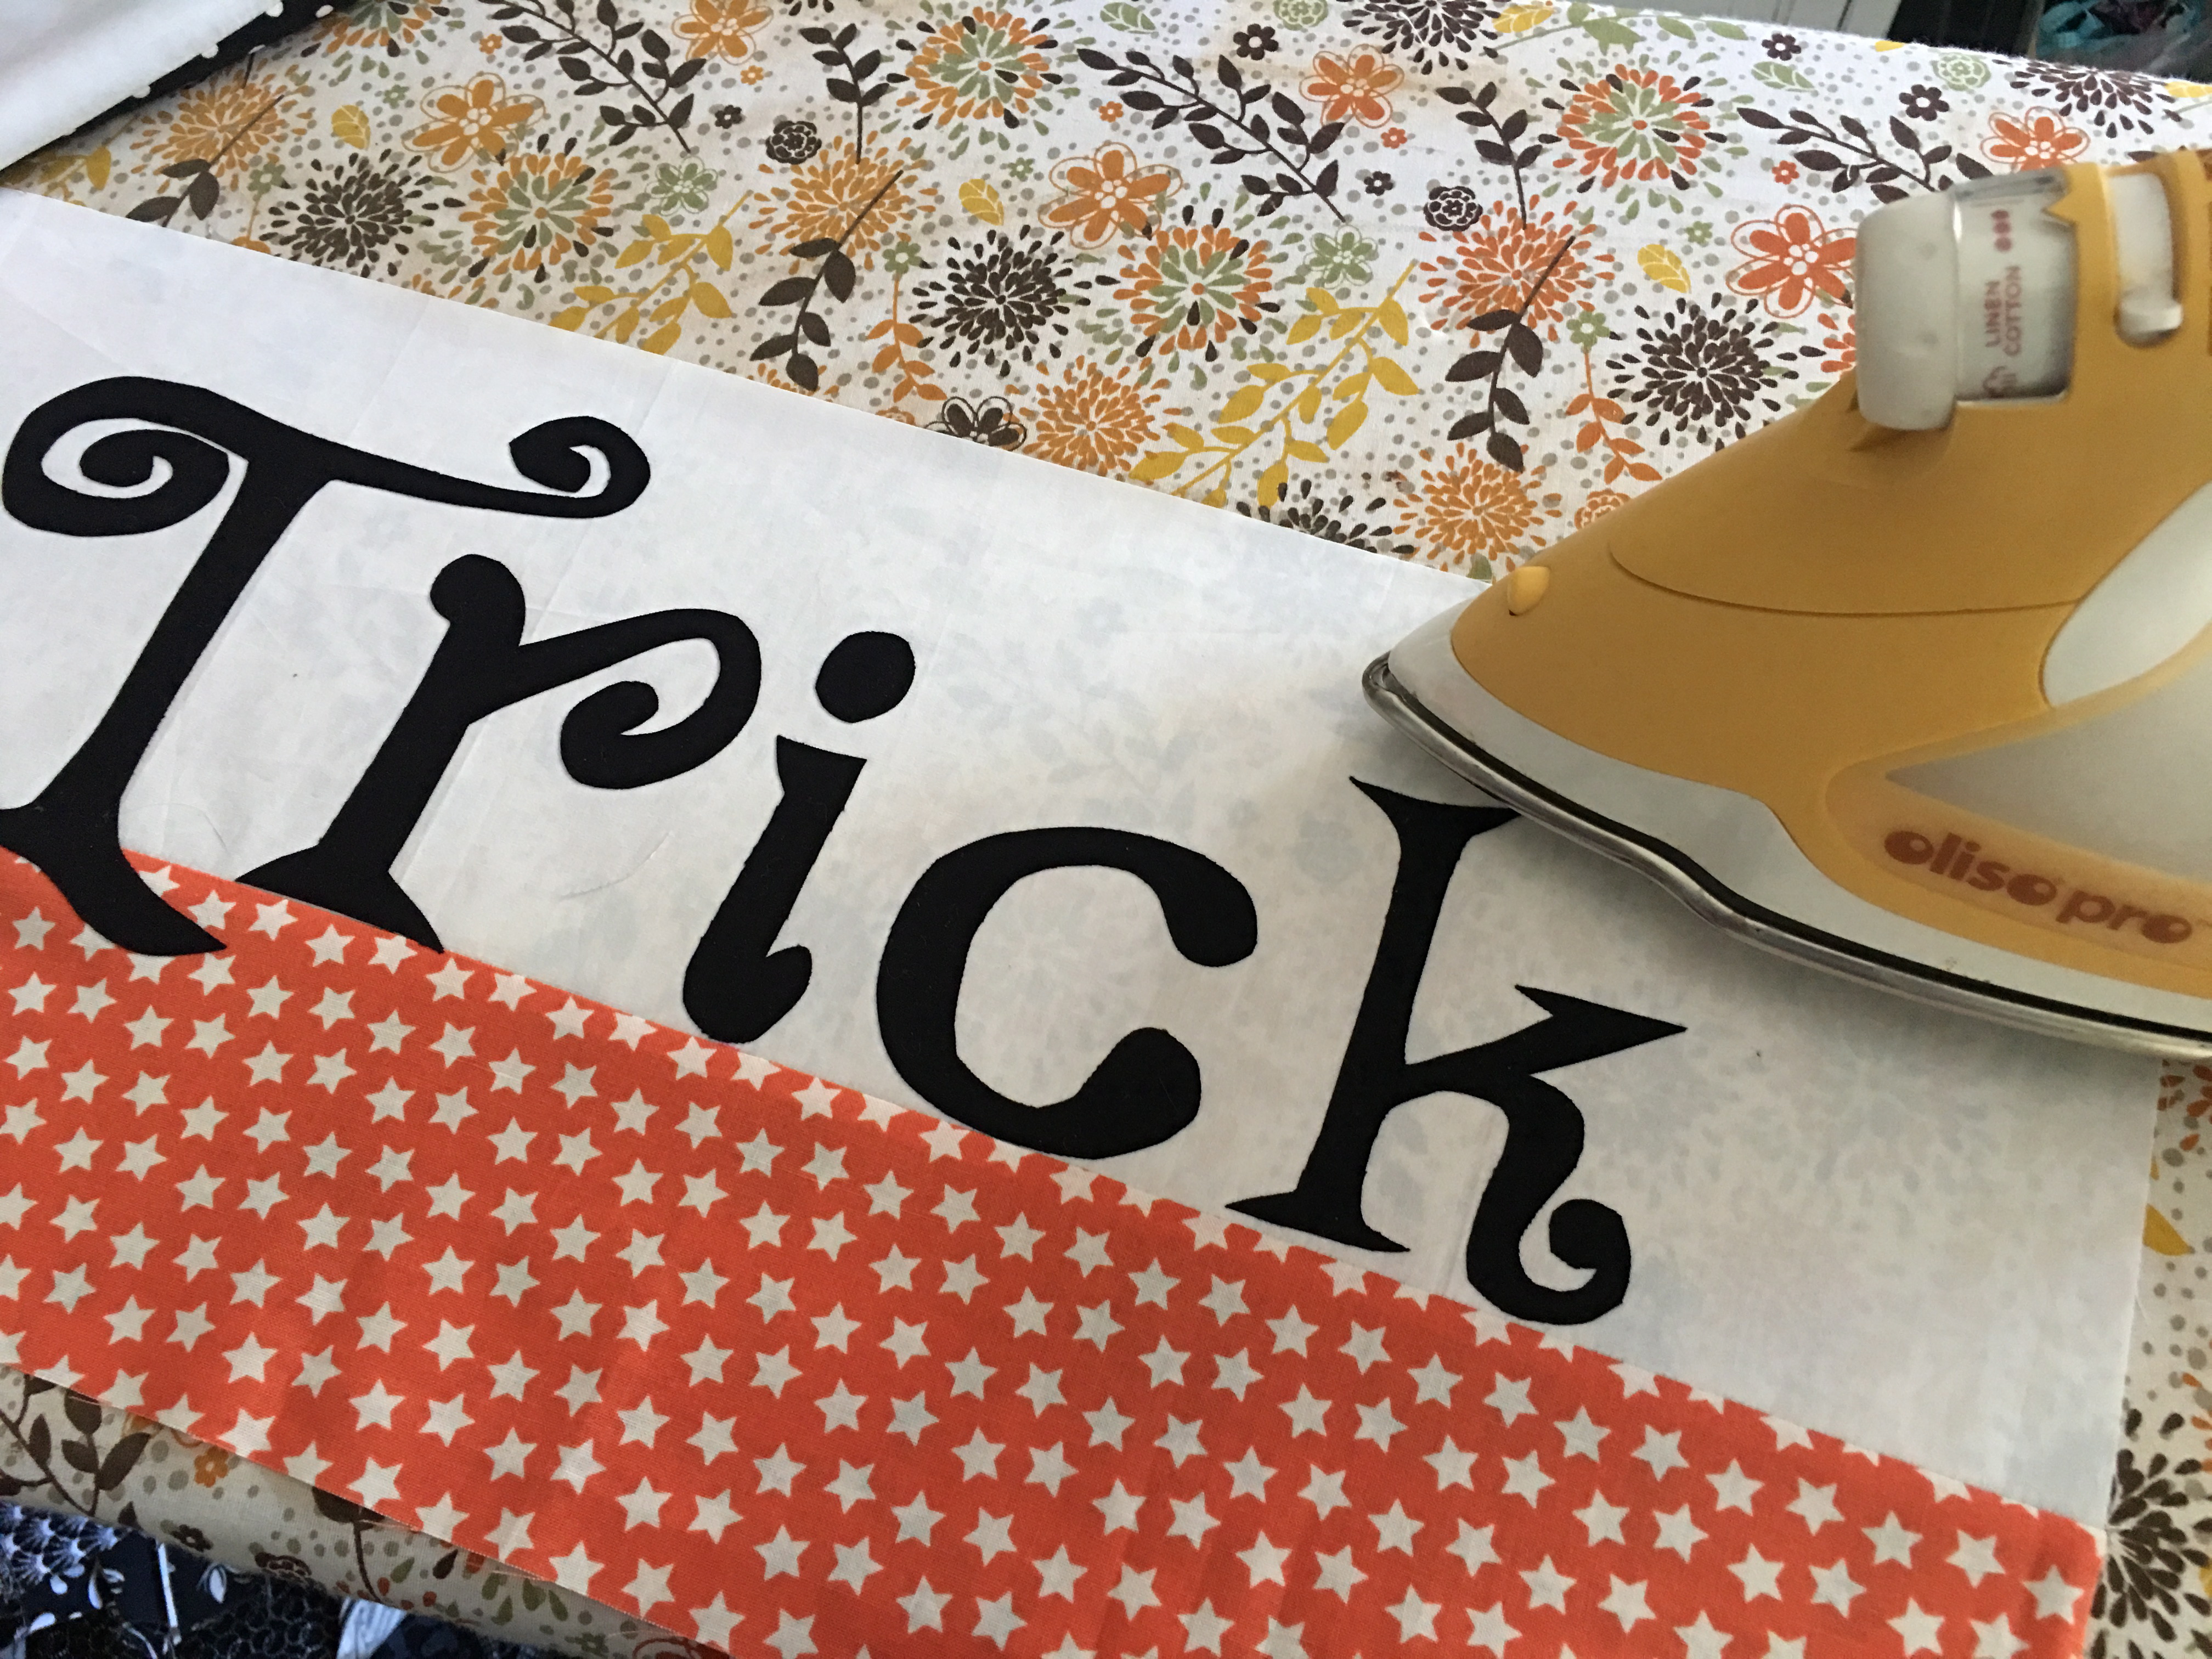
Sew around each letter in black thread. Confession: I didn’t sew around each letter – I quilted over the letters pretty good and caught most of the edges.
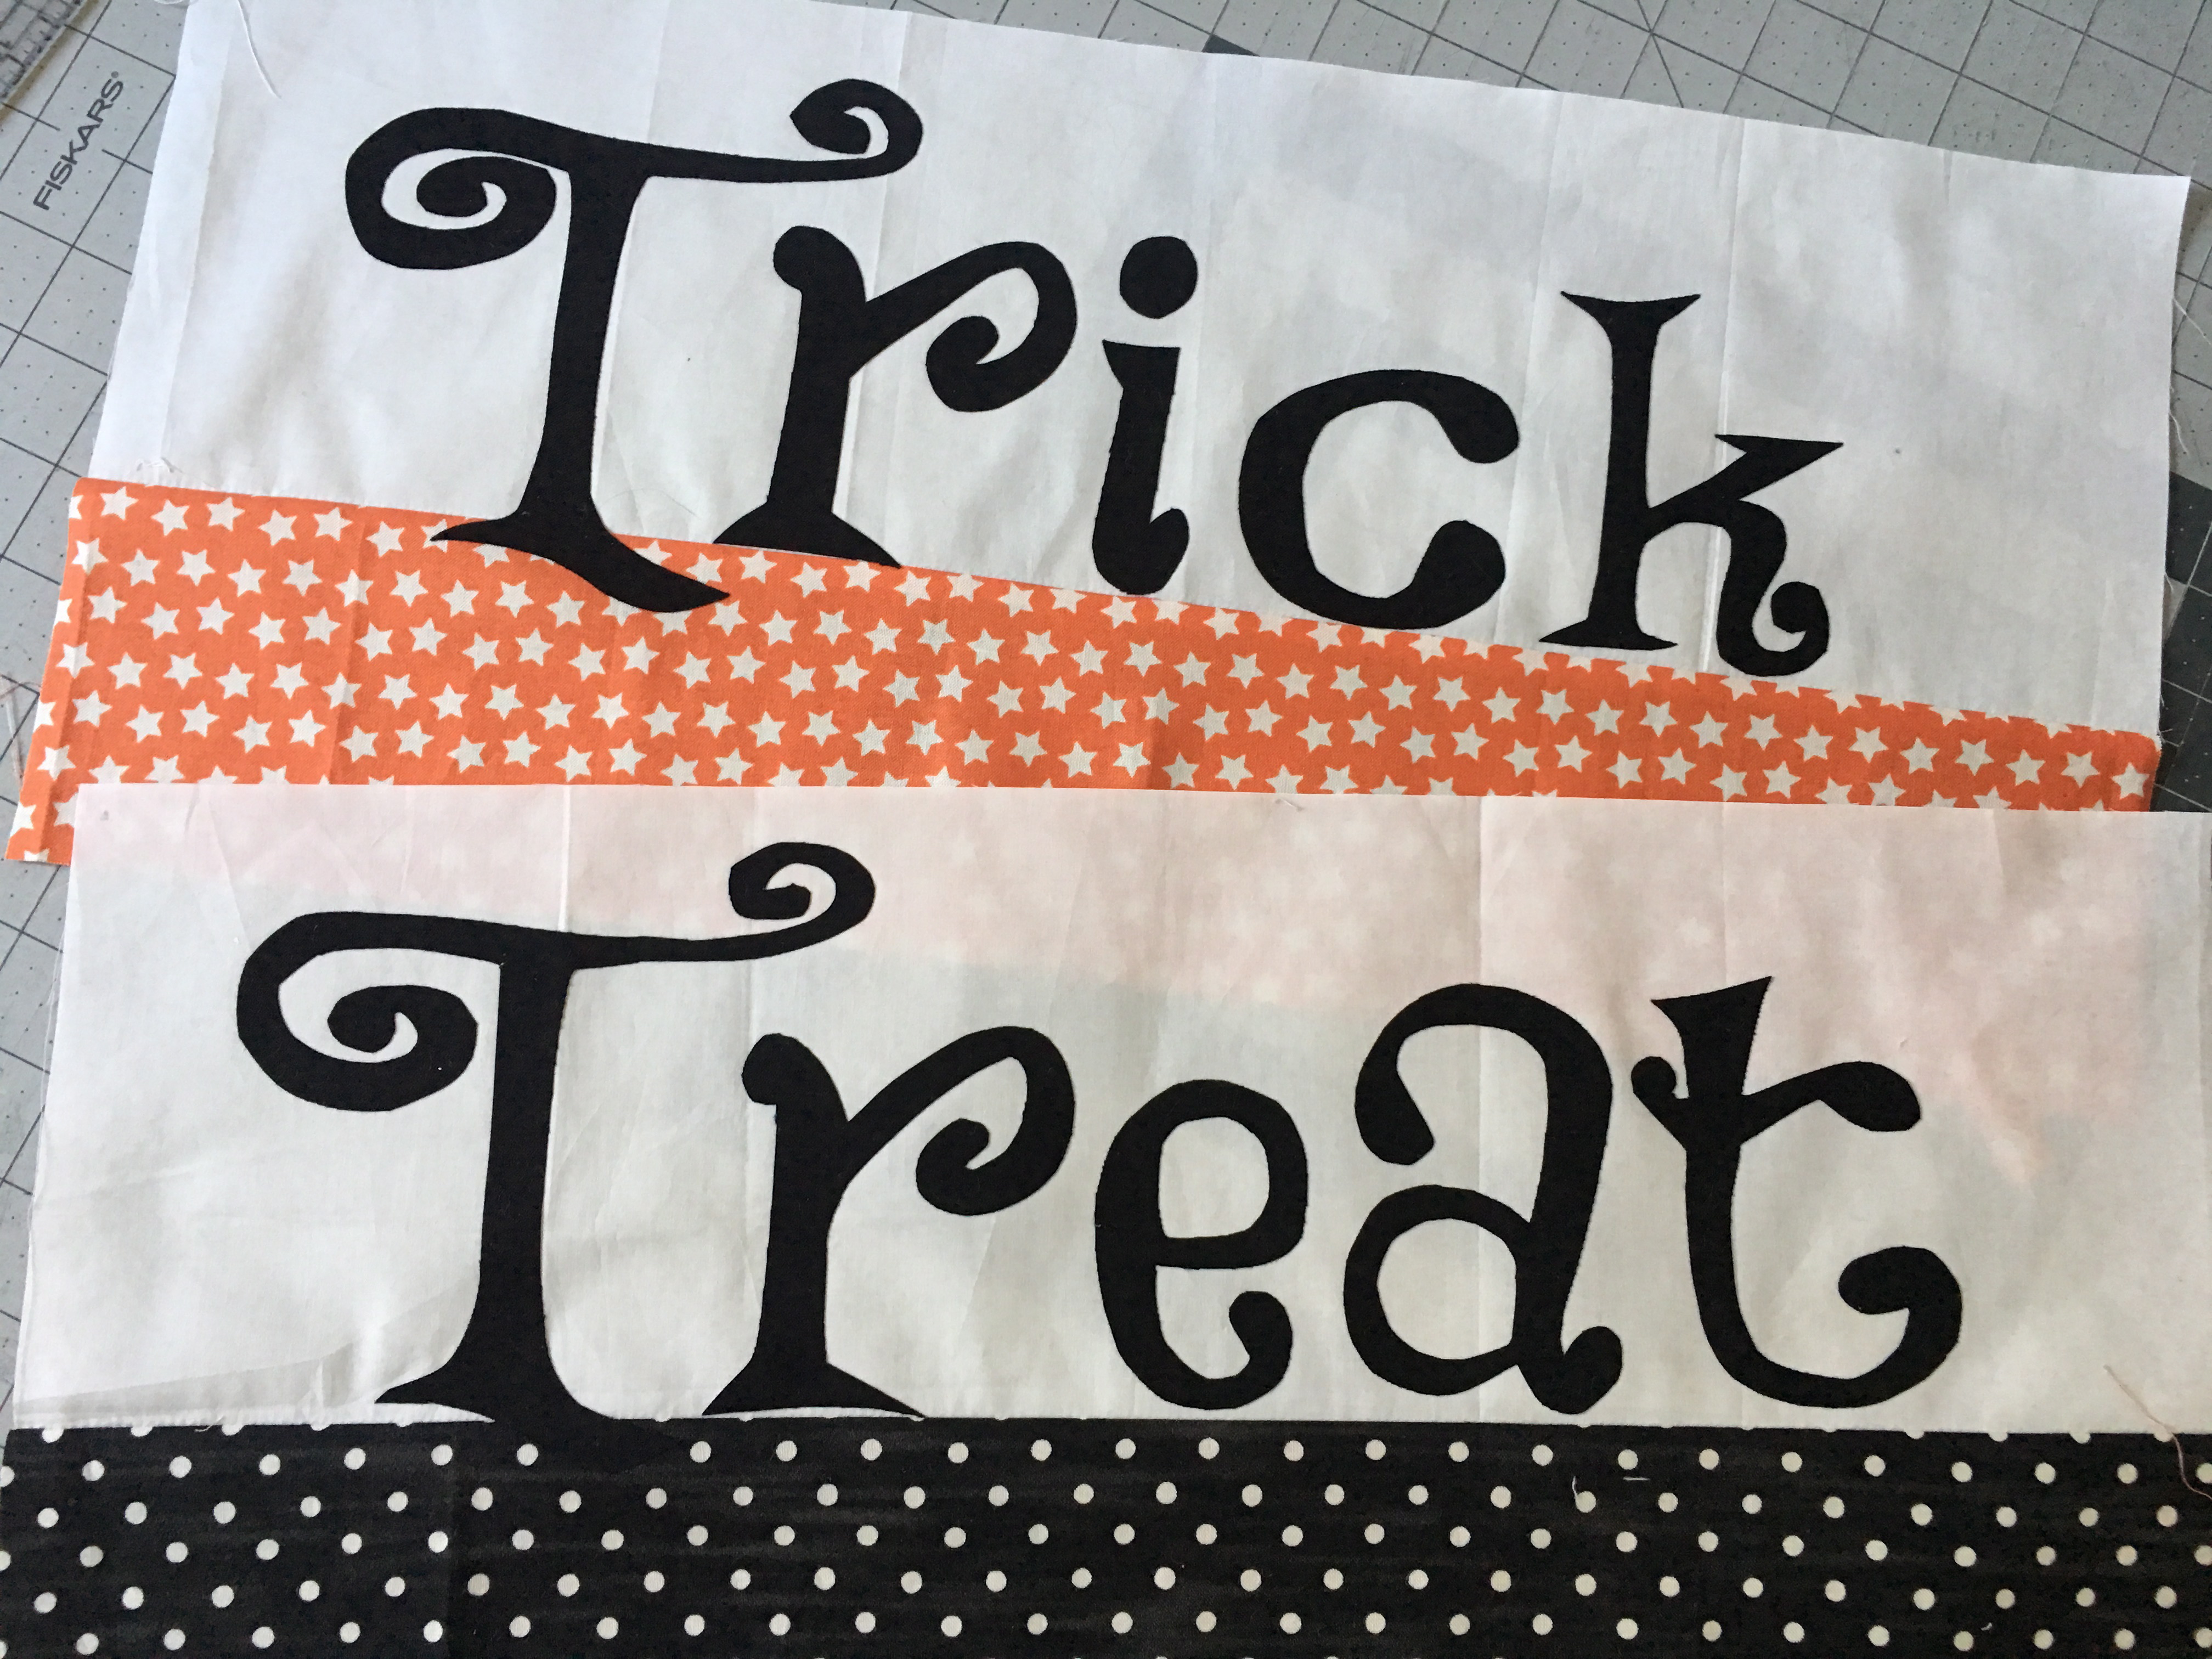
Sew the “trick” section and the “treat” section to opposite ends of the table runner. Press all seams in one direction.
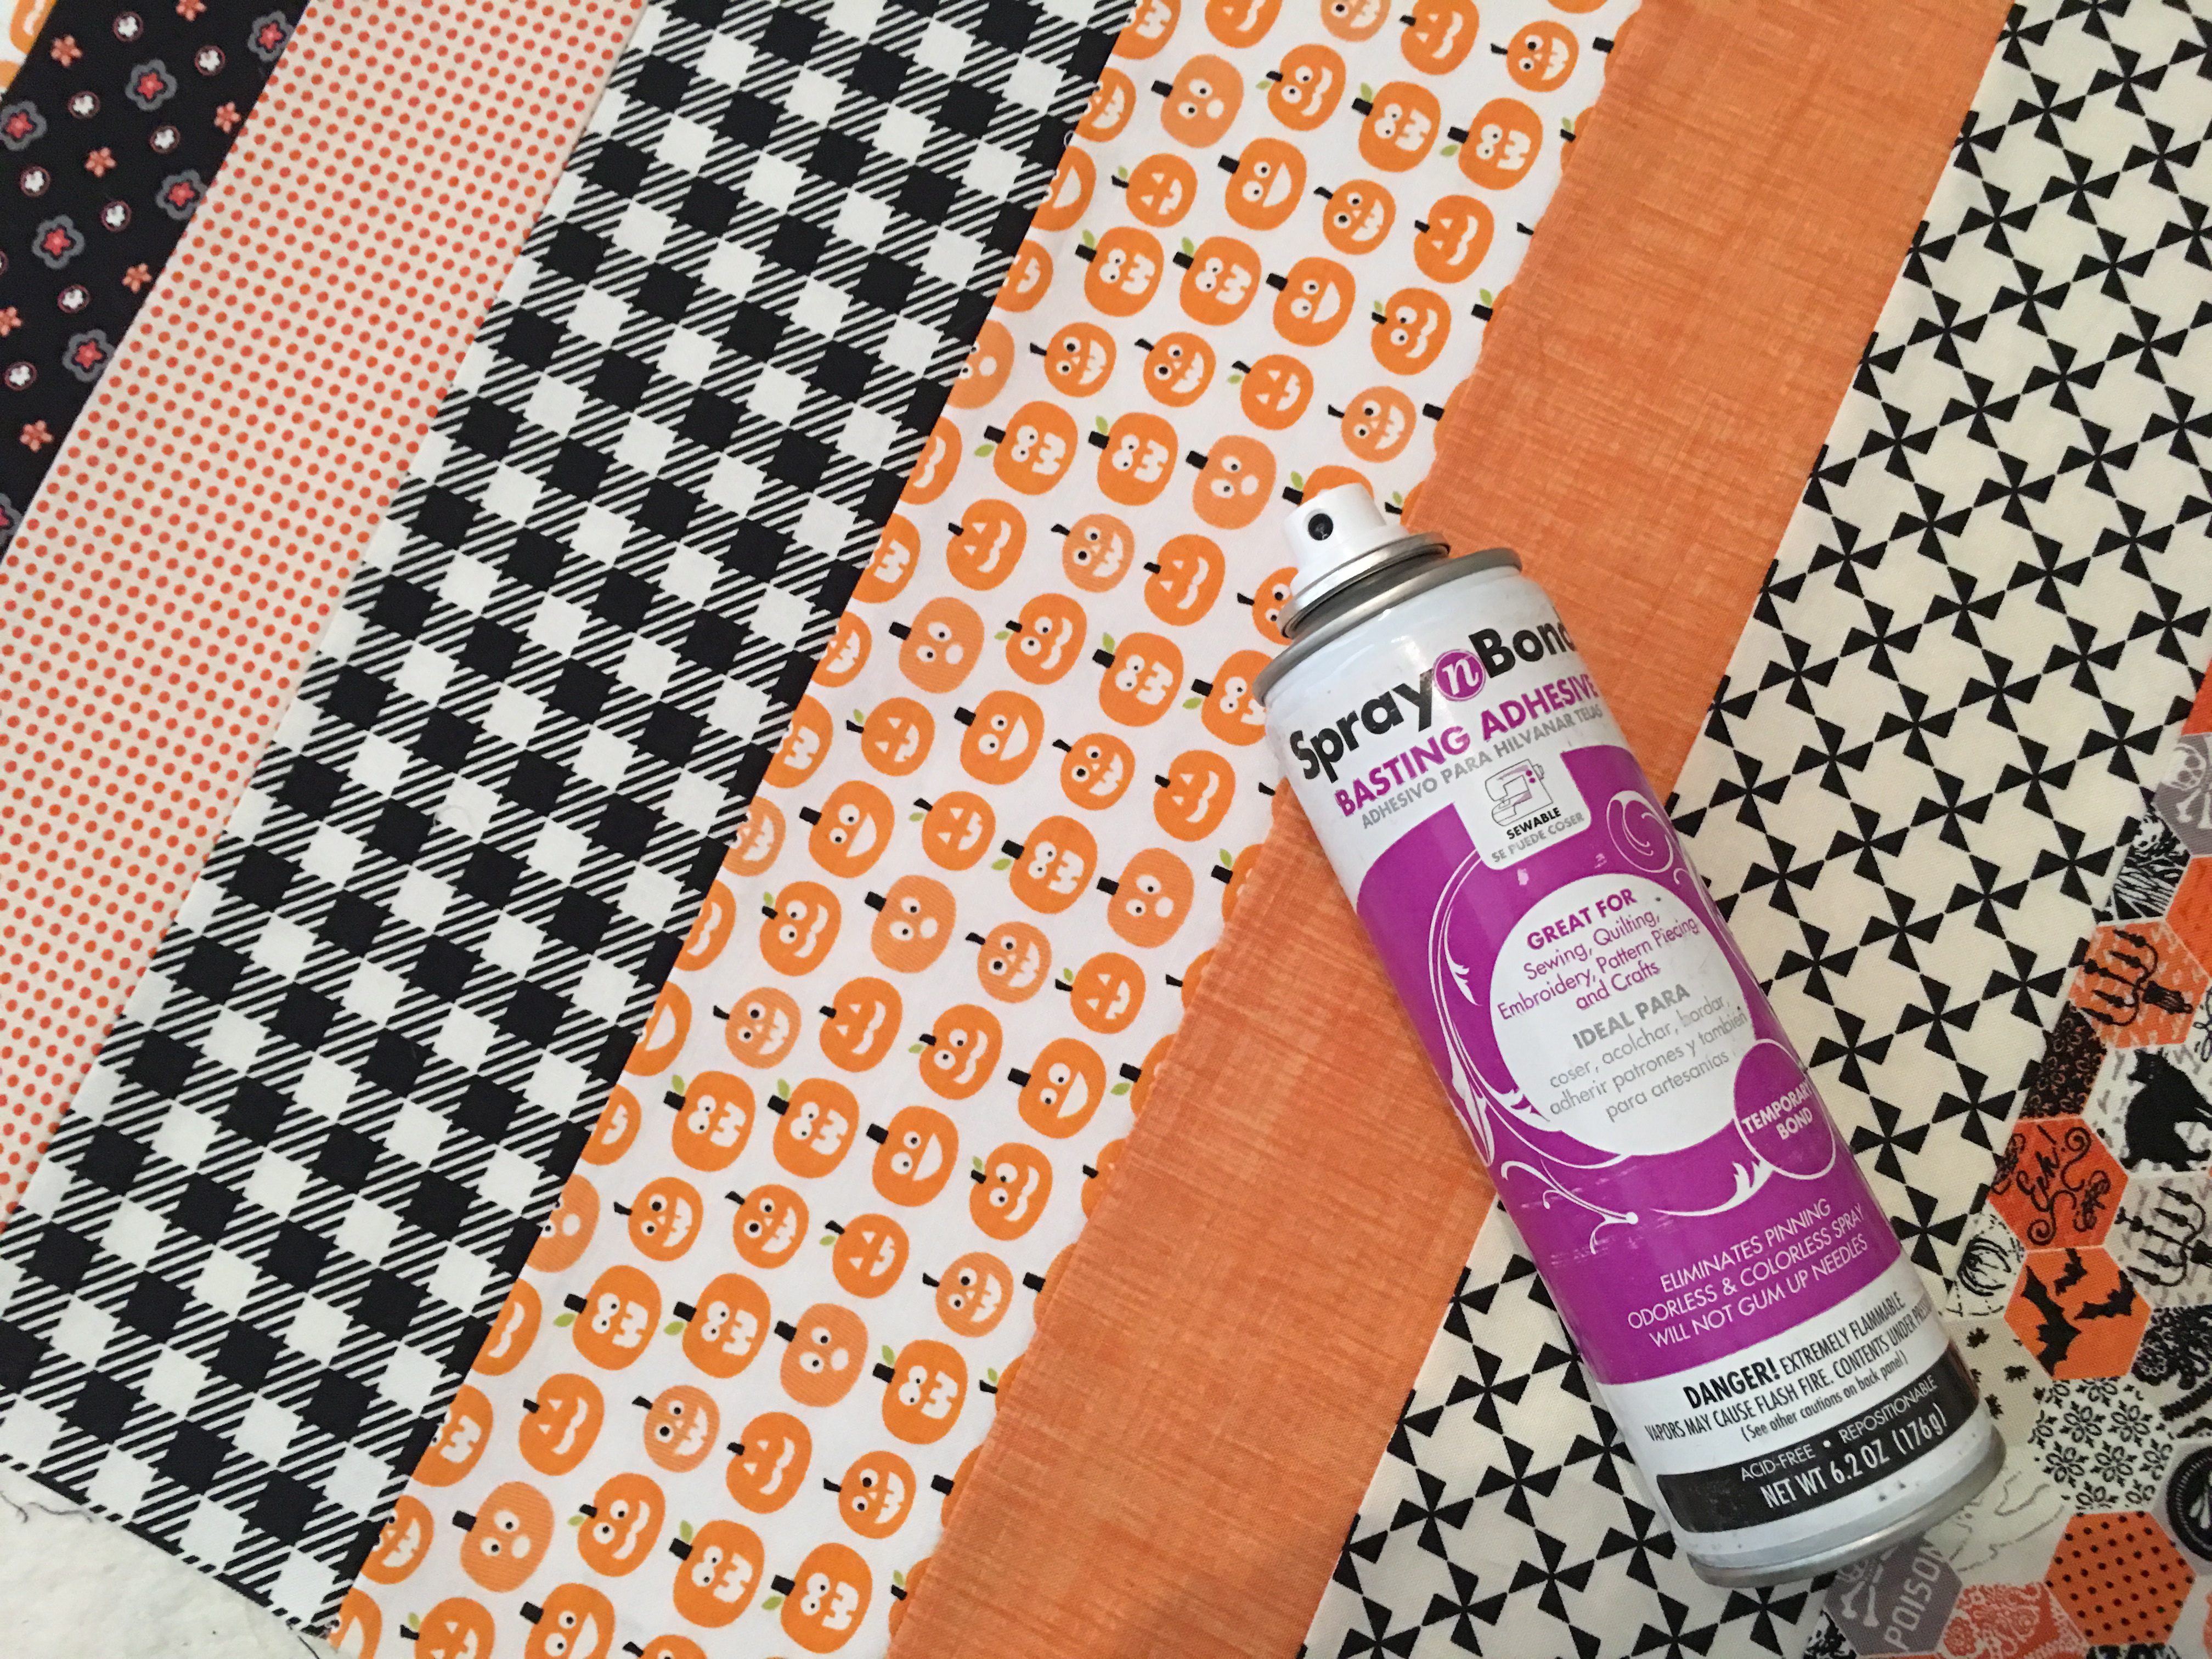
Once the runner top is complete, use Spray n Bond® Basting Spray to baste the top, batting, and back, just like you would a quilt.
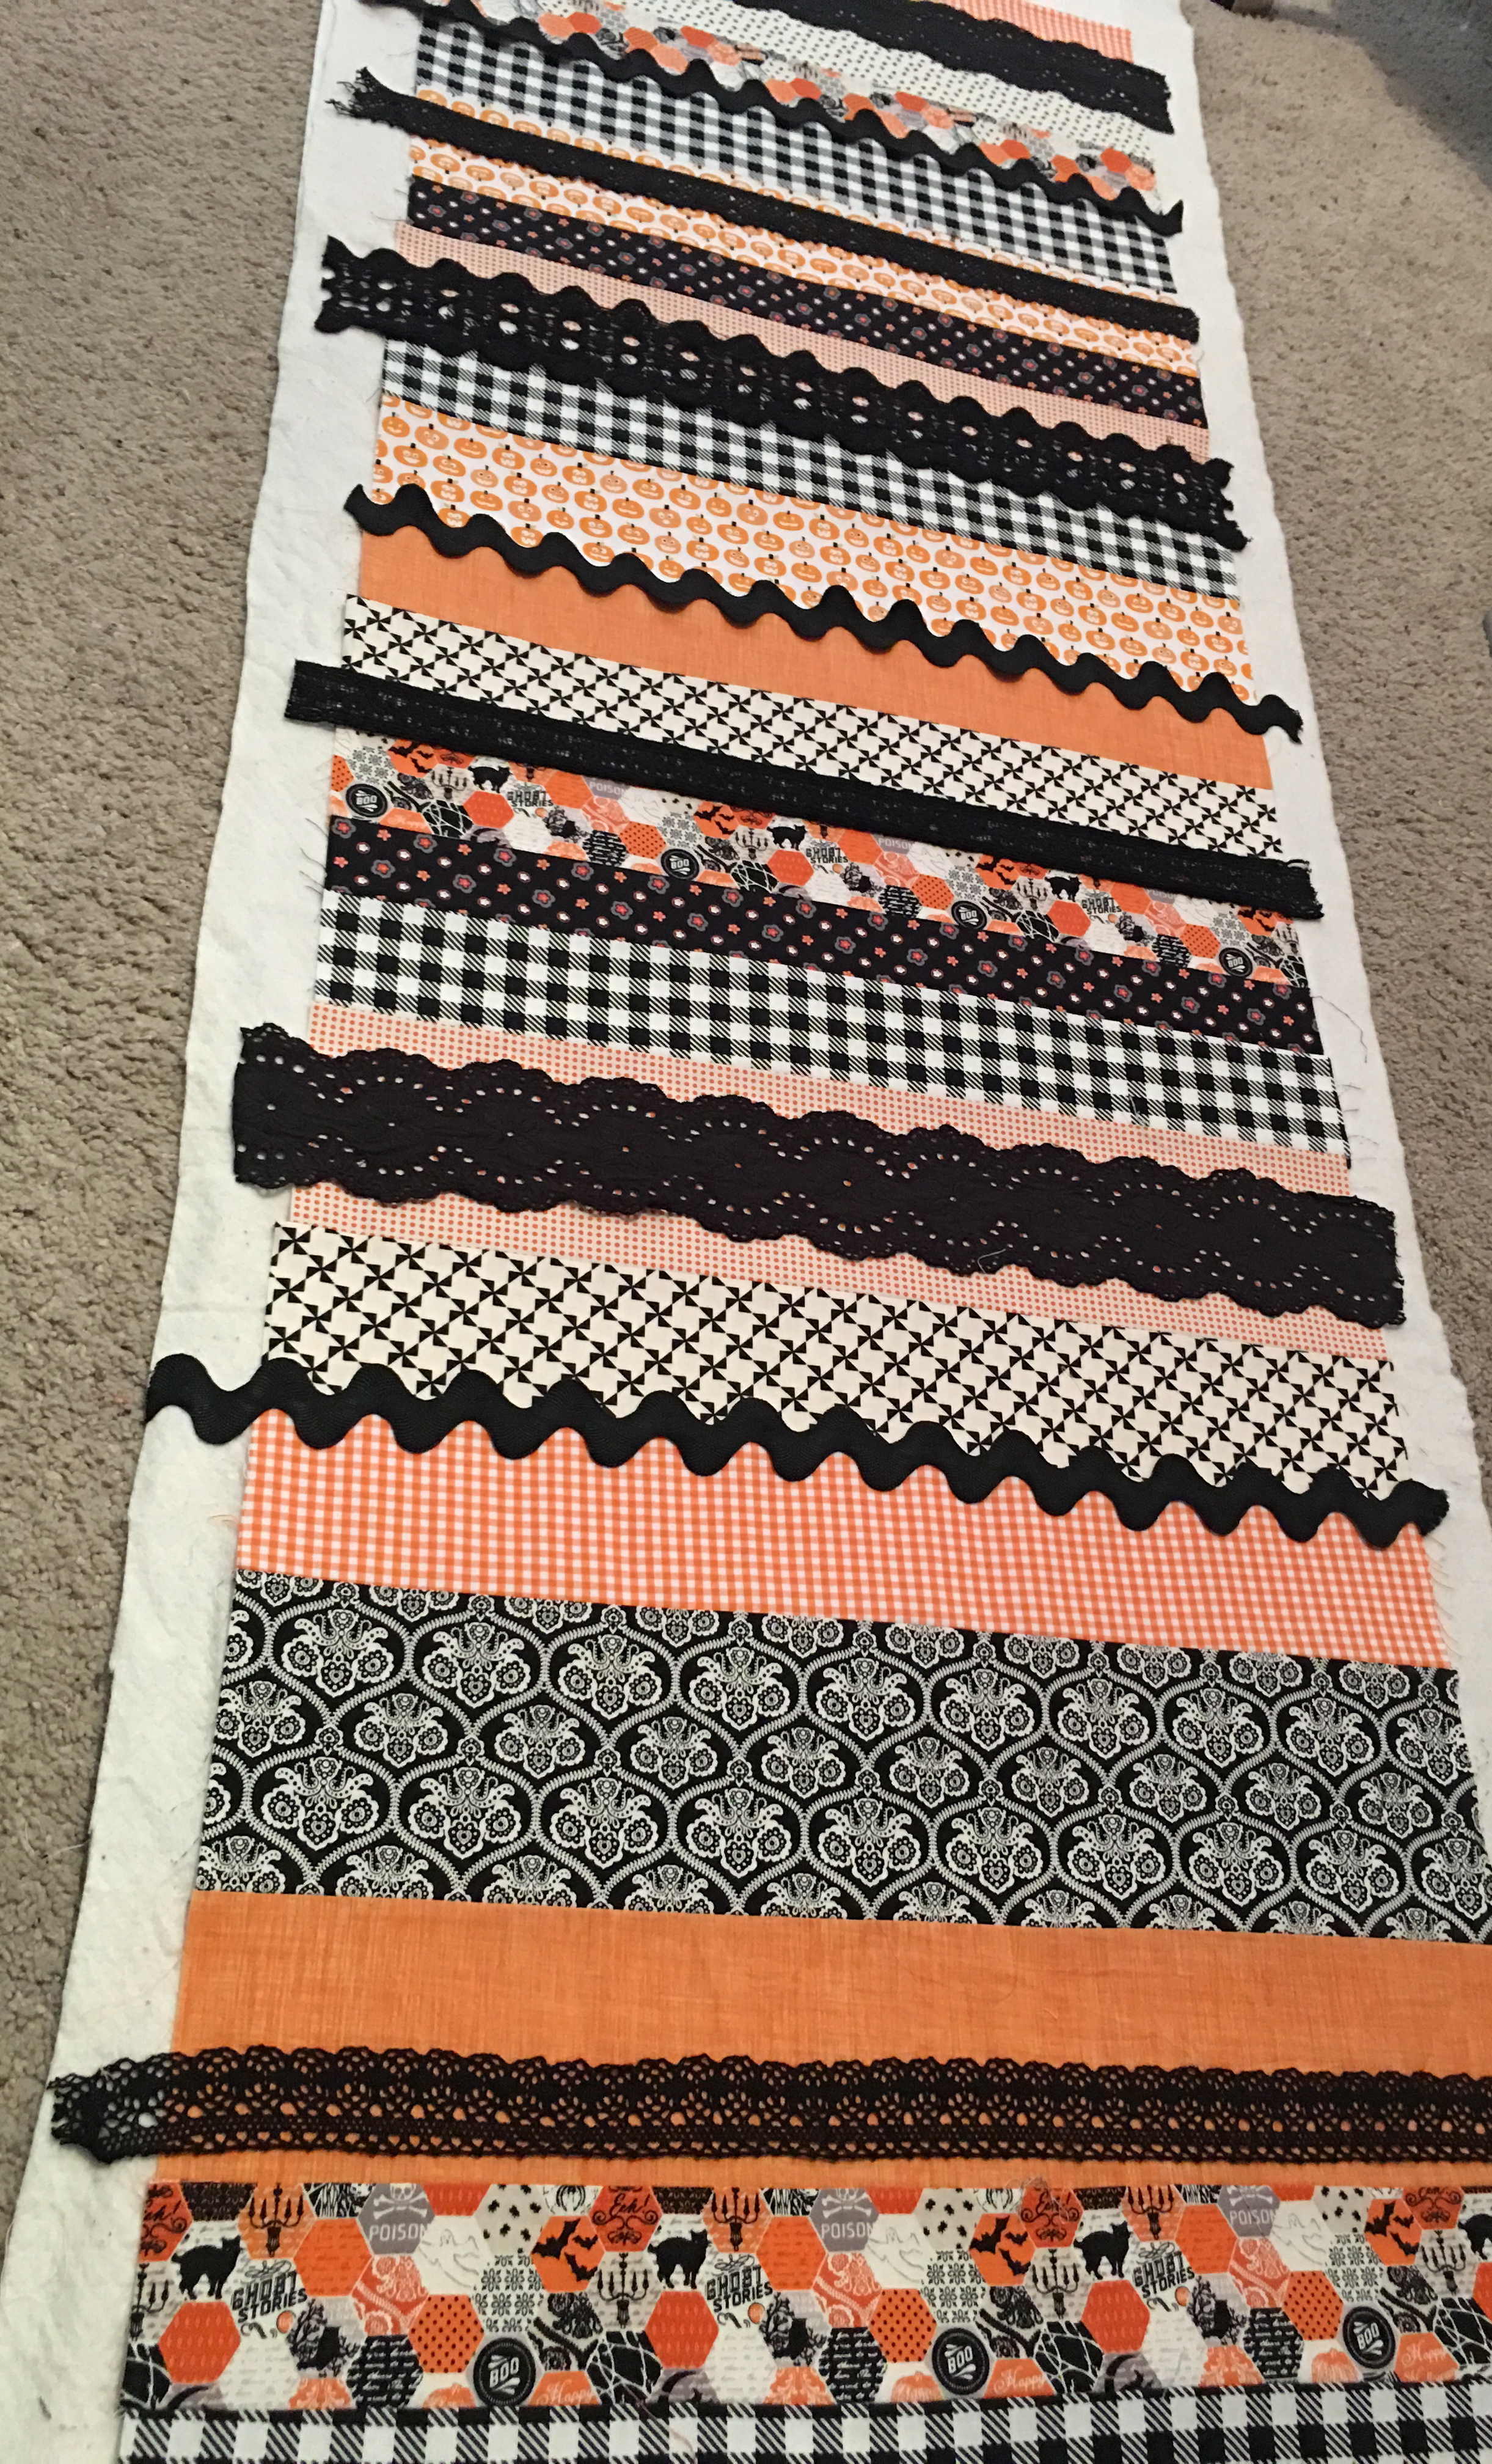
Next measure your desired trims 20″ and cut. Position them throughout the table runner. Some I placed over the seams and others I placed on the fabric. I used different widths of lace and large ric rac.
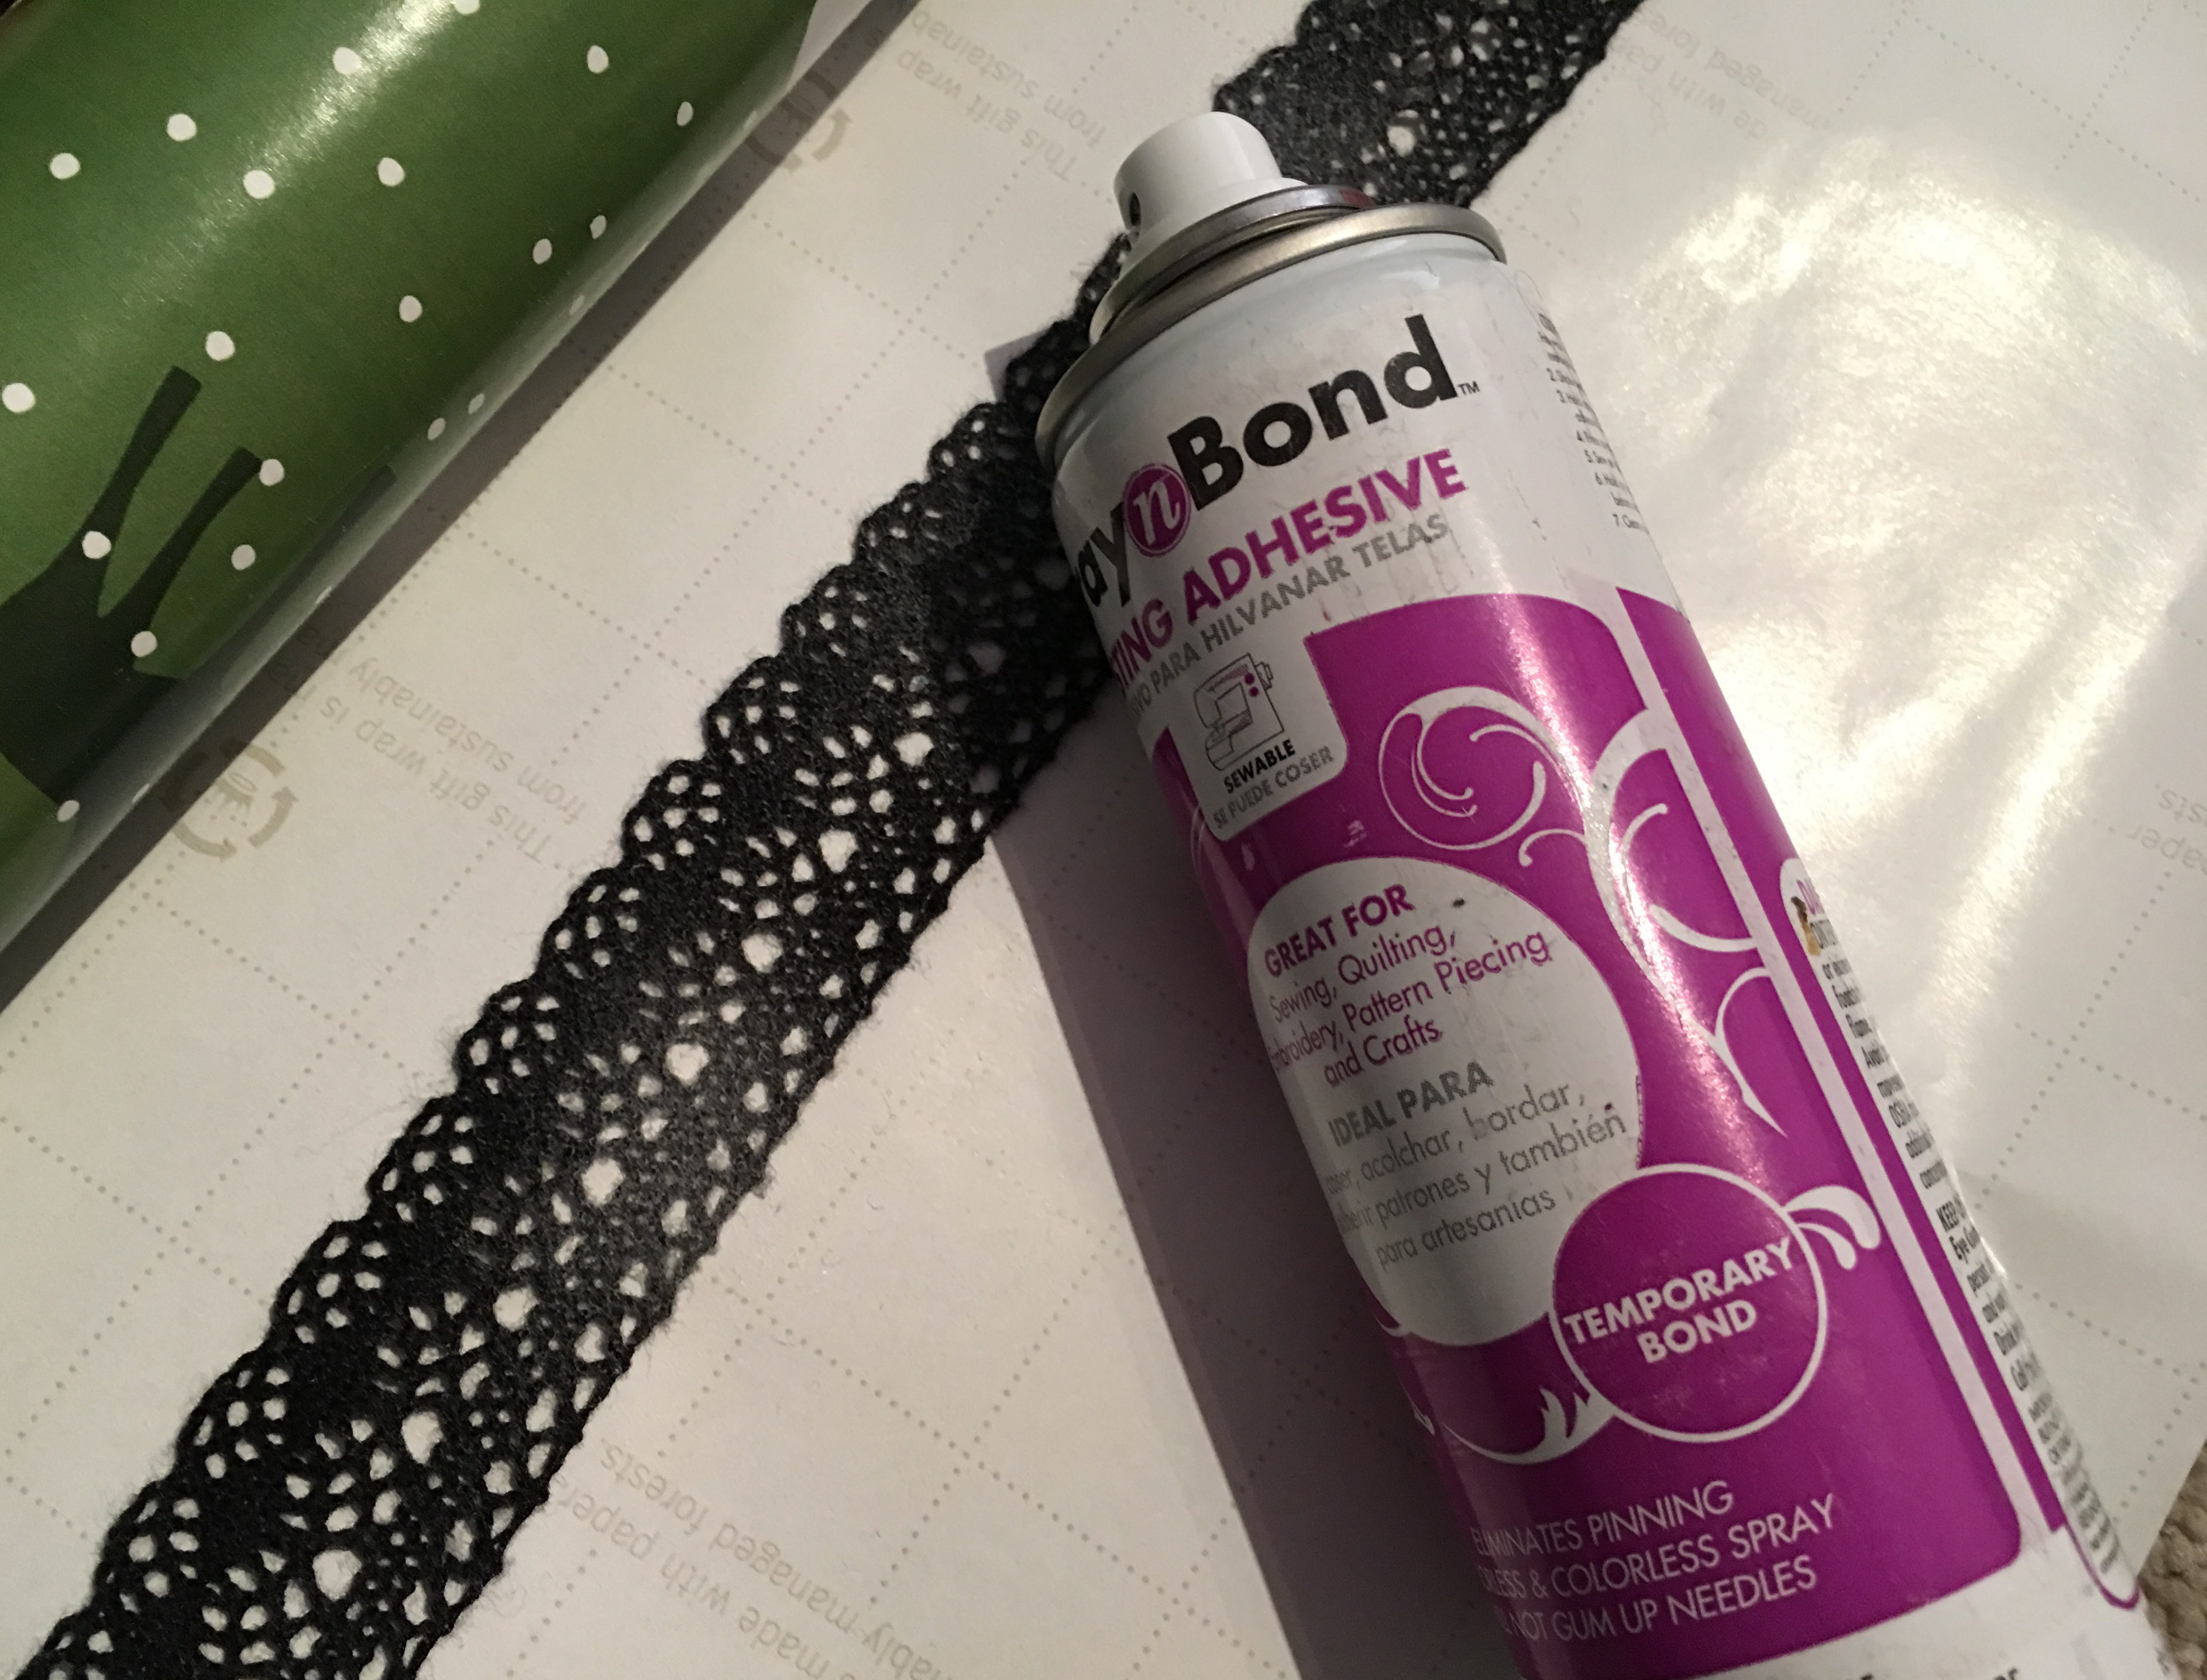
Once you have the trim how you like it, use the Spray n Bond® and spray the back of each piece of trim and re-position it. This will hold it in place while you sew.
Tip: I like to use old wrapping paper to spray my lace on. You need something behind the lace or the spray will go through onto your work surface. The wrapping paper works great because it it large and then easy to throw away!
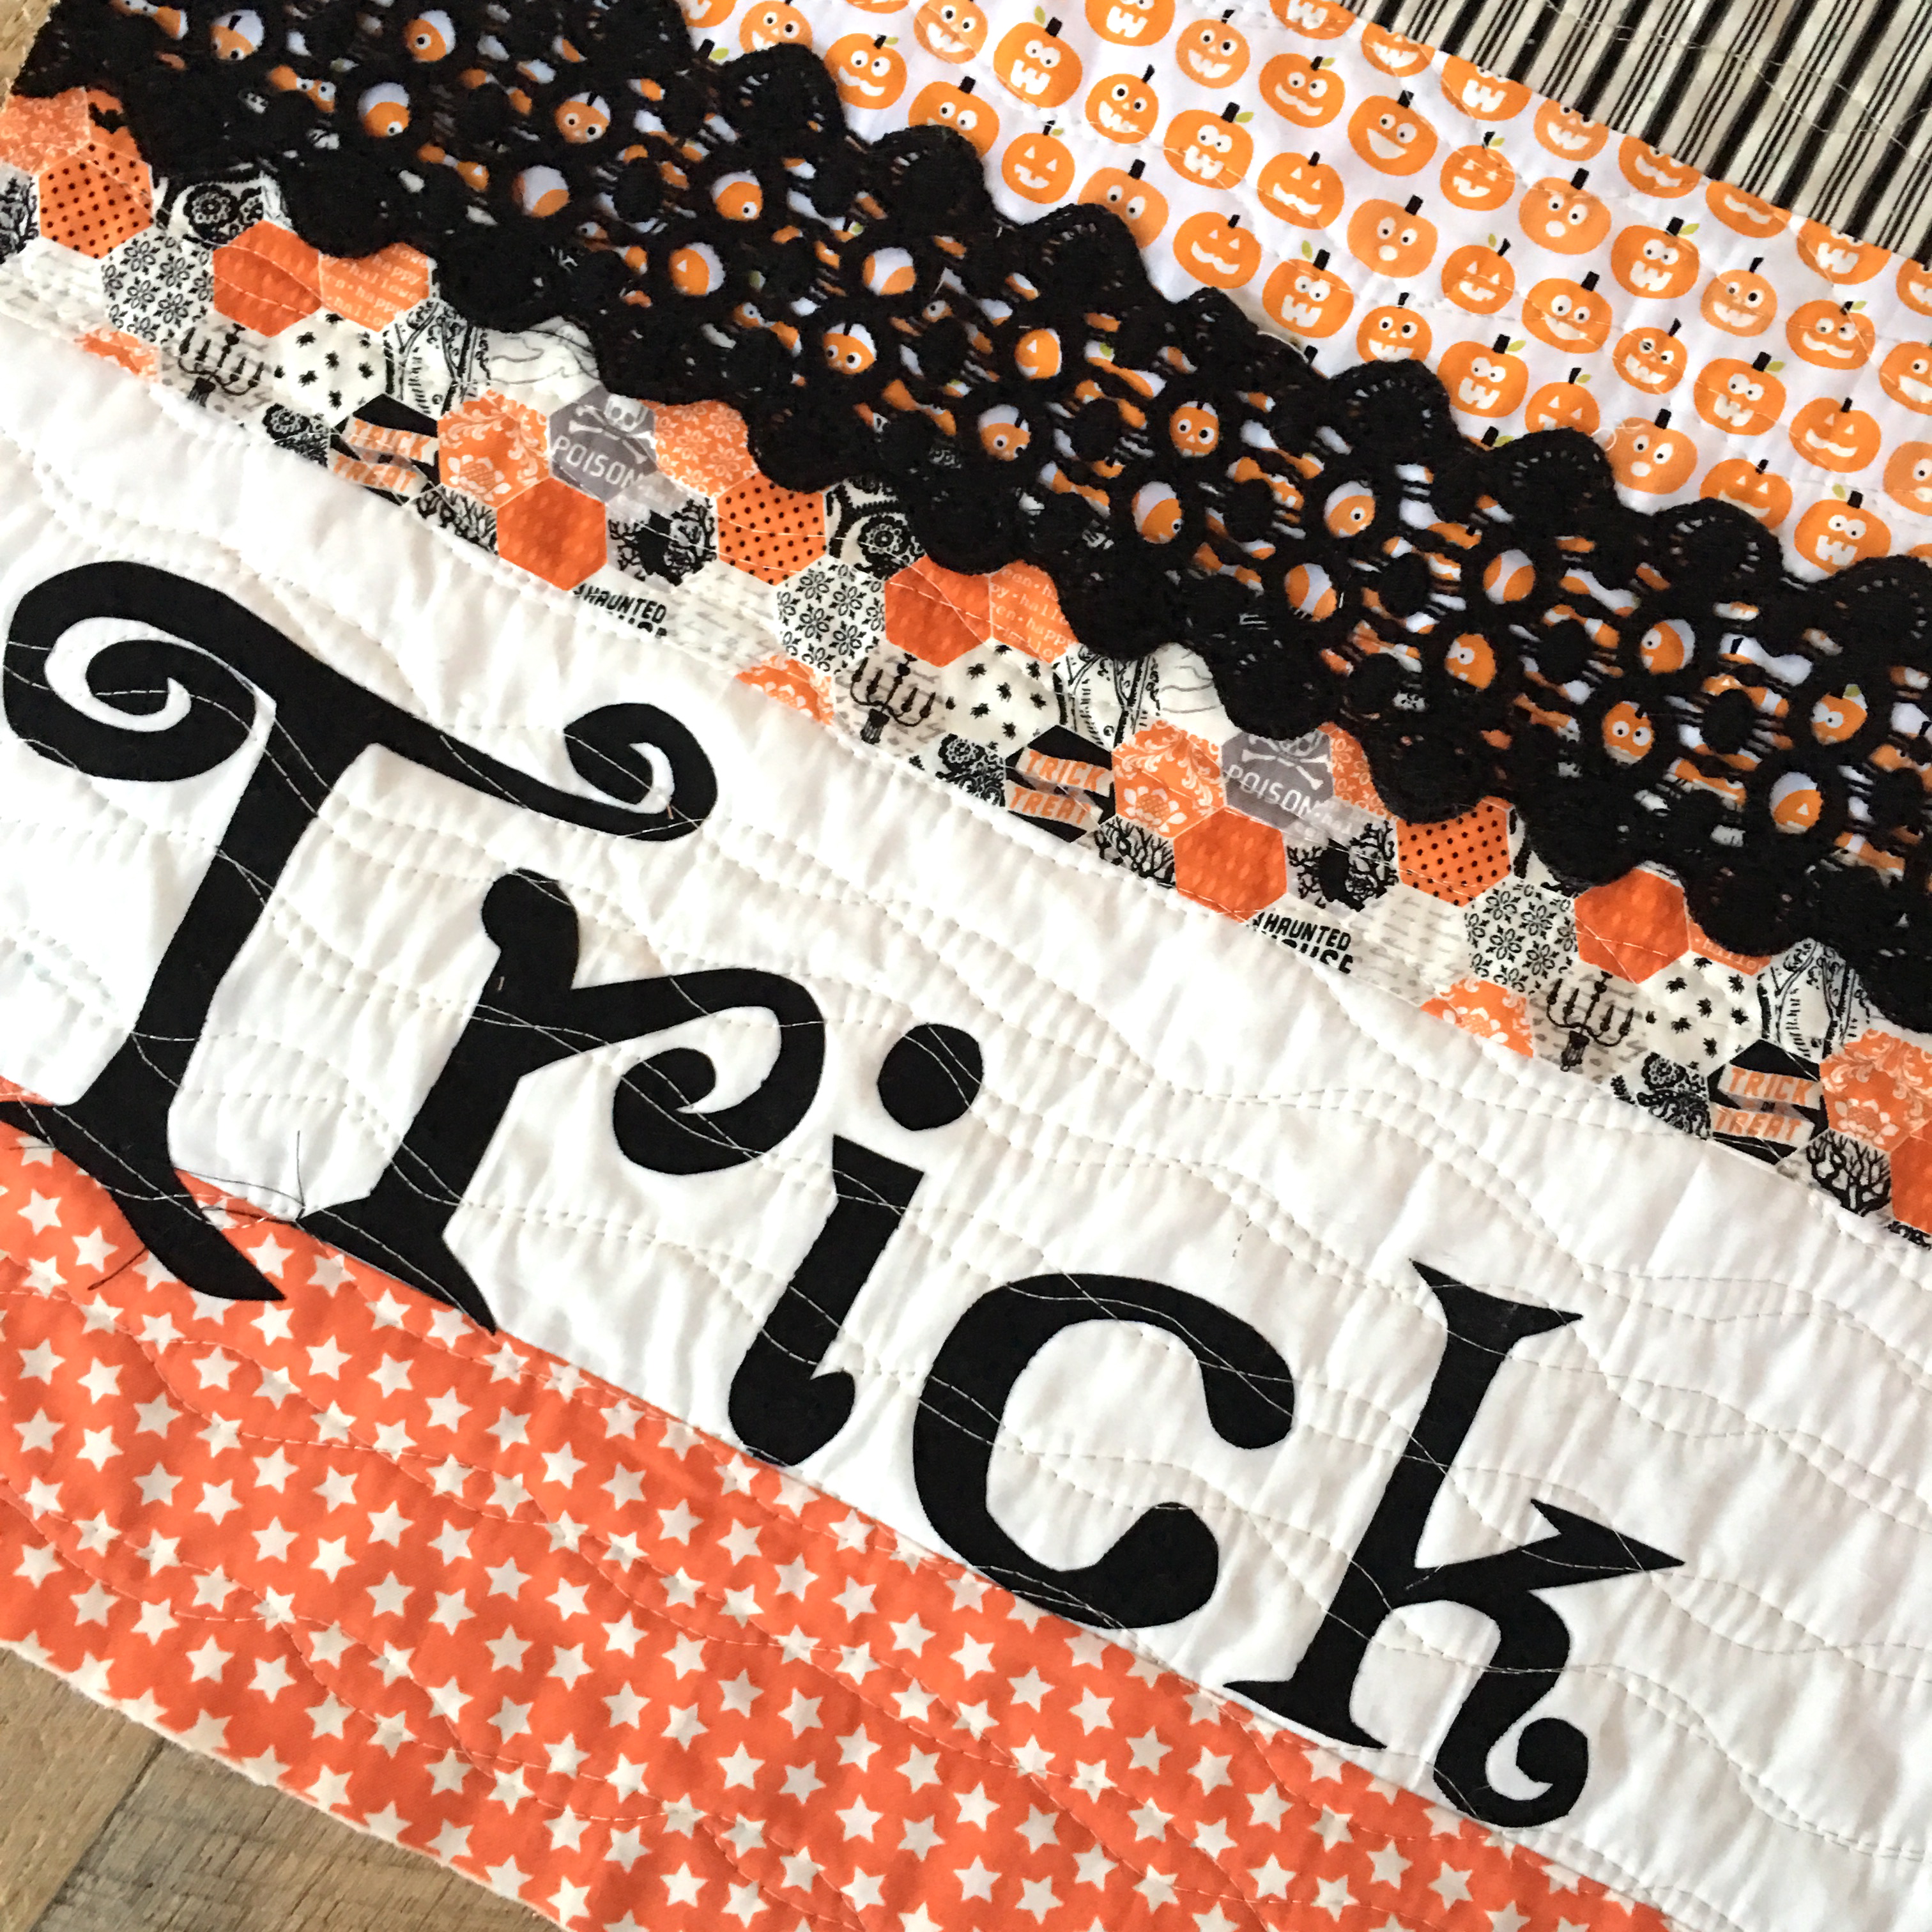
Once the trim is in place, use a walking foot and sew with black thread along the edges of the trim to secure.
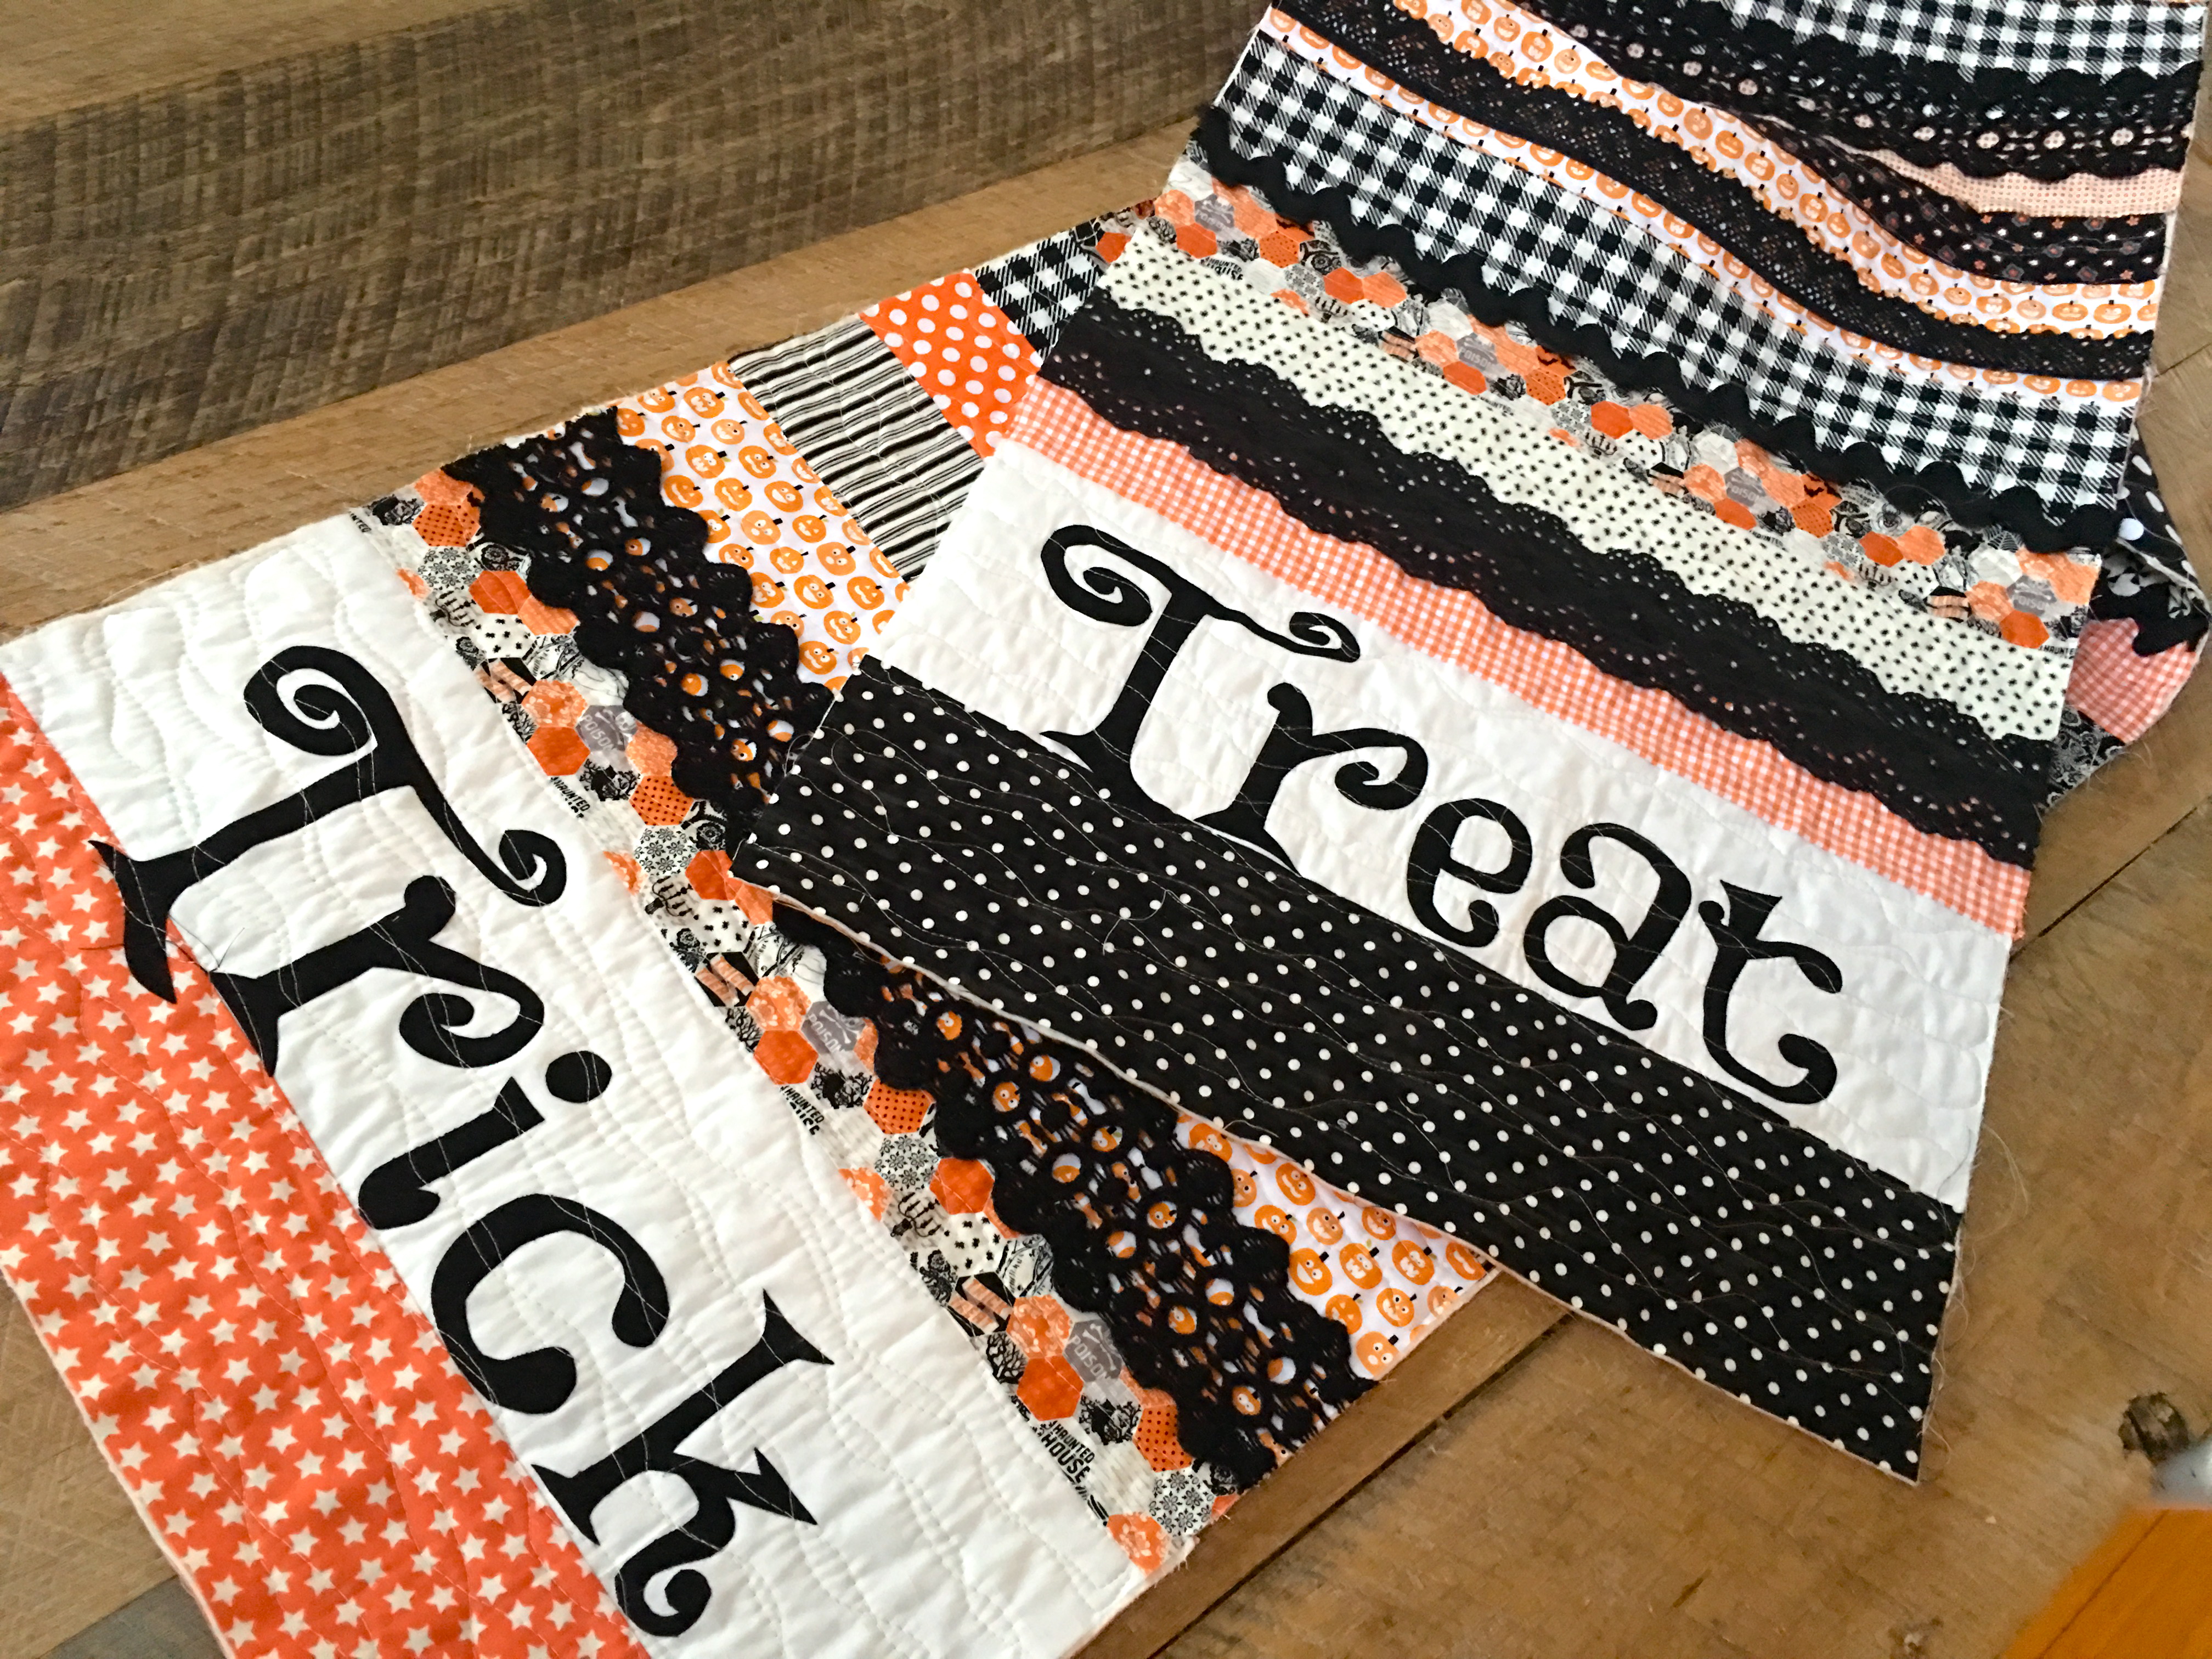
I switched to cream thread and quilted random wavy lines throughout the quilt, even over the letters. Square up the runner after you’ve quilted it to get it nice and even.
Once the quilting is finished you can bind the runner as you would a quilt.
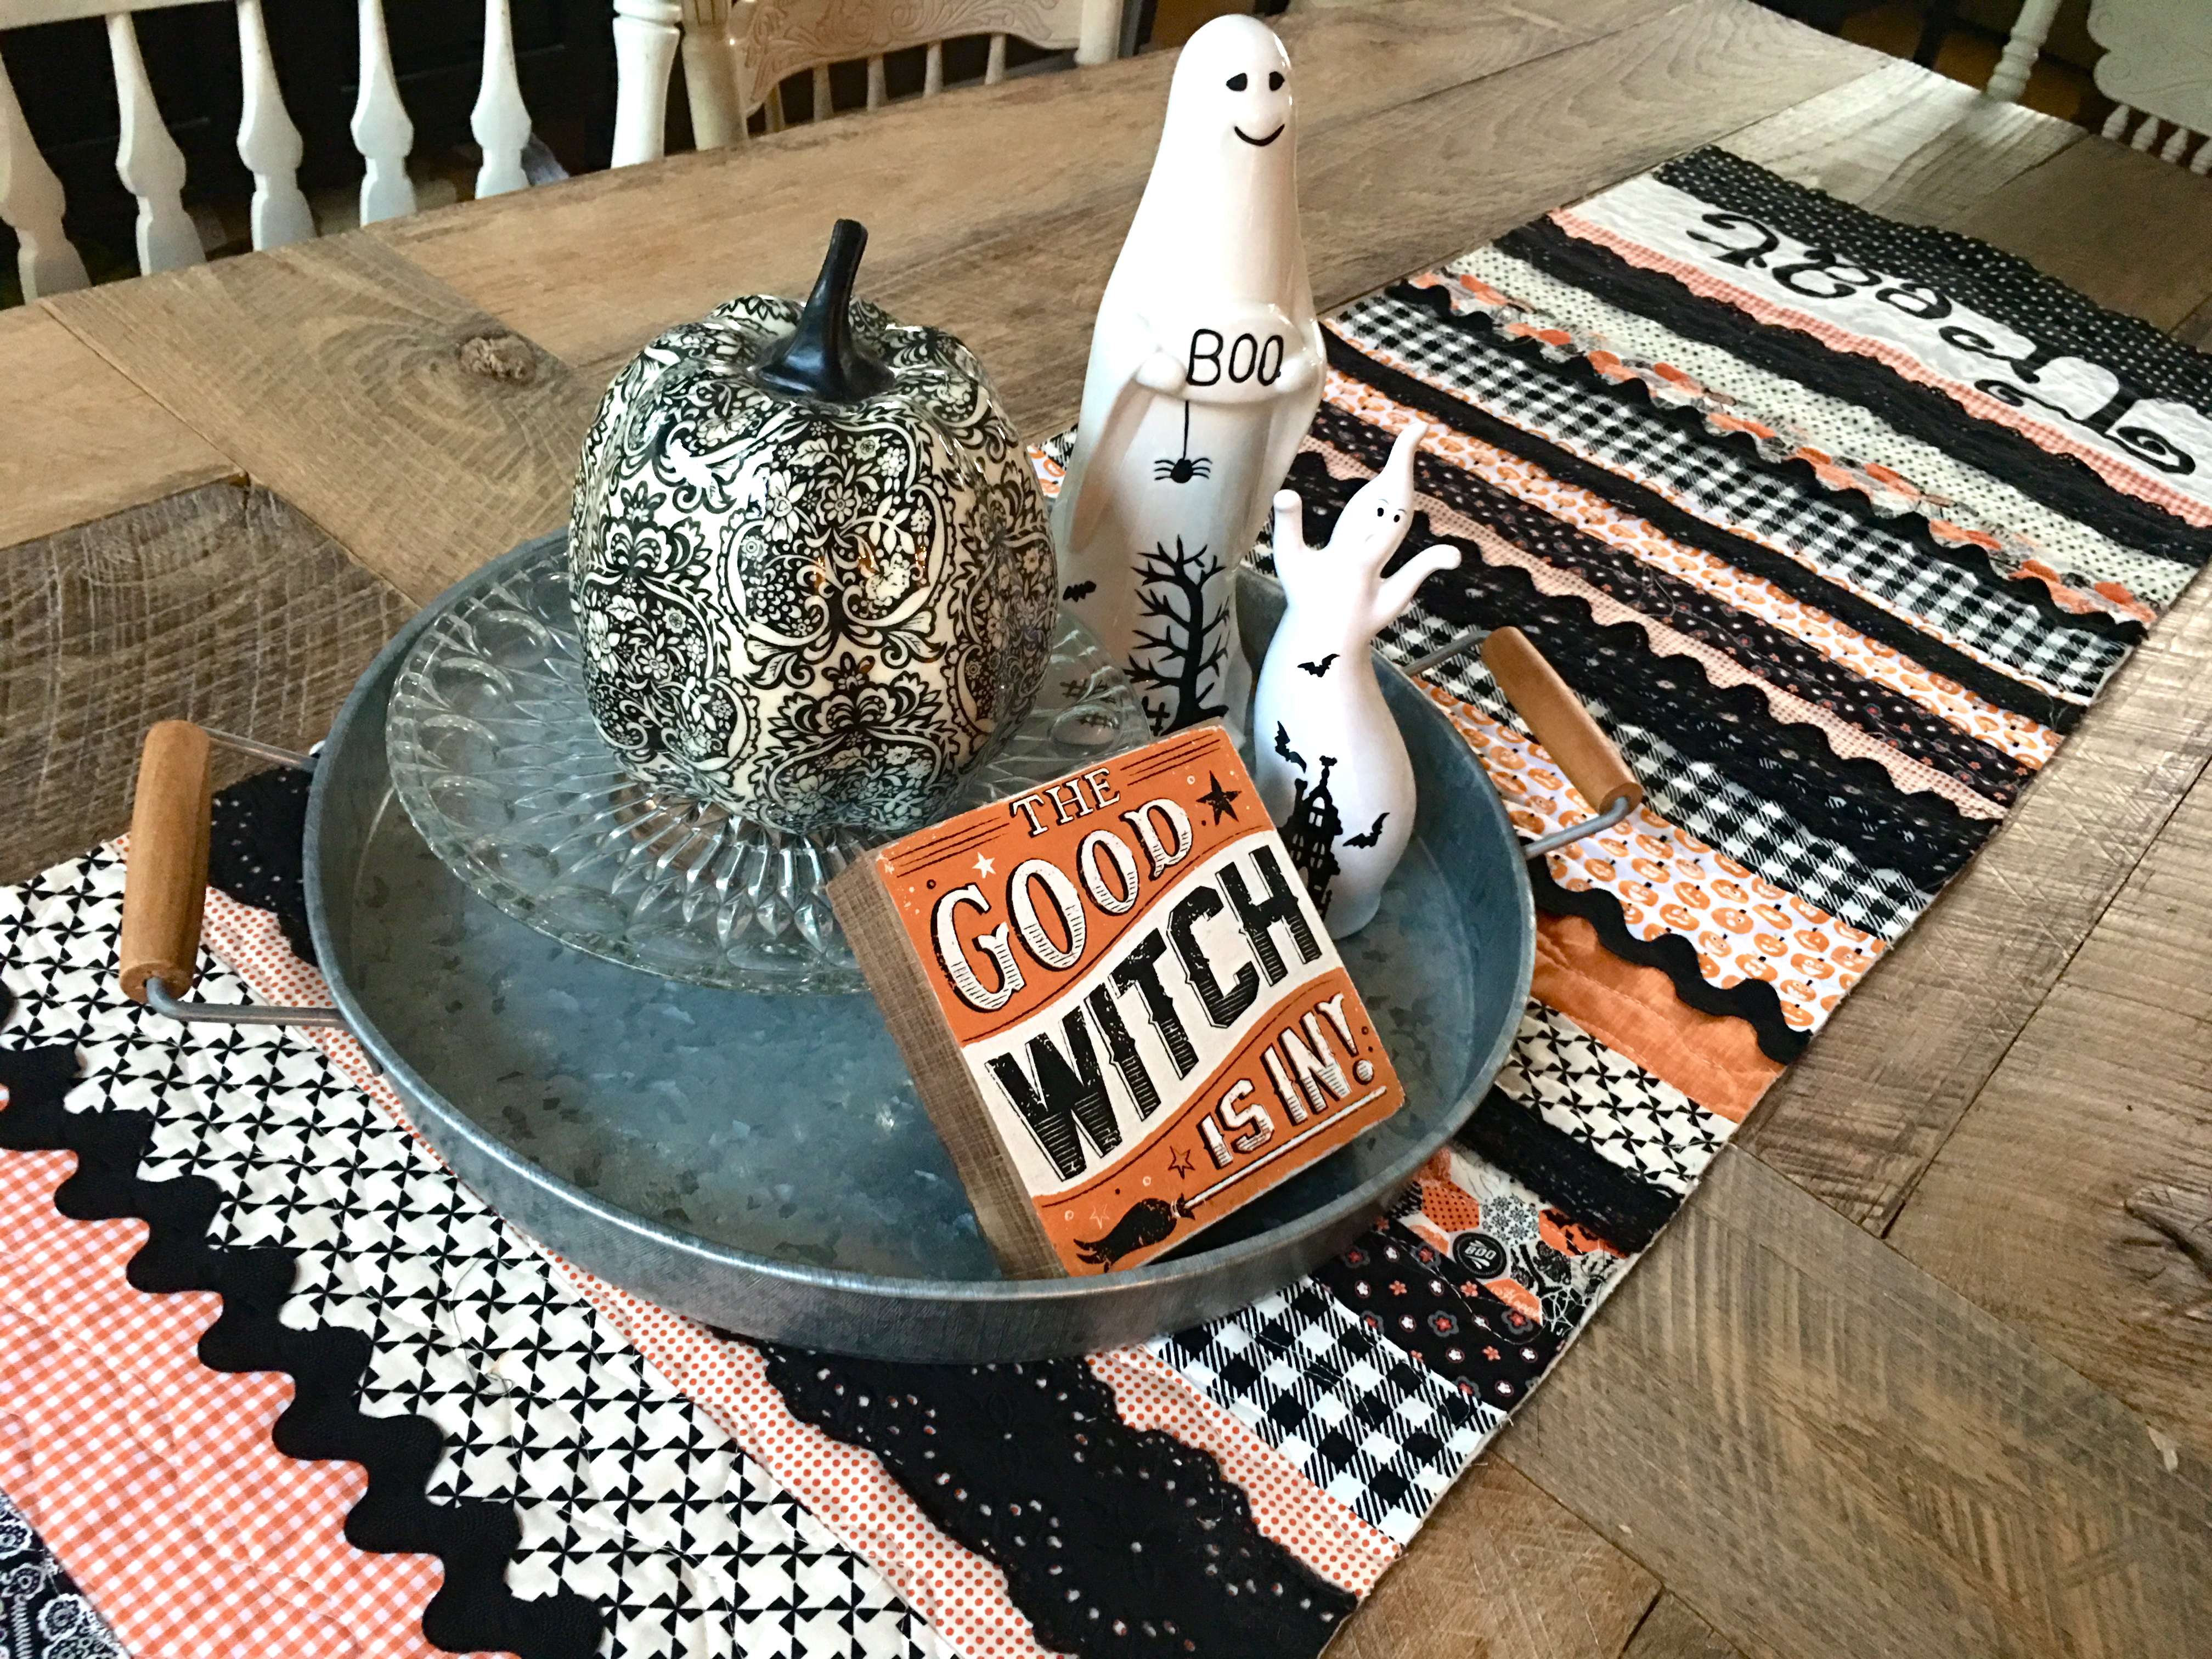
I am so in love with this little project! And it was a quick too!
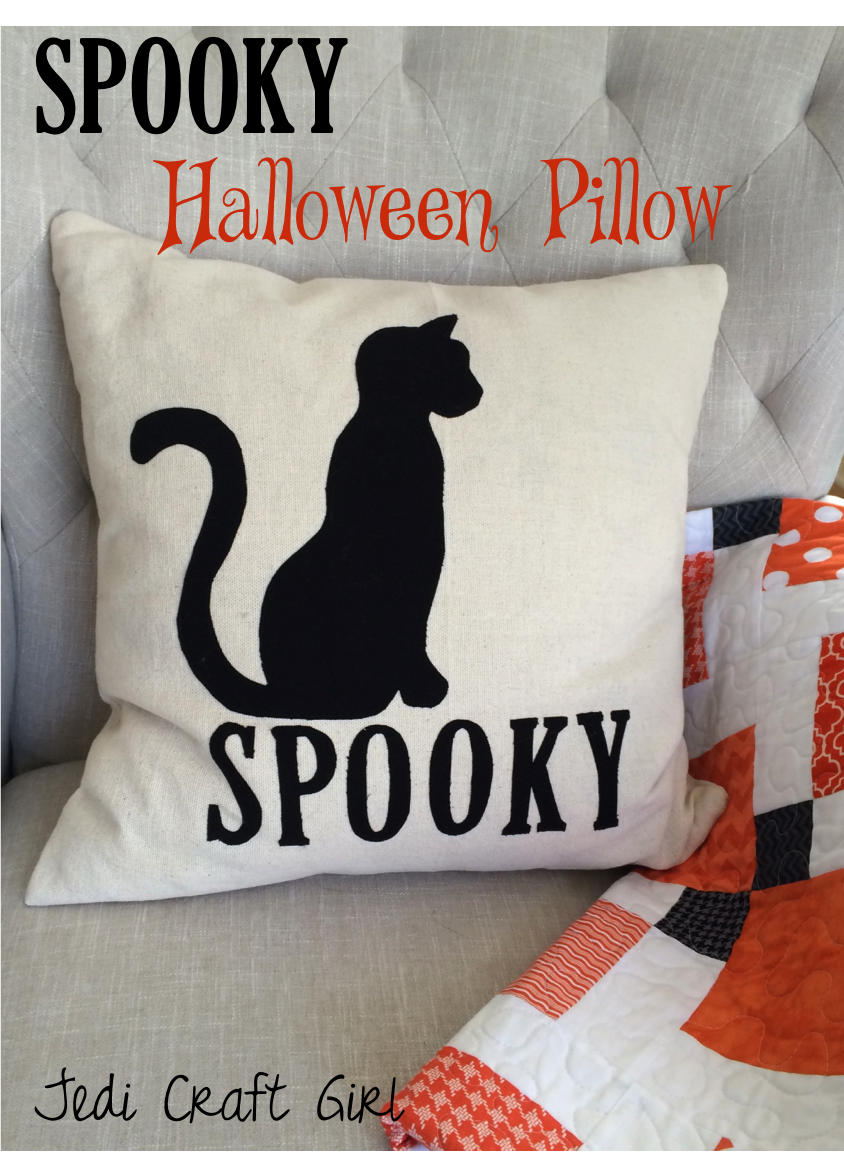
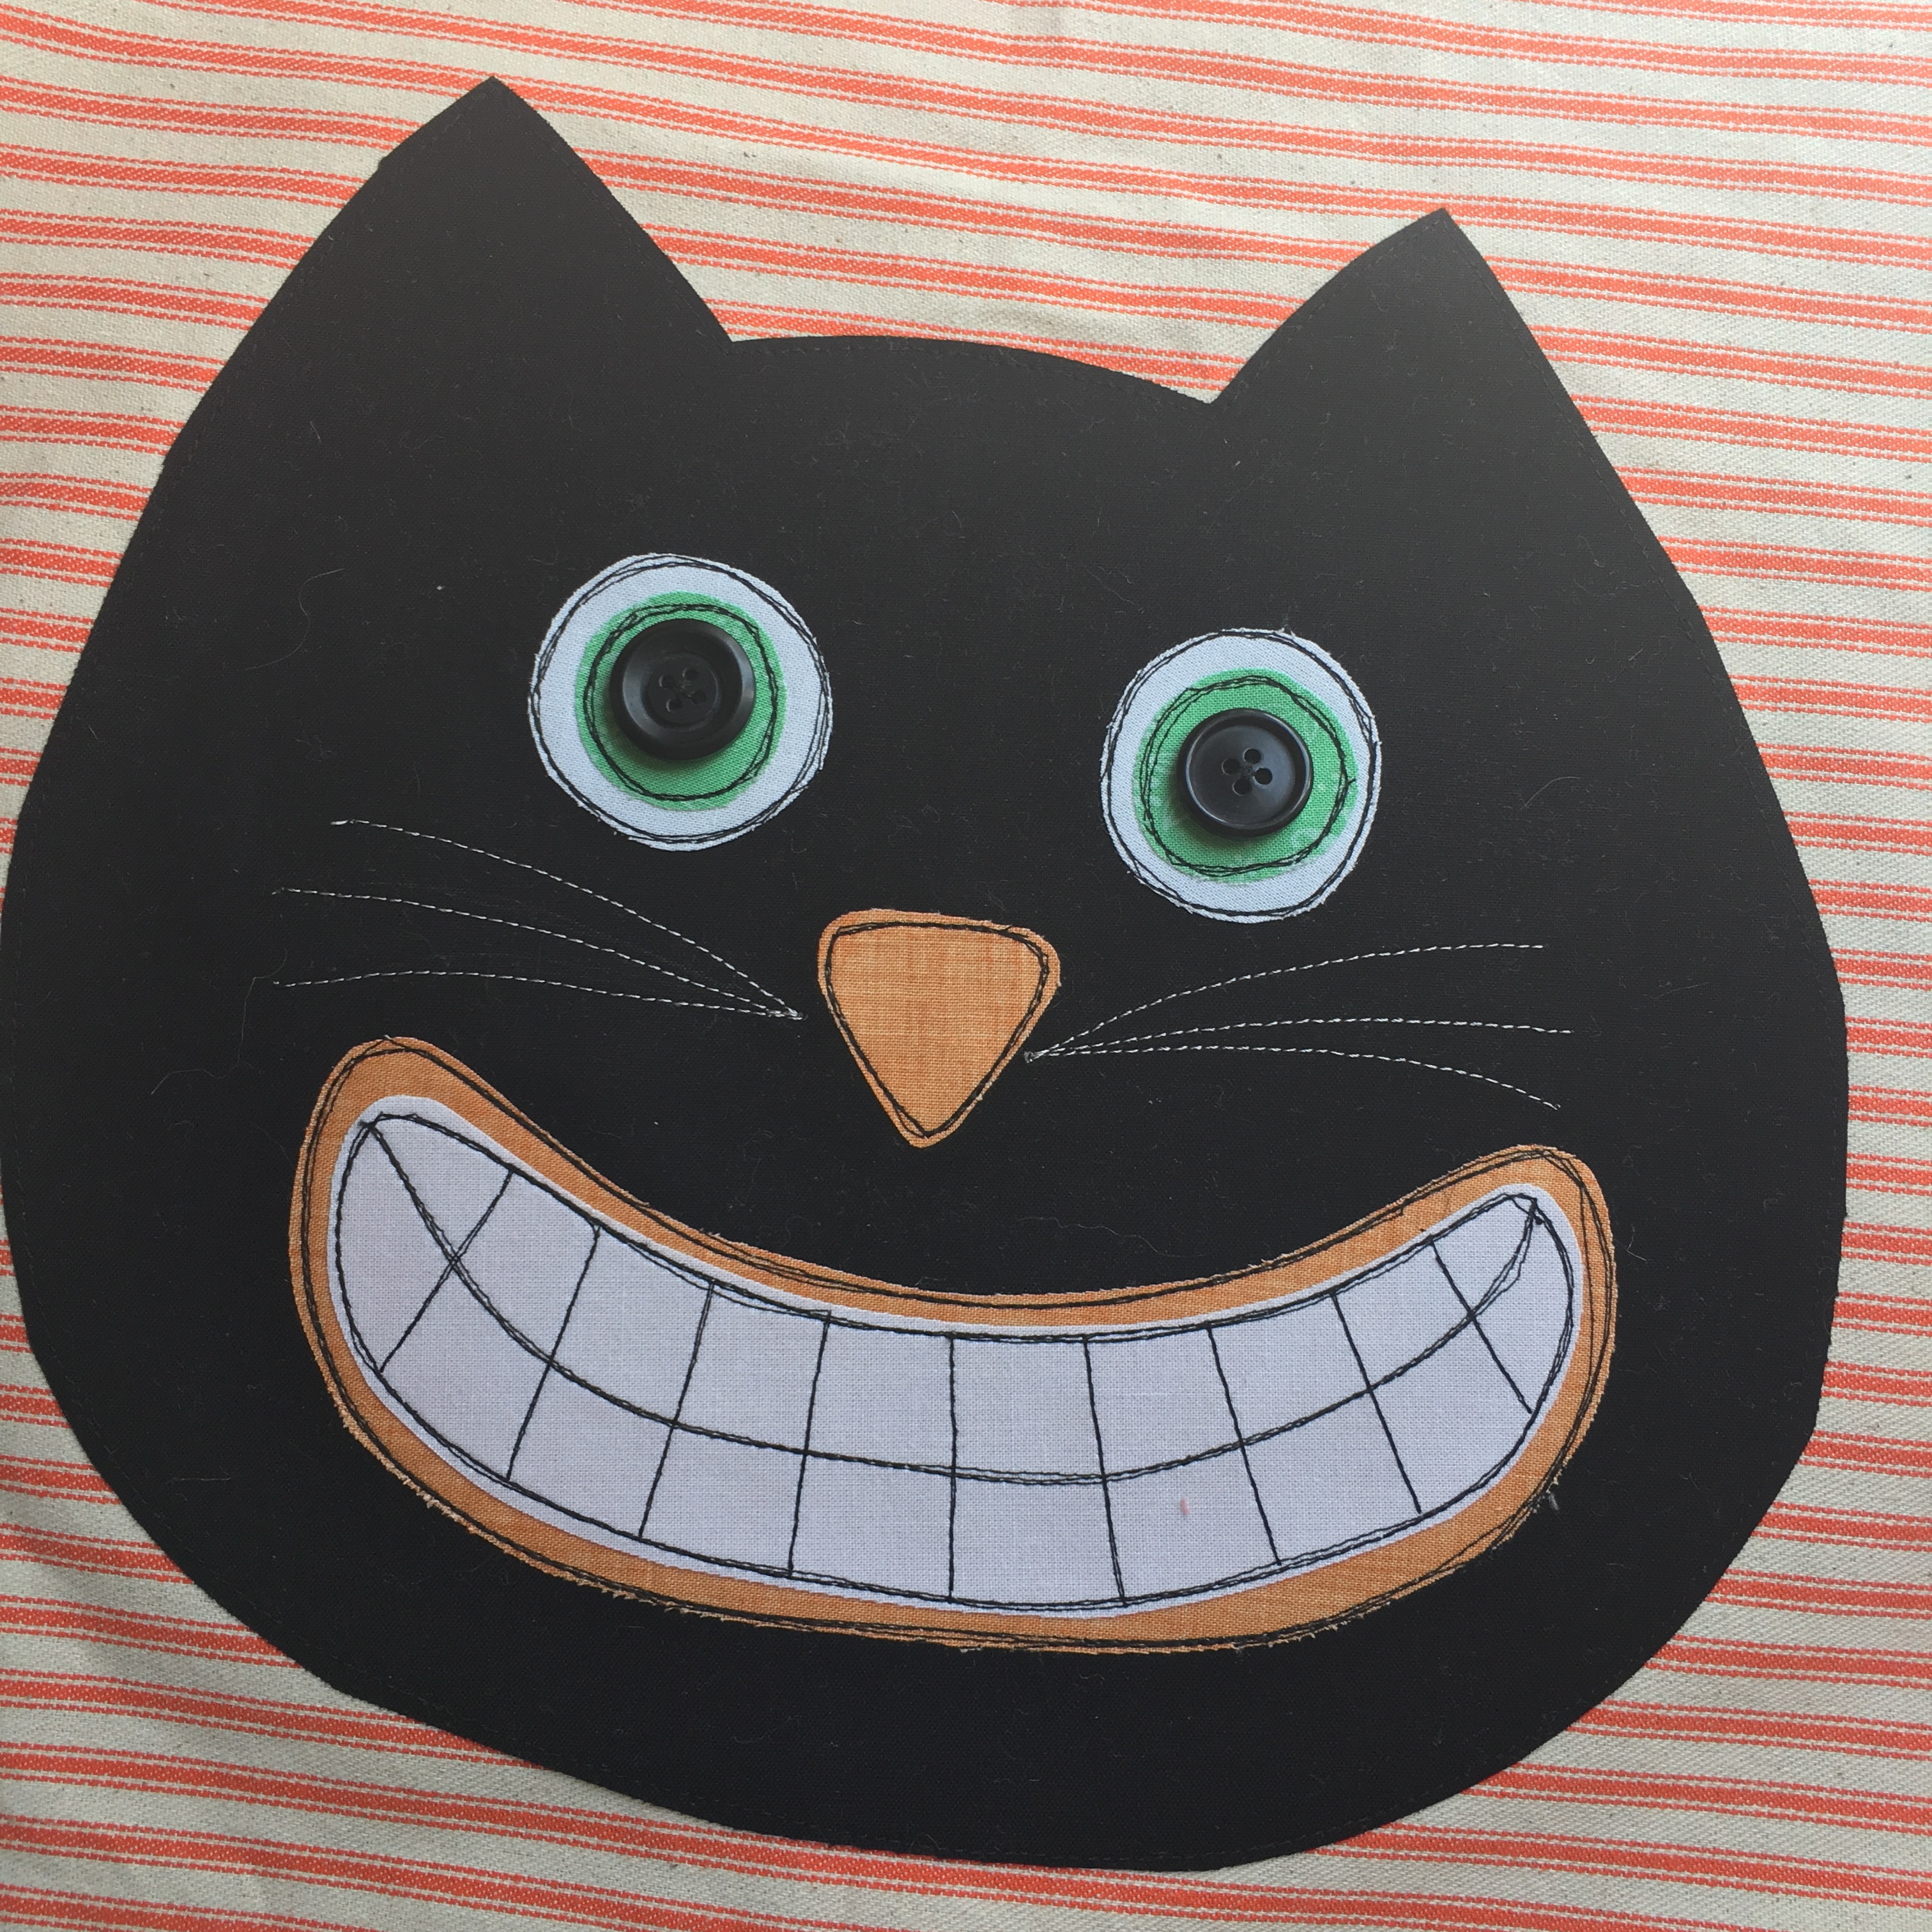
 I need another pillow like I need a hole in the head!! hahahaha!! Who doesn’t need this silly cat pillow on their couch during the month of October! I love looking into the family room and this kitty face is always smiling at me 🙂 Want to whip one up? You only need about 1 hour!!
Supplies:
Heat n Bond® Lite (may use EZ print sheets)
(2) 20″ squares orange ticking for pillow body
Fat quarter solid black
scraps of white fabric, green fabric, and orange fabric
2.5 yards pom pom trim
zipper
20″ pillow form
Cat Pattern, click HERE
Project Instructions:
Begin by printing or tracing each of the pattern pieces to the Heat n Bond® Lite fusible applique. Cut around each piece about 1/4″ away from pattern. Press the pieces to the wrong side of the desired fabrics with hot, dry iron.
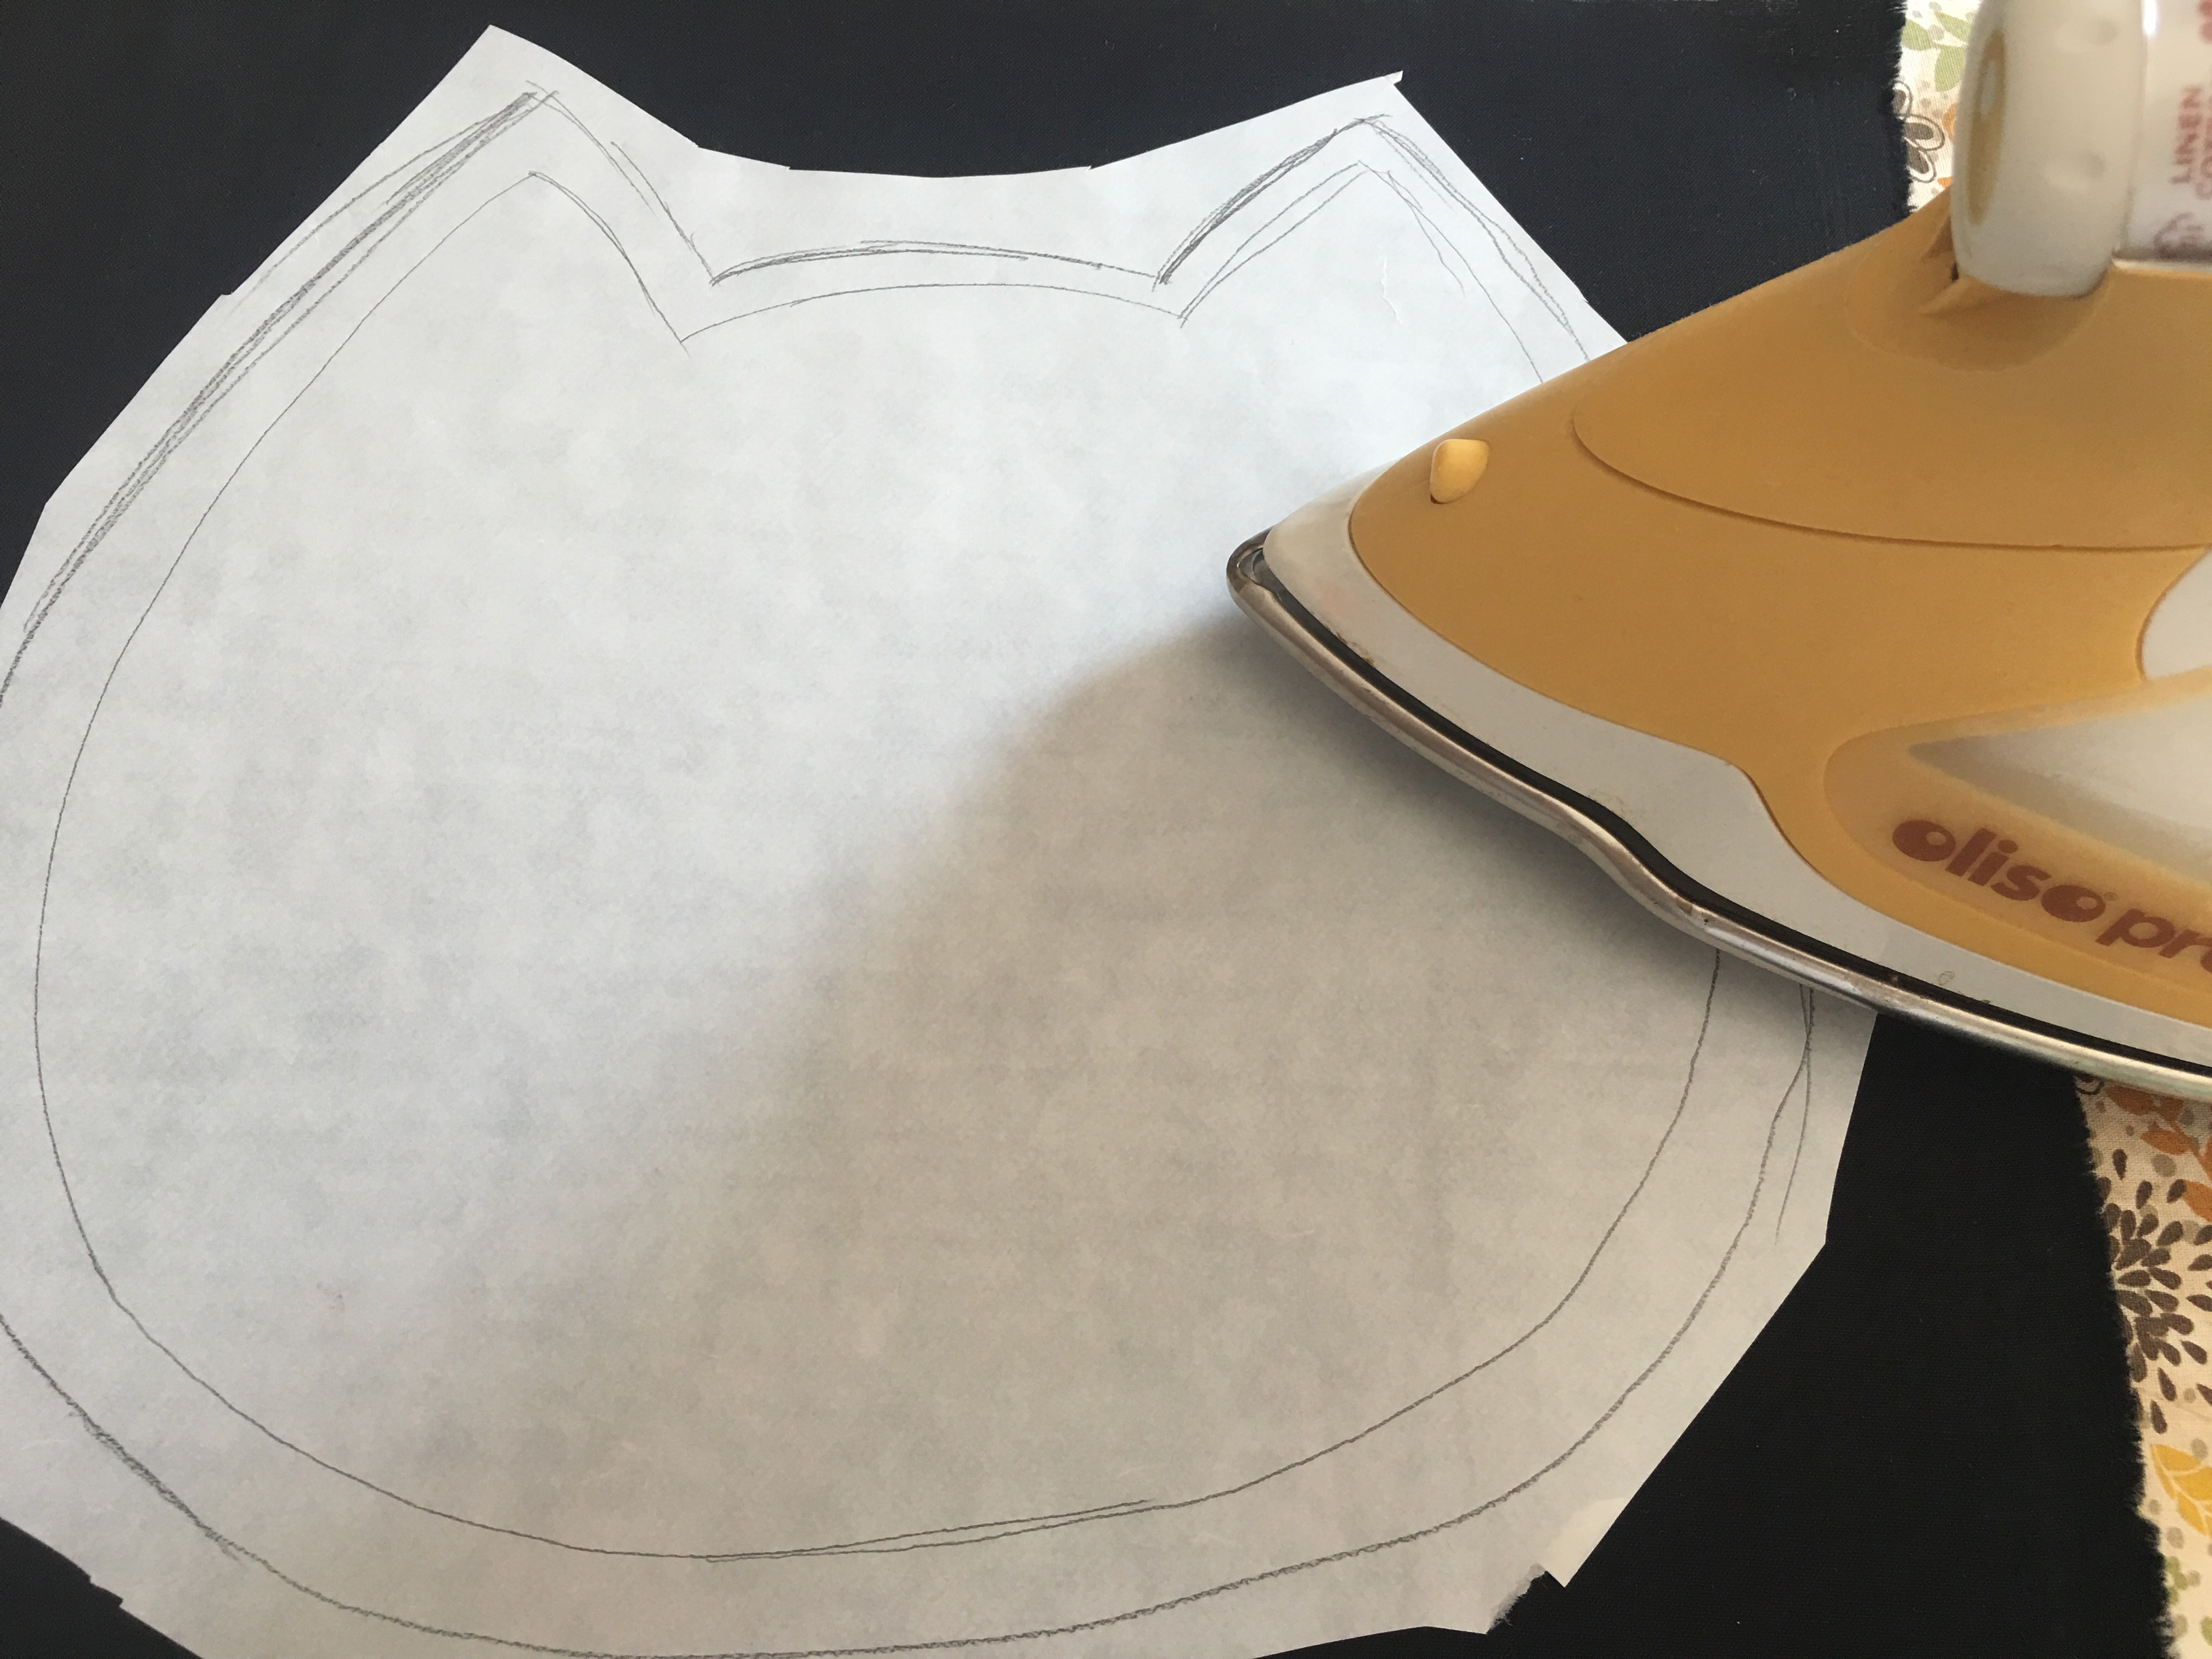
Peel off backing paper and position the cat head and face pieces on the right side of one of the 20″ orange ticking squares. Center the cat. Heat set in place.
With black thread, straight stitch around each of the applique pieces 3 times. I only stitched around the cat head once because you can’t see the stitching. Following the picture, add detail stitching for his teeth.
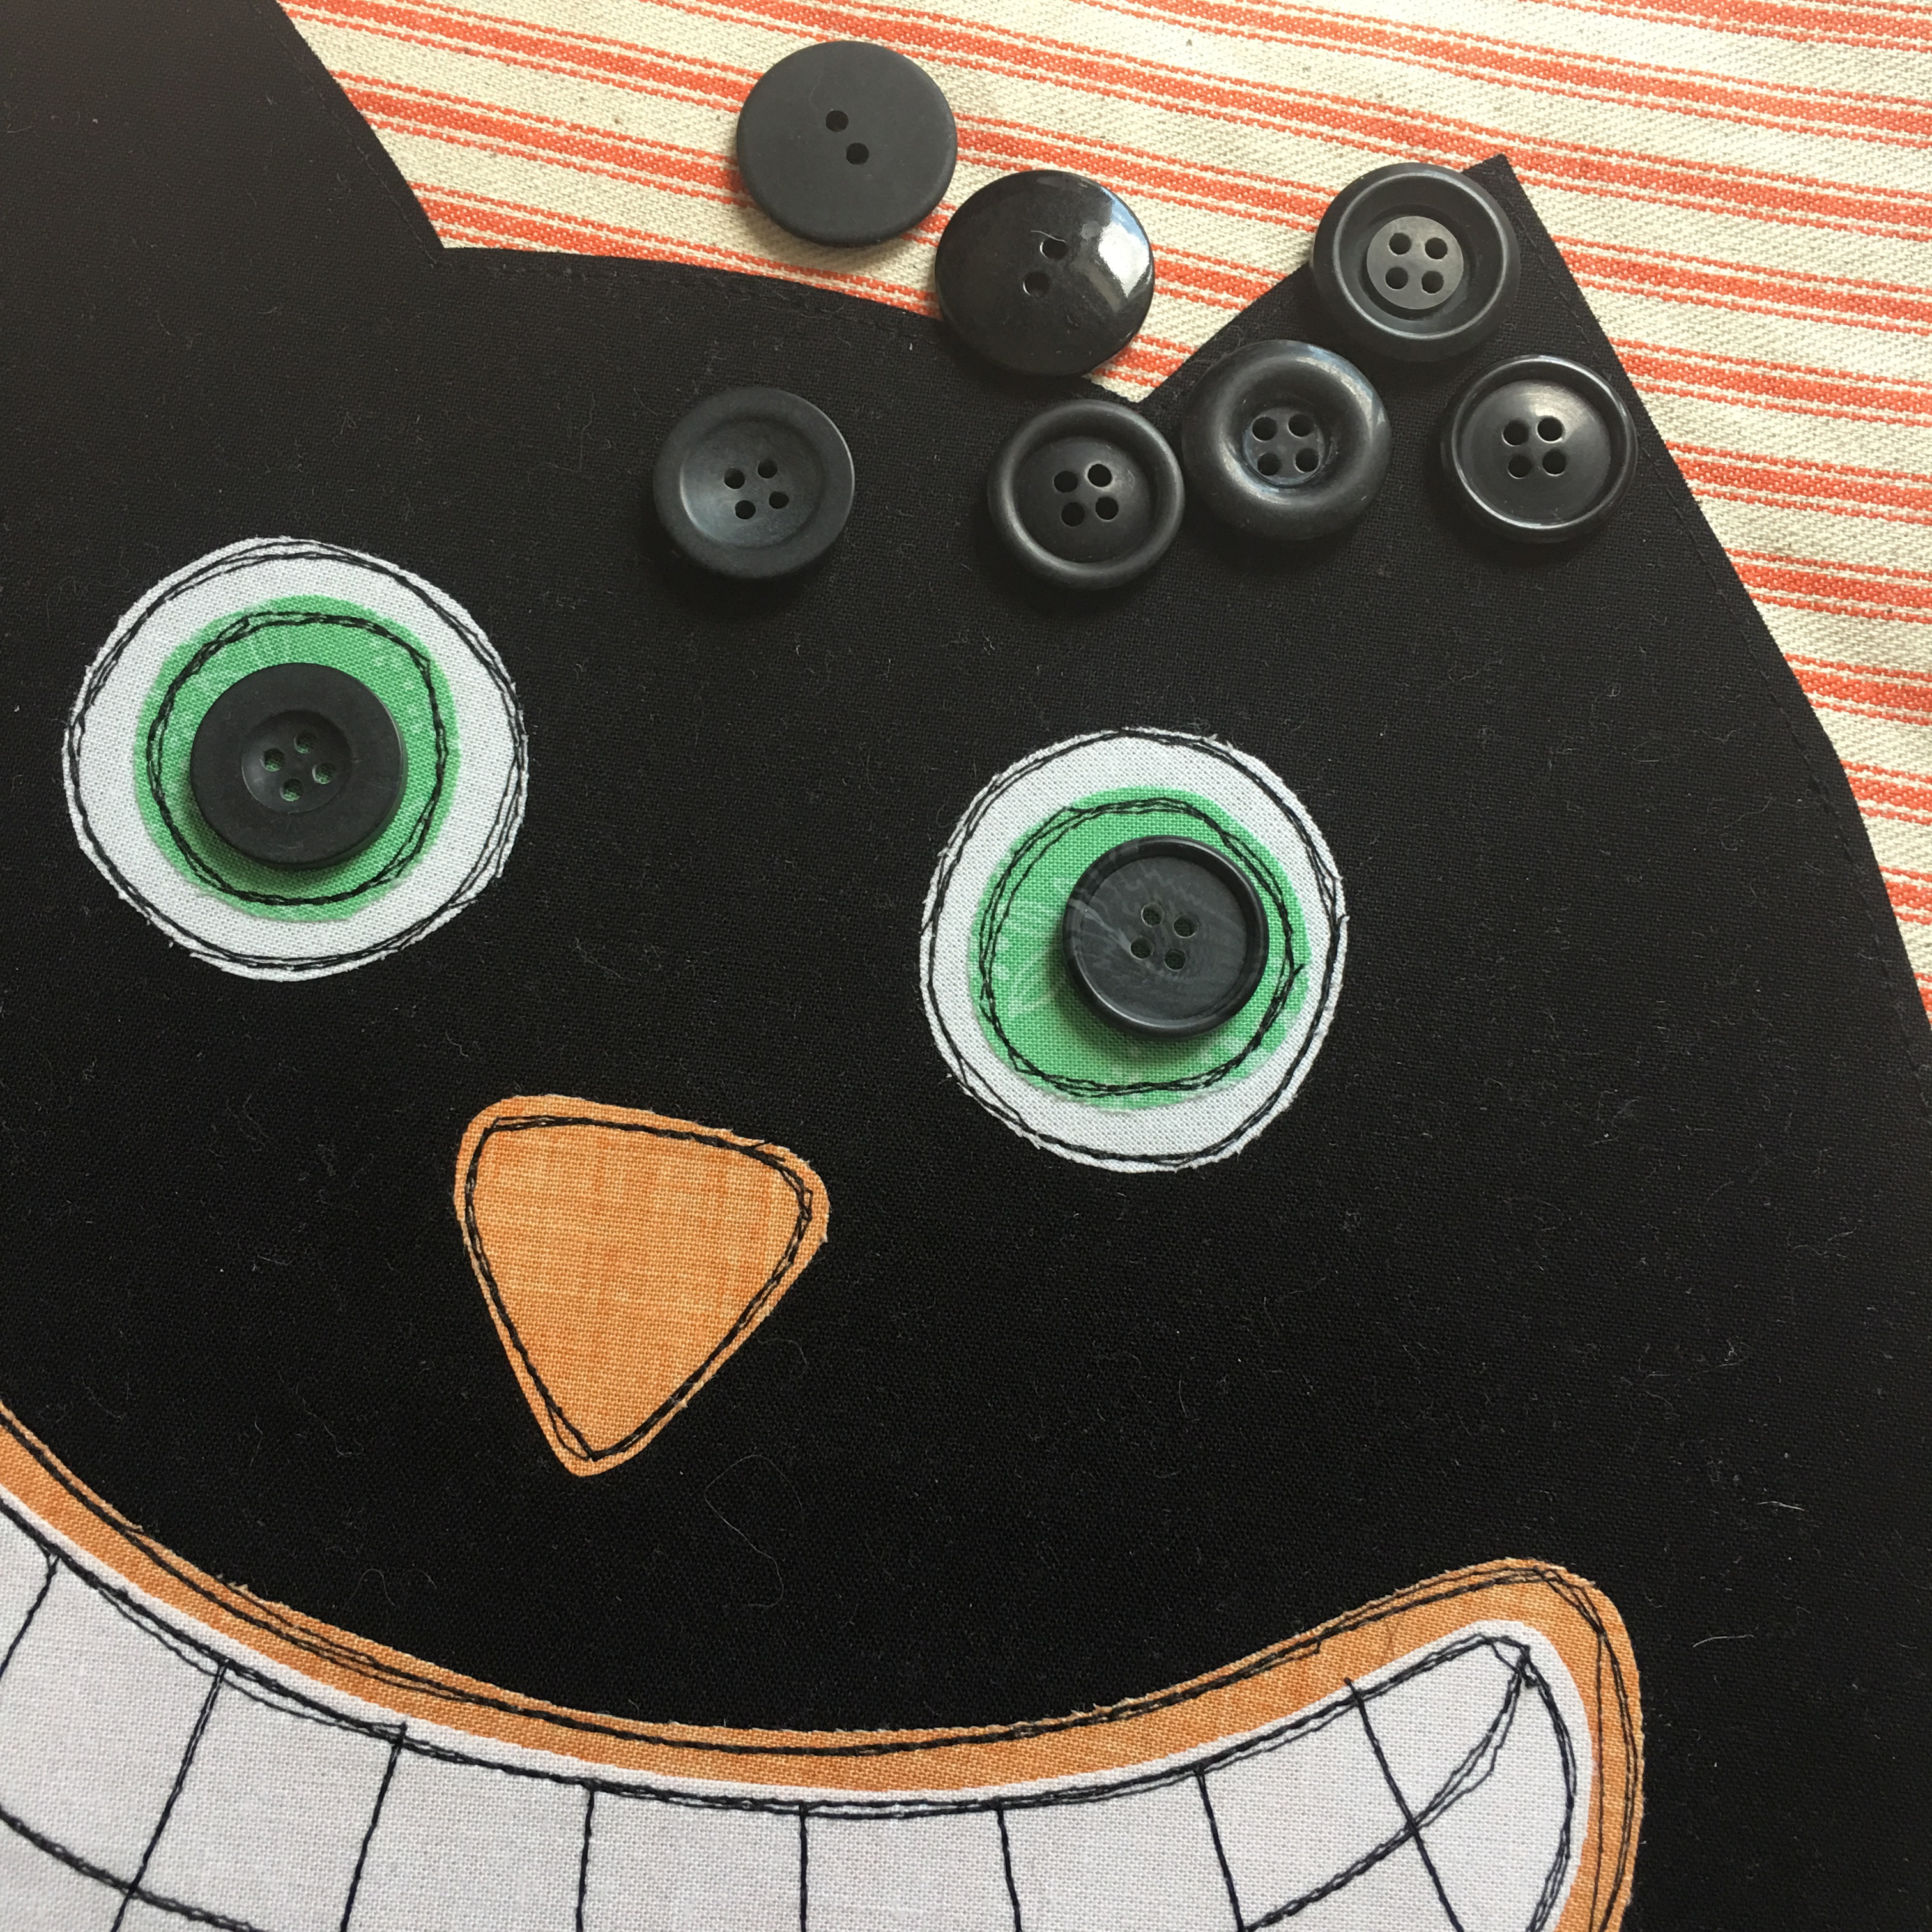
Sew black buttons for the center of his eyes.
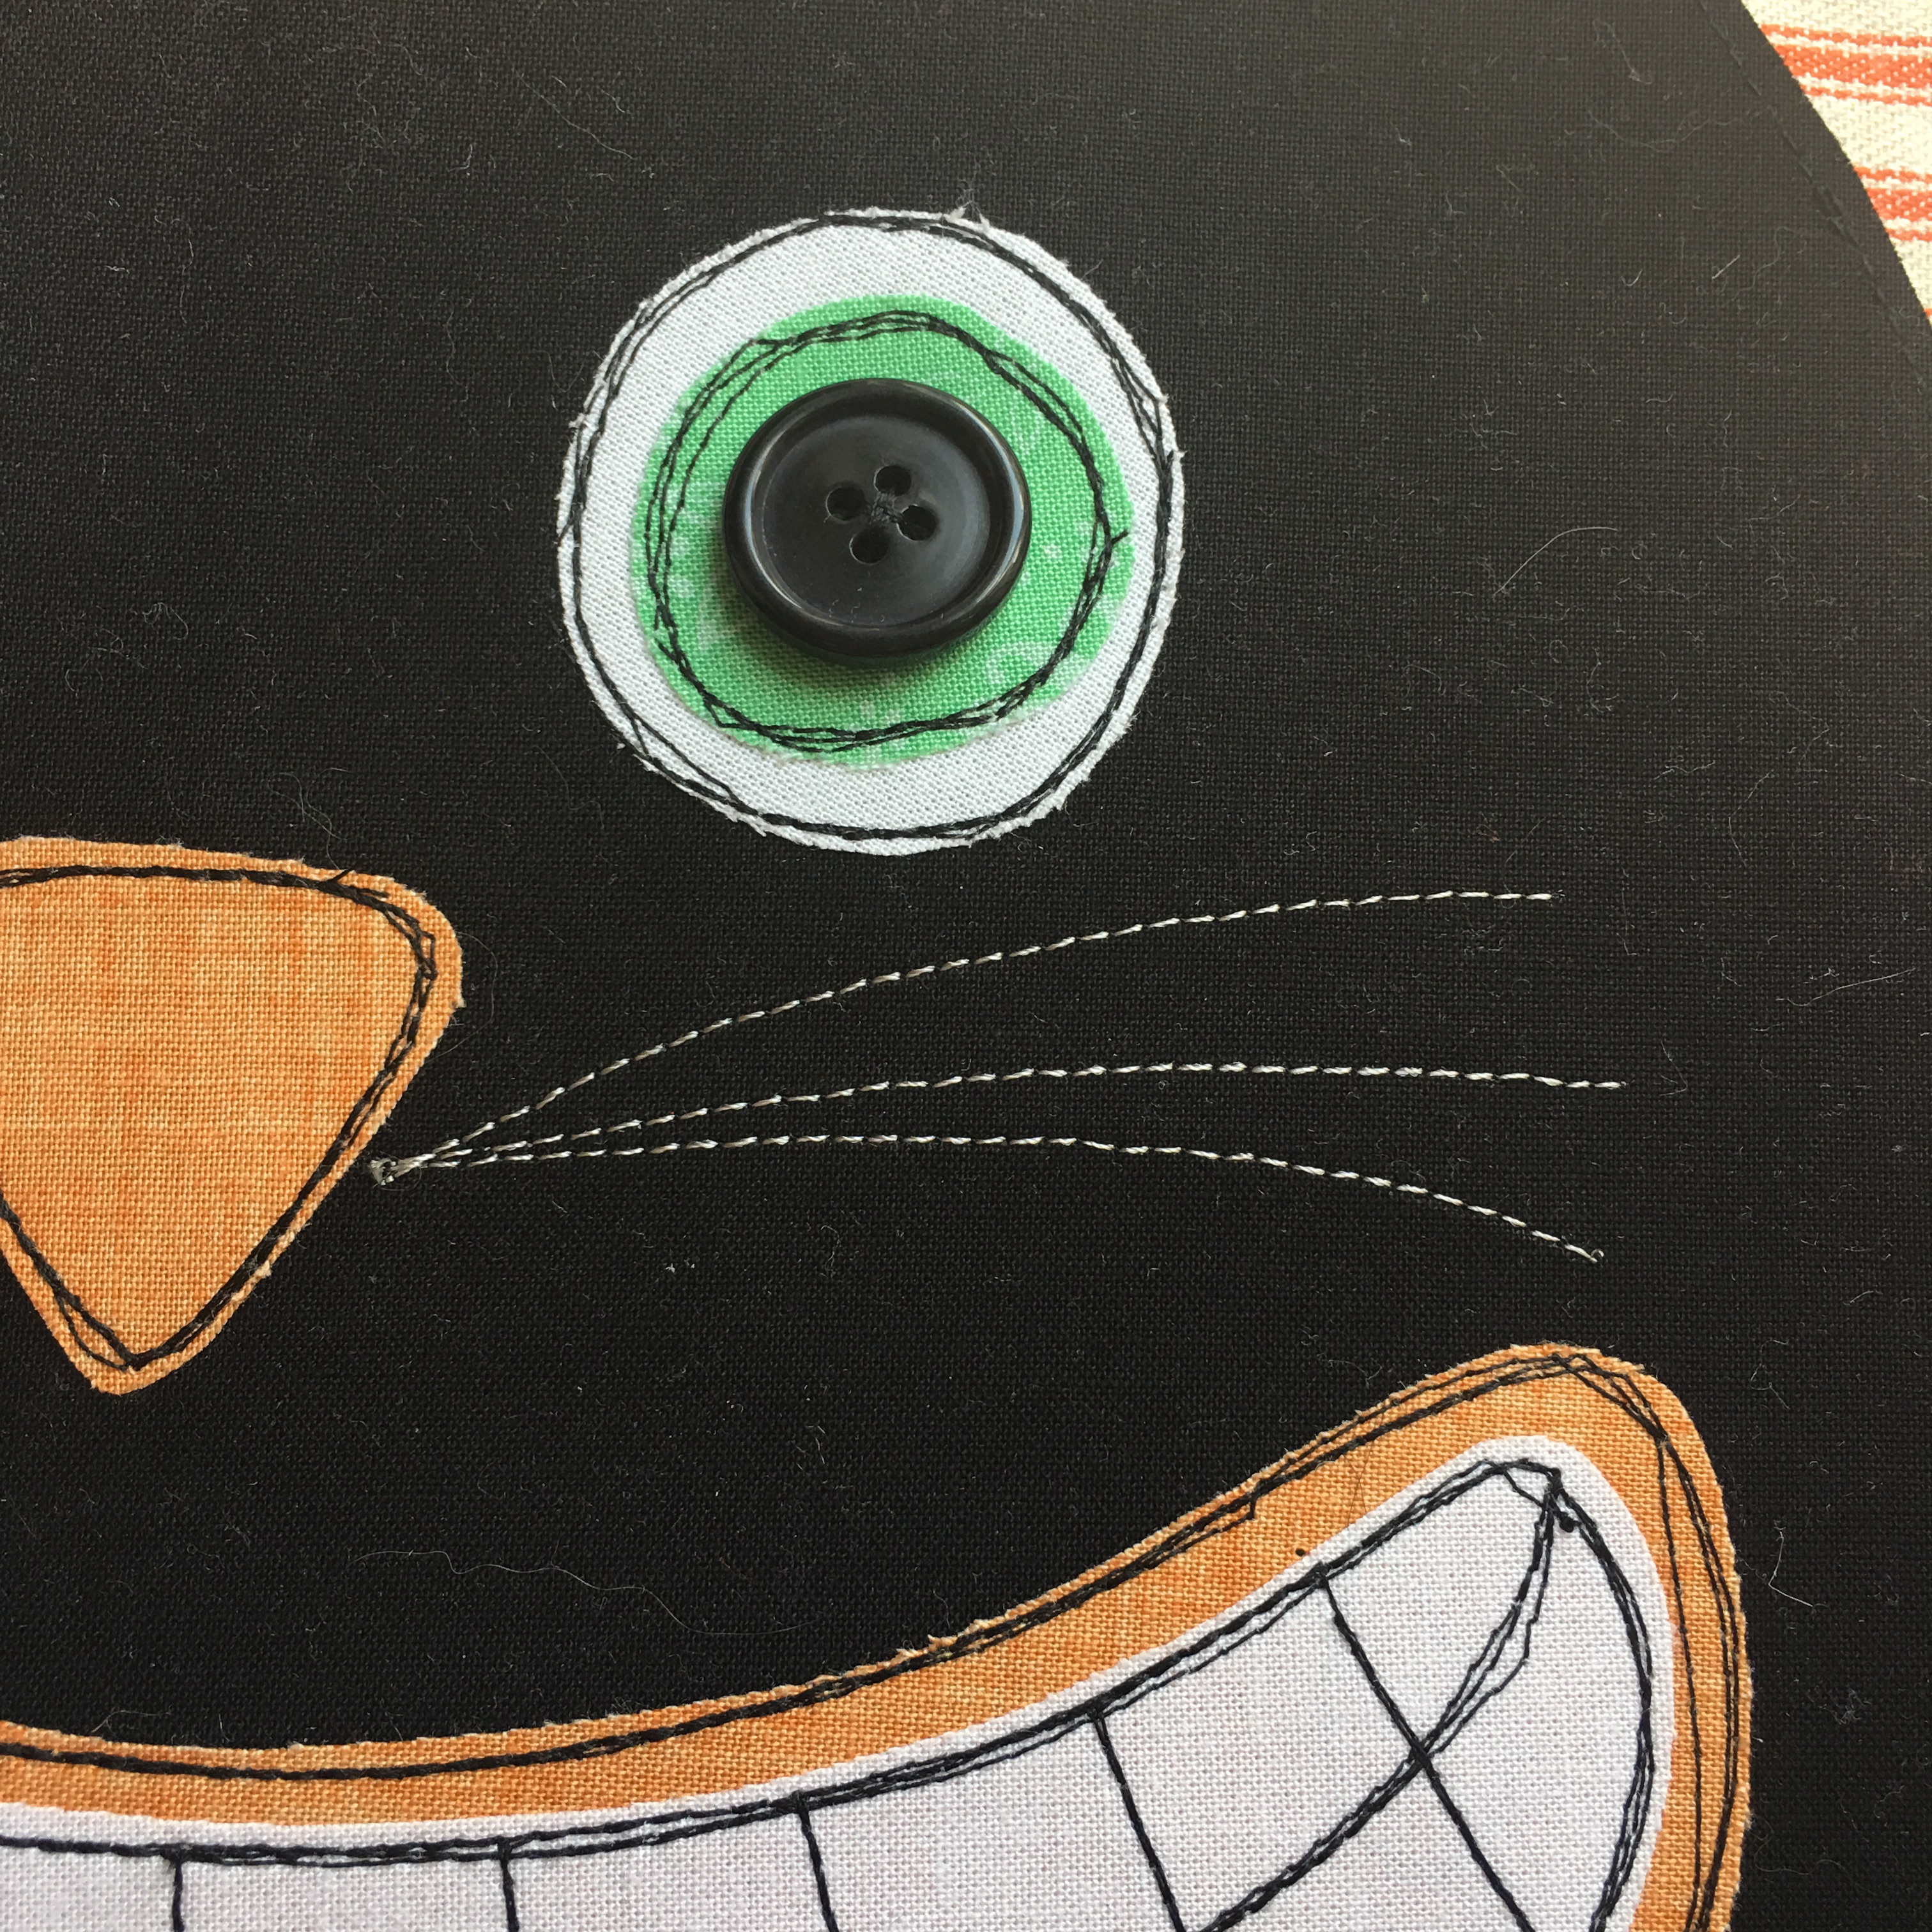
He needs whiskers!!!! I used a shiny light gray thread to stitch the whiskers. You can draw them with a pencil first so you don’t mess up ?
I only stitched the whiskers once and used a stay stitch to start and stop.
To finish the pillow, baste the pom pom trim around the pillow front, starting and stopping at the bottom center.
To finish the pillow, cut a 3″ strip off of the remaining 20″ square.

This is where the zipper will go. (If zippers make you run for the hills, you can finish this pillow using your favorite method. This just happens to be my favorite way to finish a pillow!)
Simply sew the zipper in and press. This is now the pillow back! With the zipper part way open, pin the pillow front to the pillow back, right sides together. Using a 1/2″ seam, sew around the entire pillow.

Turn right side out.
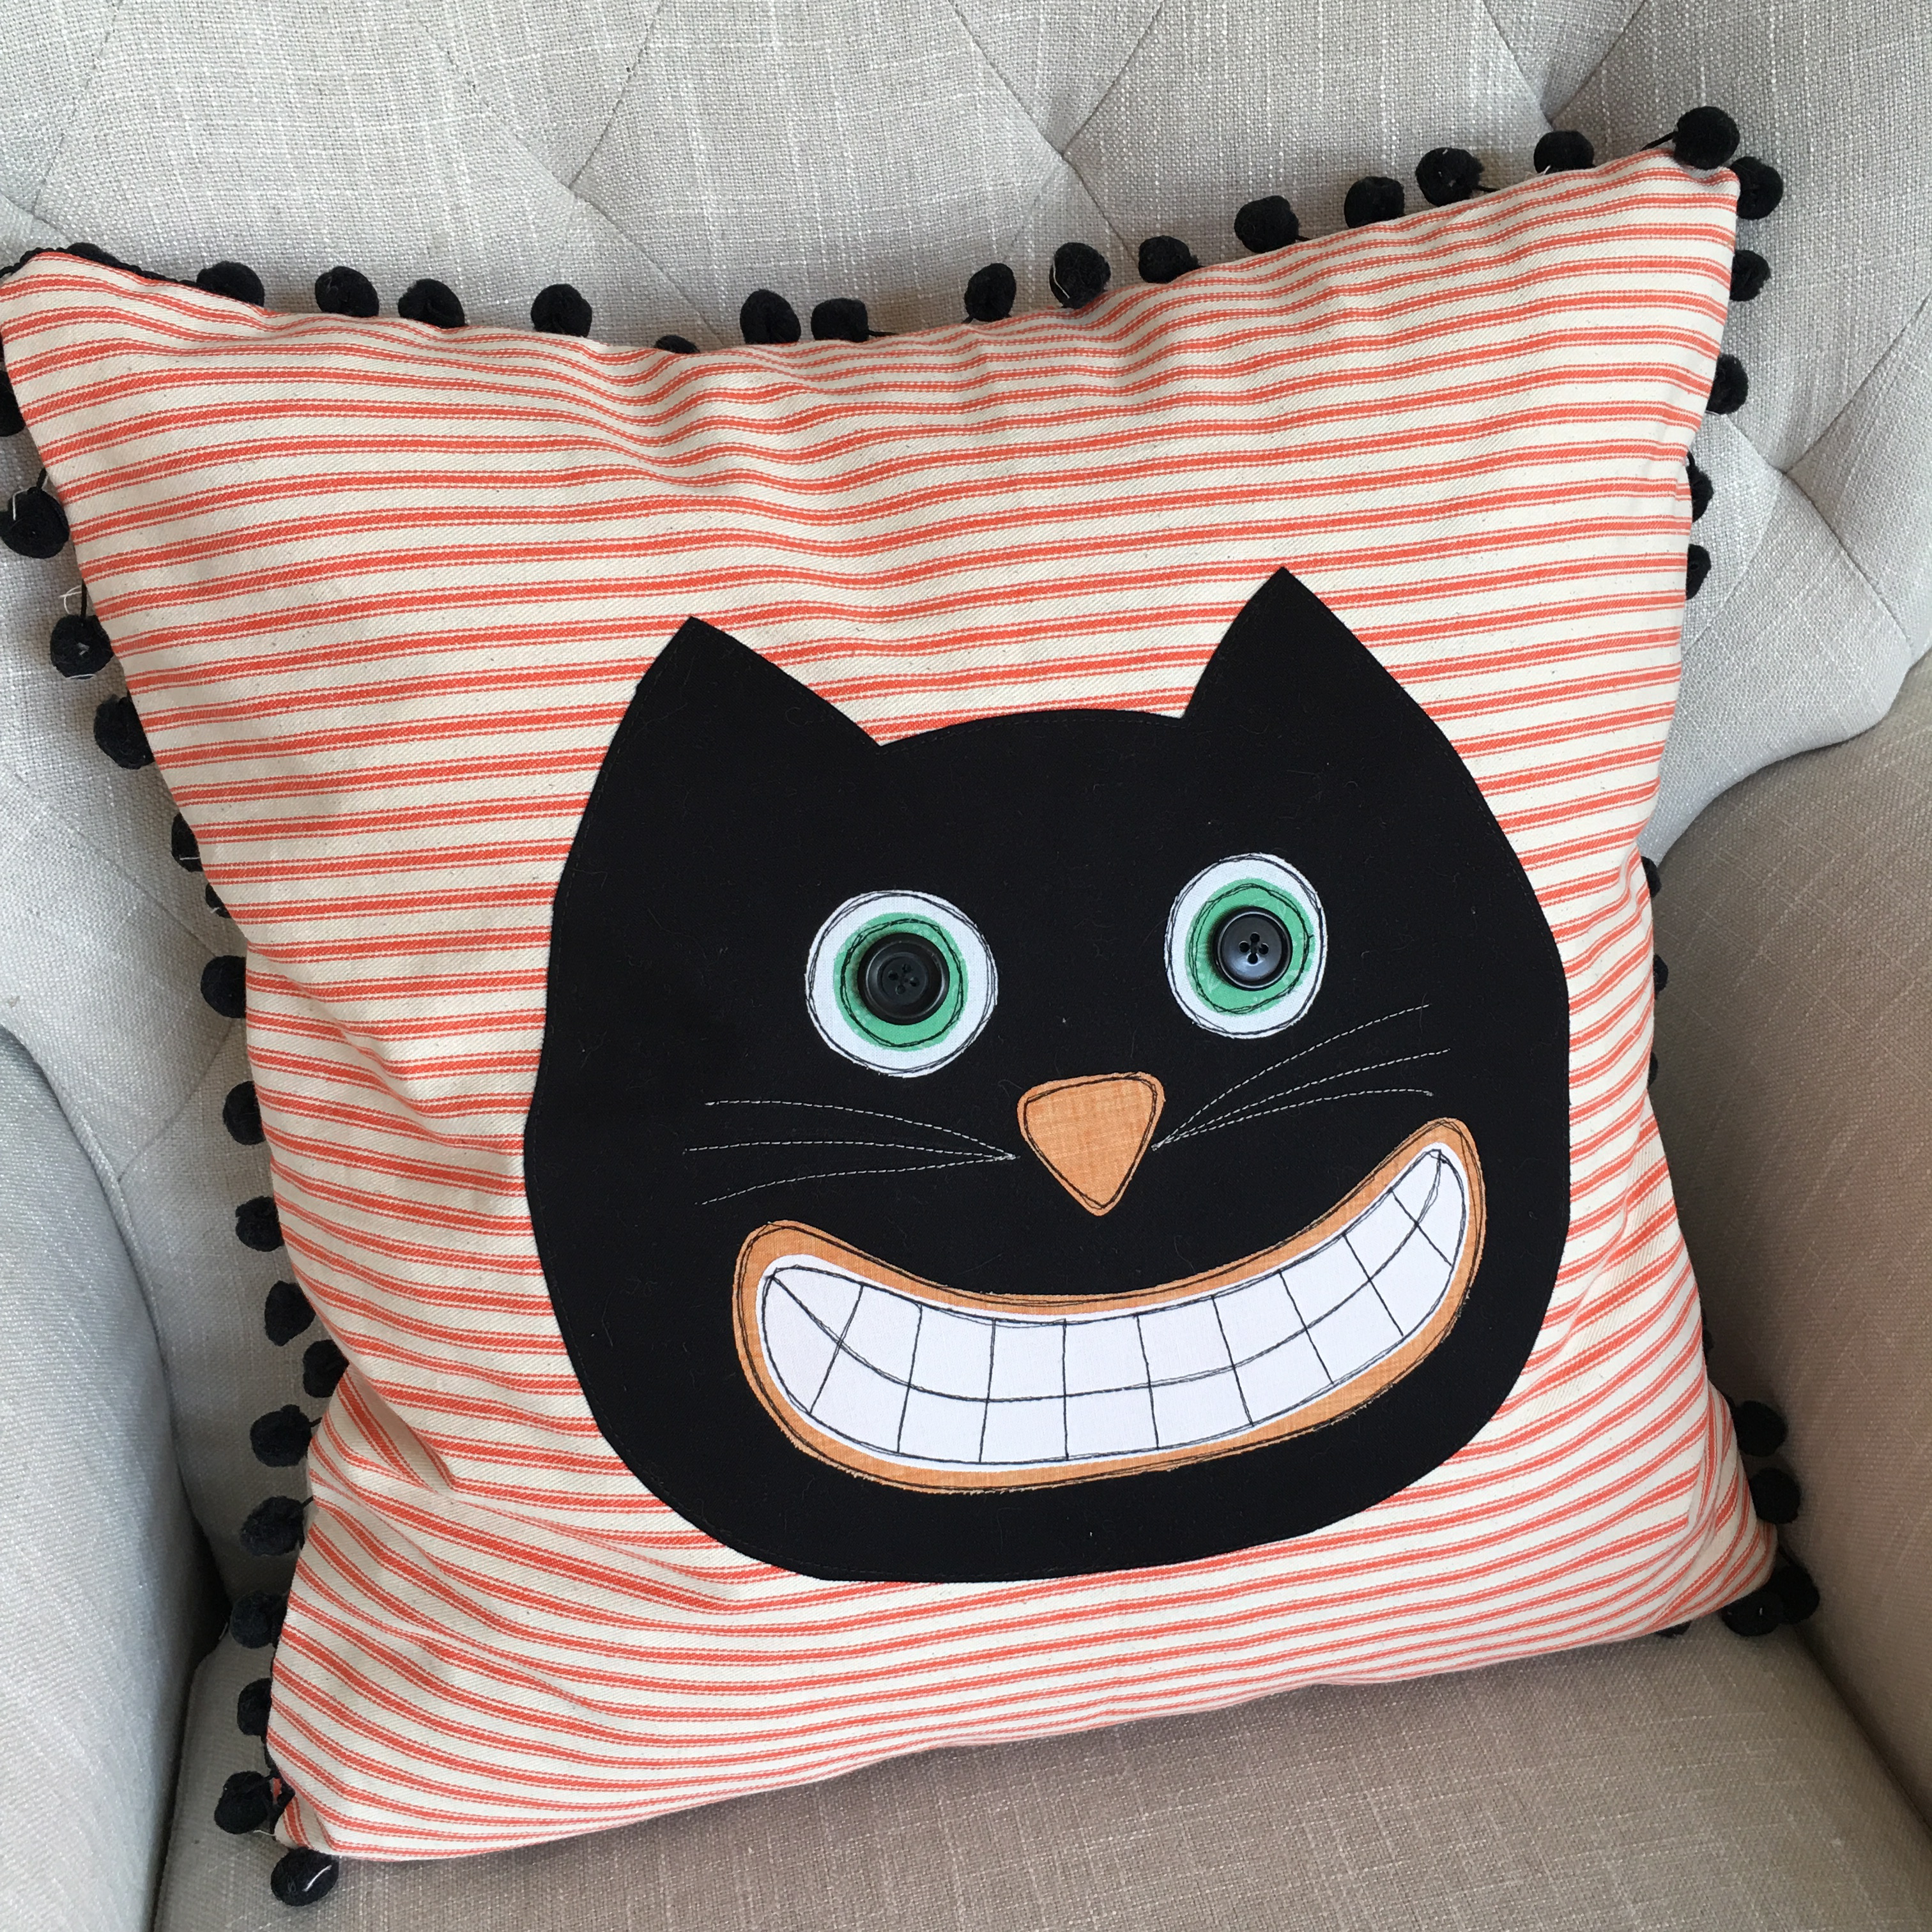
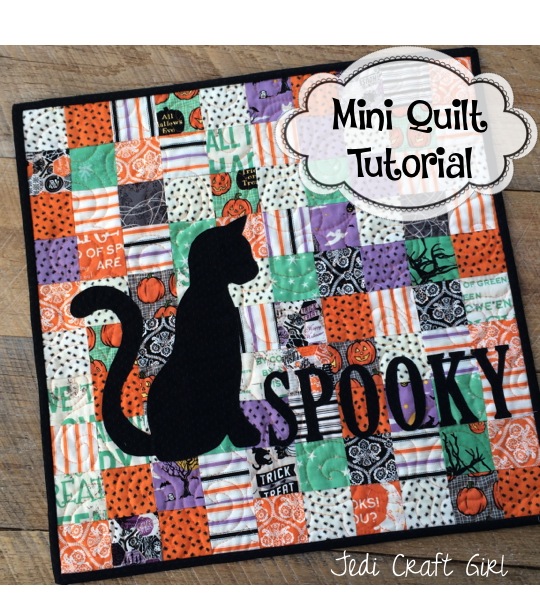
I love silly black cats!!!


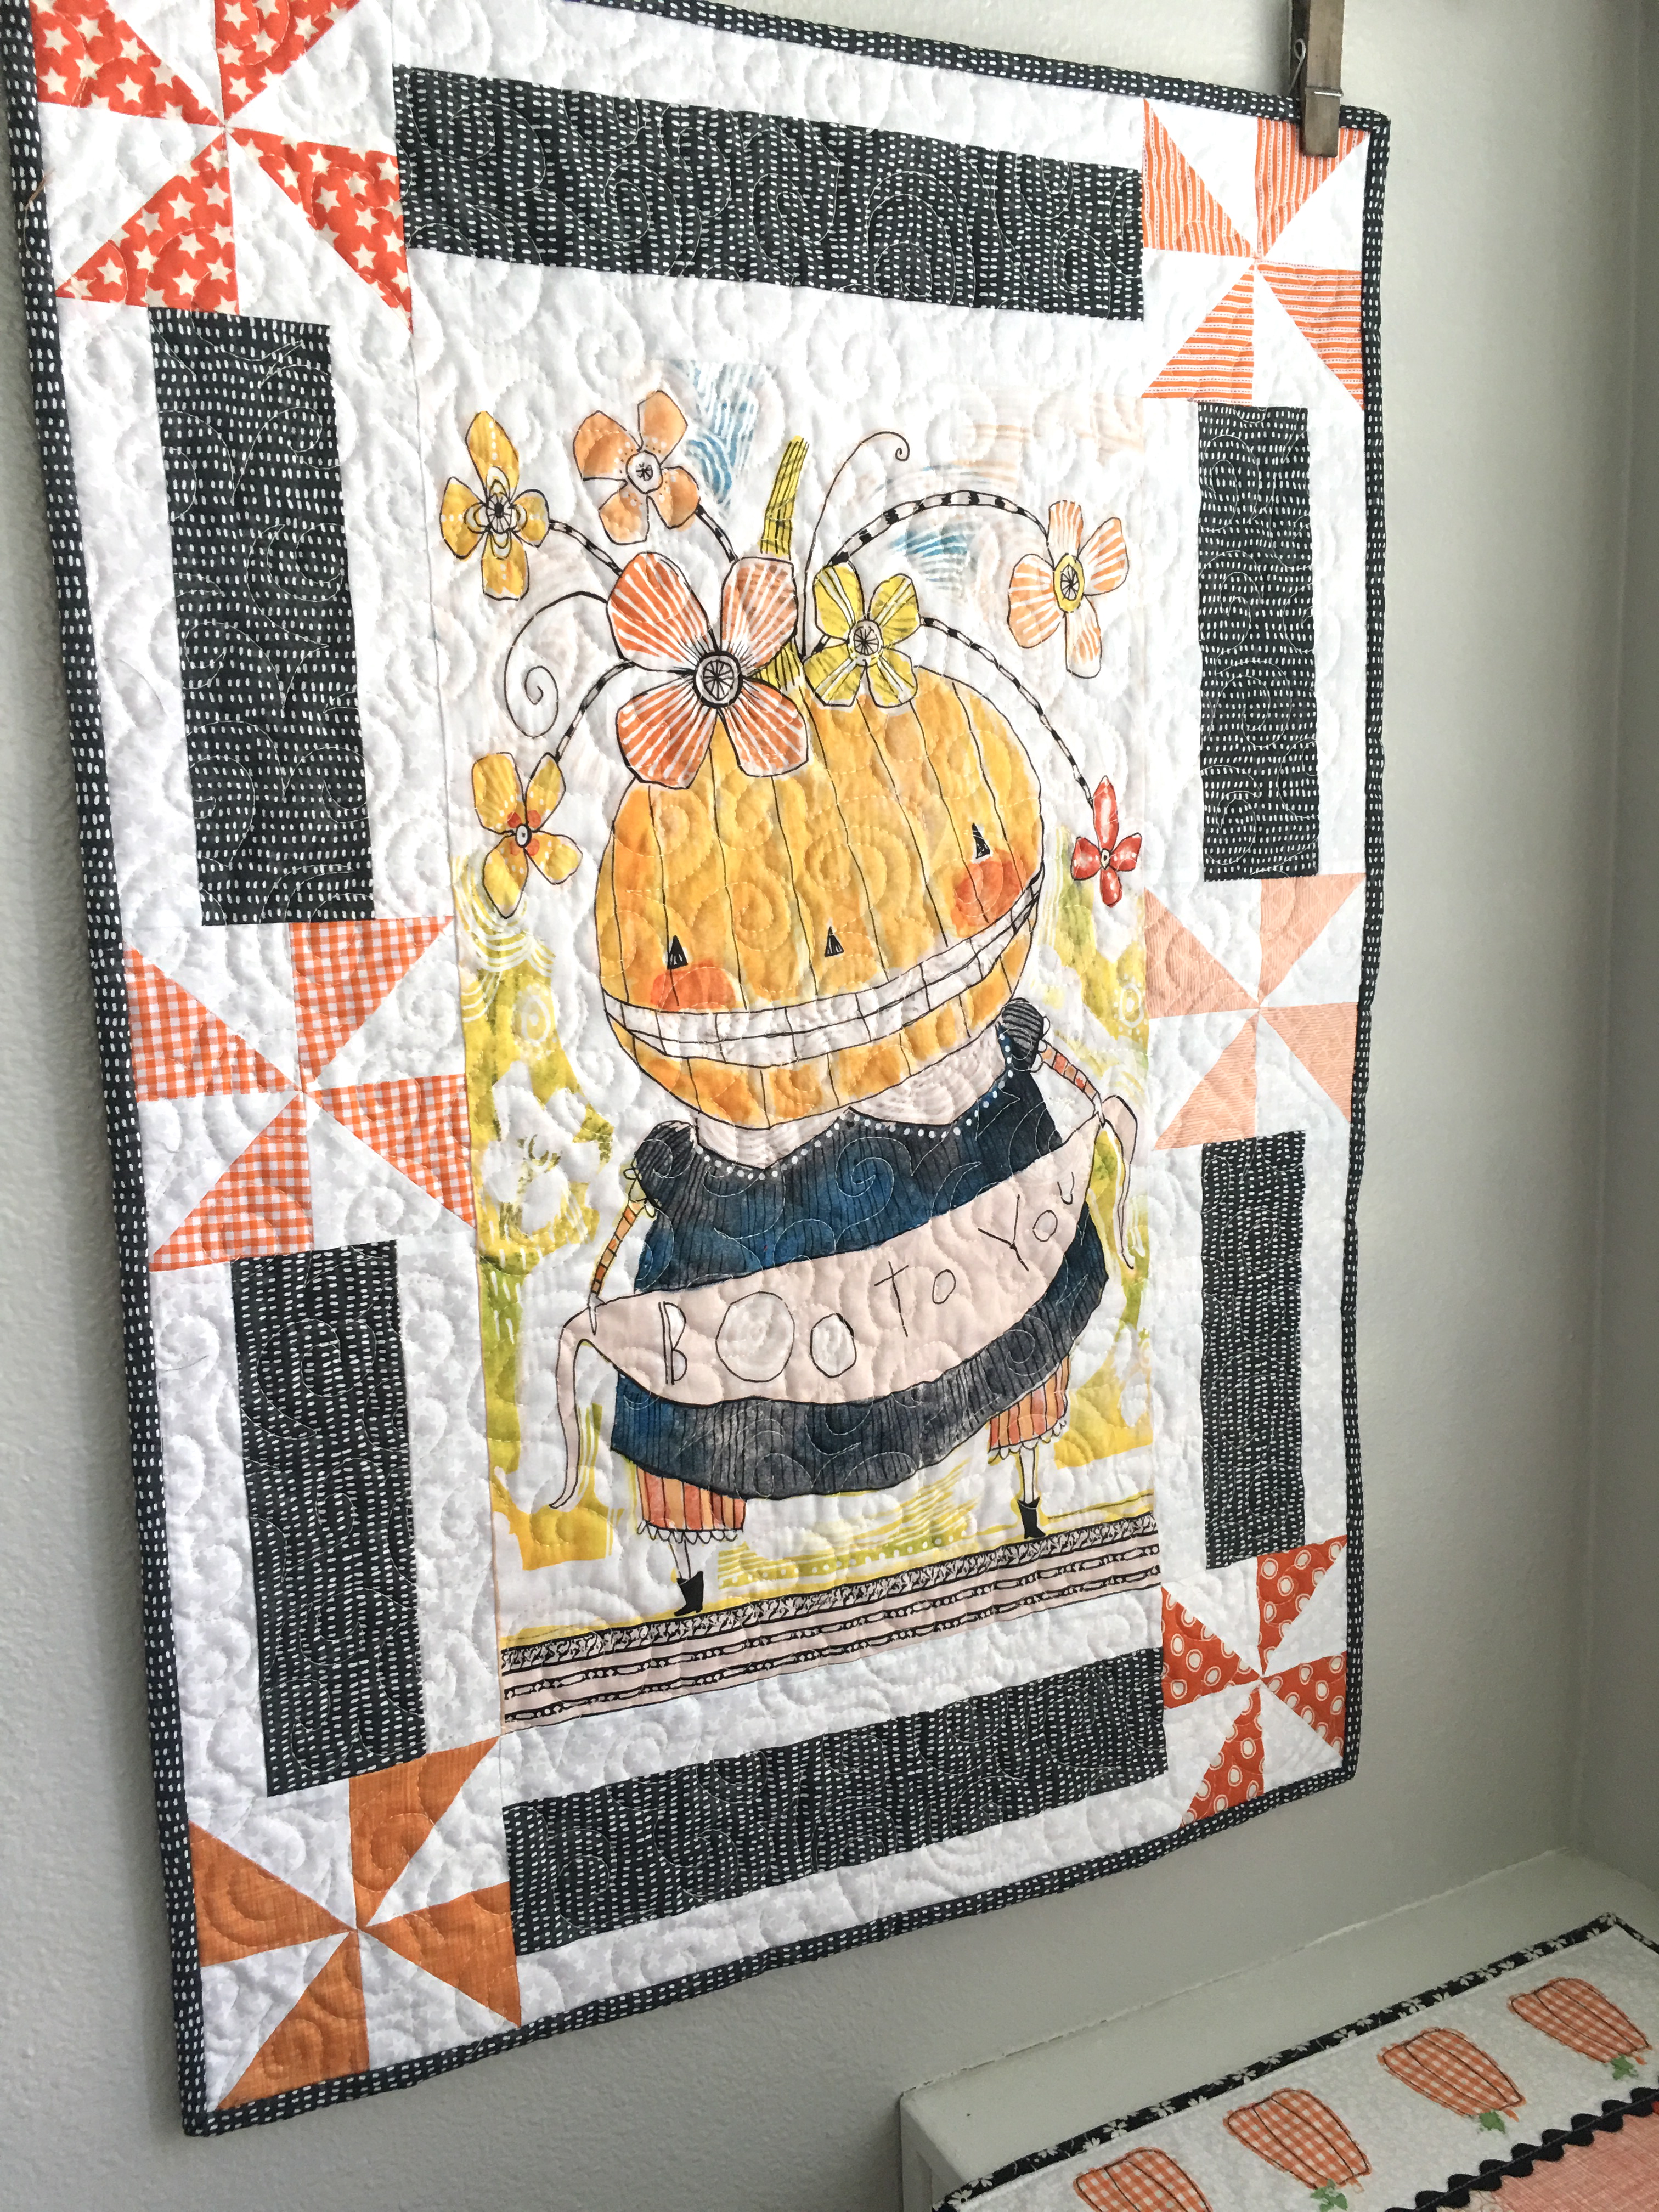
I love the adorable artwork panels by Cori Dantini for Blend Fabrics! This line is called Spooky Town. It seems each season Cori comes out with beautiful new designs! I came up with this fun way to add borders and create a wall hanging! This tutorial can also be adjusted to fit other panels of fabric .
Let’s get started:
Fabric Requirements:
1 panel
1/3 yard white fabric
1/4 yard black print
fat quarters or scraps for each of the 6 pinwheels
1/4 yard binding
1 yard back
Cut the panel so it measures 13.5″ x 23.5″ 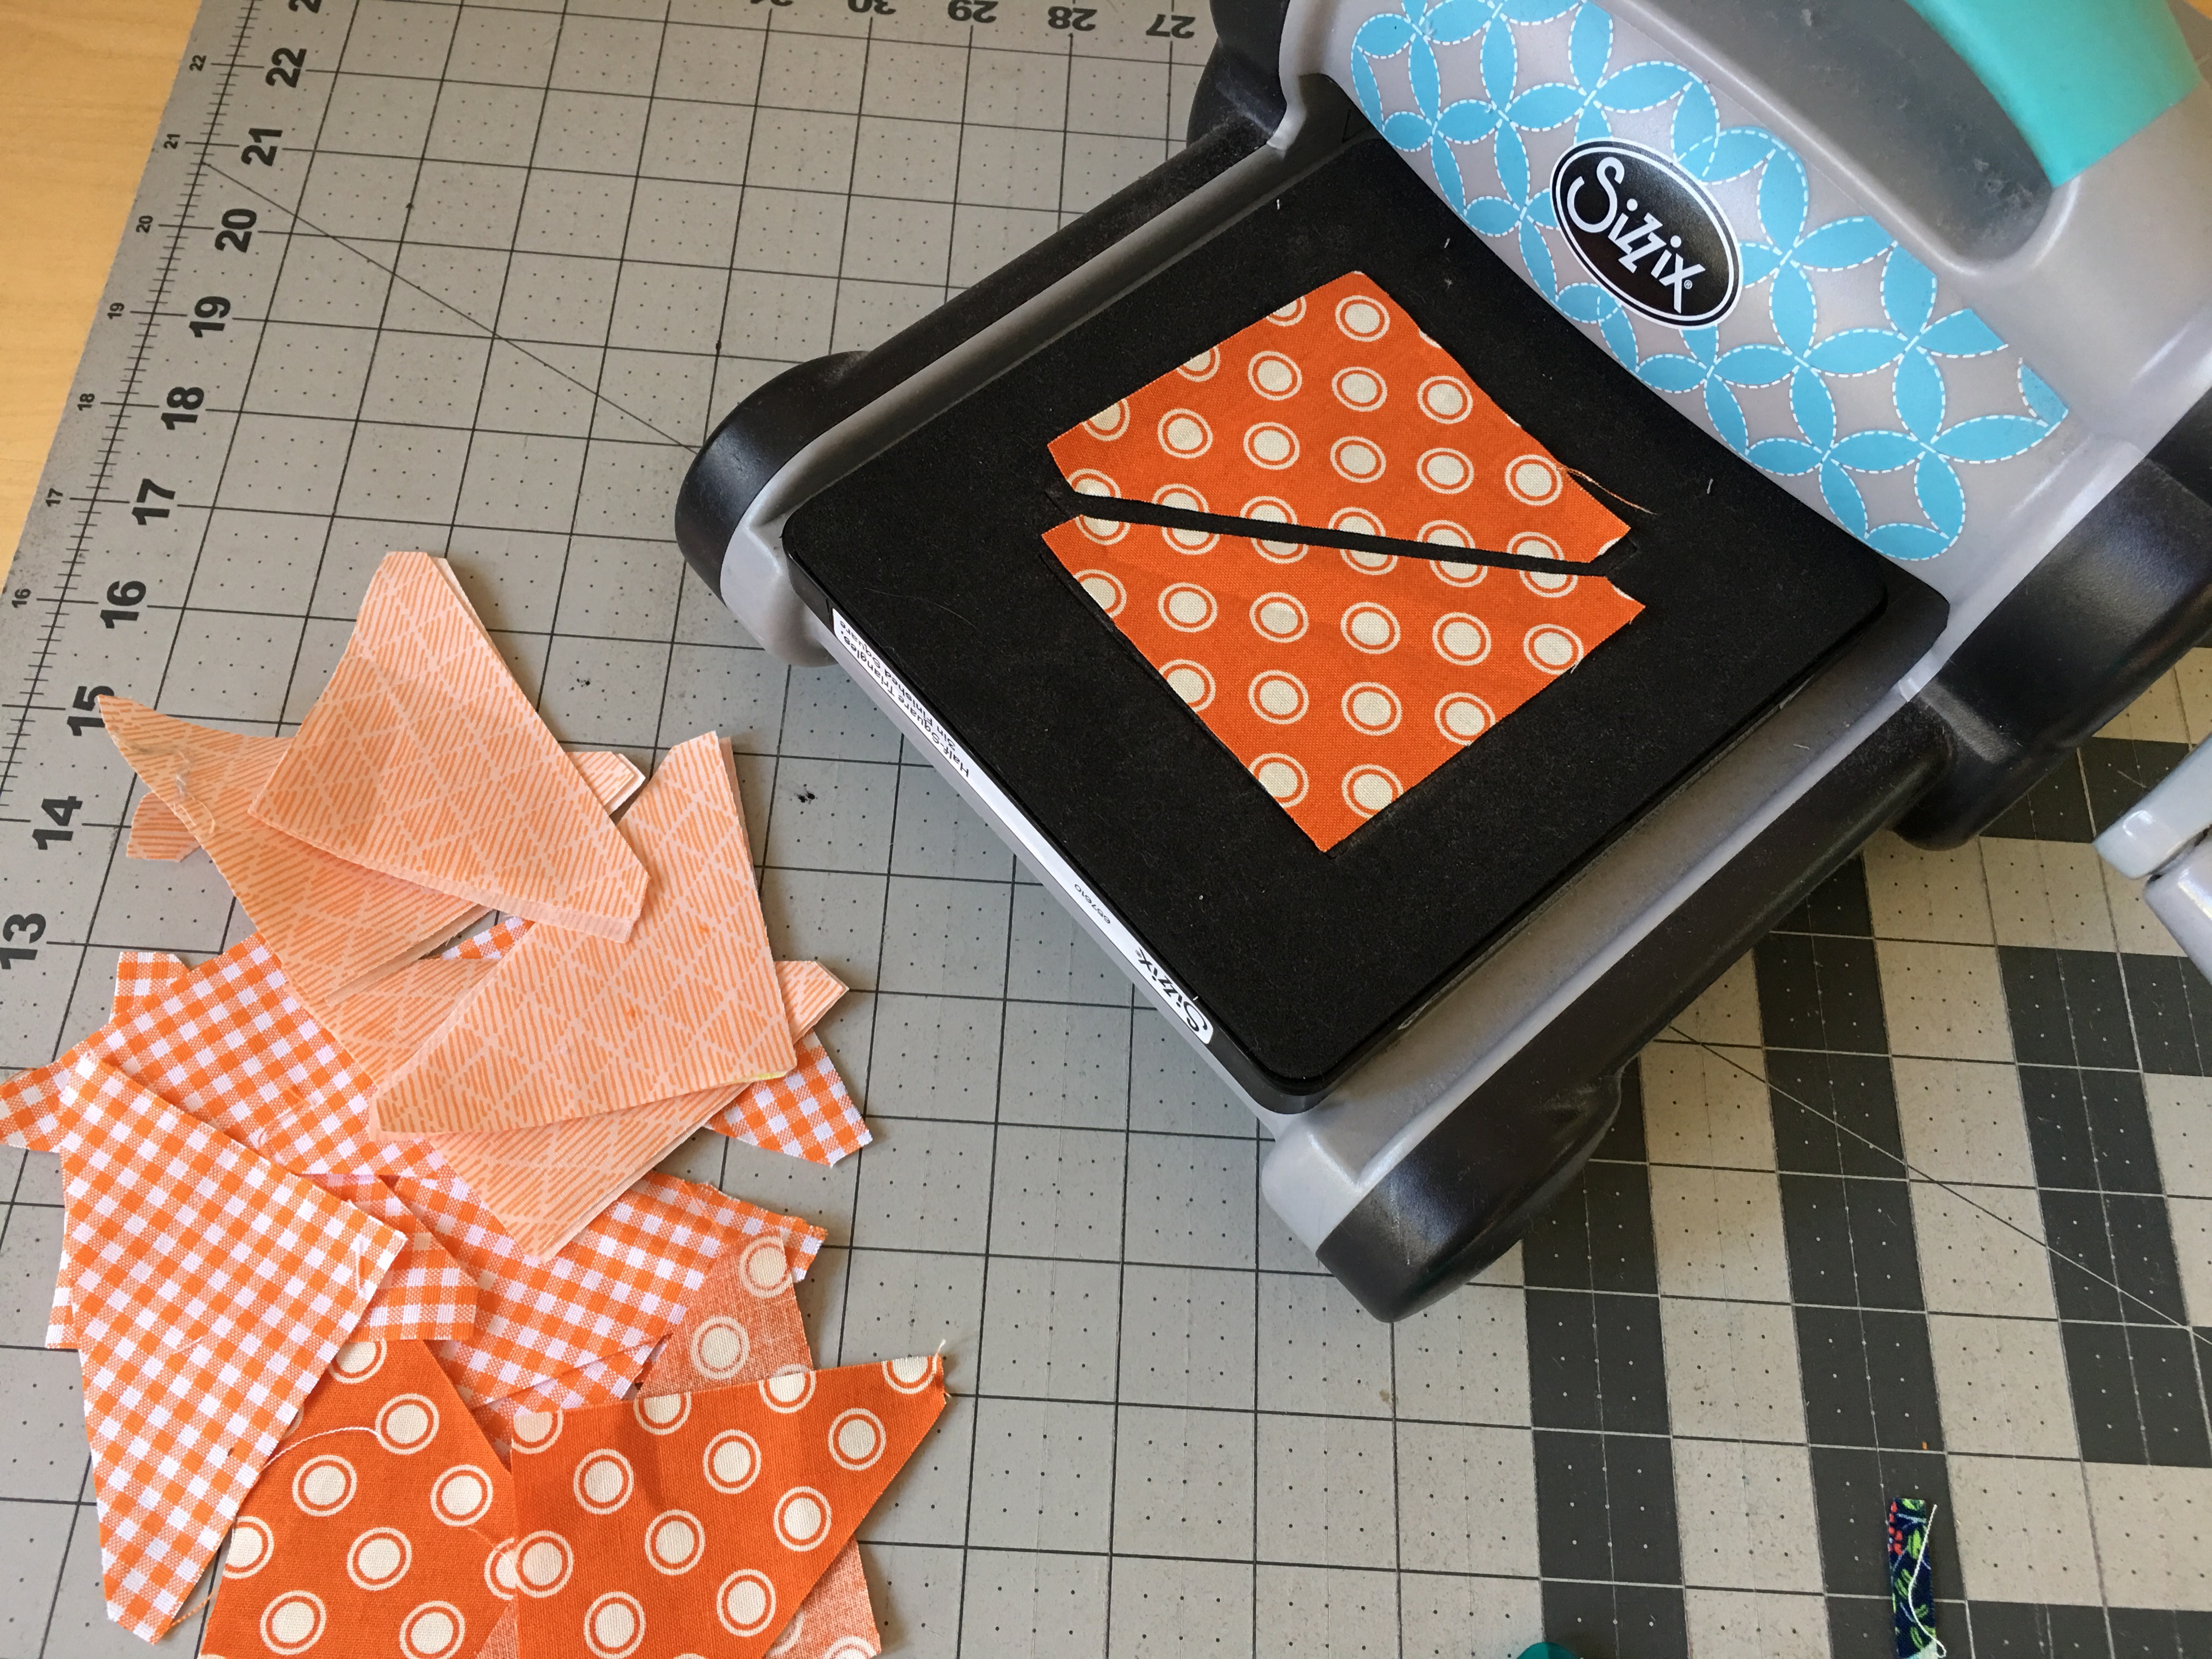
Make 6 pinwheels. Each pinwheel is made up of (4) 3″ half square triangles (HST). You can choose any method you like – I always use my Sizzix to cut the HST – they come out so perfect! You will need 24 triangles of orange and 24 triangles of white.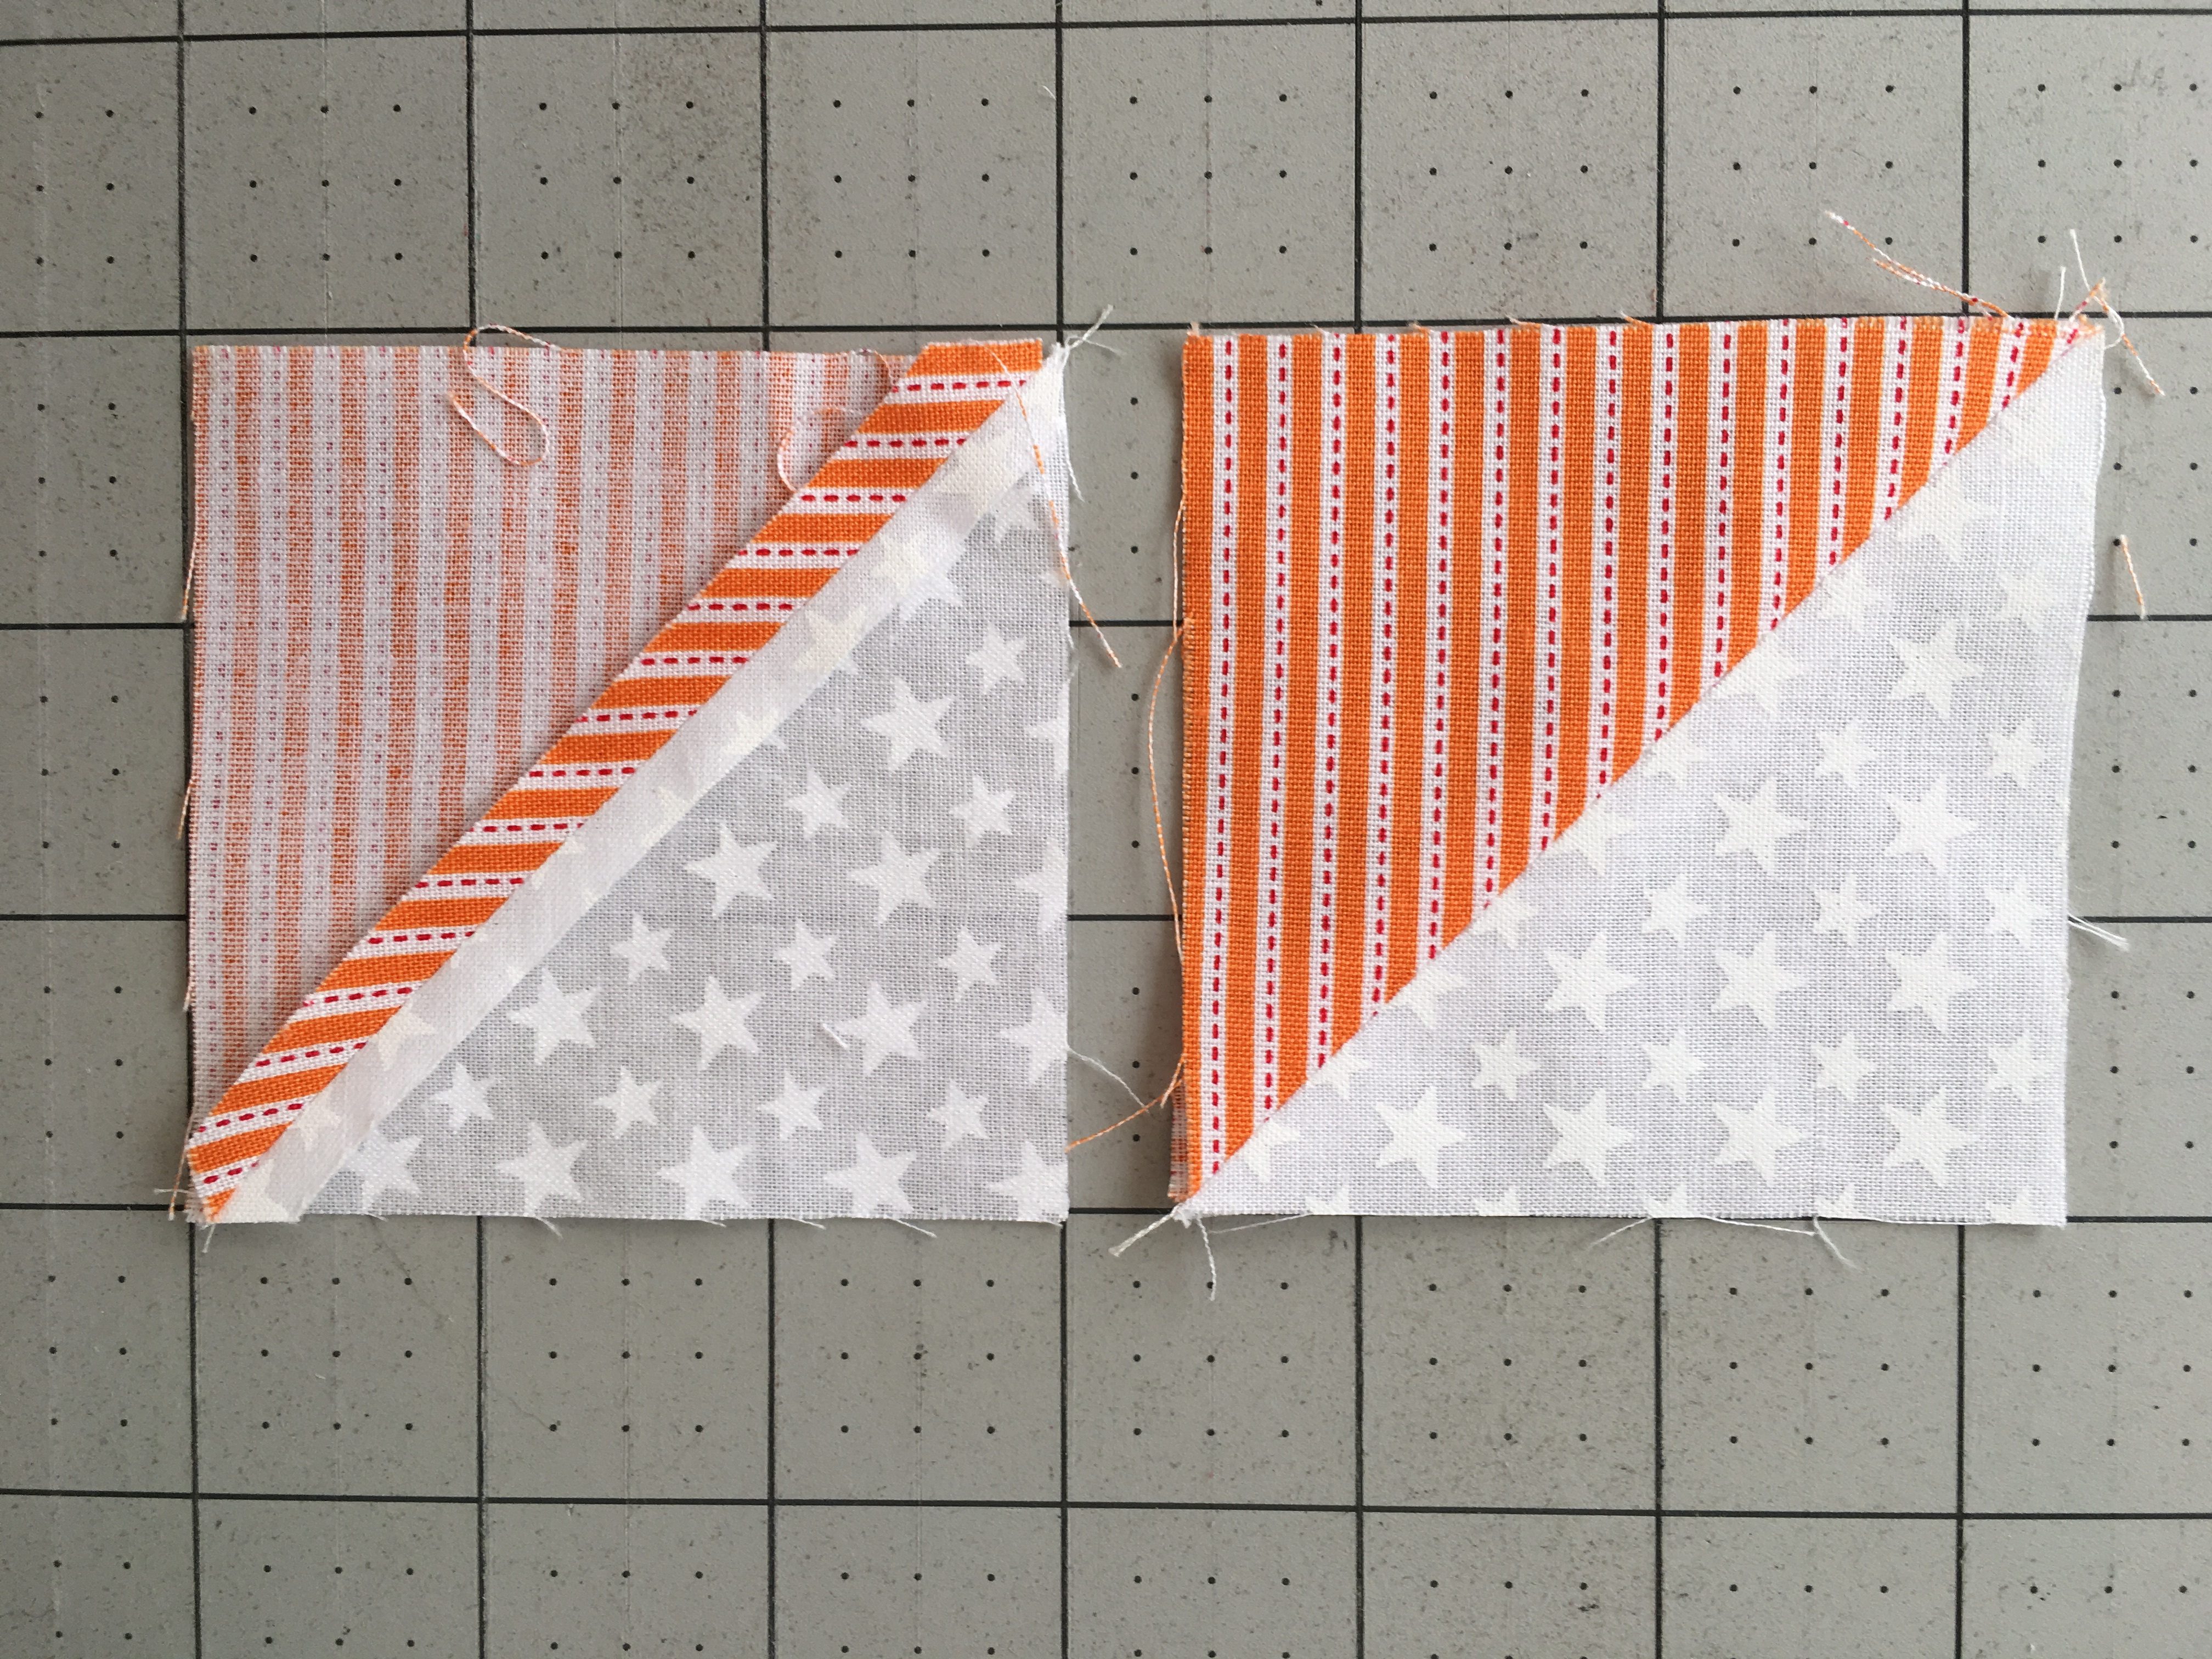
Sew the orange and white triangles together. Press seams open. You don’t have to square up with the Sizzix either!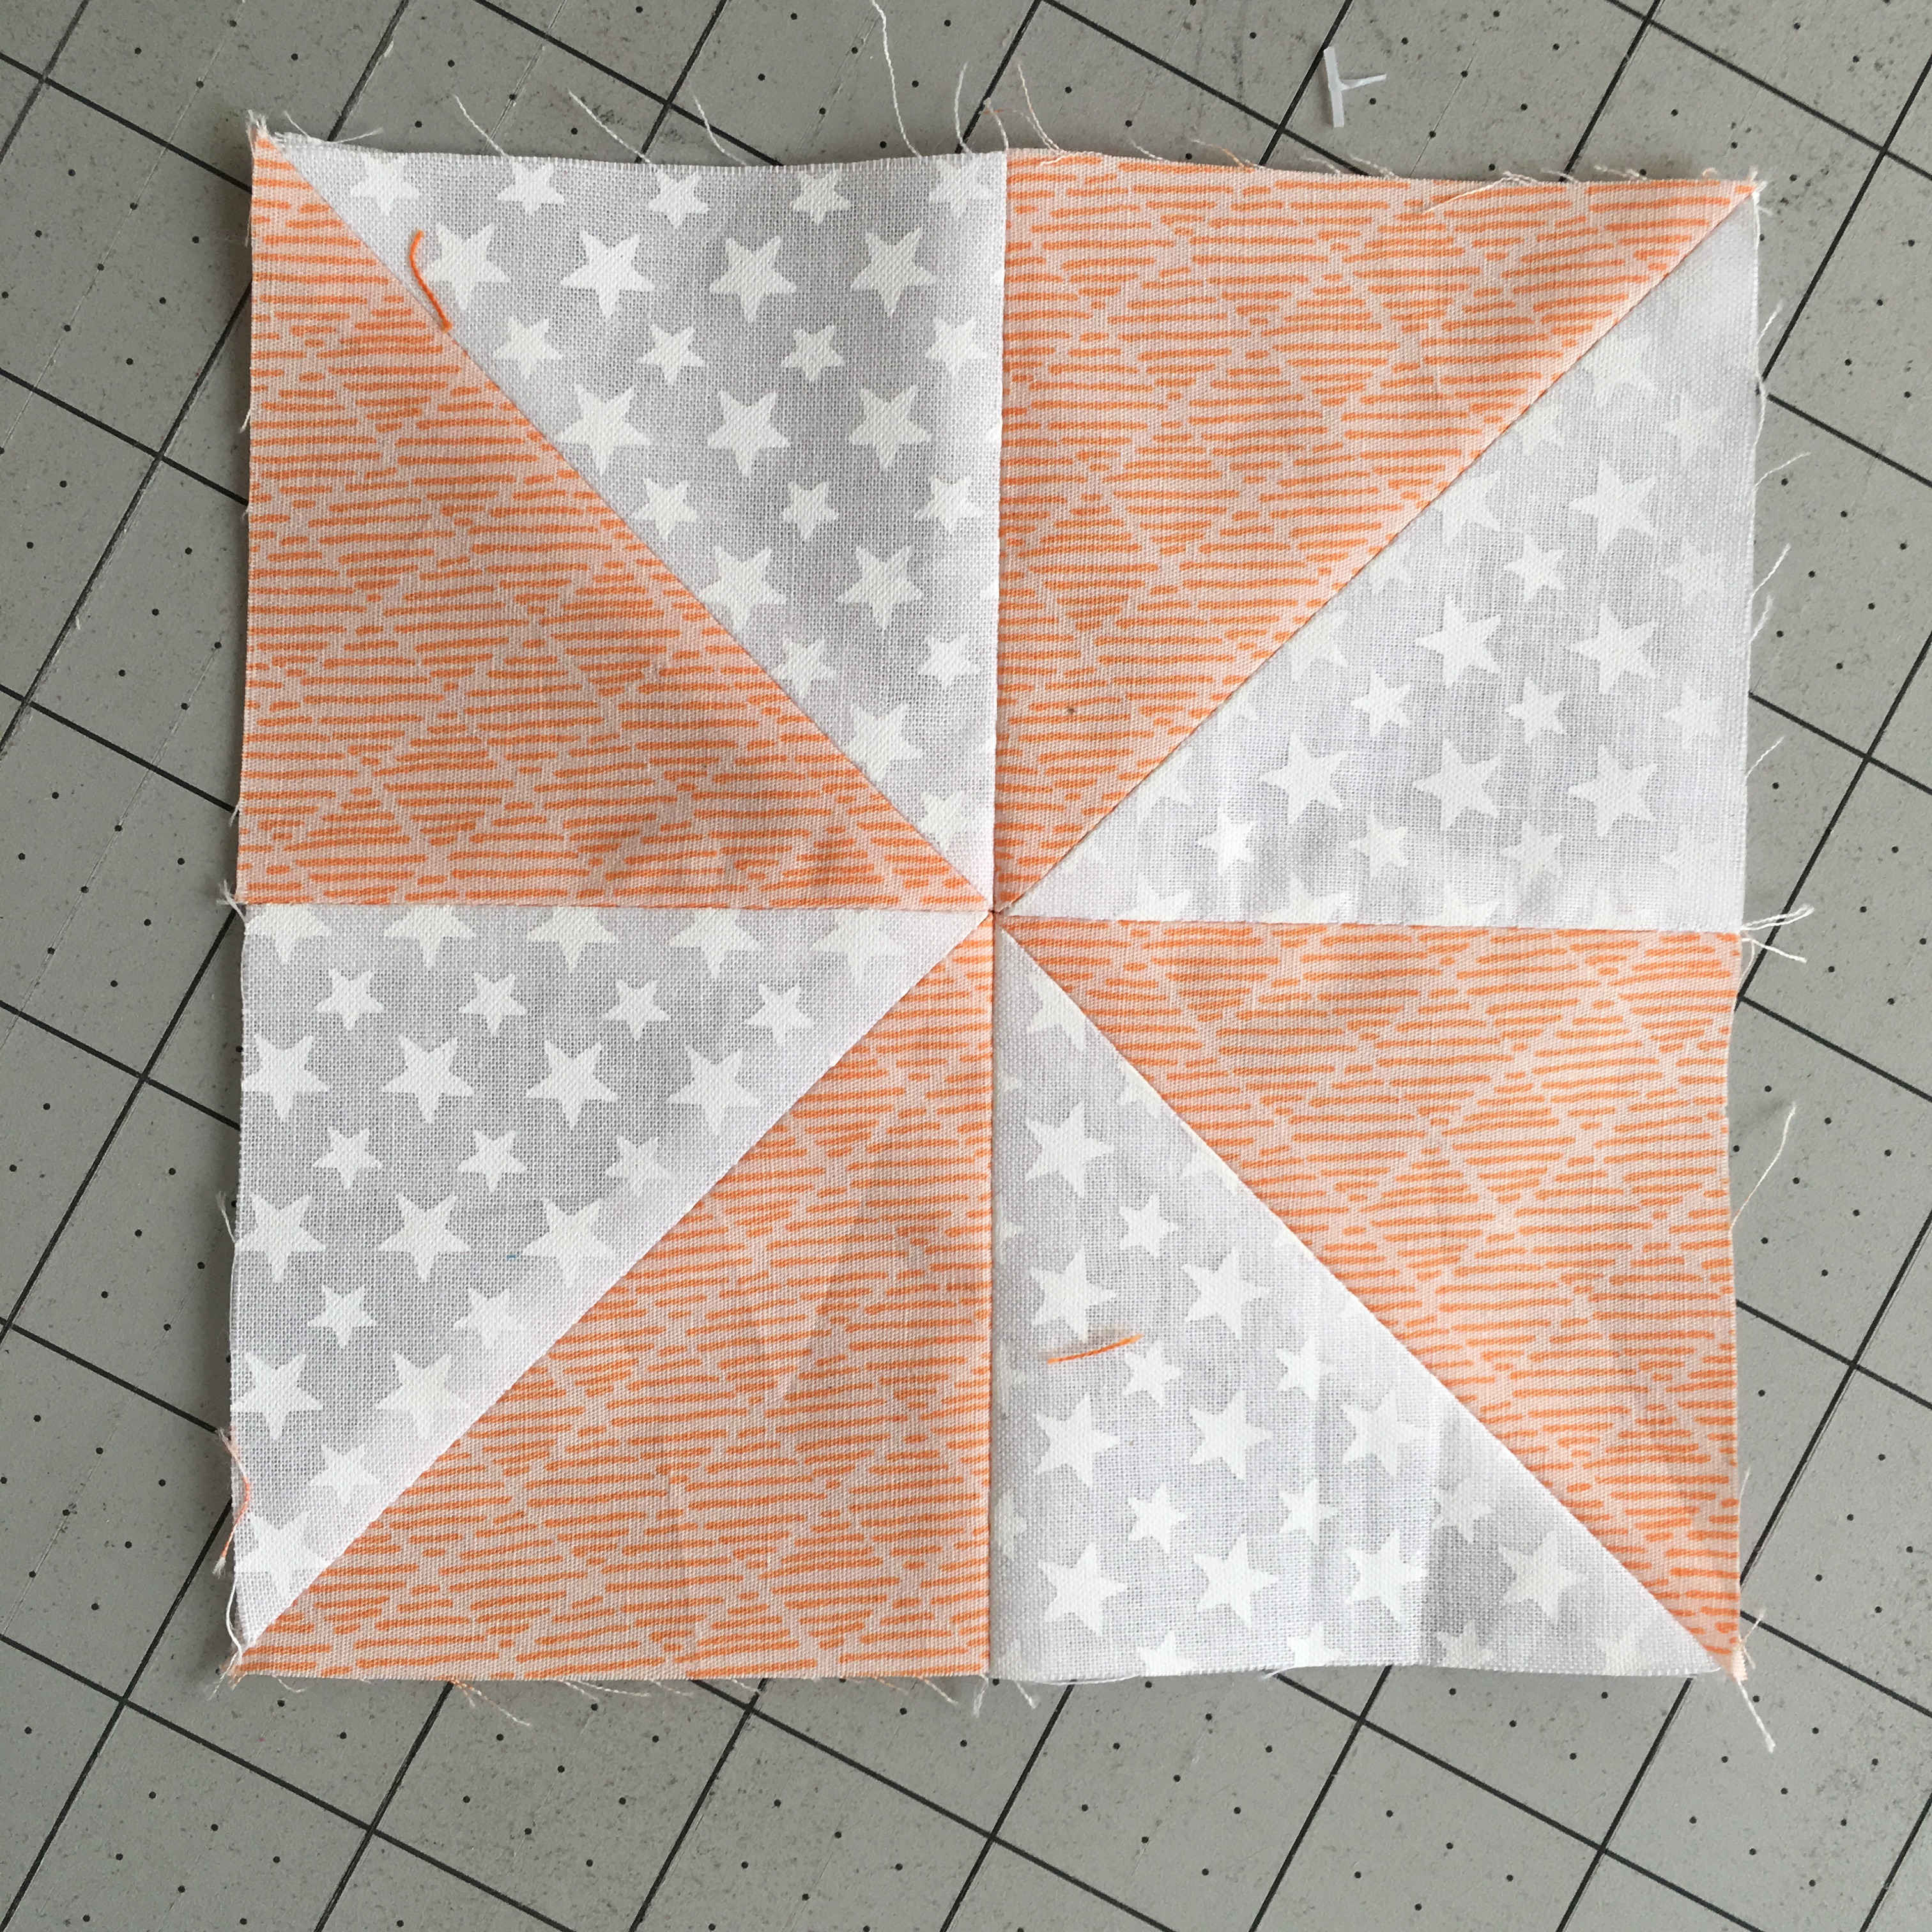
Lay out four HST and sew together as a 4-patch, pressing seams open each time. You will have 6 pinwheels measuring 5.5″ square.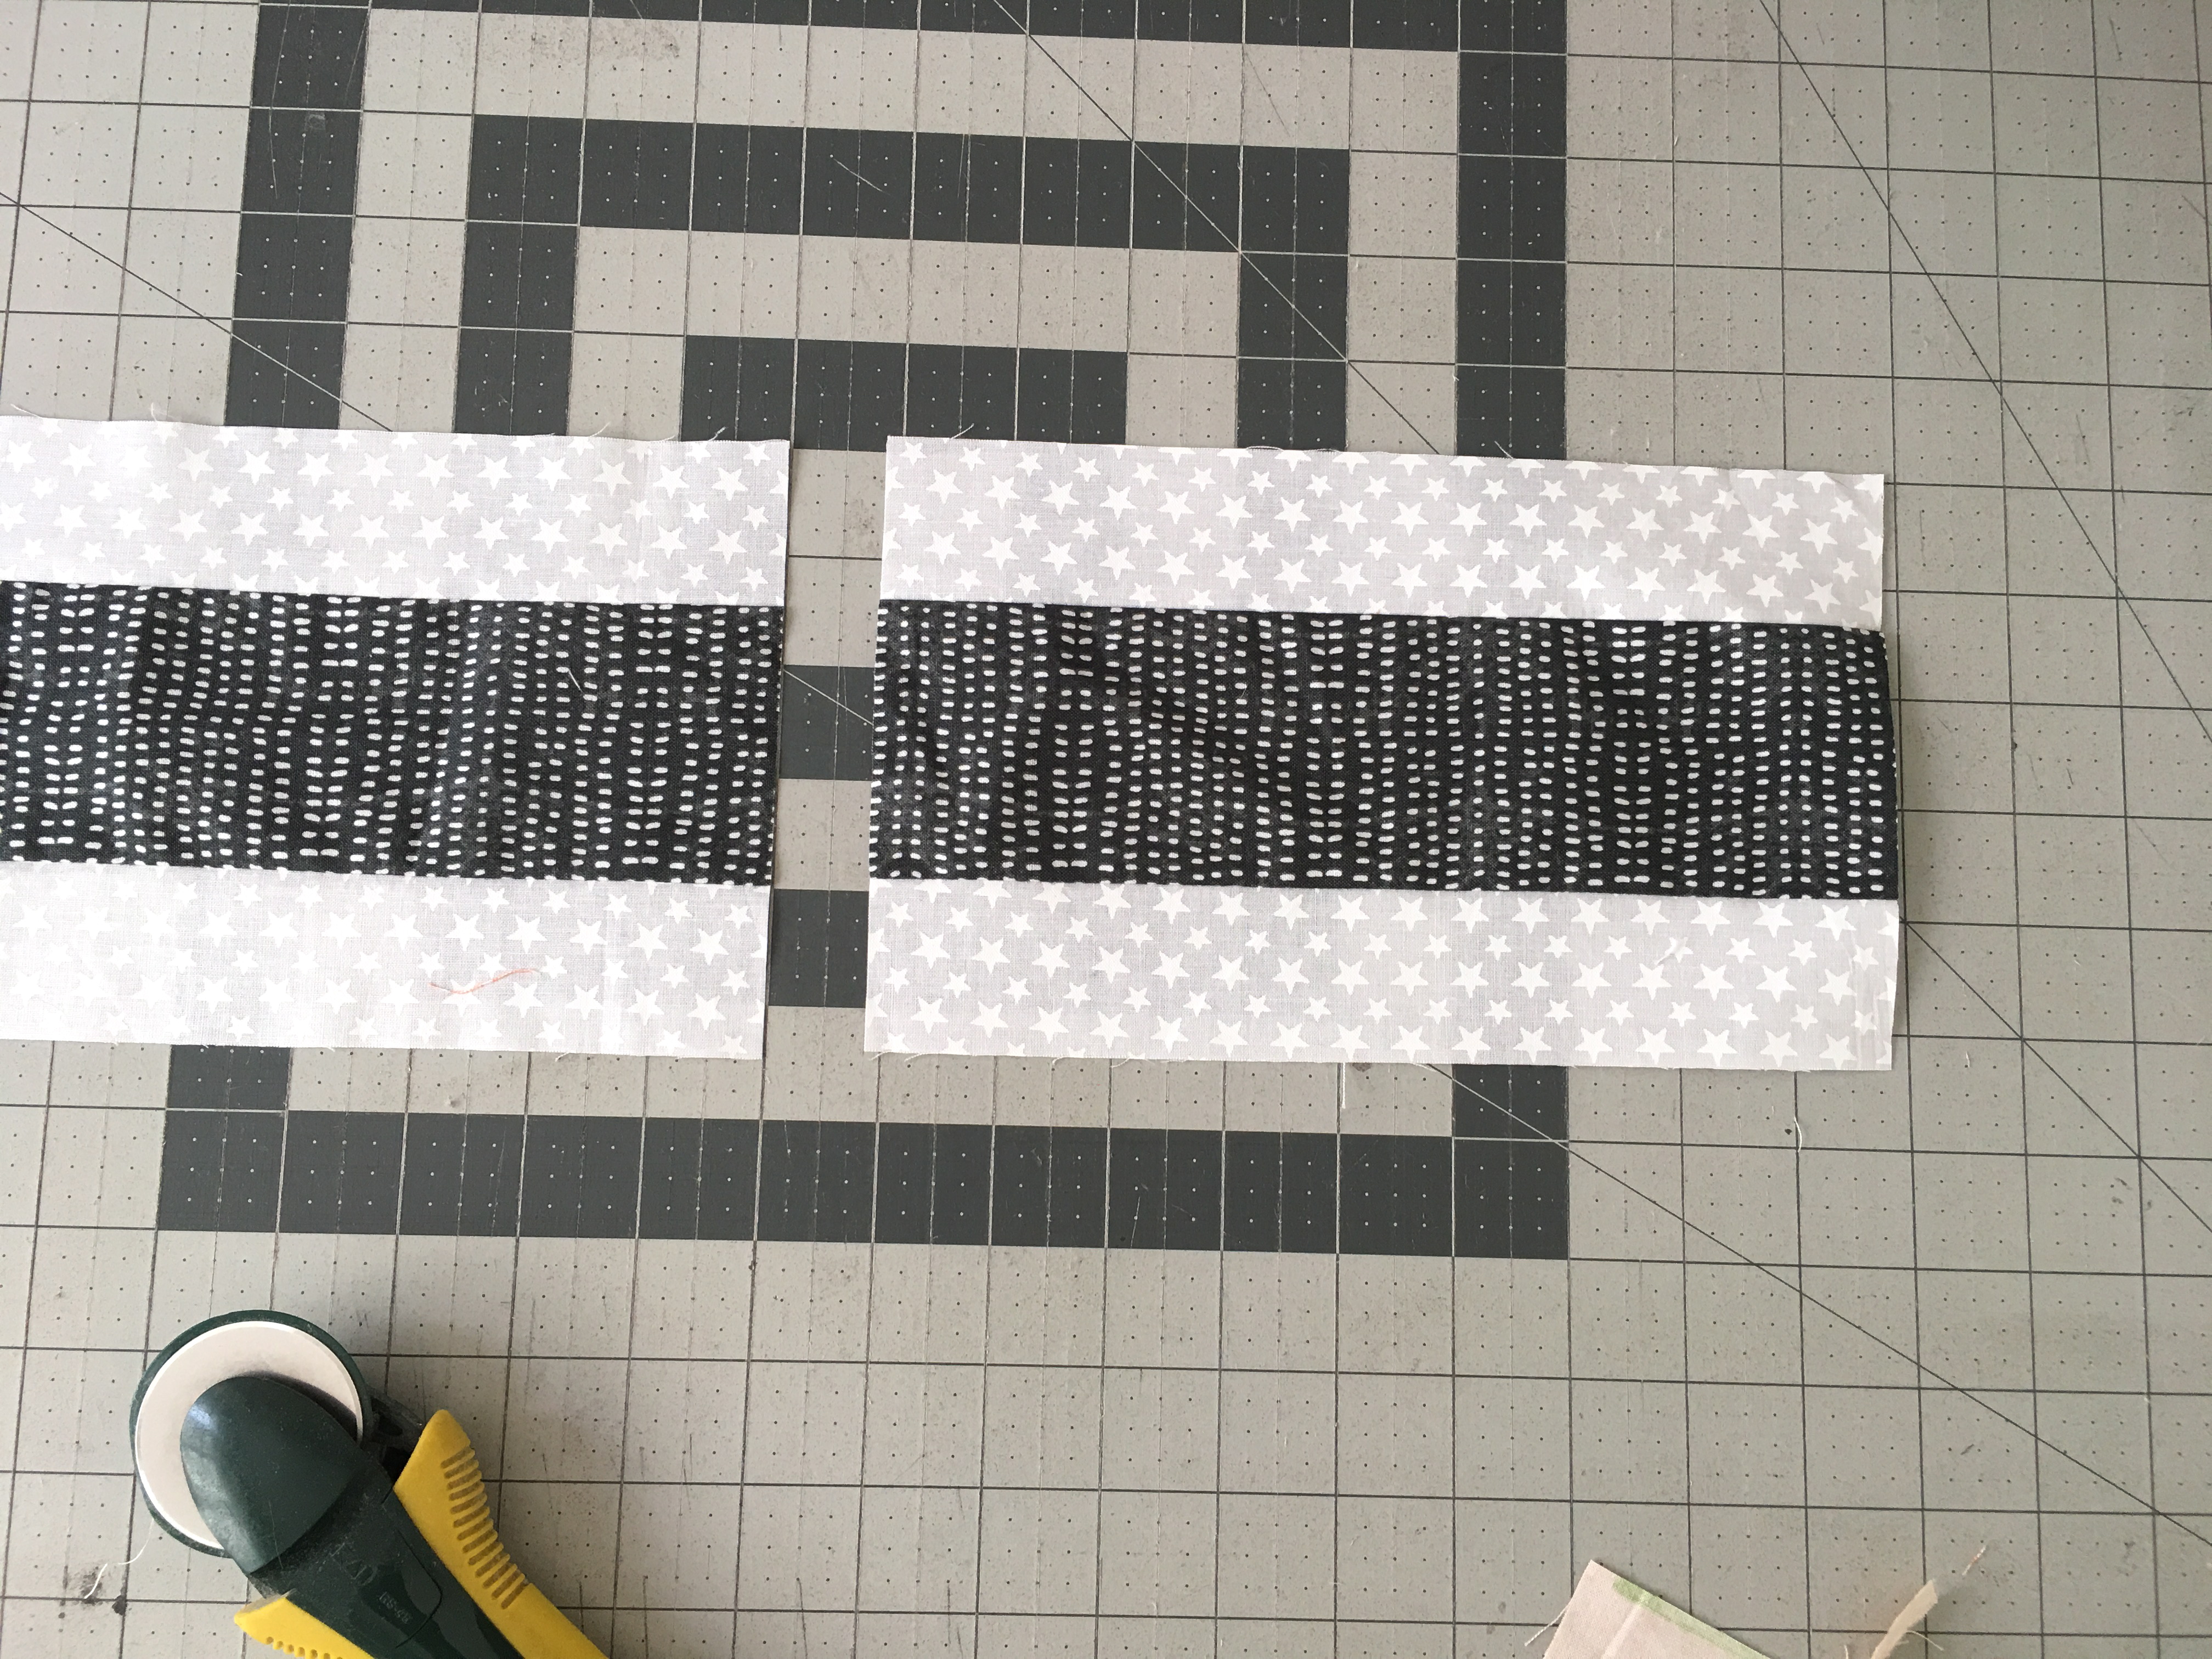
To make the strip sets, cut (4) 1.75″ x WOF of the white. Cut (2) 3″xWOF of the black. Sew the white strips on both sides of the black strip. Make 2 strip sets. Press toward the dark. Cut the strip sets in (4) units of 9″ and (2) units of 13.5″.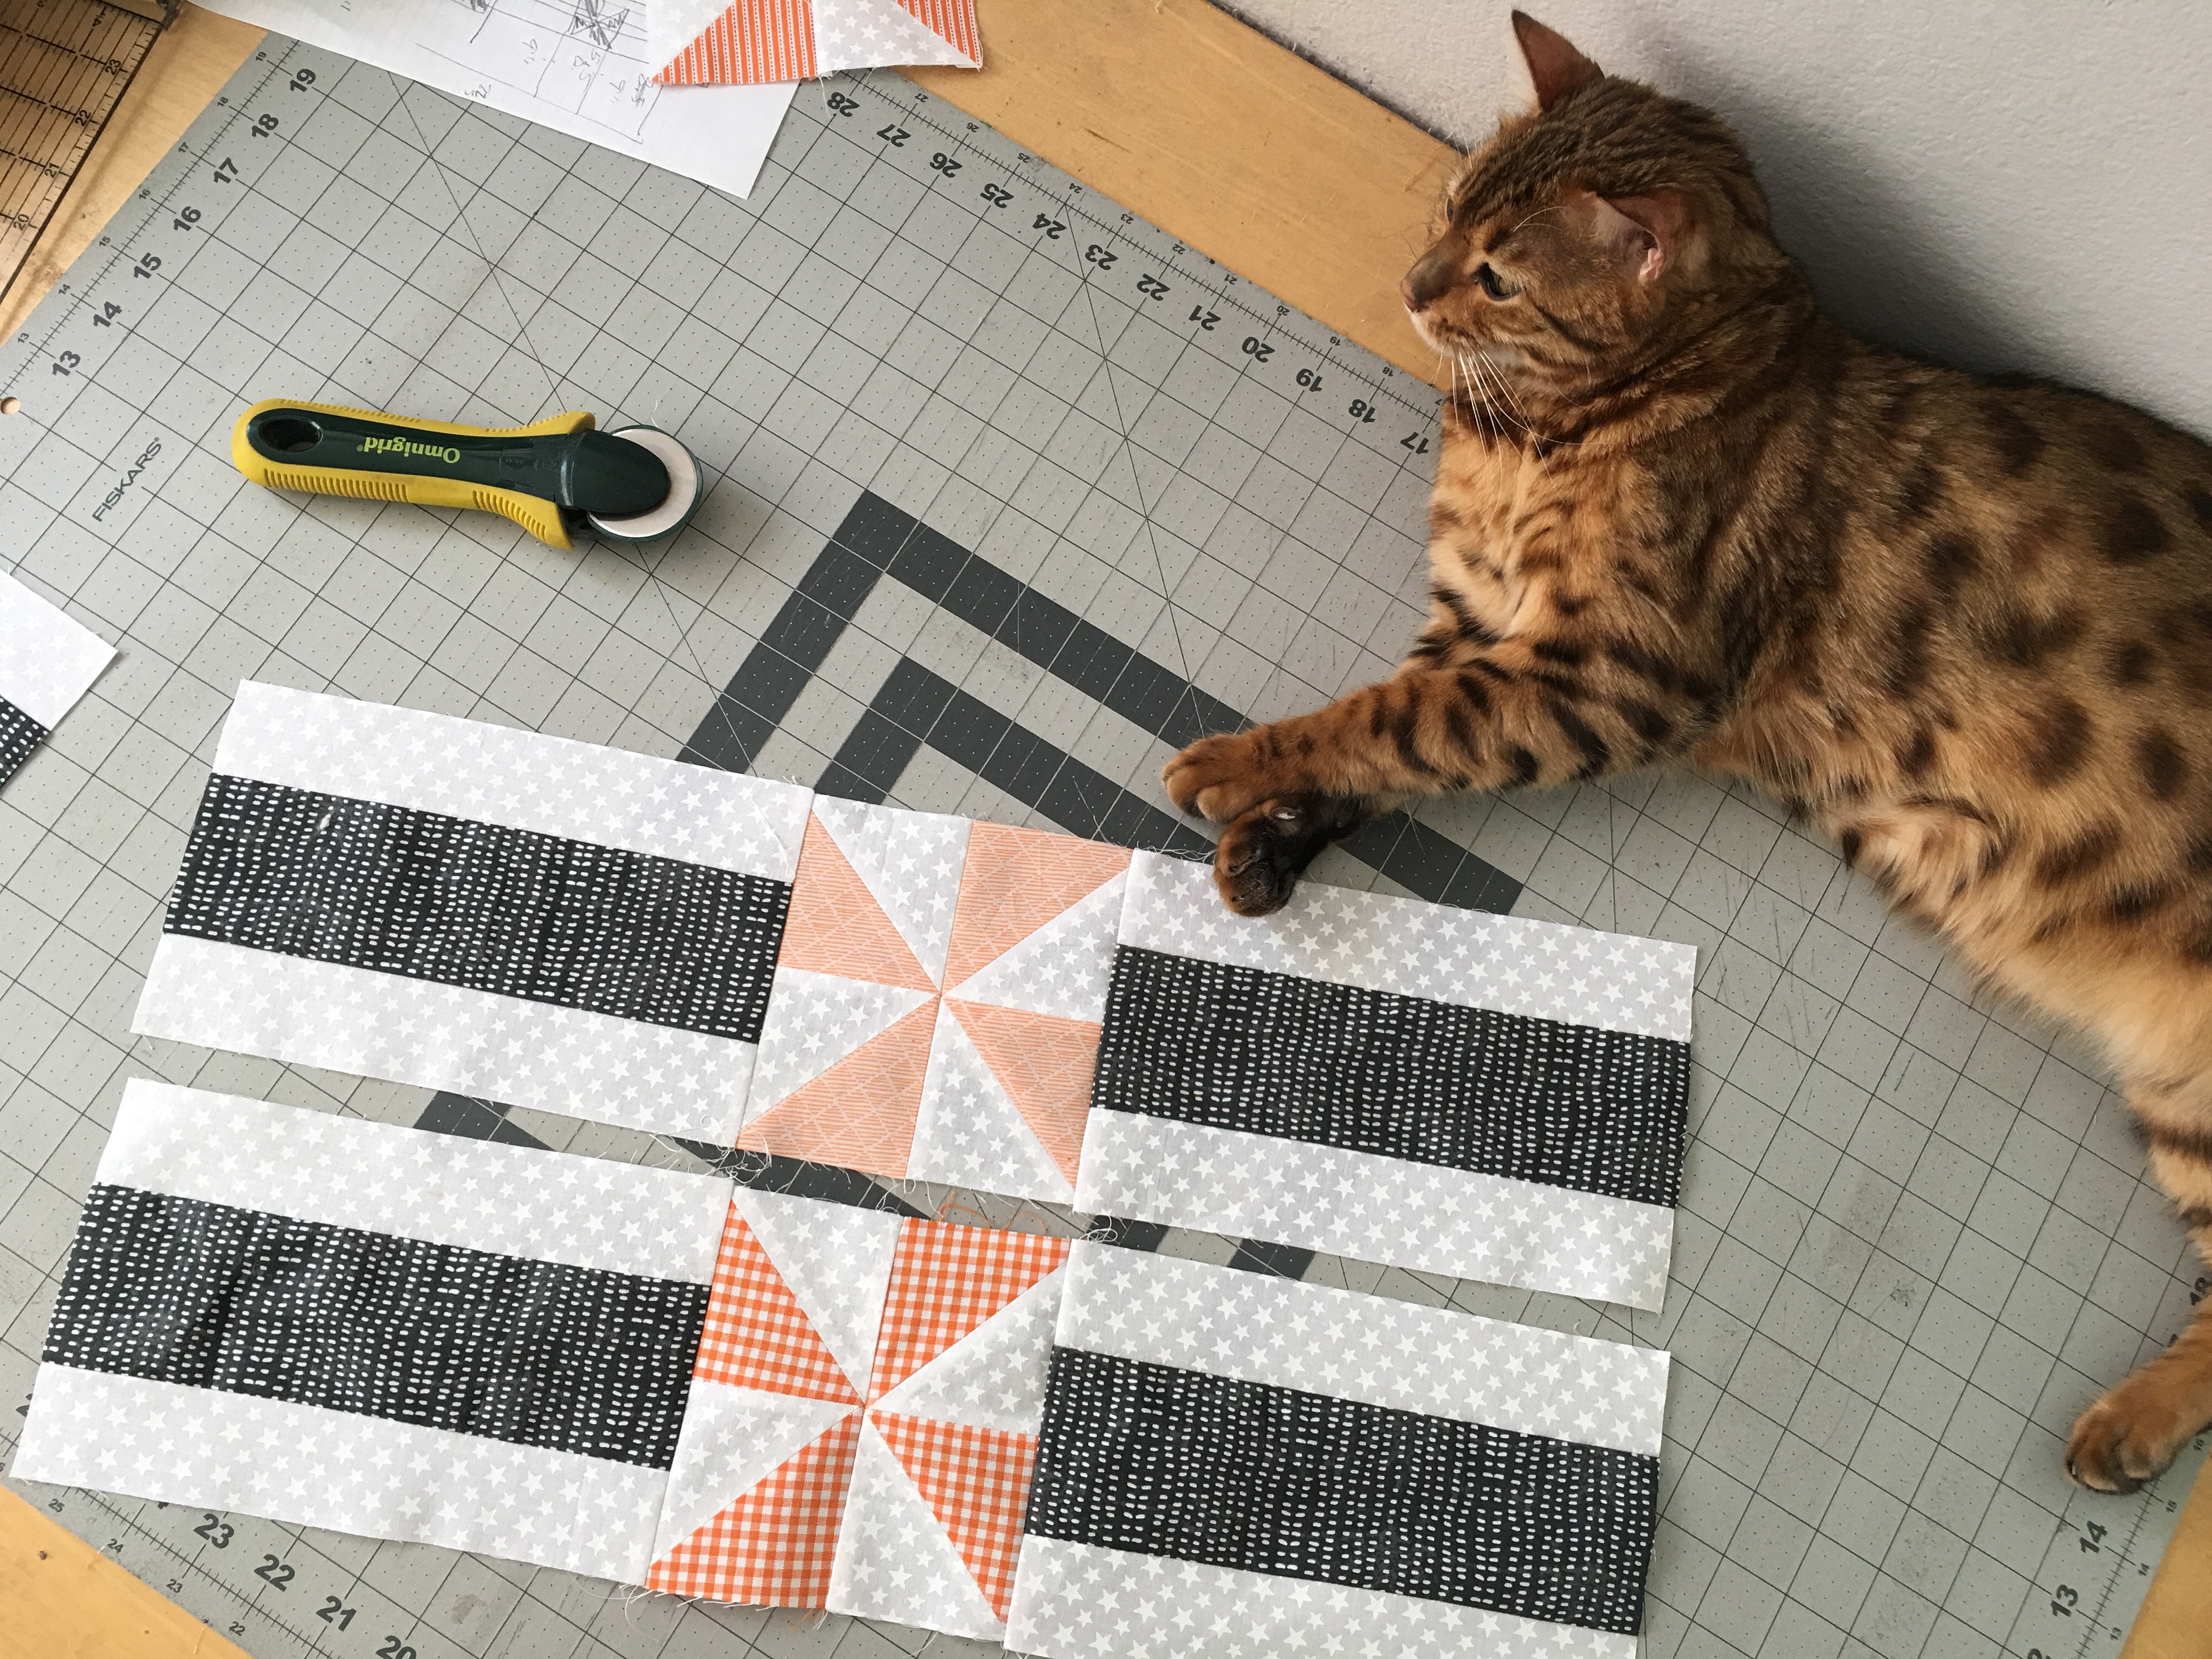
Sew the 9″ units onto both sides of a pinwheel. Make 2 of these side units.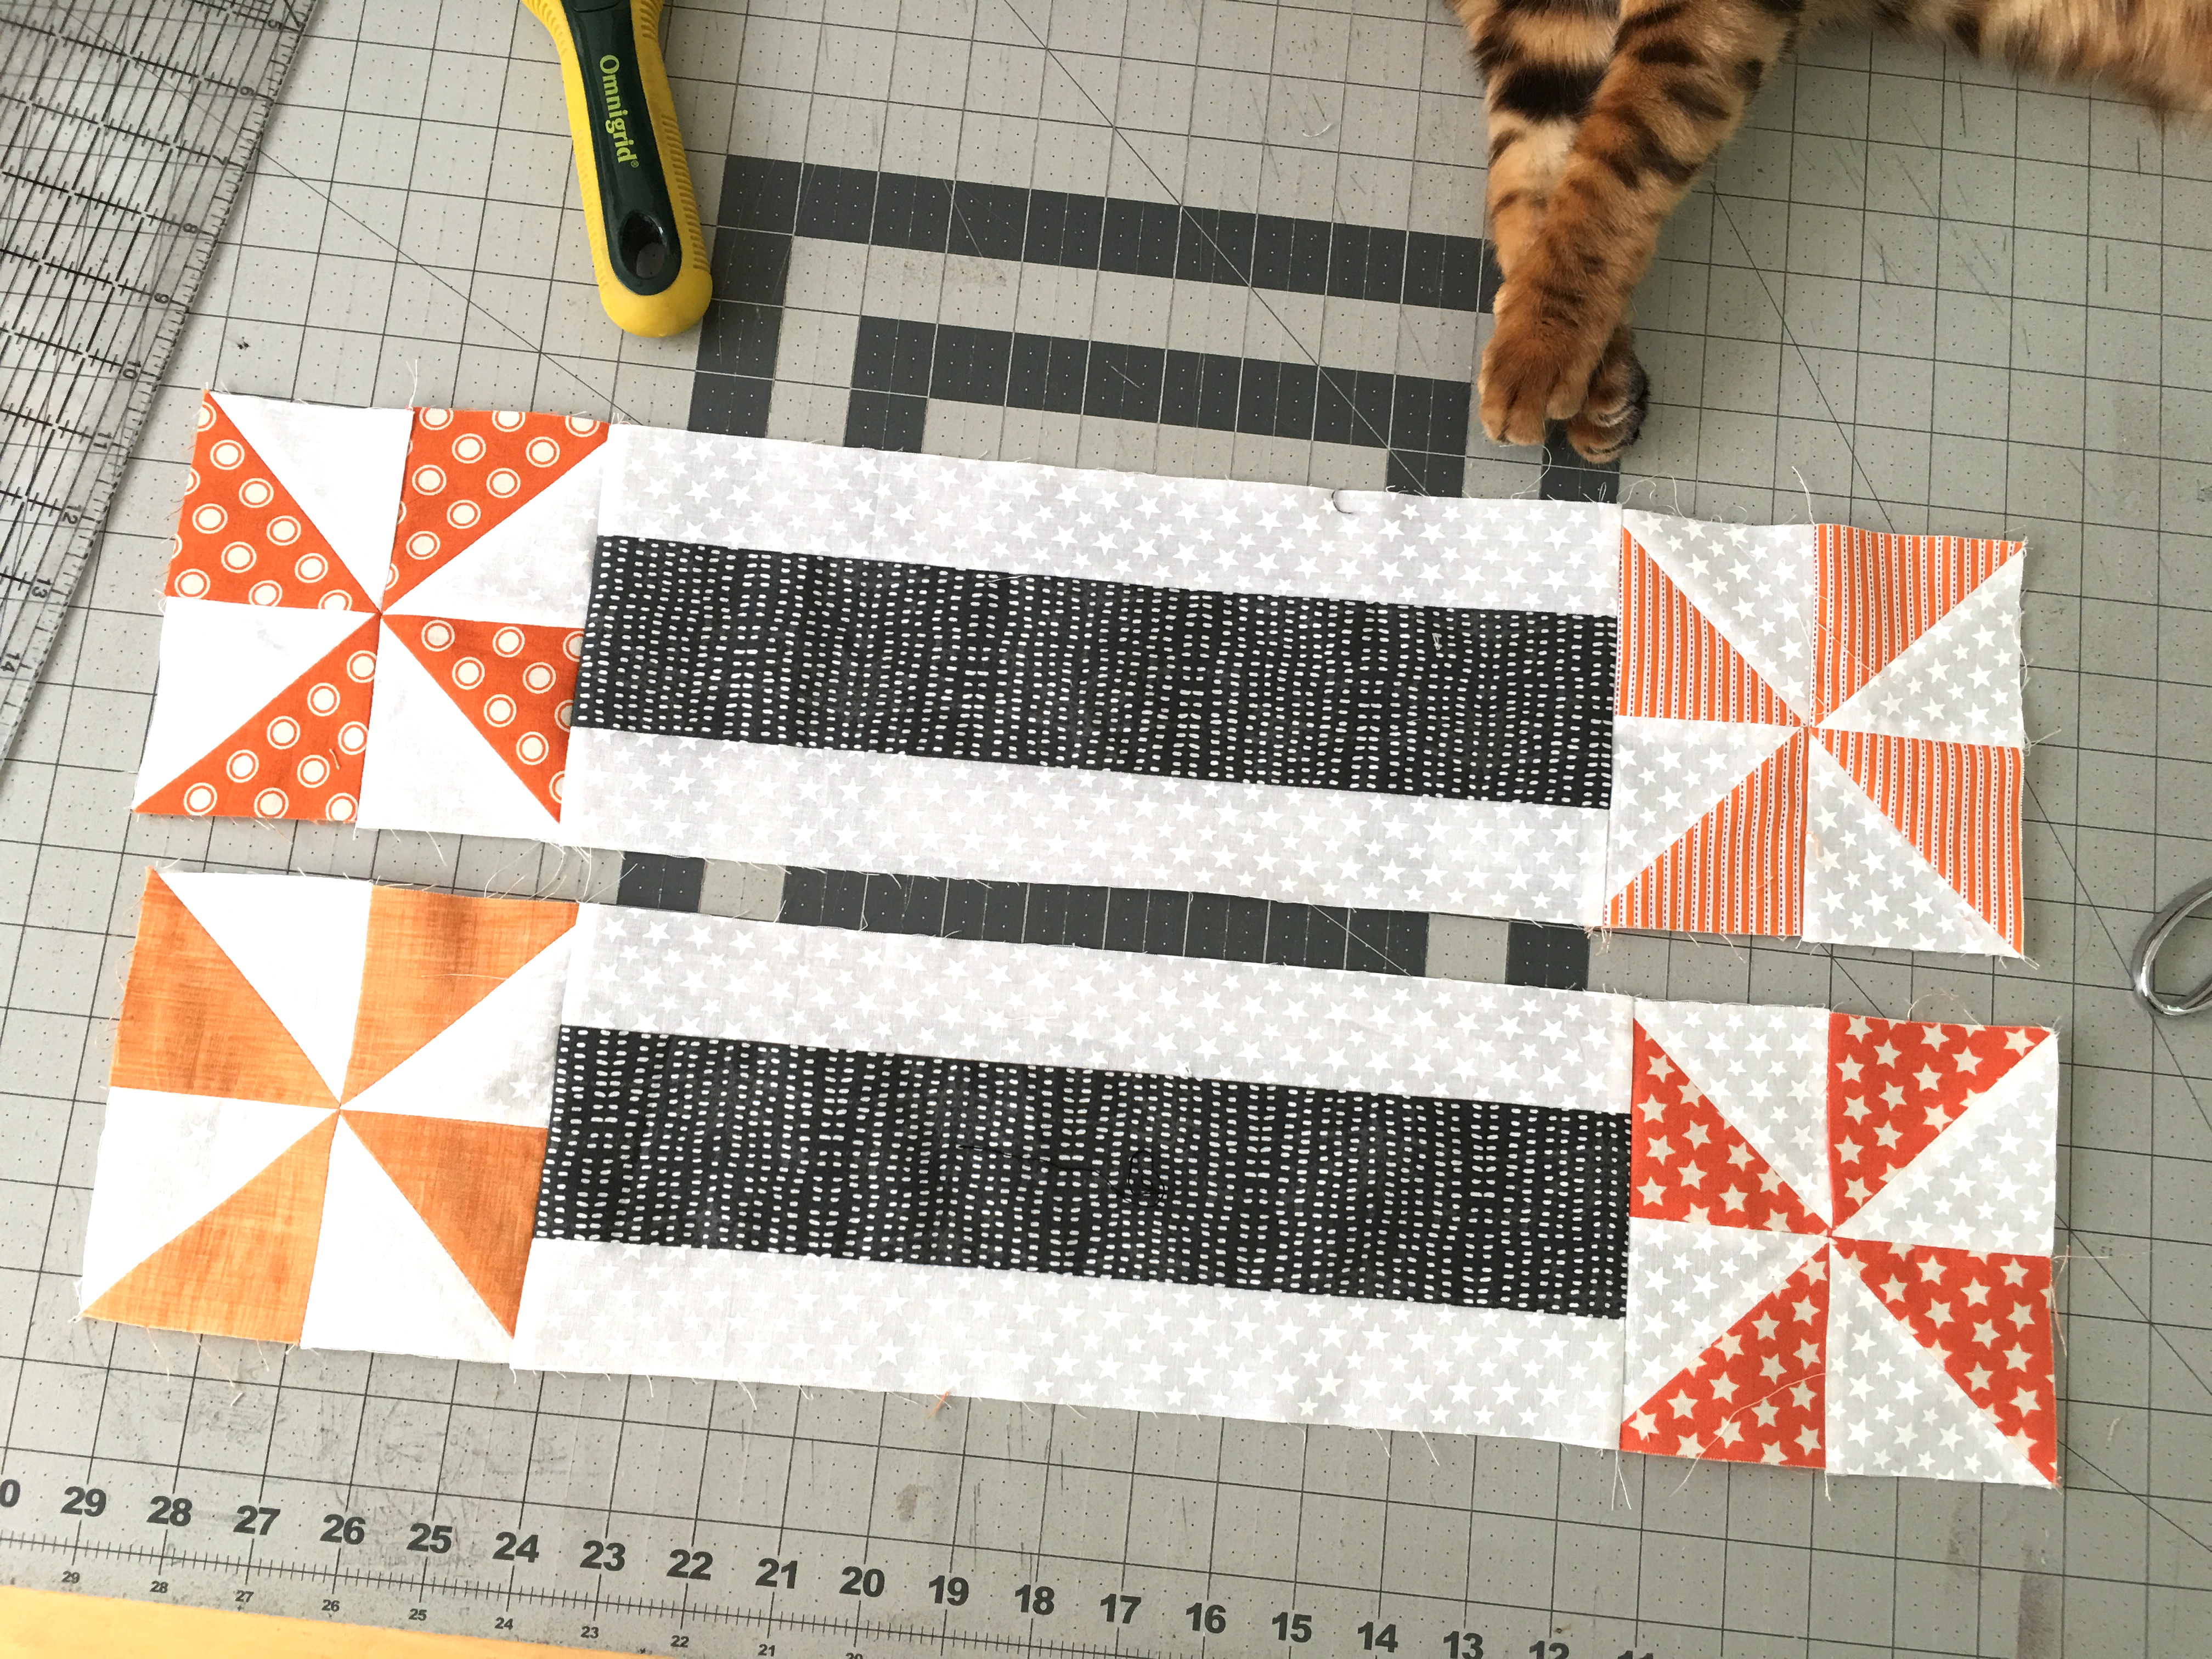
Sew a pinwheel onto the ends of both 13.5″ strip set unit. Press. Below is a diagram with the measurements.
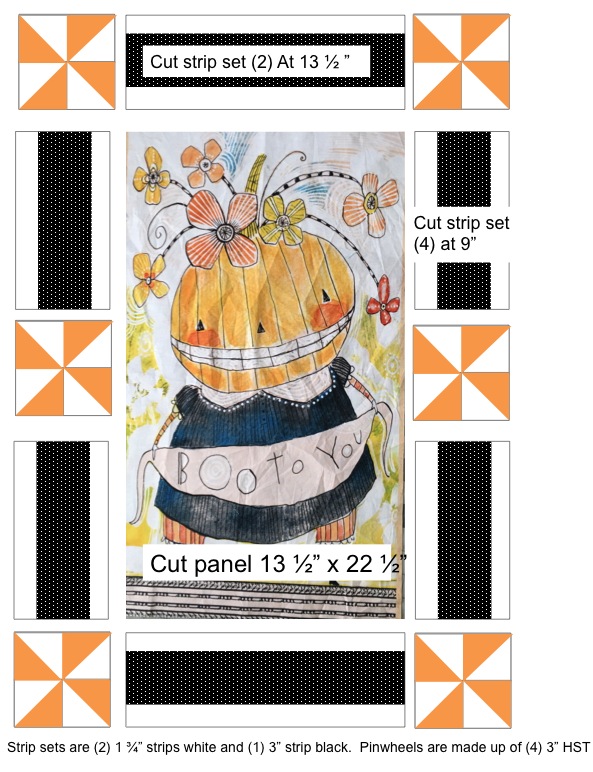
Sew the side units on first. Press open. Sew the top and bottom units on next. Press open.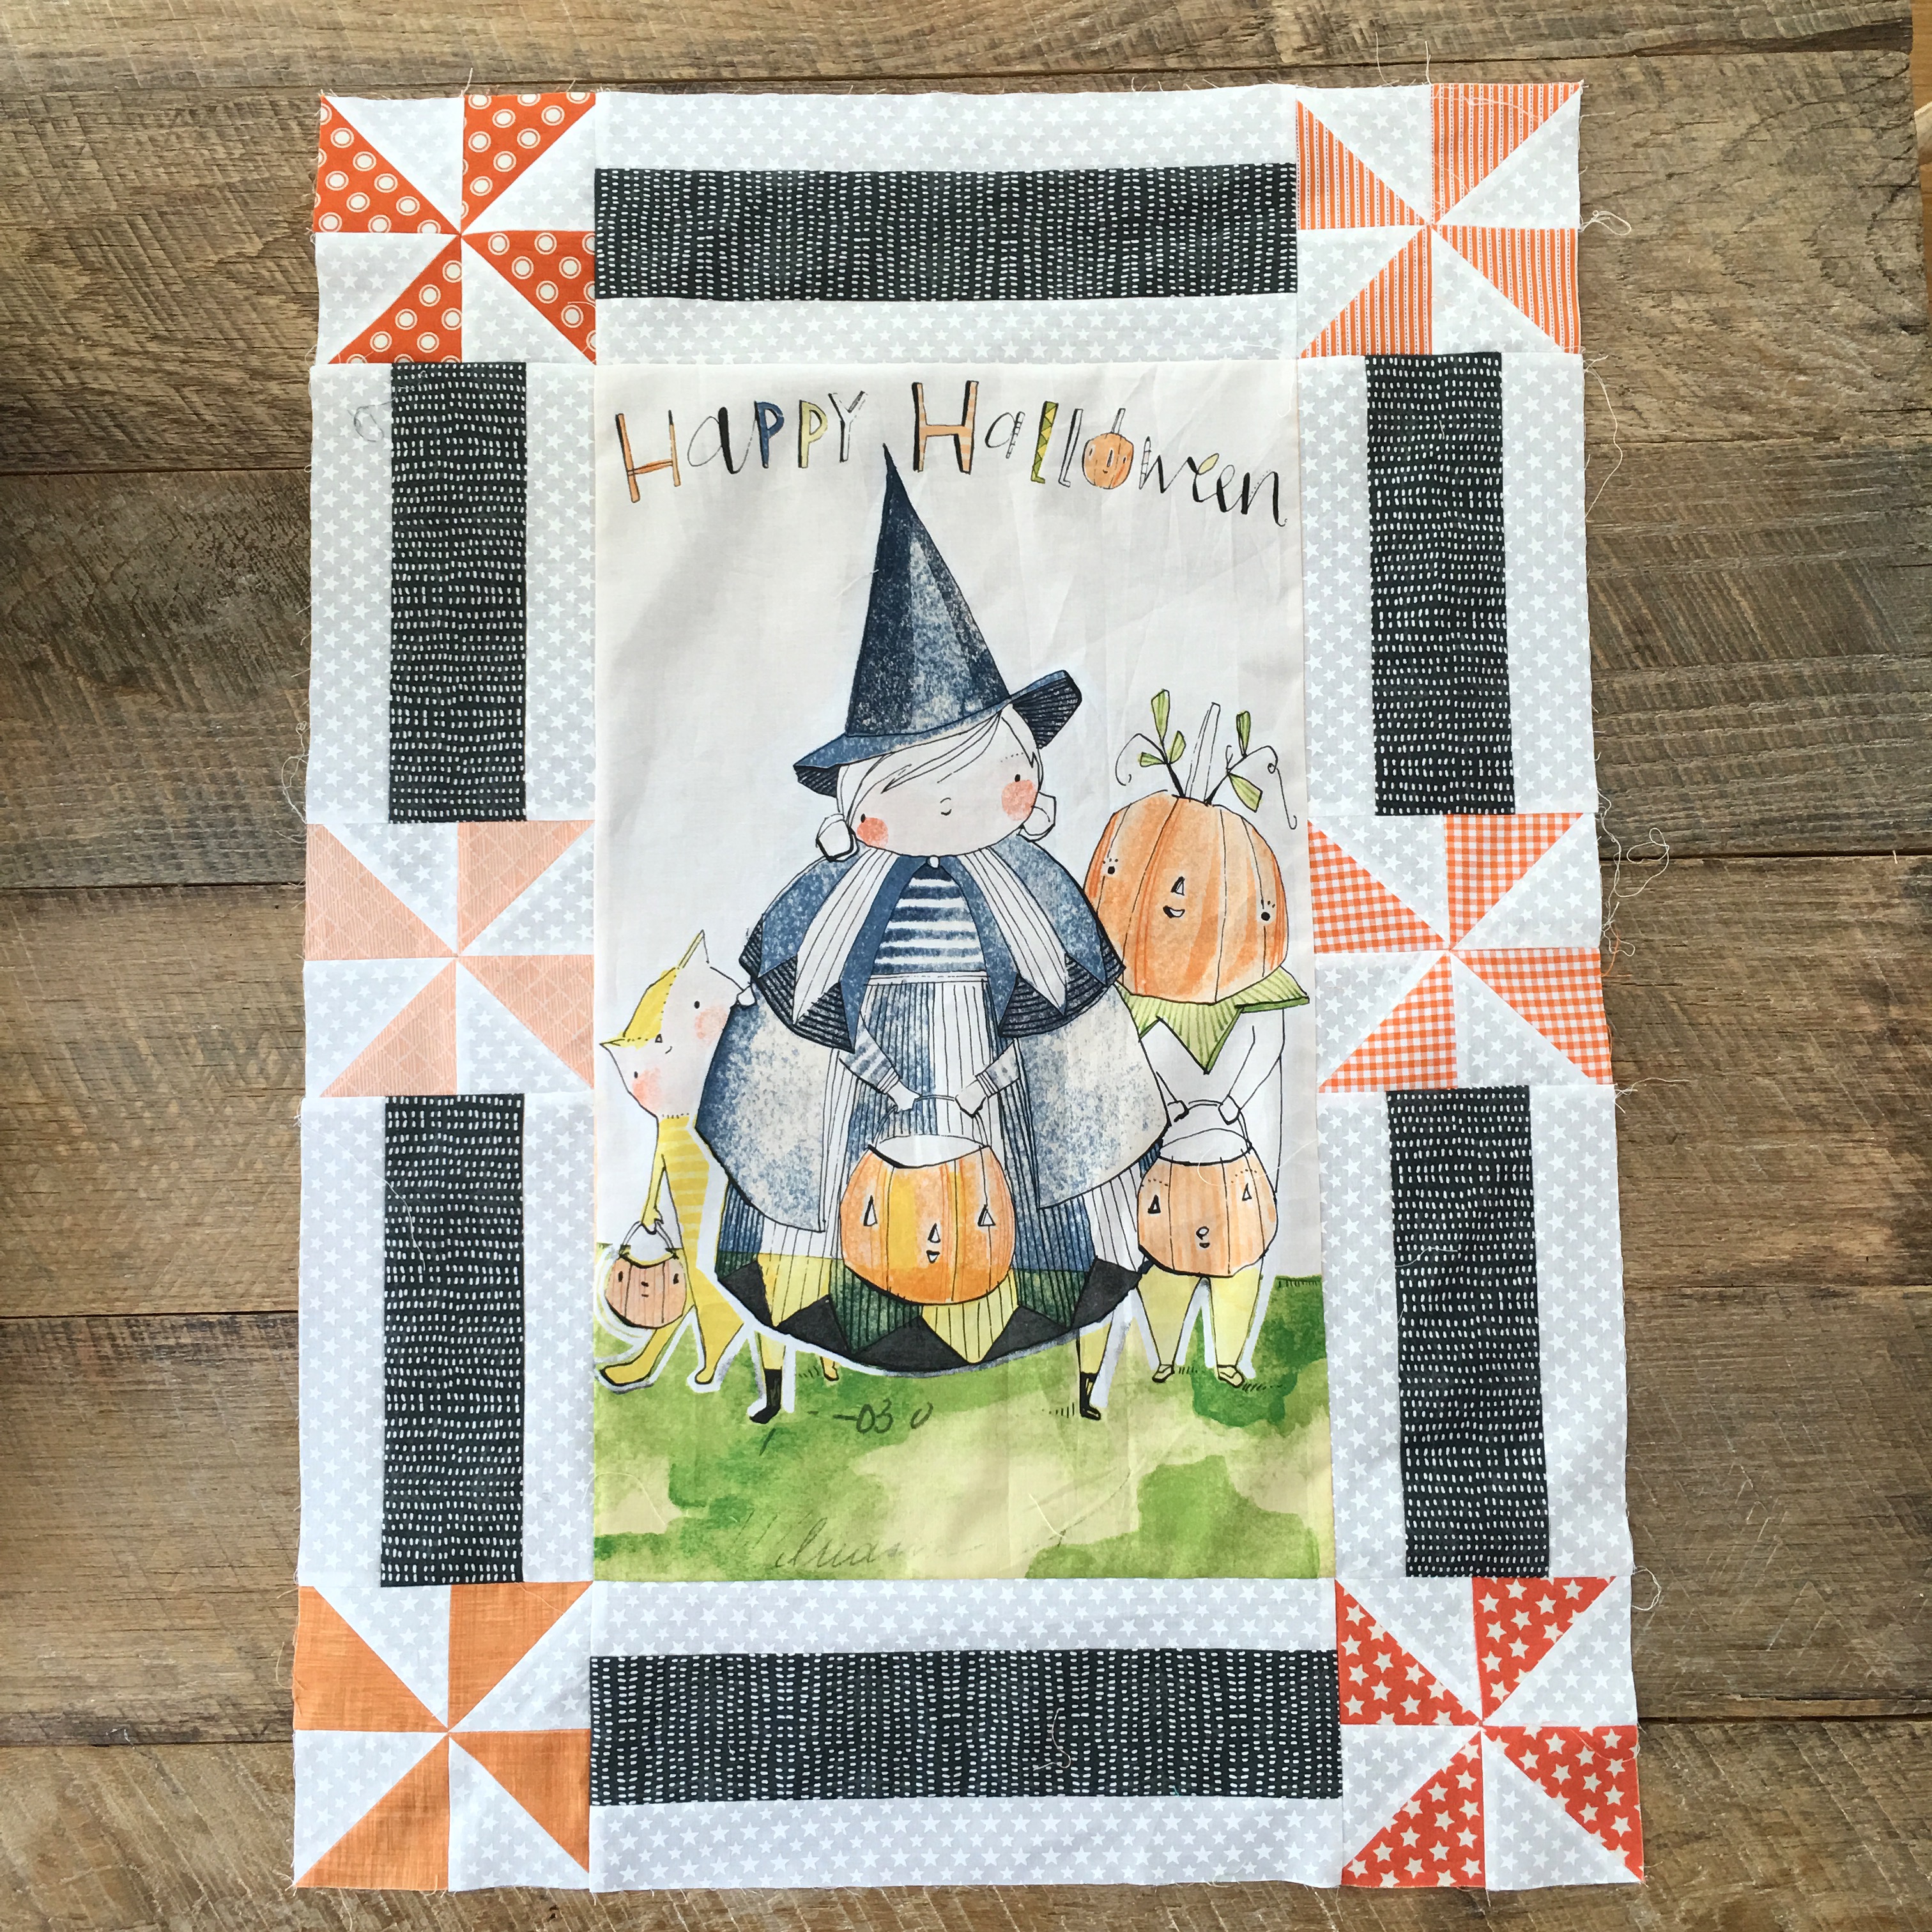
Now it’s ready to quilt and bind! You will love having this to hang in your house! I made one for me and one for my sister 🙂 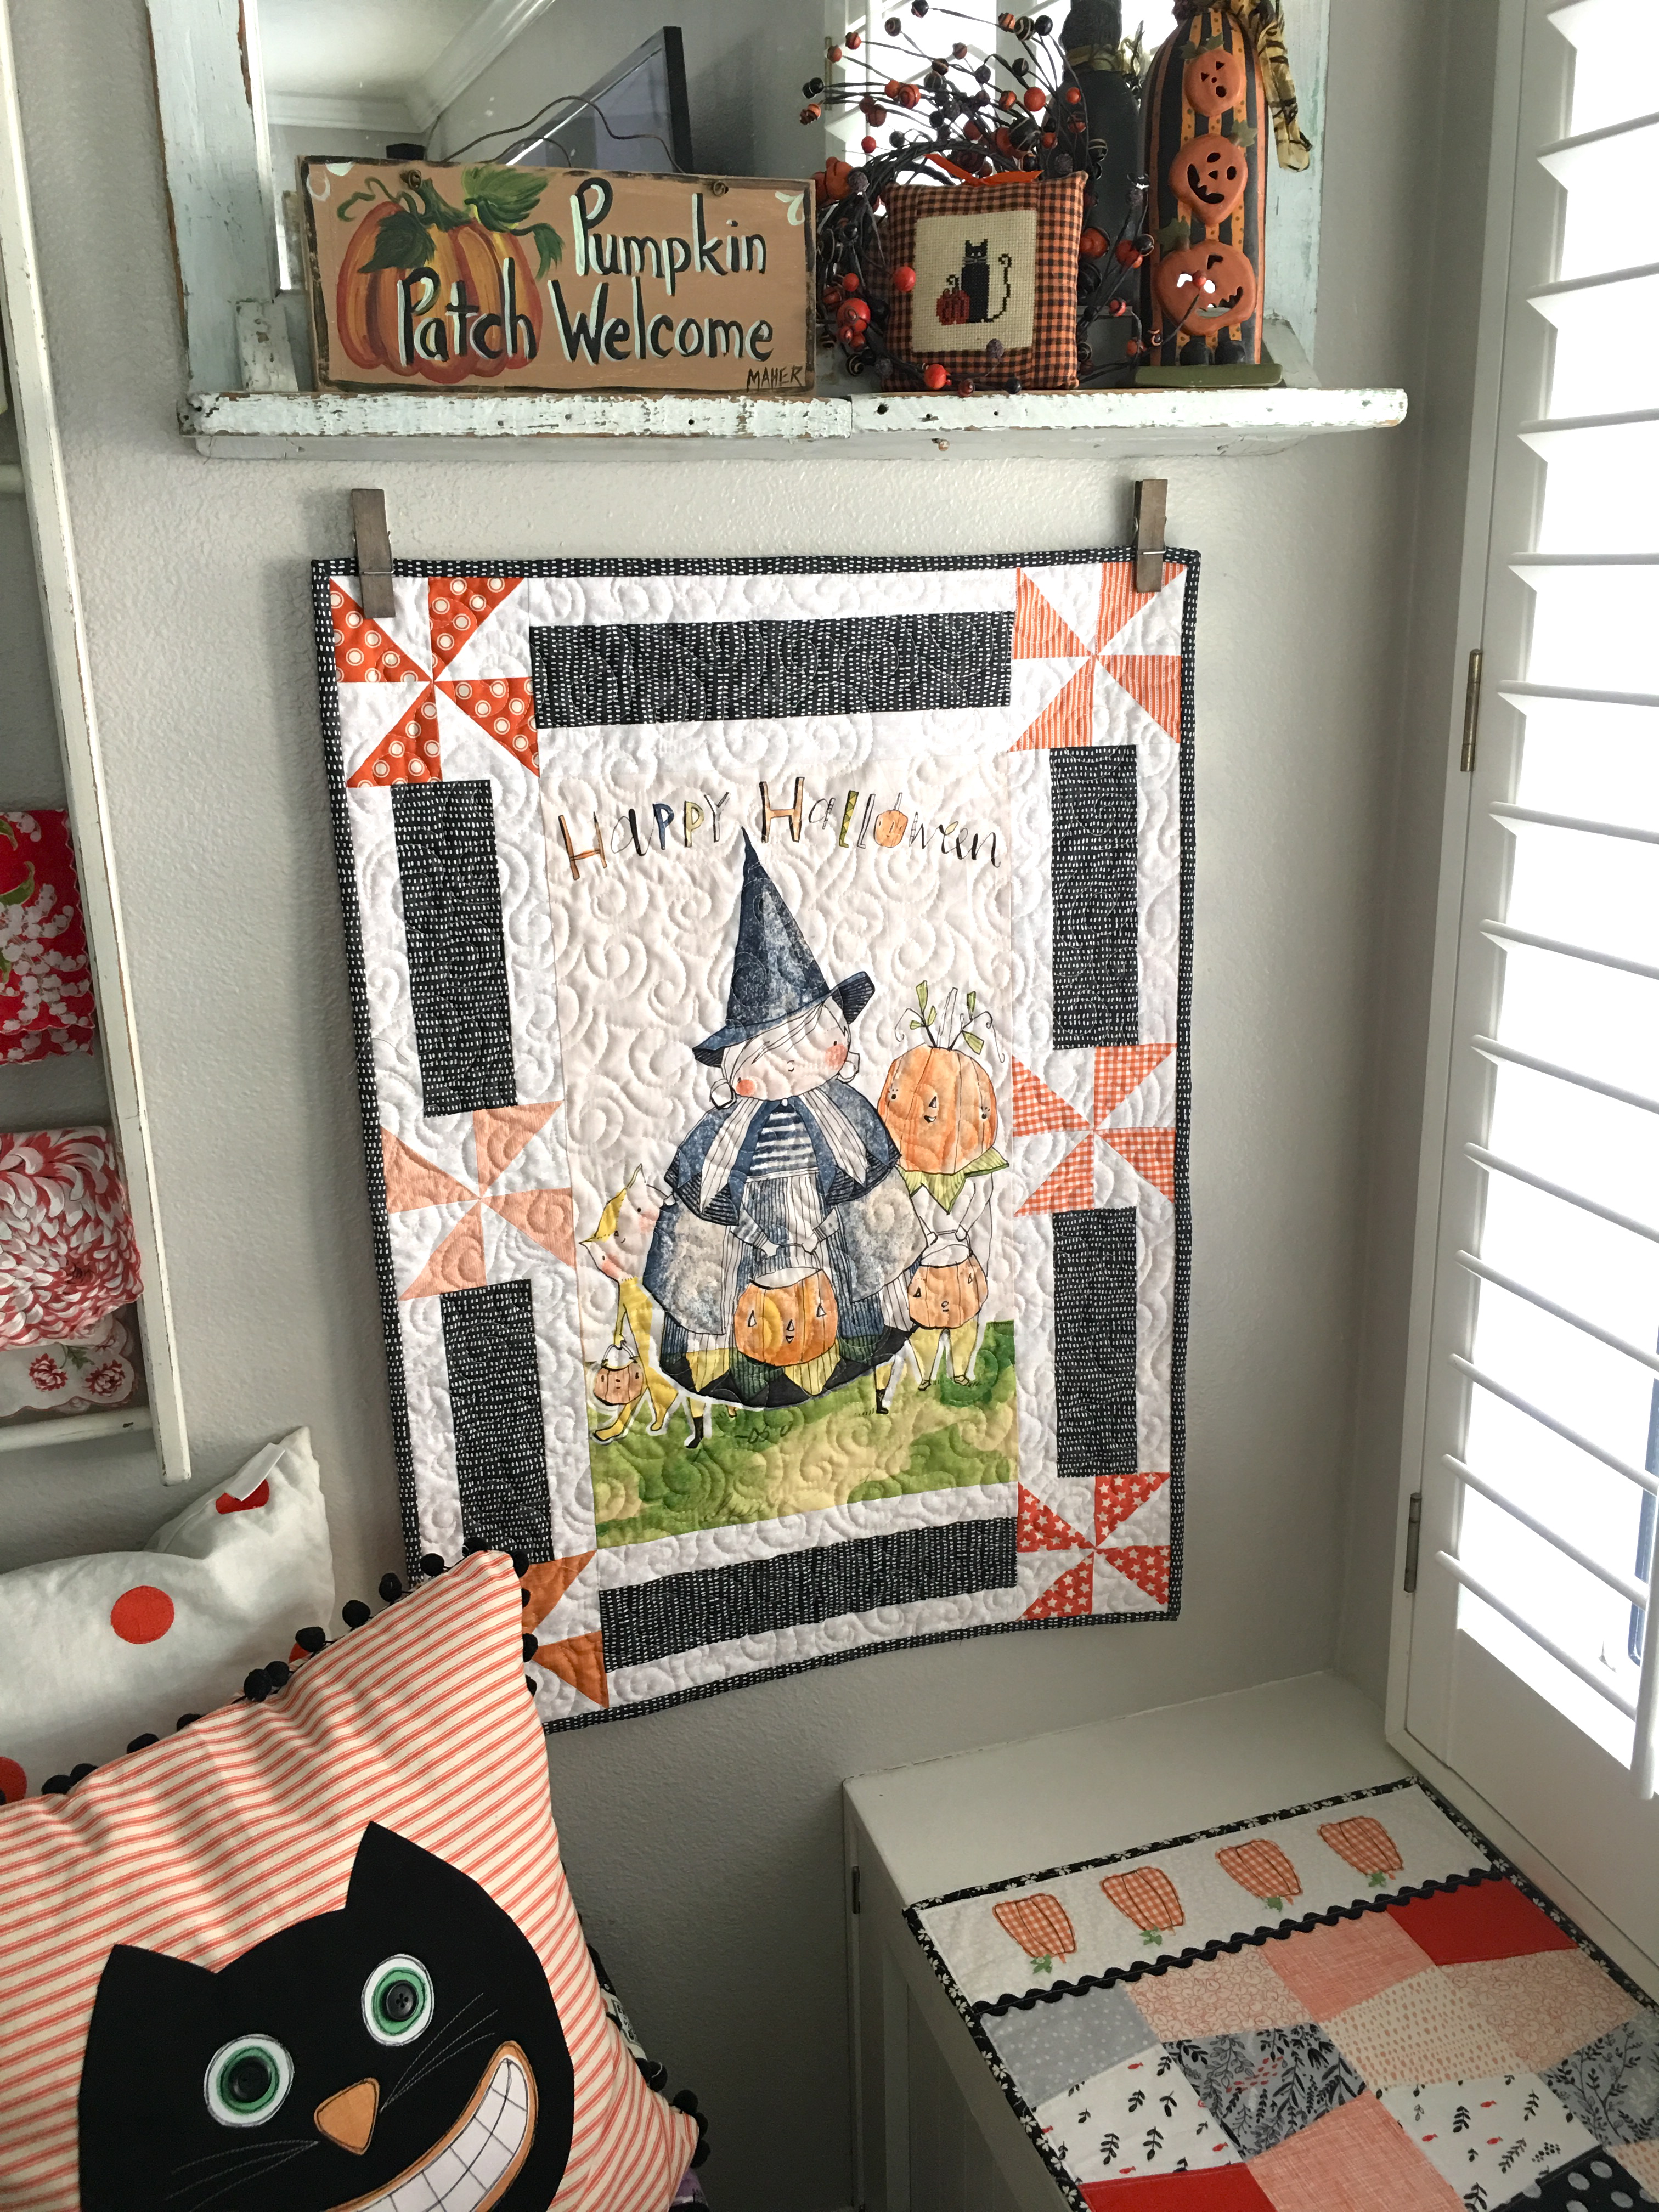
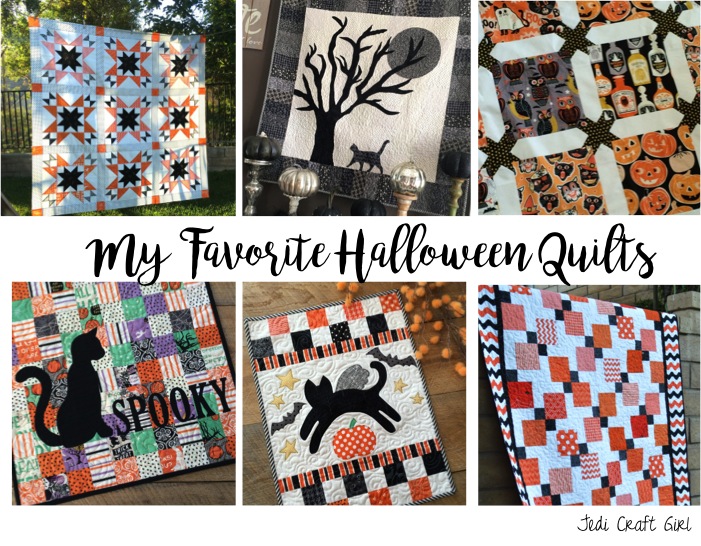
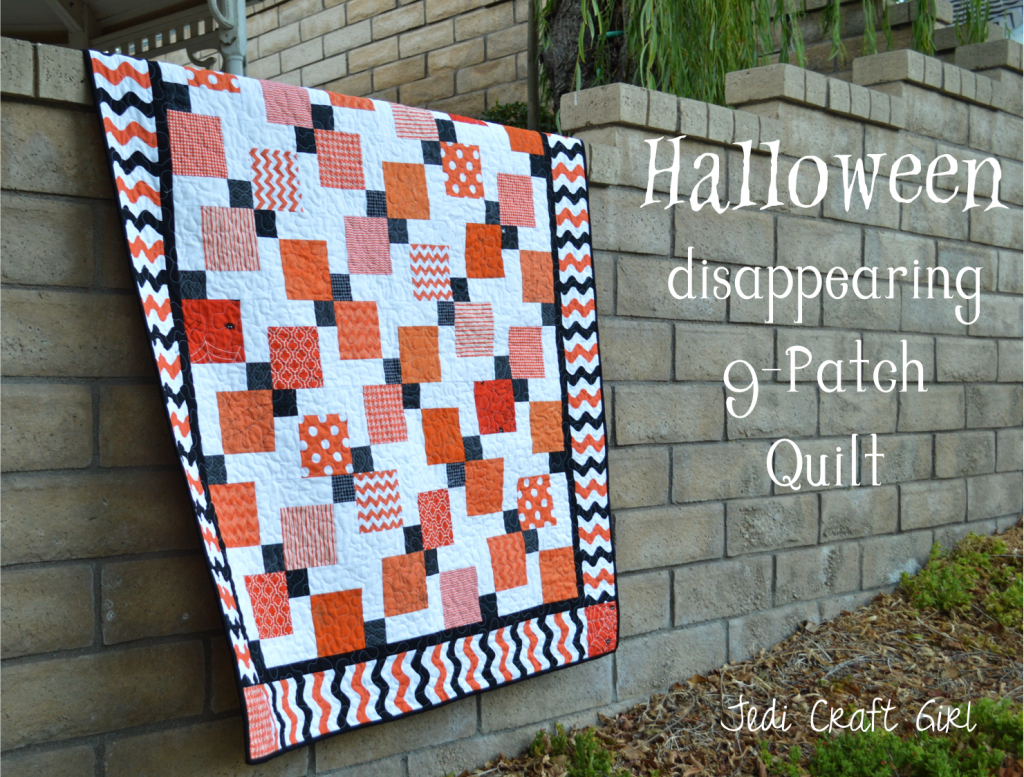
I Love looking back at the fun Halloween projects I’ve made – I think it’s my favorite holiday to sew for! I’ve collected my most popular and put them in this post for quick viewing. Click a picture to be taken to the pattern.
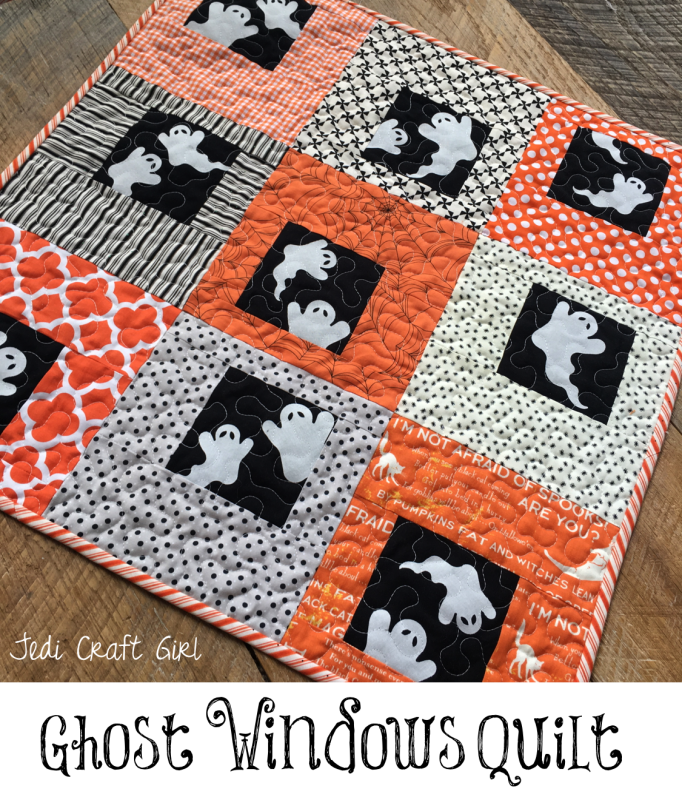


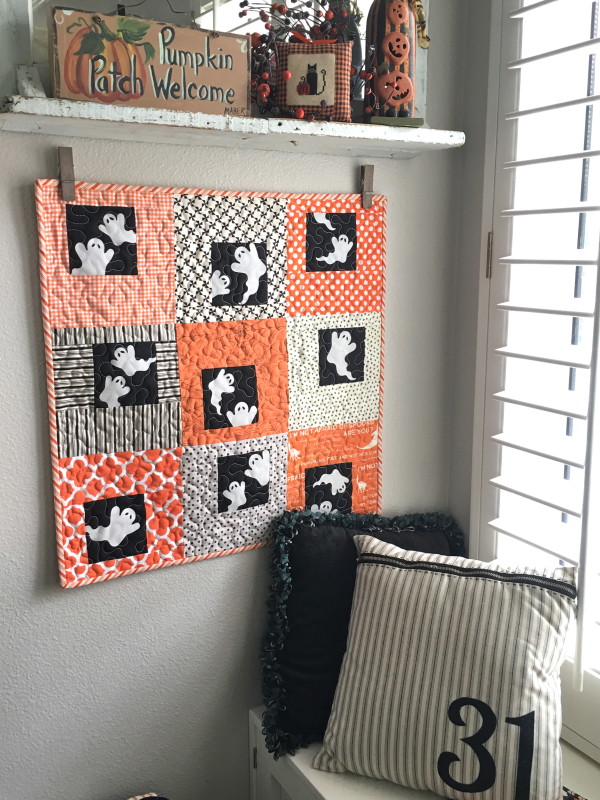
I love sewing with traditional orange and black fabrics – don’t you! This little quilt measures 24″ square and is perfect to hang on a wall or put on a table. All you need is a little yardage and the Sizzix Ghost Die and you’re set! I love that each of the ghosts have their own personality!! All seams 1/4″.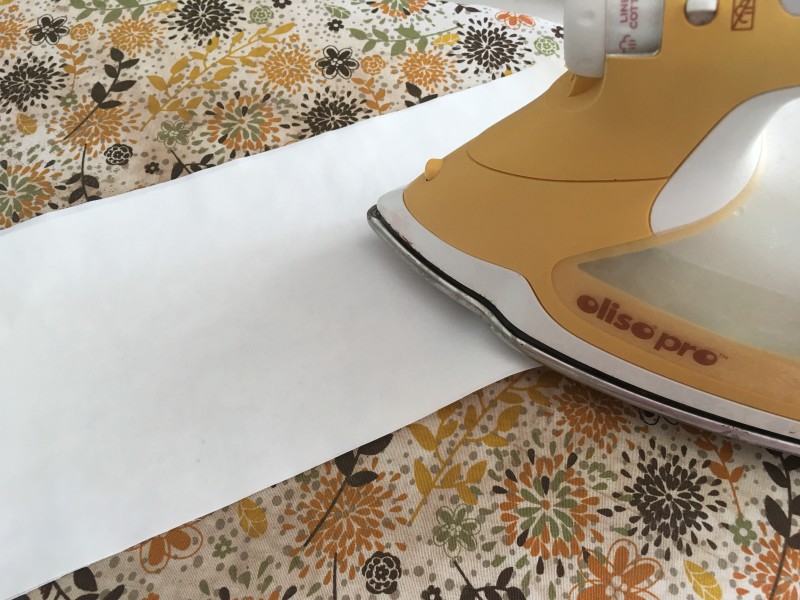
First press the Heat n Bond Ultra onto the wrong side of the off-white solid fabric. I choose Ultra because it requires no-sewing. I didn’t want to spend time sewing around each ghost!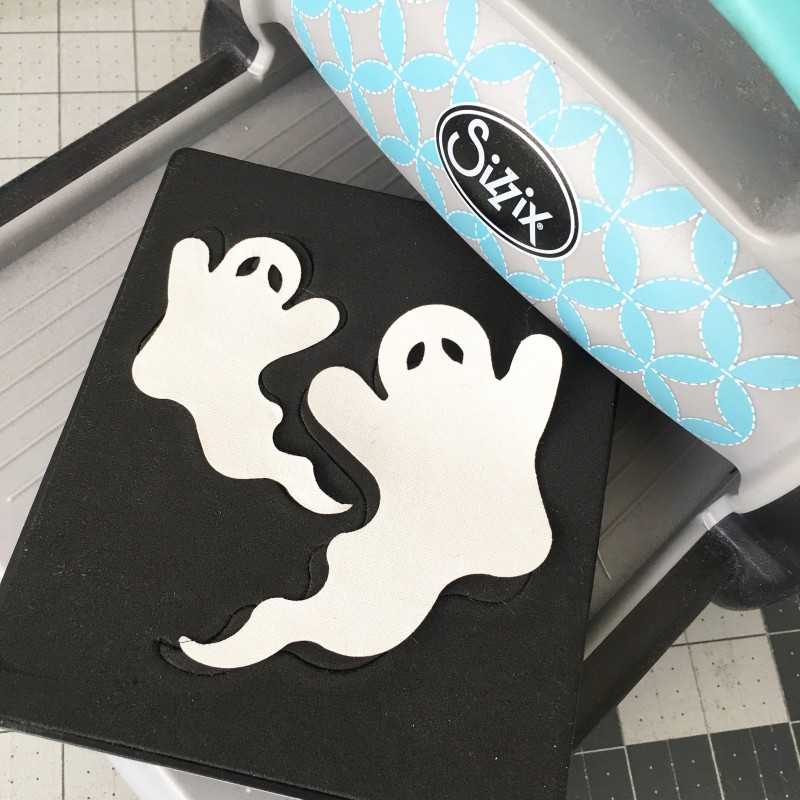
Die cut 9 sets of ghosts. Make sure to die cut ghosts going both ways to give more variety to the quilt. Cut (9) 4 1/2″ solid black squares for the ghost windows.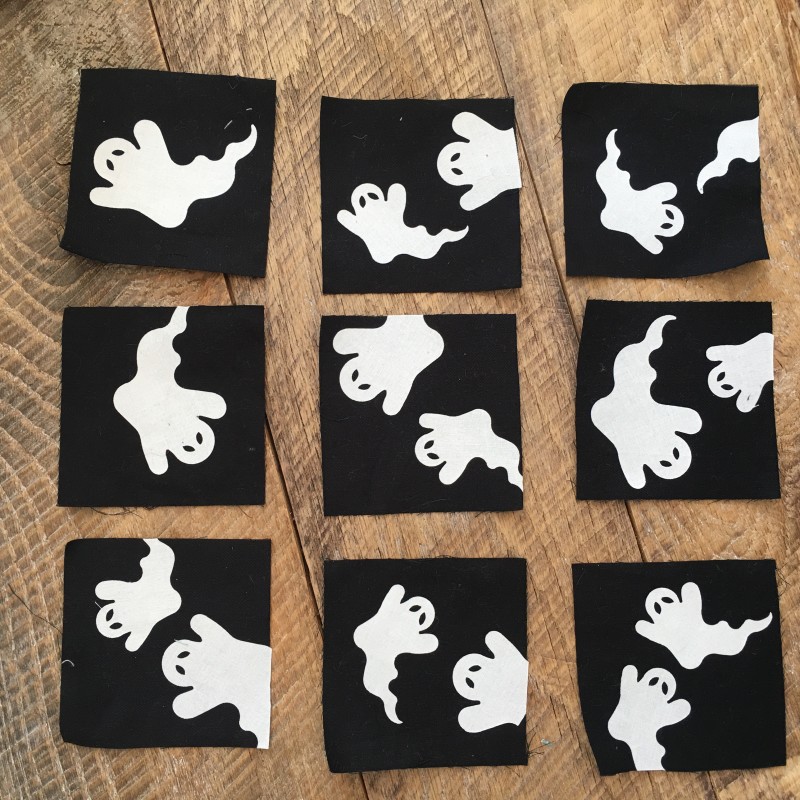
Peel off the backing of the ghosts and position them as desired.
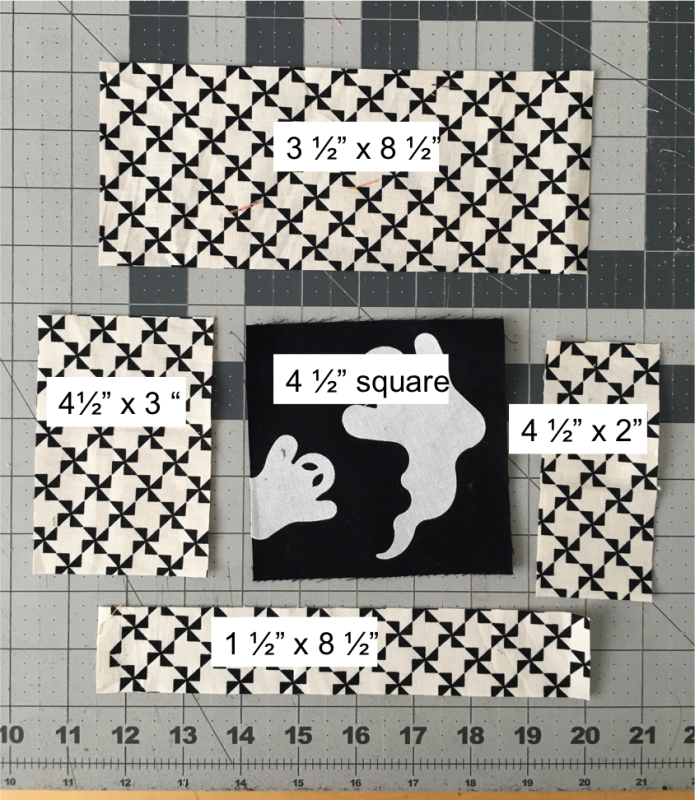
For the 9 blocks, cut 5 orange fabrics and 4 low volume fabrics according to the above dimensions. Sew the side portions on, press, then add the top and bottom pieces.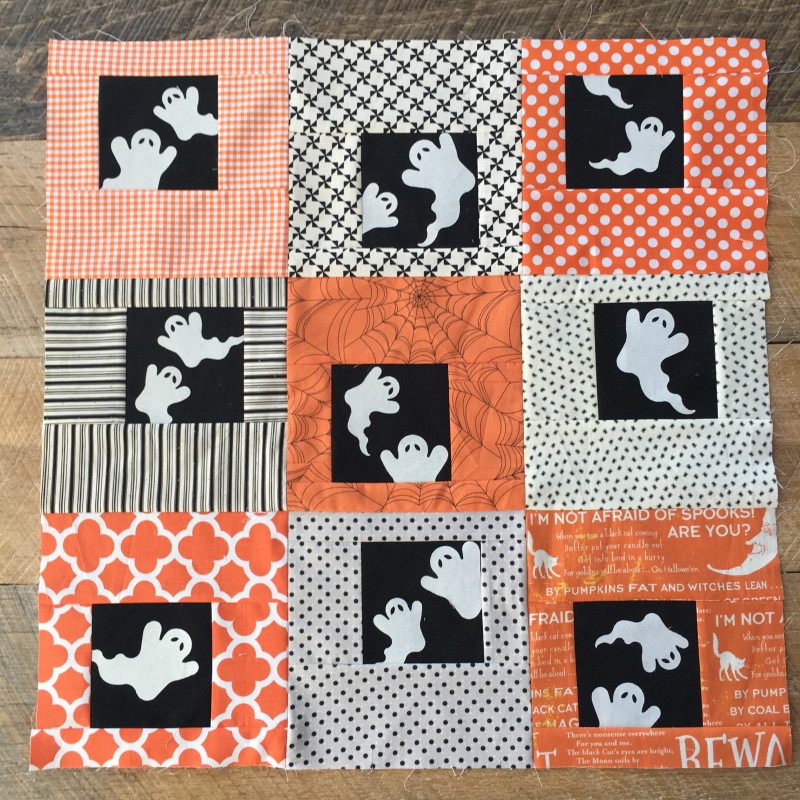
Make sure to rotate the ghost windows are in a different loceation, it makes the quilt look a little more random. Sew the blocks together in rows, press, and sew the rows together. Press.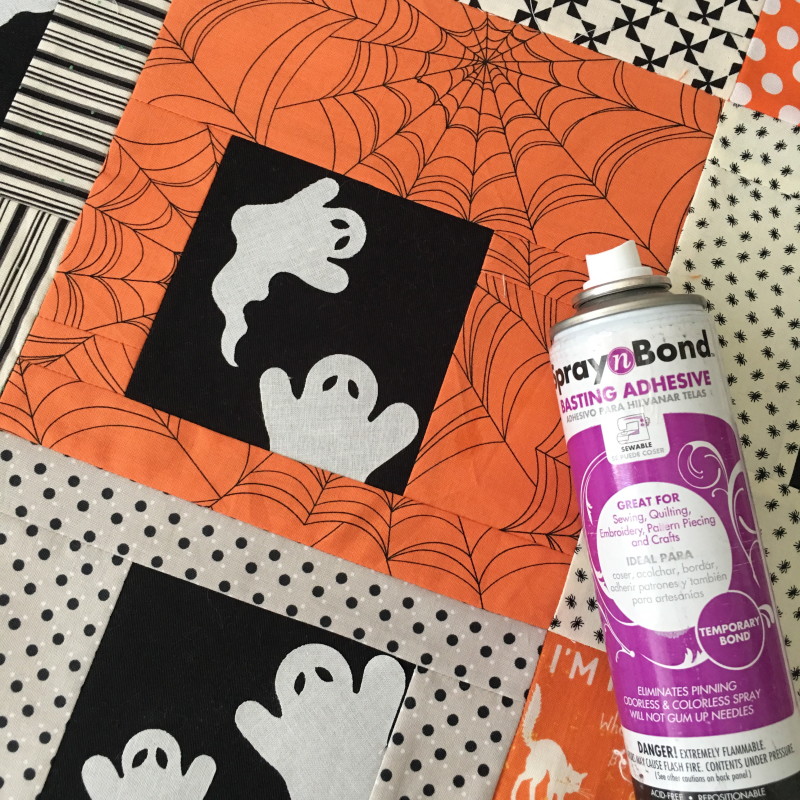
Spray baste, quilt, and bind! 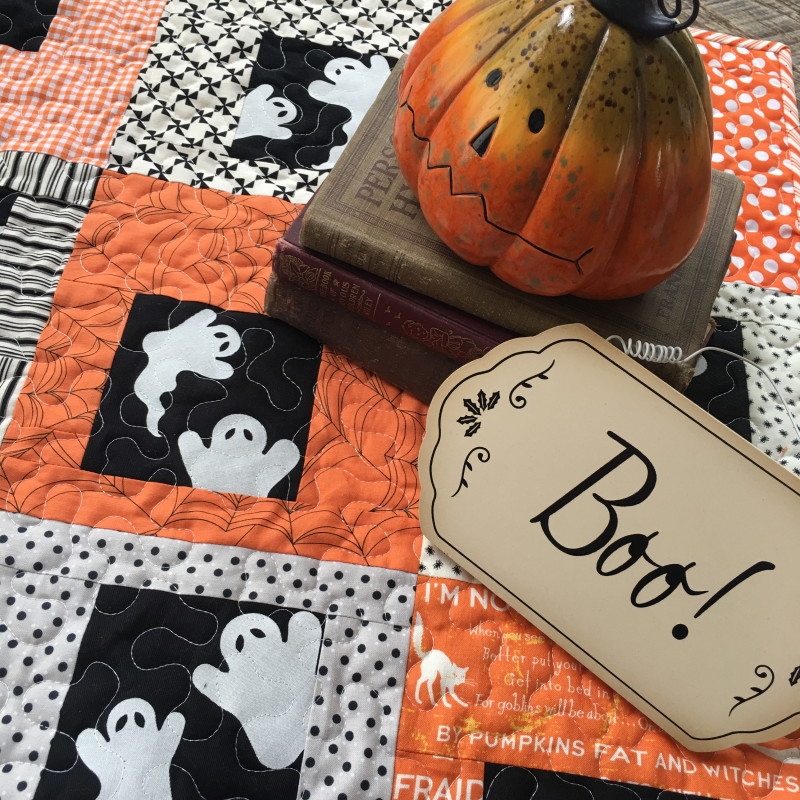
I really love these cute little Sizzix ghosts!!!!!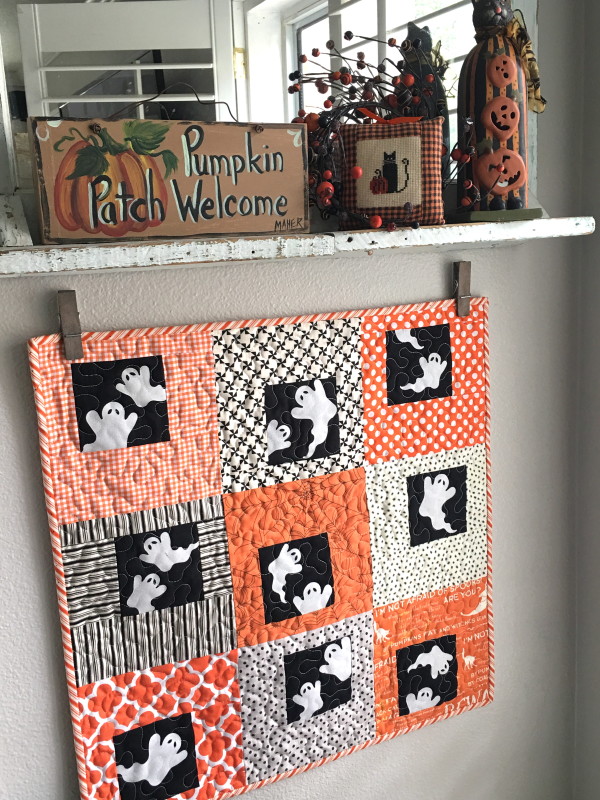
I have the perfect spot to hang it!!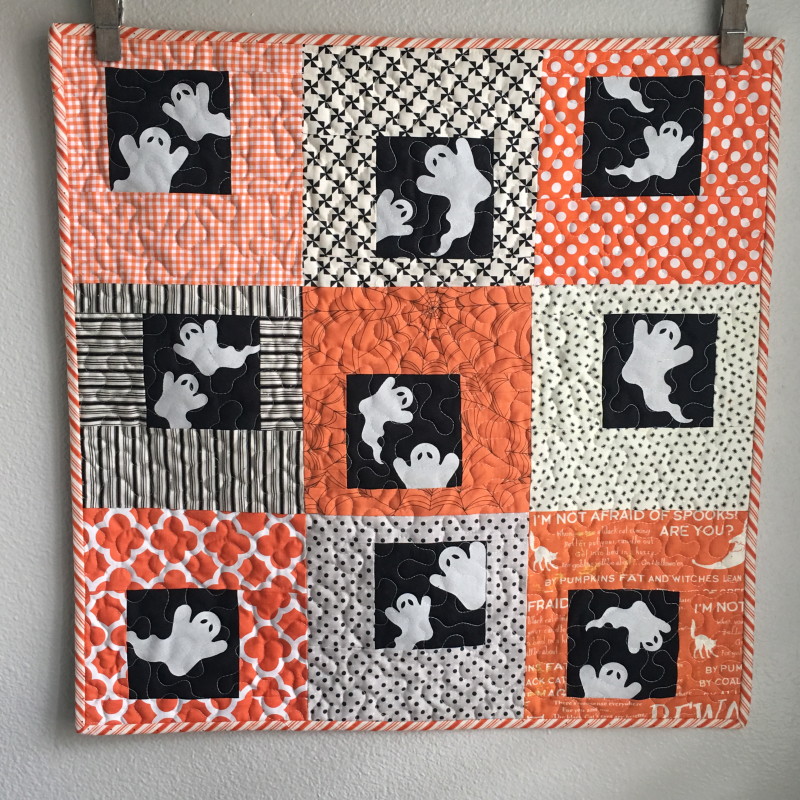
Supplies:
1/4 yard off-white fabric
1/4 yard solid black fabric
5 fat quarters or quarter yard cuts orange print
4 fat quarters or quarter yard cuts low volume black print
1/4 yard binding
1 yard backing
Heat n Bond Ulatra
Sizzix Fabi
Sizzix Ghost die
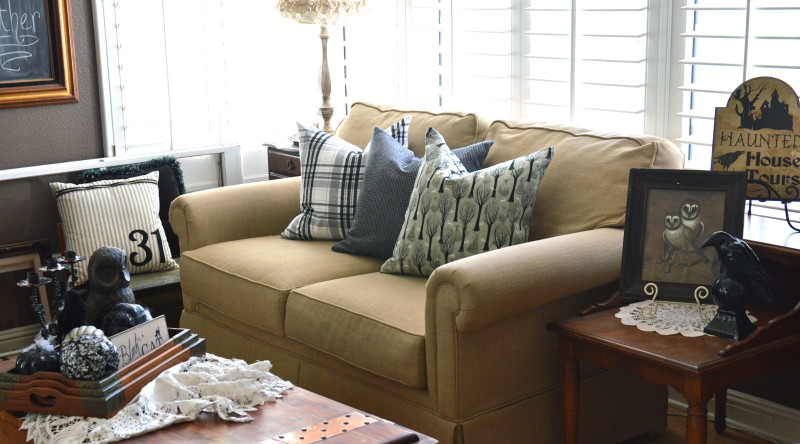
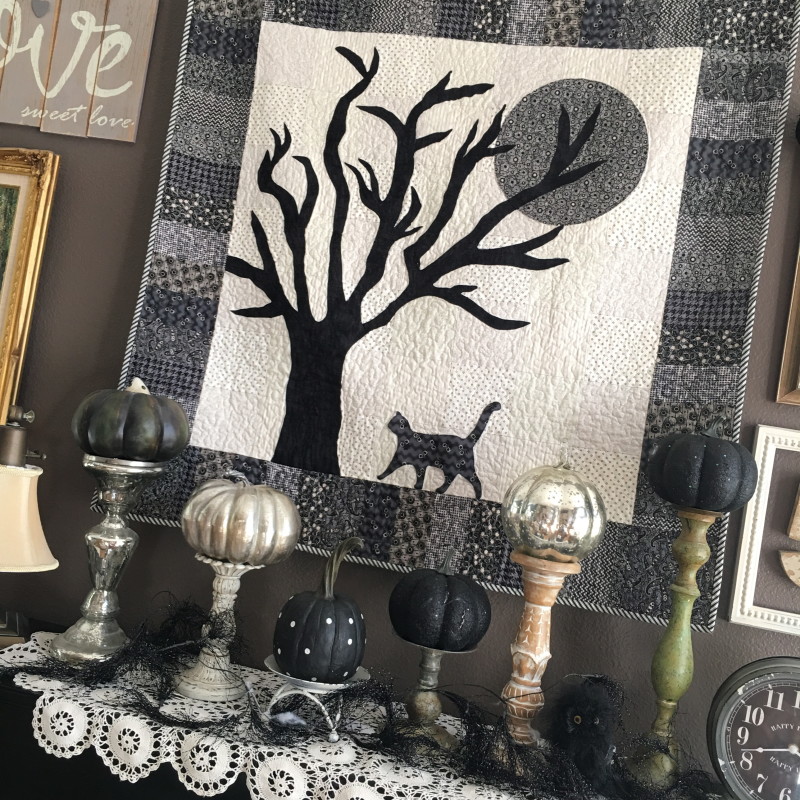
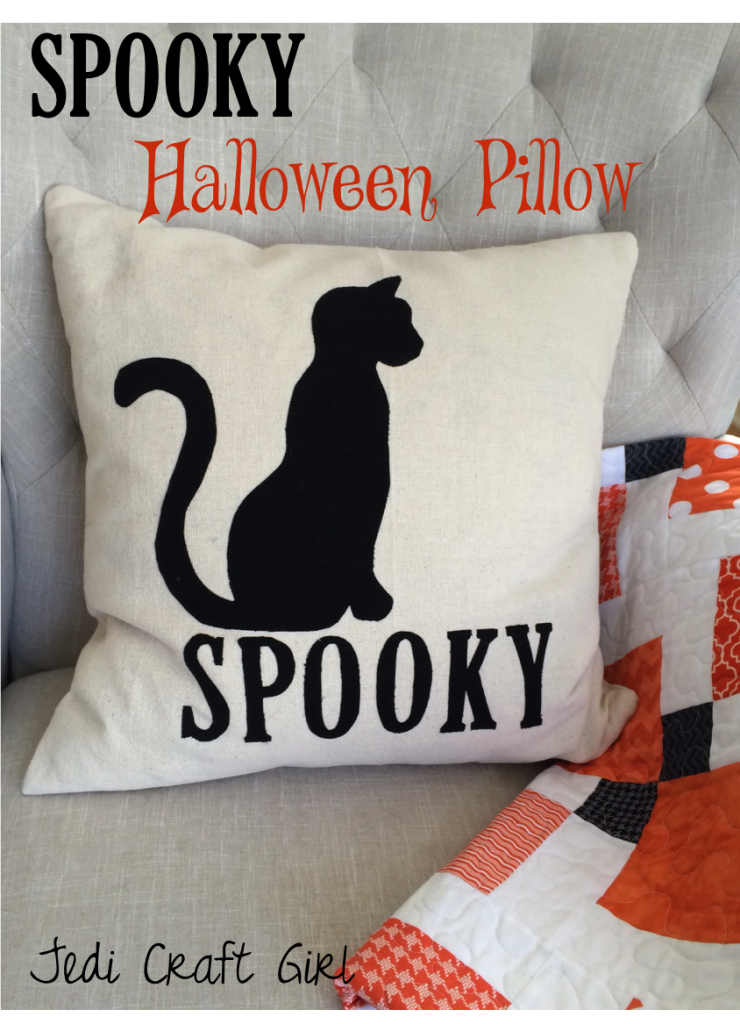
I love changing out my pillow covers for each season. My living room is blacks and neutrals for Halloween so I wanted some pillows that didn’t scream cheesy Halloween (I put those in the family room!). I found the plaid flannels at Joann Fabrics and the spooky tree print is from Cotton + Steel that I ordered from Fat Quarter Shop. To learn more about sewing an invisible zipper in a pillow, read this. It’s super easy and you can make a pillow cover in a matter of minutes!
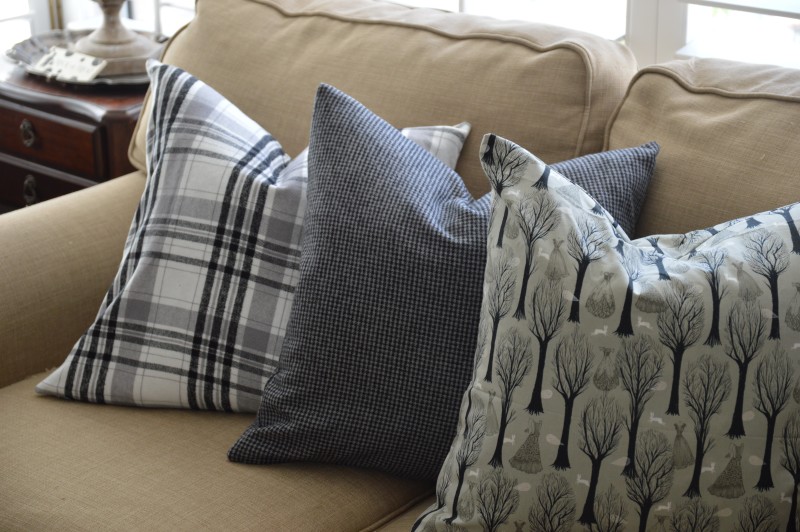
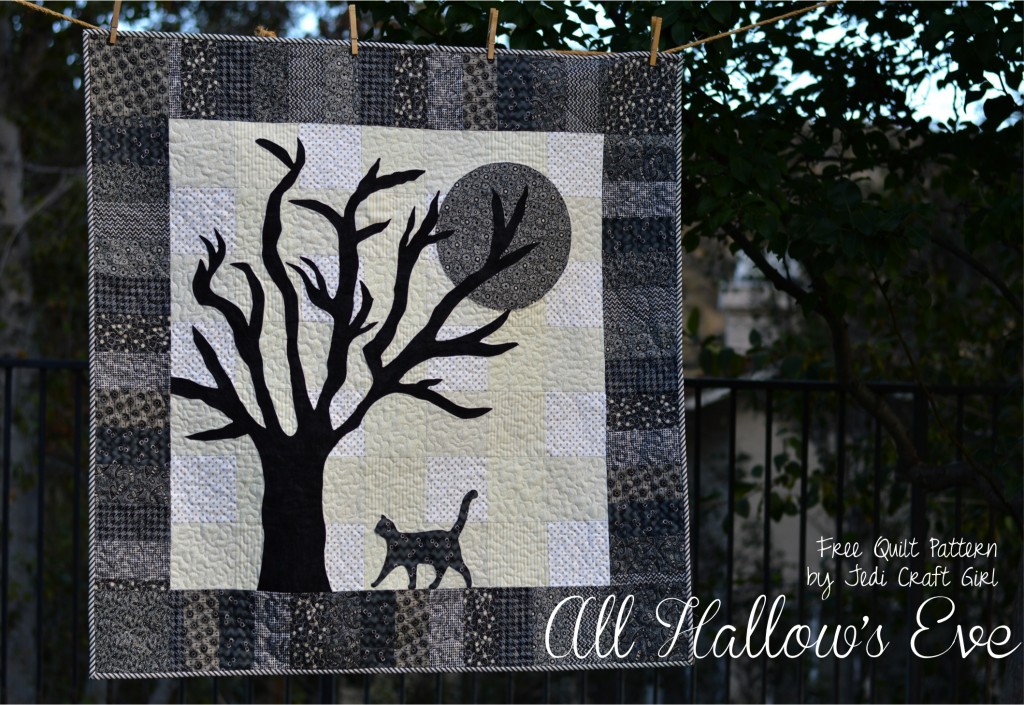
I love love love them! They look great with my Hallow’s Eve quilt!!