Star Spangled Pillow

Create a Star-Spangled Pillow

star pillow 2

Here is a fun and fast pillow to make for your 4th of July/Americana decor!  You’ll love how fast this canvas & denim pillow come together!!

star pillow

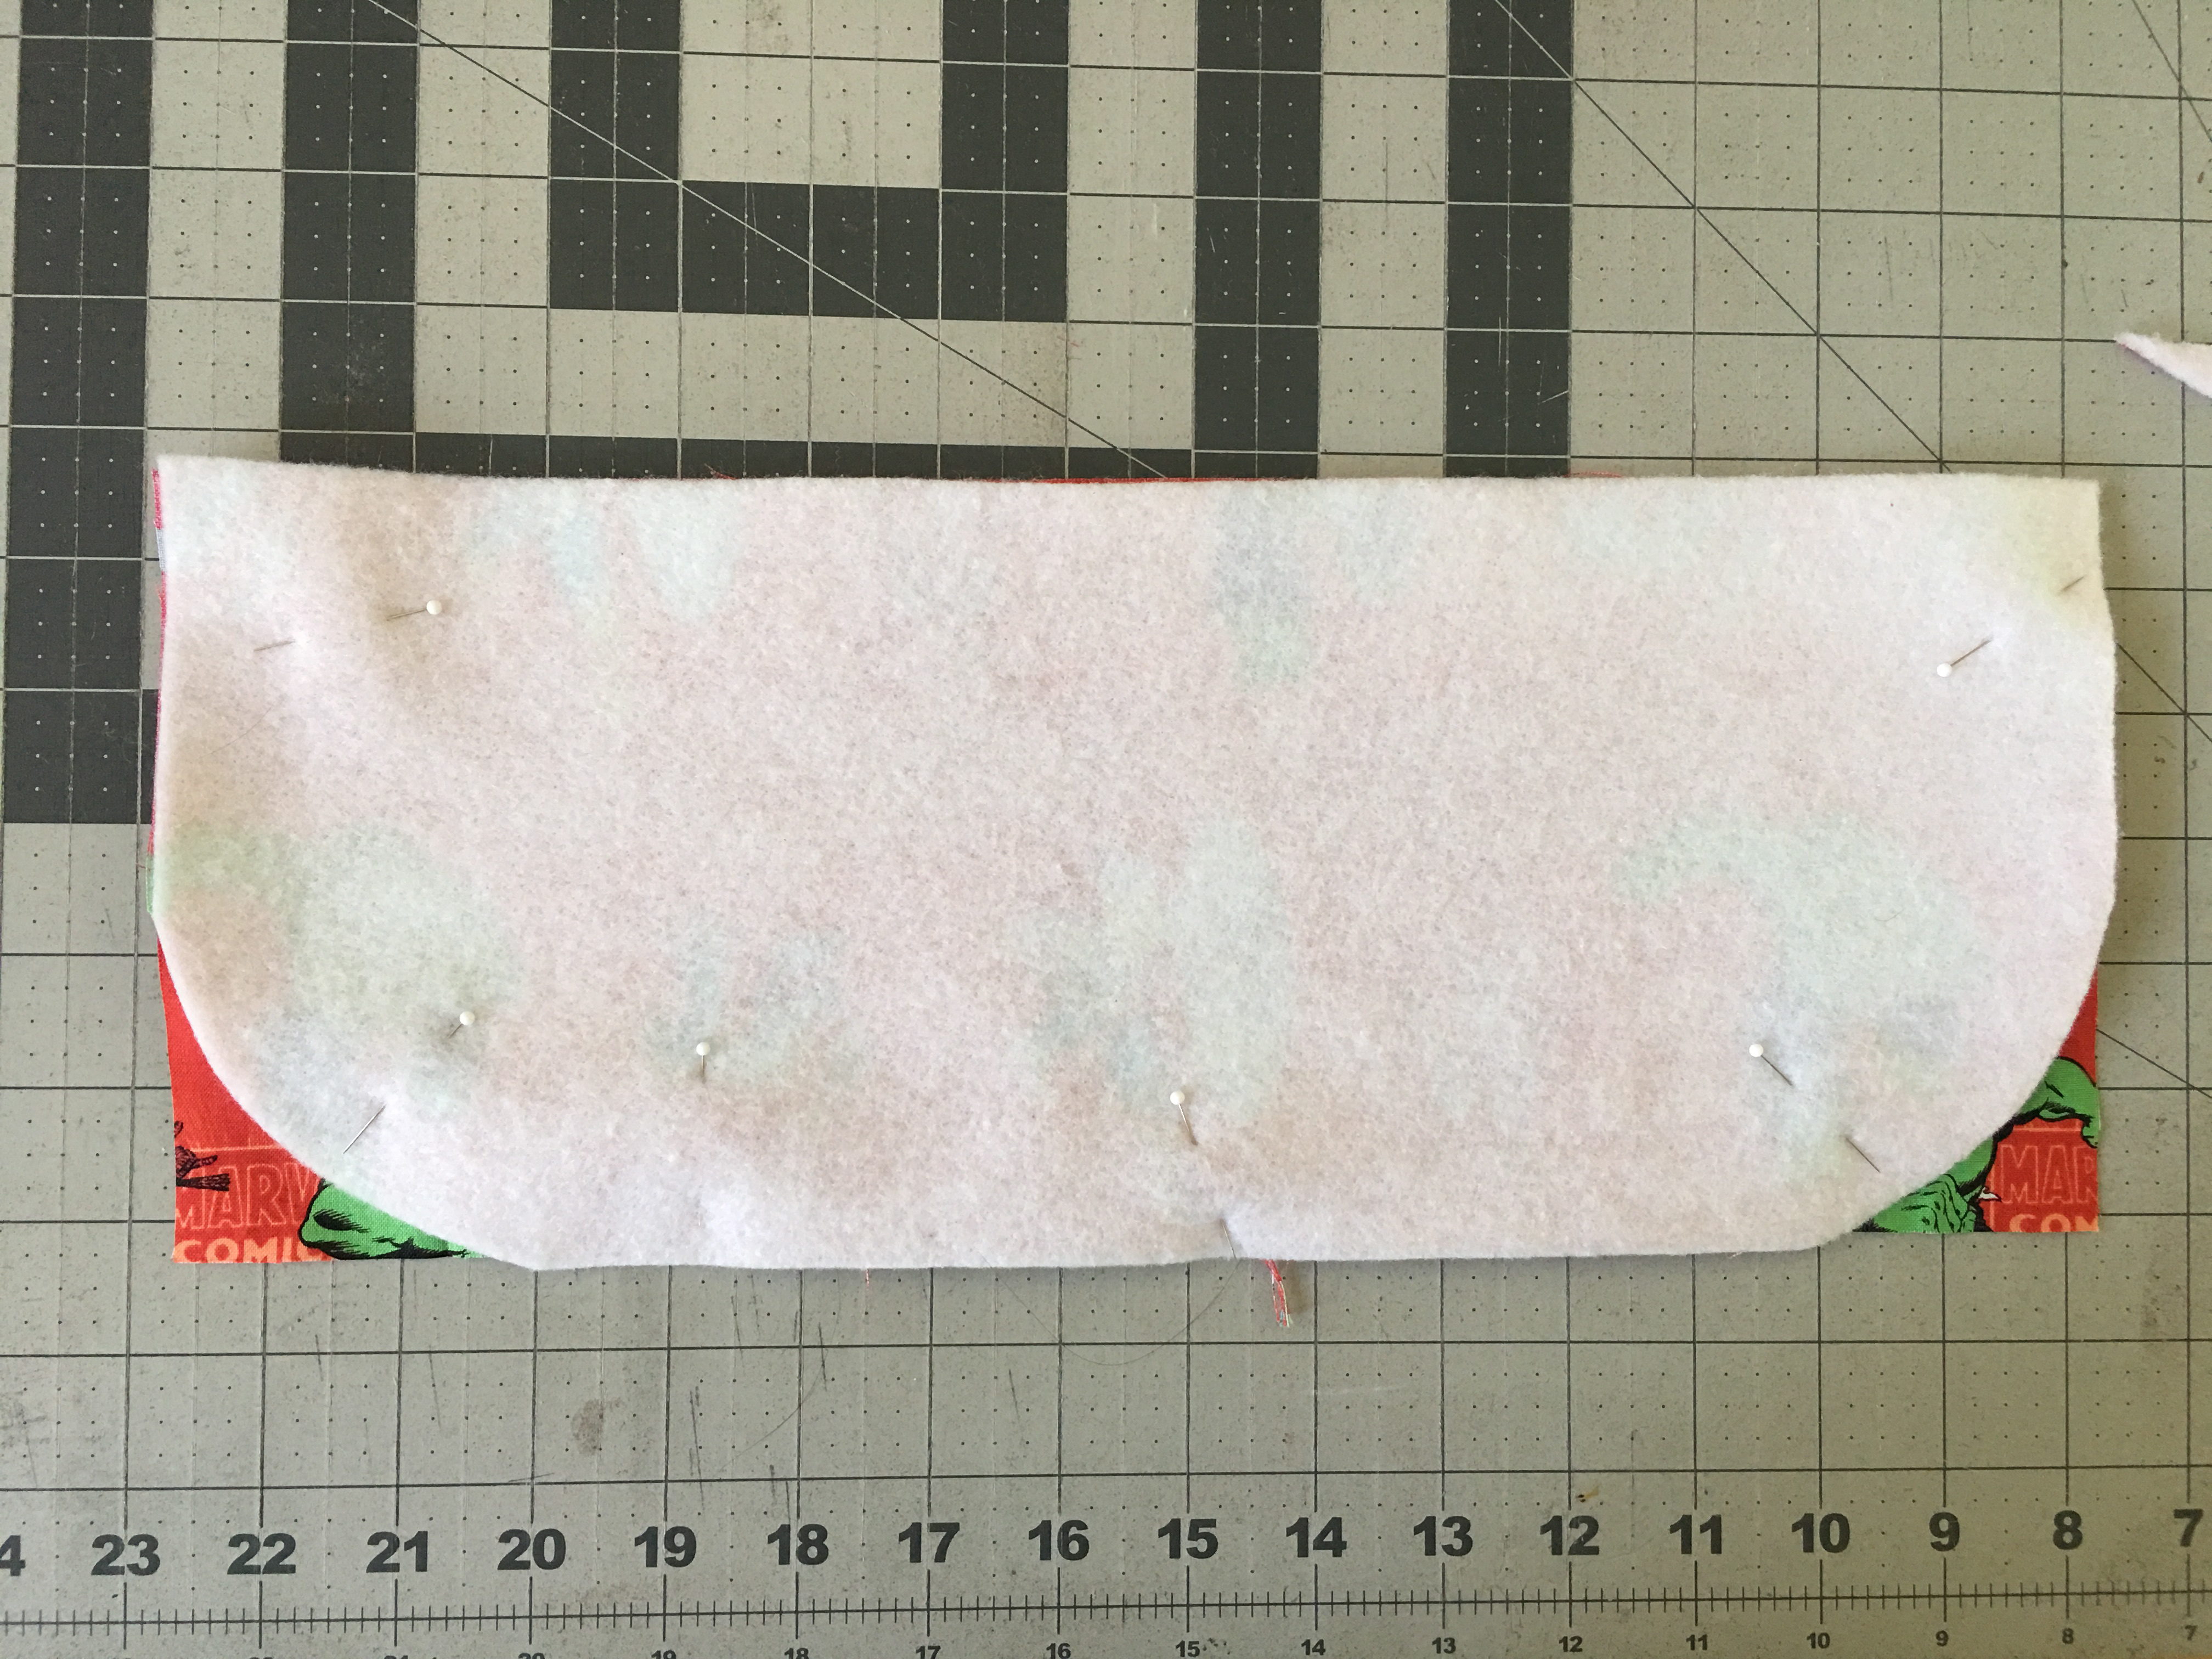
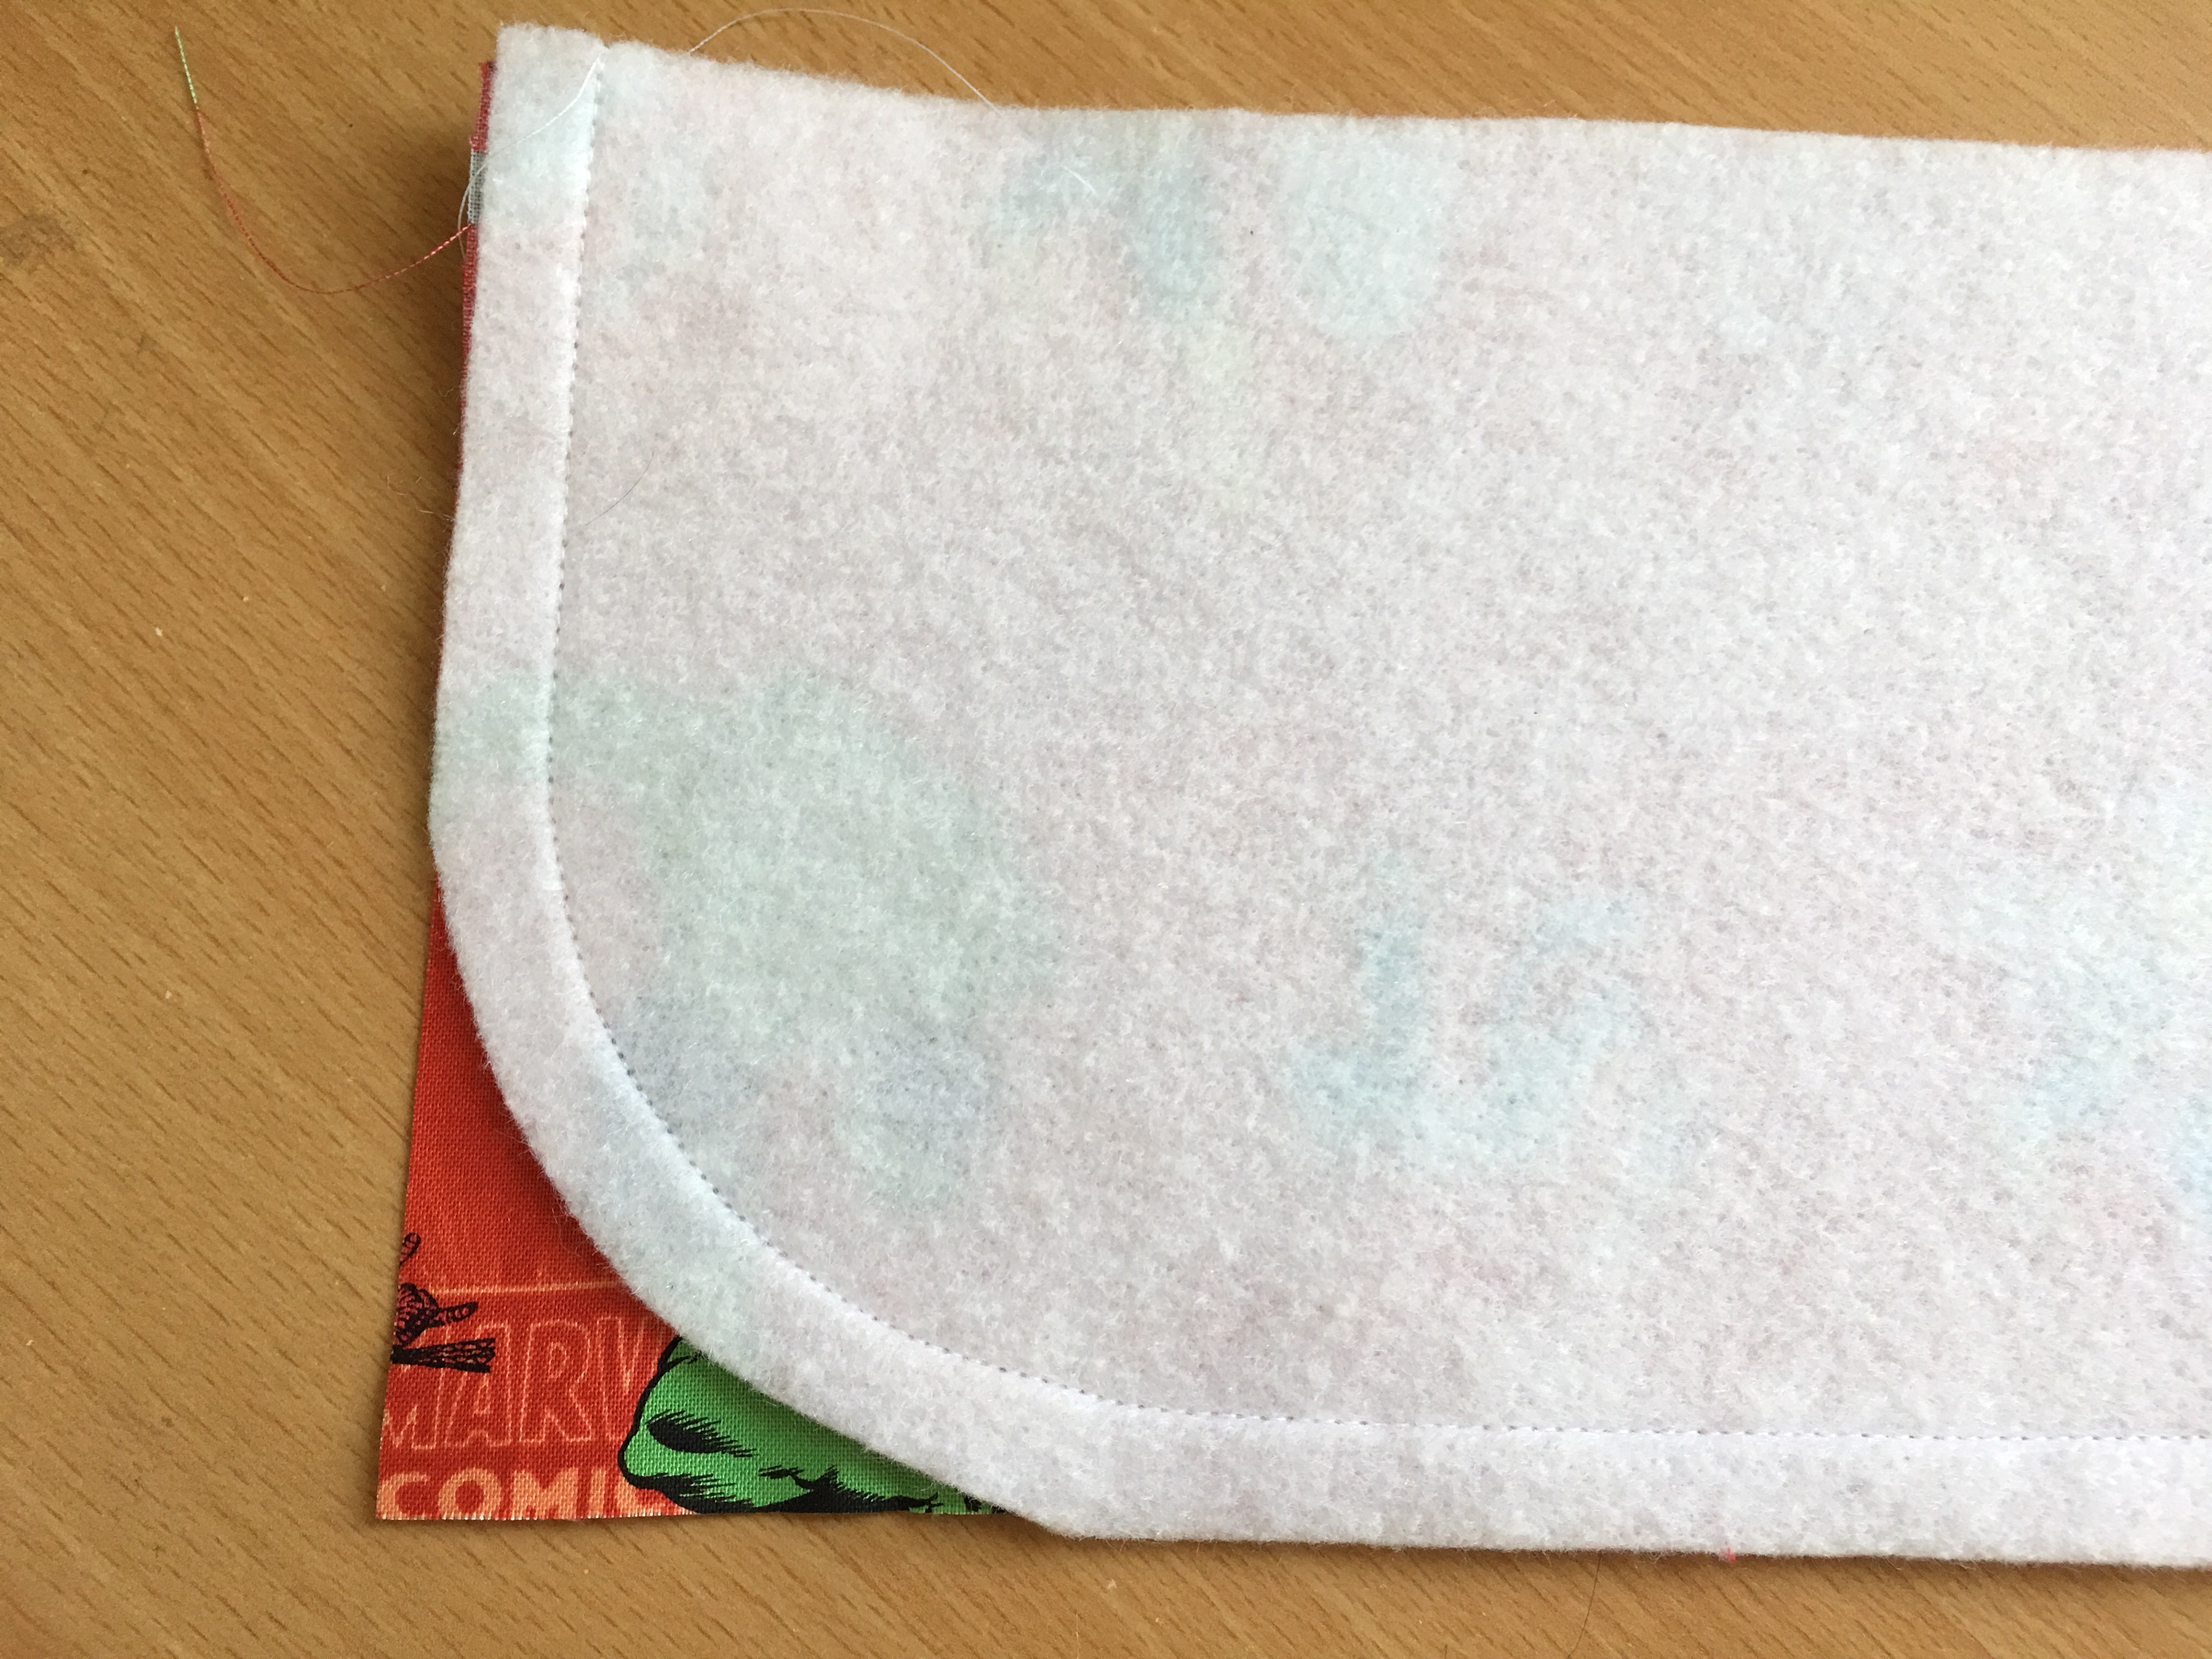
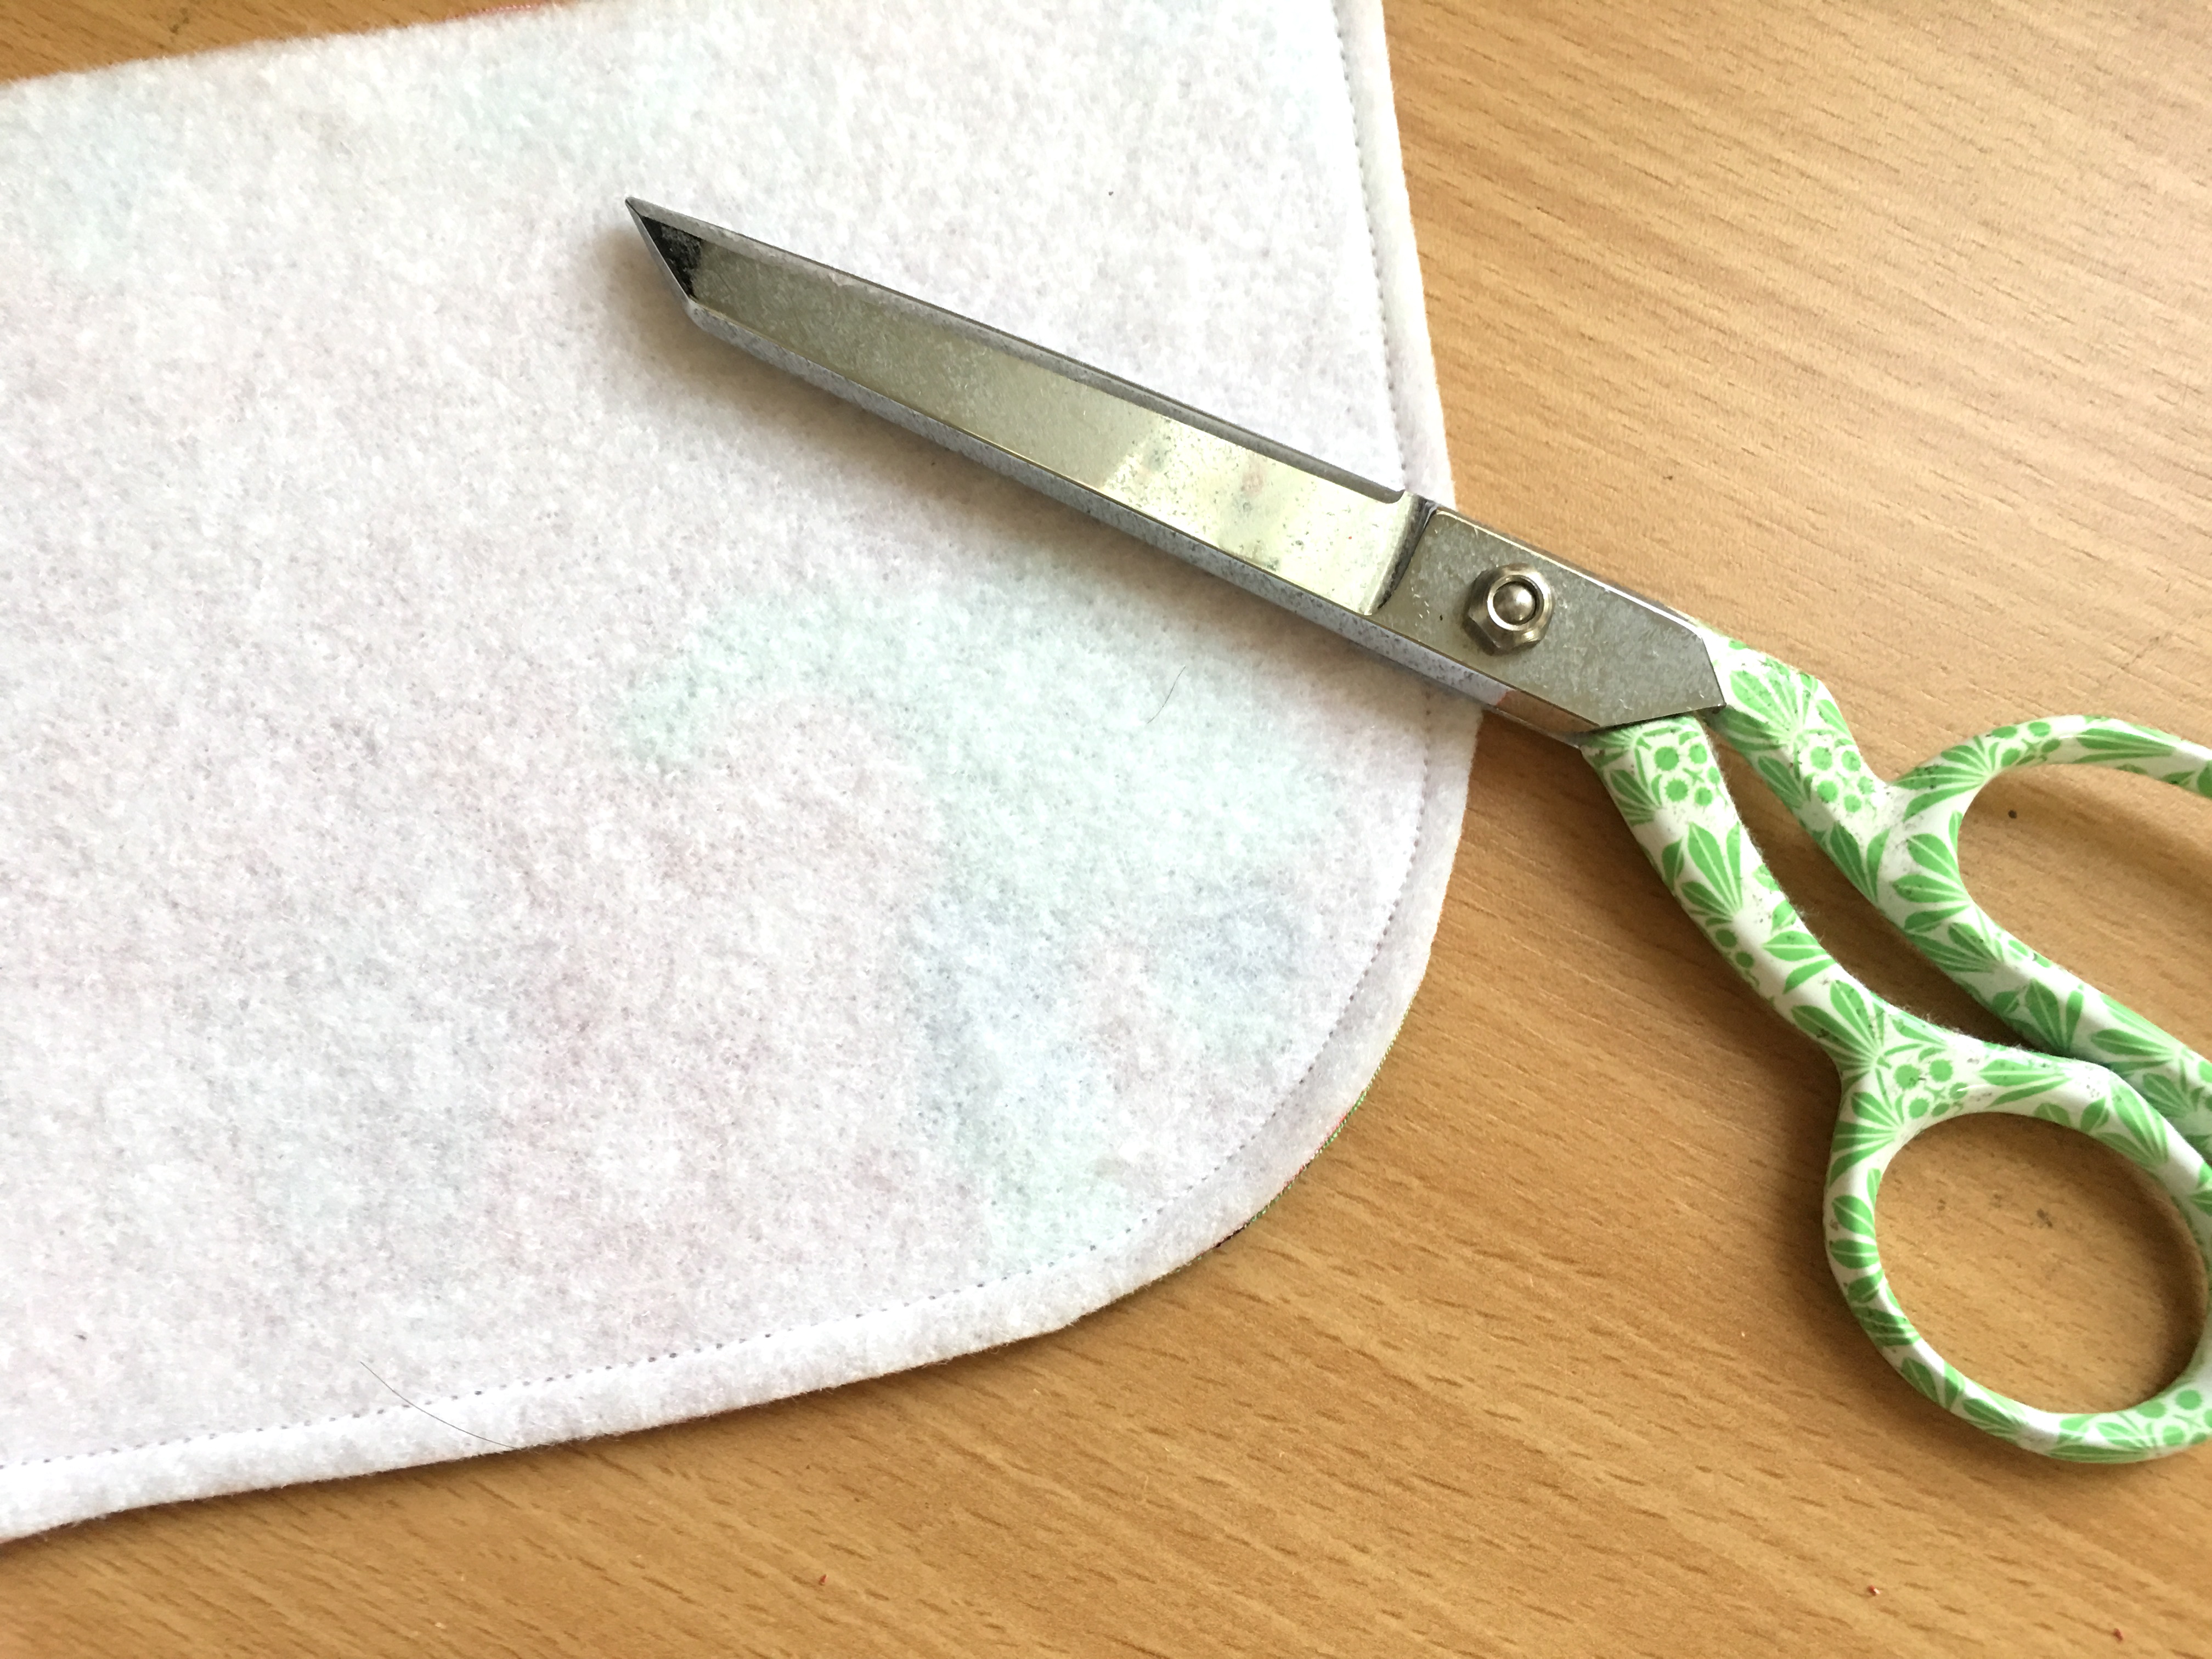
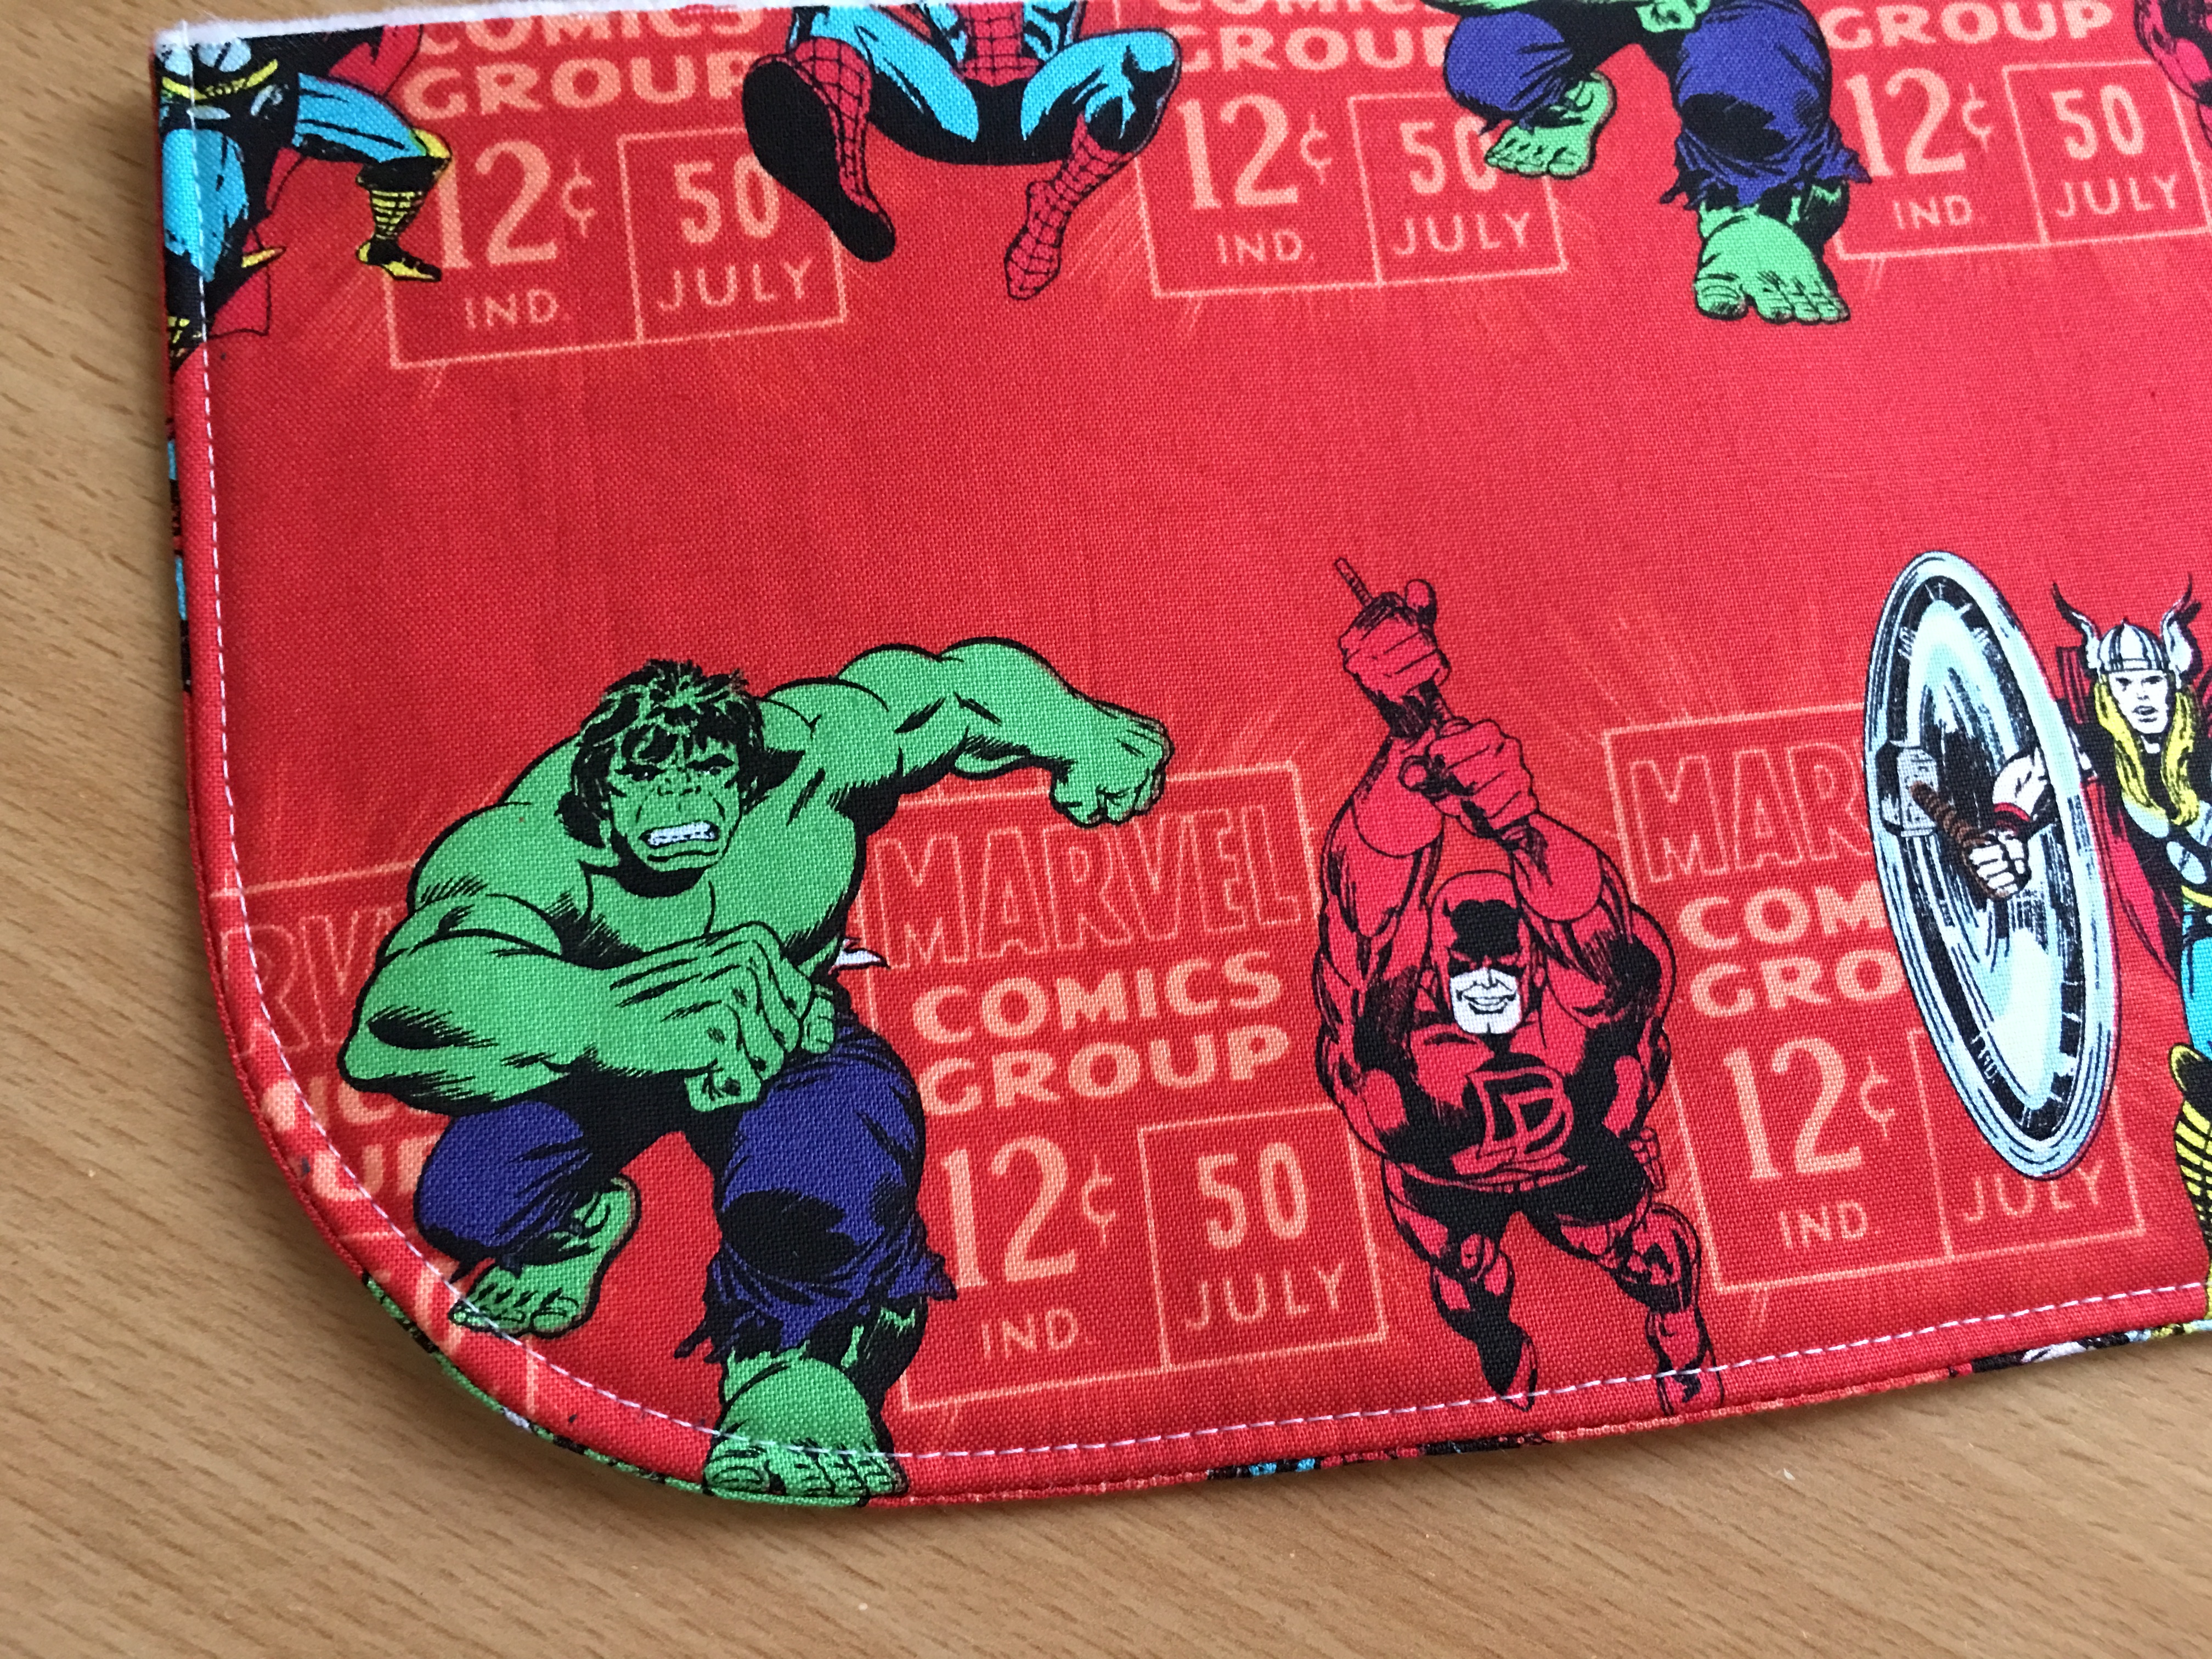
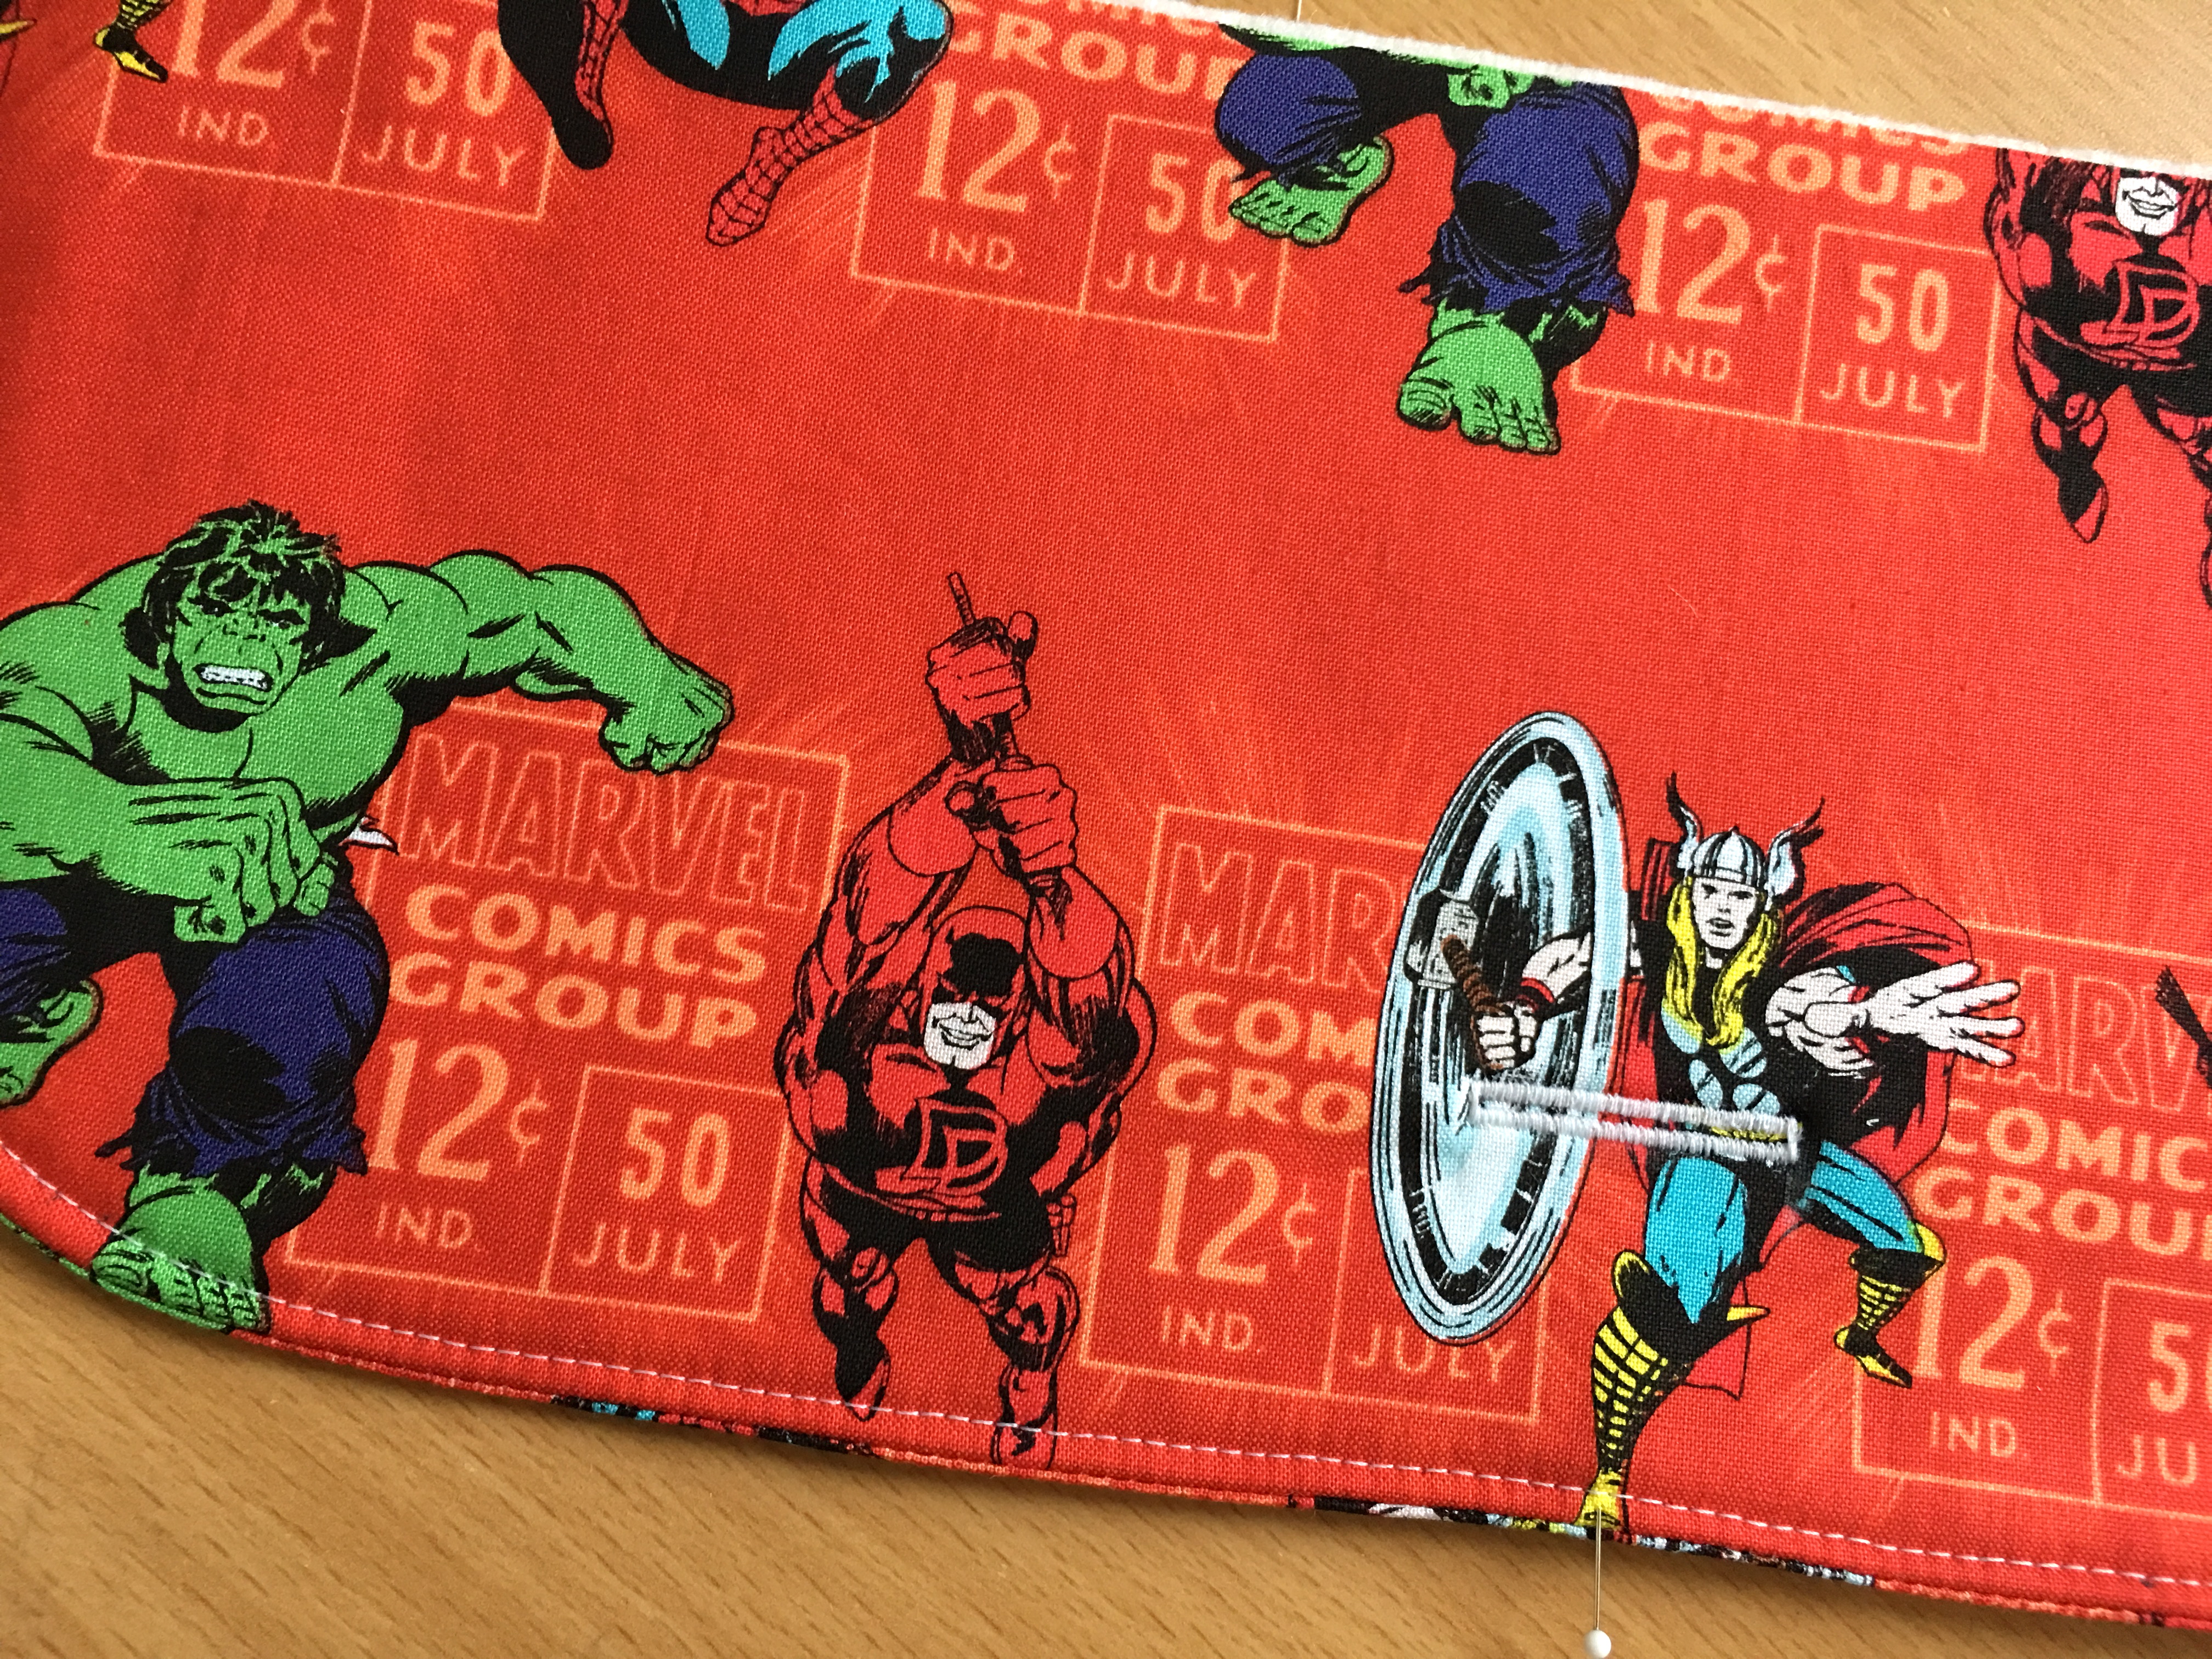
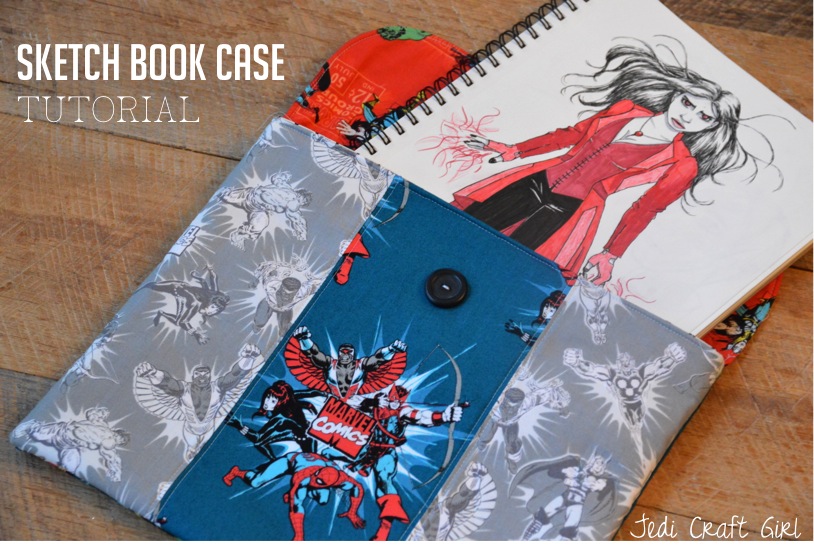
I’m thinking when it’s not summertime this pillow might live in the super hero kids room!!!

Star Spangled Pillow by Amanda Niederhauser aka Jedi Craft Girl

star pillow 6Star Spangled Pillow Supplies:

(2) 20″ squares of canvas/duck cloth

1/4 yard denim (mine is by Indigo Junction Crossroads Denim)

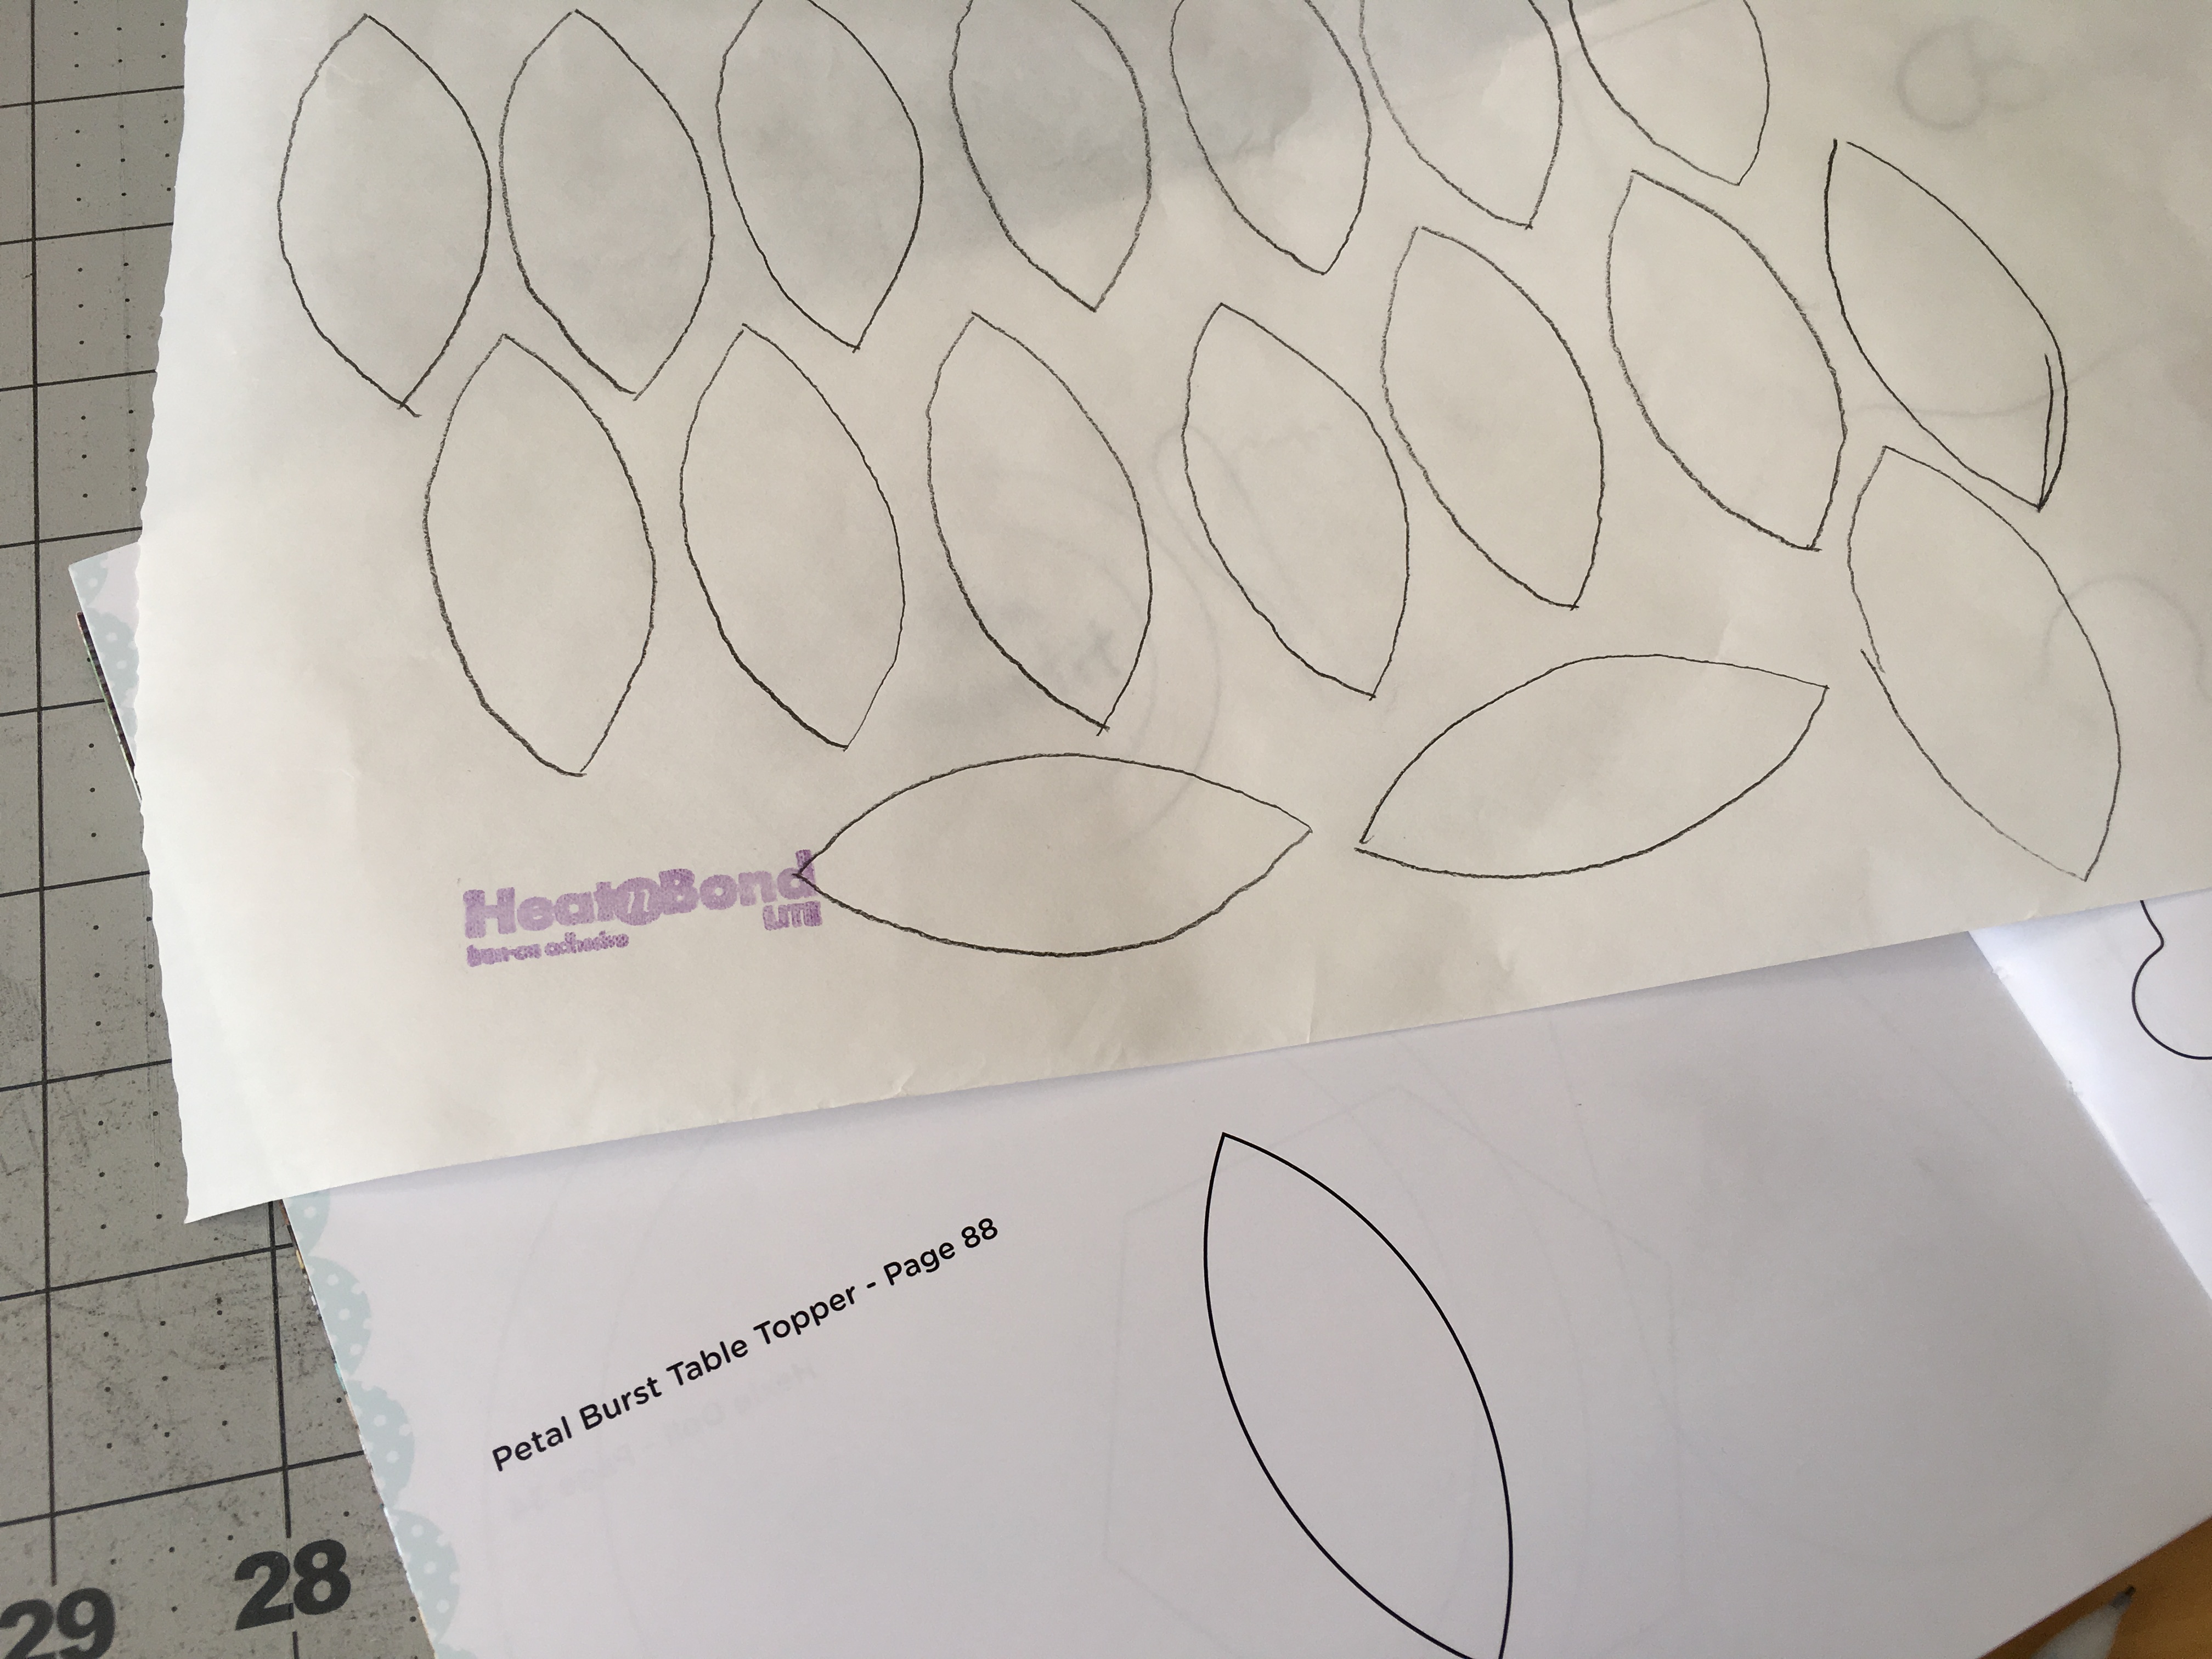
HeatnBond® Lite Fusible Adhesive

20″ pillow form

22″ or longer zipper

Star Pattern

IMG_2118

[line]Star Spangled Pillow Instructions:

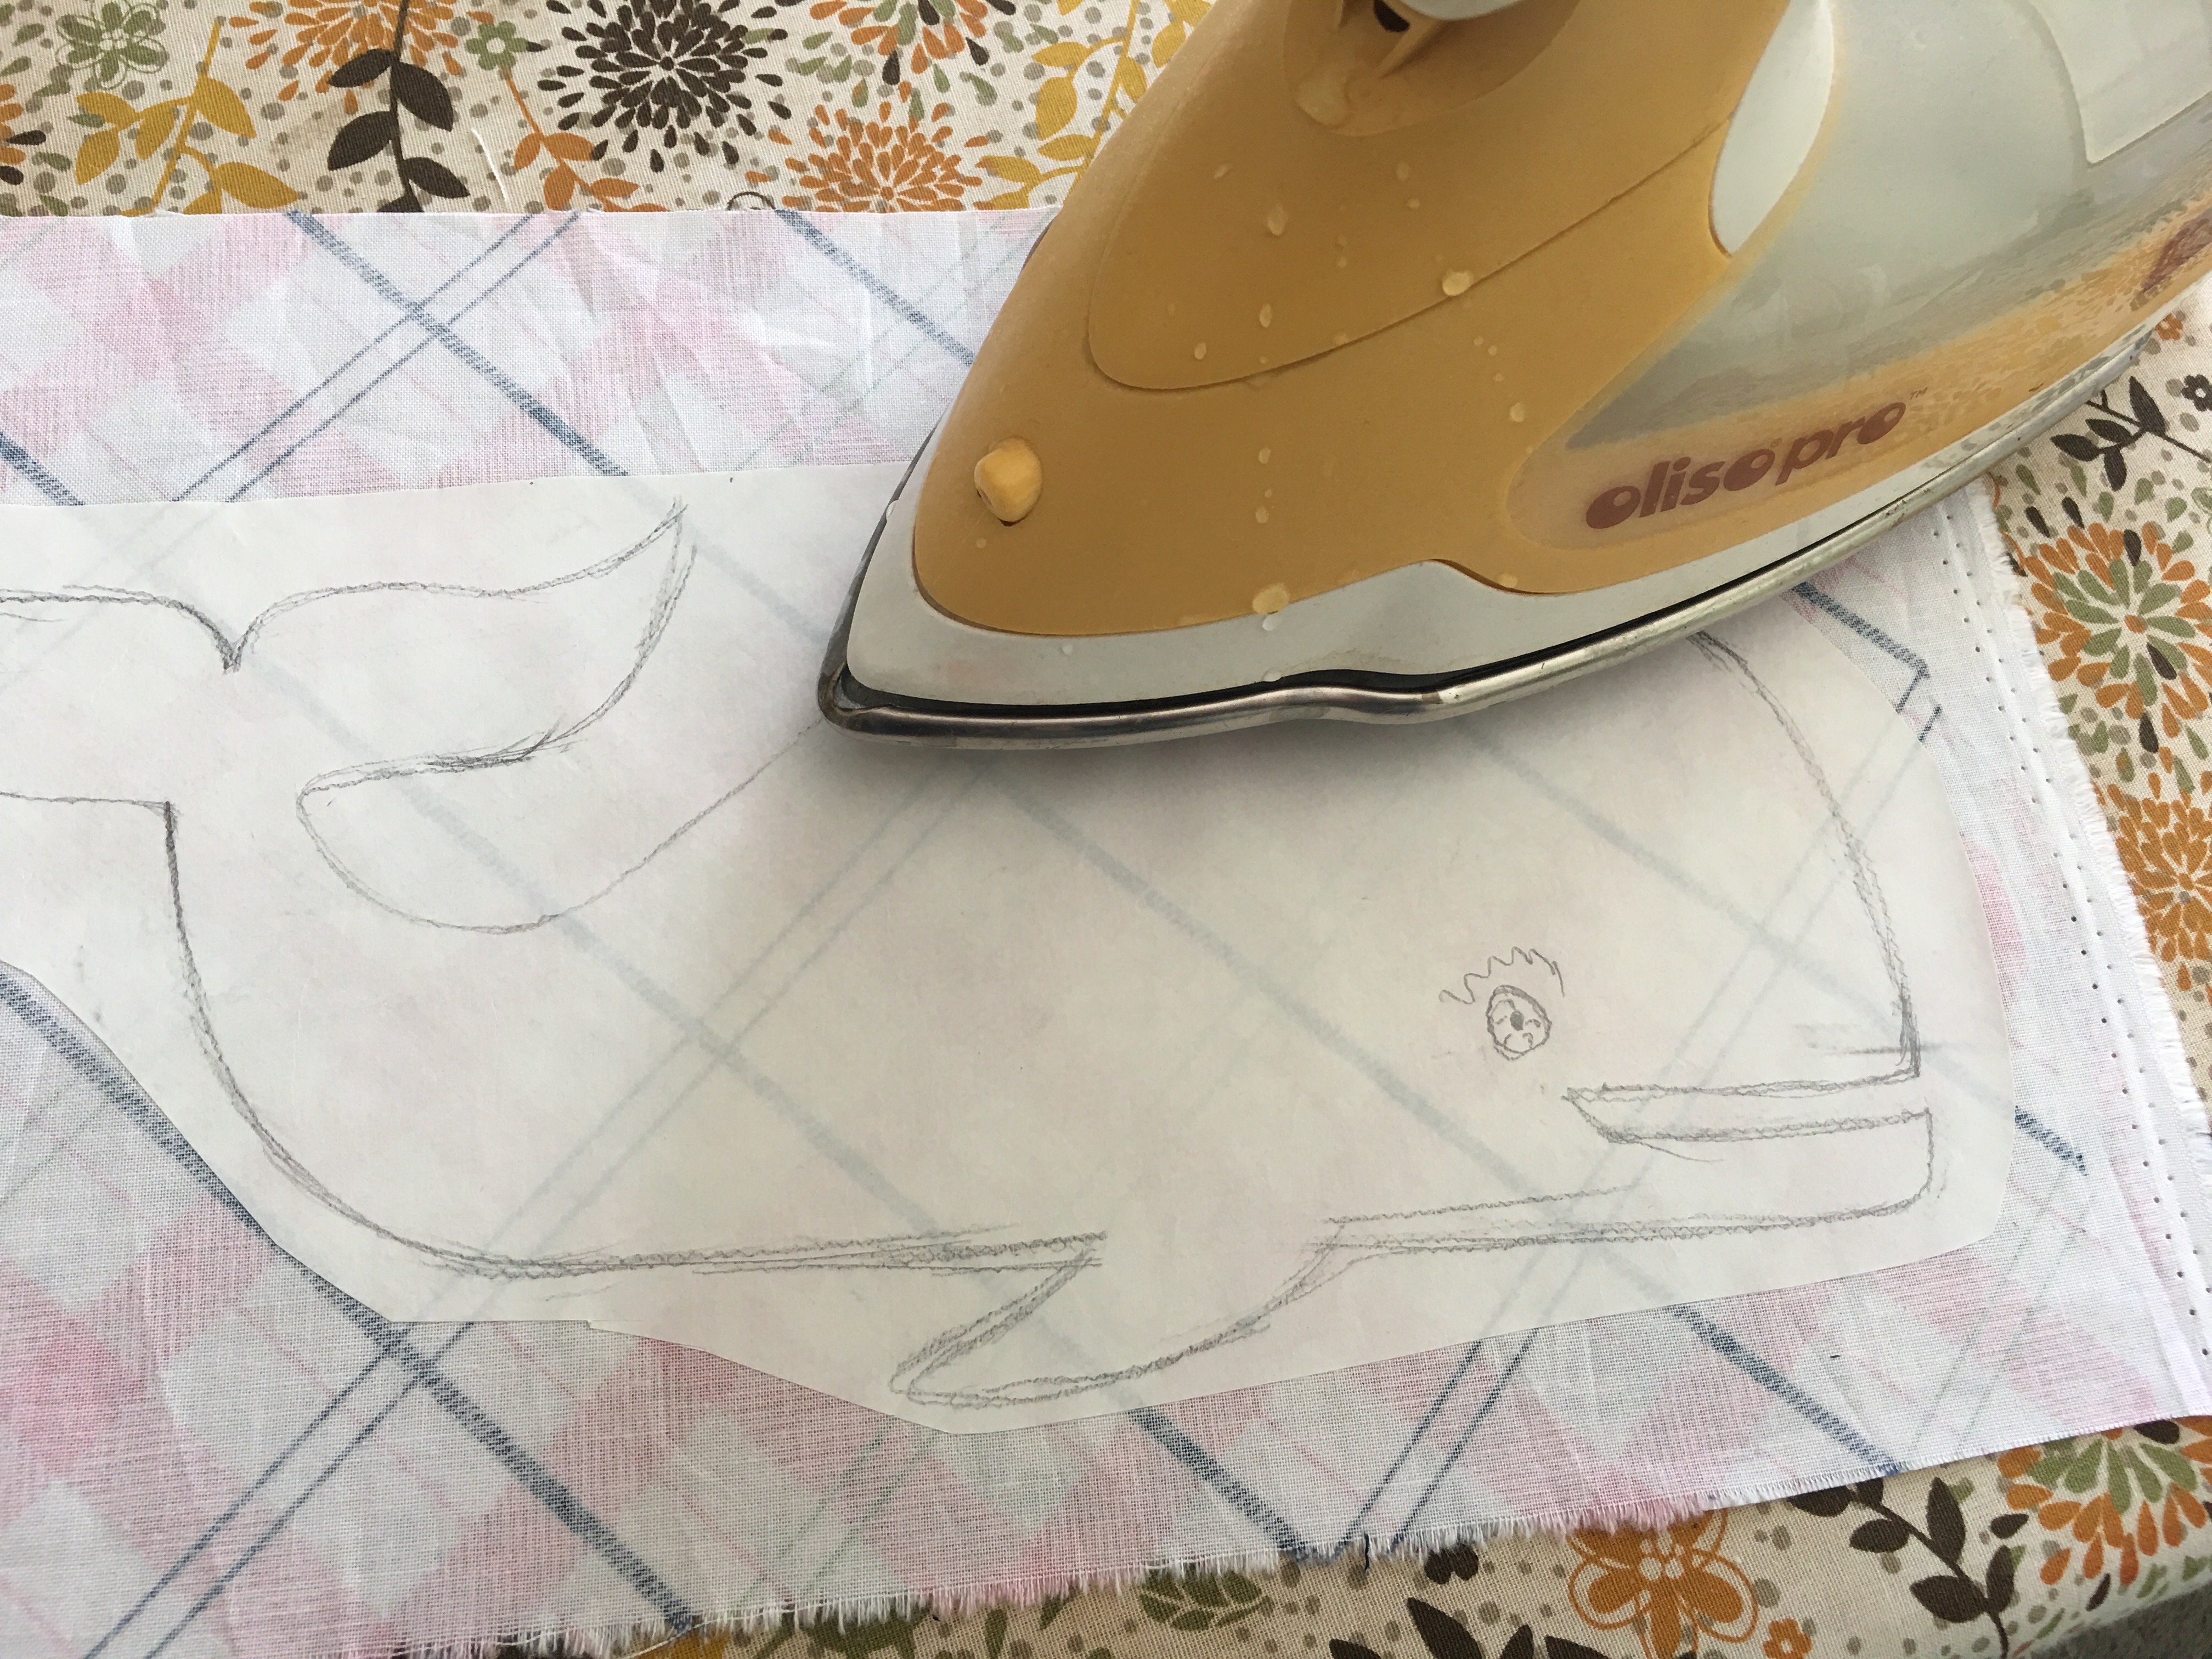
Begin by tracing 10 stars onto the HeatnBond® Lite.

IMG_2119

Fuse to the wrong side of the denim.  Cut out each star and peel off the backing paper.IMG_2120

Arrange stars as desired.  Make sure that a few hang off the edges to create a continuous pattern look.  Heat set in place.  Trim off the excess star.
IMG_2122

Top stitch around each star.  I used a shiny taupe/gray color.IMG_2123

Once complete use this tutorial to sew an invisible zipper in the bottom and finish the pillow.IMG_2124

I am ao in love and ready for summer!!!!!

star pillow 8

star pillow 7

star pillow 5

Tutti-Fruitti Market Tote Bag

This tote bag is by far my most used tote bag I own!!  What I love about it is that it is super big but folds up small so you can keep it in our purse or in your car.  My goal is to sew a bunch of these and use them when I go grocery shopping.  When they get dirty, just toss in the wash!!

IMG_1378

This fabric is called Tutti-Fruitti from Blend Fabrics – it just screams summer!  You can click on this link to see all the fabrics in the collection!
IMG_1356

My friend, Rachel from Little Fish, and I made them together and she loves taking hers to the pool!  (She also makes these adorable euro style swim trunks for little boys). You can fit a ton of beach towels in this bag!!

IMG_6035 copy-2

The bag is also reversible – I love the pineapples!!!  So click HERE and download the free pattern and get ready for summer!!!IMG_1379

IMG_6034 copy-2


Circa 1974 Quilt Pattern – Featuring Gingham Girls

Gingham Girls Logocirca 1974

It’s a 1970’s sunshiny day over here!!!  As soon as I saw Diary of a Quilter’s Gingham Girls new fabric line I knew it was for me!!  She did an amazing job of packaging up my childhood into a fabric line!  (And yes, all of you now know how old I am!!!)

DSC_0269 2
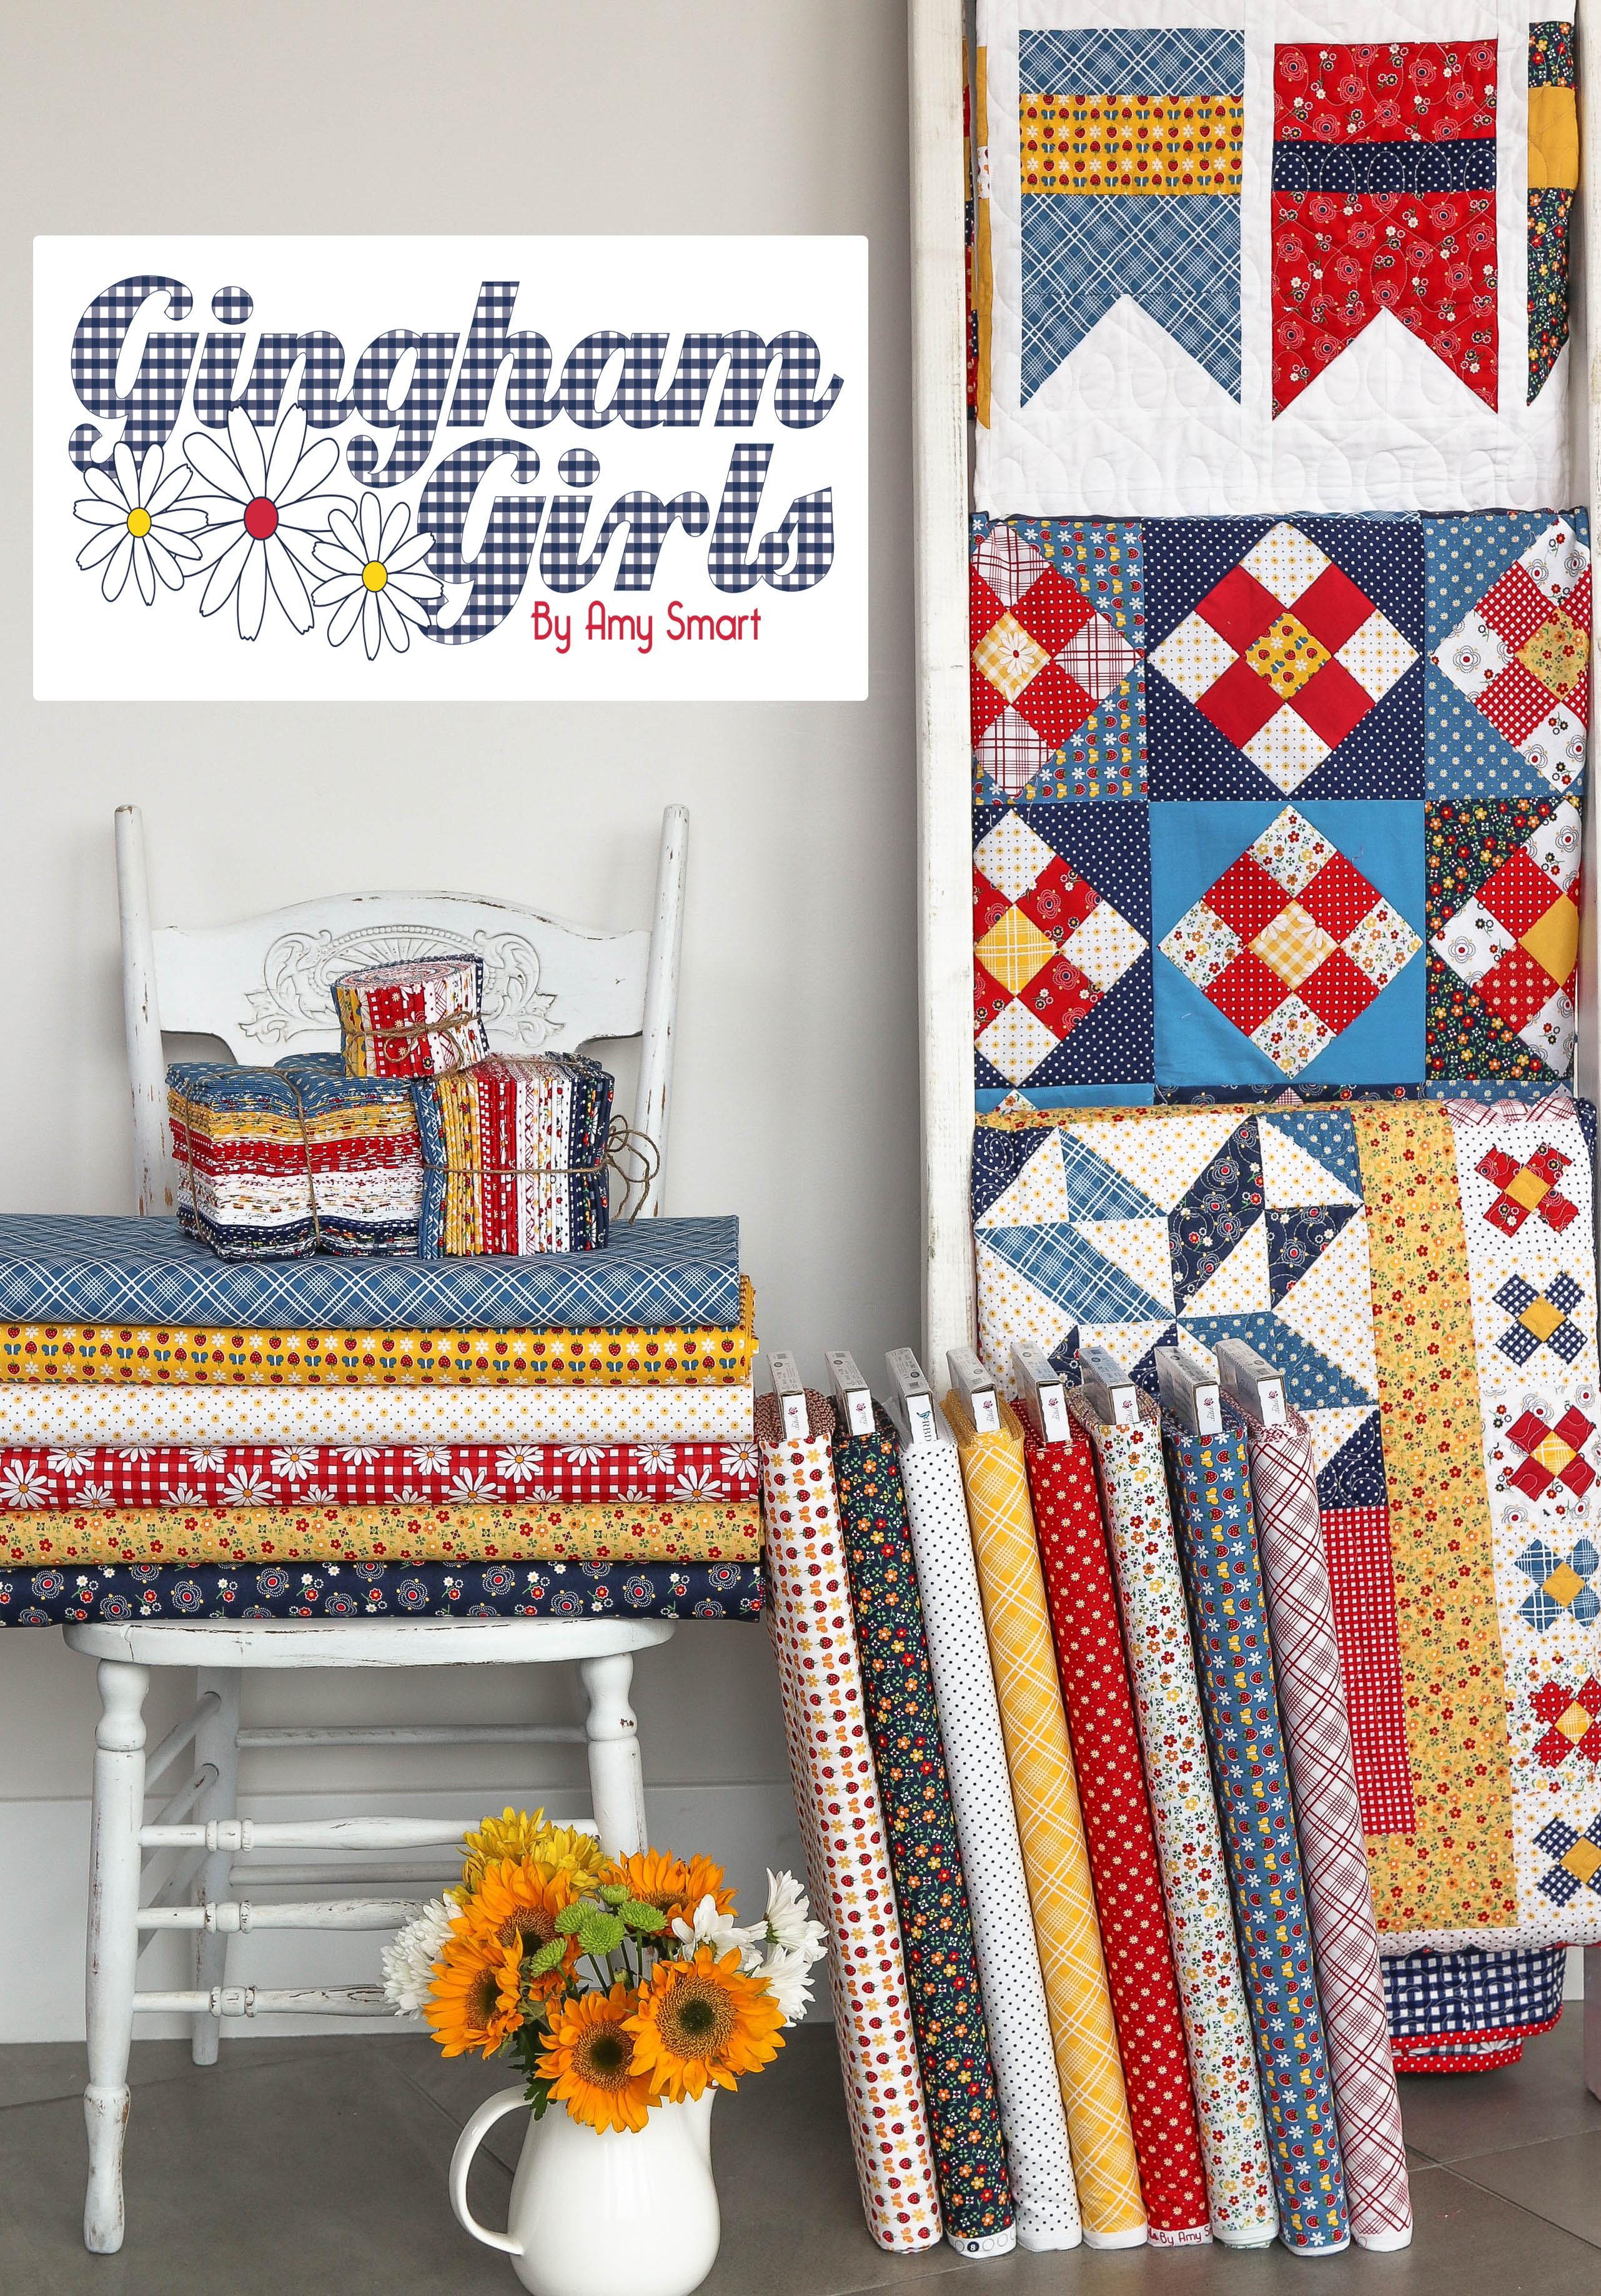
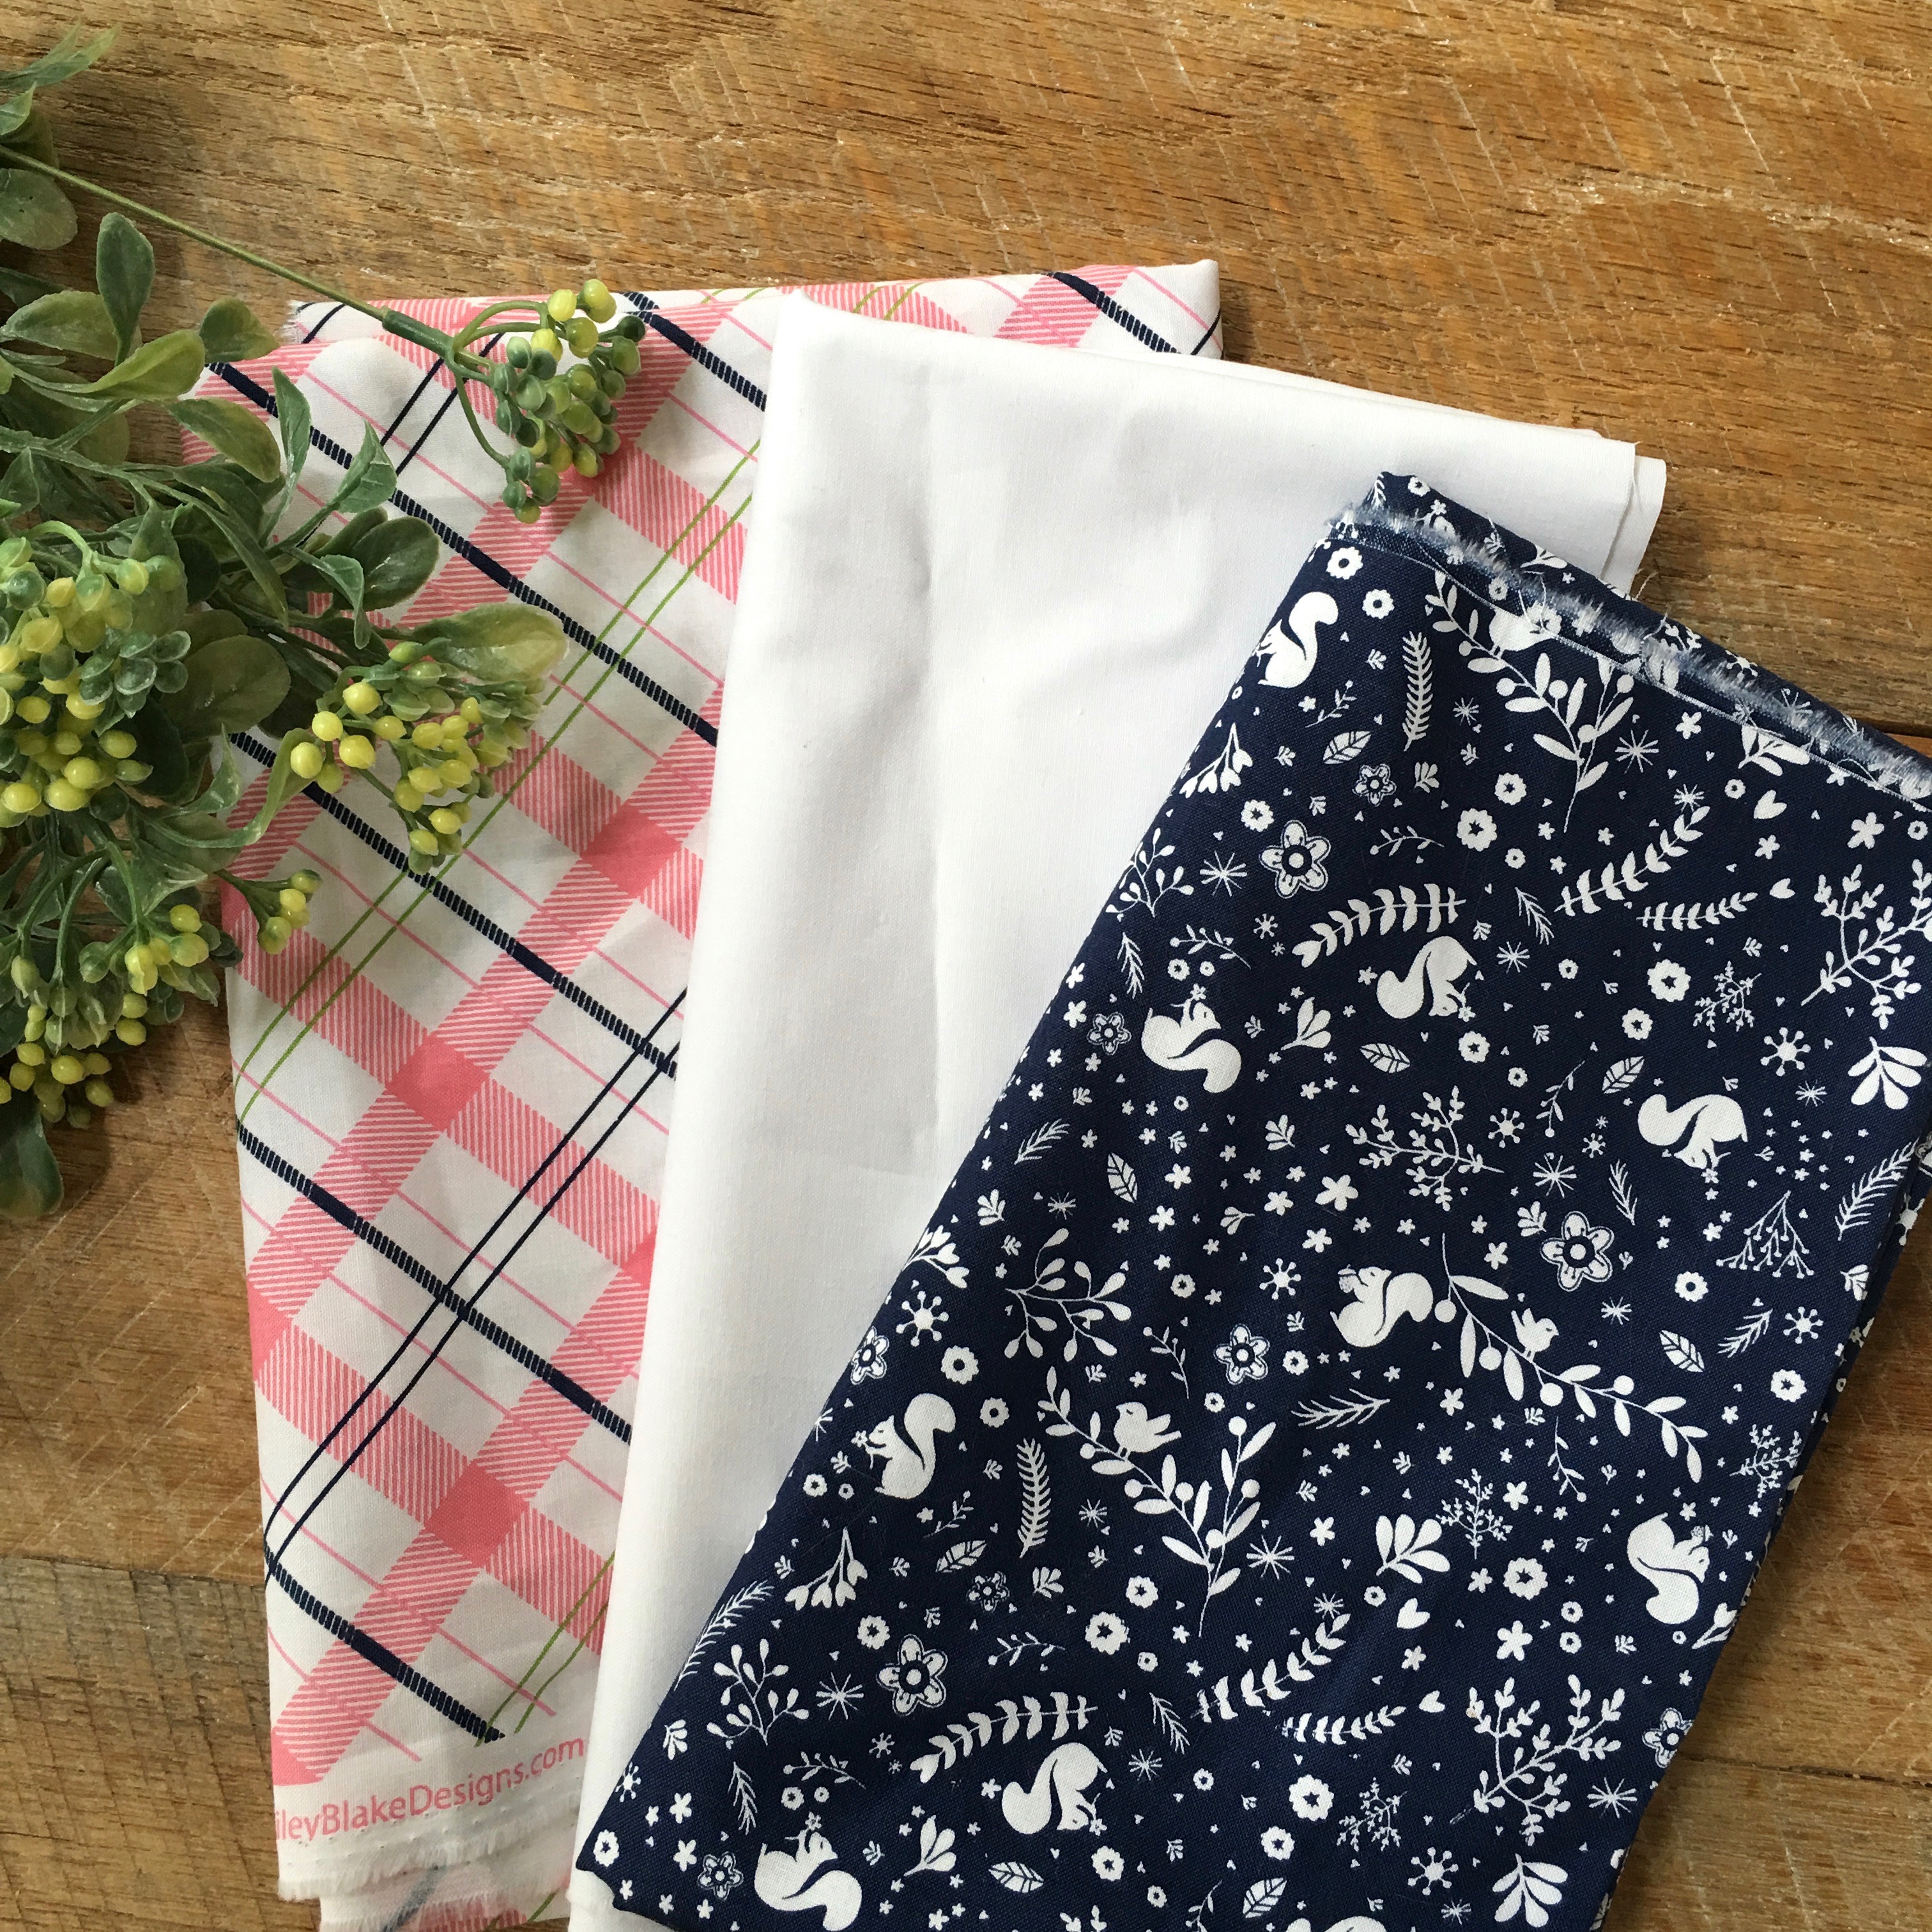
You can read all about Amy’s inspiration for the fabric line by hopping over to her blog.  I created this quilt to be your new favorite that you would take to the beach, the park, a game,  or snuggle with on the couch.  It’s 60″ x 76″ so a perfect throw size. You can customize the date to fit any occasion: birthday, anniversary, graduation, etc.

DSC_0212

This quilt is just for me!  And it’s my new favorite pattern – you’re gonna love it!

DSC_0262

DSC_0286
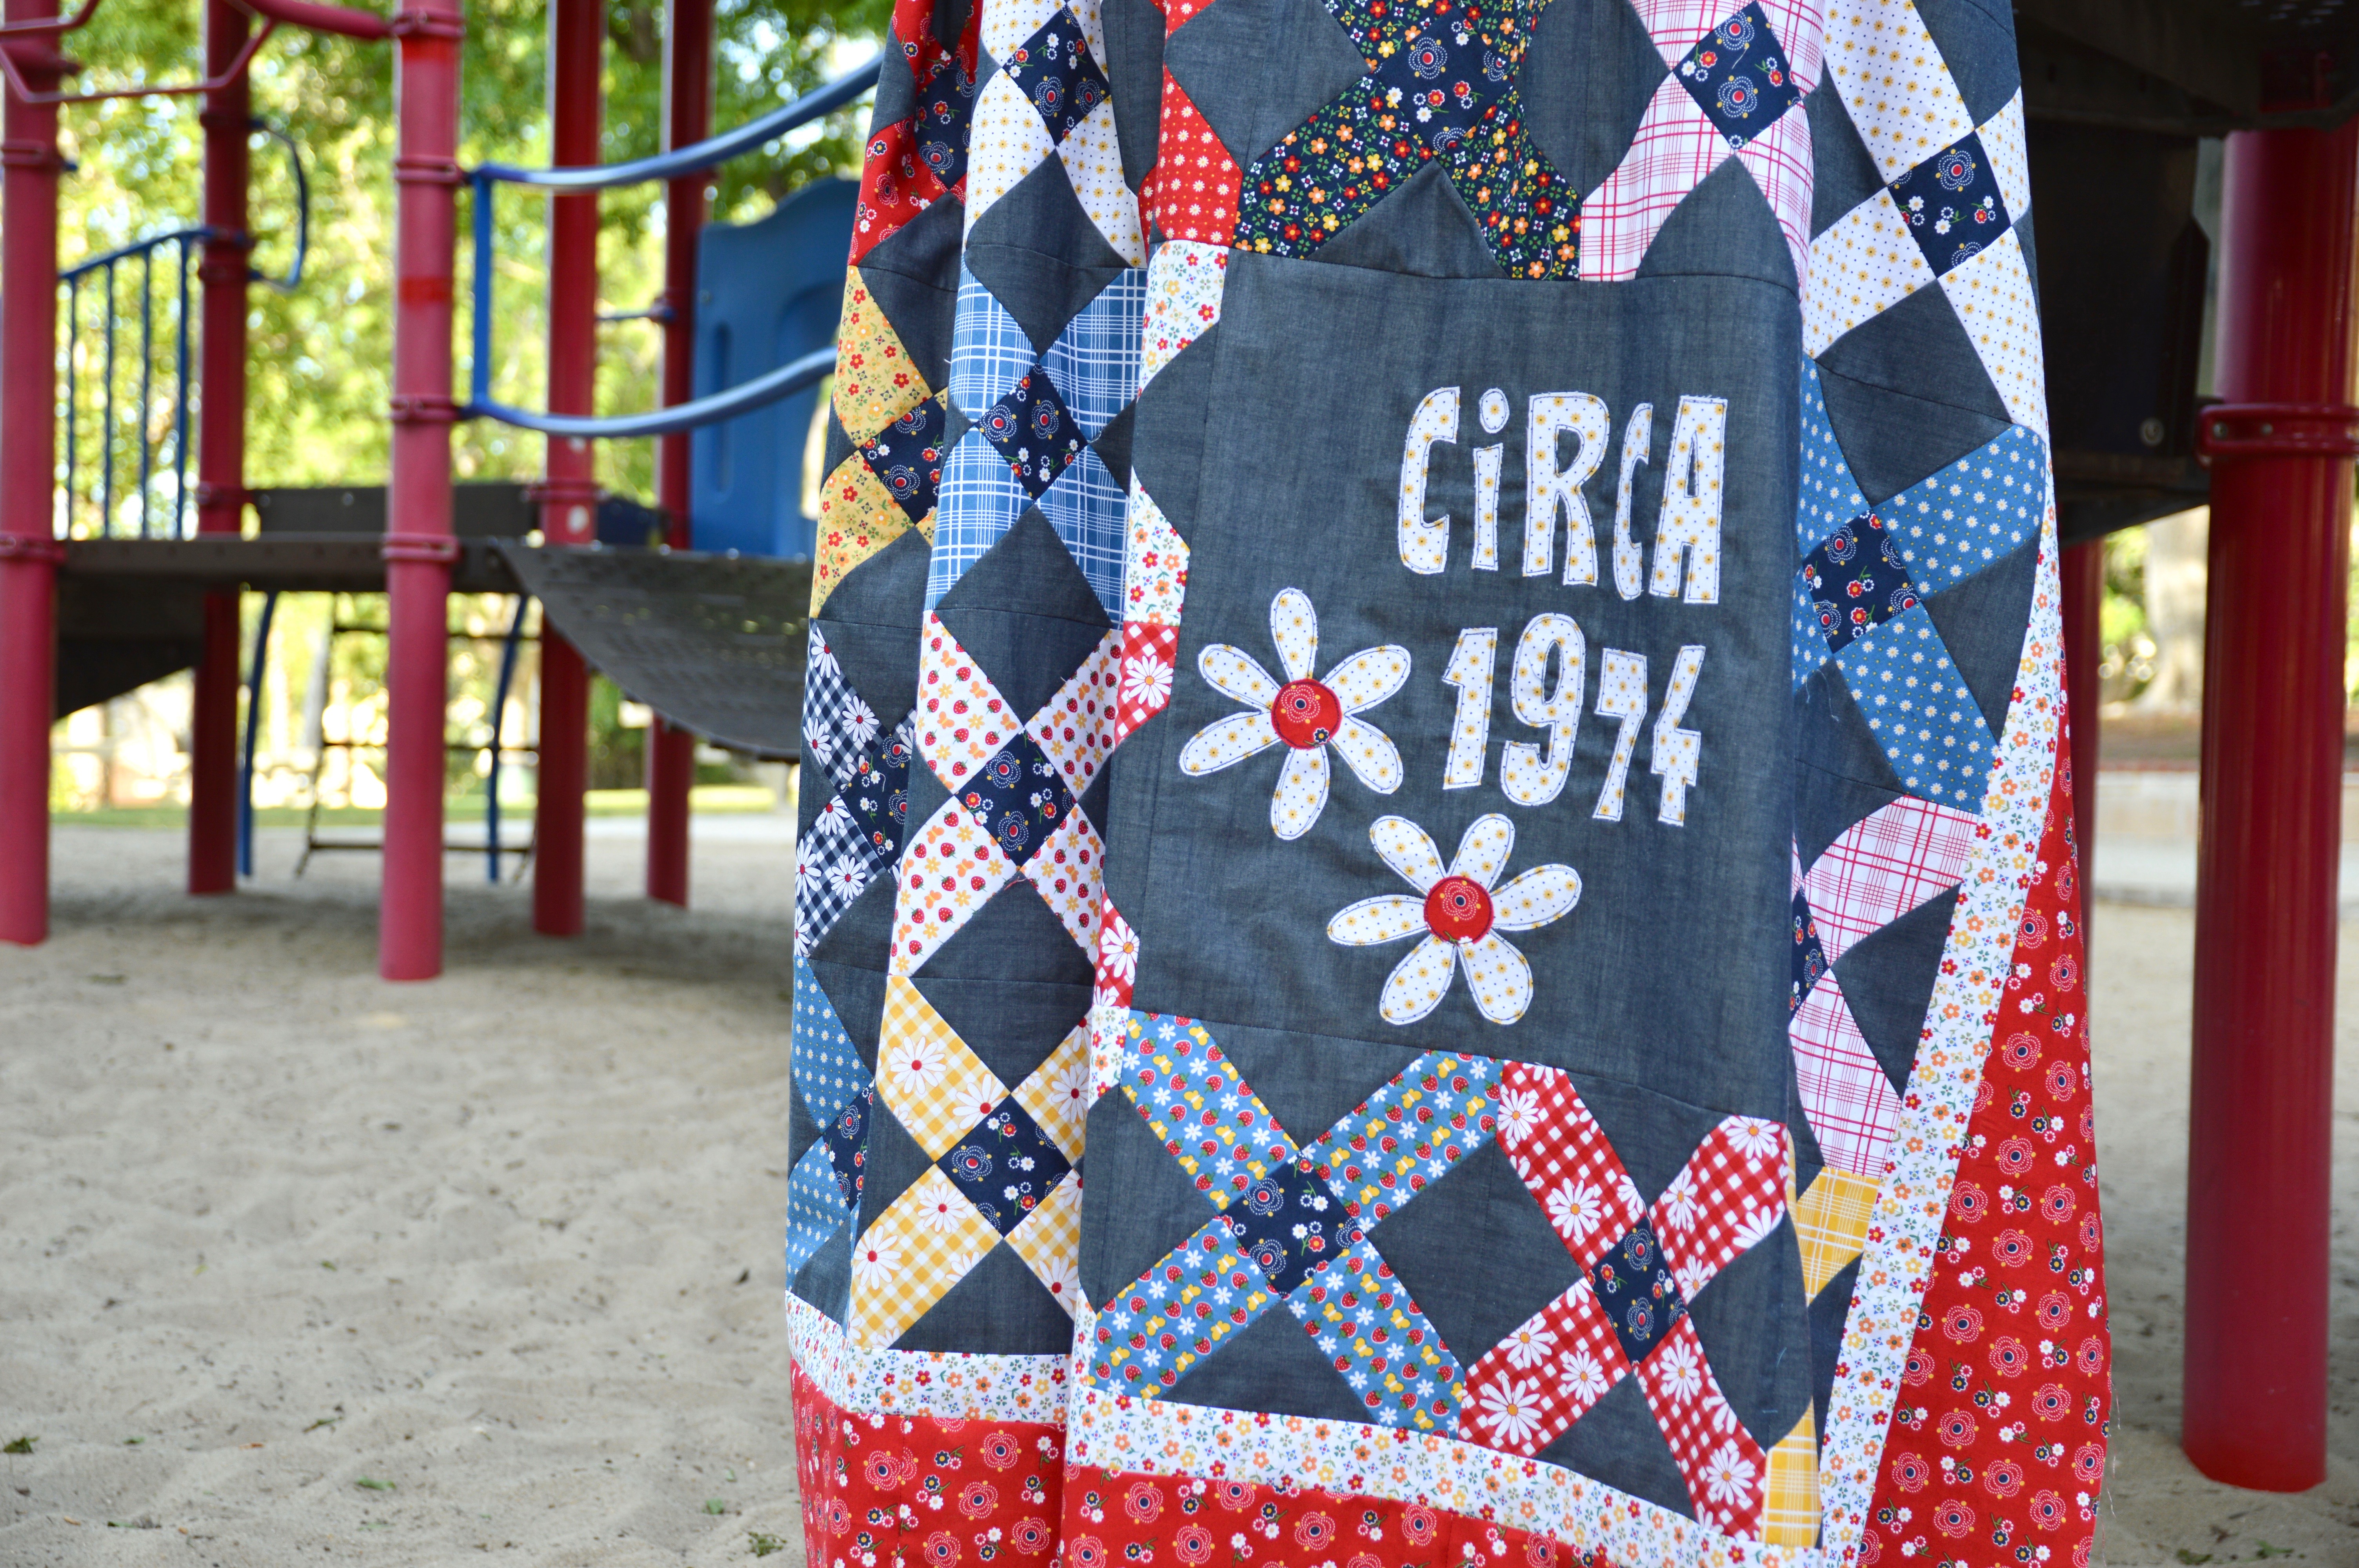
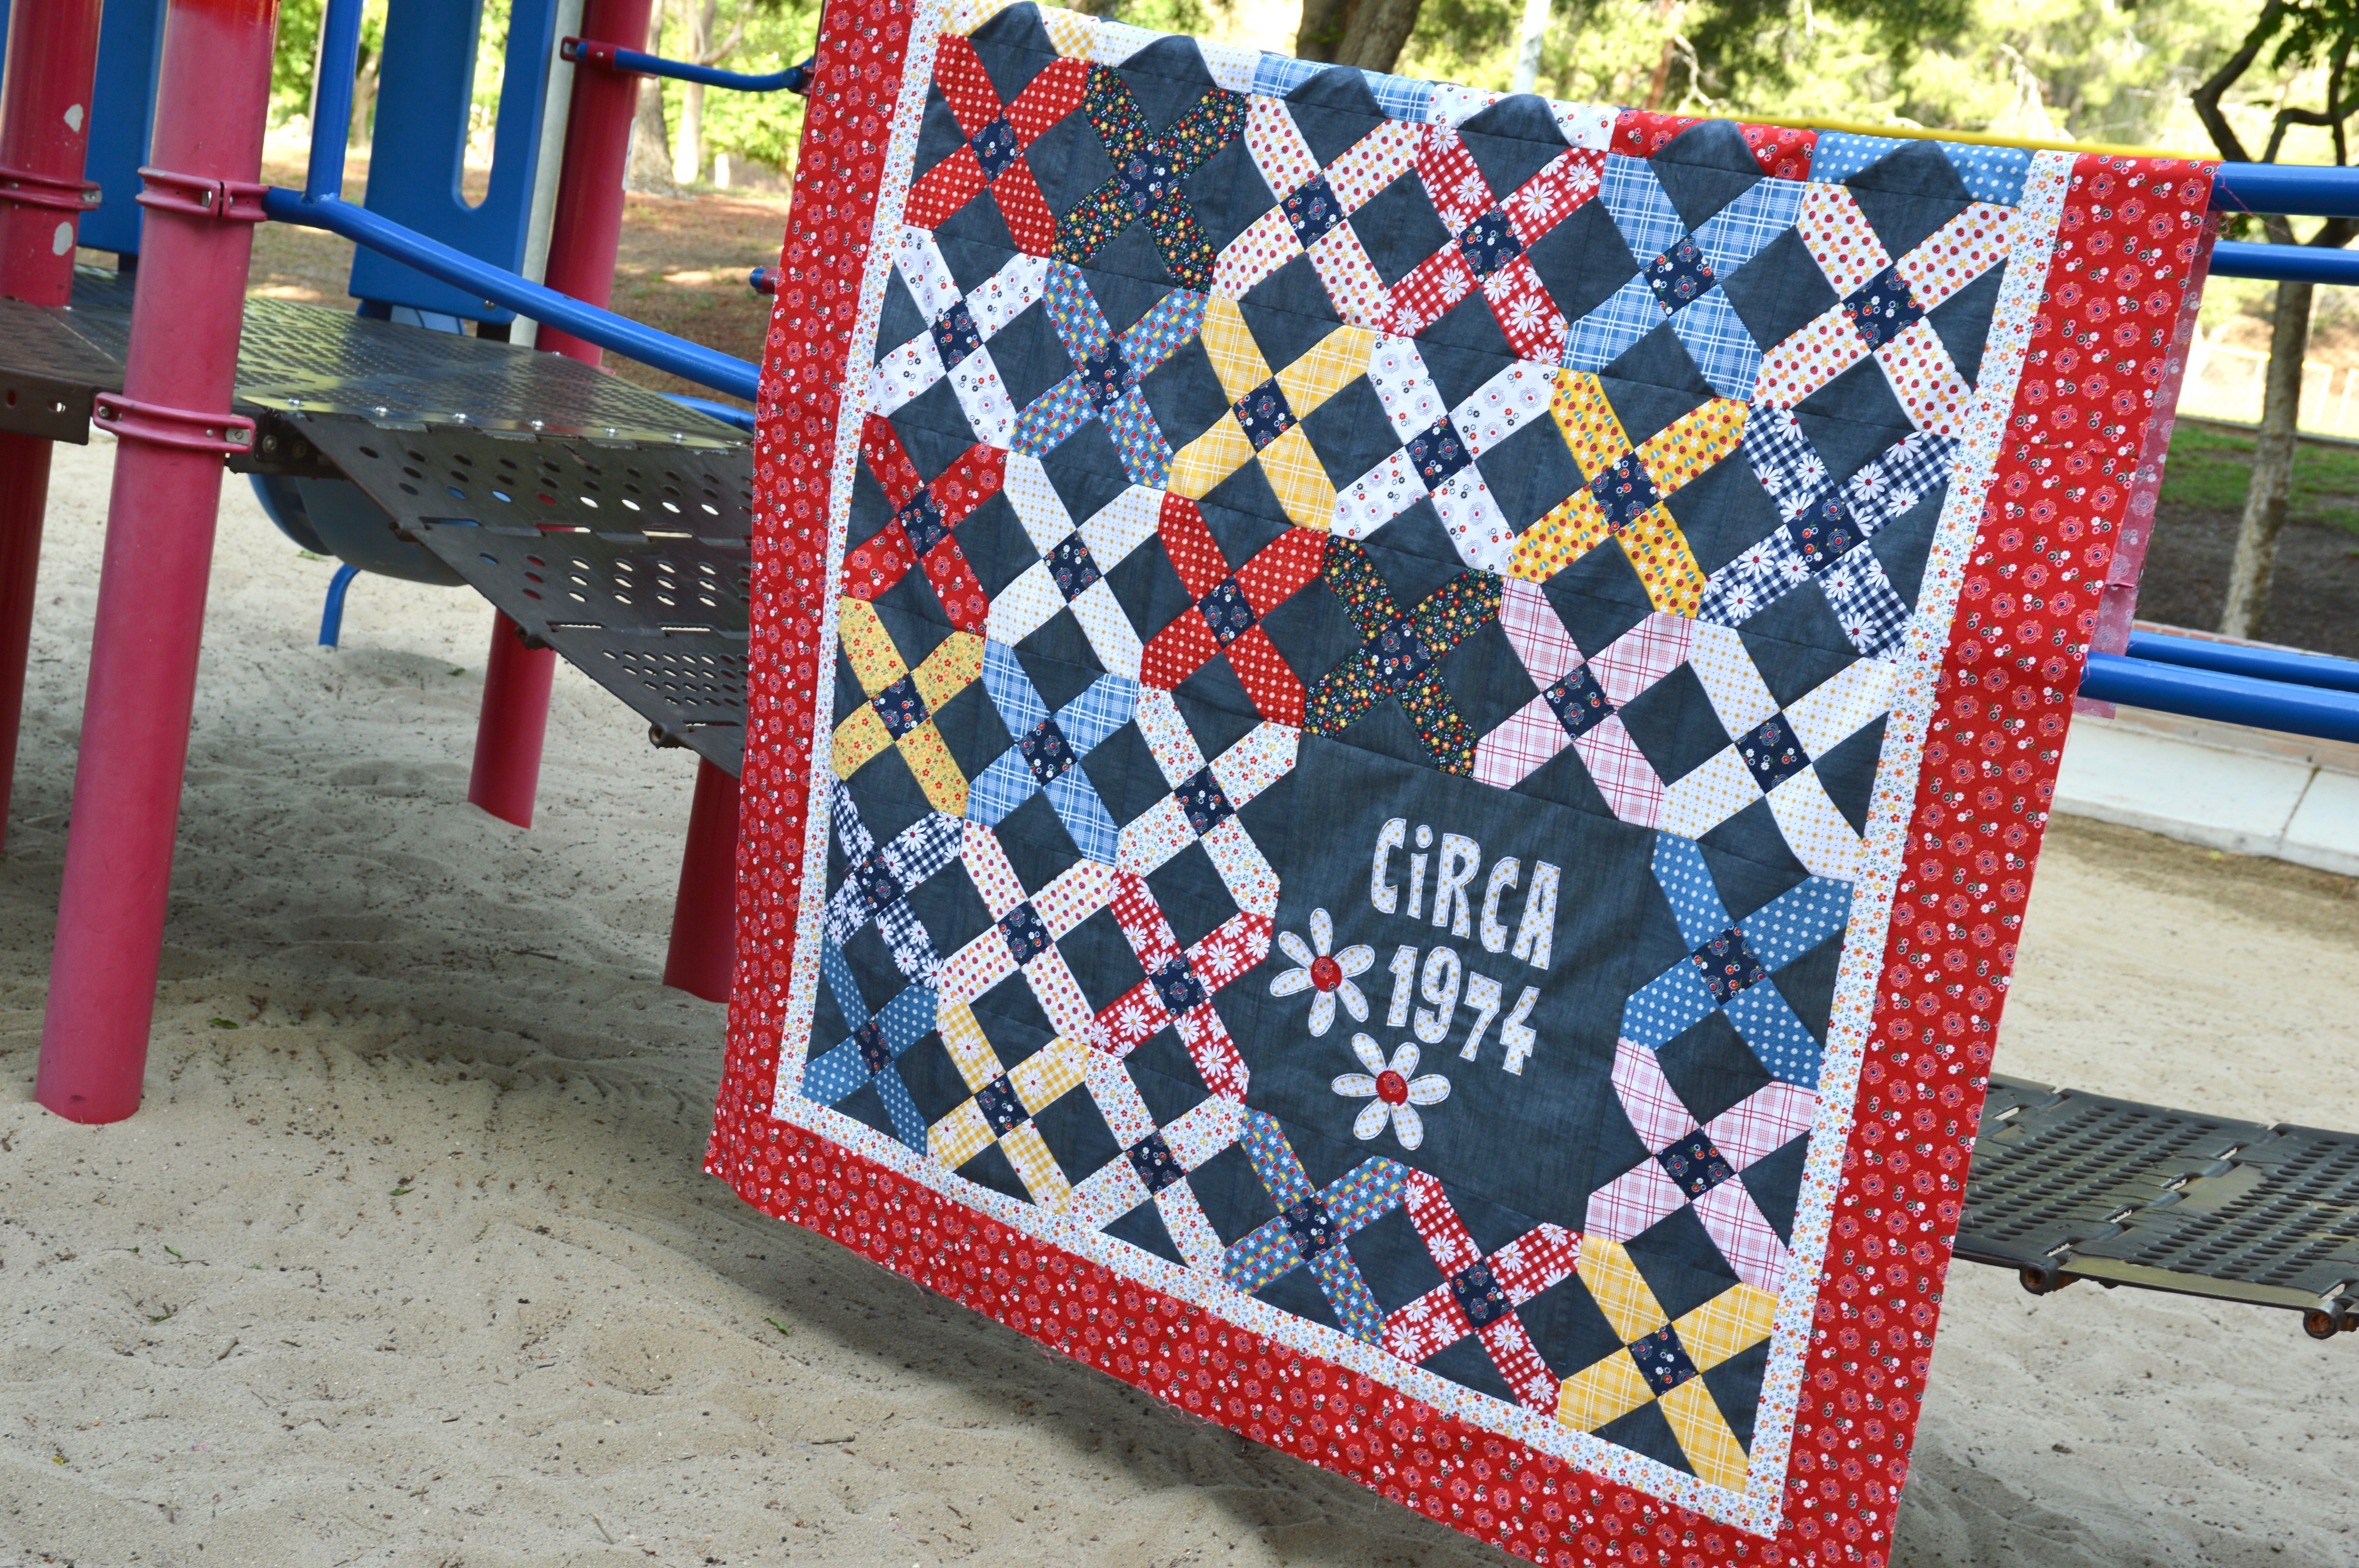
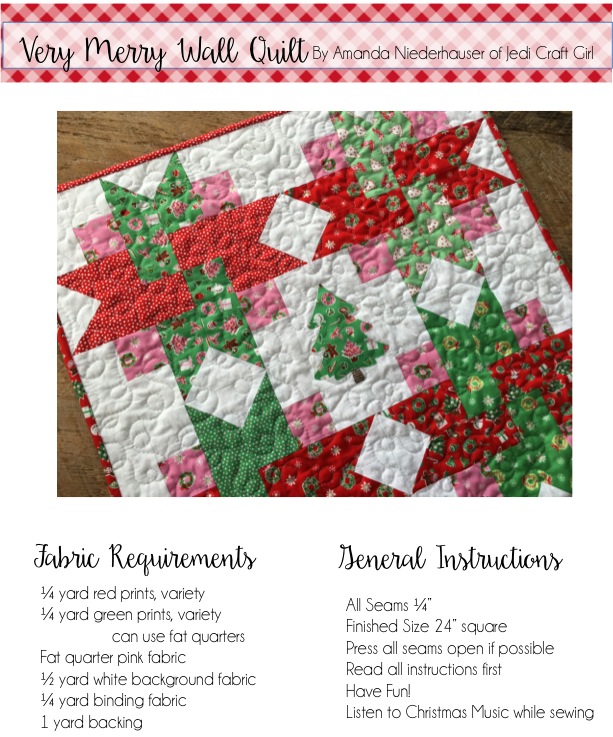
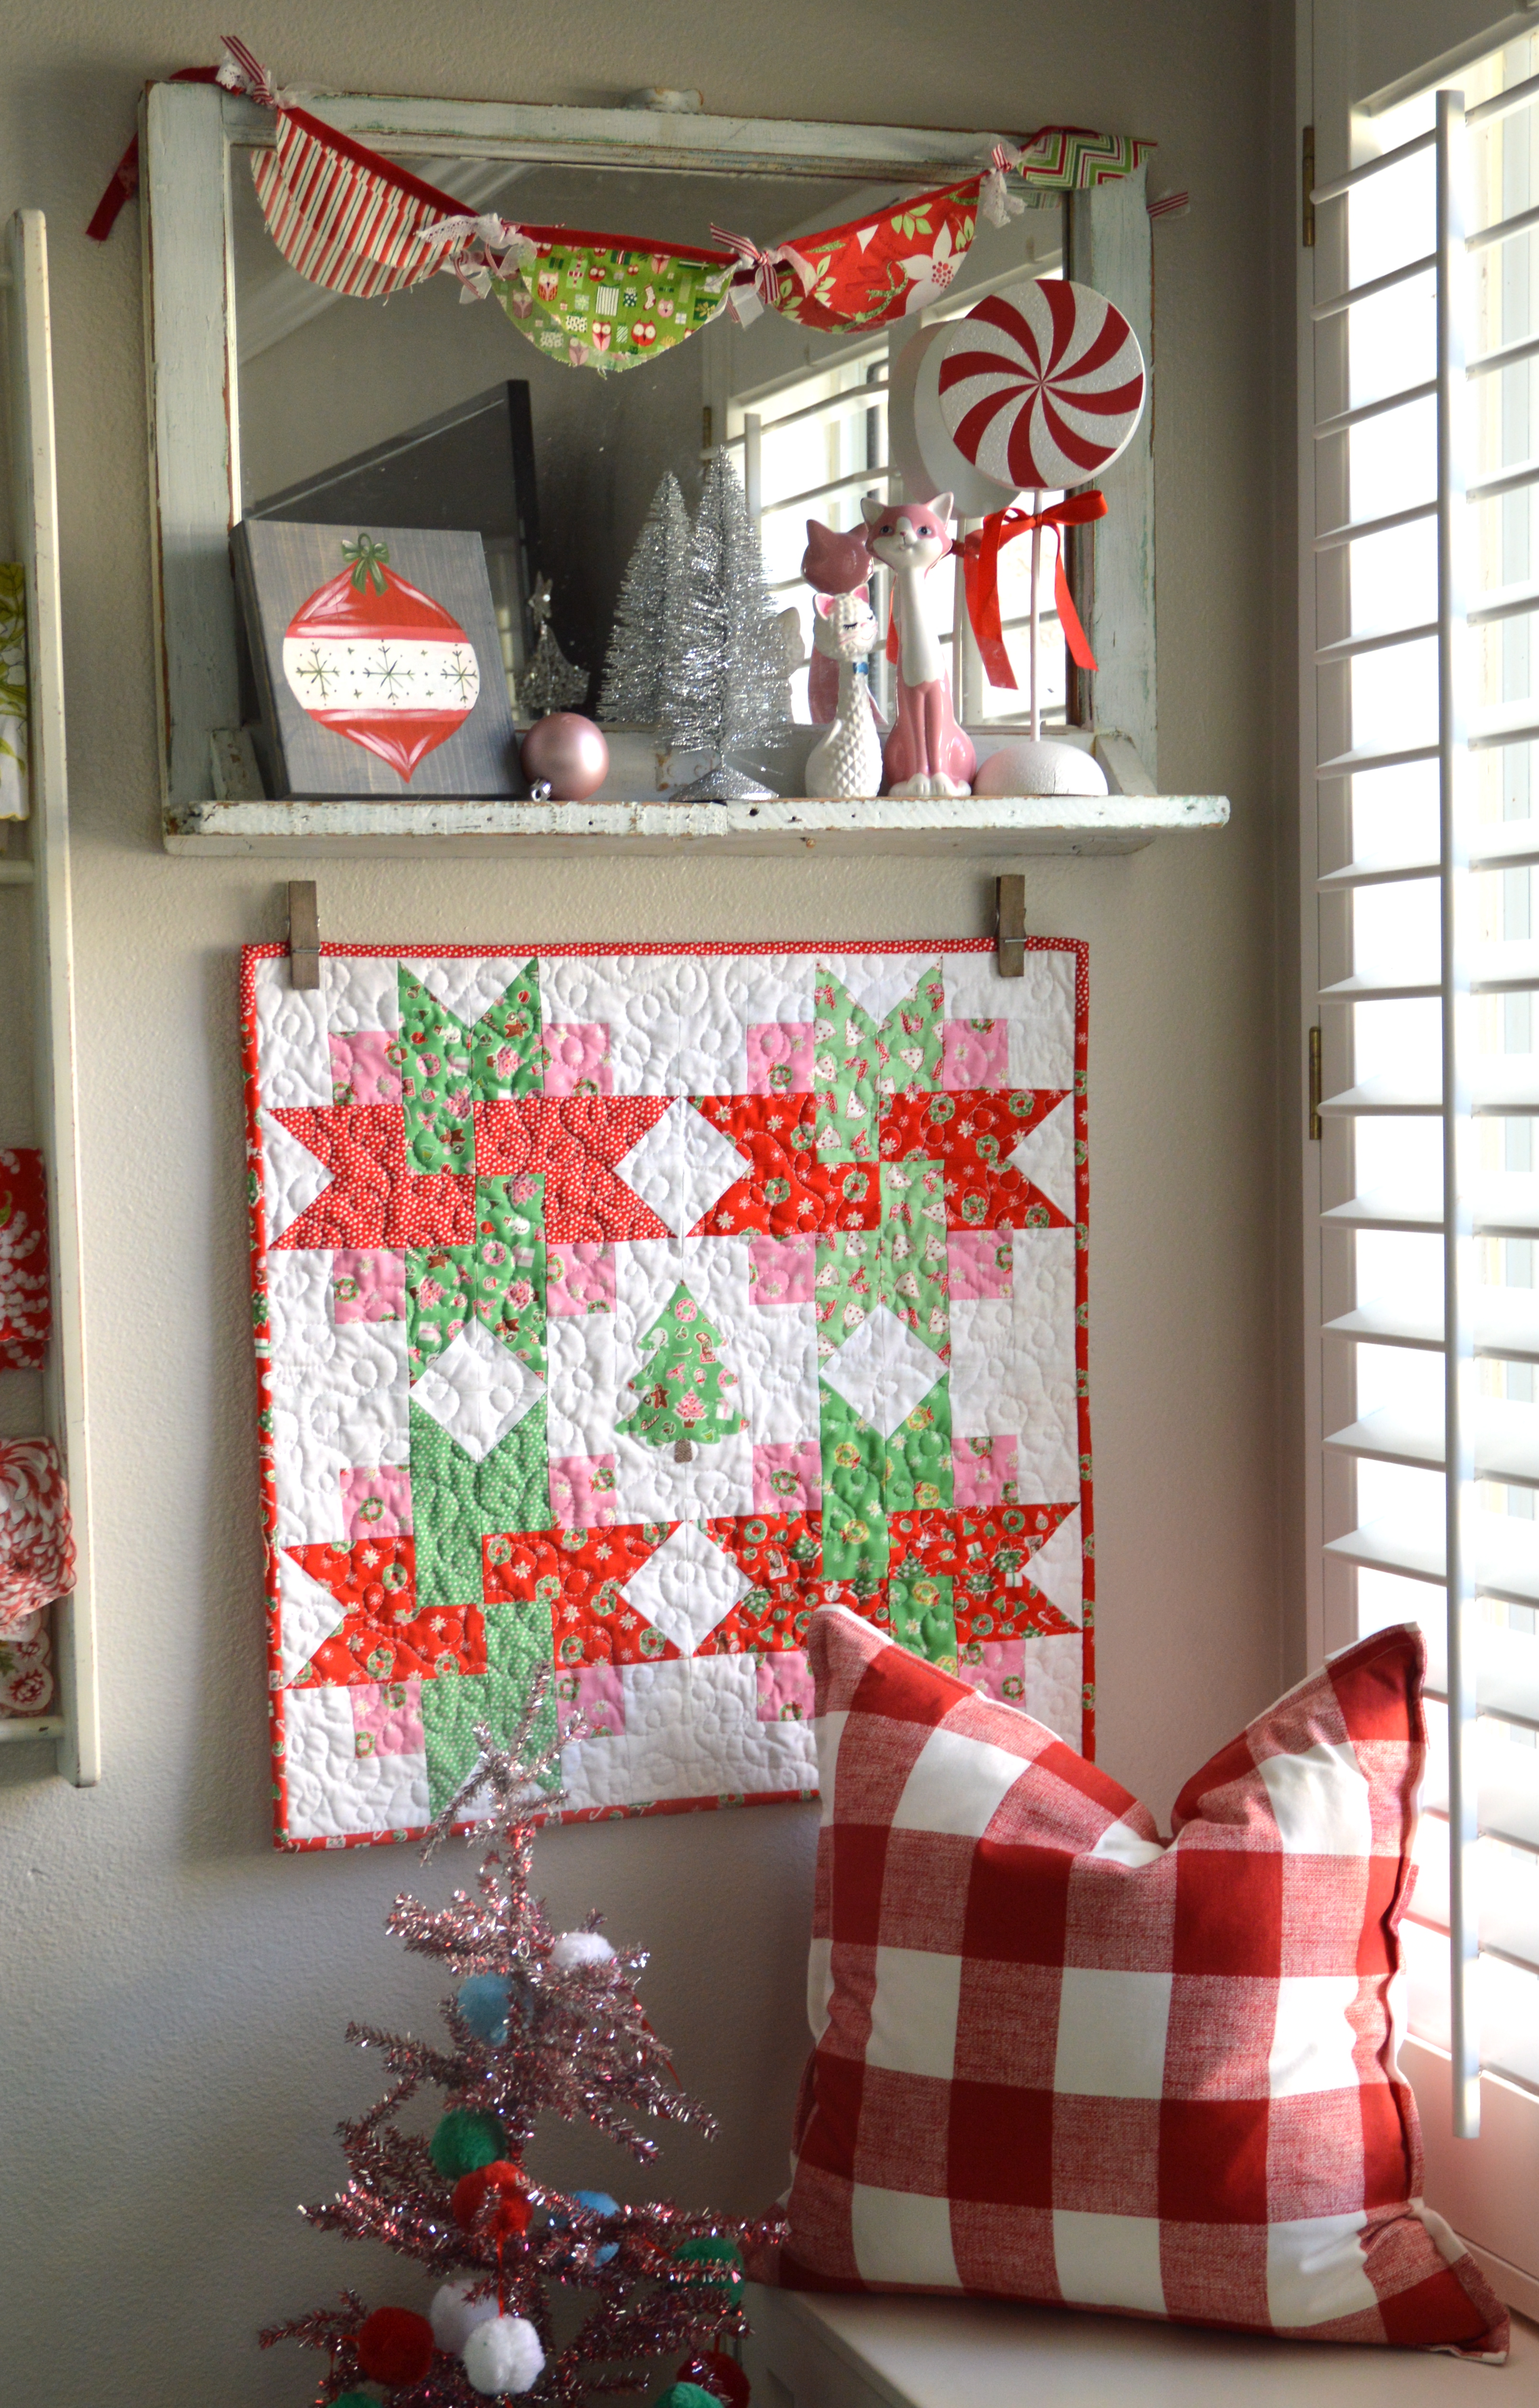
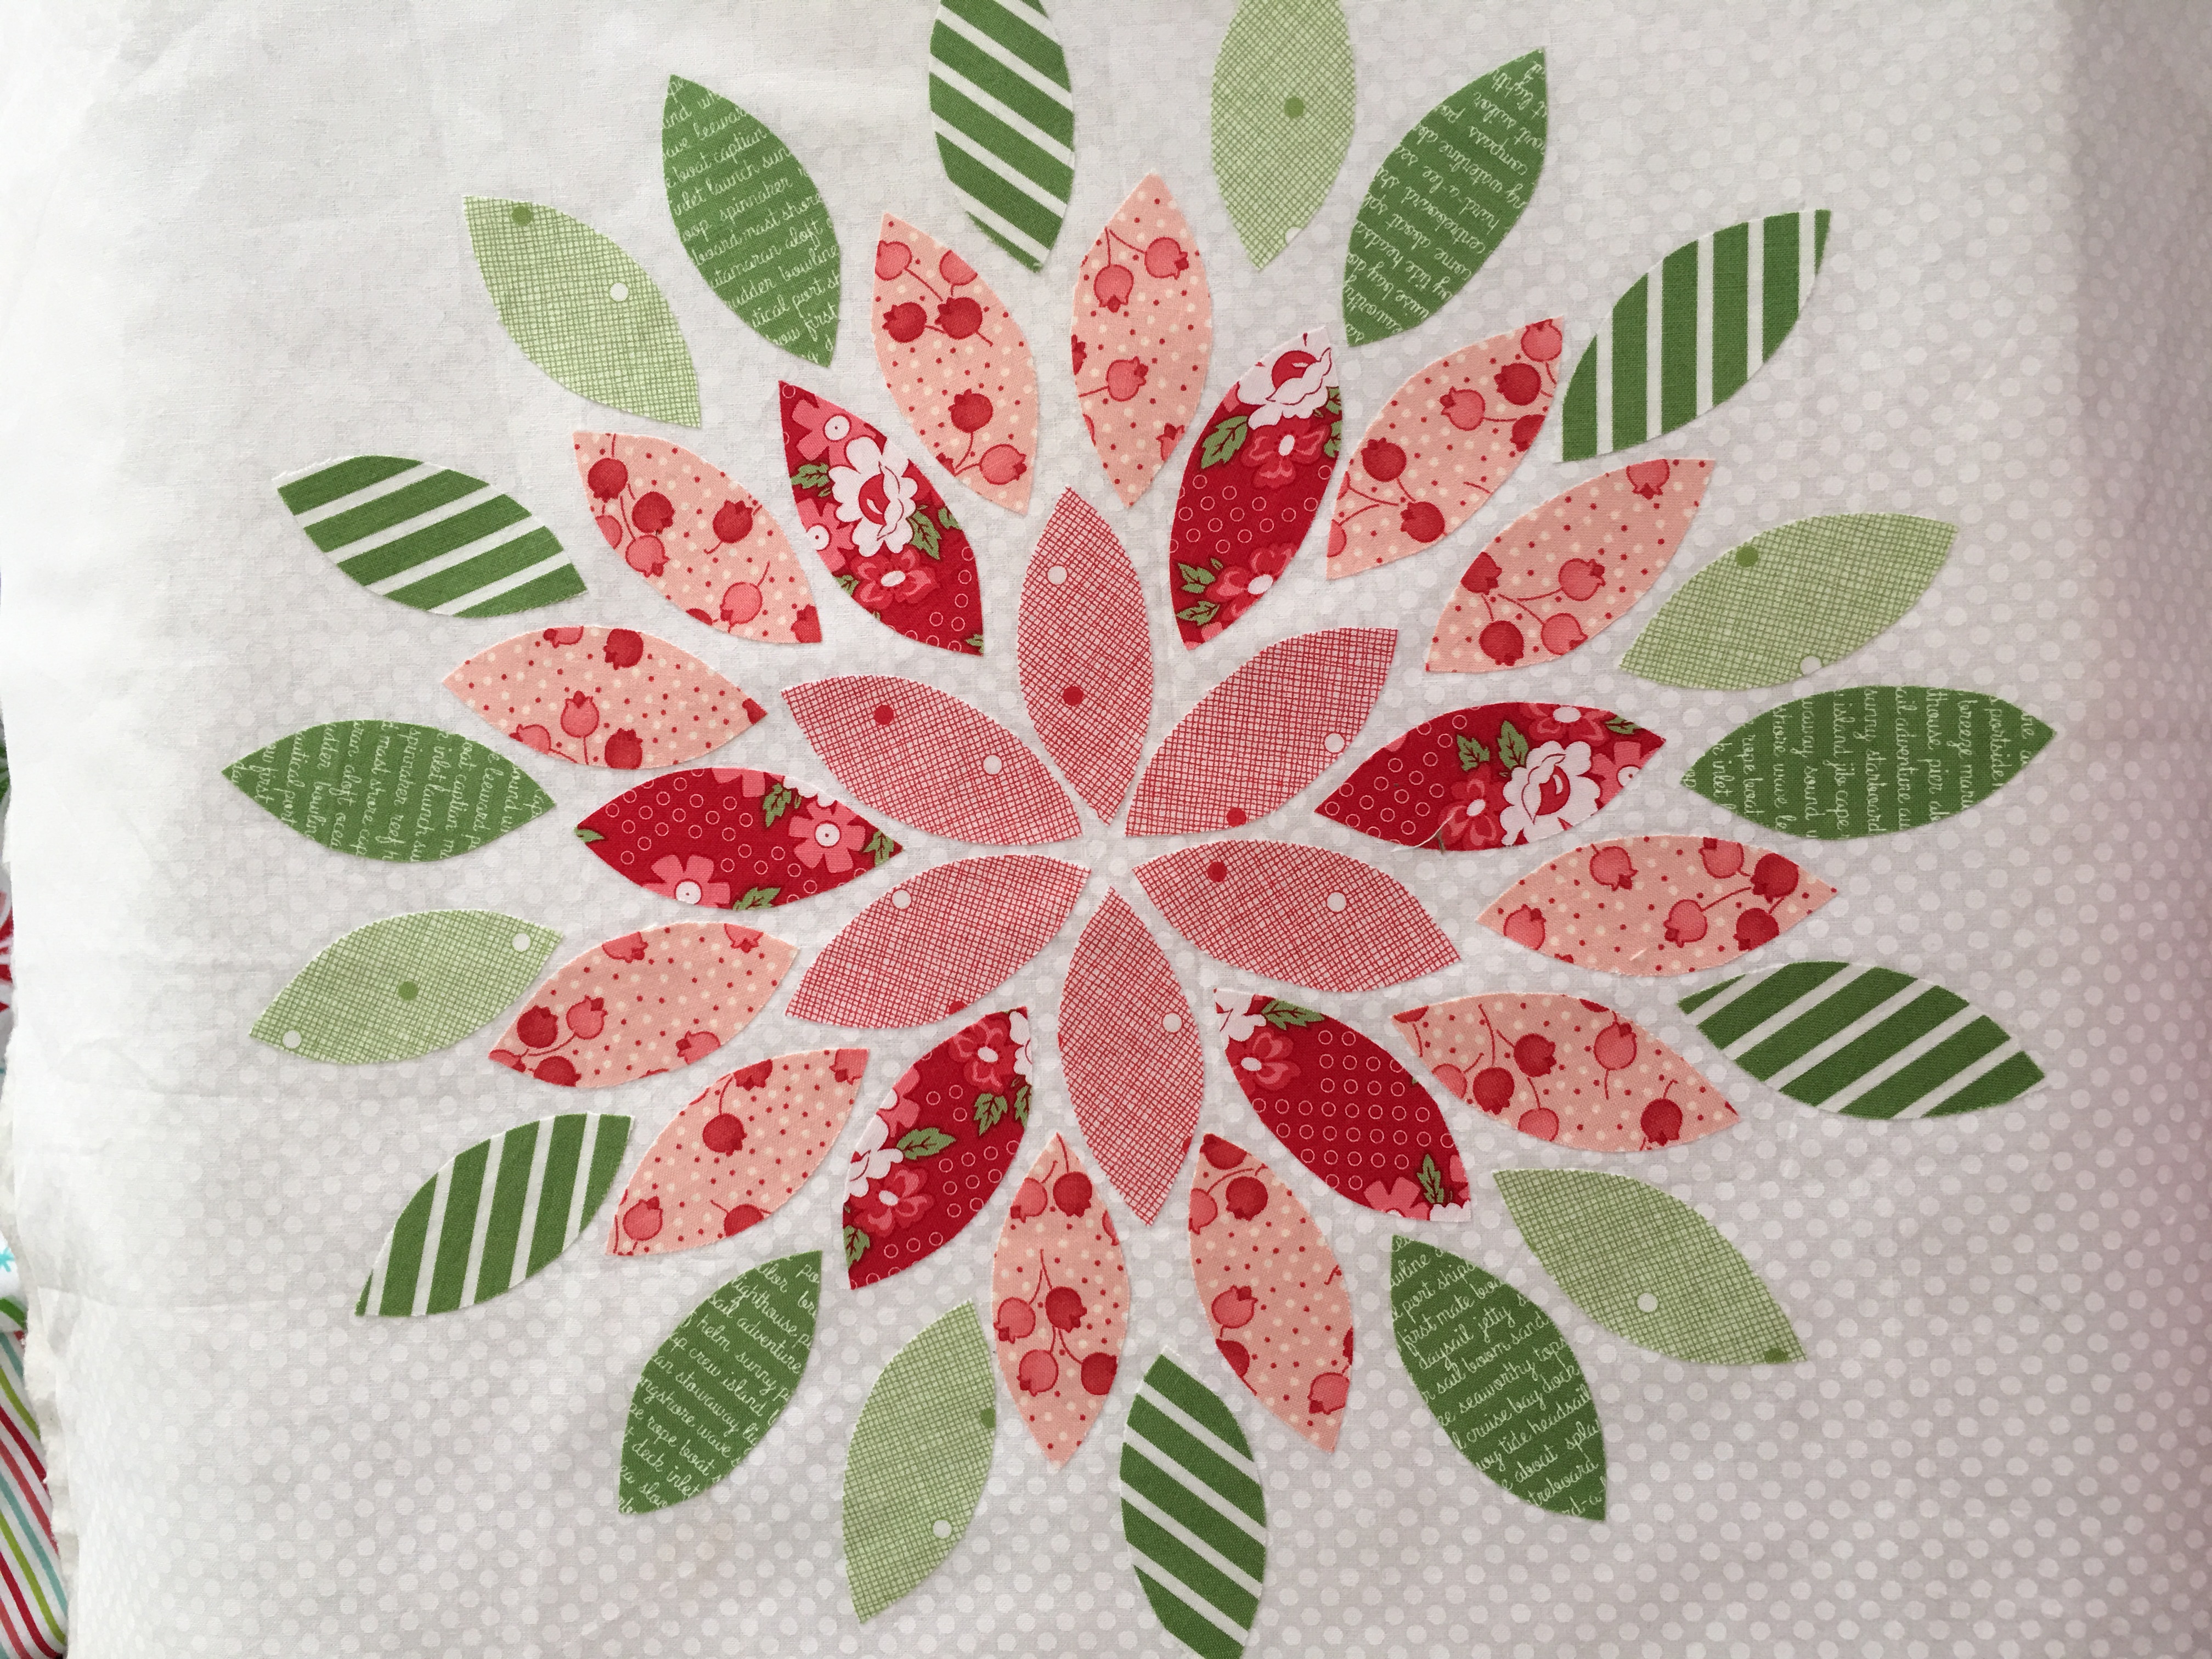
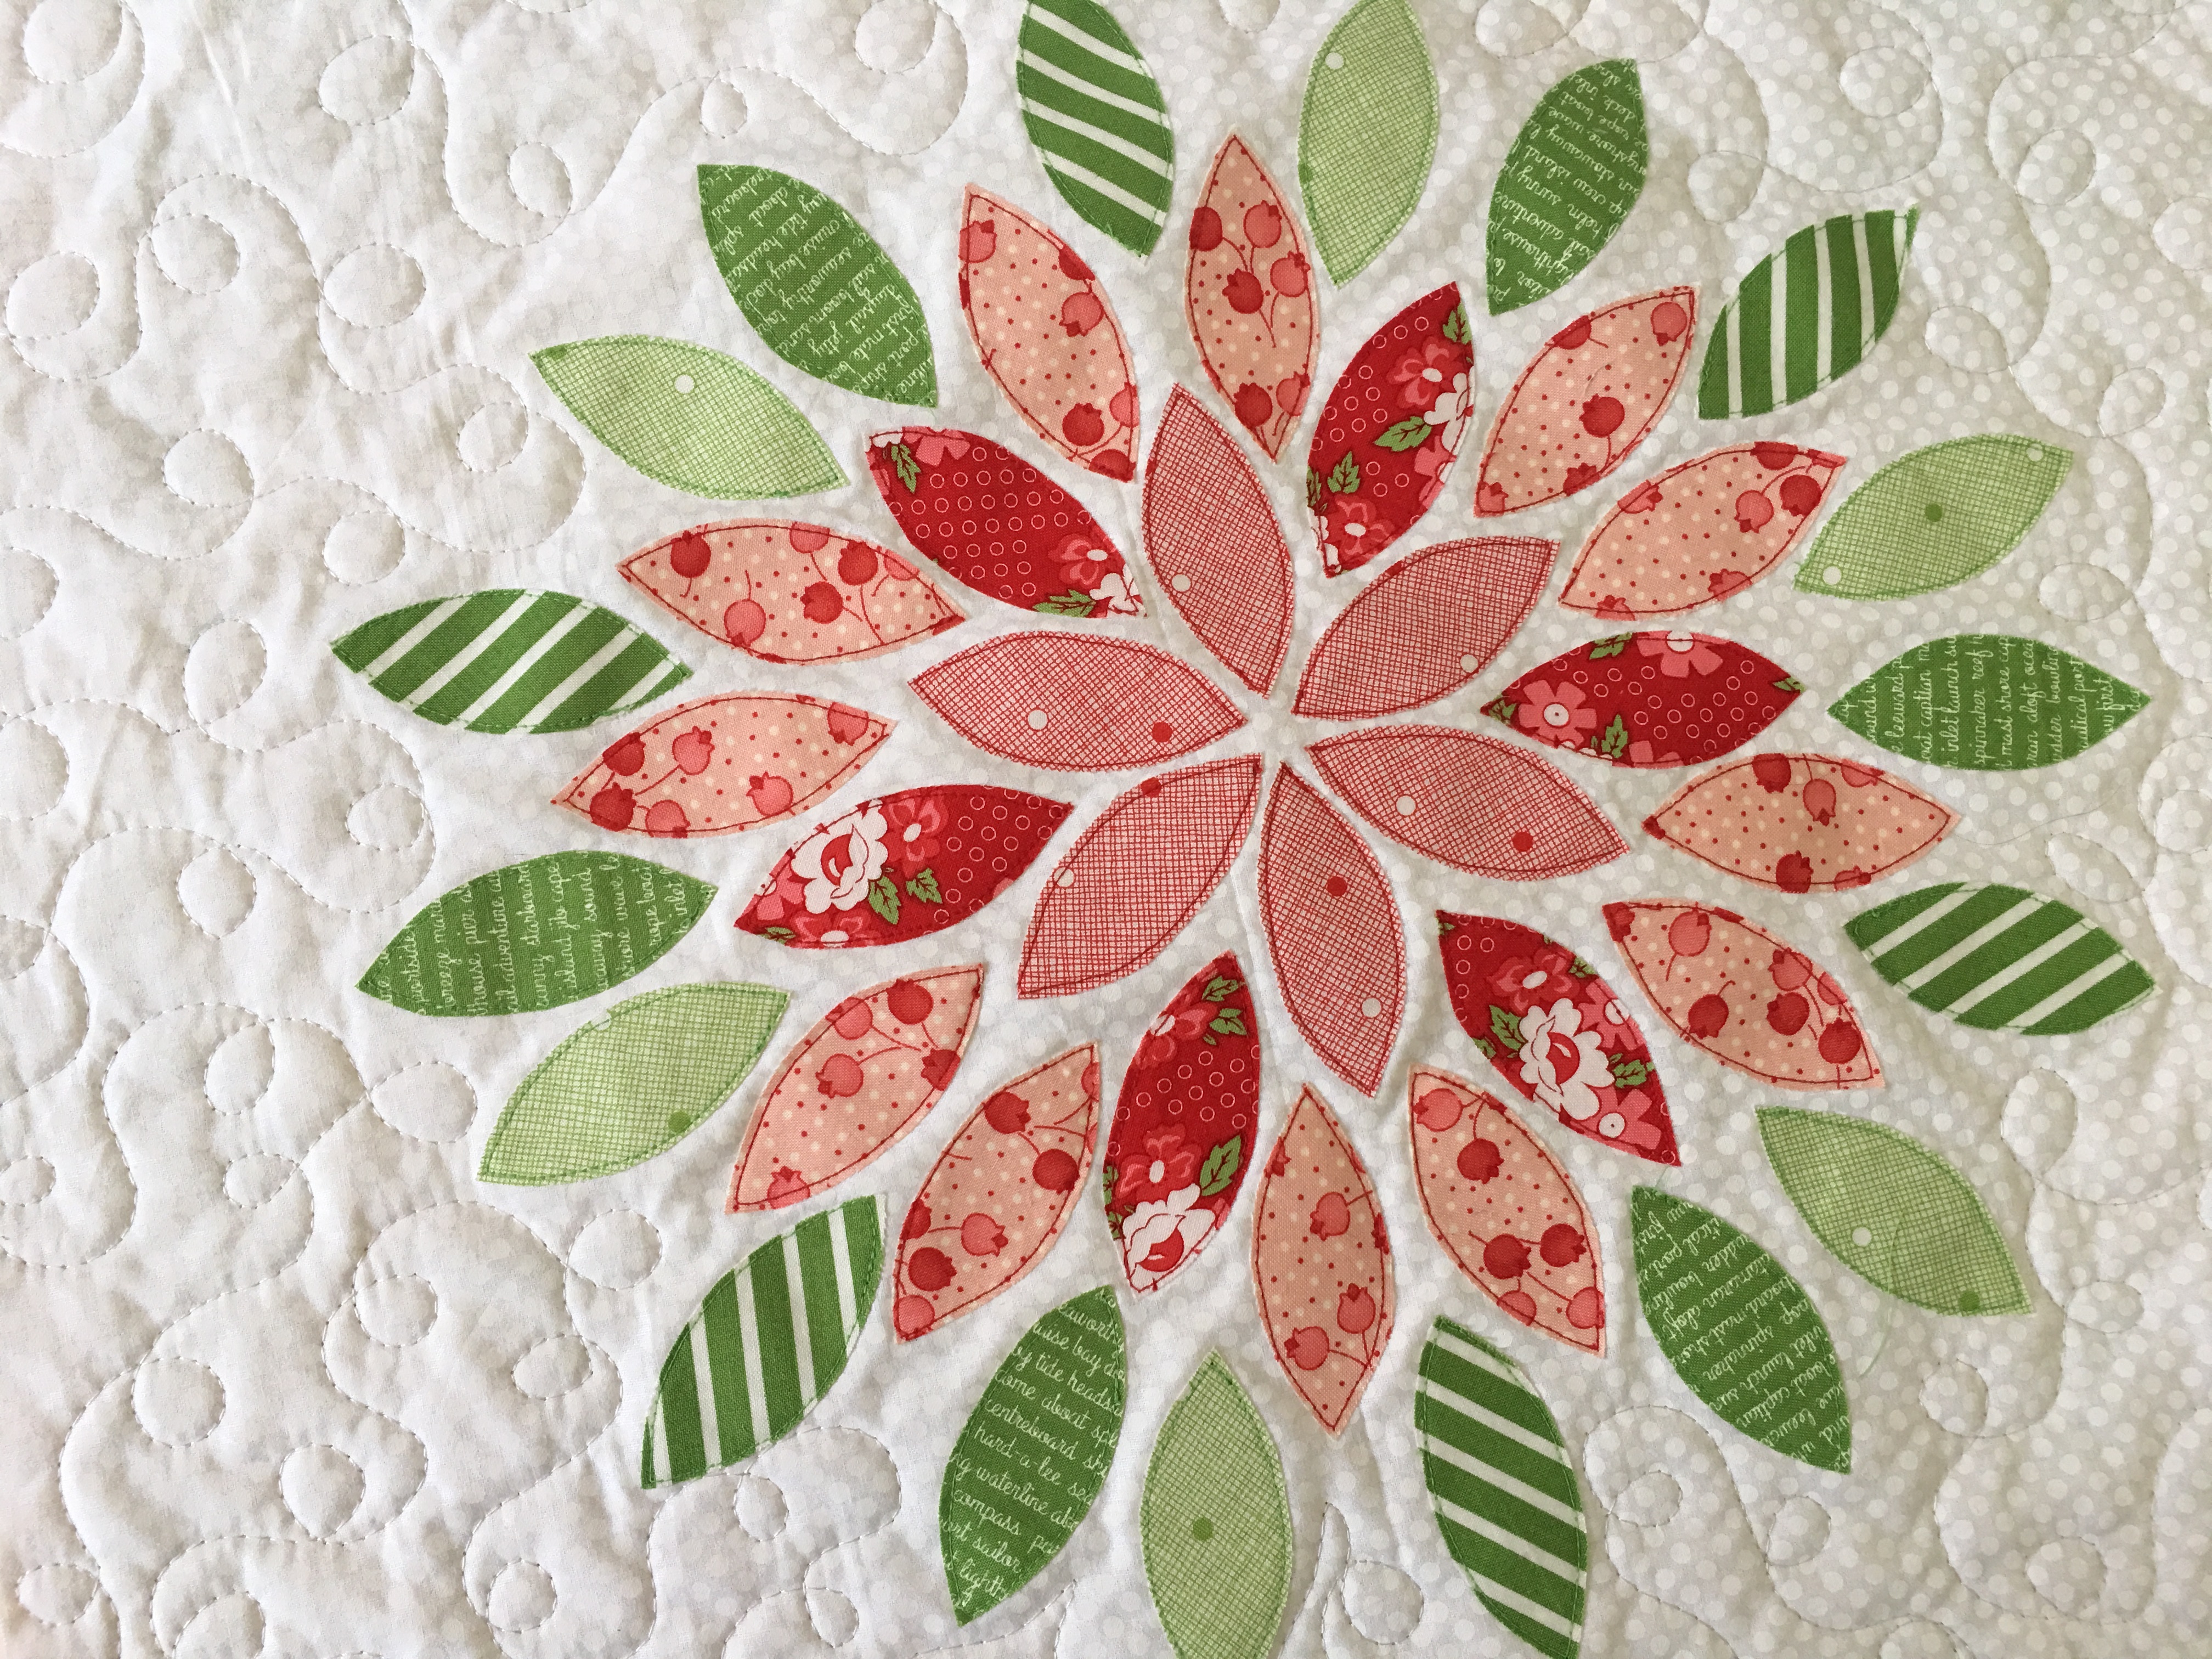
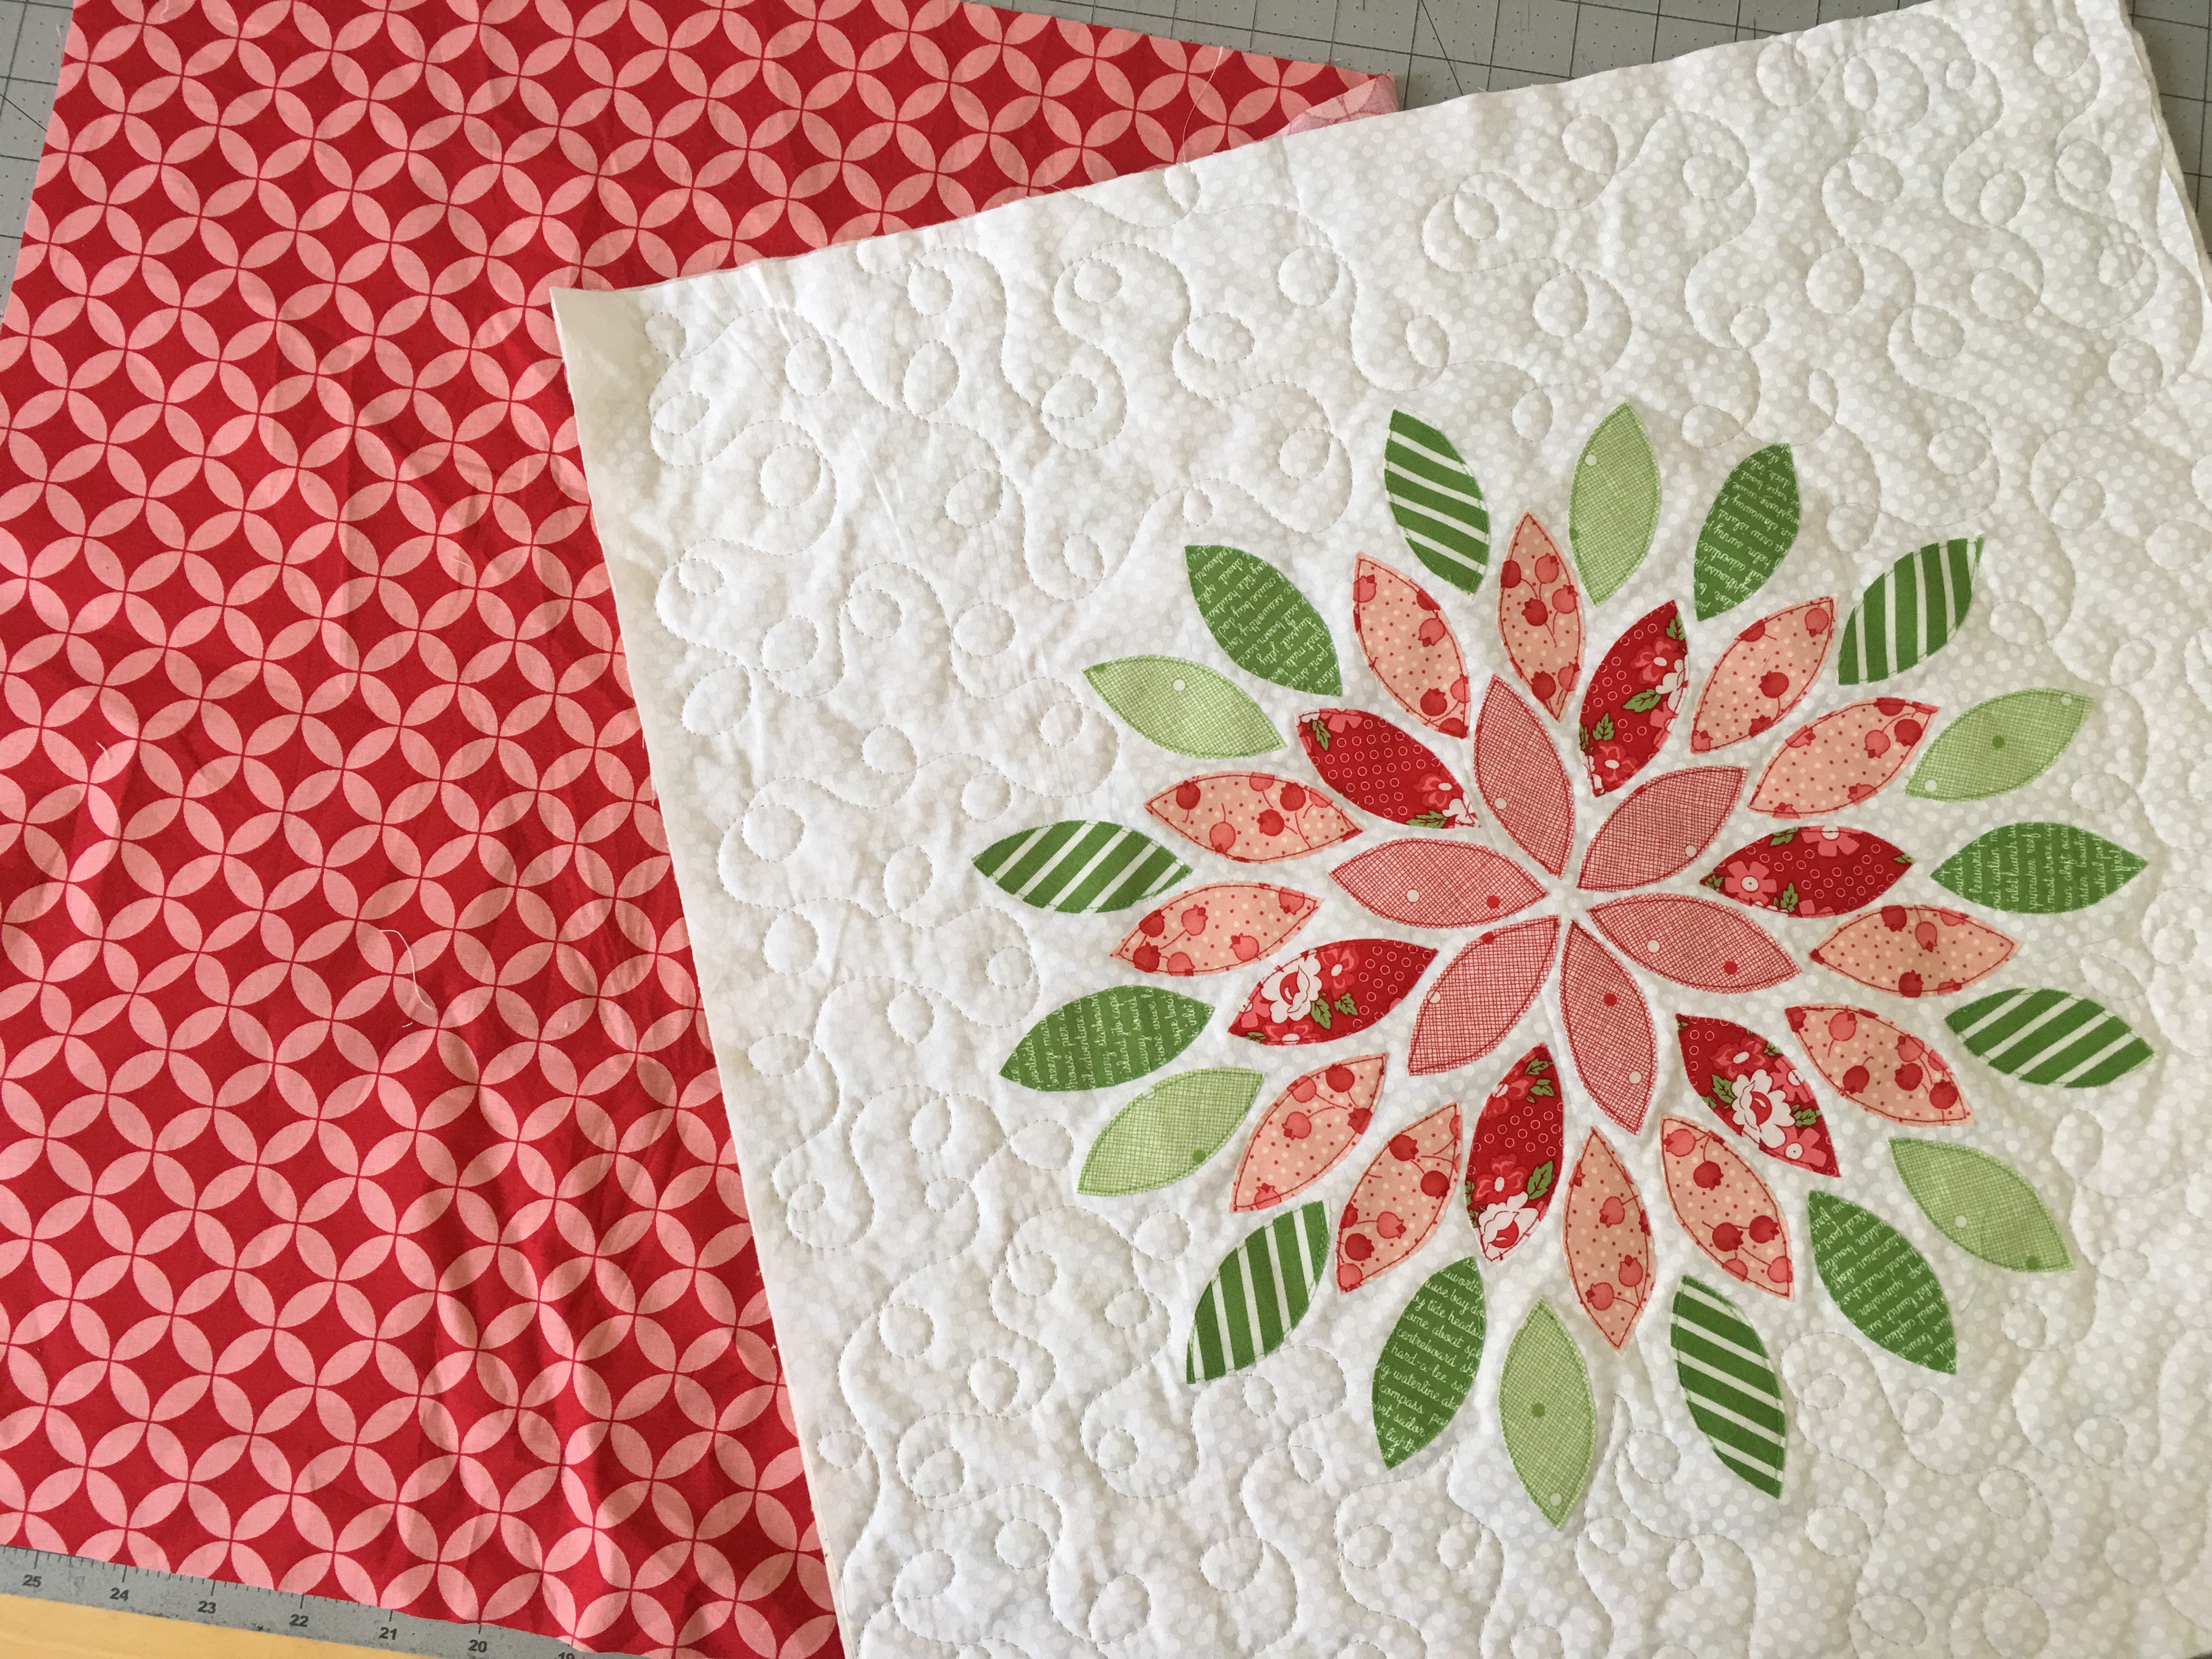
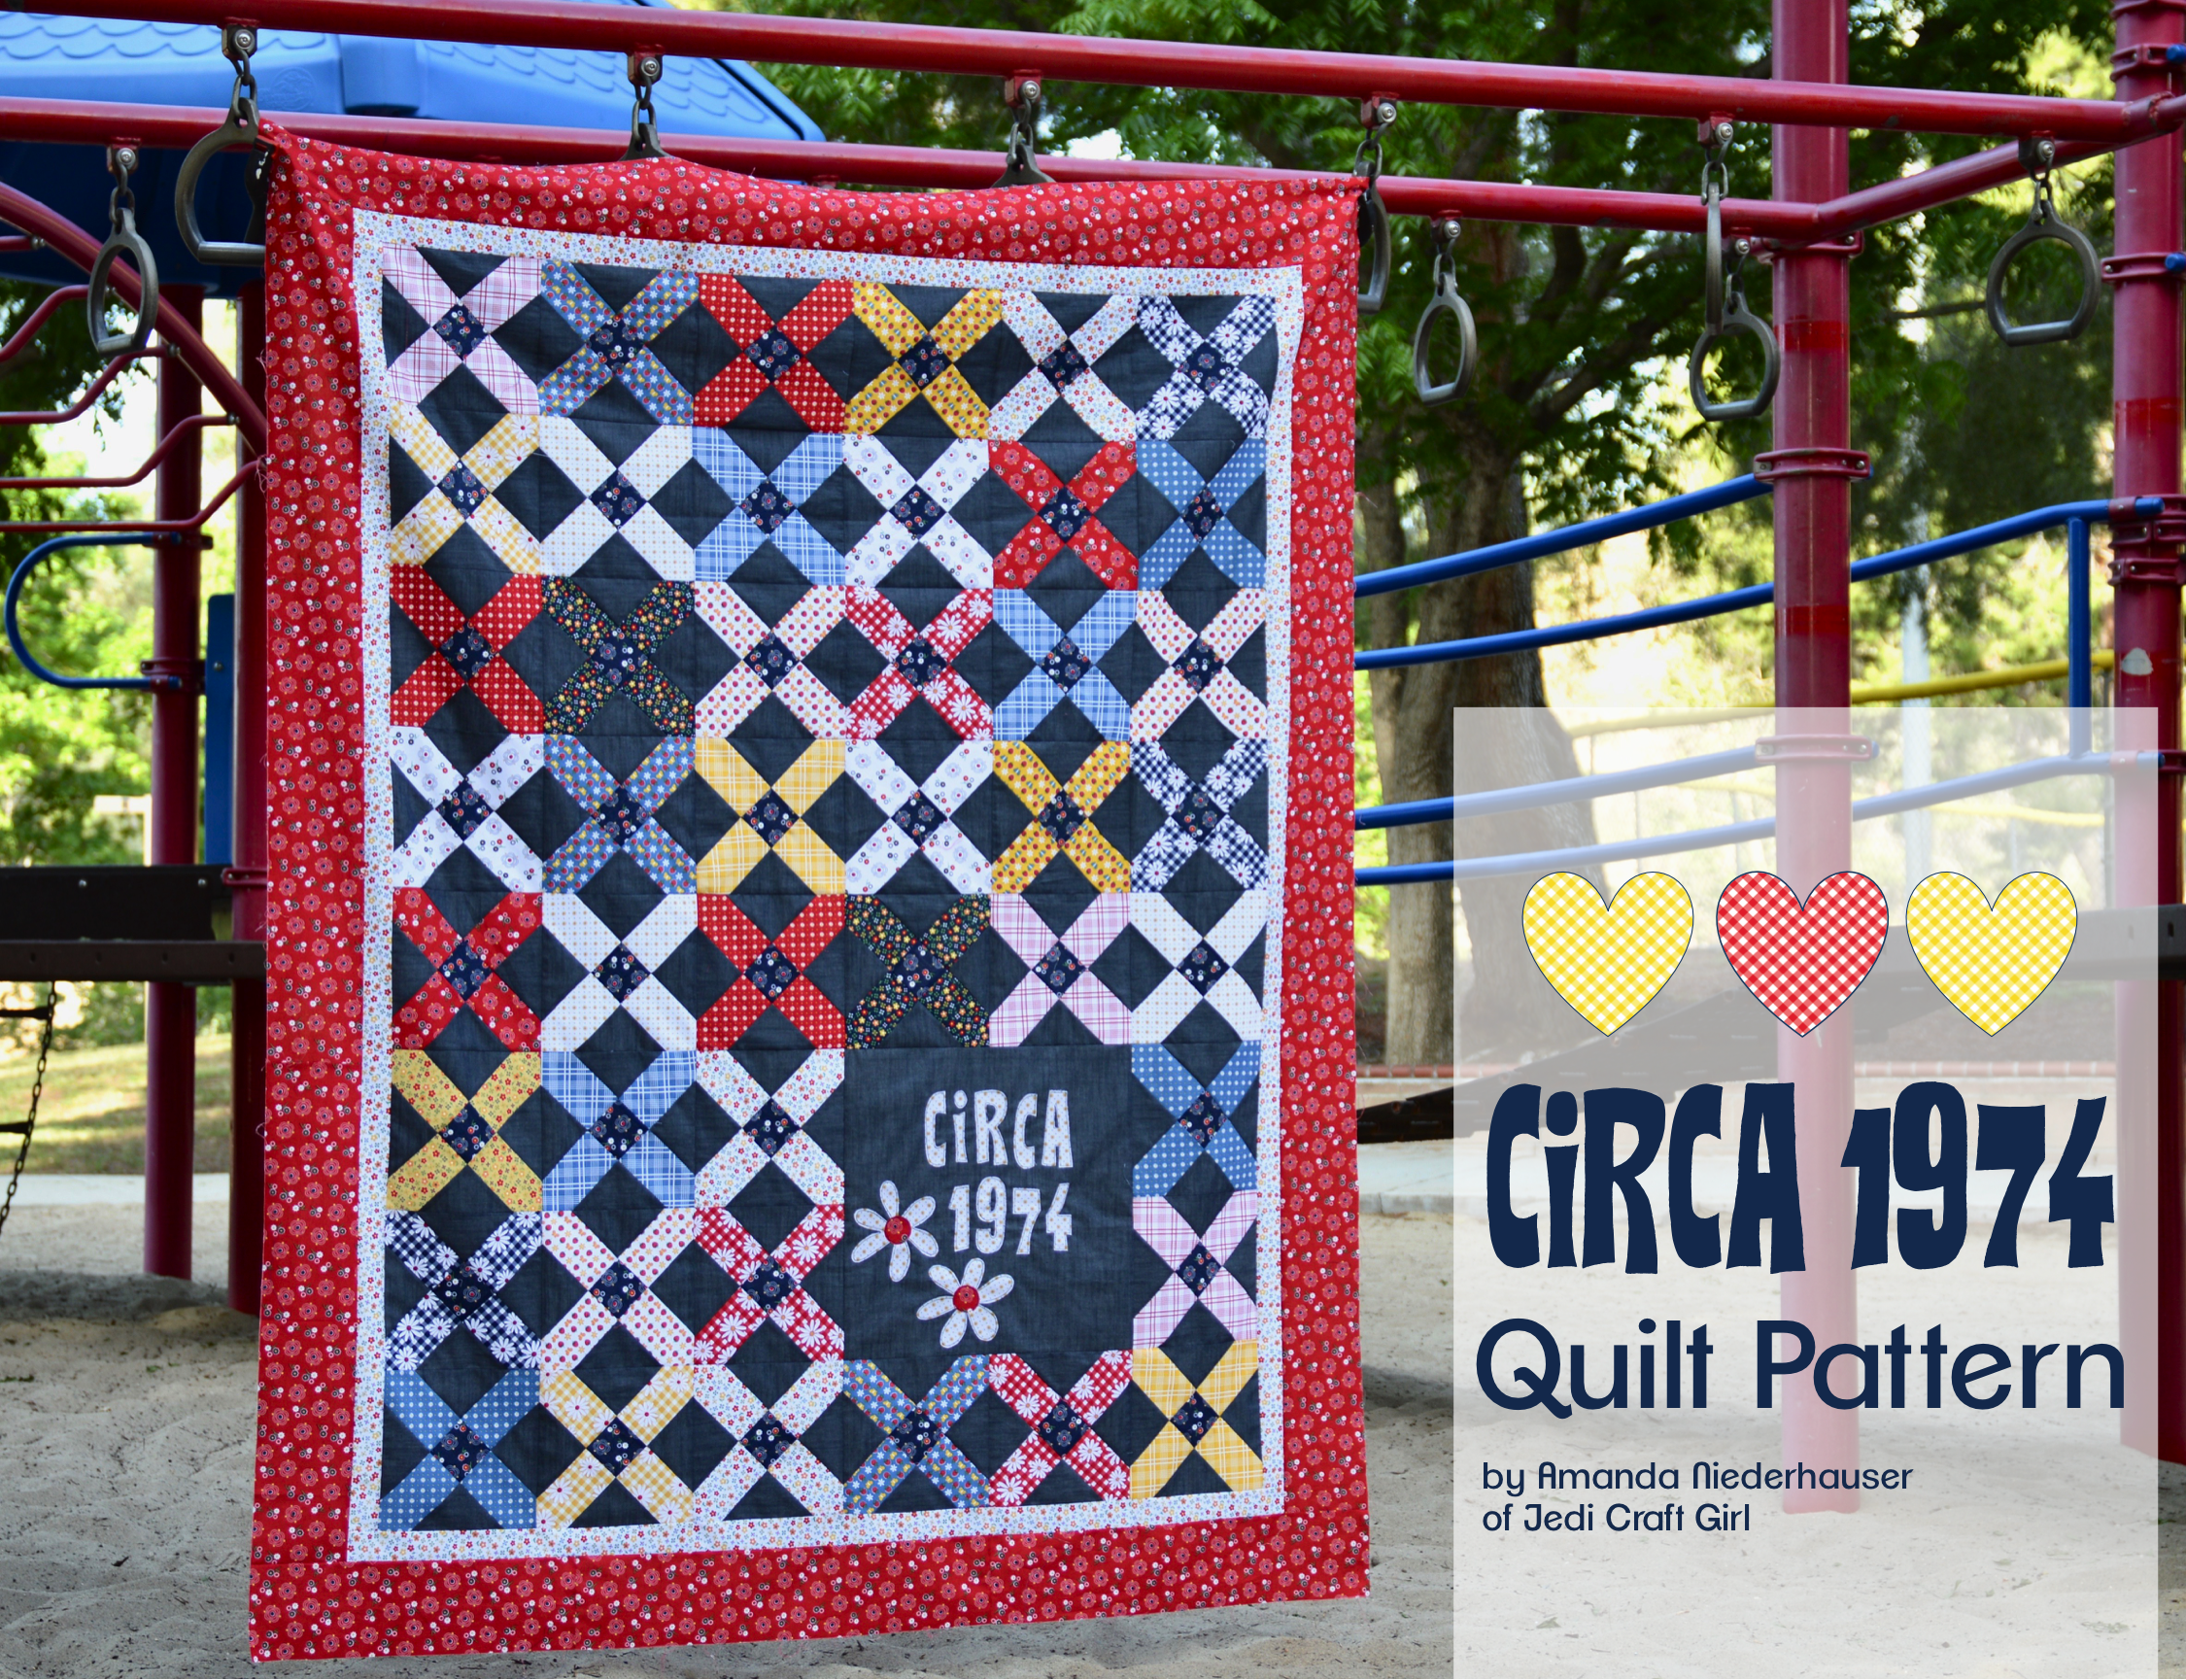
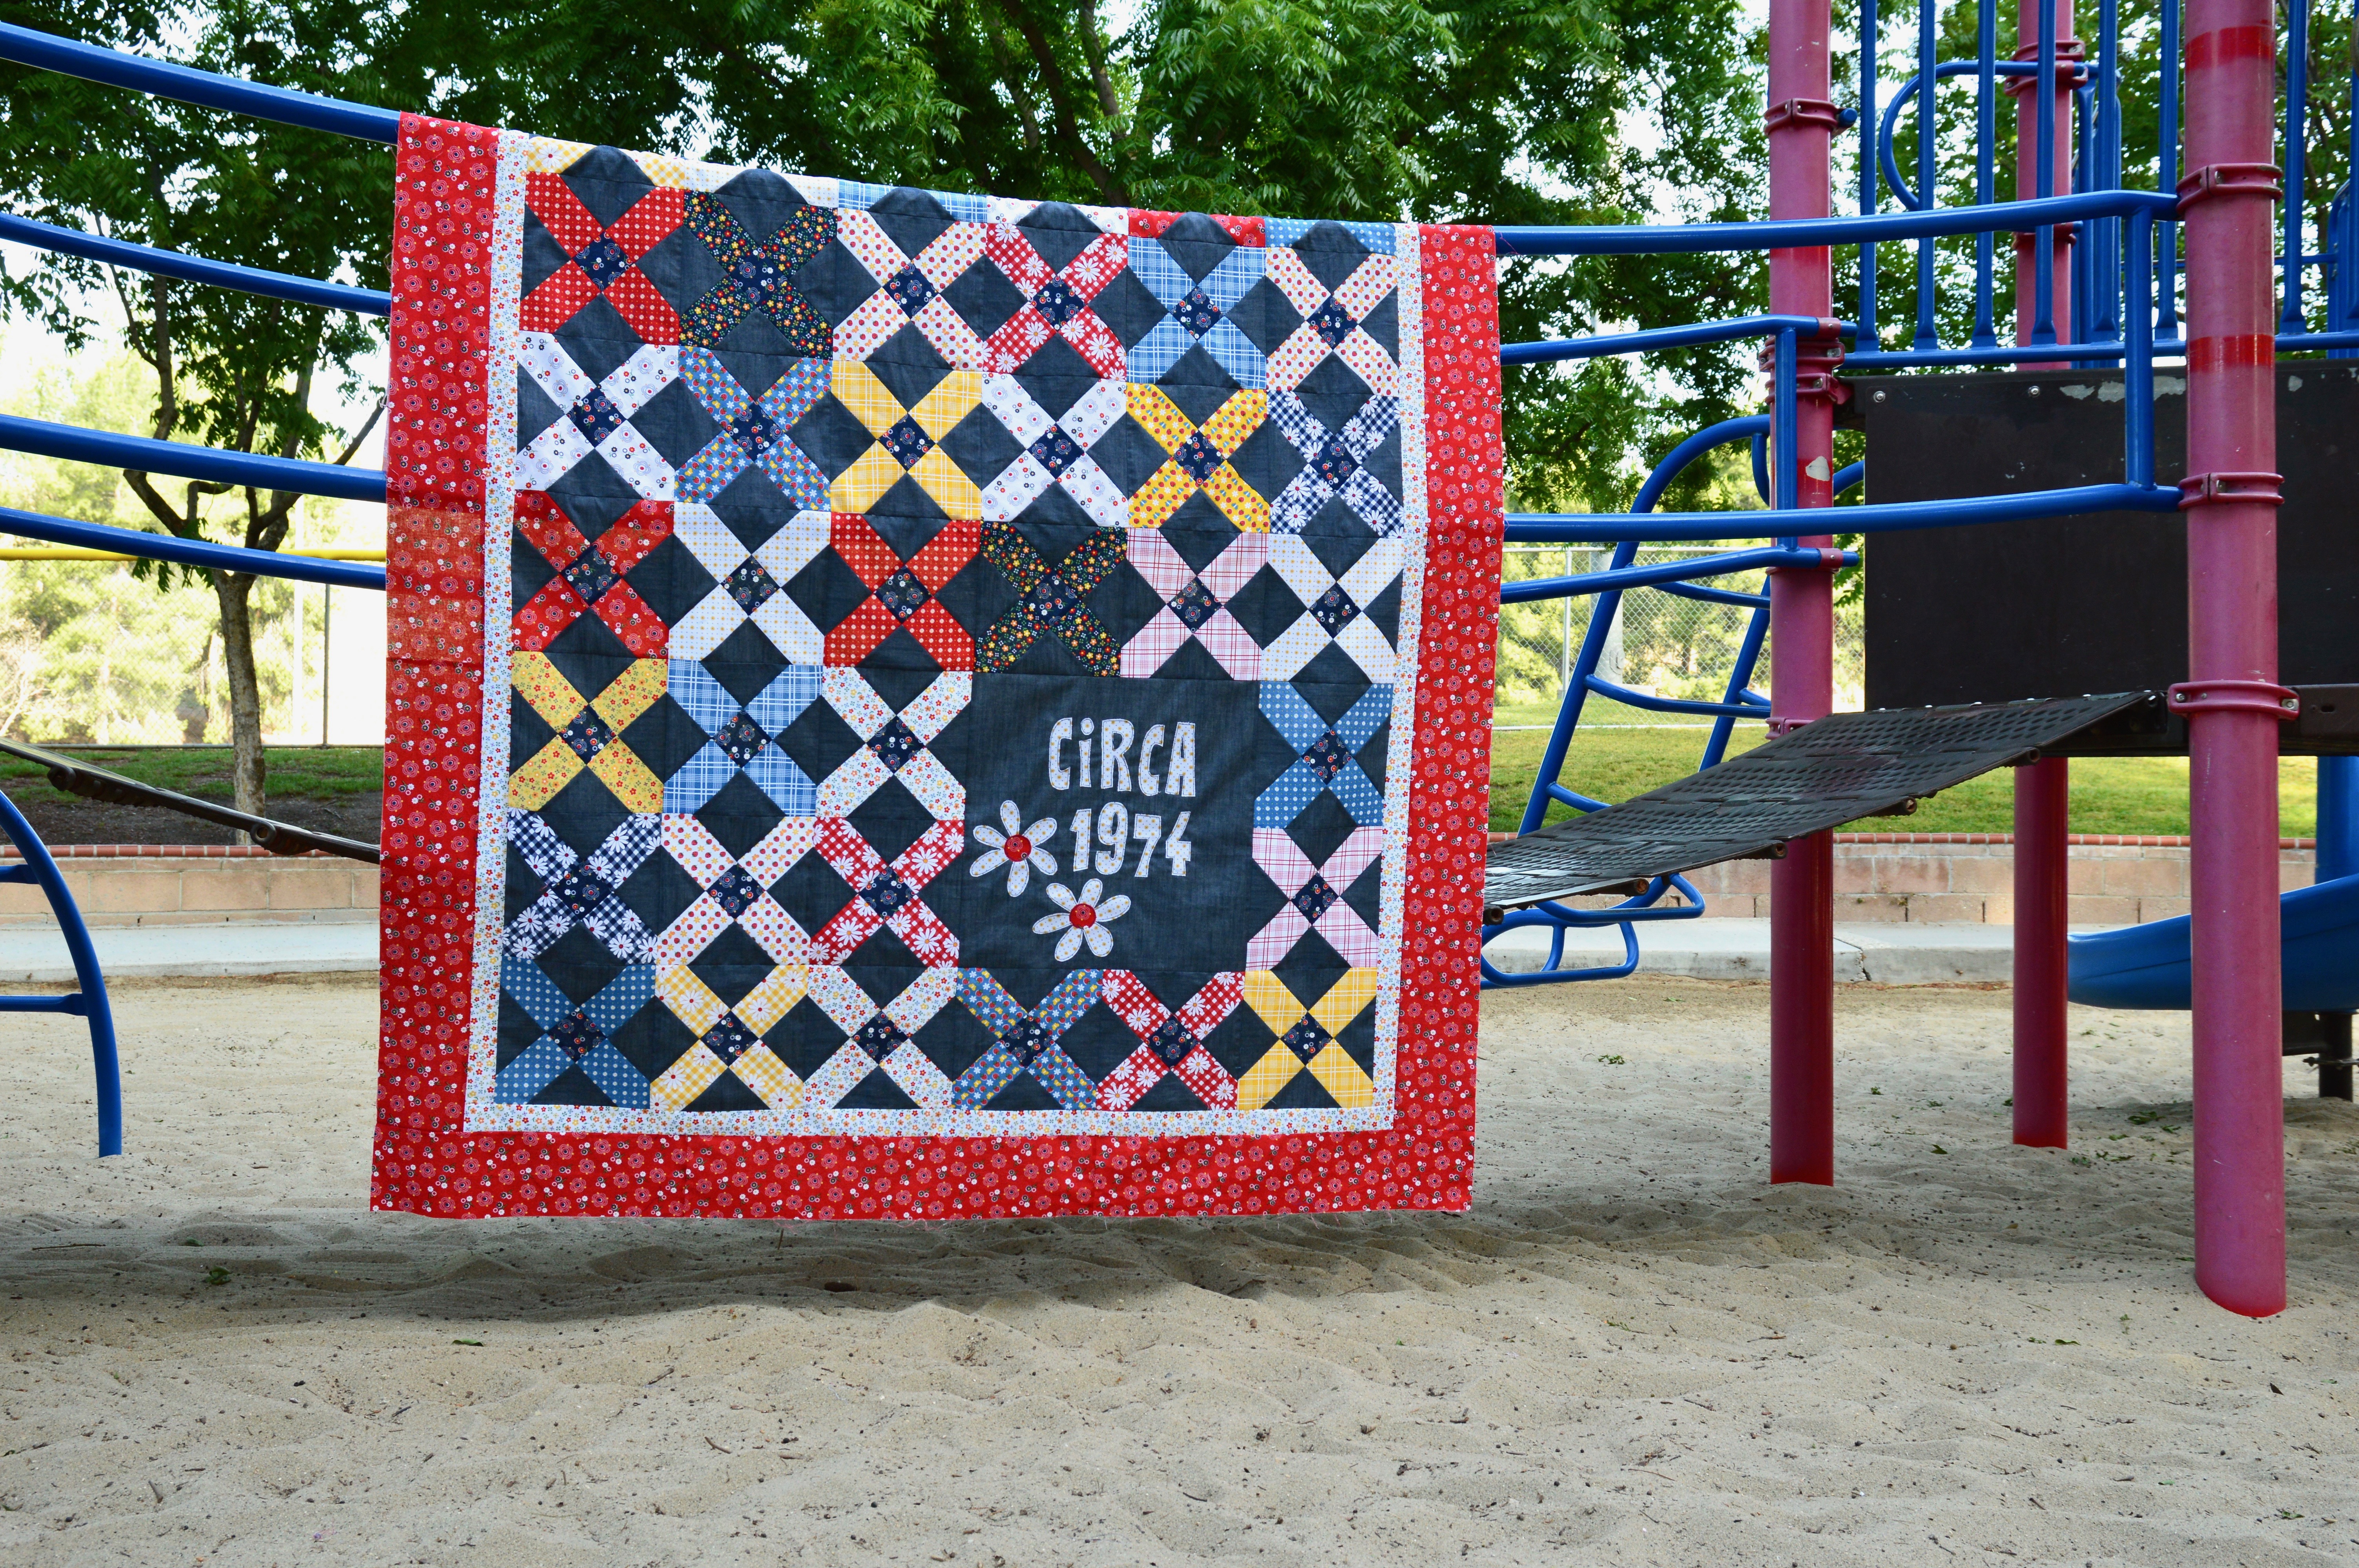
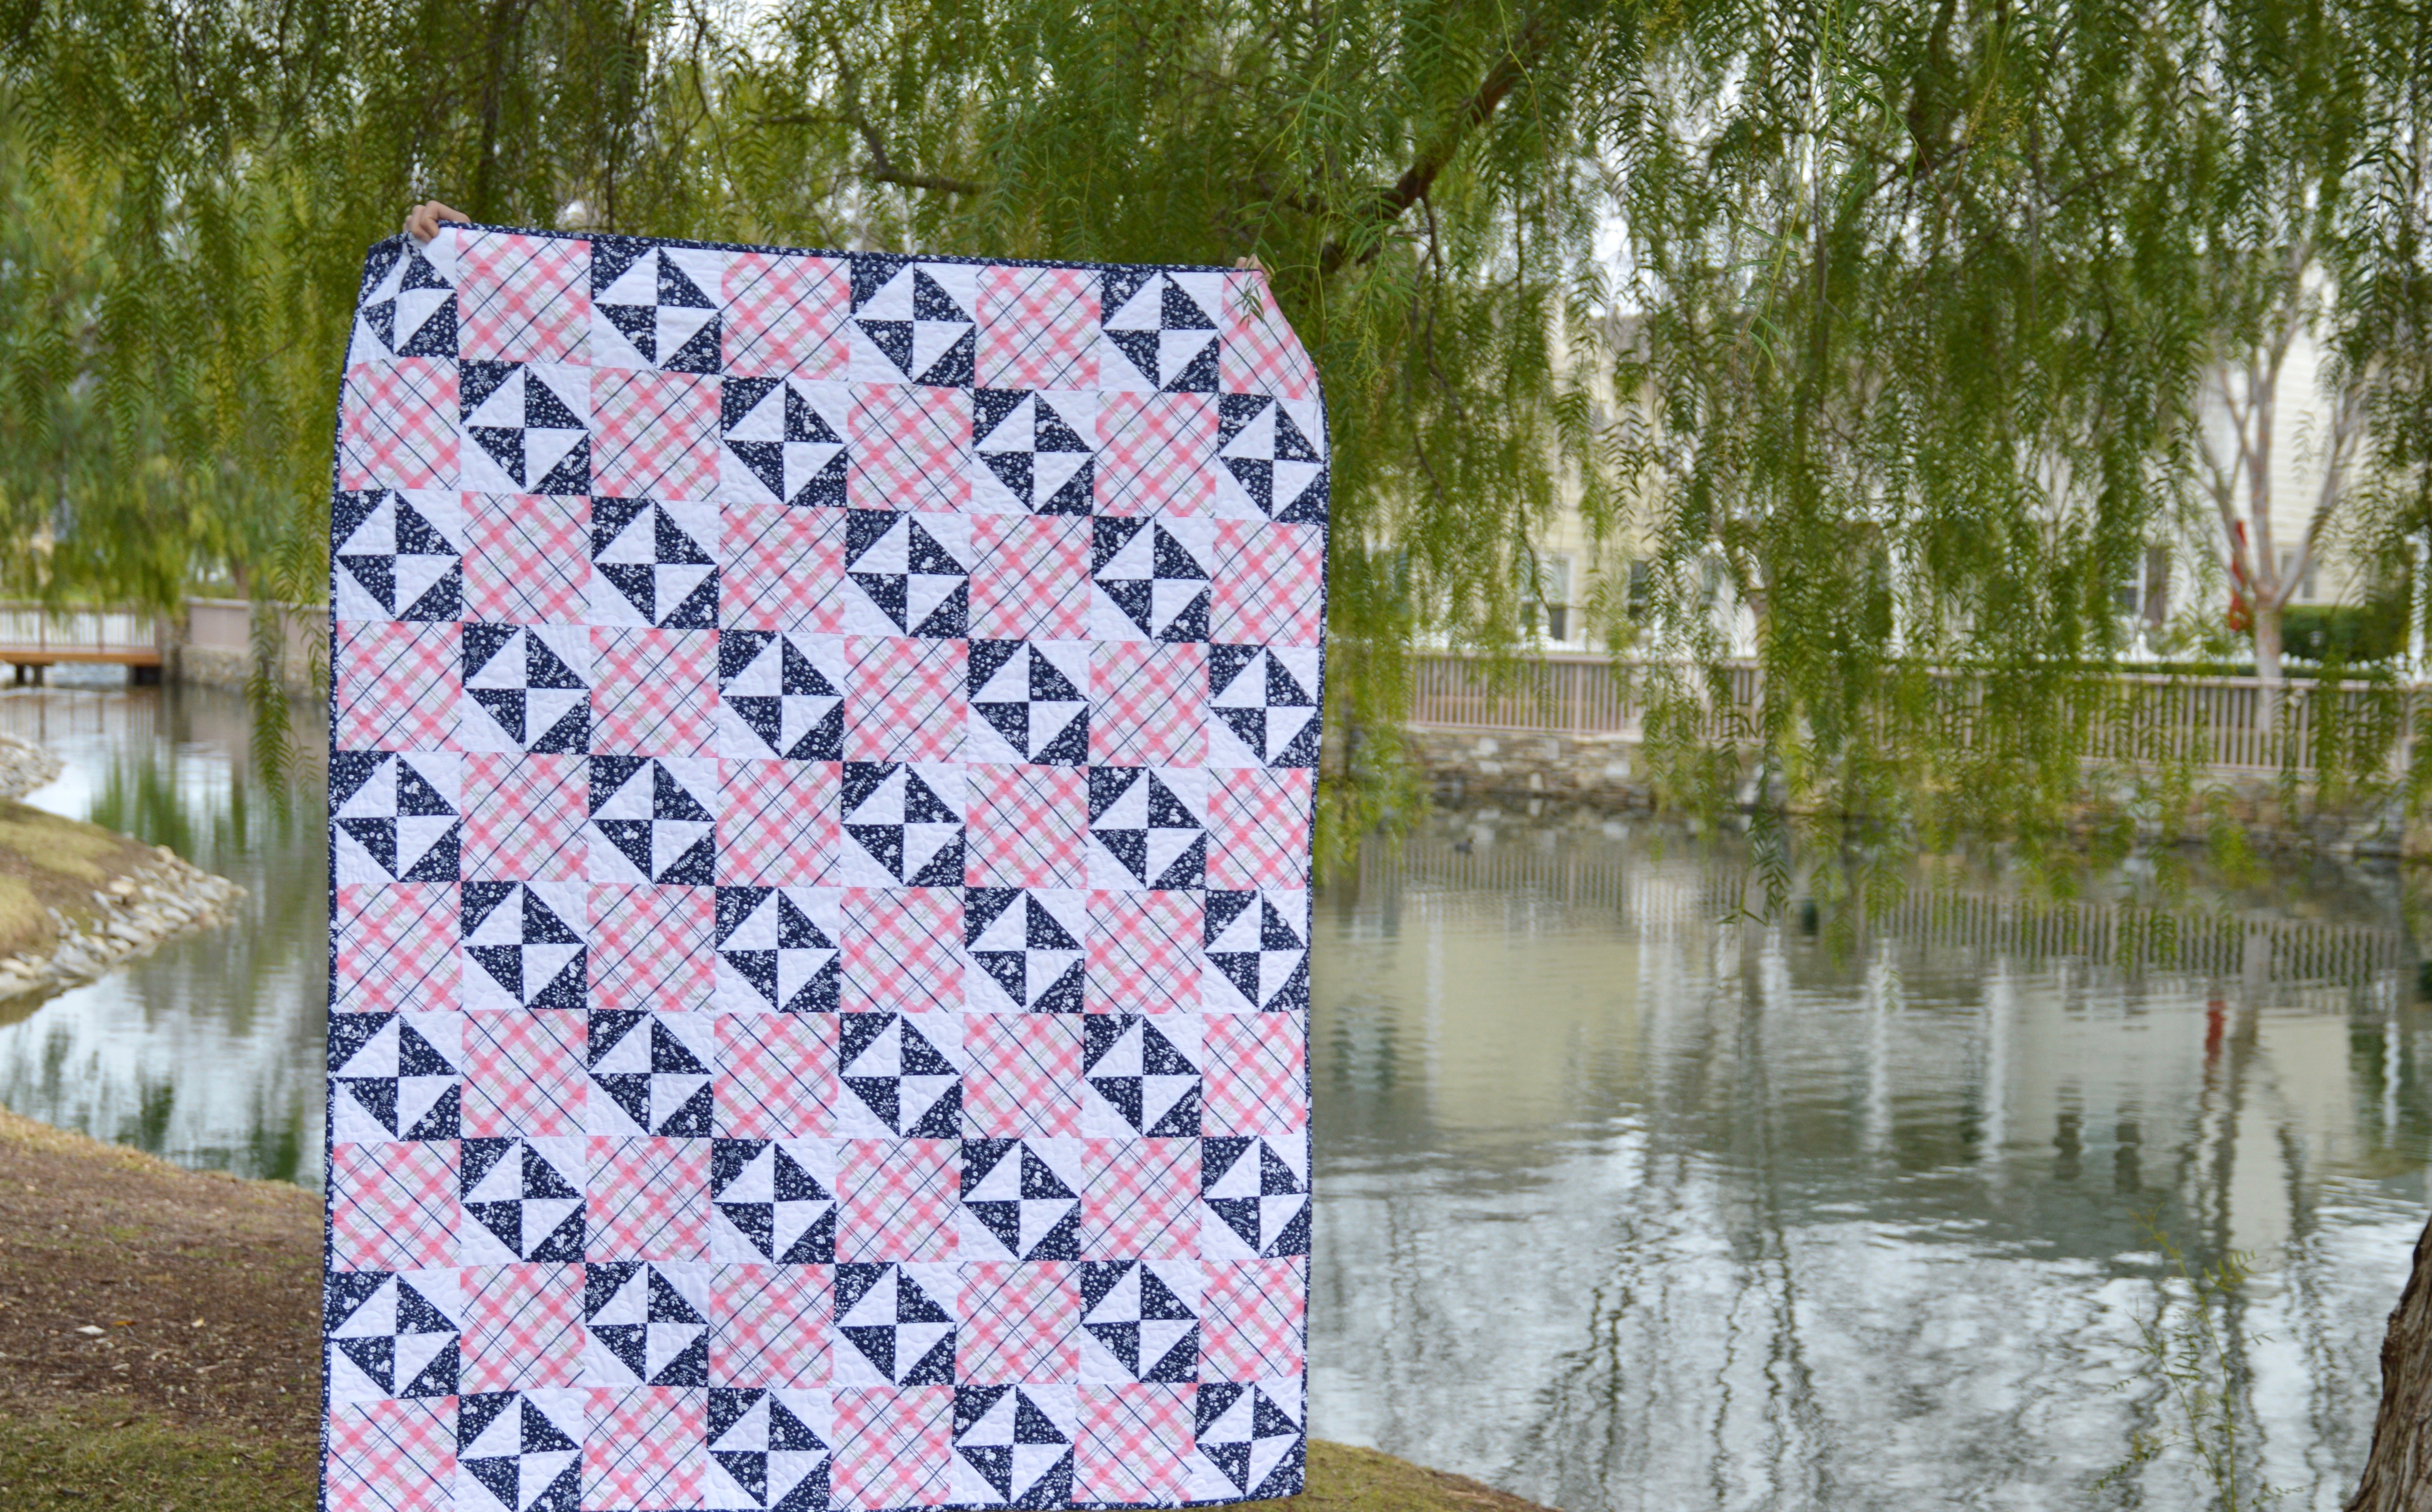
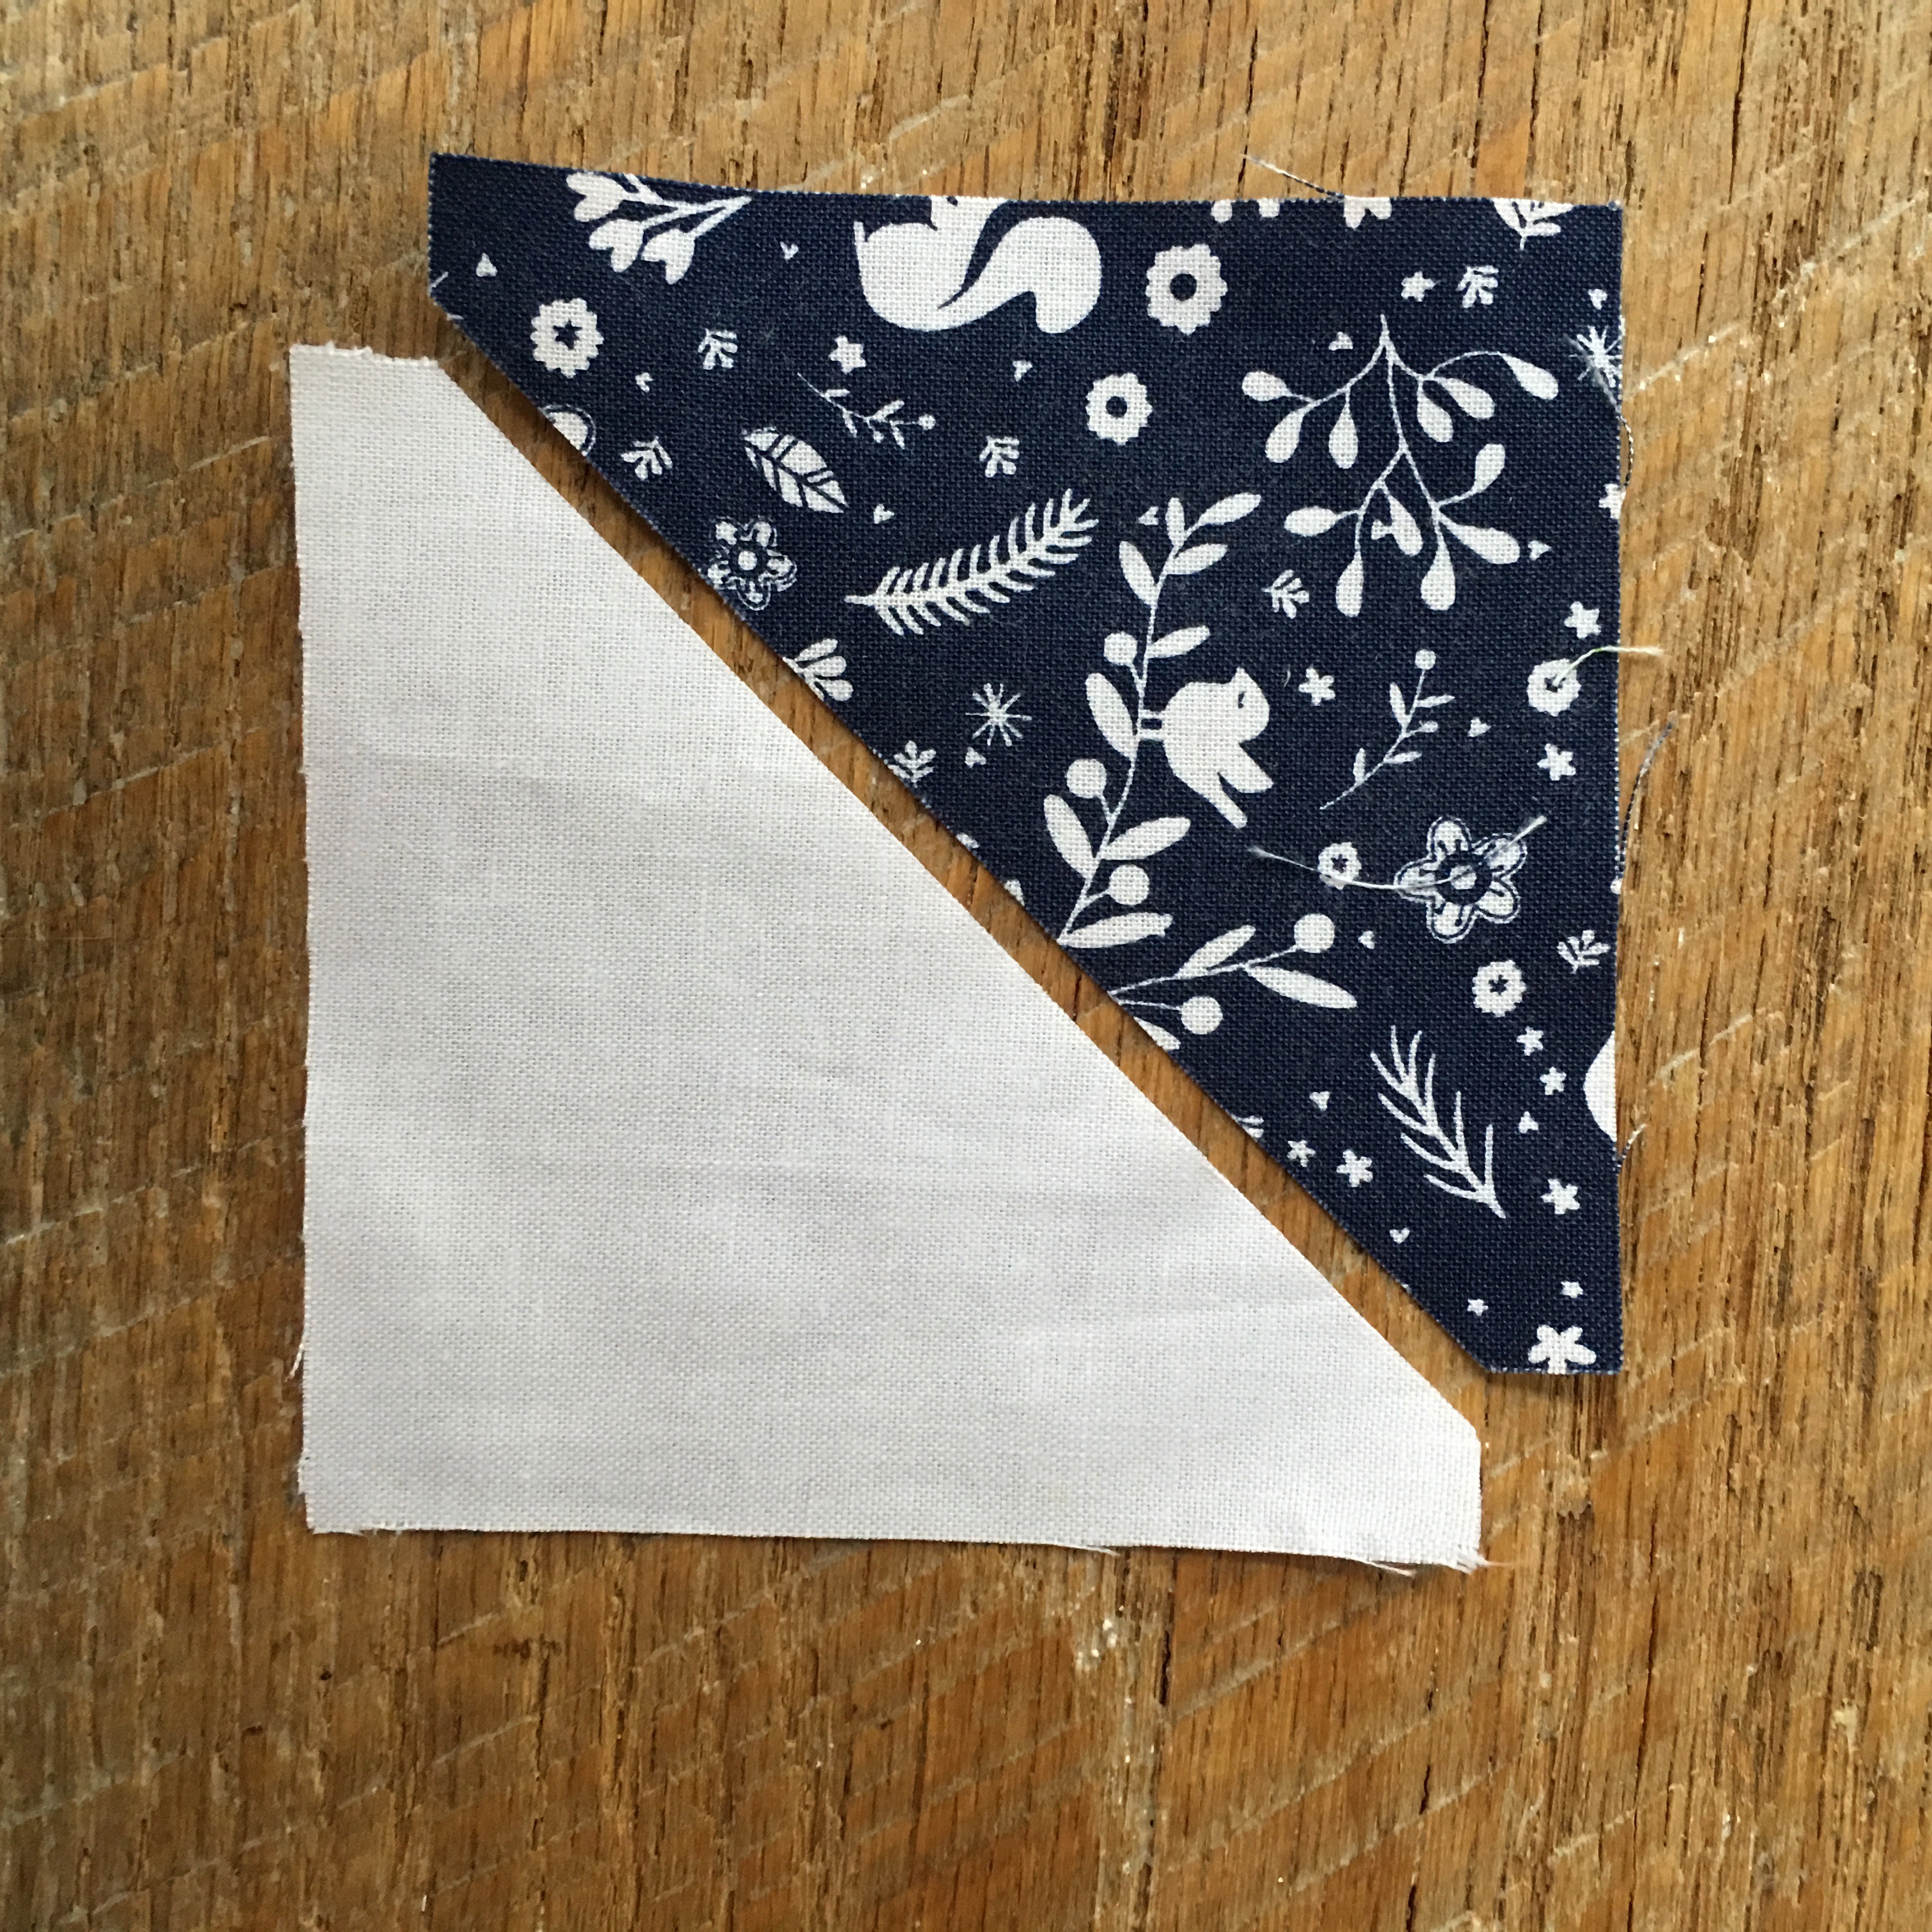
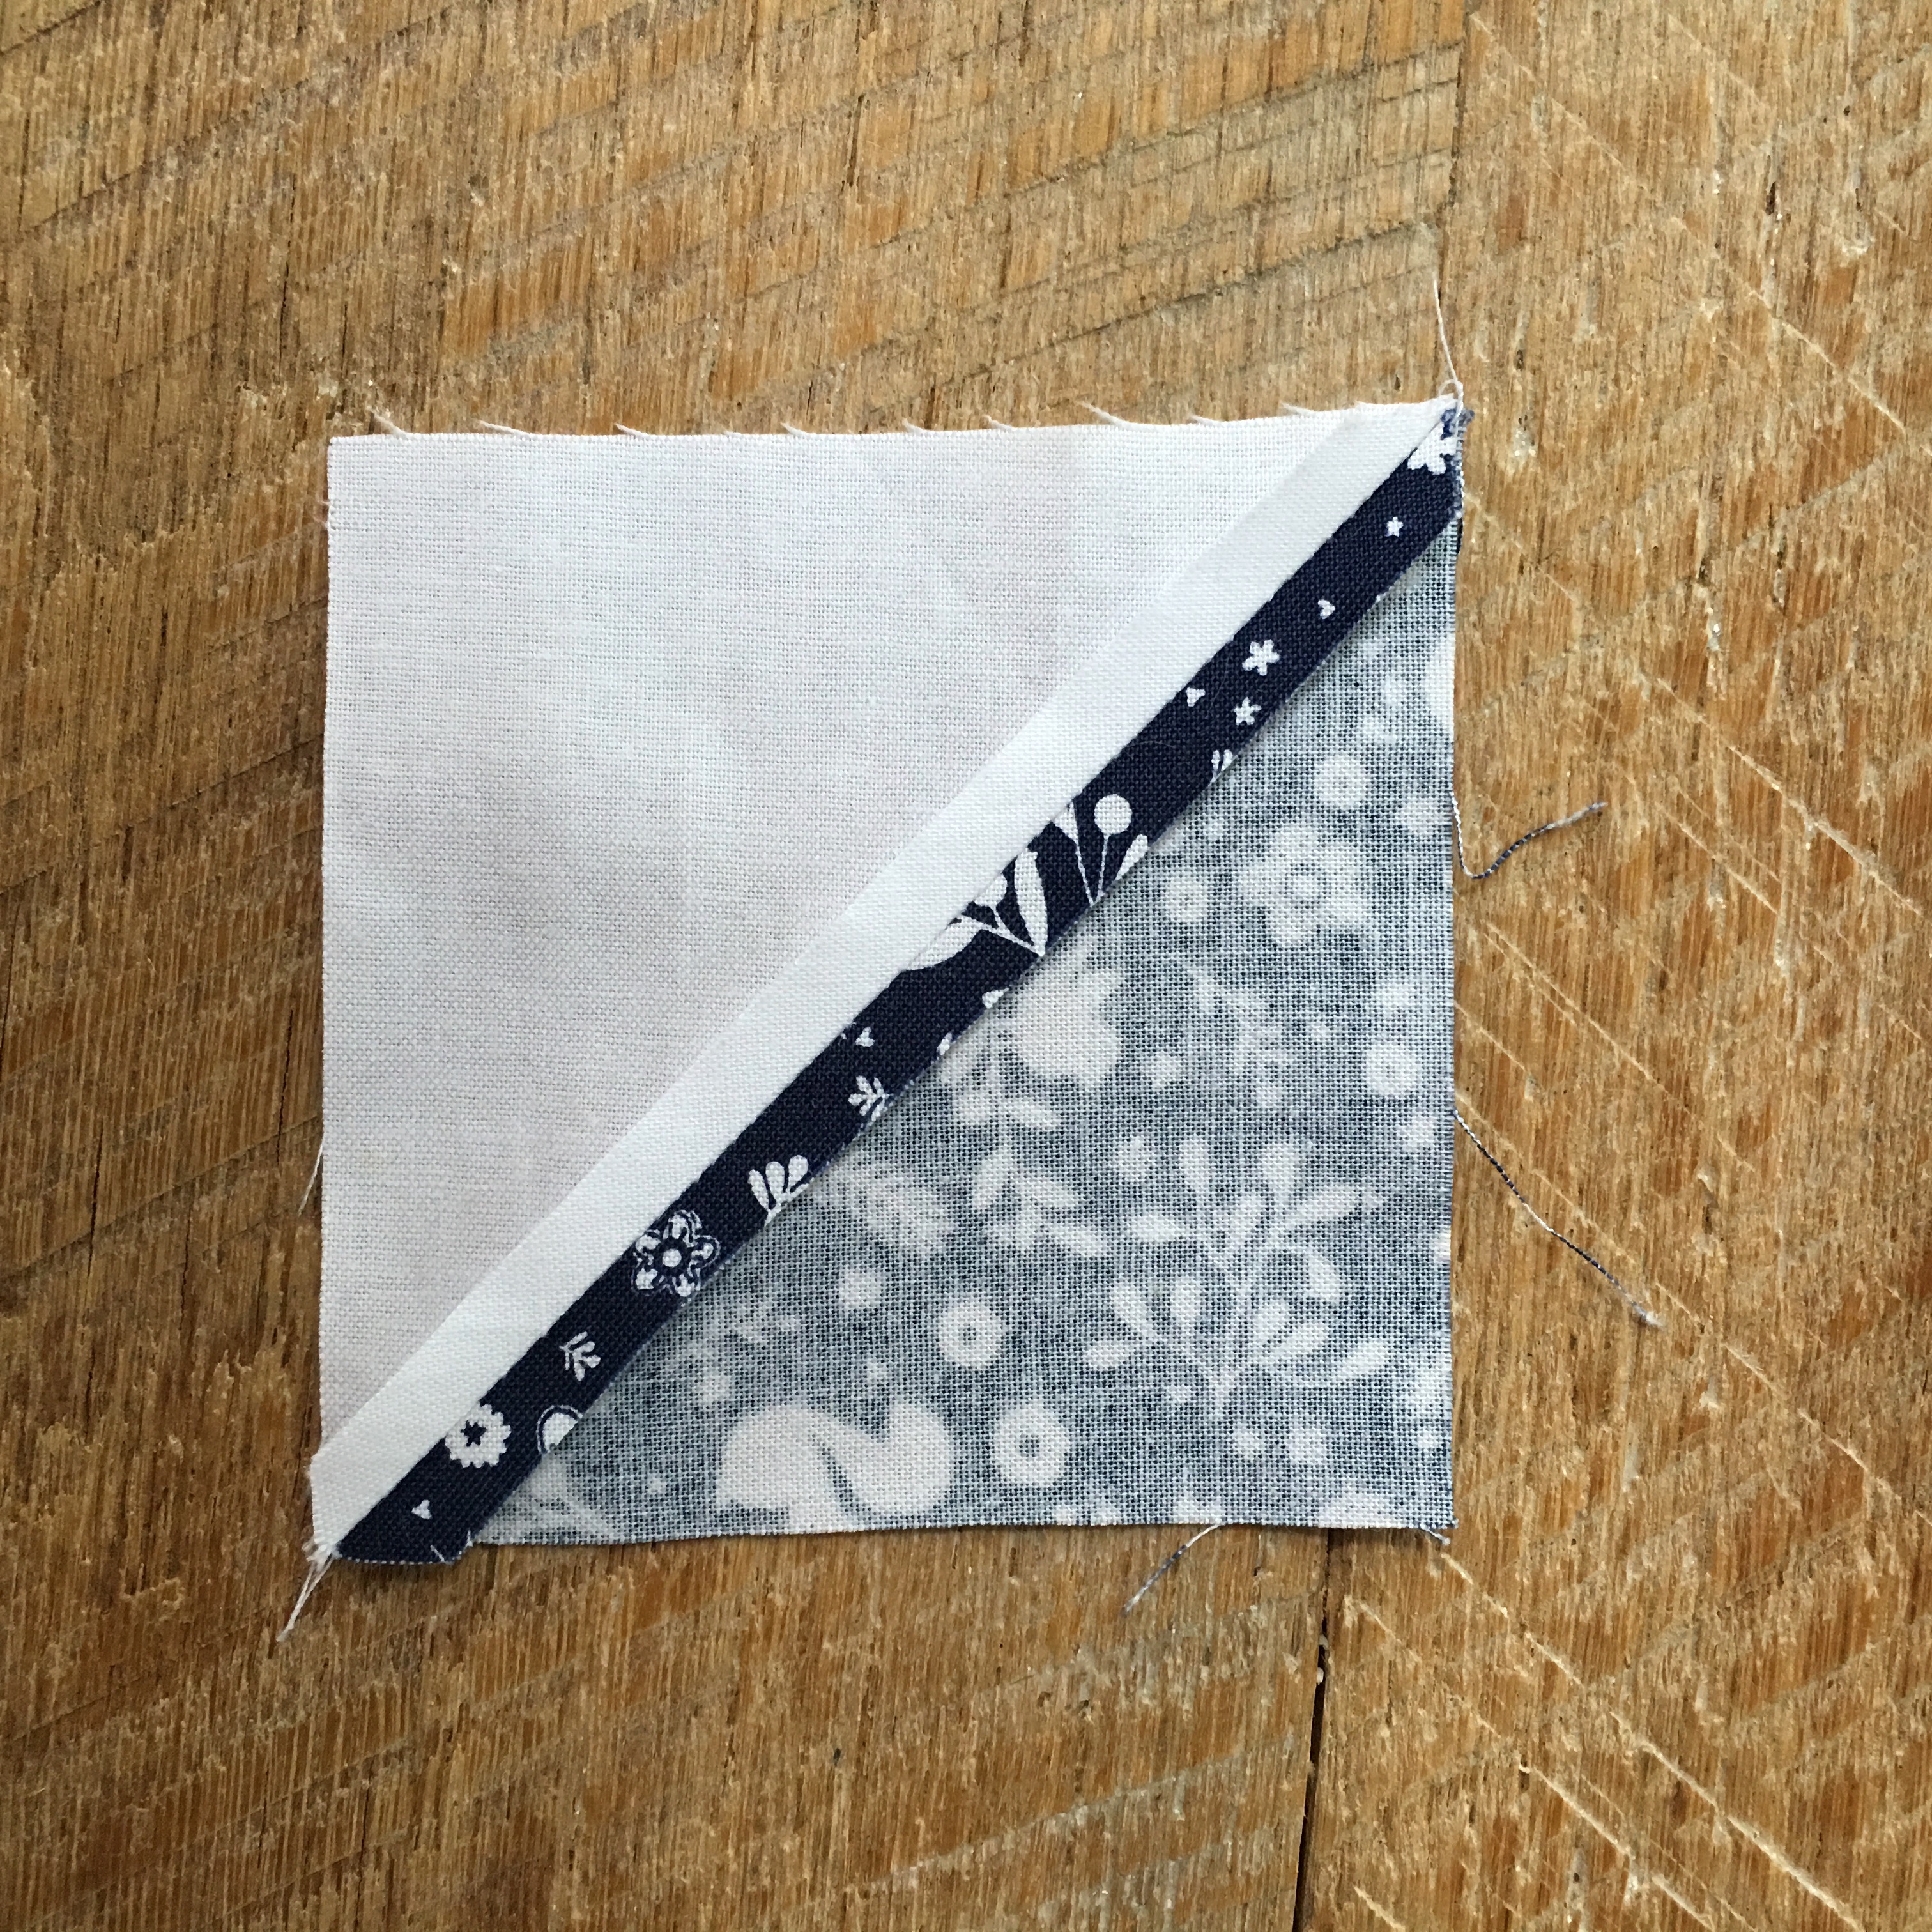
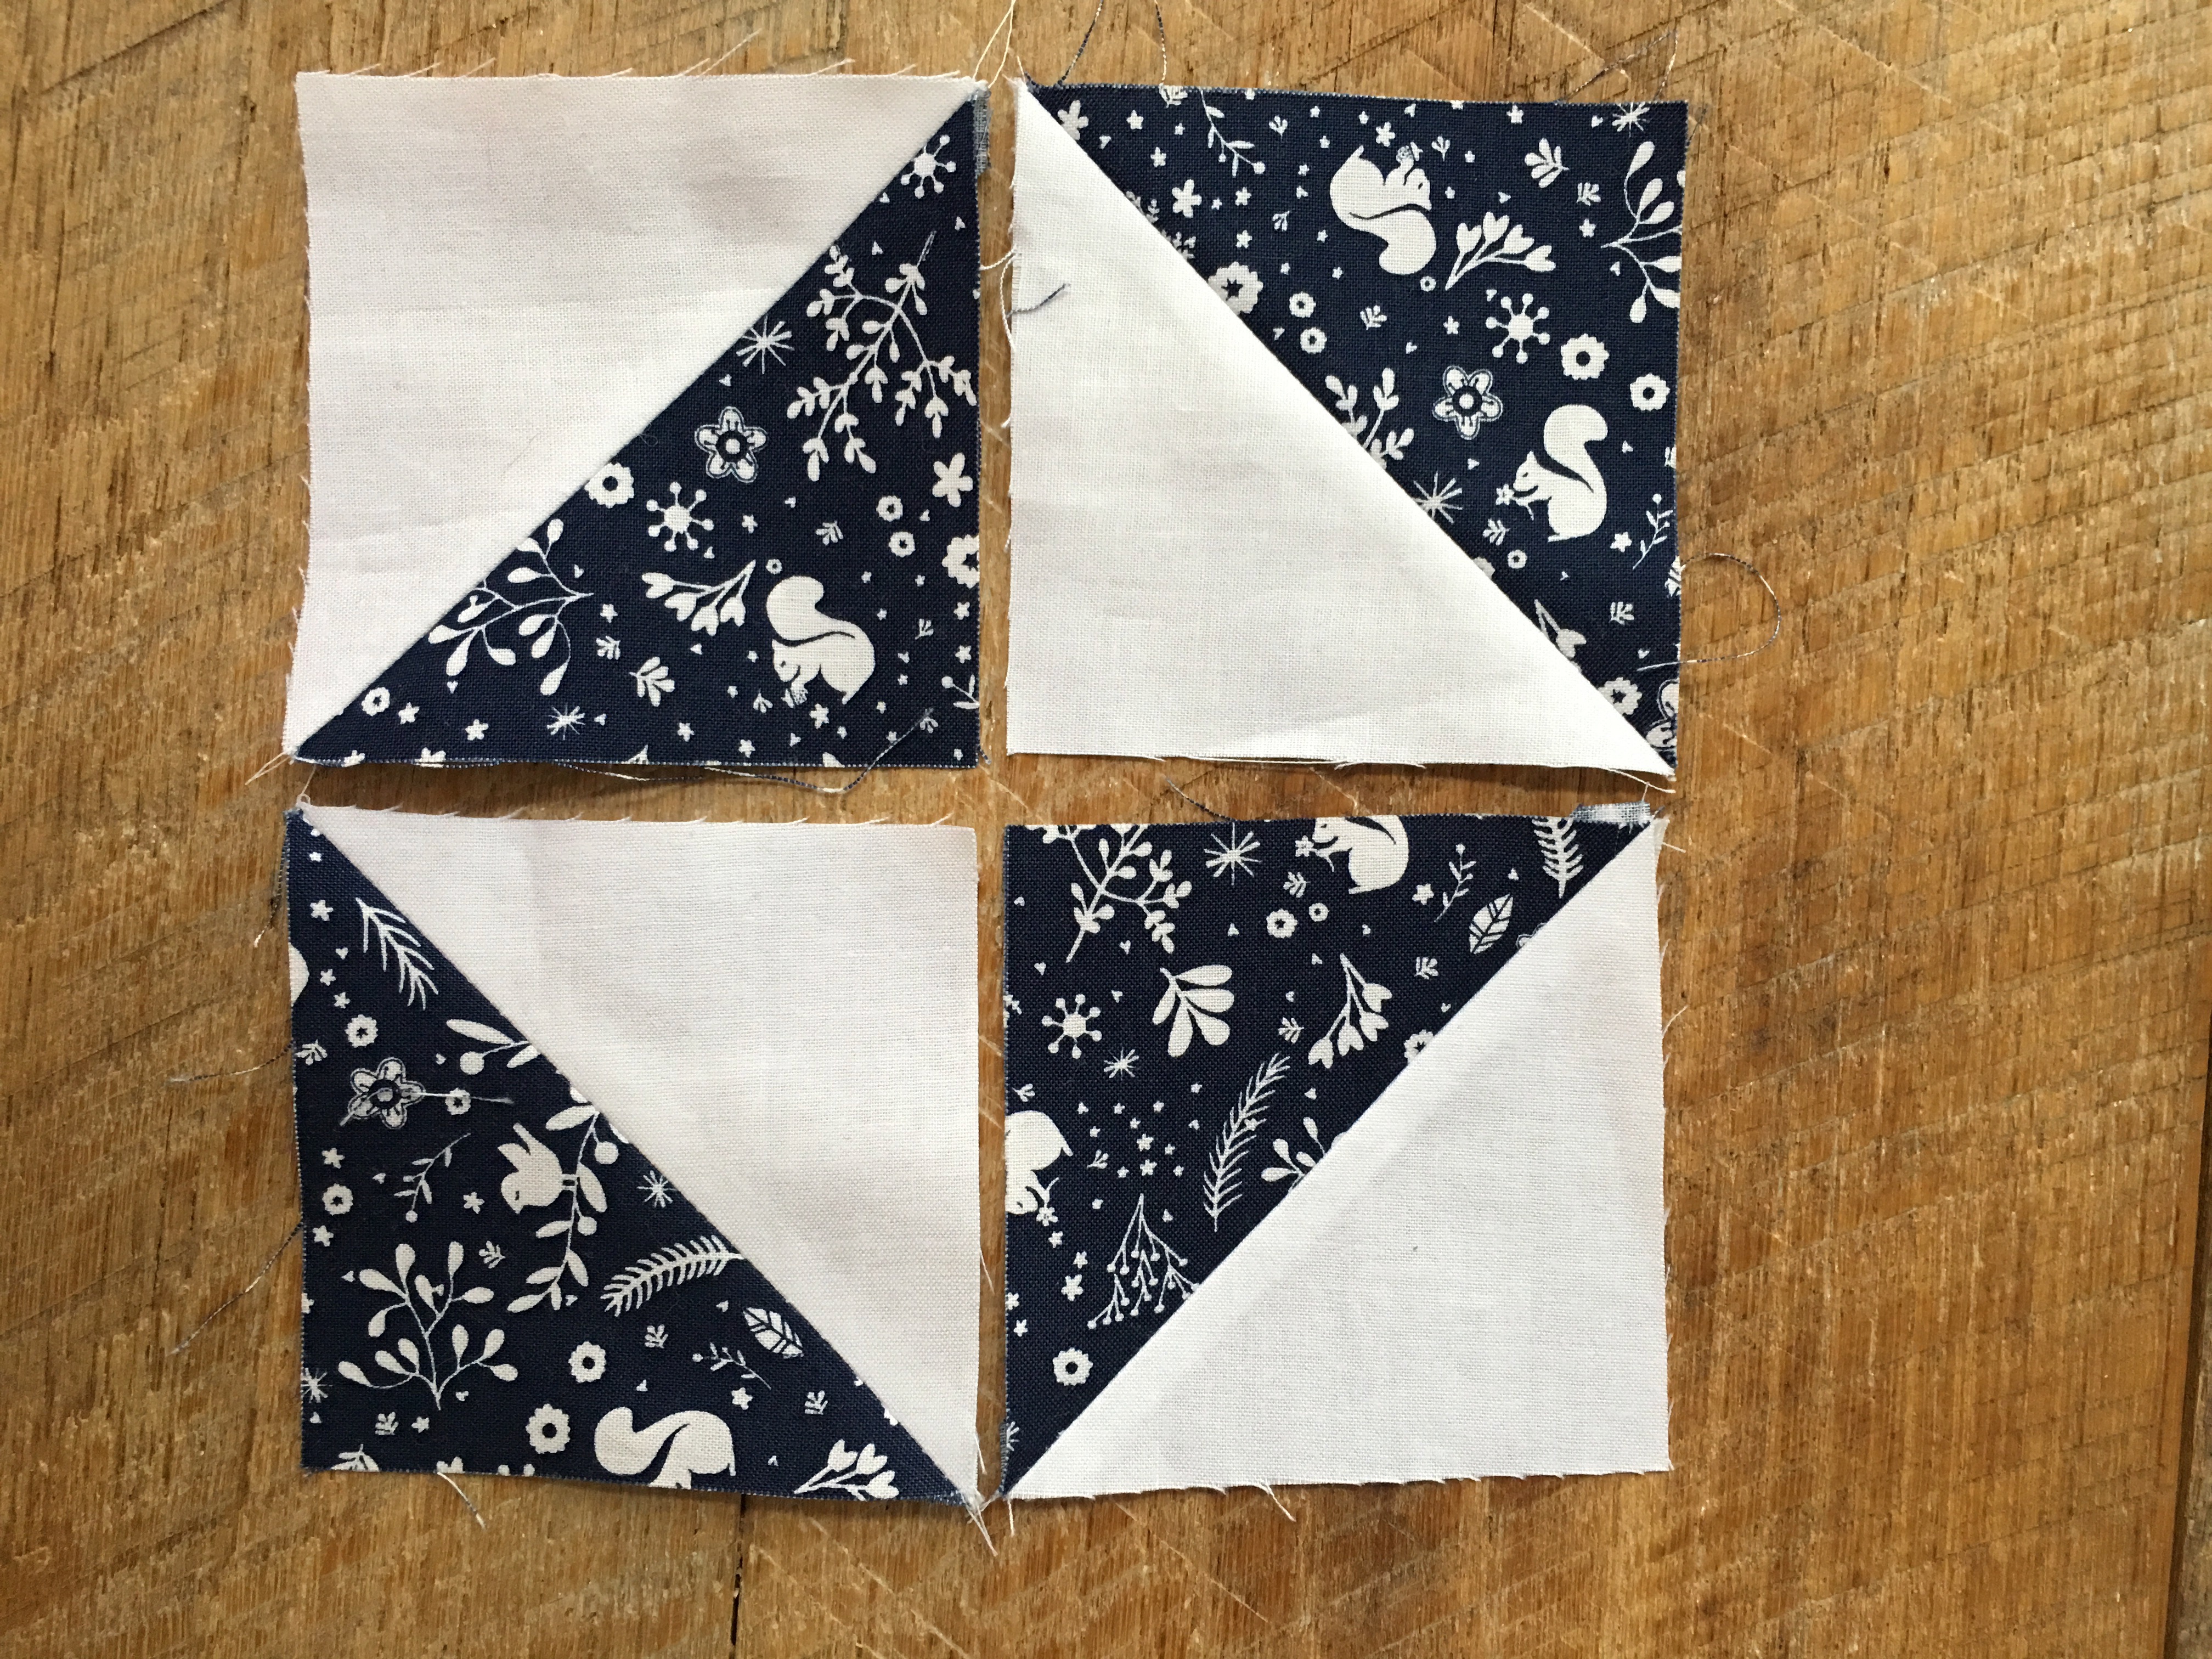
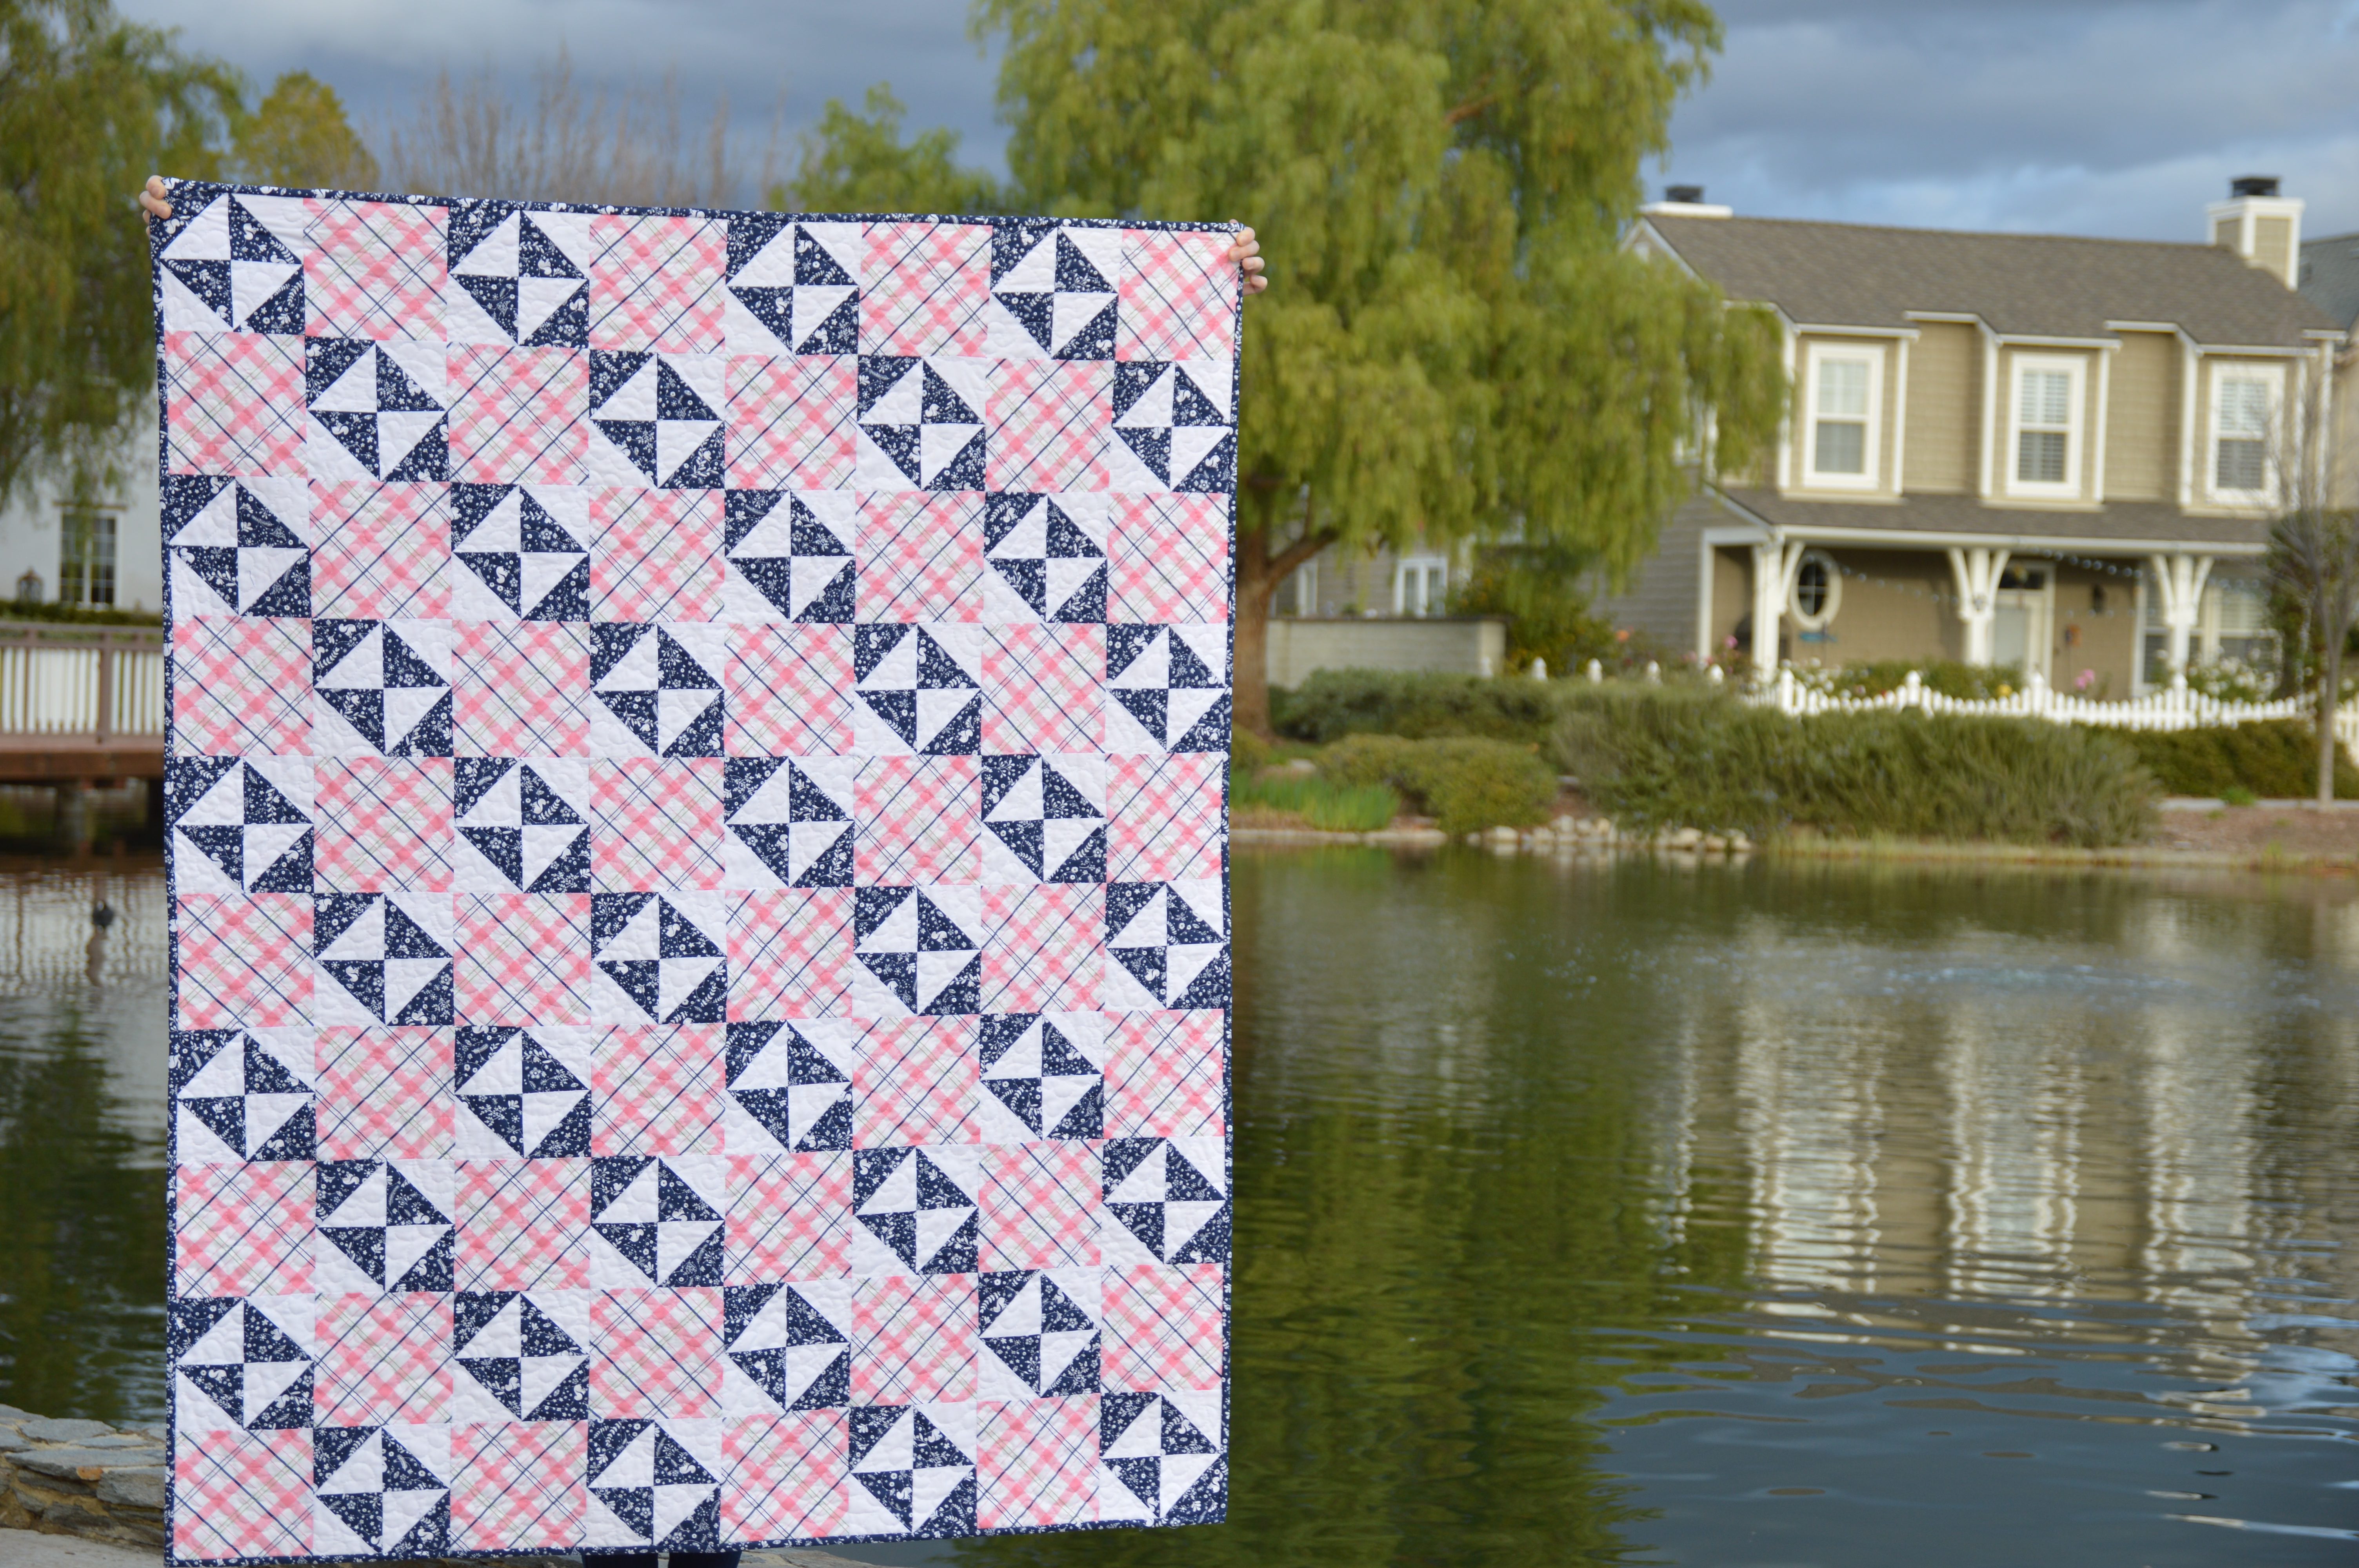
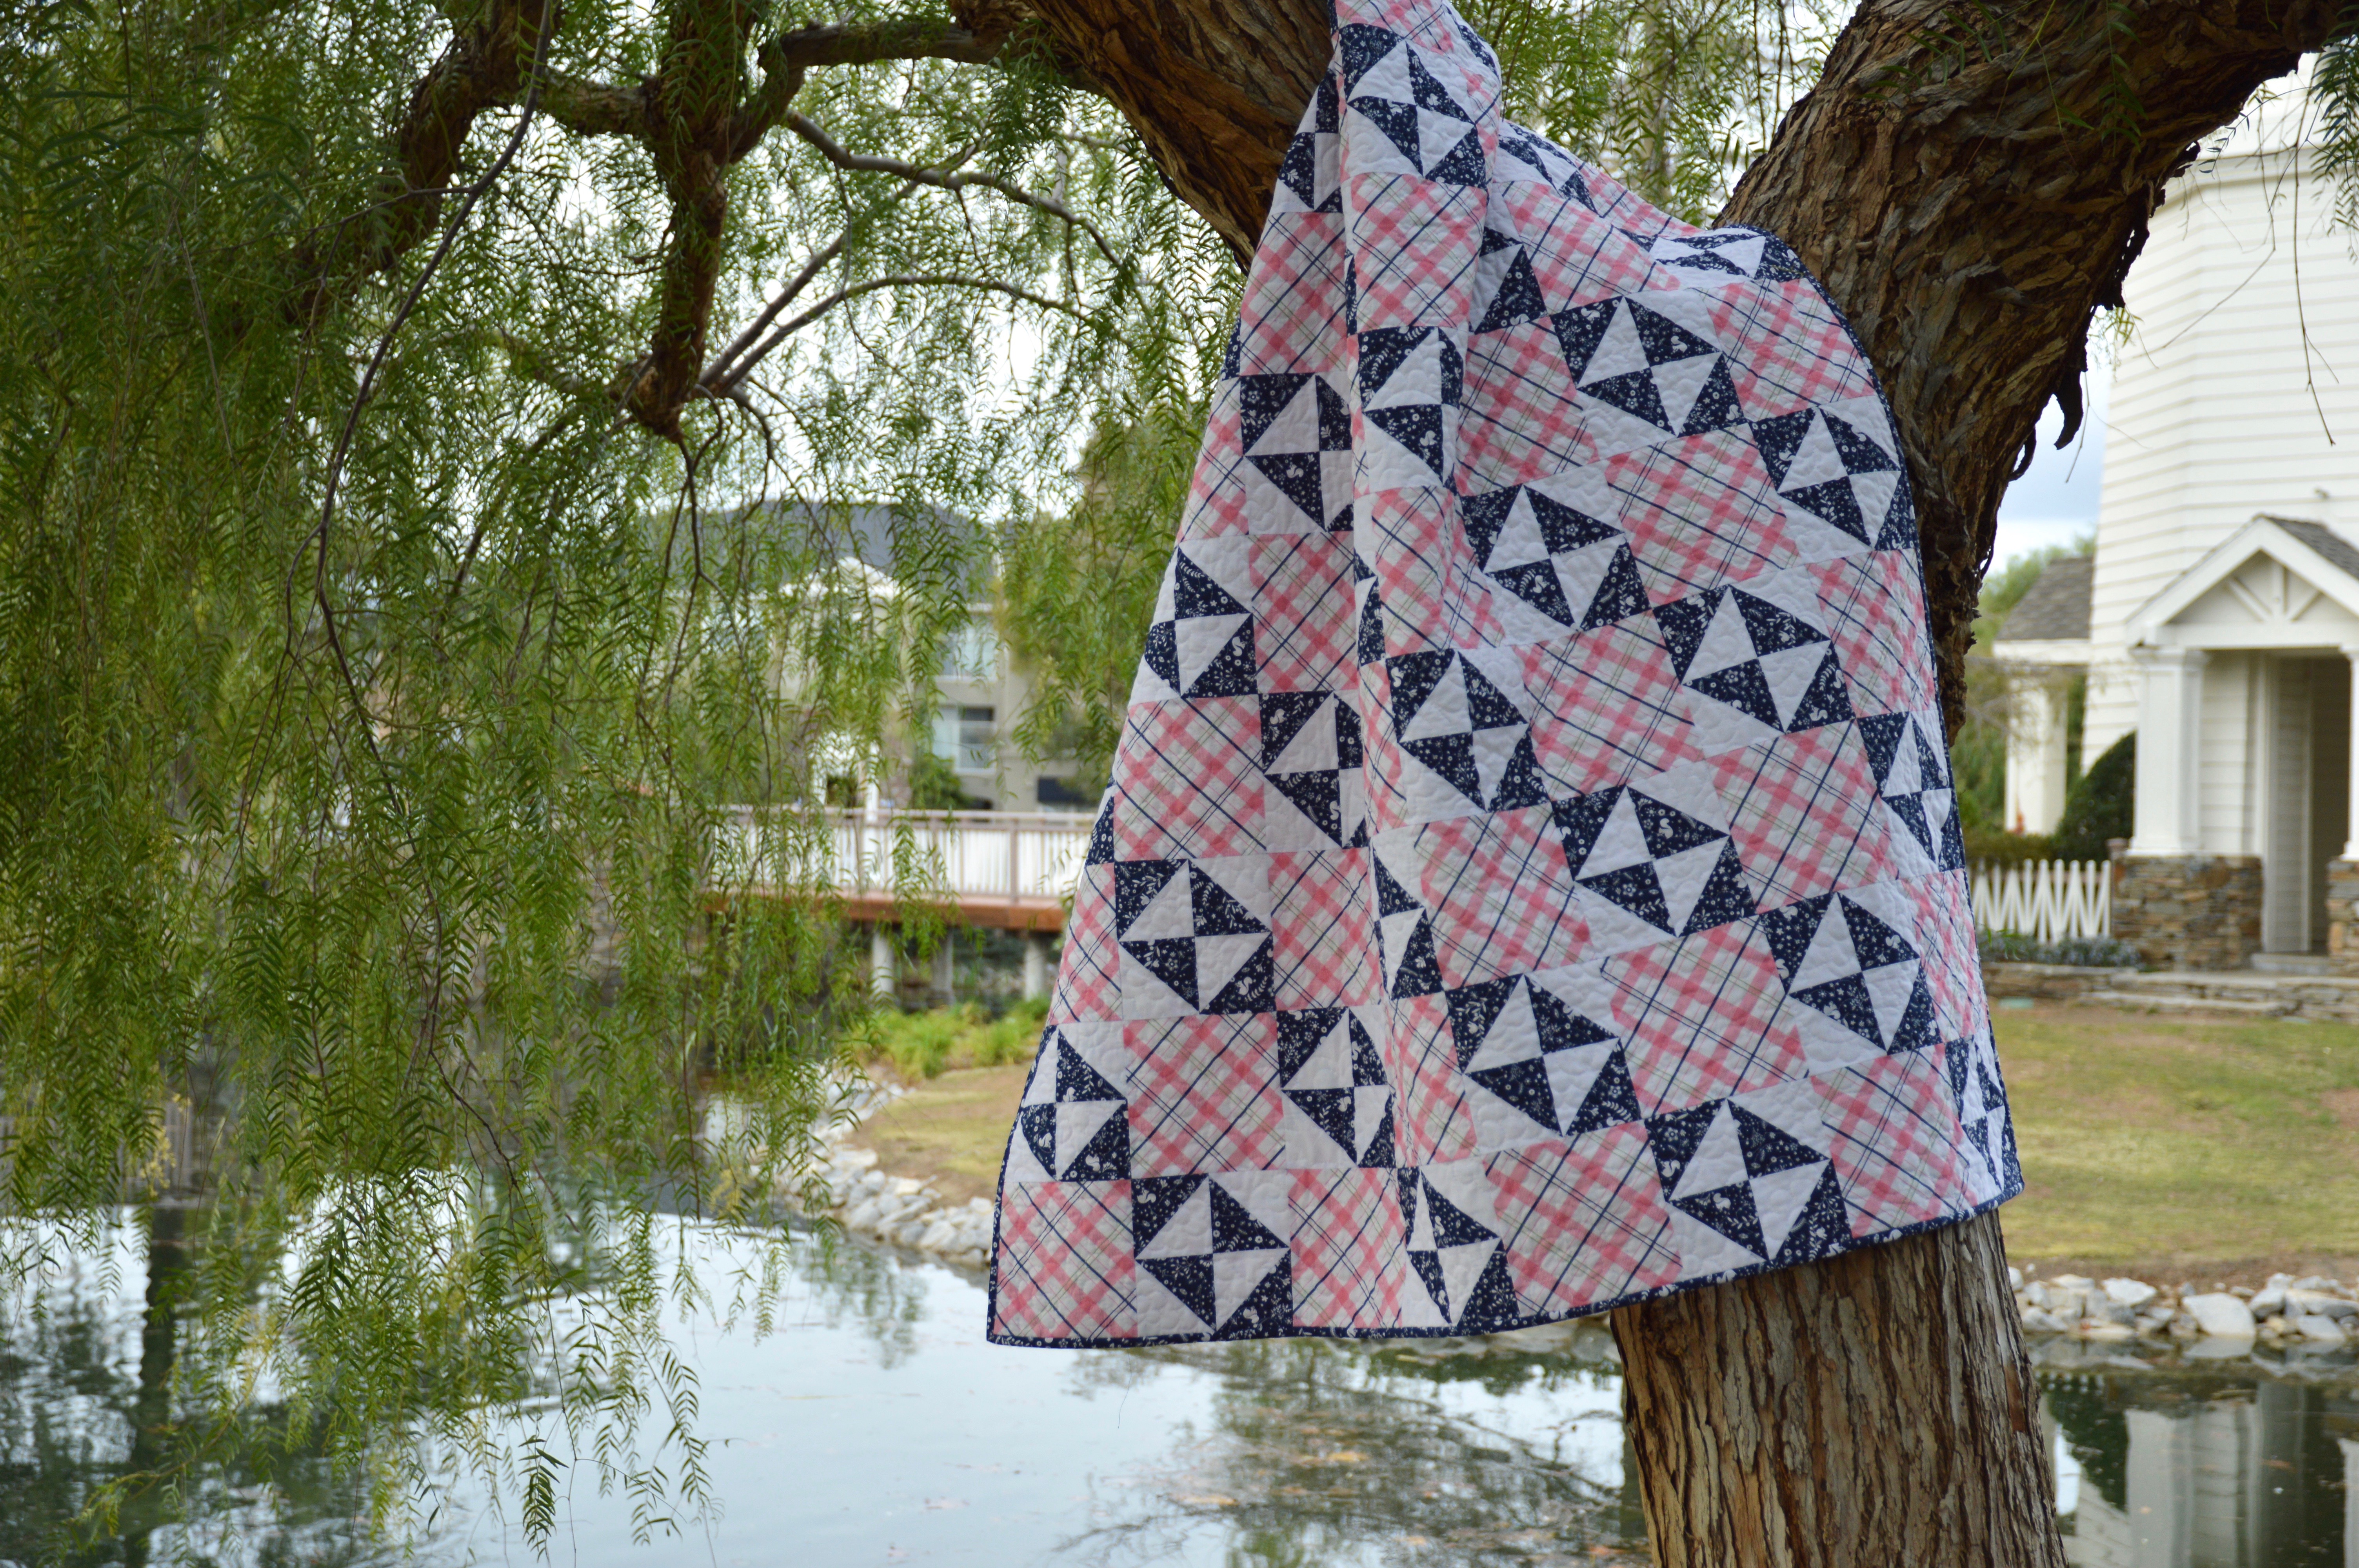
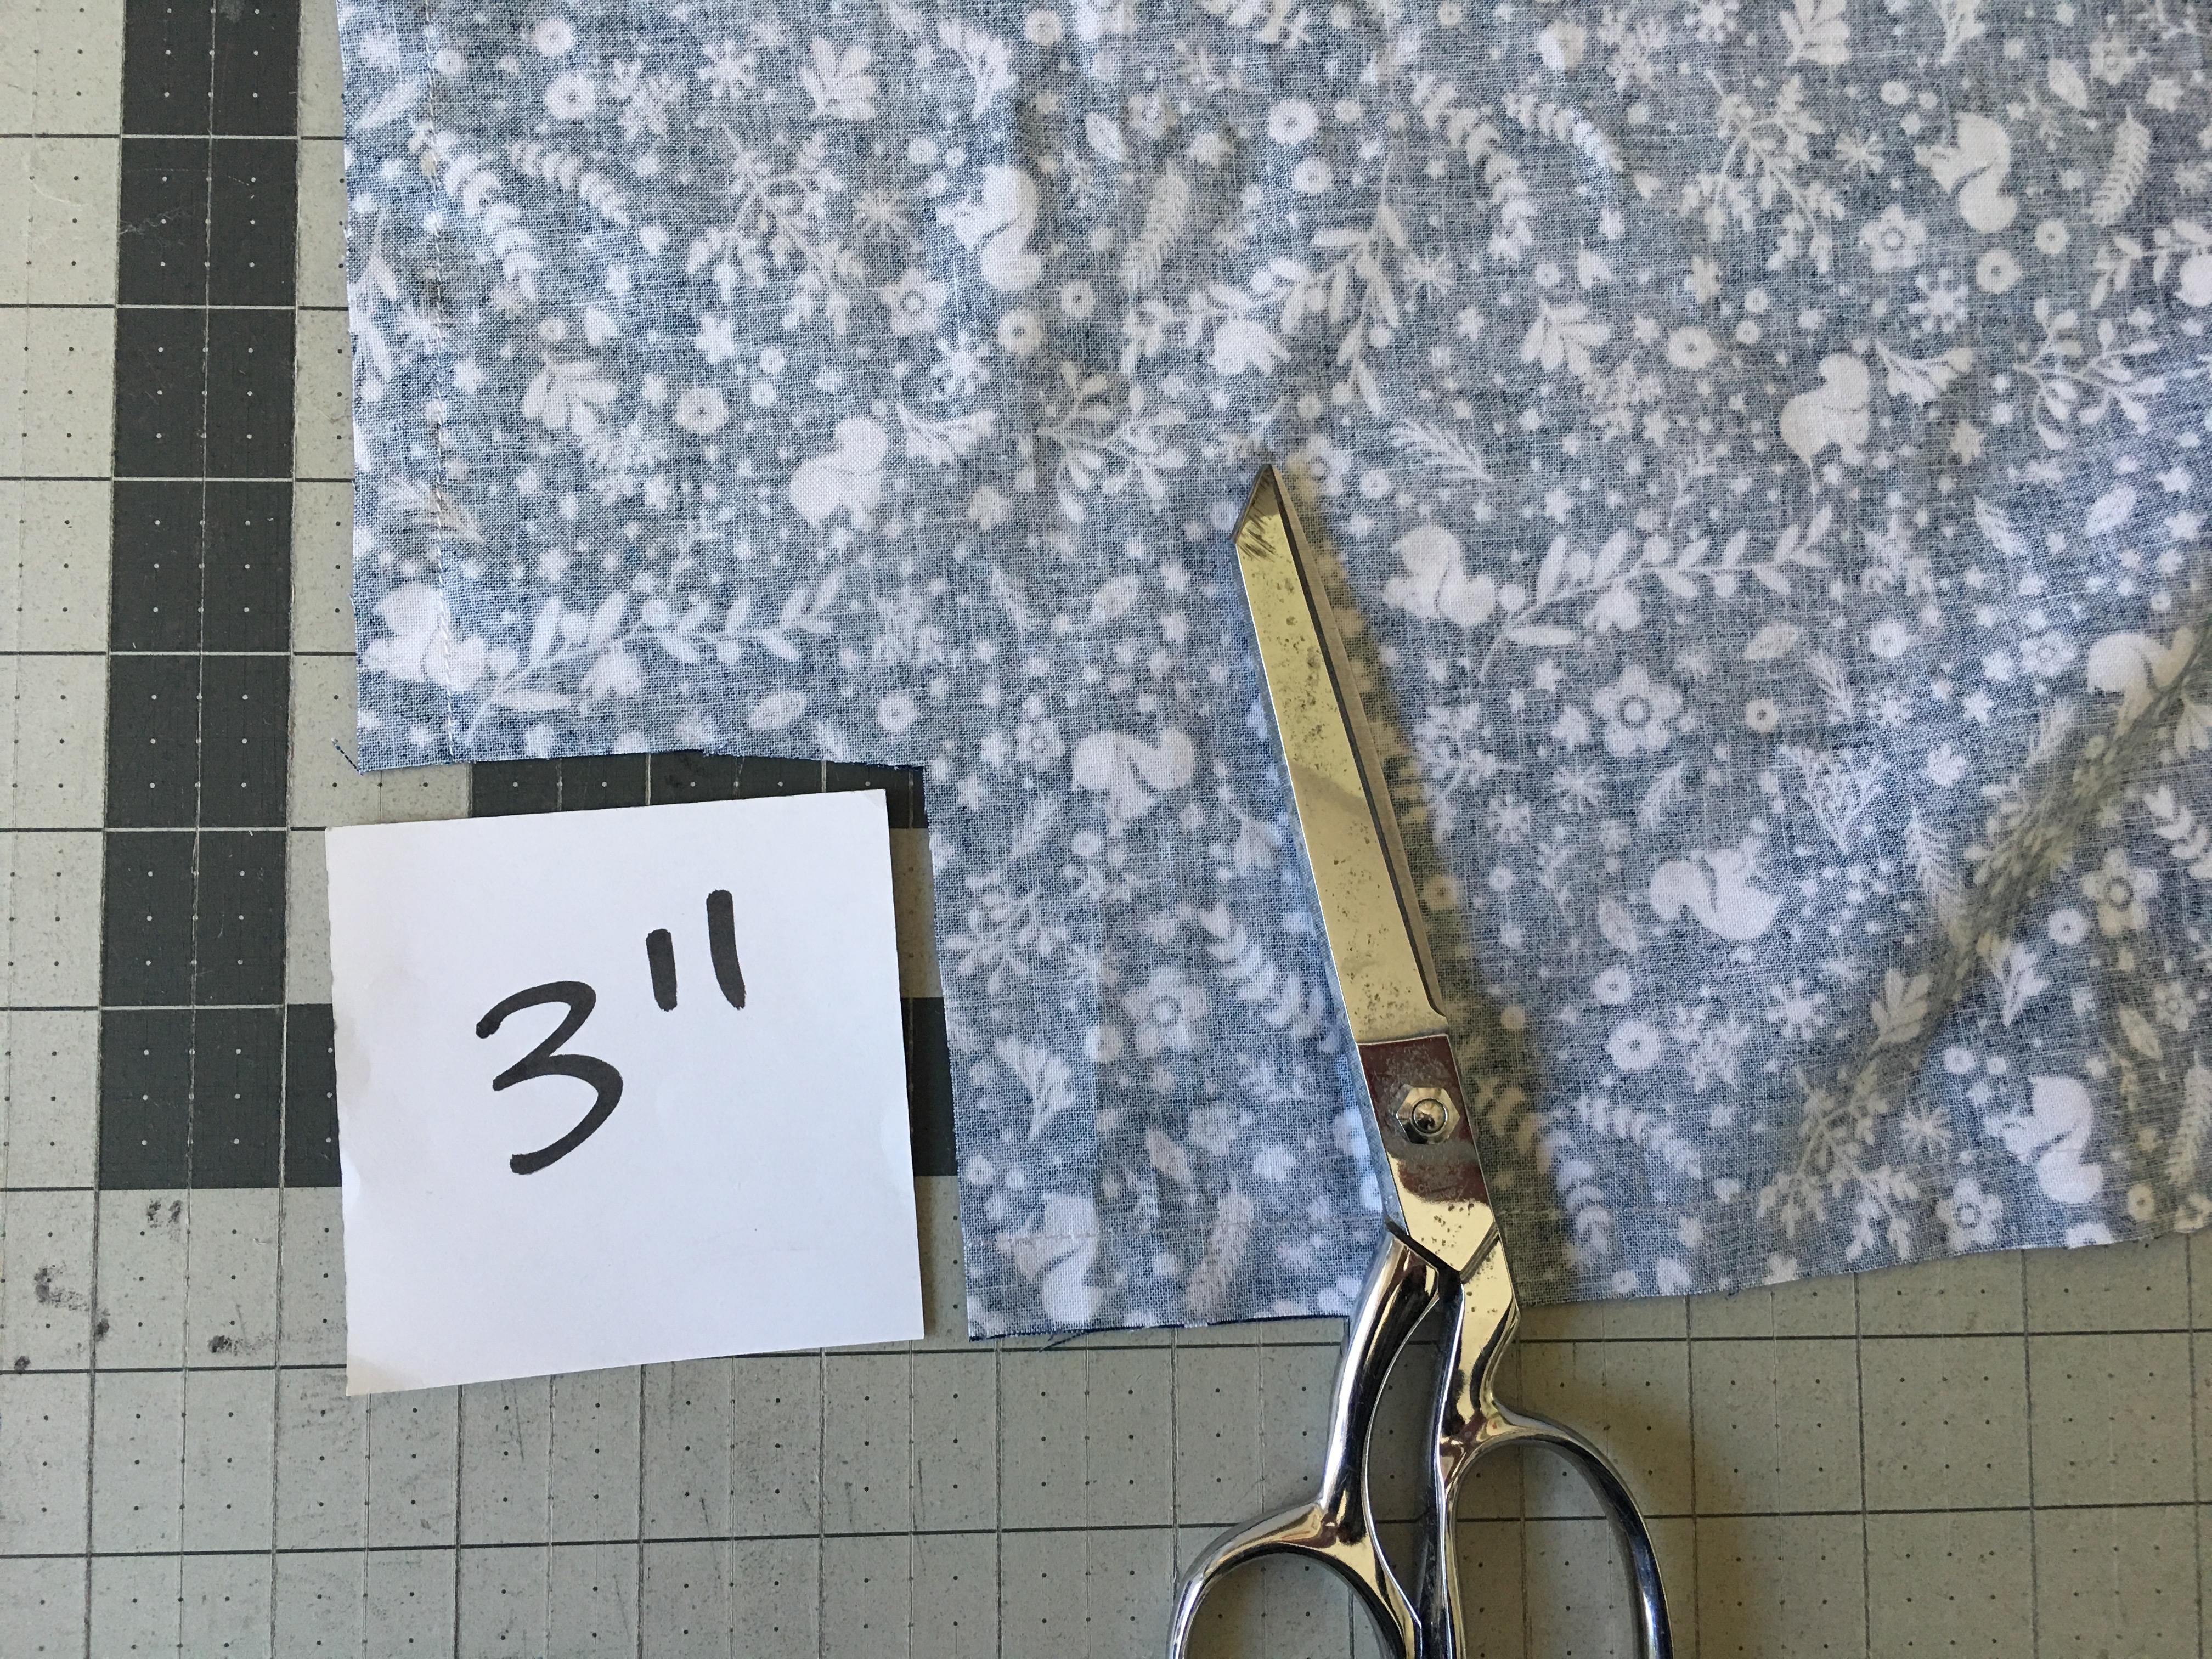
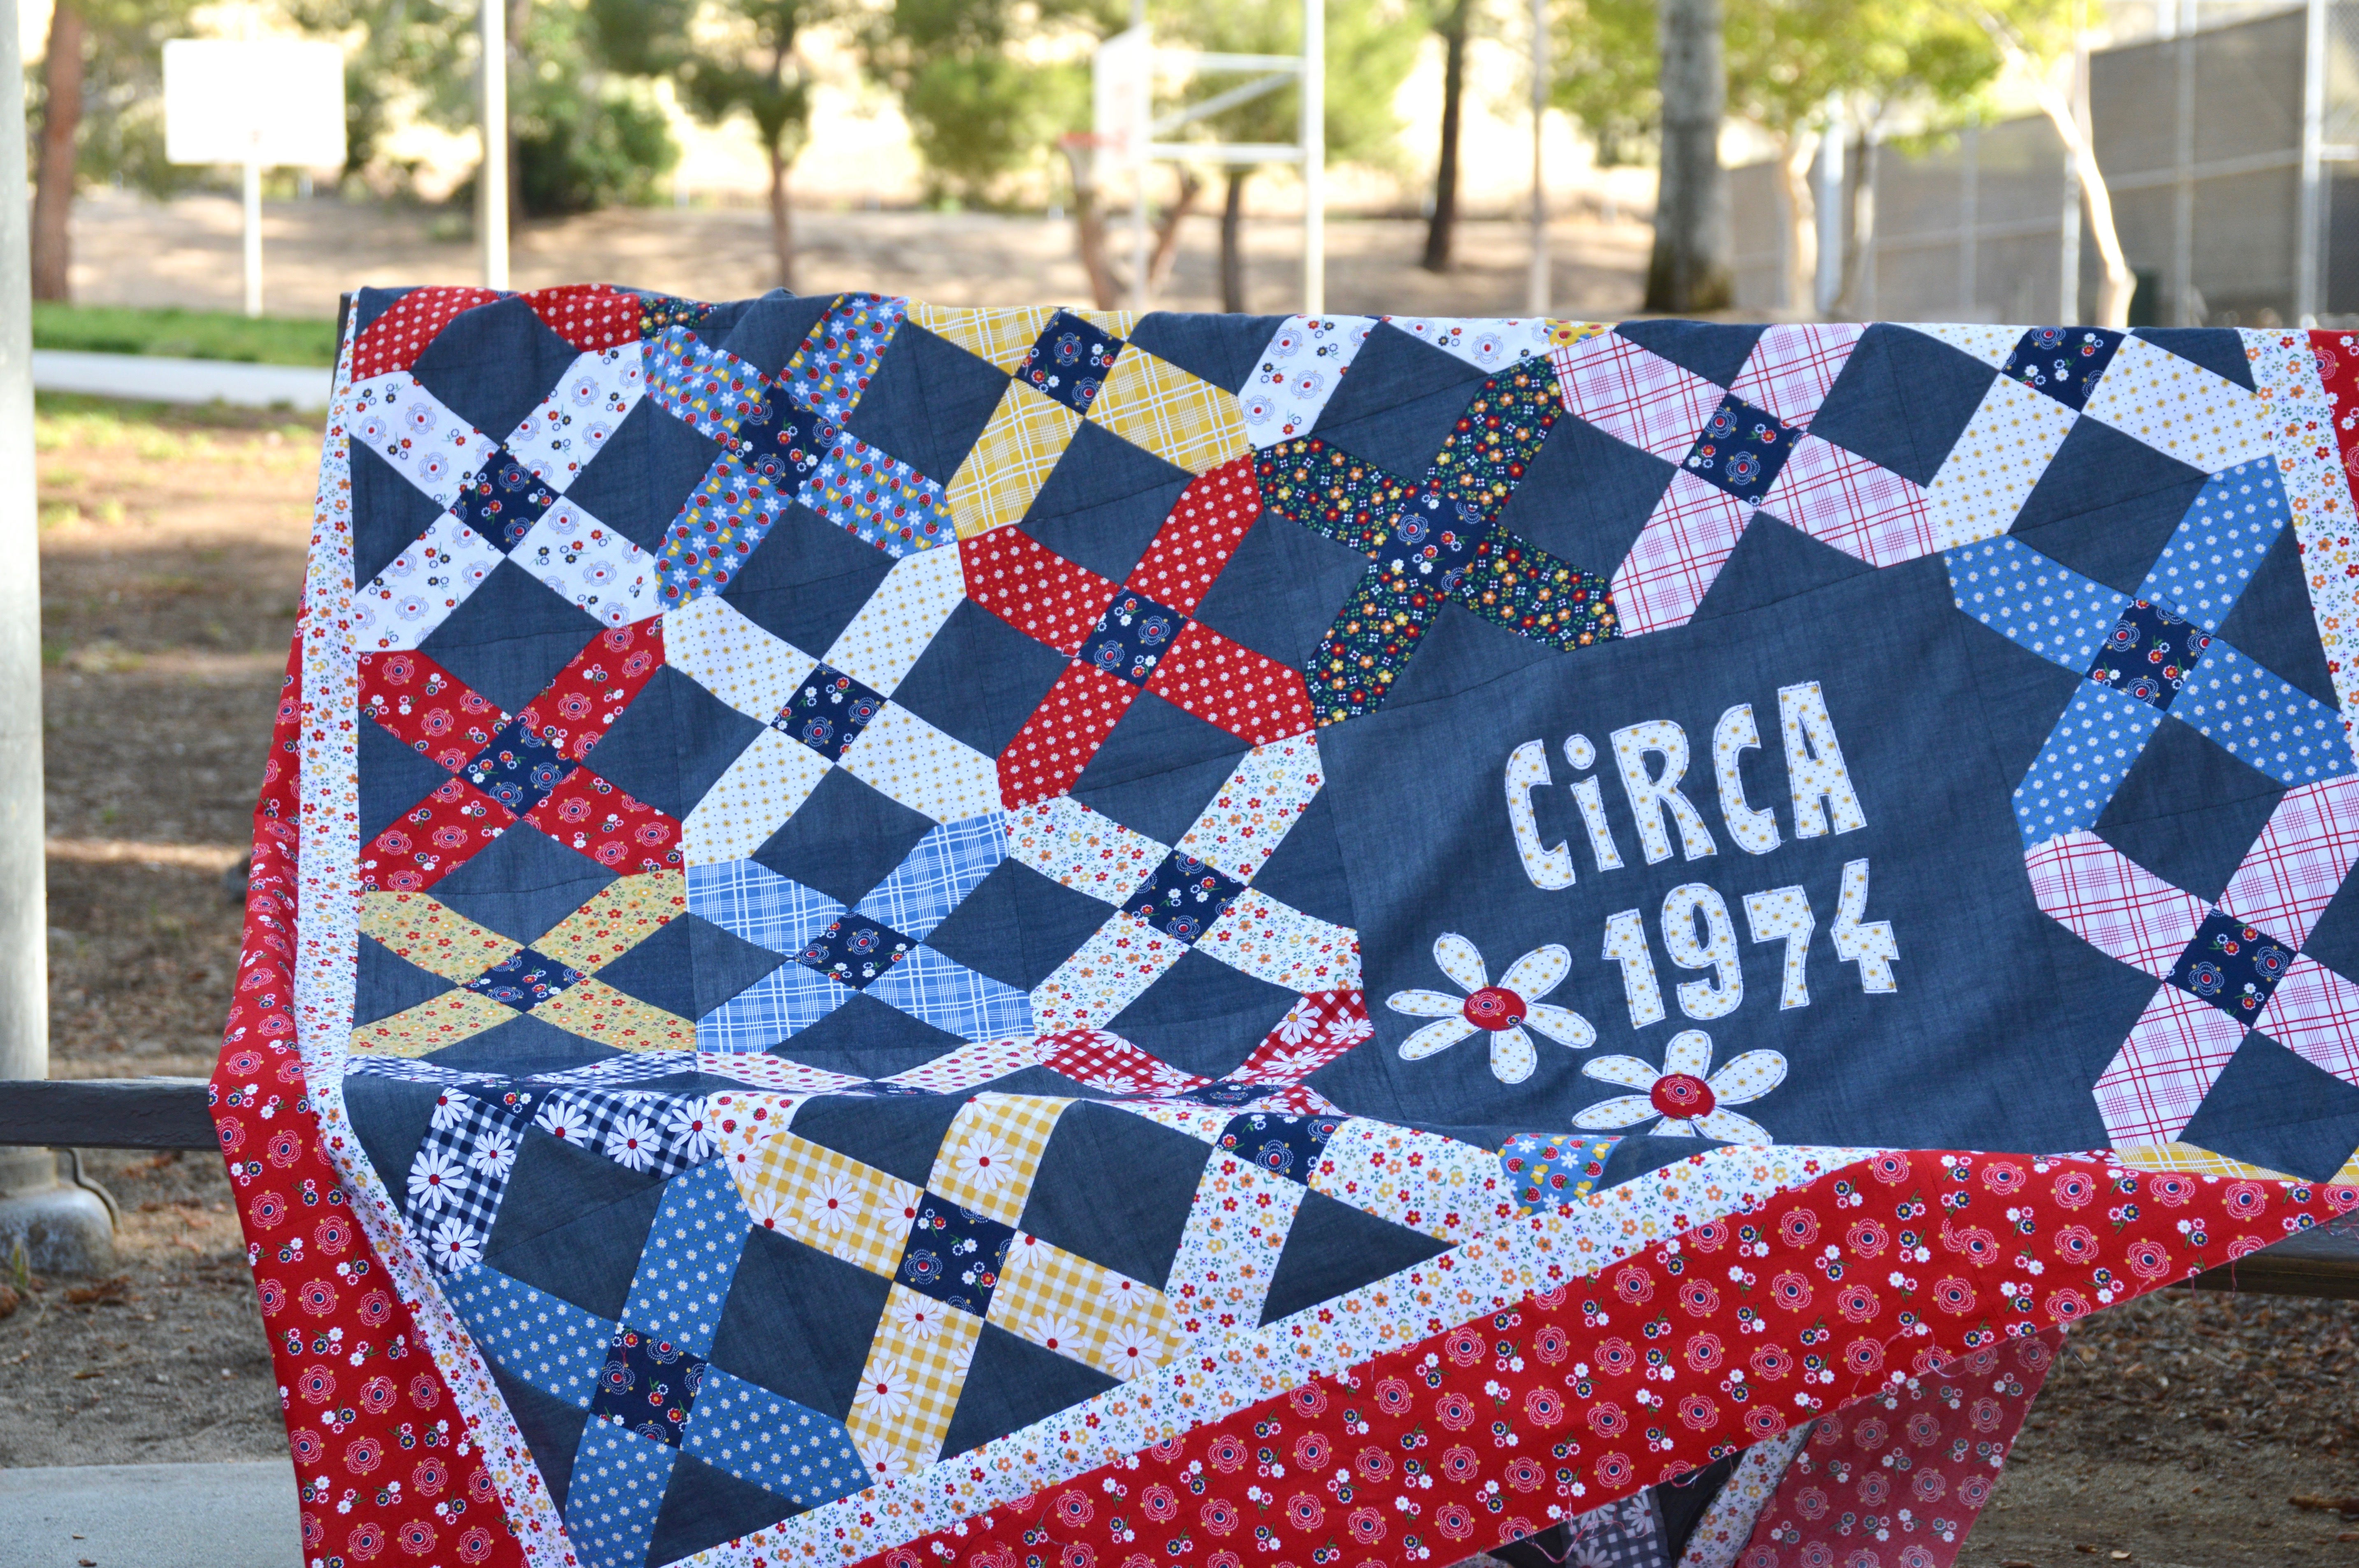
The blocks are 8″ with a little appliqué insert.  You can purchase the PDF pattern in my Etsy shop and get sewing today!!

DSC_0211

Aren’t these fabrics just amazing!!!!!  There are so many more things I want to sew!!!

Gingham Girls fabric by Amy Smart, inspired by vintage 1970's prints and colors.

Here are a two little dresses my mom sewed for me when I was 2 & 3 years old.  I got them out to inspire me when making this quilt!

IMG_1492

Thanks for stopping by!  I hope you have a groovy day!!

DSC_0267

Four-Patch Heart Mini Quilt

I can’t get enough valentine sewing!  I think its just the pick-me-up I need during wintertime!  I created this fun mini quilt that is perfect to hang on a wall, put on a table or give to someone you love.

4 patch heart cover
IMG_9234

The finished quilt measures 26″ square and is made up of 4 quilt blocks that measure 10″.
IMG_9178

These fabrics from Moda are sure to brighten your day!  The line is called Just Another Walk in the Woods – and it’s ADORABLE!!! Don’t you just love cracking open a Jelly Roll!  It’s a little bit magical!

IMG_9177

4-Patch Heart Mini Quilt Featuring Heat n Bond Lite

Here’s what you need to get started:

1/2 a Jelly Roll (or equivalent)
1/3 yard background fabric
Aurifil Threads – 2530 &
Heat n Bond® Lite EZ print sheets
1/2 yard for backing
1/3 yard binding – or you can use left over Jelly Roll Strips

Click Here to download the heart Pattern

All seams 1/4″


IMG_9186

Begin by cutting 15-18 of the jelly roll strips into 2 1/2″ squares.

Cut the background fabric:

  • (4) 6 1/2″ squares
  • (16) 2 1/2″ squares for block corners
  • (32) 2 1/2″ squares for Half Square Triangles (HST)
4-Patch Applique Hearts

Select (4) groups of (4) fabrics for the hearts.  I selected like colors for each heart but you can make it scrappy if you want!  Sew the group of 4 fabrics together in a 4-patch, pressing seams.

IMG_9183

Print (or trace) 4 hearts onto Heat n Bond Lite.

Cut out 1/8″ around each heart.

IMG_9182

Center the heart on the wrong side of each 4-patch.  Heat set.

IMG_9184

Cut out each heart and peel off the backing paper.  Fuse hearts to the center of the (4) white 6 1/2″ squares. Sew 2 times around each heart with a straight stitch.  Set aside.

IMG_9192

HSTs –  Half Square Triangles

You can make the HSTs however you prefer.  I used my Sizzix machine for quick cutting.  They need to measure 2 1/2″ when they are finished.  You will need a total of 32 HST to make the 4 blocks.

(Quick HST instructions: Draw a diagonal line on the wrong side of the (32) 2 1/2″ back ground squares.  Pair right sides together with a 2 1/2″ square cut from the jelly roll fabric.  Sew along the diagonal line.  Trim 1/4″ along the seam and press toward the dark.)

IMG_9189

Follow the chart below to construct the block:

heart block

Use the (16) background 2 1/2″ squares for the block corners and (16) low volume 2 1/2″  squares from the Jelly Roll for the center squares.

Make 4 blocks.  I chose a color for each block, but you could totally mix up the colors and make them all scrappy!!

IMG_9200

Once the blocks are finished, take the remaining 2 1/2″ squares from the Jelly Roll and piece the sashing and borders. Press all seams open.

Sew (2) strips of 5 squares for the short sashing.  Press

Sew (3) strips of 11 squares for the top, middle, and bottom sashing. Press

Sew (2) strips of 13 squares for the side sashing.  Press

heart block sashing

Make sure to match each seam and pin.

IMG_9210

Use Spray n Bond® for quick basting!  I can’t live without it!!!

IMG_9229

Quilt as desired.  Bind.
IMG_9245

IMG_9236I hope you love making this!!
DSC_0302

Preppy Plaid Tote Bag & Quilt Tutorial

Enchanted blog logo

I am so totally excited to be a part of the Enchanted Blog Tour sponsored by Riley Blake Designs!  You can see the entire collection designed by Dodi Poulsen of Two Sisters at Squirrel Hollow by clicking here 🙂
preppy plaid

When I saw this new fabric line from Riley Blake Designs called Enchanted, my heart stopped.  I took one look at this pink, navy and white plaid and immediately I was transported to a Cape Cod dream!  Sailboats, lobsters, quaint homes and preppy boys on vacation from Harvard 🙂

DSC_0188


IMG_9070
Ok Ok, so I’ve never been to the Cape but a girl can dream right?  I knew I wanted to design something that let this preppy plaid be the focus and something that would be perfect for my sailboat (hahaha).

DSC_0167

I came up with a simple quilt pattern that uses plaid, navy and white.  When only two prints arrived in the mail I began to panic wondering if I had made a terrible decision to make a quilt using only two prints!  I decided to go with my instincts and make the quilt……and I am totally in LOVE!!!!

This quilt really lets the plaid shine in and it’s a great pattern to use if you fall in love with a single fabric print.  The accent blocks are made of 4 half square triangle blocks.

DSC_0213

…..and the quilt fits nicely inside this preppy plaid whale tote bag – made with denim, plaid, and Heat n Bond Fusible fleece.  So, are you ready to set sail for the Cape?  Grab your fabrics and lets get sewing!

DSC_0154

Preppy Plaid Quilt

1/4″ seams 

Supplies

2 yards plaid print

1 yard navy print

1 yard white

Begin by cutting the plaid into (40) 6.5″ squares.

Using the navy blue print and white print sew (160) half square triangles (HST) that measure 3.5″.  You can use any method you like.  I use my Sizzix half square triangle dies!  It is super fast, super easy and no squaring up – just perfection!!

IMG_9037

Die cut 160 navy HSTs and 160 white HSTs.

IMG_9038

Sew the navy and white HSTs right sides together using 1/4″ seam.

IMG_9043

Press seams open.  Continue until you have 160 HSTs.  It’s probably a good idea to put on a movie while doing this!

IMG_9042

Lay out 4 HSTs to make the pattern above.  Sew together as you would a 4-patch.  Press seams open.  Finished block will measure 6.5″.  Make 40 of these blocks.

IMG_9045

Cut 40 squares measuring 6.5″ out of the plaid.

DSC_0121

Sew the blocks together (1/4″ seams) as you would a checkerboard, alternating each block.  Make sure the pieced blocks are going the same direction.  Press the seams toward the plaid.  There are 8 blocks across and 10 rows down.

IMG_9046

Baste (I always use Spray n Bond basting spray)

IMG_9056

Quilt.

IMG_9075

Bind.

DSC_0142

Love.

DSC_0089

Mufasa and I love sewing on rainy days!!

DSC_0098

DSC_0220

Tote Bag Instructions

I used my pattern, Quilted Tote Bag, for the measurements.  I followed the pattern pretty closely with the following exceptions:

  • I added an appliqué to the main bag.
  • I used denim.
  • I did not quilt the bag; I stabilized it with fusible fleece.
  • I came up with a new way to sew the handles (continue reading)
  • I omitted the inside pocket
  • I simplified how to make the bag bottom

Supplies

Denim (2) 20″ x 10.5″

Plaid (2) 20″ x 9.5″

Lining (2) 20″ x 19.5″

Plaid for handles (2) 5″ x 28″

Heat n bond medium stabilizer (2) 5″ x 28″

Heat n Bond Fusible Fleece (2) 20″ x 19.5″

Piece of plaid for the whale

Heat n Bond Lite

Appliqué the whale  Click HERE for the whale pattern.

IMG_9093

You can print the whale directly on Heat n Bond Lite EZ print sheets, or trace the whale onto Heat n Bond Lite.

Heat set the whale to the wrong side of the plaid fabric.

Cut out the whale.  Peel off the backing paper.

IMG_9094

Press it onto one of the denim pieces, centering.  Using 1/4″ seams, sew the denim piece to the plaid piece to make the bag front and back.  Press seams.

IMG_9099

Fuse the Heat n Bond Fusible fleece to the wrong side of the bag front and the bag back.  Add some accent stitching along the seam.

Bag Handles

Fuse the stabilizer to the wrong side of each of the handle strips.

Press in half lengthwise.  Open up and press the long ends in to meet the center.  Press.  Then press in half again.  This makes a super sturdy handle!

IMG_9095

Topstitch along both of the long edges of each handle.

IMG_9096

IMG_9097

Continue following the bag instructions from this tutorial to complete the bag.  To make the bag bottom, cut a 3″ notch out of the bottom corners of the bag and the lining.

IMG_9100
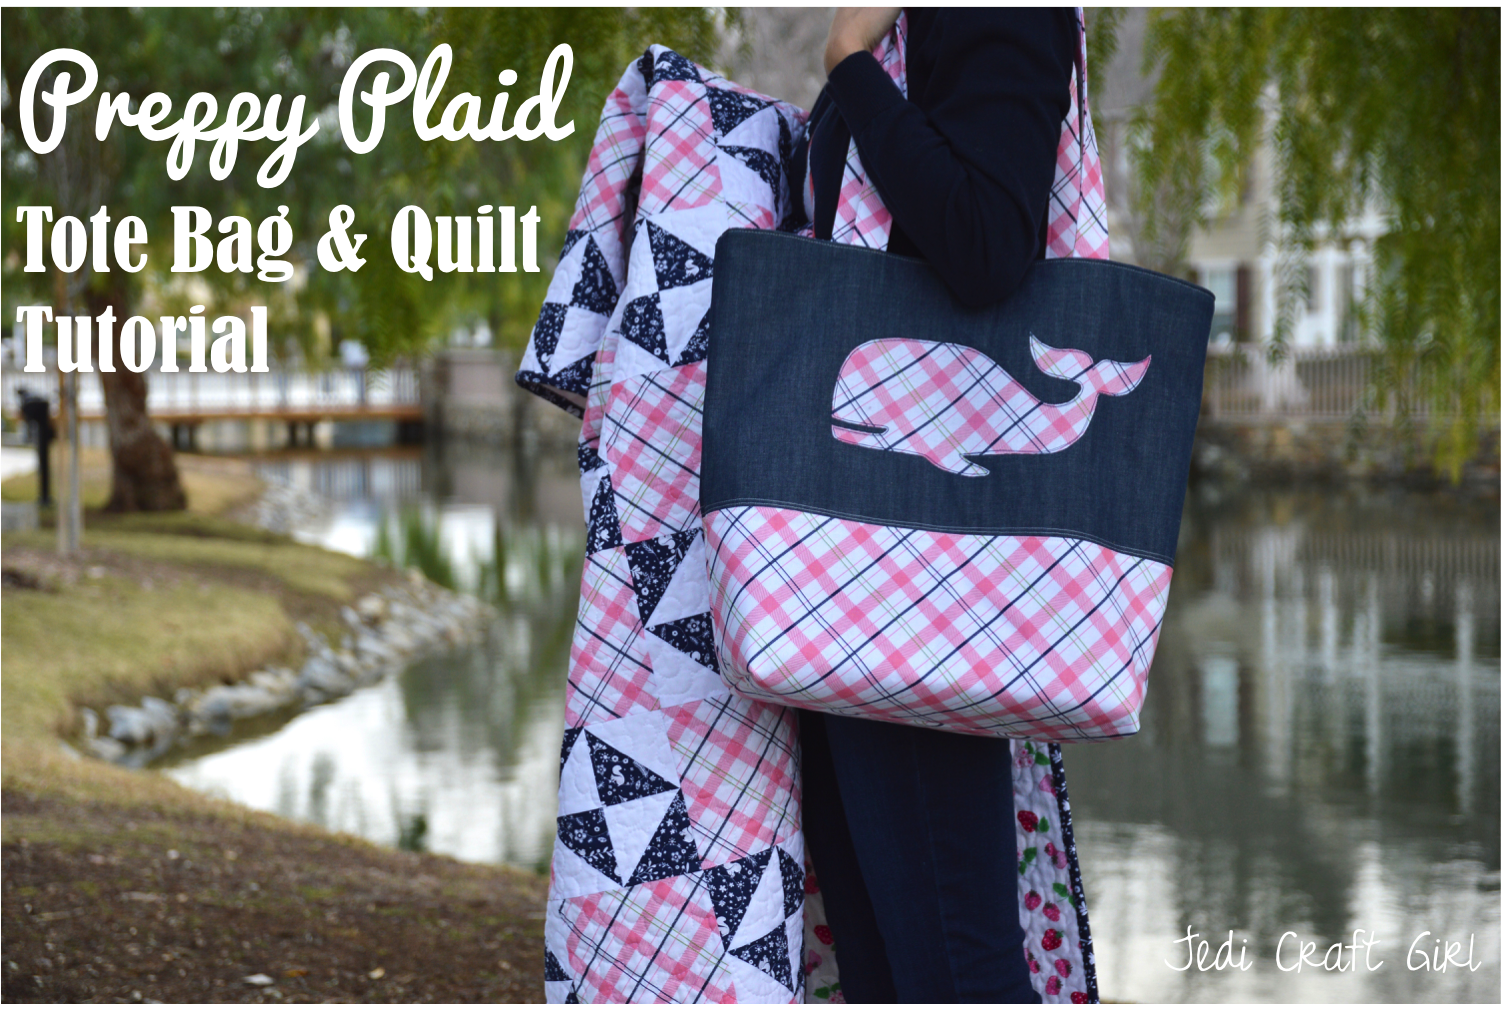
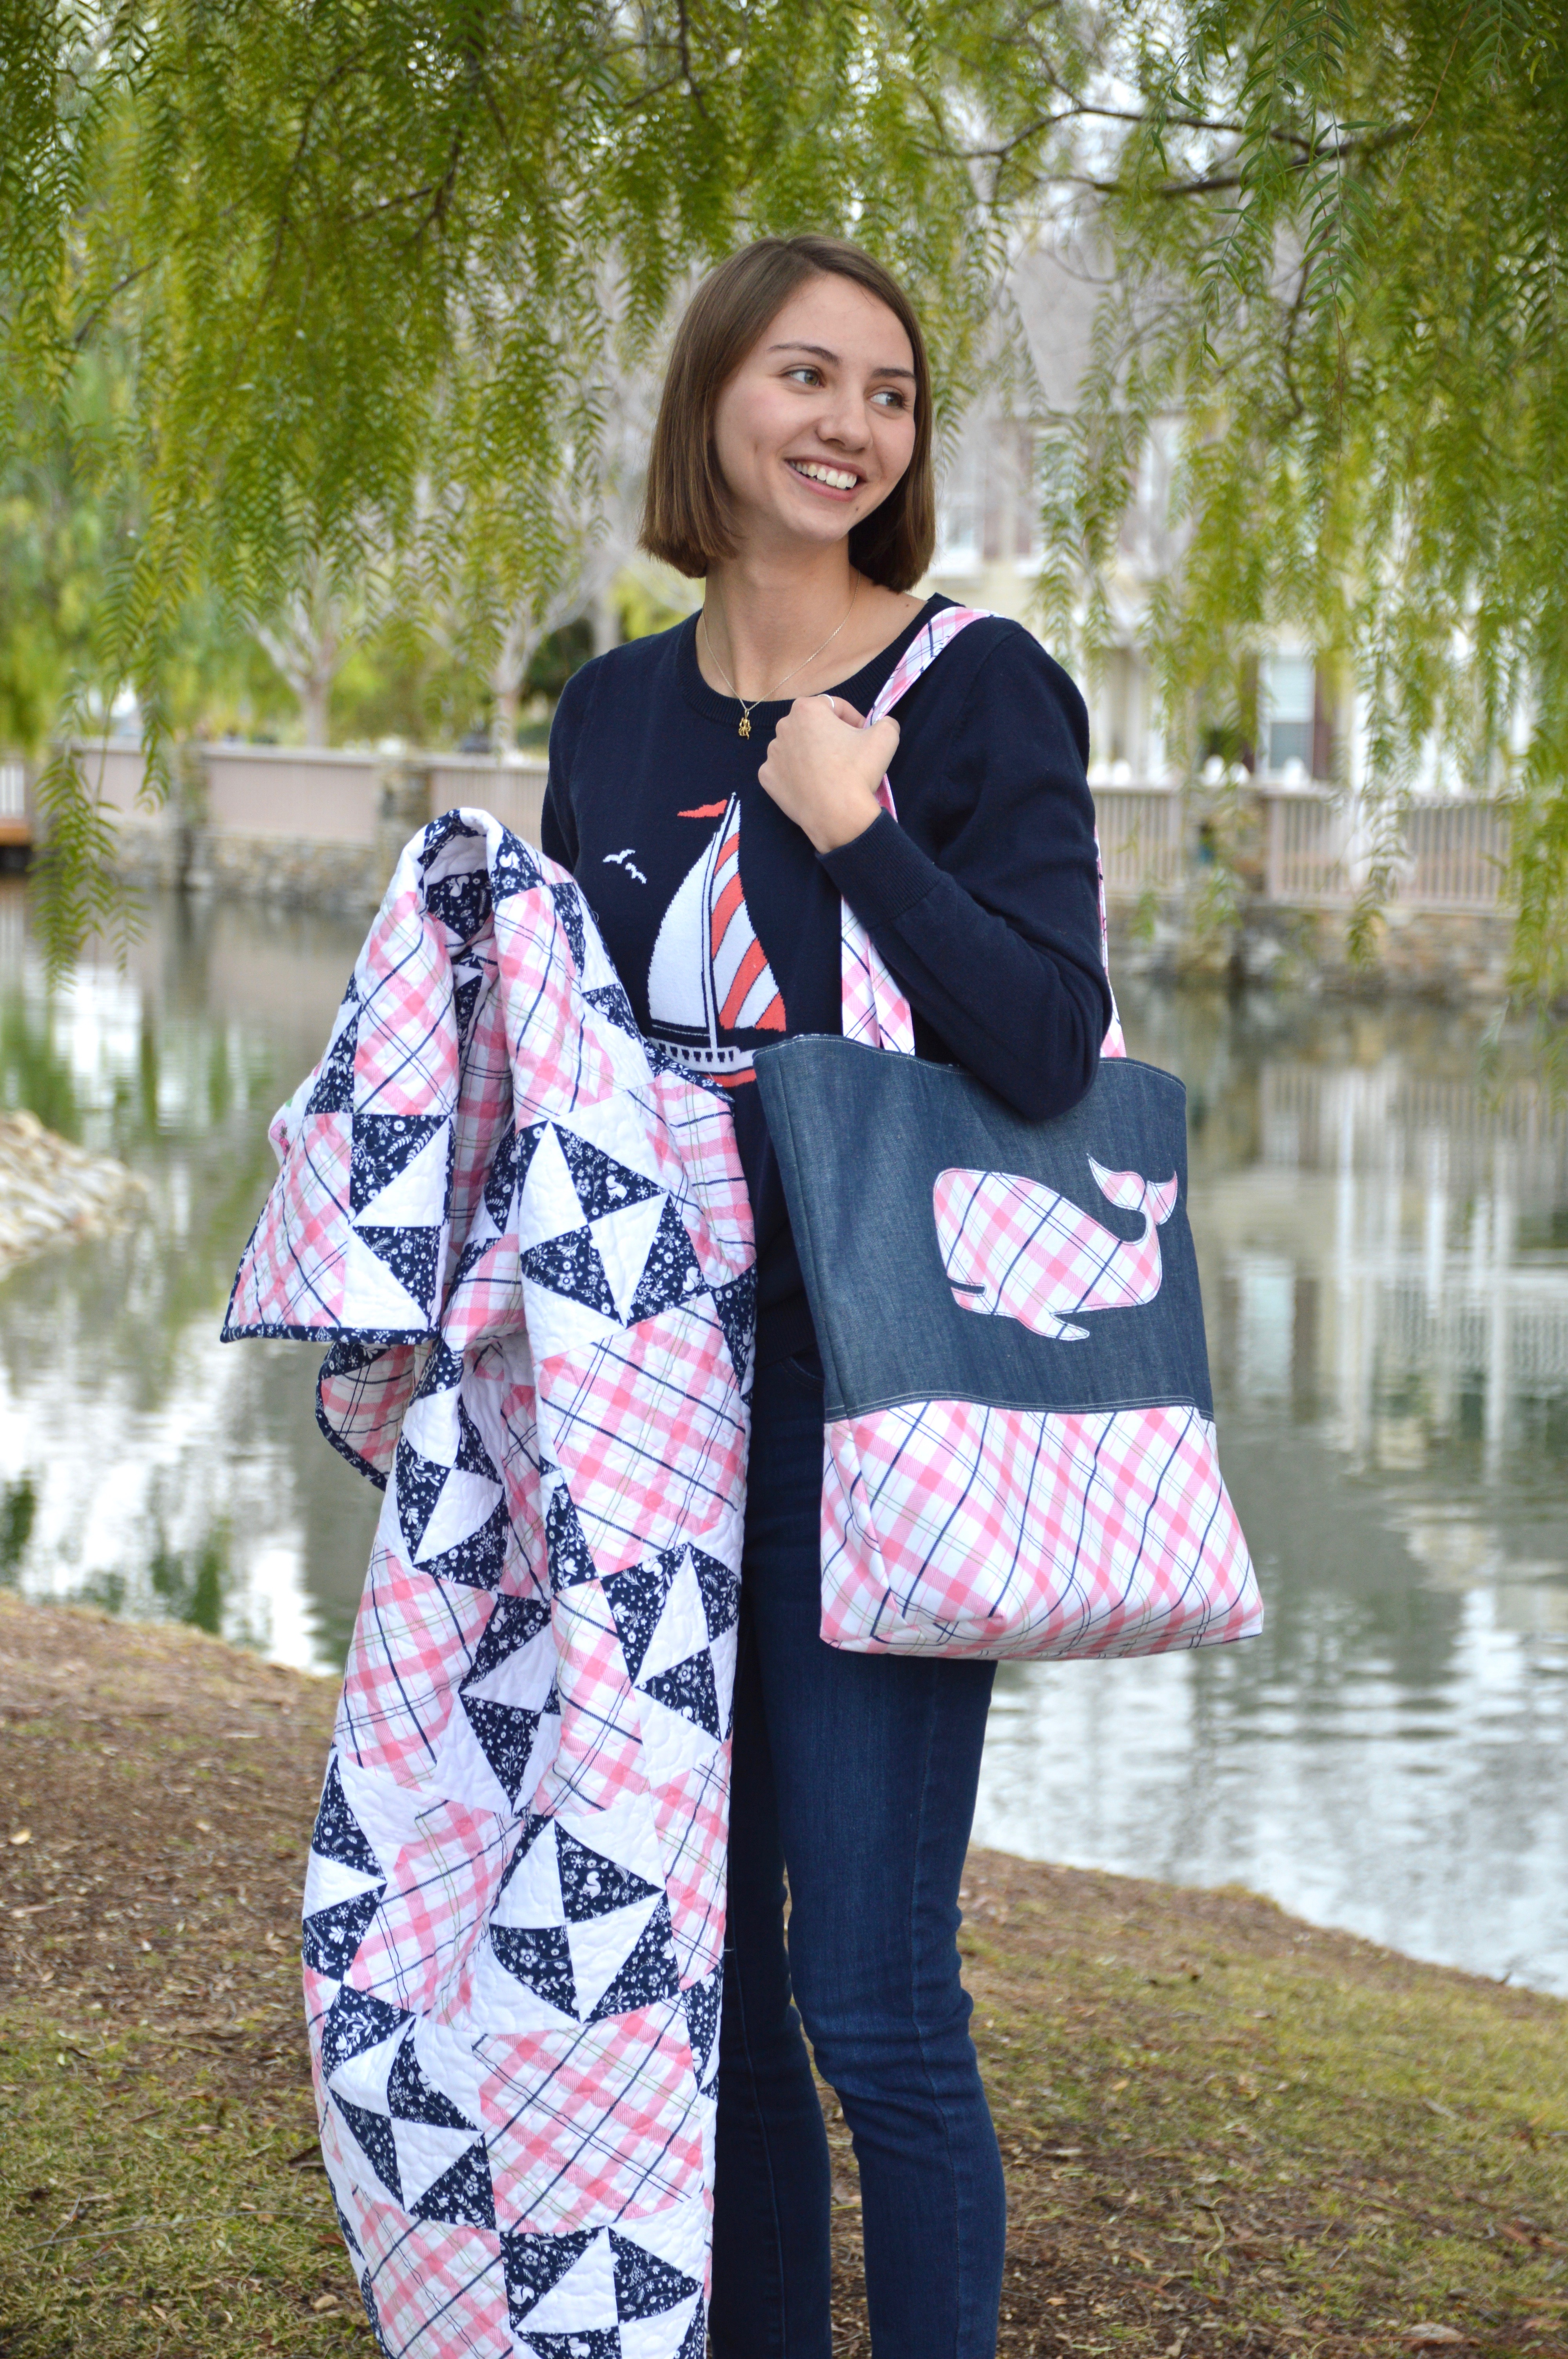
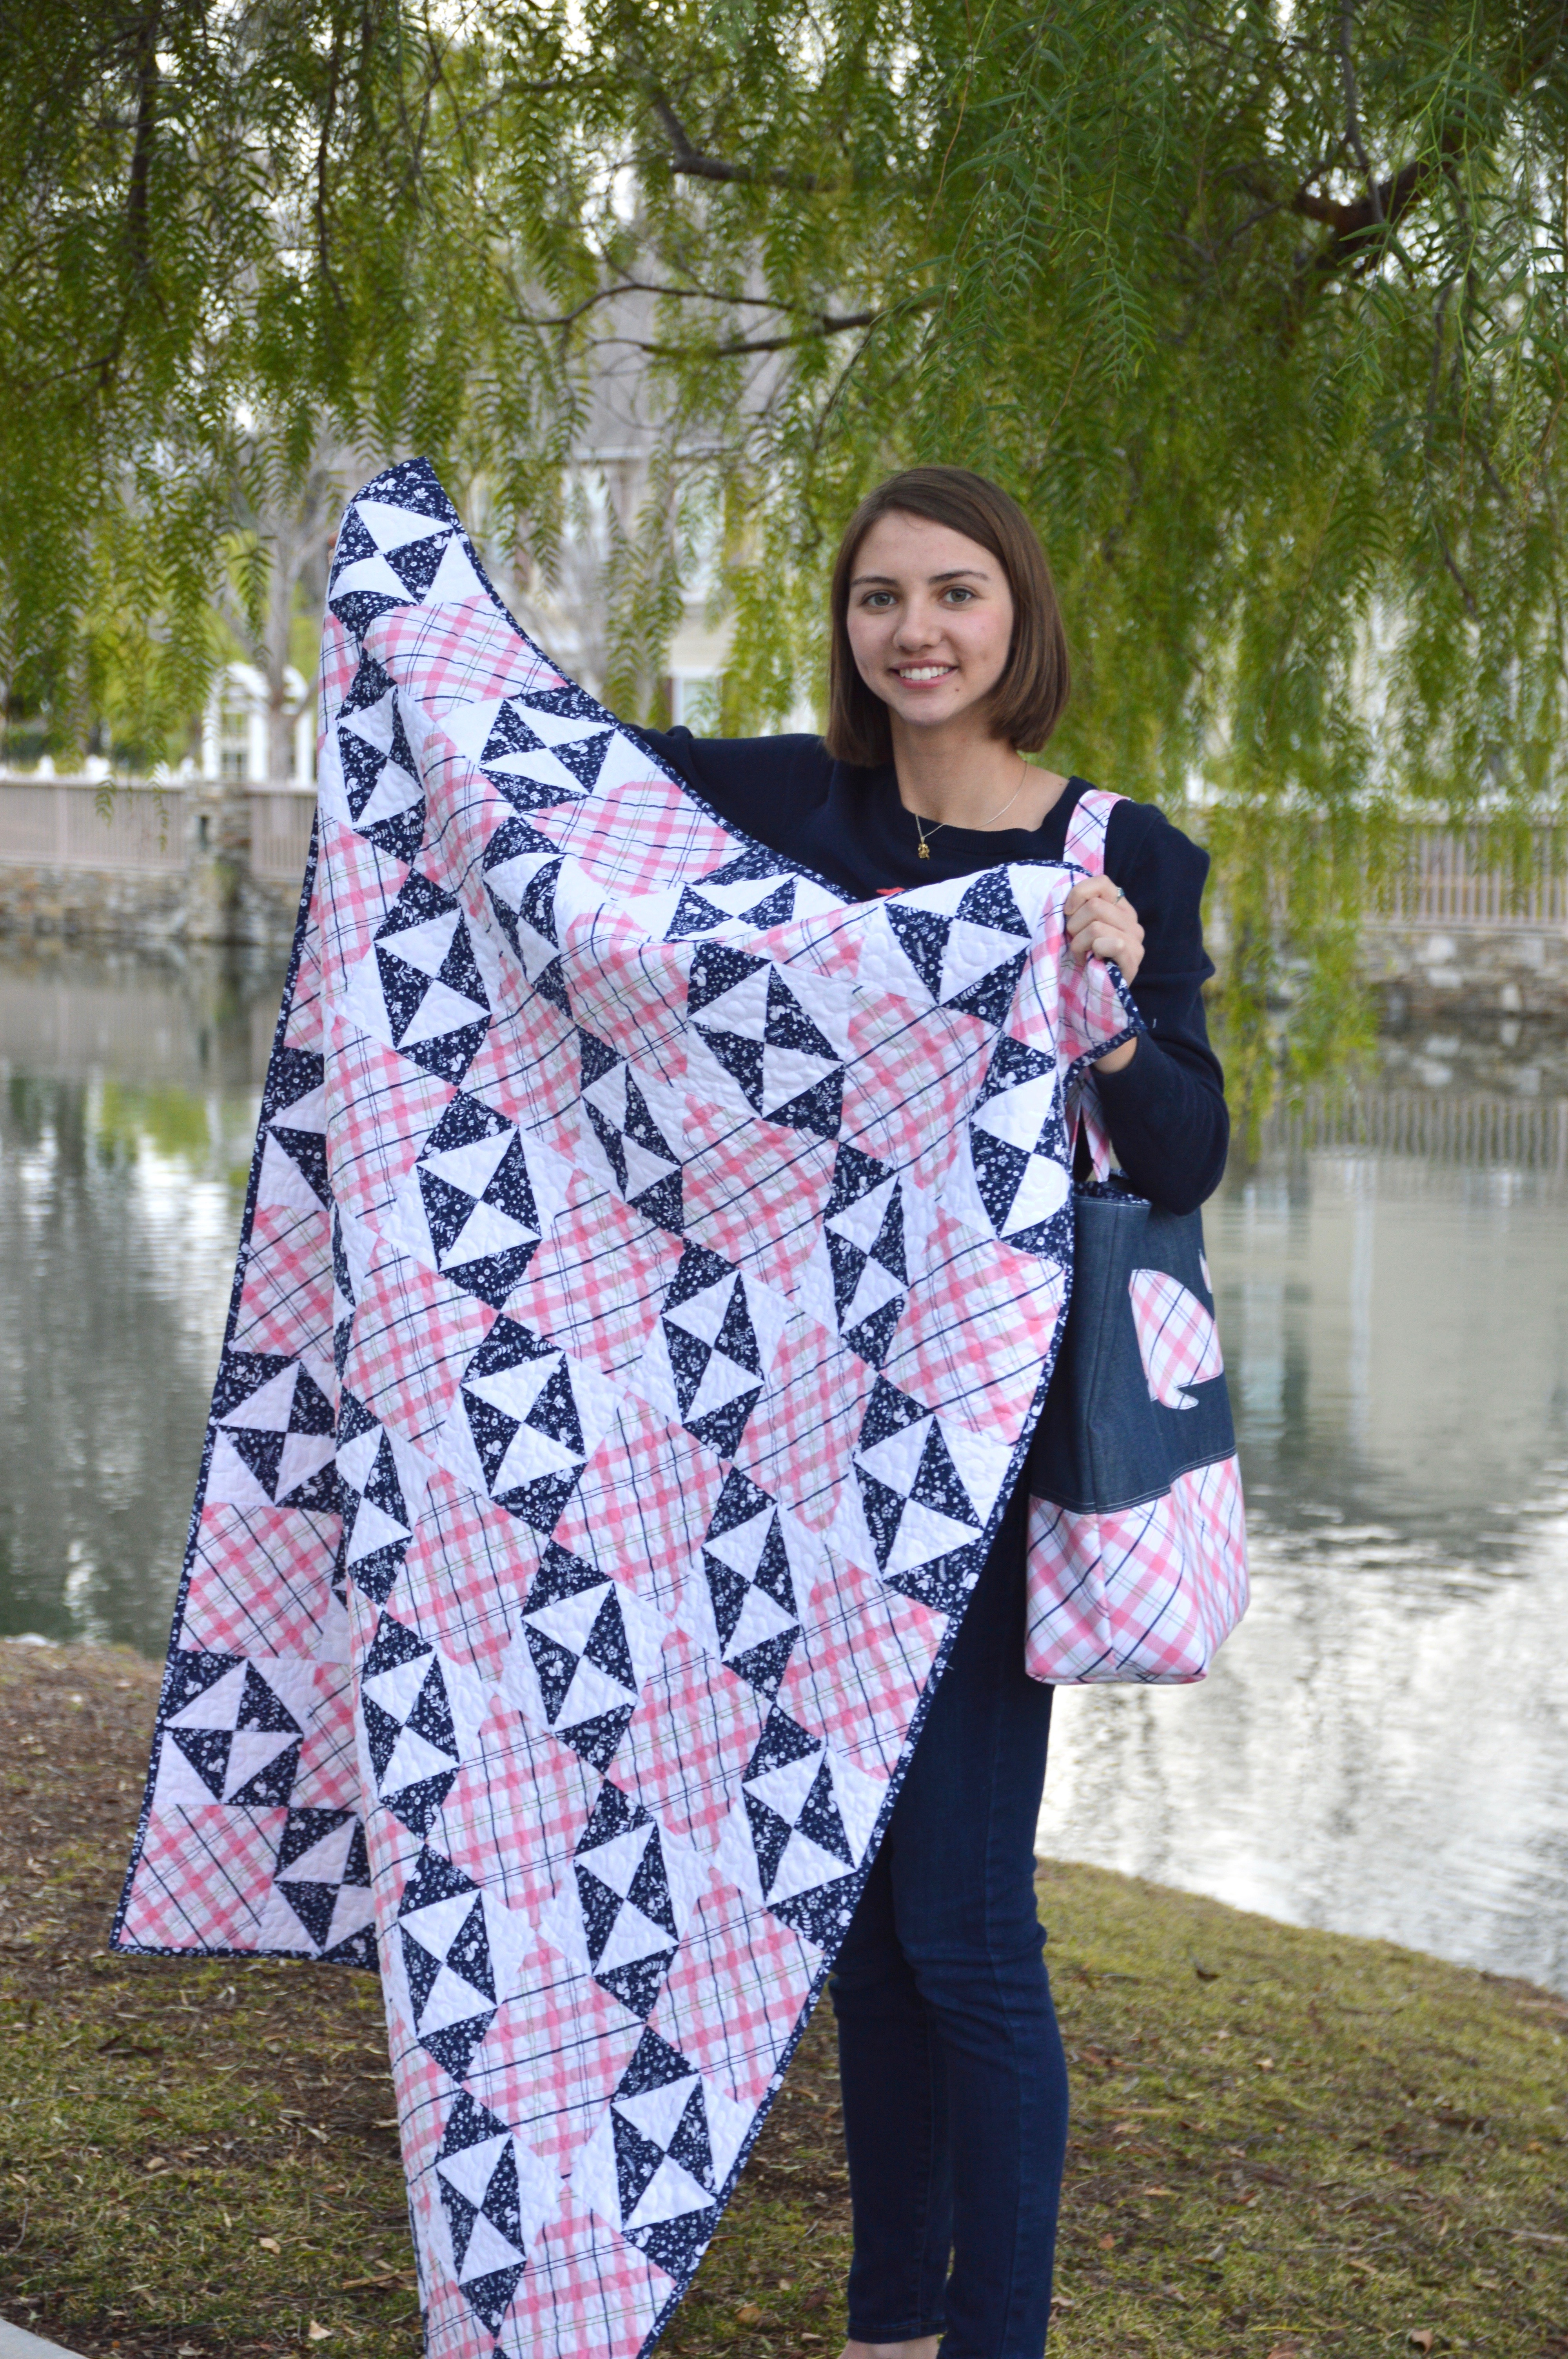
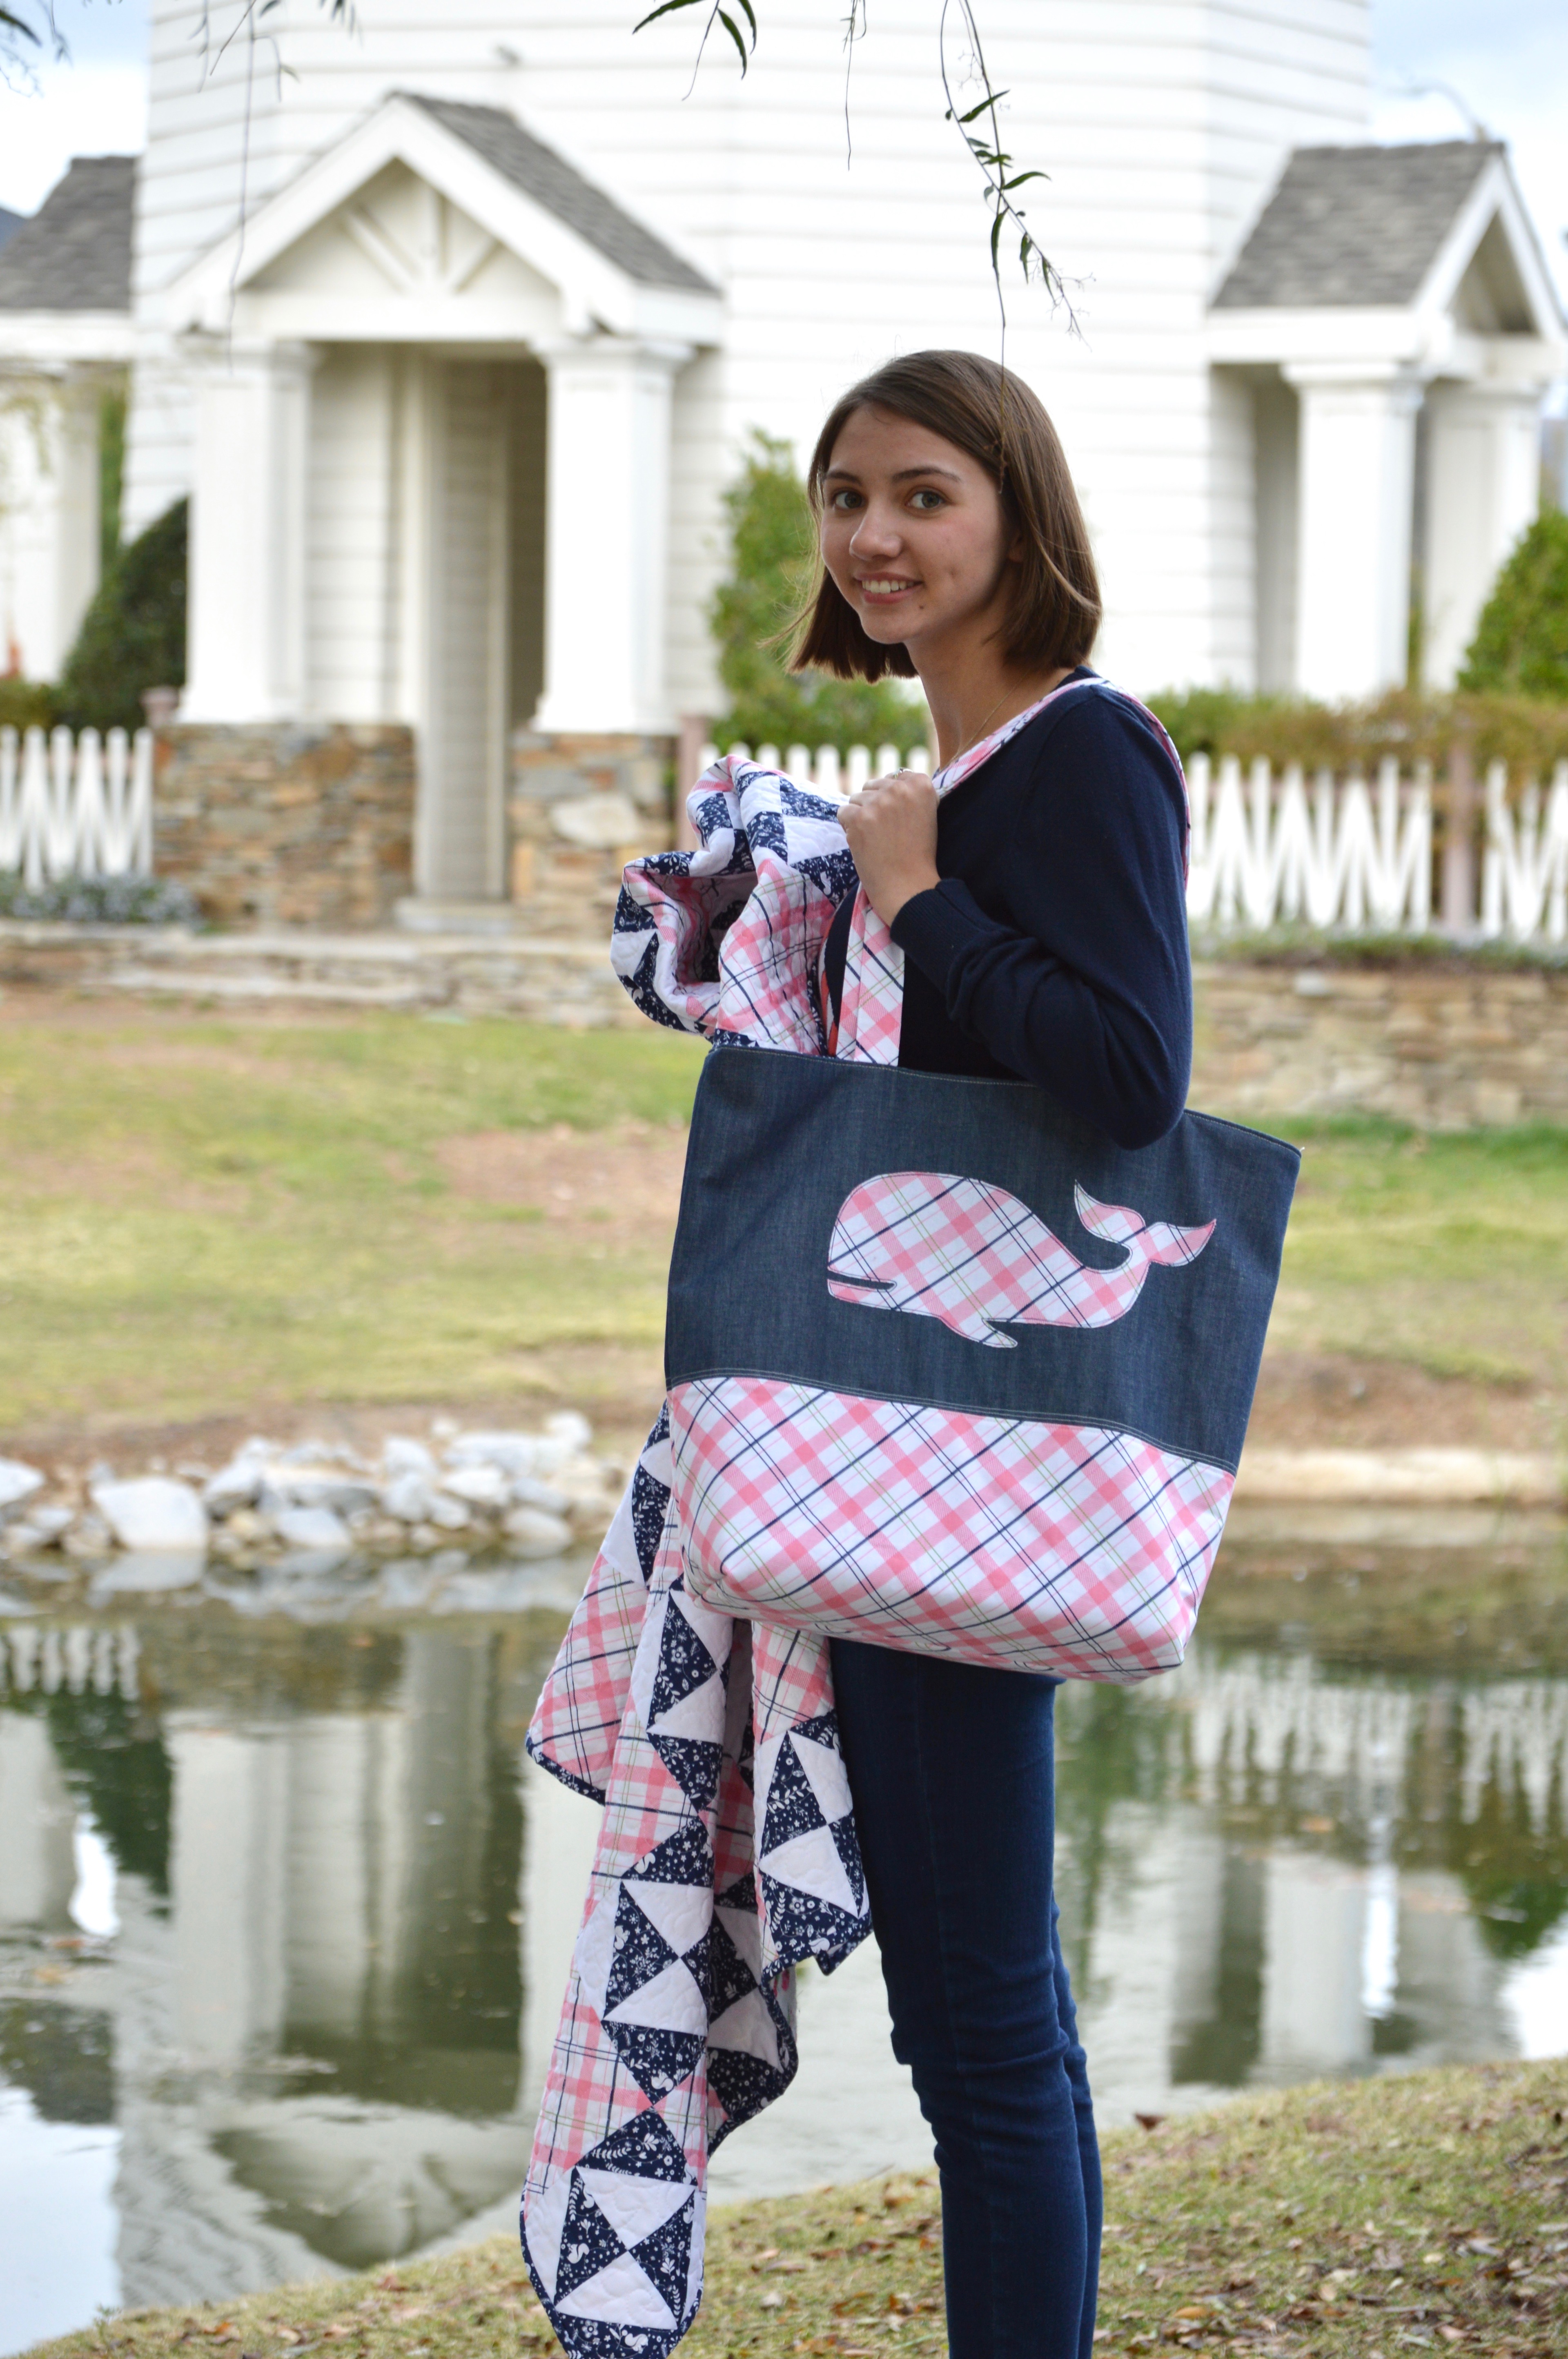
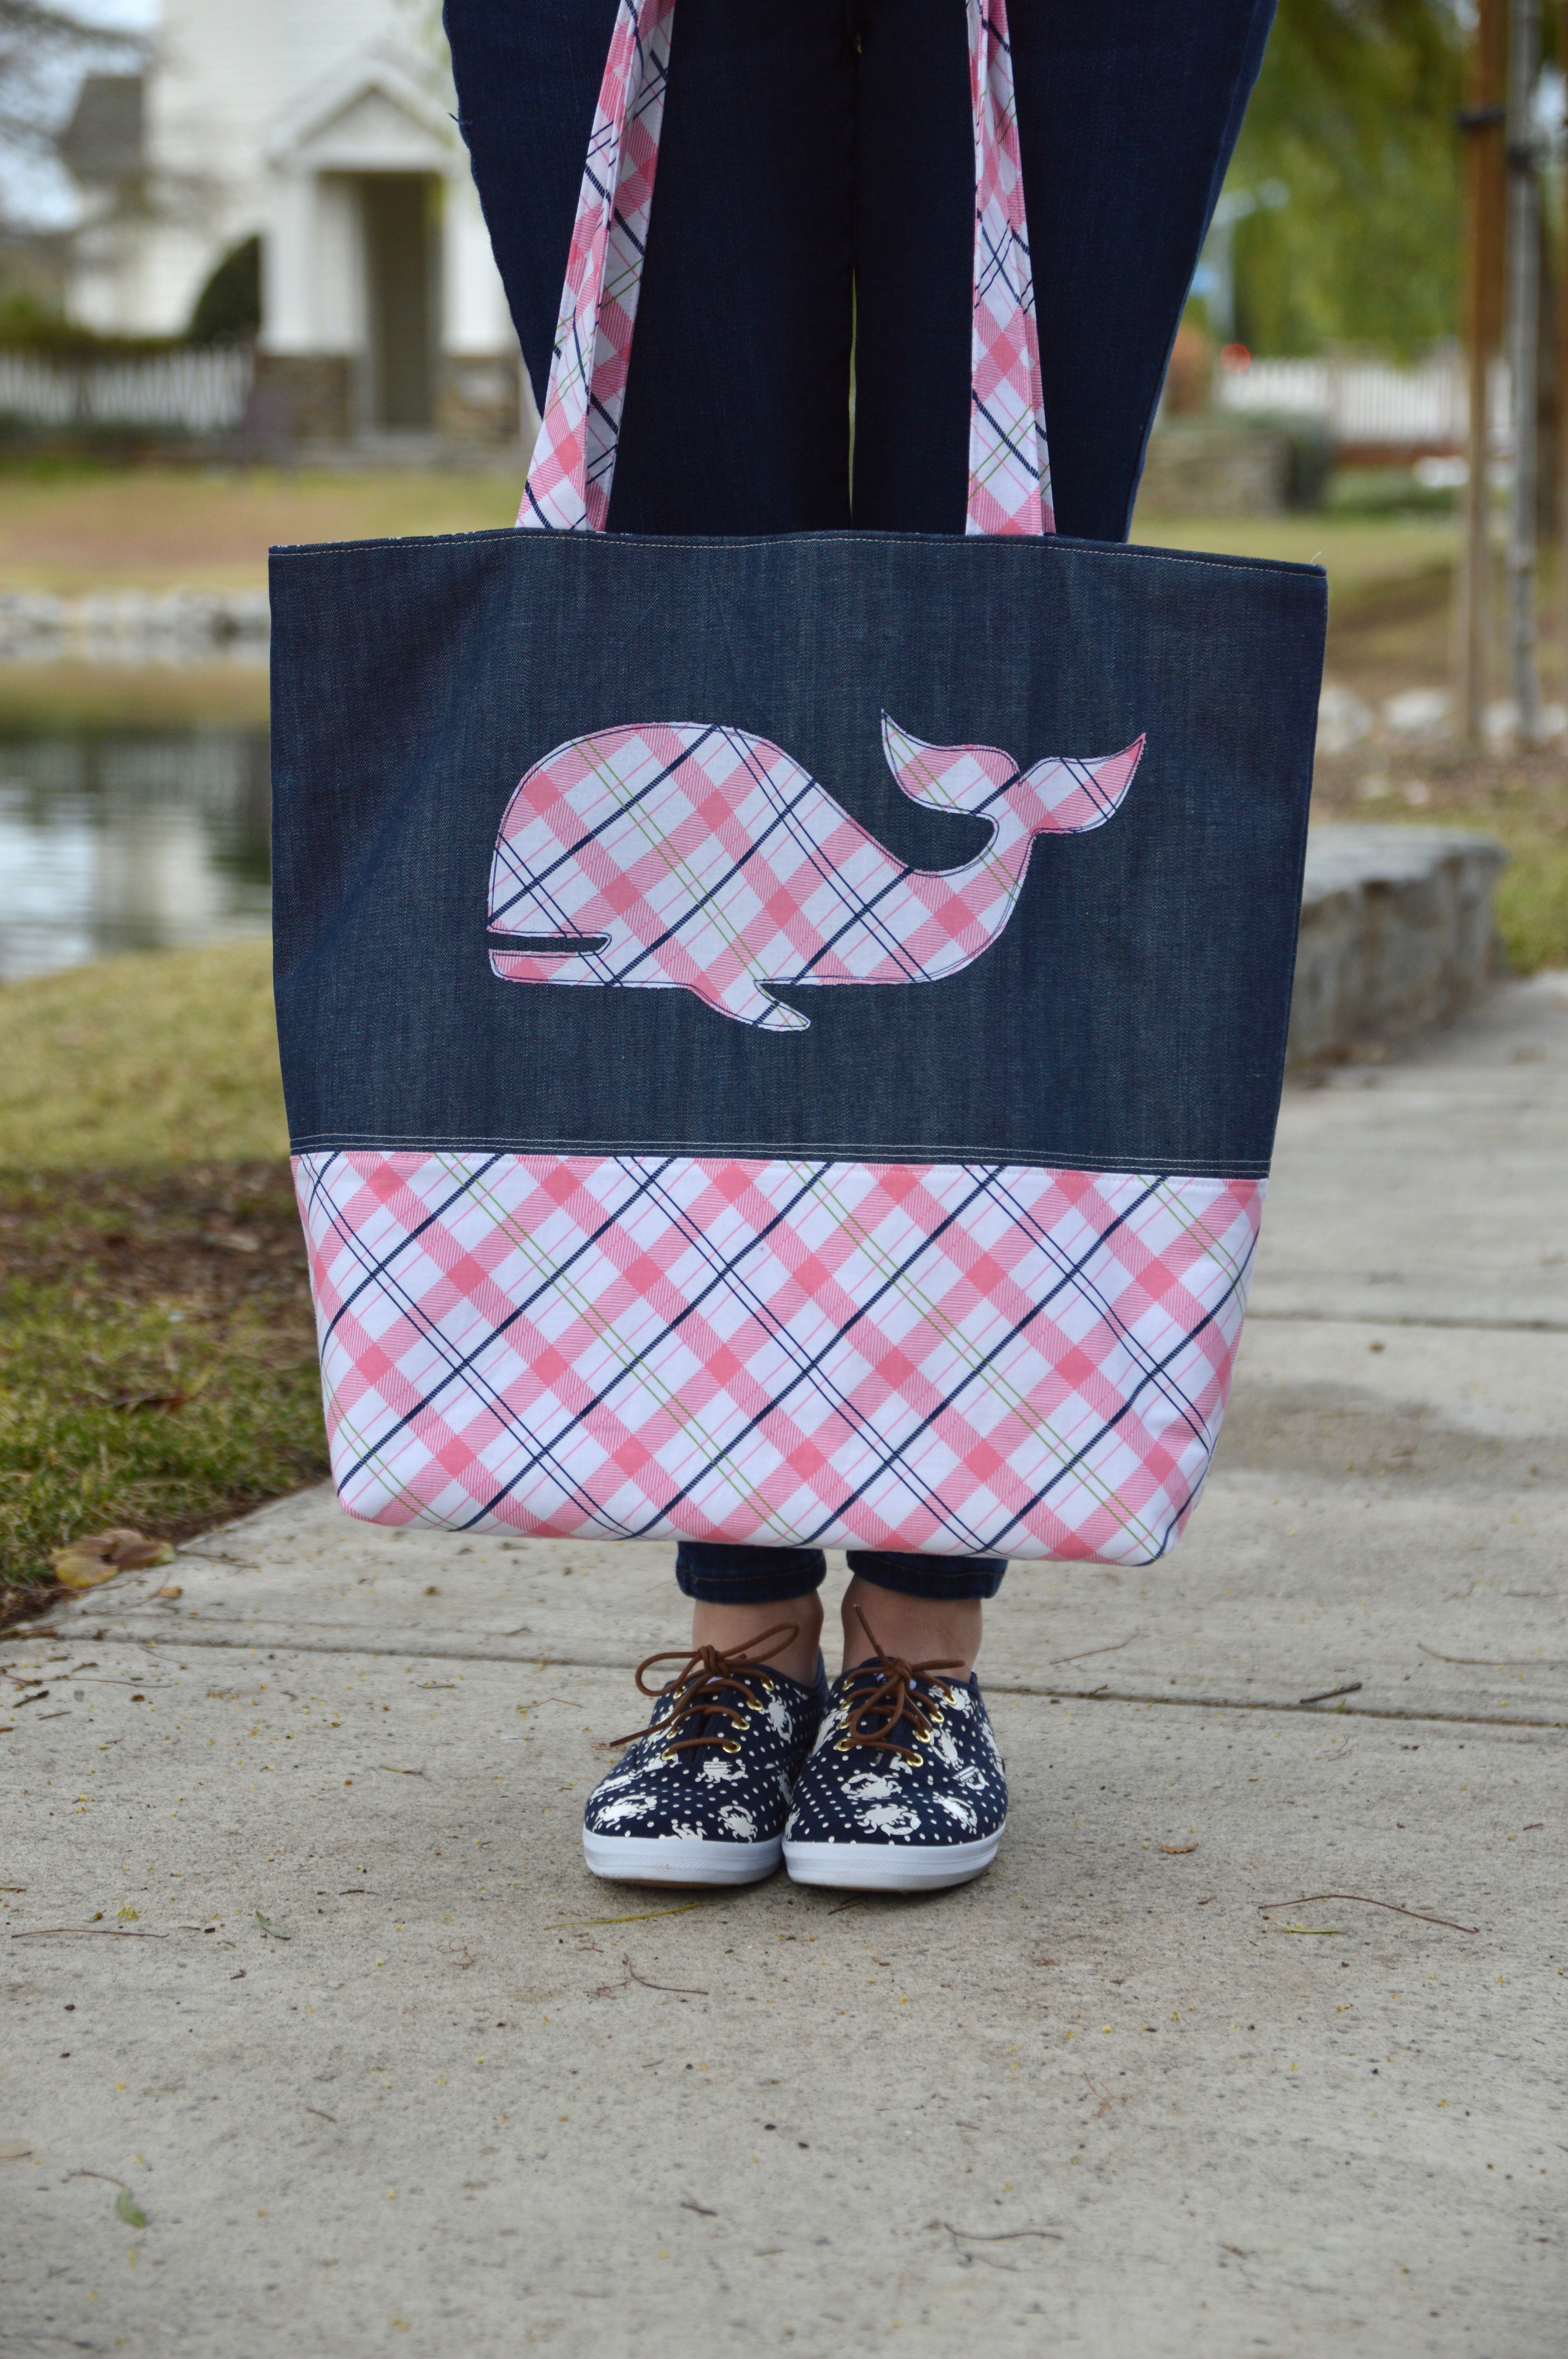
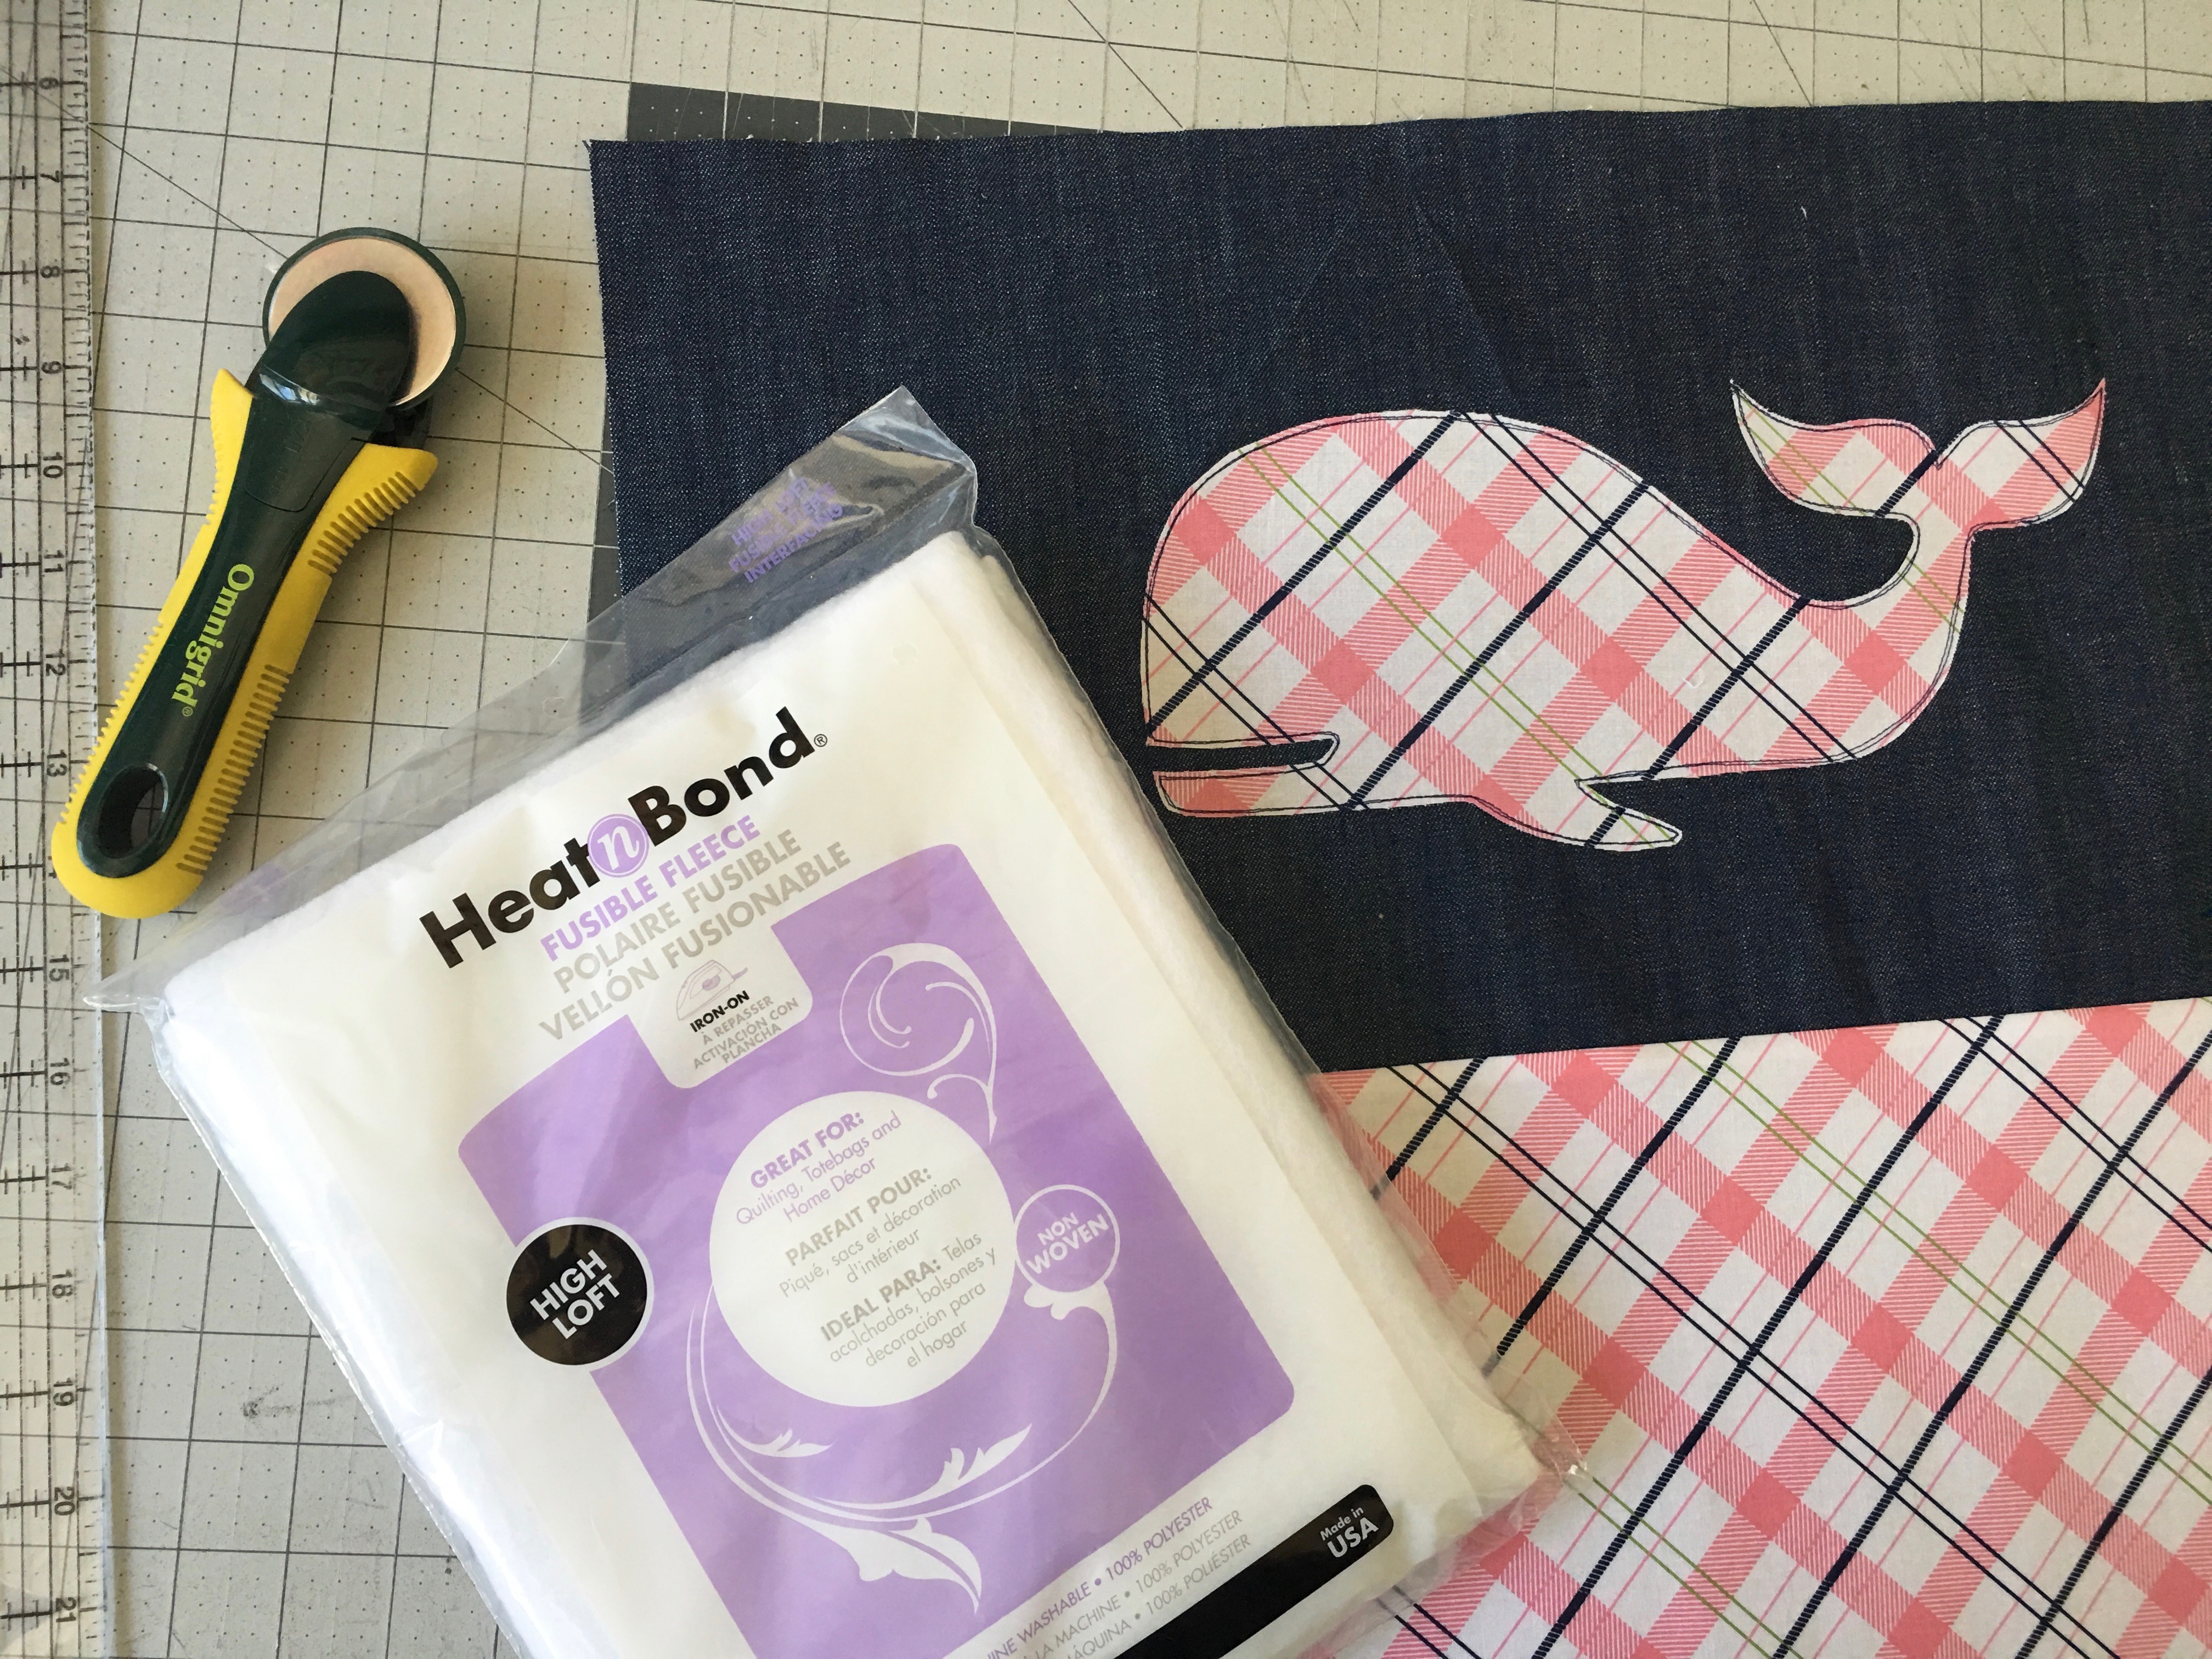
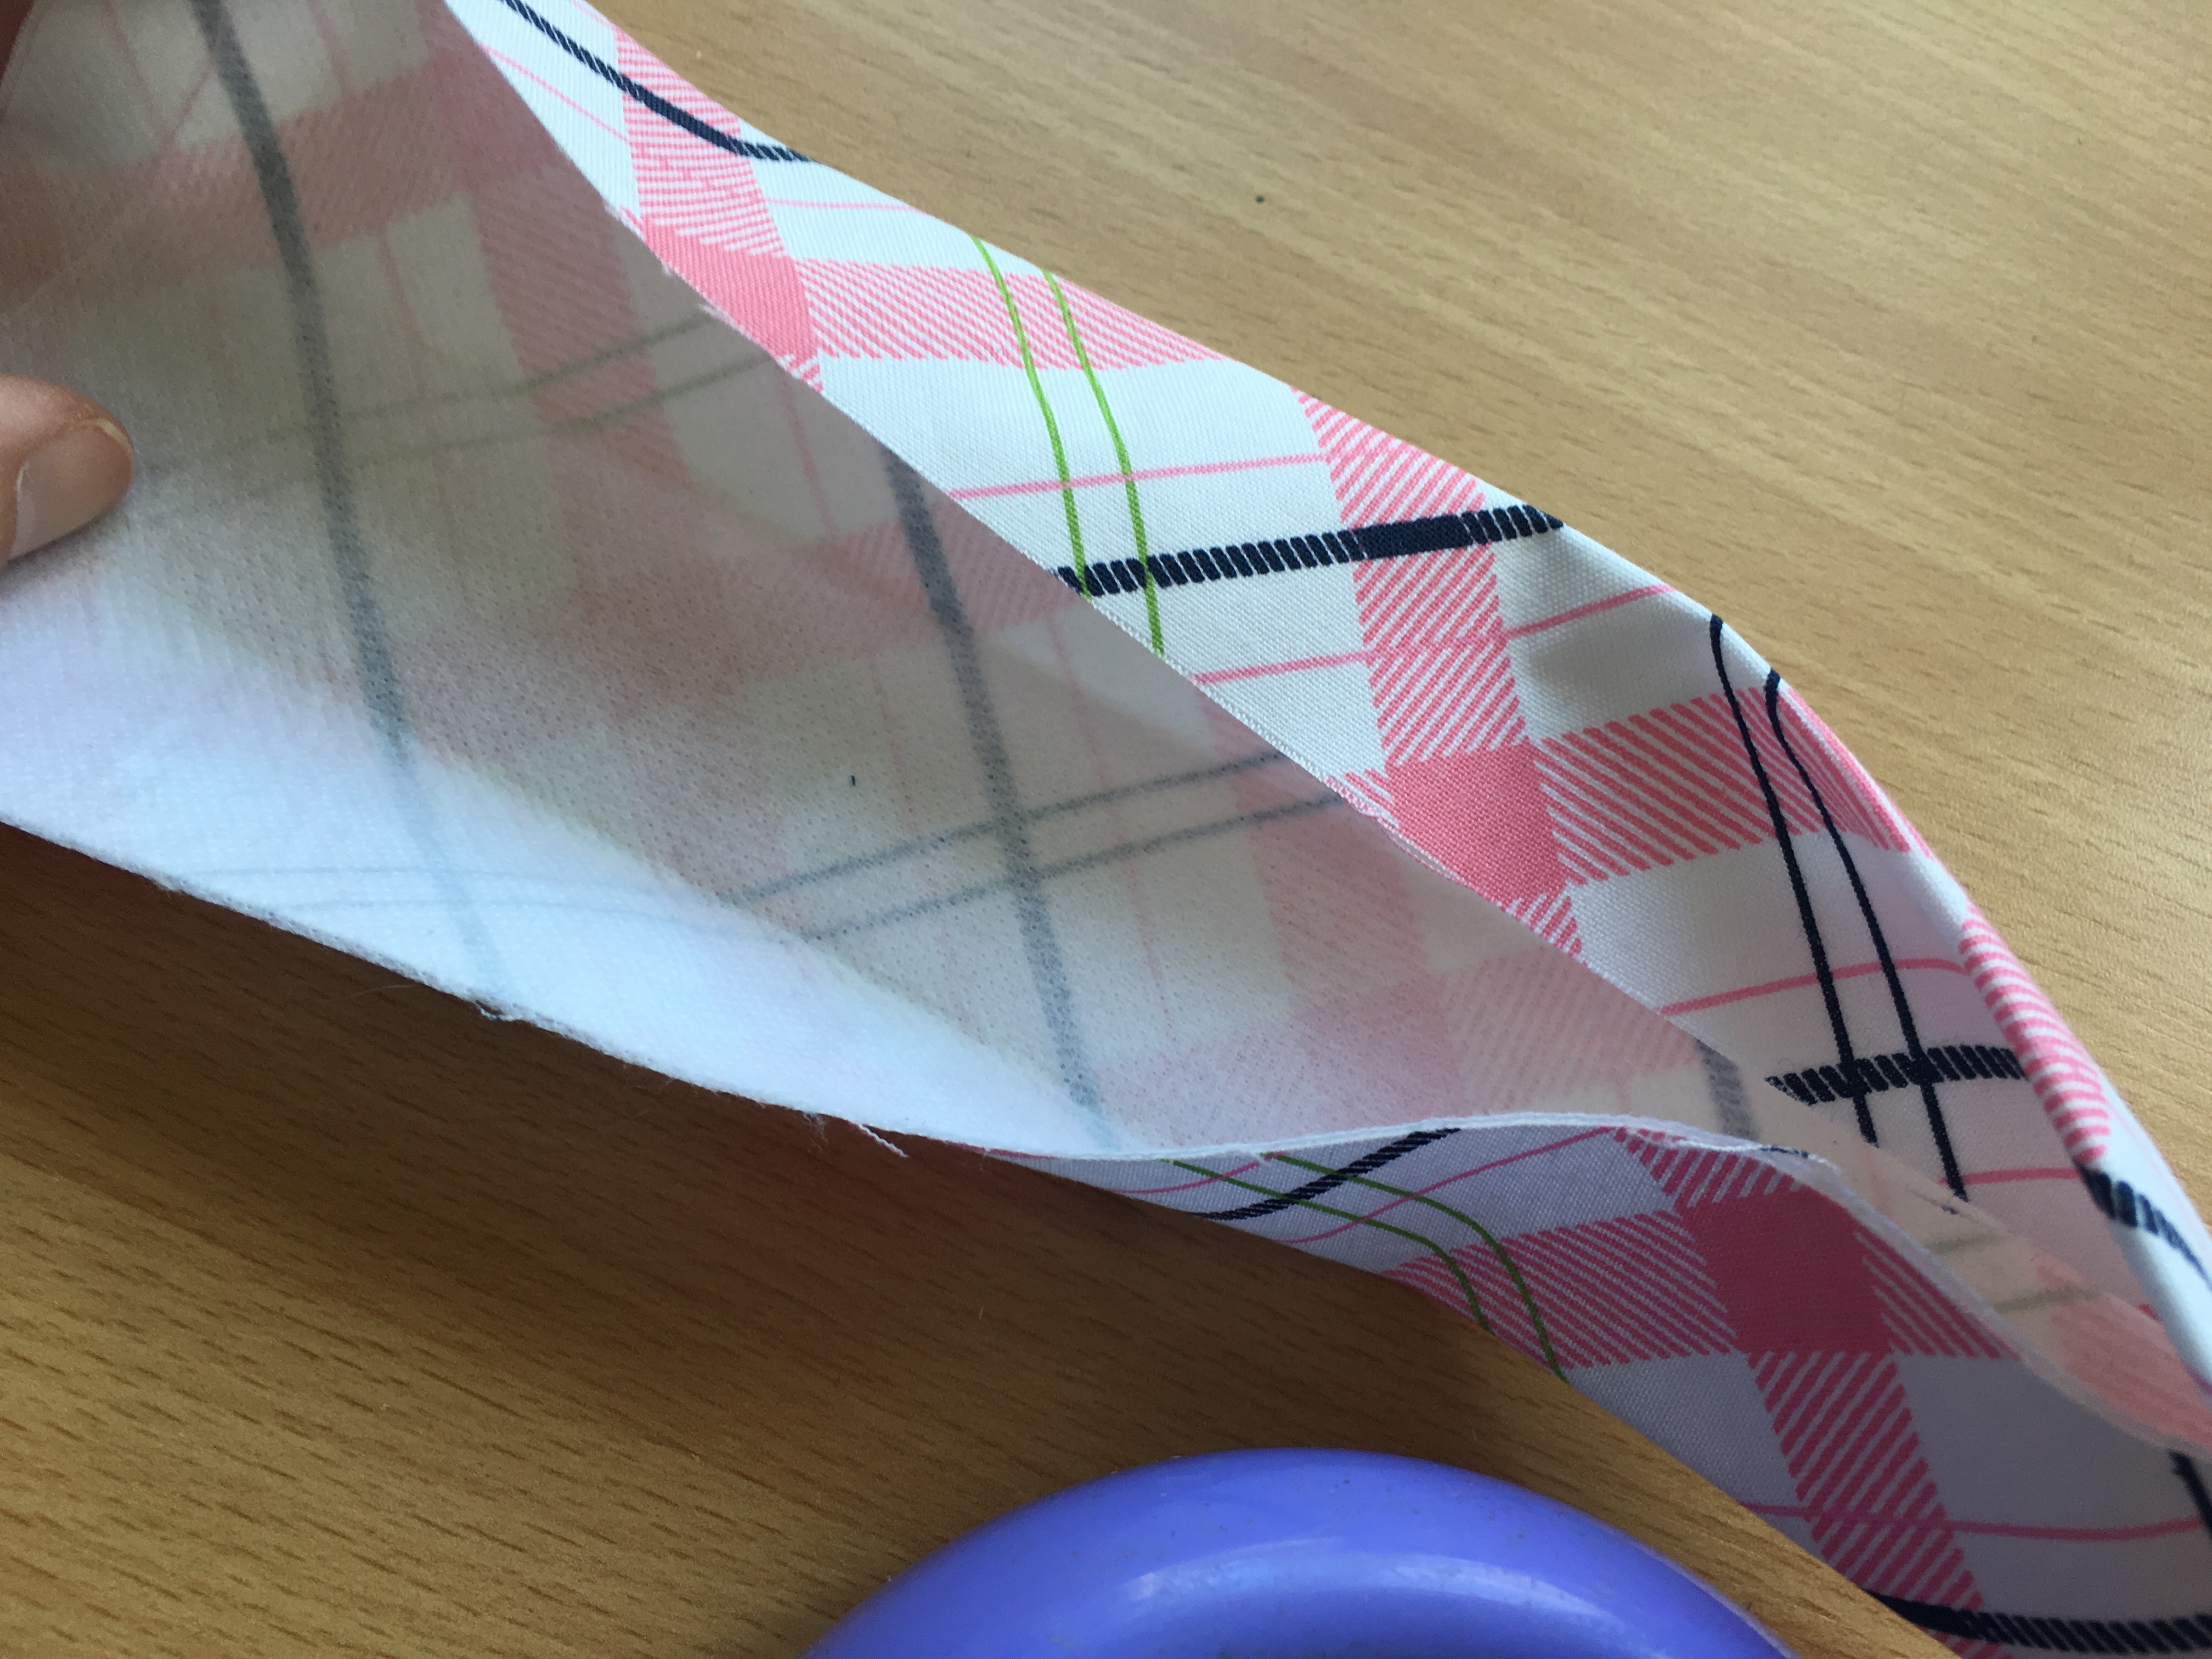
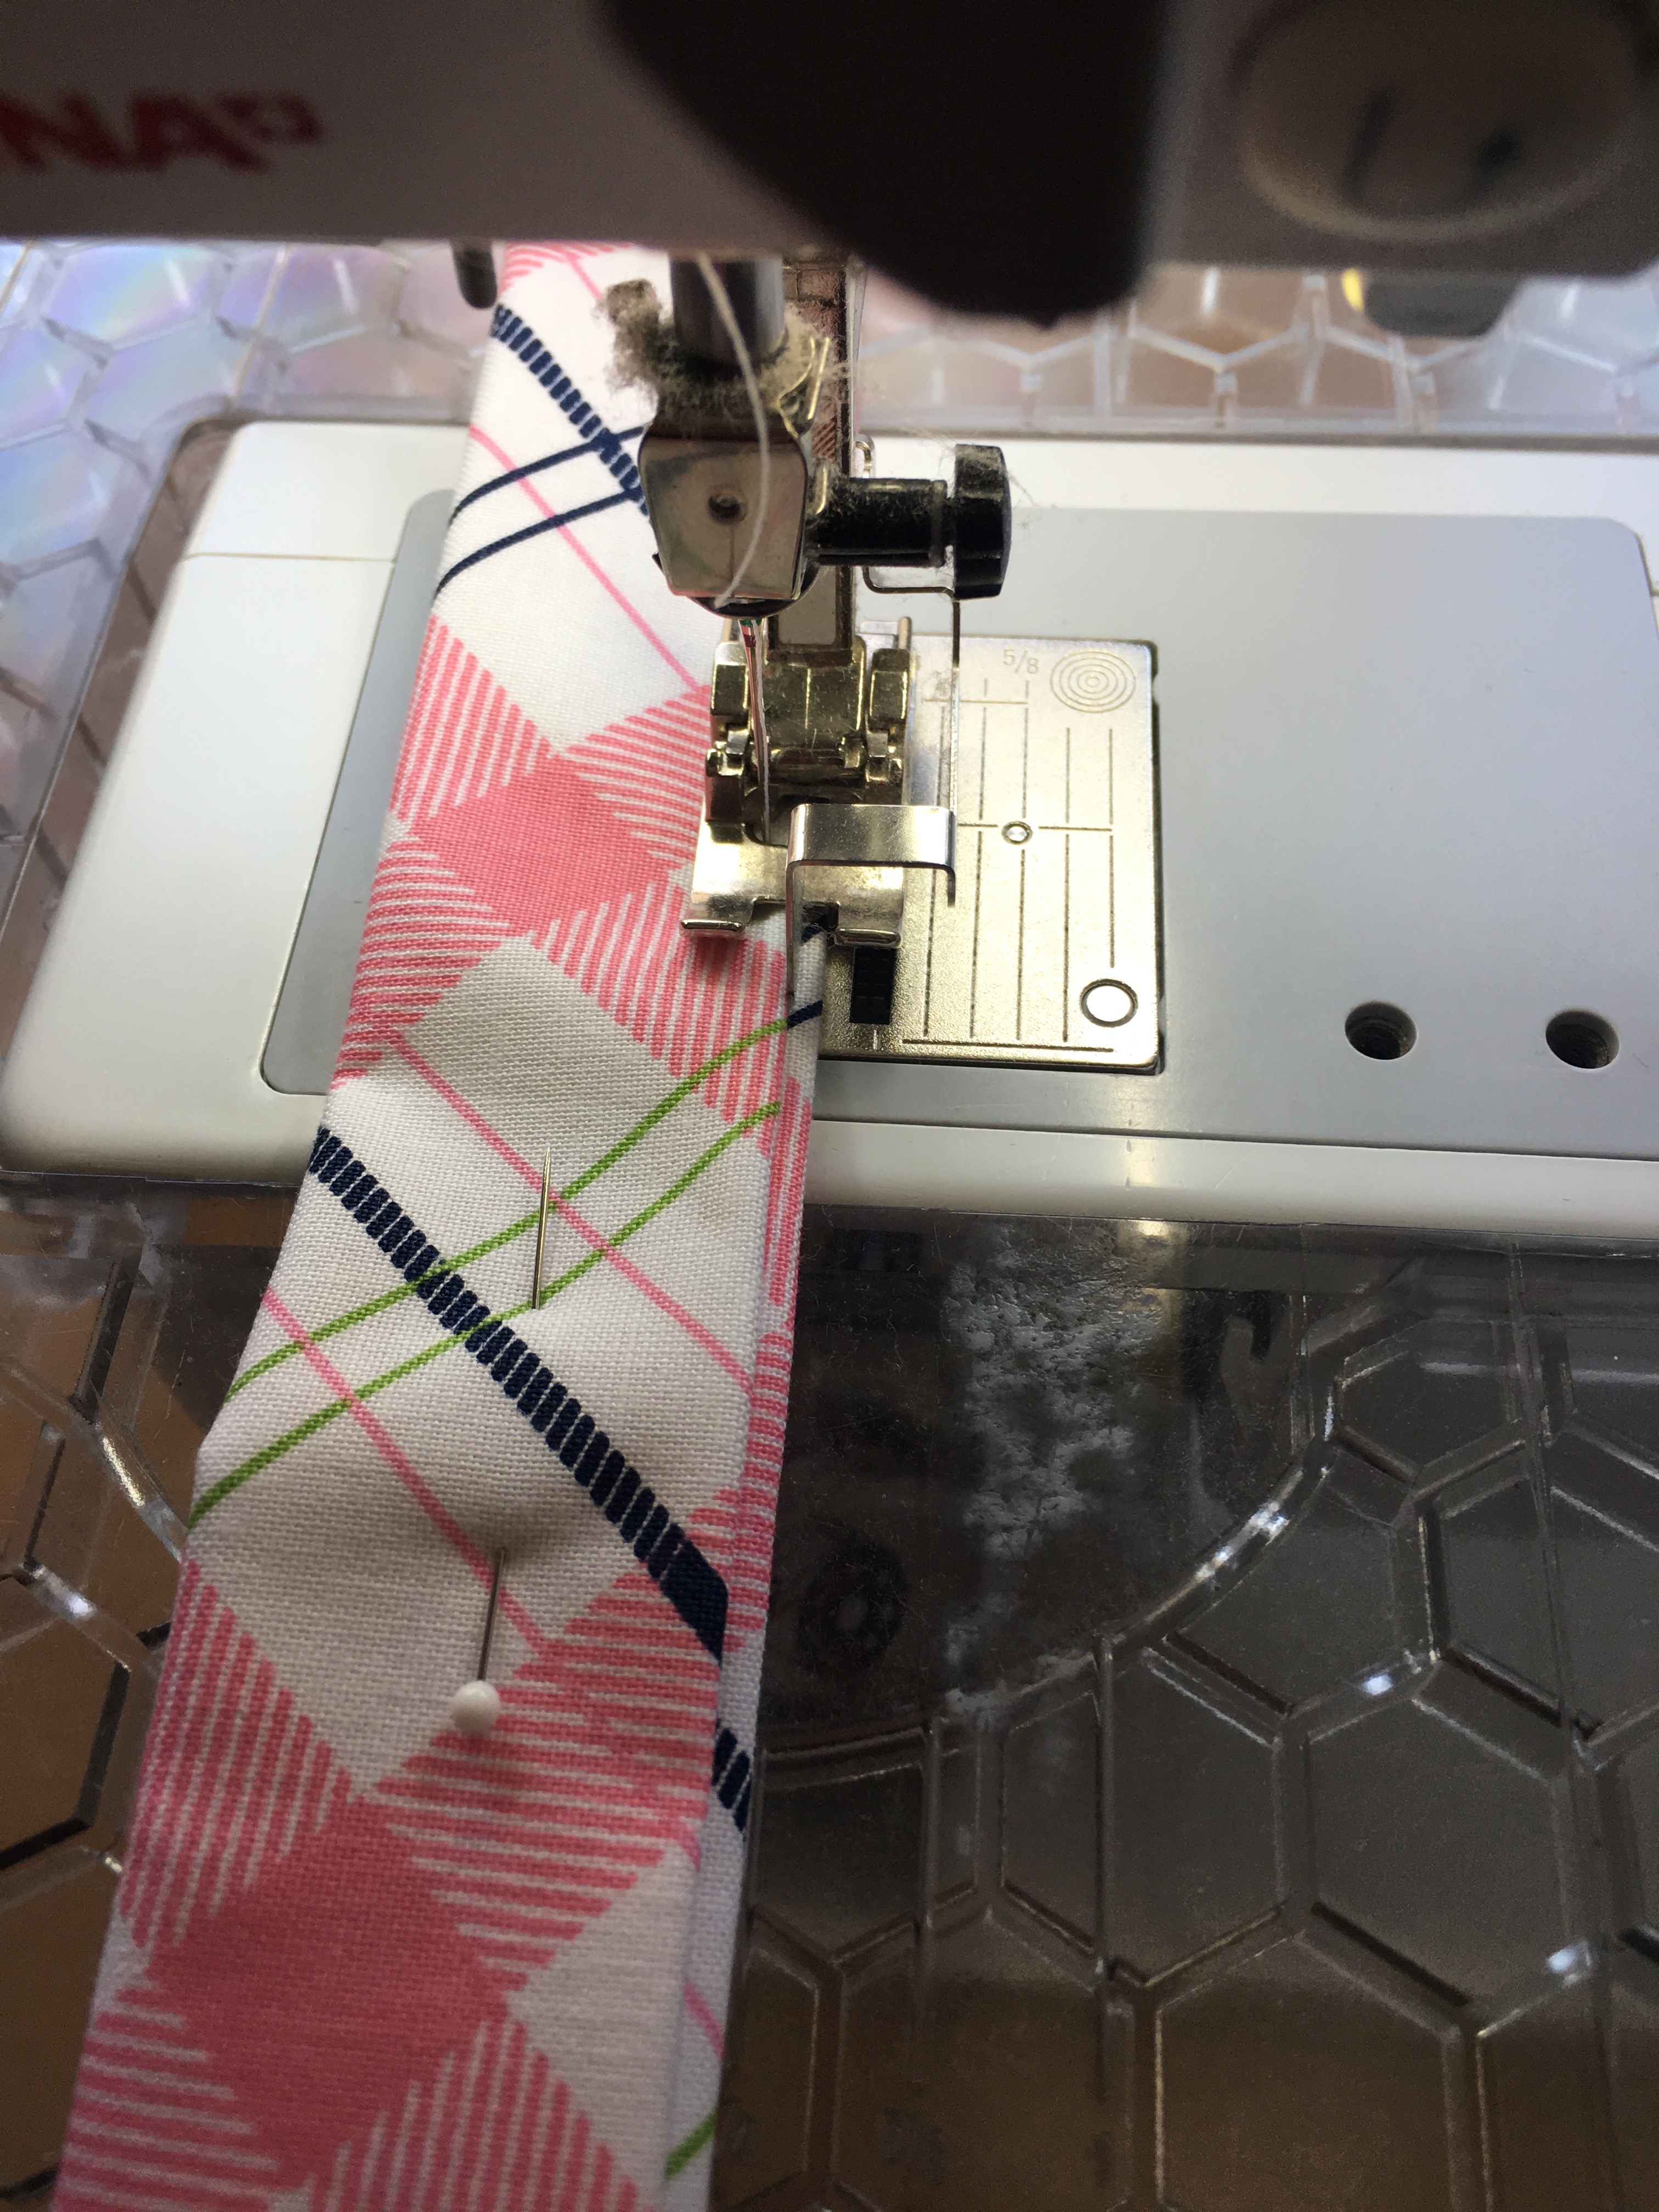
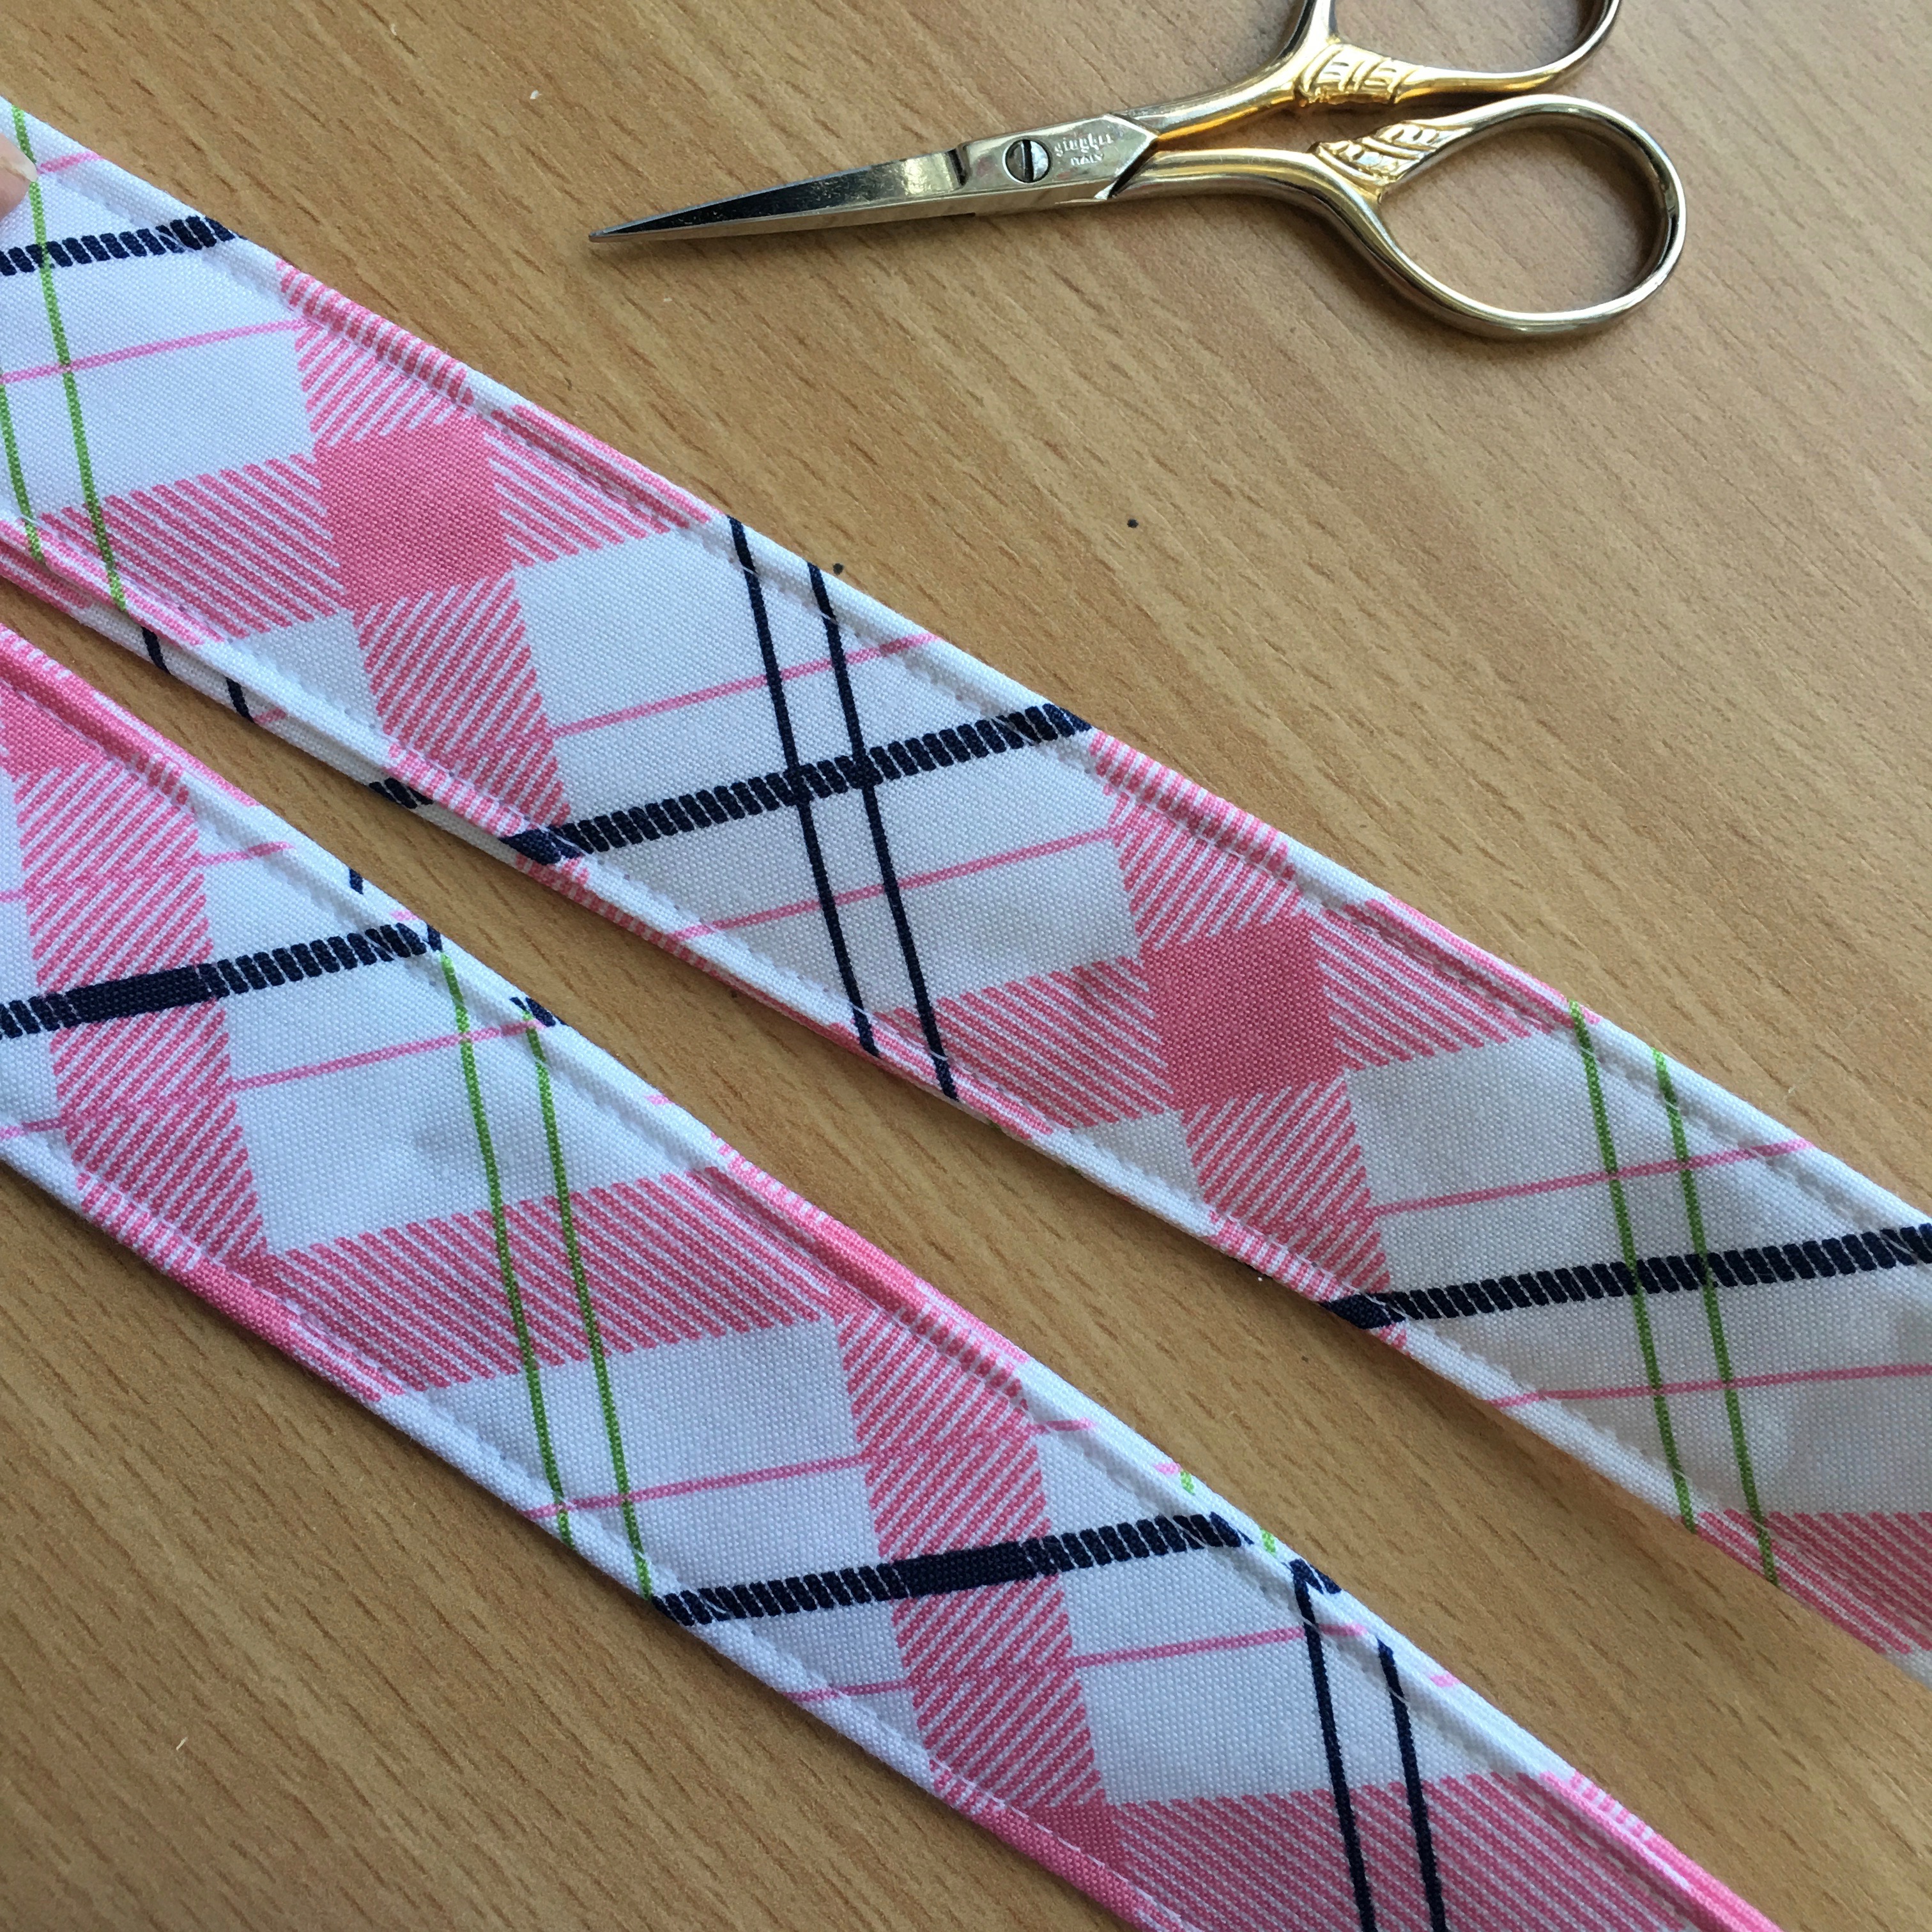
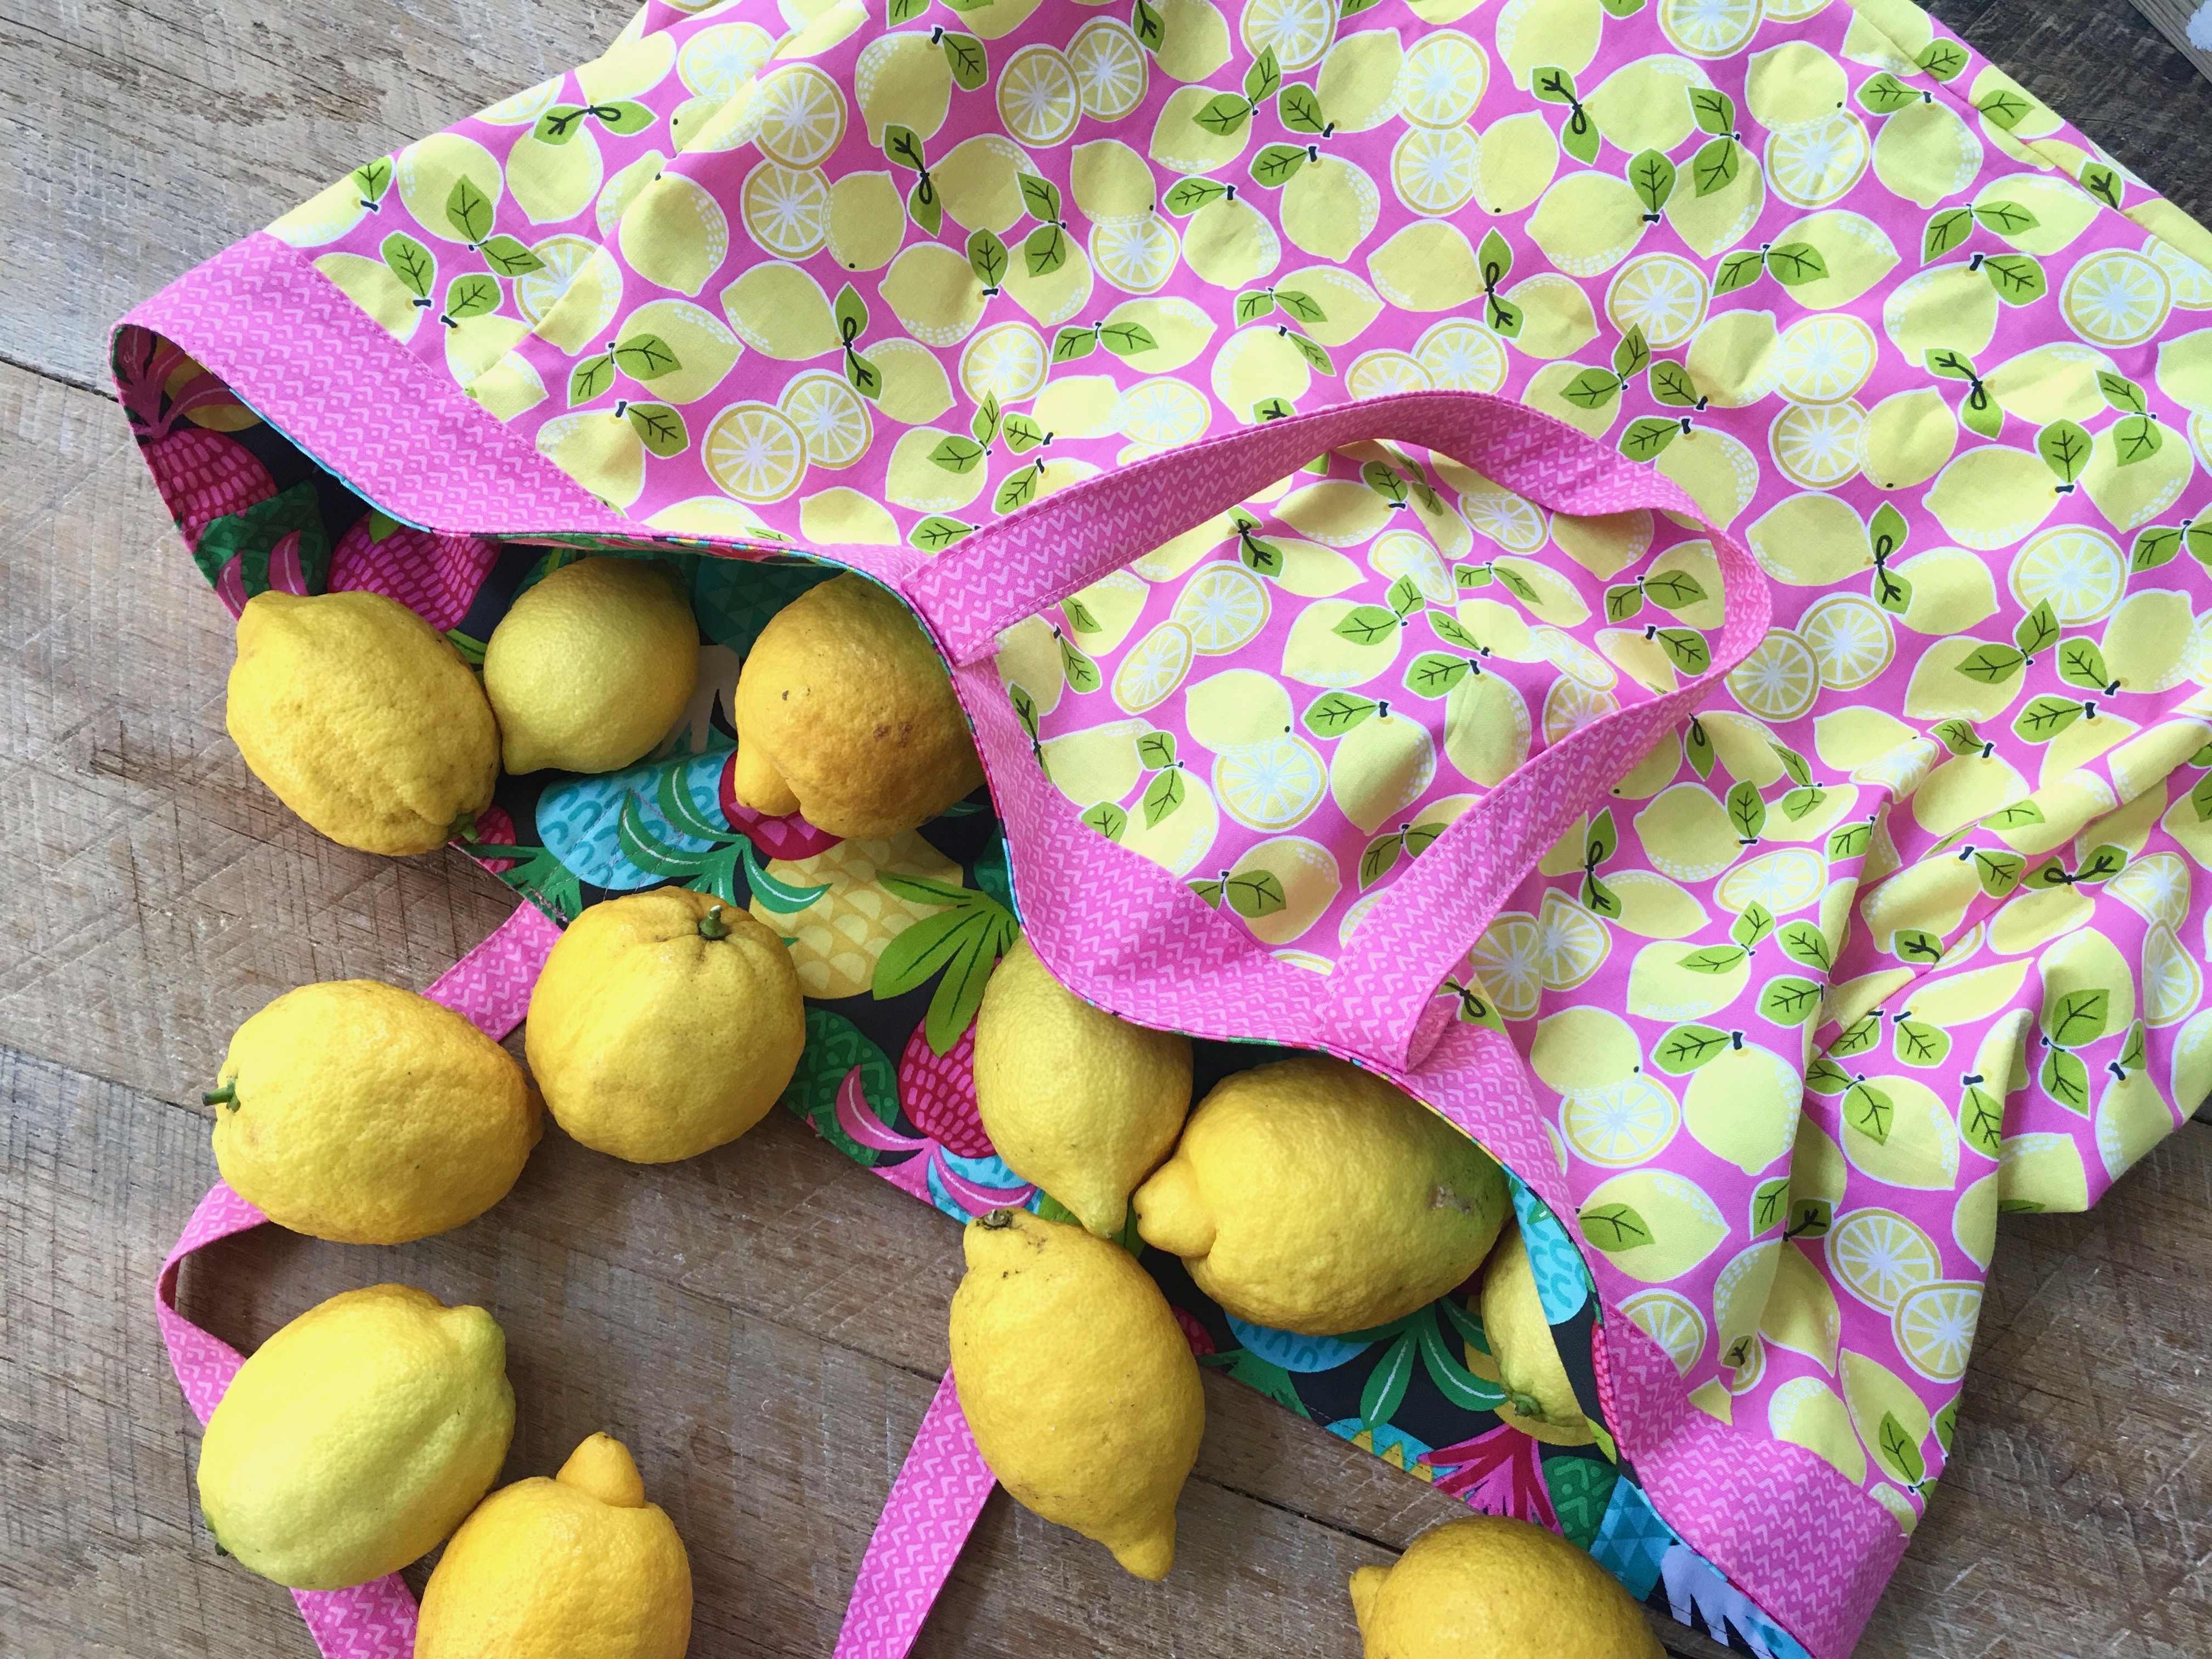
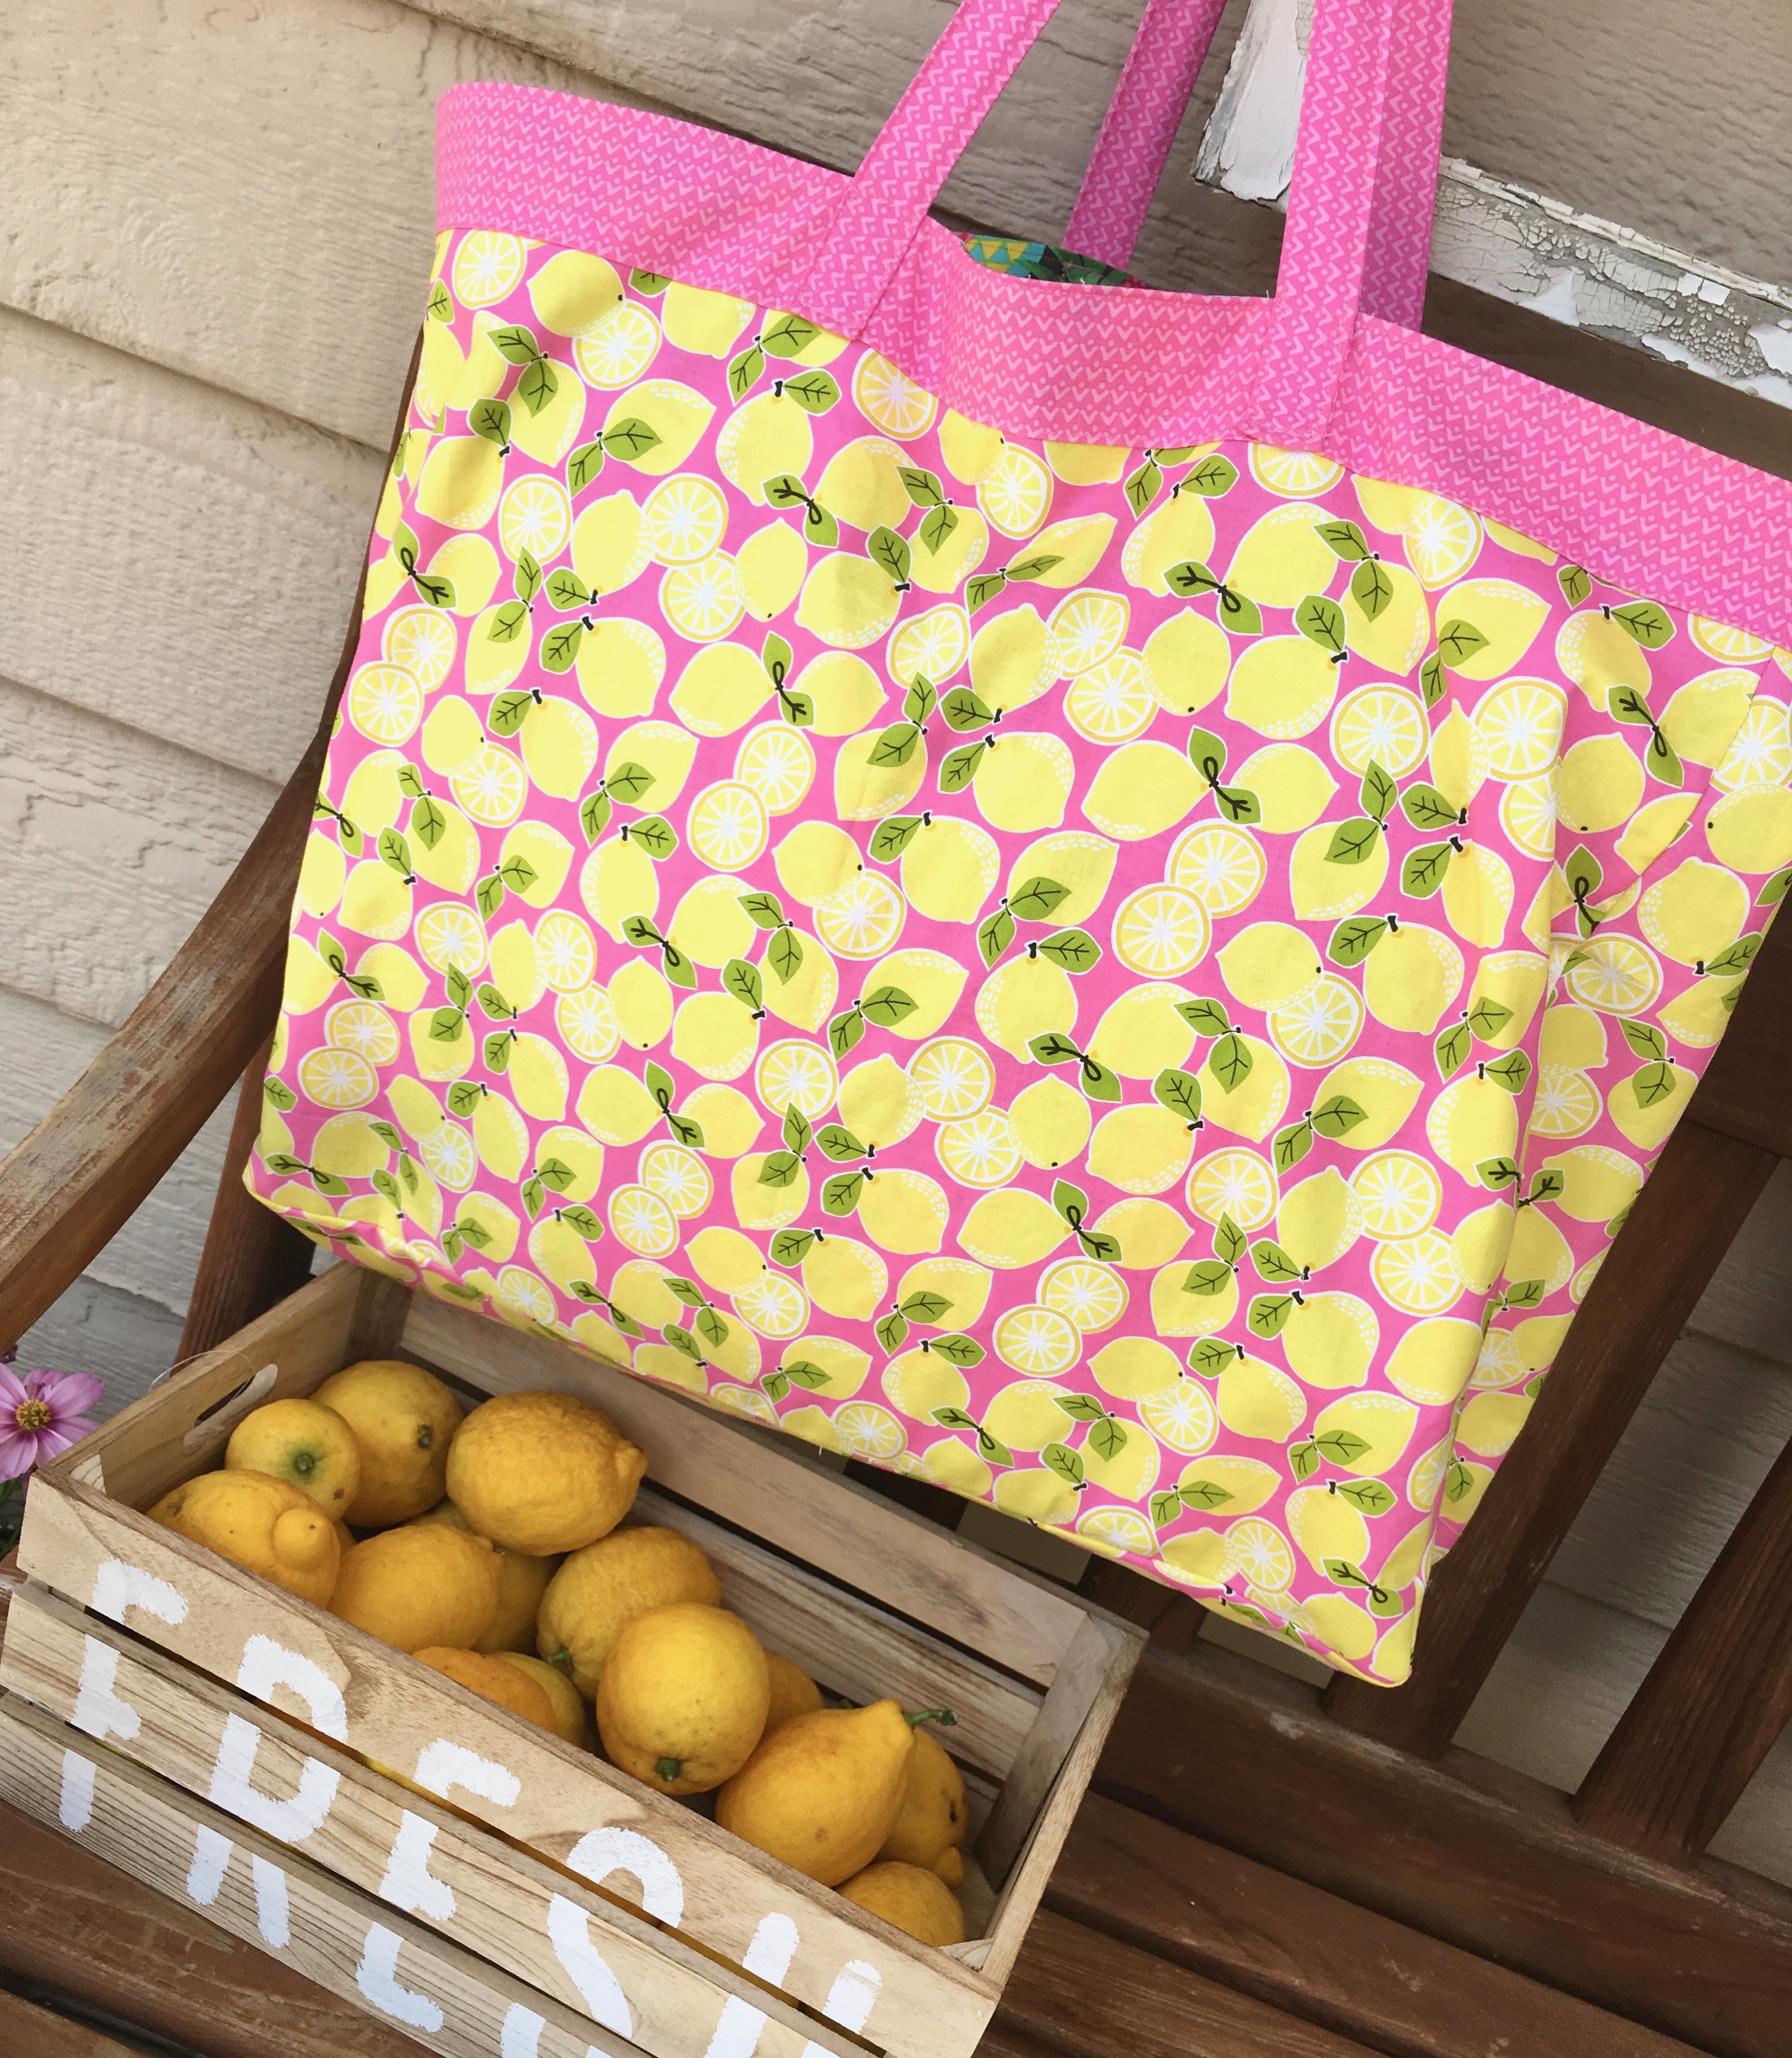
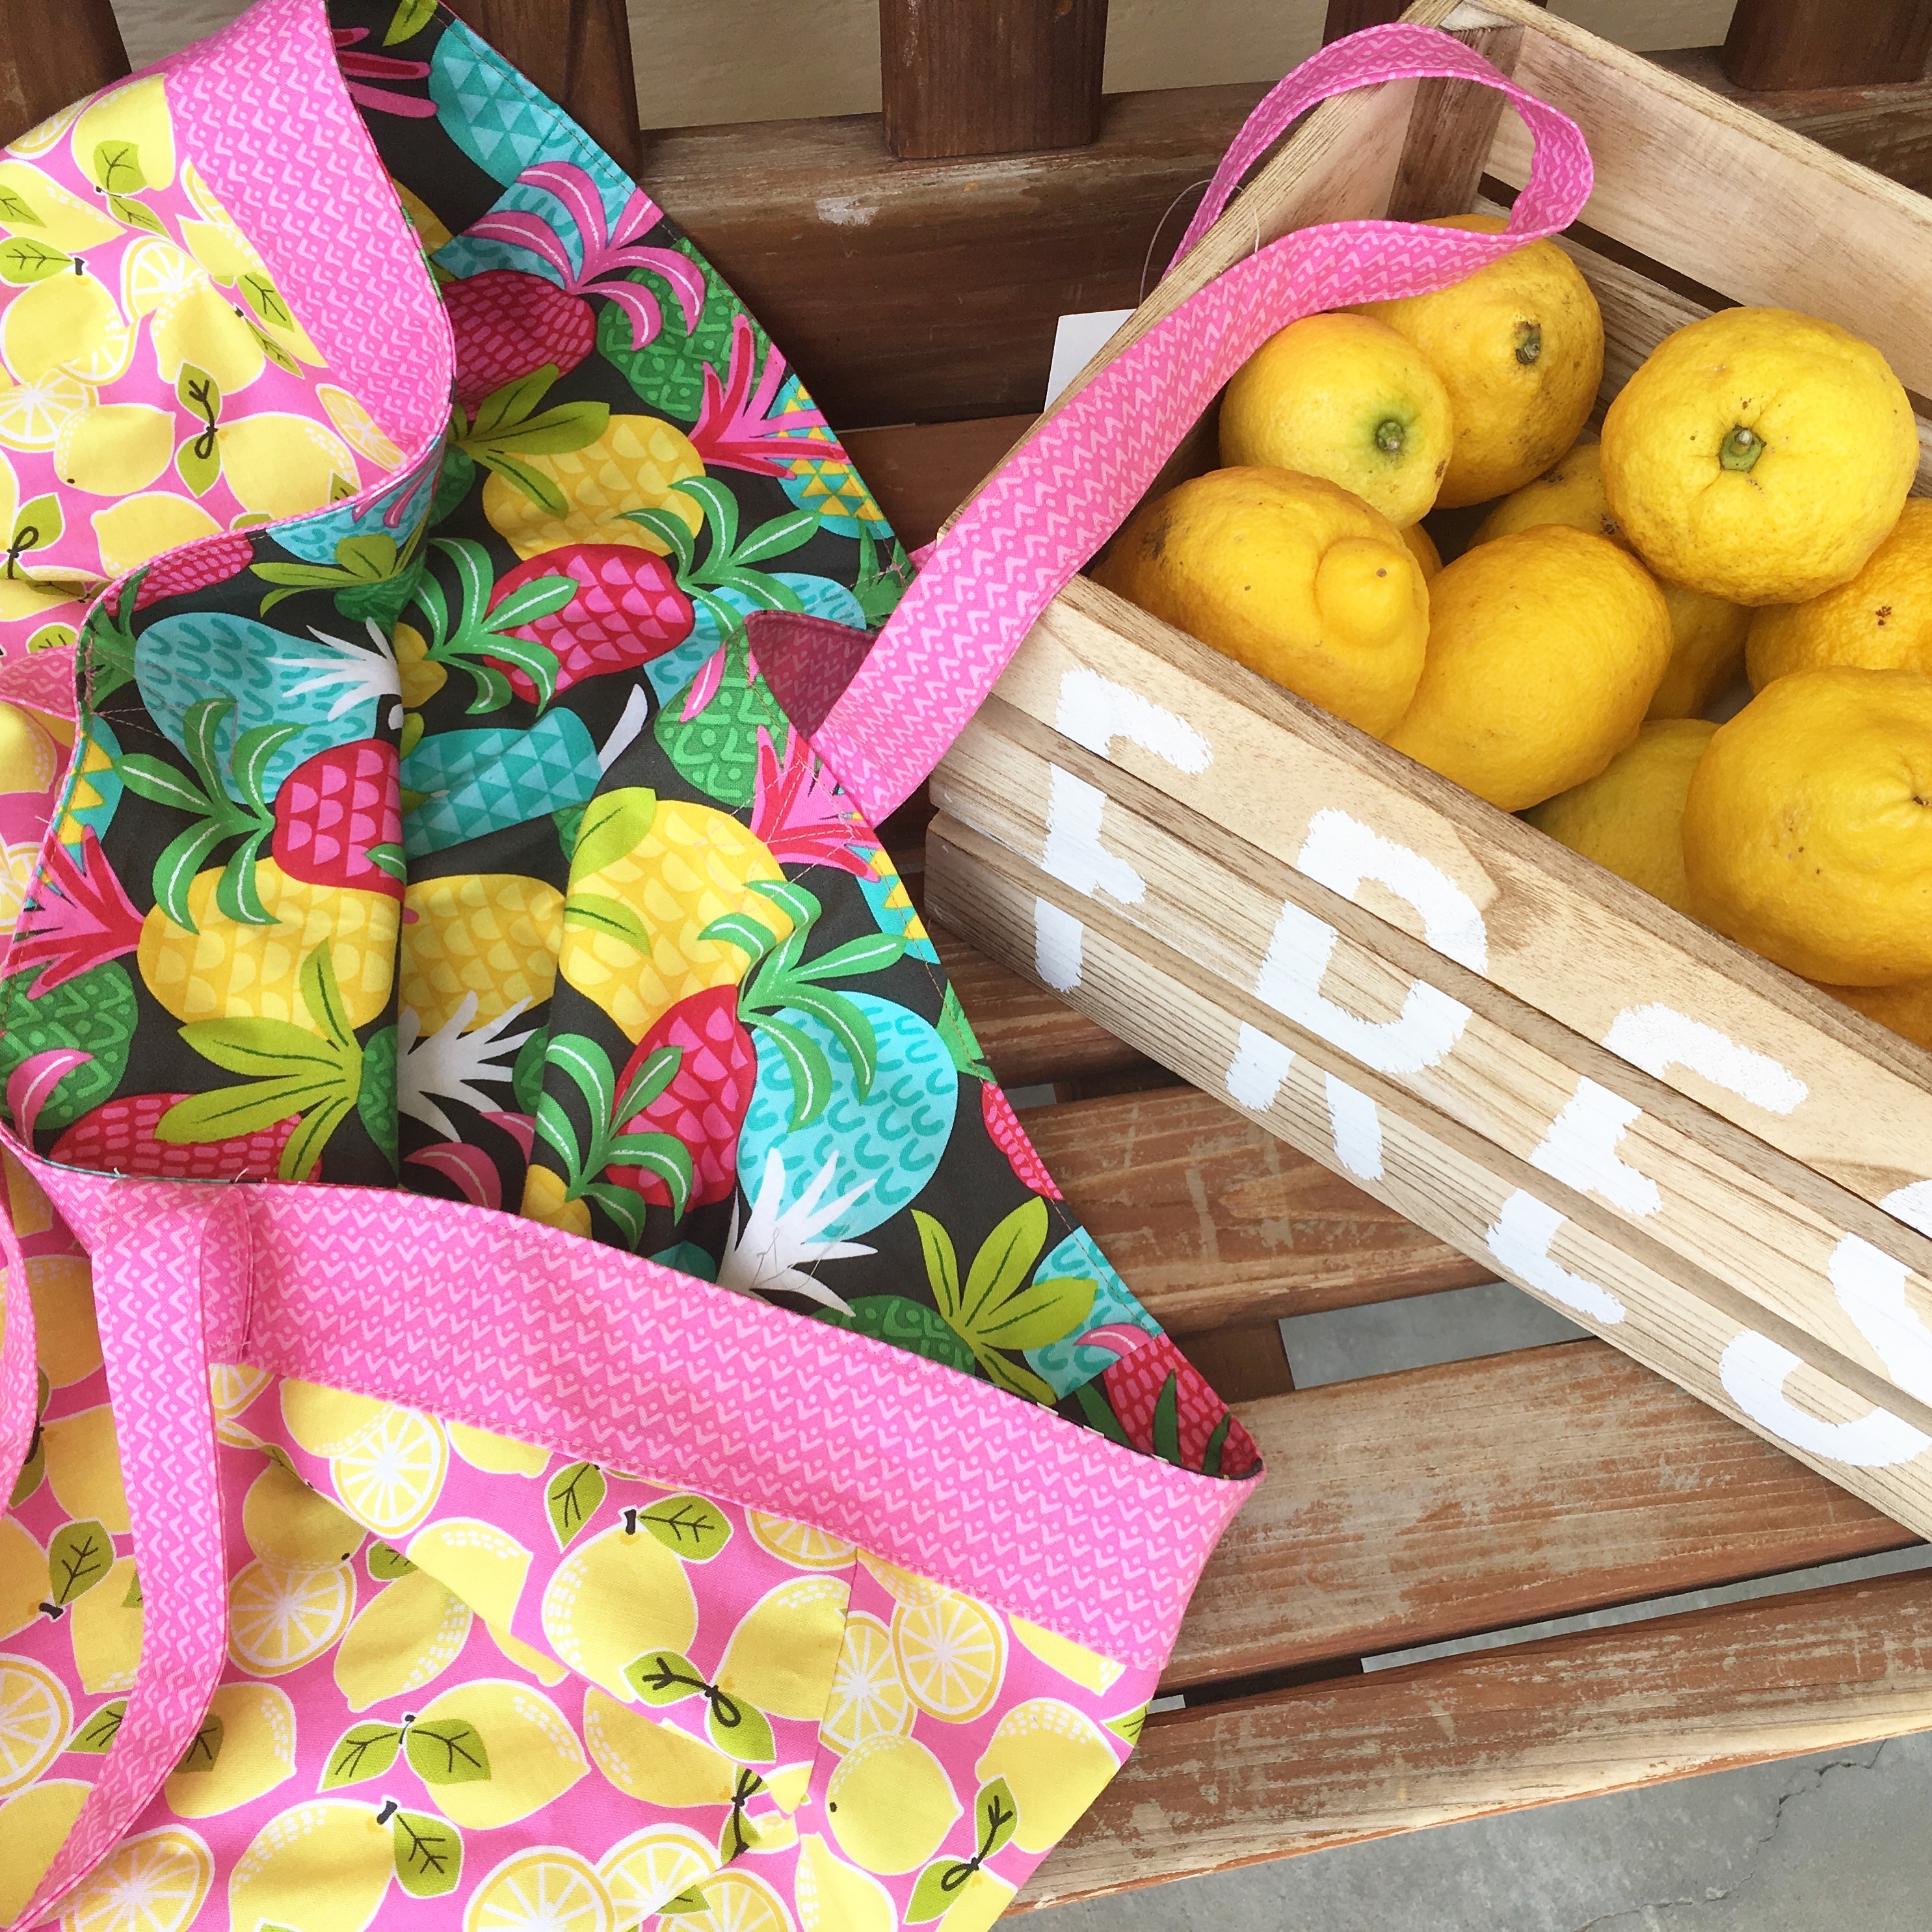
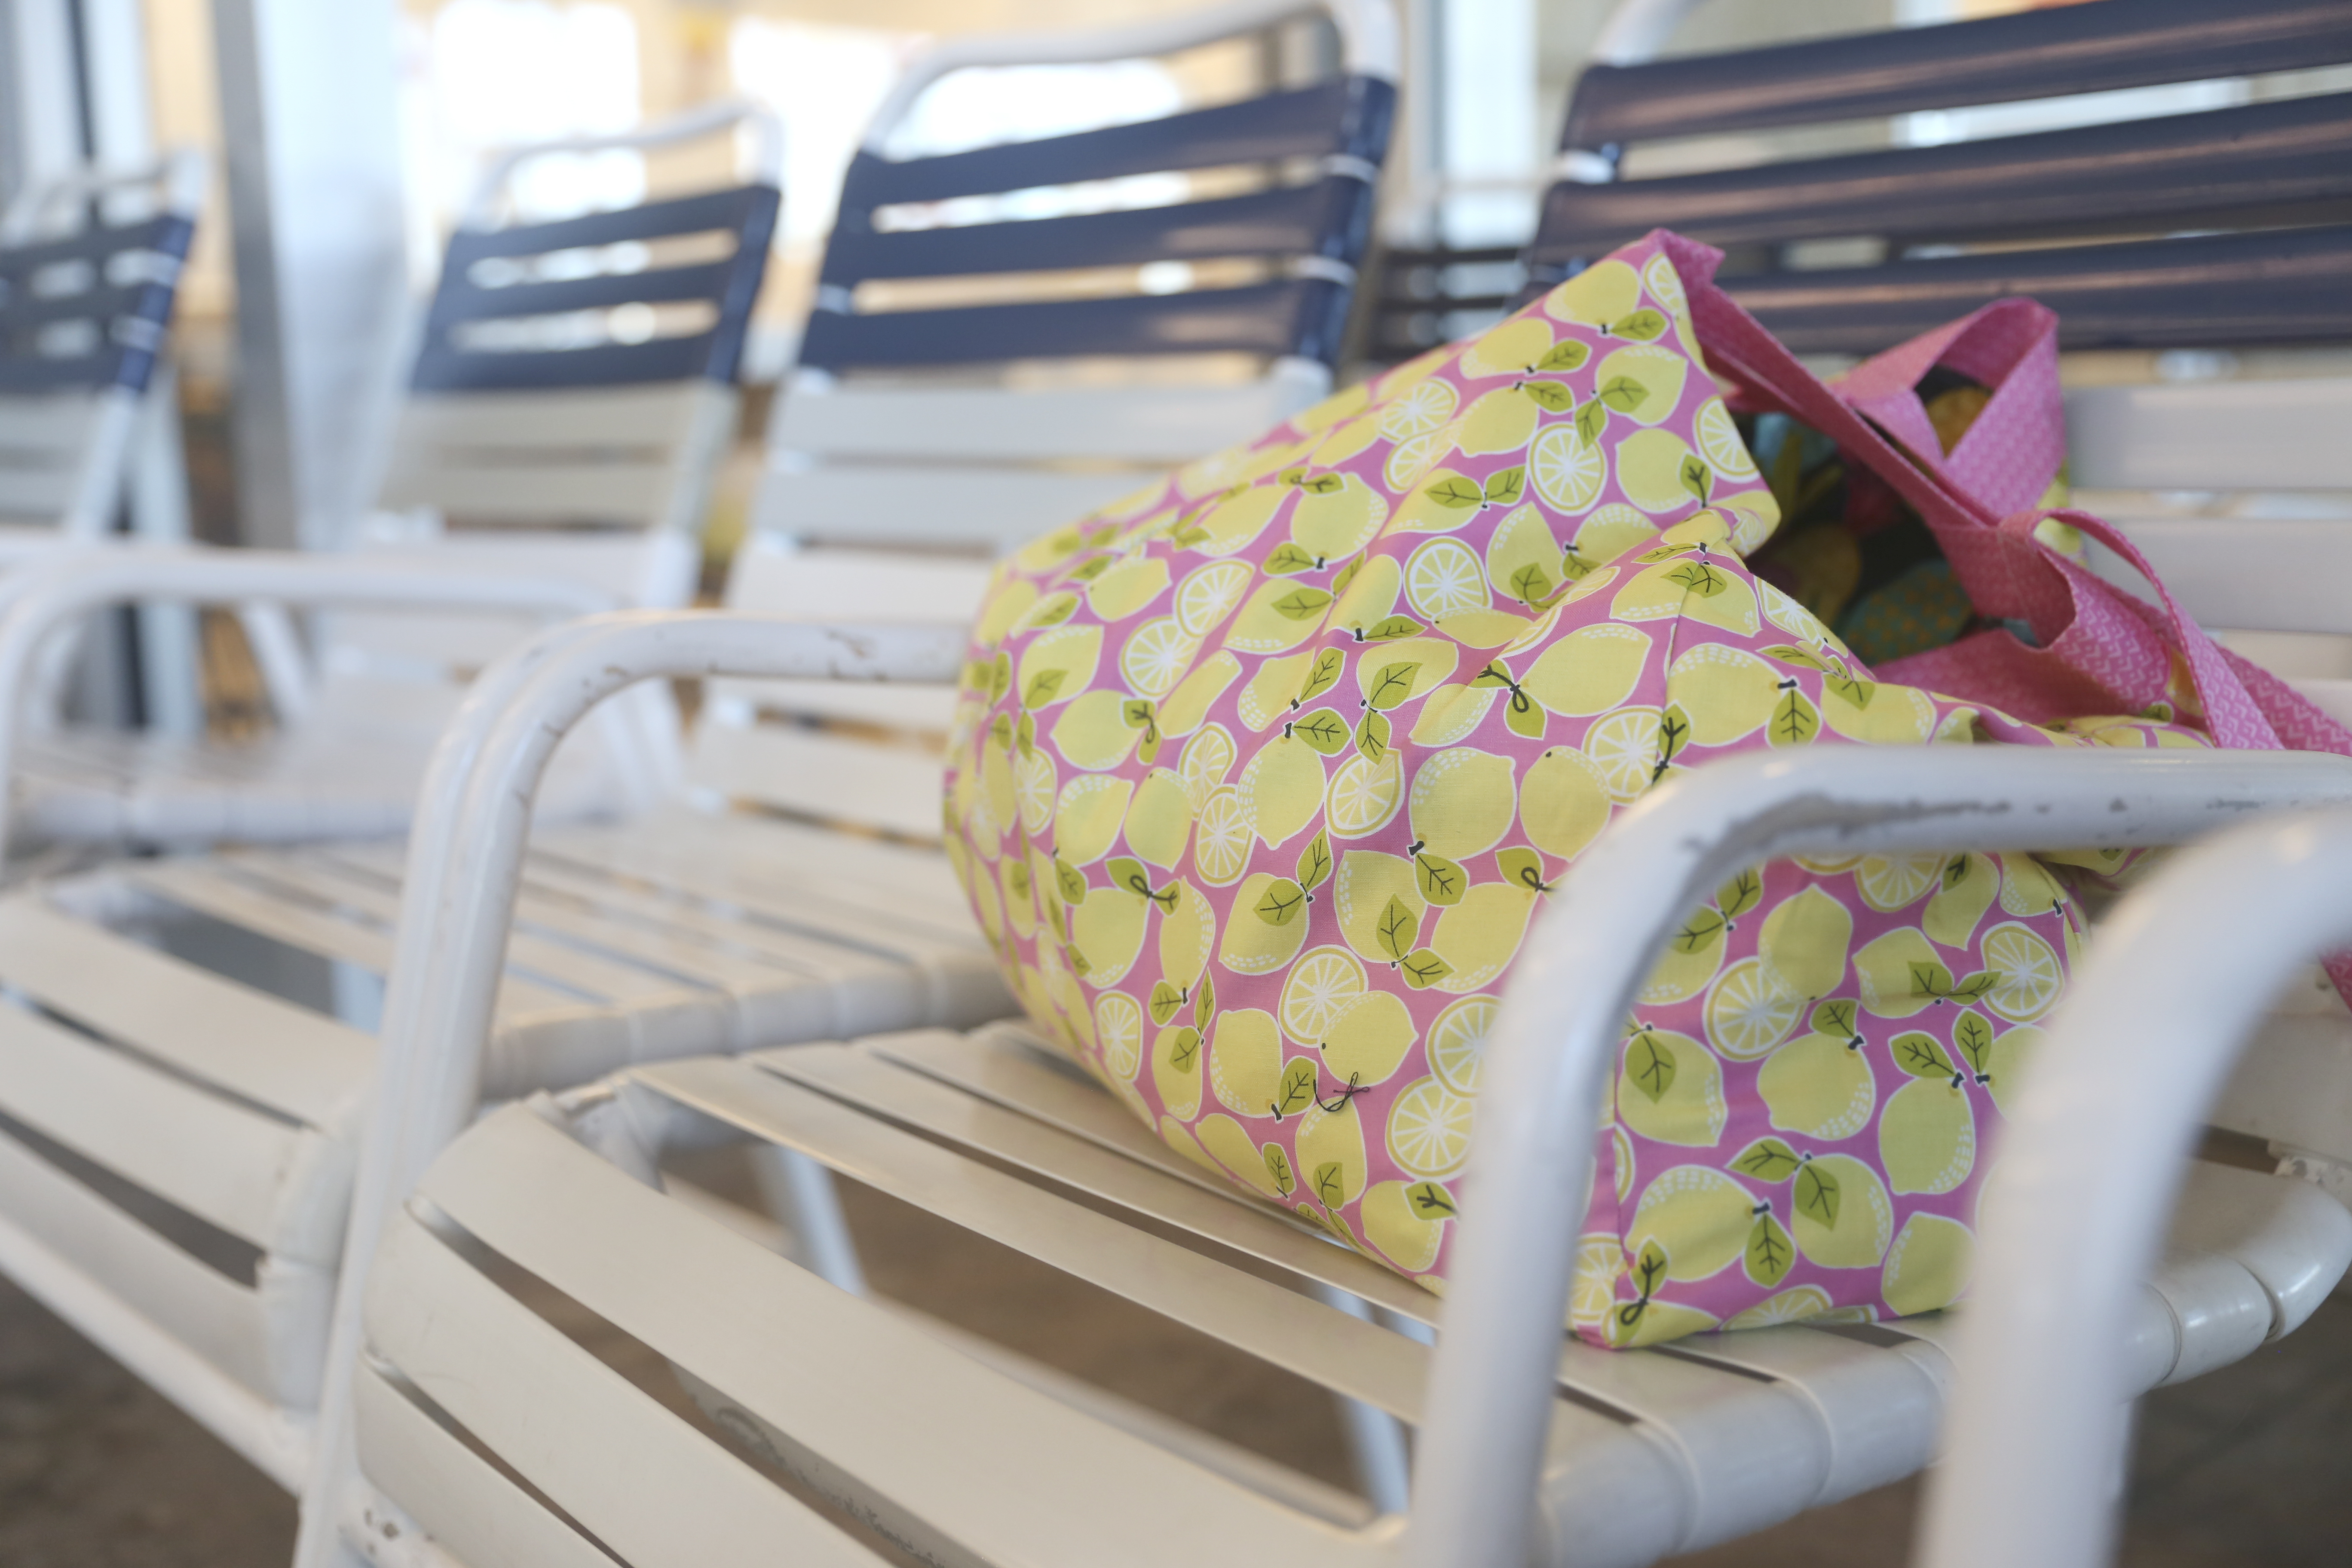
I am so in love with this tote bag!  It is such a great size, and if feels sturdy and it is super preppy plaid cute!!
DSC_0136
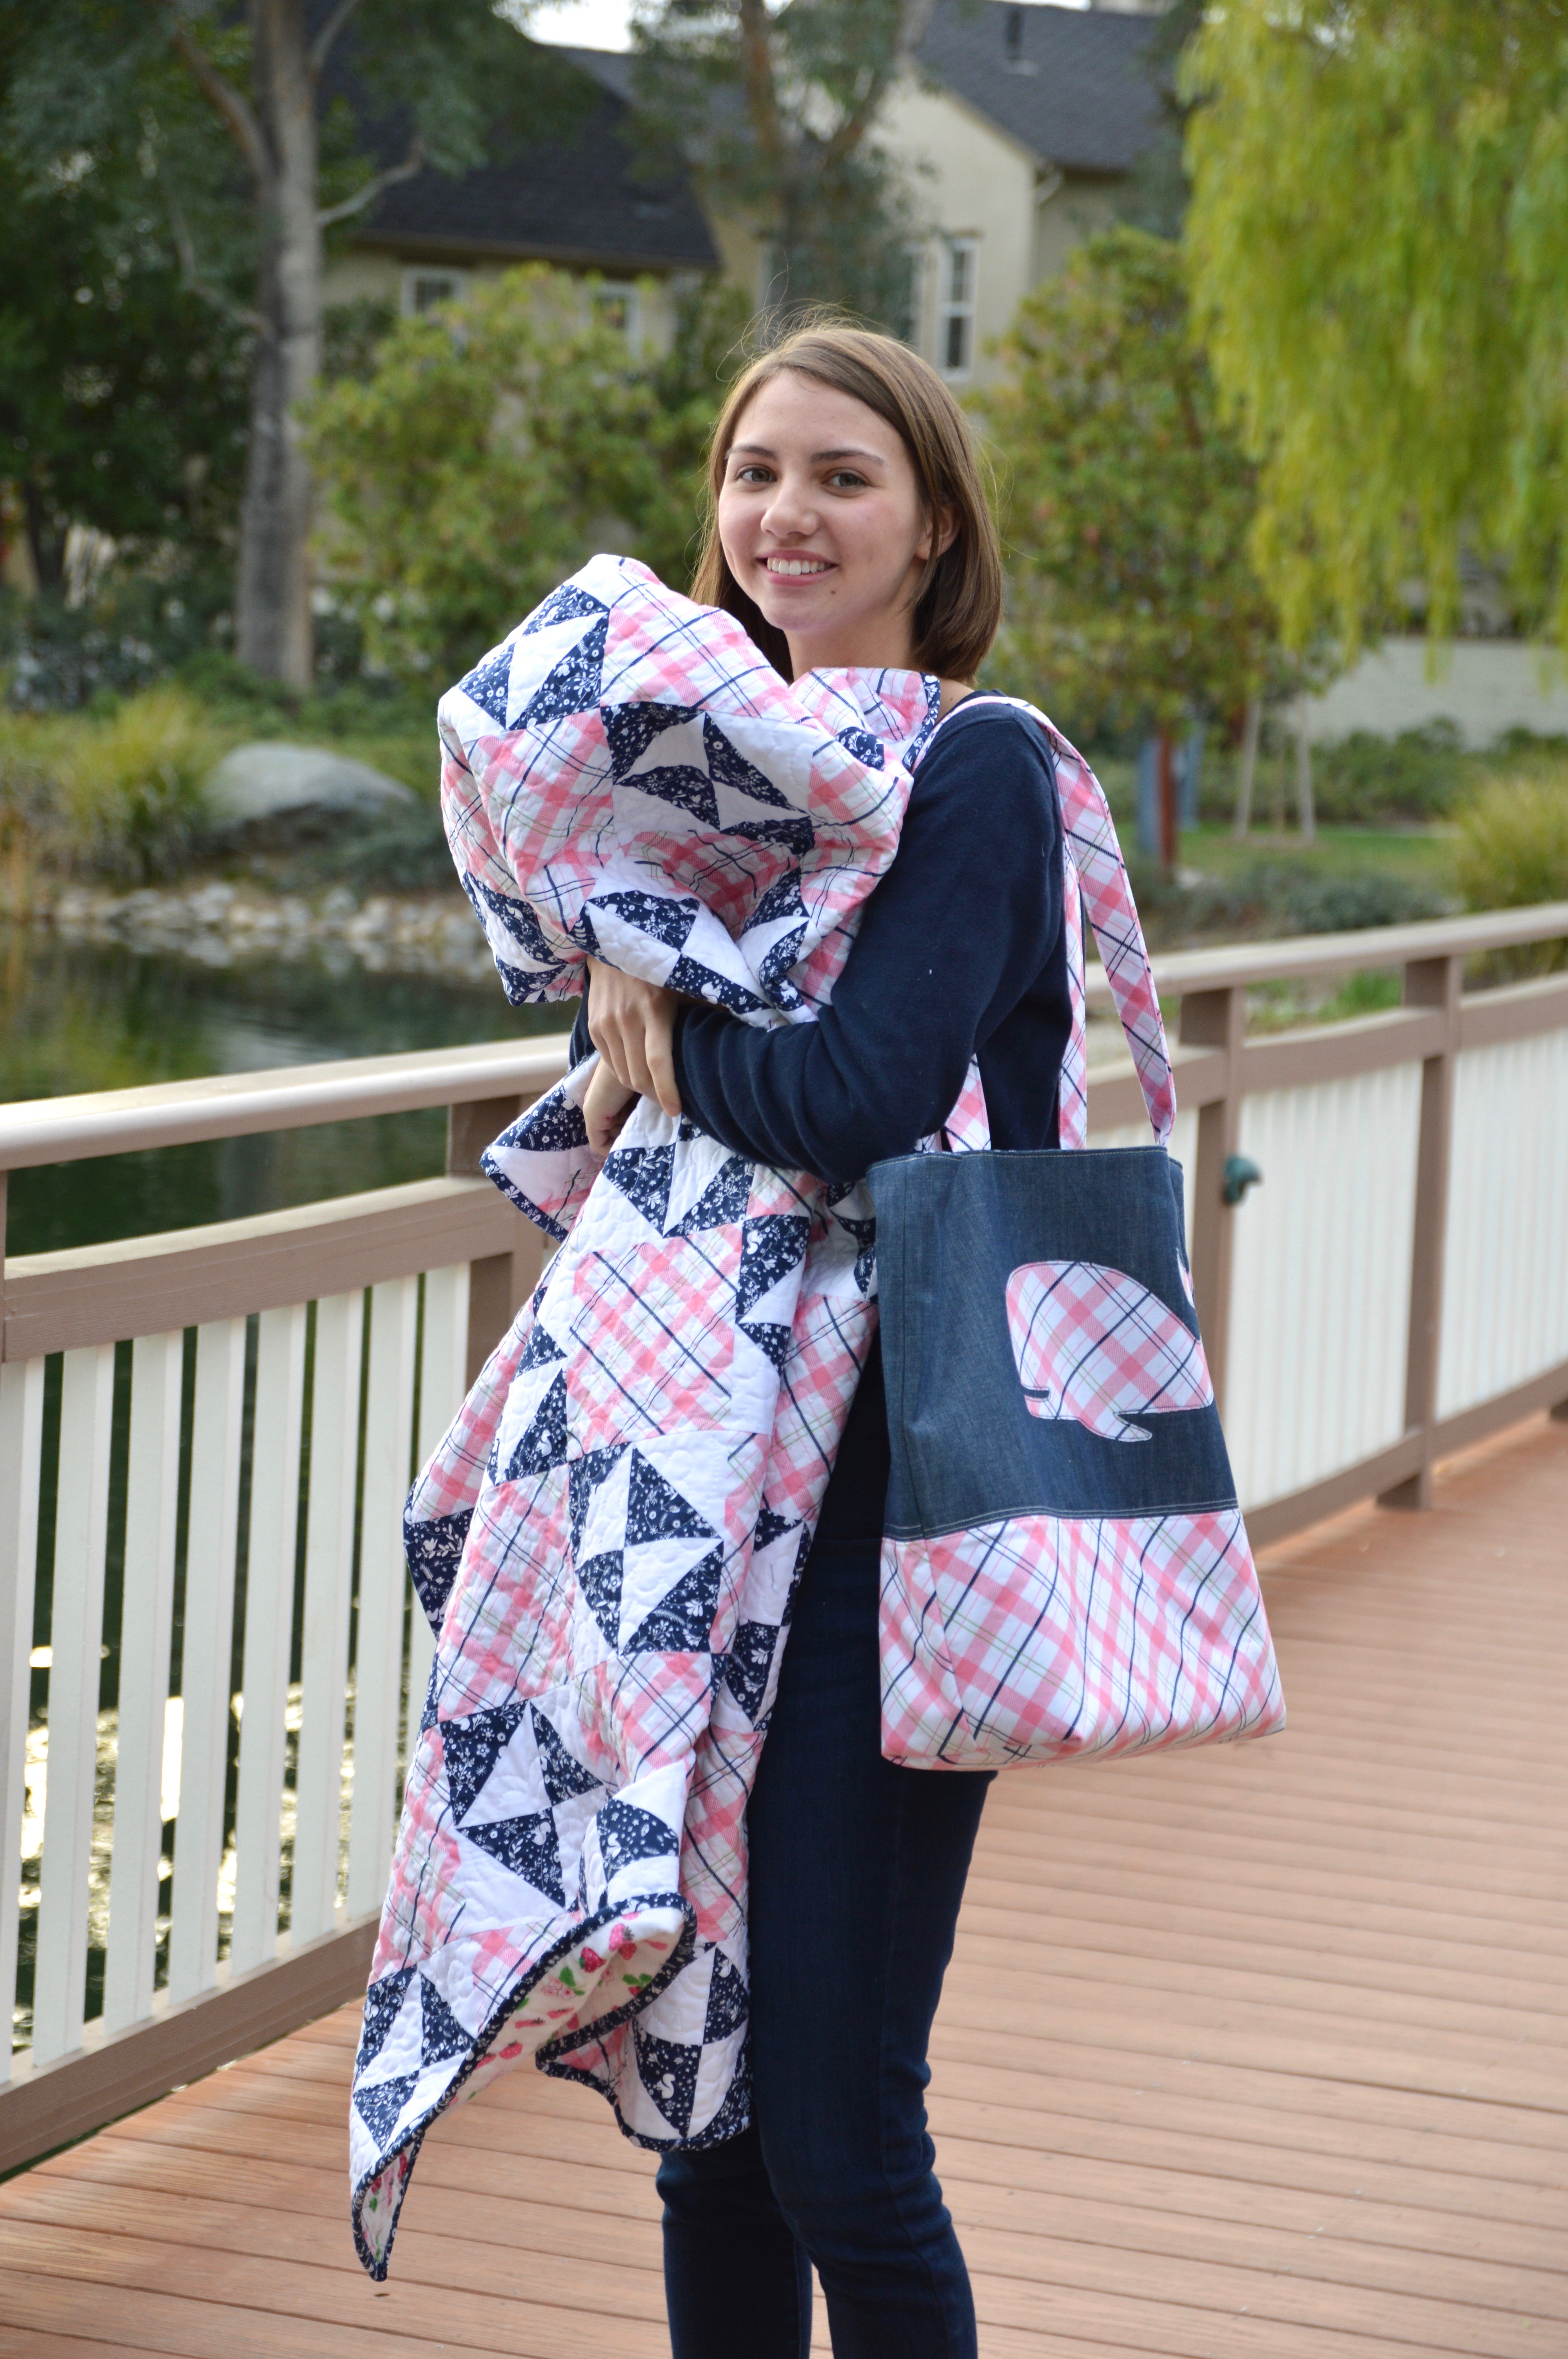
I’m ready for an Eastern Seaboard Vacation!!!
Together they make the Perfect Preppy Plaid Pair!!!!!
DSC_0110

Enchanted logo 2

Be sure to check out these amazing designers to see what they’ve created using Riley Blake’s Enchanted Fabric!!!

Blog Tour Schedule

Monday, Jan 23rd – Little Londyn

Tuesday, Jan 24th – Jedi Craft Girl

Wednesday, Jan 25th – Loose Threads

Thursday, Jan 26th – Meags and Me

Friday, Jan 27th – Pretty by Hand

Monday, Jan 30th – Tie Dye Diva

Tuesday, Jan 31st – Two Sisters as Squirrel Hallow

Wednesday, Feb 1st – Striped Swallow Designs

Thursday, Feb 2nd – Izzy and Ivy

Friday, Feb 3rd – Ellis and Higgs

Monday, Feb 6th – Aurifil

Tuesday, Feb 7th – The Crafy Quilter

Wednesday, Feb 8th – Two Sisters at Squirrel Hallow

Thursday, Feb 9th – Jina Barney Designz

Friday, Feb 10th – Riley Blake

You could win a bundle of Enchanted fabric by visiting Dodi’s blog, Loose Threads (www.sashgals.com) and leaving a comment.

One entry per blog post, per day of the Blog Tour, there on Loose Threads.

Enter every day to increase your chance of winning!!!

Jewelry Travel Set {Zipper Pouch}

img_8144

What do you give someone who has everything?  It can be challenging!  I thought my mom would love this fun travel jewelry bag!  It has little individual pouches to put bracelets and necklaces.  They all fit into this quilted zipper pouch.  I used the Wildwood collection from Blend Fabrics.

img_8149

Instead of rewriting this tutorial, here are the links so you can make your own!!

For the little jewelry button pouches I followed THIS tutorial.

For the zipper pouch, I used THESE measurements.  I used quilt batting for the stabilizer and quilted the fabric before sewing the zipper pouch.

To insert the “Open Wide” zipper, follow THESE instructions.  img_8138

This is such a fun little project and I use my set every time I travel!img_8141

Marvel Covered Composition Book

composition-book-cover

If you know me at all you know I LOVE Composition Books!  I use one for everything: sewing notes, Christmas planning, Young Women Camp Planning, Journals, Gospel study notes, To Do Lists, and on and on!  I love sewing covers for these fun books to give them personality and also add durability!  I am loving the latest Marvel Fabrics from Camelot Fabrics available at Fat Quarter Shop.  These would make great Christmas or Birthday gifts! img_8037

Cut Center piece 7″ x 16.5″

Cut (2) accent pieces 2.5″ x 16.5″

Cut Lining 11″ x 16.5″

Cut flap pieces (2) 10″ x 11″

Heat n Bond Fusible Fleece 11″ x 16.5″

To make the outer book cover, using 1/4″ seams, sew the top and bottom pieces to the center Marvel piece.  Press seams.

img_8038

Fuse the Heat n Bond Fusible Fleece to the wrong side of the fabric according to the manufacturer instructions.

img_8039

Sew accent stitching 1/8″ along both sides of the seam.

img_8040

To finish the composition book cover,  follow this tutorial.  I omitted the button closure.

dsc_0507

The book tucks easily inside the cover.

dsc_0504

It’s the perfect addition to my collection of Marvel fabric items!!!

Save

Save

Marvel Padded Sketchbook Case Tutorial

sketch-book-case-tutorial
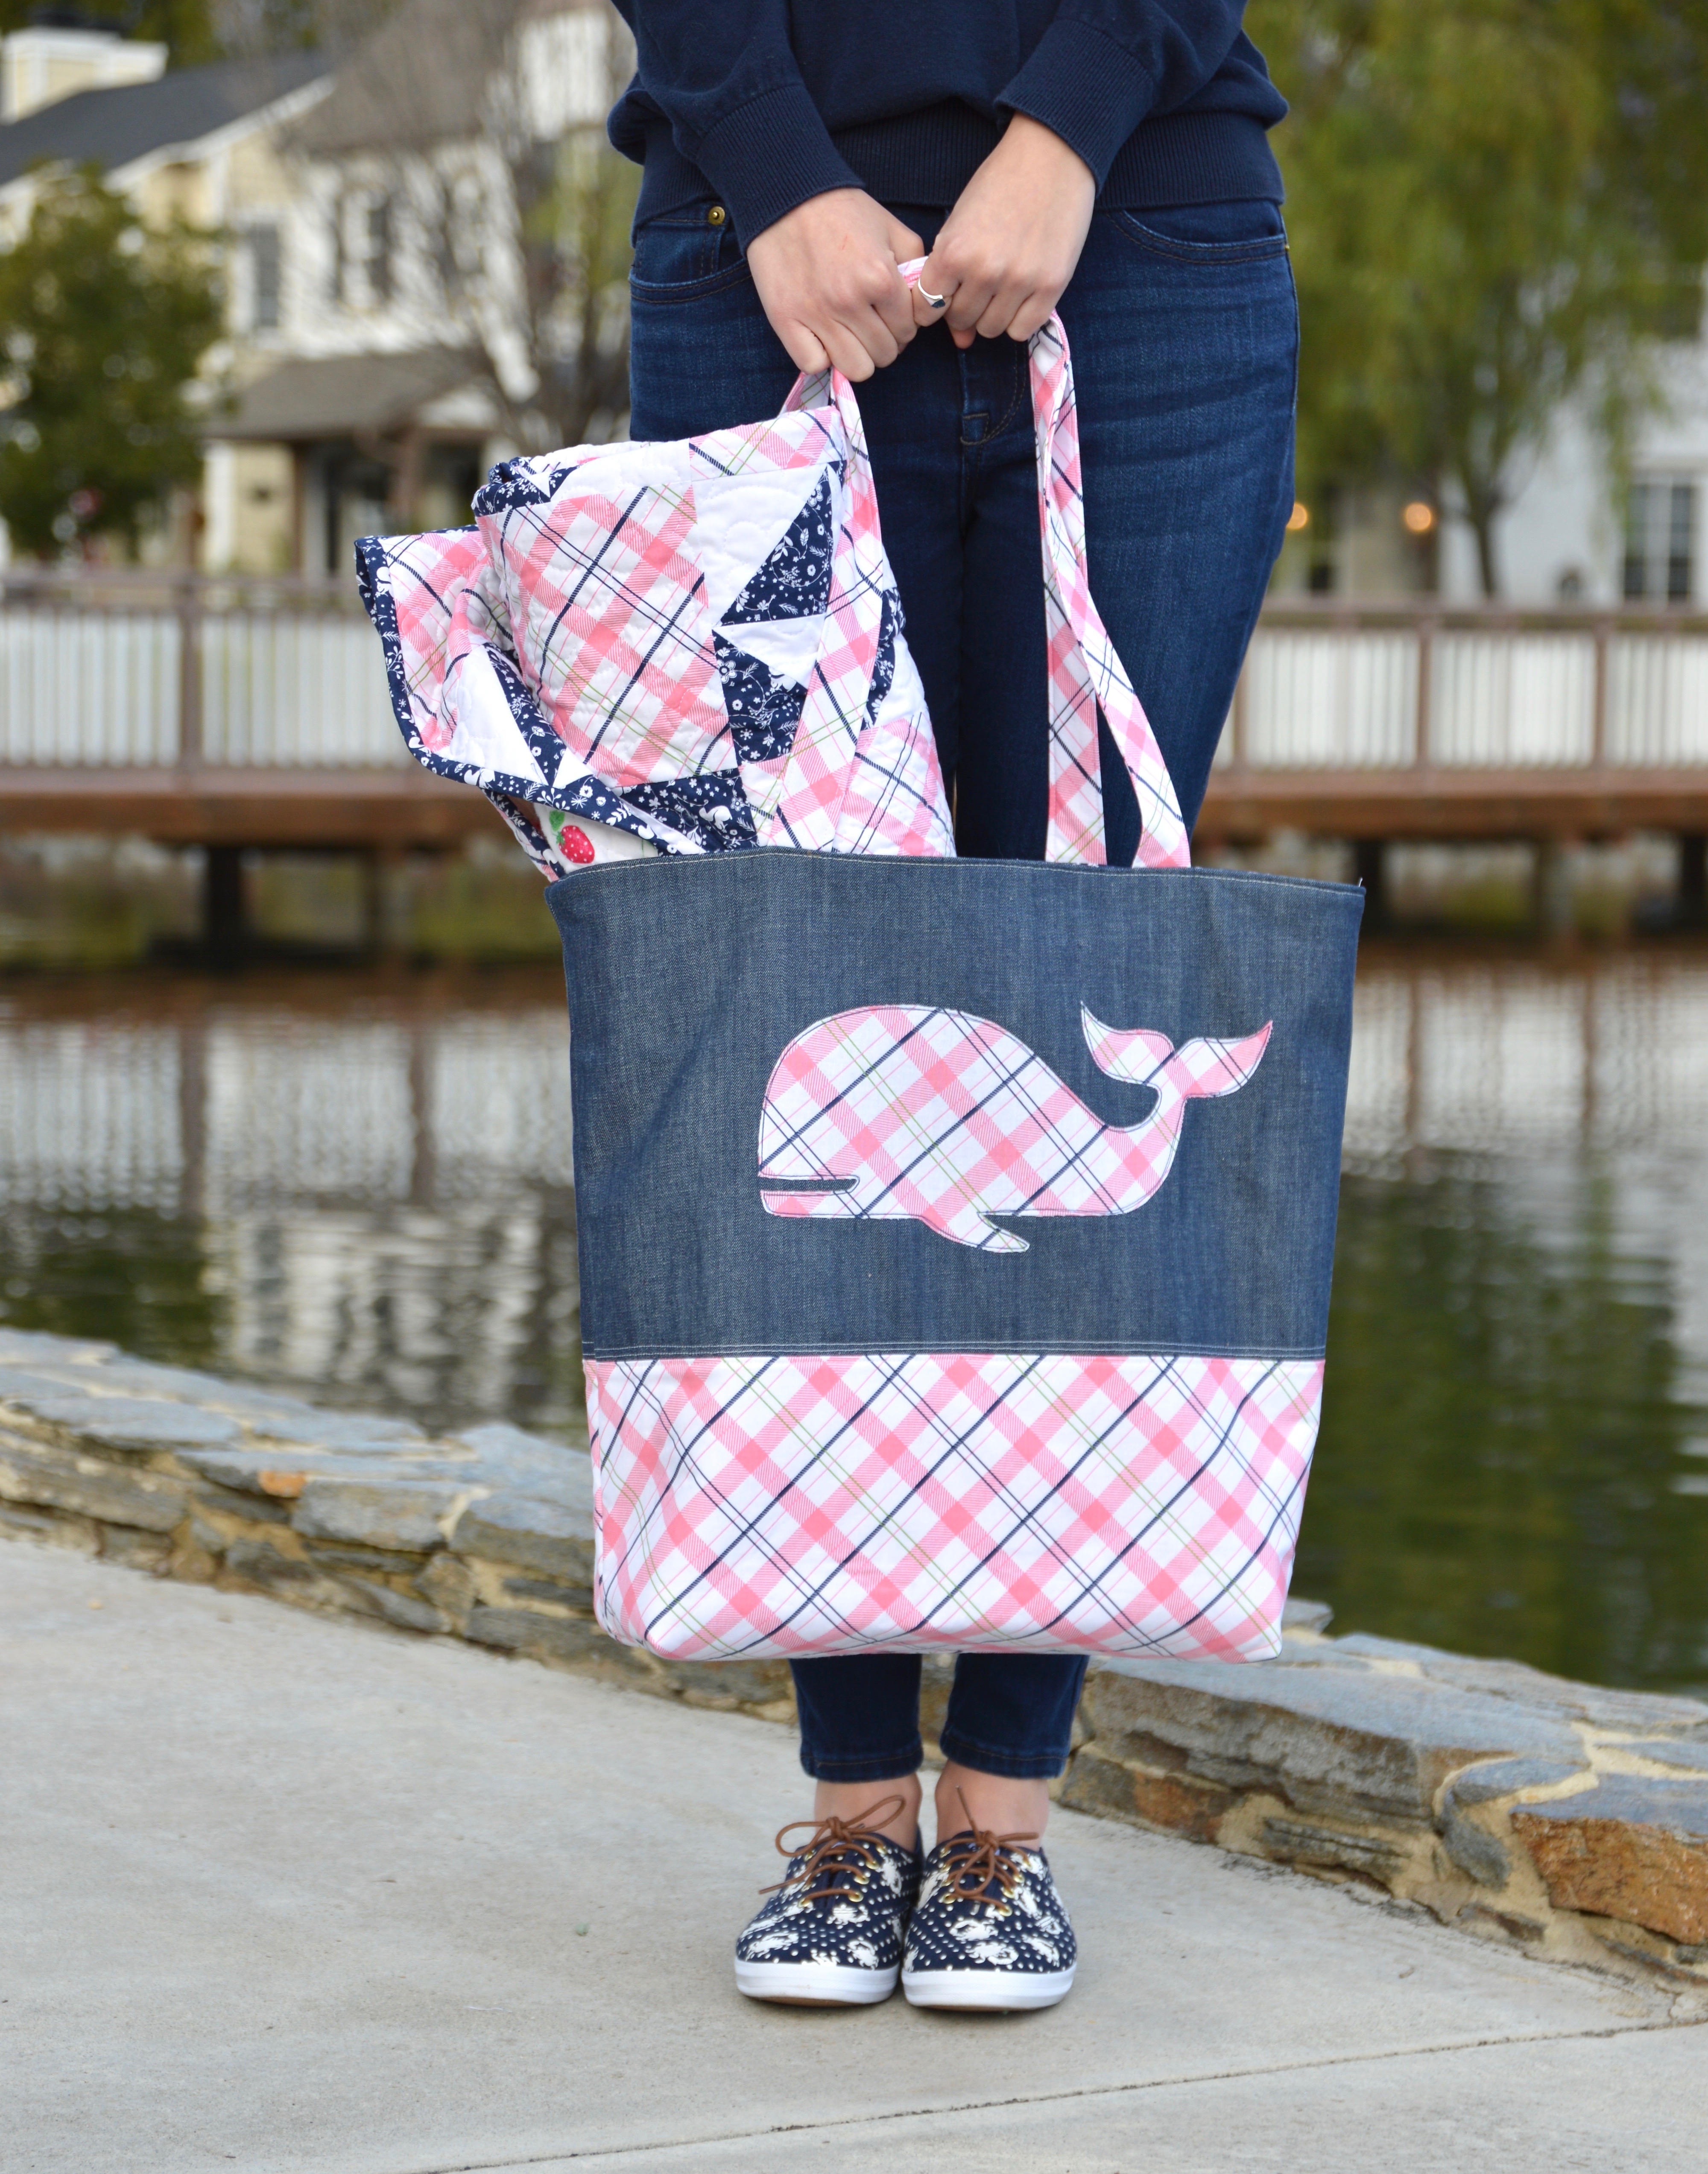
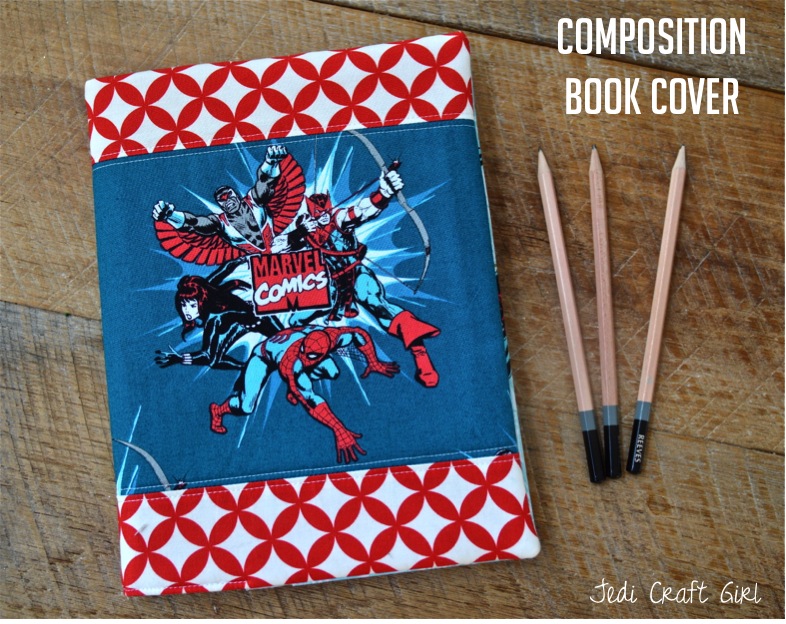
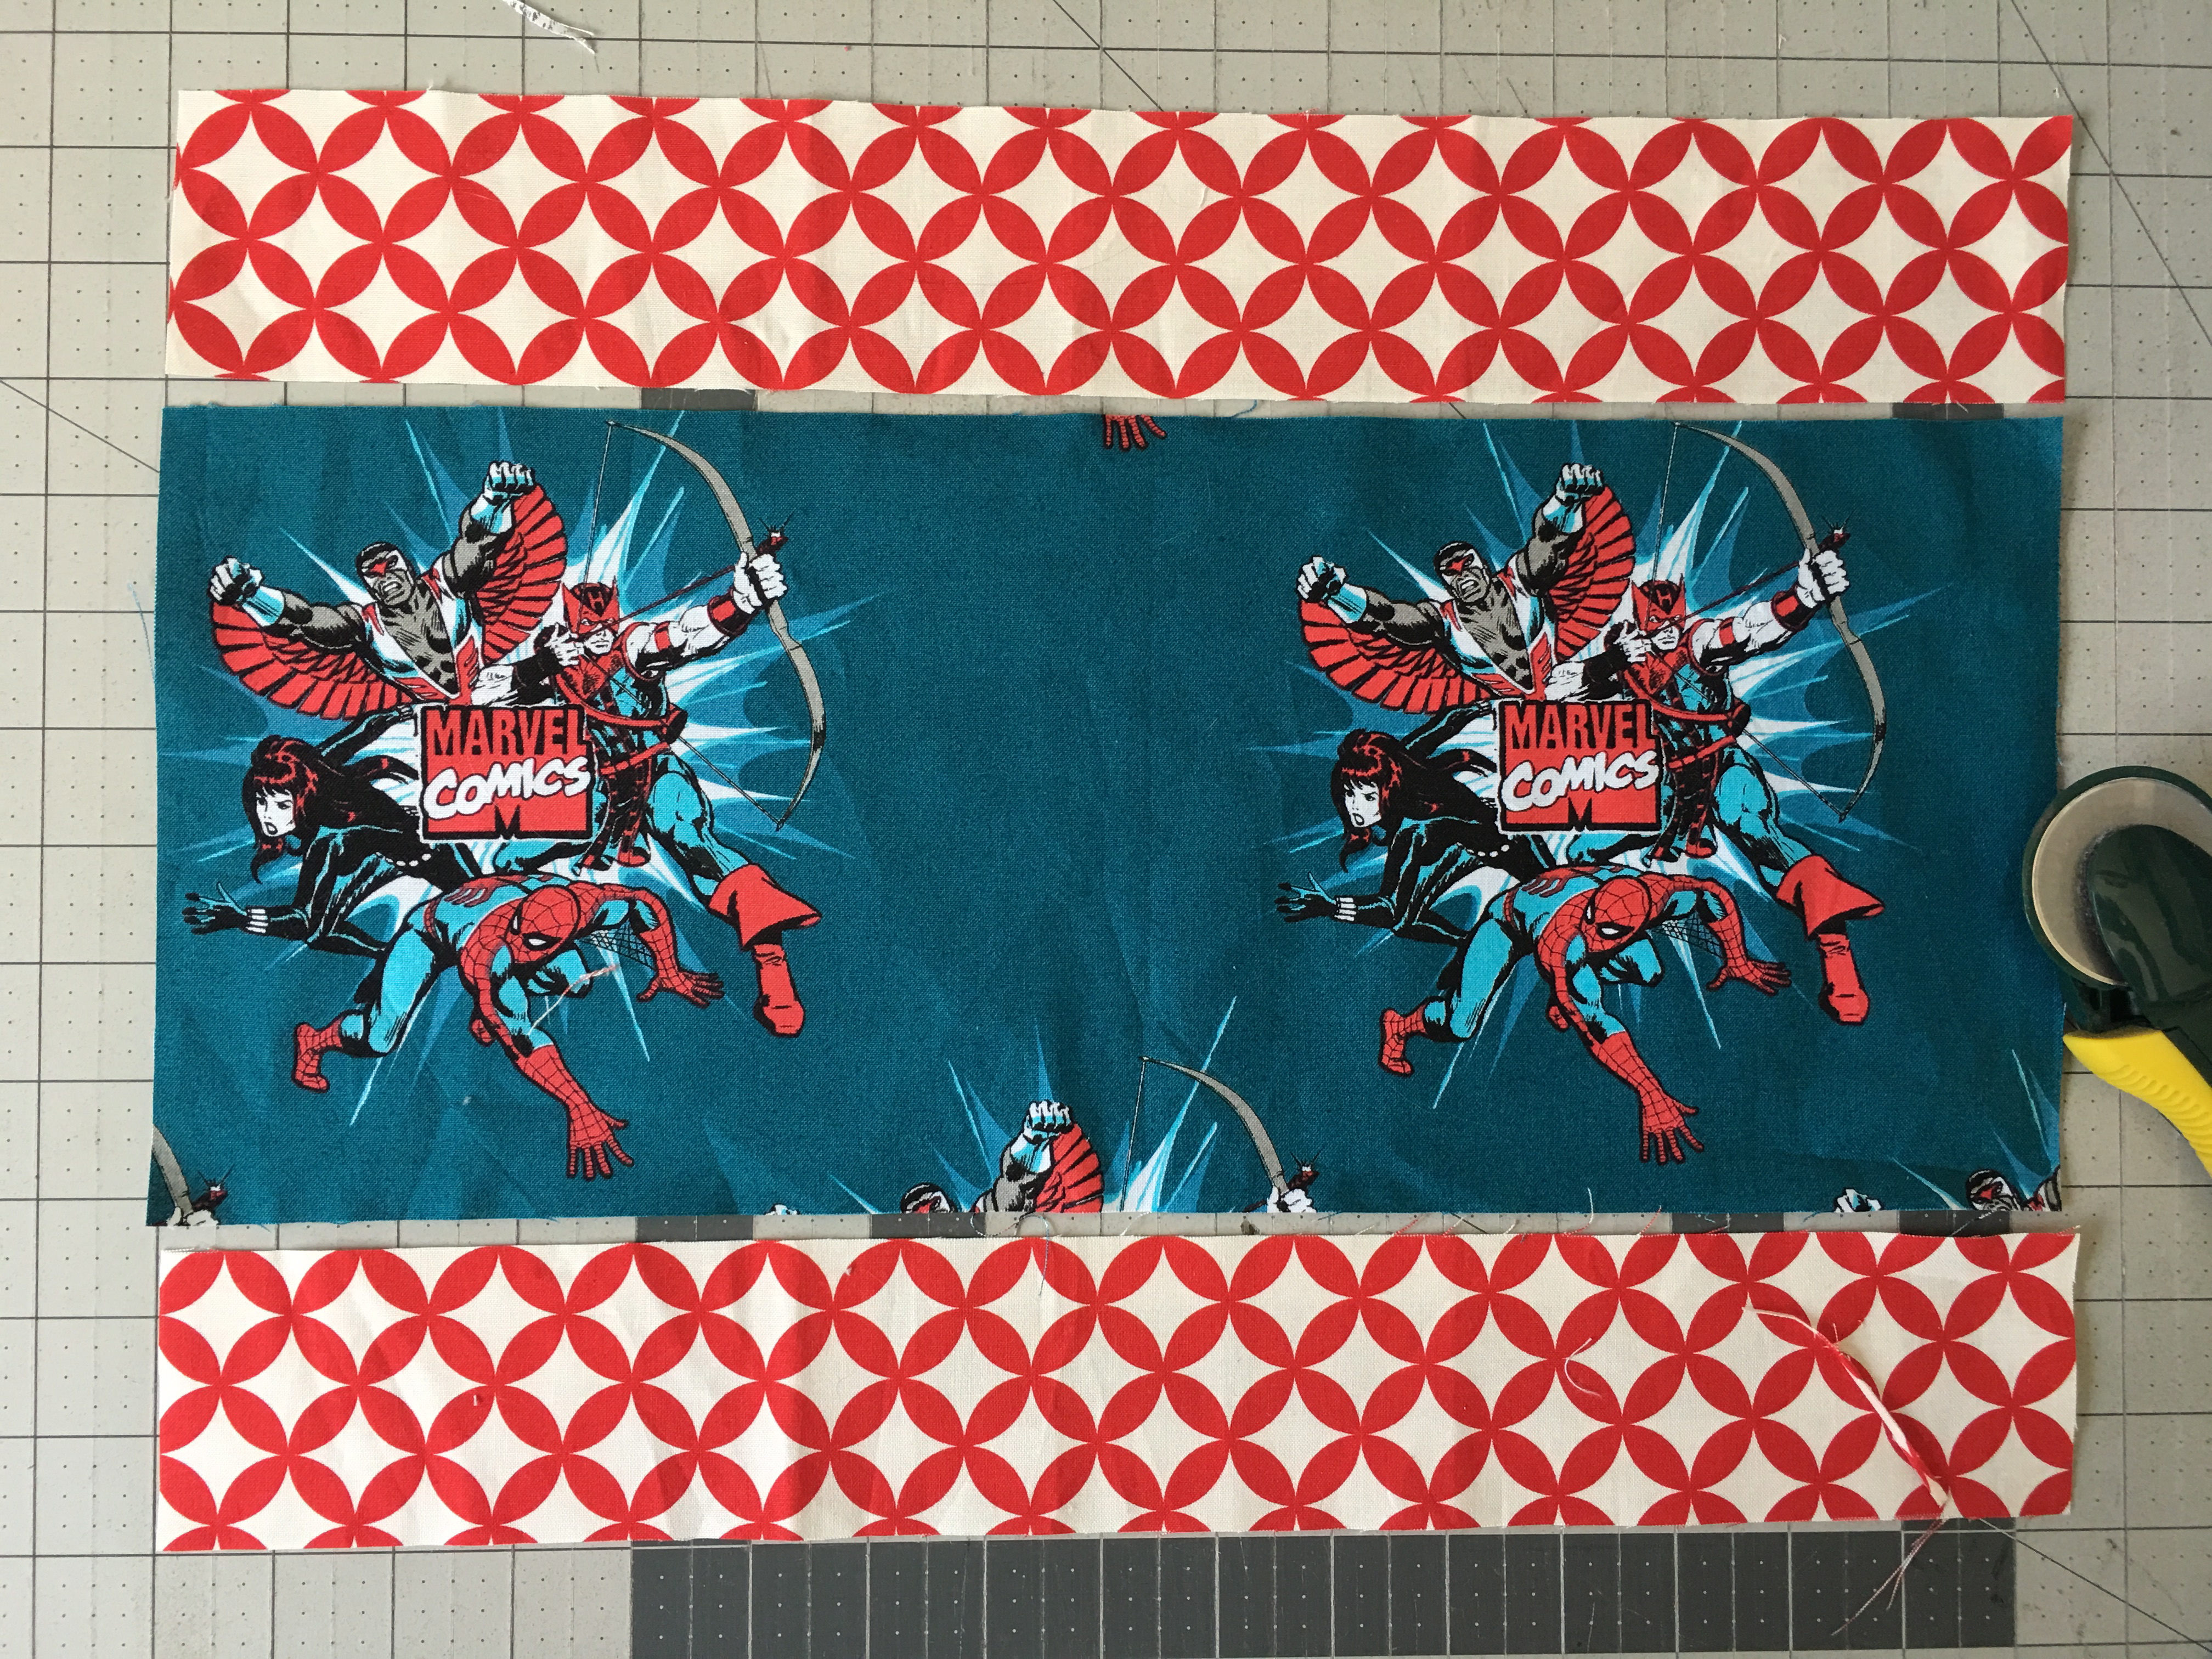
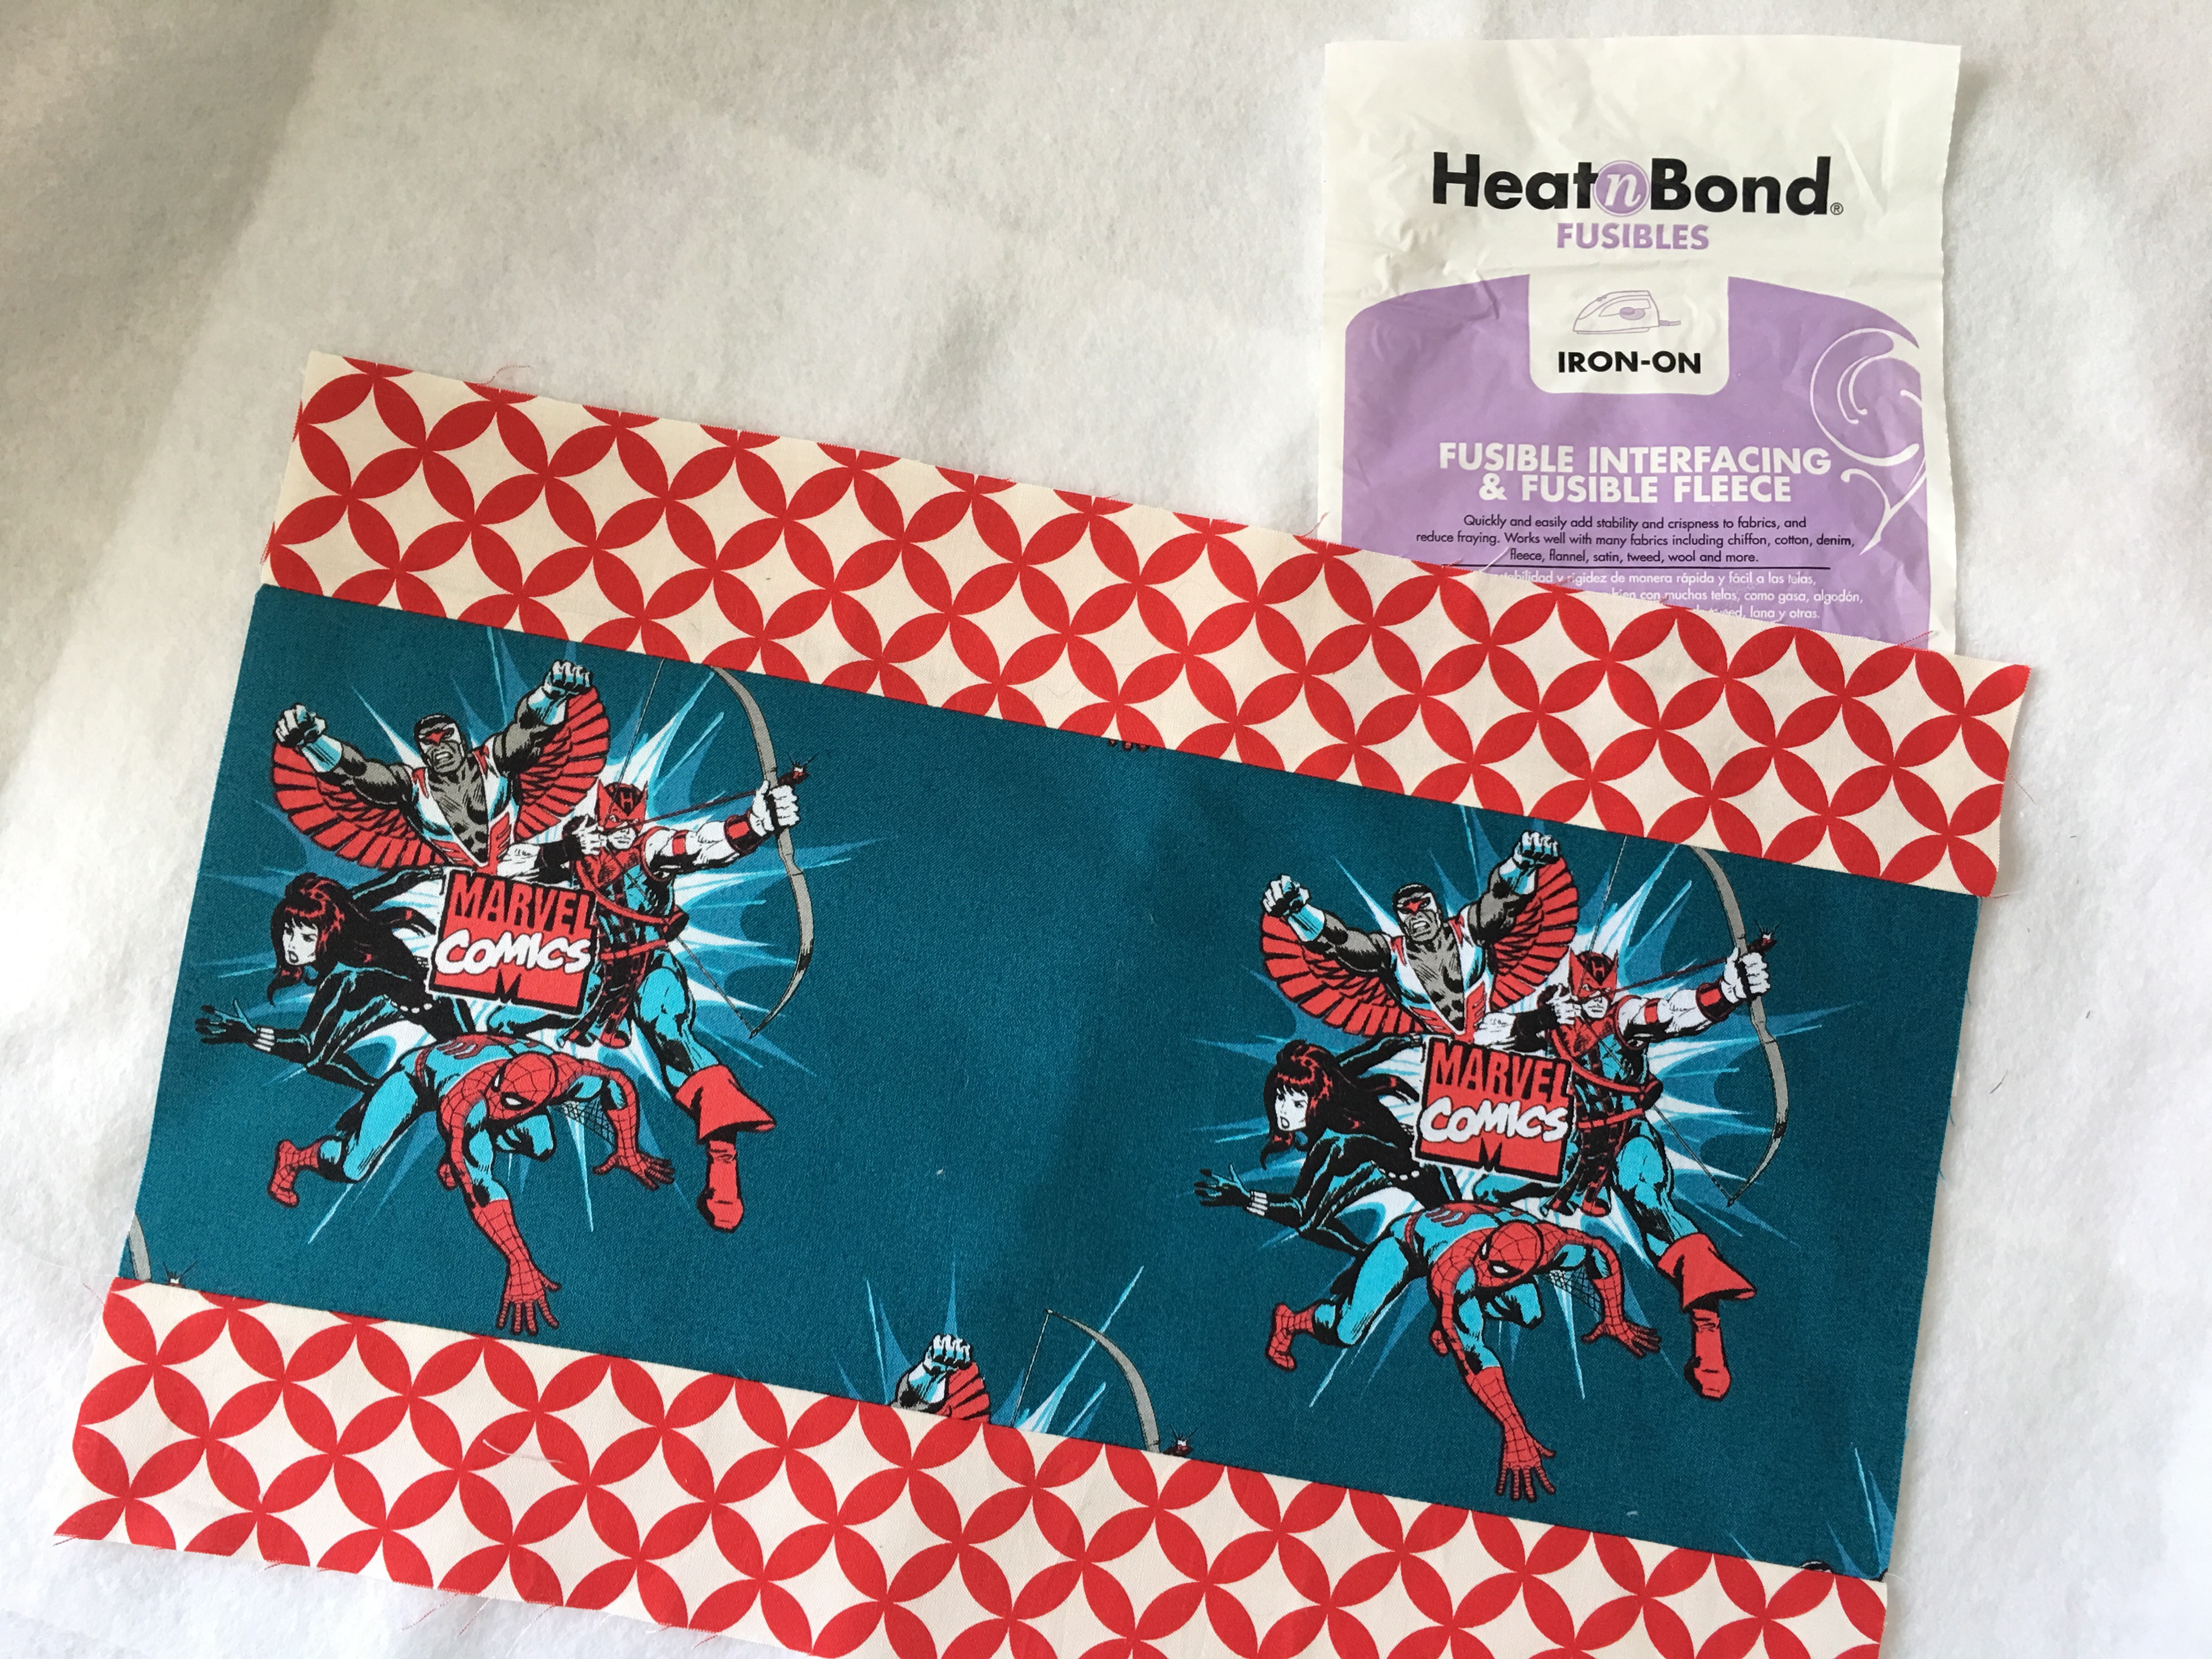
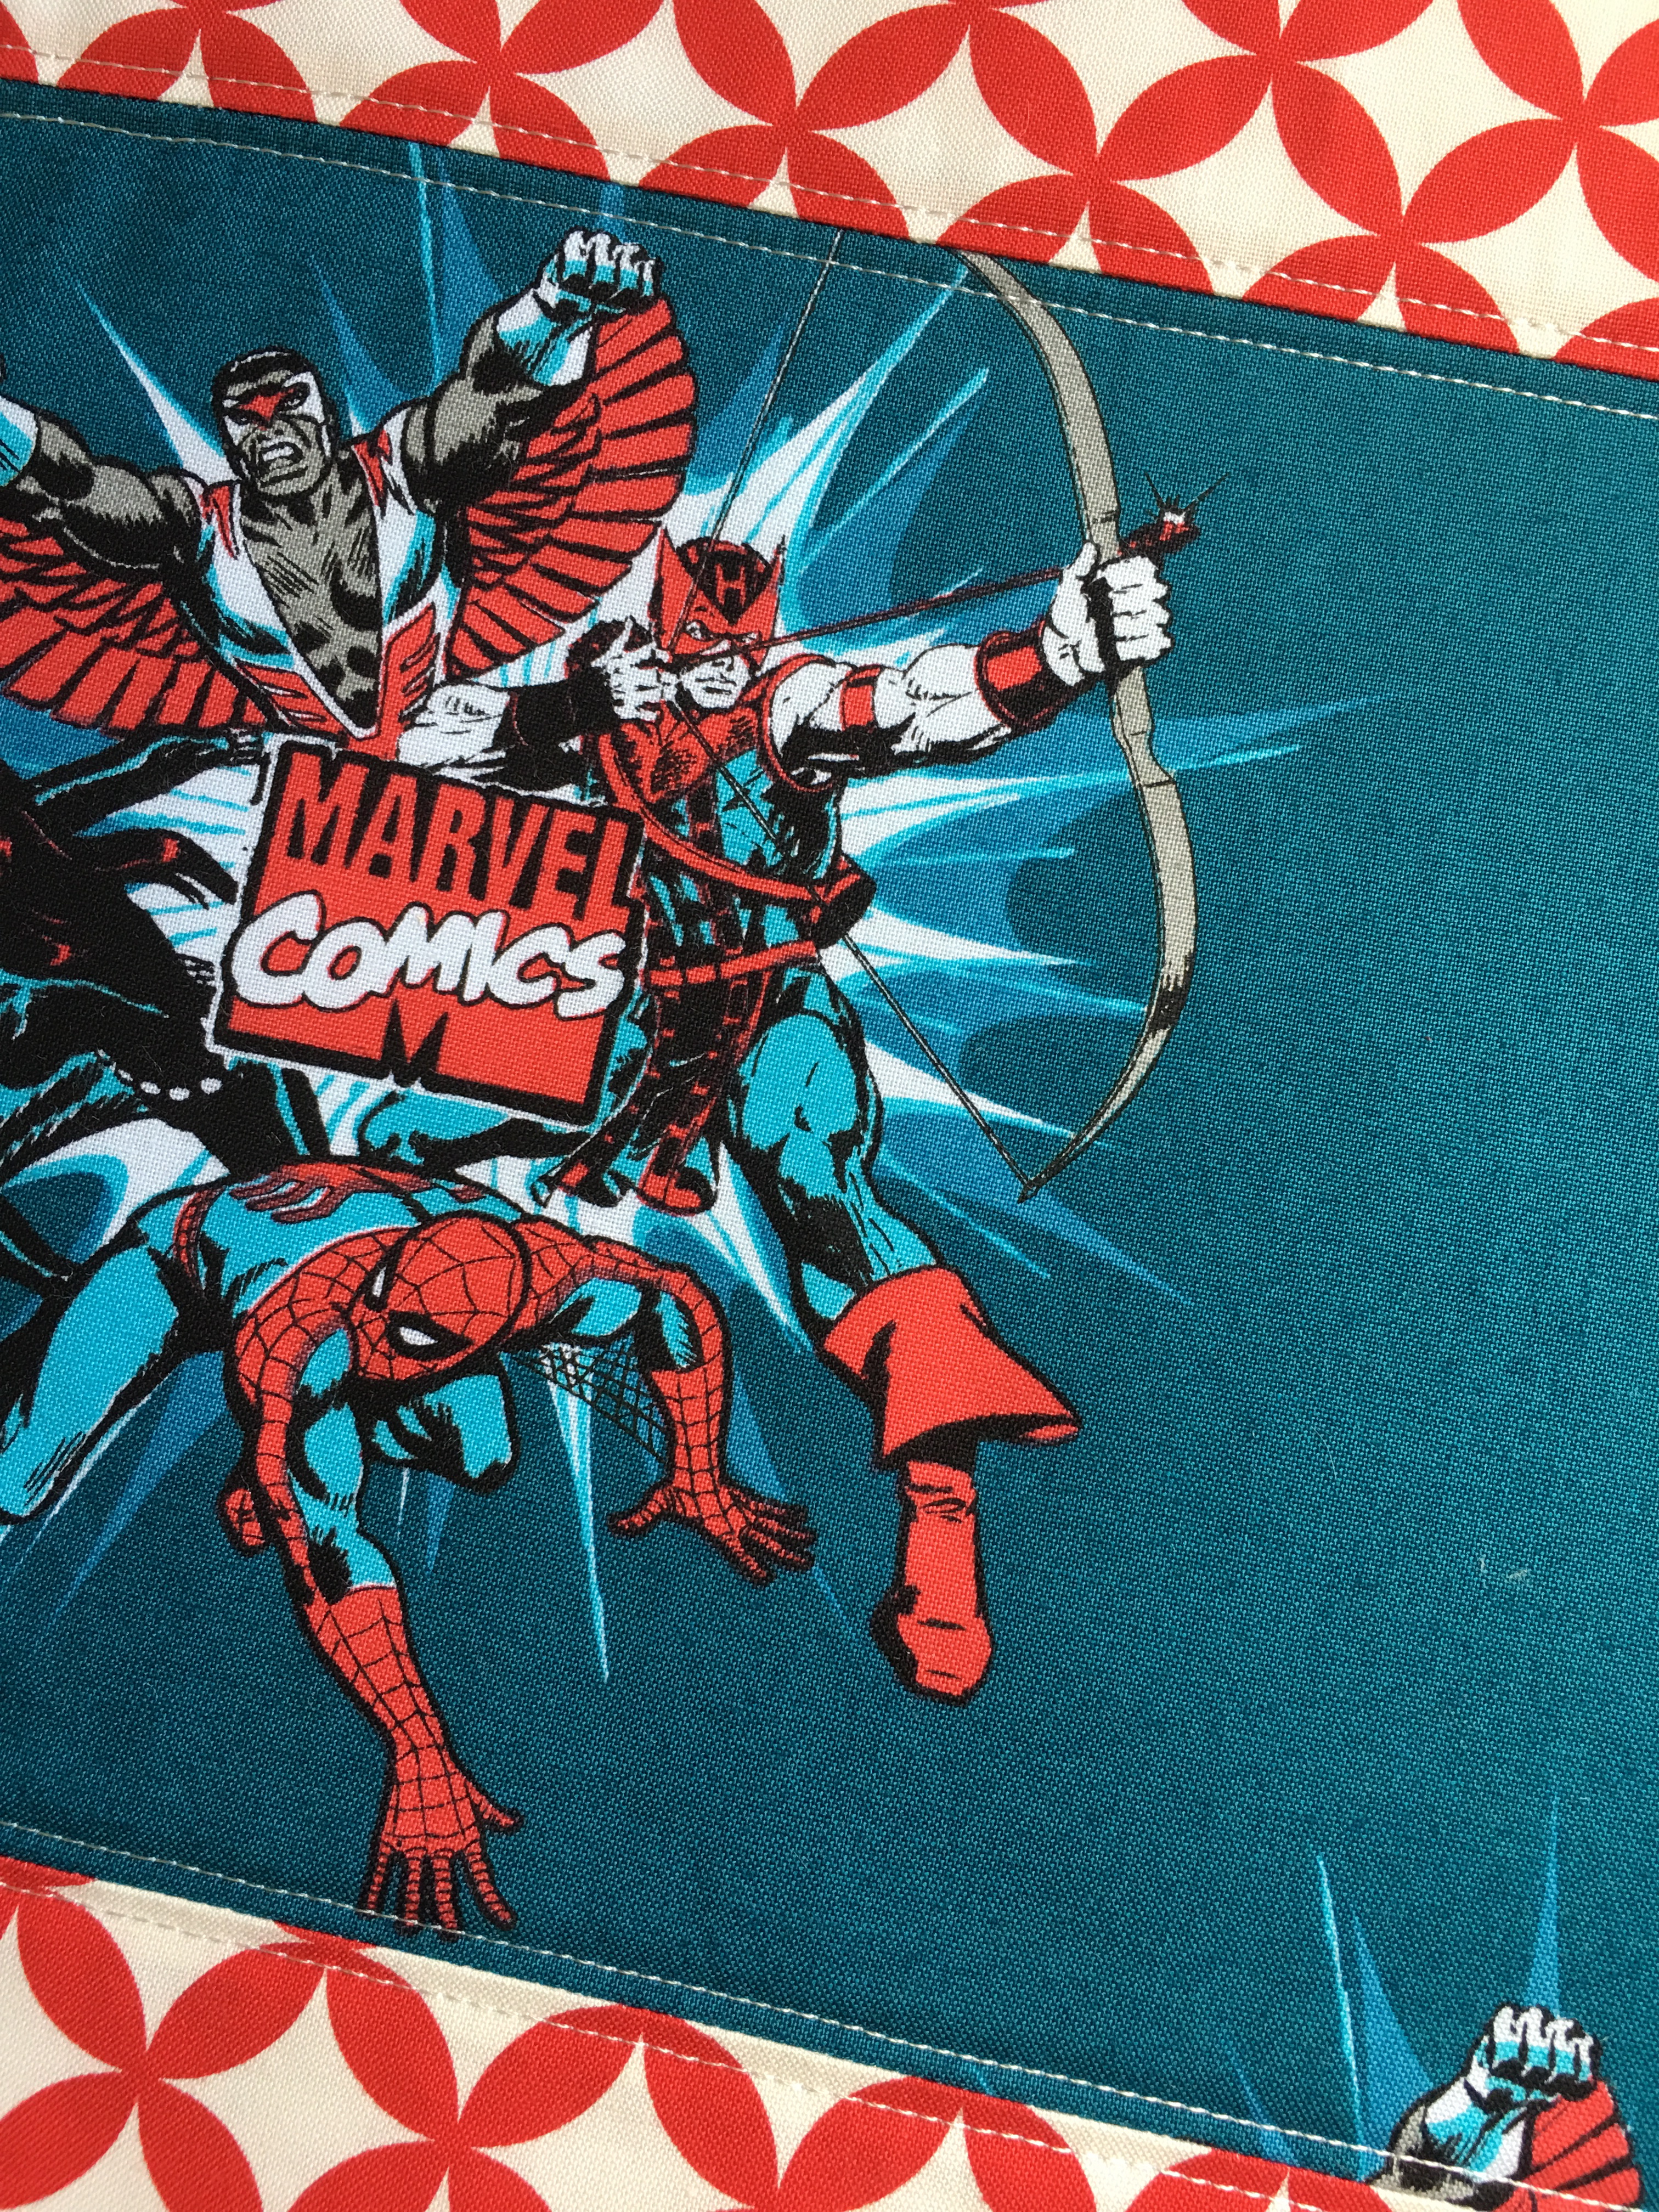
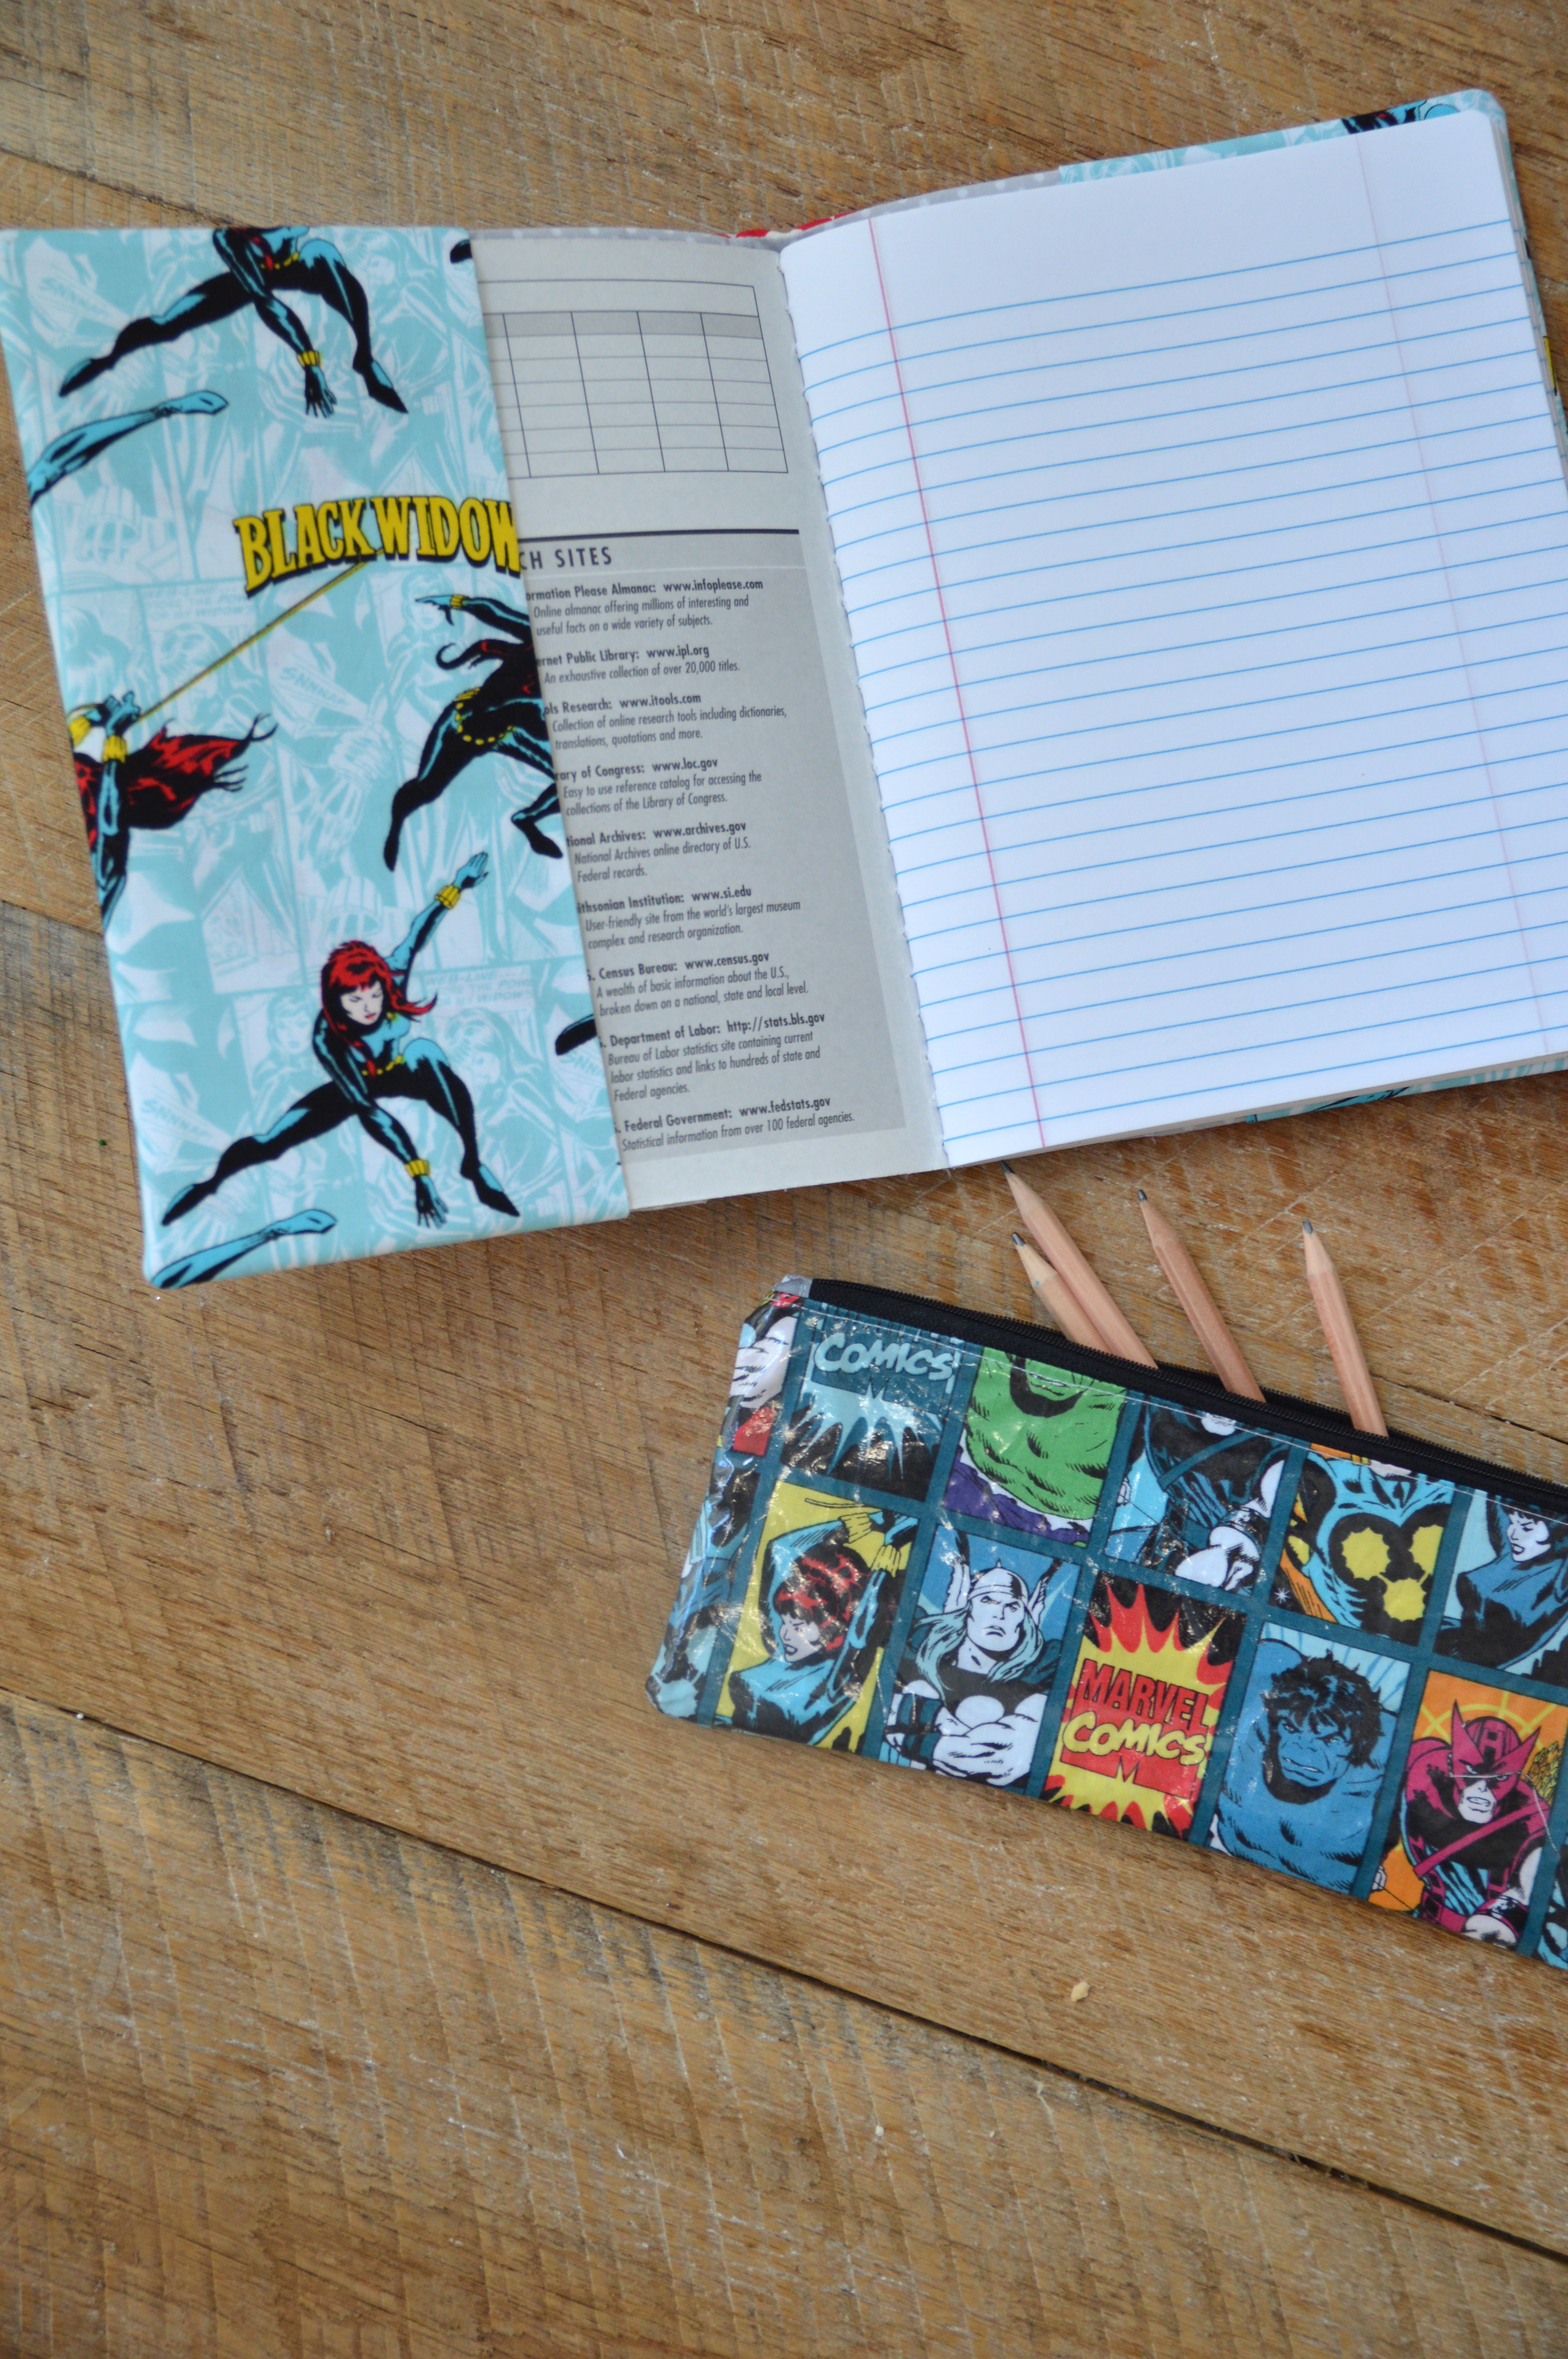
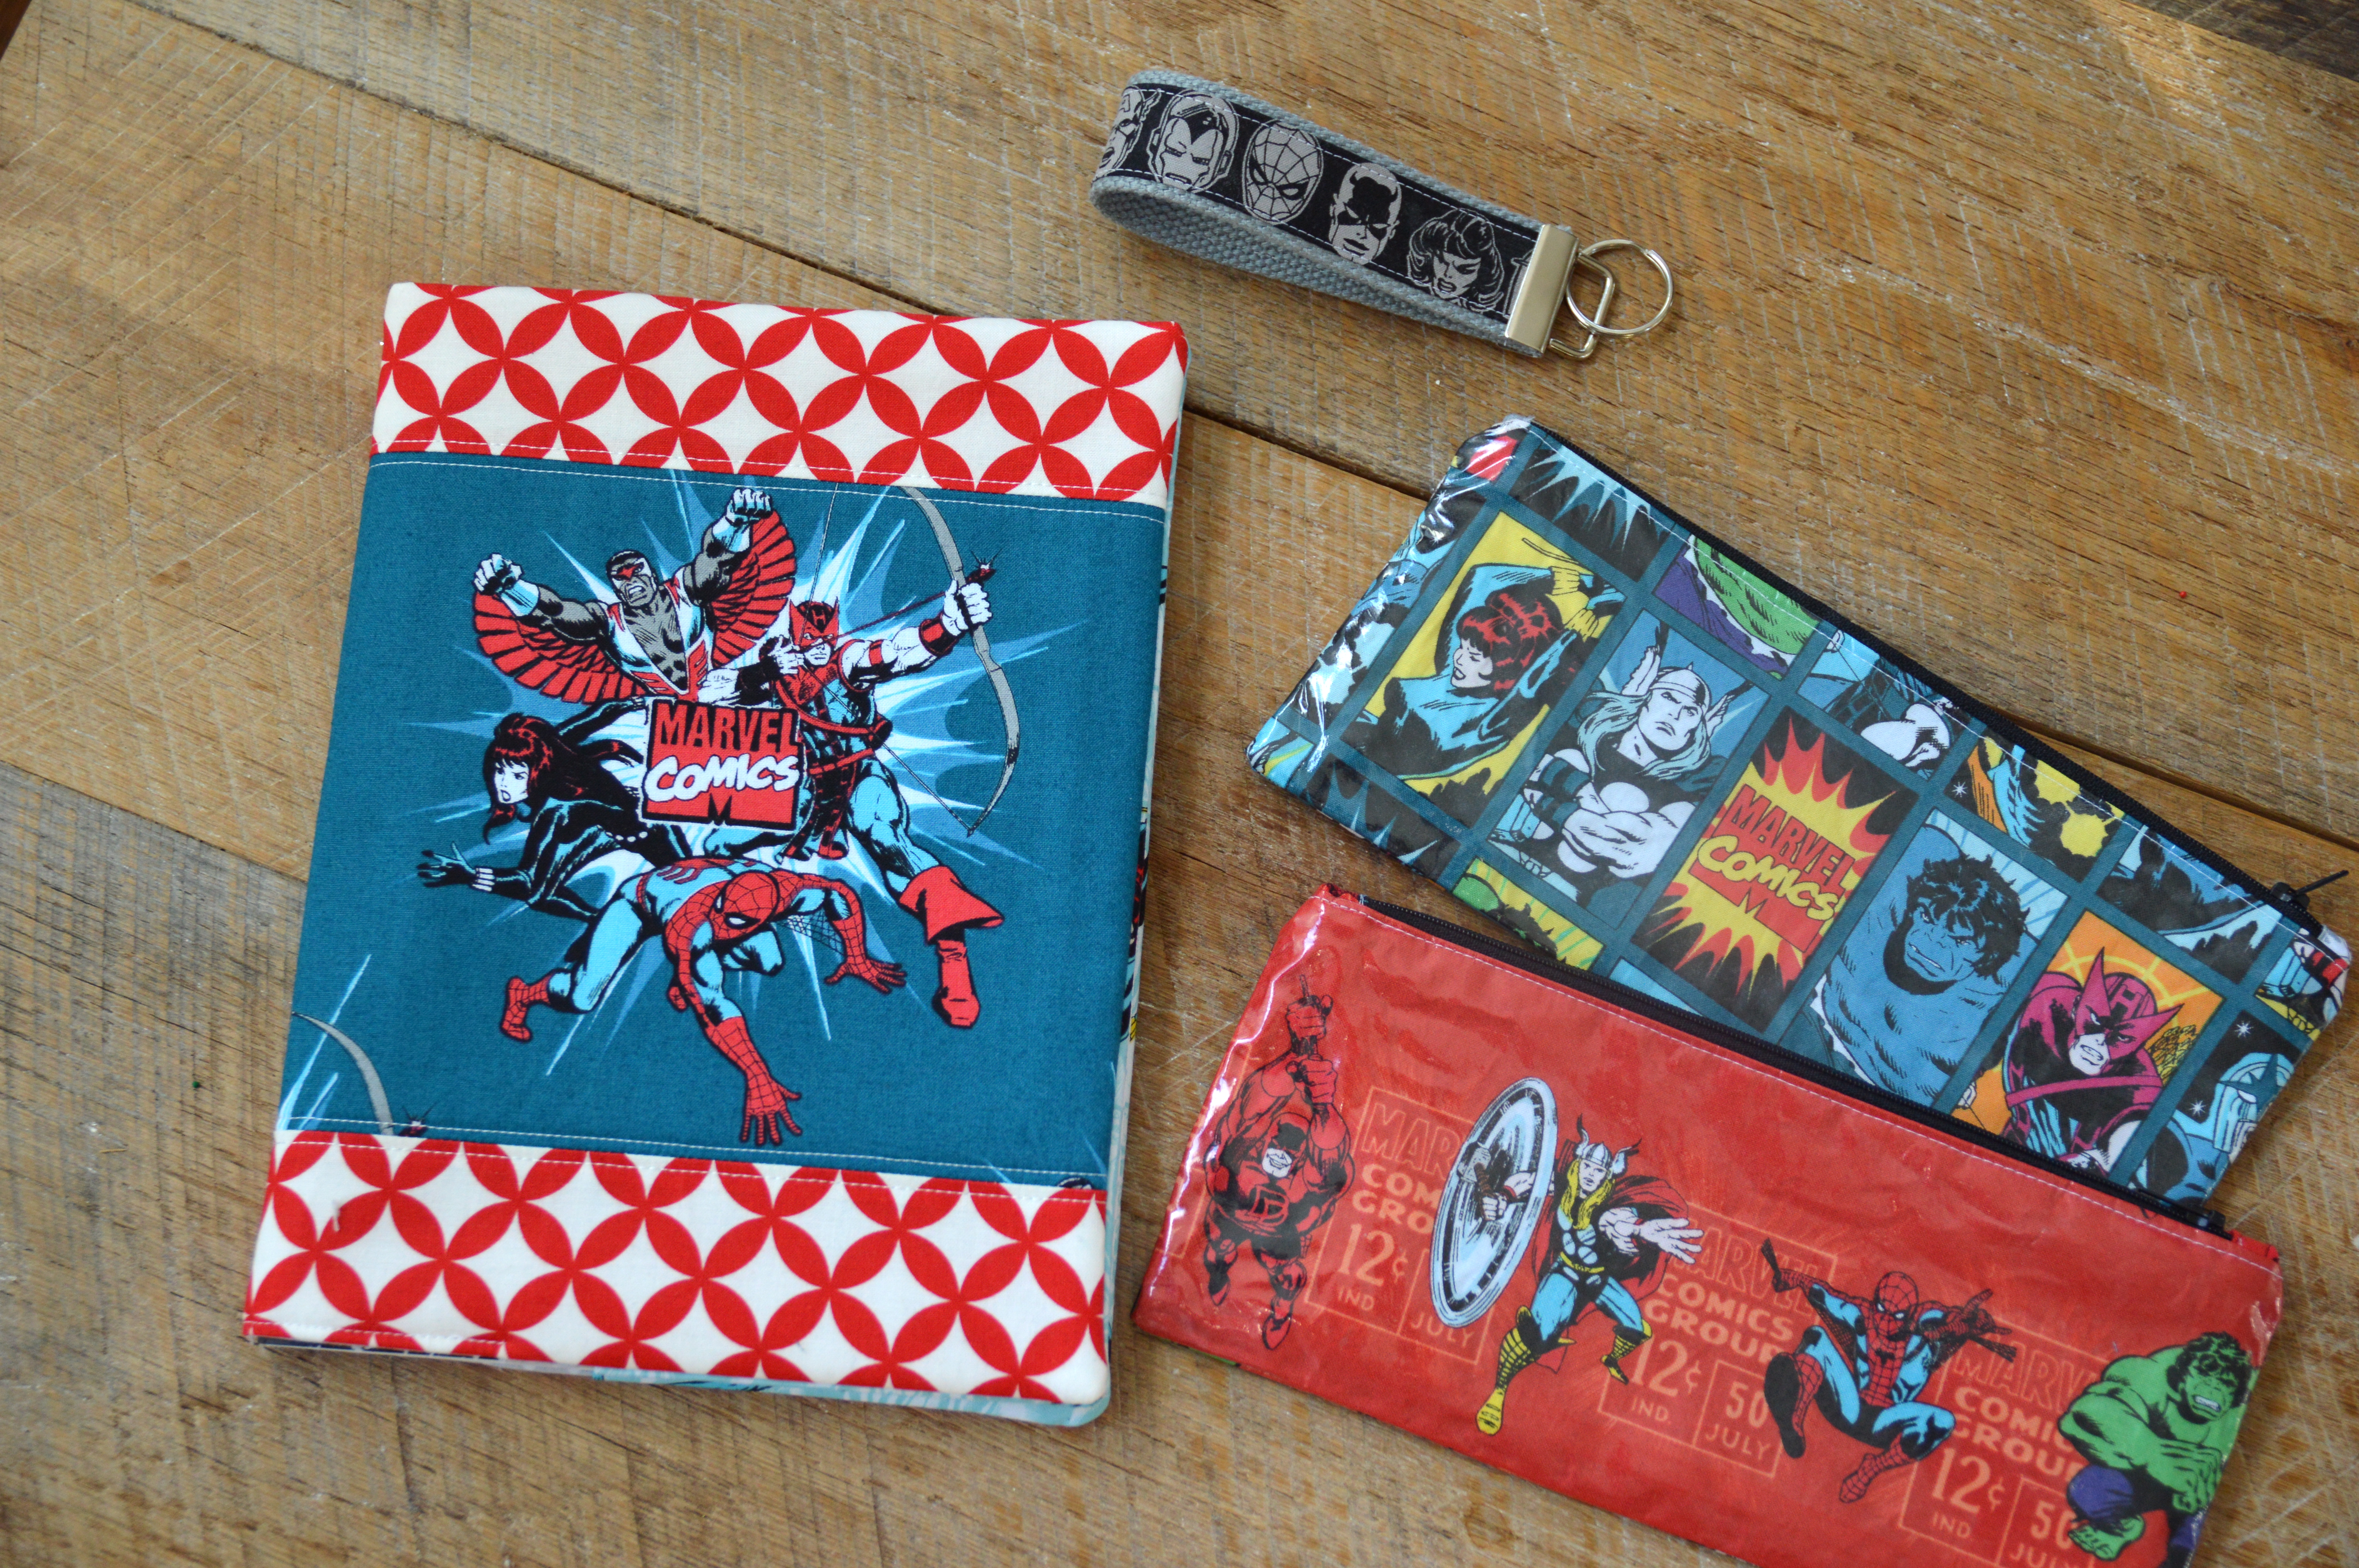
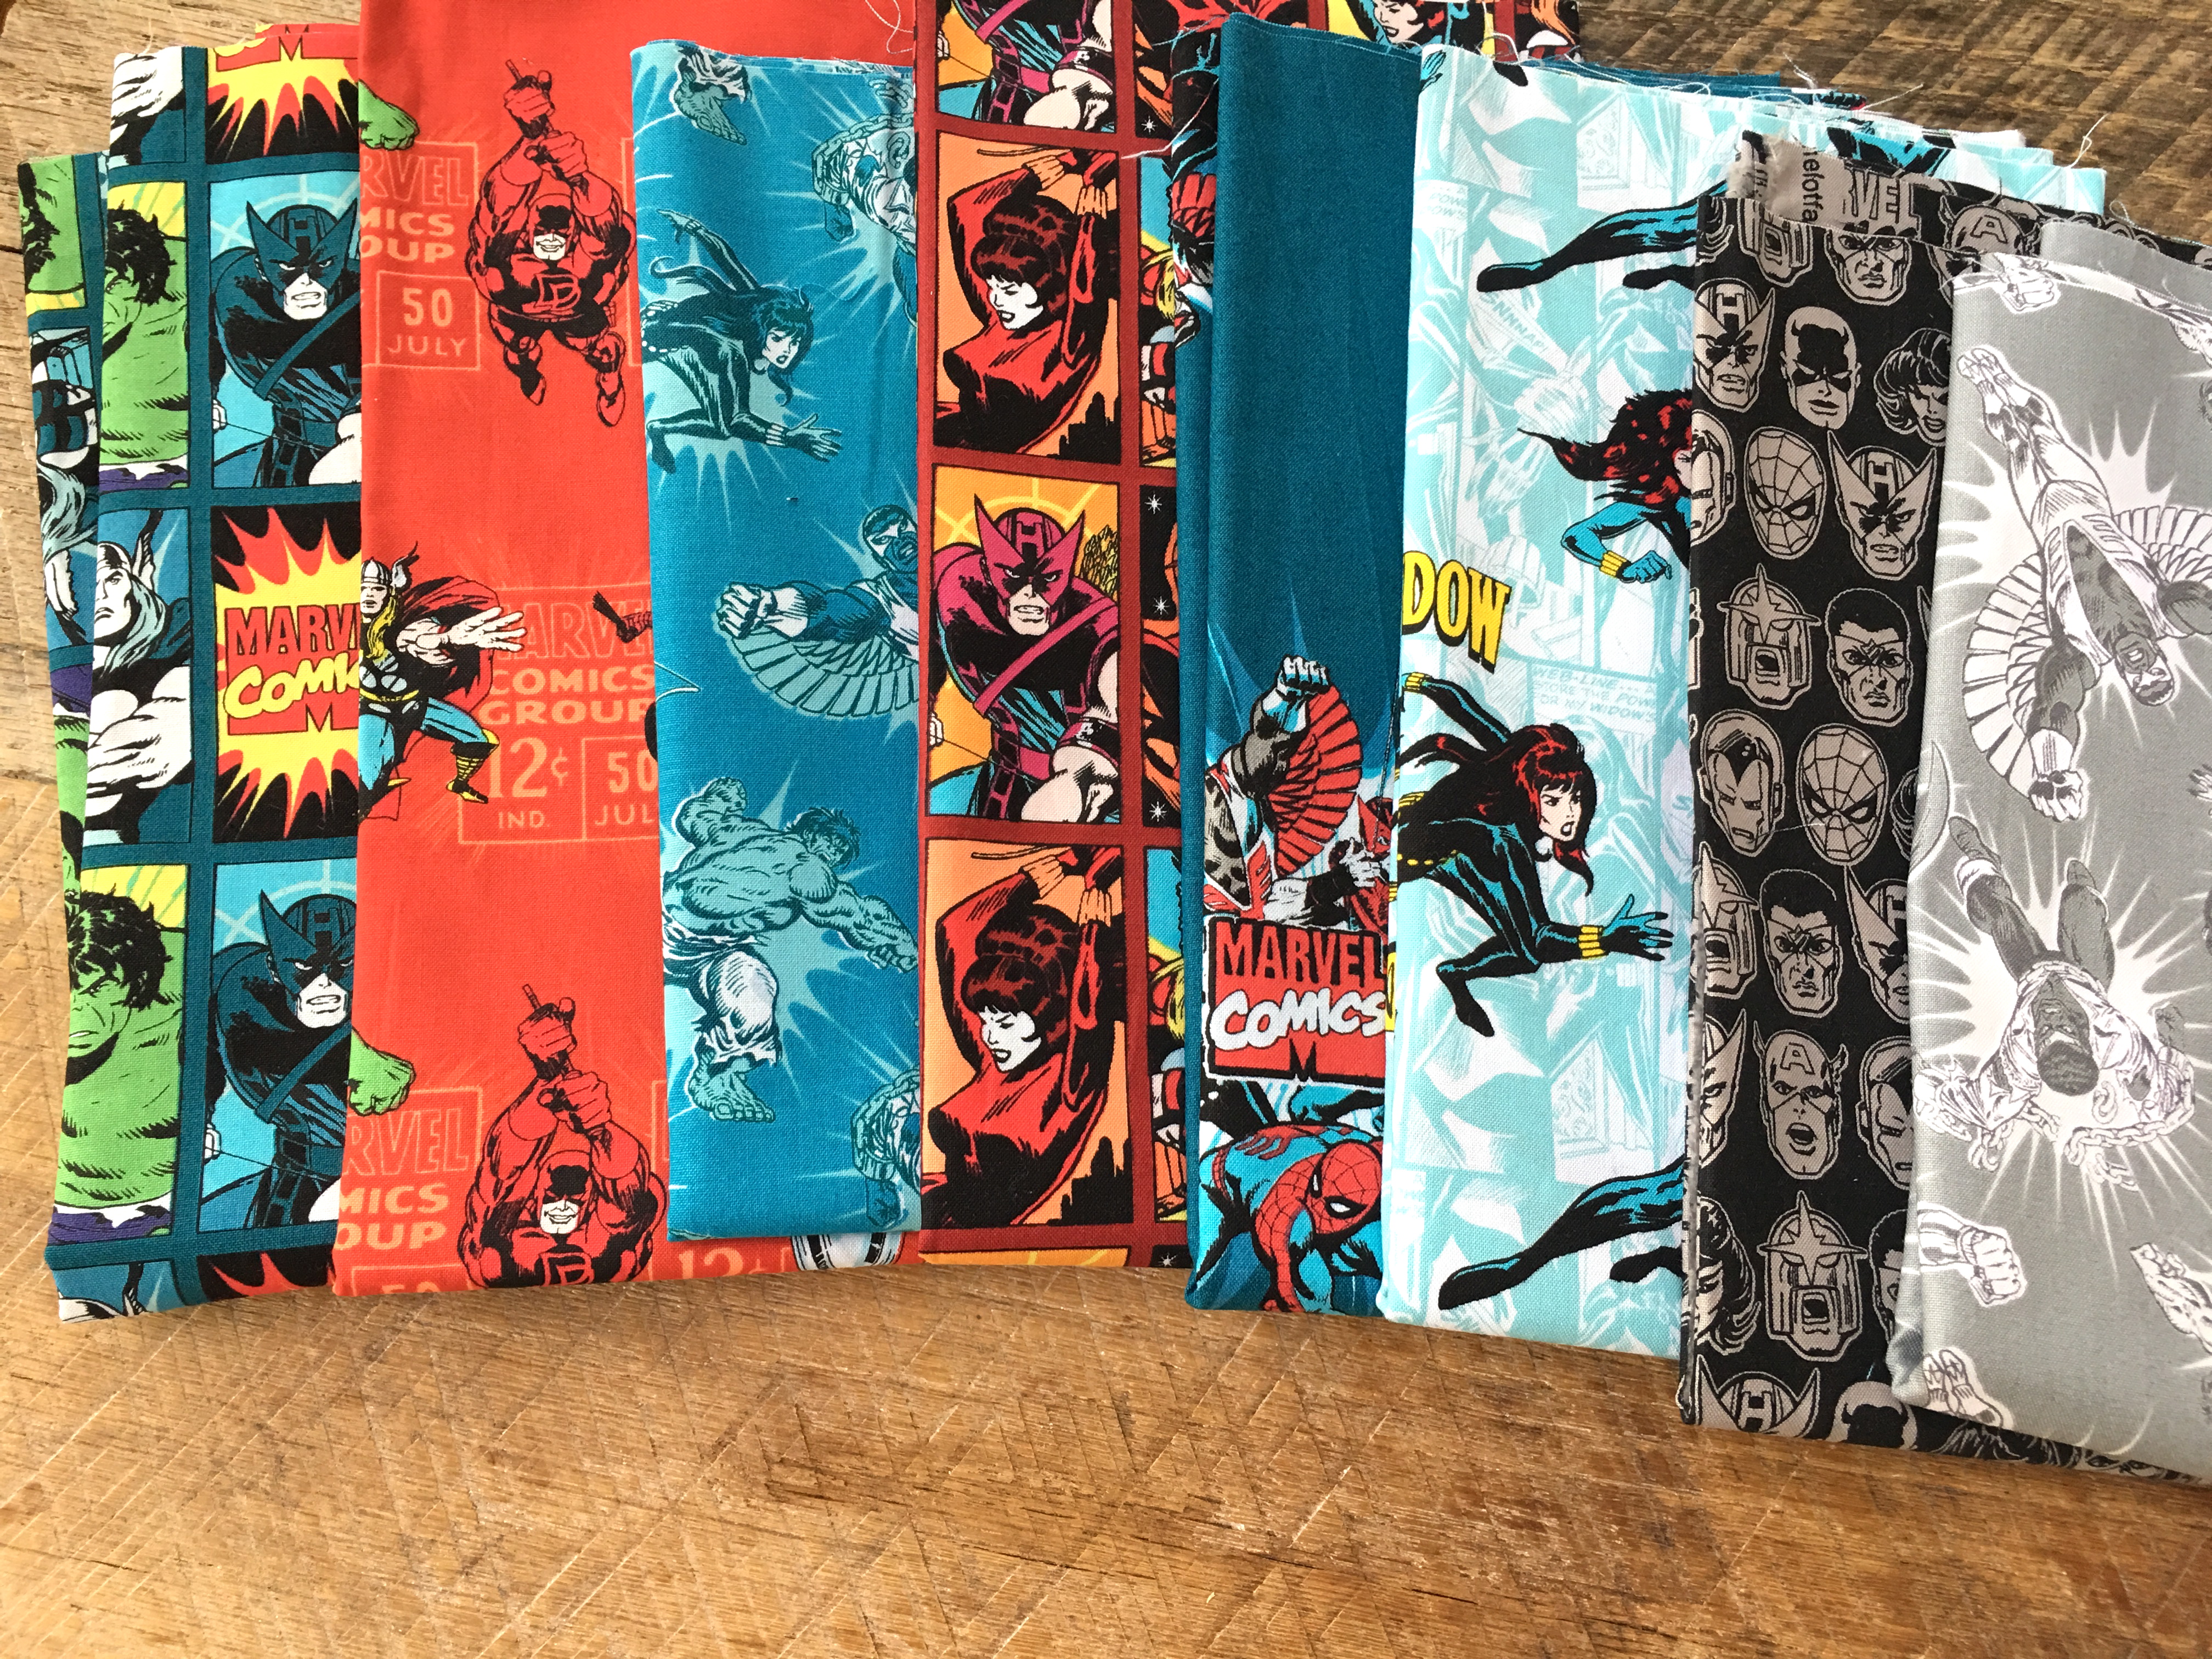
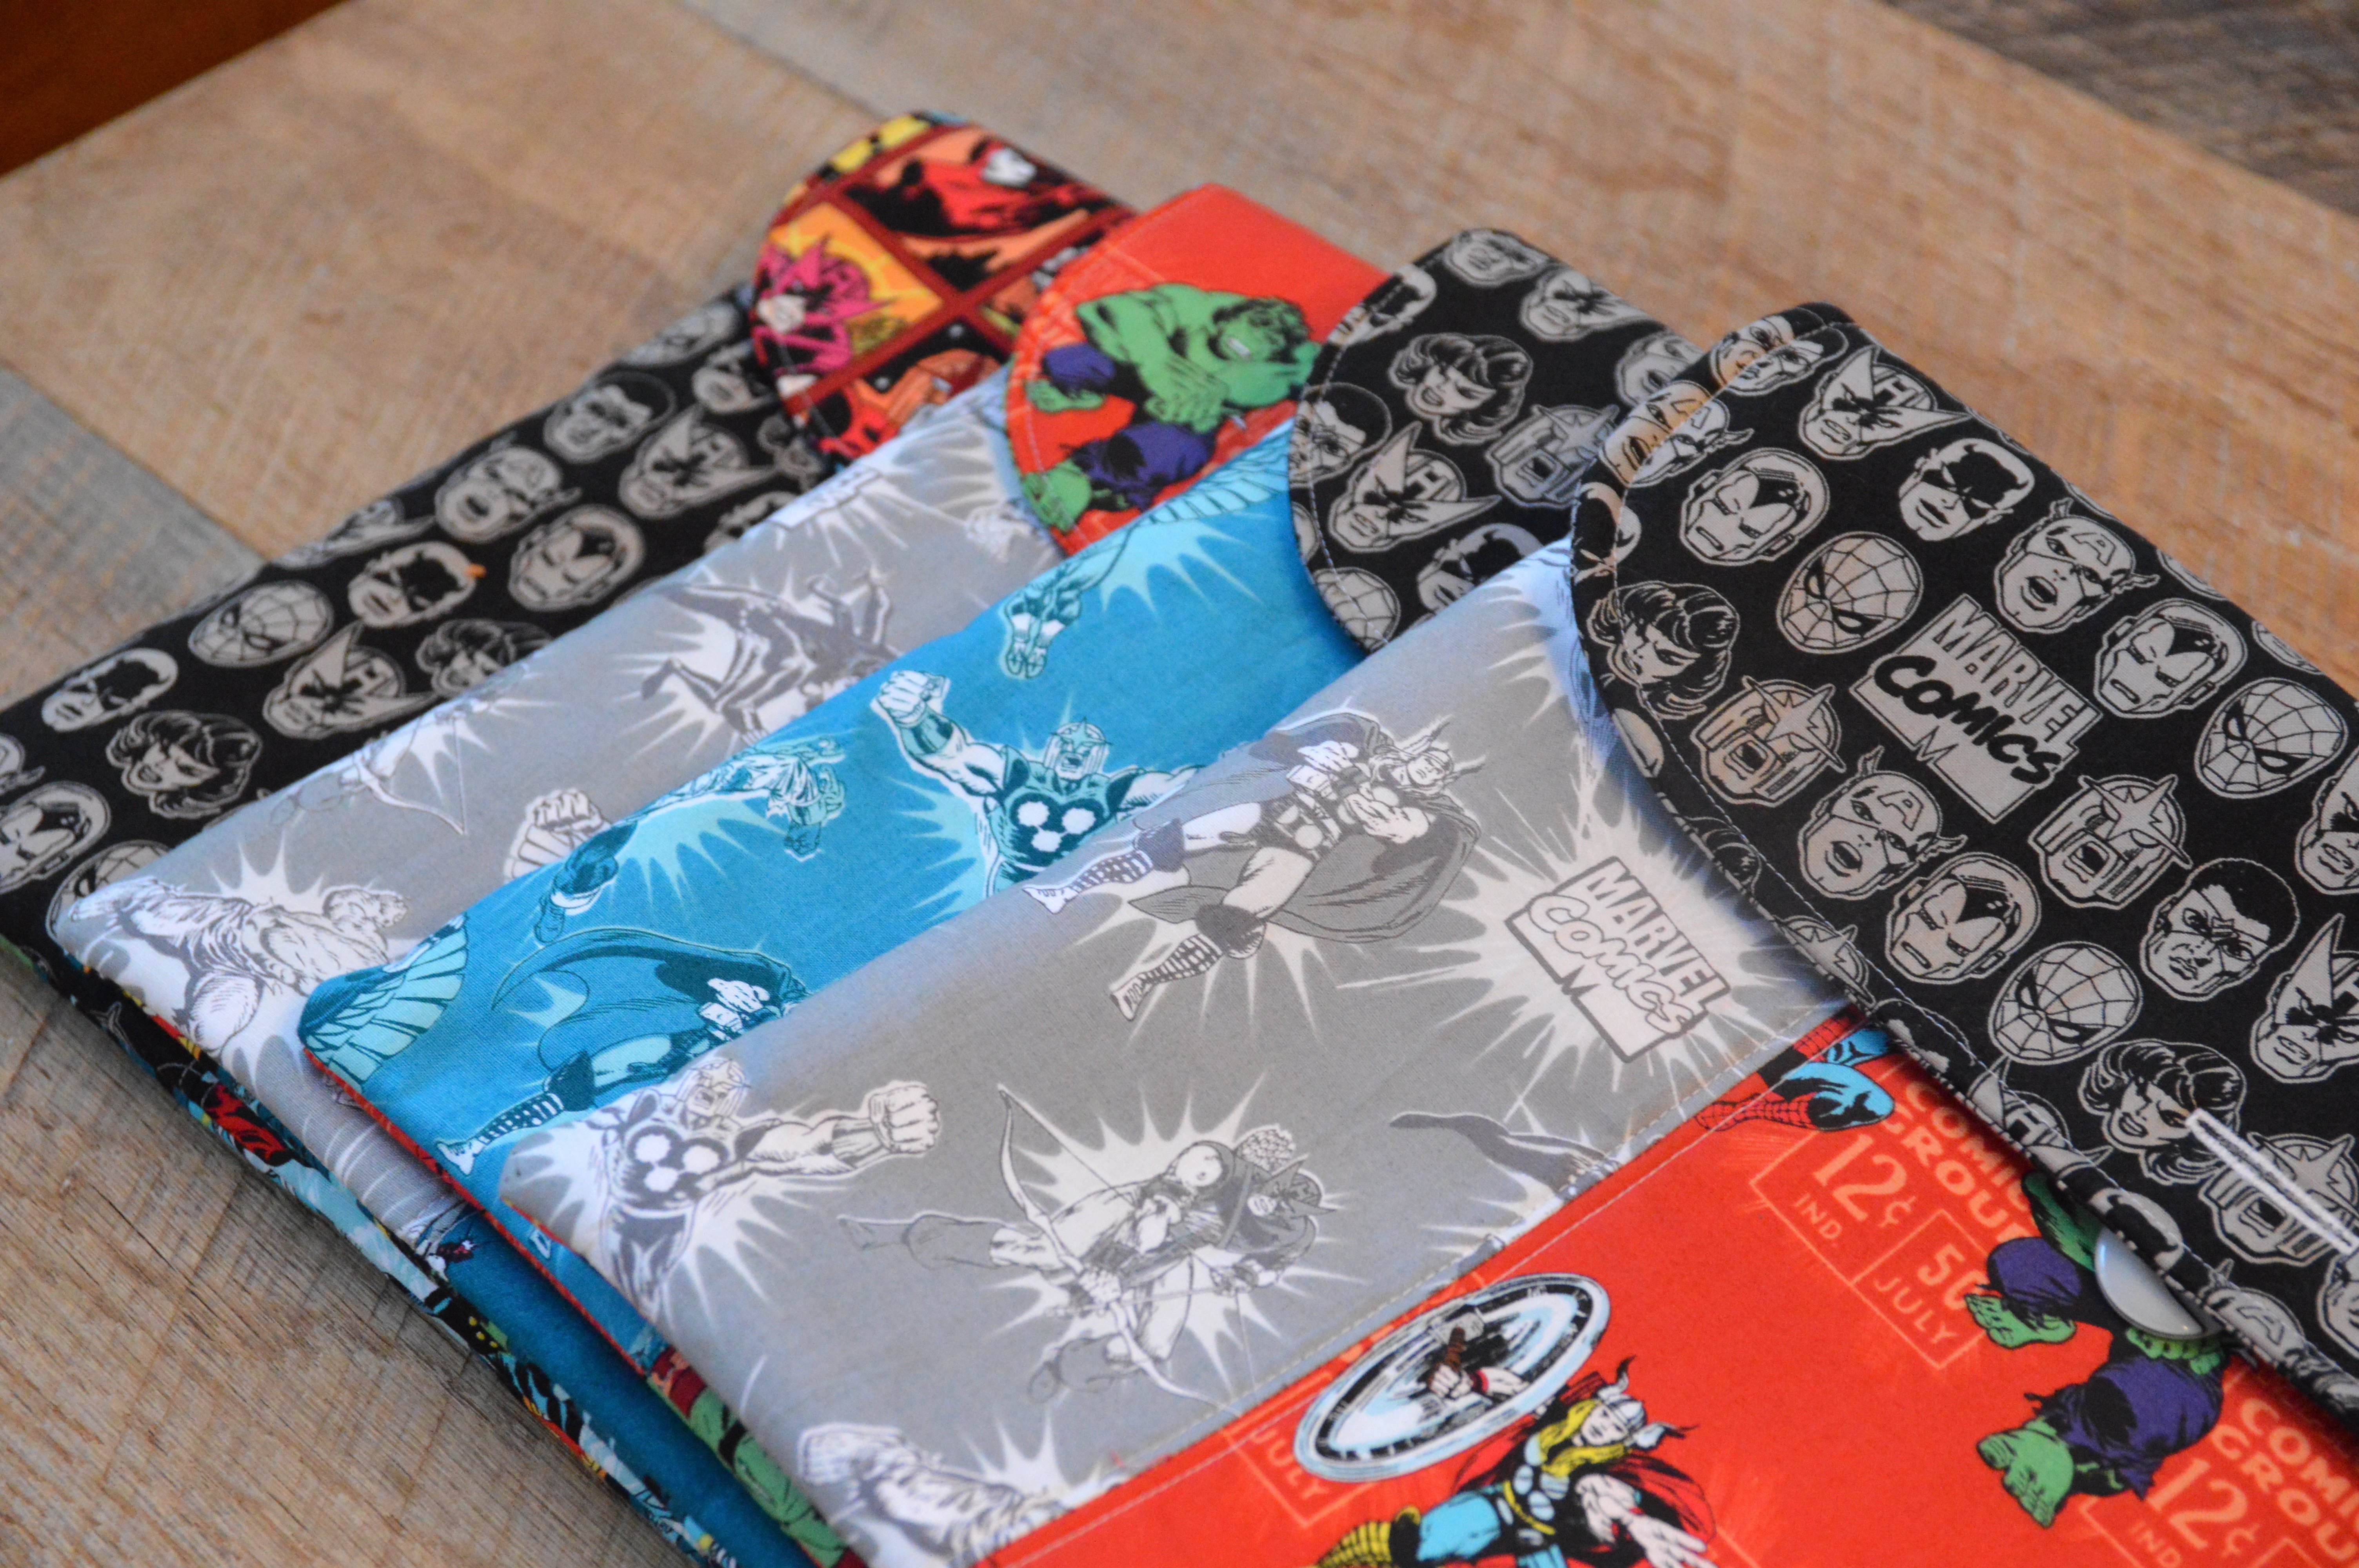
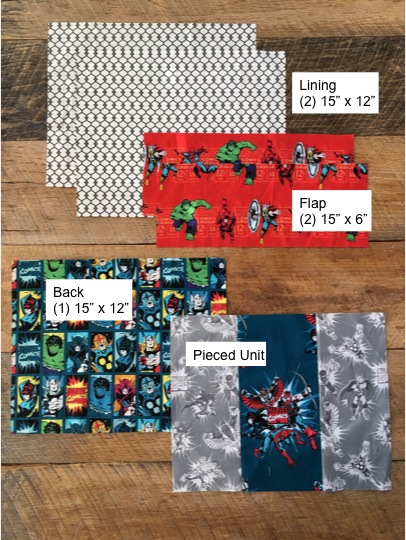
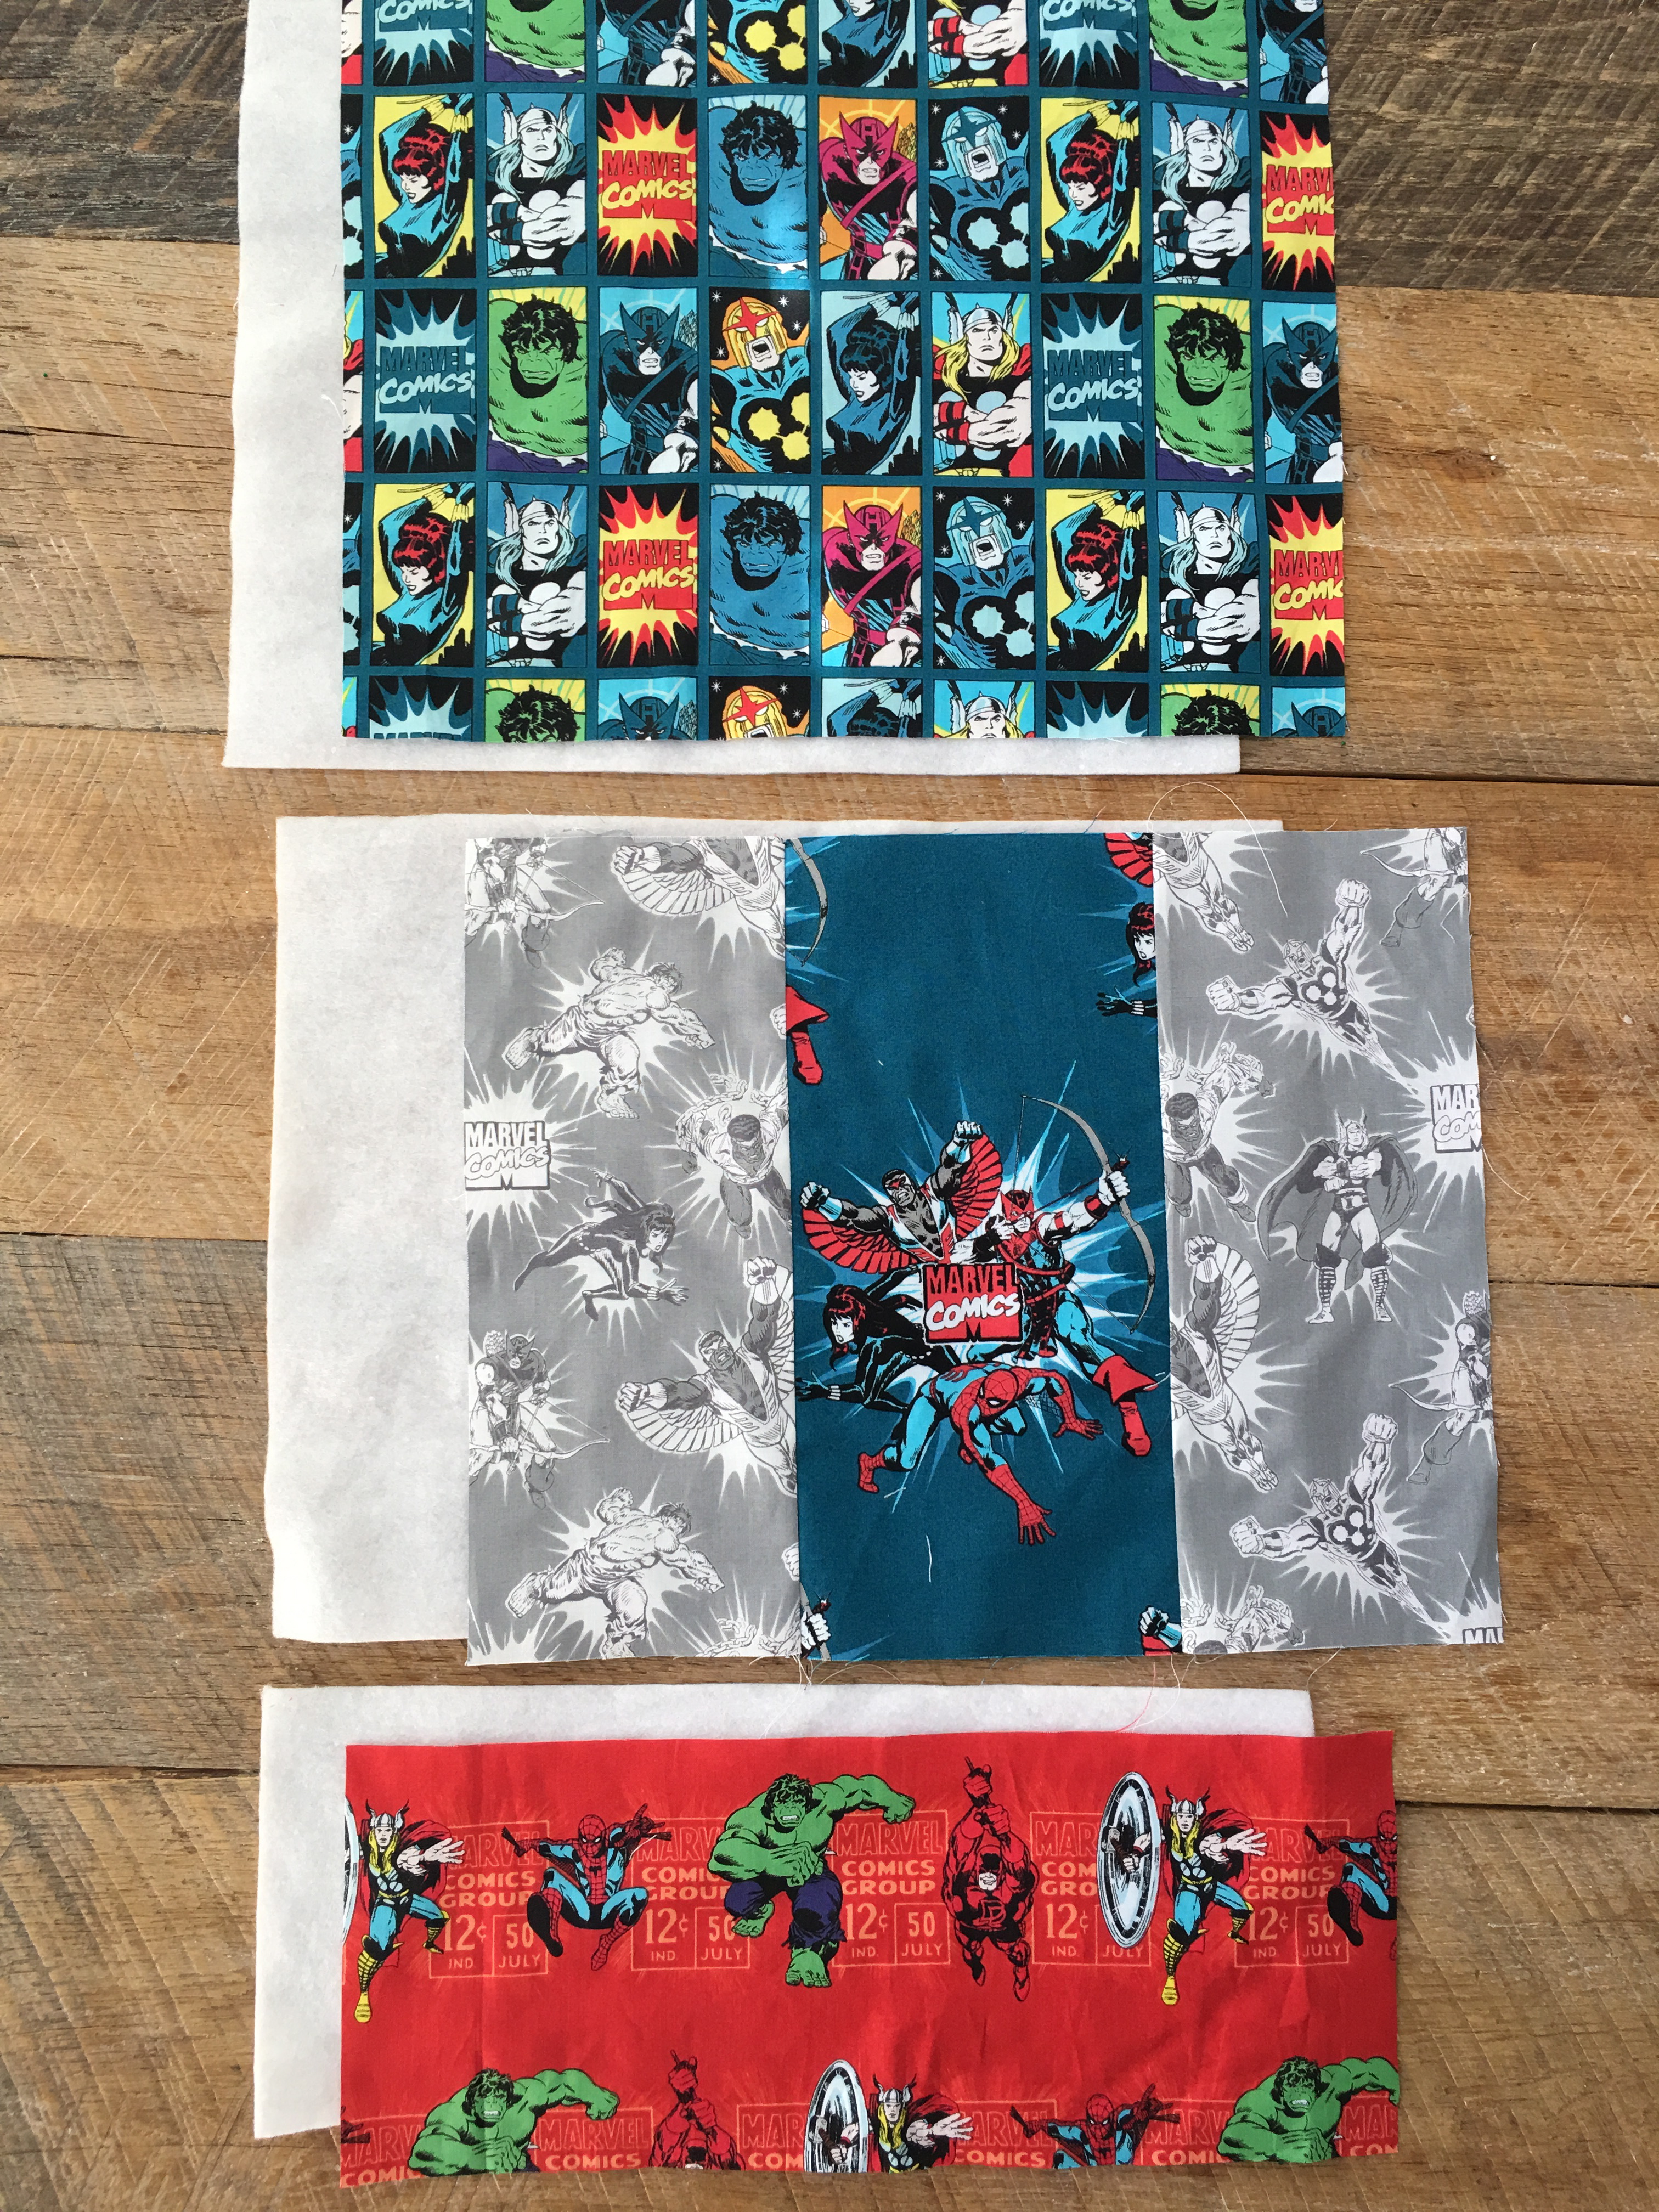
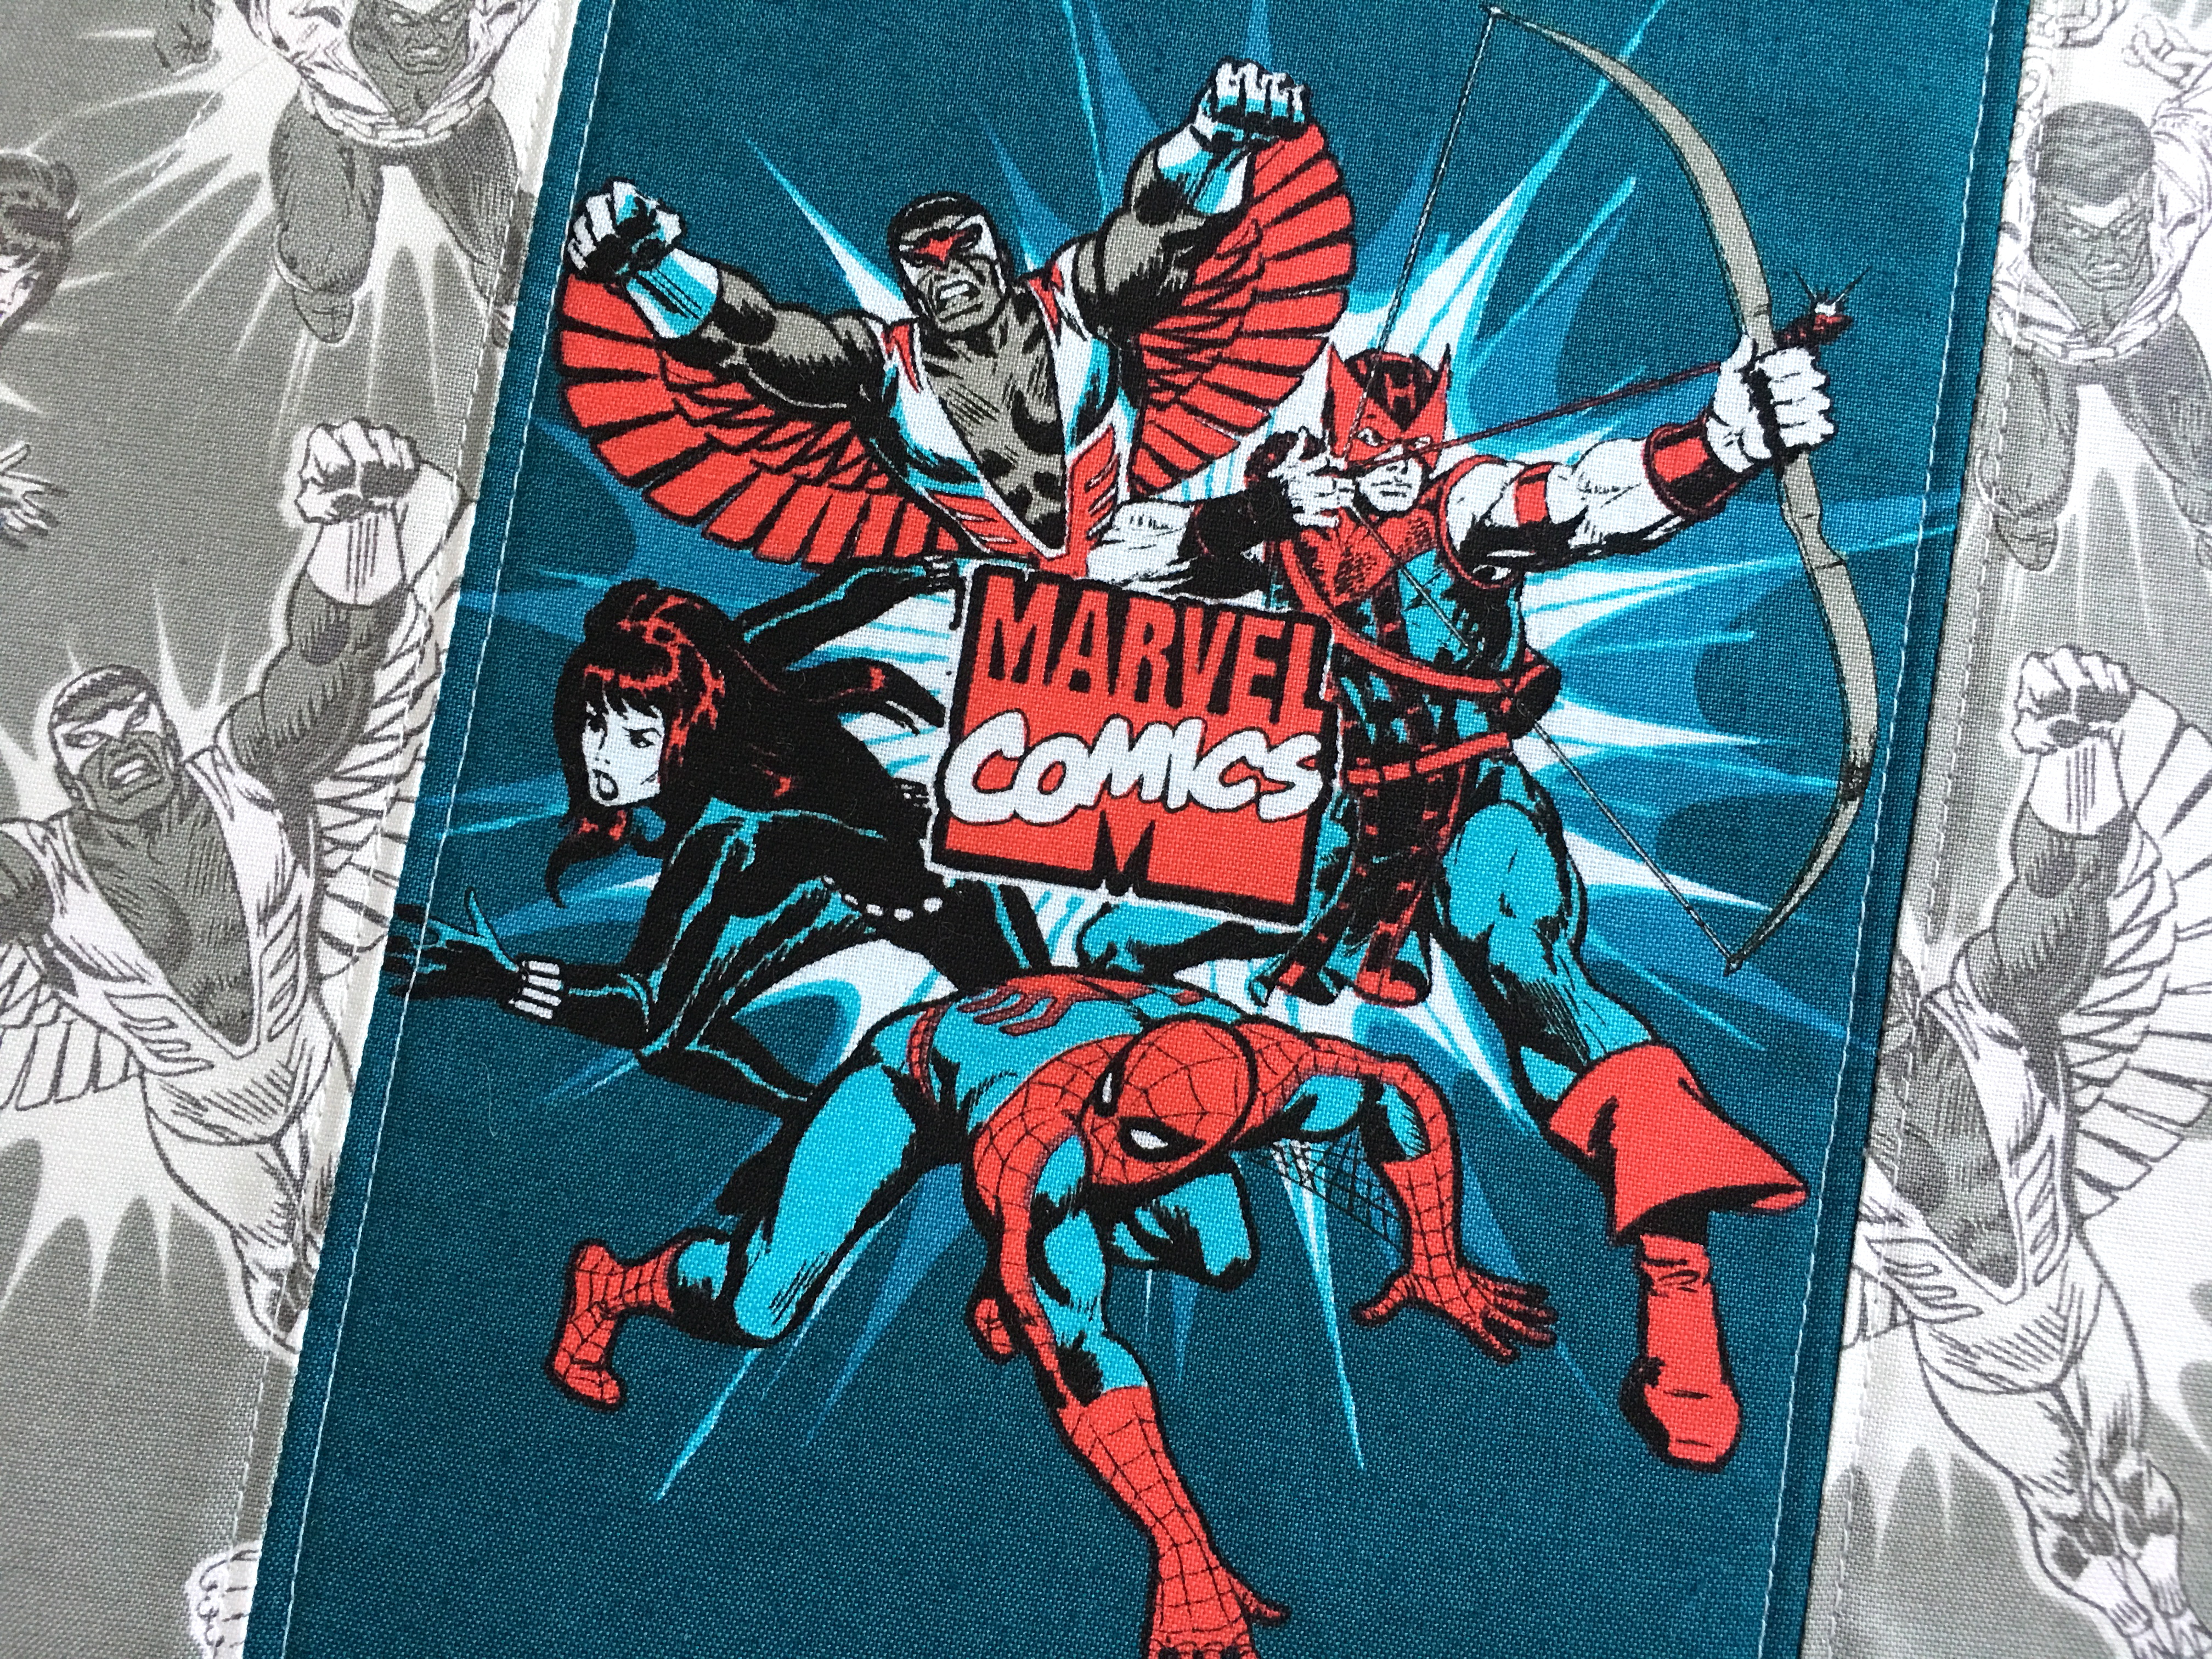
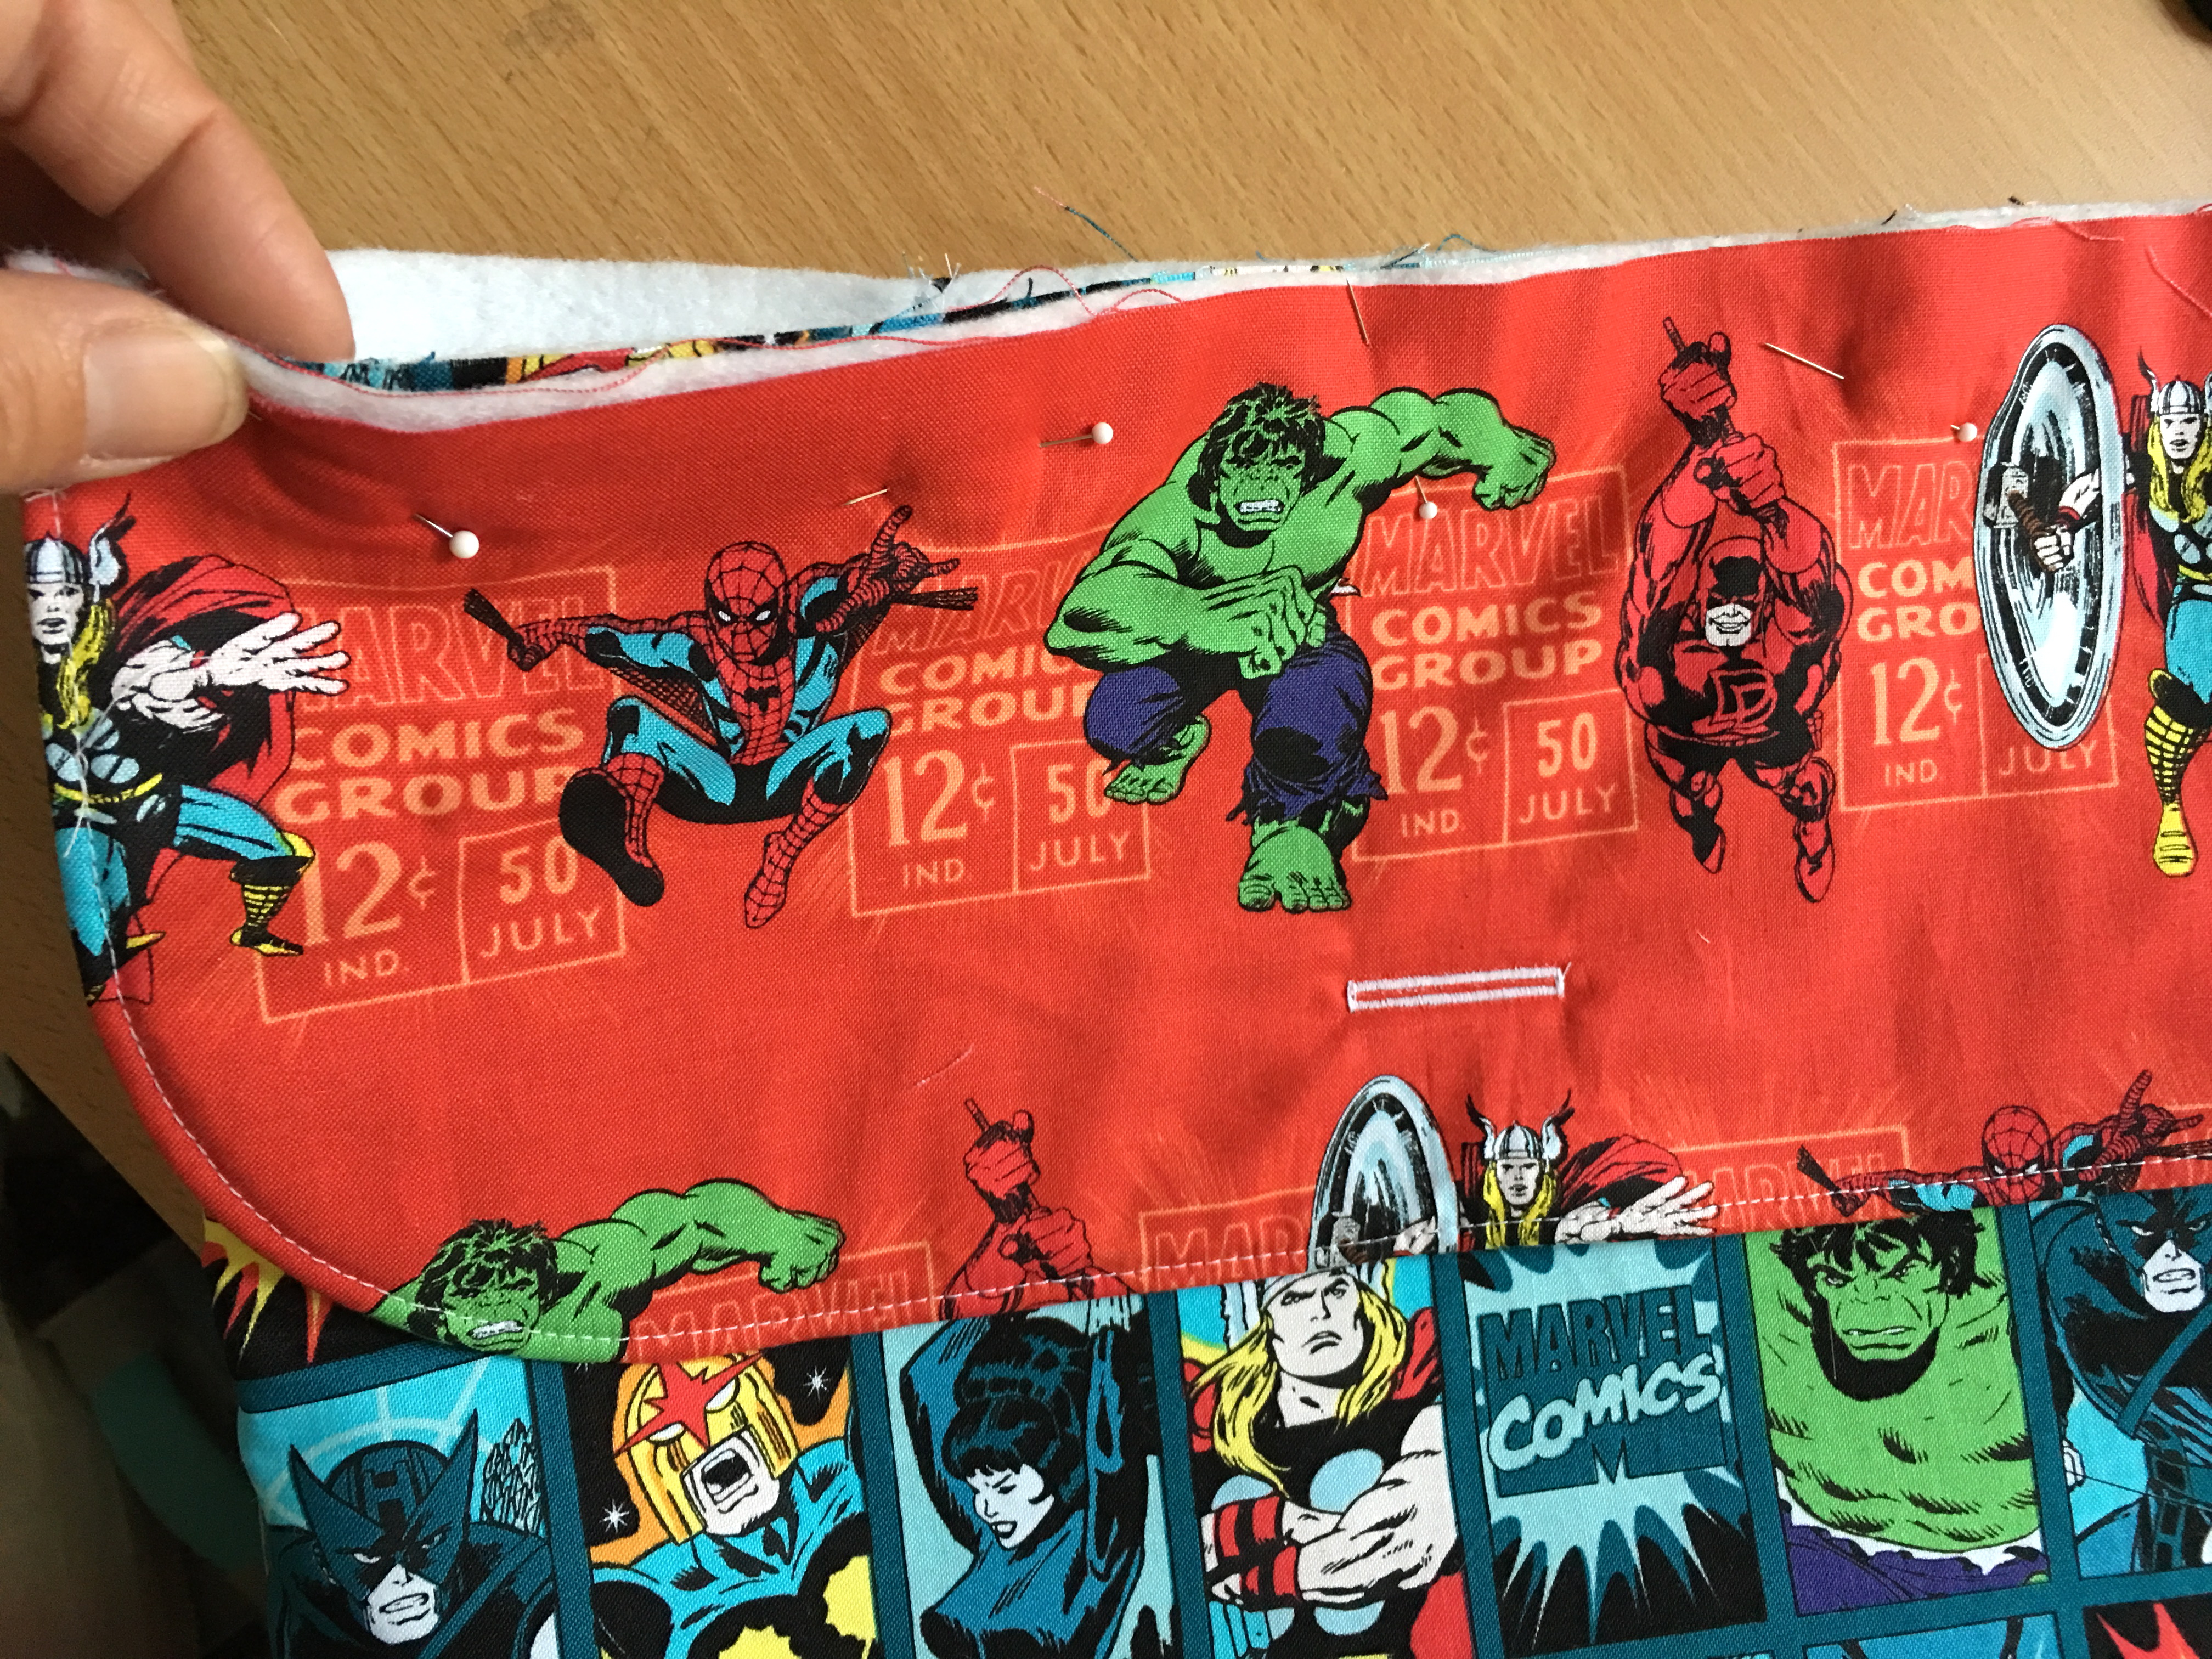
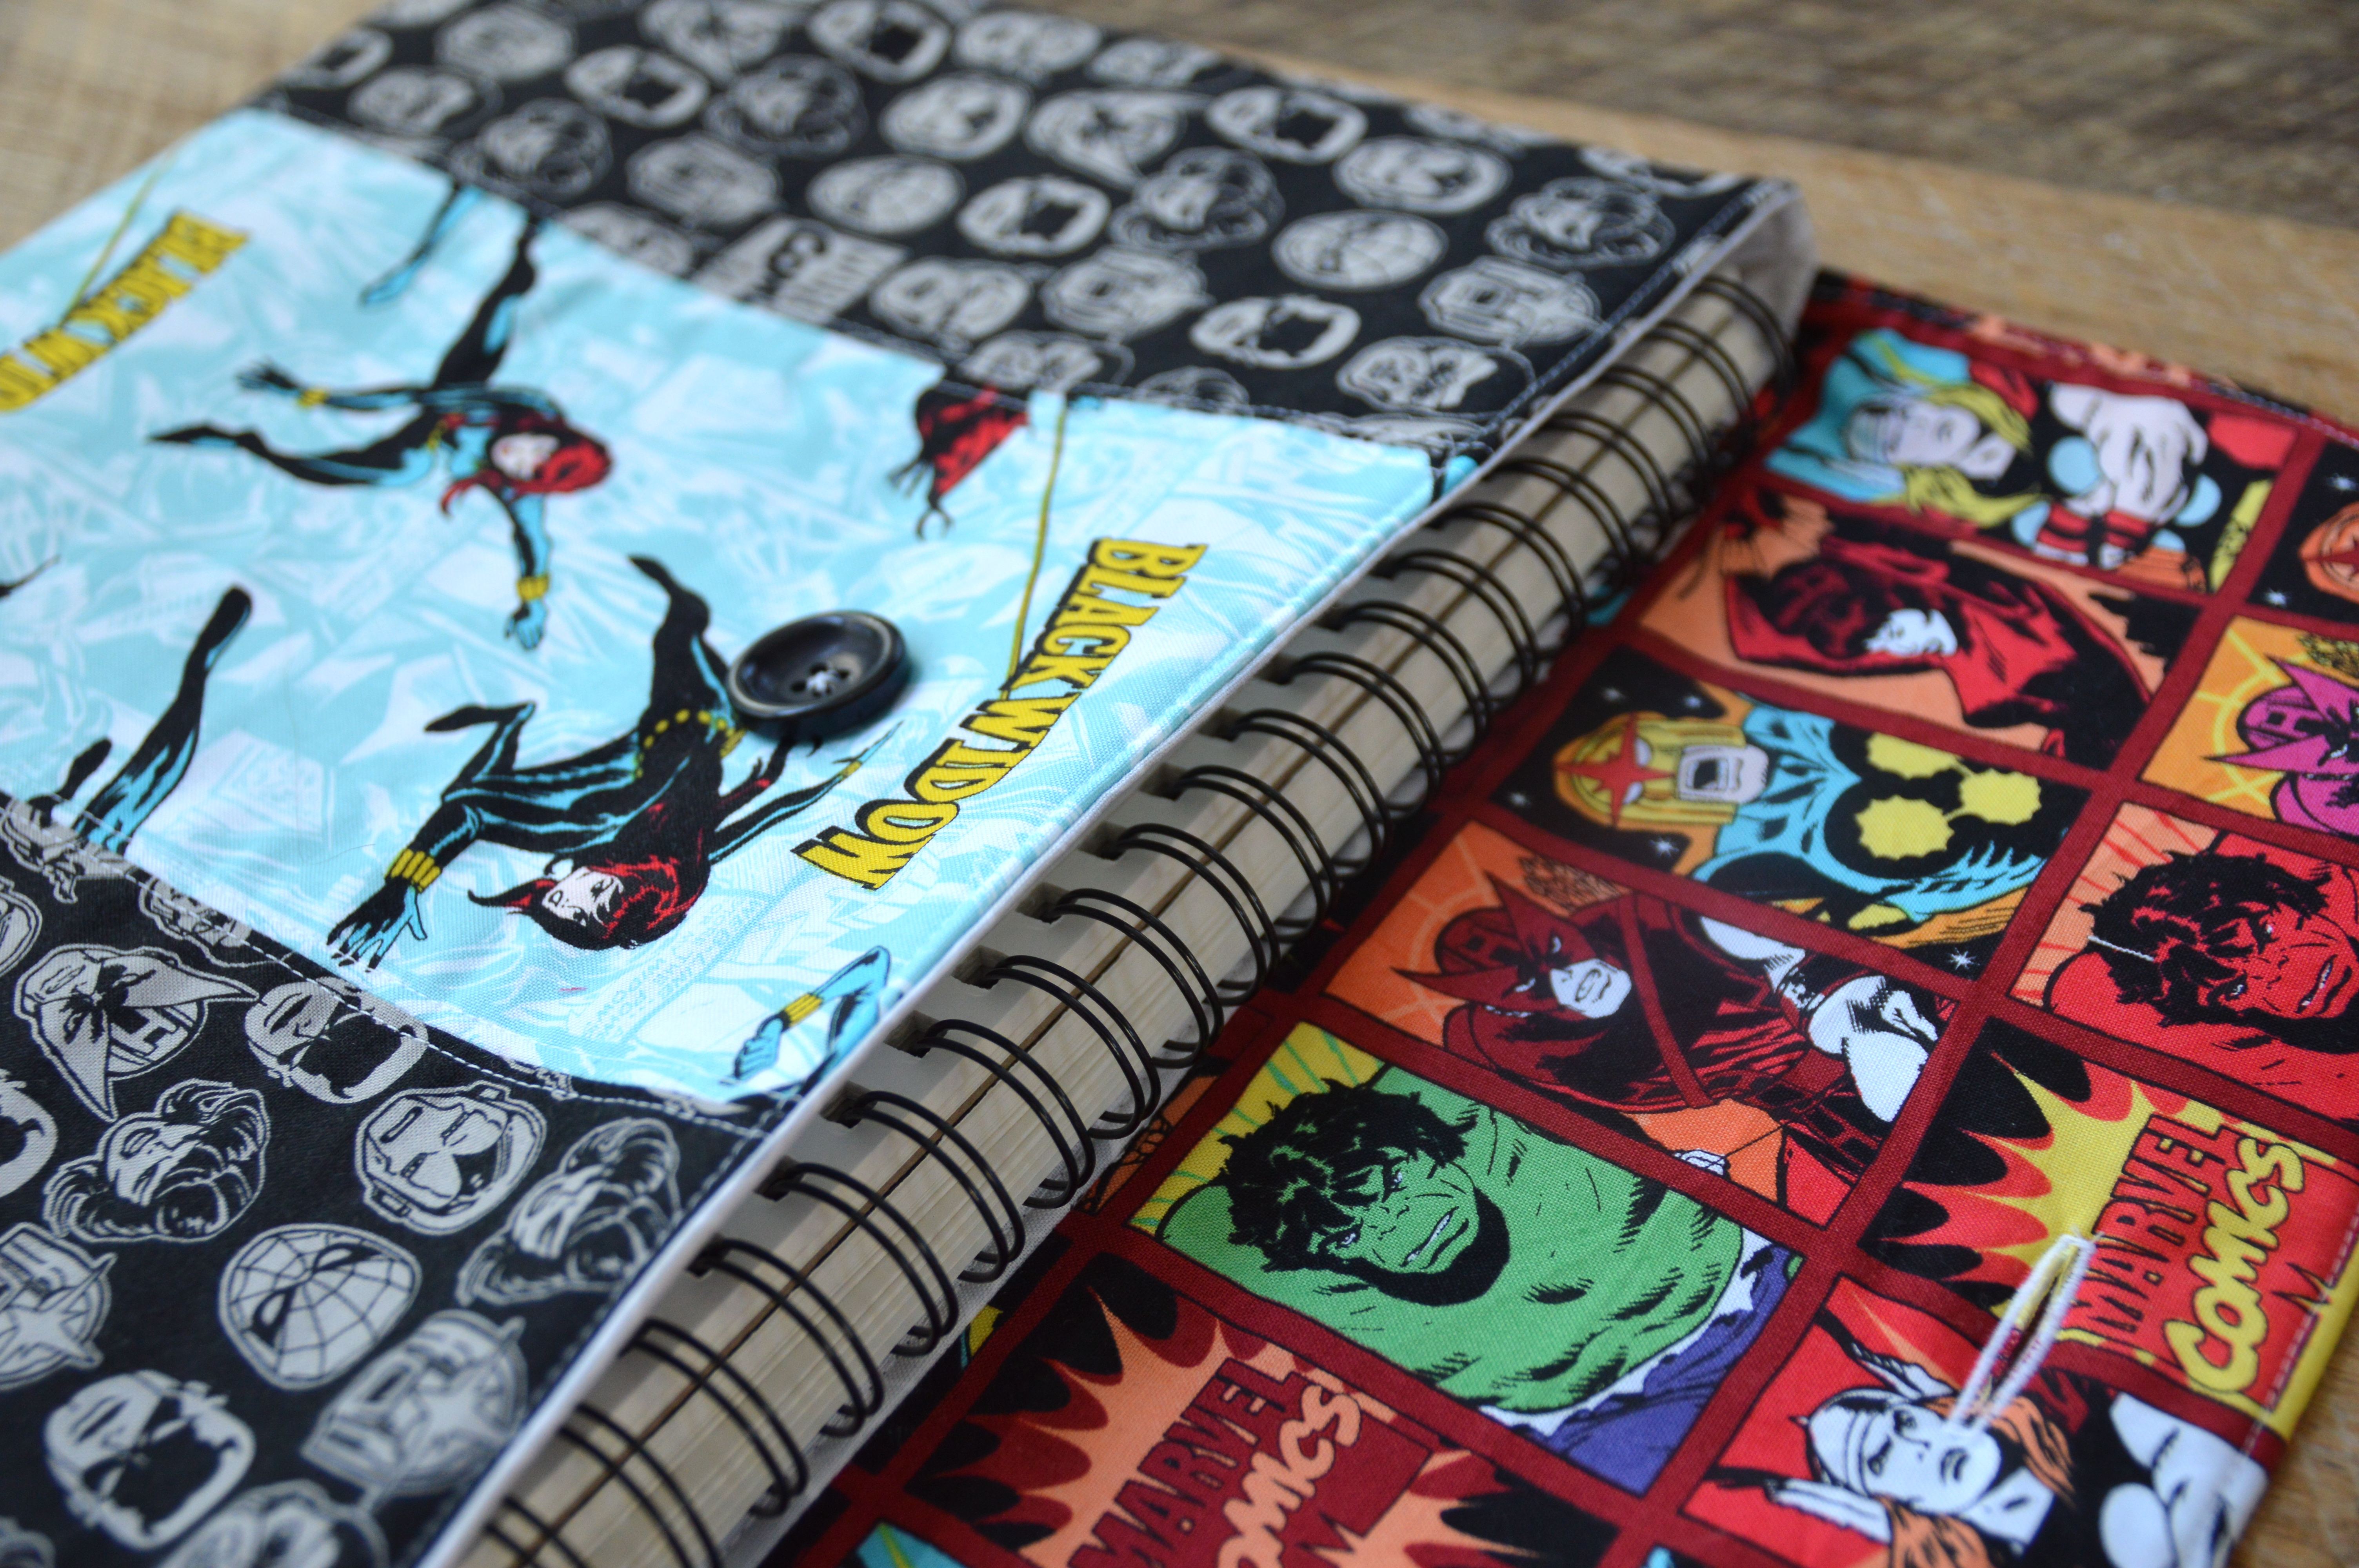
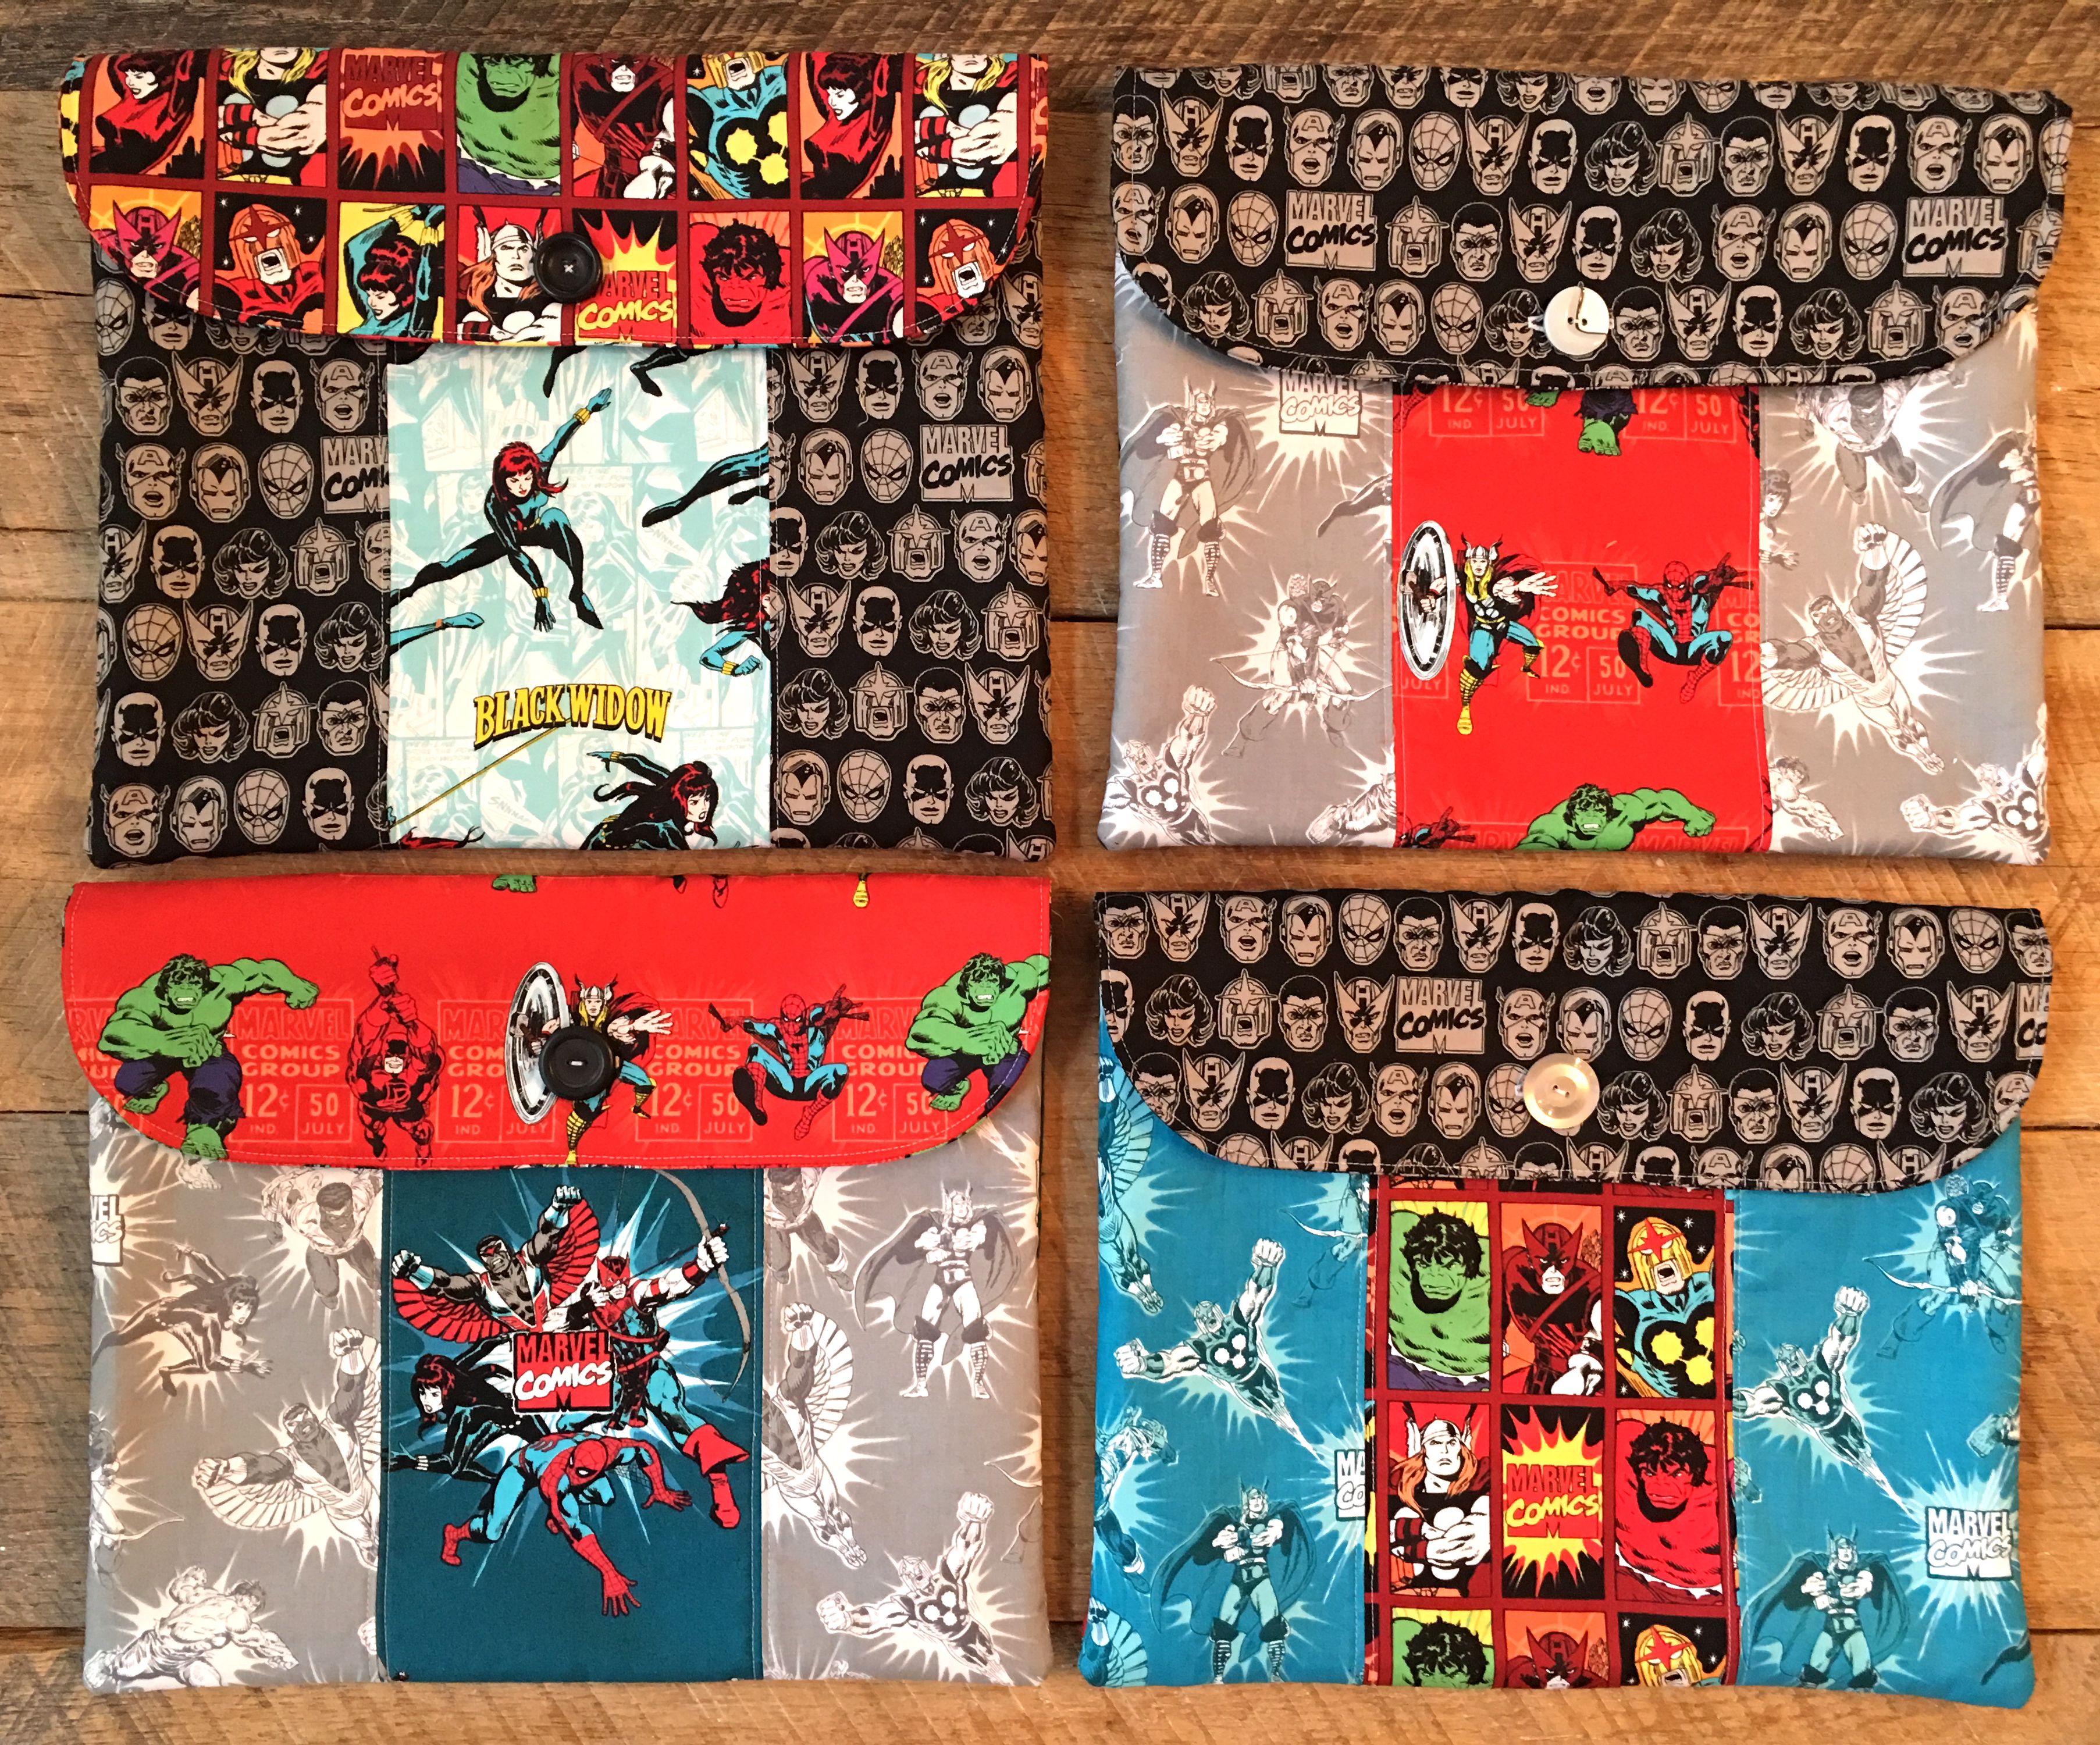
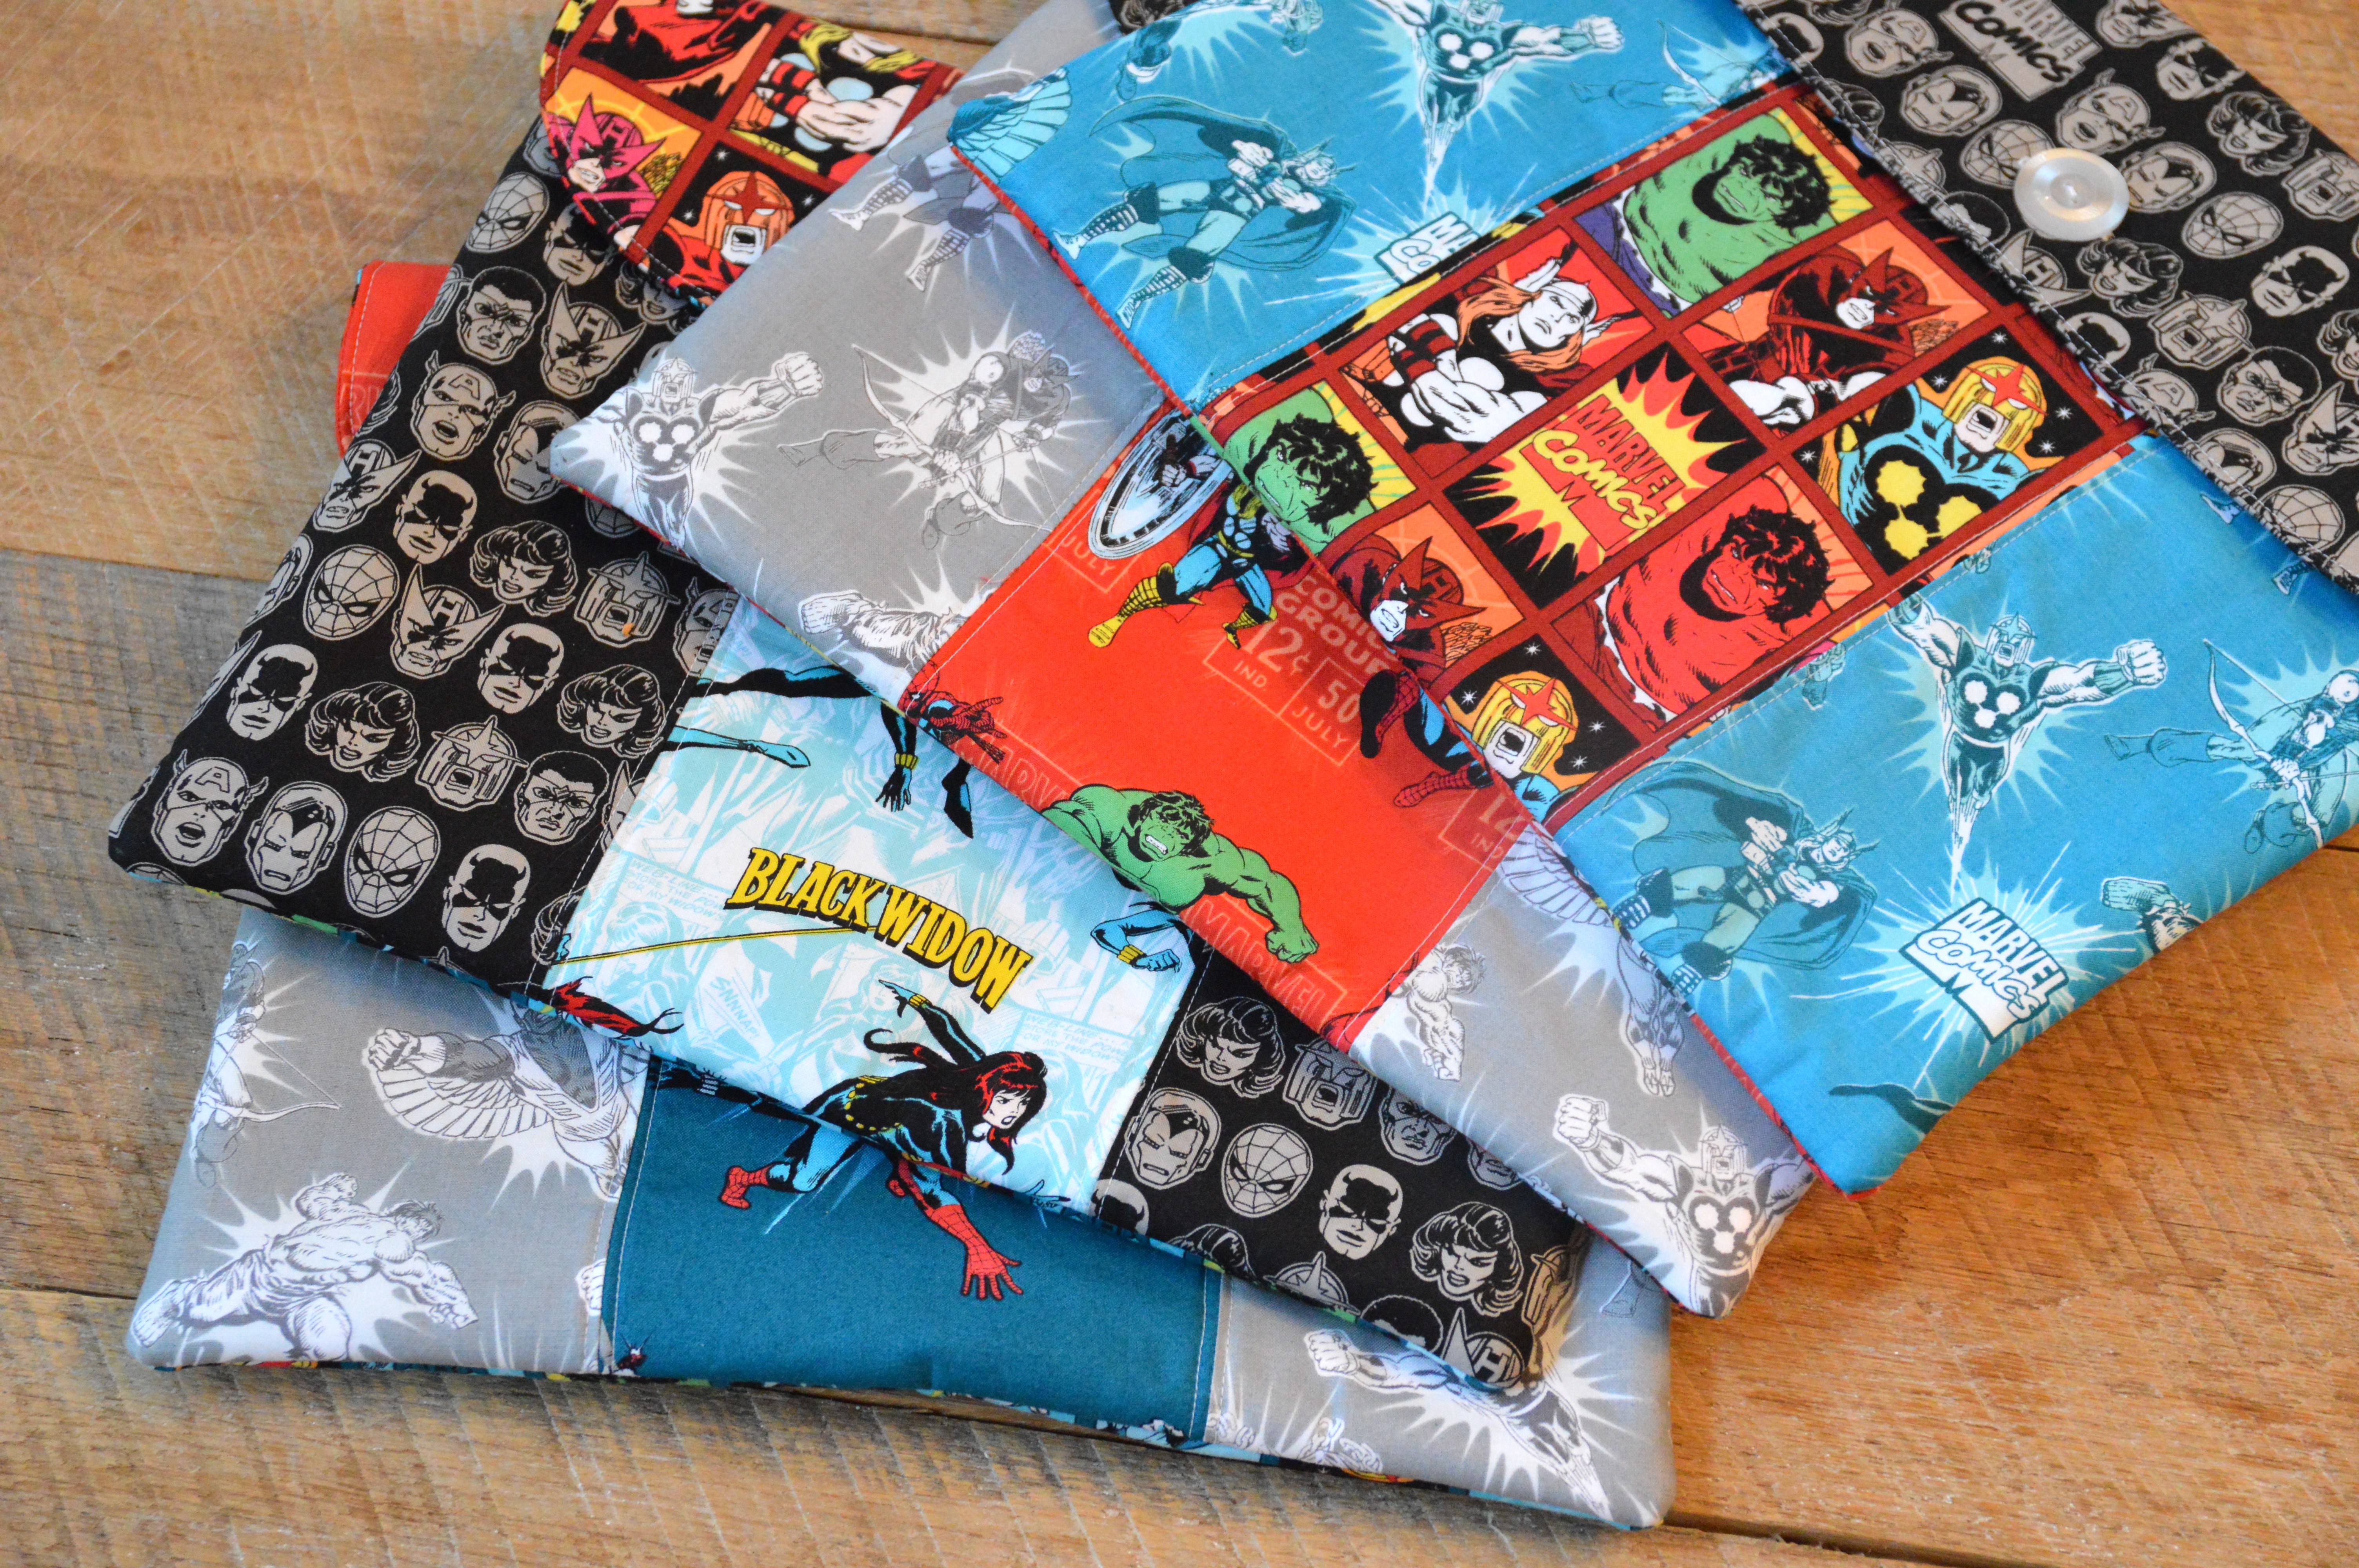
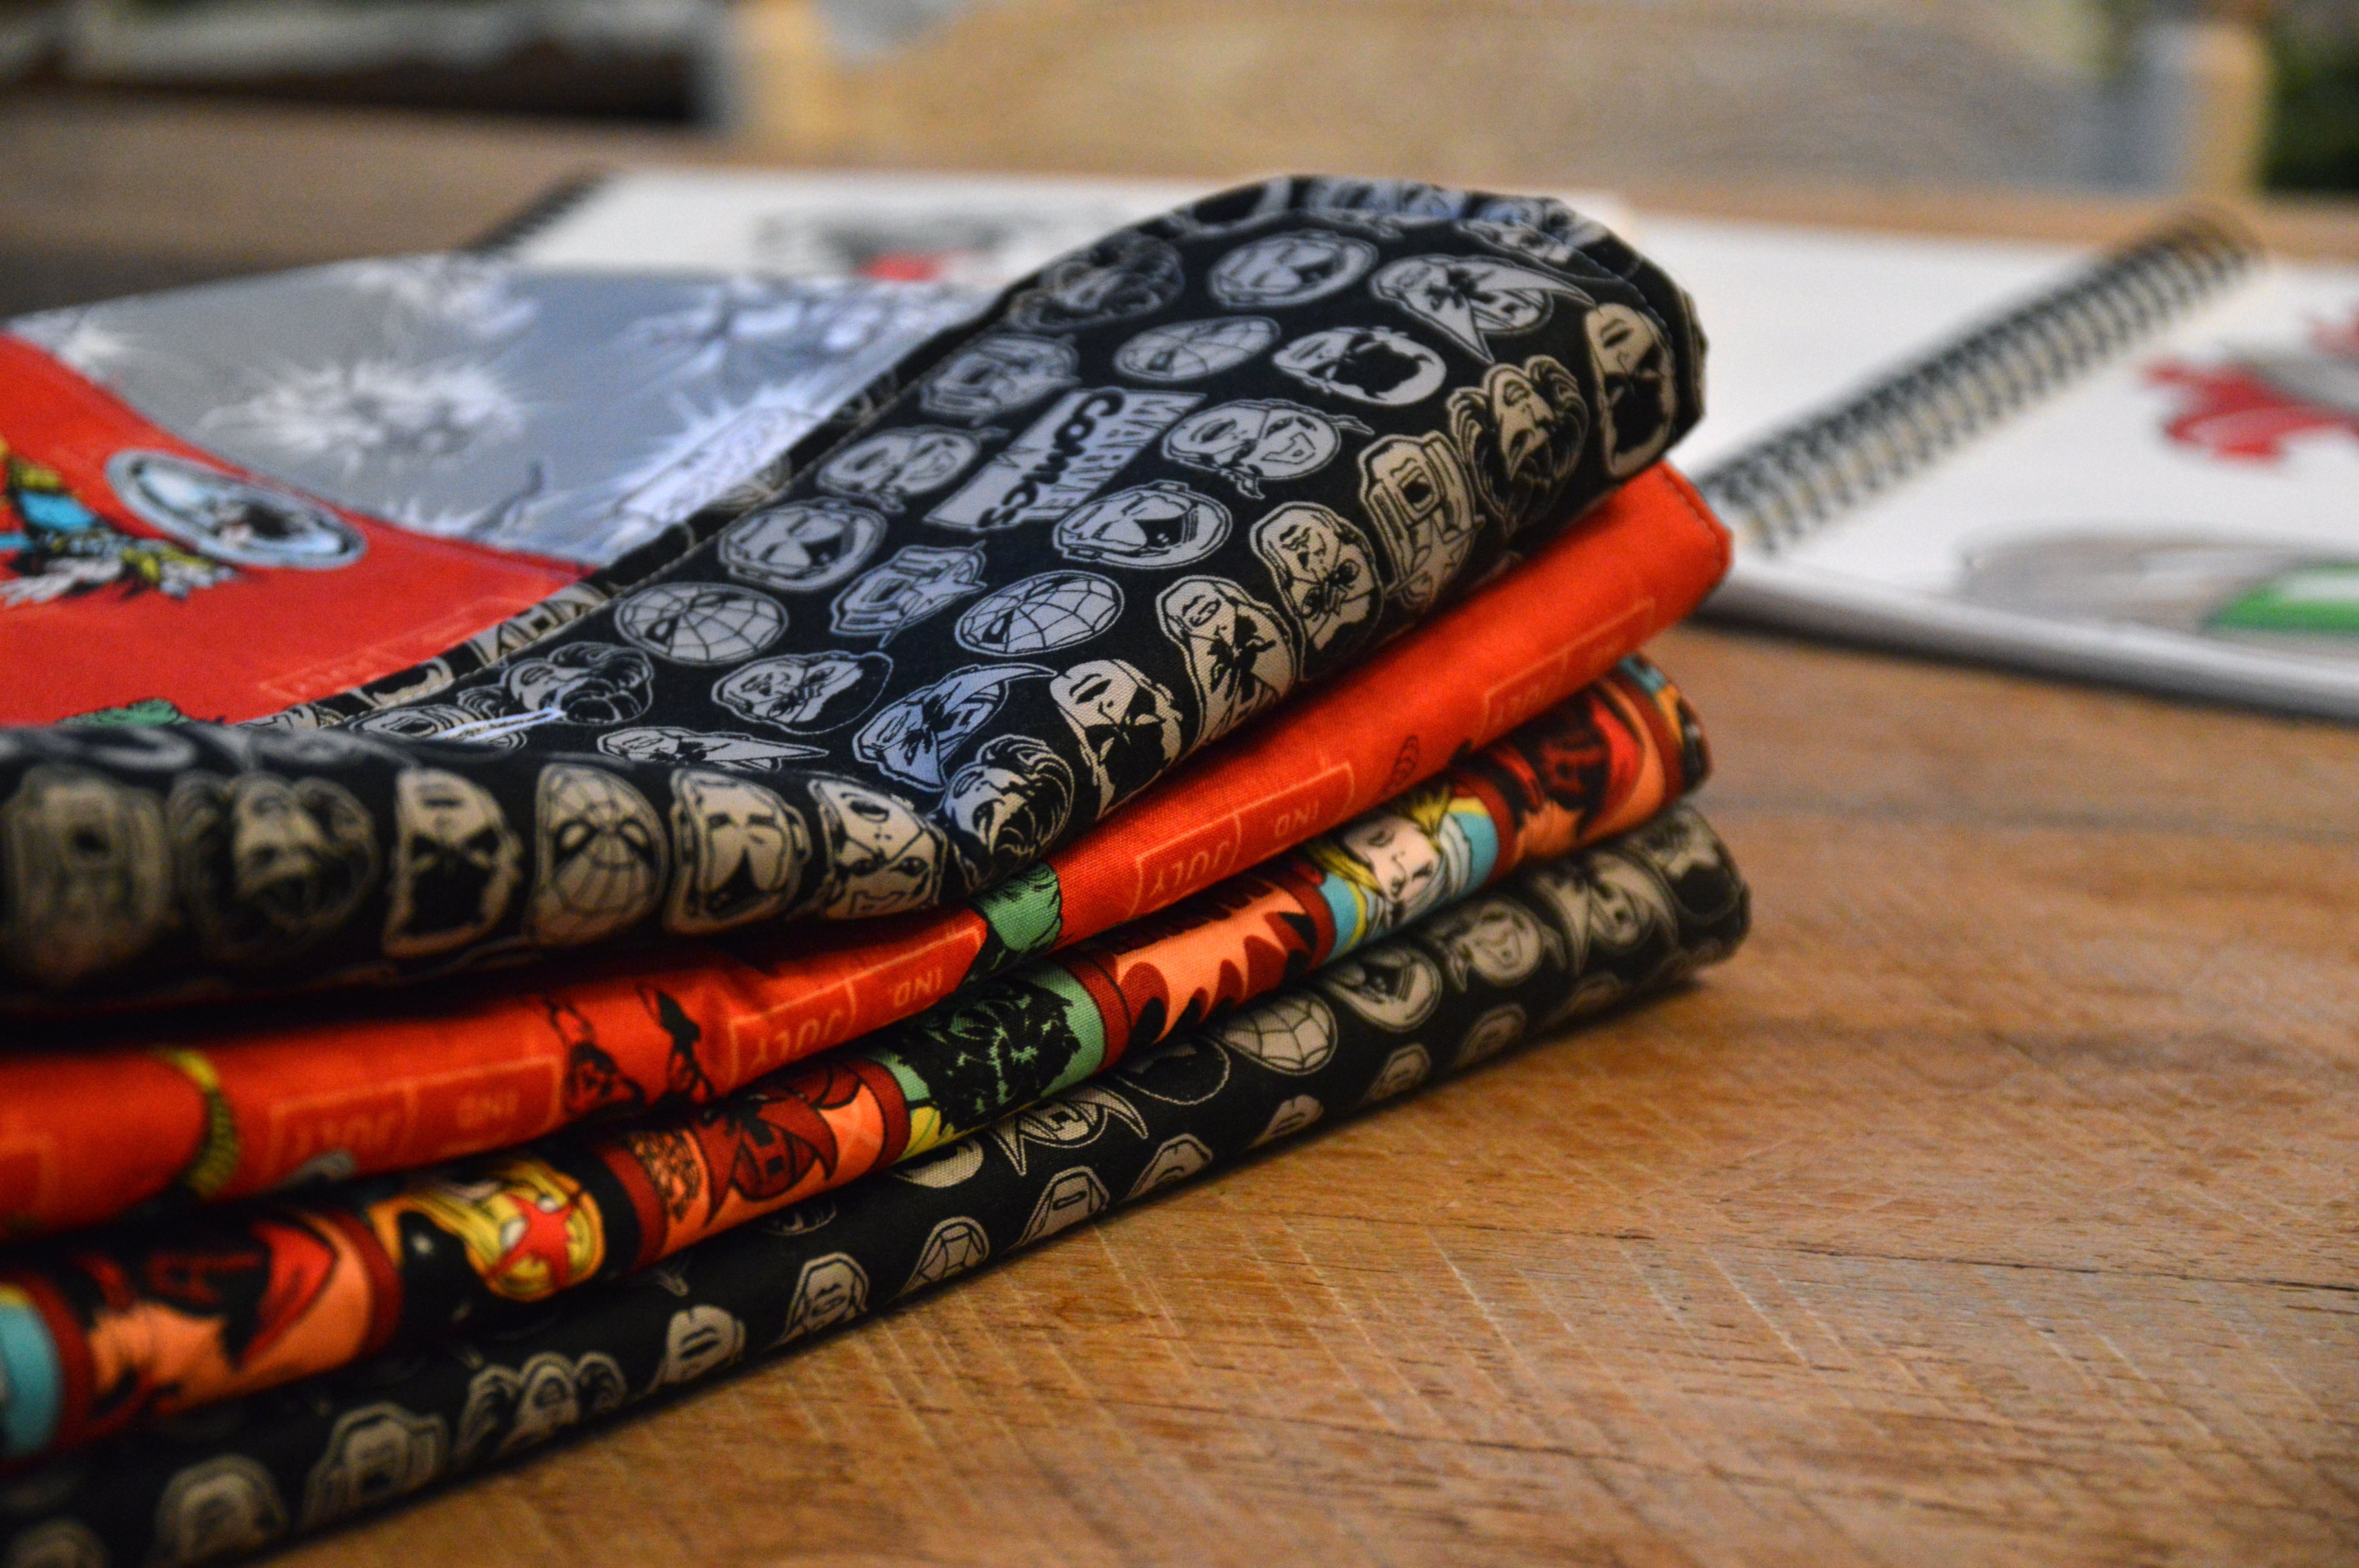
I love sewing for my kids!!!!  They are totally into Marvel right now so I’m so excited for this new line from Camelot Fabrics available at Fat Quarter Shop!!  This fun project is for a padded sketch book case with button closure (Sketch book measuring 9″x12″).  This case is also great for coloring books, journals, music books, and magazines.  The Heat n Bond Fusible Fleece gives it soft stability.  You can whip one up in about 30 minutes!  So it’s a great gift.img_7893

marvel-sketch-book-cover-3

I made four Sketch Book Cases for my daughter’s artsy friends.  The four of them sketch all day and nerd out at lunch with their sketchbooks.  They were thrilled to receive them!!img_8001

Let’s get started!

Supplies
1/2 yard lining fabric

fat quarter backing

fat quarter flap fabric

fat quarter front sides

fat quarter front center

1 yard Heat n Bond Fusible Fleece

Button

img_7914

First have your cat sleep on all the fabric so it needs ironing when you are ready 🙂

sketch-book-cutting-instructions

Cut the front side pieces (2) 5″ x 12″ and center 6″ x 12″.

Sew together as pictured above with 1/4″ seams and press.

cutting-guide

Cut the back 15″ x 12″

Cut the flap (2) 15″ x 6″

Cut the lining (2) 15″ x 12″

heat-n-bond

Cut the Fusible Fleece (2) 15″ x 12″ and (1) 15″ x 6″

img_7927

Match up the Marvel pieces with the fleece pieces and fuse to the wrong side of the fabric, according to manufacturers instructions. (only fuse one of the flap pieces)

img_7934

Sew accent stitching 1/8″ along both sides of the seams.

Prepare the flap:

img_7931

Take the fused flap piece and round the corners of the bottom two corners by tracing a small plate.  Cut with scissors.

Lay the rounded flap piece on top of the second 6″ x 15″ piece and pin, right sides together.  Sew 1/2″ seam around the side, bottom, and side.  Leaving the top open.

img_7935

img_7936

Trim down the seam allowance and clip the curves.

img_7938

Turn right side out, press and top stitch along seam 1/8″.

img_7940

Find the center of the flap and mark.  Sew a button hole that matches the size of your button.  Sew the button hole 2″ above the seam.

img_7941

Place the front pouch piece on top of the back pouch piece right sides together.  Pin the sides and the bottom.  Sew the sides and bottom using a 1/2″ seam.  Clip corners and turn right side out.

img_7933

Pin the sides and bottom of the lining pieces in the same manner.  Sew 1/2″ seam along the sides and bottom.

img_7942

Pin the flap to the back of the pouch, matching raw edges.  Make sure to center on the back piece.  Baste 1/8″ along flap .

img_7945

Place the outer pouch inside the lining, right sides together.  Match at side seams and pin all the way around.  Sew using a 1/4″ seam all the way around.

Unstitch a 3″ section on one of the sides of the lining.  Turn right side out.  Top stitch the lining closed.  Press lining down inside the pouch.  Top stitch using a 1/8″ seam around the “mouth” of the case.  Hand sew the button on.sketch-book-case-2

They were so much fun to make and the fabrics were fun to mix and match!  I can’t decide which is my favorite!

img_8017

sketch-book-case-5

marvel-sketch-book-cover

Save

Very Merry Wall Quilt {Free Pattern}

very-merry-cover-pic

dsc_0269

Today I’m sharing the pattern for this festive little Very Merry Wall Quilt!  This is such a fun project to whip up!  You can use fat quarters or better yet – just get out the Christmas scrap box!  I appliqued a tree die cut with my Sizzix Fabi machine in the center of the quilt.  You can add your favorite motif to the center!  The quilt is made up of 4 blocks.  I created a PDF pattern that you can download HERE.  These would make great little gifts as well!

img_6796

This is the state of affairs in my sewing room – projects everywhere and not enough time to get it all done by Christmas!!!

img_6798

I love this fabric Little Joys designed by my friend Elea Lutz for Penny Rose Fabrics!!  Such a classic!!

img_6877

Mufasa loves this project too and was super sad when I hung it on the wall where he couldn’t nap on it!img_7326

I collect little vintage Christmas decorations – and I love how this quilt fits in nicely!

dsc_0274

Save

Save

Quilt Petite Blog Hop

quilt-petite-blog-hop-banner

I’m so excited to be the next stop on the ‘Quilt Petite’ Blog Hop!!!  Sedef Imer of Down Grapevine has just released this adorable little quilt book! It is filled with the cutest projects and ideas – it’s just fun to look through again and again!

quilt-petite

It was difficult to choose just one project to feature here.  Since I am in full Christmas decorating mode, I thought a holiday twist would be fun!  I chose the Petal Burst Table Topper pattern, used traditional red and green colors, and turned it into a quilted pillow!  The fabrics I chose are from a variety of Bonnie & Camille fabric lines.

poinsettia-pillow
poinsettia-pillow-4

To speed up the pillow making process, I choose to applique the petals with Heat n Bond Lite.

img_6793

Once the petals were fused, I sewed around each petal with matching thread.

img_6794

I quilted around the flower and then cut the pillow top down to 20″ square.

img_6885

To finish the pillow, I cut the pillow back 20″ and inserted a zipper toward the bottom.  I placed the pillow top and back wrong sides together and basted 1/8″ all the way around the pillow.  I then added binding – just like a normal quilt.  Once it was done I popped a 20″ pillow inside.  I LOVE it!!

img_6884

poinsettia-pillow-3
quilt-petite-blog-hop-square
The blog hop goes until December 11th.   Check out this amazing list of quilt bloggers participating in the blog tour!  Be sure to visit Down Grapevine Lane for a chance to win a lovely package full of all kinds of goodies, including a copy of Quilt Petite! 
November 6: Sedef at Down Grapevine Lane
November 7: Wynn at Zakka Art
November 8: Sarah at A Little Happy Place
November 9: Bridgette at The Family Hearth
November 10: Heidi at Fabric Mutt
November 11: Minki at Minki’s Work Table
November 12: Ange at A Little Patchwork
November 13: Lauren at Molly and Mama
November 14: Michelle at Cole & Taffy
November 15: Nadra at Ellis & Higgs
November 16: Amy at Nana Company
November 17: Faith at Sarana Ave
November 18: Debbie at Happy Little Cottage
November 19: Erin at Why Not Sew
November 20: Amanda at Jedi Craft Girl
November 21: Melissa at Oh How Sweet
November 22: Stacy at Stacy Olson Design
November 23: Ayda at Cafe Nohut
November 24: Peta at She Quilts A Lot
November 25: Amanda at A Crafty Fox
November 26: Keera at Live Love Sew
November 27: Sharon at Lilabelle Lane
November 28: Kate at The Homemakery
November 29: Jemima at Tied With A Ribbon
November 30: Jodie at Ric Rac
December 1: Anorina at Samelia’s Mum
December 2: Alisha at Ministry of Fabric
December 3: Xanthe at Wife-made
December 4: Cheri at Tinker With This
December 5: Kristyne at Pretty By Hand
December 6: Kimberly at Fat Quarter Shop
December 7: Veronica at Vivid Felicity
December 8: Shari at Doohikey Designs
December 9: Jina at Jina Barney Designz
December 10: Emma at Emma Jean Jansen
December 11: Sedef at Down Grapevine Lane