Take Me To The Sea Quilt Pattern featuring Seaside by Riley Blake Designs

nautical quilt pattern

Summer is my favorite season of all!  I could live in perpetual June-August!!

take me to the sea quilt pattern
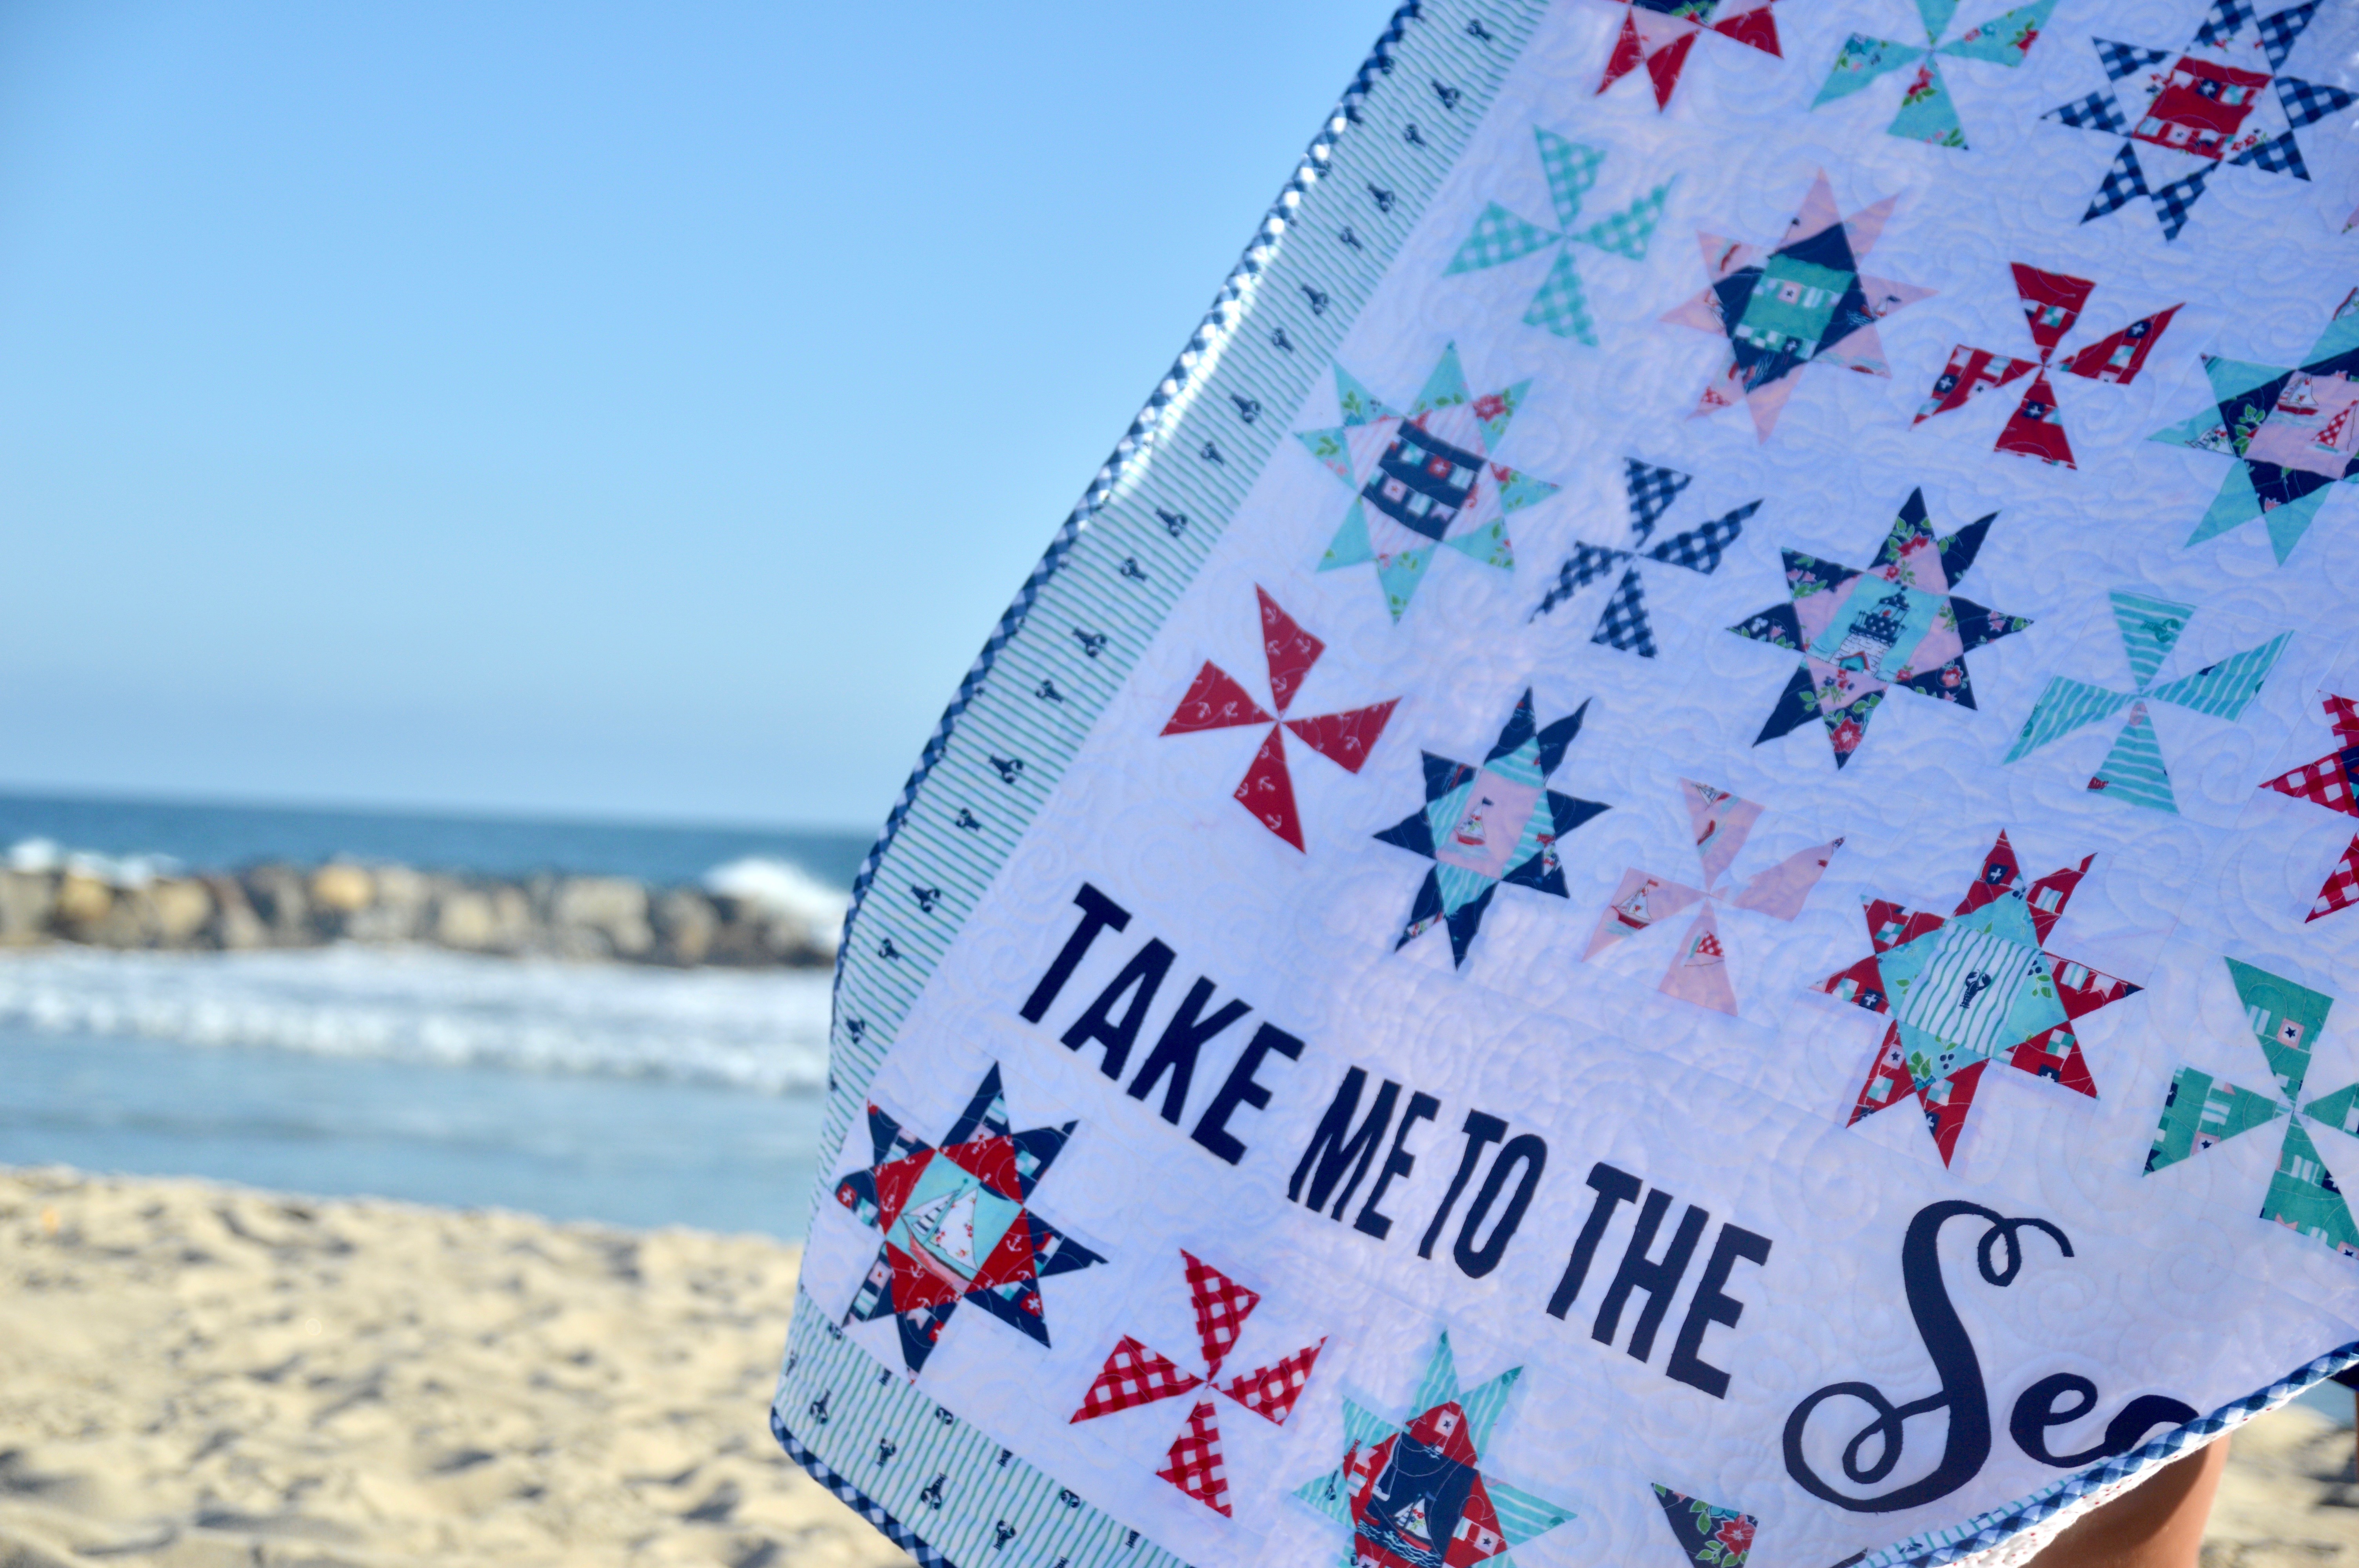
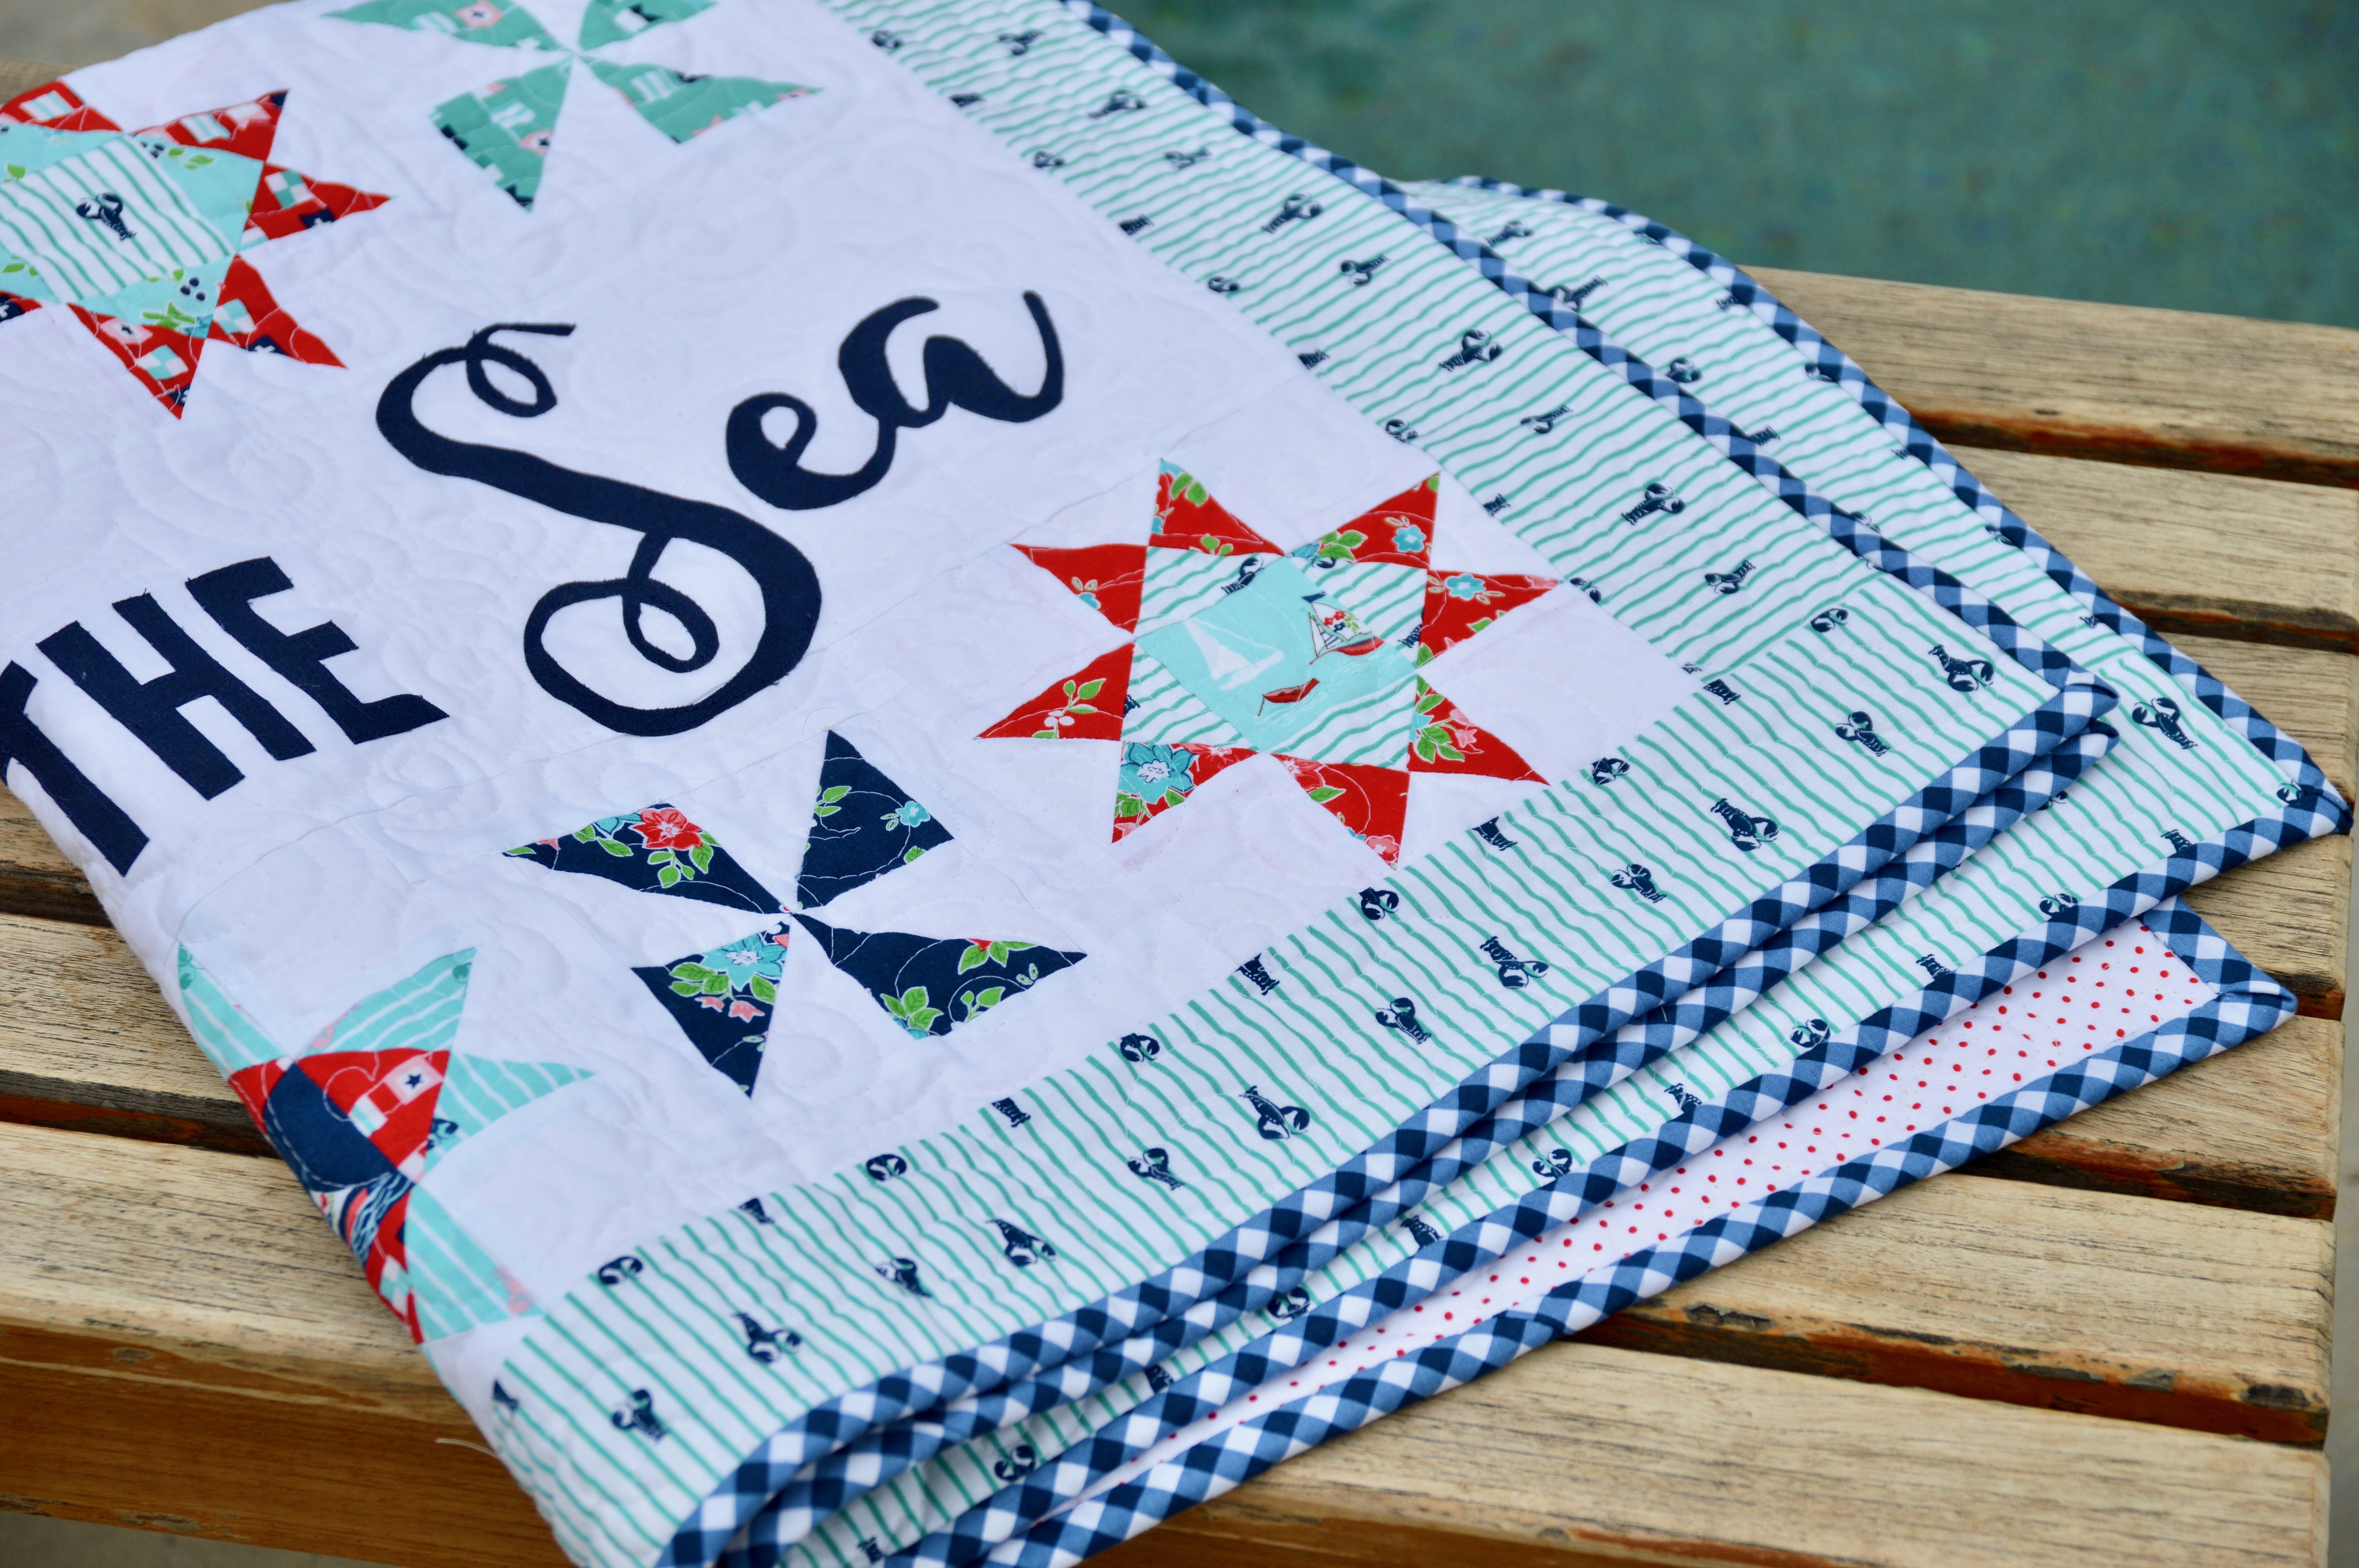
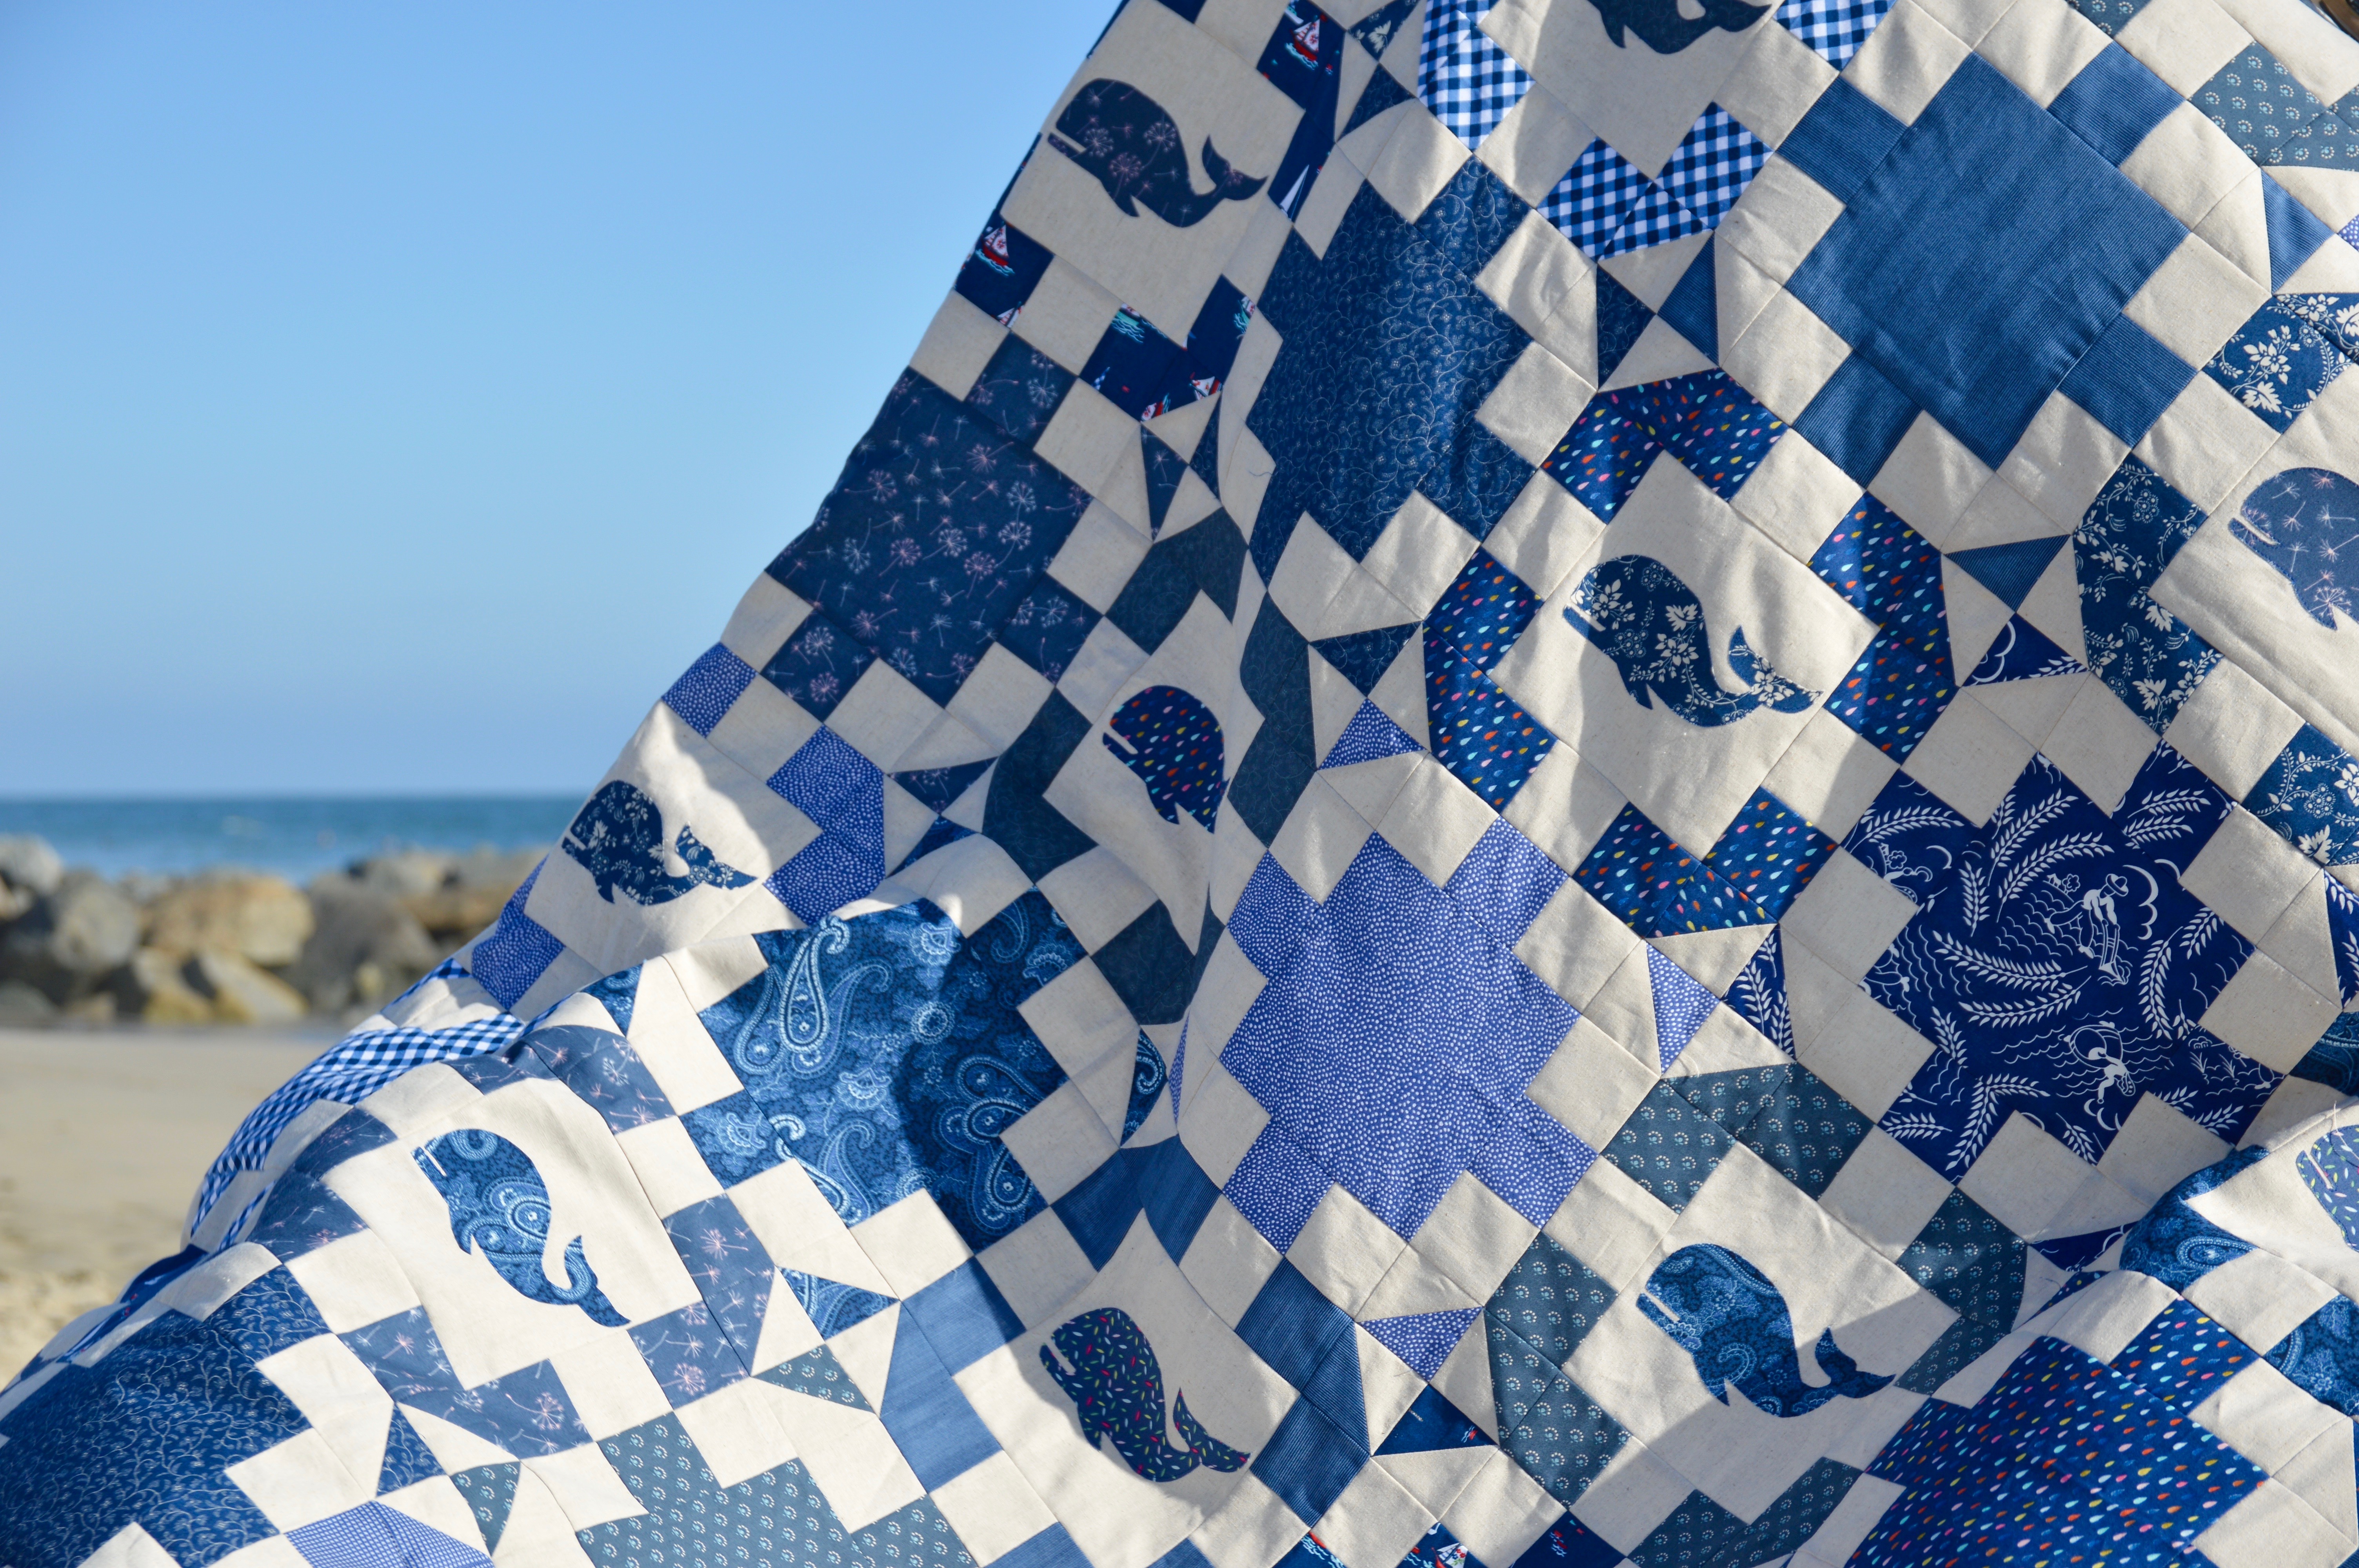
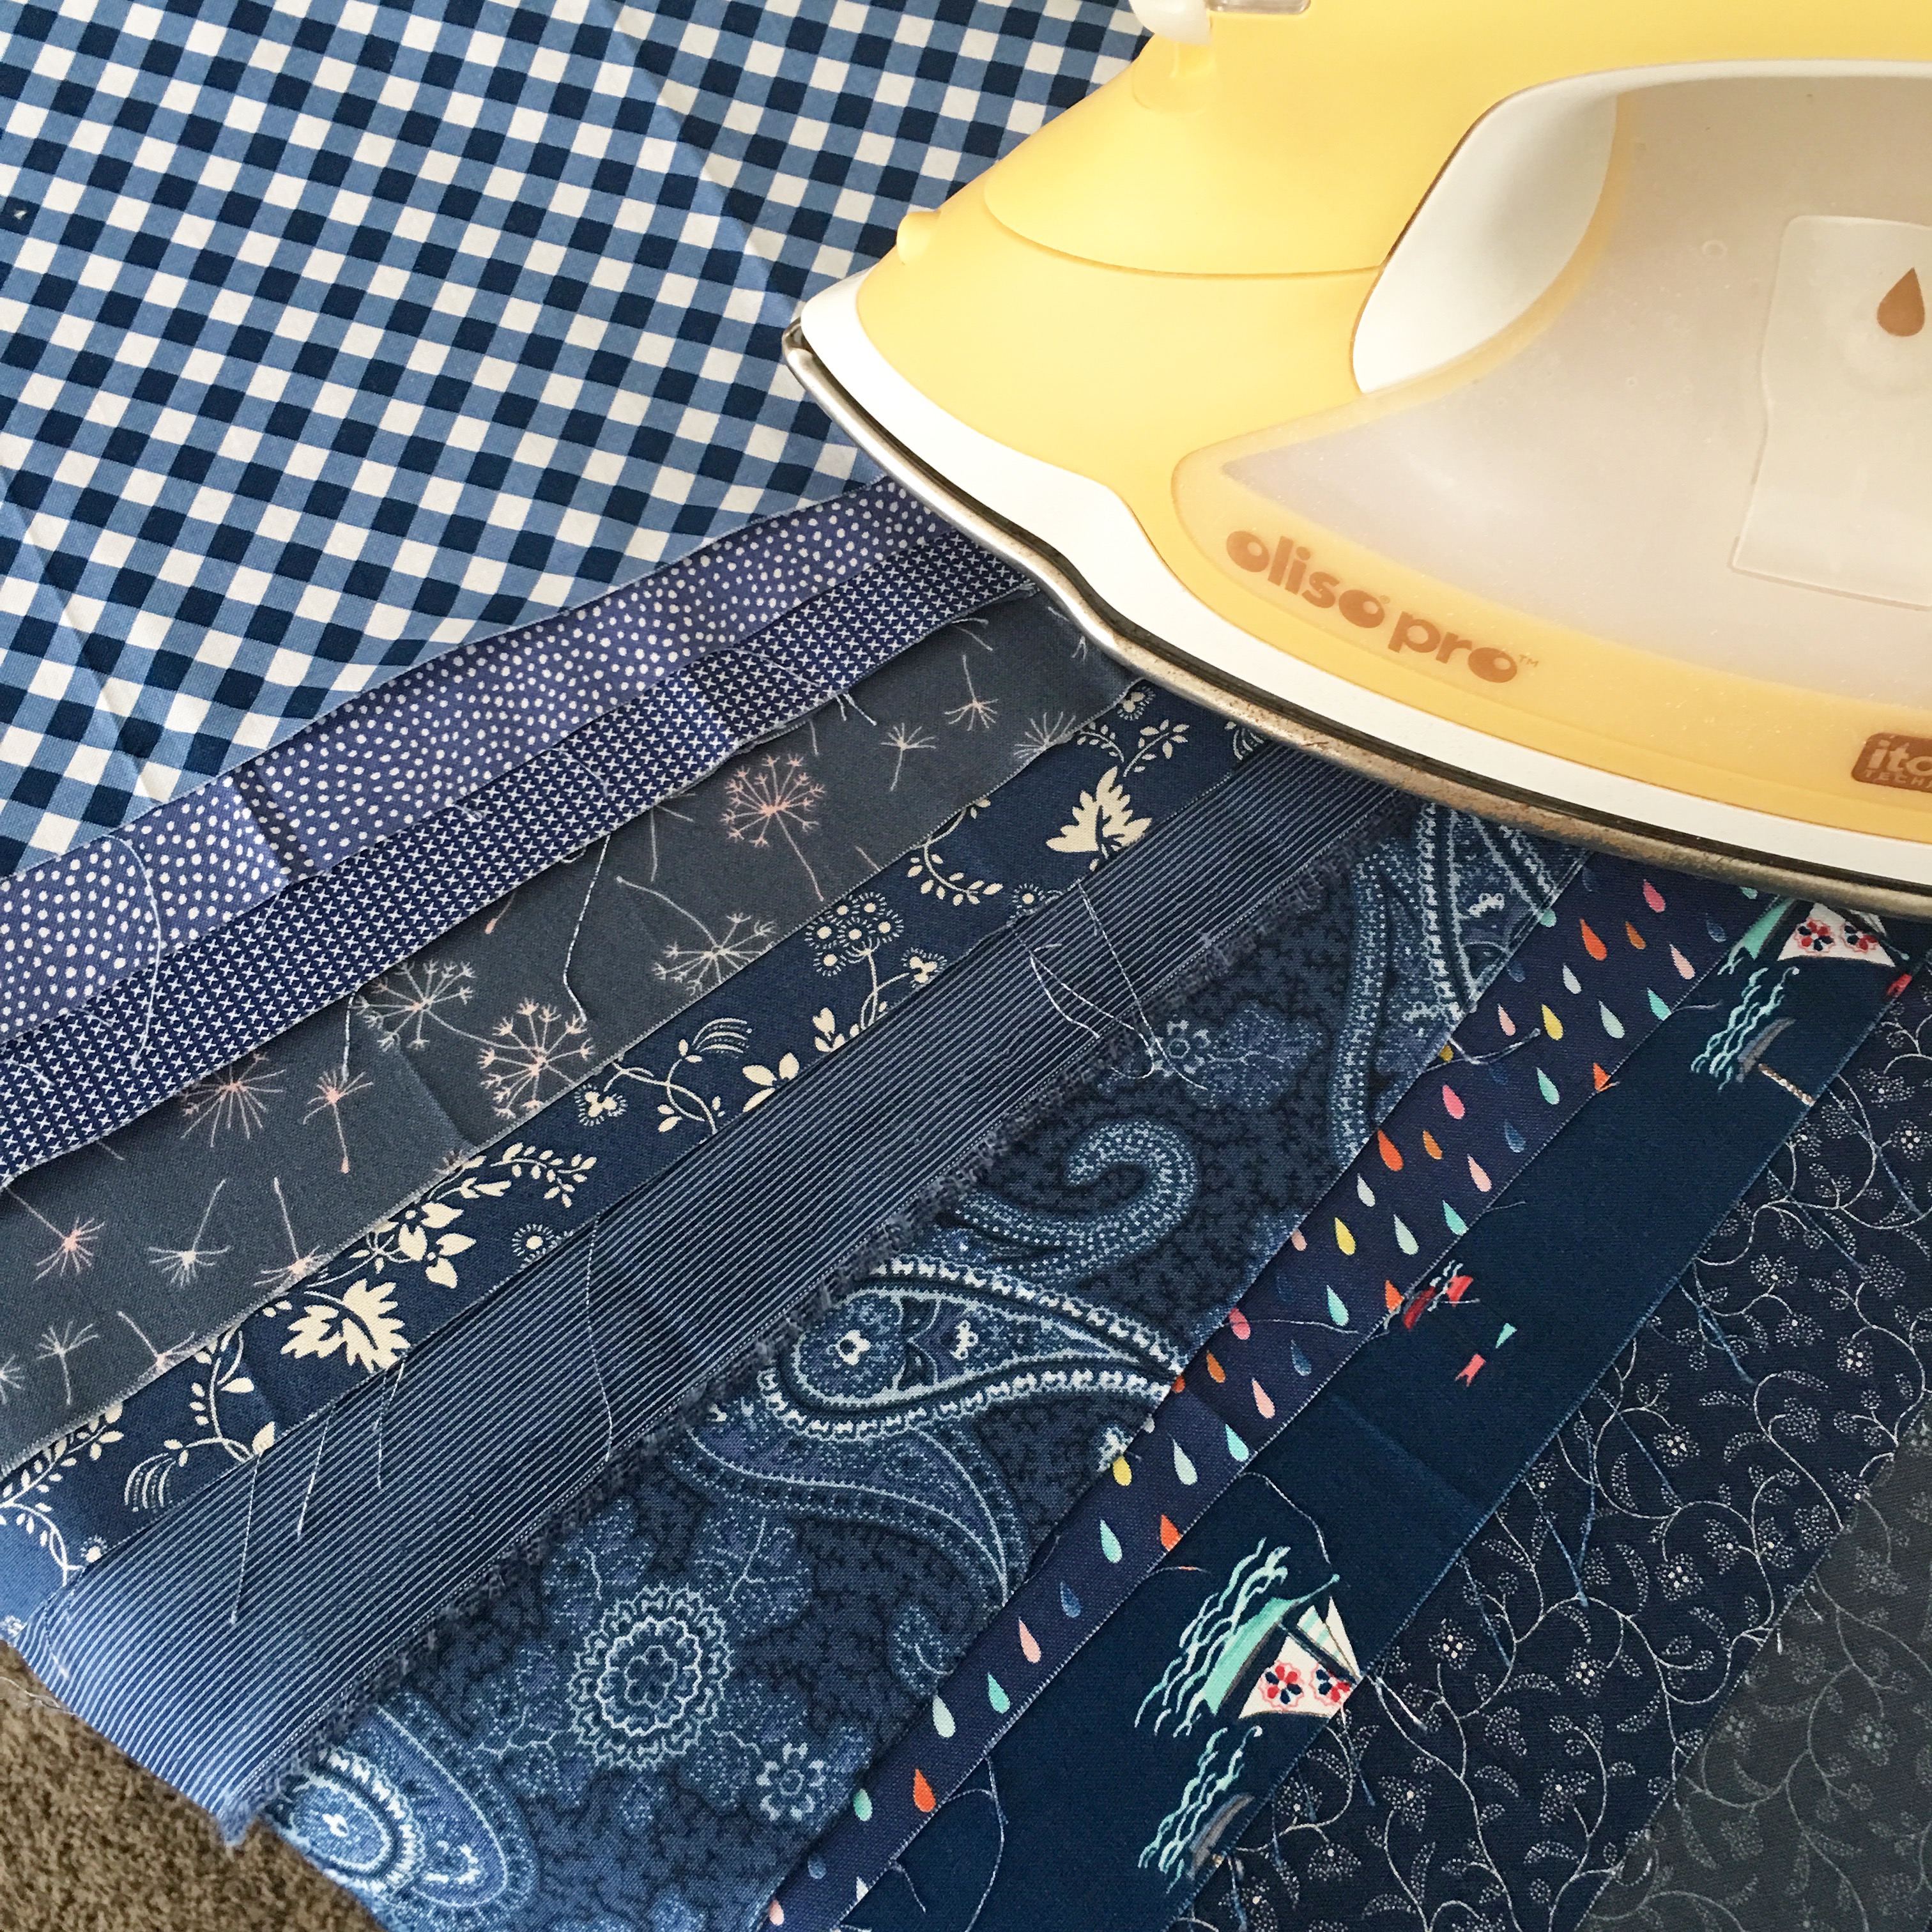
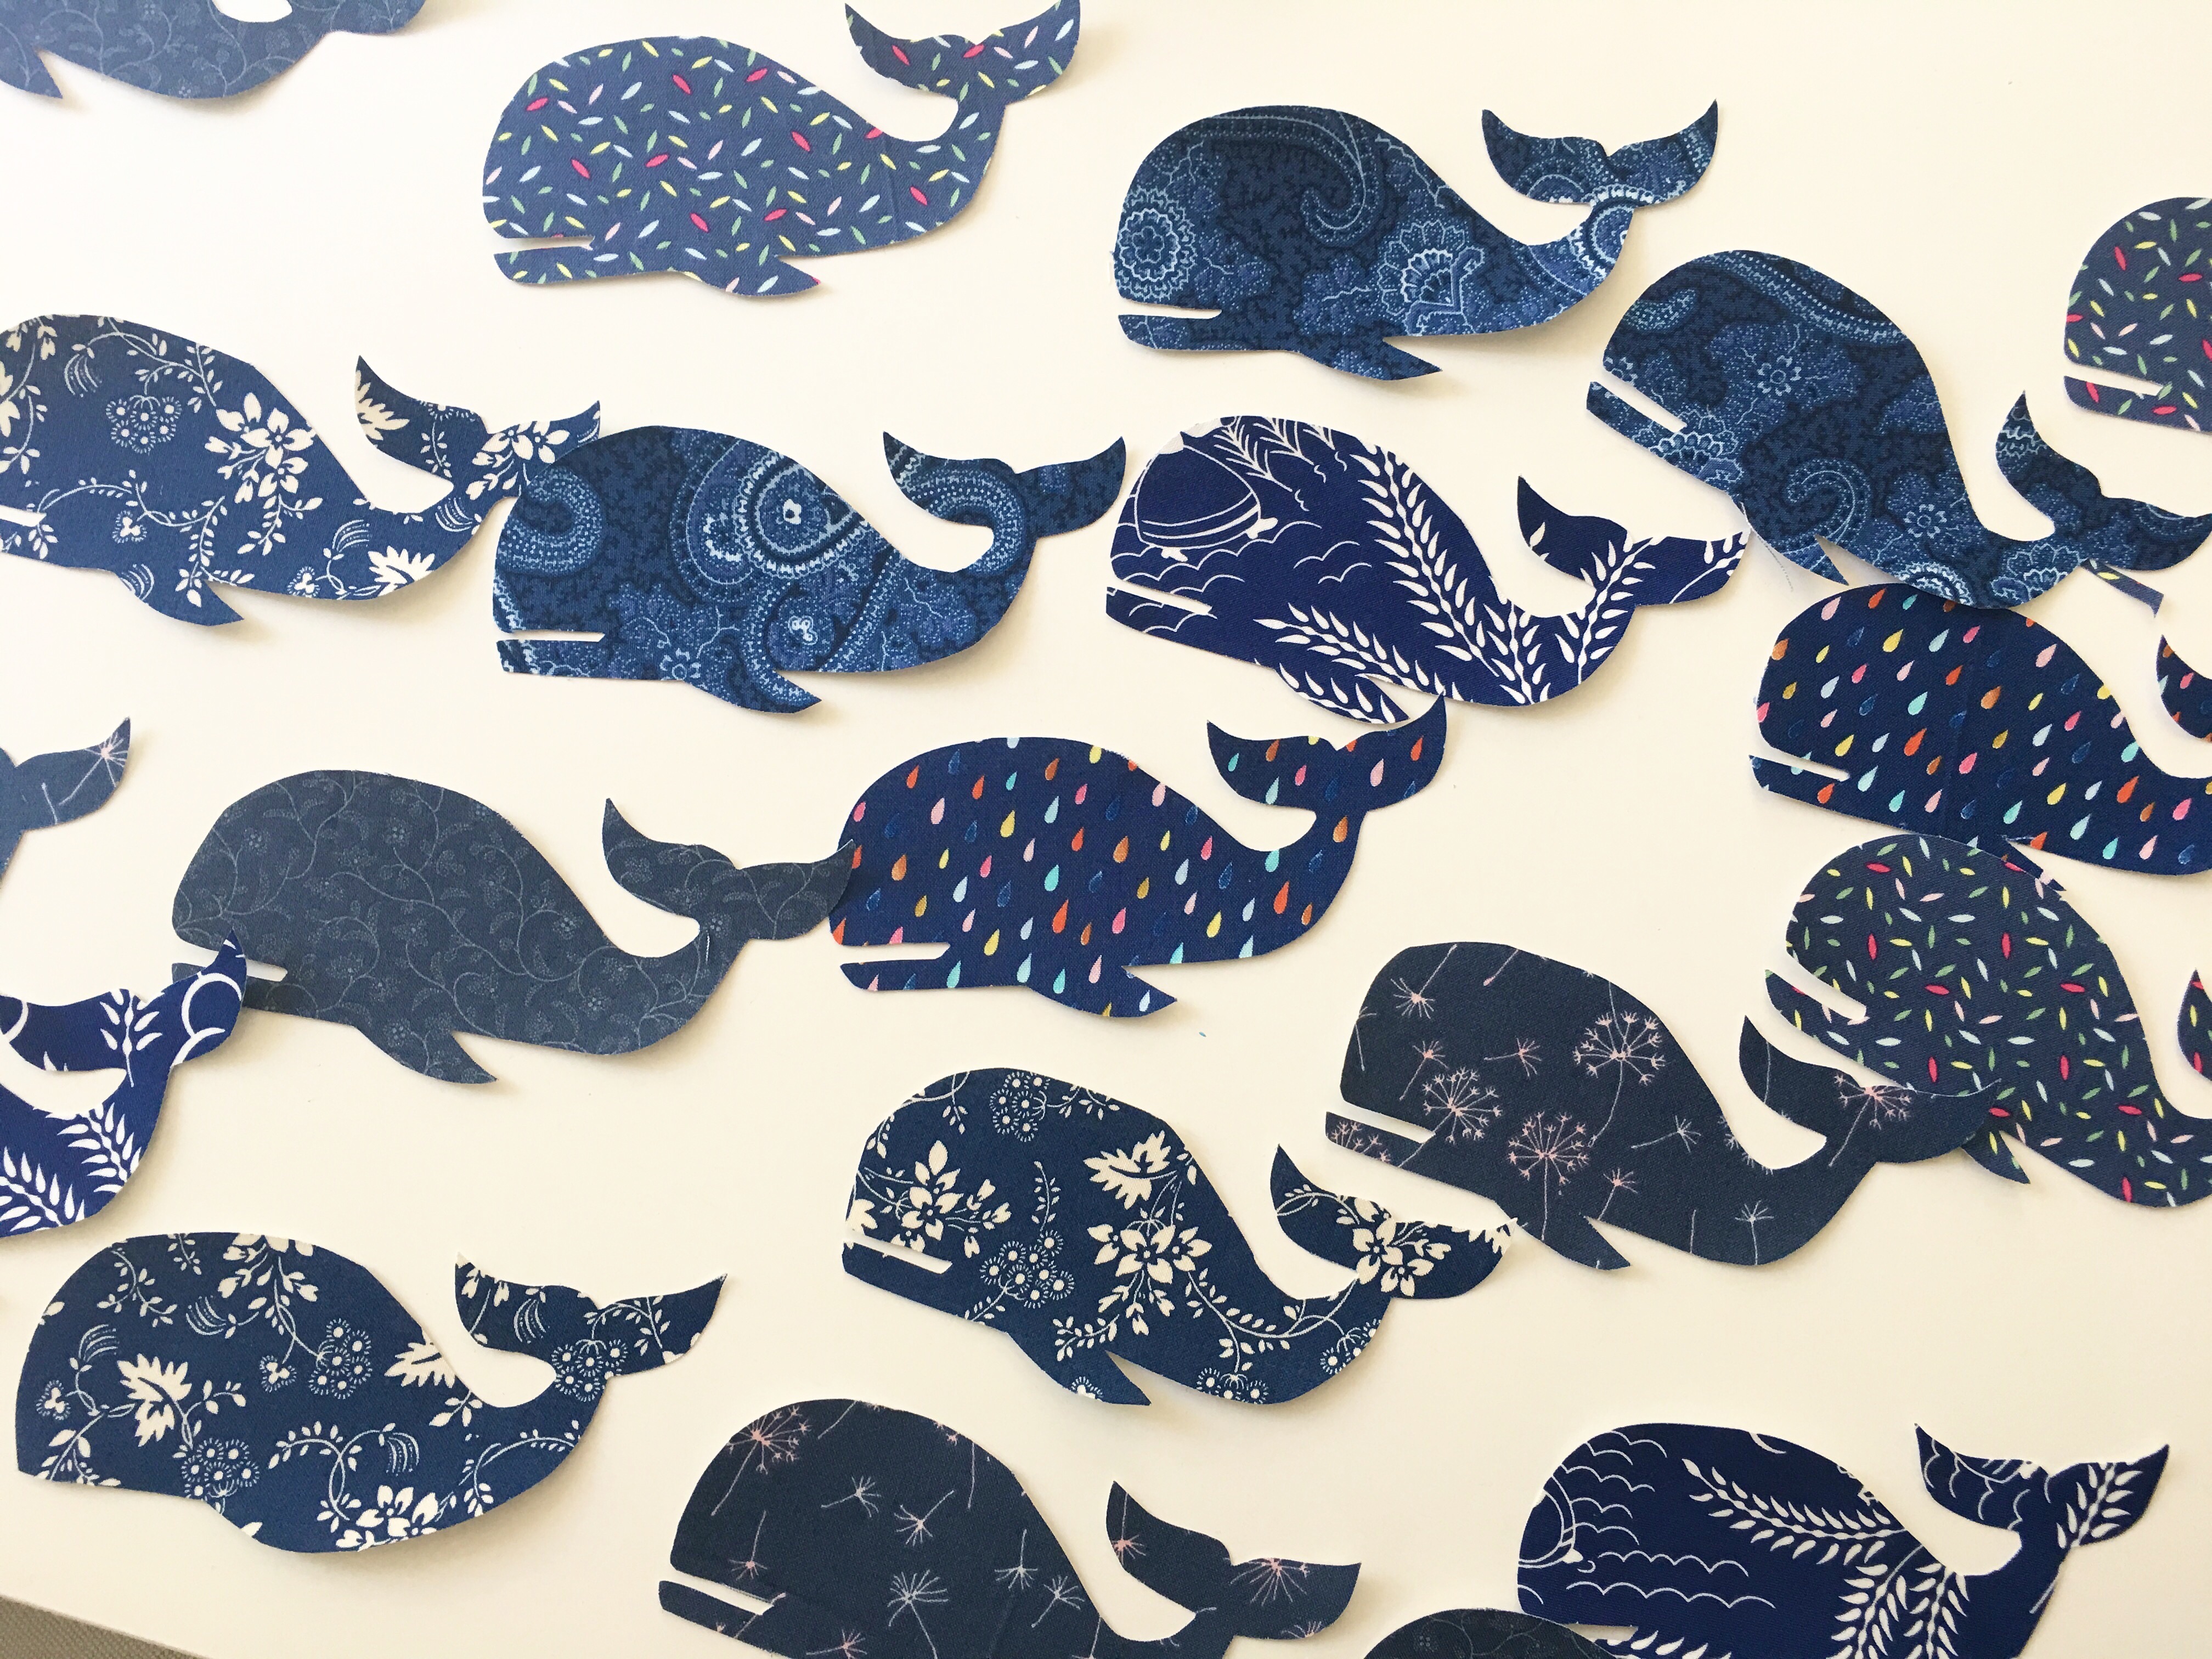
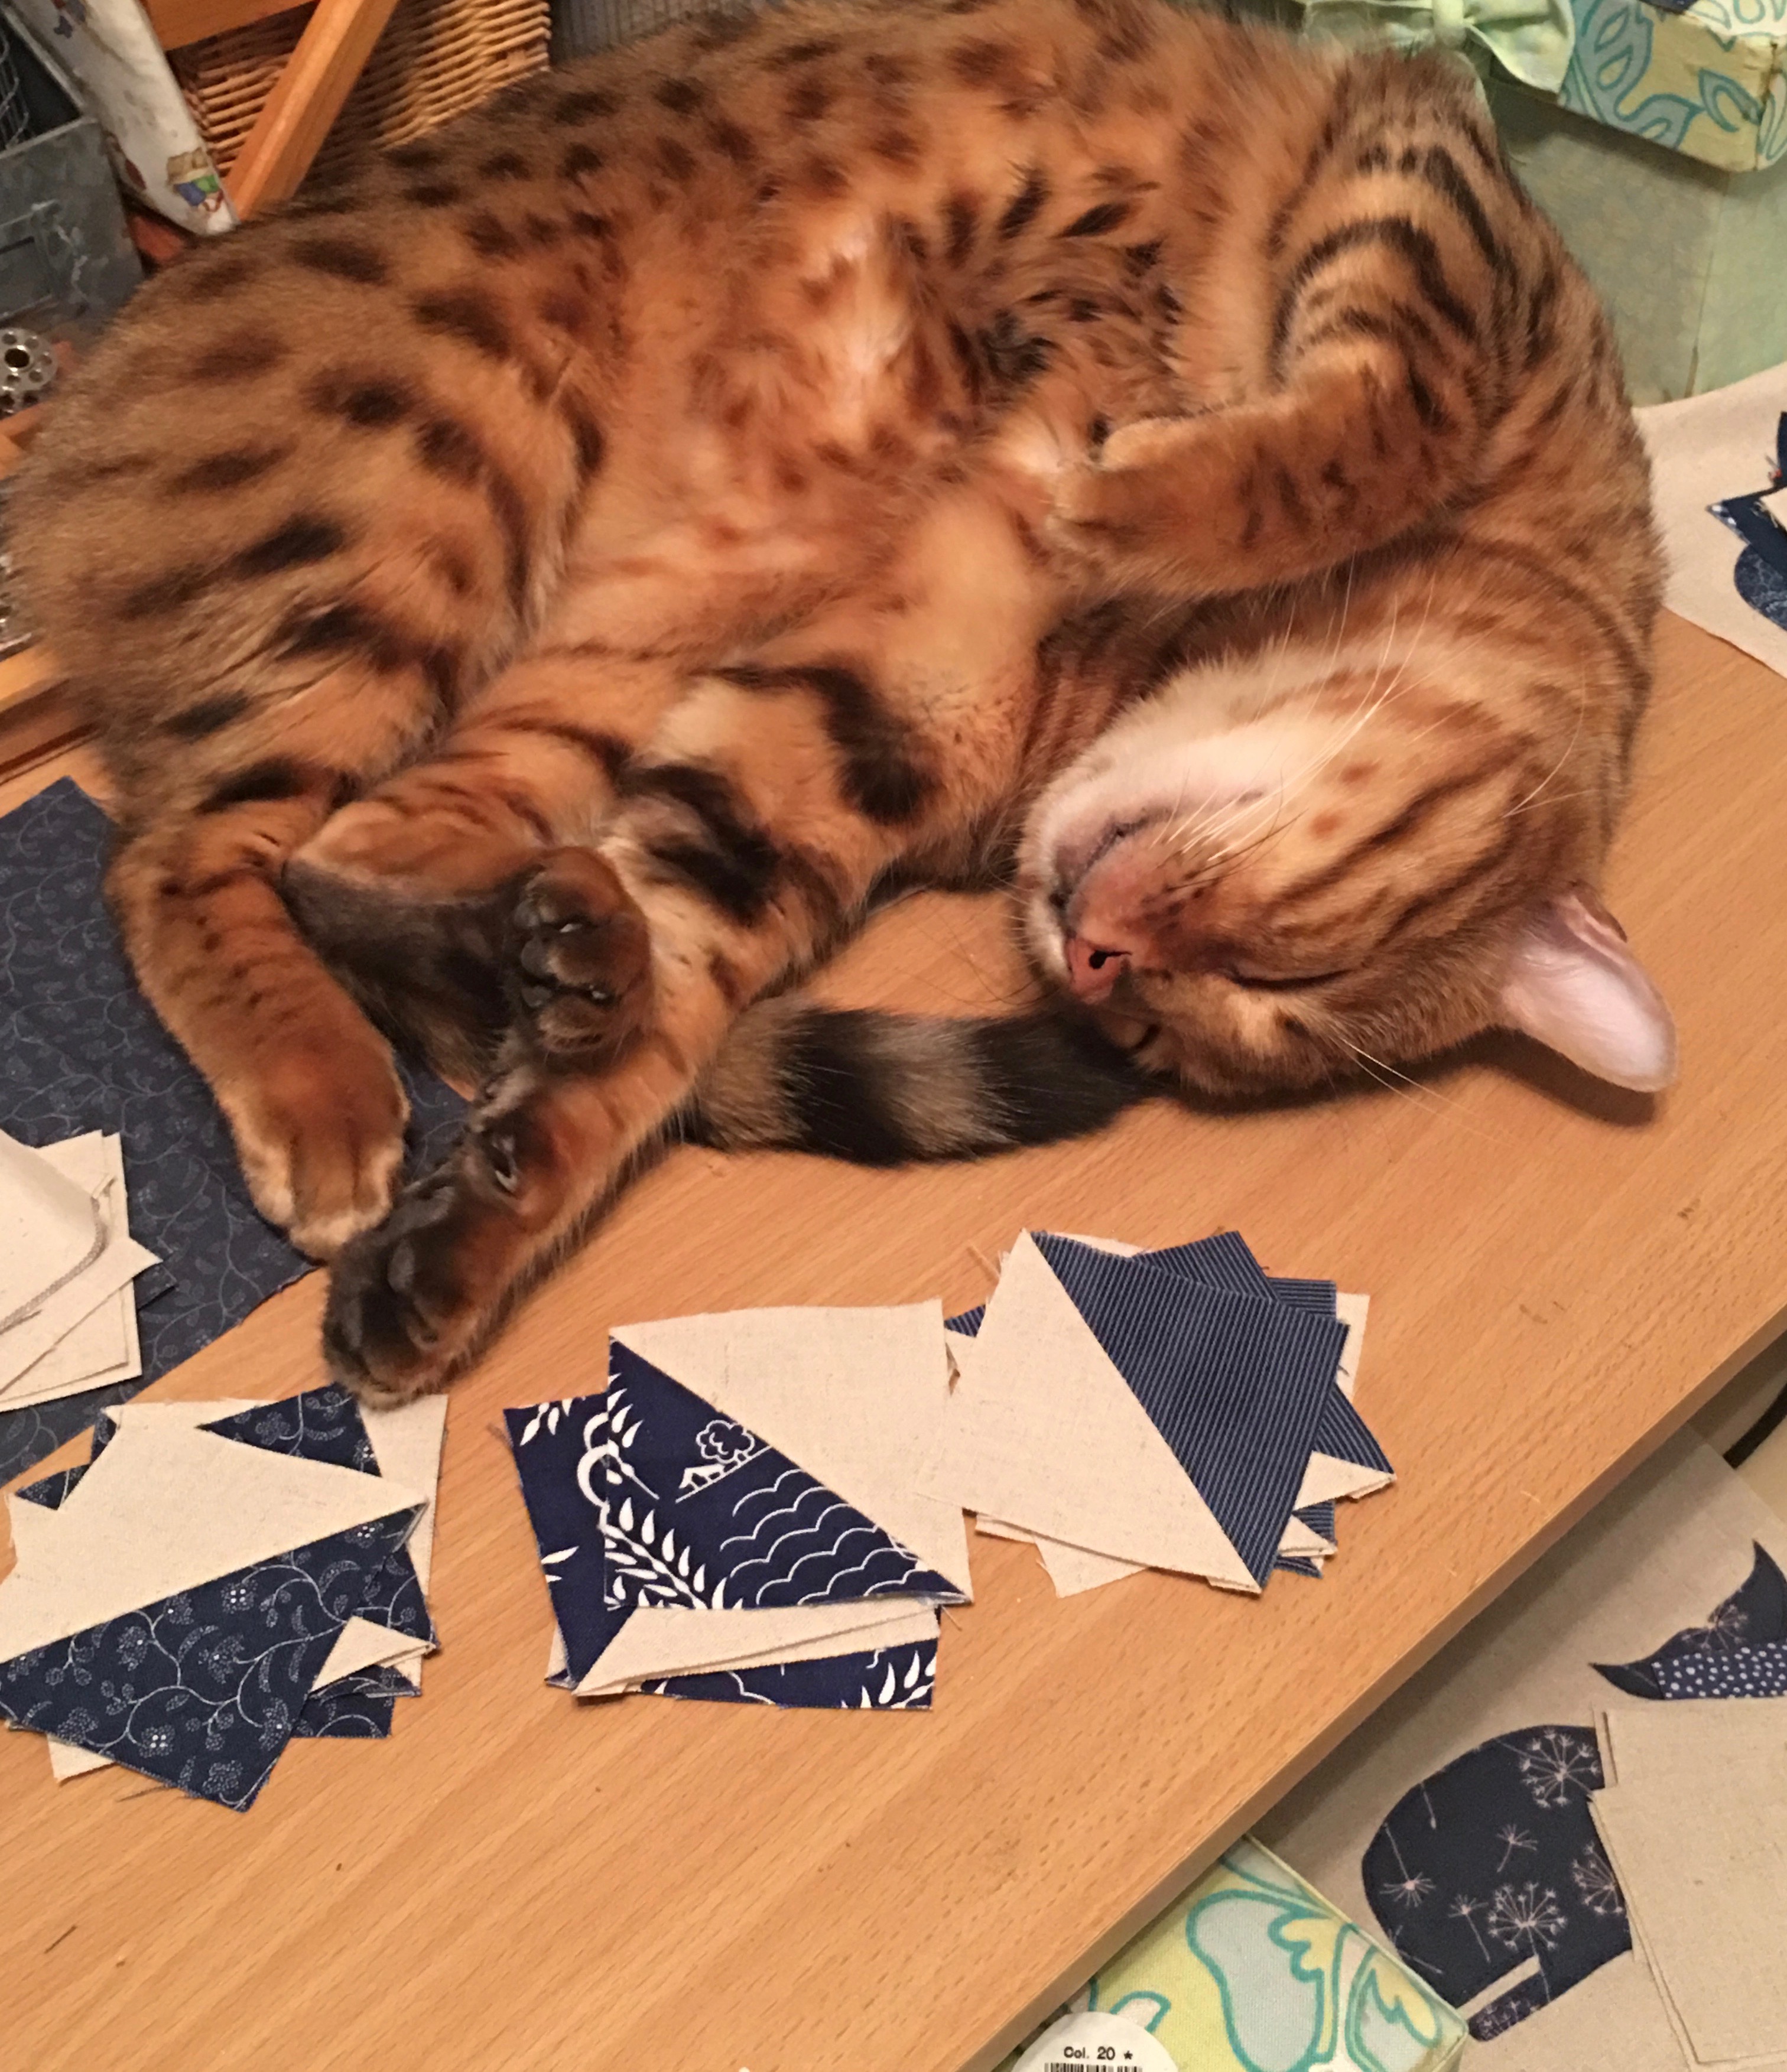
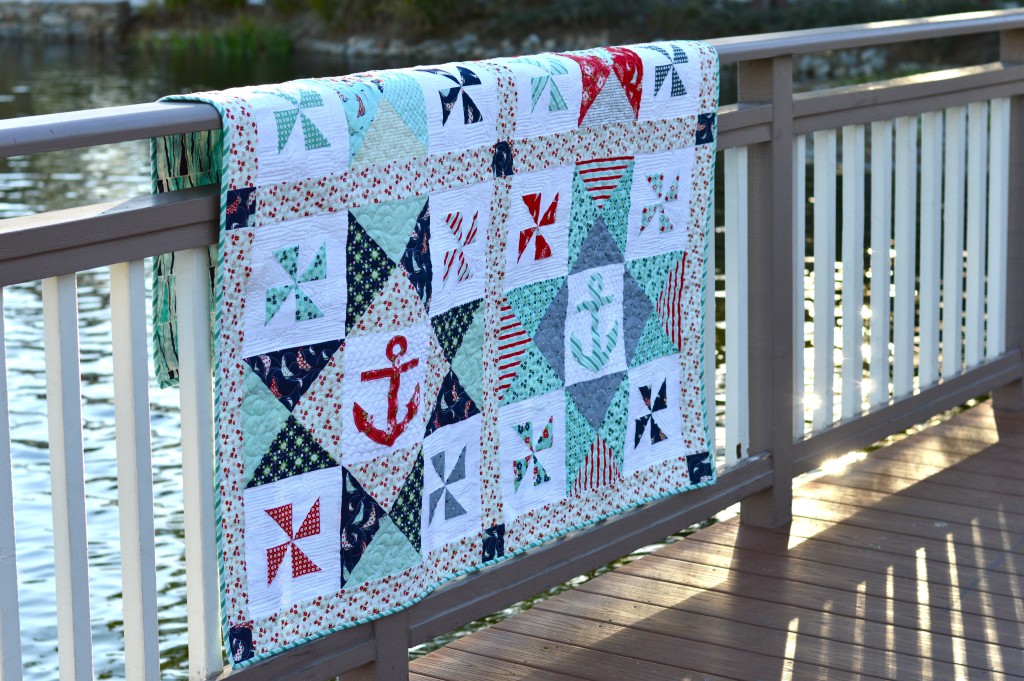
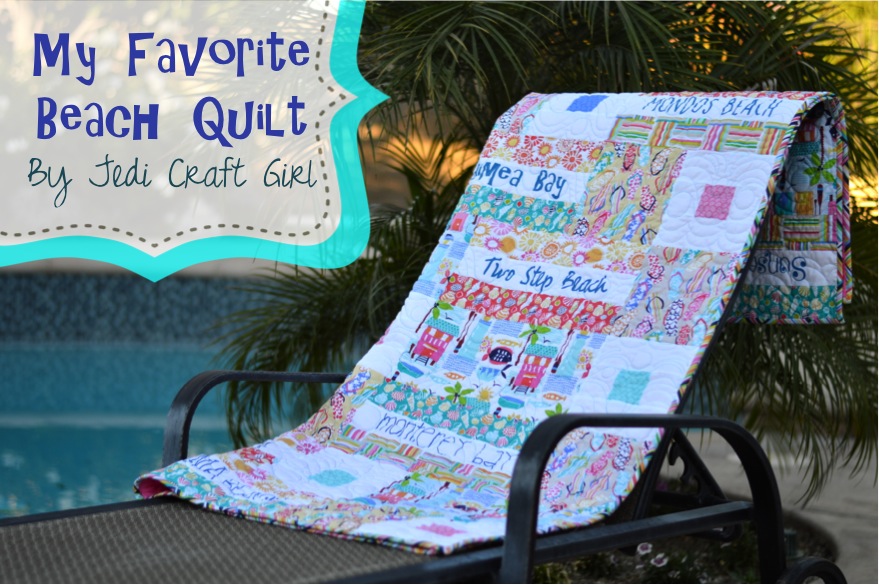
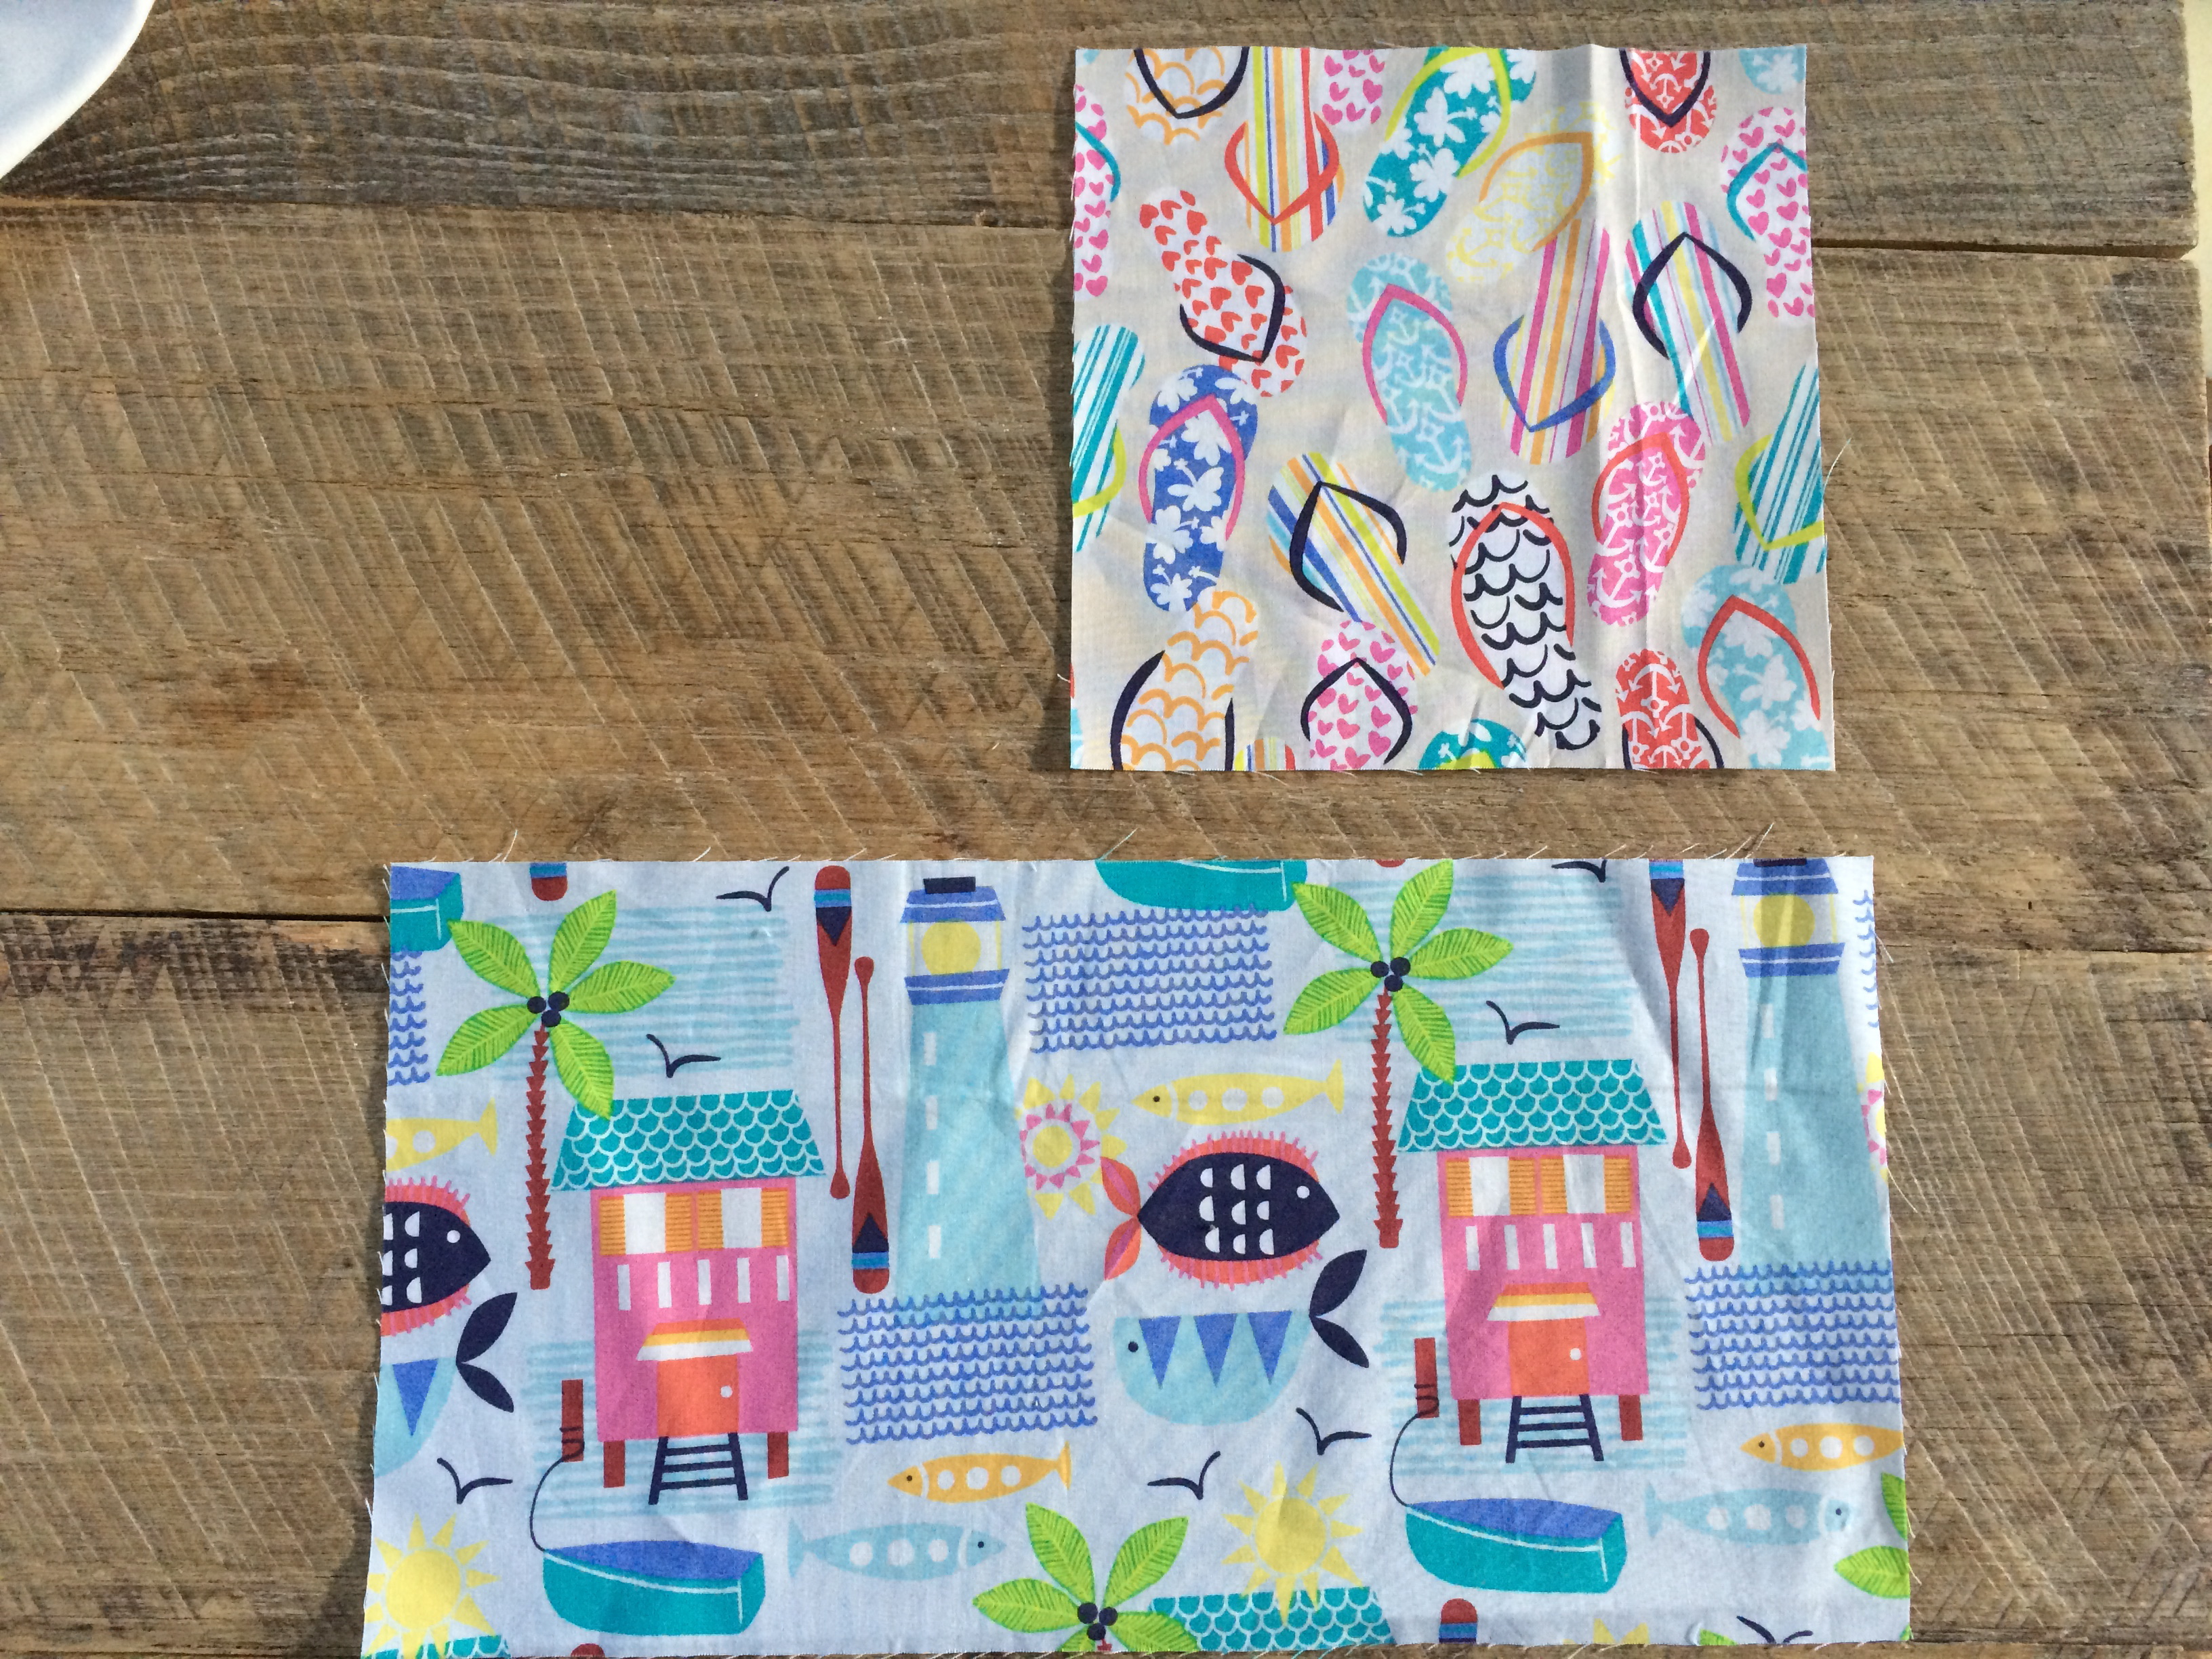
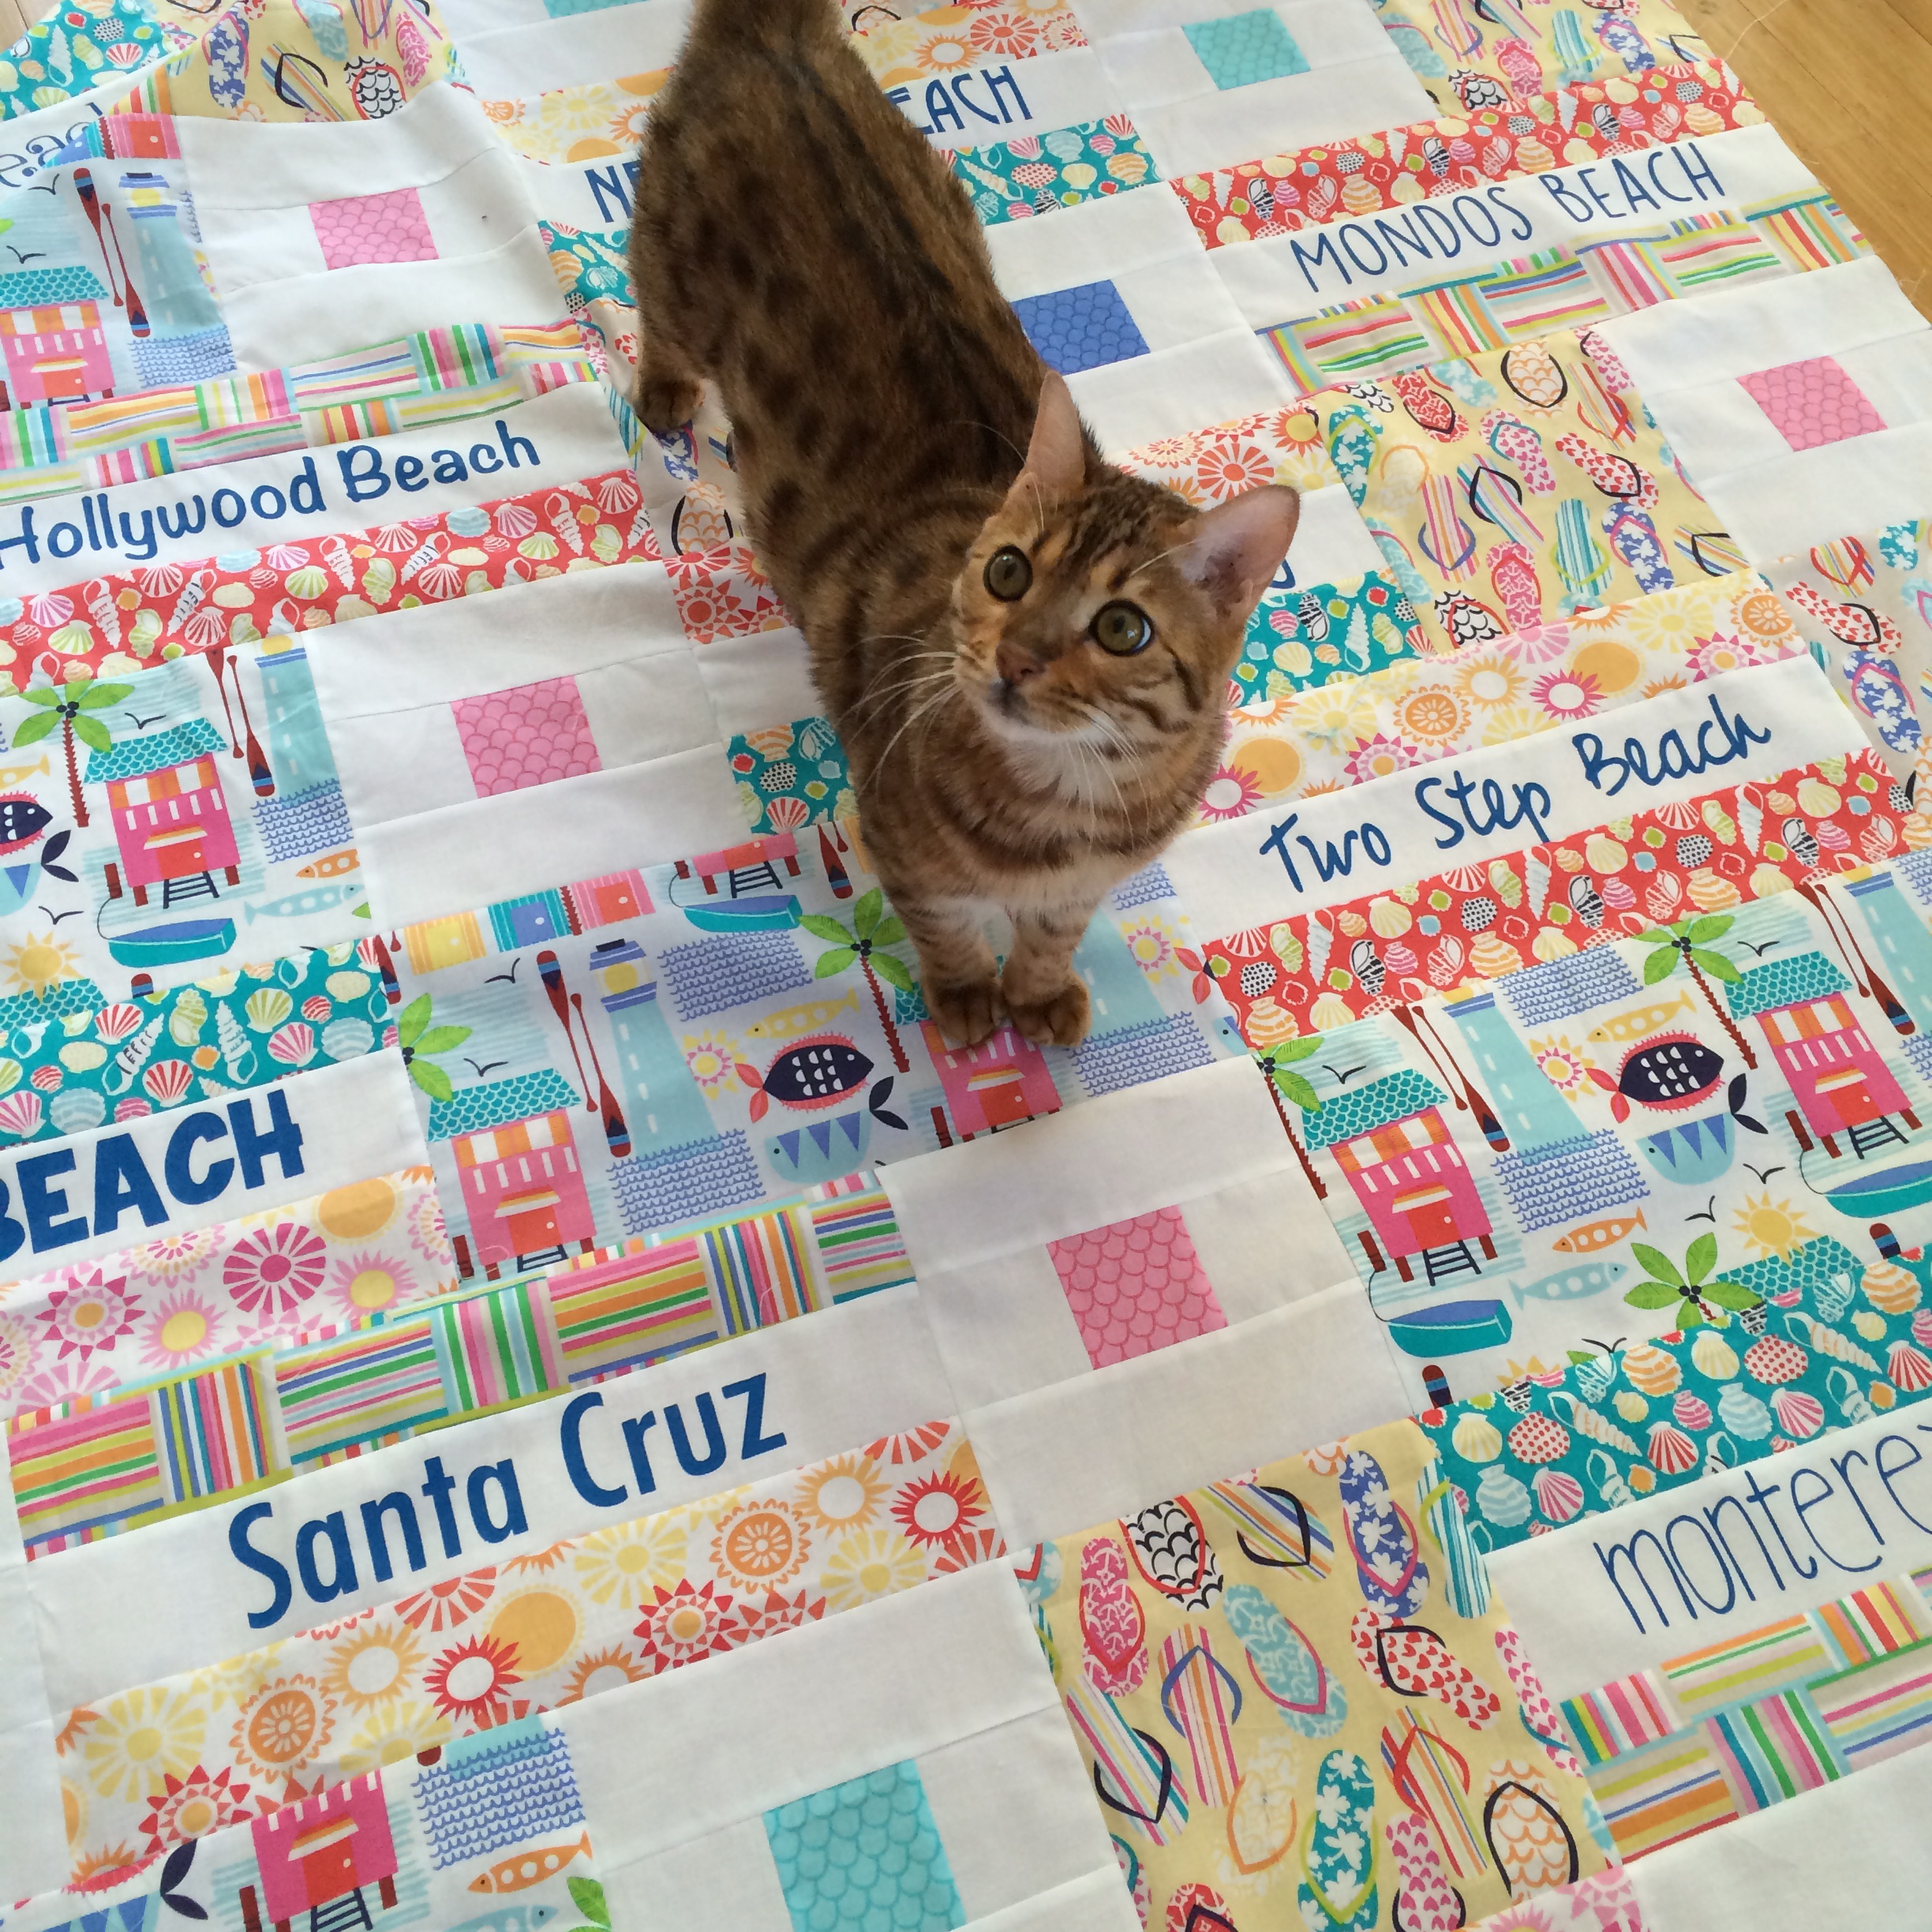
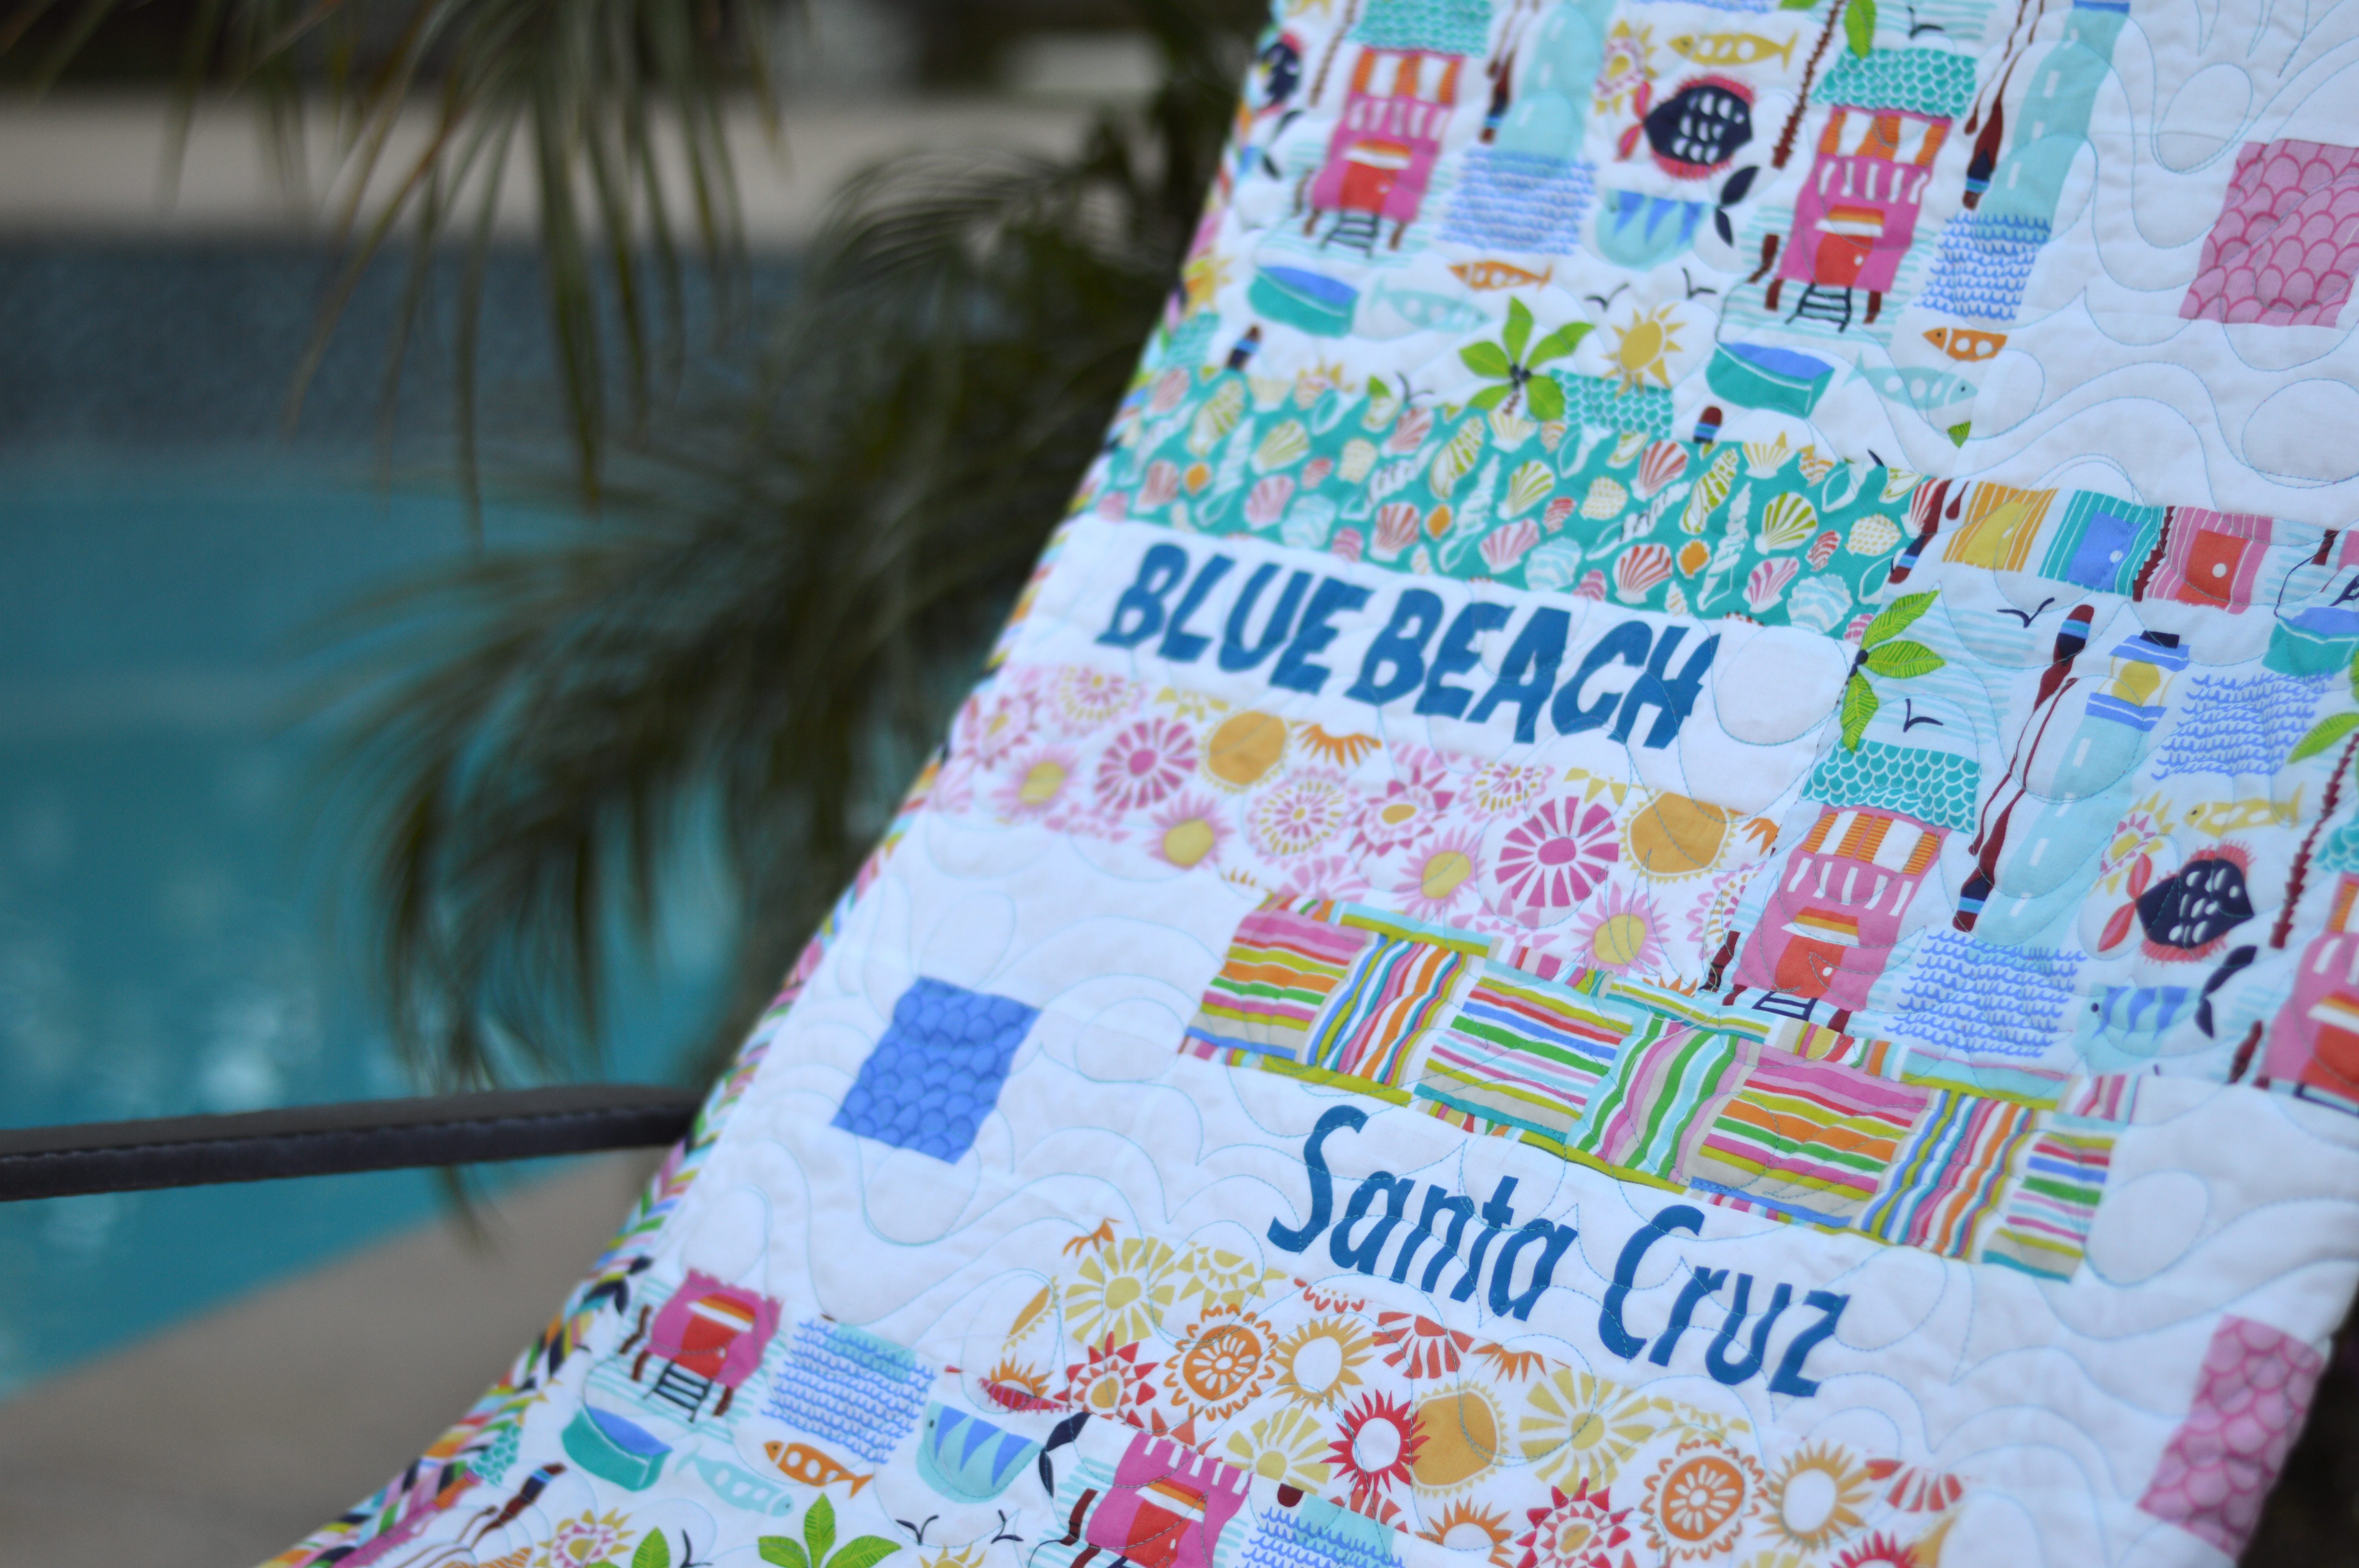
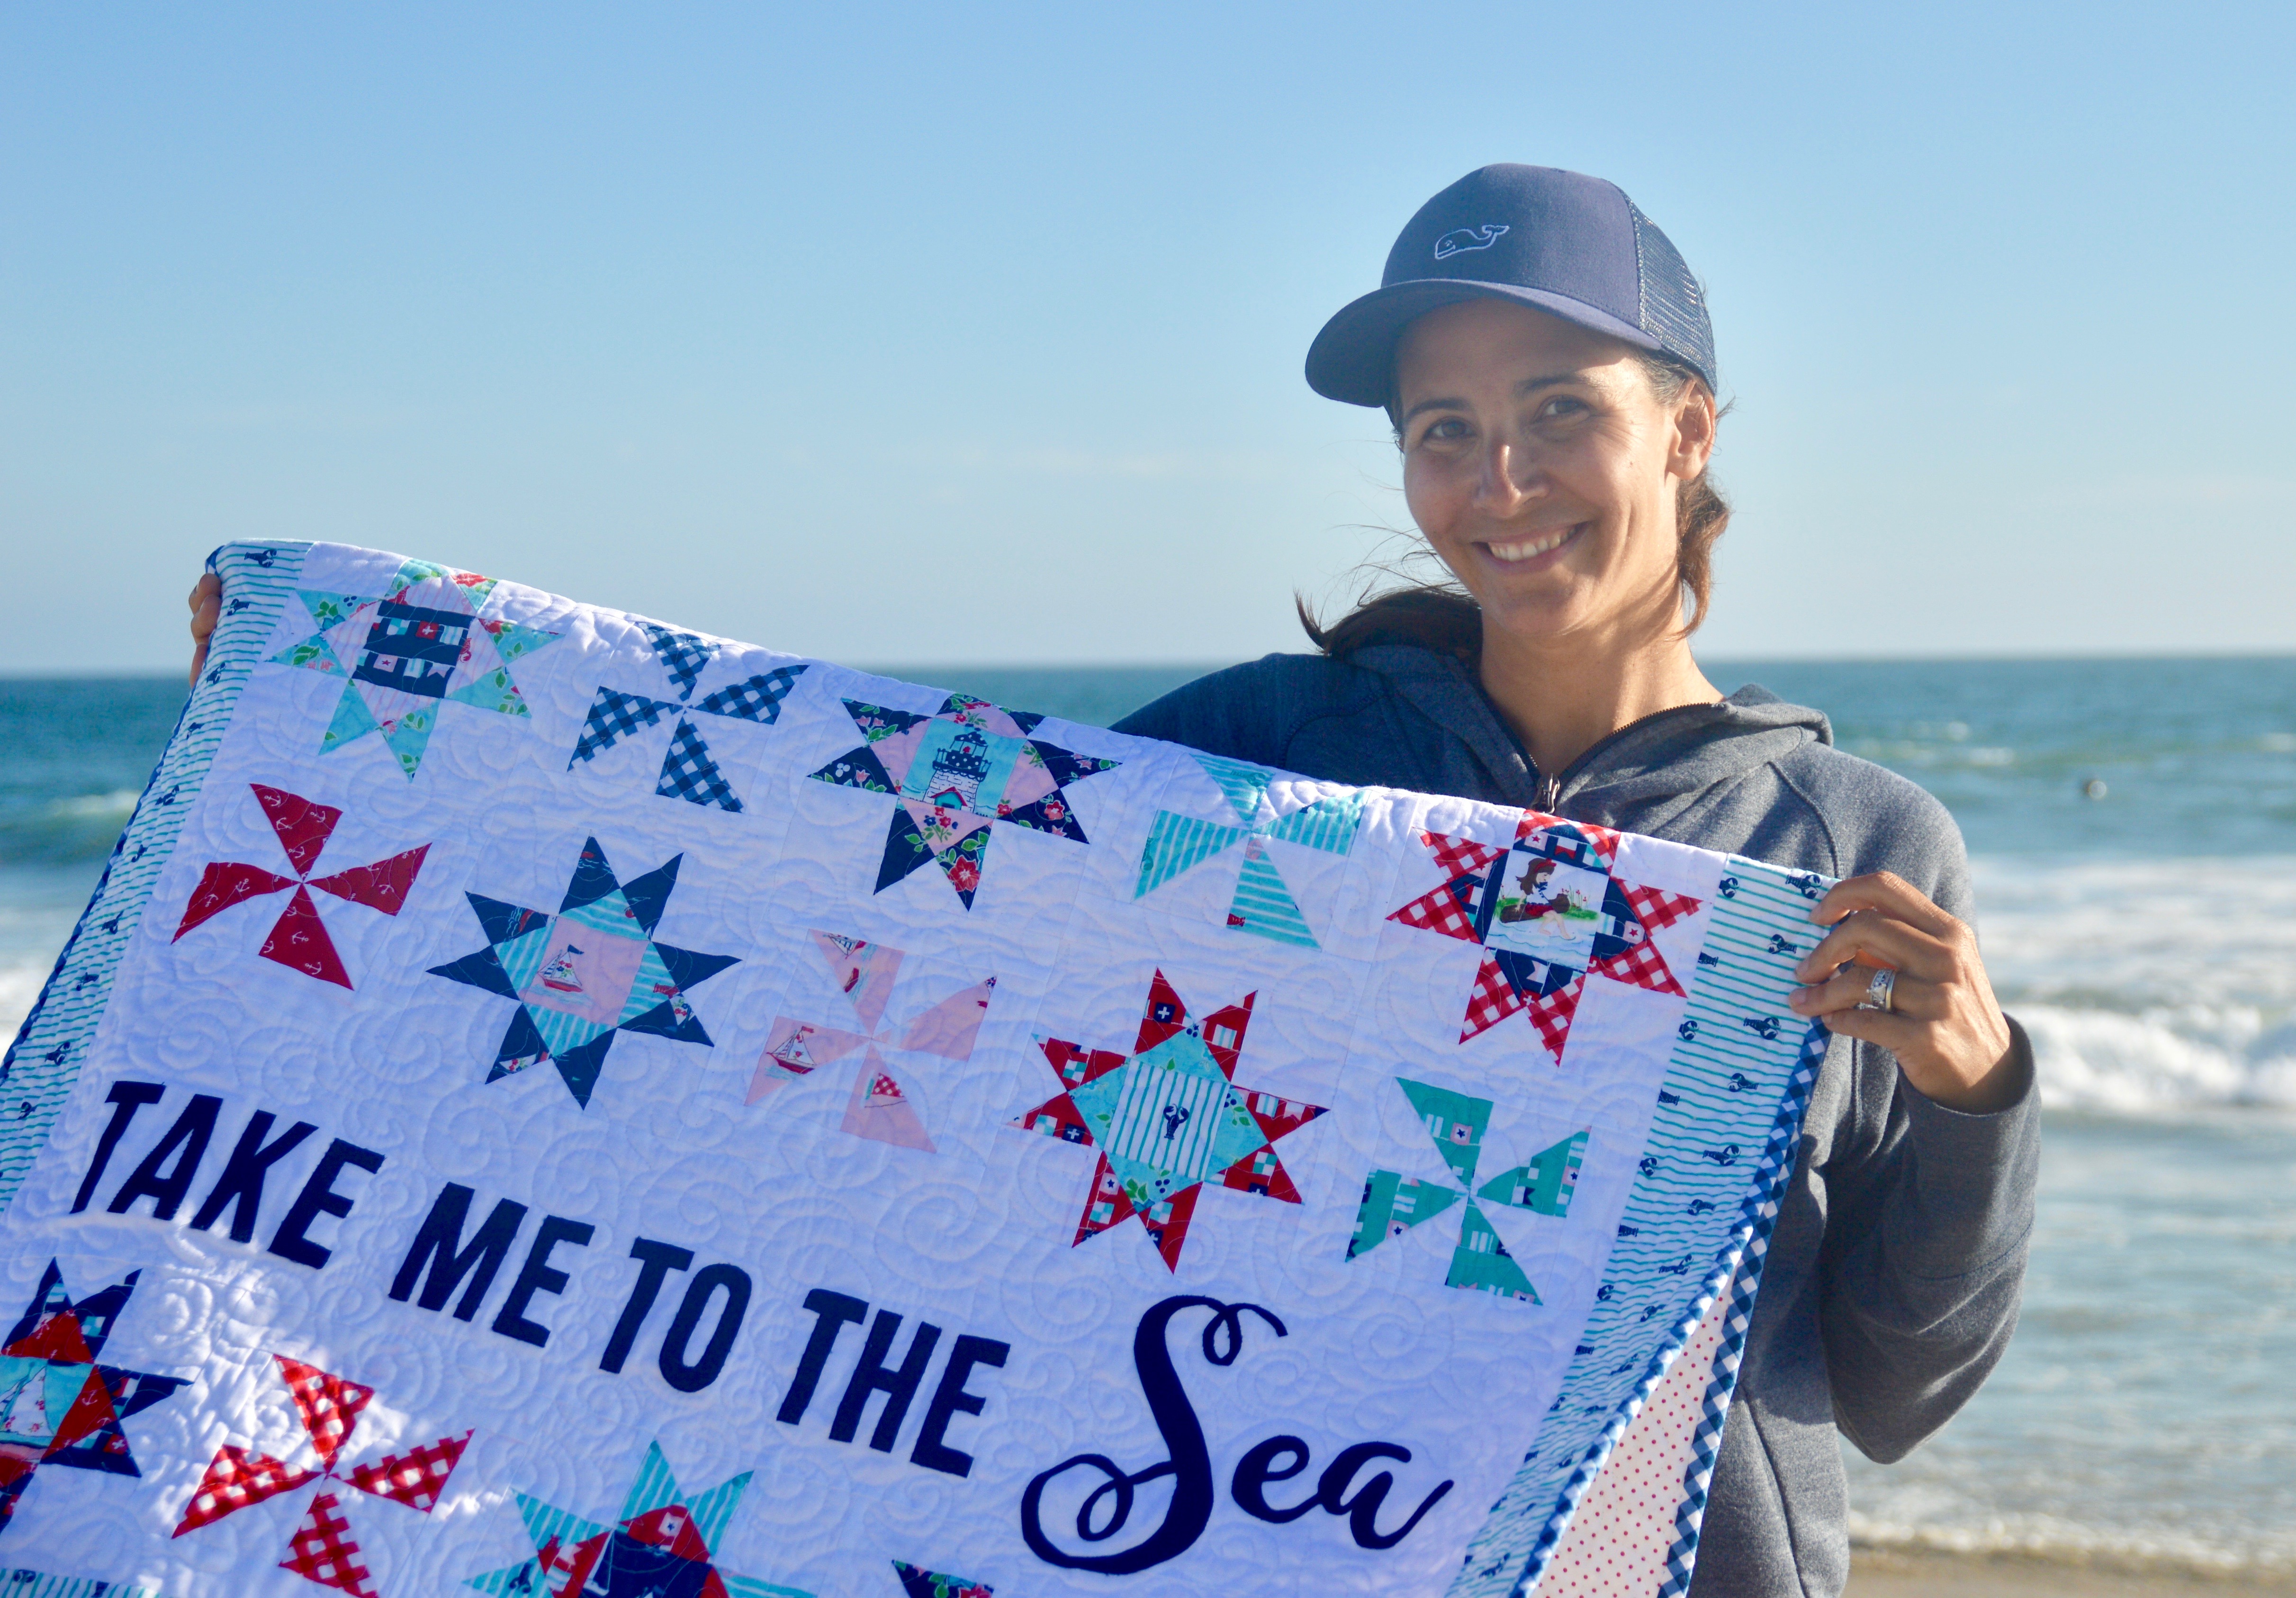
I think the reason I love summer the most is because we get to spend so much time at the beach!  We love whale watching, boogie boarding, diving through the waves, watching for dolphins and seals, getting Balboa Bars, going to Surf Shops, and relaxing!!! As soon as I saw Tasha Noel’s Seaside fabrics I knew they were for me!!  I designed this little quilt to show off all the adorable prints!!

seaside fabric by tasha noel

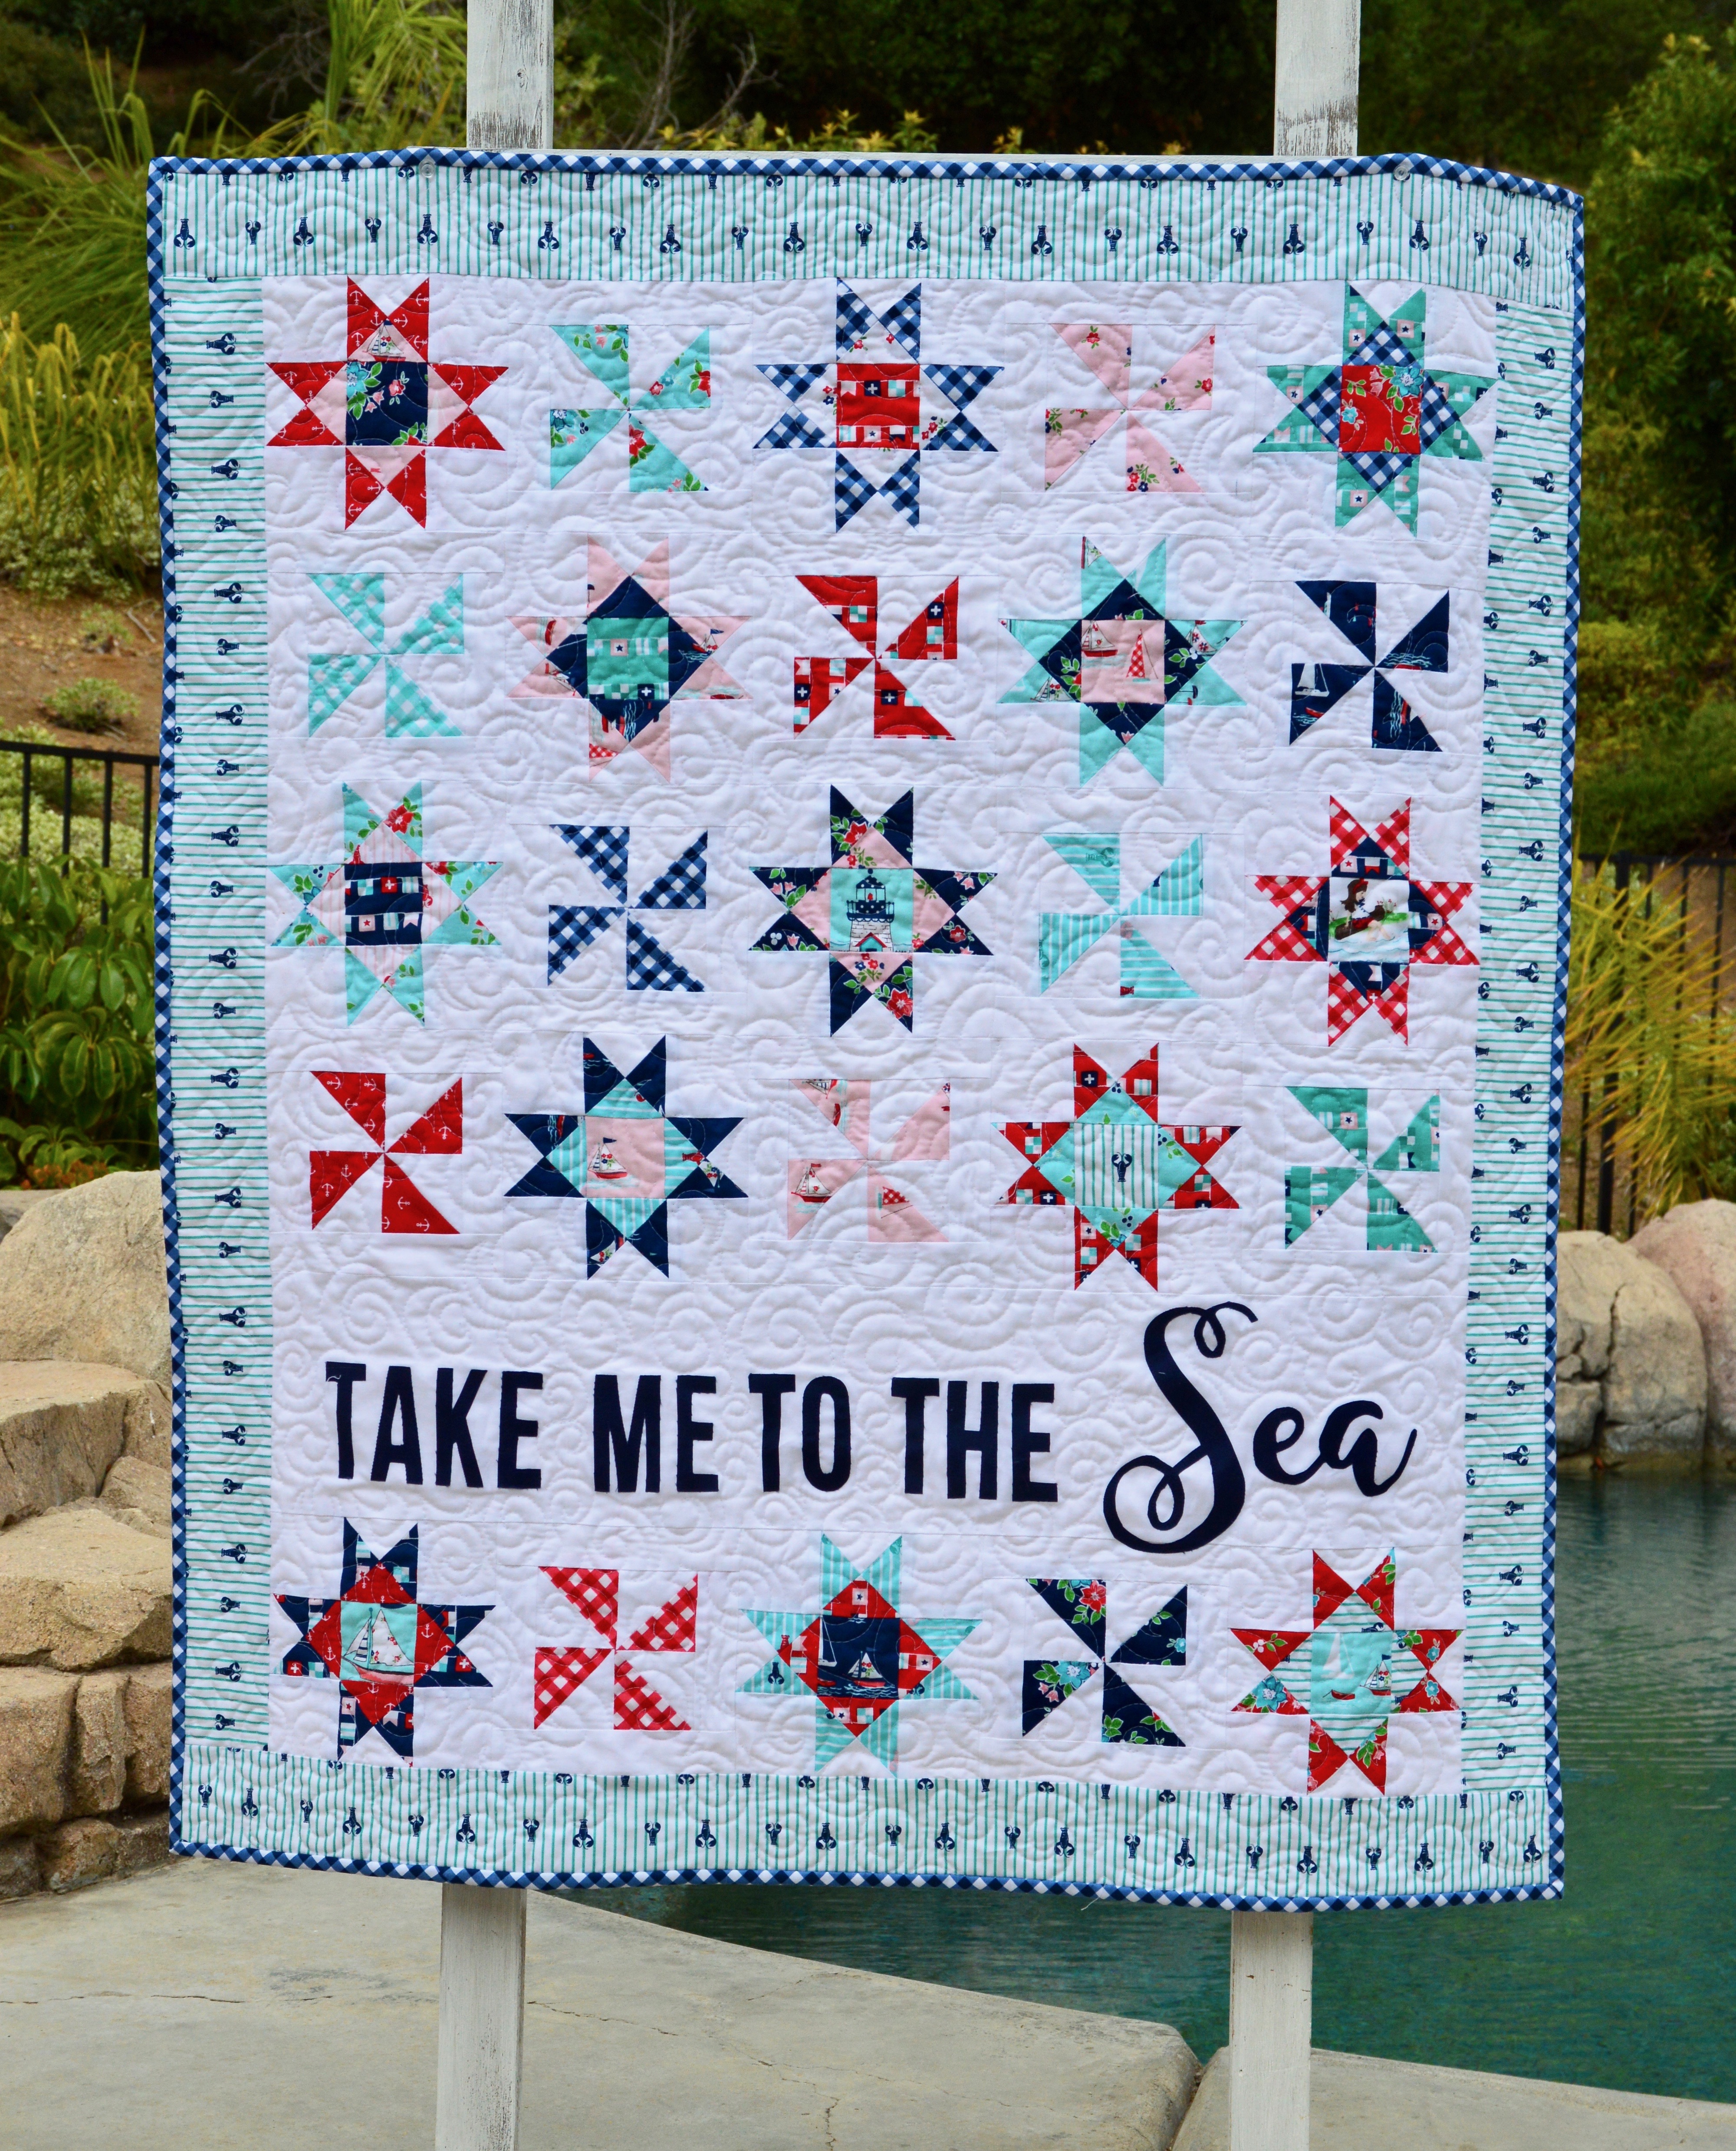
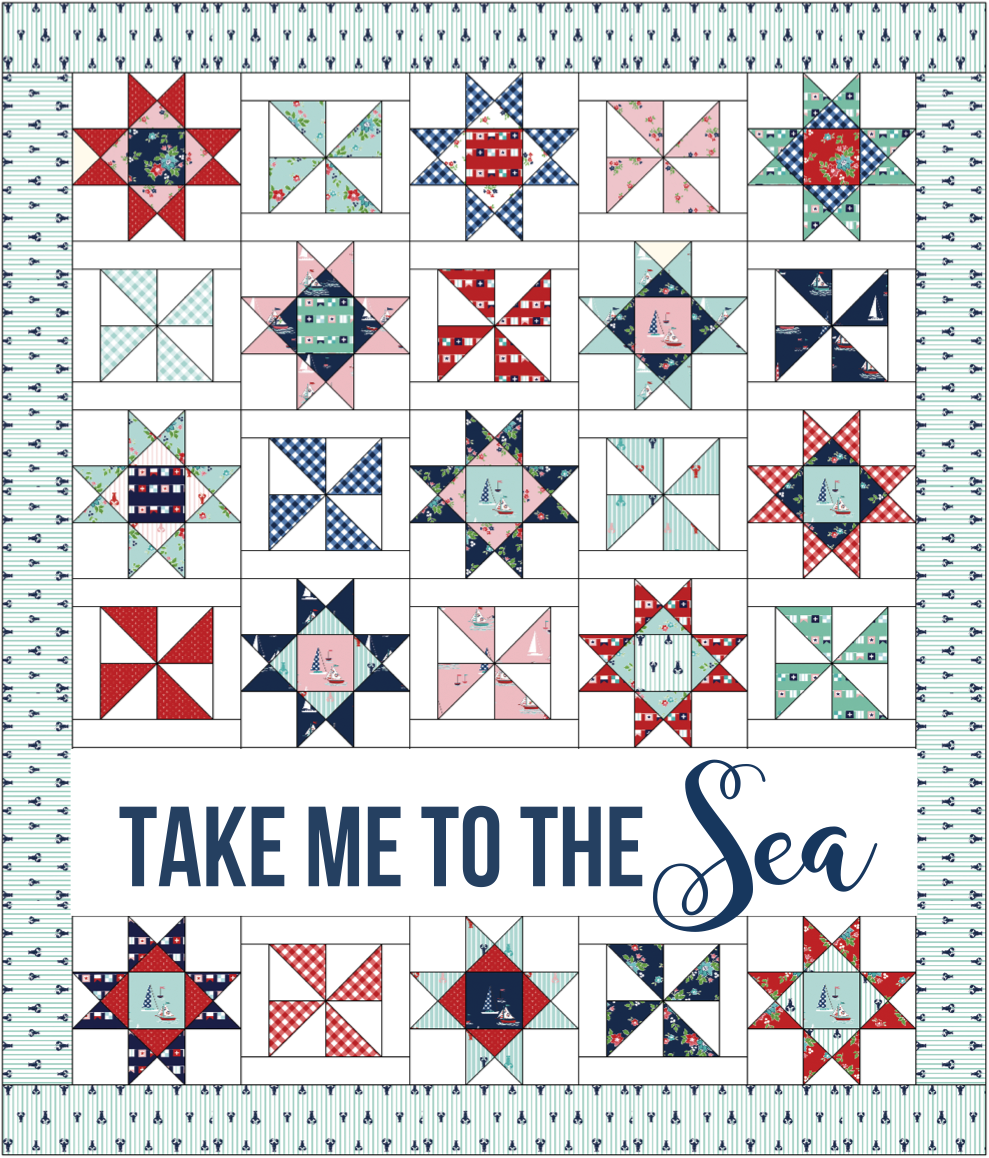
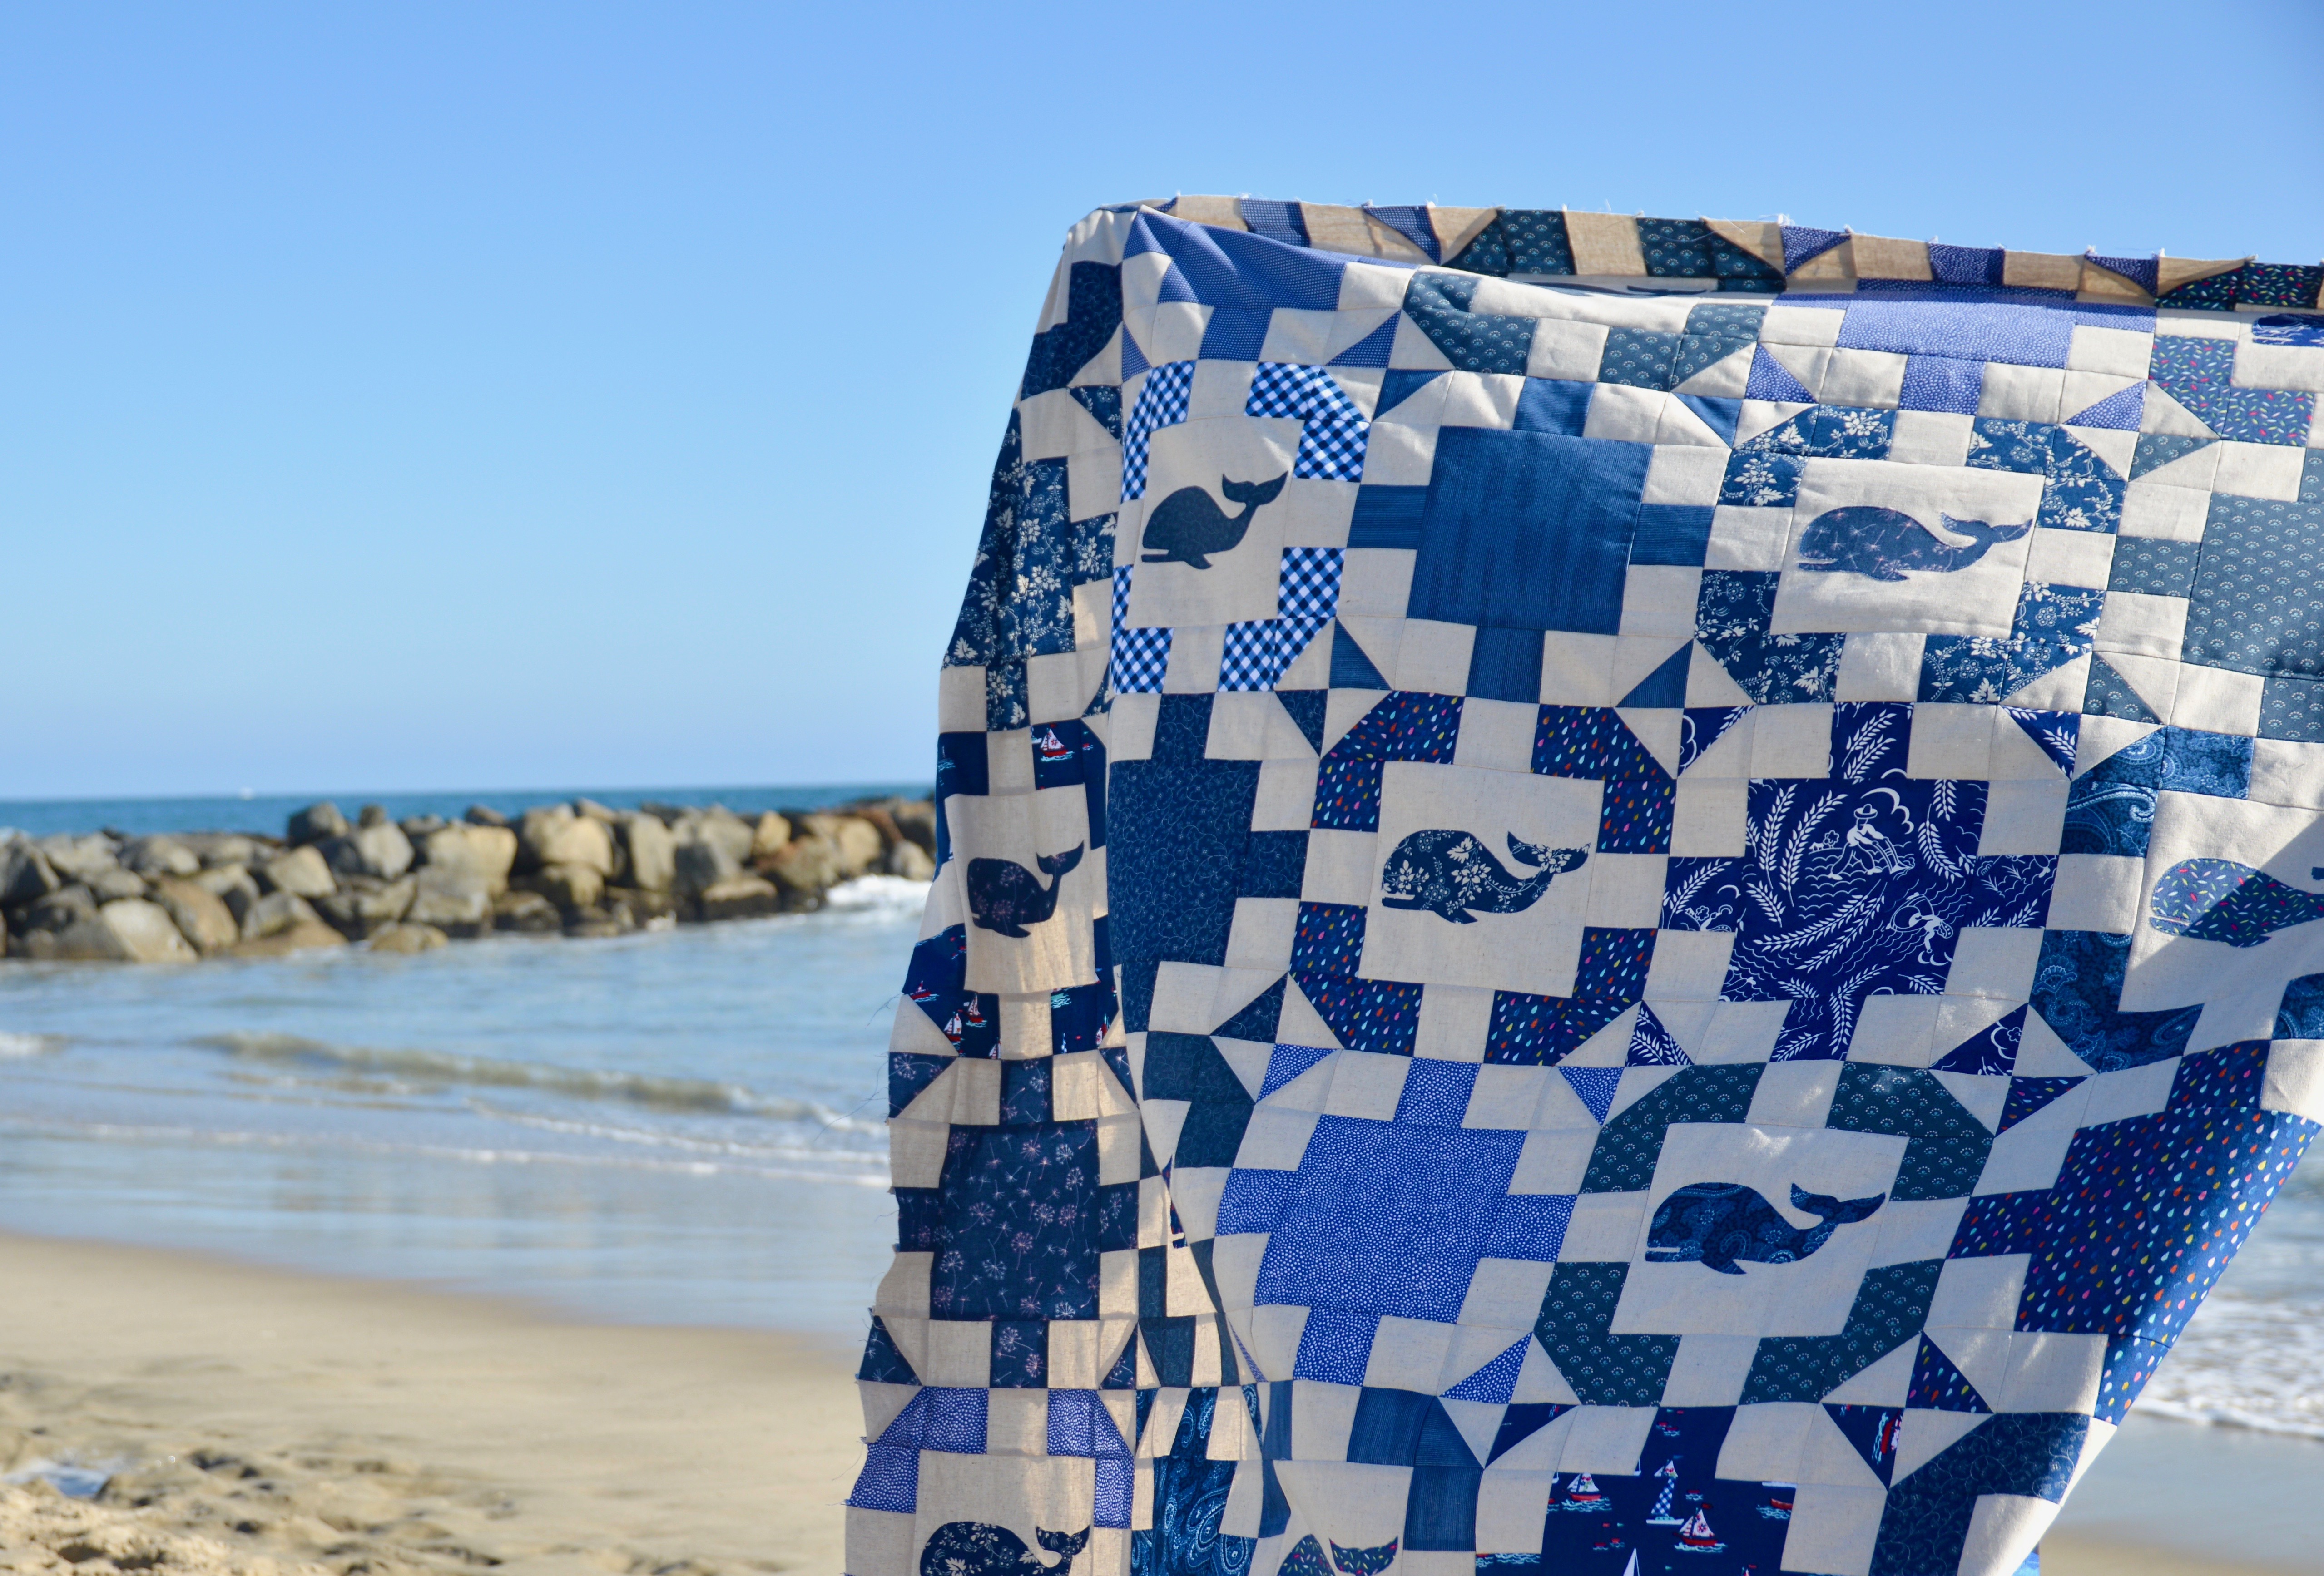
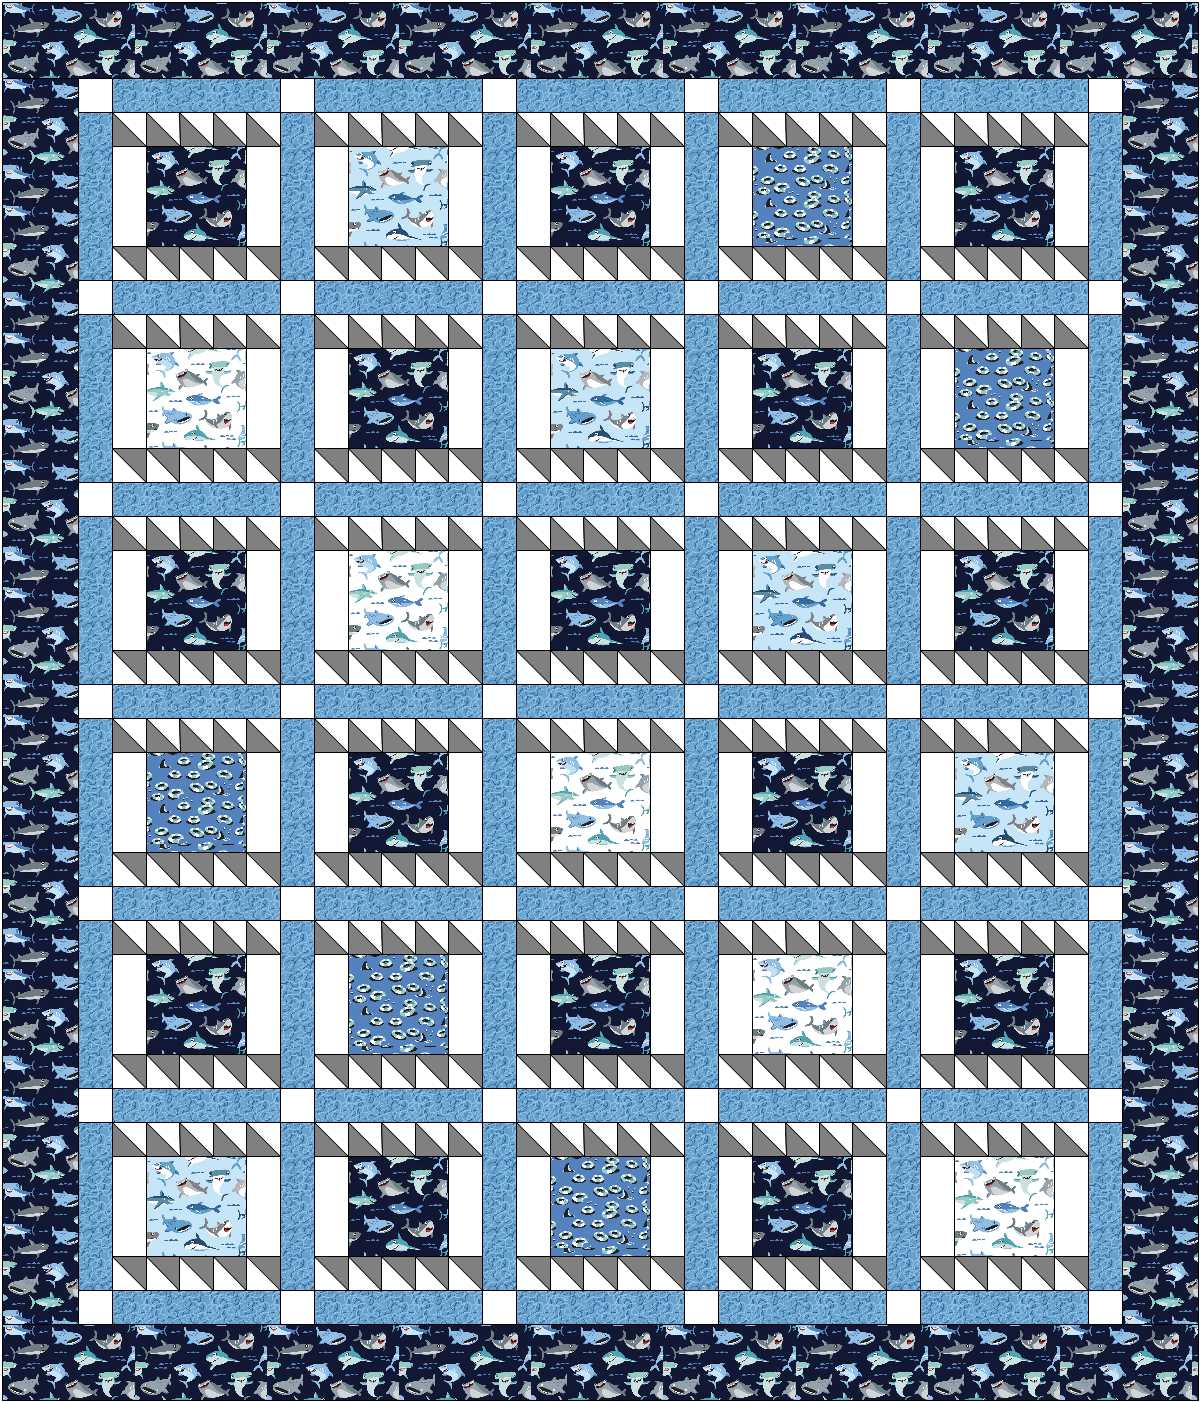
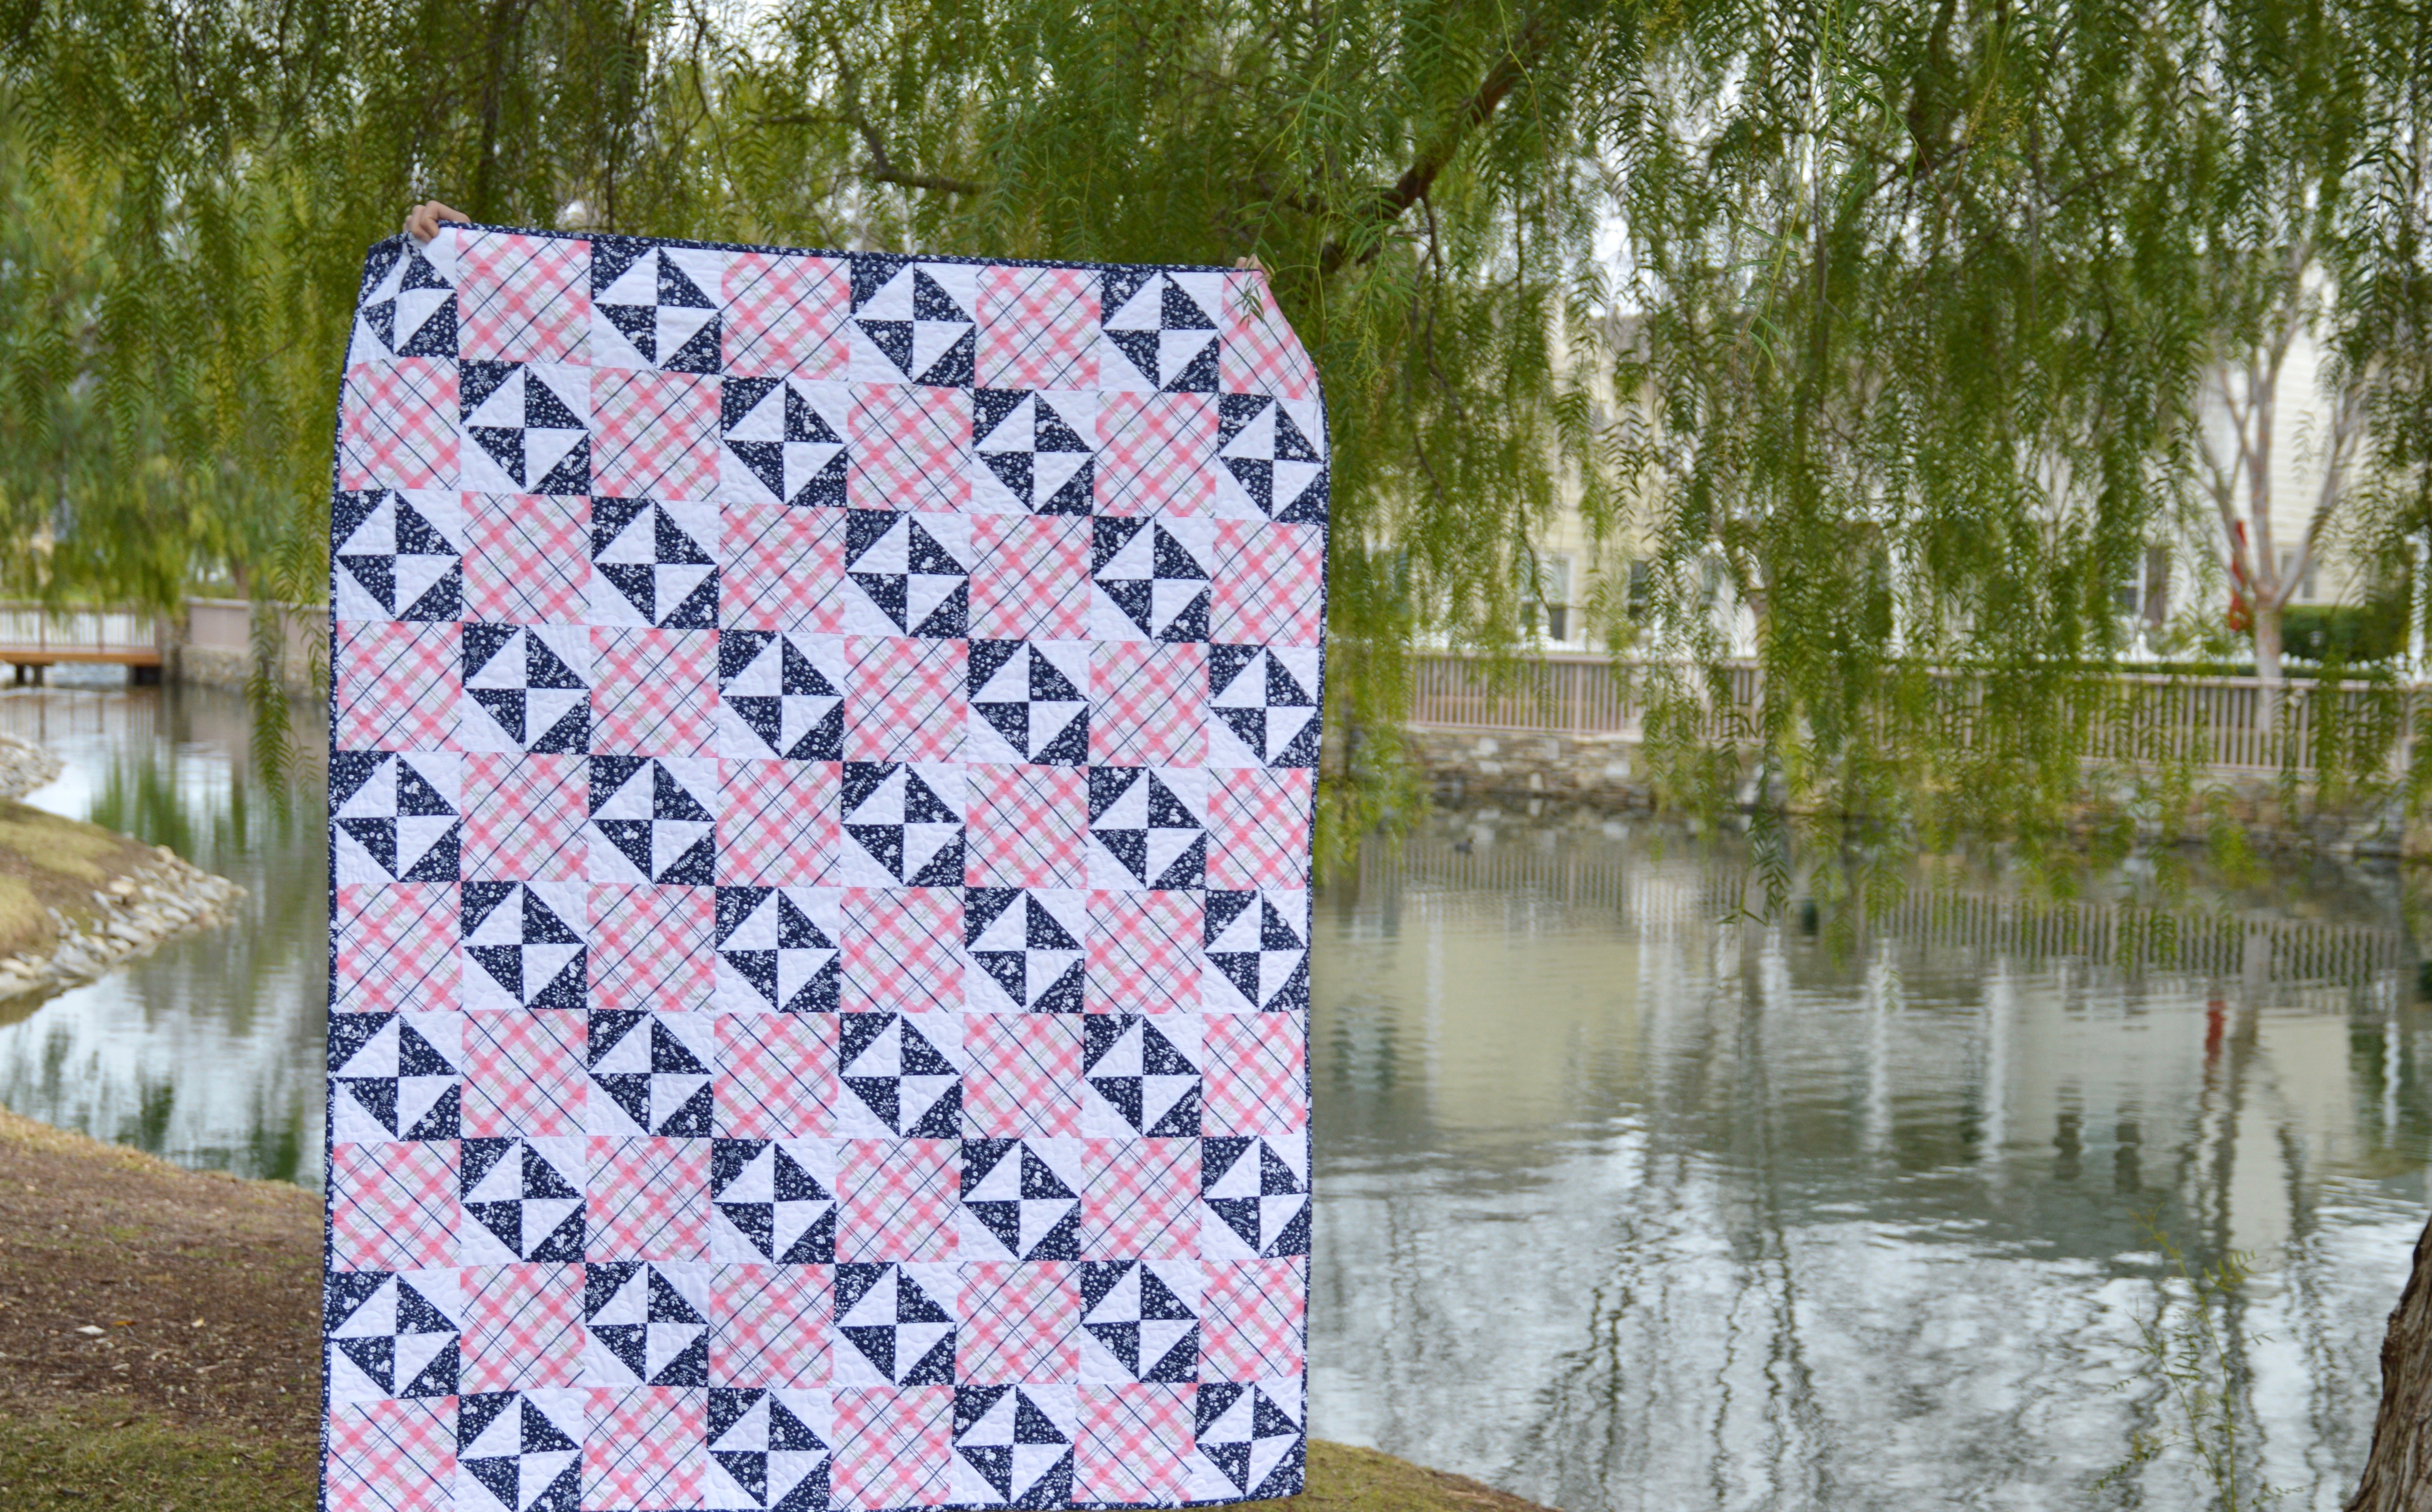
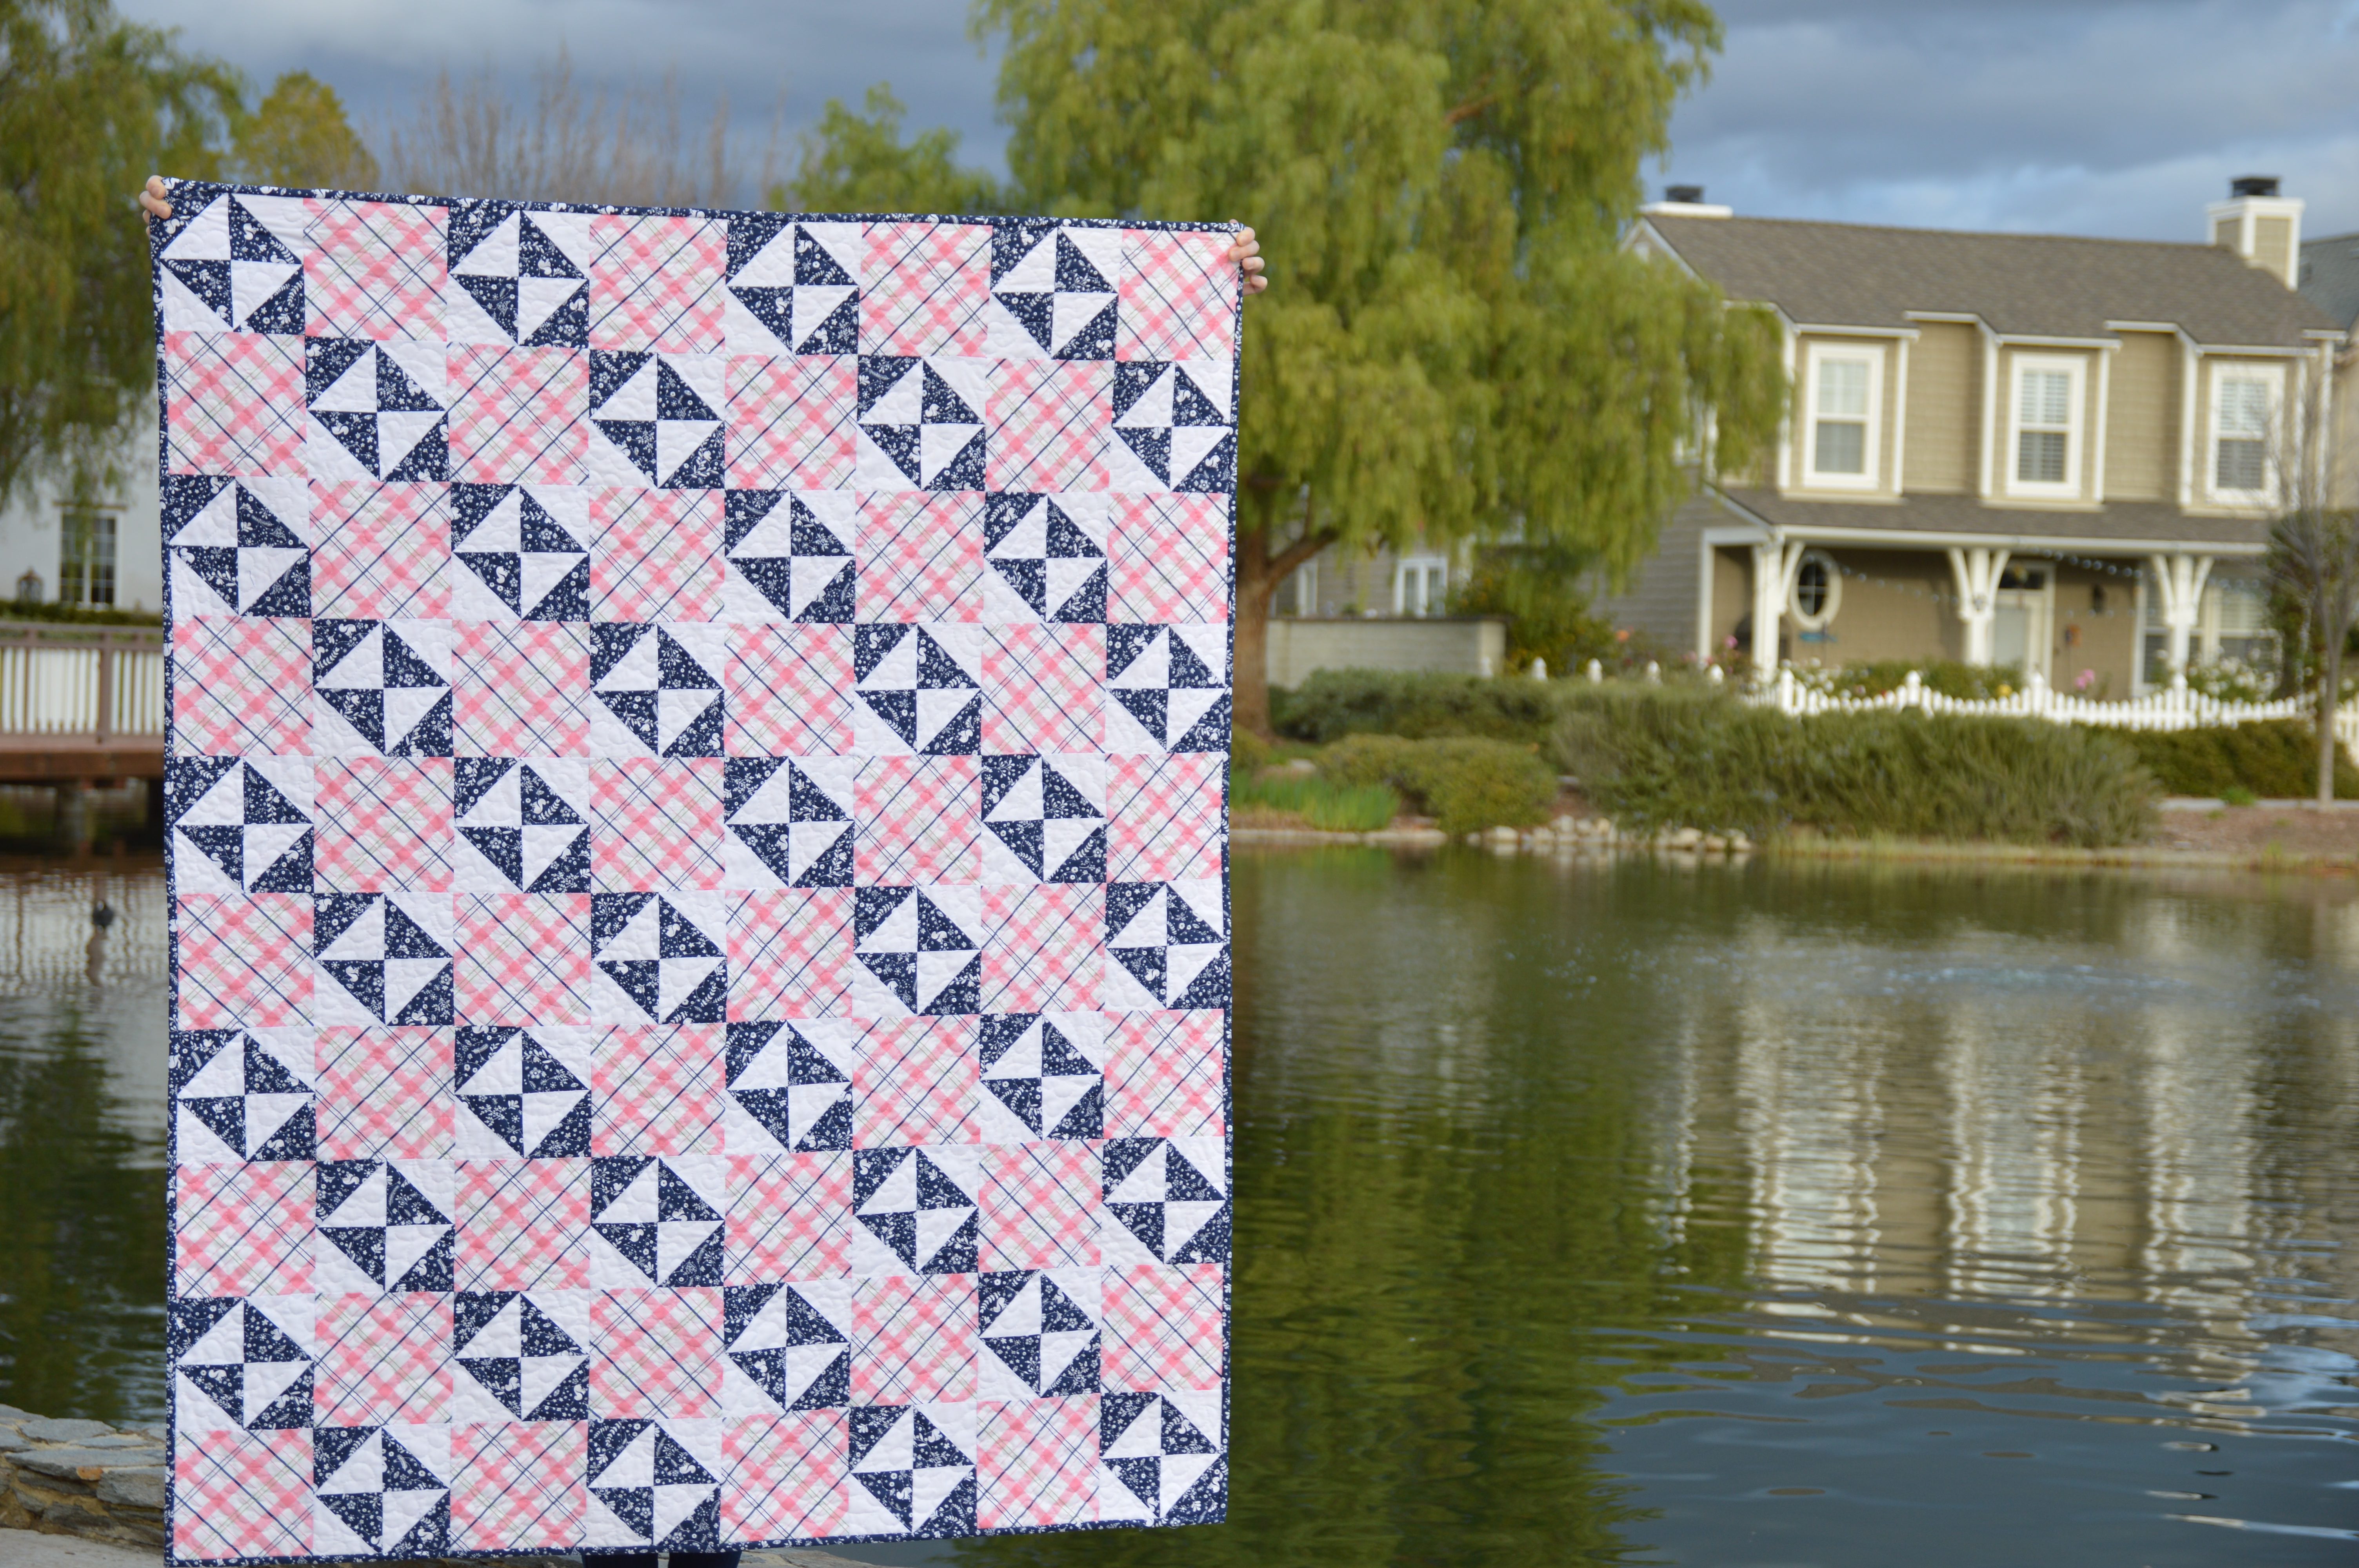
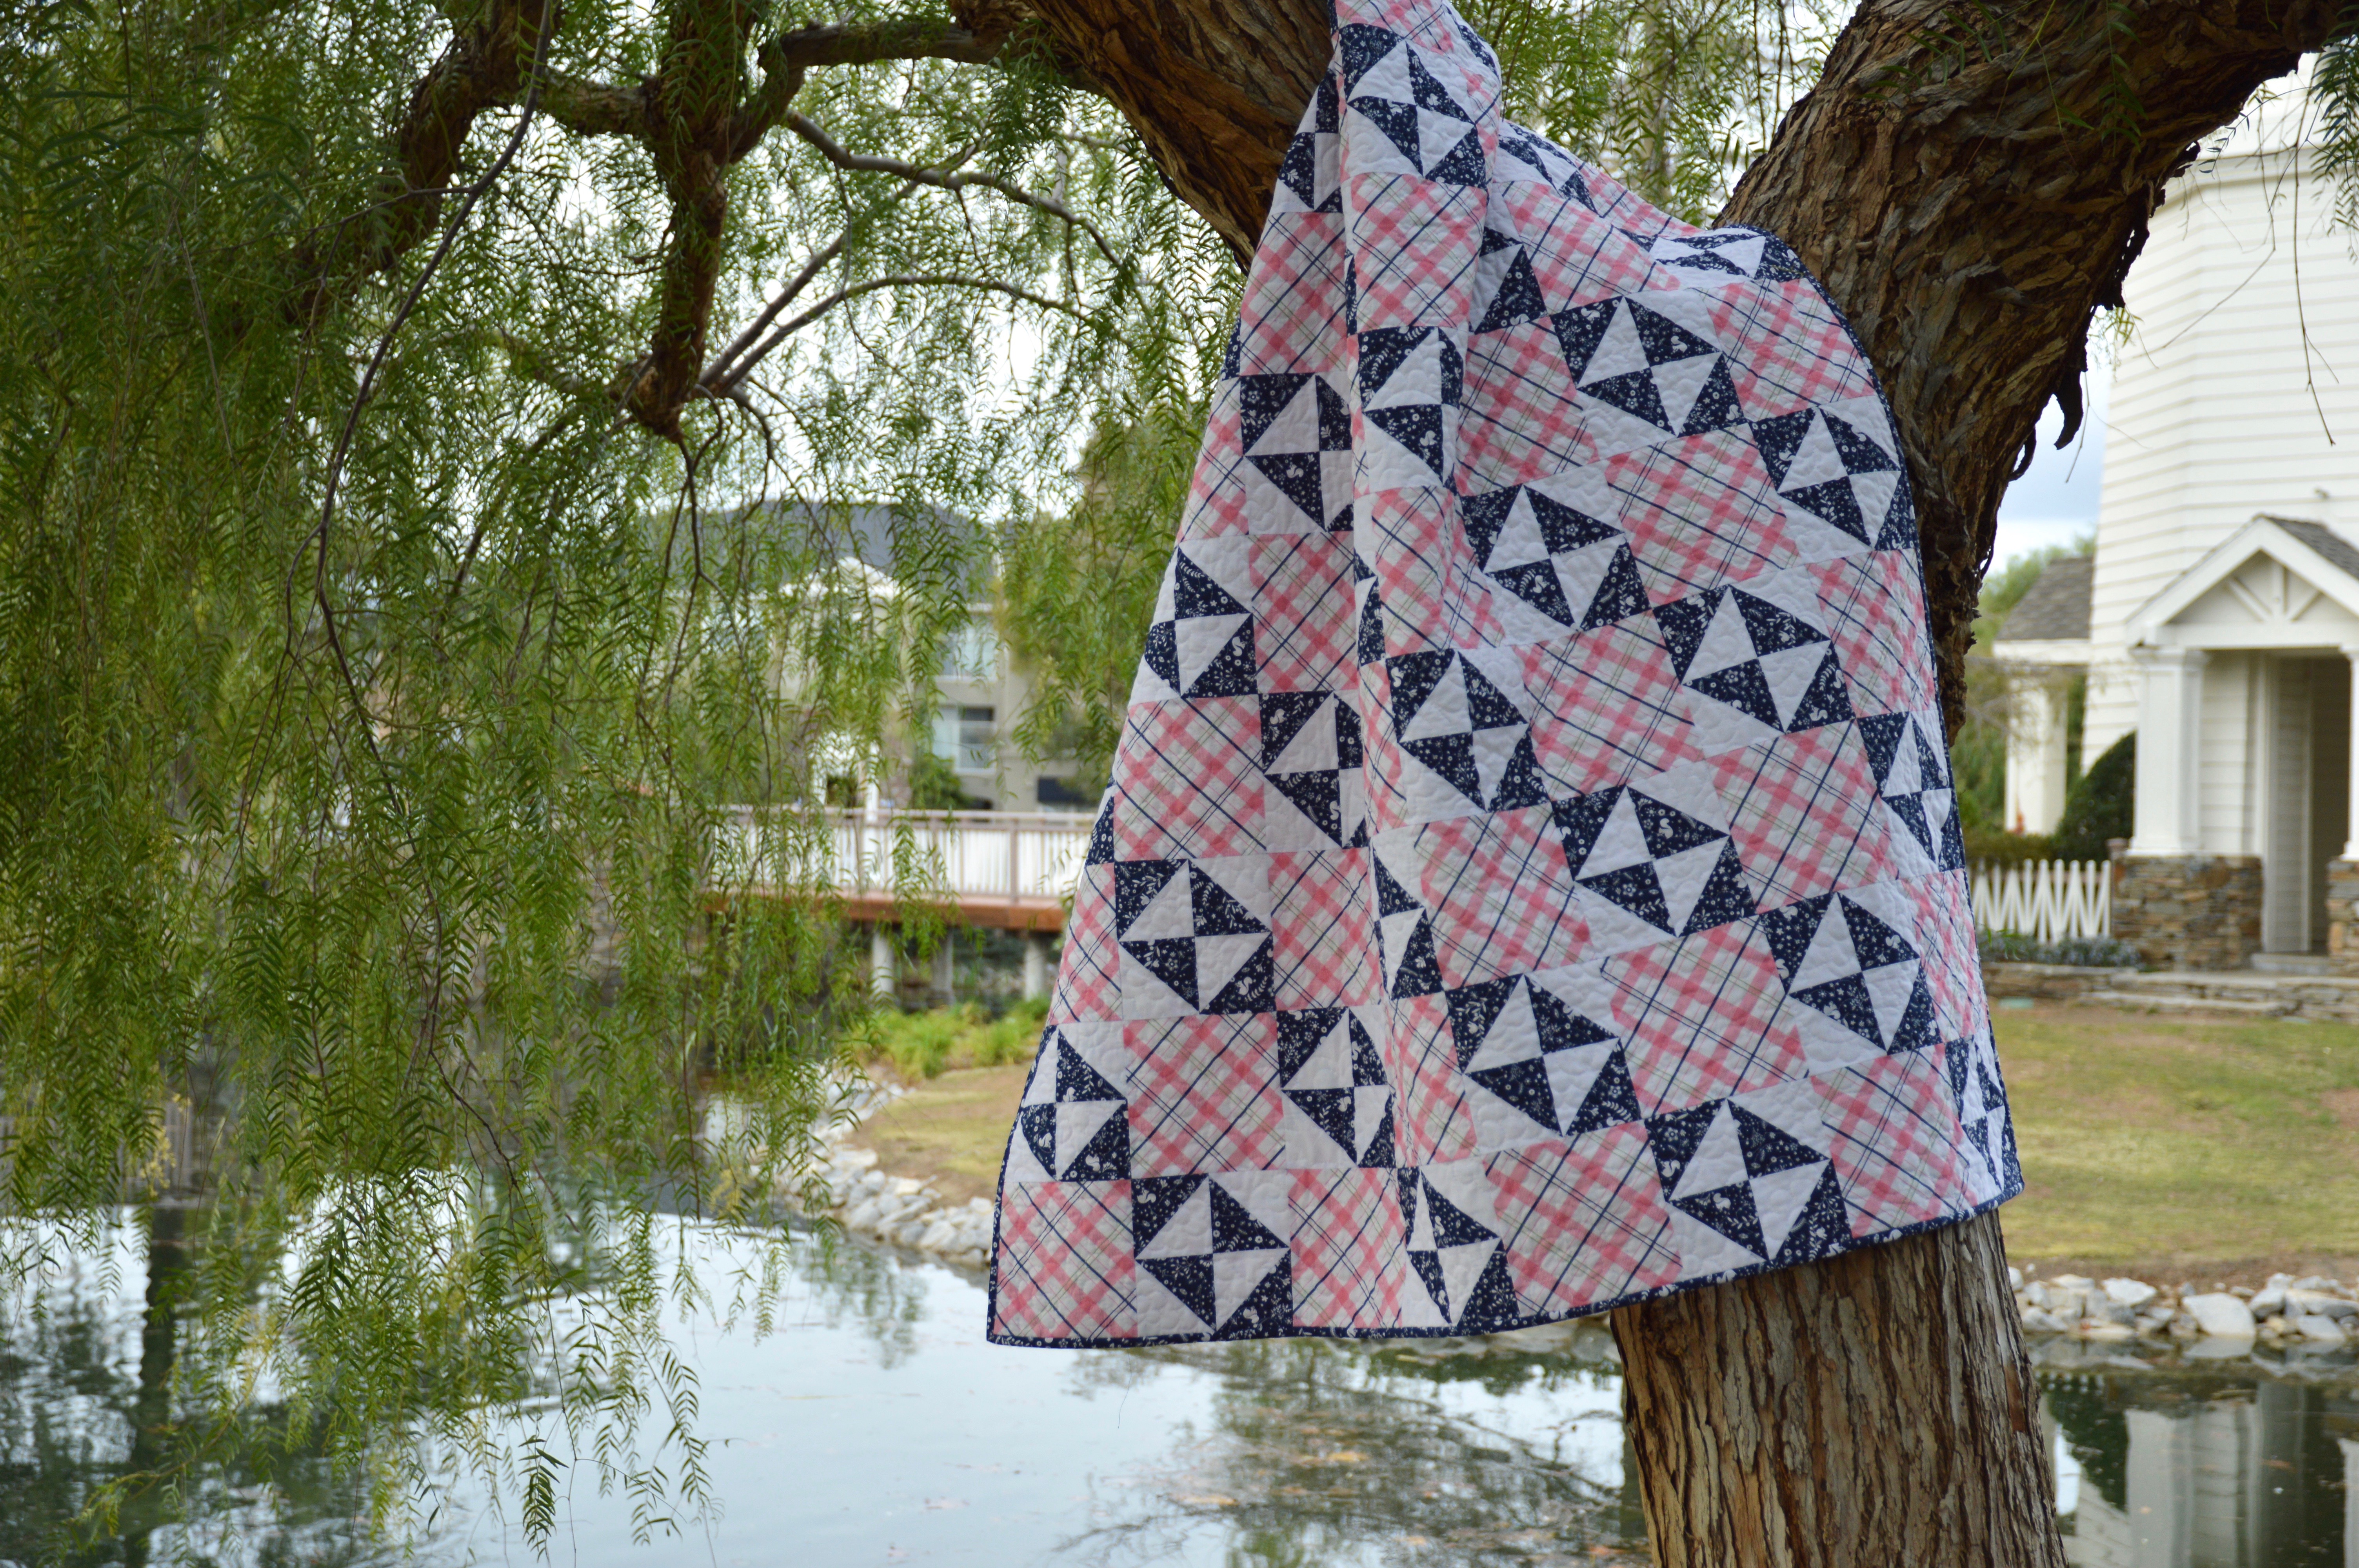
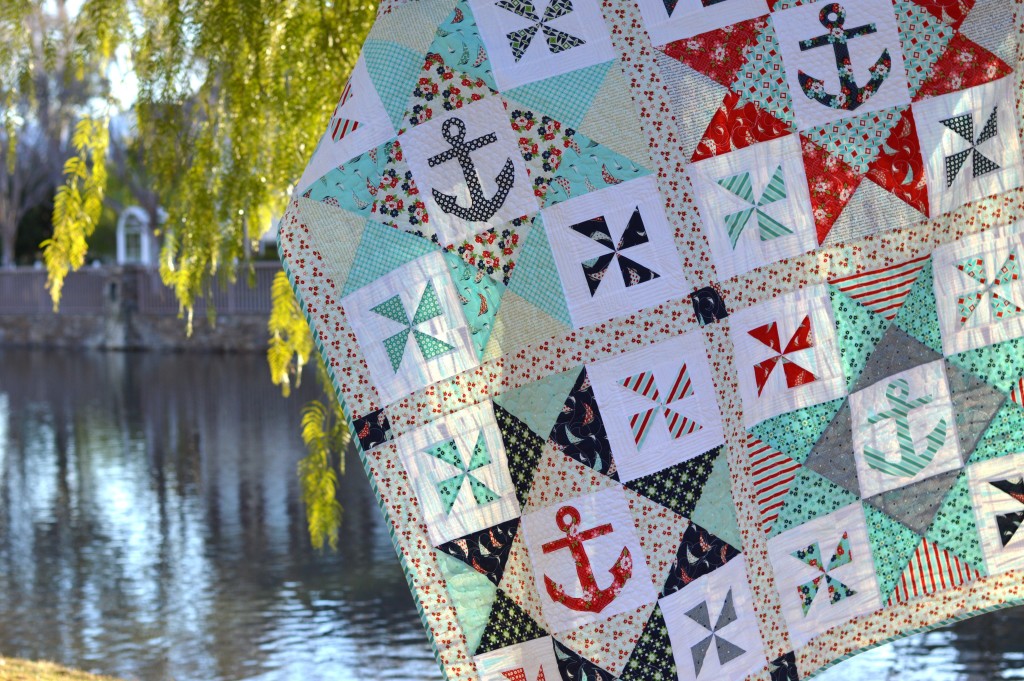
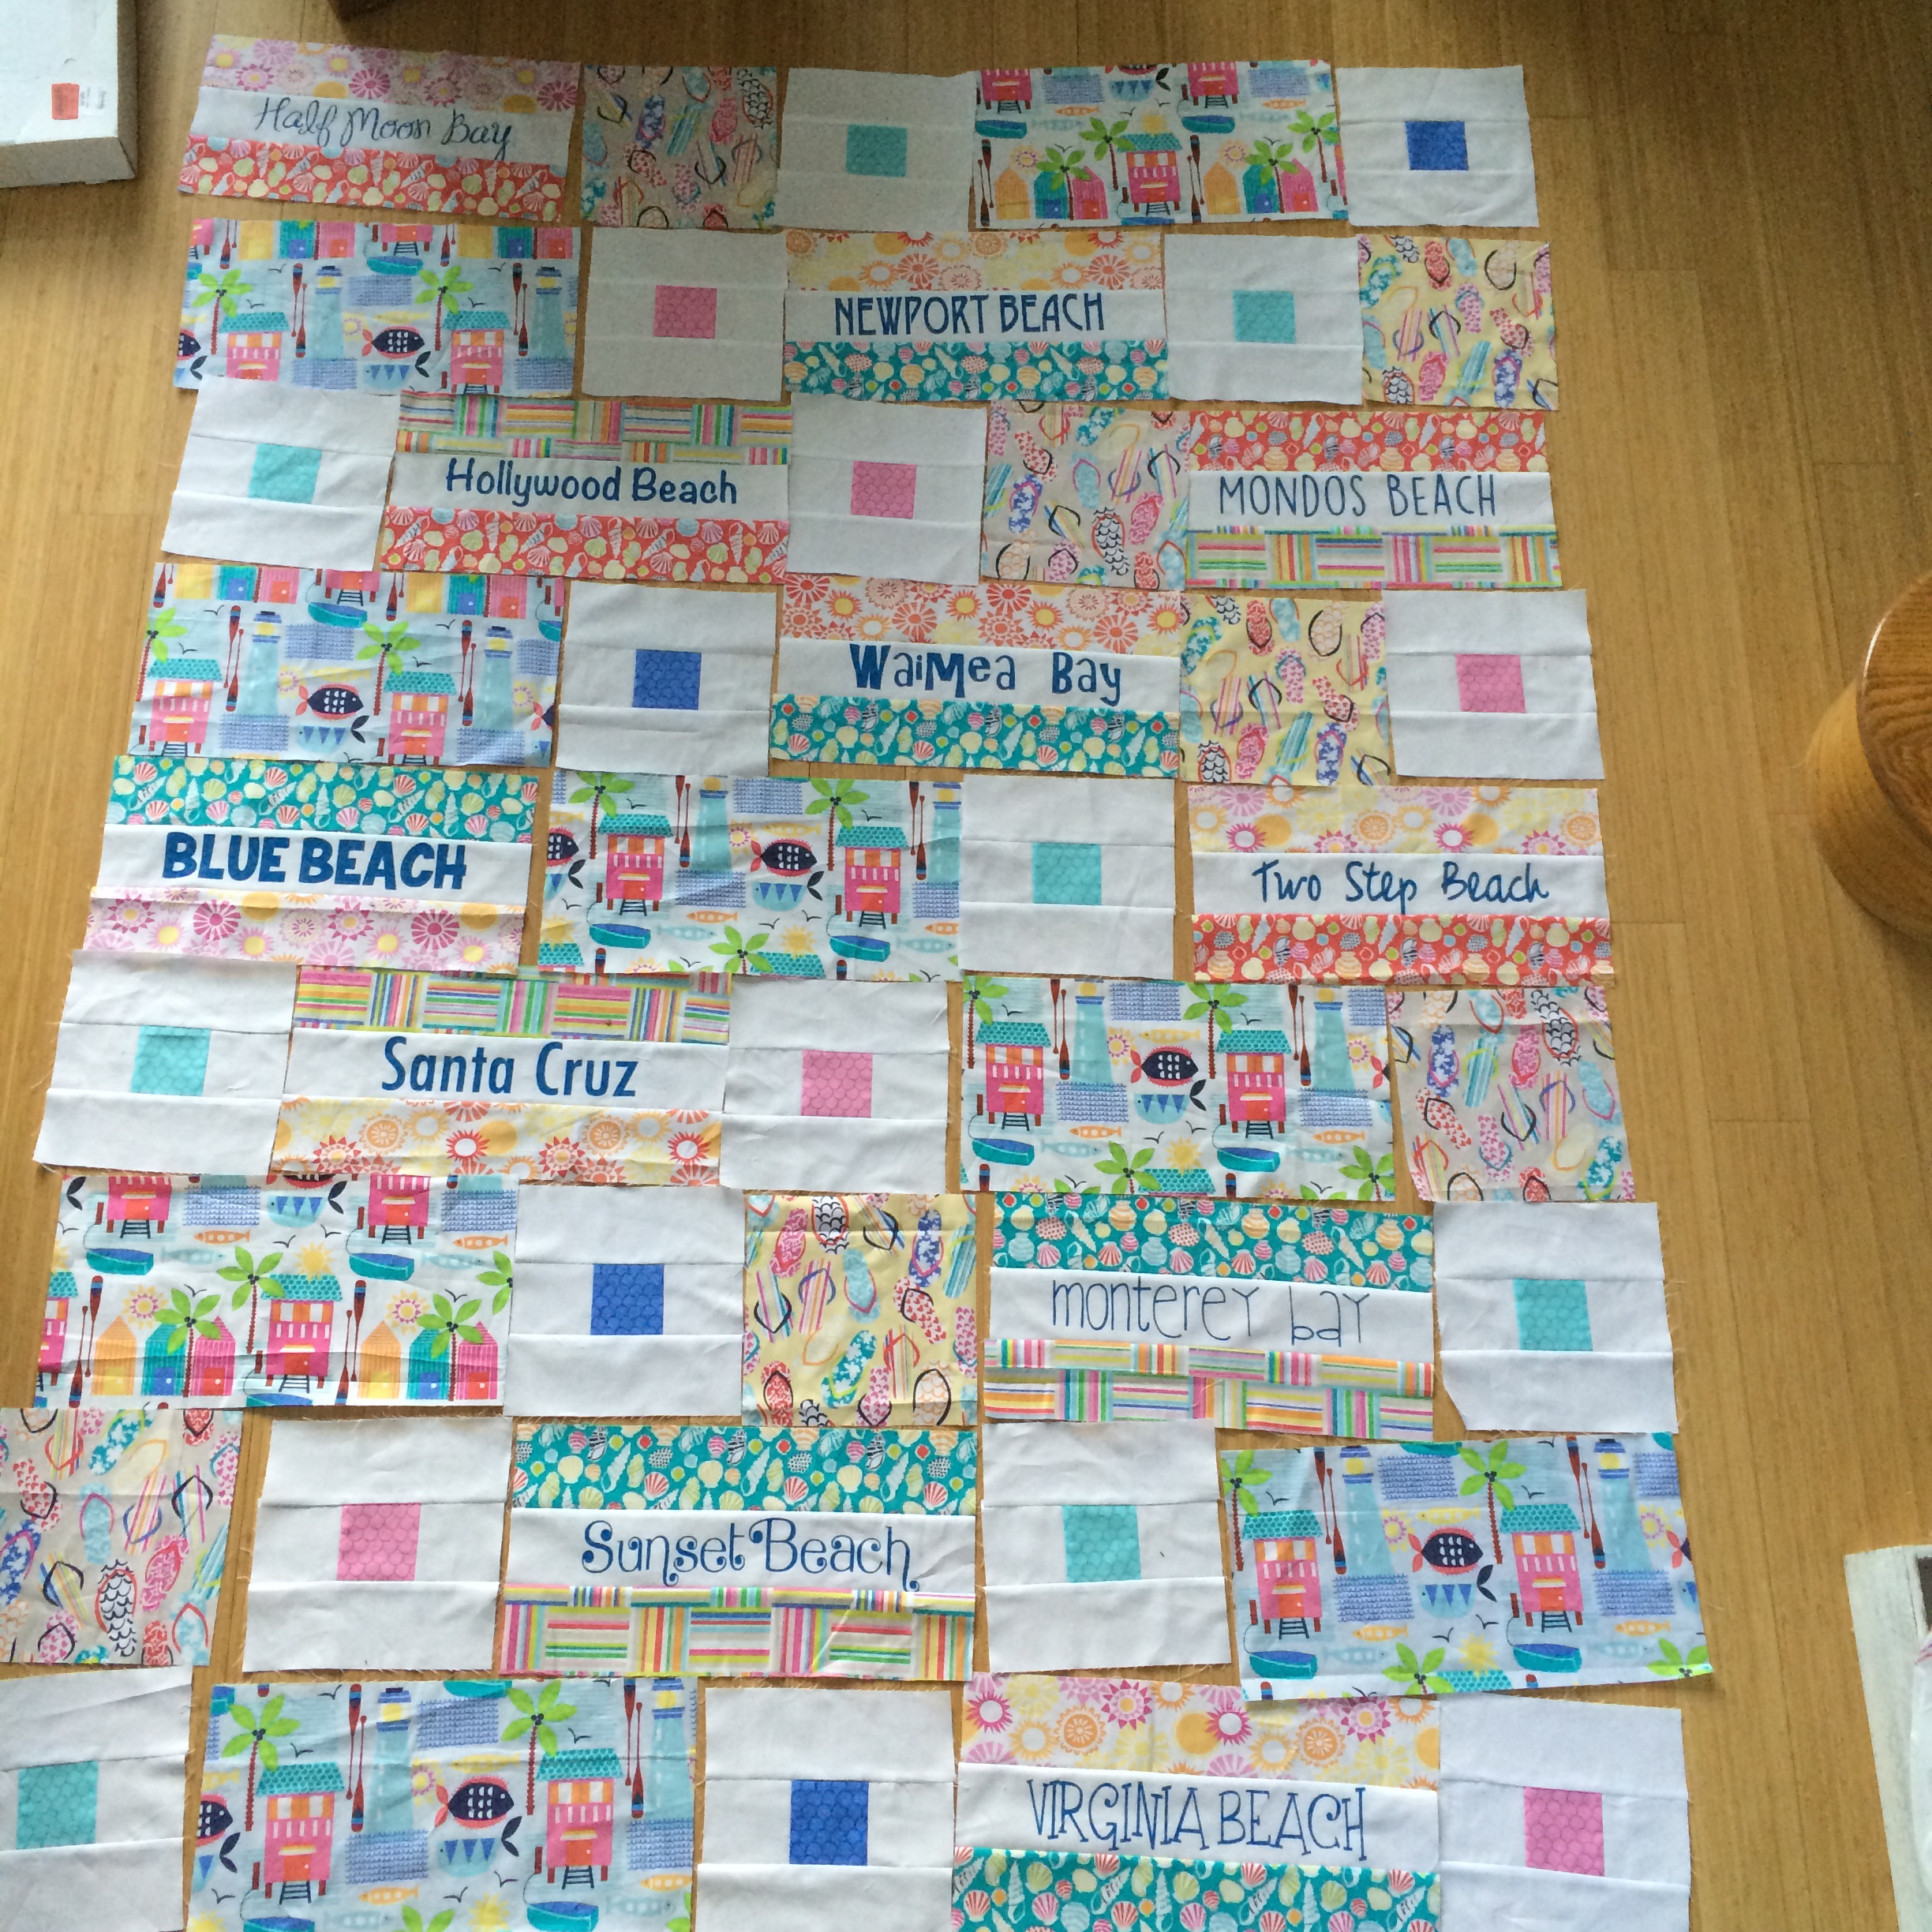
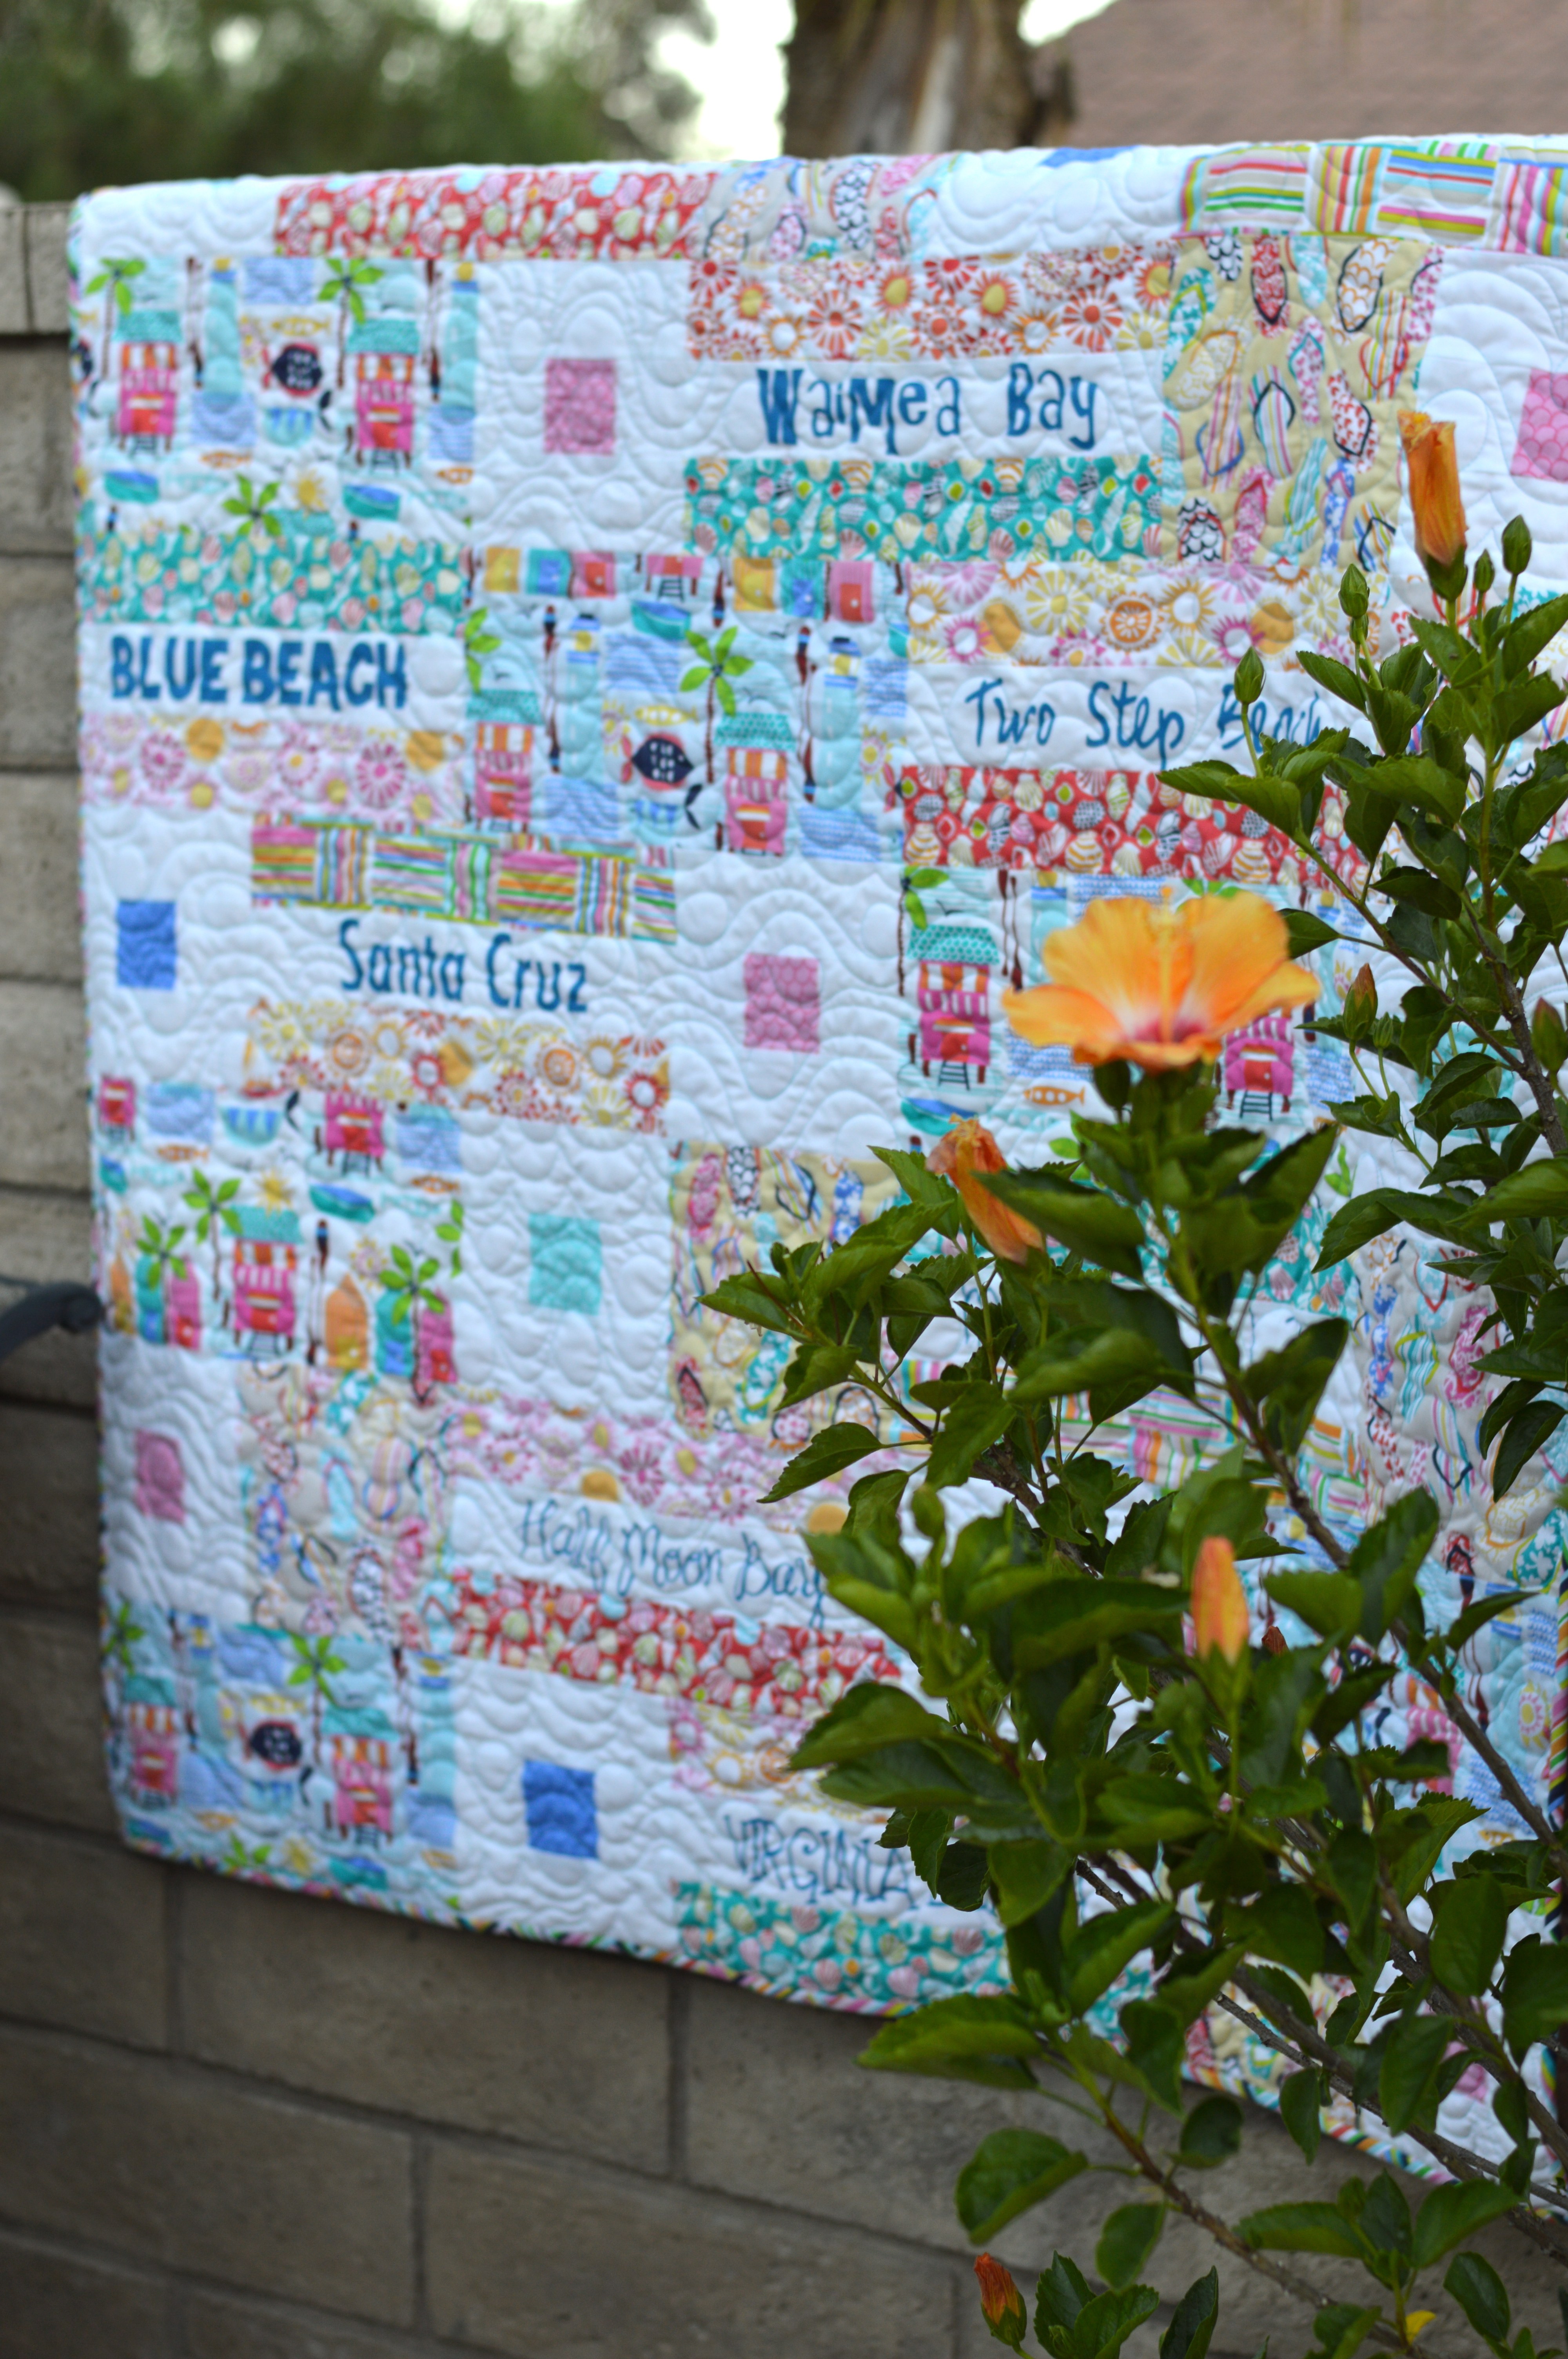
The quilt measures 35″ x 41″ with each block measuring 6″ square.  It’s perfect to hang on the wall of your beach house (I’m dreaming…..haha!). You can purchase it in my Etsy shop for instant PDF download!

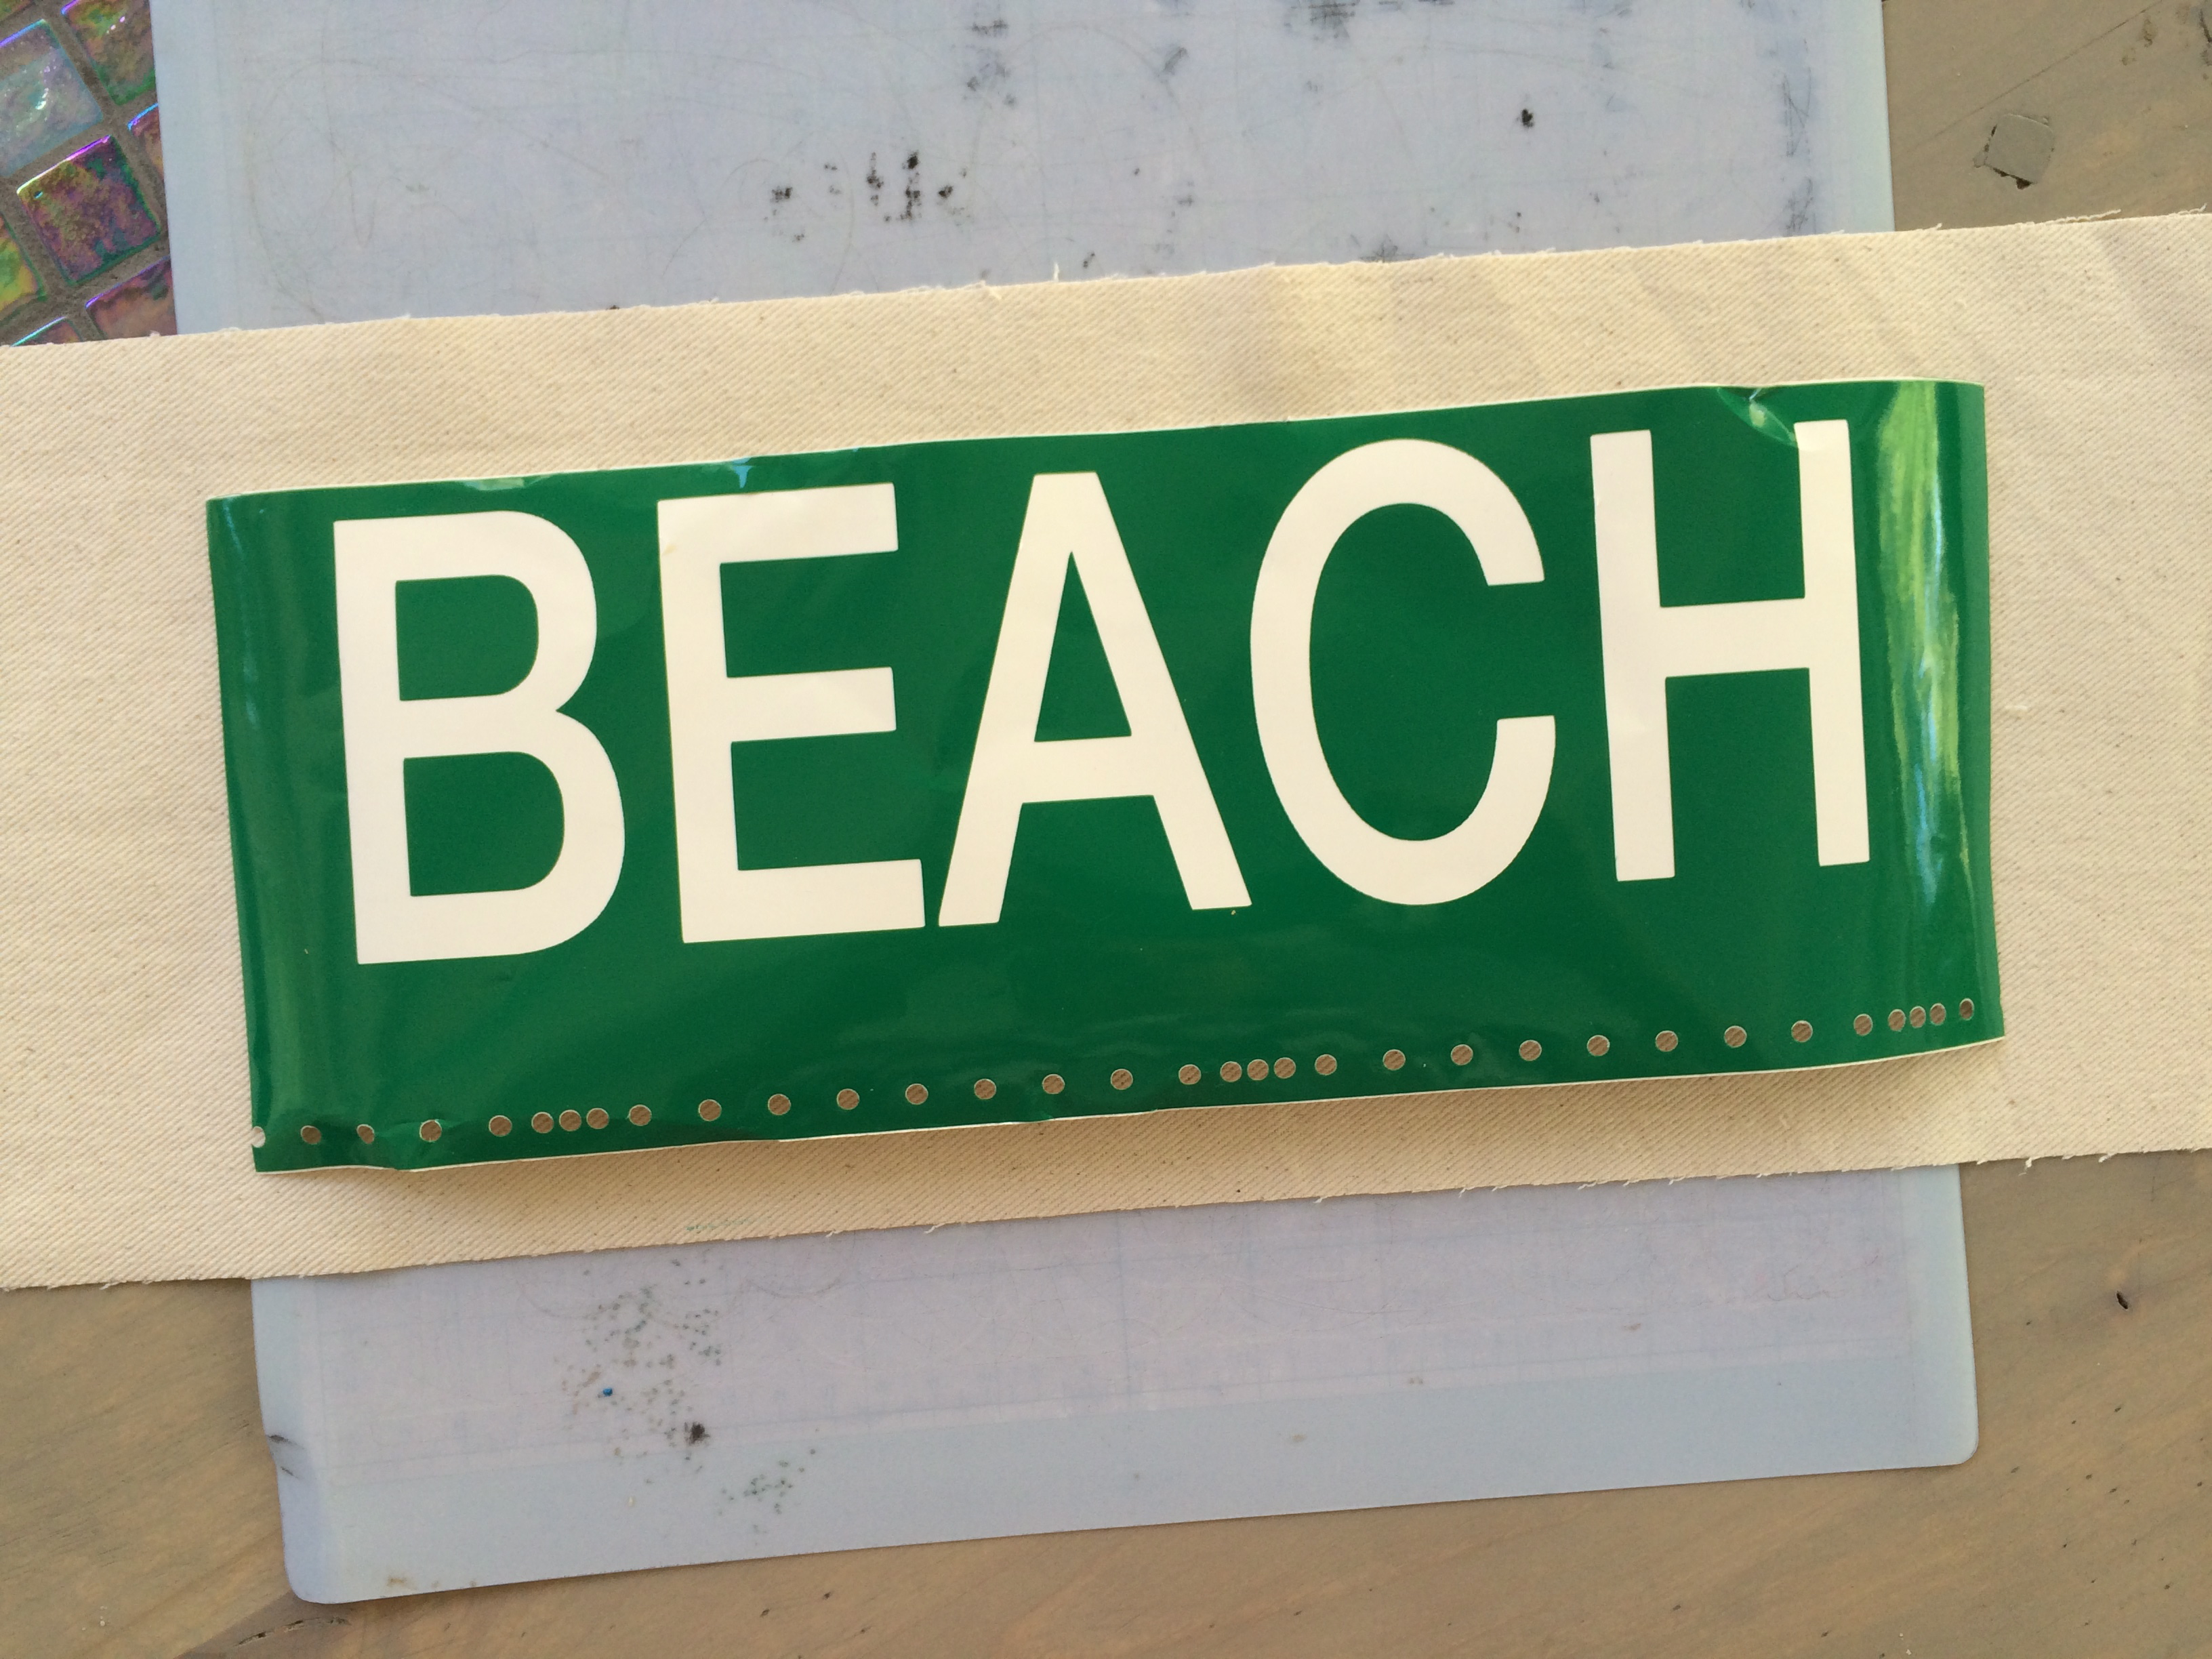
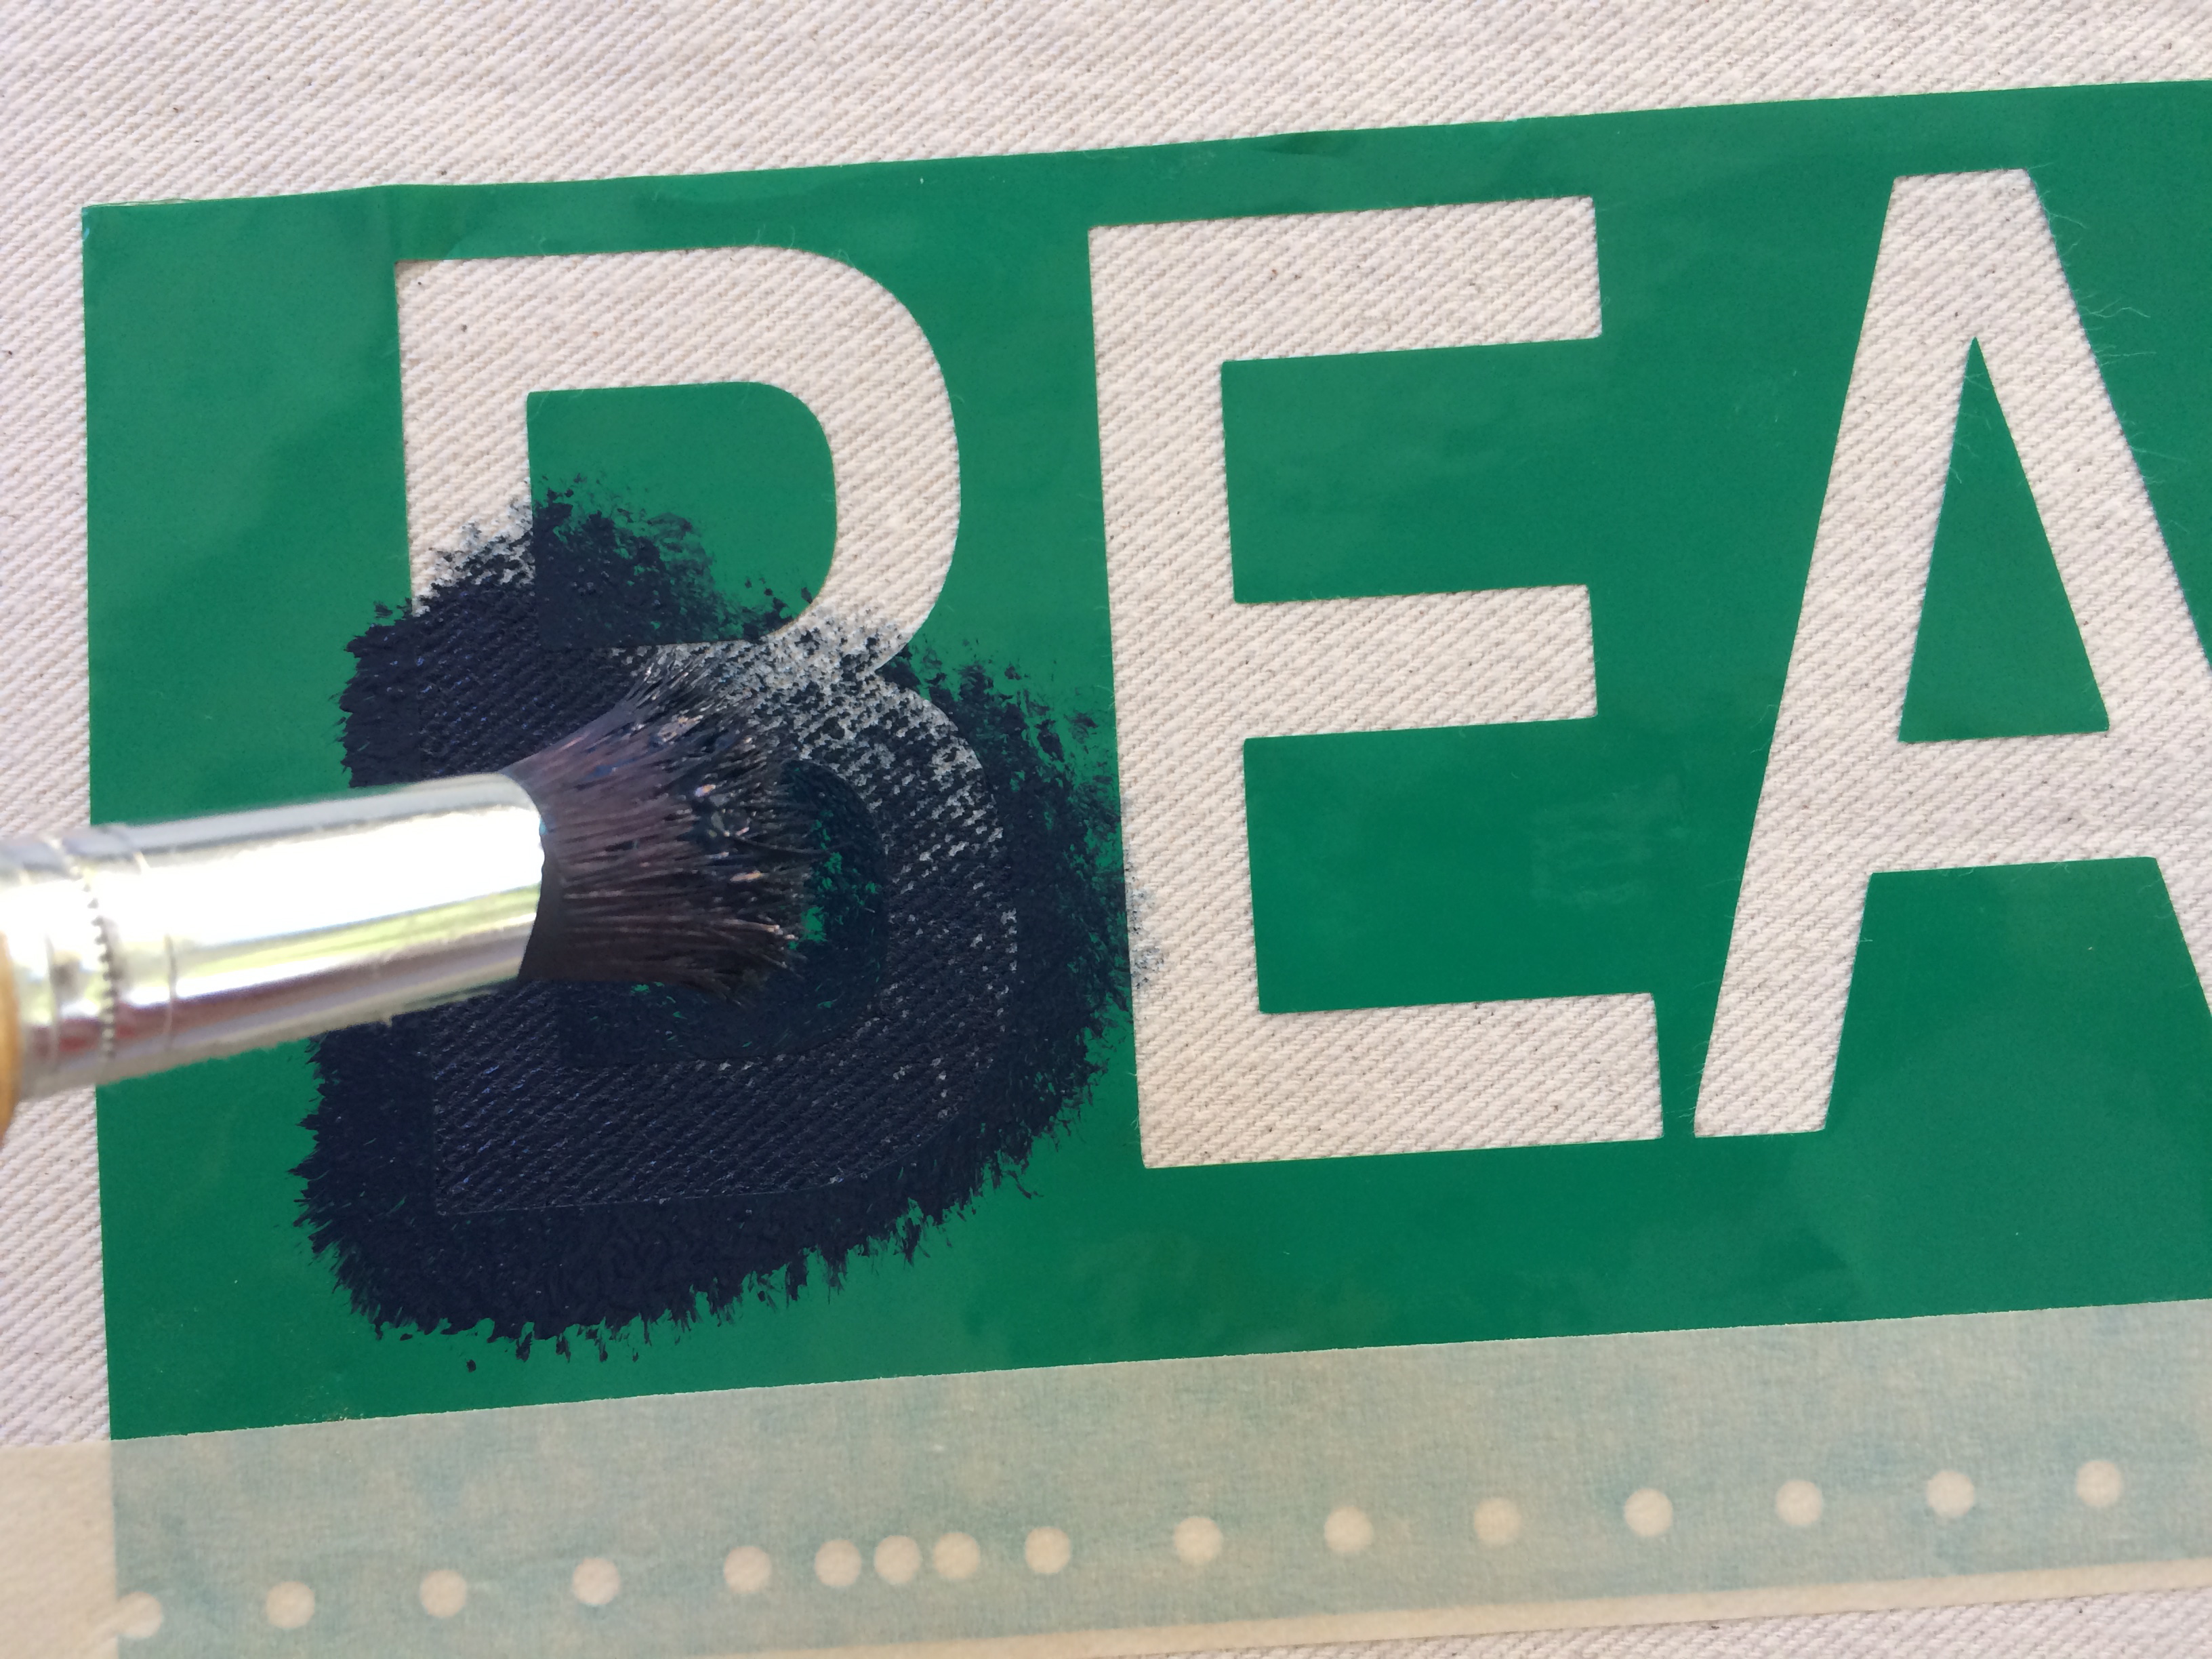
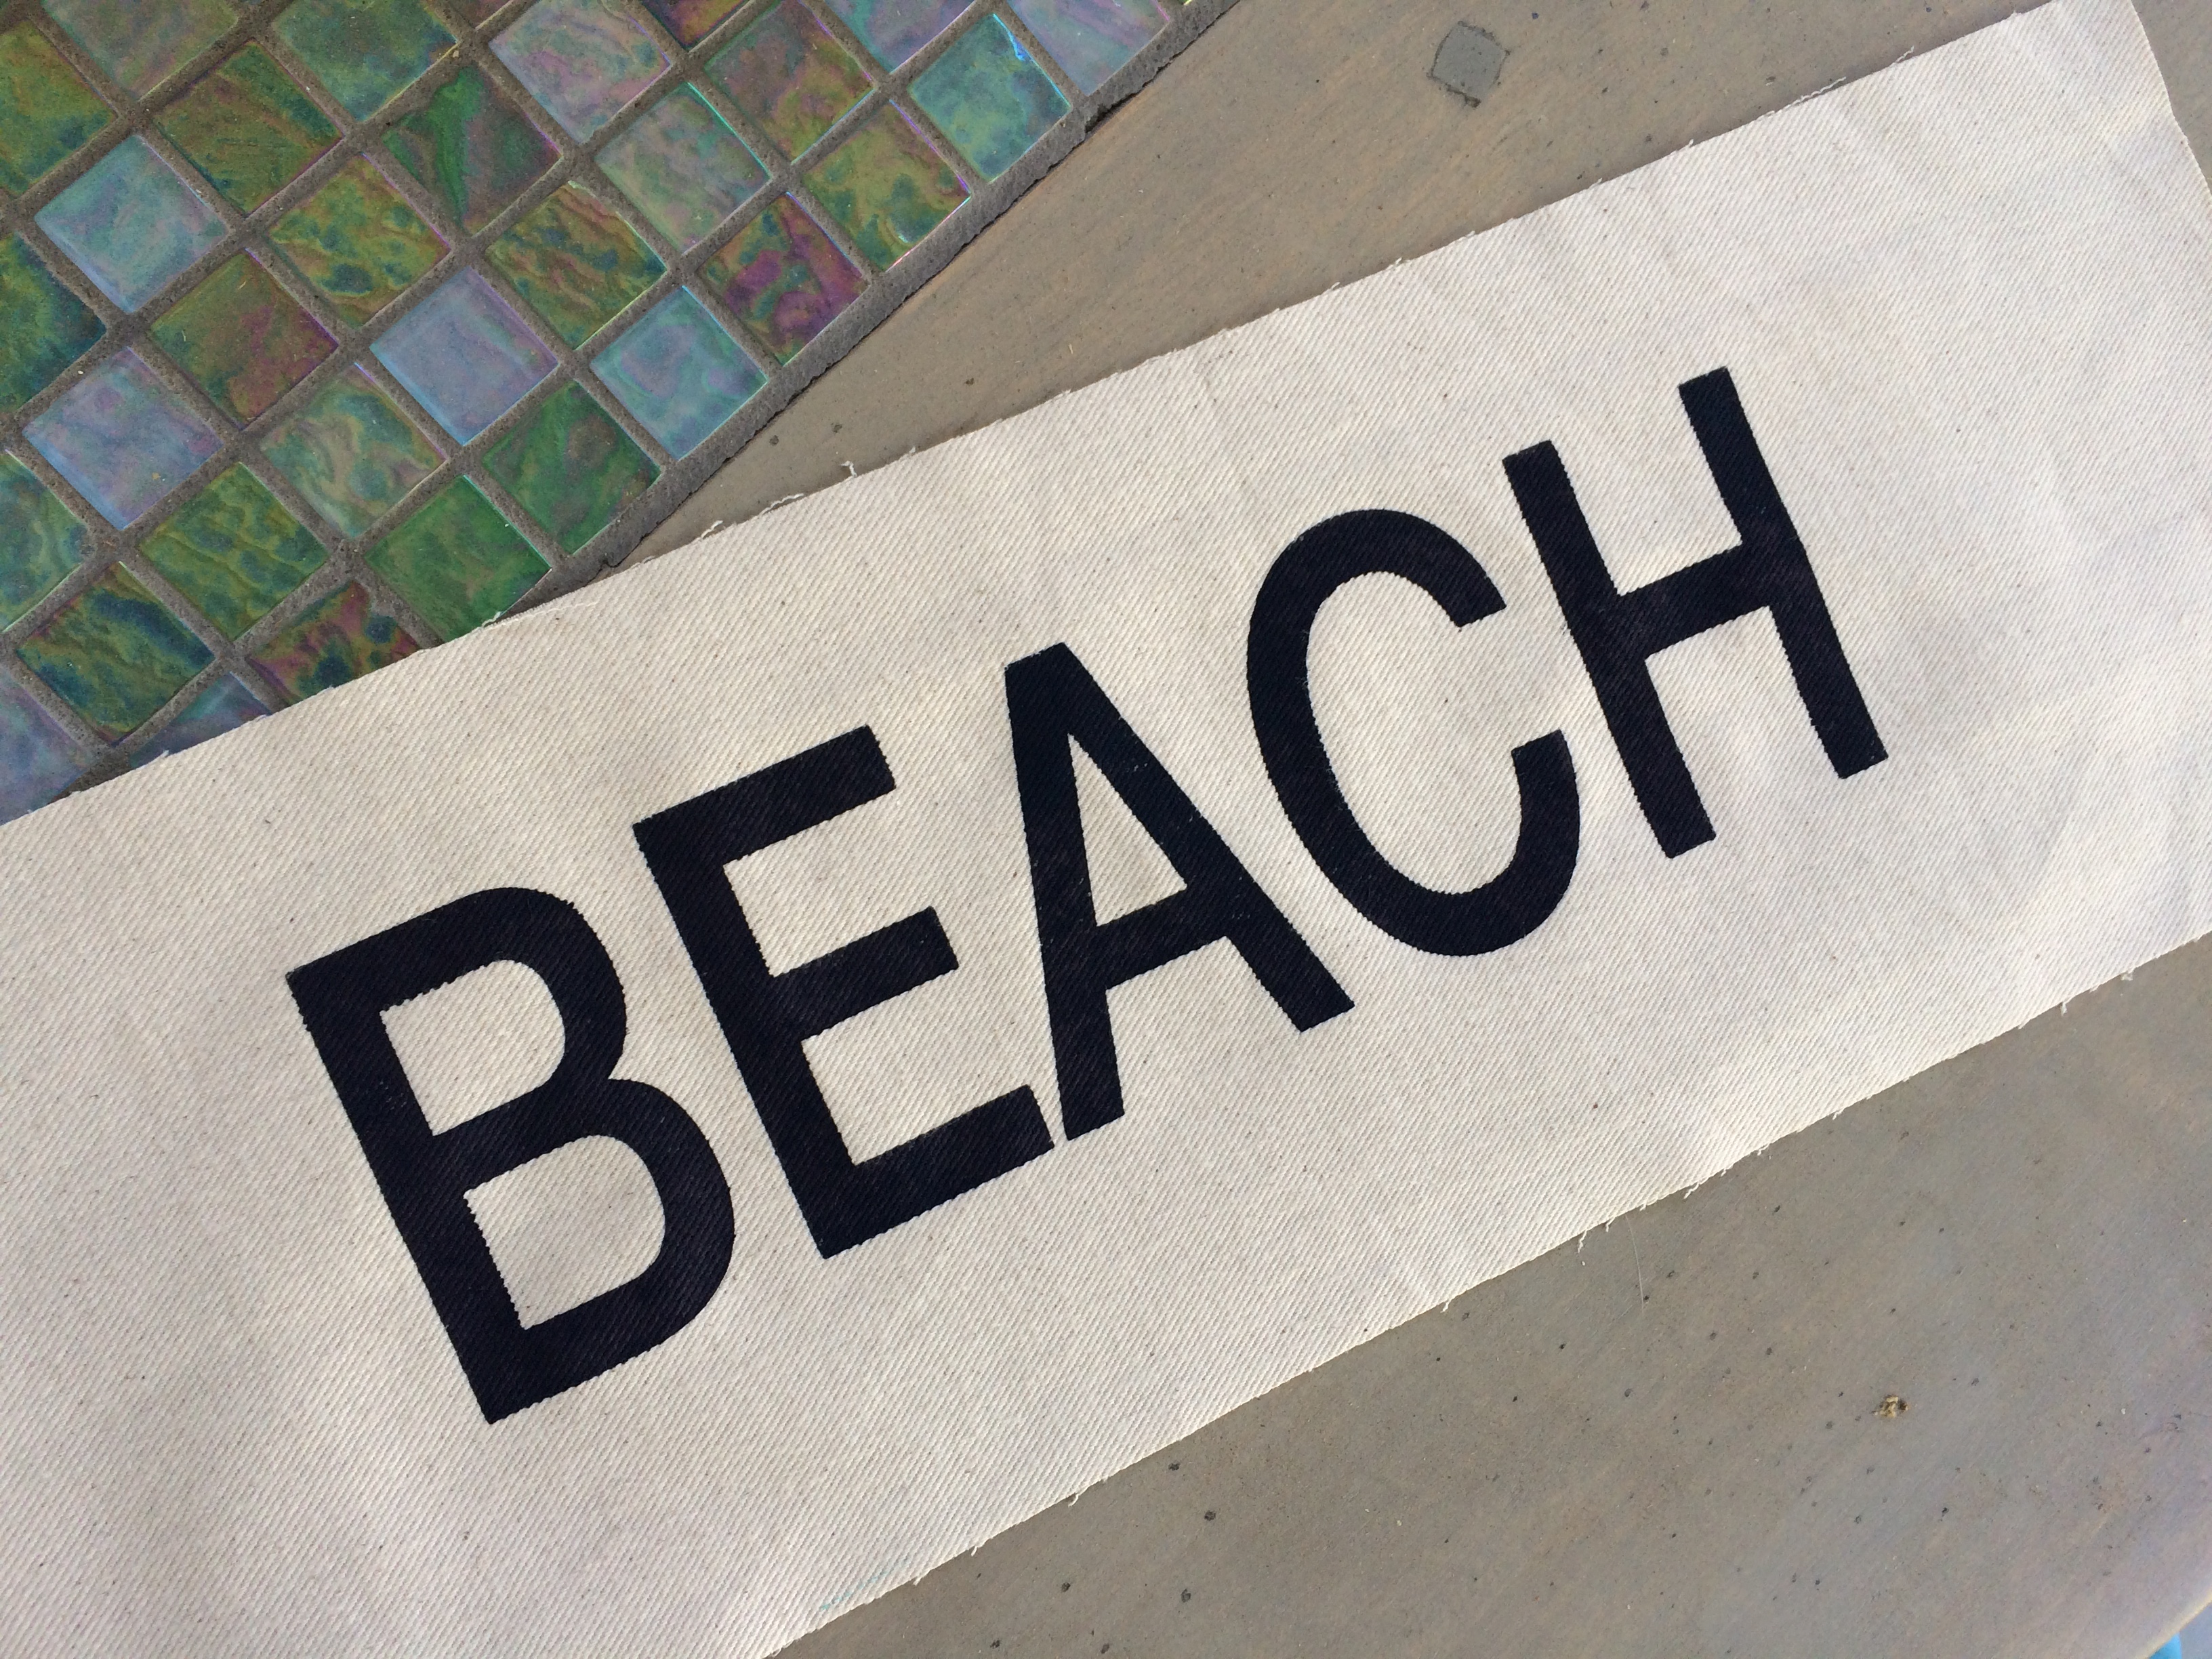
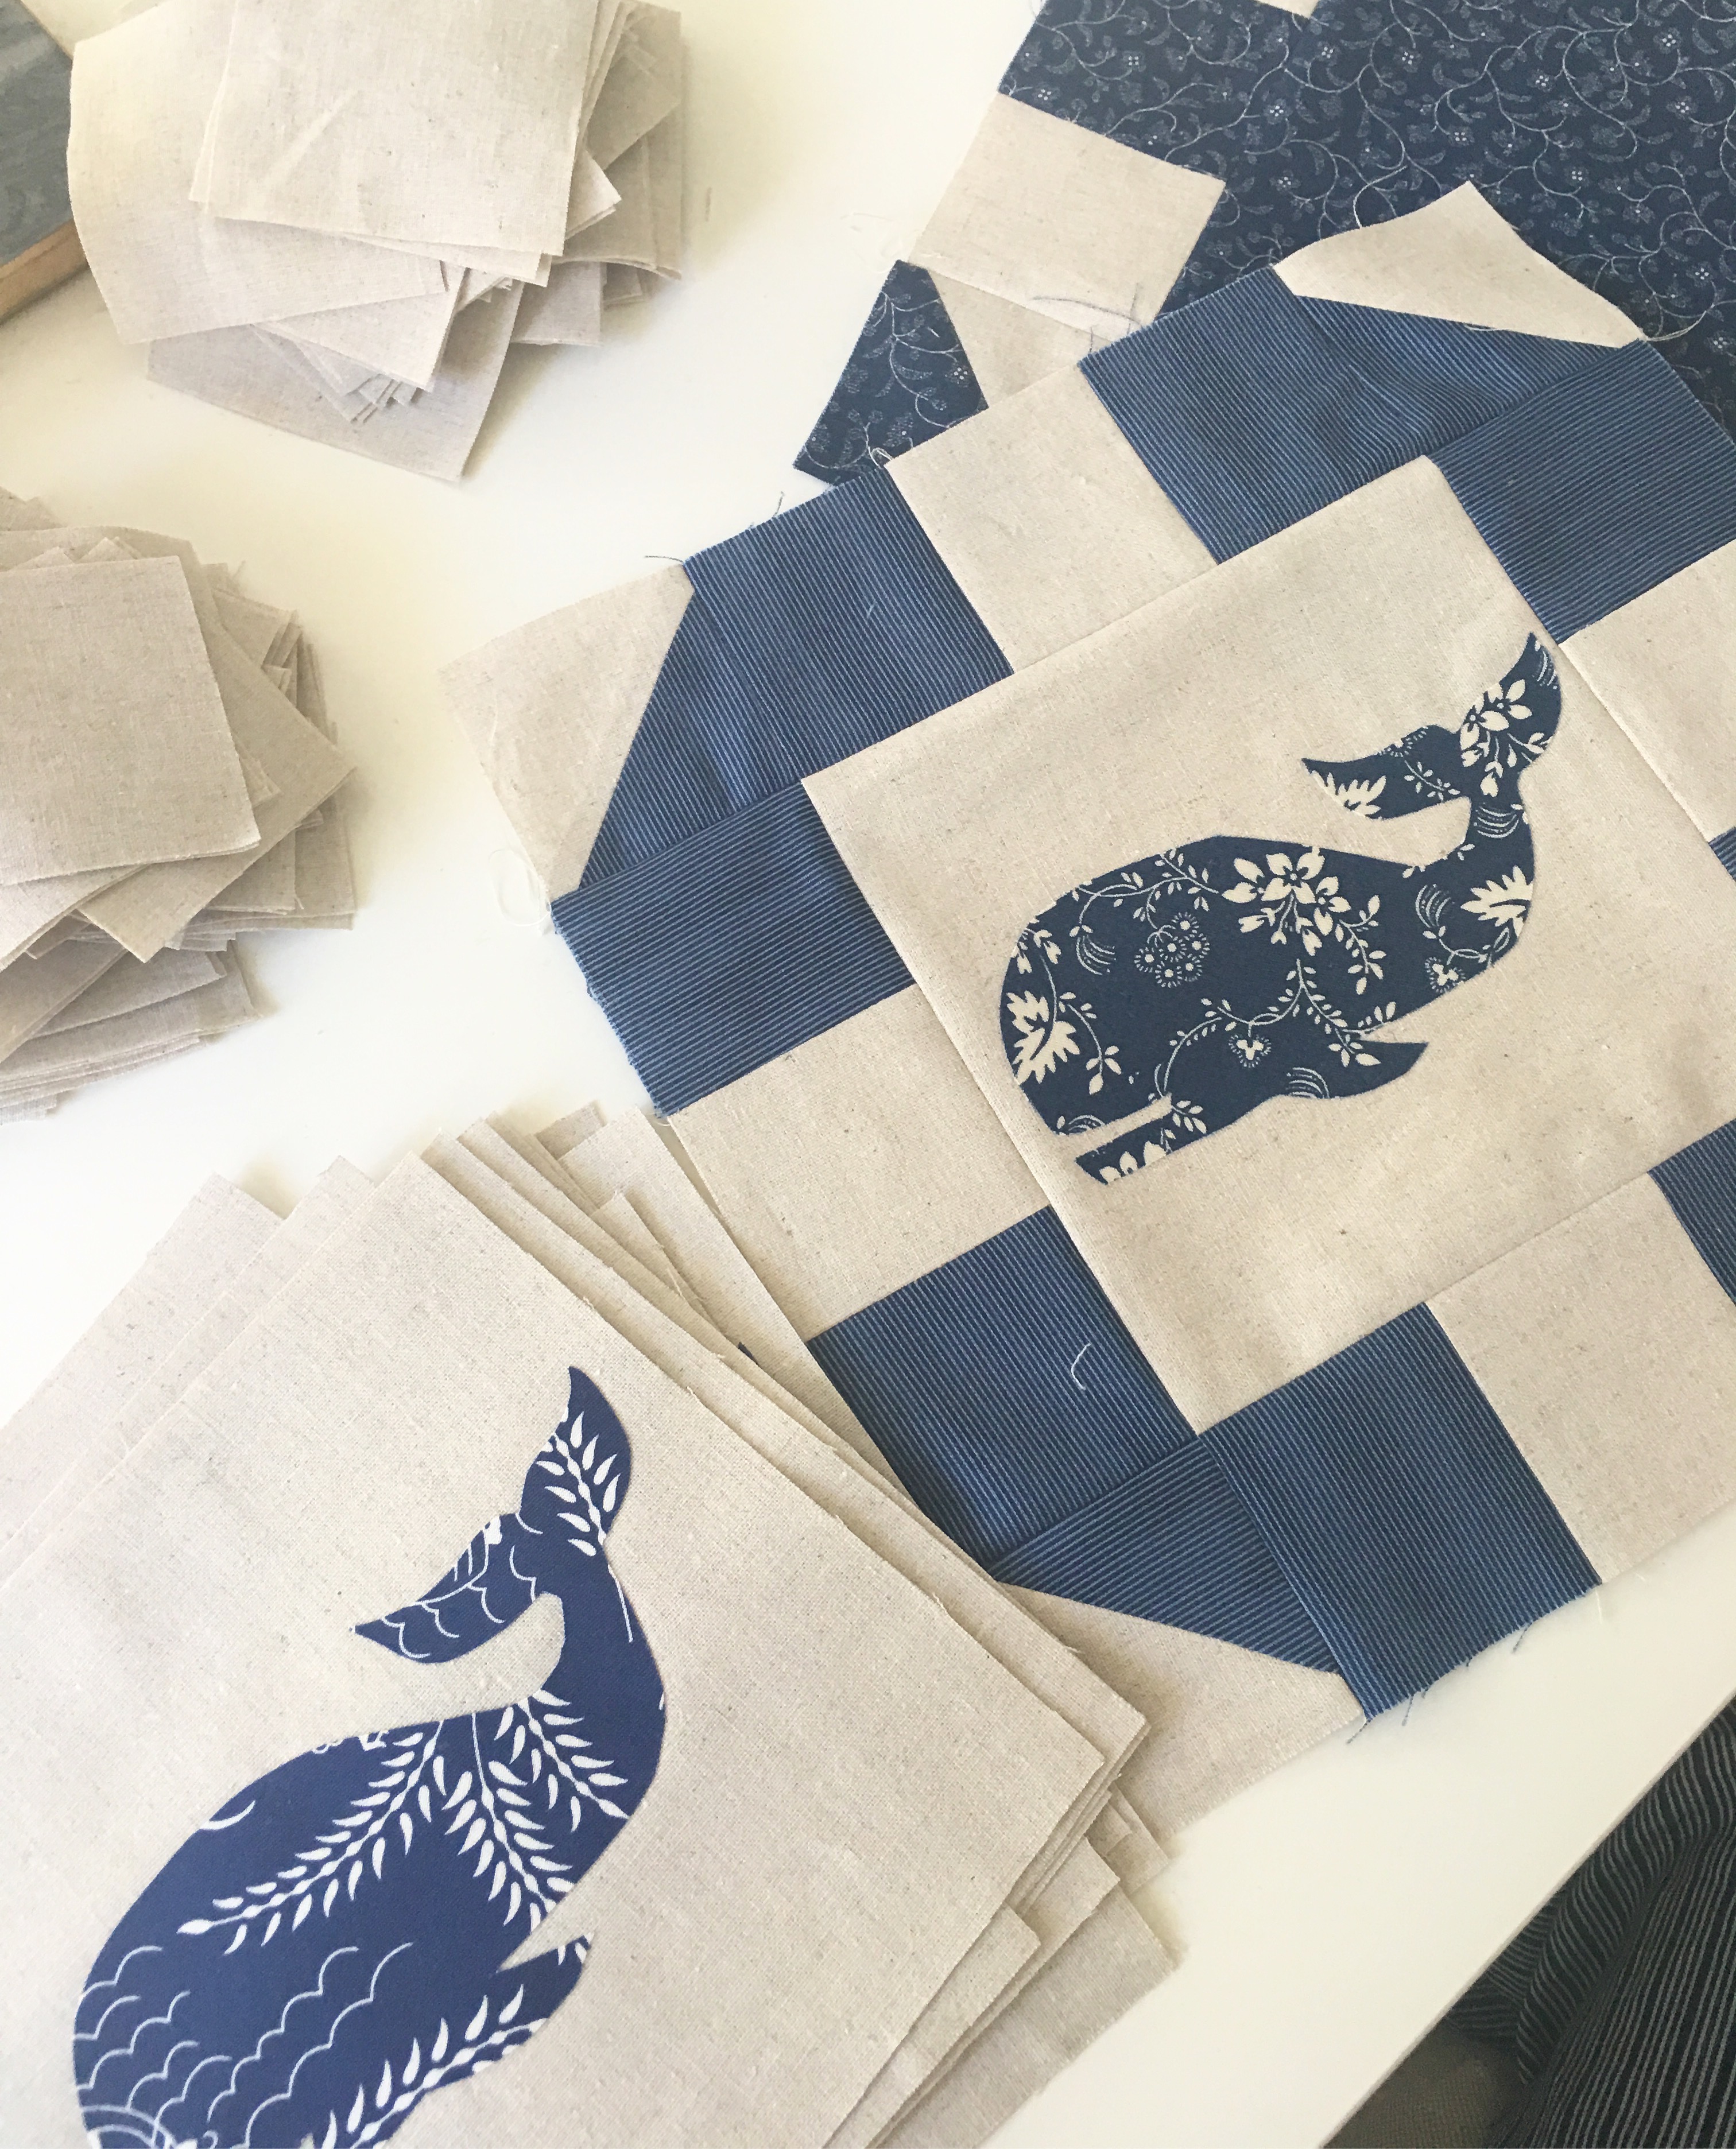
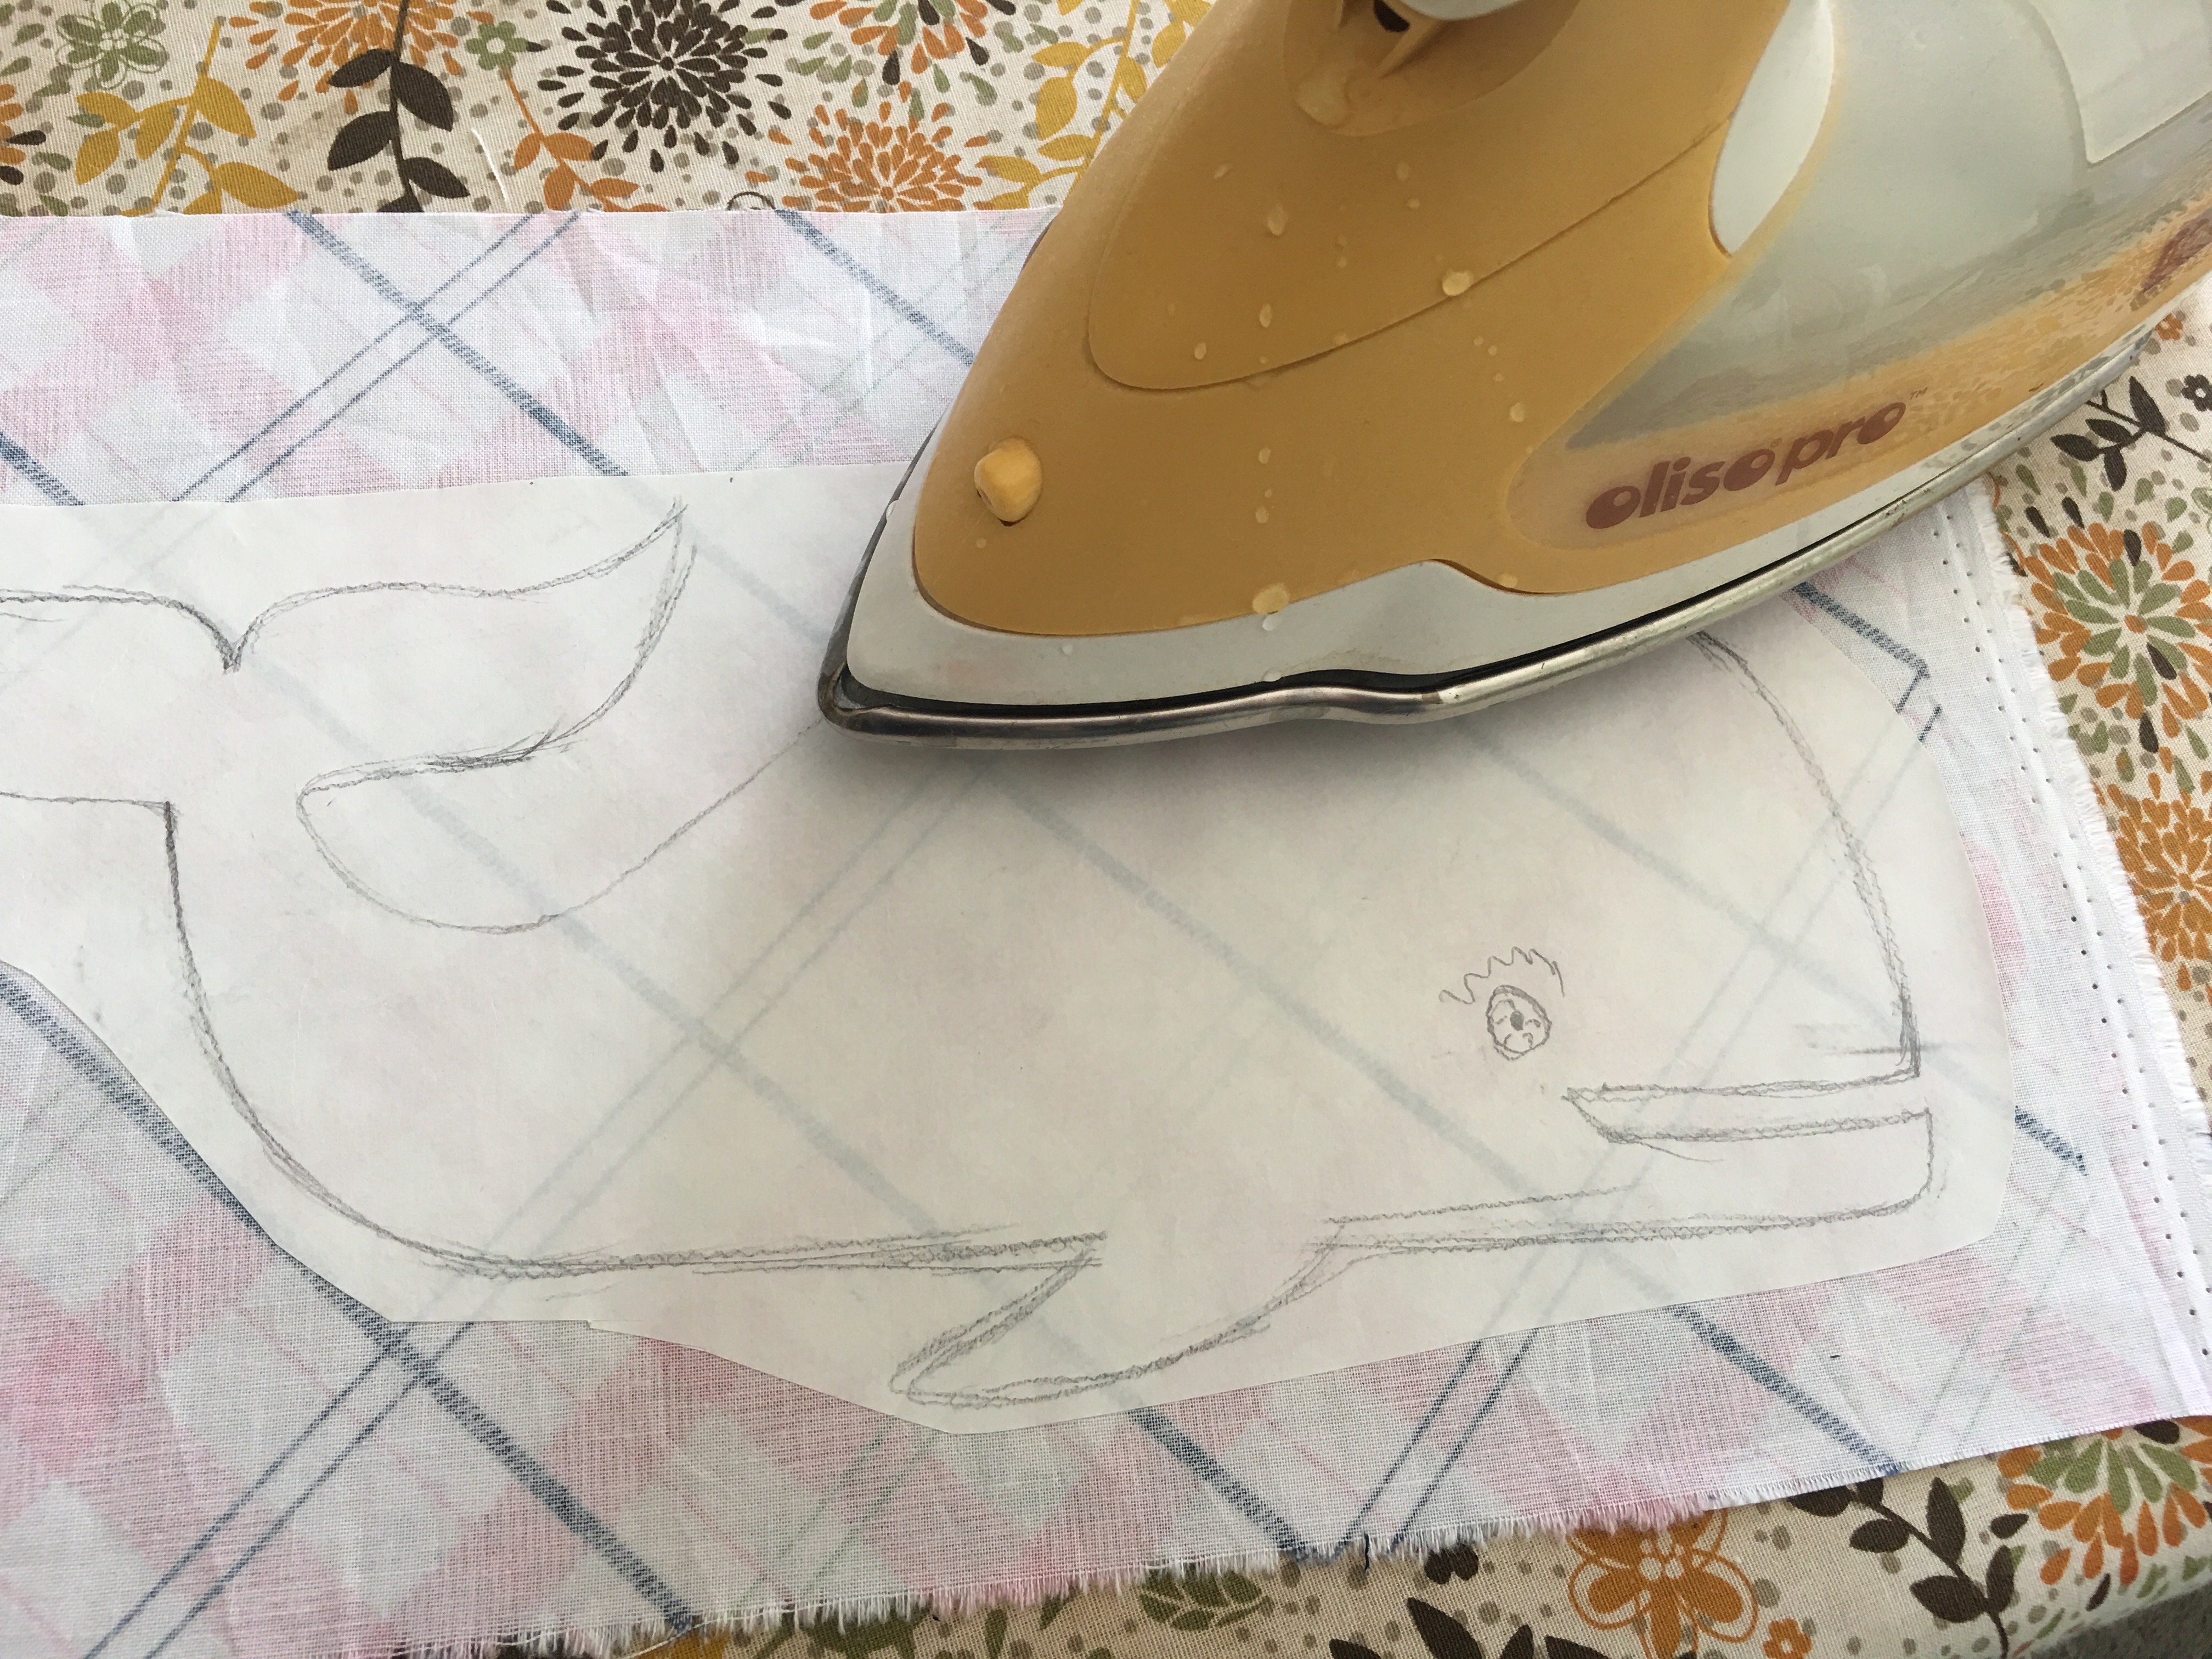
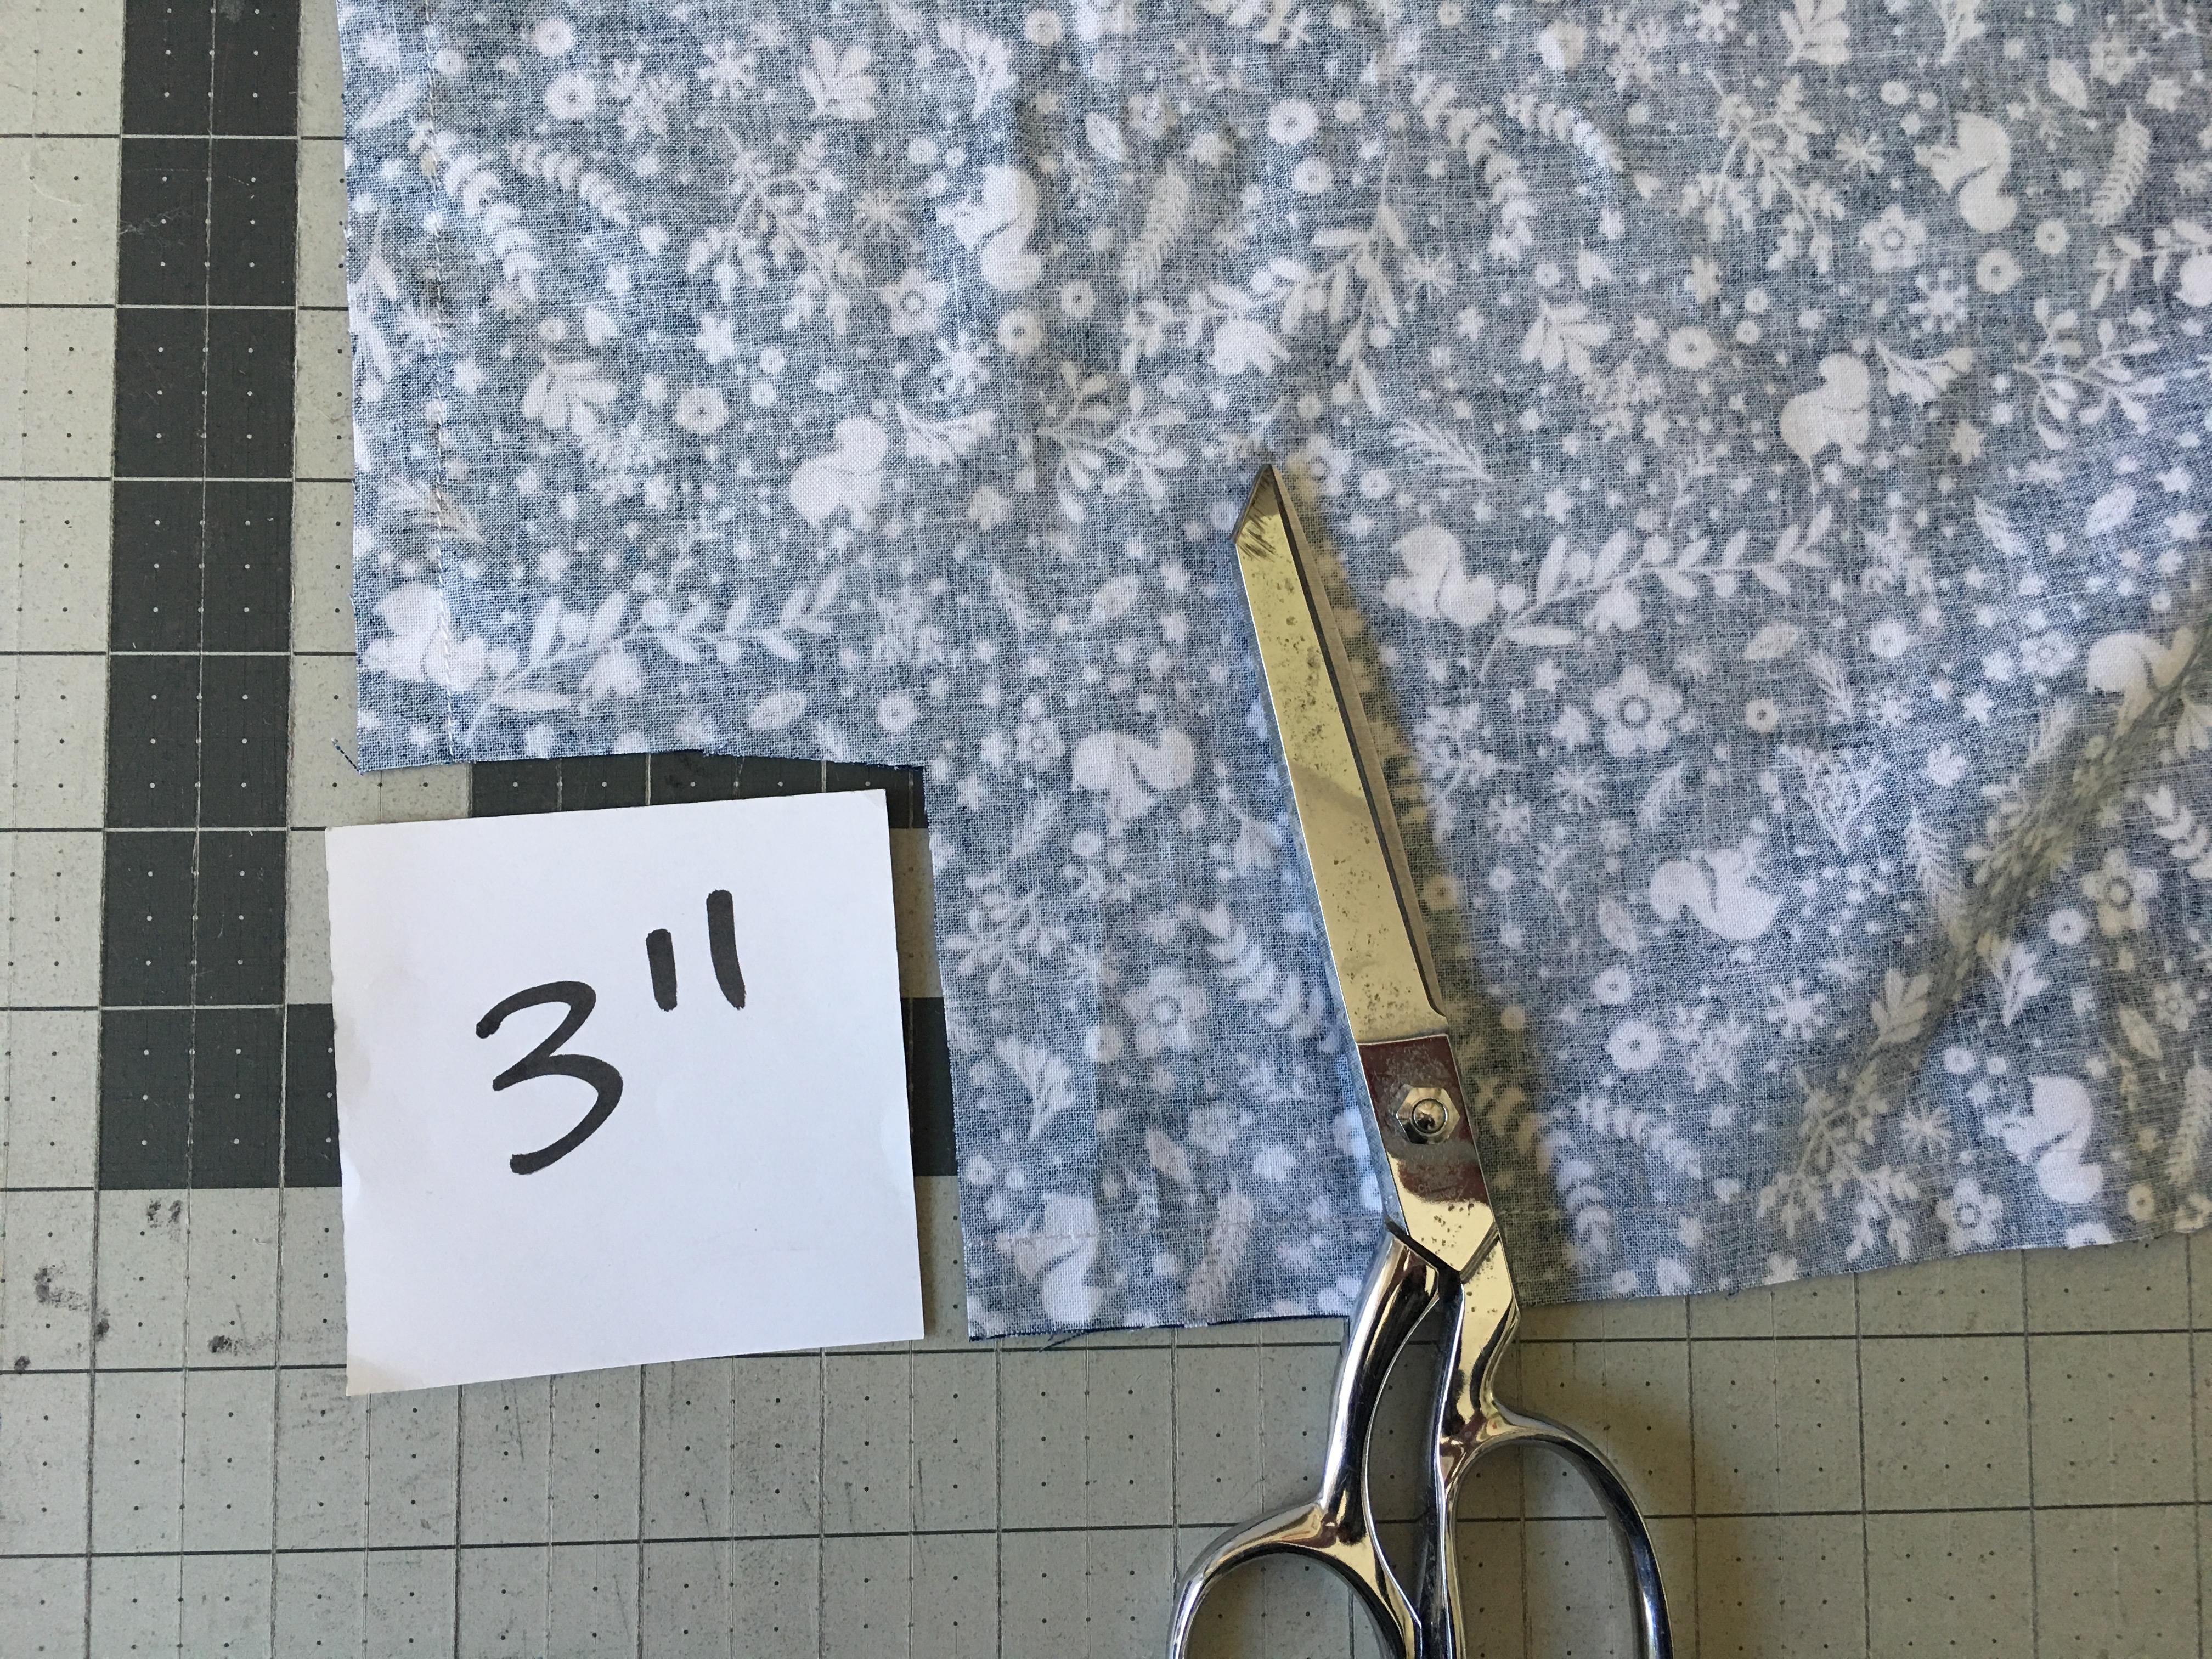
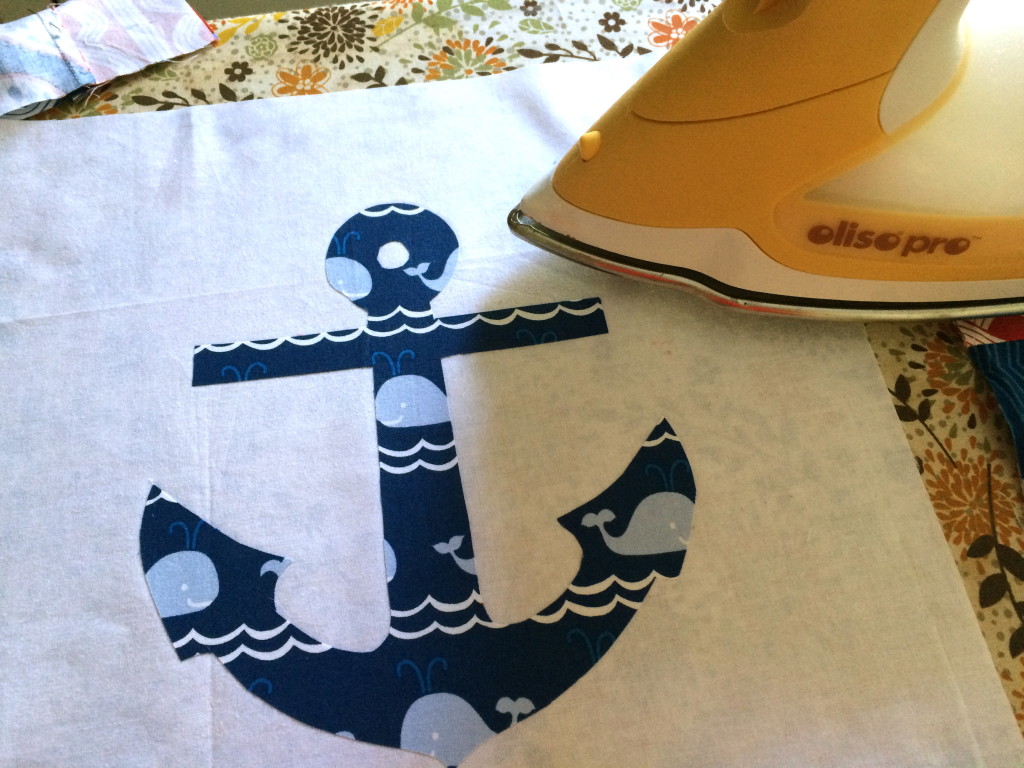
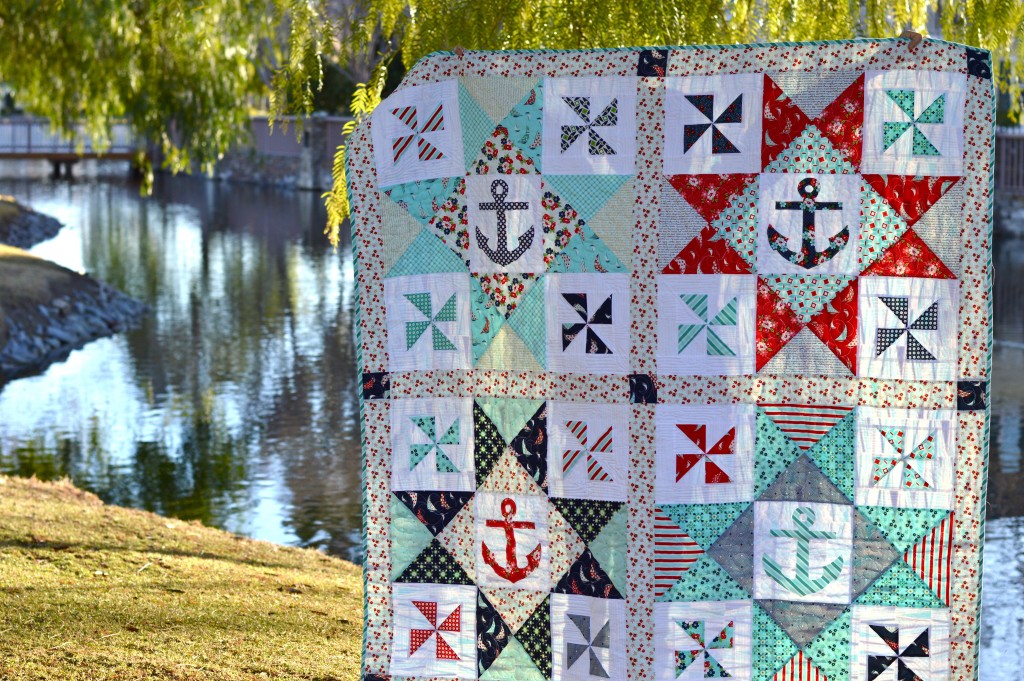
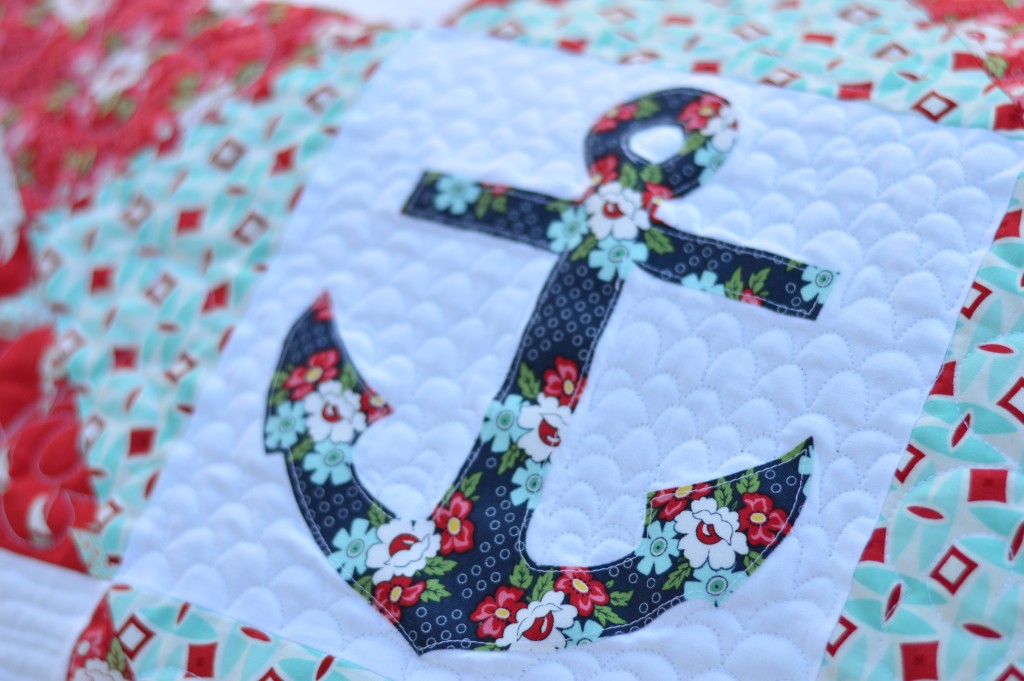
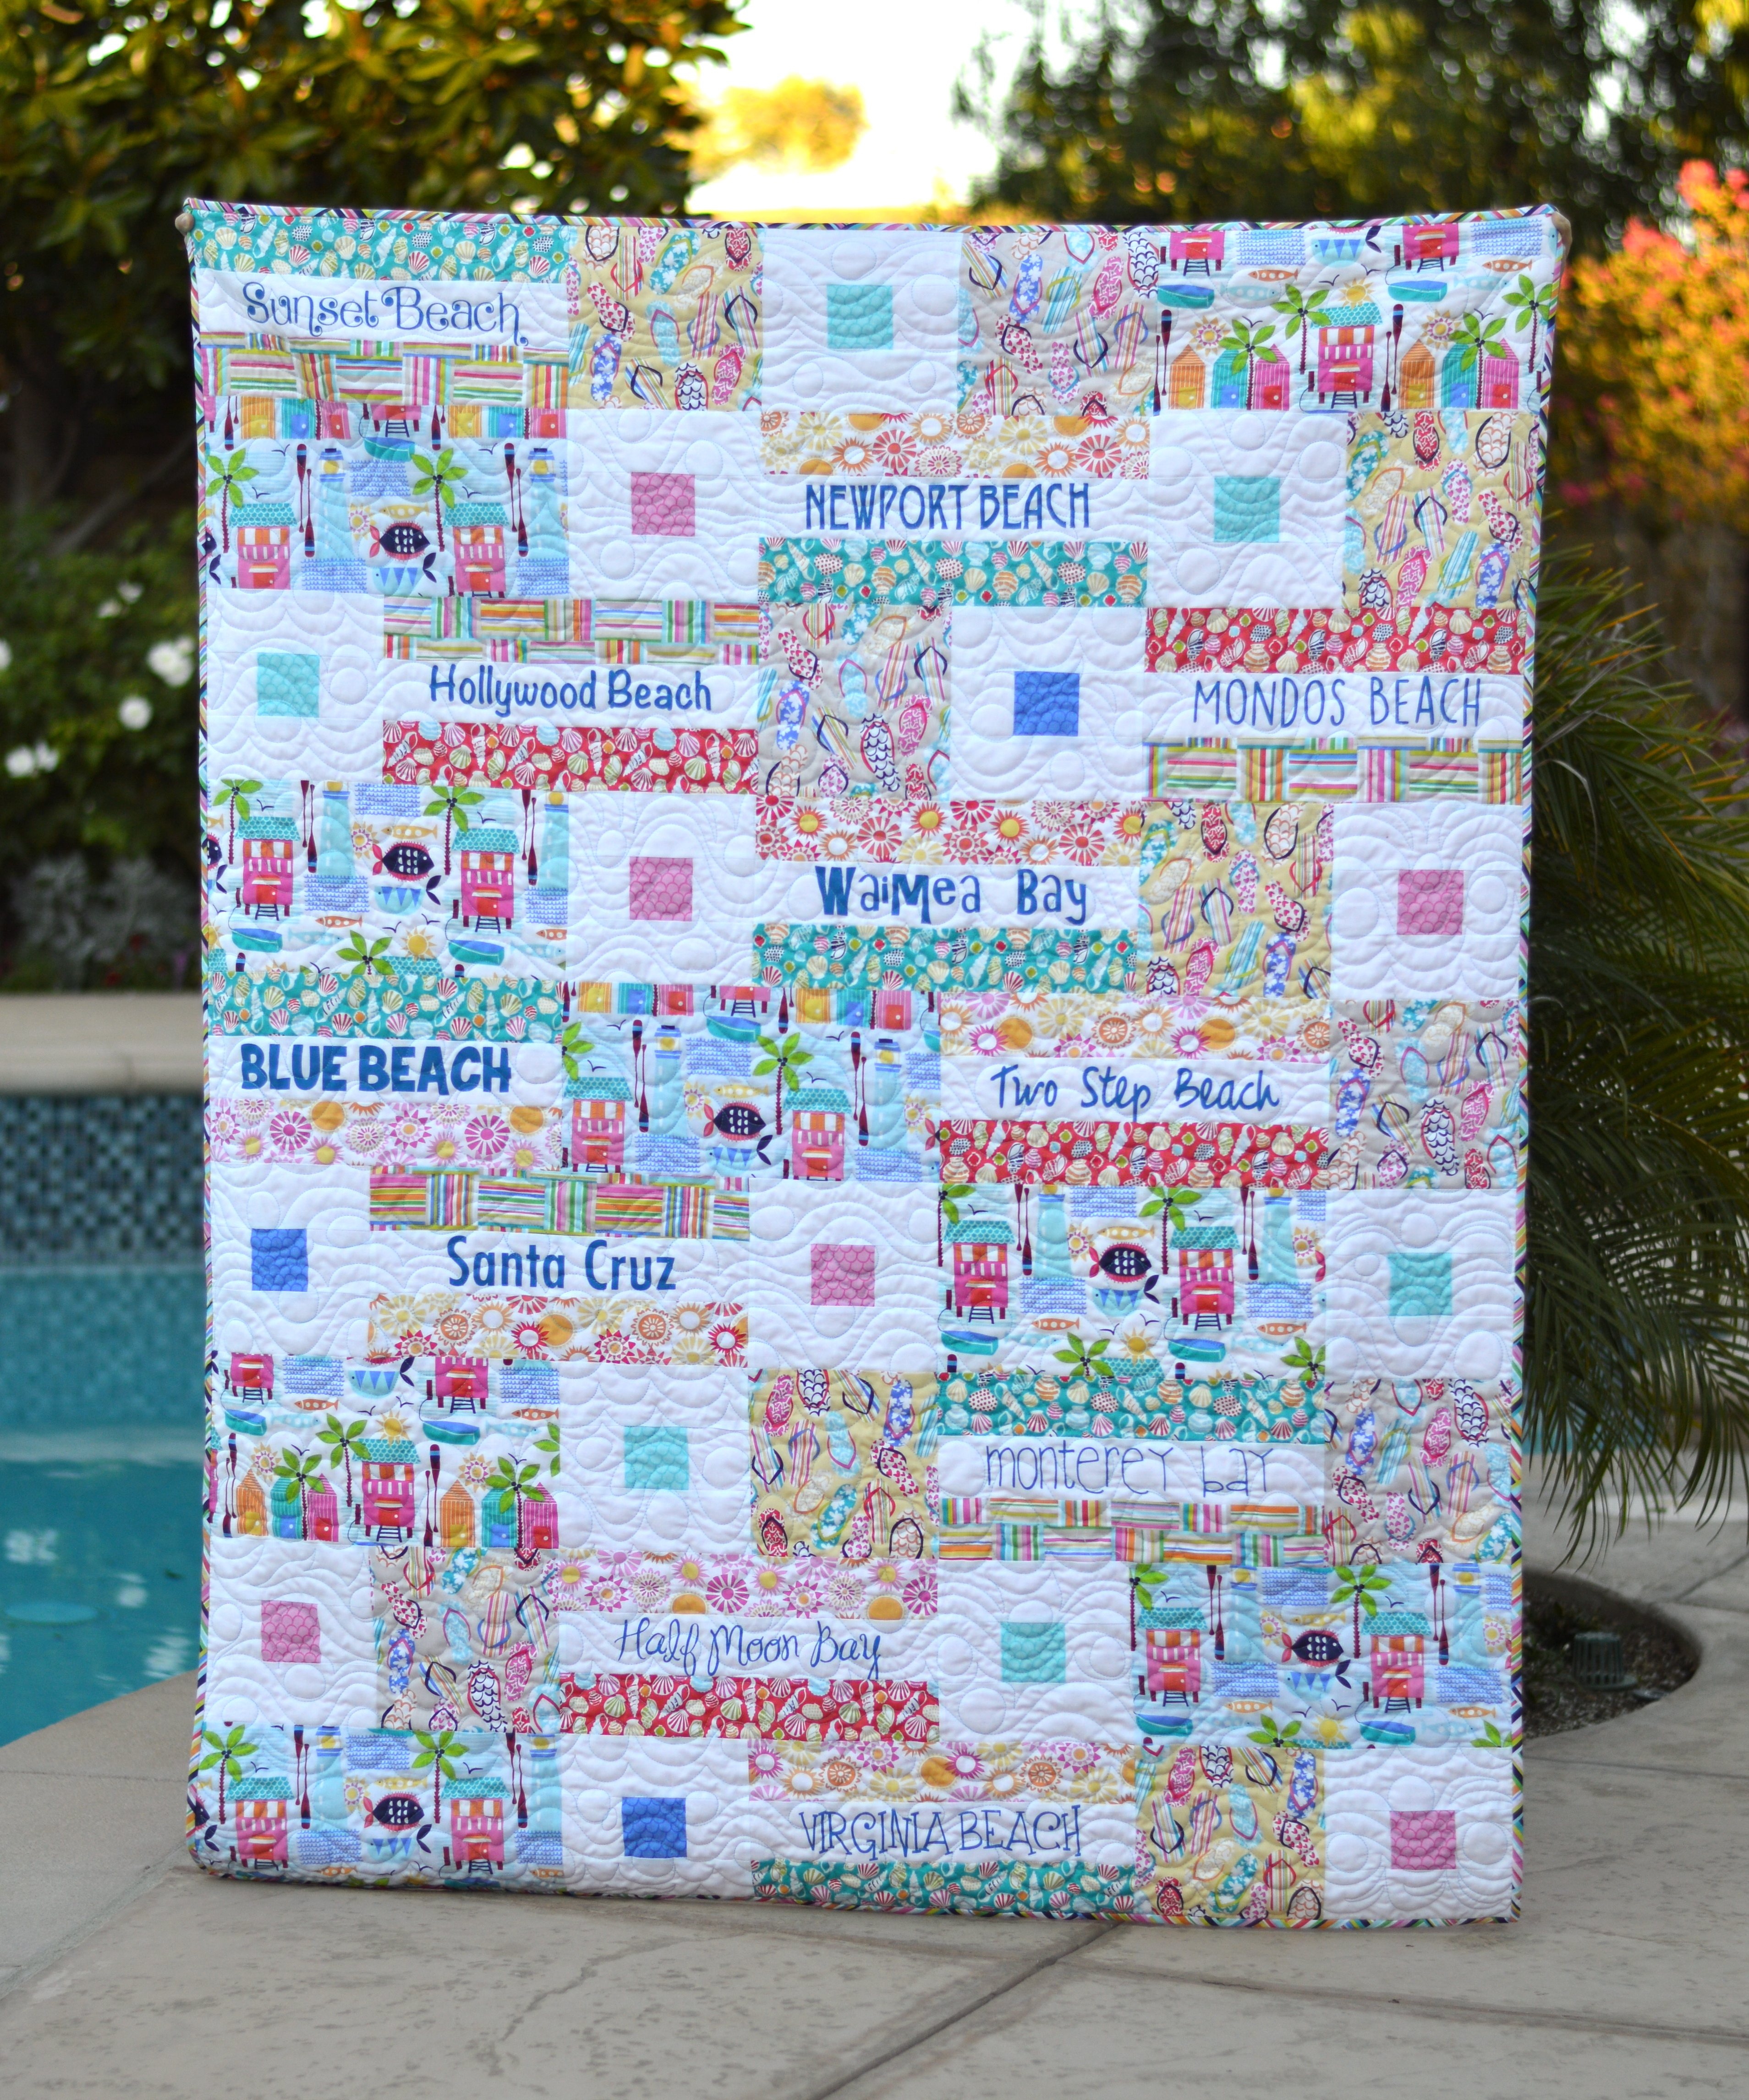
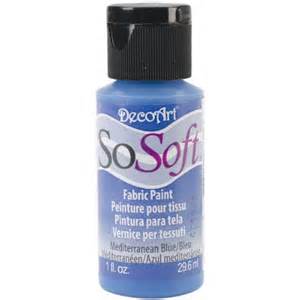
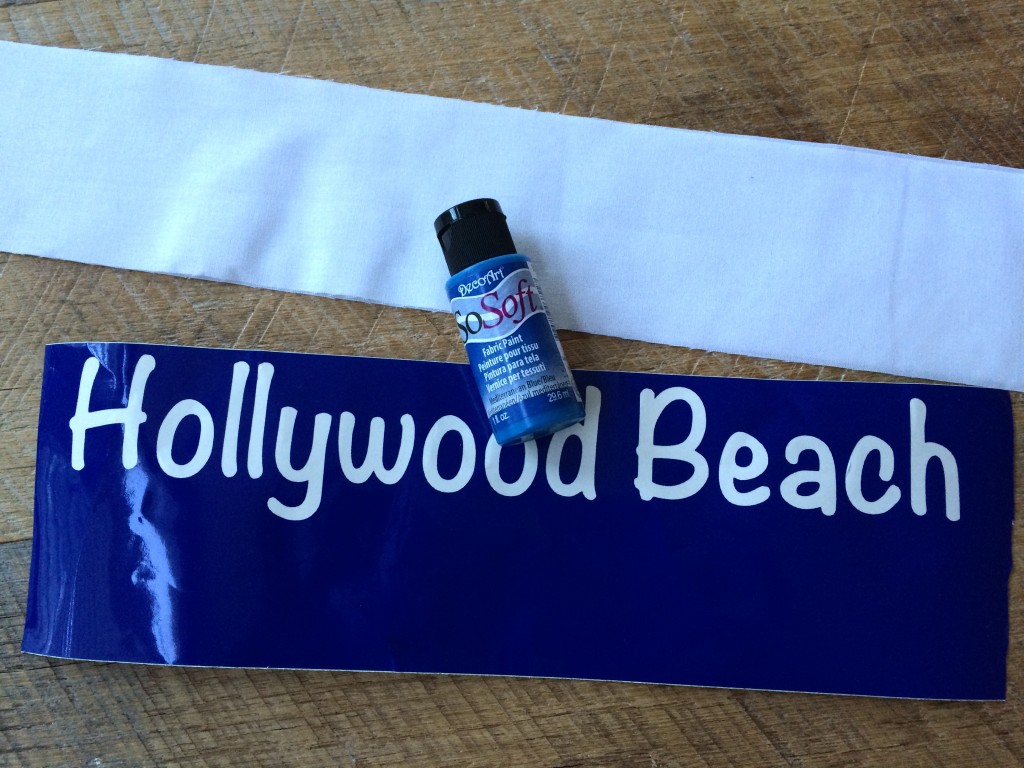
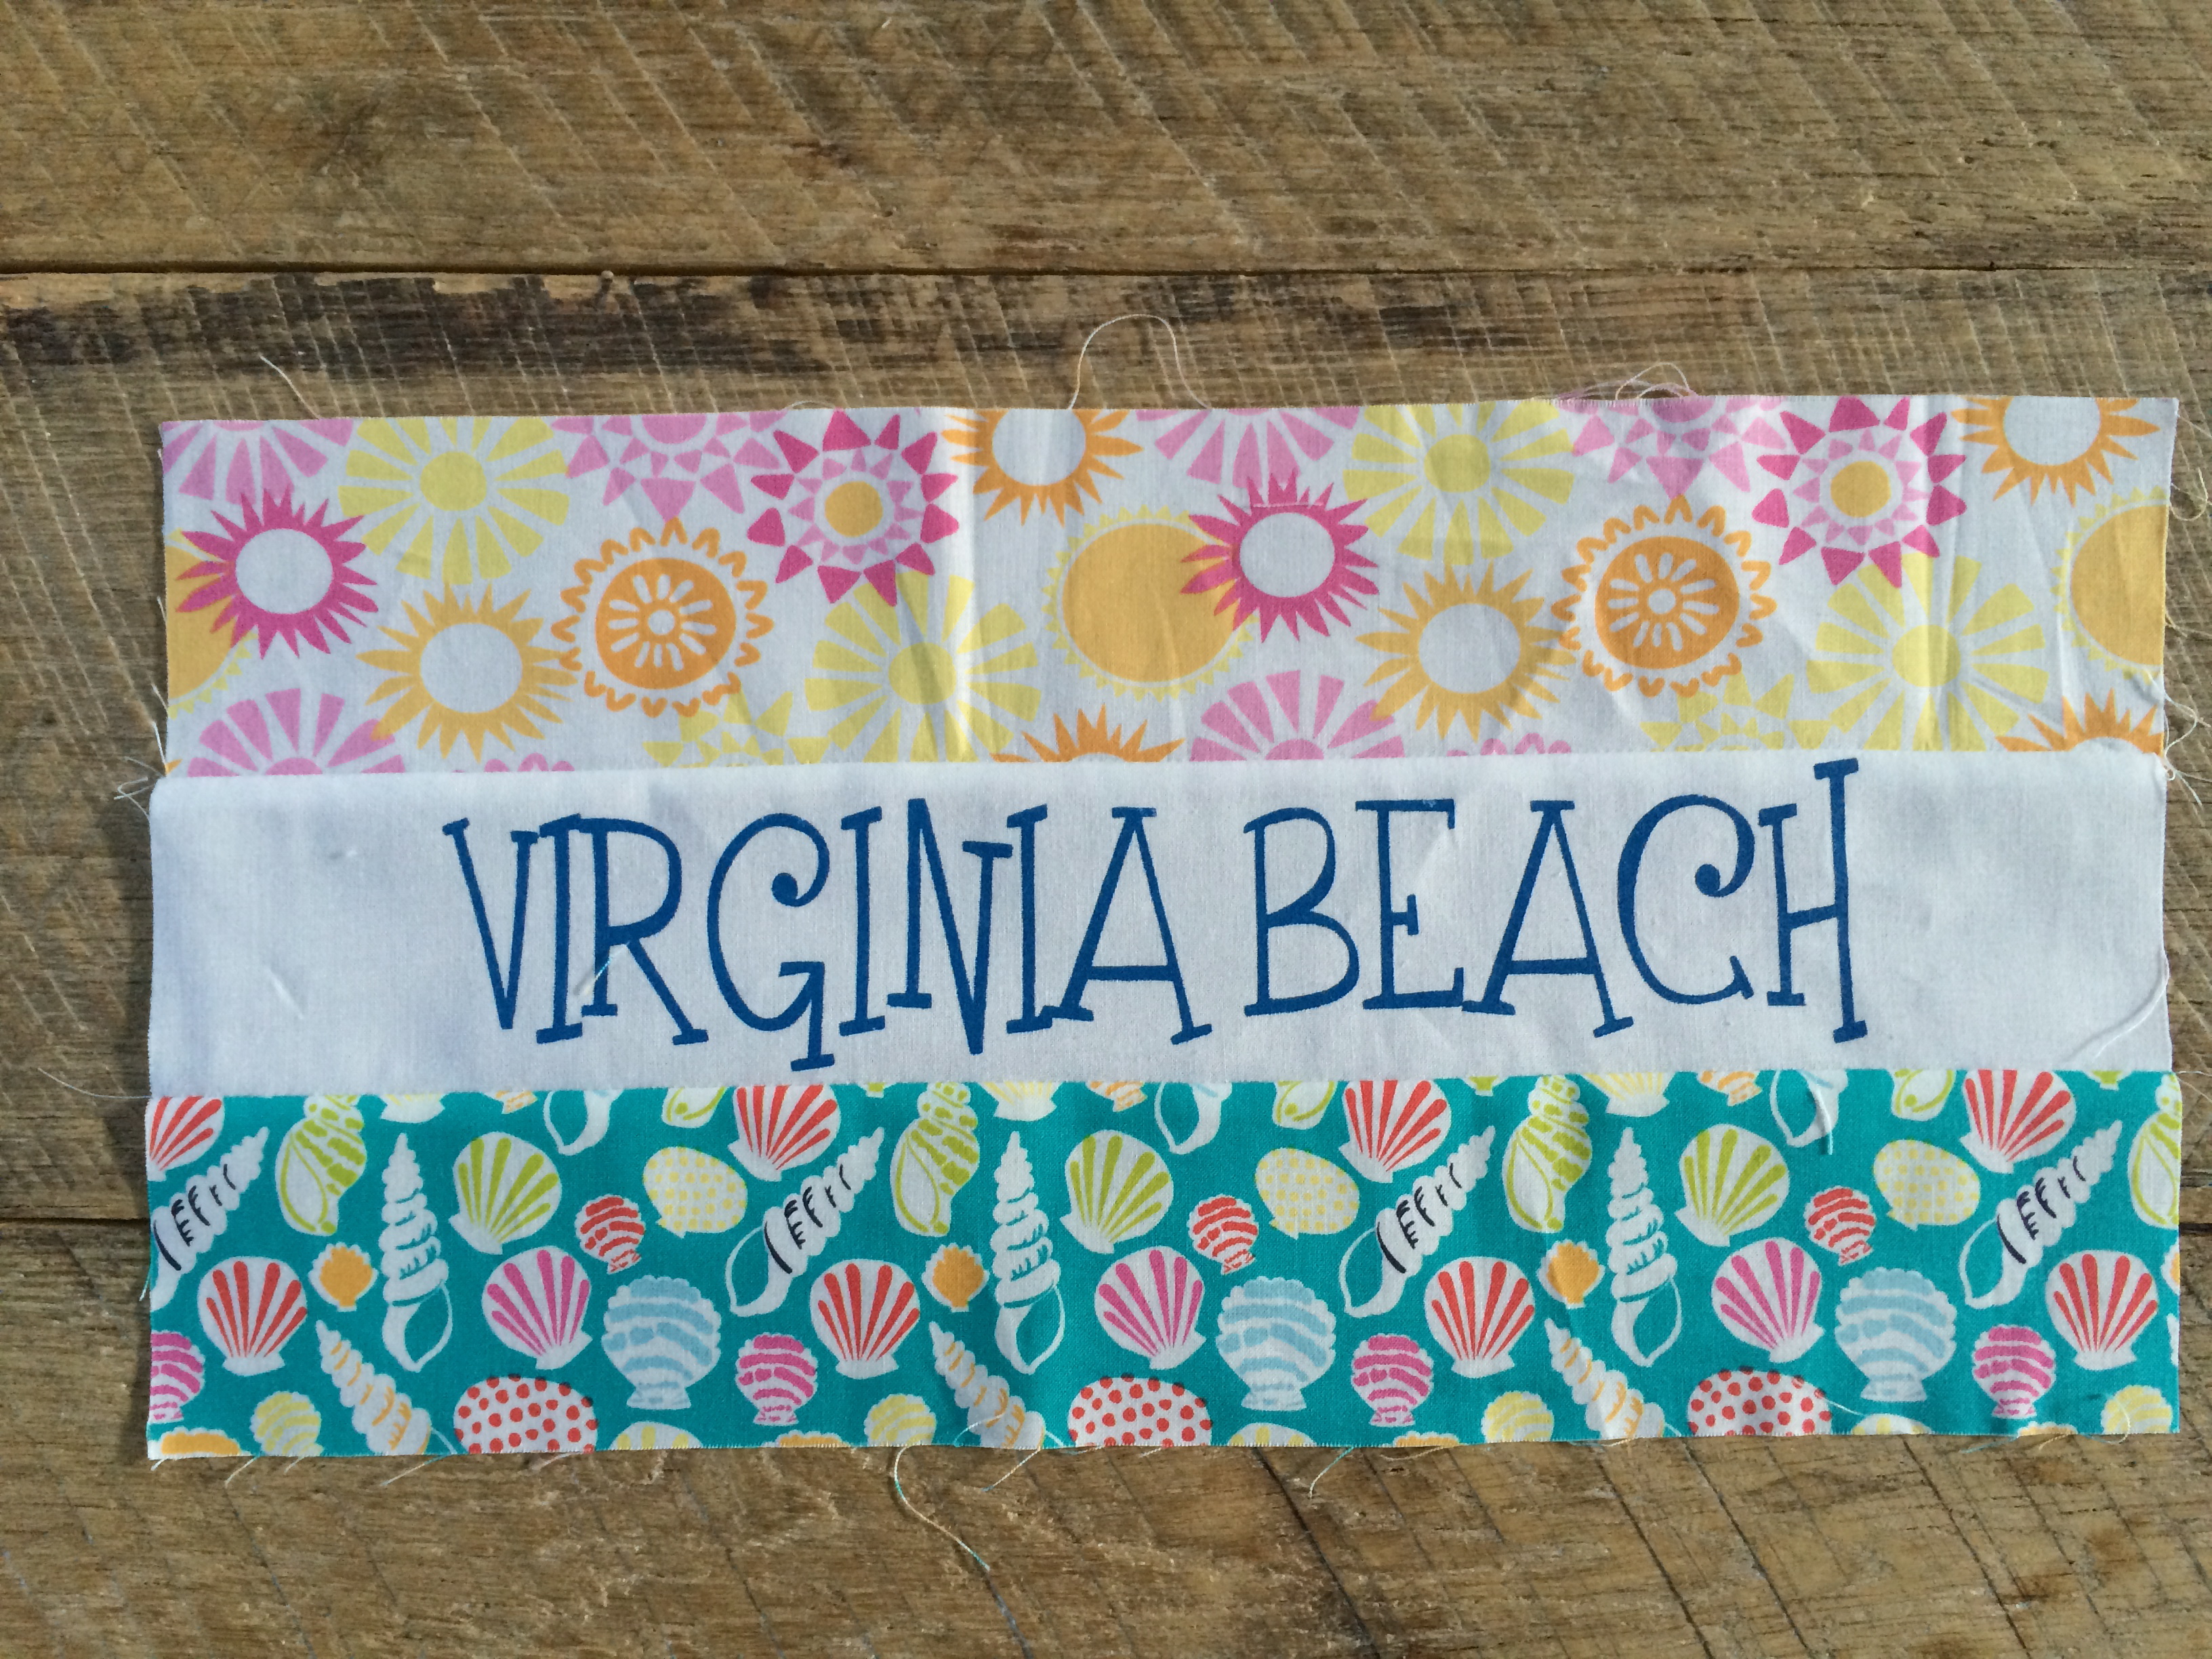
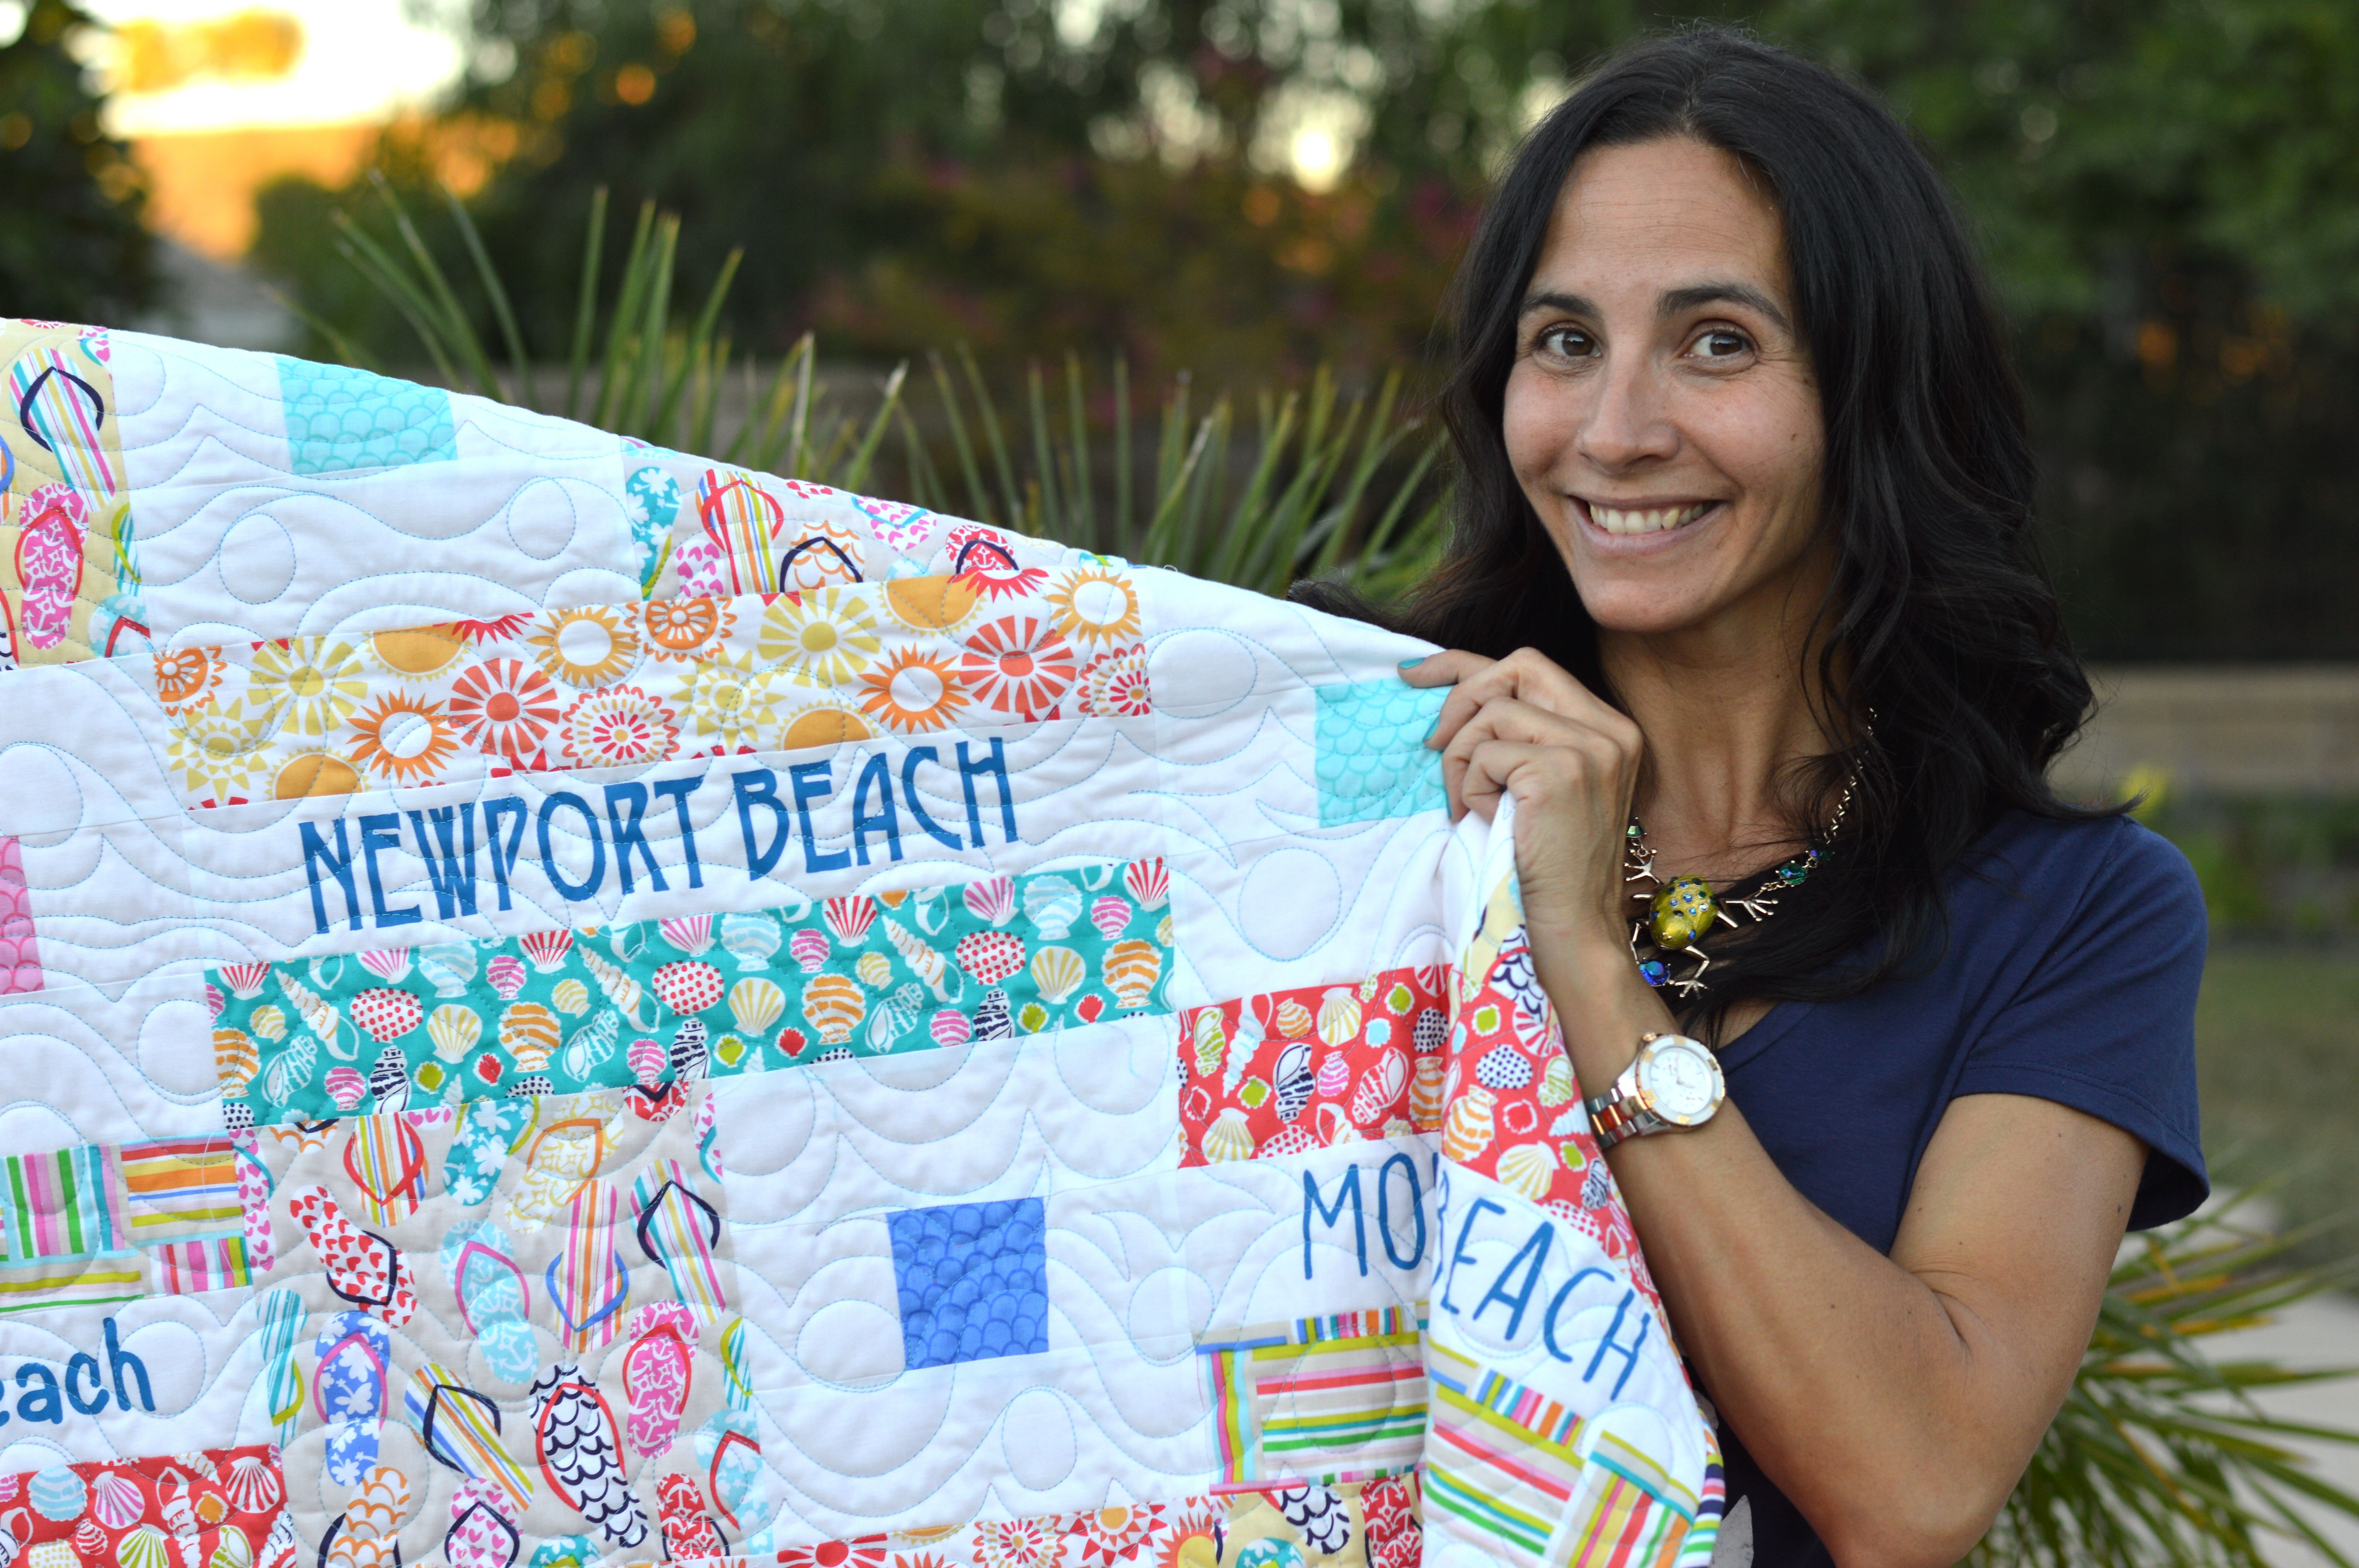
The letters are machine appliquéd using Heat n Bond Lite.  Don’t worry, they don’t take too long to cut out by hand!!

take me to the sea quilt pattern 6

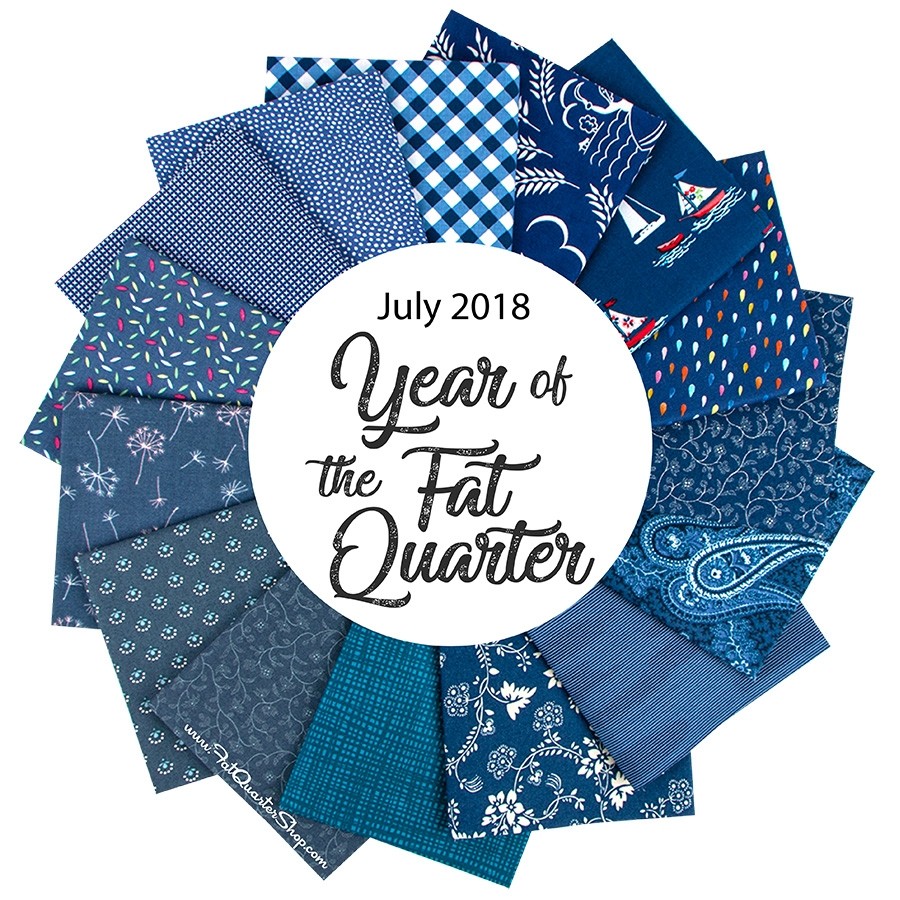
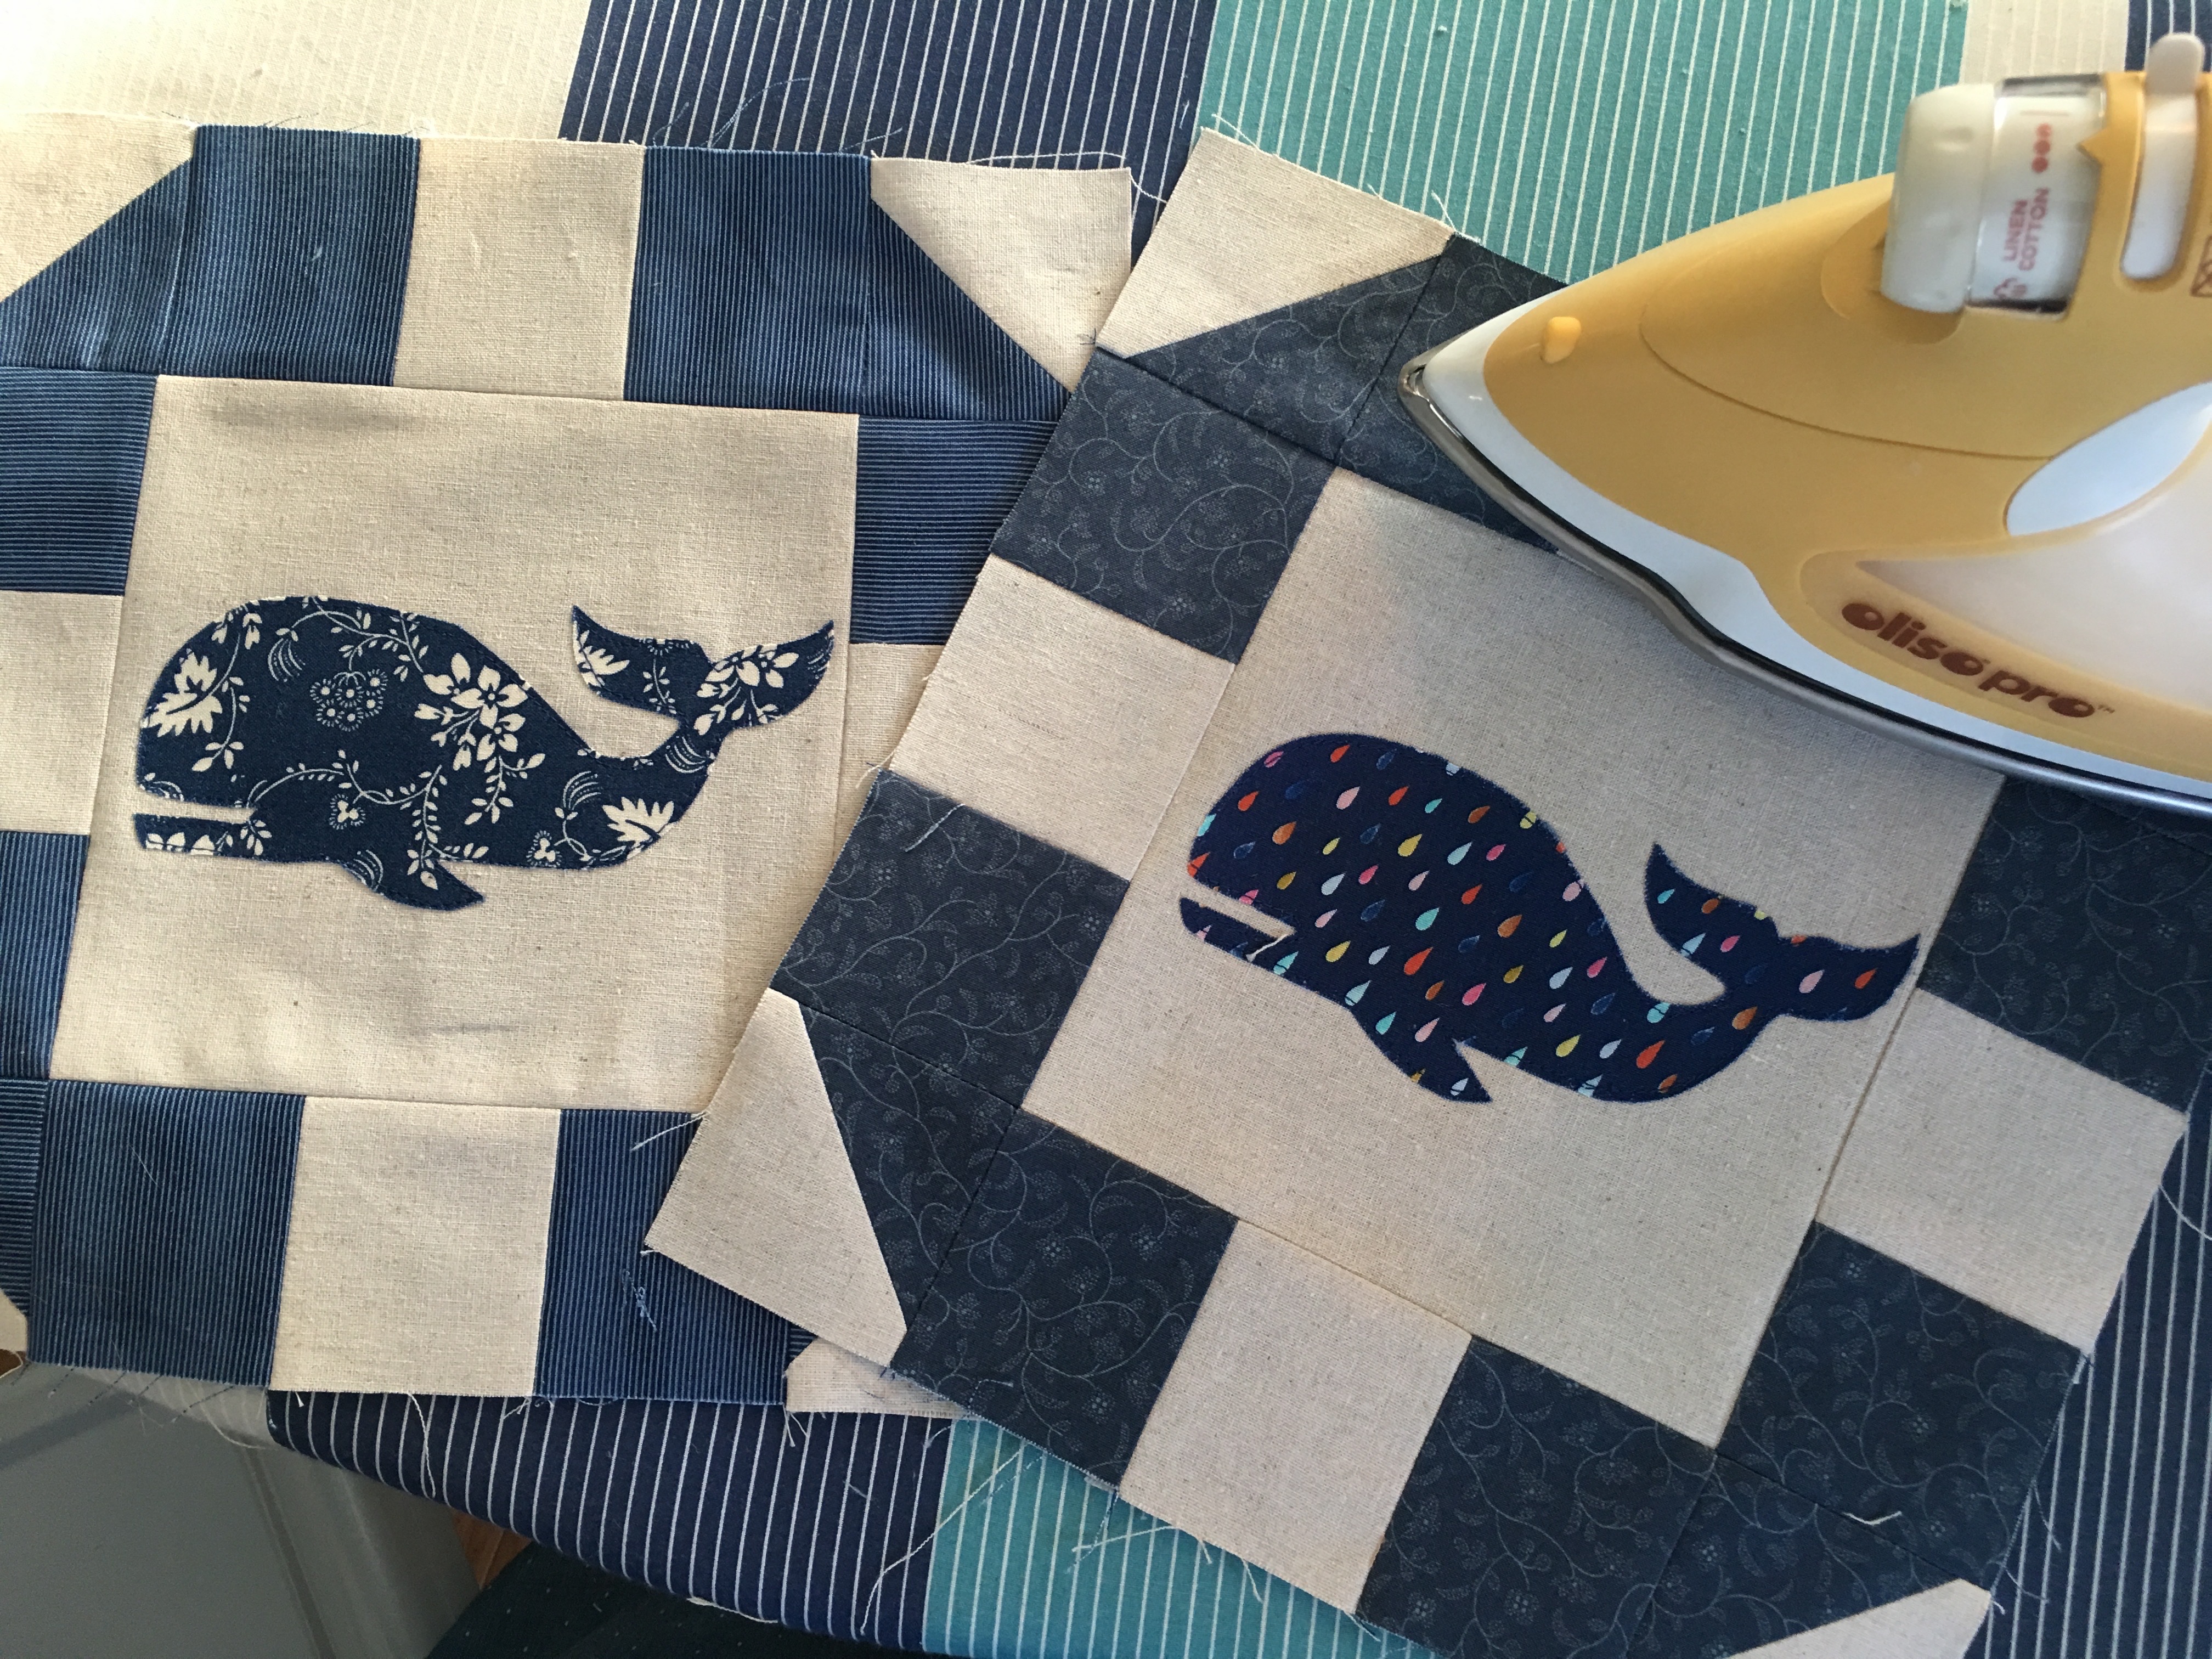
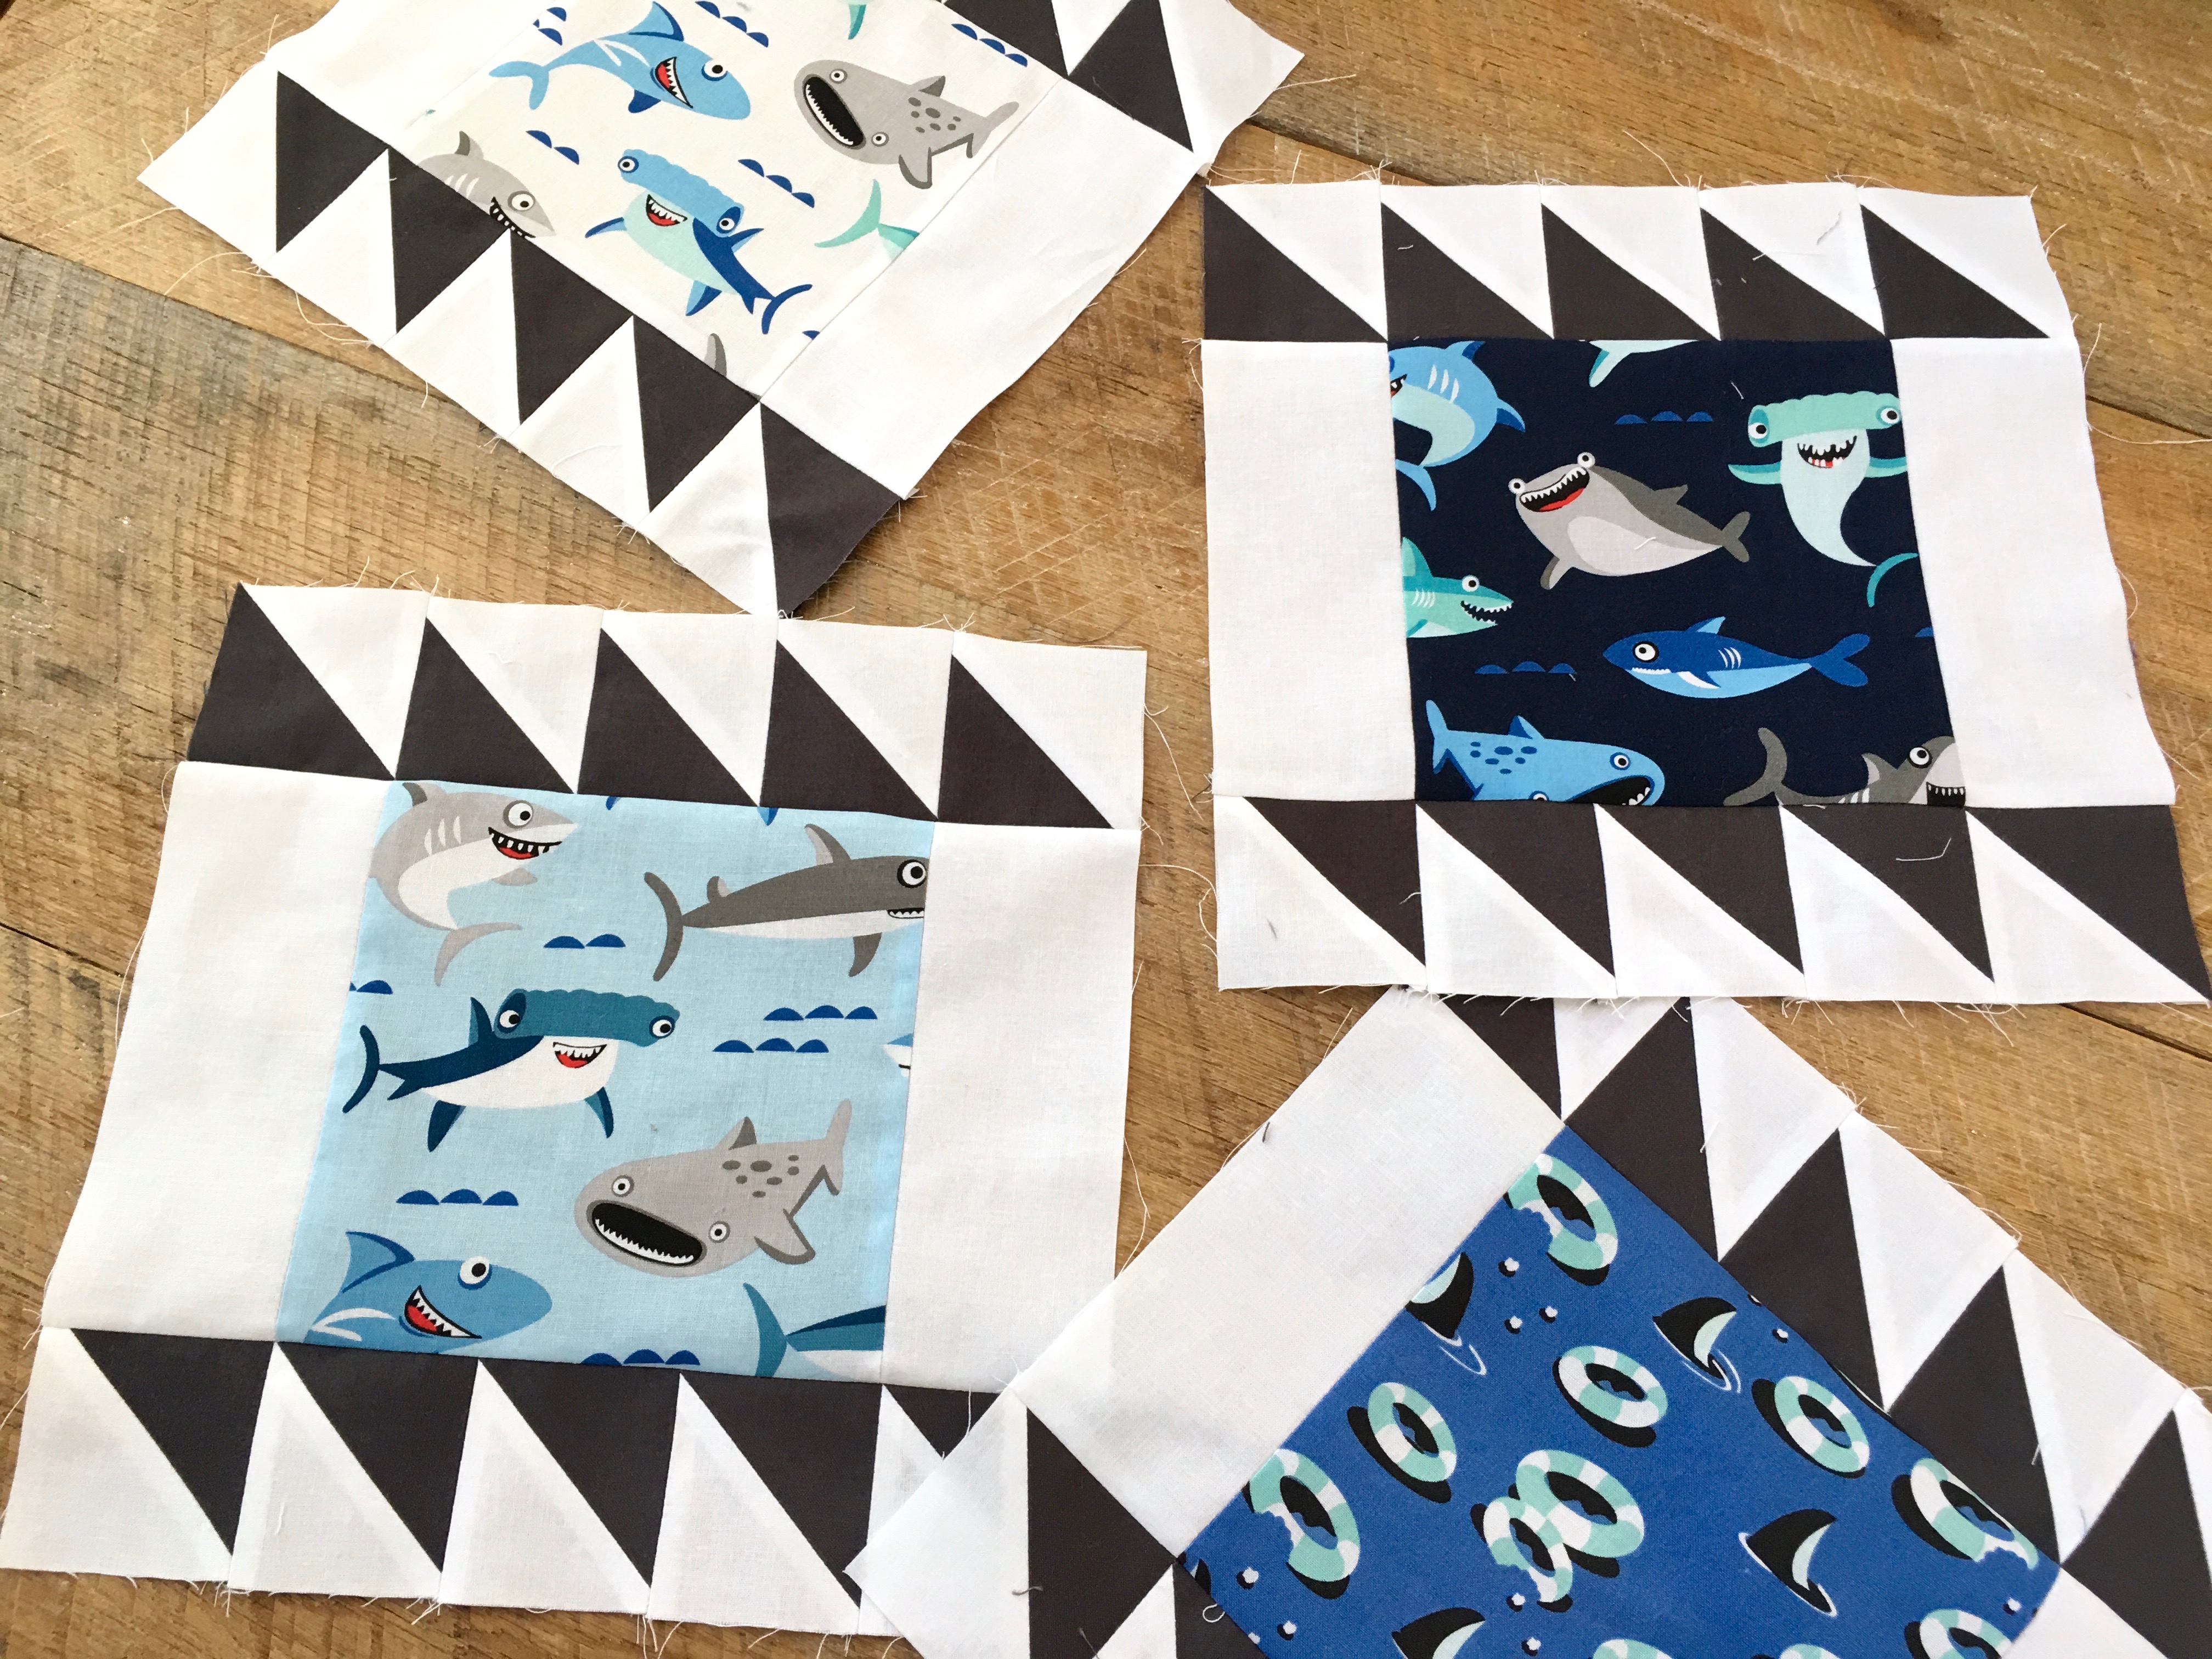
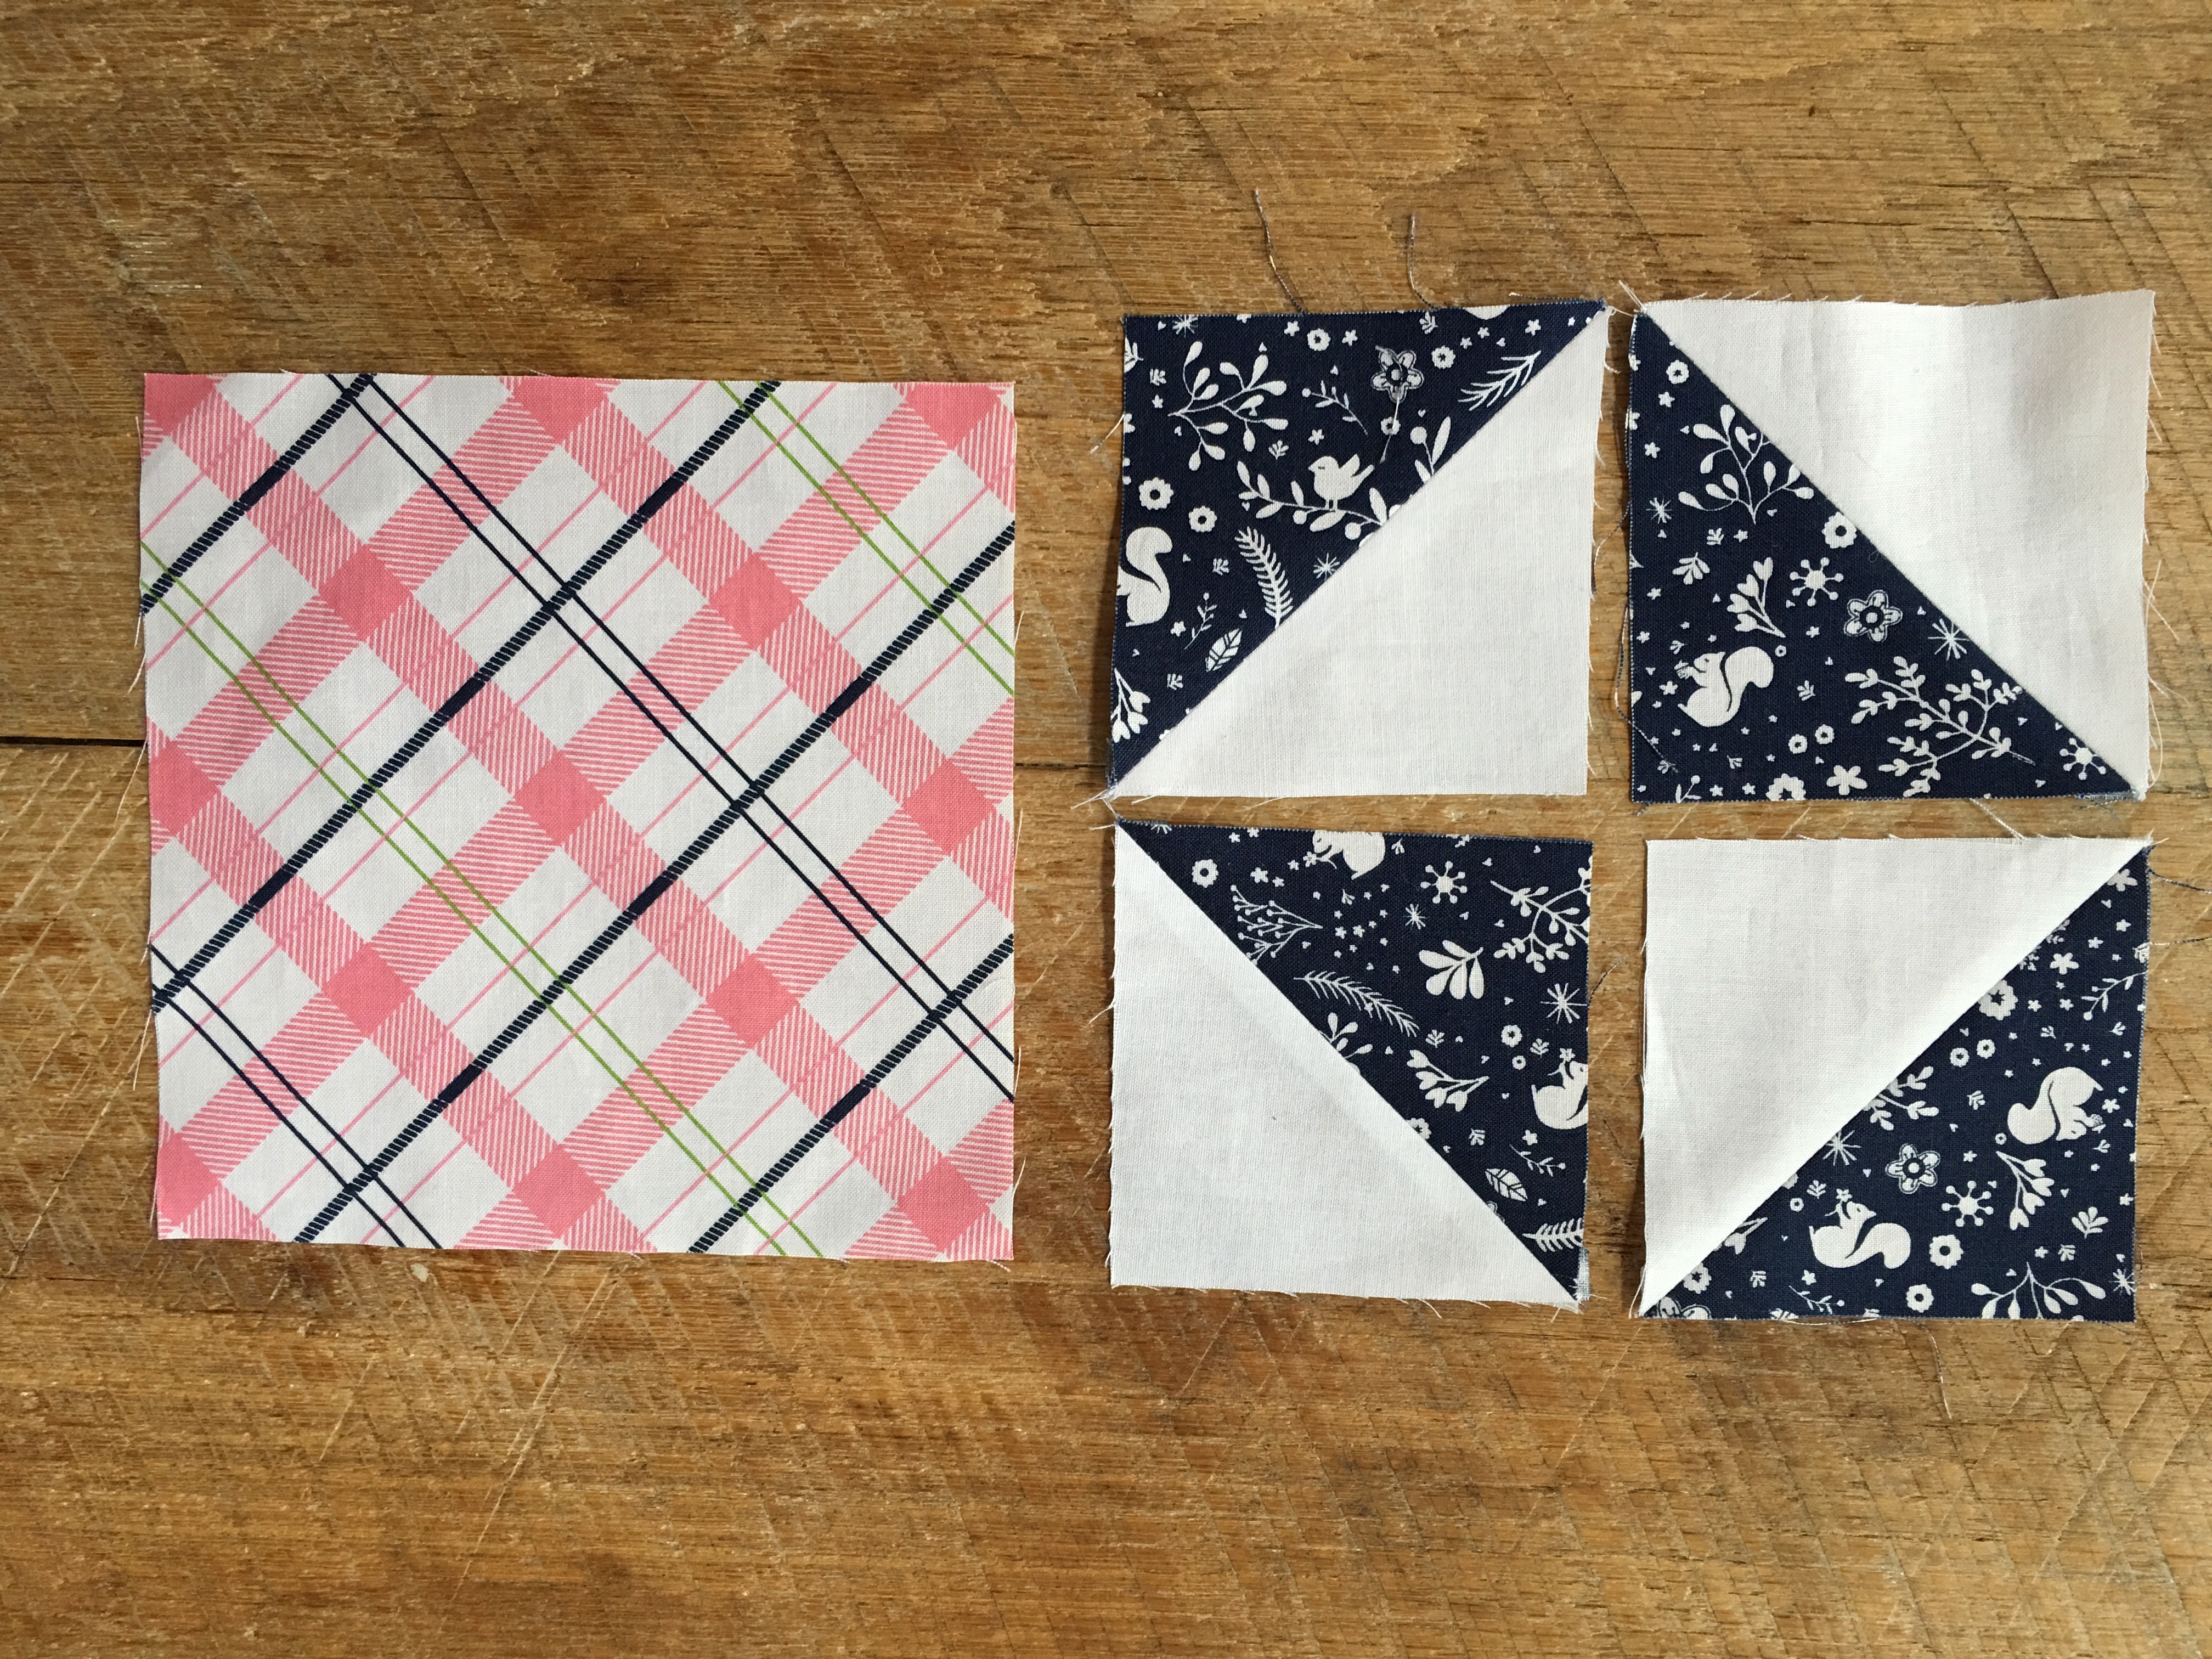
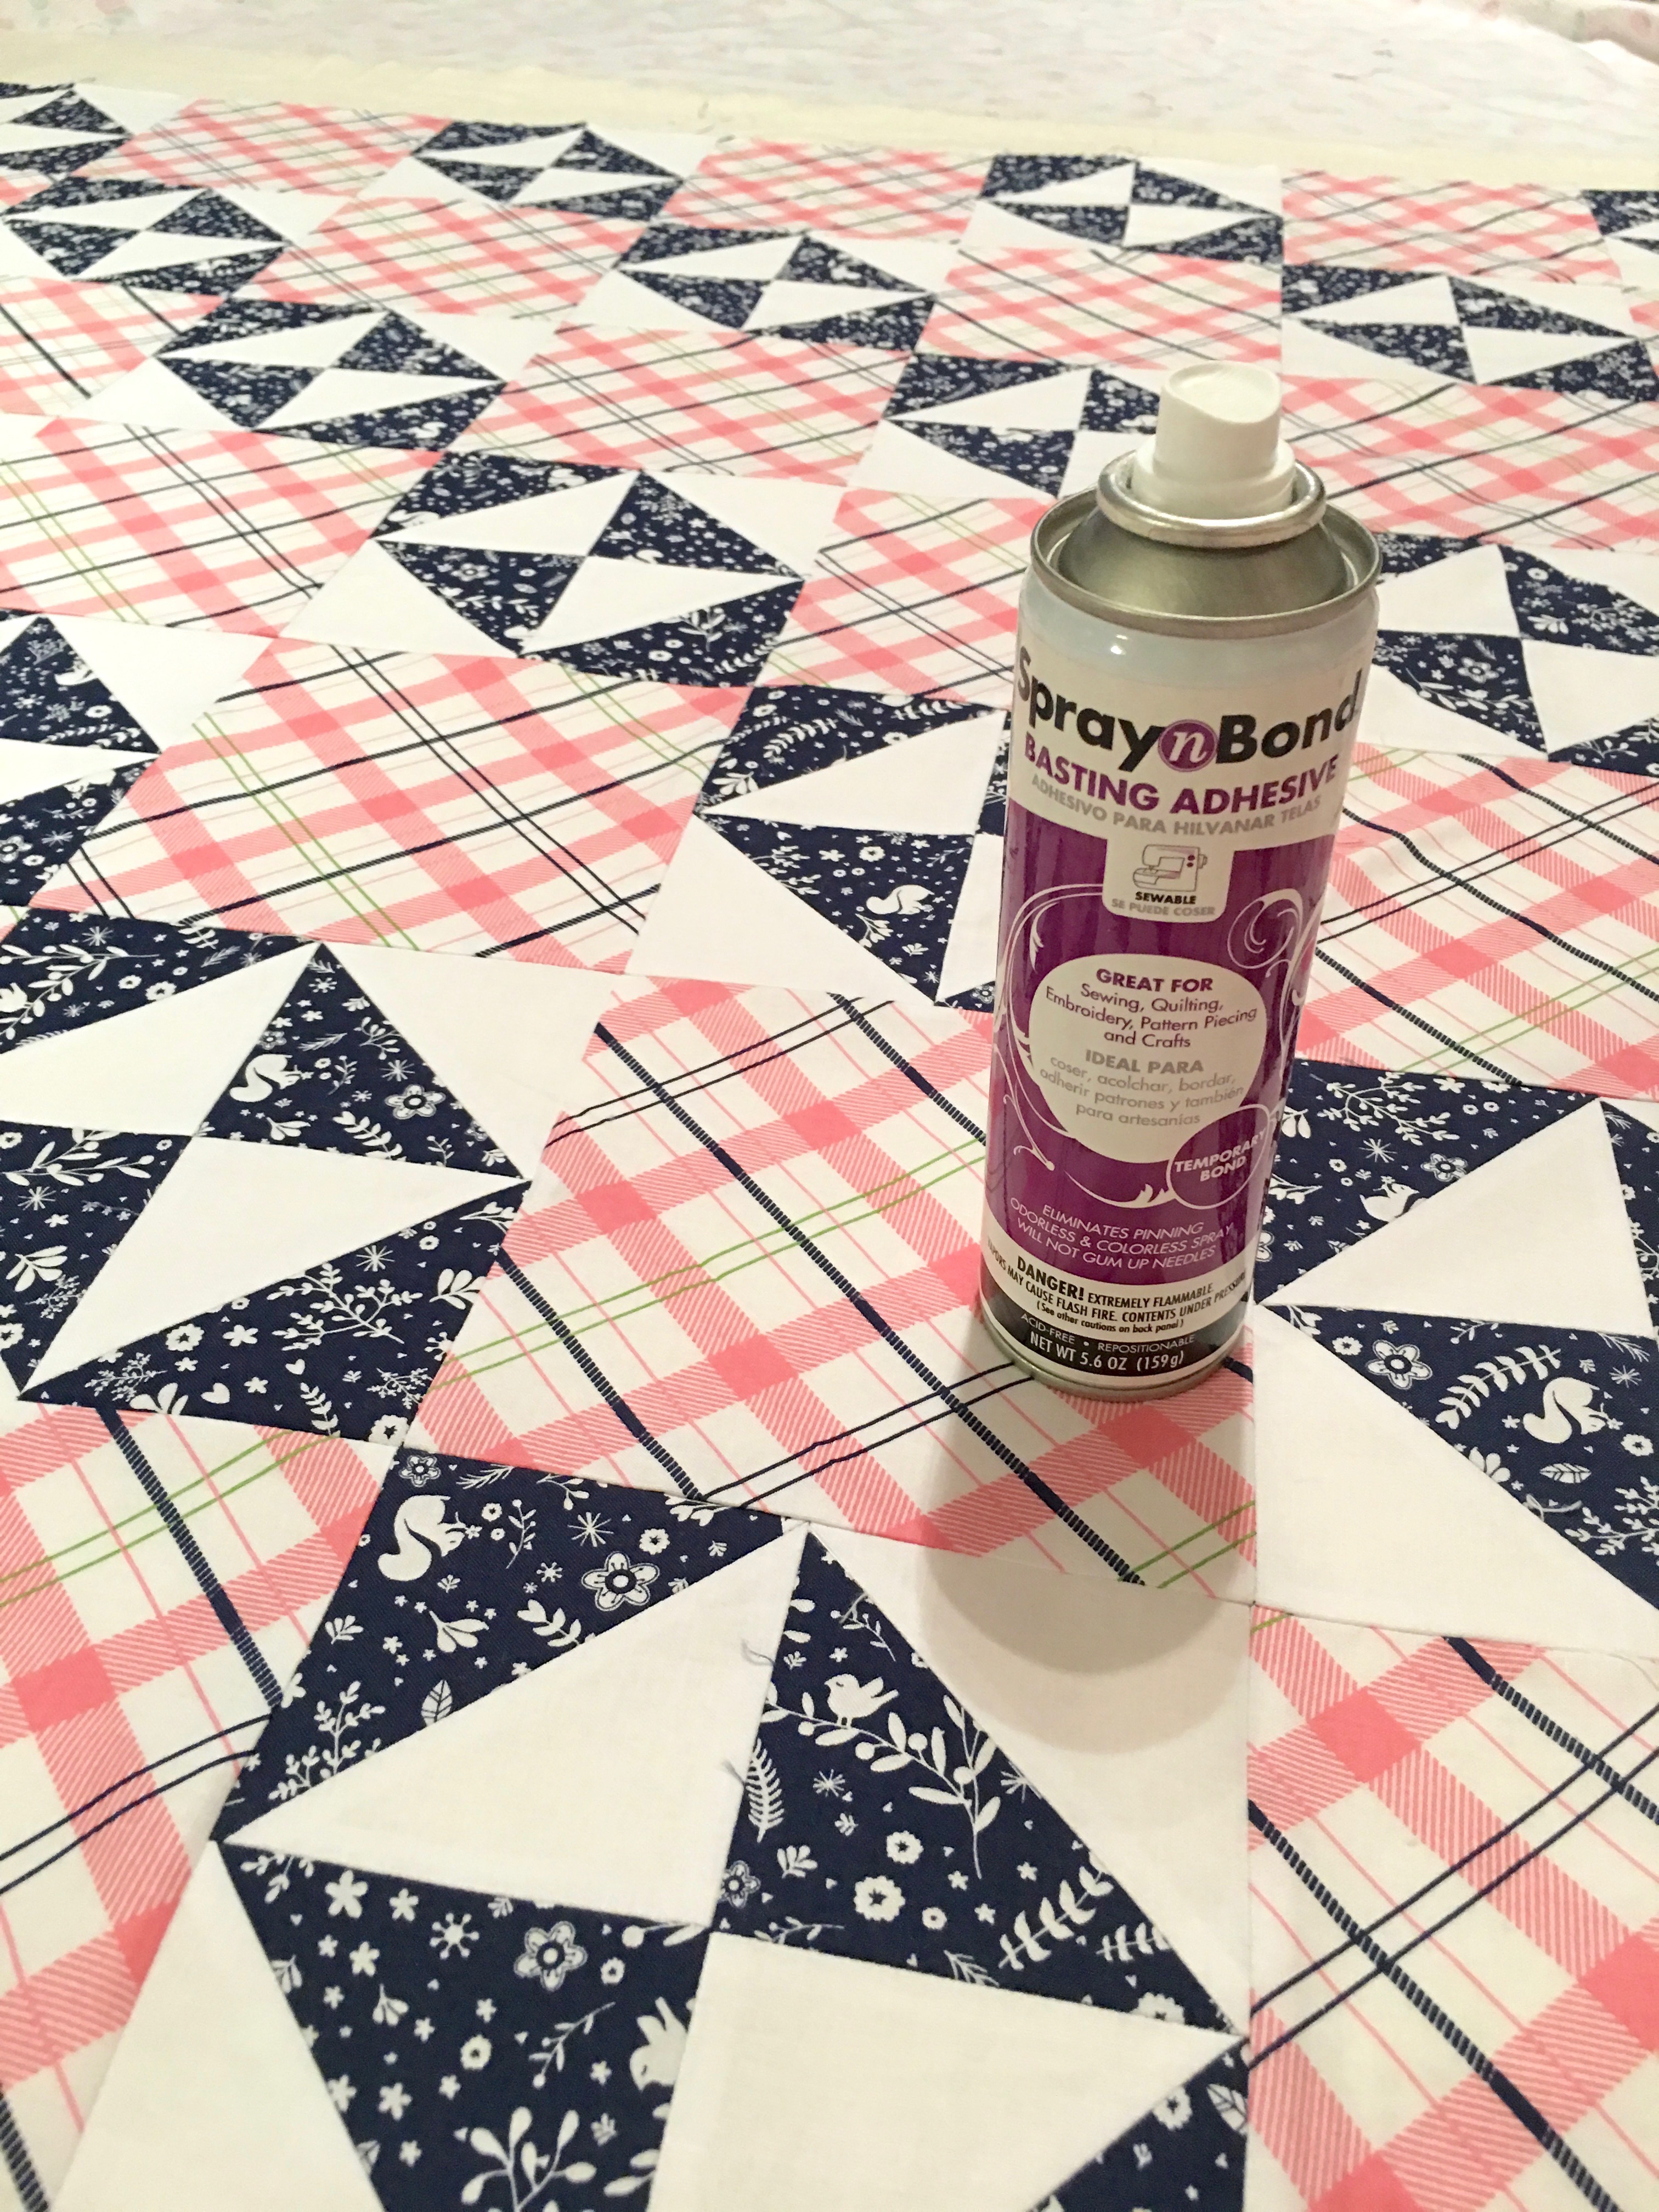
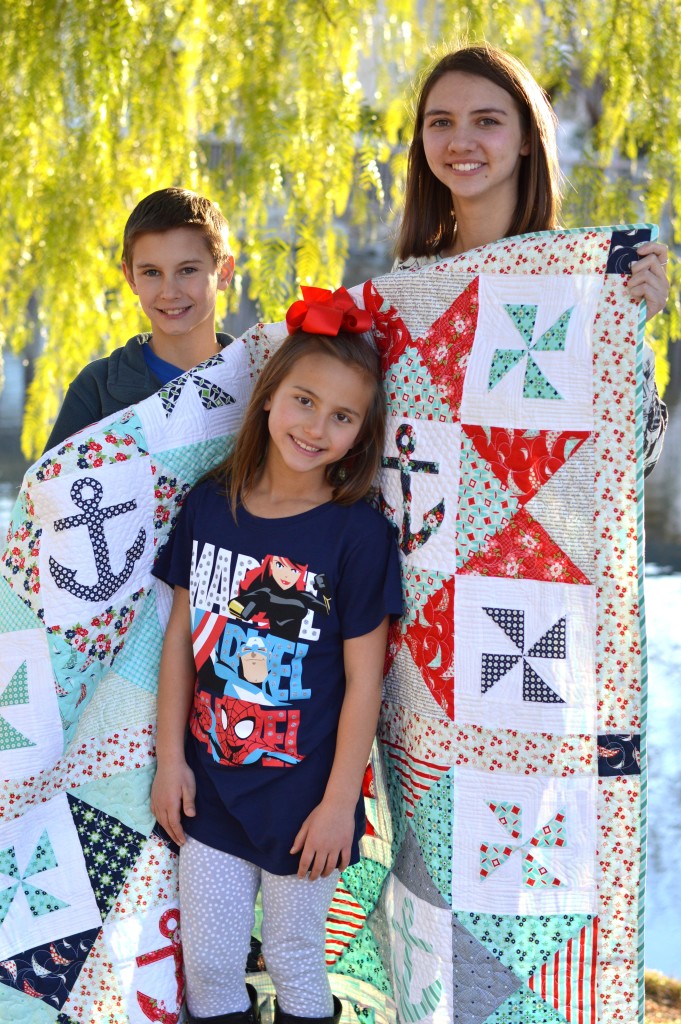
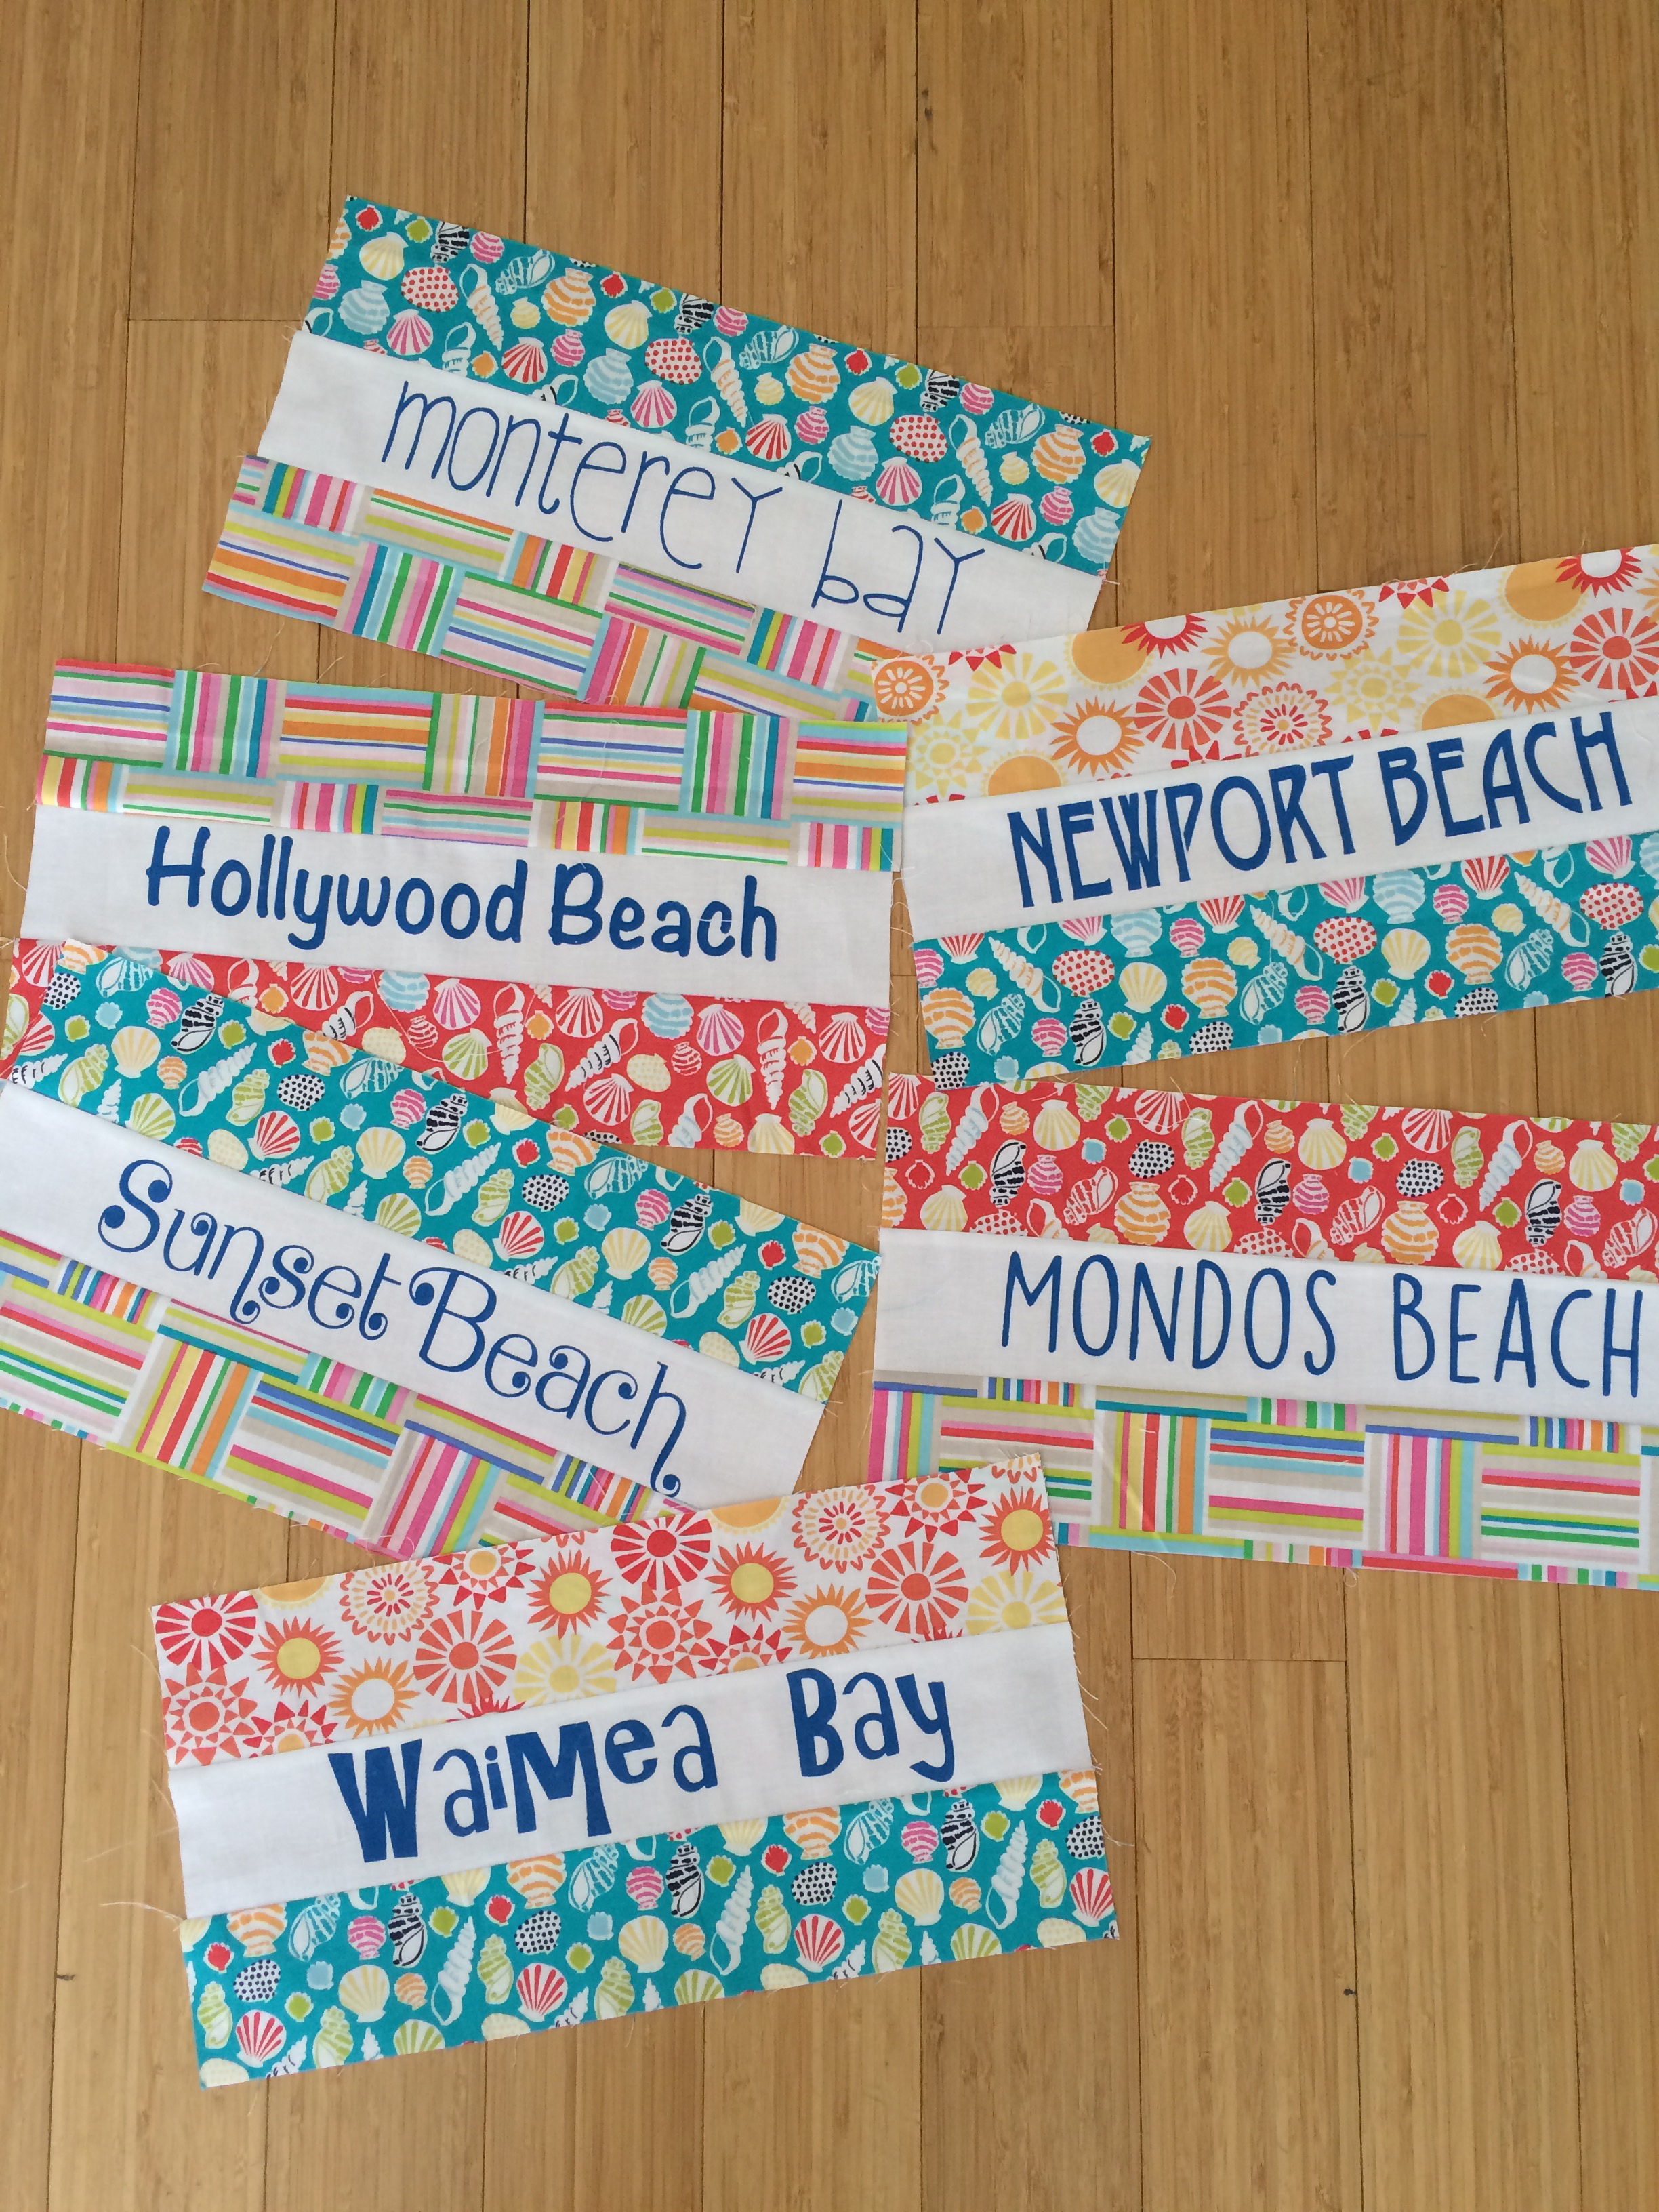
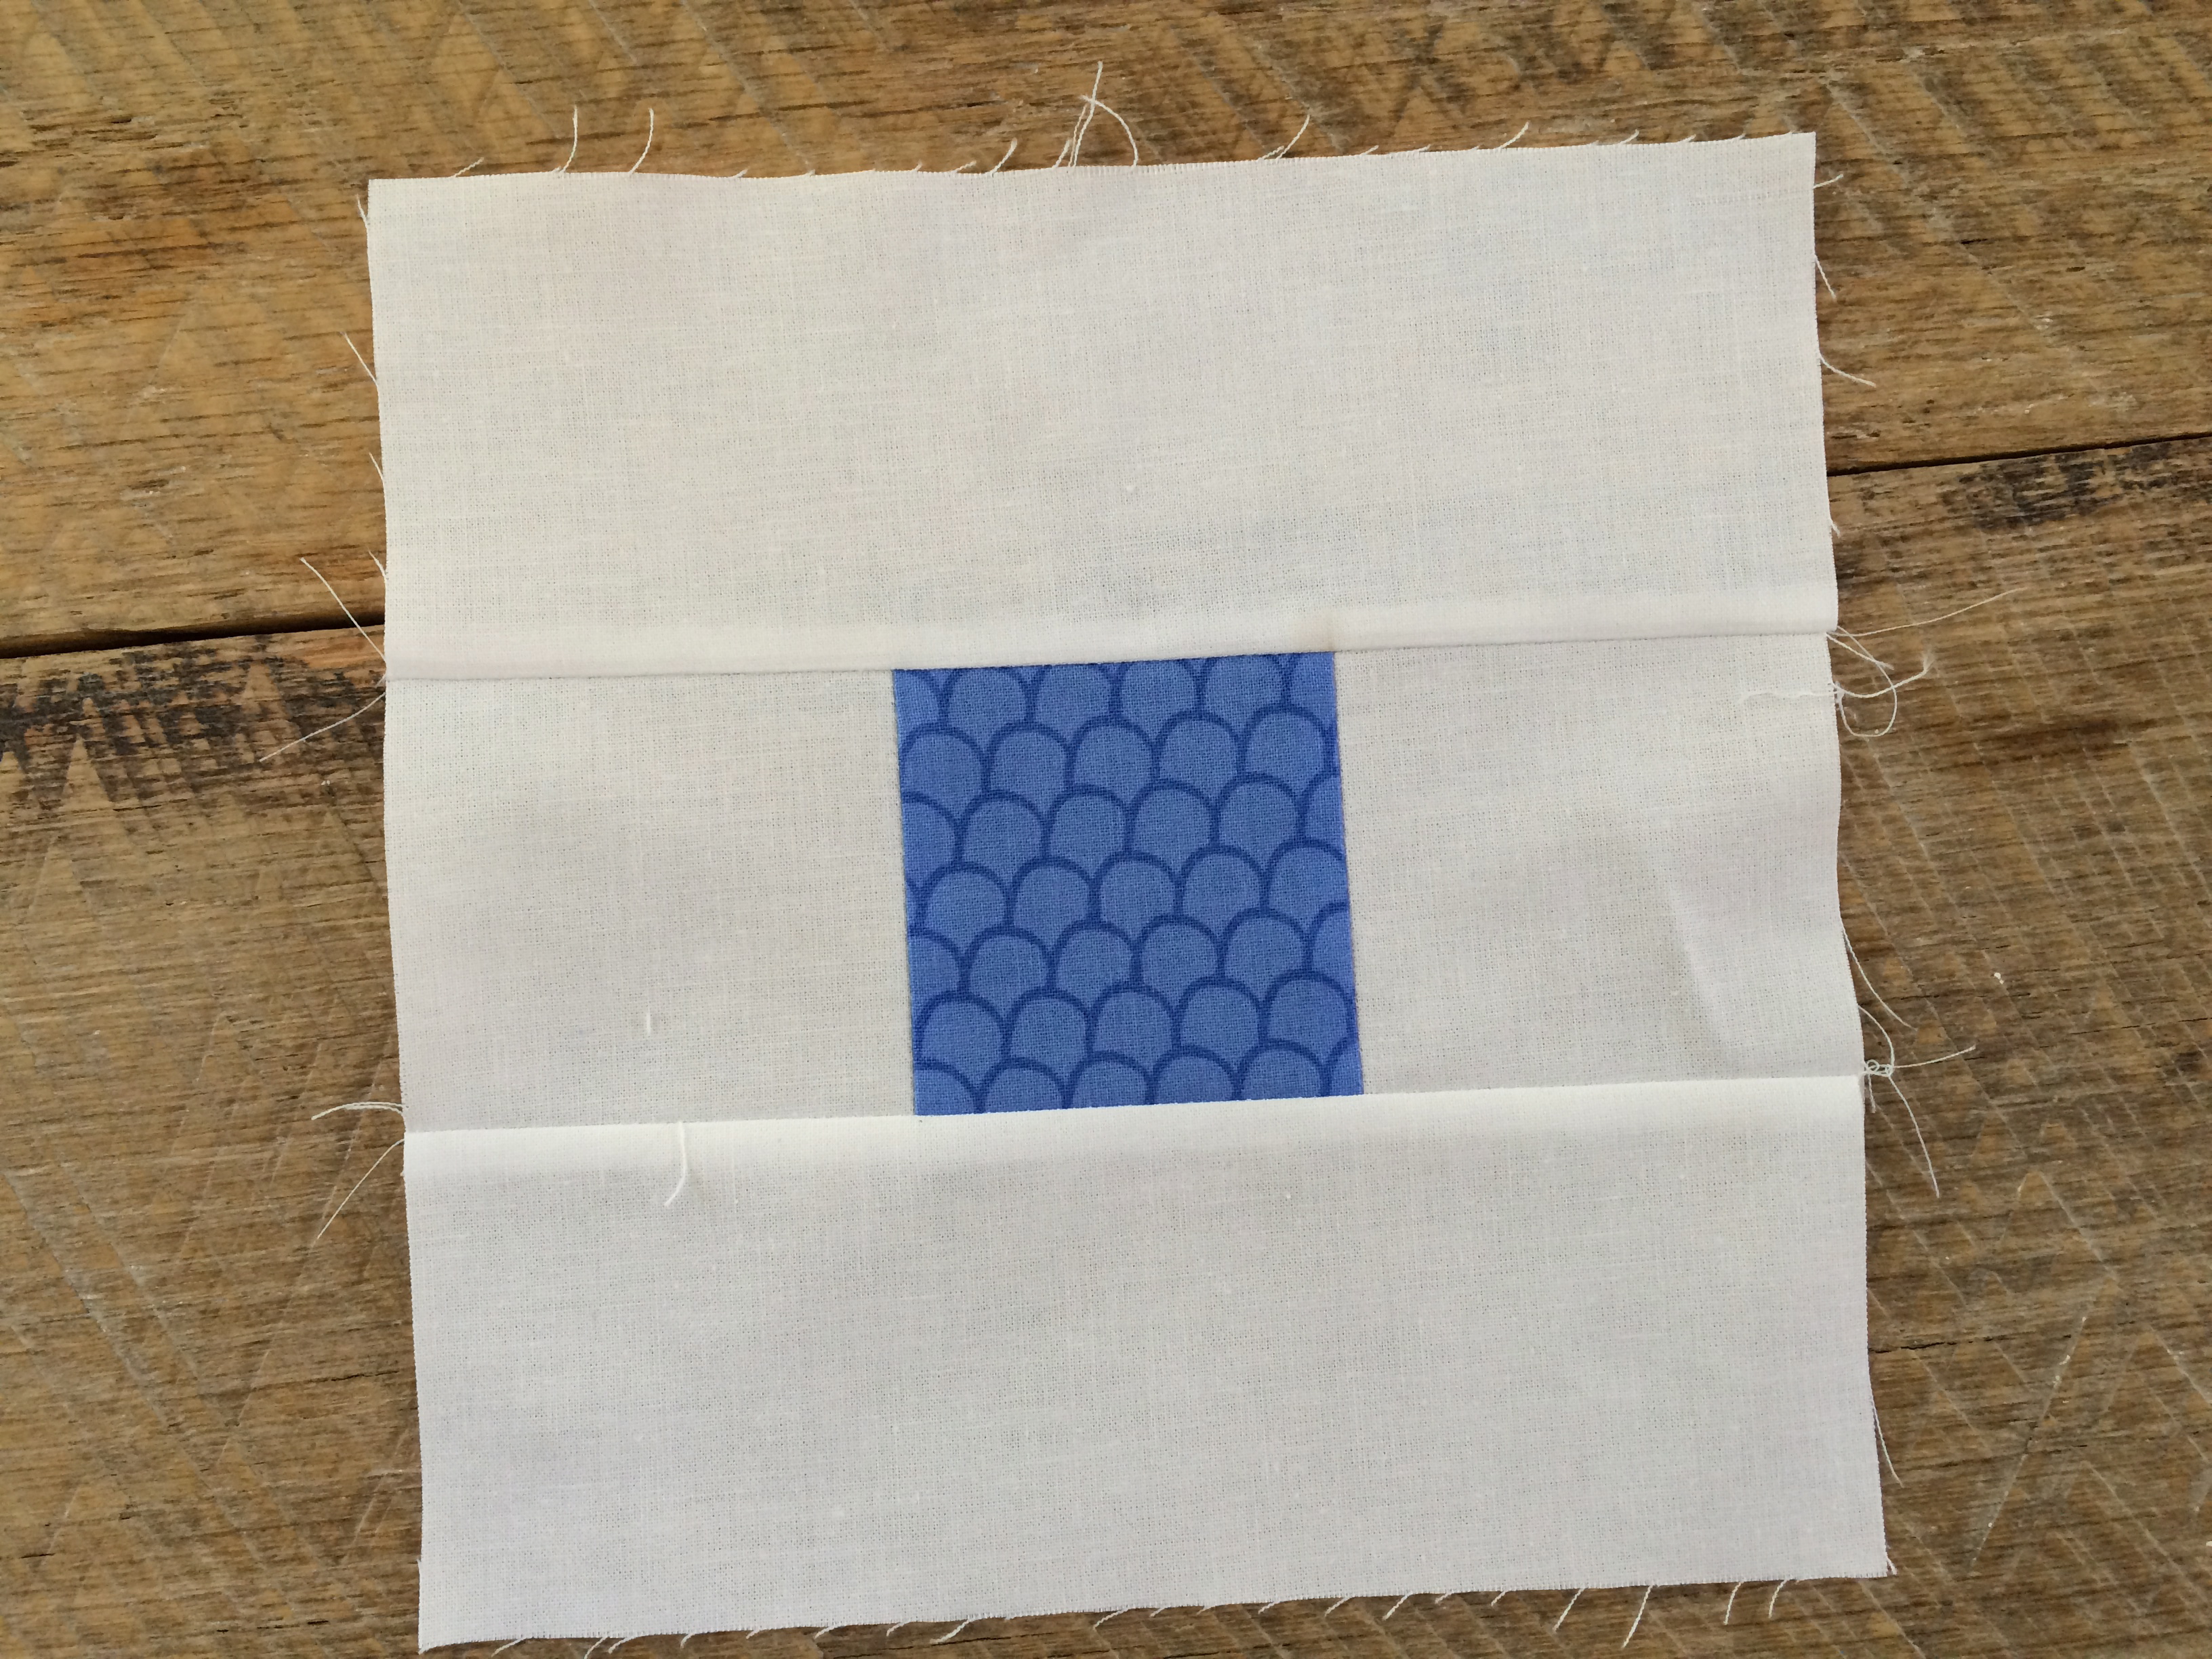
You will love that this quilt is written to accommodate layer cake (10″) squares.  In fact you only NEED 13 squares – but a few extra wouldn’t hurt to add a little variety!!

seaside quilt

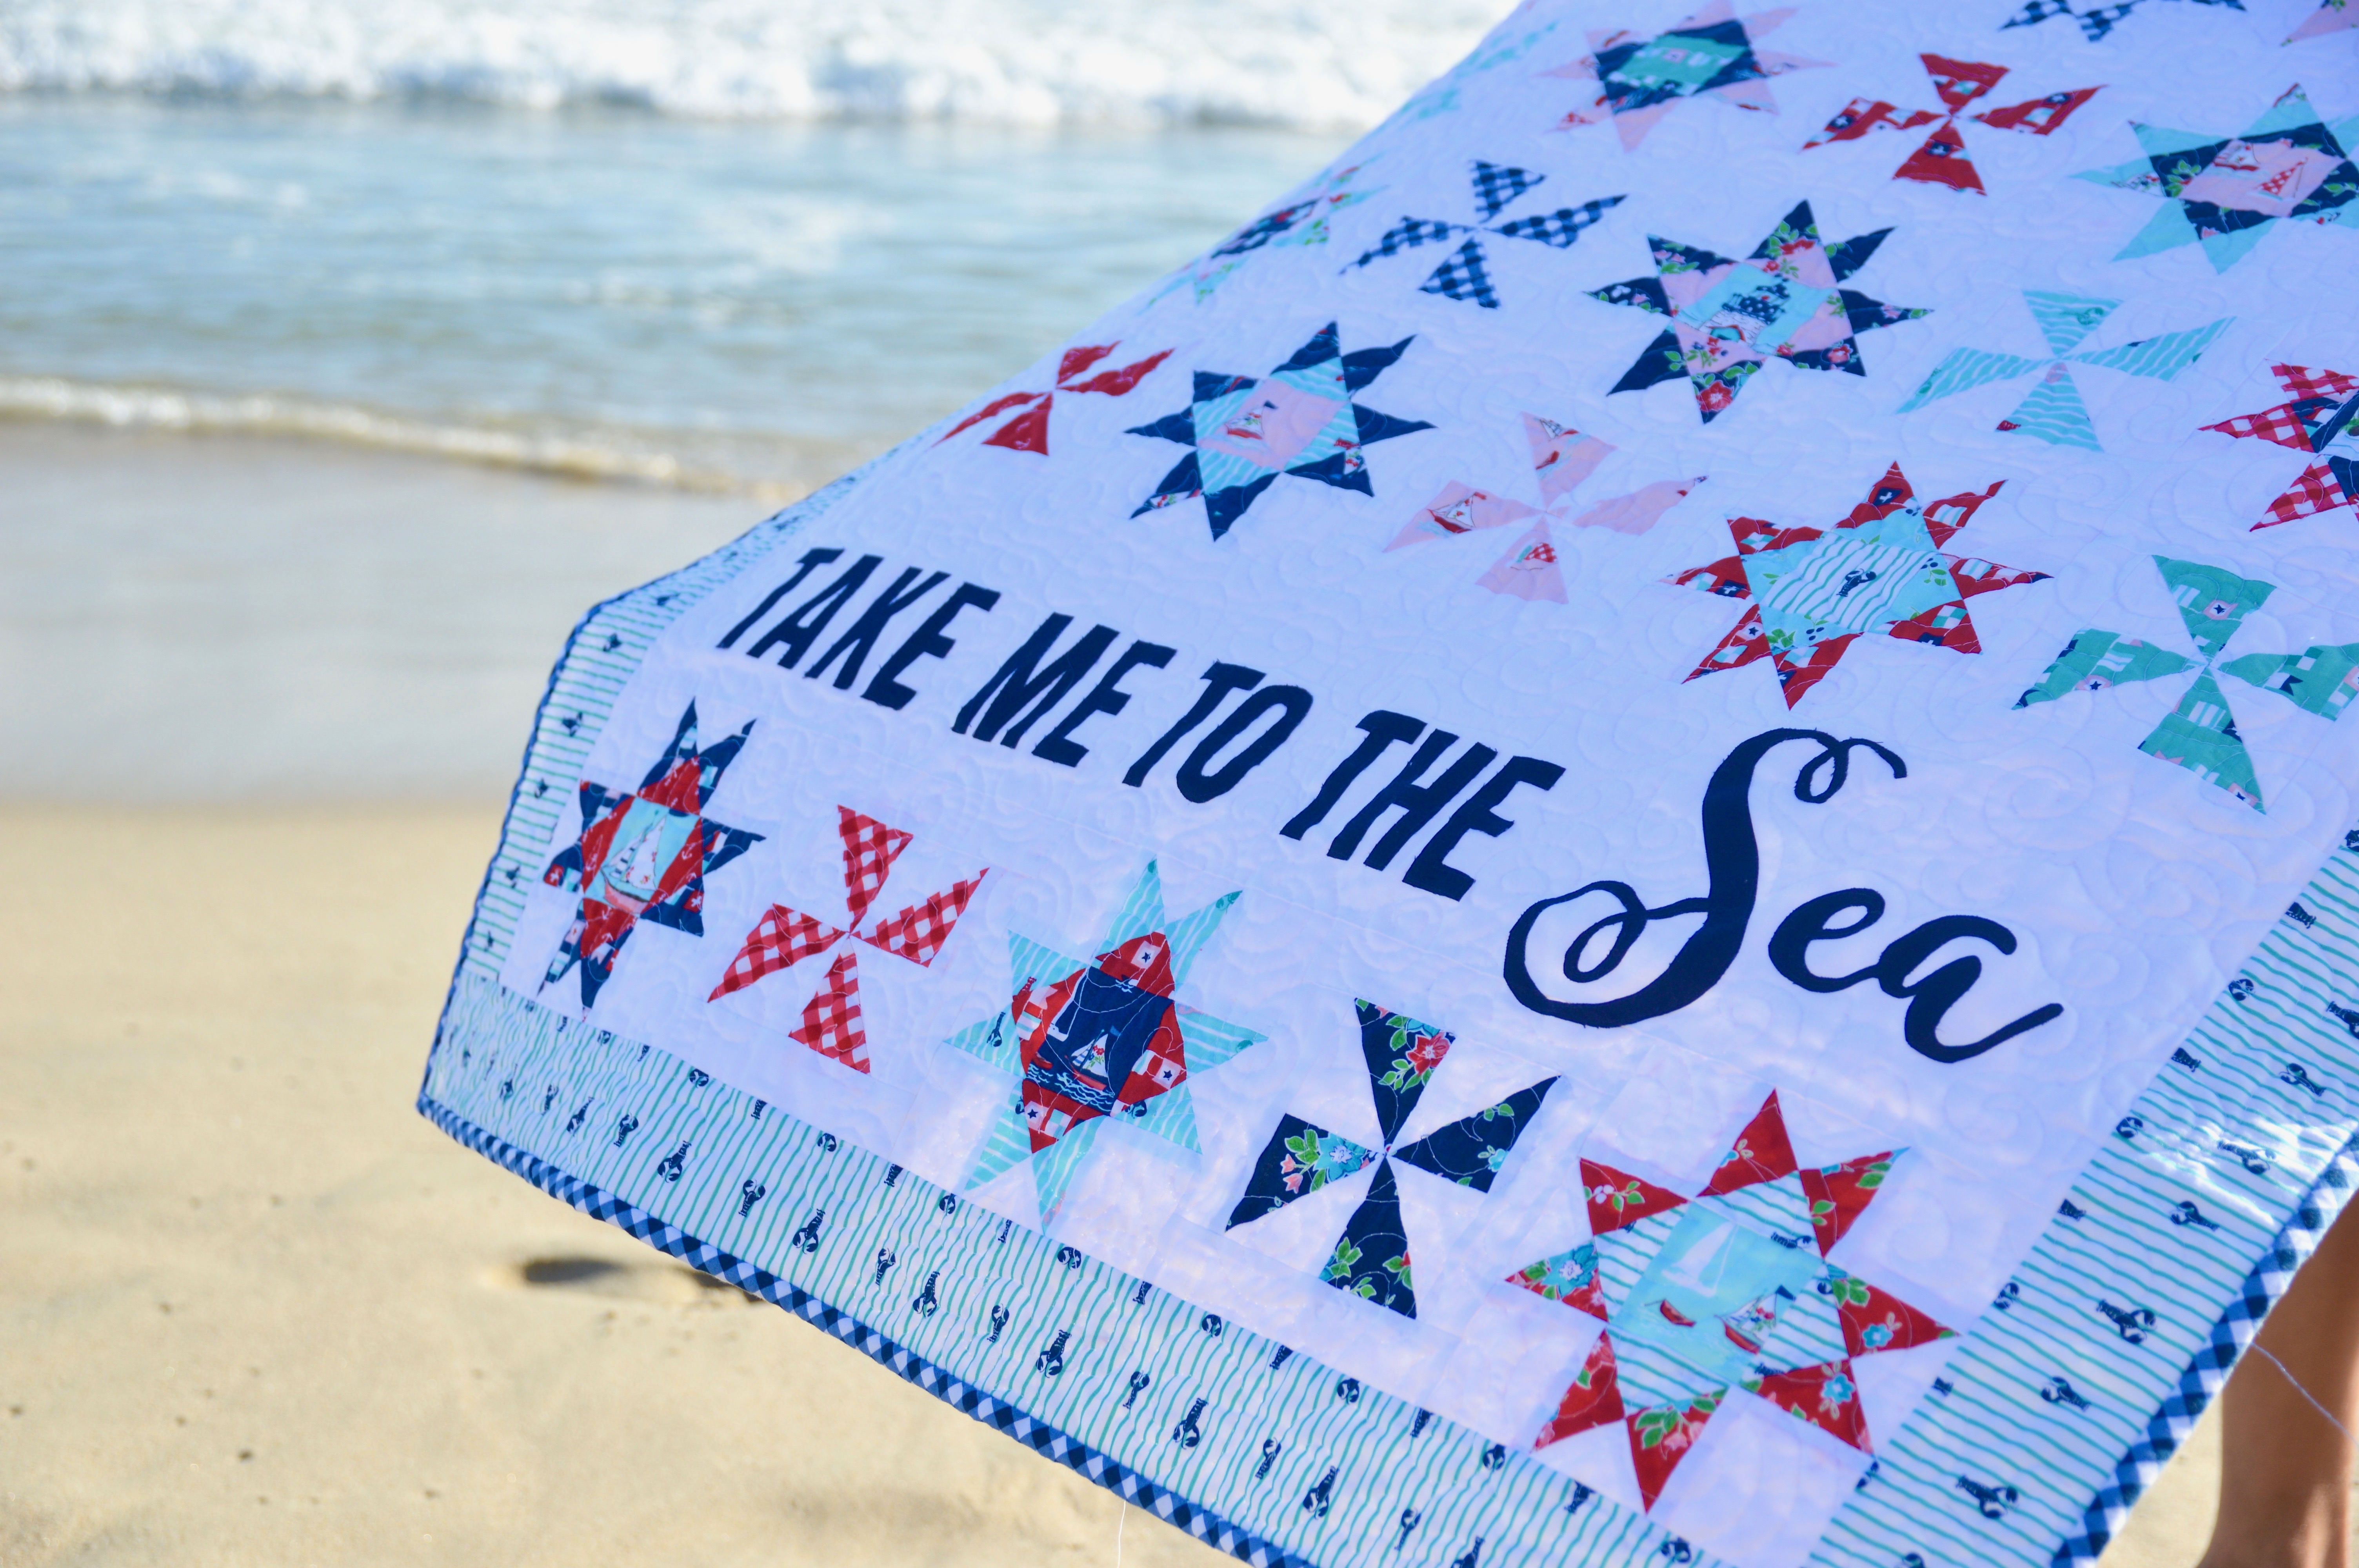
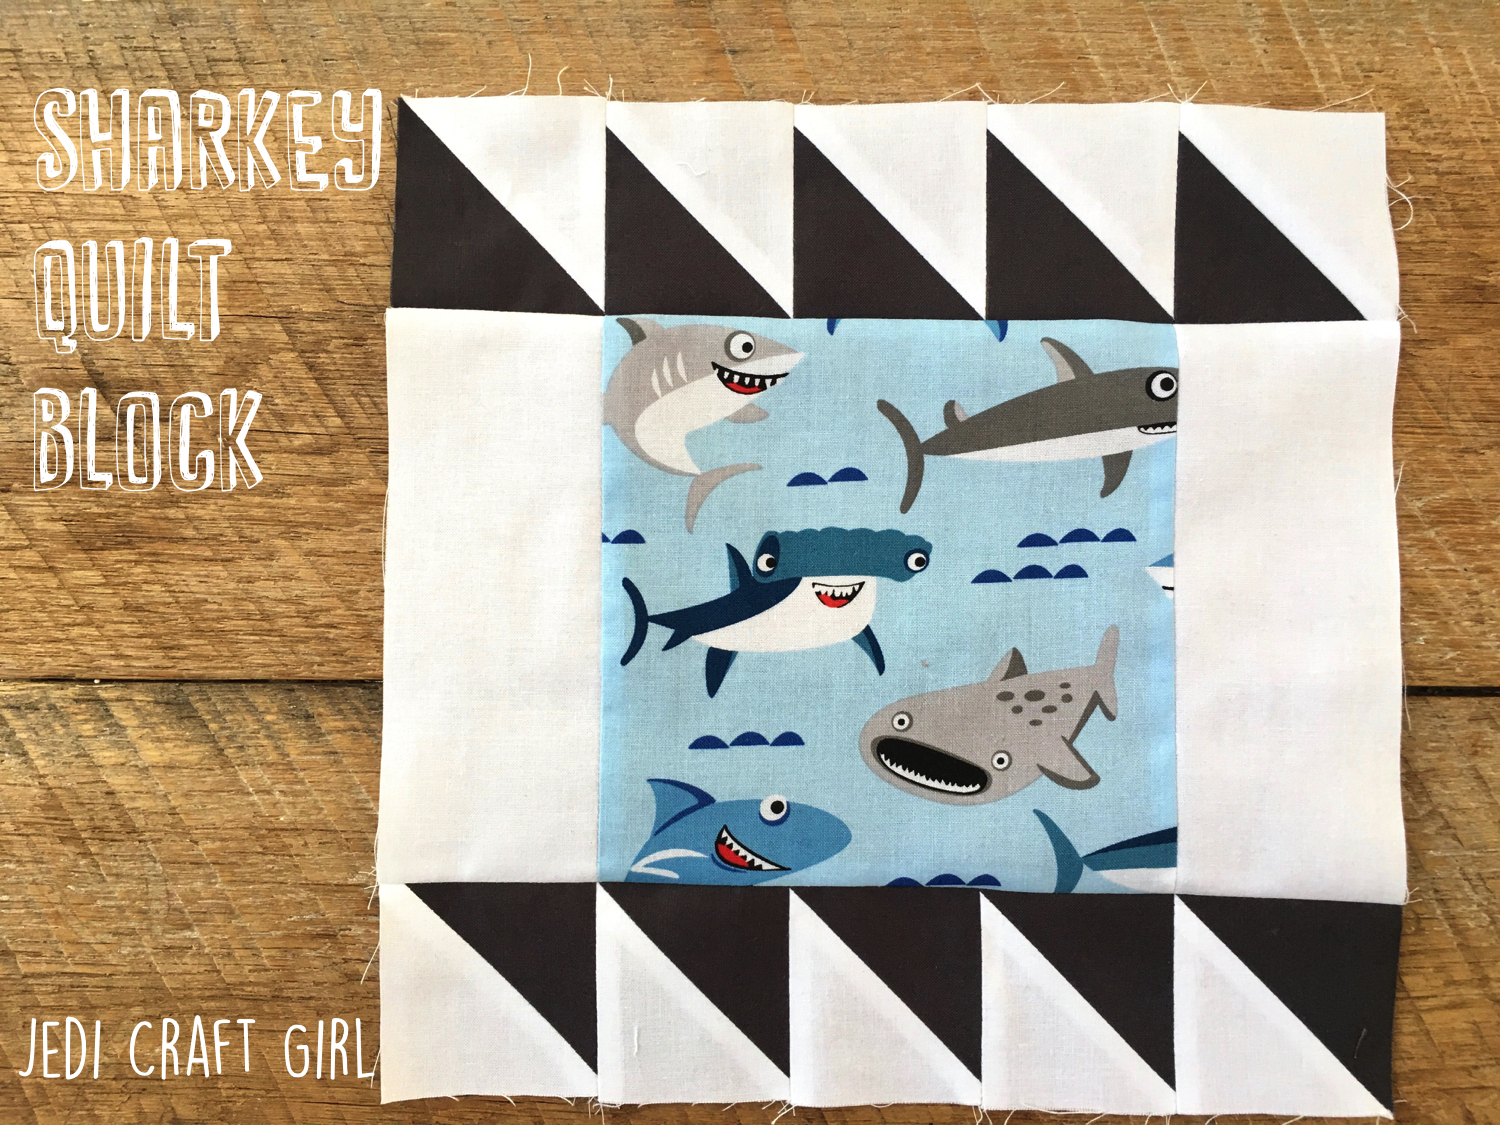
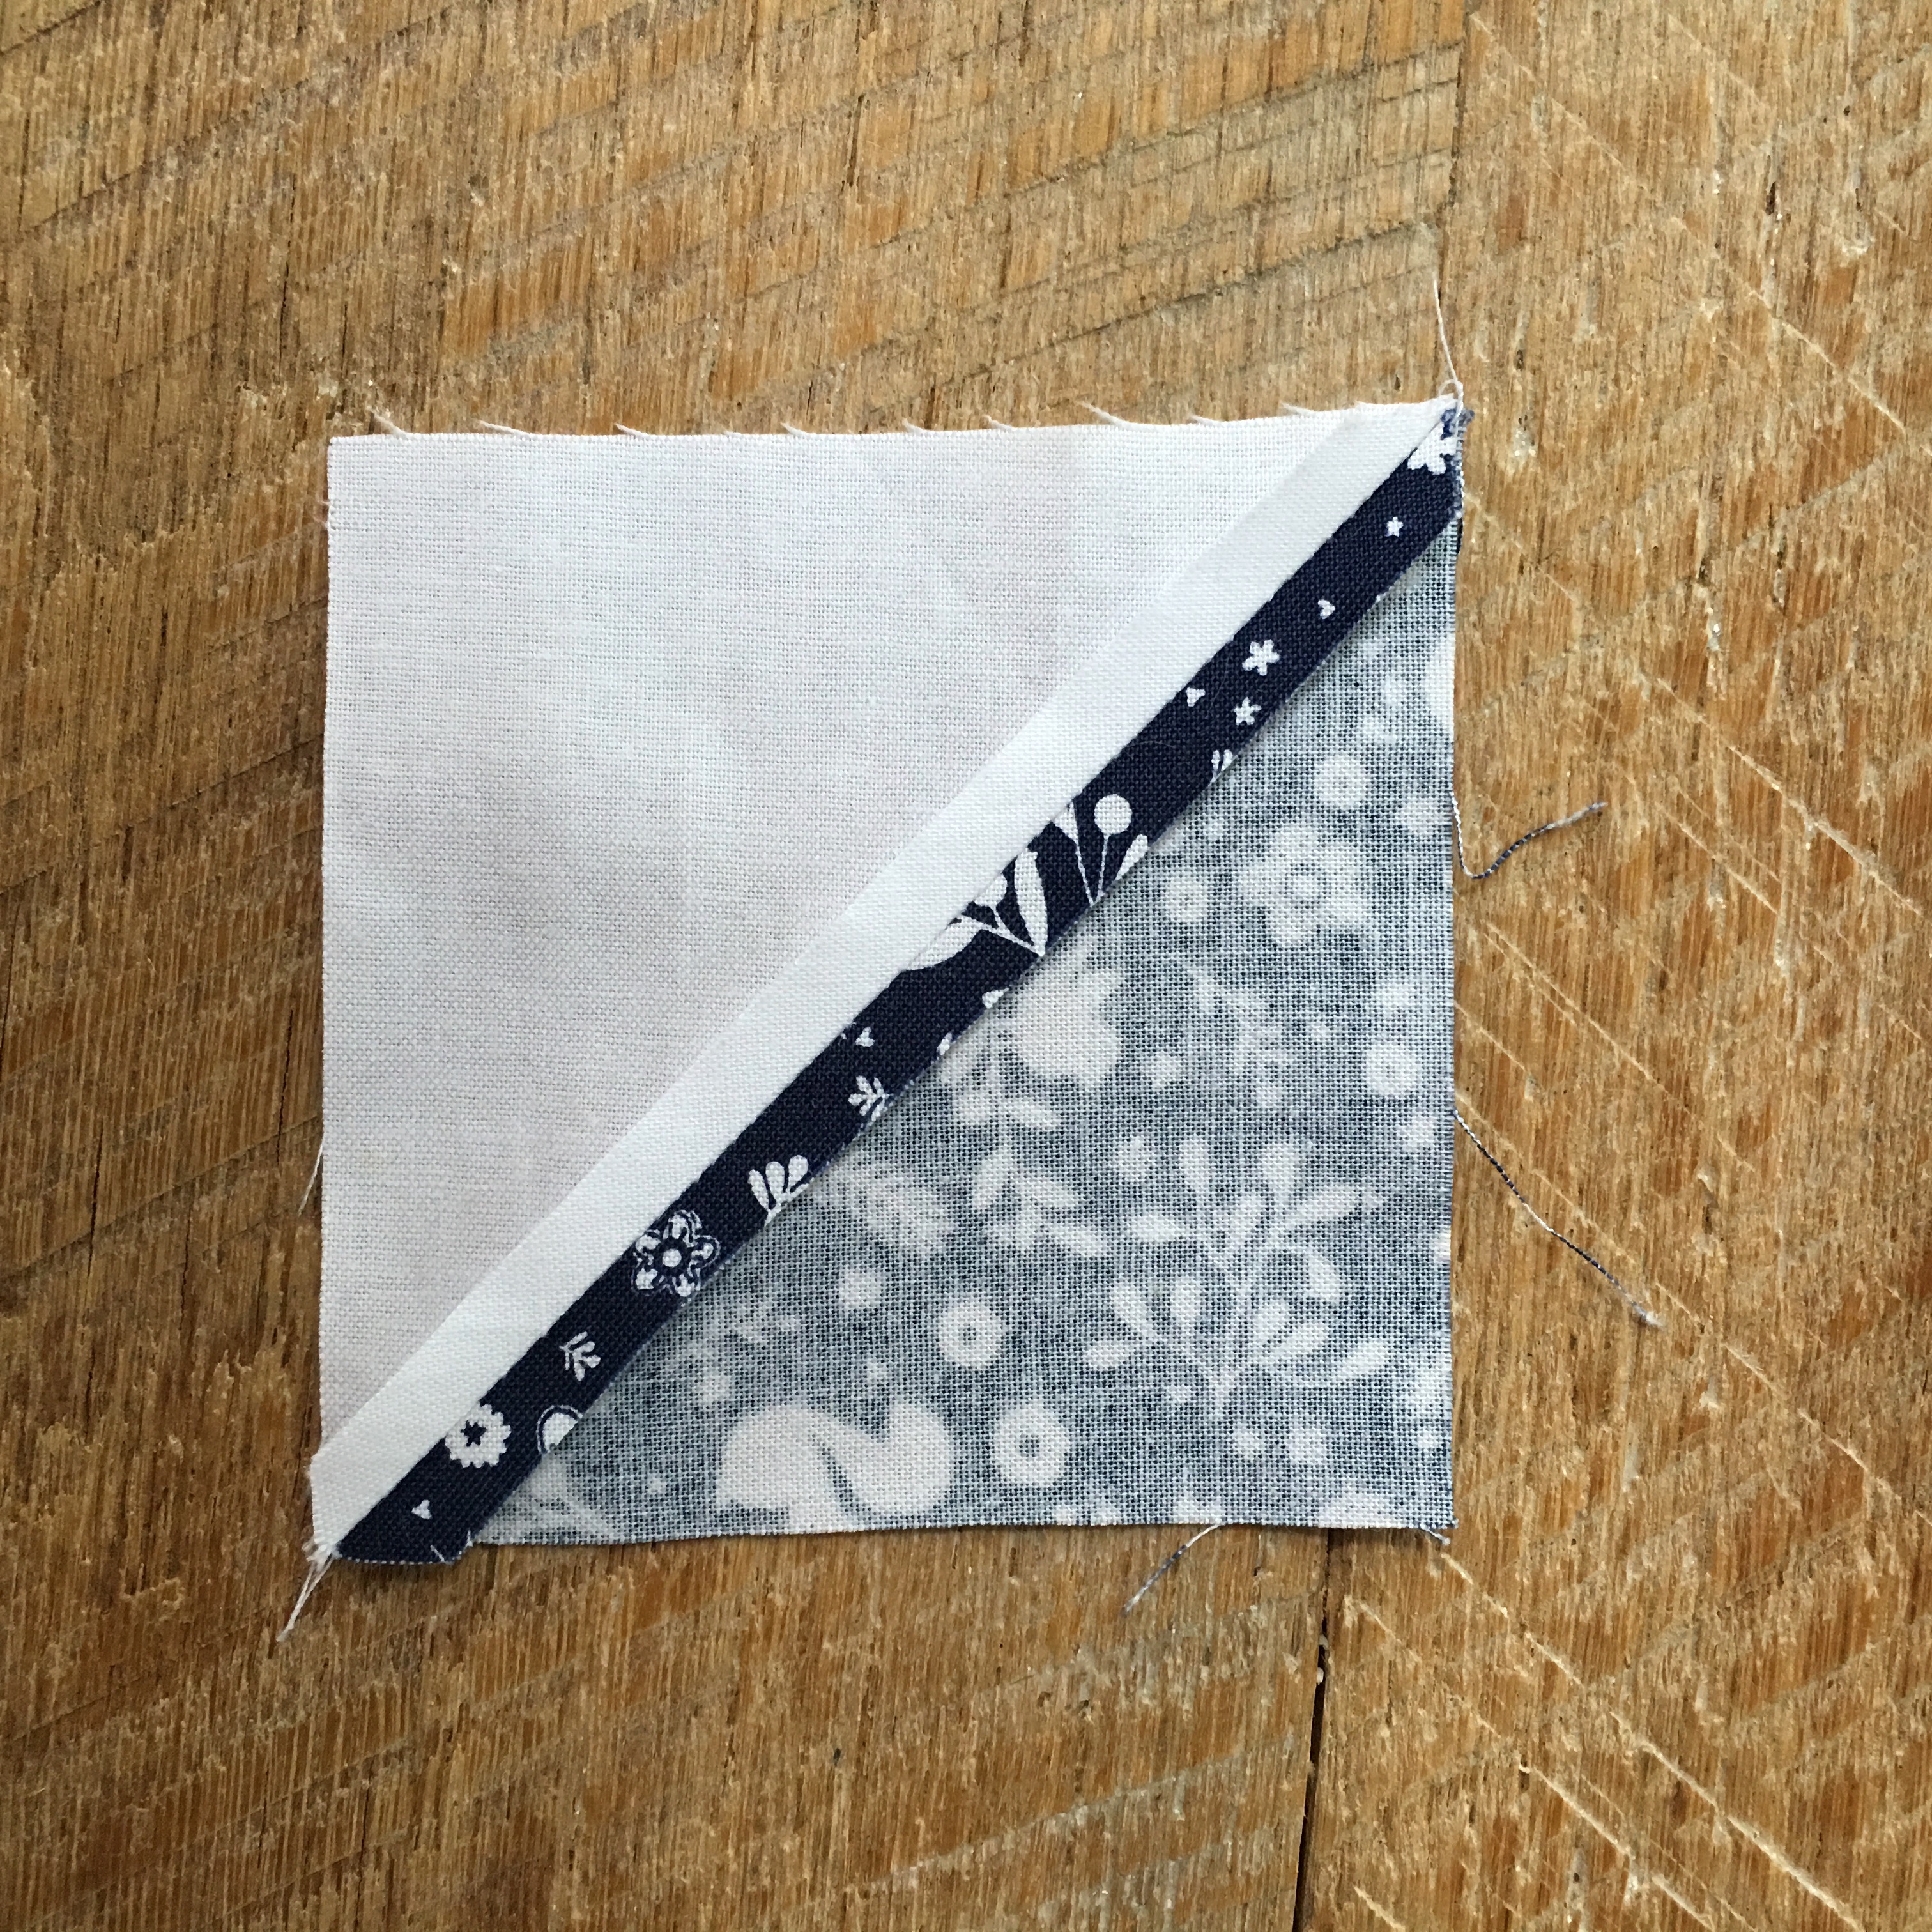
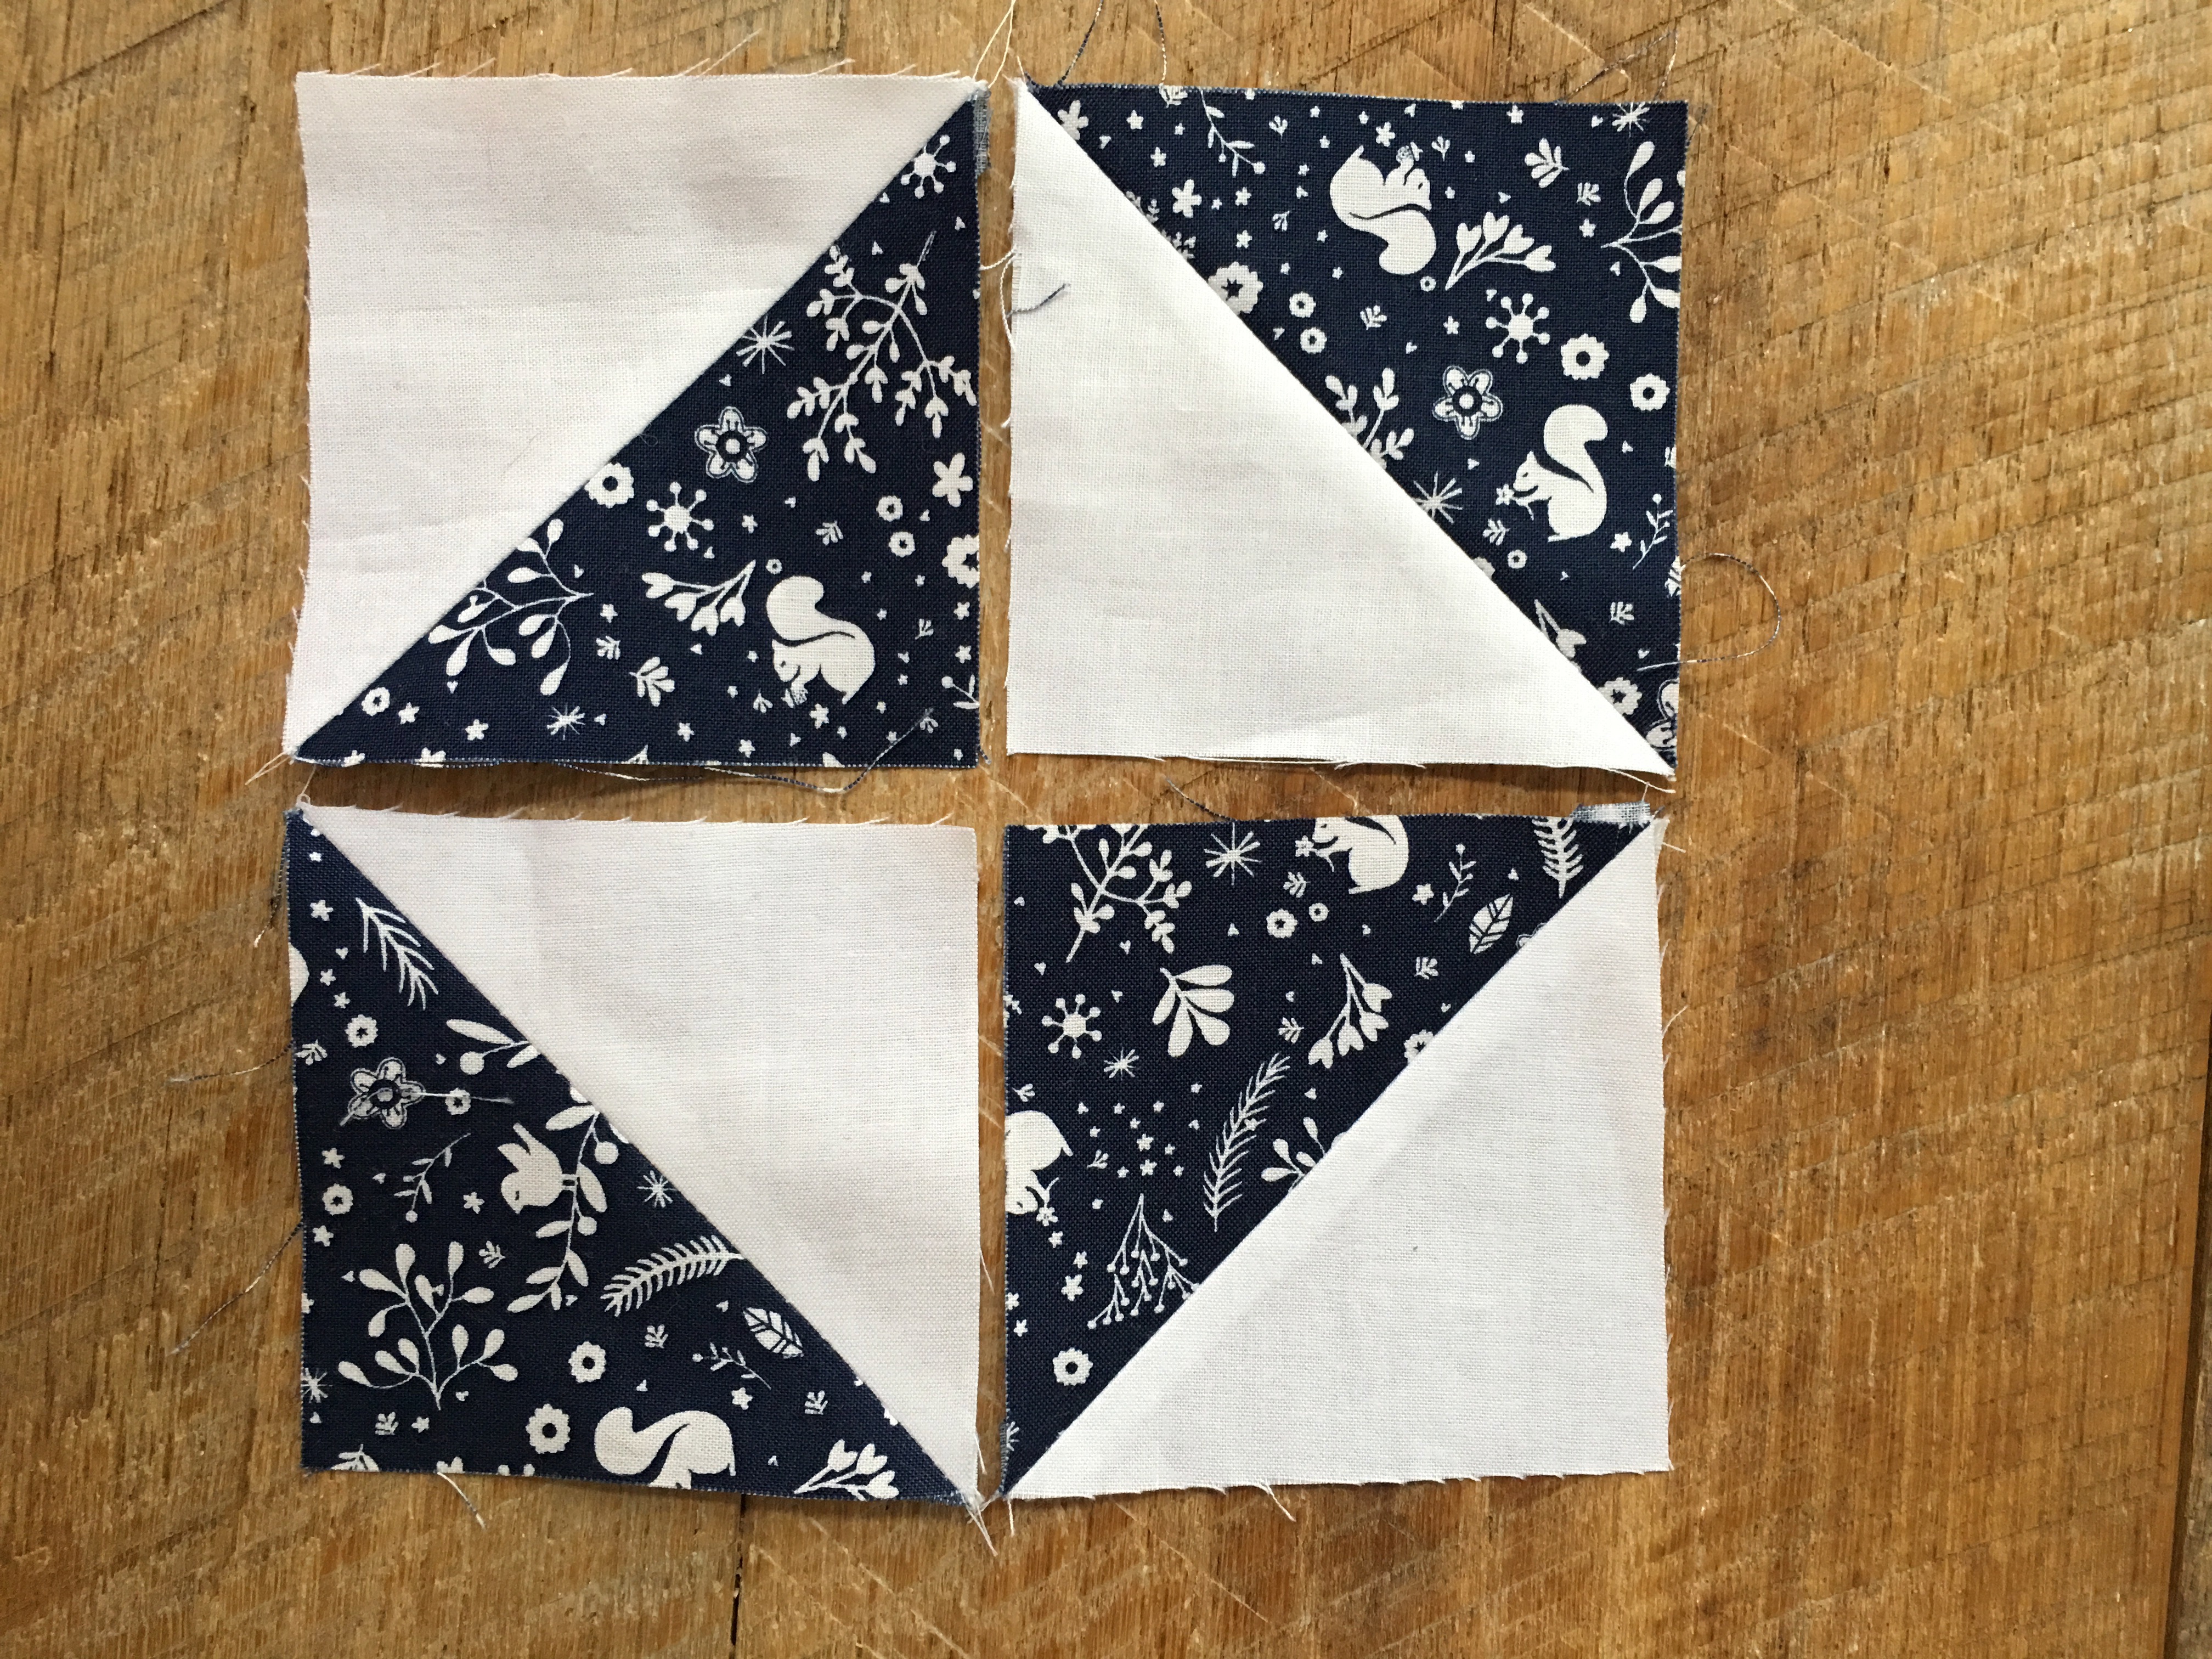
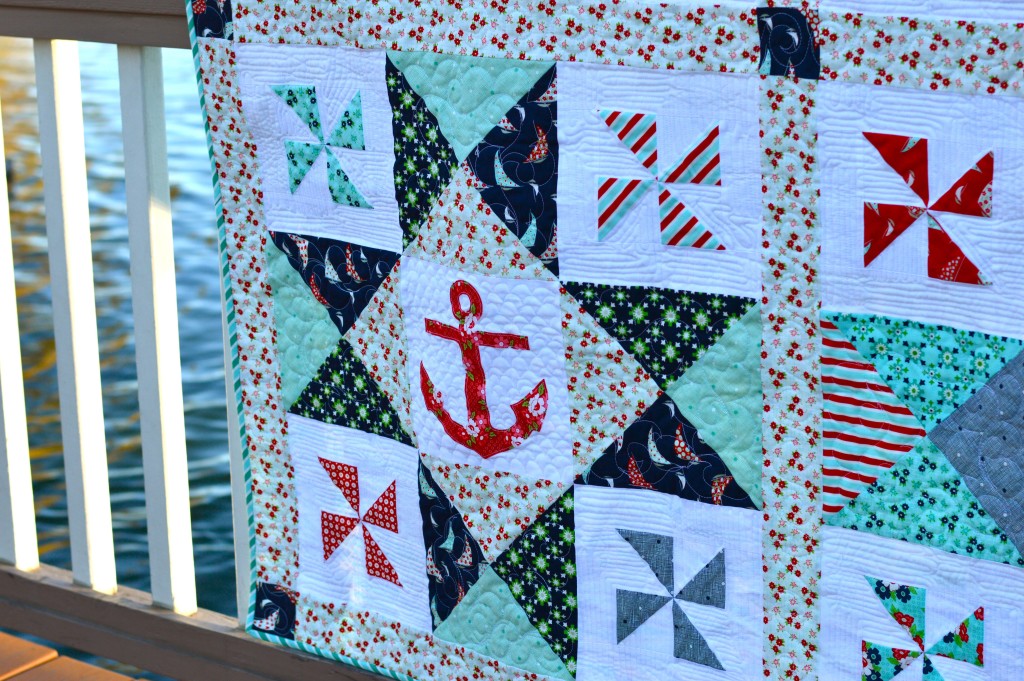
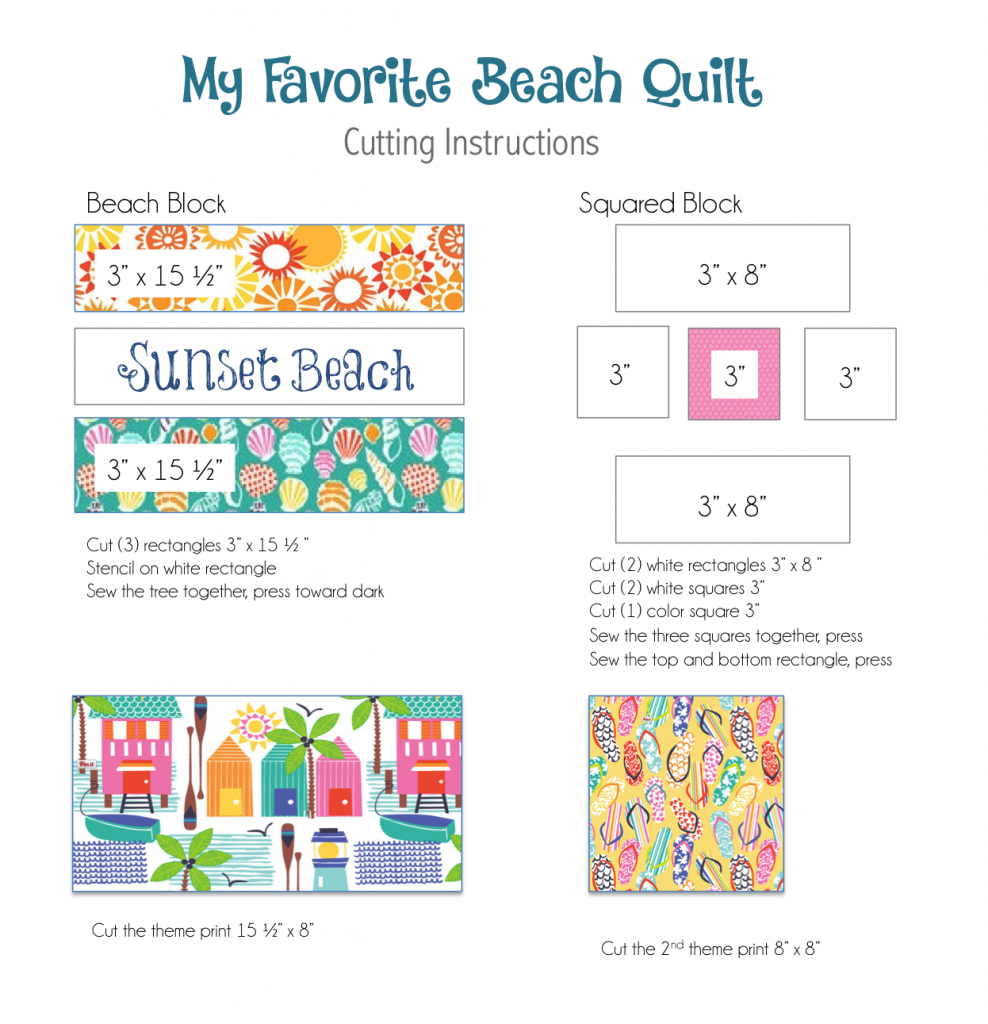
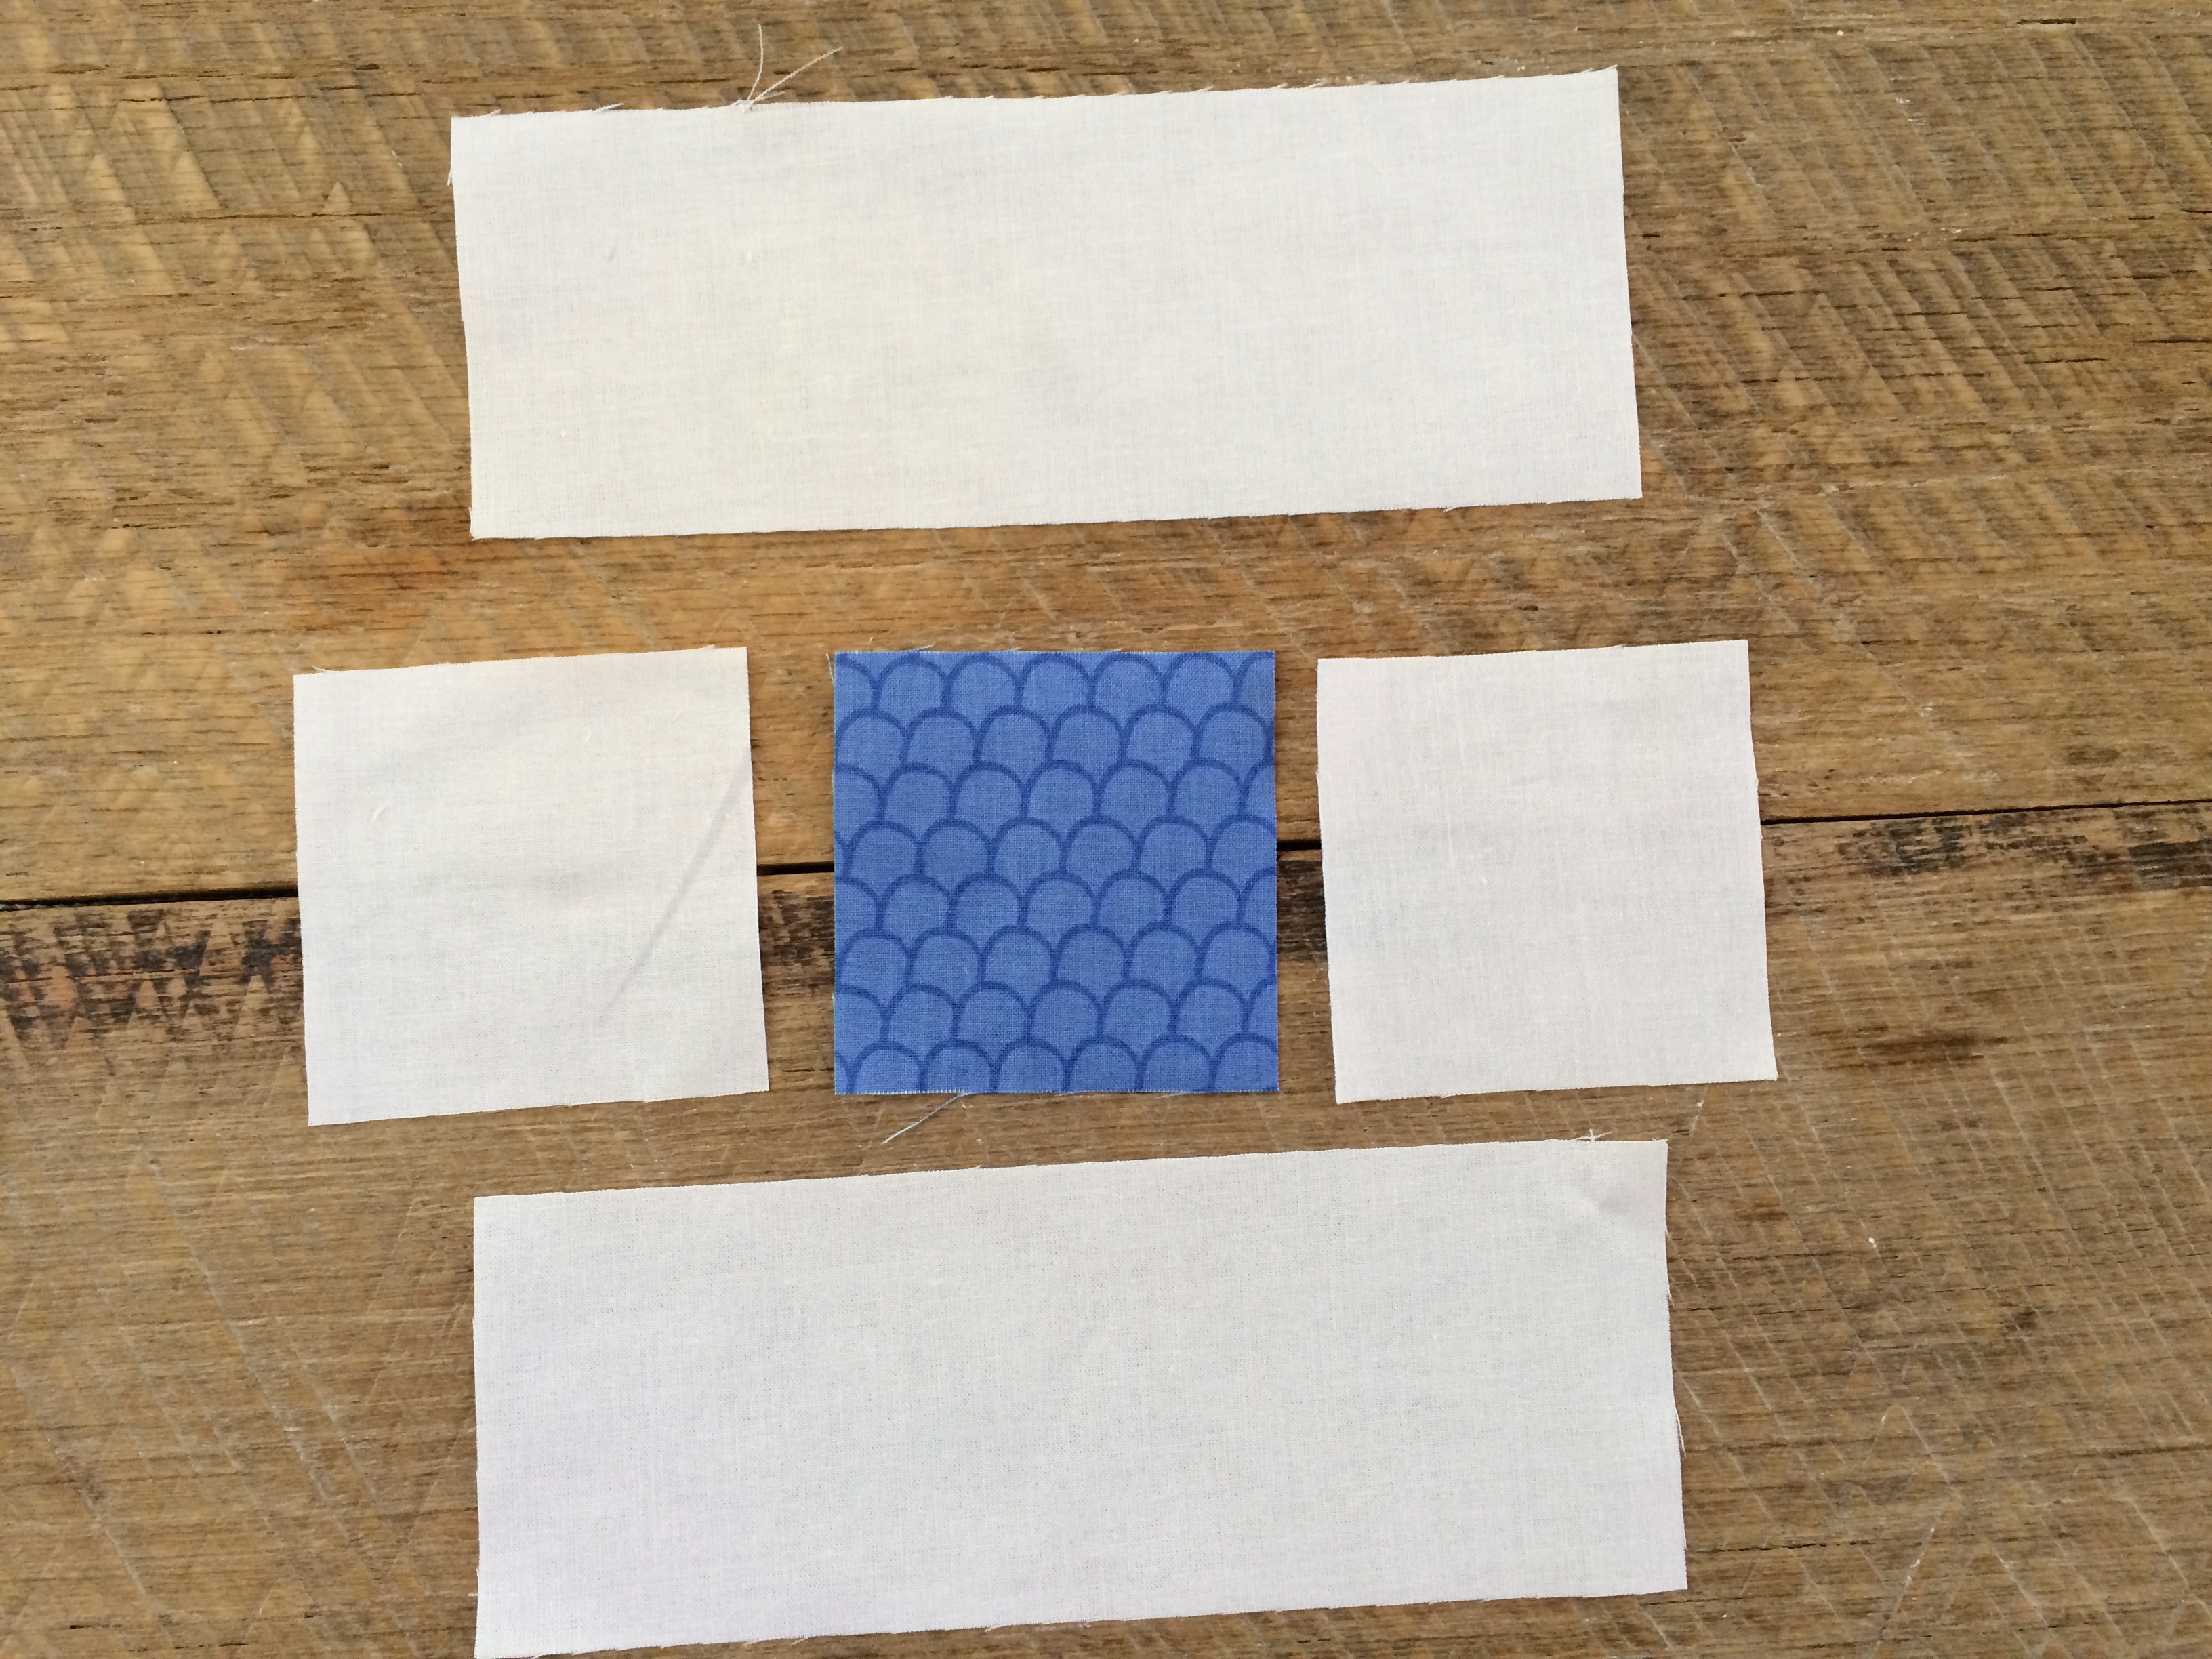
I love that there is no sashing the blocks  because it’s built into the pinwheel block!

take me to the sea quilt diagram

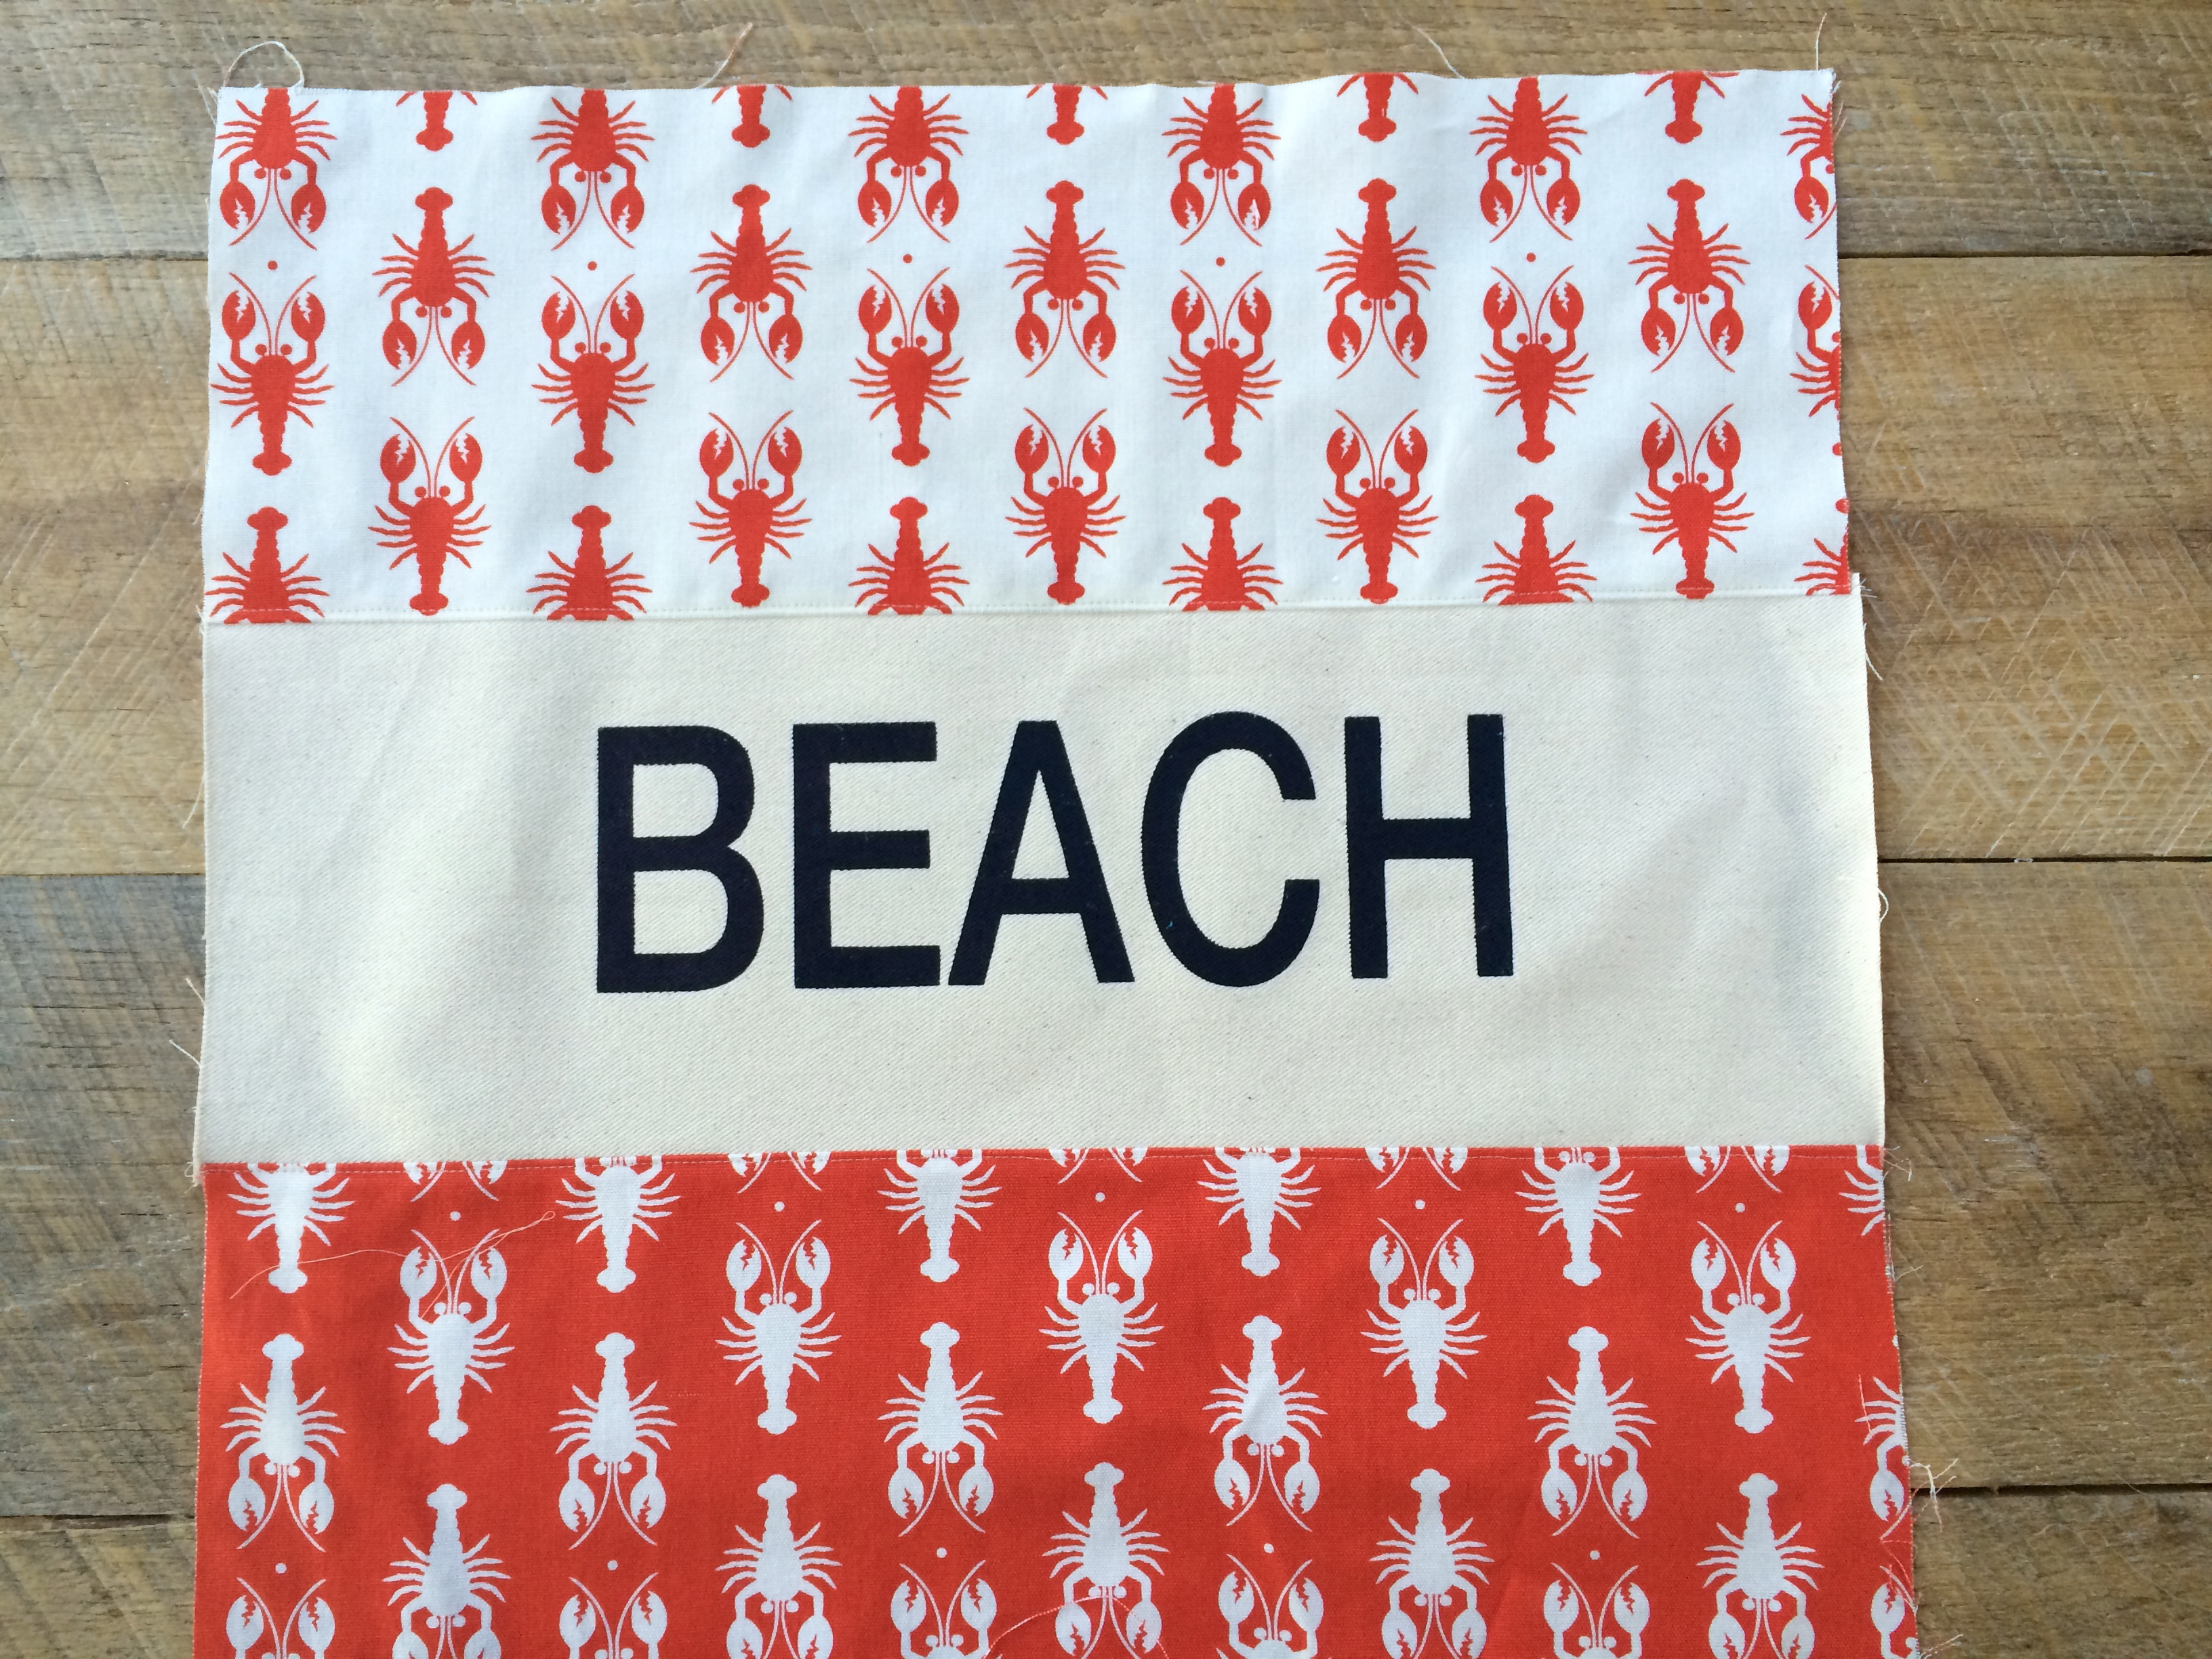
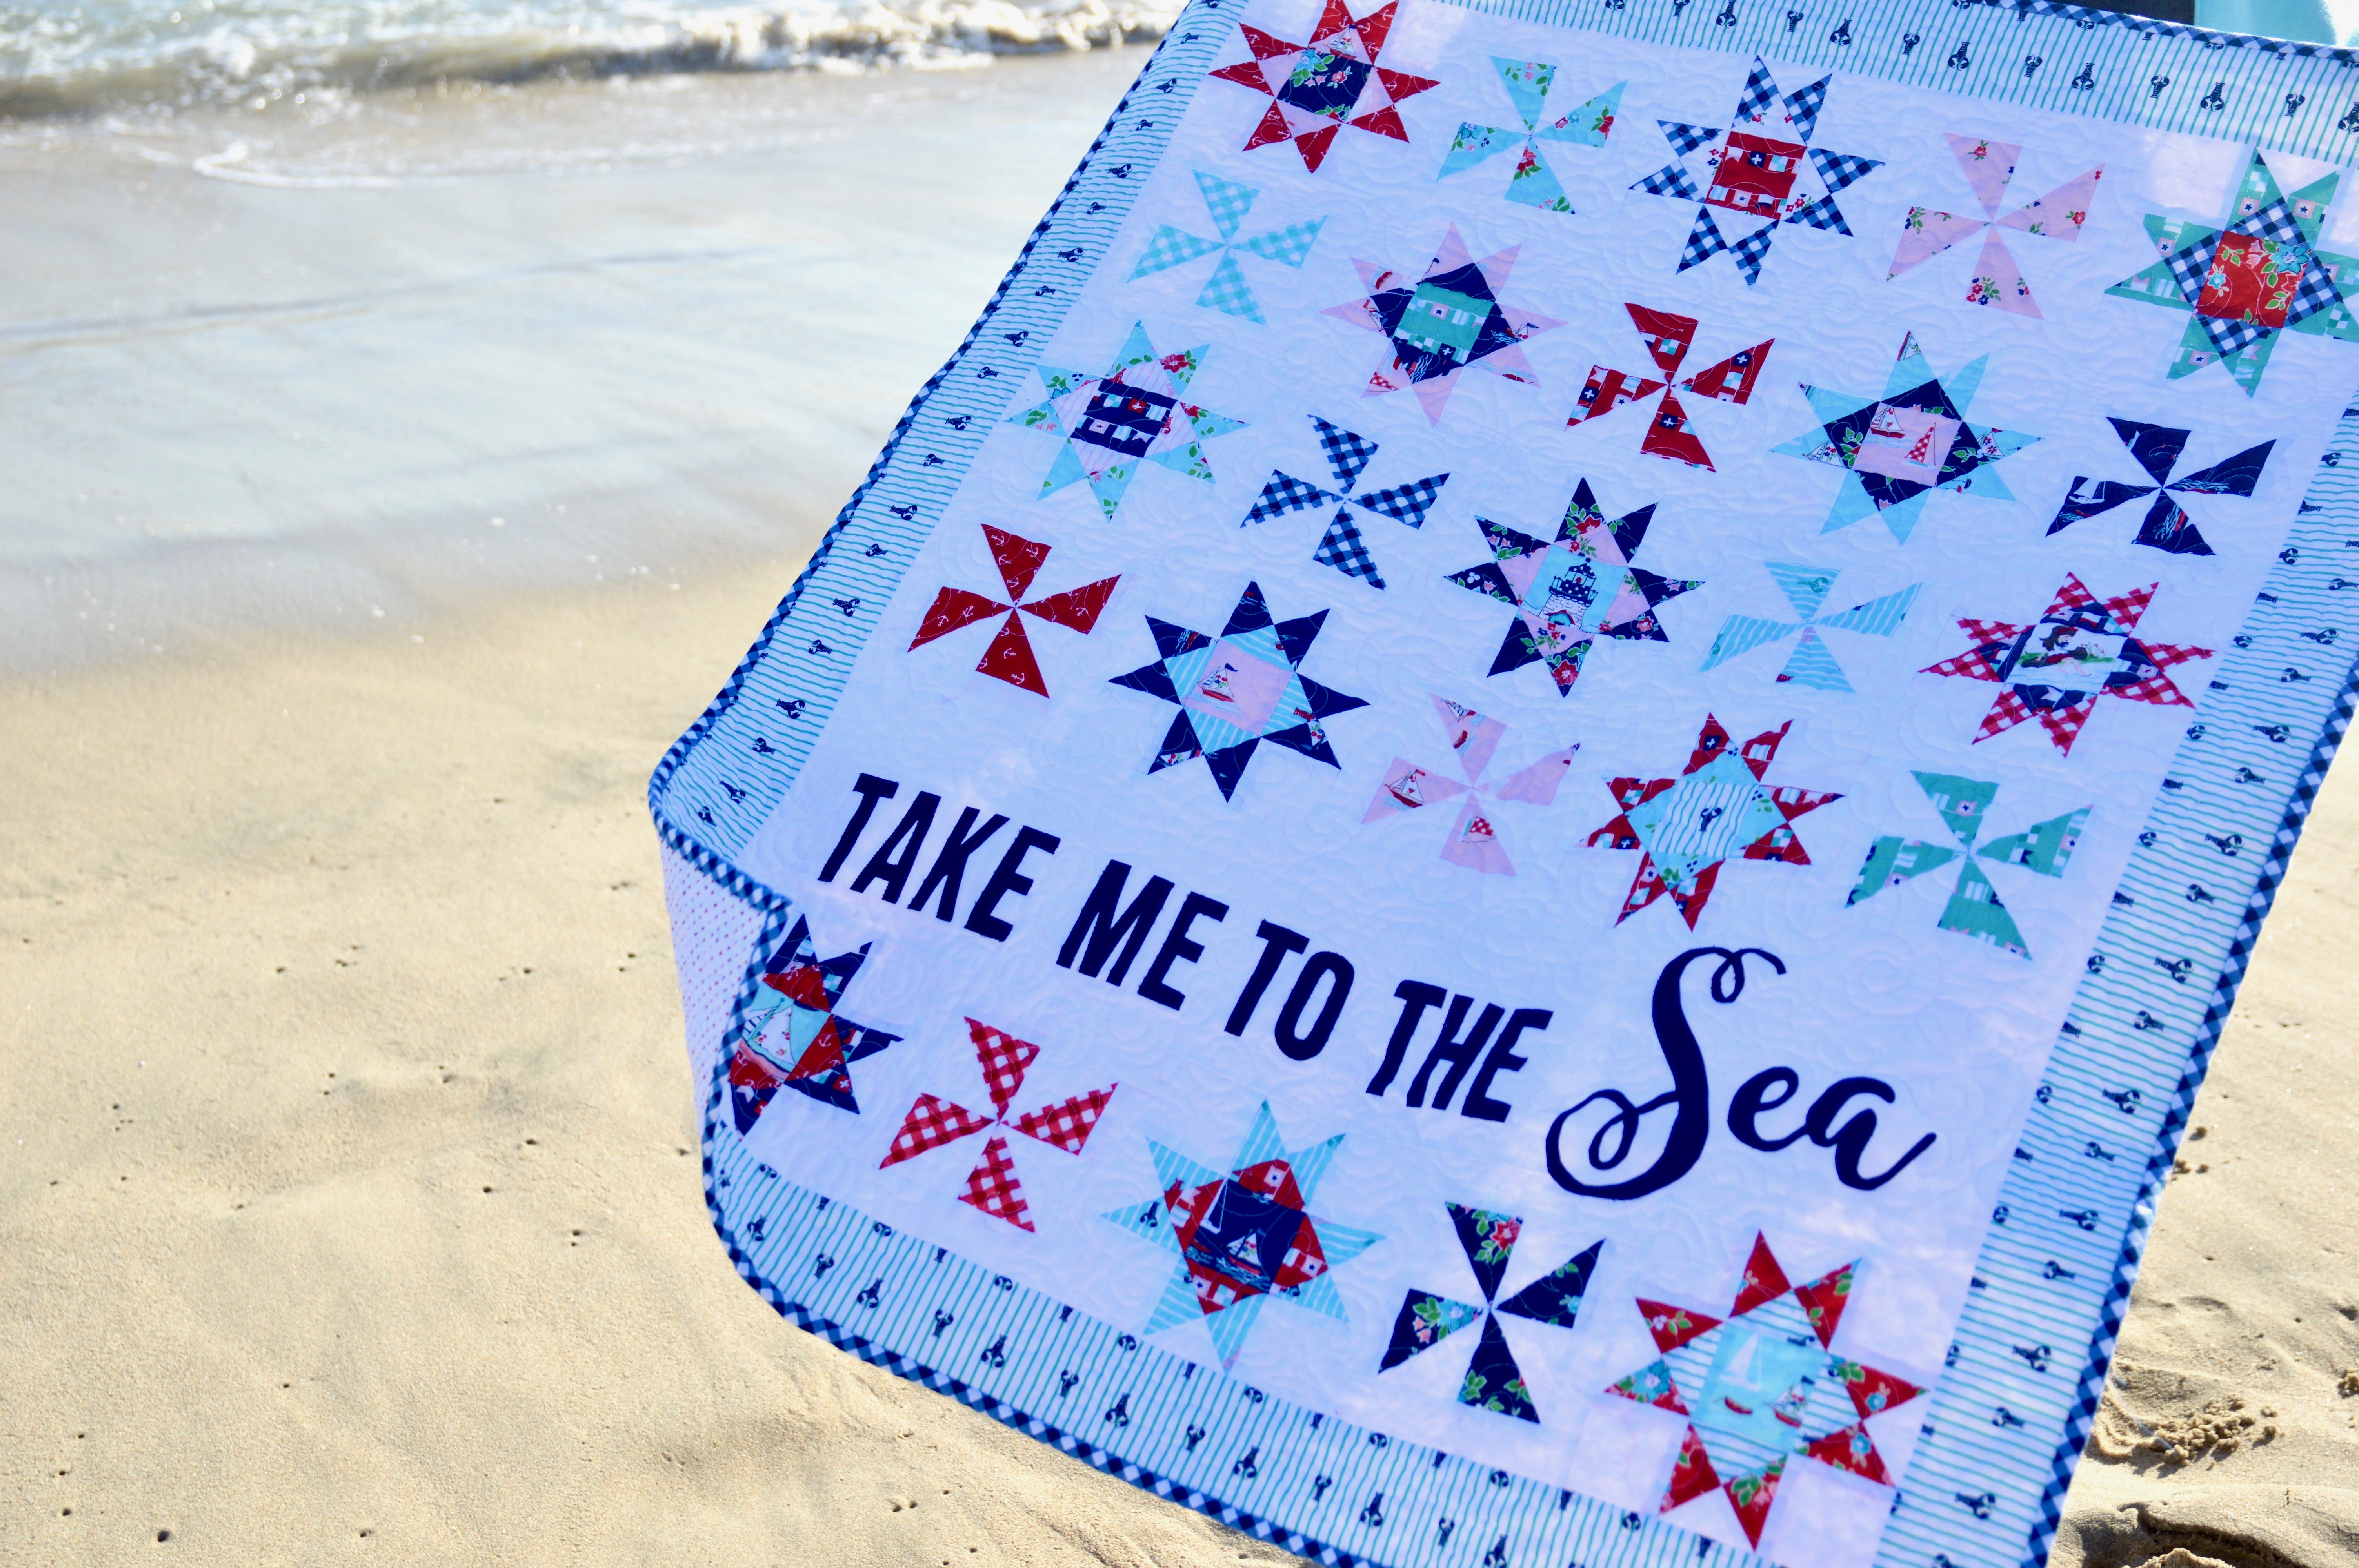
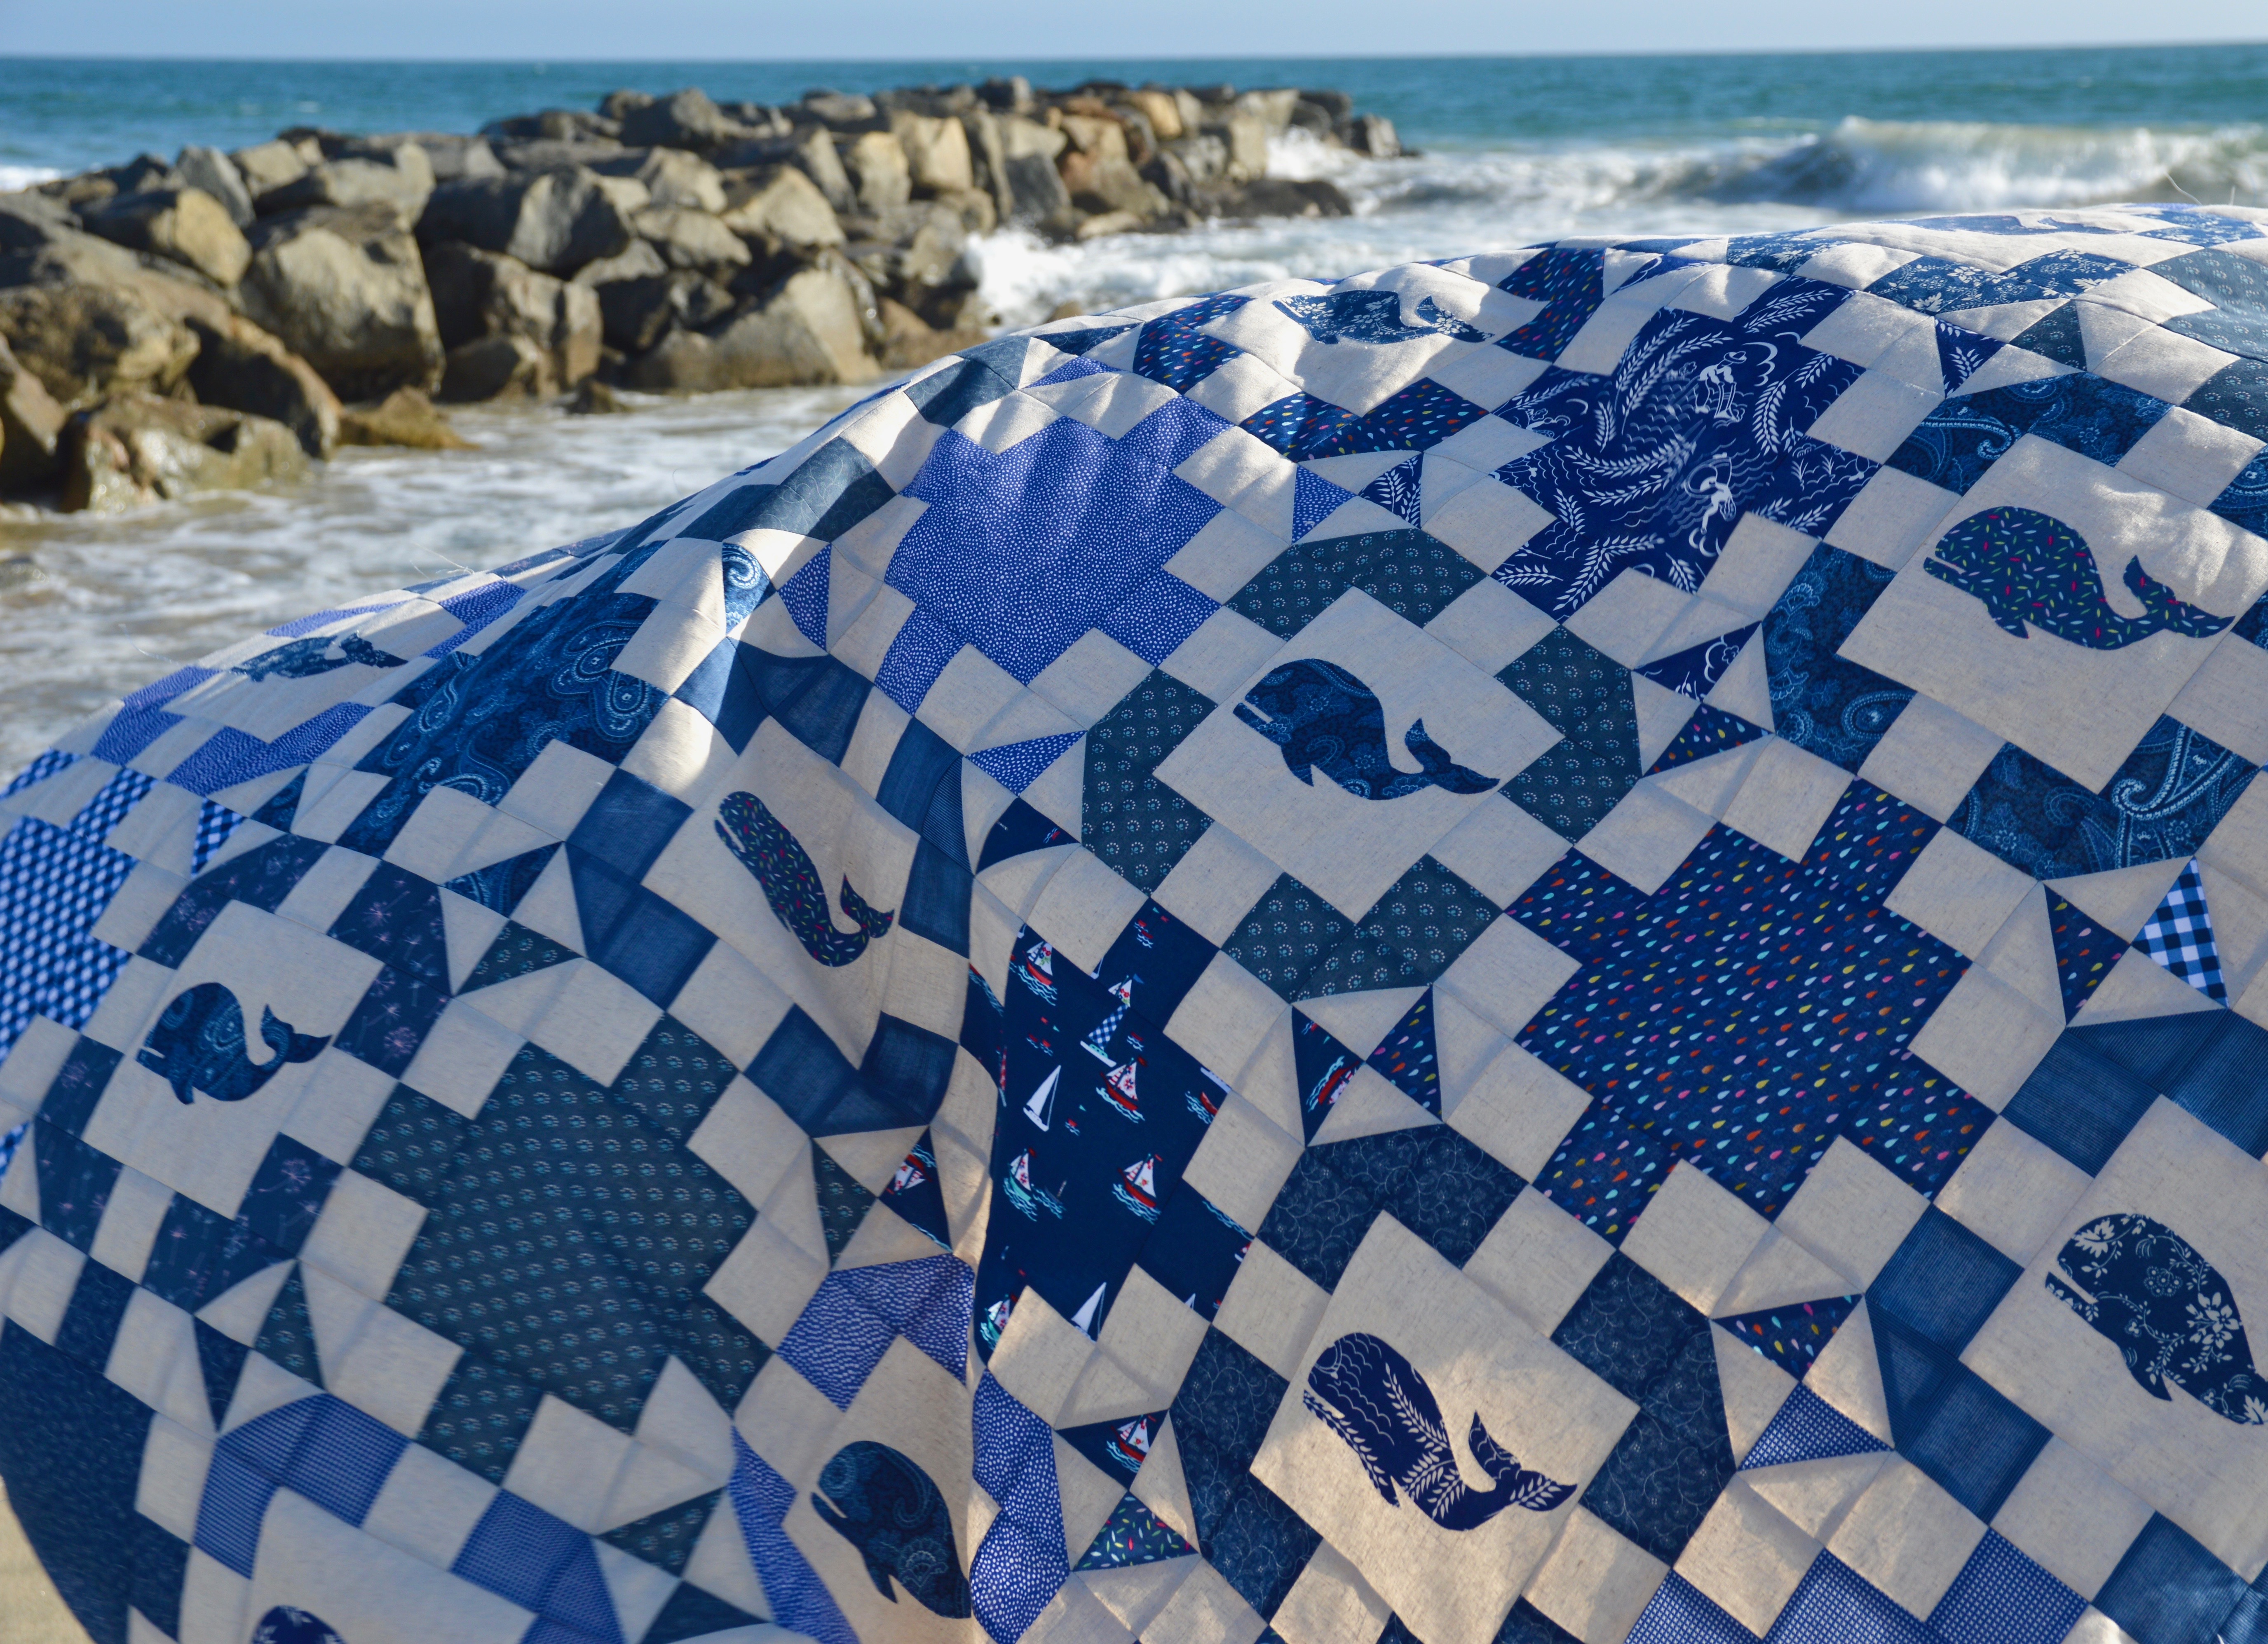
It was hard to choose a border print because they are all so amazing!  I went with the lobsters!

seaside quilt pattern 2

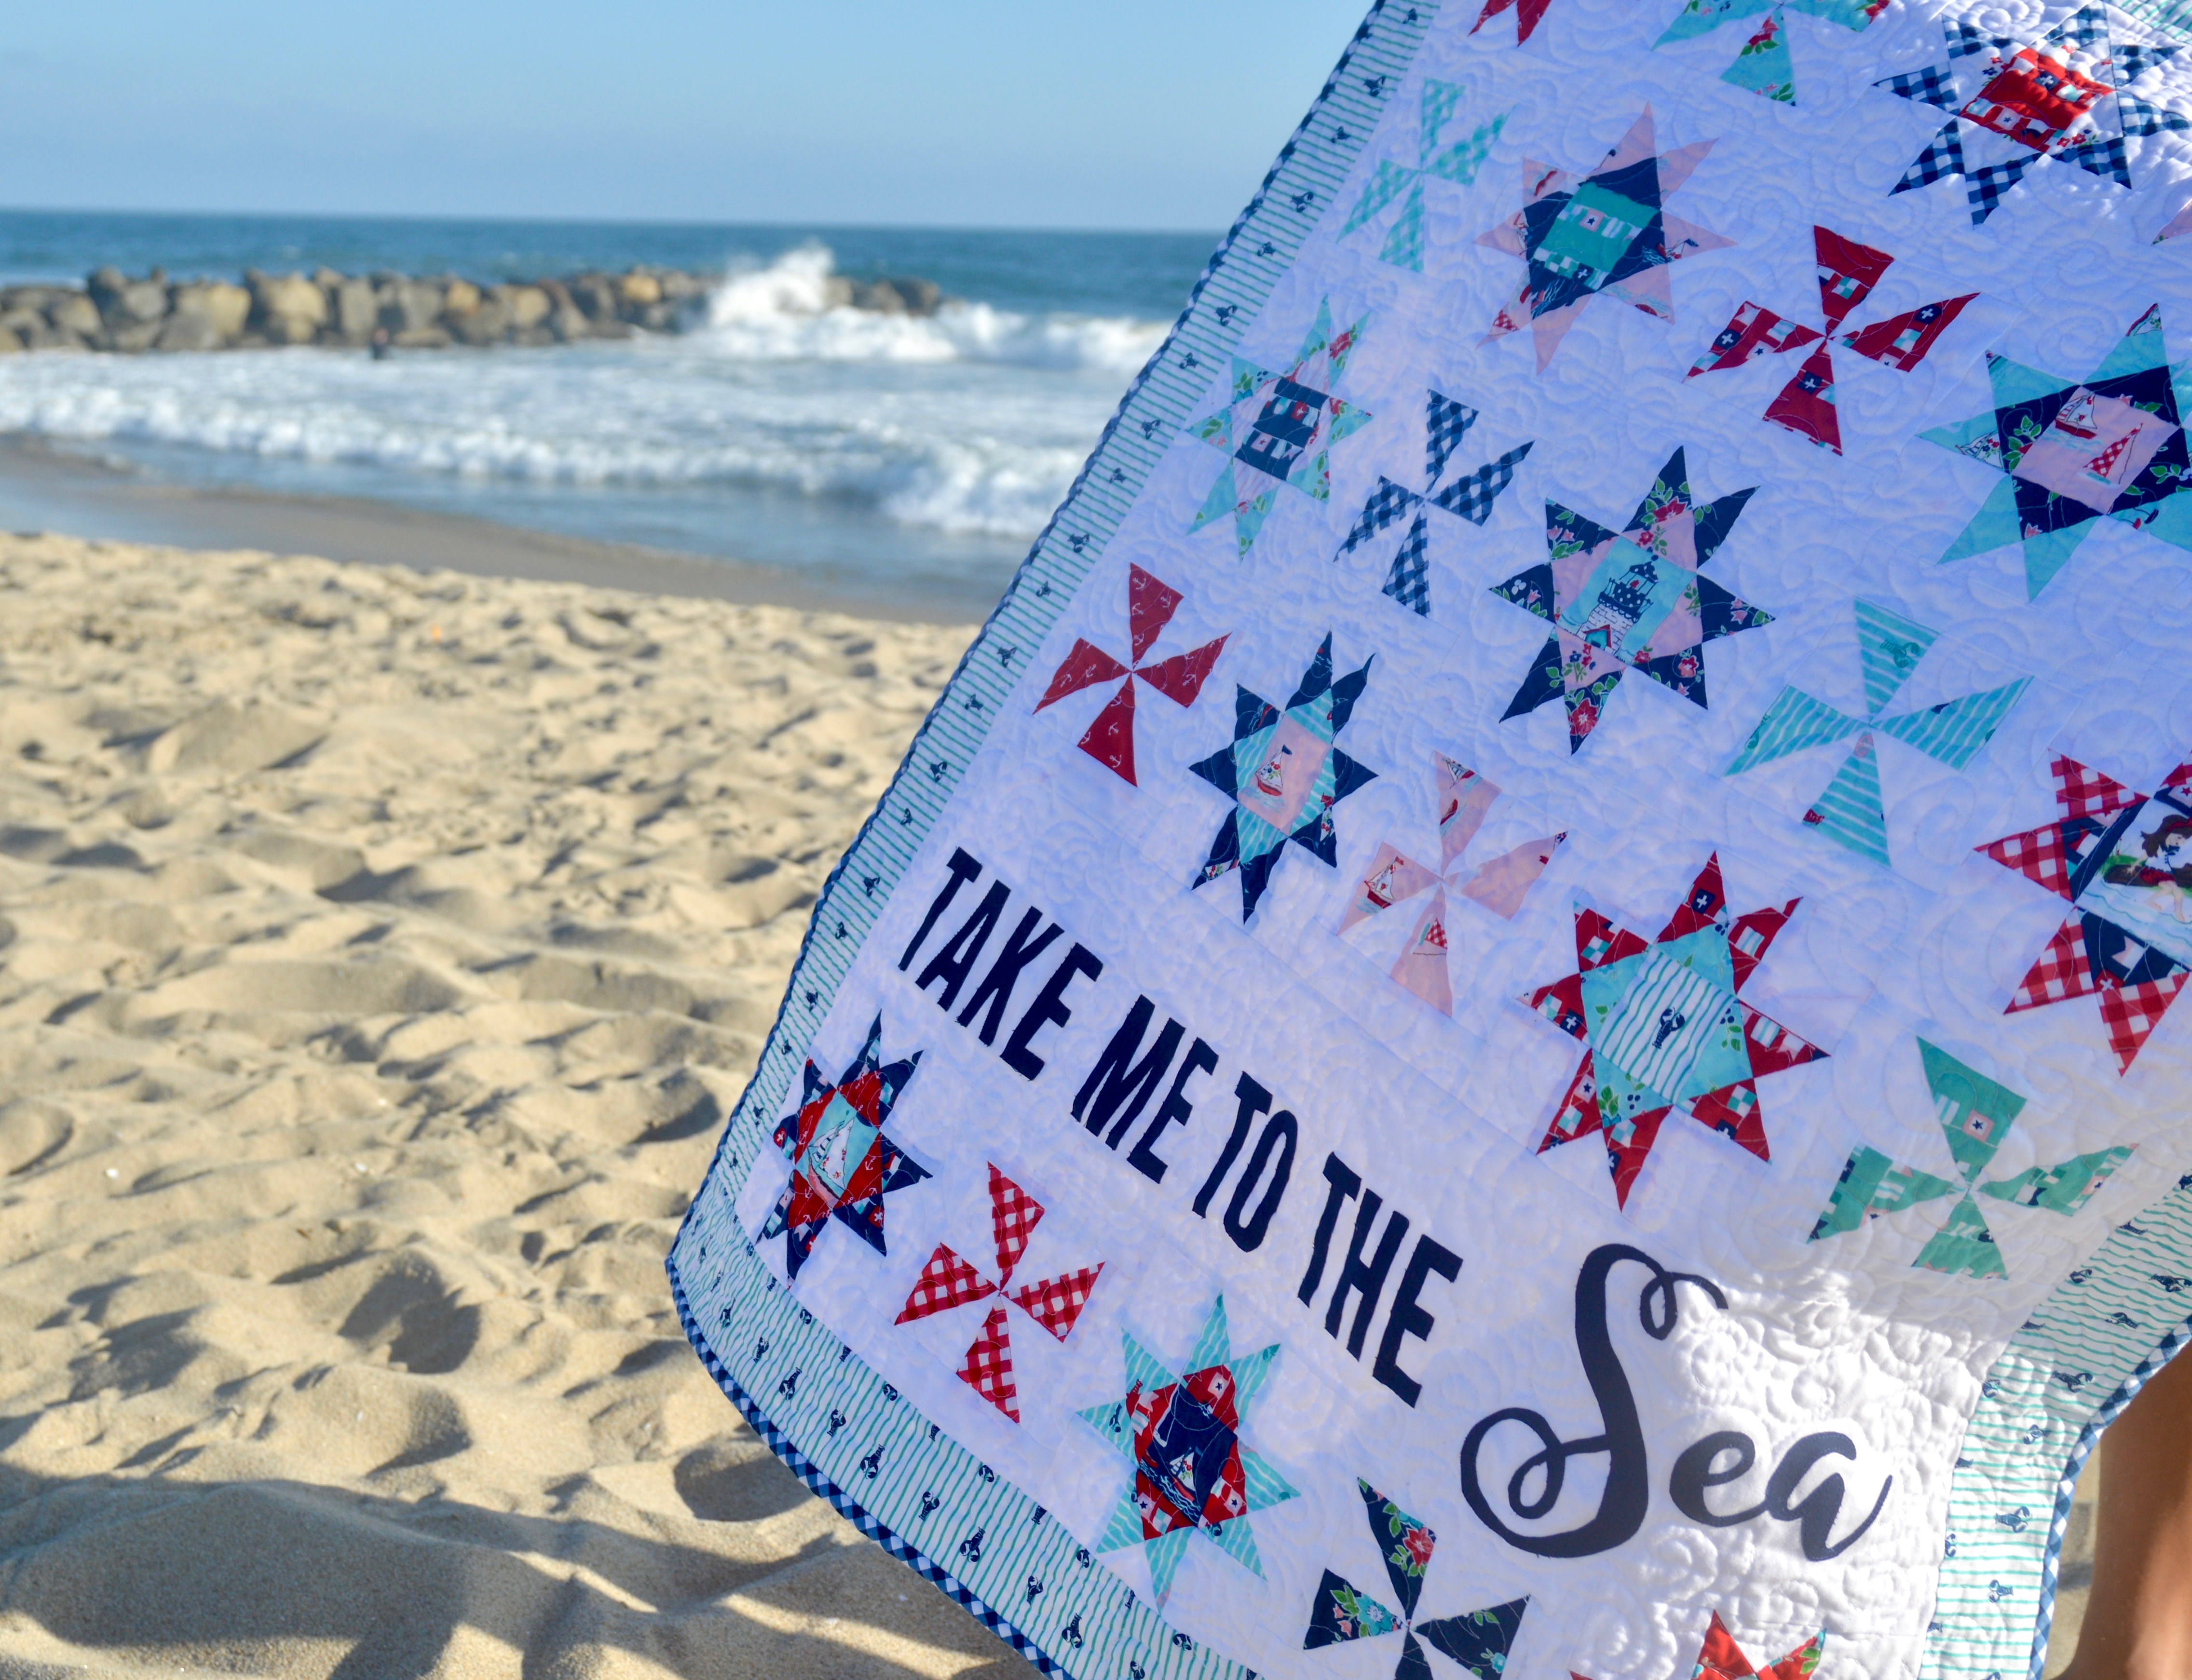
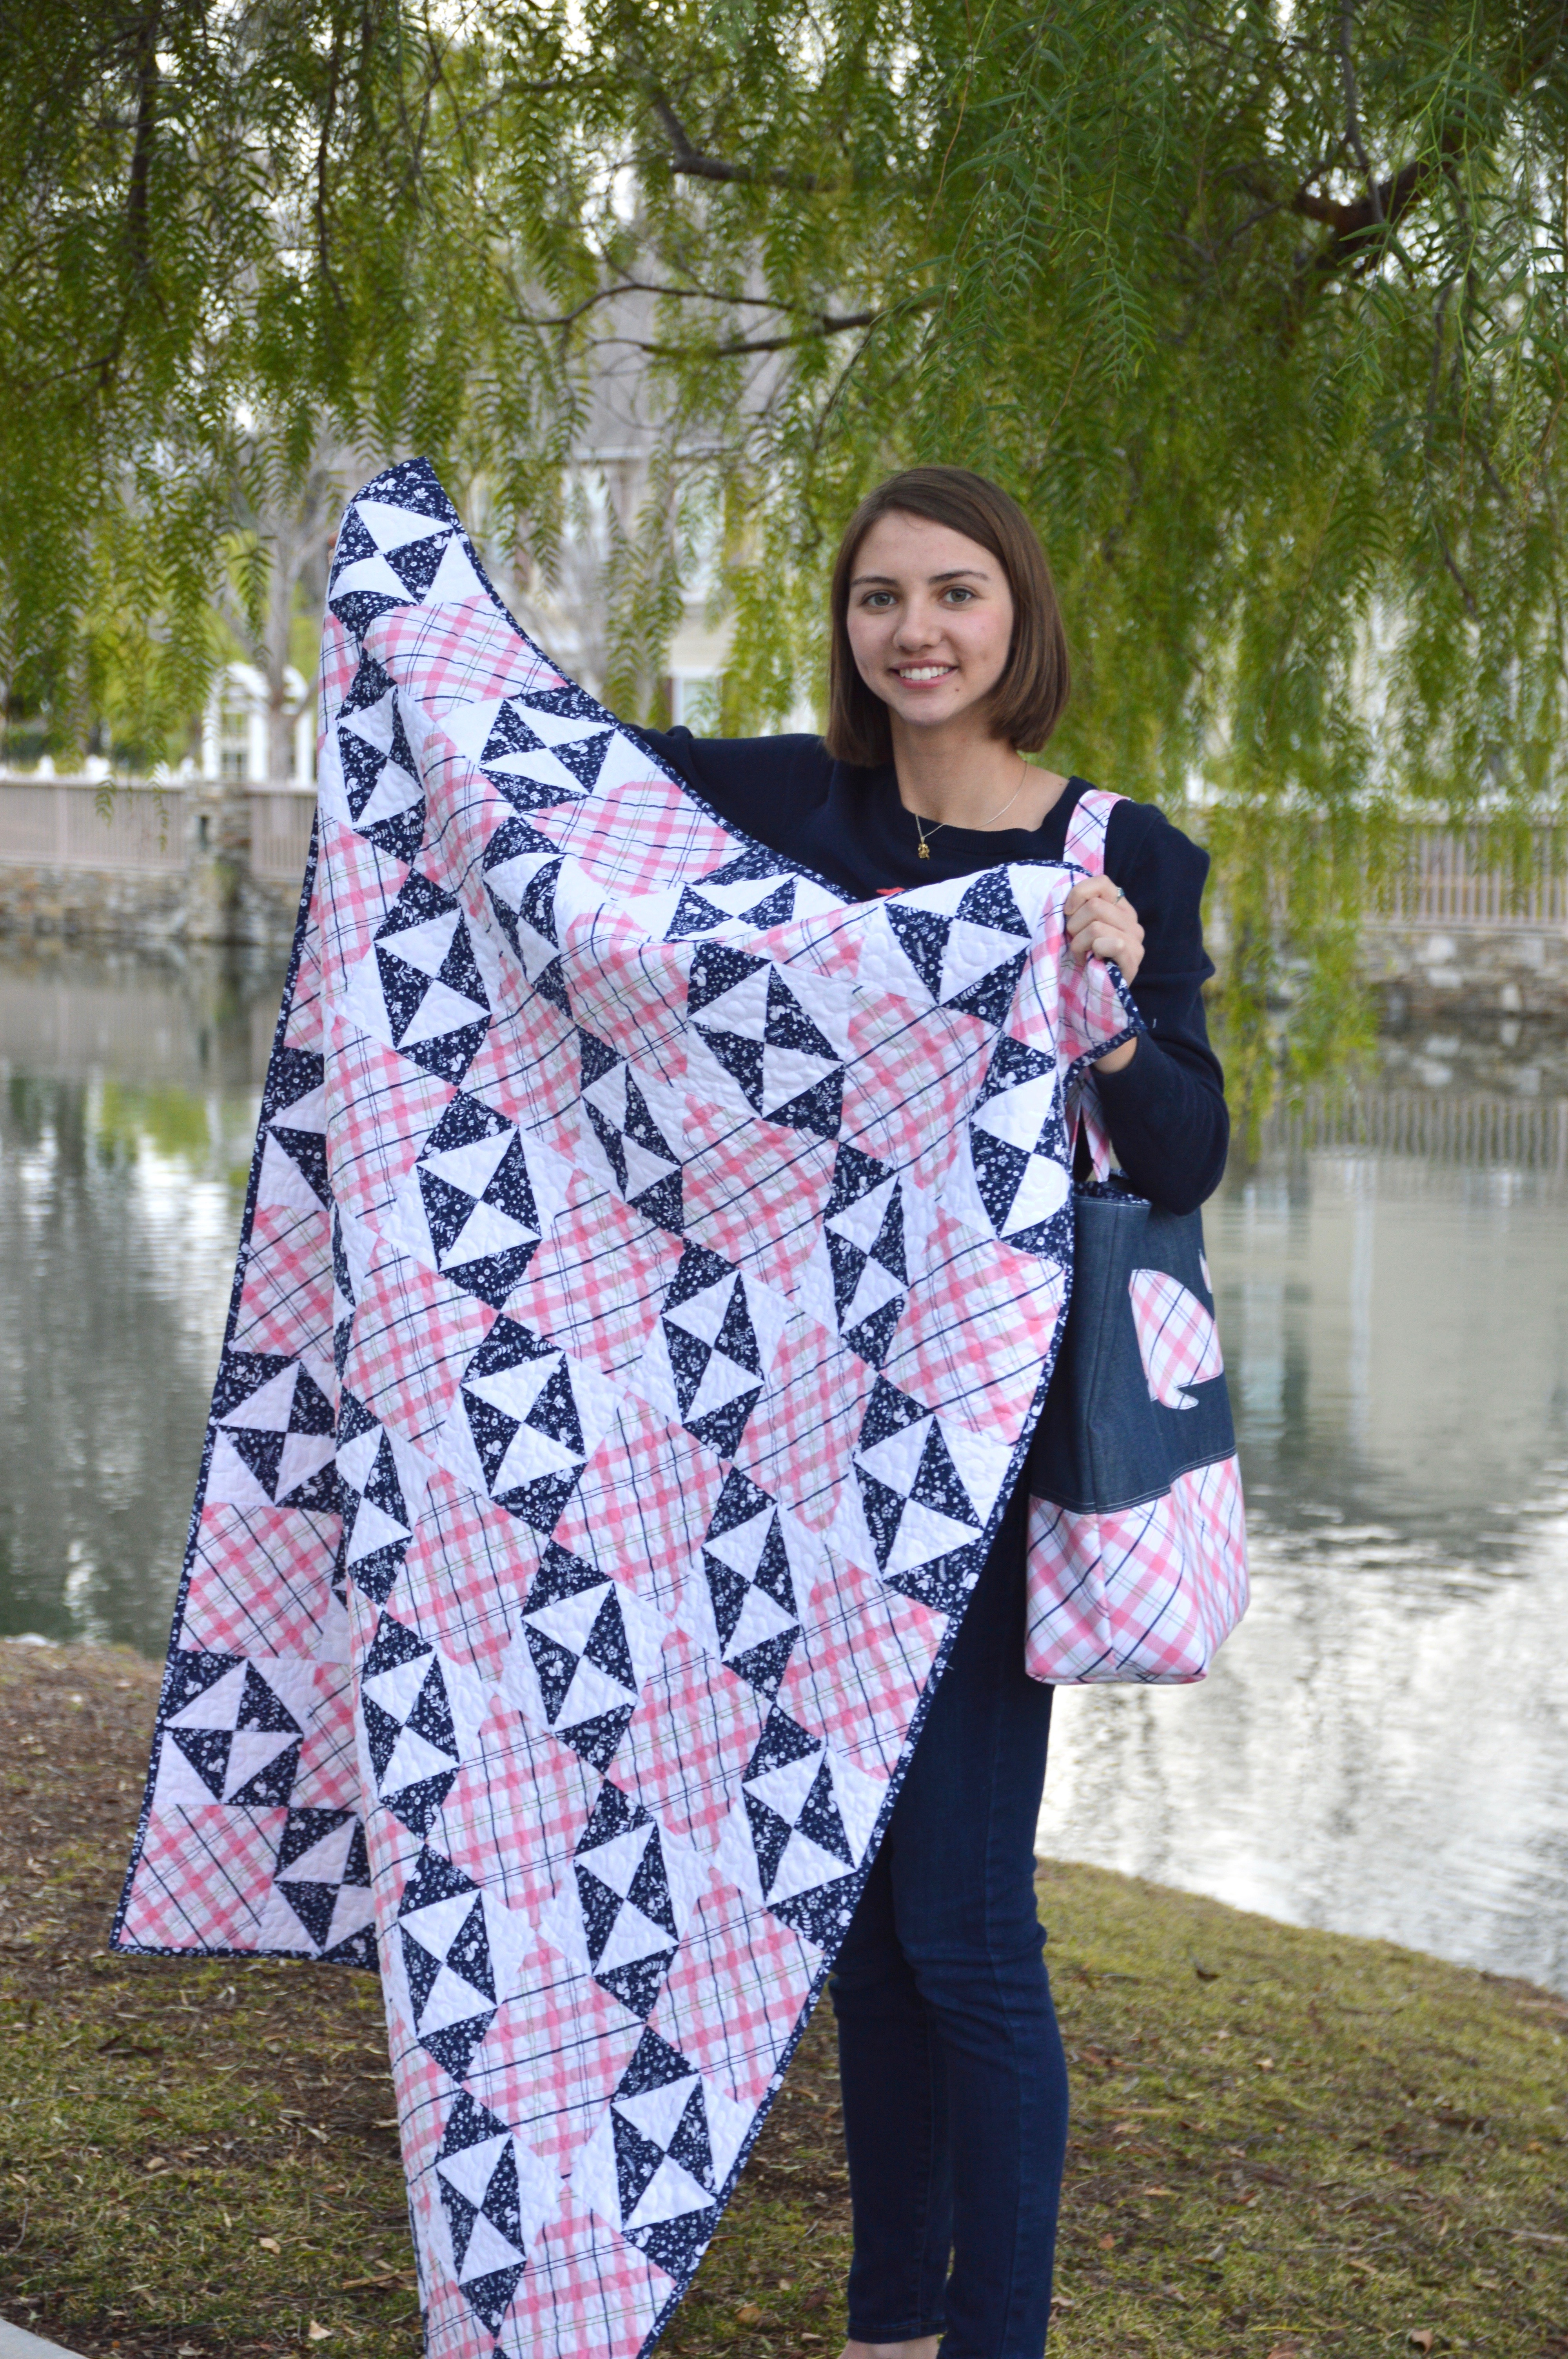
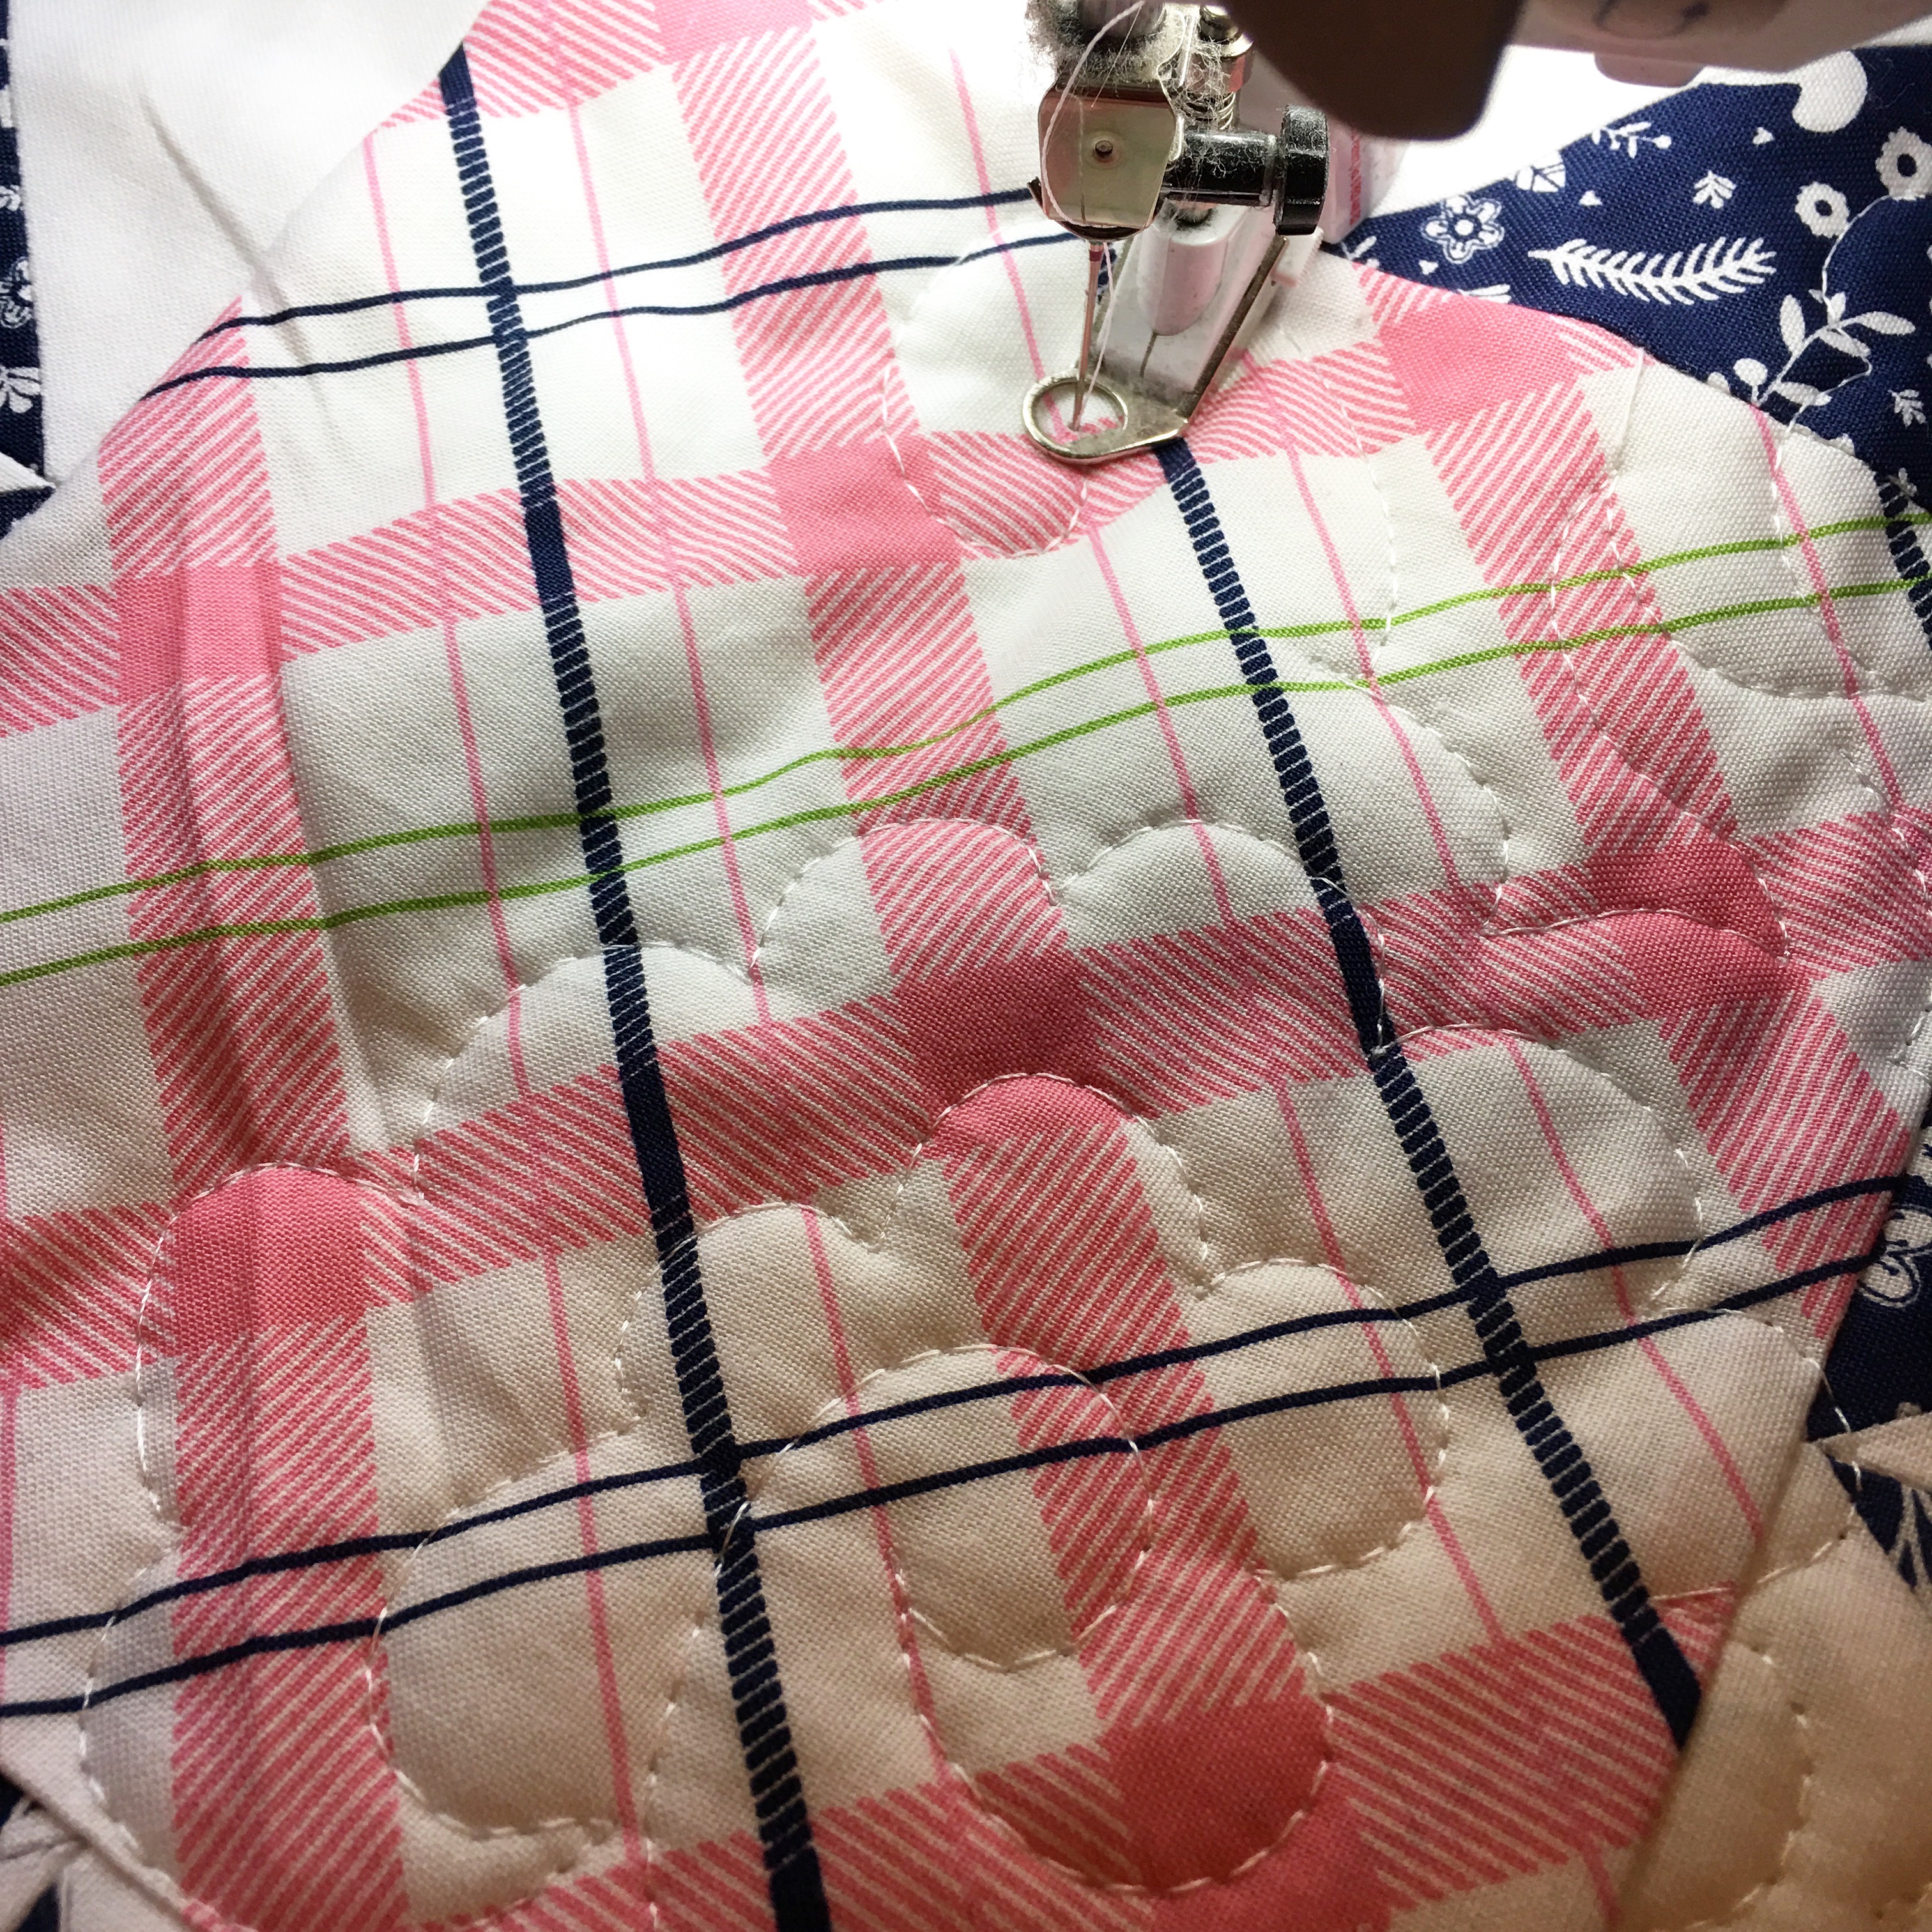
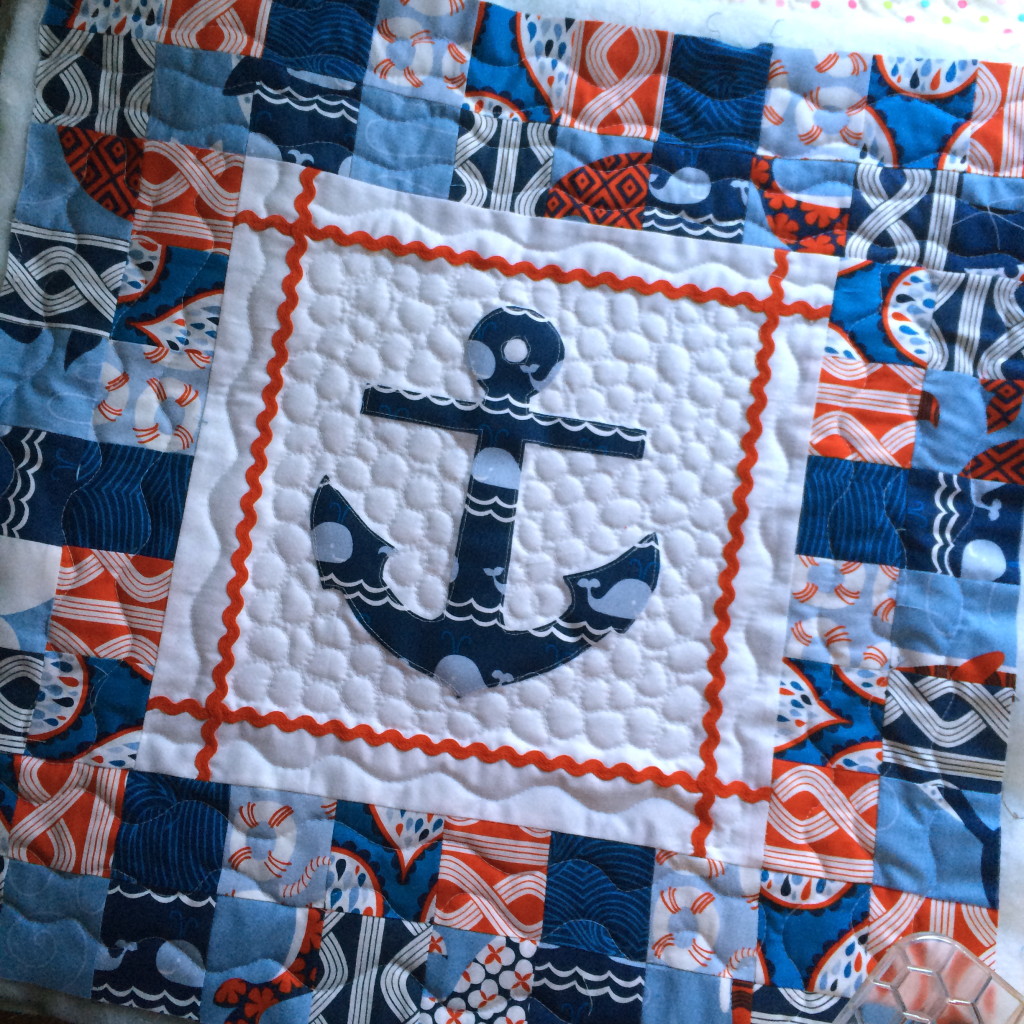
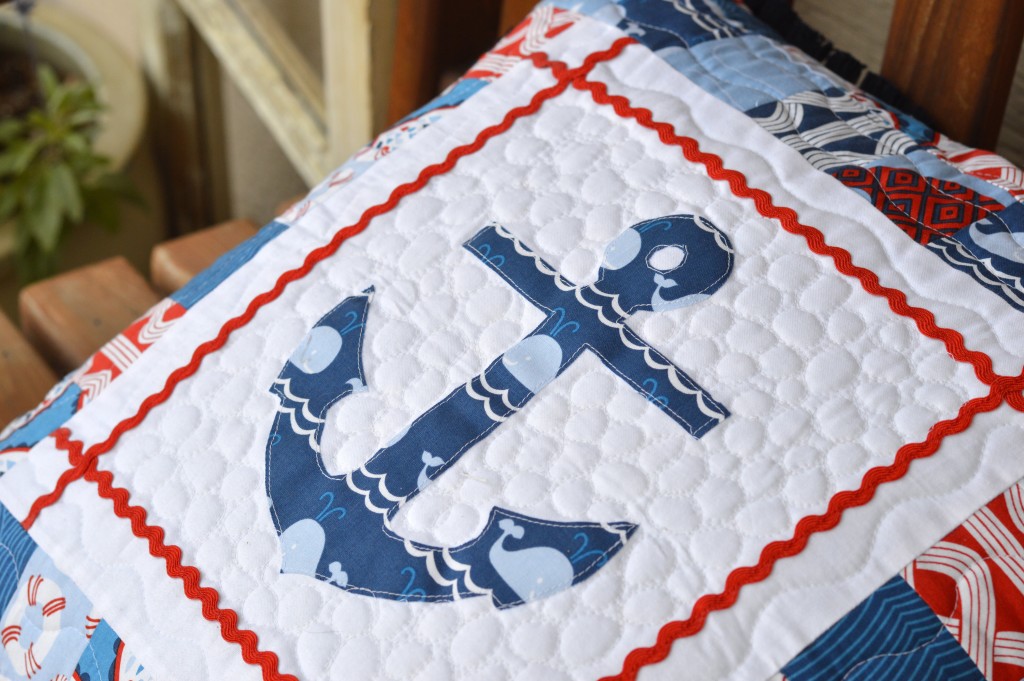
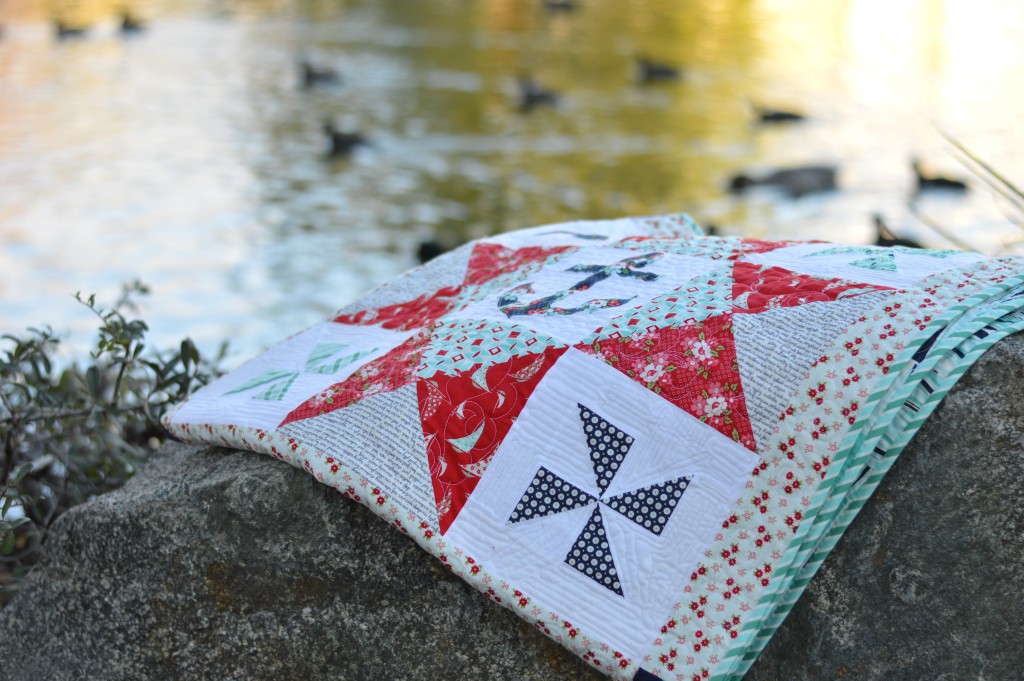
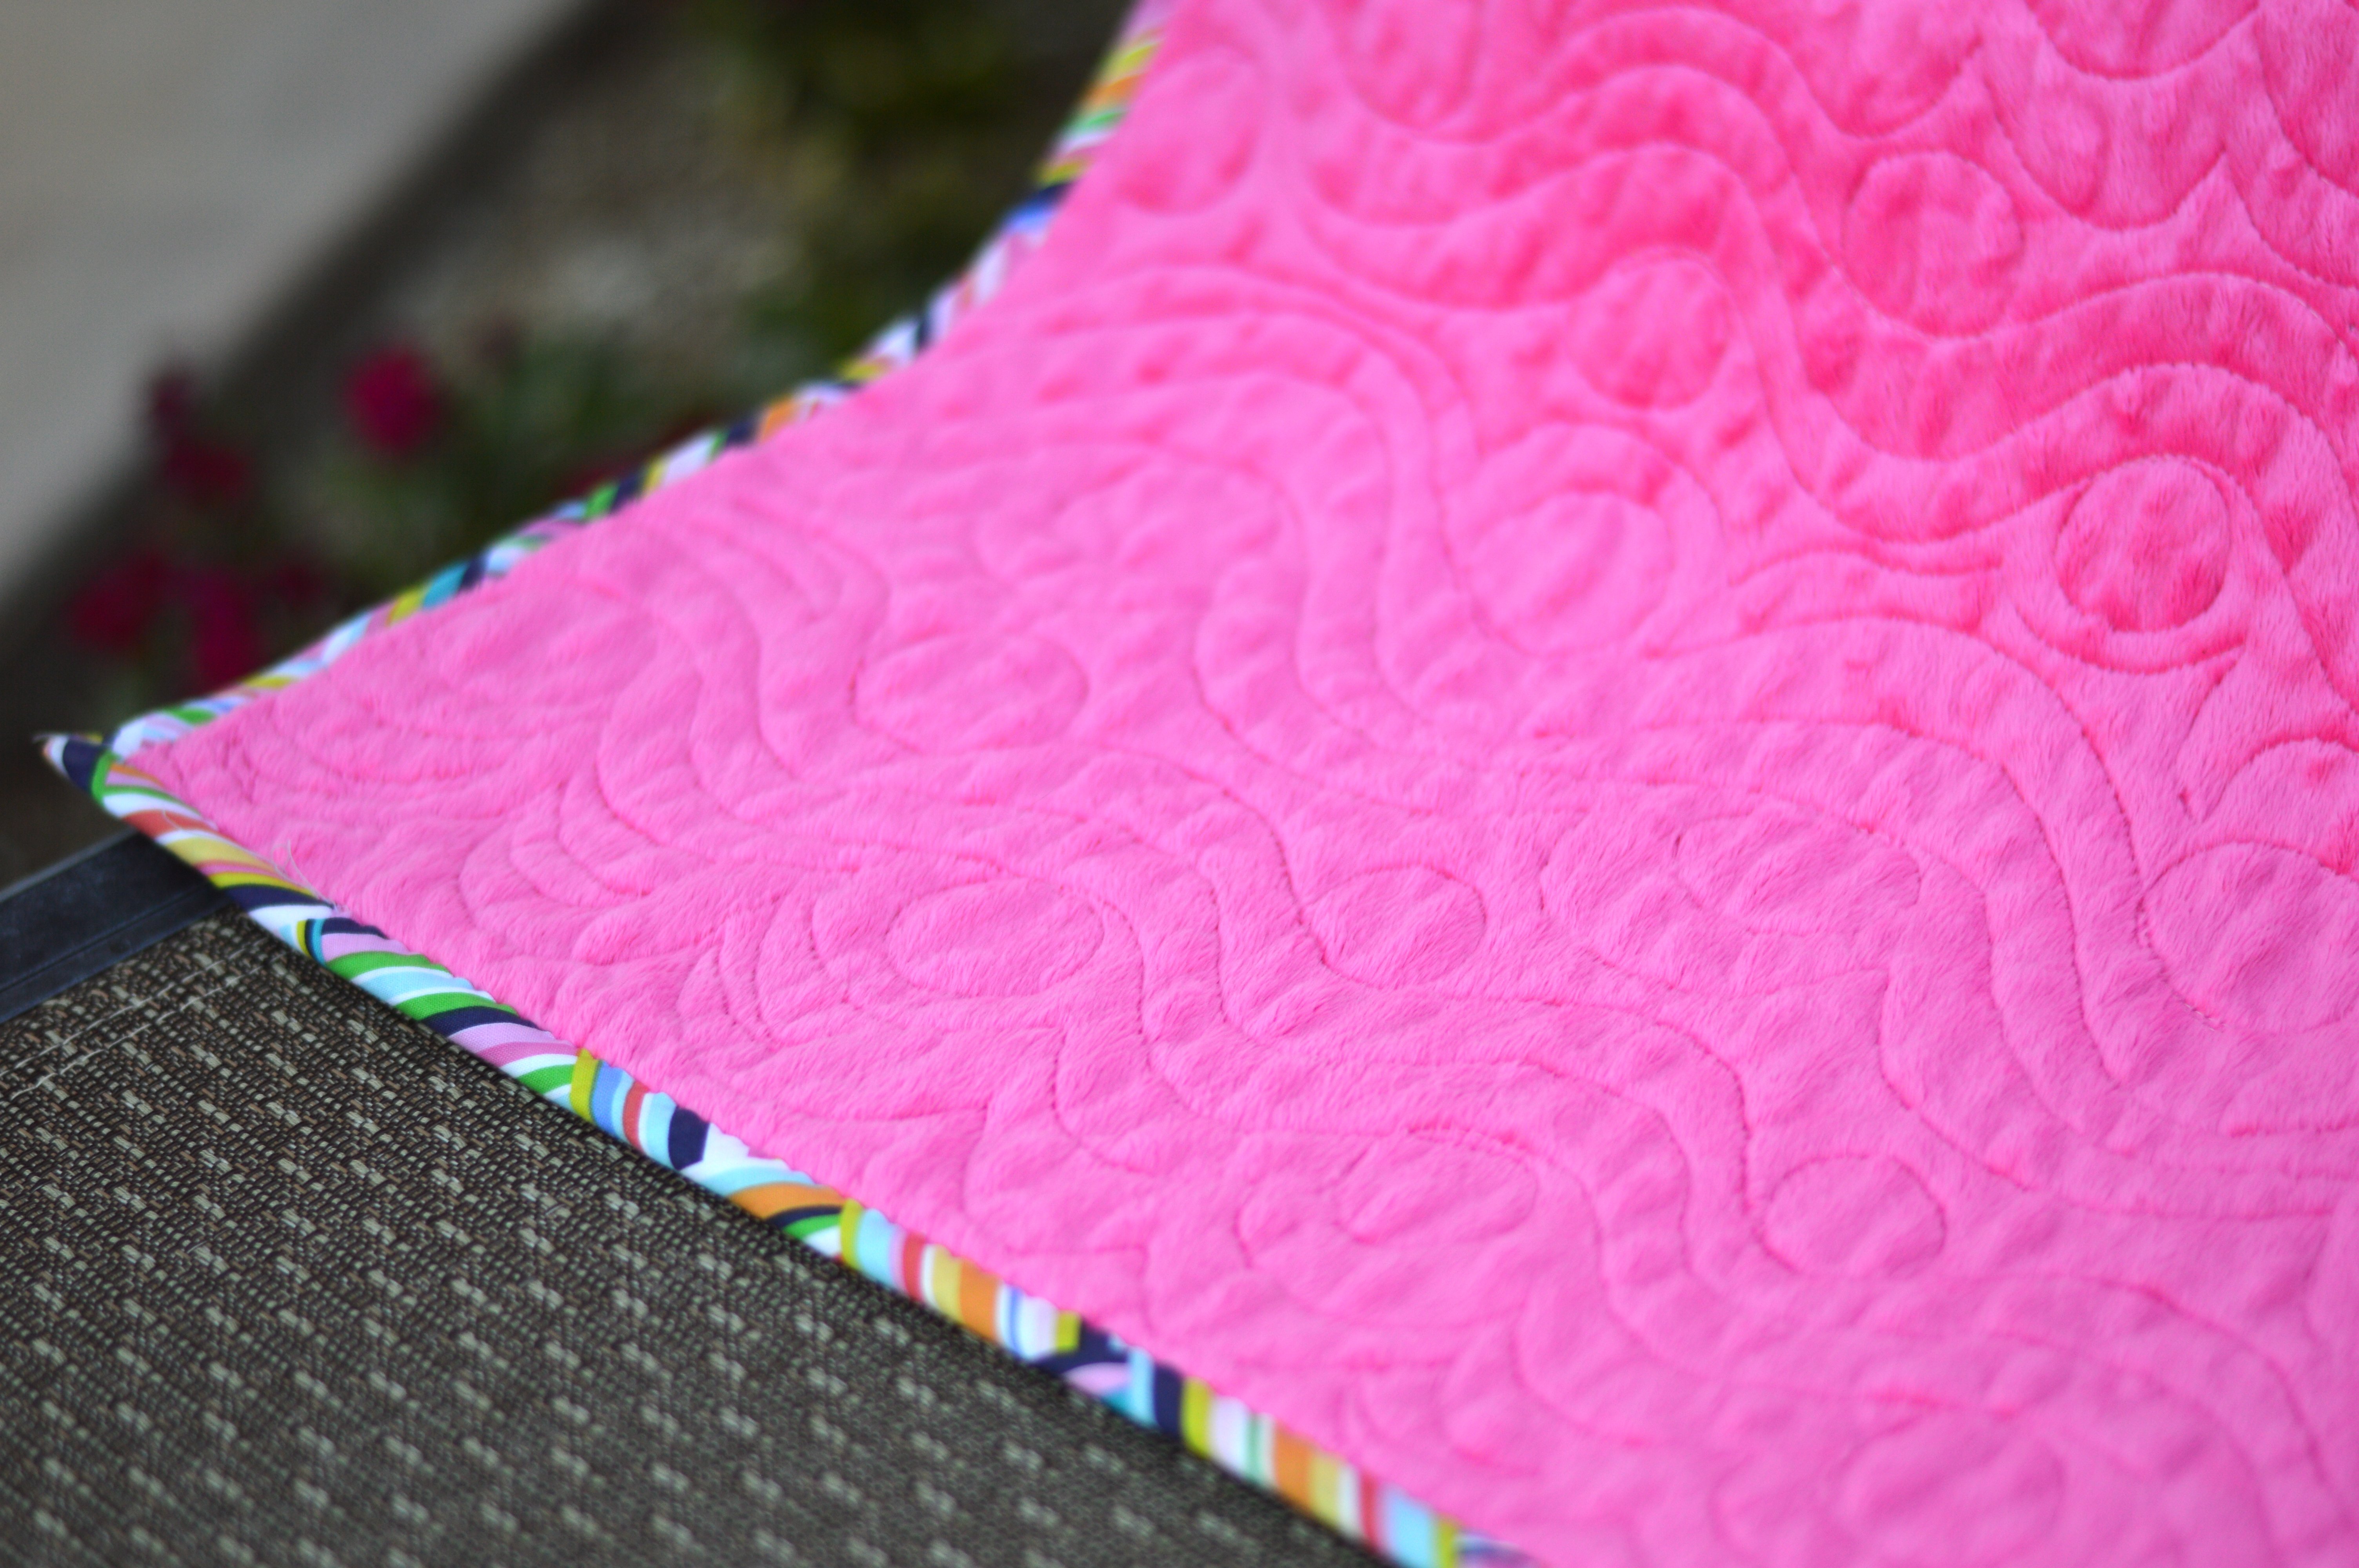
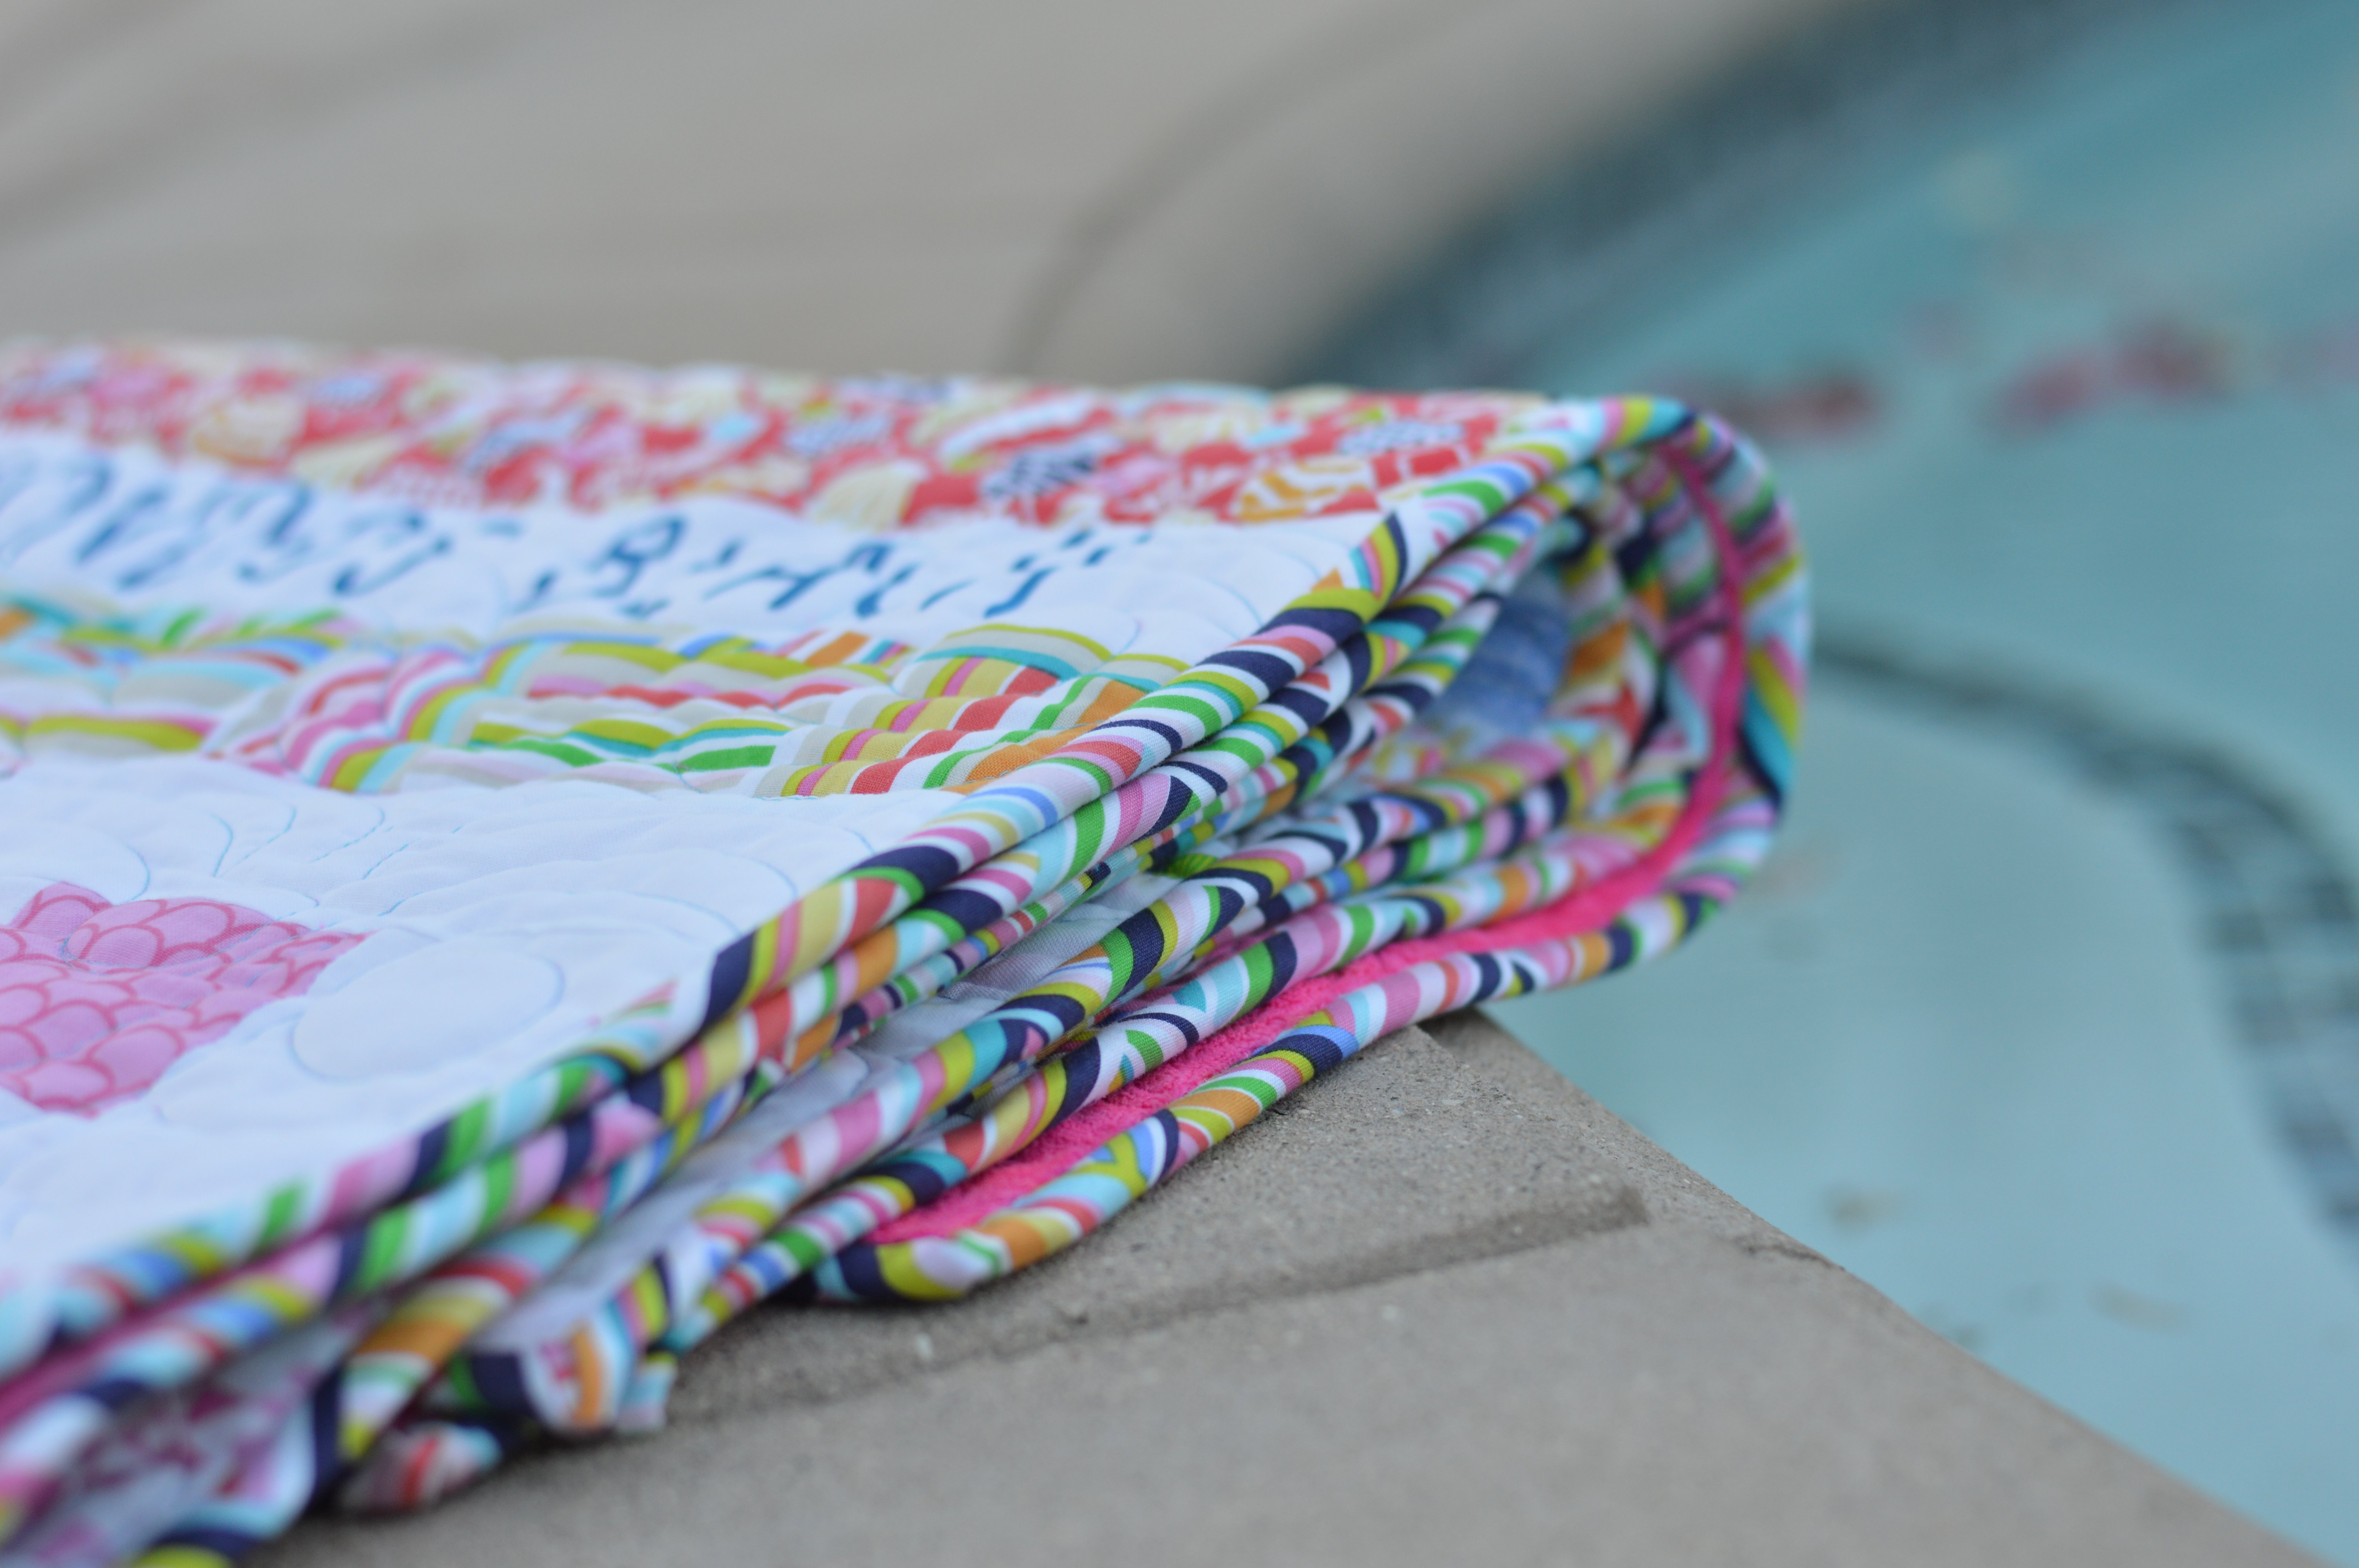
You can see the quilting detail in this photos.  I quilted it myself and it always stresses me out!!  From far away it doesn’t look too bad!

take me to the sea quilt pattern 10

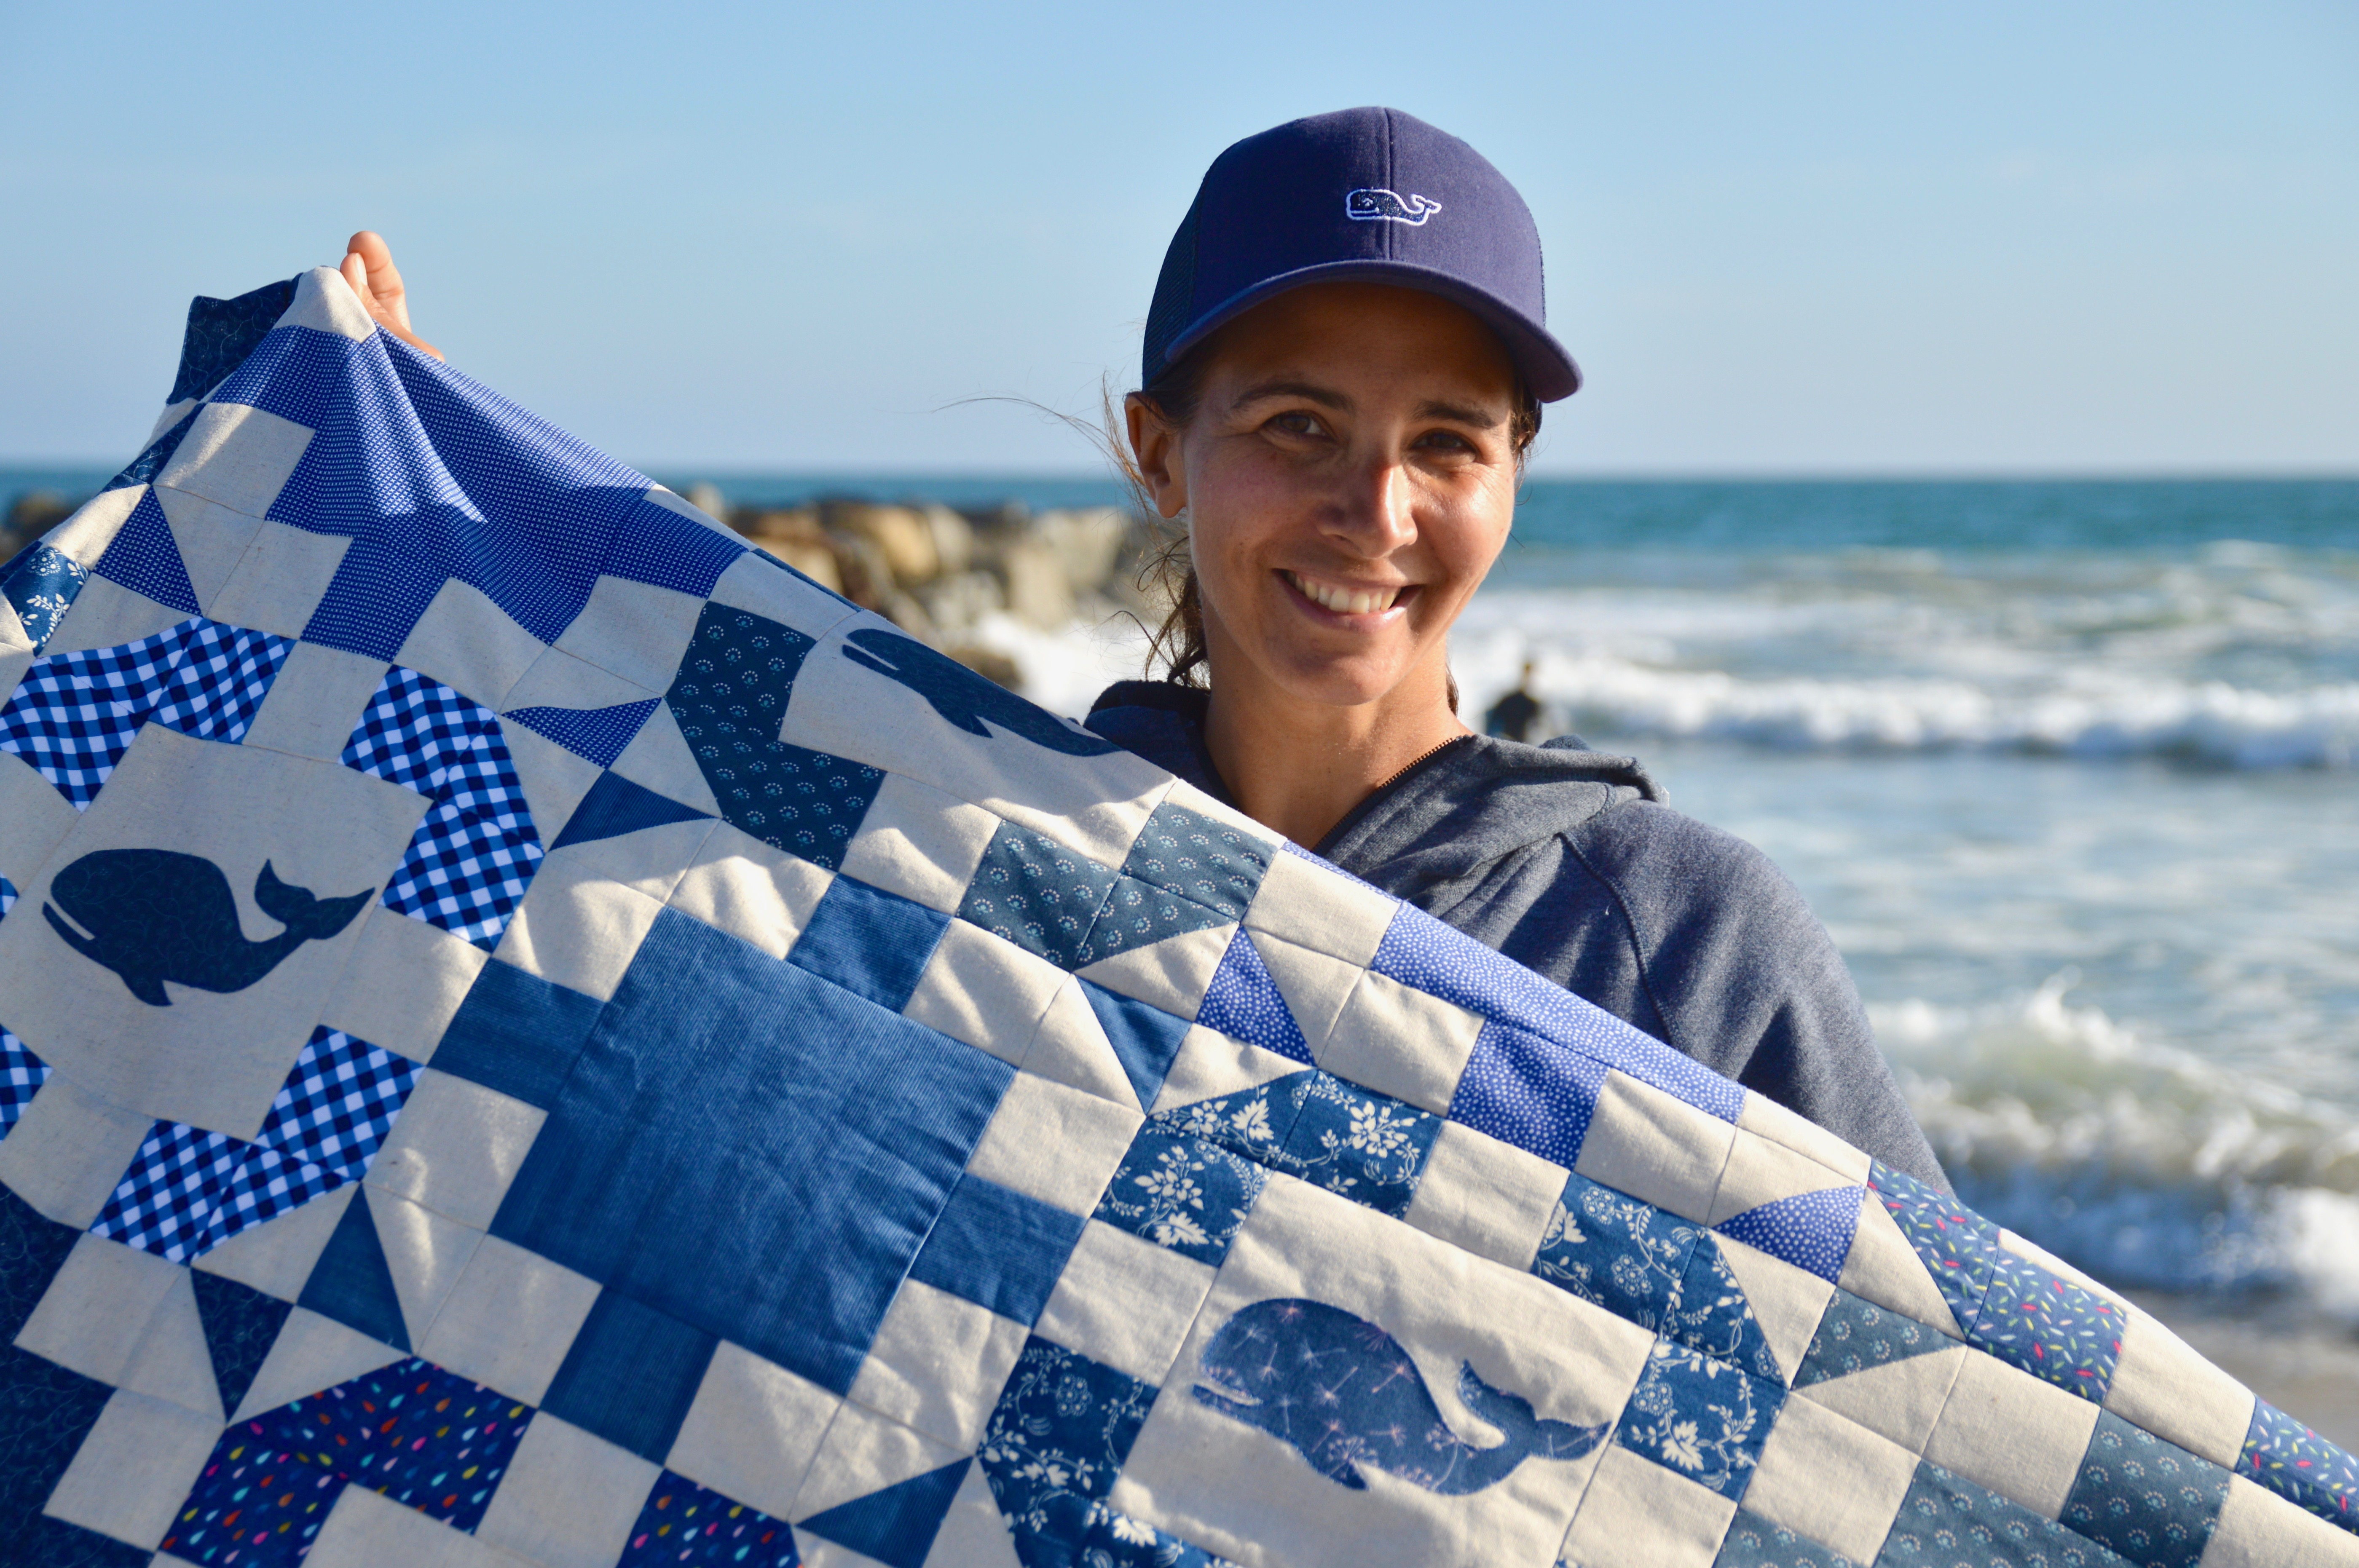
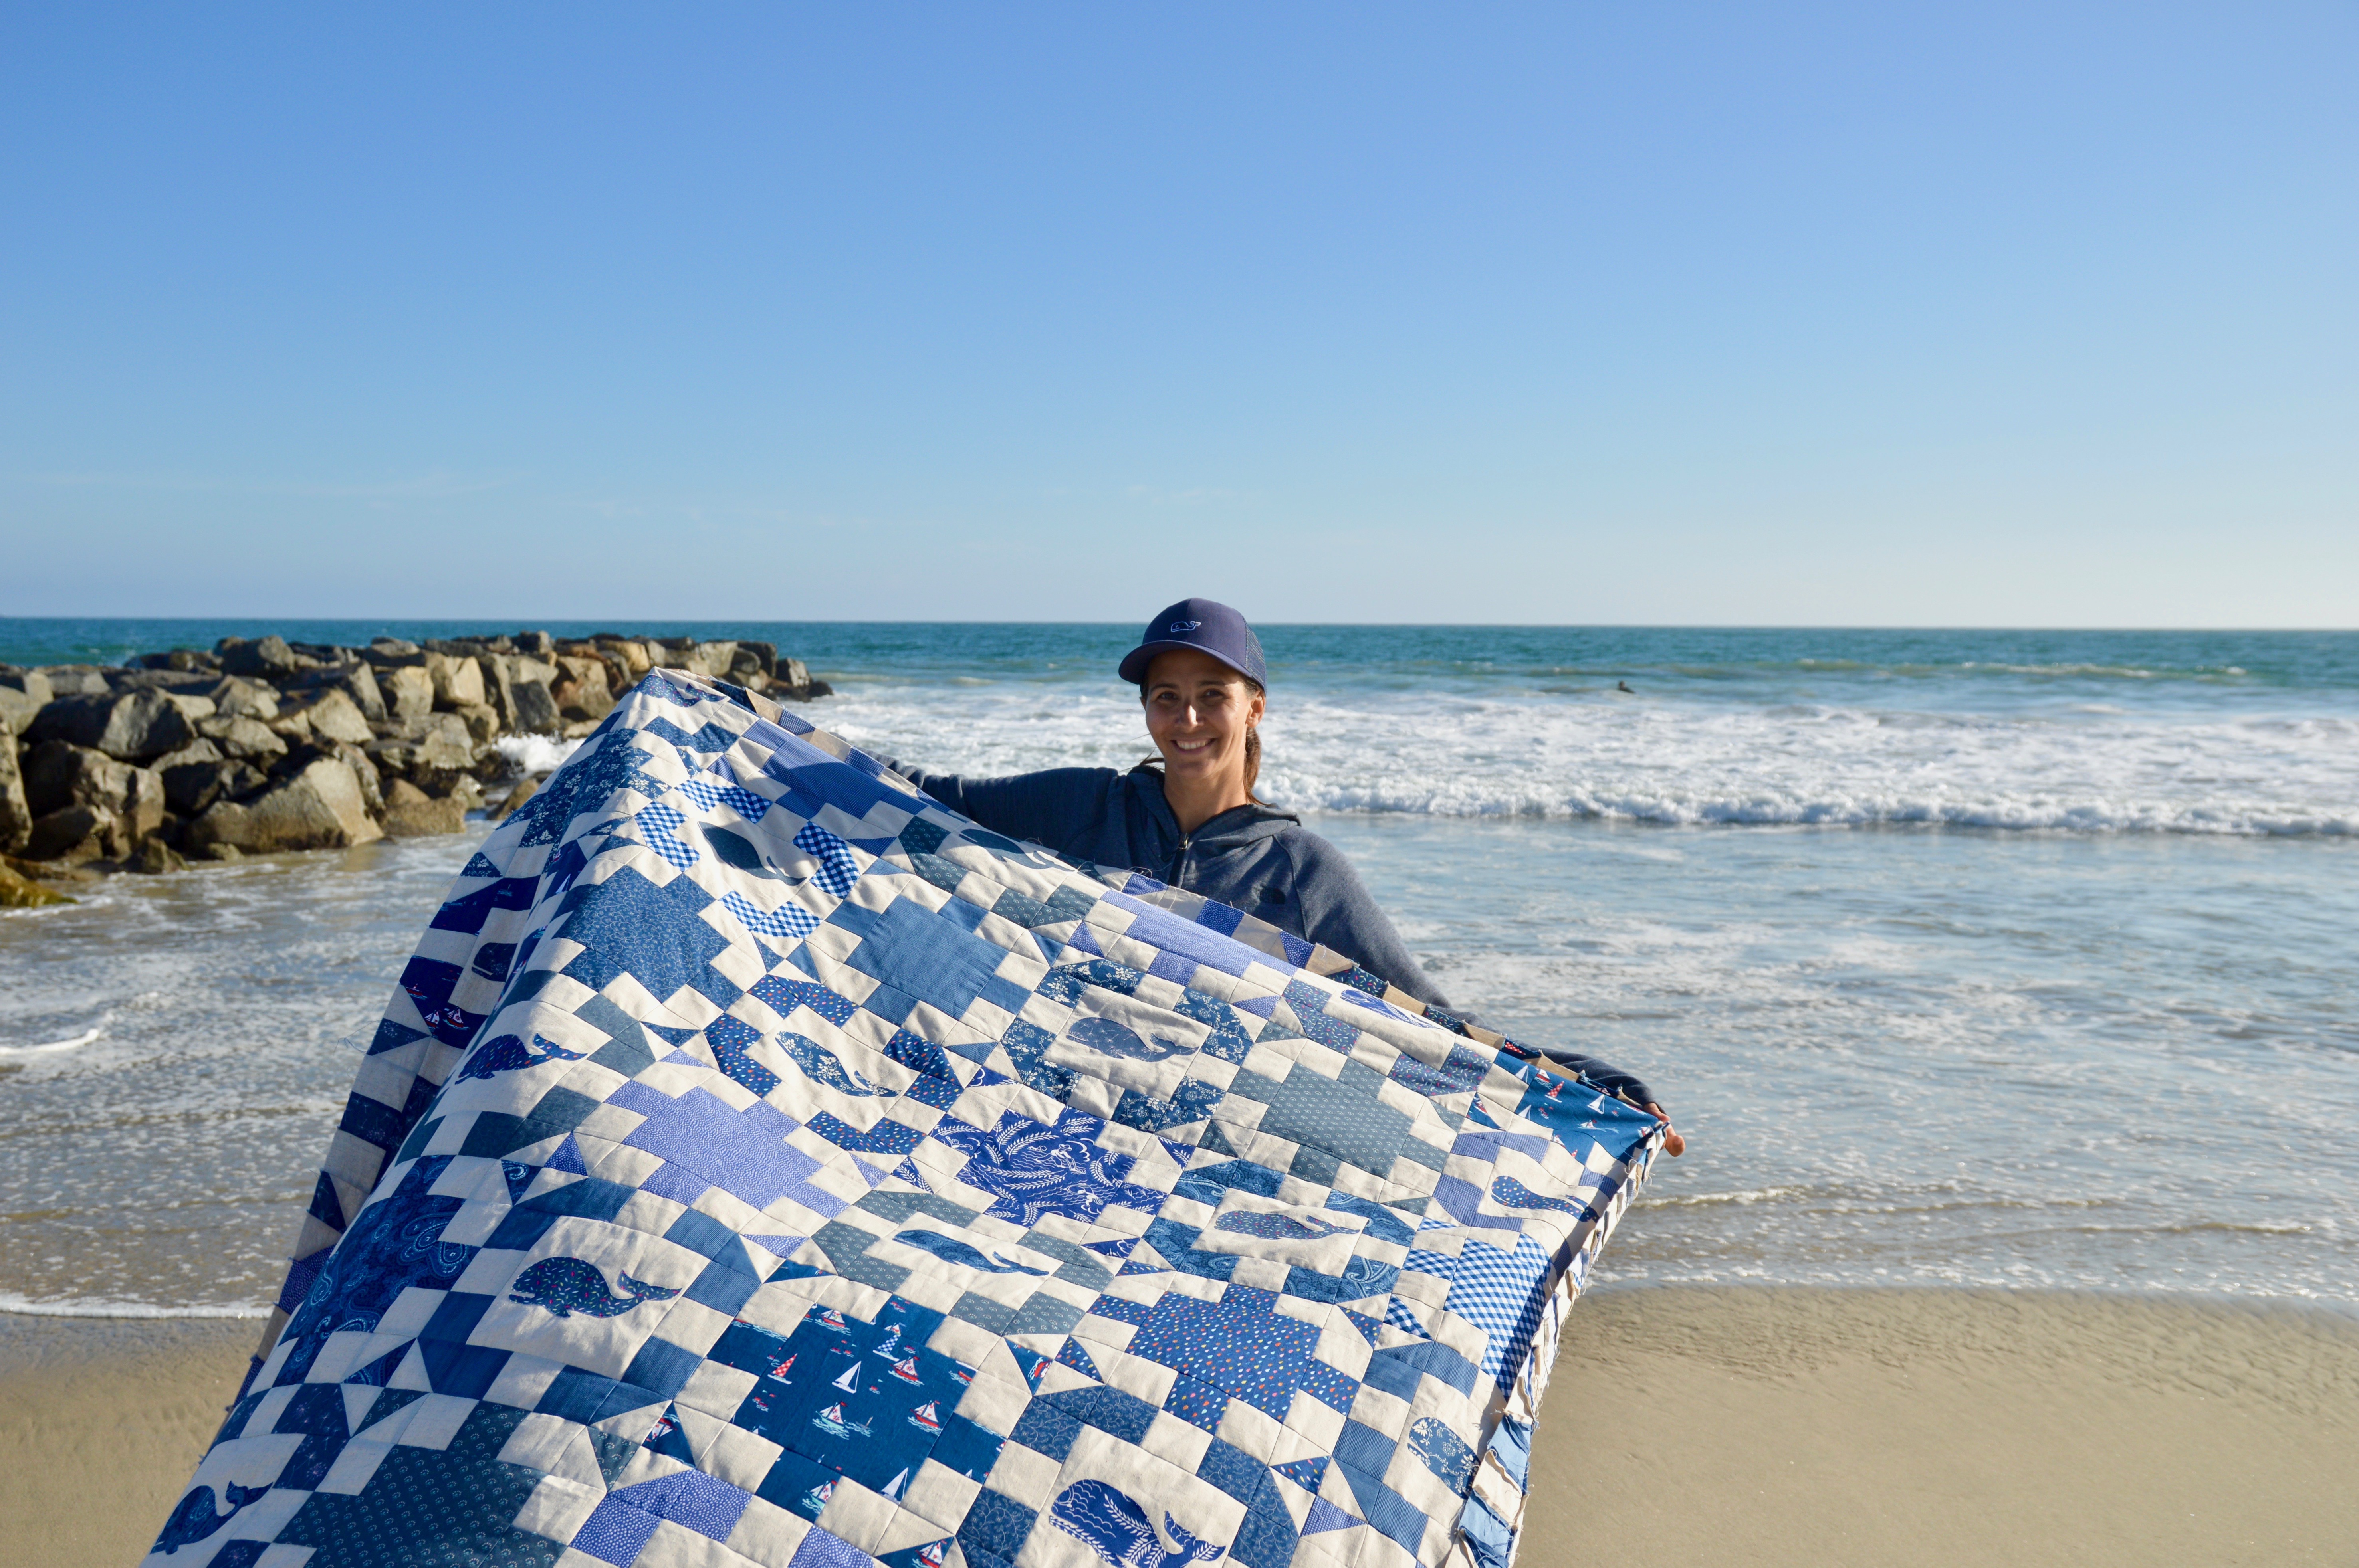
I love the surfer in the background of this photo!  We love to go to Newport Beach and watch them surf!!

seaside quilt pattern

I hope you have a great rest of your summer!!!

take me to the sea quilt pattern 8


Blue Whale Quilt Pattern

blue whale quilt 9

Meet Blue Whale!  My newest quilt pattern inspired by the amazing Year of the Fat Quarter Navy Bundle!!  Navy blue has been my favorite color all my life!  It’s so fitting that Fat Quarter Shop choose July to be Navy because it’s my birthday month!  As soon as I saw all these wonderful Navy fat quarters together my creative mind went to whales – my favorite ocean animal!  I’m so excited!!!!july-circle-textblue whale quilt 2

OK, so I’m just a little excited about this quilt, the color, the whales, the fabric, seriously this quilt is ME!!!!!  I hope its YOU too!!!!

blue whale quilt 6

Here are the details:

Navy fabrics: Fat Quarter Shop’s July Navy curated bundle – 14 fat quarters

Background fabric: Essex Linen Natural – 2 1/2 yards

Block Size: 10″

Finished Quilt Size: 60″ x 70″

Pattern available in my Etsy shop for instant download

IMG_0578

I love that the navys differ in shade and intensity, it makes the quilt more interesting!

IMG_0598

The whales are machine appliquéd using Heat n Bond Lite.  Yes, they are hand cut, but you can totally do it!  Just put on Netflix and before you know it they’re done!

IMG_0696

The blocks are super fun to make!

IMG_0675

I started this project when I was in Utah visiting Amber from Gigi’s Thimble!  We had so much fun sewing together!

IMG_0848

Then the quilt project moved home to California where Mufasa stayed up late with me to help me sew!  Actually I stayed up late and he slept on the blocks!

IMG_0874

I loved seeing each block come together!  I love all the different Navys!

IMG_0888

I love having my daughter lay out my quilt blocks, she has a good eye for spacing colors!

blue whale quilt 8

This quilt feels like a little piece of the ocean in my home!  So, even if you don’t live near the beach, you can feel like you do!
blue whale quilt 3

I hope you love it!!!!  Happy July, Happy Summer!!!!!!

2018-july-bundle-450

Sharkey Quilt {Free Pattern}

sharkey block

When I saw this new fabric from Riley Blake Designs called Sharktown I completely FREAKED OUT!!!  And then I showed my daughter (whose favorite animals are sharks) and she TOTALLY FREAKED OUT!  So I promised her a Sharkey Quilt for one of her many graduation presents.  I Love Love Love theme prints, especially animal theme prints.  However, they sometimes pose a design challenge: showing off the fabric + quilt design.  I put on my thinking cap…..I wanted something that looked sharkey……and the Sharkey Block was born!  I love the idea of using half square triangles to resemble shark fins (or shark teeth!). The center block lets you show off the super amazing fabric designs!
IMG_2272

I designed this fun pattern using the Sharkey Blocks which measure 10″ and some blue water sashing!  I choose the all the blue fabrics from the Sharktown fabric line and added in the solid gray accent.  You can download the PDF pattern by clicking HERE.

sharkey pattern cover
sharkey 2


Preppy Plaid Tote Bag & Quilt Tutorial

Enchanted blog logo

I am so totally excited to be a part of the Enchanted Blog Tour sponsored by Riley Blake Designs!  You can see the entire collection designed by Dodi Poulsen of Two Sisters at Squirrel Hollow by clicking here 🙂
preppy plaid

When I saw this new fabric line from Riley Blake Designs called Enchanted, my heart stopped.  I took one look at this pink, navy and white plaid and immediately I was transported to a Cape Cod dream!  Sailboats, lobsters, quaint homes and preppy boys on vacation from Harvard 🙂

DSC_0188


IMG_9070
Ok Ok, so I’ve never been to the Cape but a girl can dream right?  I knew I wanted to design something that let this preppy plaid be the focus and something that would be perfect for my sailboat (hahaha).

DSC_0167

I came up with a simple quilt pattern that uses plaid, navy and white.  When only two prints arrived in the mail I began to panic wondering if I had made a terrible decision to make a quilt using only two prints!  I decided to go with my instincts and make the quilt……and I am totally in LOVE!!!!

This quilt really lets the plaid shine in and it’s a great pattern to use if you fall in love with a single fabric print.  The accent blocks are made of 4 half square triangle blocks.

DSC_0213

…..and the quilt fits nicely inside this preppy plaid whale tote bag – made with denim, plaid, and Heat n Bond Fusible fleece.  So, are you ready to set sail for the Cape?  Grab your fabrics and lets get sewing!

DSC_0154

Preppy Plaid Quilt

1/4″ seams 

Supplies

2 yards plaid print

1 yard navy print

1 yard white

Begin by cutting the plaid into (40) 6.5″ squares.

Using the navy blue print and white print sew (160) half square triangles (HST) that measure 3.5″.  You can use any method you like.  I use my Sizzix half square triangle dies!  It is super fast, super easy and no squaring up – just perfection!!

IMG_9037

Die cut 160 navy HSTs and 160 white HSTs.

IMG_9038

Sew the navy and white HSTs right sides together using 1/4″ seam.

IMG_9043

Press seams open.  Continue until you have 160 HSTs.  It’s probably a good idea to put on a movie while doing this!

IMG_9042

Lay out 4 HSTs to make the pattern above.  Sew together as you would a 4-patch.  Press seams open.  Finished block will measure 6.5″.  Make 40 of these blocks.

IMG_9045

Cut 40 squares measuring 6.5″ out of the plaid.

DSC_0121

Sew the blocks together (1/4″ seams) as you would a checkerboard, alternating each block.  Make sure the pieced blocks are going the same direction.  Press the seams toward the plaid.  There are 8 blocks across and 10 rows down.

IMG_9046

Baste (I always use Spray n Bond basting spray)

IMG_9056

Quilt.

IMG_9075

Bind.

DSC_0142

Love.

DSC_0089

Mufasa and I love sewing on rainy days!!

DSC_0098

DSC_0220

Tote Bag Instructions

I used my pattern, Quilted Tote Bag, for the measurements.  I followed the pattern pretty closely with the following exceptions:

  • I added an appliqué to the main bag.
  • I used denim.
  • I did not quilt the bag; I stabilized it with fusible fleece.
  • I came up with a new way to sew the handles (continue reading)
  • I omitted the inside pocket
  • I simplified how to make the bag bottom

Supplies

Denim (2) 20″ x 10.5″

Plaid (2) 20″ x 9.5″

Lining (2) 20″ x 19.5″

Plaid for handles (2) 5″ x 28″

Heat n bond medium stabilizer (2) 5″ x 28″

Heat n Bond Fusible Fleece (2) 20″ x 19.5″

Piece of plaid for the whale

Heat n Bond Lite

Appliqué the whale  Click HERE for the whale pattern.

IMG_9093

You can print the whale directly on Heat n Bond Lite EZ print sheets, or trace the whale onto Heat n Bond Lite.

Heat set the whale to the wrong side of the plaid fabric.

Cut out the whale.  Peel off the backing paper.

IMG_9094

Press it onto one of the denim pieces, centering.  Using 1/4″ seams, sew the denim piece to the plaid piece to make the bag front and back.  Press seams.

IMG_9099

Fuse the Heat n Bond Fusible fleece to the wrong side of the bag front and the bag back.  Add some accent stitching along the seam.

Bag Handles

Fuse the stabilizer to the wrong side of each of the handle strips.

Press in half lengthwise.  Open up and press the long ends in to meet the center.  Press.  Then press in half again.  This makes a super sturdy handle!

IMG_9095

Topstitch along both of the long edges of each handle.

IMG_9096

IMG_9097

Continue following the bag instructions from this tutorial to complete the bag.  To make the bag bottom, cut a 3″ notch out of the bottom corners of the bag and the lining.

IMG_9100
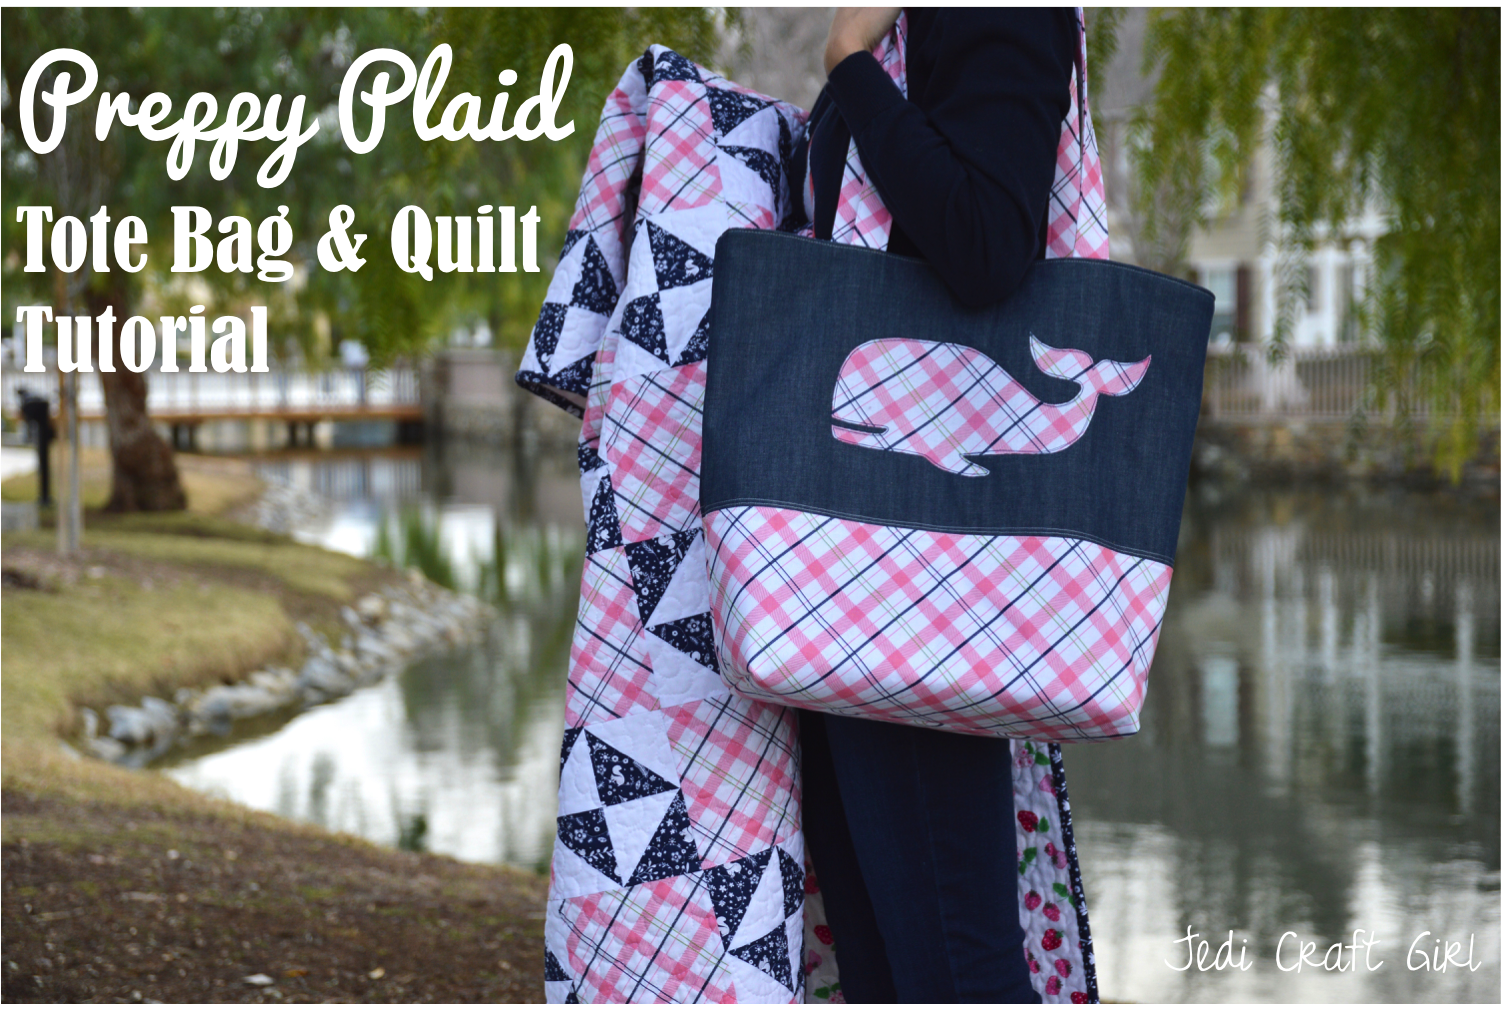
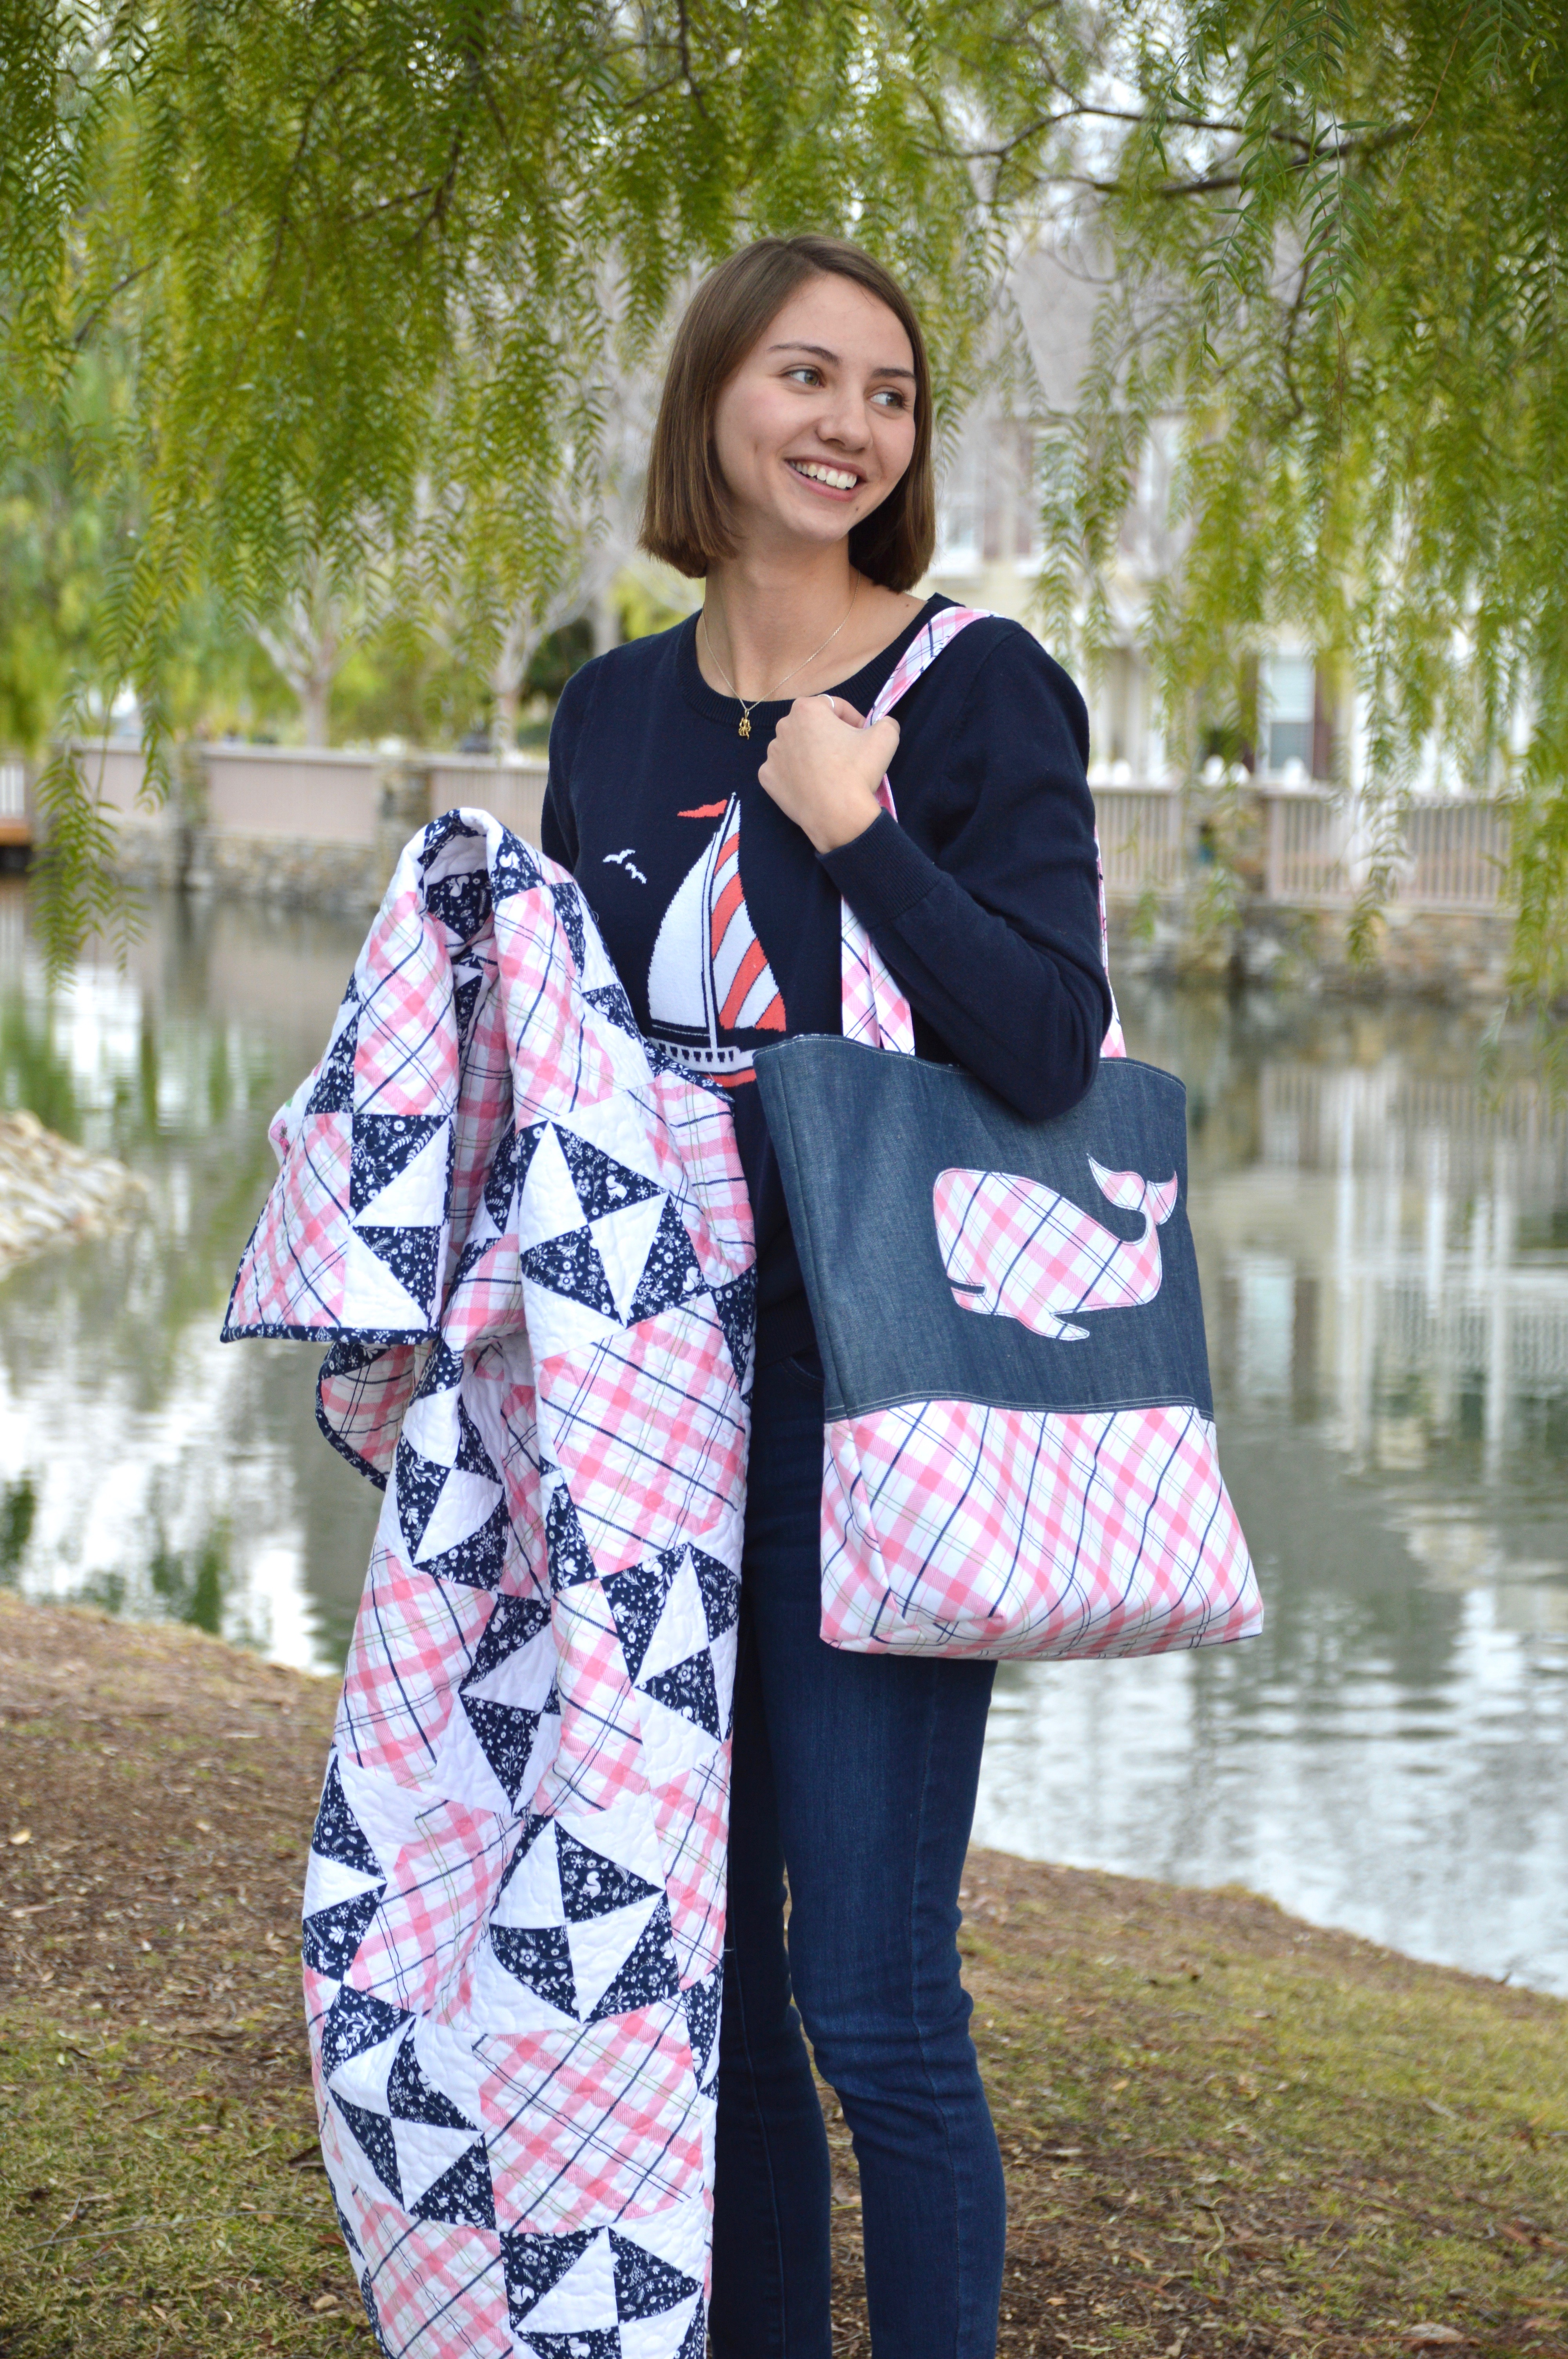
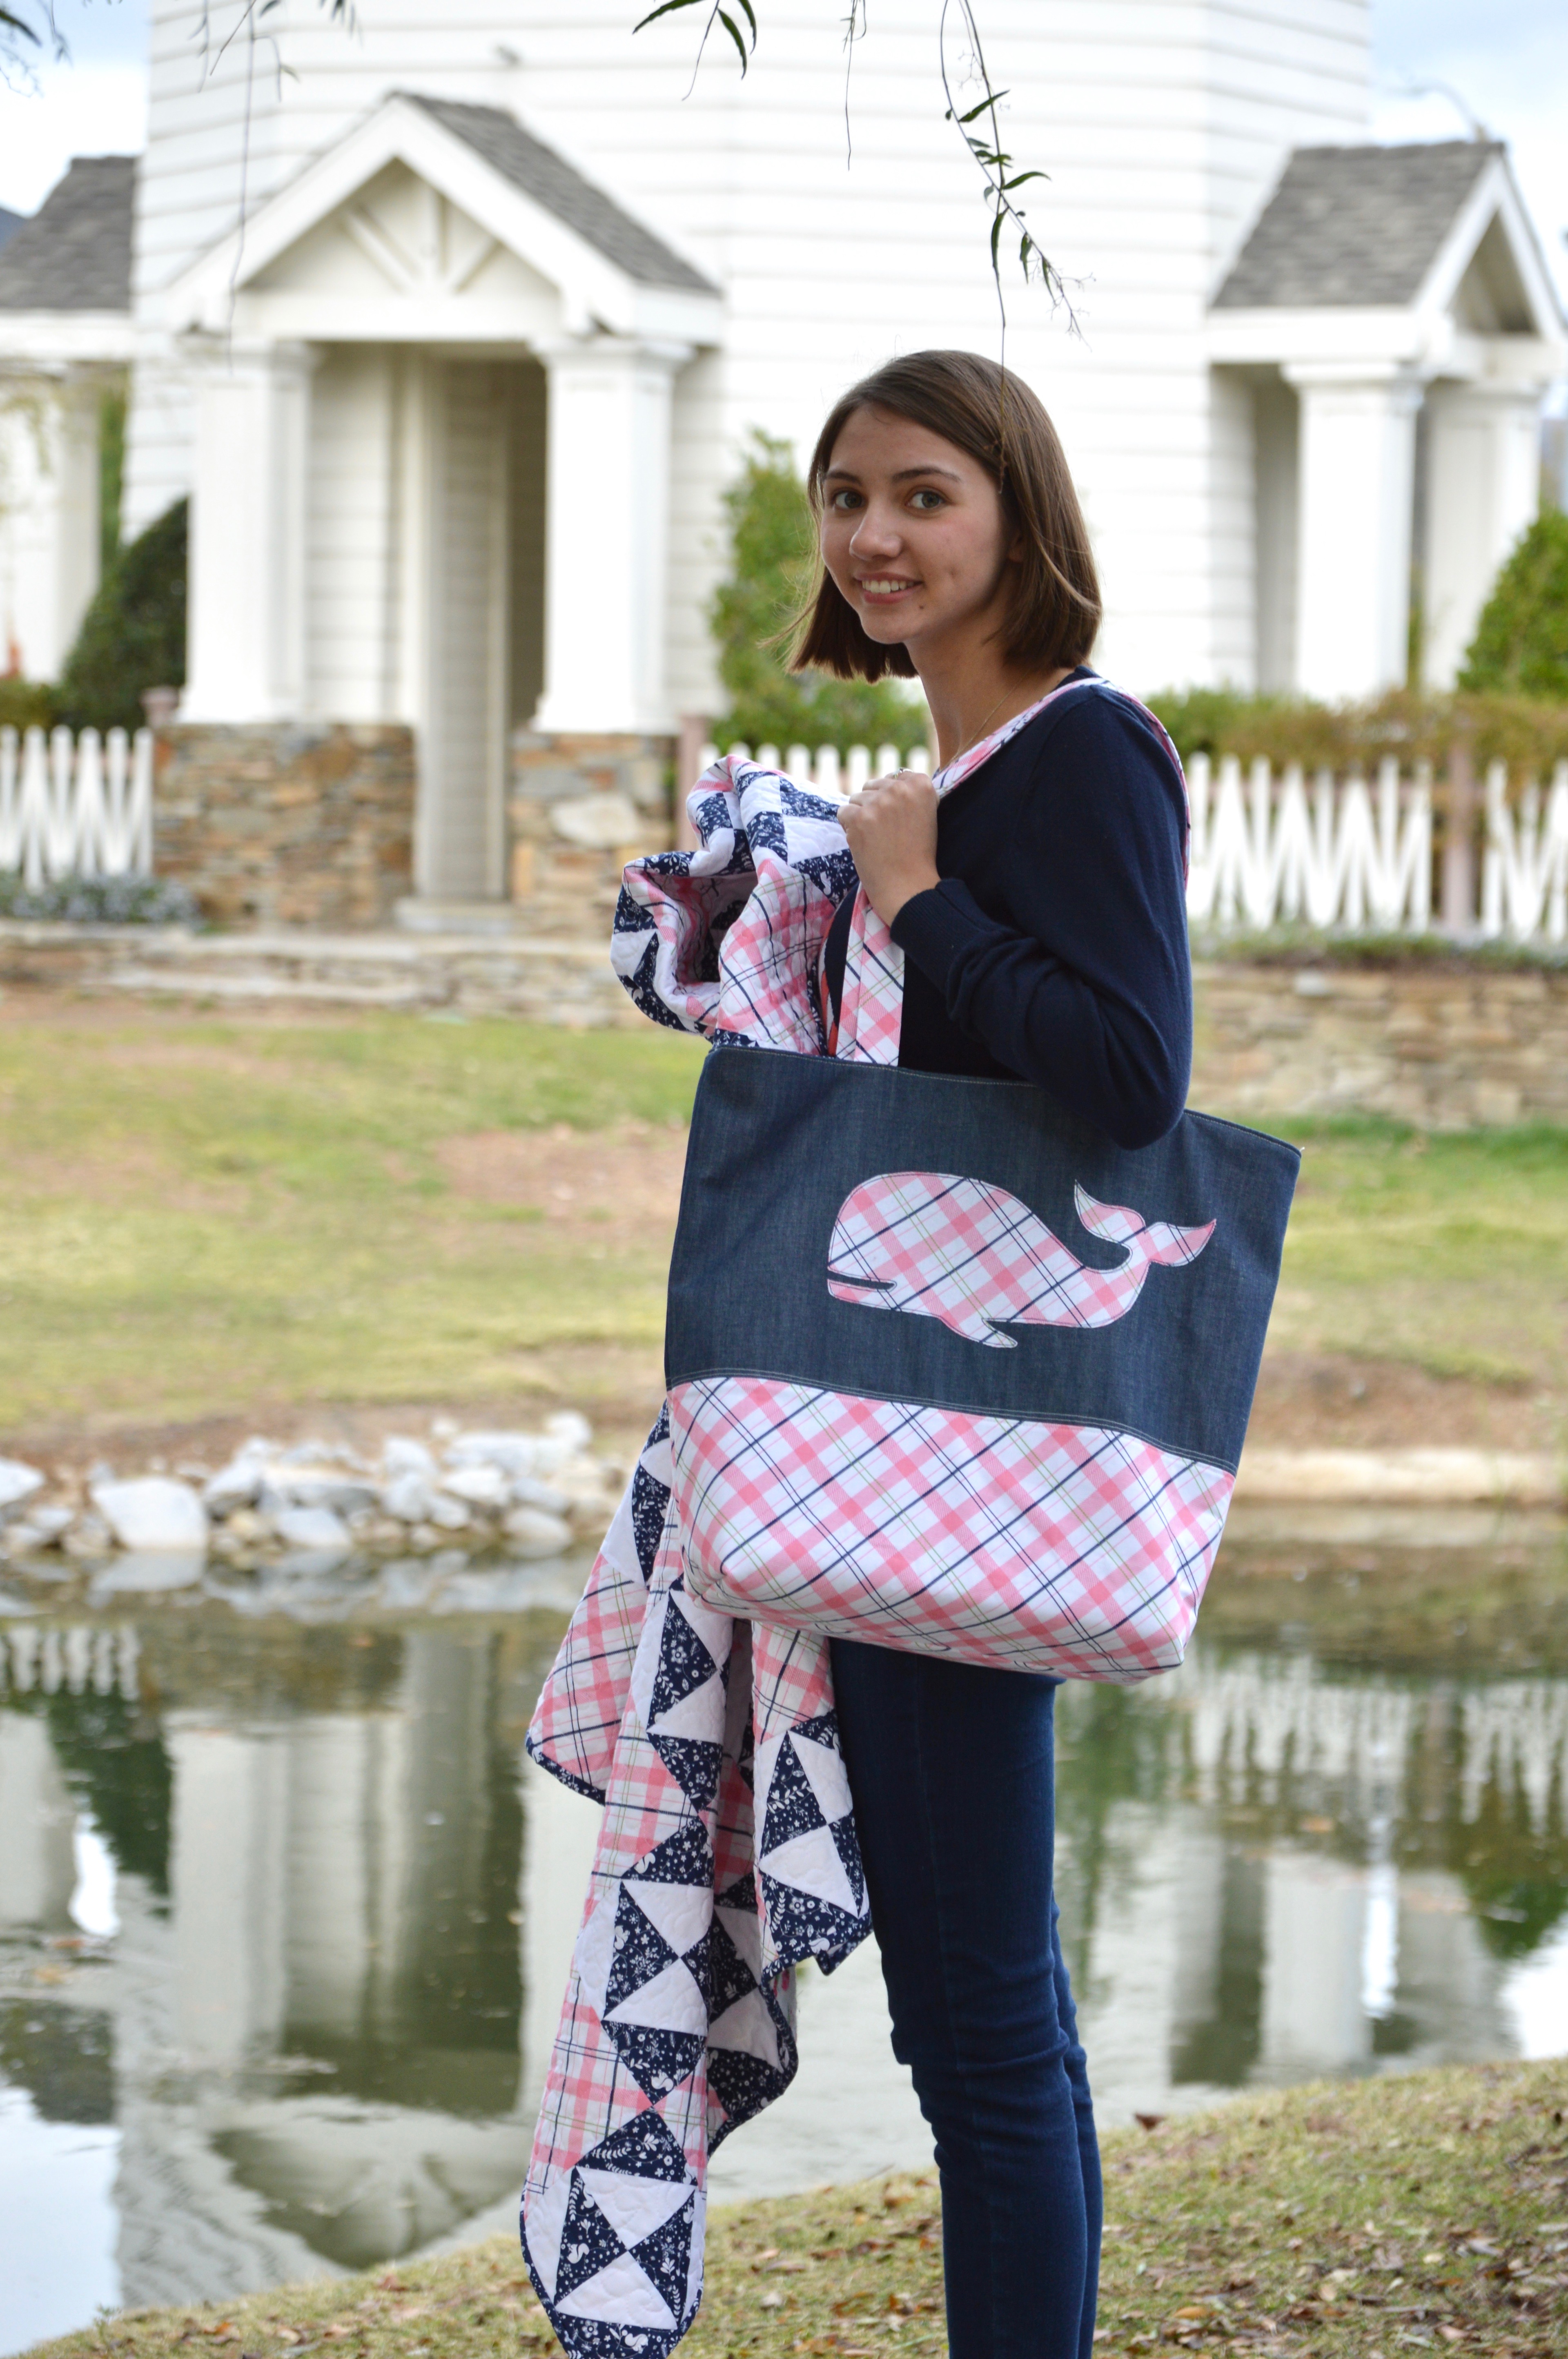
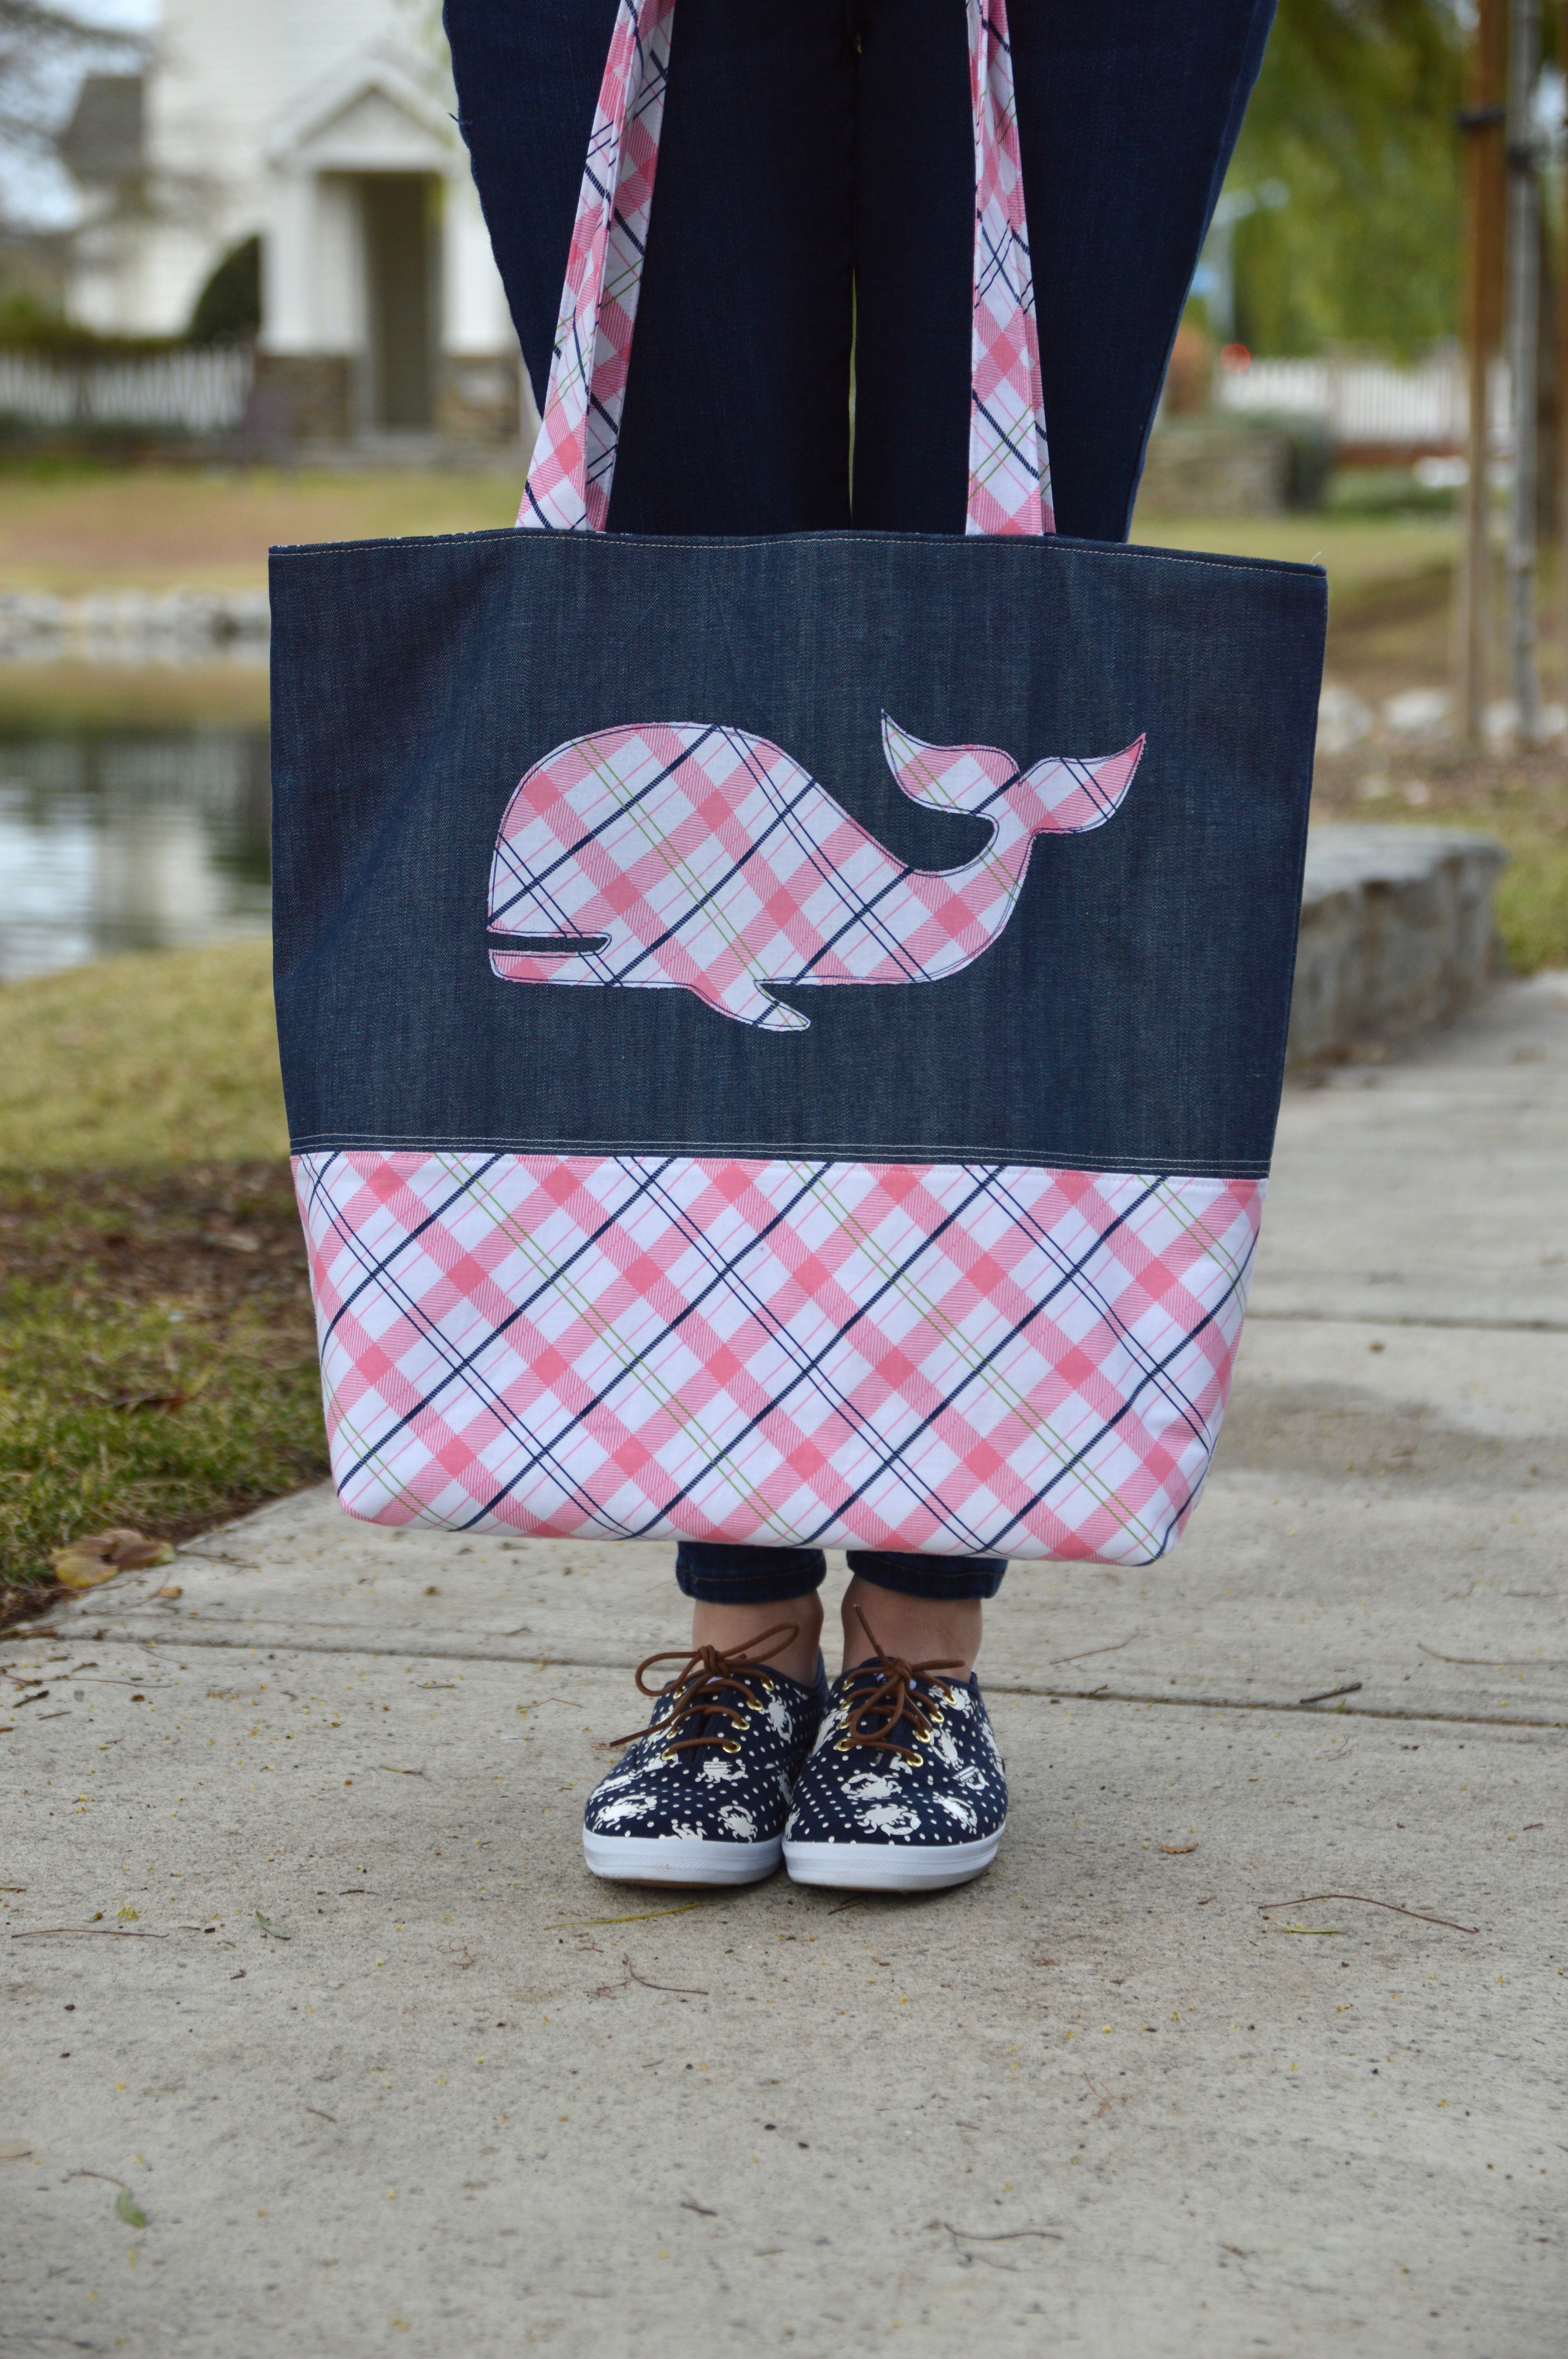
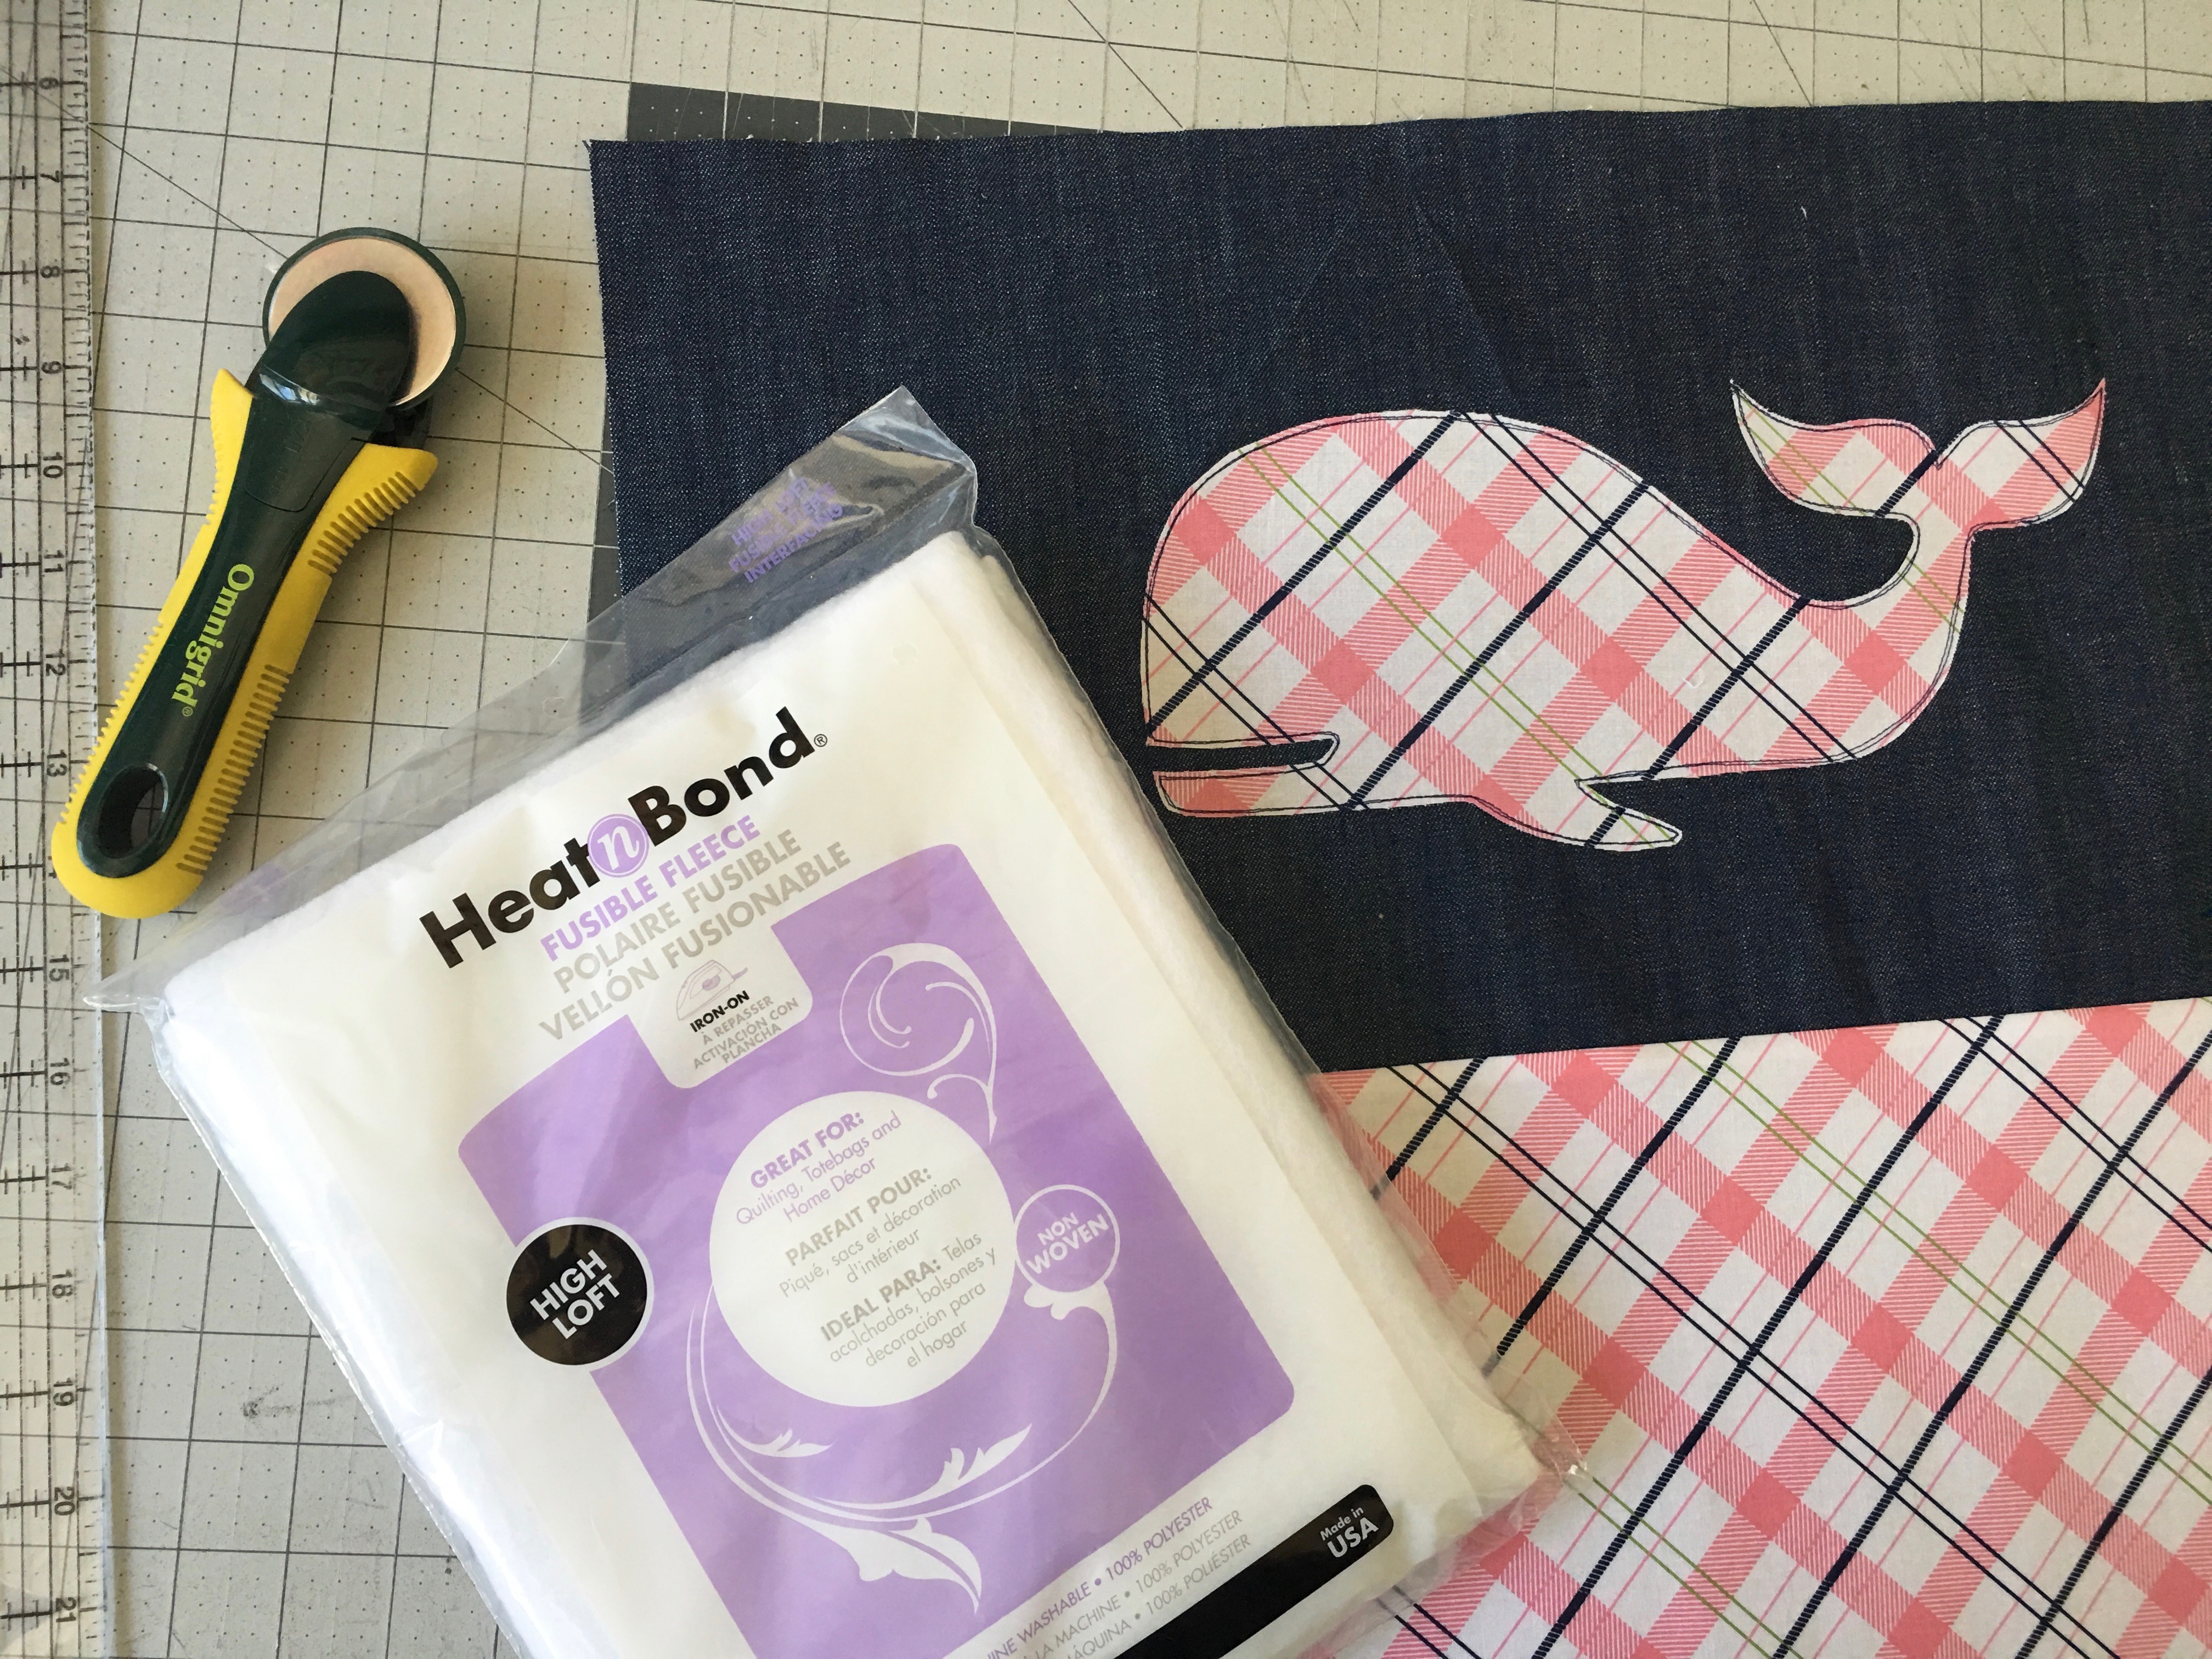
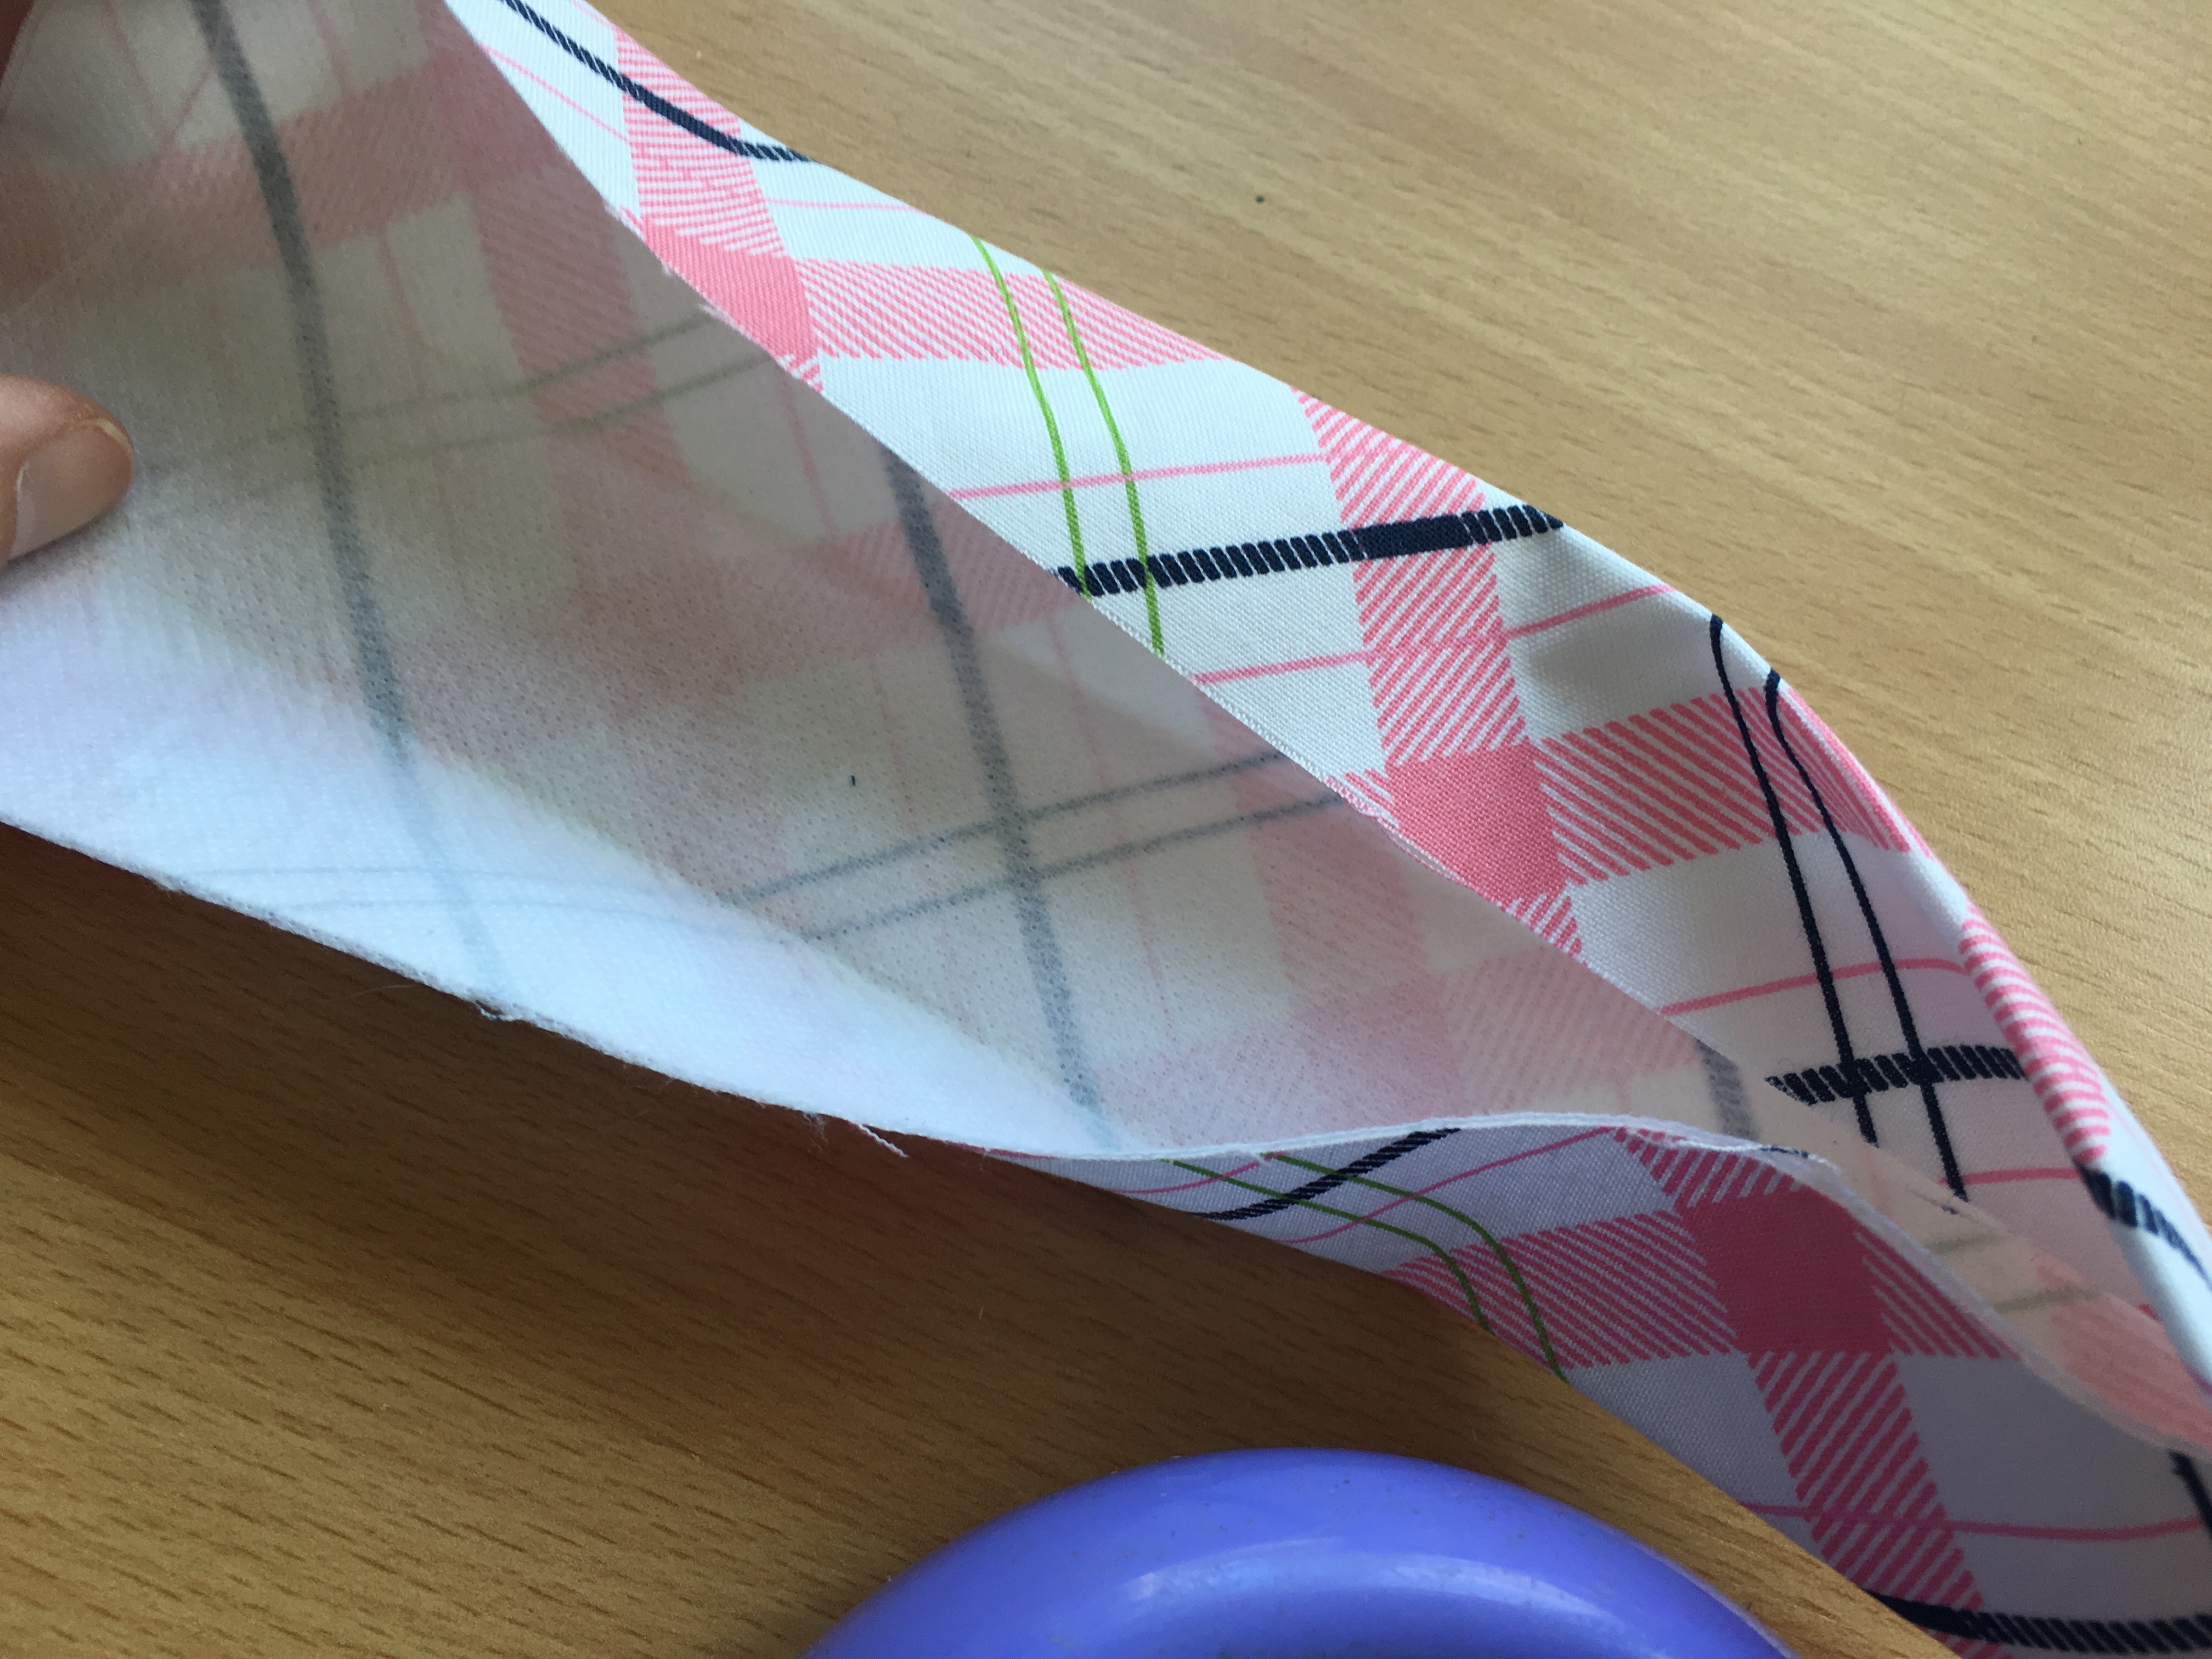
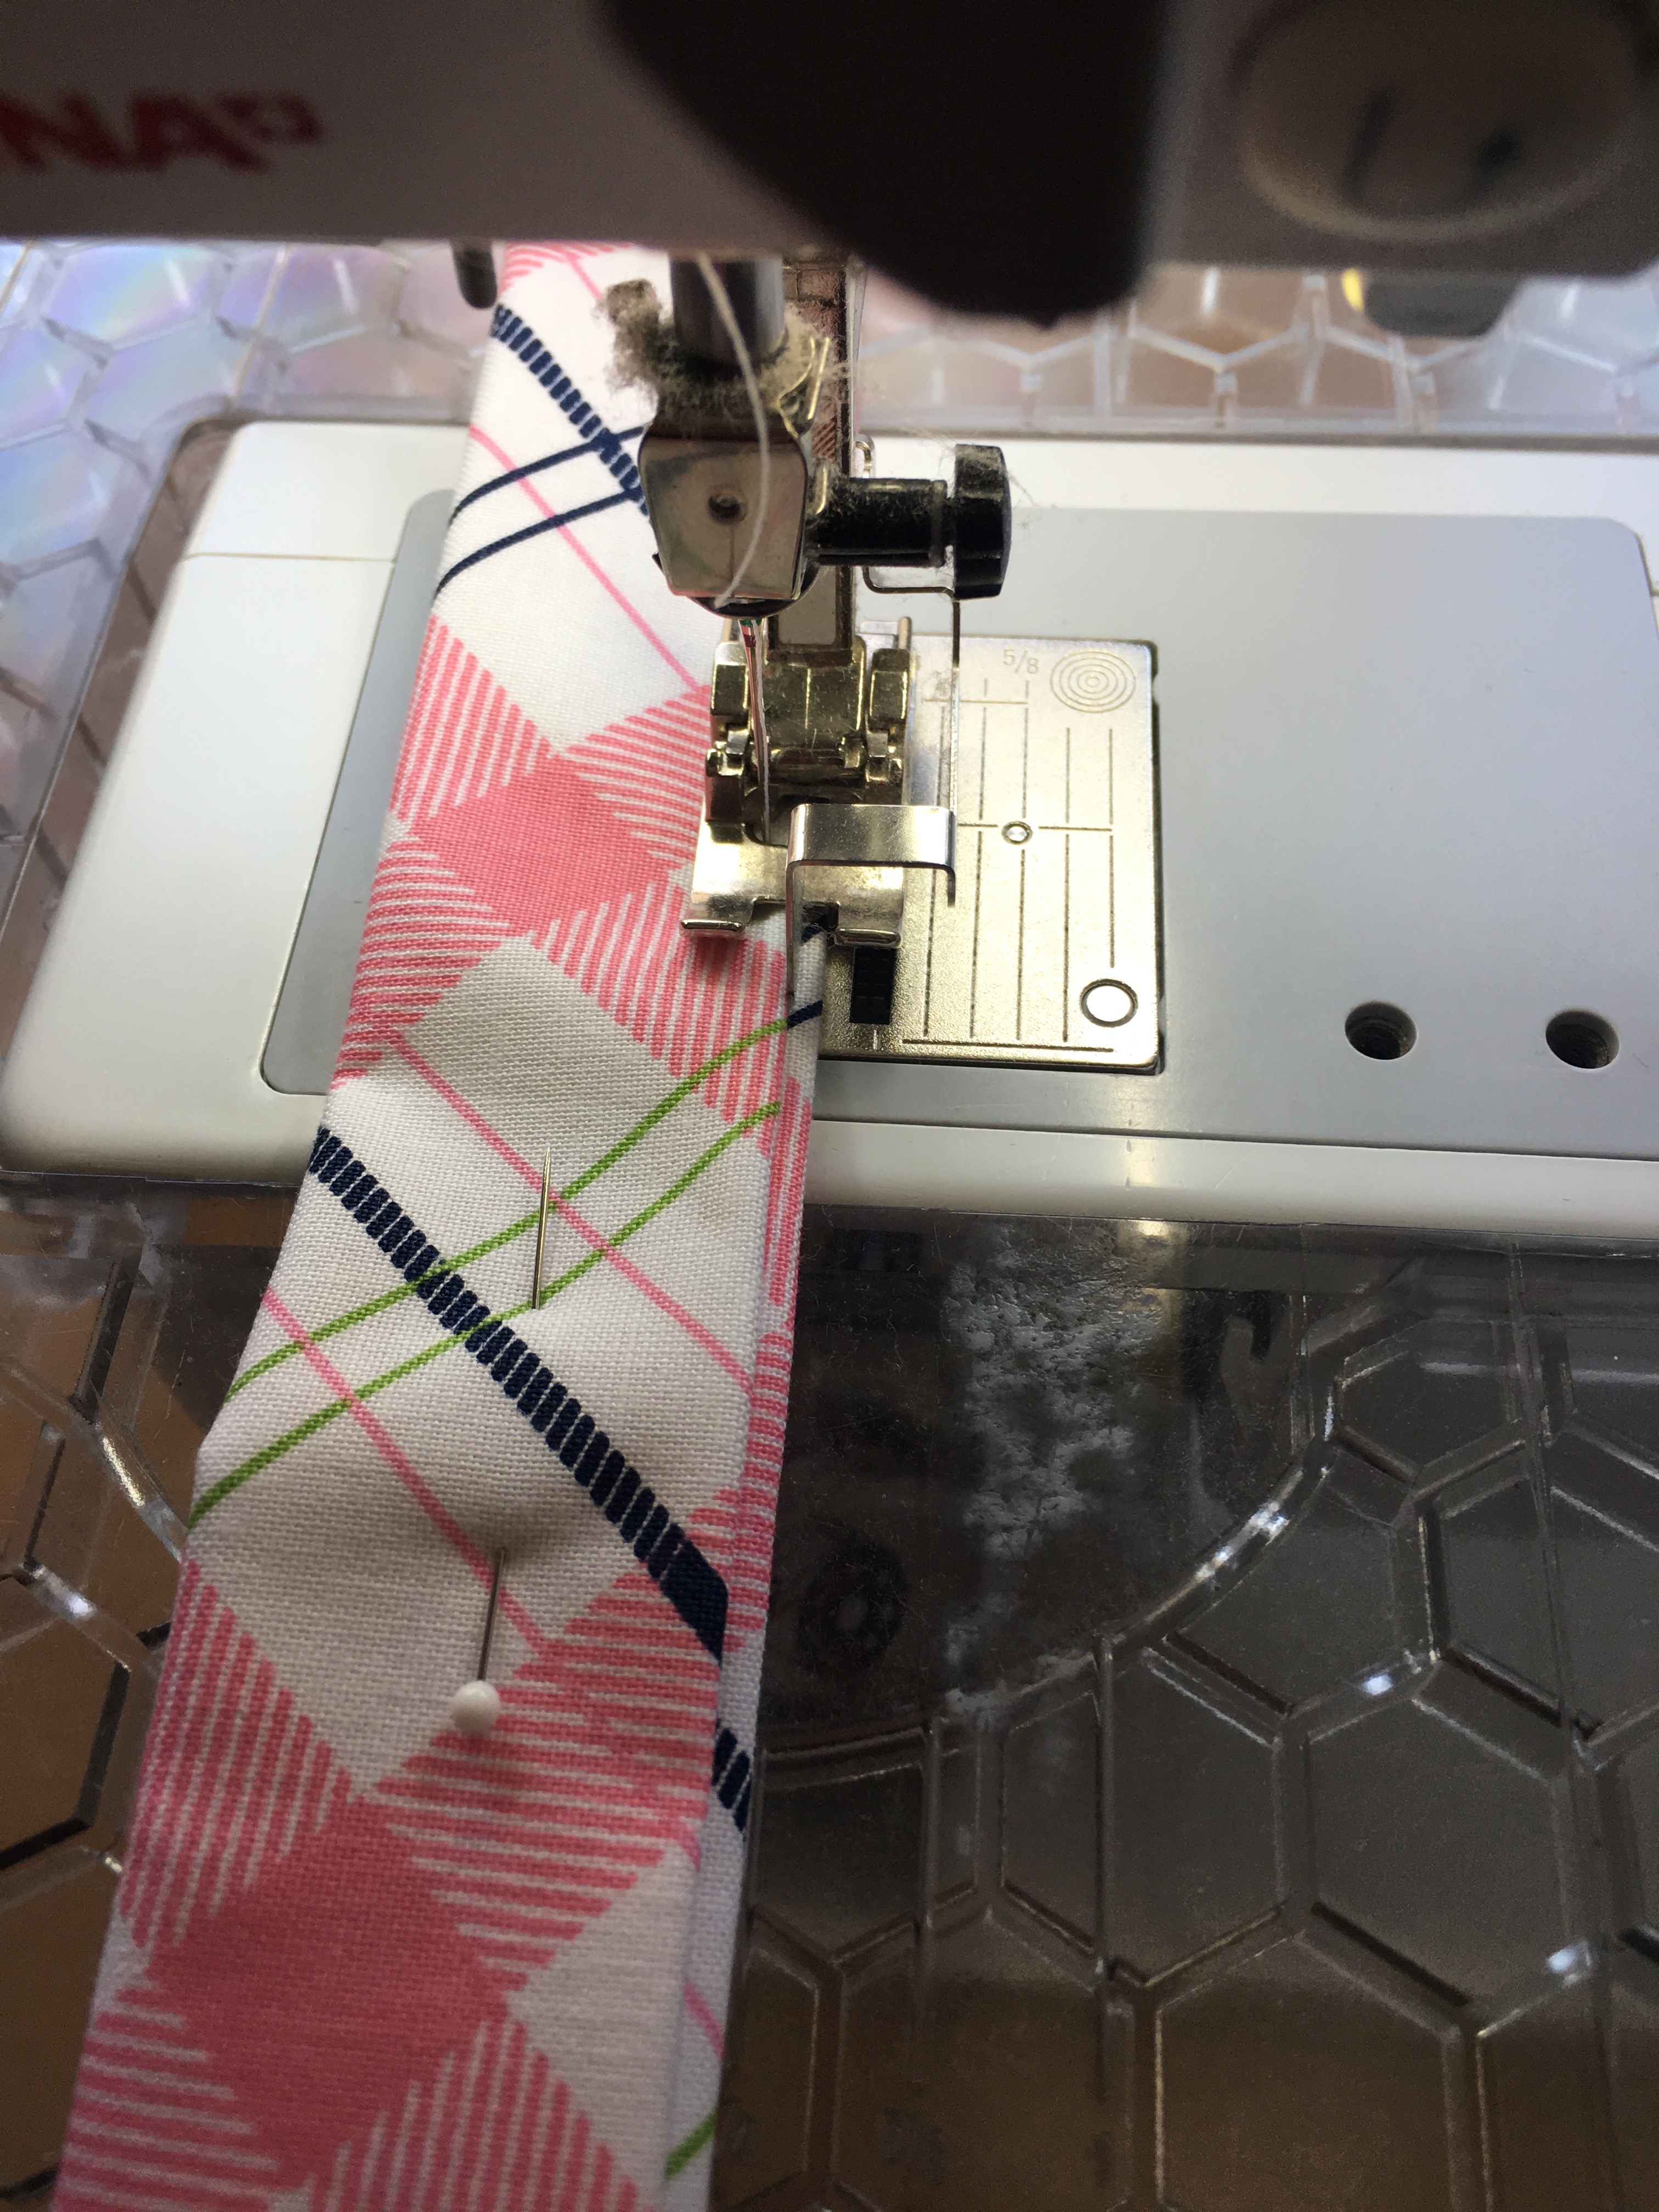
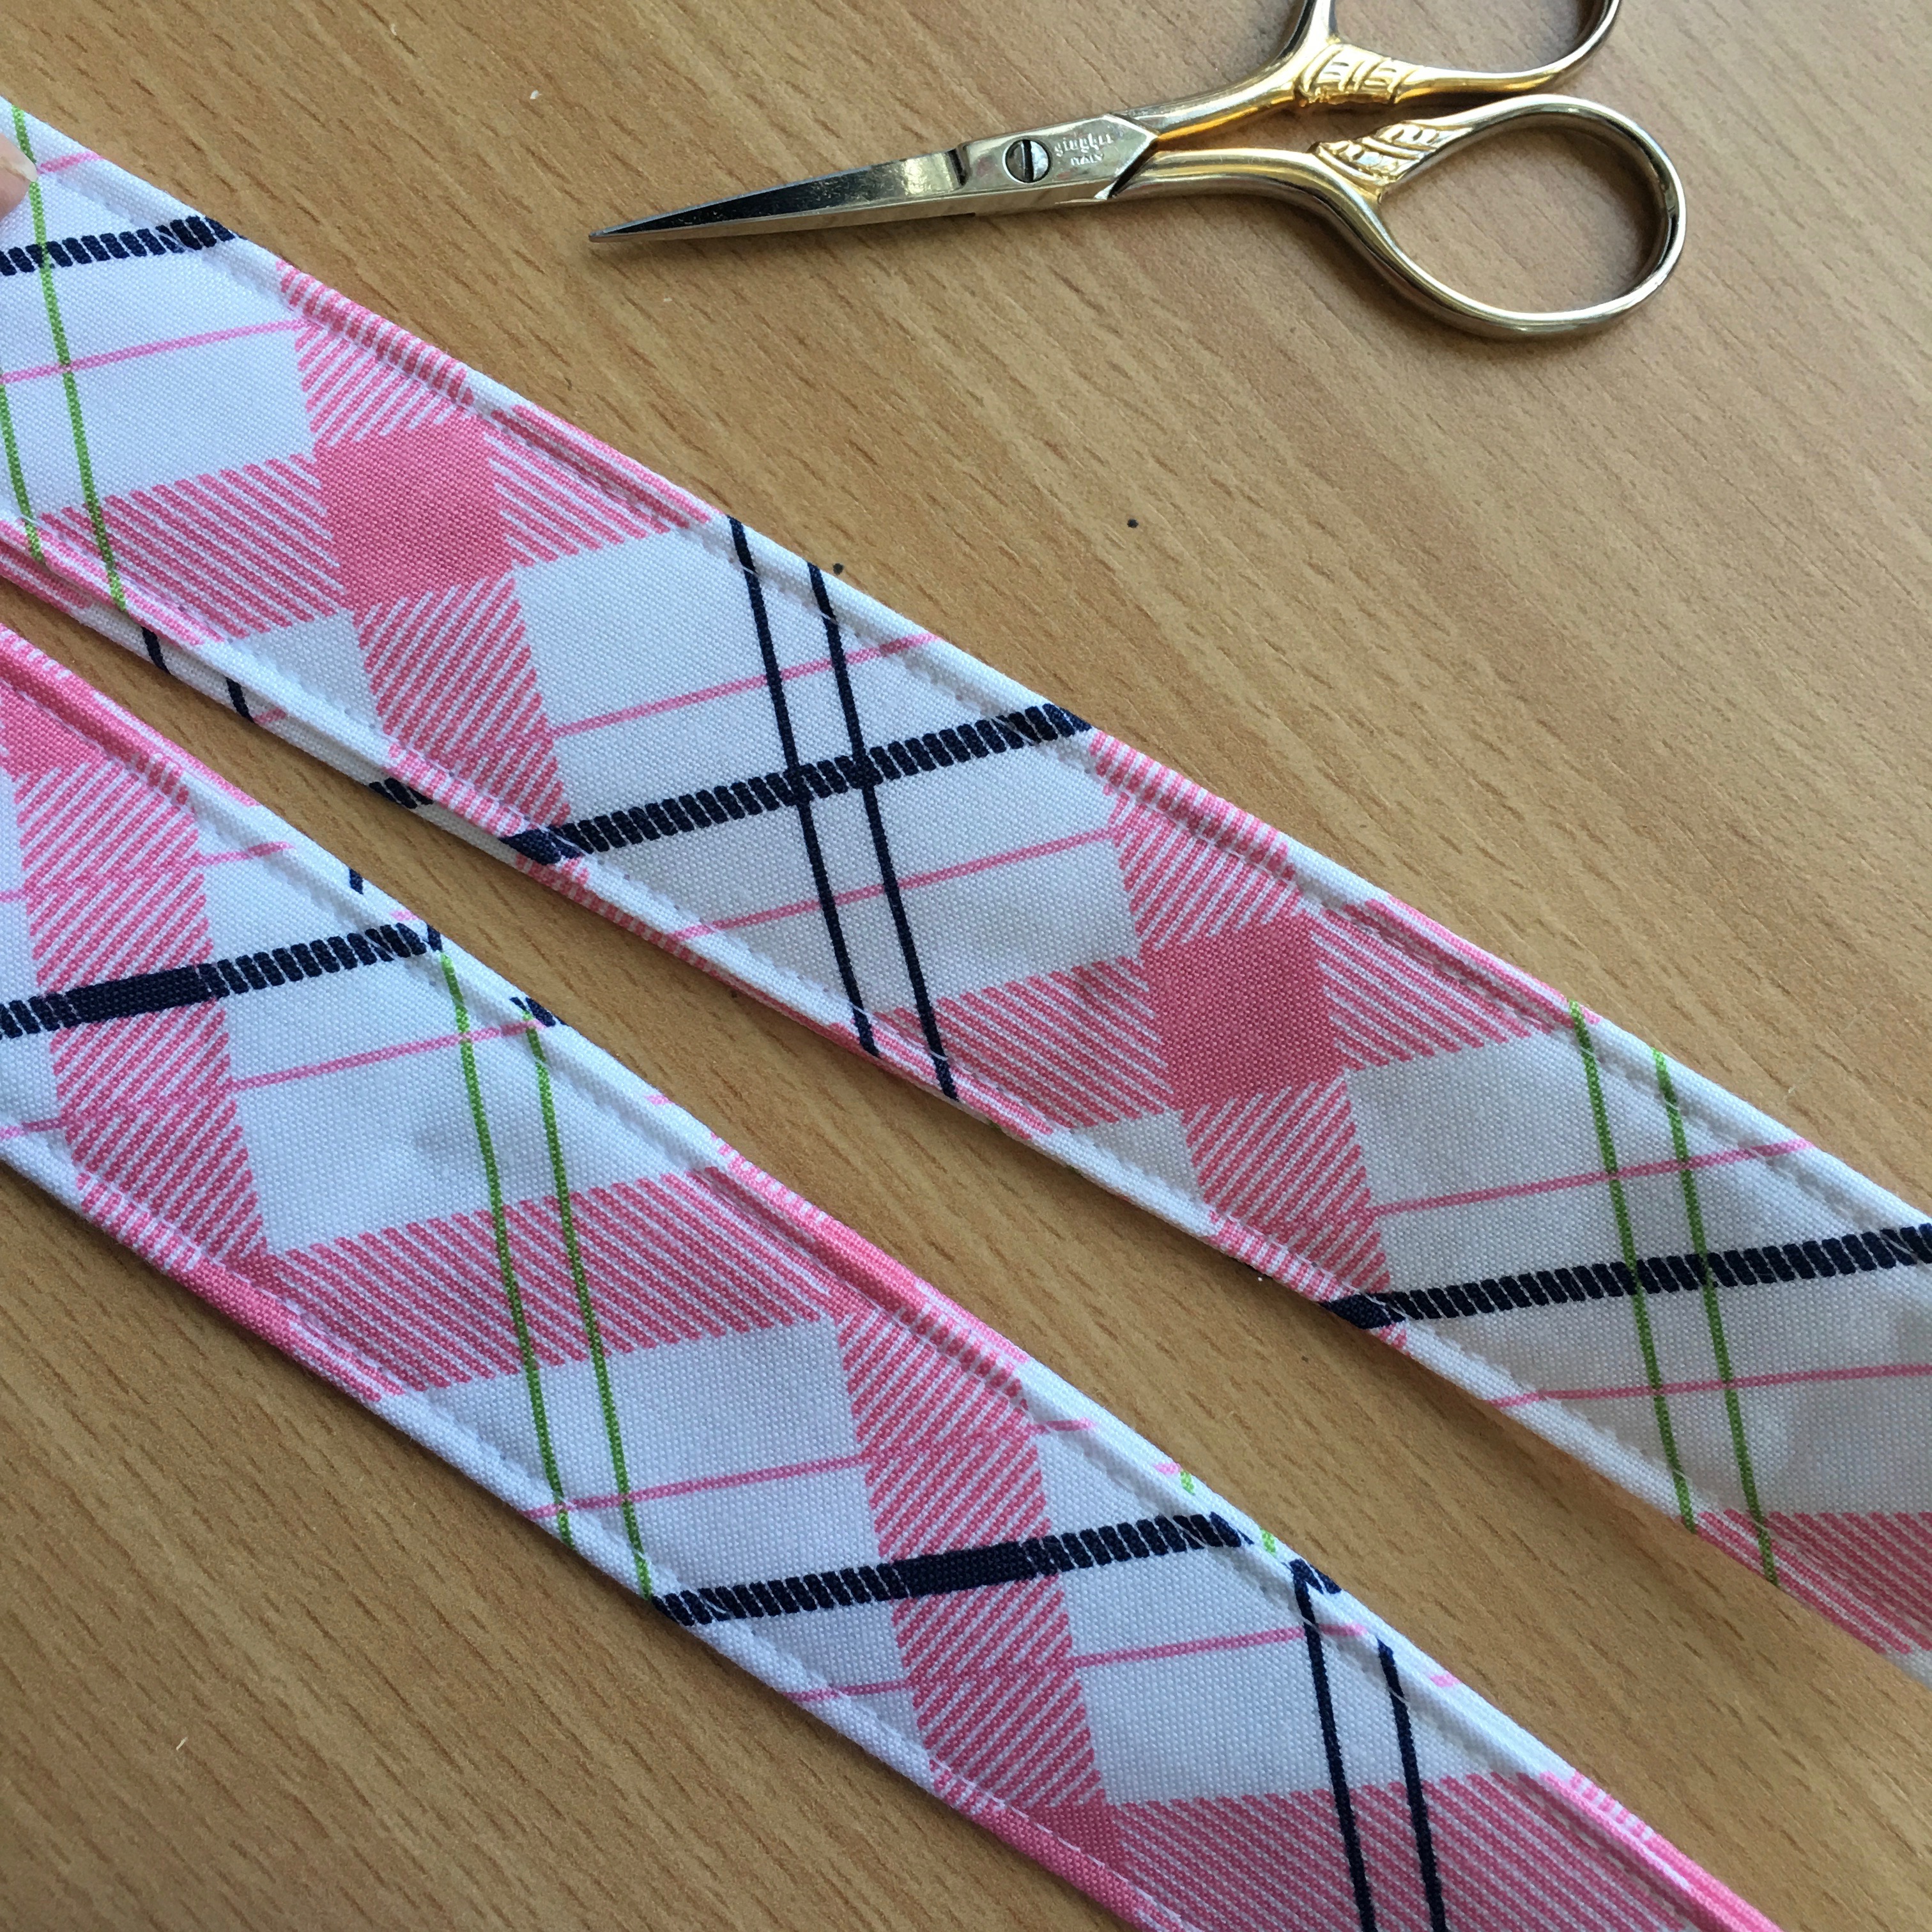
I am so in love with this tote bag!  It is such a great size, and if feels sturdy and it is super preppy plaid cute!!
DSC_0136
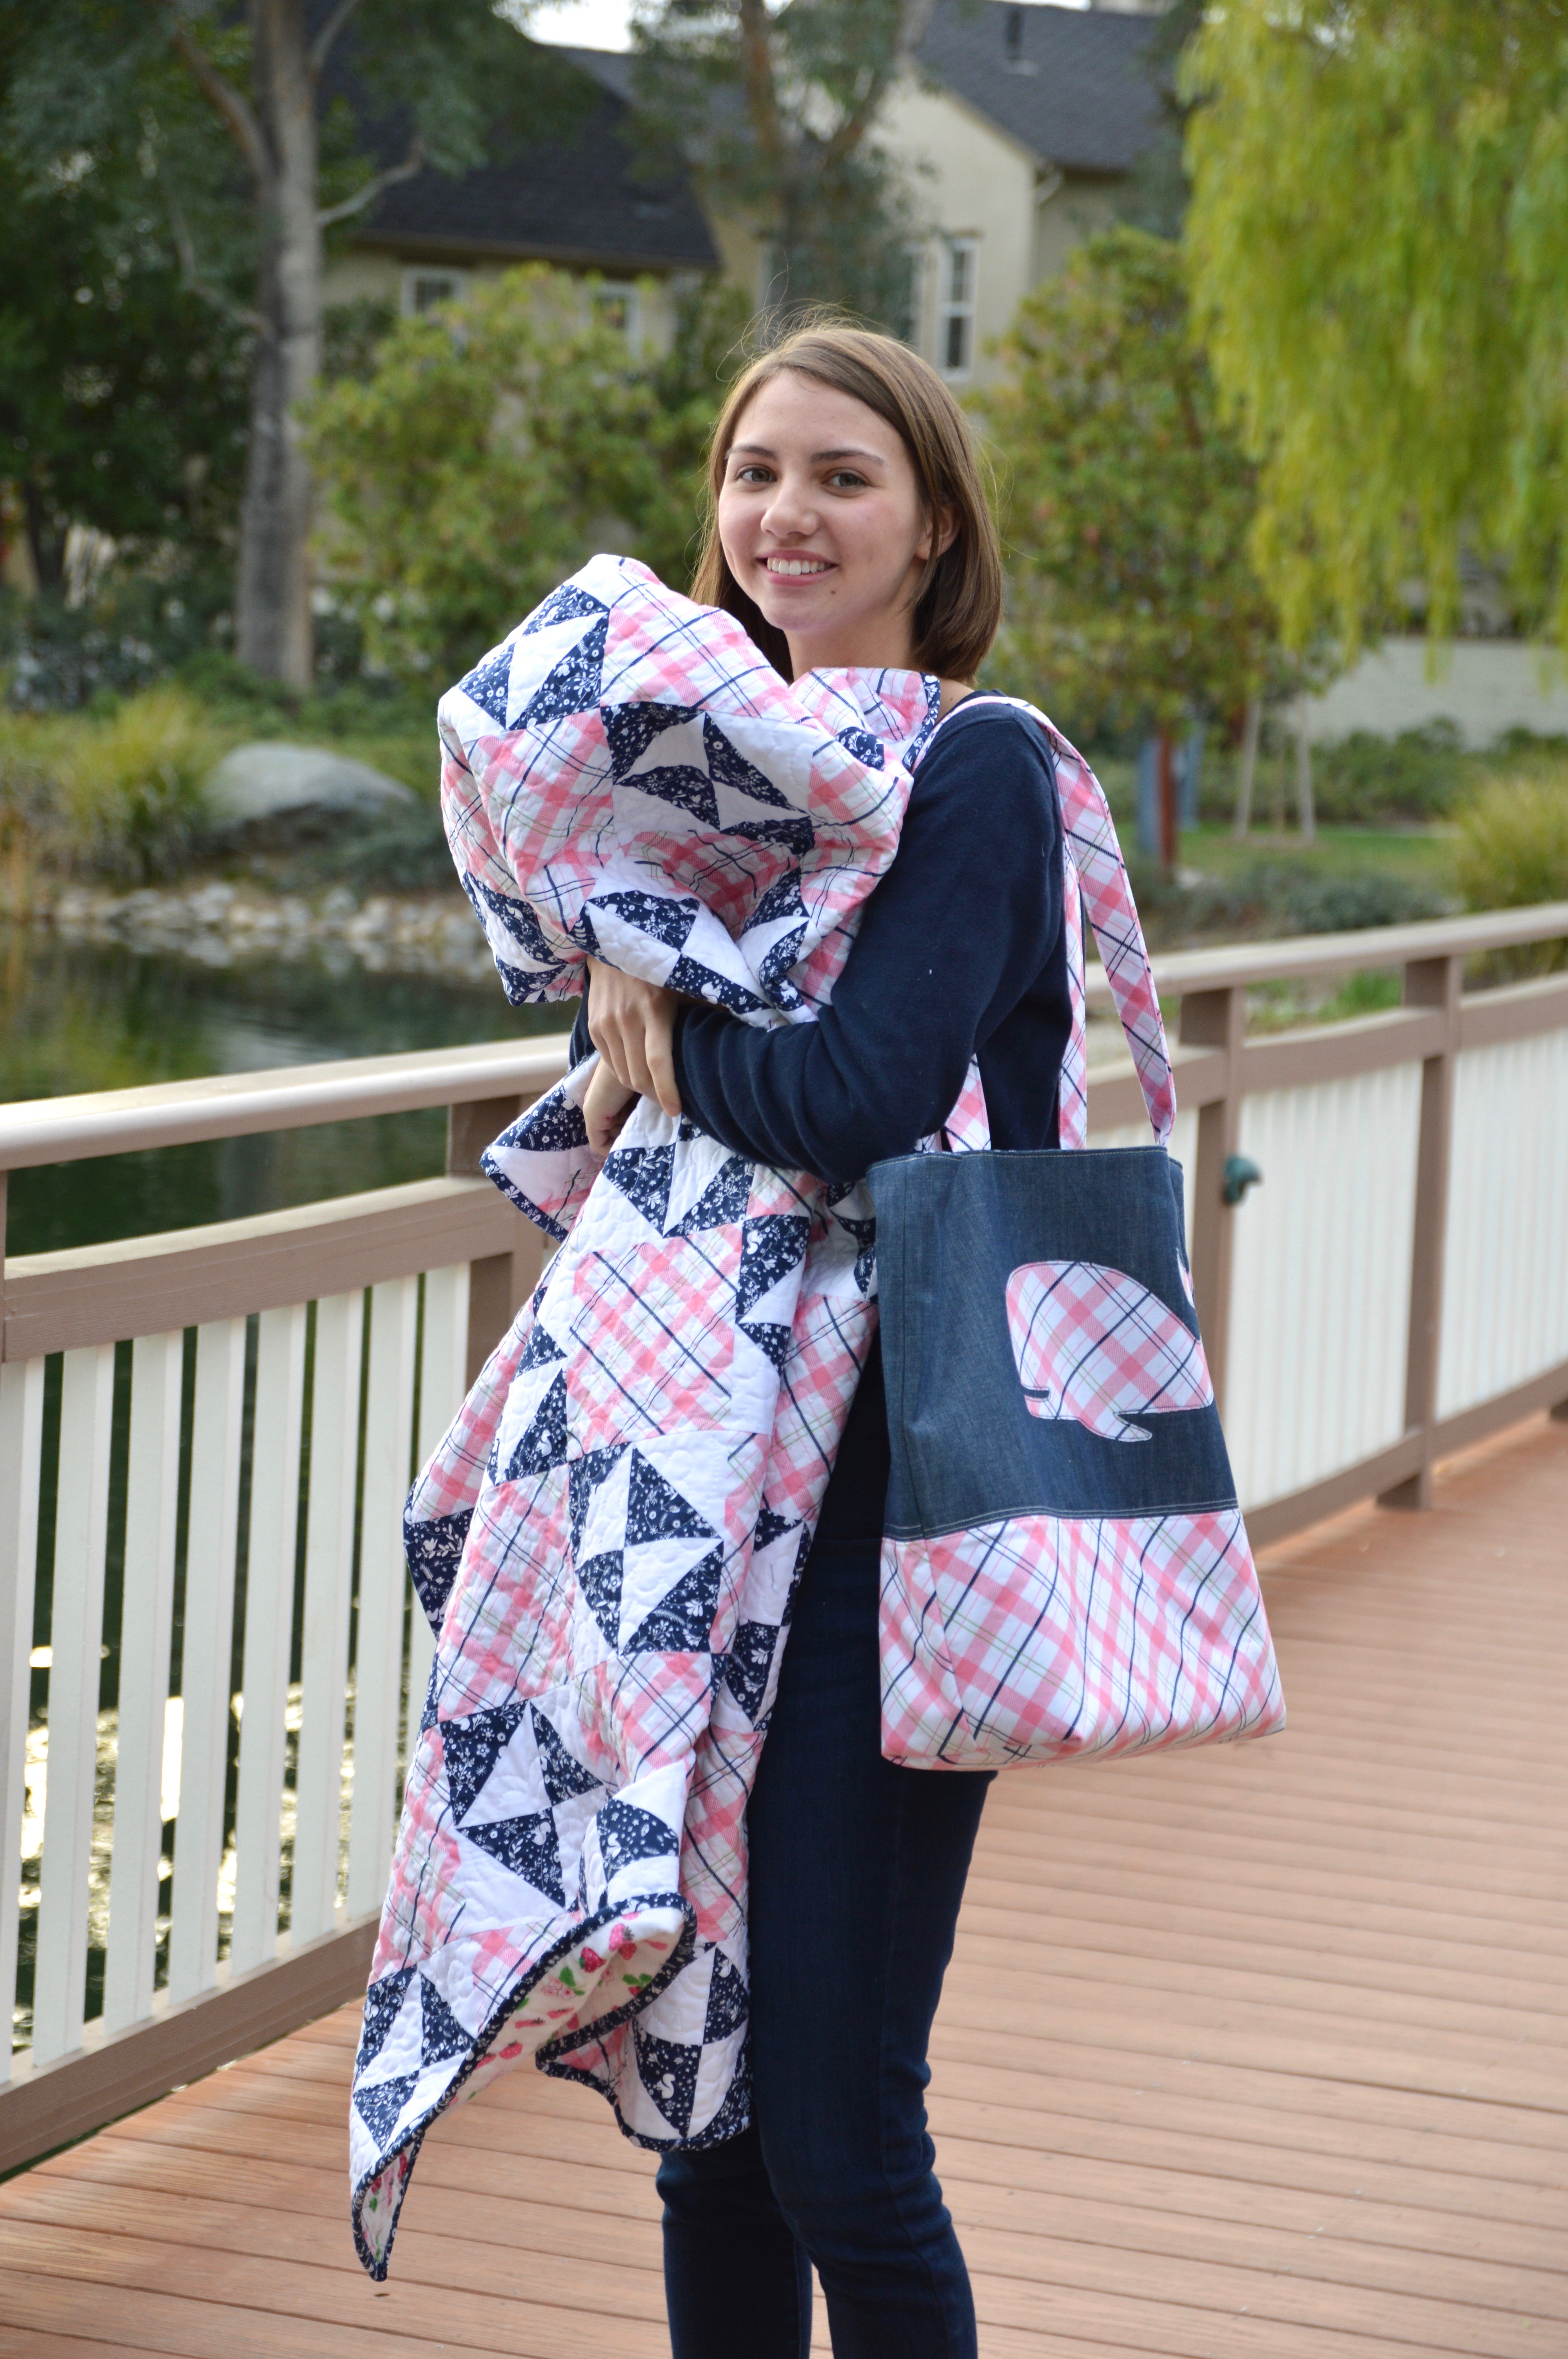
I’m ready for an Eastern Seaboard Vacation!!!
Together they make the Perfect Preppy Plaid Pair!!!!!
DSC_0110

Enchanted logo 2

Be sure to check out these amazing designers to see what they’ve created using Riley Blake’s Enchanted Fabric!!!

Blog Tour Schedule

Monday, Jan 23rd – Little Londyn

Tuesday, Jan 24th – Jedi Craft Girl

Wednesday, Jan 25th – Loose Threads

Thursday, Jan 26th – Meags and Me

Friday, Jan 27th – Pretty by Hand

Monday, Jan 30th – Tie Dye Diva

Tuesday, Jan 31st – Two Sisters as Squirrel Hallow

Wednesday, Feb 1st – Striped Swallow Designs

Thursday, Feb 2nd – Izzy and Ivy

Friday, Feb 3rd – Ellis and Higgs

Monday, Feb 6th – Aurifil

Tuesday, Feb 7th – The Crafy Quilter

Wednesday, Feb 8th – Two Sisters at Squirrel Hallow

Thursday, Feb 9th – Jina Barney Designz

Friday, Feb 10th – Riley Blake

You could win a bundle of Enchanted fabric by visiting Dodi’s blog, Loose Threads (www.sashgals.com) and leaving a comment.

One entry per blog post, per day of the Blog Tour, there on Loose Threads.

Enter every day to increase your chance of winning!!!

True Blue Summer Satchel


summer satchel
I love summer! Isn’t it the best!!!! In our family we have lots of outdoor actives and camps scheduled. Sometimes I need to carry a few items around that I can have quick access too, like my clipboard, water, bug spray and flashlight. I came up with this pattern for a cross-body satchel. It’s not complicated and sews up quick – it would be fun to make one for the whole family – you can match at your family reunion!IMG_8140_2

I used Heat n Bond® Medium Weight Fusible Stabilizer to give the bag more stability. Don’t you just love these whales by Blend Fabrics!!!
IMG_8136_2


Here is how you can make one:

Supplies:

1/2 yard outer bag
1/2 yard lining
1/3 yard bag strap
1 yard Heat n Bond® Fusible staibilizer

Cut:

(2) outer bag 15″wide x 16″ tall
(2) lining 15″wide x 16″ tall
(2) stabilizer 15″wide x 16″ tall
(2) Strap 5″ x WOF


IMG_8108_2

Fuse the HeatnBond® stabilizer to the wrong side of the (2) outer bag pieces.IMG_8109_2

With right sides together, pin all the way around the outer bag, leaving the top open. Do the same with the lining pieces. Sew using 1/3″ seam all the way around leaving the top open. You should have (2) bags, one outer and one lining.IMG_8110_2

To form a pleate in the bottom, cut a 1″ notch out of the bottom corners of the outer bag and the lining.IMG_8111

Match seams, pin, and sew 1/4″ seam, backstitching to start and stop.IMG_8112

Sew the (2) 5″ strap pieces together end to end. Press the seams open. Measure how long you want your strap. Mine was 48″. Cut at the desired length. Fold in half, right sides together and sew 1/3″ seam all the way down.
IMG_8113

Turn right side out, press and top stitch.IMG_8114

Baste (1/8″) the ends of the strap centering on the side seams on the right side of the outer bag.IMG_8115

Place the lining inside the bag so that right sides are facing each other. Match side seams and pin all the way around.IMG_8116Sew 1/4″ seam all the way around the top of the bag leaving a 3″ opening. Turn bag right side out and press. Sew a 1/8″ top stitch around the bag top, sewing the opening closed.
IMG_8117_2

IMG_8130

IMG_8122

To add a little detail to the fabric, I used Deco Foil™ Transfer Adhesive and followed the loops on the fabric. After it dried I rubbed the Deco Foils™ on the adhesive. You can add a little shine to any project this way!!

IMG_8142

Anchor Pillow Tutorial

anchor pillow tutorial

It’s feeling like summer here in Southern California with temperatures reaching up to 90 degrees!  Let the fun begin!  I’m such a summer girl – I hate to be cold!  In celebration of the wonderful warm weather we’re having I thought I would share this fun nautical pillow with you.  The fabrics are from Blend’s True Blue line which is in reproduction since it was so popular!  Which is great news because it’s one of my favorites!!

anchor pillow 1

Let’s get started!

Supplies:

Fat Quarters or quarter yard cuts of a variety of the True Blue Fabrics

fat quarter or 1/2 yard white fabric for center

2/3 yard backing

2 yards ric rac

Heat n Bond Lite EZ Print Sheets

20″ pillow insert

2.5 yards pillow trim

Anchor Pattern, Click HERE

IMG_6370

Cut the center white fabric 12.5″ x 12.5″.  Print out the anchor on the Heat n Bond Lite EZ print sheets or trace the anchor onto Heat n Bond Lite.  Press the Heat n Bond to the wrong side of the anchor fabric.  Cut the anchor out and peel off the backing paper.  Press the anchor in the center of the white fabric.  Top stitch around the anchor.

IMG_6371

Position the ric rac as picture:

IMG_6372

I used Spray n Bond to hold it in place while I sewed.  You can also use pins.  Sew the ric rac on with matching thread.

anchor pillow diagram

Refer to the above diagram for sewing the patchy boarder.  All squares are 2.5″ and all seams are 1/4″.

IMG_6375

Once the pillow top is complete, spray baste it to the batting and then to a backing.  The backing fabric won’t be seen, it just gives the pillow added stability.  Quilt as desired.

IMG_6376

I quilted mine with wavy lines and then “pebbles” in the center.  After quilting square up each side.  The final measurement should be pretty close to 20″.  You loose a little with the quilting.

Baste the pillow trim onto the pillow top.  Finish the quilt as desired.  I always put a zipper in the back of my pillow and you can follow the instructions in this tutorial.

anchor pillow 4

I love how this pillow turned out and it goes great with all my other nautical sewing projects!  For more nautical projects, click HERE.

anchor pillow 9

anchor pillow 6

Mufasa was especially impressed with this project 🙂

anchor pillow 3

anchor pillow 5


Come Sail Away With Me Nautical Quilt

sail away with me quilt 4

I LOVE this quilt!  I had the quilt top finished AND quilted and it has been waiting for binding for a long time.  This weekend was cold and rainy and it was the perfect time to finish up a little work in progress.  Today the sun came out and I was able to take a few pictures of the final quilt!  I am so ready for spring and MORE nautical quilts!!!

IMG_7534

I love the fabrics in this quilt: Day Sail by Moda.  They have such a fun feminine-nautical feel.  The pattern is available HERE with a bonus wall hanging pattern as well.

sail away with me quilt 10

Since I don’t own a sail boat (which this quilt would be perfect for) it will be a great size for the beach or a picnic or maybe I will just hang it on the wall so it doesn’t get dirty 🙂

sail away with me quilt 6

sail away with me quilt 2

sail away with me quilt 7

I have the best quilt “modelers”.  So cute and helpful!!!

sail away with me quilt 8    sail away with me quilt 3

Let me know if you get a chance to make this by tagging me on Instagram!sail away with me quilt
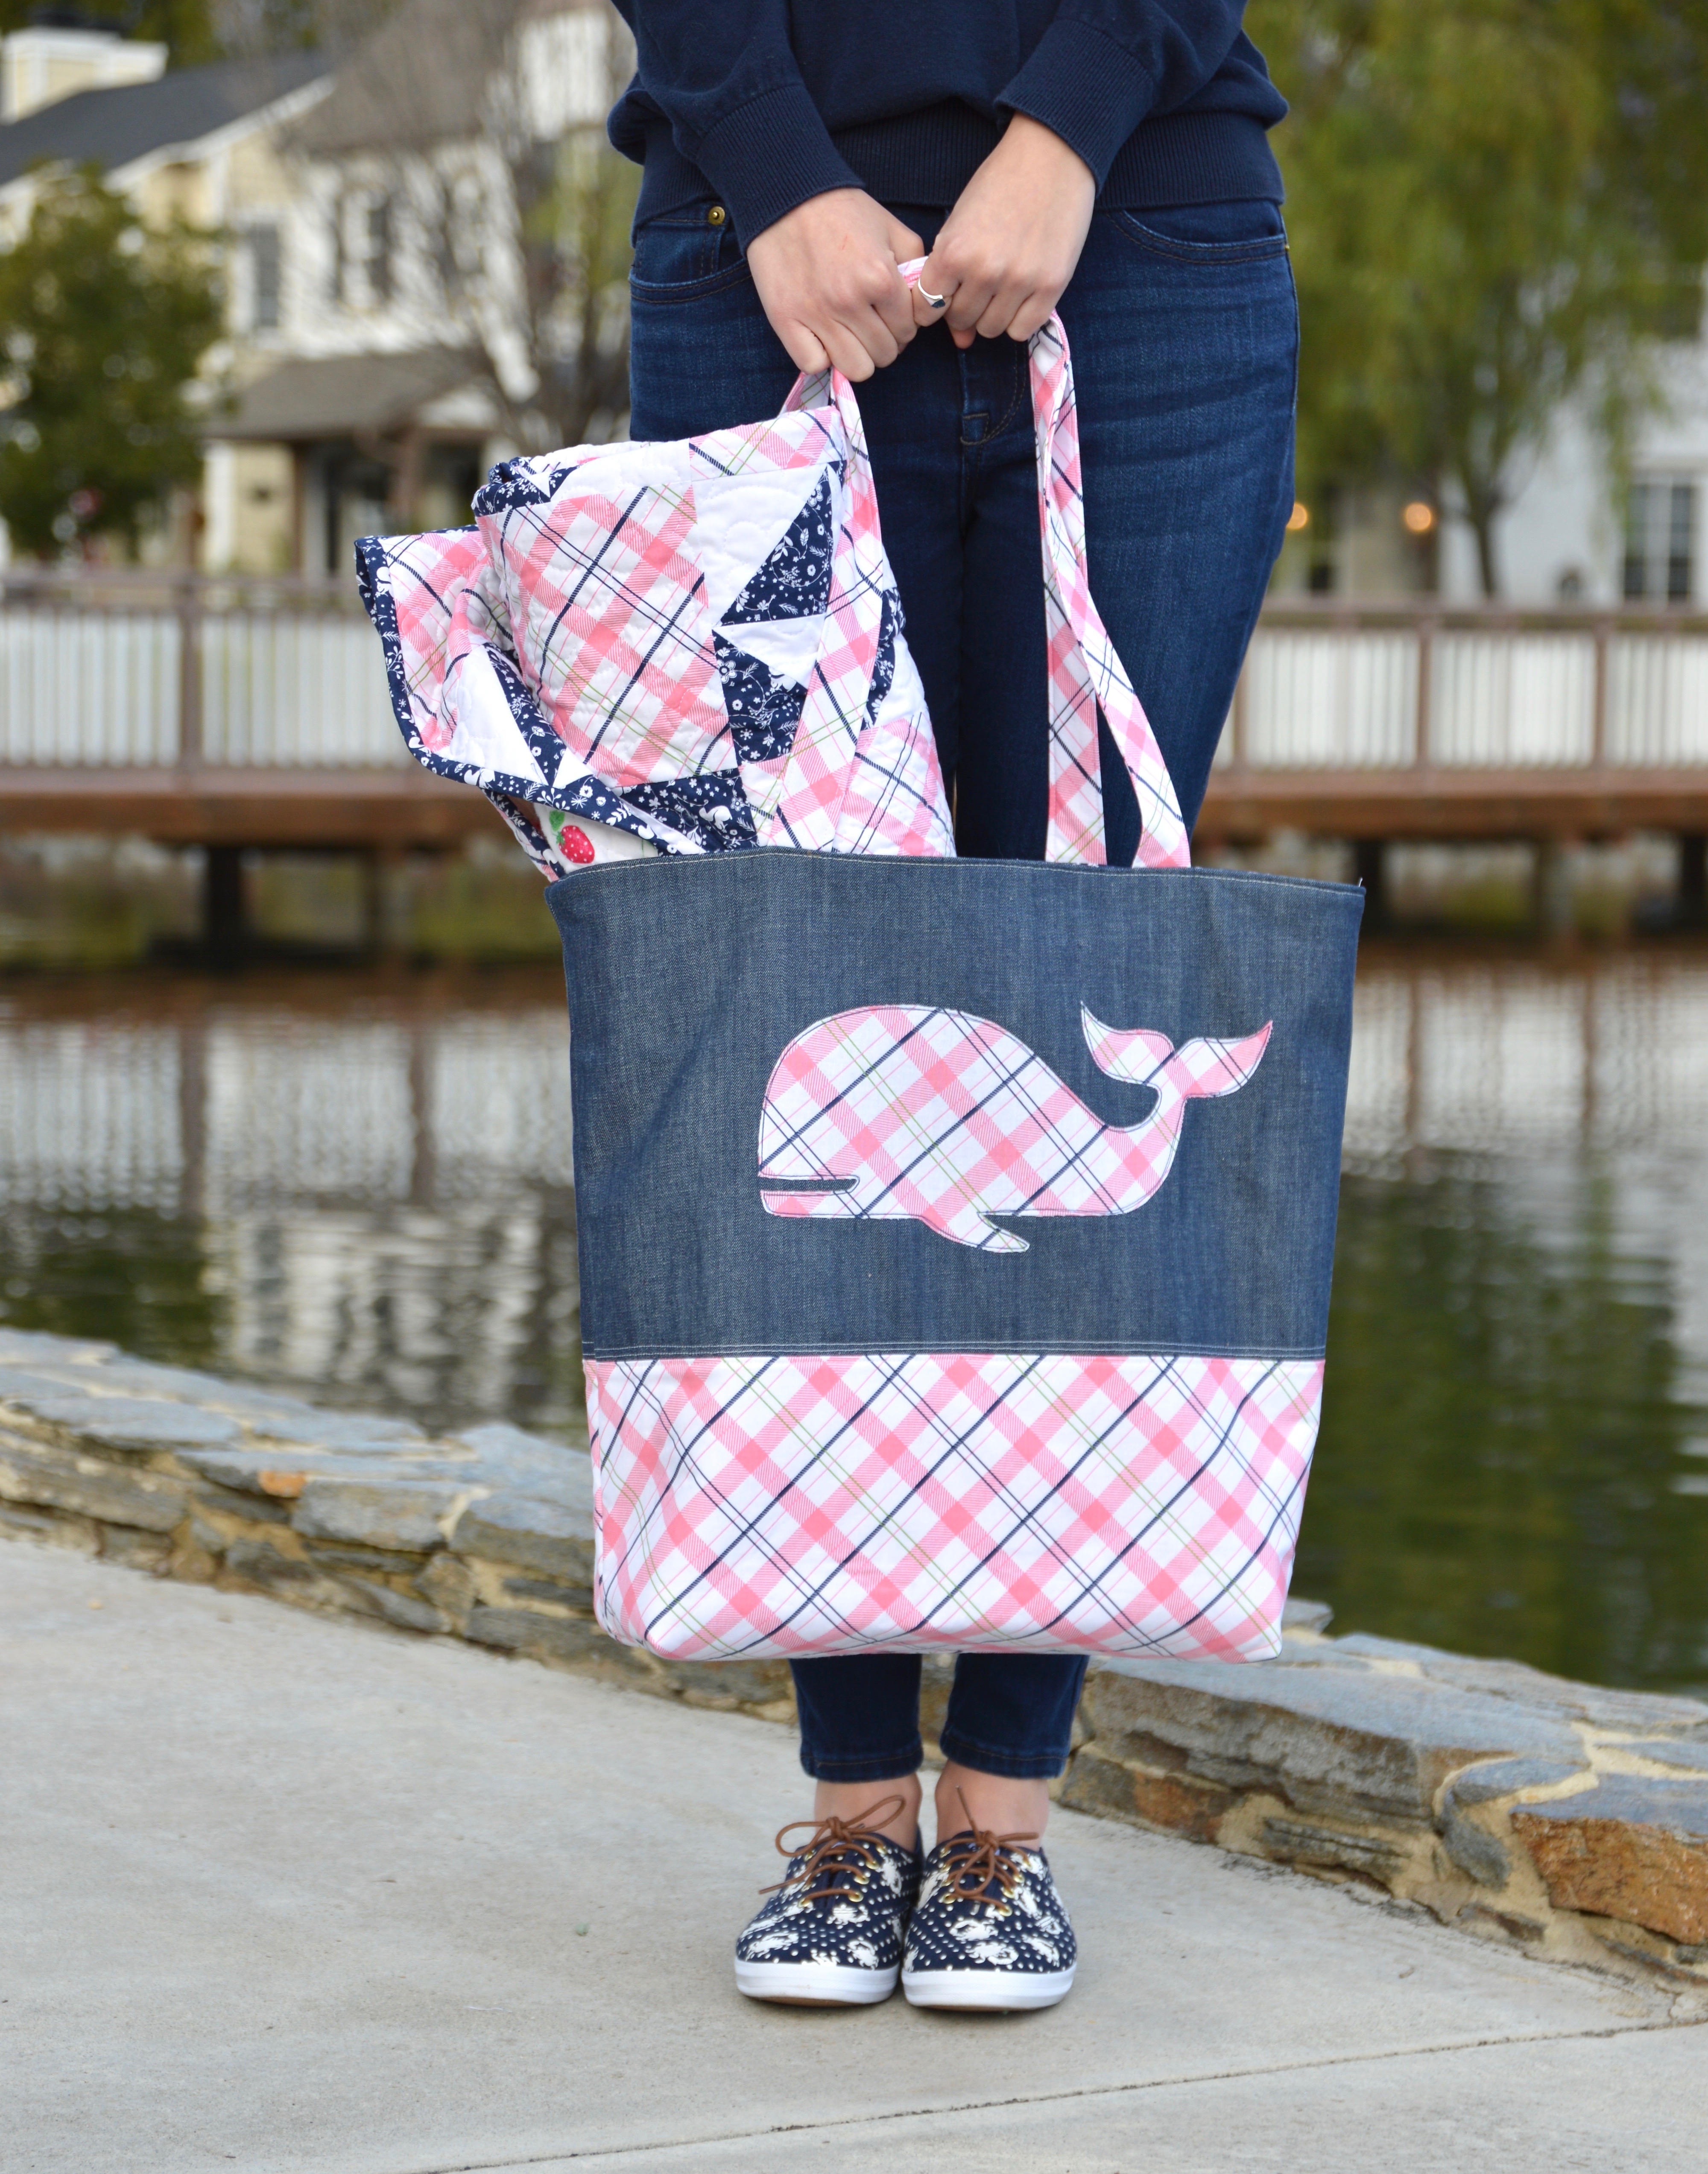
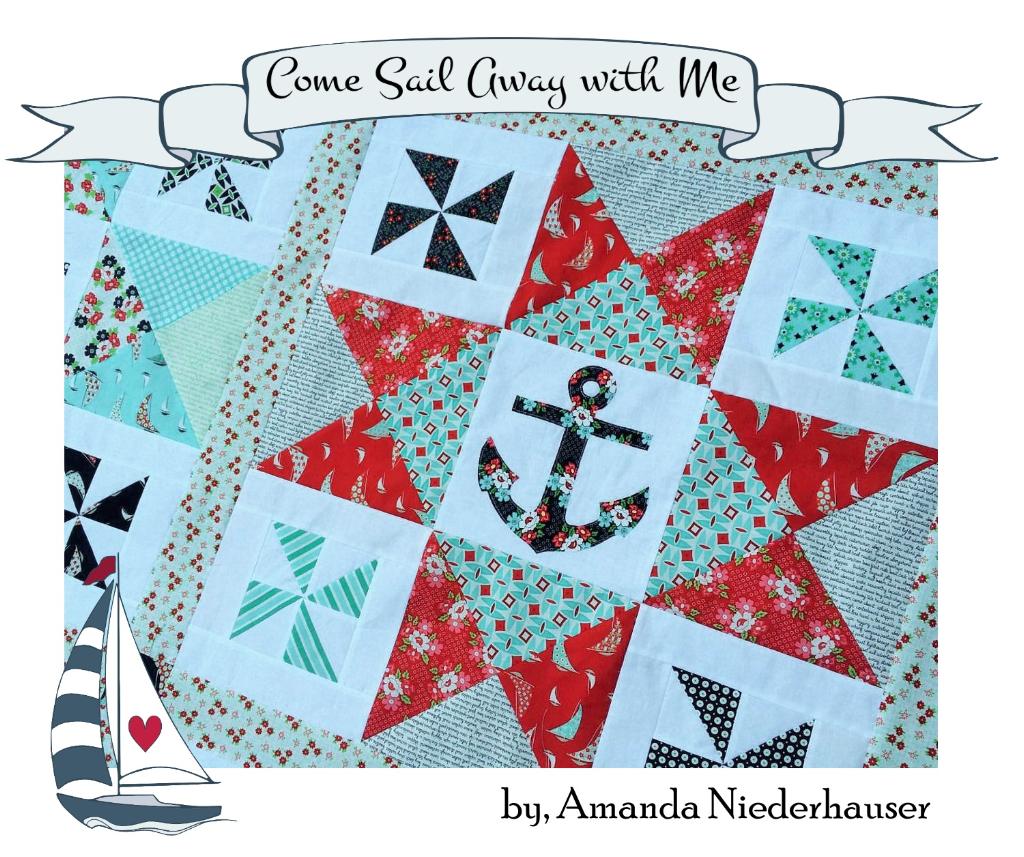
Come Sail Away With Me!!!

Sizzix Applique Anchor Ornaments


sizzix anchor ornamentsMy Sizzix Applique Anchor Ornaments project is over at the Sizzix blog today!  Sizzix has introduced an ANCHOR DIE!!!!  My mind has been blown!  Think of all the amazing projects we can make now!  Pillows, quilts, skirts, shirts, bags, table runners, and the list goes on and on!  I love the idea of nautical and Christmas intertwined.  I cam up with this fun little ornament – you can hang on a tree or on a hook.  It would make the perfect gift for your ocean loving friends!!

sizzix anchor ornament. 3

sizzix anchor ornament. 2

Mufasa’s favorite sewing projects involve the Sizzix machine!


sizzix anchor ornament. 7

Hop on over for the instructions.  Wouldn’t these be cute tied on packages!!!

sizzix anchor ornament. 5


My Favorite Beach Quilt {Blend Sun-sational}

my favorite beach quilt        It’s still August and I am going to enjoy every last minute of summer!  I love the Sun-sational fabric line from Blend Fabrics.  Just looking at them makes me feel like I’m enjoying summer at the beach.  I am a California girl who was raised loving the beach.  Through the years my family has come to love many beaches.  I thought it would be great to include the names of these beaches in the quilt.

my favorite beach quilt blend fabrics 108 It makes it so personal!  I used SoSoft Fabric Paint by DecoArt.  I purchased at my local Beverly’s Fabric and Craft store.  I’ve painted on T-shirts and fabric before with acrylic paint.  It kind of leaves a rough texture after it dries.  I wanted something soft that would blend nice with the fabric.  This totally did the trick!  After it dried I could hardly feel it was paint – it just felt like the fabric!

decoart sosoft paintHere is how you can make this quilt:

51″ x 64″ Finished quilt

Supplies:

Fat quarters of assorted beach prints

1.5 yards white cotton fabric

1/2 yard for binding

3 yards backing

So Soft fabric paint

Vinyl stencils

This quilt is made of up 4 “blocks”.  Two are rectangles and two are squares.  Below is the cutting instructions for each block.  You can make this quilt larger or smaller, or mix up the blocks to create a totally different pattern!

You will need:

(11) Beach Name Blocks

(15) Squared Blocks

(9) 8″ square theme print blocks

(8) 8″ x 15.5″ theme print rectangles

cutting instructions beach quilt

Once everything is cut prepare the stencil for the beach names.  I cut vinyl on my Cricut and peeled out the inside of the letters to leave a vinyl stencil.  Each beach name is a different font.  I put the vinyl on the 3″ x 15.5″ white strip and stenciled using the SoSoft paint.  I let dry completely then removed the vinyl.  I made sure to heat set the paint while I was pressing the block.

sunsational beach quilt blend fabrics 2

Once the paint is dry, sew the beach name block together. 1/4″ seams throughout.

sunsational beach quilt blend fabrics 6I love how they turned out!  Do you have any of the same favorite beaches as we do?

sunsational beach quilt blend fabrics 4Sew the squared blocks together by sewing a white square to both sides of the center blue square.  Press.  Add the top and bottom rectangles, press.

sunsational beach quilt blend fabrics

sunsational beach quilt blend fabrics 3Cut the remaining theme print blocks, you can use as many theme prints as you want!

sunsational beach quilt blend fabrics 7  Next comes the fun part – laying it out.  I played with several different patterns until I decided on this one.  There is not really a pattern to it, kind of random 🙂

sunsational beach quilt blend fabrics 9  It’s always a good idea to photograph your quilt layout, especially if you have a #kittyquilter in your home!  Mufasa!!!!!sunsational beach quilt blend fabrics 10Sew the blocks together in rows and the rows together, matching seams that intersect.  Make sure #kittyquilter inspects all finished work!!  Quilt as desired.sunsational beach quilt blend fabrics 11I put minky on the back and had my friend use her long arm quilting machine to quilt it.  I love the pattern she did!!

my favorite beach quilt blend fabrics 106The binding is cut on the bias, my favorite way to make binding!!

my favorite beach quilt blend fabrics 100

my favorite beach quilt blend fabrics 104I’m so ready for a beach vacation now!!!

my favorite beach quilt blend fabrics 102

my favorite beach quilt blend fabrics 107Thanks for stopping by!!!  Surfs up!!!

my favorite beach quilt blend fabrics 105

Riley Blake Designs Lobster Pillows

riley blake lobster pillowsDSC_0456

lobster pillow riley blake 6

lobster summer pillow riley blake

Home-Dec-Love-AD-01-731x1024
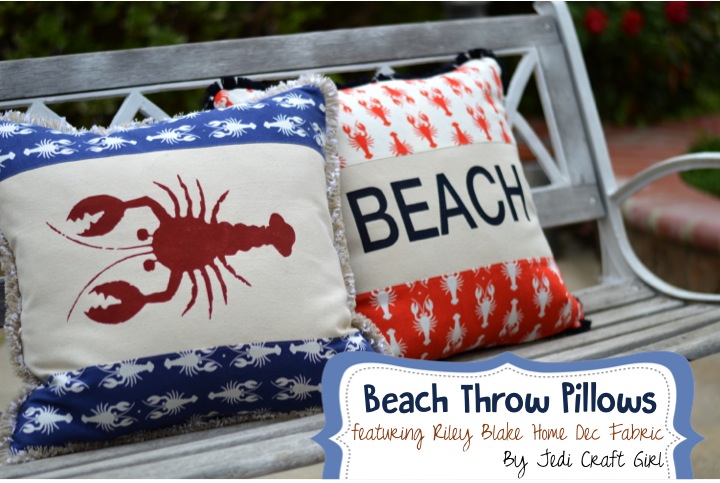
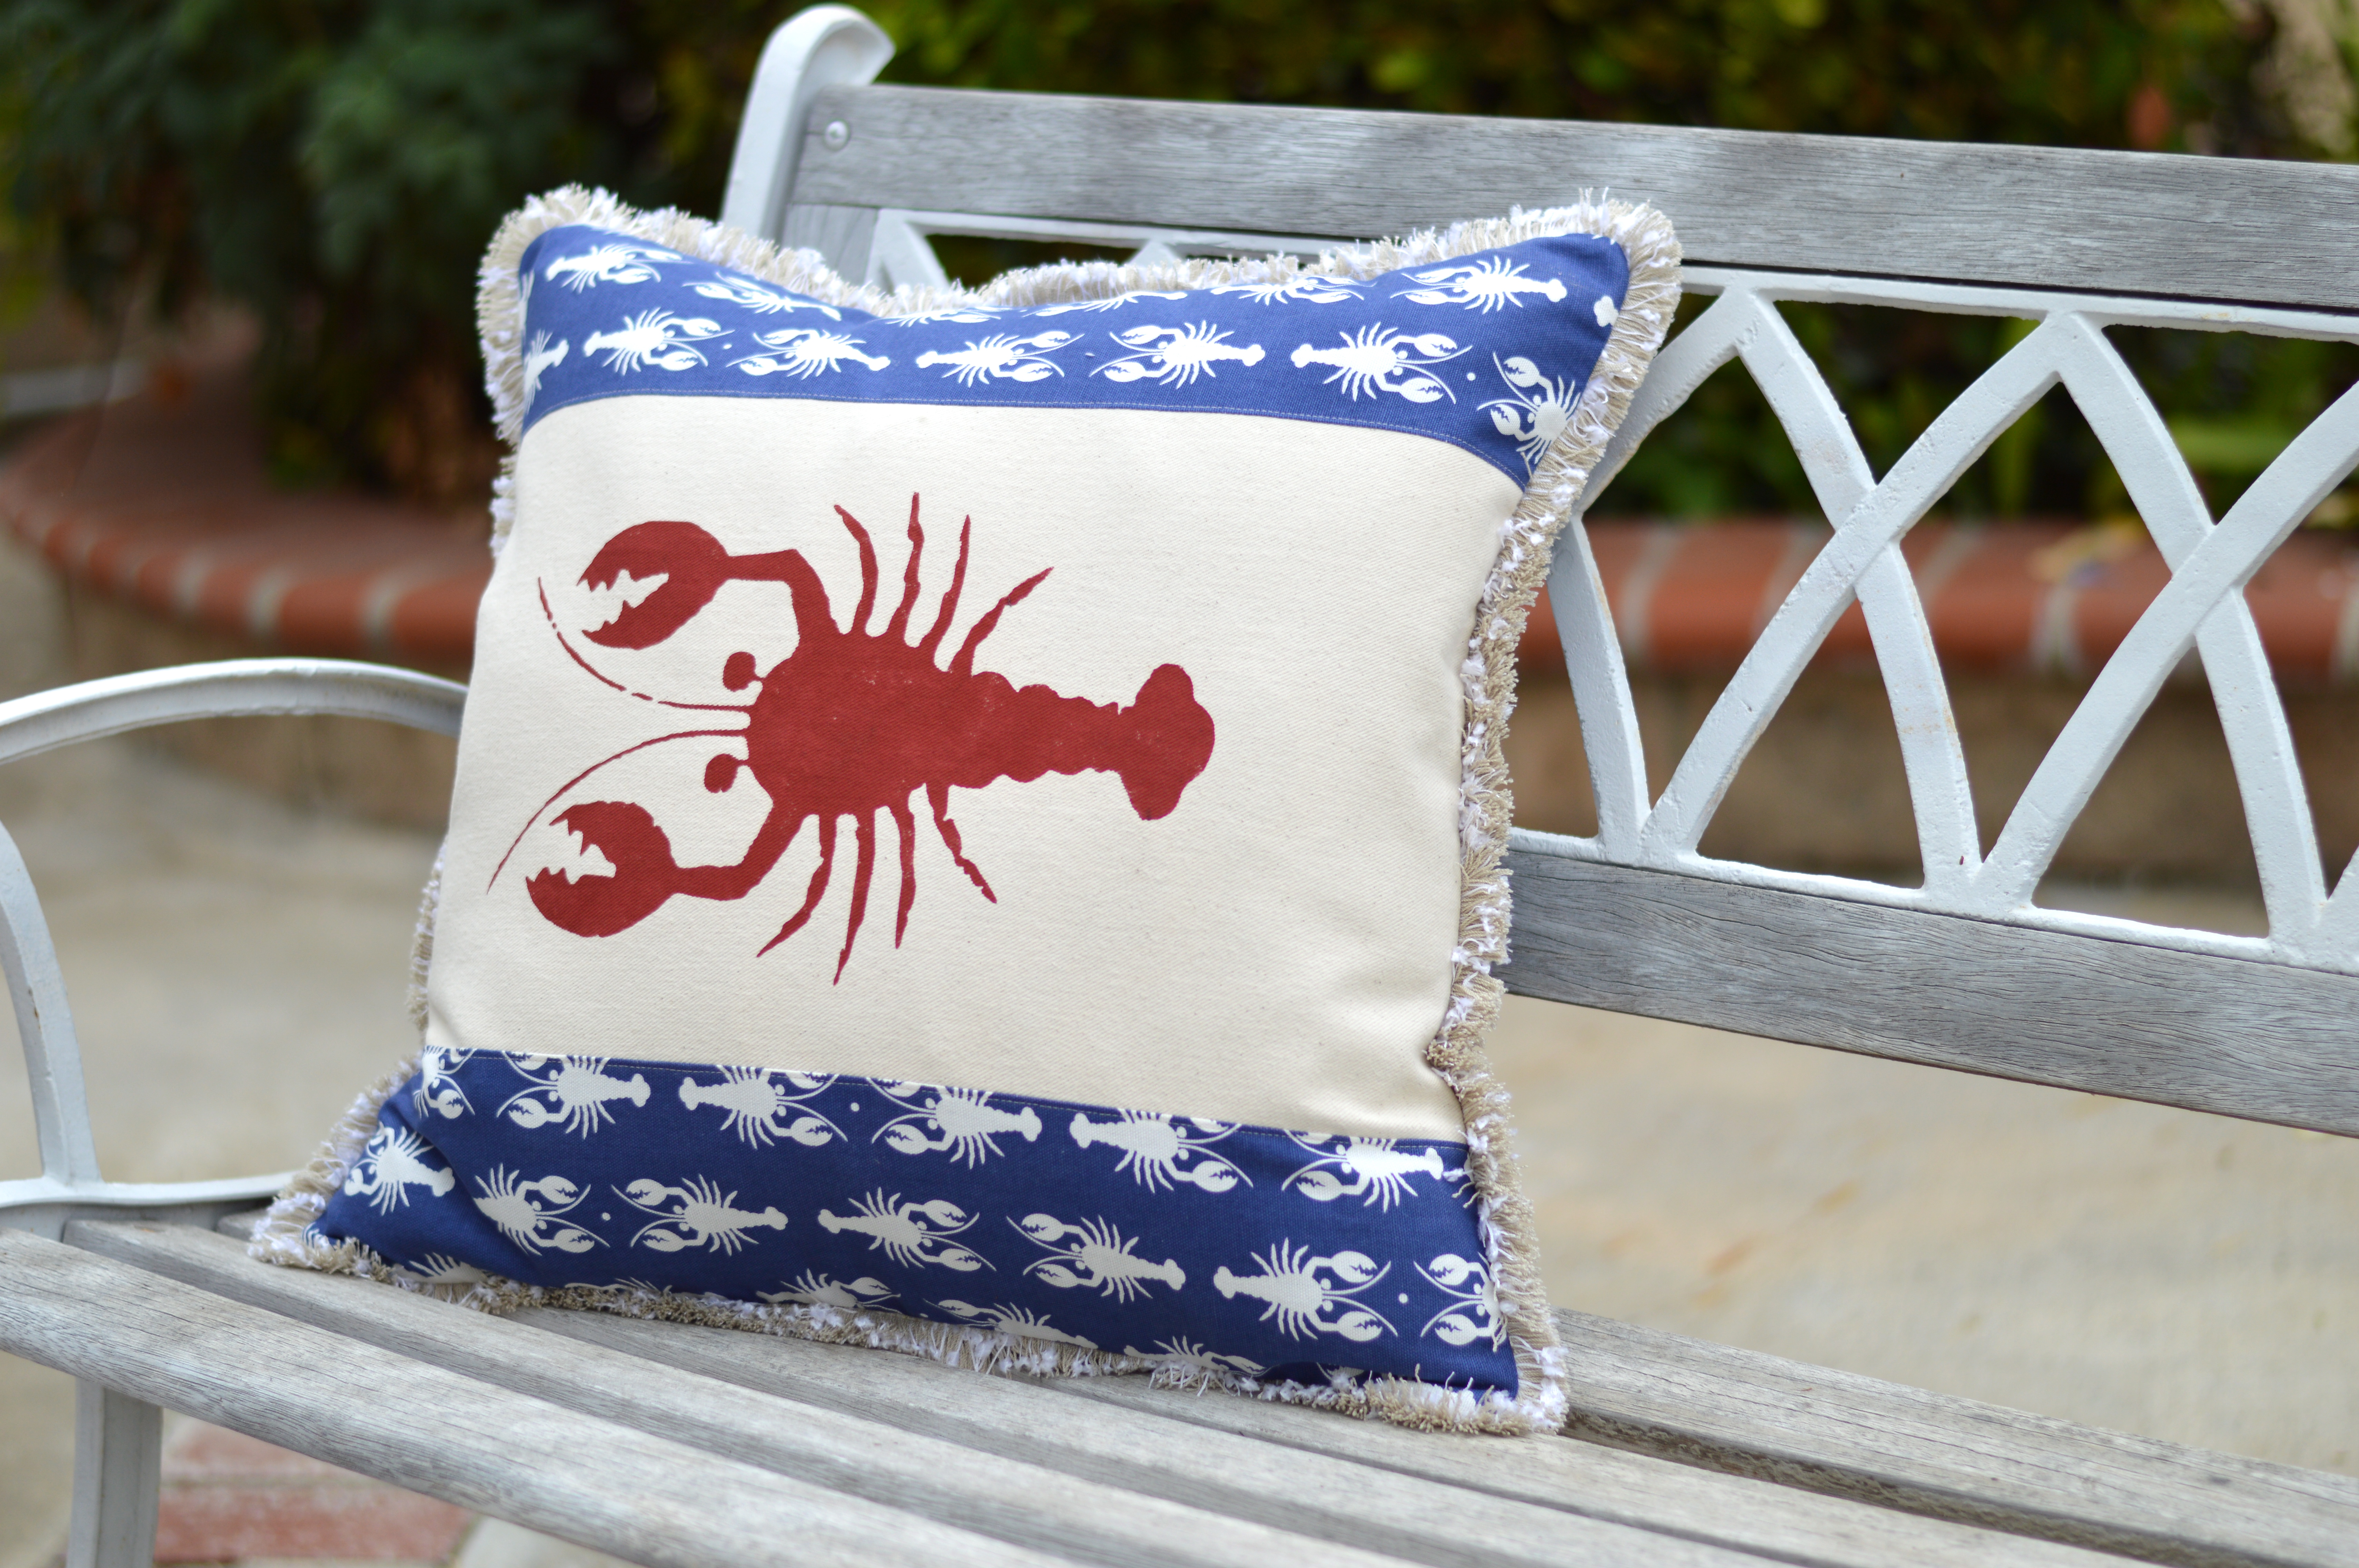
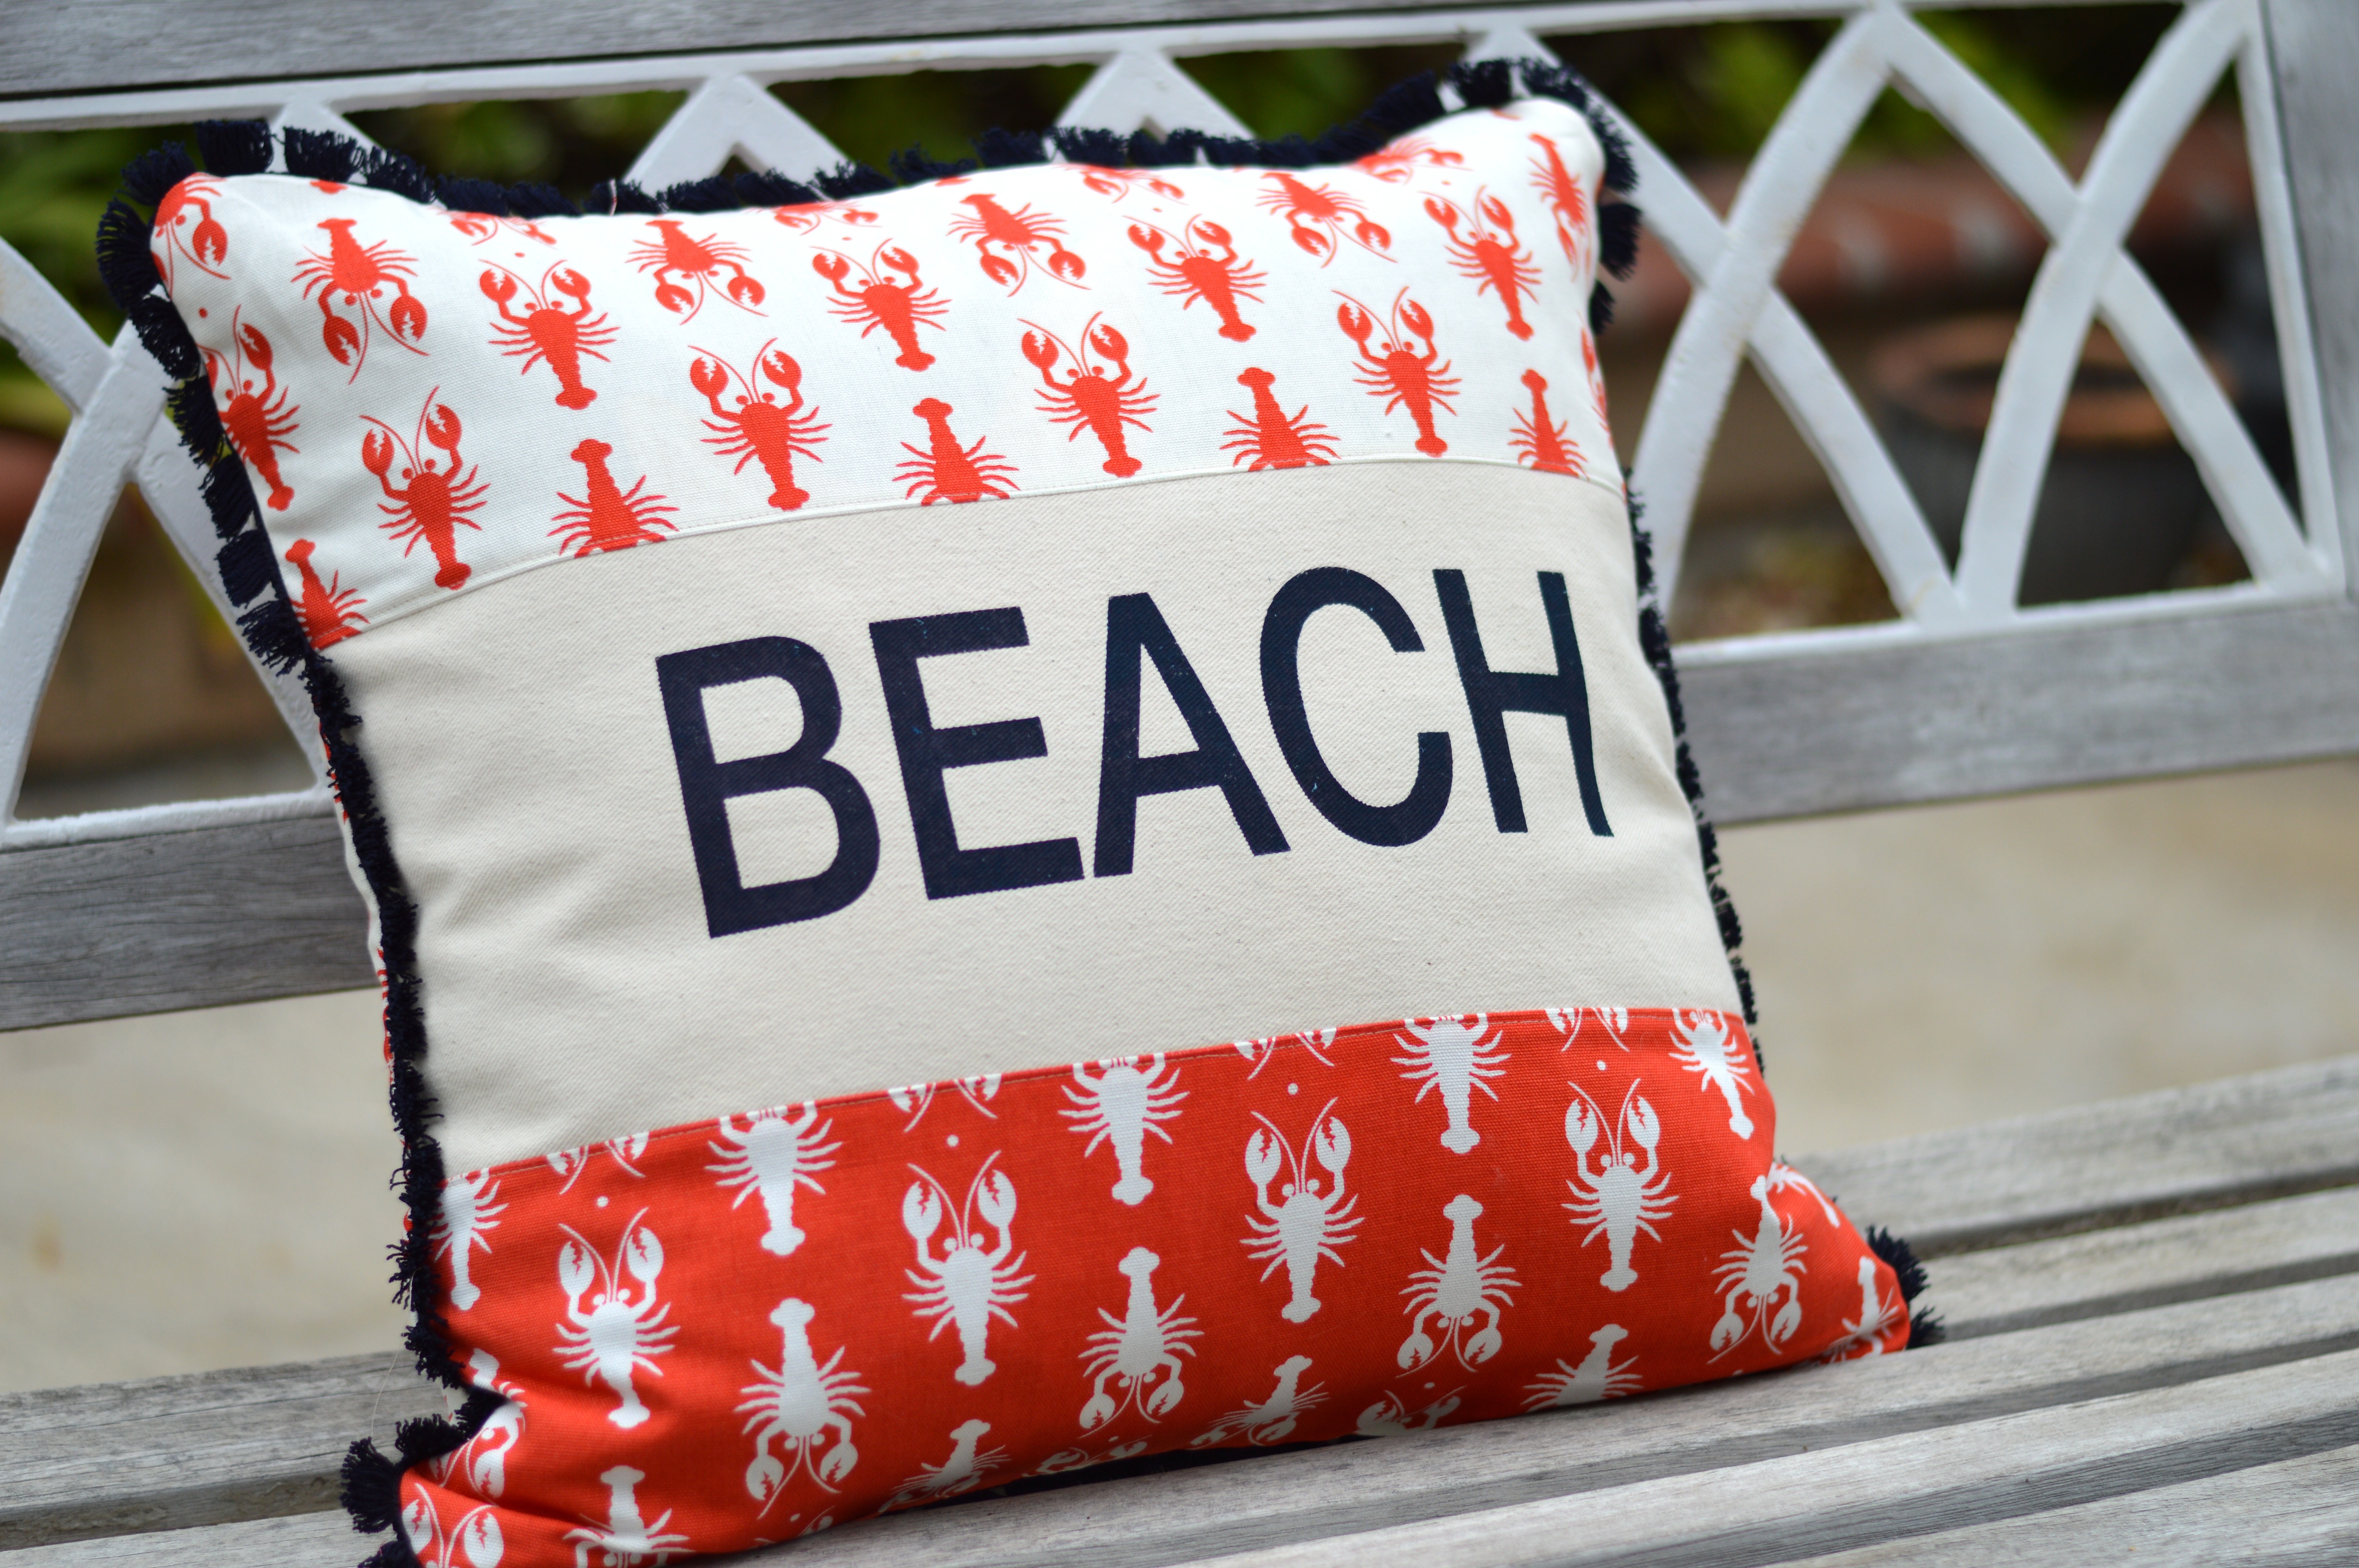
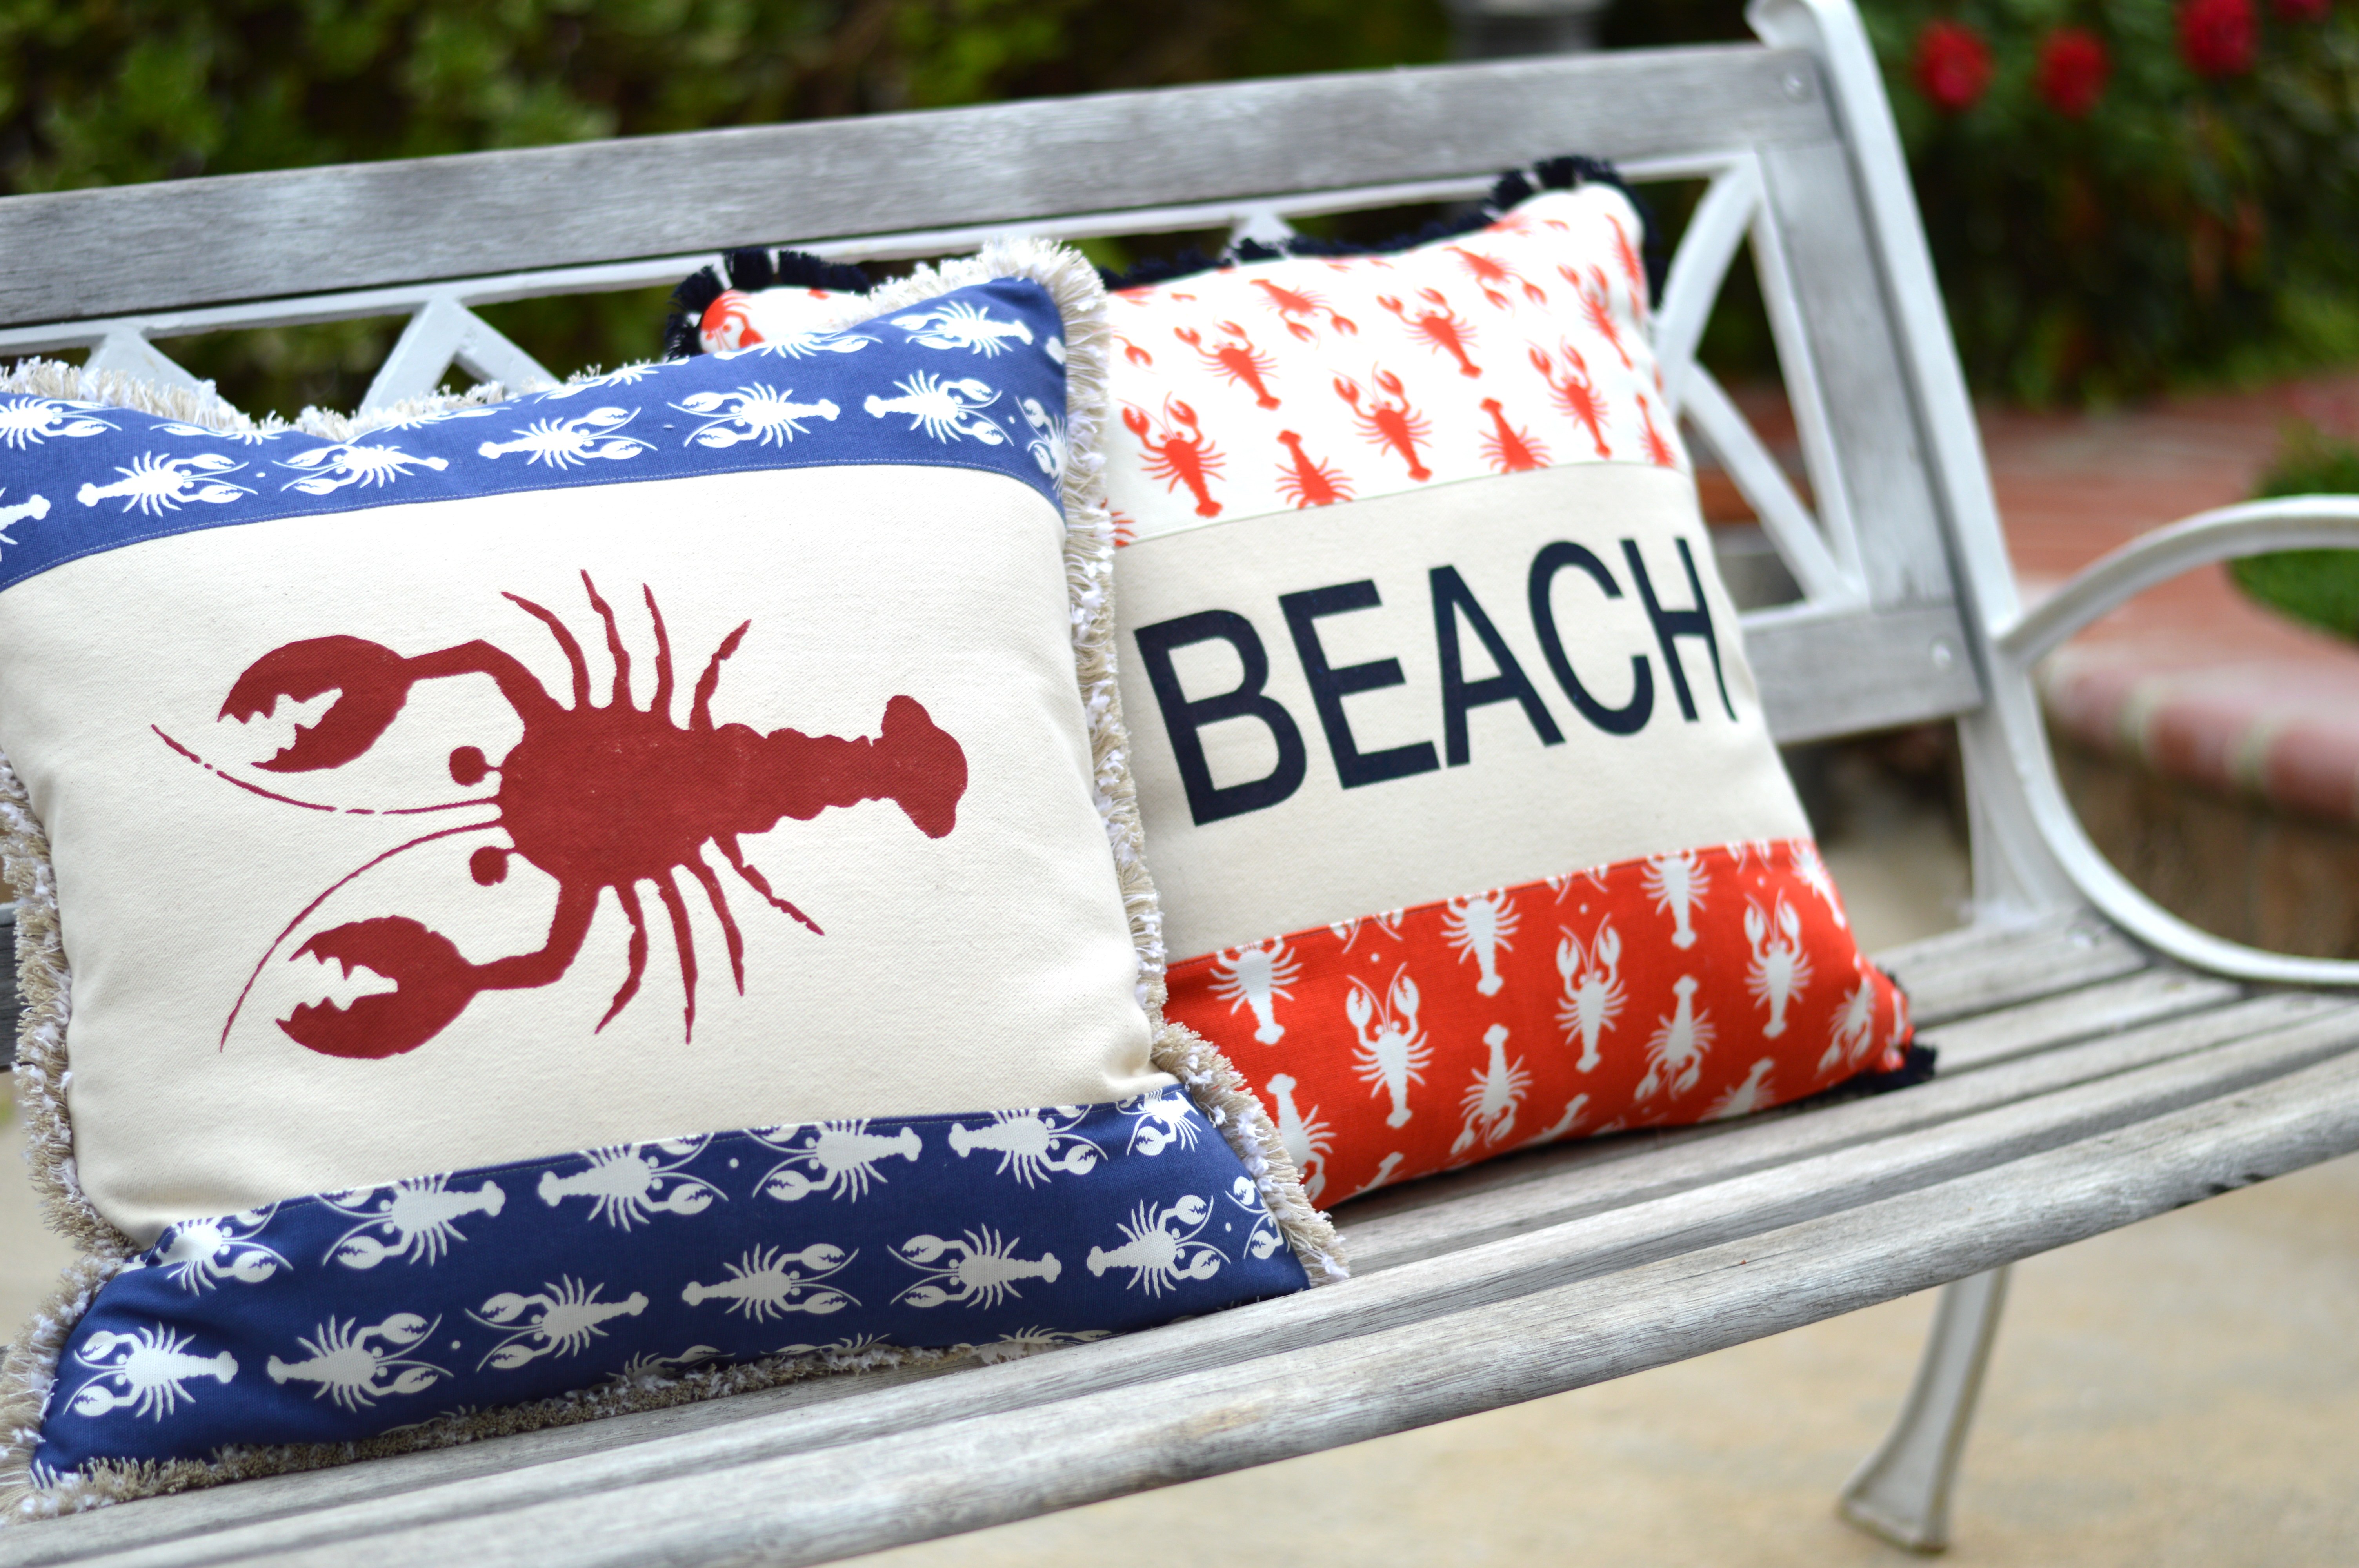
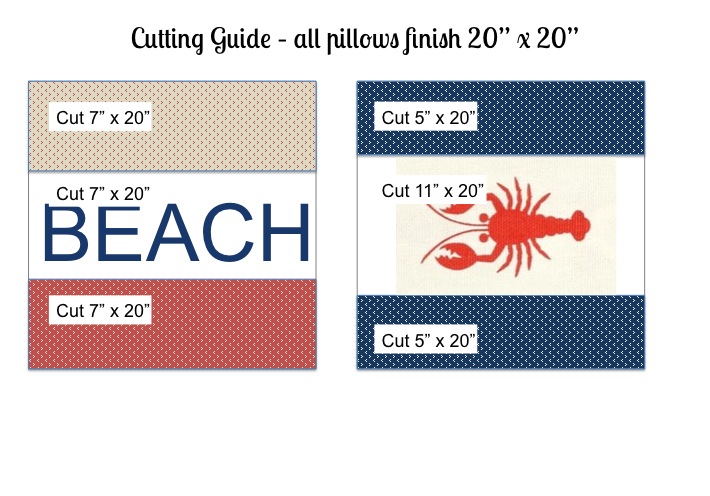
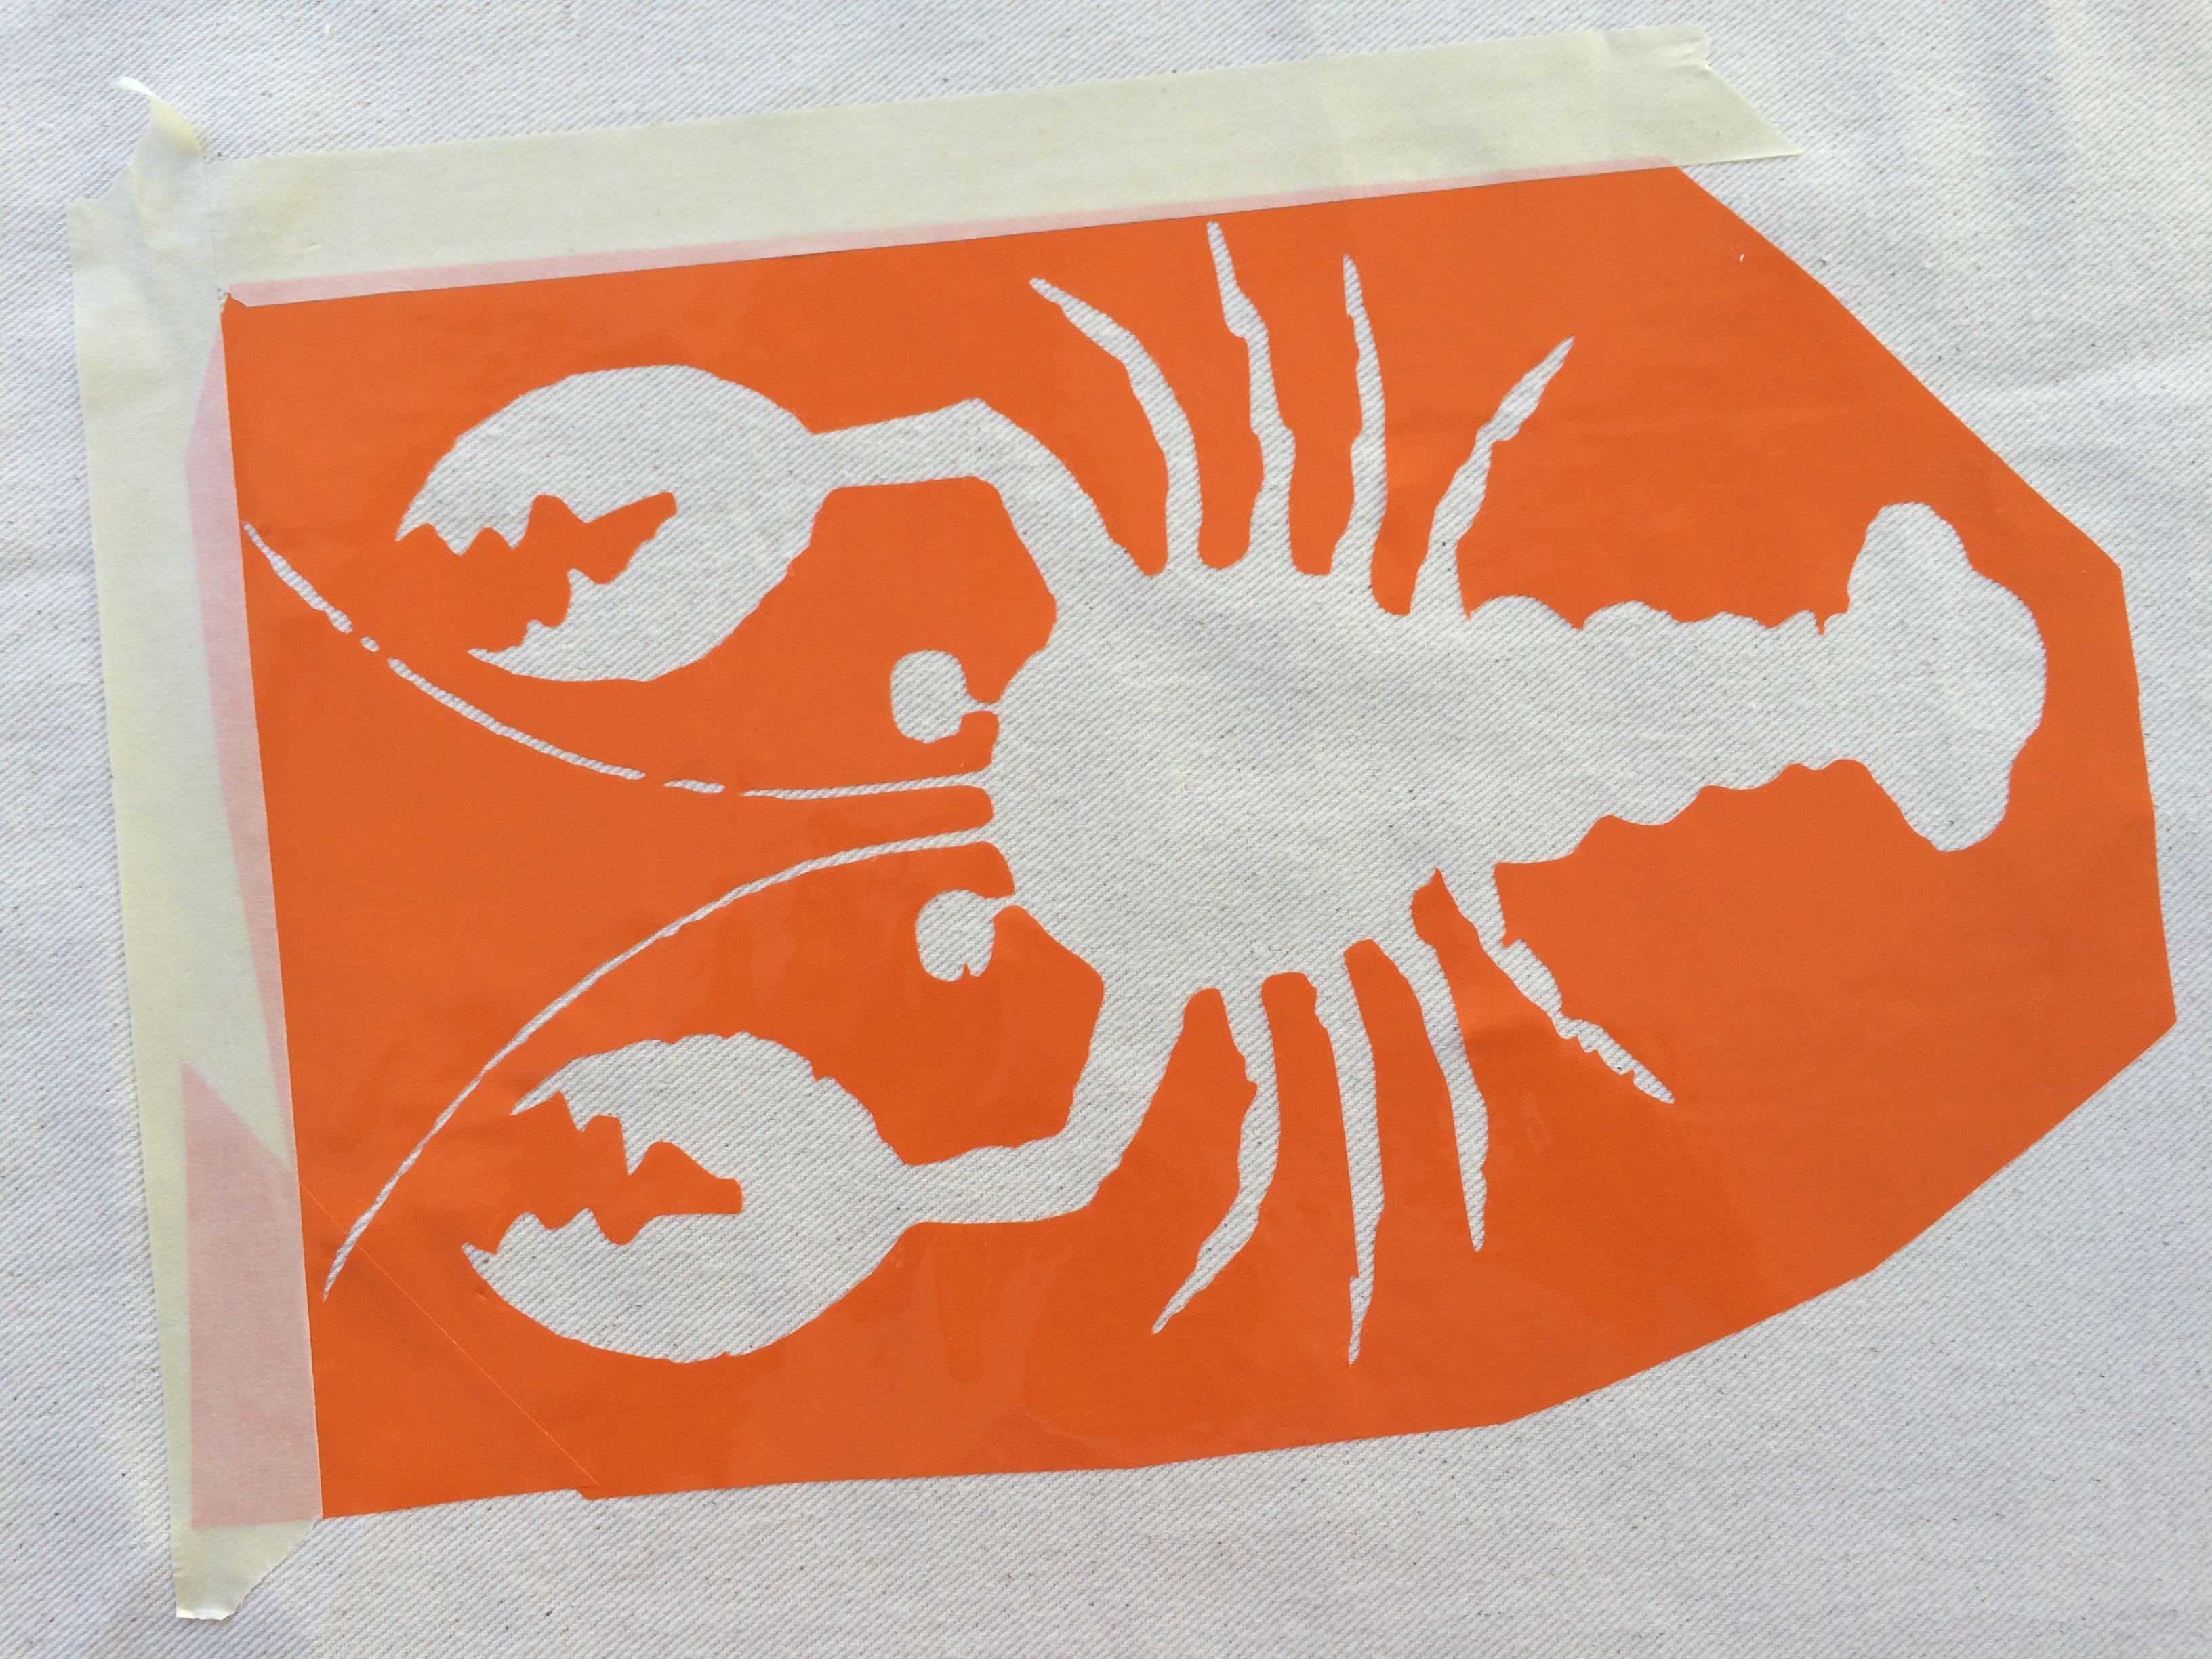
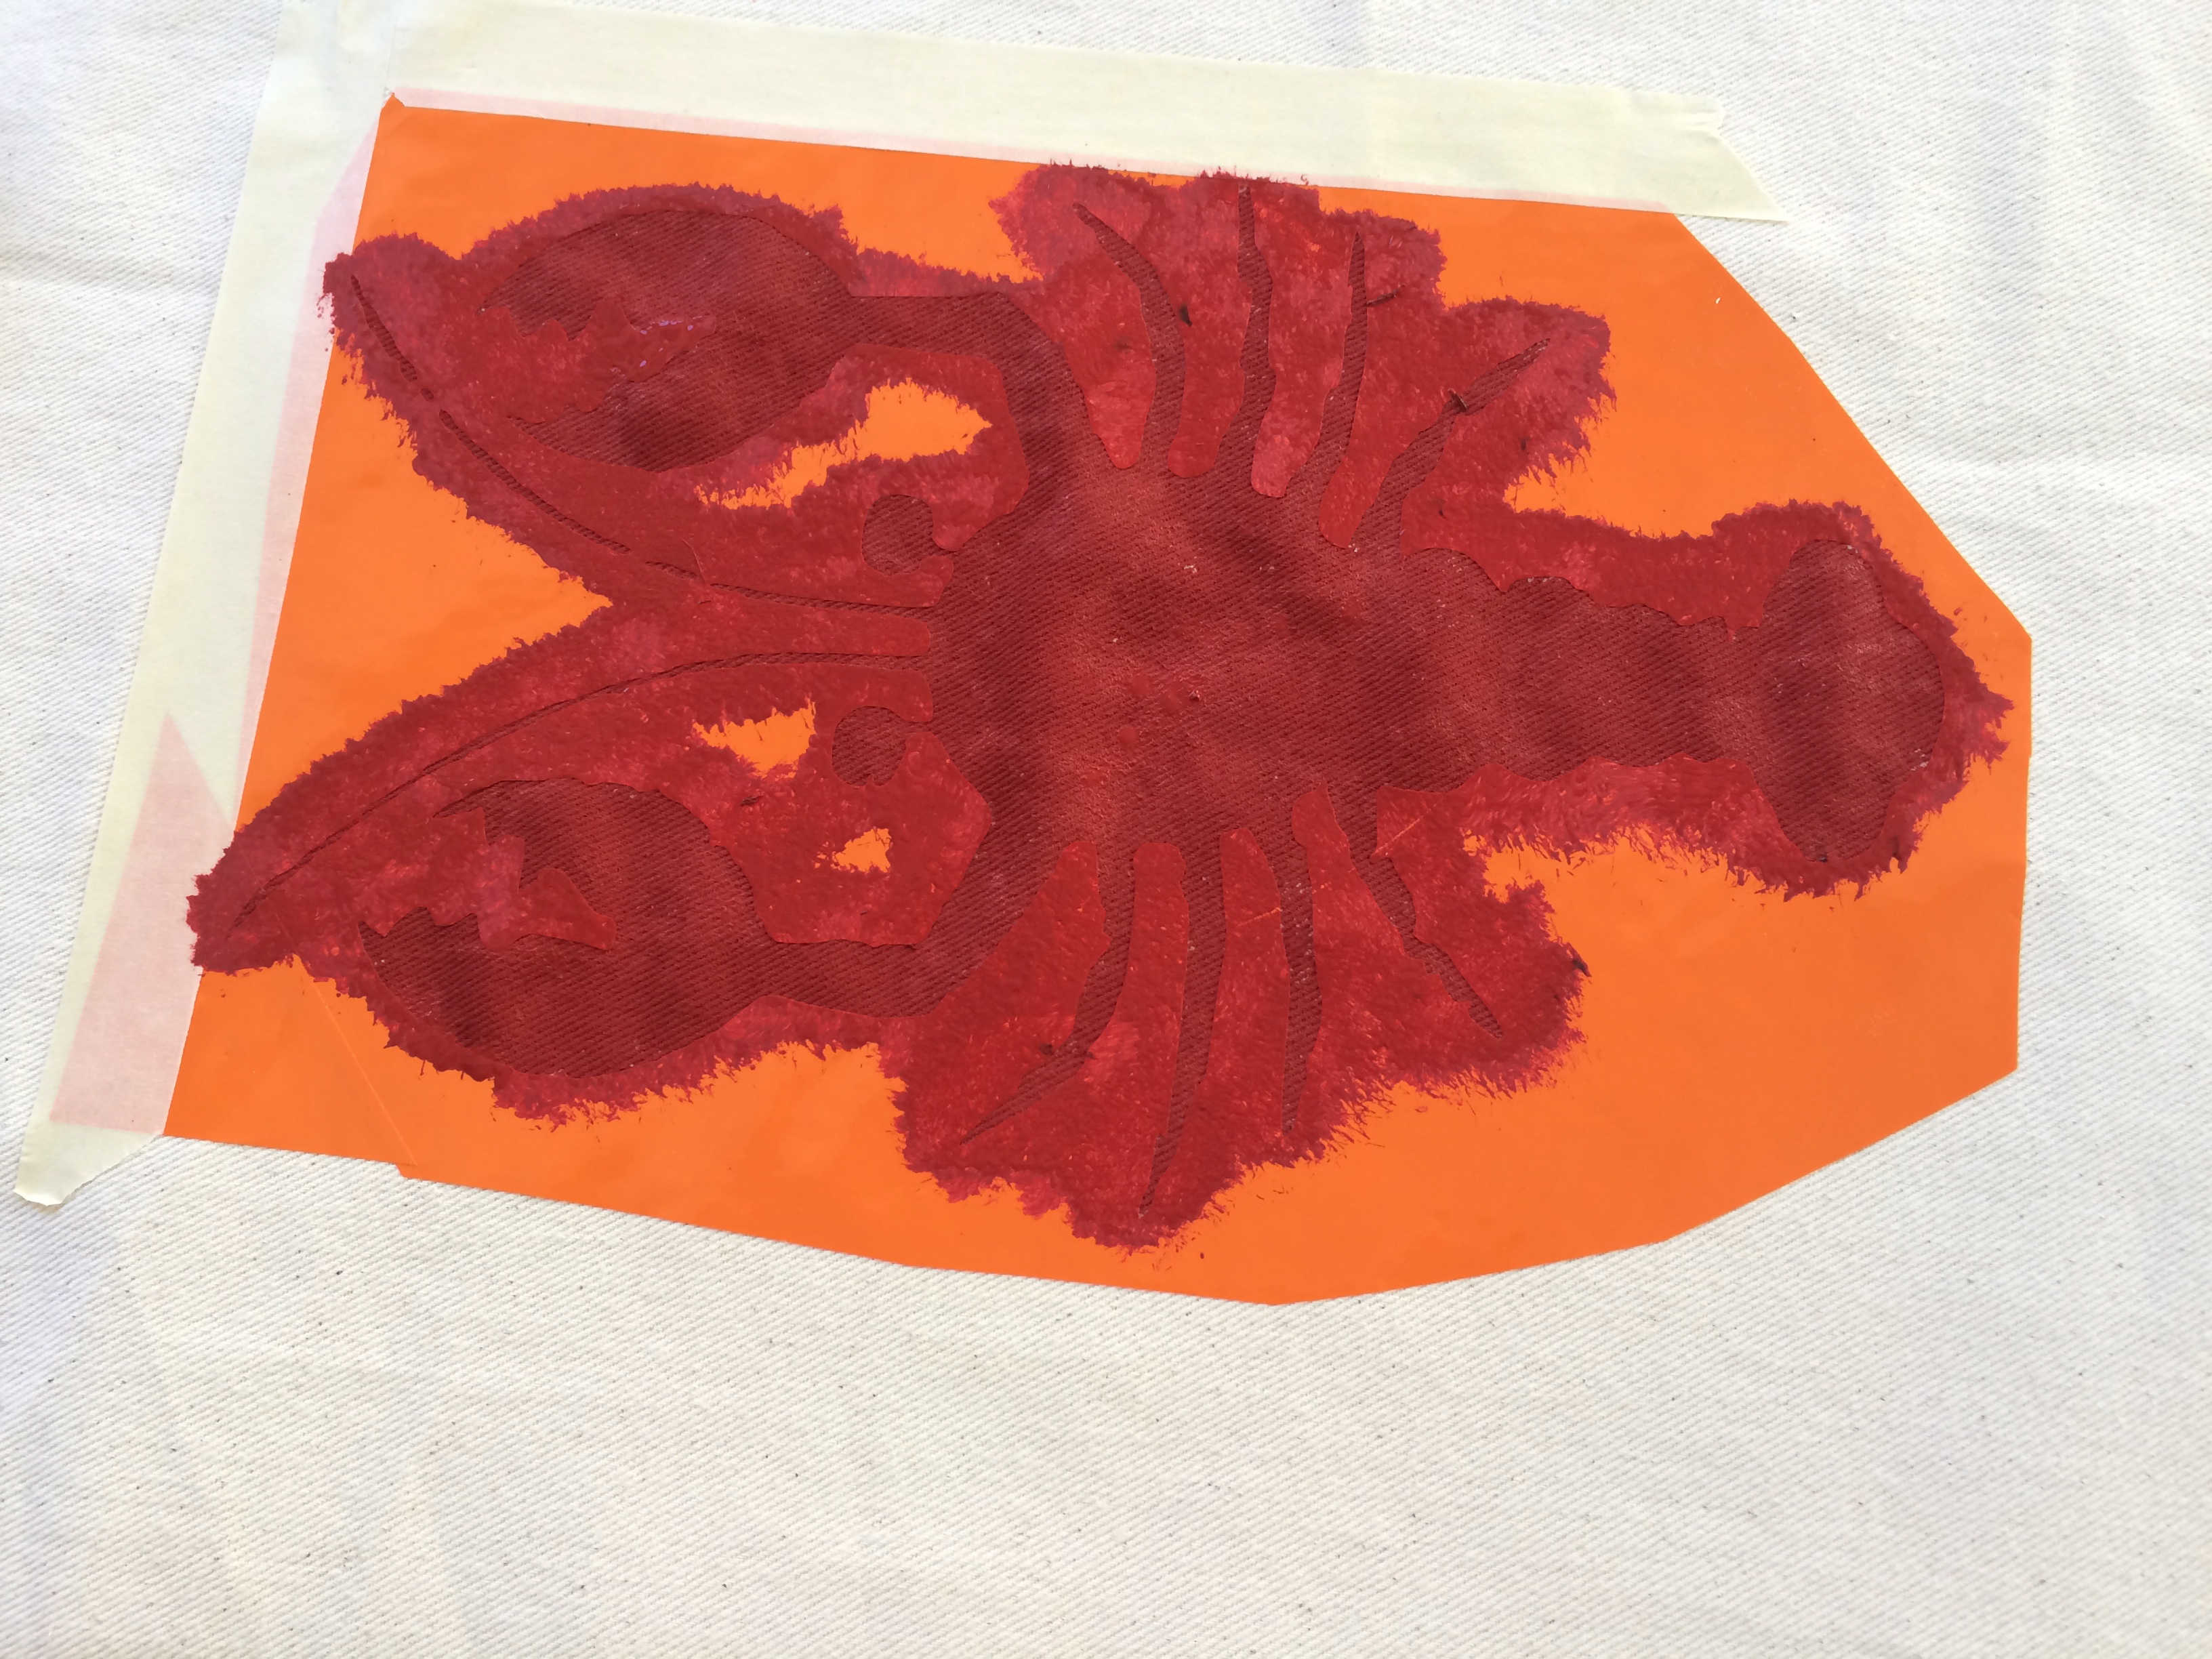
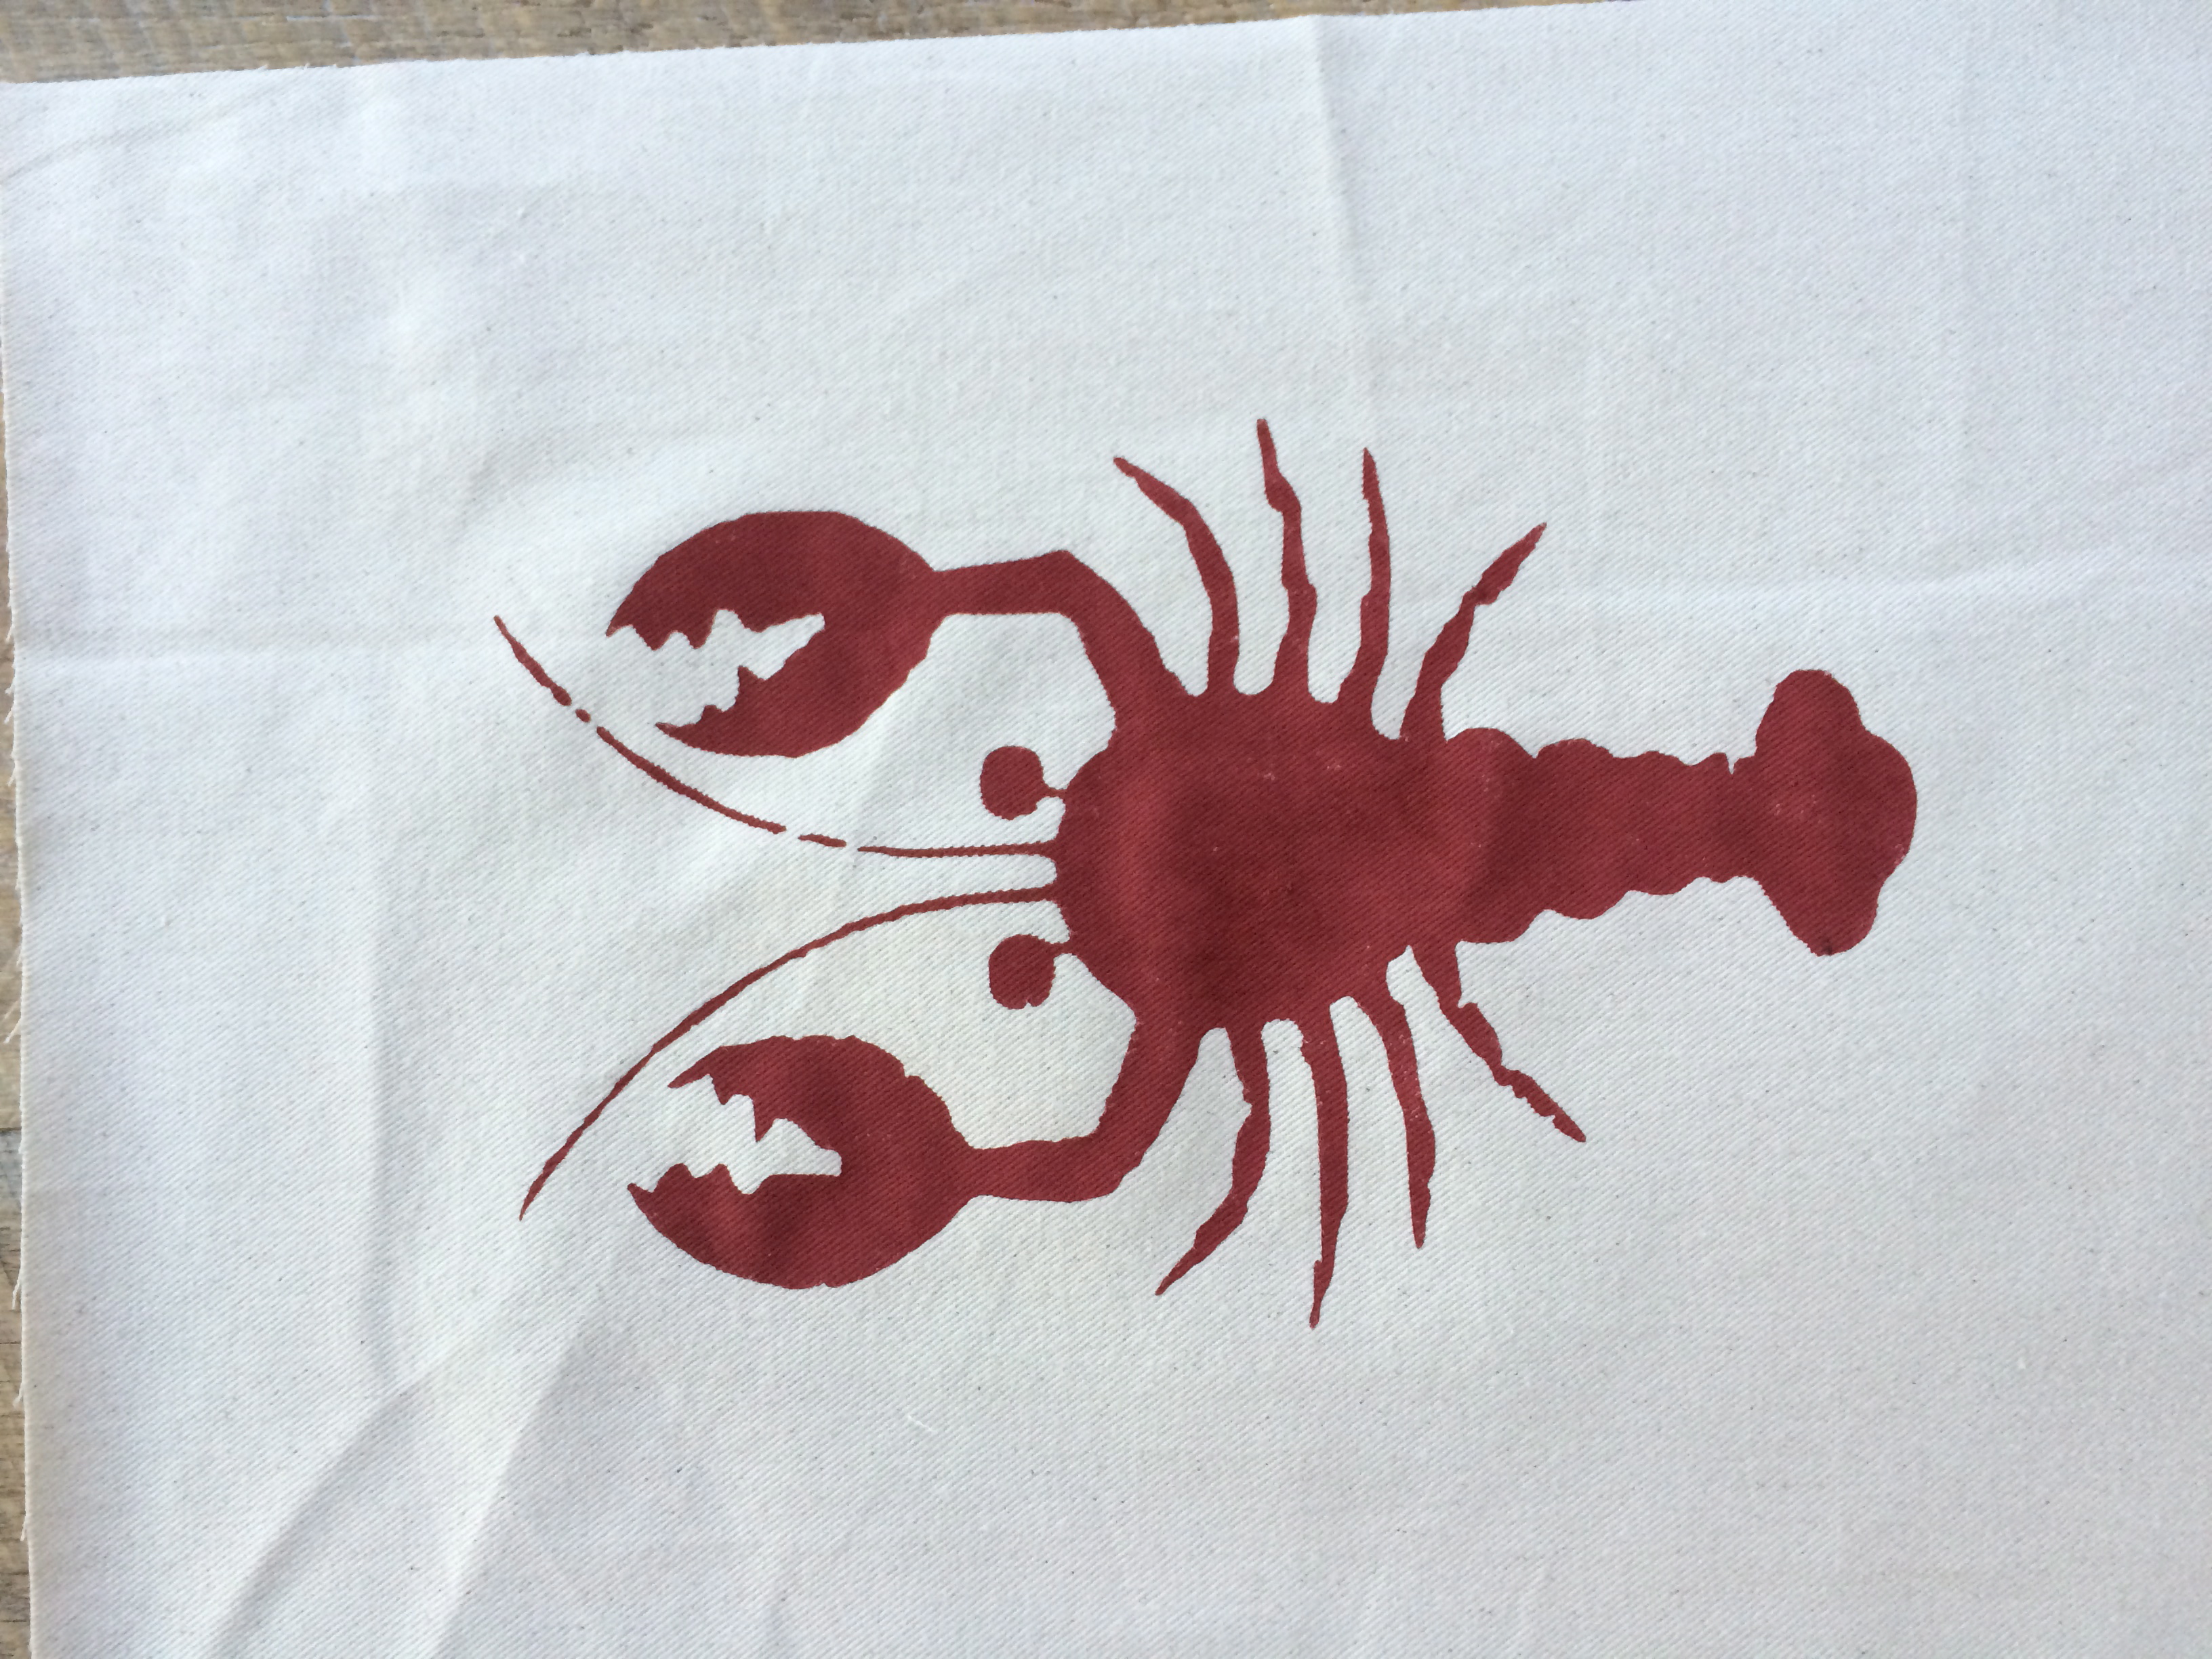
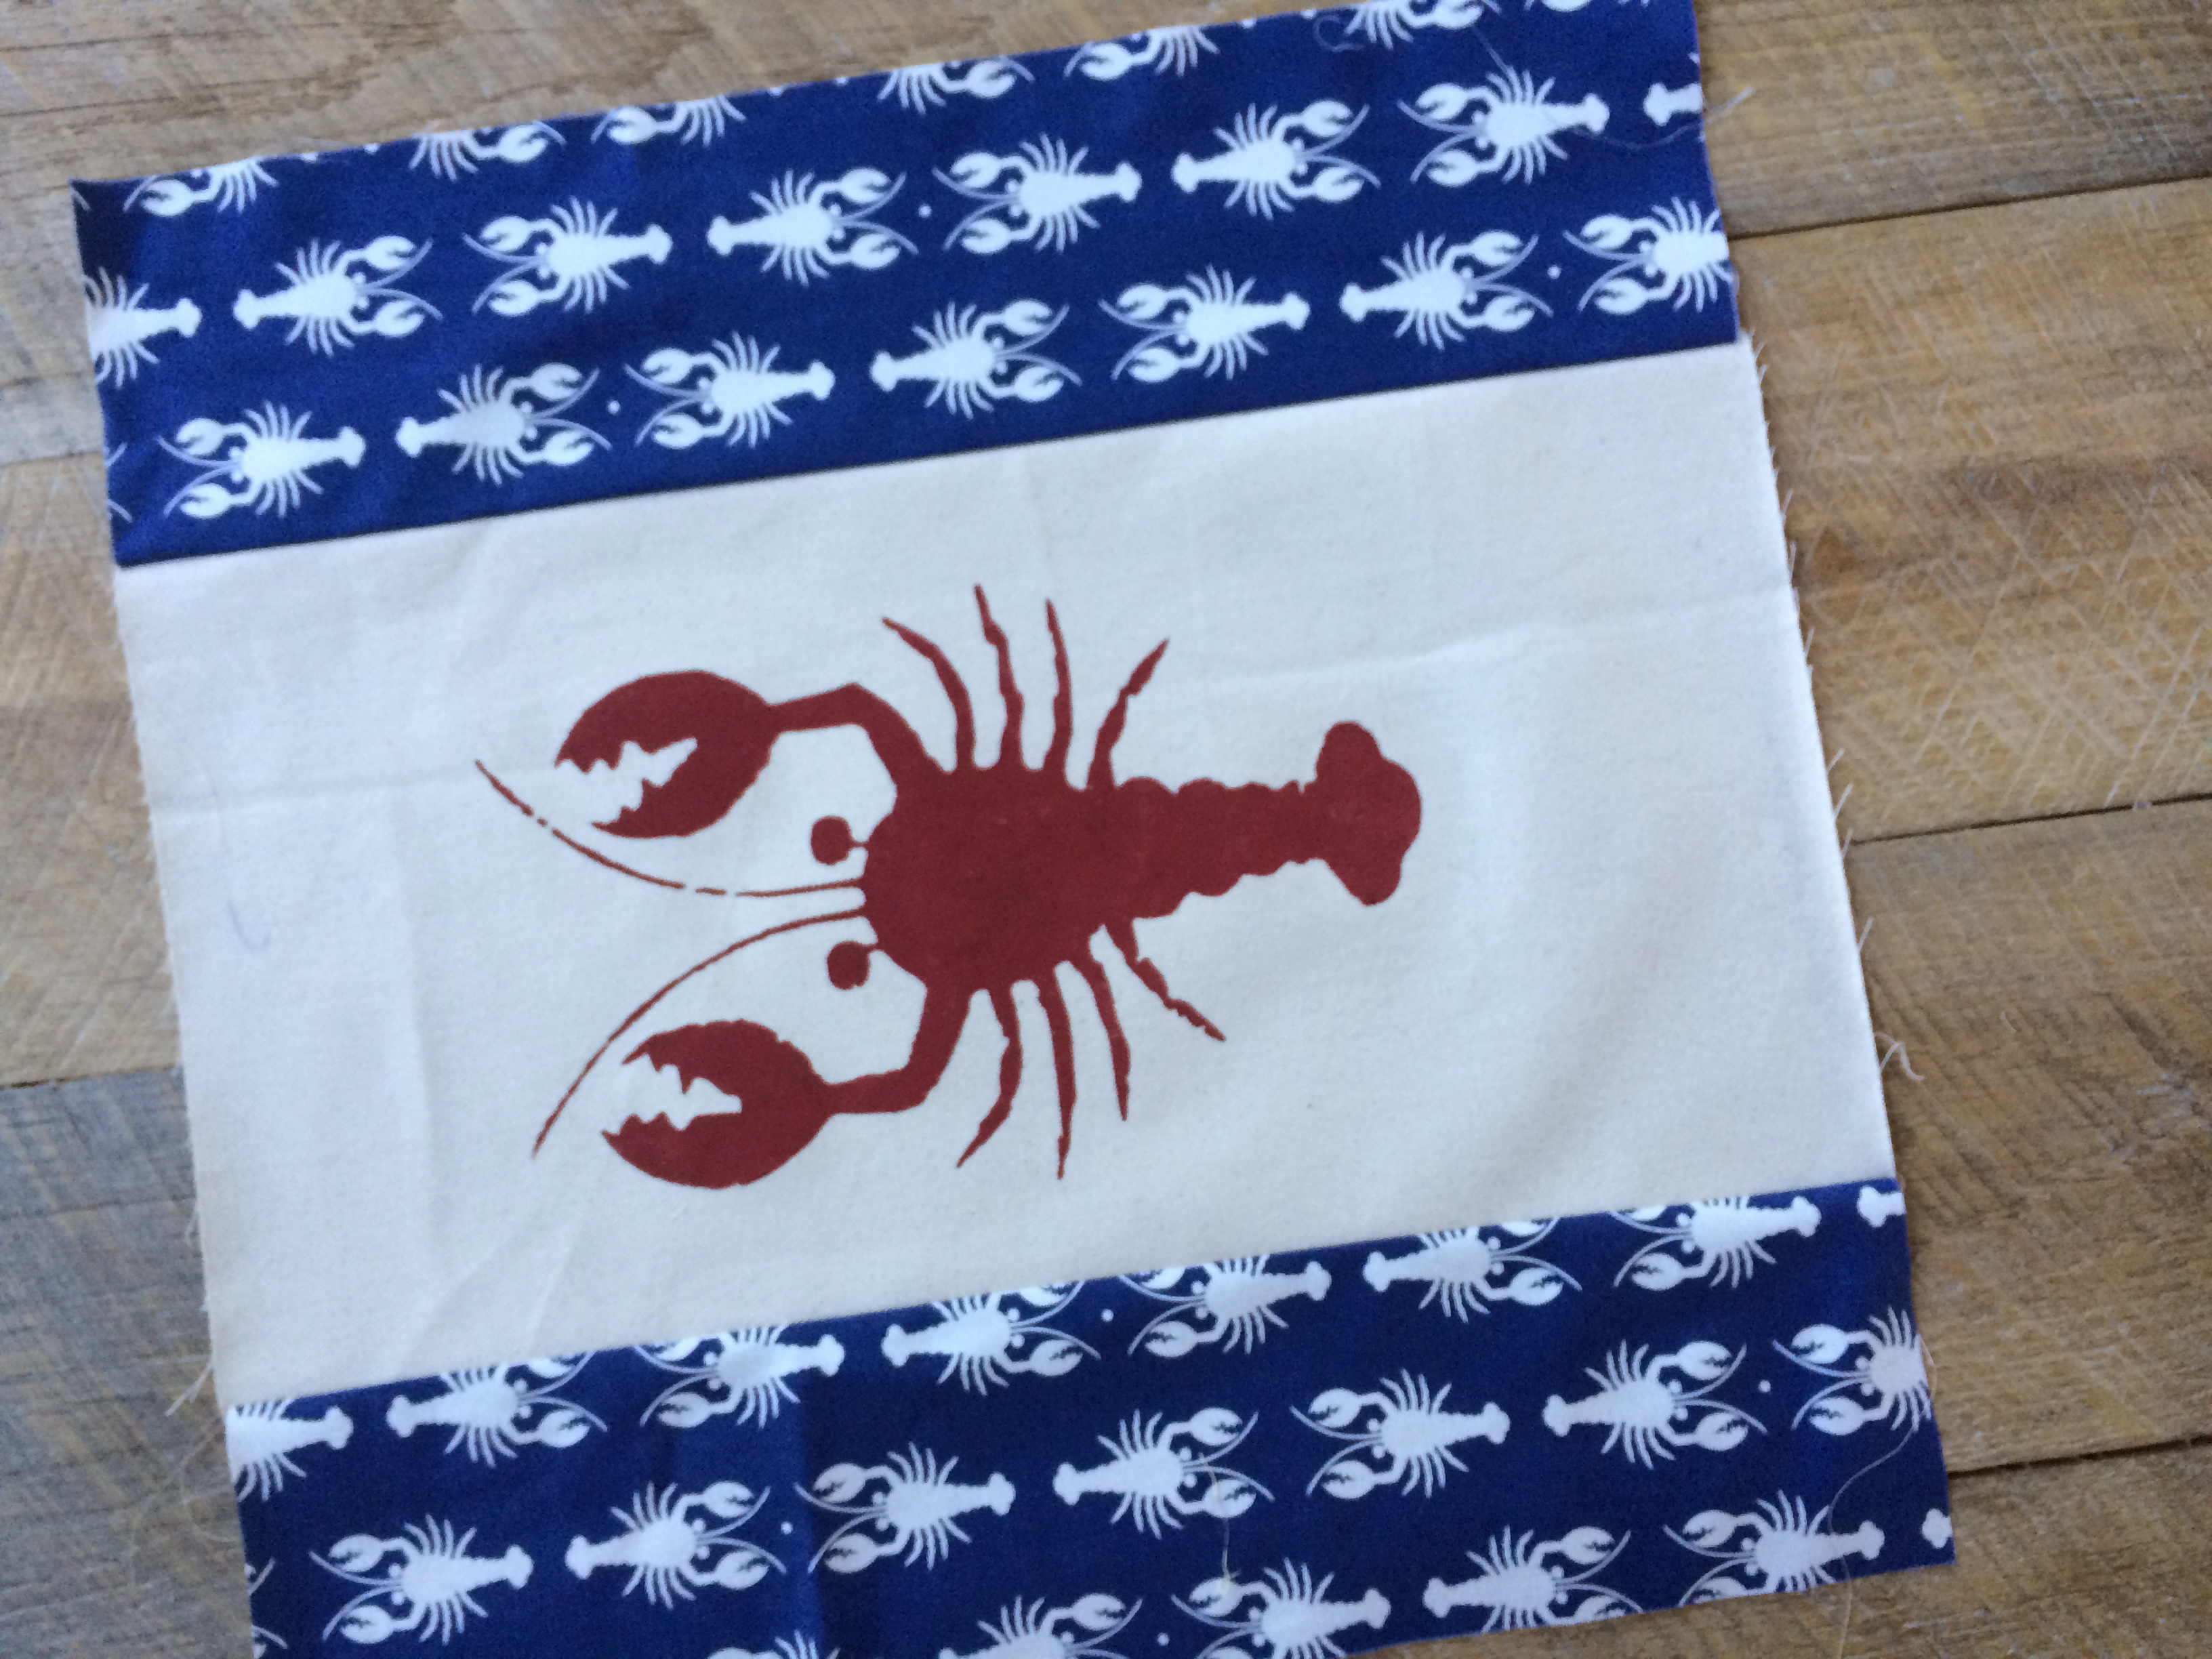
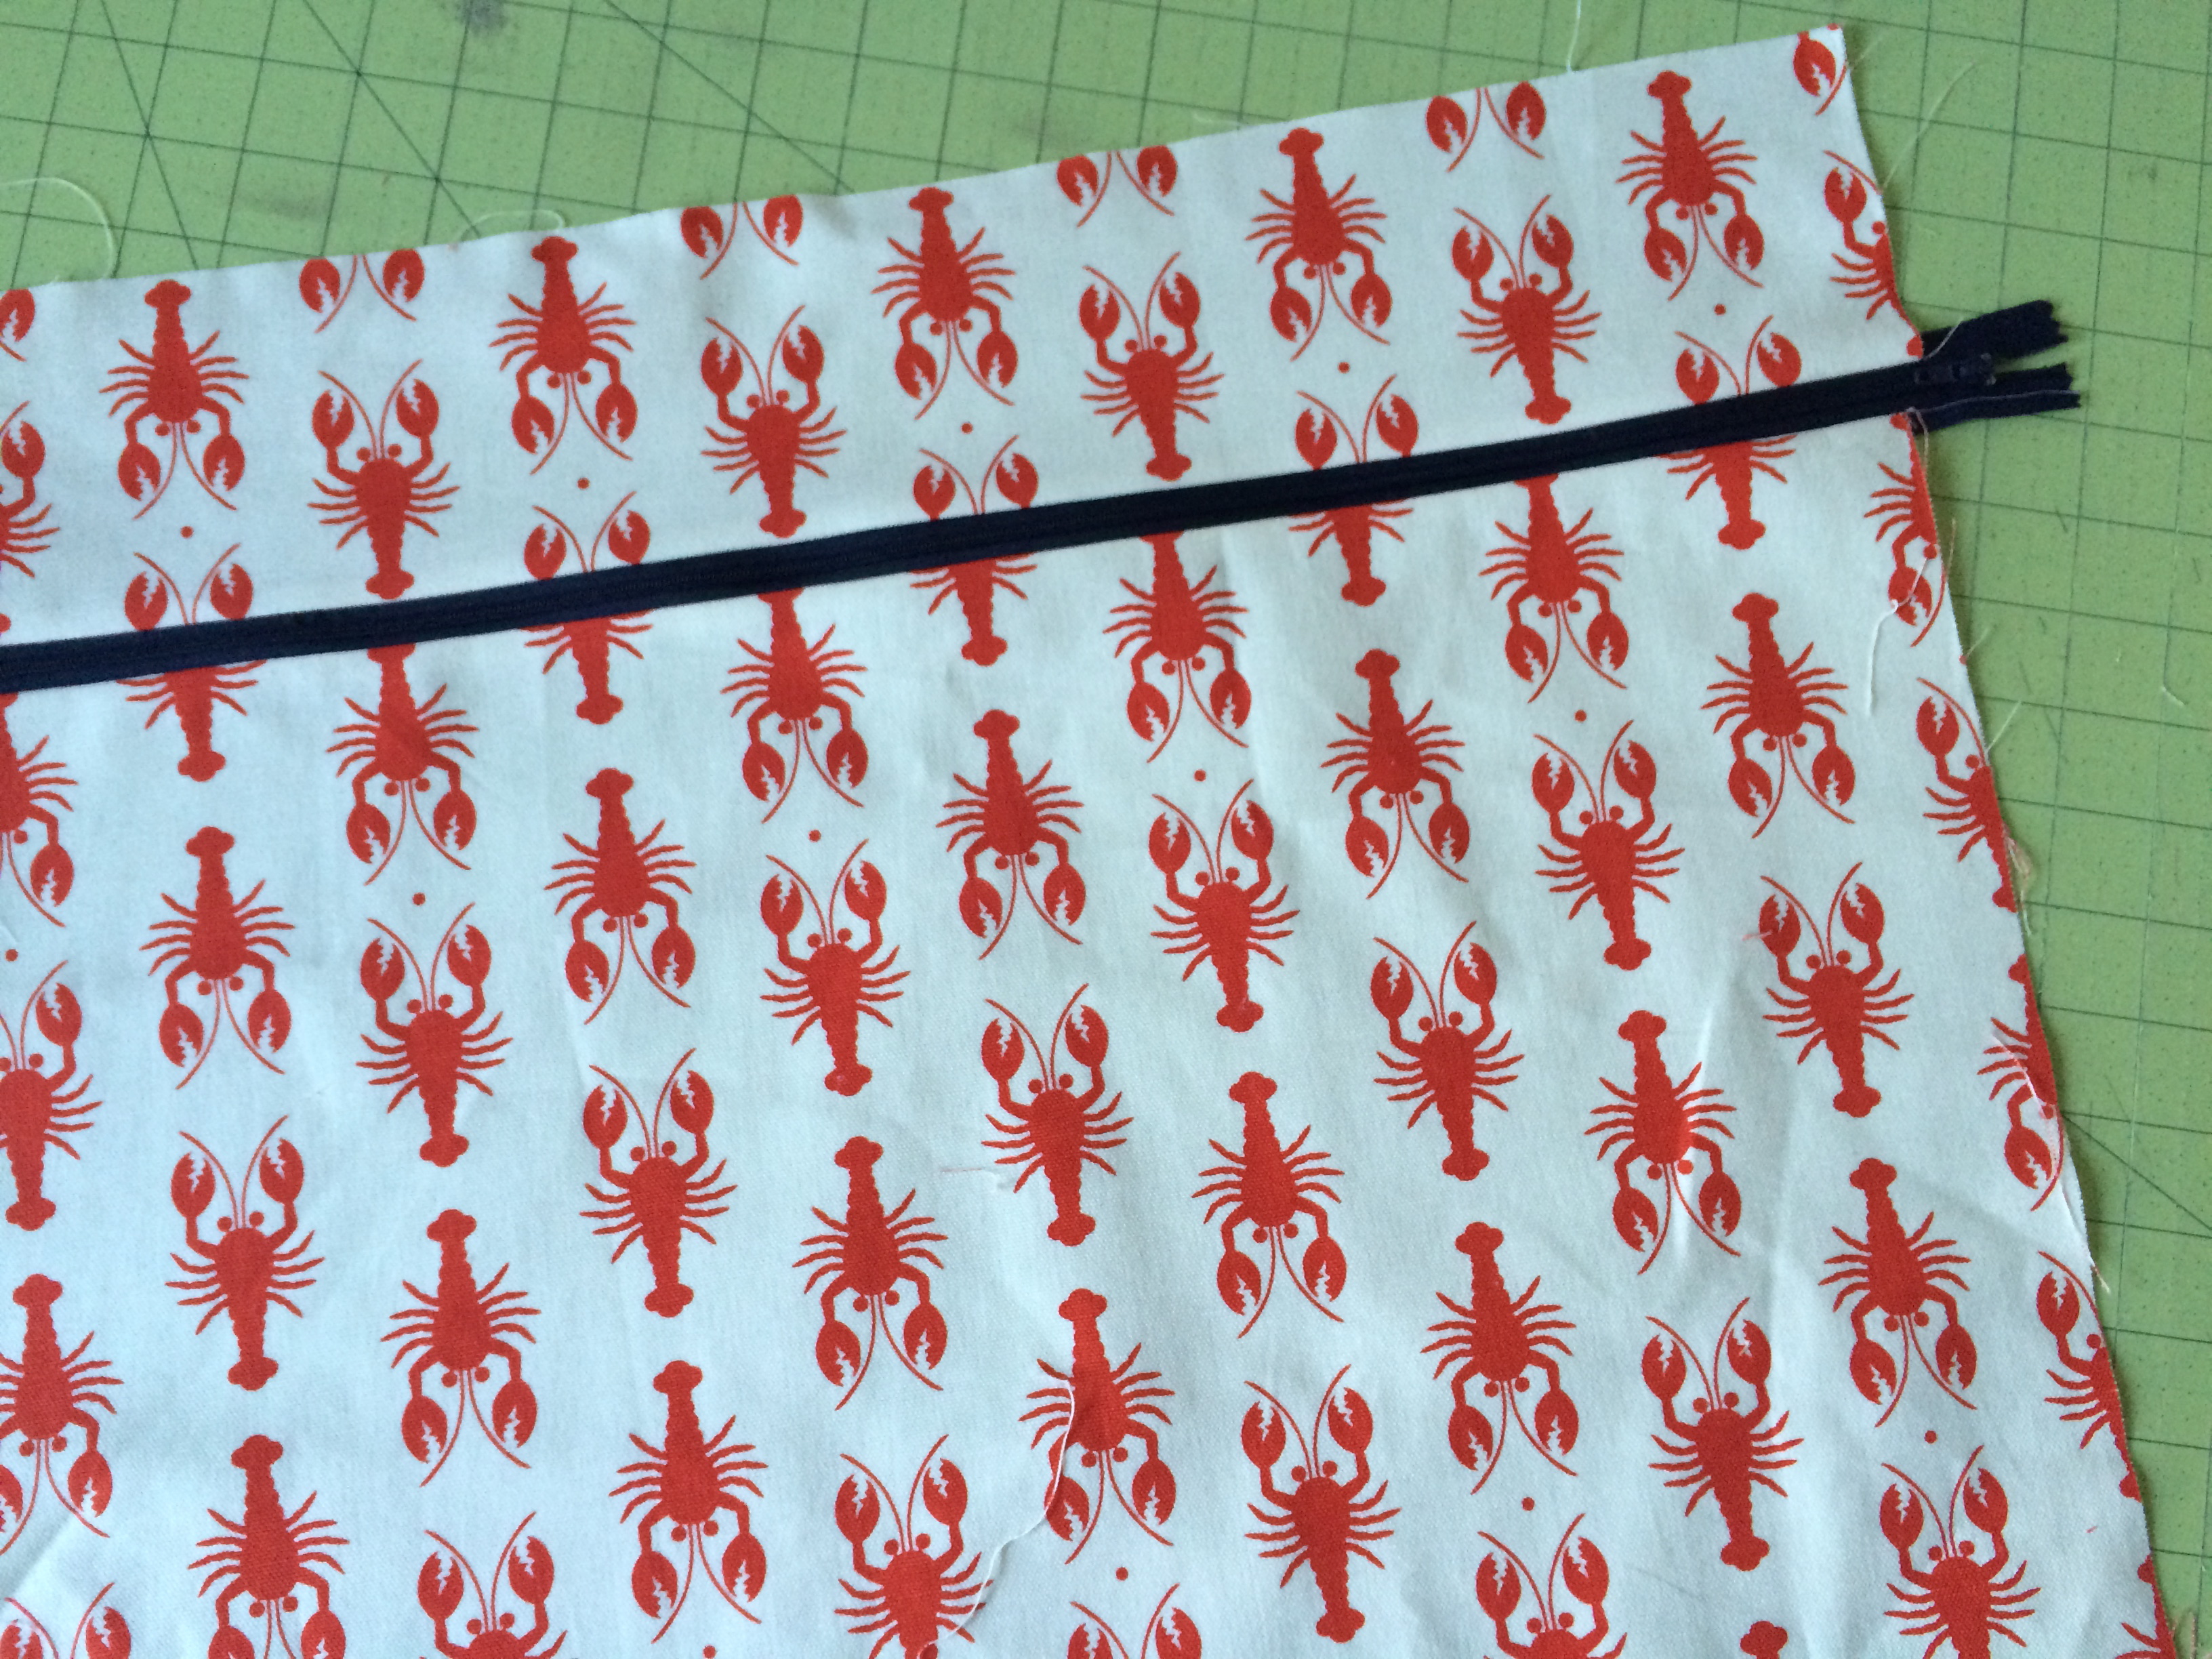
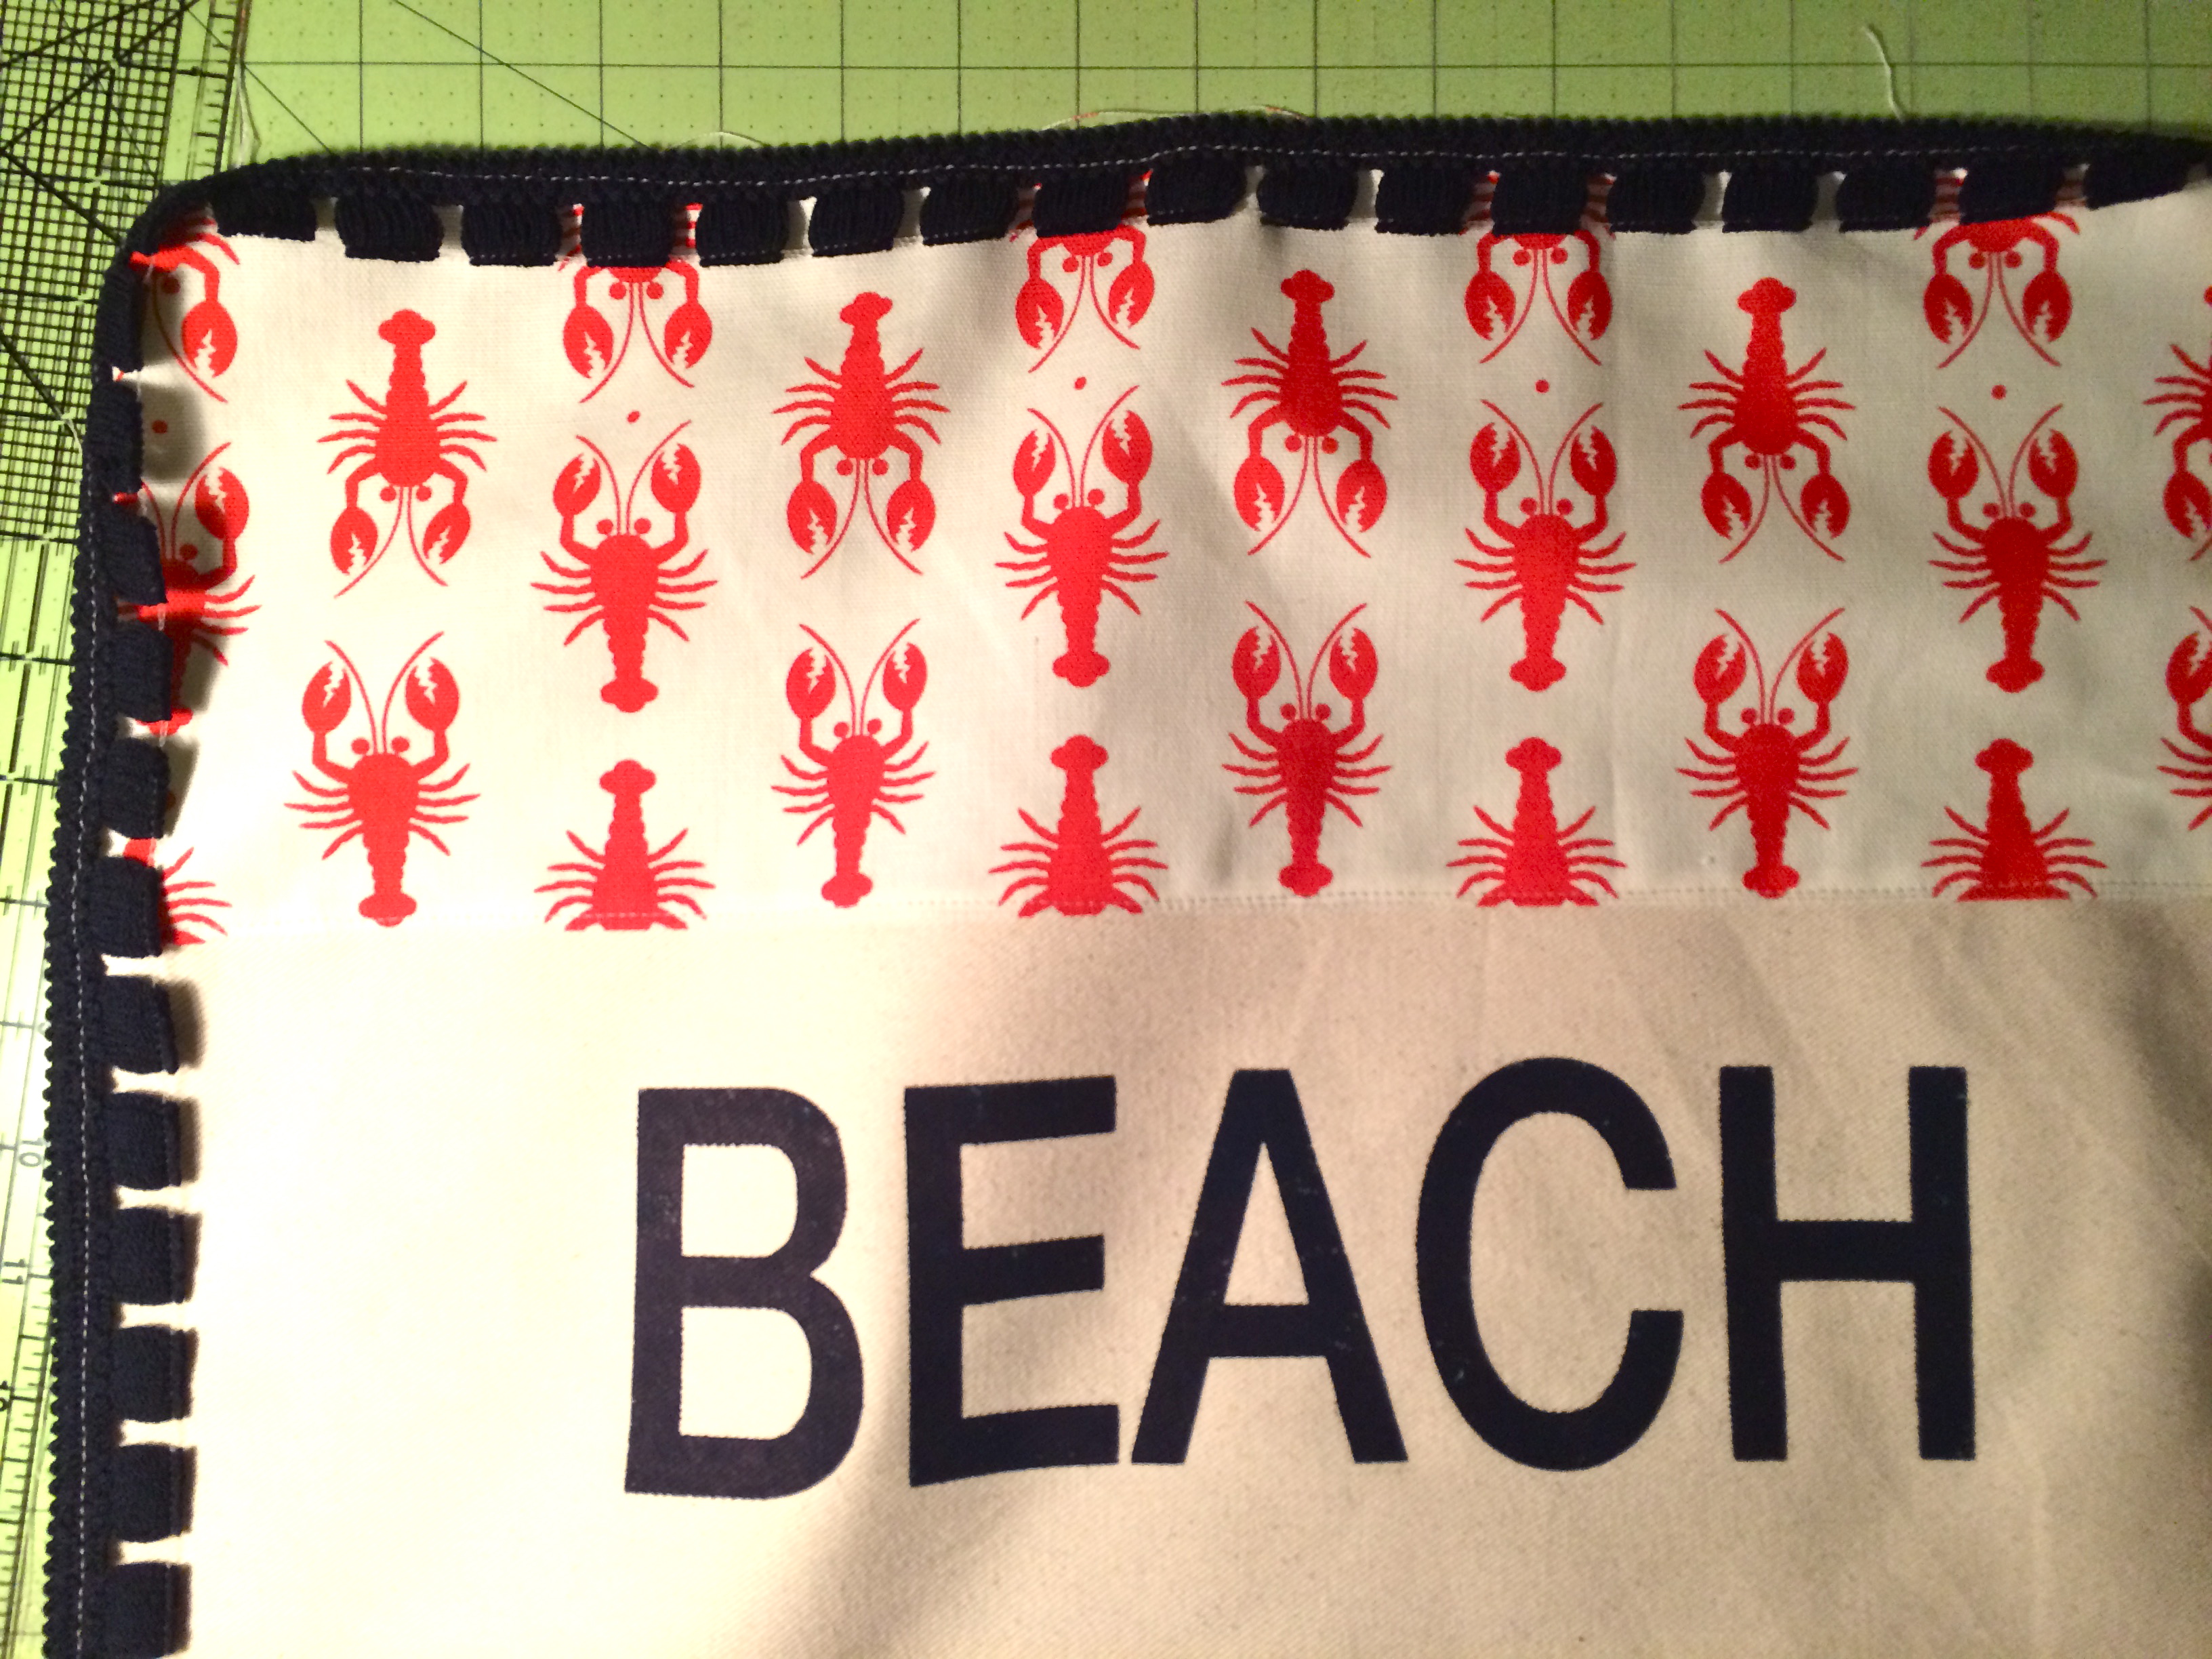
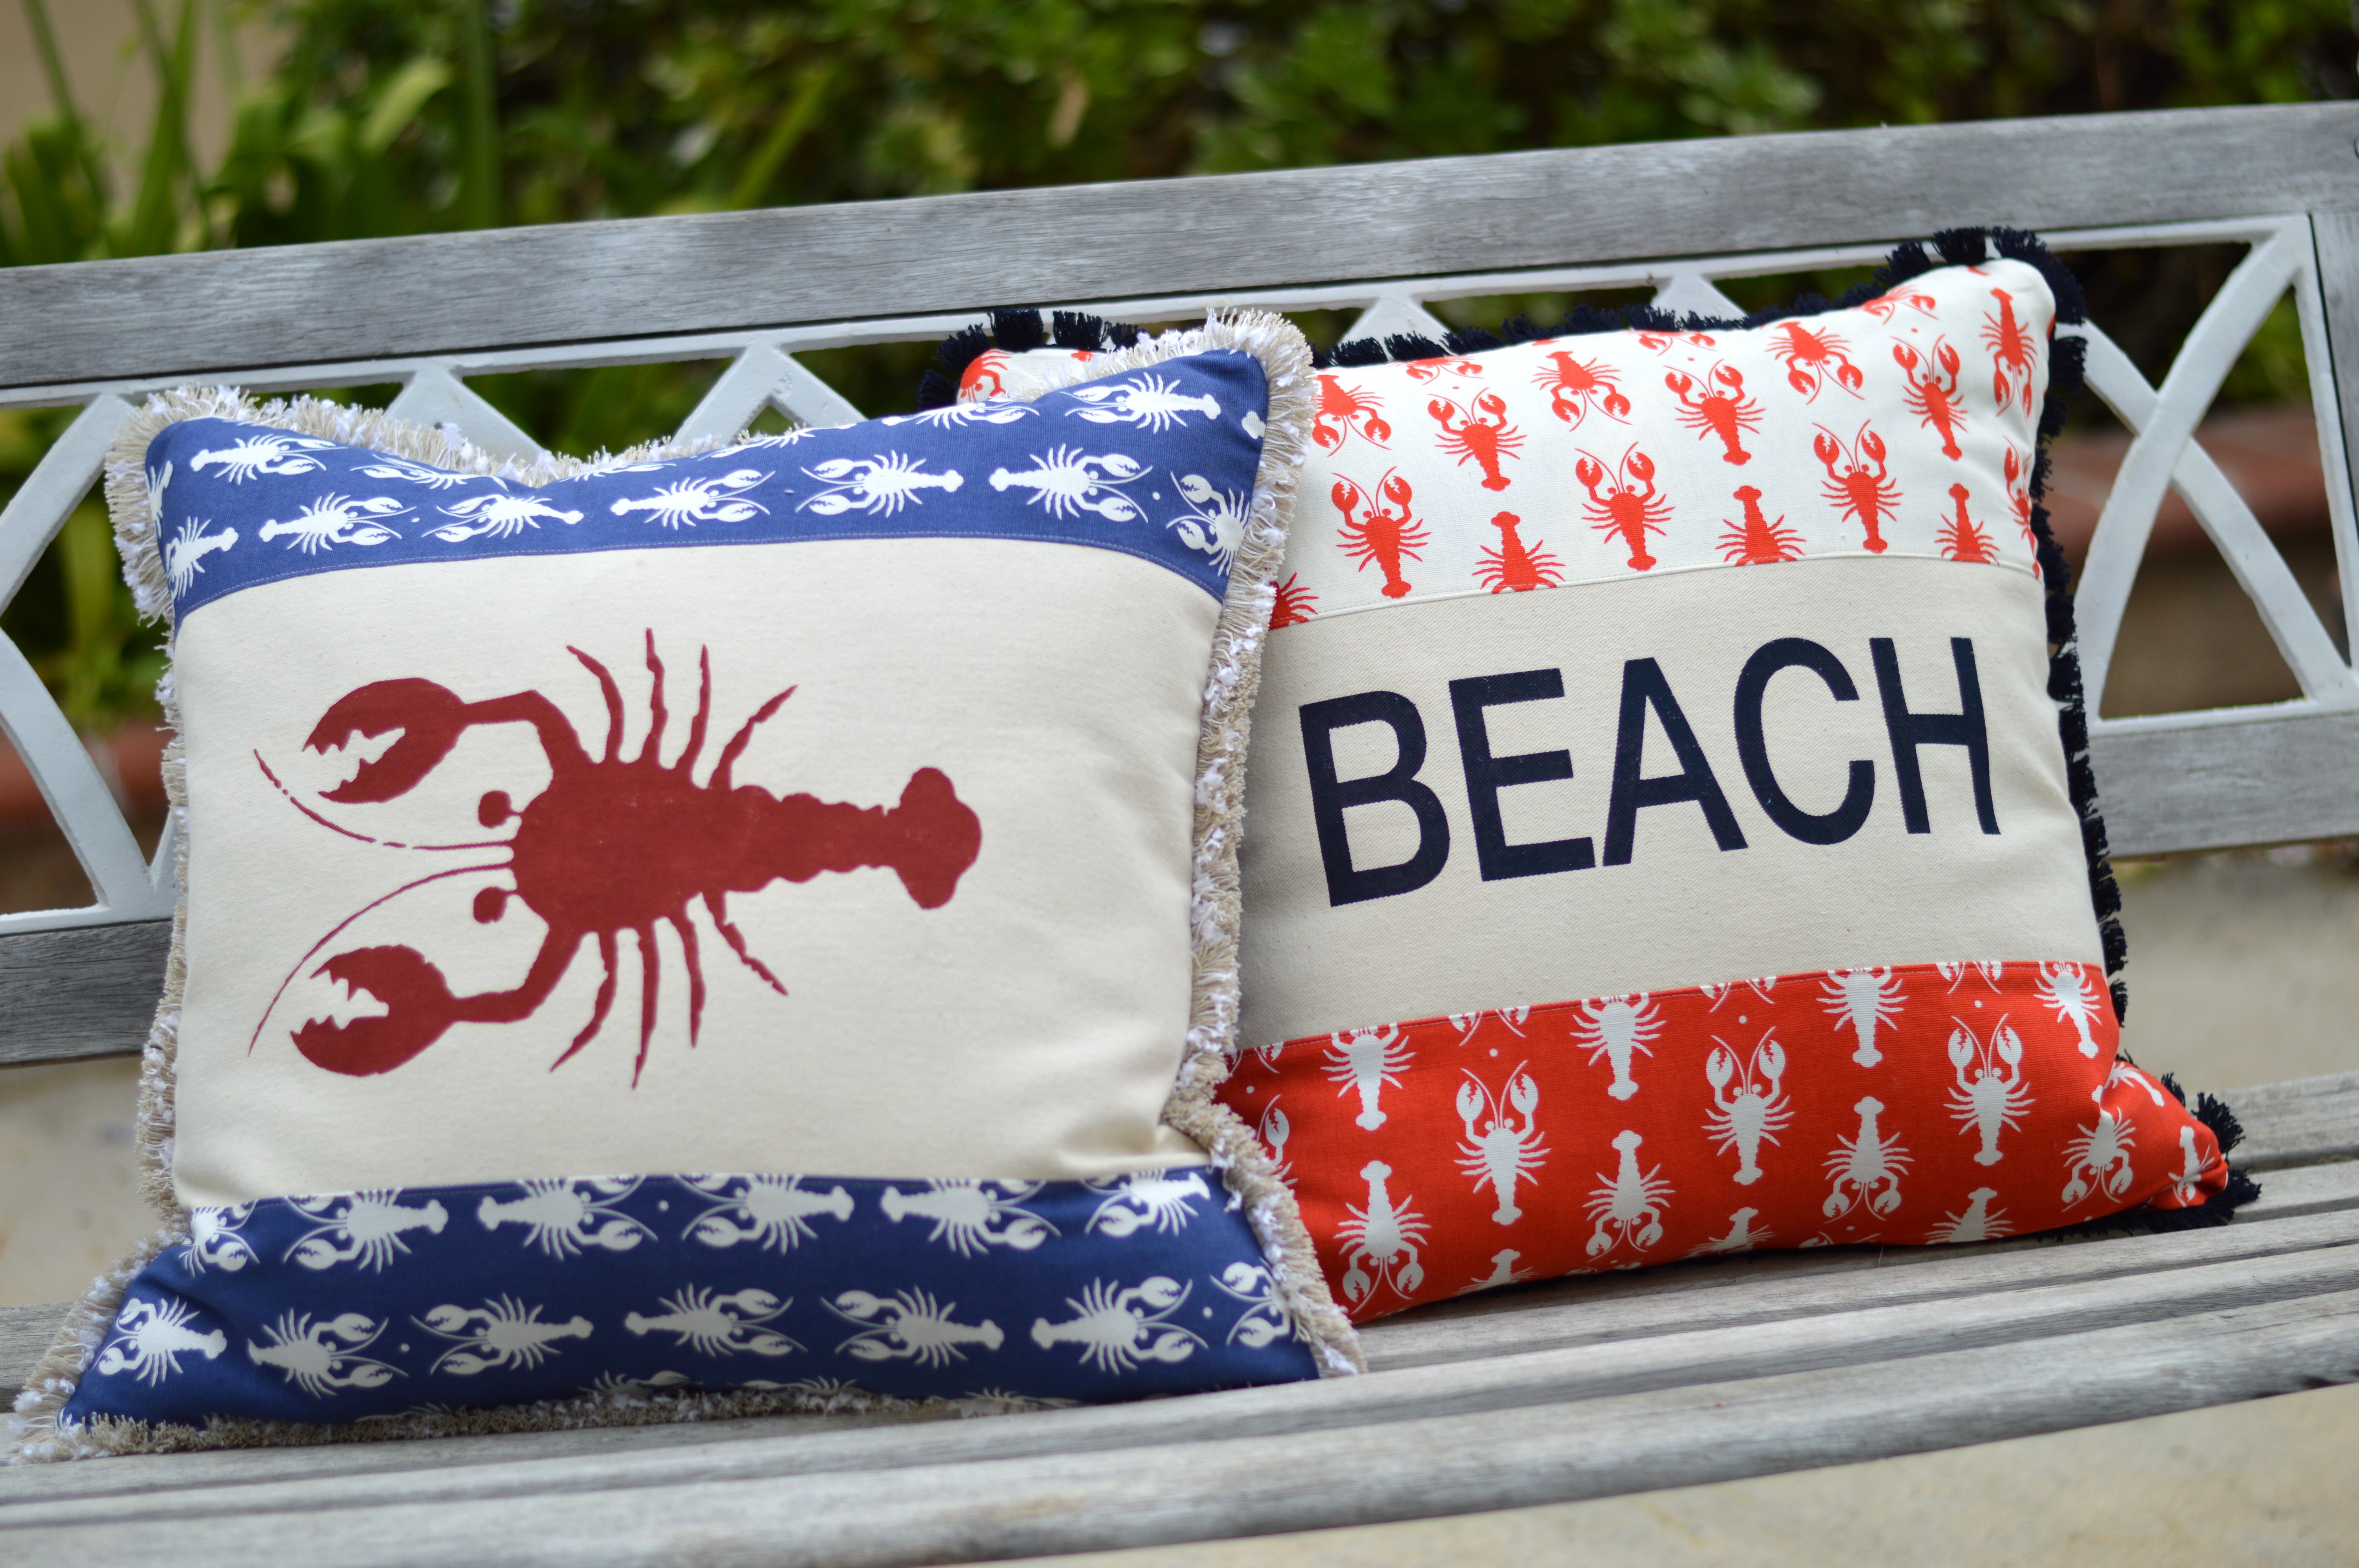
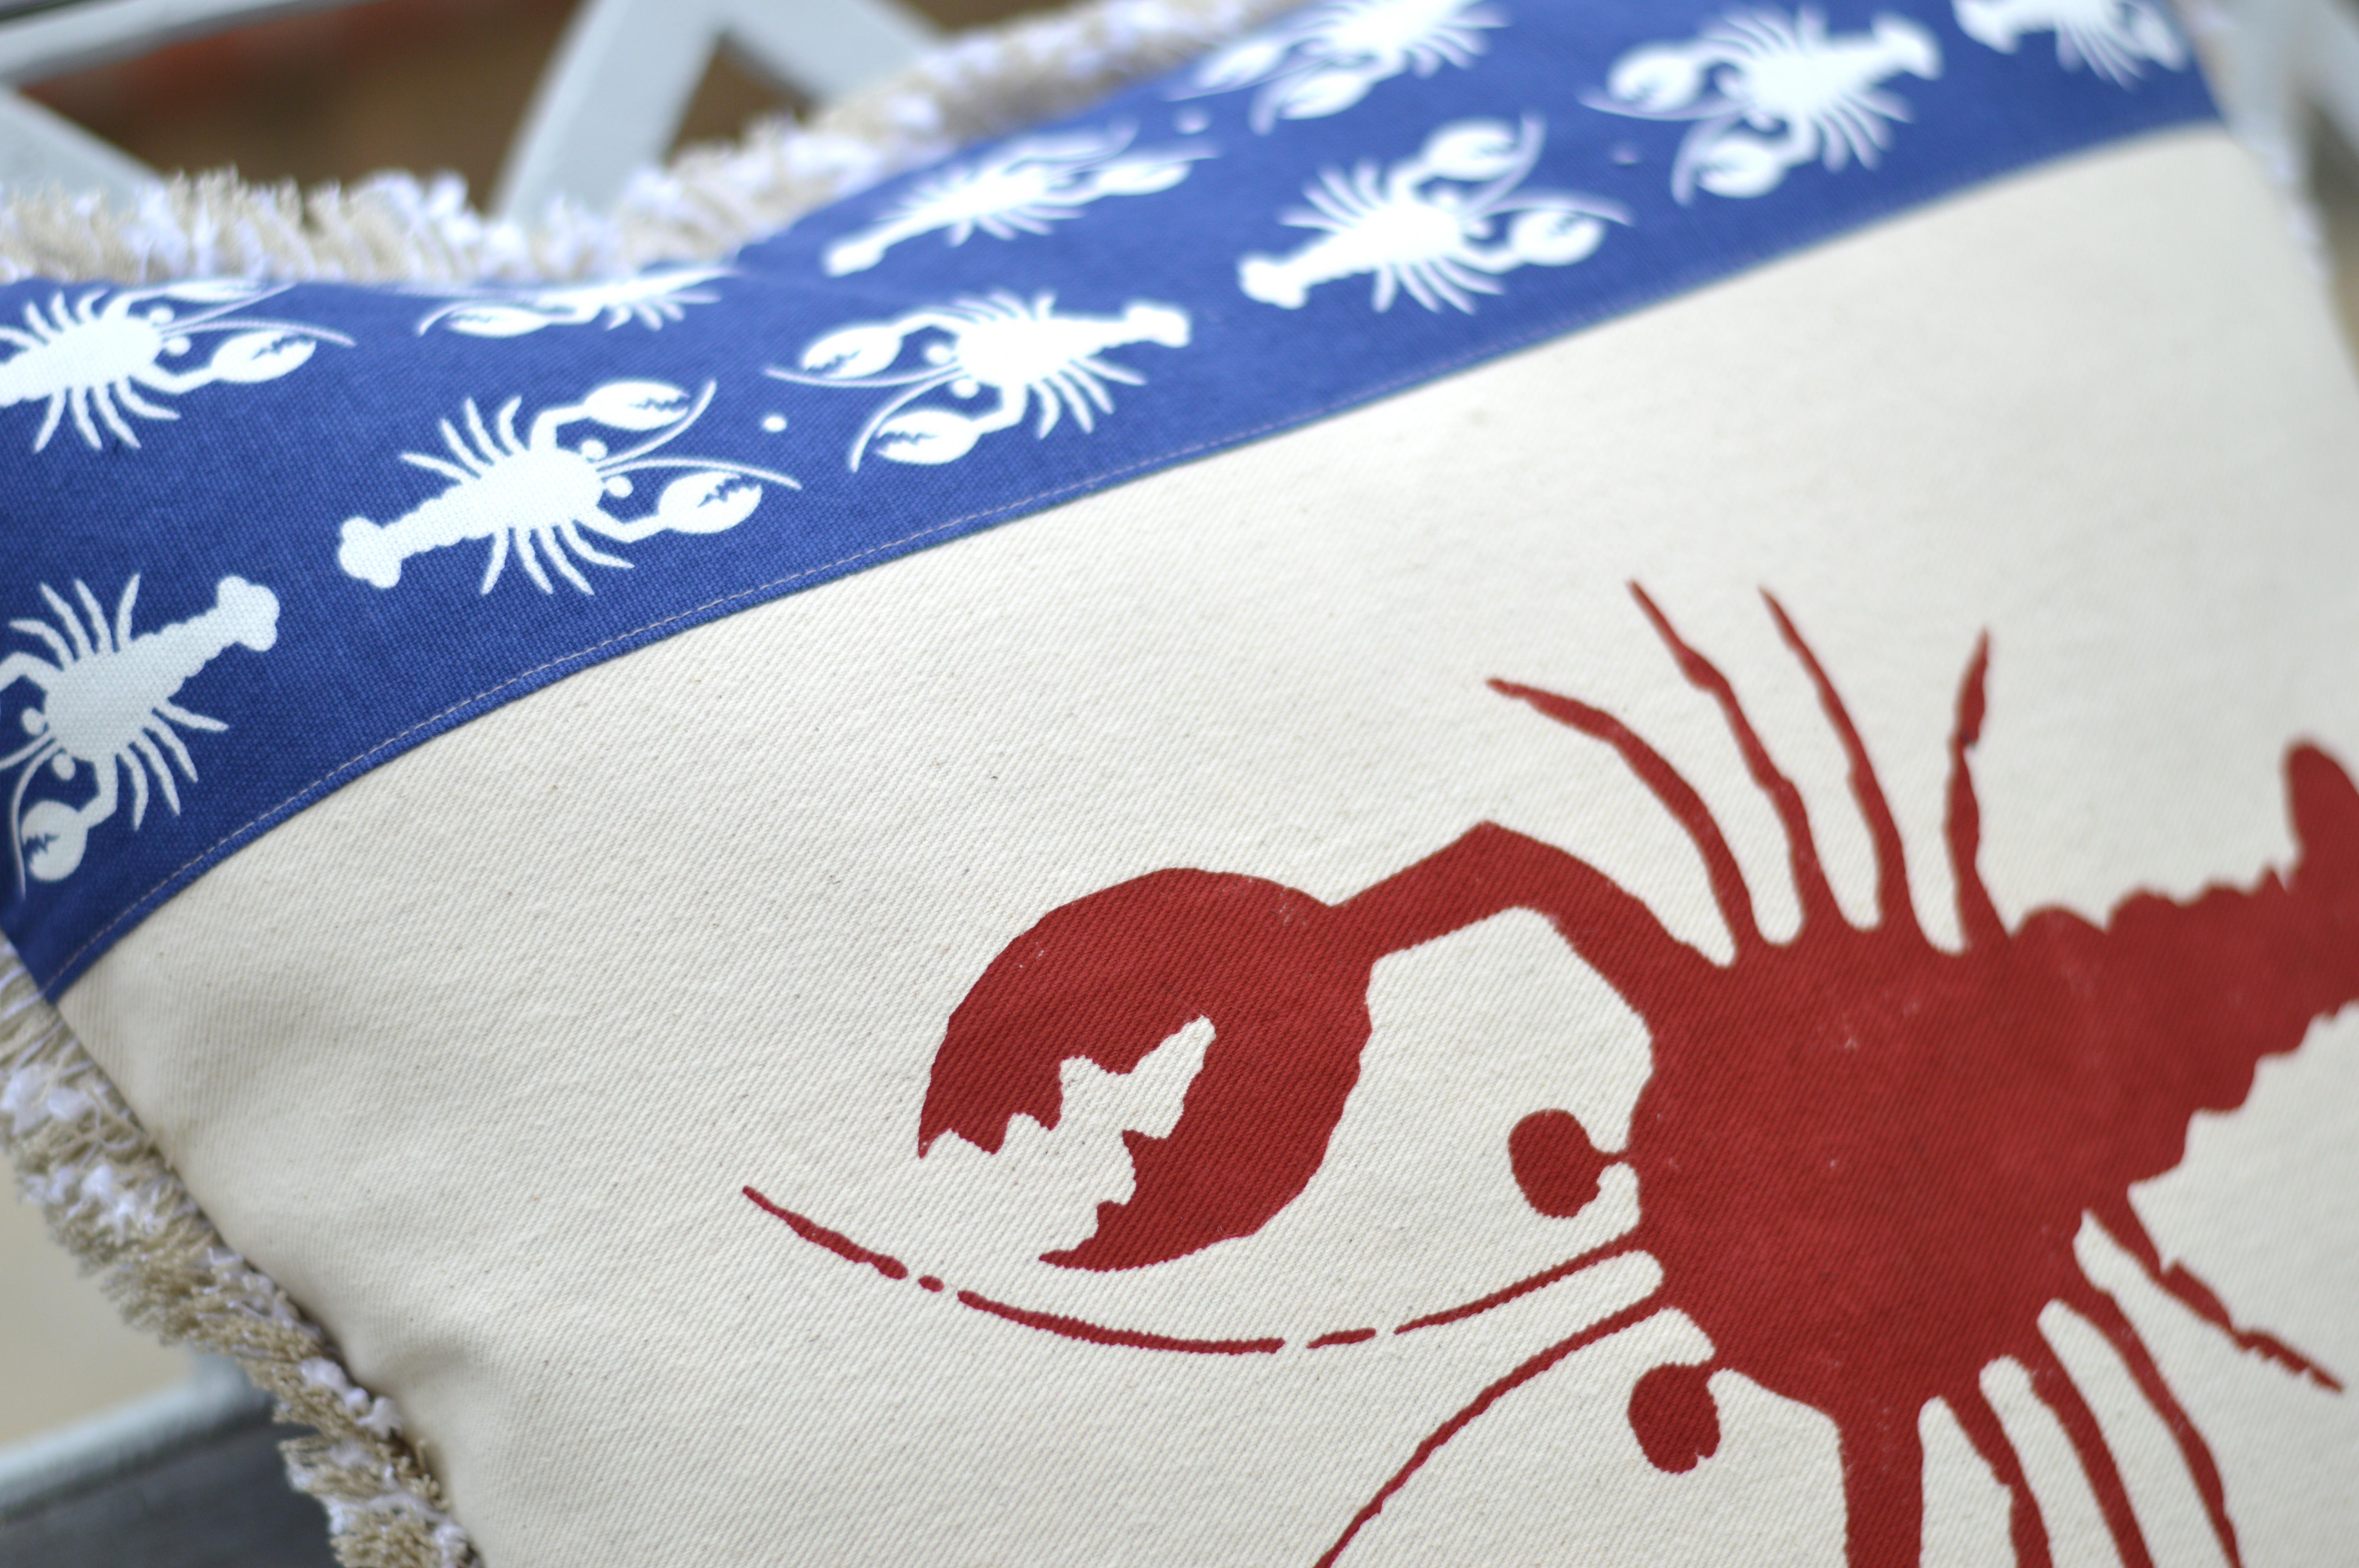
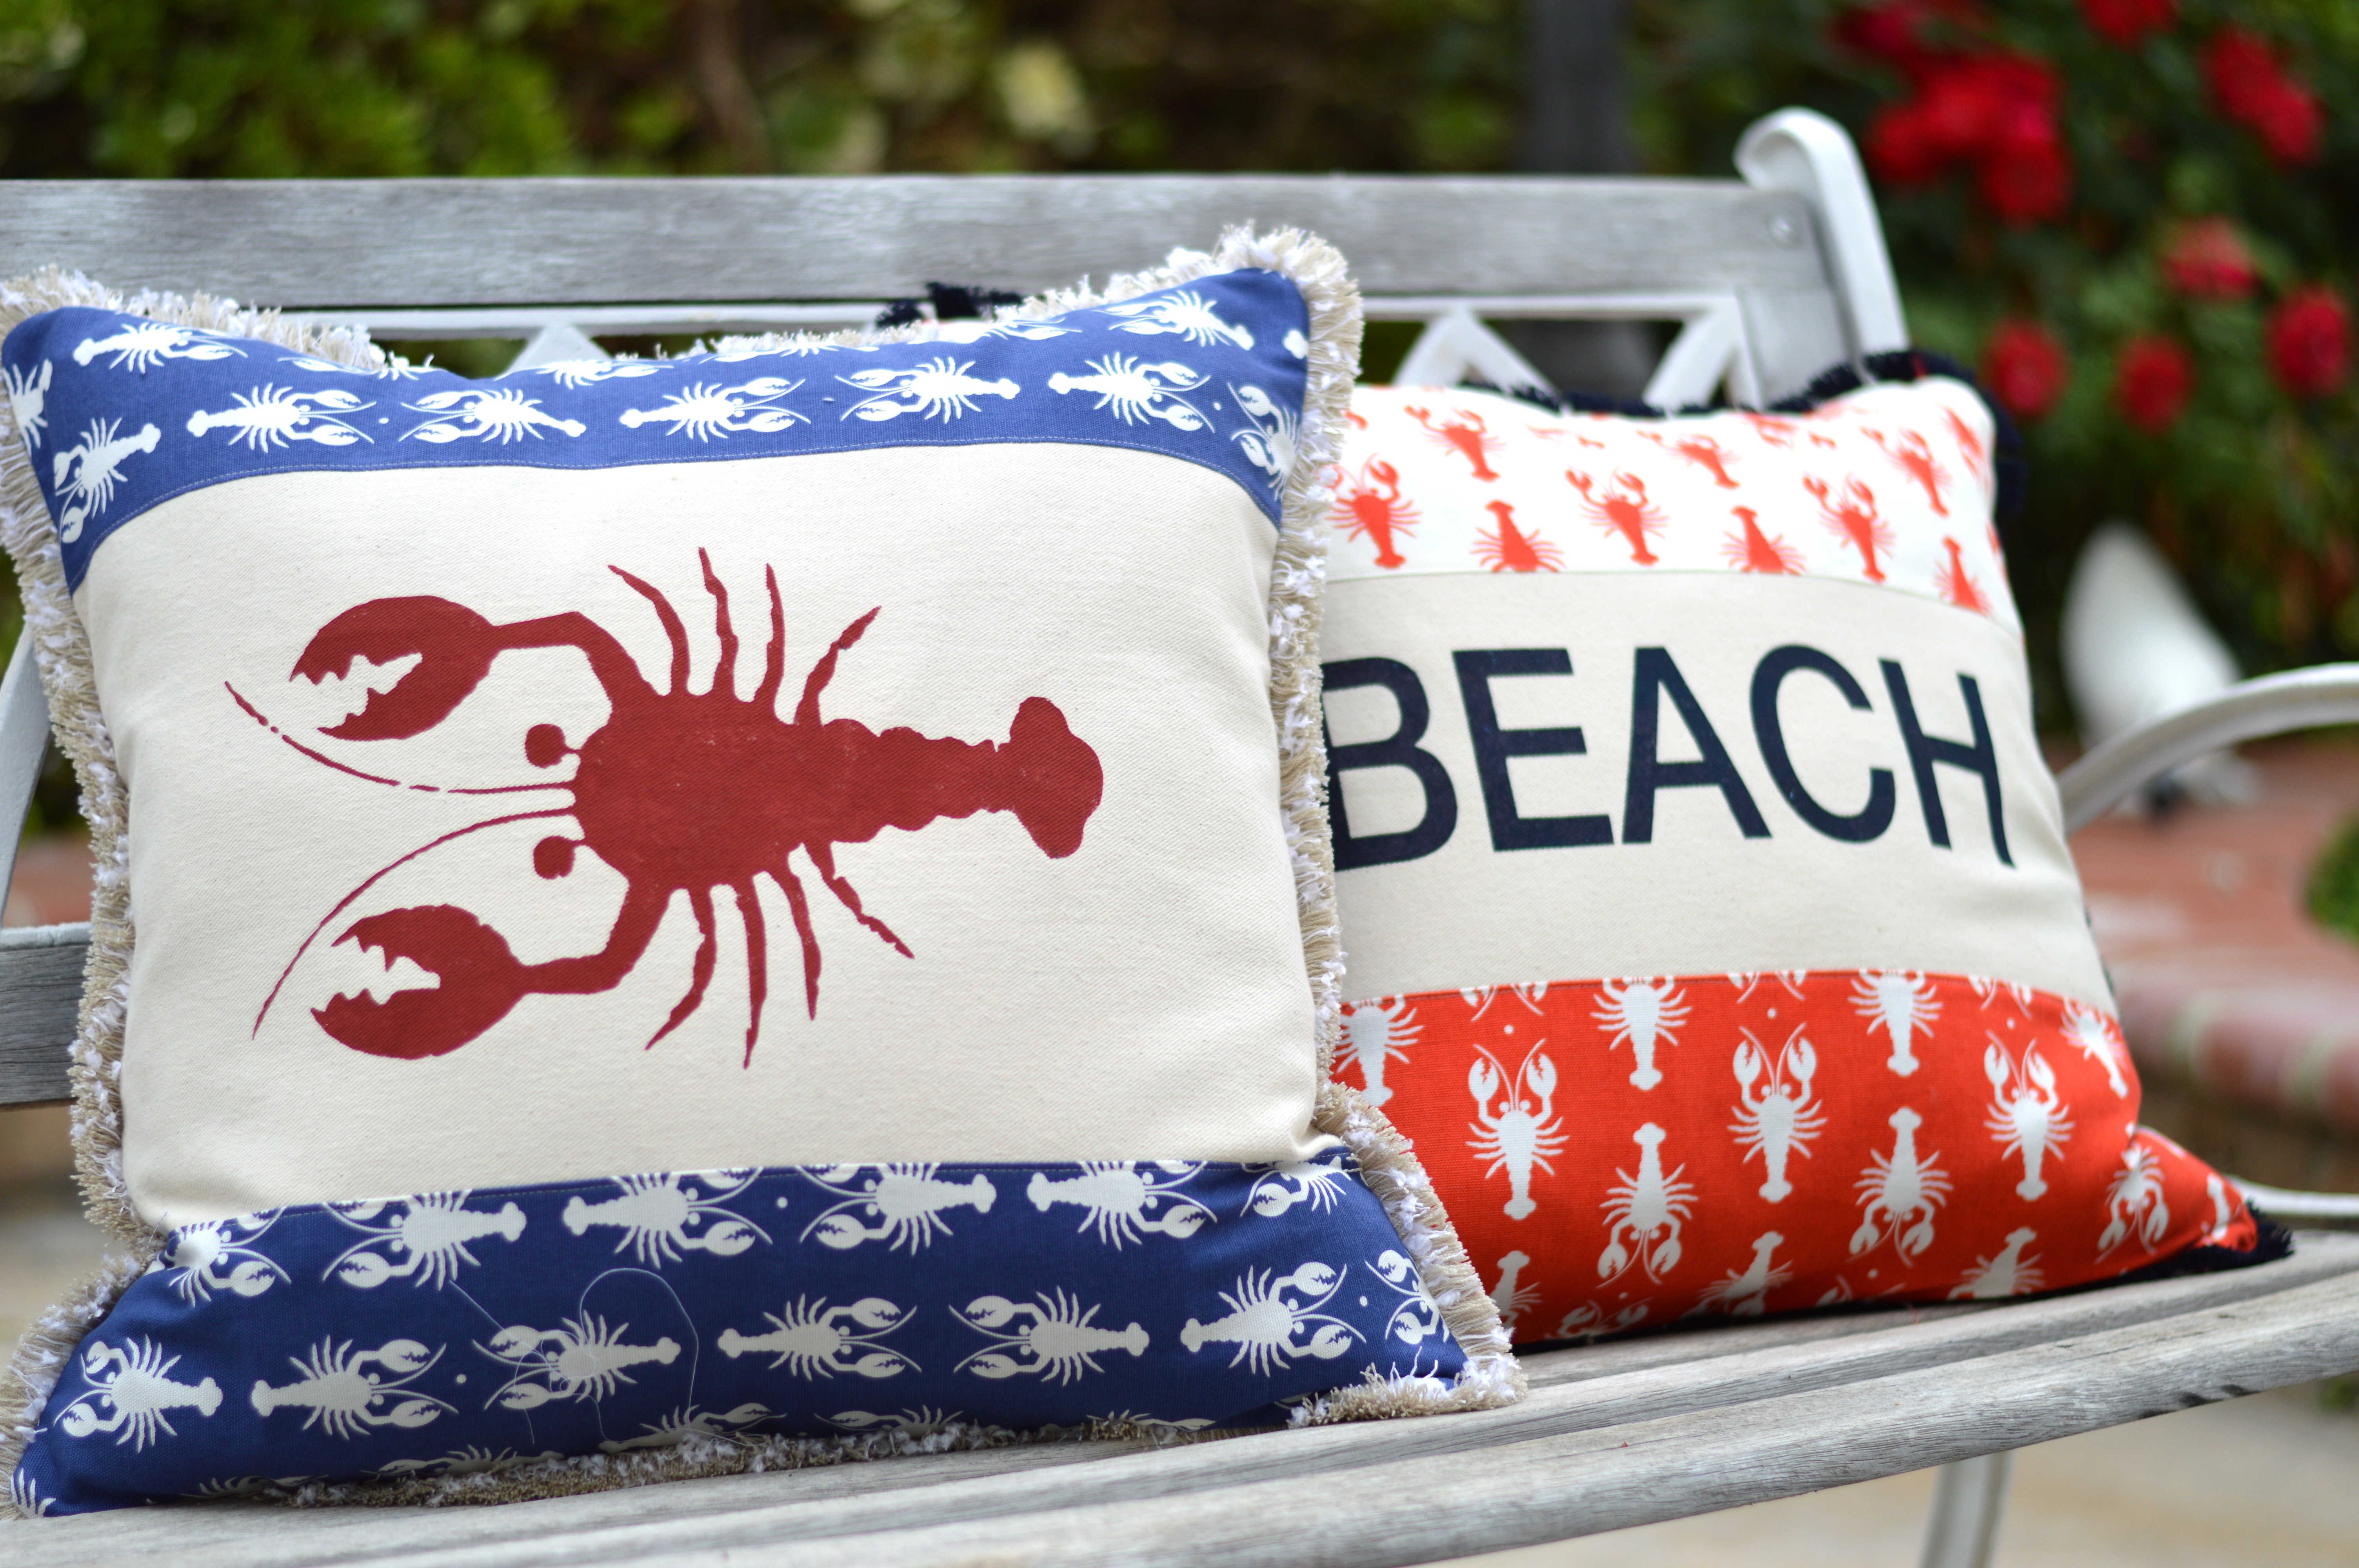
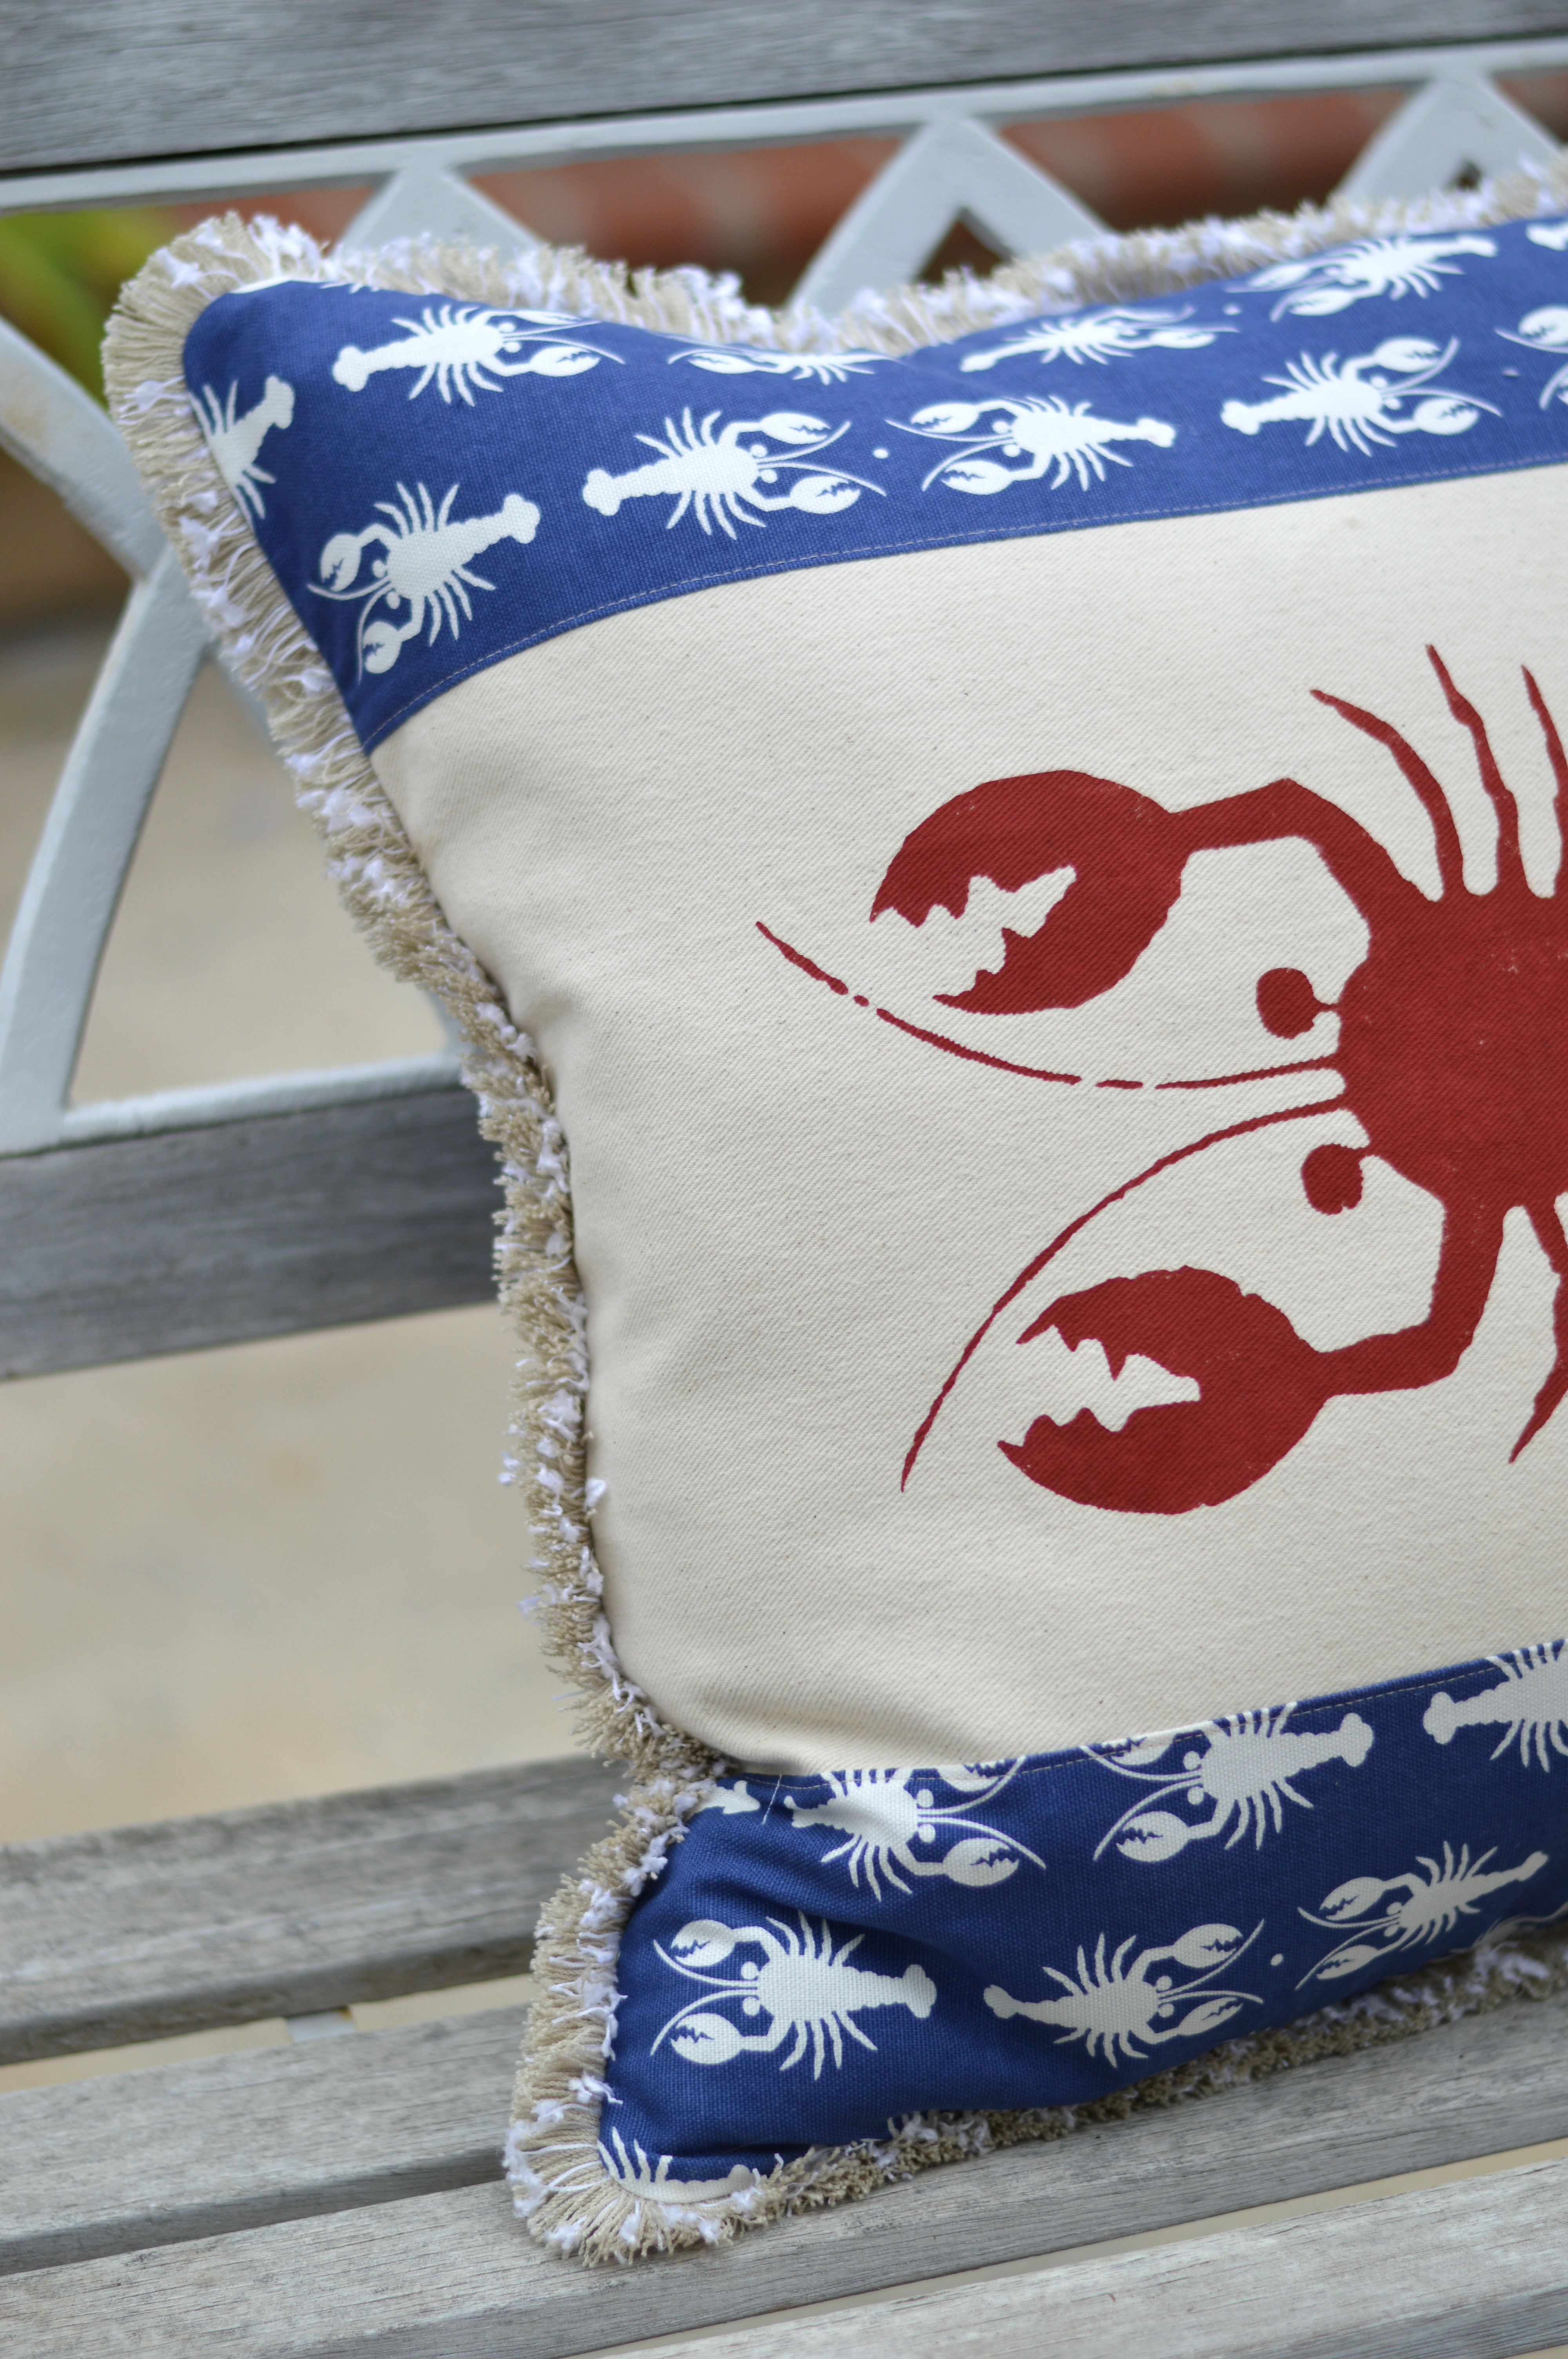
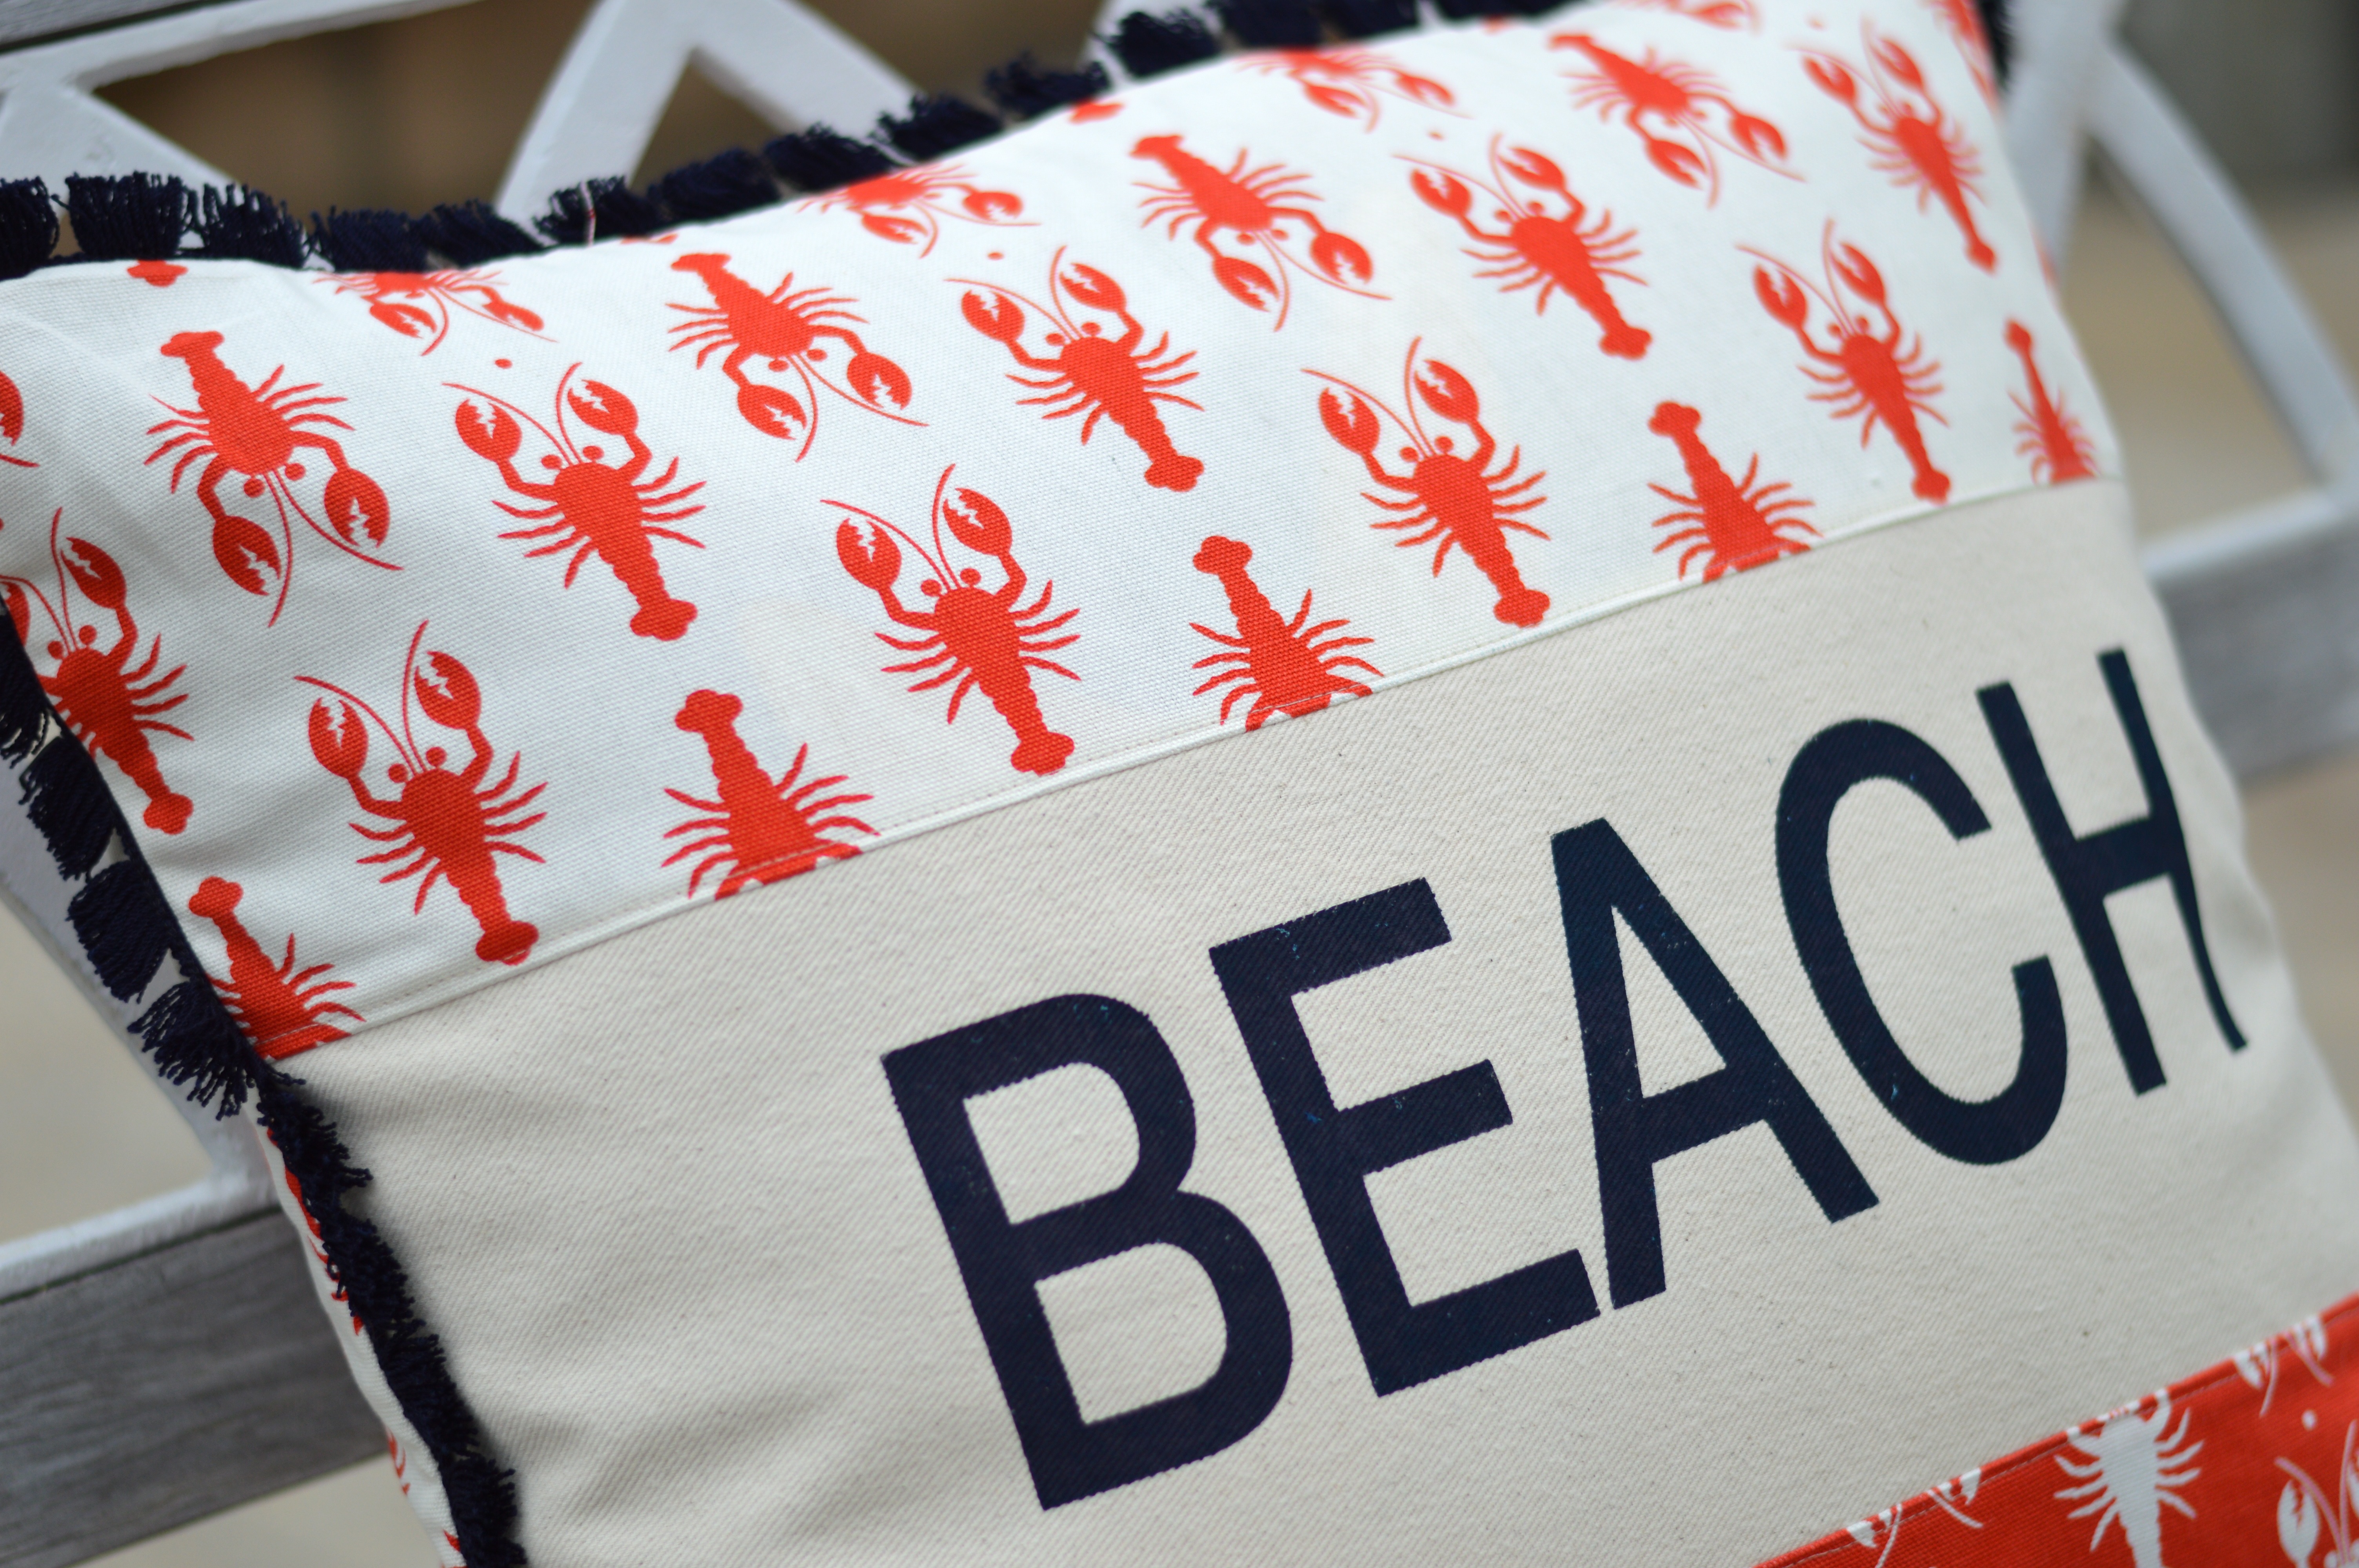
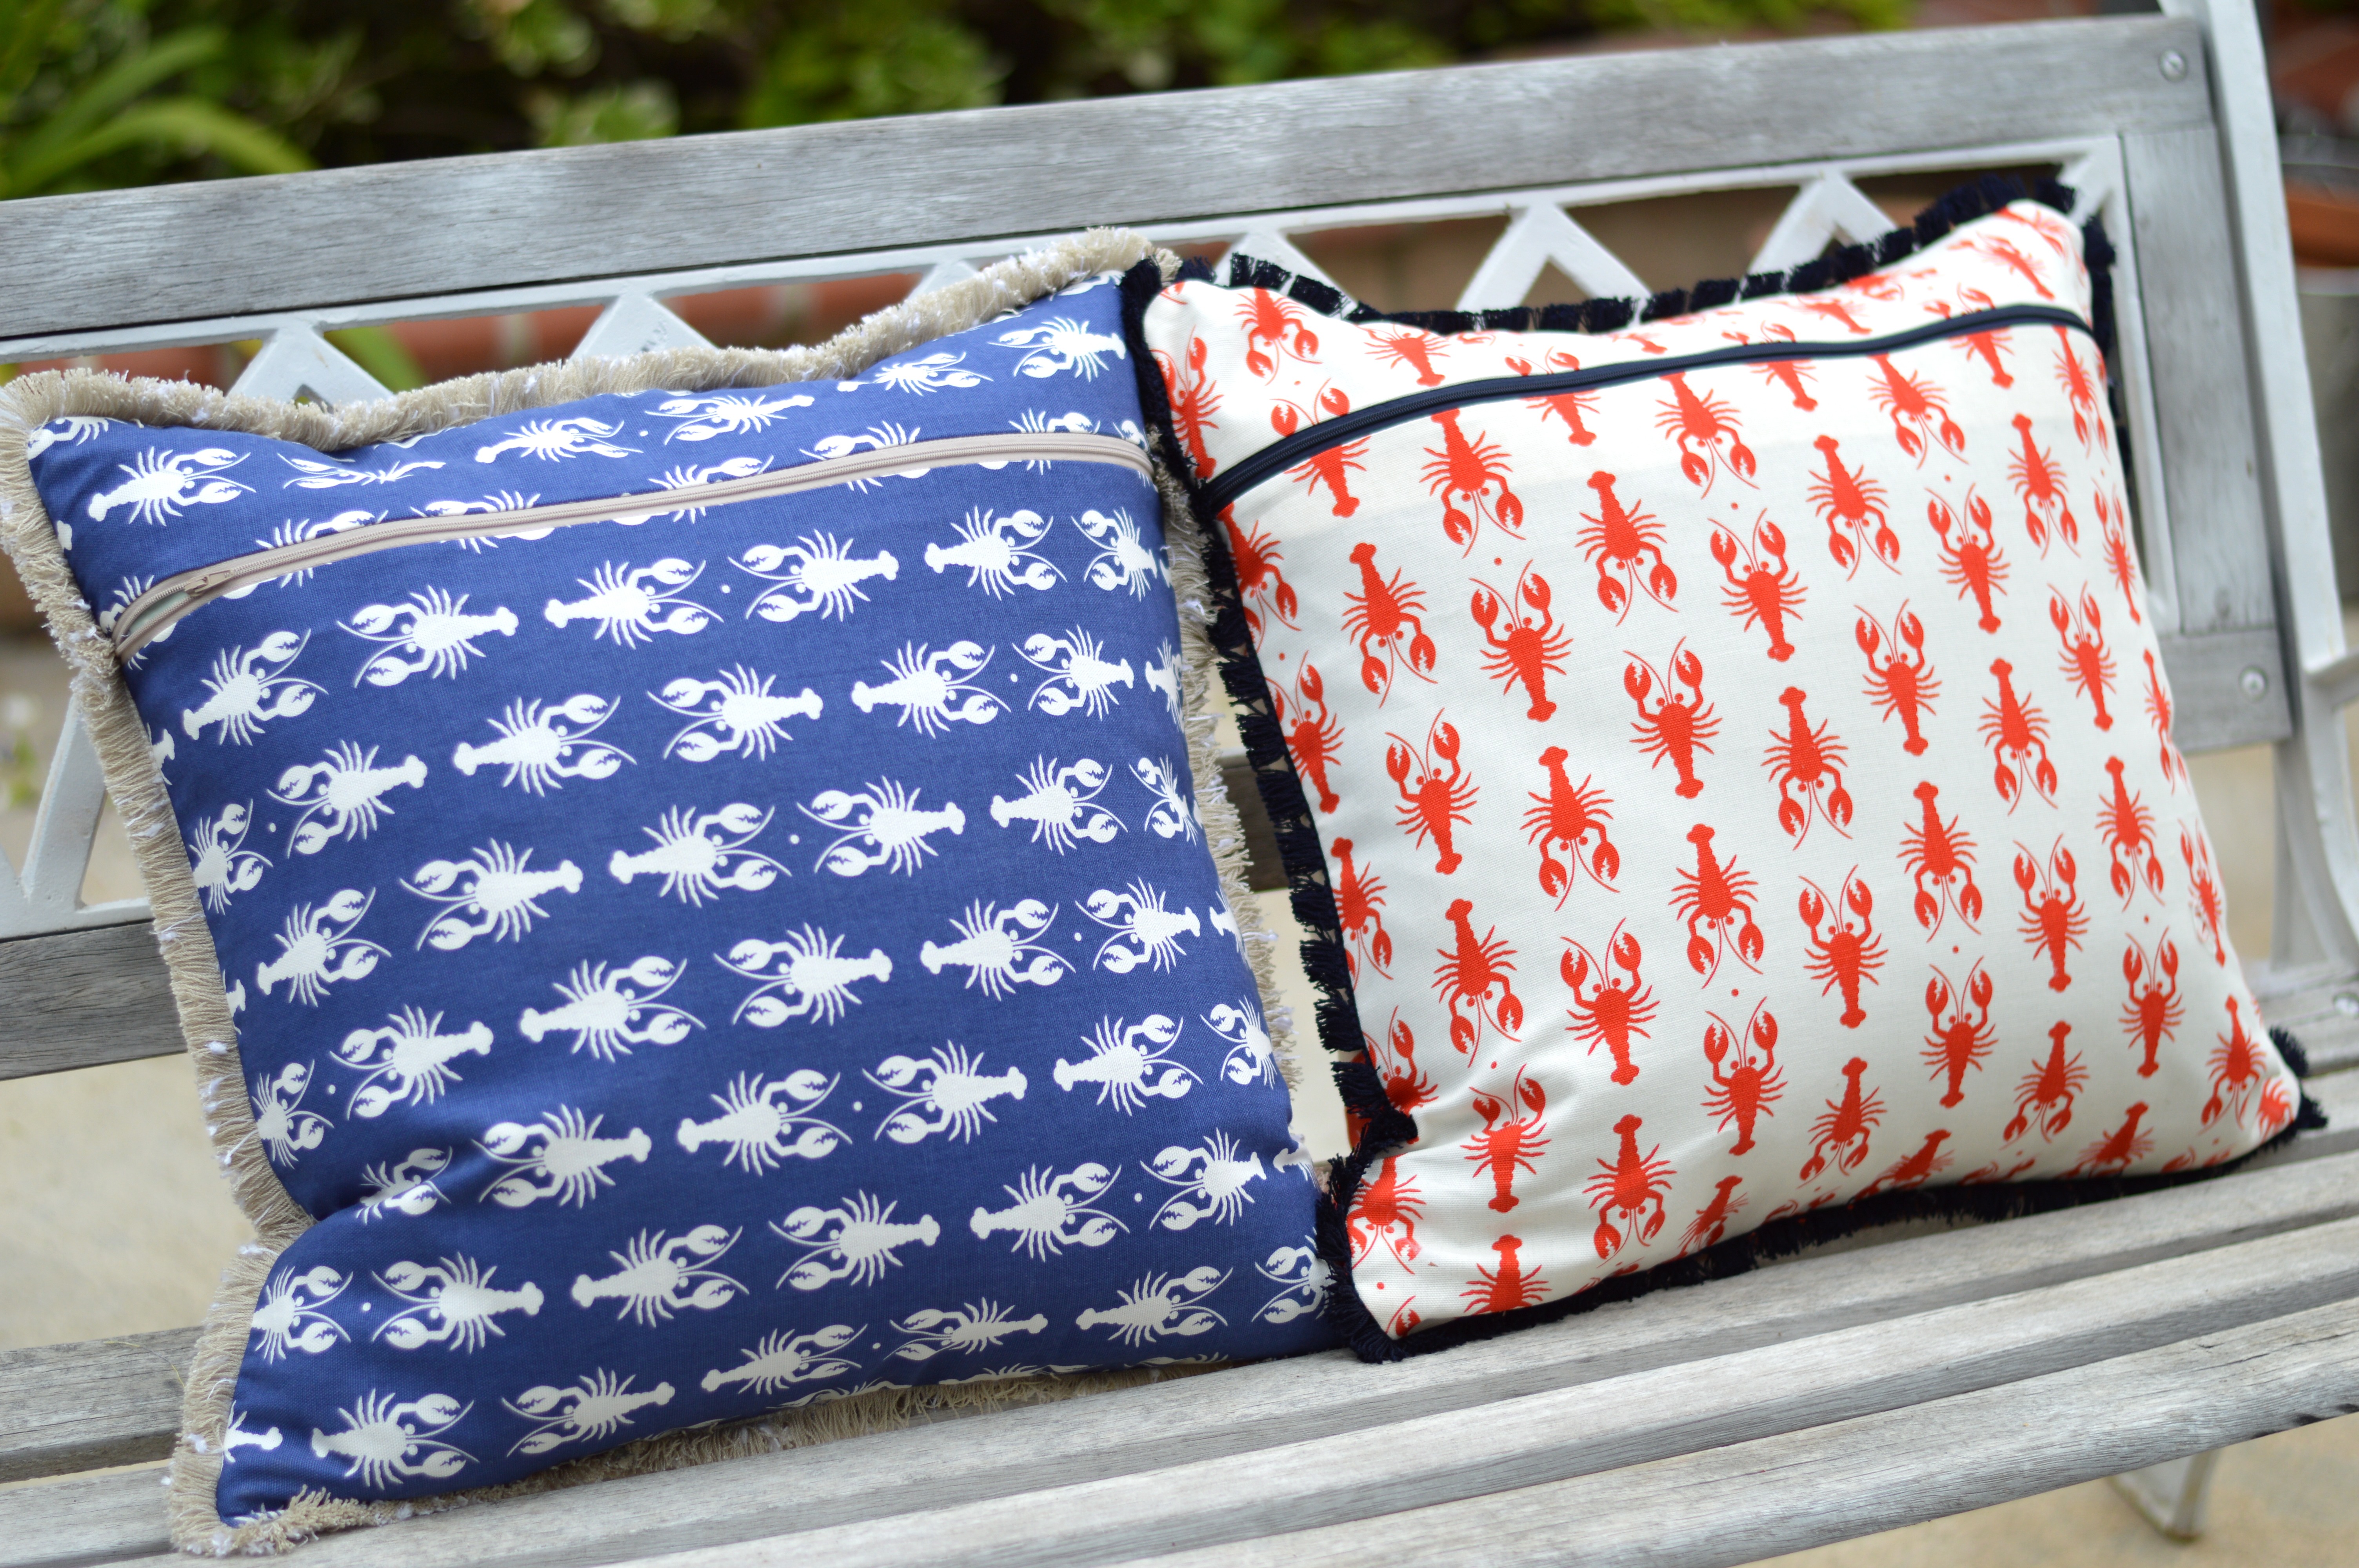
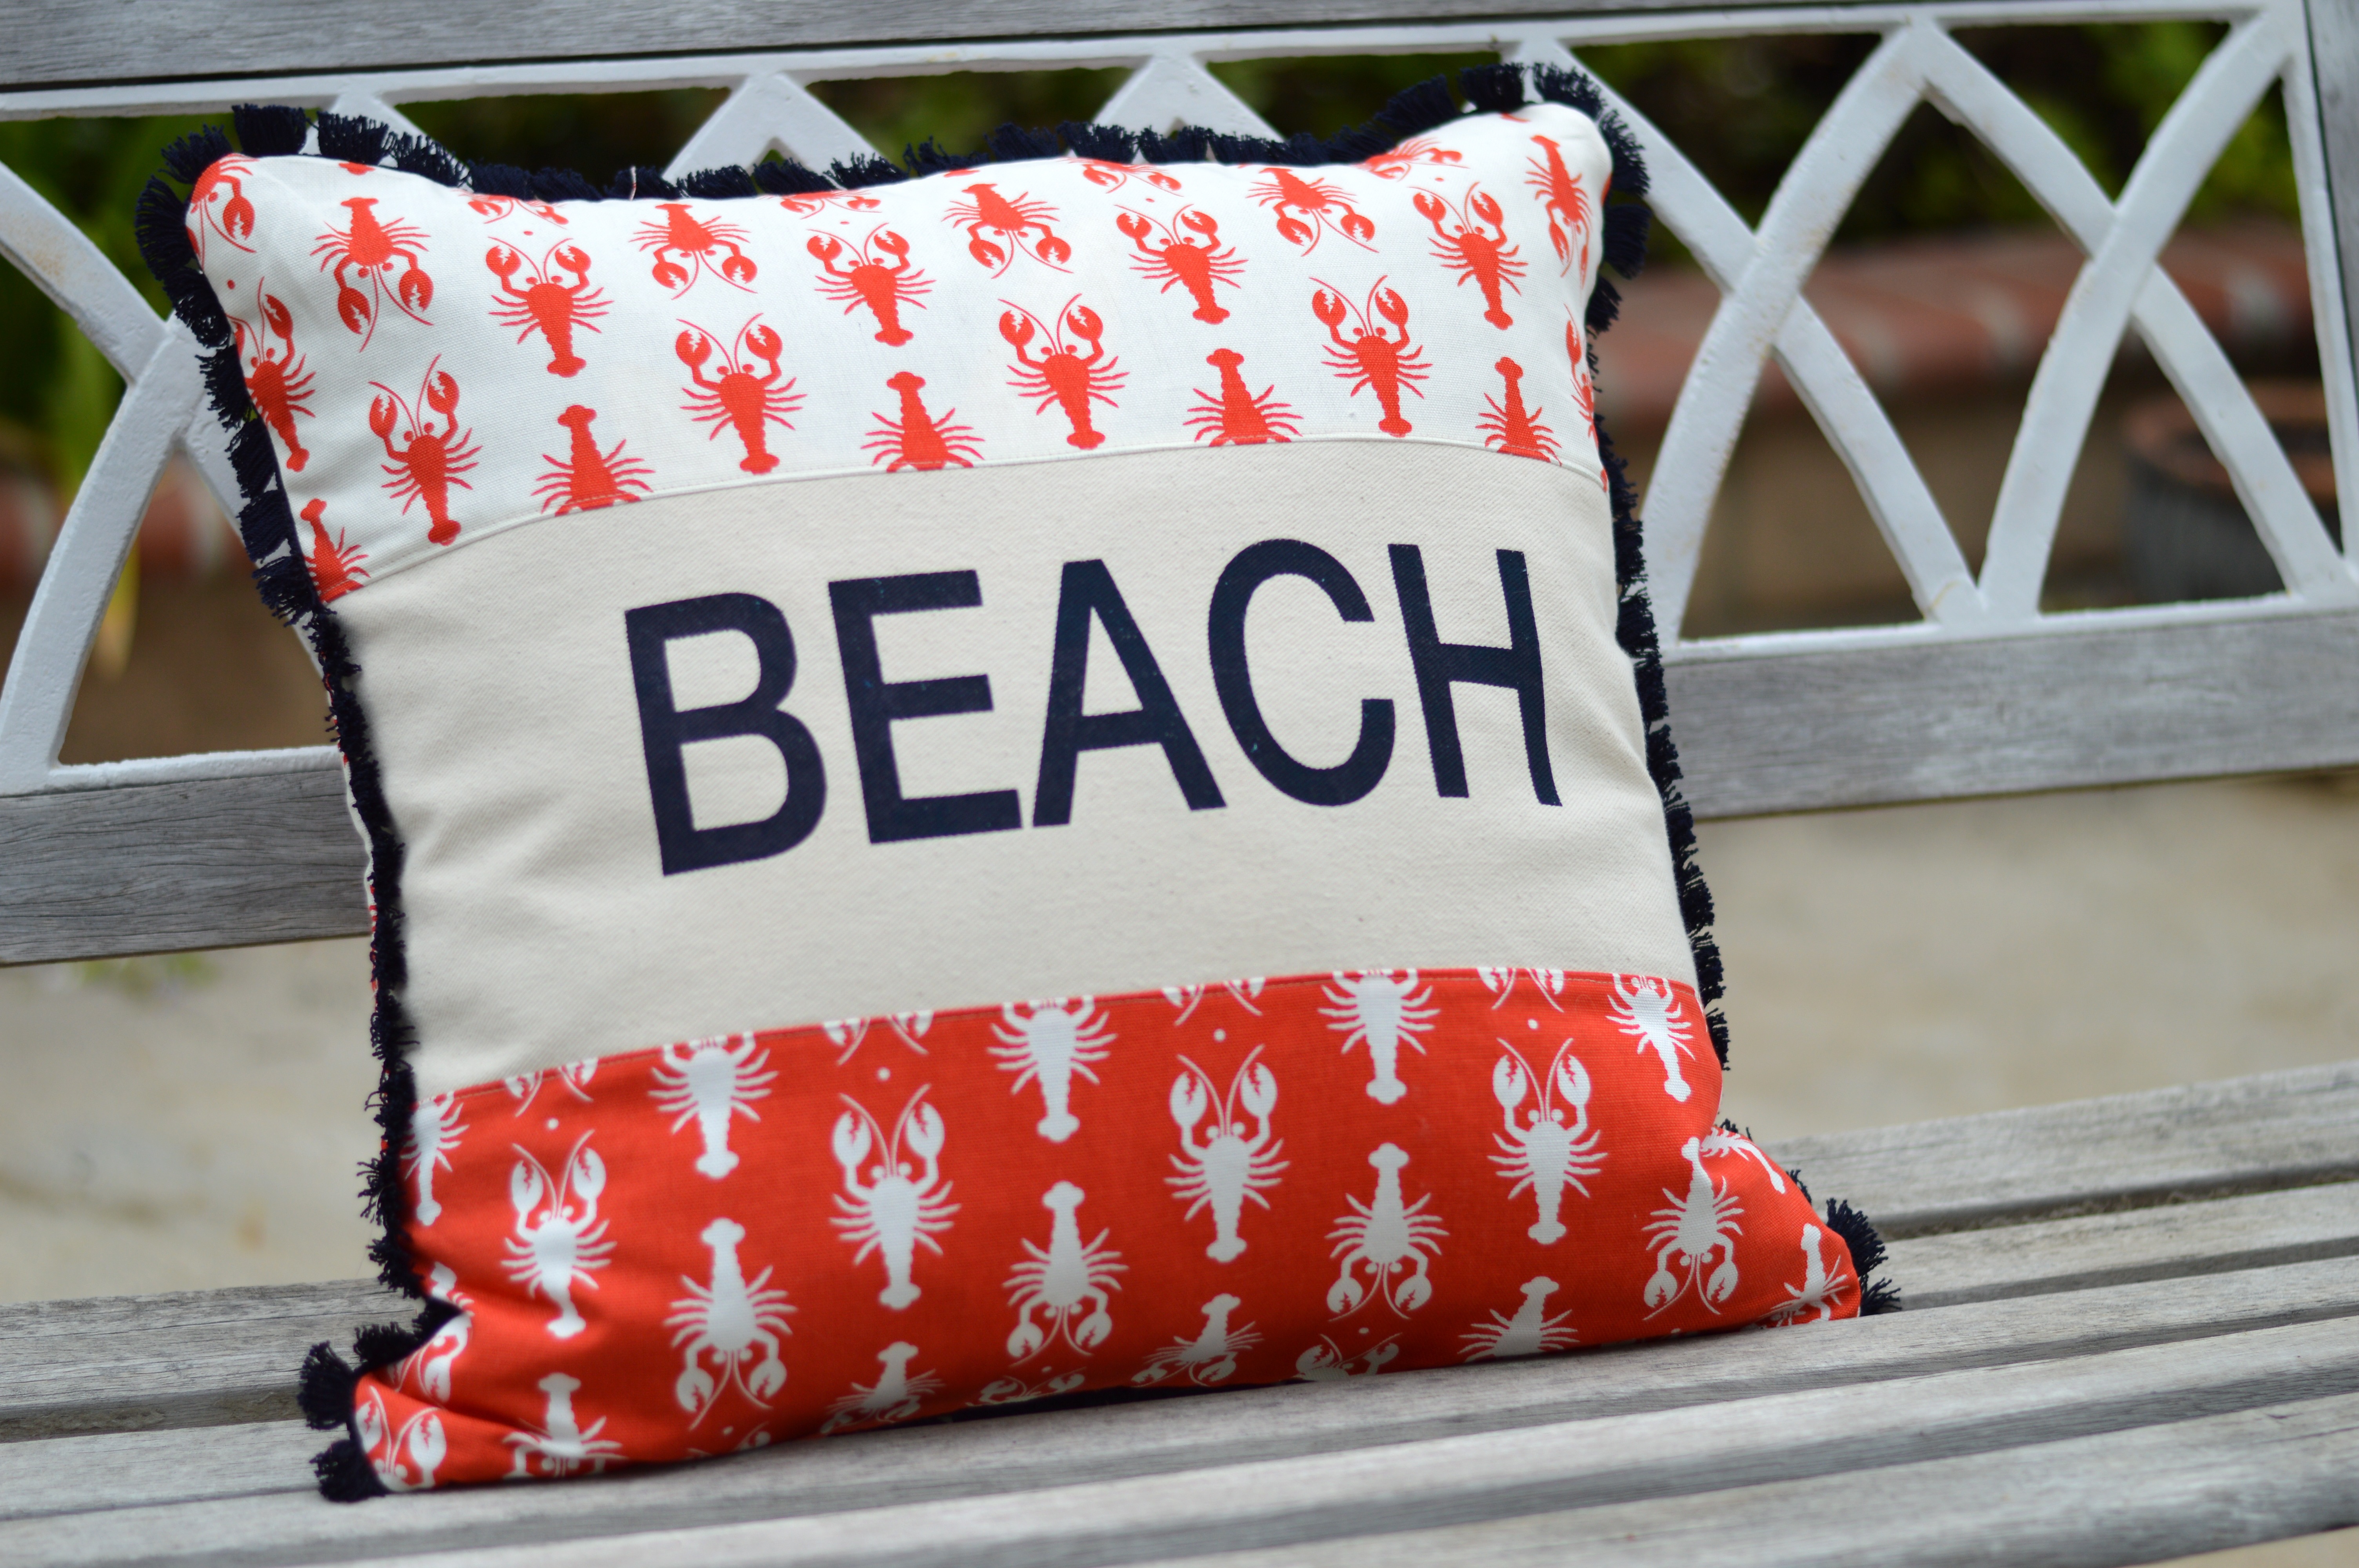
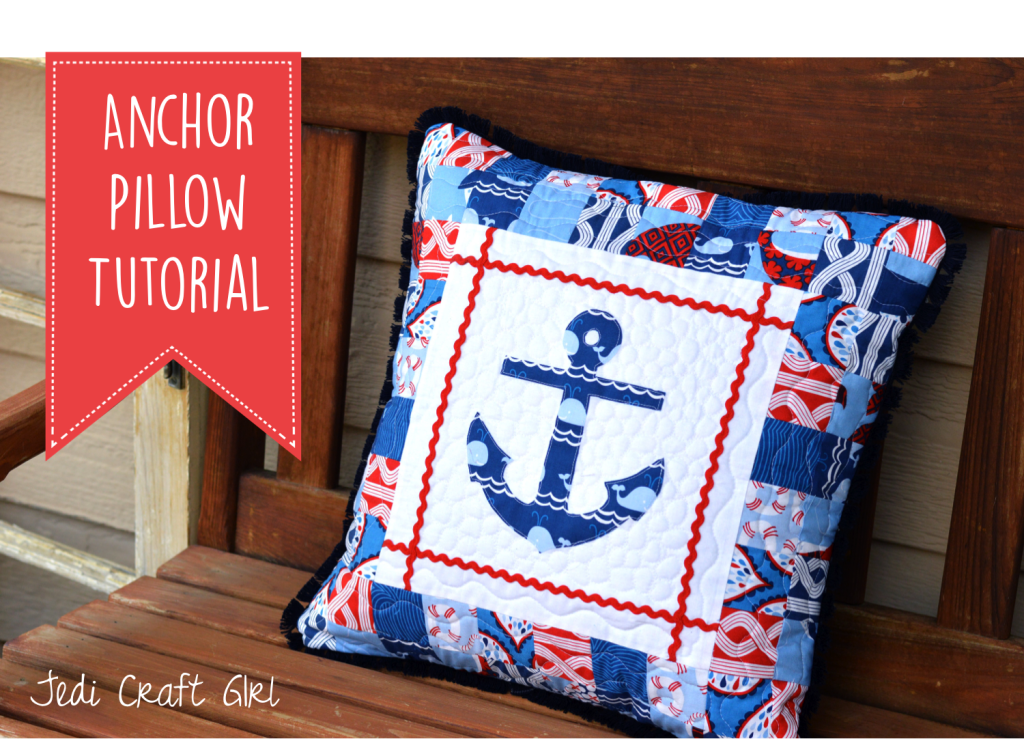
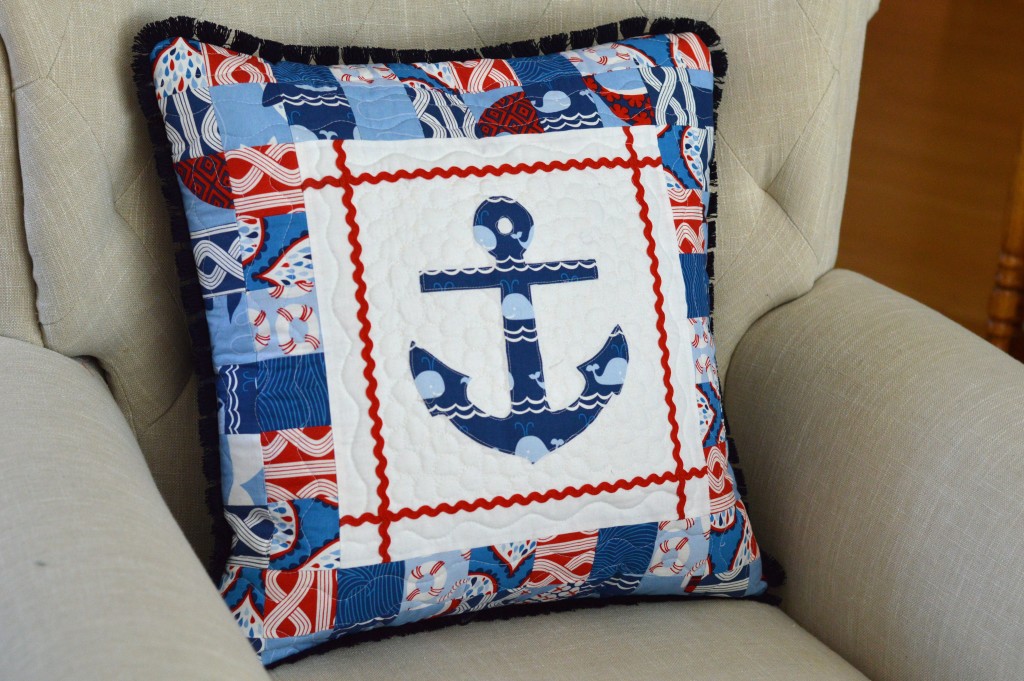
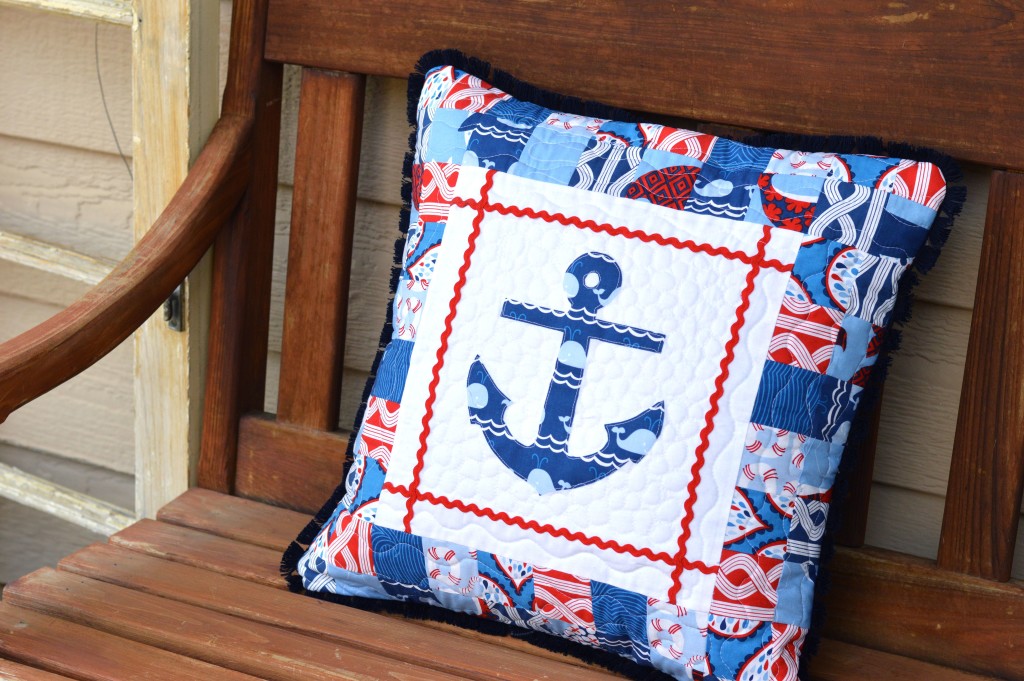
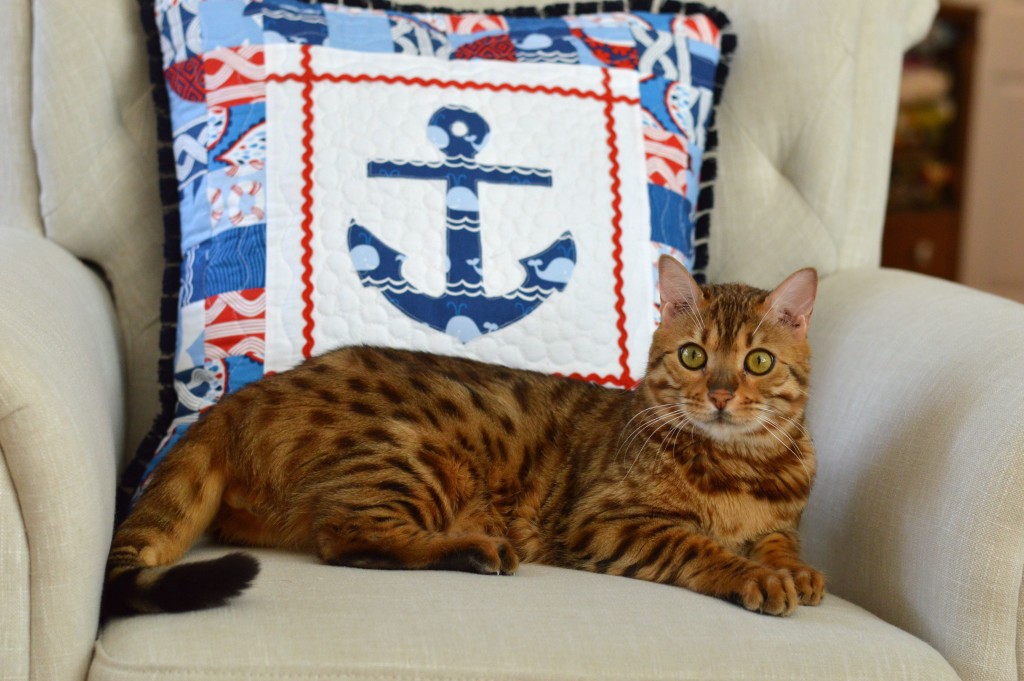
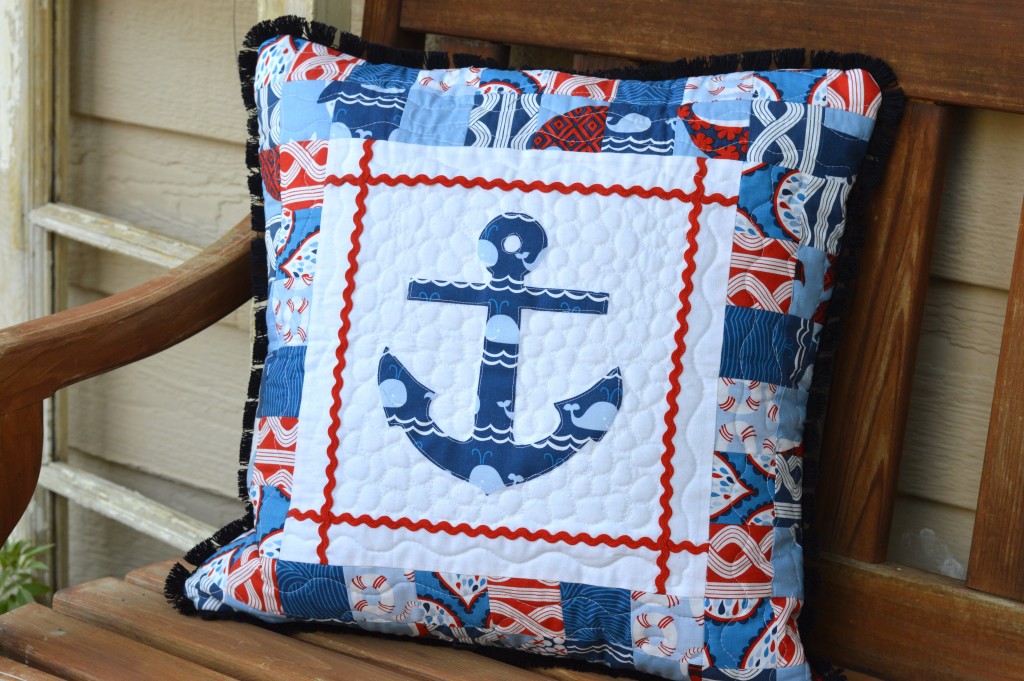
I am so happy to be a part of the Riley Blake Designs Home Dec Love Blog Tour!  If you are new to my blog WELCOME!!!!  I love all things nautical and when I saw this RBD Lobster fabric it was love at first sight!  These lobster pillows are the perfect addition to your indoor or outdoor summer decorating.  I like to pretend I have a sailboat and these are the perfect pillows for a relaxing cruise around the bay 🙂  You can find the Lobster fabrics on RBD website.  Let’s get started!

Supplies:

3/4 yard each blue, cream, and red lobster print

1/2 yard natural canvas or denim

2.5 yards trim per pillow

20″ pillow form

22″ zipper

Craft paint

stencil patterns, Click HERE and HERE for Lobster.  Click HERE and HERE for BEACH letters

Begin by creating a stencil.  There are 2 methods I like to use.  The first is to upload the graphic to my cutting program for my vinyl cutter and cut the image in vinyl and peel out the inside leaving a single-use stencil.  The second way is to trace the image on plastic binder dividers and cut it out with and craft knife.  This way you can use the stencil over and over.  For this project I cut the images on my cutting machine.

Cut the fabrics according to the cutting guide below:

pillow cutting instructionsProceed to stencil the letters and the lobster on the corresponding cuts of fabric.

riley blake lobster pillow

riley blake lobster pillow 3

riley blake lobster pillow 5

riley blake lobster pillow 4  riley blake lobster pillow 6

riley blake lobster pillow 15Once the paint has dried, heat set the image with a hot iron.  Piece the strips together as shown in the picture.  Press seams and top stitch along seams.

riley blake lobster pillow 11

riley blake lobster pillow 12Now prepare the back.  Make sure to have your cat inspect and sit on all fabrics!!

riley blake lobster pillow 7

Cut the back pieces 20″ x 20″riley blake lobster pillow 8

Make a cut at the 4″ mark.  This is where the zipper will go.riley blake lobster pillow 9

Sew the zipper in and press the zipper open.  Trim off excess zipper.riley blake lobster pillow 10   Baste the trim all the way around the pillow, beginning and ending at the bottom center of the pillow.  I rounded the corners as I basted the trim in place.  Place the pillow front to the pillow back right sides together.  MAKE SURE ZIPPER IS OPEN PARTIALLY.  Pin, matching edges all the way around the pillow.  Sew using a generous 1/4″ seam allowance.  Clip excess corners and turn right side out.  Insert pillow formriley blake lobster pillow 13

lobster summer pillow riley blake 2 lobster pillow riley blake 4

lobster pillow riley blake

lobster pillow riley blake 3

lobster pillow riley blake 7

lobster pillow riley blake designs

lobster pillow riley blake 9Check out all these amazing projects featuring Riley Blake Designs Home Decorating Fabric!