Perfect Party Mini Quilt

DSC_0200

I’m super excited to be part of Penny Rose Fabrics Perfect Party Blog tour! This new fabric line is called Perfect Party and is designed Lindsay Wilkes.

DSC_0138

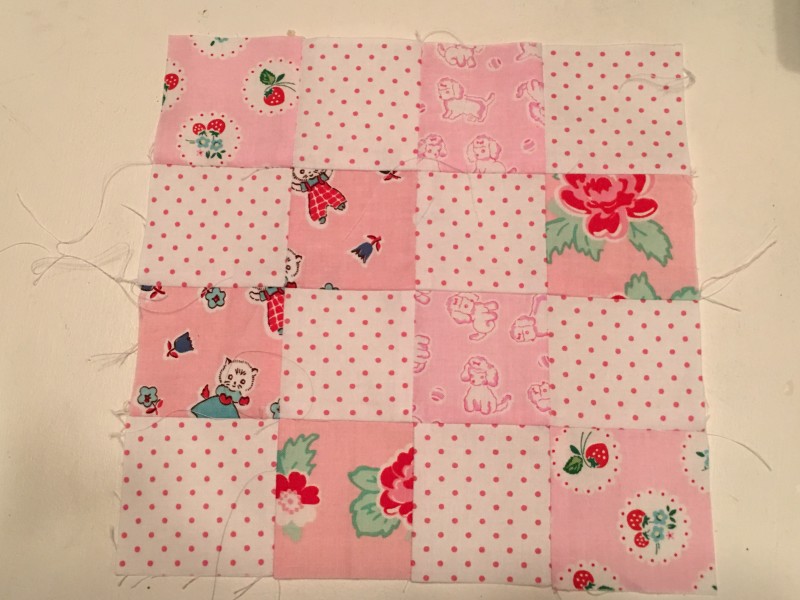
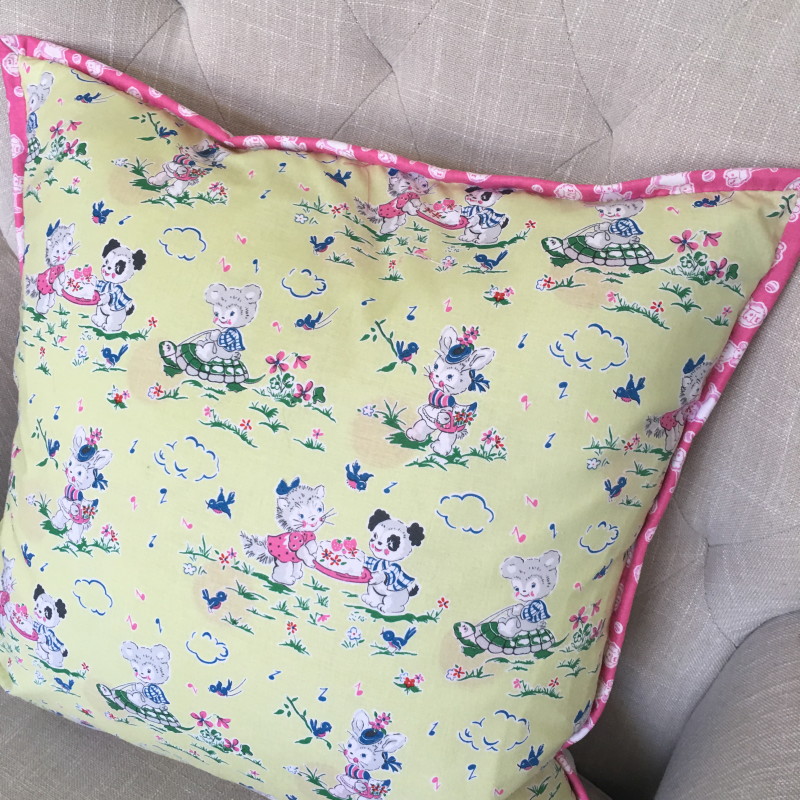
I love the vintage inspired motifs of this fabric – cats, bunnies, ducks, birds!! What’ s not to love!  I wish Sally was younger so I could make her the cutest dress in the world out of these fabrics!
IMG_1695

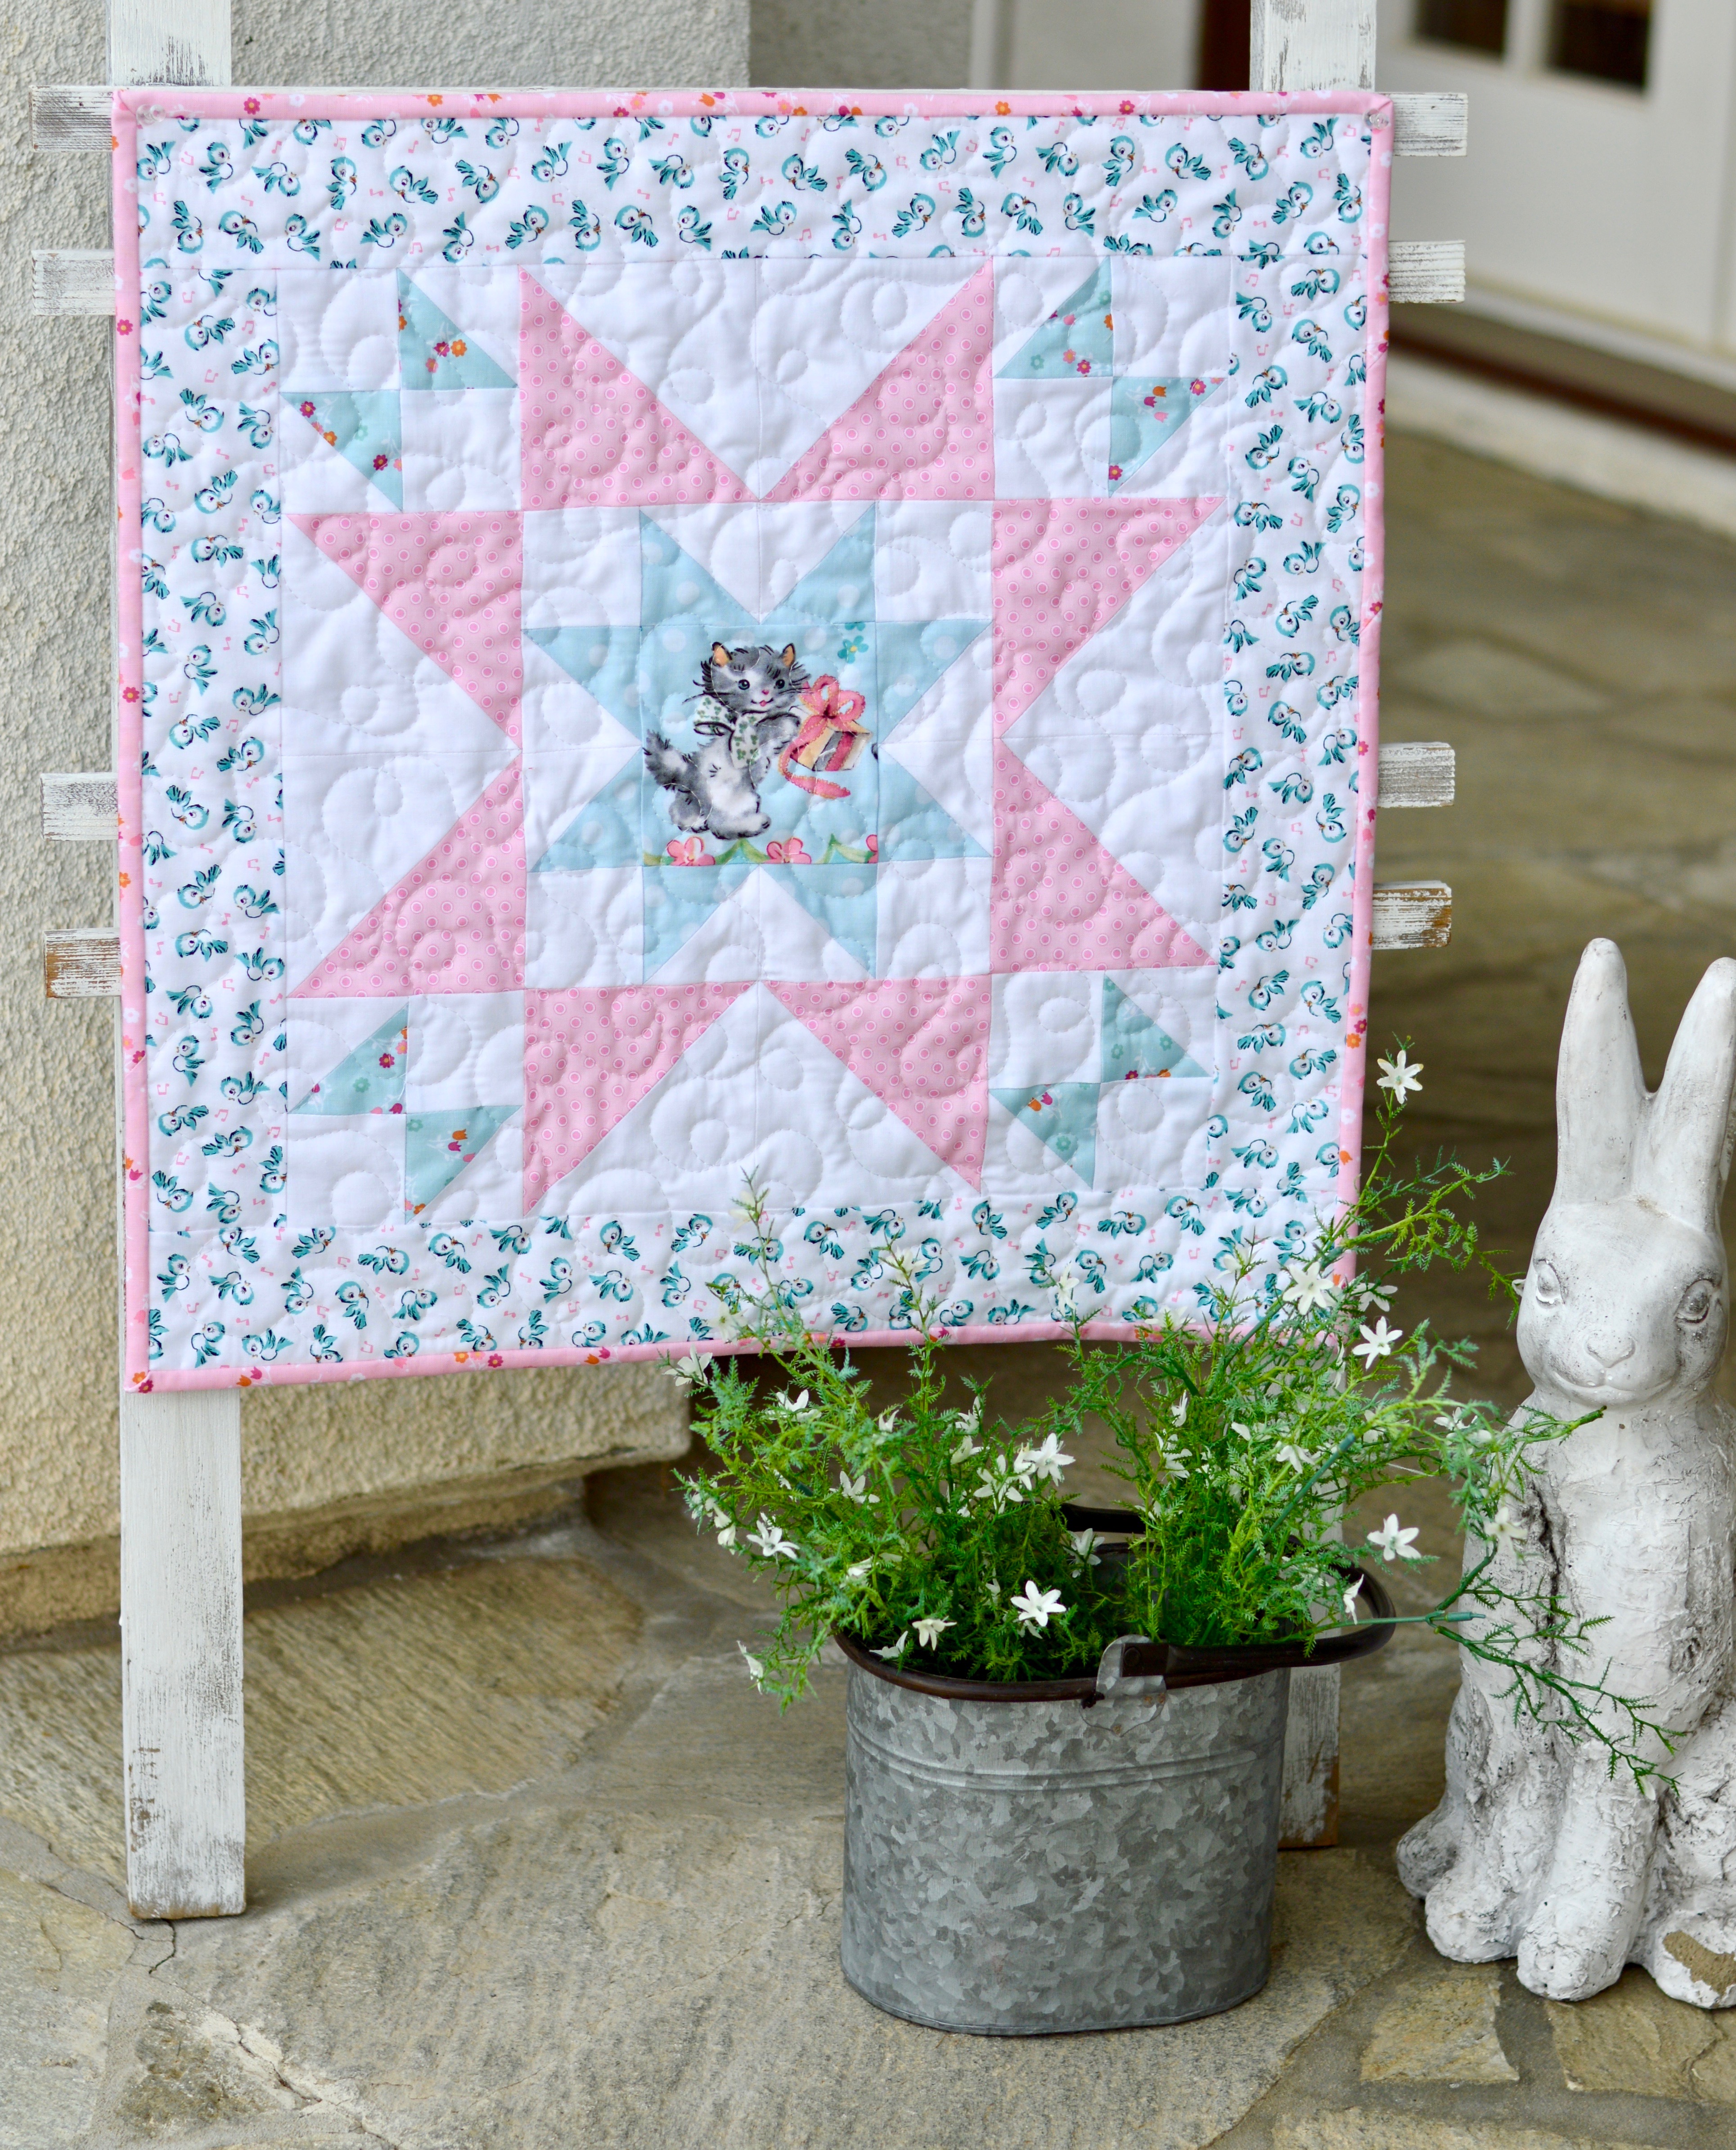
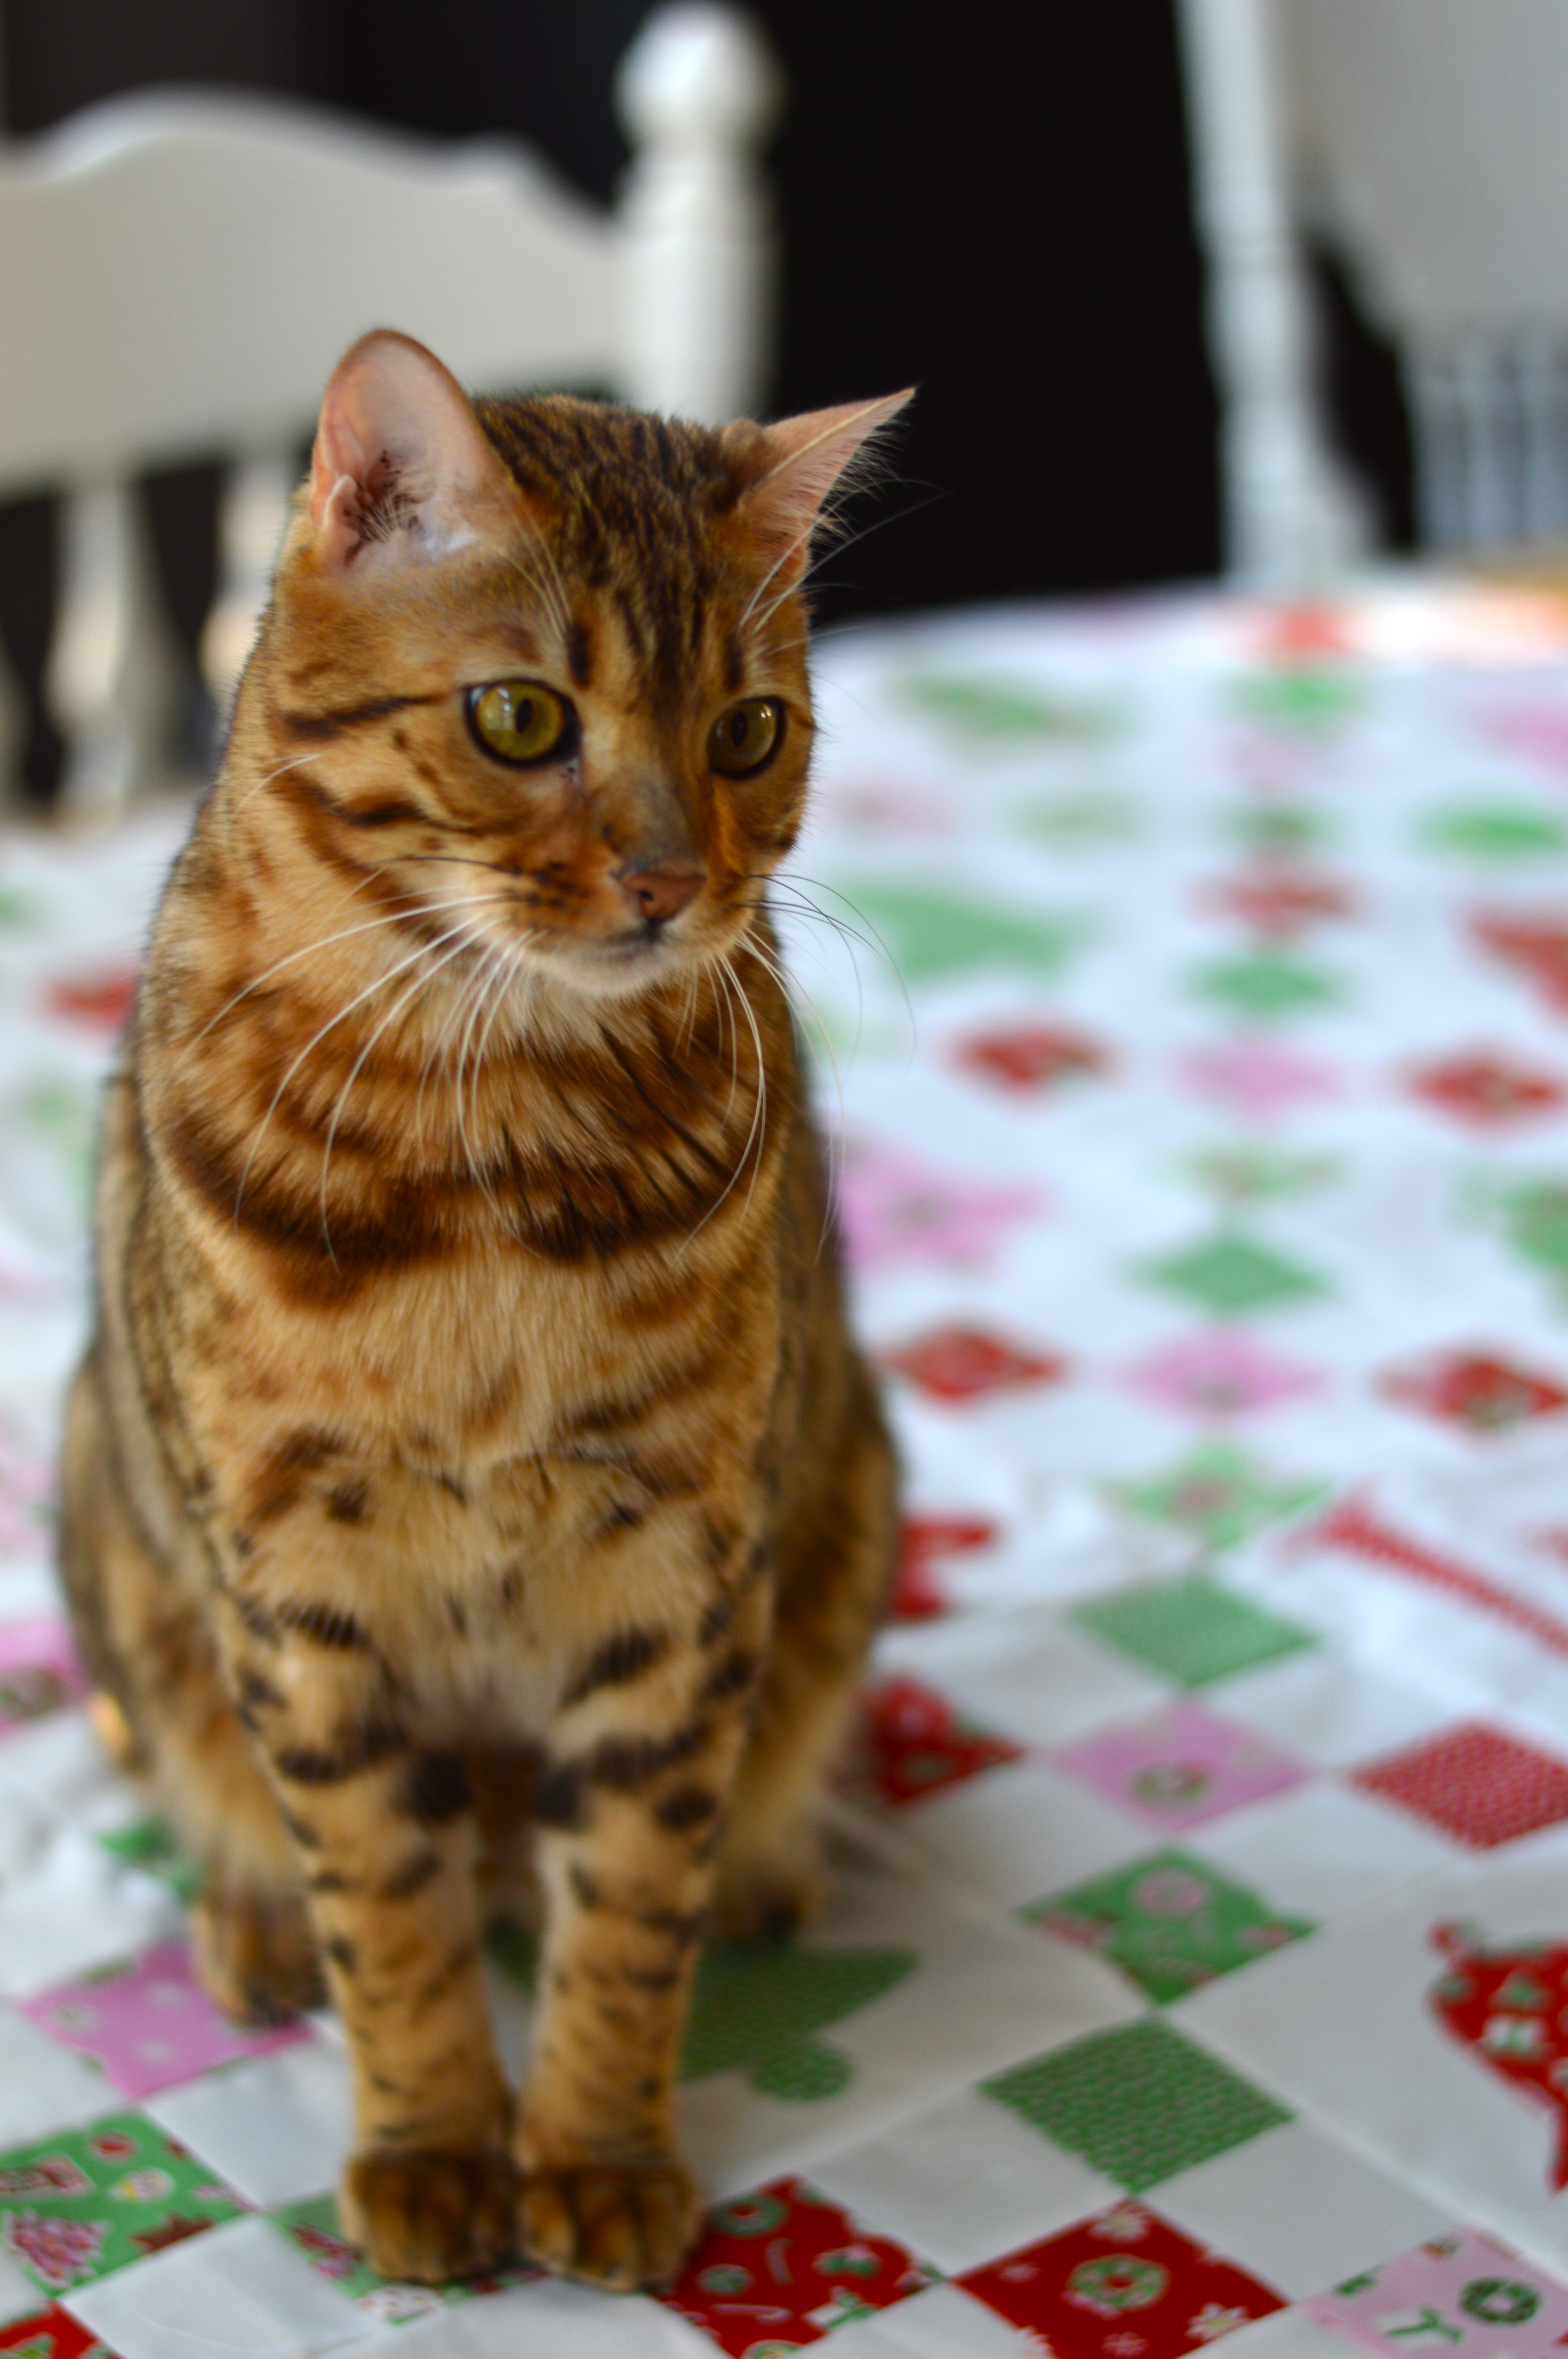
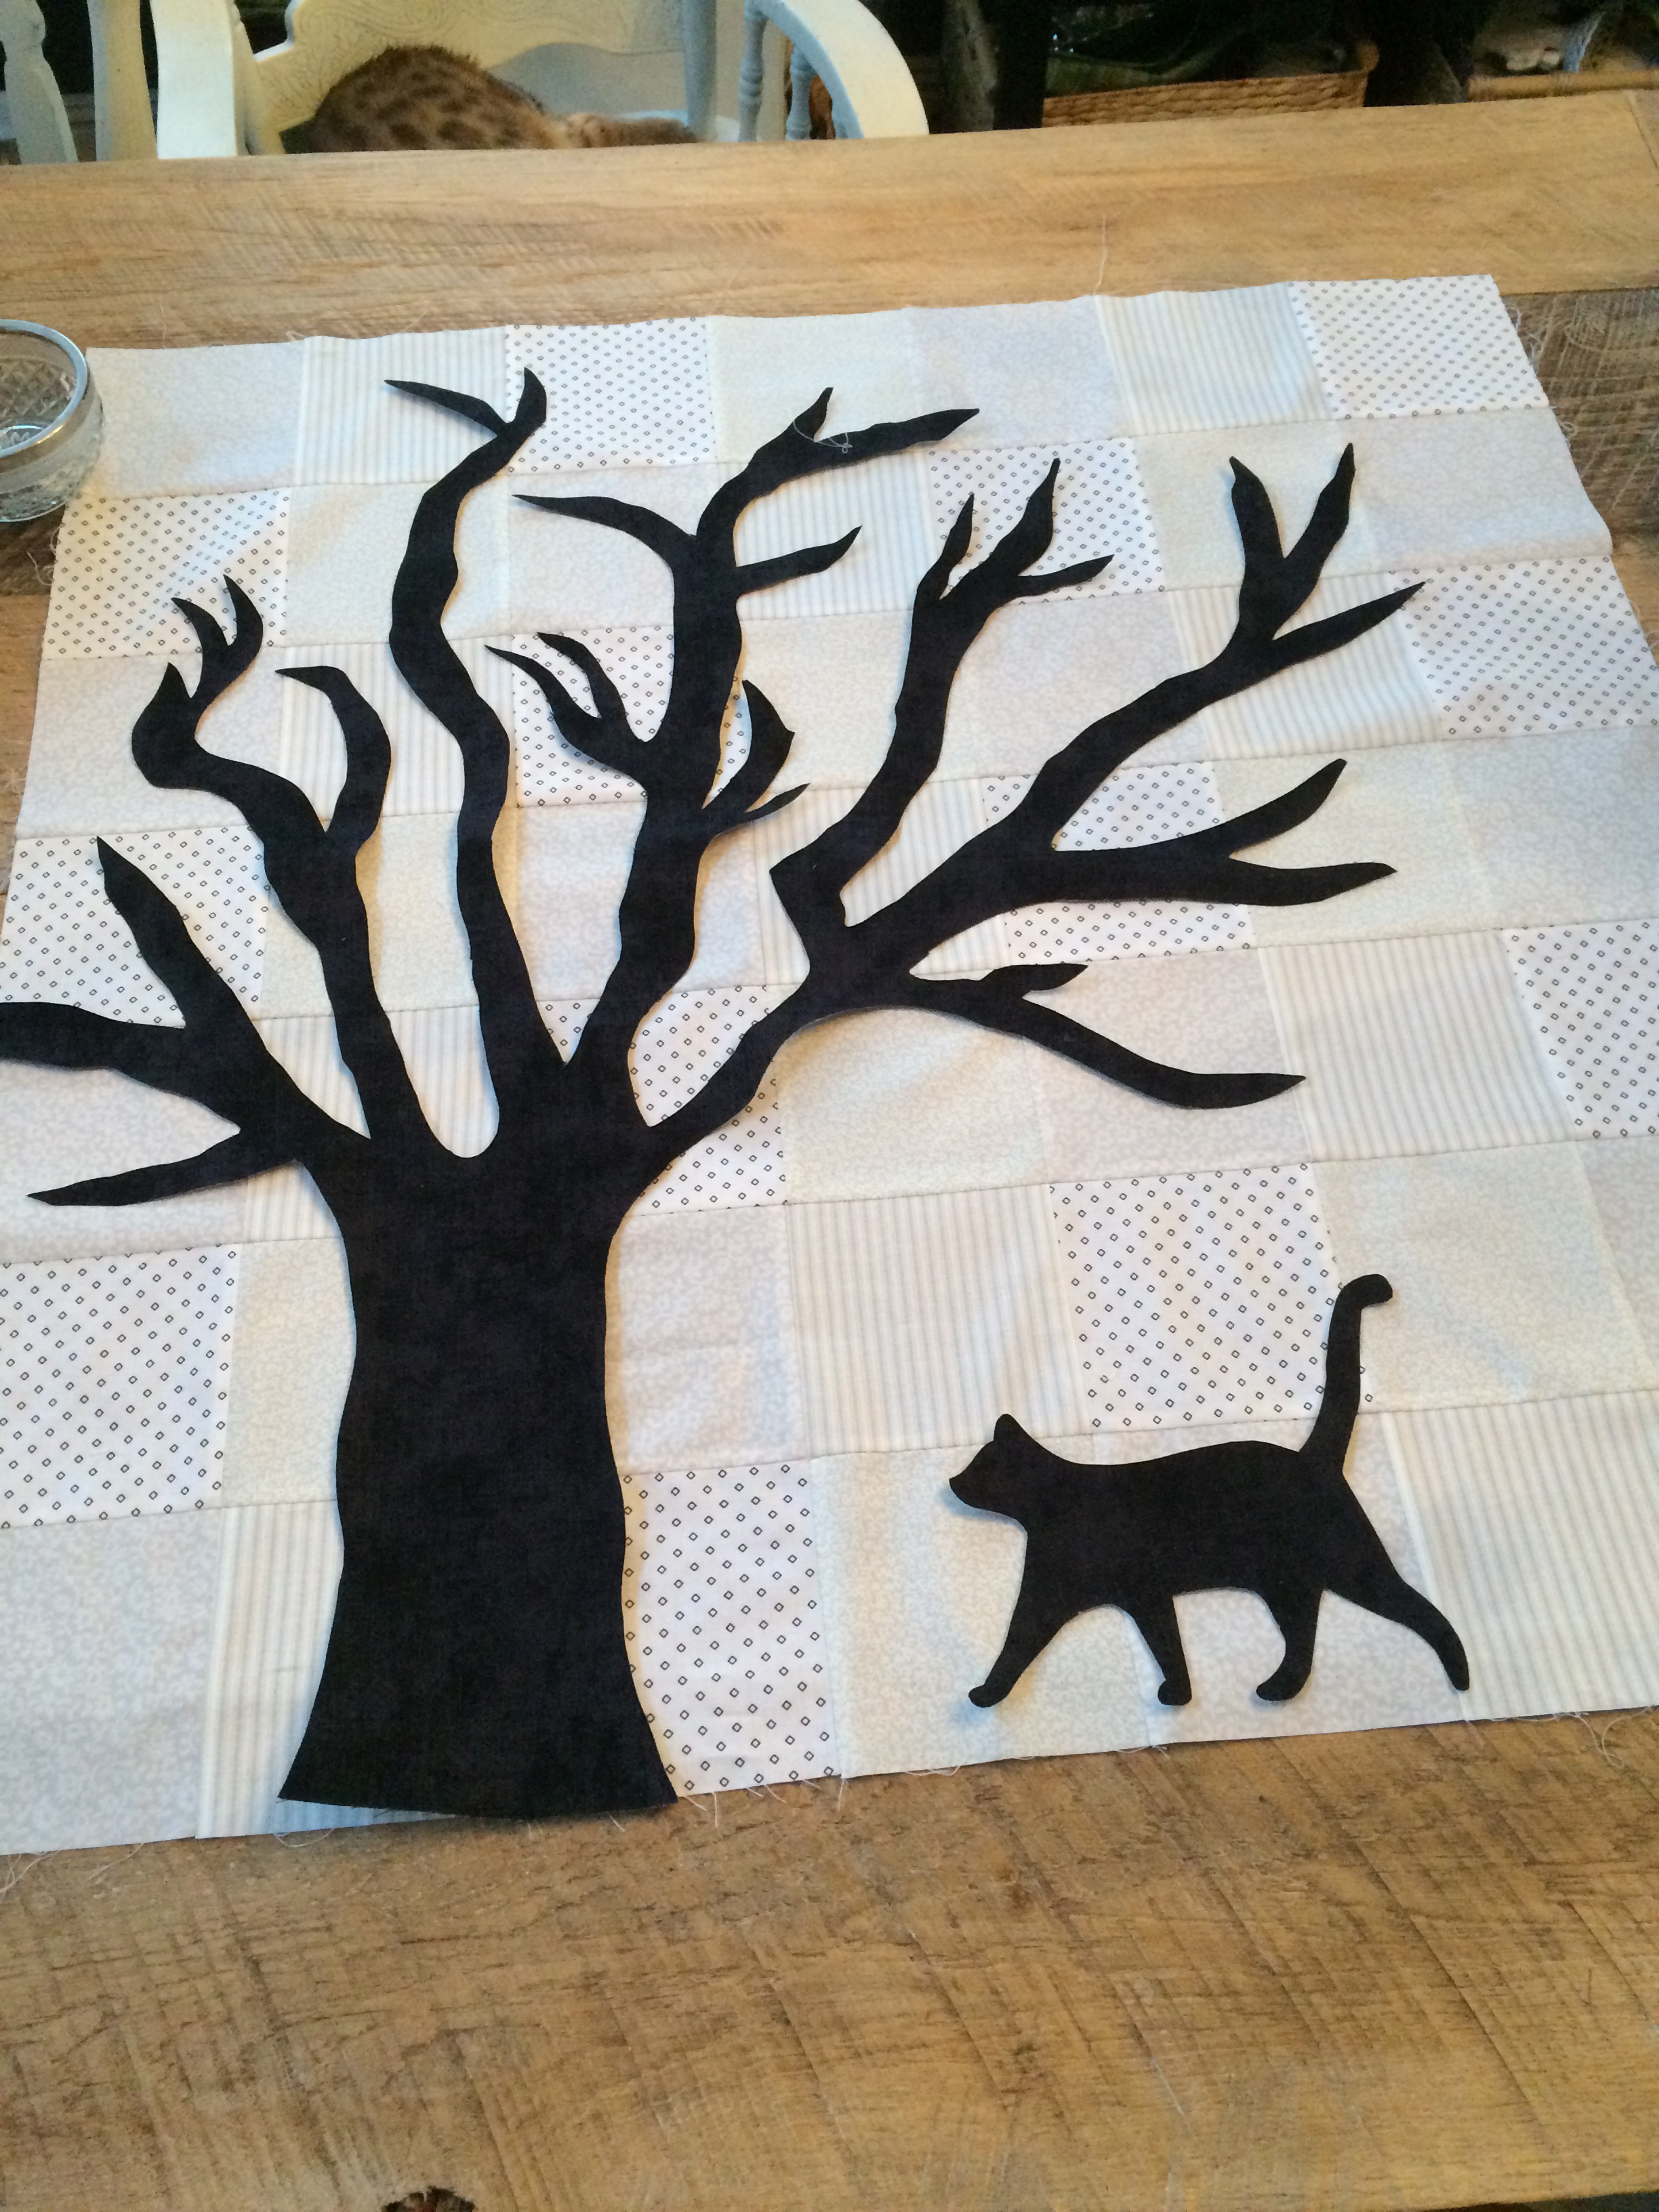
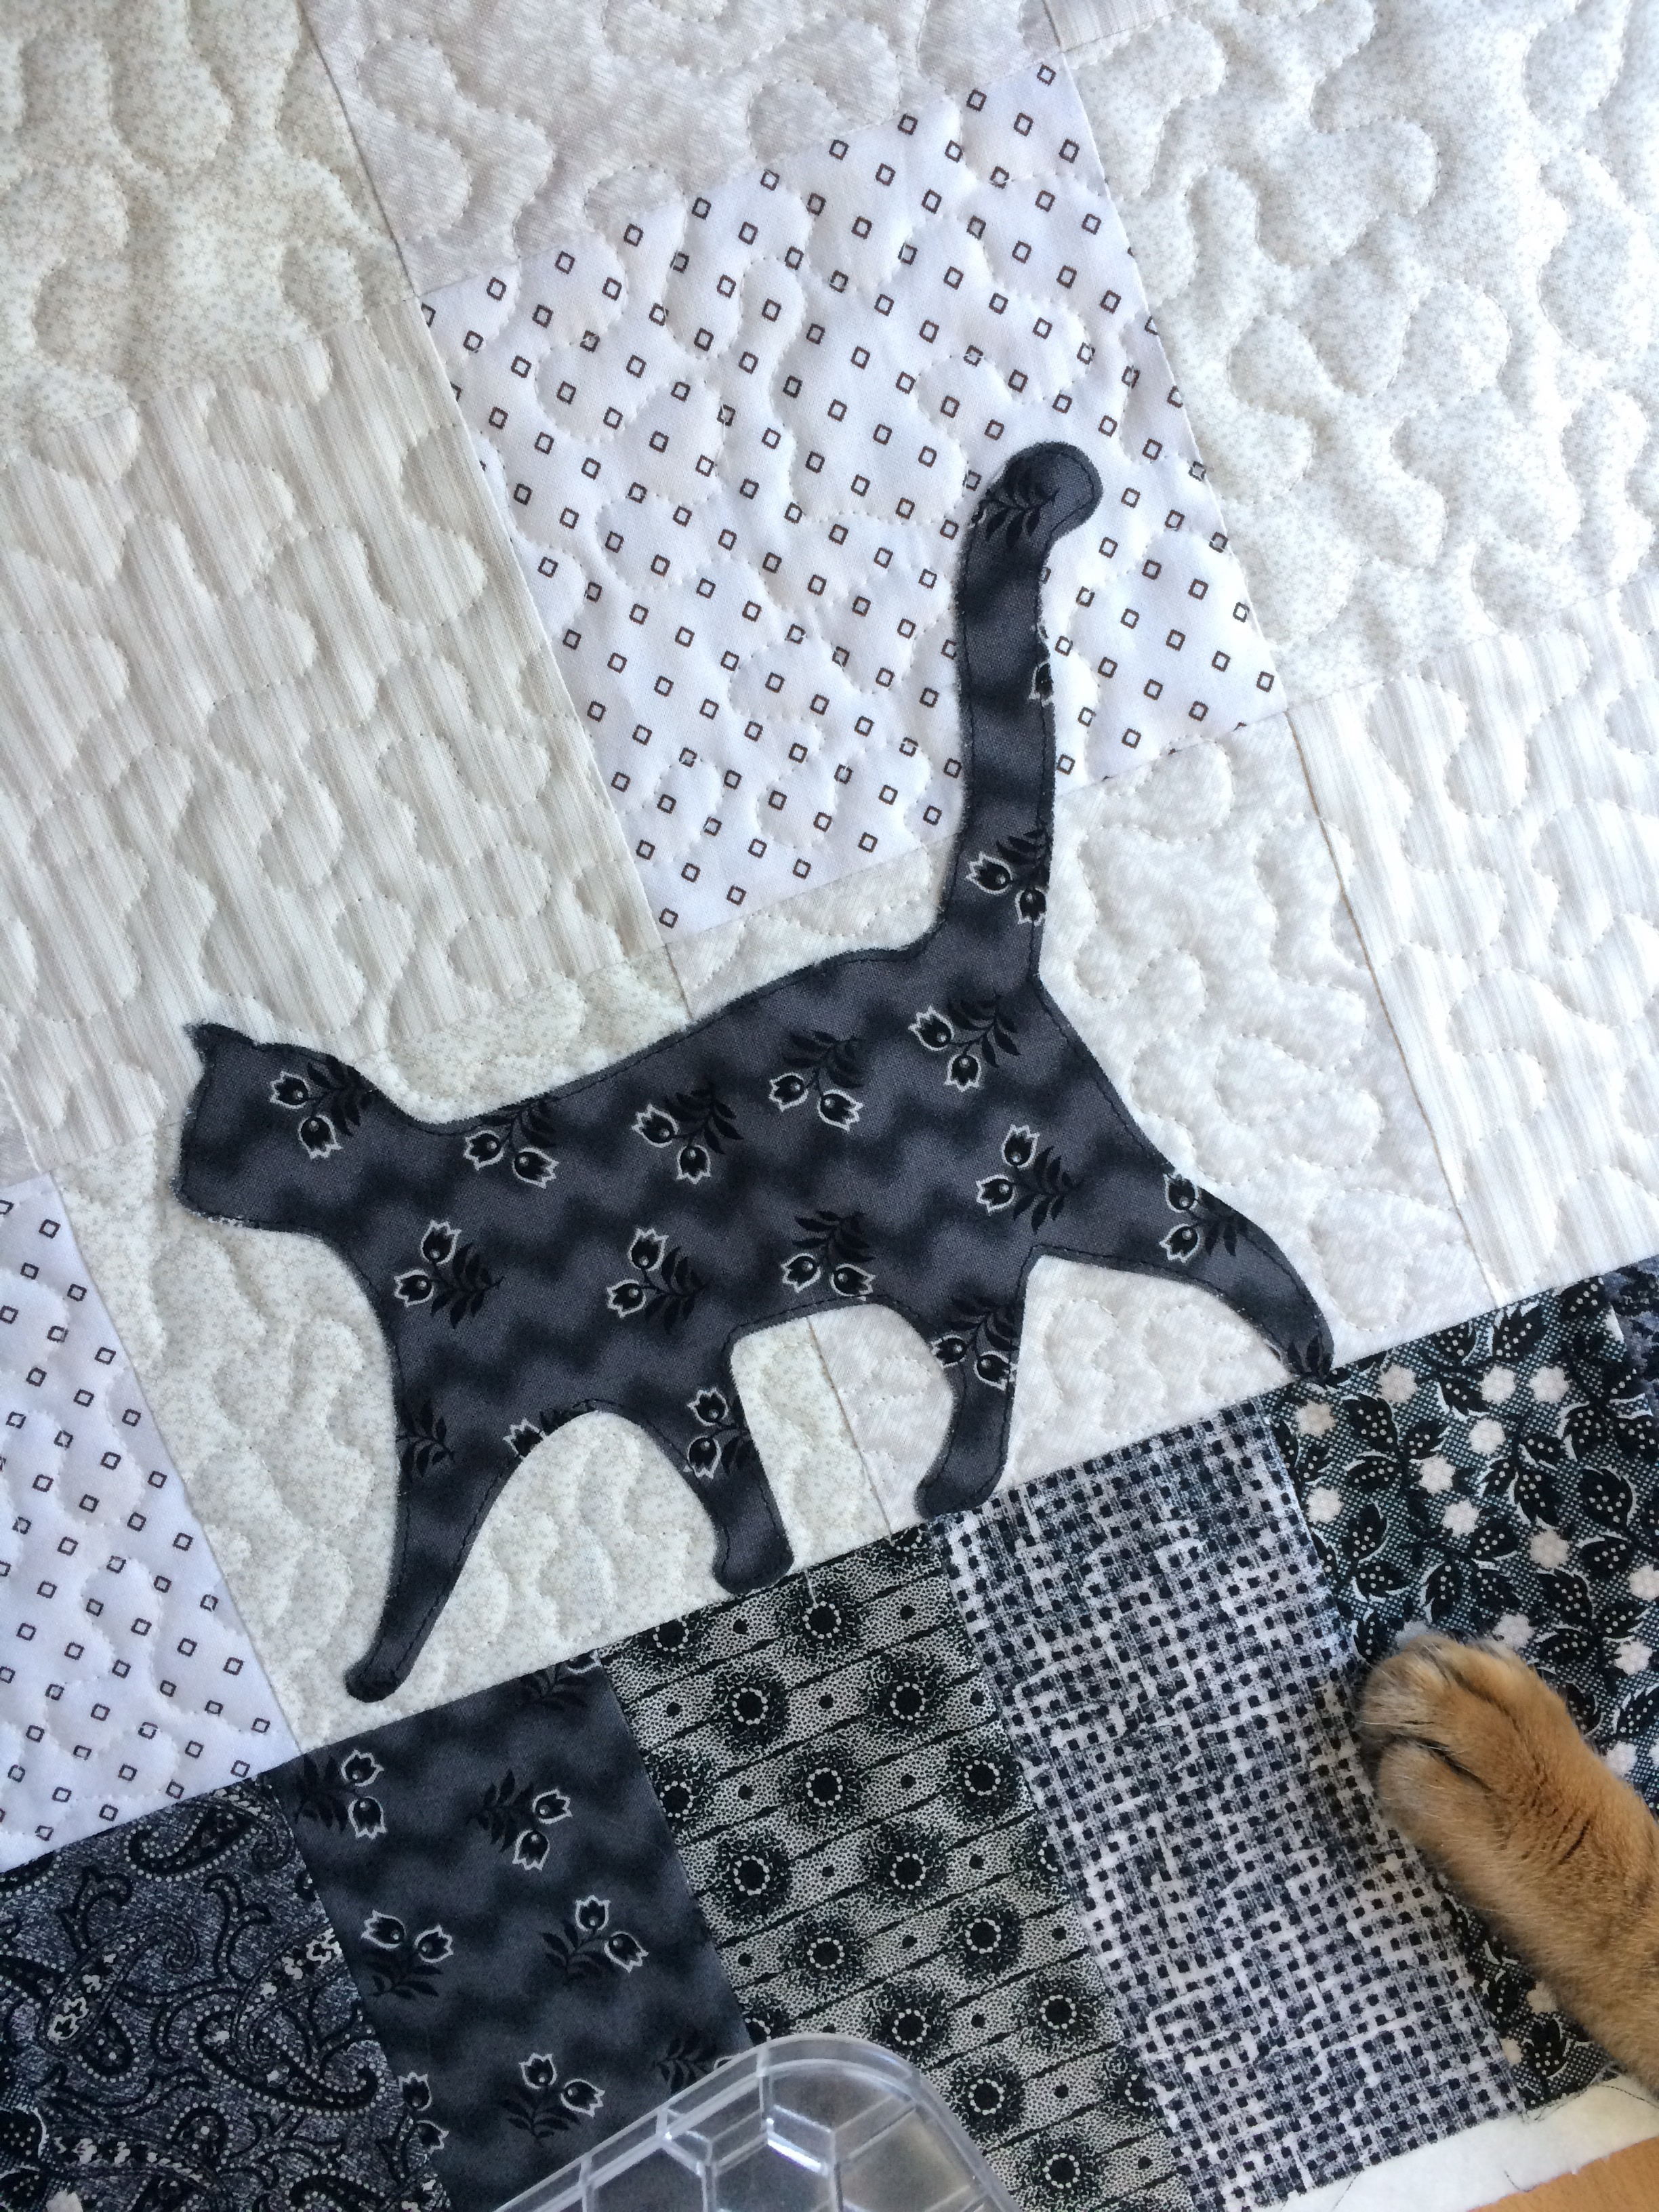
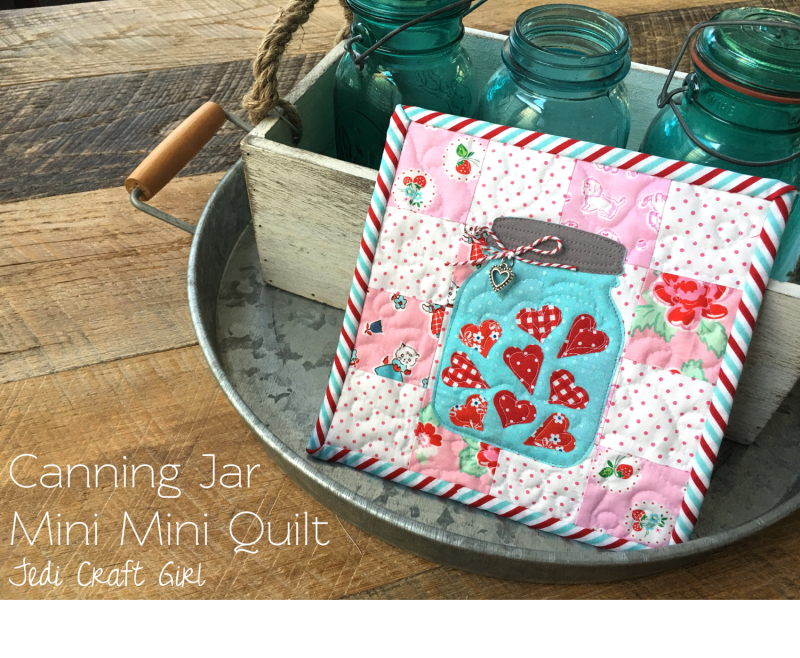
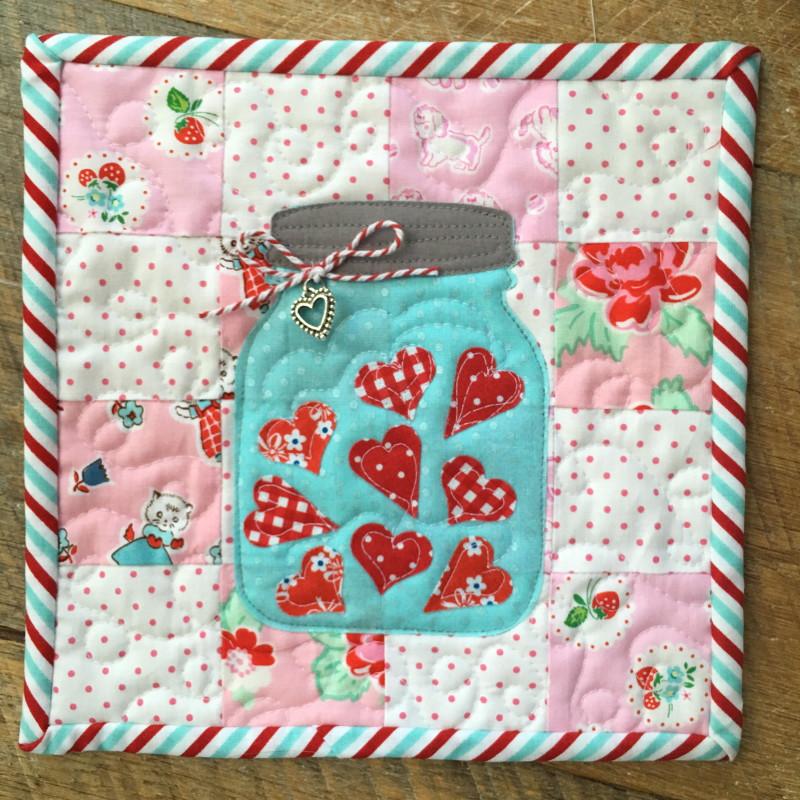
These fabrics just happen to match my vintagy kitchen and family room so I decided to sew a little mini quilt.  Of course I love the cats the most so I fussy cut a cat from the panel print.

DSC_0179

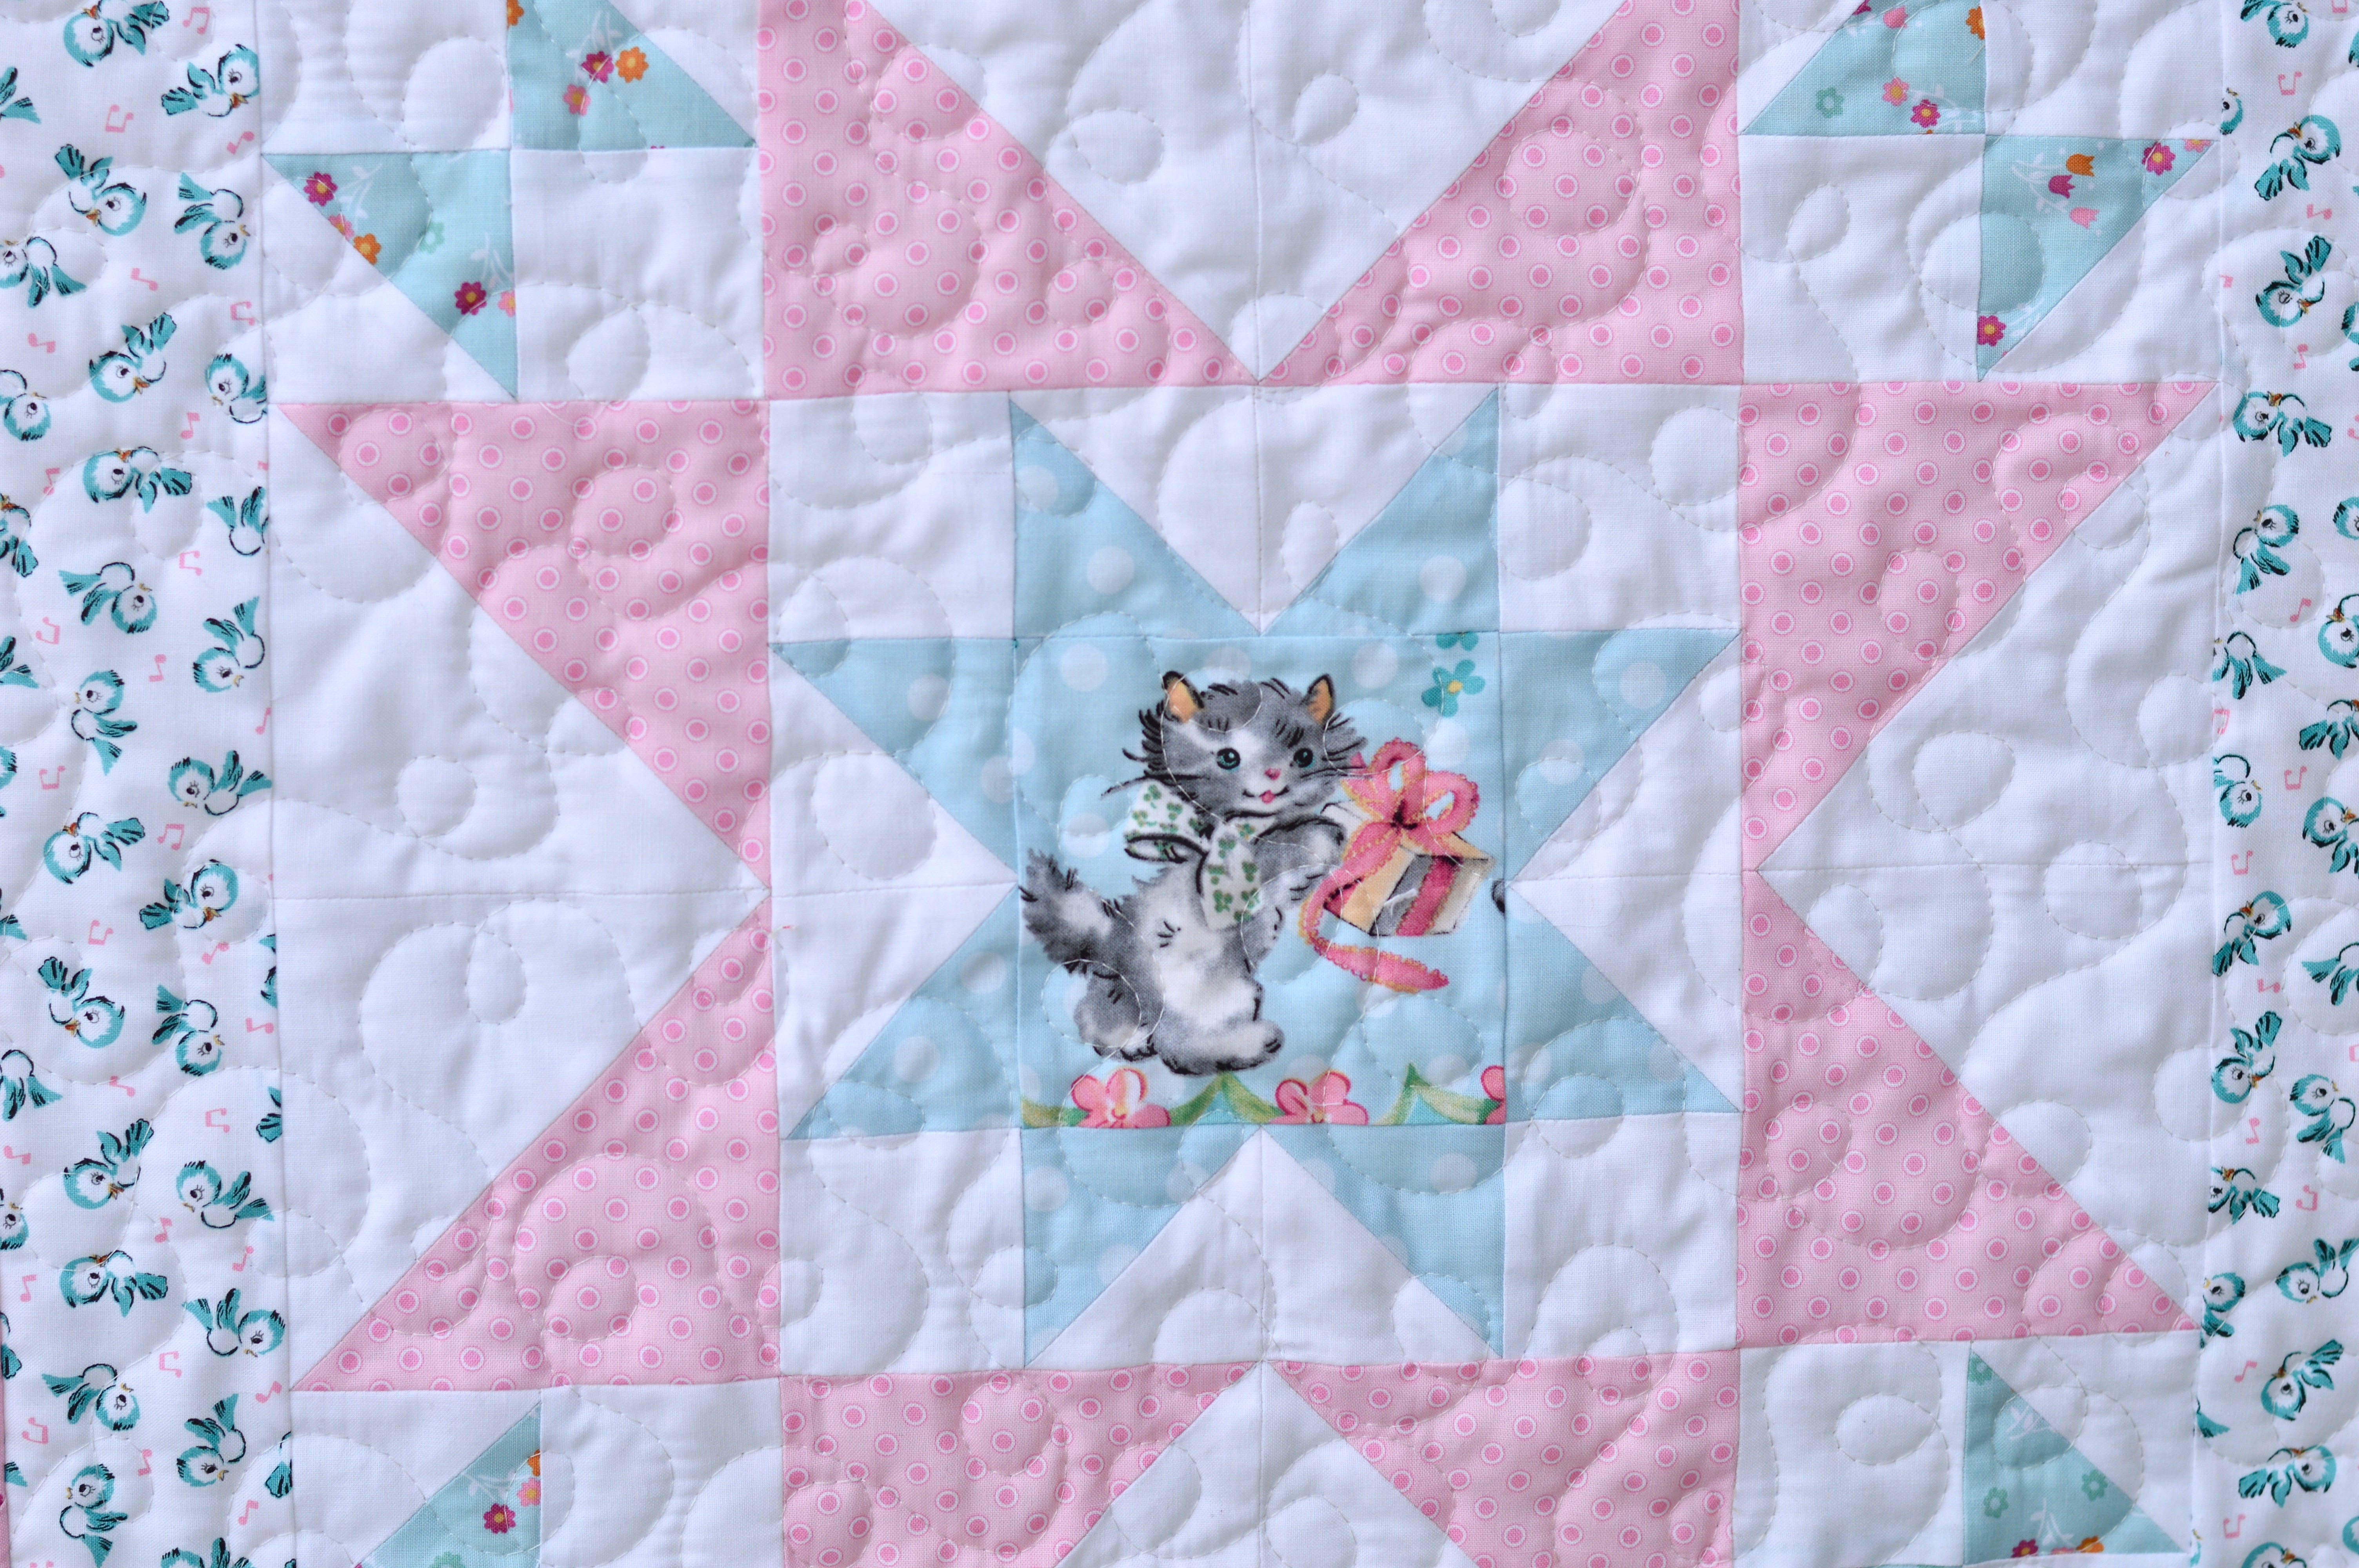
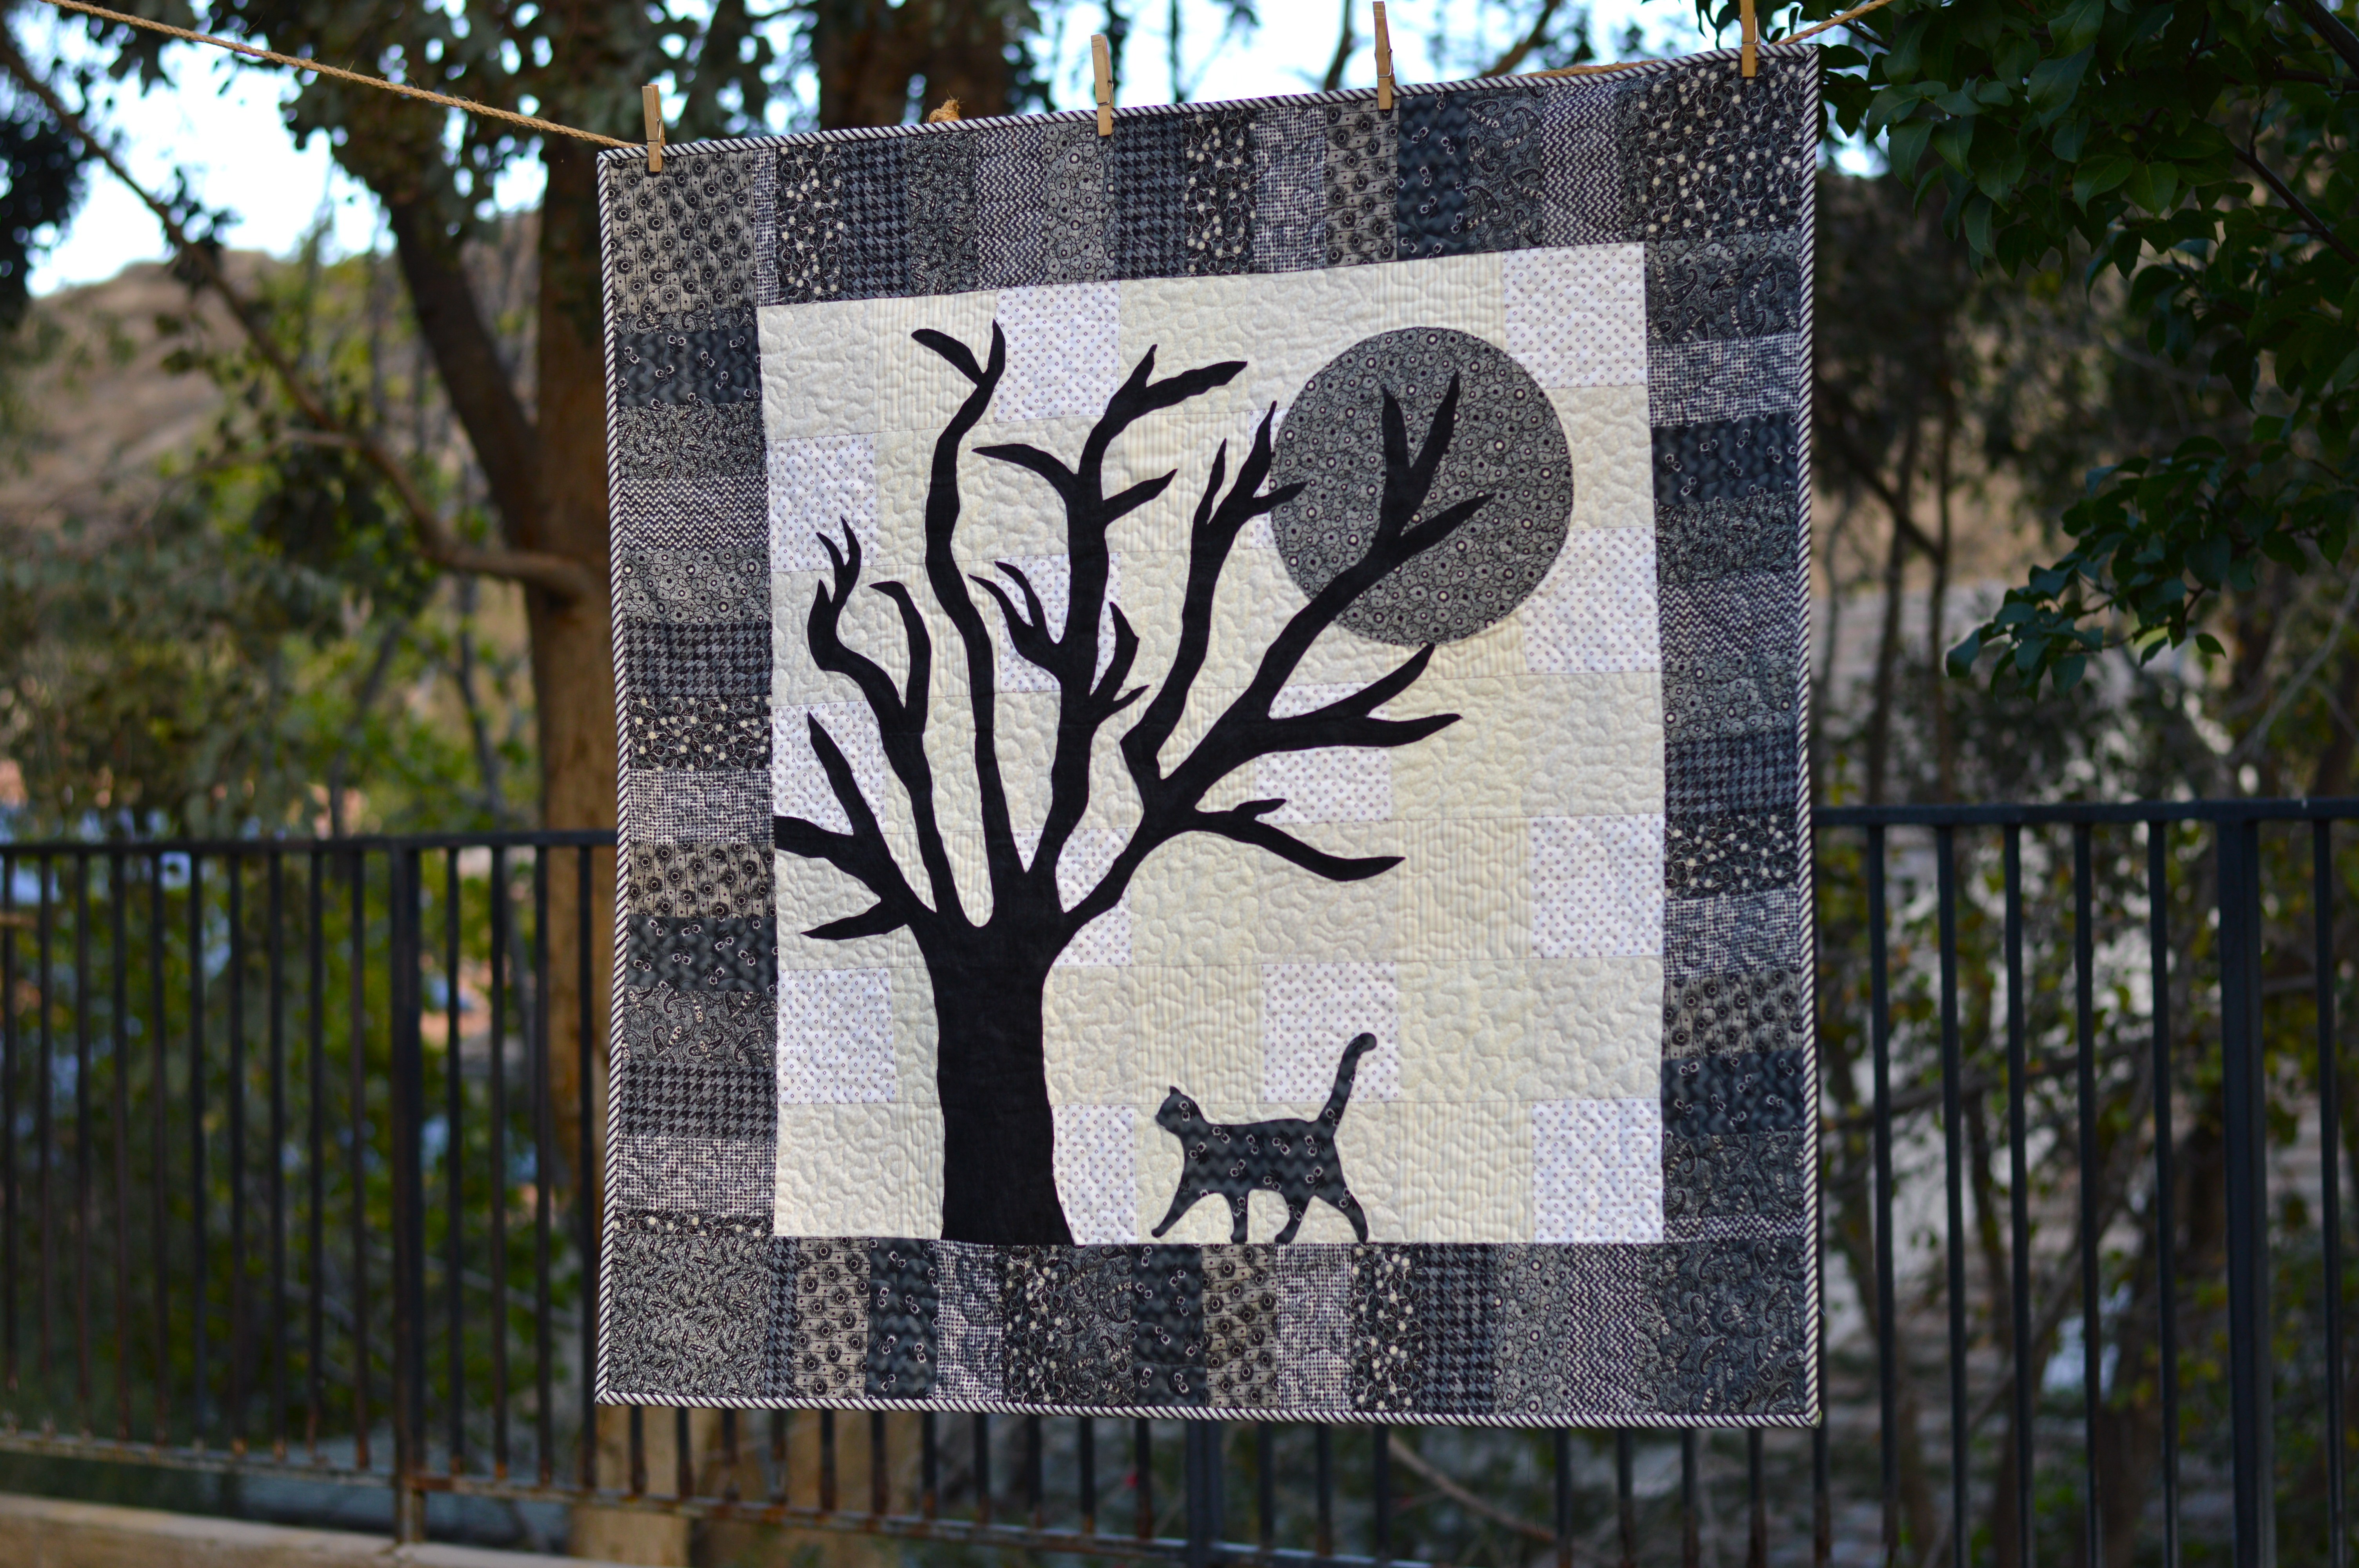
The cat is purrrrfect for the center of the star.  I used a block from my October Stars Quilt Pattern and then added a 3″ border.

DSC_0174

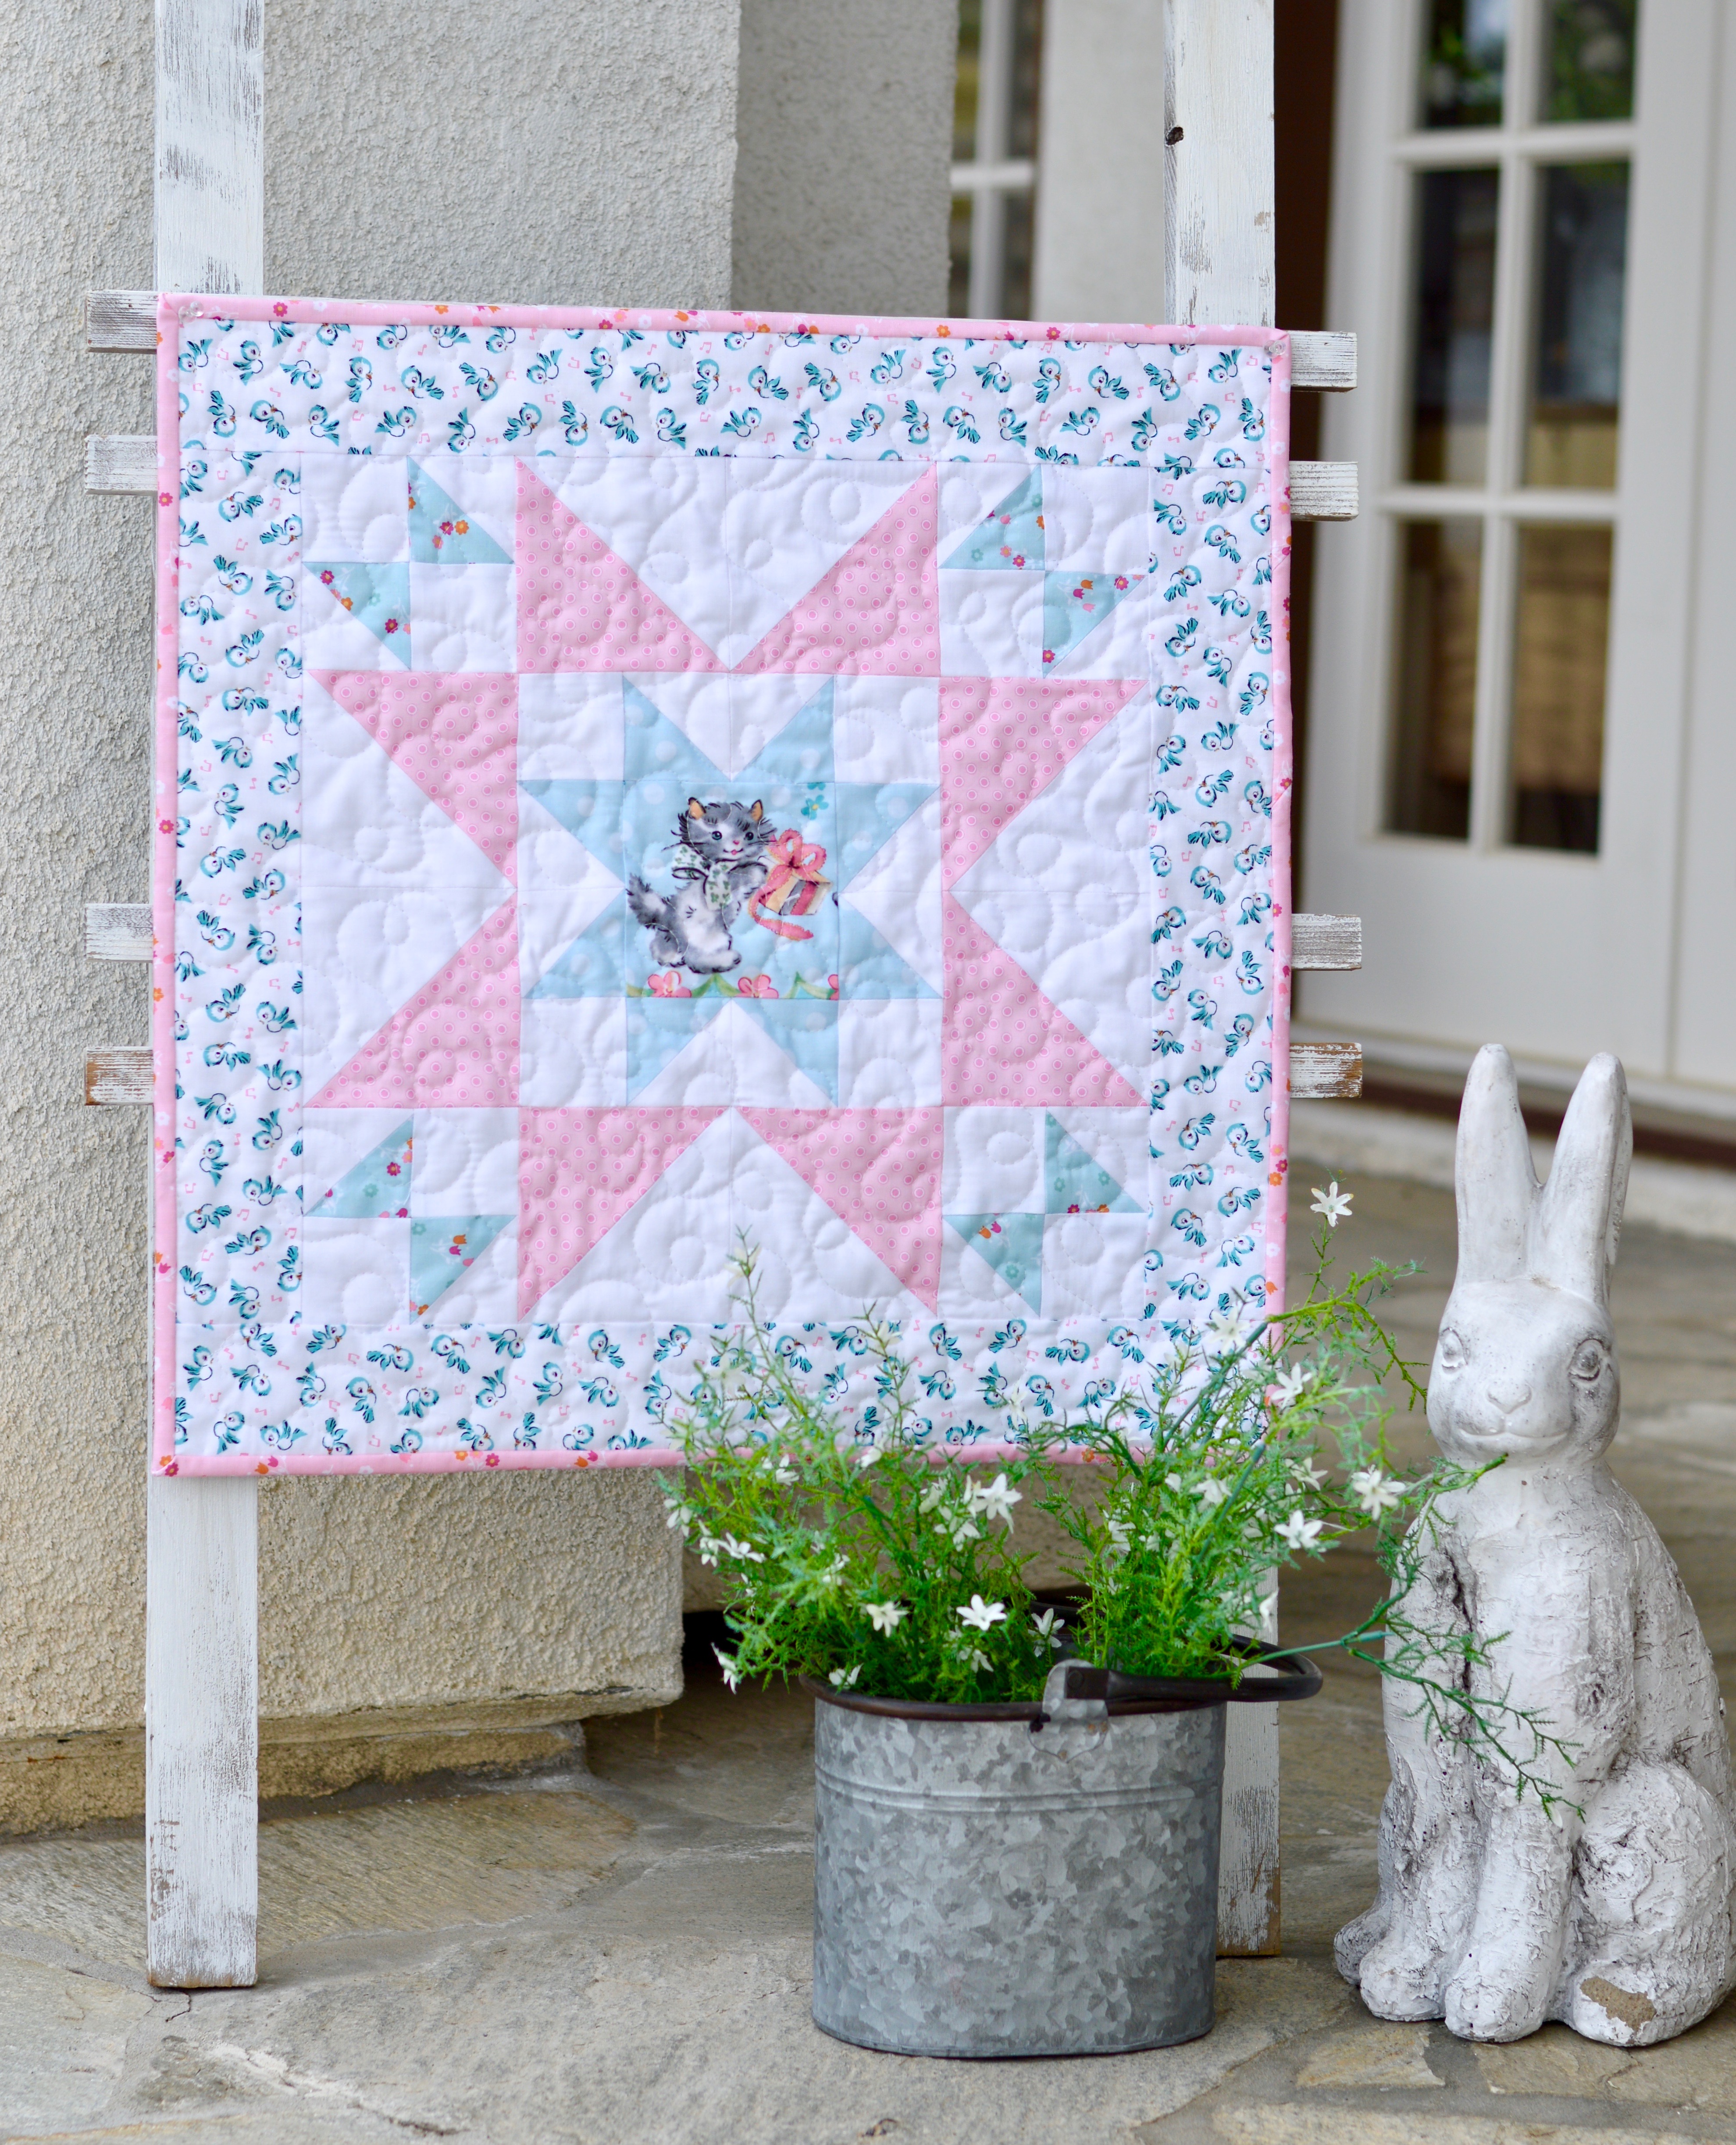
It’s so cheerful and springy!!!  This would also make a cut pillow!

DSC_0247

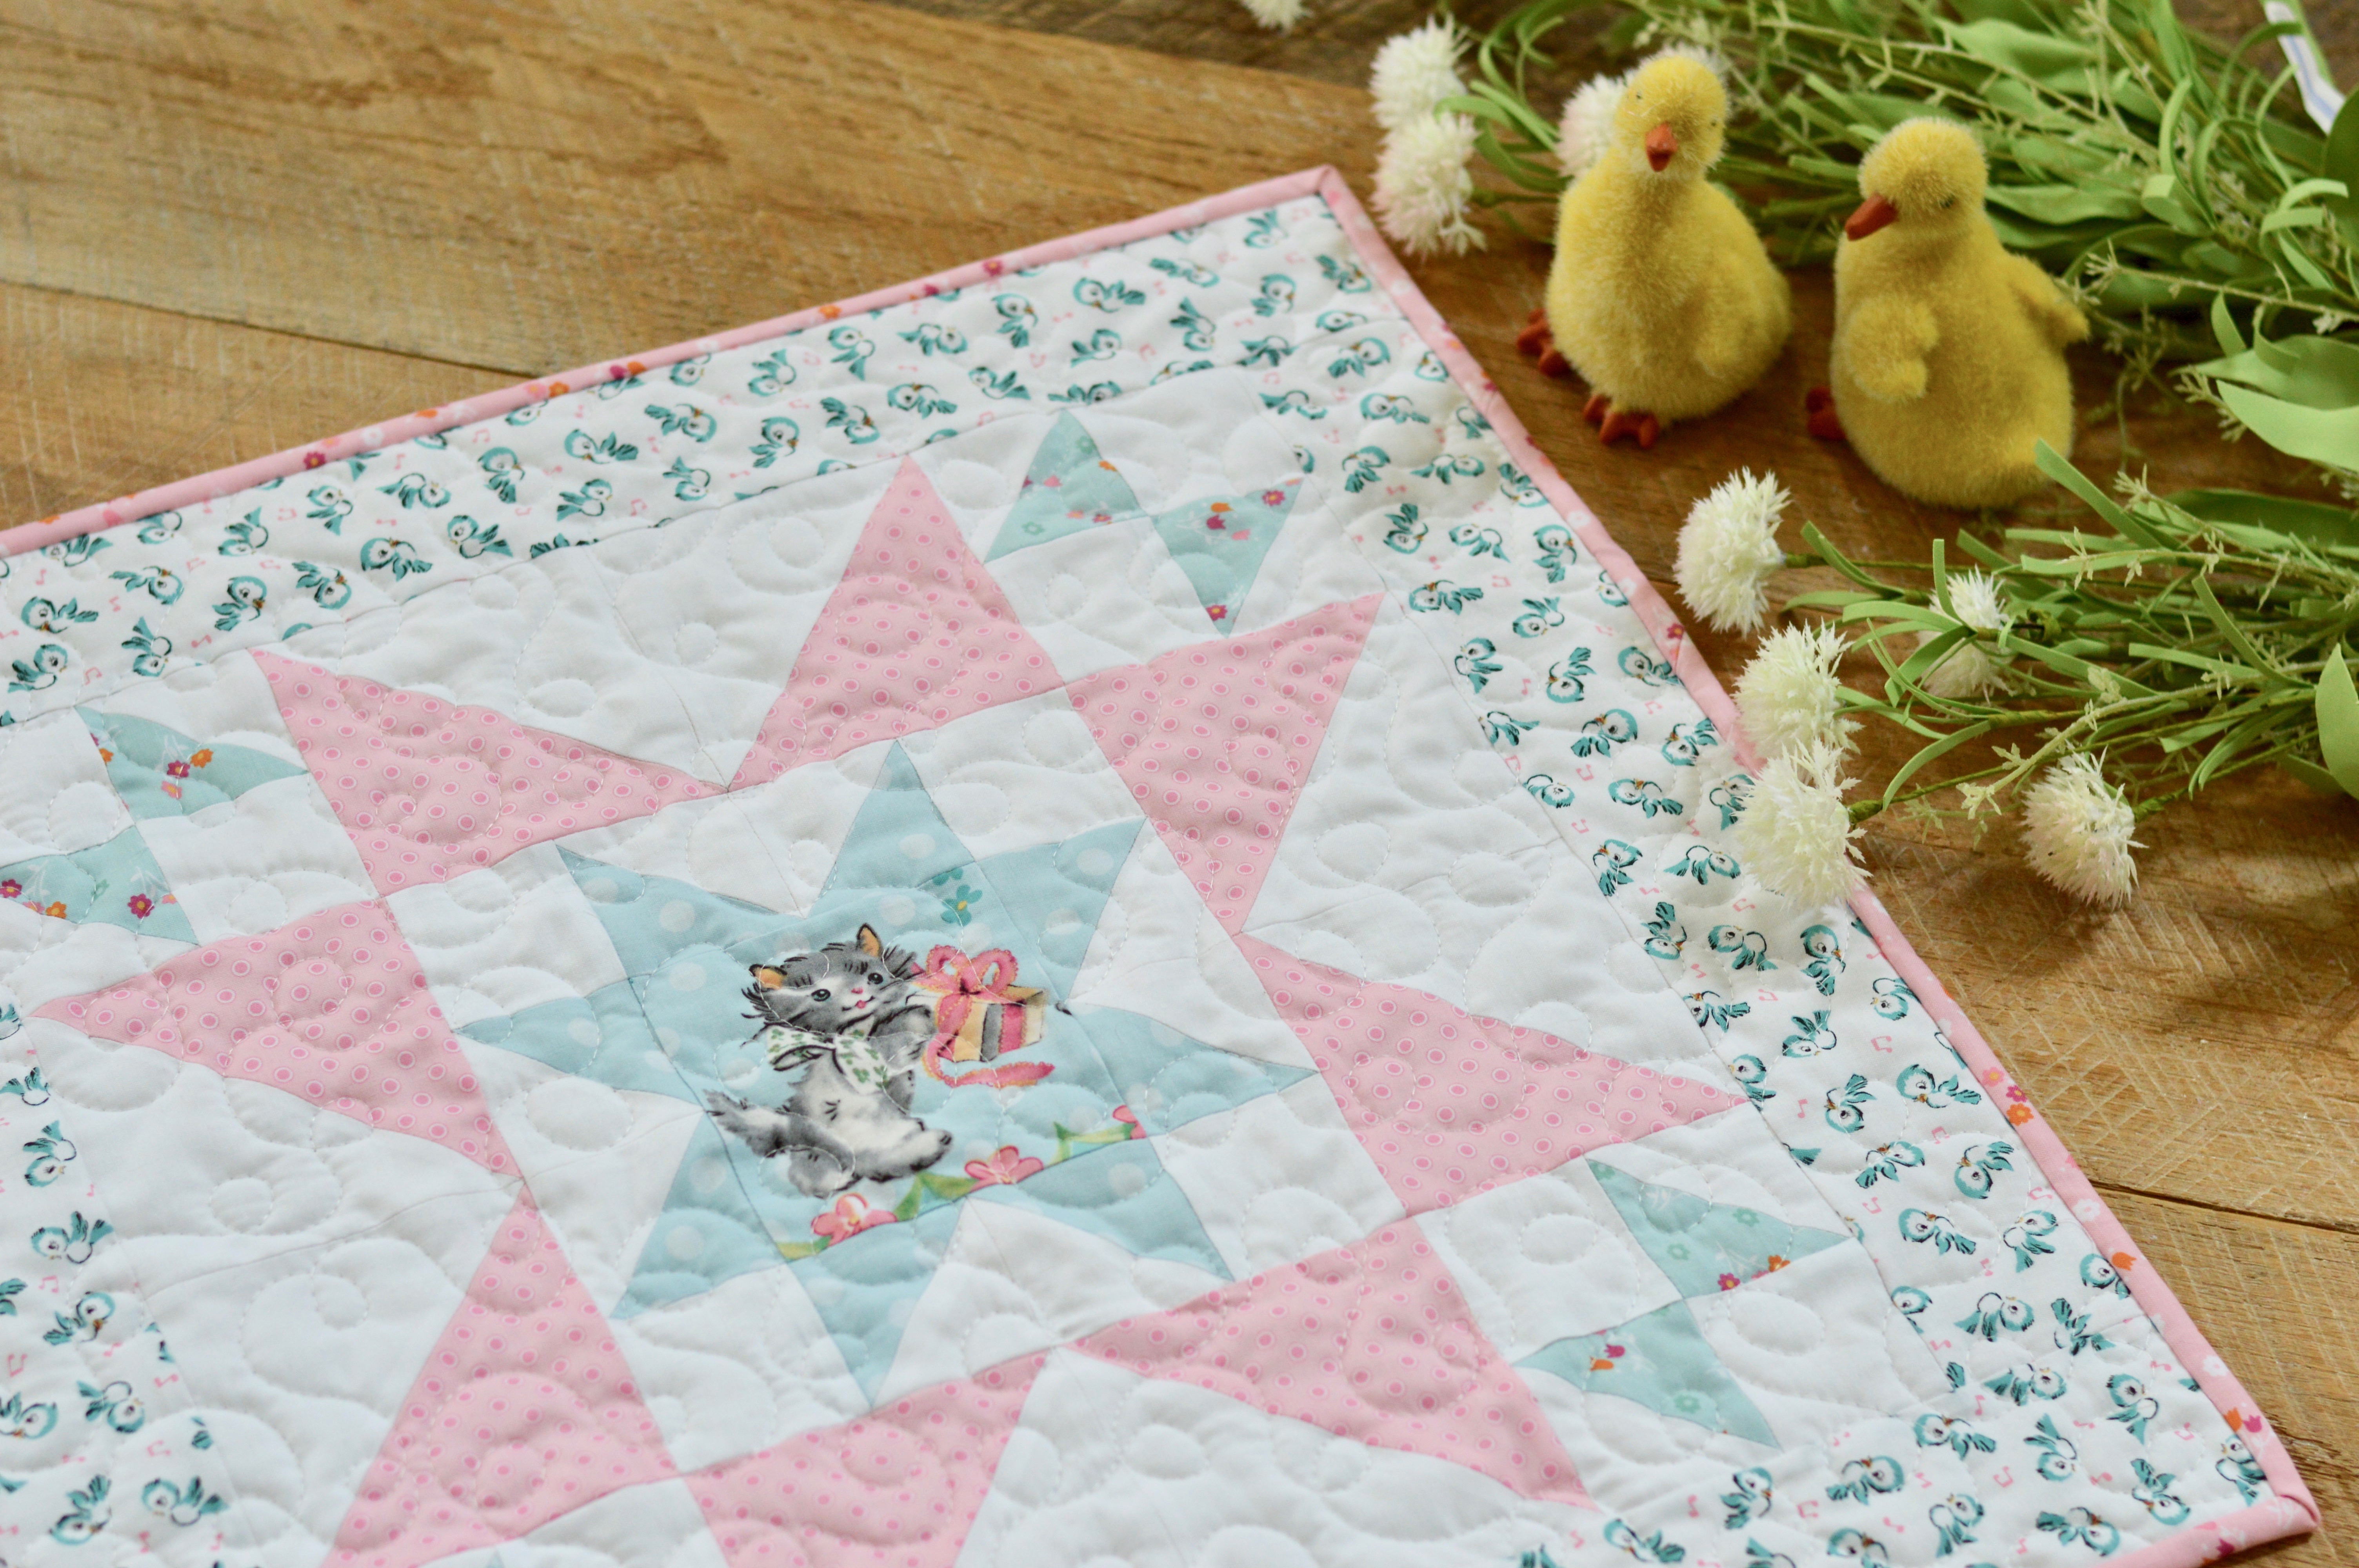
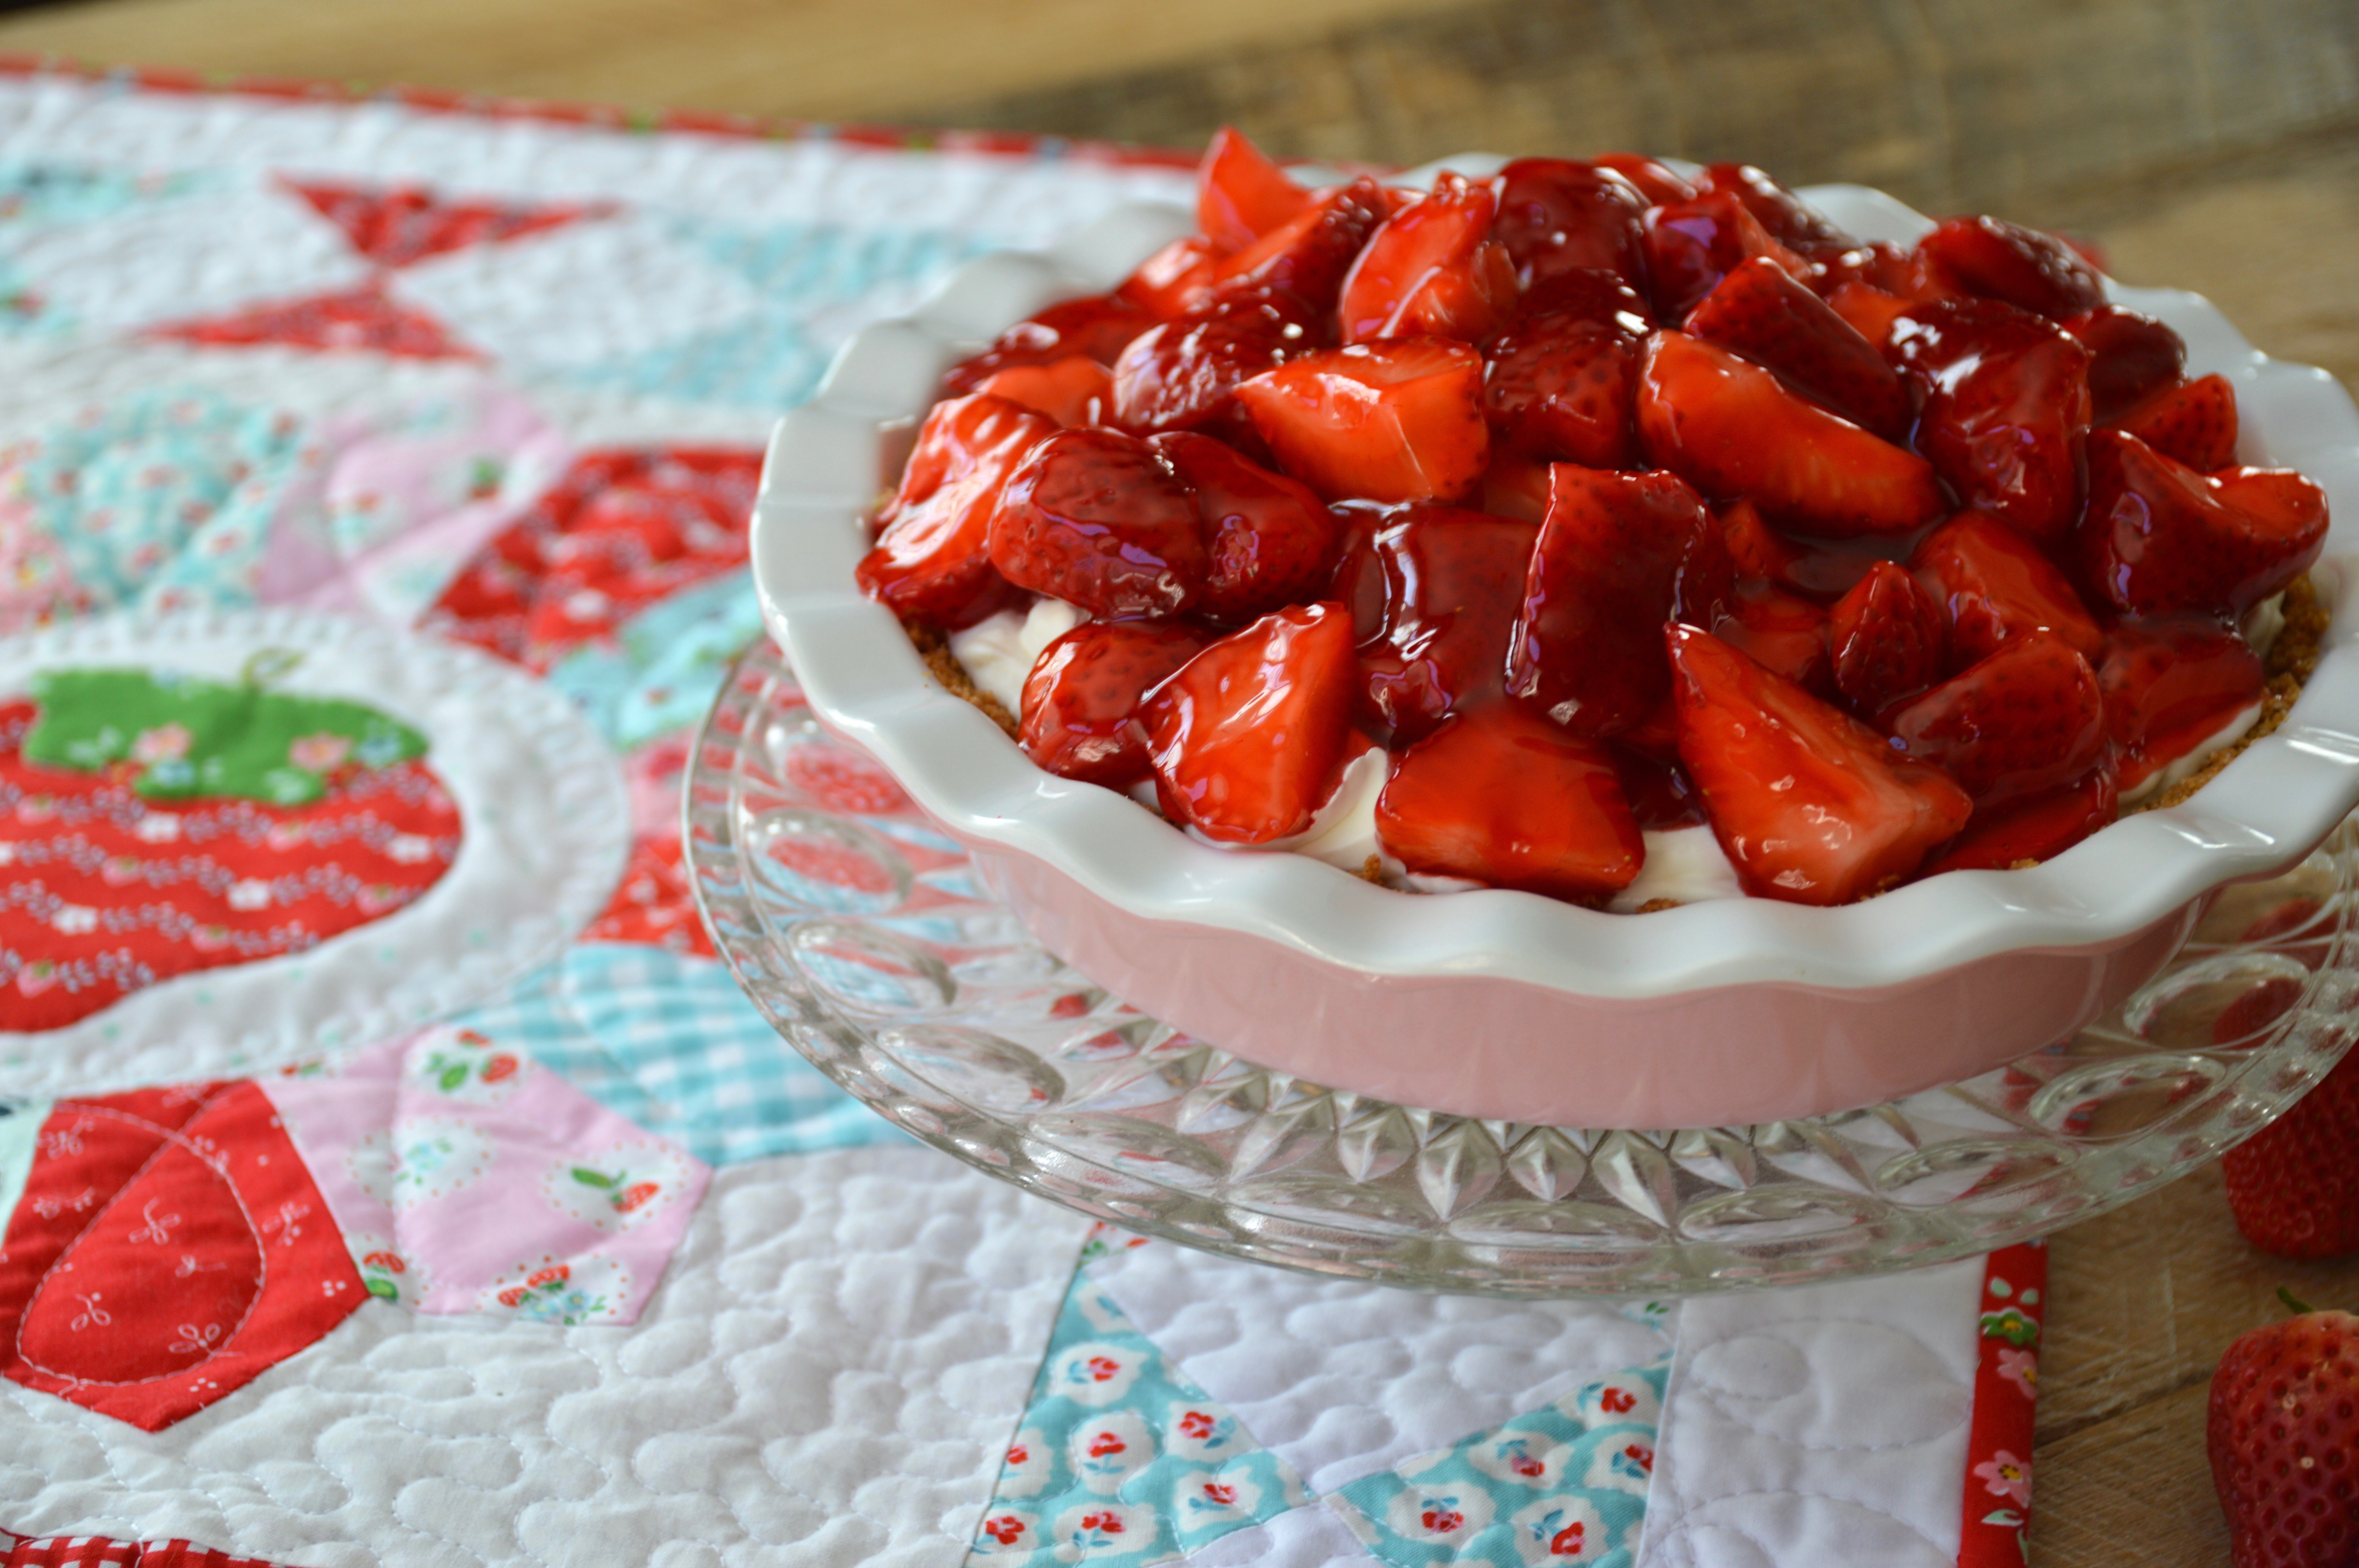
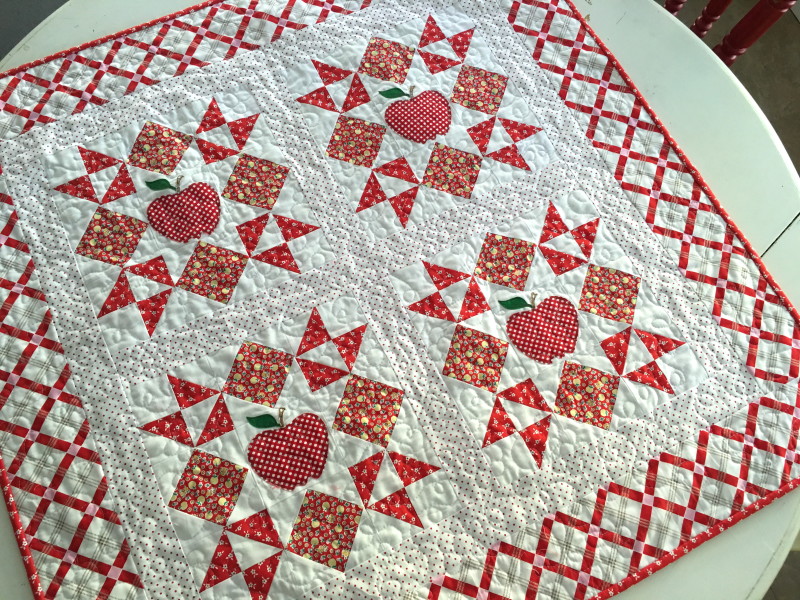
I have a little table that it will fit nicely on!

DSC_0222

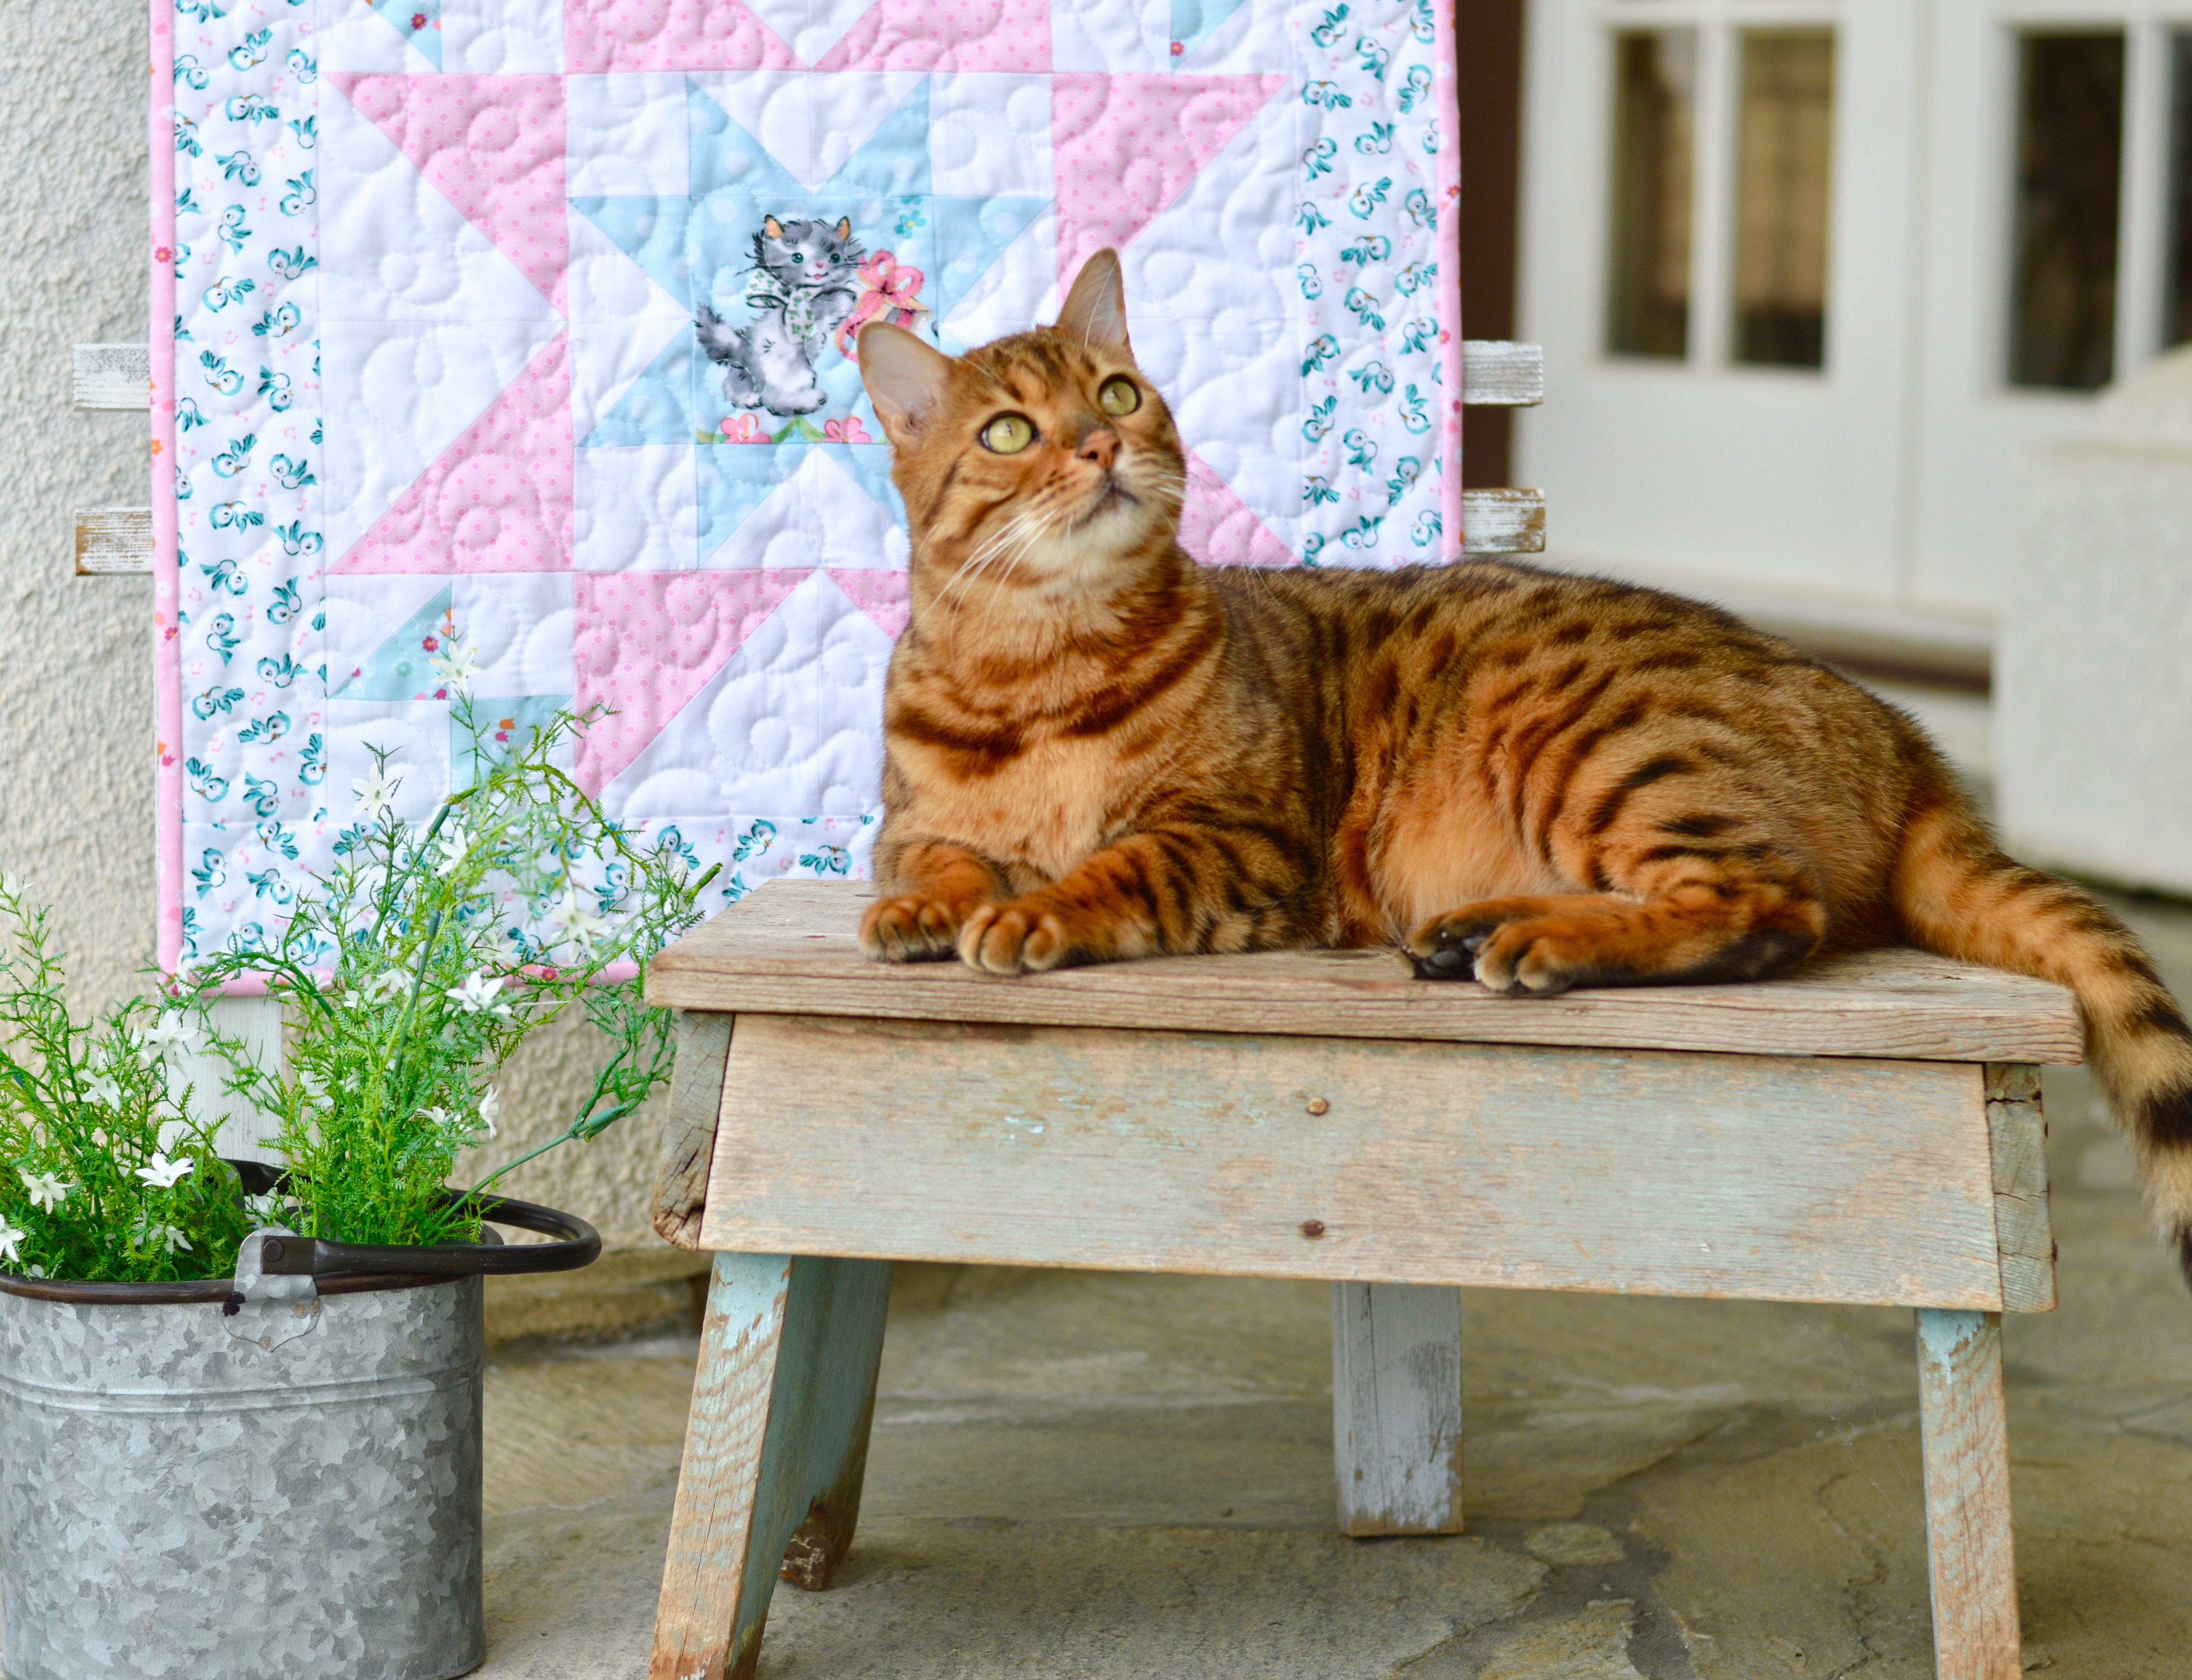
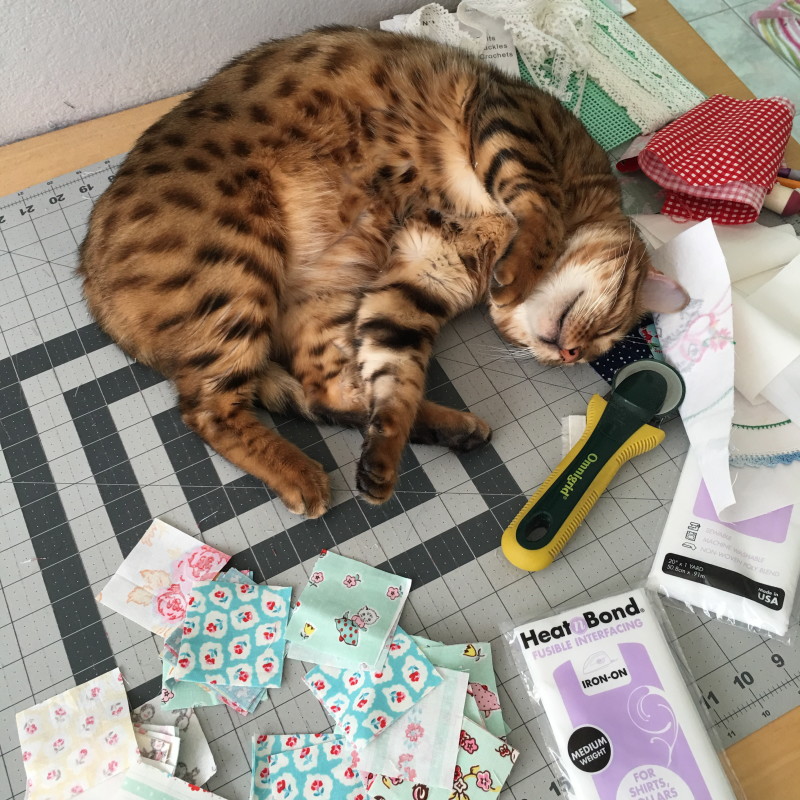
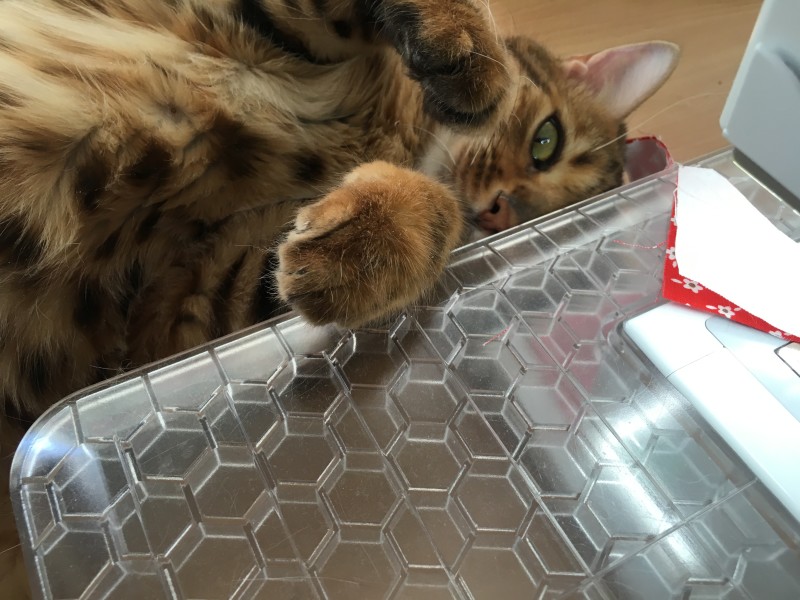
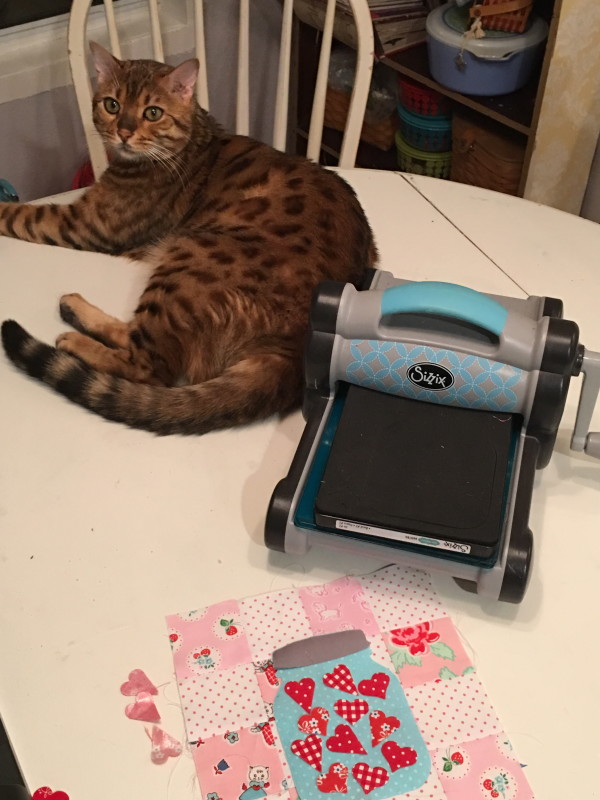
Mufasa was not appreciating being left out of the picture, so he choose to sit front and center!  What a ham!!!

DSC_0132

I know you will love these adorable fabrics – I can’t wait to sew a few more items!
DSC_0127

Little Joys Quilt Tutorial Updated

little-joys-quilt
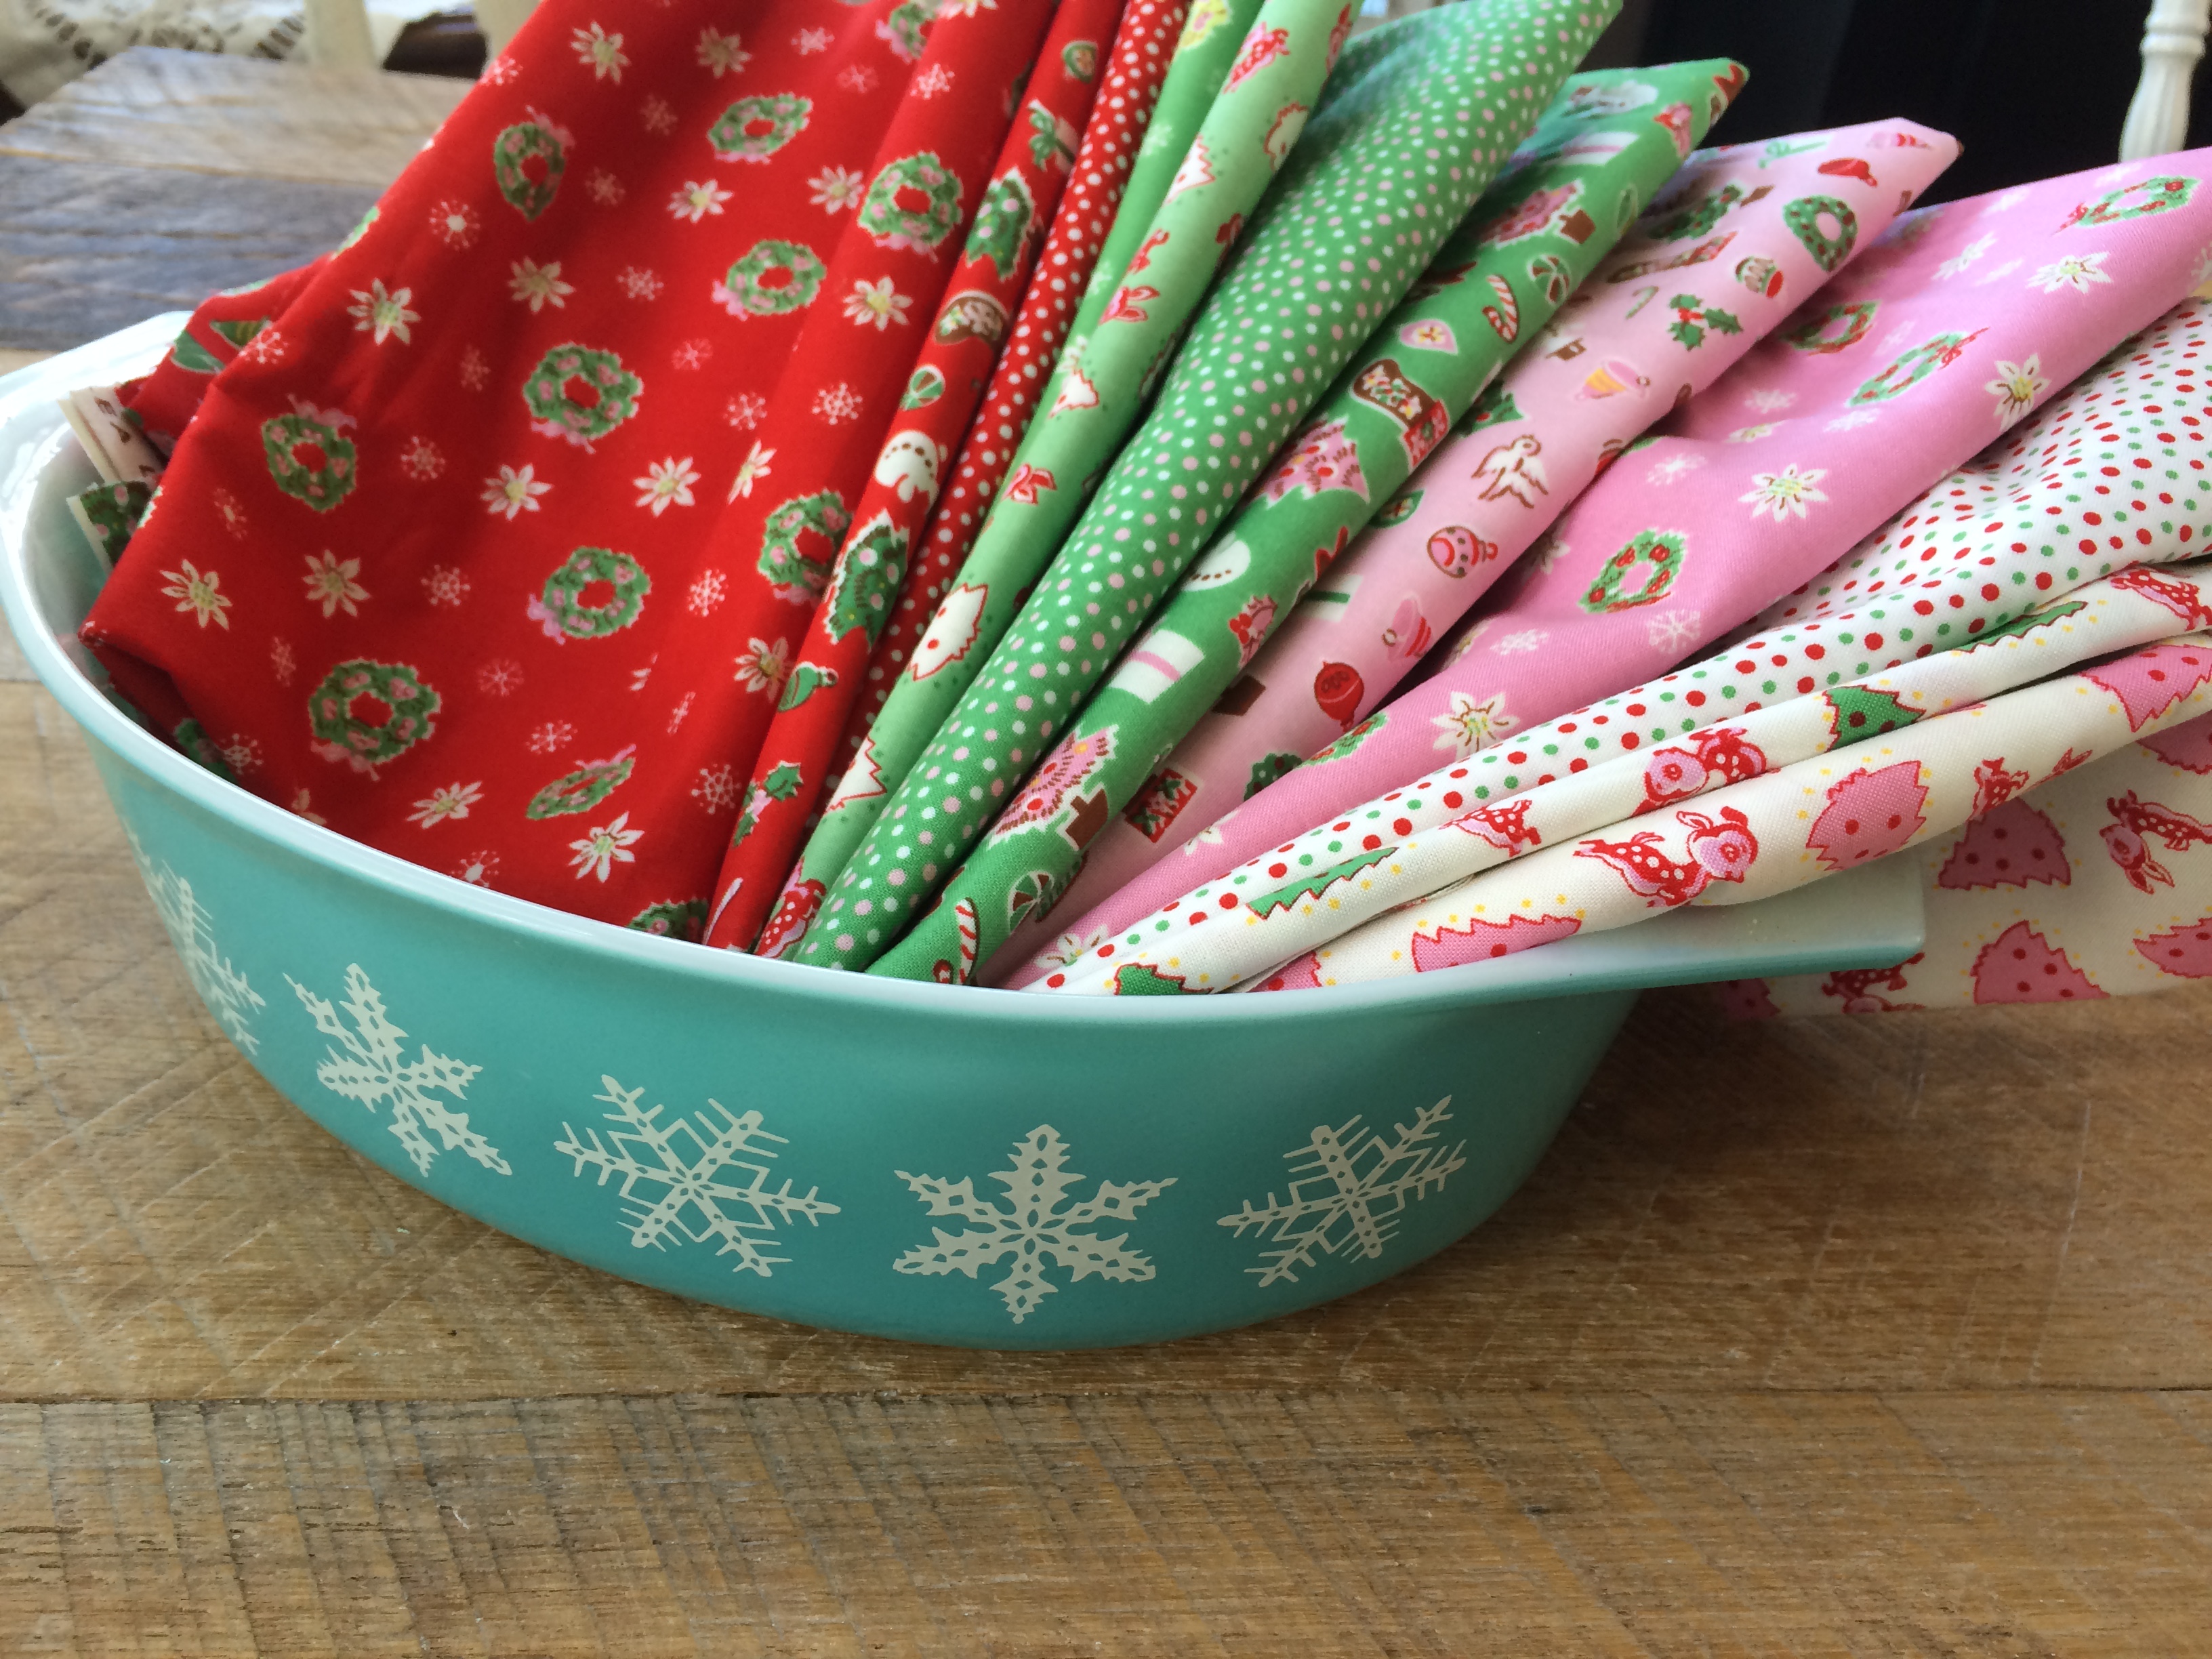
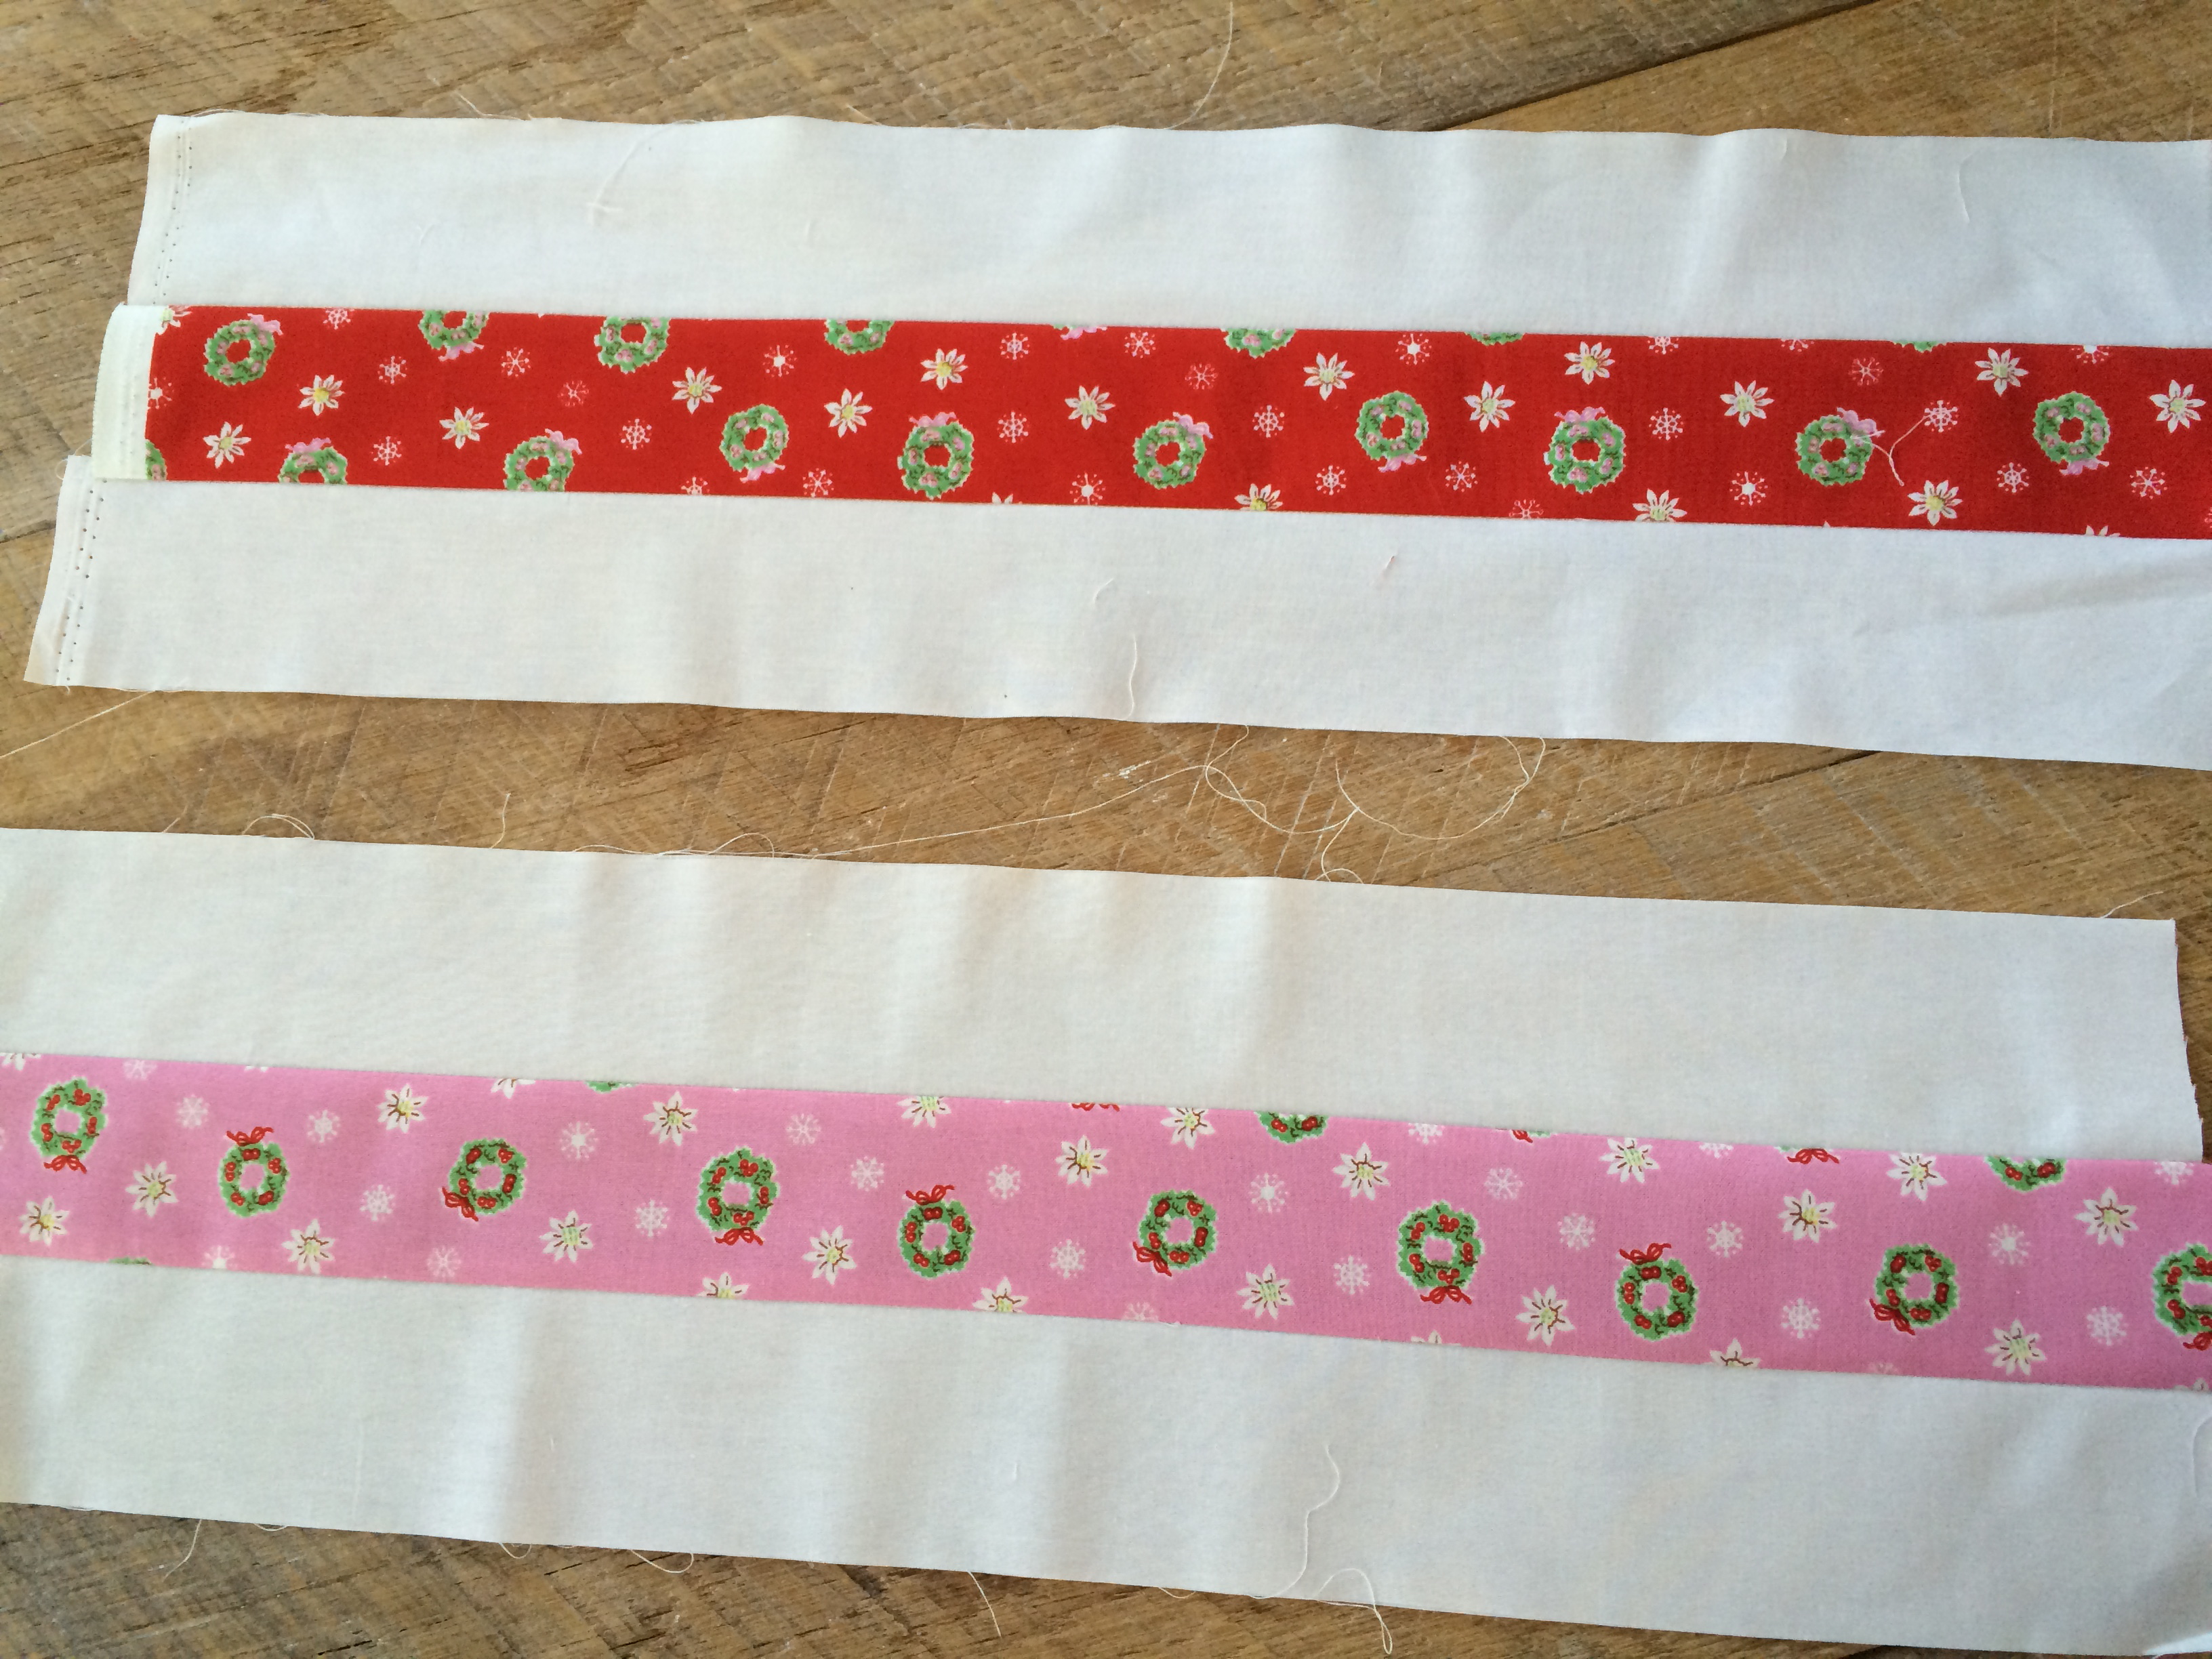
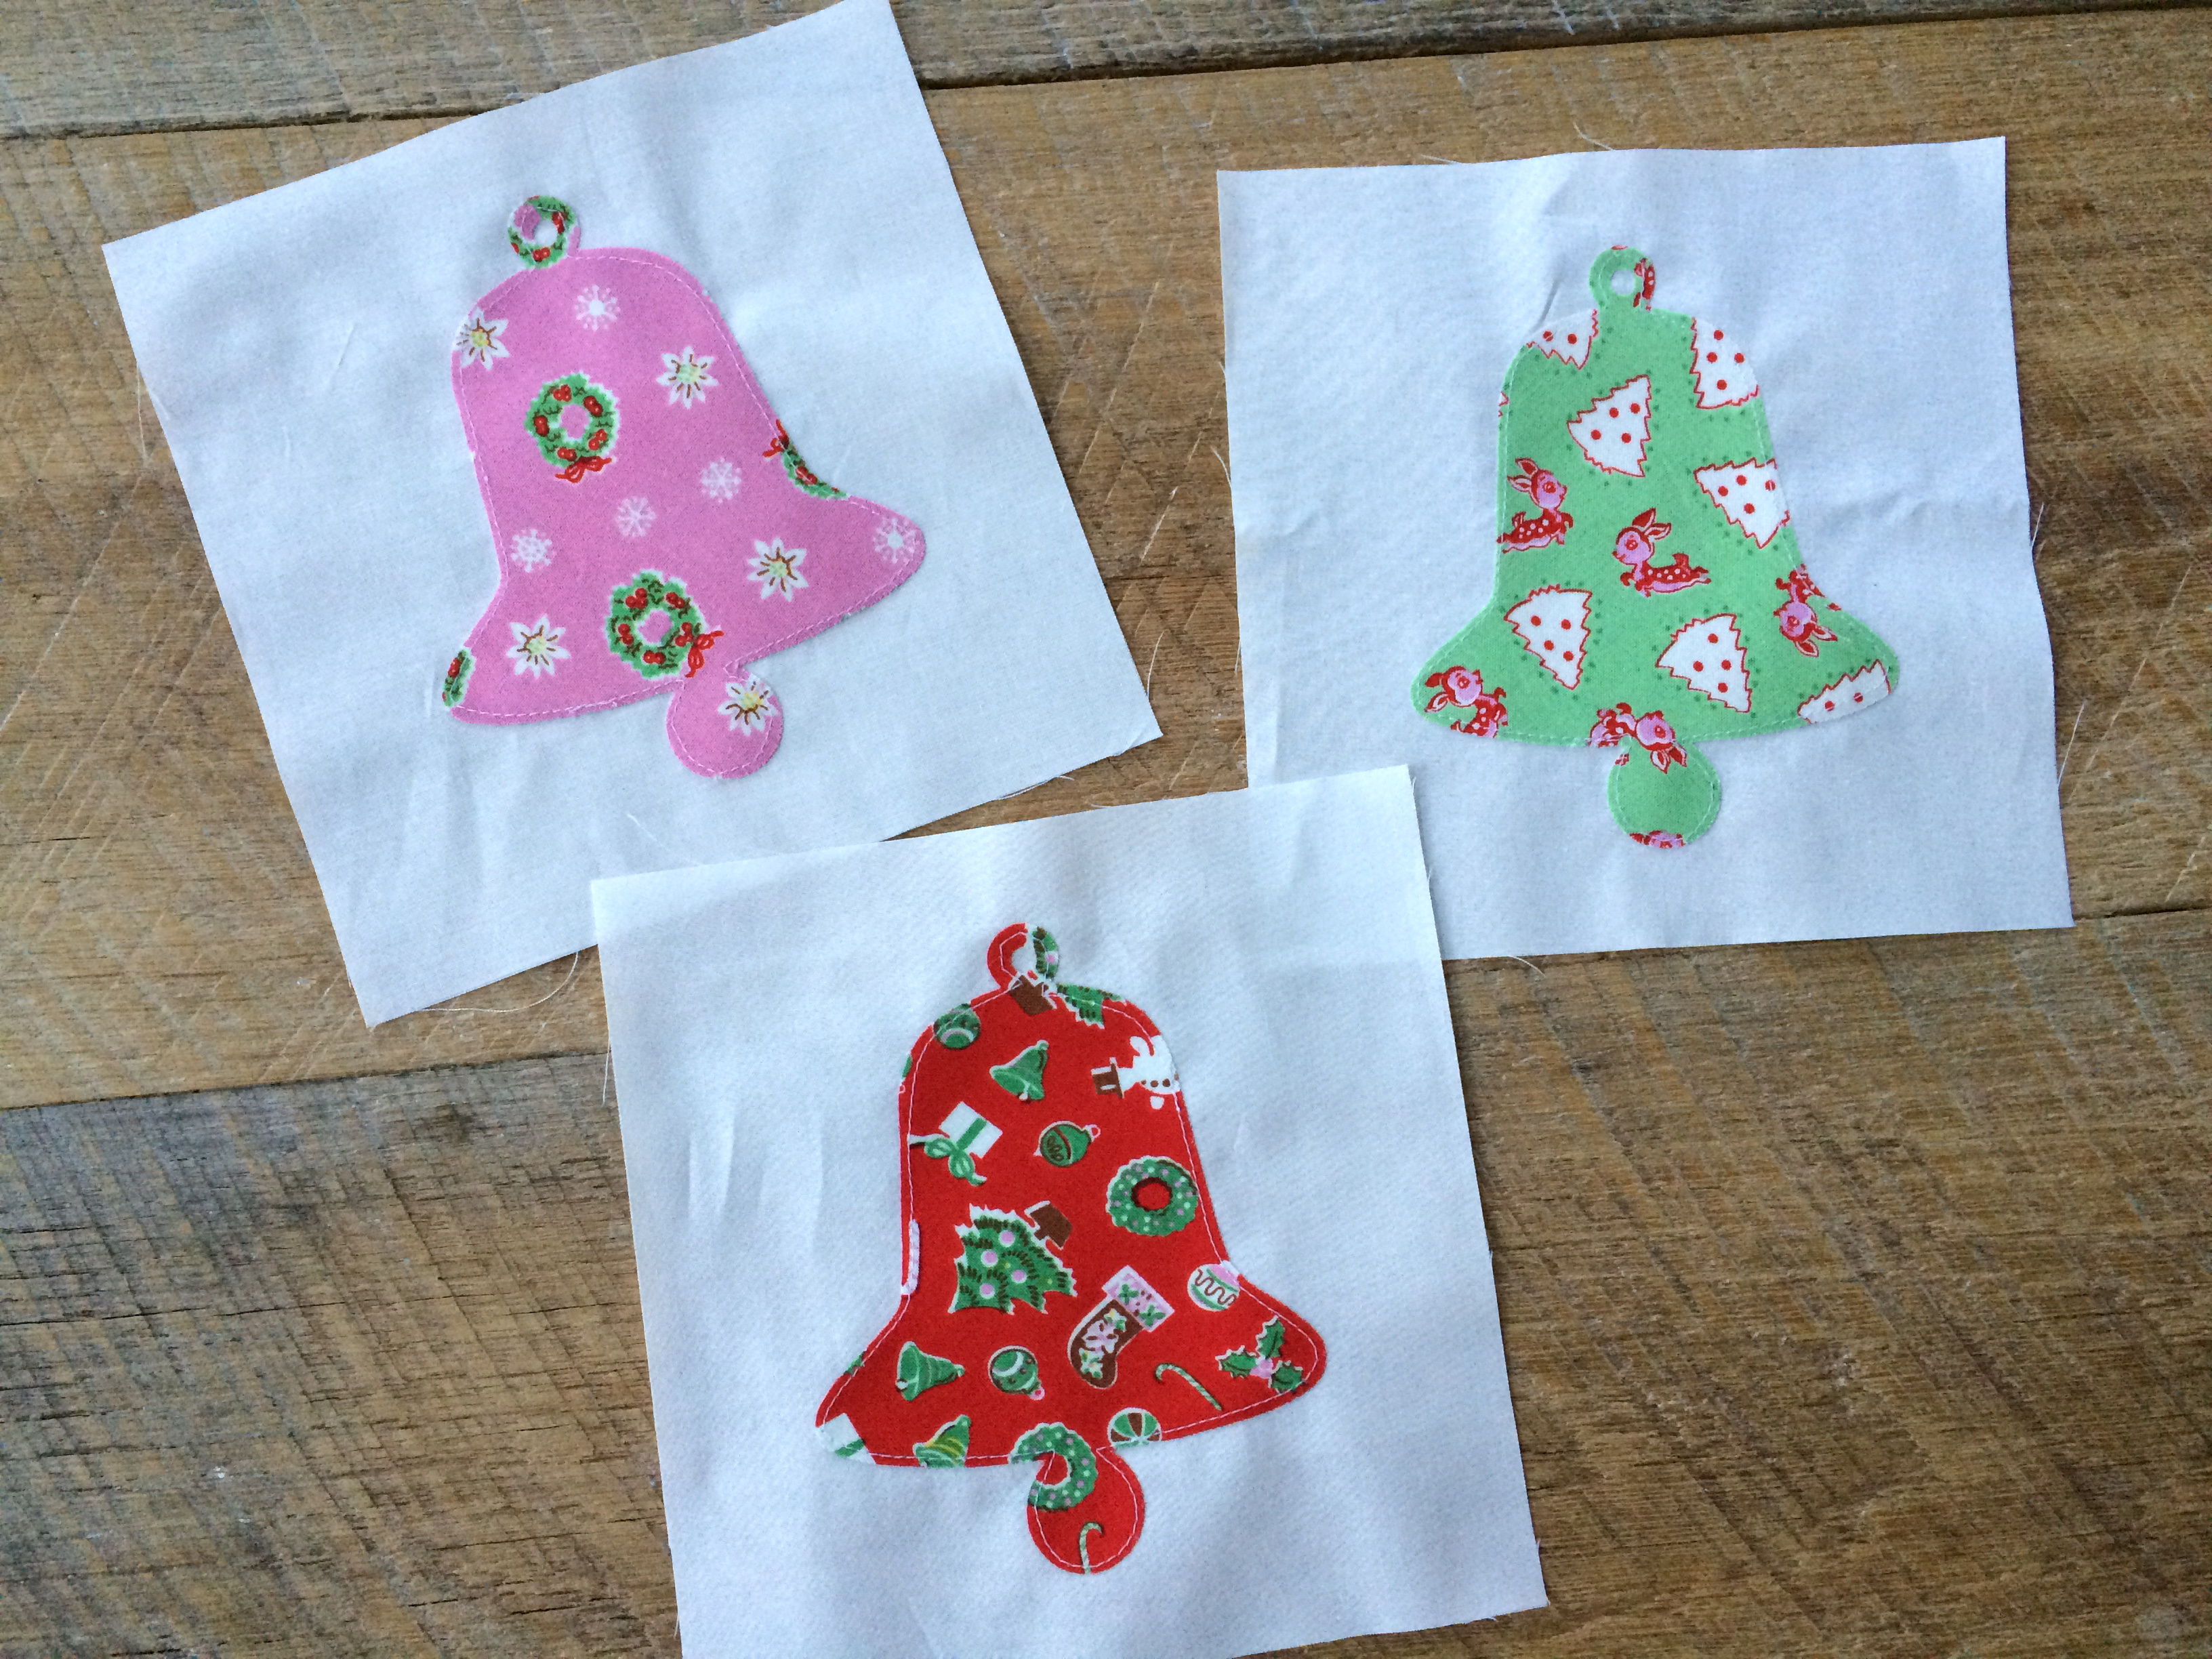
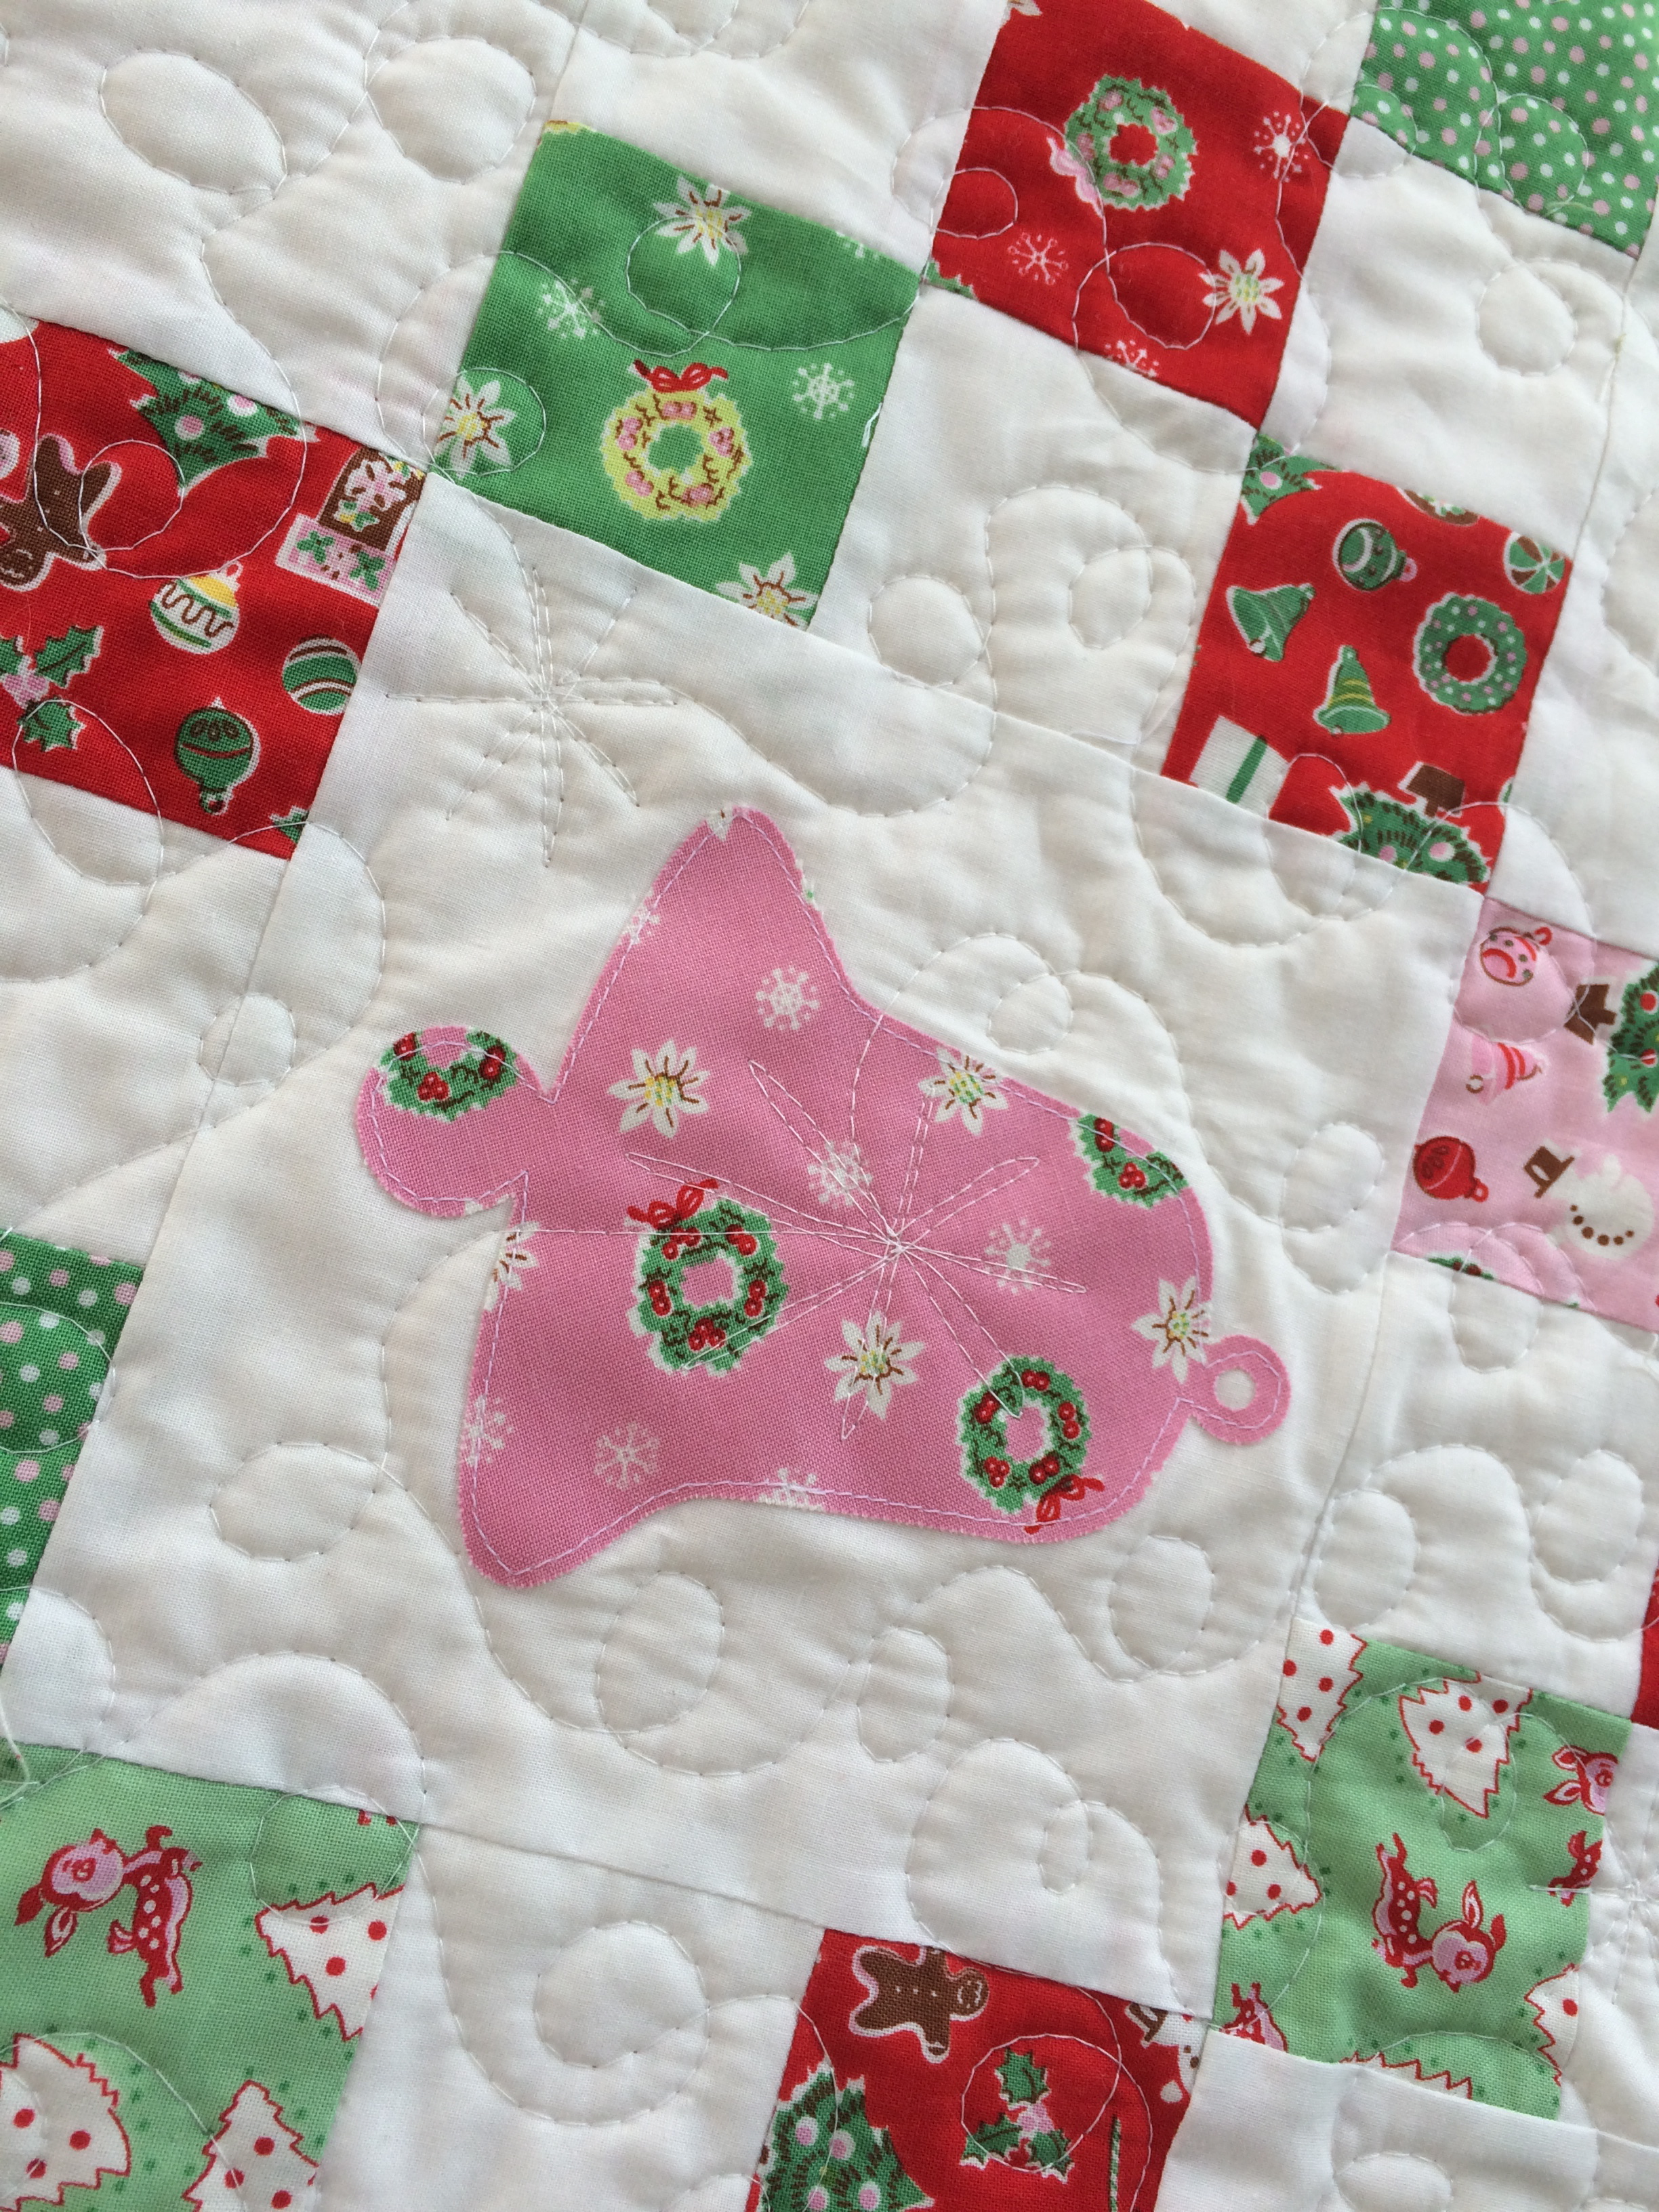
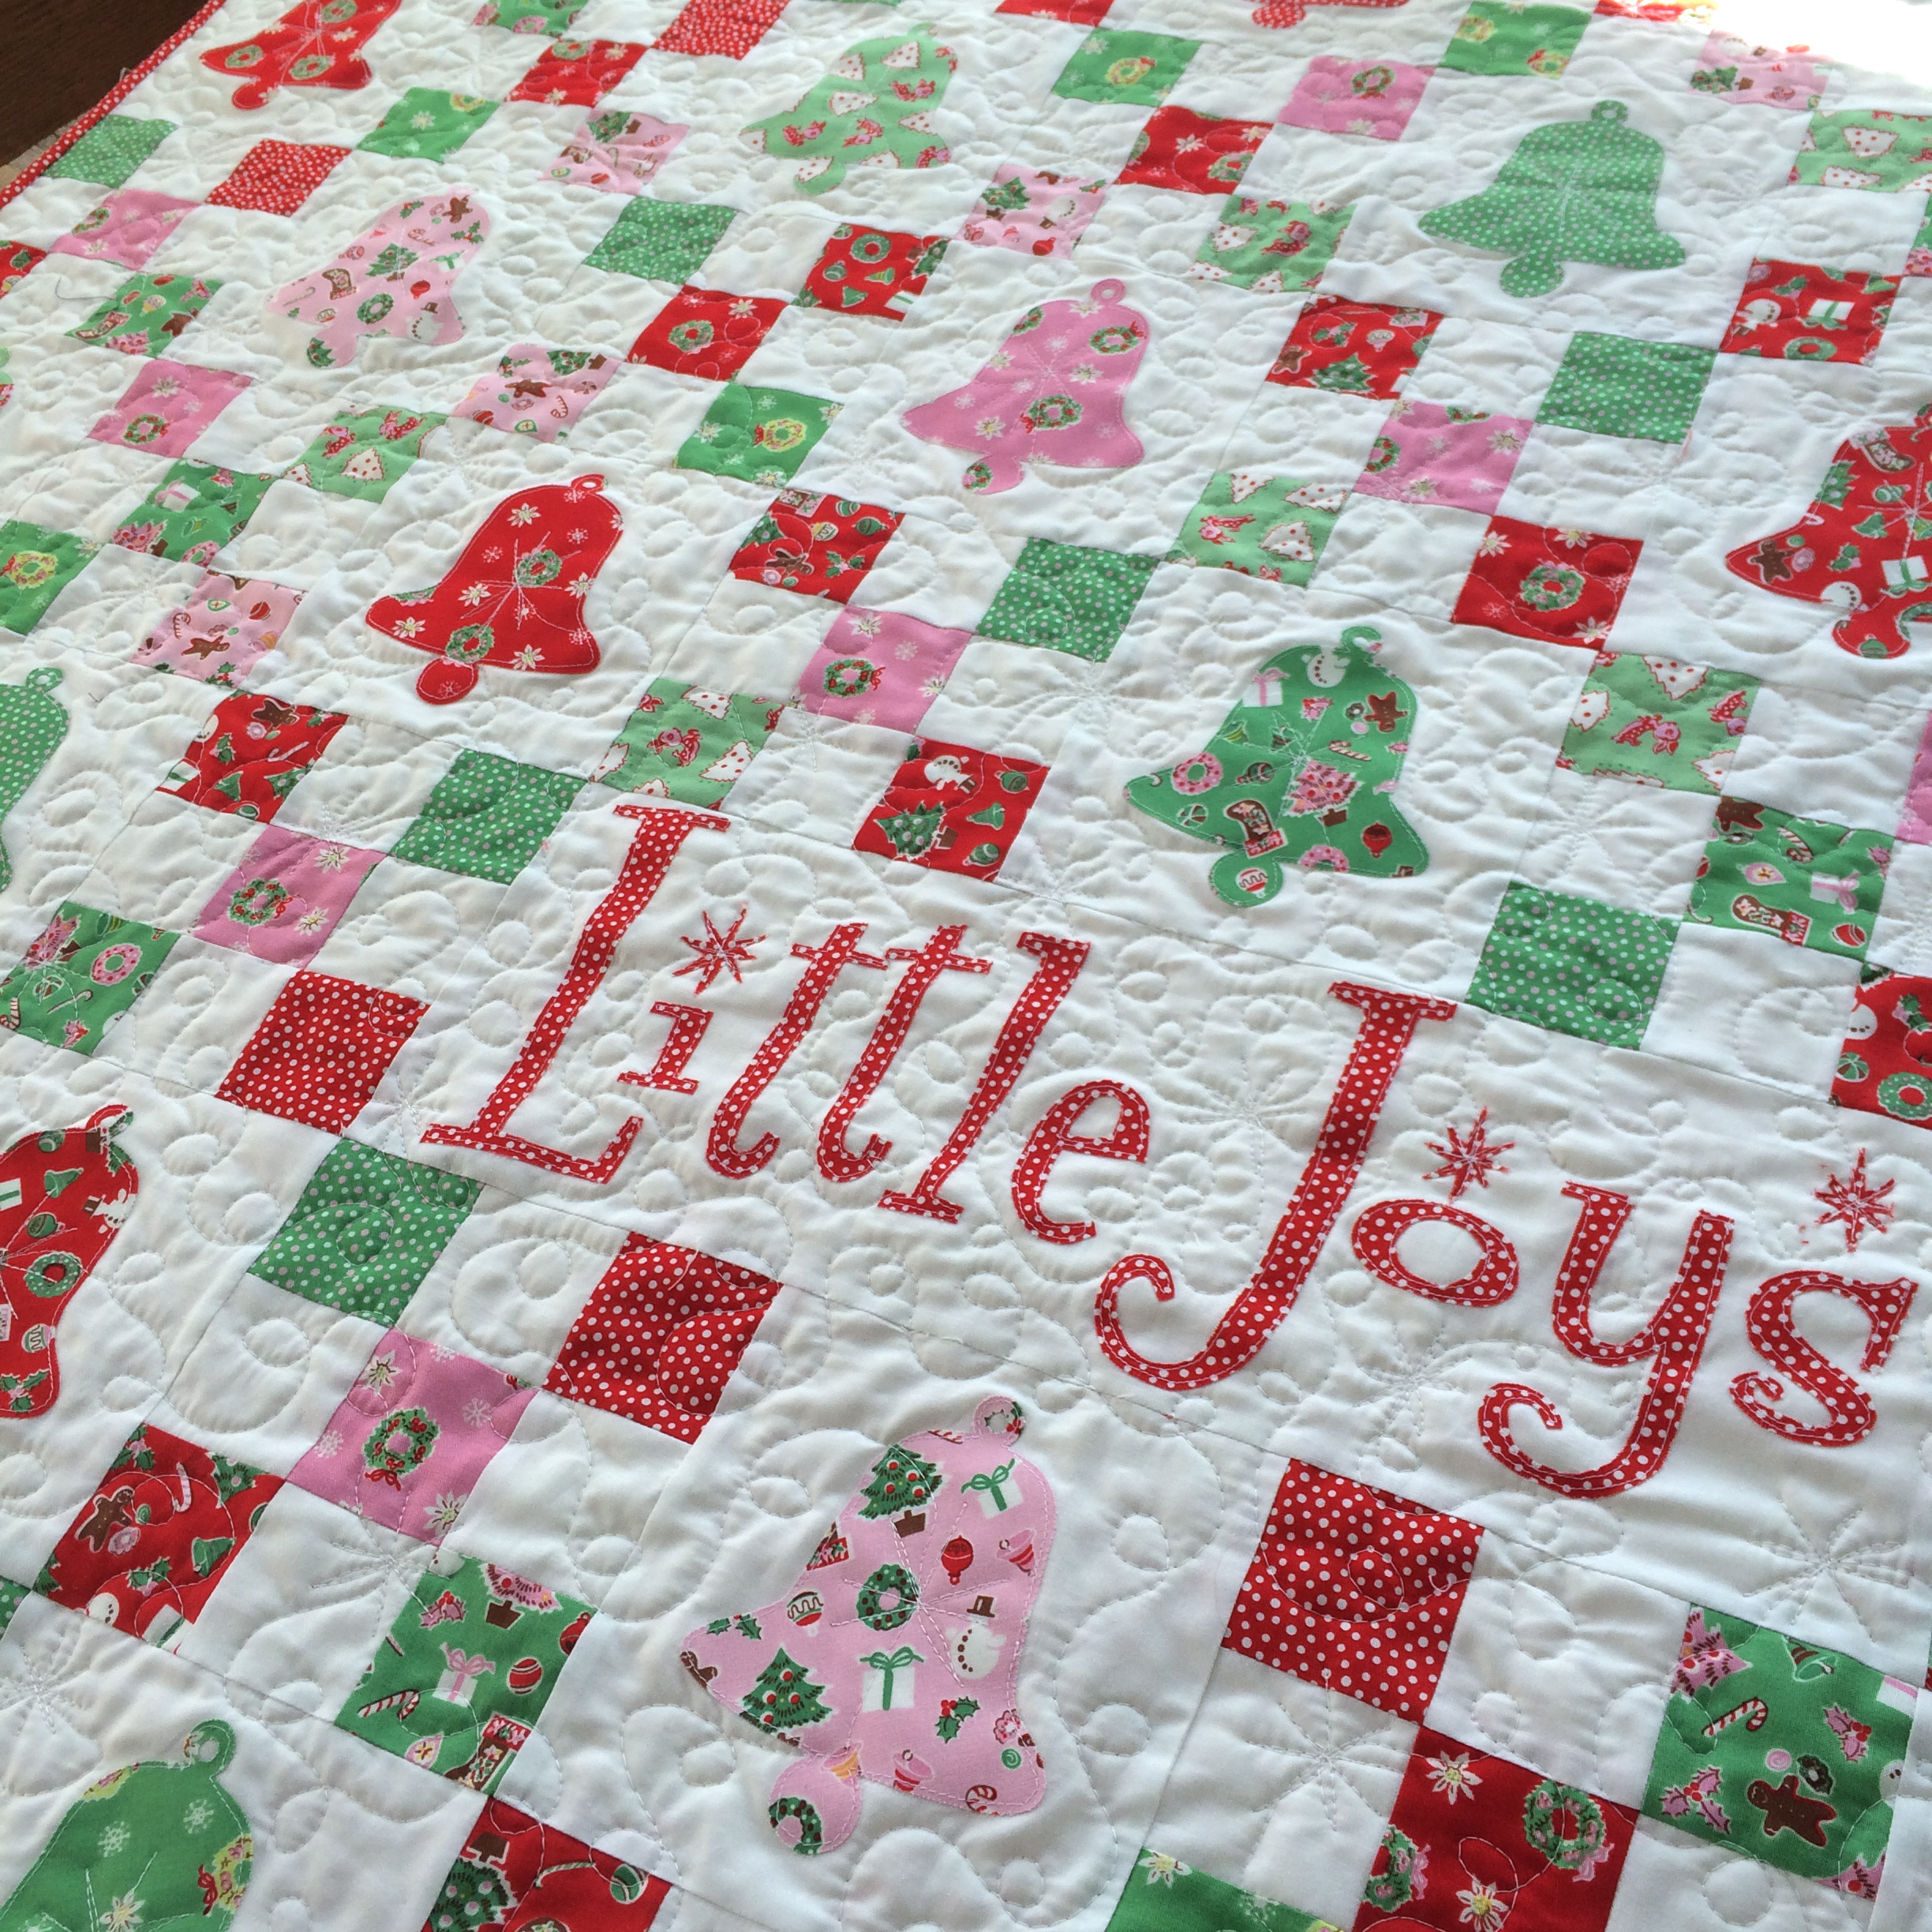
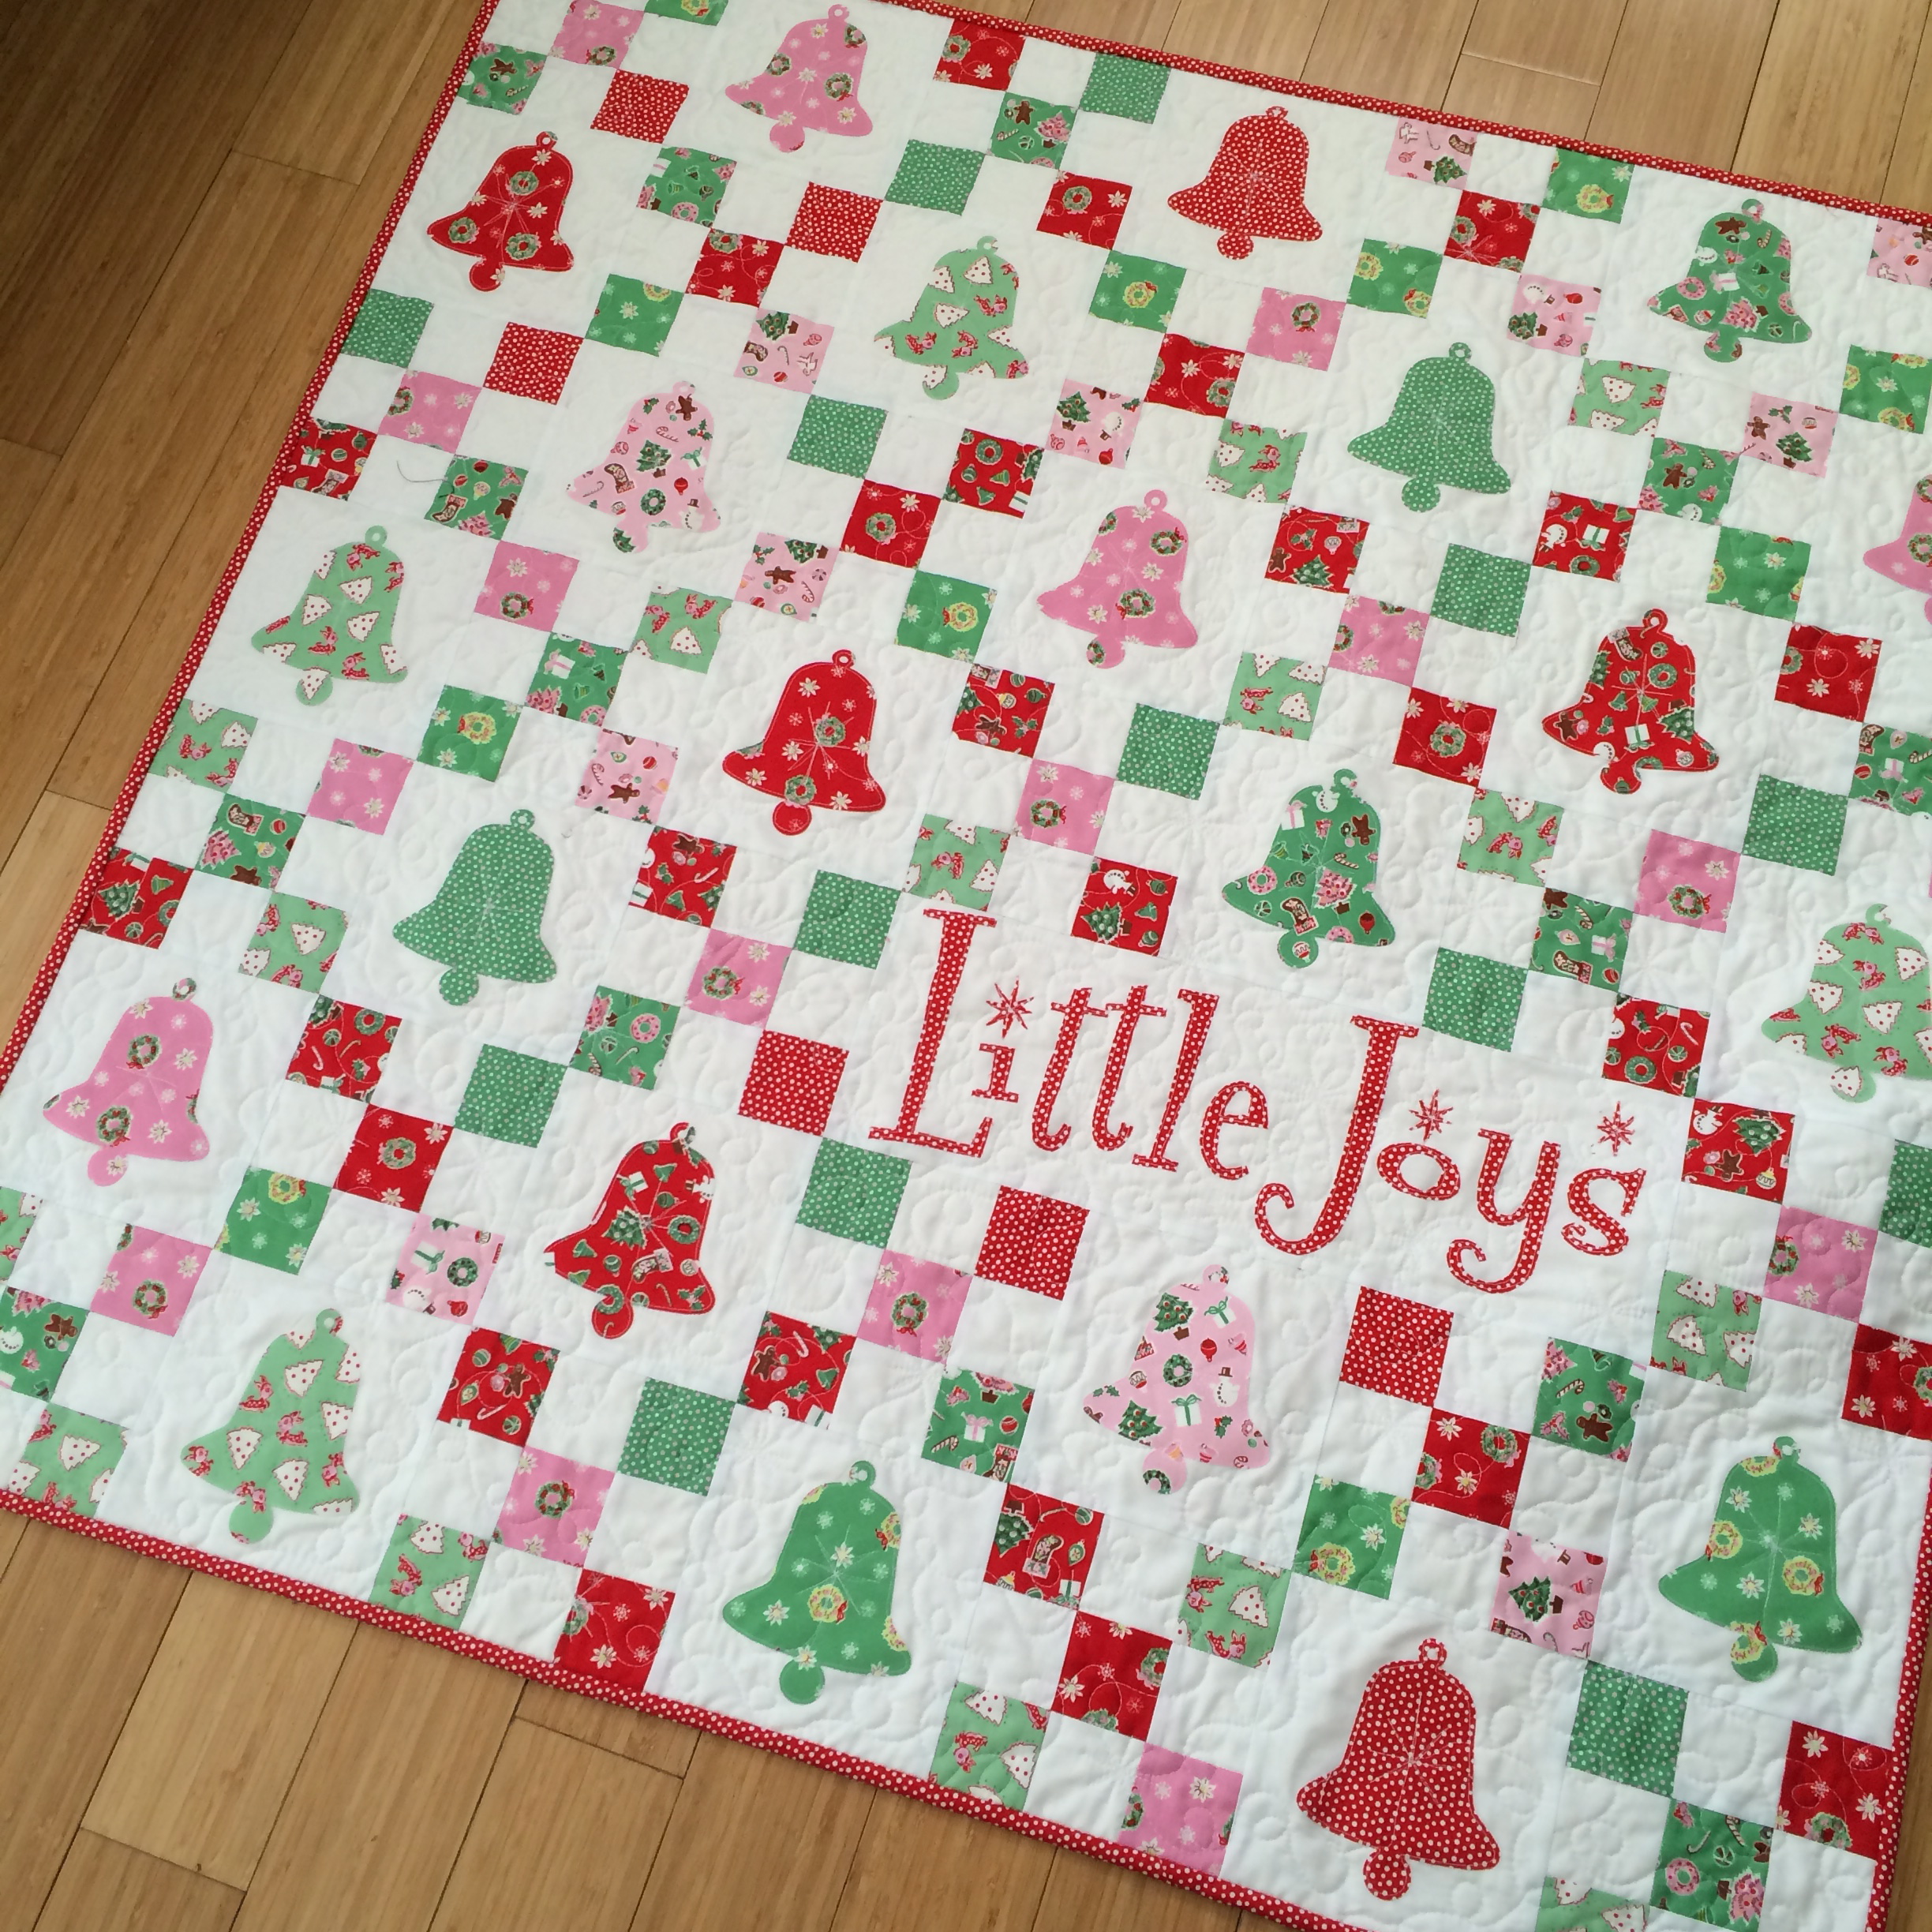
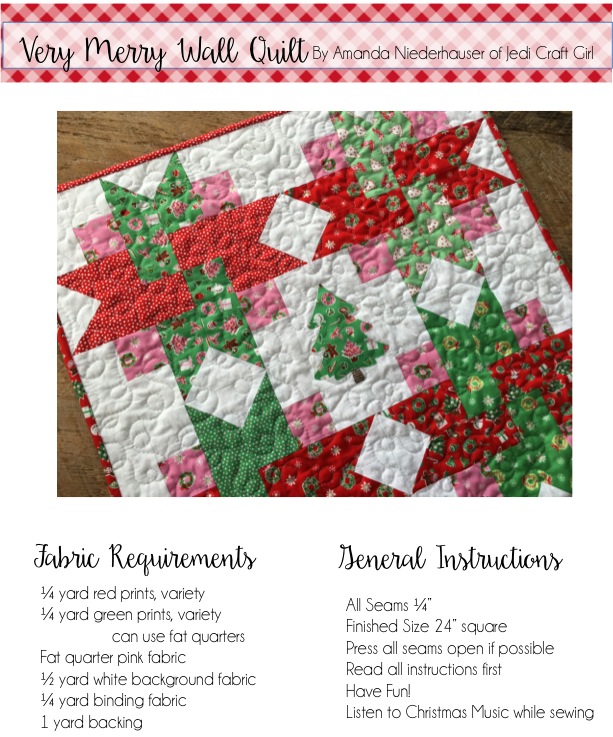
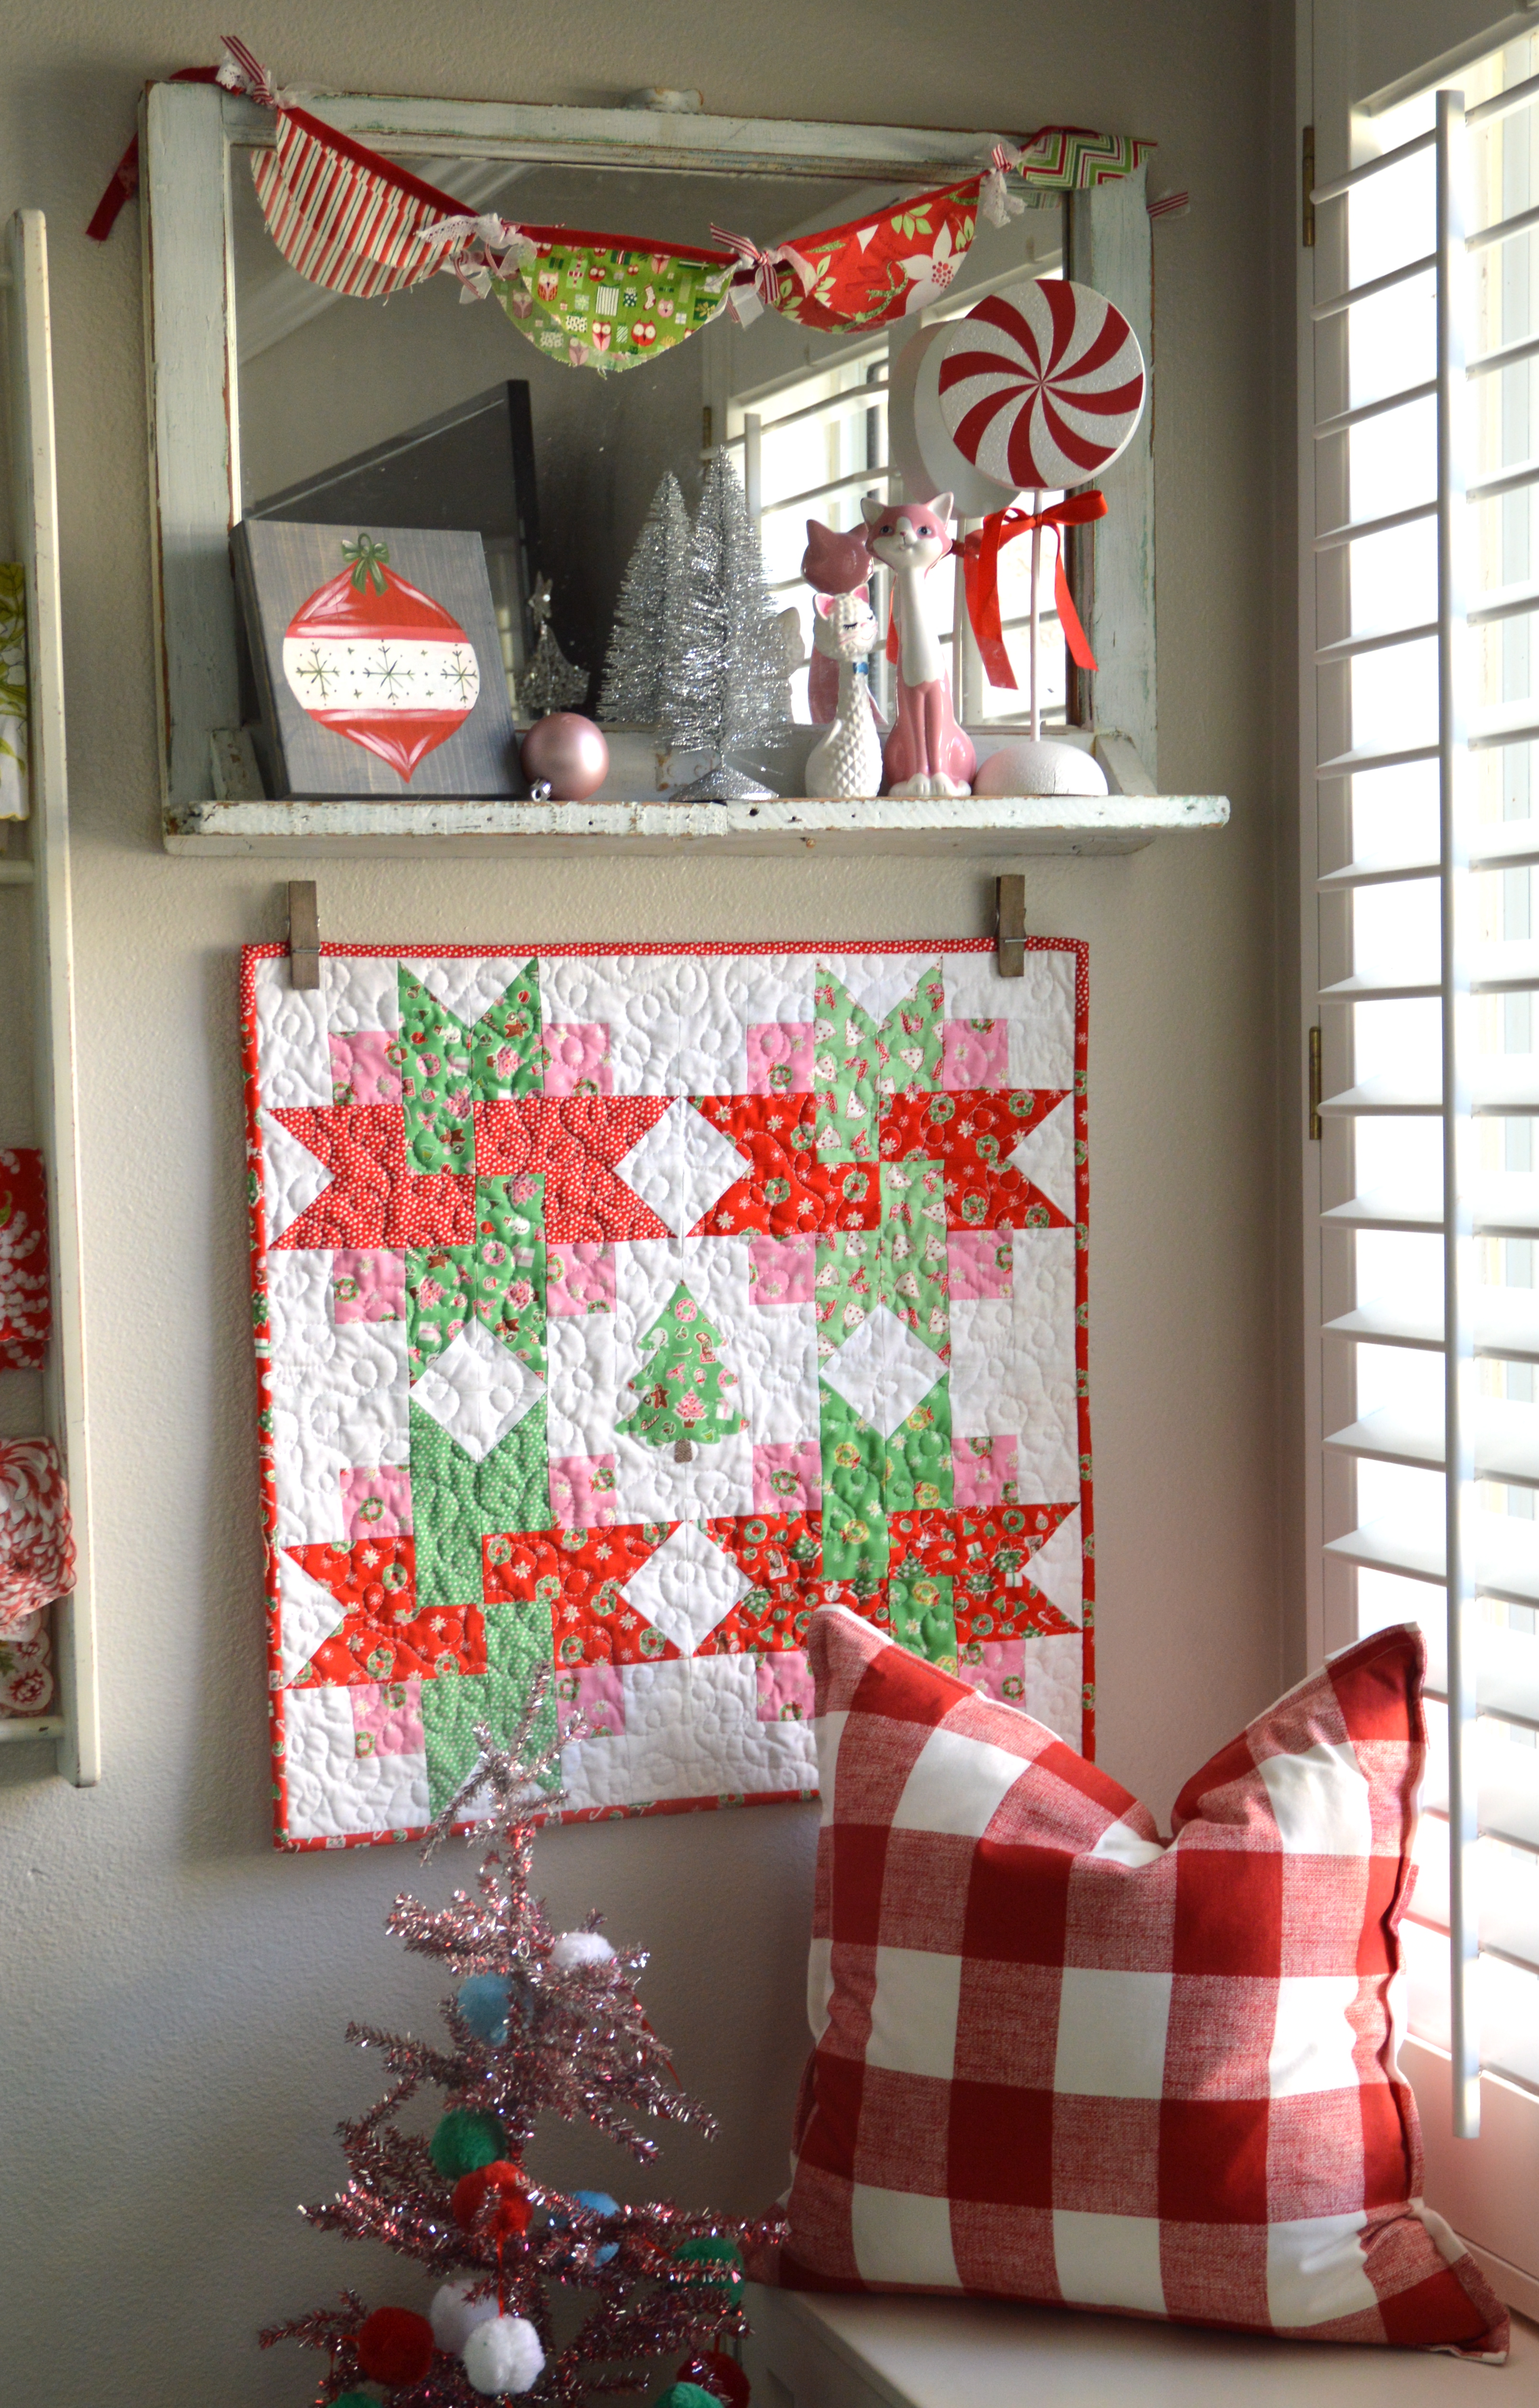
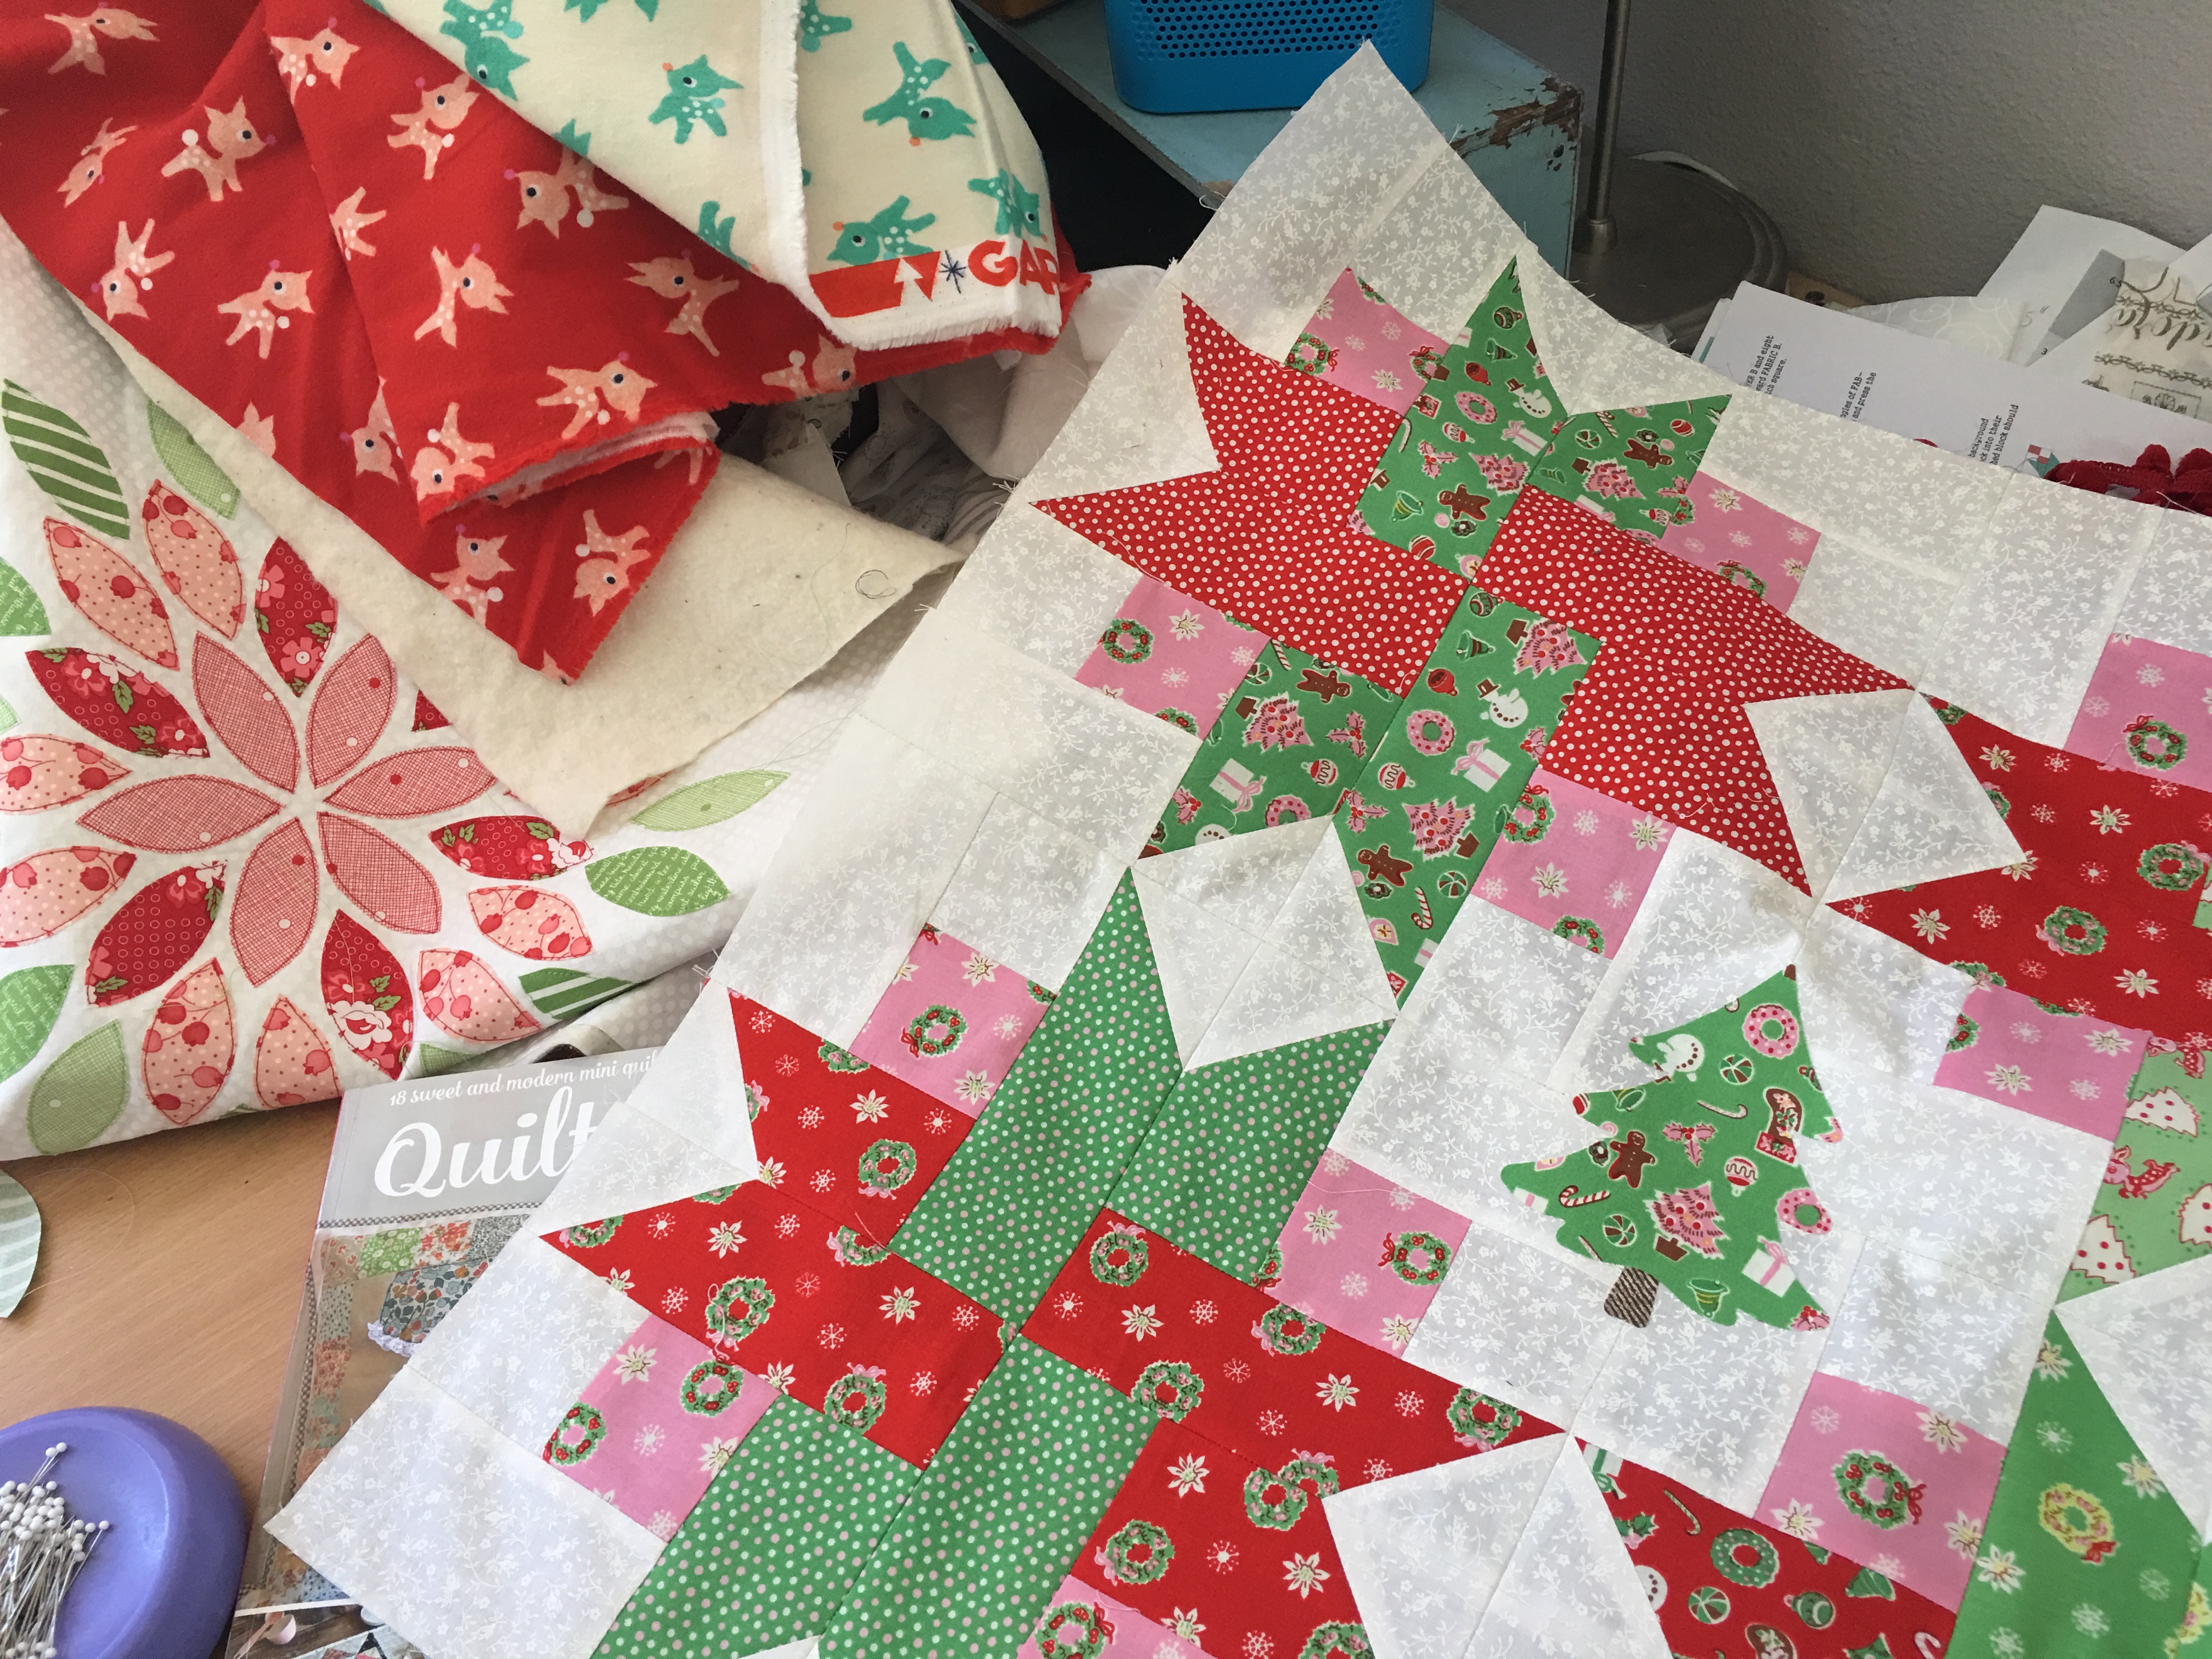
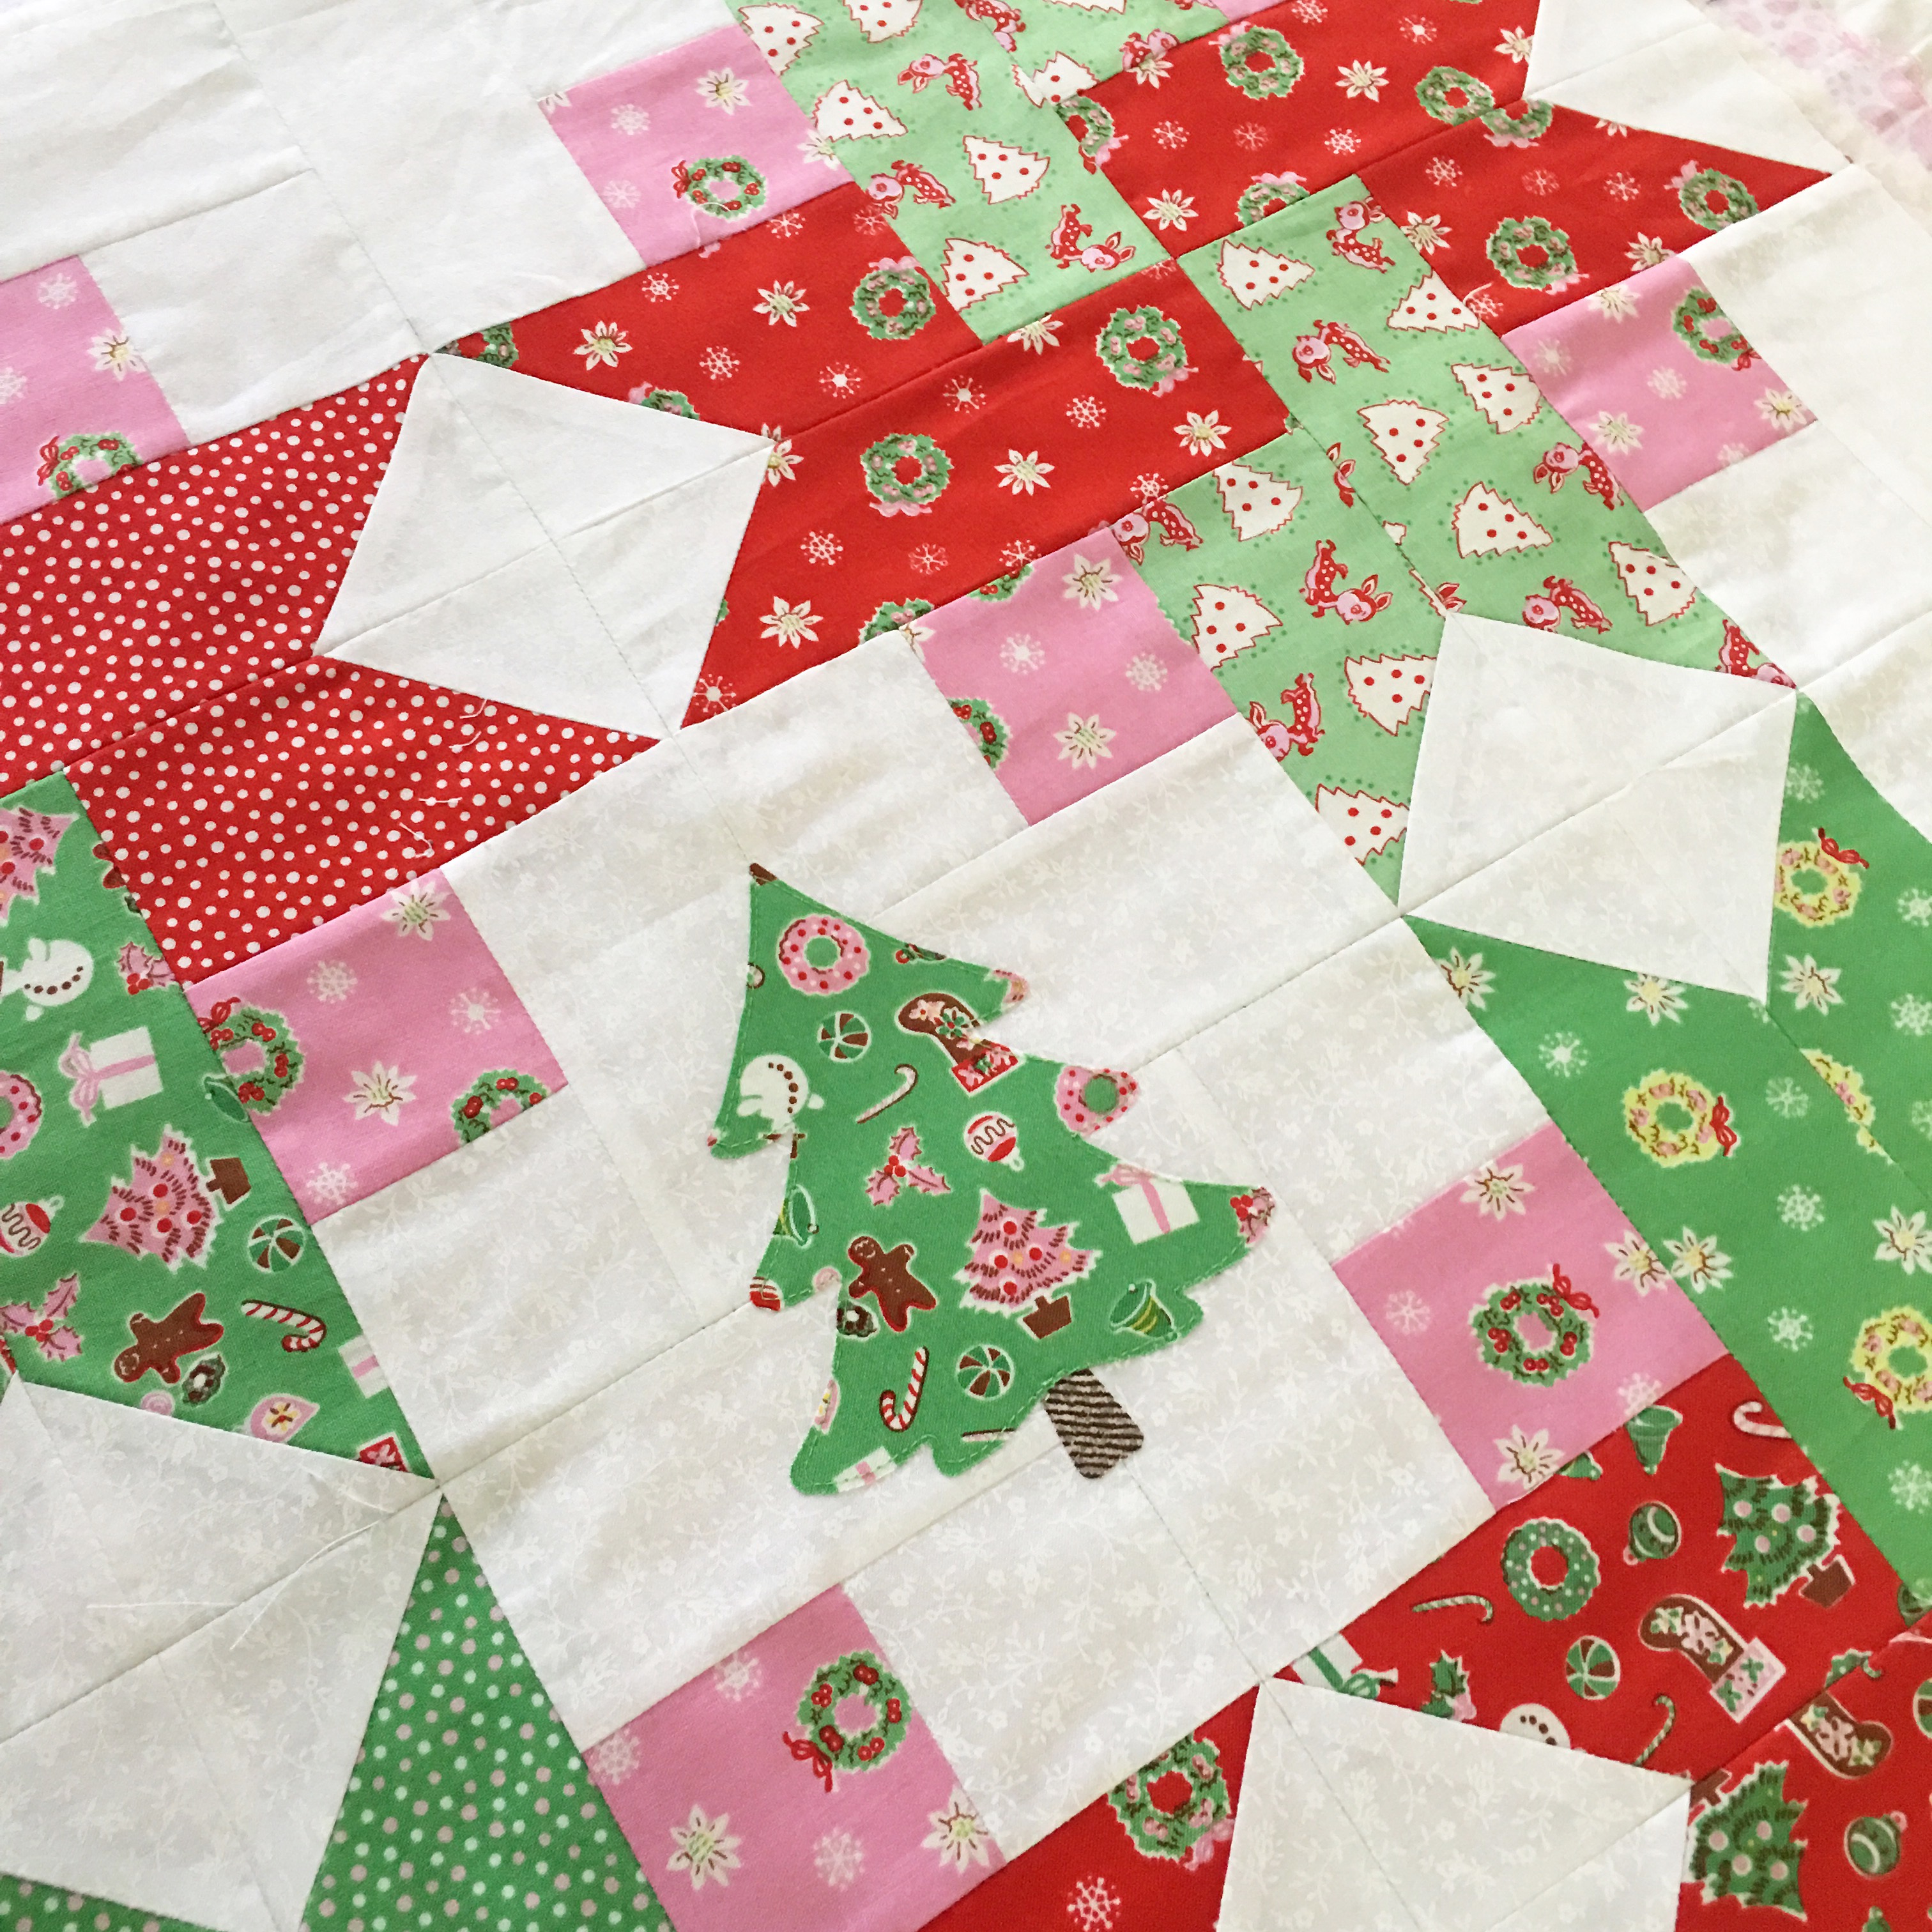
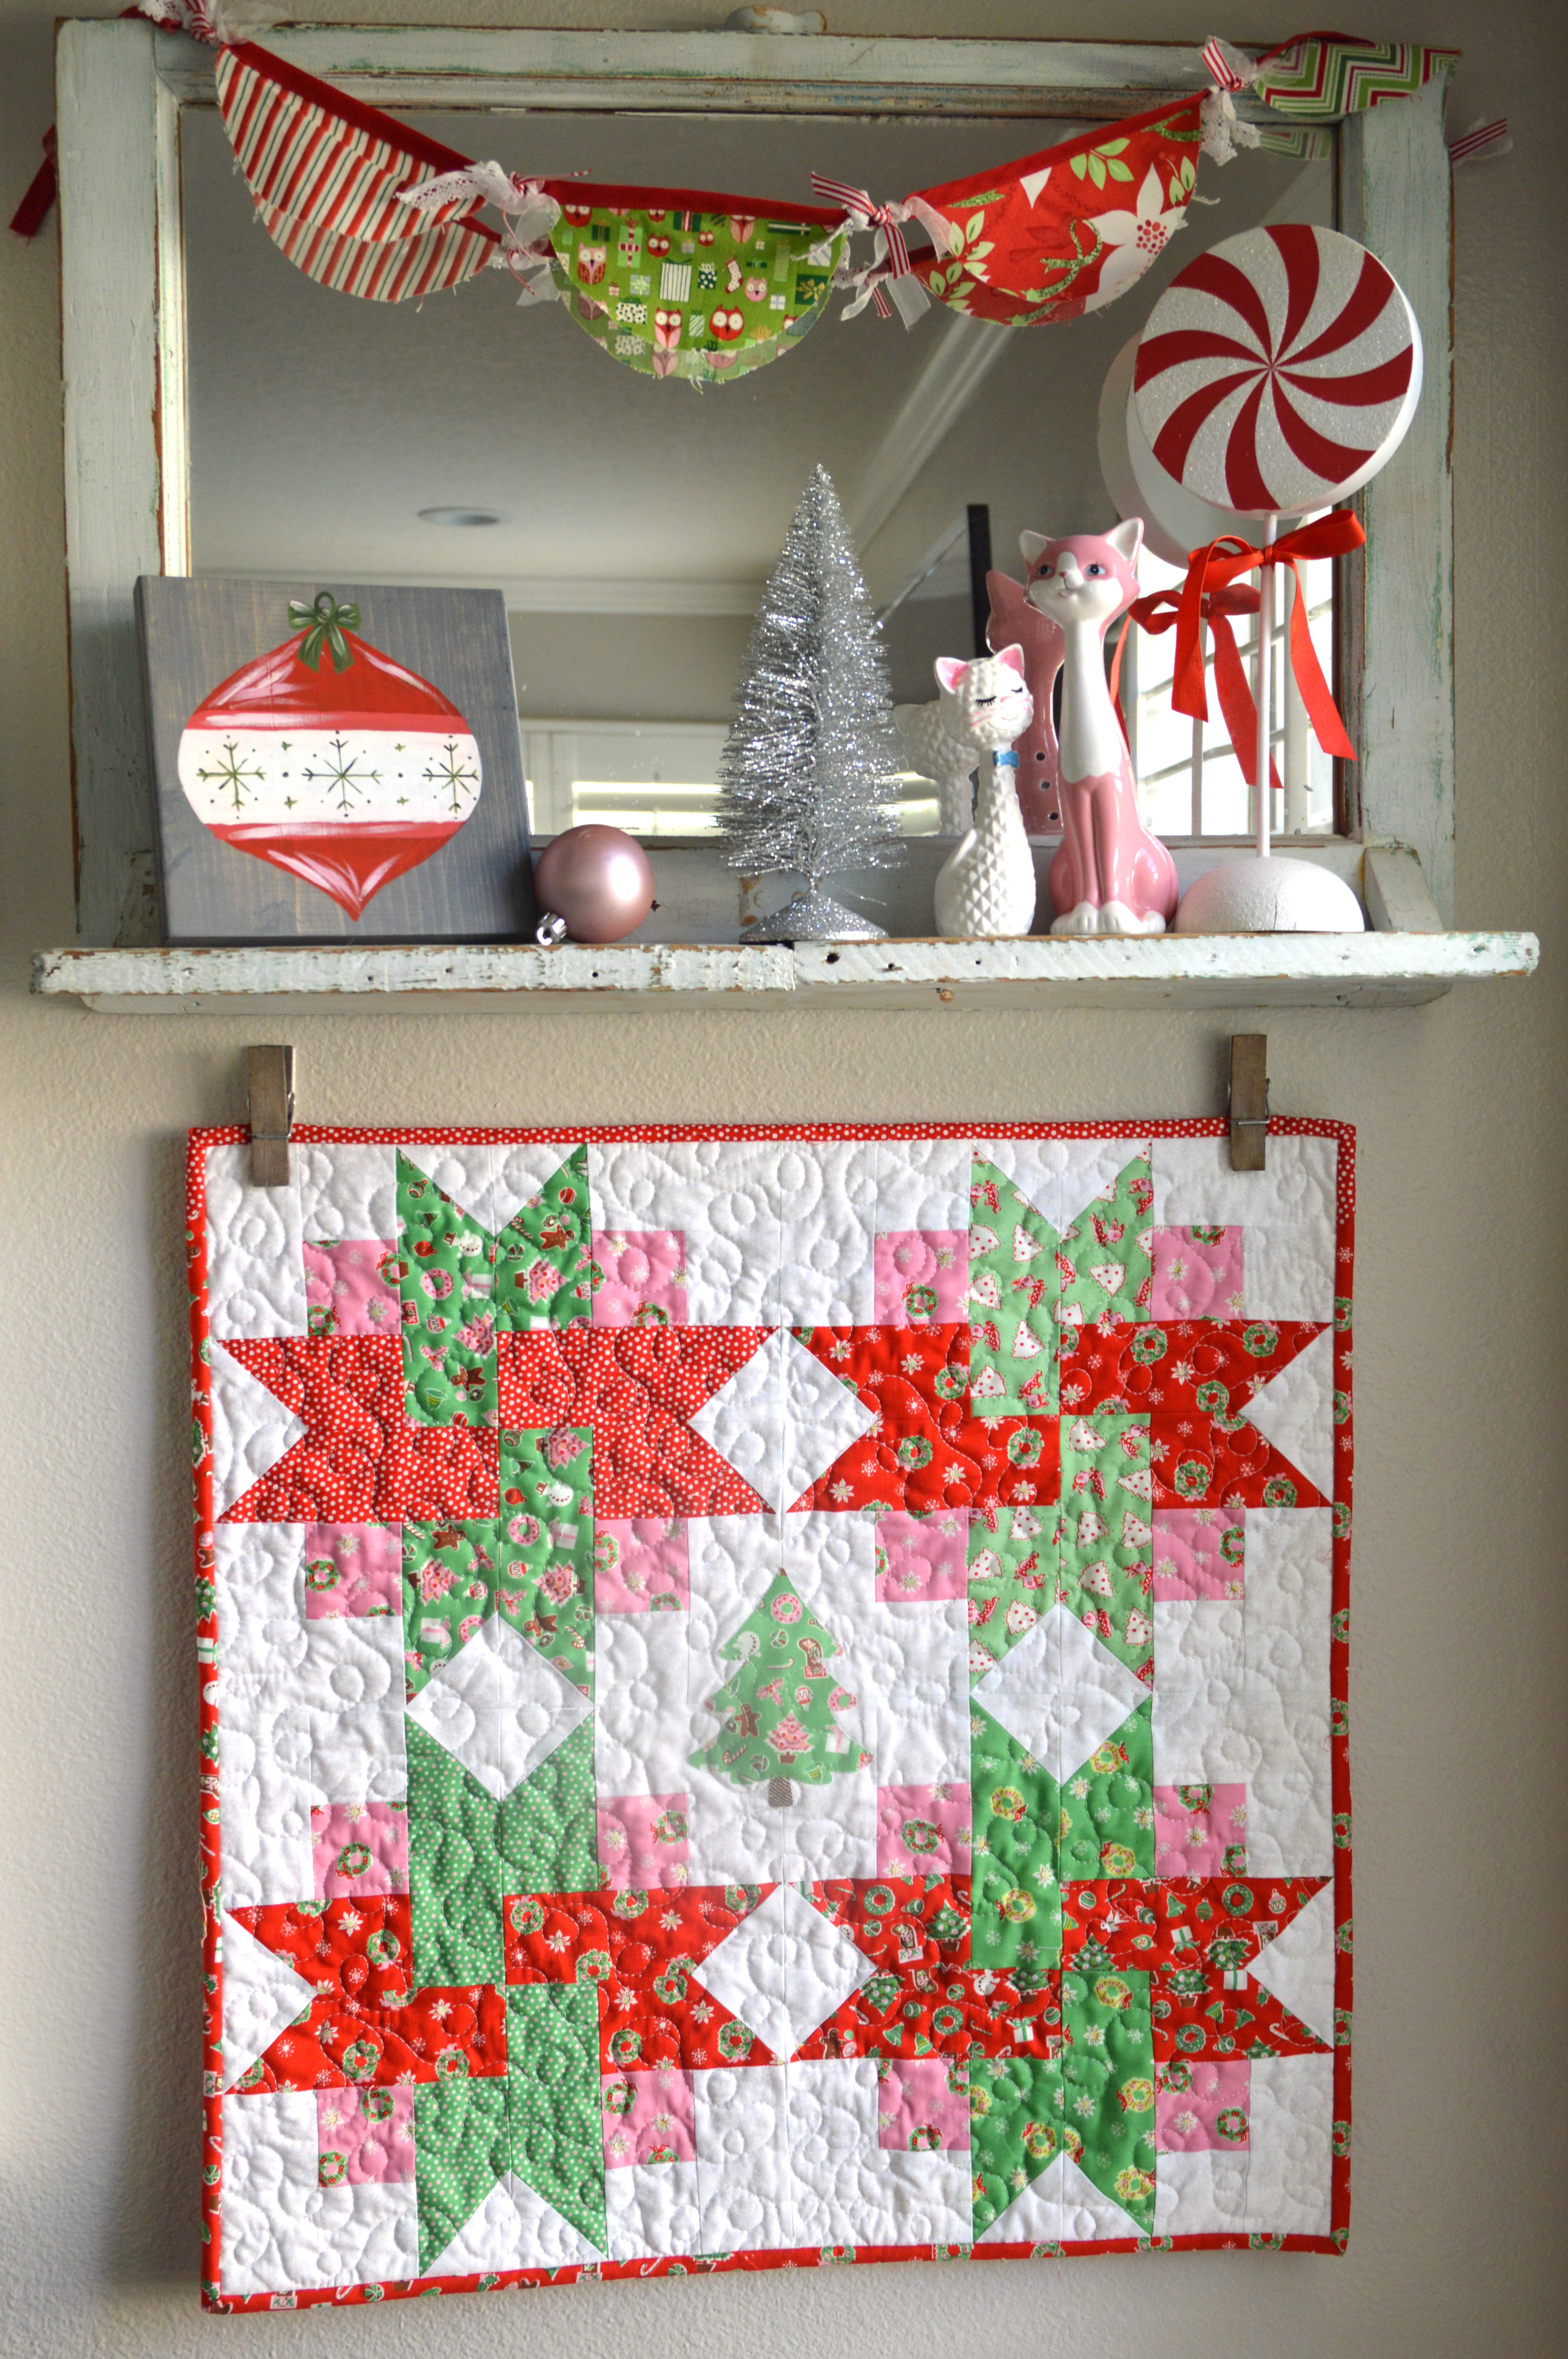
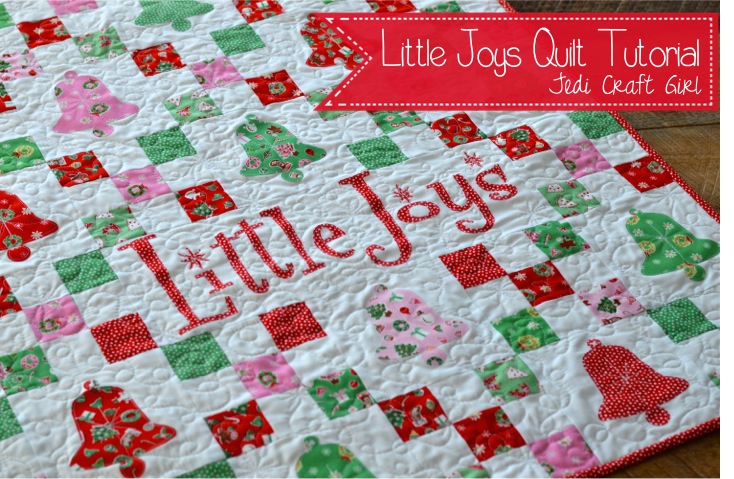
I wrote this pattern a few years ago for Penny Rose Fabrics.  I updated it and have the full tutorial available here!  I have always loved the Penny Rose “Little Joys” Christmas fabrics!  These sweet vintage prints make me think of a simpler time.  I love collecting vintage Christmas ornaments and decorations; this quilt is sure to fit into the mix!

little joys quilt pattern christmas 35This quilt measures 42″ square and is a perfect size to hang on a wall, put at the end of a bed, or center on a table.  The quilt is made up of 6″ solid blocks with bell applique and  6″ nine-patch blocks that form a chain.

Screen Shot 2015-11-30 at 8.08.25 AMI used this Bell from Sizzix.  It is such a versatile die!

little joys quilt pattern christmas 15

Mufasa was all over this project because it involved the Sizzix Fabi – his FAVORITE toy!little joys quilt pattern christmas 20

Fabric Requirements:

9 fat quarters (green, red, and pink) – this is a scrappy little quilt so there are different amounts of each color – the colors don’t form a pattern in this version, but if you would like a pattern it would be easy to do!

1 1/2 yards solid white fabric

Heat n Bond Lite for appliqué

1/2 yard binding

1 1/4 yard backing (the fabric needs to measure at least 43″ wide or you may need to piece it)

Cutting Instructions

Fat Quarters:

Cut (2) 2 1/2″ x WOFQ strips from each fat quarter. You will have a few extra.

Use remaining fabric for bell appliqué and letters

Solid White:

Cut (6) 2 1/2″ x WOF strips, cut them in half to give you (12) 2 1/2″ x 21″ strips.

Cut (5) 6 1/2″ x WOF strips, subcut into (22) 6 1/2″ squares and (1) 6 1/2″ x 18 1/2″ rectangle

little joys quilt pattern christmas 7

2 1/2″ strips are cut from each of the 9 fat quarters.

little joys quilt pattern christmas 3

6 white 2 1/2″ x WOF strips are cut and then cut in half to equal the width of the fat quarter strips.

little joys quilt pattern christmas 16

Sew white, dark, white strip sets together, making 3 strip set units.  Press toward the dark.

little joys quilt pattern christmas 5

Sew 6 strip units of the dark, white, dark pattern (above).  Press toward the dark.

little joys quilt pattern christmas 13

Sub cute each strip set in 2 1/2″ increments.  You should have 8 per strip set.

little joys quilt pattern christmas

Lay out blocks making a checkerboard pattern.  Sew together, matching seams.  Press seams in one direction.  Continue this process making 24 total checkerboard blocks.

little joys quilt pattern christmas 11

Cut the remaining fat quarters into 5″ squares and fuse Heat n Bond Lite to the wrong sides of the fabric (above).  Using the Sizzix Bell die, die cut 22 bell shapes.  Peel off backing paper and heat set to the centers of the 6 1/2″ white squares. Sew around each bell with a straight stitch.

little joys quilt pattern christmas 6

little joys quilt pattern christmas 12For the Little Joys word block I cut the letters by hand.  Download the Little Joys pattern HERE.  I printed the letters on Heat n Bond EZ print sheets.

little joys quilt pattern christmas 17You can also trace onto iron-on transfer paper.  The letters are in reverse.  Iron the heat n bond to the wrong side of the letter fabric.  Cut out by hand around each letter.  Peel off the backing and position on the white rectangle.  Heat set in place.  Sew around each letter.

little joys quilt pattern christmas 19

Now you’re ready to lay out the whole quilt!  Use the above photo as your guide.  Again, my colors are random but you can make a color pattern!

Sew each block together creating rows, pressing toward the applique blocks.  Then sew the rows together, pinning at intersections so seams match up.  Press all seams in one direction.

Baste, Quilt, Bind!

IMG_2019Mufasa also loves the sewing machine!  No animals were harmed in the quilting of this project!


little joys quilt pattern christmas 9Make sure your cat approves 🙂

little joys quilt pattern christmas 2I free motion quilted this with loop de loos and retro style stars.  I love how it turned out!  Add the binding and you’re finished!

little joys quilt pattern christmas 10

little joys quilt pattern christmas 14

Circa 1974 Quilt Pattern – Featuring Gingham Girls

Gingham Girls Logocirca 1974

It’s a 1970’s sunshiny day over here!!!  As soon as I saw Diary of a Quilter’s Gingham Girls new fabric line I knew it was for me!!  She did an amazing job of packaging up my childhood into a fabric line!  (And yes, all of you now know how old I am!!!)

DSC_0269 2
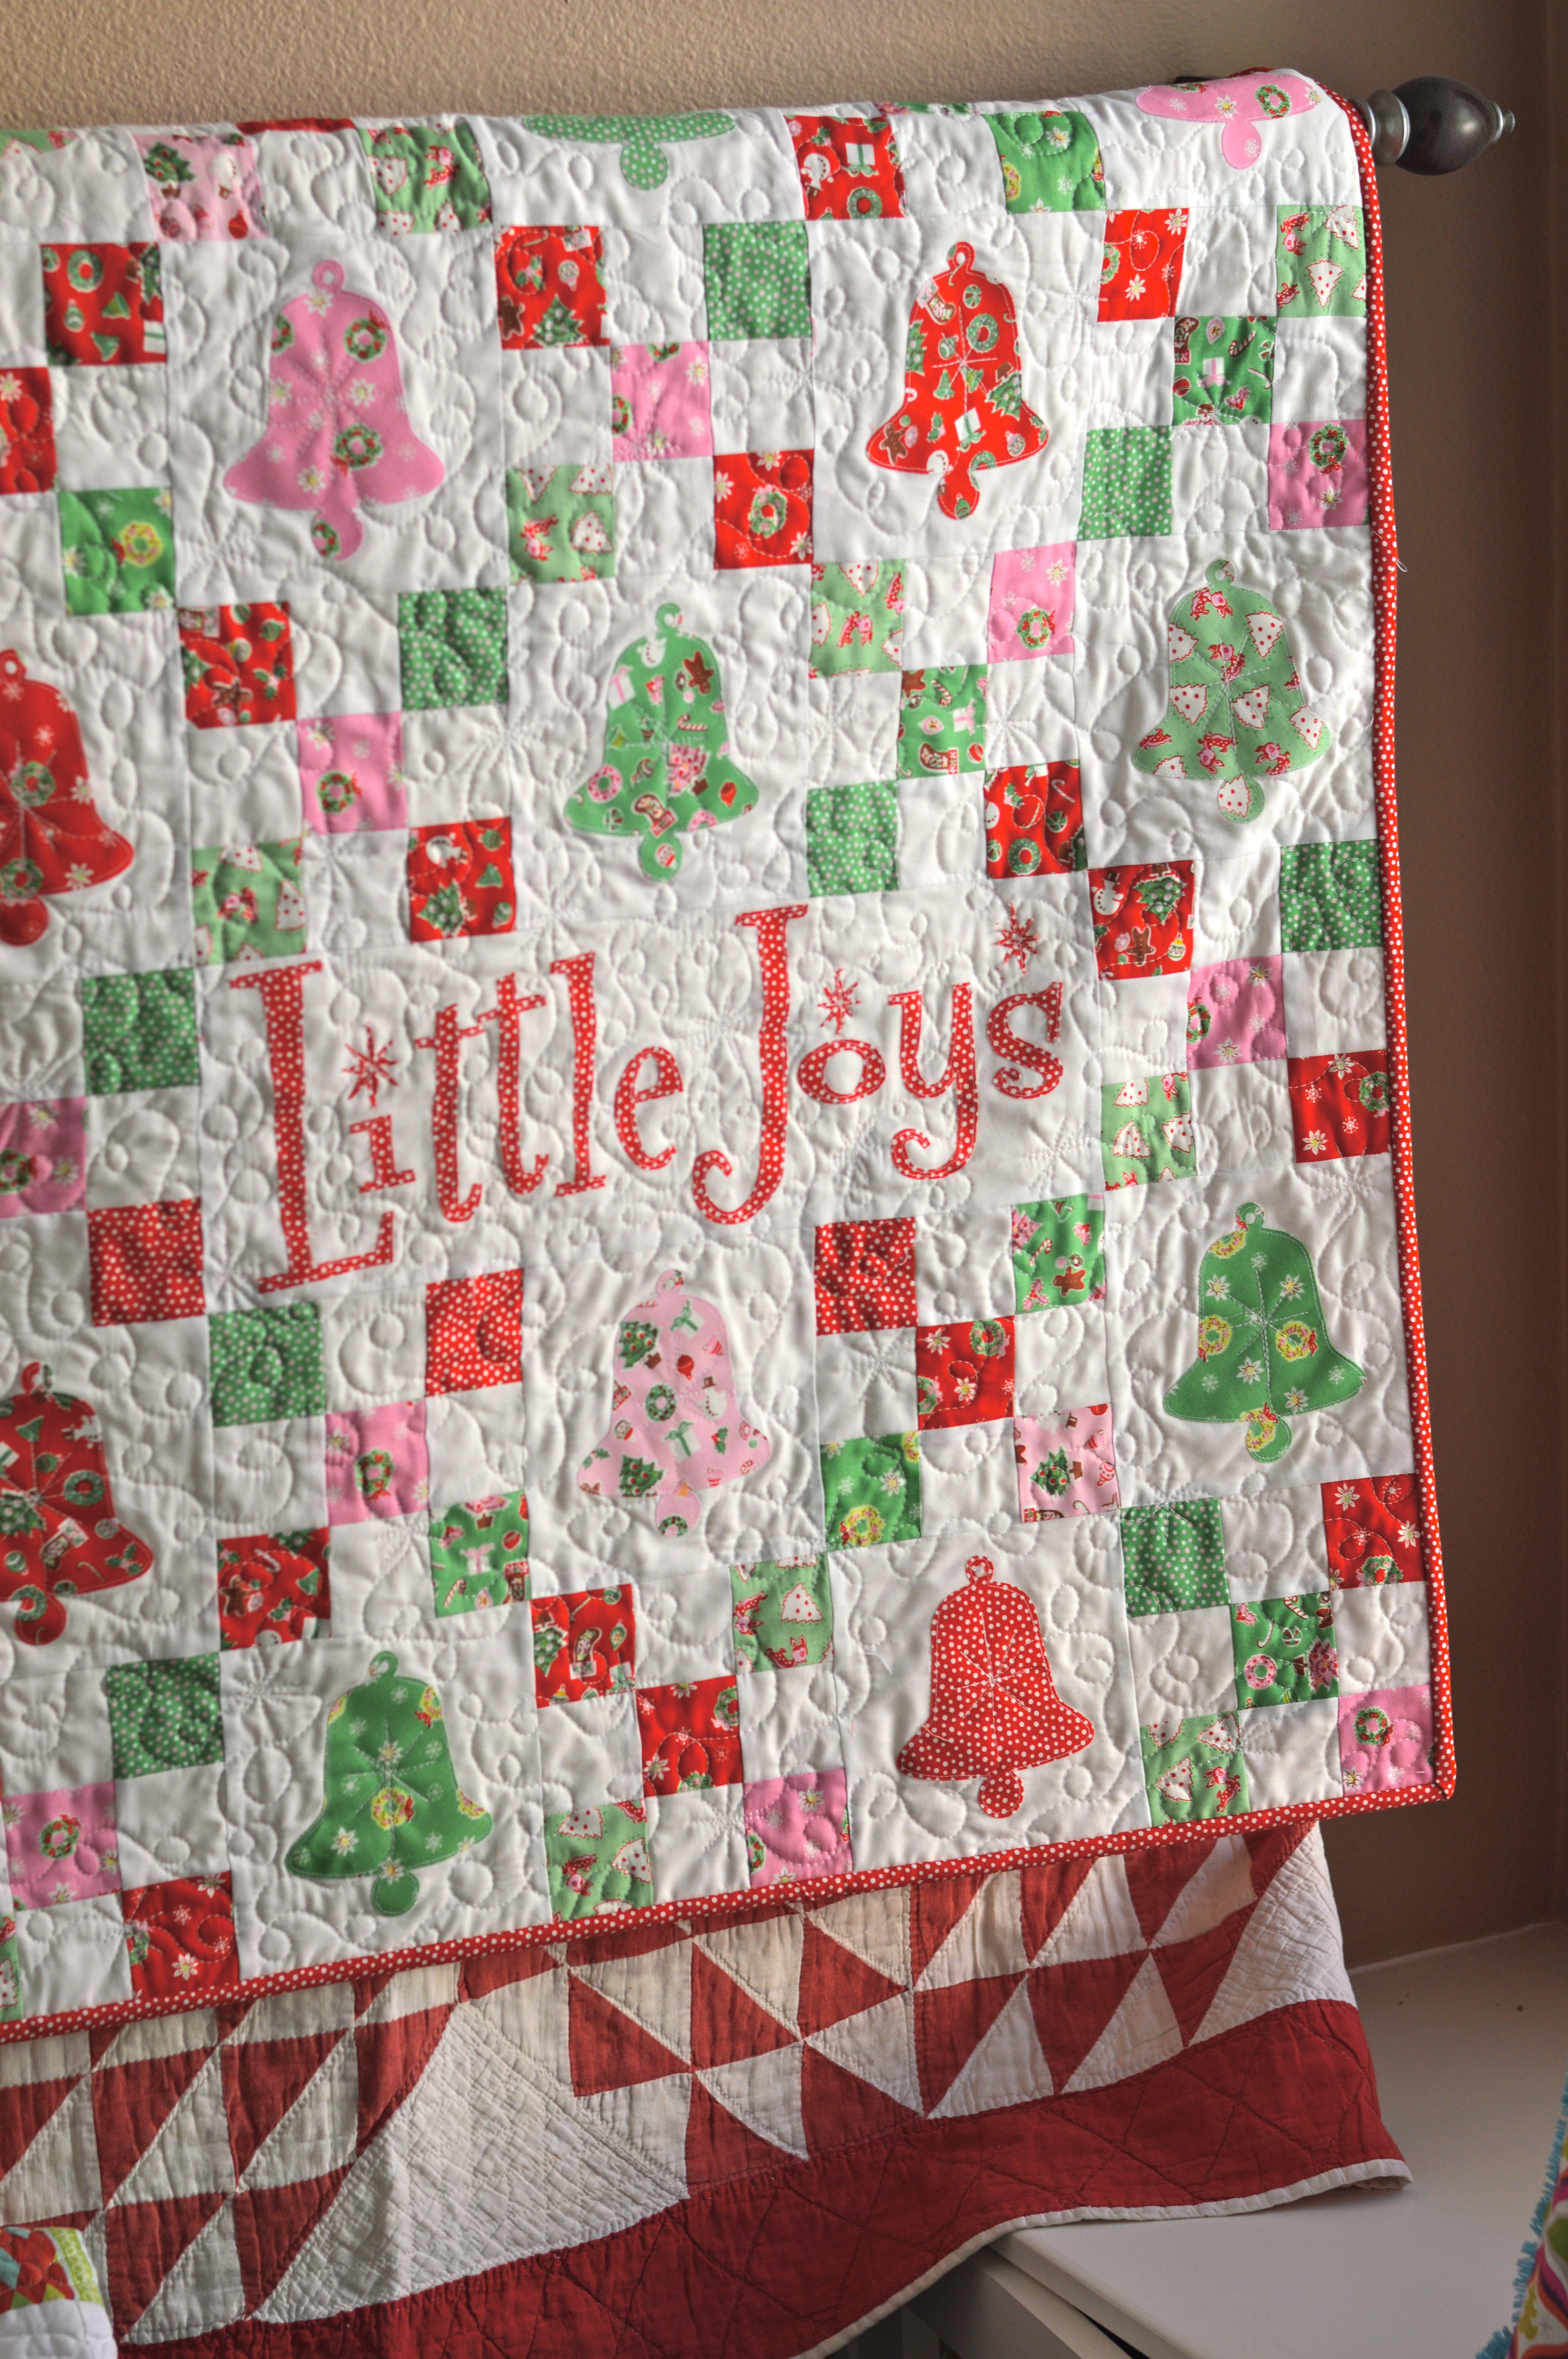
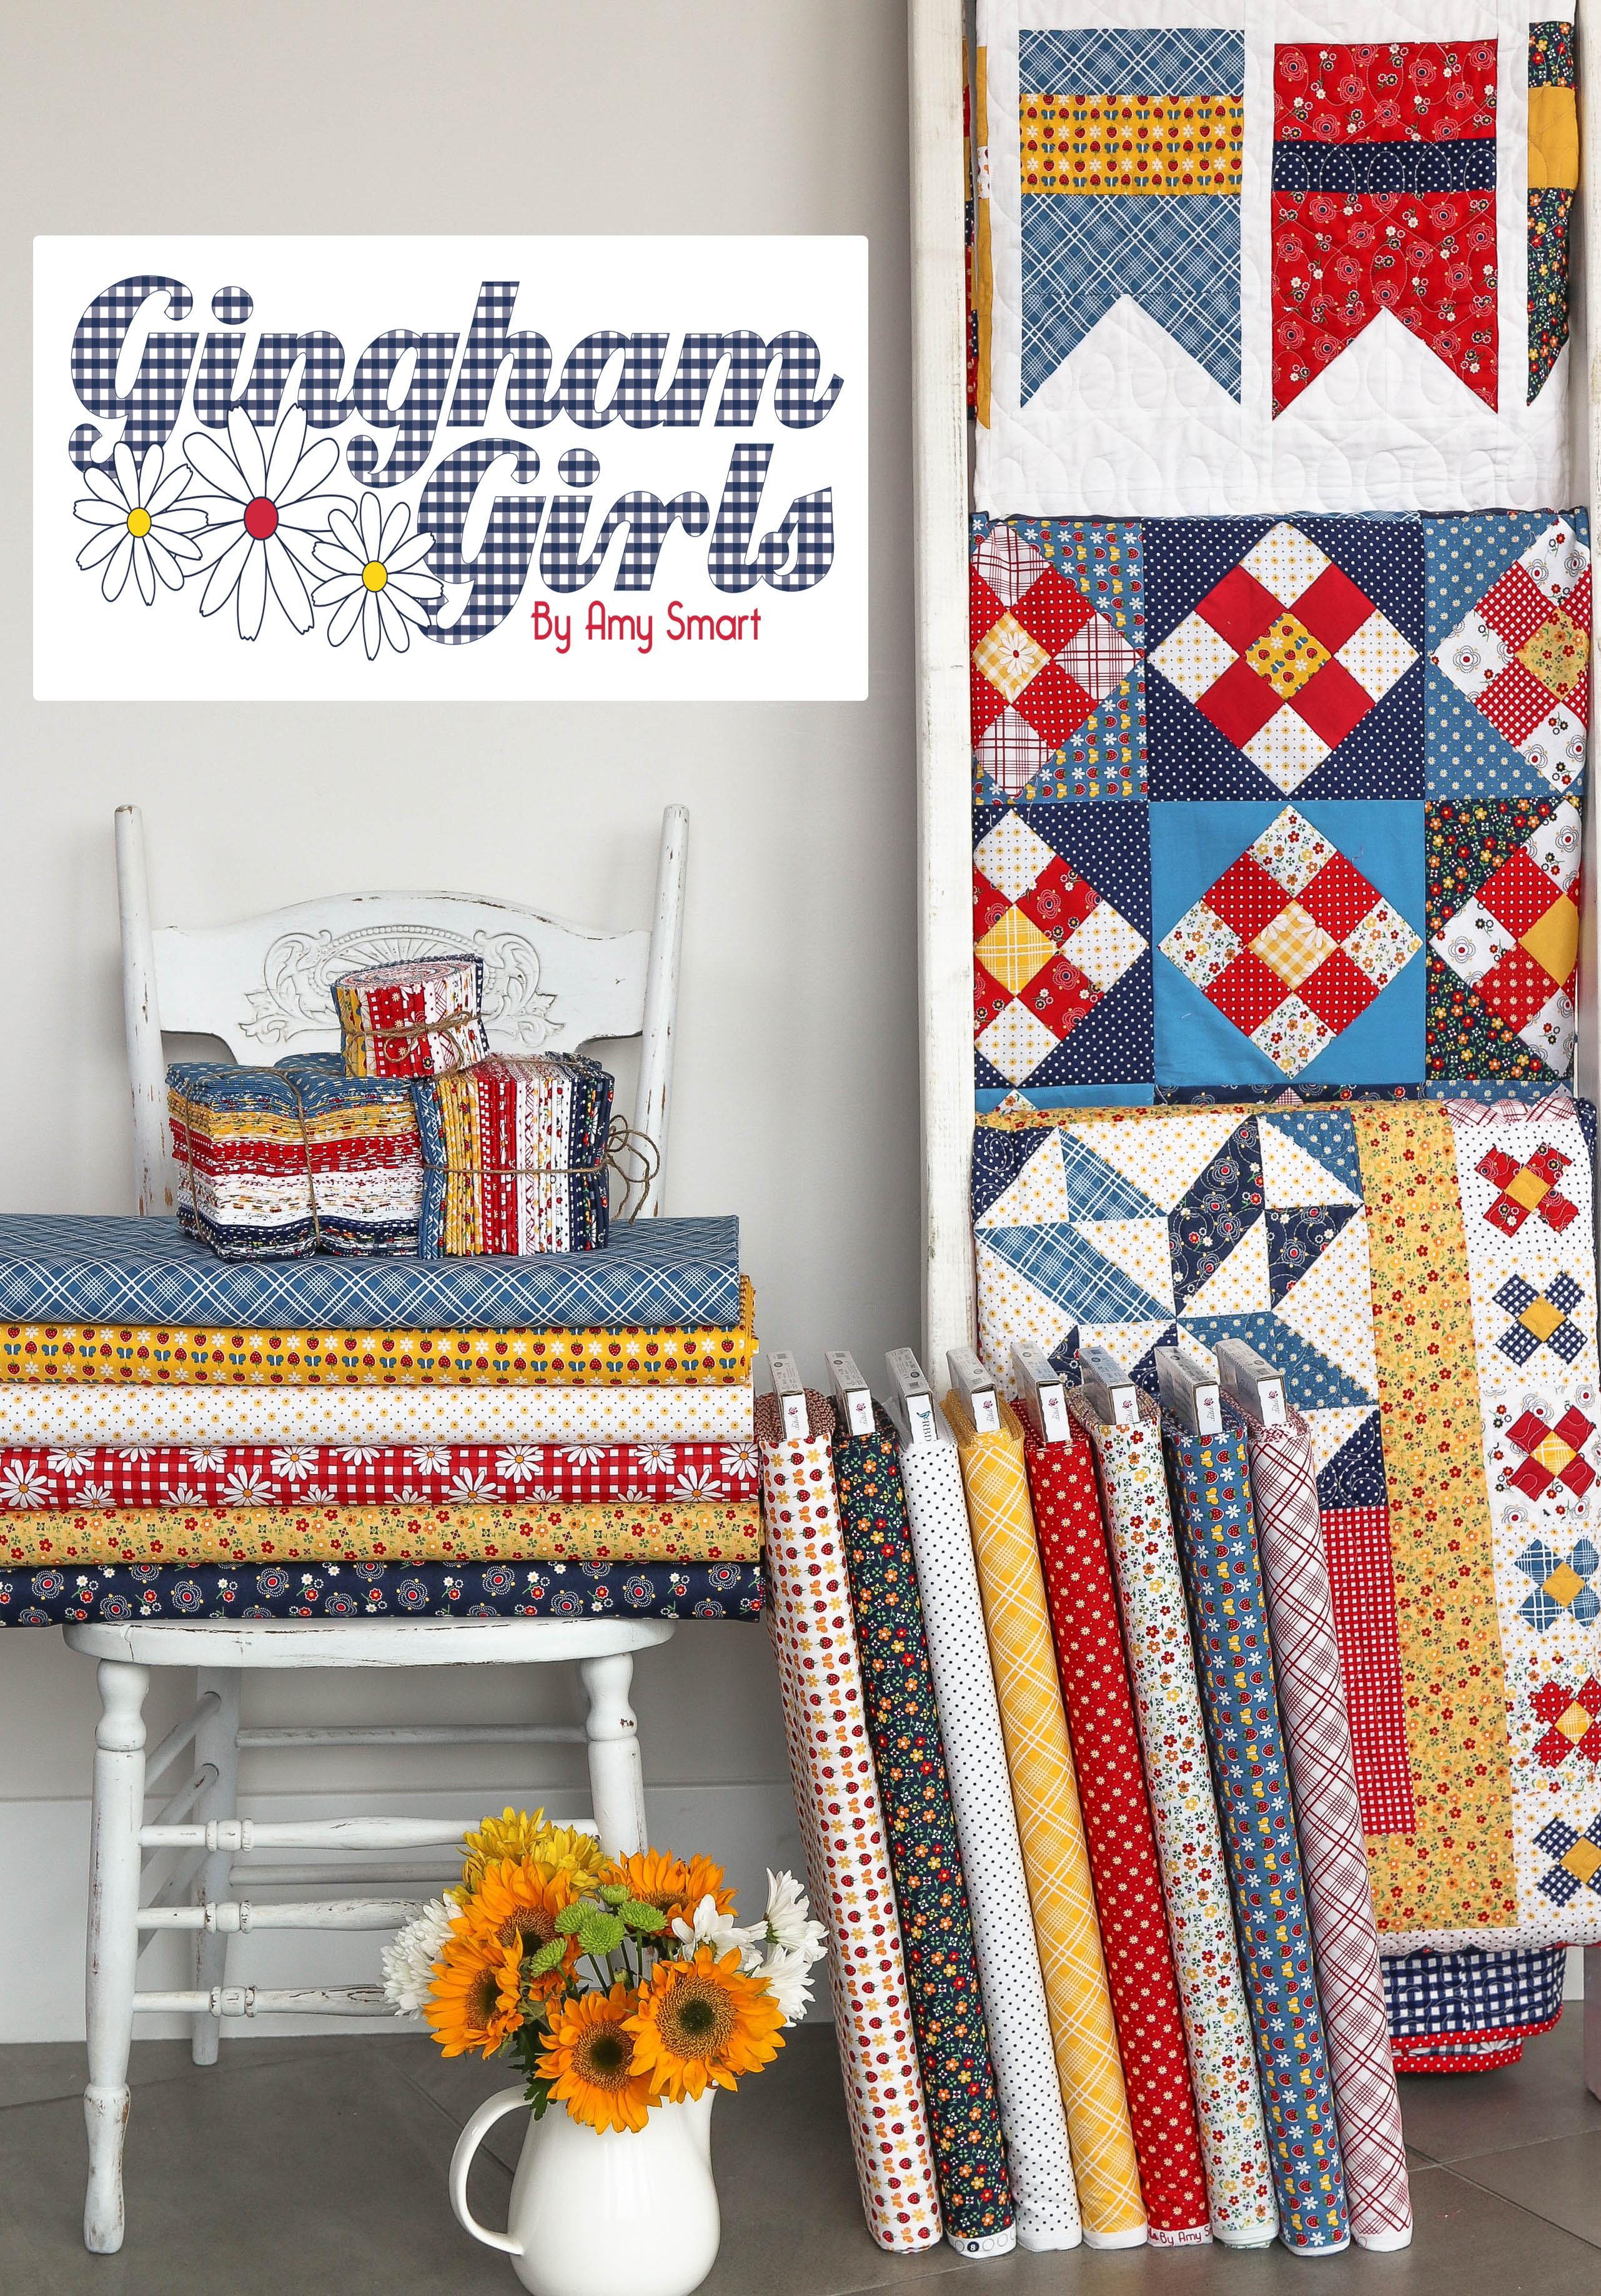
You can read all about Amy’s inspiration for the fabric line by hopping over to her blog.  I created this quilt to be your new favorite that you would take to the beach, the park, a game,  or snuggle with on the couch.  It’s 60″ x 76″ so a perfect throw size. You can customize the date to fit any occasion: birthday, anniversary, graduation, etc.

DSC_0212

This quilt is just for me!  And it’s my new favorite pattern – you’re gonna love it!

DSC_0262

DSC_0286
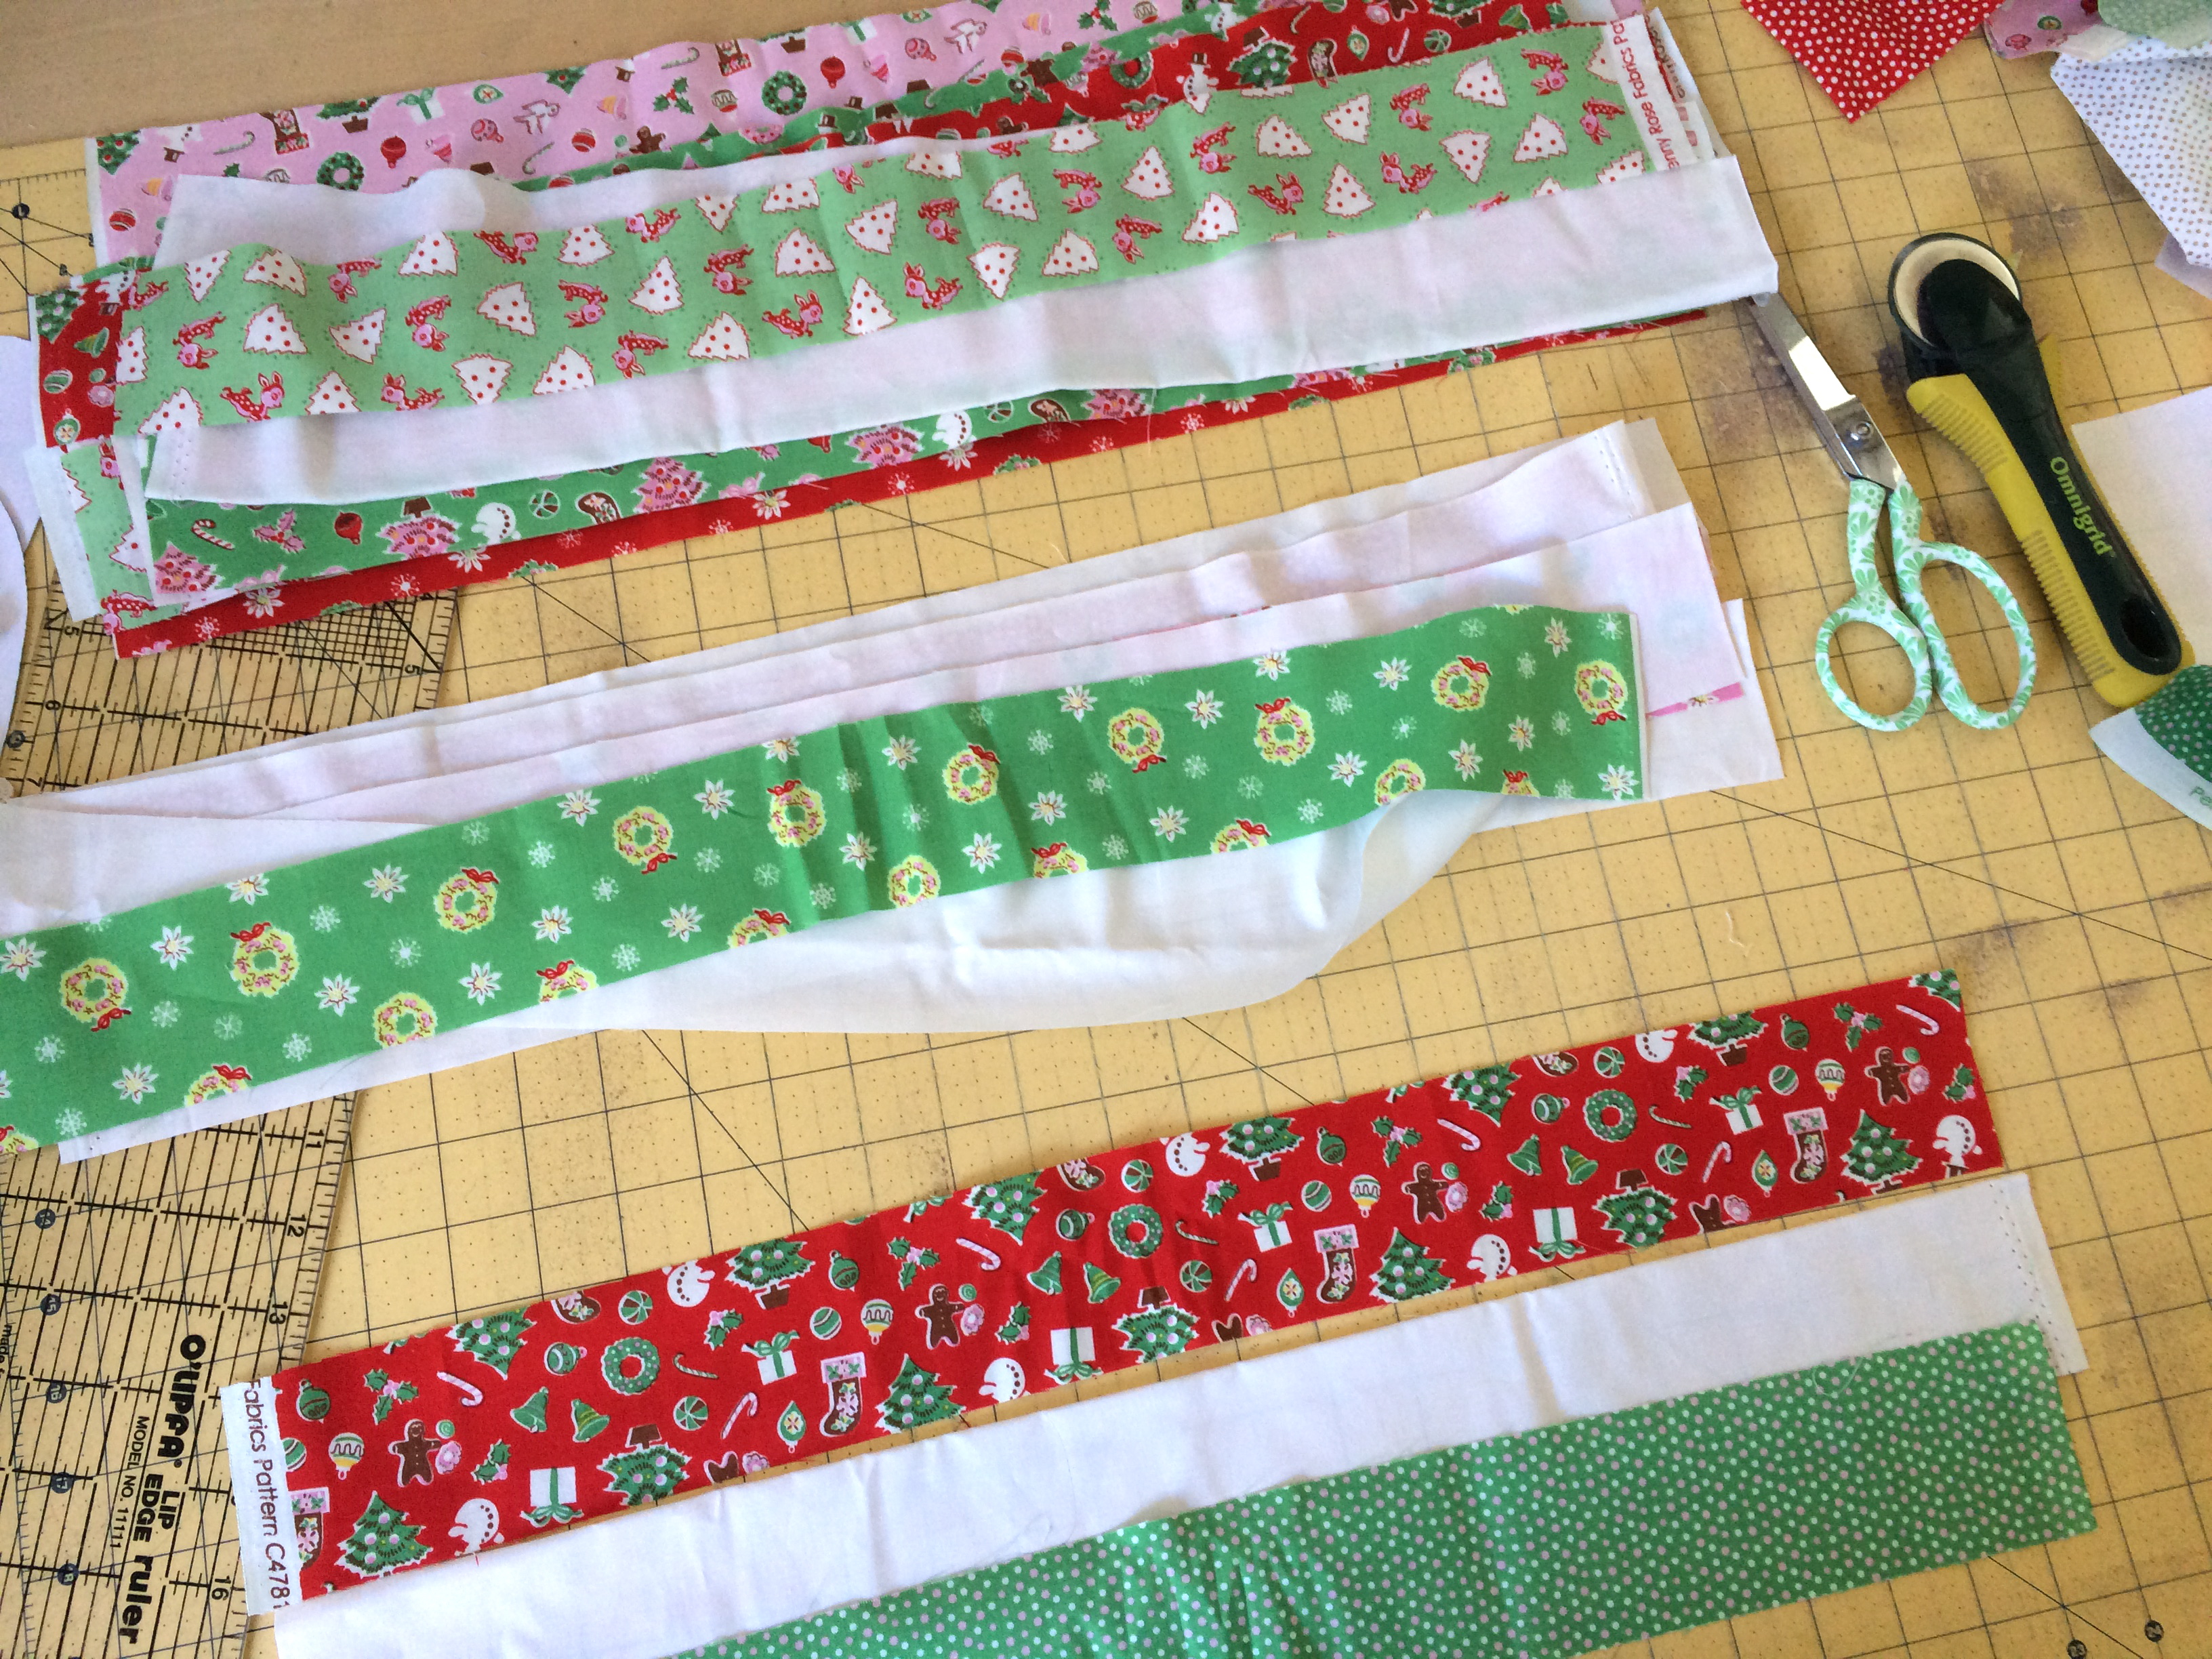
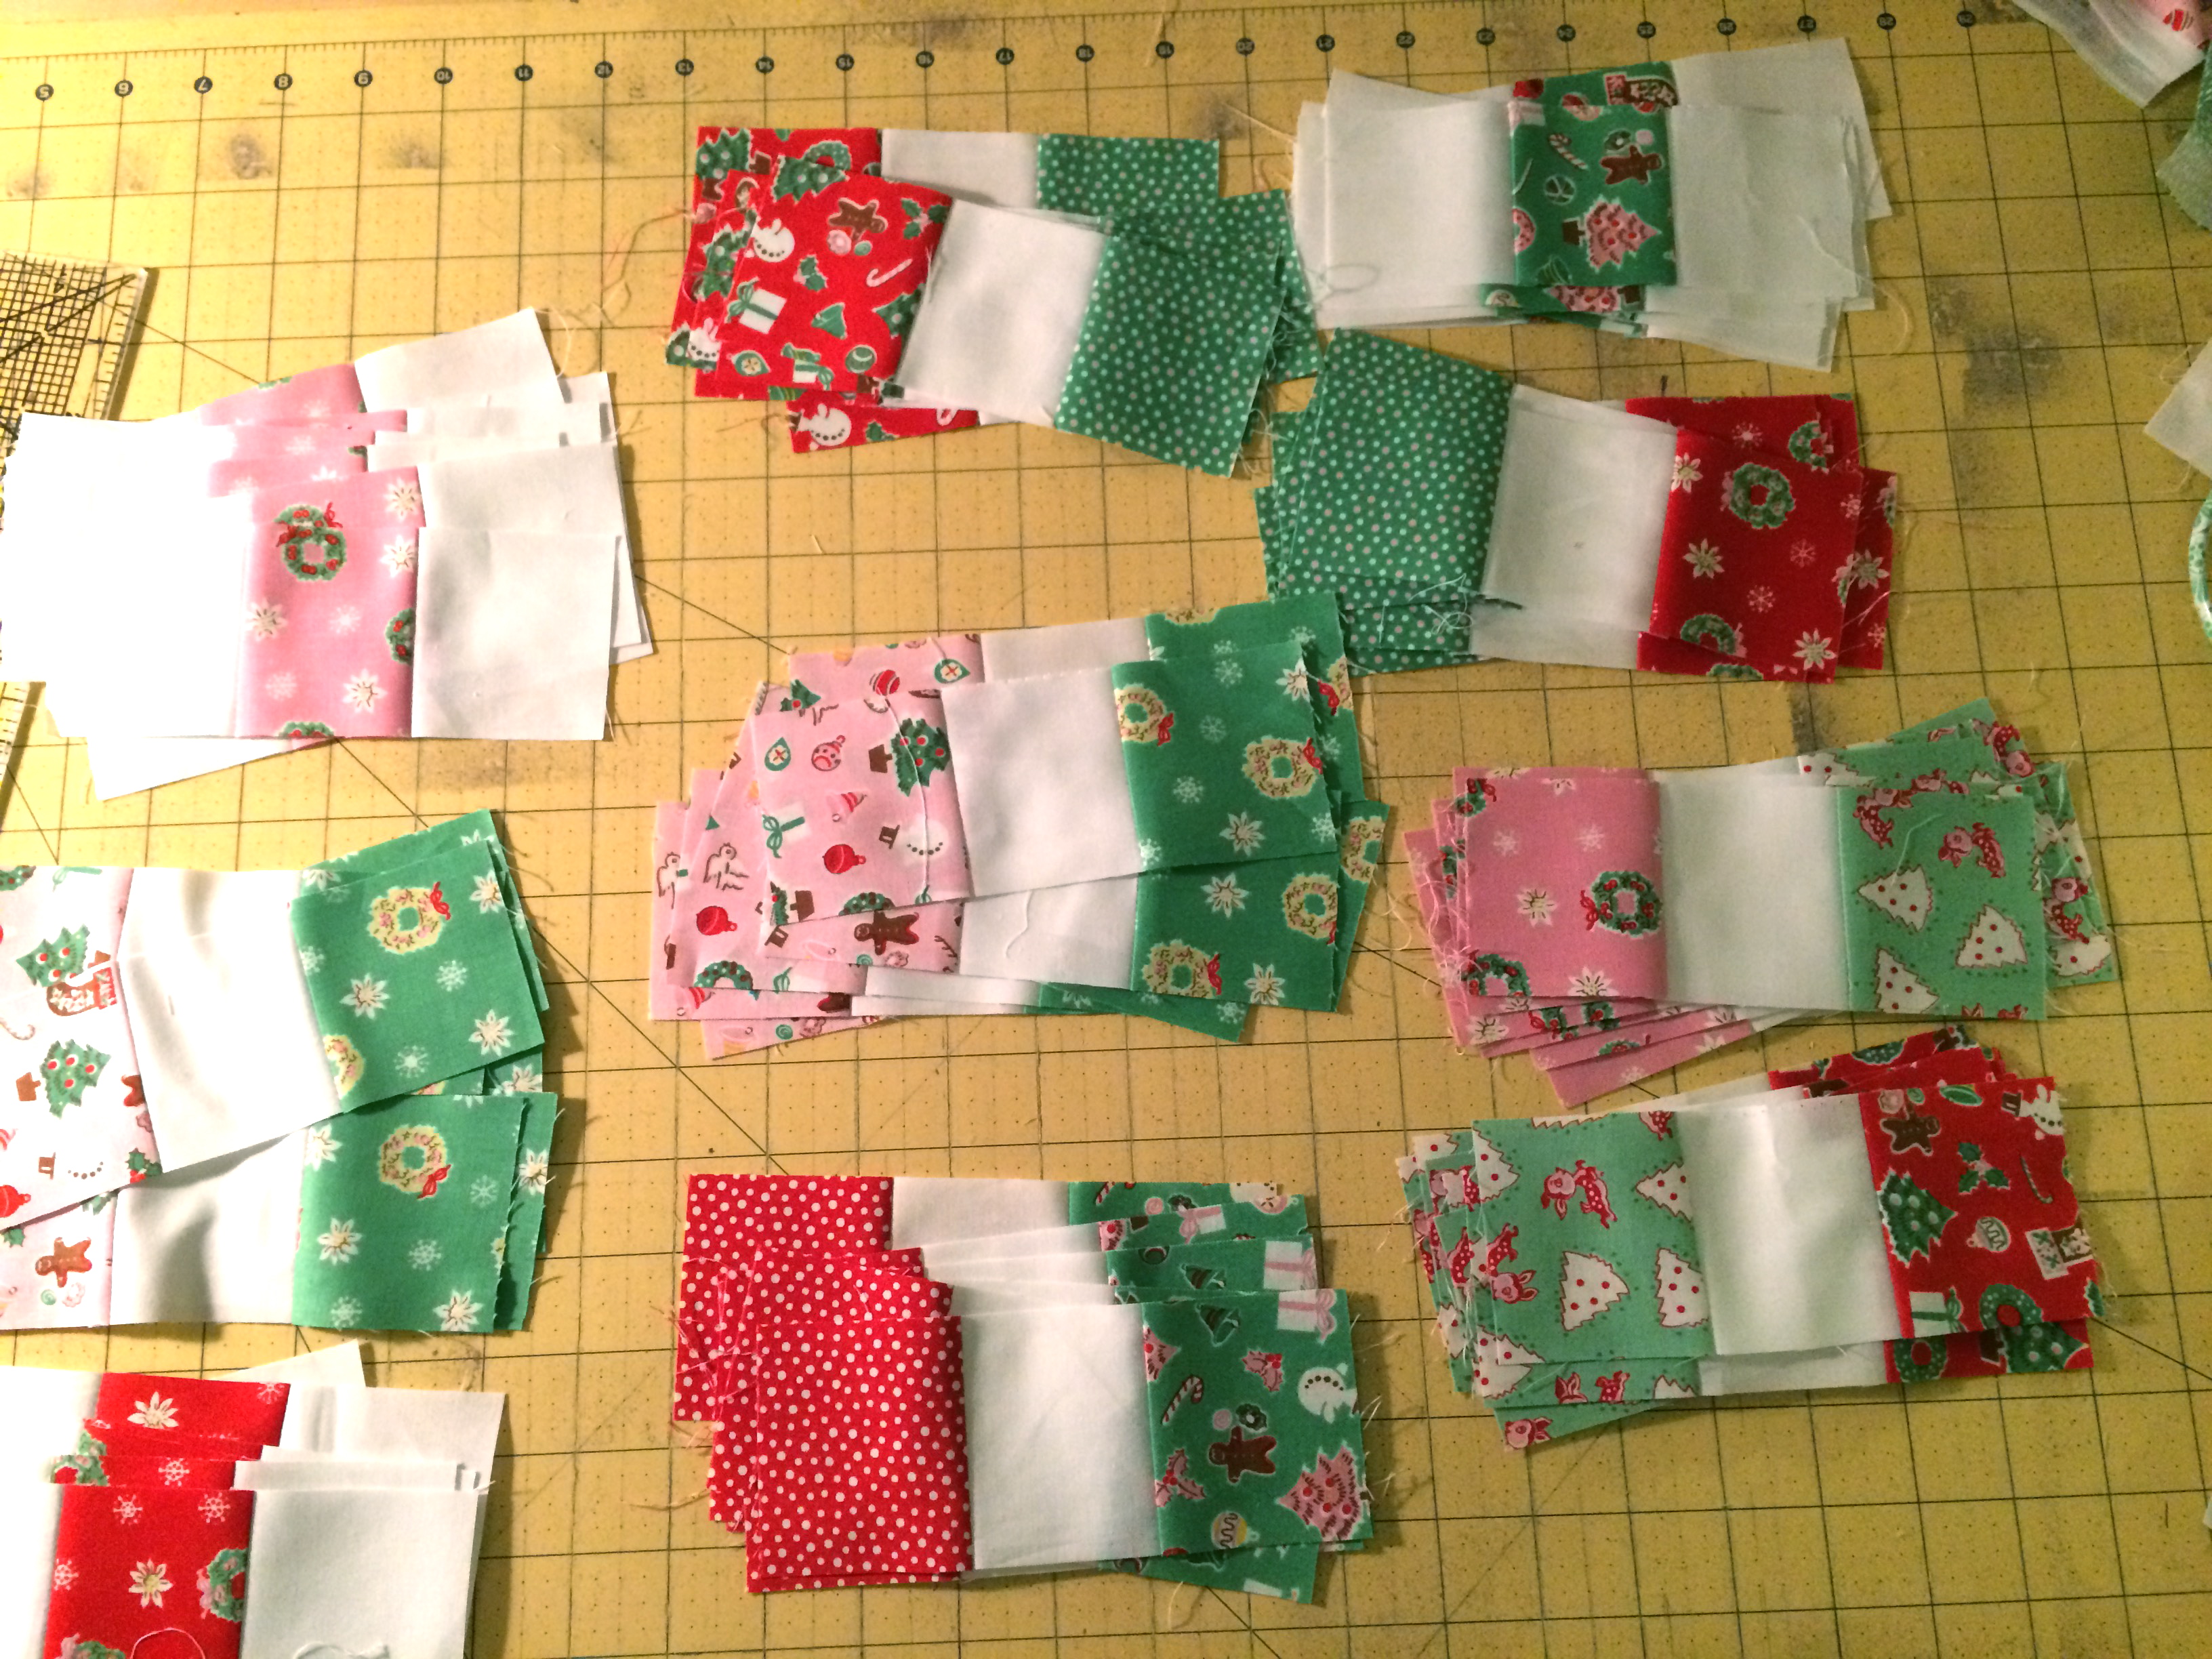
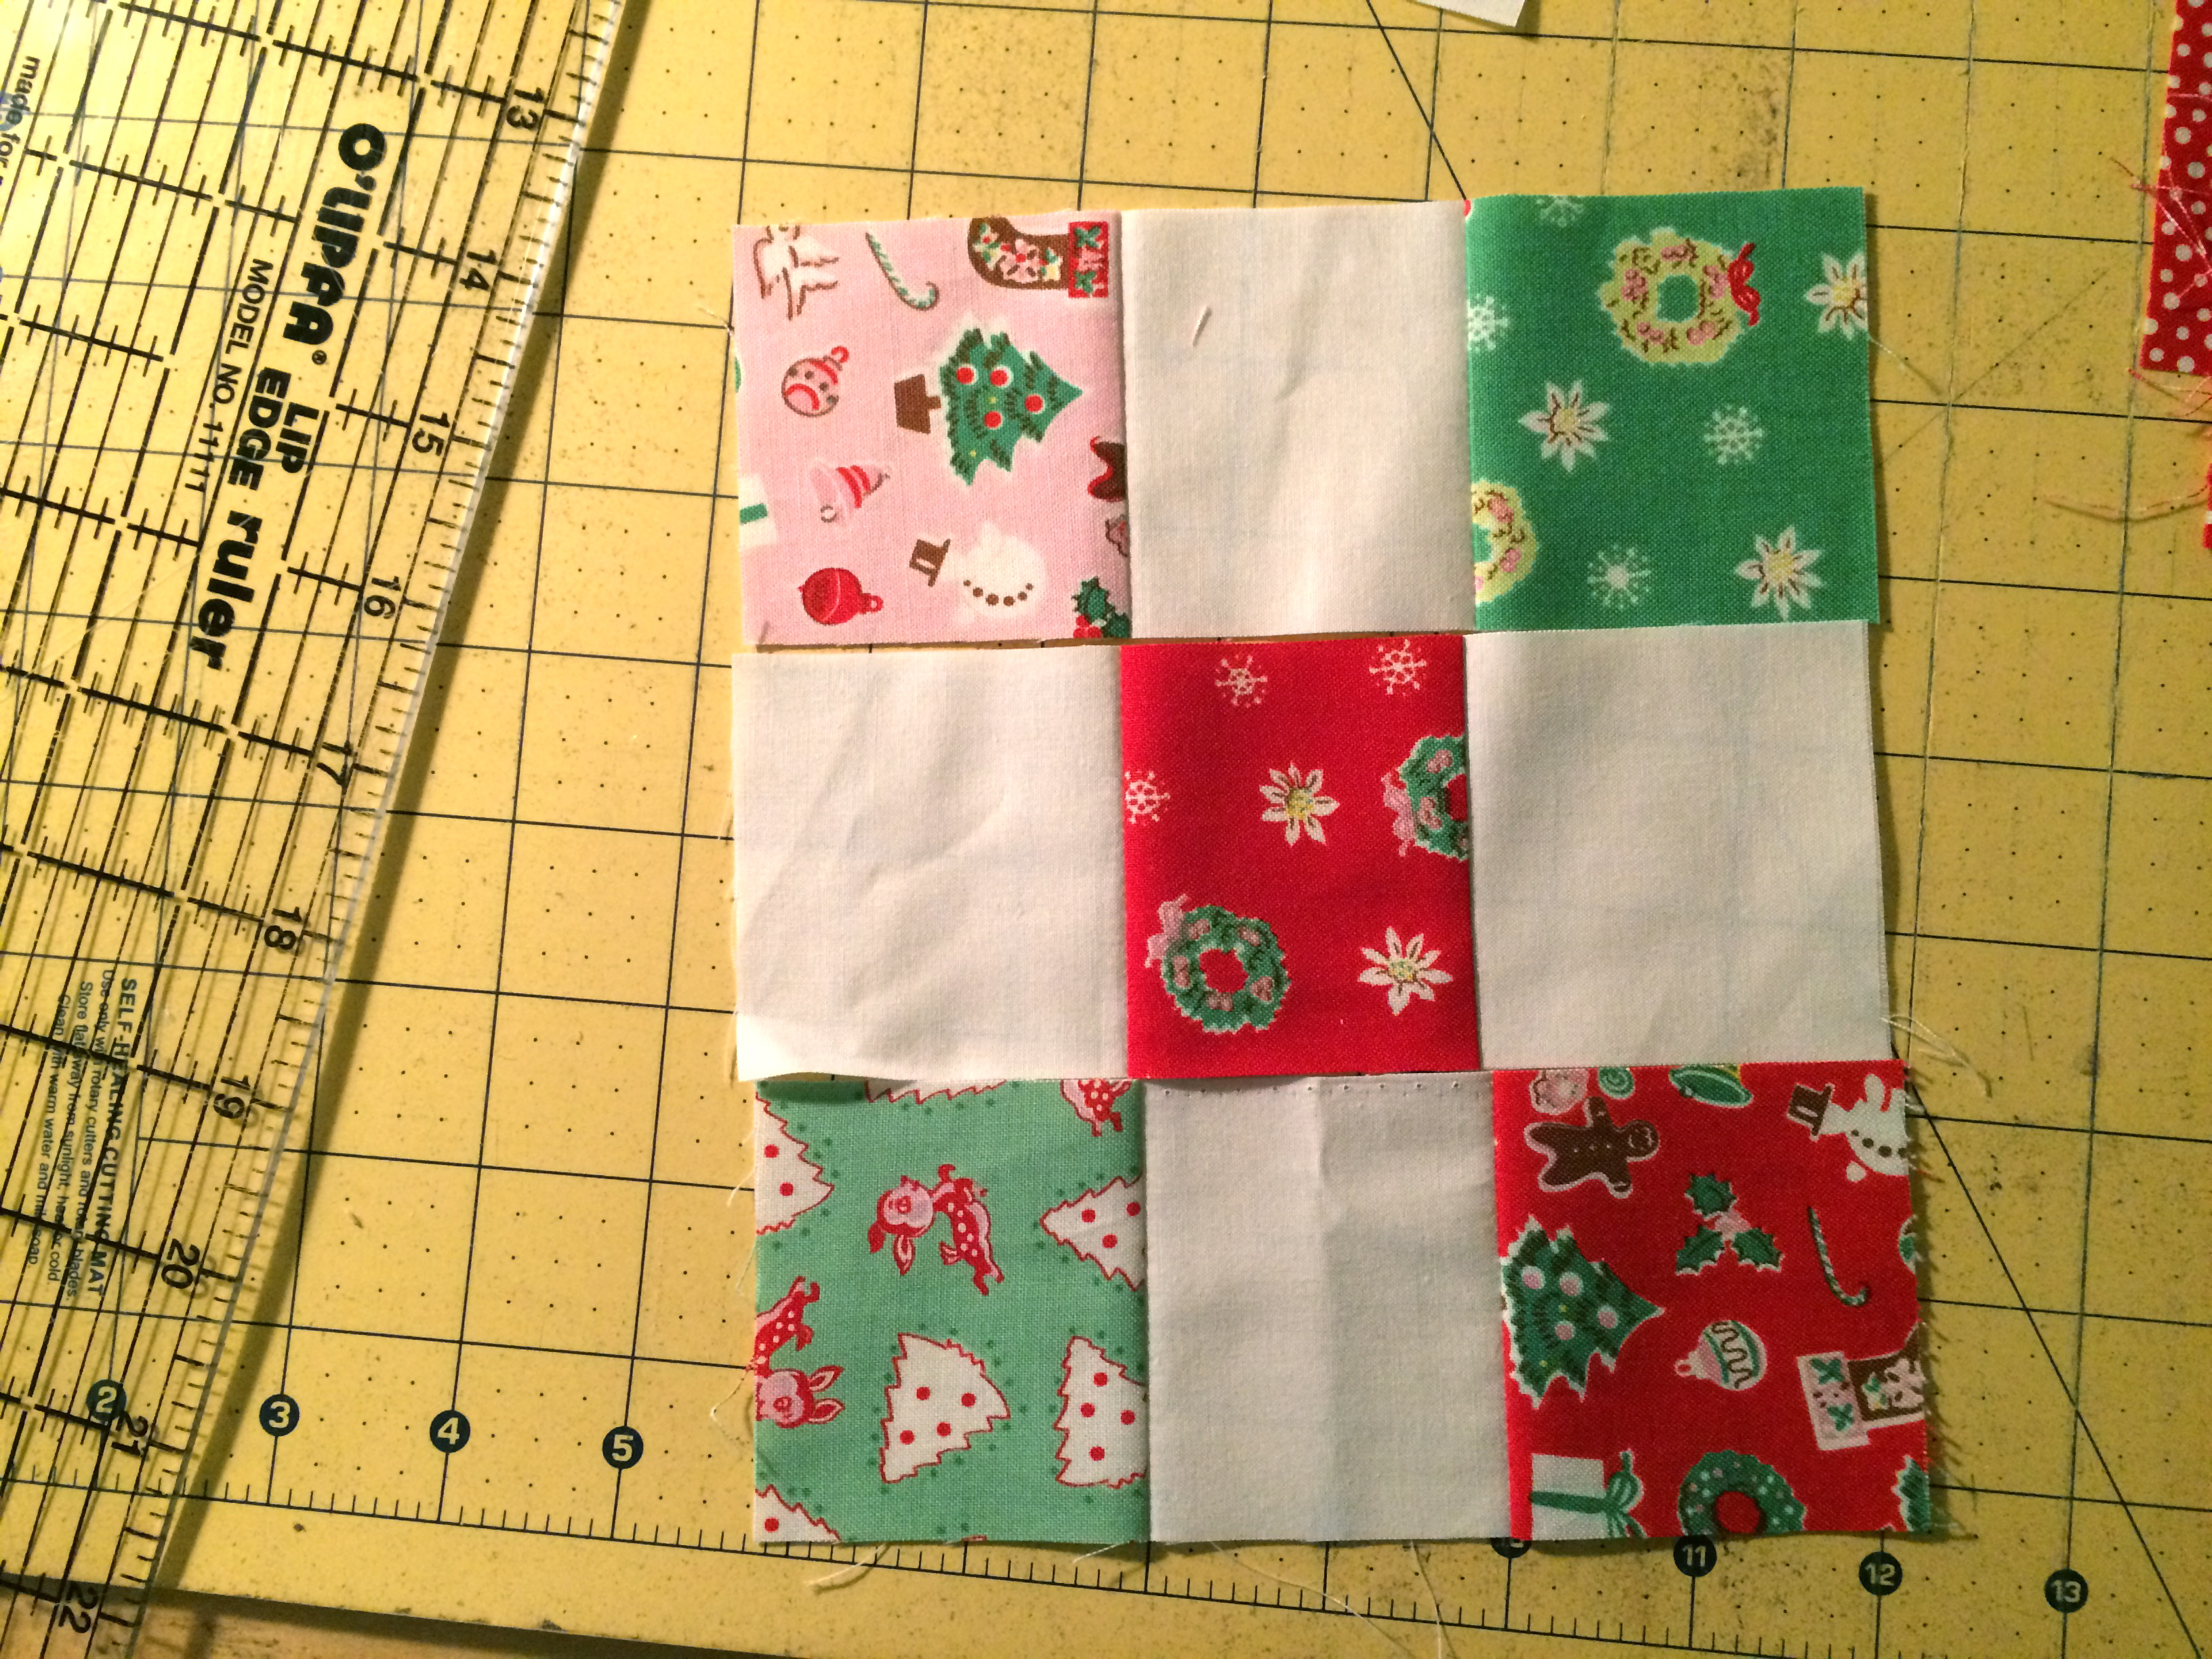
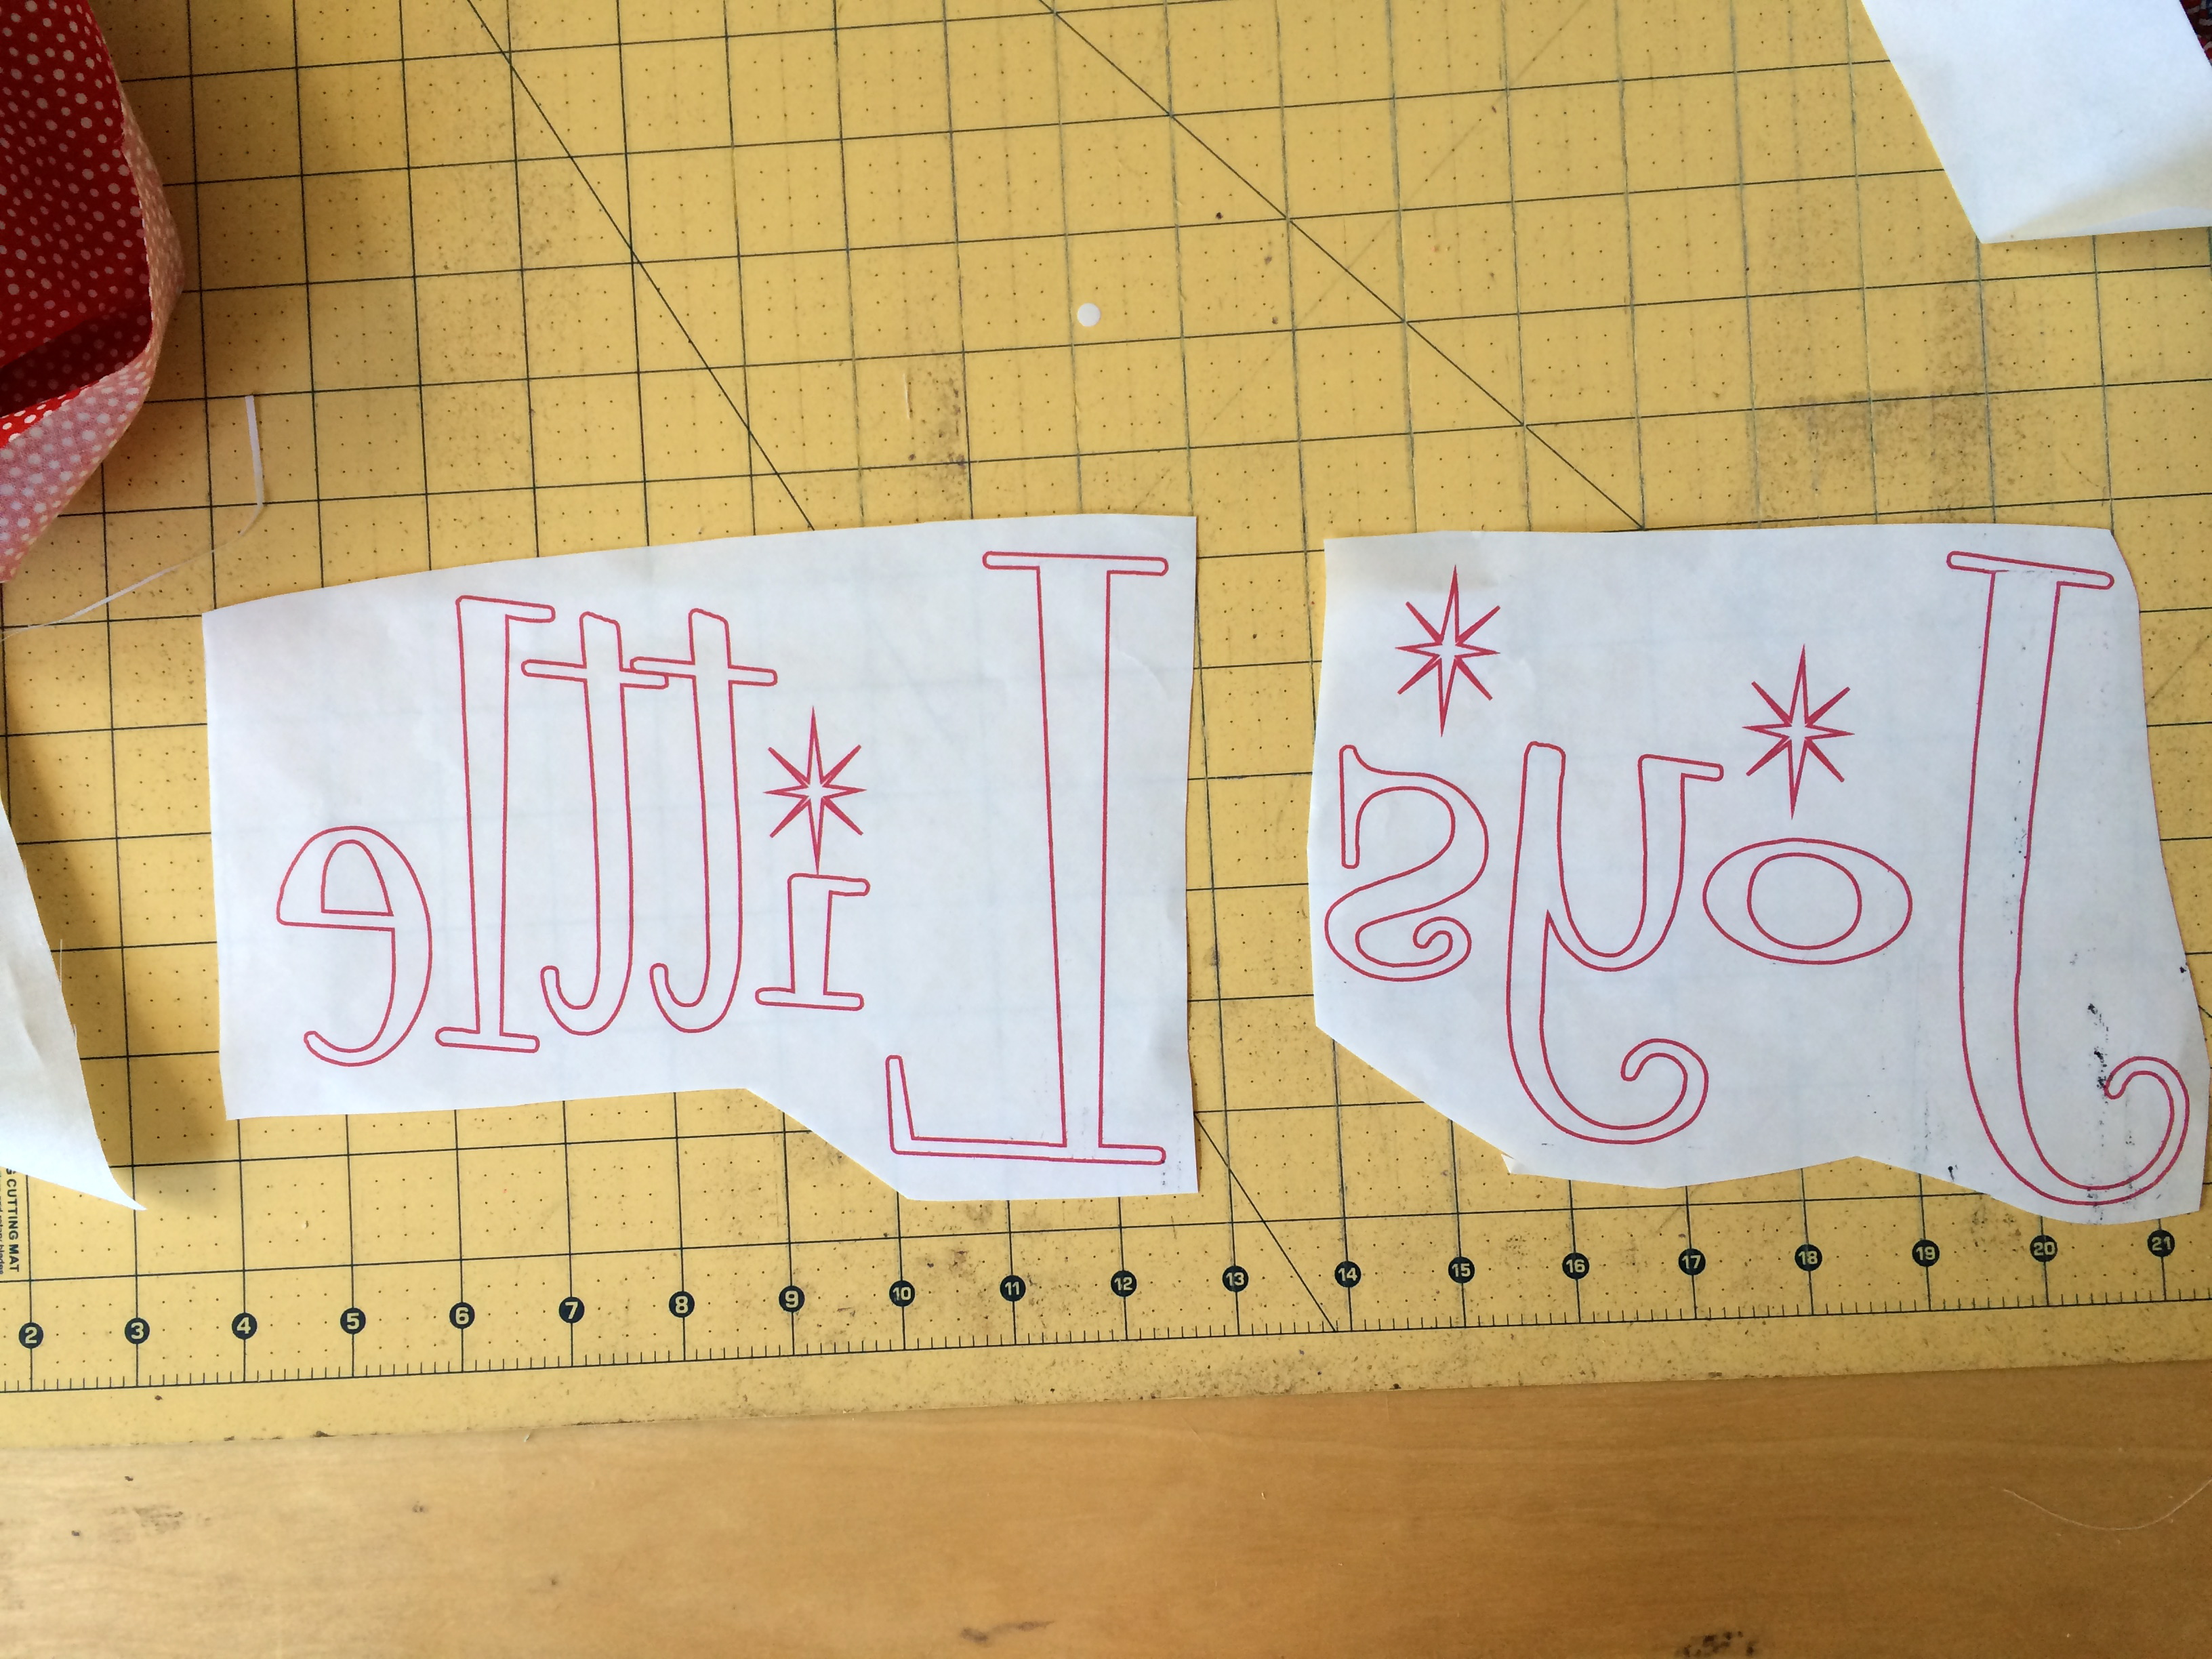
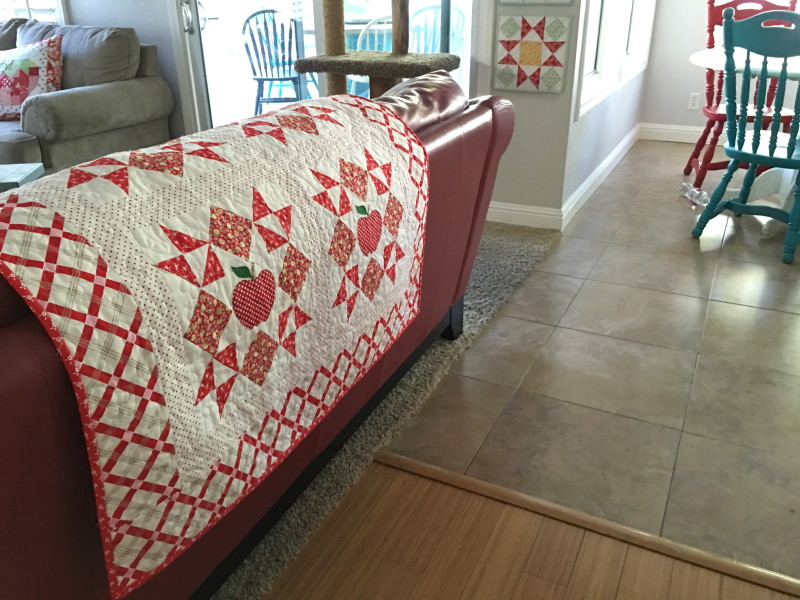
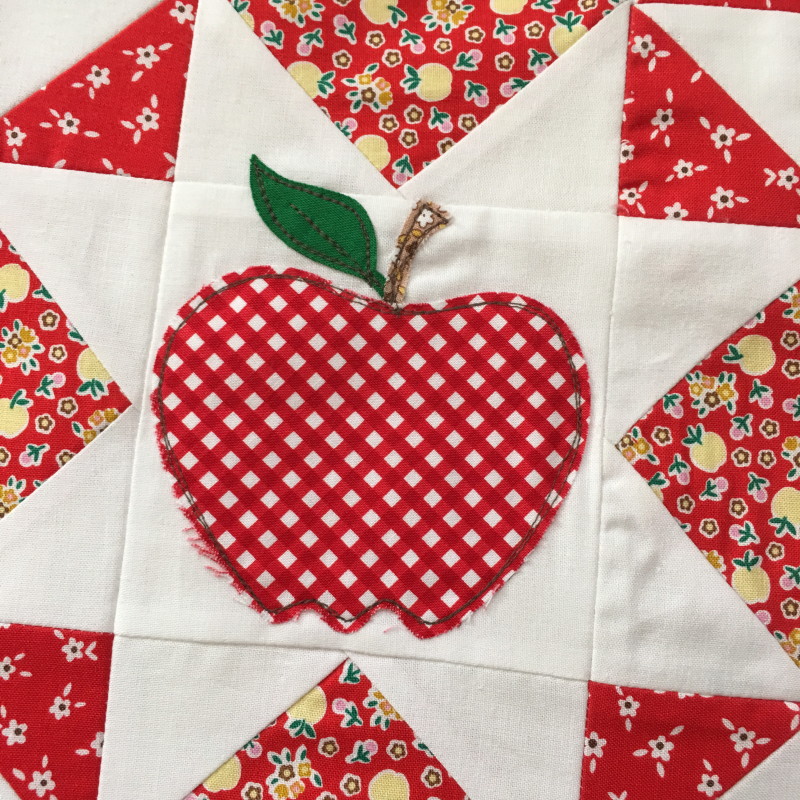
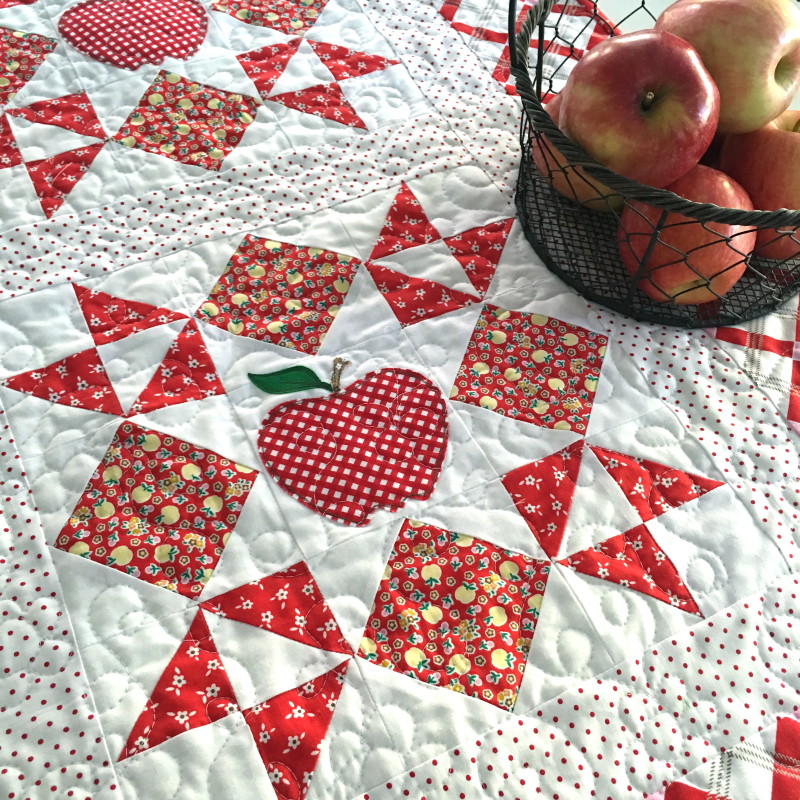
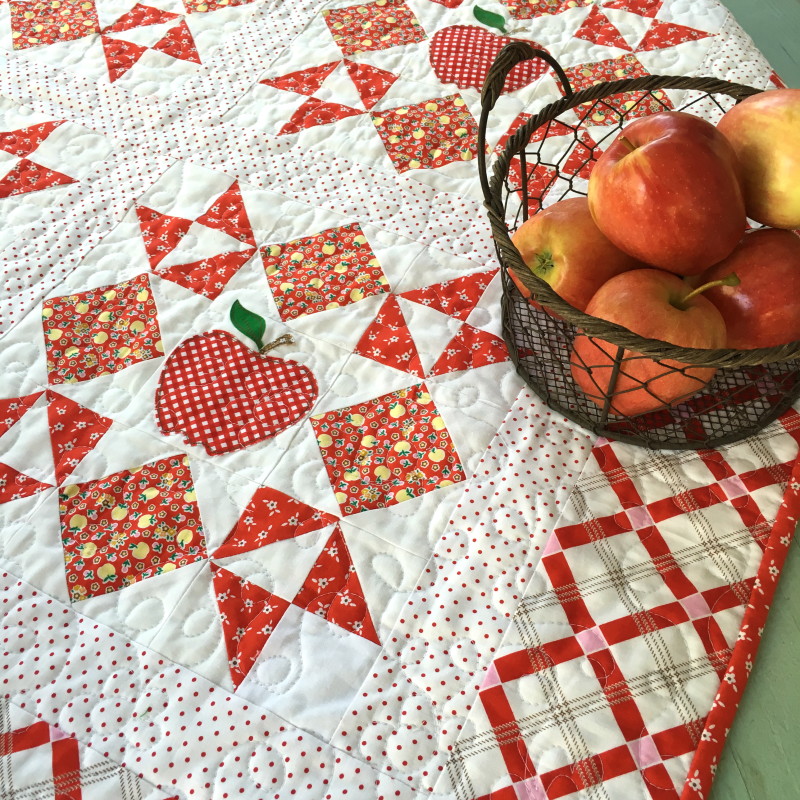
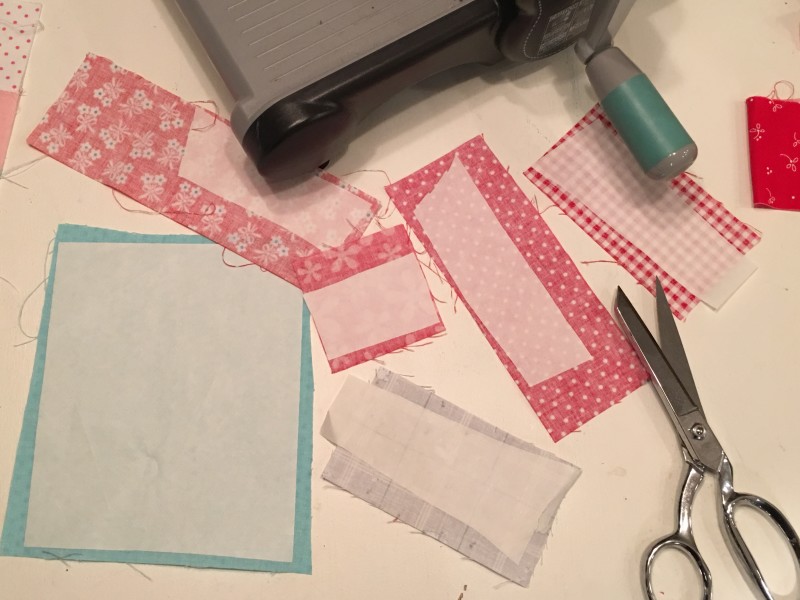
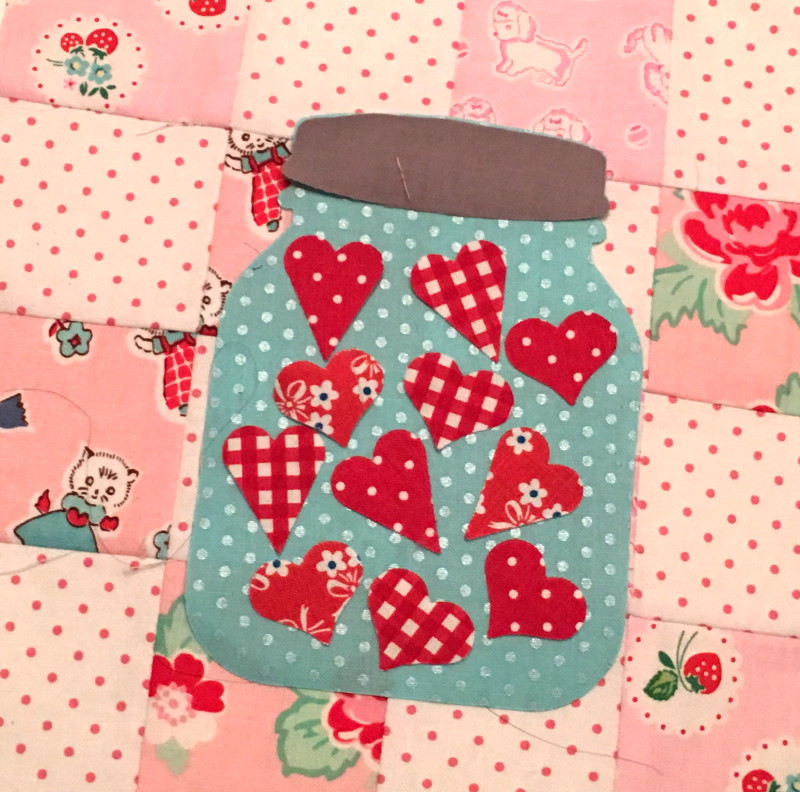
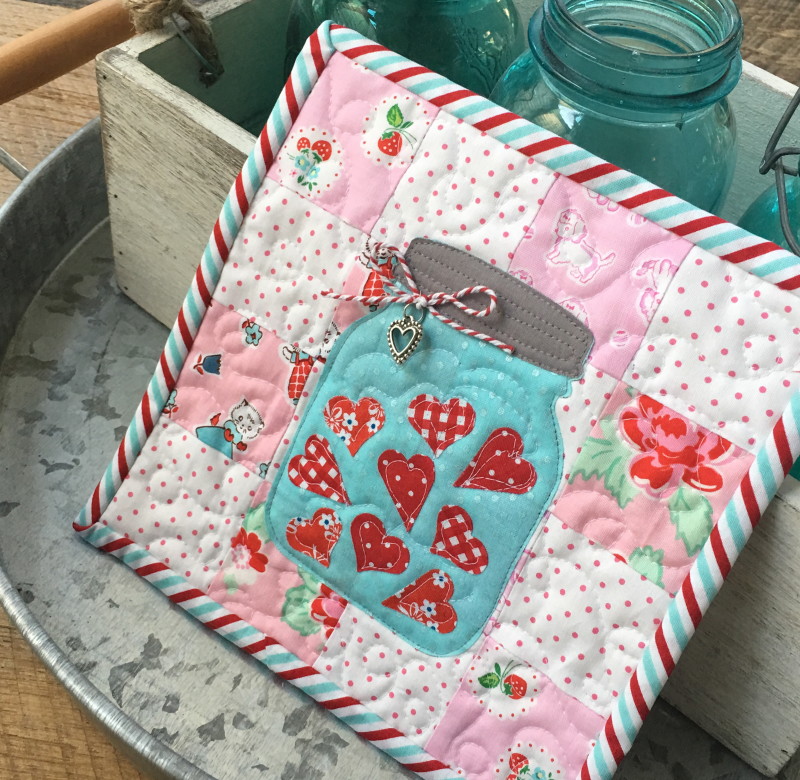
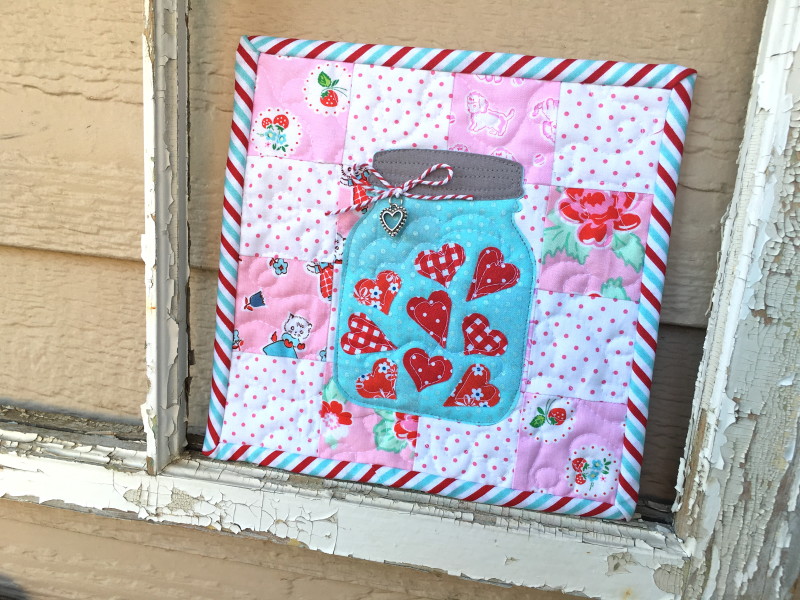
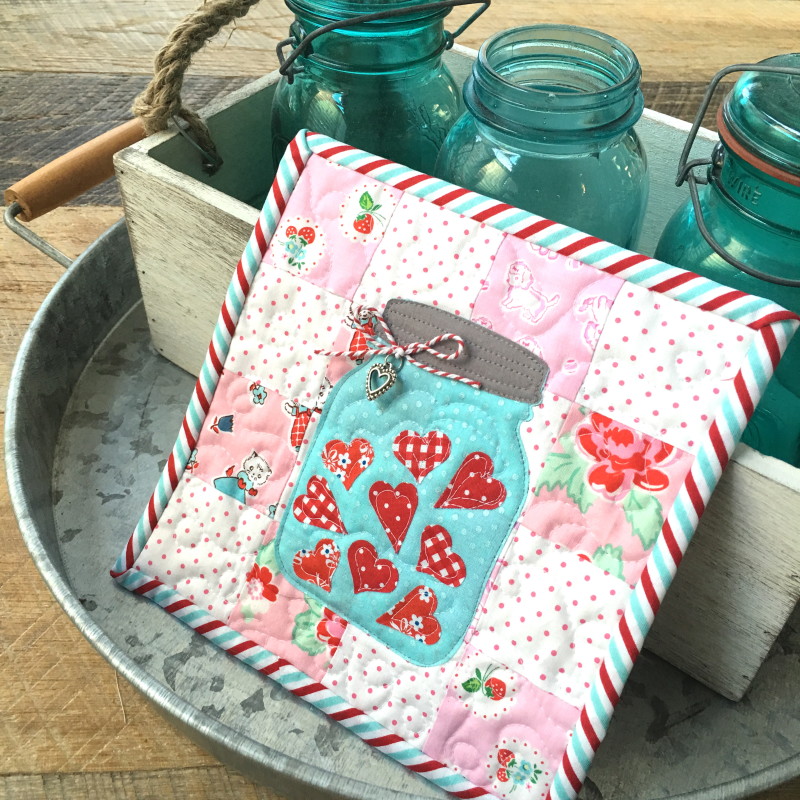
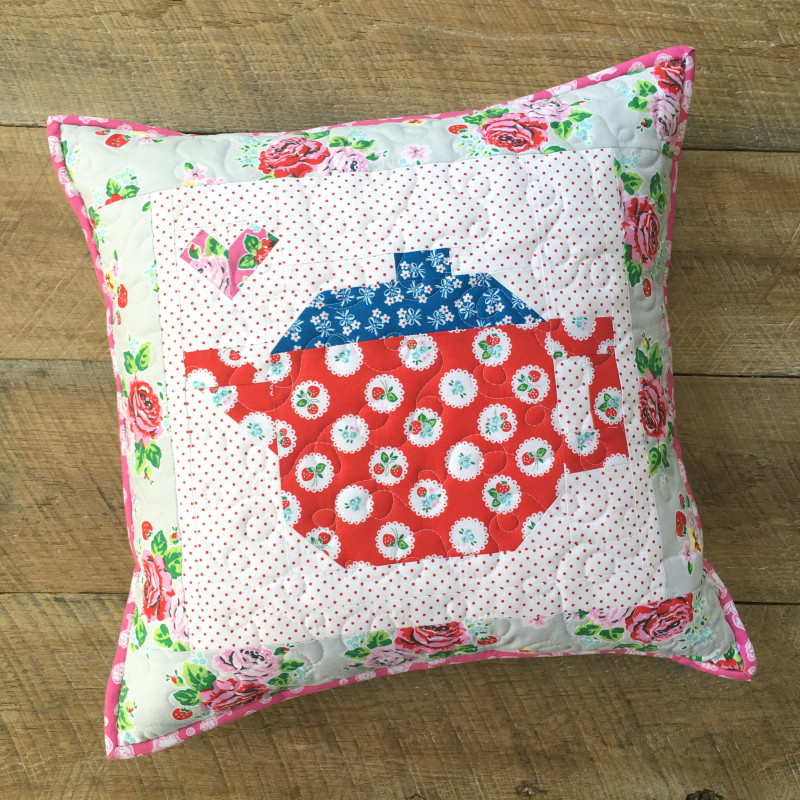
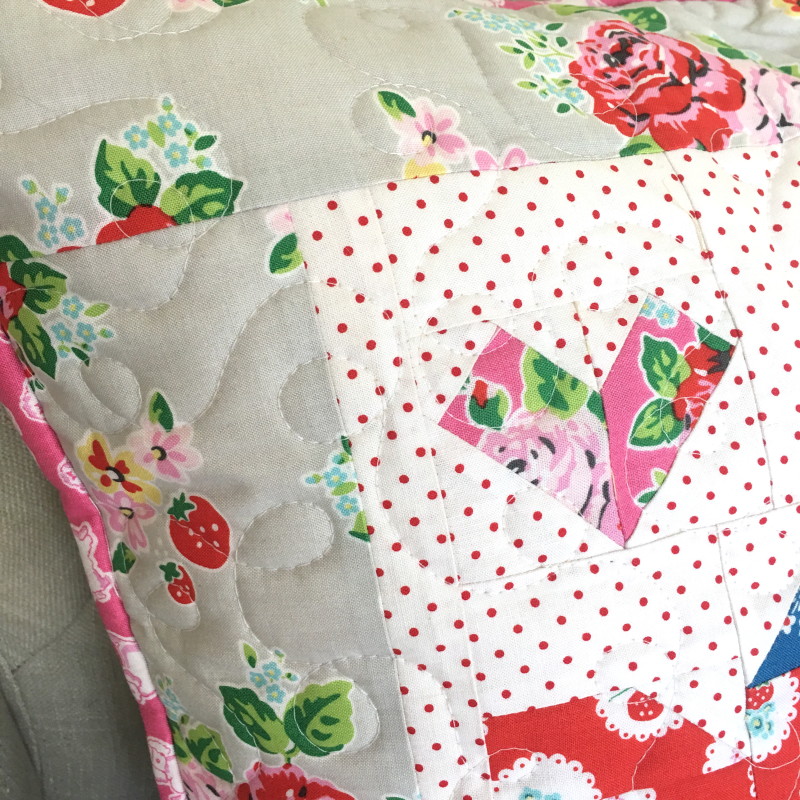
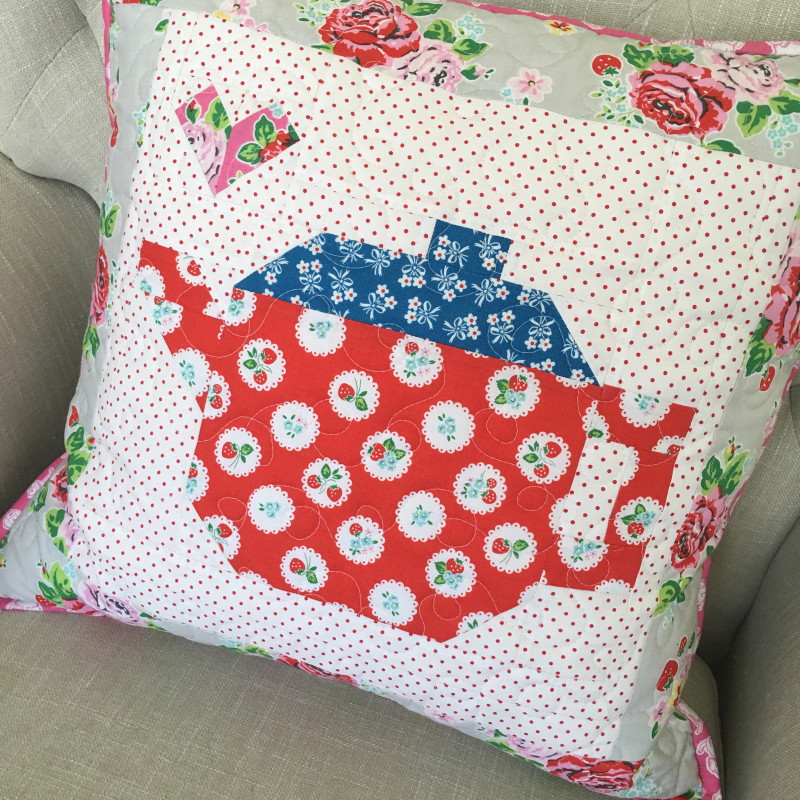
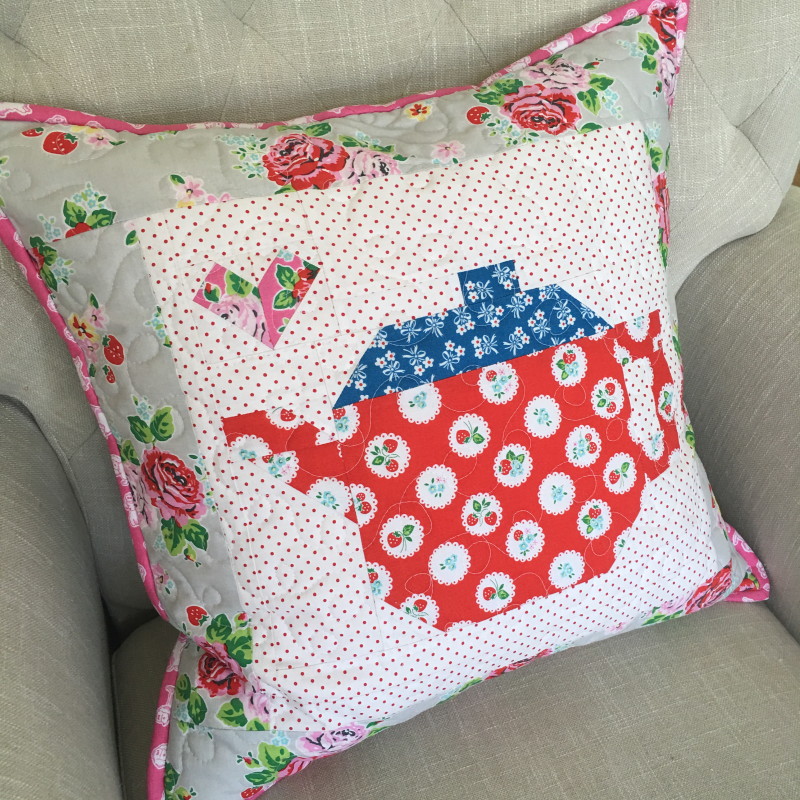
The blocks are 8″ with a little appliqué insert.  You can purchase the PDF pattern in my Etsy shop and get sewing today!!

DSC_0211

Aren’t these fabrics just amazing!!!!!  There are so many more things I want to sew!!!

Gingham Girls fabric by Amy Smart, inspired by vintage 1970's prints and colors.

Here are a two little dresses my mom sewed for me when I was 2 & 3 years old.  I got them out to inspire me when making this quilt!

IMG_1492

Thanks for stopping by!  I hope you have a groovy day!!

DSC_0267

Sweetie Pie Sew Along {Strawberry Pie}

IMG_8442

It’s my turn on Lori Holt’s Sweetie Pie Sew Along!  It’s been so much fun to see everyone’s take on these adorable blocks.

IMG_4328

Of course I choose to make the strawberry block because I live in Southern California where we have strawberries all year round!

DSC_0281

Lori’s templates are super easy to use and I love her appliqué method of using sew-in light weight stabilizer.

IMG_4189 IMG_8378

I normally machine appliqué everything, but for Lori, I did the whole thing by hand….which is saying a lot for me.  I loved every minute of it!

IMG_9969
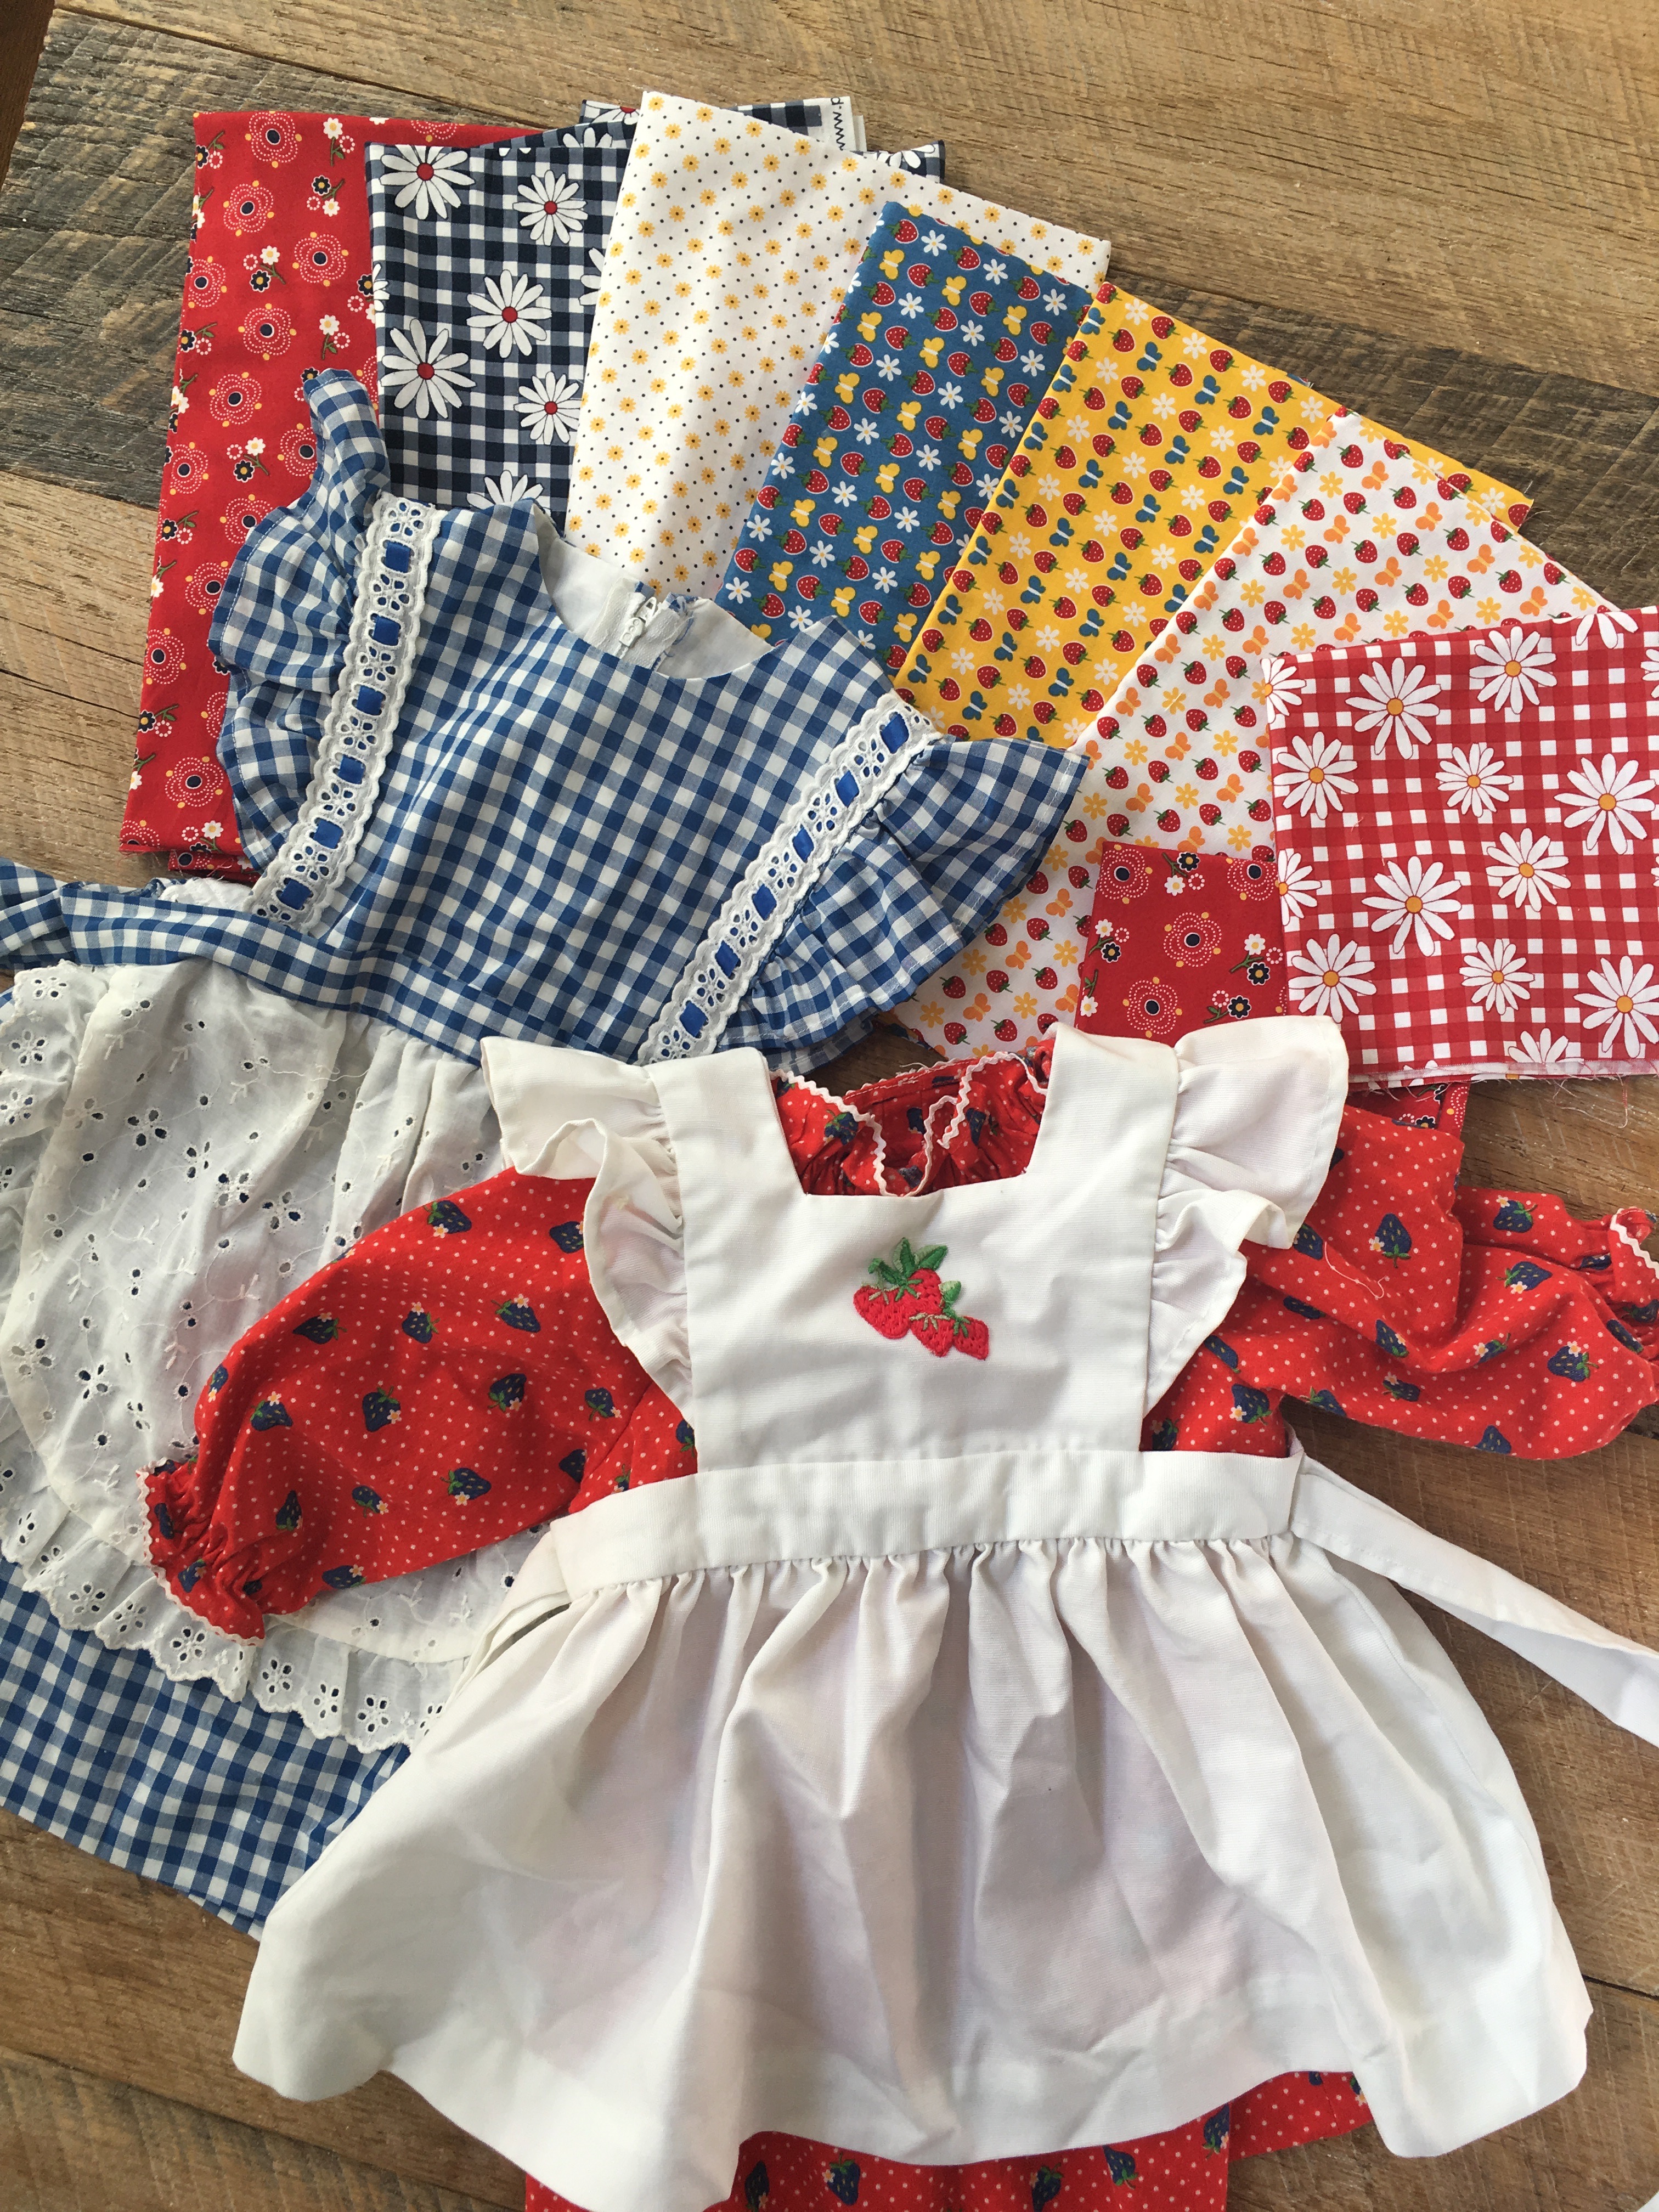
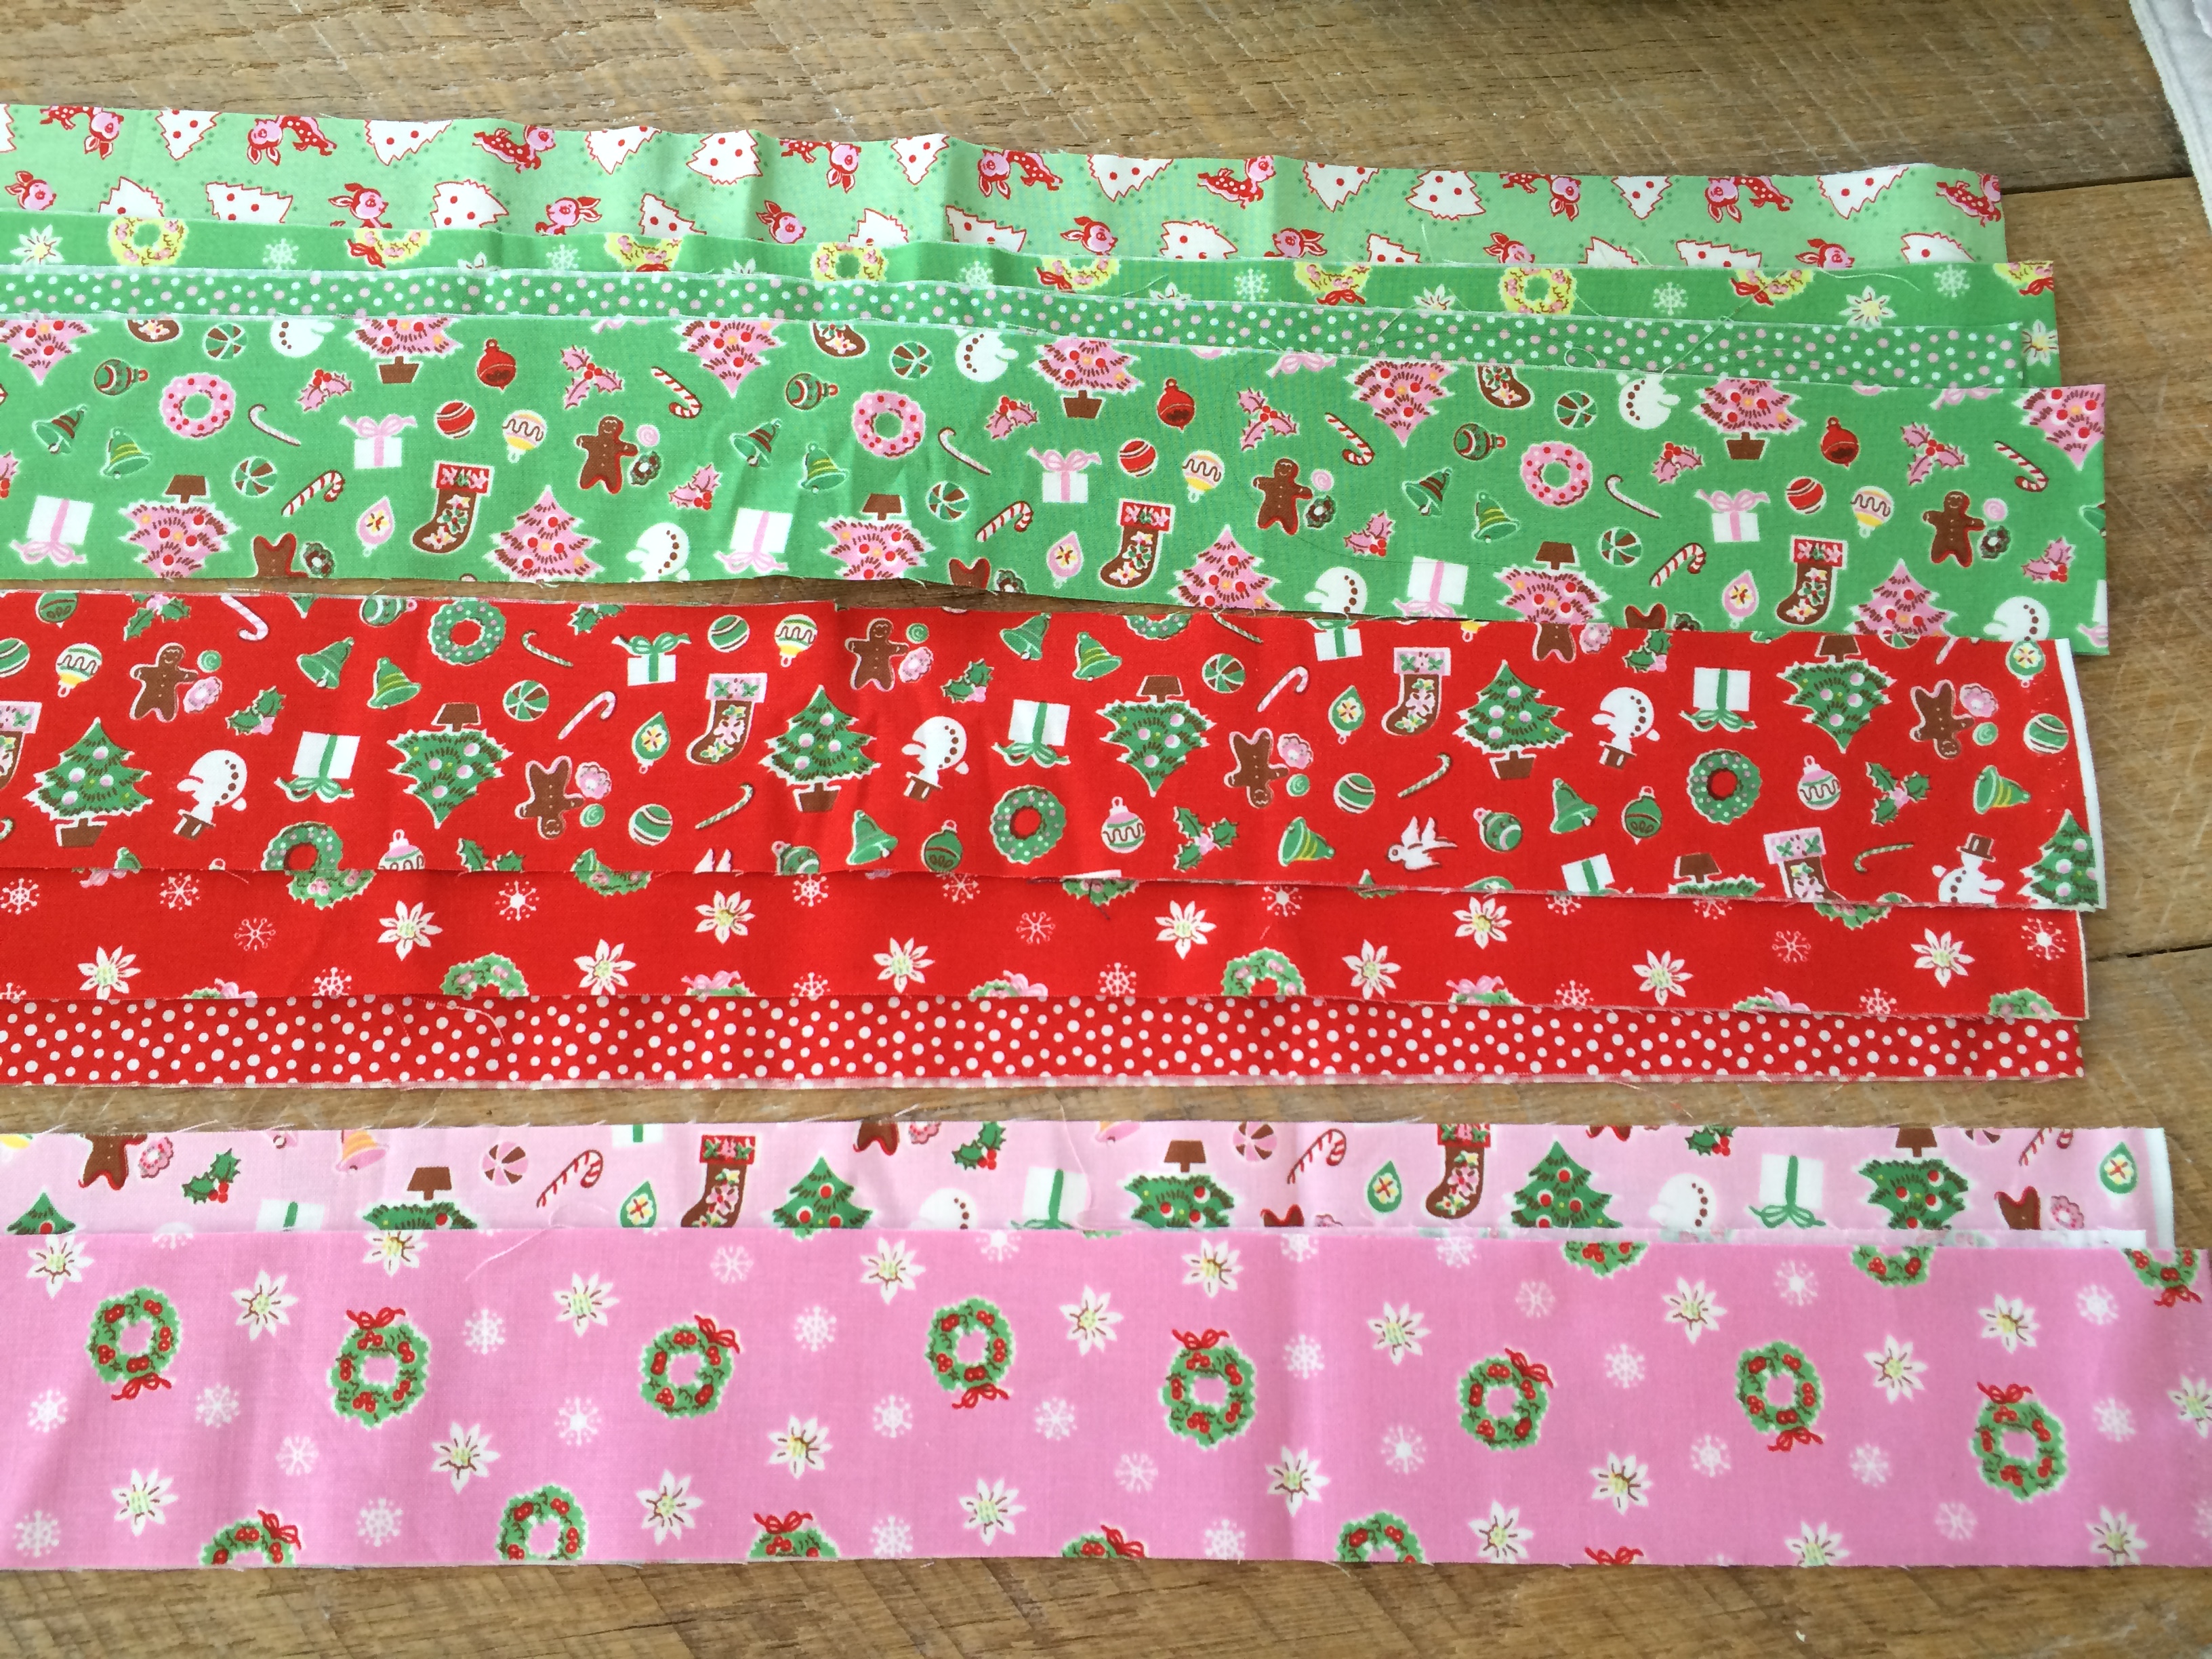
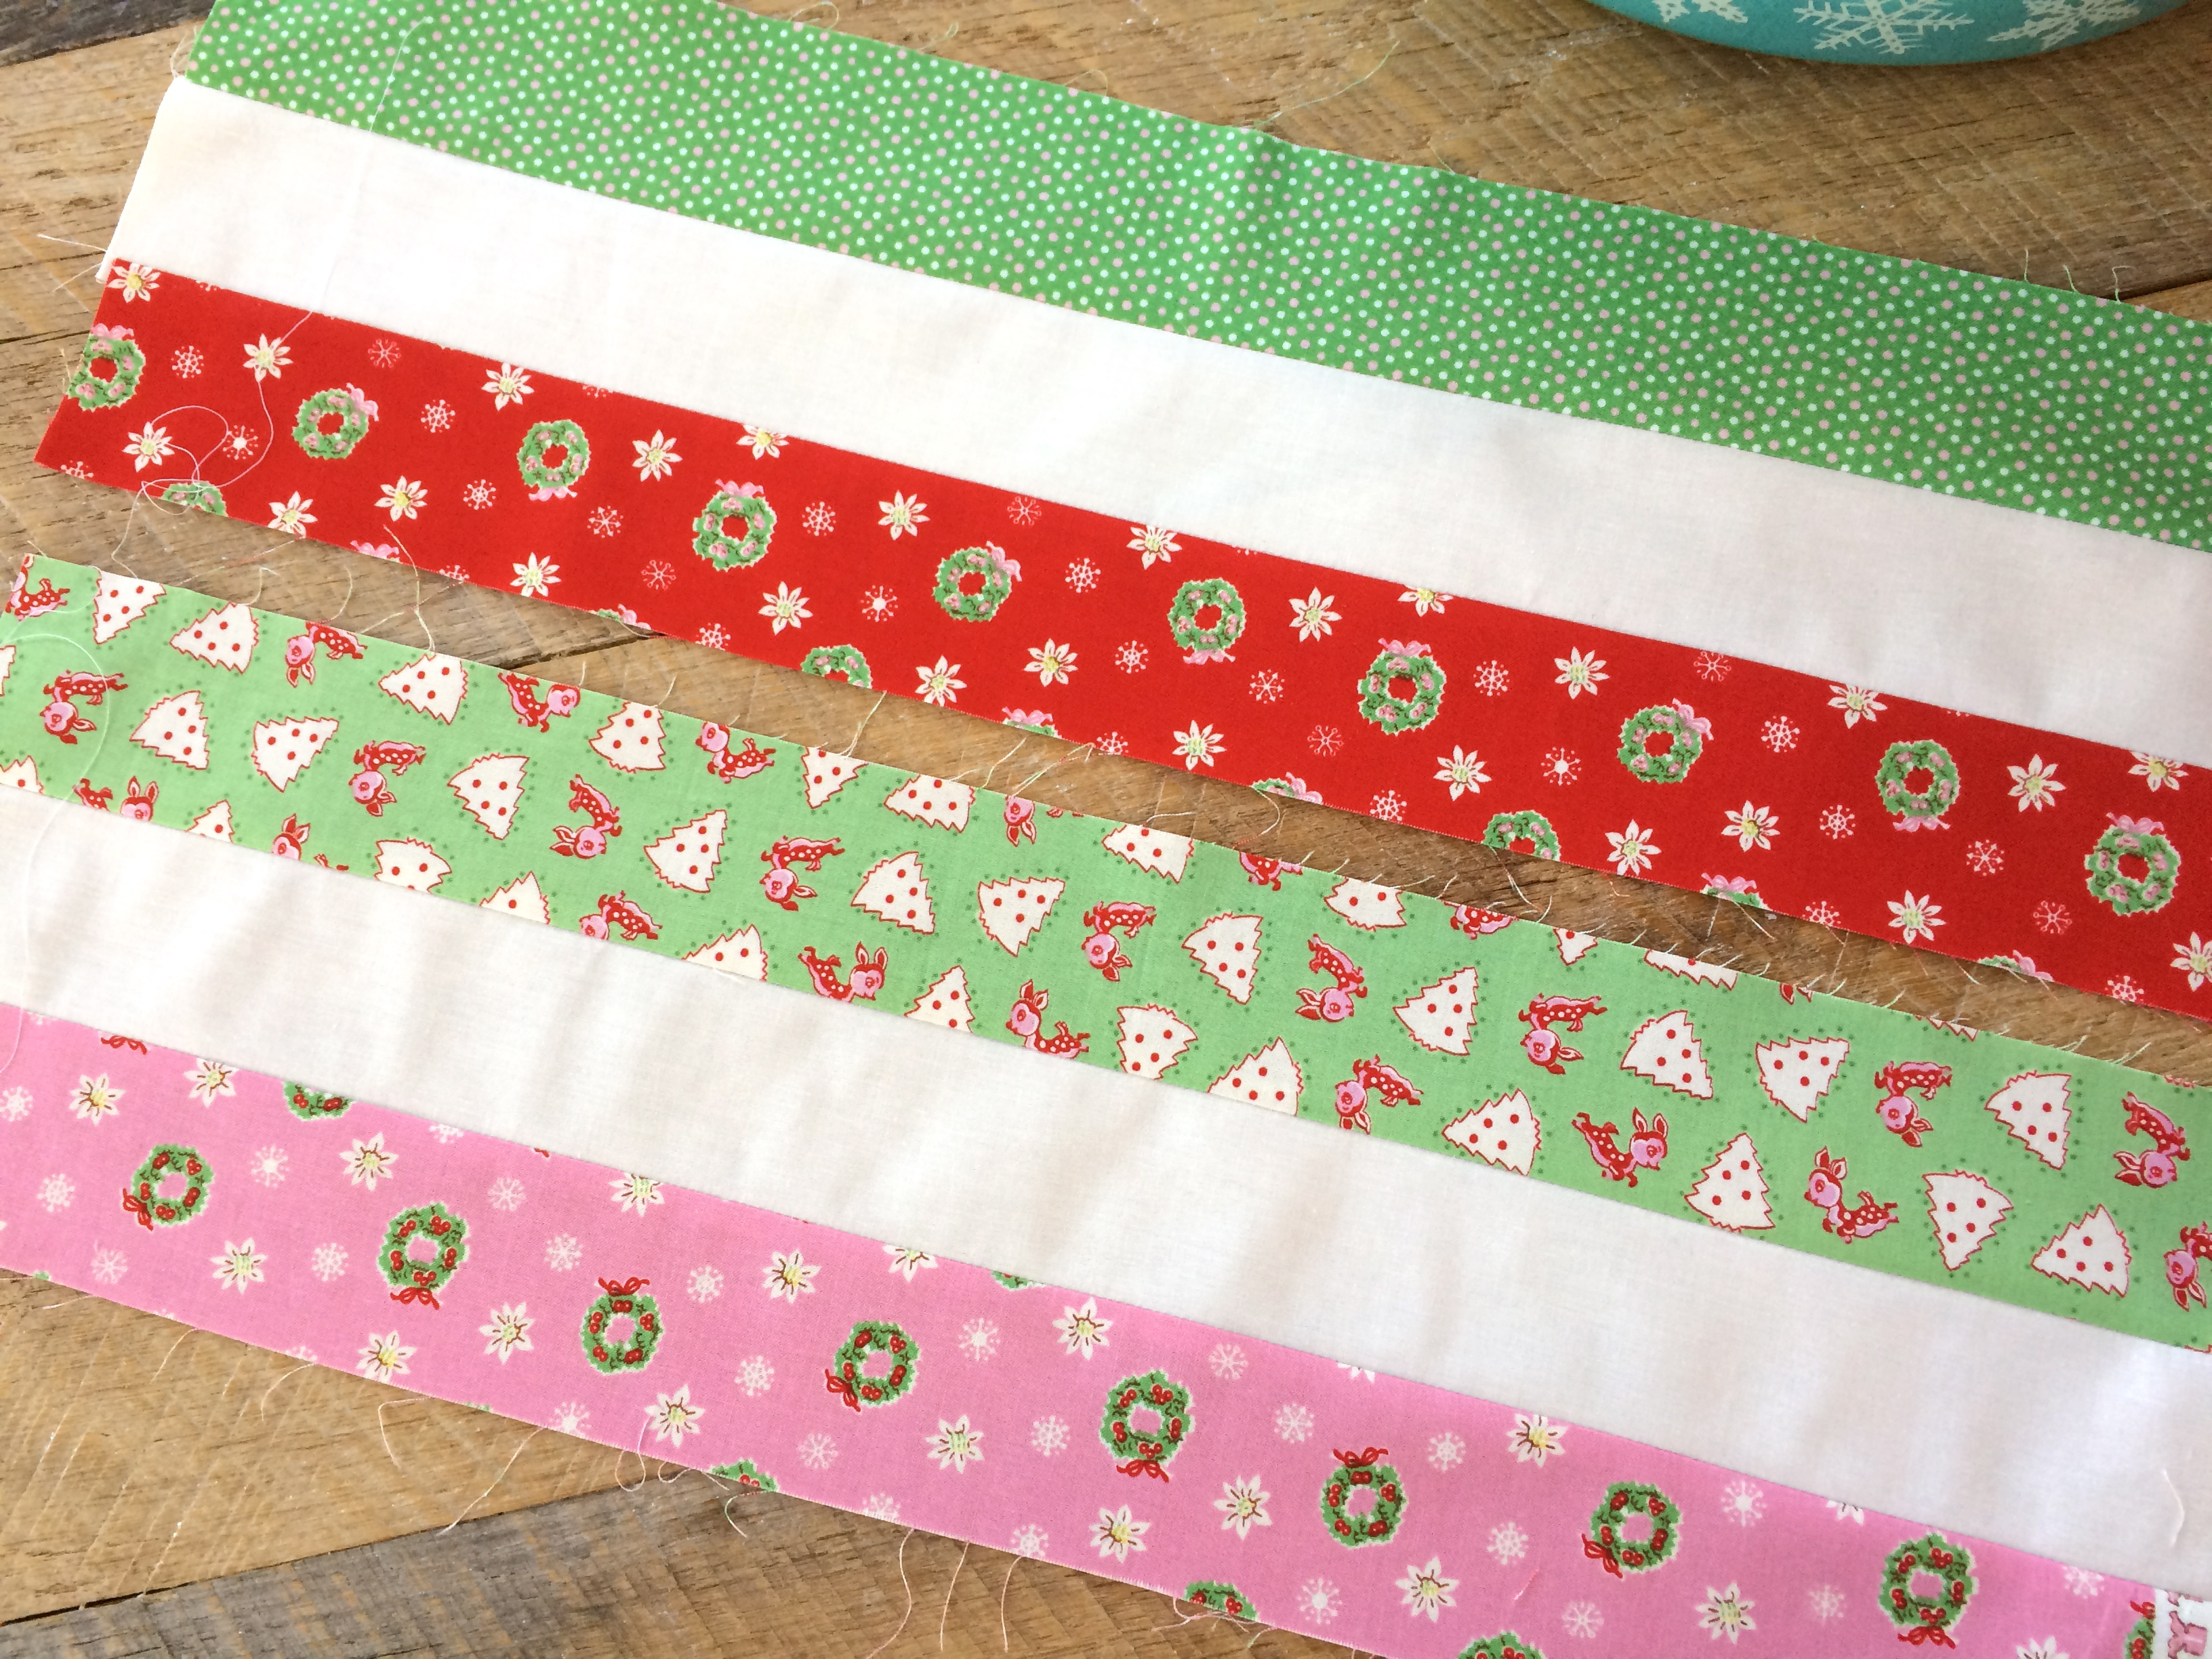
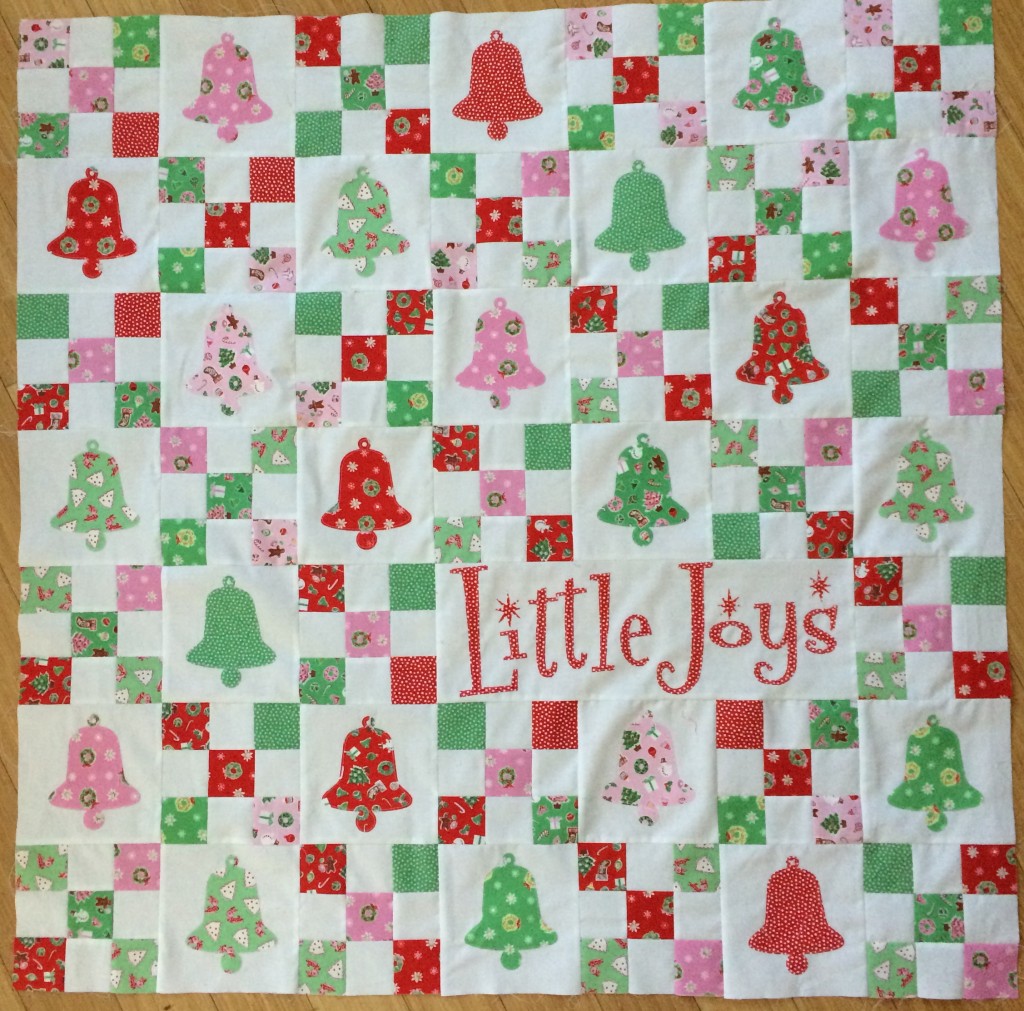
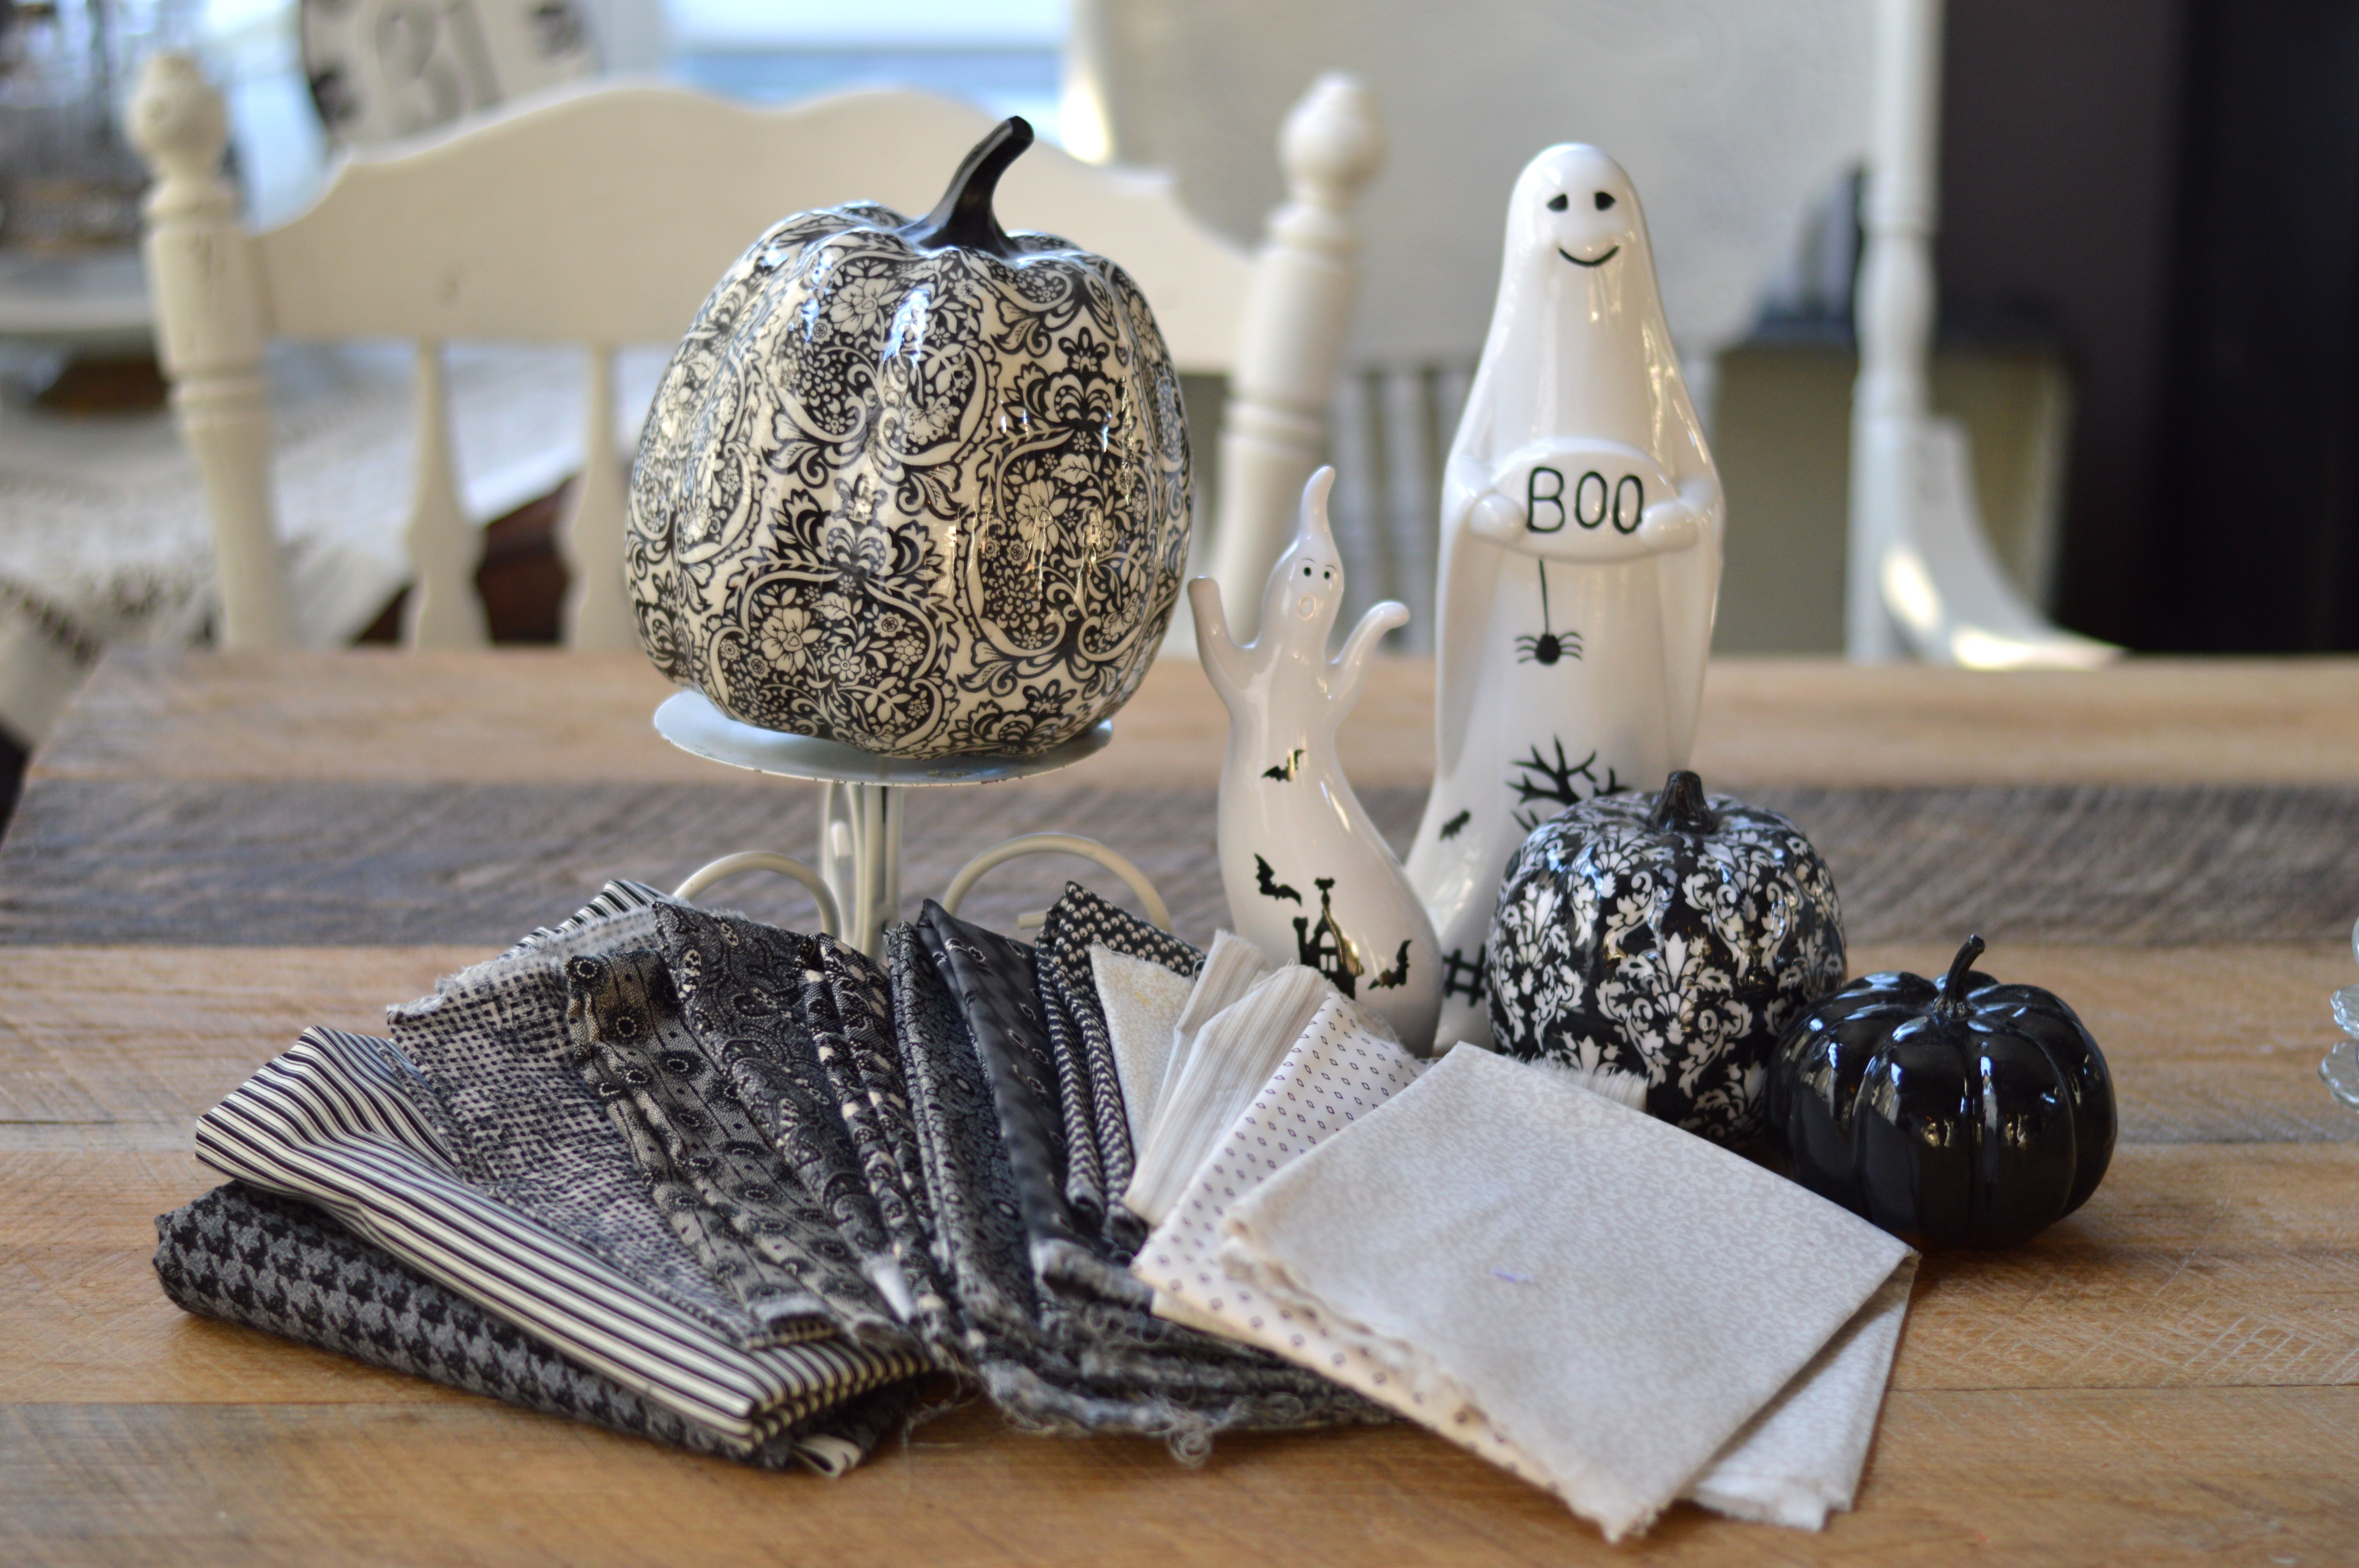
For my fabrics I grabbed a selection of Riley Blake Designs fabrics from all my favorite designers – I tried to get them all in there 🙂

IMG_9917
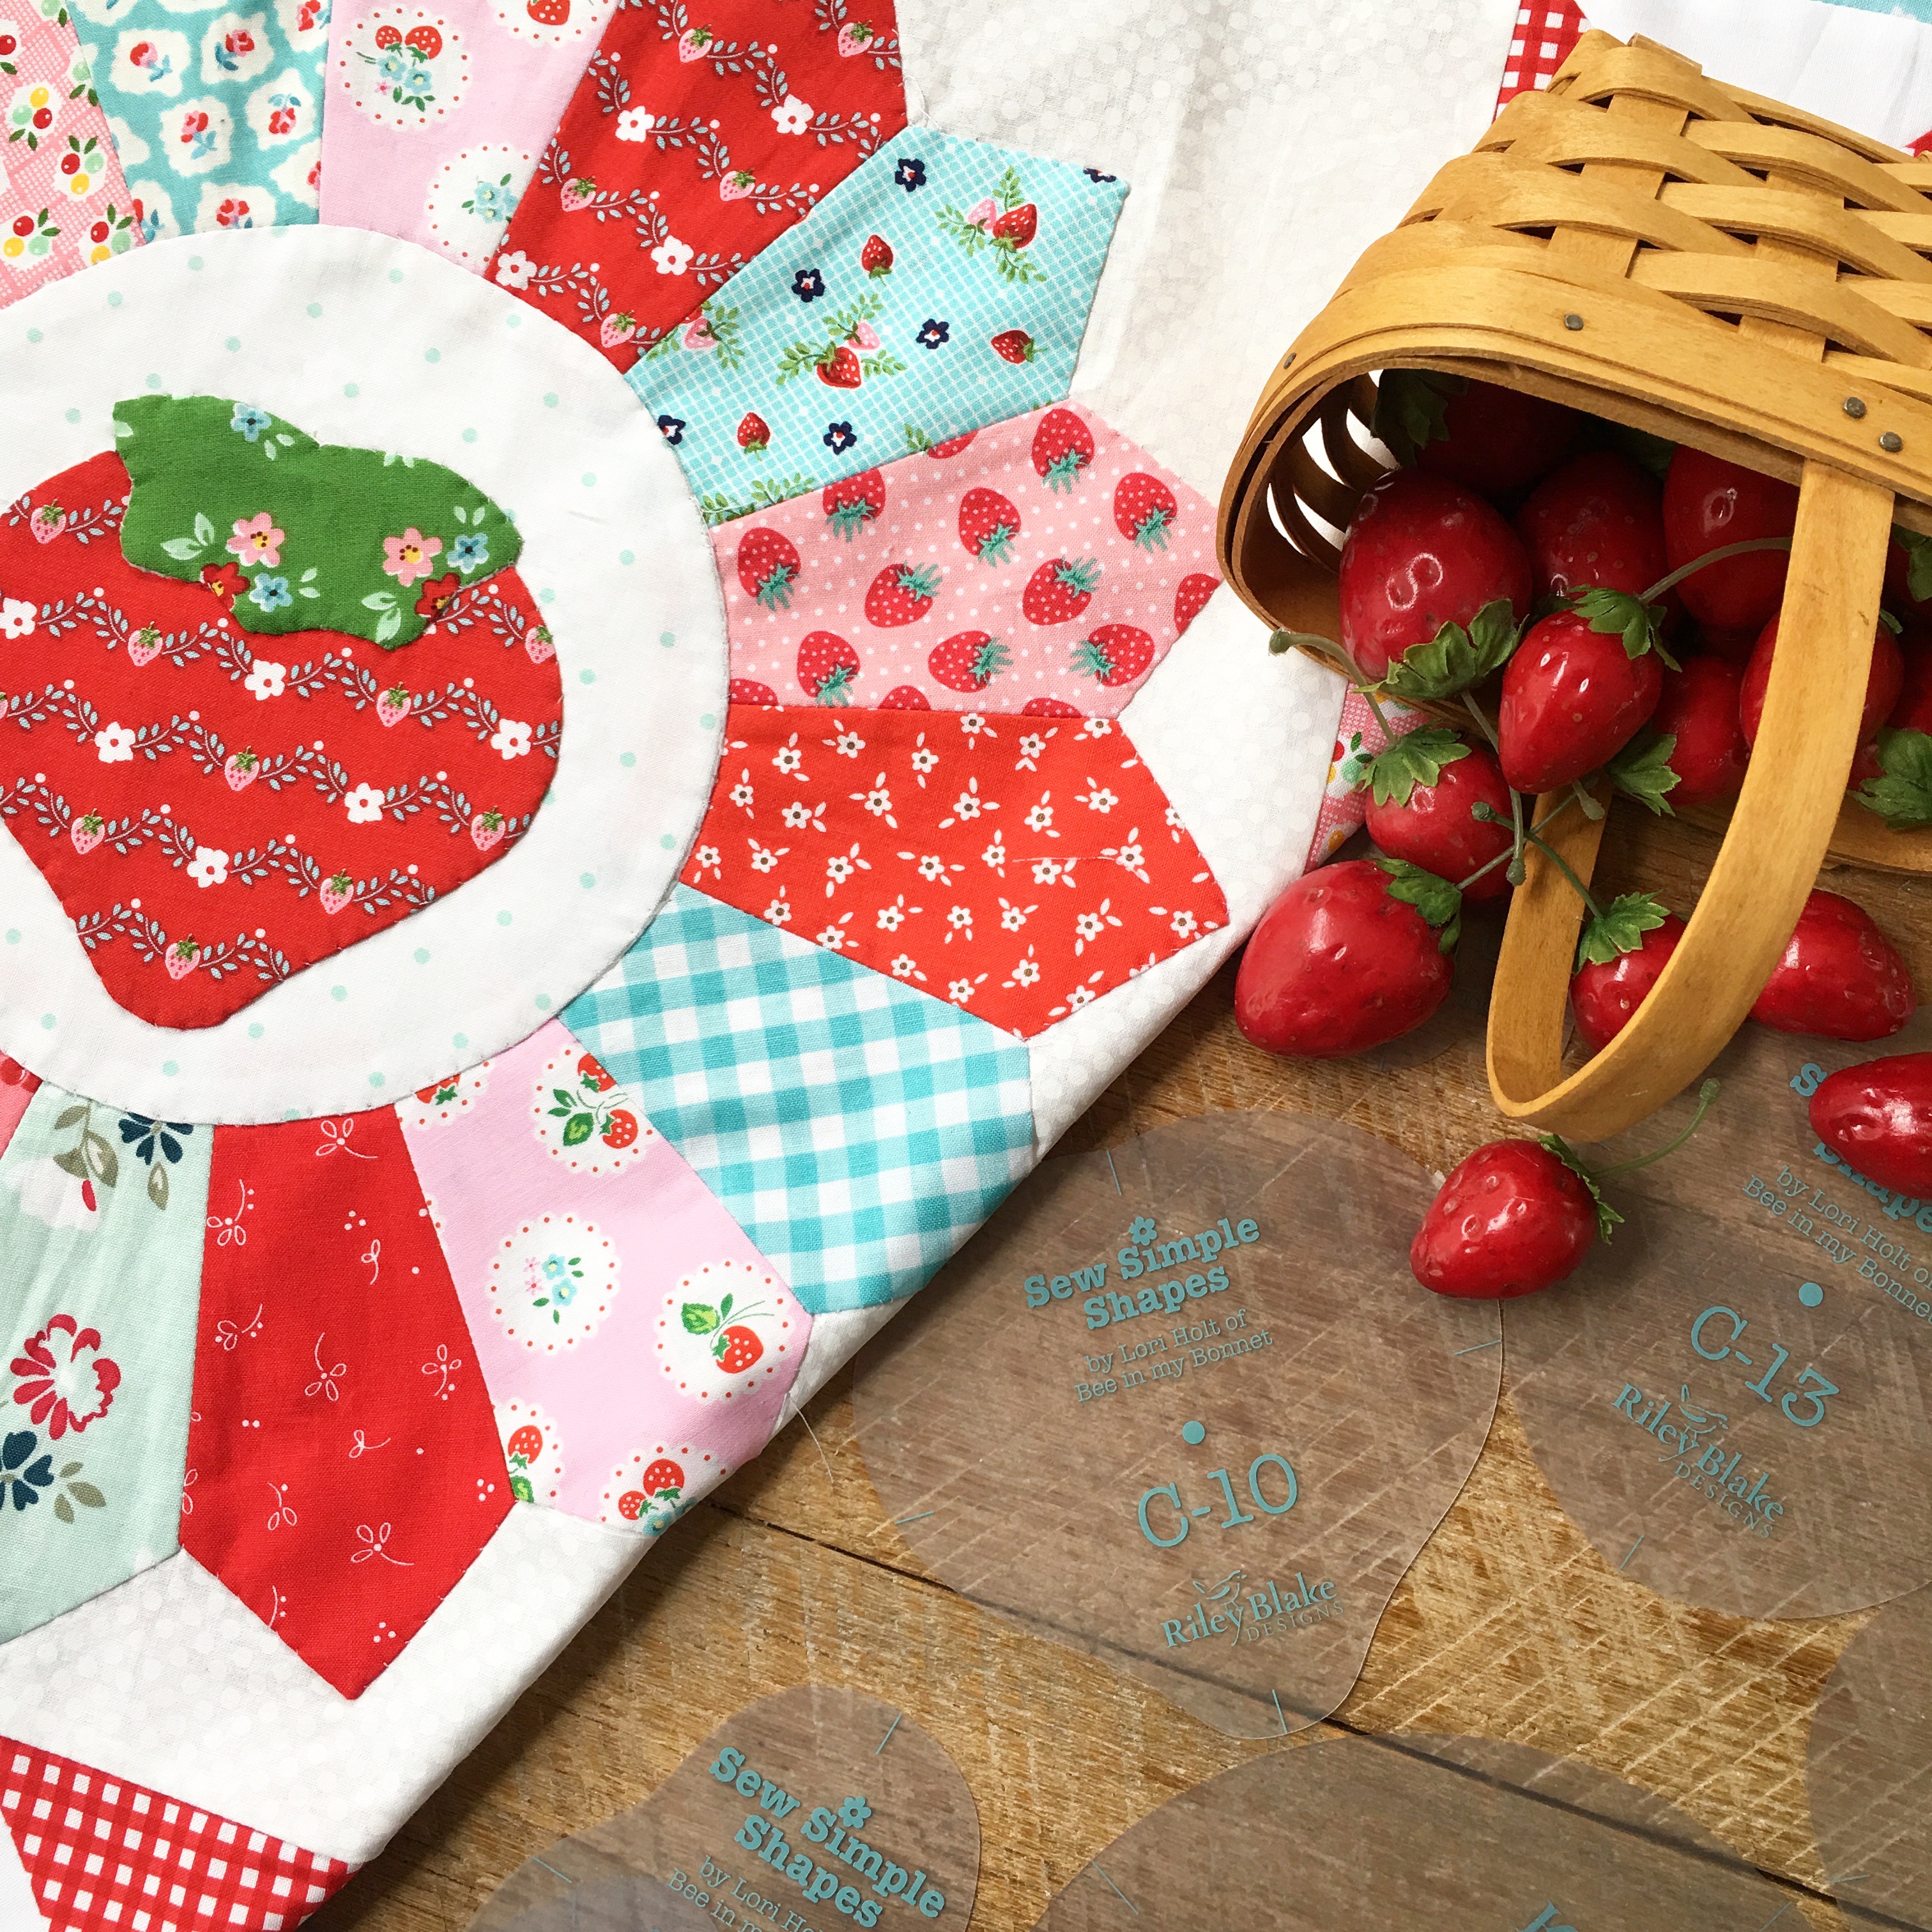
If you haven’t joined in it’s not too late.  The free pattern is on  Lori’s blog and you can hop on over to read more!!

IMG_0029

I made my block into a little wallhanging.  I made 20 hourglass blocks with my Sizzix 4 1/2″ hourglass die (they finish 4″).  You can always make them the traditional way.

Cut the inside pie block 16 1/2″ square.

The hourglass blocks, unfinished are 4 1/2″, finished they are 4″.

The outer border is cut 2 1/2″.  I quilted it and added some red binding.  I LOVE it!!!!!

And since I was making a Quilty Pie, I also needed a real pie to eat!!!!  You can find the recipe of my favorite Fresh Strawberry Pie over at my food blog, The Rounded Teaspoon.

DSC_0300

There is a graham cracker crust with a cream cheese/whip cream filling…..yummmmm!

DSC_0265

DSC_0245 
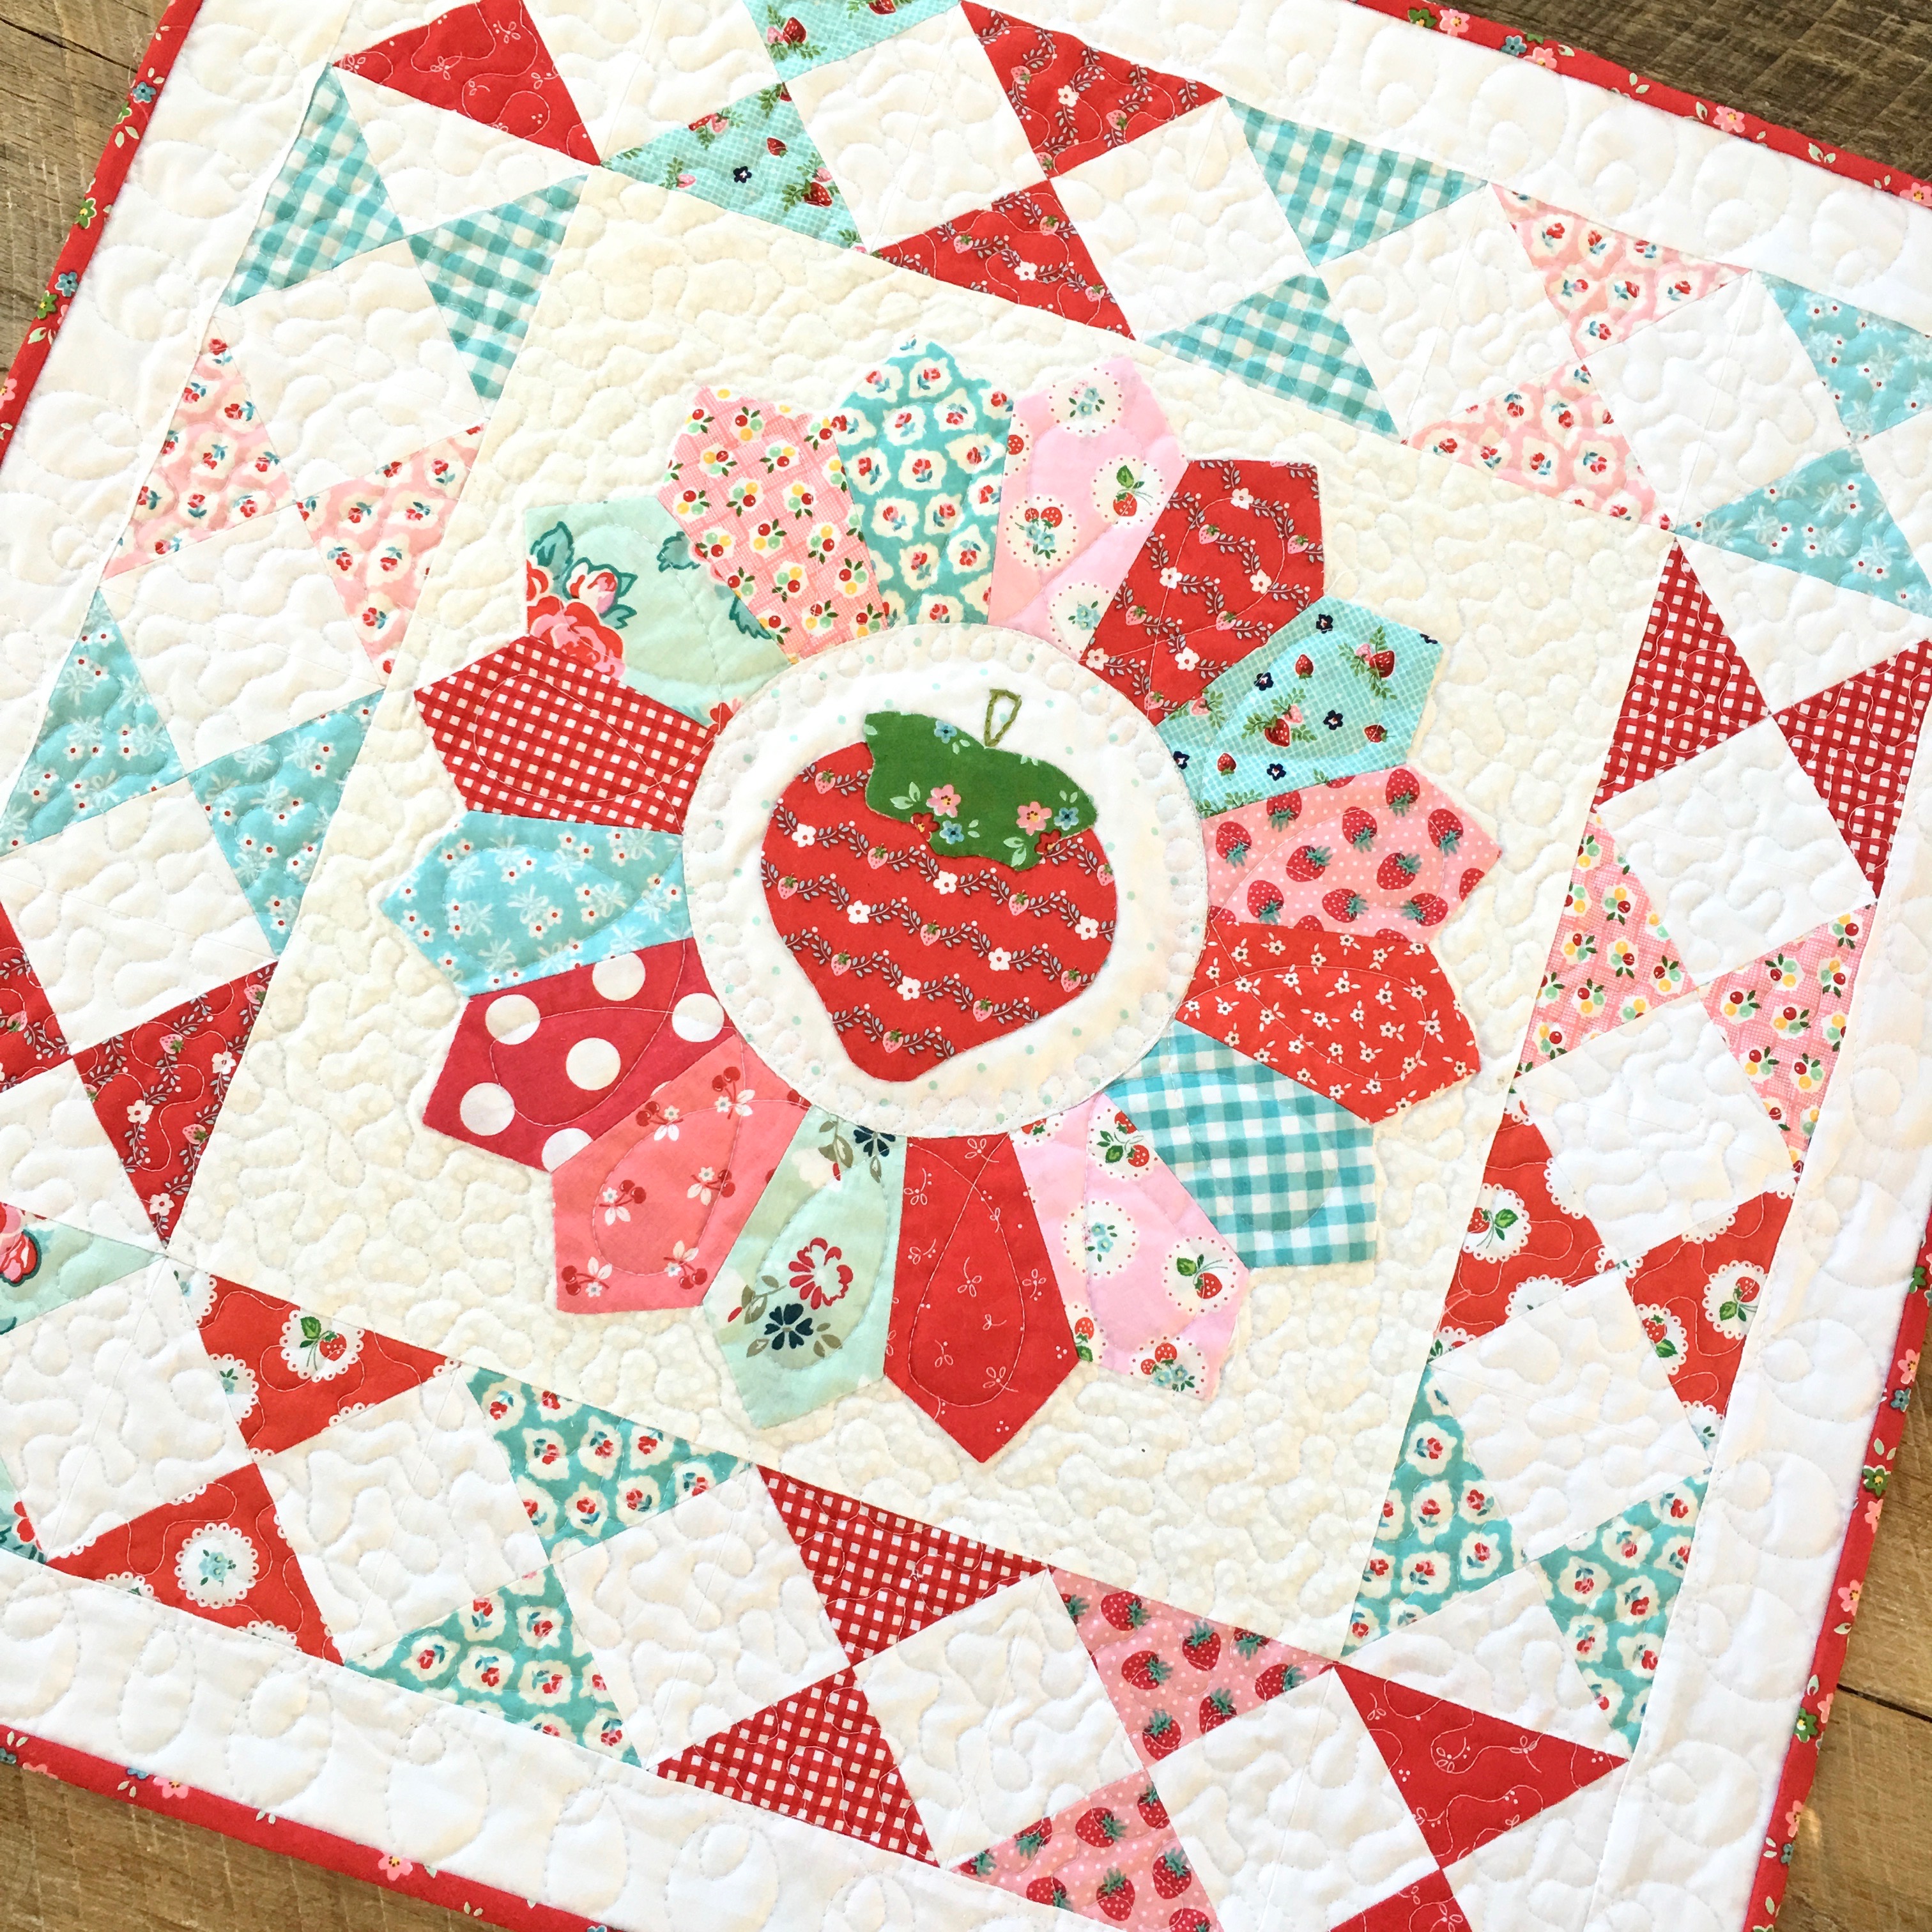
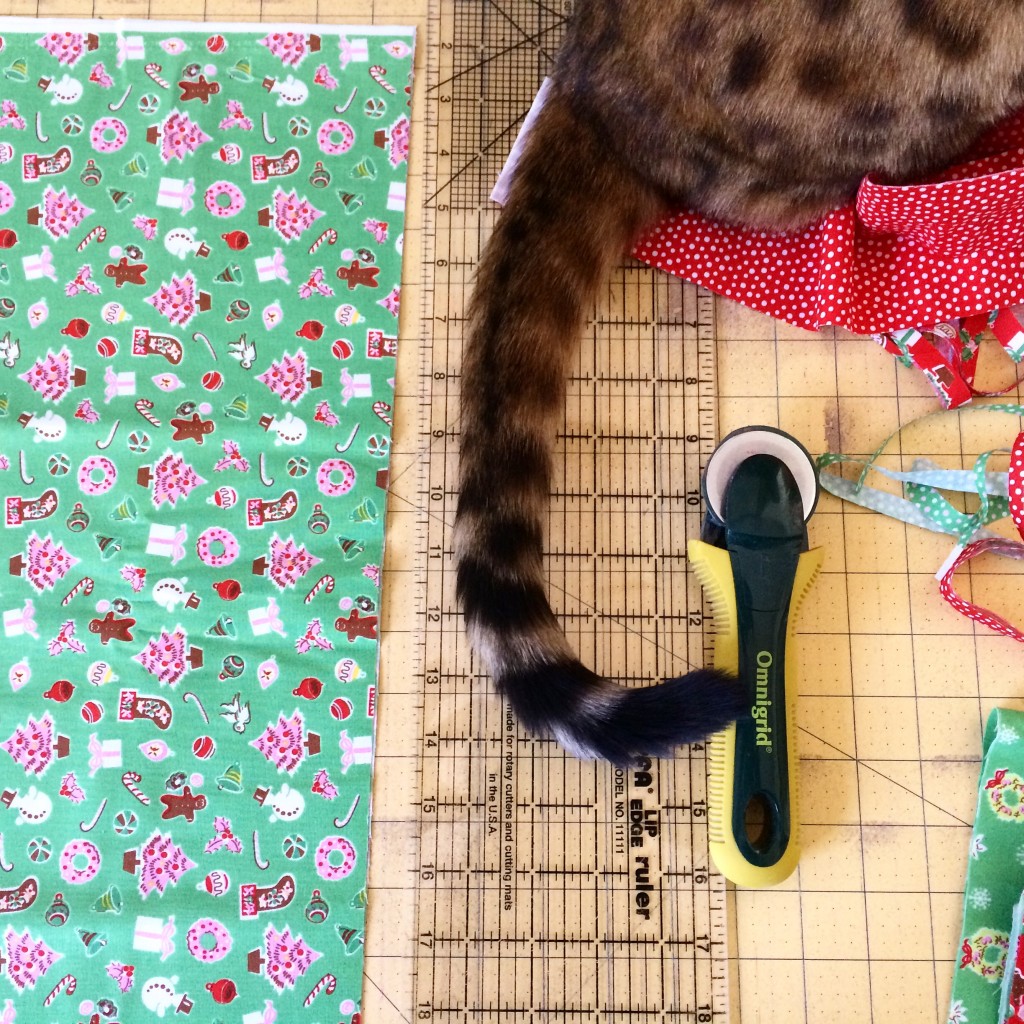
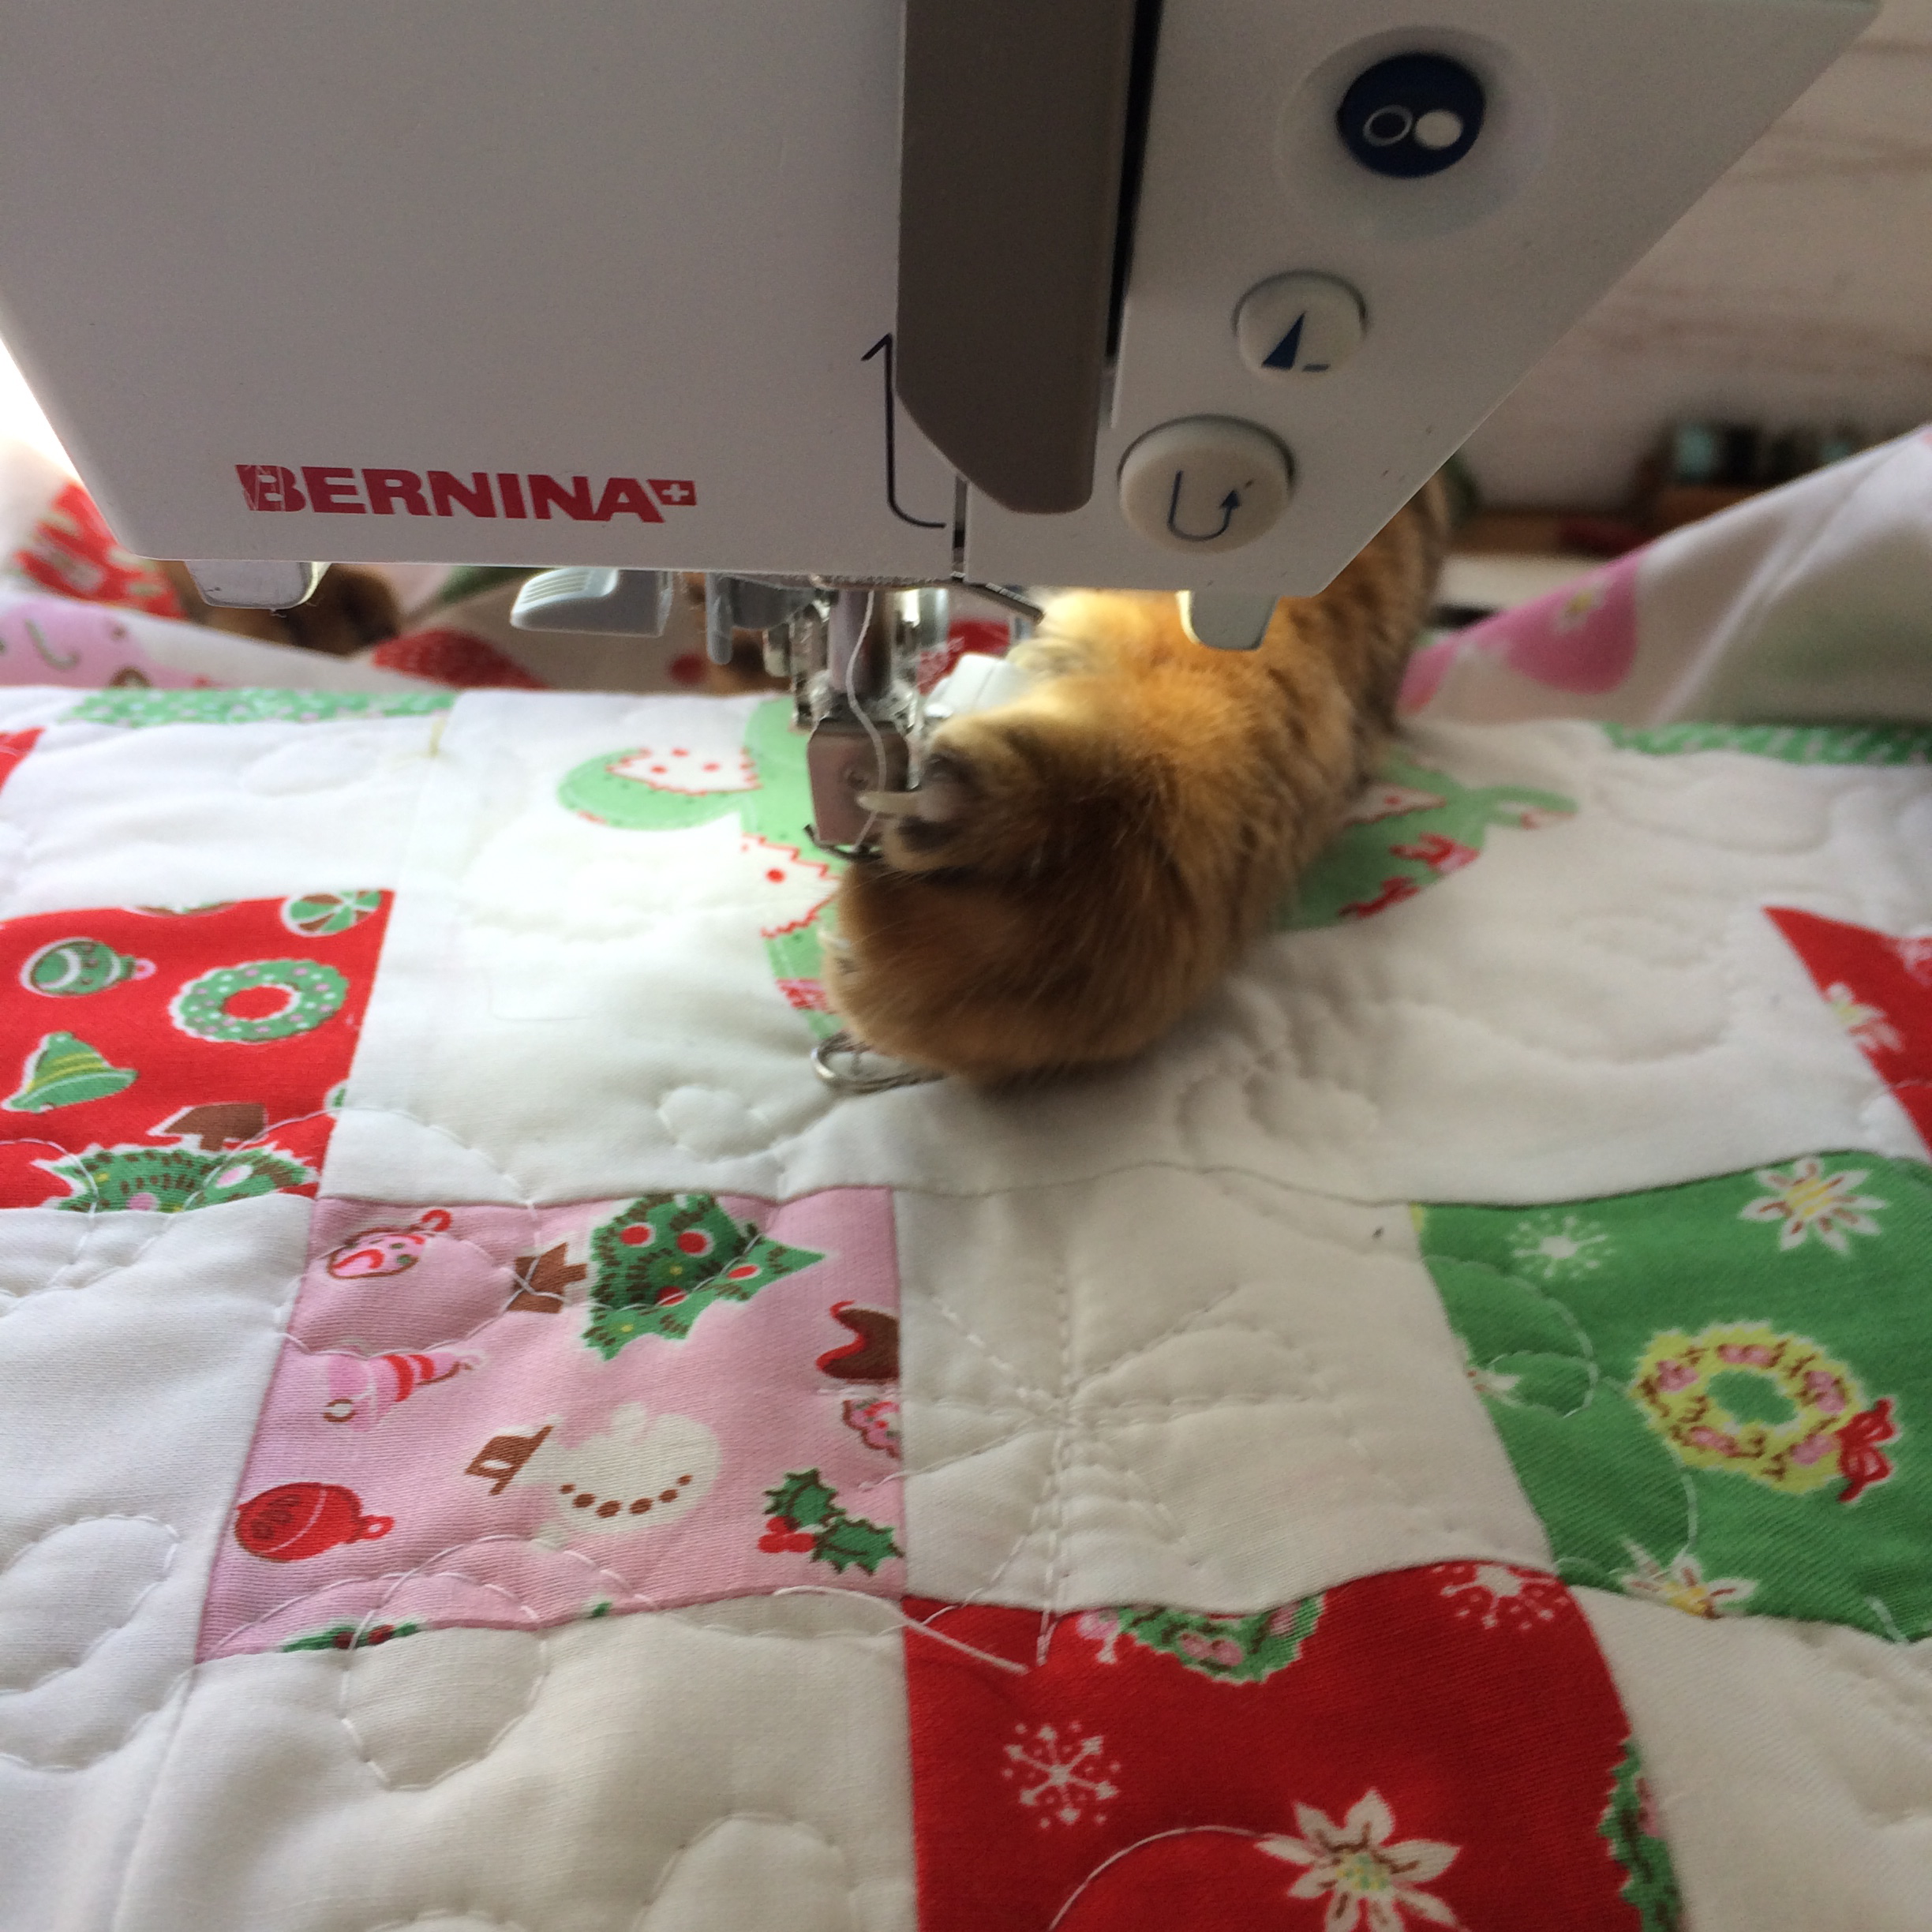
And of course, Mufasa helped 🙂

IMG_0002

Thanks for stopping by!!!!

Very Merry Wall Quilt {Free Pattern}

very-merry-cover-pic

dsc_0269

Today I’m sharing the pattern for this festive little Very Merry Wall Quilt!  This is such a fun project to whip up!  You can use fat quarters or better yet – just get out the Christmas scrap box!  I appliqued a tree die cut with my Sizzix Fabi machine in the center of the quilt.  You can add your favorite motif to the center!  The quilt is made up of 4 blocks.  I created a PDF pattern that you can download HERE.  These would make great little gifts as well!

img_6796

This is the state of affairs in my sewing room – projects everywhere and not enough time to get it all done by Christmas!!!

img_6798

I love this fabric Little Joys designed by my friend Elea Lutz for Penny Rose Fabrics!!  Such a classic!!

img_6877

Mufasa loves this project too and was super sad when I hung it on the wall where he couldn’t nap on it!img_7326

I collect little vintage Christmas decorations – and I love how this quilt fits in nicely!

dsc_0274

Save

Save

All Hallow’s Eve Quilt

 halloweenIt’s feeling a little like fall and that means time to break out the fall decor!  I made this quilt last year and it’s one of my favorites!  I decorate my dining/living room with a more neutral pallet and I love using black and gray to decorate for Halloween.  The family room and kitchen are bright orange, black, and turquoise 🙂  I used a variety of neutrals and gray/blacks from Penny Rose Fabrics. You can download the details of the pattern HERE.

Quilt measures 42″ square.

spooky halloween quilt 30Most of the black/gray fabrics are from the Civil War Times fabric line. I love the variety! The rest of the fabrics are from Penny Rose Classics.Screen Shot 2015-10-21 at 9.03.17 PMIMG_3614I love black and metallic pumpkins on vintage candlesticks!

spooky halloween quilt 22I first made the background by sewing 5″ squares together in 7 rows of 7. Then the applique comes next. You could totally add ghosts and bats, I wanted to keep it simple.

spooky halloween quilt 26The moon is made by tracing a pie plate.

spooky halloween quilt 28Here is a little close up of the quilting, with Mufasa’s permission 🙂 spooky halloween quilt 6I love striped binding cut on the bias – it’s my absolute FAVORITE!!!! The backing is from Penny Rose’s mensware line – I love houndstooth!!!Ok, so this is totally my new favorite Halloween Quilt!

IMG_3612

spooky halloween quilt 9

Lovely Little Patchwork Tote Bag

LLP Sew Along Banner

IMG_7827

I’m super excited to be a part of Kerri Horsley’s Lovely Little Patchwork Blog Tour!  Her book is so adorable with creative projects ranging from quilts to pillows to aprons!

IMG_3224
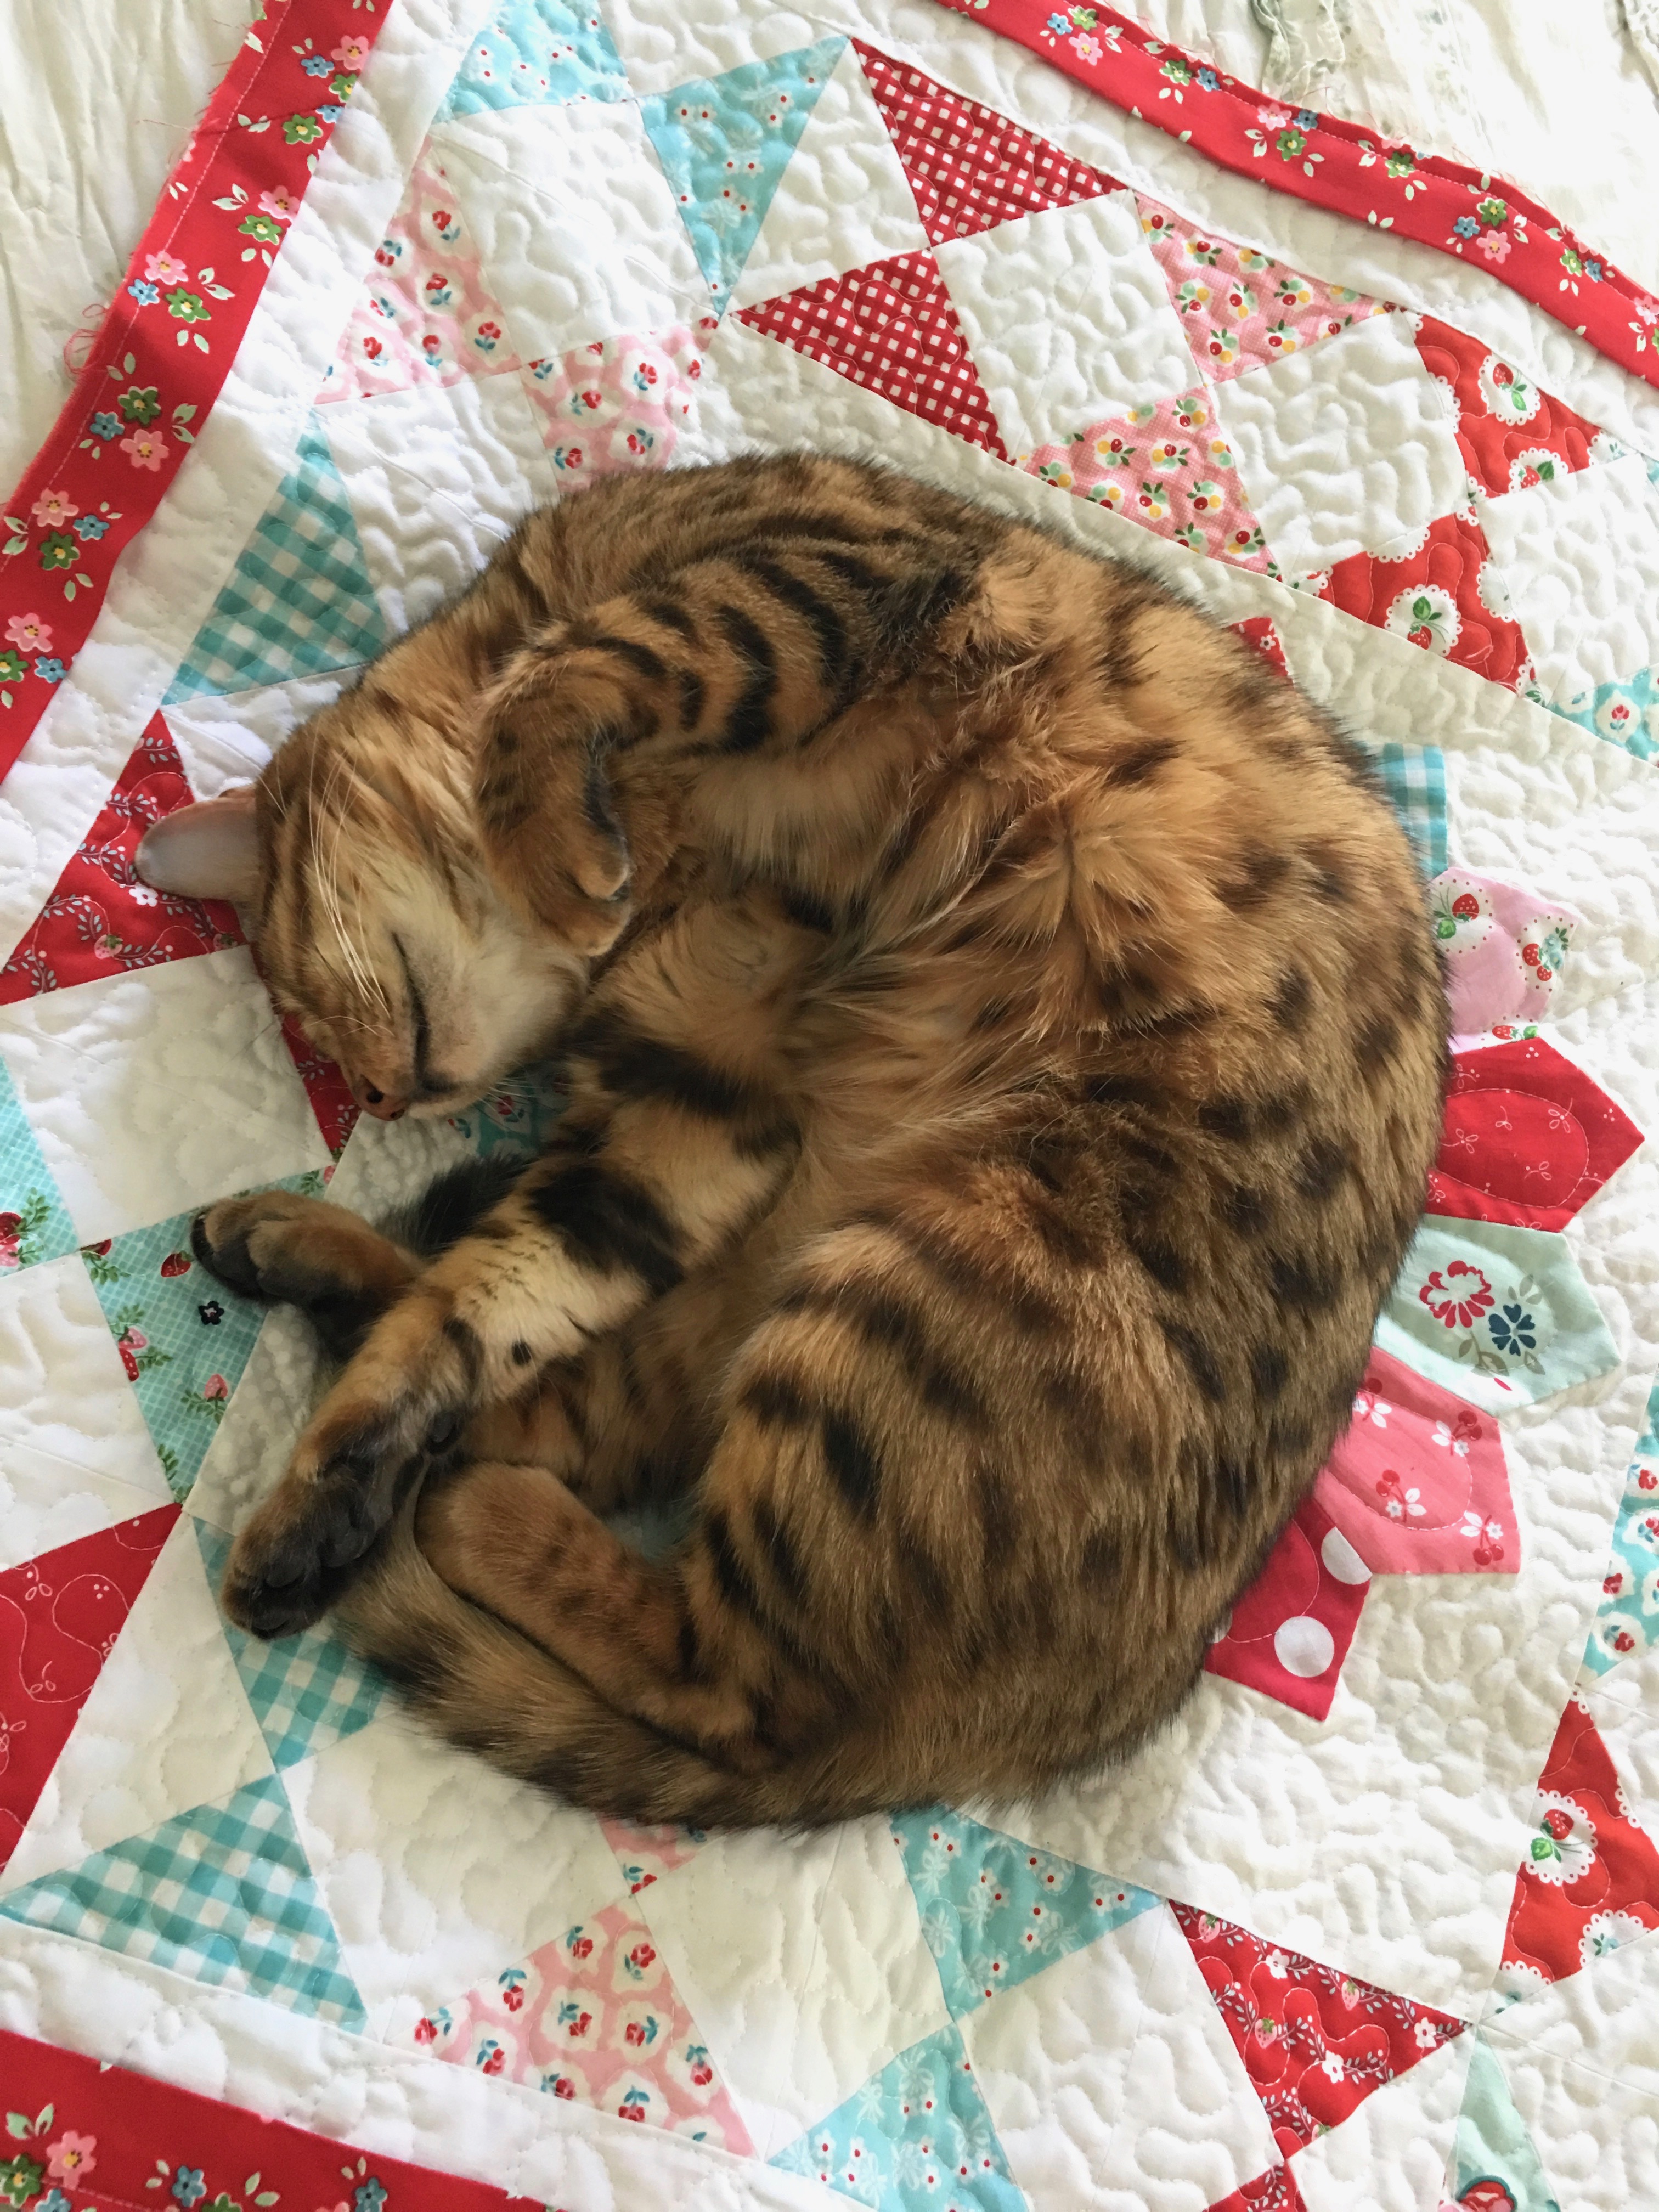
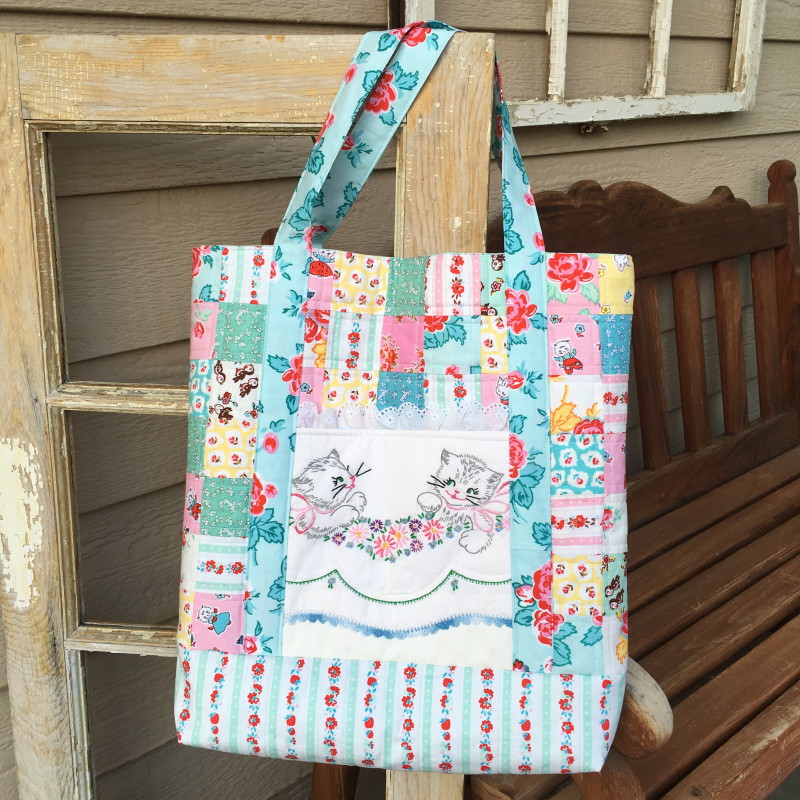
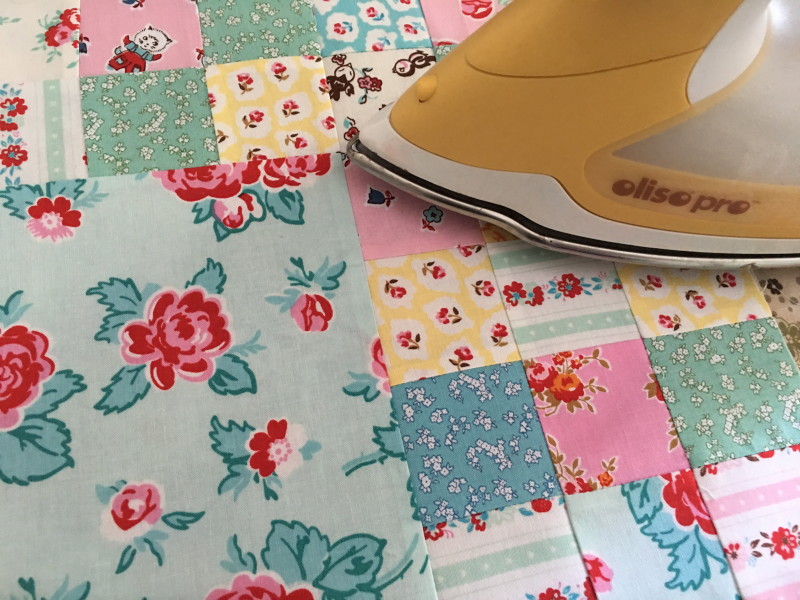
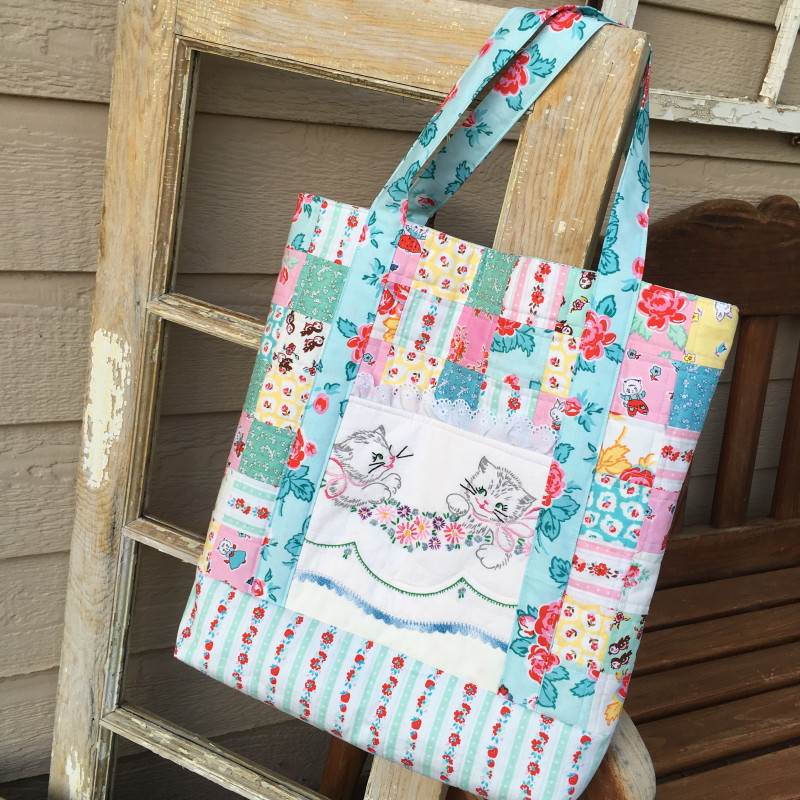
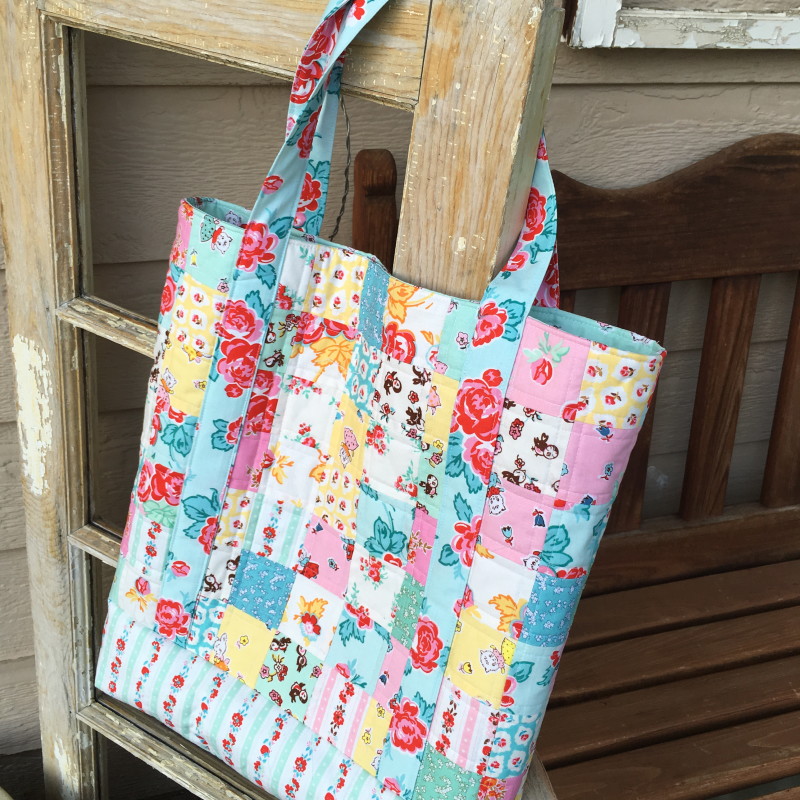
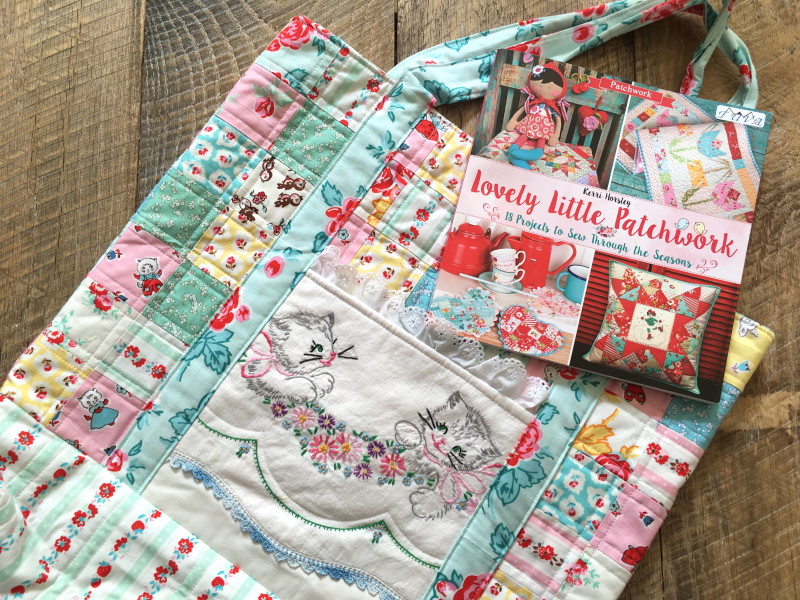
What I love about this book is that not only are the projects inspiring but the book is also fun to read and so pretty to thumb through! I choose to make her Patchwork Market Tote.

IMG_7760

For my fabrics I selected Milk, Sugar, Flour by Elea Lutz for Penny Rose Fabrics – one of my all time favorite fabric lines!  The pattern calls for an embroidered pocket.  I found this vintage pillow case with cats and flowers and knew it would be purrrrfect for this project.

IMG_7776

I gathered all my supplies and began cutting and Mufasa decided this would be the perfect place for a catnap 🙂

I followed the cutting instructions exactly.  I am a lover of totebags and so I stabilized my bag a little differently.   My favorite method is cotton batting + HeatnBond medium weight fusible stabilizer!

IMG_7787

Once I had the outer portions of the tote bag completed  I fused the Heat n Bond® medium weight stabilizer to the wrong side of the outer bag pieces.

Next, I used  Spray n Bond to baste the fused outer bag pieces to cotton quilt batting and then quilted. The addition of the stabilizer gives the bag more strength and substance while the batting keeps it feeling soft!

IMG_7758

I cut my pillowcase to the measurements indicated in the pattern.

IMG_7763  I used this same method to create the pocket, first ironing on stabilizer to the wrong side of the embroidery piece, followed by quilt batting.

IMG_7812I quilted the entire bag with straight line stitching along each of the seams.

I didn’t have webbing for the straps so I created my own using the same length measurements as in the pattern.

To create a 1″ wide handle, cut a 4″ x desired length piece of fabric.   Press the entire length in half.

IMG_7782Open the strap and press both long edges in to meet the center crease.

IMG_7785Now comes the fun part, cut a 2″ x desired length piece of stabilizer and slip it inside the folded handle.  Press to fuse.  Then fold the 2″ piece in half again lengthwise to result in a 1″ wide strap.  Top stitch both sides to secure.  There are 4 layers of fabric and 2 layers of stabilizer in the handle!  It’s perfect!  I topstitched along the handles and then continued following the pattern.

IMG_7822

I love it so much!

IMG_7834

I took this bag to quilt market in May and I was thrilled to show it to Elea who absolutely loved it!!  IMG_8083

lovely little patchwork 2

For more inspiration stop by each of these designers’ blogs to see what fun projects they have made from Kerri’s book!!

28.08.2016 Sarah Edgar @sarahedgarprettyfabrics alittlehappyplace.blogspot.co.uk
29.08.2016 Heidi Staples @fabricmutt fabricmutt.blogspot.com
30.08.2016 Megan Jimenez @QuiltStoryMeg quiltstory.blogspot.com
02.09.2016 Cheri Lehnow @tinkerellen tinkerwiththis.blogspot.com
03.09.2016 Ange Hamilton @alittlepatchwork alittlepatchwork.wordpress.com
04.09.2016 Sedef Imer @downgrapevinelane downgrapevinelane.com
05.09.2016 Kimberly Jolly @fatquartershop fatquartershop.blogspot.com
06.09.2016 Samantha Dorn @aqua_paisley aquapaisleystudio.com
07.09.2016 Ayda Algın @cafenohut cafenohut.blogspot.com
08.09.2016 LeAnne Ballard @everydaycelebrations everydaycelebrate.blogspot.com
09.09.2016 Sharon Burgess @lilabellelane lilabellelane.blogspot.com
10.09.2016 Lauren Wright @mollyandmama mollyandmama.com.au
11.09.2016 Kate May @thehomemakery thehomemakery.co.uk/blog/
12.09.2016 Debbie Homick @happylittlecottage1 happylittlecottage.blogspot.com
13.09.2016 Wynn Tan @zakkaart zakkaart.blogspot.com
14.09.2016 Kim Kruzich @retro_mama retro-mama.blogspot.com
15.09.2016 Jennie Pickett @cloverandviolet cloverandviolet.com
16.09.2016 Veronica AM @VividFelicity vividfelicity.wordpress.com
17.09.2016 Nadra Ridgeway @ellisandhiggs ellisandhiggs.com
18.09.2016 Amanda Woodruff @acraftyfox_amanda acraftyfox.net
19.09.2016 Minki Kim @zeriano minkikim.com
20.09.2016 Sharon Yeager @daisycottagequilting Instagram
21.09.2016 Peta Peace @shequiltsalot shequiltsalot.com
22.09.2016 Sarah Scott @piccolostudio_sarah piccolostudio.com.au
23.09.2016 Kristin Cobb @goobadesigns Instagram
24.09.2016 Erin Cox @whynotsewquilts whynotsew.blogspot.com
25.09.2016 Kerri Horsley @sewdeerlyloved lovelylittlehandmades.blogspot.com

Apple Picking Quilt Tutorial


apple cover
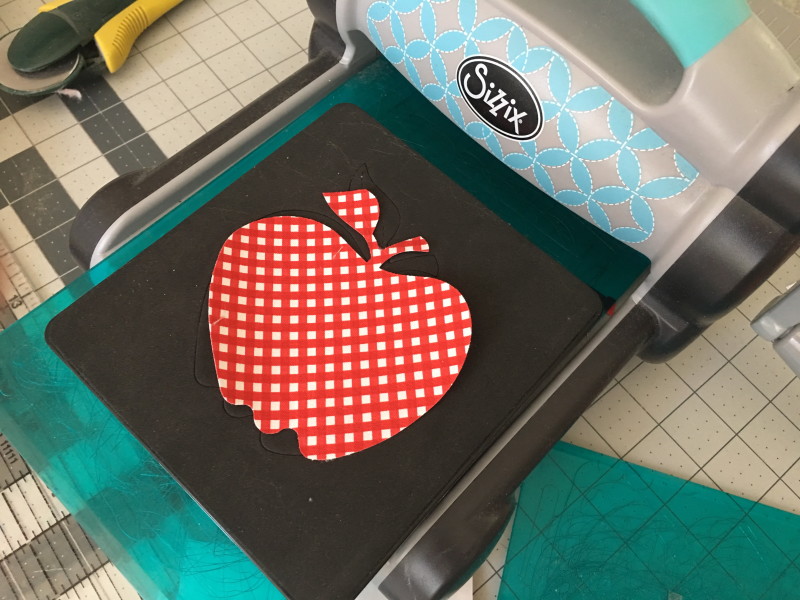
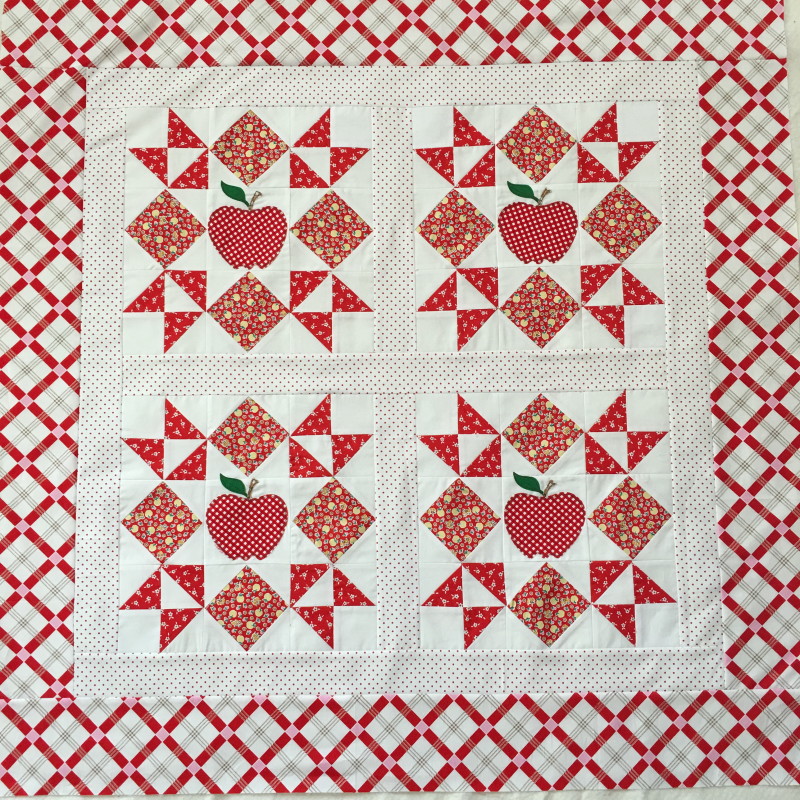
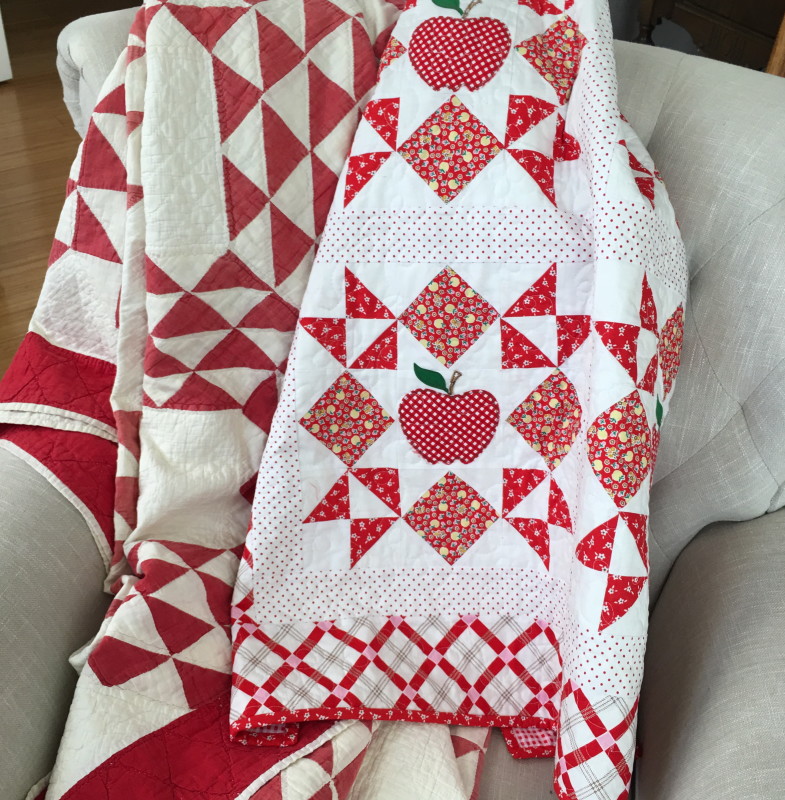
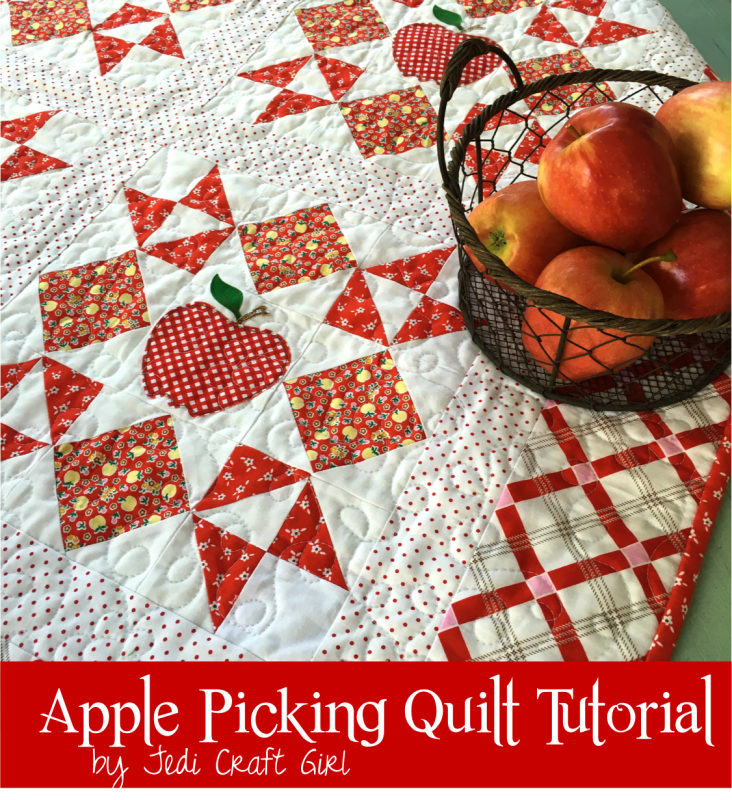
Today is my turn on the Apple Farm blog hop with Elea Lutz and Penny Rose Fabrics!!!!!  I have always been a fan of Elea Lutz’s designs and I was thrilled to meet her in person at Quilt Market!  She is the cutest ever!  IMG_8213

I love Elea’s newest line called Apple Farm.  It has such a fun vintage feel!

Screen Shot 2016-08-18 at 10.02.05 PM
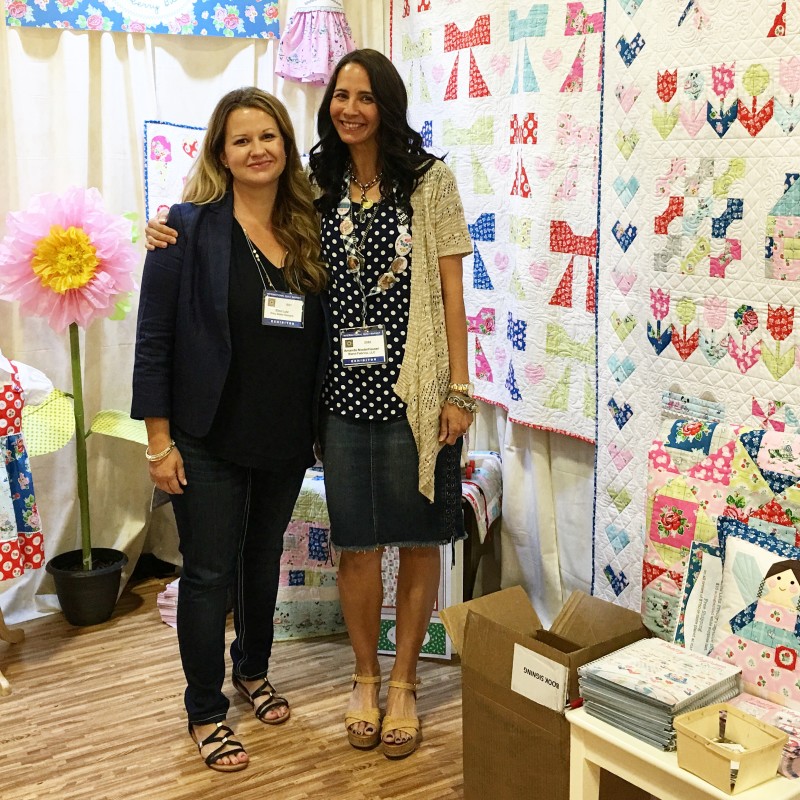
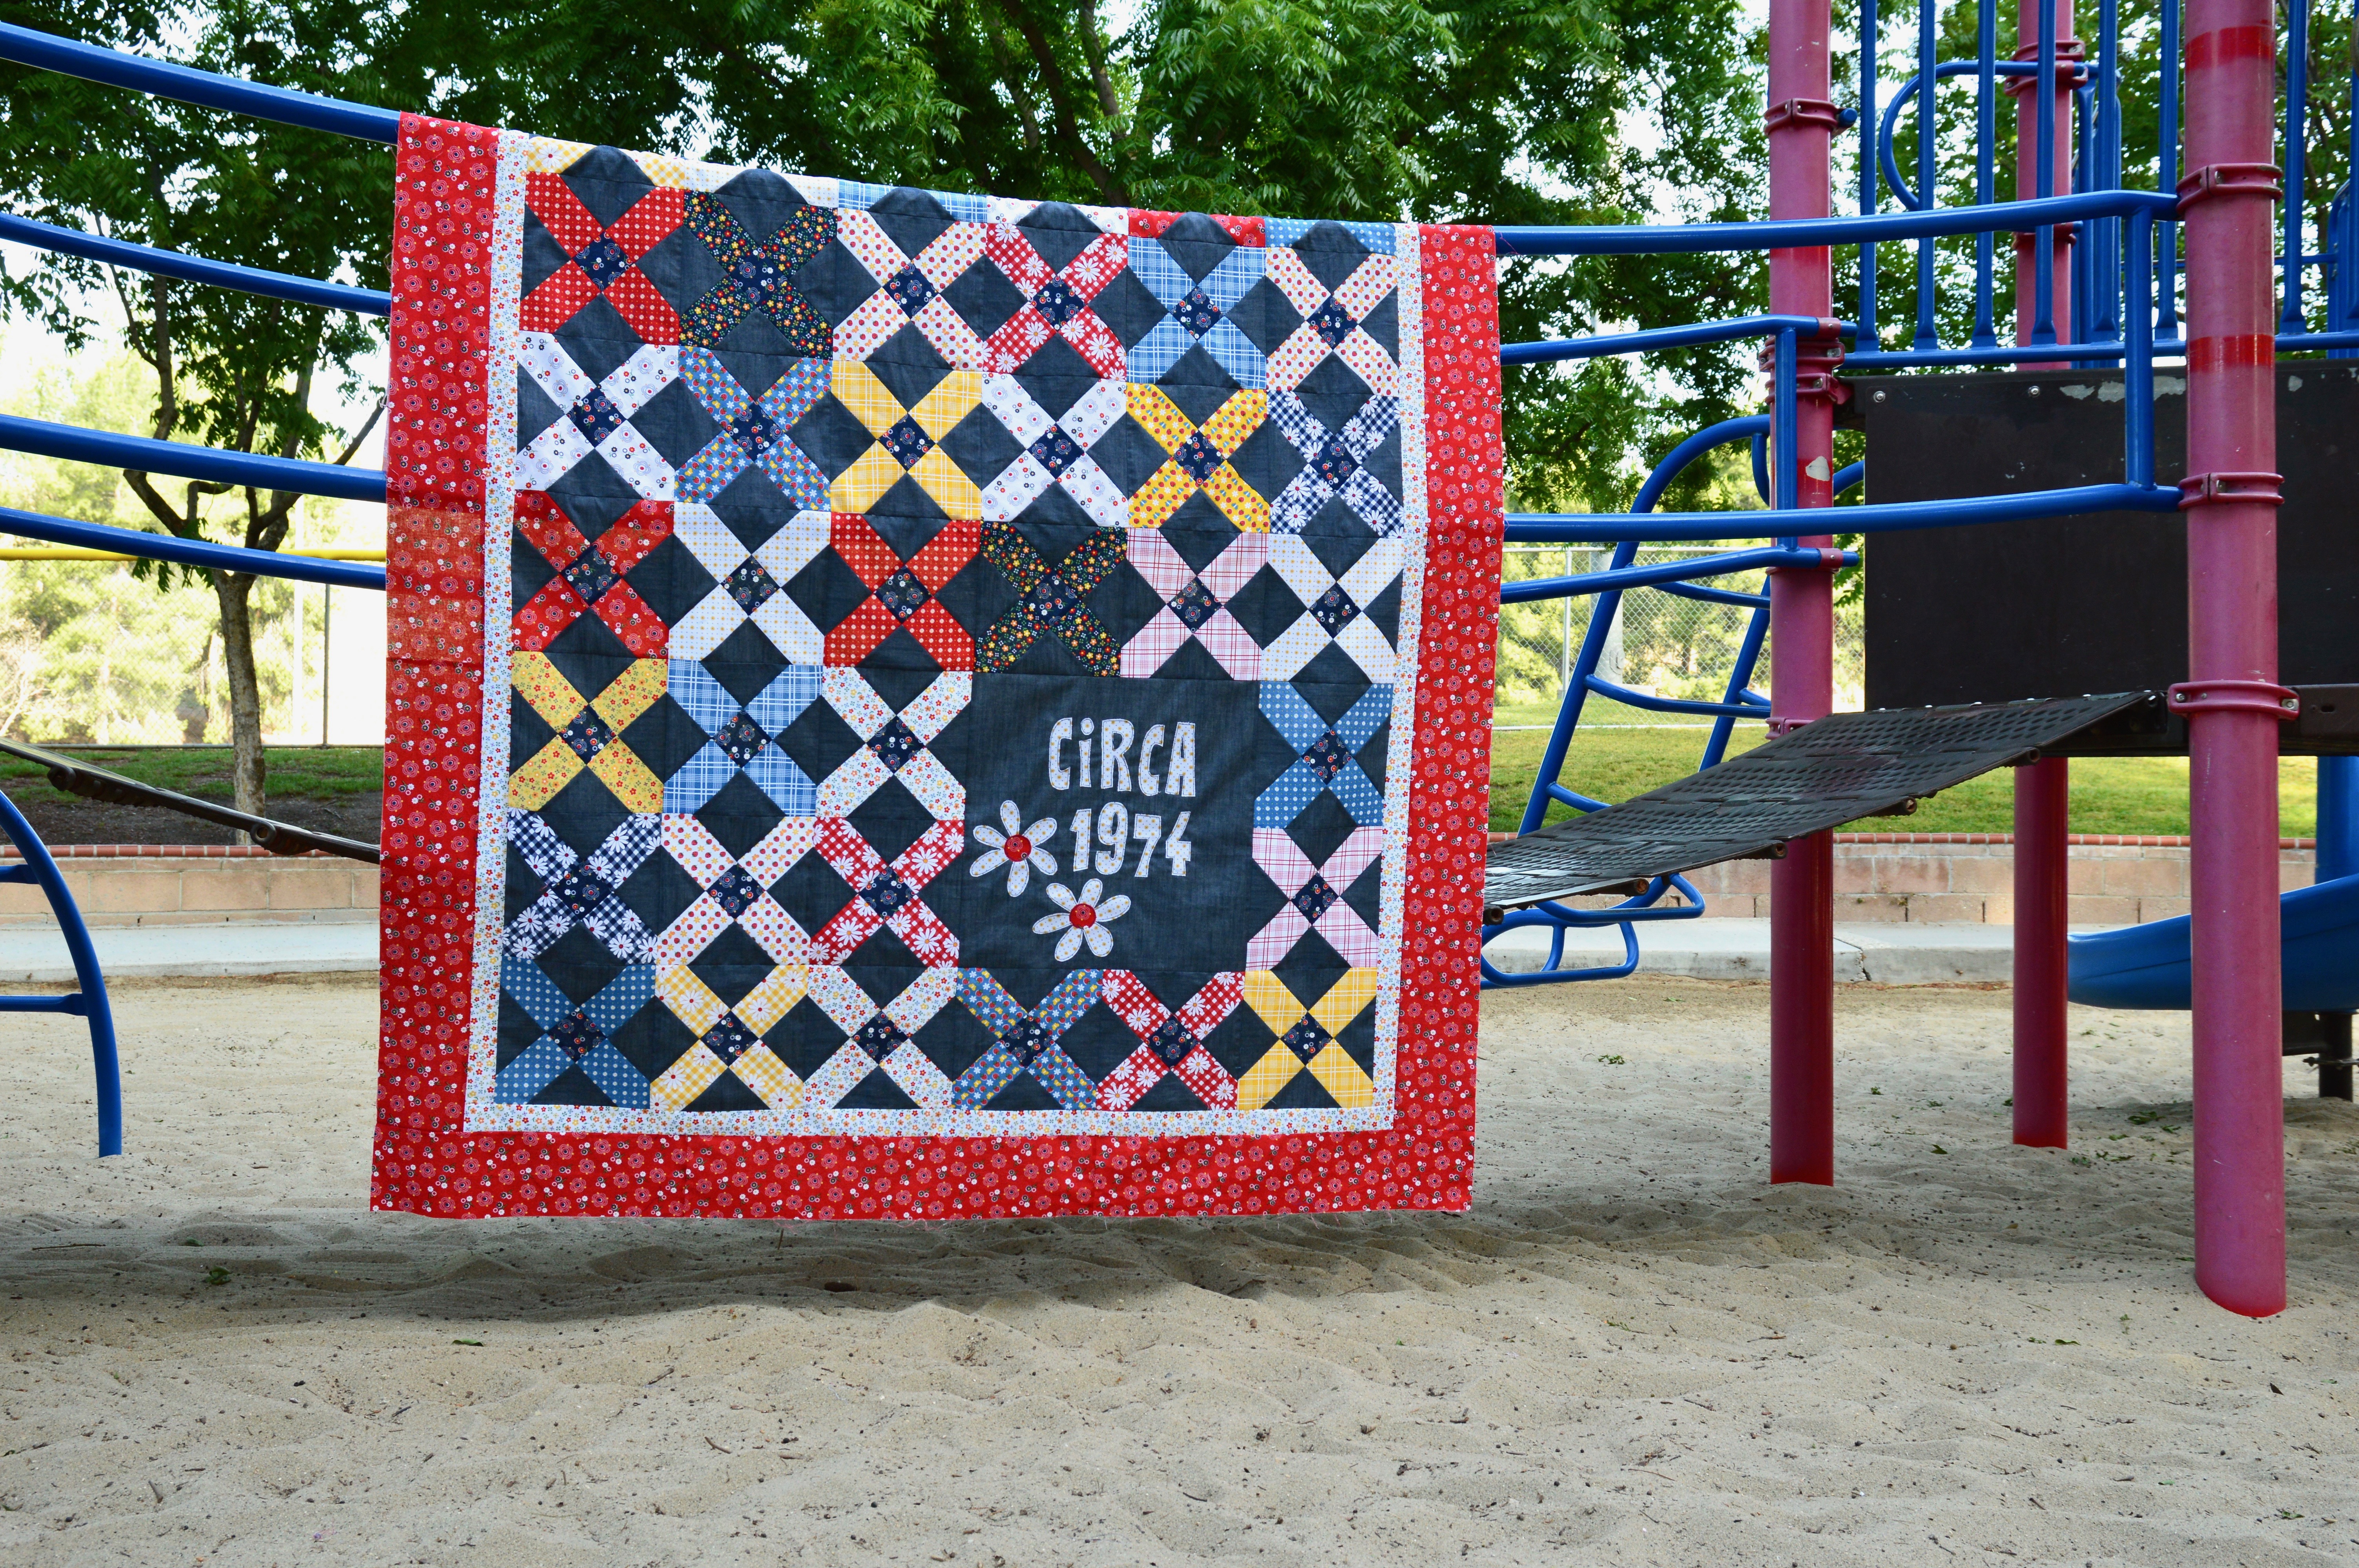
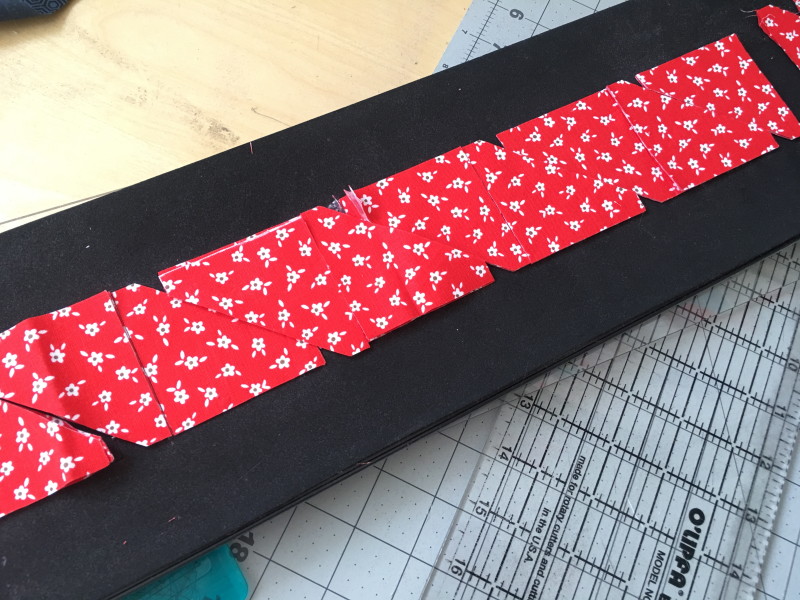
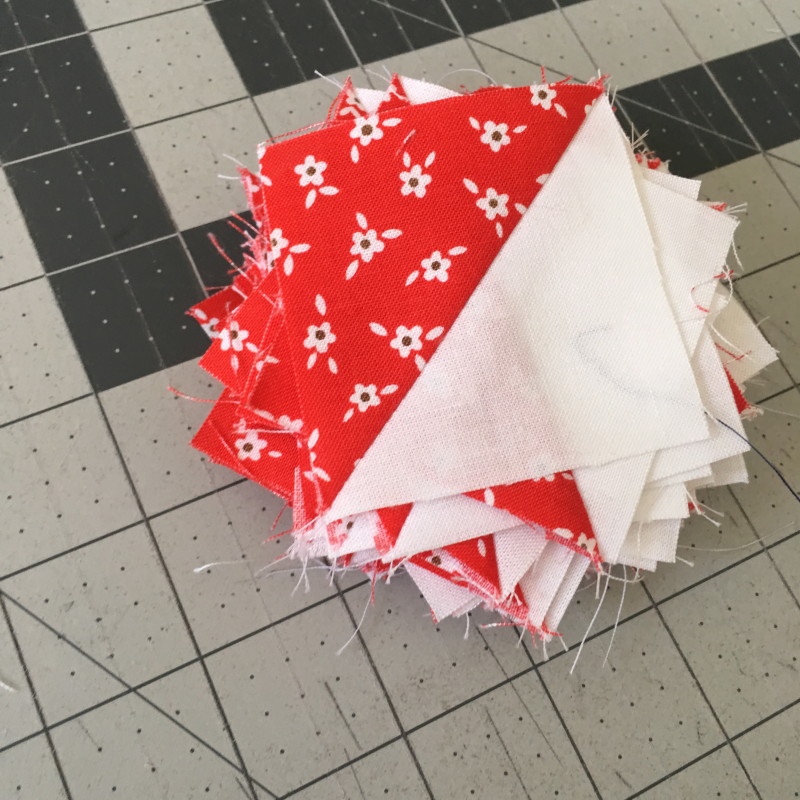
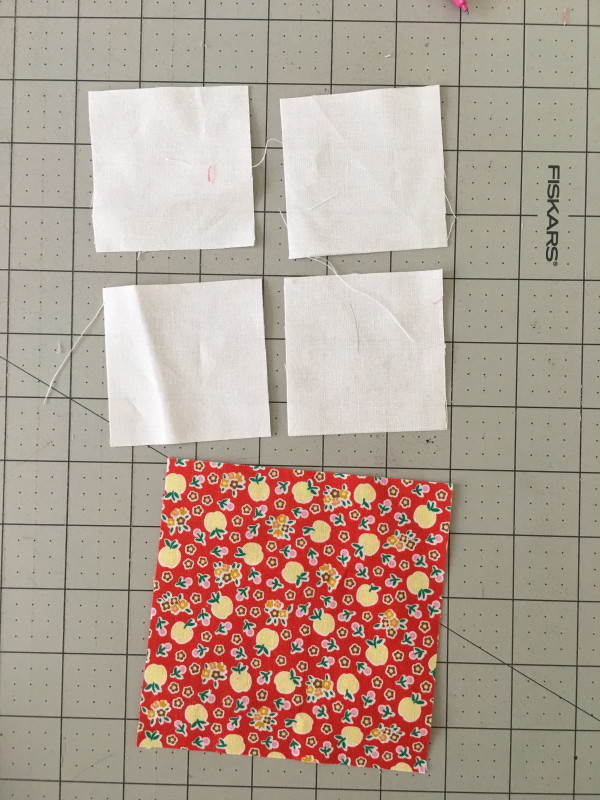
I choose to work with the reds from this collection.  I have a vintage red and white quilt from my Great Grandmother and it was sort of the inspiration for my design.

IMG_2913

The quilt measures 37″ square and it’s perfect to throw over a couch, place on a table, or hang on a wall.

IMG_2920

Let’s get started!!

Supplies:

Fat quarters or quarter yard cuts of 2 red prints

3/4  yard solid white fabric

1/2 yard red swiss dot fabric

fat quarter red gingham

scraps of green and brown

1/2 yard plaid border print

1/3 yard binding

1 1/2 yard backing

Heat n Bond Lite

Sizzix HST die and apple die

The quilt block is made of of 3 parts:  The center block, the “economy block” and the half square triangle (HST)  block.  All seams are 1/4″

For the HST block…

You will need 48 HST consisting of solid white and the darker red print.  I used my 2 1/2″ HST Sizzix Die.  You can literally cut all the HST you need in 30 seconds!  If you don’t have access to this die, just make 48 HST that finish 2 1/2″ square.

I love the Sizzix die because the squares finish perfectly even and no trimming or squaring up!

IMG_2881

Mufasa was very helpful in the chain piecing!IMG_2866

Cut (16) 2 1/2″ squares out of solid white.

Lay the block out like this:

IMG_2882

Sew together as you would a 4-Patch.  It is helpful to press the seams open to reduce bulk.  You need 16 total of these blocks.

For the Economy Block….

Cut (16) 4 1/2″ squares from the lighter red print.

Cut (64) 2 1/2″ squares from the solid white.  Draw a diagonal line on the back of each white square.IMG_2877

Position a 2 1/2″ square in the corner of the 4 1/2″ red square.  Sew along the diagonal line.  Repeat this process for each of the 4 corners.  Trim 1/4″ along the seam, and press.   IMG_2884

For the centers…

Cut (4) 4 1/2″ squares of solid white.  Don’t applique the apple until the block is sewn because it will overlap slightly.

Lay out the block like this:IMG_2885

Sew together in rows.  Press seams open.  Make four of these blocks.

For the apple applique…

IMG_2886

Fuse Heat n Bond Lite to the wrong side of the red gingham.  Position the gingham on the apple die diagonally.  Trim off the stem and the leaf.  Make four of these.  Repeat this process and die cut the leaf and the stem with the appropriate colors of fabric.

IMG_2893

Peel off the backing paper and position in the center of the block.  Heat set in place.  Sew around each piece twice with desired thread color.

For the sashing and borders…

Cut (2) 12 1/2″ x 2 1/2″ pieces for center sashing.

Cut (5) 2 1/2″ x WOF strips for sashing and borders.  I didn’t measure the borders, just sew and cut off the excess.  Press toward the sashing.

IMG_2889

Cut (4) 4 1/2″ x WOF strips of the plaid.  Sew the sides, press, then the top and bottom, trimming off the extra each time.  Quilt as desired.IMG_2890

I love how this quilt turned out and I love the red & white feel of it without it being totally red and white!  I think the plaid border is my favorite!!

IMG_2911

OK – I totally love this pattern!  I’m going to make it again for sure!

IMG_2912

IMG_2914

IMG_2898

Here’s a list of all the other bloggers taking part in the blog hop, pop over to their blogs for more Apple Farm inspiration.

8/8/16 Jemima @tiedwitharibbon www.tiedwitharibbon.com
8/8/16 Anorina @sameliasmum www.sameliasmum.com
8/9/16 Kimberly @fatquartershop www.fatquartershop.blogspot.com/
8/9/16 Bridgette @thefamilyhearth www.thefamilyhearth.com
8/10/16 Taunja @taunjalynn www.carriedawayquilting.com
8/10/16 Nadra @ellisandhiggs www.ellisandhiggs.com
8/11/16 Shari @doohikeydesigns www.doohikeydesigns.com/blog/
8/11/16 Heidi @fabricmutt www.fabricmutt.blogspot.com

8/12/16 Lindsey @fortworthfabricstudio www.fortworthfabricstudio.blogspot.com
8/15/16 Ange @alittlepatchwork www.alittlepatchwork.wordpress.com
8/15/16 Lauren @transientart www.transientart.com
8/16/16 Jessica @euphoria_jessica www.euphoriajessica.blogspot.com
8/16/16 Kristyne @prettybyhand www.prettybyhand.com
8/17/16 Melissa @ohhowsweetco www.ohhowsweet.com
8/17/16 Sedef @downgrapevinelane www.downgrapevinelane.com
8/18/16 Faith @faithessenburg www.saranaave.wordpress.com
8/18/16 Veronica @vividfelicity www.vividFelicity.wordpress.com
8/19/16 Megan @dollyhenryau www.dollyhenry.blogspot.com
8/19/16 Amanda @jedicraftgirl www.jedicraftgirl.com
8/19/16 Elea @elealutz www.elealutzdesign.com

Mini Mini Quilt {Sizzix Jar Applique}

jar mini quilt

IMG_0466

Sometimes something small is better than something big 🙂  I designed this mini mini quilt for a sweet friend.  It can be hung from a clothespin, tacked to a wall or bulletin board, or placed in a hutch; where ever you need a little happy!  I love this jar die by Lori Whitlock.

Screen Shot 2016-07-26 at 9.56.59 PM

I was thrilled to meet up with Lori at Quilt Market!  She is a super talented designer of fabric, paper, Sizzix dies, and crafts.IMG_8221

Let’s get started!!

Supplies:

Sizzix Jar #2 Die

(8) 2 1/2″ squares of white dot

(8) 2 1/2″ squares pink print

Fabric for jar, lid, and hearts

Heat n Bond Lite

2 1/2″ x WOF binding

batting

backing

Bakers Twine

Heart Charm


IMG_0443

All seams 1/4″.  Begin by sewing the 2 1/2″ squares together in an alternating pattern with 4 rows of 4.  Press.

IMG_0442

Fuse the Heat n Bond Lite to the wrong side of the jar fabric, lid fabric, and heart fabric. IMG_0444

As you can see this is a great scrap buster!!!IMG_0445

Die cut the jar, the lid and the hearts.  I die cut 11 hearts.  Peel off the backing paper.

IMG_0452

Position the hearts on the jar and the jar on the quilt block.  Mufasa and I are working very late tonight!!IMG_0449

Press the applique pieces in place.

Baste the backing fabric, batting, and quilt block.  Quilt.  I quilted loop de loos around the jar, then quilted with dark gray thread outlining the jar and lid.  I also quilted inside each heart.  Square up the quilt block and add the binding.

IMG_0464

Tie a bow out of bakers twine and tack it to the side of the jar.  I added a little silver heart charm – yes I’m cute 🙂

IMG_0473

I hope you love making this project!  I can’t wait to make more and give for gifts.  You might want to tuck this little idea away for Valentines Day!!

IMG_0469

Pretty Playtime Quilts Teapot Block Pillow

Blog-Header

Today is my turn on the Pretty Playtime Quilt Blog Tour!  I love this sweet pattern book by Elea Lutz!  (Juicy tidbit…..Elea and I once spent a wild night together at an 80’s dance club!!!)  The patterns for this entire quilt are in the spiral bound book available from Fat Quarter Shop.  You can make the sampler quilt or you can get creative with the blocks!Screen Shot 2016-07-03 at 10.00.13 PM
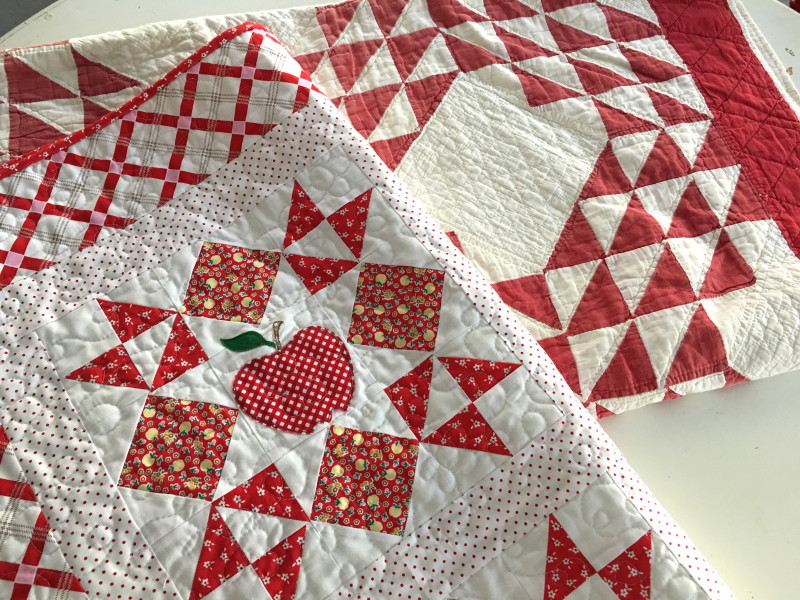
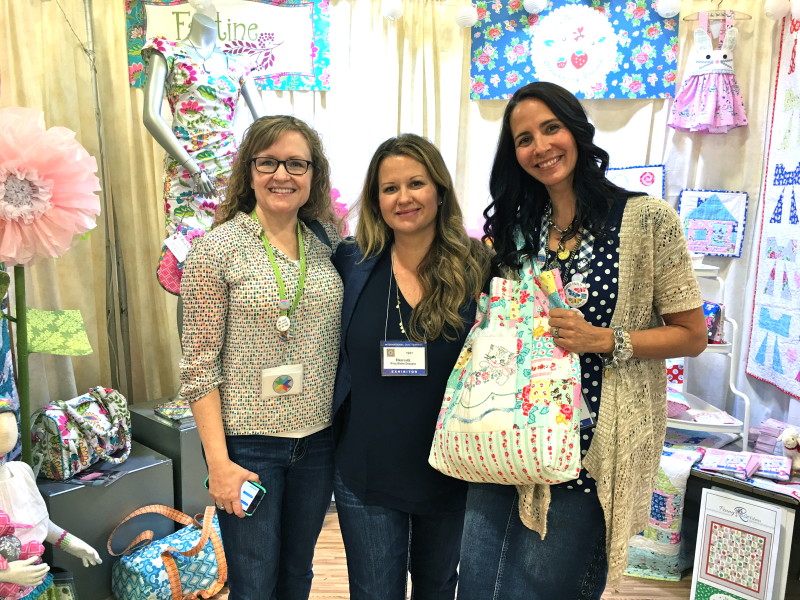
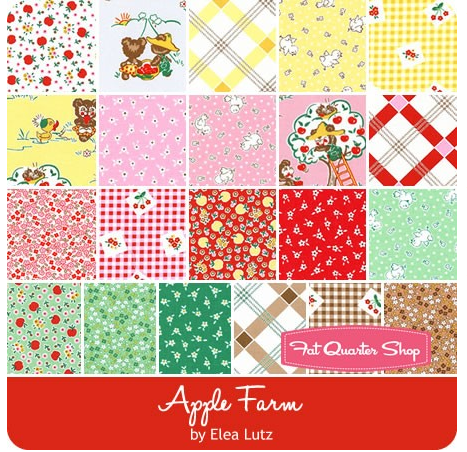
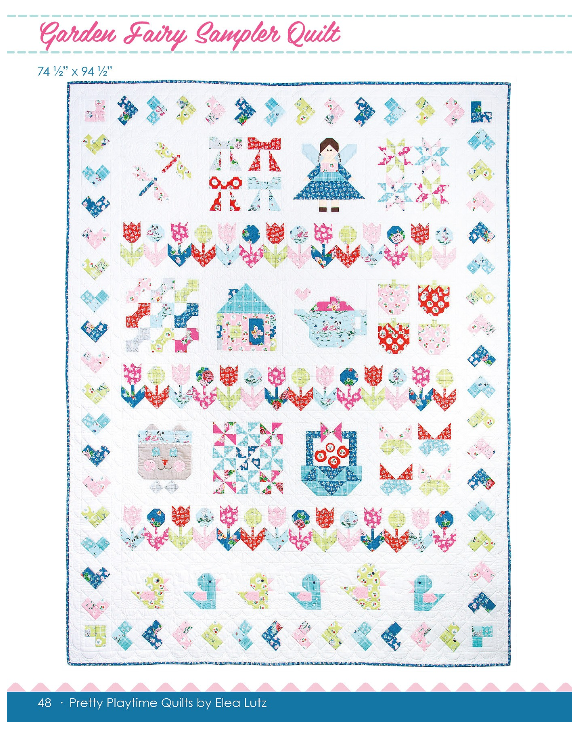
The fabrics used in the pattern book are from Elea’s fabric line
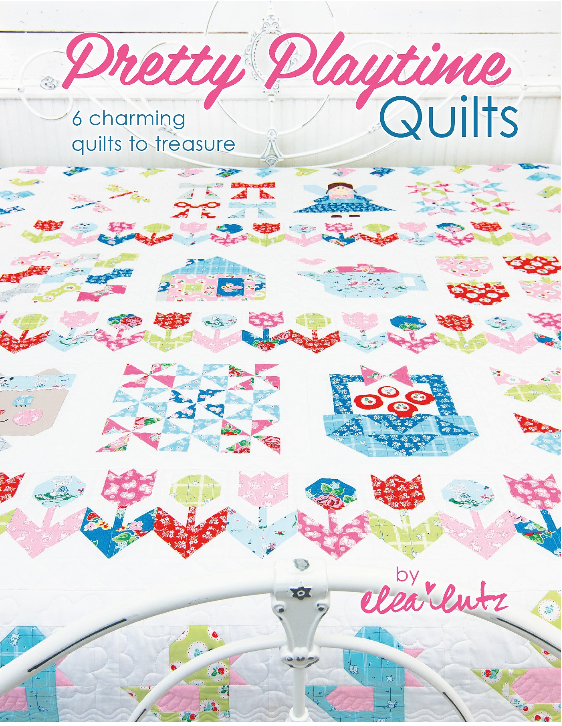
 Strawberry Biscuit.Screen Shot 2016-07-03 at 9.59.54 PM

I choose to make a throw pillow out of the teapot block.IMG_9424

I sewed the block exactly like the pattern instructed.  I love how the instructions are super easy to read and the diagrams make sewing the block a snap.  I added a 1.5″ border around the teapot followed by a 3.5″ floral border.  IMG_9416

I quilted the entire block like you would a mini quilt.  I trimmed it down to measure 20″ square.  Before adding the binding I sewed a 20″ x 20″ back with a zipper.  IMG_9412

I basted the quilted front to the pillow back wrong sides together with a 1/8″ seam all the way around.  Then I added the binding just like you would a quilt.IMG_9409

I inserted a 20″ down pillow form.  It’s super soft and perfect for propping your head while reading or watching a movie 🙂IMG_9414

Be sure to check out a new block from a new designer each week!  You will love all the inspiration!

Week 2 – Erin from Why Not Sew?
Week 3 – Wynn from Zakka Art
Week 4 – Anorian from Samelia’s Mum
Week 5 – Amy from Diary of a Quilter
Week 6 – Renee from Sewn with Grace
Week 7 – Jemima from Tied with a Ribbon
Week 8 – Amanda from Jedi Craft Girl
Week 9 – Debbie from Happy Little Cottage
Week 10 – Tina from Emily Ann’s Kloset
Week 11 – Erica from Kitchen Table Quilting
Week 12 – Kristyne from Pretty by Hand
Week 13 – Heidi from Fabric Mutt
Week 14 – Brigitte from The Family Hearth
Week 15 – Lorrie from Sew Mod Designs
Week 16 – Kristin from They Grow Up Too Fast