LUCKY St. Patrick’s Day Pillow Tutorial

I can’t believe it’s almost St. Patrick’s Day!  Of course a St. Patrick’s Day pillow is in order.  I hope you get a chance to make one – you will be so LUCKY!!!
Supplies:
19″ pillow
Assortment of green fabrics
1/8 yard white fabric
Scrap of Gray fabric for letters
3/4 yard backing fabric
zipper – 20″ or longer
Heat n Bond EZ Print appliqué sheets
Heat n Bond Fusible Fleece
Dig out all your green fabrics and toss it into a pile!!

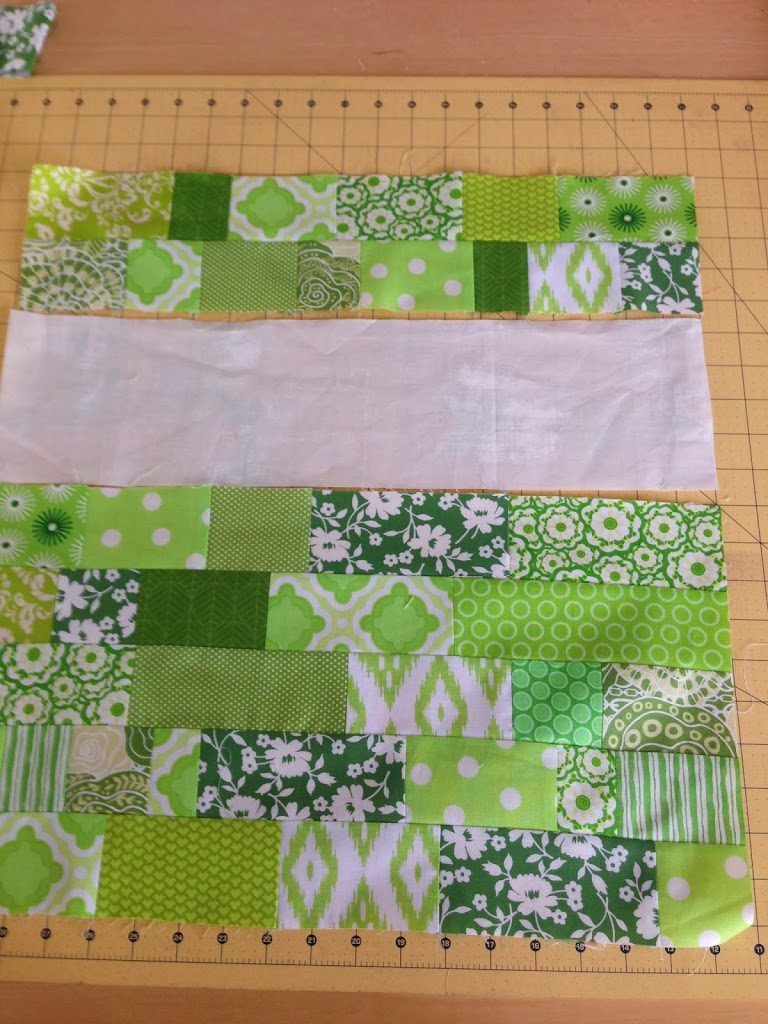
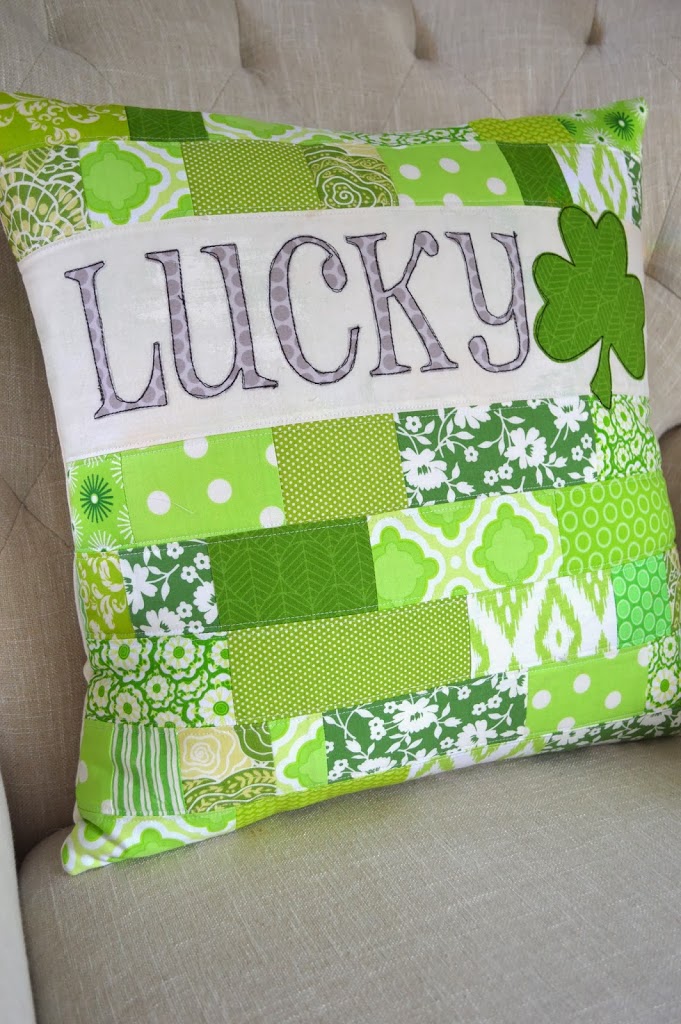
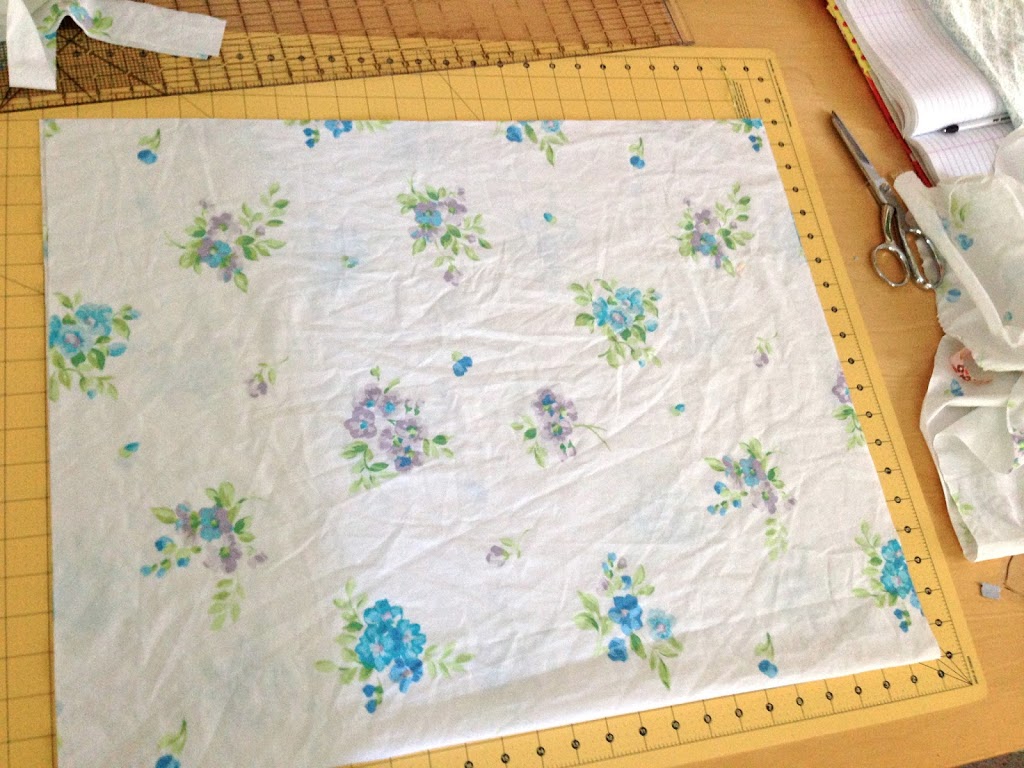
Cut into 2.5″ strips – it doesn’t matter how long they are, just get a nice assortment.

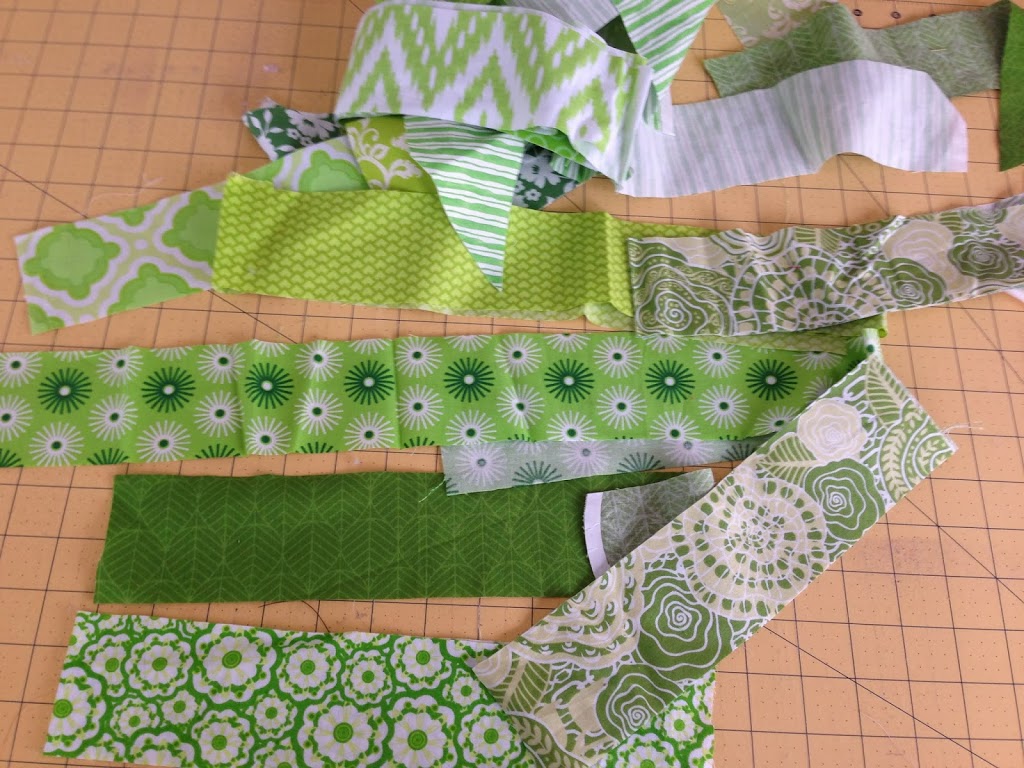
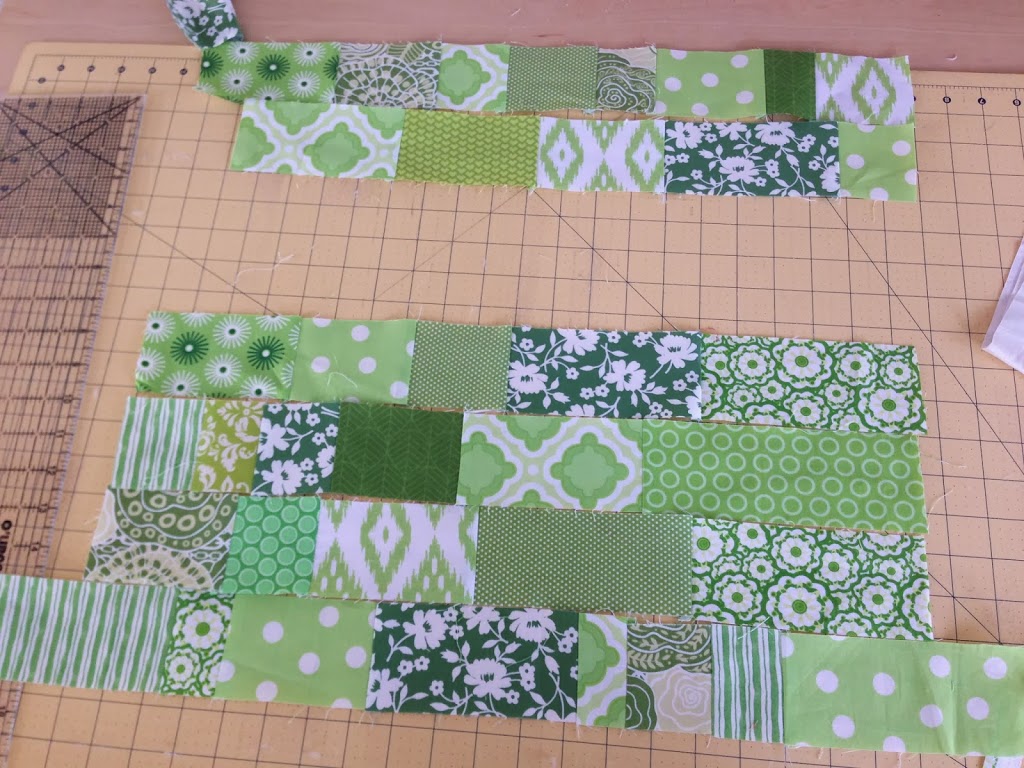
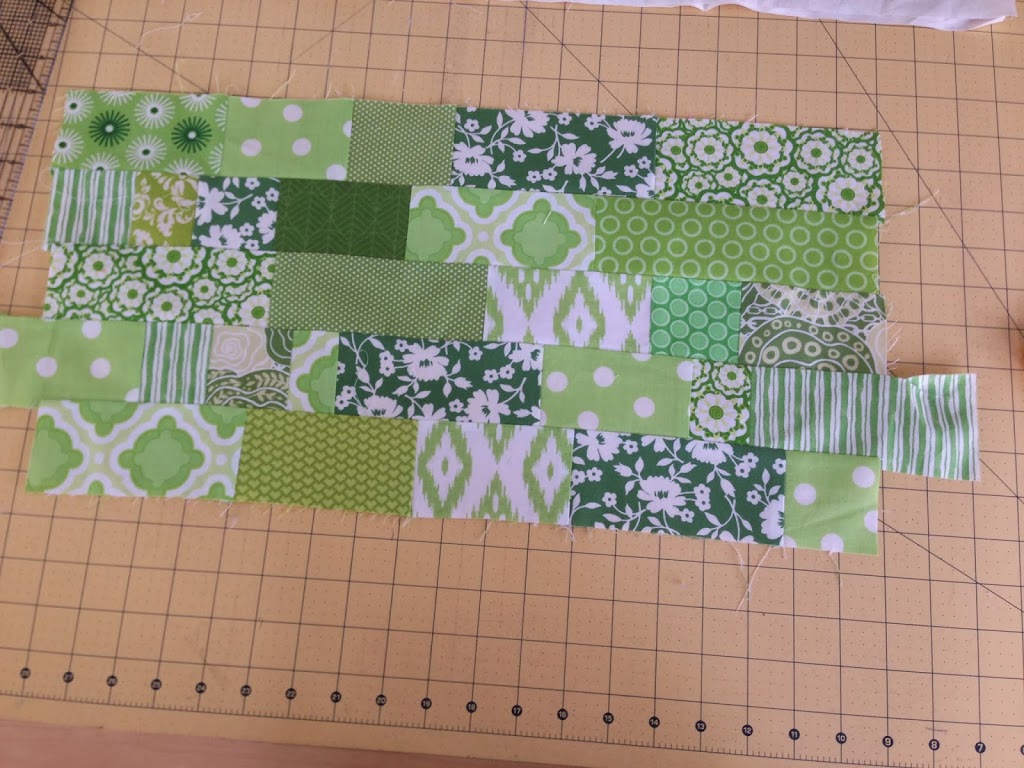
Cut the strips into random lengths – using your scissors, gasp!!  You can use a rotary cutter – I am all about speed when I sew and the scissors seemed faster!

Put all the pieces in a basket.  Pull out 2 pieces and sew them together (1/4″ seams) end to end, continue doing this by grabbing 2 pieces at a time.  I dare you to not even look at the fabrics and just be totally random!!!
Here is the chain piecing.  Once you have a fair amount of pairs sewn, pair up the pairs, then pair up those strips.  The goal is to have 7 strips that are 19″ long.

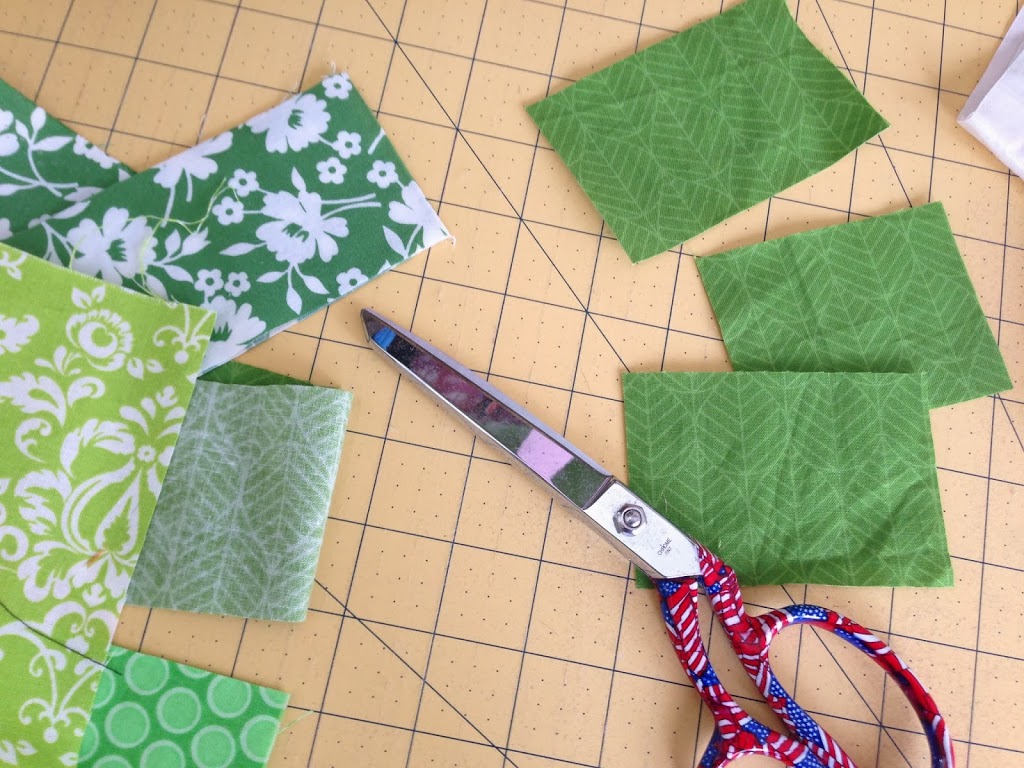
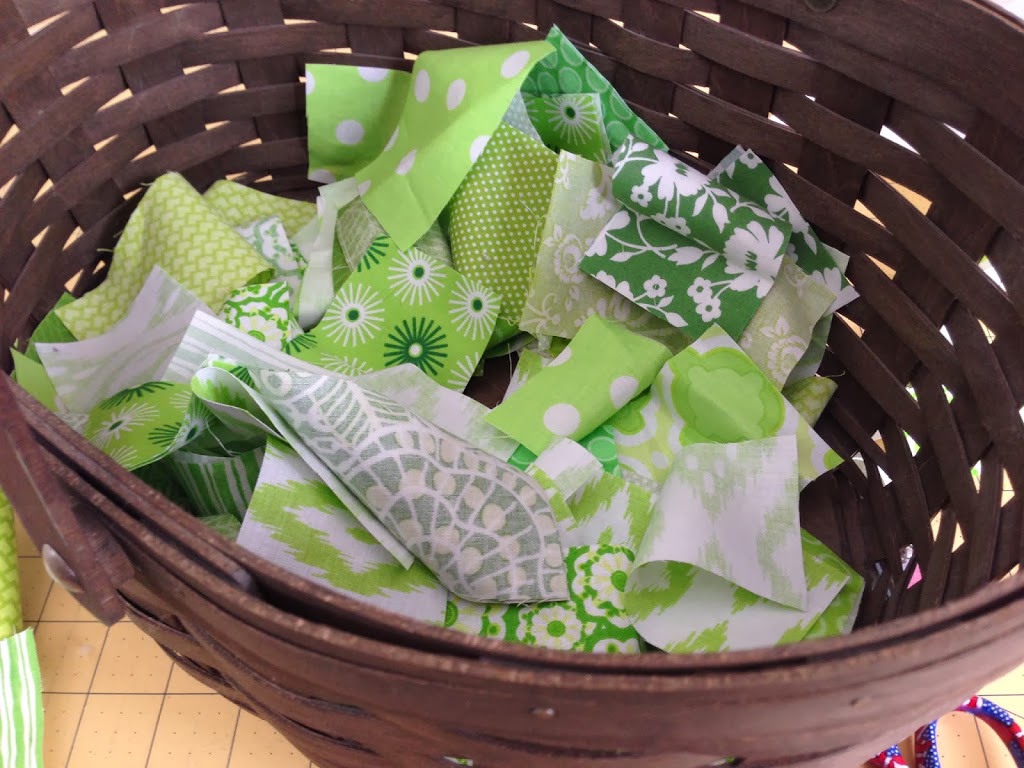
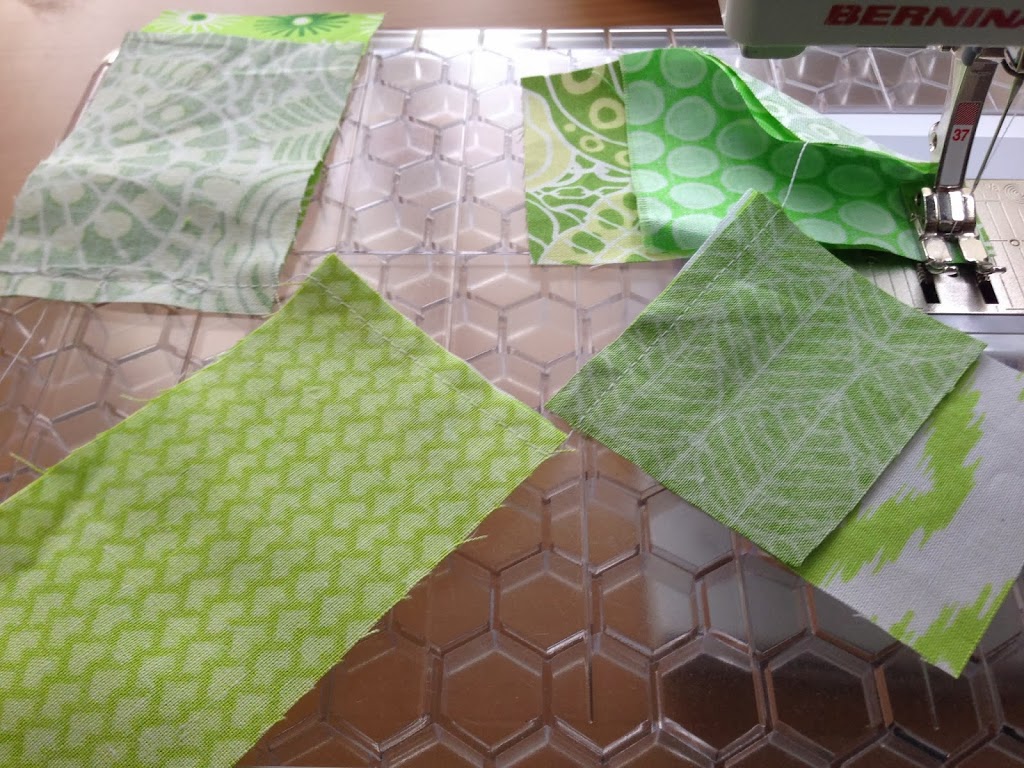
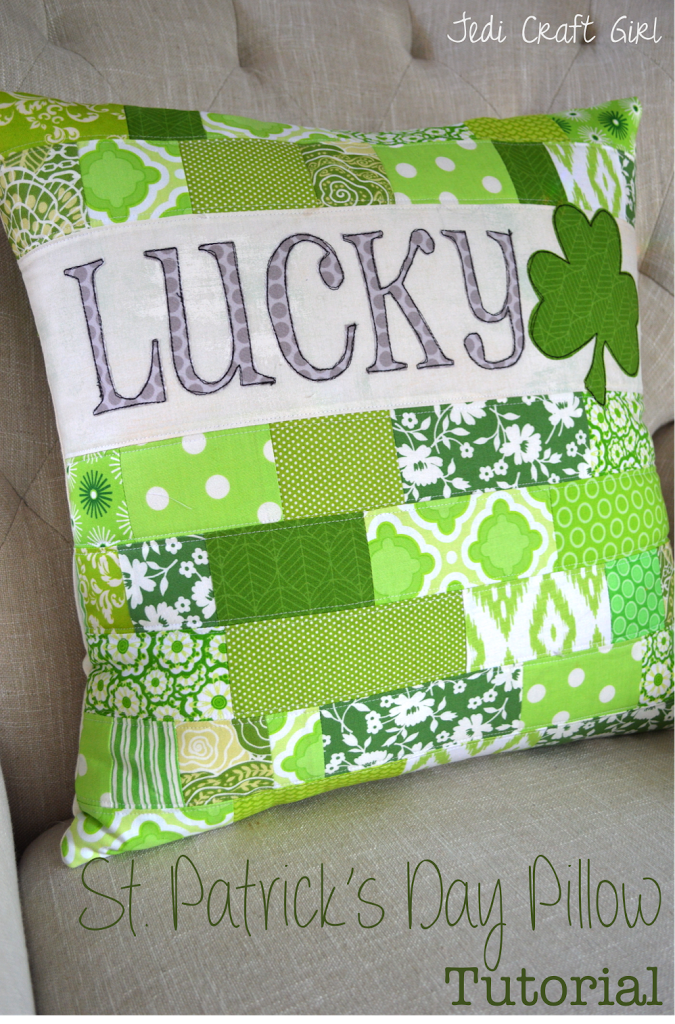
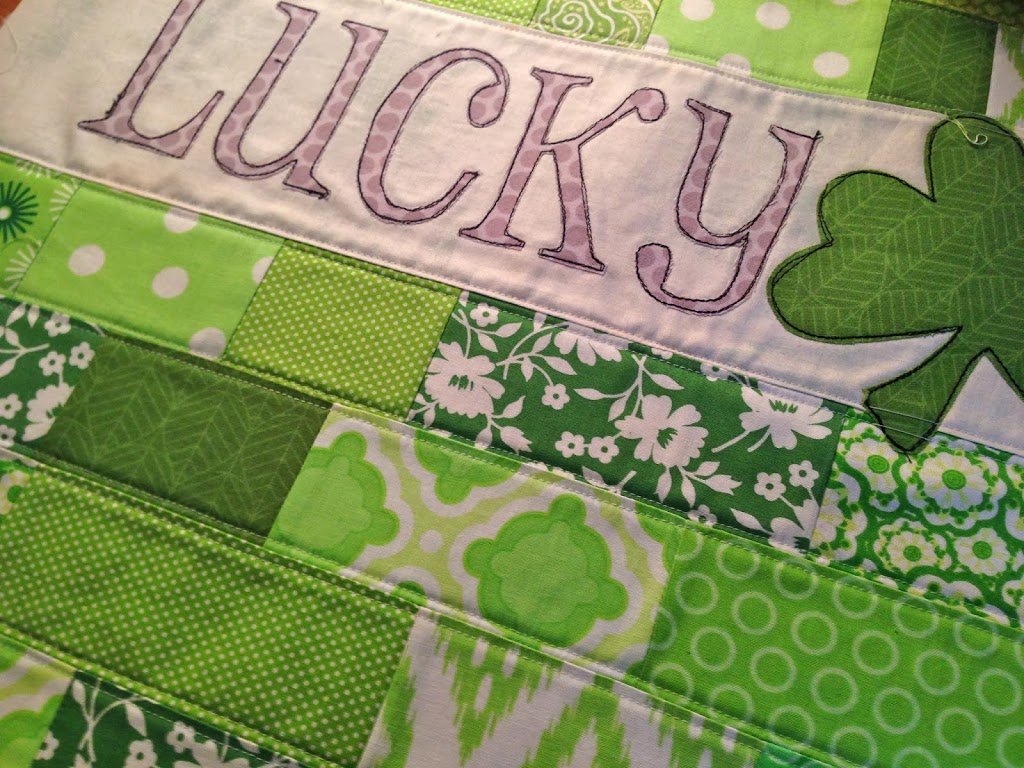
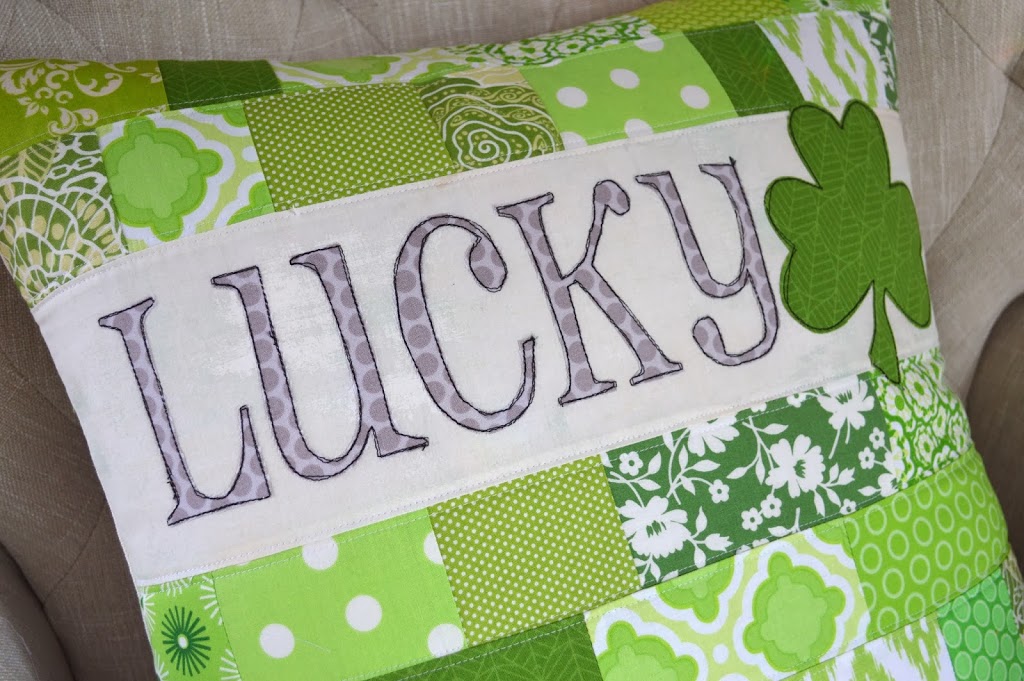
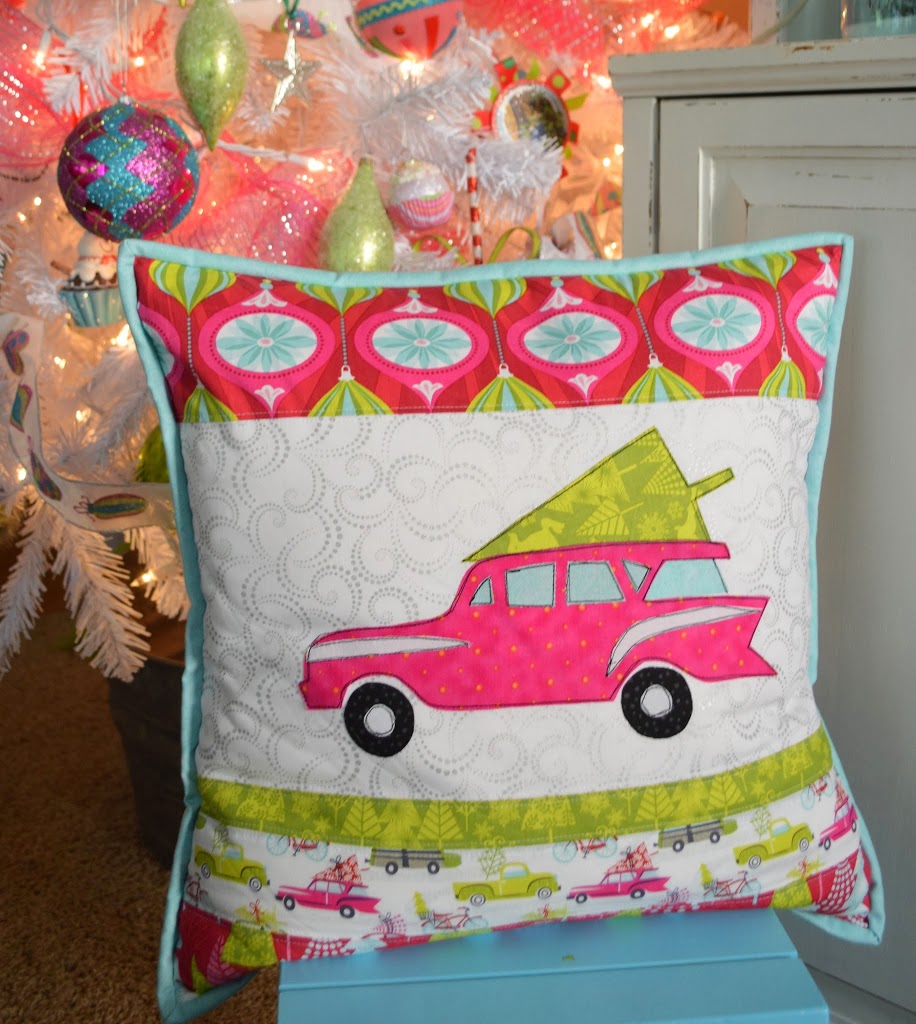
I went pretty random and did not pay attention to the pattern – I like how it’s scrappy.

Once you have laid out the strips, sew them together using 1/4 inch seams.  There are 5 strips on the bottom and 2 strips on the top.  Don’t worry about the fact they don’t line up.  Sew them together, then square them up to 19″ long.

Cut a piece of white fabric 5″ x 19″.  This is for the appliqué.  Sew all pieces together like this:
Prepare the appliqué by downloading the pattern HERE.  I used these EZ print sheets from Therm o Web.  You put them in your printer and then you don’t have to draw the pattern by hand!  They are great!  Make sure to print it in reverse.
Once the pattern is printed, cut around the words and shamrock.  Iron to the WRONG side of your fabric.   I choose to use a gray dot for the letters.  Then cut out the letters and shamrock.  The letters are a little bit tedious, I was almost tempted to try the Cricut, but me and the Cricut don’t get along very well!


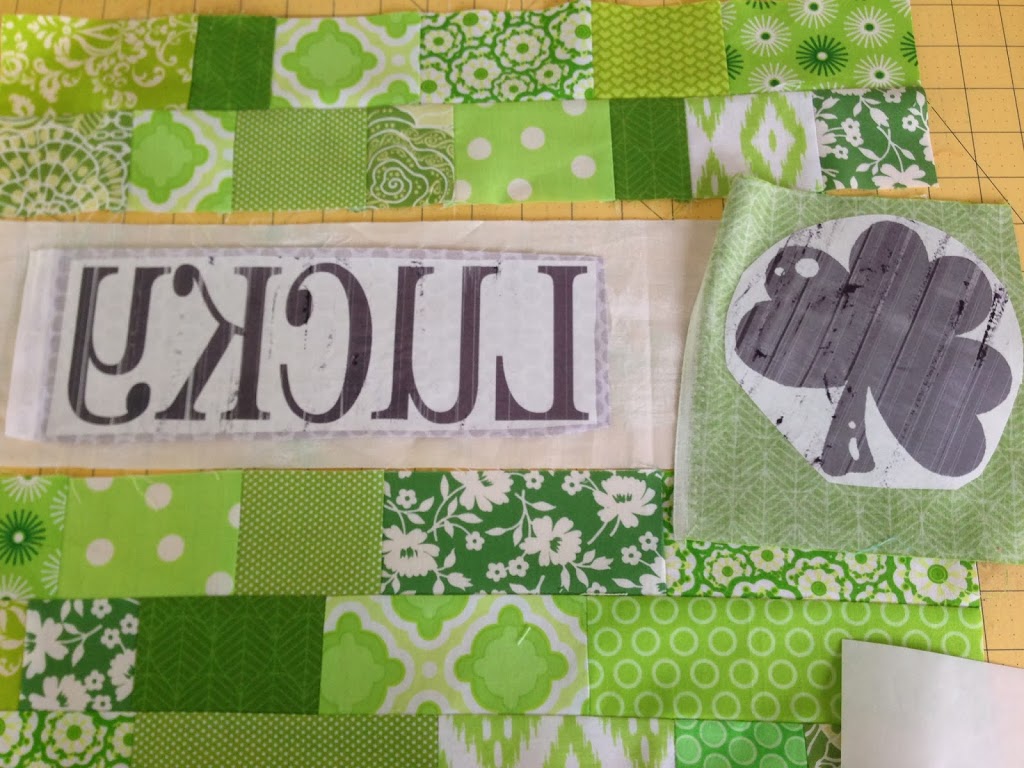
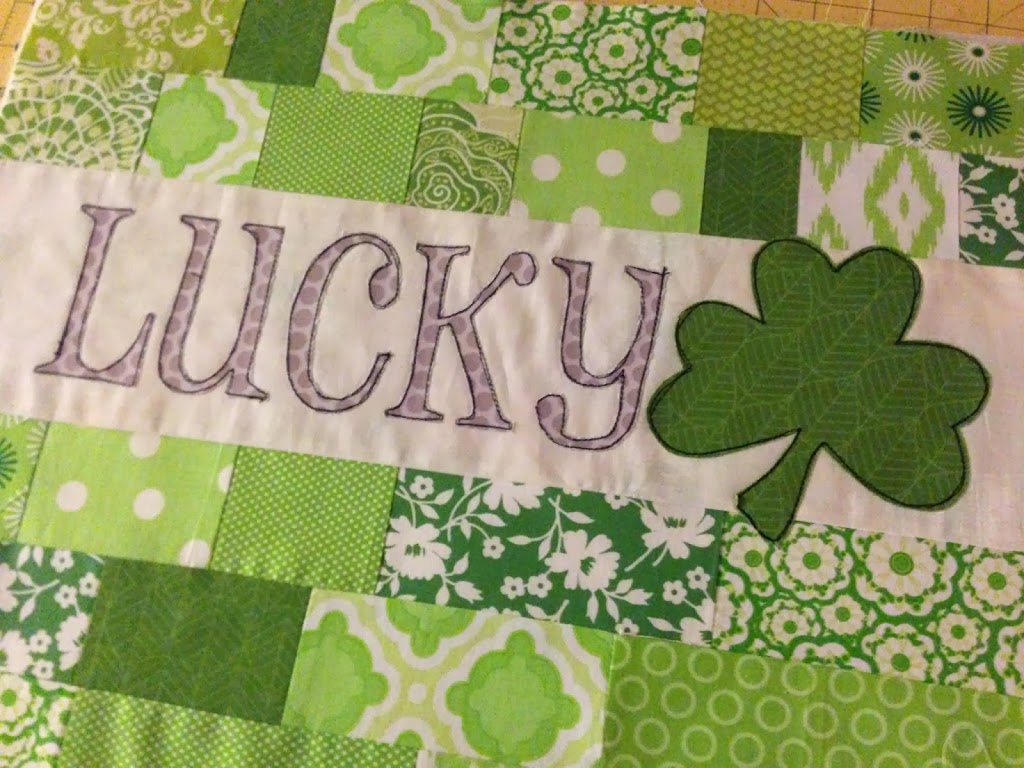
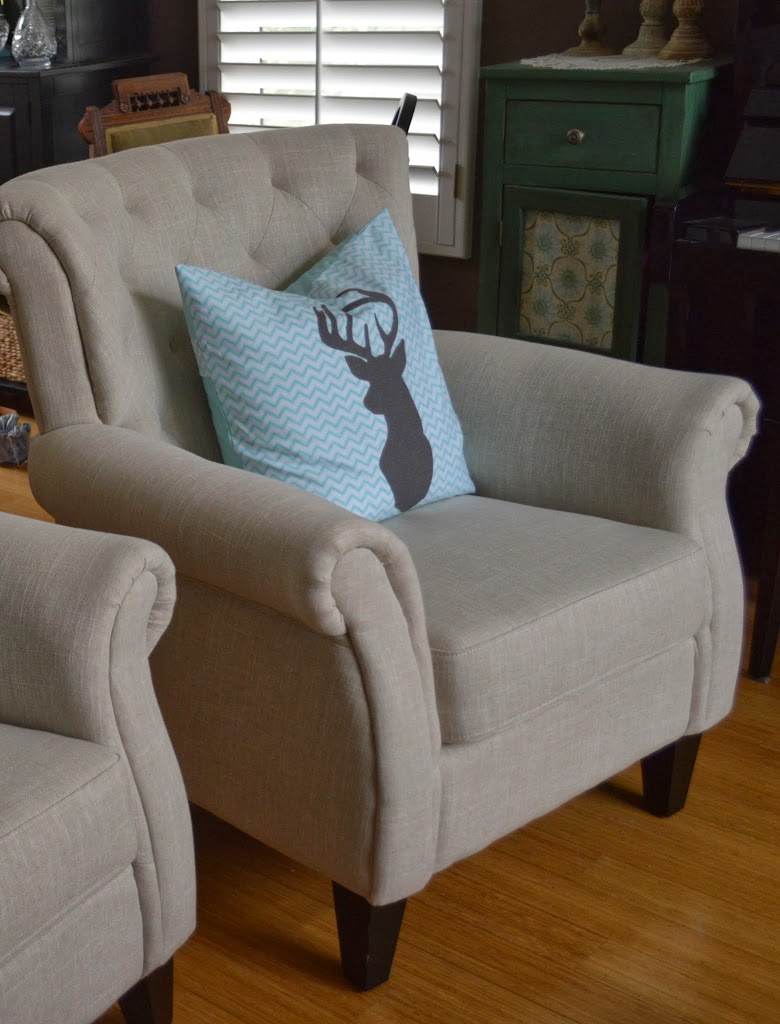
Sew using a straight stitch in black thread twice around the letters and the shamrock.

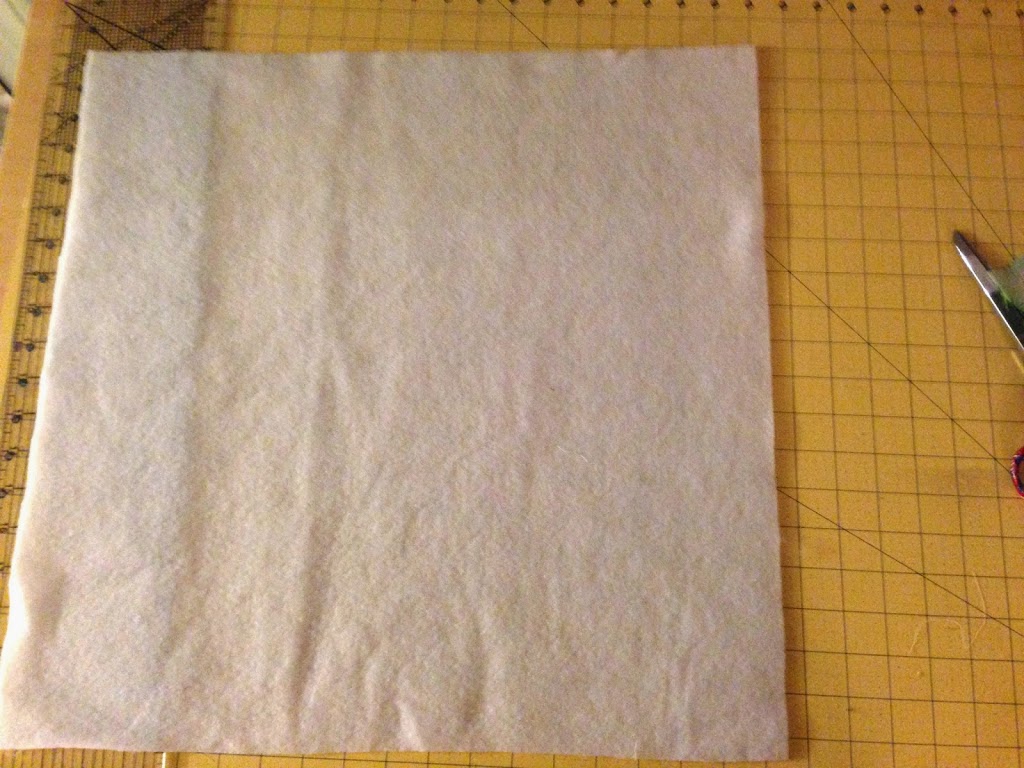
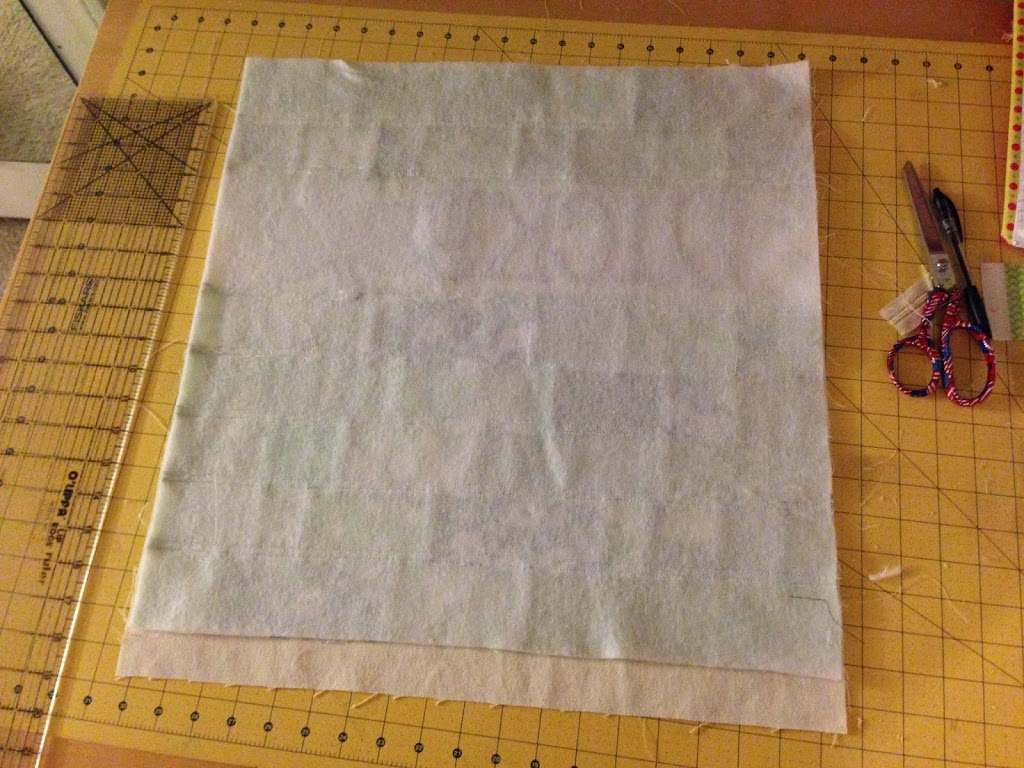
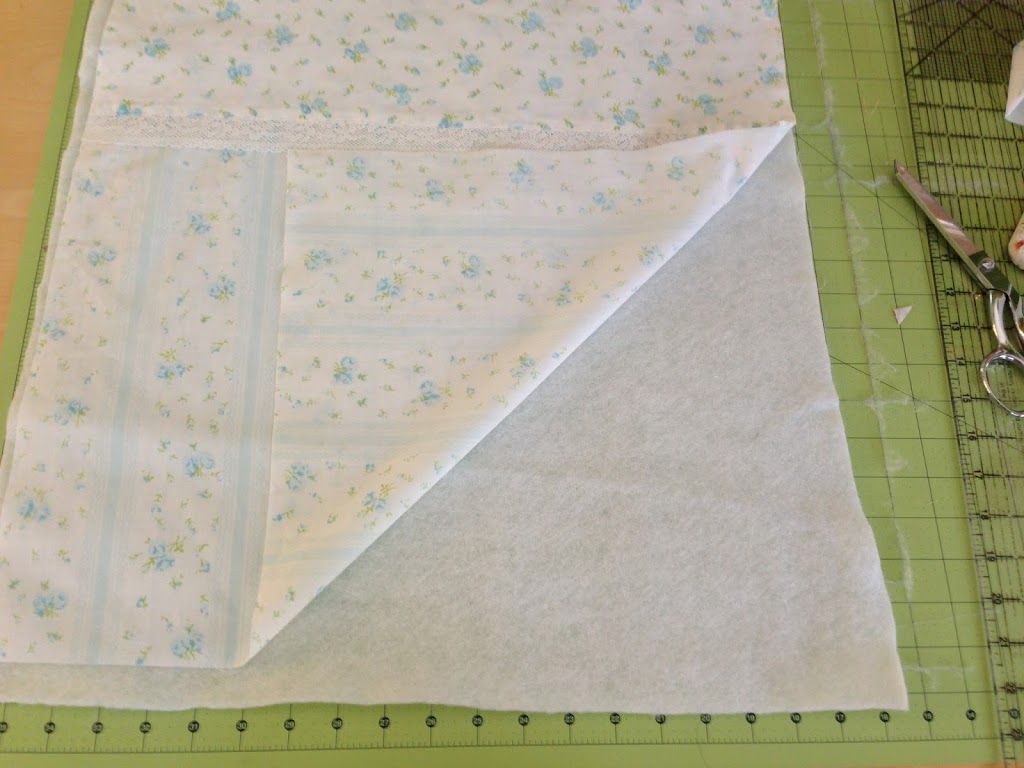
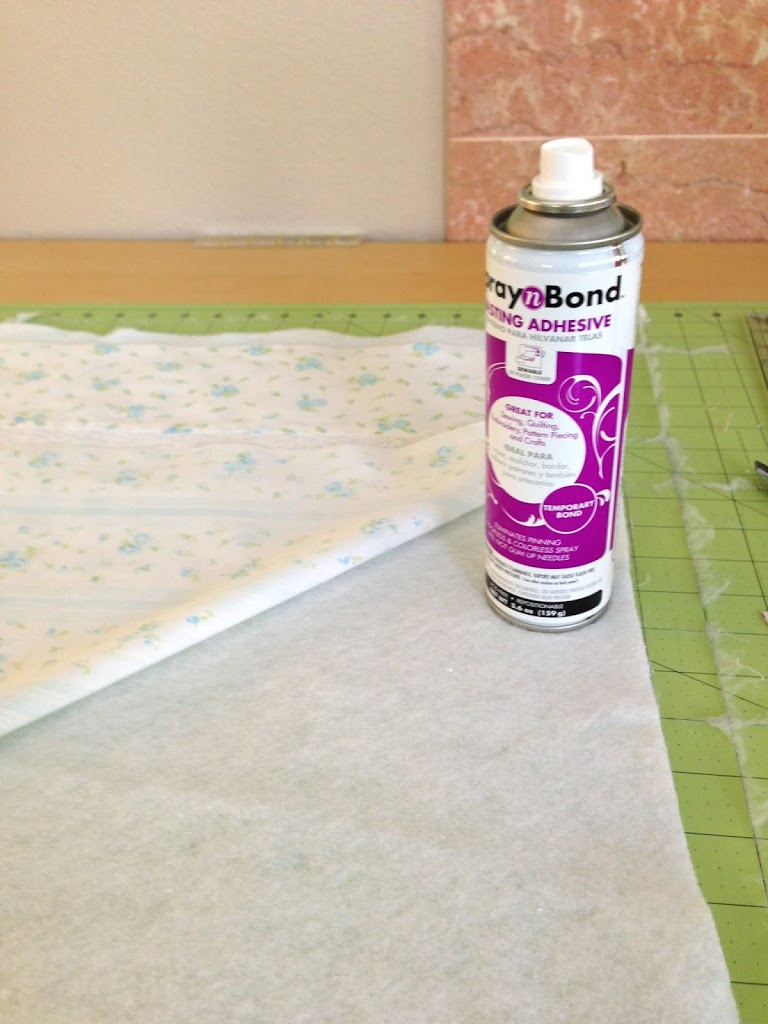
Cut a piece of fusible fleece 19″ square and iron it to the wrong side of the lucky pillow top.


Sew straight lines 1/8″ from each seam.

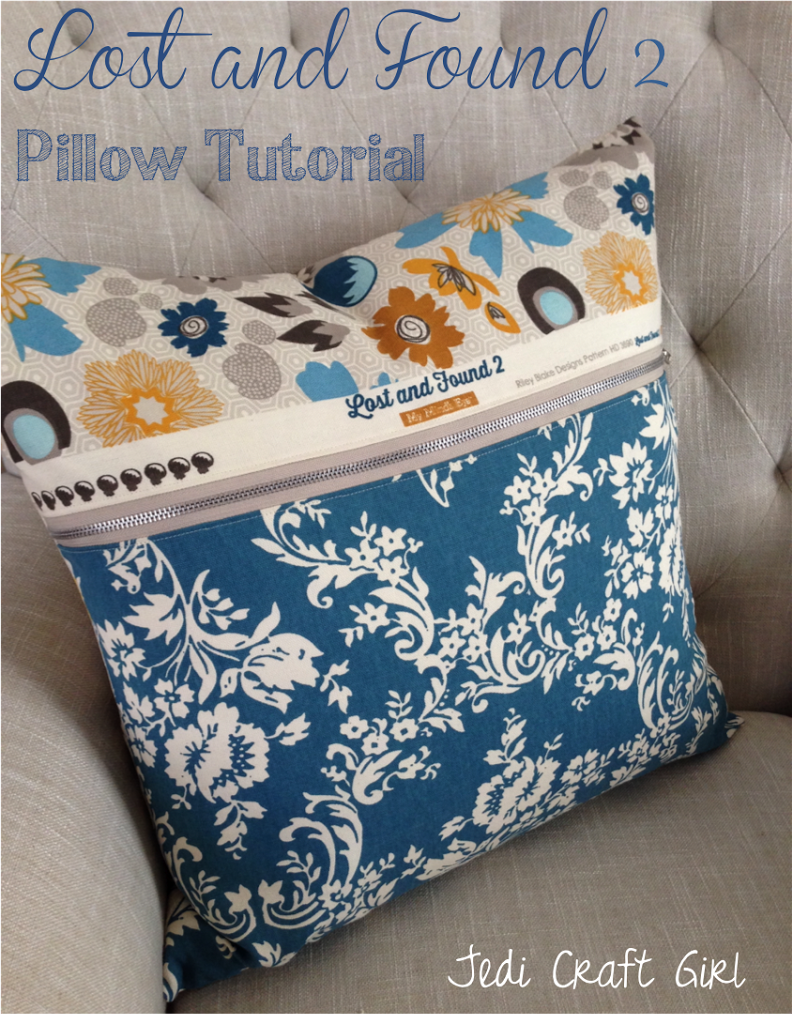
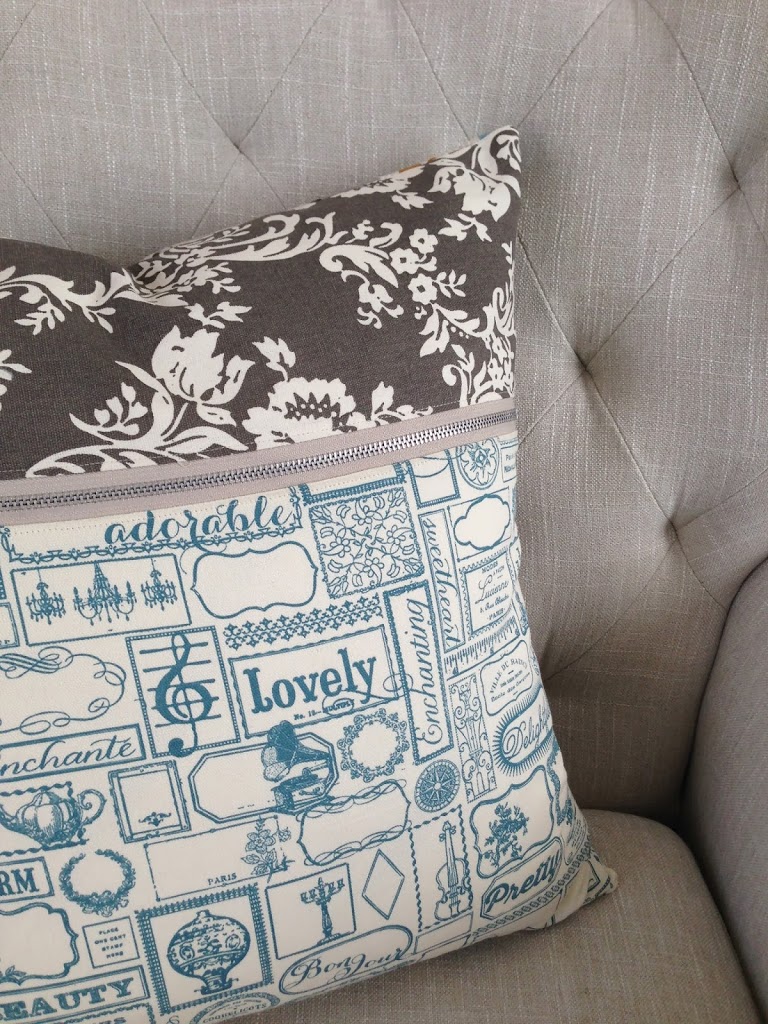
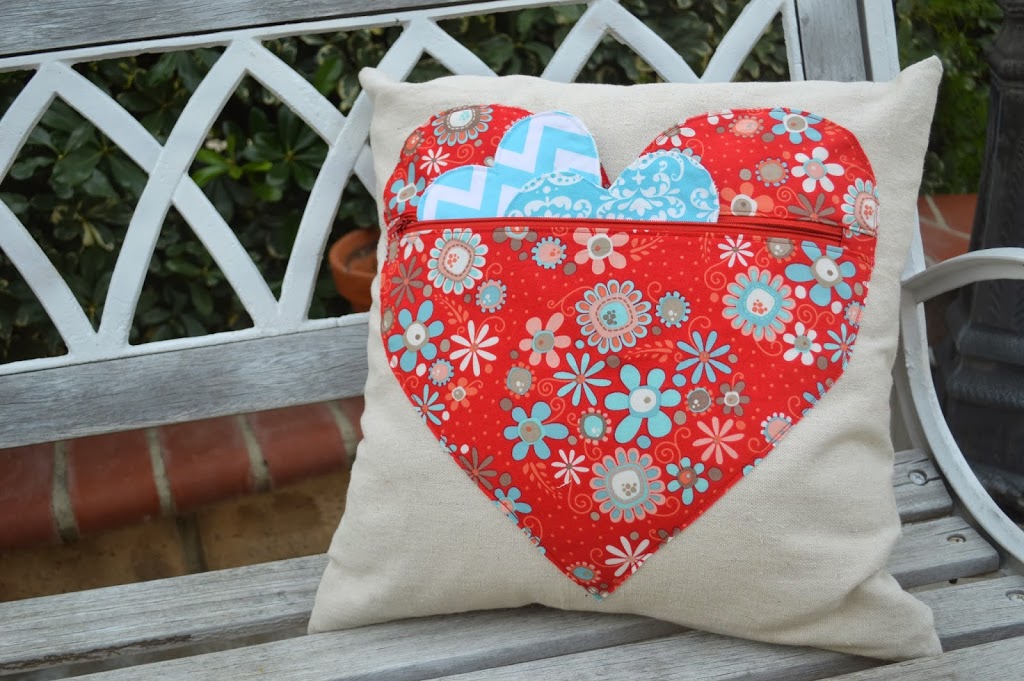
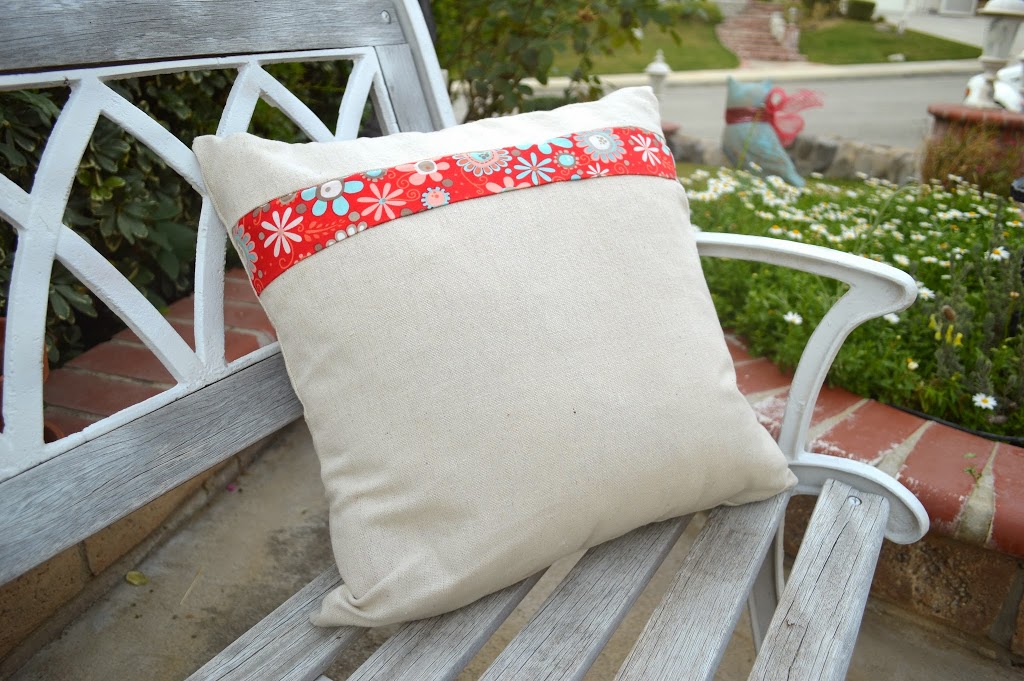
Prepare the pillow back….
From your backing fabric cut (1) 4.5″ x 19″ and (1)16″ x 19″
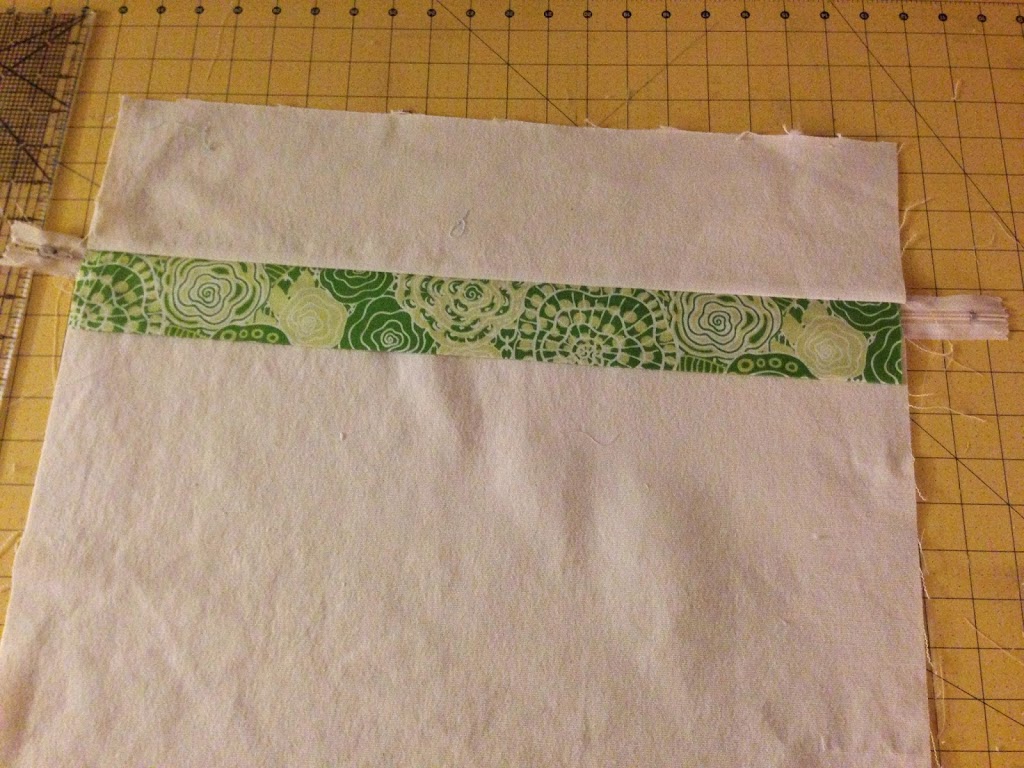
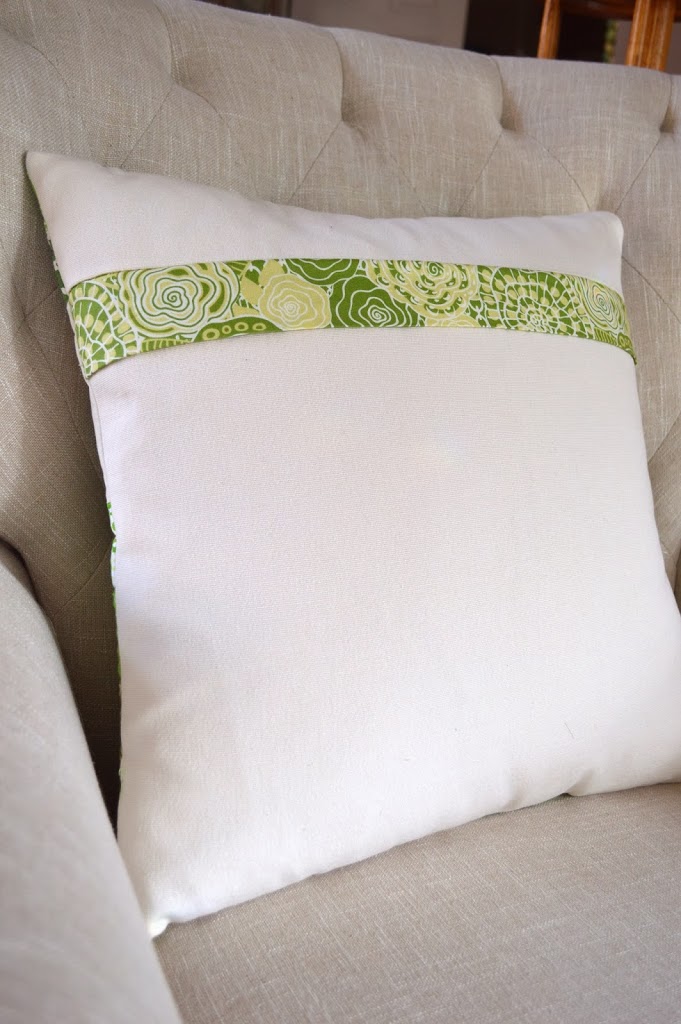
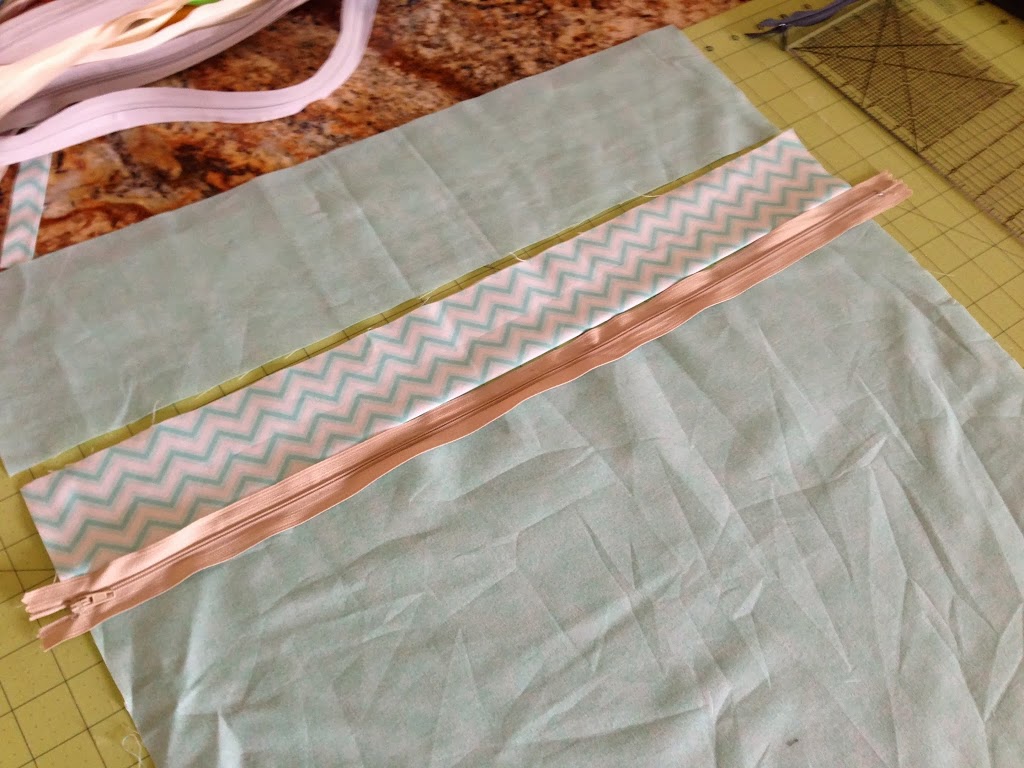
Cut a 4.5″x 19″ strip from a green fabric
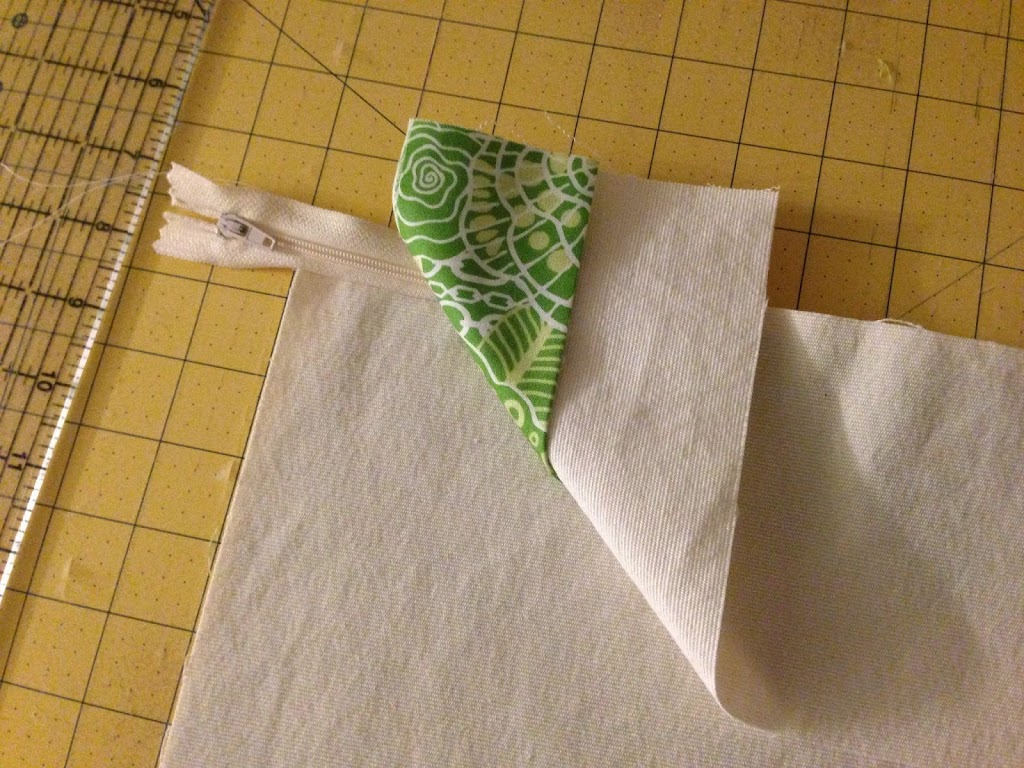
Lay the pieces out like this with the zipper.  Press the green piece in half lengthwise.

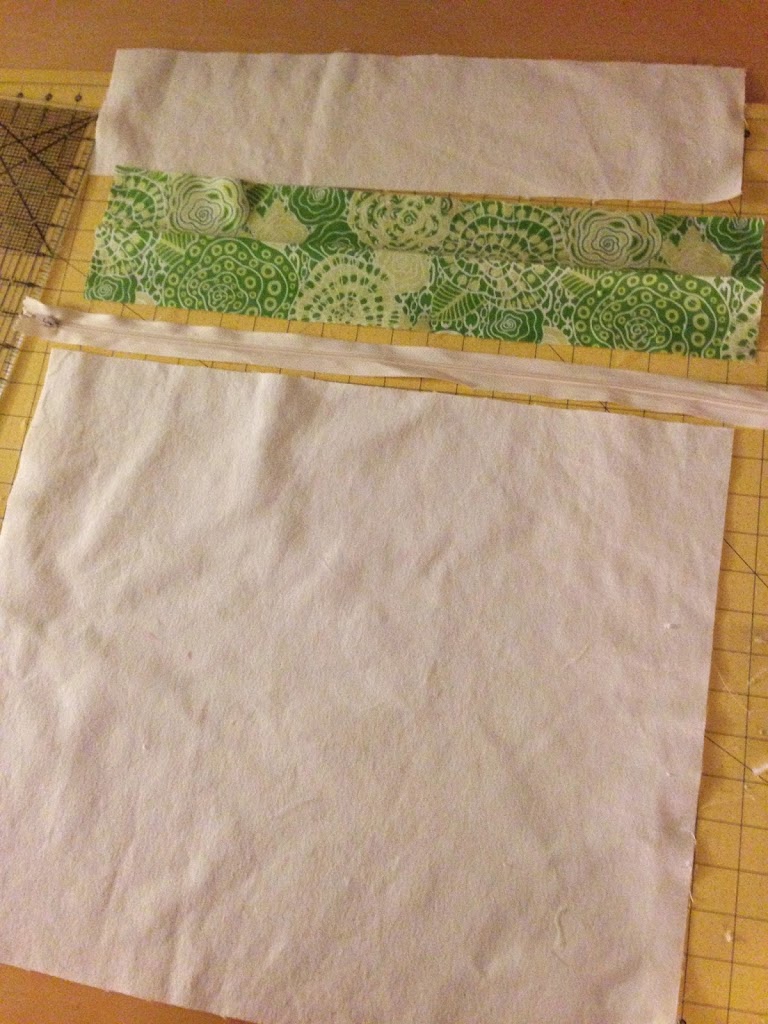
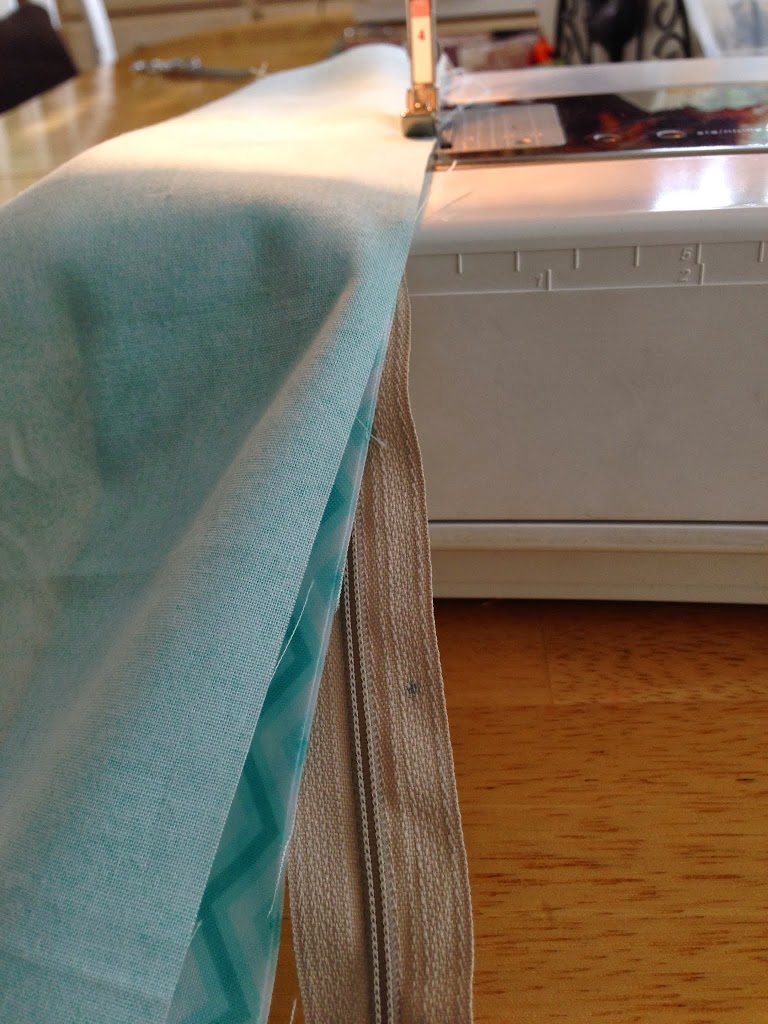
Turn the zipper over, align with the top of the large back piece and sew using a zipper foot along the edge:

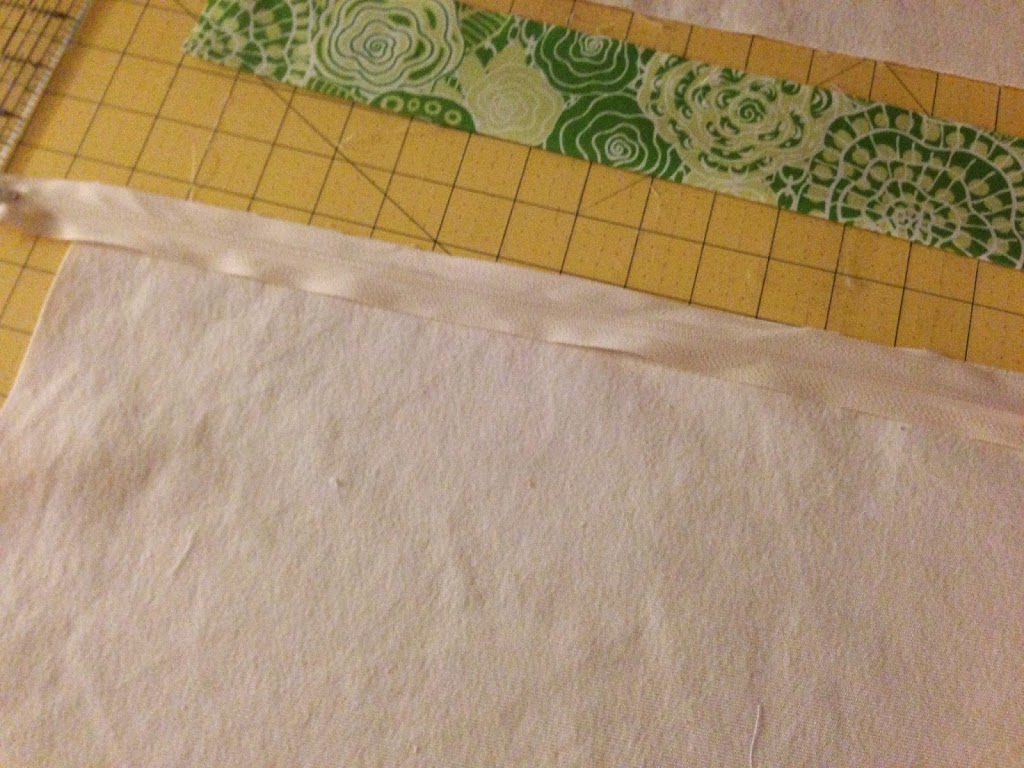
Sew the opposite side of the zipper adding the green strip, layer like this:

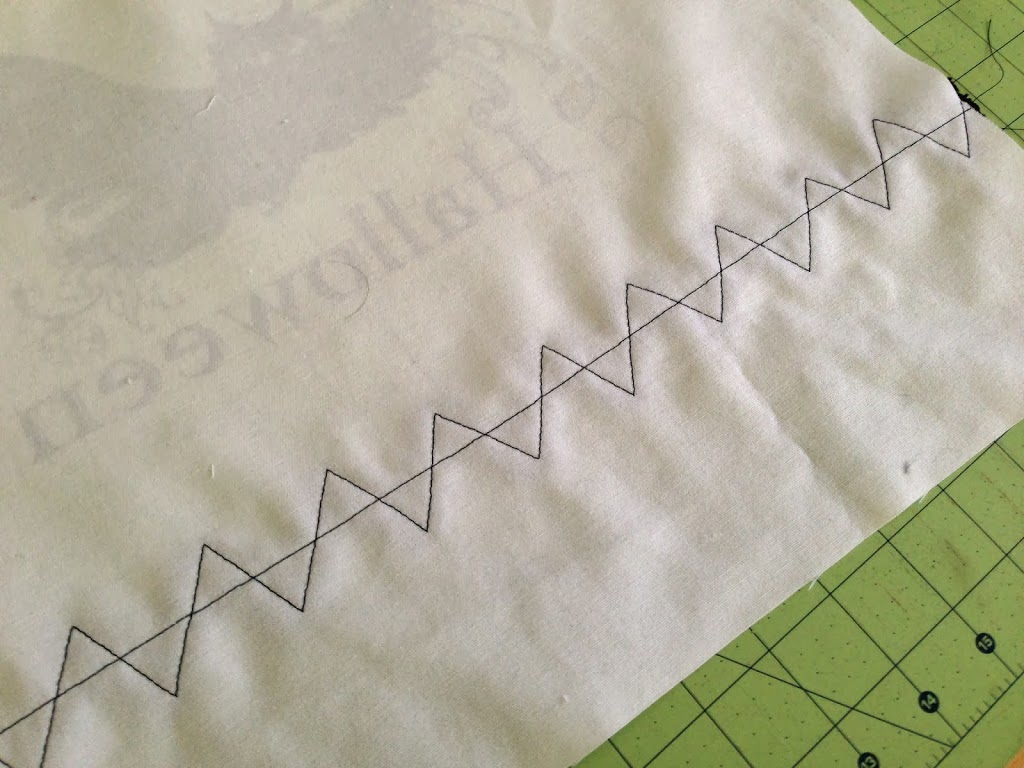
My backing fabric was a heavy woven fabric, I choose to zigzag my seams because they were already starting to fray.  Press the seams away from the zipper.  Put the zipper pull in the center of the pillow and cut the excess zipper off both edges.

Place the pillow front on the pillow back with right sides together.  Pin all the way around.  Make sure the zipper is open so you can turn it after it’s sewn.  Sew all the way around the pillow using a generous 1/4″ seam.

Notice there is about an inch of extra backing hanging out – don’t freak out!!!!  I added a little extra in the measurement to account for variances in zippers.  Just cut it to size, making sure you line up the tops.  Turn and place the pillow inside!!!  Aren’t you LUCKY!!!!

Amanda

Lost & Found Pillow Tutorial

 Today my tutorial for these fun pillows is over at Riley Blake Designs.  I am so in love with this fabric!  It is the same line of fabric I used in my placemats, only it’s decor weight!  I love the chunky metal zipper accent.

 This is the back of the pillows:

They are the perfect addition to my living room chairs!

Amanda

Family Love Pillow

Today I am a contributor over at Ginger Snap Crafts!  I love Ginger & her fun blog – she has so many great projects and ideas!  I came up with this fun idea for a Valentine Pillow.  The heart on the front of the pillow has a zipper in it and inside the heart are 5 smaller hearts.

There is one heart for each member of our family.  Everyone has their name on the back of the heart.  Every day from February 1st to the 14th we will choose a heart and write a positive quality or character trait on that person’s heart.  On Valentine’s Day, everyone will receive their own heart.   I am  hoping it will help us have extra love in our family!

The pillow is actually made from a drop cloth, this is the pillow back:

Check out Ginger’s blog for the full pillow tutorial!

Amanda

Hip Holiday Retro Christmas Pillow

 I am so totally in love with this Hip Holiday line from Blend Fabric!  My favorite print is the retro cars with the christmas trees!  I had to make a throw pillow – surprising?  The tutorial is over on the Therm O Web Blog – check it out!

This pillow is featuring my new favorite way to finish a pillow – a zipper flap on the back!

Should I be concerned that I have a matching pink, white, green and aqua Christmas tree in my family room?

 So totally in love!

Amanda

Deer Friends, Christmas Deer Throw Pillow Tutorials

Do you like my new chairs?  I just ordered them from Amazon and they came in 2 days!  It was totally risky of me to just push a button and have chairs sent to my house, sight unseen!  But, I LOVE them!  They are exactly what I wanted and they are even comfortable!!!  The whole reason to buy new chairs is to sew new pillows, right?  I am obsessed with deer!  Deer throw pillows my chairs do need (a little Yoda verbiage!)
My friend and I got together and the children played and we sewed!!  An entire herd of deer throw pillows!
Here’s how to make the appliqué deer pillow: My pillow form is a 20″ square down pillow.  Down is a bit “squishy” so the pillows have a more casual feel. 
Appliqué Pattern, download HERE.  Print 2 of these and reverse one of the images.  The image is on 2 pages because it is larger than a piece of paper.
Print out the pattern and tape it together.  Trace the pattern onto Heat n Bond Lite fusible appliqué.  I used a wool blend fabric for the gray deer.  You can use any type of fabric.
Cut the chevron fabric 21″
Iron the deer to the center of the fabric and stitch around the deer.
I wanted a bit of an accent on the back of the pillow, so I put the zipper on the back with a decorative flap over the zipper….sounds hard but is super easy!!
To make the flap, cut your accent fabric 5″ x 20″ and press in half lengthwise.  
Cut your back pieces 4.5″x20″ and 16″x20.
Lay them out like this with your zipper placed as so (NOT invisible zipper)
I promise I ironed my pieces!!
Layer the top piece of the pillow back, the folded flap, and the zipper so all the raw edges align, like this:
Using your zipper foot, sew along the zipper.  For the other side with out the flap, sew the backing fabric to the zipper just as you would normally sew in a zipper.  Press the flap down to cover the zipper – super easy!!! Pin the pillow front and back with right sides together.  Make sure to open zipper so you can turn it.  Sew a generous 1/4″ seam around the entire pillow!

I couldn’t just have 2 deer pillows – I needed more.  This one is super quick!  It is for a 18″ pillow.

Cut the center deer fabric 10 1/2″ x 19″
Cut the aqua snowflake fabric (2) 4 1/4″ x 19″
Sew them in this order using 1/4″ seams

 I had this pretty light gray lace I top-stitched over the seams.  Now, cut the back of your pillow 19″ square and finish as desired.  I put an invisible zipper in the bottom.

Deer pillow #3 – this fabric doesn’t exactly have deer on it, but it has antlers atop the Cuckoo clocks!  And it’s teal!!!  Another quick pillow!!  This pillow form is 20″ but it is pretty floppy, so I decided to cut my pillow cover at 20″ so it would fit better.

Cut the teal print 15″ x 20″
Cut the gray dot 5 1/2″ x 20″
Sew using 1/4″ seams
Cut the back piece 20″ square.

Top stitch lace along seam.  Finish as desired – again another invisible zipper – those things are totally AWESOME!!!

Here are my friend’s cute deer pillows – she used a bolder chevron and a brown deer on an 18″ firm pillow.

I am so loving the zipper flap!
Sewing deer pillows makes me happy 🙂

Amanda

Spooky Potion Throw Pillow

I can’t believe how fast October is flying by!  There are so many projects I want to make, and so little time!  I thought this pillow was super fun.  The spooky bottles are from Blend’s Spooktacular line of fabric.  The tutorial is over on the Therm O Web blog today!

Amanda

Halloween Pillow Tutorial

When the calendar turned September, I was wishing so badly that it was still July.  How I love the summer!  Today is October 1st and I have decided to deal with the fact that time is moving super fast!  Bring on the Halloween!  Pumpkins, owls, candy, costumes, bats, black cats and everything else!
My summertime throw pillows were not matching my Halloween decor.  I decided to make Halloween covers for my current pillows.  This one only took about 30 minutes start to finish.  Here’s how you can make one:
Supplies:
Iron- on transfer paper (purchase at Michaels, Wal Mart, etc. in the computer paper section)
Graphic to print
(2) 17″ squares of light colored canvas, duck cloth or other heavy fabric
1 yard of super jumbo ric rac
16″ pillow form
To begin, you need a graphic to print on the iron-on transfer paper.  If you are artsy you can make your own.  I went to Etsy and searched “Halloween pillow iron-on” and 19 pages of vintage style Halloween graphics came up.  Most of them are only $1.00 and download instantly.  Super fast & cheep – yea!
Size the graphic to take up as much of the 8.5″ x 11″ paper.  Make sure to tell the printer to “Flip” the image or “Mirror”.  It needs to print out backwards 🙂

Trim about 1/8″ around the graphic

Follow the manufactures instructions.  Essentially use a dry, hot iron and press into place.  It takes a few minutes.  Then when it’s cooled, peel off the paper backing.  I love it already!!

I thought a little trim would be fun and still keep the pillow somewhat simple.  Pin the super jumbo ric rac into place.

When sewing normal ric rac, you just sew a straight line down the center.  I did this with the super jumbo ric rac and the points were still floppy.  With matching thread, follow the zig zag of the ric rac and sew into place like this:
You can finish the pillow using your favorite method.  I put an invisible zipper in the bottom.  Click HERE for the tutorial.  You could easily sew, turn and stuff the pillow or sew an envelope back.  I love how it turned out!!  It’s super spooky!!!

Amanda

Modern Pumpkin Pillow Tutorial

I love pumpkins, I love turquoise & orange, and I love houndstooth & chevron!  This pillow is all the things I love!!   Are you ready for fall?  We’ve had a HOT summer in Southern California!  Making this pillow totally got me totally excited for fall.   This pillow is quick and easy.  It’s being featured on the Therm O Web blog, click HERE for the tutorial.  I hope you enjoy it!!!

 I love the back of the pillow!  A spooky spider!

Amanda

Vintage Kitty Pillow

The day after my Toonces passed away, I was on Etsy looking at every item that had a black cat: fabric, clothing, jewelry, accessories, quilts, pillows, artwork, greeting cards….you get the idea – pretty pathetic!  By the way, there are 37,221 items that come up when you search “Black Cat.”  Anyway, I came across these fabric squares with original artwork of different breeds of cats.  And one of them looked exactly like Toonces!

Isn’t it cute!  I love what is says around the image:
Soft velvet black coat
Always by my side
purring motor firing love
feeling all warm inside

I had to have it!  I contacted the seller to ask a few questions and you will never guess what….she lives 2 miles from my house!  So I arranged to pick the items up so we could meet!

Her name is Maria Nicodemus.  She paints these beautiful pictures of kitties and has them printed on high quality canvas-like fabric.  You can find her Etsy shop HERE or her blog, Ginger Eyed, HERE.

Here are some of her creations:

This is what I ended up ordering:

My daughter has a Bengal Kitty, so I bought this for her – I cant wait to make something WILD out of it!

Here is Marbles already messing it up!

This is how I made my vintage black cat pillow:
I have a large collection of vintage sheets – I pick them up everywhere I go.  When we were preparing to burry our dear Toonces, I cut this sheet in half and used one half to wrap him in.  (pass the Kleenex).  I kept the other half.  I thought it very fitting that I use this fabric to make this pillow.

My pillow form is 18″ so I cut my fabric 19″.  I loved how the hem of the sheet was in different fabric then the main part of the sheet and I wanted to use the lace trim also.  I included the hem in the pillow body.

I ran out of my favorite Therm O Web fusible fleece, so I used their sew in fleece and Heat n Bond basting spray.  (This stuff is amazing!)  The sheet was pretty thin, so this gave it some soft stability.

I couldn’t quite decide what to do around the cat image.  I had some eyelet lace and sewed it to the cat square.

Then I pressed it under.  I also added a larger piece of eyelet along the lace that was on the sheet.

I used basting spray under the cat image to hold it in place while I top-stitched it on.

I finished the pillow with more of the sheet fabric on the back and an invisible zipper at the bottom.  I put a down pillow form inside & it feels all soft and squishy….just like Toonces 🙂  I love how it turned out.  Now every time I walk into my bedroom I see this pillow and it makes me smile 🙂

 
It matches the other vintage sheet pillowcases I made!

Amanda

Vintage Sheet Pillowcases, New Bedding, & the Bengal Cat

I bought new bedding for my bedroom!  That is always a big deal for me!  Are you like me & need like 5 pillows to sleep???  Which means I needed more pillowcases then the 2 that came with the sheets.  I got out the box of vintage sheets and came up with these!
This is how to make them: (this will make 1 standard size pillow)
Cut the main fabric on the fold measuring  21″ high and 26″ long (fold is on the long side)
I used the lace ruffle off a different sheet.  I cut this 1 1/2 inches away from the ruffle seam.
Sew it to the edge of your pillow fabric.  Press seams.  The lace on the sheet was super crooked.  I came up with a way to cover it up.
 
I bought this bolt of lace in the LA fabric district.  50 yards for $15!!  I will be using it on everything!!
 
Sew the lace covering the seams.
 After the trim is sewn on, fold the pillow right sides together and sew the 2 sides.  I didn’t sew French Seams, I just zig zagged so it wouldn’t fray.

 
 I love how they turned out!  So does Marbles!  He loves my new bedding and sleeps there everyday now!  The quilt is Tahari from TJ Max, sheets are from Target.  I was hesitant about buying sheets from Target.  I LOVE these!  They have super deep pockets and a double row of elastic to keep the sheets in place.  And they are super soft and comfy!  The quilt at the bottom of the bed was $16 at Home Goods!


Amanda