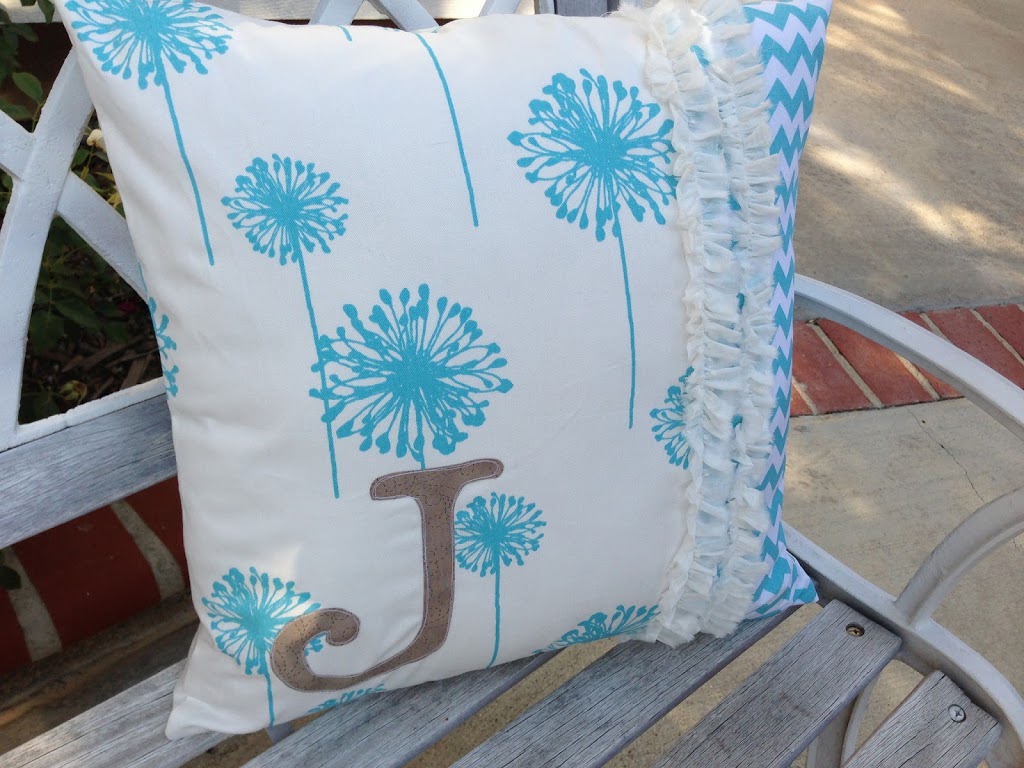
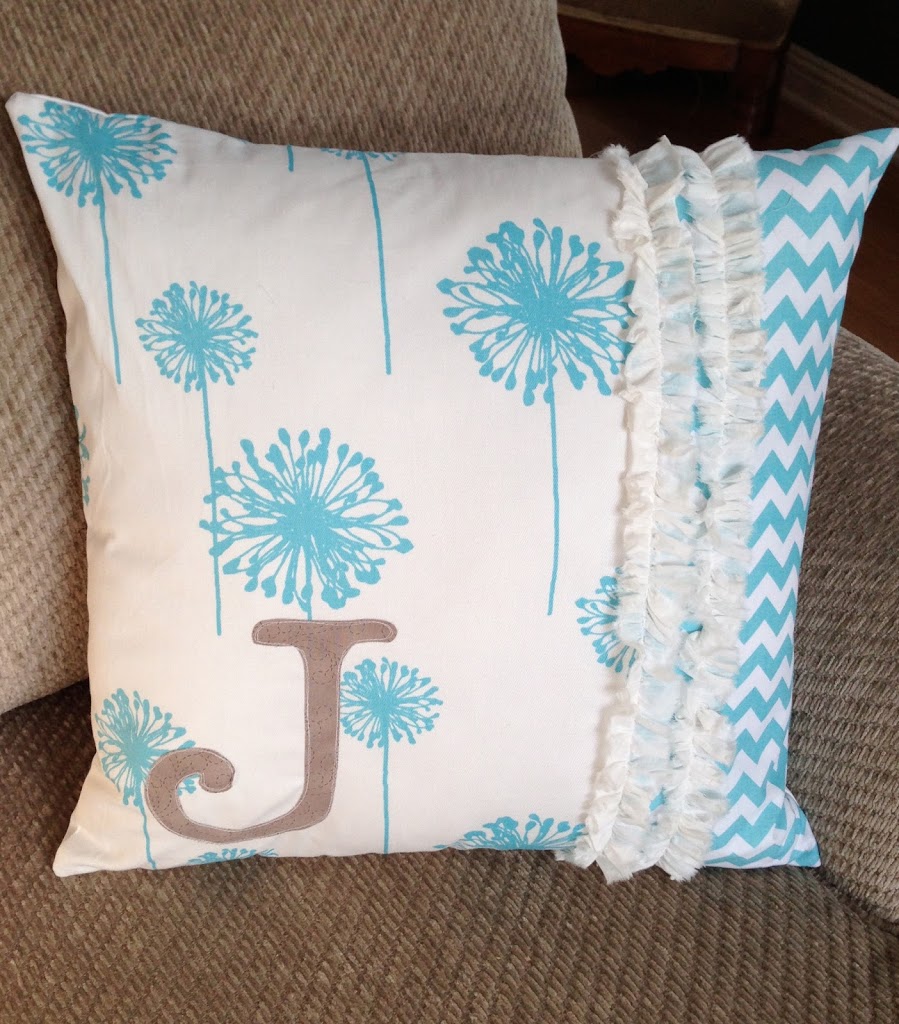
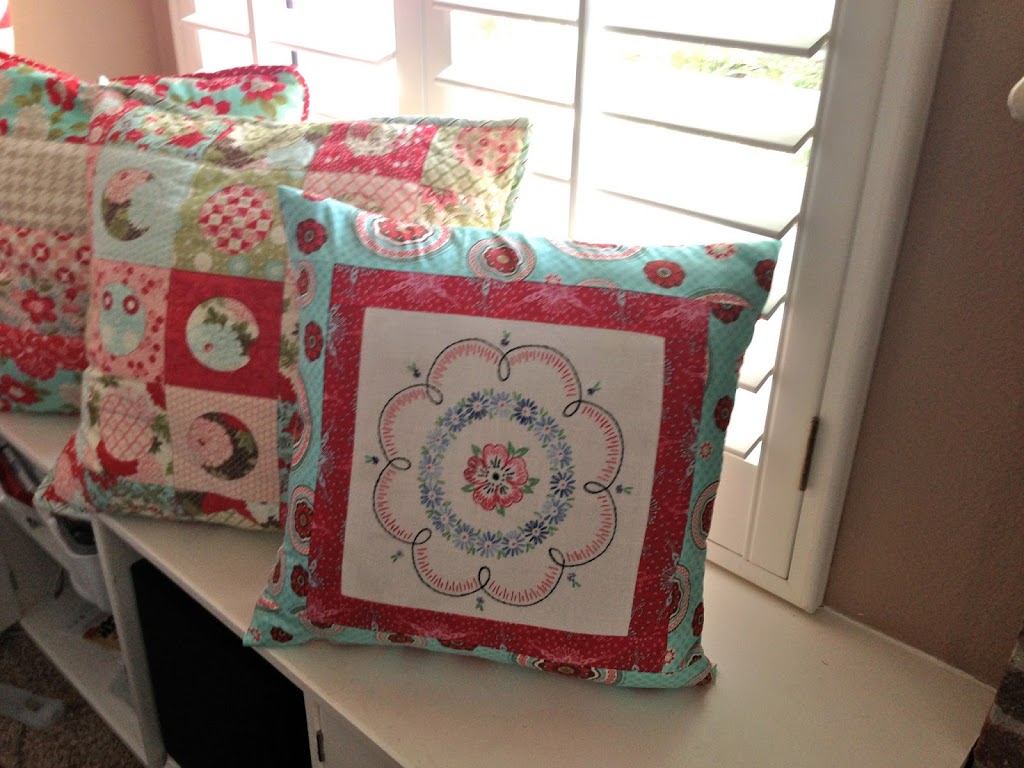
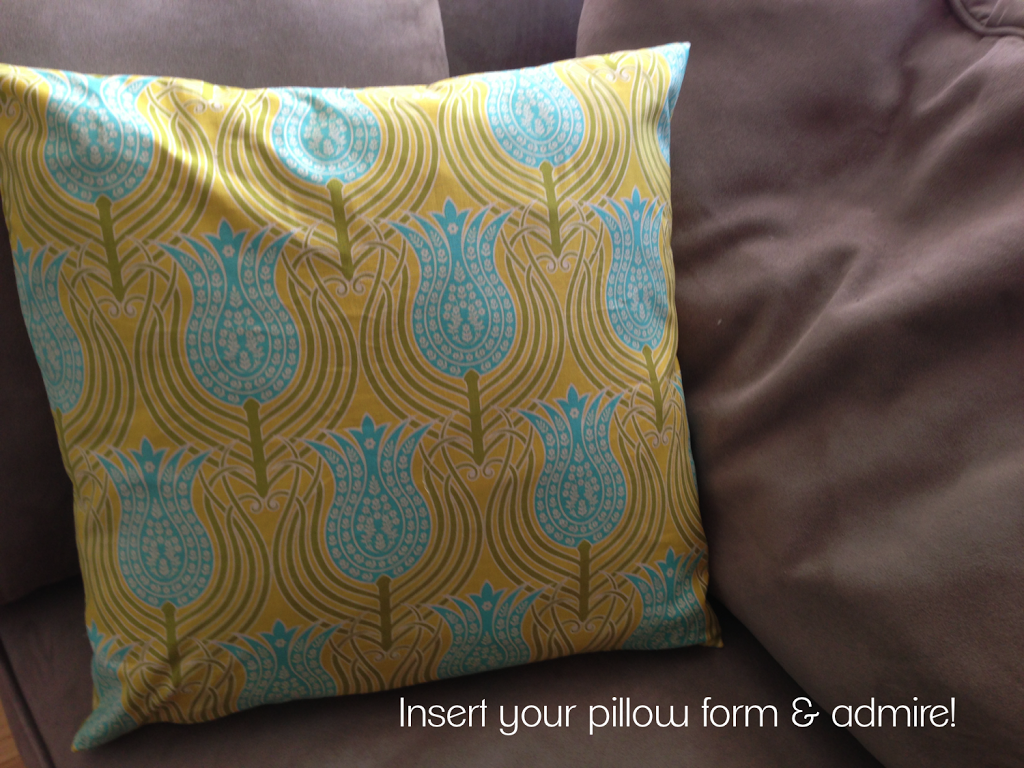
I am still not over my throw pillow obsession!! Lately I have been giving them as bridal shower gifts. I love making personalize gifts!! This one was for a friend who loves aqua!!
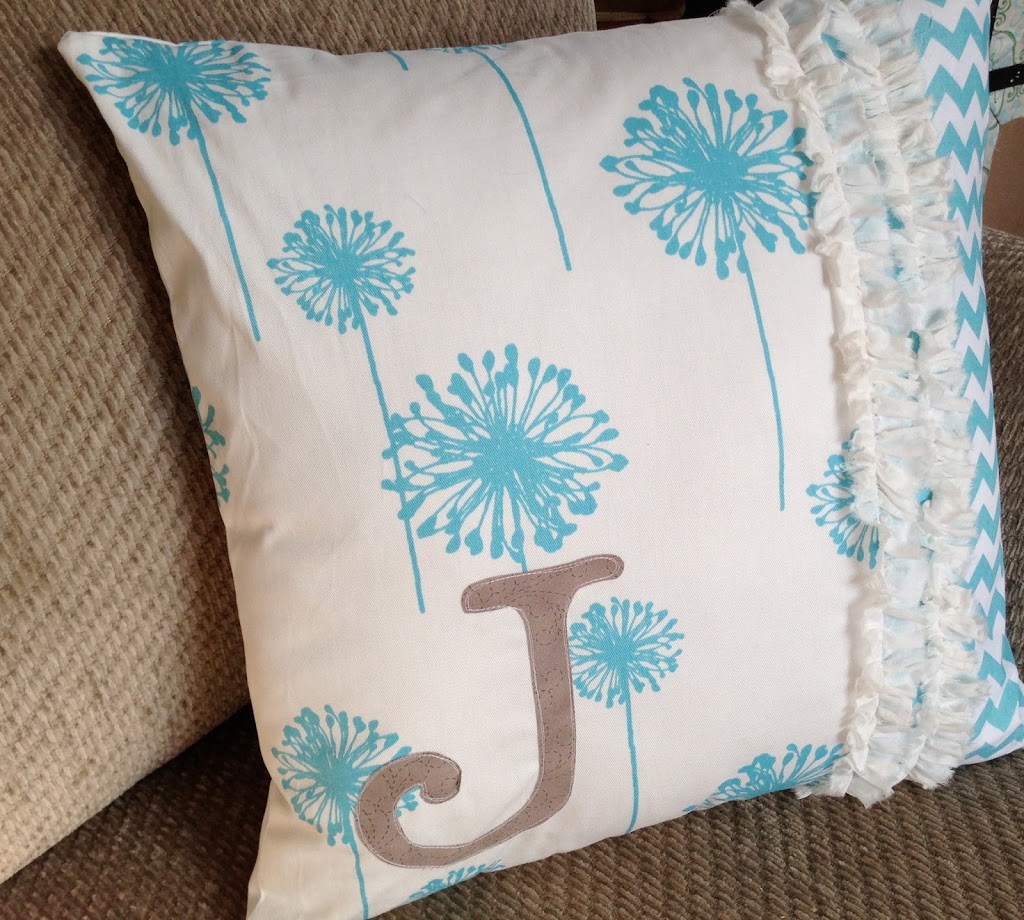
It turned out cute & she loved it!!

Saving the universe one project at a time!
I am still not over my throw pillow obsession!! Lately I have been giving them as bridal shower gifts. I love making personalize gifts!! This one was for a friend who loves aqua!!
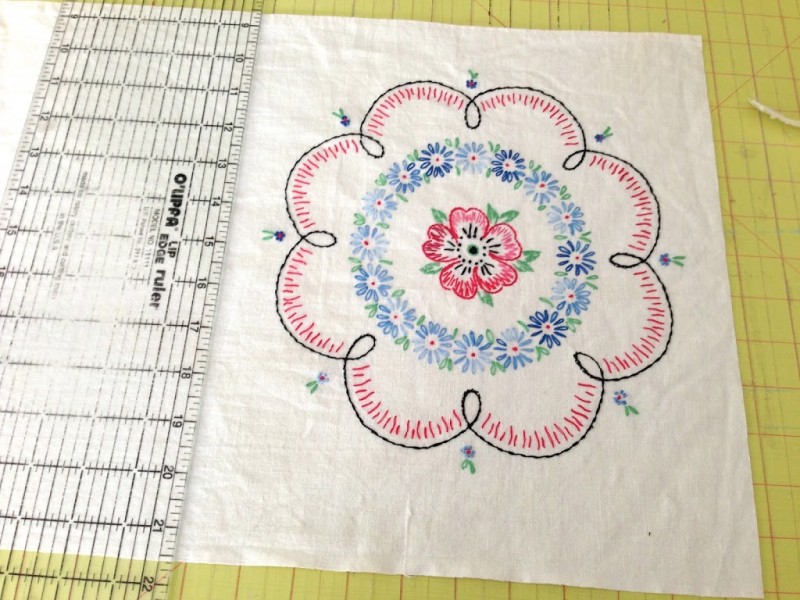
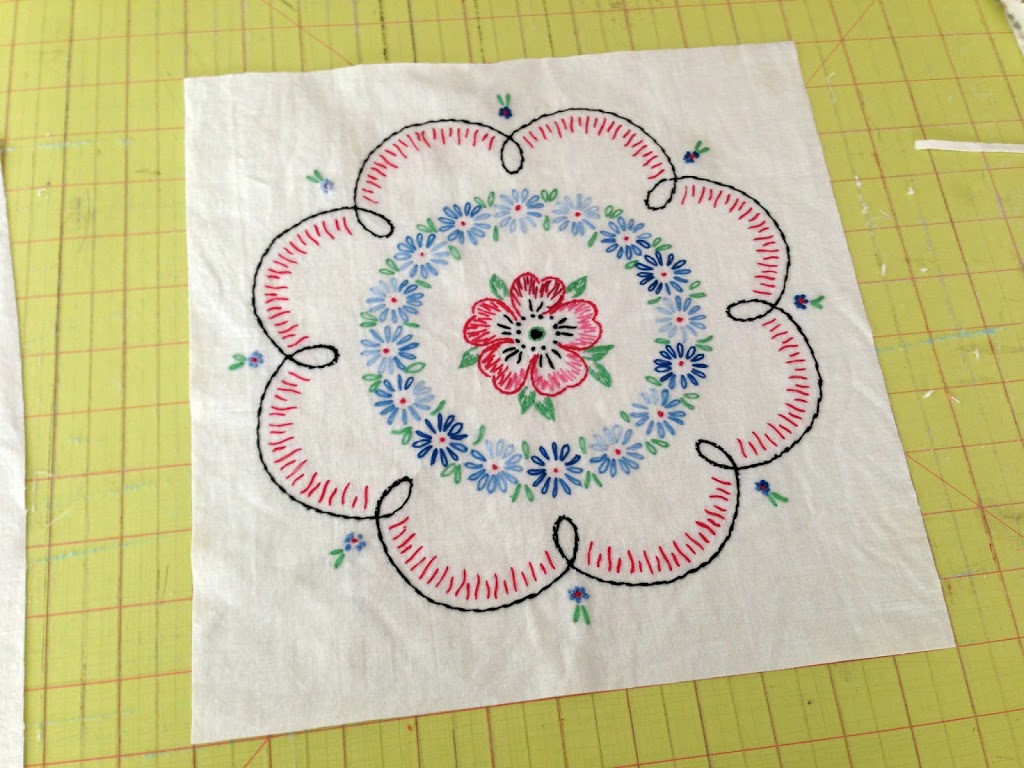
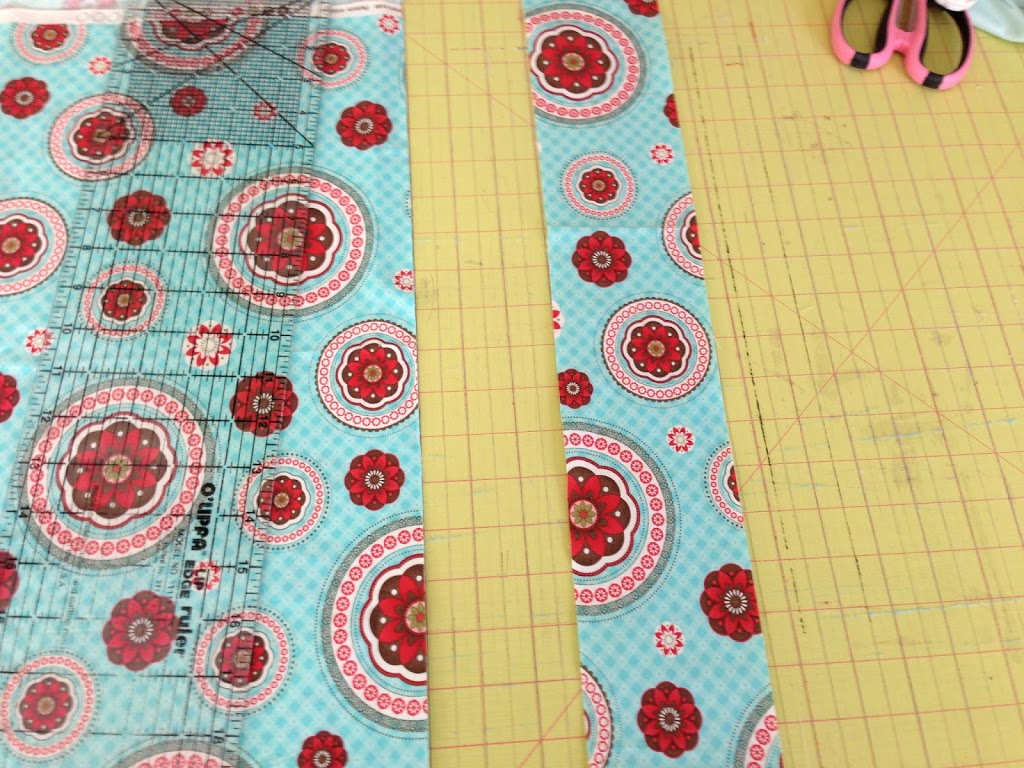
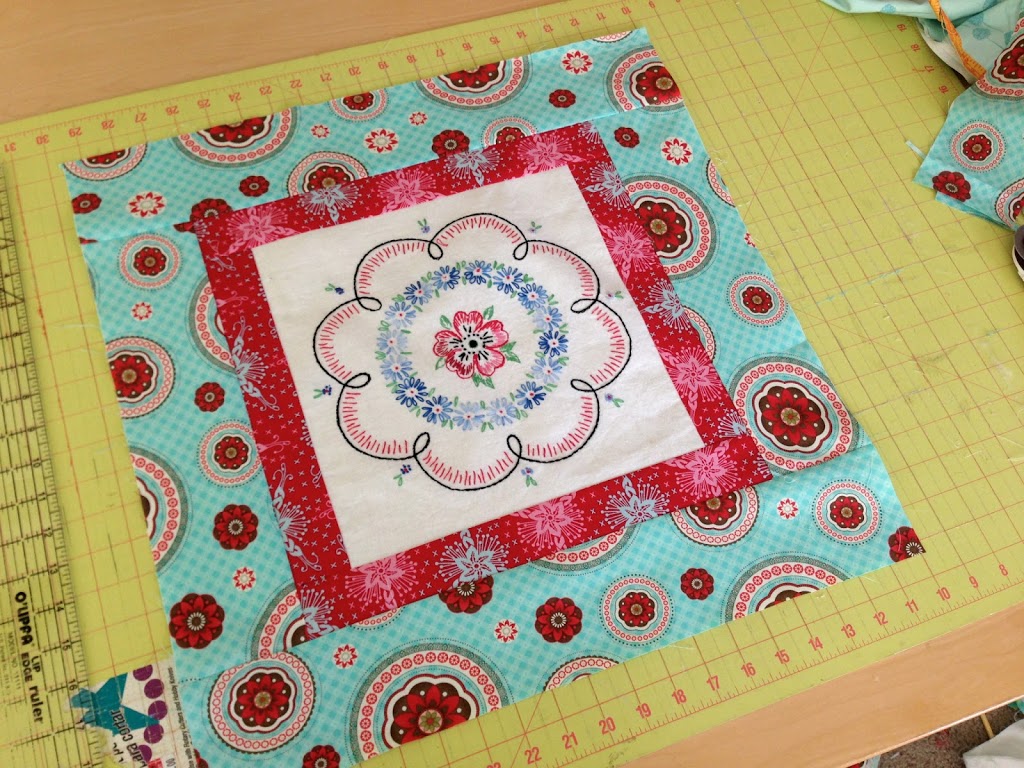
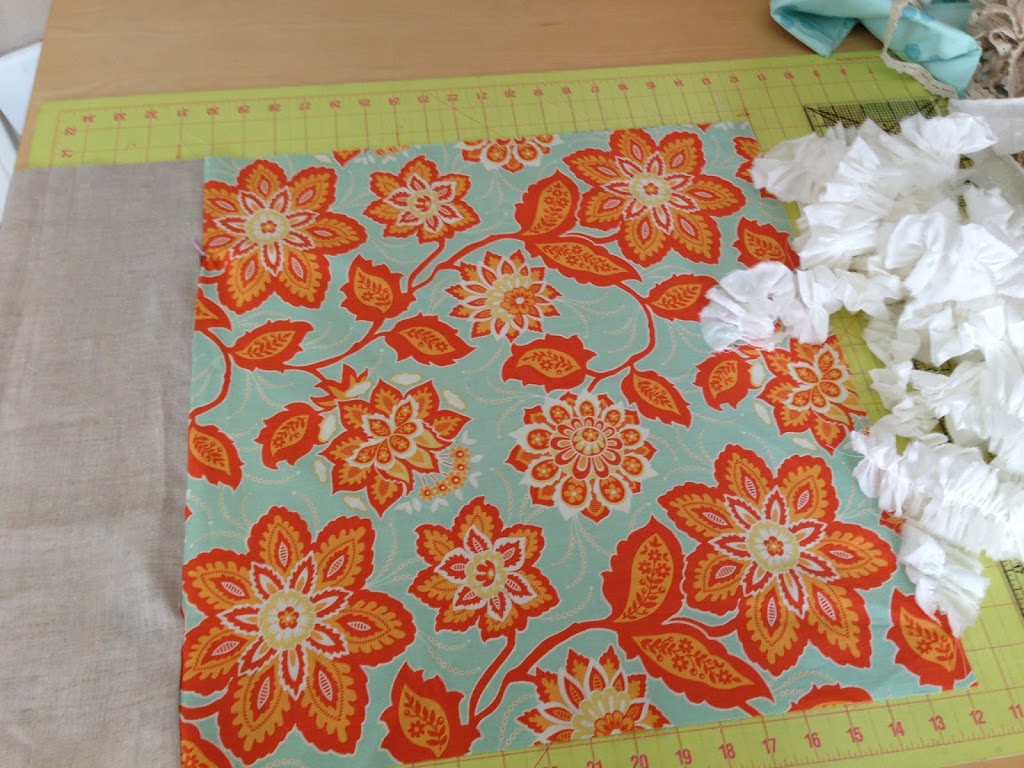
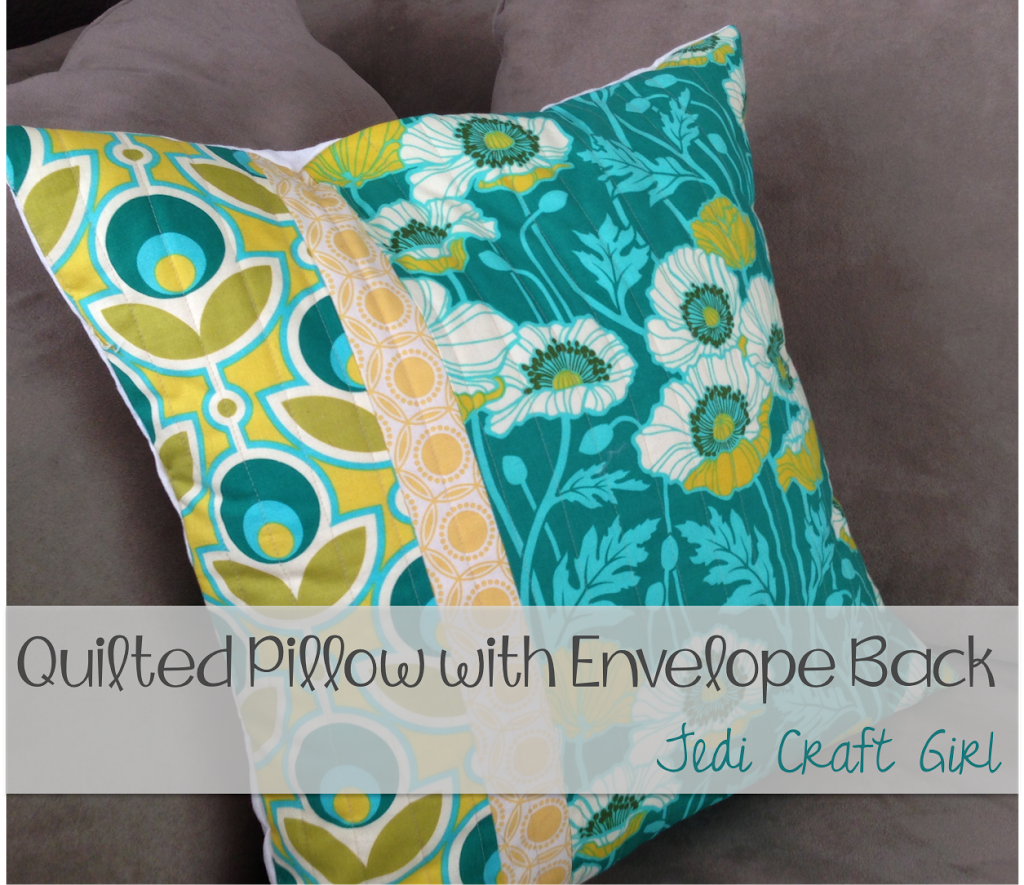
Cut the image how you want. Mine was an 11″ square.
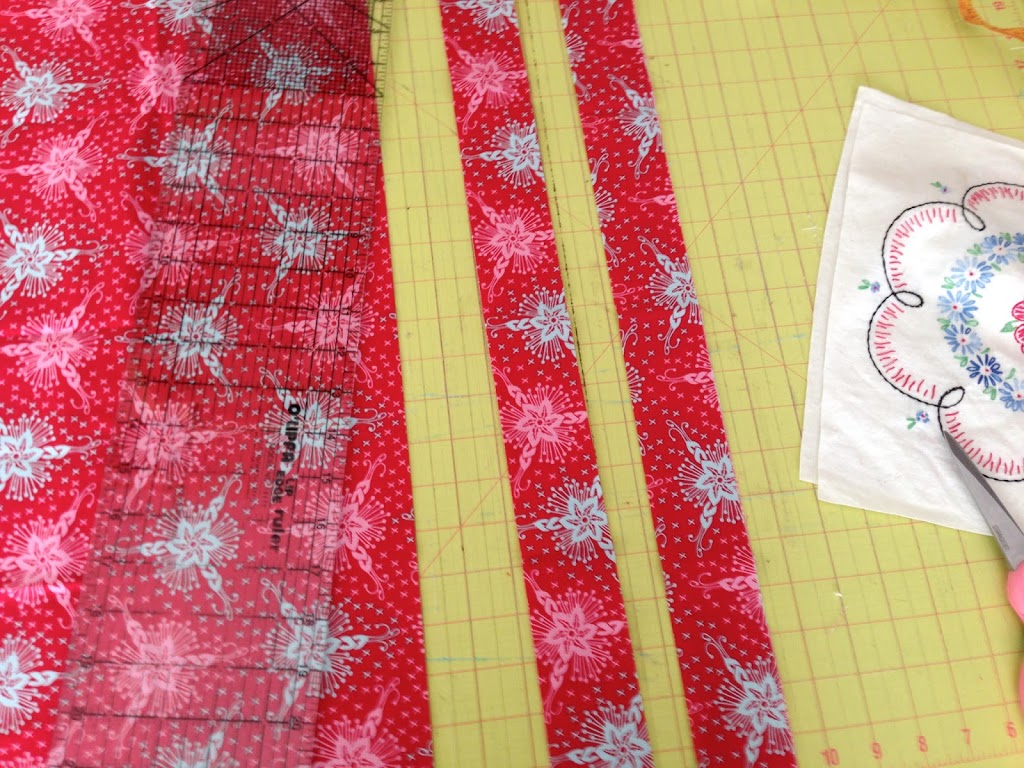
Next, cut (2) 2″ strips x WOF for the first border. Sew the pieces: sides first, press, then top and bottom, press.
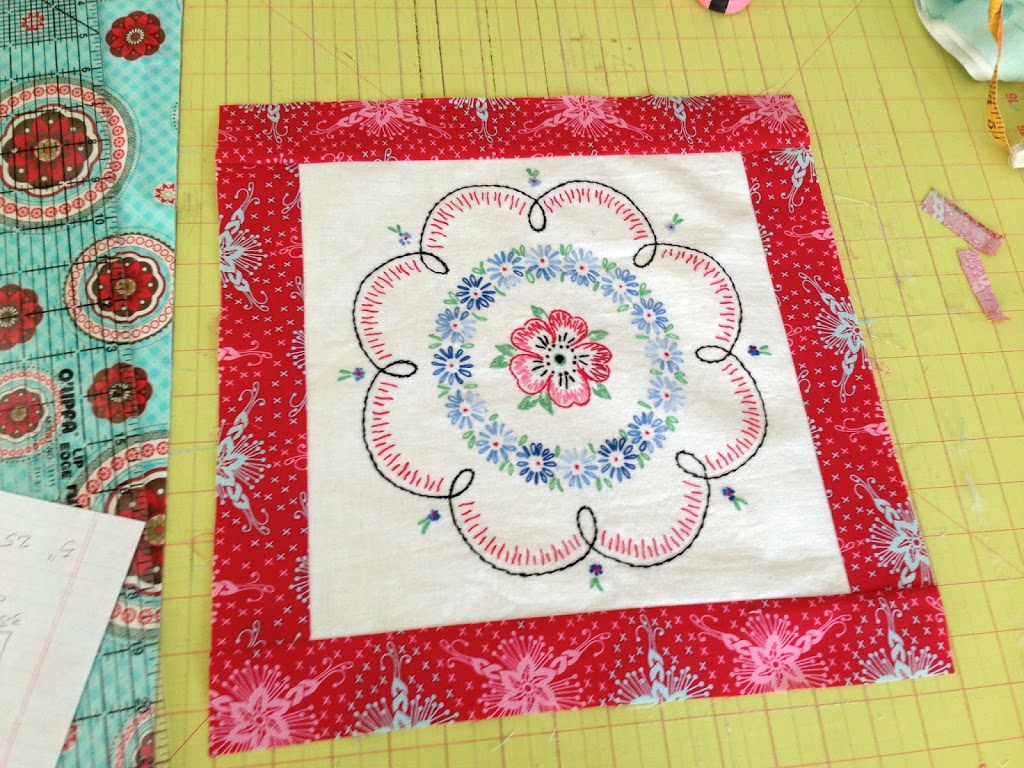
For the 2nd border, cut (2) 3 1/2 inch strips. Follow the same process, sew the sides, press, sew the top and bottom, press.
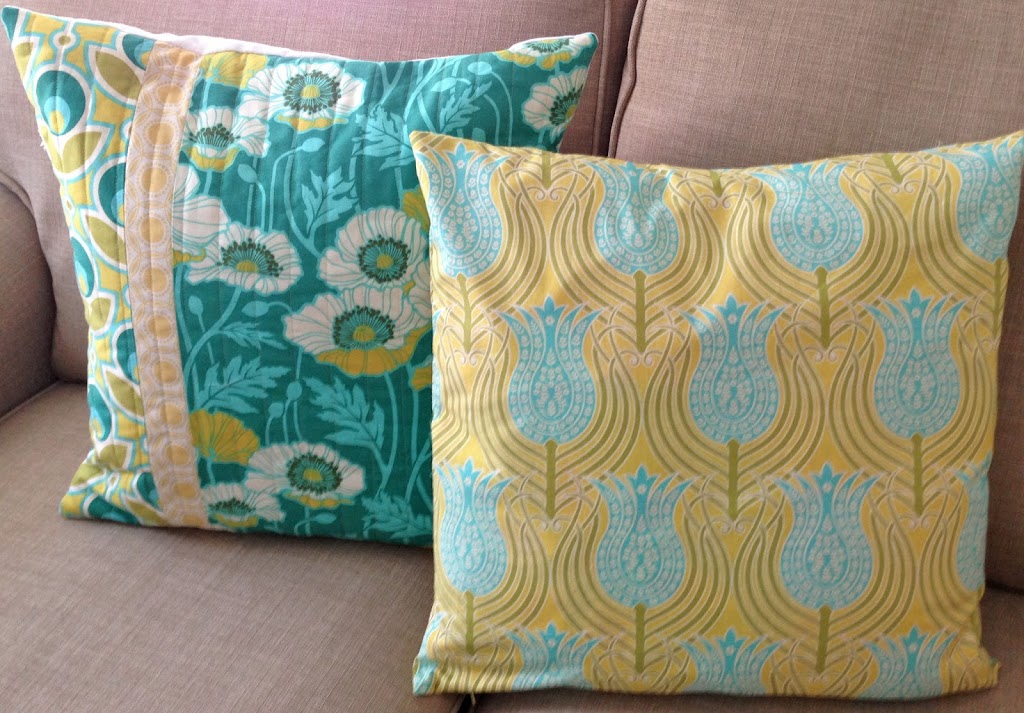
I love it! I was tempted to turn it into a mini quilt 🙂
Finish how you would normally finish a pillow. Can you guess how I finished mine? Invisible Zipper! I am a pro now!!

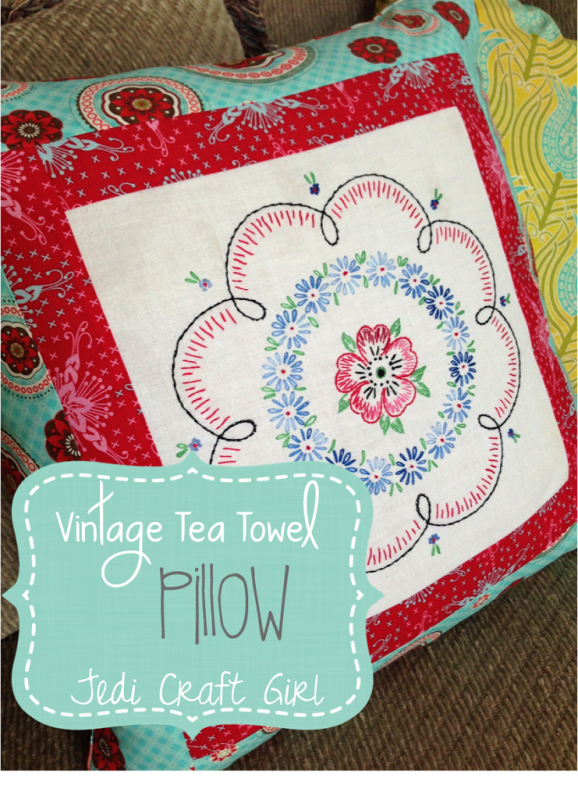
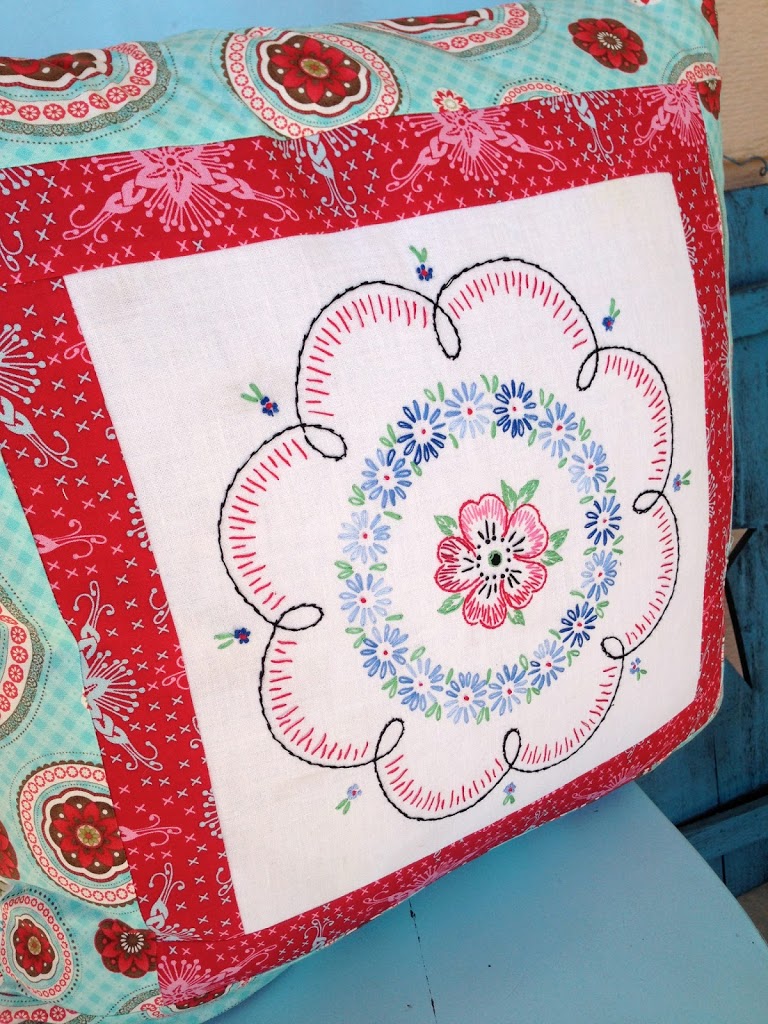
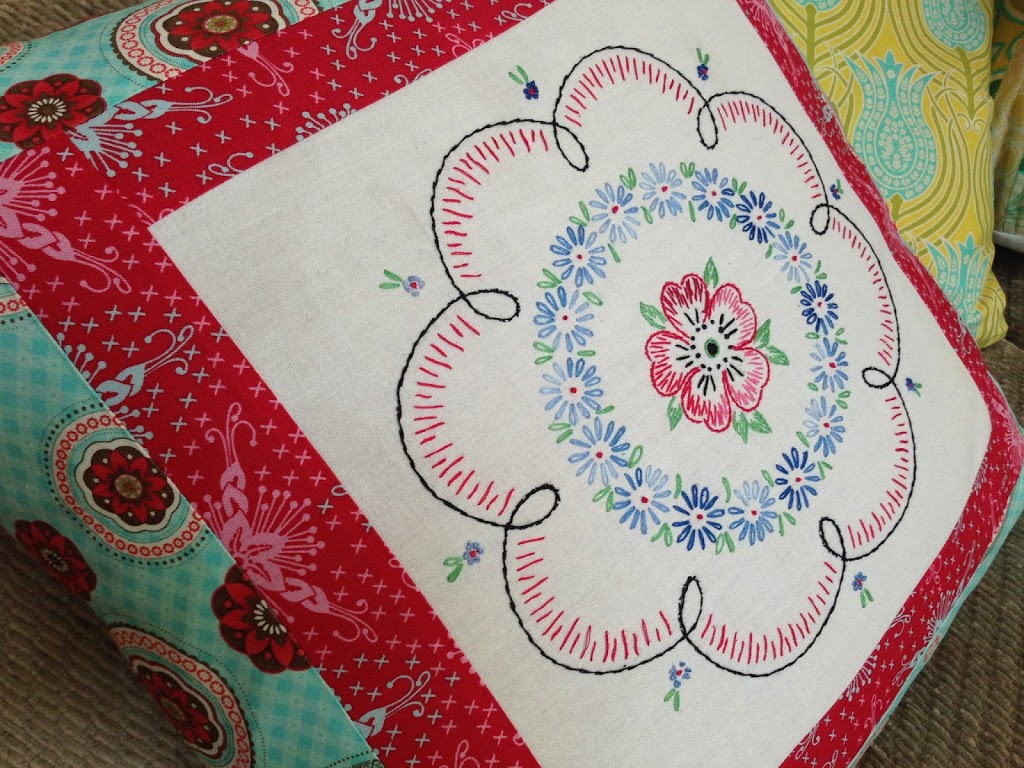
I love the embroidery work. And I love that I didn’t have to do it!!

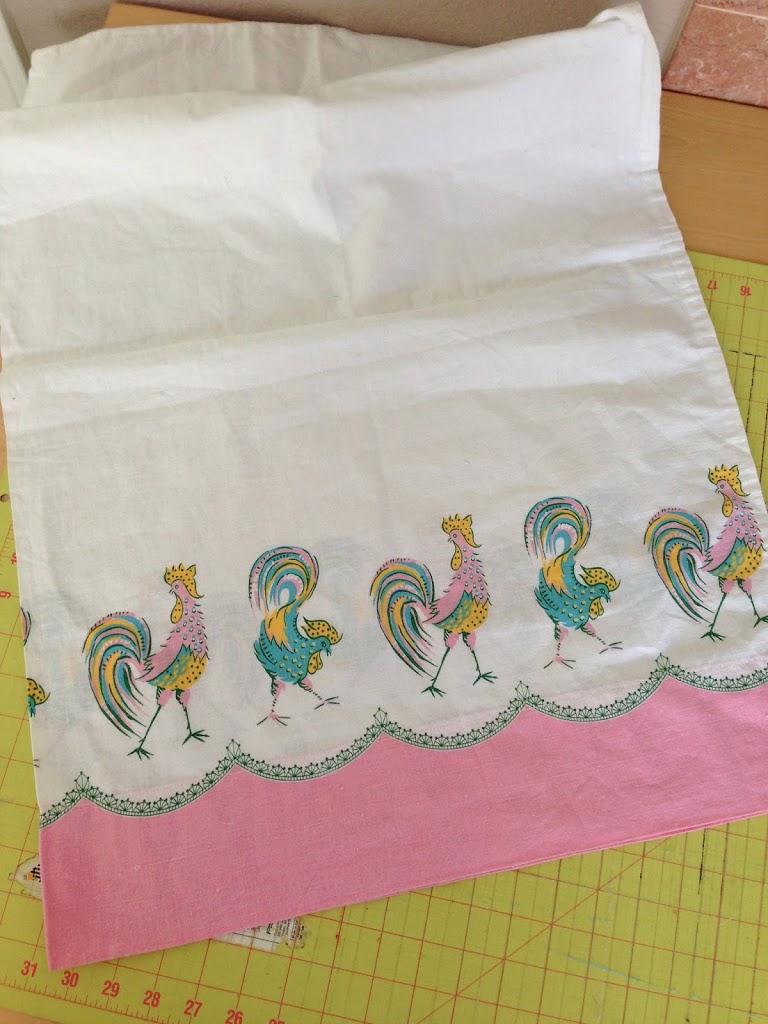
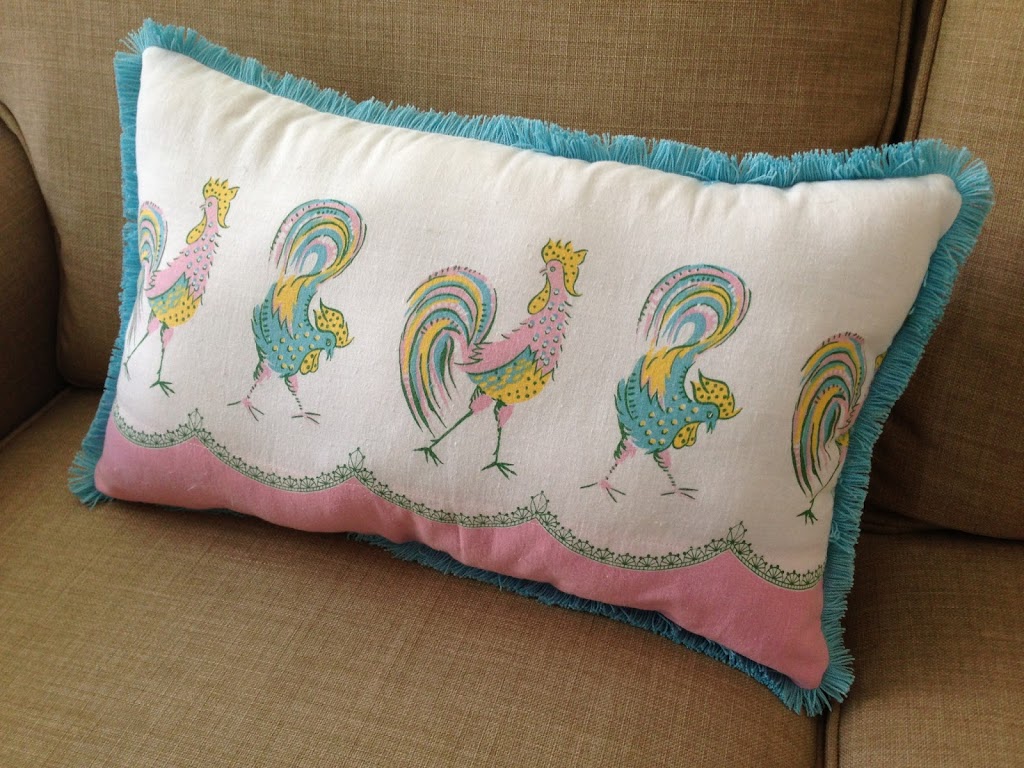
When I was out in Lucketts, Virginia, I bought this flour sack pillow case. I think it was a flour sack first, then someone sewed it into a pillow case. I don’t have much of a need for pink and aqua roosters in the bedrooms of my house; I do, however, NEED a THROW PILLOW adorned with pink & aqua roosters in my house – who doesn’t?
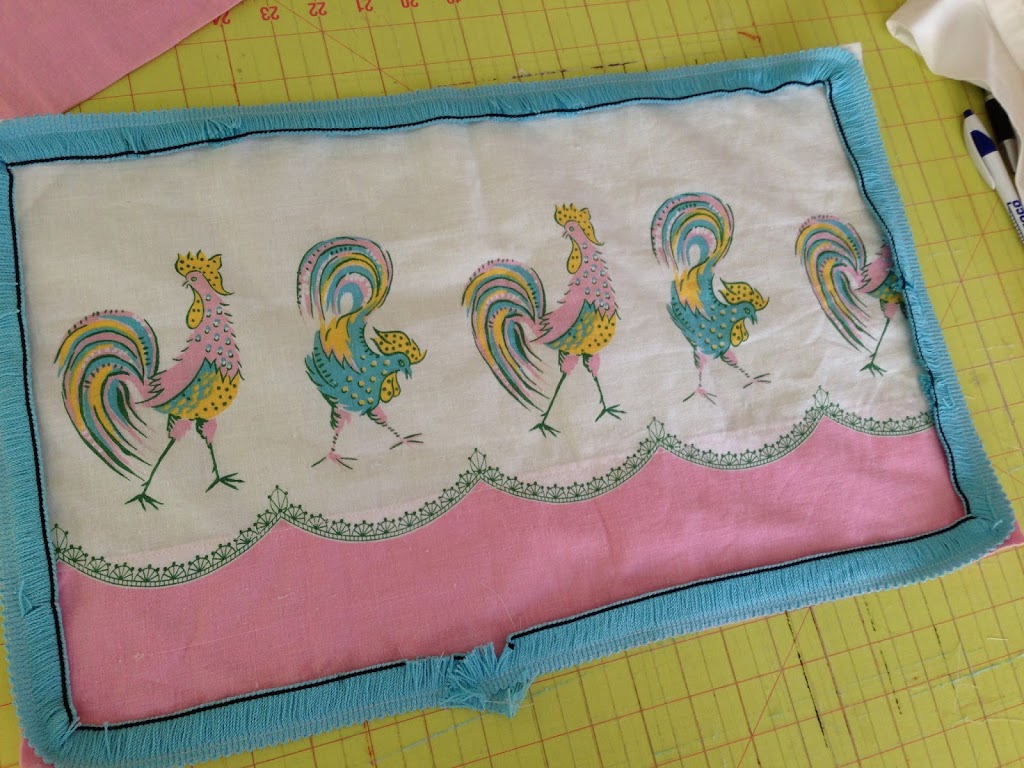
I cut the pillow case down, attached some aqua trim, sewed, turned, and stuffed!
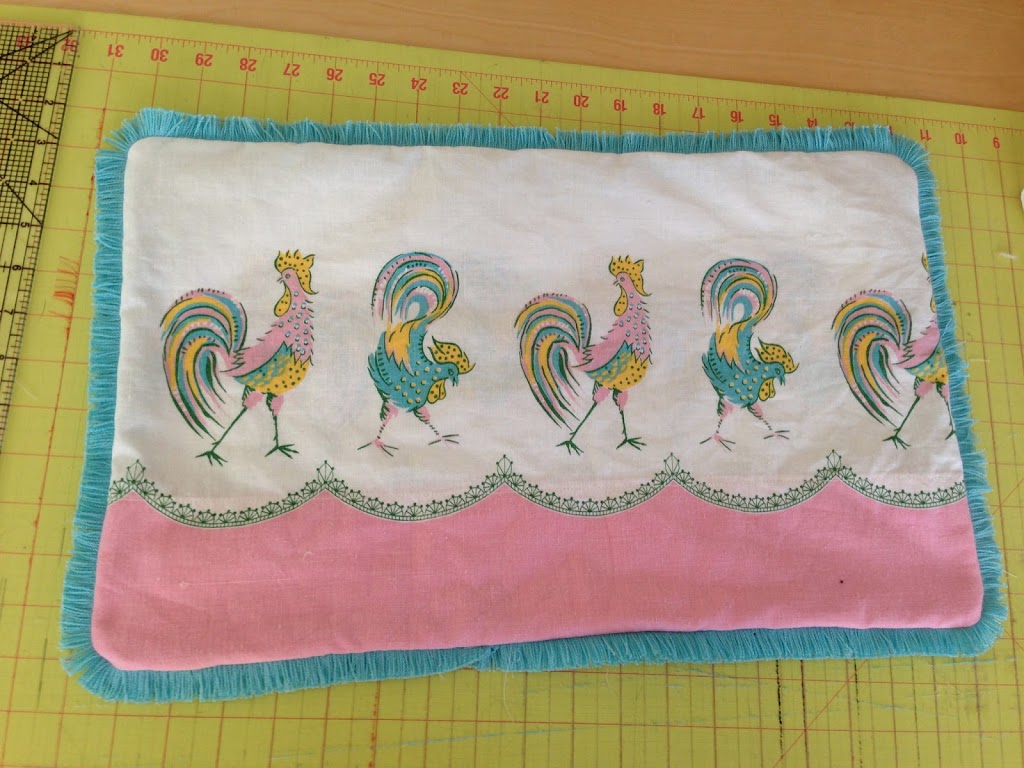
Now it is one of my favorite pillows ever!
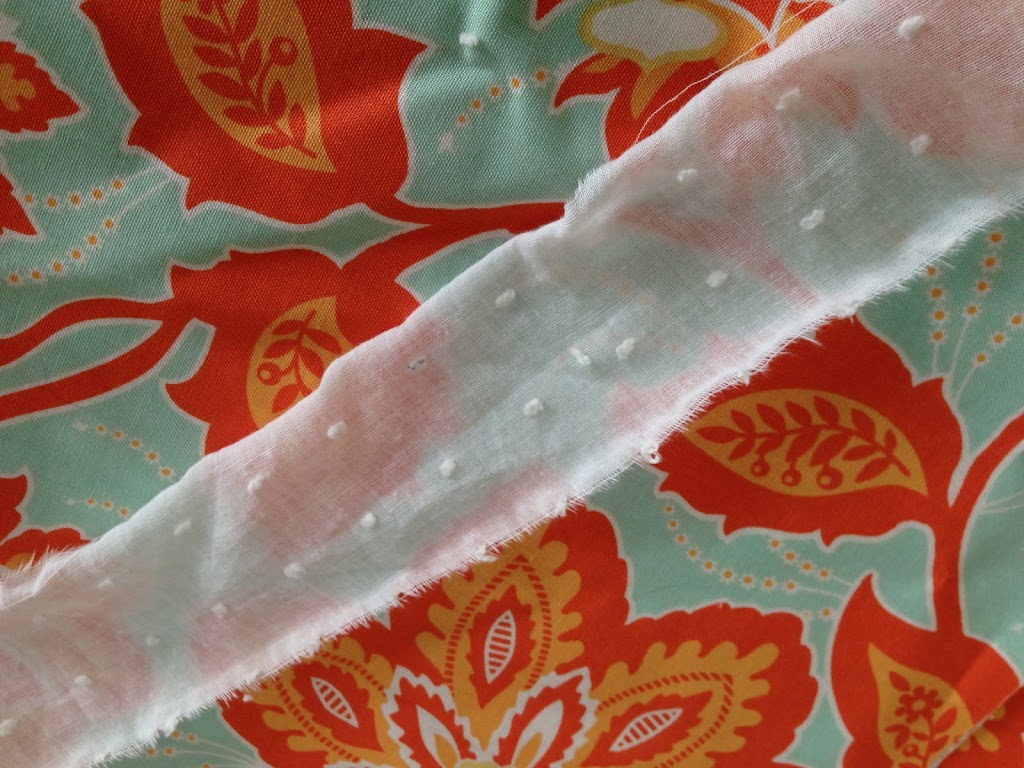
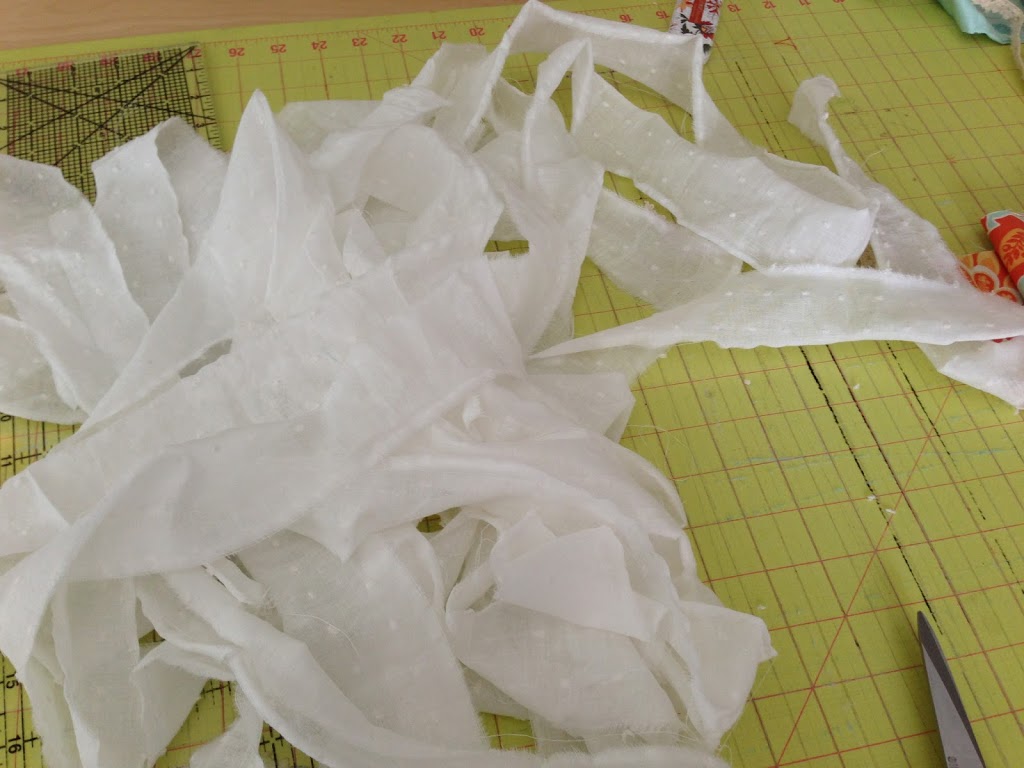
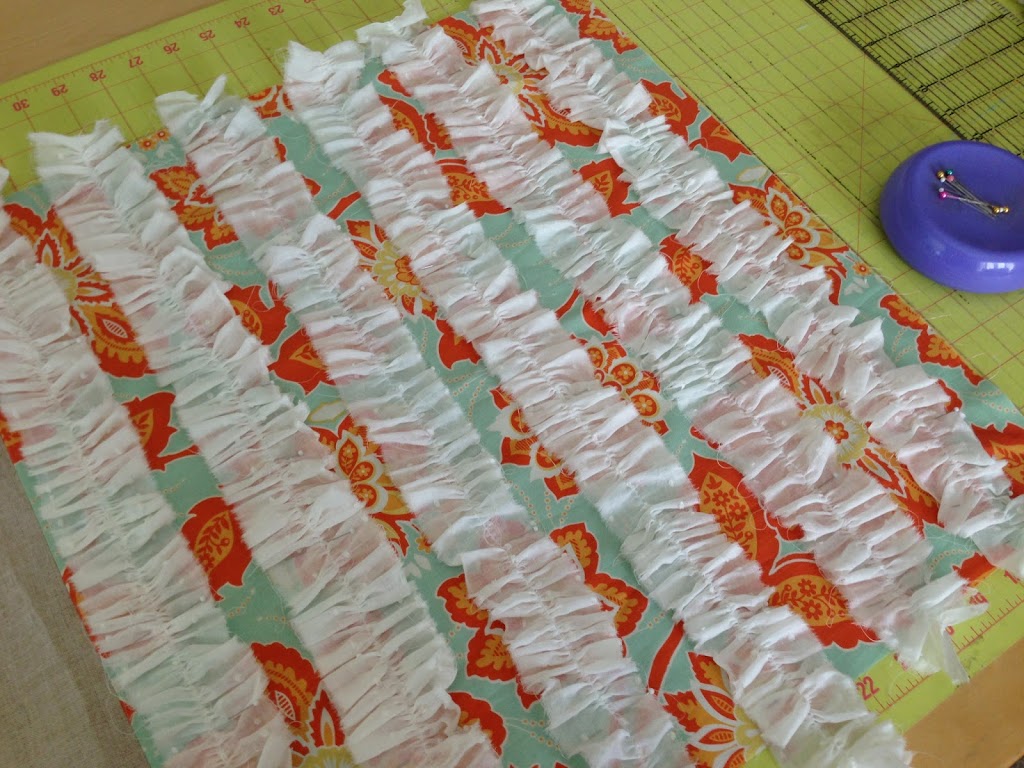
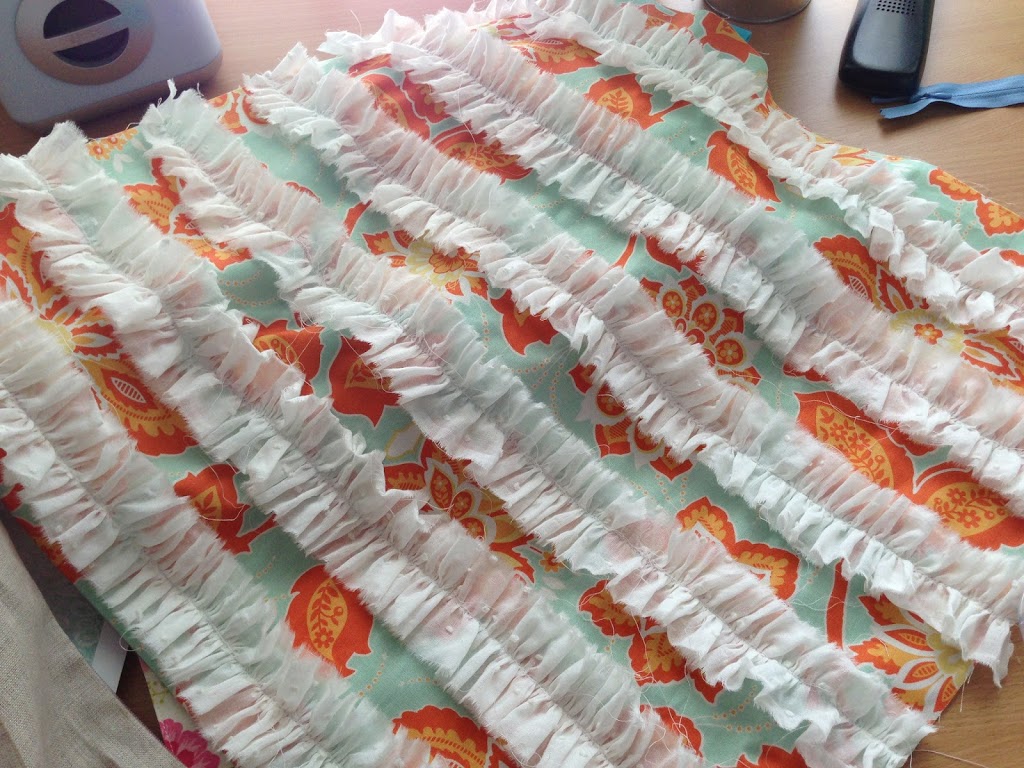
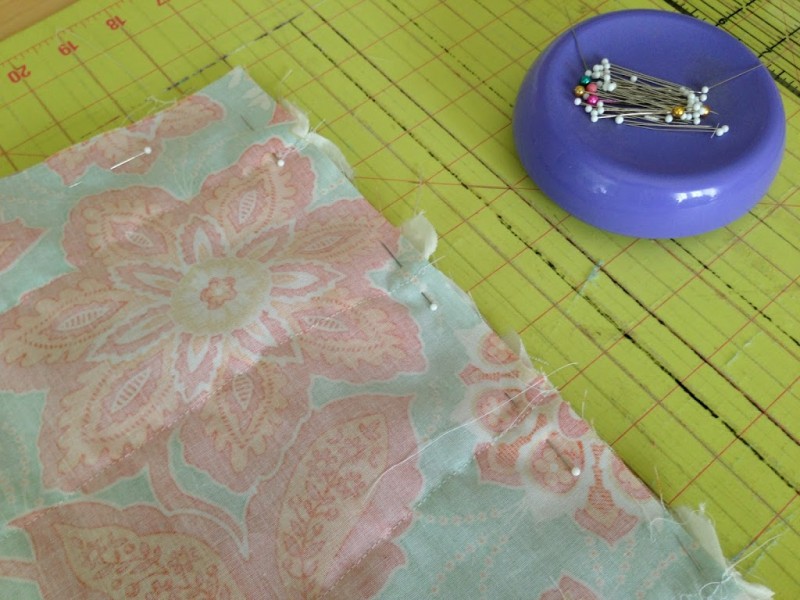
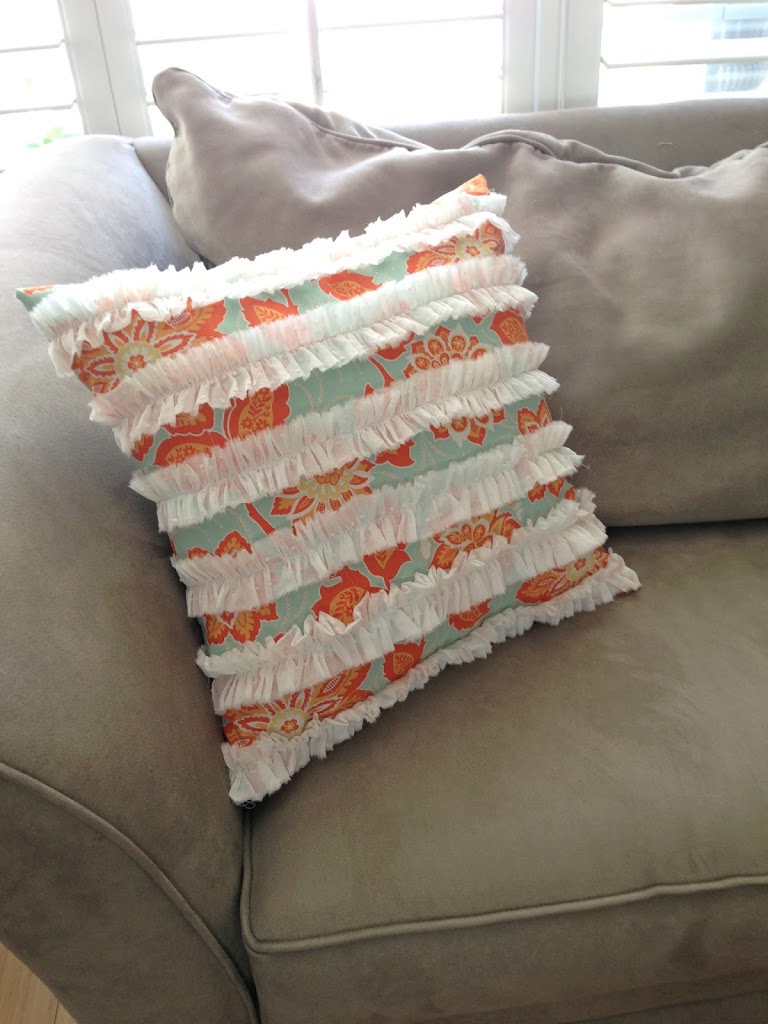
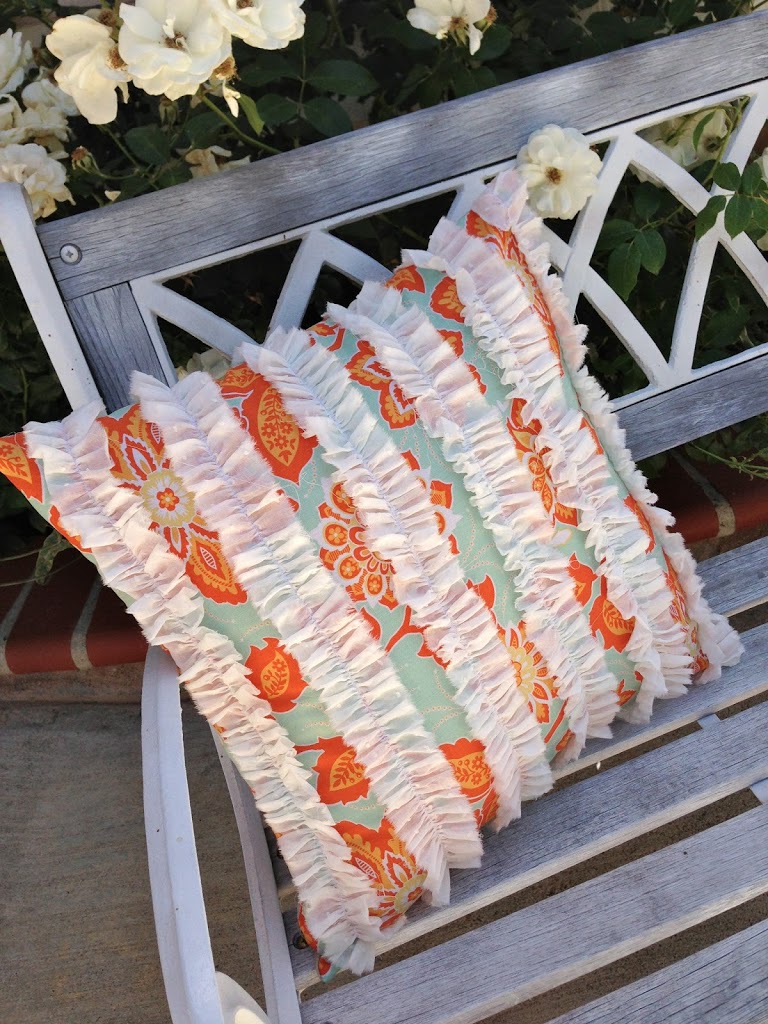
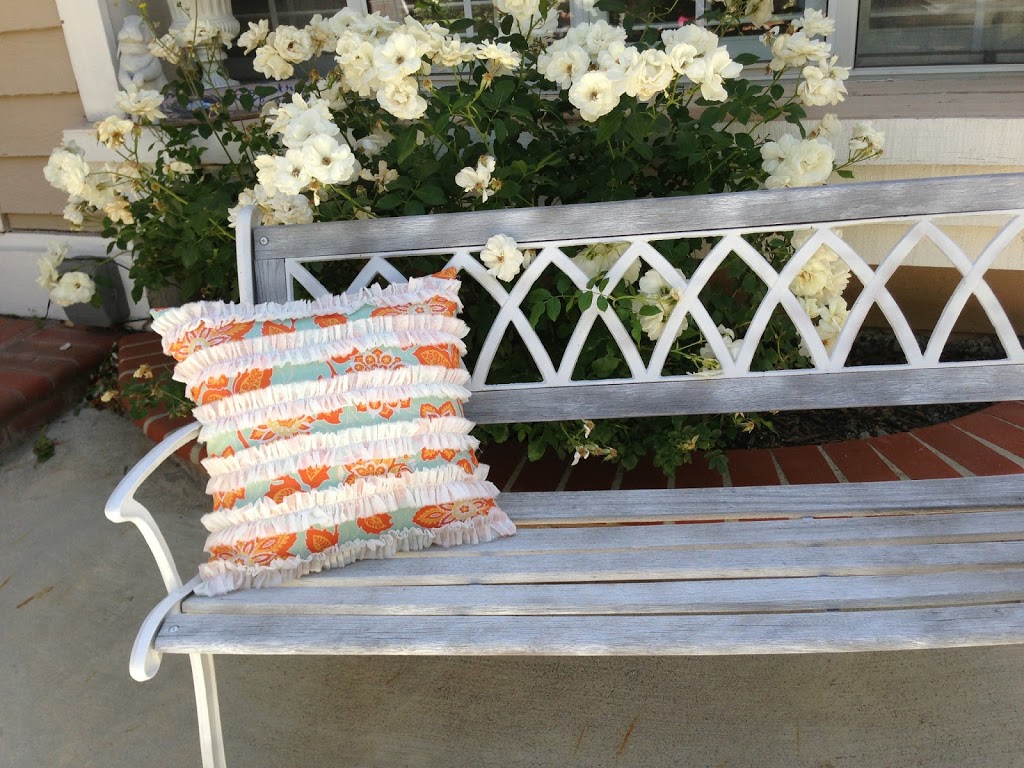
This is the fun part because you get to rip your fabric. I snipped my white fabric every 2 inches then ripped all the way down the width of the fabric.
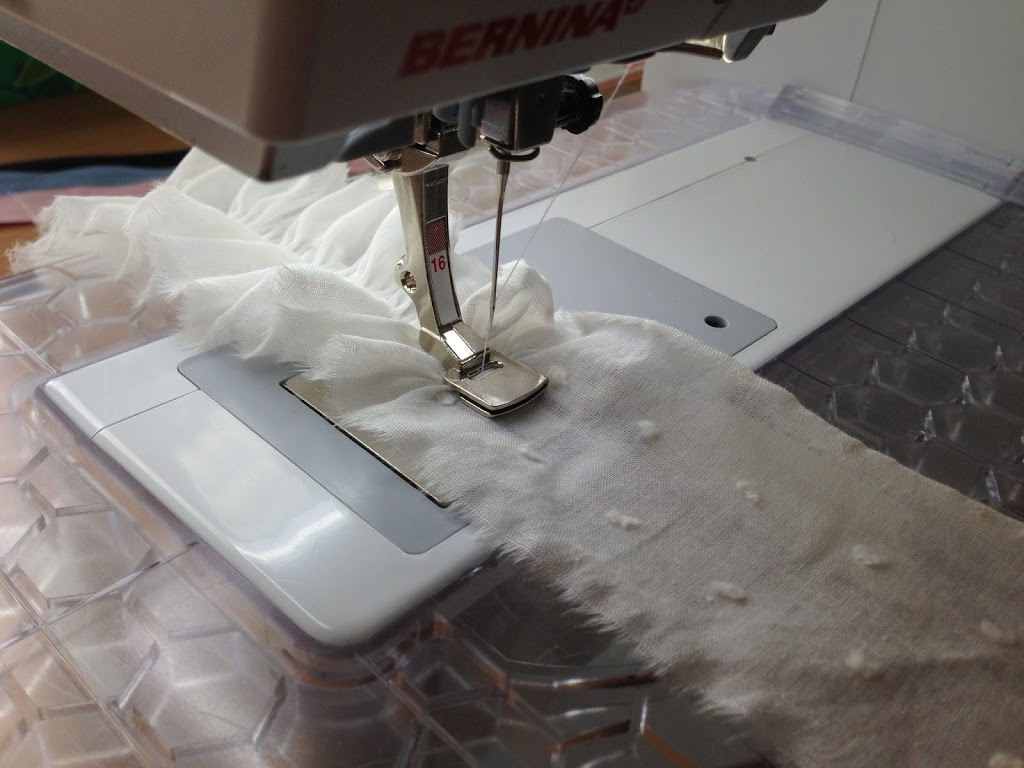
My pillow form is 18″ so I cut my front and back piece 19″. I inserted my invisible zipper before I sewed the ruffles on. It made it easier. For my back I choose a piece of neutral colored linen.
 Sew & Turn!!
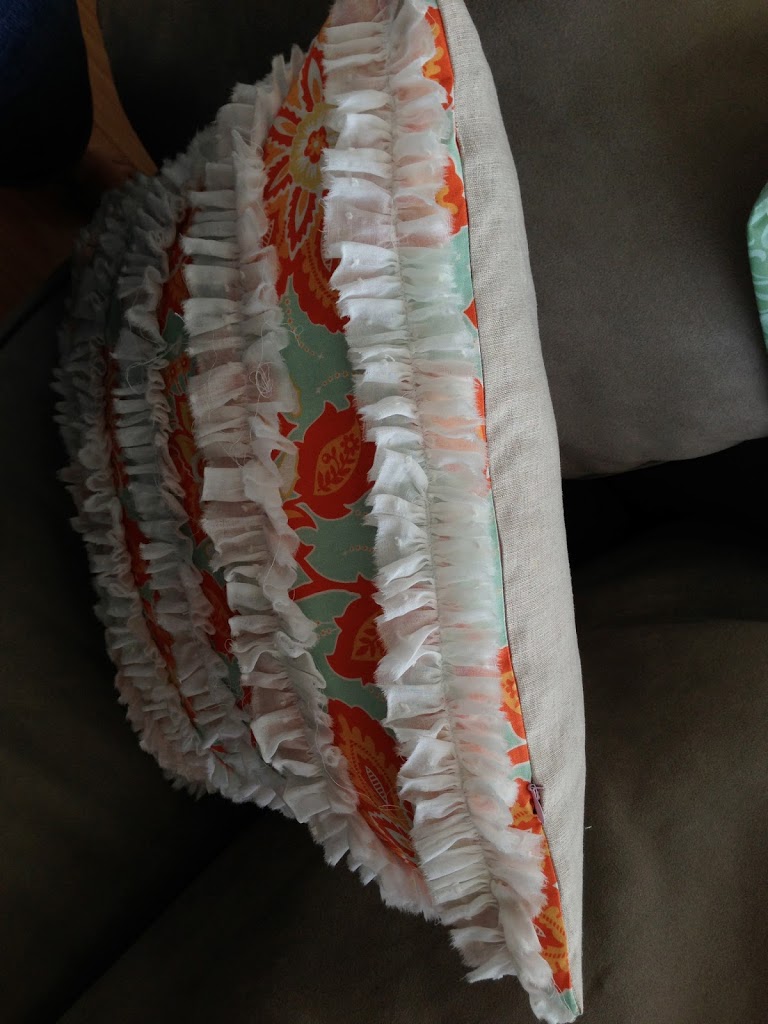
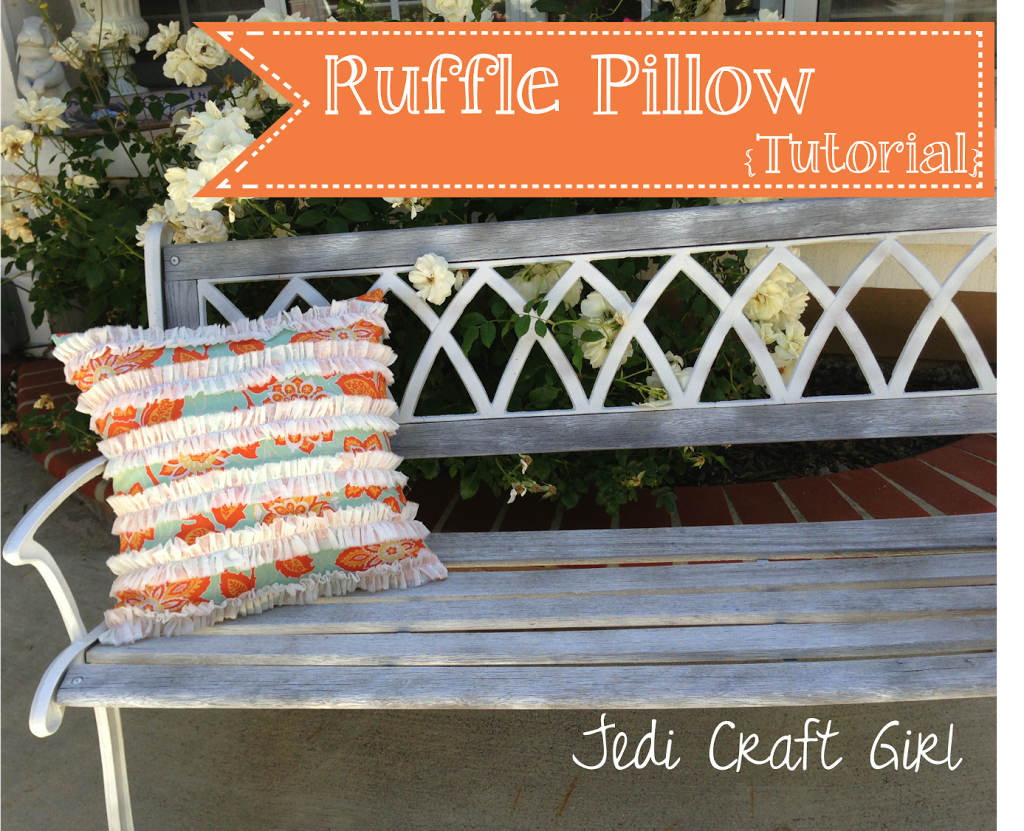
I am excited to share this tutorial from Thrifty Modest Threads. “We are three sisters-in-law who came together to create a blog where we could post our crafty creations, talk about our adventures in motherhood, and share our thrifty modest finds! We are currently in the process of launching our new blog called “Muddy Toes & Pretty Bows” which will also include crafty projects, sewing, our crazy kids, and just about anything that life throws at us!”
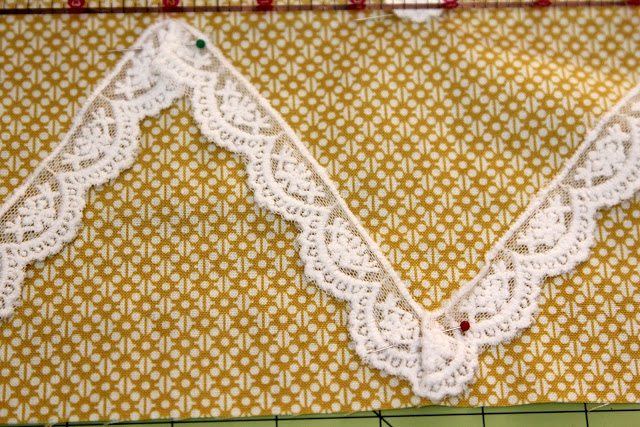
Cut fabric 12in x 16in. Cut three long strips of lace. Now get ready for a lot of measuring and marking to make sure the zigzags are equal distance apart from one another.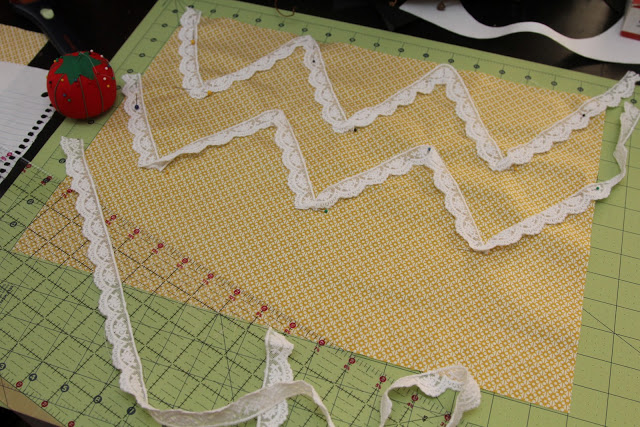
Pin the lace and sew it on! Pretty easy!
Thanks so much Thrifty {Modest} Threads for sharing this tutorial! I am hoping to make one of my very own!
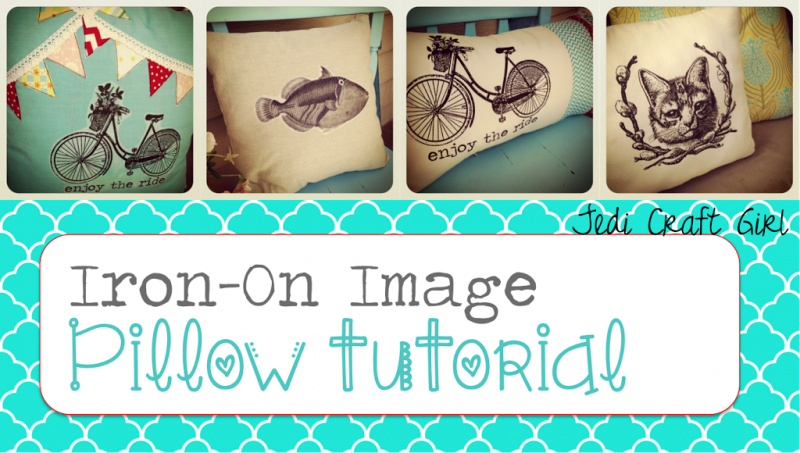
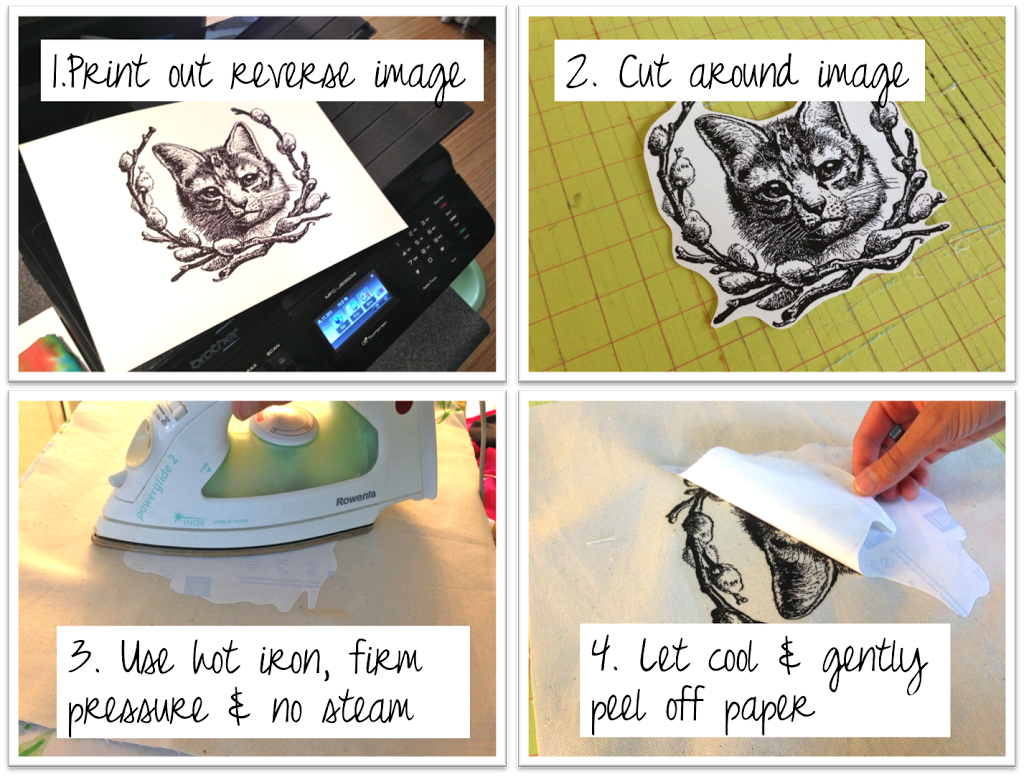
I love these graphic pillows I see everywhere!! They are super fast and easy to make! Here is what you do: The first item of business is to find a graphic you like. I went to Etsy and typed “pillow download” in the search field. Literally hundreds of fun images came up to purchase and download. Most are only $1.00 each! You can use any graphic you have or find.
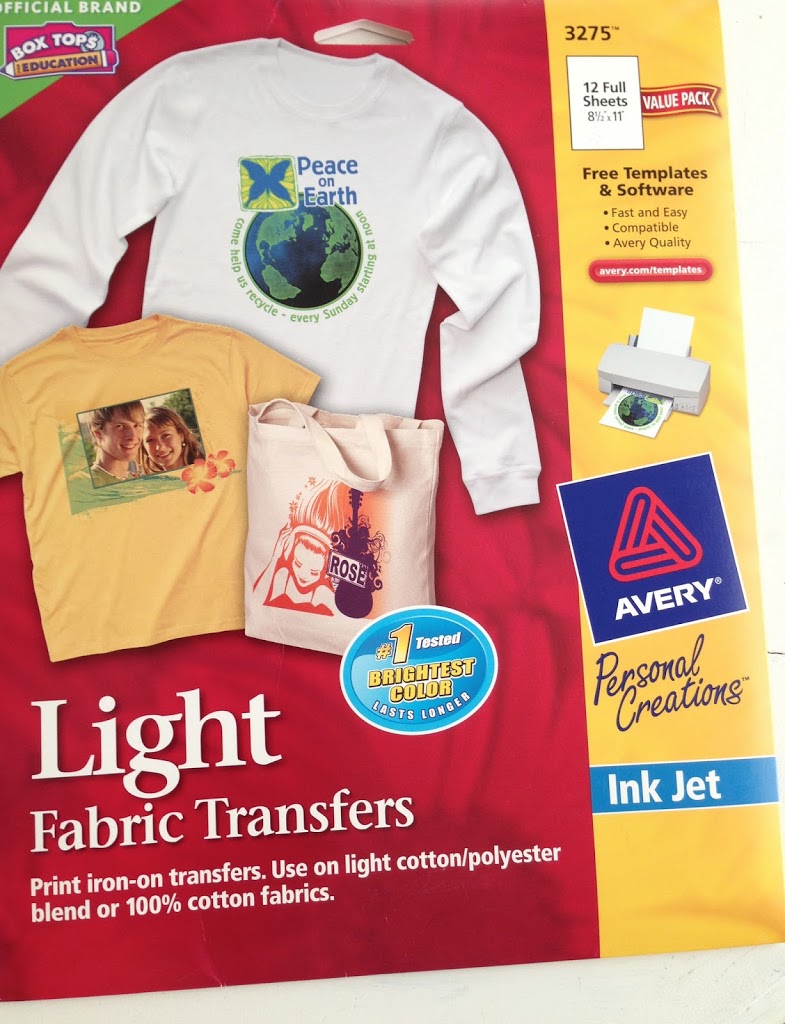
Next you need to get some kind of fabric transfer. This is the one I used from Avery:
 Ta-Da!!
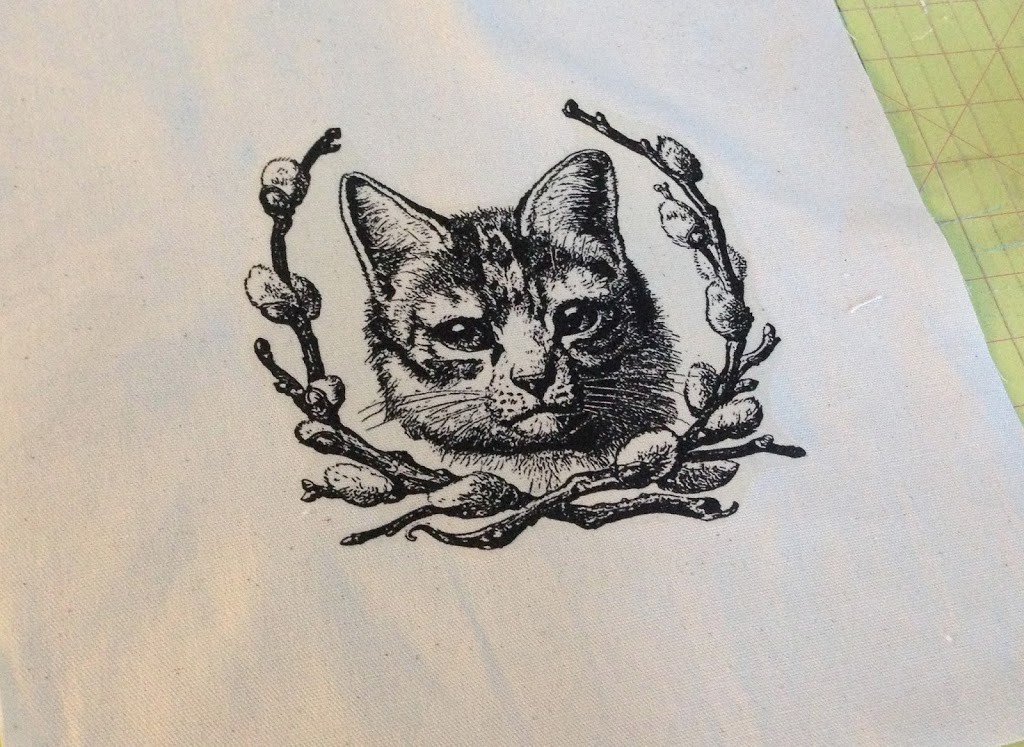
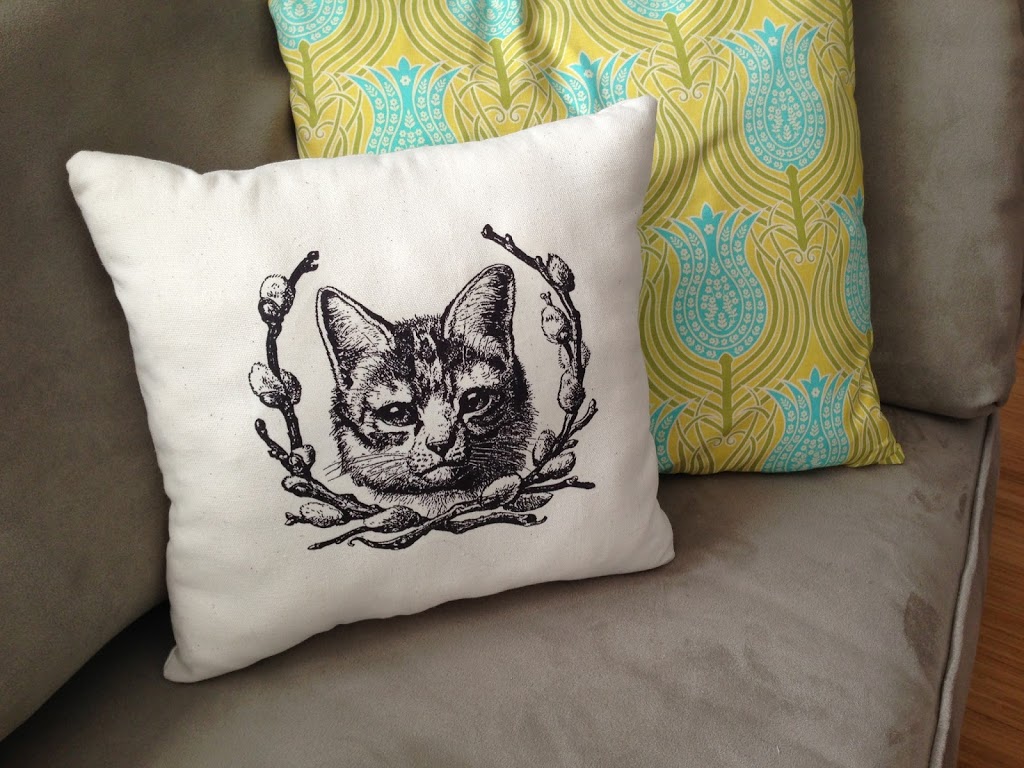
Pillow #1 – Antique Kitty:
This was the quickest pillow to make. Two squares 12″ each. Sew, turn, and stuff with fiber-fill. Hand stitch opening closed.
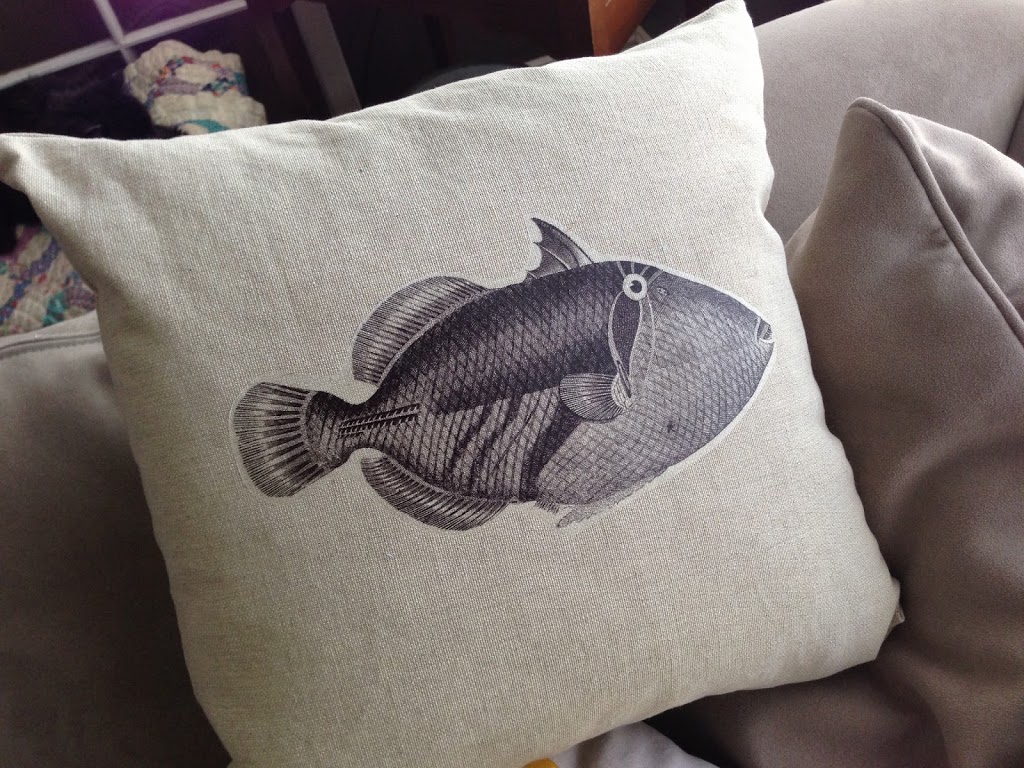
Pillow #2 Huma Huma Antique Tropical Fish Pillow
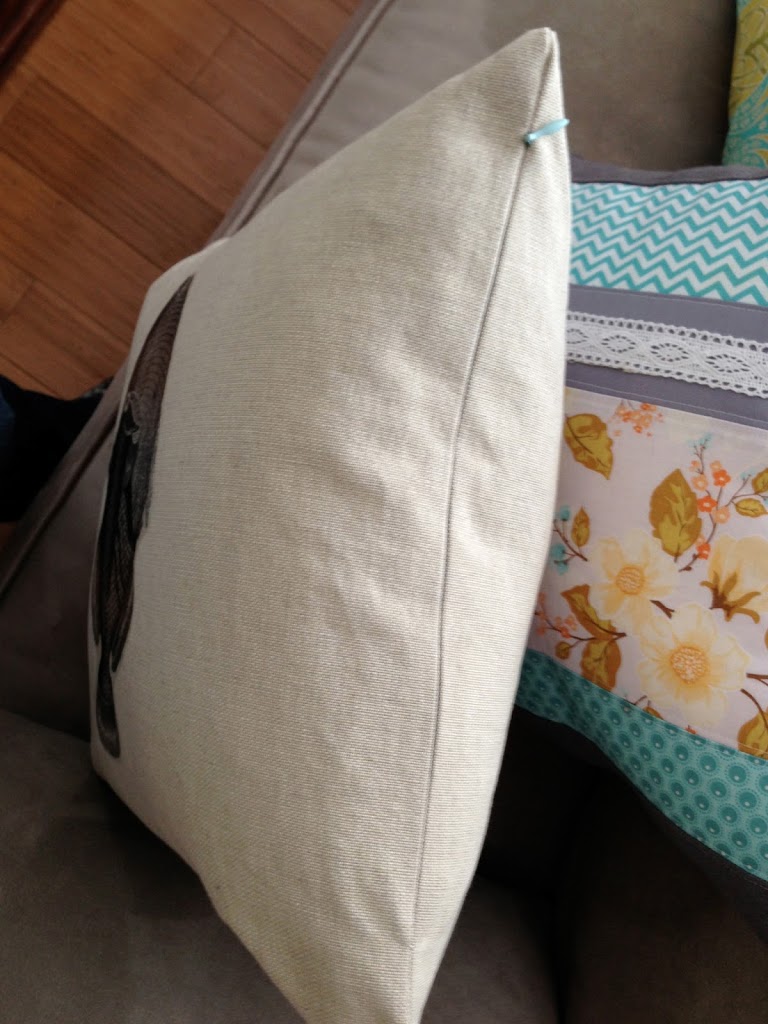
This was similar to the kitty pillow, only it measures 18″ and I inserted an invisible zipper in the bottom seam to insert the pillow form. Click HERE for my invisible zipper tutorial.
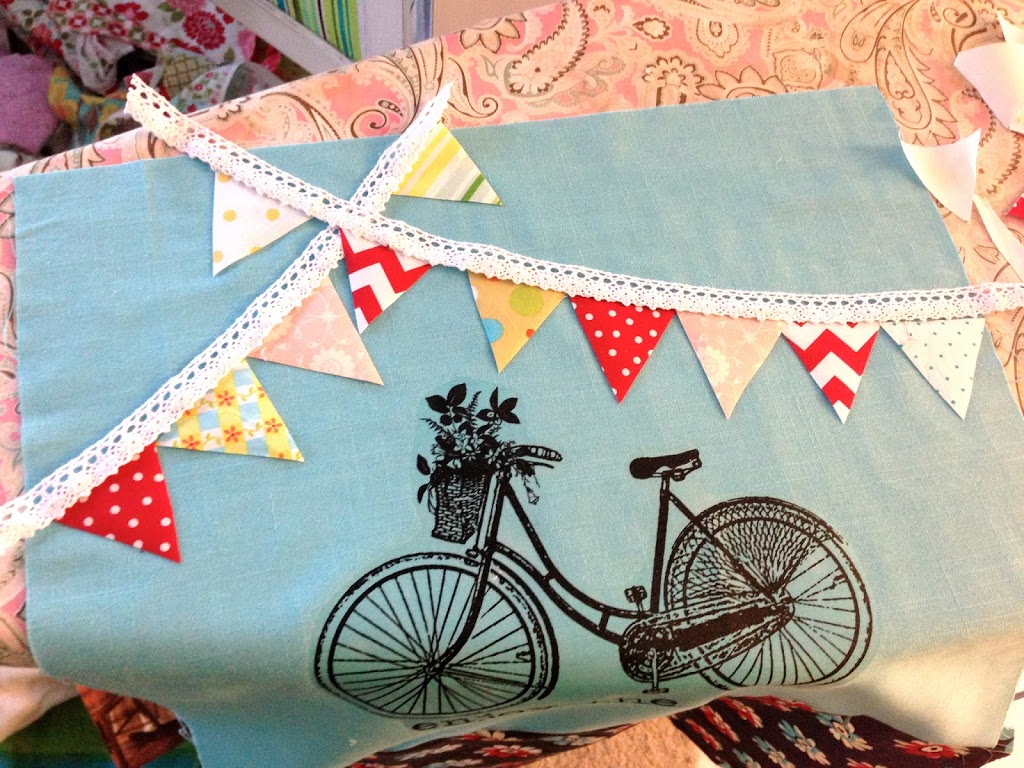
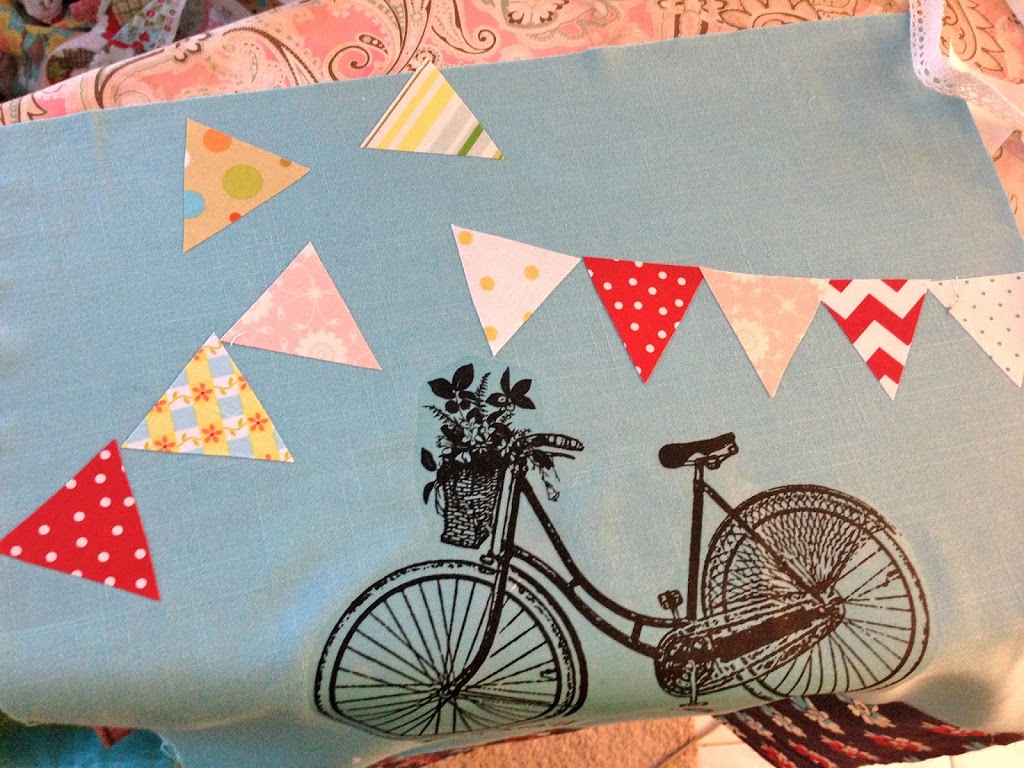
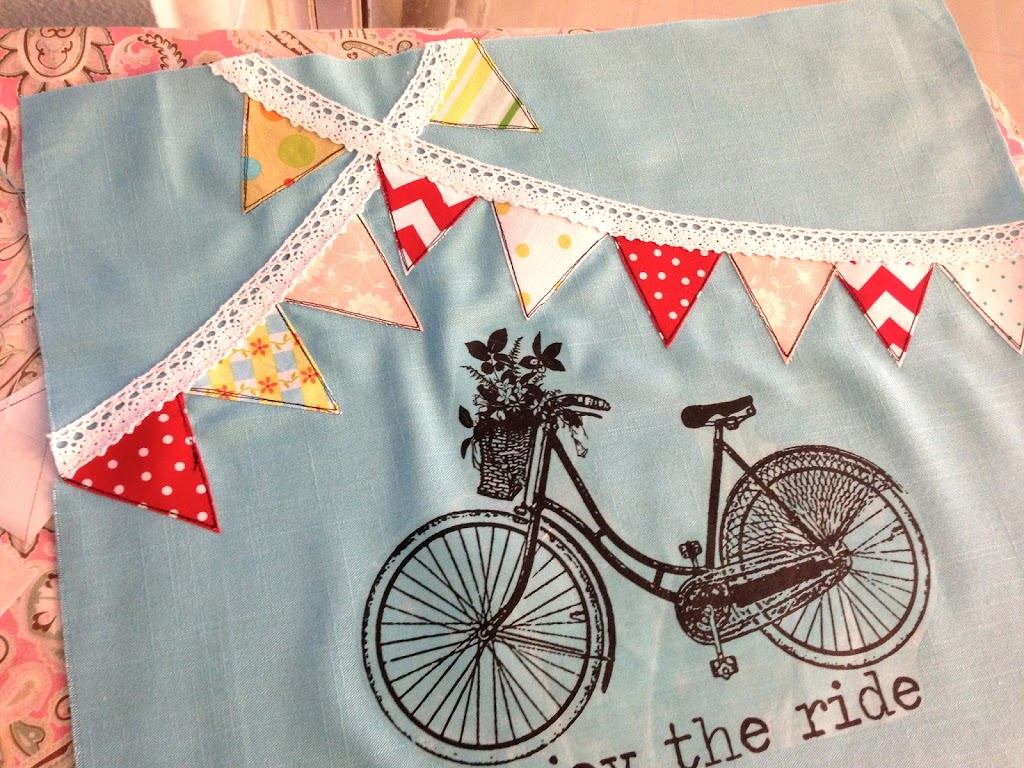
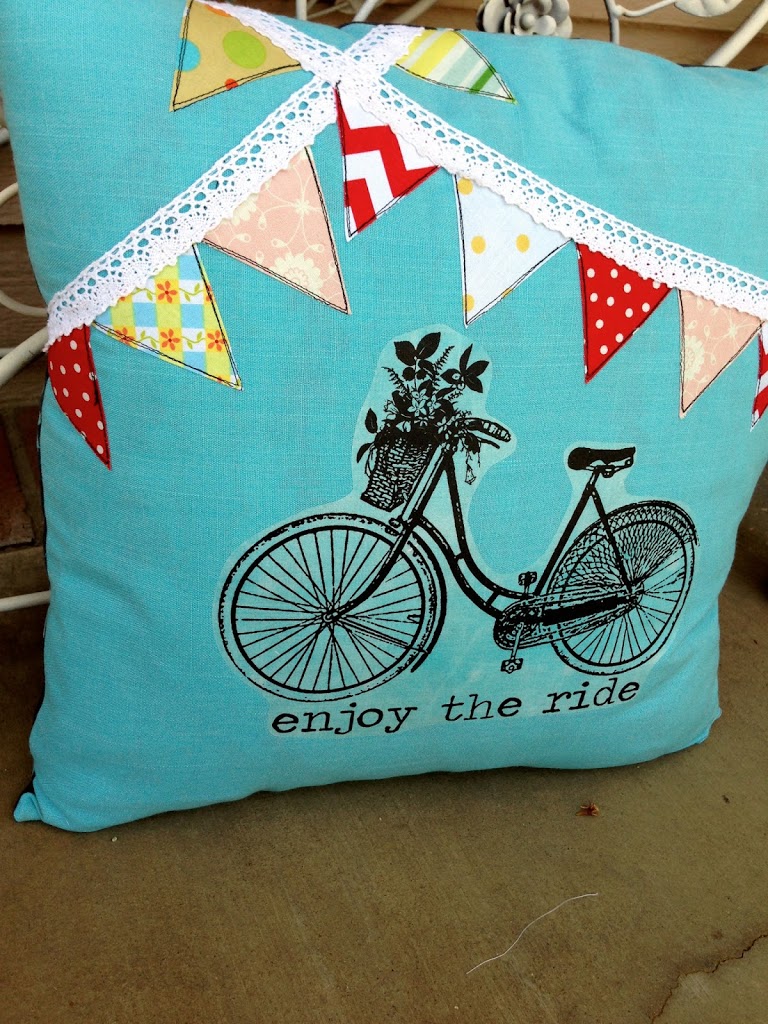
#3 Enjoy The Ride Banner Pillow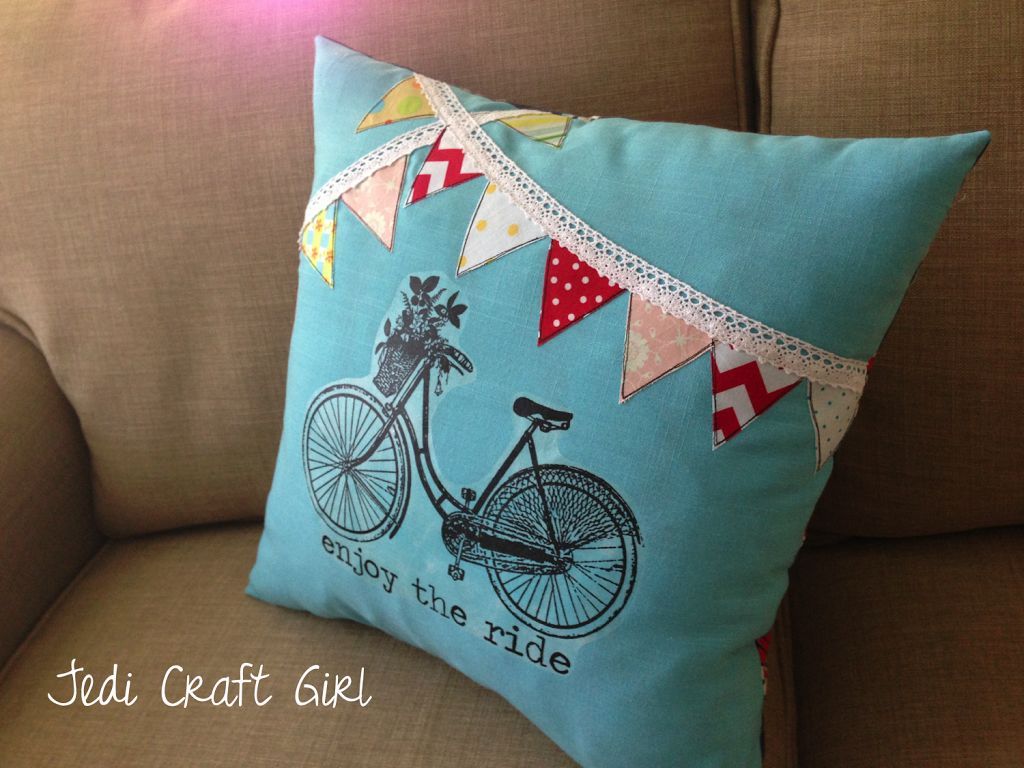
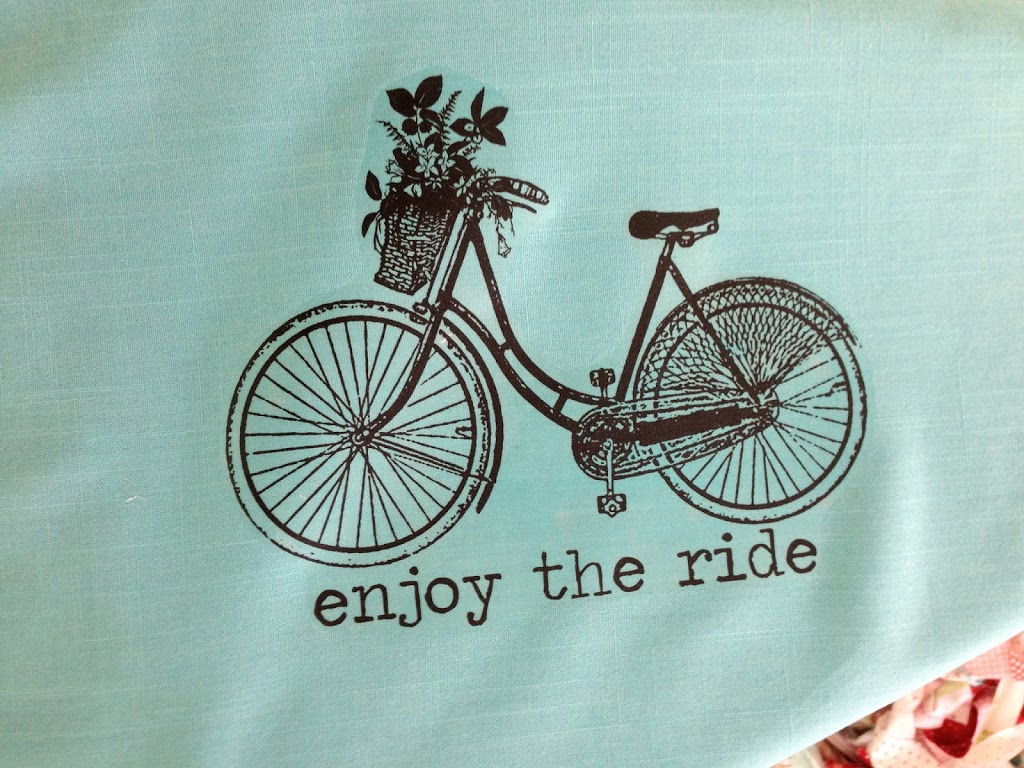
I added the text to the bottom of the bike graphic I purchased from Etsy. I choose to use turquoise linen for this pillow. Looking back, I should have kept with more neutral tones. You can kind of see the edge of the iron-on material. Live and learn!
My pillow form is 16″ so I cut two 17″ squares. Iron on your graphic.
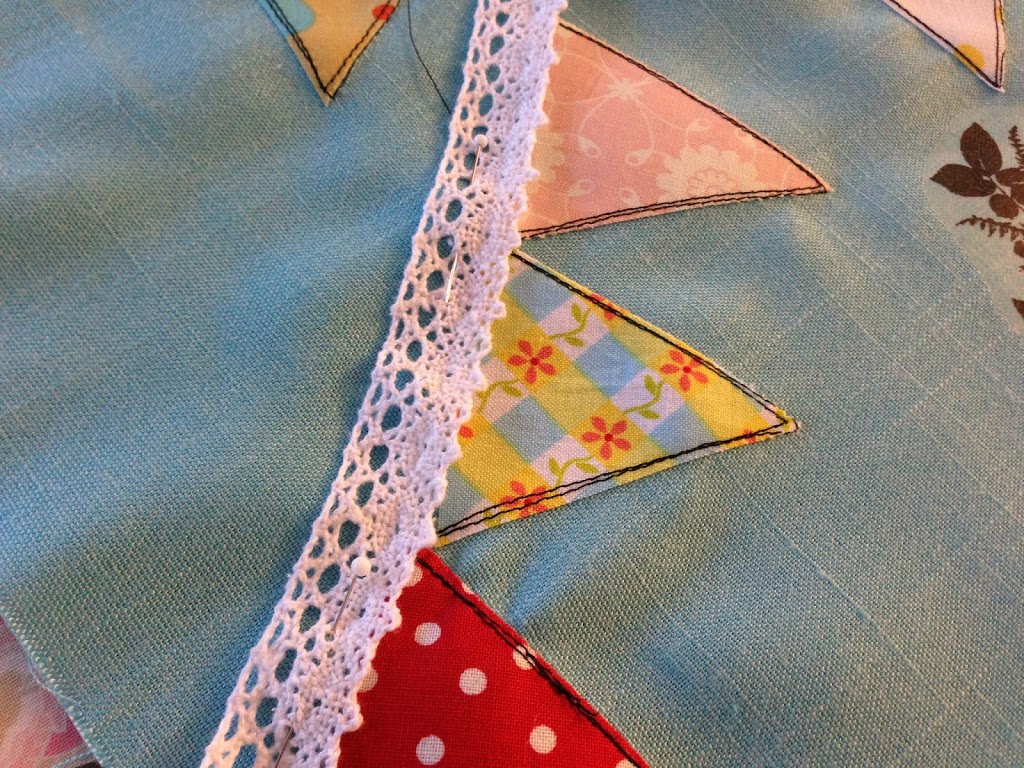
Cut little triangles out of Heat N Bond Lite and iron them to the wrong sides of your banner fabrics. Cut out your triangles, peel off the back, and they are ready to be ironed into place.
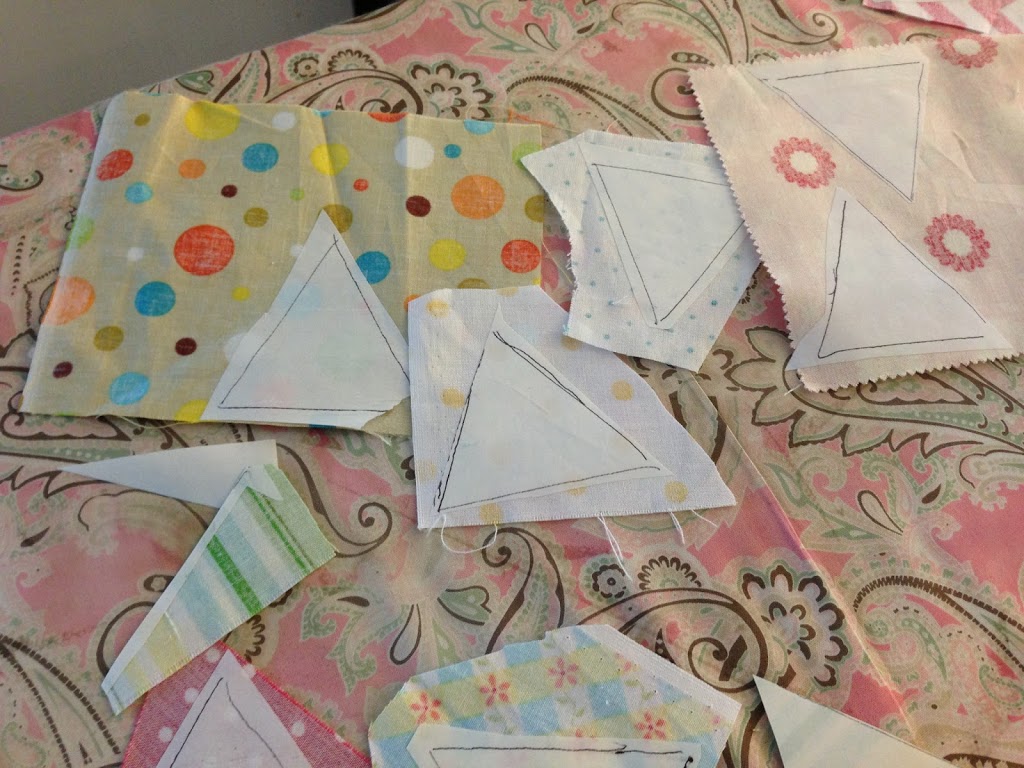
This is how I laid out mine. I used some crochet lace for the banner.
Remove the lace and iron on the triangles. Be careful not to move them.
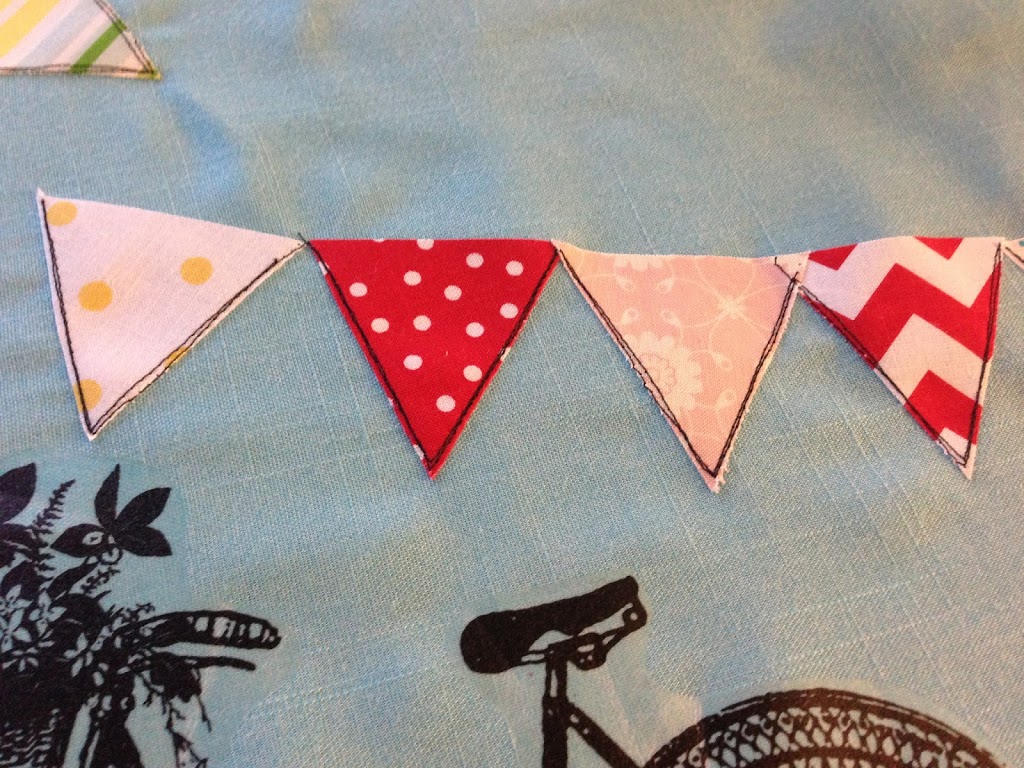
I used black thread to accent stitch around the triangles. I stitched them twice so they look “sketchy”. I didn’t bother stitching the top as the lace will cover them.
Now pin your lace on and sew along the top and bottom of the lace in matching thread.
Now it is ready to finish into a pillow! I used an invisible zipper on the bottom to insert the pillow form. You can finish the pillow the way you like best. You can even just sew and stuff it!
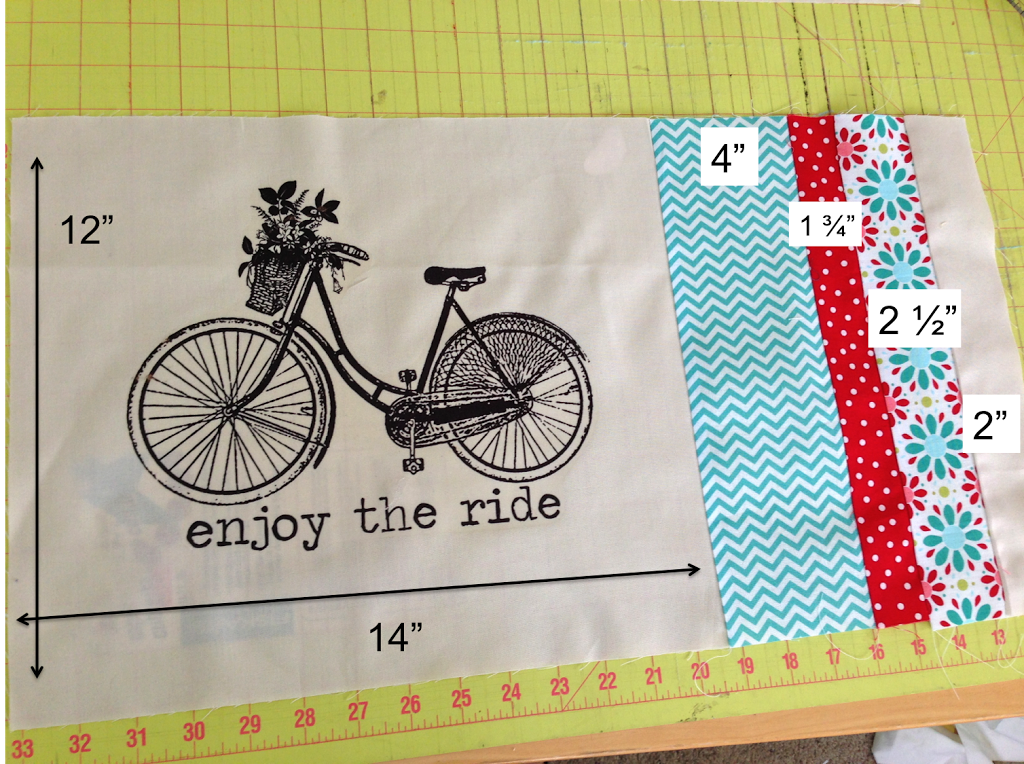
Cut the back piece 12″ x 22″
Use 1/4″ seams in your piecing. After you piece the strips on, press the seams to one side. BE CAREFUL not to touch the iron on your iron-on image – it will melt!!
Sew the front to the back with right sides together. Leave a small opening in the bottom seam to turn and stuff. Hand stitch closed. Done!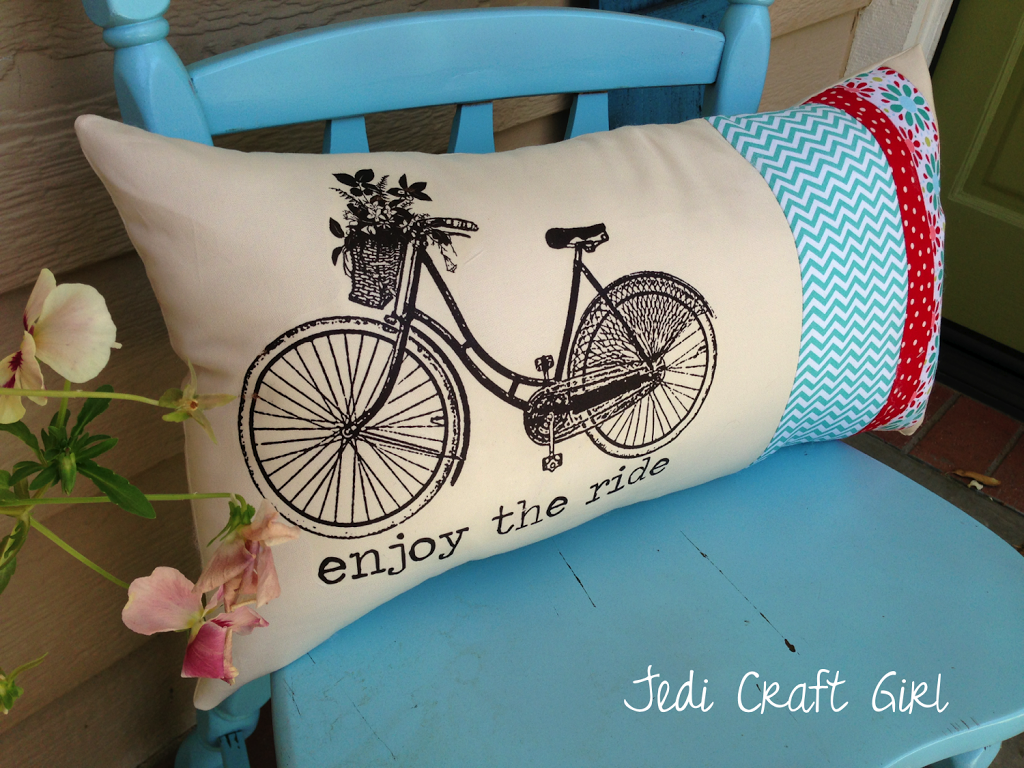
The possibilities are endless using iron-on images. I hope you come up with something fun!!
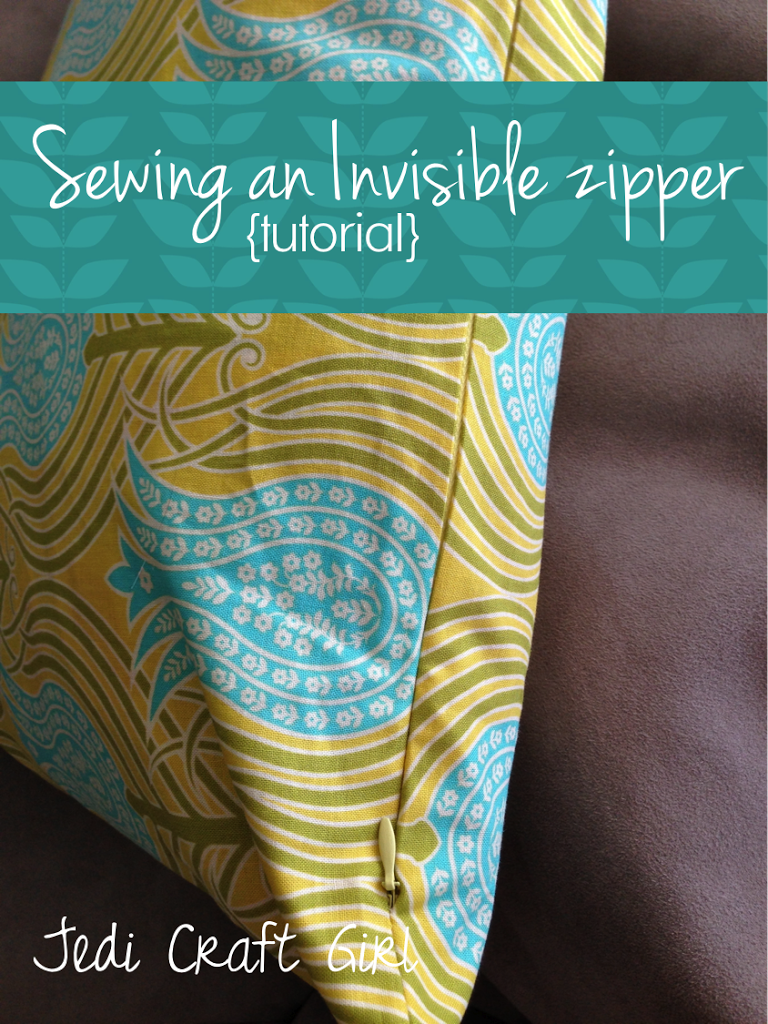
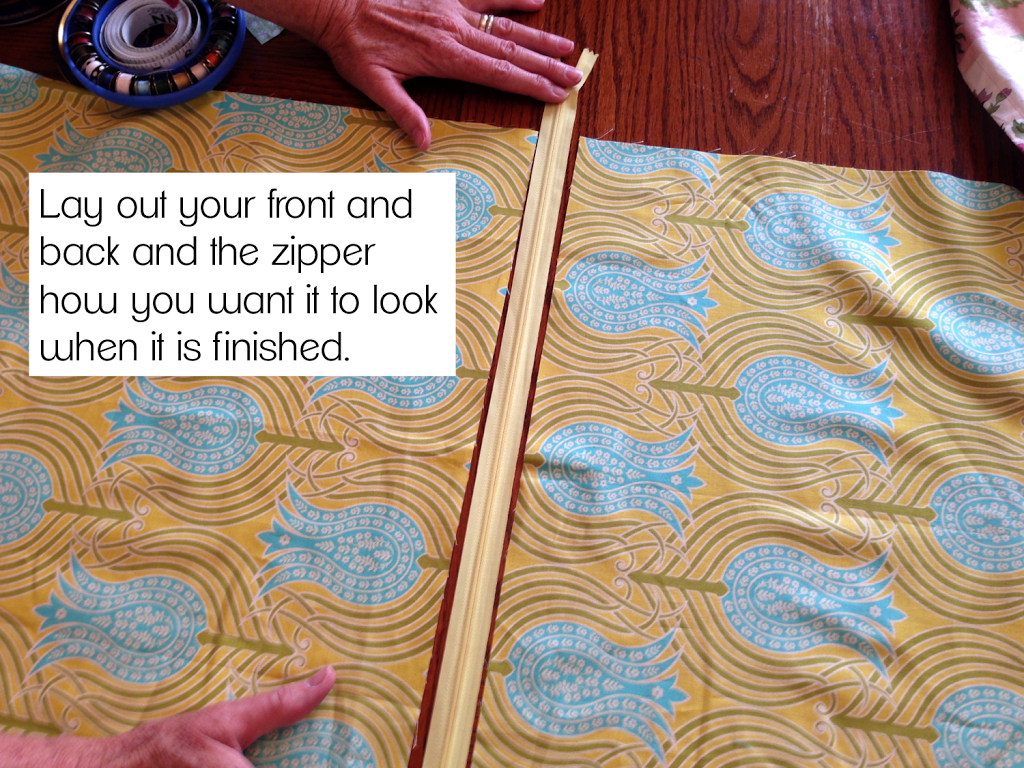
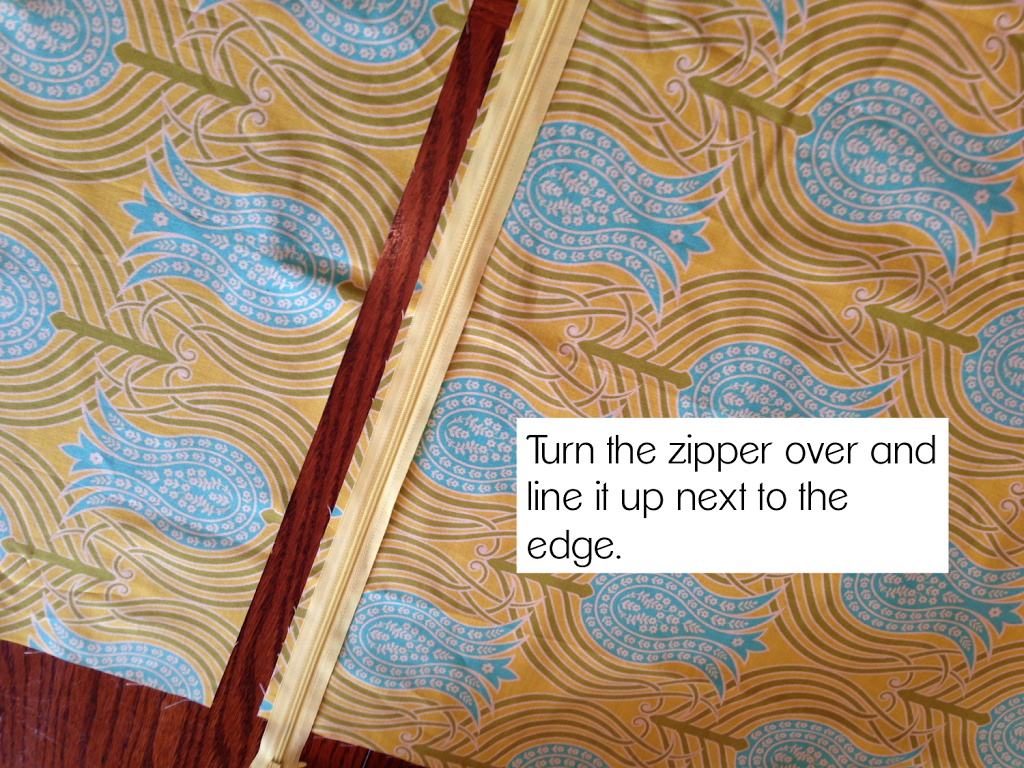
I love finishing my pillows with invisible zippers! Once you try it you will love it too!
I cut my pillow squares the exact size as my pillow inserts (I try to always use 20″ pillow forms)
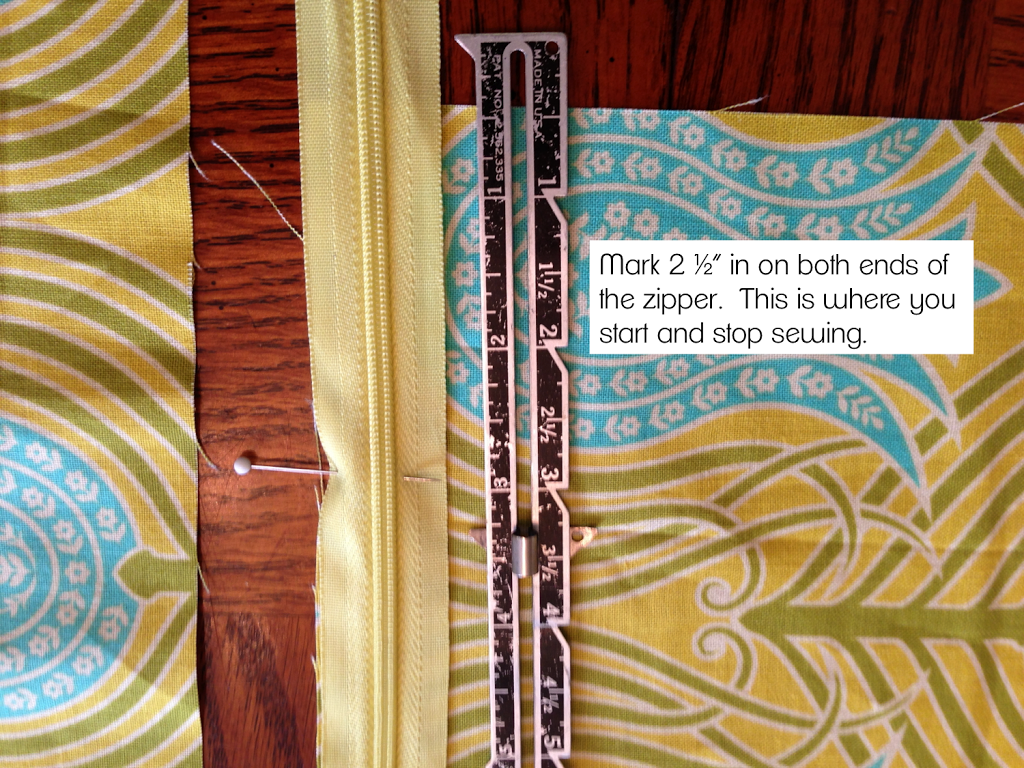
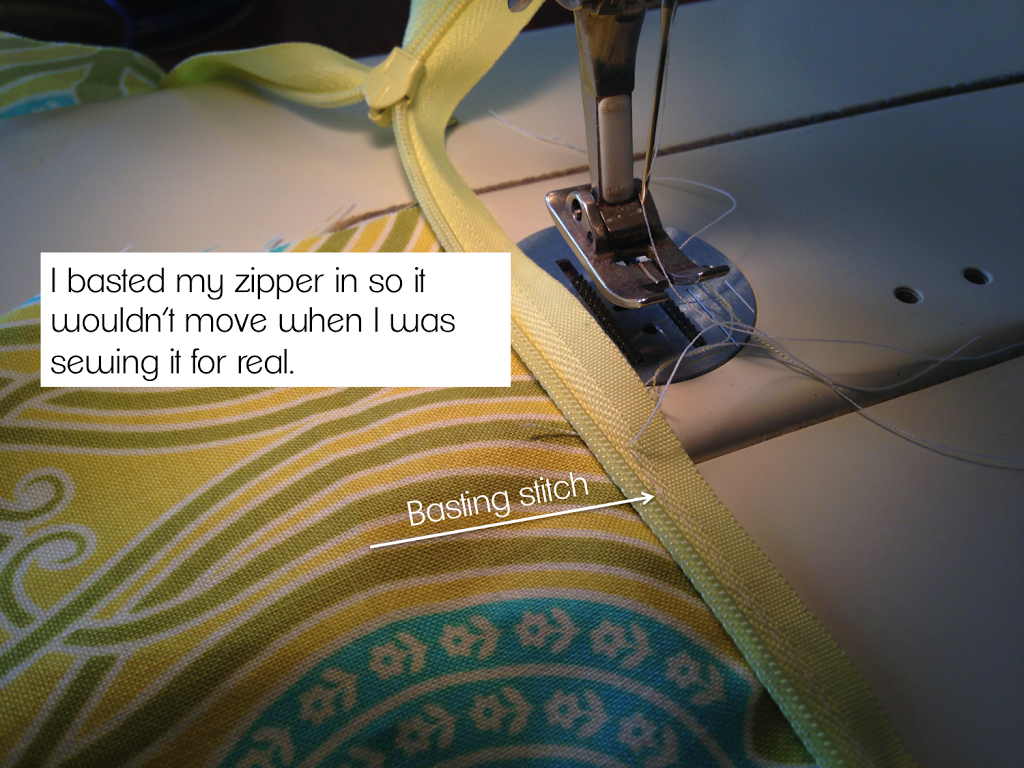
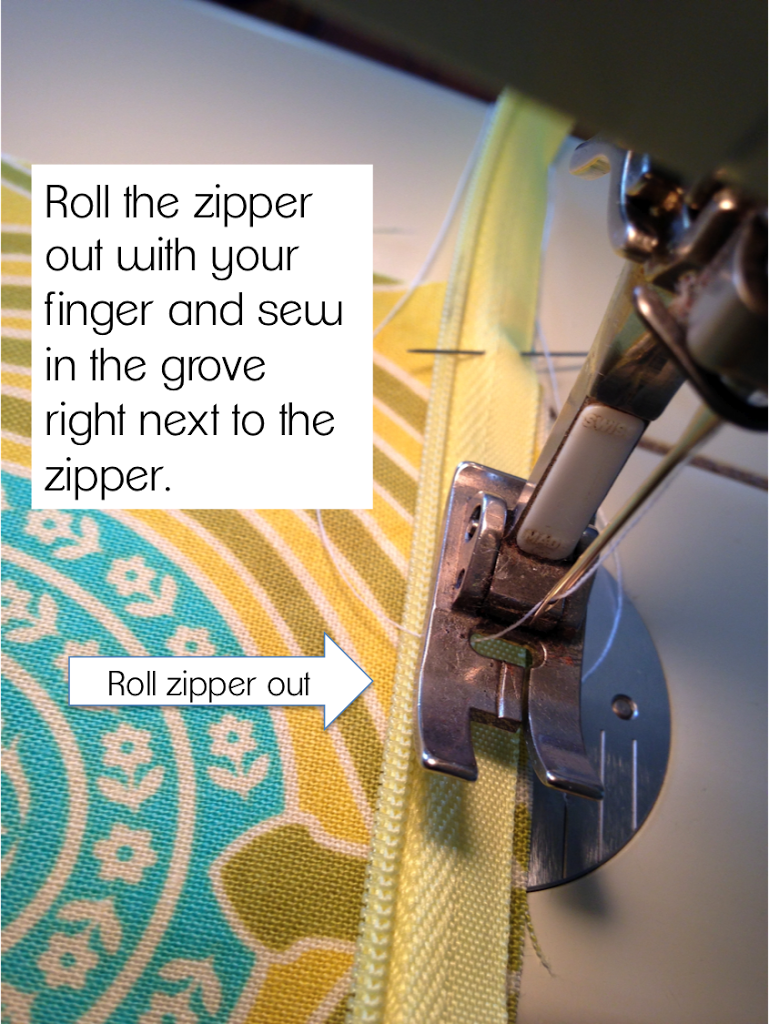
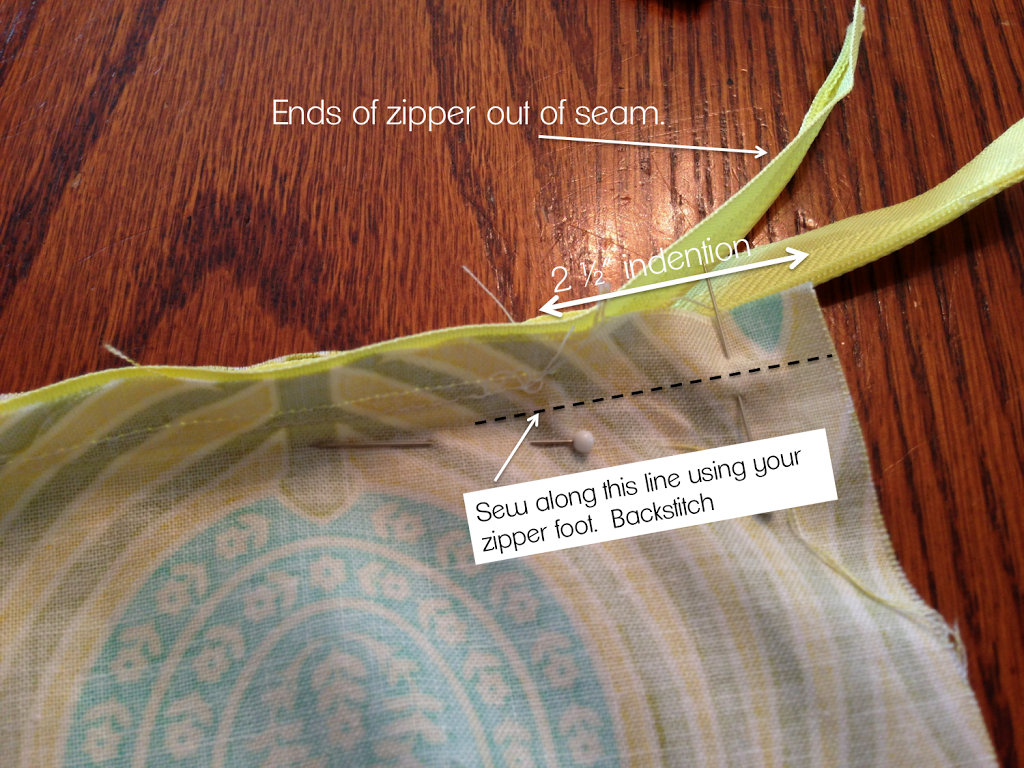
Make sure to start and stop at the 2 1/2″ mark. Now, pin the other side of the zipper to your other square of fabric.
This next step can seem tricky. You are going to put on your zipper foot and sew a seam that will close up that 2 1/2″ space on both sides of the zipper. Below I have shown exactly where your seam should be and where it should start. Notice it starts about 1/2 inch from where the first seam ends. It is ok that the seams don’t meet up. When you press the pieces, it will lay really flat. In fact, the closer you get to the first seam, the more pucker-y it will be.
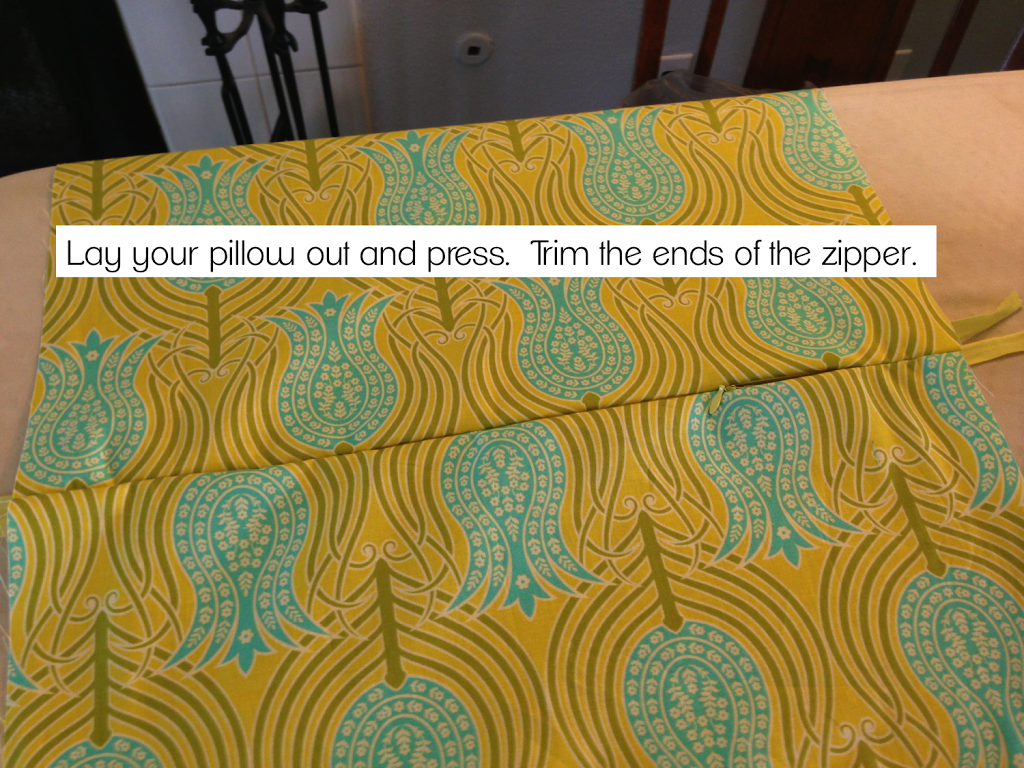
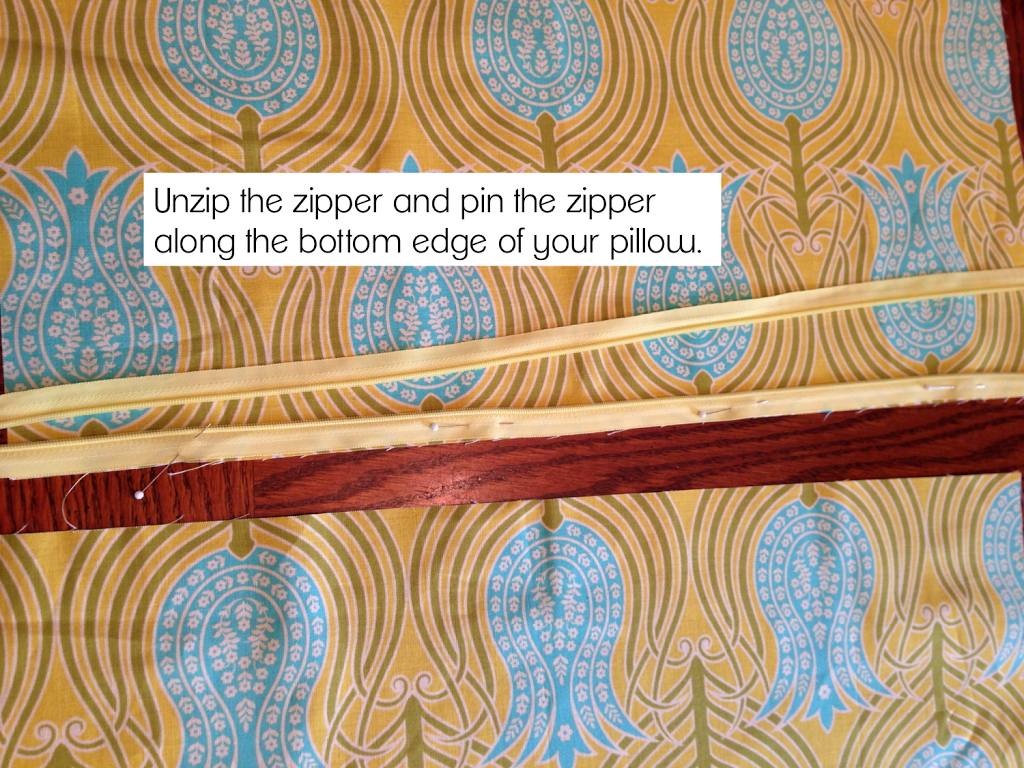
To finish the pillow, place right sides together and pin all the way around. MAKE SURE THE ZIPPER IS PARTIALLY OPEN. Sew 1/4″ all the way around the pillow, starting and stoping at the zipper. Turn right side out.
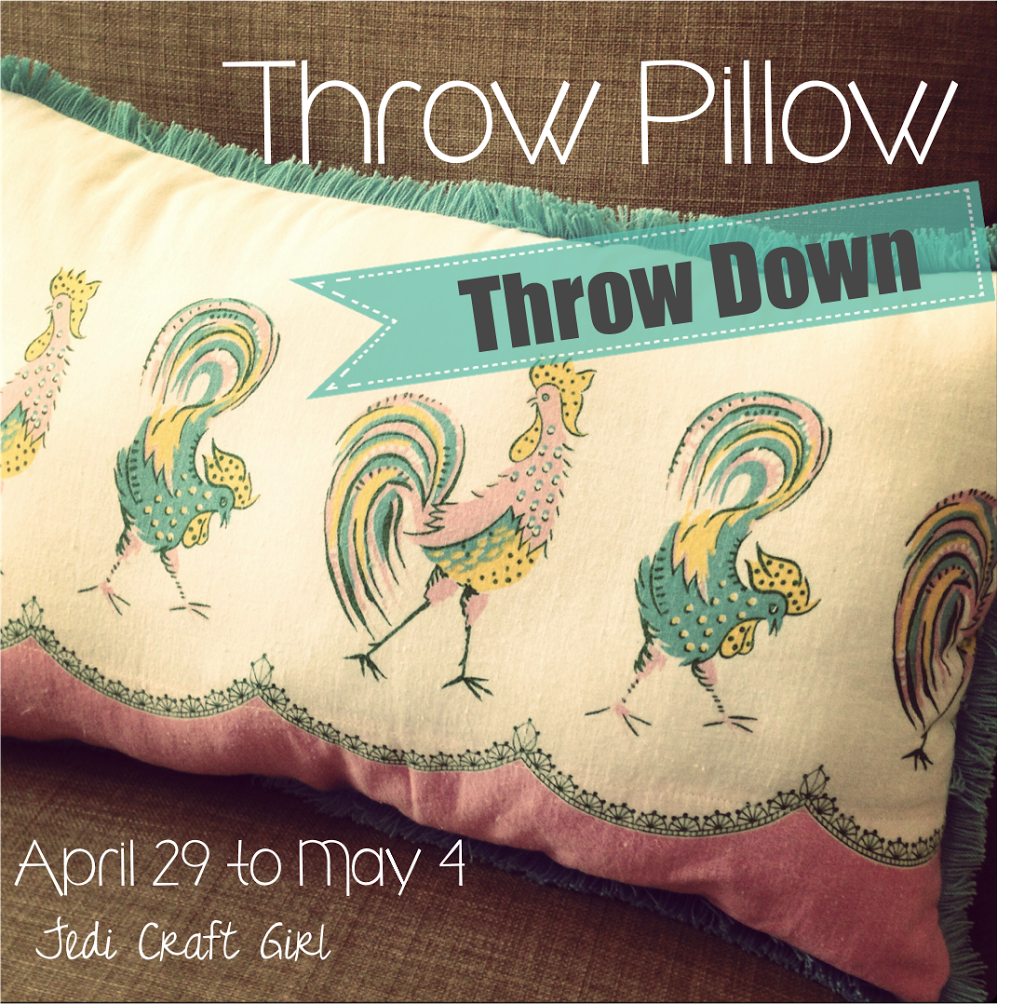
I am so excited for this week! I have been working on lots of fun pillows and working with lots of fun people to get this throw down started! This will not be a “Throw Down” in the sense that there are winners and looser, I hate to see people cry 🙂 Just fun tutorials every day. “Who can’t use a few more pillows around the house”….(said no husband ever!)
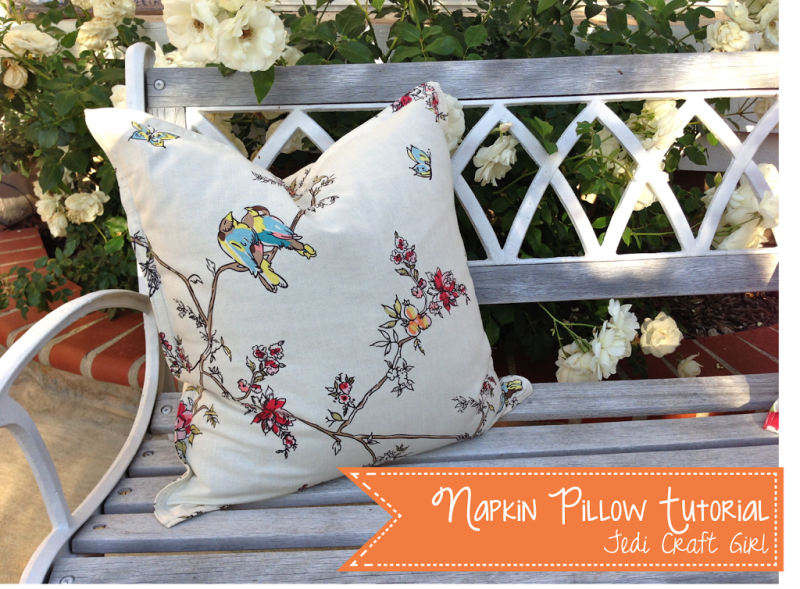
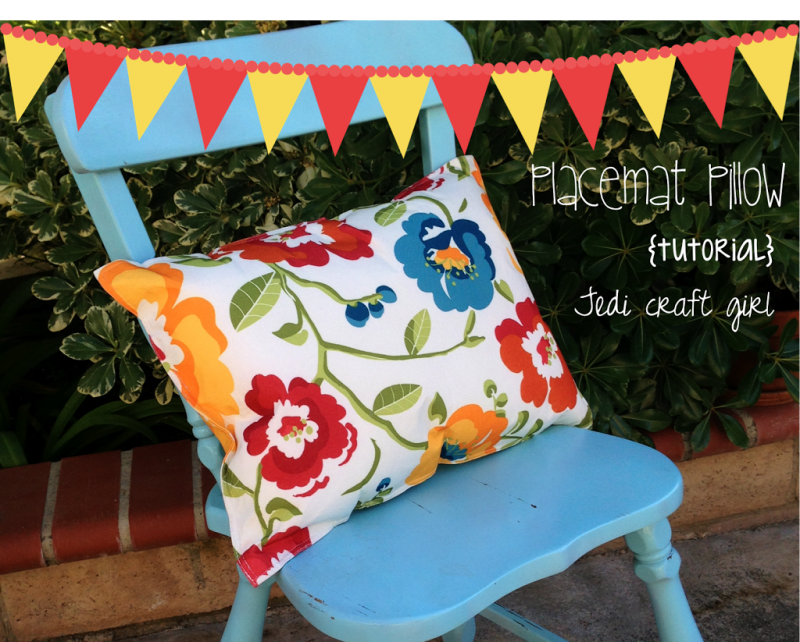
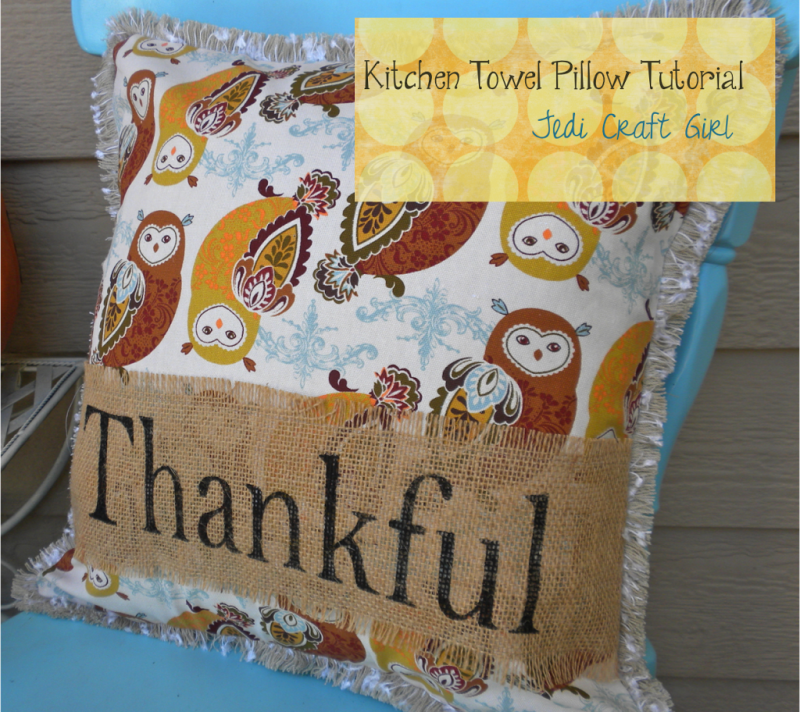
Here are today’s three features – its all about fast & easy and sewing with kitchen linens: napkins, placemats, and towels!


