Strippy Table Runner

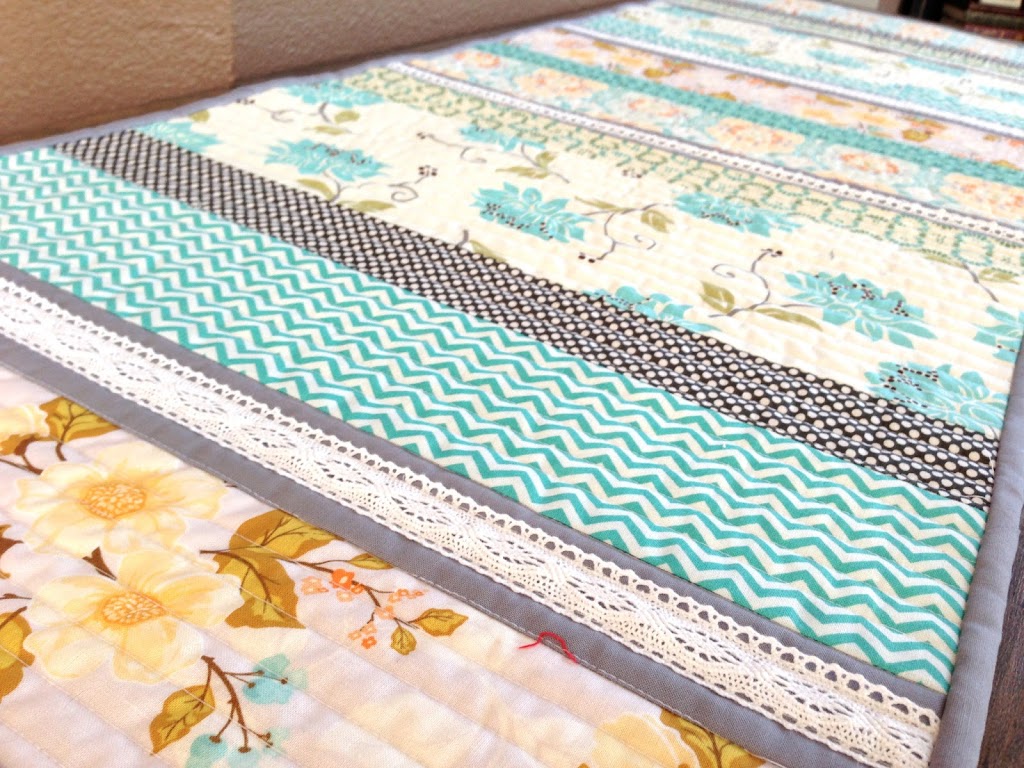
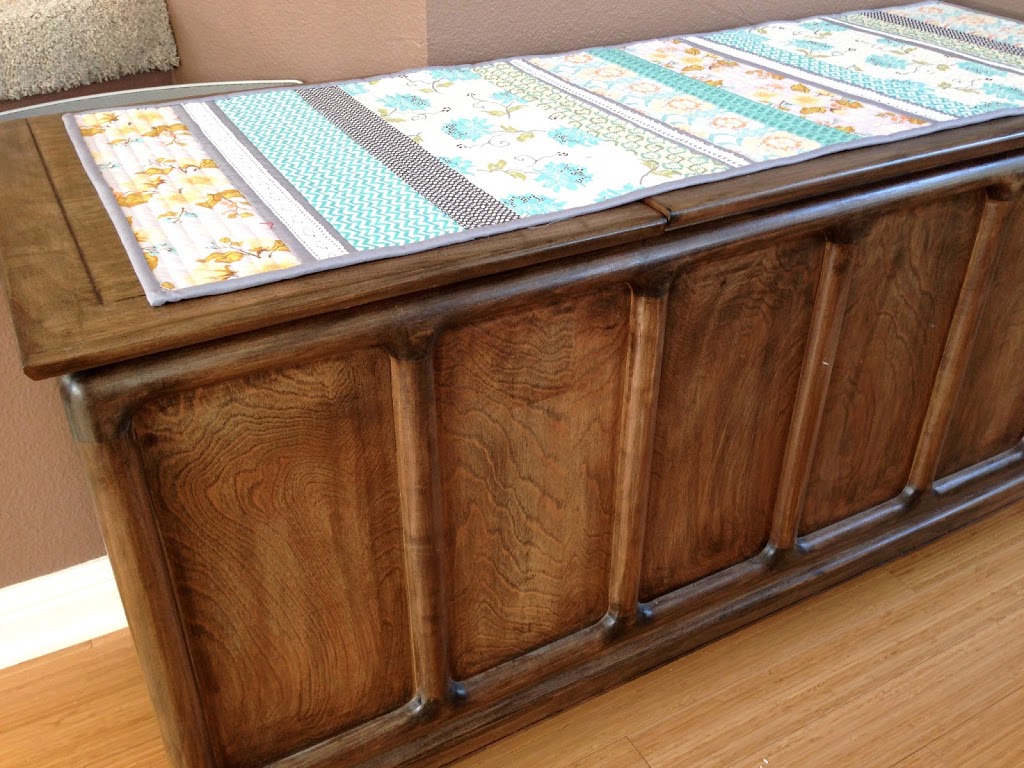
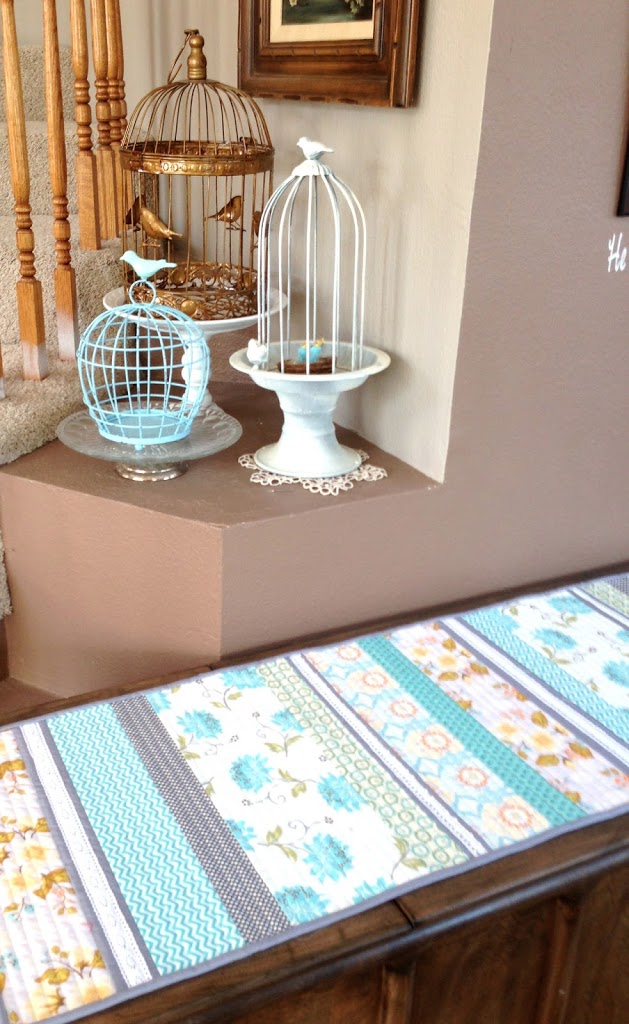
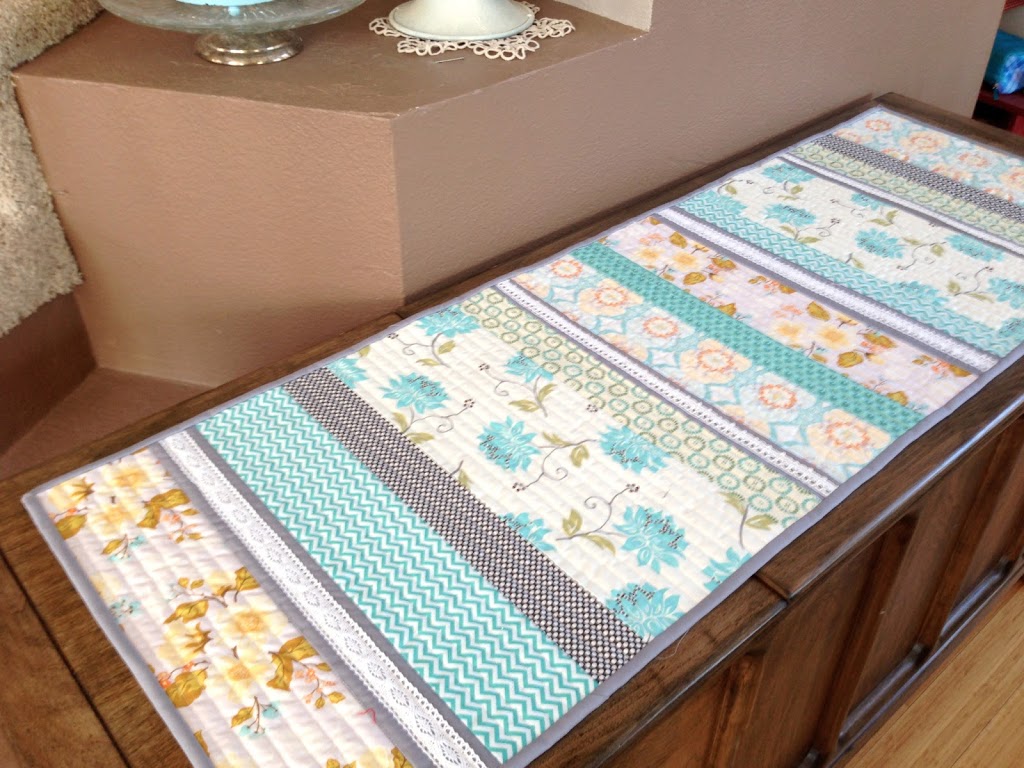
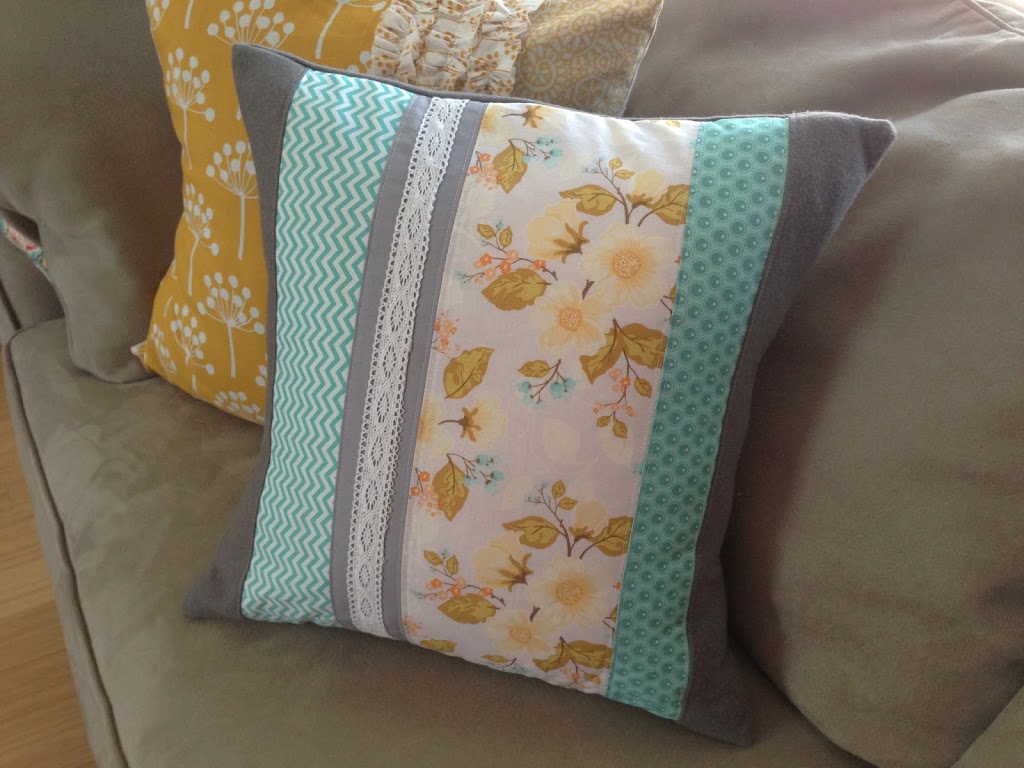
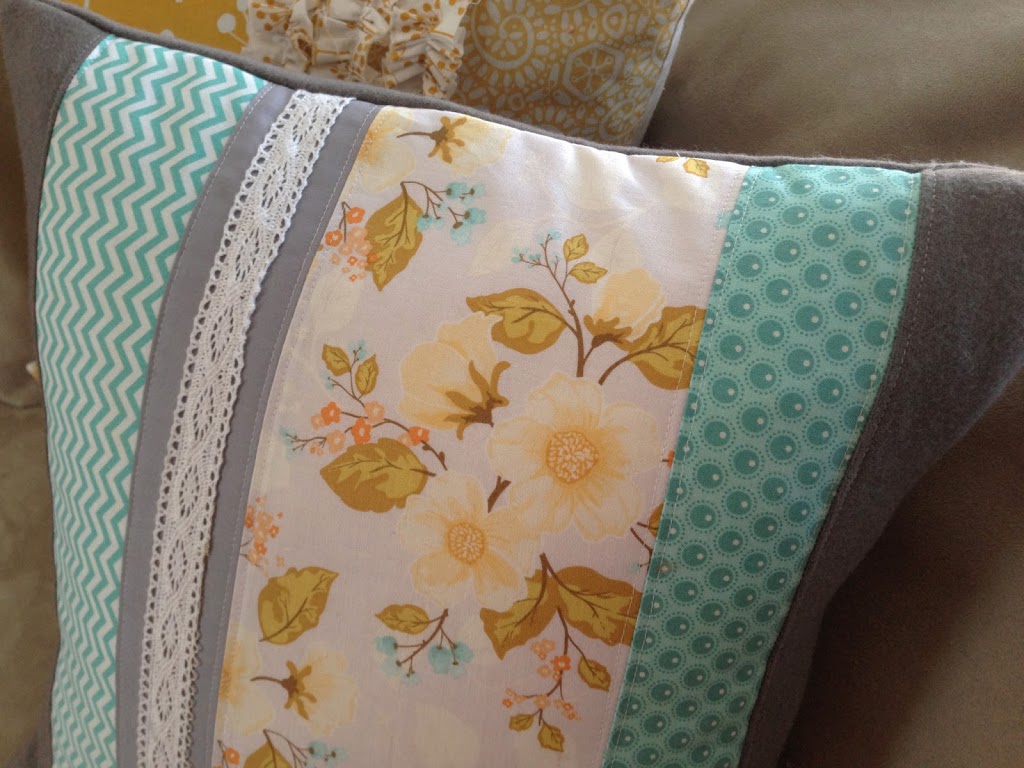
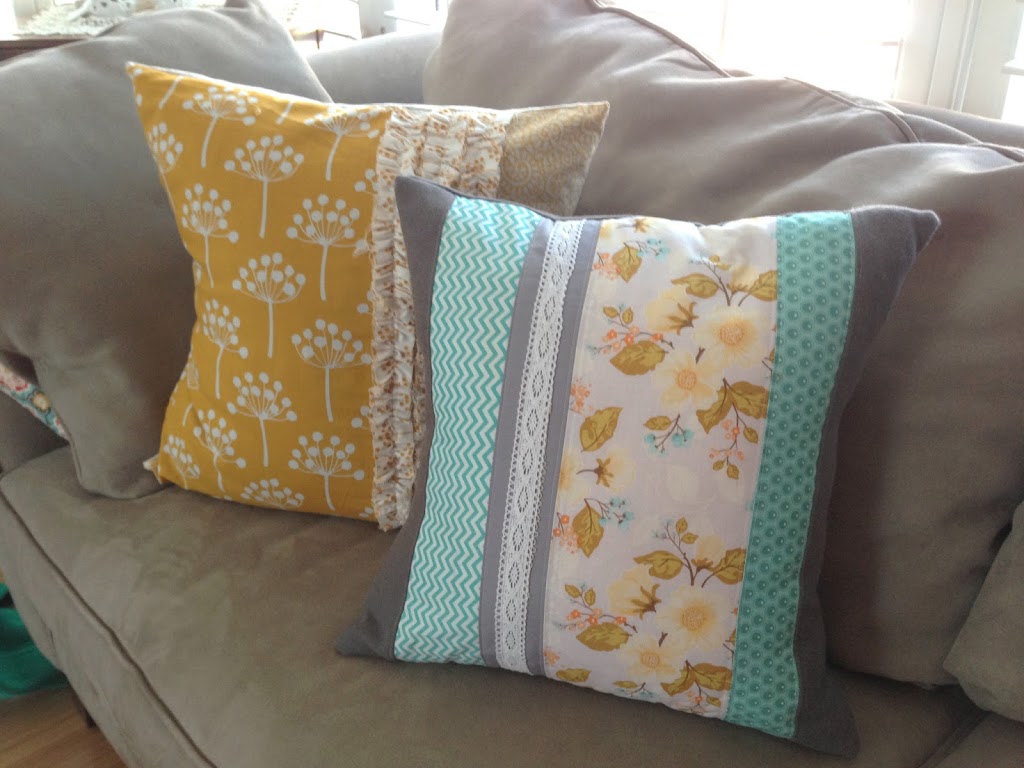
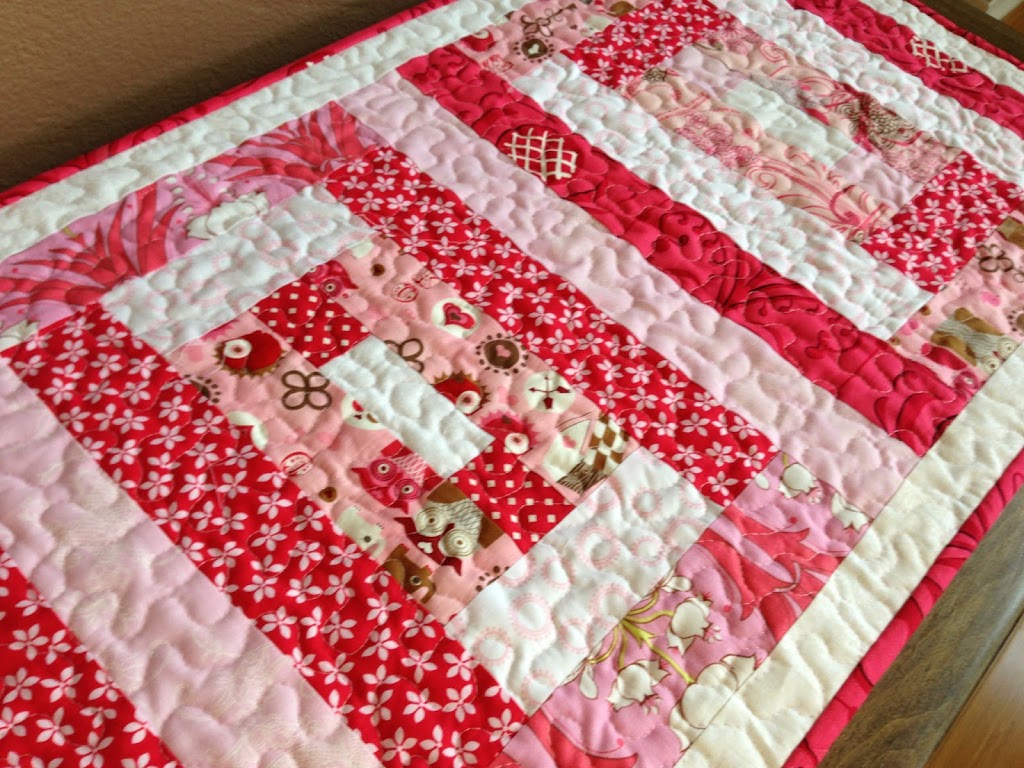
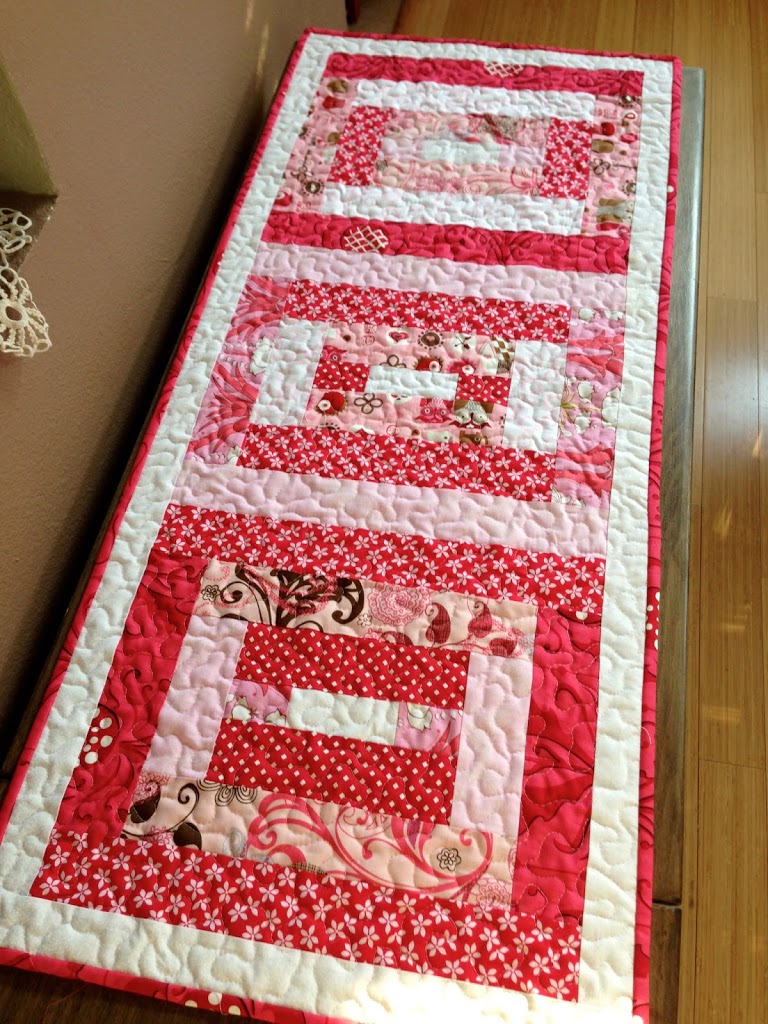
 I bought this fabric last year in hopes of making a table runner for the dining room.  It finally happened and I love it so much.  The fabrics make me happy when I look at them!!!  There is no real rhyme or reason to the pattern.  I figured out how I wanted it and cut various widths of fabric then sewed them together.  I sewed crocheted lace on the strips of solid grey.  I like the feel it gives it.  For the quilting, I did straight line quilting every 3/4 inch.  I love it!!!

Amanda

New Throw Pillow

 I sewed up a new throw pillow today!  I bought a remnant of grey wool on sale was dying to use it.  The print fabrics are cotton.  I added some crochet lace and then put the wool on the sides and the back.  It makes it feel cozy!  I love having a new throw pillow in the house!!


Amanda

Happy Valentine’s Day!

Its been a crazy month.  February is starting to feel like the new December!  Of course I left making the children’s valentine’s to the night before at 10pm.  Lucky Ginger Snap Crafts posted this idea and it was quick and easy!
 
Here are mine.  I could not find any crazy straws with loop-de-loos – only squiggles.  We added a Hawaiian Punch on the go pouch and tied them all together.  We only had to make 60 of these!!

I found this cute printable from Lizzie Jane Baby and sized it down to use as a tag for my daughter’s Valentines.

 My daughter made the quilted valentine keychains for her friends.  She fussy cut images of birds and fish and owls!  She is the cutest 13 year old ever 🙂

I tied up all my valentine keychains and hopefully I can get them delivered today.

Amanda

Chevron Mini Quilt

I pieced this mini quilt in the summer.  I needed the safety pins that were basting it together so I decided to finish it!!  I love it.  It’s bright and happy. 

It’s made from half square triangles (HST).  Half the squares are white and the other half are color.  I love HSTs because you can arrange them in so many fun patterns.

Amanda

Beginning Quilt Project – Table Runner

My friend is learning to sew and she wanted to learn how to piece a small quilt.  I found this free pattern for a table runner – it’s a great beginner project!
  
We were inspired by Valentine’s Day and choose fabrics that were pink, red, and white.  She came over and I helped her cut and taught her all about the basics of quilting.  She did great!  Here is the finished project!  (we ran out of time so I quilted it for her….that will be the next lesson!)


Amanda

My Red Kitchen Has Got To Go!!


Welcome to the Jedi Craft Girl blog!  I am entering this post in the Creating with the Stars contest from East Coast Creative.  It’s such an exciting contest and there are so many amazing applicants!!
  
I have lived in my Southern California tract home built in 1989 for the past 9 years.  When we moved in I painted my kitchen red – Tomato Red to be exact.  Lots of things change in nearly a decade and the kitchen had to go.  Unfortunately, living in California is not cheap and neither are renovations.  It was left to me, my paint brush, and thrifty mind to fix this place up.
This is the after.  Ahhhhhh… just a sigh of happiness when I look at this photo! 
It’s amazing how big the kitchen feels now just by changing the colors.

 I removed all the cupboard doors, sanded, primed, and painted and painted and painted white.  Then I sanded and distressed the doors and frames so some of the red would show through.

For the pantry doors, I applied paintable textured wallpaper to the insets and painted them red then aqua.  A light sanding and you can see how the red shows through the detail of the wallpaper – love it!!!  (Click Here for the full details of that project)

 
I found this kitchen table on Craig’s List for $25. Whoo Hoo! It was honey oak.  I did a chalk paint treatment in white (click here for those details).   The chairs were given to me by a friend.  Four cans of spray paint in four different colors = HAPPY!!
Next up, a rolling cart I found on the side of the road.  I wheeled it home a half mile while on a walk.  Several coats of paint, distress, electric sander to the top and some custom mixed stain and now I have the perfect place for my Pyrex collection!
I love my big kitchen window.  I found this vintage looking fabric and sewed a pleated curtain with red pom-pom trim.  I nail-gunned it to a board then to the ceiling.   It gives it the perfect airy look.  I hung the custom hook board above and now I can display my vintage Strawberry mugs.


Sometimes I think my kitchen is too cheerful and colorful – like there should be a birthday party going on everyday in there!  But then I think – “What could be better!!”

Amanda

Valentine Heart Art – Fabric & Canvas

 I needed a little pick-me-up today and so I made this Valentine Heart Art.  Here is how you make one: 
Supplies:
Art Canvas
Fabric scraps – I used only red and aqua
Deco Page (Mod Podge)
Sponge Brush
Let’s get started!!
Begin cutting out random heart shapes in a variety of sizes.  I didn’t use a pattern and every heart is different!  

 Keep cutting.  I laid out my pattern as I went so I knew what sizes to cut. Now start deco paging.  With your sponge brush paint the glue under the heart, then over the heart, making sure to coat well.  (nice cereal bowl in the background…I was eating breakfast and crafting!)

 Let dry completely and you are done!

 I was hoping to frame mine but I chose an odd size canvas….hmmmmm.  Oh well, I will hang it up anyway!

 HAPPY!!!!

I Whale always Love You

 I am loving anything with whales!!  I had to make something fun for Valentine’s Day!  You can make one too!!  Scroll down for the pattern and tutorial!

 This one is with not so traditional Valentine’s colors – I needed something to hang in the guest bathroom.

To make this Whale Valentine’s Day Art follow the steps below:

Click HERE for the purple and aqua “I whale always love you”
Click HERE for the red & aqua one
Click HERE for a neutral color one with cream background and grey letters
 
Download whale and heart image HERE.  Draw the images on a piece of fusable webbing (Heat Bond or Wonder Under etc).  Cut it out larger than the outline of the whale (do not cut on the line).  Using a HOT iron, press the whale onto the WRONG side of your fabric for a few seconds.  Do the same thing for the heart.

 Now cut out the images on the line.  Peal the paper off the fusable webbing and position the whale and heart where you want them. 

Press the images with the hot iron for a few seconds.

 I sewed around the whale and the heart.  You don’t have to do this step – the fabric will stay on the paper fine.

 Frame as desired!!


Kitchen Table Re-Do

I bought this kitchen table (and 4 chairs which will be used in a different project) on Craig’s List for $25!  I was so excited for a new project.

 Right away I got to sanding it.

 Then I primed it with a dark primer.

 I painted it black.

 Then I painted over the black with white paint.  I used the same chalk paint method as I used on my coffee table.  The technique comes from I Heart Naptime.  I mixed 5 tablespoons of Plaster of Paris with 2 Tablespoons water.  Then added 2 cups of white paint.

My plan was to have the white paint look aged & like it’s chipping off with the black showing through.  Only I got so excited to paint I forgot to add Vaseline to parts of the table to make the paint scrape off easier.  I would definitely not forget this step!!

 Anyway, I painted 3 coats of white paint to the table.

 Next I sanded the edges so the black paint would show through & the table would look aged.  This is where the Vaseline would have been nice.  I didn’t get the big chunky paint chips that I wanted.  I am sure they will come over time!!

This Minwax Finishing Wax is my favorite stuff!!!  It gives such an amazing feel to your furniture – different then polyurethane.  You rub the wax on and then in 20 minutes you buff it out with a clean cloth.  It makes the paint feel like it’s been there for a long time!!  I even used it on my table top.  It won’t protect it as good as polyurethane, but I want the table to age naturally.

 This is our first meal at the table.  I love how it fits the space in my kitchen better than my rectangular table.

 Yea!  Now what can I paint next??

It’s Apple Time!!

 I saw these stuffed apples in a magazine somewhere and decided to create my own.  I wanted to have this ready for September 1st – I am only 19 days late!  Oh well – life is busy – isn’t it!!

Here’s what you need to make your own bushel!

Supplies:
fabric – charm squares or scraps
stuffing
ribbon
green and brown felt
sewing machine
hot glue gun

Start by pieceing the front of your apple.  Sew the charm squares or scraps.  This is a great scrapbuster!  Press seams to one side.

Print out this apple pattern and size how you want.  Cut your pattern out

 Layer and pin your apple back, pieced front (wrong sides together) and the pattern on top (below photo)

 Cut around pattern using your pinking shears.  Leave about 1/4 inch allowance from pattern.

 Cut a ribbon loop and a brown felt stem.  Tuck these in between the front and back apples so they catch in the seam.

 Sew around the apple leaving a small opening to stuff.

 I also tried sewing around the apple with the pattern pinned on to help me get a perfect seam.  Use what ever seems easiest.

You can see where I started and stopped, on the flattest side of the apple.

 Stuff then sew shut

 I cut leaves out of green felt and hot glued them on – I ran out of time.  I wanted to stitch detail in the leaf using embroidery floss – but they look OK without the detail.

Hang as desired and give to all your friends!!