Penny Rose Strawberry Jam Quilt

strawberry jam quilt. 9

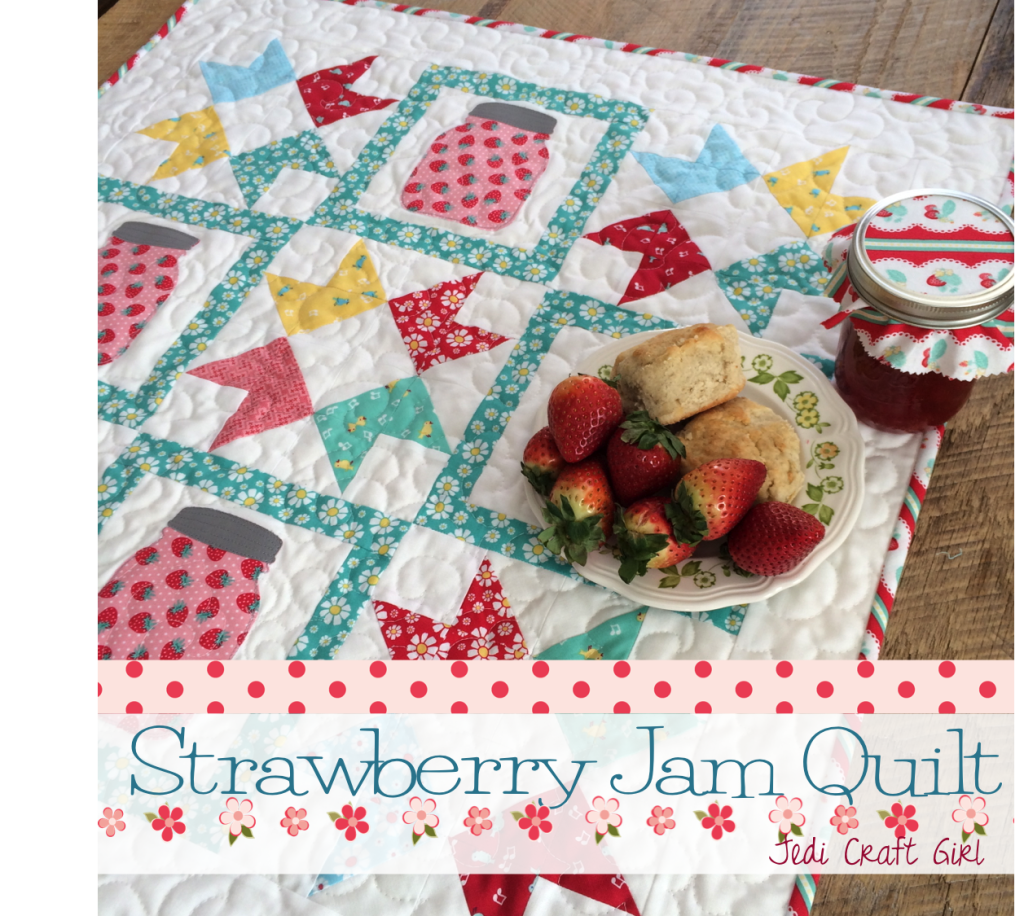
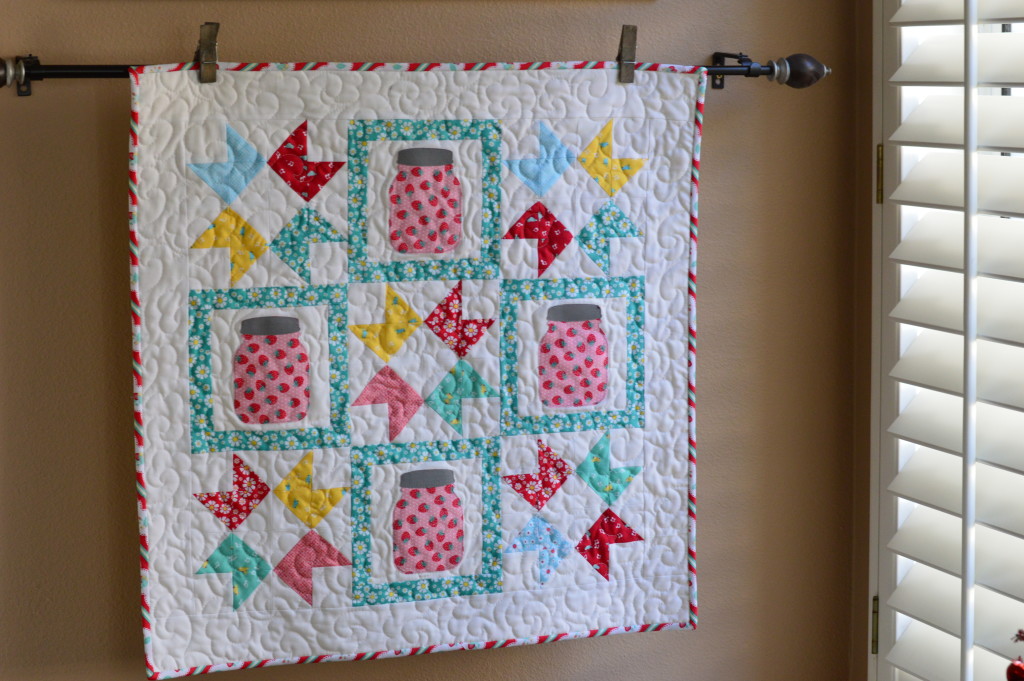
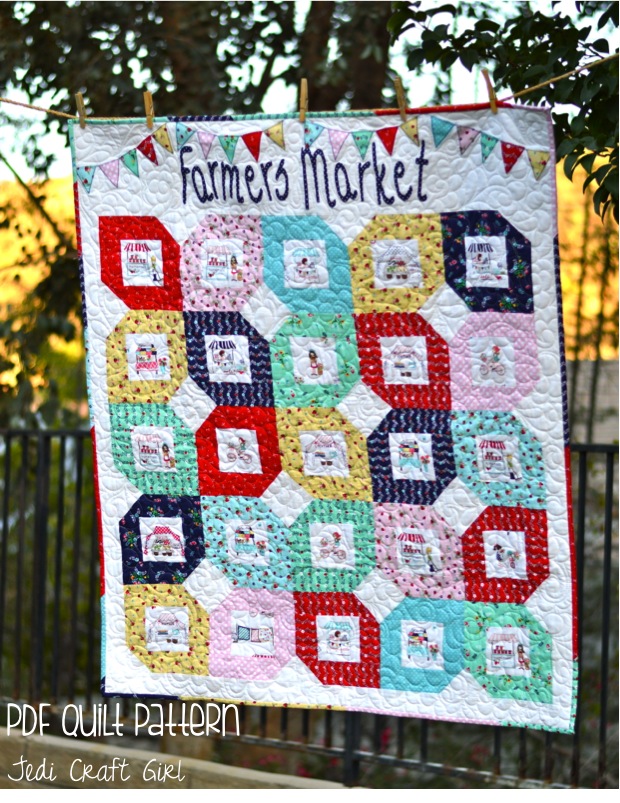
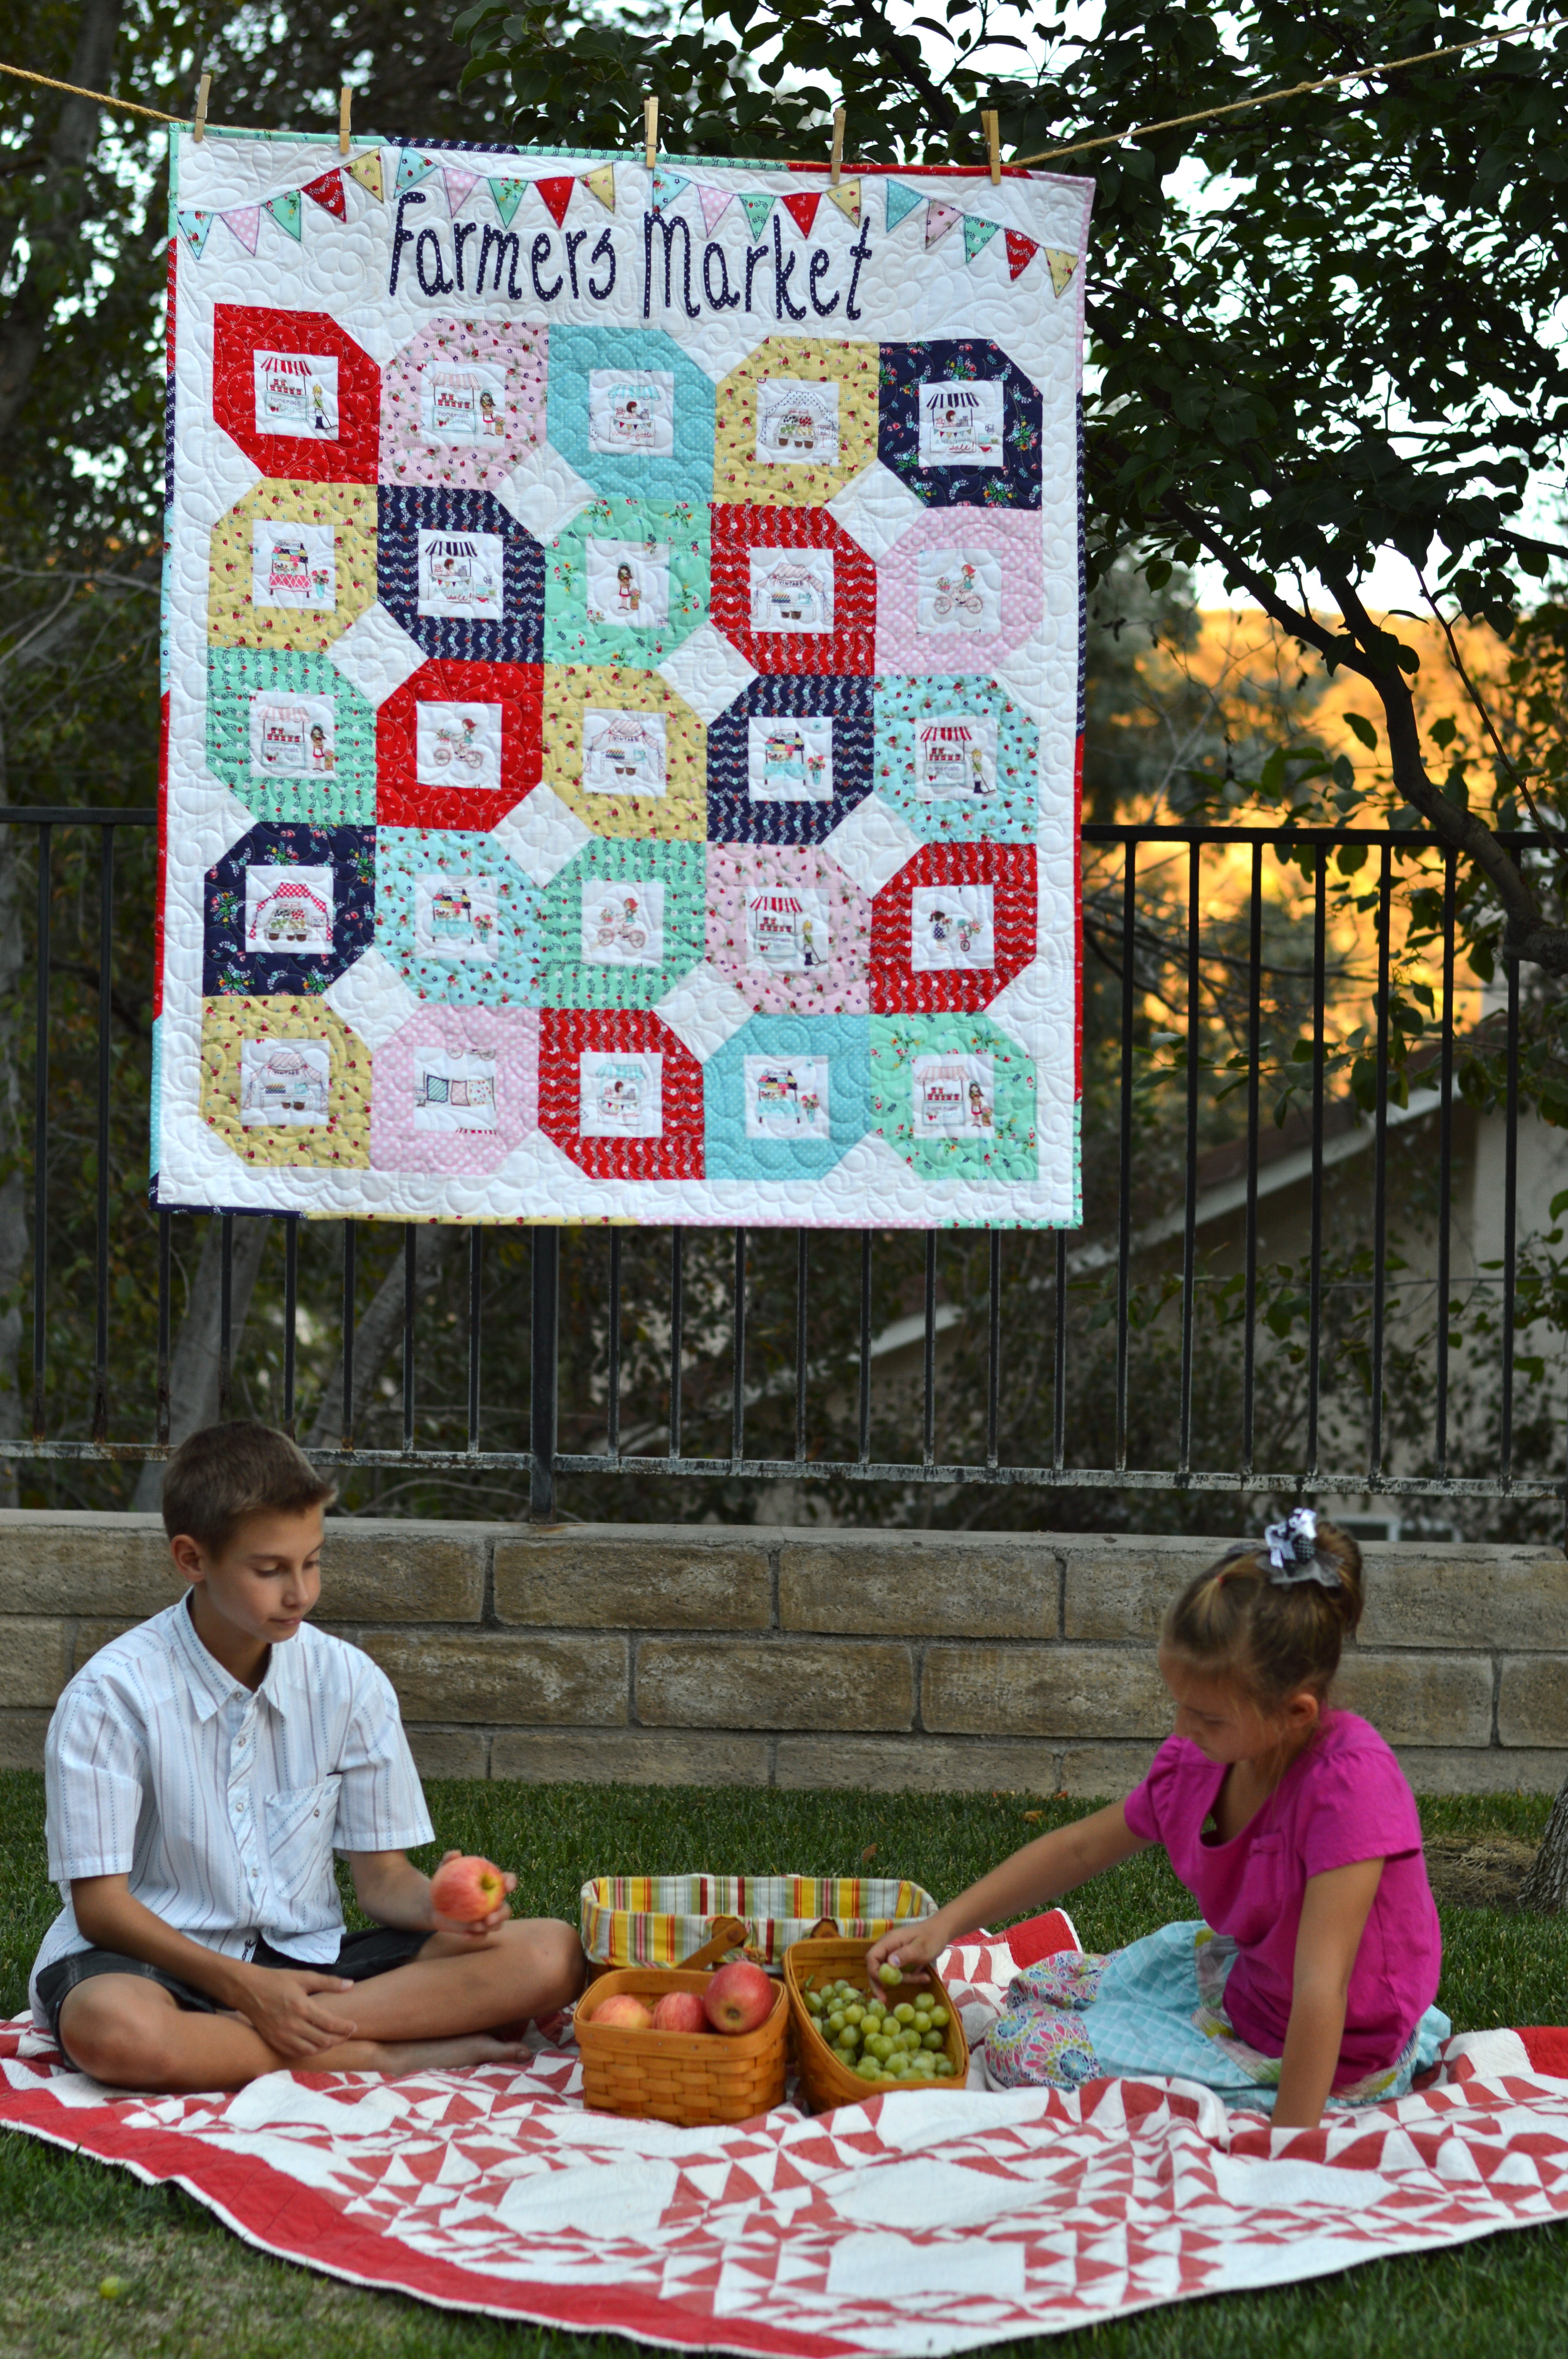
I’m happy to share this delicious little quilt called Strawberry Jam. Living in Southern California, it’s strawberry season all year round! This quilt reminds me of fun times spent in the kitchen making popovers, biscuits, rolls, and anything else we could bake to hold our fresh strawberry jam on! YUMMY!! The Shabby Strawberry fabric line is brand new from Penny Rose. Let’s get started!

strawberry jam quilt 24

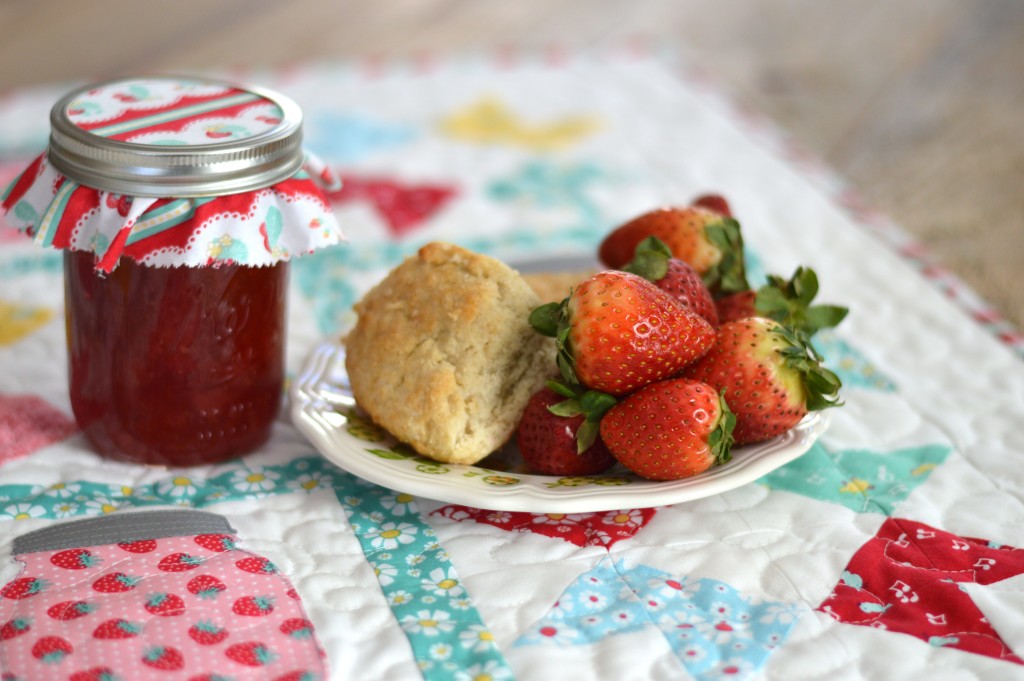
First make sure you have some hot buttermilk biscuits and fresh strawberry jam to keep you going while you make the quilt 🙂  For the full instructions hop on over to the Penny Rose Blog!!

strawberry jam quilt. 7

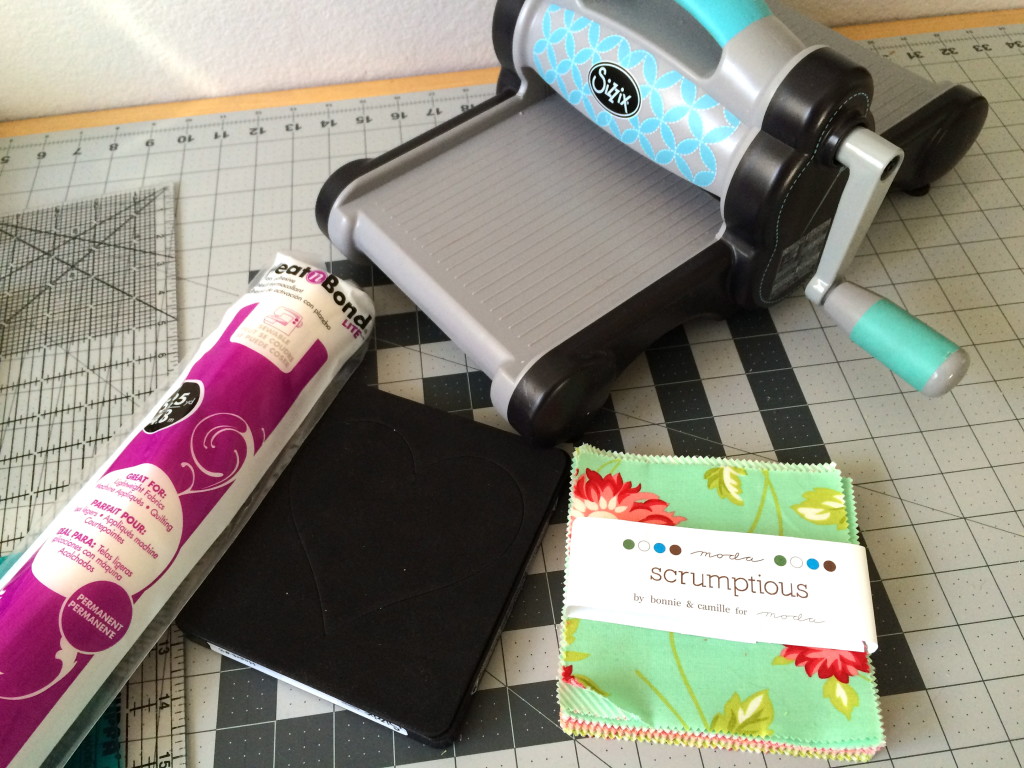
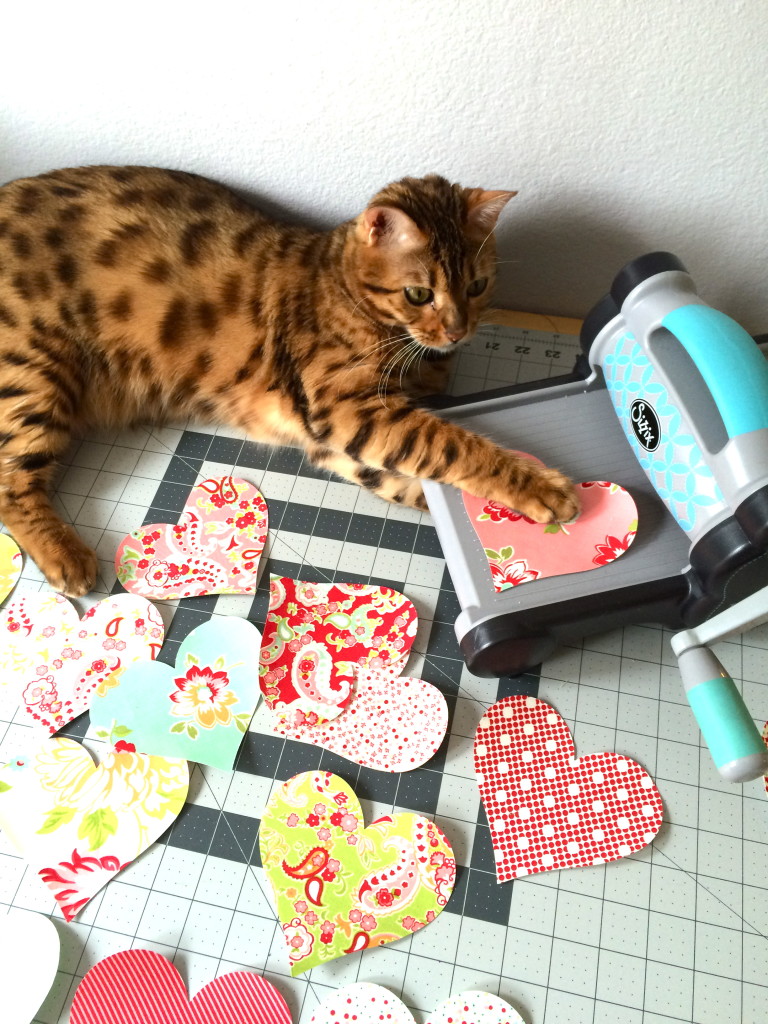
I used my Sizzix Fabi machine to die cut the jam jar. This die is called Jar #2 by Lori Whitlock. It’s the cutest!

Screen Shot 2016-01-26 at 9.50.40 PM
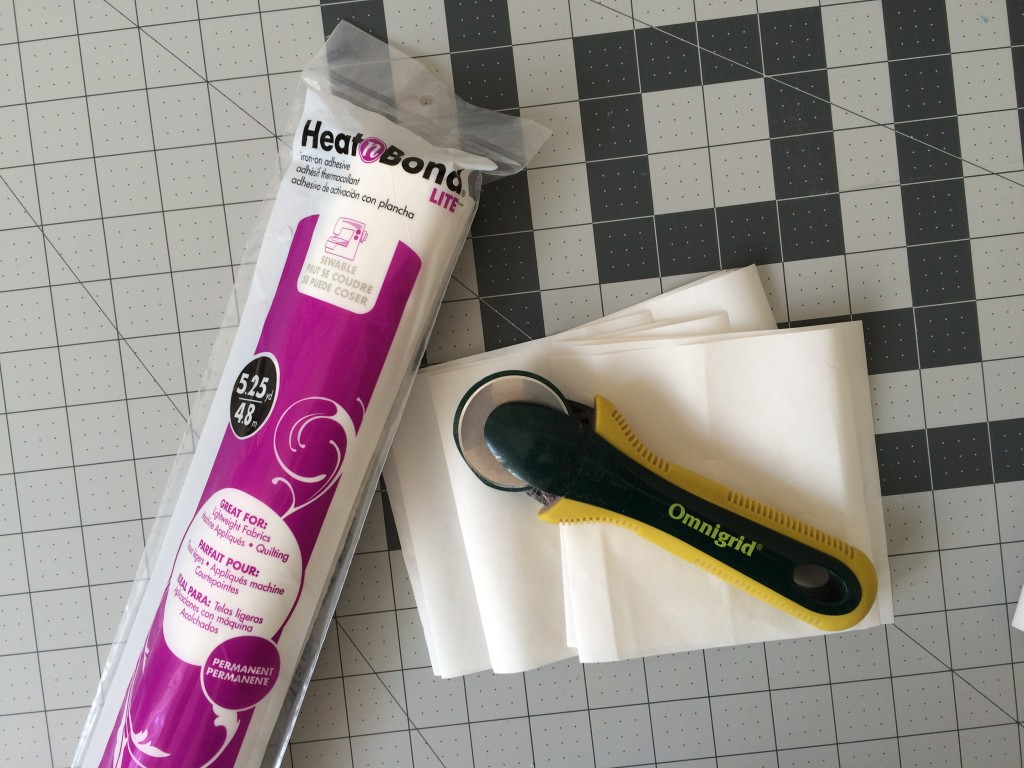
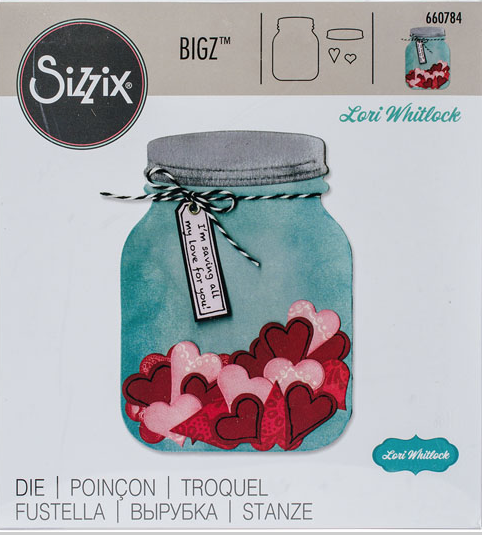
Iron  Heat n Bond Lite to the back of the strawberry fabric. Then run it through the Sizzix Fabi with the jar die. Peel off the backing and heat set it into place. I did the same thing with the jar lid, it’s part of the die. strawberry jam quilt. 16

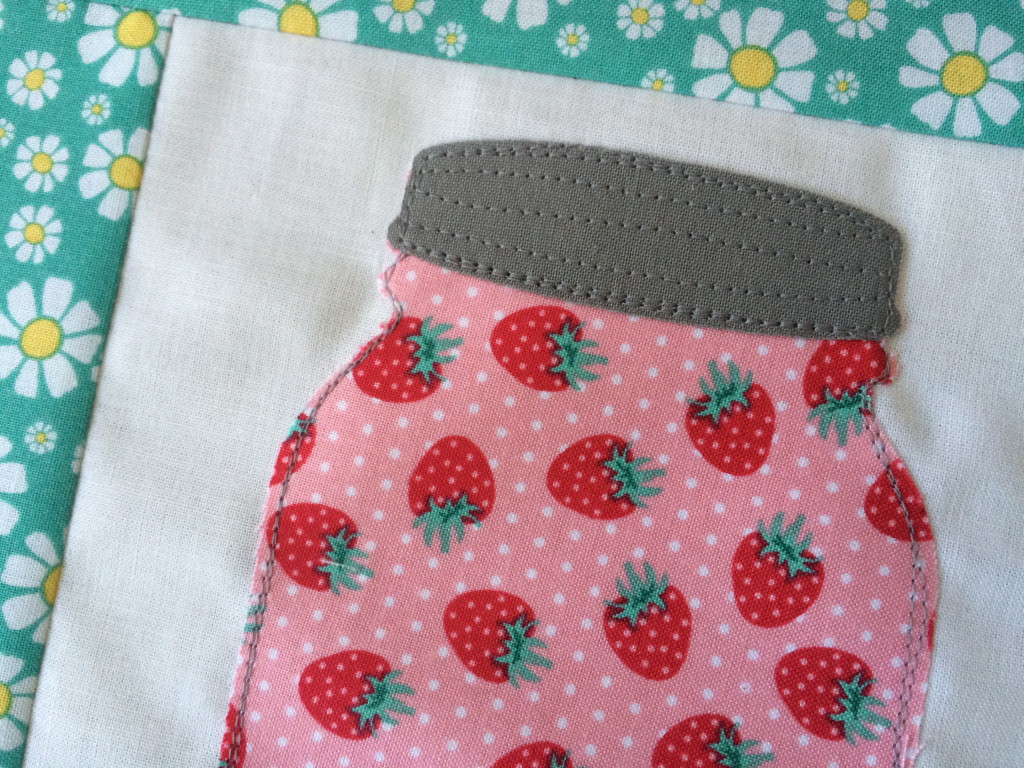
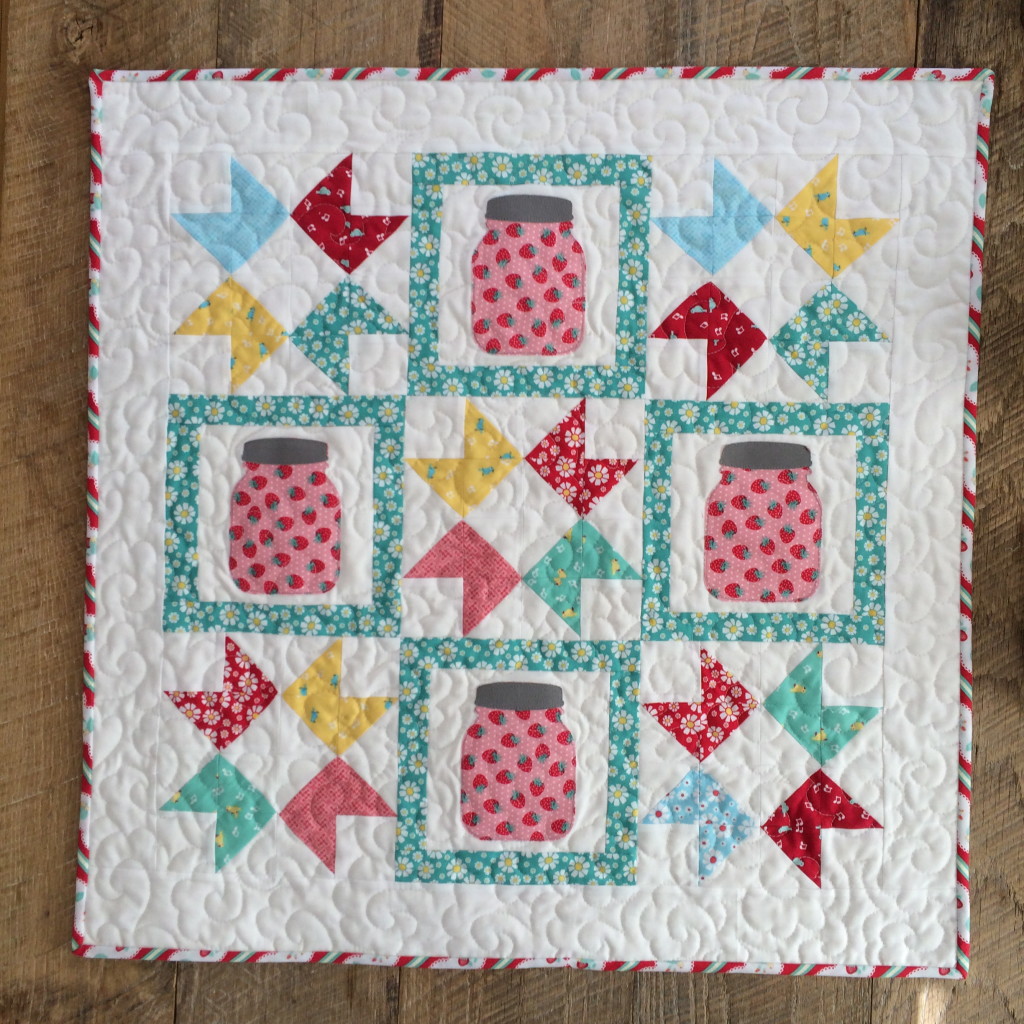
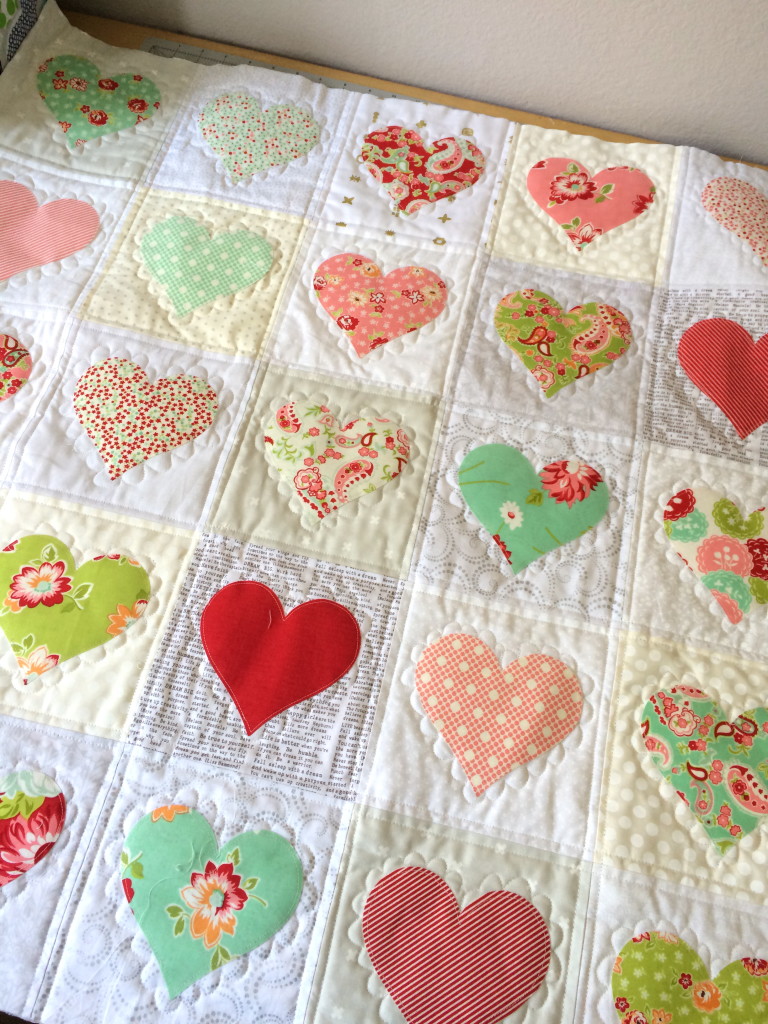
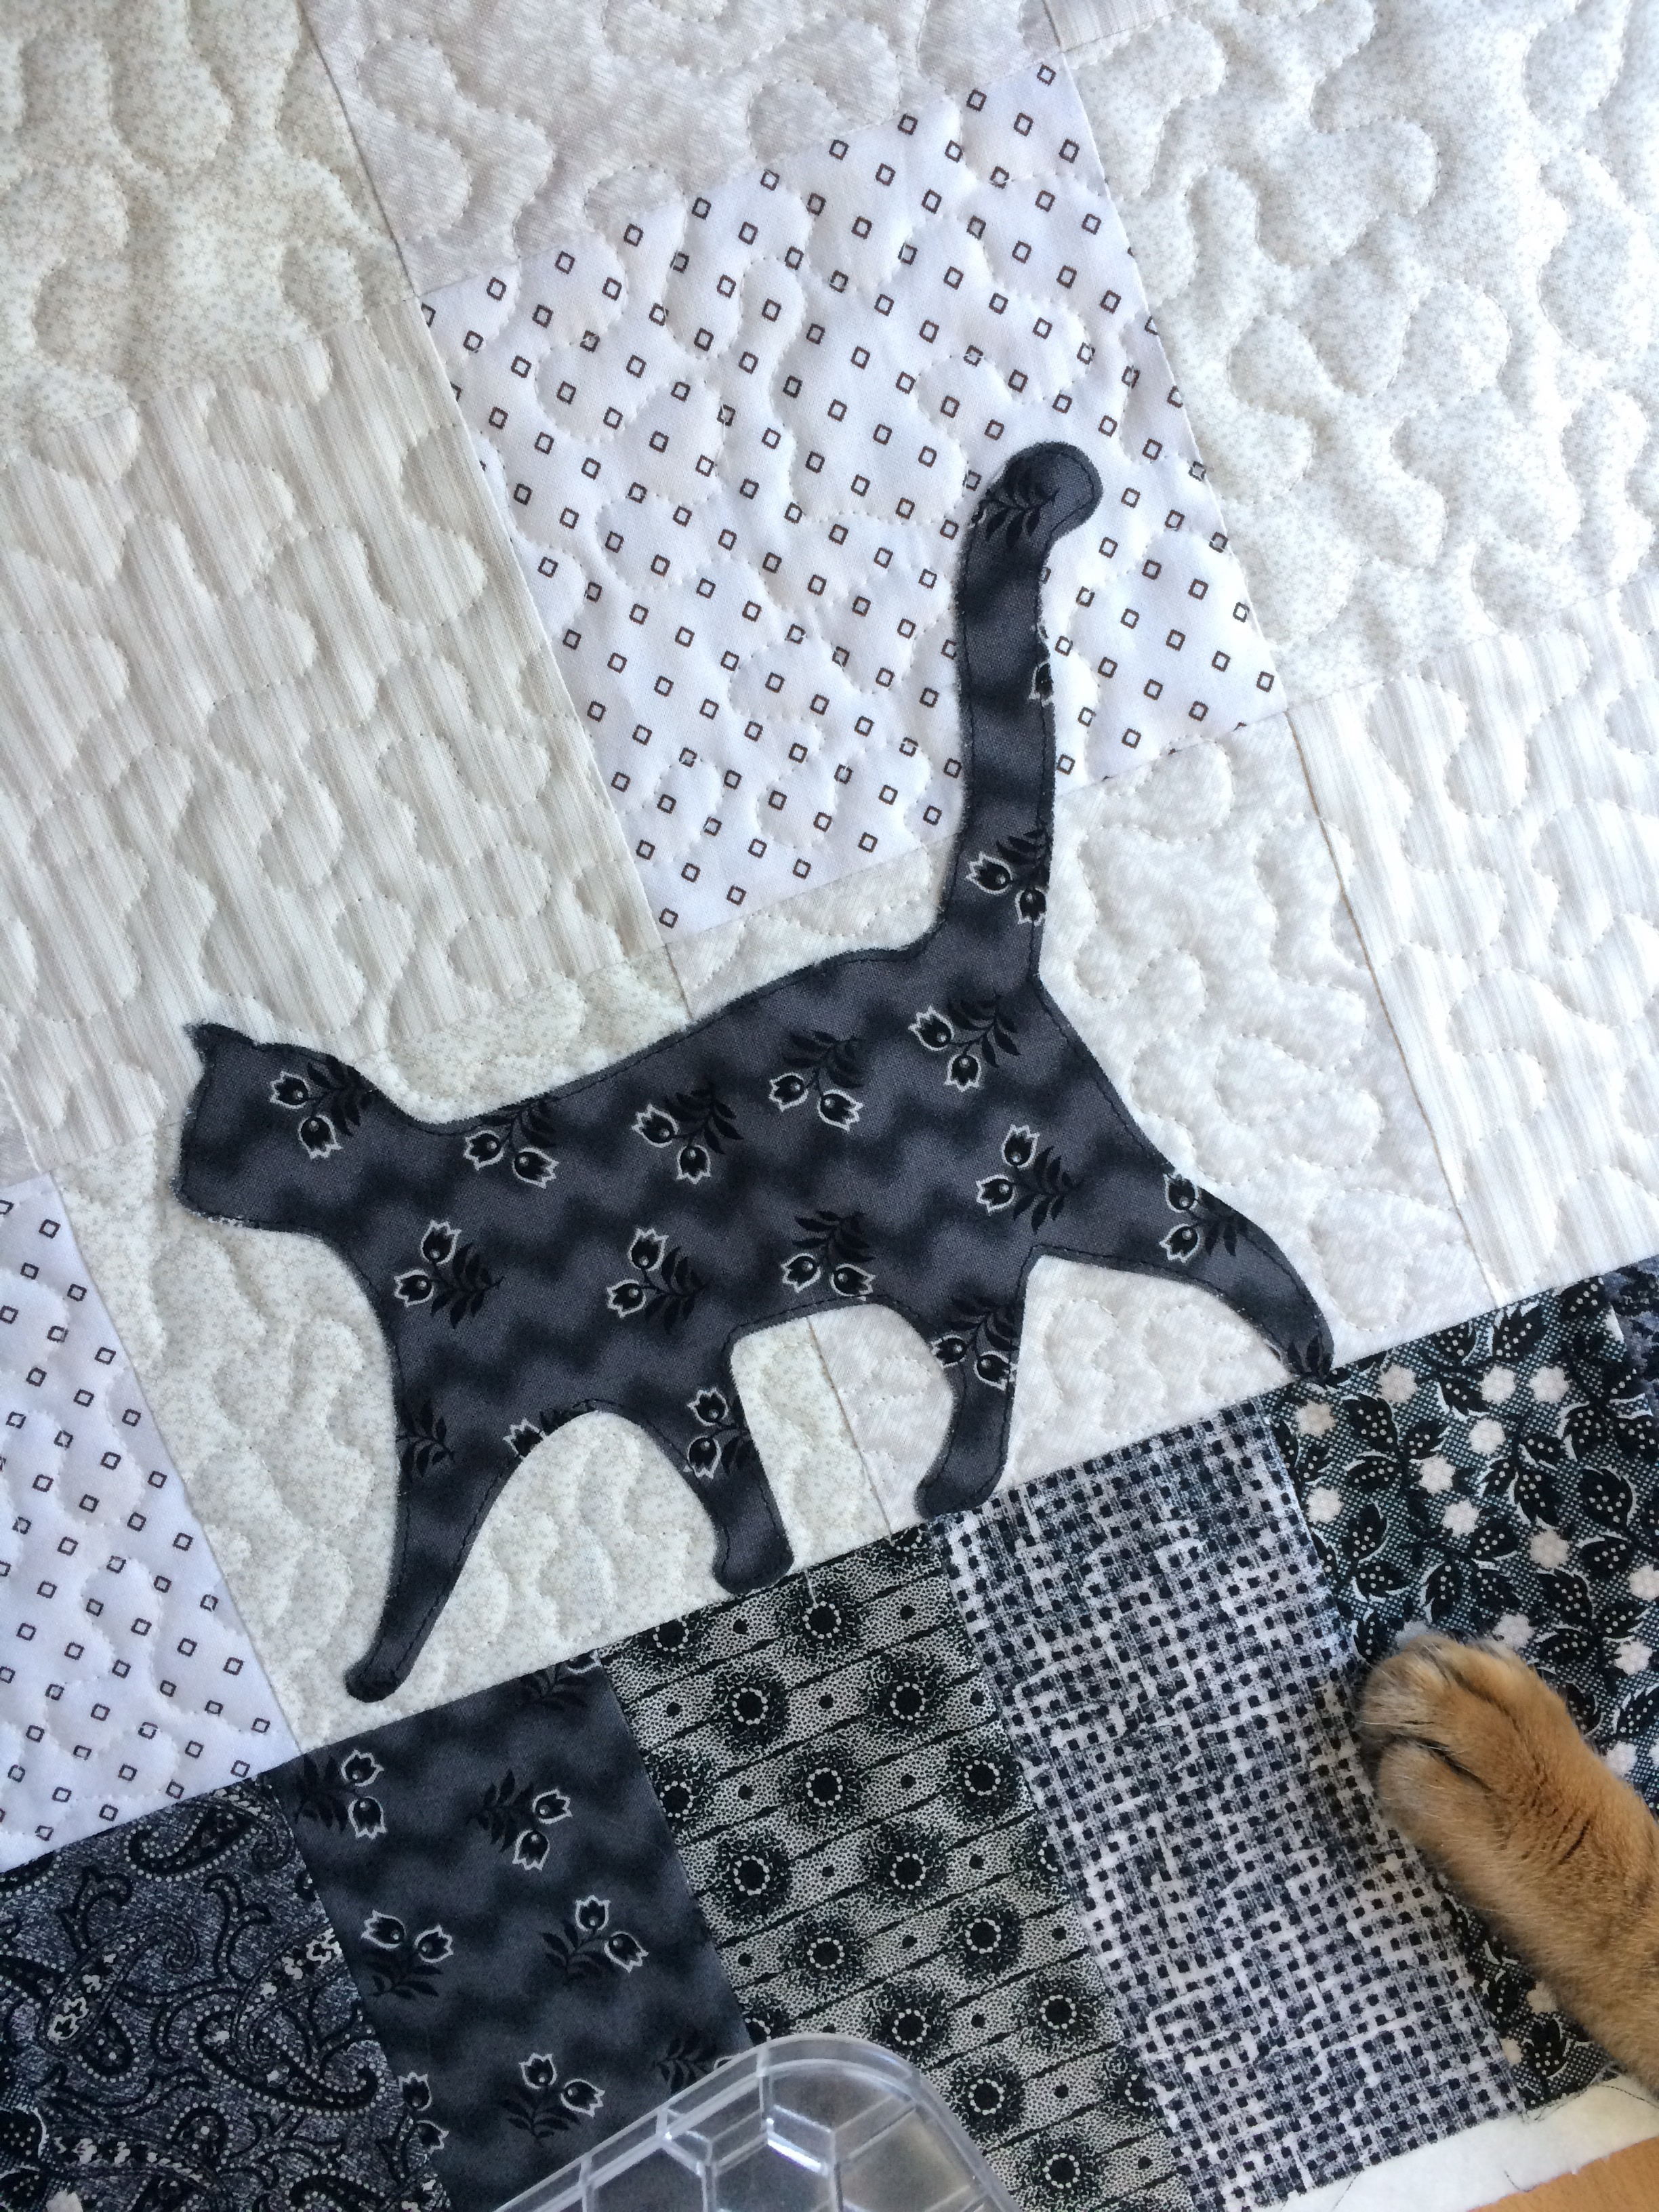
Stitch around the jar and lid with gray thread.

strawberry jam quilt. 26

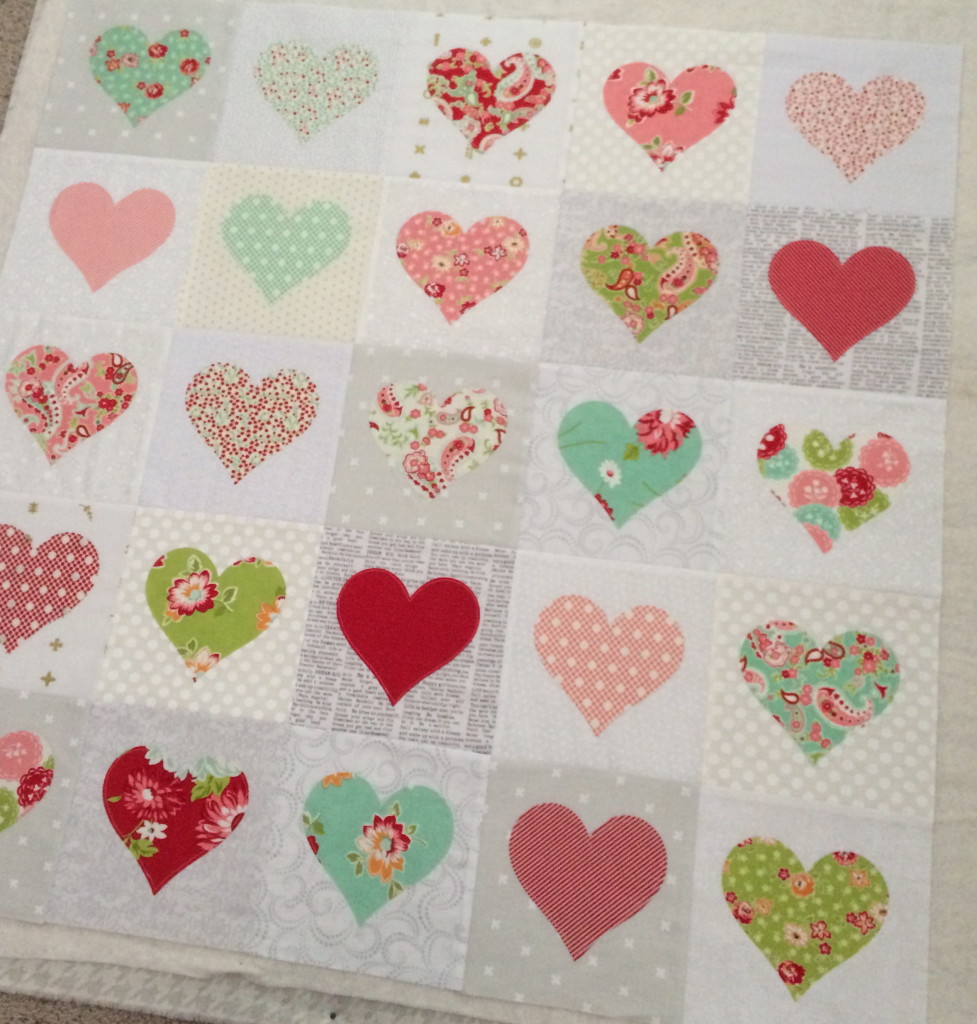
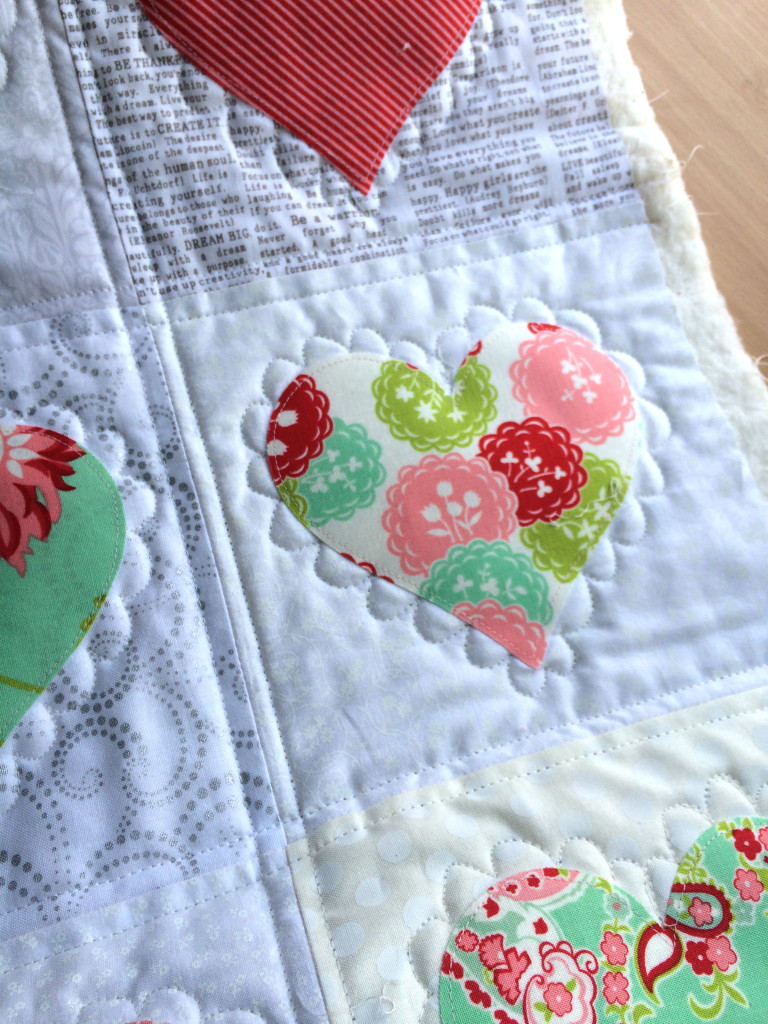
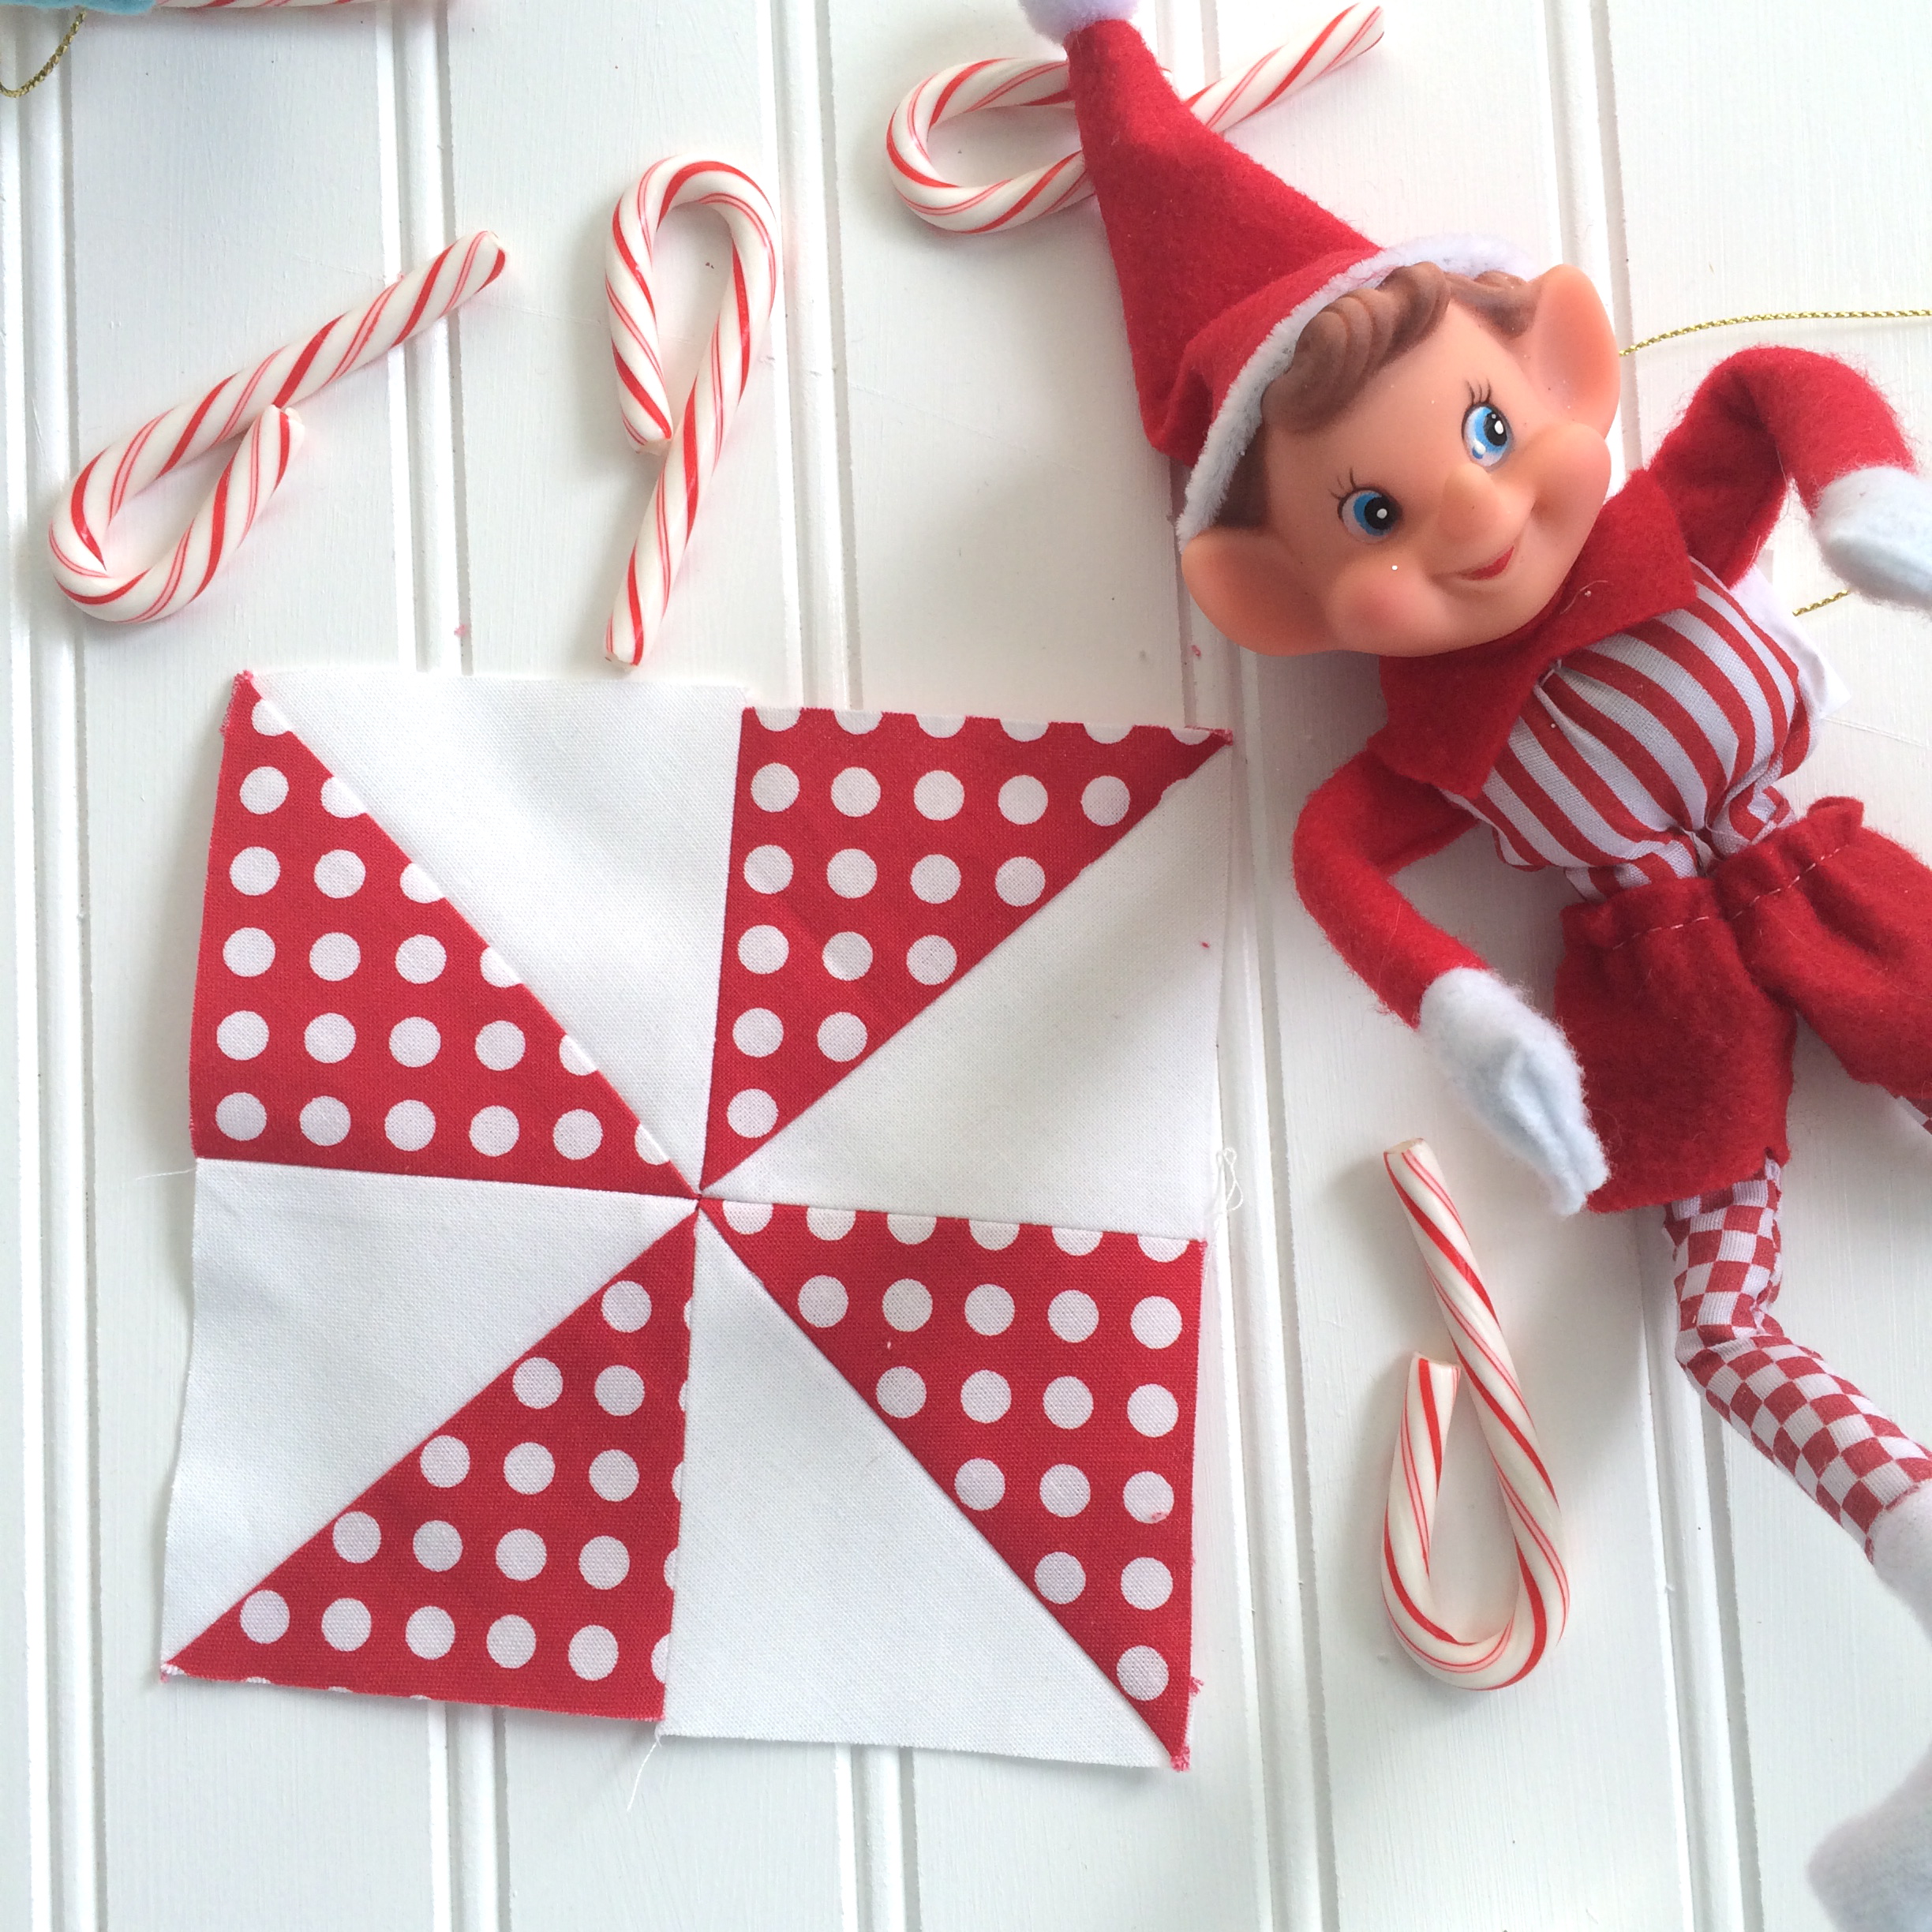
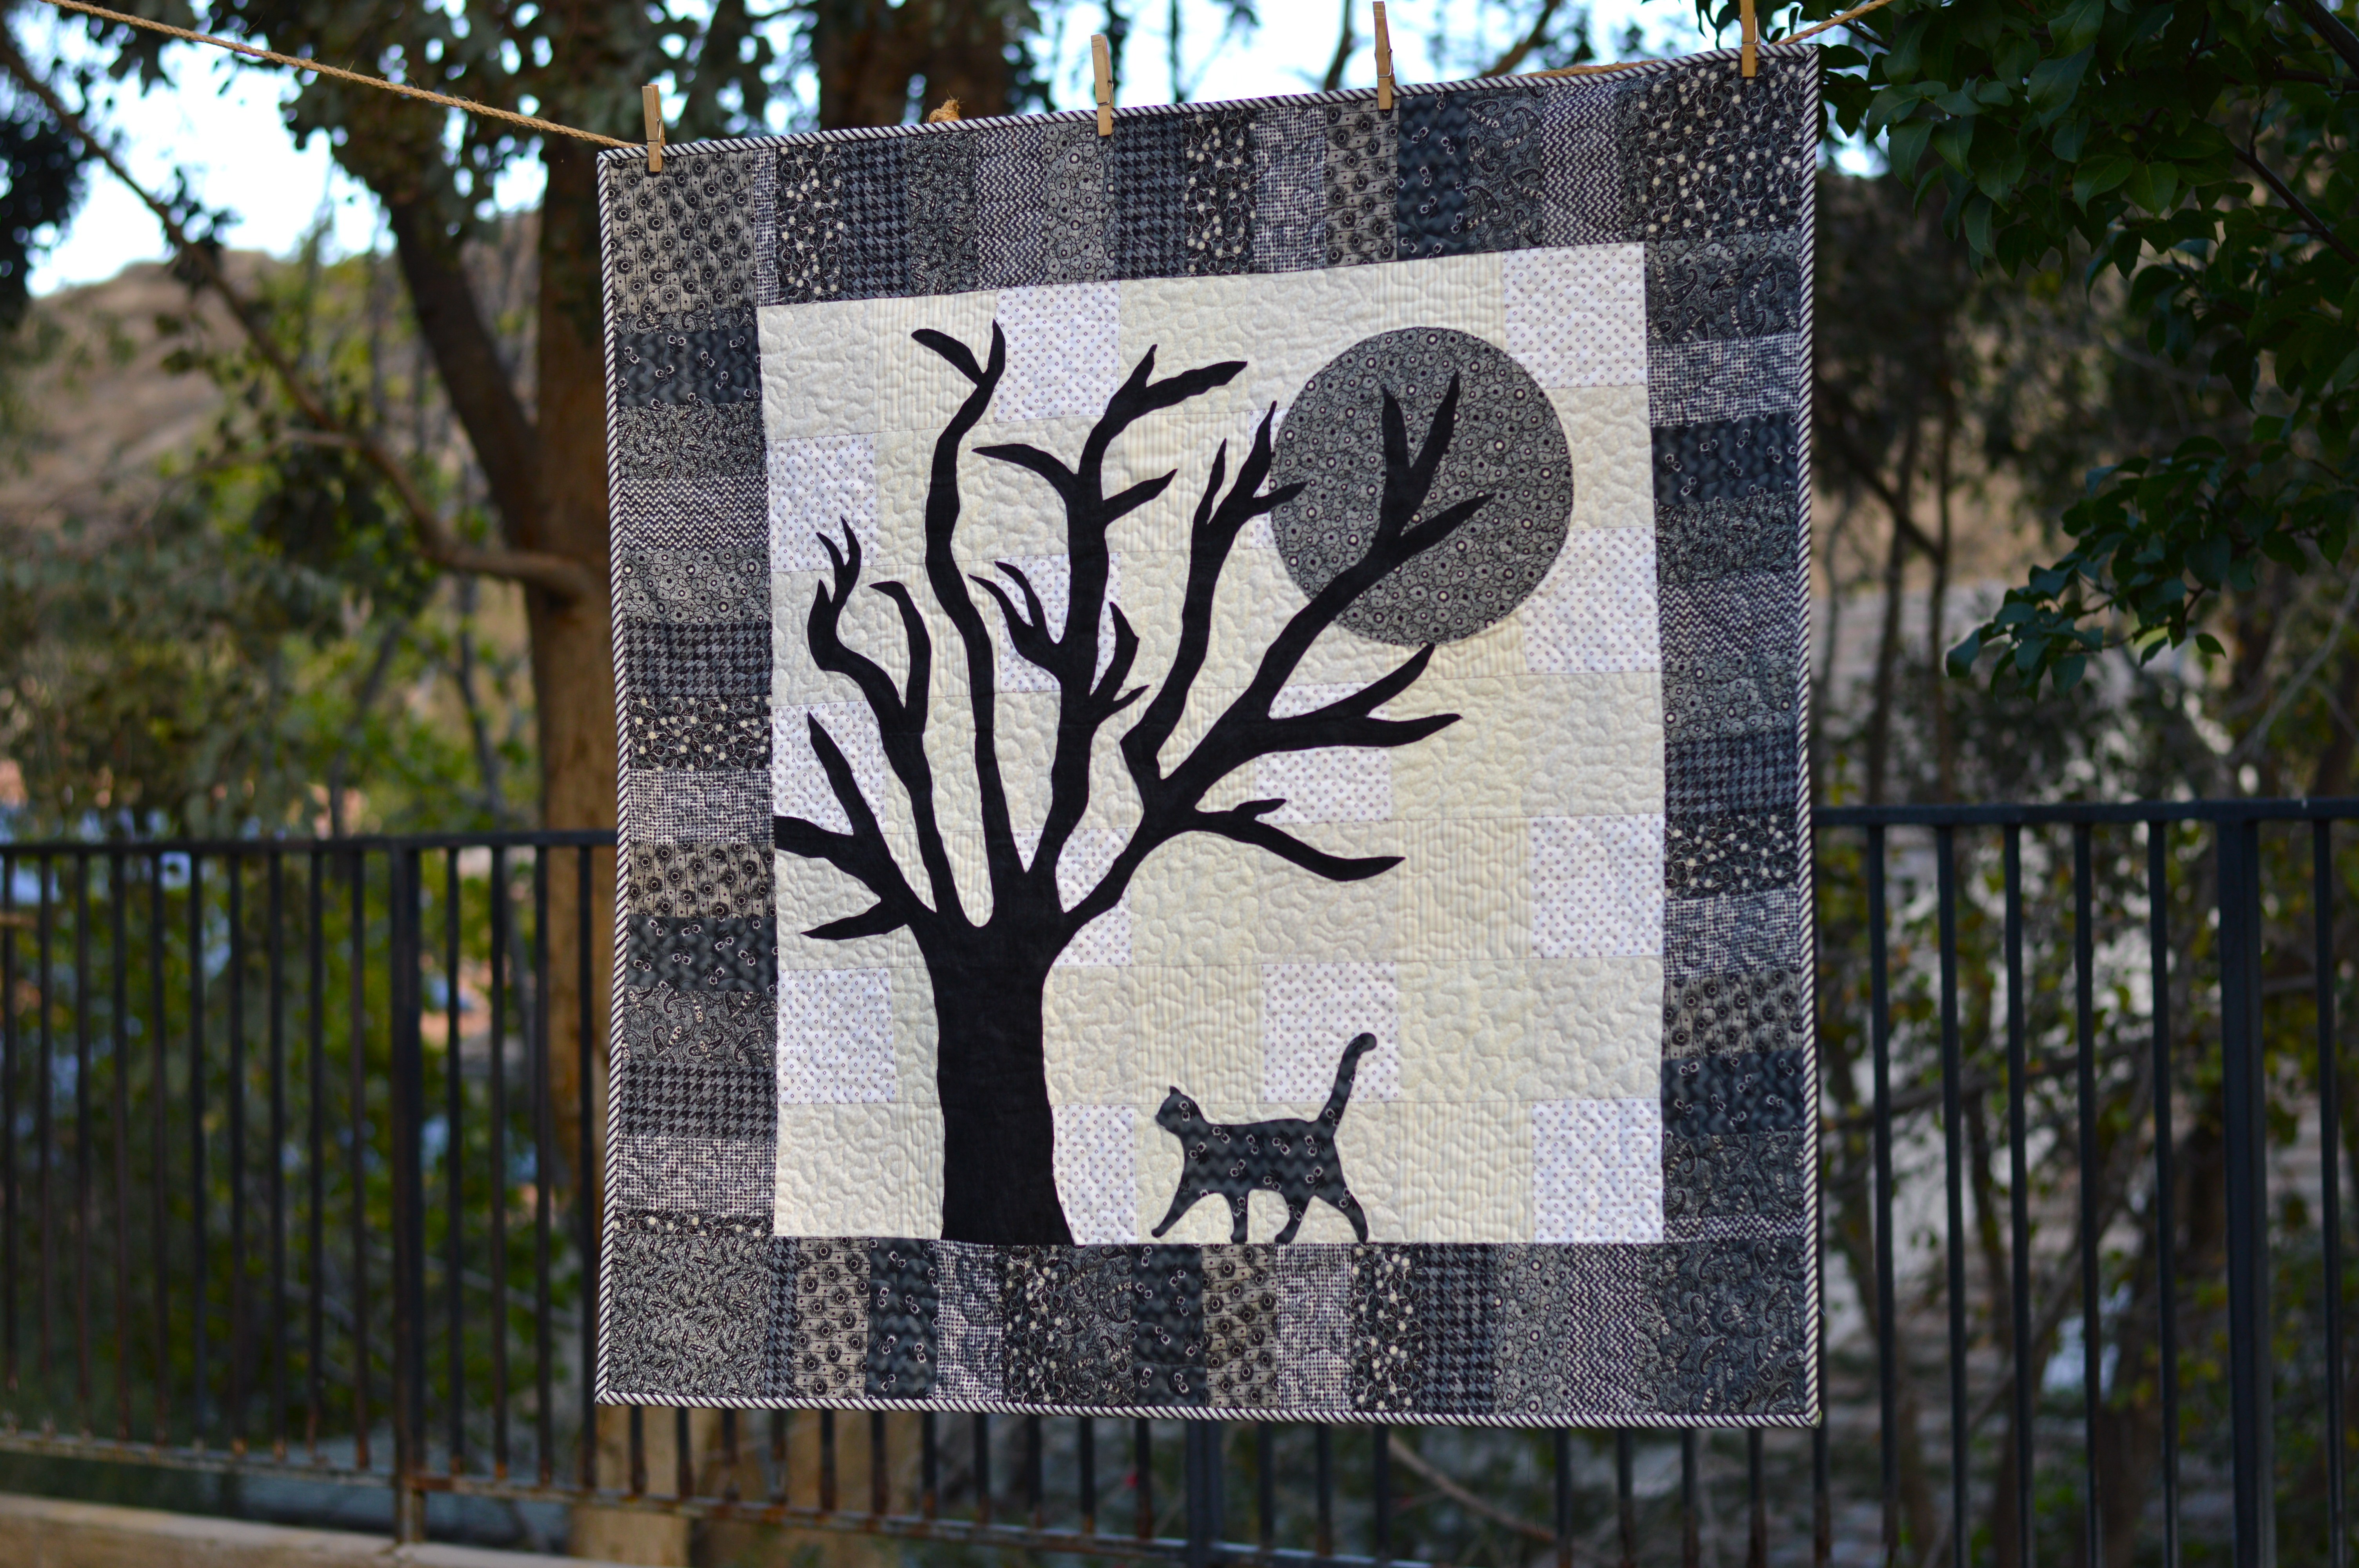
I love how SWEET it turned out! strawberry jam quilt. 22

Sizzix Heart Quilt

sizzix heart quilt

I think I love Valentine’s Day so much because it pulls me out of the “After Christmas Blues”.  It’s bright, and happy!  I love the simplicity of this quilt – a simple heart applique.  What makes it feel special is that no two hearts are the same and the backgrounds are a variety of low volume prints.  When ever I go to a quilt shop and I’m not sure what to buy, I end up purchasing charm packs.  I had this “Scrumptious” charm pack by Moda tucked away and it was perfect for this project.  sizzix heart quilt 3

DIY Heart Quilt: A Cozy and Sweet Make for Valentine's Day
Heat n Bond Lite by Therm O Web is my go to for any Sizzix applique projects. I love it because it’s light weight, it fuses fast, and peels easy. Cut the Heat n Bond Lite into (25) 5″ squares.
DIY Heart Quilt: A Cozy and Sweet Make for Valentine's Day
Select 25 of your favorite squares from the charm pack.
DIY Heart Quilt: A Cozy and Sweet Make for Valentine's Day
Fuse the Heat n Bond Lite to the wrong side of each of the 25 charm squares. Let cool.
DIY Heart Quilt: A Cozy and Sweet Make for Valentine's Day
Make sure your cat helps with all the die cutting! Die cut each of the 25 squares using the Fabi heart. The squares are just big enough to cover the whole heart.
DIY Heart Quilt: A Cozy and Sweet Make for Valentine's Day
Cut a variety of low volume prints into 7″ squares. You will need 25 total. Peel off the backing paper and position the heart in the center of each of the 7″ squares. Heat set into place. Top stitch around each heart, I used light pink thread.
DIY Heart Quilt: A Cozy and Sweet Make for Valentine's Day
Lay out the blocks as desired. You could easily turn this into a table runner or add more blocks for a baby quilt or throw quilt. Sew each block together in rows using 1/4″ seams. Press each row alternately so it makes it easy to match seams. Sew the rows together and press in one direction. Quilt.
DIY Heart Quilt: A Cozy and Sweet Make for Valentine's Day
I quilted a scallop boarder around each heart to give it a “Valentine” feel. Then 1/4″ straight line seams. Add the binding and you’re done!
DIY Heart Quilt: A Cozy and Sweet Make for Valentine's Day


Tinsel Table Top Quilt

tinsel quilt cover

It’s almost Christmas!!  There is still time to whip up a few last minute gifts!  I love this pattern because it shows off theme prints so well.  If you didn’t know, I LOVE theme prints!  Especially if they have cats!  I love this fabric by Cotton and Steel called Tinsel.  I couldn’t bring myself to cut it up into tiny pieces.  Click HERE to download the PDF.

tinsel quilt. 11

tinsel quiltThere are two versions you can make.  A table runner or a table square.

tinsel quilt. 5I love that the fabric has “Sally’s Christmas List”  because I have a Sally 🙂tinsel quilt. 3I quilted it with loops and retro stars.tinsel quilt. 4The runner is for me!!tinsel quilt 18And the square is for Mufasa’s best friend Roo!

tinsel quilt. 13   tinsel quilt. 6        Baby Mufasa was such a big help!!!  IMG_3043

Santa’s Little Helper Quilt

santa's little helper quilt patternHey good lookin’!  Whatcha got cookin’? How ’bout cookin’ somethin’ up for me!

Stitchn_Kitchen_Christmas_Blog_Tour-01I’m so excited to be participating in Riley Blake’s Stitchin’ Kitchen blog tour!  Thanks for stopping by and welcome to my little corner of blog land!!!  I’m a Southern California mom who loves cats, quilting and sewing!!  You can follow Mufasa and I and our sewing antics on Instagram @jedicraftgirl.

christmas elf quilt 6I love sewing at Christmas time and I am loving all the amazing projects everyone is creating as part of the Riley Blake Stitchin’ Kitchen Blog Tour!  I created this fun little throw quilt with inspiration from our elf, Ritchie.  My kids love our Elf and they love writing him little notes.  This special Santa’s Little Helper Quilt has a pocket on the back of the quilt for children to leave notes for their elf and for the elf to leave notes in response.  It’s a magical quilt and it was created with a little help from some magical elf friends!

christmas elf quilt 26Let’s get cookin’!  All fabrics are from the Santa Express fabric line.Screen Shot 2015-12-11 at 2.51.25 PM

christmas quiltRecipe yields 1 quilt 32″ x 42″

1/4 ” seam allowances

Ingredients

1/4 yard each:  blue santa, green snowflake, reindeer, and stripe fabrics for strips

1/3 yard solid white for pinwheels

1/3 yard Riley Blake Basics prints in red

1/4 yard for pocket

1 1/2 yard backing

batting

1/2 yard binding

a sprinkle of elf magic

Directions

Preheat your television to play your favorite Christmas movies while you are bakin’ up this project!

Begin by cutting the red basics and the solid white fabrics into 4 1/2″ squares.  You will need 20 of each.

christmas elf quilt 8Using a sprinkling of elf magic use the directions below to create some magical half square triangles.

magic pinwheel instructions

It’s almost like magic how the half square triangles appear!  Make sure to cut off the little “dog ears” of the pinwheels.christmas elf quilt 12
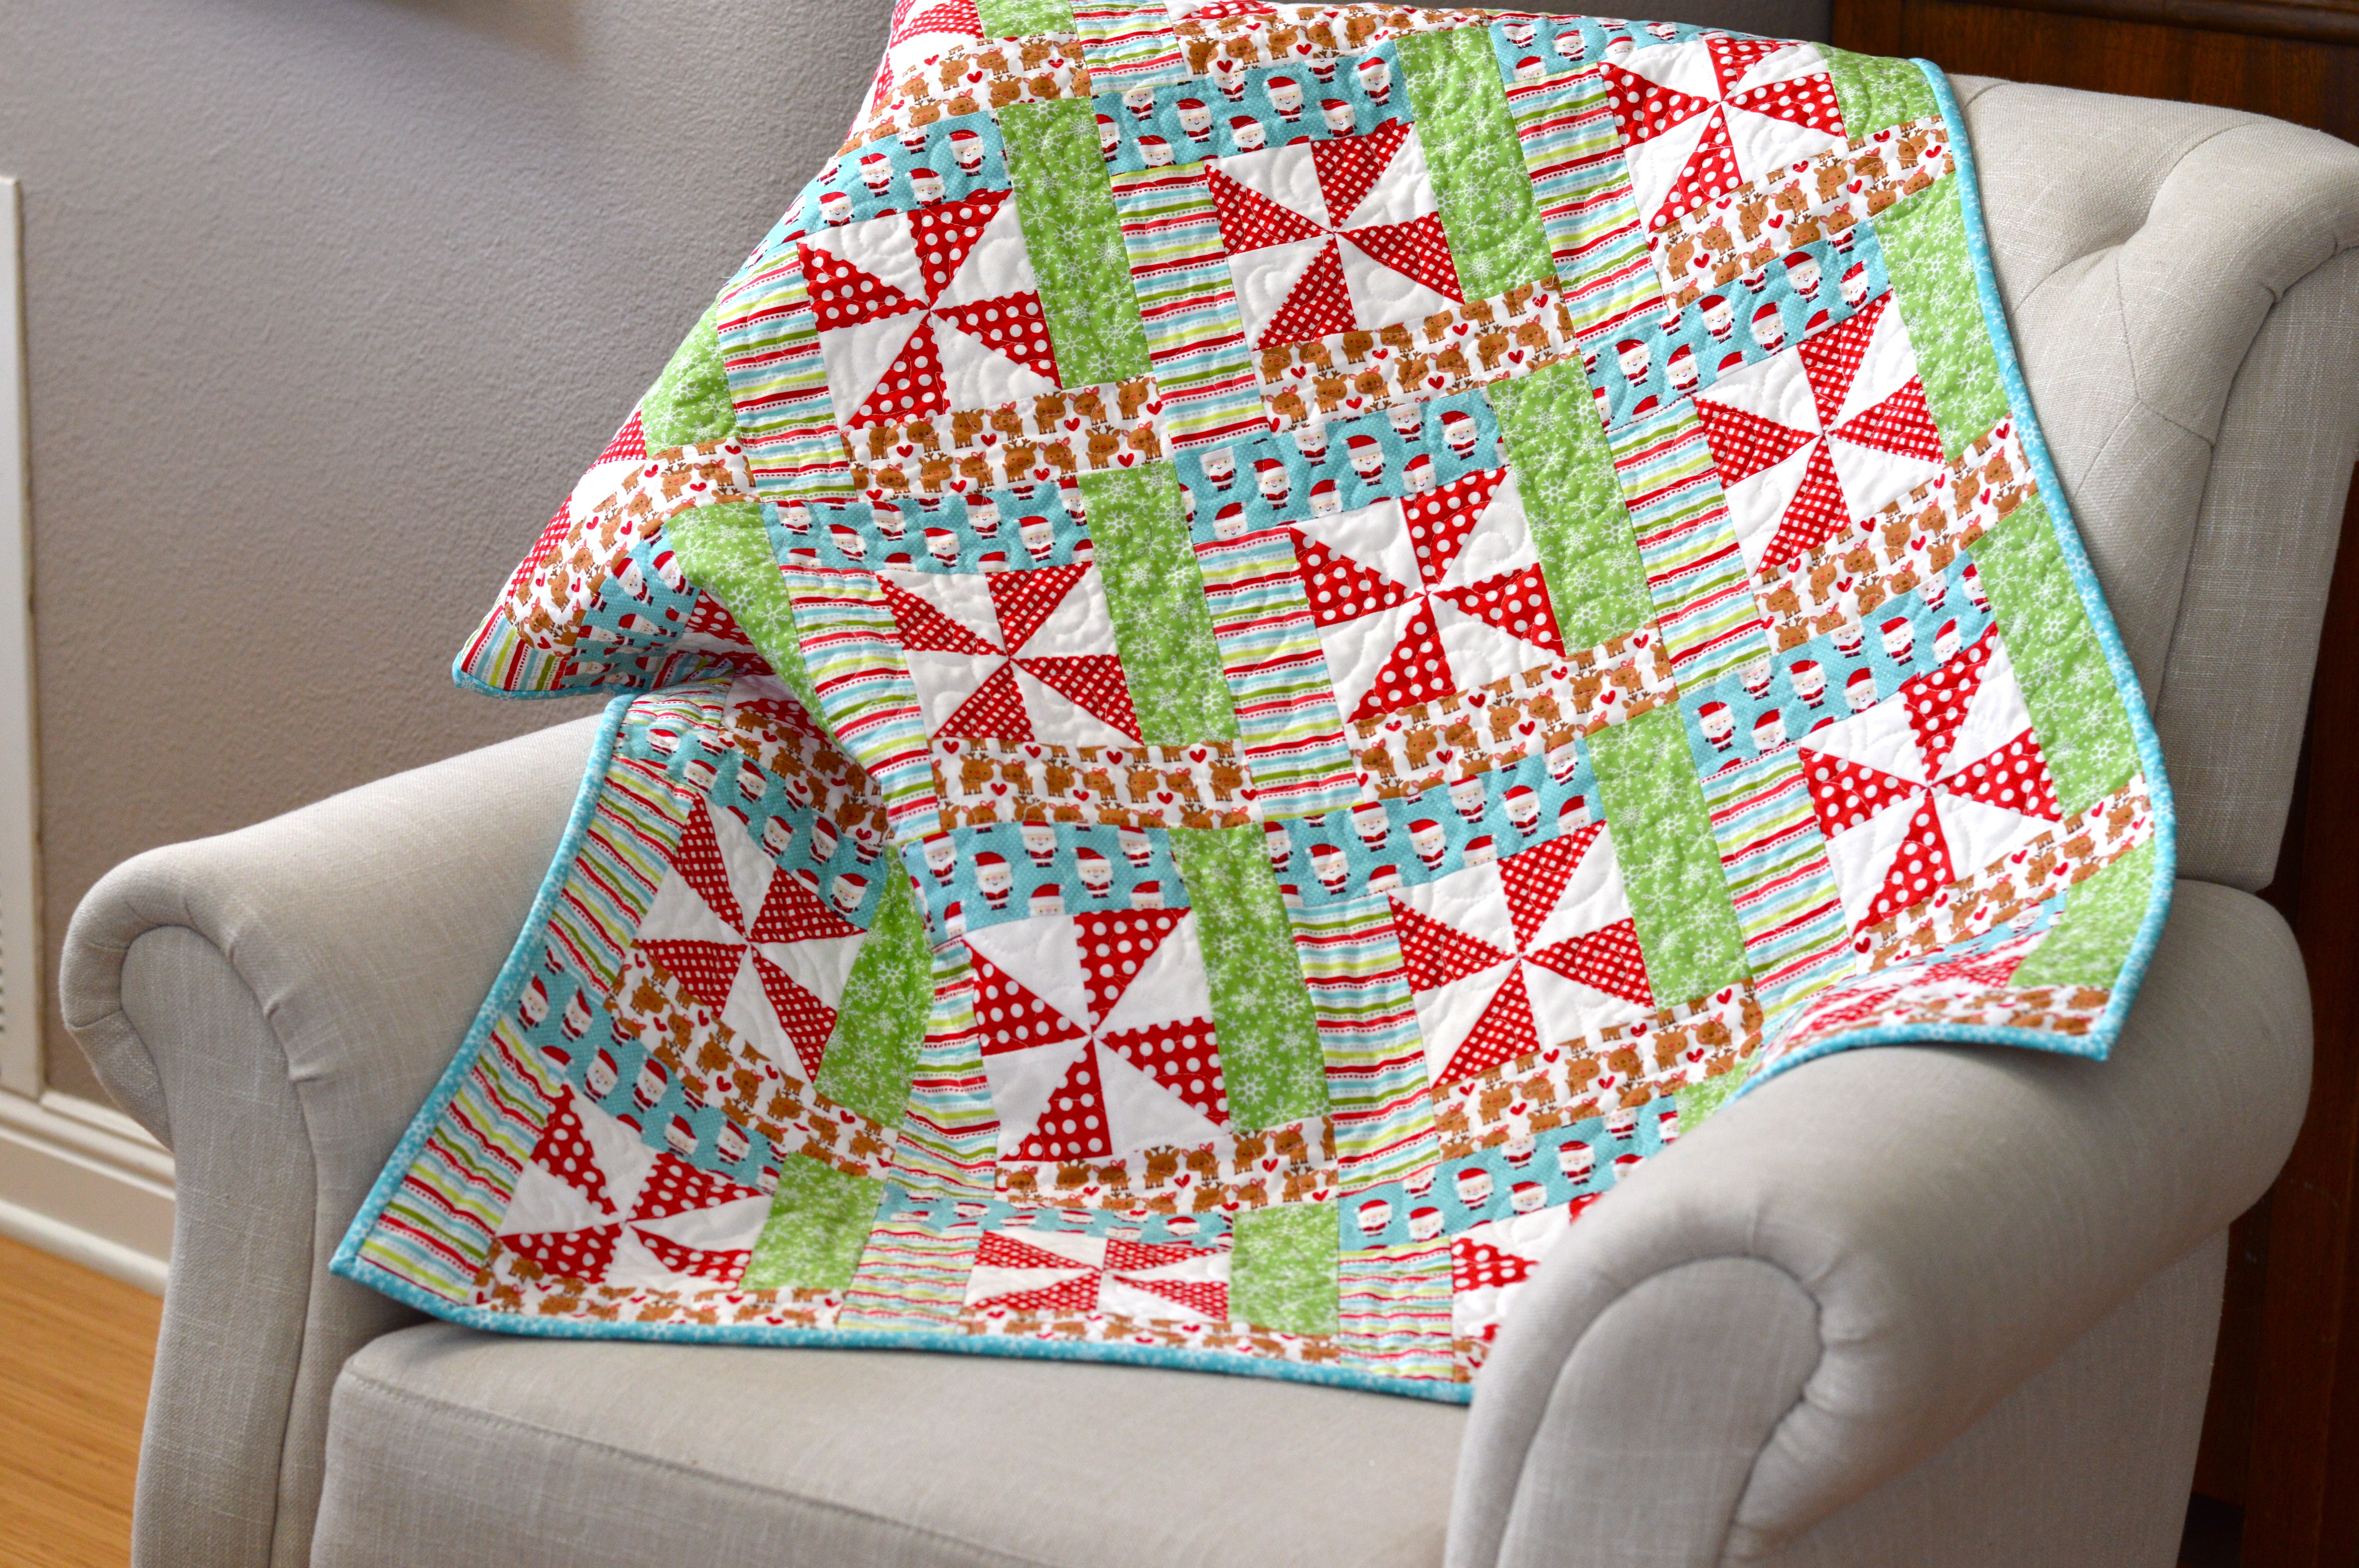
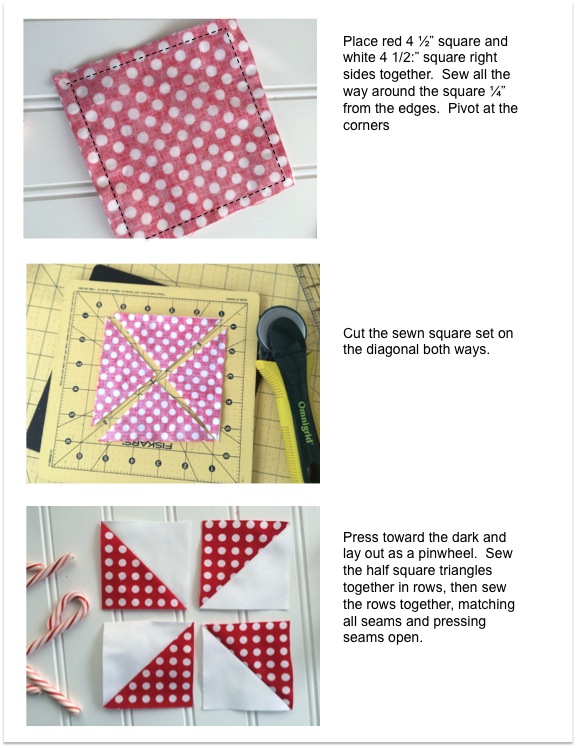
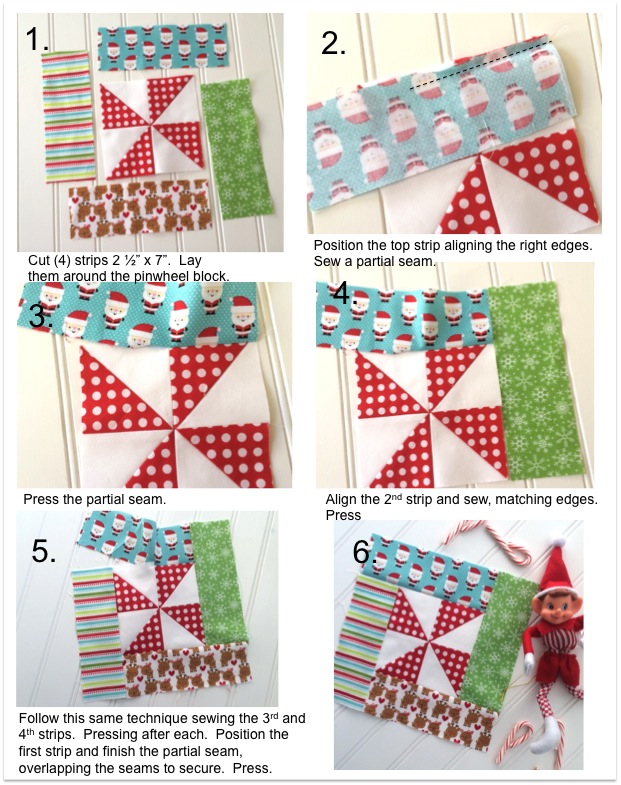
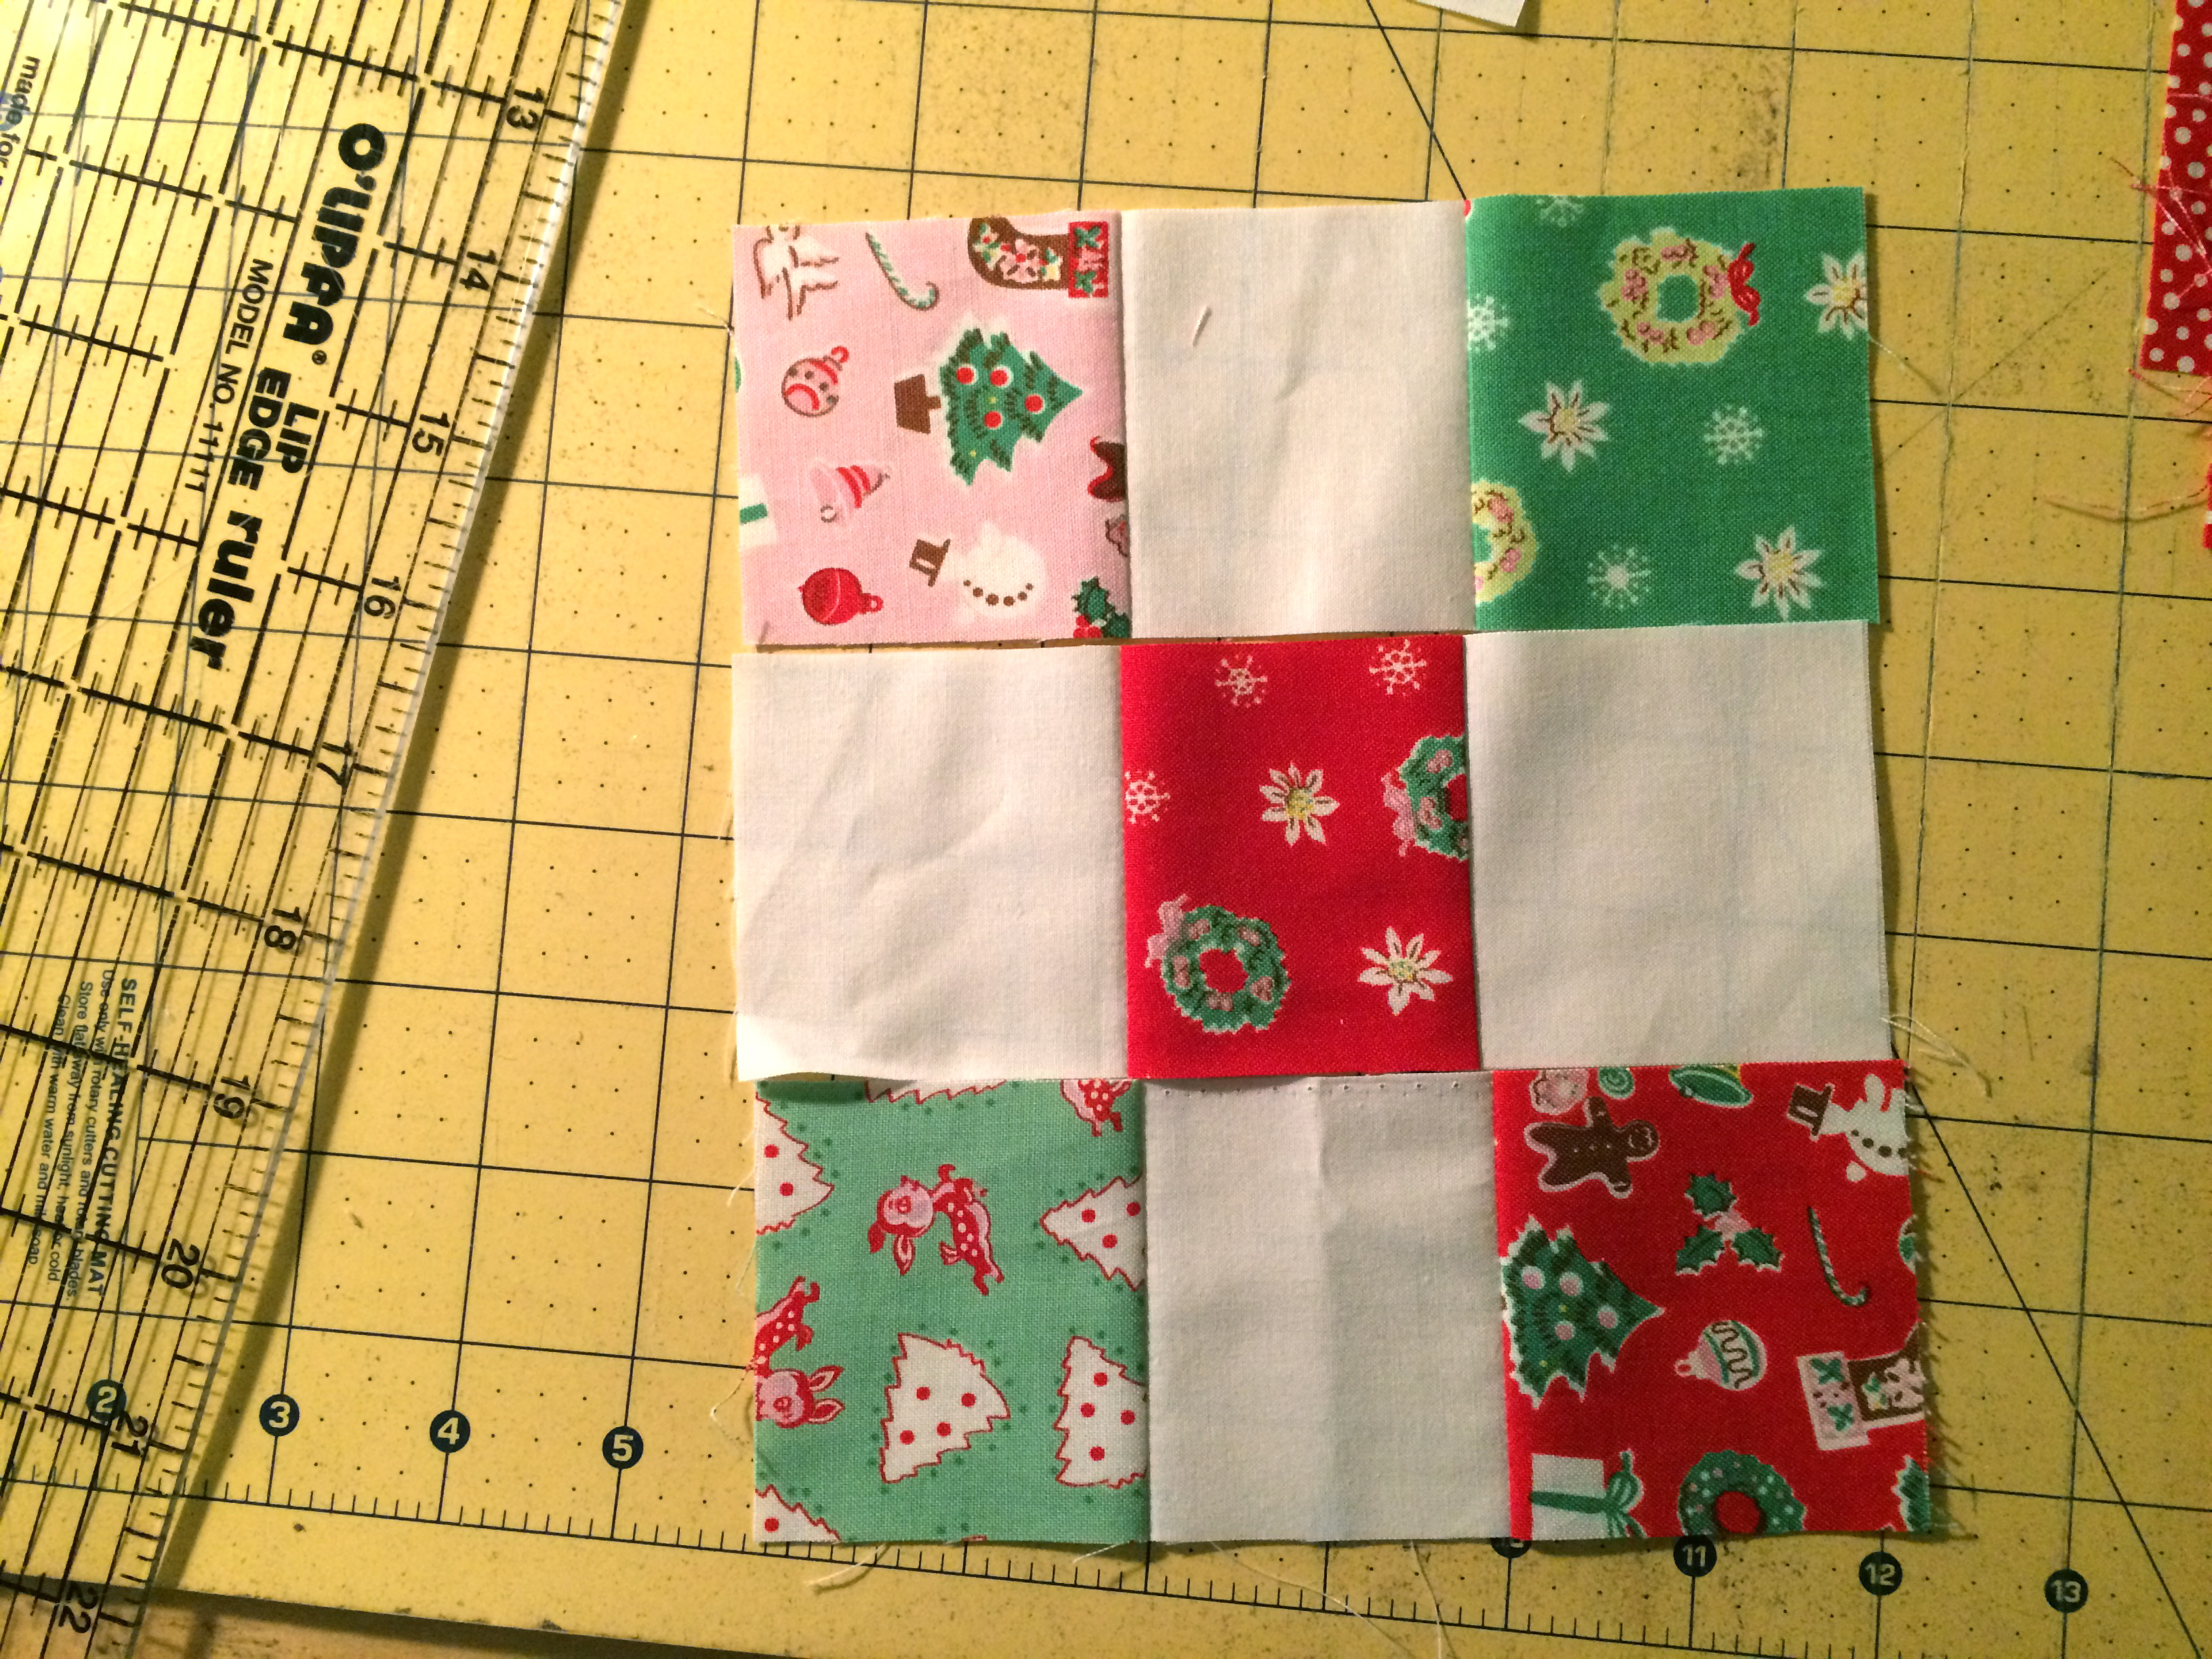
Pressing the seams open helps the pinwheel lay flat.christmas elf quilt 15'

christmas elf quilt 16

Once you have pinwheel blocks constructed (dry ingredients) you can now add them to the side strips (wet ingredients).

pinwheel block sashing instructionsSewing blocks with partial seems also seems a little magical!  Lay the 20 blocks out and sew them together in rows.  Pressing seams alternately and pinning at intersections.

christmas elf quilt 25

Quilt as desired 🙂  Add binding.christmas elf quilt 27
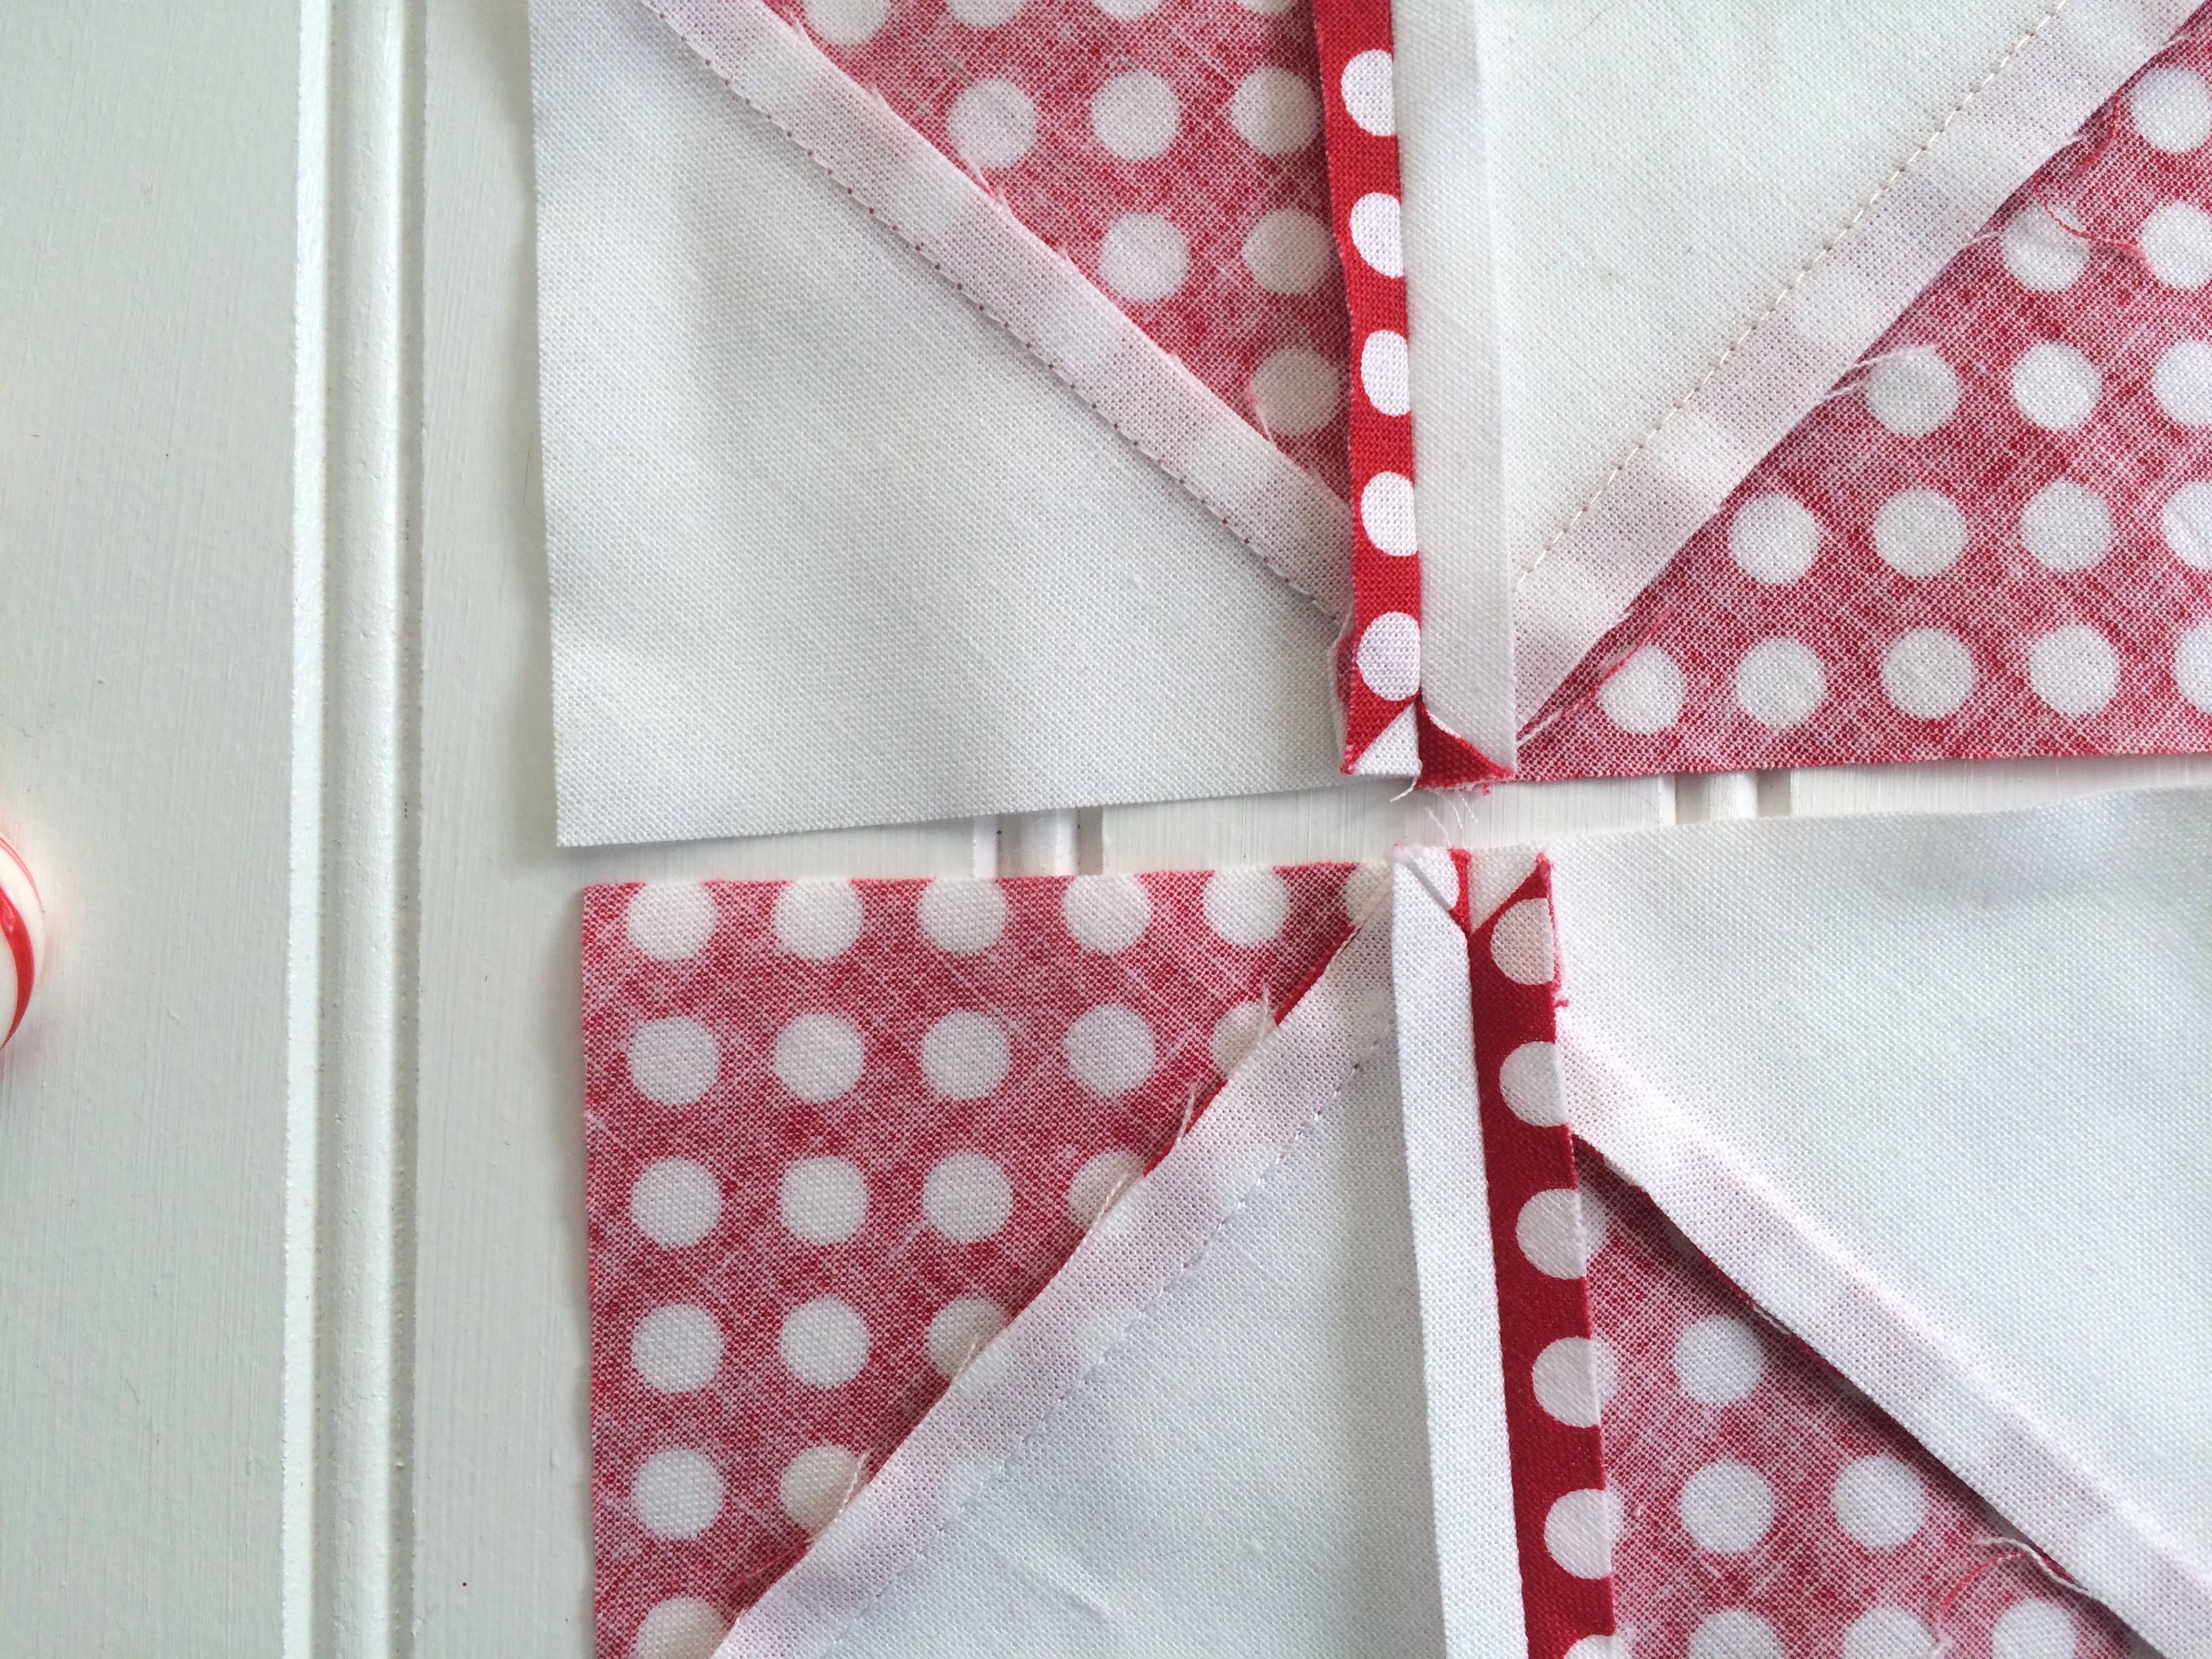
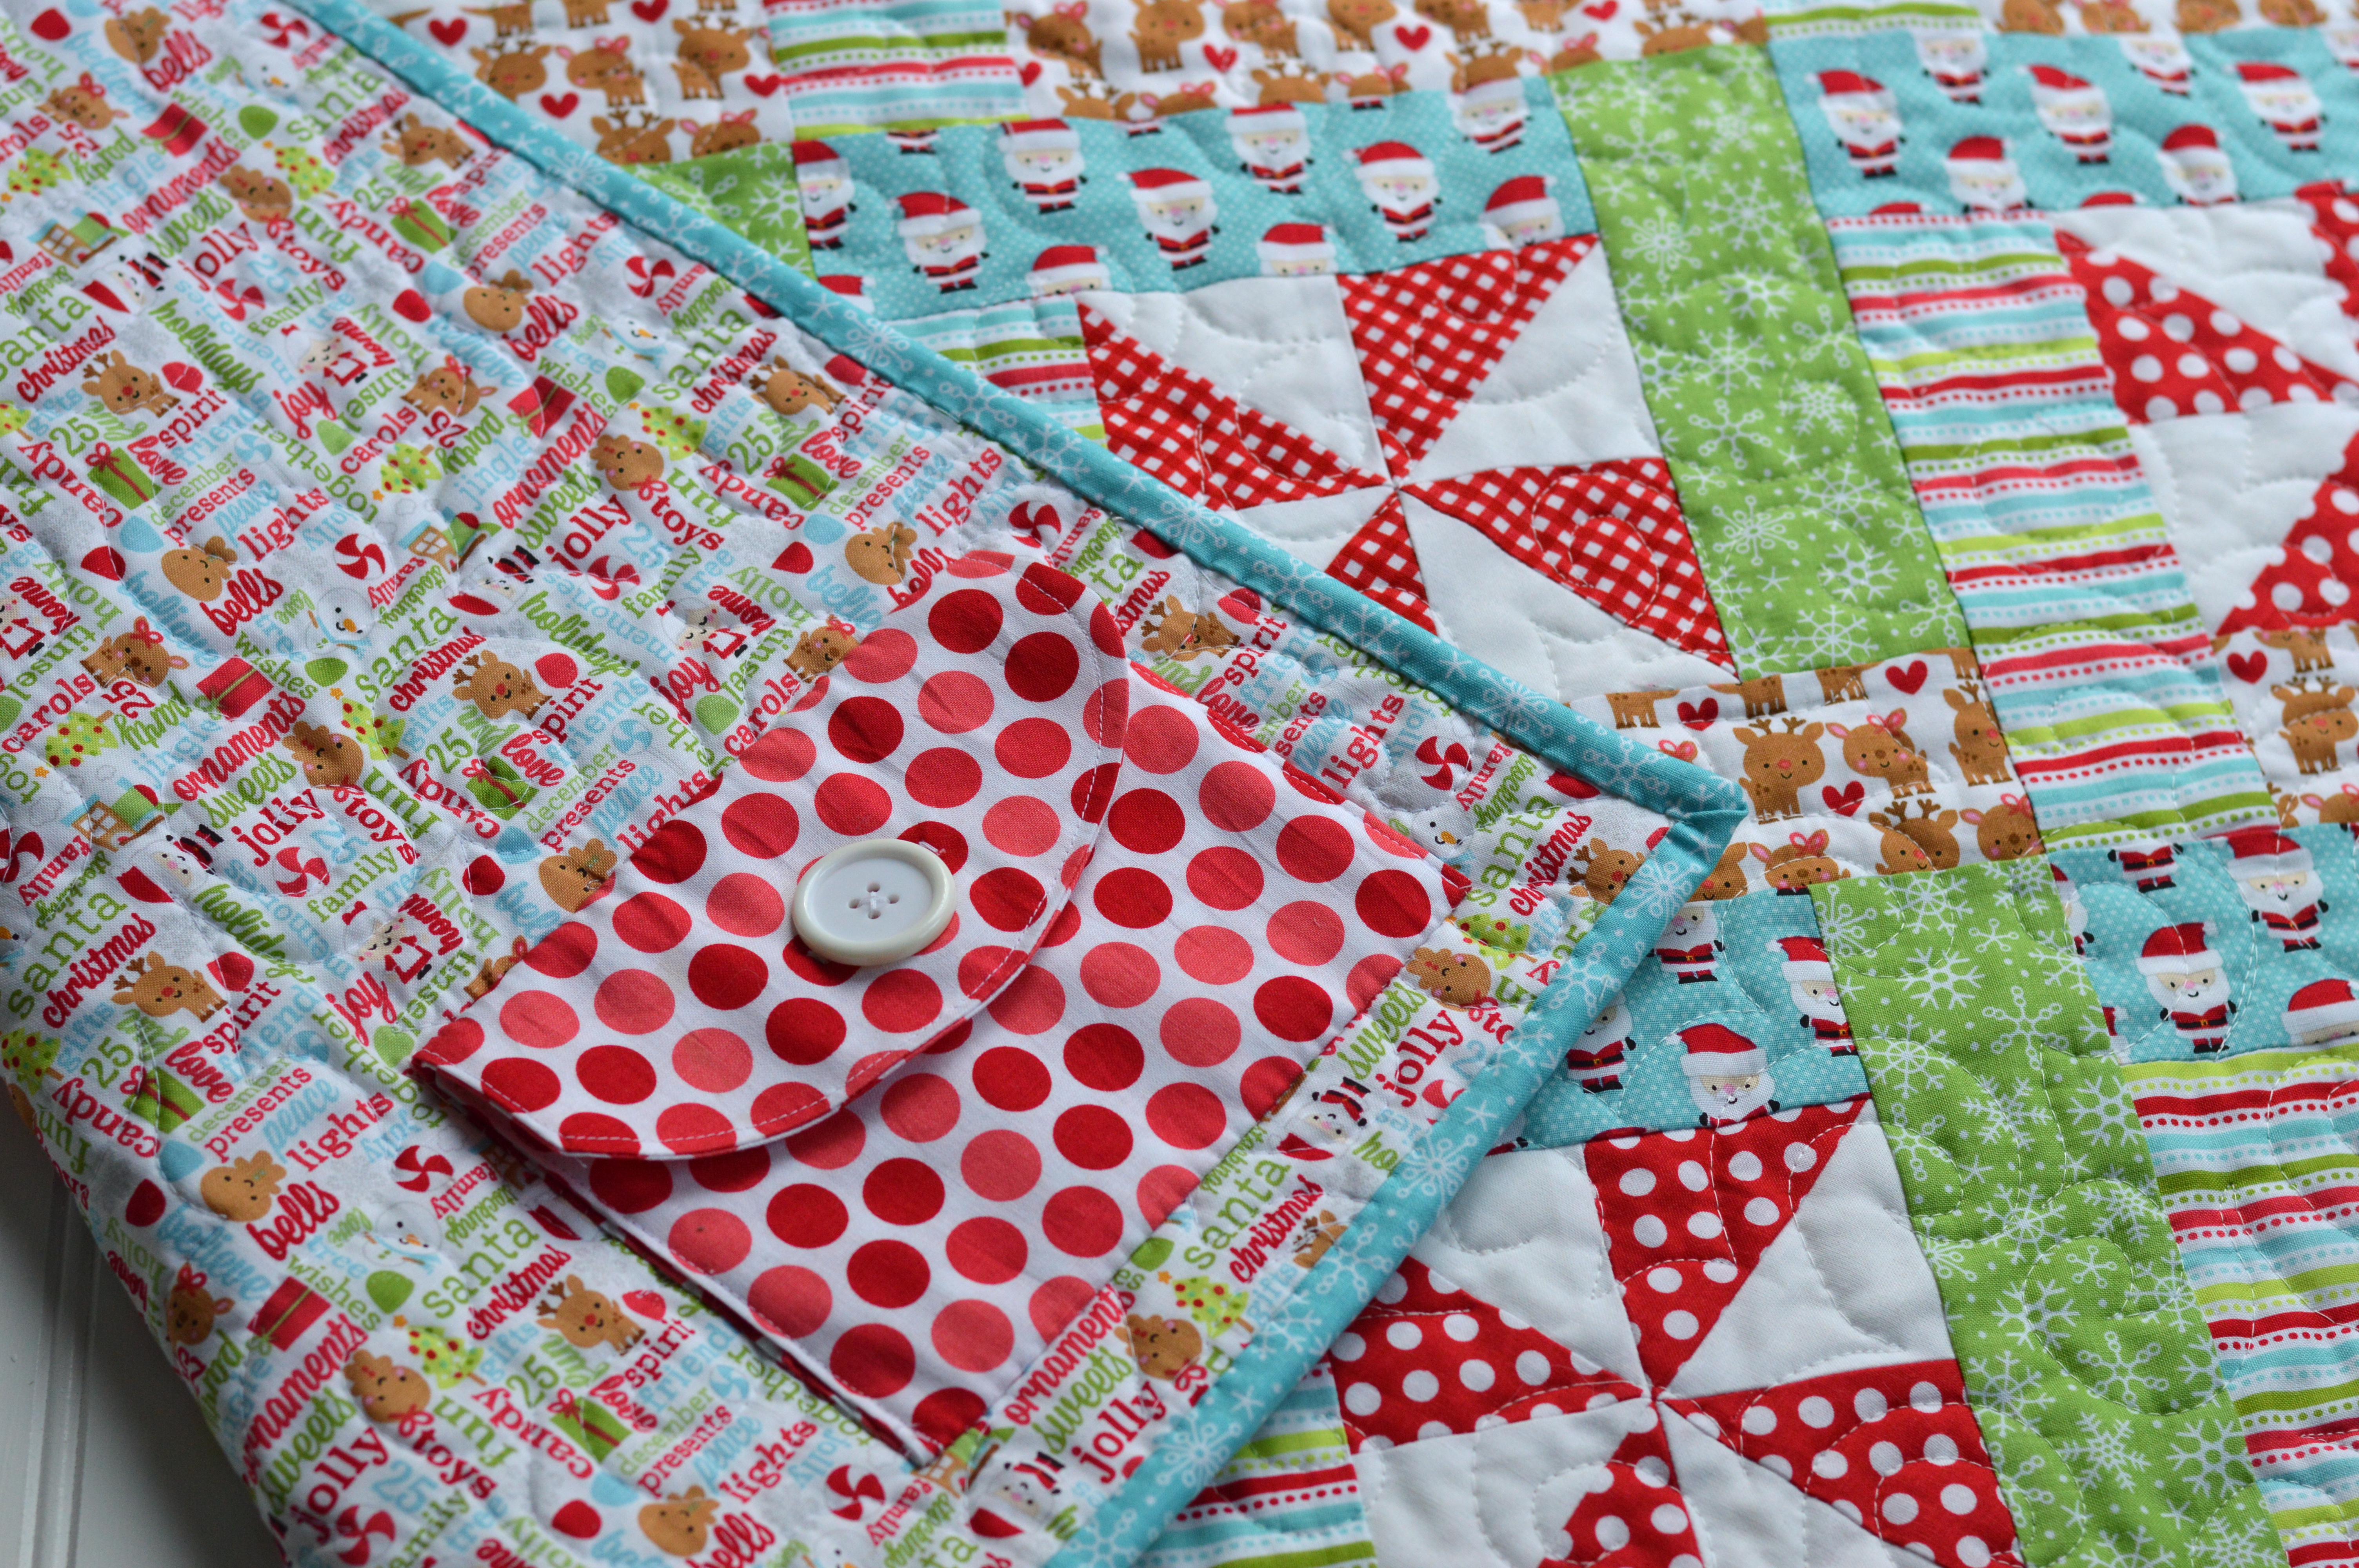
To make the little envelope for the back, follow the instructions below:

fabric envelopeHand stitch the envelope on the back of the quilt as you would hand applique a quilt label or applique piece.

christmas elf quilt 4

I just love this little pocket!  You could use this same idea for a tooth fairy quilt!!

christmas quilt elf

With the quilt all finished, it’s time to enjoy some homemade gingerbread cookies!  These are my family’s favorite!  We’ve been making this recipe every year since I was in Kindergarten!

gingerbread cookiesThey are so spicy and yummy and your house will smell delightful!!!

christmas elf quilt 3

Be sure to follow along with our Stitch ‘n Kitchen blog tour for holiday project tutorials and favorite recipes!

12/1 – Riley Blake Designs

12/2 – Simple Simon

12/3 – Mode de Lis

12/4 – One Little Pooh

12/5 – A Bright Corner

12/7 – Quiltscapes

12/8 – Life After Laundry

12/9 – Crafting Chicks

12/10 – Melly Sews

12/11 – Choo Choo Skadoo

12/12 – Jedi Craft Girl

12/14 – Polka Dot Chair

12/15 – Sew Like My Mom

12/16 – Sugar Bee Crafts

12/17 – Fort Worth Fabric Studio

12/18 – Messy Jesse

12/19 – Leigh Laurel Studios

12/21 – The Happy Housie

12/22 – The Flannel Queen

12/23 – Riley Blake Designs

12/24 – Riley Blake Designs

12/25 – Riley Blake Designs

Winterberry Quilt

winterberry quilt 2

I visited my friend Tina in New Jersey this summer!  We sewed for 5 straight days and this is one of the quilts we put together.

winterberry quilt 9 I just got it back from the quilter; just in time for December!  The fabrics are called Winterberry by Moda.  winterberry quilt 3We choose this pattern called Modern Greek Cross.  It is such a FUN pattern!winterberry quilt 4

I’m used to sewing with Mufasa so I was so happy to have Roo’s company while we sewed.  winterberry quilt 5

The blocks are so much fun to put together!winterberry quilt 6

All good kitty quilters must approve the quilt layout before sewing it together!winterberry quilt 7

We sewed this together in August and December seemed so far away.  How time files!  winterberry quilt 8  The quilting turned out darling – she used an allover holly design.  I love it! winterberry quilt 12

Mufasa totally approves!  I think it’s so cute that Roo helped make the quilt that Mufasa is sitting on!  They are best friends and don’t even know it!winterberry quilt

Little Joys Quilt Tutorial

little-joys-quilt
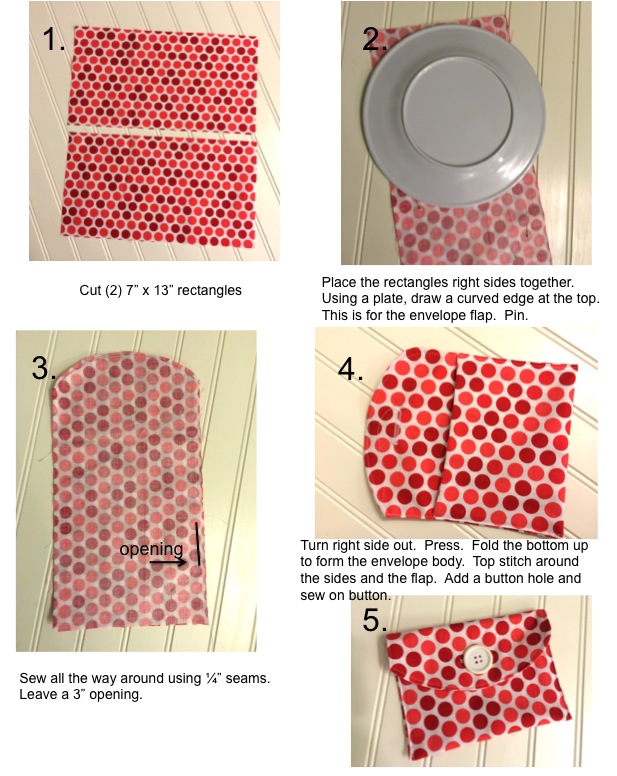
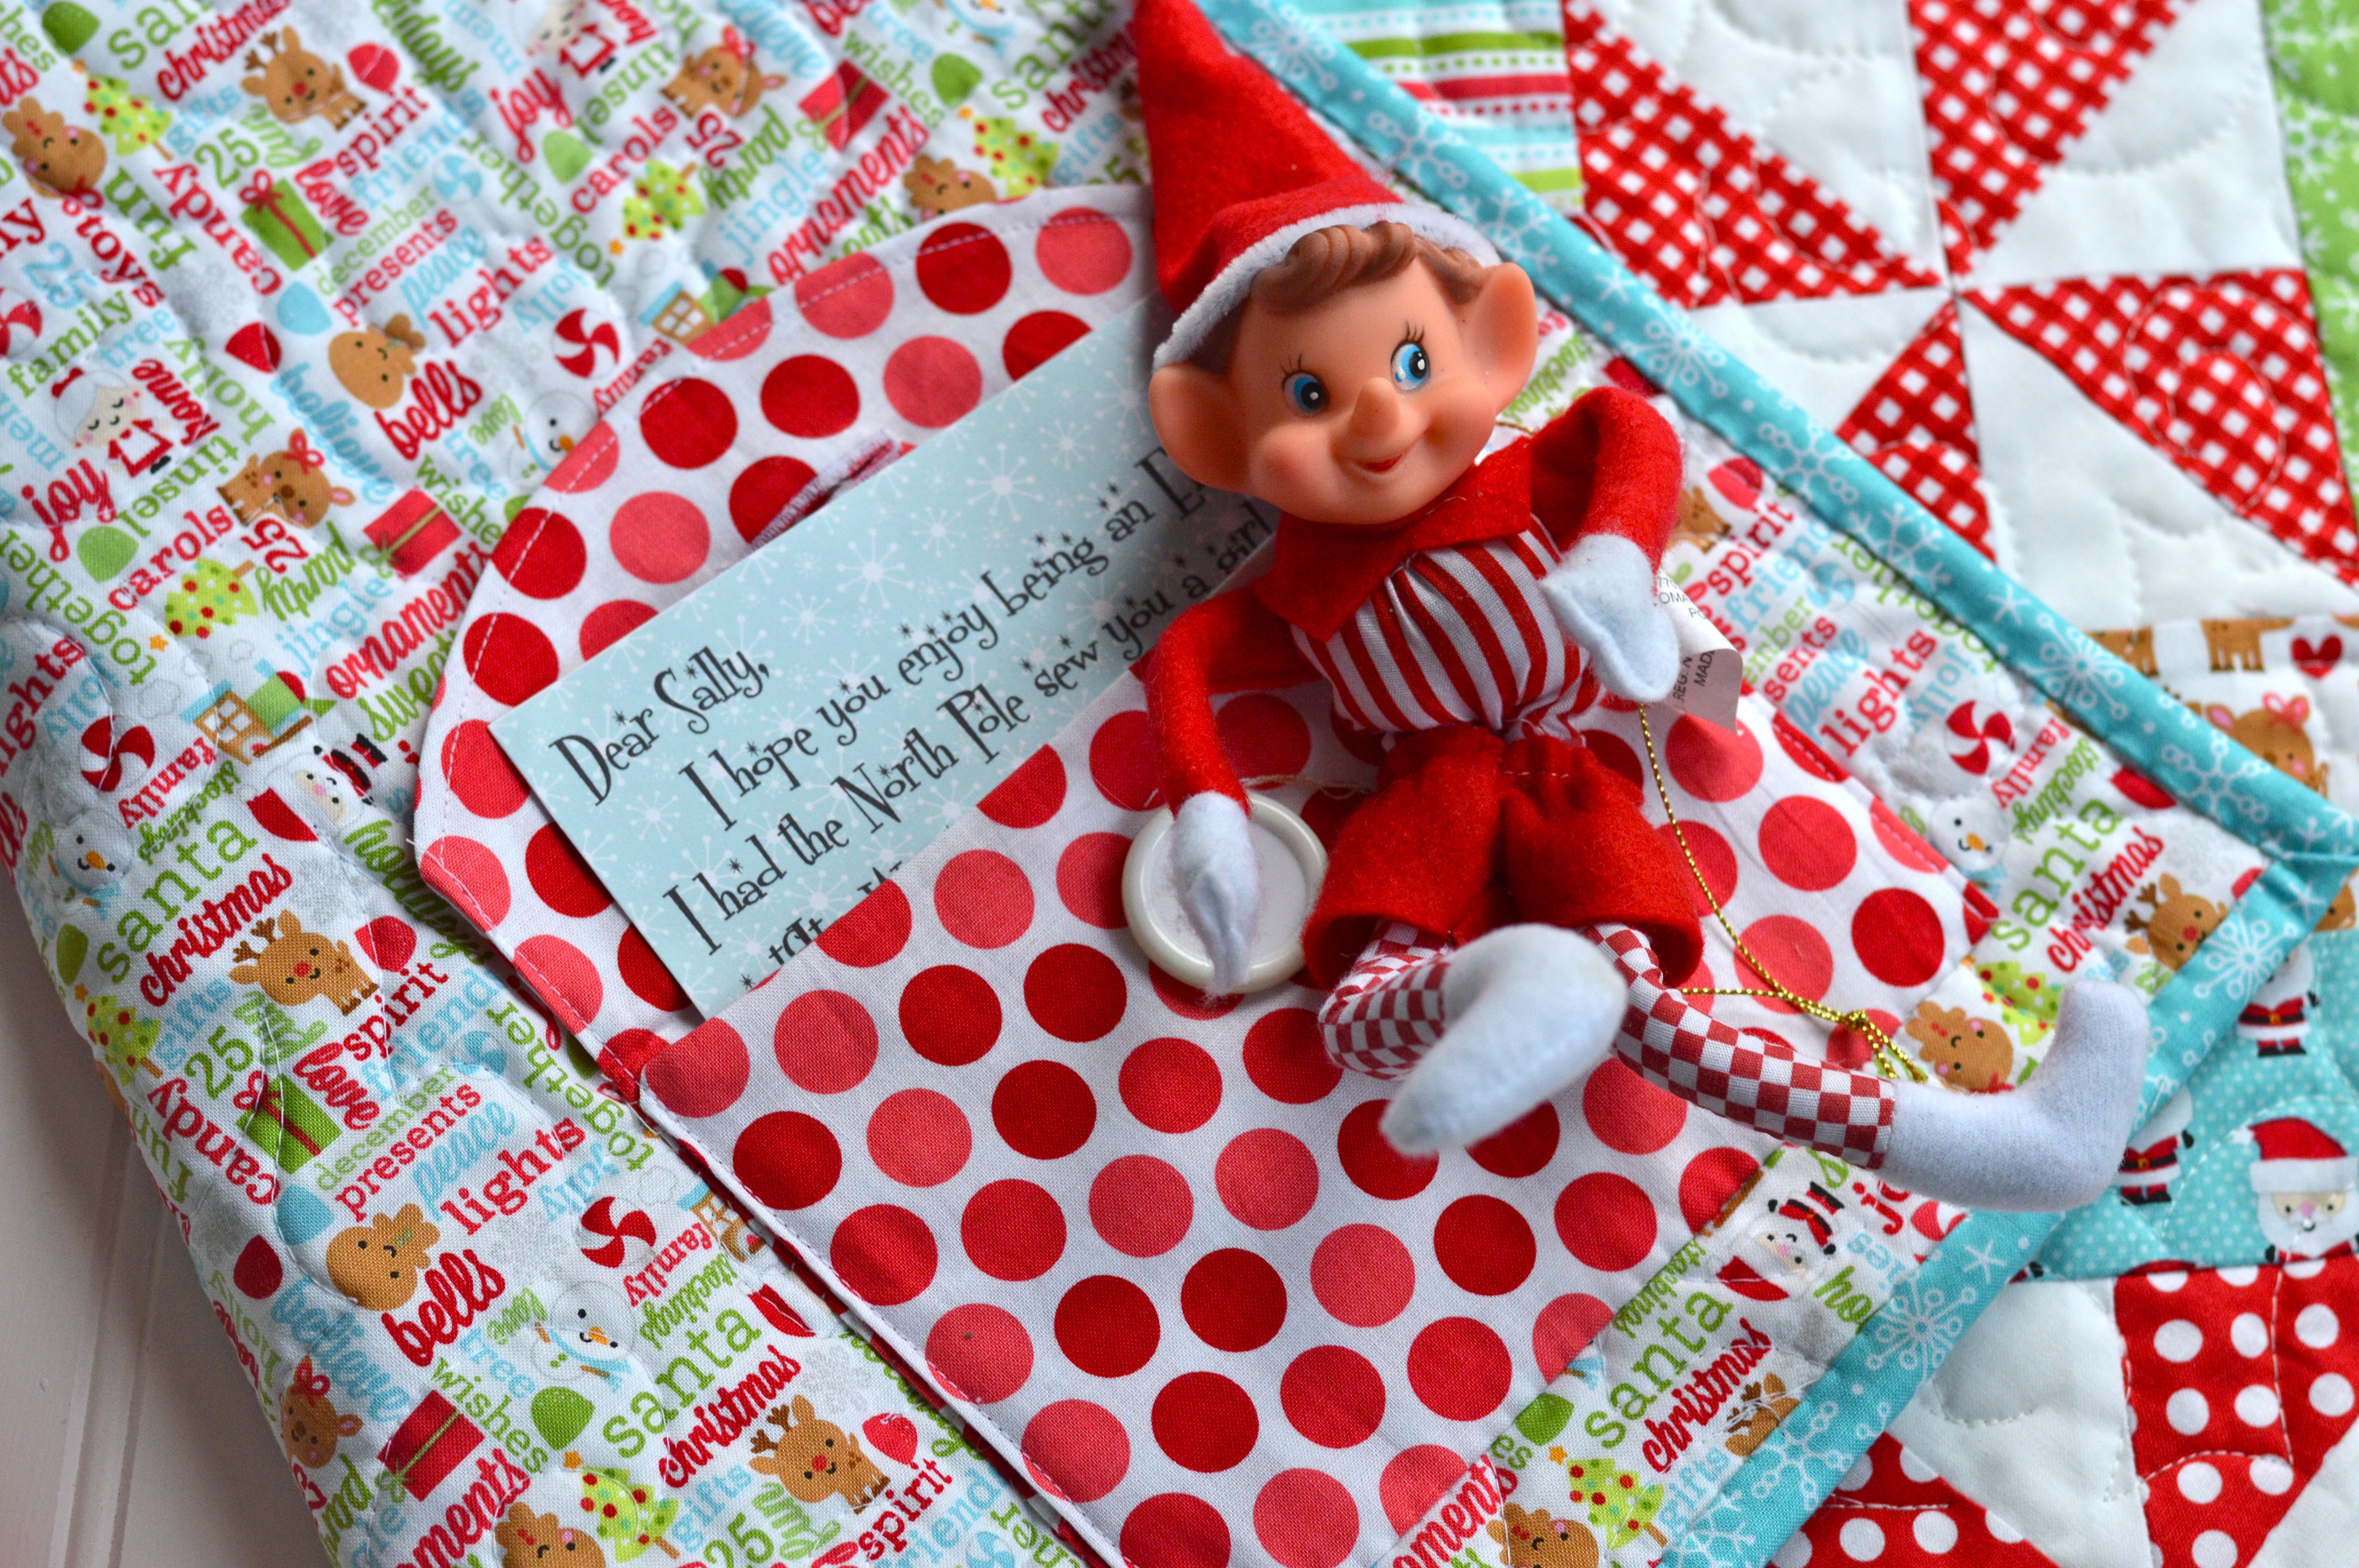
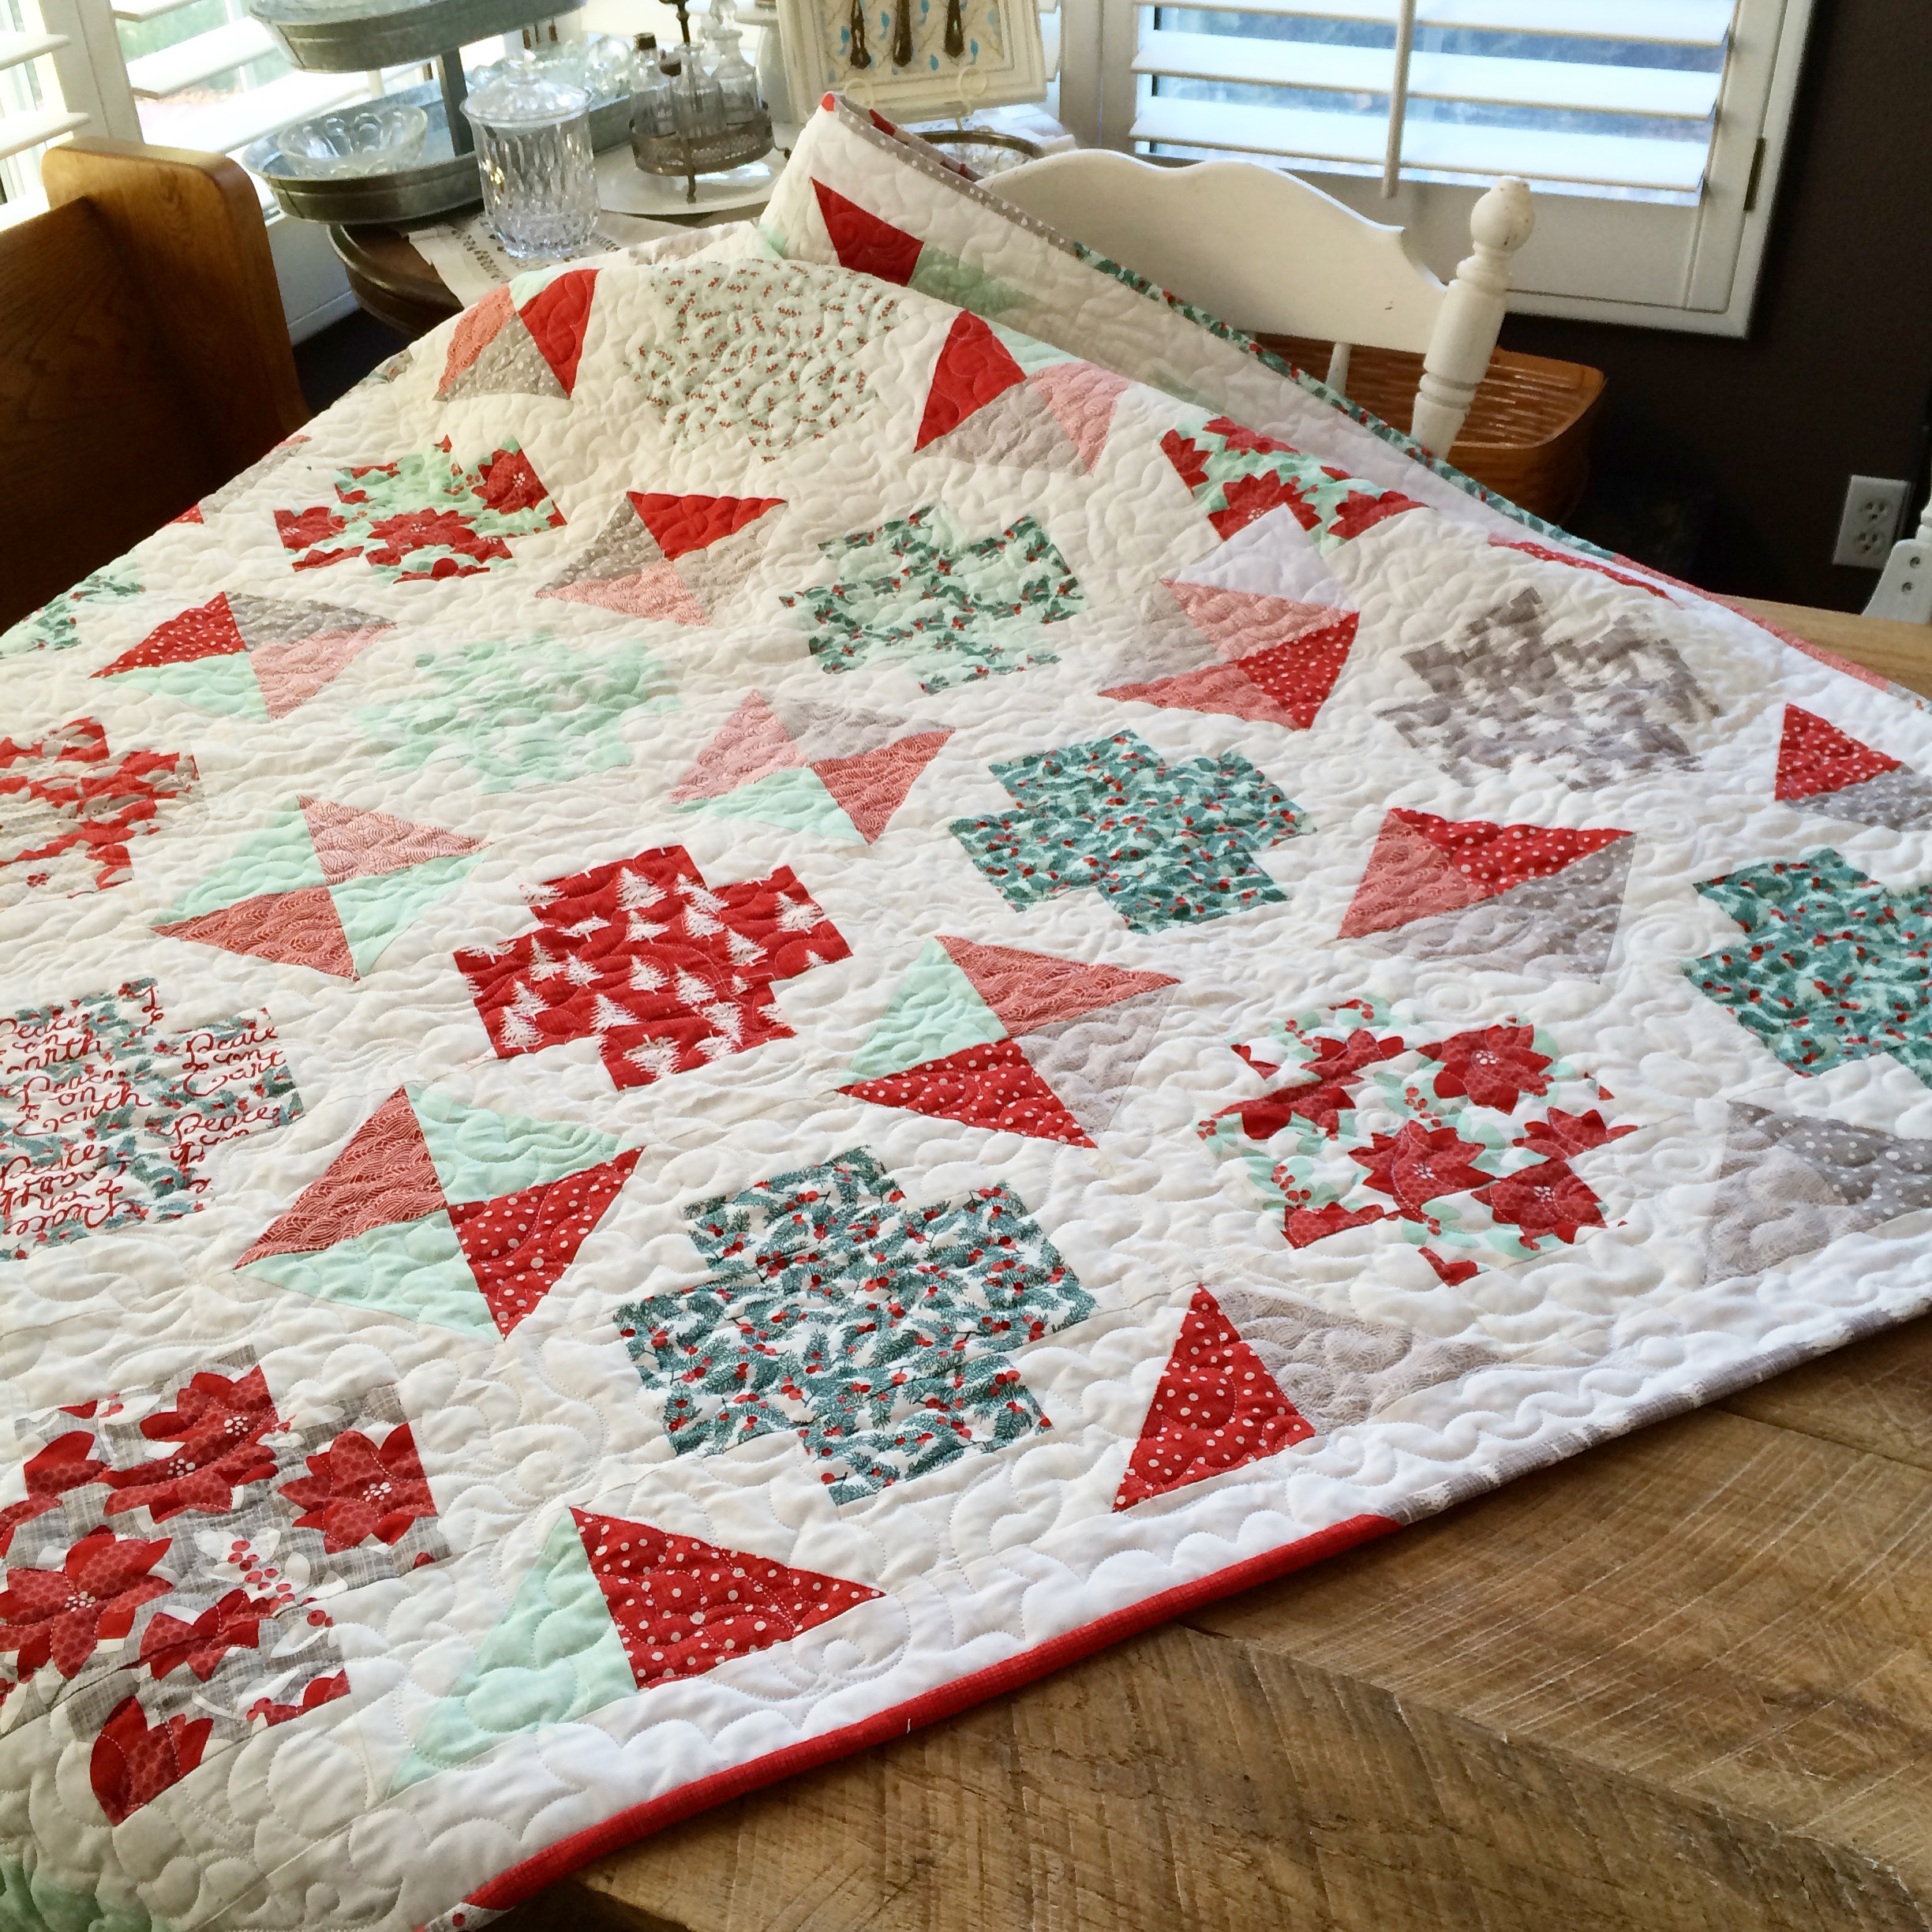
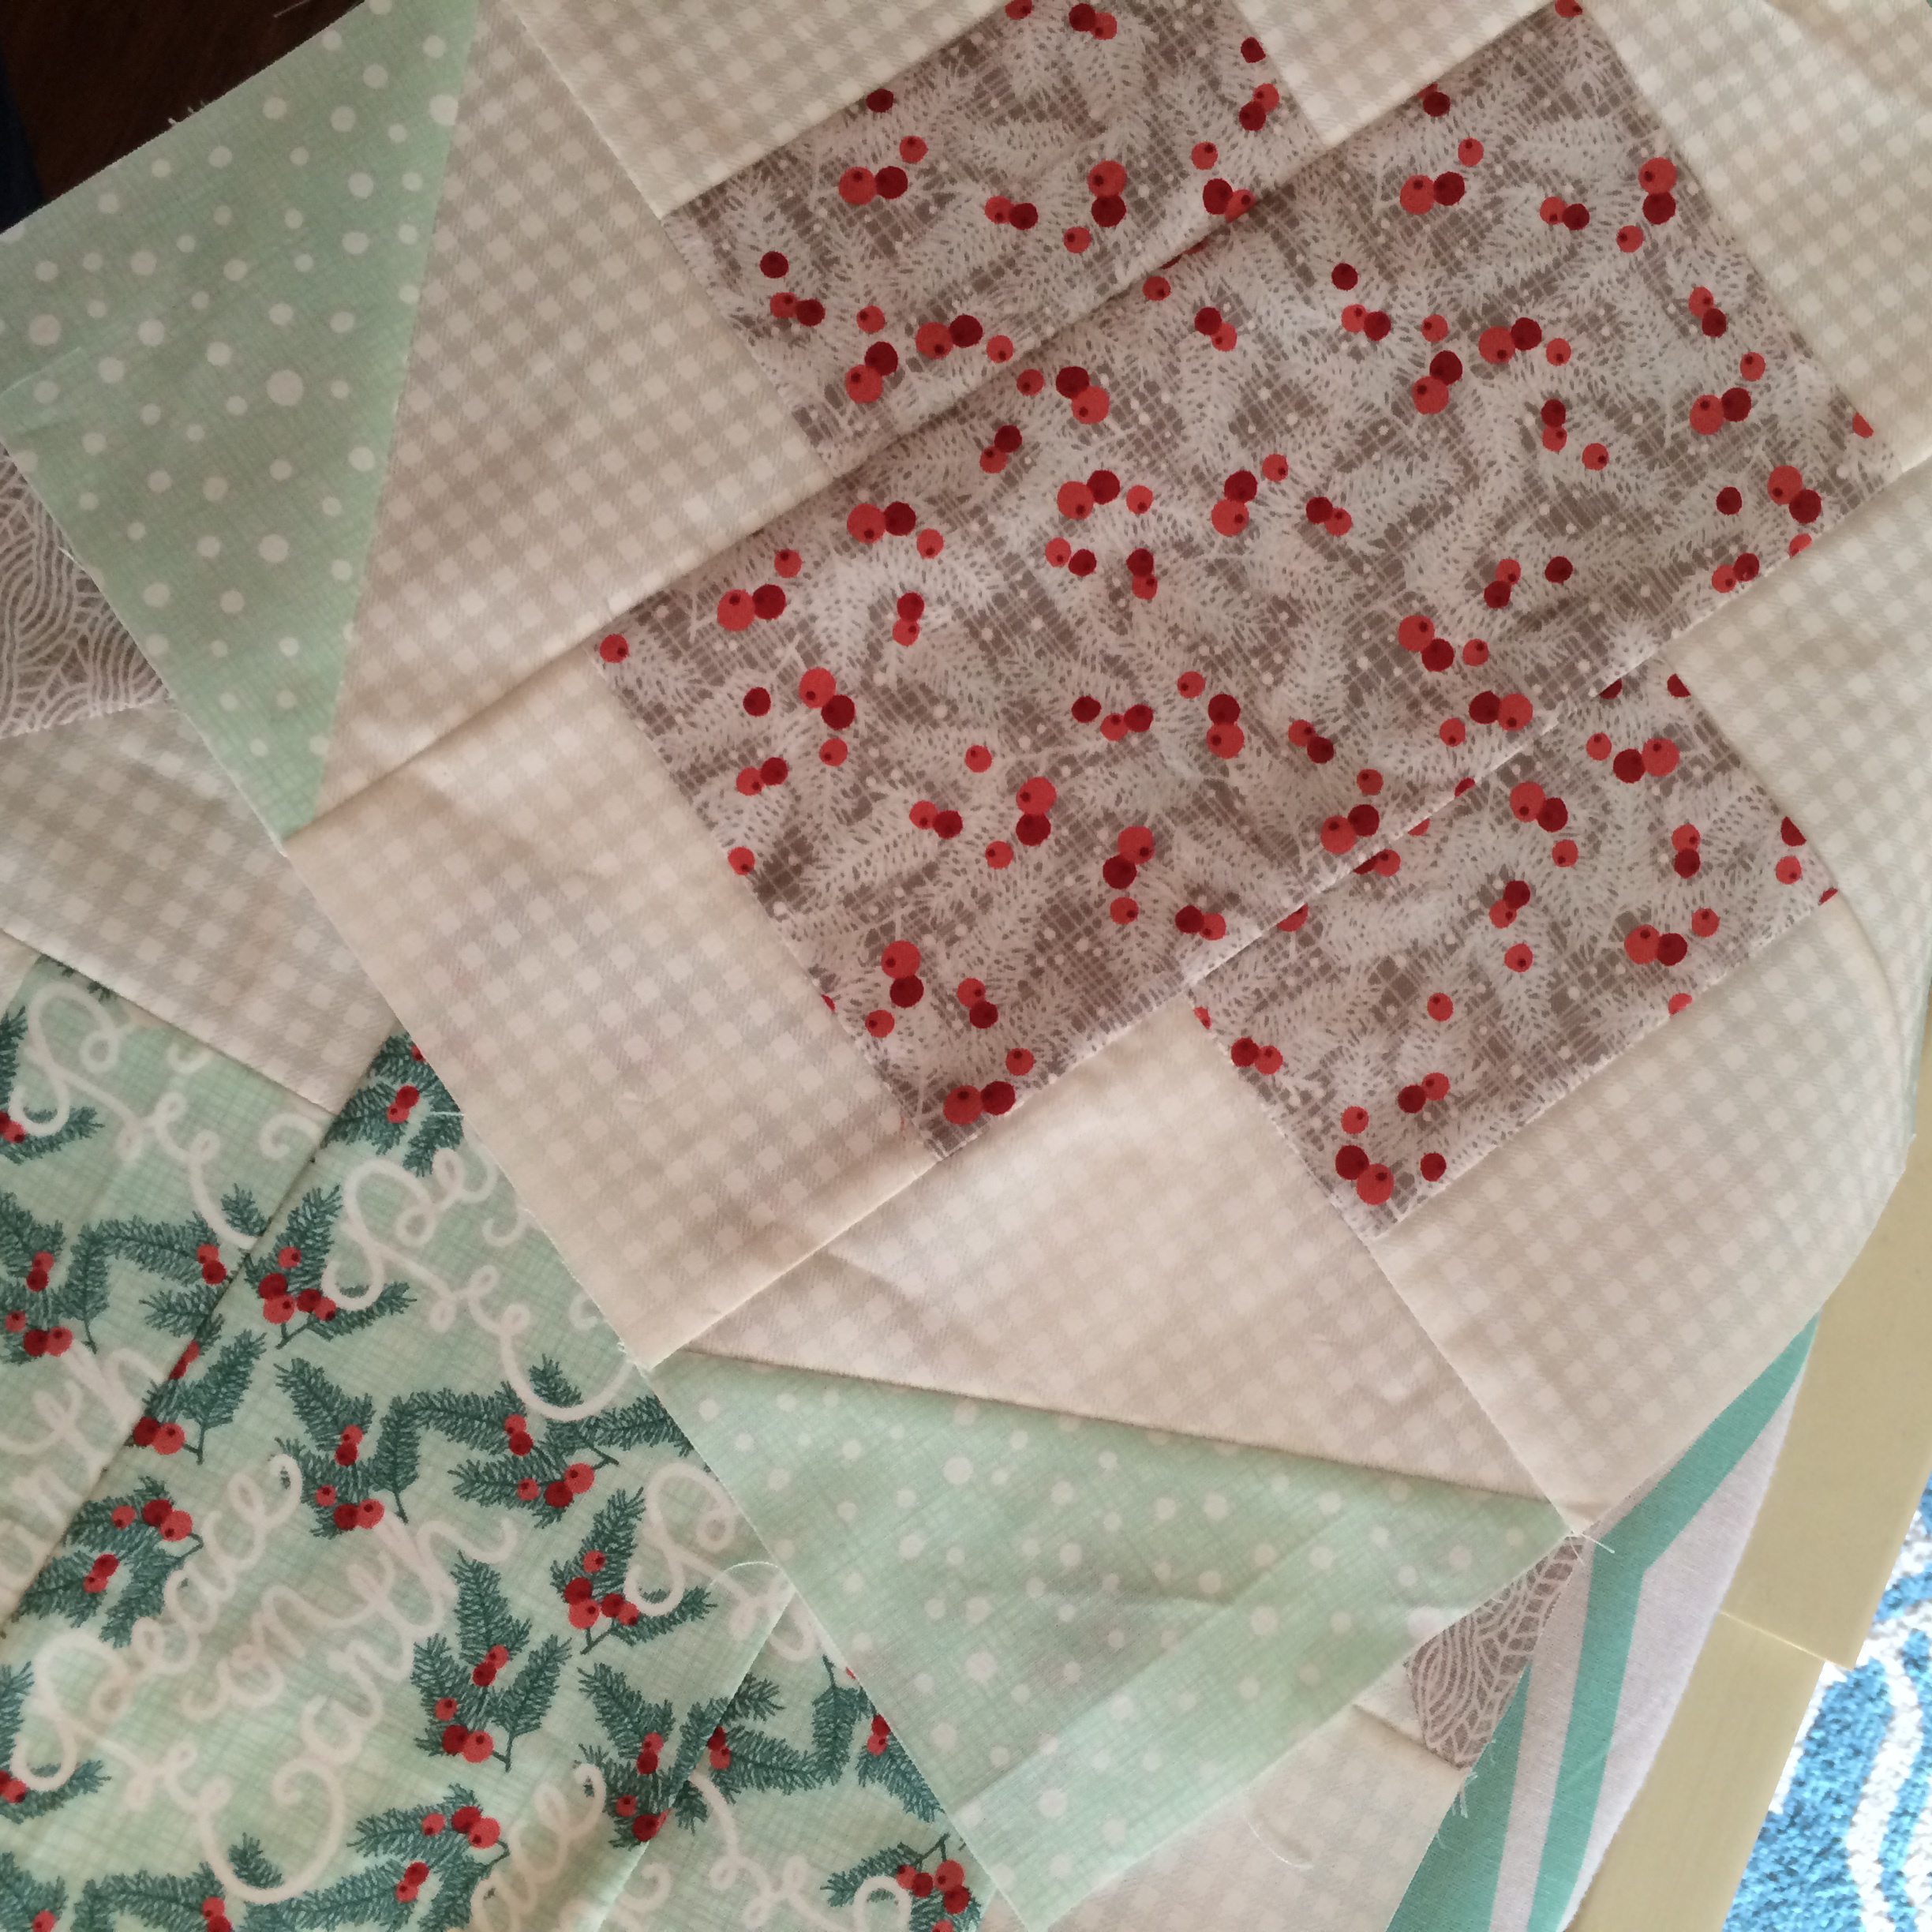
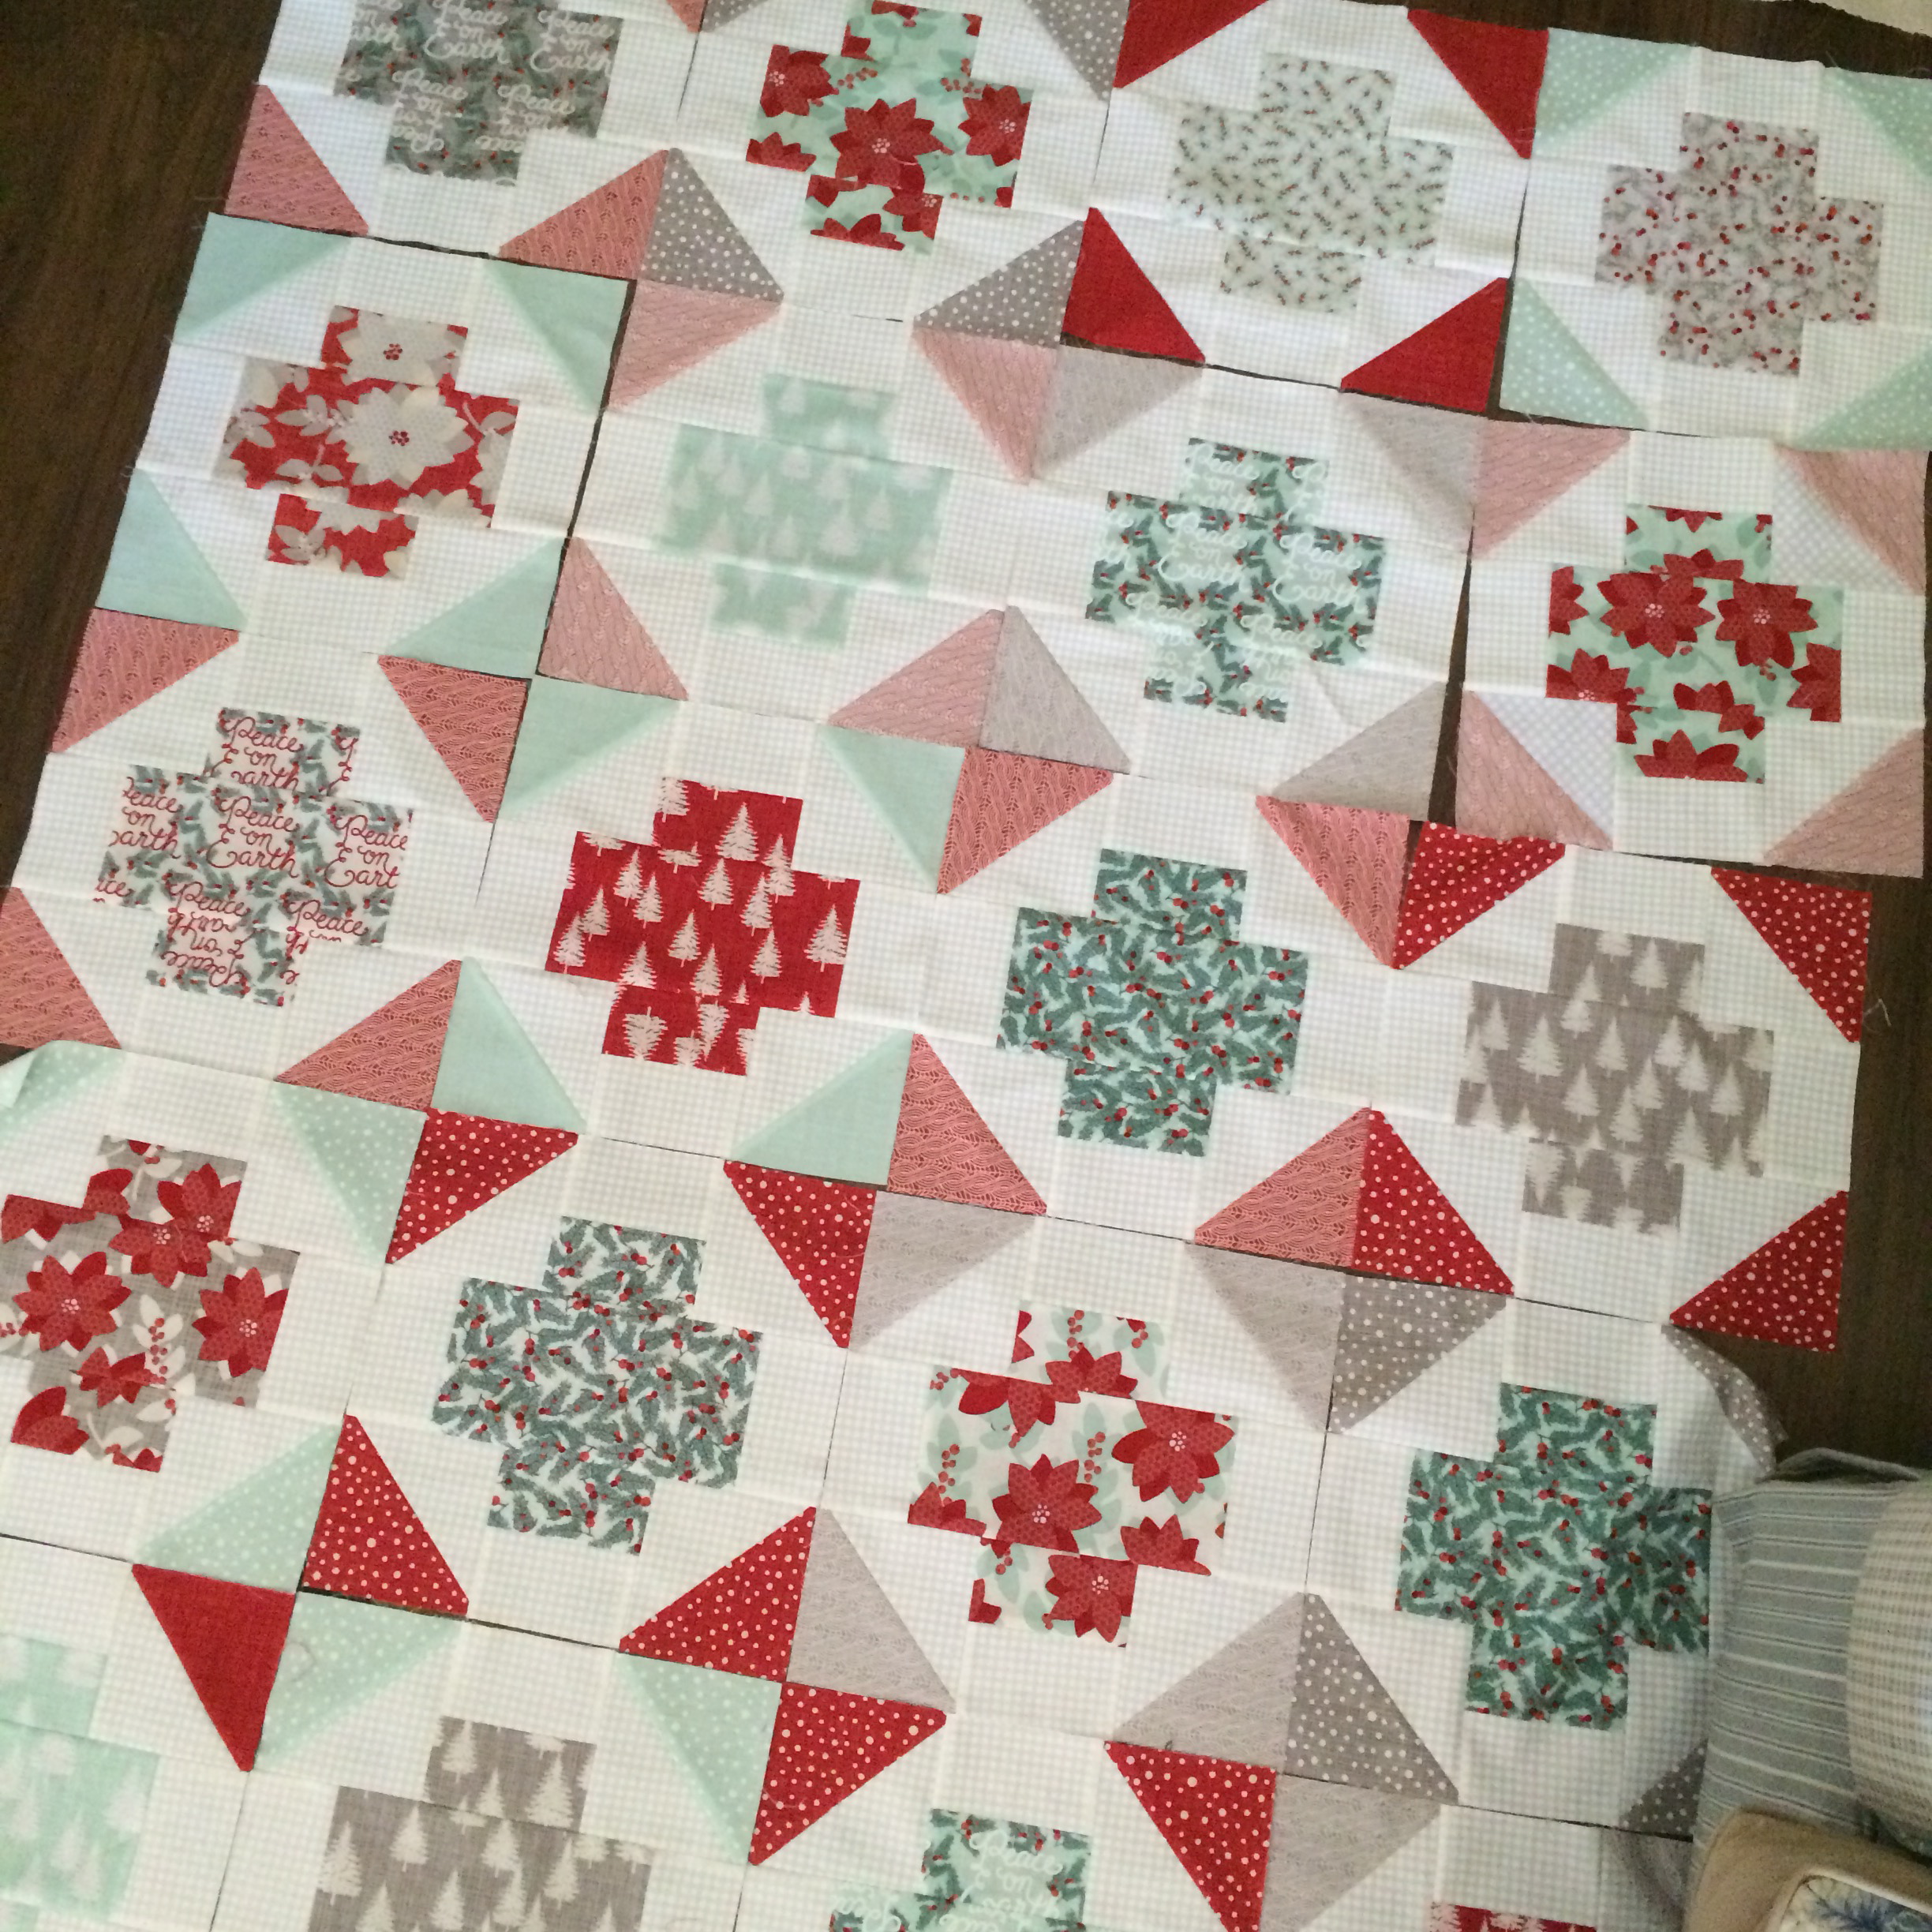
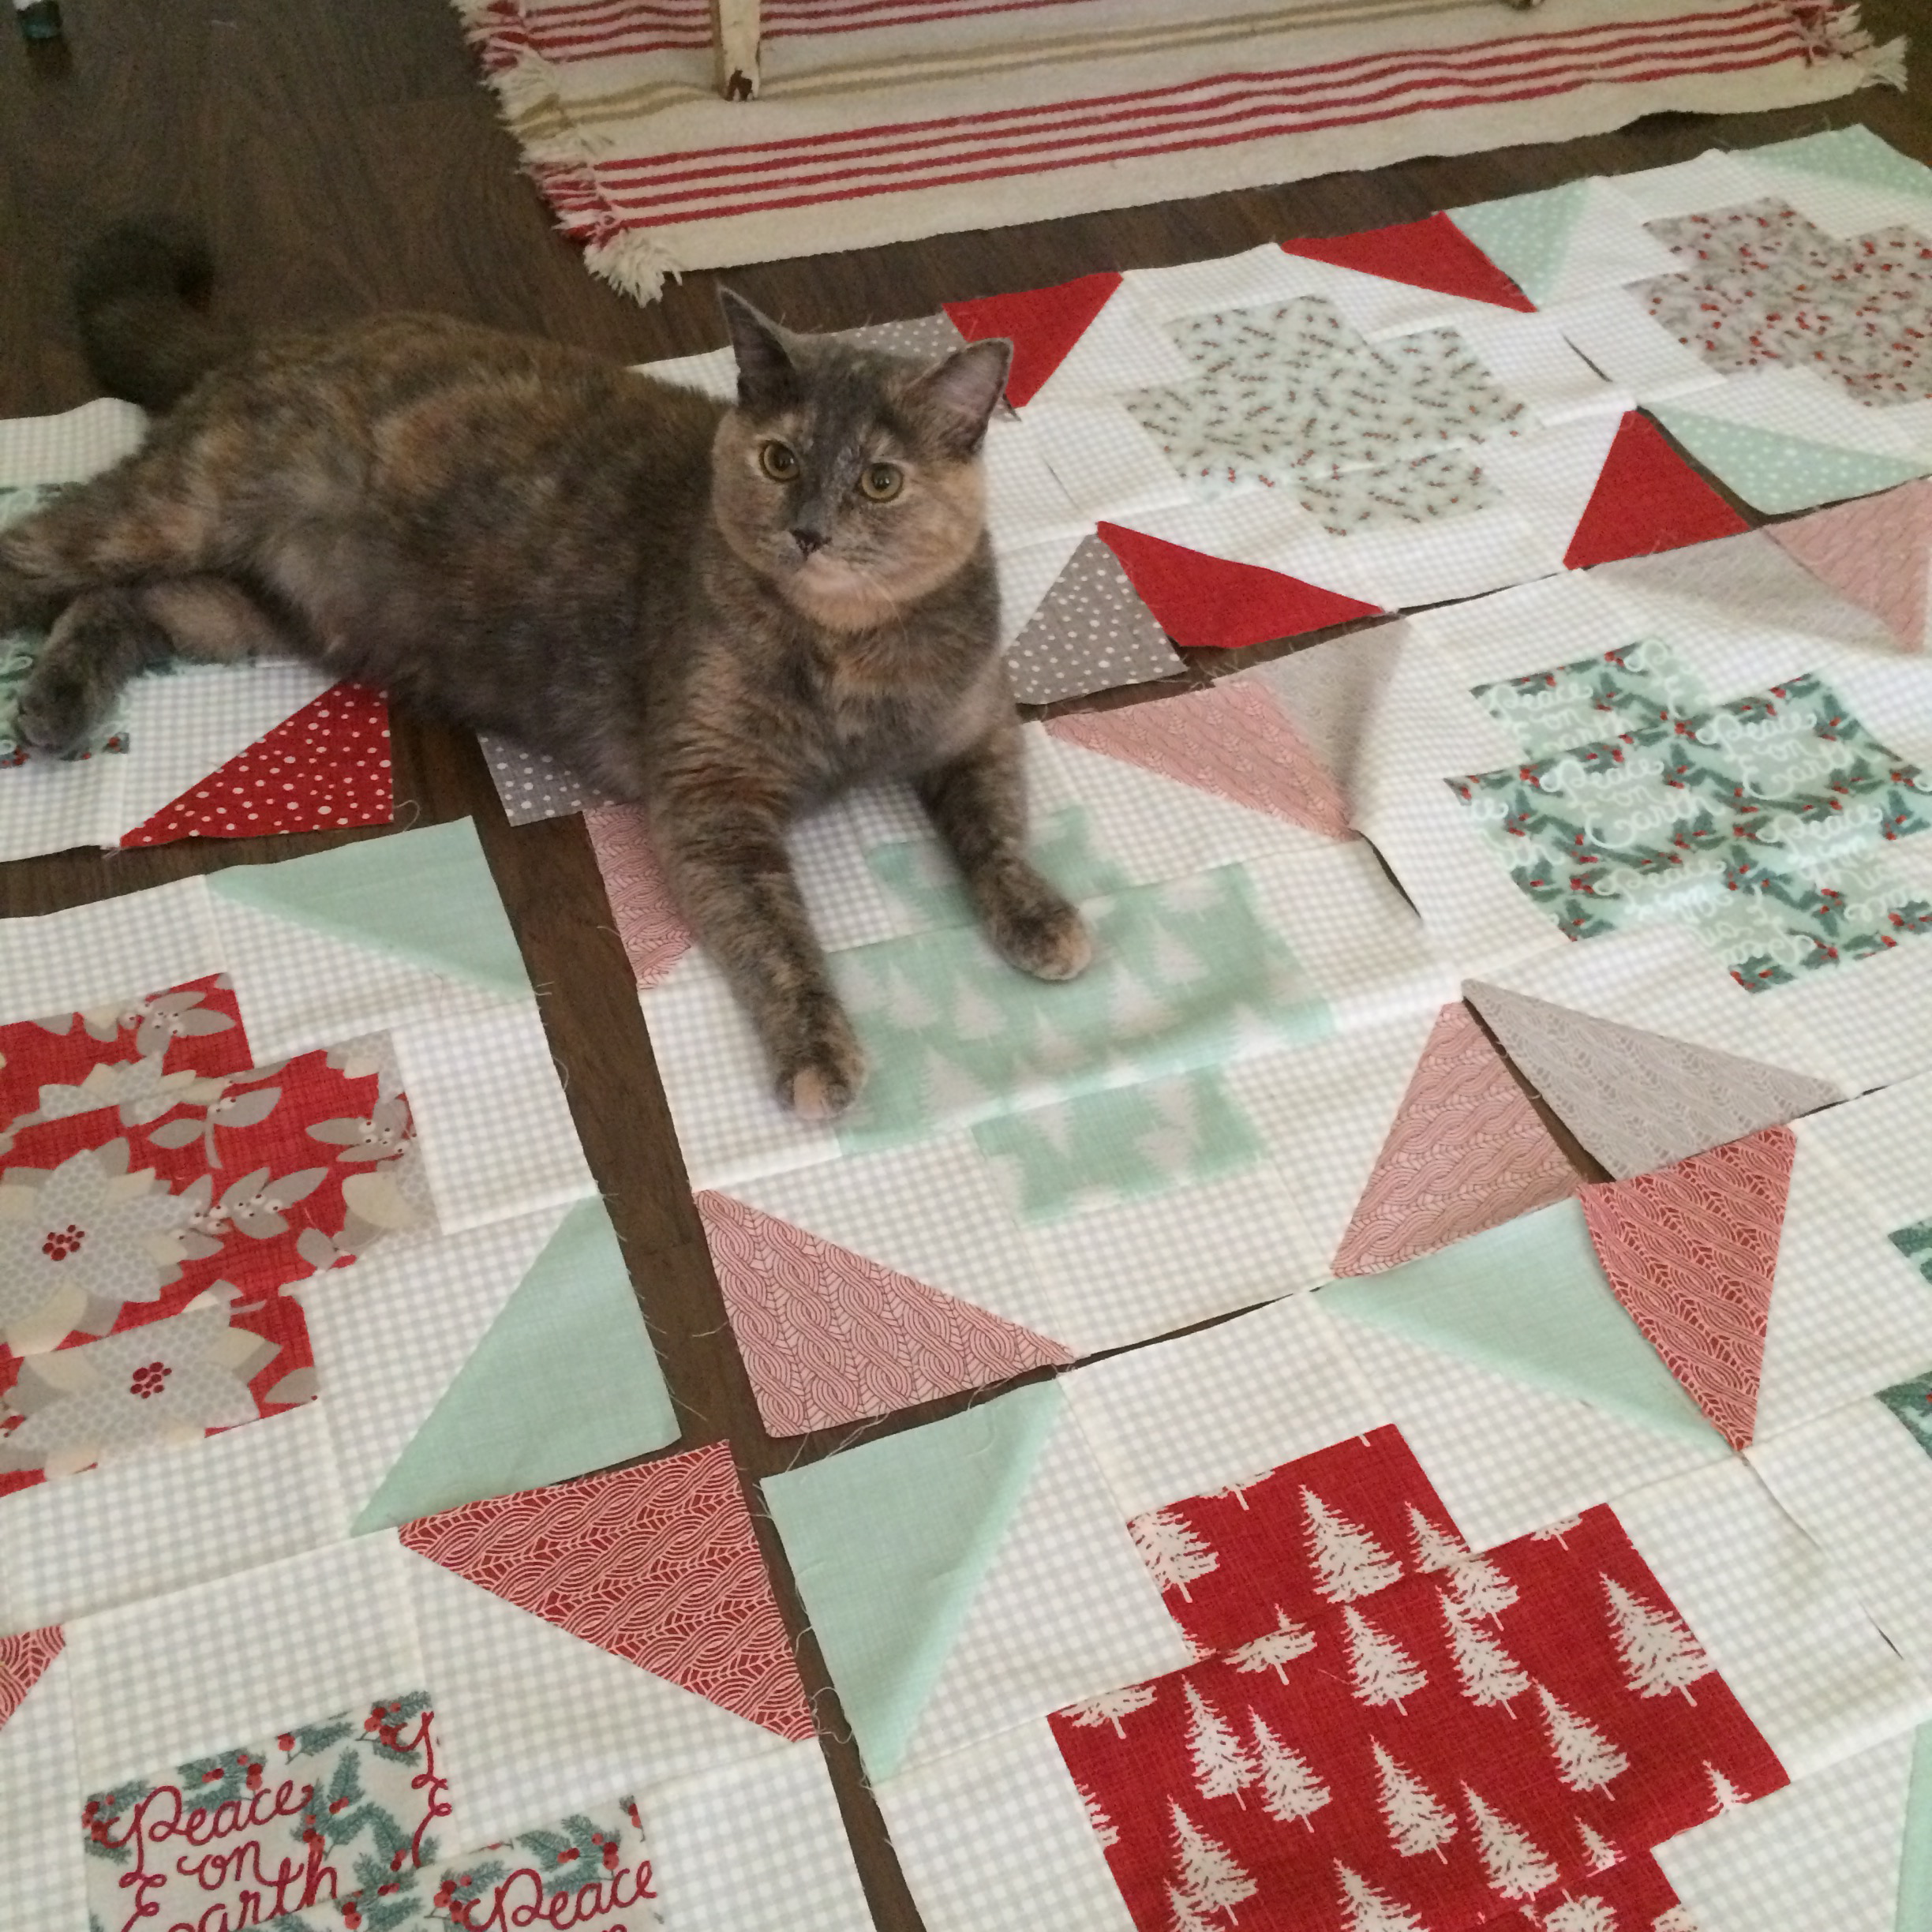
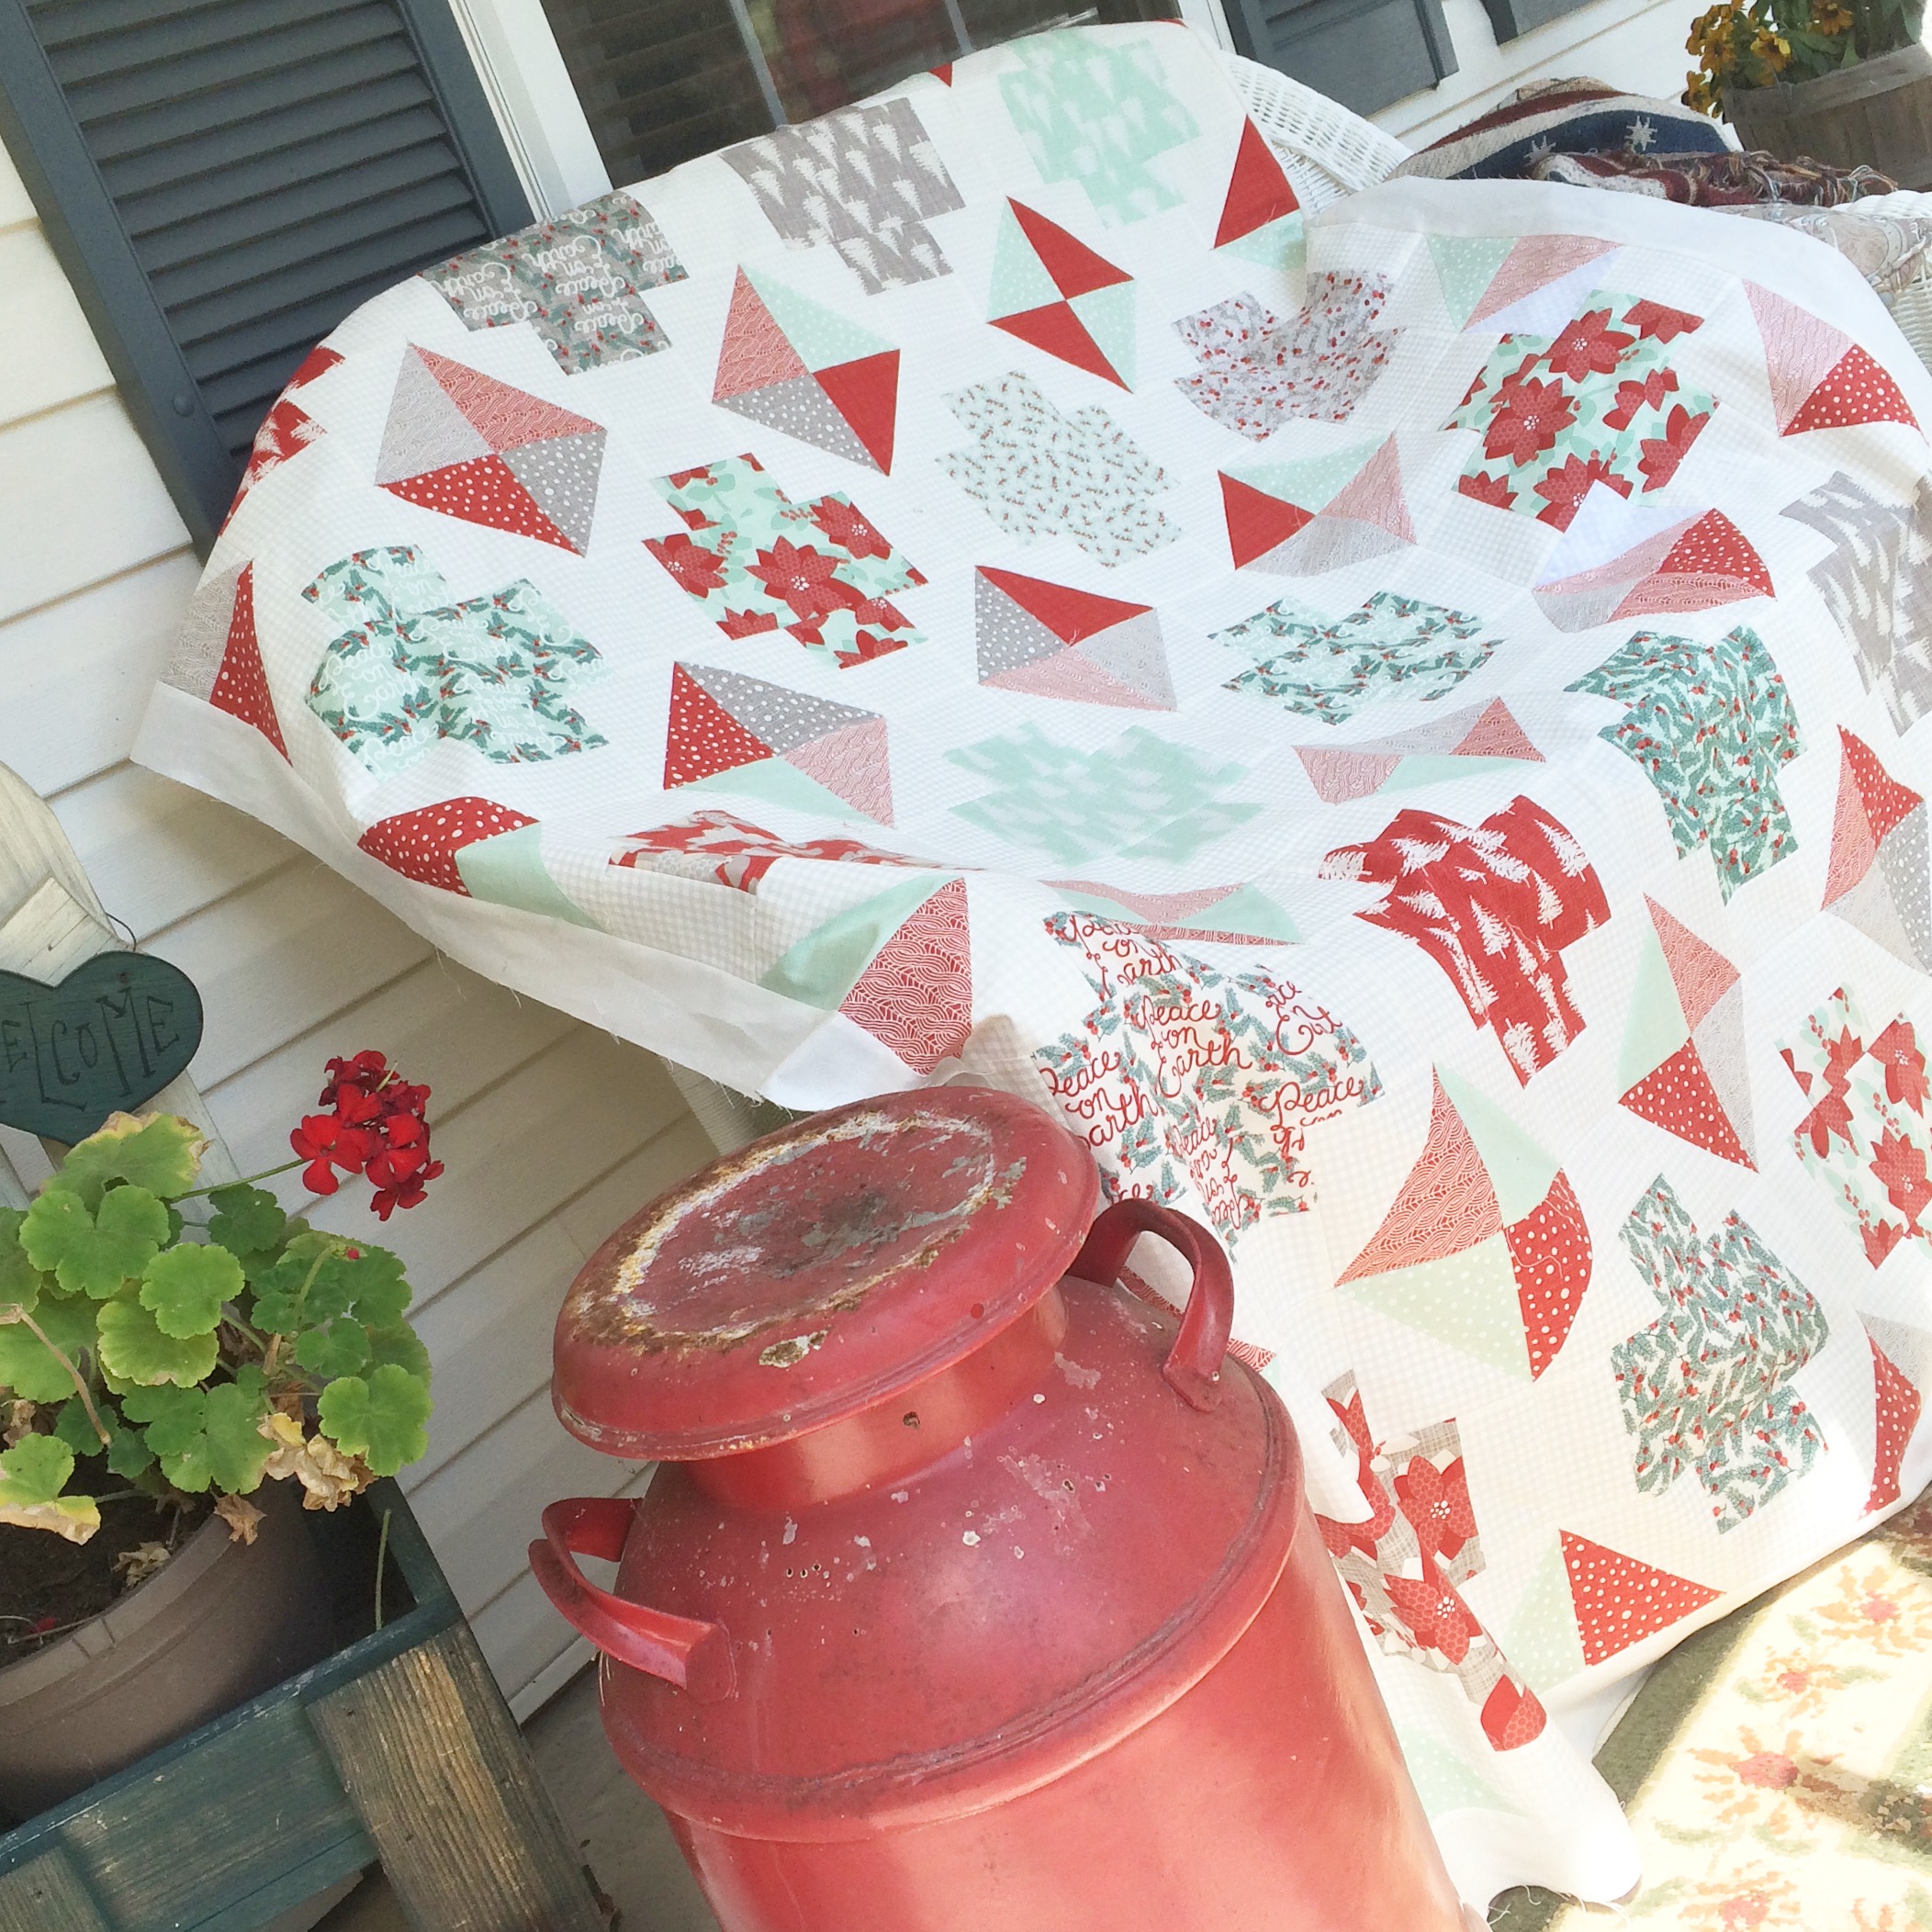
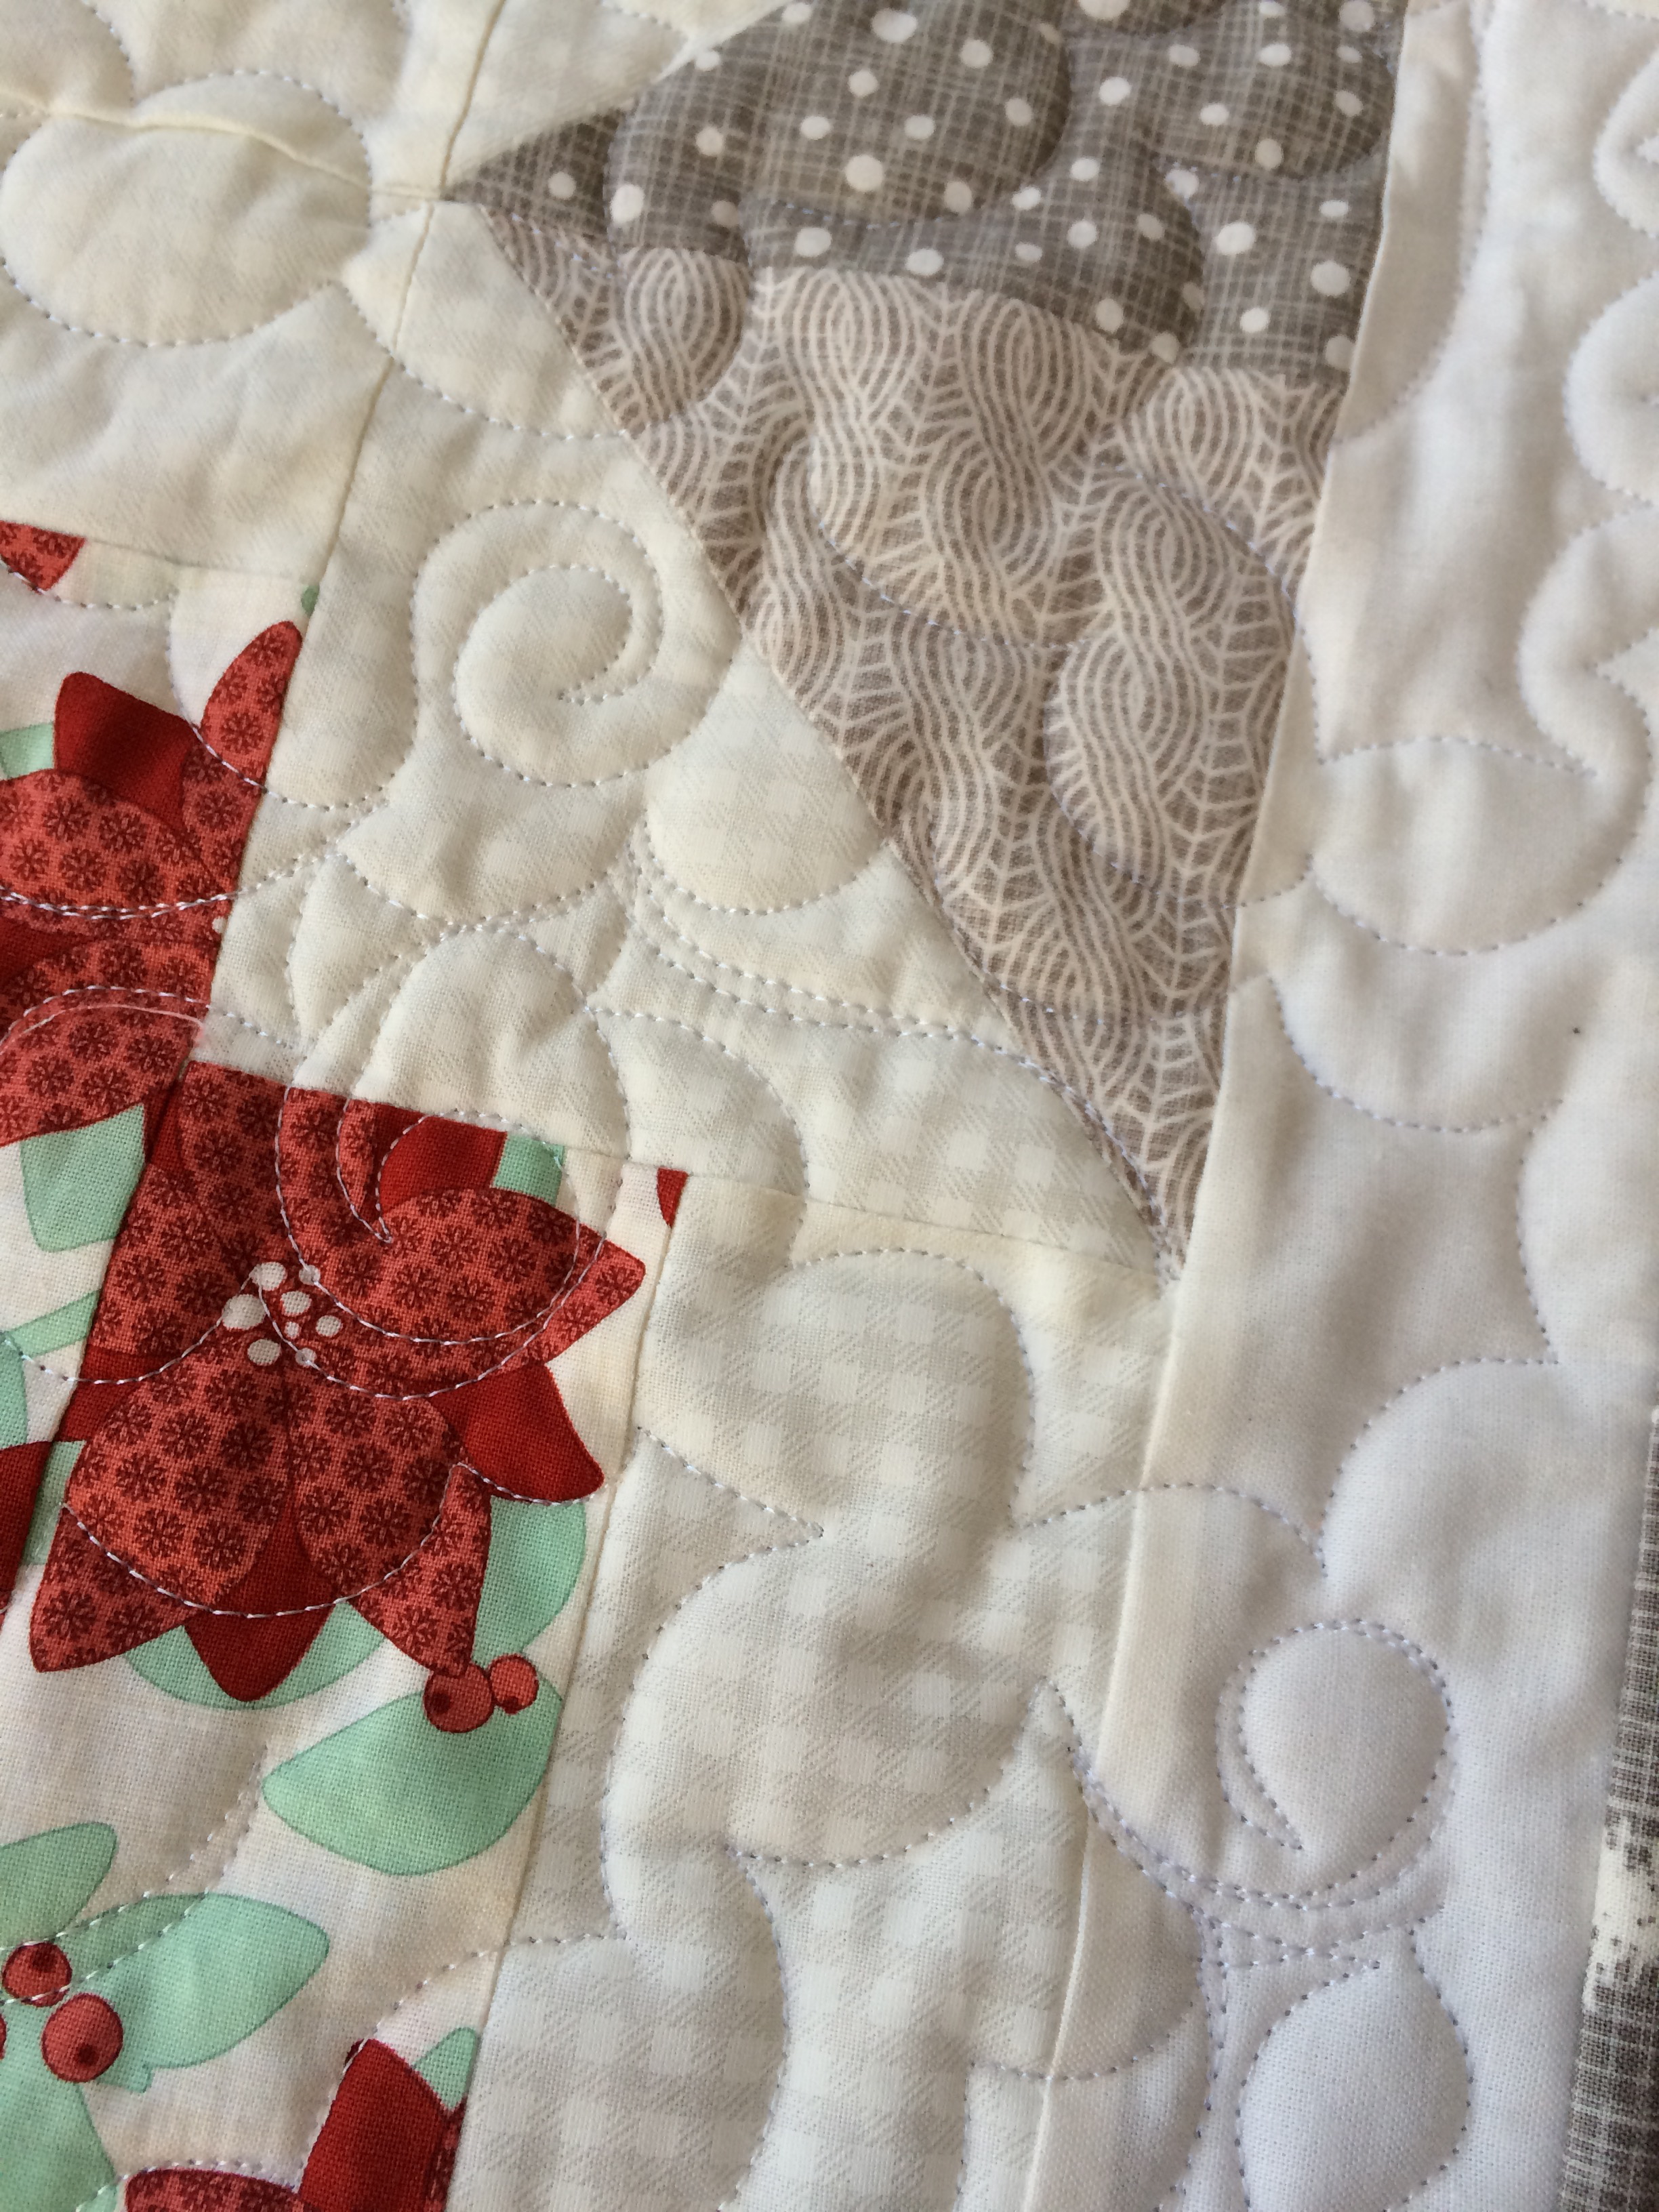
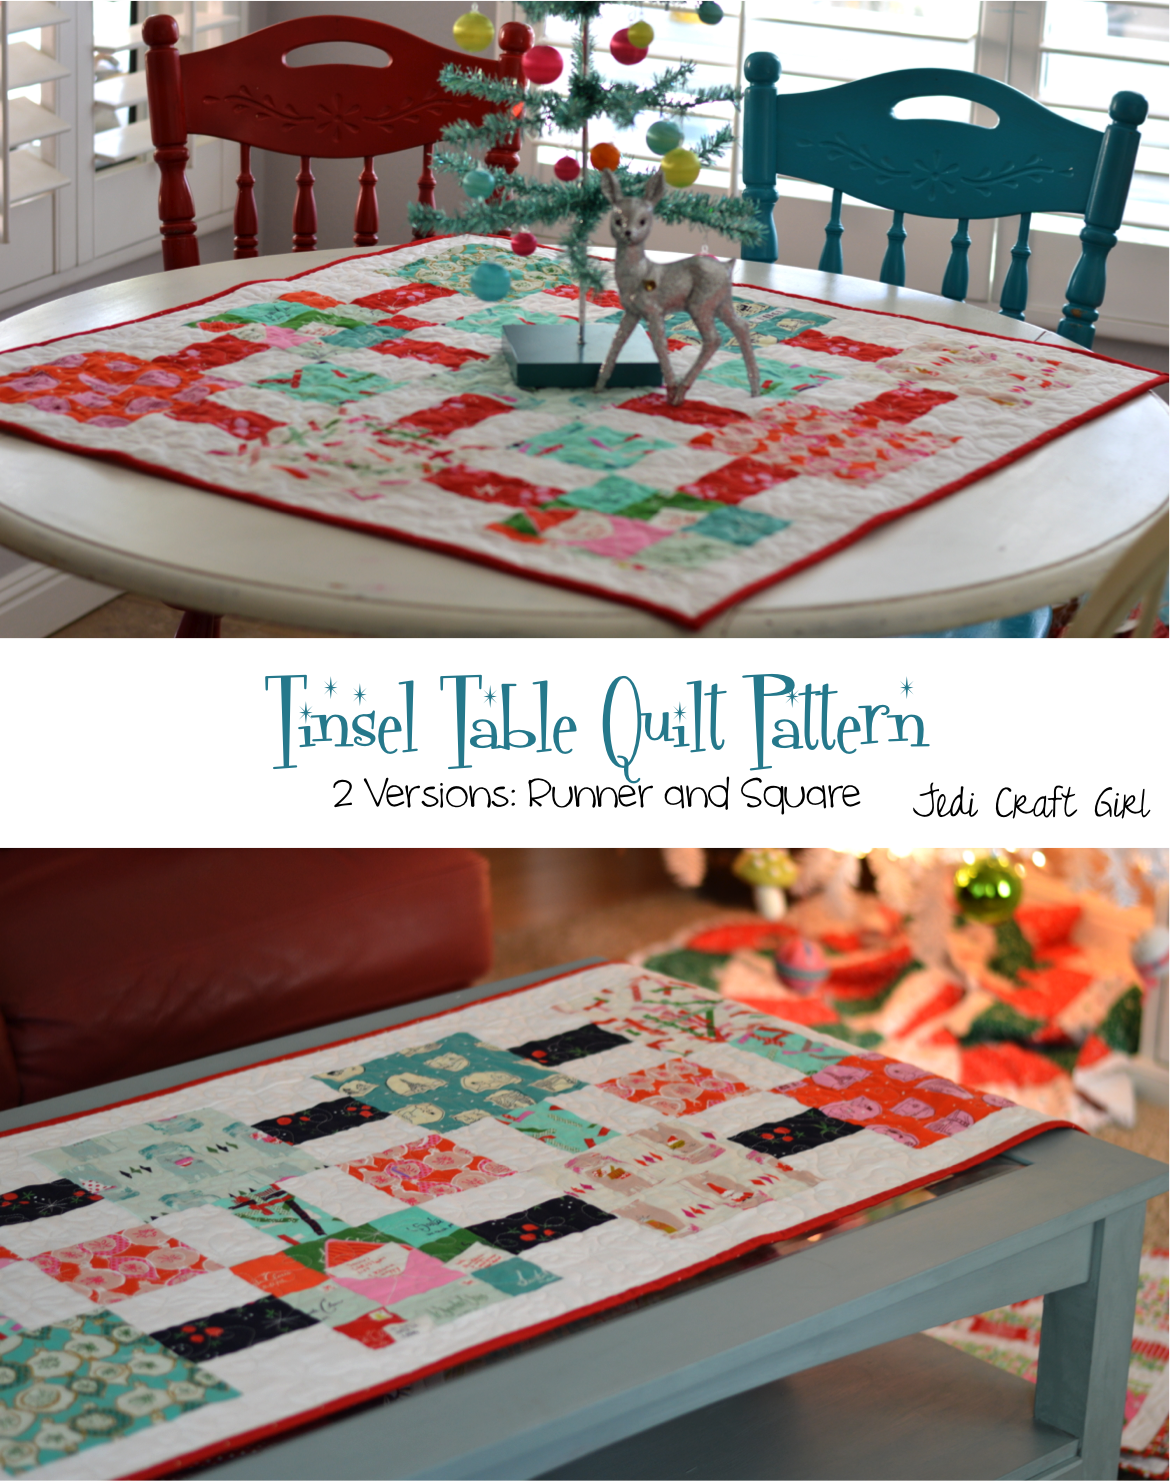
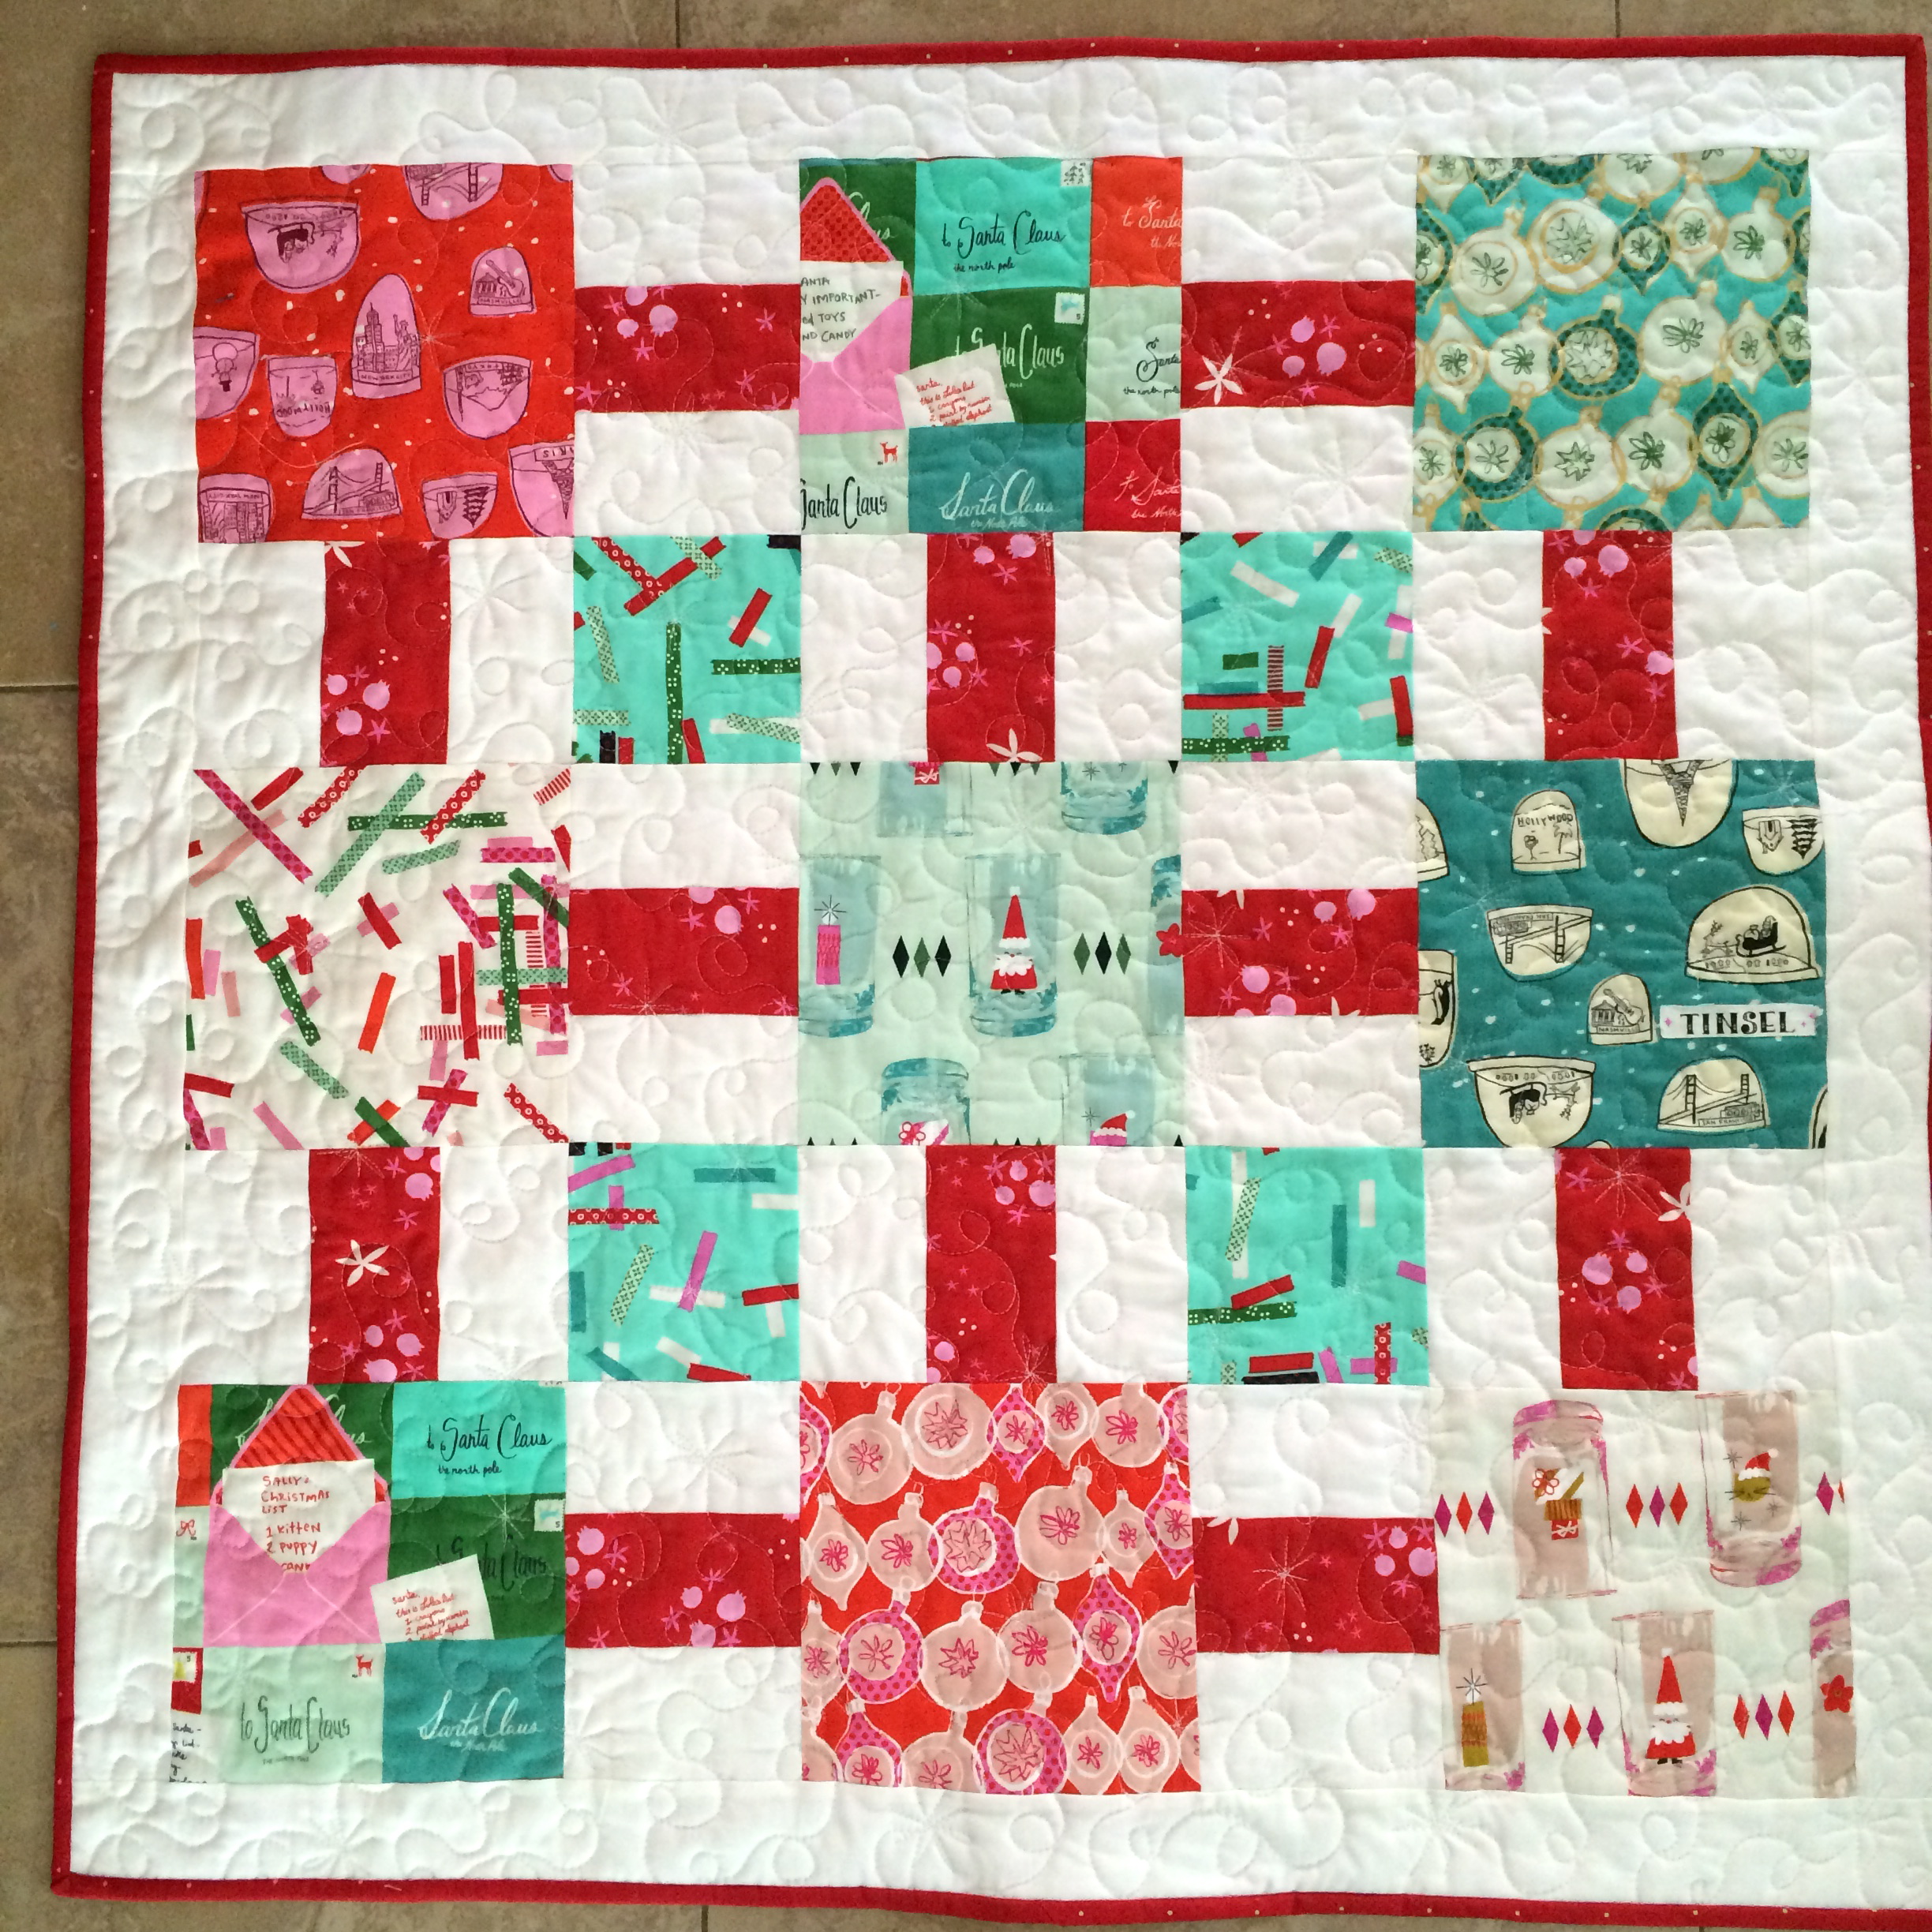
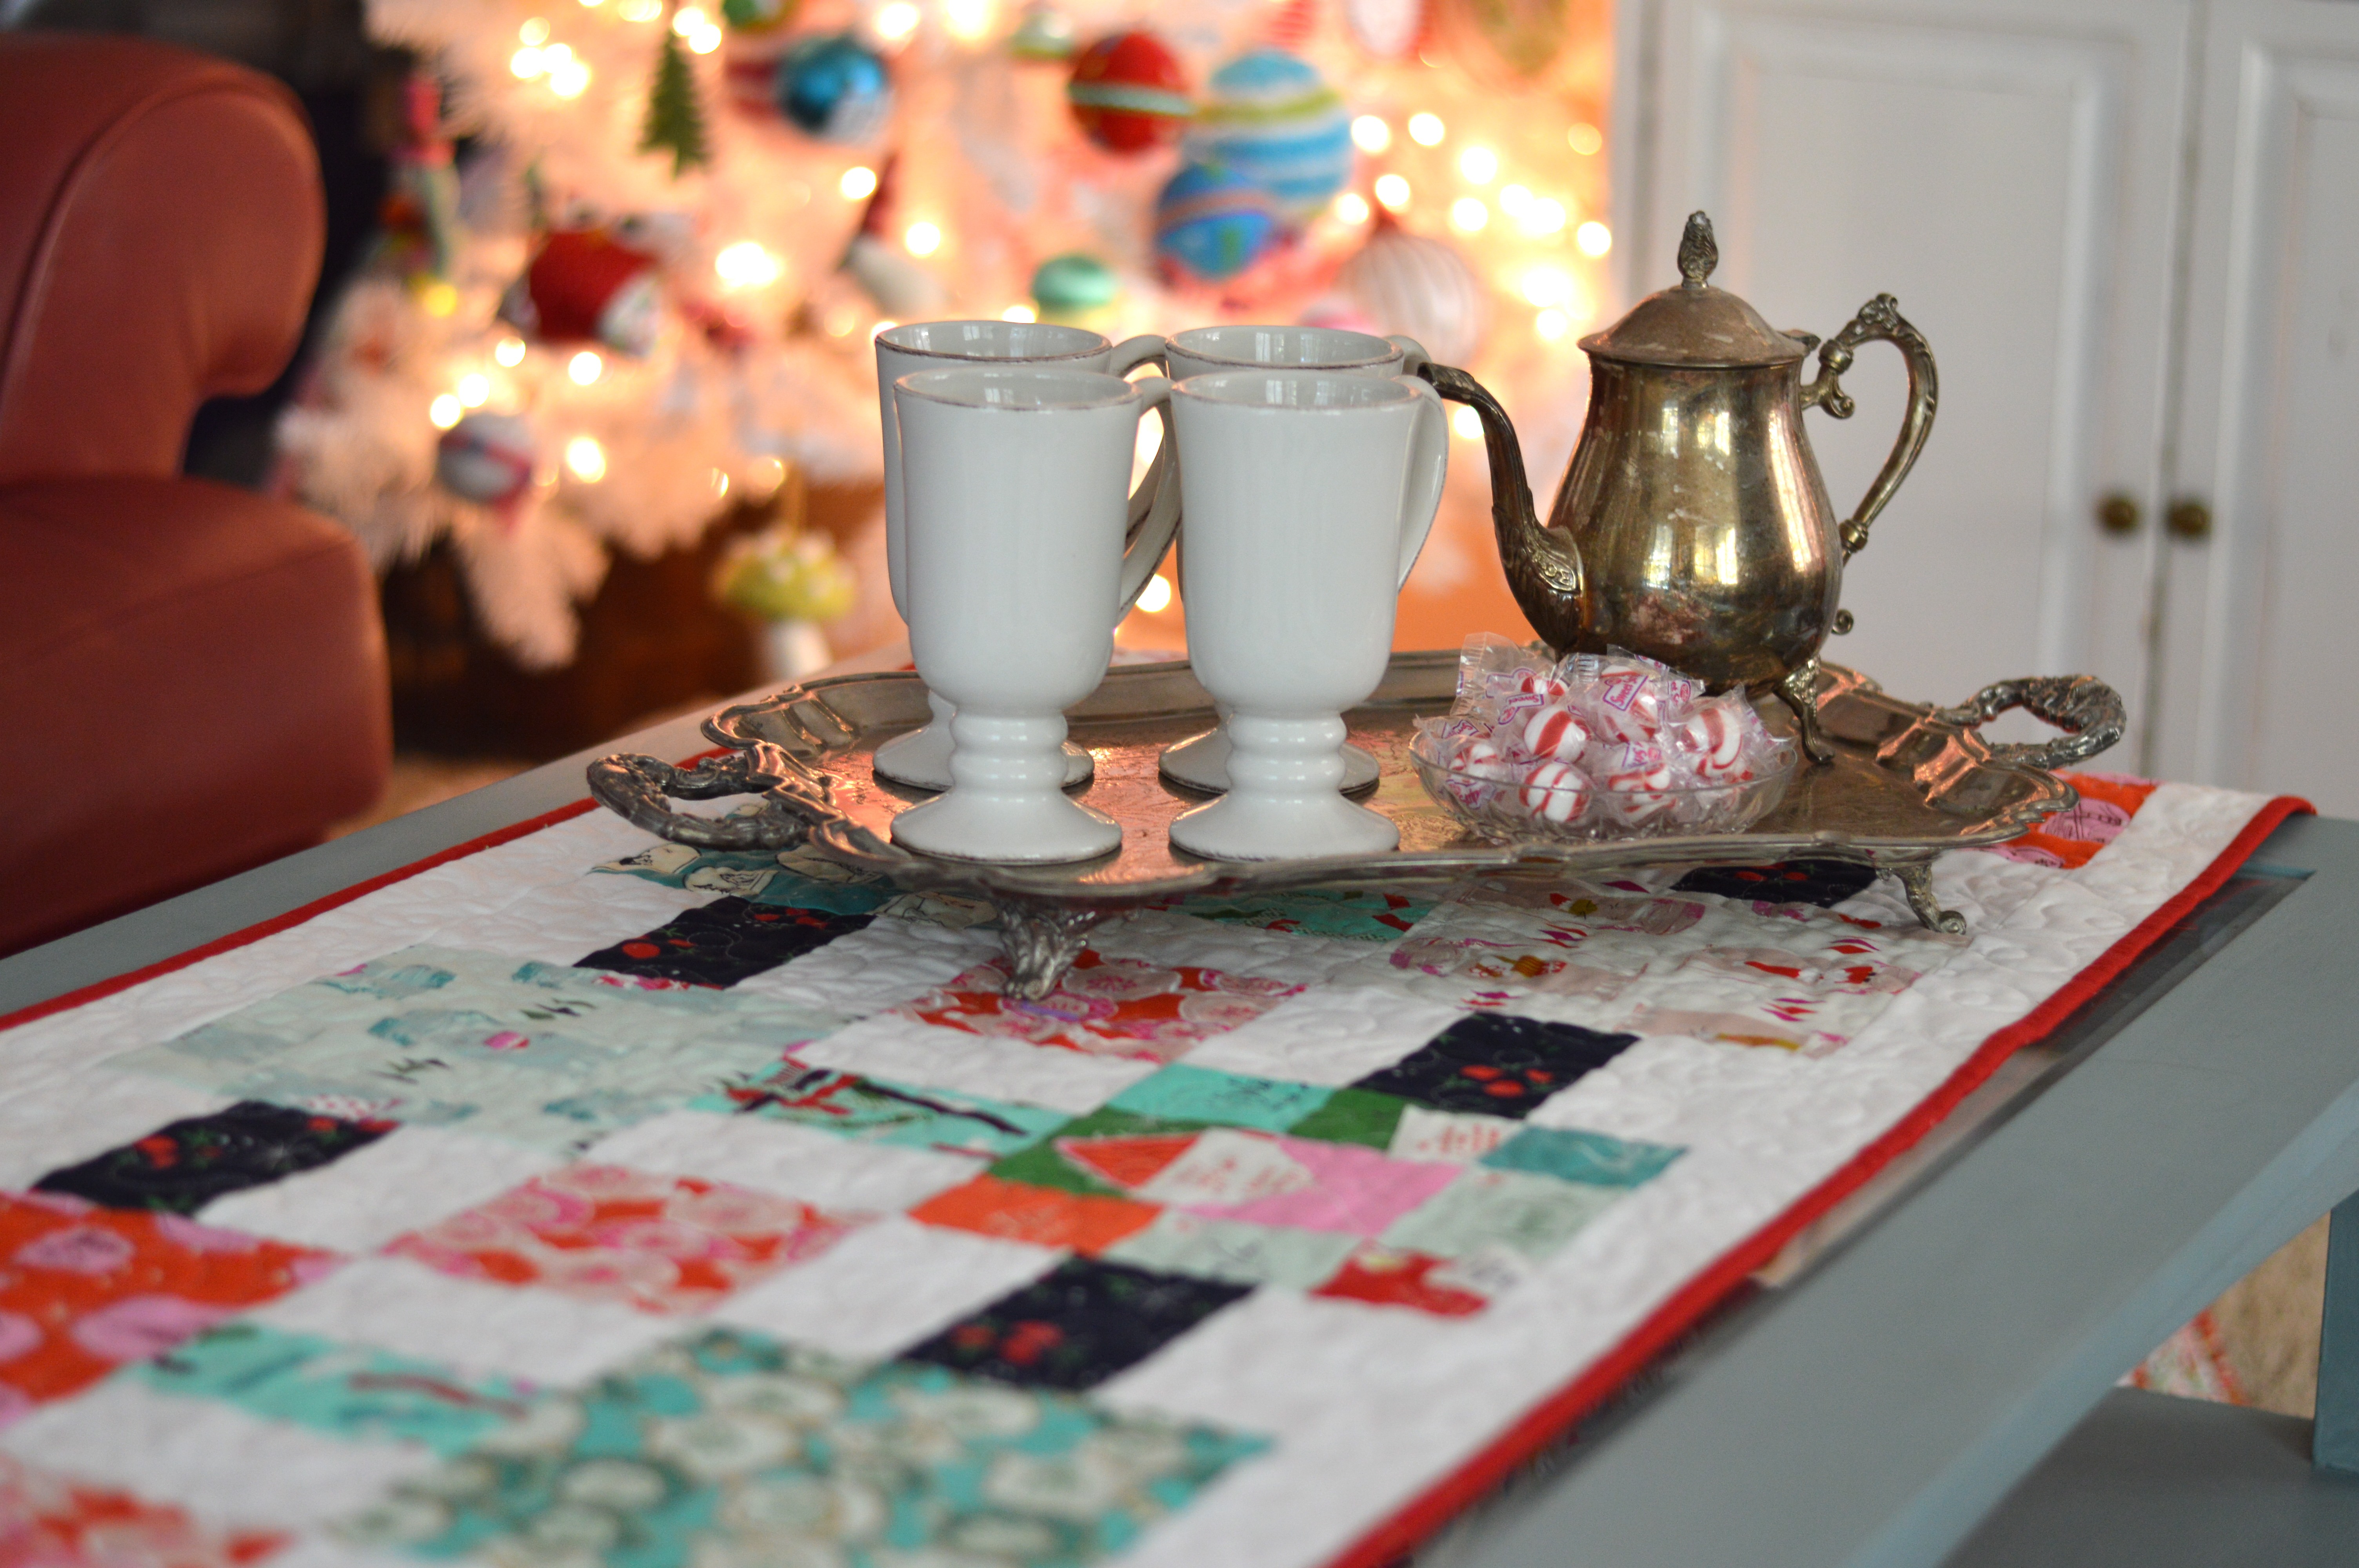
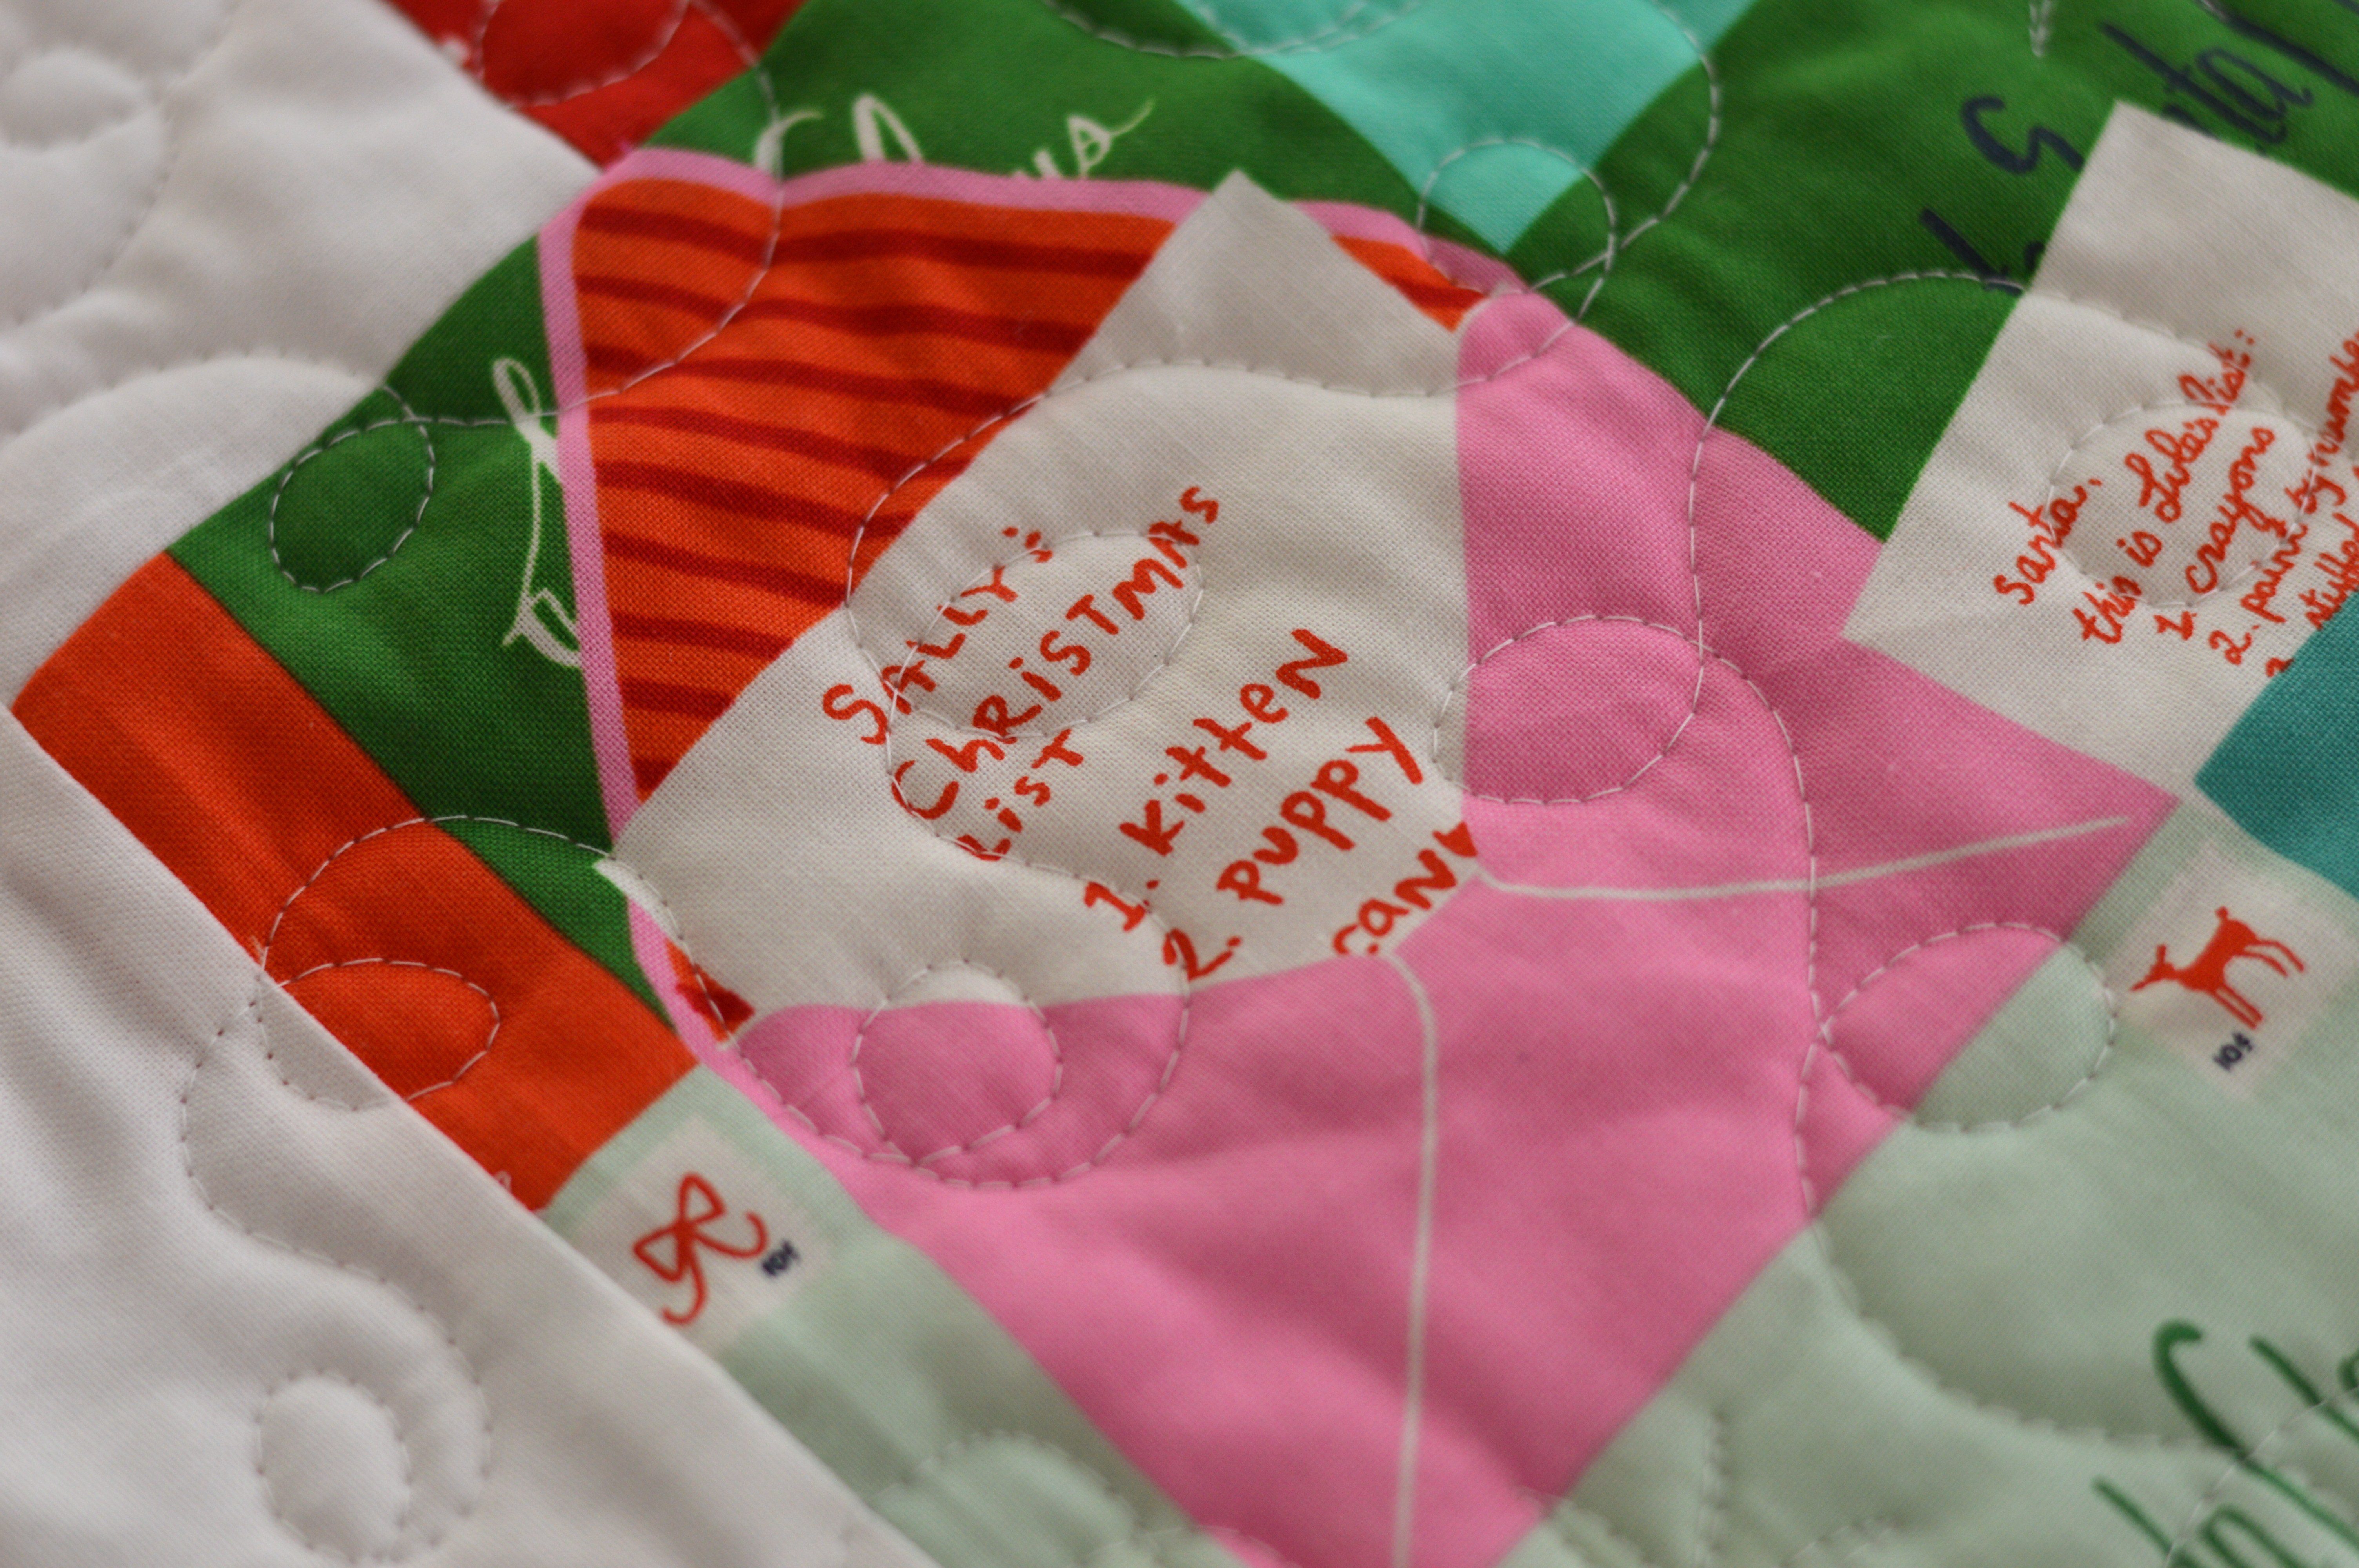
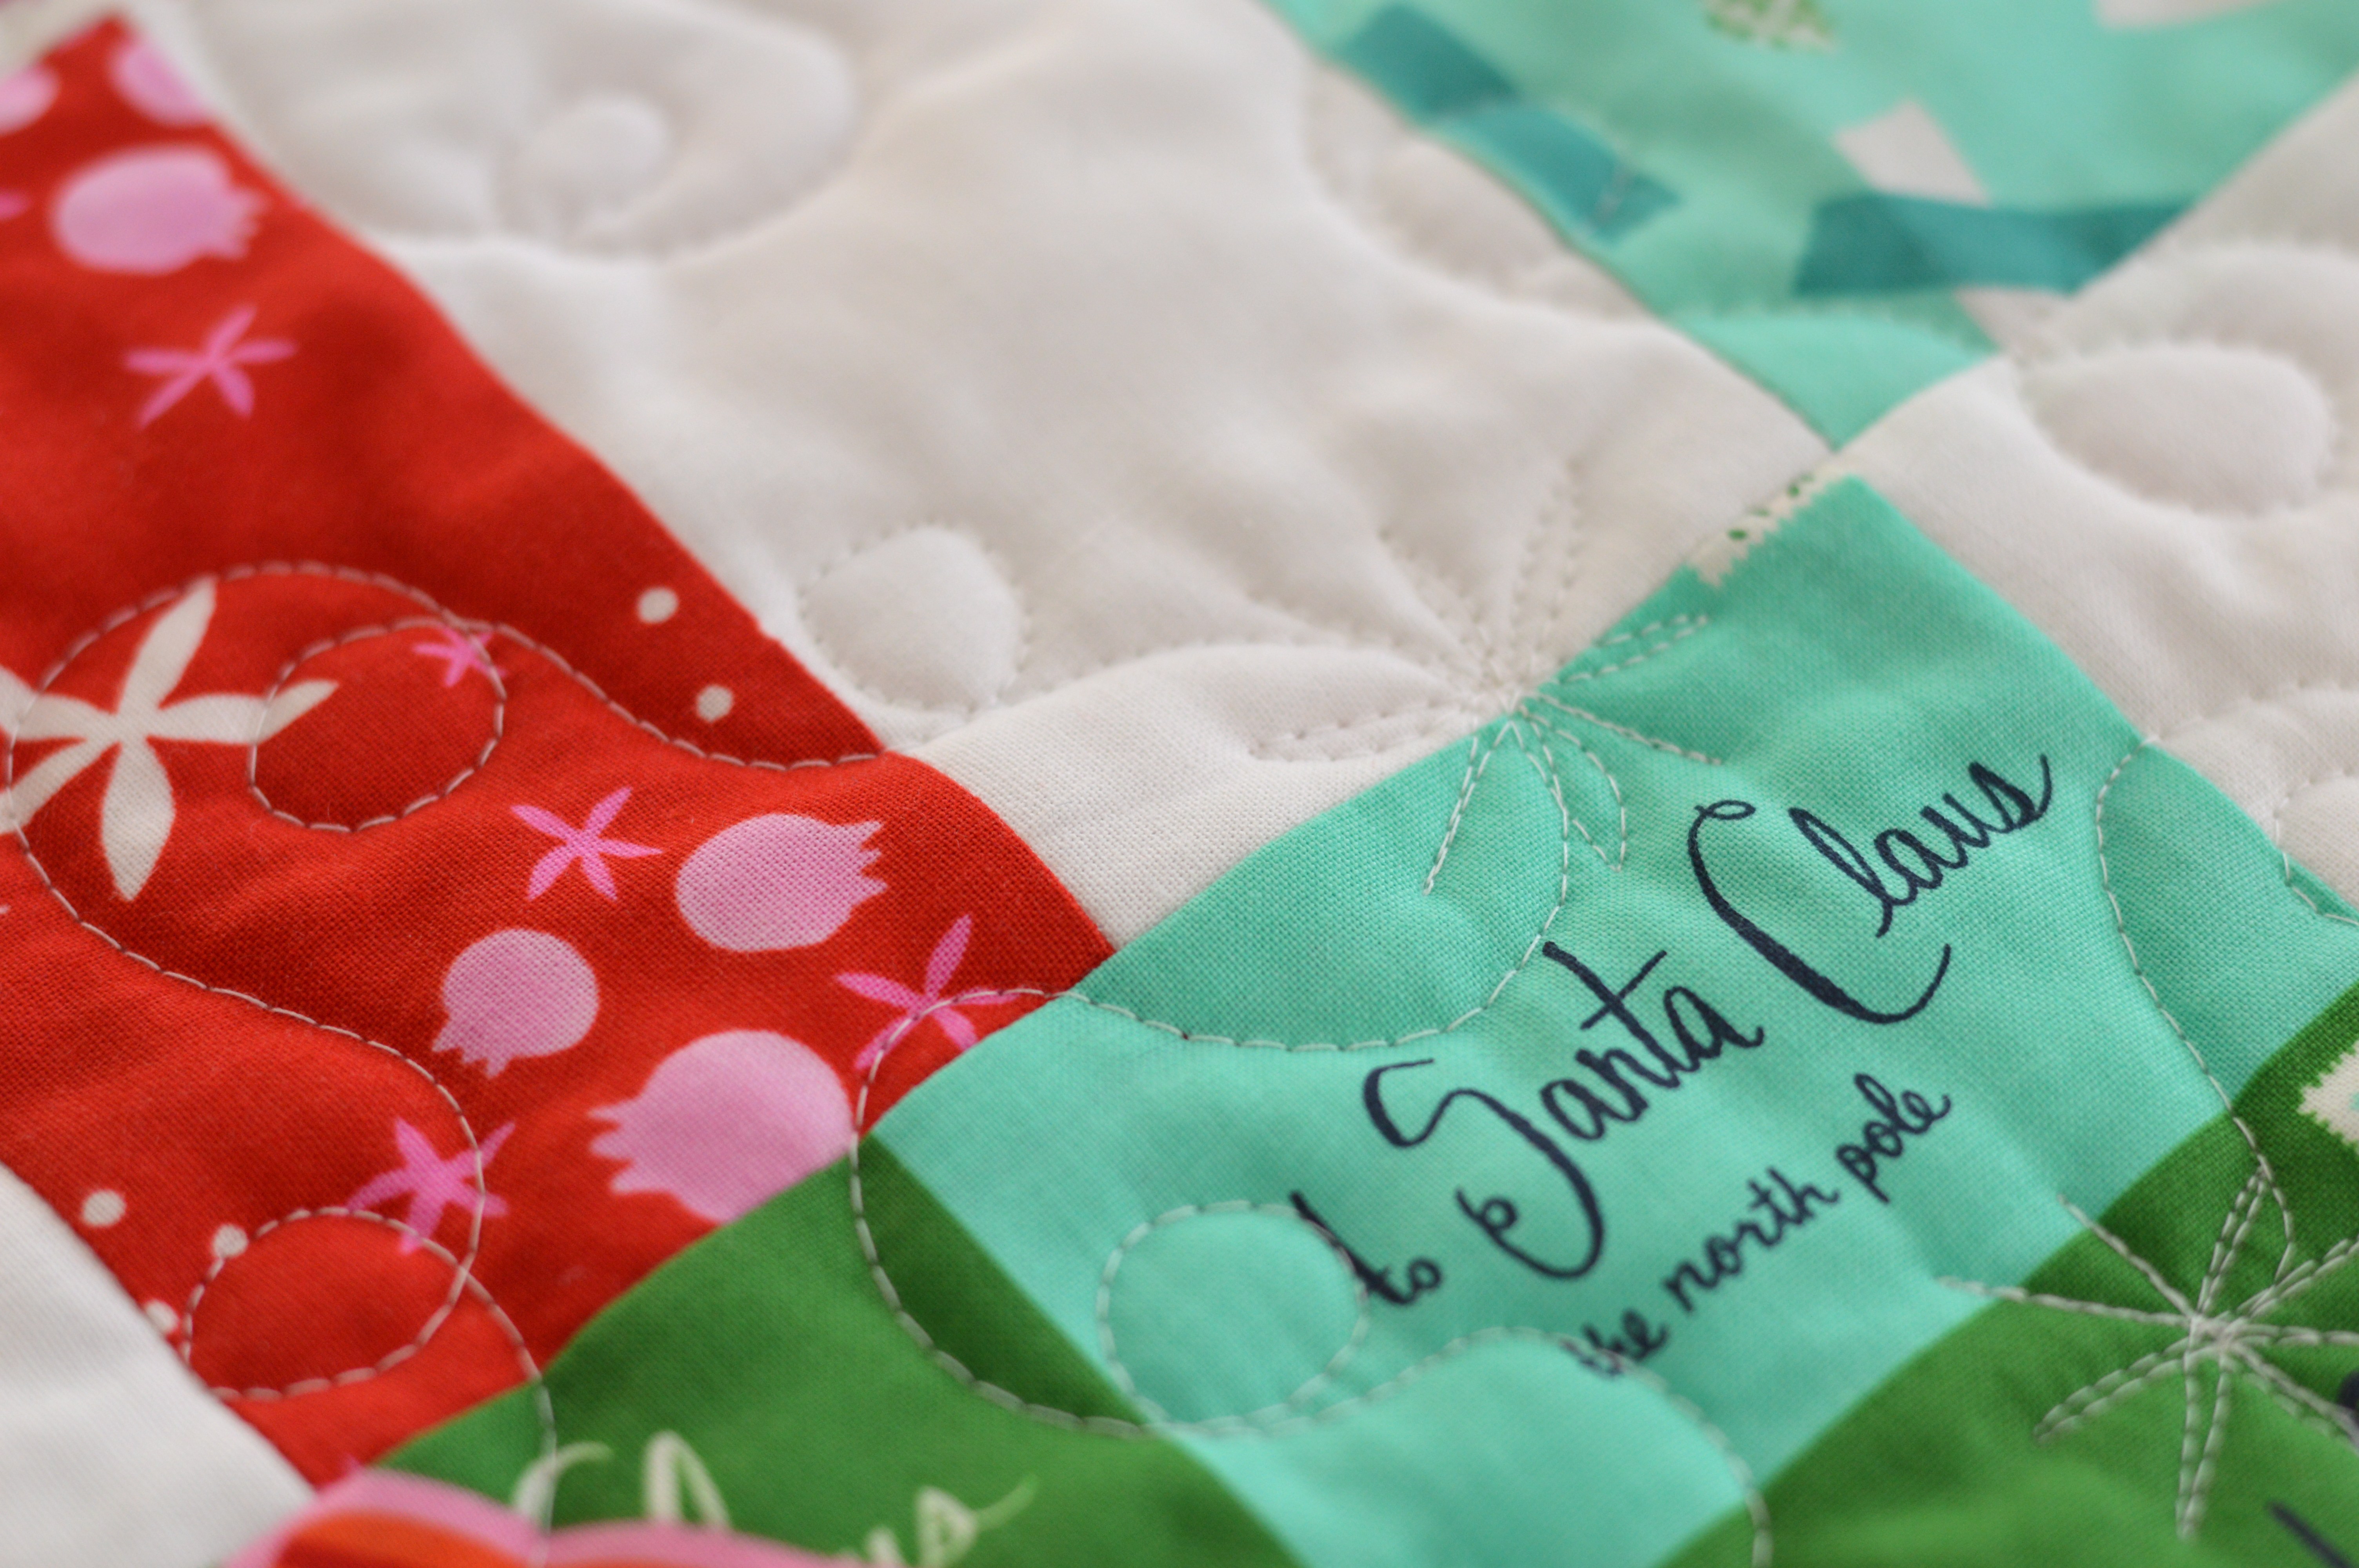
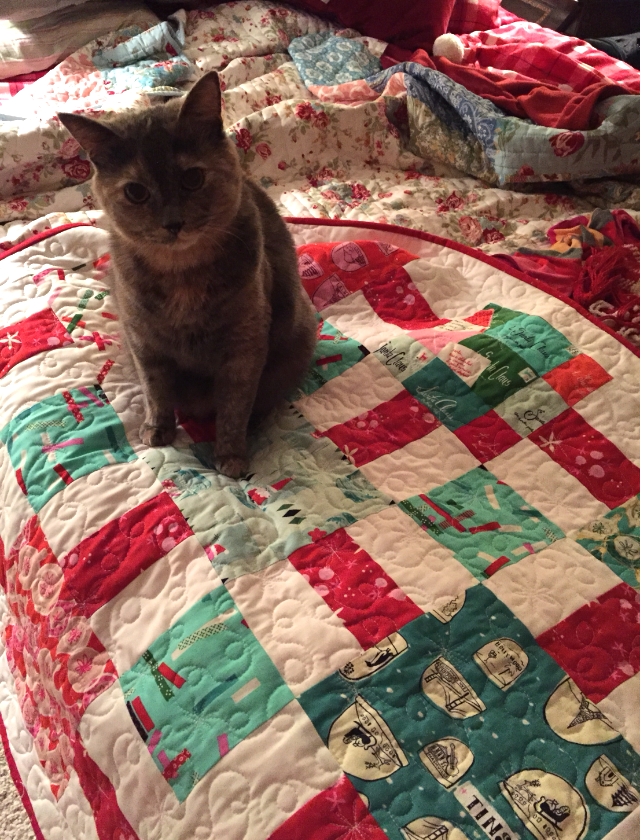
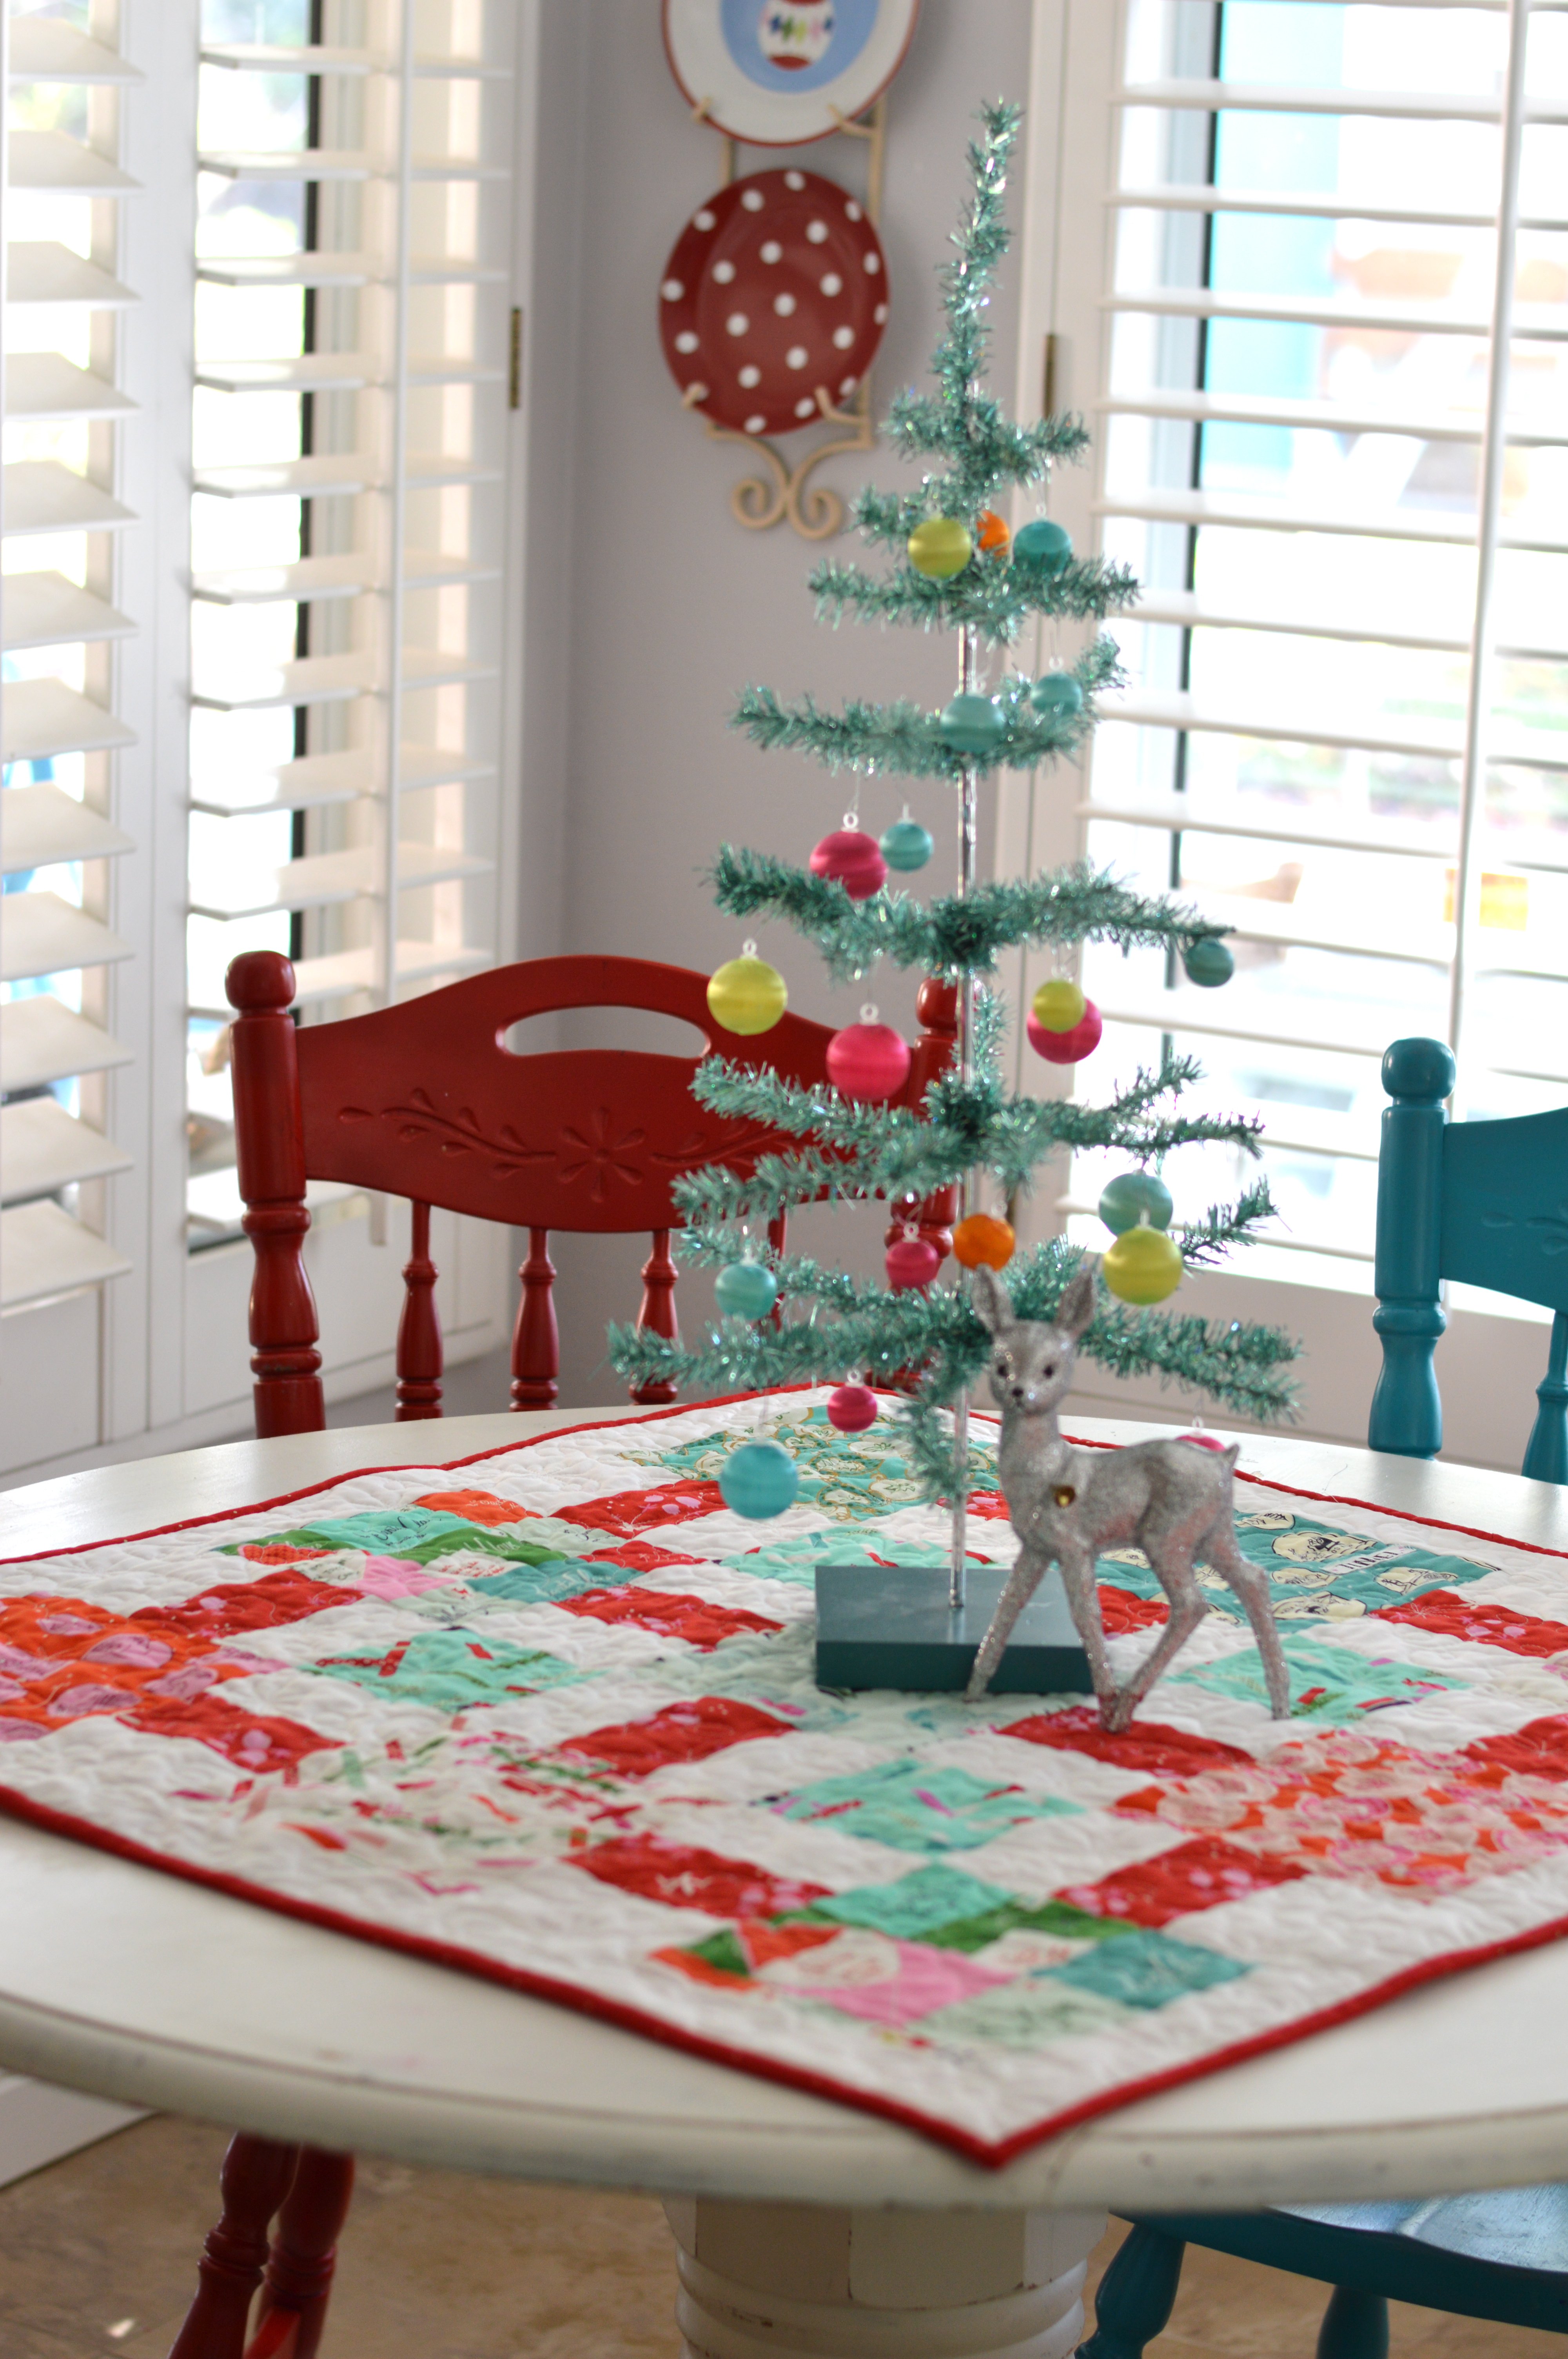
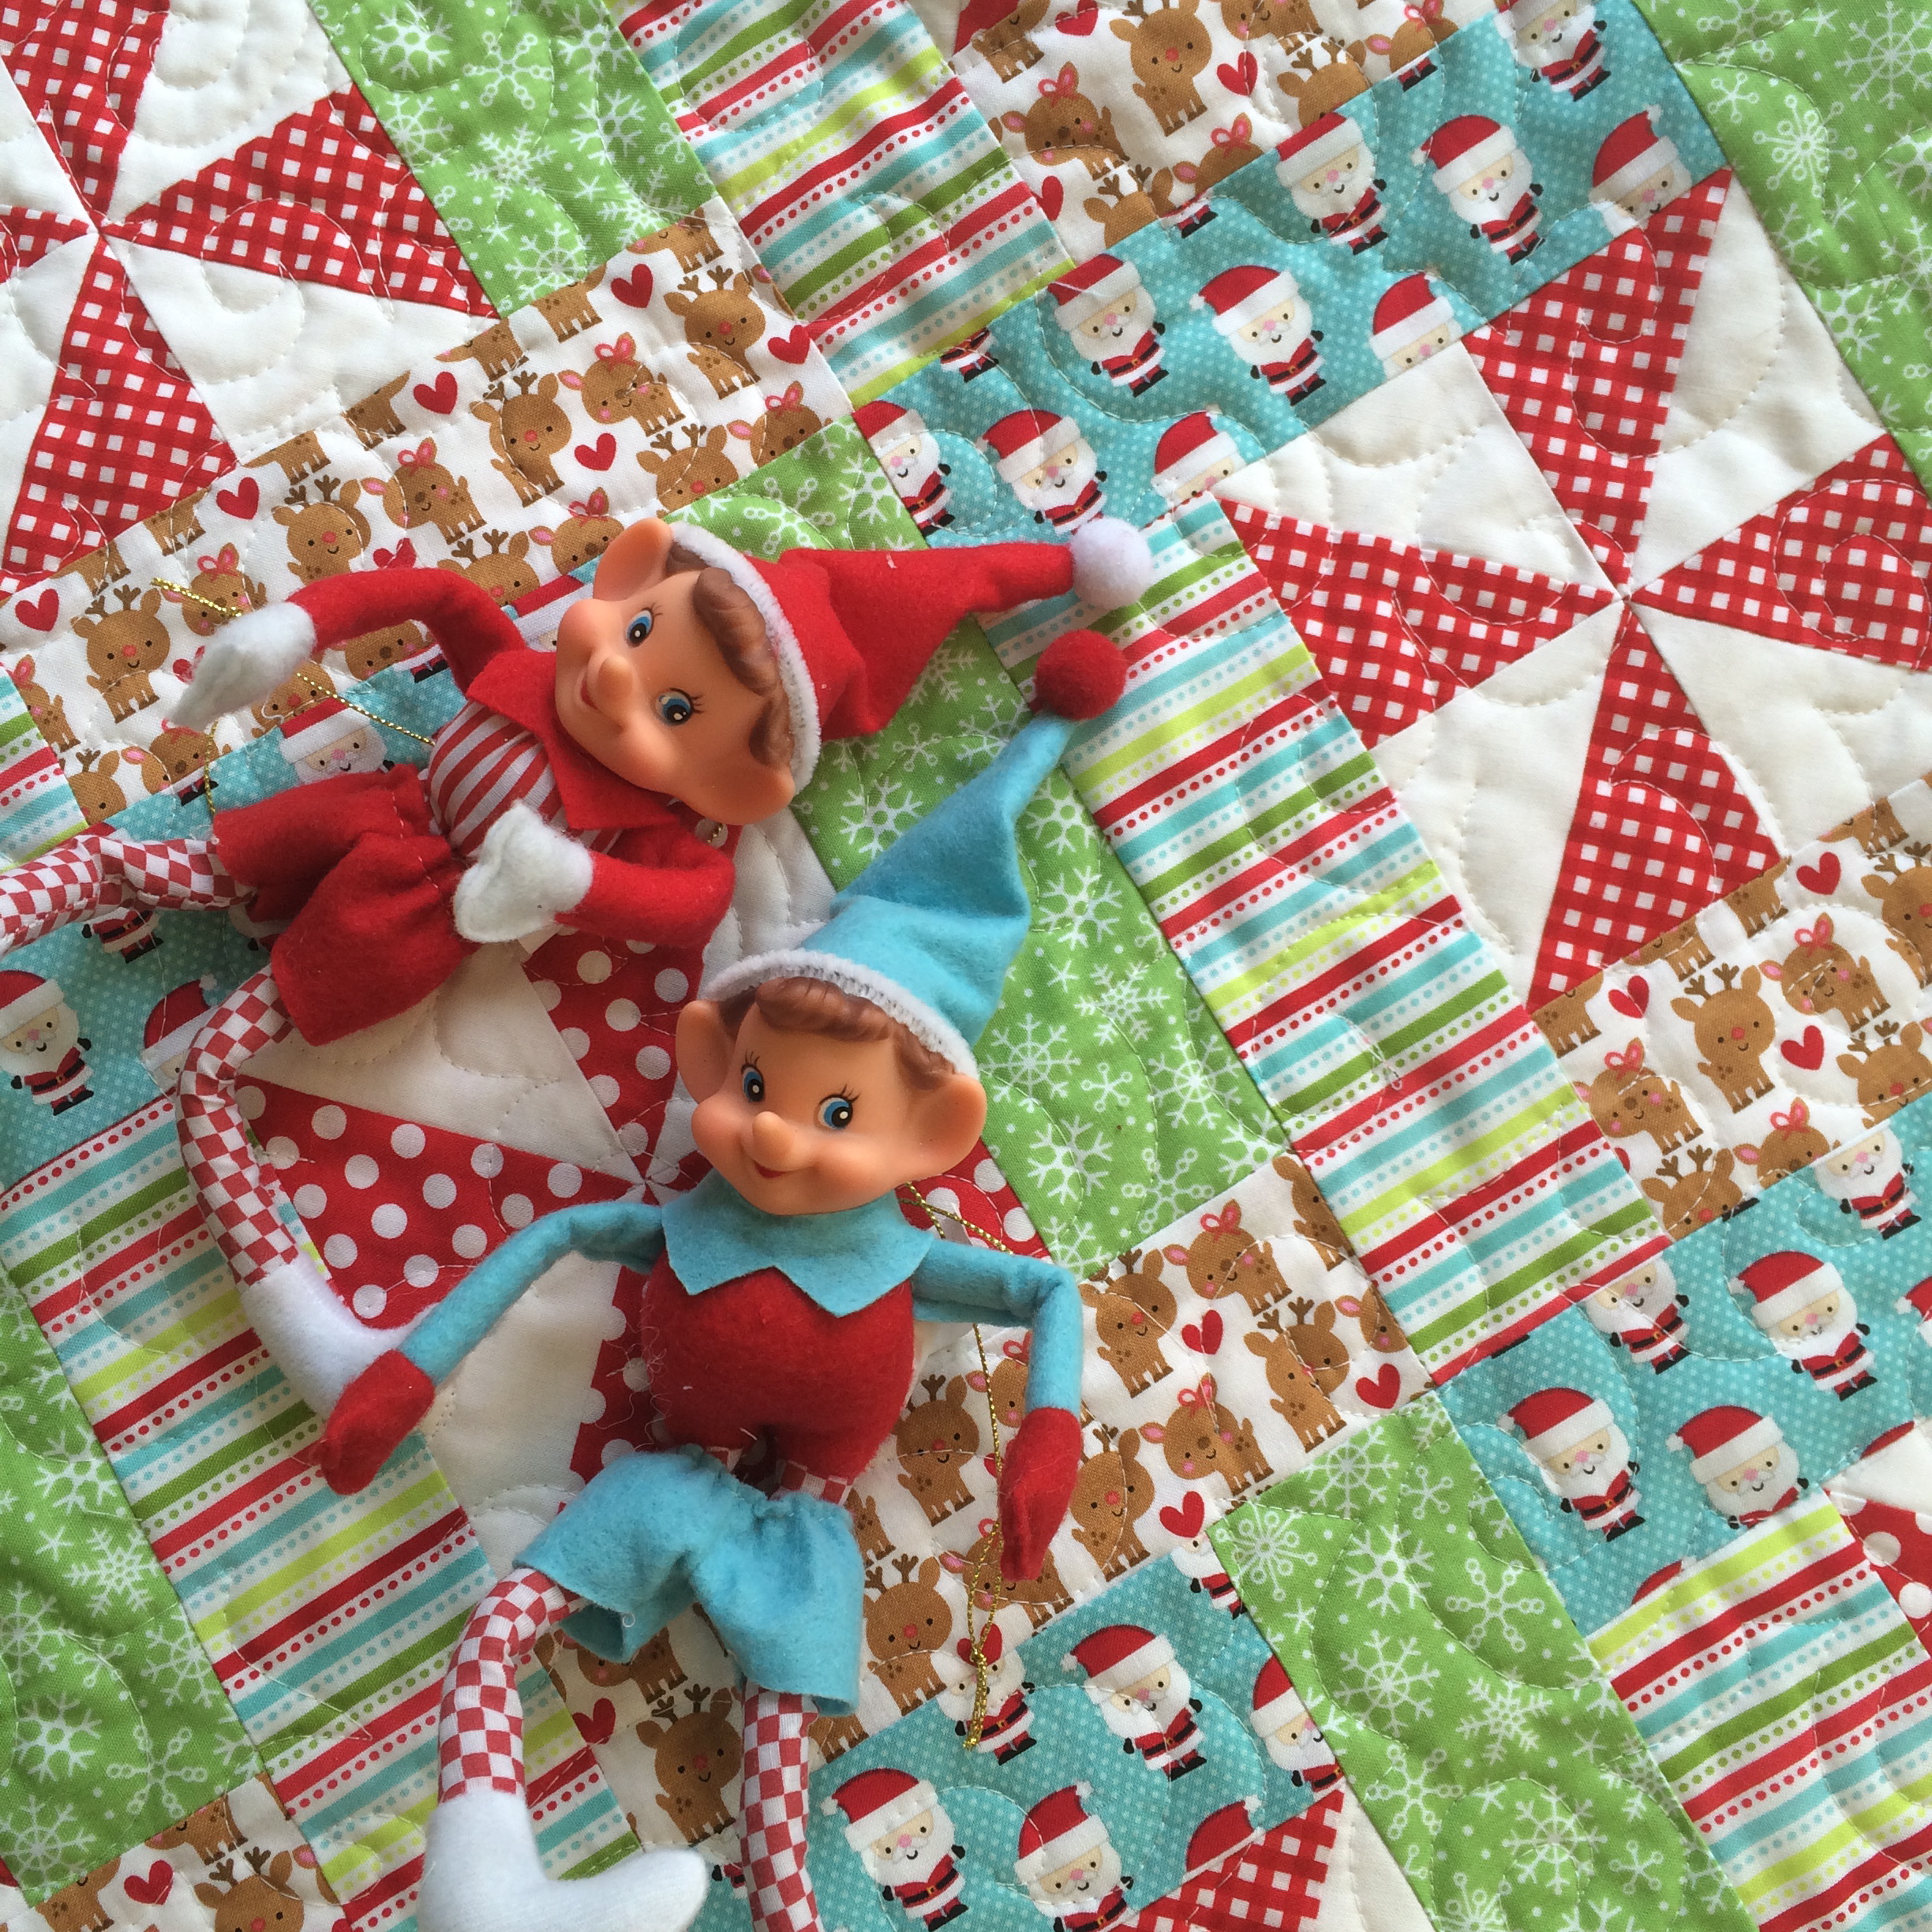
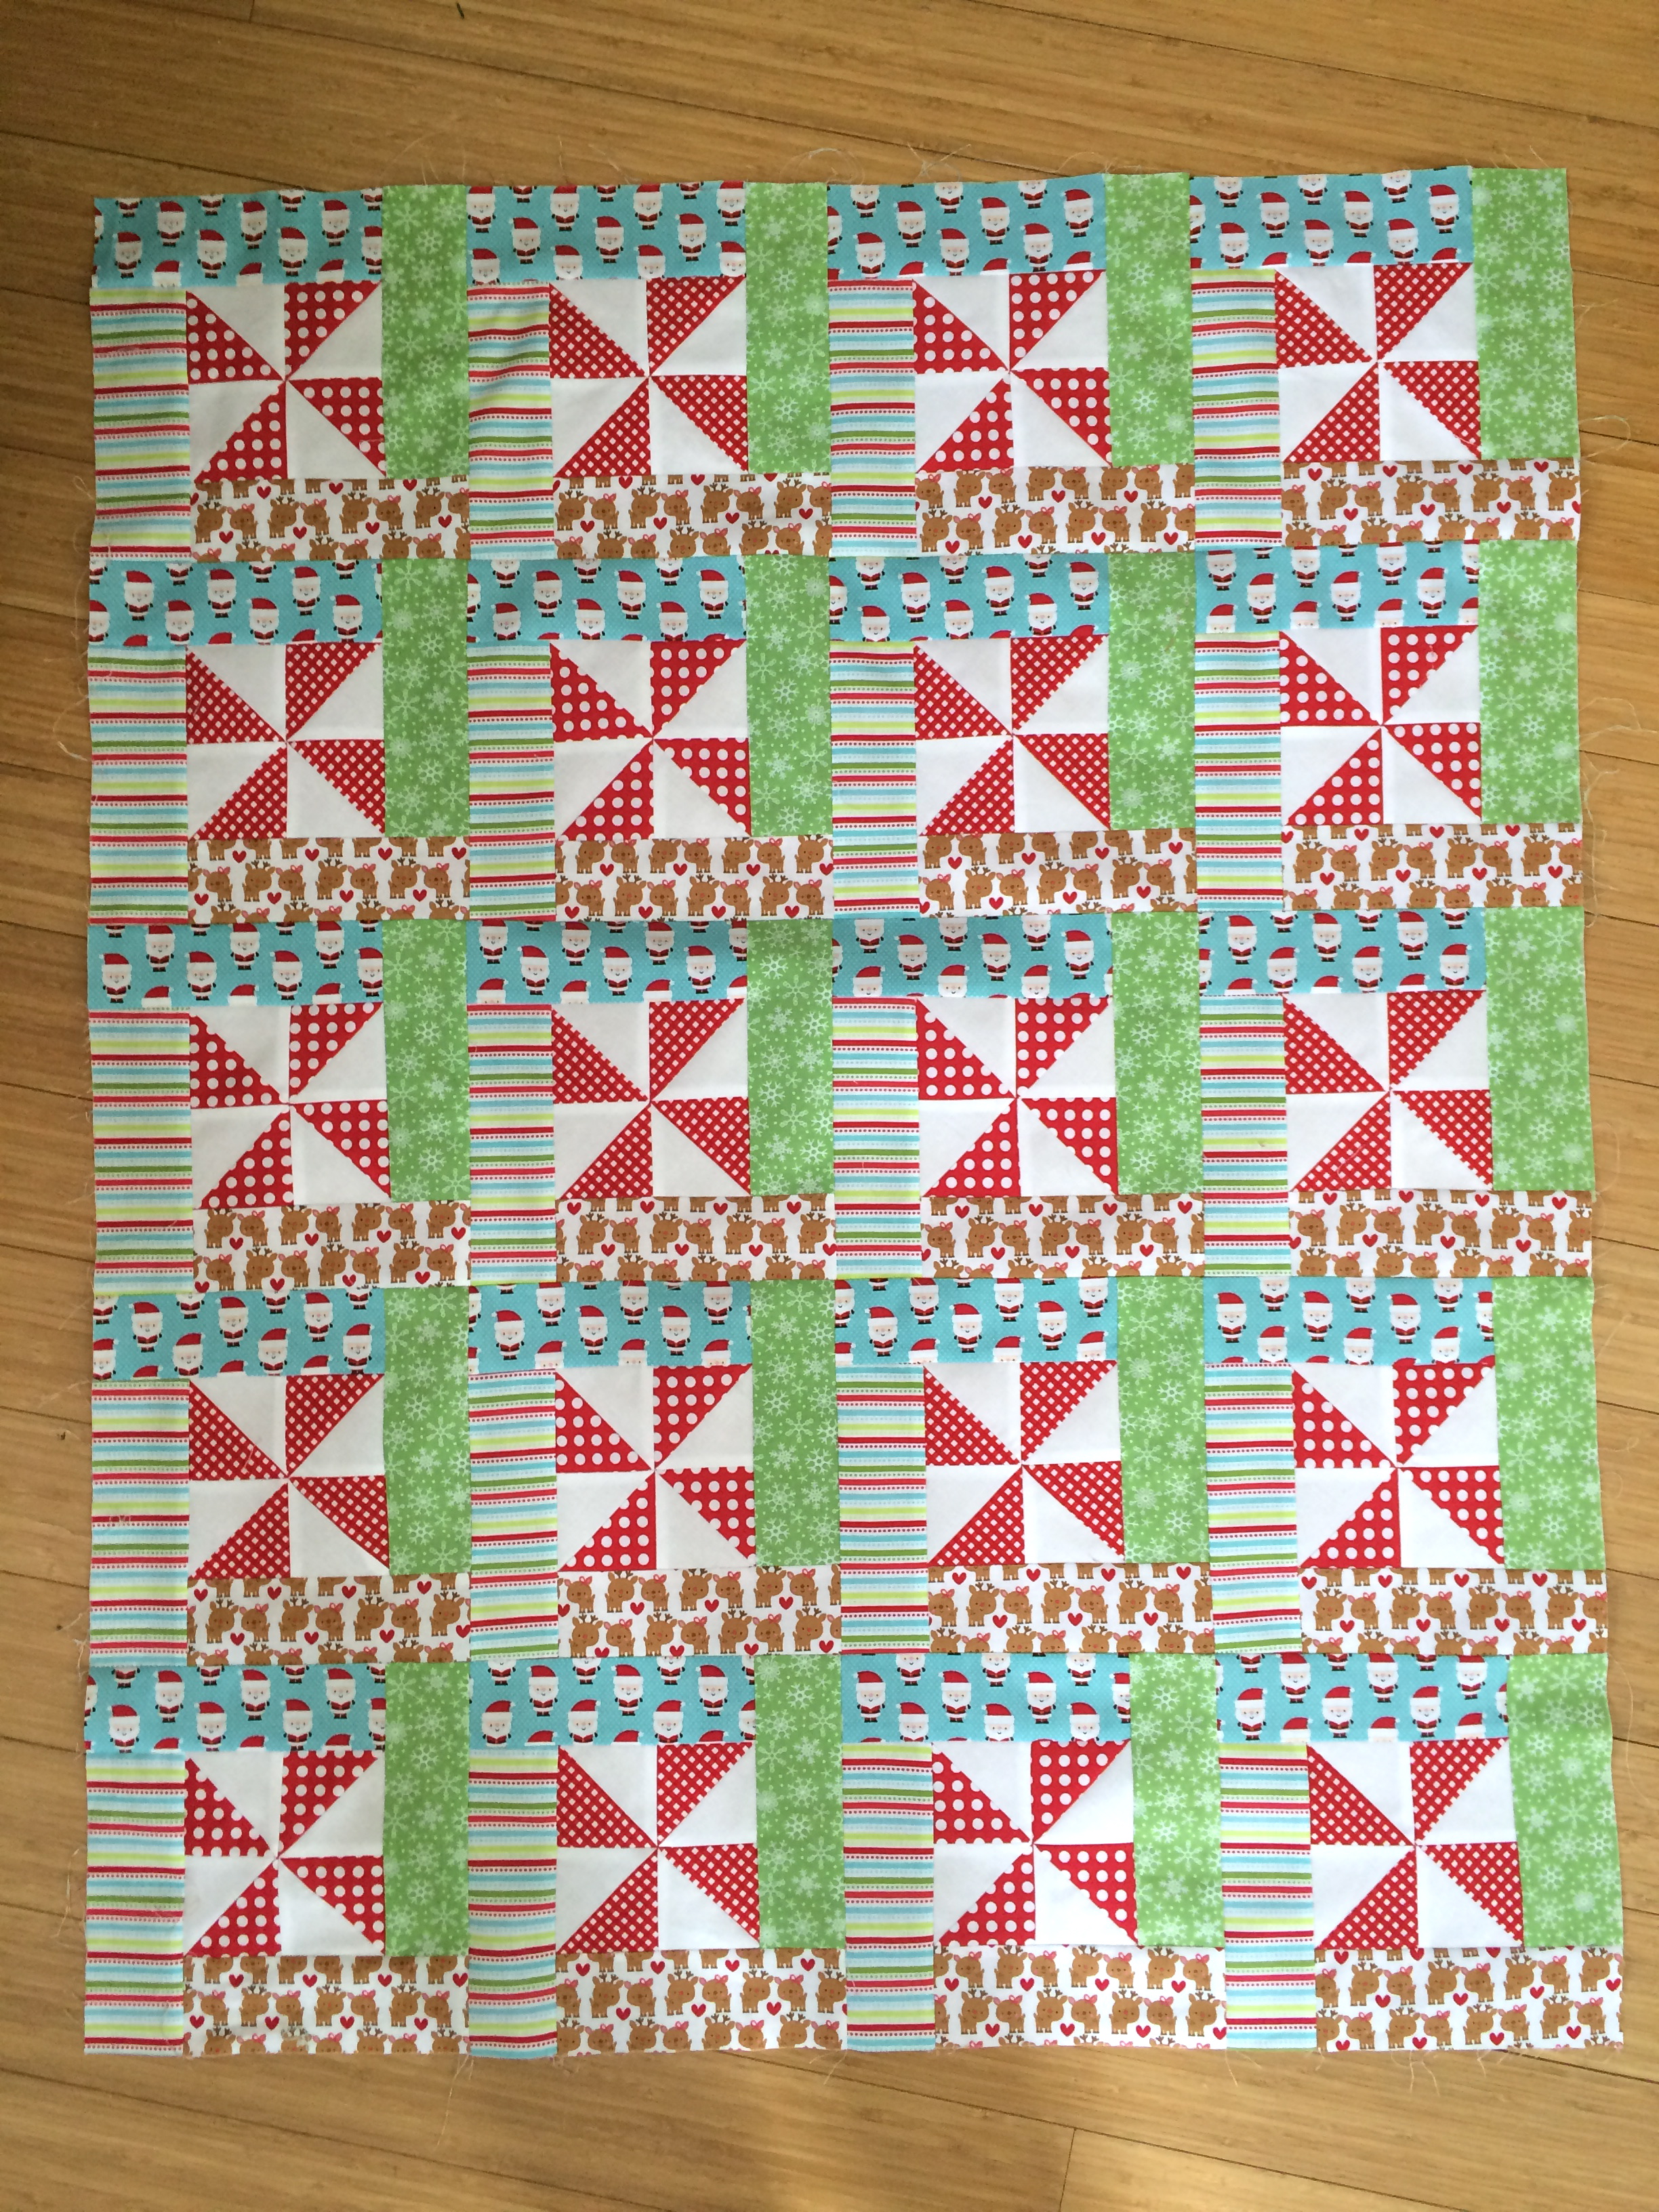
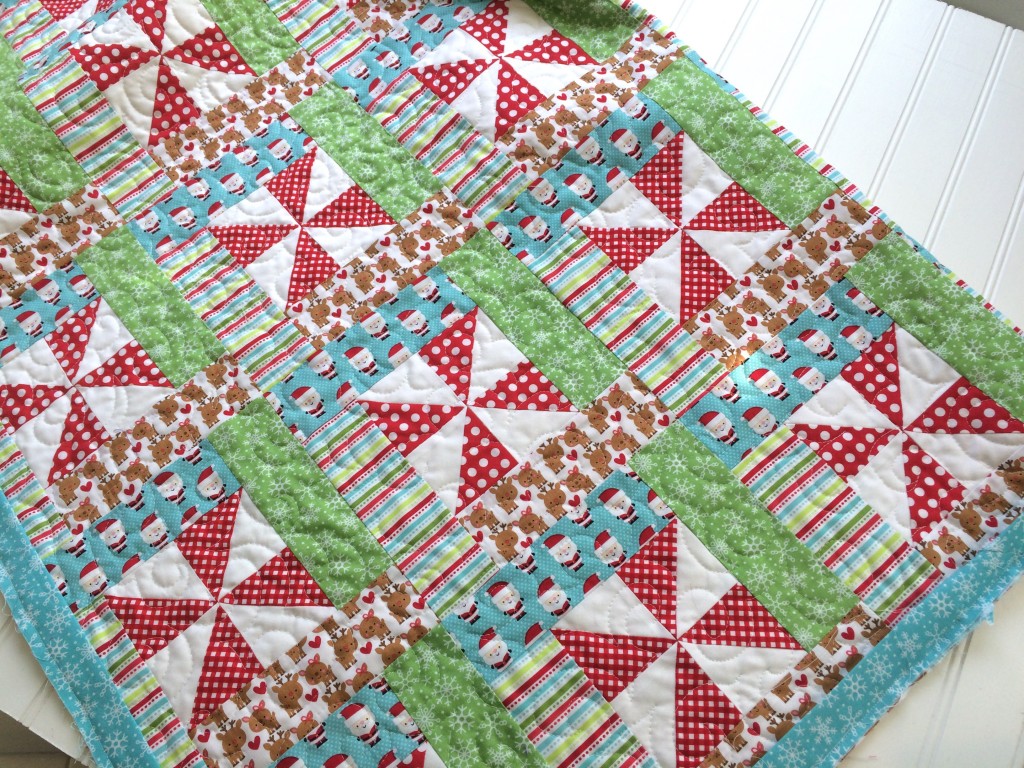
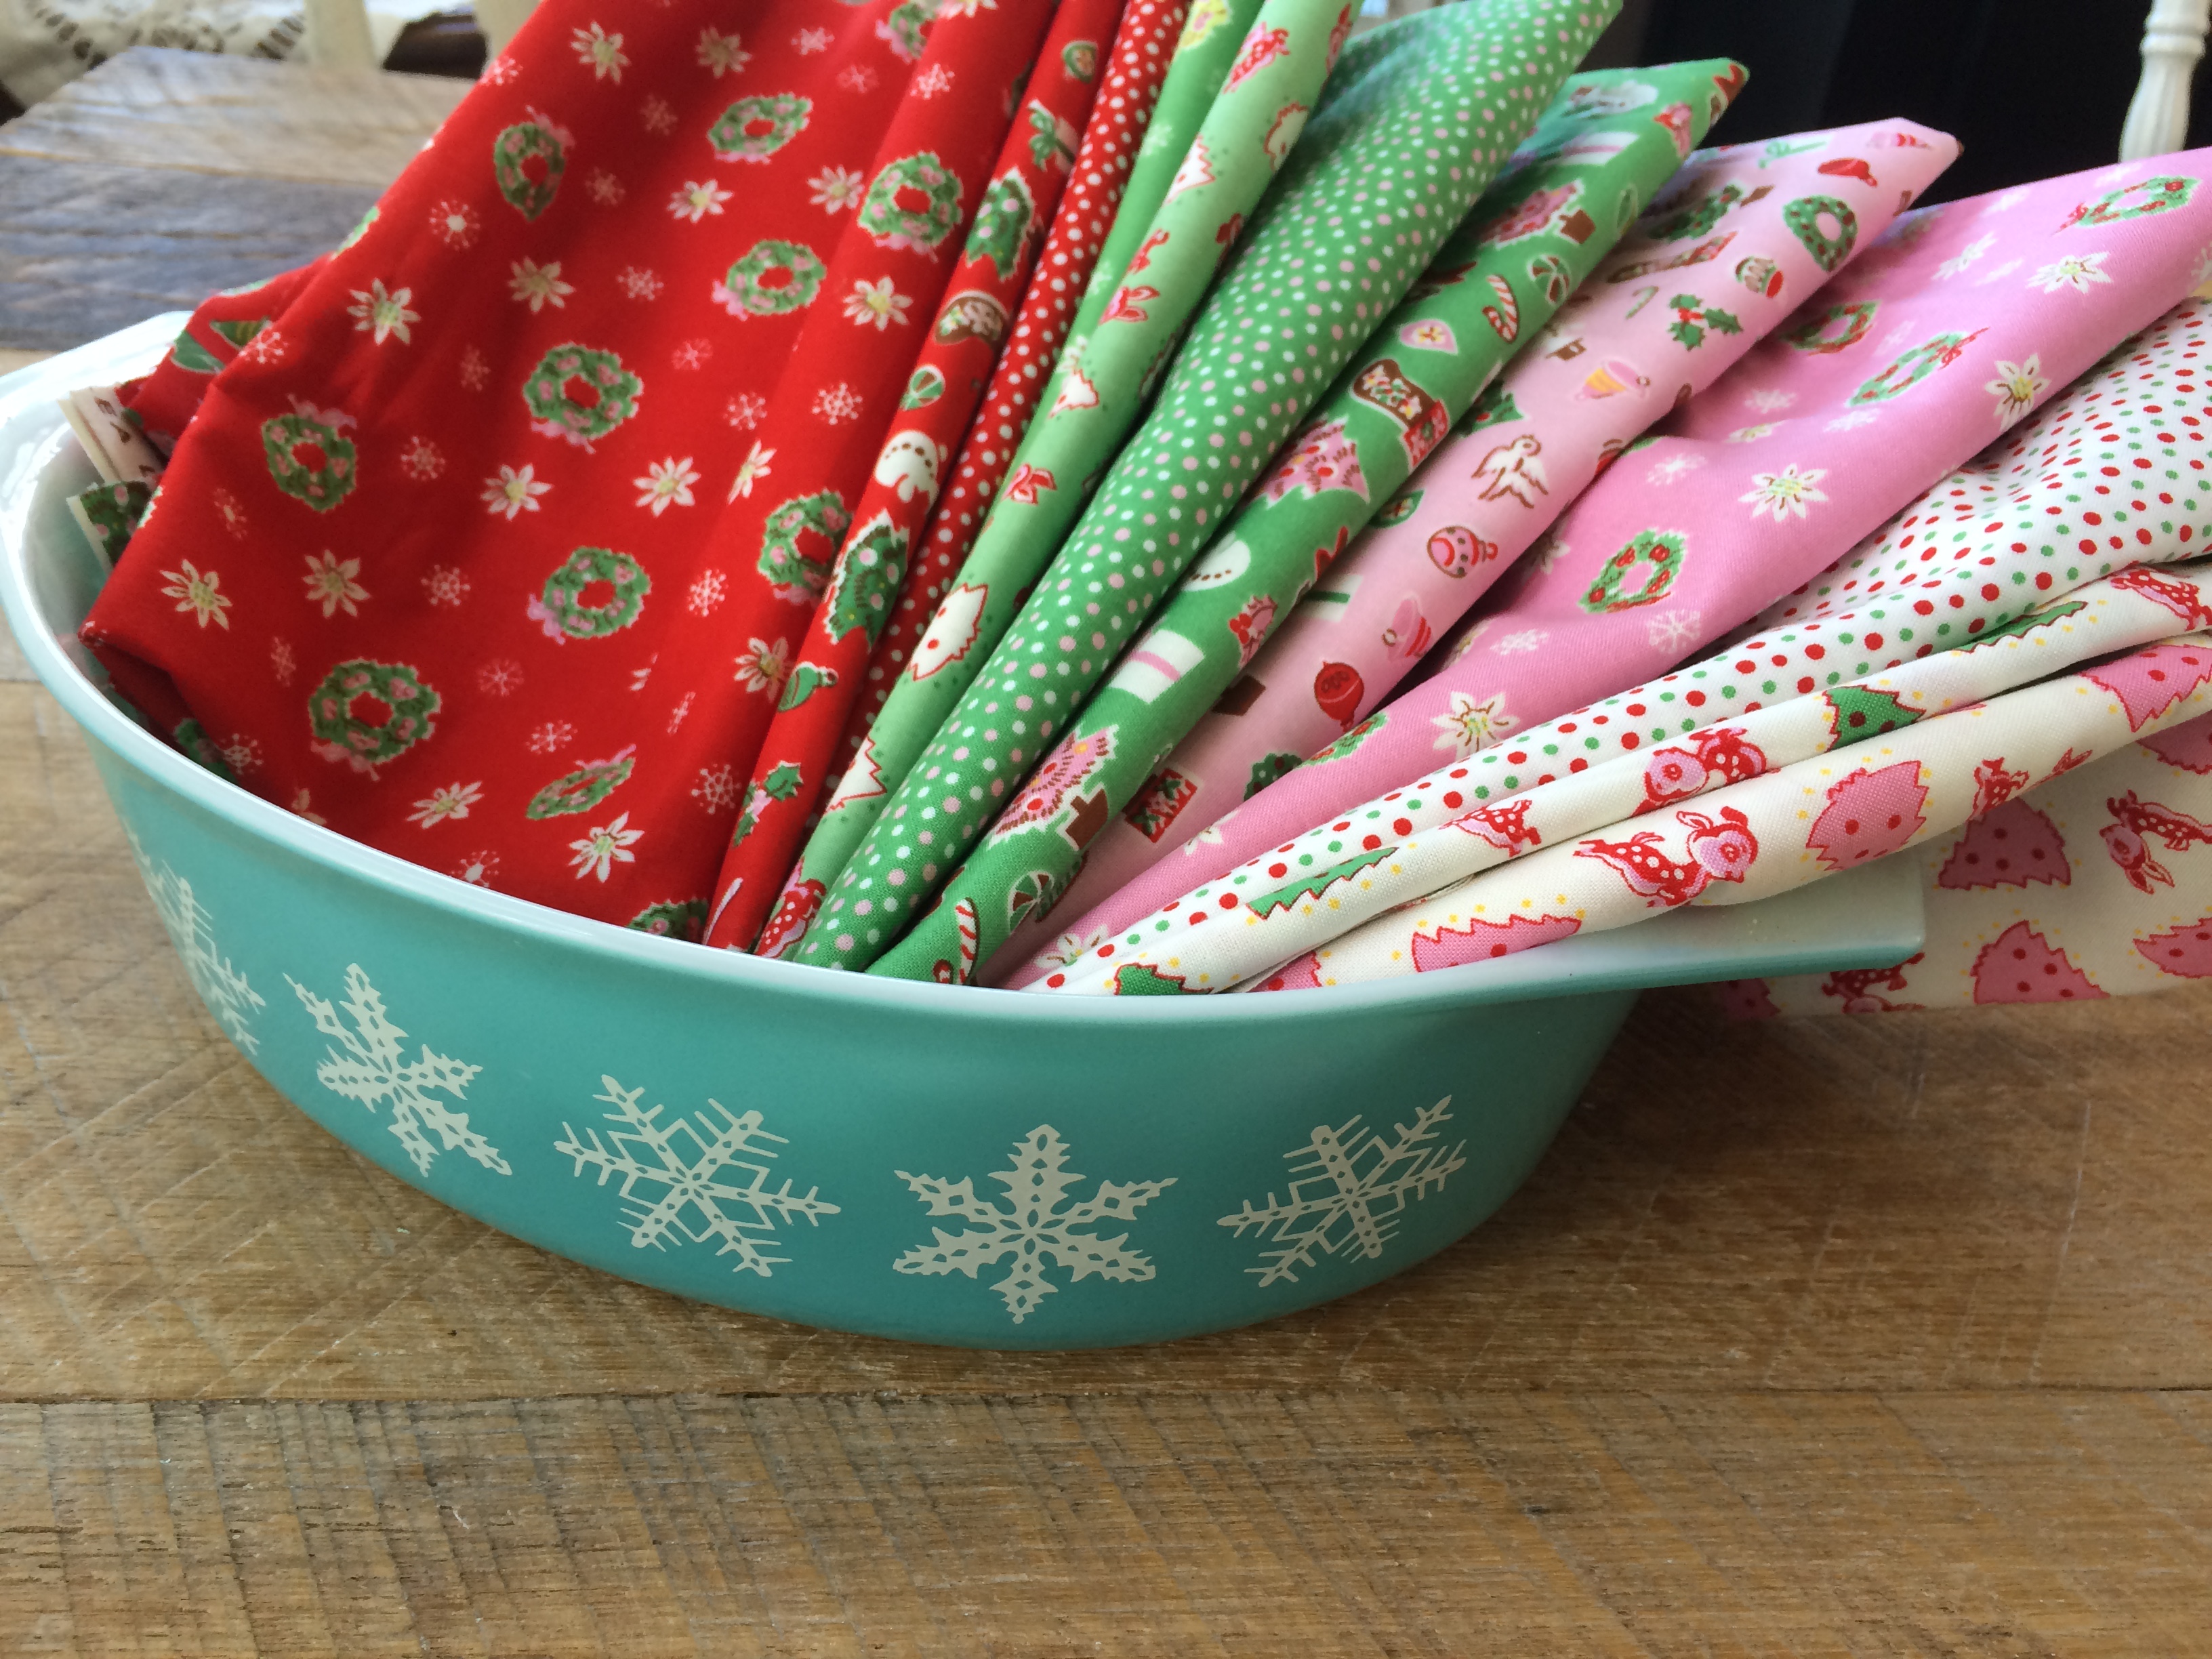
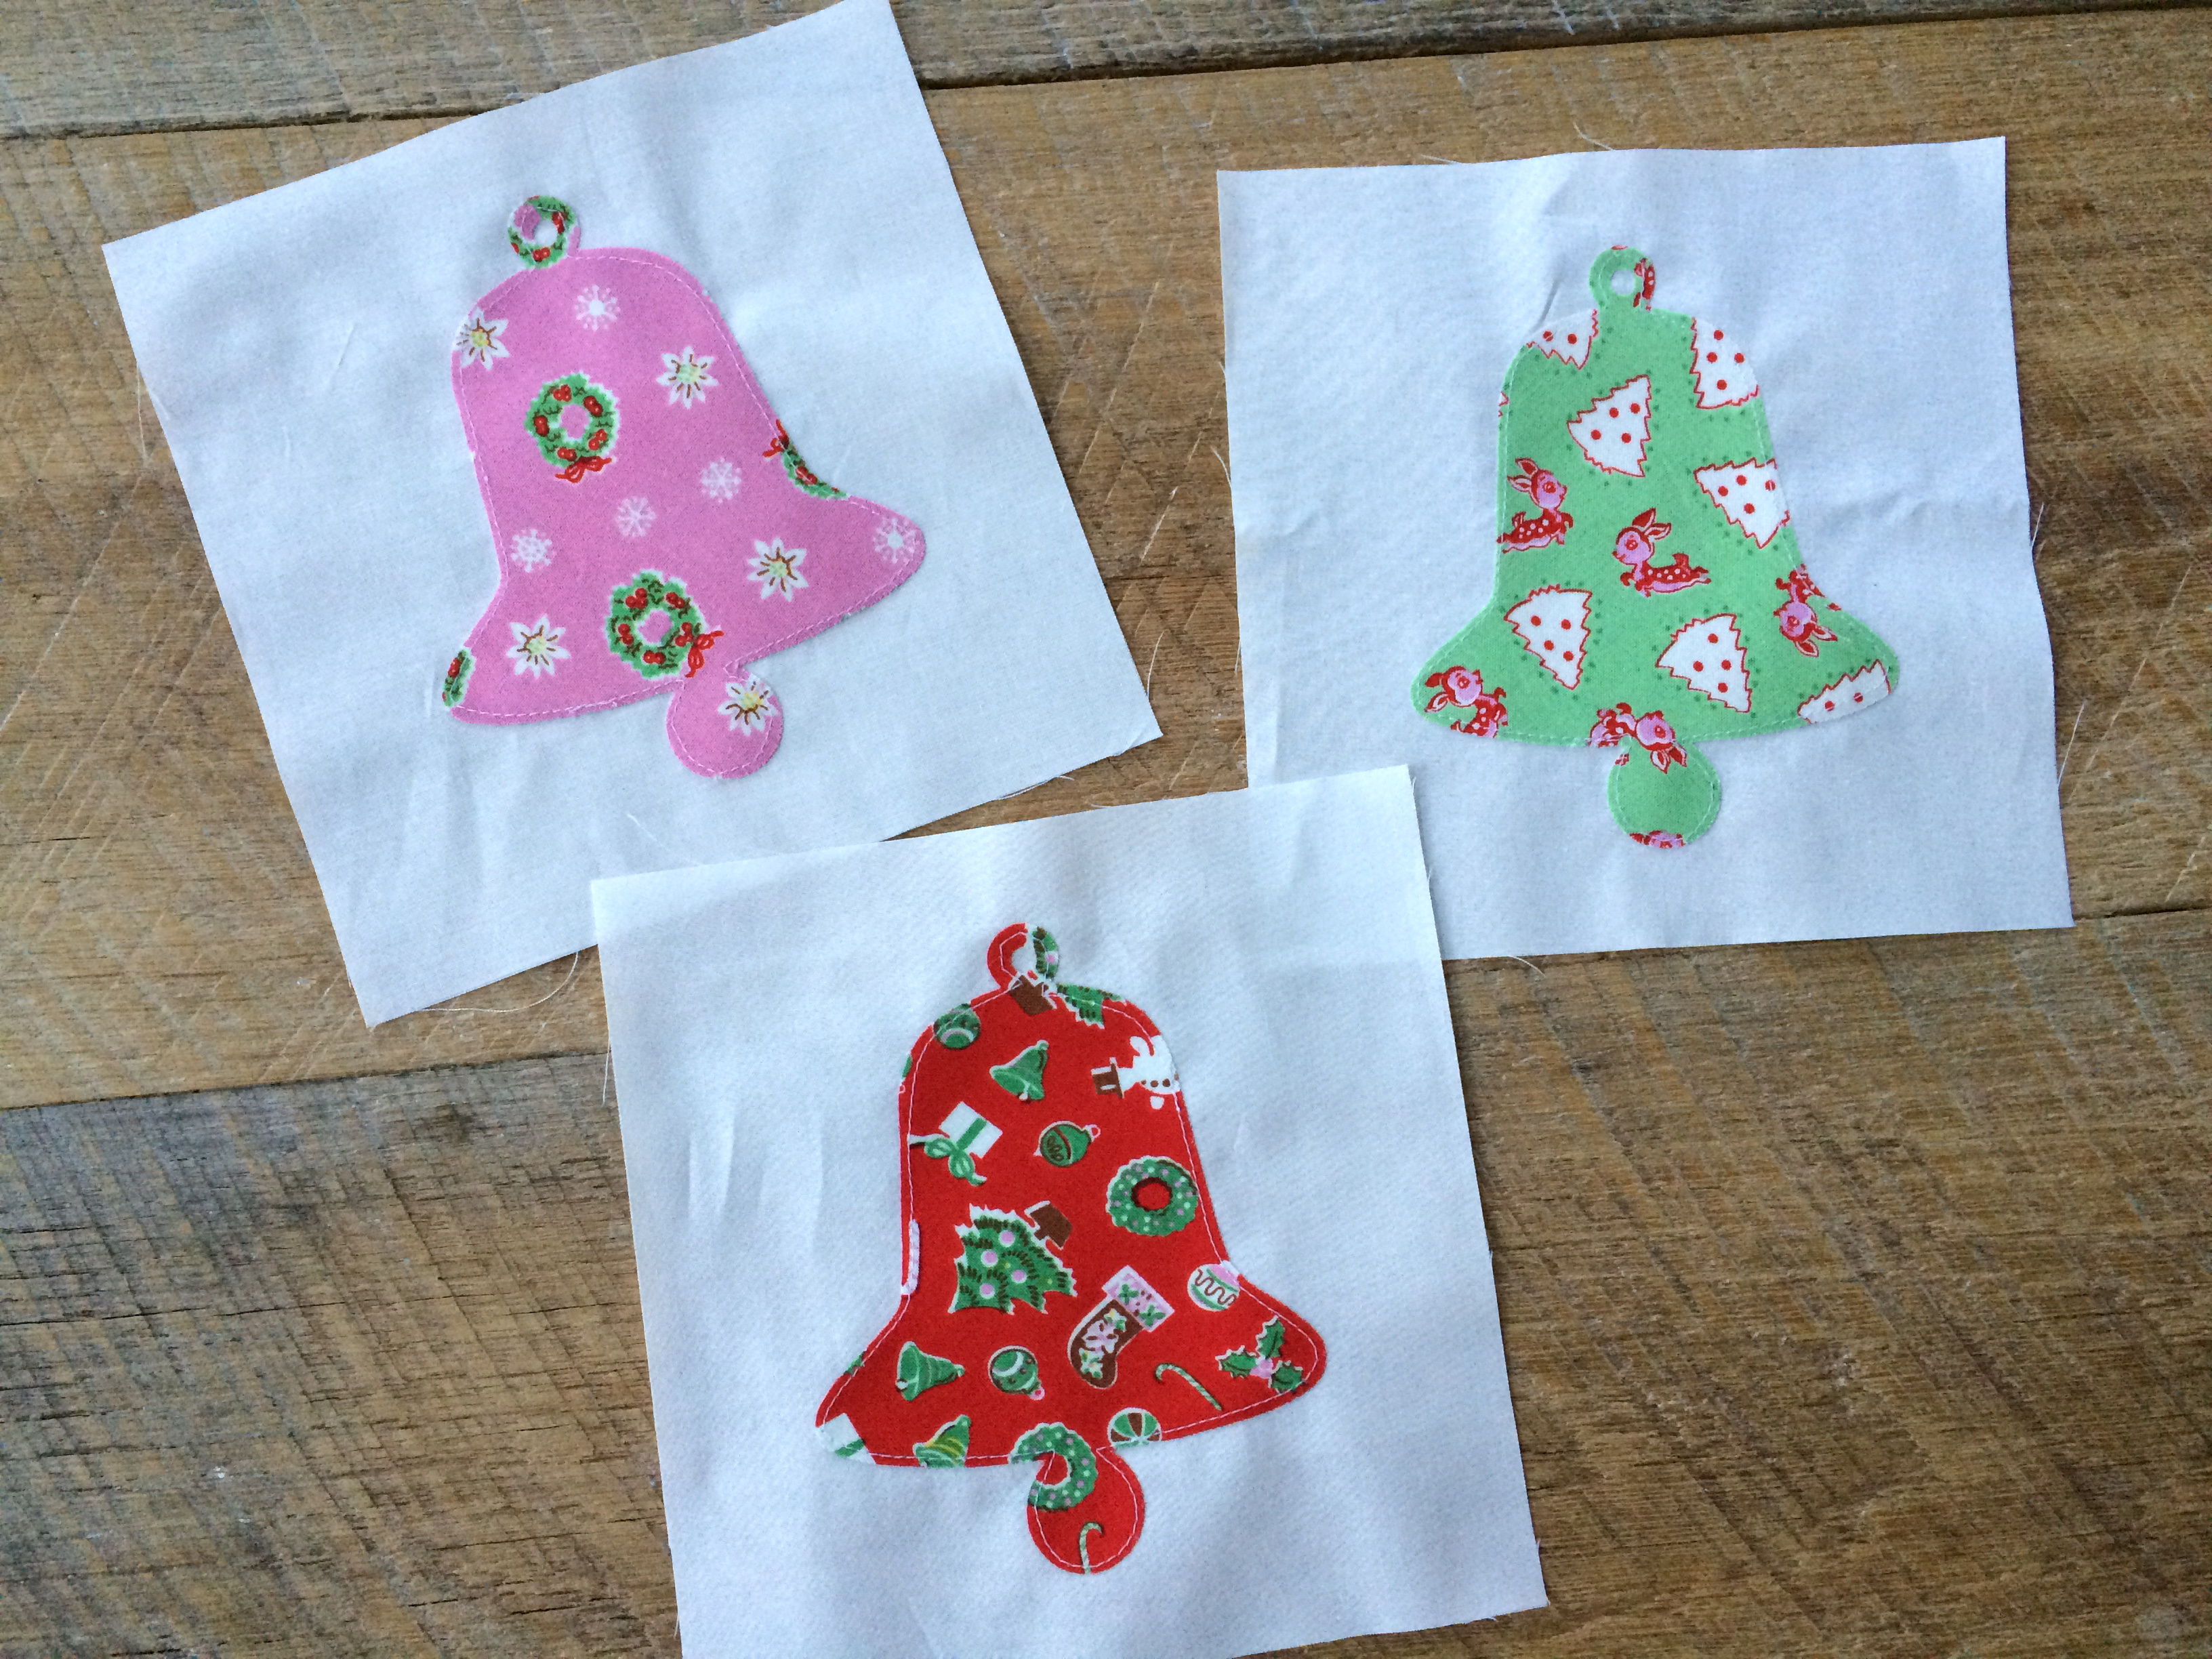
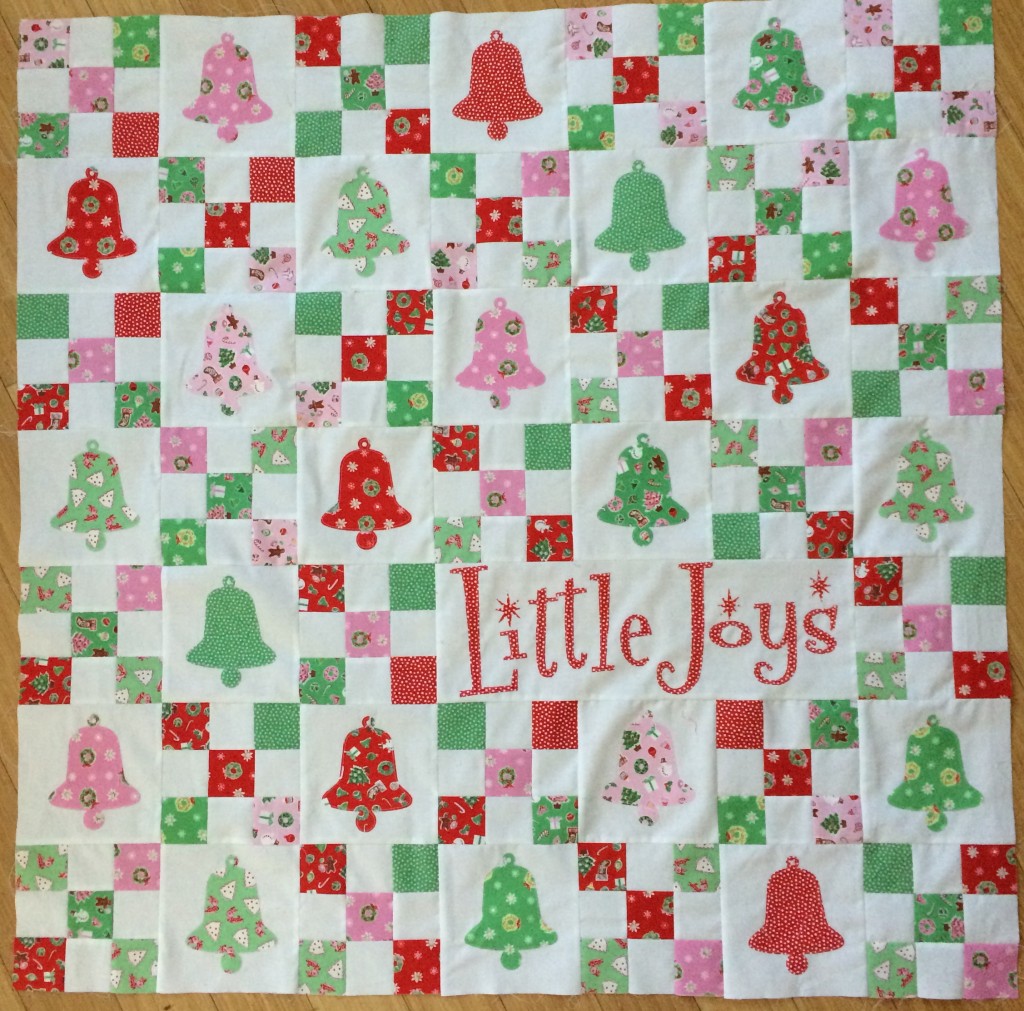
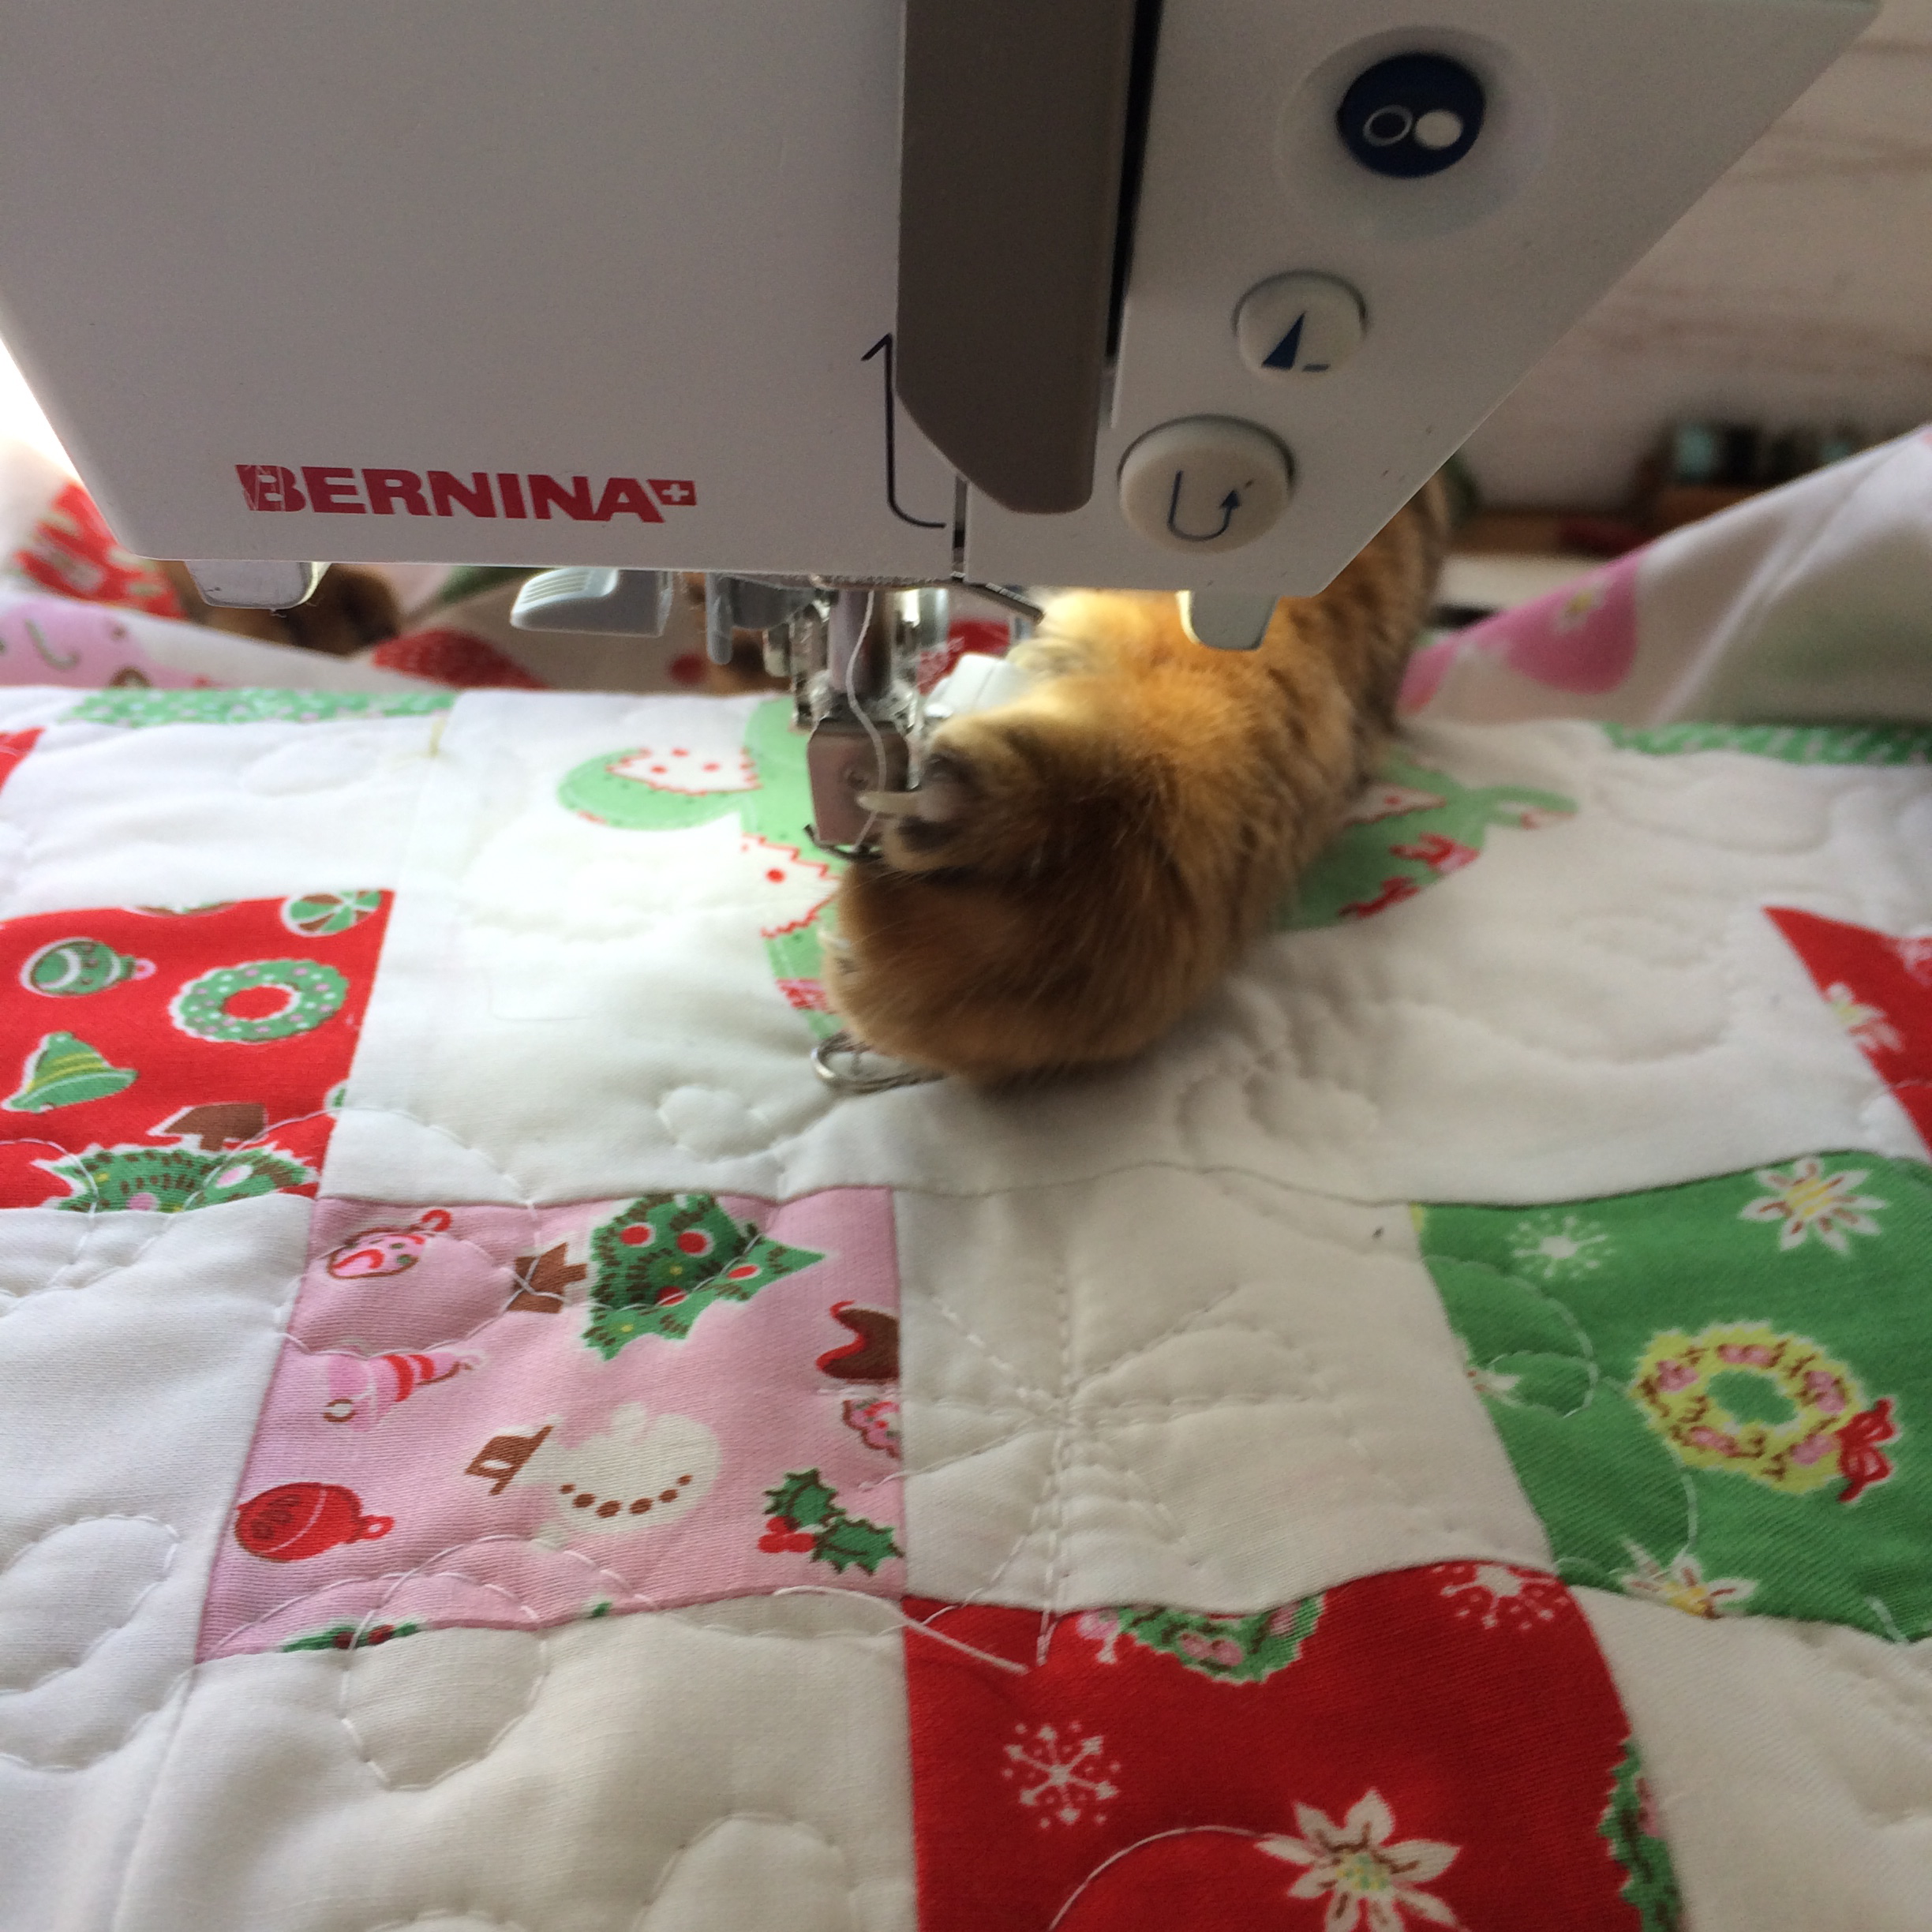
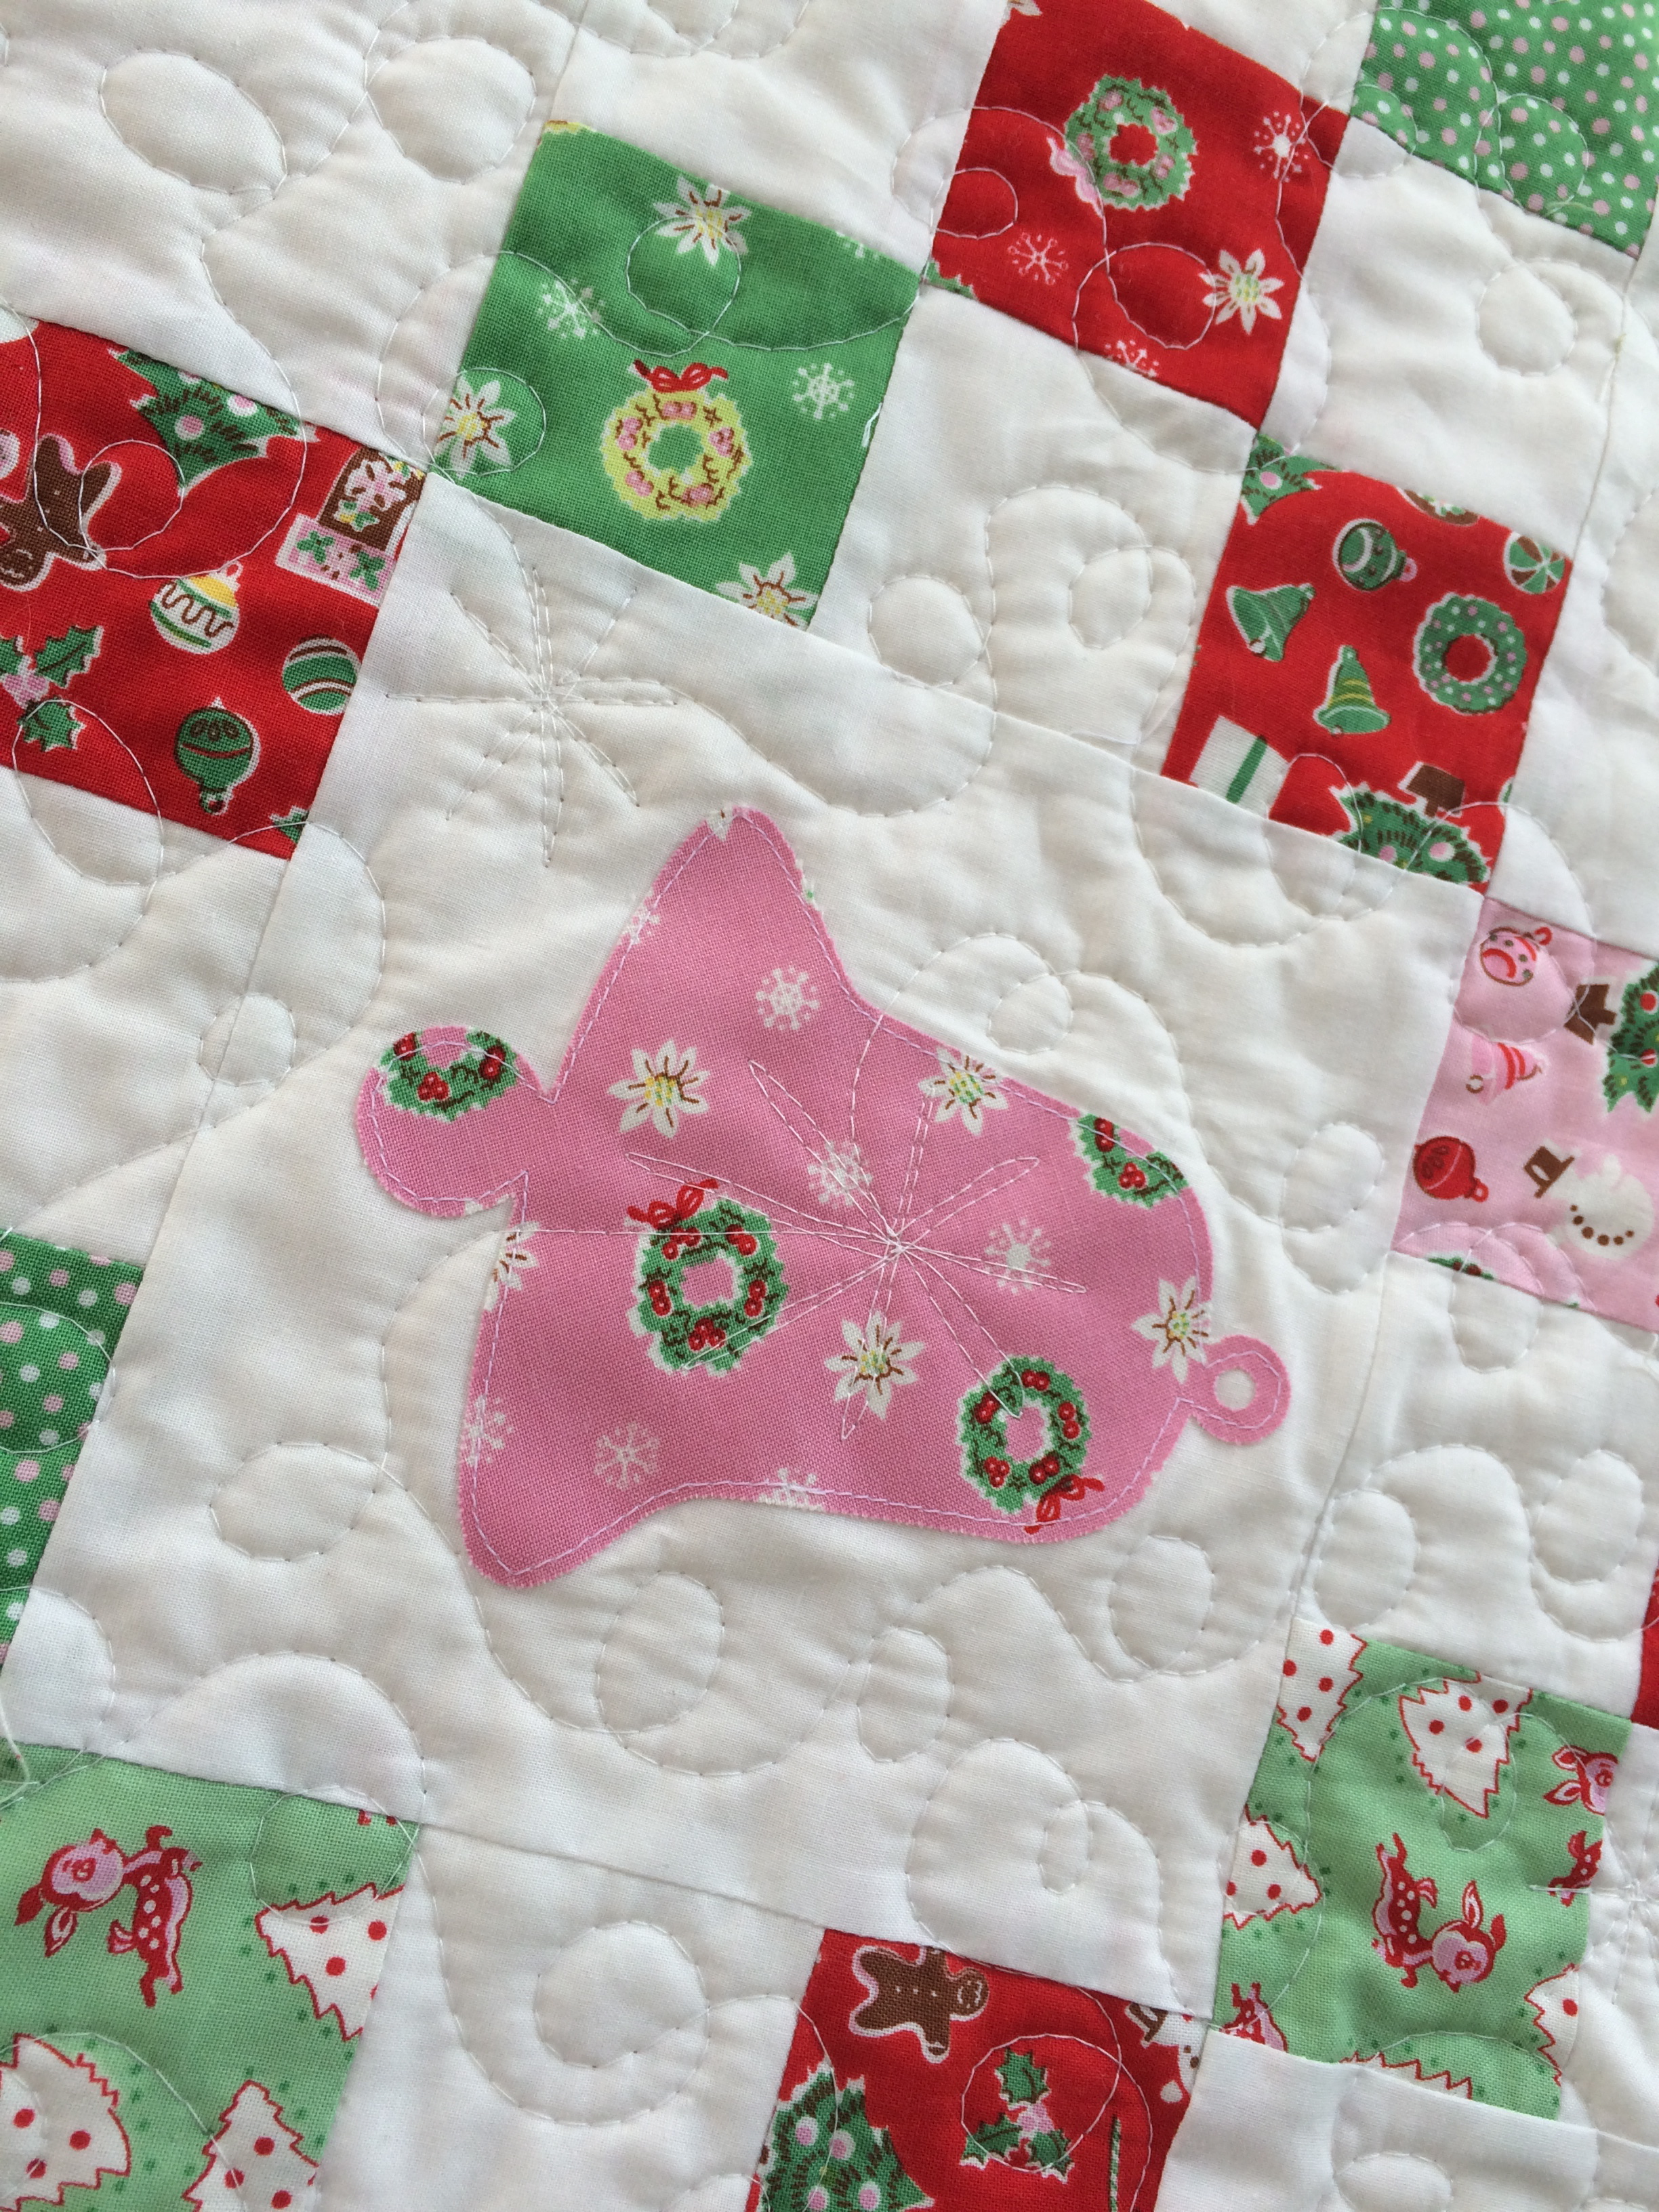
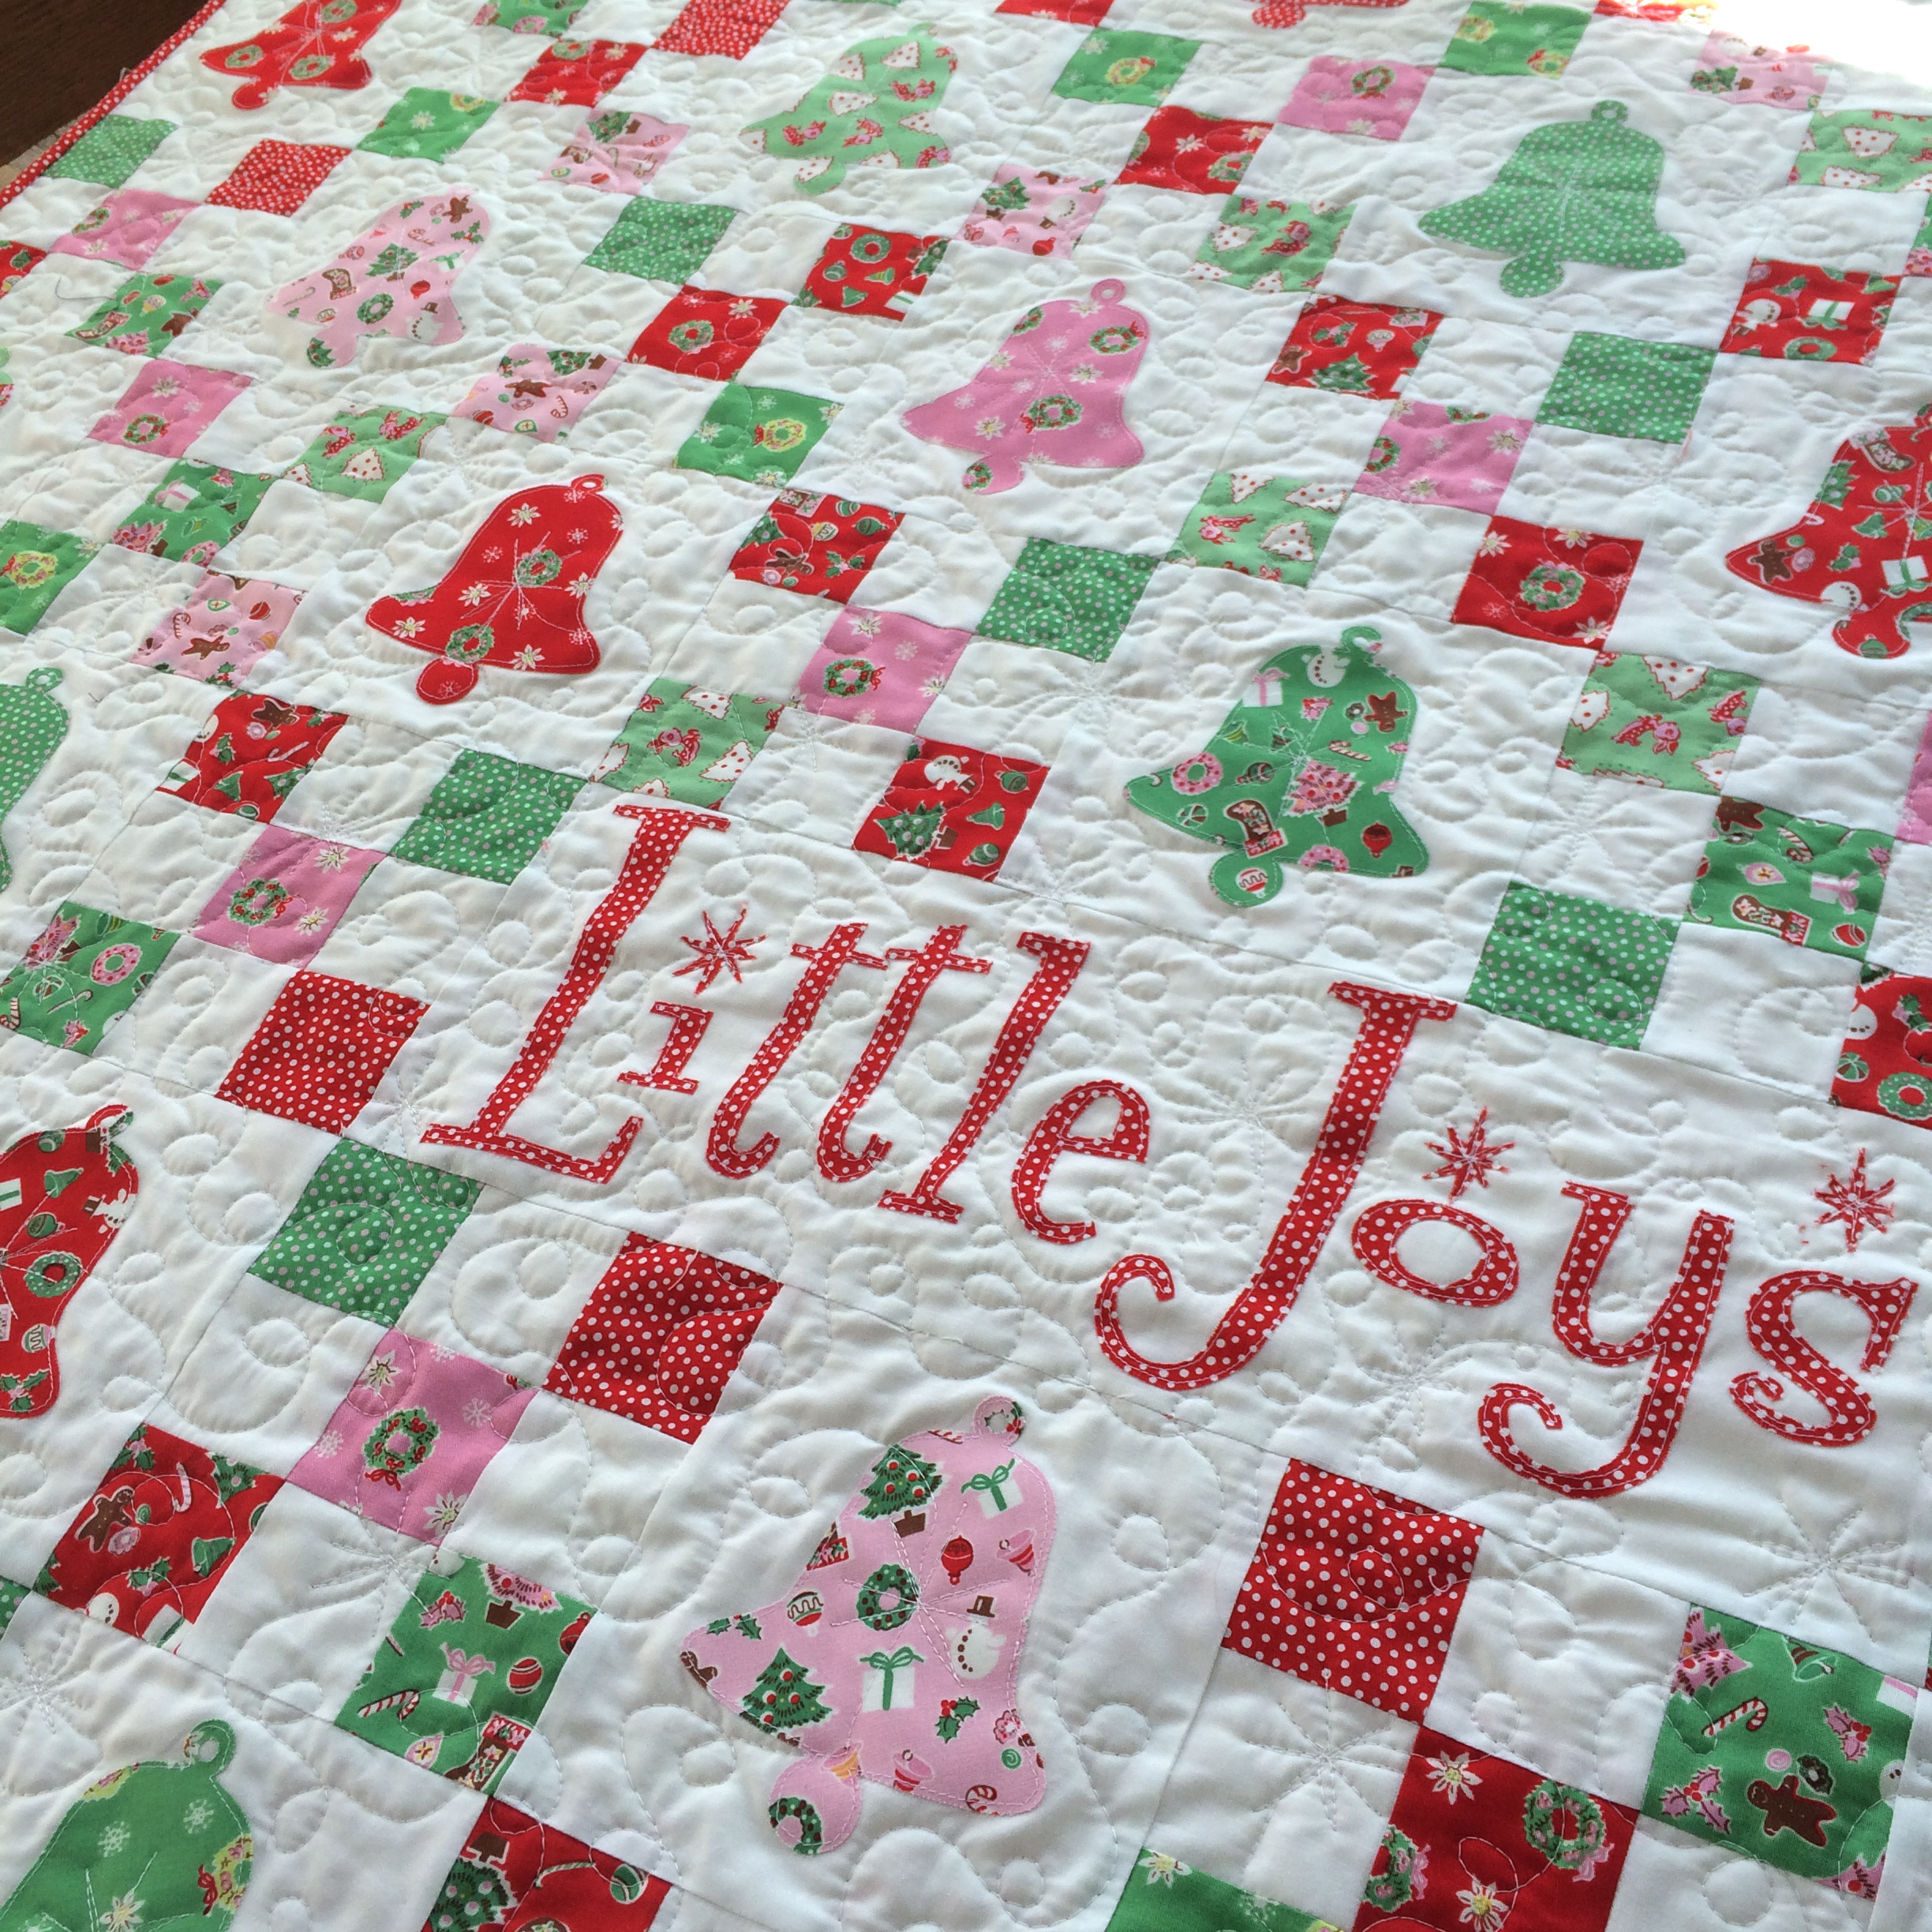
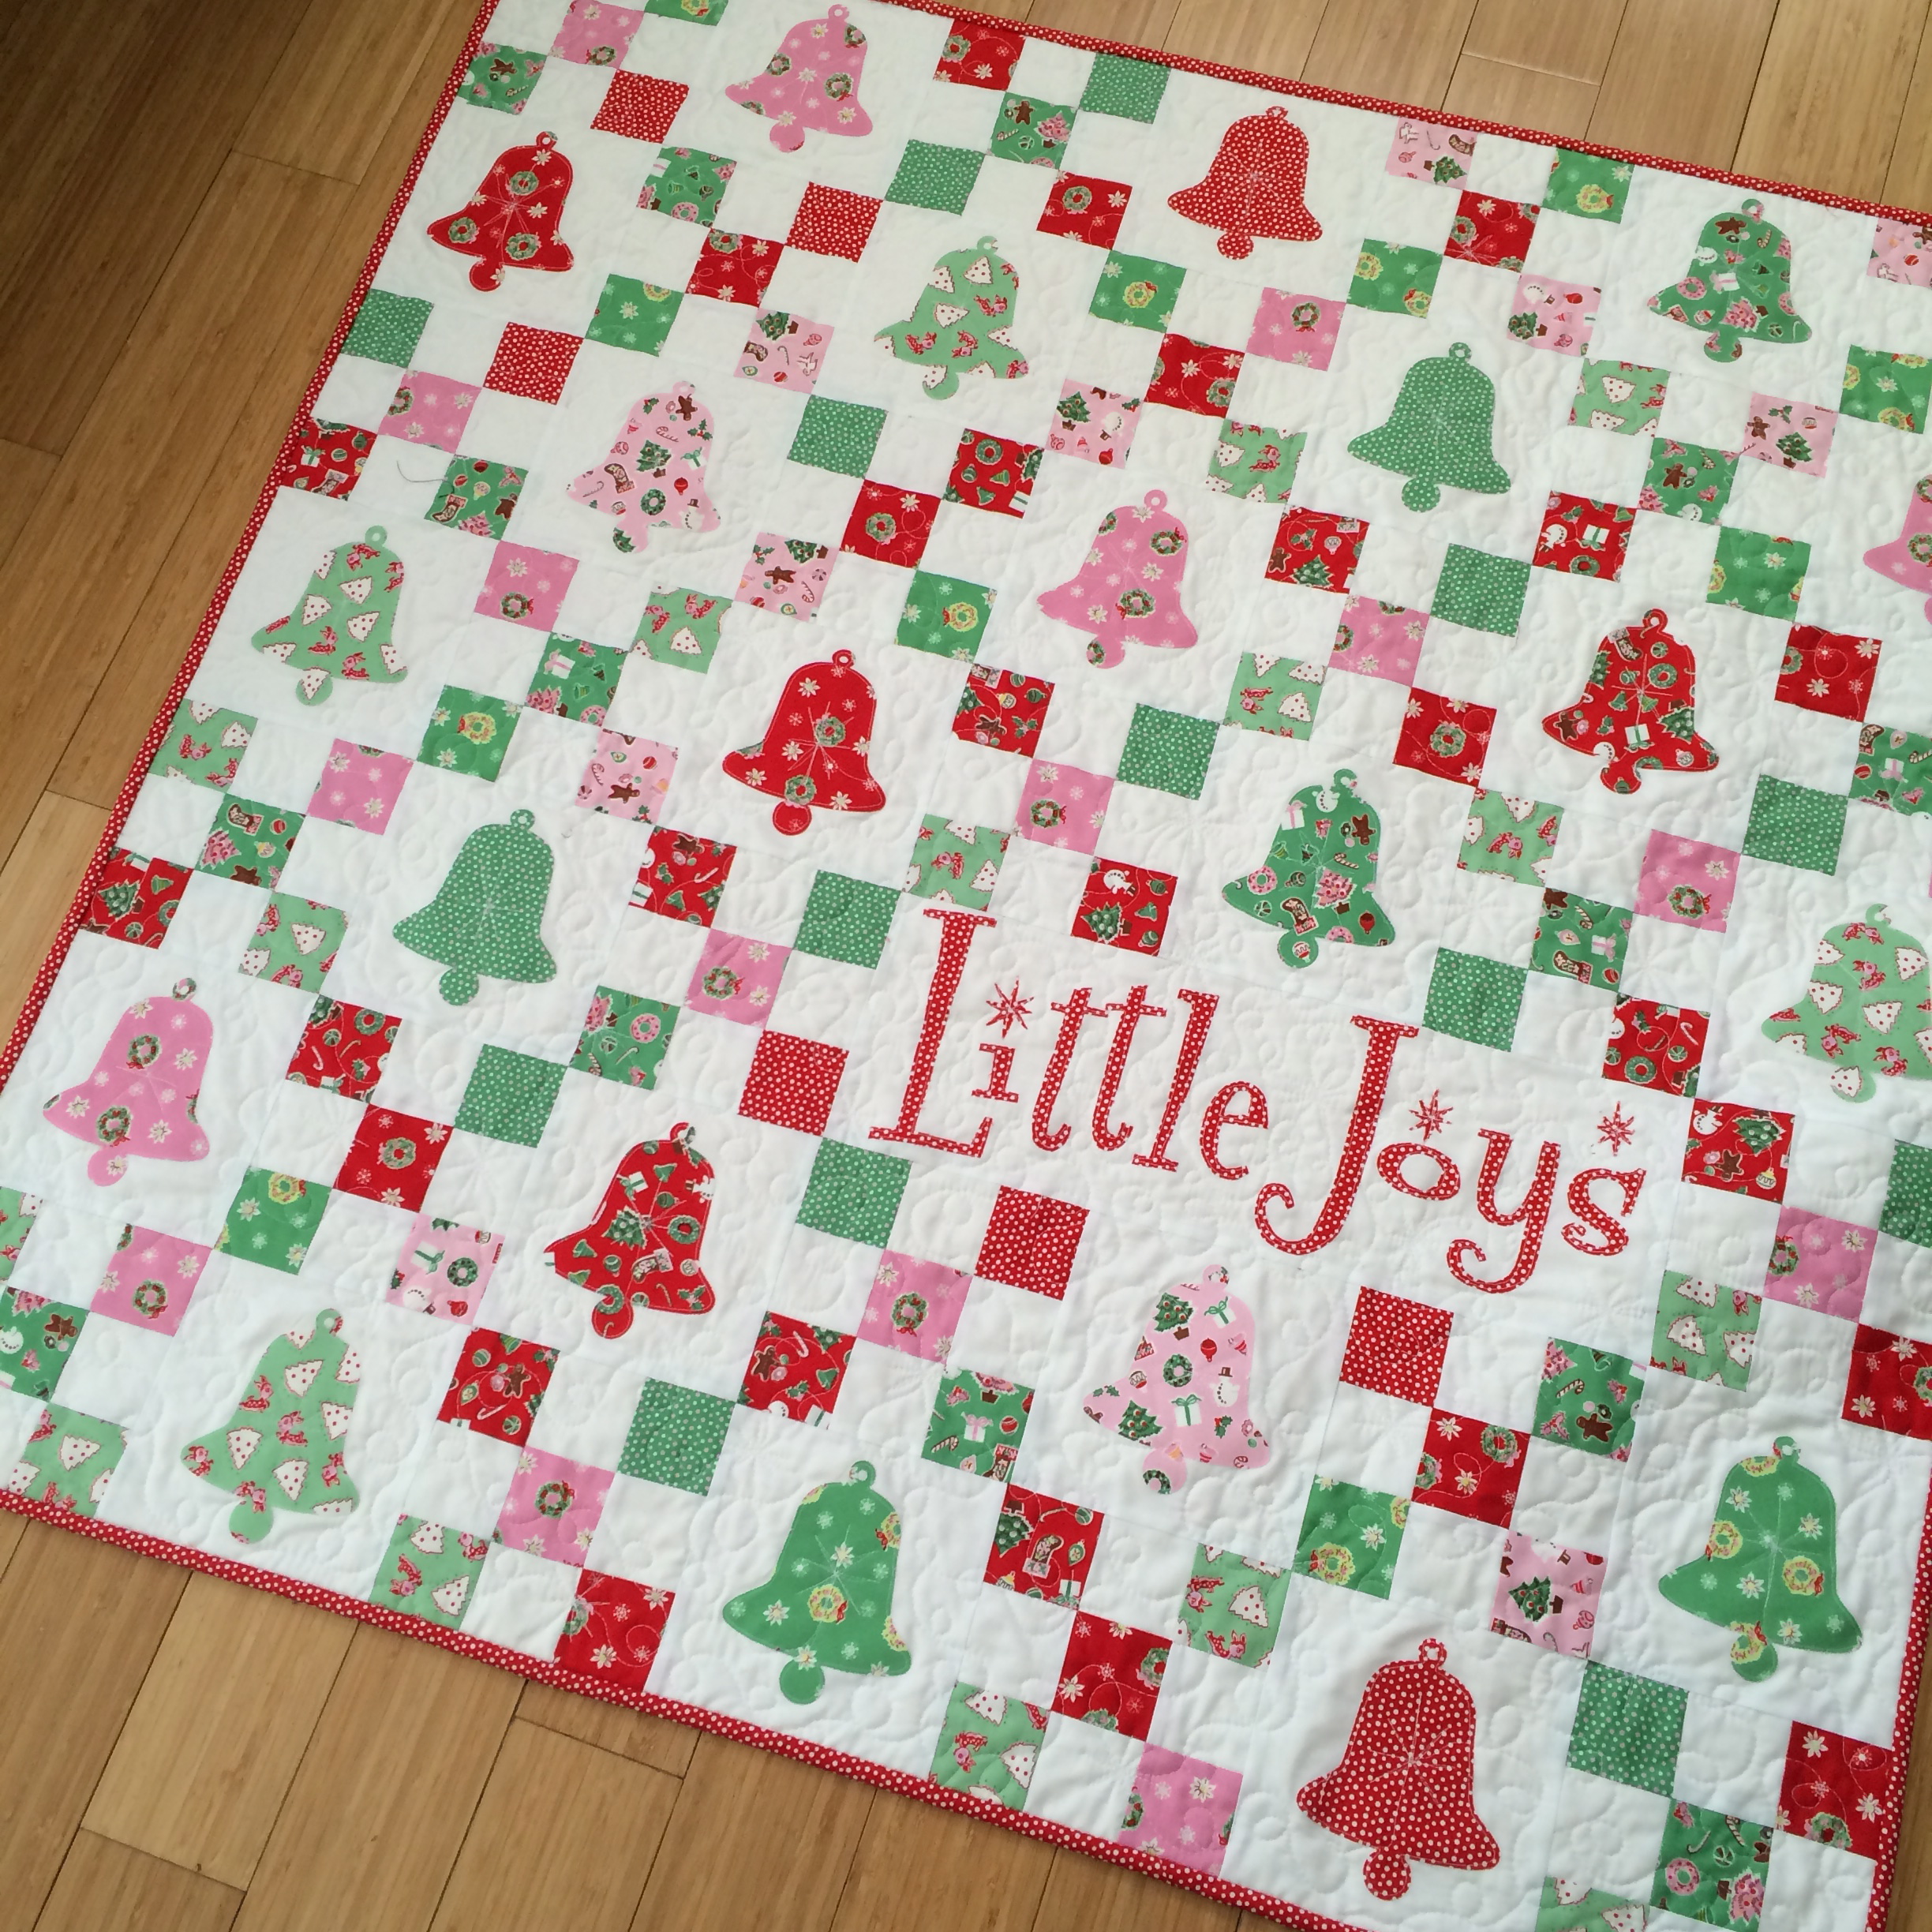
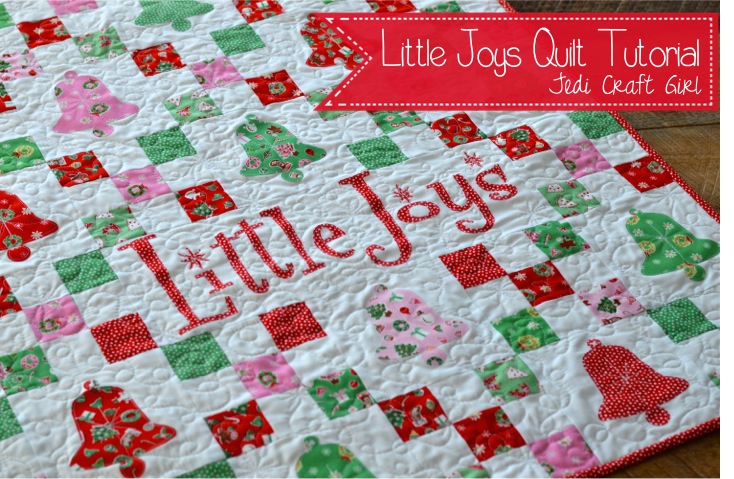
I wrote this pattern a few years ago for Penny Rose Fabrics.  I updated it and have the full tutorial available here!  I have always loved the Penny Rose “Little Joys” Christmas fabrics!  These sweet vintage prints make me think of a simpler time.  I love collecting vintage Christmas ornaments and decorations; this quilt is sure to fit into the mix!
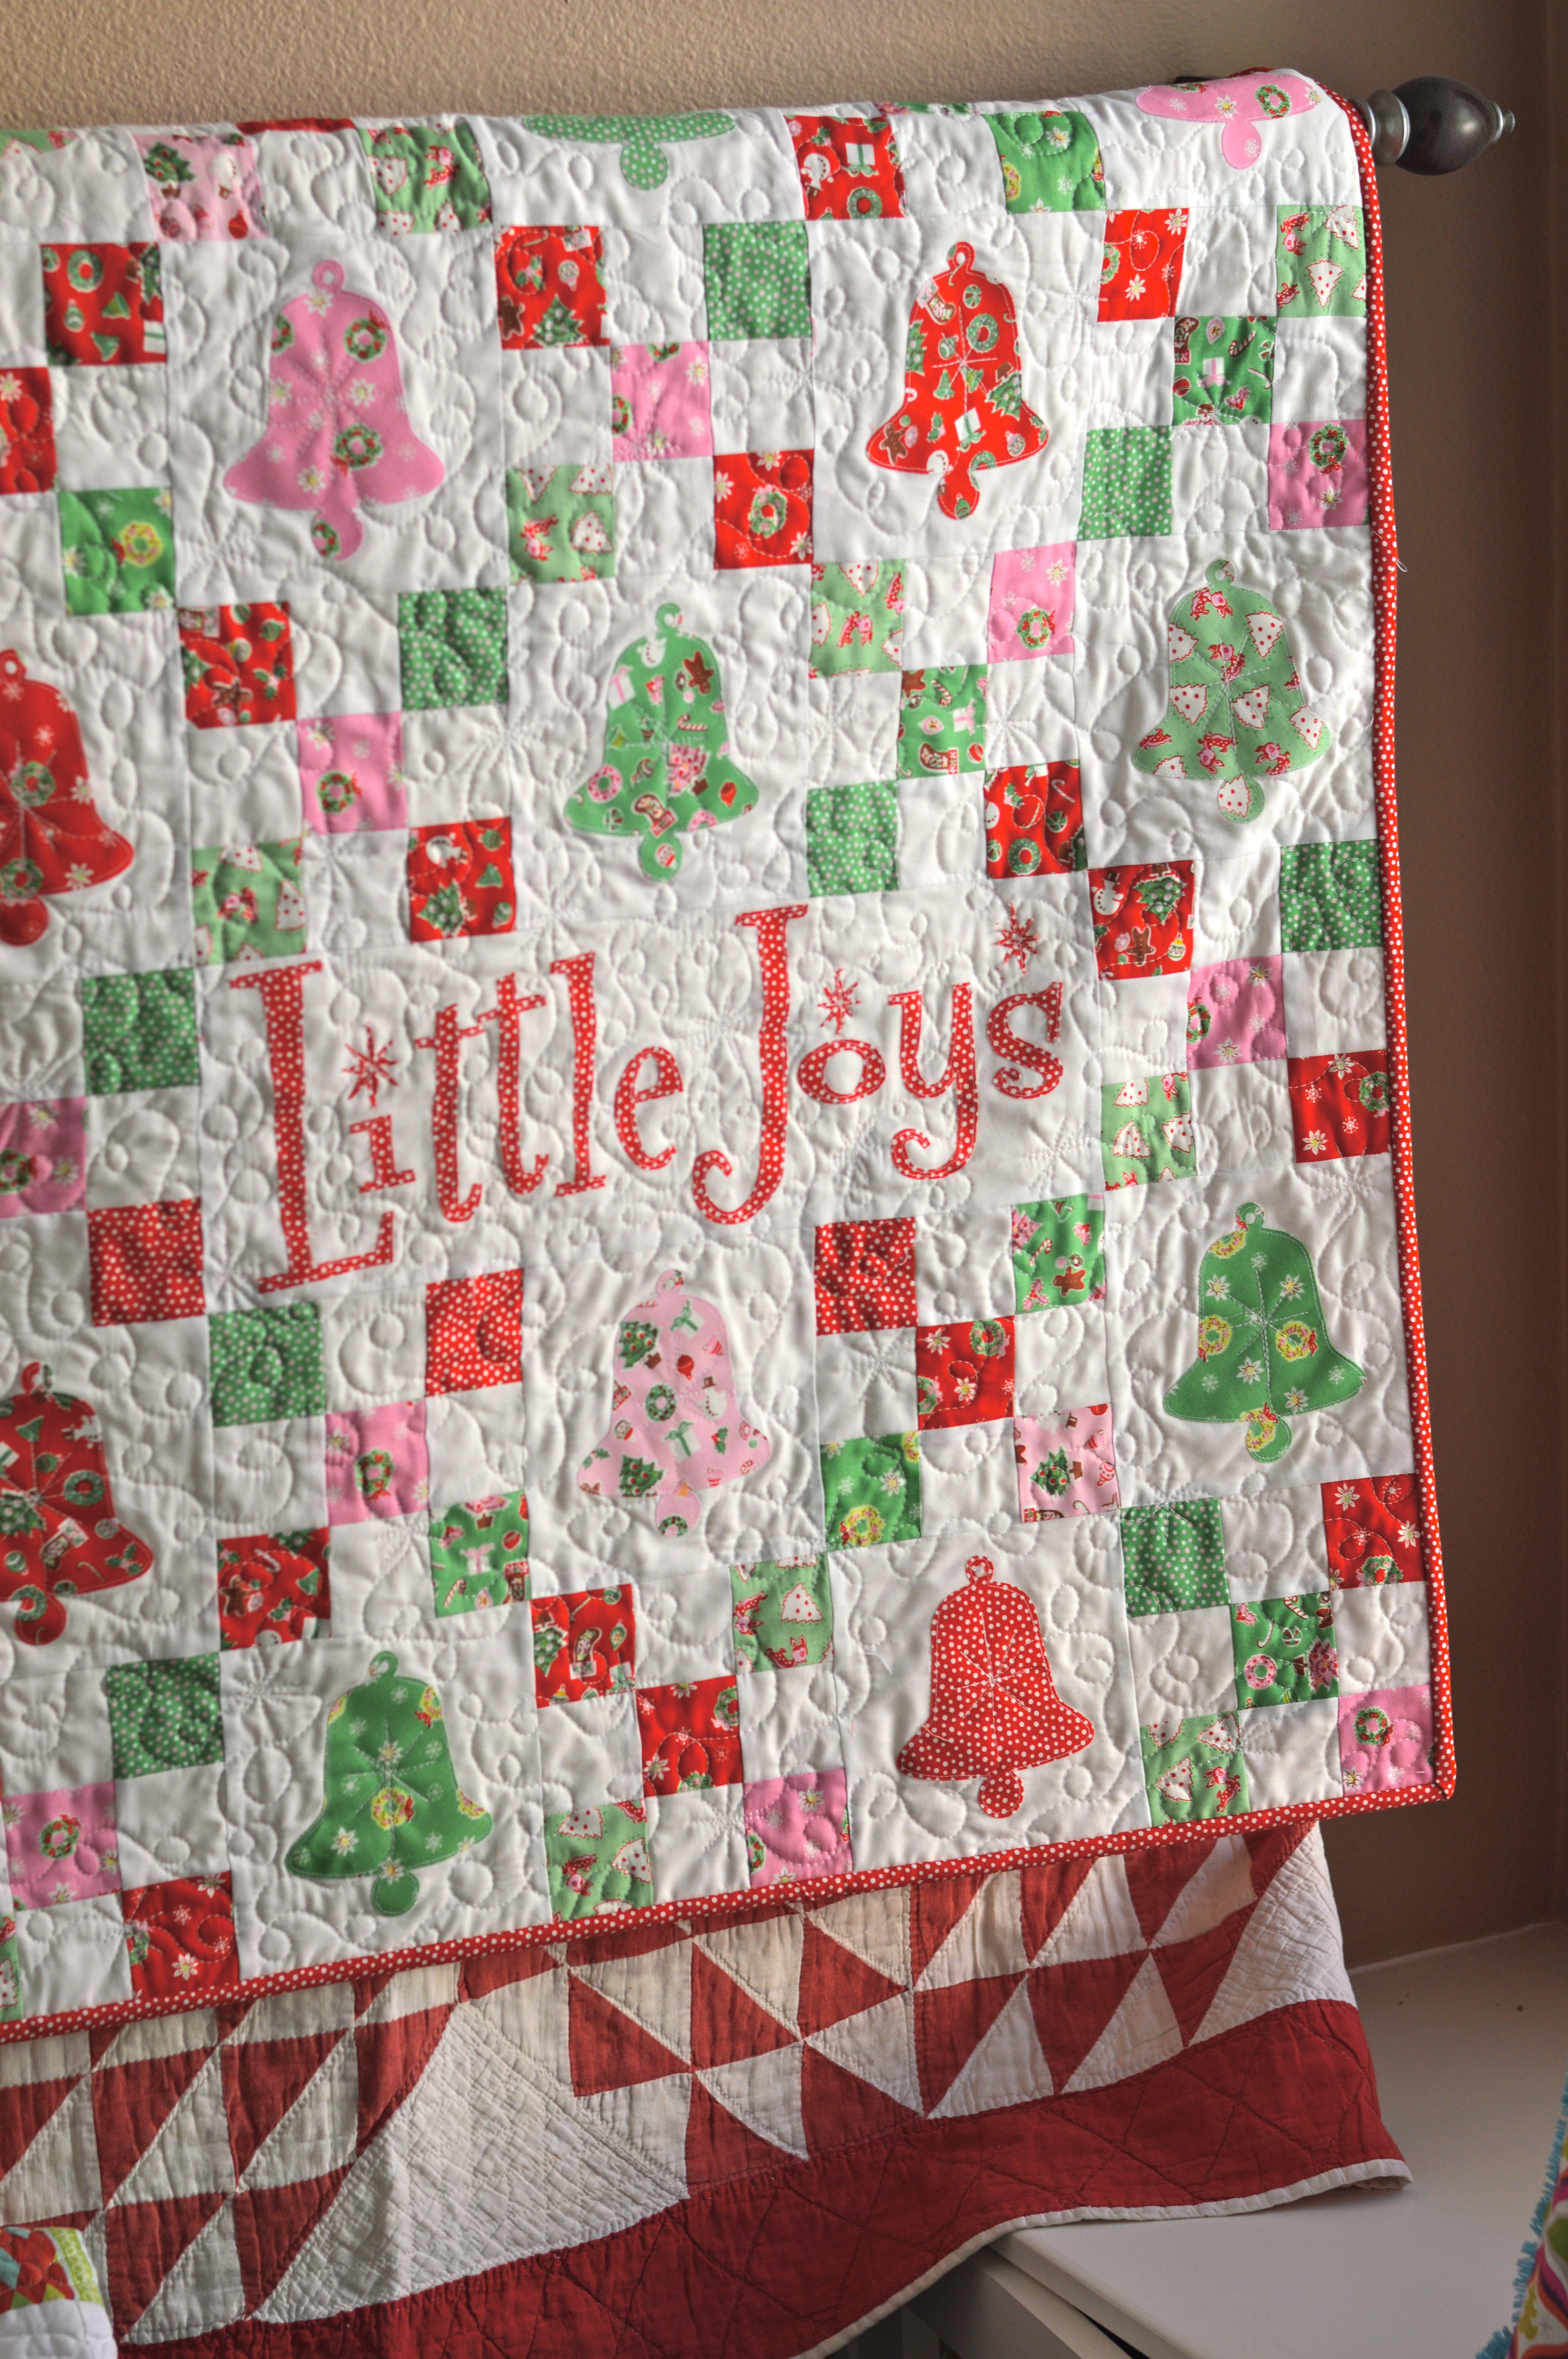
little joys quilt pattern christmas 35This quilt measures 42″ square and is a perfect size to hang on a wall, put at the end of a bed, or center on a table.  The quilt is made up of 6″ solid blocks with bell applique and  6″ nine-patch blocks that form a chain.

Screen Shot 2015-11-30 at 8.08.25 AMI used this Bell from Sizzix.  It is such a versatile die!

little joys quilt pattern christmas 15

Mufasa was all over this project because it involved the Sizzix Fabi – his FAVORITE toy!little joys quilt pattern christmas 20

Fabric Requirements:


9 fat quarters (green, red, and pink) – this is a scrappy little quilt so there are different amounts of each color – the colors don’t form a pattern in this version, but if you would like a pattern it would be easy to do!

1 1/2 yards solid white fabric

Heat n Bond Lite for appliqué

1/2 yard binding

1 1/4 yard backing (the fabric needs to measure at least 43″ wide or you may need to piece it)

Cutting Instructions

Fat Quarters:

Cut (2) 2 1/2″ x WOFQ strips from each fat quarter. You will have a few extra.

Use remaining fabric for bell appliqué and letters

Solid White:

Cut (6) 2 1/2″ x WOF strips, cut them in half to give you (12) 2 1/2″ x 21″ strips.

Cut (5) 6 1/2″ x WOF strips, subcut into (22) 6 1/2″ squares and (1) 6 1/2″ x 18 1/2″ rectangle

little joys quilt pattern christmas 7

2 1/2″ strips are cut from each of the 9 fat quarters.

little joys quilt pattern christmas 3

6 white 2 1/2″ x WOF strips are cut and then cut in half to equal the width of the fat quarter strips.

little joys quilt pattern christmas 16

Sew white, dark, white strip sets together, making 3 strip set units.  Press toward the dark.

little joys quilt pattern christmas 5

Sew 6 strip units of the dark, white, dark pattern (above).  Press toward the dark.

little joys quilt pattern christmas 13

Sub cute each strip set in 2 1/2″ increments.  You should have 8 per strip set.

little joys quilt pattern christmas

Lay out blocks making a checkerboard pattern.  Sew together, matching seams.  Press seams in one direction.  Continue this process making 24 total checkerboard blocks.

little joys quilt pattern christmas 11

Cut the remaining fat quarters into 5″ squares and fuse Heat n Bond Lite to the wrong sides of the fabric (above).  Using the Sizzix Bell die, die cut 22 bell shapes.  Peel off backing paper and heat set to the centers of the 6 1/2″ white squares. Sew around each bell with a straight stitch.

little joys quilt pattern christmas 6

little joys quilt pattern christmas 12For the Little Joys word block I cut the letters by hand.  Download the Little Joys pattern HERE.  I printed the letters on Heat n Bond EZ print sheets.

little joys quilt pattern christmas 17You can also trace onto iron-on transfer paper.  The letters are in reverse.  Iron the heat n bond to the wrong side of the letter fabric.  Cut out by hand around each letter.  Peel off the backing and position on the white rectangle.  Heat set in place.  Sew around each letter.

little joys quilt pattern christmas 19

Now you’re ready to lay out the whole quilt!  Use the above photo as your guide.  Again, my colors are random but you can make a color pattern!

Sew each block together creating rows, pressing toward the applique blocks.  Then sew the rows together, pinning at intersections so seams match up.  Press all seams in one direction.

Baste, Quilt, Bind!


IMG_2019Mufasa also loves the sewing machine!  No animals were harmed in the quilting of this project!


little joys quilt pattern christmas 9Make sure your cat approves 🙂

little joys quilt pattern christmas 2I free motion quilted this with loop de loos and retro style stars.  I love how it turned out!  Add the binding and you’re finished!

little joys quilt pattern christmas 10

little joys quilt pattern christmas 14


All Hallow’s Eve Wall Quilt featuring Penny Rose Fabrics

halloweenIt’s finally feeling like fall here in Southern California!  Yippee!!!!!  I love decorating for Halloween and I totally needed a new spooky wall hanging in my living room.  I like to decorate with spooky neutrals in my living room/dining room.  The family room and kitchen get a brighter treatment 🙂  When I saw the huge variety of neutrals and gray/blacks from Penny Rose Fabrics I knew exactly what I wanted to make!  I love that this is more subtle Halloween and not so obvious.  I hope you love it too!  You can download the details of the pattern HERE.

Quilt measures 42″ square.

spooky halloween quilt 30Most of the black/gray fabrics are from the Civil War Times fabric line.  I love the variety!  The rest of the fabrics are from Penny Rose Classics.Screen Shot 2015-10-21 at 9.03.17 PM

spooky halloween quilt 10Here is the finished quilt hanging above the piano.  I’m a little giddy right now 🙂

spooky halloween quilt 22I first made the background by sewing 5″ squares together in 7 rows of 7.  Then the applique comes next.  You could totally add ghosts and bats, I wanted to keep it simple.

spooky halloween quilt 26The moon is made by tracing a pie plate.

spooky halloween quilt 28Here is a little close up of the quilting, with Mufasa’s permission 🙂  spooky halloween quilt 6I love striped binding cut on the bias – it’s my absolute FAVORITE!!!!  The backing is from Penny Rose’s mensware line – I love houndstooth!!!spooky halloween quilt 8Ok, so this is totally my new favorite Halloween Quilt!

spooky halloween quilt 9

Farmers Market Quilt Pattern featuring Riley Blake Designs Vintage Market

farmers market quilt coverI am so excited to share my newest pattern called Farmers Market!  The inspiration came from this amazing fabric by Riley Blake Designs called Vintage Market, designed by the super talented Tasha Noel.  This fabric has darling images of fruit stands, antique markets, and jam for sale.  All things I LOVE!!!  Plus the colors are fabulous!!!farmers market quilt vintage market

This pattern is available to you for FREE!  Click HERE to download the PDF pattern.  I hope you love making it – it was so much fun!

farmers market quilt vintage market 2

farmers market quilt vintage market 7Don’t my sweet children look like they are having such a lovely picnic!  You would ever know they were fighting with each other and I was yelling at them “just look at the fruit!!!!”

farmers market quilt vintage market 6  farmers market quilt vintage market 9

farmers market quilt vintage market 10

farmers market quilt vintage market 11

Star Wars Quilt

star wars quilt 4My Daughter, Ella, pieced this Star Wars quilt!  We are a total Star Wars Nerd Family!!  This quilt is such a great beginner quilt because it teaches a few “tricks”, it is simple to piece together, and yet it looks a little more complicated than just sewing squares together.  This pattern is the same pattern I used for my Luckie Girl Quilt.  Click HERE to download it.

luckie girl quilt pattern

This is such a fun quilt because you can use a variety of theme prints and really show them off.  And it can be sewn in a few hours!!

star wars quilt 3I had my quilter quilt “retro” inspired shapes and stars.  It’s my favorite quilting yet!star wars quilt 2

star wars quiltWe put cuddly orange minky on the back and it’s the perfect quilt for watching all 6 episodes of Star Wars with!!!star wars quilt 6

Happy Haunting Halloween Quilt

happy haunting halloween quilt coverIsn’t Halloween the best time of year for quilting?  I get so excited over orange and black and cats and bats!  I can’t have enough quilts!  I am so in love with this line from Deena Rutter called Happy Haunting by Riley Blake Designs.  It is everything Halloween should be!

happy haunting halloween quilt 2This quilt sews together fast and YOU get to pick the layout of each block.

happy haunting halloween quilt 21This quilt is also best put together with a friend.  Tina from @emilyannskloset and I got together this summer for a Coast to Coast Kitty Quilter Retreat where we sewed about 15 hours each day for 4 days!

happy haunting halloween quilt 26  Let’s get started!

Finished Quilt 55″ x 55″

Supplies:

fat quarters or quarter yard cuts of Halloween prints

1 yard sashing

3/4 yard outer boarder

fat quarters for applique

1/3 yard for background blocks for applique

Heat n Bond Lite or Heat n Bond Lite EZ Print Sheets

Applique pattern, click HERE

1/2 yard binding

3 yards backing

FOR THE BLOCKS

Begin by cutting the fabric into the following categories:

2.5″ squares

2.5″ x 4.5″ rectangles

4.5″ squares

4.5″ x 8.5″ rectangles

just keep cutting from a variety of fabrics until you have a sizable amount.

happy haunting halloween quilt 24Now the fun begins – don’t lay it out!  Just be totally random!  The goal here is to create 8.5″ blocks by using a combination of 4 patches, strip sets, and larger rectangles.  Below are a few examples, the combinations are endless!  Just be creative!

happy haunting halloween quilt 30

Each time we finished a block we hung it up on a clothes line and said “No, THIS is the cutest block!”

happy haunting halloween quilt 25For the finished quilt you will need 20 total pieced blocks and 5 applique blocks.  We even made a block that was all 2.5″ squares!

happy haunting halloween quilt 3 APPLIQUE

For the applique background squares, cut (5) 8.5″ white squares.  Trace the applique onto heat n bond lite or use the Heat n Bond EZ print sheets.  Iron the heat n bond to the wrong side of the fabrics and cut out the shapes.  Peel off the backing paper then press in place on the white squares.  The spiders have ric rac stitched onto the block and the legs are stitched with black thread. Top stitch around each image.happy haunting halloween quilt 29

Once all the blocks are finished it’s time to sash.  I love that Tina choose black and white gingham to sash her quilt – it gives it a cozy country look!

FOR THE SASHING

Cut (20) 2″ x 8.5″ strips

you will need to piece the next sashing strips to give you the following measurements

(6) 2″ x 46.5″ strips for the horizontal rows

(2) 2″x 49.5 strips for the sides

Sew the 8.5″ sashing strips in between the blocks forming horizontal rows.  Then add the horizontal strips along the top, middle rows, and bottom.  Press.  Finish by adding the 2 side strips.

happy haunting halloween quilt 28

OUTER BOARDER
After sashing add the outer boarder.  I don’t measure at this point – do you?  Cut (6) 3.5″ x WOF strips for the outer boarder.  You will need to sew them together end to end to have enough length.  Sew the side strips on, square up, press and then sew the top and bottom strips on.

happy haunting halloween quilt 10I had my friend use her long arm quilter to sew swirls all over the quilt, even through the applique.  I LOVE it!happy haunting halloween quilt 8   I am totally in love with this quilt.  I cut the striped fabric on the bias for the binding.  Striped binding is my absolute FAVORITE!!!!happy haunting halloween quilt 4   happy haunting halloween quiltI had such a wonderful time putting this quilt together with my friend Tina.  Isn’t it fun to sew with friends and family!!!

IMG_1088