Charming & Thankful Holiday Table Quilt Tutorial

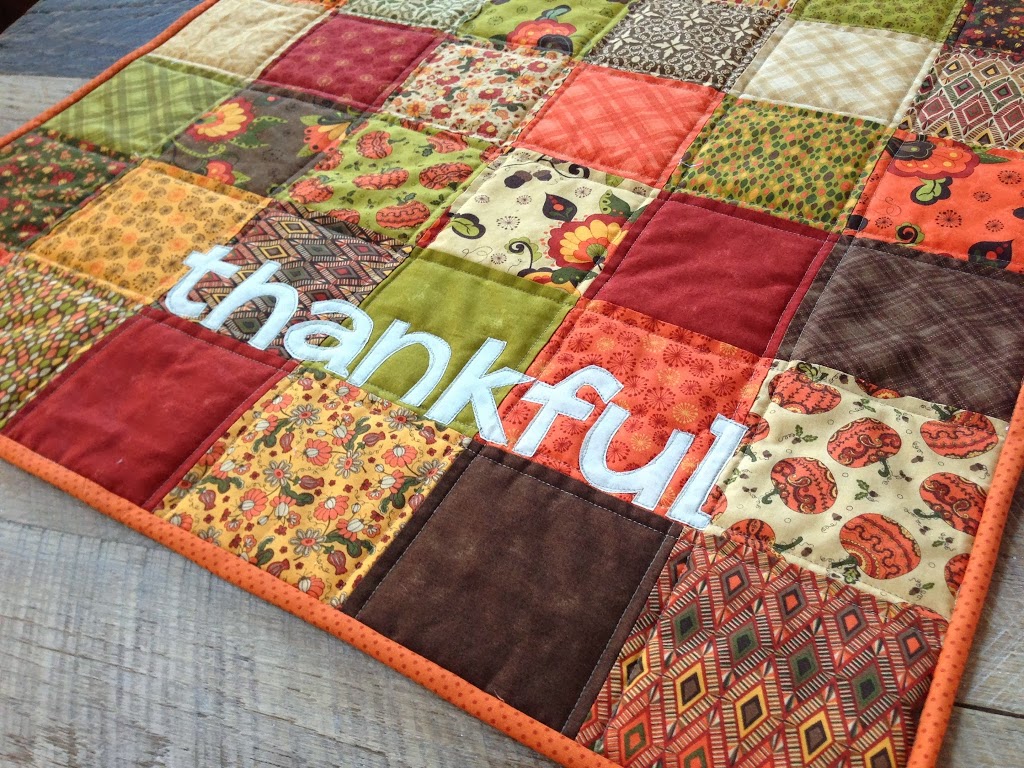
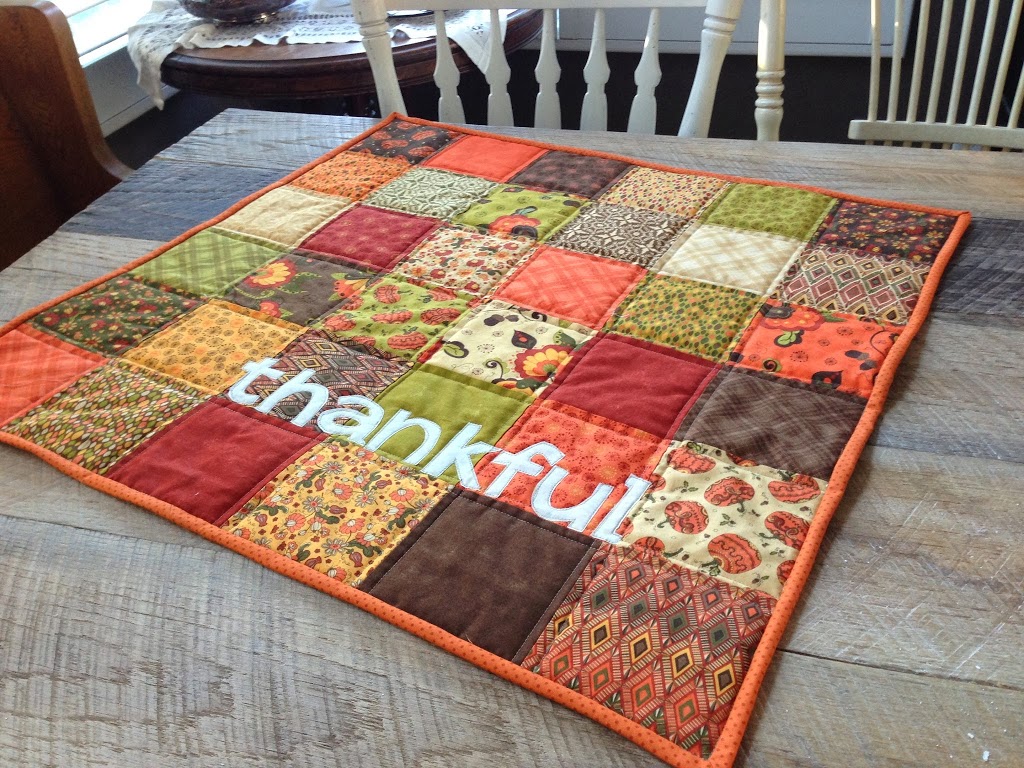
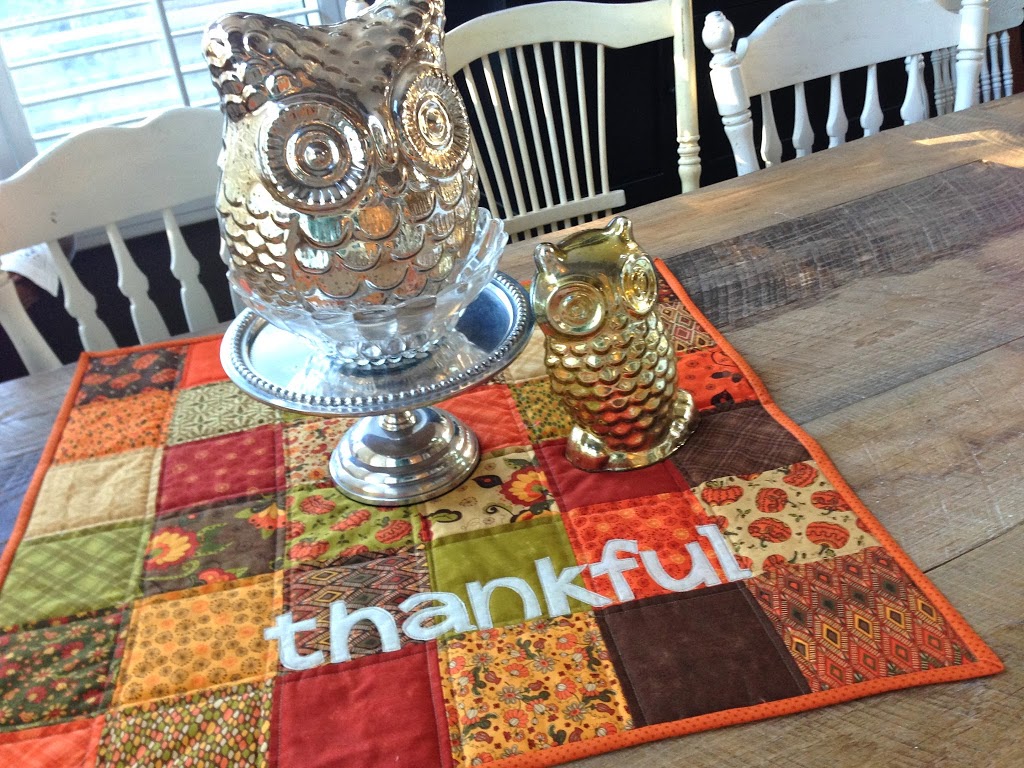
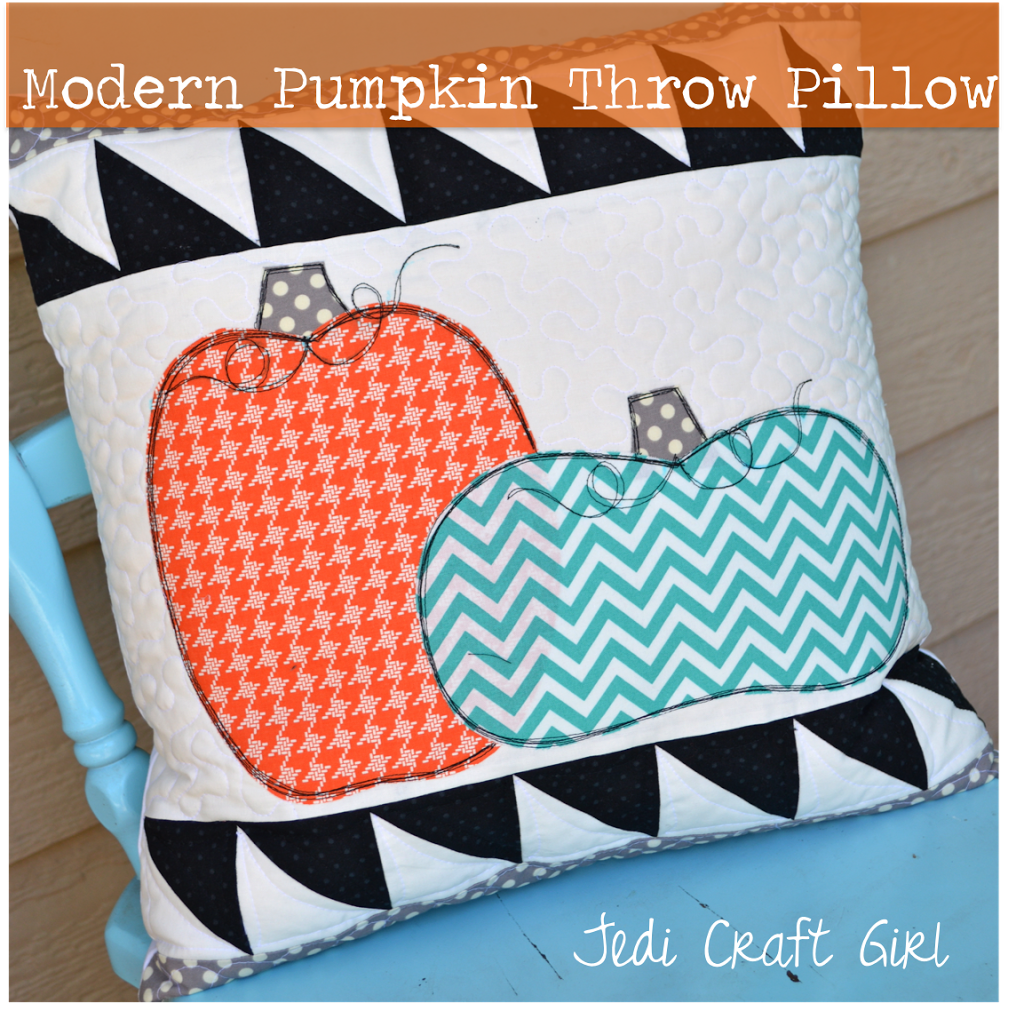
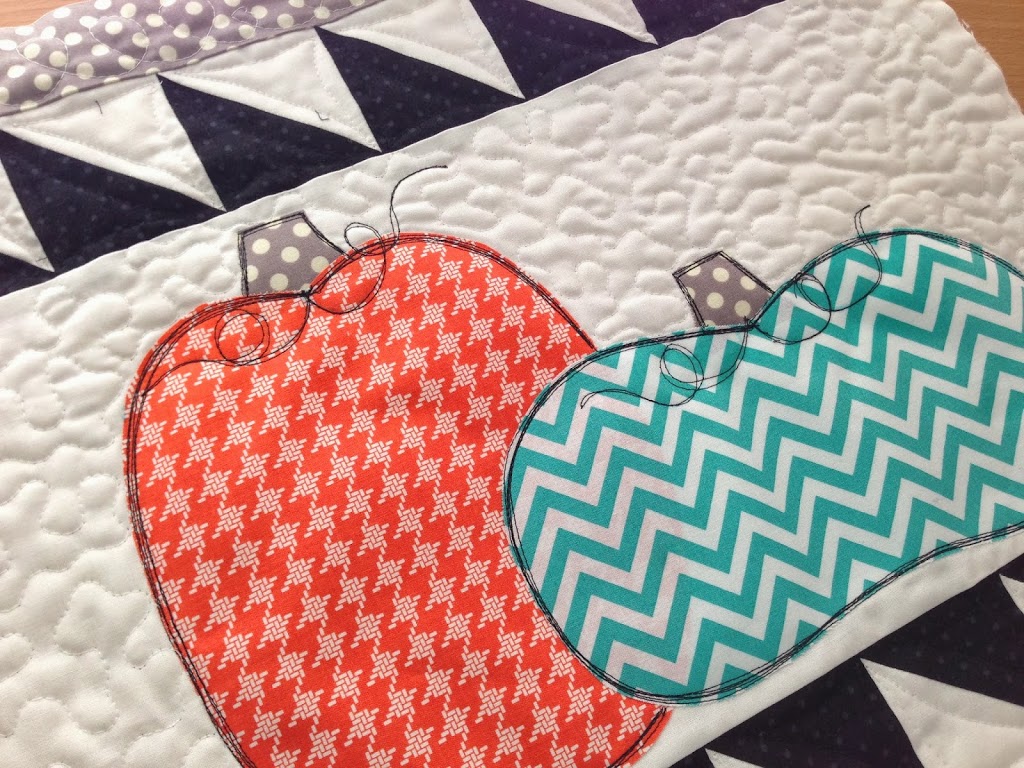
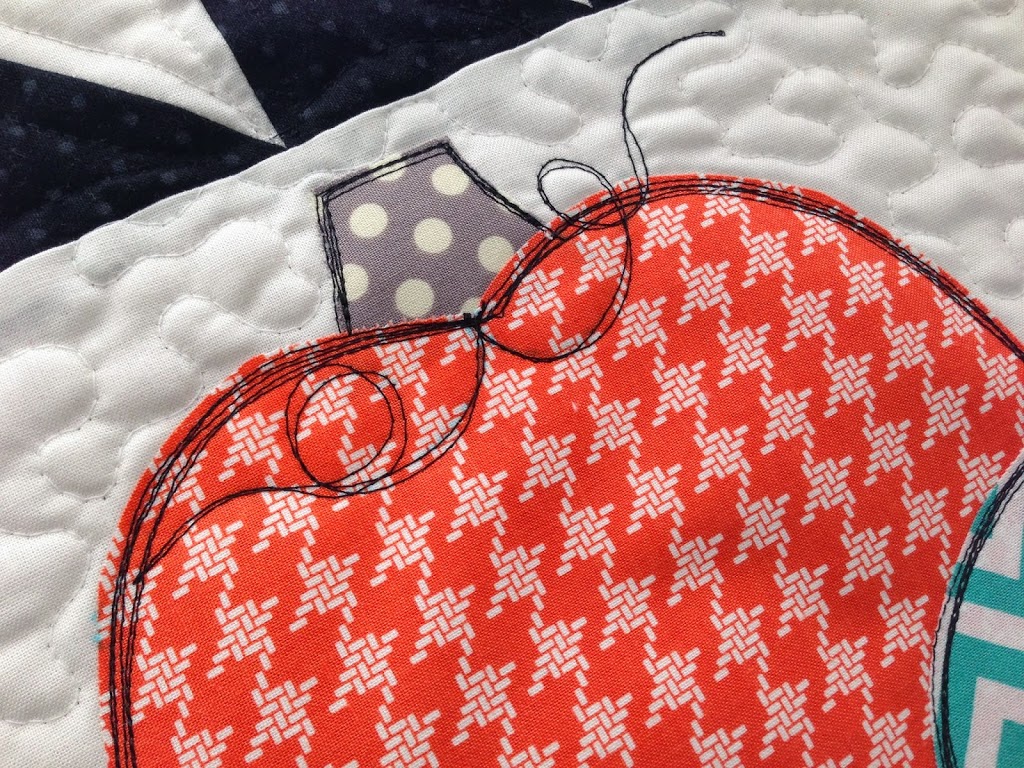
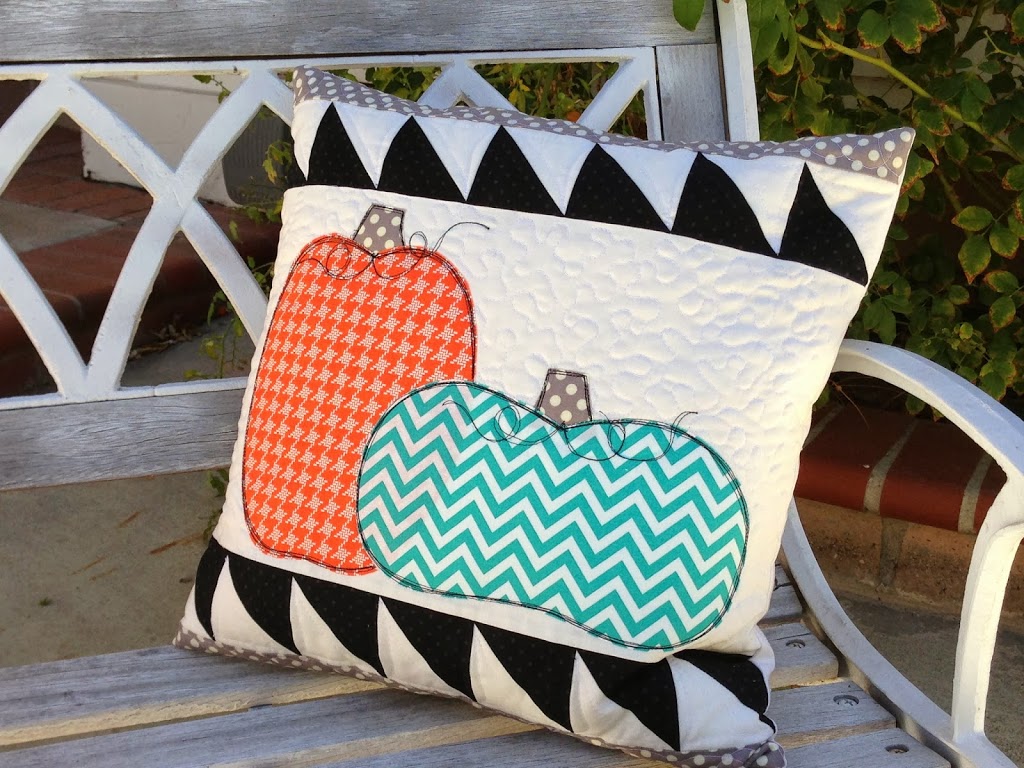
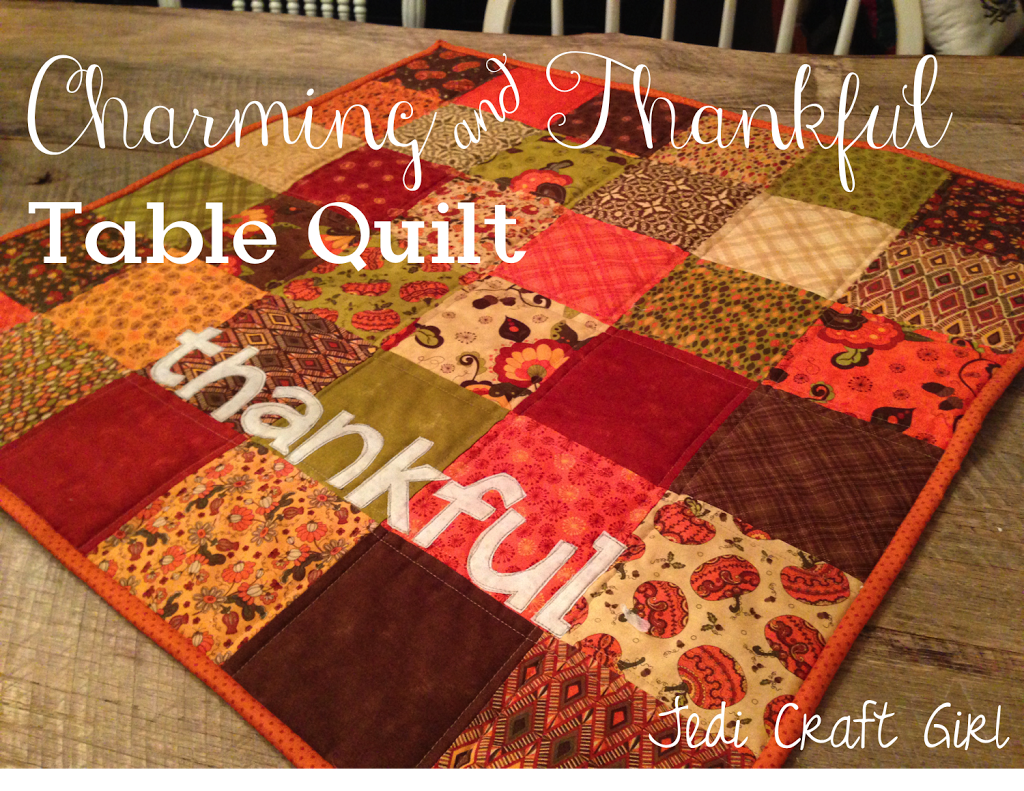
 I can’t believe it’s November 14th already!  I am sharing my tutorial for my Thankful Table Quilt over on the Therm O Web Blog today.  It’s a fun little project using just 1 charm pack and the word “Thankful” appliquéd.  It sews up really quick! I just love these fall colors!  The charm pack I used is Posh Pumpkins by Moda.

Amanda

Deer Friends, Christmas Deer Throw Pillow Tutorials

Do you like my new chairs?  I just ordered them from Amazon and they came in 2 days!  It was totally risky of me to just push a button and have chairs sent to my house, sight unseen!  But, I LOVE them!  They are exactly what I wanted and they are even comfortable!!!  The whole reason to buy new chairs is to sew new pillows, right?  I am obsessed with deer!  Deer throw pillows my chairs do need (a little Yoda verbiage!)
My friend and I got together and the children played and we sewed!!  An entire herd of deer throw pillows!
Here’s how to make the appliqué deer pillow: My pillow form is a 20″ square down pillow.  Down is a bit “squishy” so the pillows have a more casual feel. 
Appliqué Pattern, download HERE.  Print 2 of these and reverse one of the images.  The image is on 2 pages because it is larger than a piece of paper.
Print out the pattern and tape it together.  Trace the pattern onto Heat n Bond Lite fusible appliqué.  I used a wool blend fabric for the gray deer.  You can use any type of fabric.
Cut the chevron fabric 21″
Iron the deer to the center of the fabric and stitch around the deer.
I wanted a bit of an accent on the back of the pillow, so I put the zipper on the back with a decorative flap over the zipper….sounds hard but is super easy!!
To make the flap, cut your accent fabric 5″ x 20″ and press in half lengthwise.  
Cut your back pieces 4.5″x20″ and 16″x20.
Lay them out like this with your zipper placed as so (NOT invisible zipper)
I promise I ironed my pieces!!
Layer the top piece of the pillow back, the folded flap, and the zipper so all the raw edges align, like this:
Using your zipper foot, sew along the zipper.  For the other side with out the flap, sew the backing fabric to the zipper just as you would normally sew in a zipper.  Press the flap down to cover the zipper – super easy!!! Pin the pillow front and back with right sides together.  Make sure to open zipper so you can turn it.  Sew a generous 1/4″ seam around the entire pillow!

I couldn’t just have 2 deer pillows – I needed more.  This one is super quick!  It is for a 18″ pillow.

Cut the center deer fabric 10 1/2″ x 19″
Cut the aqua snowflake fabric (2) 4 1/4″ x 19″
Sew them in this order using 1/4″ seams

 I had this pretty light gray lace I top-stitched over the seams.  Now, cut the back of your pillow 19″ square and finish as desired.  I put an invisible zipper in the bottom.

Deer pillow #3 – this fabric doesn’t exactly have deer on it, but it has antlers atop the Cuckoo clocks!  And it’s teal!!!  Another quick pillow!!  This pillow form is 20″ but it is pretty floppy, so I decided to cut my pillow cover at 20″ so it would fit better.

Cut the teal print 15″ x 20″
Cut the gray dot 5 1/2″ x 20″
Sew using 1/4″ seams
Cut the back piece 20″ square.

Top stitch lace along seam.  Finish as desired – again another invisible zipper – those things are totally AWESOME!!!

Here are my friend’s cute deer pillows – she used a bolder chevron and a brown deer on an 18″ firm pillow.

I am so loving the zipper flap!
Sewing deer pillows makes me happy 🙂

Amanda

Tricks and Treats Halloween Tote Bags

I love sewing for Halloween and can’t seem to get enough Halloween fabrics!  My tutorial for these fun bags is over at the Therm O Web Blog.   I used Fusible Fleece to make these bags – it is quick and easy and it makes the bags soft.  I love that the bags can stand up on their own and don’t flop over.  They are perfect for carrying LOTS of CANDY!!!
I designed these “Tricks” and “Treats” bags for the Therm O Web fall advertising campaign!  I am pretty excited!!!  
 I found the ad in this magazine – it has such cute ideas!!!
For more Halloween Tutorials click :

Amanda

Spooky Potion Throw Pillow

I can’t believe how fast October is flying by!  There are so many projects I want to make, and so little time!  I thought this pillow was super fun.  The spooky bottles are from Blend’s Spooktacular line of fabric.  The tutorial is over on the Therm O Web blog today!

Amanda

Halloween Applique Art

Today my Halloween Appliqué Art Tutorial is over on the Therm O Web Blog!  This project was super fast and super easy!  This would also be a fun project to let your children design!

Amanda

Halloween Table Square Tutorial

 Today I am a guest blogger over at Ginger Snap Crafts.  I am sharing this quick and easy tutorial for a cute Halloween table accent.  I can’t get enough of orange chevron!!!

Amanda

Halloween Pillow Tutorial

When the calendar turned September, I was wishing so badly that it was still July.  How I love the summer!  Today is October 1st and I have decided to deal with the fact that time is moving super fast!  Bring on the Halloween!  Pumpkins, owls, candy, costumes, bats, black cats and everything else!
My summertime throw pillows were not matching my Halloween decor.  I decided to make Halloween covers for my current pillows.  This one only took about 30 minutes start to finish.  Here’s how you can make one:
Supplies:
Iron- on transfer paper (purchase at Michaels, Wal Mart, etc. in the computer paper section)
Graphic to print
(2) 17″ squares of light colored canvas, duck cloth or other heavy fabric
1 yard of super jumbo ric rac
16″ pillow form
To begin, you need a graphic to print on the iron-on transfer paper.  If you are artsy you can make your own.  I went to Etsy and searched “Halloween pillow iron-on” and 19 pages of vintage style Halloween graphics came up.  Most of them are only $1.00 and download instantly.  Super fast & cheep – yea!
Size the graphic to take up as much of the 8.5″ x 11″ paper.  Make sure to tell the printer to “Flip” the image or “Mirror”.  It needs to print out backwards 🙂

Trim about 1/8″ around the graphic

Follow the manufactures instructions.  Essentially use a dry, hot iron and press into place.  It takes a few minutes.  Then when it’s cooled, peel off the paper backing.  I love it already!!

I thought a little trim would be fun and still keep the pillow somewhat simple.  Pin the super jumbo ric rac into place.

When sewing normal ric rac, you just sew a straight line down the center.  I did this with the super jumbo ric rac and the points were still floppy.  With matching thread, follow the zig zag of the ric rac and sew into place like this:
You can finish the pillow using your favorite method.  I put an invisible zipper in the bottom.  Click HERE for the tutorial.  You could easily sew, turn and stuff the pillow or sew an envelope back.  I love how it turned out!!  It’s super spooky!!!

Amanda

Totally Boy Crazy Quilt Riley Blake Tutorial

My quilt pattern is on the Riley Blake Cutting Corners Blog today!  I had so much fun making this quilt.  The Boy Crazy line is soooo cute!!!  I love the retro cars, rocket ships, and submarines in the theme print.  This fabric is great for little boys AND big boys! 

I couldn’t resist doing a little appliqué.  You gotta love the yellow submarine!

With the leftover scraps I made a few zipper pouches,  because I always need more zipper pouches!  This one is for my son to keep in his backpack.  It holds his Epi-Pen, inhaler, and tissues.  (Poor guy)

 This one is for me.  I am a big Beatles fan 🙂

Amanda

Modern Pumpkin Pillow Tutorial

I love pumpkins, I love turquoise & orange, and I love houndstooth & chevron!  This pillow is all the things I love!!   Are you ready for fall?  We’ve had a HOT summer in Southern California!  Making this pillow totally got me totally excited for fall.   This pillow is quick and easy.  It’s being featured on the Therm O Web blog, click HERE for the tutorial.  I hope you enjoy it!!!

 I love the back of the pillow!  A spooky spider!

Amanda

DIY Soccer Banner Tutorial

This is my first soccer banner ever!  I had no idea what I was doing and I was determined to use only materials I had on hand.  This is what I came up with! We are the Daisies (white) and there are 5 girls on our team.  So – 5 daisies on the banner!  Not too hard!!

Start with canvas or duck cloth.  I was happy I had bought this in the fabric district for $2 a yard!  Only it was a tan/cream color – not very 5 year old!  Luckily I had just purchased NEON pink spray paint!  I hemmed the edge of the canvas then spray painted it with the neon pink.

Neon pink does not photograph very well in bright sun.  I like how it finished kind of patchy, I have quilting fabric like this.  (it’s nice to know you can spray paint anything!!)

I got out my Therm O Web Heat n Bond and traced the block letters and daisies.

Iron the Heat n Bond to the wrong side of the fabric and cut out on the line.

Peel off the paper and lay out the words.

I was afraid to iron directly on the spray paint so I grabbed an old piece of fabric and laid it on top.  It took a few seconds to get the Heat n Bond to melt.

I put an old towel on the tile floor then laid out the rest of the banner.  I ironed it on the floor – I didn’t want to move it to the ironing board.

I sewed around all of the appliqué pieces in black thread.  On the daisies I sewed around 3 times.

If I would have time, I would have hand stitched the names, but I had 10 minutes left before team pictures, so a sharpie did the trick in putting the girls names on the flowers.

I love it!!!  The neon really makes it!

 My husband assembled a PVC pipe stand and we took it to our first game on Saturday!!

Amanda