Placemat Pillow

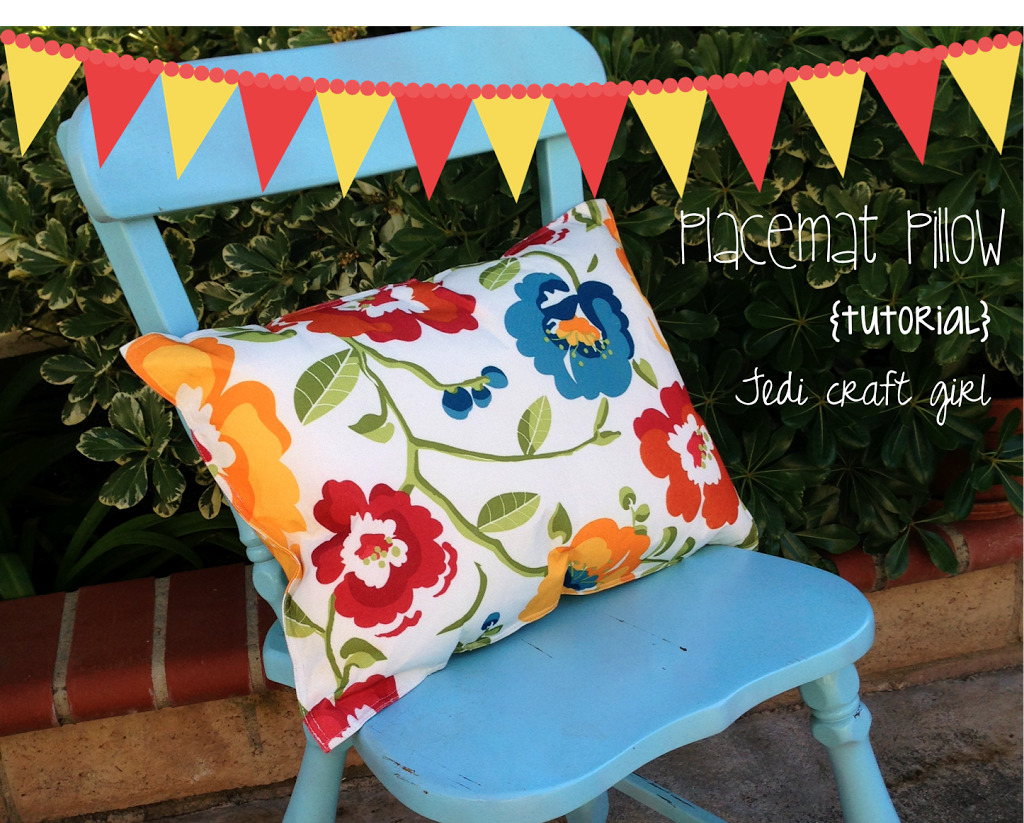
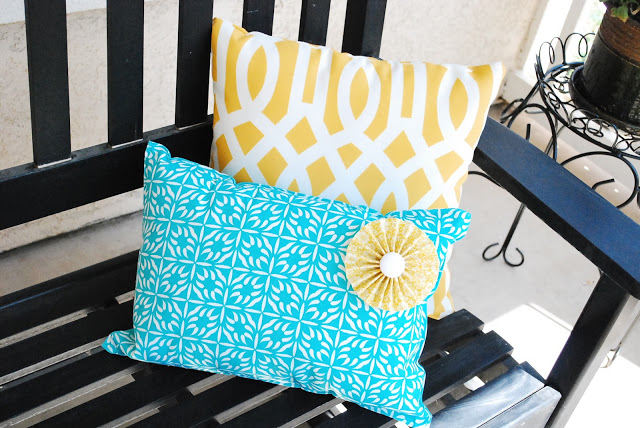
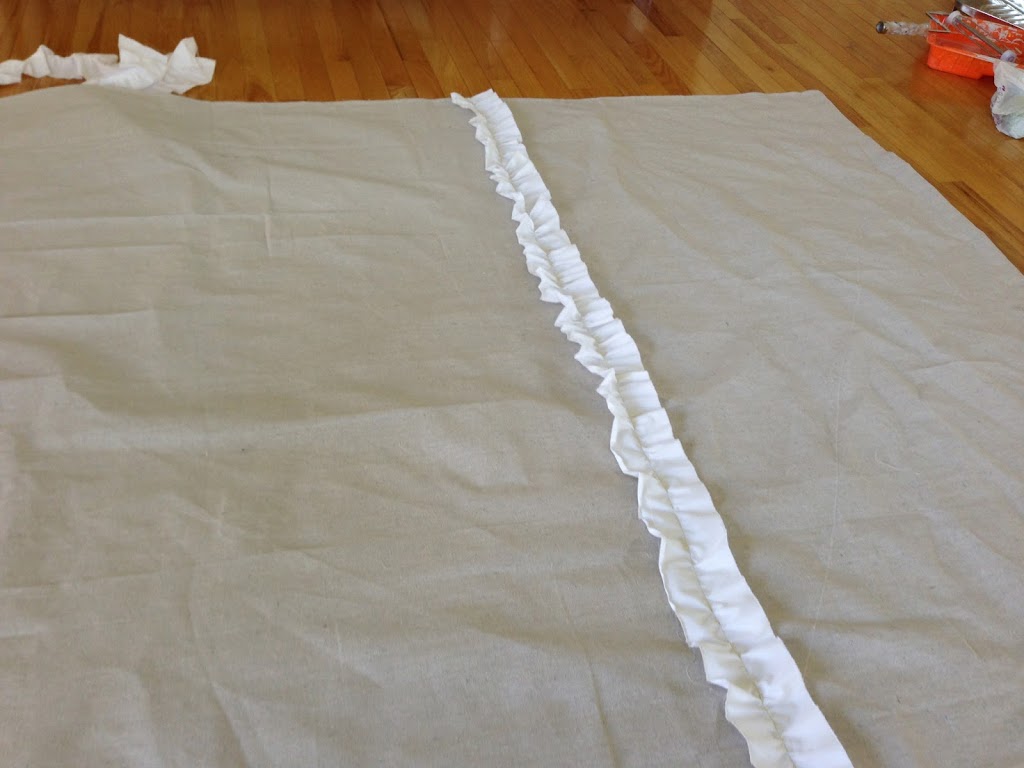
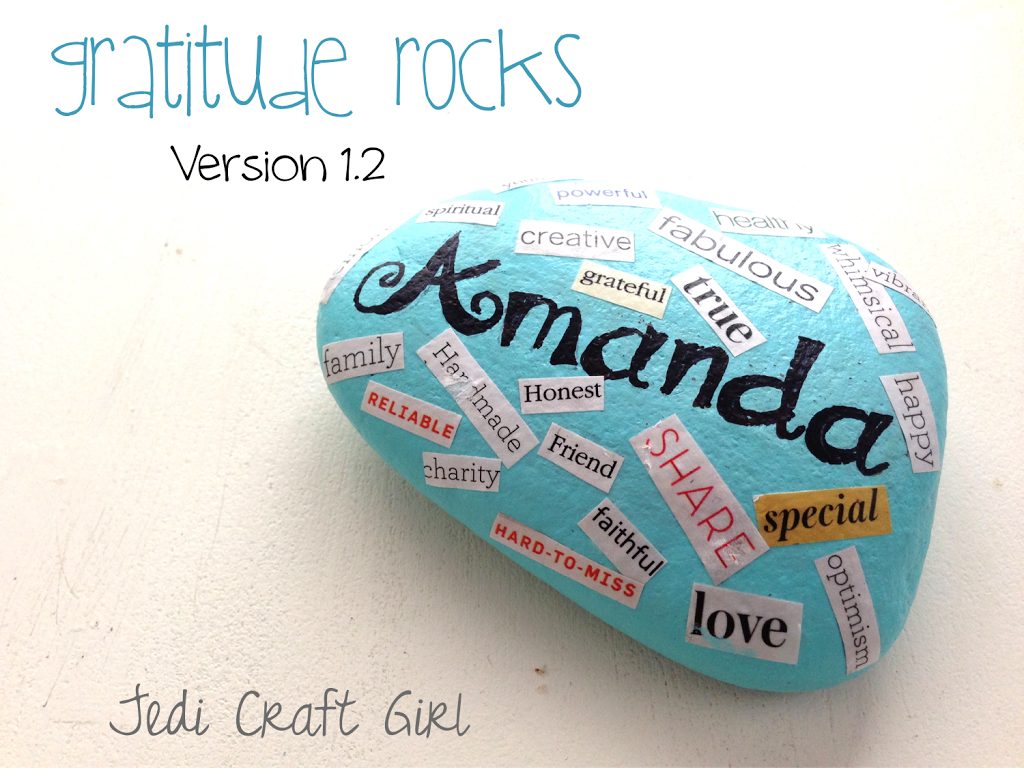
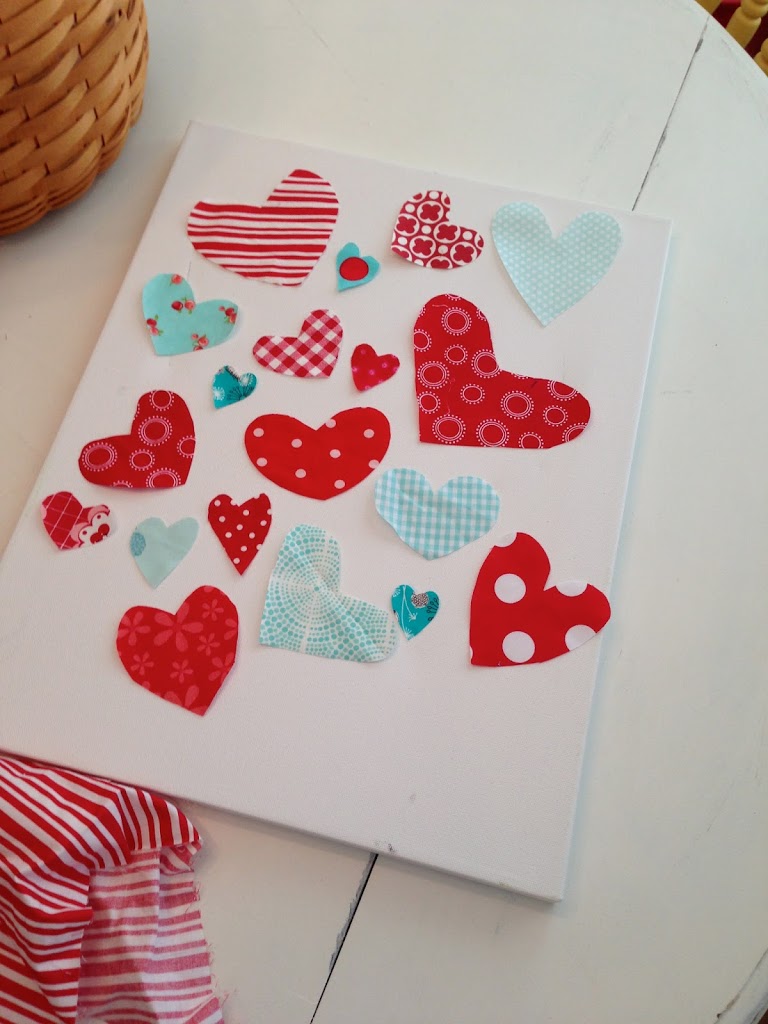
This is the easiest way to make a pillow – EVER!  You can time it – it’s about 10 minutes.  There are lots of examples all over the internet – just Google “Placemat Pillow.”  I love this turquoise one from A Pumpkin and a Princess.  The rosette added to the pillow is darling.

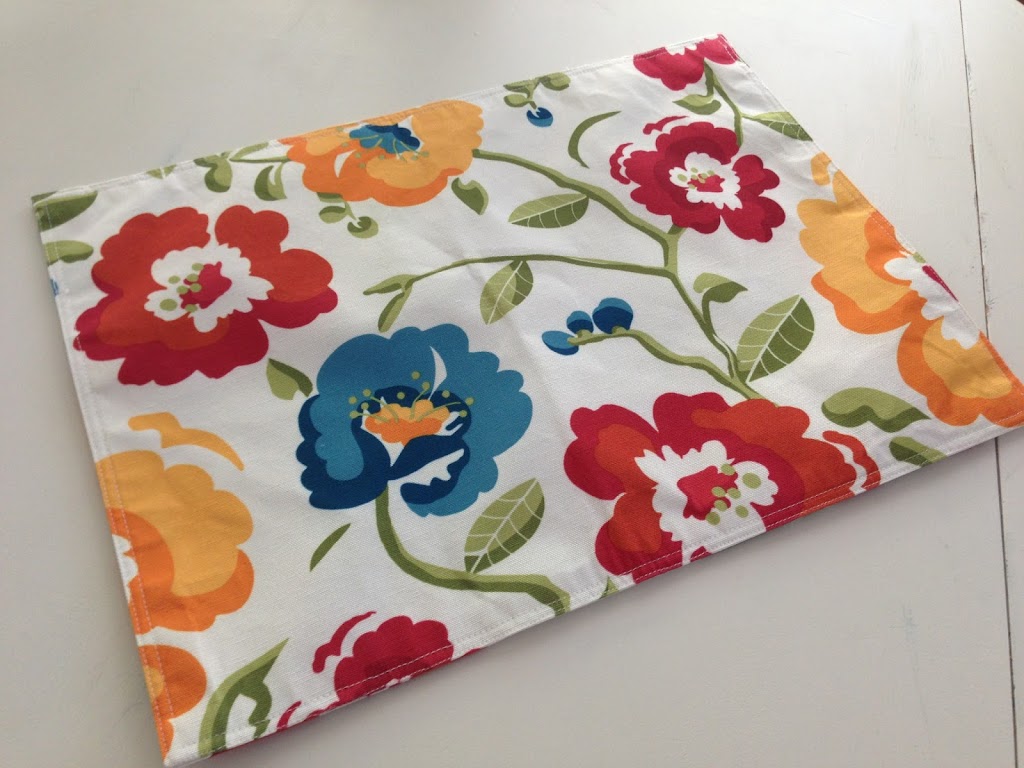
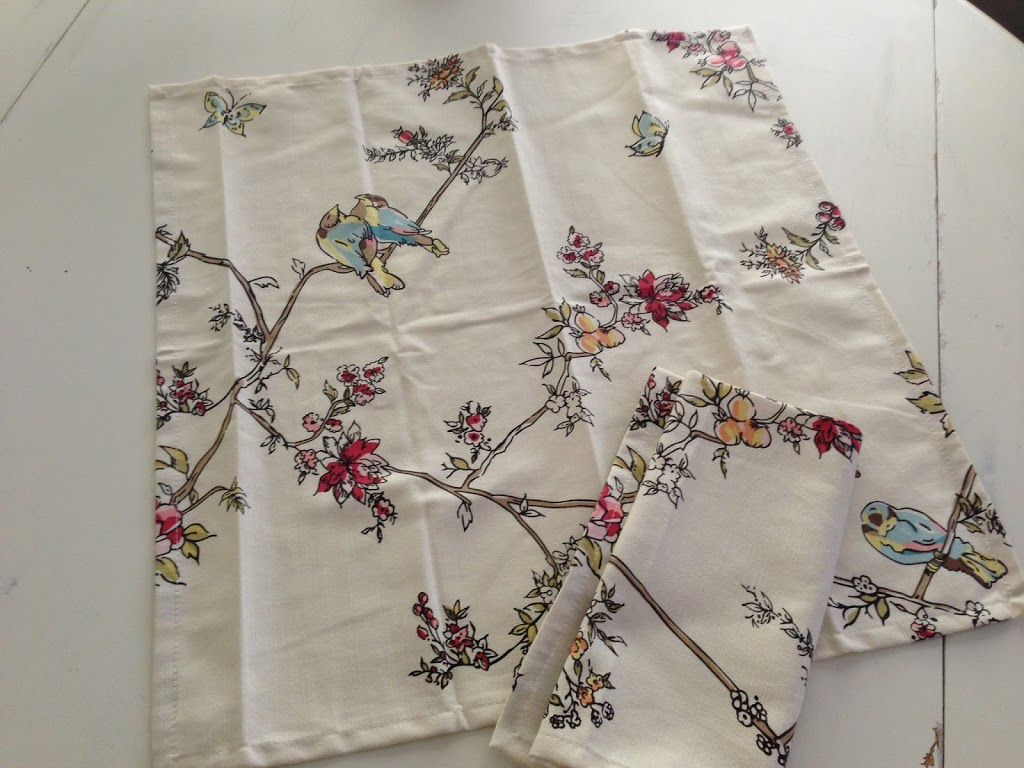
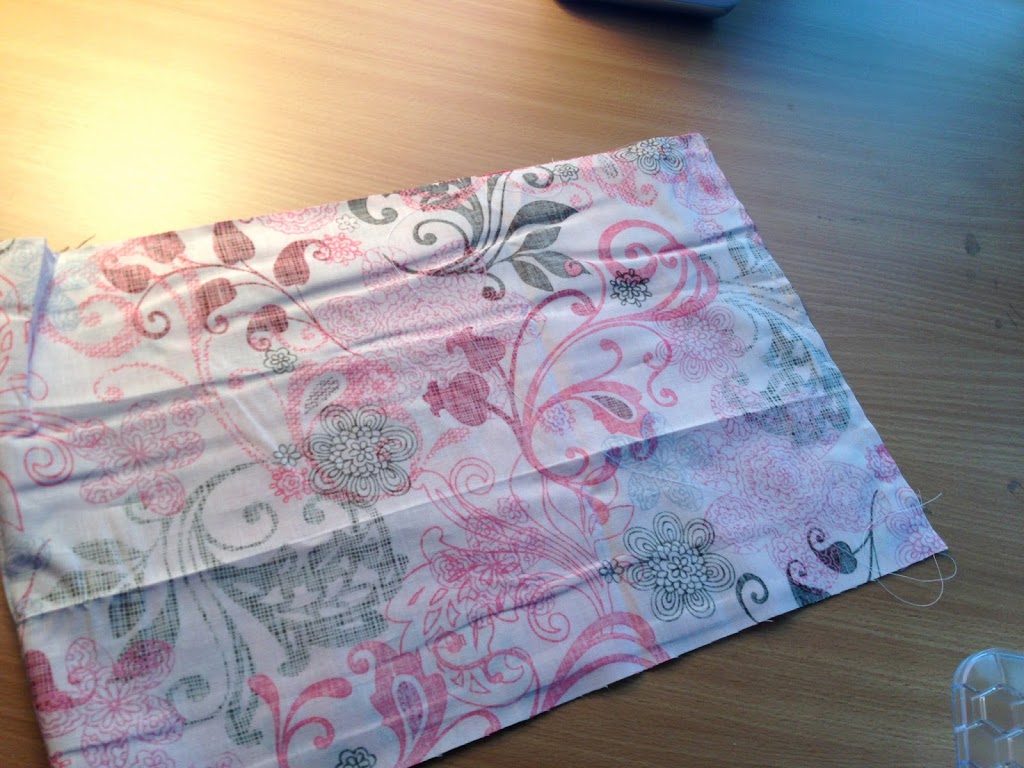
Here is how you make your own.  Get a placemat.  I bought this one at Kohls.  They have a pretty good selection of placemats.  I always see random placemats for sale and now I know what to do with them!  Snatch them up as you find them!

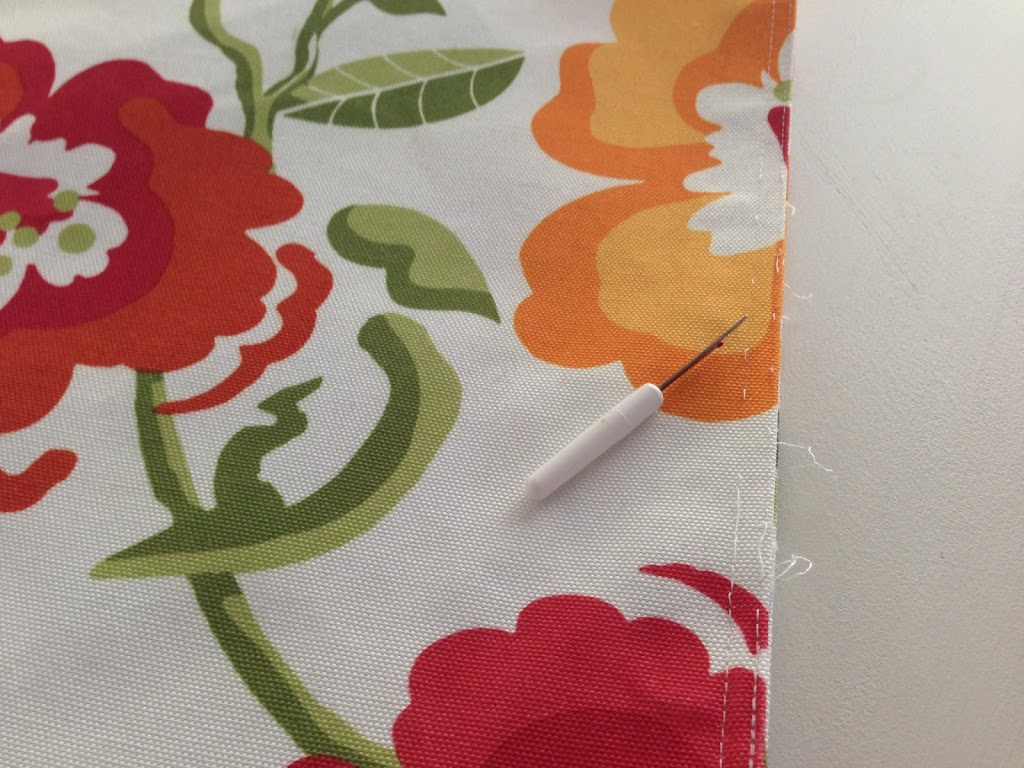
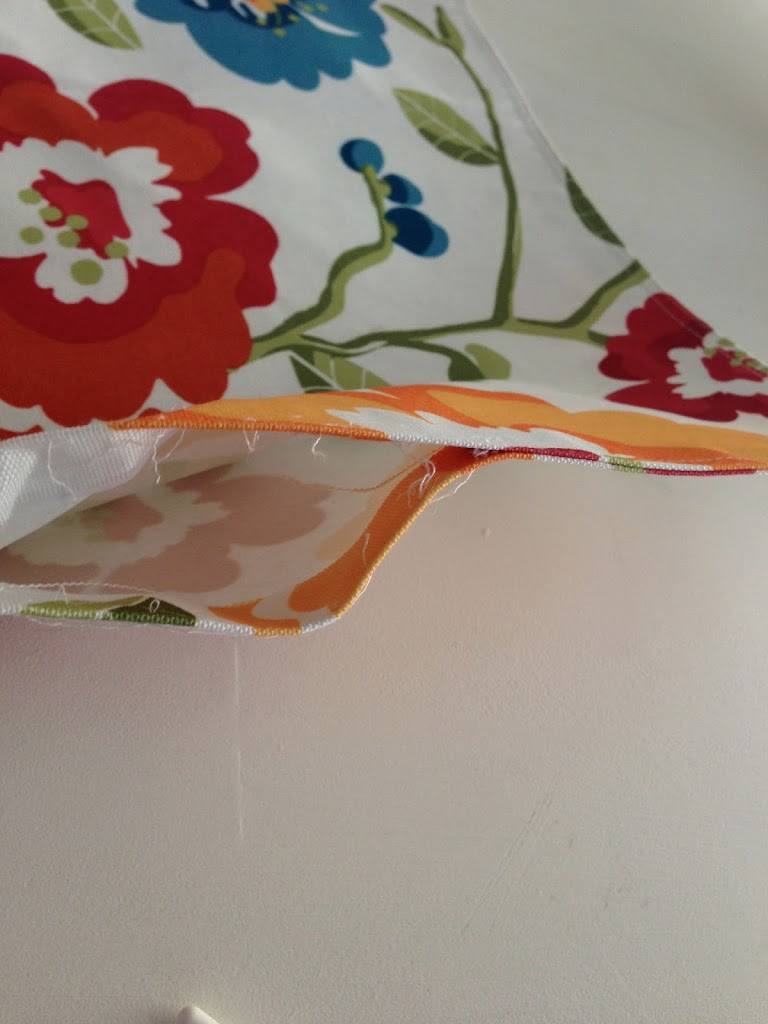
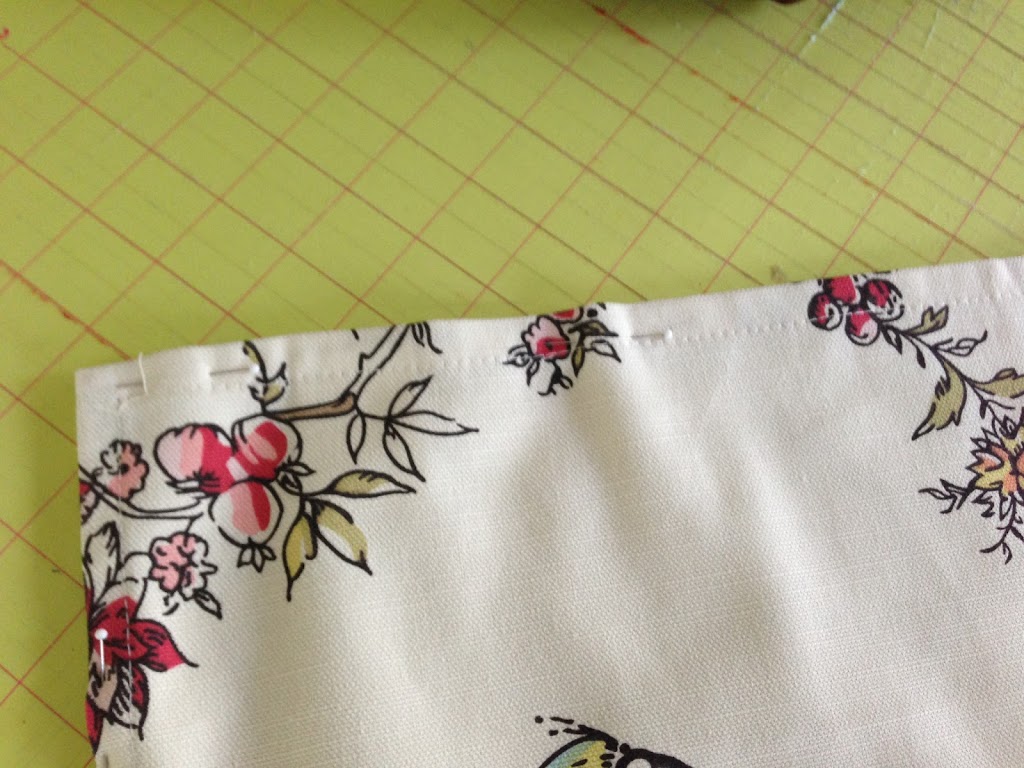
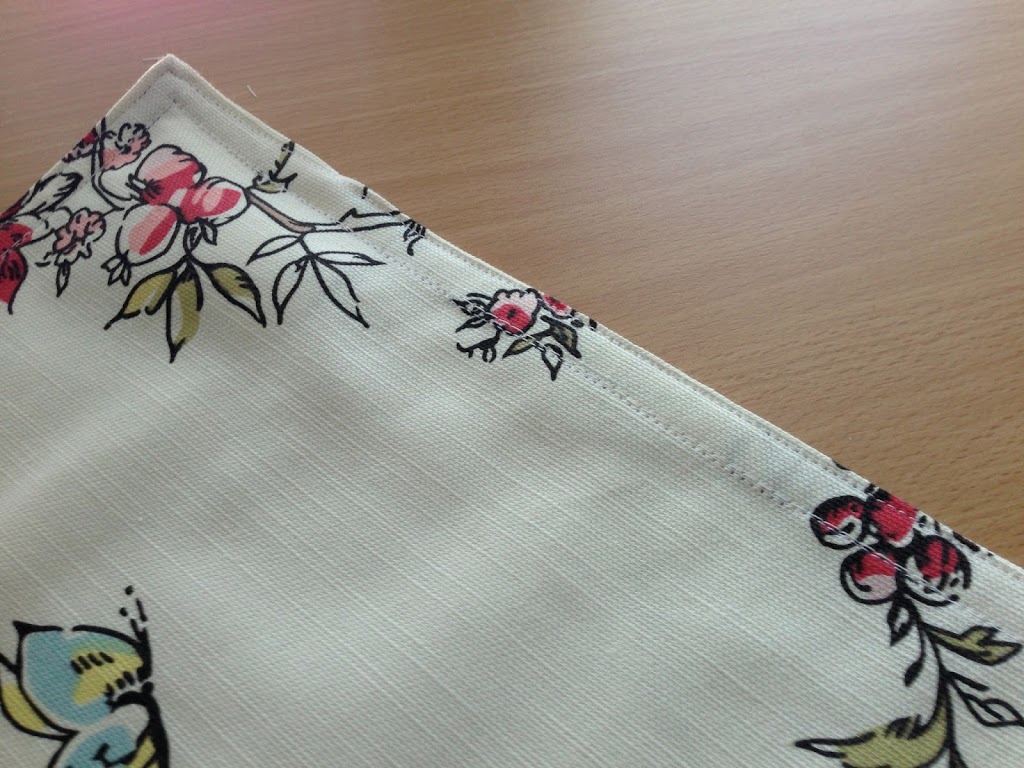
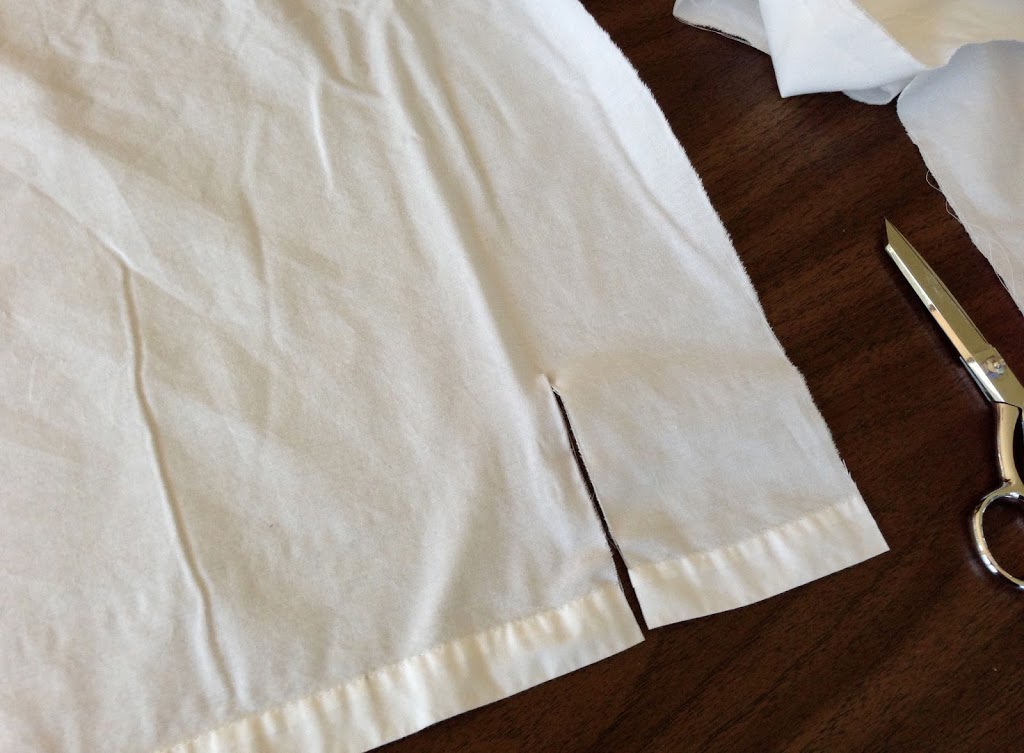
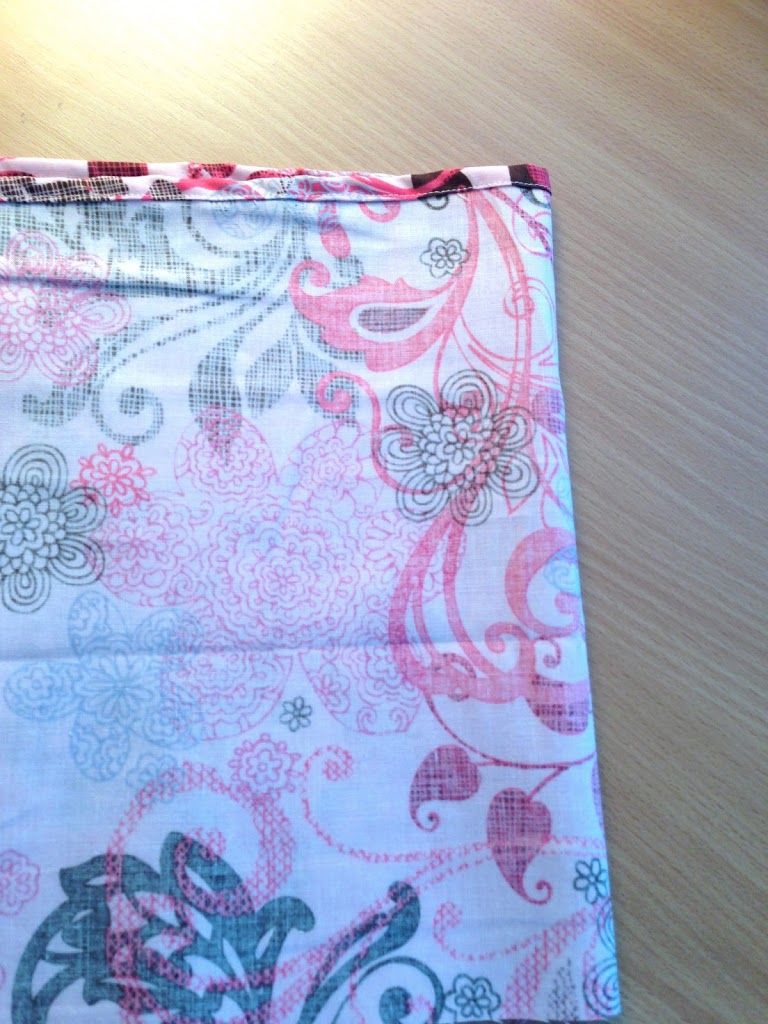
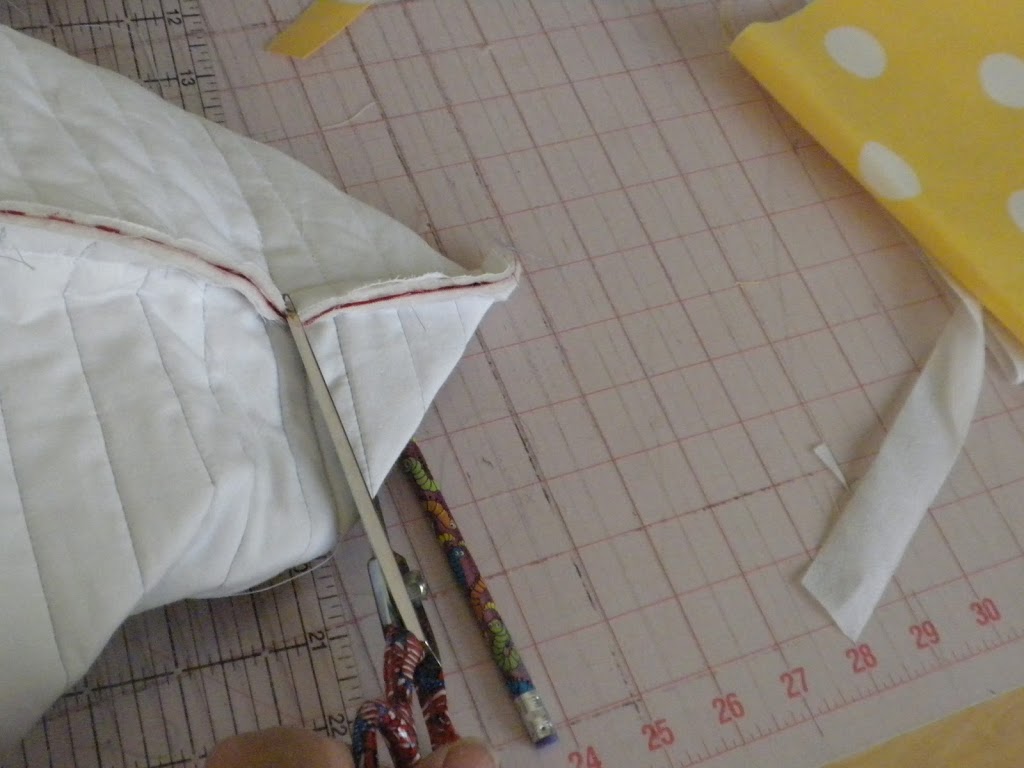
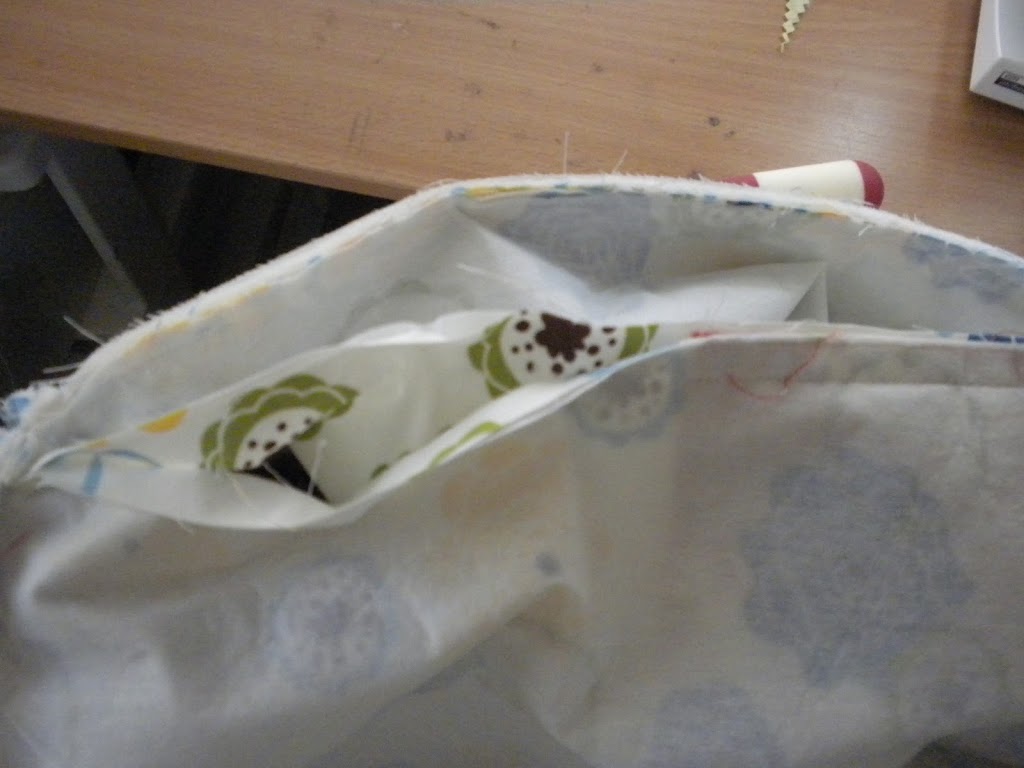
 Get your seem ripper and rip about a 4″ section of the seam – enough to get your hand in.

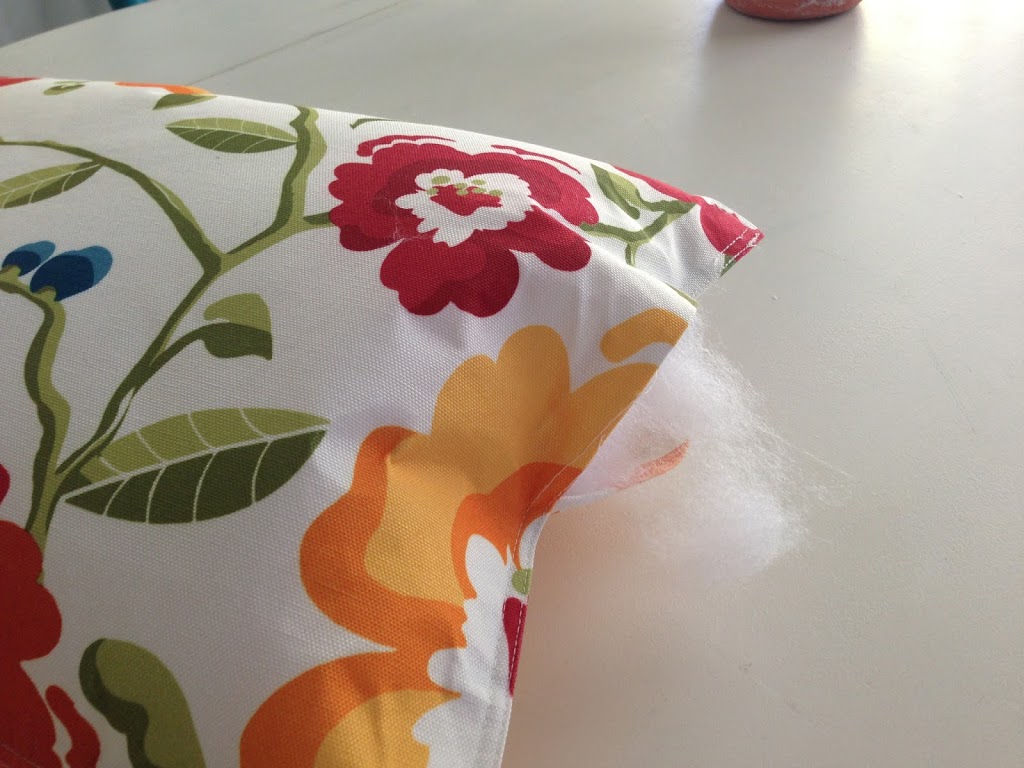
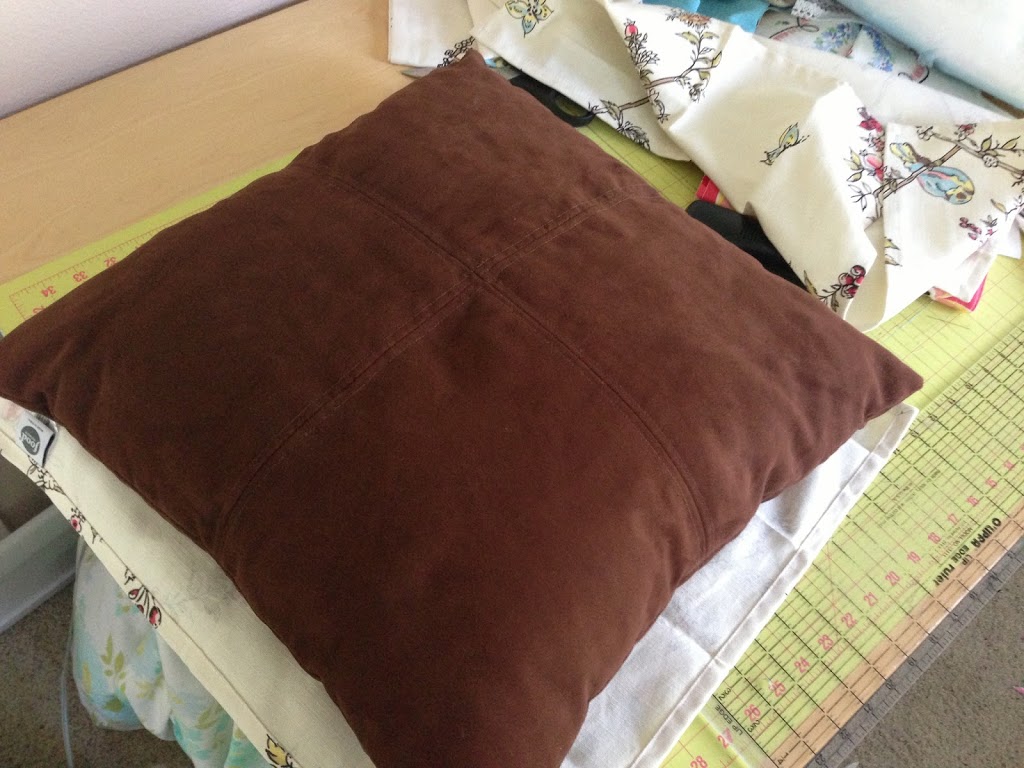
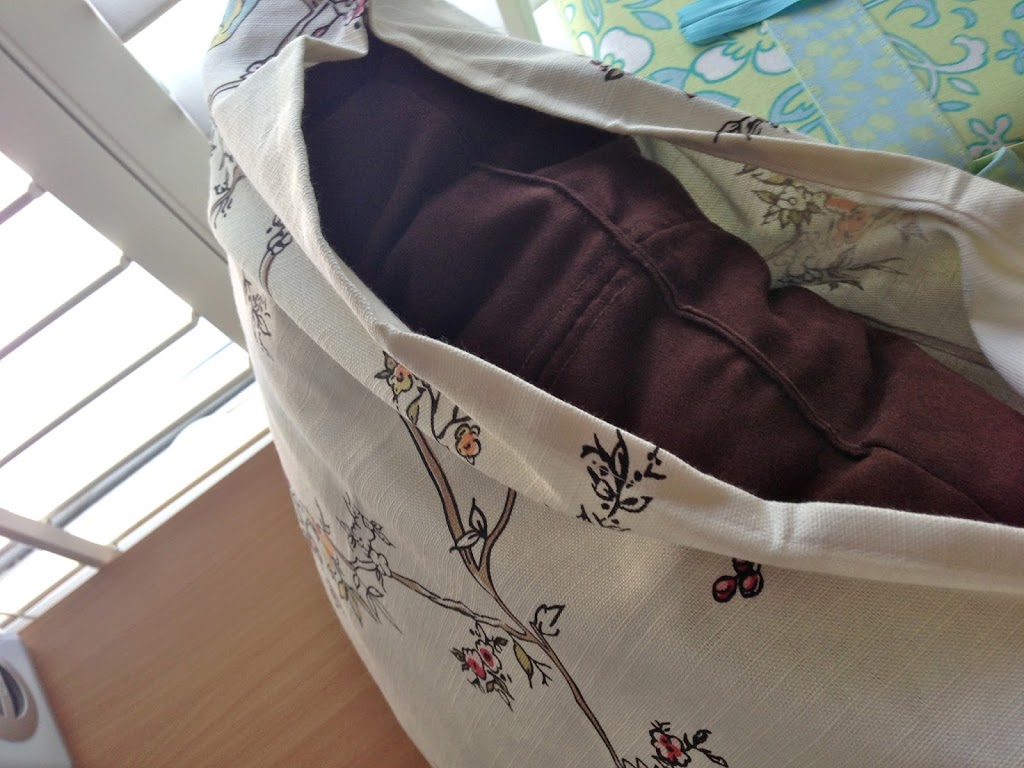
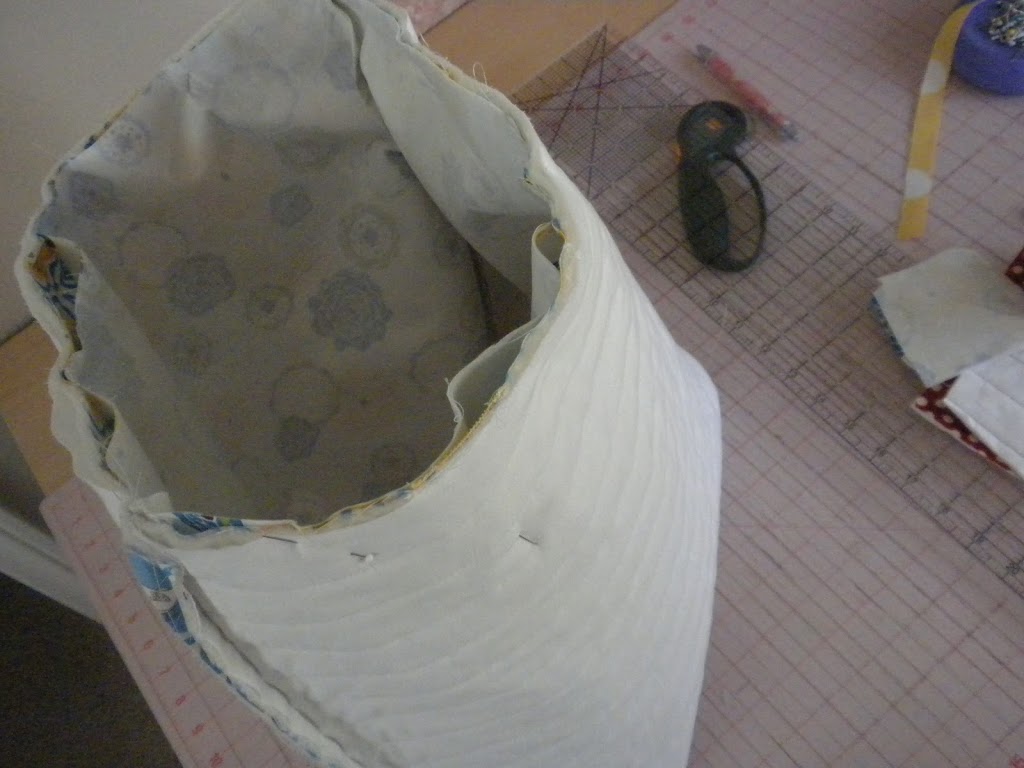
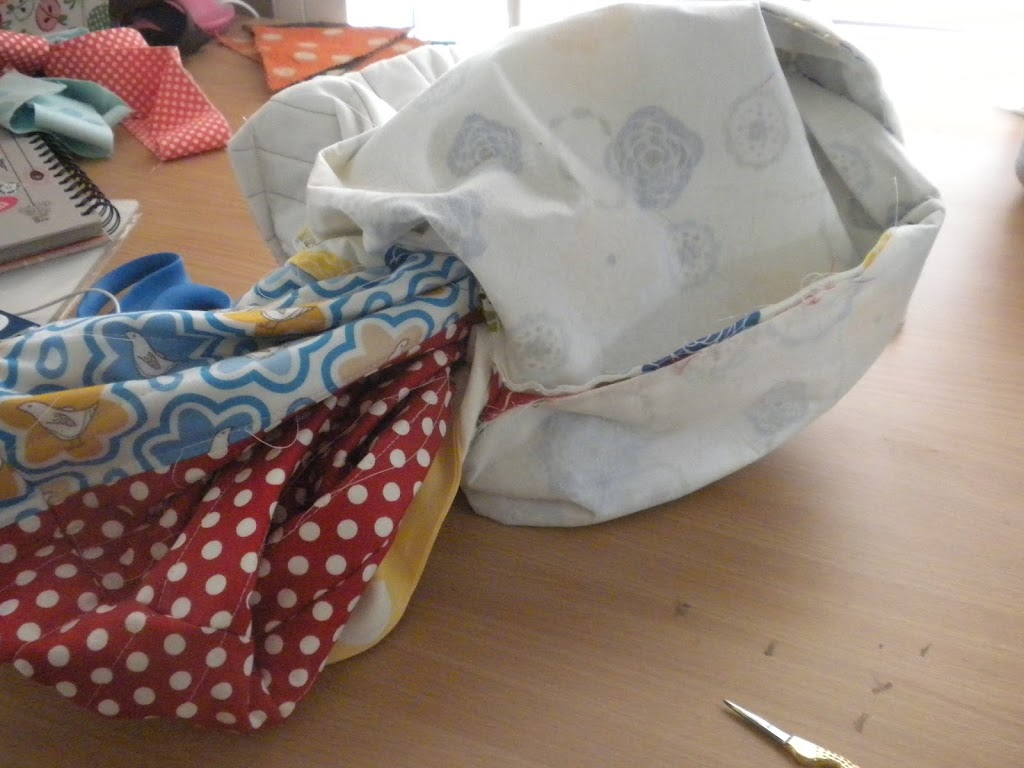
 Using your favorite fiber-fill, stuff the opening until it is the desired fluffiness.

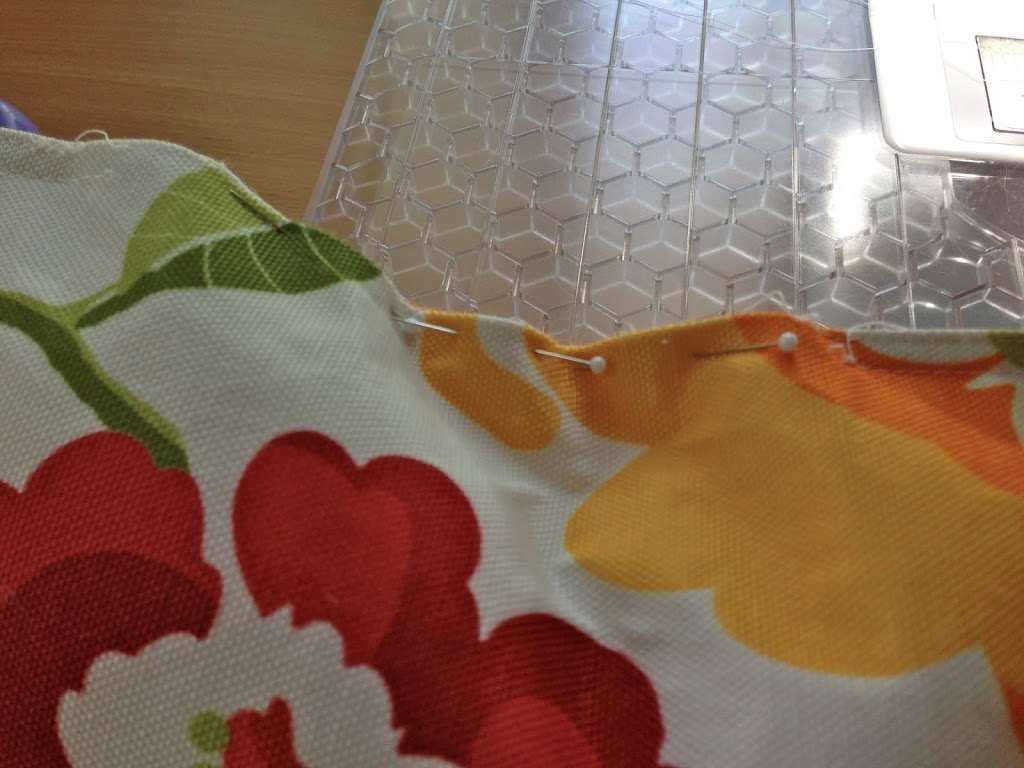
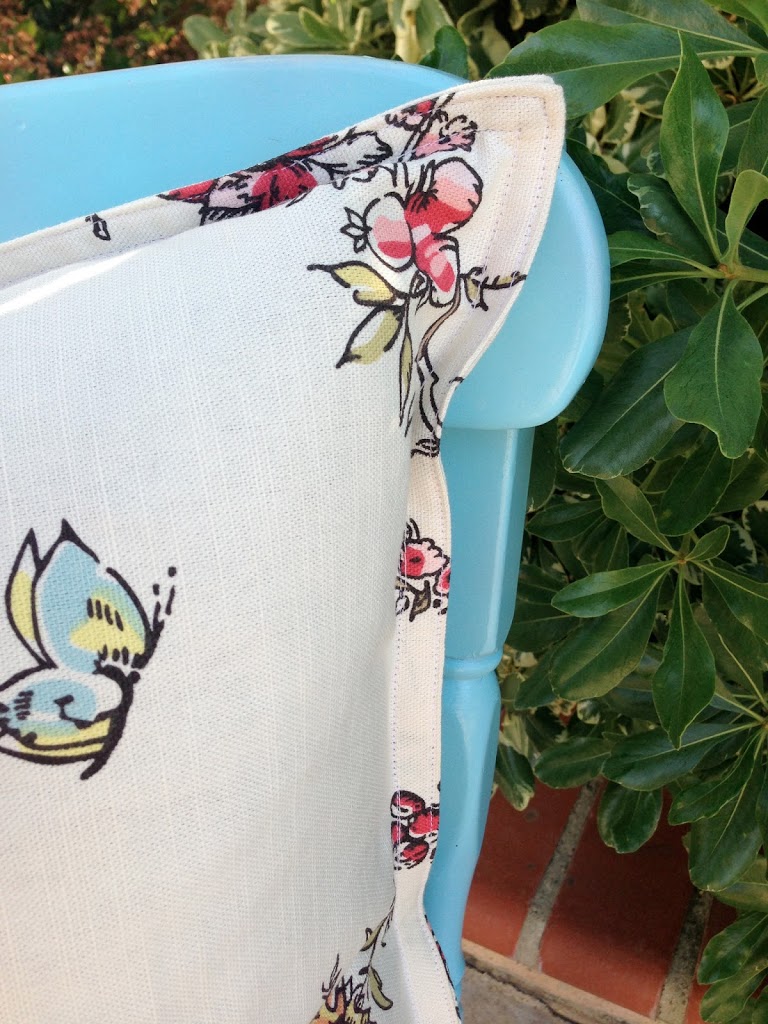
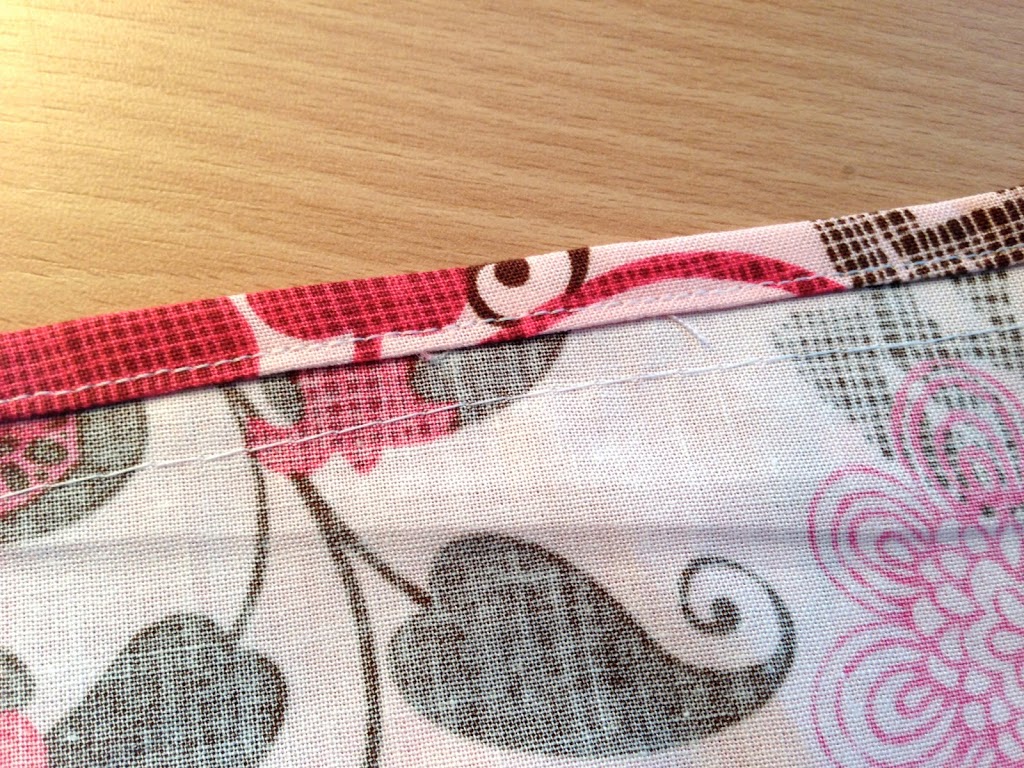
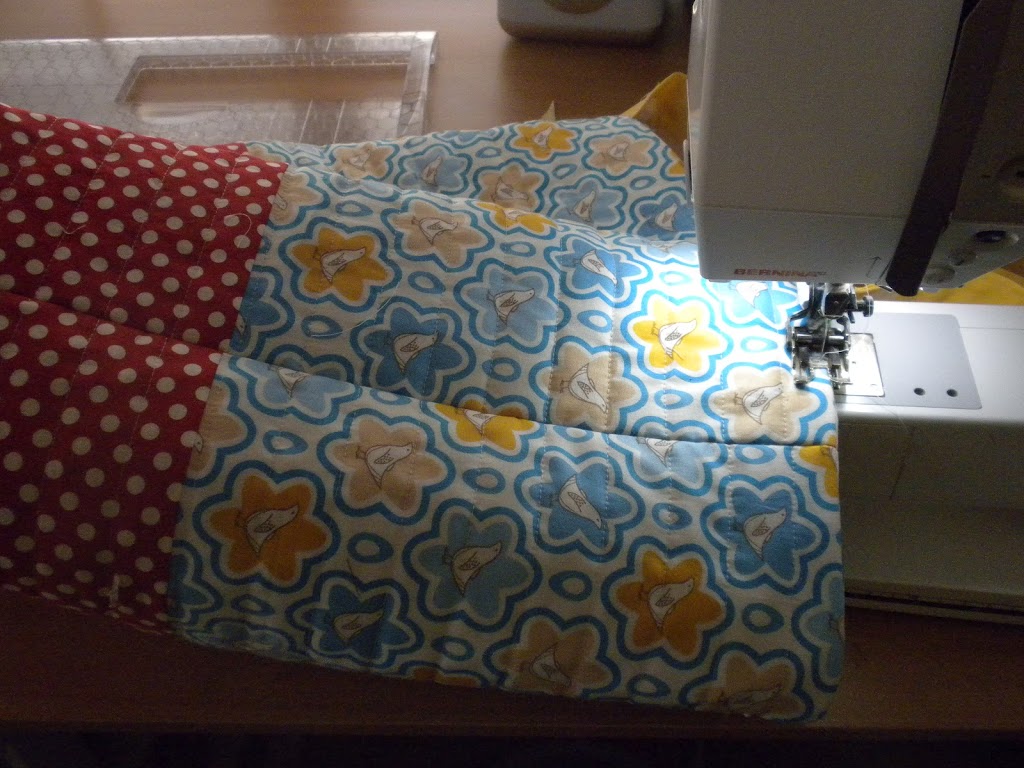
 Pin the opening closed and sew along the edge of the pillow.  My placemat had a double seam, so I sewed 2 seams.

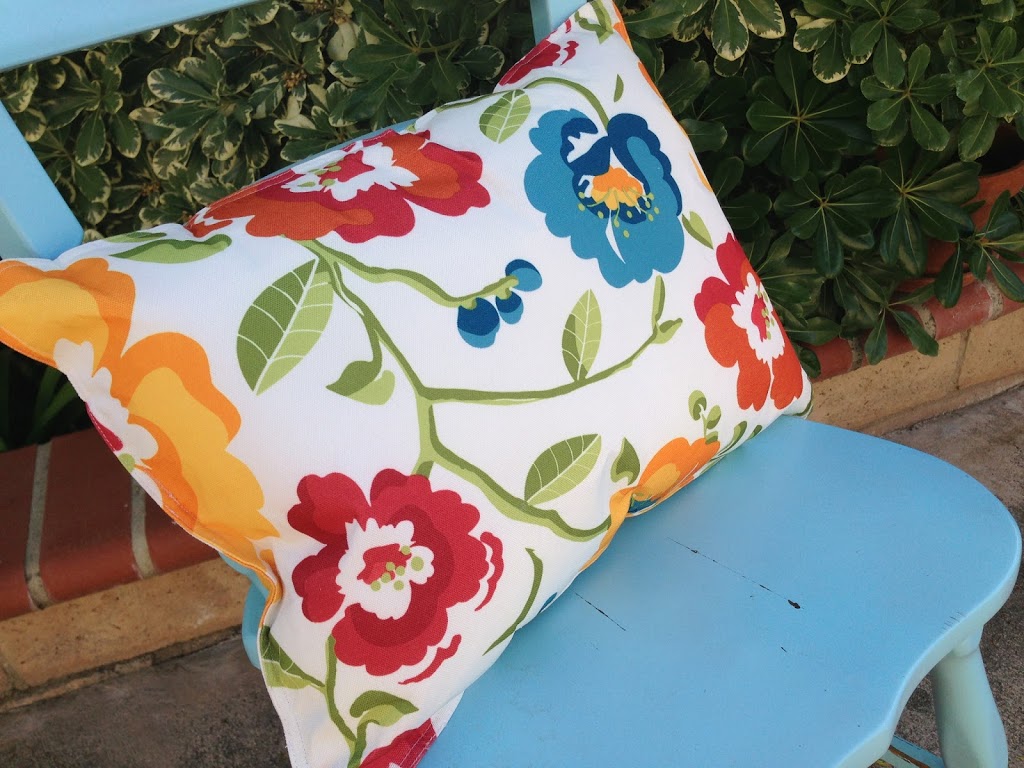
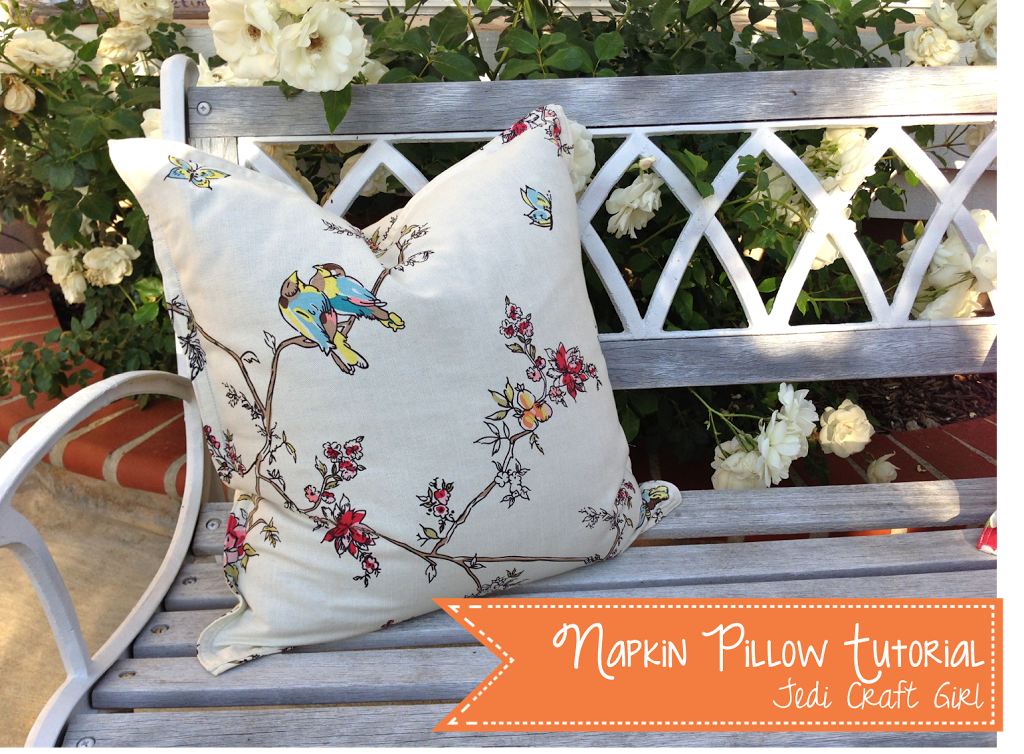
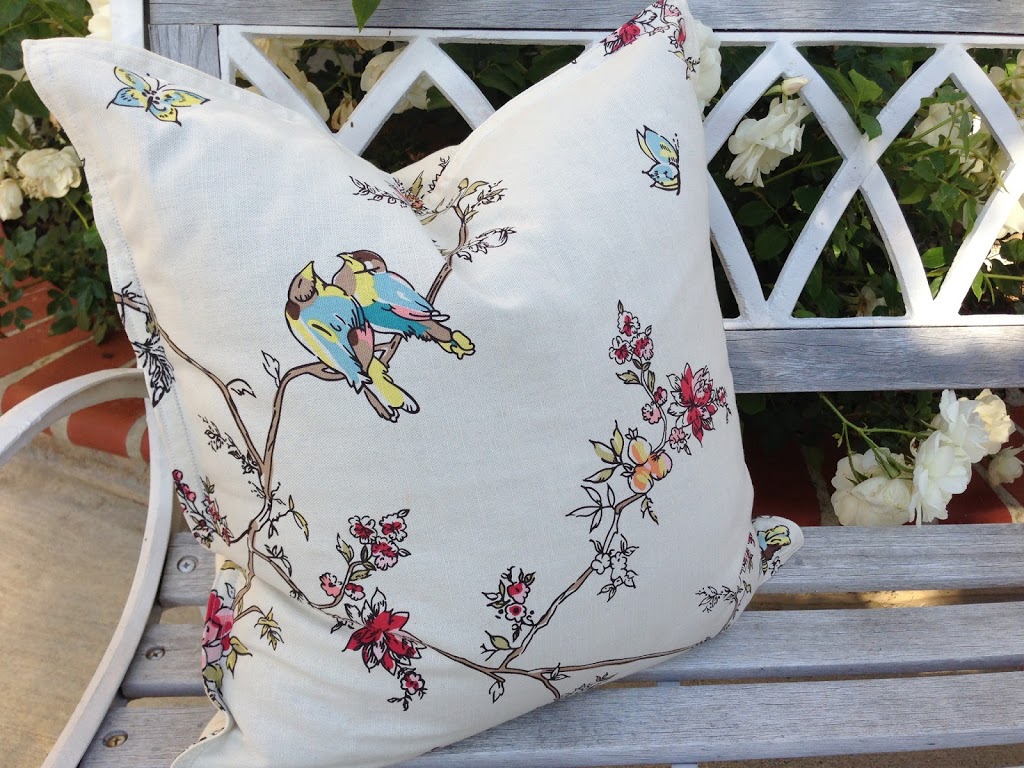
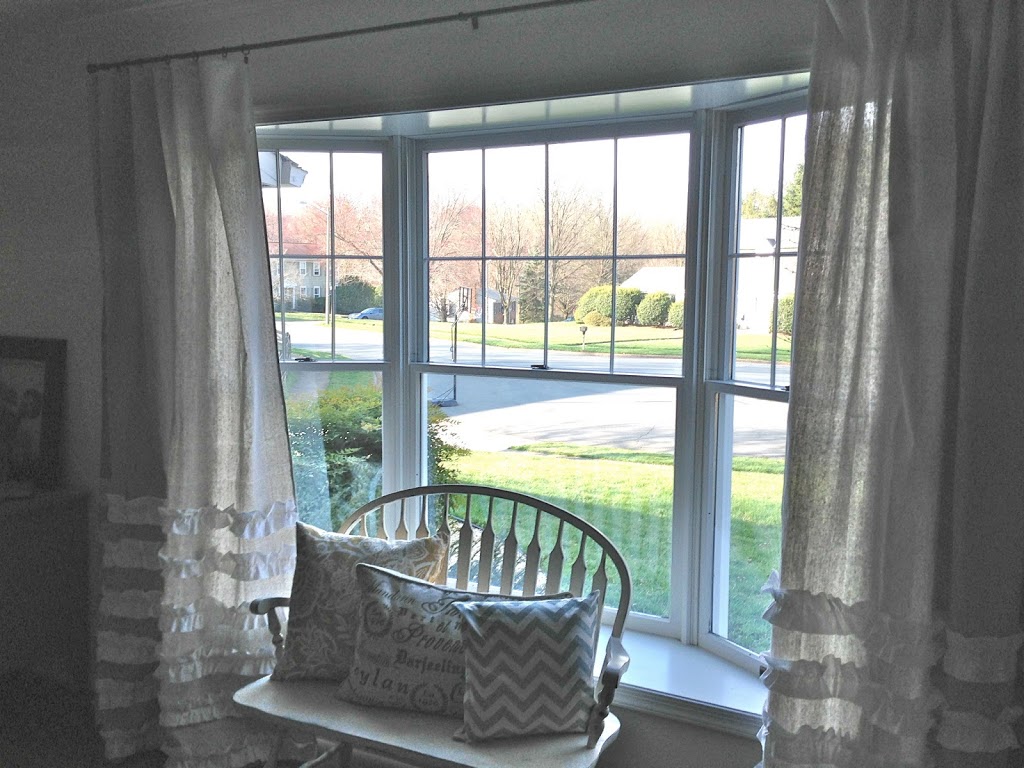
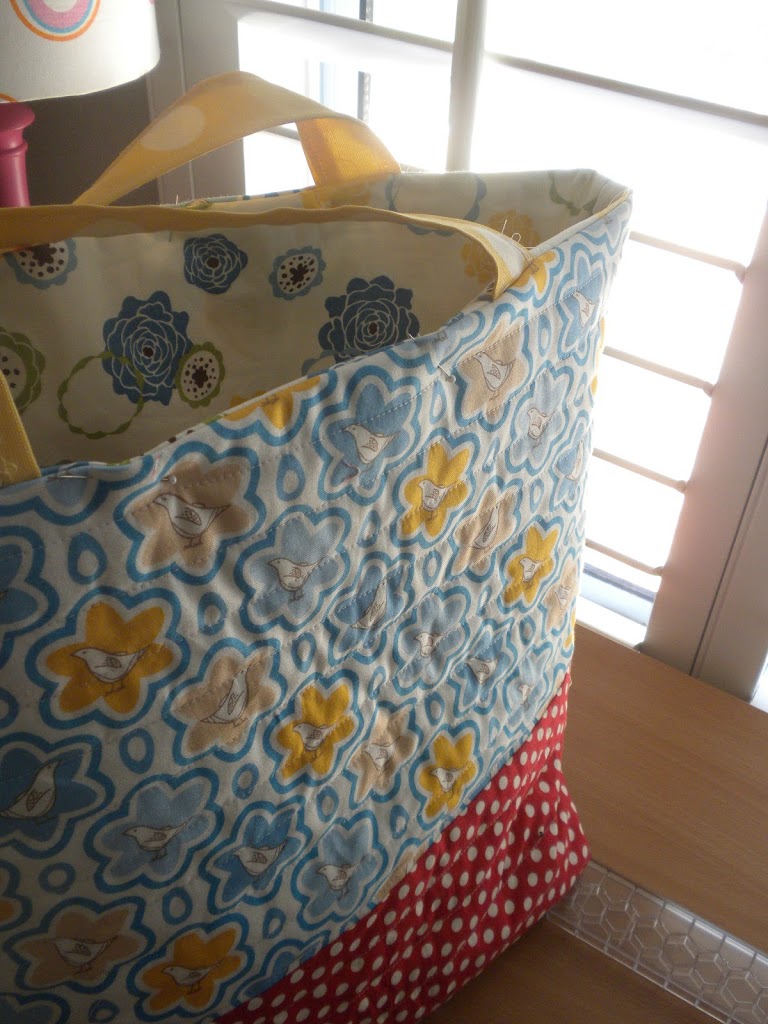
 Done!  This placemat was kind of a stiff-durable fabric.  Not the kind of pillow I would want to watch TV with, but perfect for my bench on my porch!


Amanda

Napkin Pillow


 This is a fast, easy way to make a throw pillow.  Google “napkin pillow” and you will see lots of ideas.  There are different ways to construct this pillow, here is how I made mine:

You will need 2 cloth napkins.  I bought these bird ones at Kohls.

Keep in mind we are working with cloth napkins.  Have you ever folded cloth napkins before?  They never match up.  Don’t freak out if your napkins are not perfectly square.  Press the wrinkles out of the napkins.  Choose 2 that match up the best.
Find a pillow that best fits the size of the napkin.  The pillow & the napkin should be very close to the same size.
 
 With wrong sides together, pin around the border of your napkin.  Of course, you can sew right sides together and turn the pillow;  I wanted a little border on the edge of my pillow.

I sewed a seam along the very edge of the napkins, then a second seam along the hem of the napkin.  This created a little border.  Make sure to leave most of the bottom open so you can insert your pillow.

 Insert your pillow.  The way I am making this pillow does not allow for easy washing of the pillow covering.  I am OK with that.   If I really need to wash it, I can rip out the seam.  I would have put a zipper, but there was too much bulk with all the hems of the napkin.

 Pin the opening closed.  Sew a double seam on the sewing machine.  It was a little tricky holding the pillow and maneuvering the sewing at the same time – it can be done!

Here you can see the 2 seams.


 I loved my pillow so much, I sewed a second one.  The fabric is soft and they feel so comfortable!


Amanda

The Cutest Curtains Ever!!! {tutorial}

 I spent a week in Virginia helping my friend decorate her house.  She has this big window in her front room and it needed some curtains.  Here is how you can make them too!

We bought this 2-pack of canvas drop cloths at the Home Depot.  They were $10 for the pair.  We liked these because they were a little more gray than tan.

Some of the other canvas drop cloths were only 1 in a package.  The ones we bought were perfect because we needed 2 curtain panels.

They ended up being the perfect width for our window.  You may need to adjust the measurements to fit your window.  Measure how long you want them and then add 3″ for the hem.  Make sure to consider how you want to hang them.  Ours were hung with curtain clips on a rod.  Cut off the extra fabric and hem.  Our hem was rolled once then again about 2 1/2 inches.

We bought a Queen size flat sheet at the thrift shop it was on sale for $3.

Snip the sheet at 4″ increments and tear apart.  (Do this the long way so you have enough length to ruffle.)  We used 6 strips per panel.  Adjust depending on the size of your curtains.  The combination of the warn, softness of the sheet and the tearing gave the ruffles a nice vintage edge.

After the strips are torn, cut the hemmed edges off the strips so they are raw on all 4 sides.  Sew a gathering stitch down the center of the 4″ strips.  Gather.

Draw a line 1/3 the way up from the bottom of the curtain.  Then draw a line every 6″ to the bottom of the curtain.  You should have 6 lines for 6 ruffles.

Adjust the ruffle to fit the width of your panel.  Pin the gathered seam along the pencil line.  Continue pinning all 6 ruffles.  Sew a straight stitch over your gathering stitch.  It’s a little awkward because the drop cloth is a little thick. 


 Keep gathering and gathering and pinning and pinning – you can do it!!

 Once you have sewn the ruffles on, they are ready to hang!!  You could easily make a pocket at the top if you don’t want to use curtain clips.  We bought our clips and rod at Target.

We finished our project at 1:00 am.  We hung them up and sat on the couch and admired them for quite some time.  They gave the room such a darling, finished look.

 In my house in California, I have shutters on all my windows, so I don’t think I will be able to have my own set of these curtains in my house.  That makes me sad.  I took lots of pictures so I could remember how cute they turned out!!

Amanda

Gratitude Rocks version 1.2

We’ve had so much fun making these gratitude rocks, I though I would post our latest versions.  For the original post, click HERE.

Step #1 Paint river rocks.

Step #2 Write or paint your name on the rock
Step #3 Cut words out of magazines describing the person whose name is on the rock.   By doing this, you are showing your gratitude for these qualities and talents. 

 Step #4 Use Mod Podge to attach the words to the rock

Step #5 Smile at your rock every time you look at it!!!


Amanda

Onsie Dress Tutorial

 My friend mailed me this “blank” onsie for a baby shower.  It’s a cute idea.  Everyone invited to the shower gets a onsie and they have to decorate/embellish it and bring it to the shower.  I think they are having prizes or something.  That’s a lot of pressure, “Here is a plain onsie, you write a craft blog, so this better be amazing!!”  Is how I felt 🙂  So this is what I came up with.  (I am sure there are lots of tutorials out there with the same idea – this is my take on it.)

Part 1 Bib construction

 Draw a “bib” shape on Heat N Bond Lite Fusable Web.  I curved the top of it to match the curve of the onsie neck.  I didn’t include a pattern because each onsie is slightly different.  You can do it – draw your own!!   Iron it on the wrong side of your fabric.  Then cut along your line and peel off the back and iron it right on your onsie.

 Cut your piece of lace and a matching piece of Heat N Bond.  Iron it to the lace.  Then cut the lace so it matches the curve of the bib.  Iron the lace to the bib piece.


Sew the lace down both sides.  Then sew around the bib portion using a straight stitch.
Next, prepare the ruffle.  Cut a strip of fabric 1 3/4″ x 23″. 
I don’t have a serger so I did a rolled hem on the strip of fabric – which is just turning it twice as narrow as you can and sew along the fold. 

 Now, because I am not using a serger, I zigzagged the opposite side of the fabric so it won’t fray.  (above)

Then roll the edges in and hem.

 Now roll your zigzagged edge over and stitch in place.  I used the zigzag because I will be gathering it and I wanted to reduce the bulk.  Sew a gathering stitch along the edge of the zigzag hem and gather.   It should look like this:

Get out your pins and start fussing with the ruffle to get it to fit.  I use a lot of pins in this process so it fits perfectly.  Make adjustments in the ruffle as necessary.

 Sew the ruffle along your gathering stitch.

You could add buttons along the lace – but I was worried about putting buttons on something for a baby.

Part 2 – Skirt Construction

You can tell from the photos it is getting later and later and I am getting tired-er.  My photos aren’t the best.  Essentially you are making a little gathered skirt and sewing it to the onsie.

Cut your skirt fabric 11 1/2″x 34″.
My onsie is size 3 to 9 months.  (That’s a new size to me.  My youngest is 5 and I never had onsies made that size!)  If your onsie is larger I would add a little to both measurements. 

With right sides together, sew the two edges together to form the back seam.  You will have a continuous piece.  Press the seams open or zigzag the edges.  My seam allowance was a generous quarter inch.  It doesn’t really matter on this project.

(Maybe I should iron my fabric!!)  The skirt is top-stitched to the onsie (you could cut the onsie apart and sew it to the shirt portion like a T-shirt dress, but then you wouldn’t have the onsie diaper cover which is what I love about this dress.)  Because it is a top-stitched skirt, you need a rolled hem on the top of the skirt piece so it doesn’t fray.

Now we are ready to gather.  Sew a gathering stitch around your skirt waist about 1/4 inches below your top hem.  Pictured below:

 Gather your skirt and ease it around the waist of the onsie.  You can choose where you want this.  Mine was 2 1/2″ below the armpit.   I drew a light line in pencil so I could see where to pin the skirt.  Pin your ruffled skirt following your line making sure to evenly distribute the ruffles.  When you are happy with how it looks, sew it along your gathering stitch.  I covered my seam by sewing ric rac.  You could sew ribbon or lace or your favorite trim….or not.  It doesn’t look that bad with just the seam.

Dress Hem:  You can hem the dress how ever you like.  I was going to sew a small ruffle along the hem in coordinating fabric but I ran out of time.  So I did a lace hem.  I sewed the lace and pressed it out and top stitched it down.  You could use ric rac, or other decorative trim, or you can sew a regular hem.

Here it is!!  I also sewed a matching flower for the baby’s head – but I finished it on my way out the door to mail it – so no photo 🙁

Amanda

Quilted Heart Keychains

Every Valentine’s Day I like to make a little item to give my friends.  And so the Quilted Heart Key chain idea was born 🙂  I love this project because it is a total scrap buster!!  Here is how you can make one:

Supplies:

Scraps of 2 fabrics 
Scraps of cotton batting
Fusible web
Twill tape or ribbon
Small jump ring or key chain
Larger jump ring or zipper pull
Click HERE for the heart pattern

Step 1
Cut your main heart fabric into 2 squares about 4″ each.  Also cut your batting that size – this measurement can be very rough.

Step 2
Layer your items like you would a quilt.  Top piece right side facing out, batting, and back facing opposite.  
 
 Pin your heart to the top of this layering.
Step 3
Sew around the heart following the pattern.

Step 4
Trim close to your sewn edge.


Step 5
Cut 2″ of twill tape and loop it through your small split ring.   Sew the edges down toward the center of the heart.  This will be covered when you add the next fabric heart.


Step 6
Trace your smaller heart onto your fusible web (trace 2).  Iron it to the wrong side of the fabric.

Cut the hearts out on the line and iron them to both sides of the heart trying to center them the best you can.

Step 7
Top stitch around the center heart.  I stitched around it twice.  I like when the stitches kind of follow each other and are not perfect – kind of sketchy like.  
Then add your larger split ring or zipper pull.  Done! 
 

Amanda

Valentine Heart Art – Fabric & Canvas

 I needed a little pick-me-up today and so I made this Valentine Heart Art.  Here is how you make one: 
Supplies:
Art Canvas
Fabric scraps – I used only red and aqua
Deco Page (Mod Podge)
Sponge Brush
Let’s get started!!
Begin cutting out random heart shapes in a variety of sizes.  I didn’t use a pattern and every heart is different!  

 Keep cutting.  I laid out my pattern as I went so I knew what sizes to cut. Now start deco paging.  With your sponge brush paint the glue under the heart, then over the heart, making sure to coat well.  (nice cereal bowl in the background…I was eating breakfast and crafting!)

 Let dry completely and you are done!

 I was hoping to frame mine but I chose an odd size canvas….hmmmmm.  Oh well, I will hang it up anyway!

 HAPPY!!!!

I Whale always Love You

 I am loving anything with whales!!  I had to make something fun for Valentine’s Day!  You can make one too!!  Scroll down for the pattern and tutorial!

 This one is with not so traditional Valentine’s colors – I needed something to hang in the guest bathroom.

To make this Whale Valentine’s Day Art follow the steps below:

Click HERE for the purple and aqua “I whale always love you”
Click HERE for the red & aqua one
Click HERE for a neutral color one with cream background and grey letters
 
Download whale and heart image HERE.  Draw the images on a piece of fusable webbing (Heat Bond or Wonder Under etc).  Cut it out larger than the outline of the whale (do not cut on the line).  Using a HOT iron, press the whale onto the WRONG side of your fabric for a few seconds.  Do the same thing for the heart.

 Now cut out the images on the line.  Peal the paper off the fusable webbing and position the whale and heart where you want them. 

Press the images with the hot iron for a few seconds.

 I sewed around the whale and the heart.  You don’t have to do this step – the fabric will stay on the paper fine.

 Frame as desired!!


Glitter Volleyball Christmas Ornaments


 I needed a little gift for the girls on our Volleyball team.  Here is what I came up with!  I started with a chipboard coaster.  I got mine at Michael’s.  I spray painted them white.

Then I got out a gray Sharpie and had my daughter draw the volleyball lines.  These would be cute for any sports – basketball, baseball, soccer, etc.

 I cute out all the player’s names in red vinyl and punched a hole in the top.

 Then, my favorite part, the clear glitter.  I could use this stuff on everything I own.  It is great because you can see through it – but it gives it a sparkly finish.

 Get out the Elmer’s glue (or any similar) and brush over the top of the ornament – making sure to cover it completely.  Sprinkle on the glitter & now they are super cute!

 I attached a little ribbon and let them dry completely.
 They are pretty cute!

 The fun thing is I left the backs plain so the girls could all sign the back of the ornament.

Quilted Tote Bag Tutorial


This is my favorite tote bag.  Of course I didn’t invent the quilted tote 🙂  Here is my tutorial for how I made this one.  Hope you love it!

Supplies:
1/3 yard main outer fabric
1/3 yard bottom contrast outer
3/4 yard muslin or other light weight for the back of the quilting
3/4 yard bag lining
1/4 yard handles
quilt batting
911 feather weight interfacing (optional)
1/3 yard contrasting fabric for pocket (optional)

Instructions
Cut your main outer fabric (top piece) 2 pieces 10.5″ x 20″
Cut your bottom contrast fabric 2 pieces  9.5″ x 20″
Sew these two pieces together and press. 

I pin basted my two outer bag pieces and straight lined quilted every 1 inch.  You can quilt how you want it.  I actually used an old sheet for the back of this part – you will never see it – it just adds stability to the quilting.

Quilt both pieces

Cut your lining (2 pieces) 19.5″x20″.  (I had to cut 1/4 inch off the 19.5″ piece because the outer bag shrunk from the quilting.  So mine measured 19.25″ x 20″)  Iron the fuseable Pelon to the wrong side of your bag lining fabric – this is optional.  Once I finished mine, I thought this step really wasn’t necessary.

Next, prepare your pocket. Cut 2 strips 6.5″ x 20″.  Sew the two pocket pieces right sides together.

Sew 1/4 inch along the top and bottom – leaving edges open.

Turn and press.  Top stitch along just the top of the pocket piece.

Pin the pocket band where you want the pocket to hit.  I pinned mine 7 inches from the top of the bag.

Now sew along the sides and the bottom using a narrow 1/8 inch seam allowance.  Then sew lines going down the pocket piece to form the pockets.  I just eyeballed mine.  Some are narrow for pencils, others are wider.

Prepare the handles.  Cut 2 strips 28″ x 4″.  If your fabric is thin, iron fusable interfacing to handle pieces before sewing.  This fabric was kind of canvas-like.  Fold longways and sew along the side leaving the ends open to turn.

Turn and press both handles.  Top stitch both sides of handles.

Now, pin your outer bag right sides together, matching the side seams.  Also, pin your lining together right sides together.  Sew around both pieces leaving the top open.  I used about a 1/2 inch seam.  Make sure your seam allowance is exactly the same for both bags or they won’t match up!

Place your handles as desired.  Use this point to shorten the handles if you want.  Baste the handles on to the outer bag using a 1/8 inch seam.

Push out the bottom of the bag – while it is wrong side out.  Flatten and measure 3 1/2″ from the point and draw a straight line.  Do this to both ends of the outer bag and the lining.

Pin in place and sew along your line – back-stitching to start and stop.

Trim along your seam about 1/4 inch.

You are almost done!  Now the fun part!  Leaving the outer bag wrong side out, put the lining (right side out) inside the quilted bag.  Match the side seams and pin all the way around the bag.  It should line up perfectly.

Sew a 1/4 inch seam all around the entire bag.

Unstitch a little place on the side lining of the bag to turn the bag right side out.

Turn bag right side out and top stitch the opening closed using matching thread.

Press the lining down so the top of the bag is flat (it will want to puff out the top).

Top stitch using 1/8″ seam all around the bag.

You are done!!!!