It’s Apple Time!!

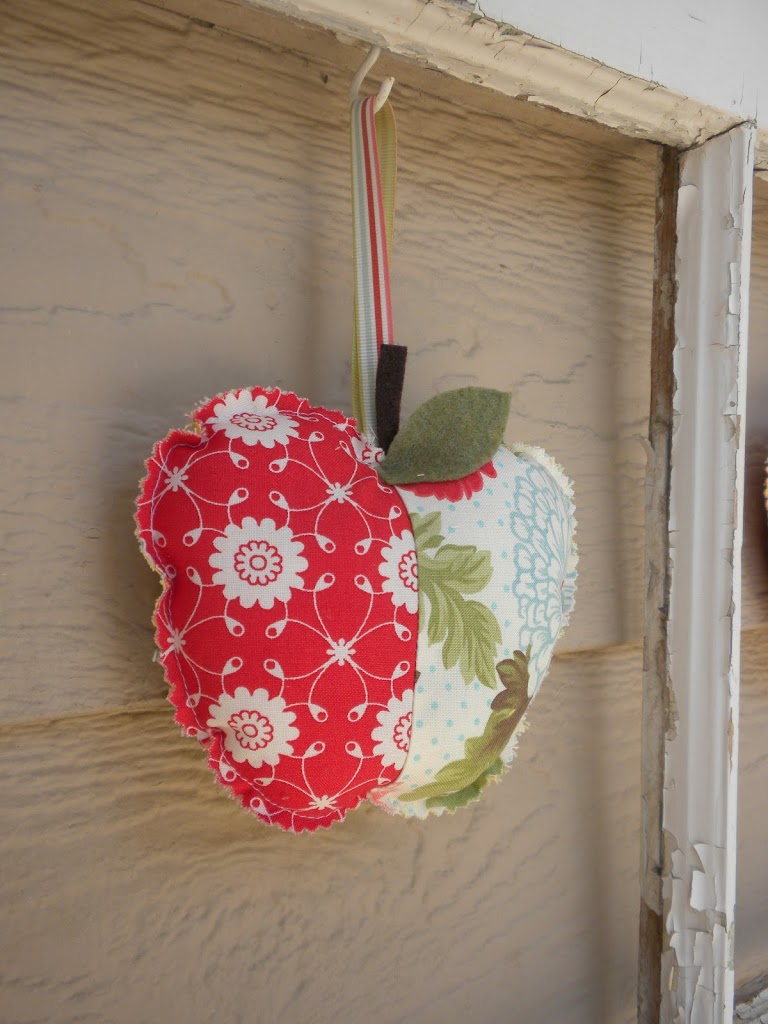
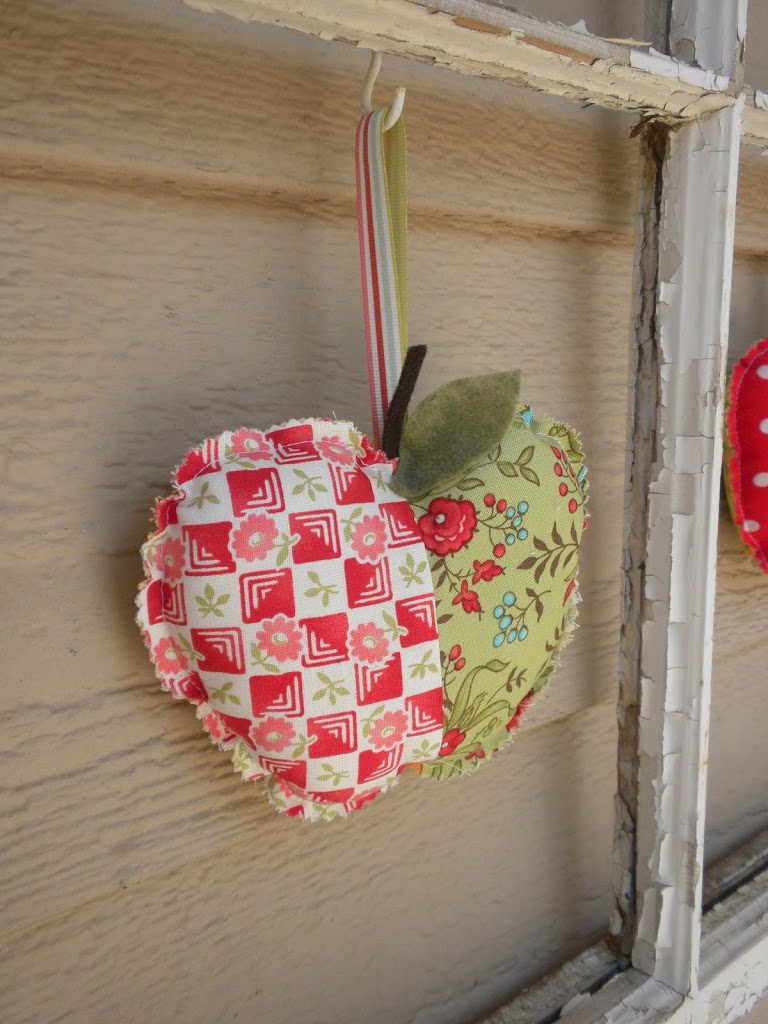
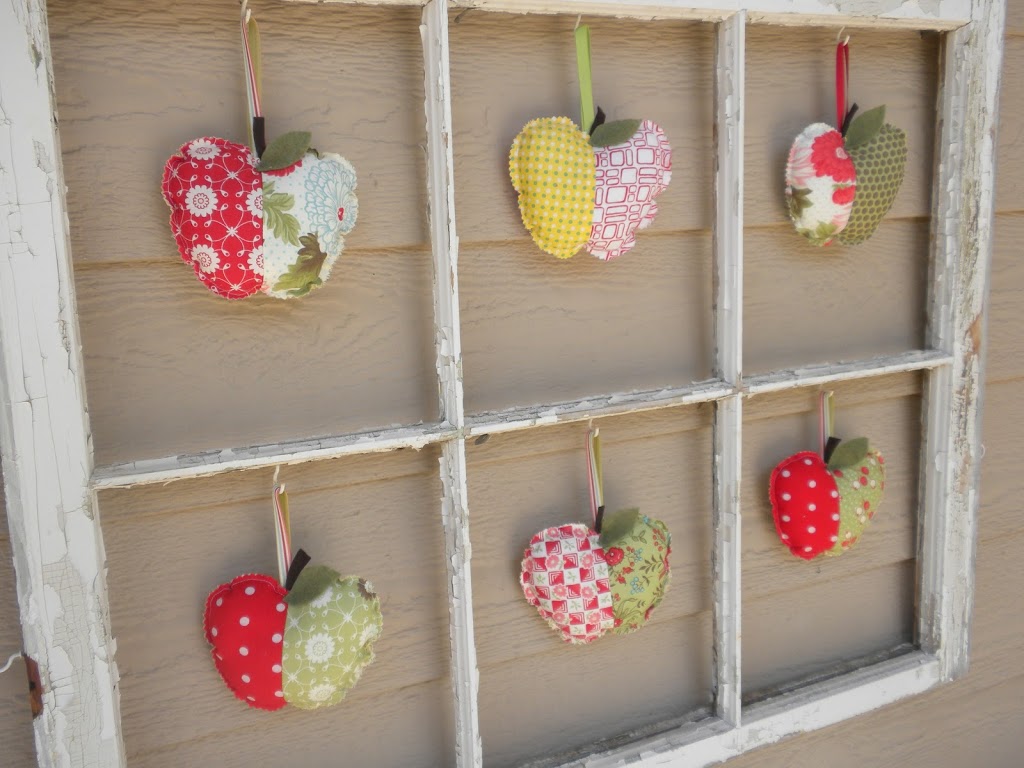
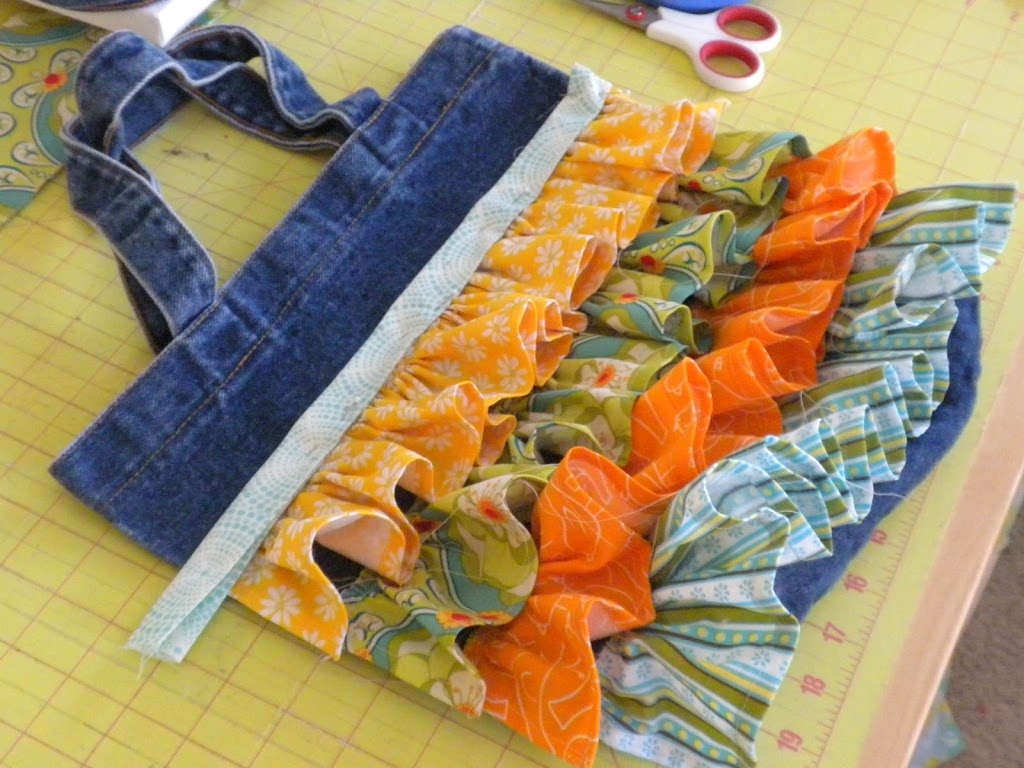
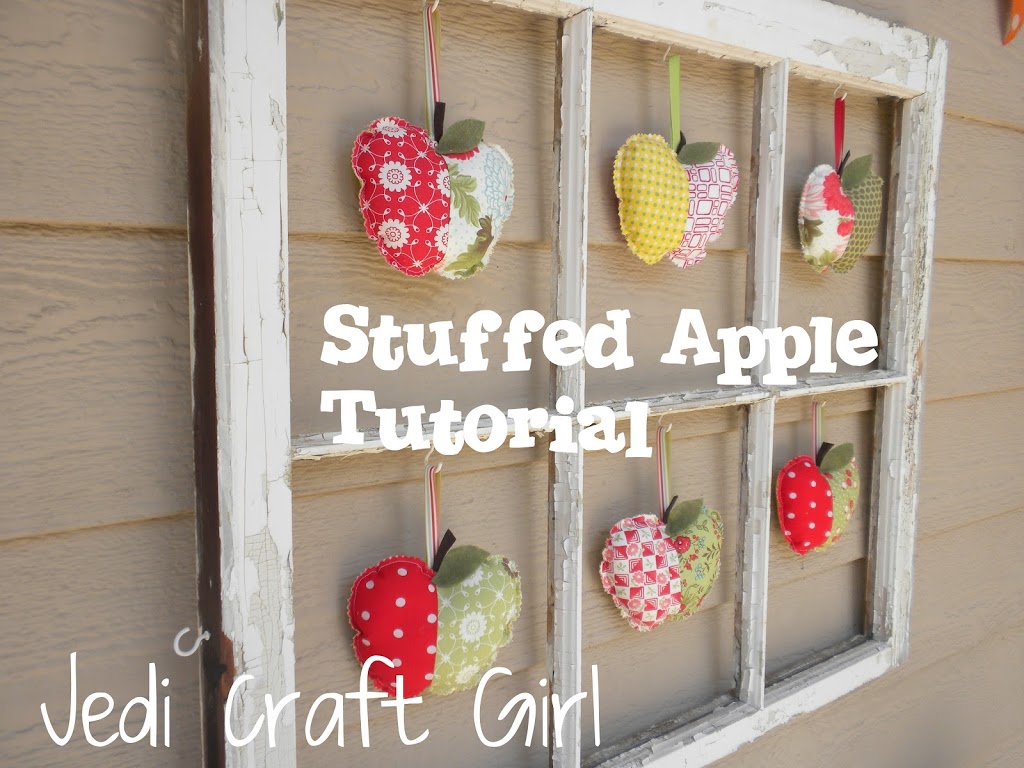
 I saw these stuffed apples in a magazine somewhere and decided to create my own.  I wanted to have this ready for September 1st – I am only 19 days late!  Oh well – life is busy – isn’t it!!

Here’s what you need to make your own bushel!

Supplies:
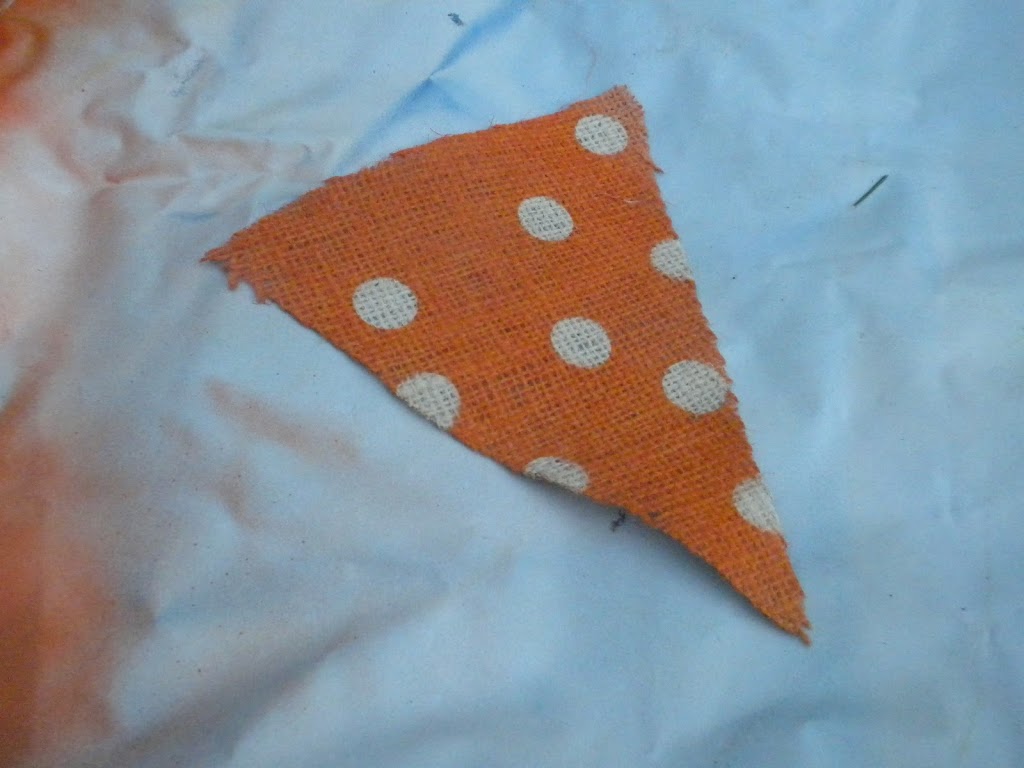
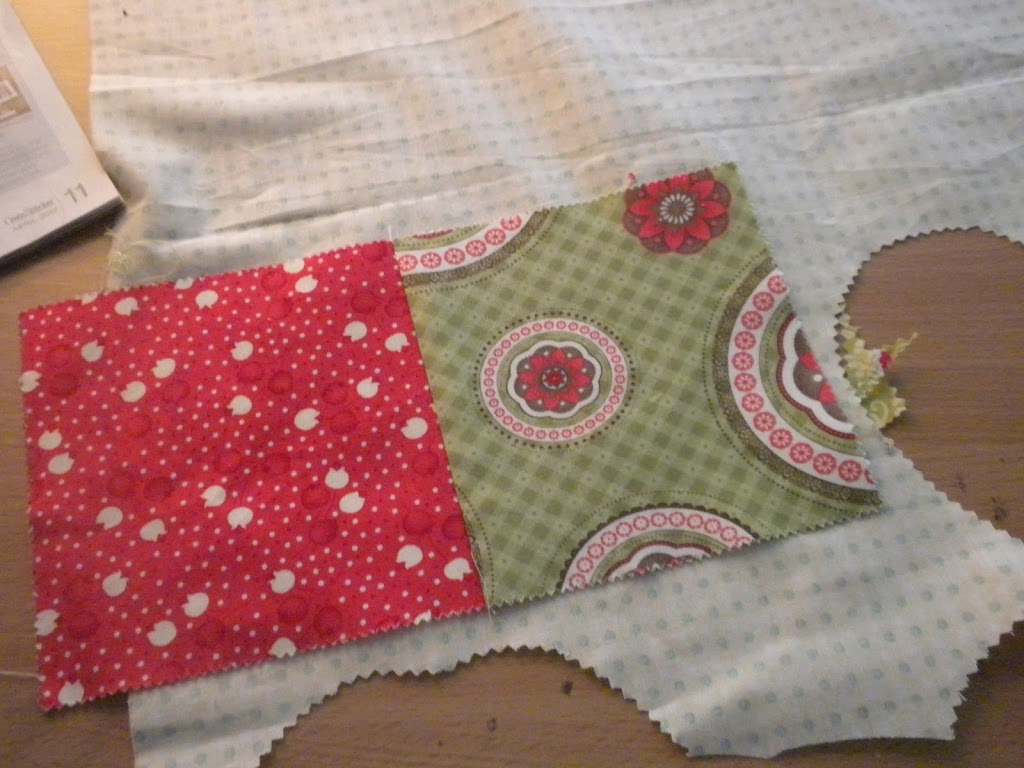
fabric – charm squares or scraps
stuffing
ribbon
green and brown felt
sewing machine
hot glue gun

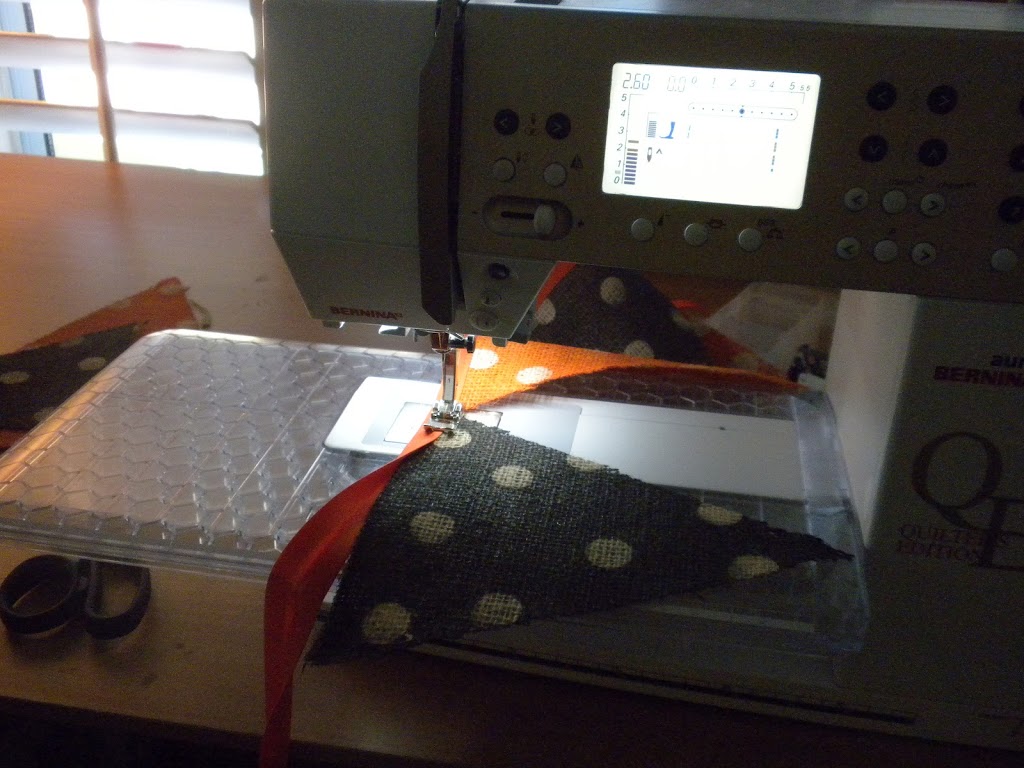
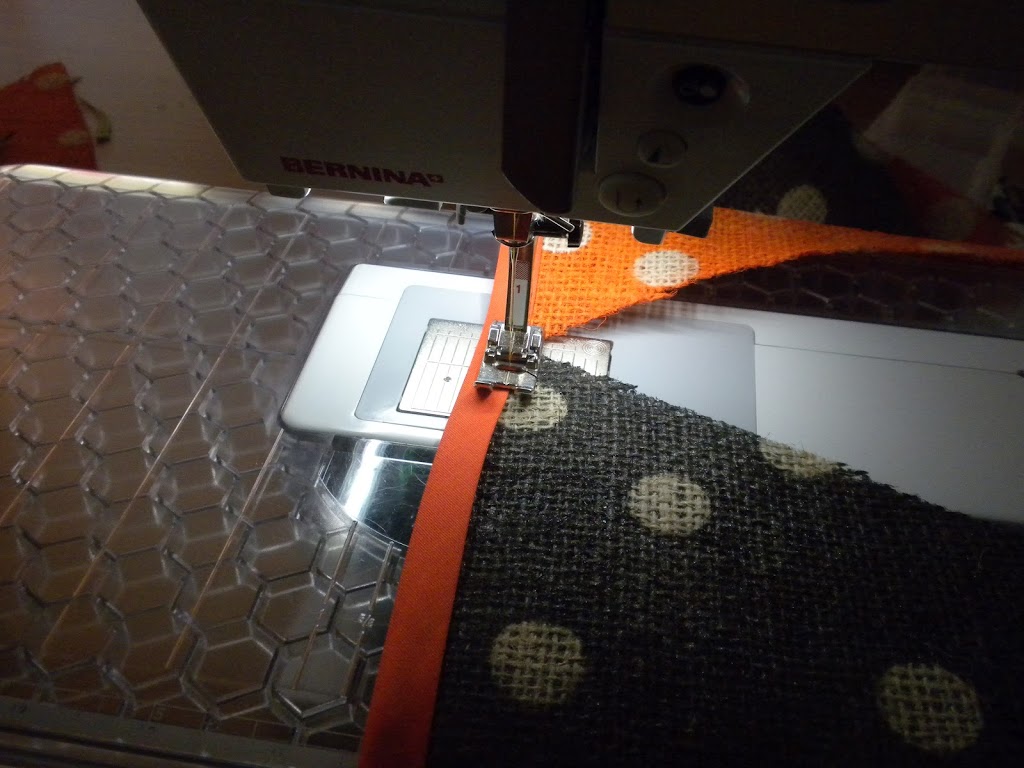
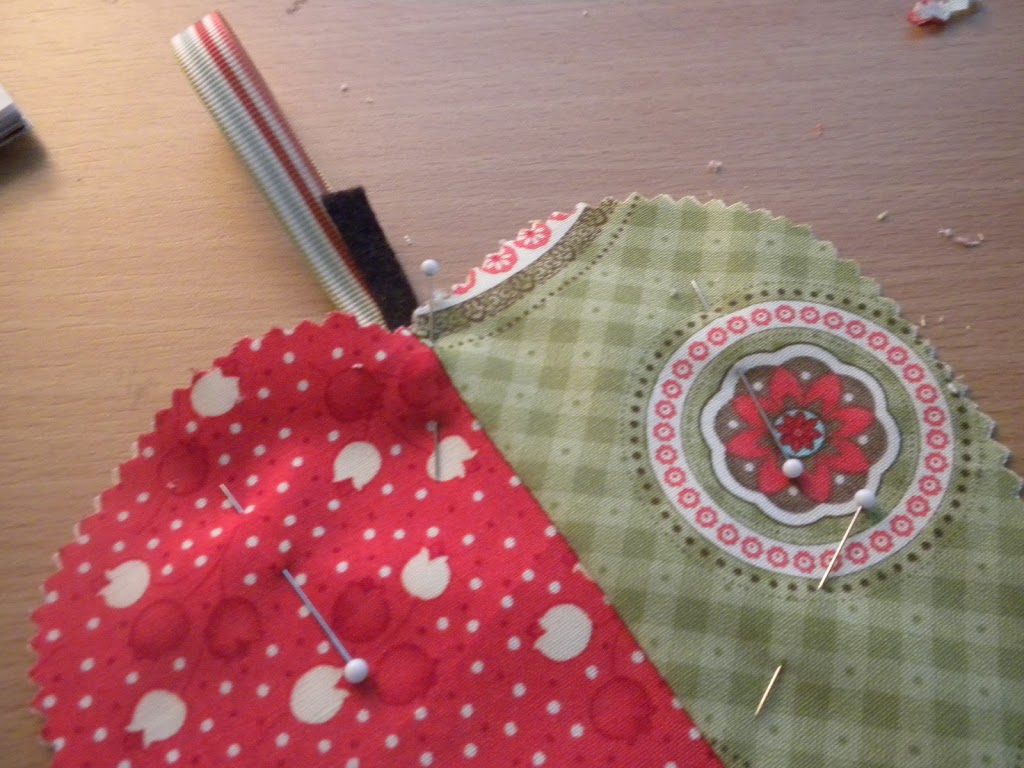
Start by pieceing the front of your apple.  Sew the charm squares or scraps.  This is a great scrapbuster!  Press seams to one side.

Print out this apple pattern and size how you want.  Cut your pattern out

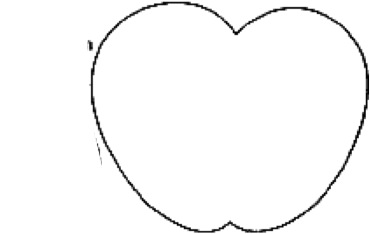
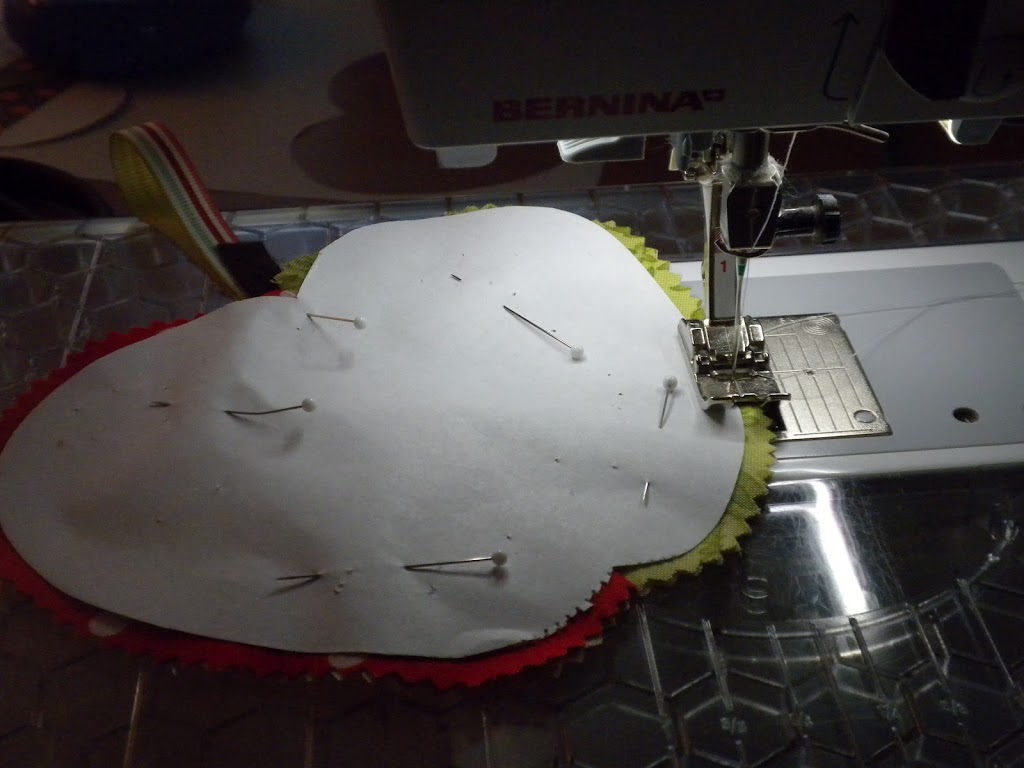
 Layer and pin your apple back, pieced front (wrong sides together) and the pattern on top (below photo)

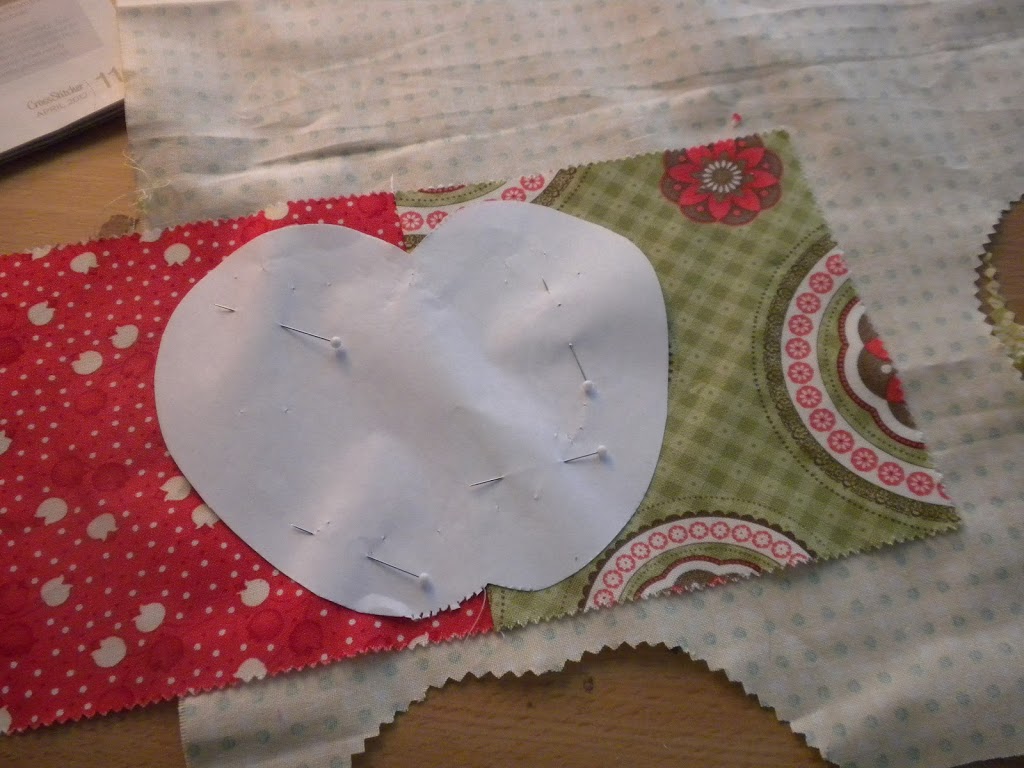
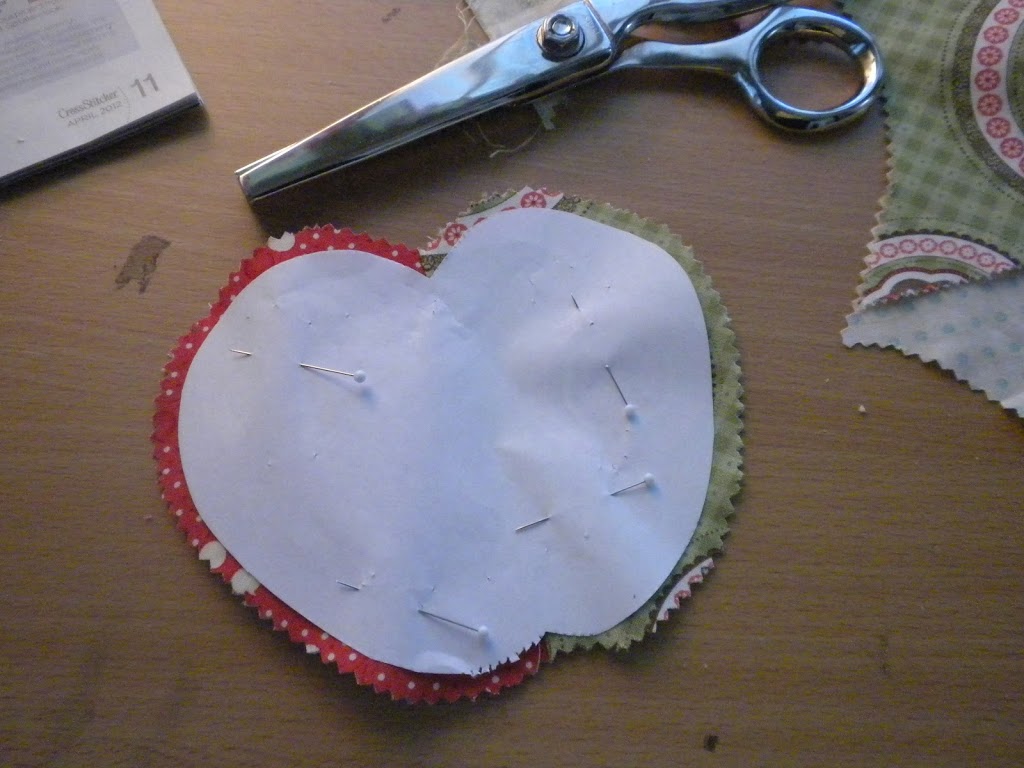
 Cut around pattern using your pinking shears.  Leave about 1/4 inch allowance from pattern.

 Cut a ribbon loop and a brown felt stem.  Tuck these in between the front and back apples so they catch in the seam.

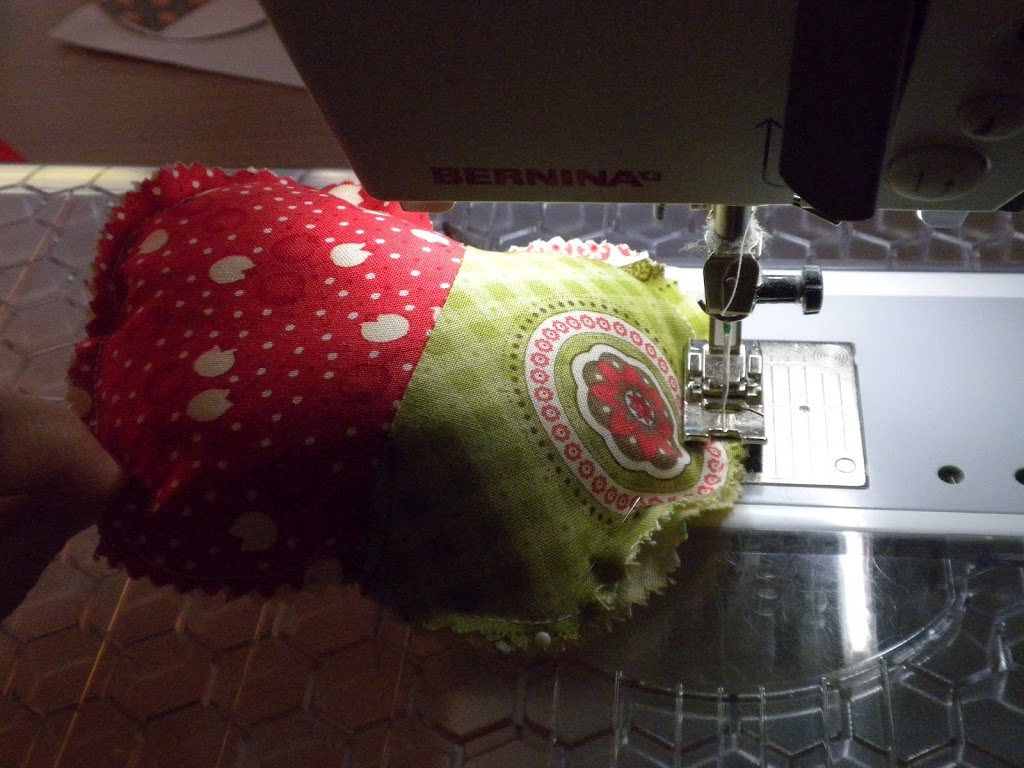
 Sew around the apple leaving a small opening to stuff.

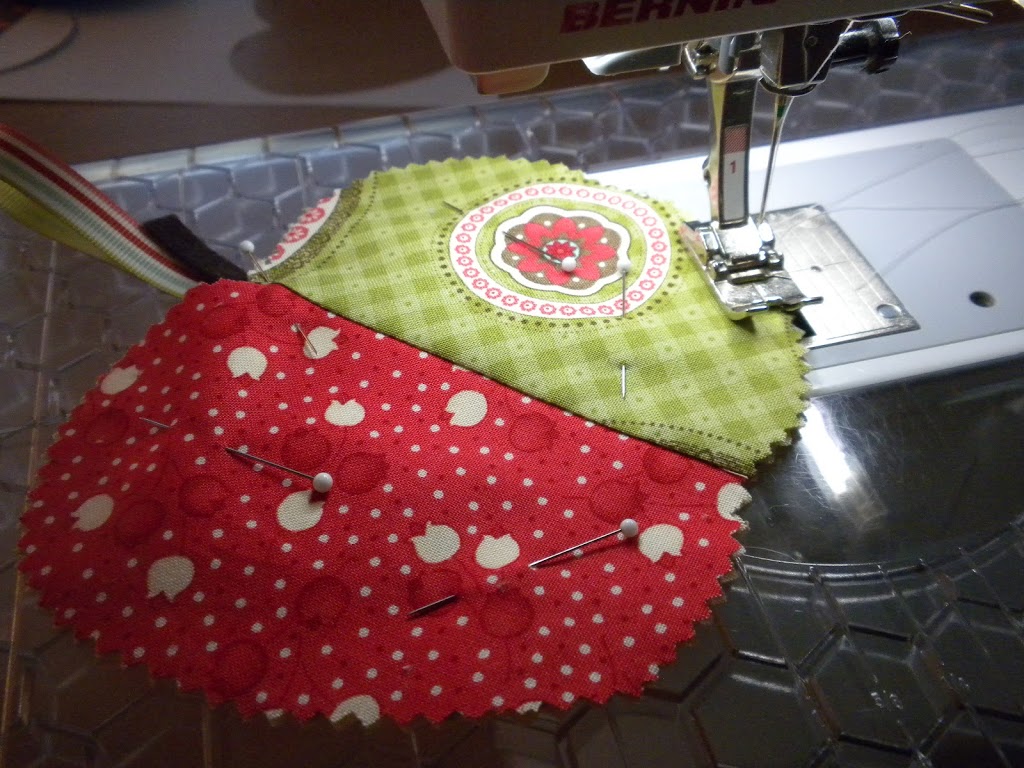
 I also tried sewing around the apple with the pattern pinned on to help me get a perfect seam.  Use what ever seems easiest.

You can see where I started and stopped, on the flattest side of the apple.
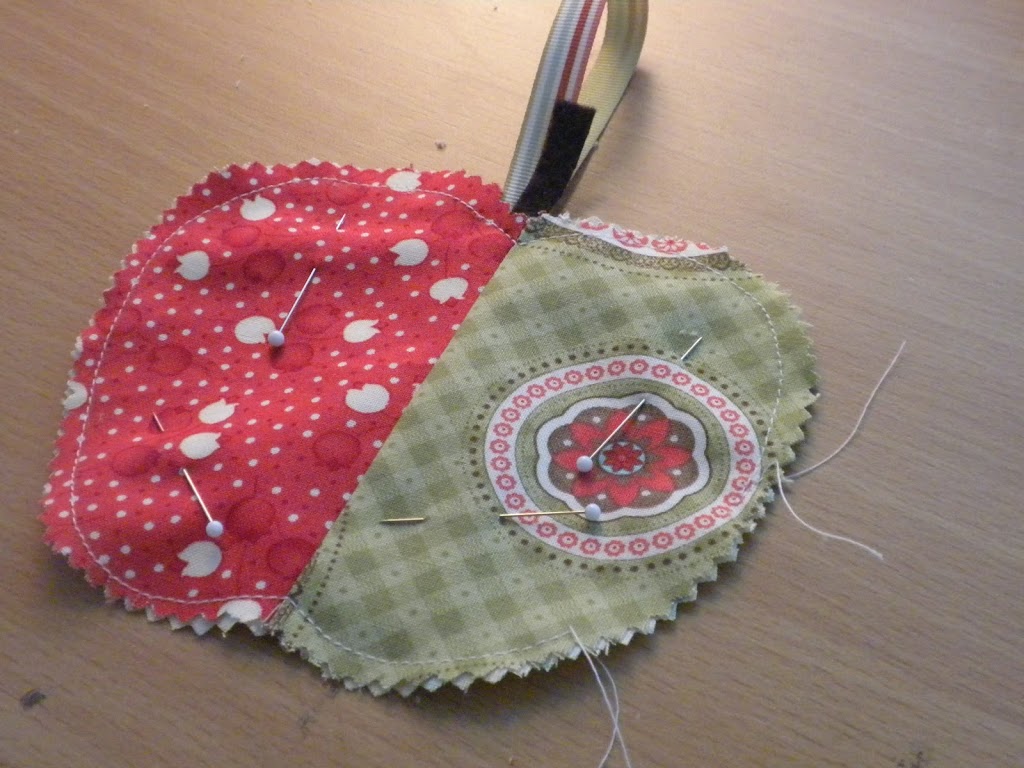
 Stuff then sew shut

 I cut leaves out of green felt and hot glued them on – I ran out of time.  I wanted to stitch detail in the leaf using embroidery floss – but they look OK without the detail.

Hang as desired and give to all your friends!!


Burlap Halloween Banner

 I just discovered the fantastic world of spray painted burlap!  Where has this idea been all my life!!!  Here is how you can make your own super cute Halloween Banner:

Supplies:
Burlap (I bought mine at Joann’s – very inexpensive)
scissors
spray paint (white, orange, black)
sticker circles
double fold bias tape

Here is what you do:
 Cut your burlap into triangles.  I just used scissors.  I made a paper pattern and pinned it.  Not all of mine are perfect – burlap kind of stretches – but not to worry – it will still be cute!

Spray Paint White
I painted both sides of my triangles – I was worried they would blow in the wind & I wanted them to be colored on both sides.  Spray paint the burlap triangles white.  This helps the polka dots have a little more contrast.  My burlap doesn’t look bright white, it just looks not as brown.

Circle Stickers
Get your circle stickers (I got mine at Albertsons because that’s where I was).  Put dots all over both sides of the triangles.

Spray Paint
I painted half my triangles orange and half metallic black (that’s what was in the shed).  Paint one side, let dry, then flip over and paint the other side.

 Remove the dots and get really excited because they look so cute!

 Sew
 Measure your bias tape and cut it how long you want your banner – leaving extra to tie at the ends.  Open the bias tape and put the edge of the triangle inside and sew making sure to catch both sides of the bias tape.  I didn’t pin – just keep feeding the triangles in as you sew. 


 Hang as Desired!!!

 I Love it!!!

Square In a Square Baby Quilt Tutorial

 Here is a fun quilt tutorial I came up with.  I made this for a friend who is having a baby boy.
What you Need:
(28) 6 inch squares of theme fabrics
(8) 2-inch WOF strips – (mine are cream with brown circles) for outside of blocks
(4) 3-inch WOF strips of center block fabric (mine are all different)
Fabric for binding and back
Here’s what you do: (Make sure to use 1/4″ seam allowances and press after each step)
Sew 4 strip sets of (2) 2-inch strips with the 3-inch strip in the center 


 Chop the strip up into 3-inch increments


 This makes a 6-inch block.  You need 28 of them.

Lay out your pattern – Mine measures 7 blocks across and 8 blocks down.

 Sew the blocks together in rows.  Sew the rows together.  Make sure to press seams going opposite direction so they line up.  Quilt as desired


4th of July Ruffle Shirt Tutorial

I had fun making these patriotiec ruffle t-shirts.  They sew up really quick & don’t they look festive!
First you need to rummage through everyone’s closet or a garage sale and find red, white, and blue old t-shirts.  
 Next, using your rotary cutter, cut the shirts into 1 1/4″ strips. 
  
I used my Bernina foot #16 – the “Ruffle” foot.  I LOVE this foot!  It is so much fun to use.  Set the tension on 10 and bump the stitch length all the way up.  Then hit the gas & it ruffles for you!  If you don’t have a ruffle foot, just ruffle the strips by sewing gathering stitches.

Once you have all your ruffles made, lay them on your shirt and pin in place.  WARNING: You might want to try the shirt on at this point.  I did not try the shirt on and just sewed the ruffles.  I found they hit my chest in a weird place – so I UN-STITCHED them & made them shorter.  Uggggh

Sew the ruffles on following the stitching on the ruffle.  I used matching thread so the stitches wouldn’t stand out so much.

And now you are ready for a picnic, a parade, or a party!!


Ruffled Bag Tutorial is Here!

I am linking this post up to Family Ever After’s “Pinspired…Rewired” Link Party.  I had seen ruffled tote bags all over on Pinterest.  Here is the bag that was my inspiration.  There wasn’t a pattern or tutorial so I came up with this one on my own. 

What you need:
1 tote bag
6 strips of fabric 3.5″xWOF.  4 strips are for the ruffles, 1 strip for the trim, and 1 strip is for the flower.  You can use ribbon instead of making the top trim.
1 button (I made a covered button)

Here is my lovely denim blag.  It measures about 12″ x 12″ not including the handles.  

 Cut your fabric into strips 3.5″ – this is a great Stash Buster project!!

Here are my fabrics

Do a narrow rolled hem along the 2 short sides of the 4 strips and the bottom of the strip. 

So the top of the strip is a raw edge.

 Turn your stitch length up to the maximum and sew 1/4″ gathering stitch along the raw edge of all 4 ruffle strips.  Then pull strings and gather each ruffle like this:

 Take your tote bag and mark a line 3″ from the bottom.

 Then mark 2″ from your first line.  Repeat every 2″ until you have 4 total lines drawn.

 Pin your bottom ruffle to the tote bag matching the raw edge of the fabric to your first marked line.  You kind of have to scrunch the bag to get it pinned.  This one is the hardest.  It SOOO doesn’t have to be perfect!

  Sew along your gathering stitch.  Again, this one is the hardest, the rest get easier.  You have to bunch it around your machine – but it will work!

Then go over your seam with a zig zag stitch to keep it all from fraying.
Repeat this process with each ruffle matching the raw edge of the ruffle with your marked line.  Stitch along your gathering stitches and then zig zag to finish.  You don’t have to zig zag the last ruffle because we will cover it.

 Take your “trim” piece of fabric and cut it so it is just slightly longer than your bag.

 Press this piece in half

 Then open it and press the two sides into the center fold.  Then bring these two sides together to make a trim piece with no raw edges. 

 Fold one end in and pin in place.  Adjust the length and trim if necessary.  Fold the other end in and pin in place.  Top stitch all the way around the trim piece.  You can totally use pre-made trim, double-fold bias tape, or ribbon.  Your bag is almost done!!  Just the flower is left!

 To make the flower, take your last 3.5″xWOF piece and fold in half – don’t press in half – you want it to puff a little.  Use your gathering stitch again and run it 1/4″ along the raw edge. 

Pull up the threads to ruffle – you want it as ruffled as possible – careful not to break the thread.  Since the fabric is double thickness, it needs a little extra care.
Then tuck the end of the fabric under so you can’t see it and start to twirl it around.  You can play around to get the look you want.  Here is where I got the hot glue gun out.  I added glue each time I turned.  You can sew it too.  I was just in a hurry:)  Once the flower is done I hot glued a fabric covered button in the center.  You can use any button that you like.  Then I hot glued it to the bag. 

Thanks for stopping by!  Hope you get the chance to make one!