Guest Bathroom Finished!

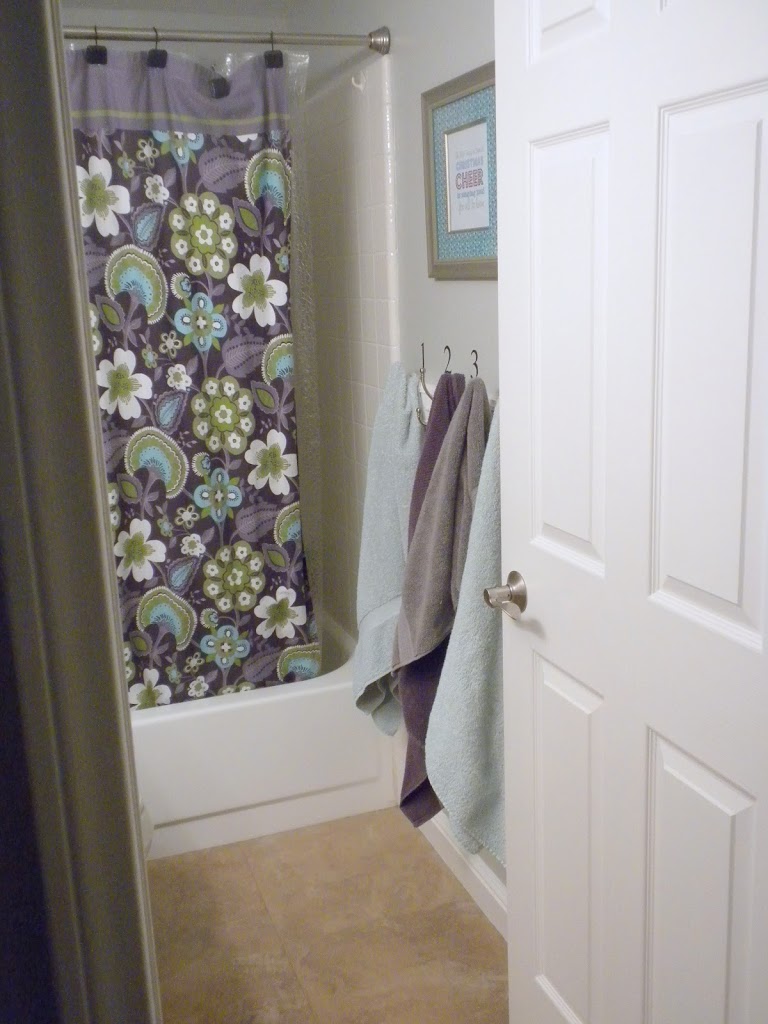
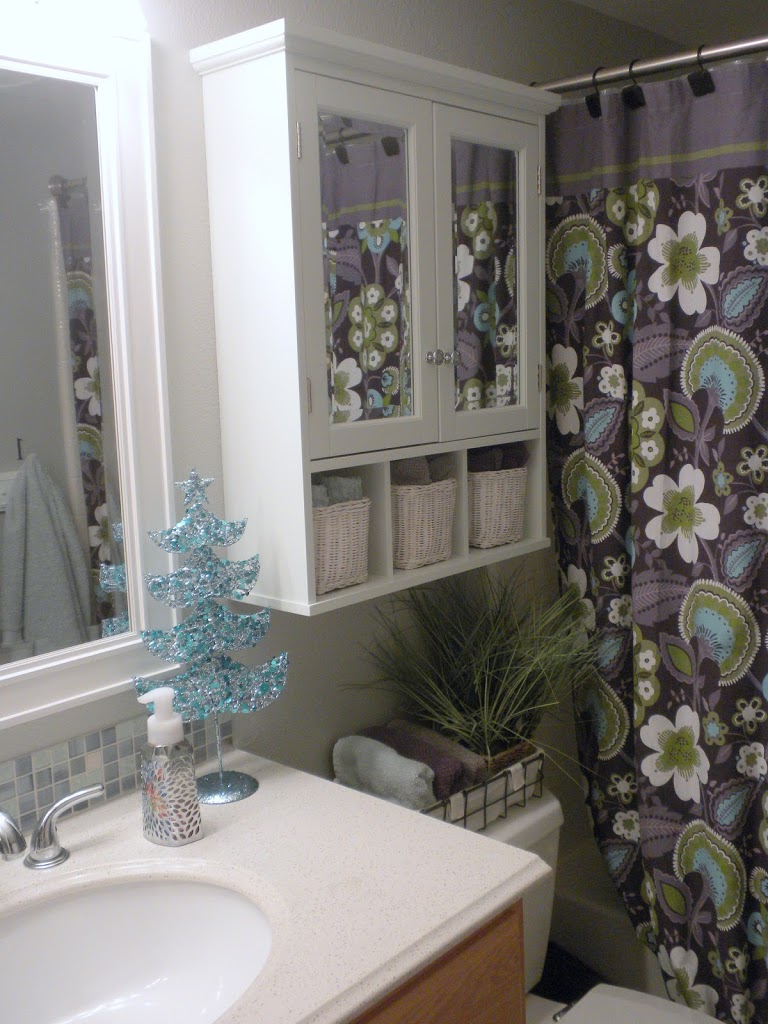
 Welcome to my new guest bathroom!!  Finished moments before my whole family arrived for Thanksgiving!!!  It’s a small bathroom & hard to photograph 🙂

 The new vanity is Hickory.  We got rid of the 1989 banjo style vanity & counter top!  There was much celebration when that thing went in the garbage can!!

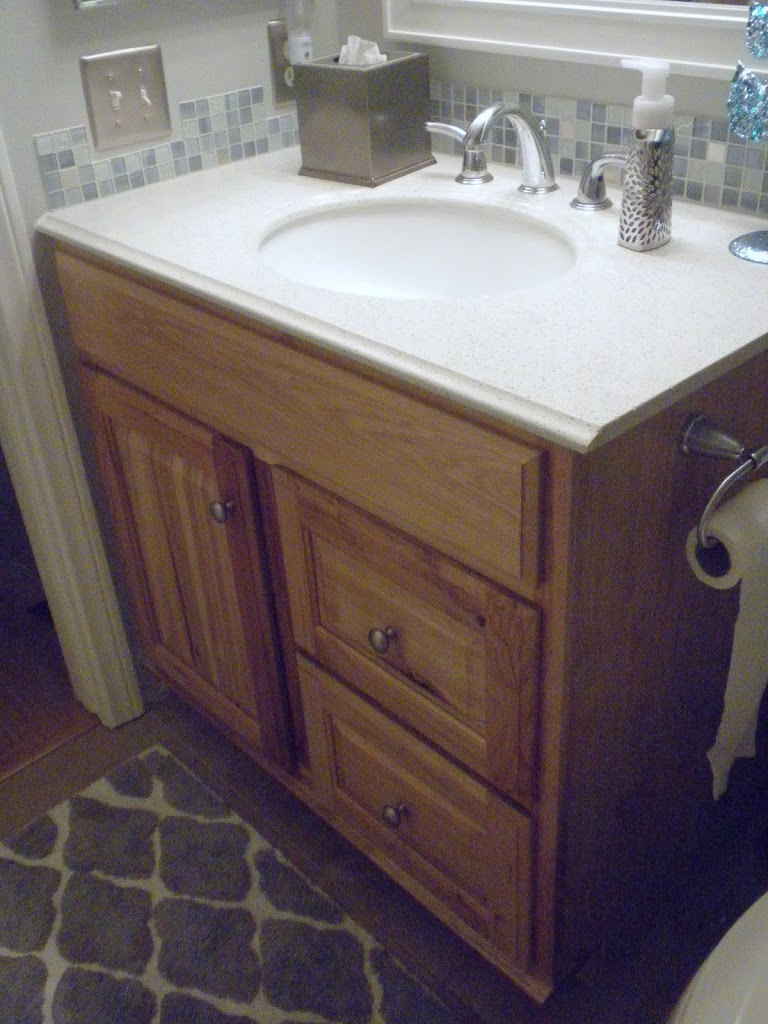
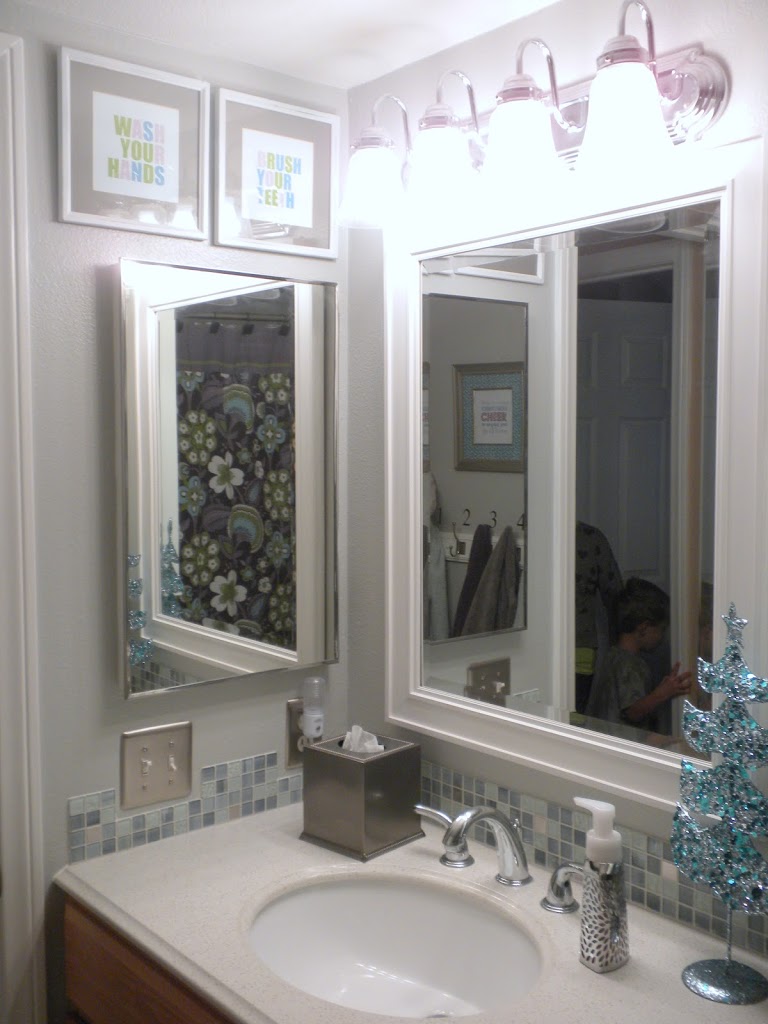
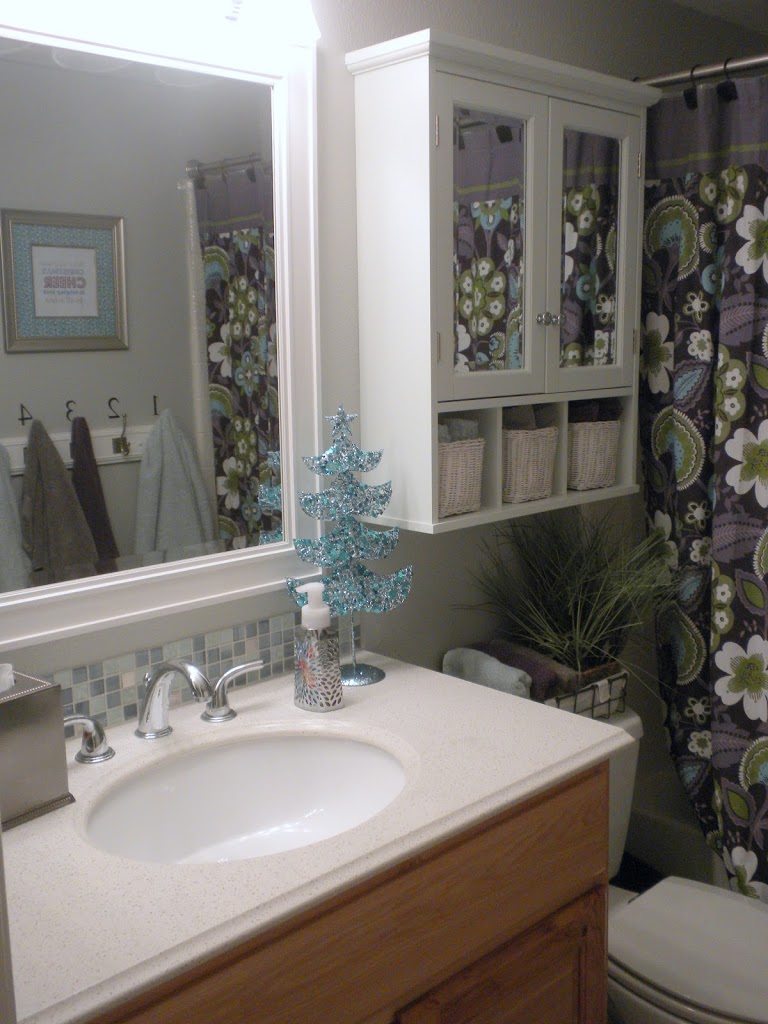
 I love the 1″ tile backspalsh.  There are different textures in the tile & every few often there is a stainless steel square!

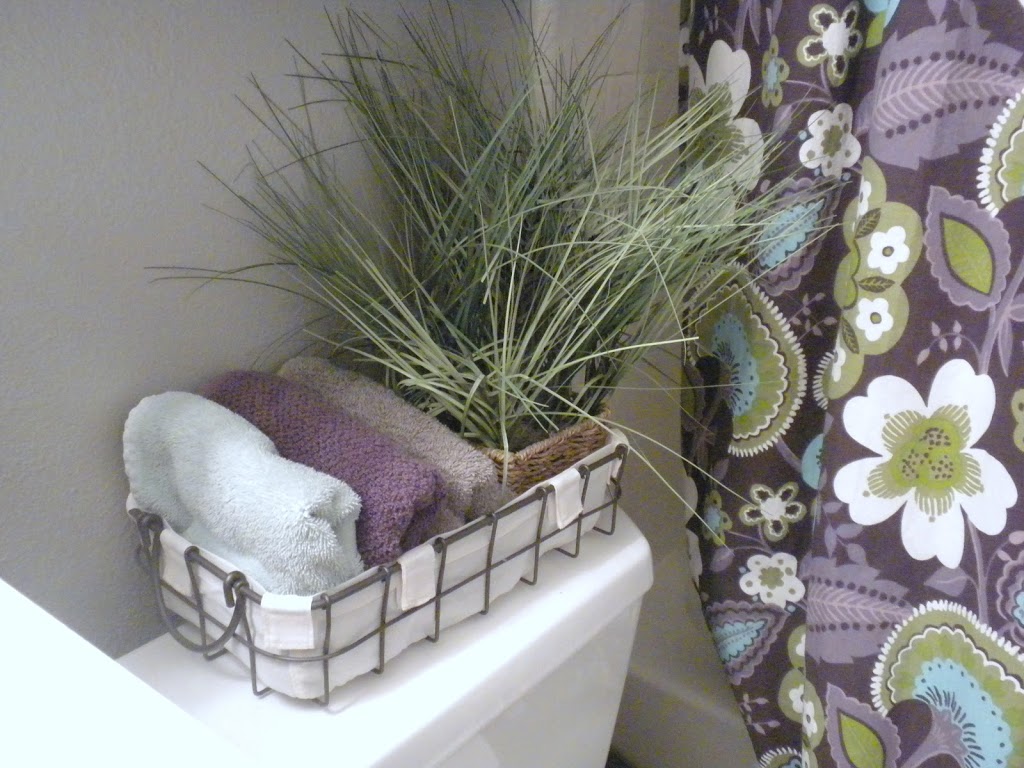
 Of course I got to go shopping & get new towels!  That is the reward for all the hard work!

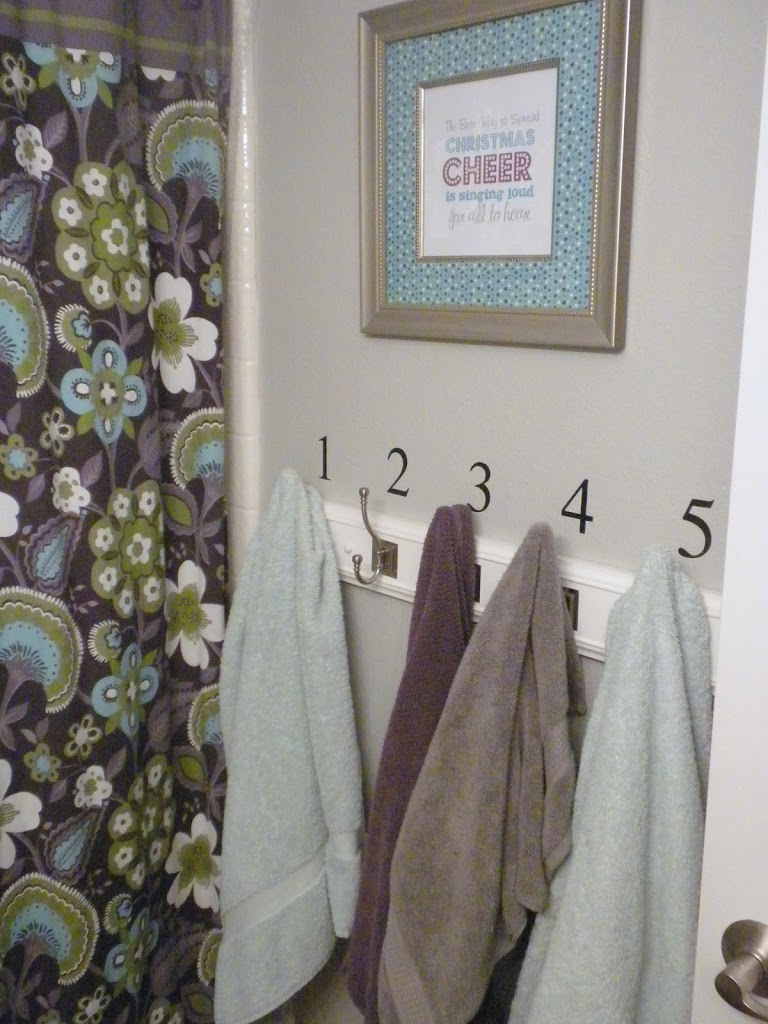
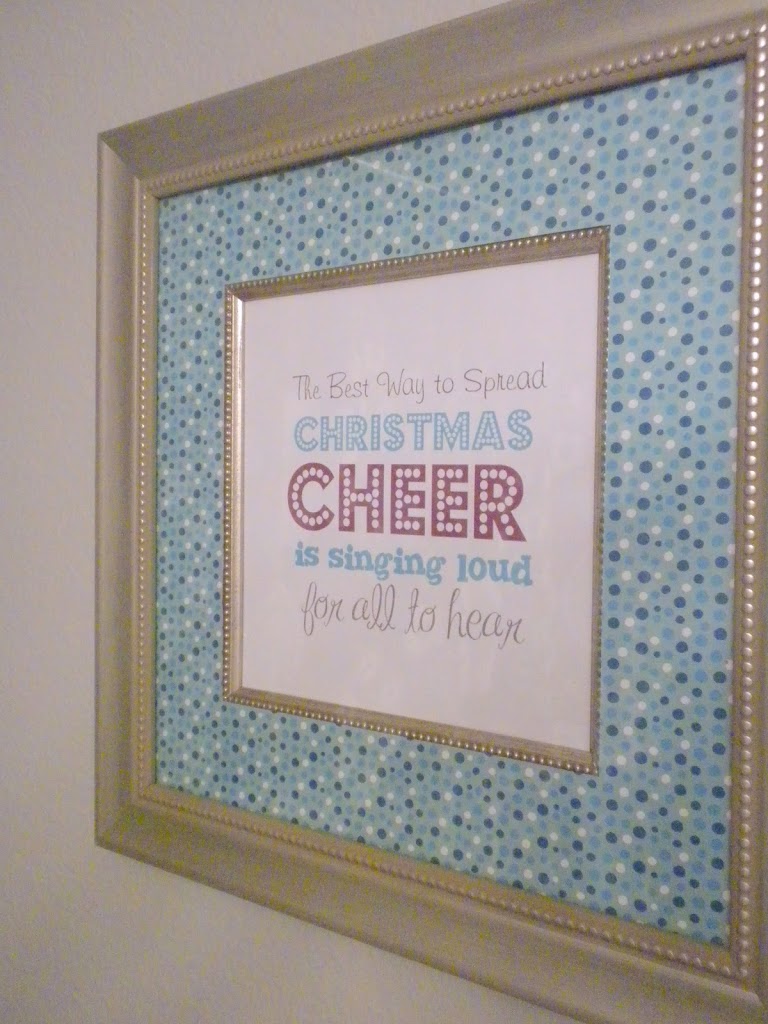
 I wanted something Christmas-y in the bathroom but I wanted to stay true to my new color pallet.  So I made this Elf saying picture – cute!

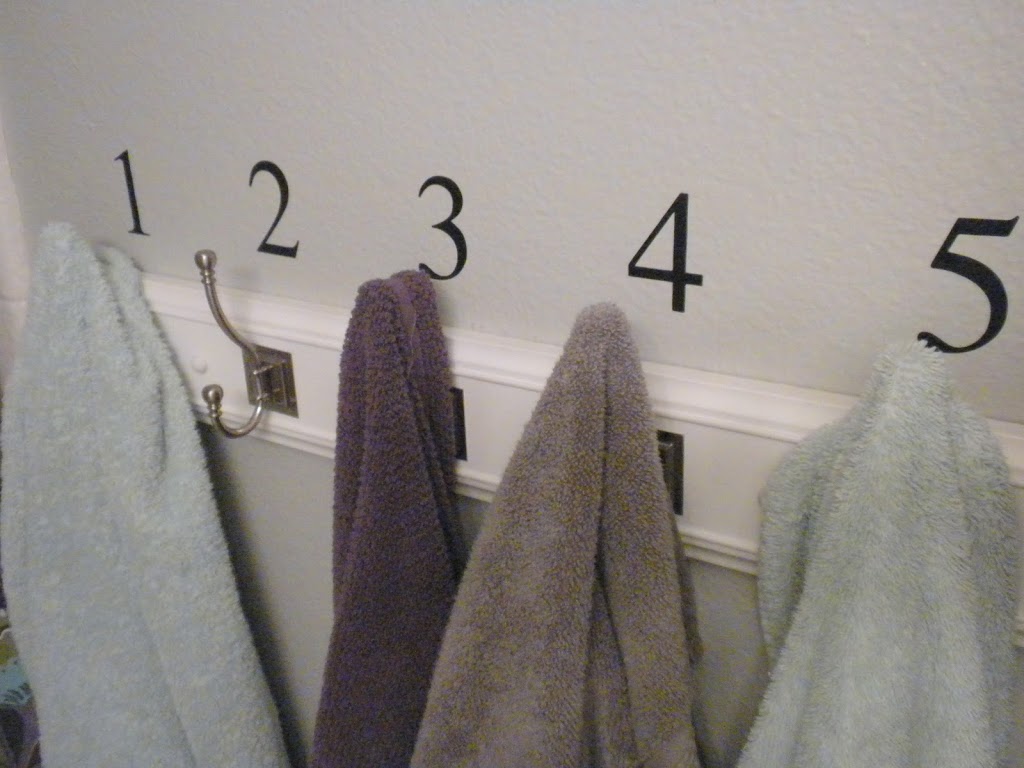
 The towel rack has been in the bathroom for years.  But I finally got smart and numbered them.  I hated not knowing whose towel was whose.  Now I know Ryan is #1 Sally choose #5 and guests are #3 and #4!!

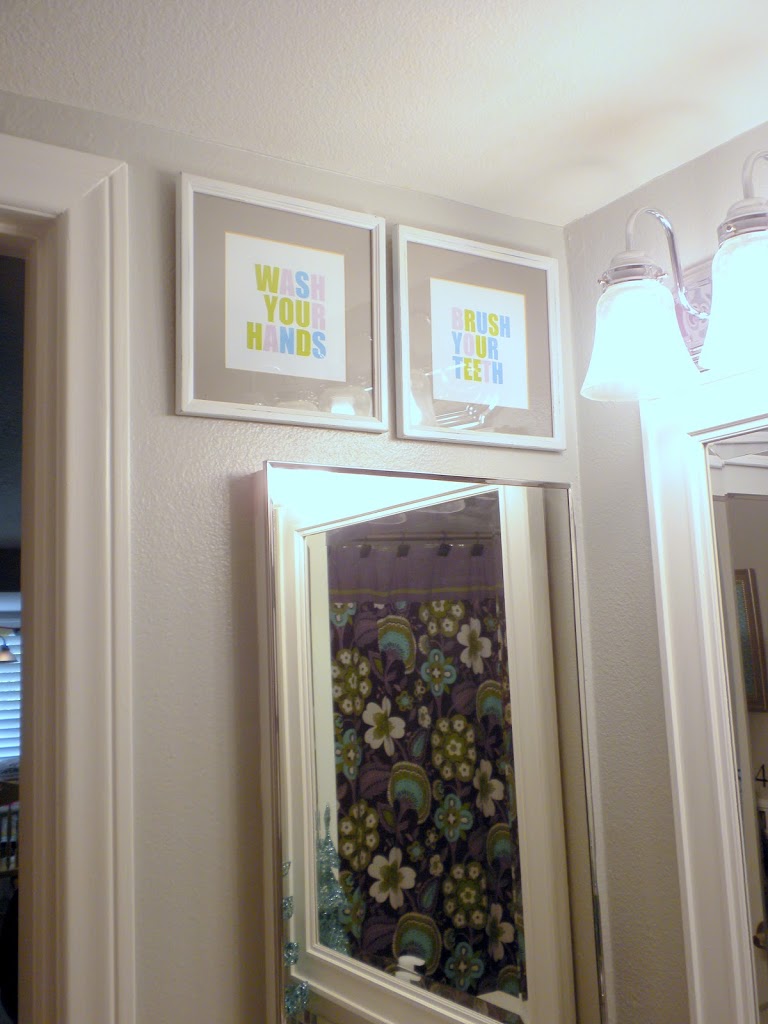
 I purchased 5 different items to hang above the toilet.  A funky wire basket, a different shelf with doors, a big basket towel holder thing and this.  After holding them all up – I choose this mirrored cabinet from Lowe’s.

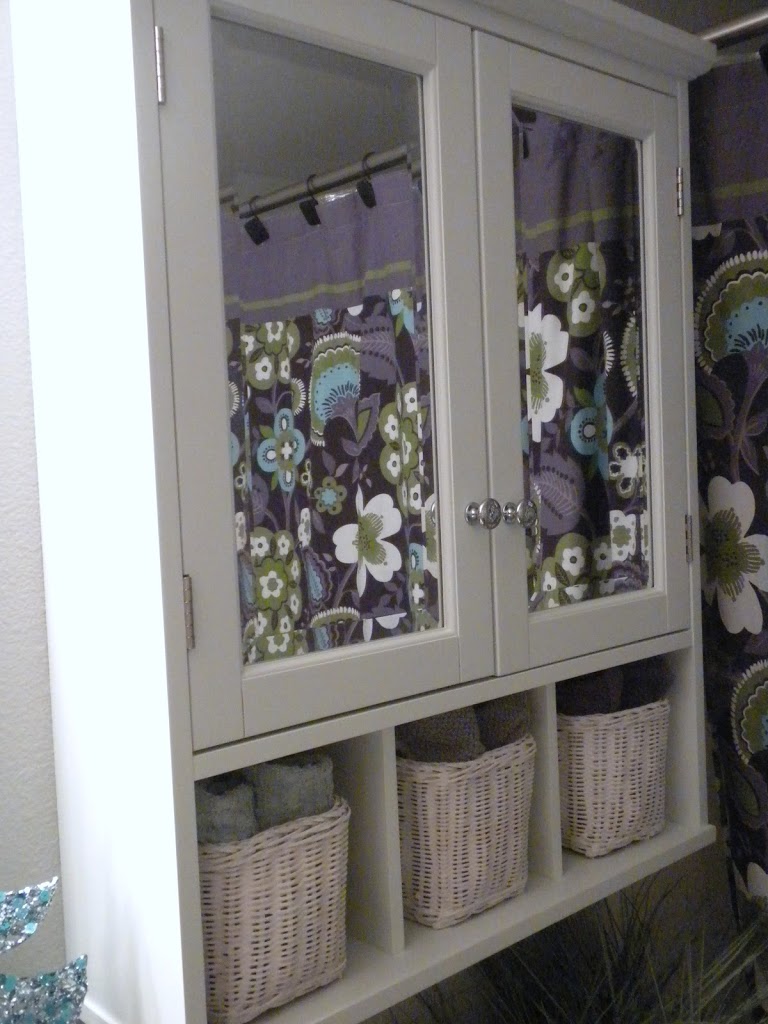
 I feel so happy every time I walk in there!!!

Glitter Volleyball Christmas Ornaments


 I needed a little gift for the girls on our Volleyball team.  Here is what I came up with!  I started with a chipboard coaster.  I got mine at Michael’s.  I spray painted them white.

Then I got out a gray Sharpie and had my daughter draw the volleyball lines.  These would be cute for any sports – basketball, baseball, soccer, etc.

 I cute out all the player’s names in red vinyl and punched a hole in the top.

 Then, my favorite part, the clear glitter.  I could use this stuff on everything I own.  It is great because you can see through it – but it gives it a sparkly finish.

 Get out the Elmer’s glue (or any similar) and brush over the top of the ornament – making sure to cover it completely.  Sprinkle on the glitter & now they are super cute!

 I attached a little ribbon and let them dry completely.
 They are pretty cute!

 The fun thing is I left the backs plain so the girls could all sign the back of the ornament.

Painted Halloween Jar Candles

I made these jars a few years ago.  I have been asked a few questions about the process, so here is a more detailed set of instructions. 

Supplies:
jars, craft paint, white school glue, vinyl motifs cut from Cricut or Silhouette

1.  Collect glass jars – any kind: pickle, relish, molasses, spaghetti sauce, etc.  Mason jars can work – but it’s nice to have a smooth surface for the vinyl to adhear.

2.  Remove all labels, wash & dry the jars

3.  Put a fair amount of glue into a paper bowl and add some paint.  I didn’t measure – but it’s more glue than paint.  You are just trying to tint the glue.  The glue helps the paint to be transparent so you can see the flicker of the candle through the paint.

4.  Start painting the inside of the jars.  You can be real precise and get the glue/paint even, or I like to make it look drippy and spooky!!


5.  Let the jars dry

6.  I cut out trees, pumpkins, bats, spiders, etc. on my cricut.  If you don’t have access to a cutting machine, I have seen black Halloween silhouettes at the Dollar Tree you could Mod Podge to the outside


7.  I put real candles in my jars.  If you are worried about flamibility, you can use battery lights or even twinkle lights.

Hope this helps!  Happy Crafting!!

Back to School

I vinyl-ed these sanitizer bottles to give the teachers on the first day of school.  Both teachers are boys – so can’t get too cutesy!  The hardest part of this craft is getting the label off the Germ-X bottle!!!

Laundry Room Update

 My laundry room is finally coming along.  David finished the tile work and built the shelf this past weekend.  I decorated the buckets and tubs with fabric tape from my friend Judy at Sprizzie.  I love it – she also has lots of fun washi tape!  I don’t keep all my laundry in here – there just isn’t room.  This is where the stragglers life.  The rest is in hampers in everyone’s room.

 I bought these vintage frames at a garage sale.  The art work was a little faded.  I printed out photos of my girls wearing clothes I wore when I was little and I mounted them right on top of the vintage prints.

The frames are really hanging on the wall – the fabric bows are made to look like the picture is hanging from them – the bows are actually hot glued on!

 Oh yes, the lost and found board is in full use!  It’s kind of embarrassing how many missing socks I am responsible for!!

 Finally I cut this little phrase out and put it on the door.  I found it on the internet somewhere & loved how it turned laundry into something to be thankful for!  A nice reminder for sure.

I have a few more things to finish – I am making a little quilt to hang above the backsplash.  Hopefully it will get done soon!


I saw this idea on Pintrest and thought I would make my own!  I found this country checker board at a garage sale for 50 cents.  It sure beat waiting for hubby to cut wood for me!!
I sanded it, primed it & spray painted it yellow.  I cut the vinyl on the cricut and added some scrapbook paper to the clothespins.  I used epoxy to adhere the clothespins to the board.  Added a little fabric to the bottom & drilled in a decorative knob.  I love it!  Now maybe I can keep all the socks together!


https://www.jedicraftgirl.com/2012/05/i-saw-this-idea-on-pintrest-and-thought.html

Spring Dining Room Table

After making all the cake plates, I realized I don’t have anywhere to store them. I decided to use them in my spring table decor. I bought these tins at Target in the $ section. I searched for rabbit silhouettes on the internet and cut them on the cricut out of black vinyl. Then placed spring green silk hydrangeas in each of the tins. I love how it looks! There are 5 total.

Sewing Room Up-Date

I am almost finished updating my sewing room. I will post photos when it is all finished!! I just put this vinyl up last night – It is my favorite sewing saying and it is true!!

Sewing Room Up-Date

I am almost finished updating my sewing room. I will post photos when it is all finished!! I just put this vinyl up last night – It is my favorite sewing saying and it is true!!