Blue Whale Quilt Pattern

blue whale quilt 9

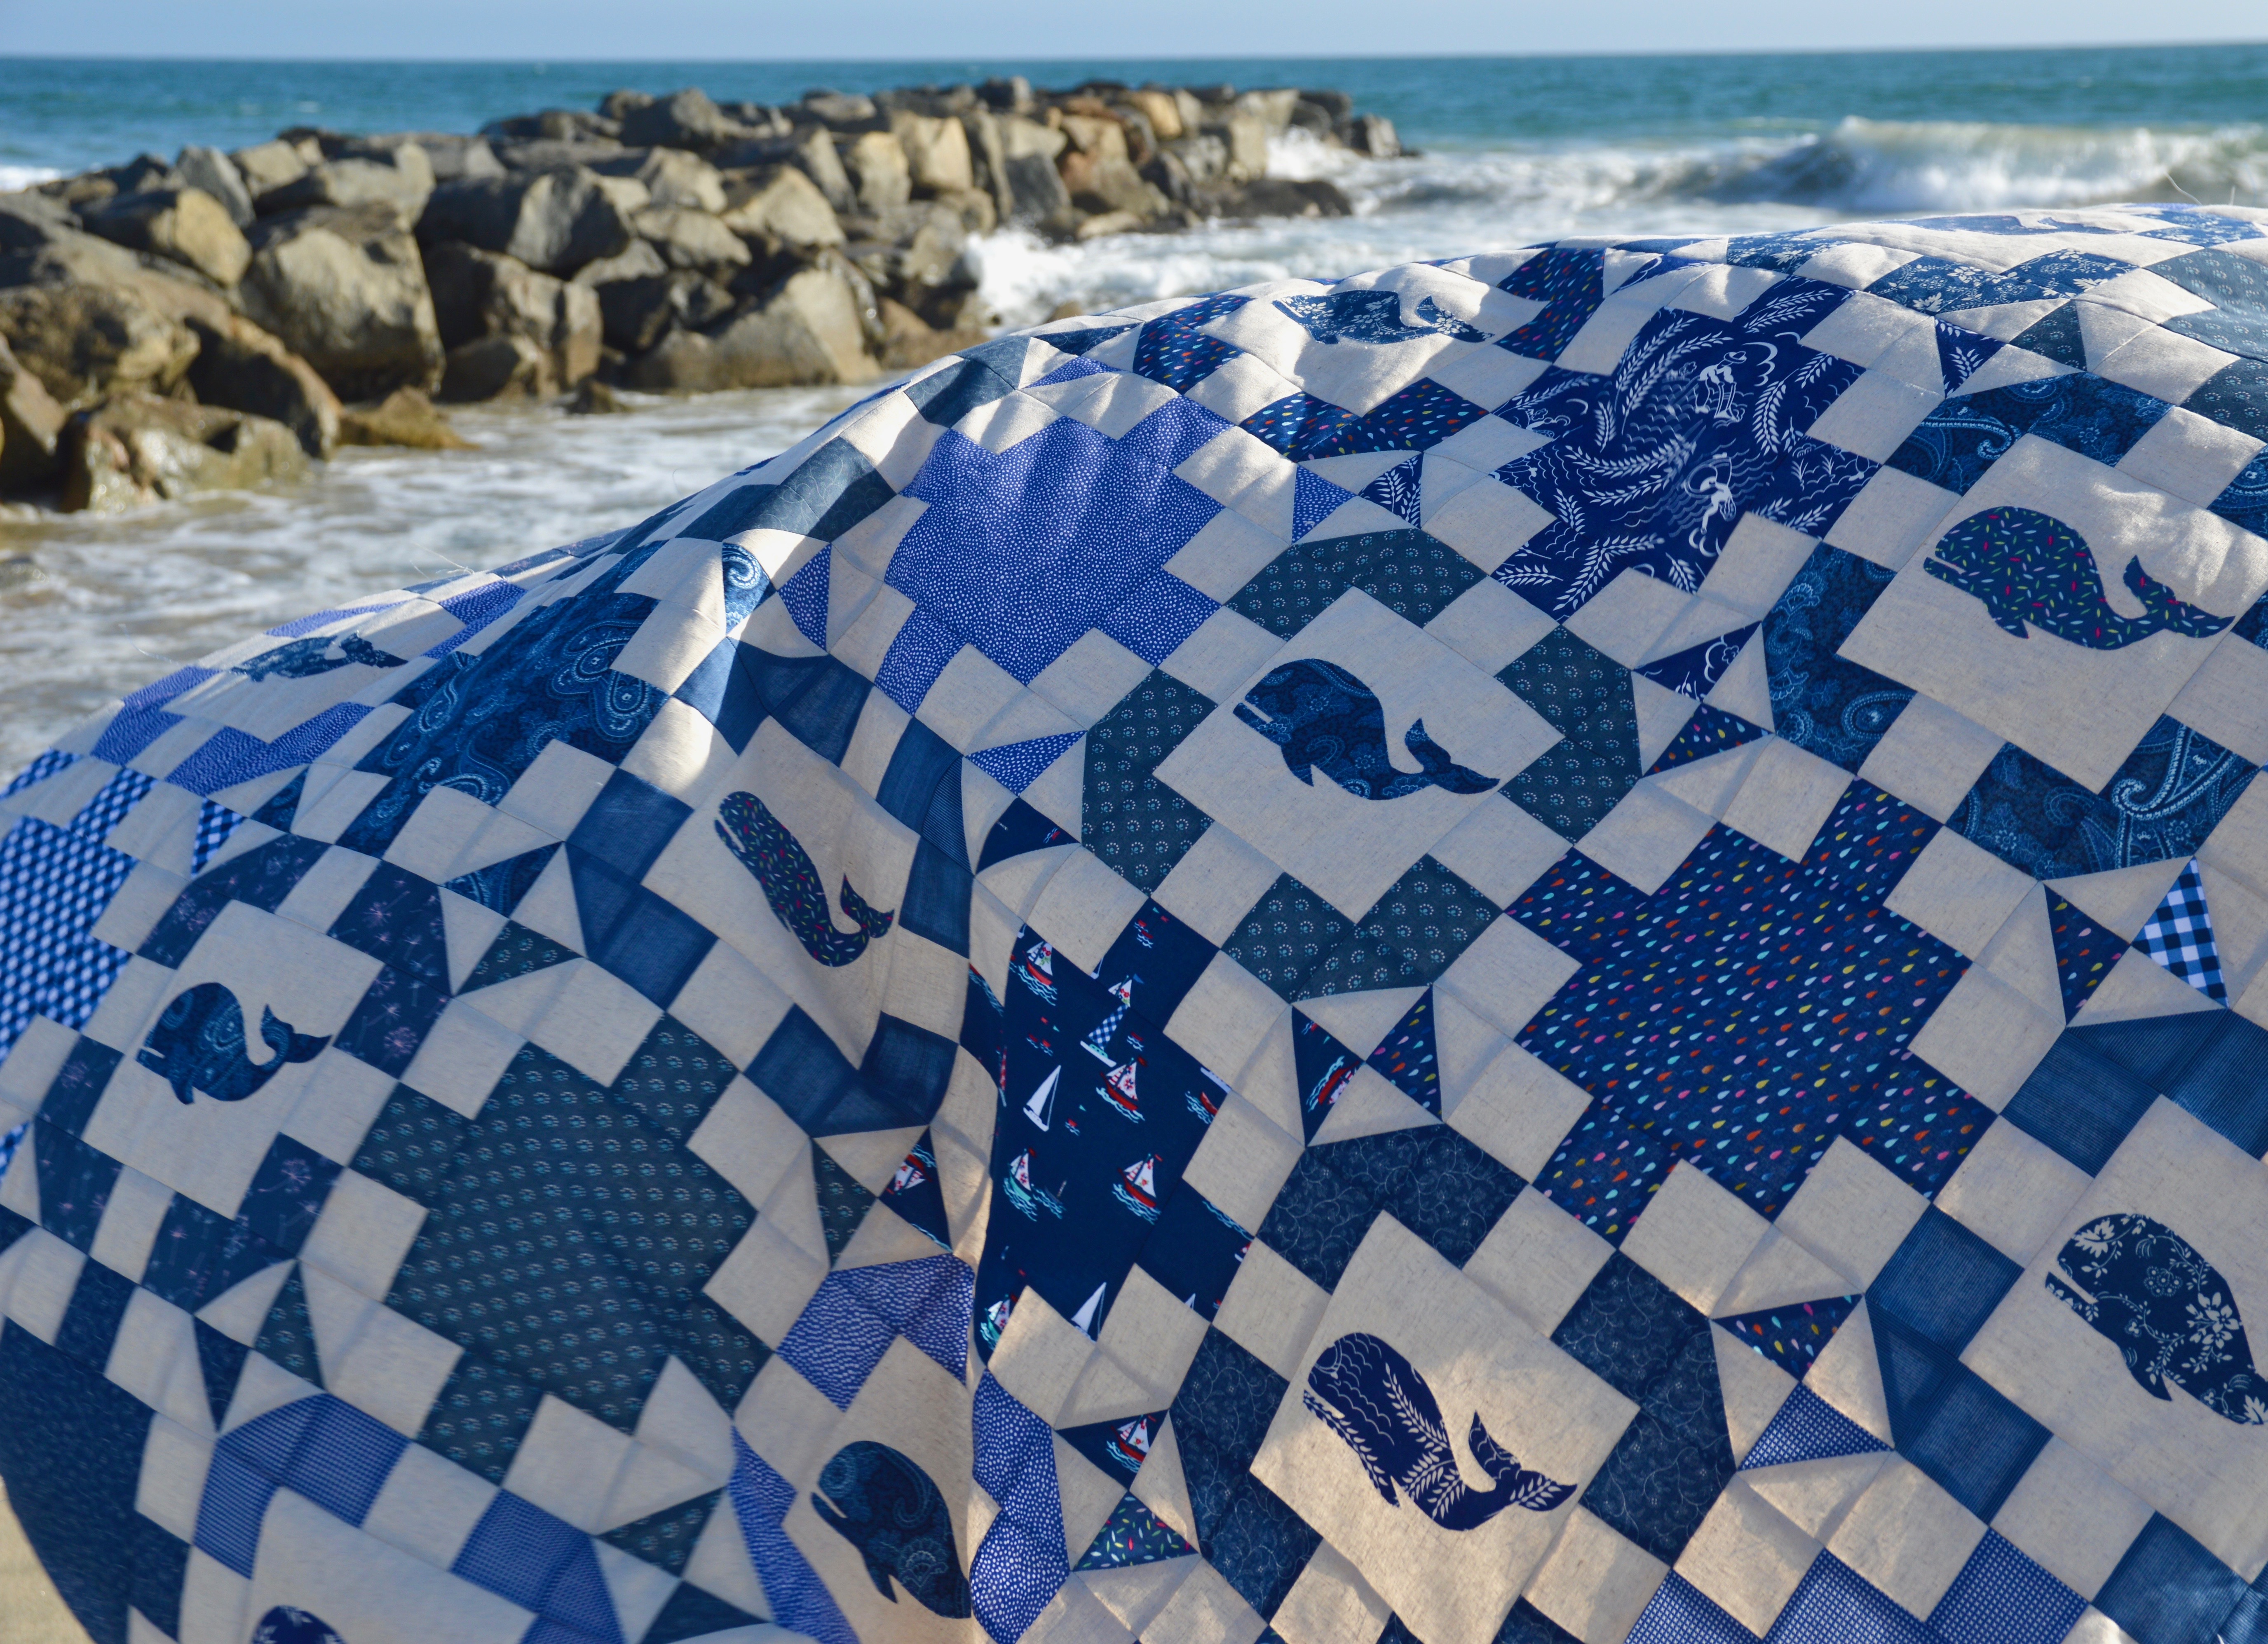
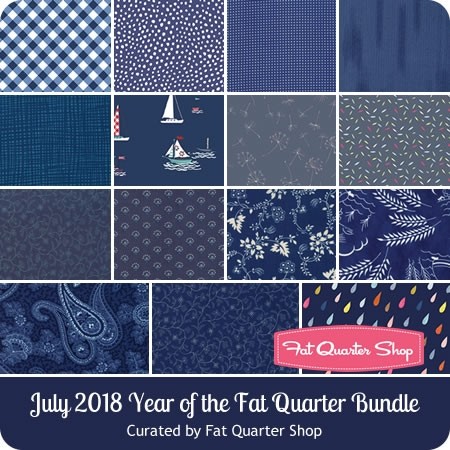
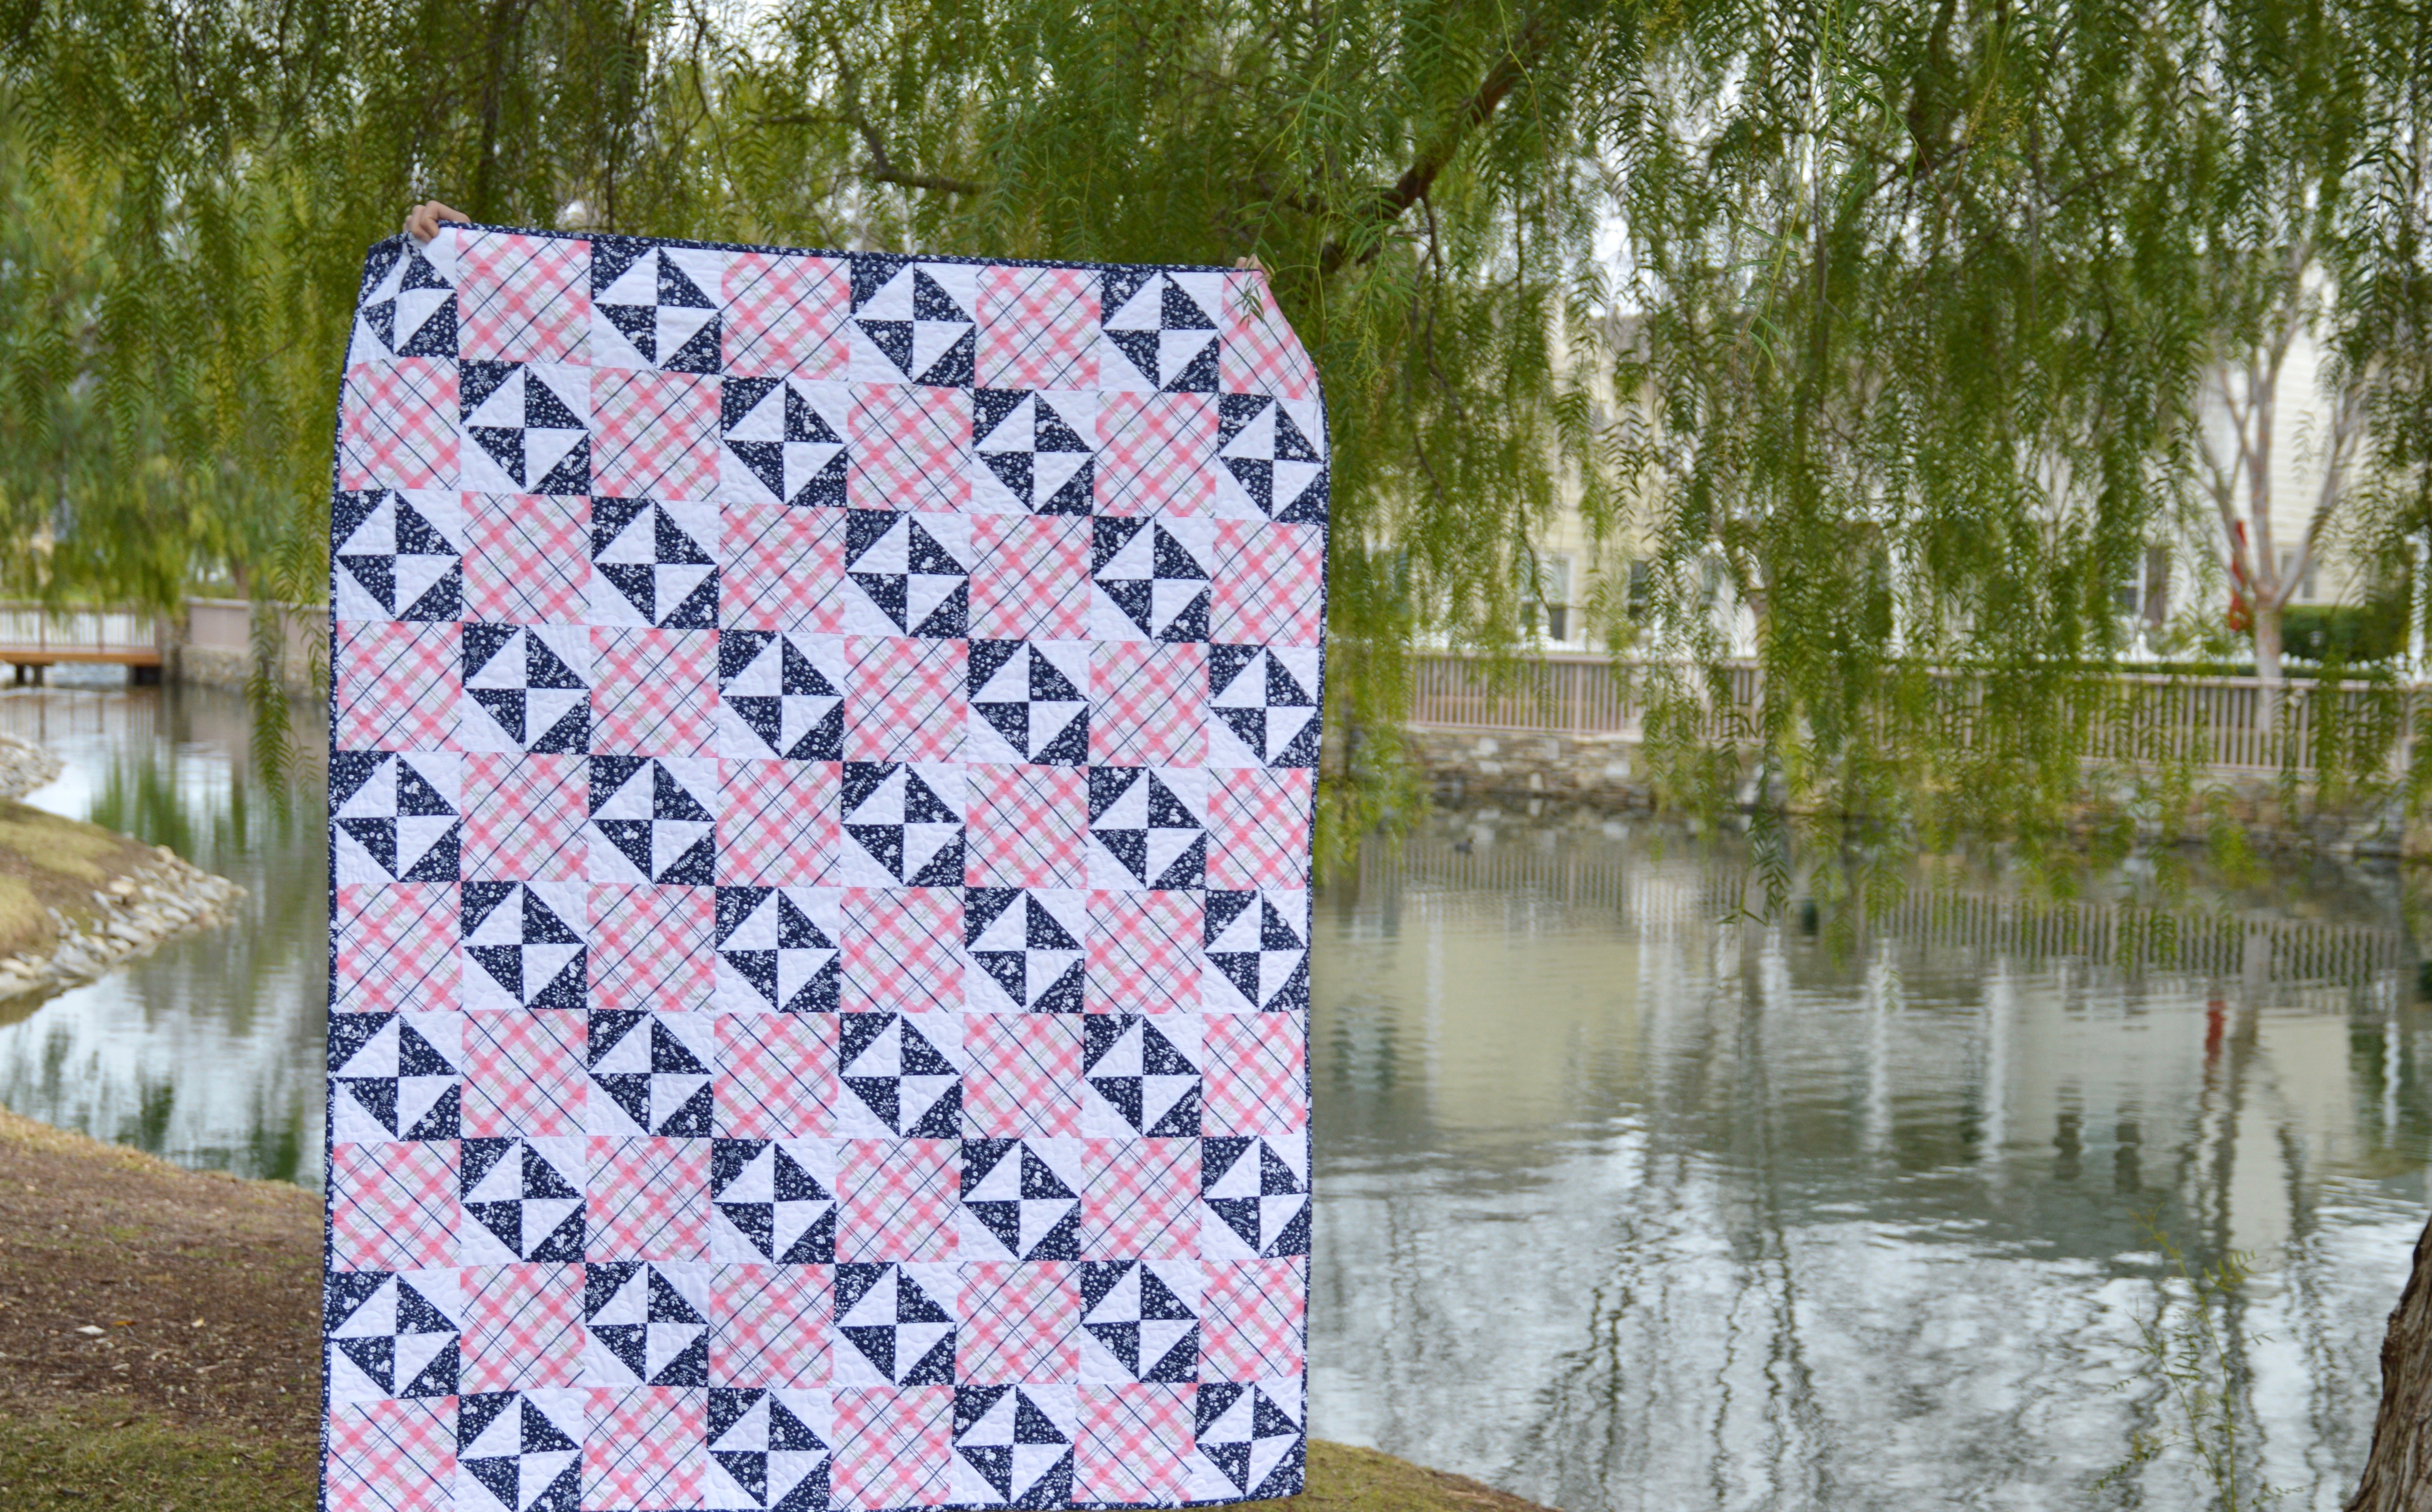
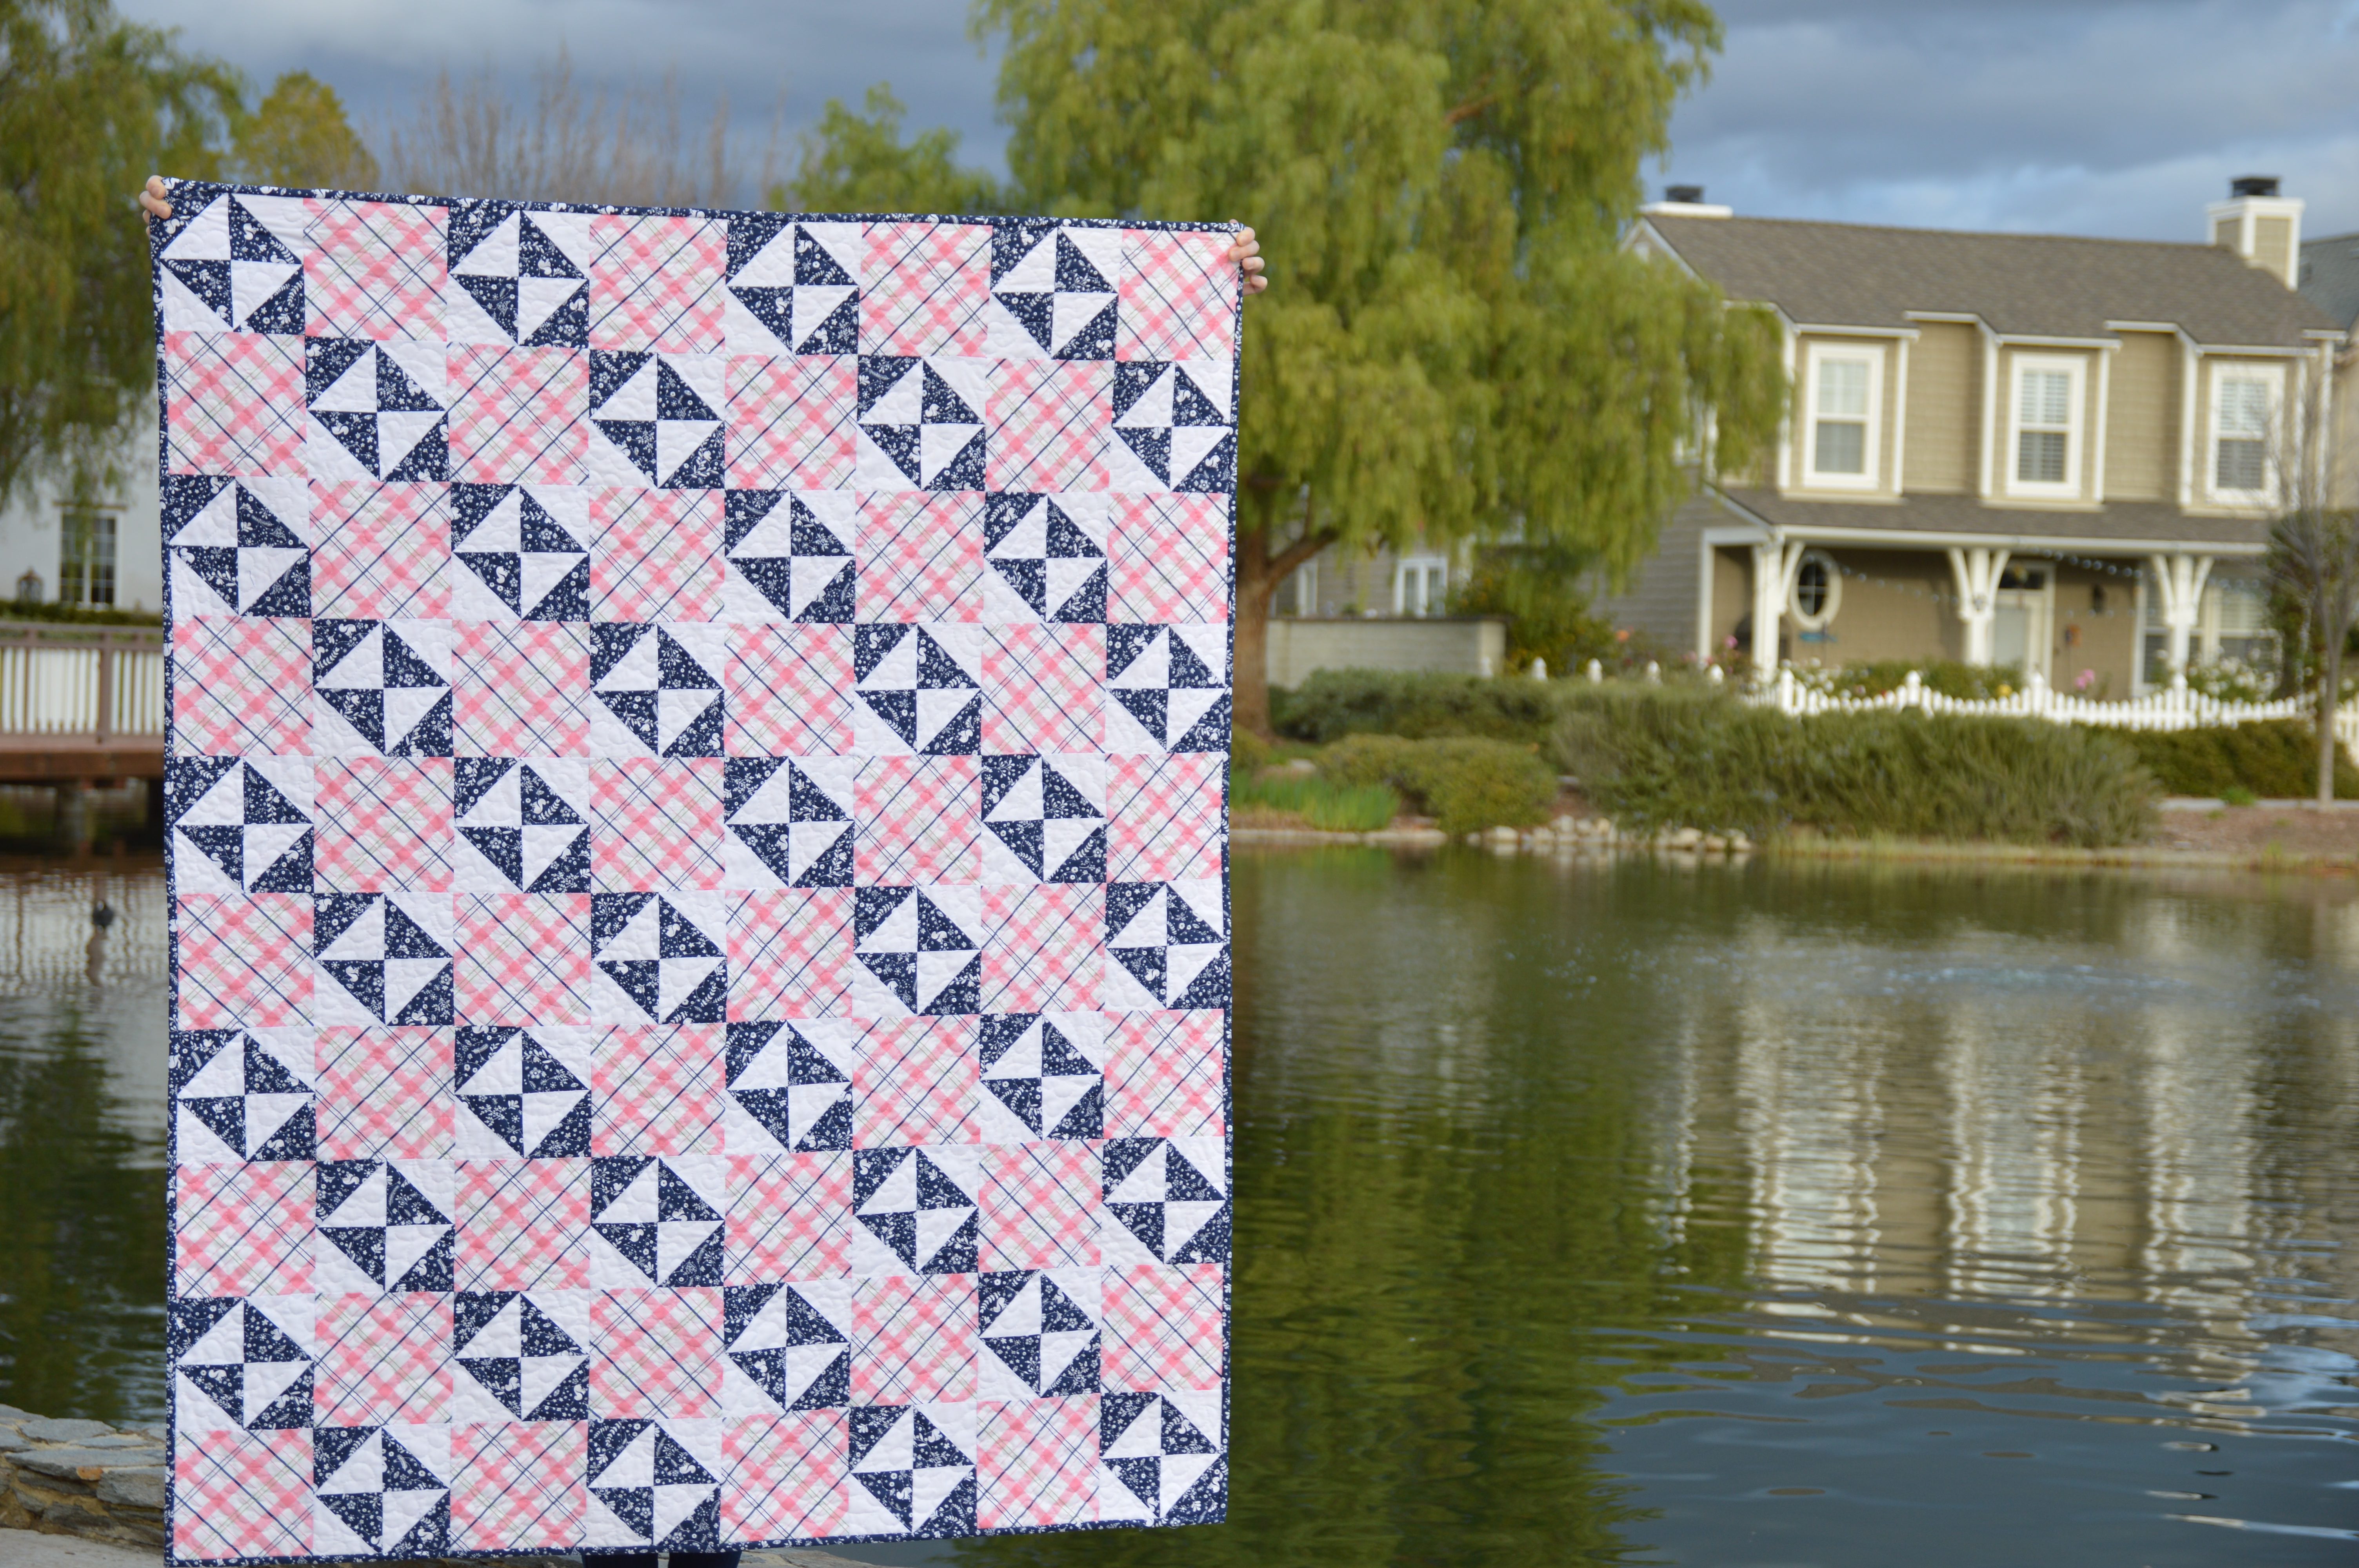
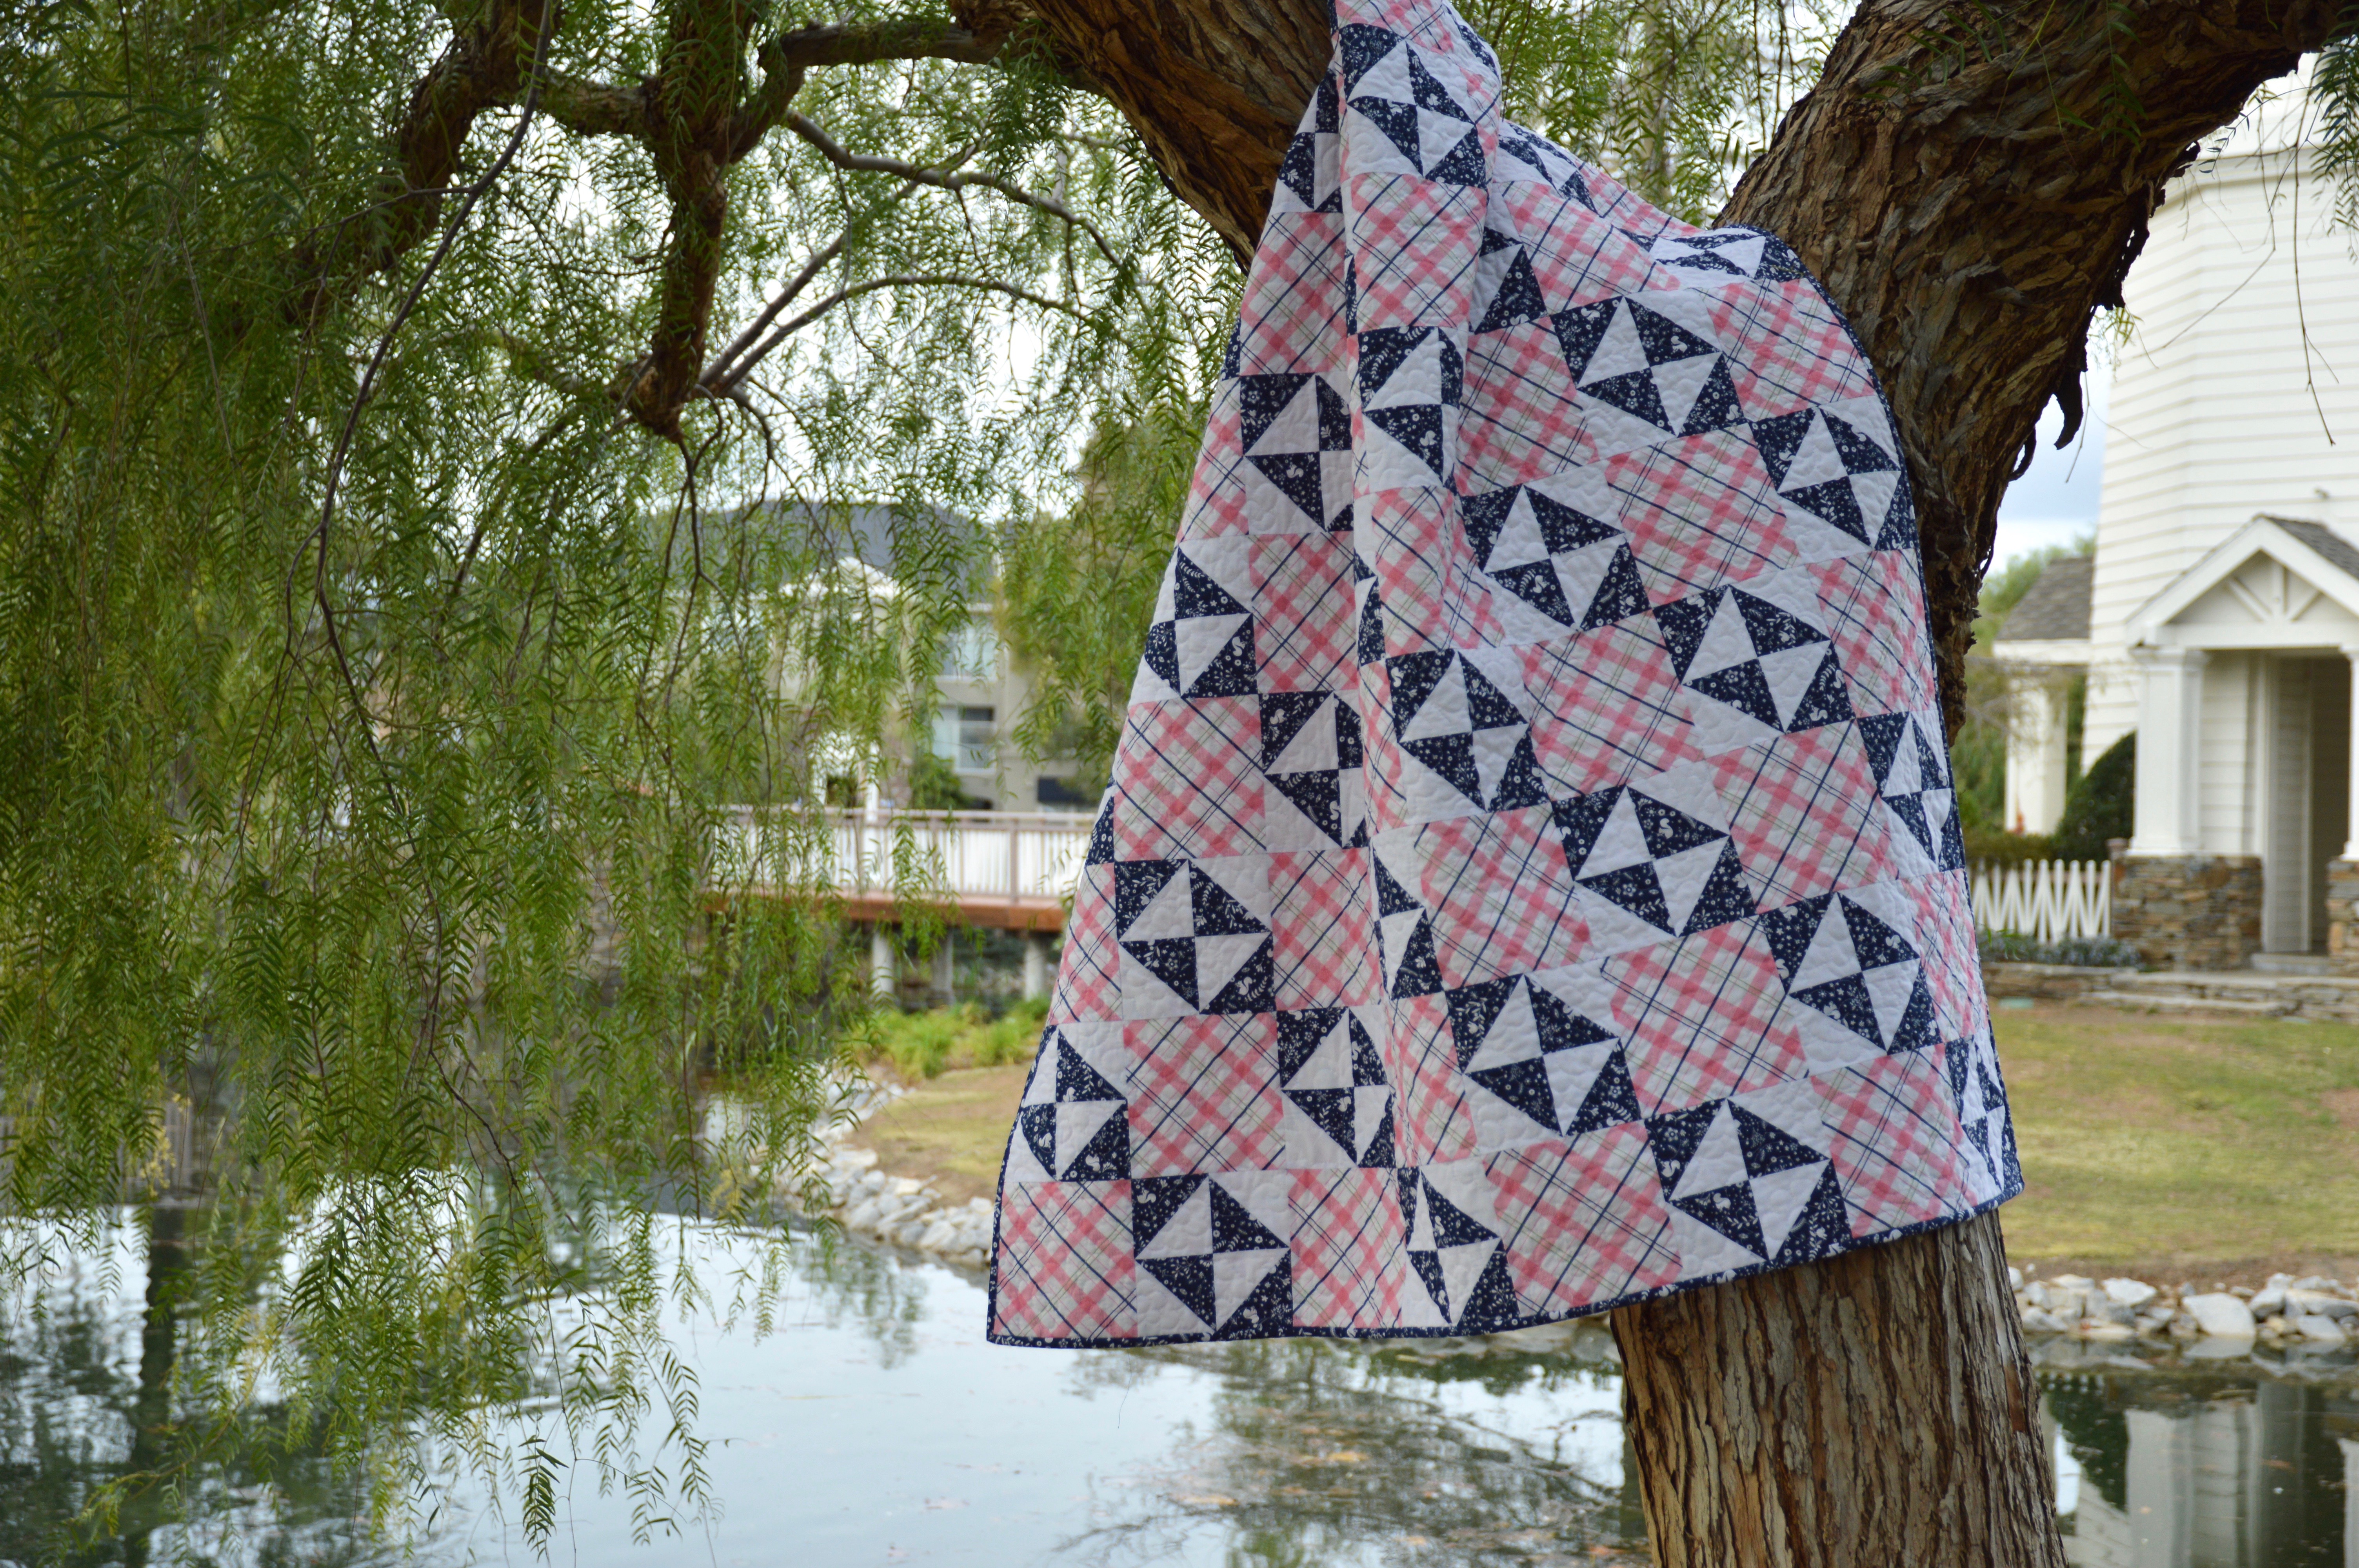
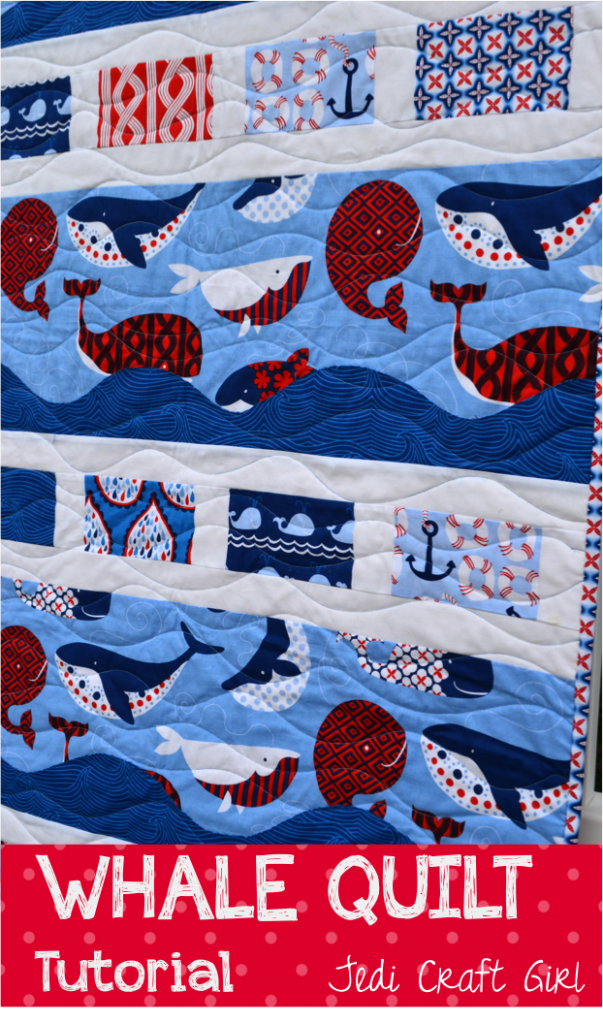
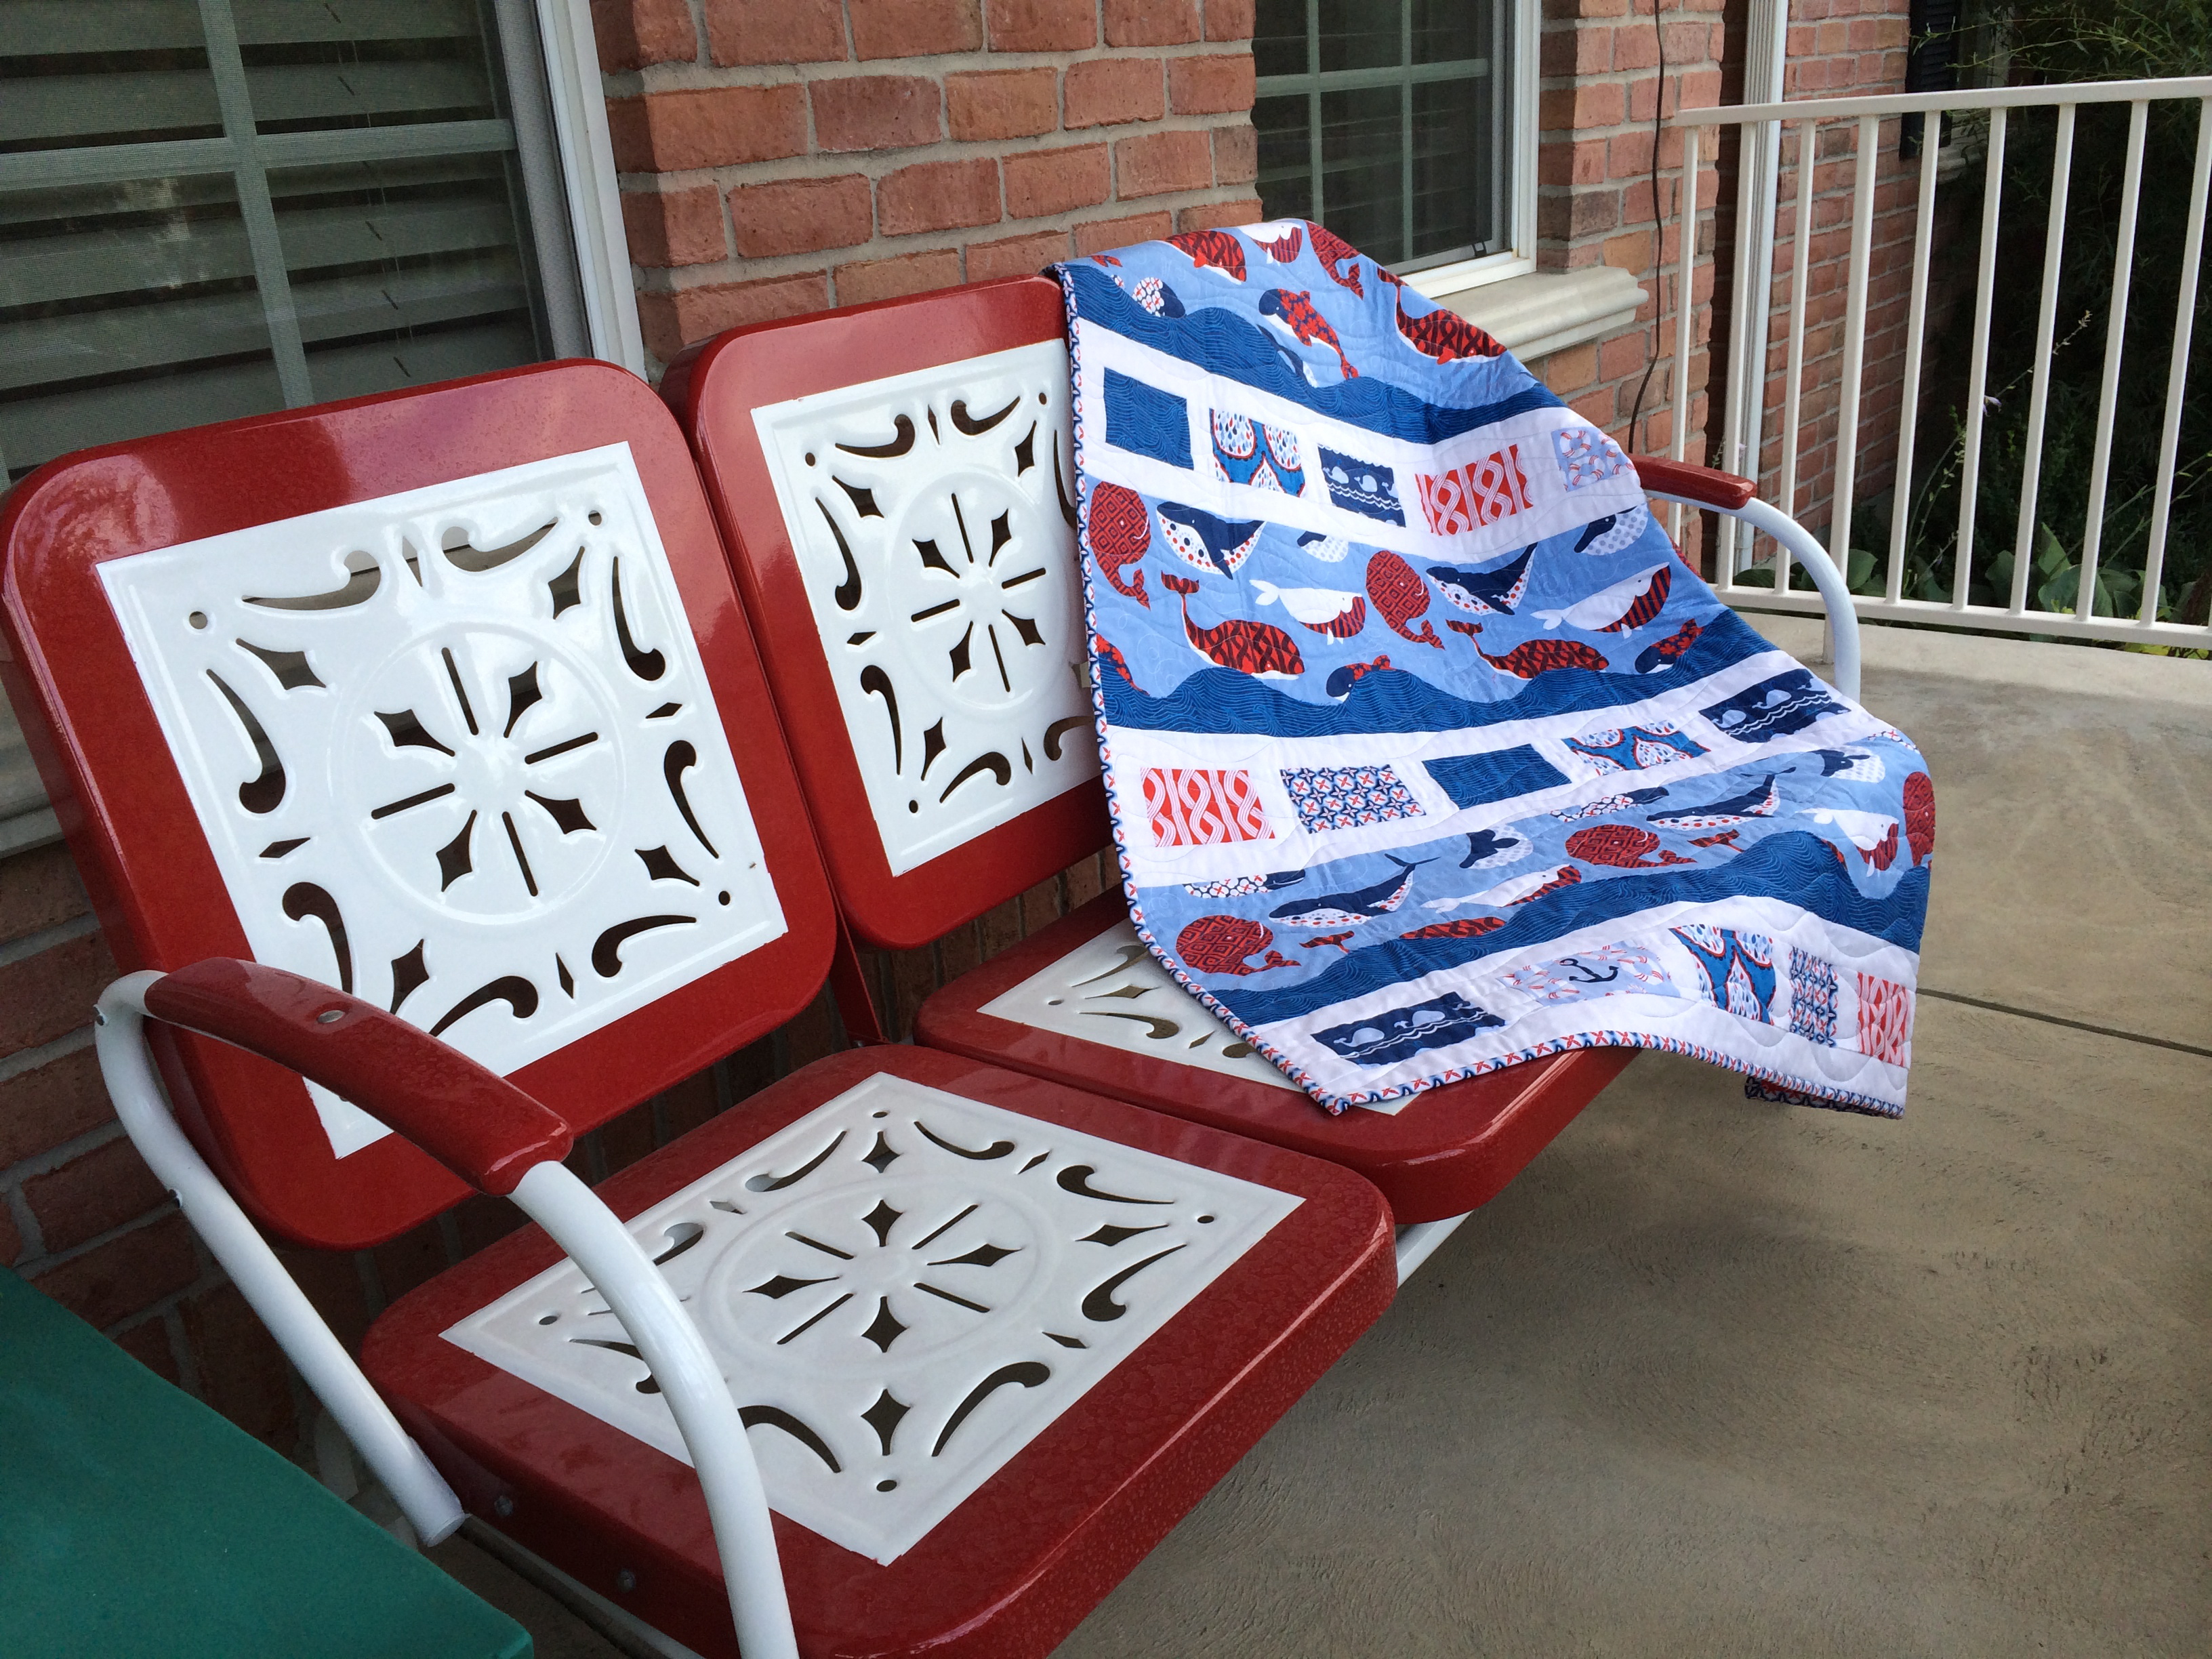
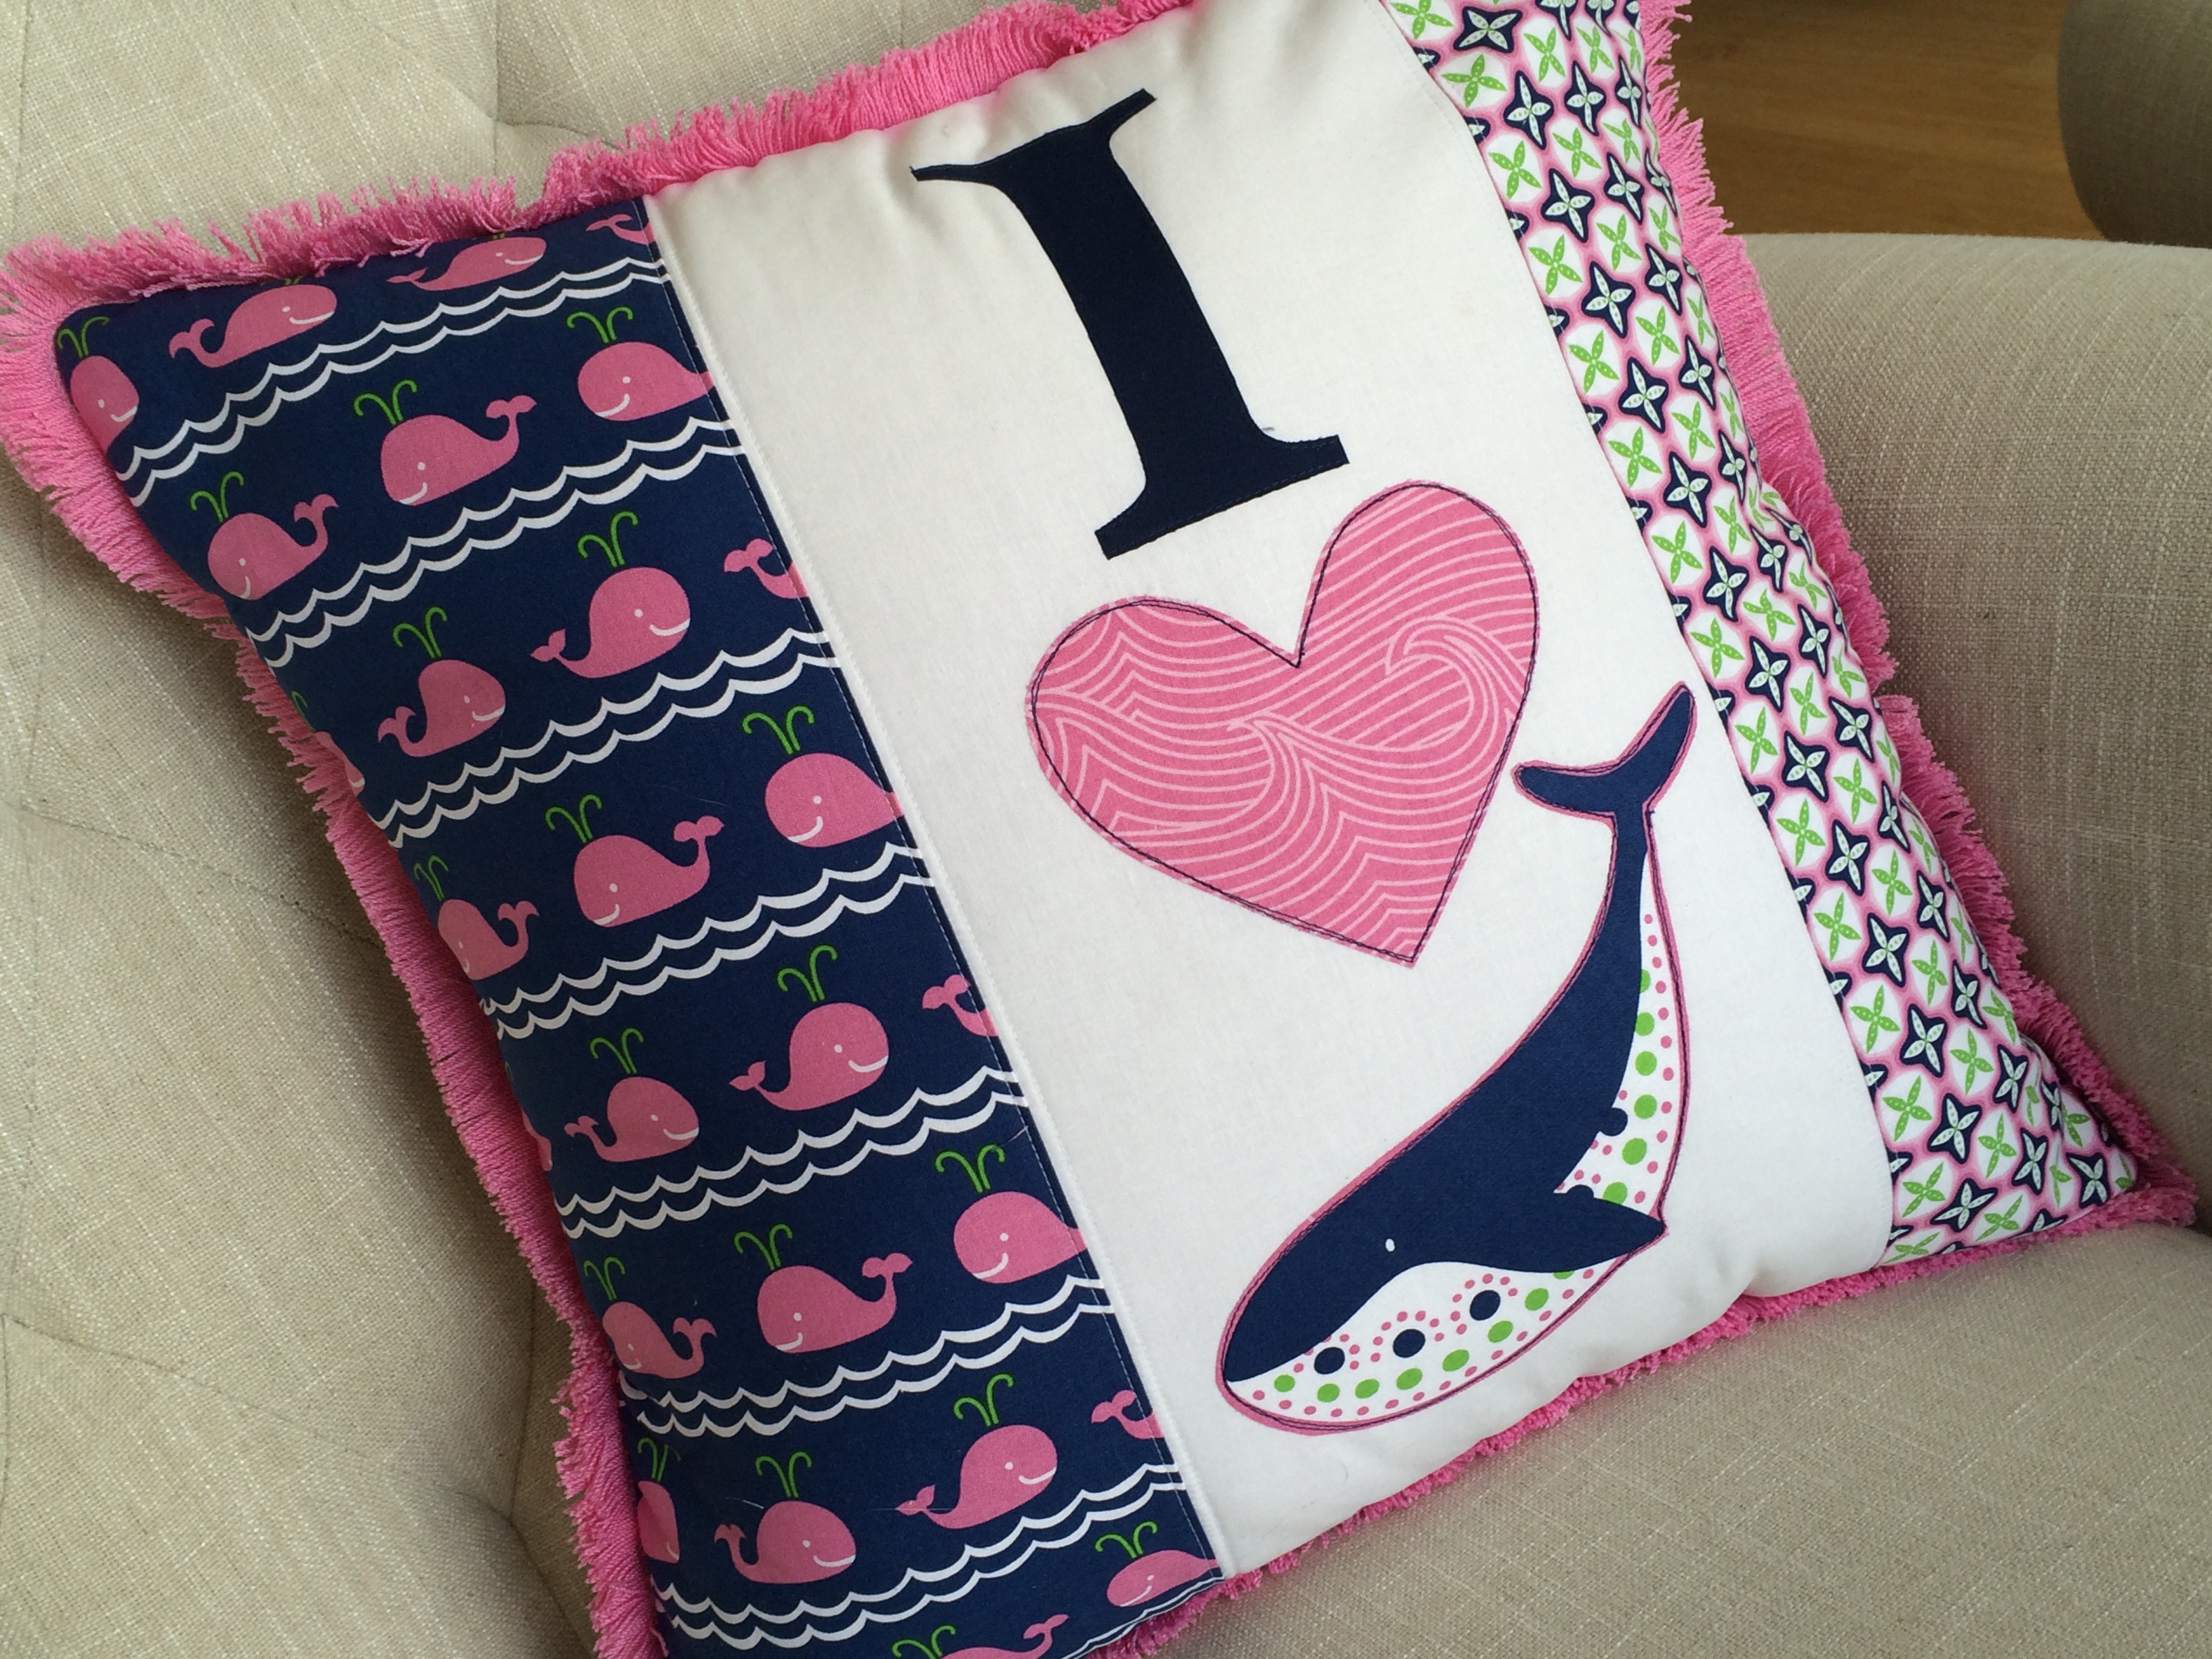
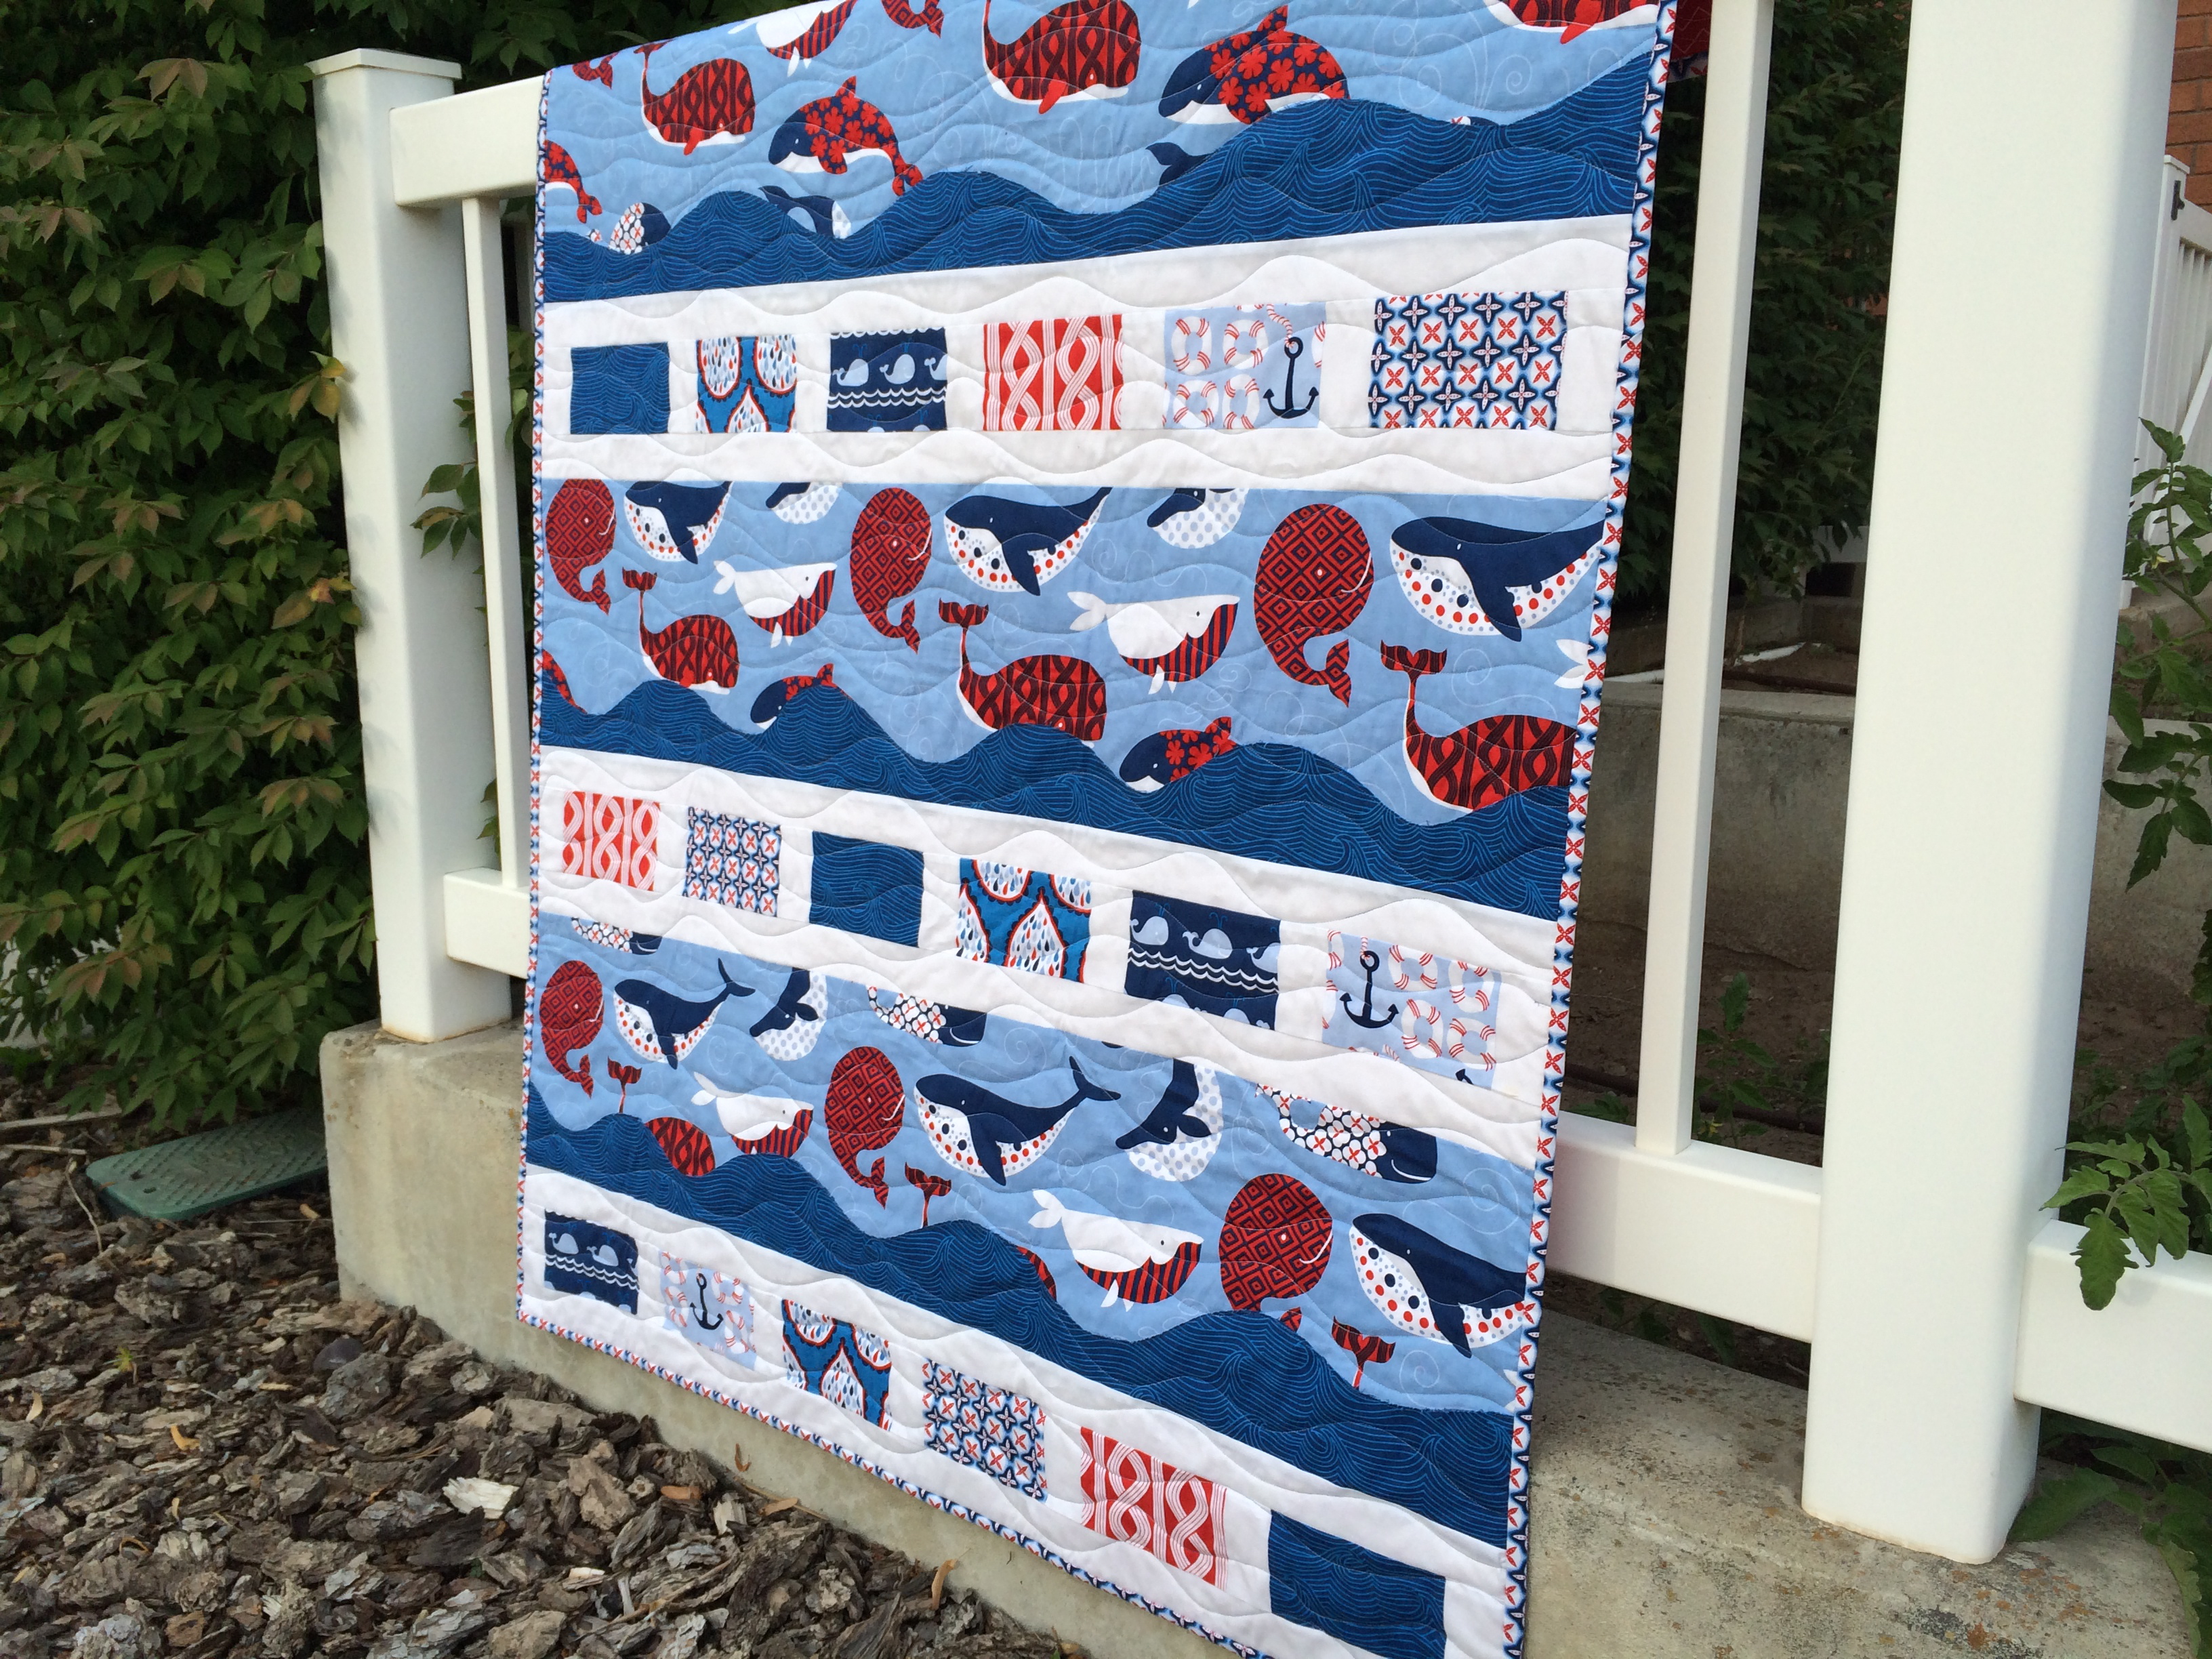
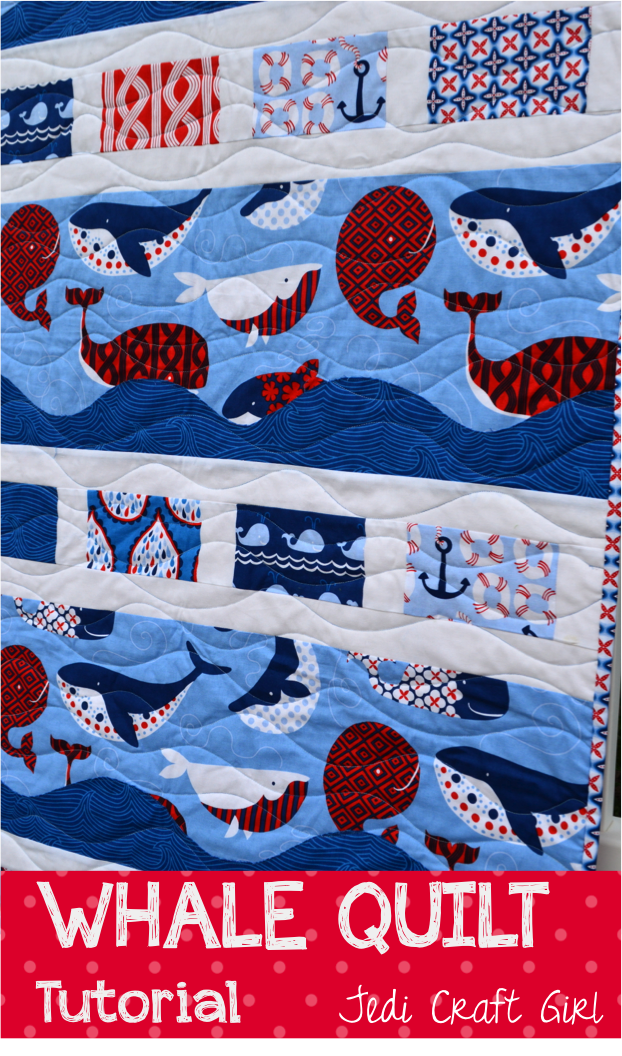
Meet Blue Whale!  My newest quilt pattern inspired by the amazing Year of the Fat Quarter Navy Bundle!!  Navy blue has been my favorite color all my life!  It’s so fitting that Fat Quarter Shop choose July to be Navy because it’s my birthday month!  As soon as I saw all these wonderful Navy fat quarters together my creative mind went to whales – my favorite ocean animal!  I’m so excited!!!!july-circle-textblue whale quilt 2

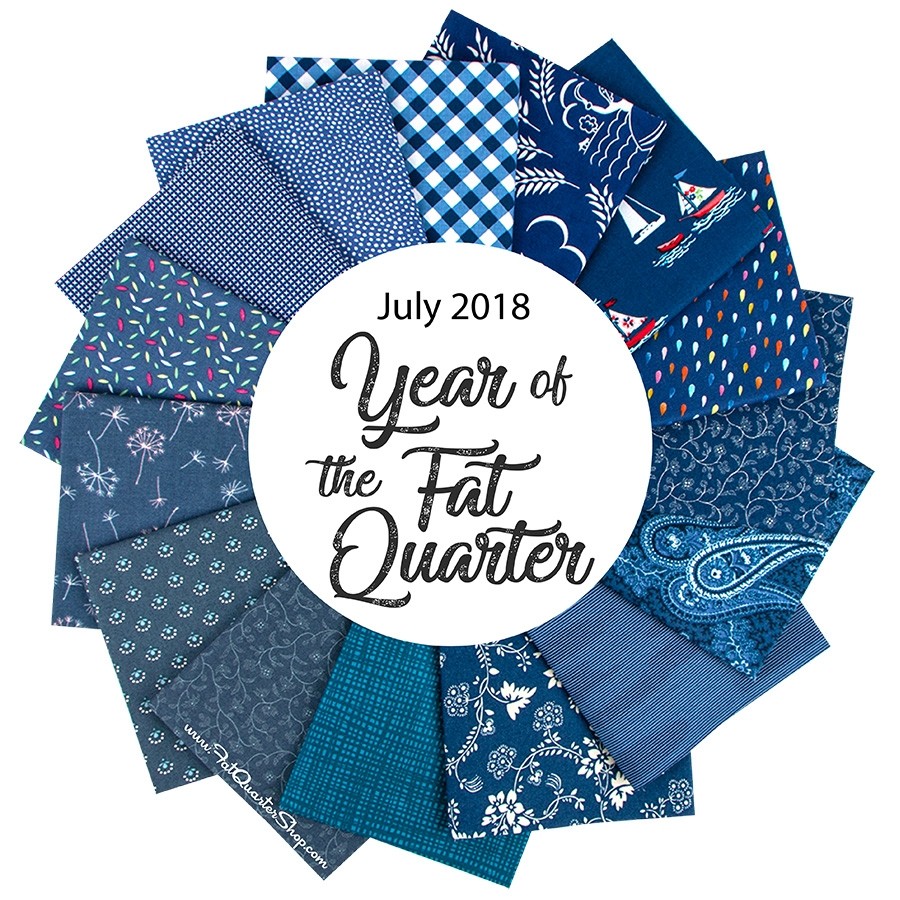
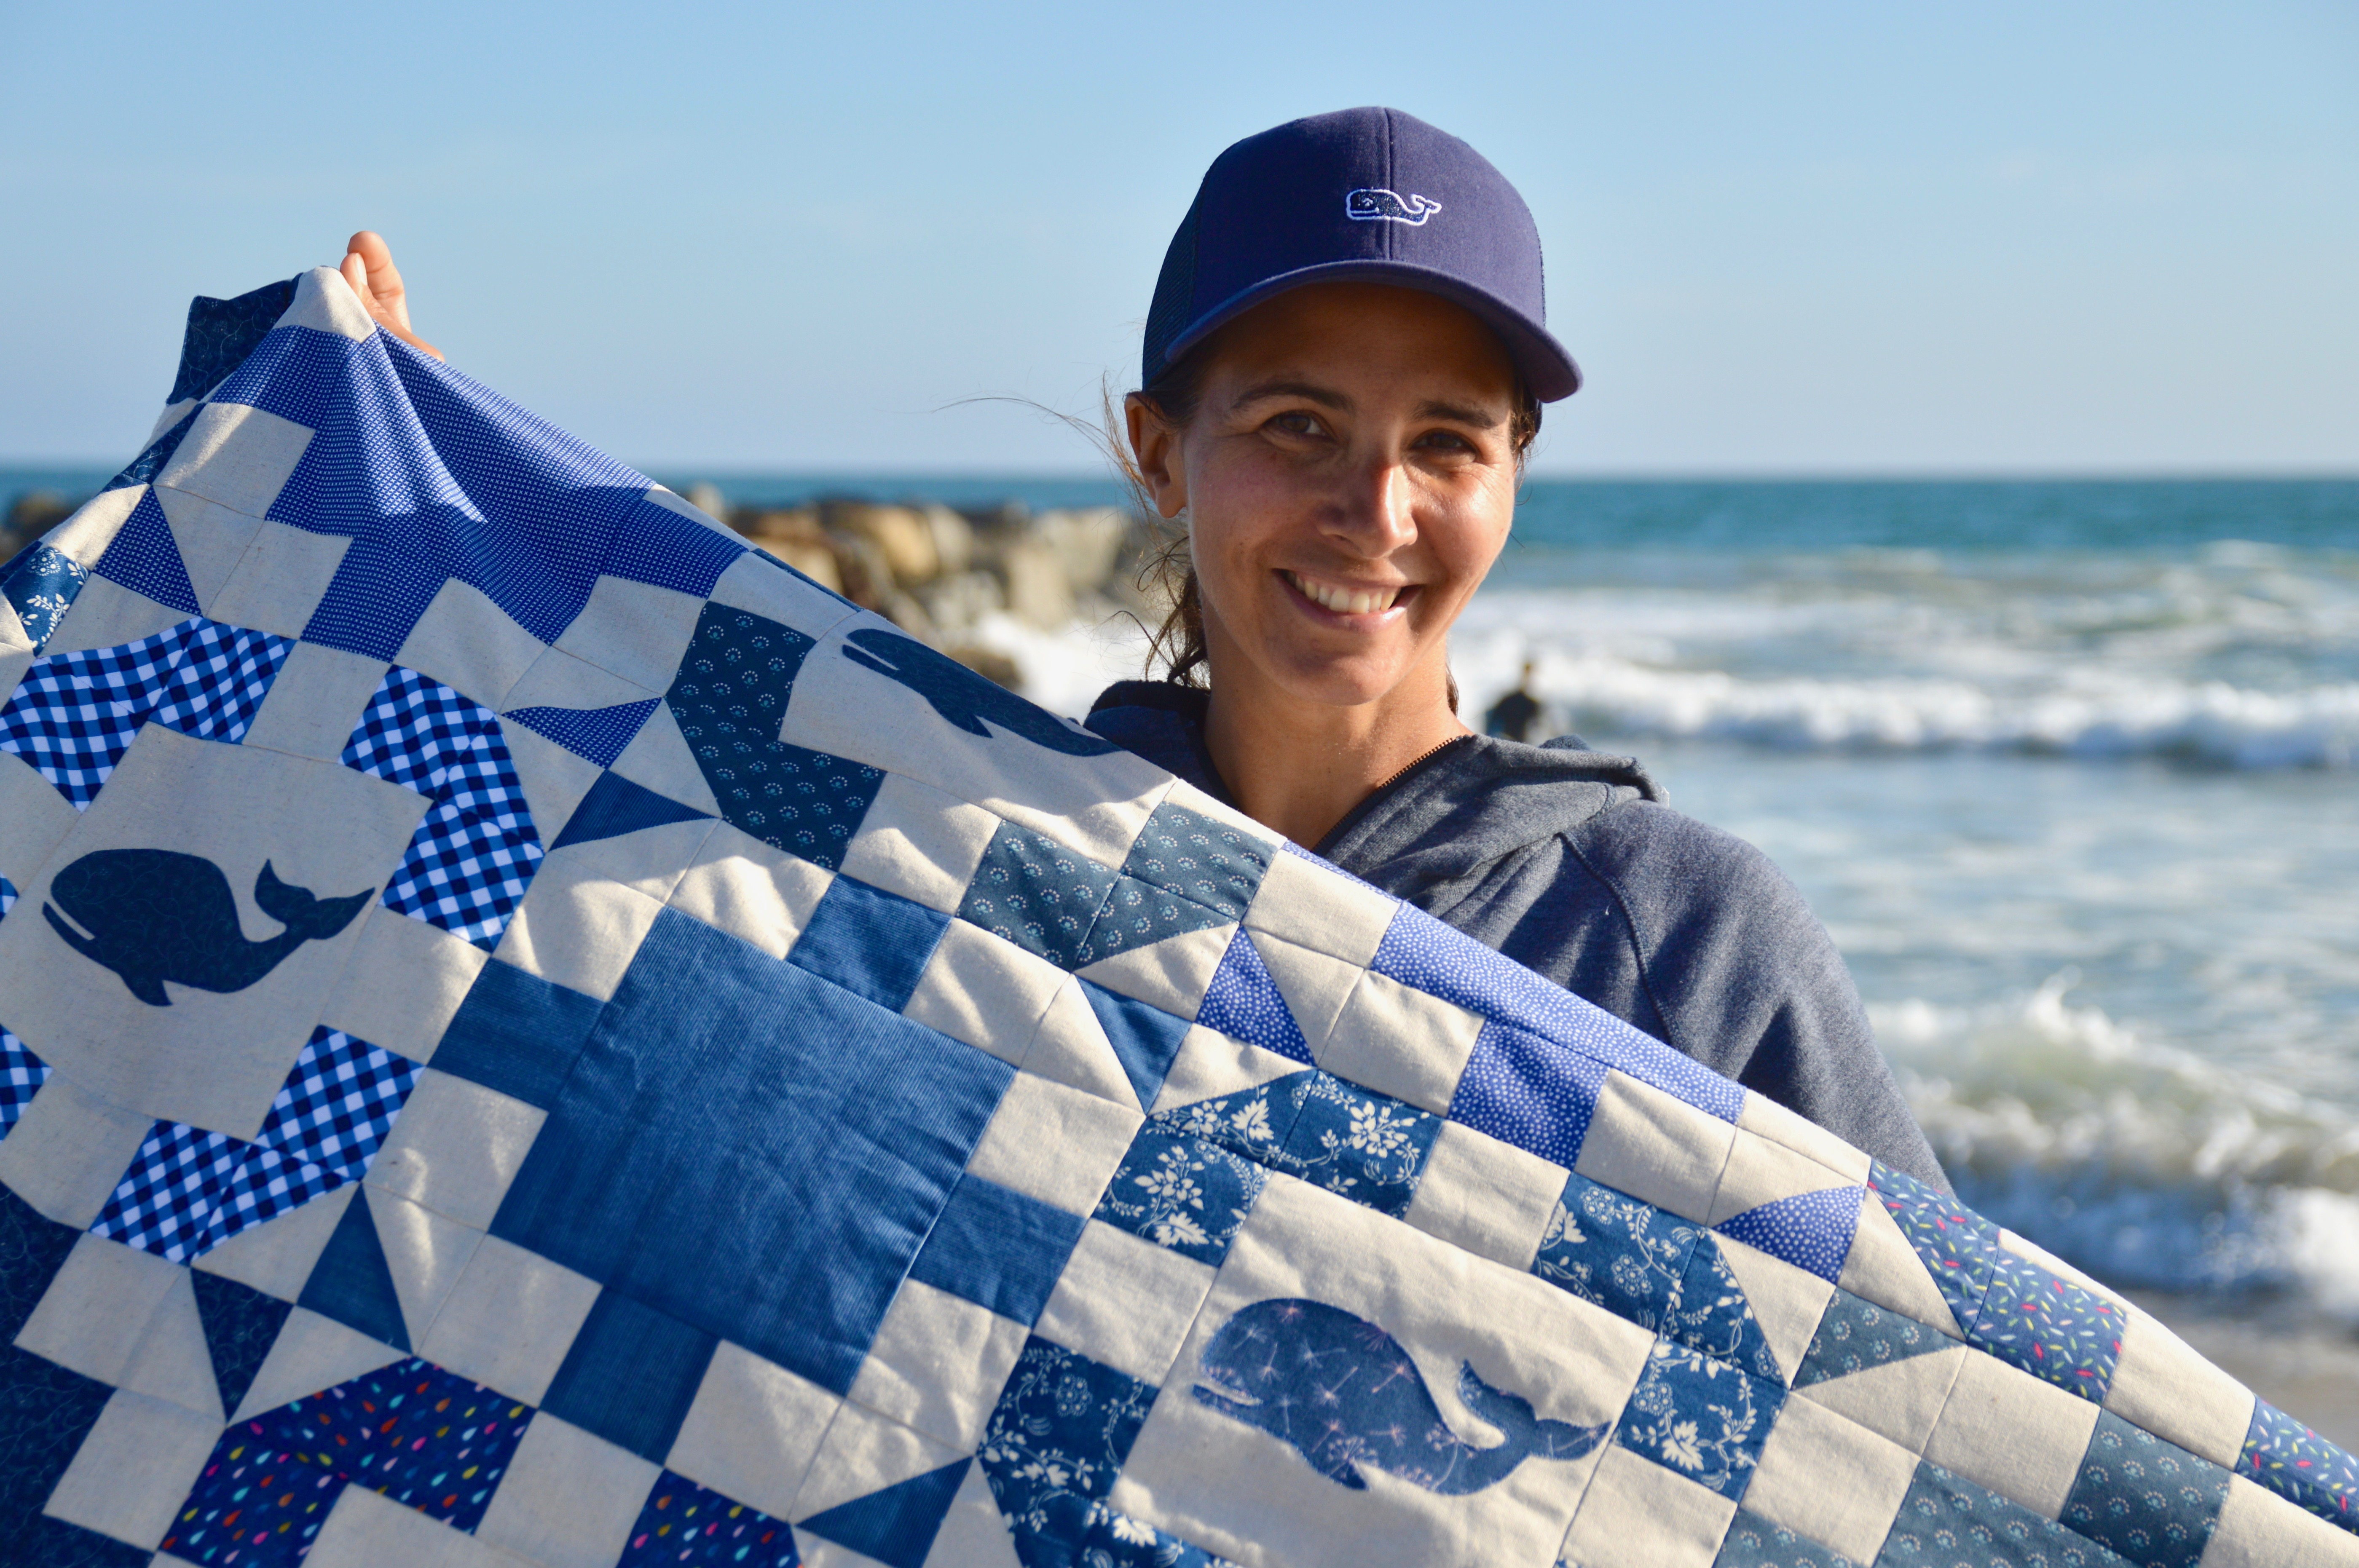
OK, so I’m just a little excited about this quilt, the color, the whales, the fabric, seriously this quilt is ME!!!!!  I hope its YOU too!!!!

blue whale quilt 6

Here are the details:

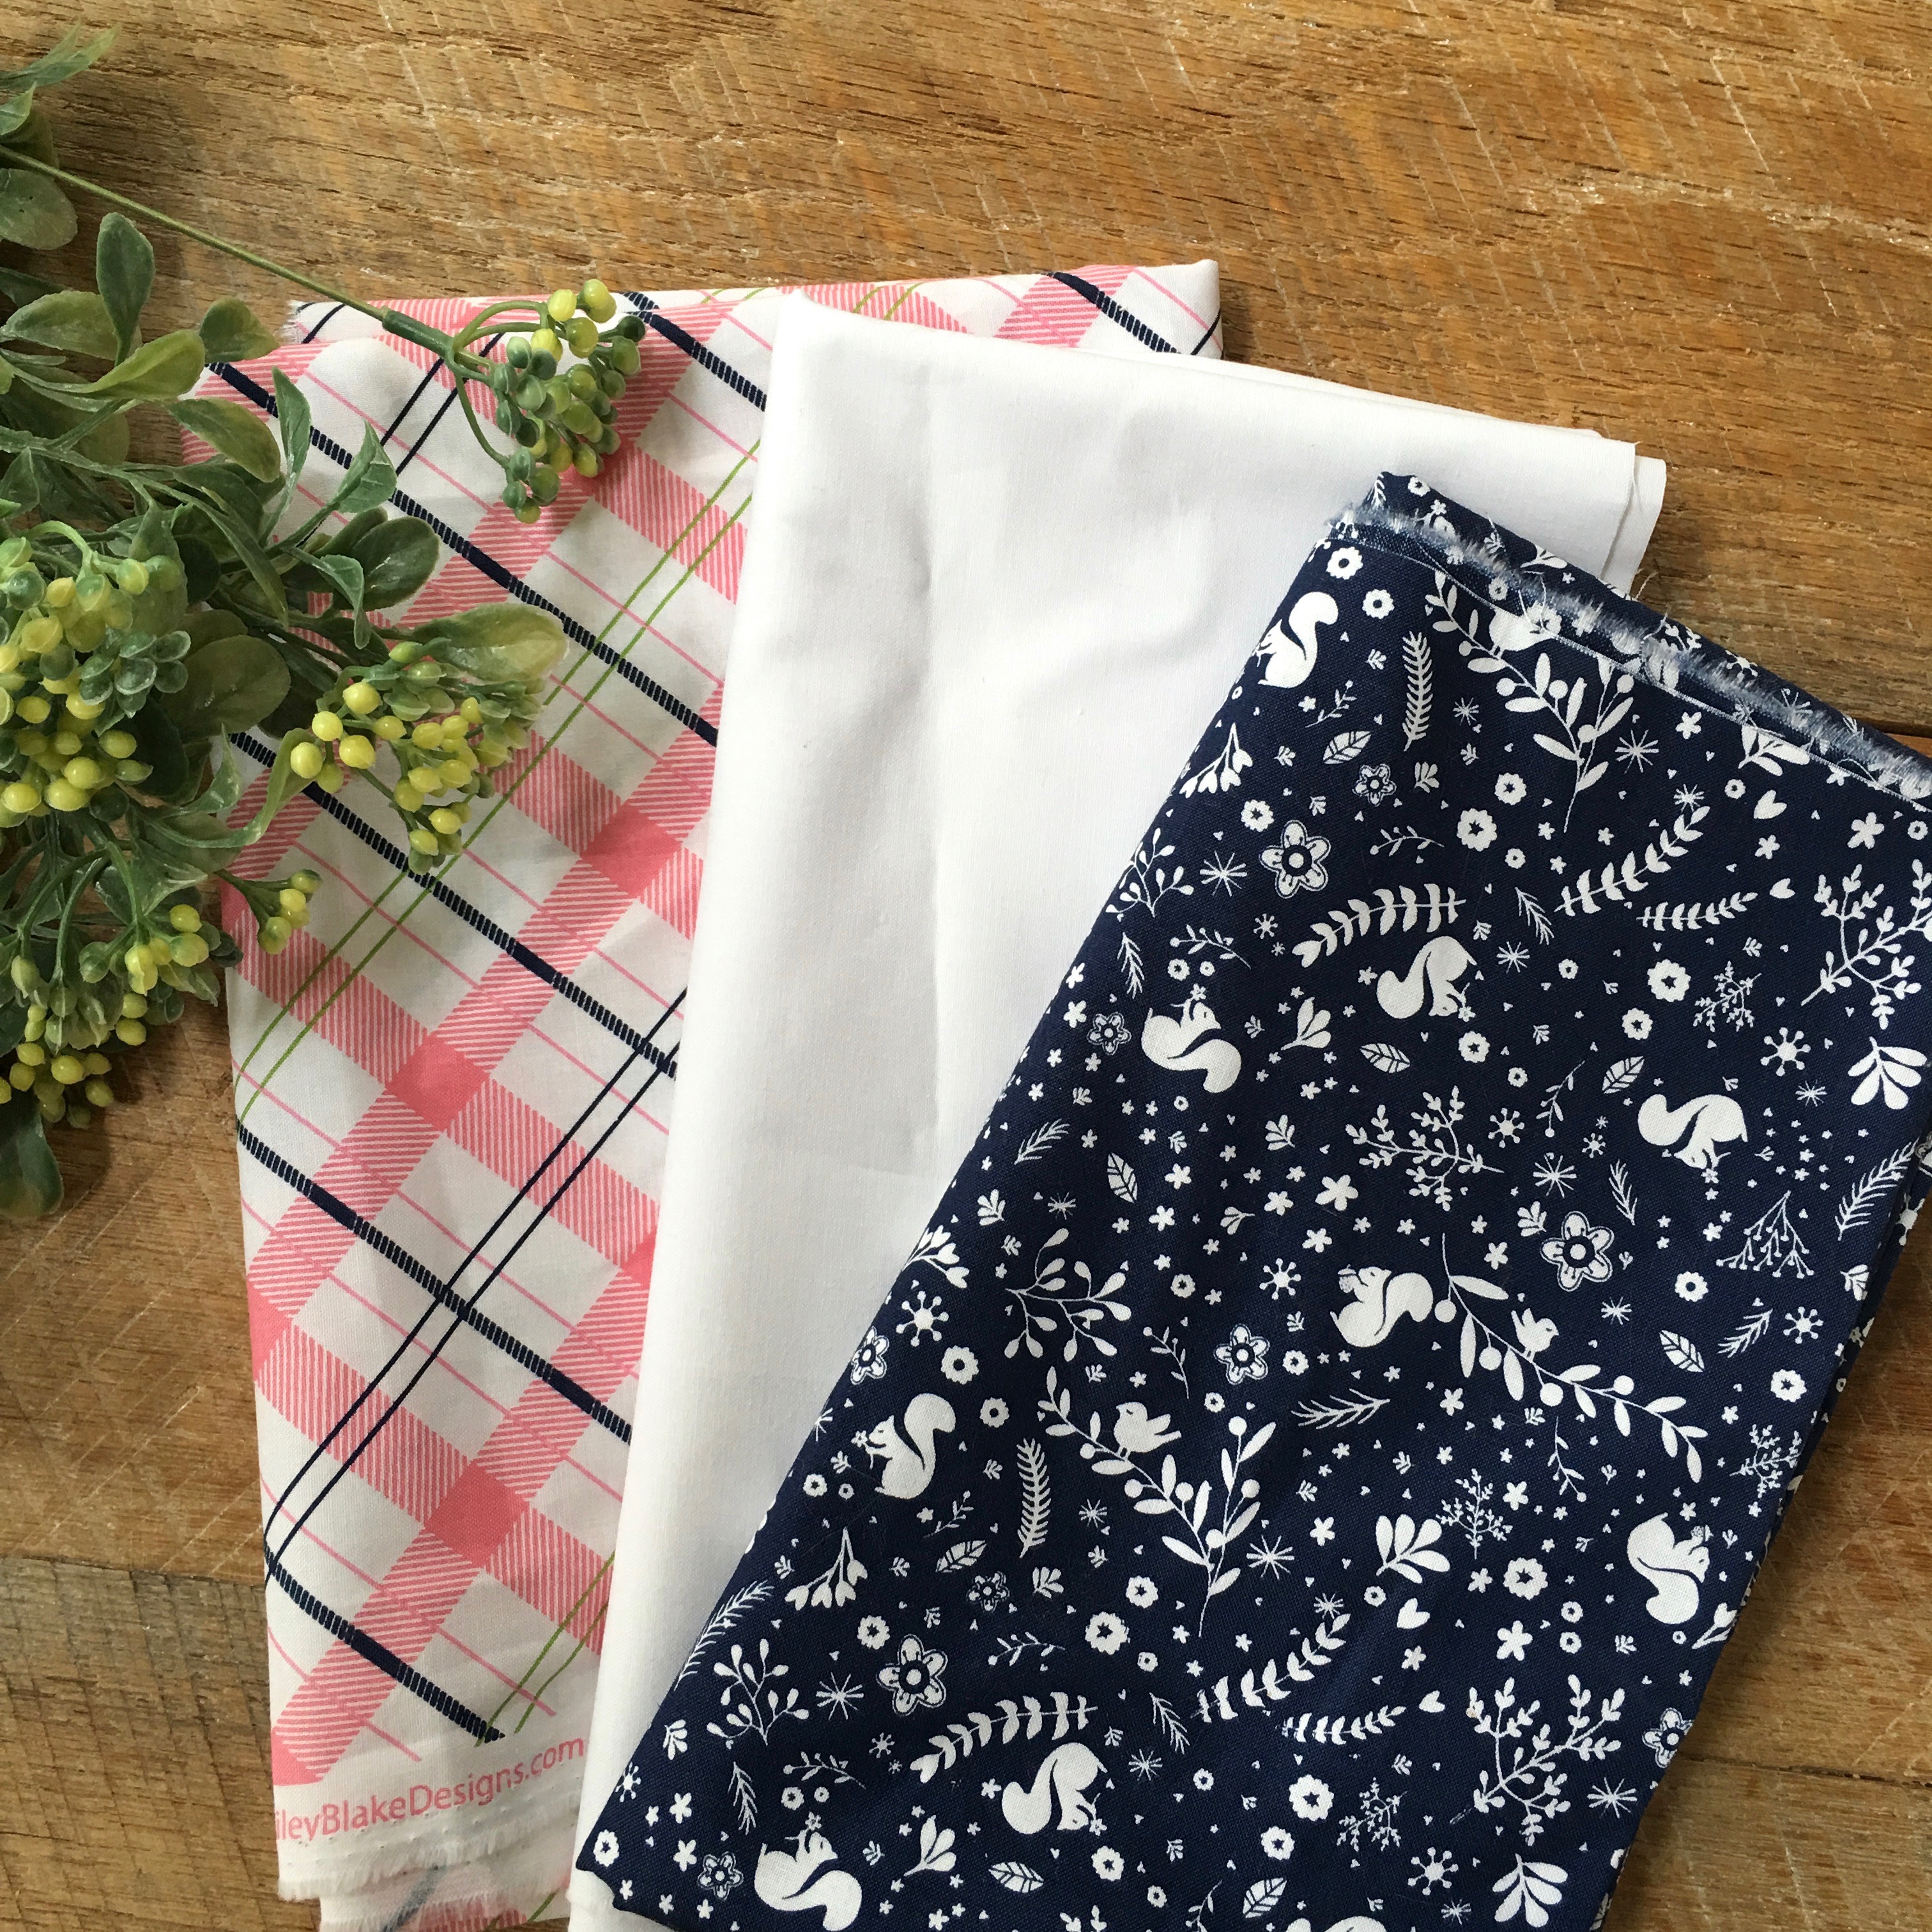
Navy fabrics: Fat Quarter Shop’s July Navy curated bundle – 14 fat quarters

Background fabric: Essex Linen Natural – 2 1/2 yards
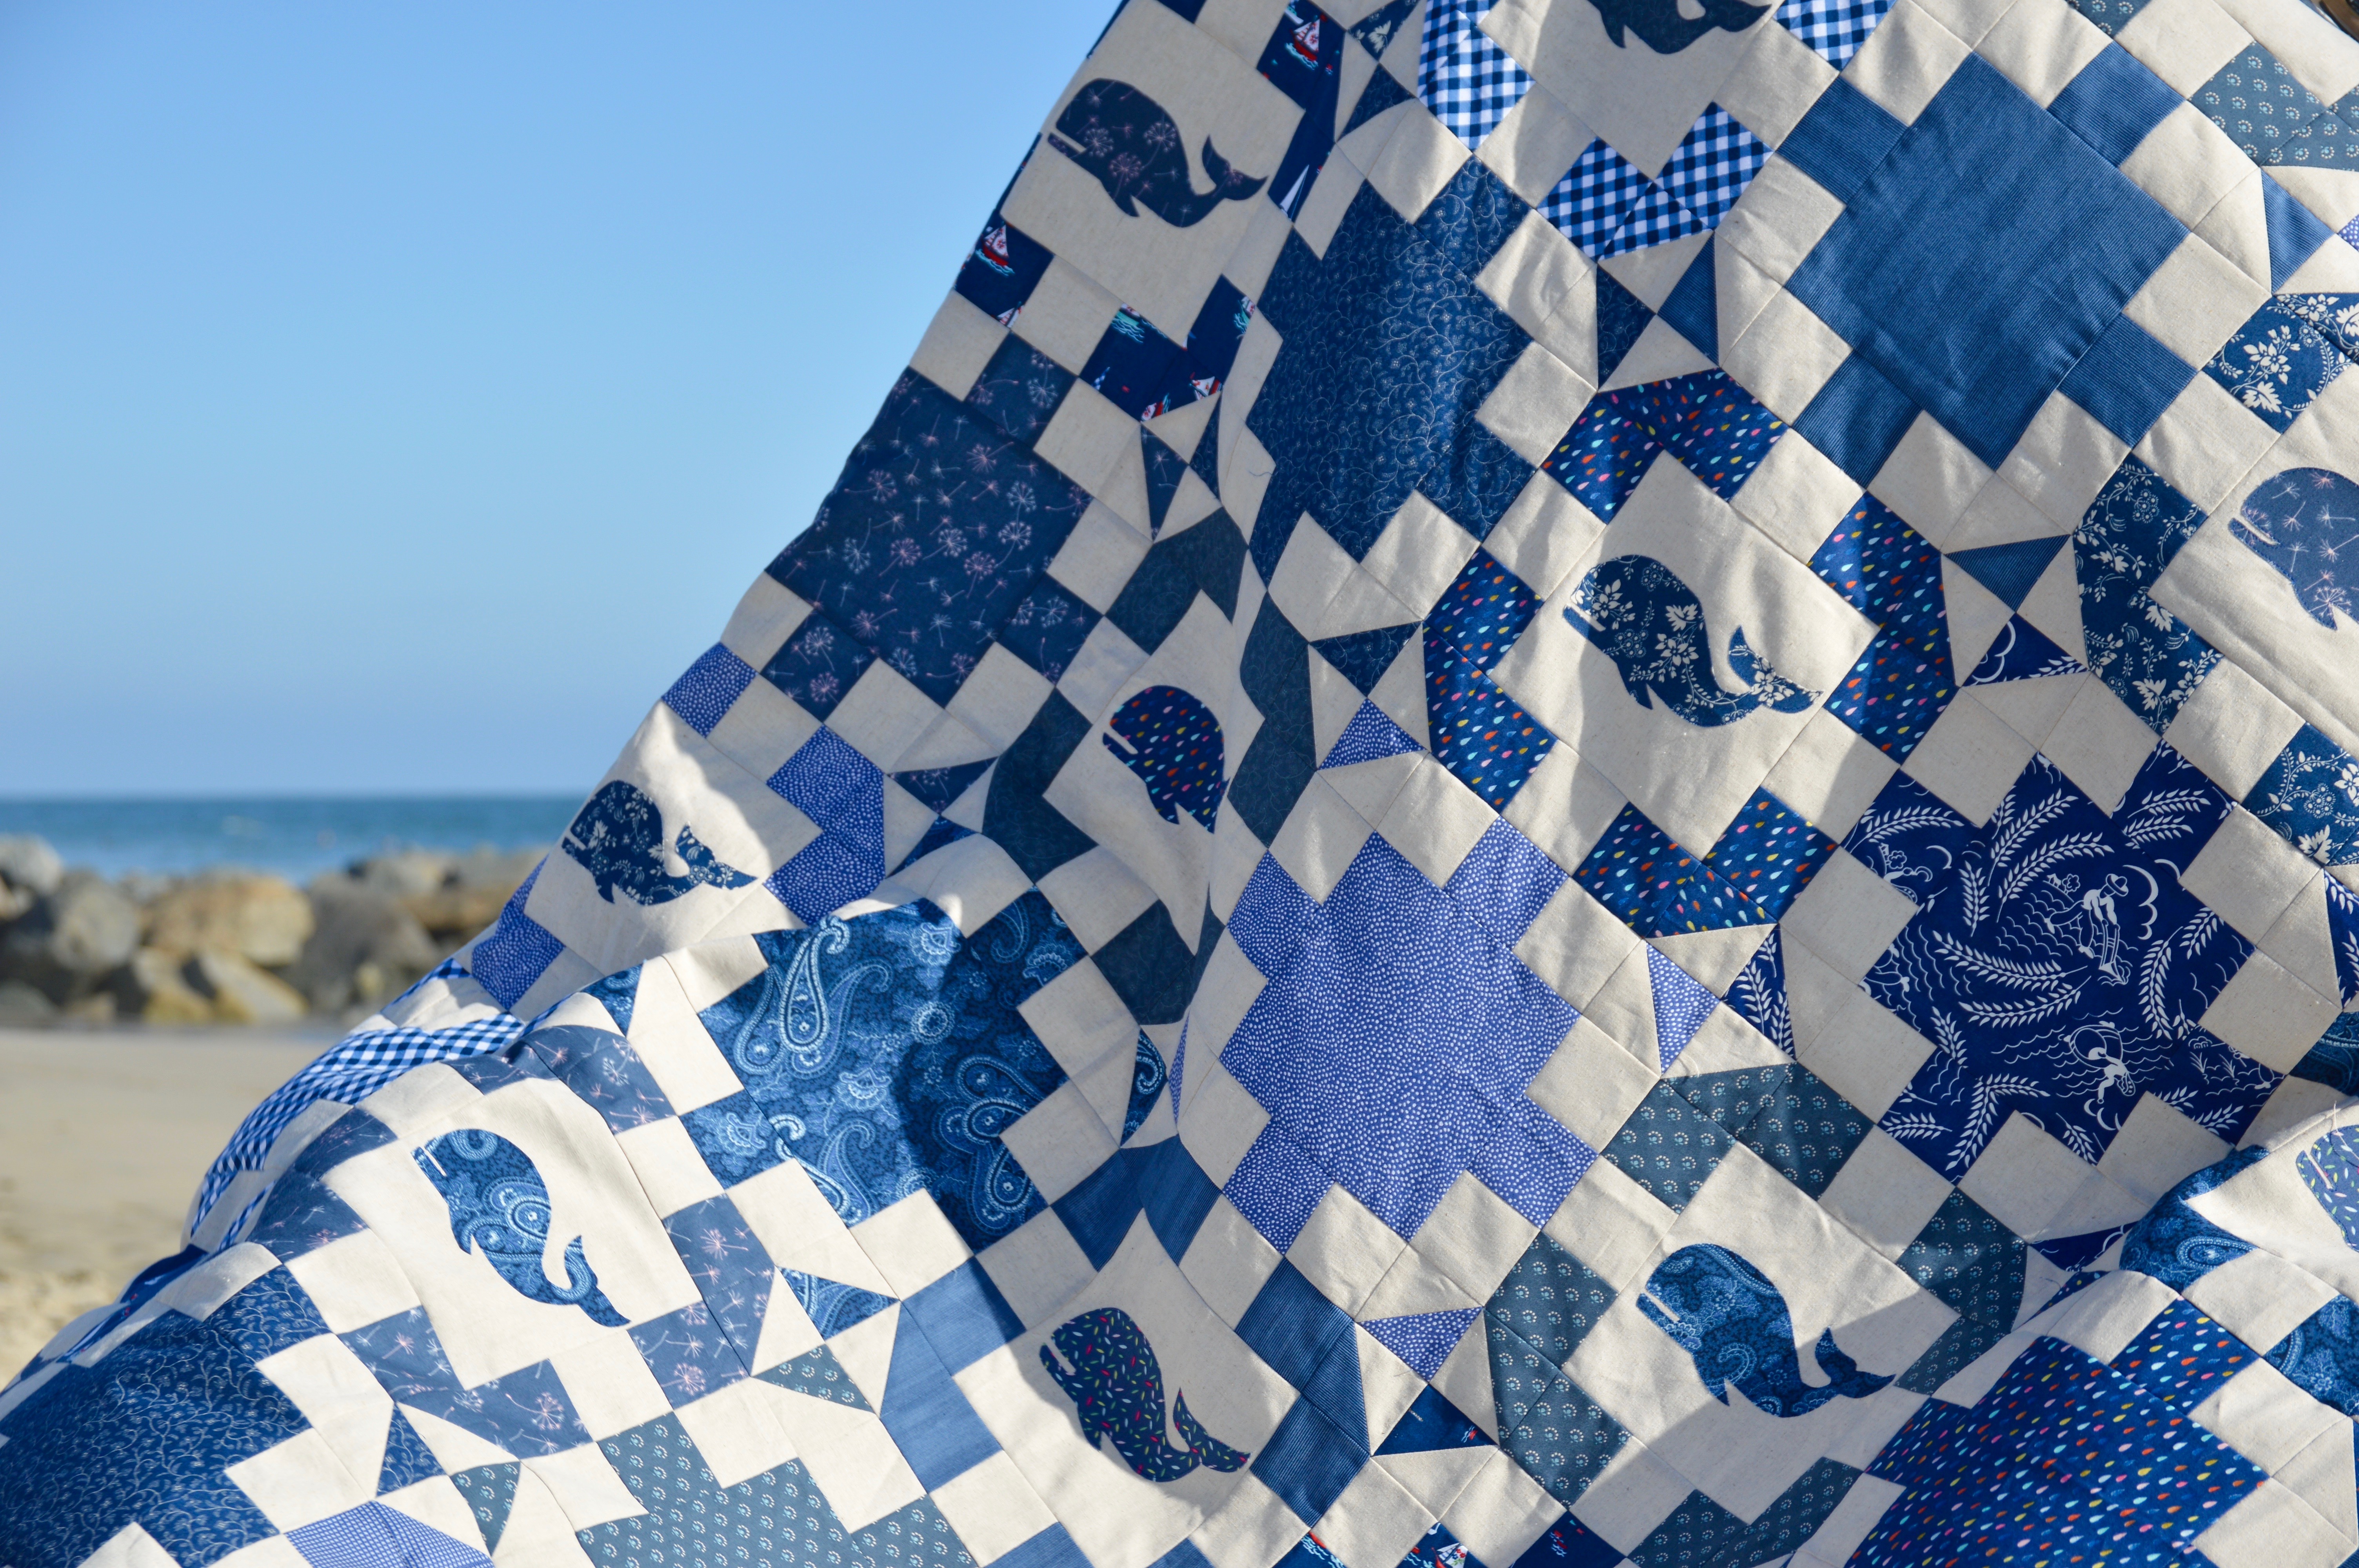
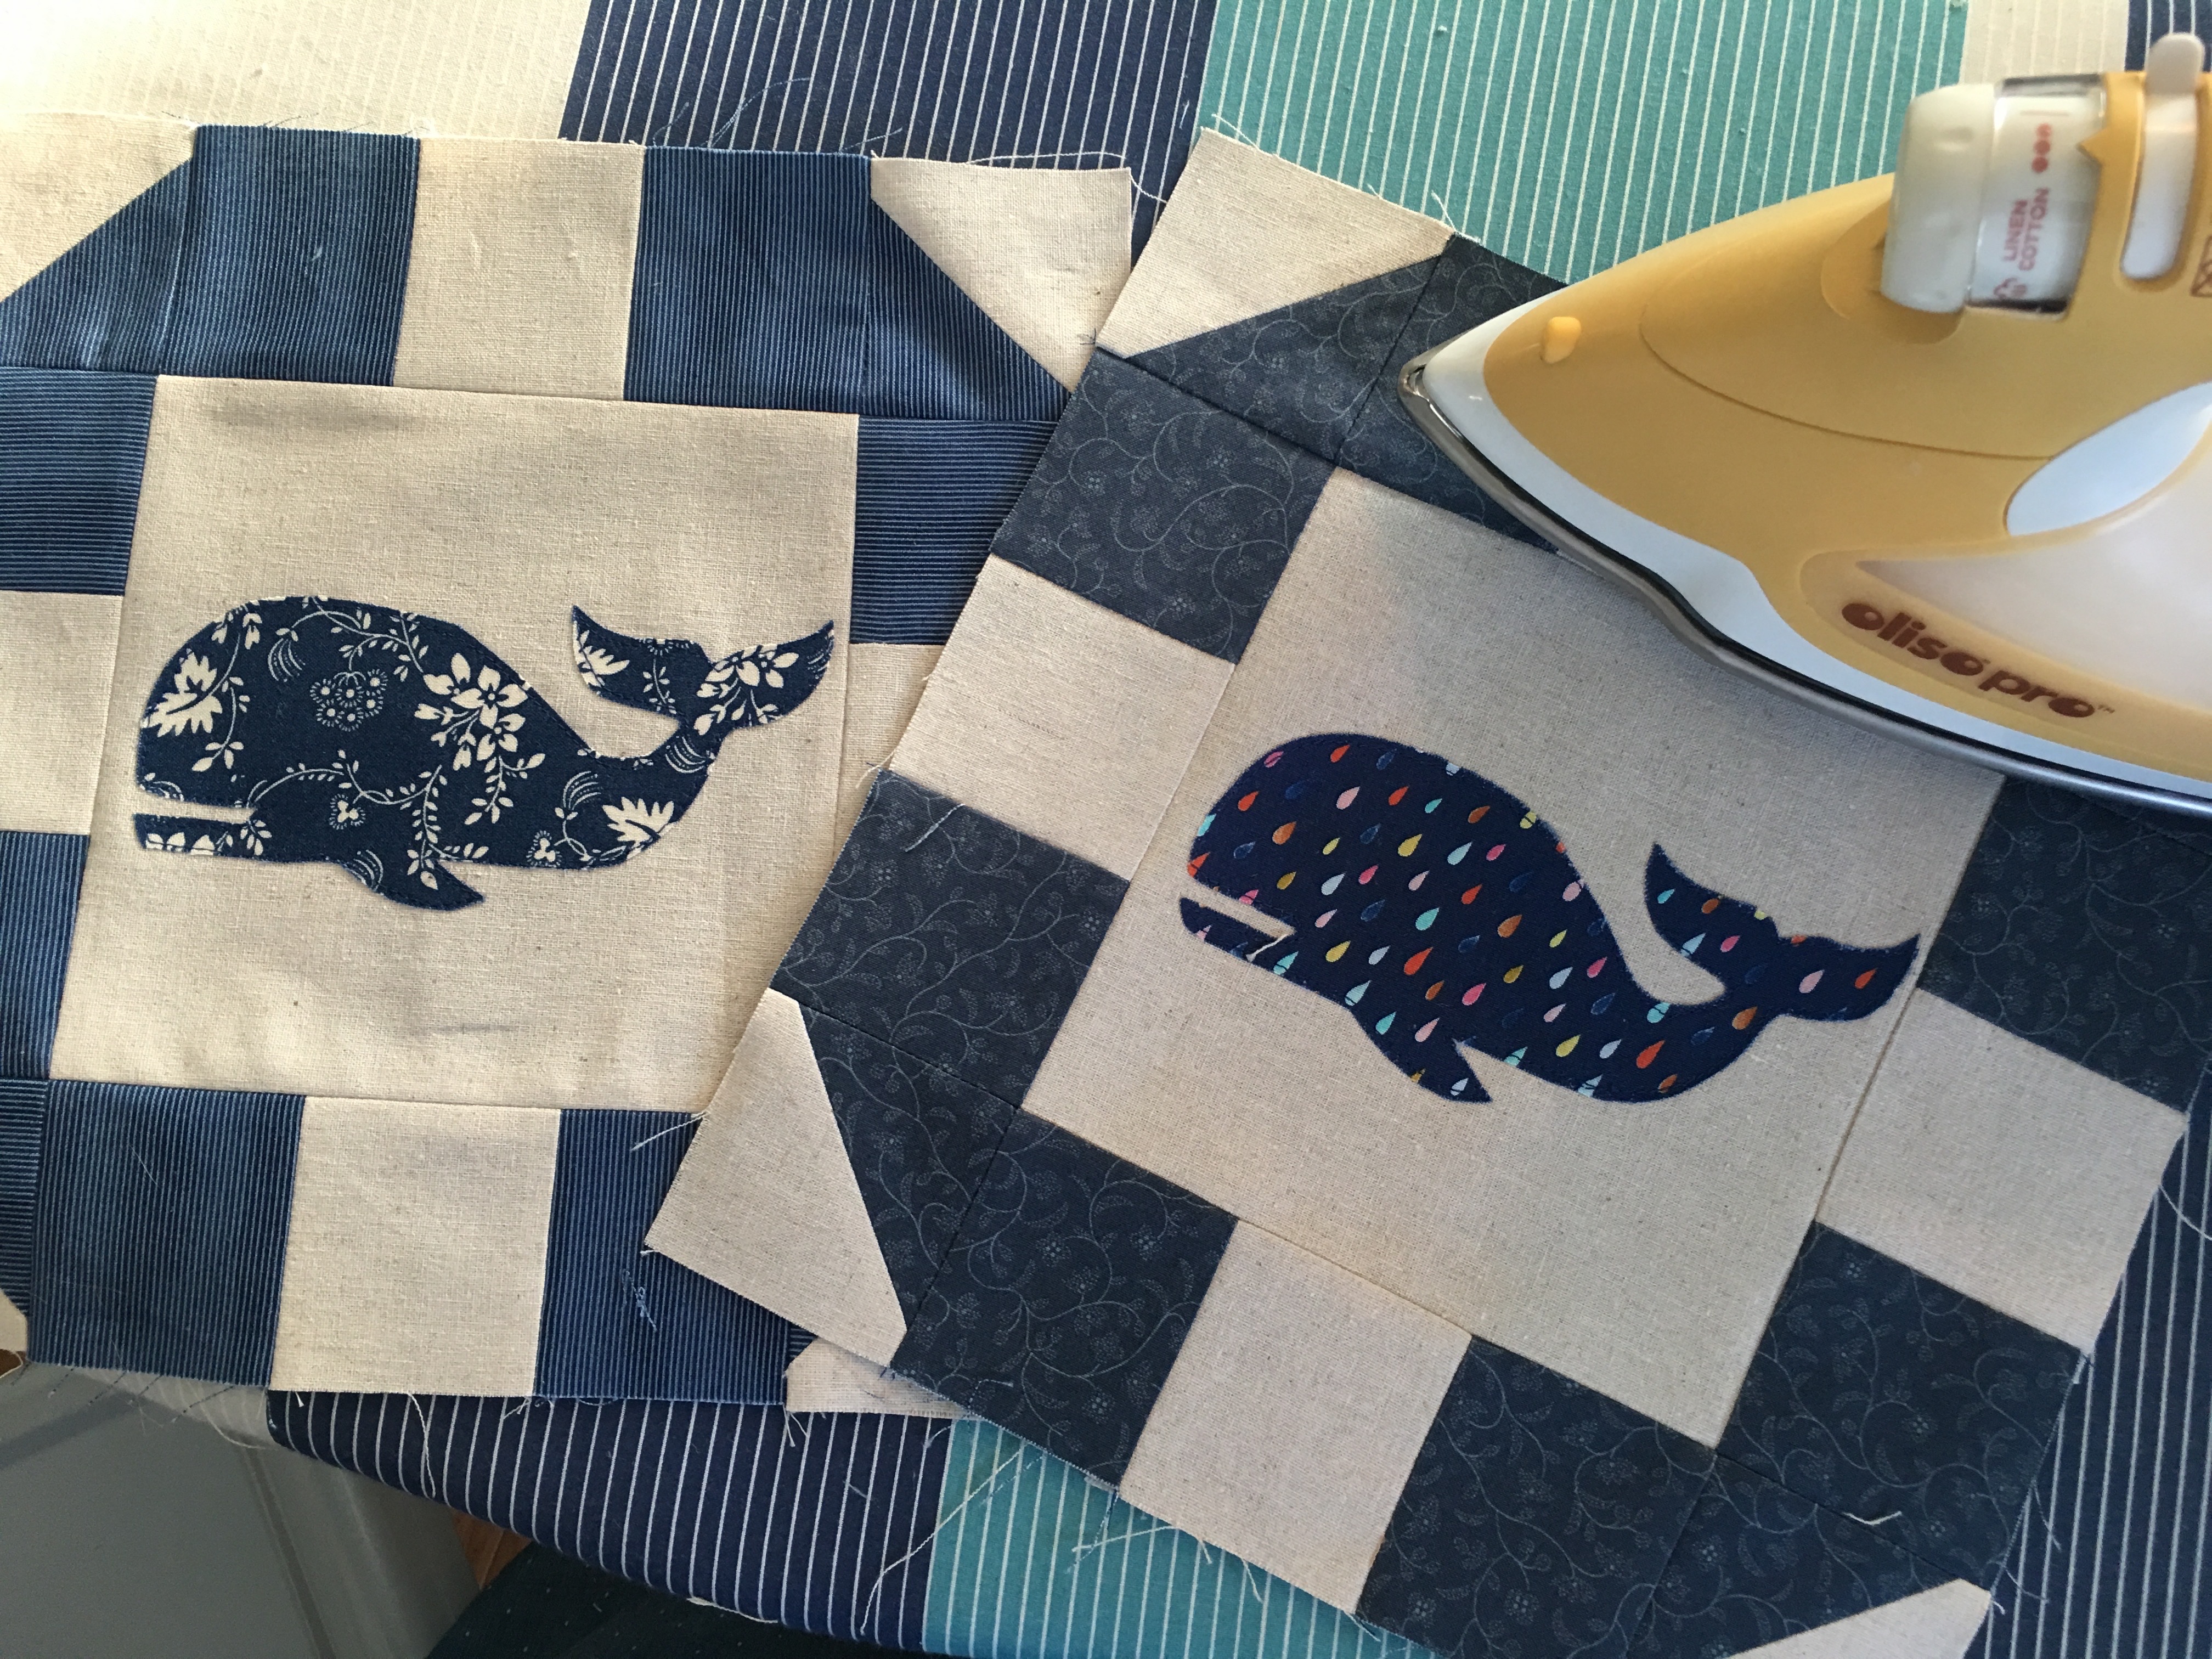
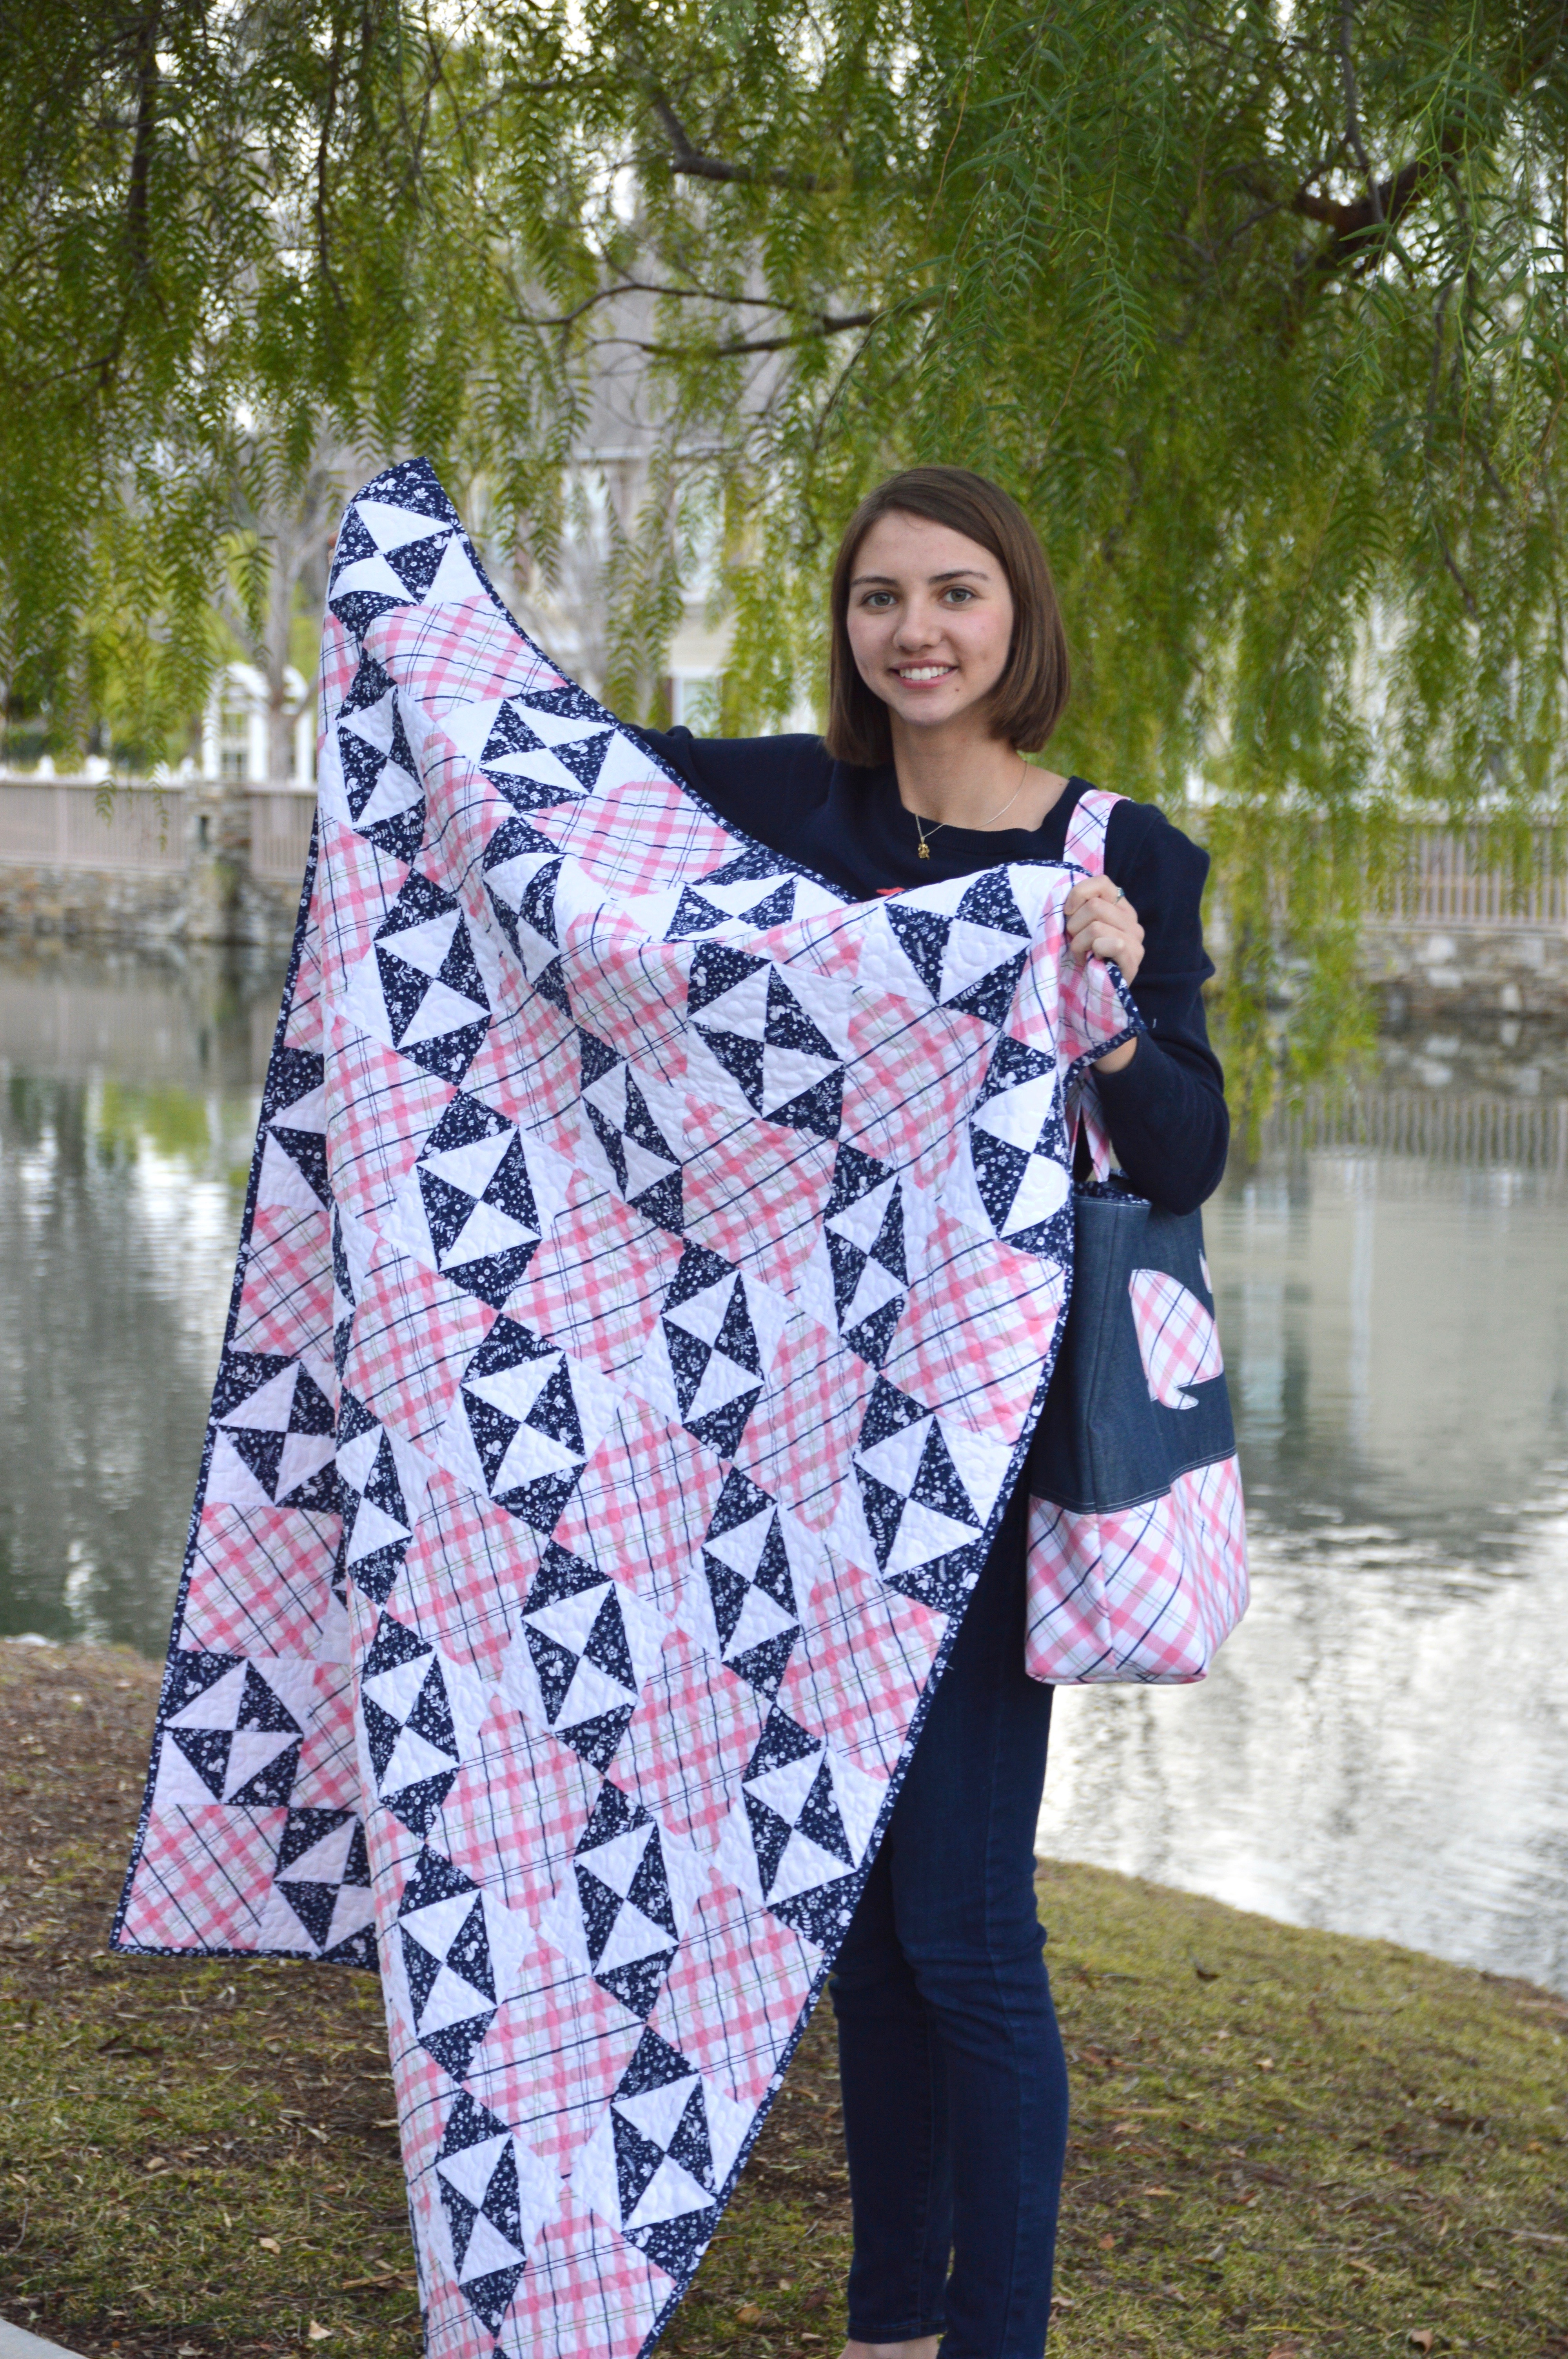
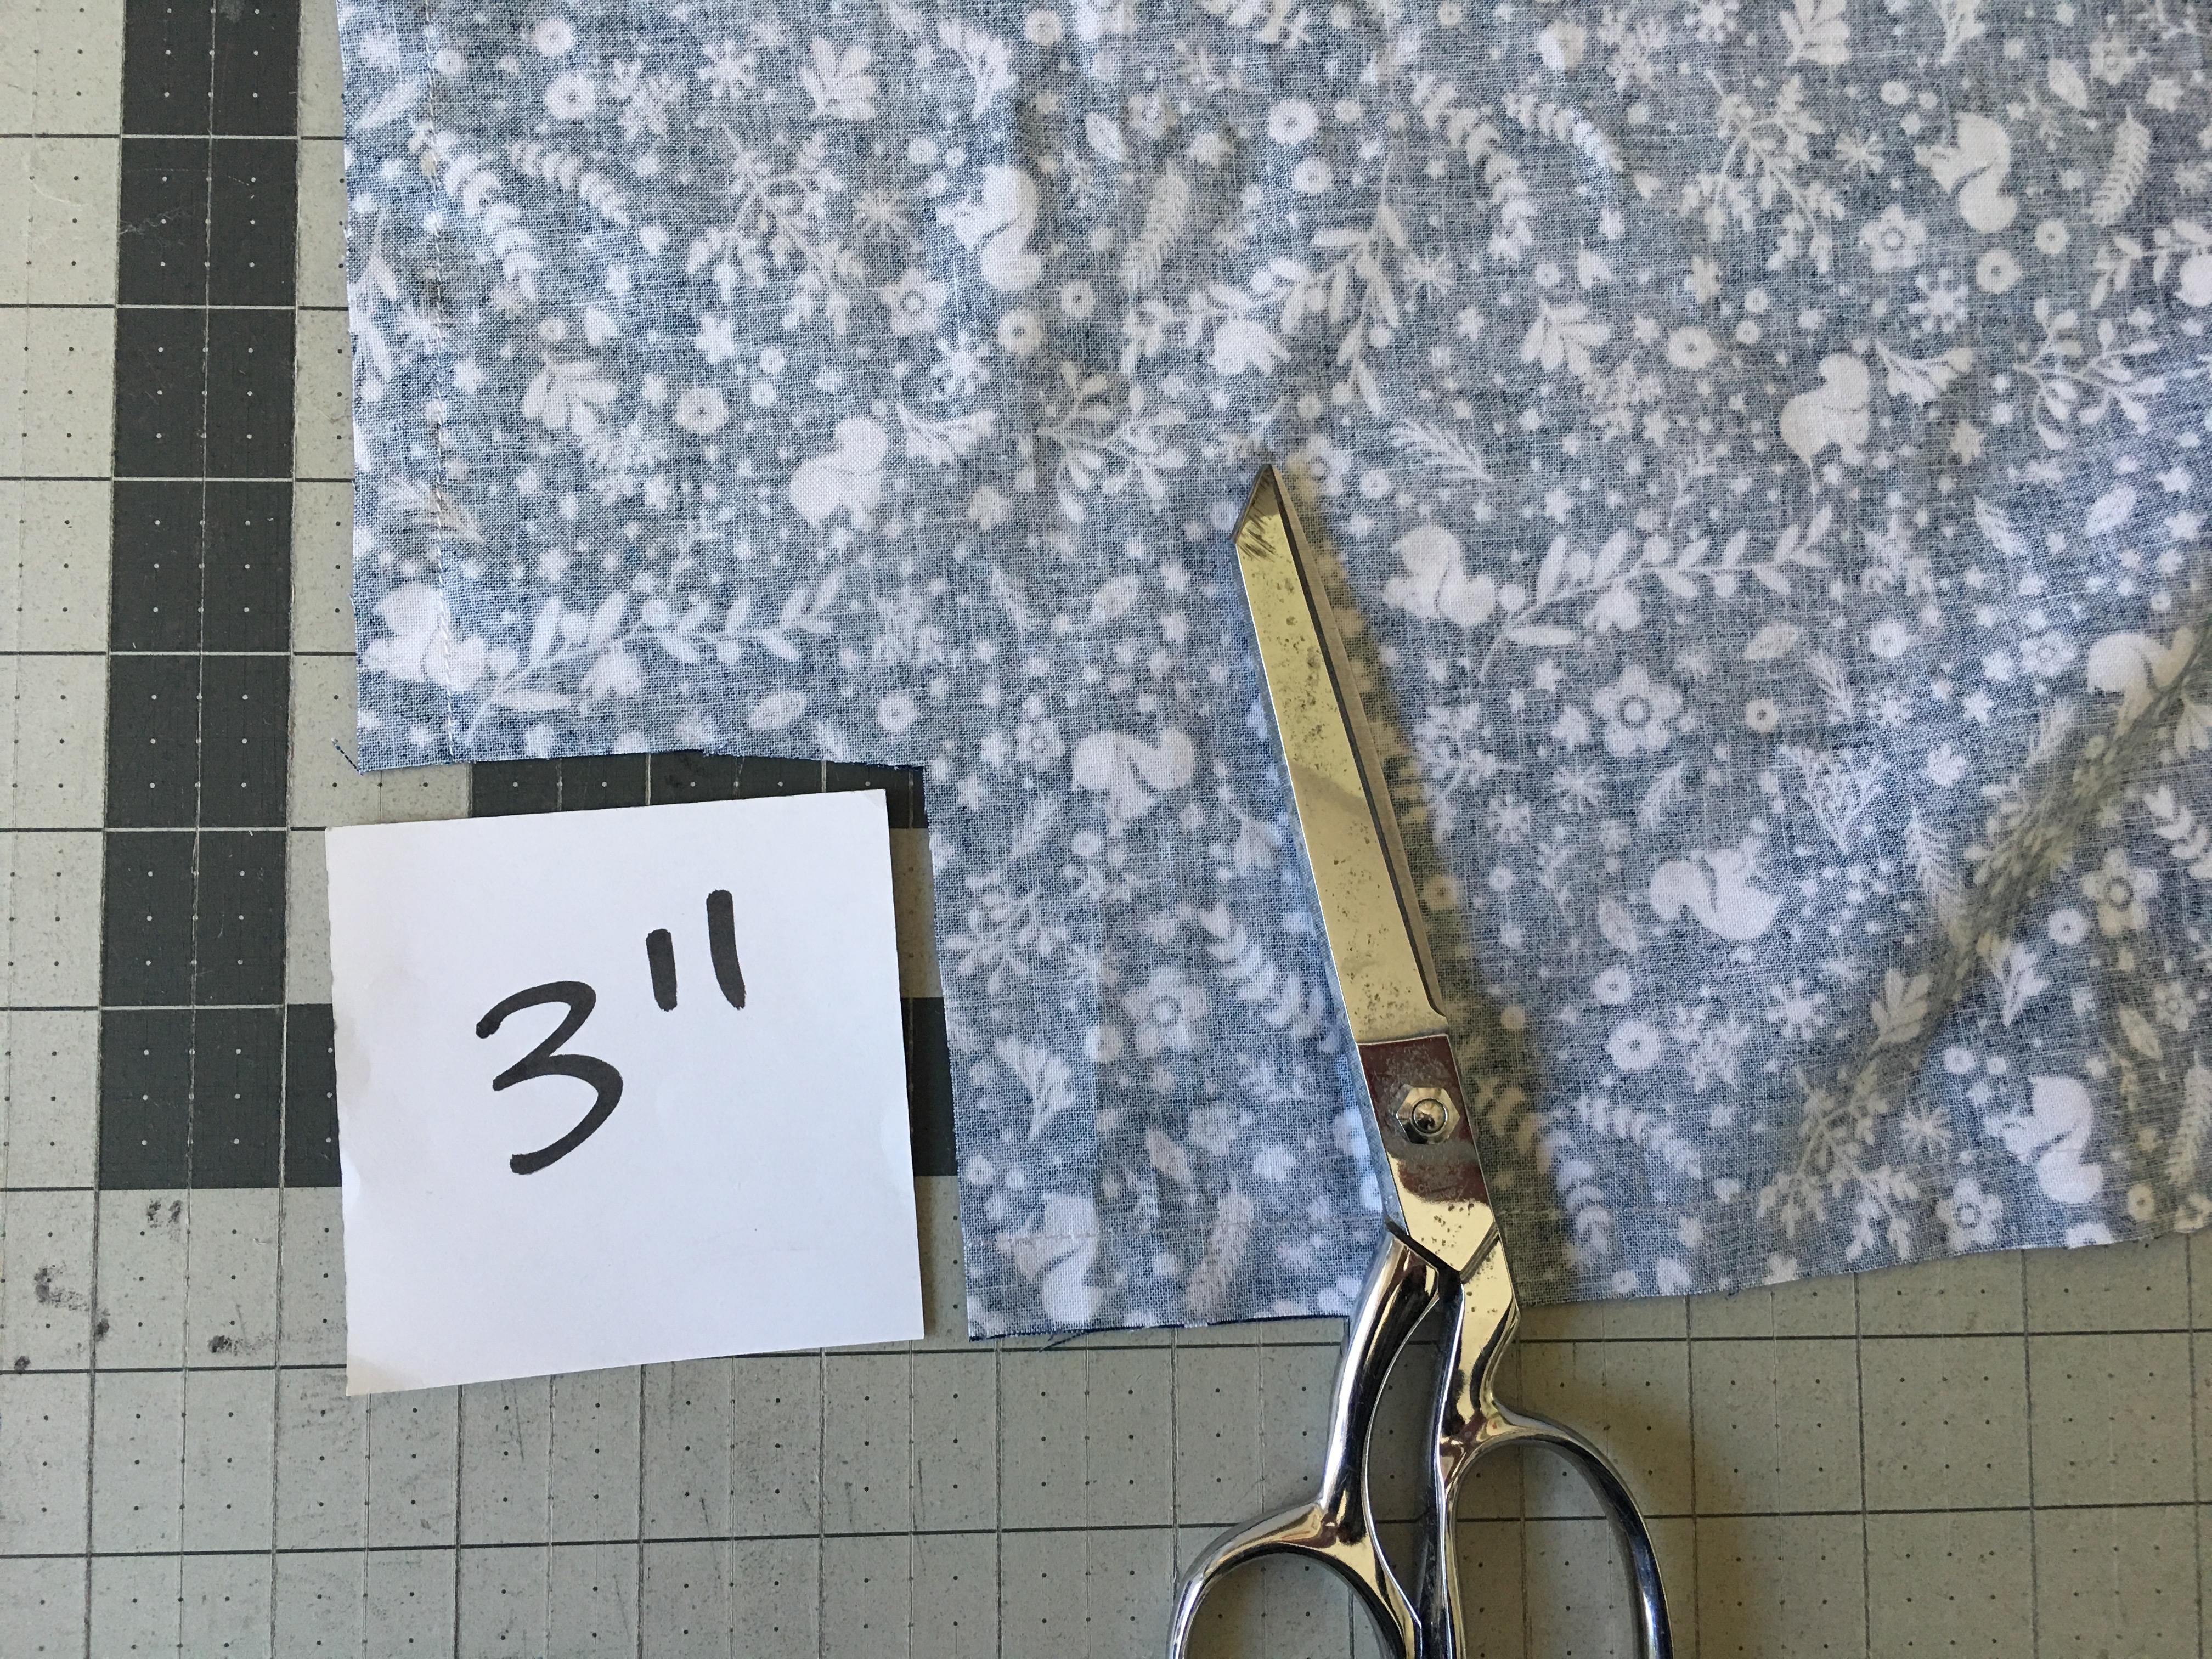
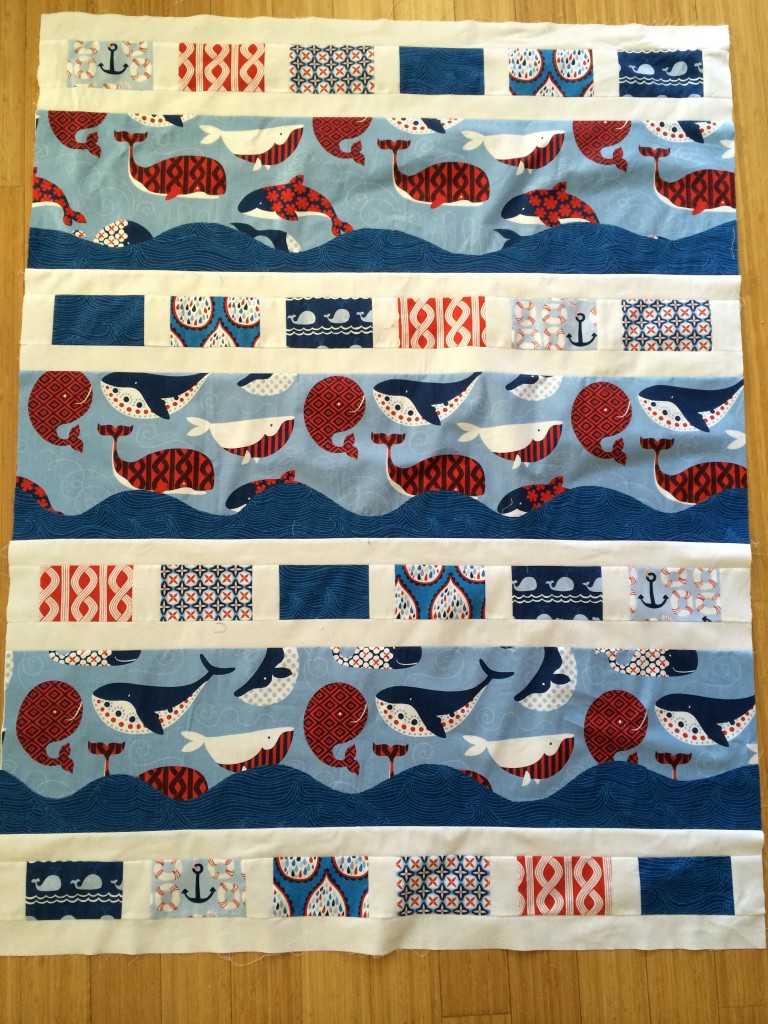
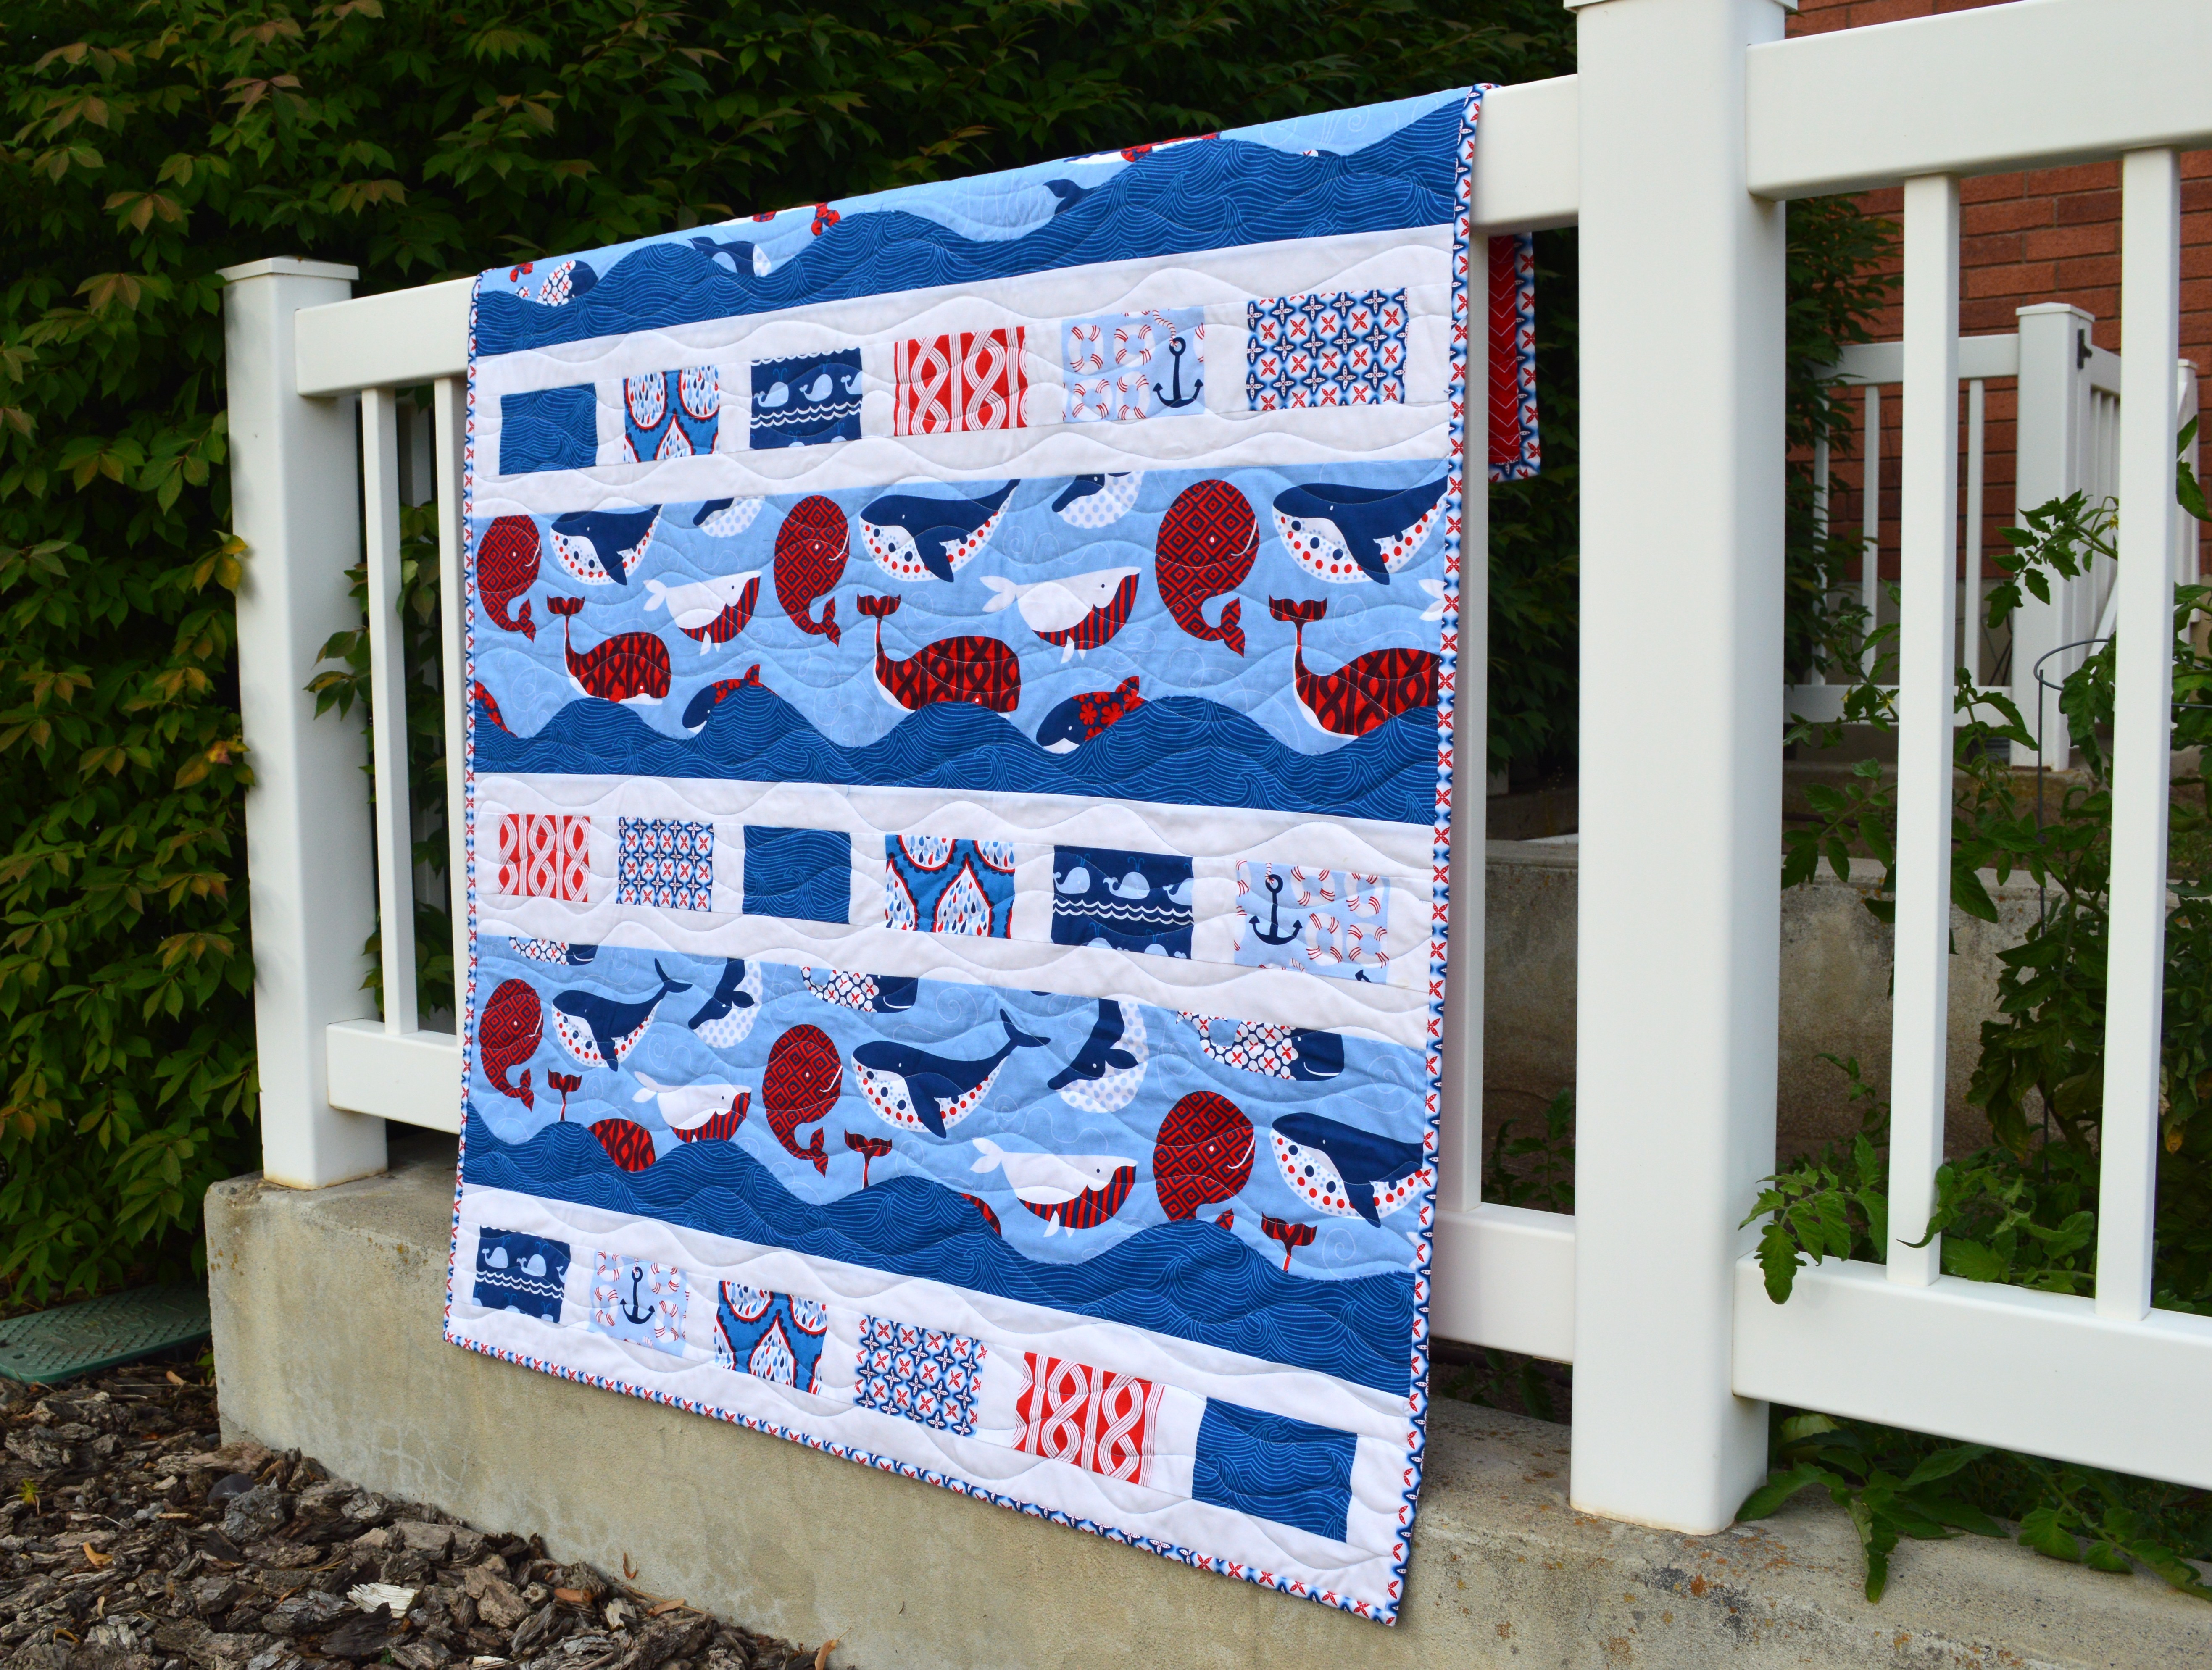
Block Size: 10″

Finished Quilt Size: 60″ x 70″

Pattern available in my Etsy shop for instant download

IMG_0578

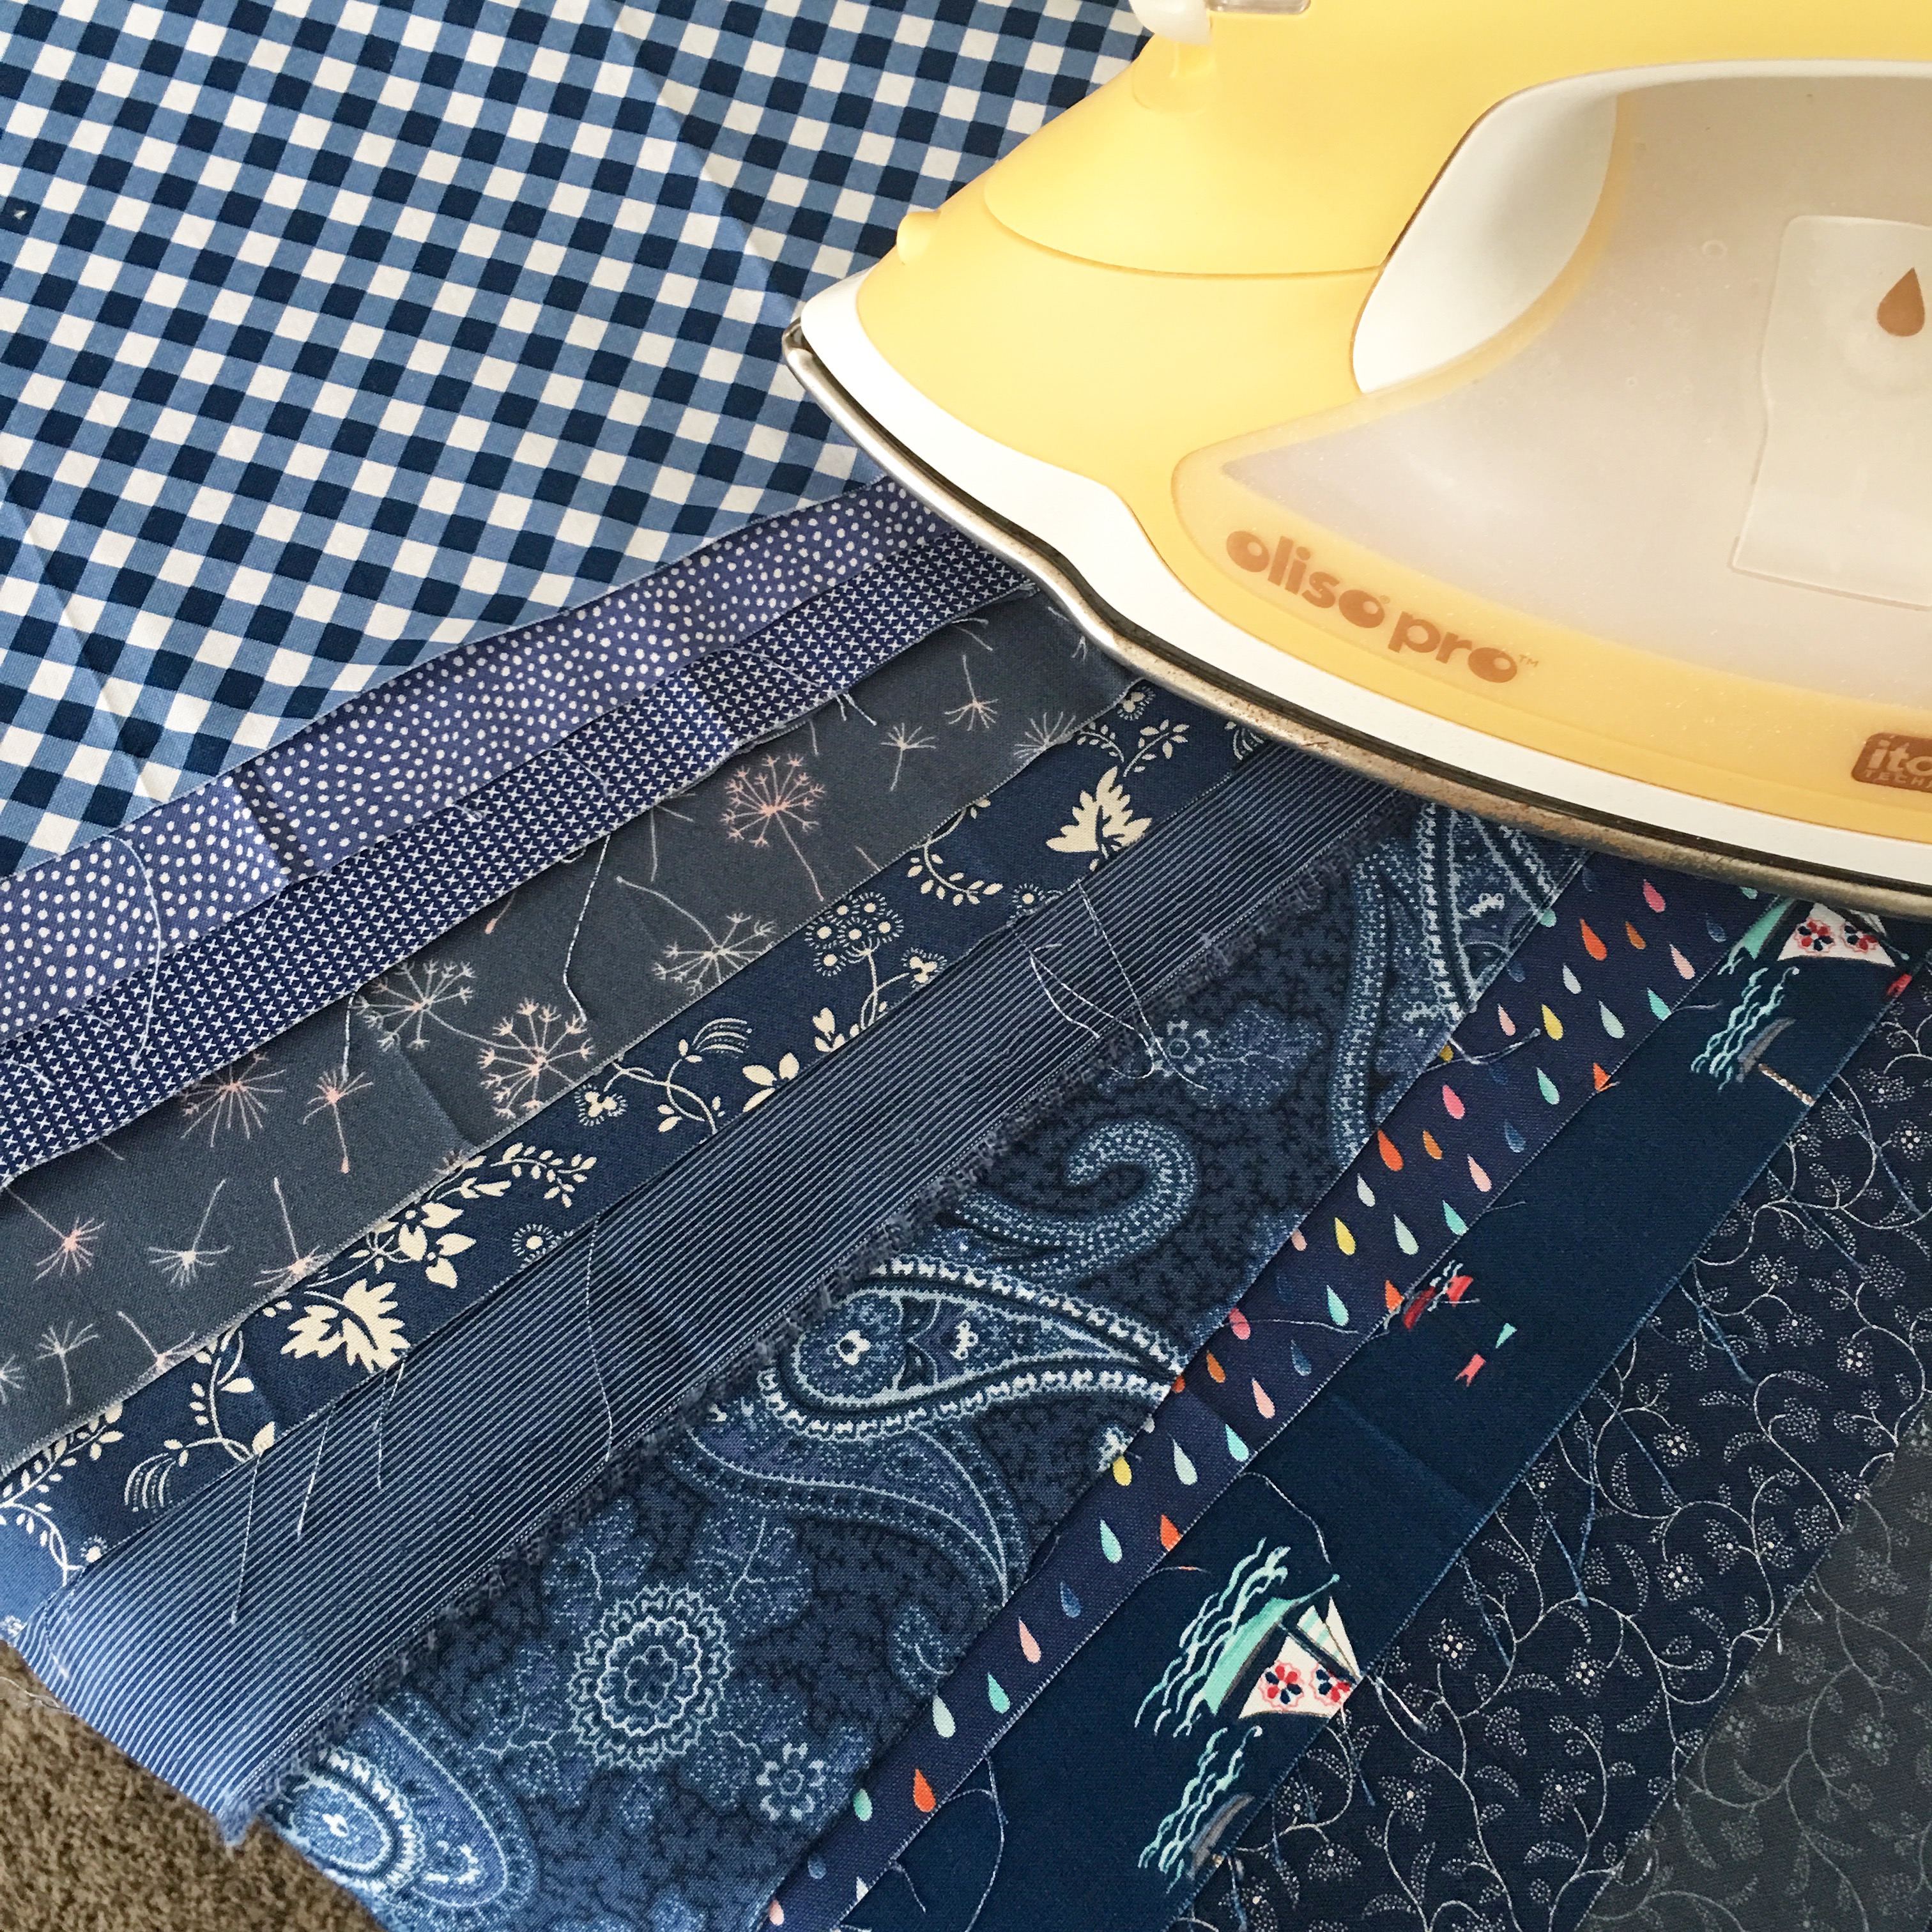
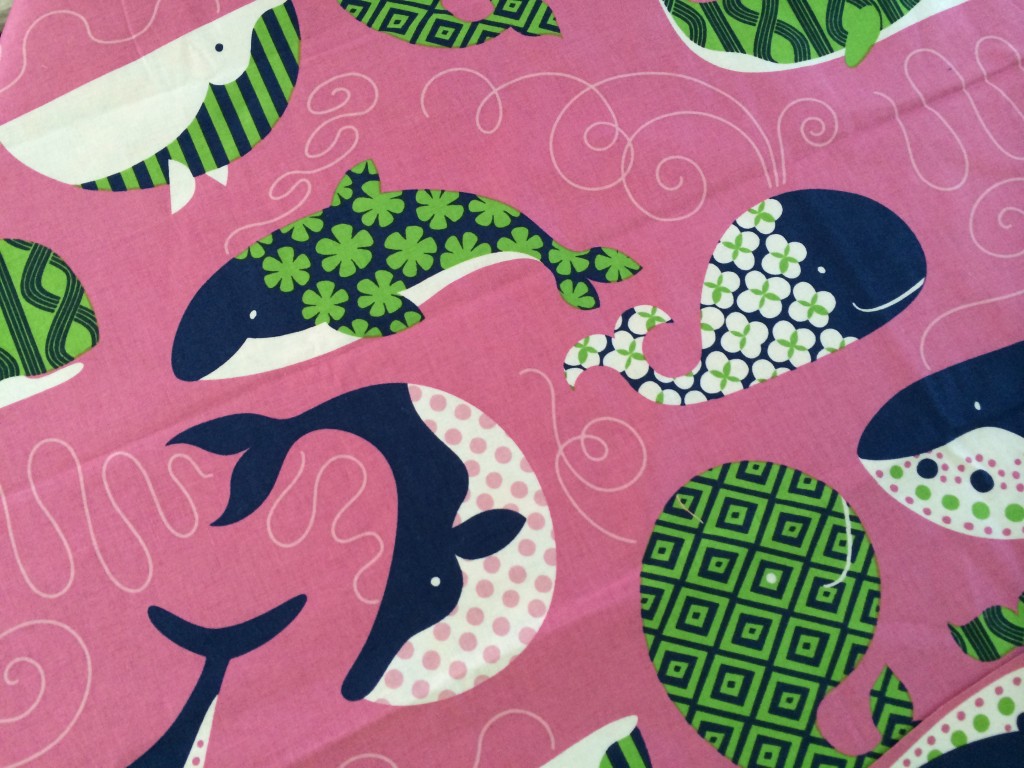
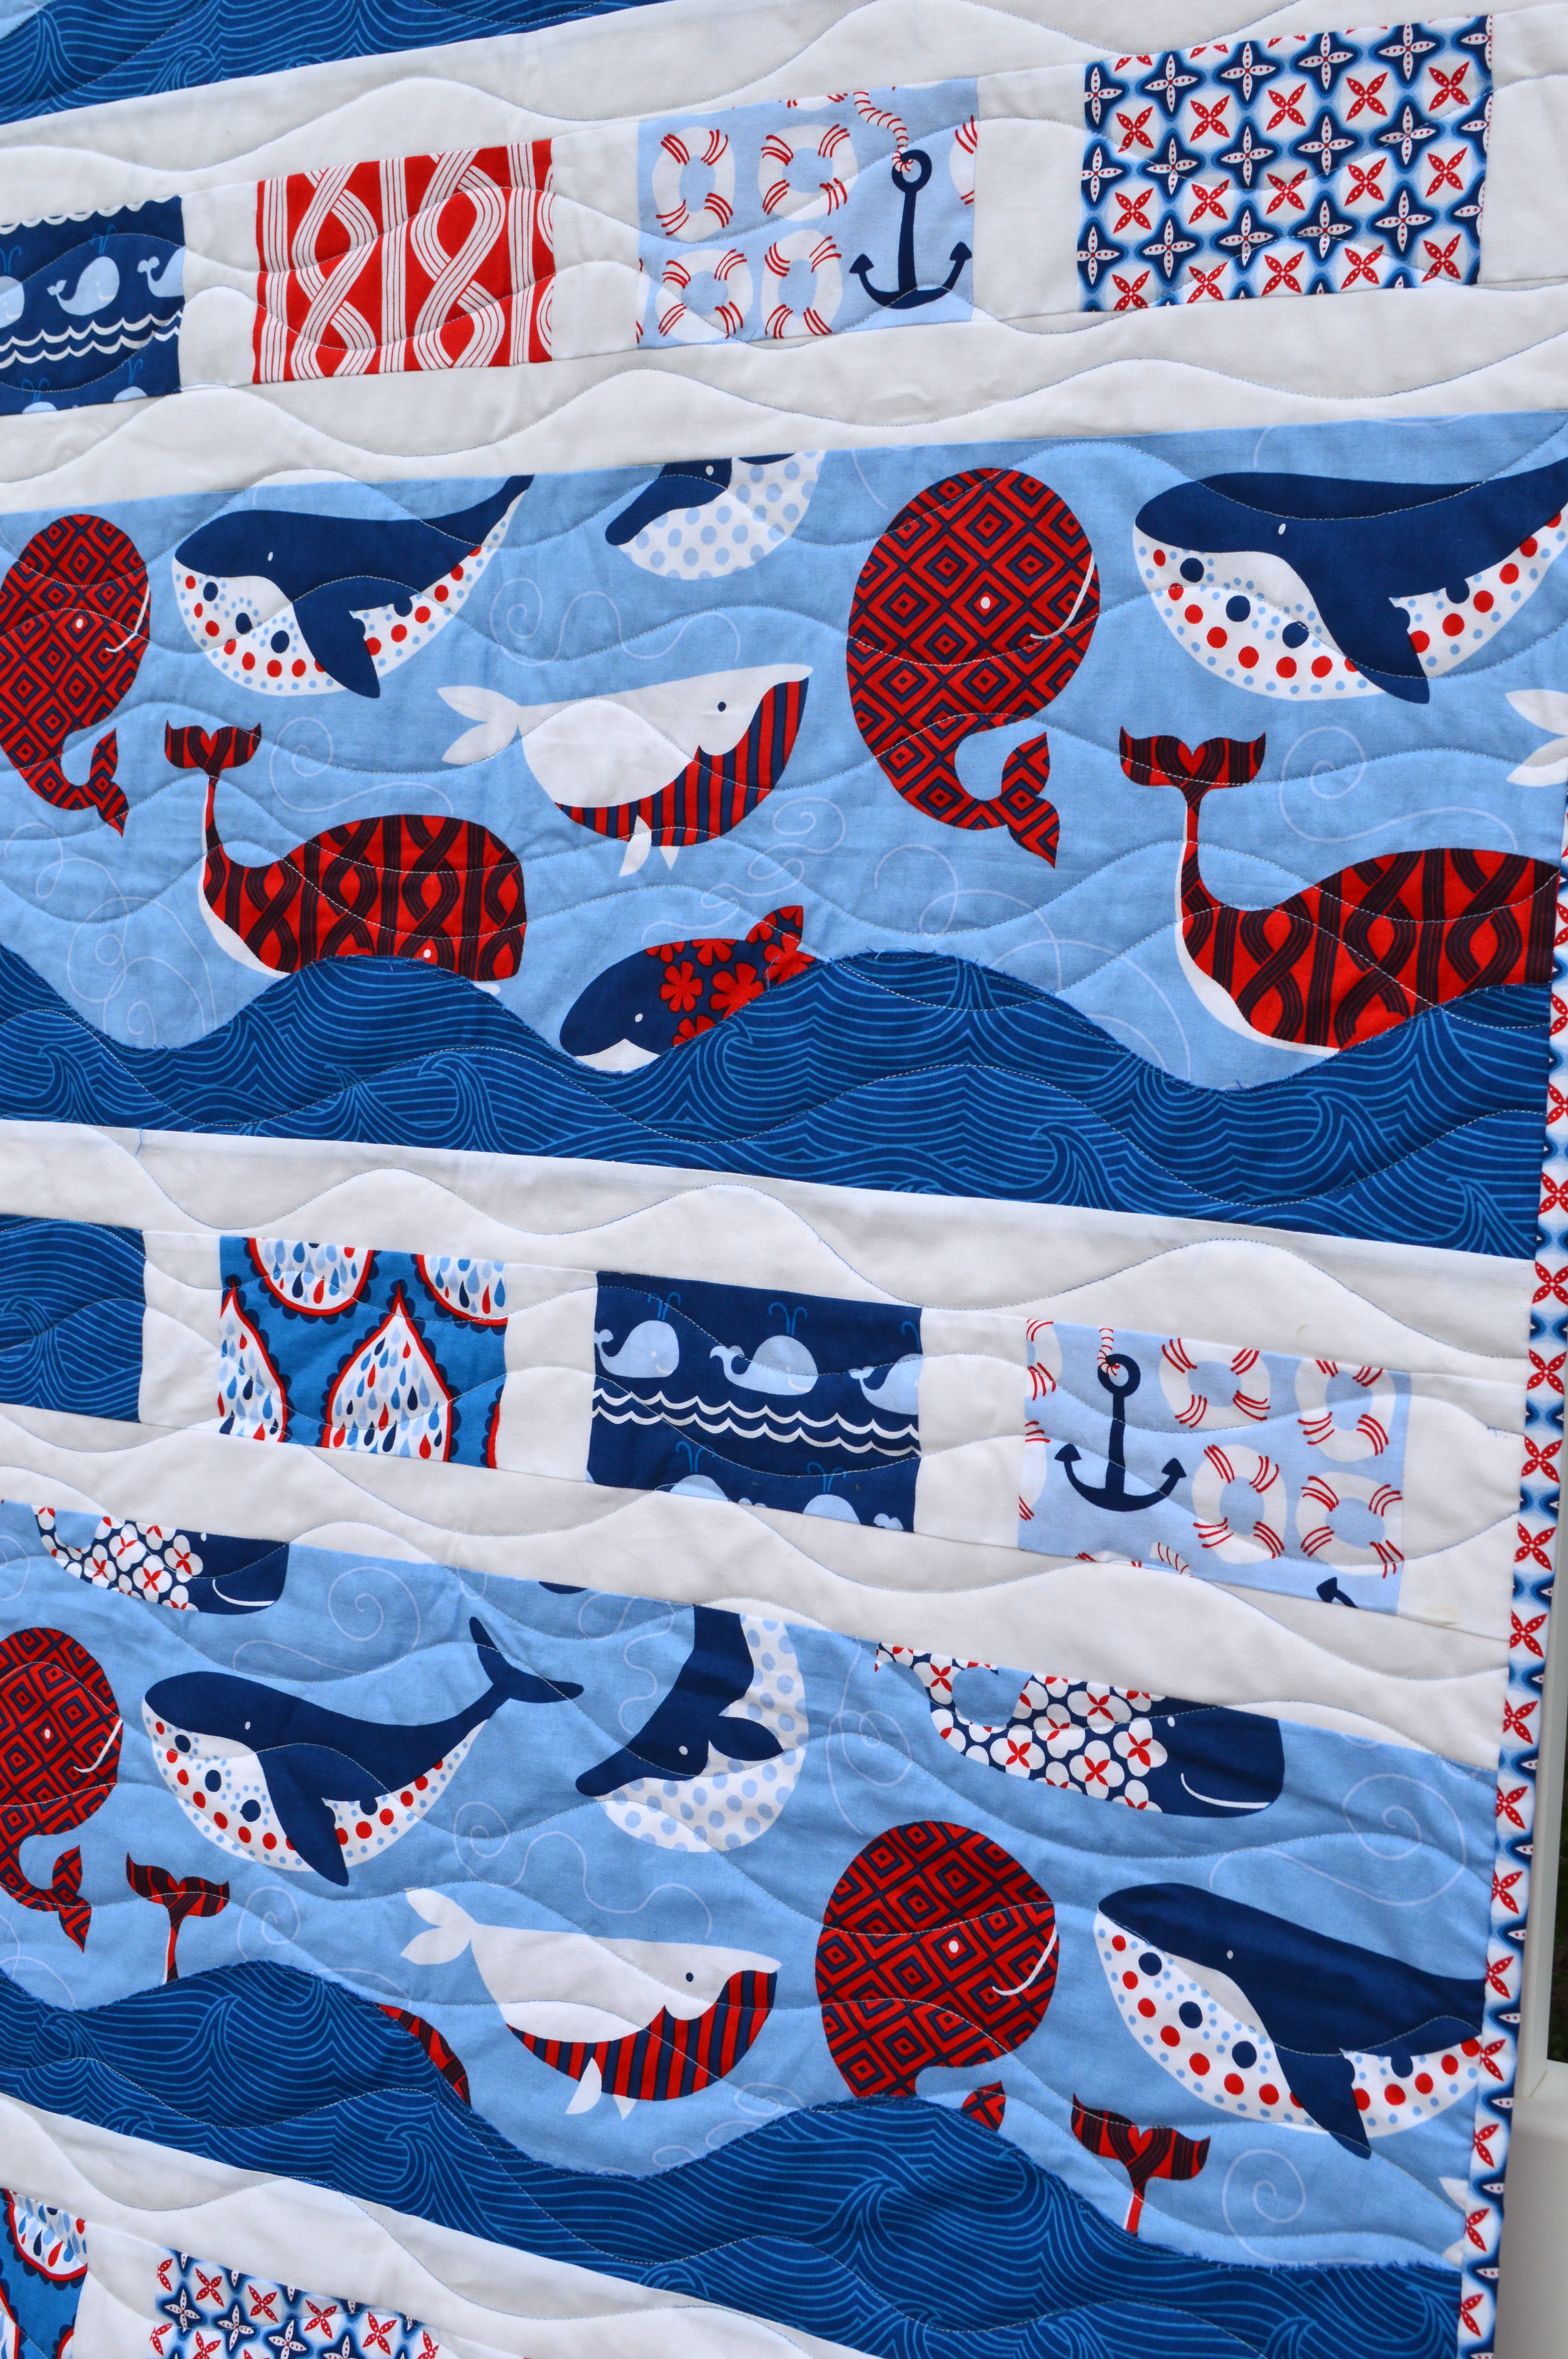
I love that the navys differ in shade and intensity, it makes the quilt more interesting!

IMG_0598

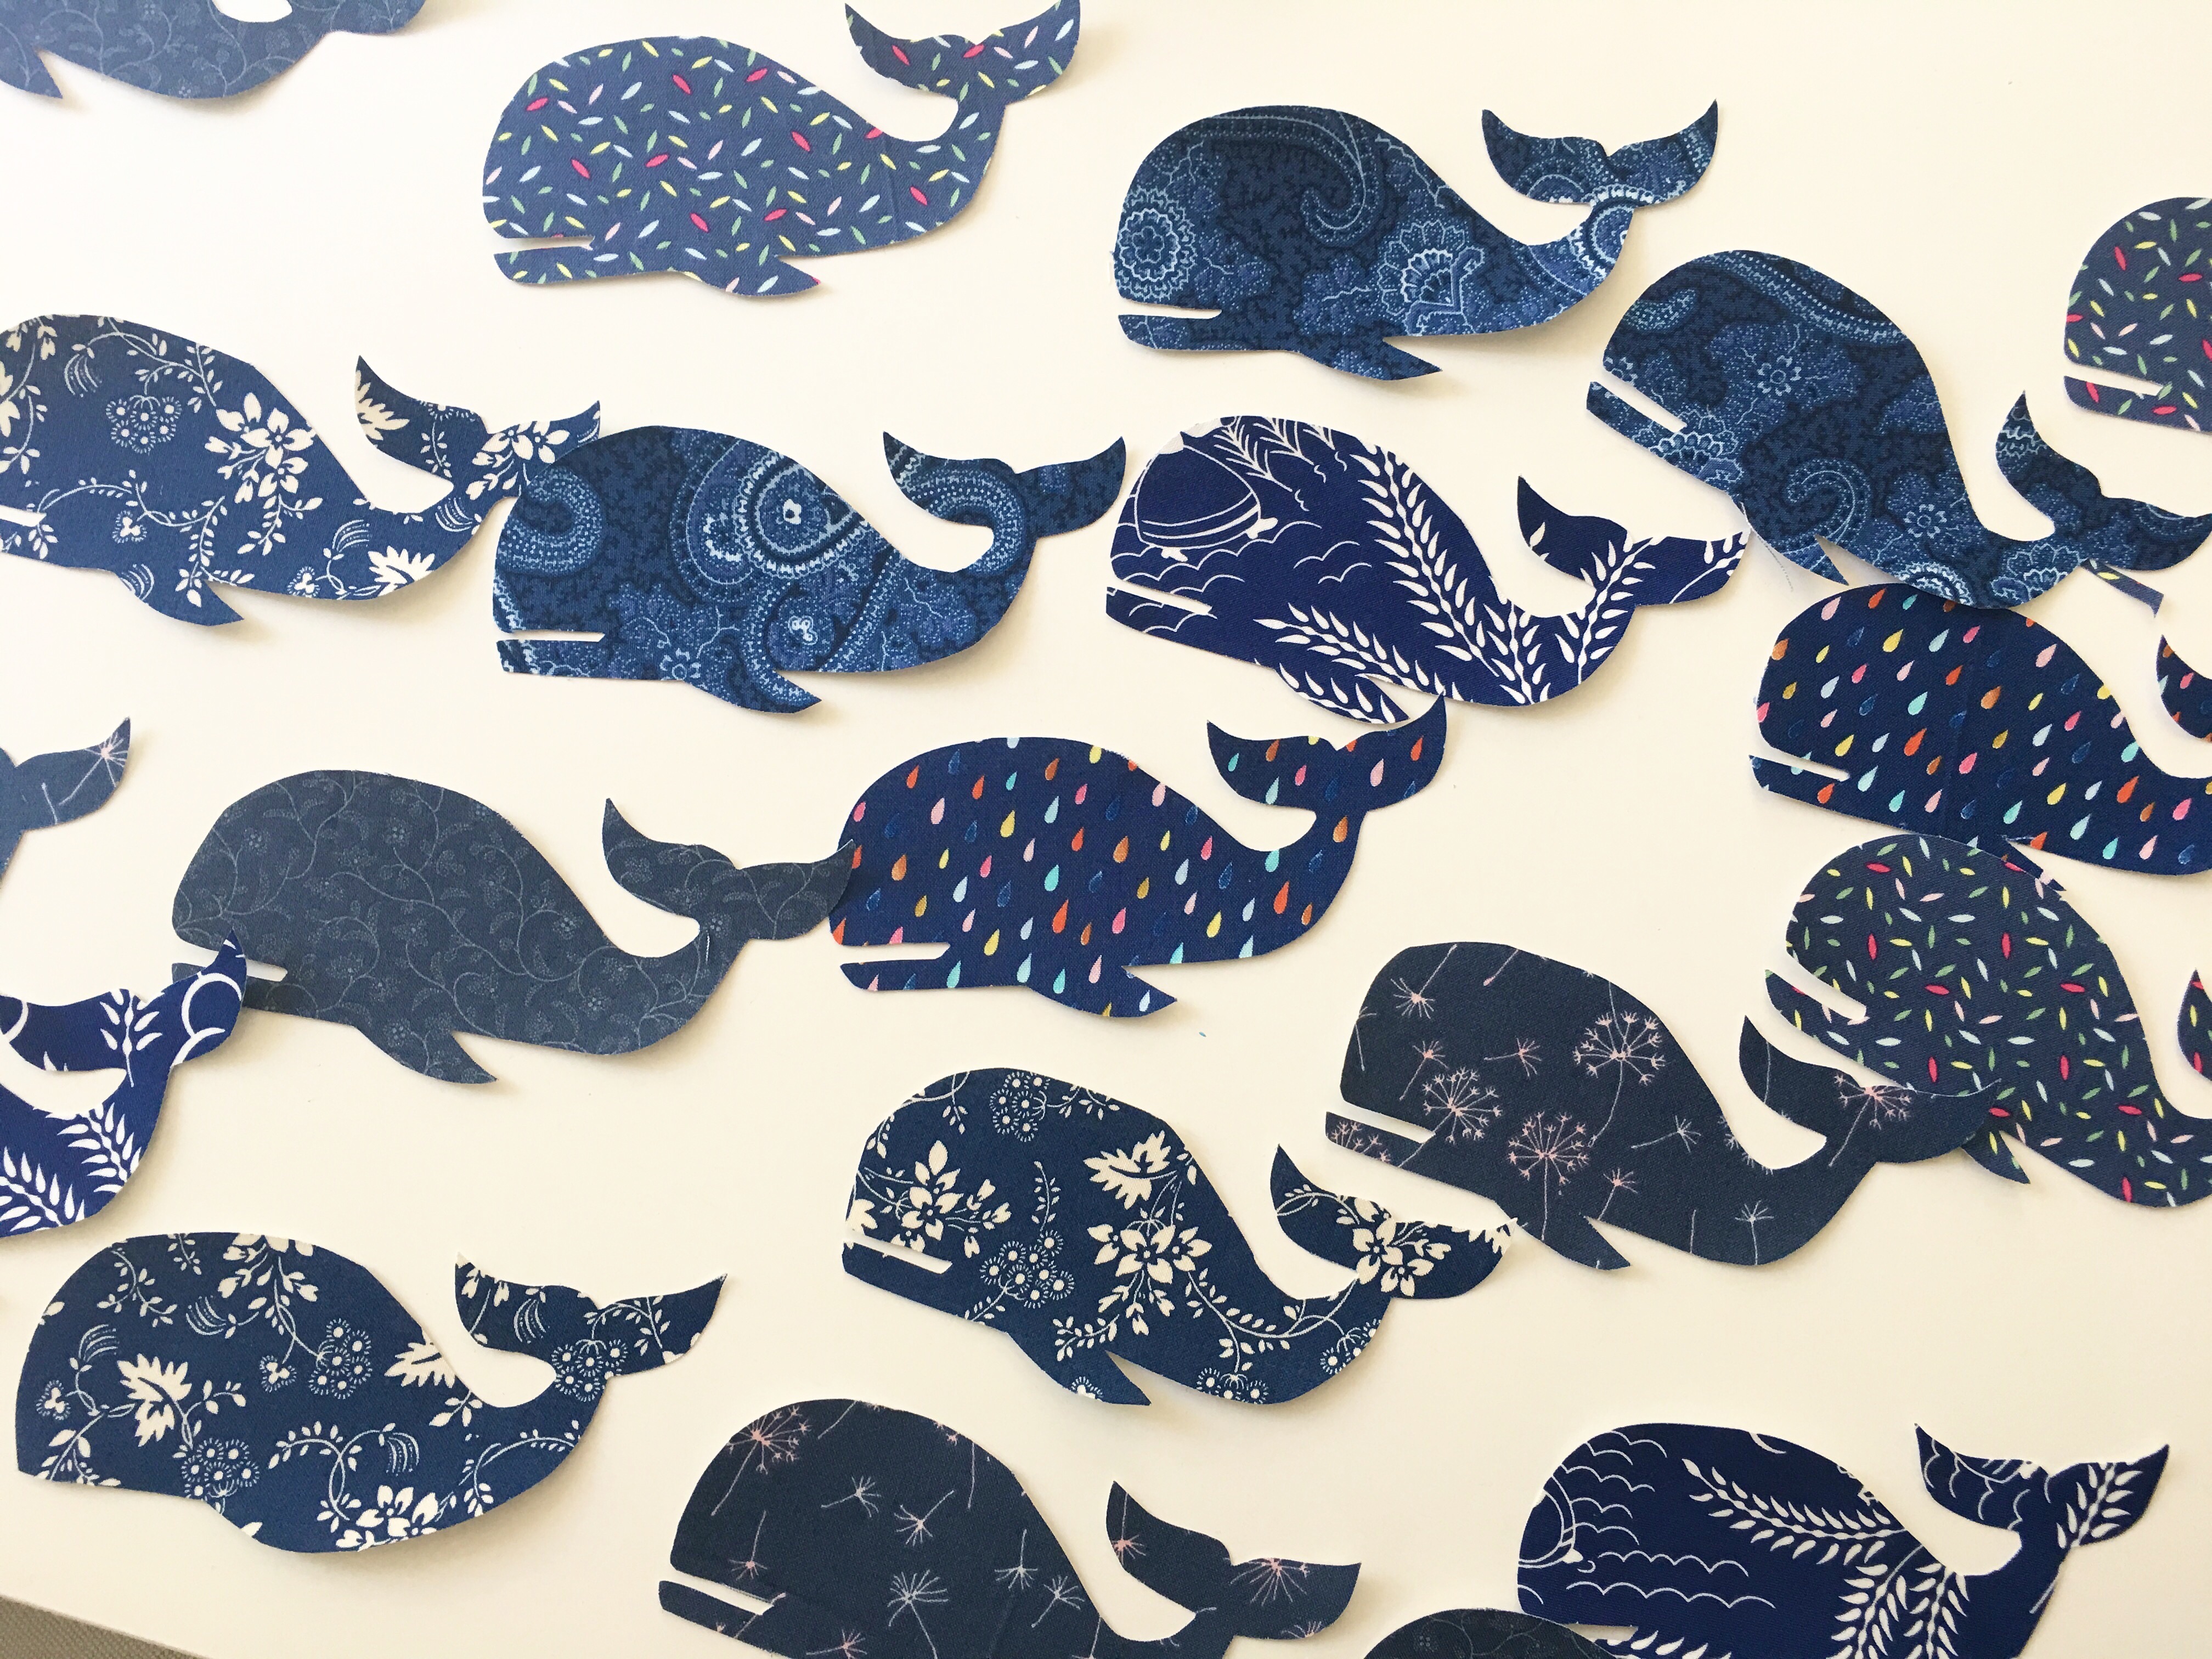
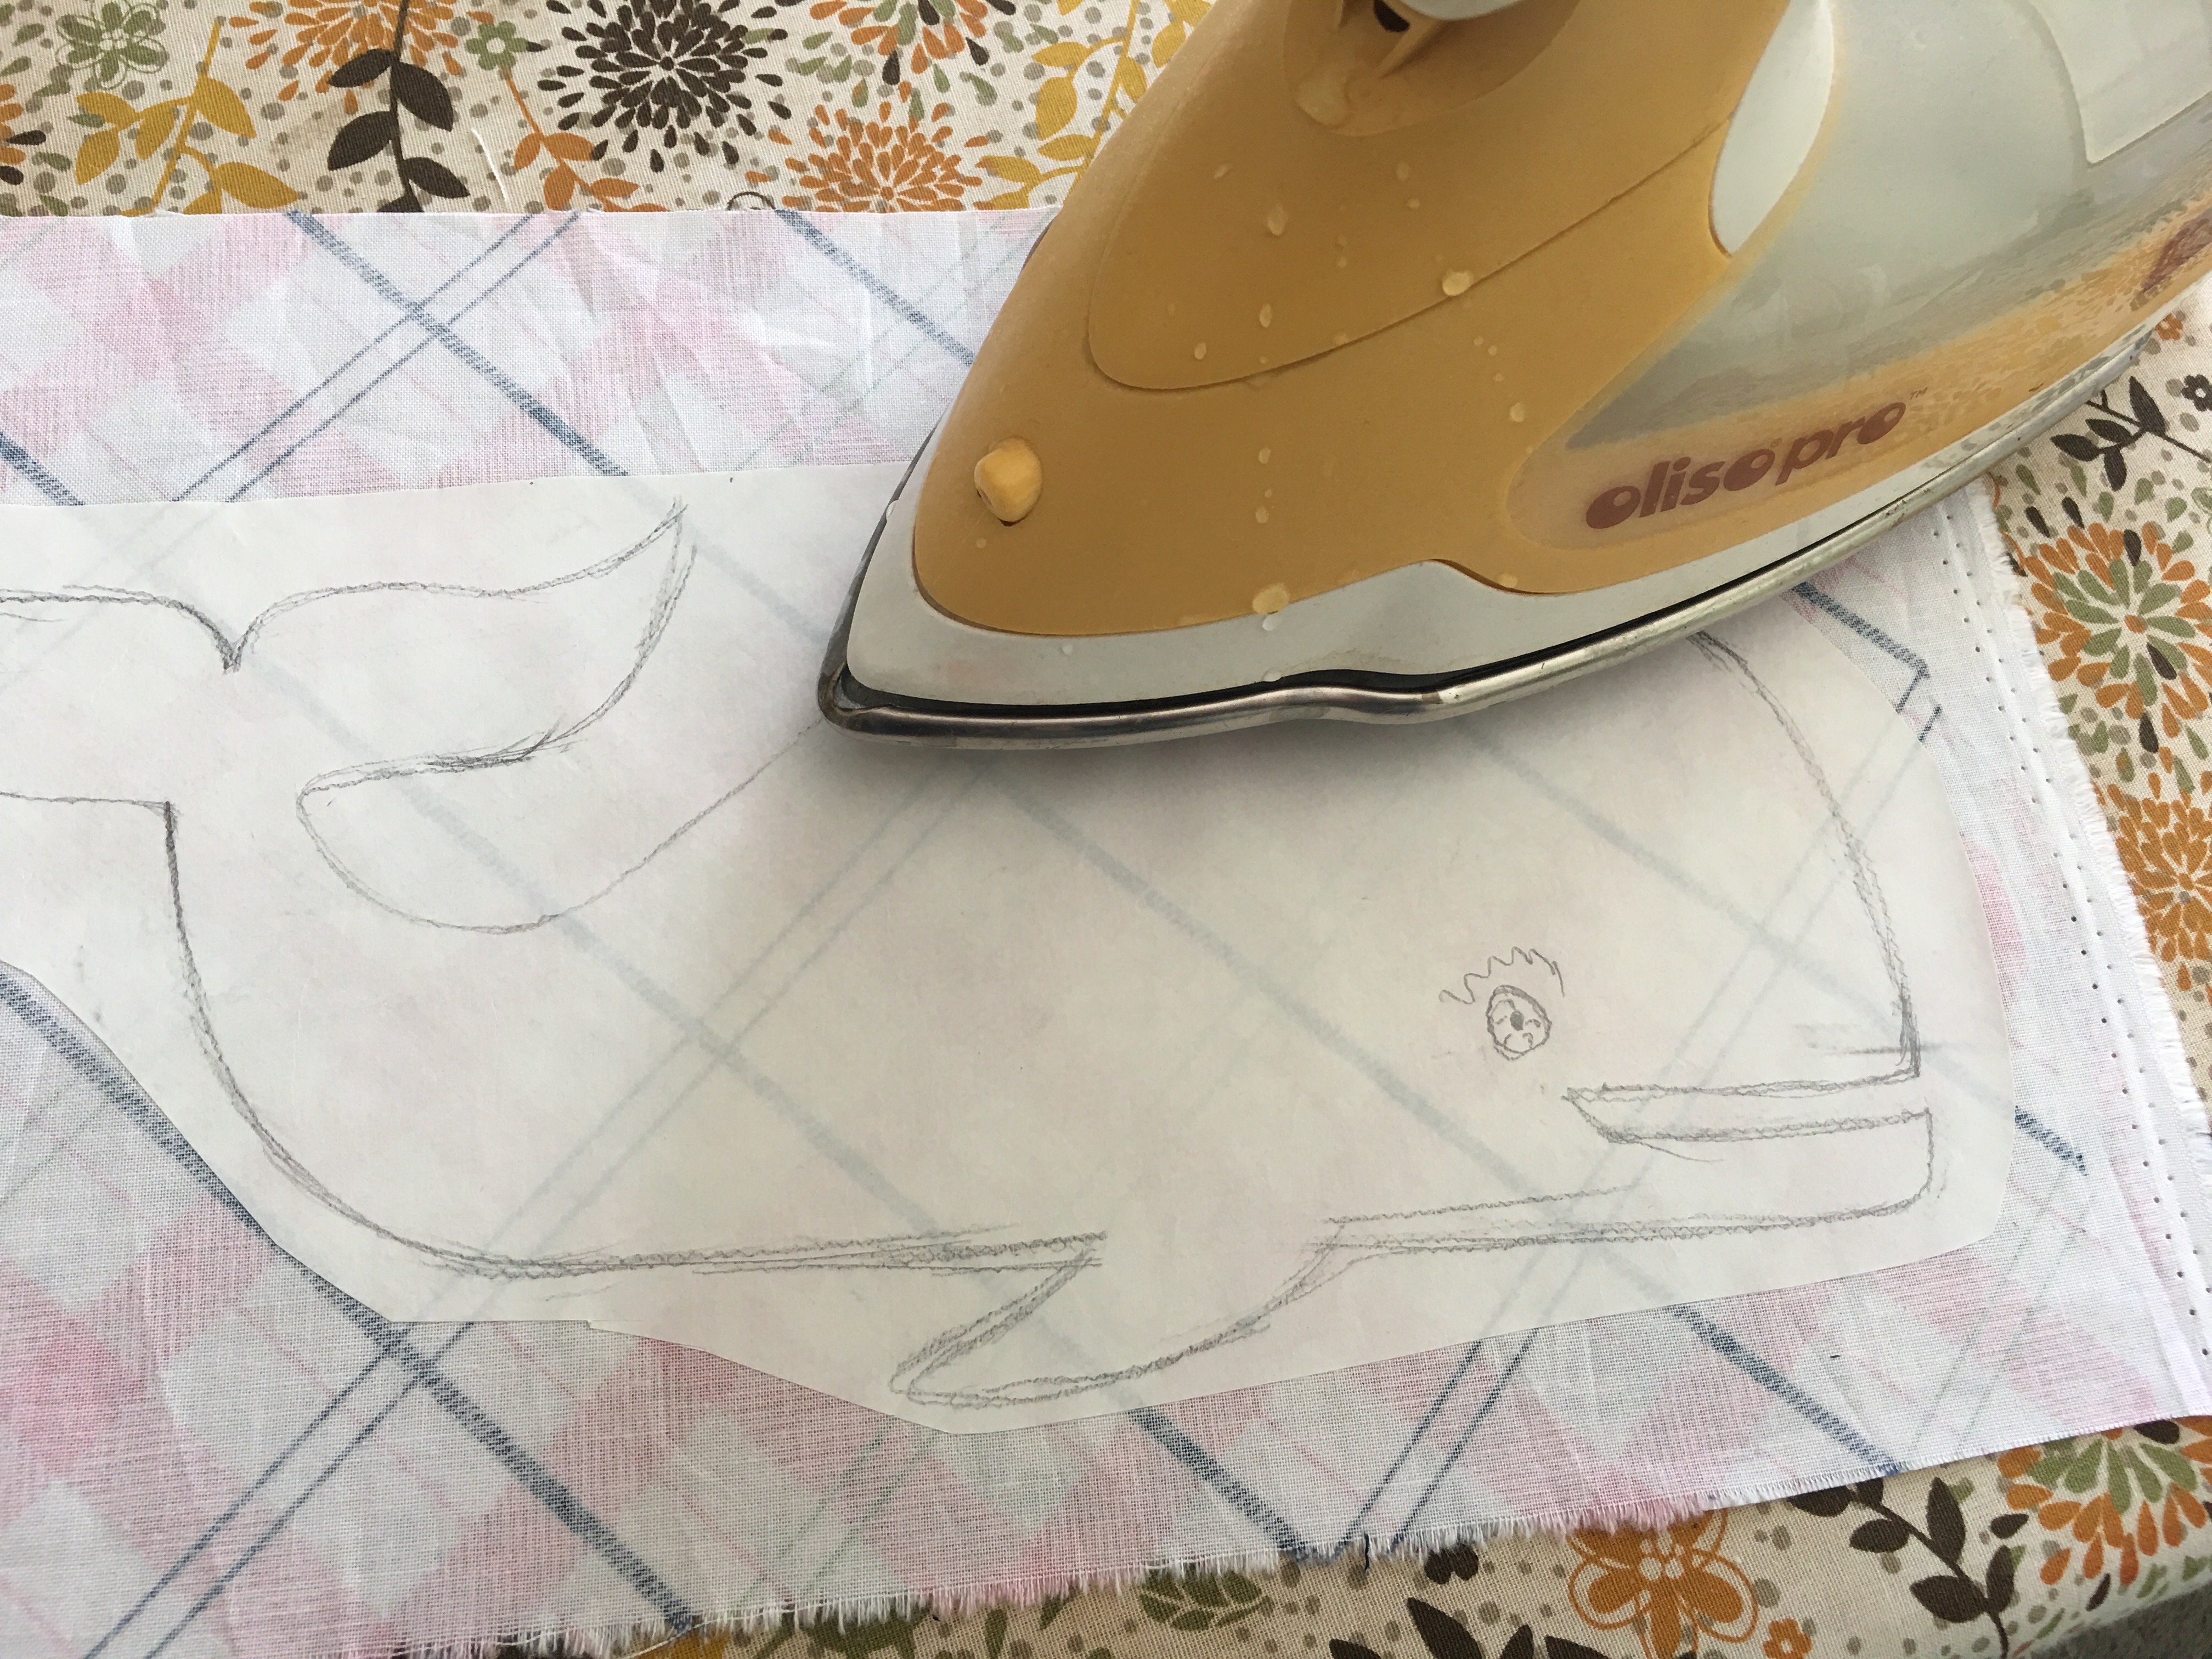
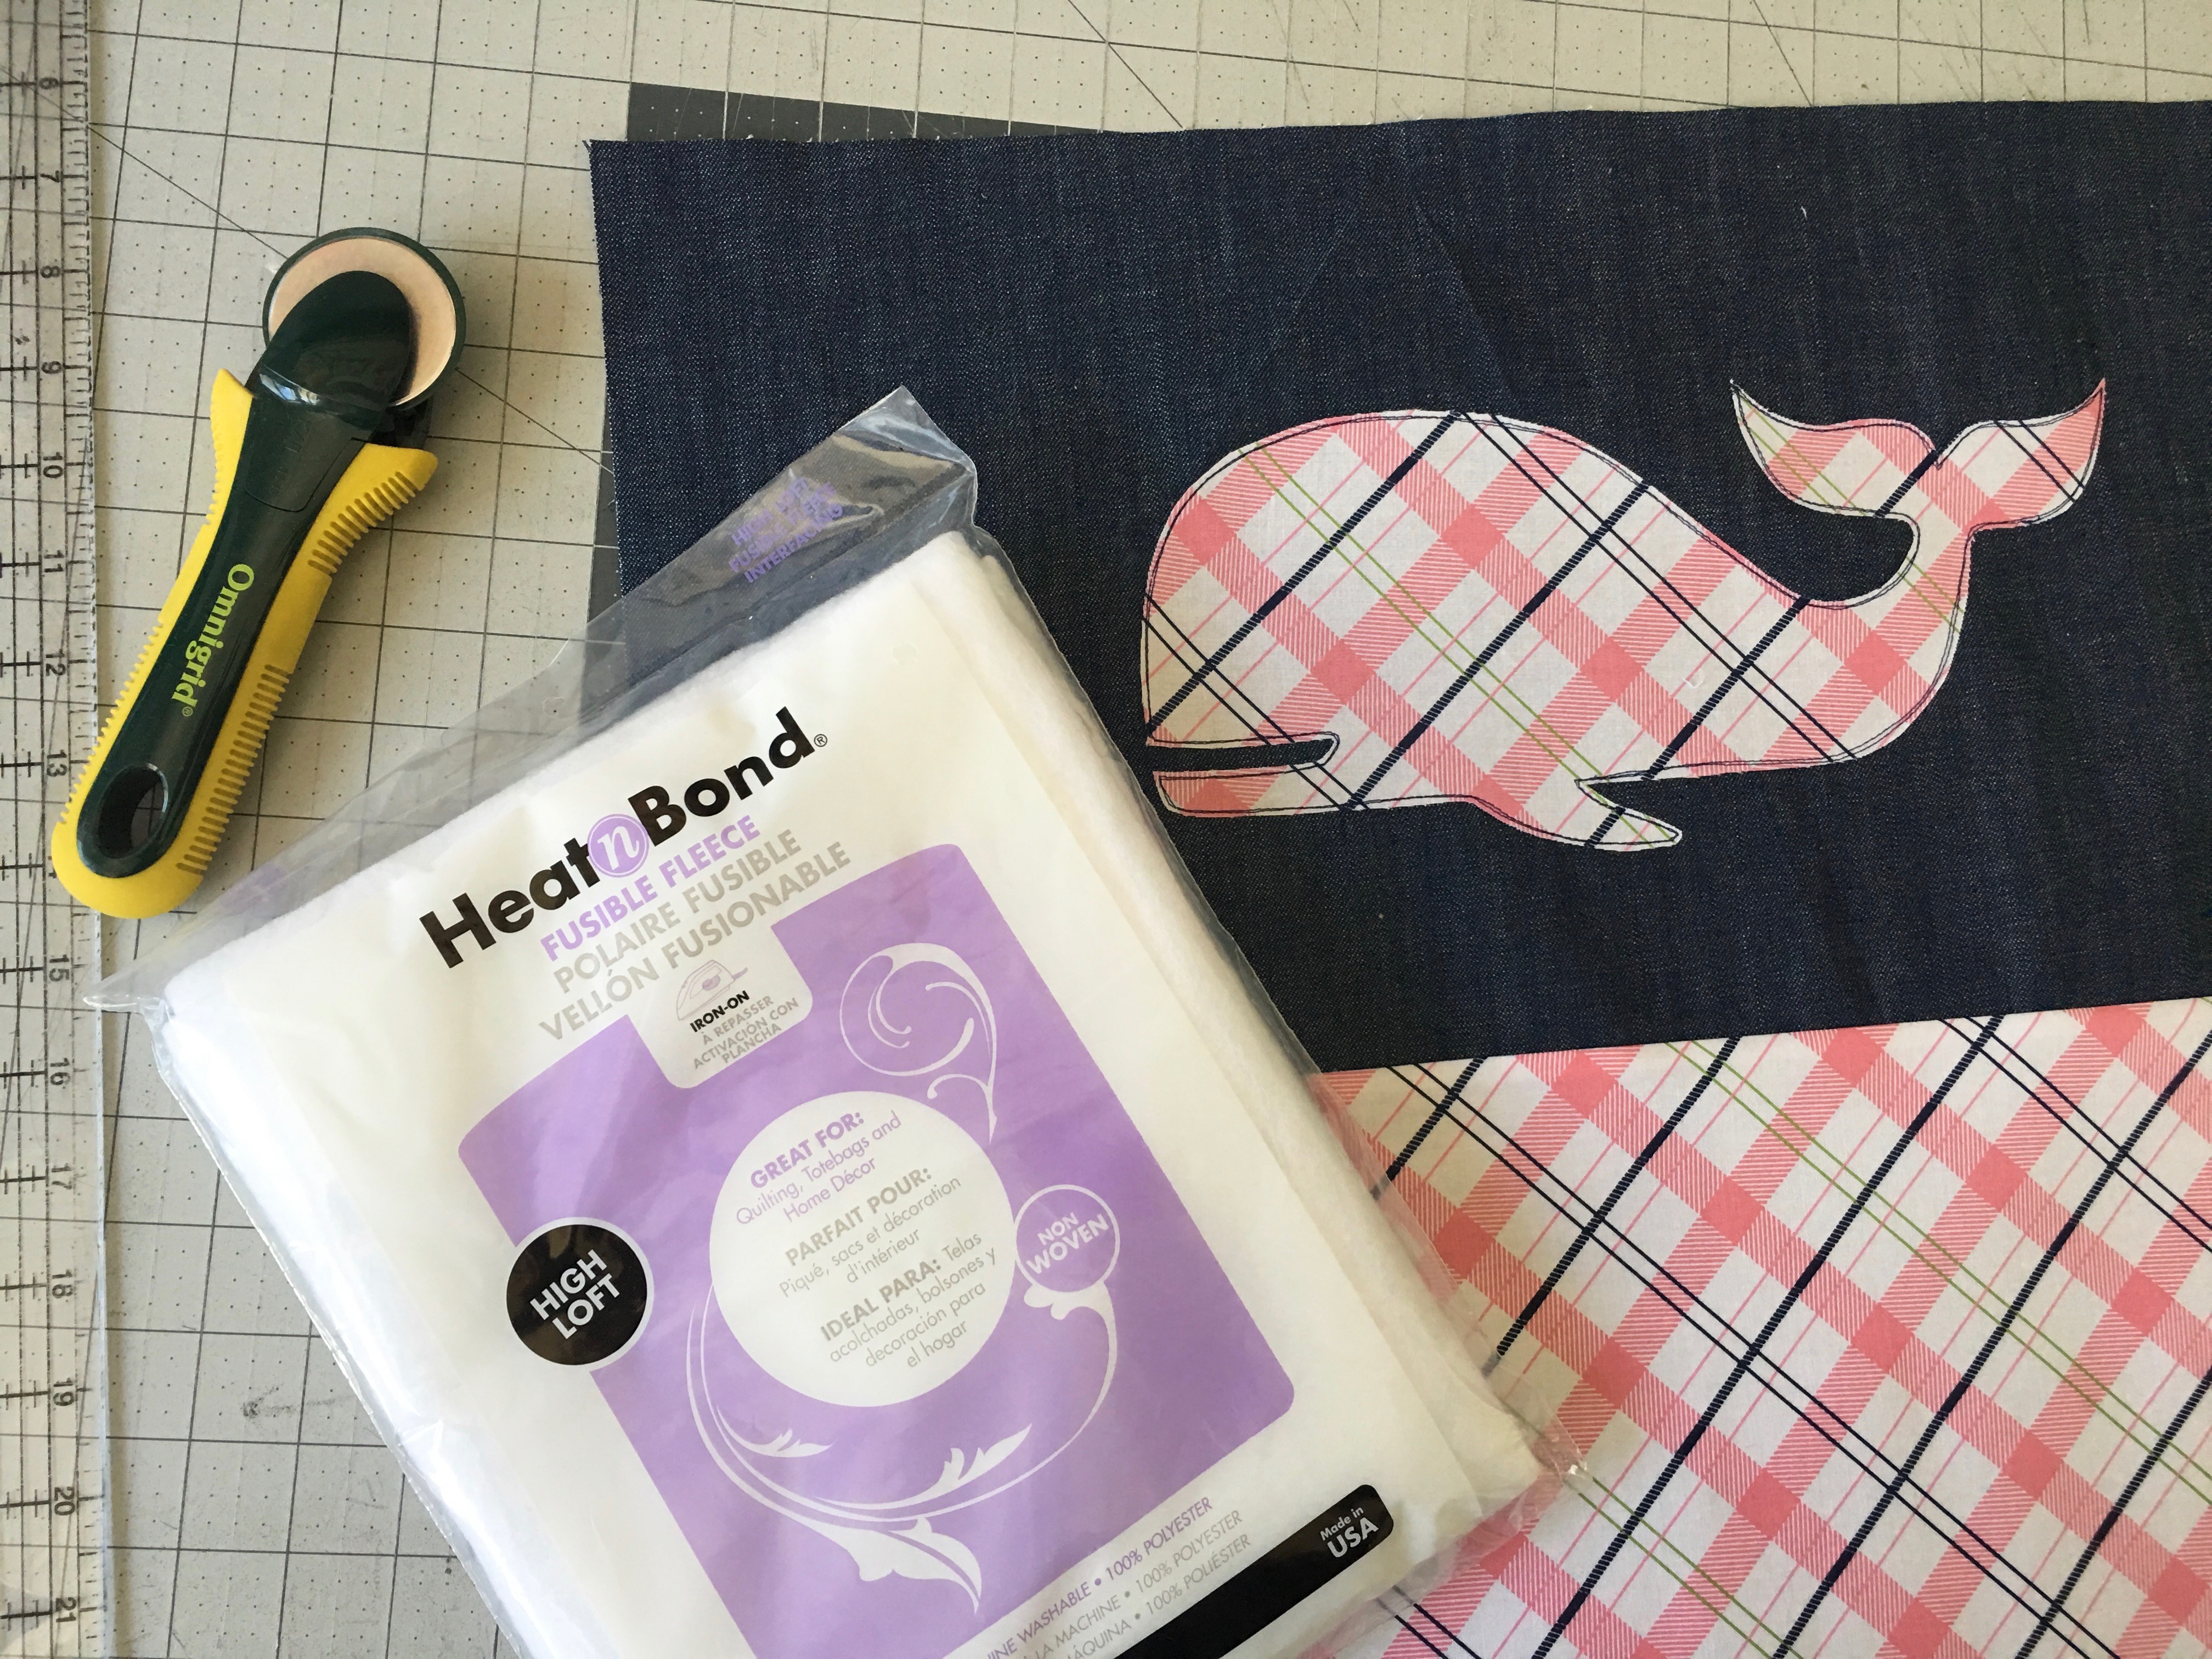
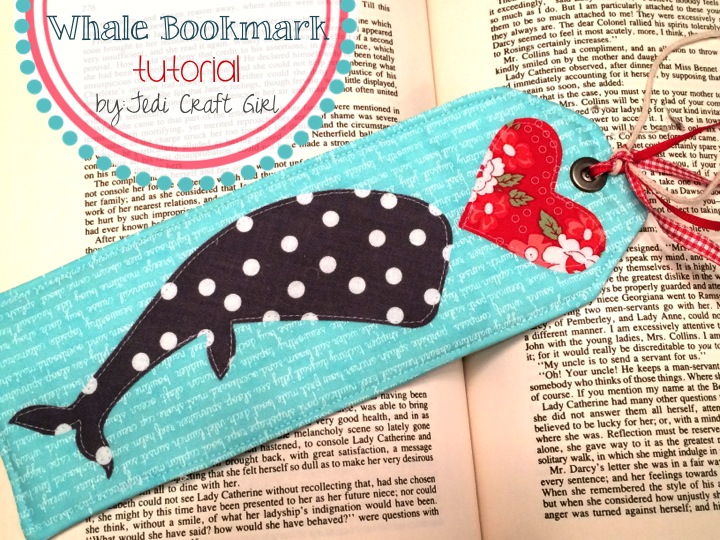
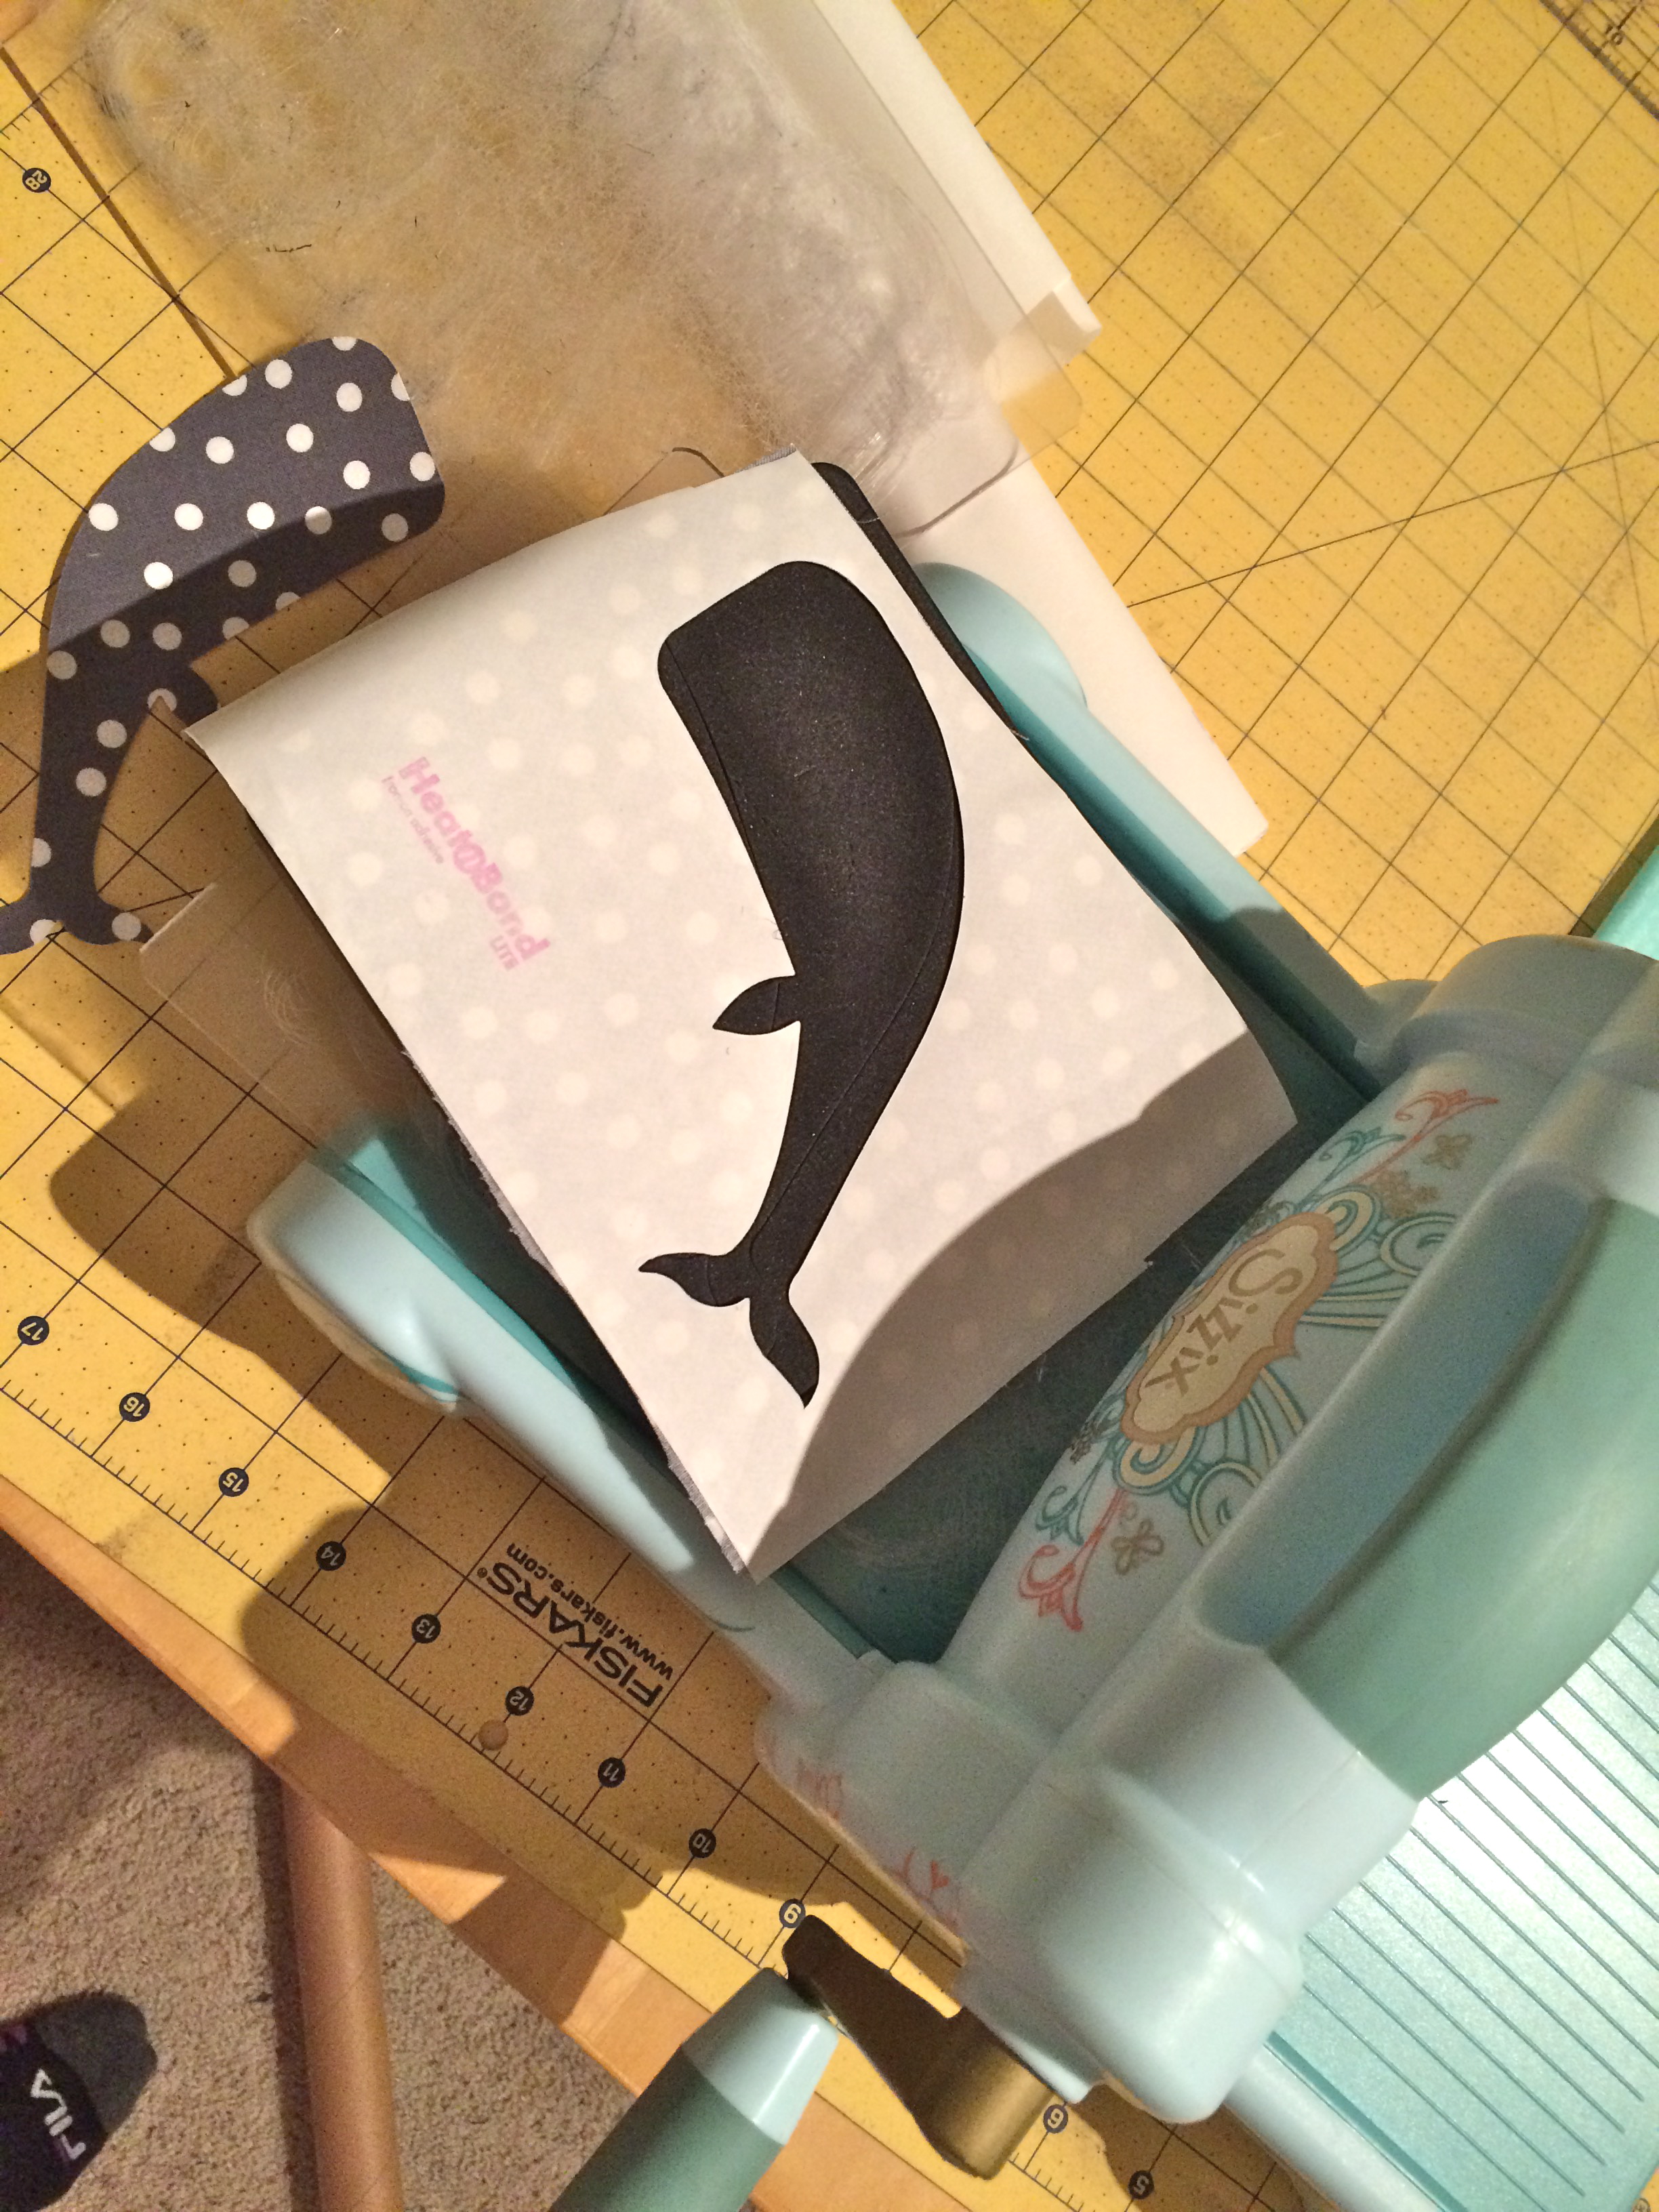
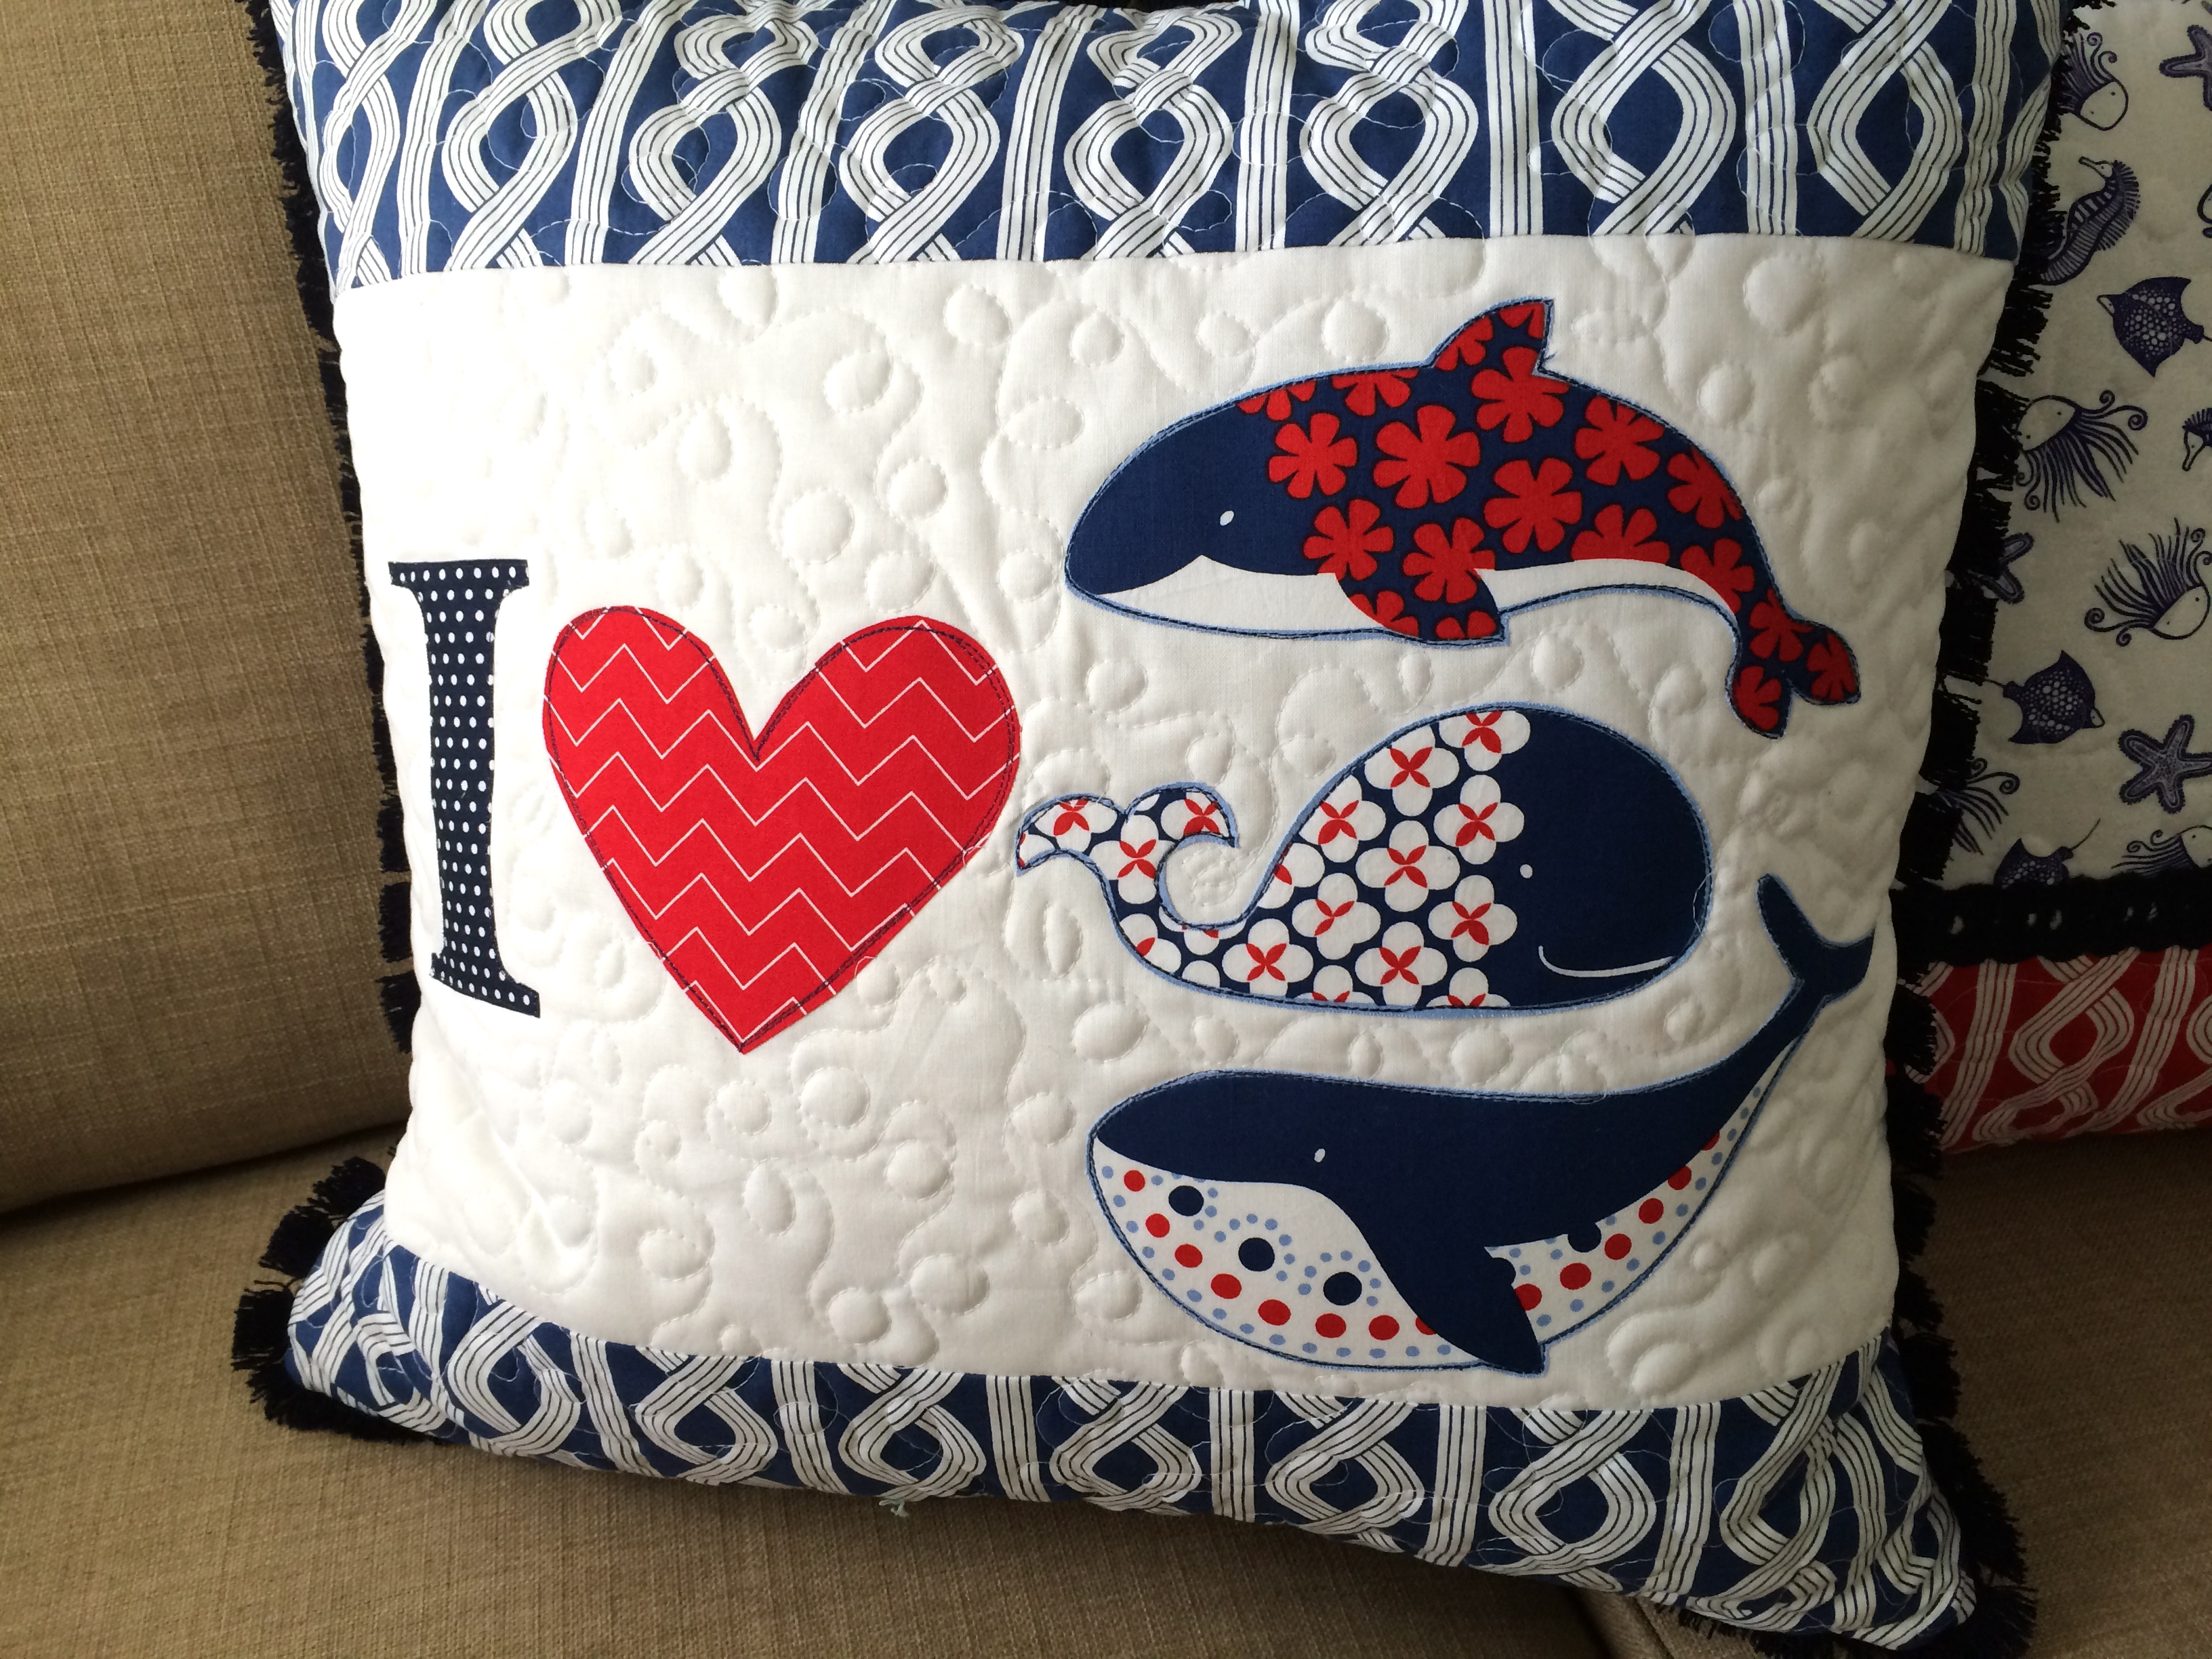
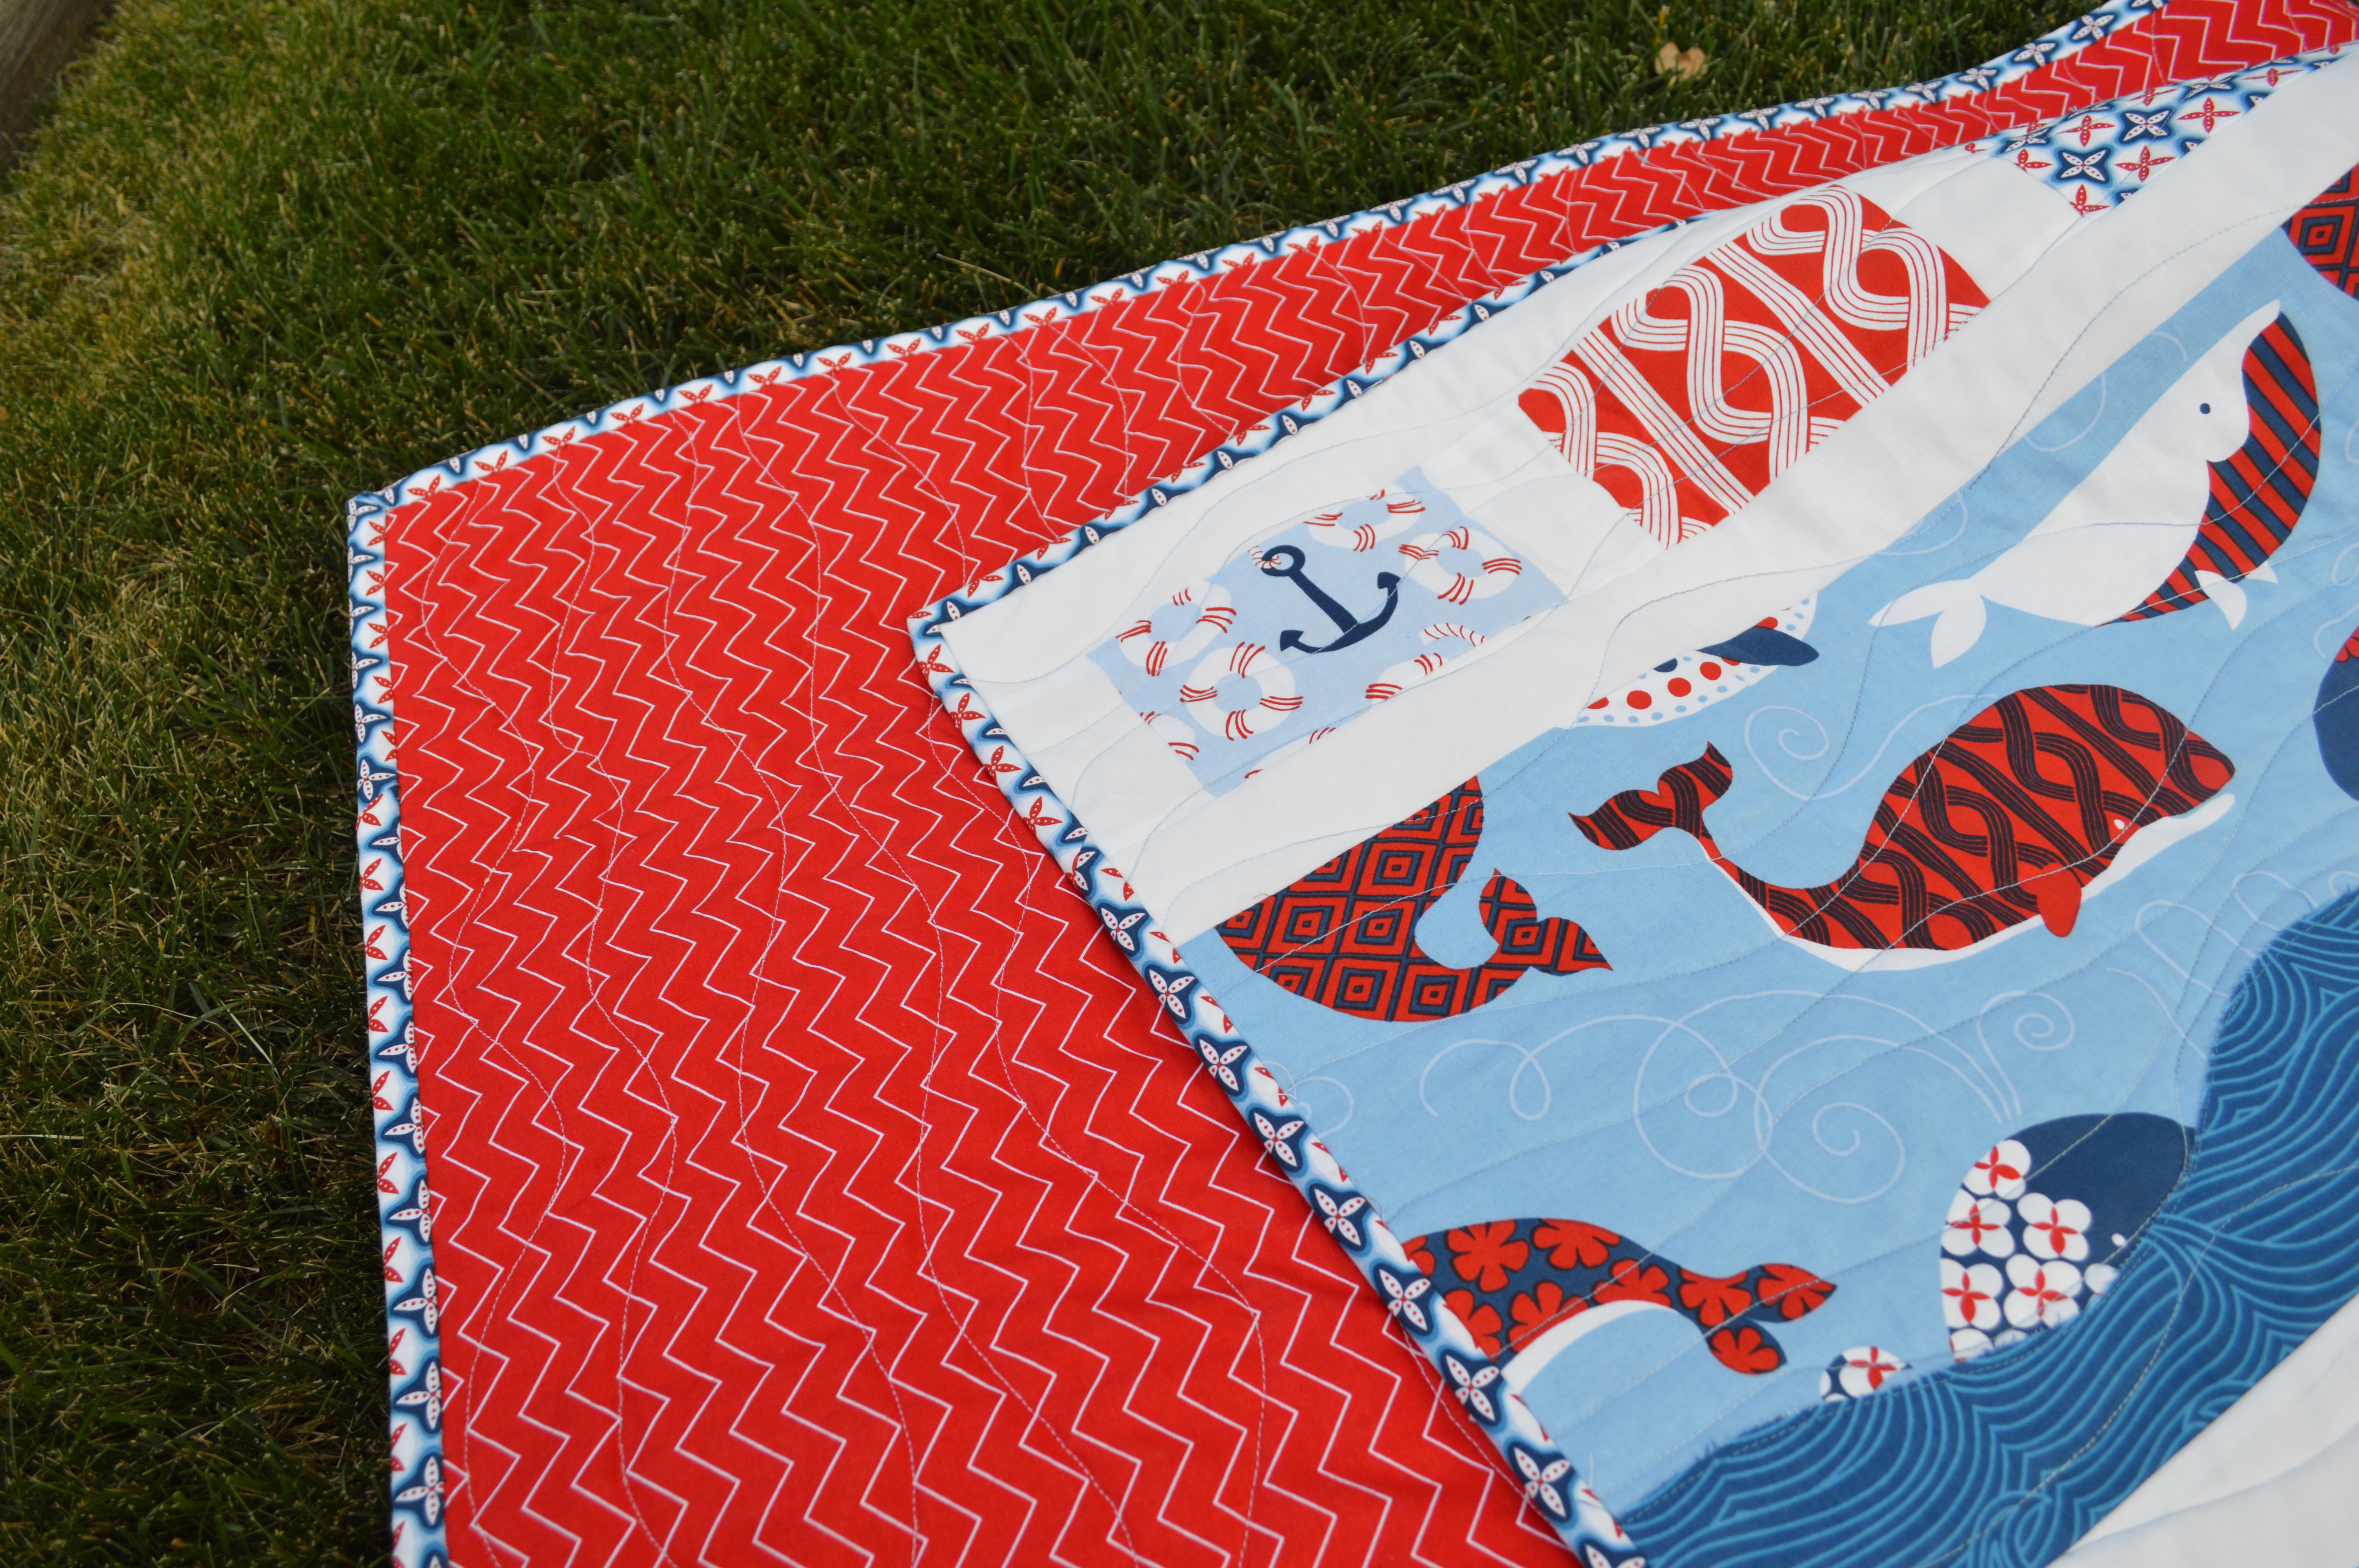
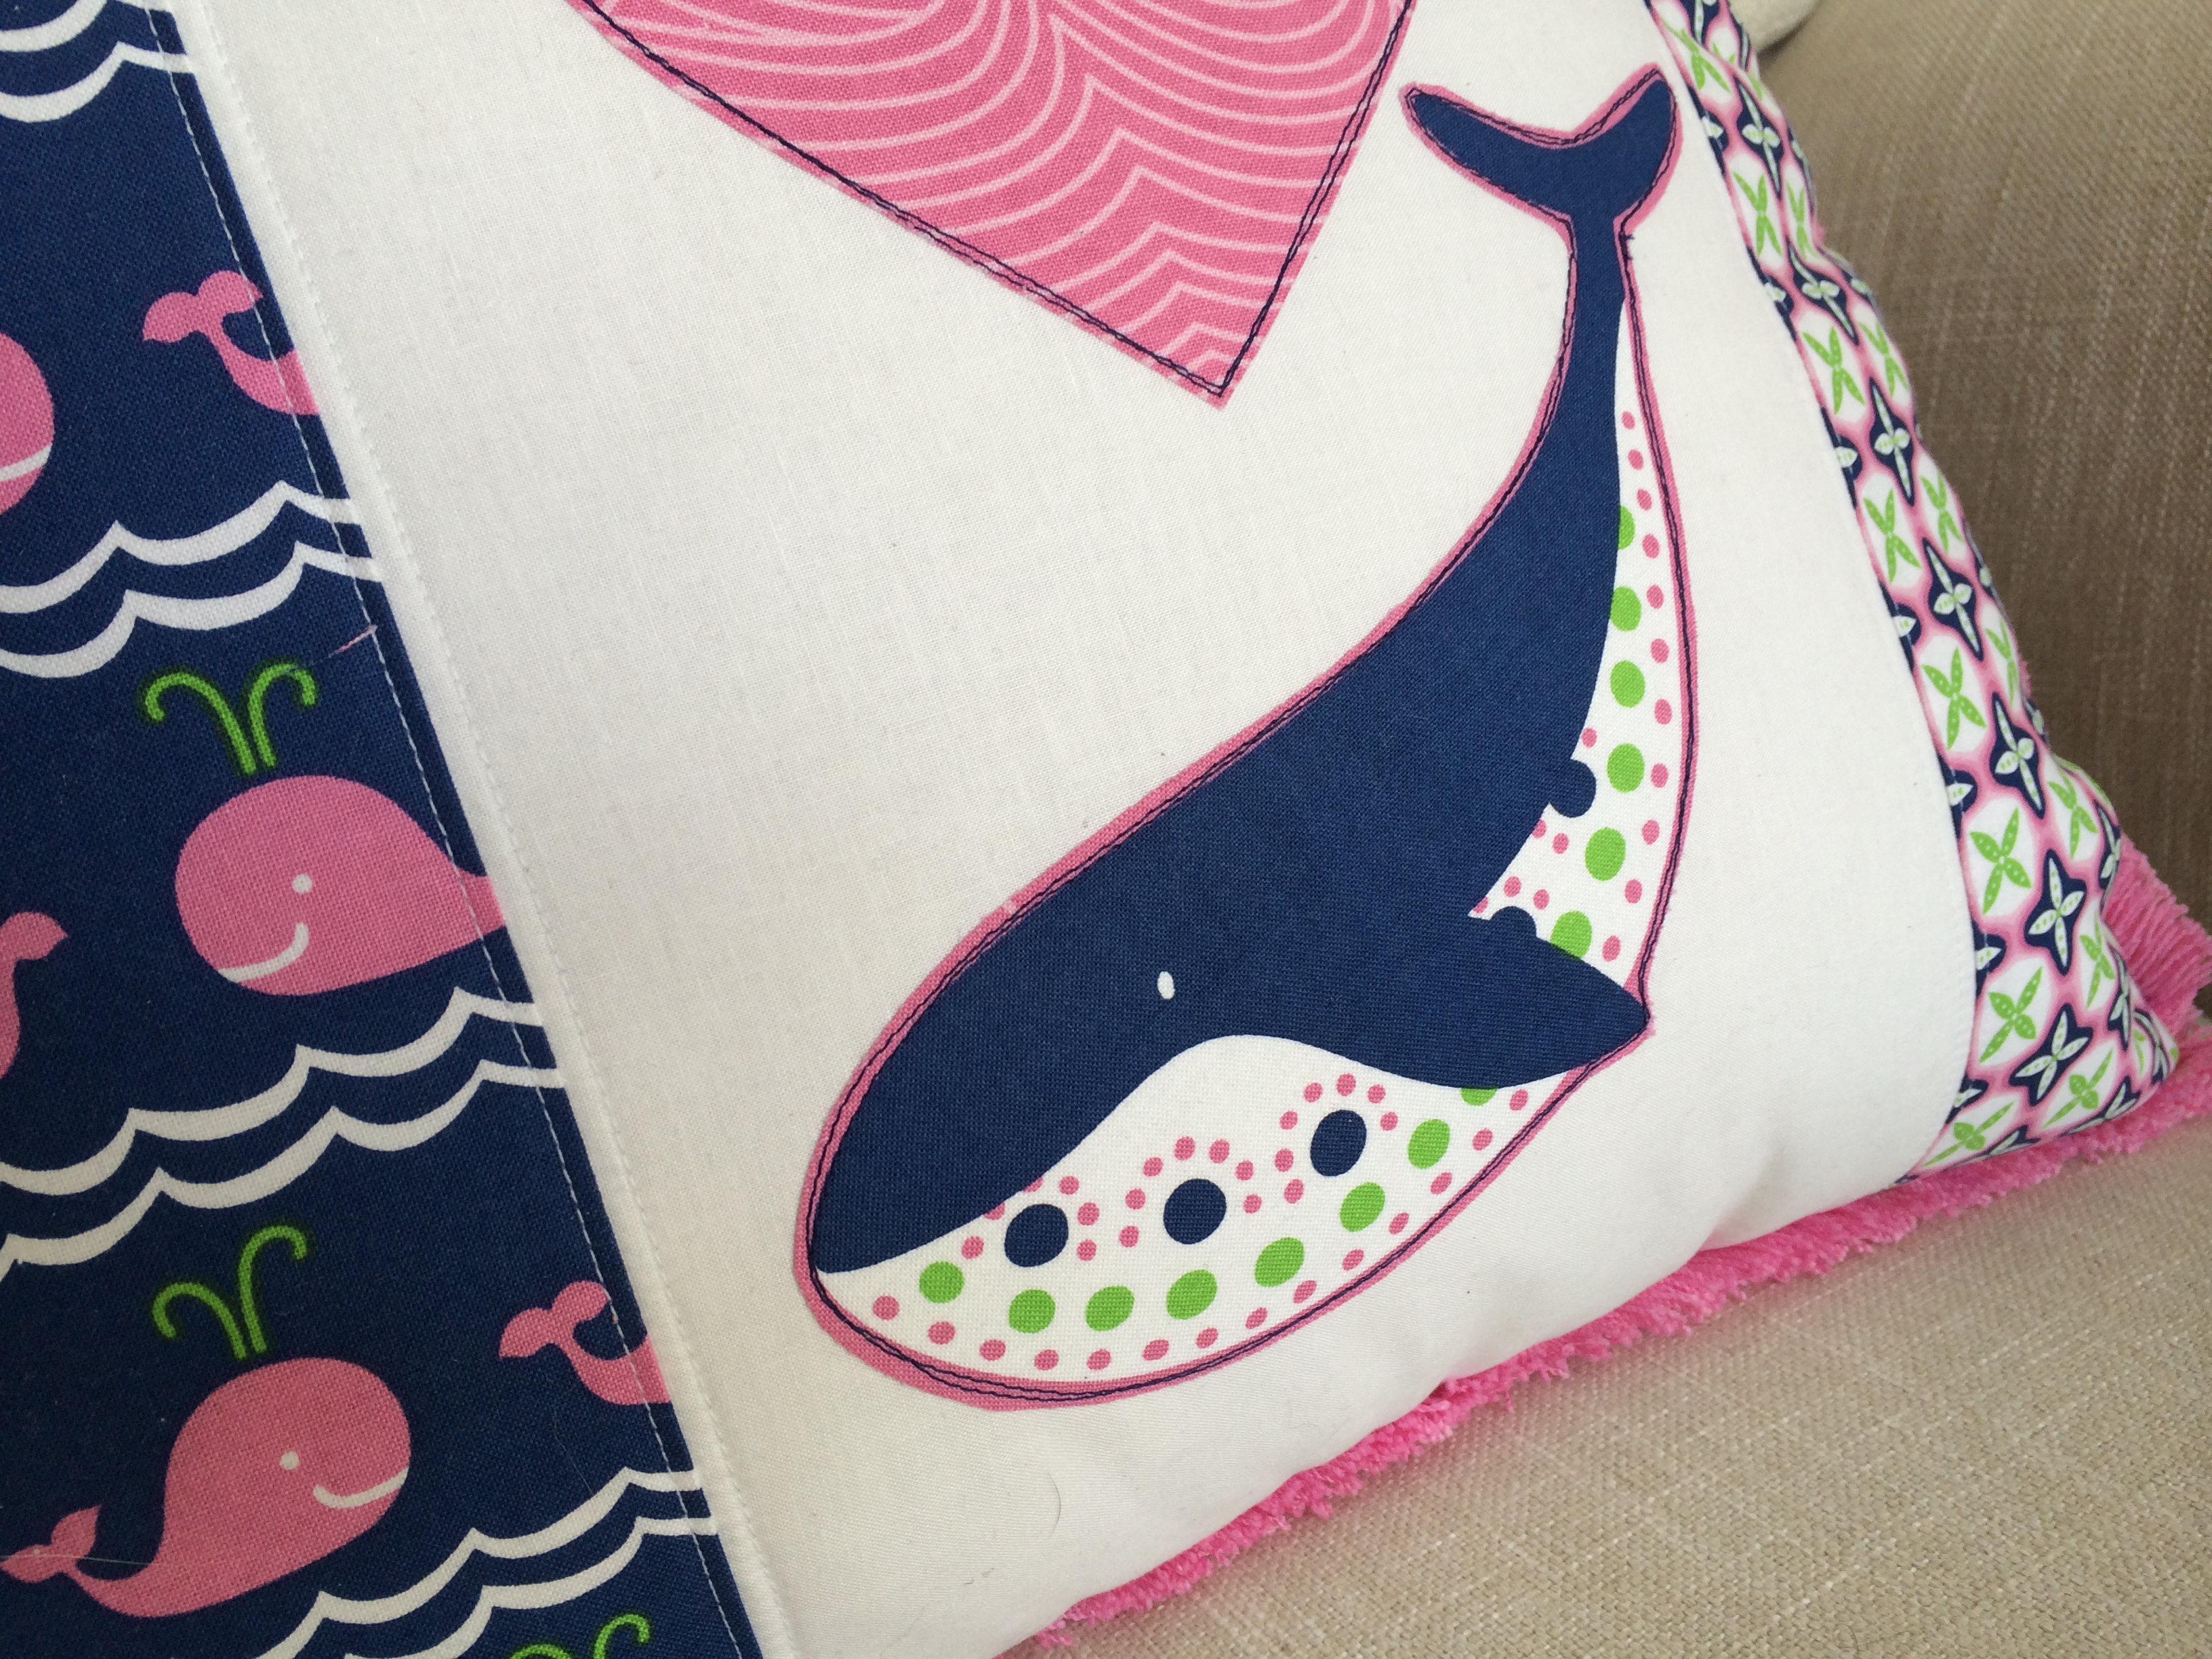
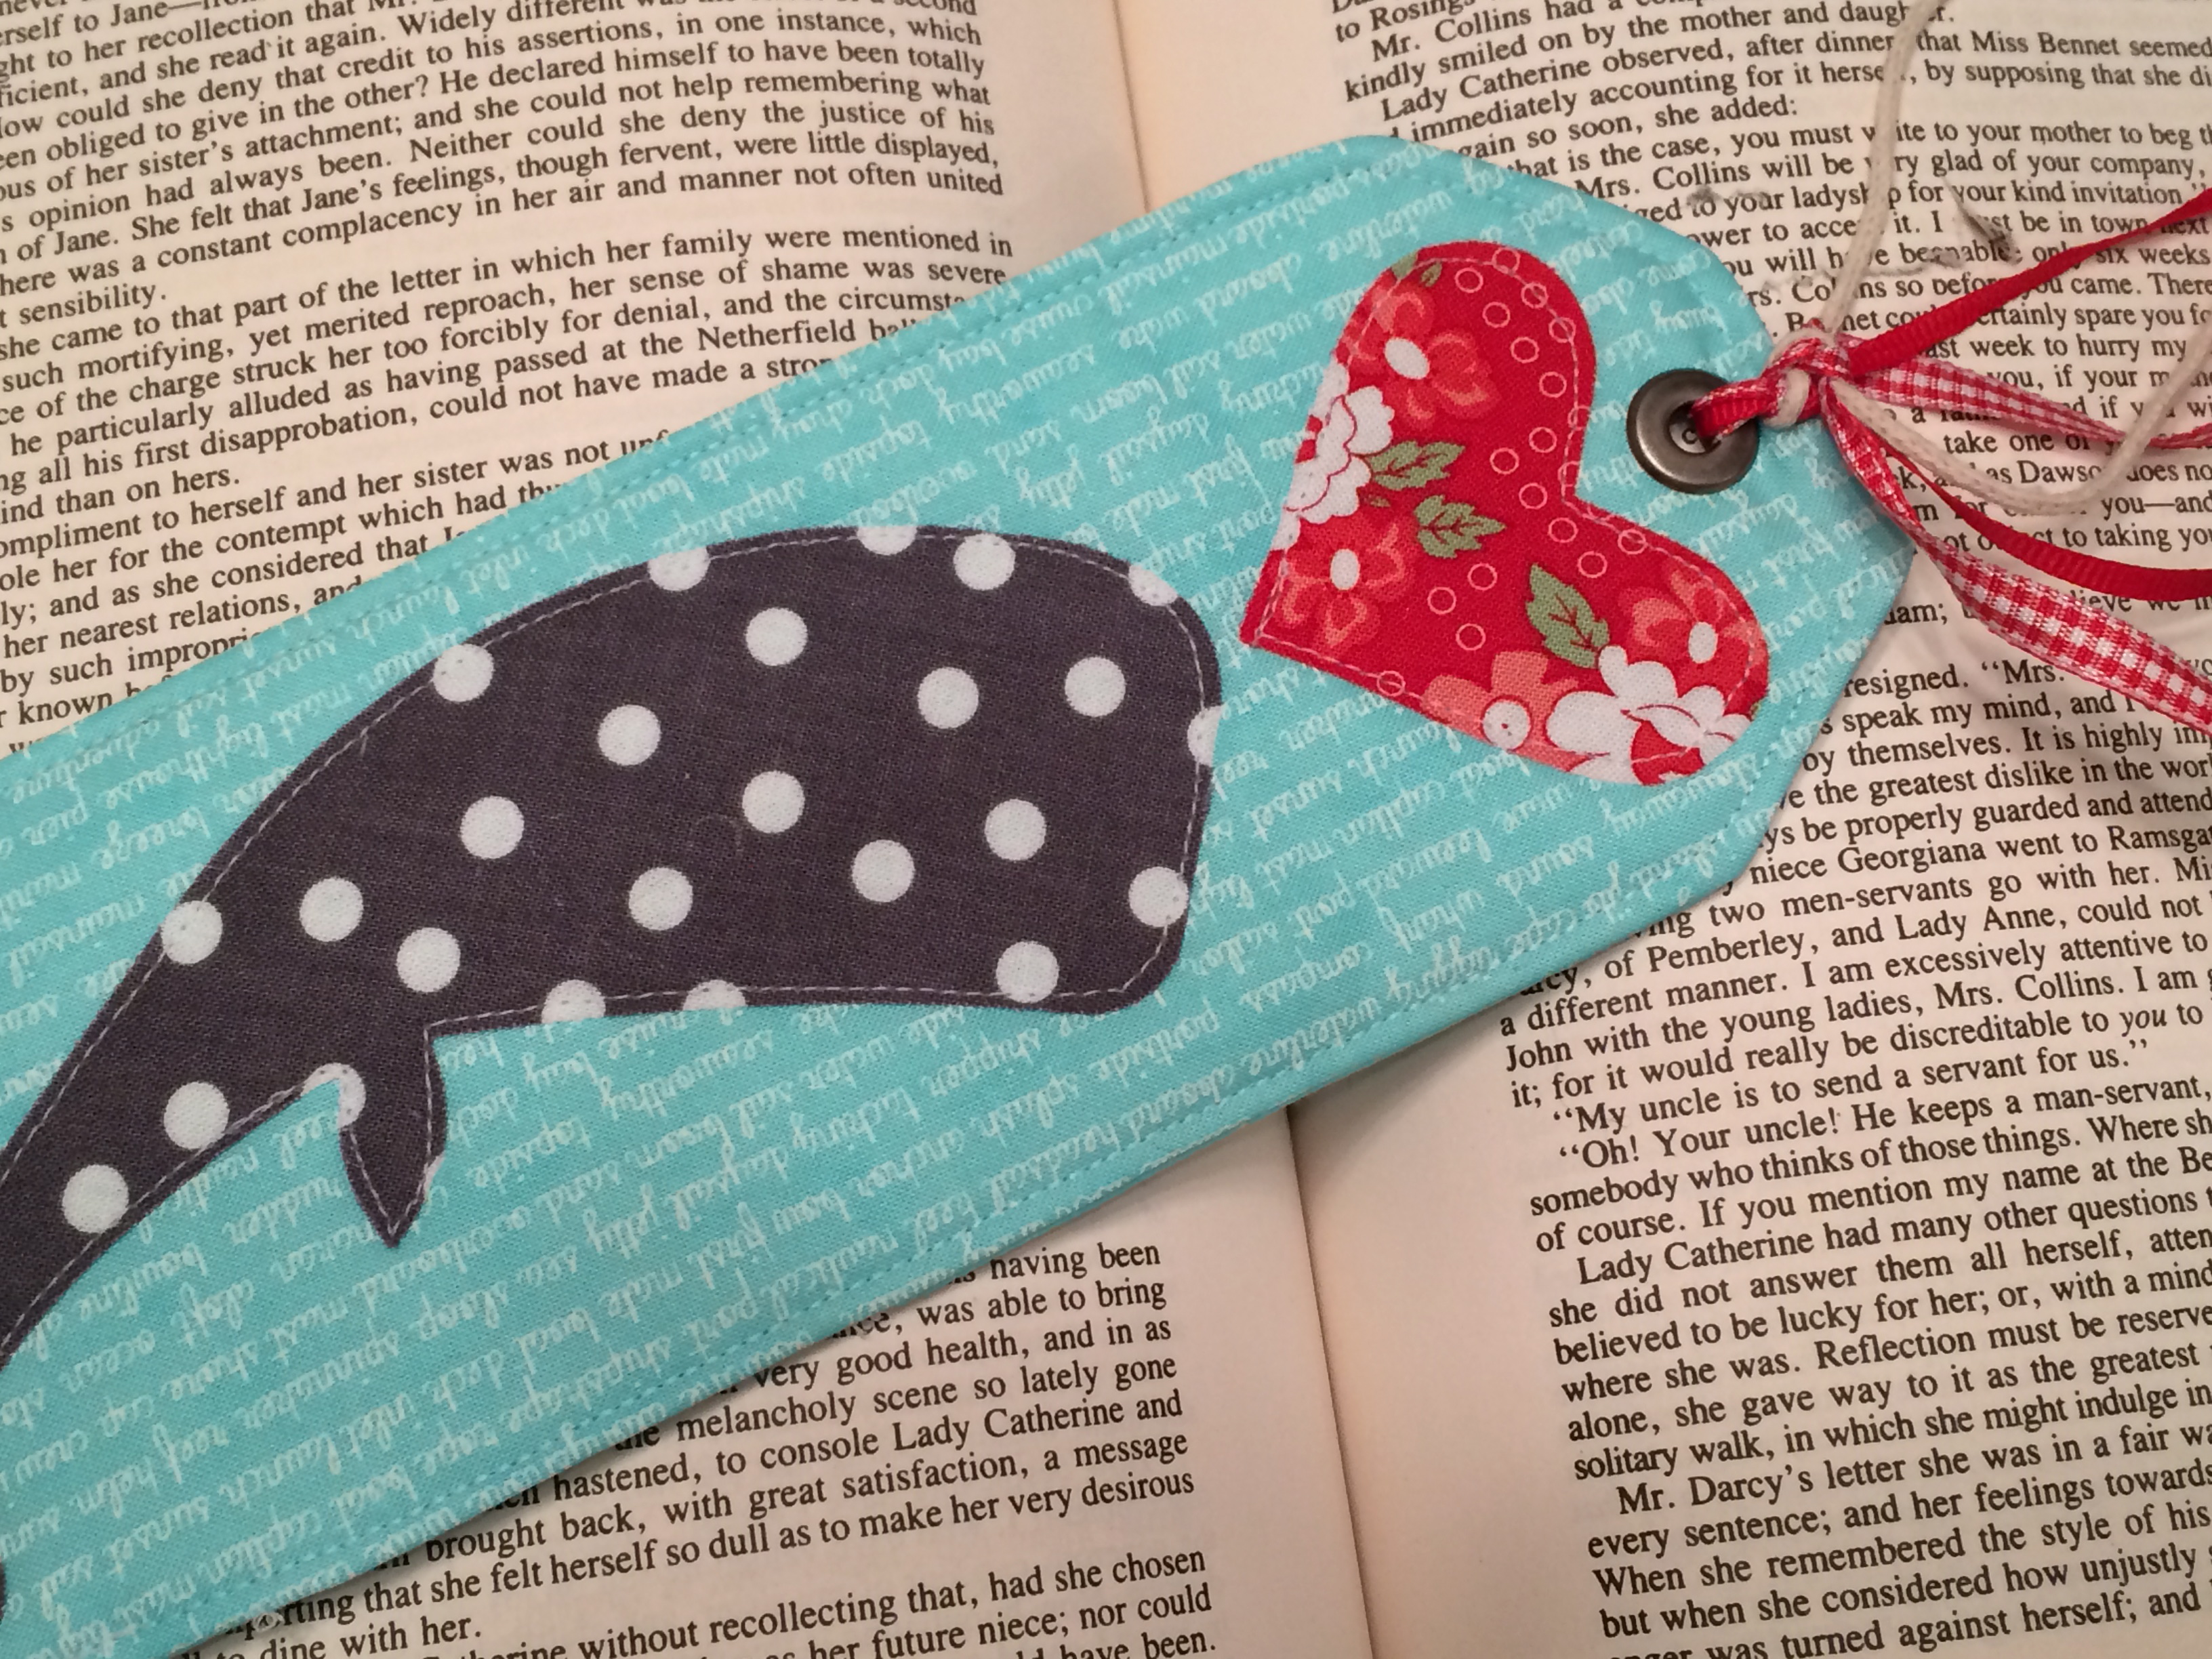
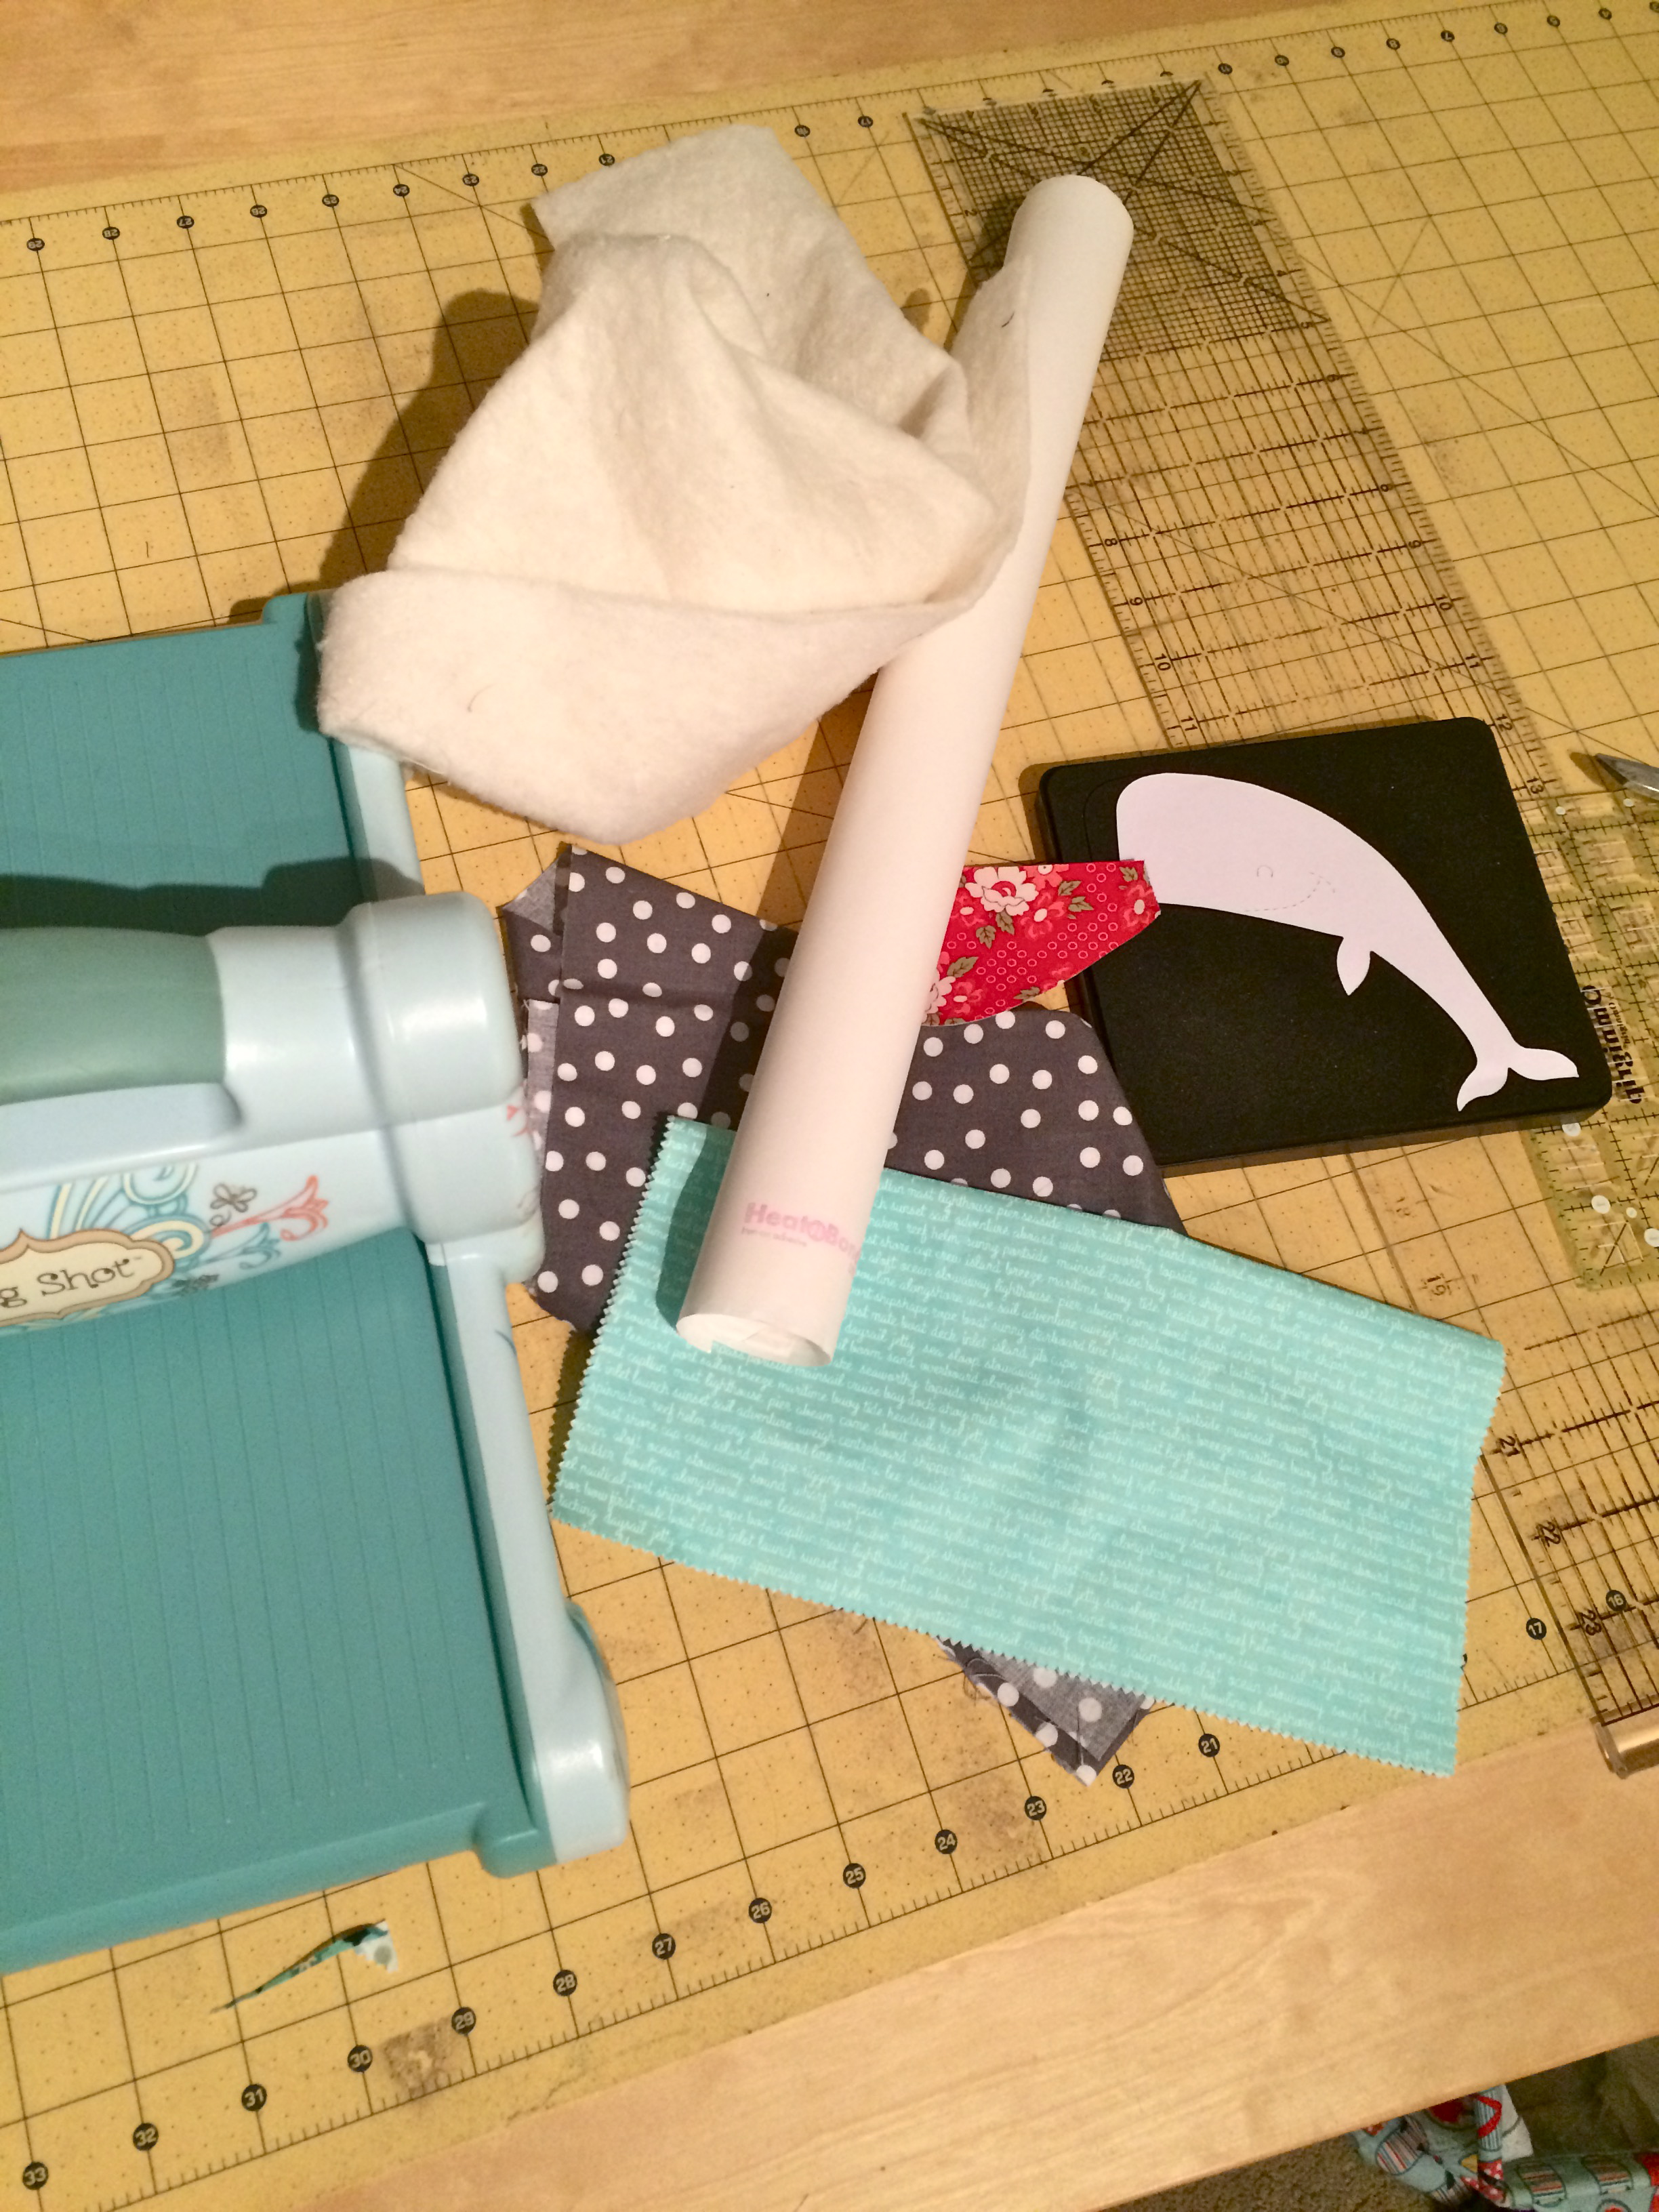
The whales are machine appliquéd using Heat n Bond Lite.  Yes, they are hand cut, but you can totally do it!  Just put on Netflix and before you know it they’re done!

IMG_0696

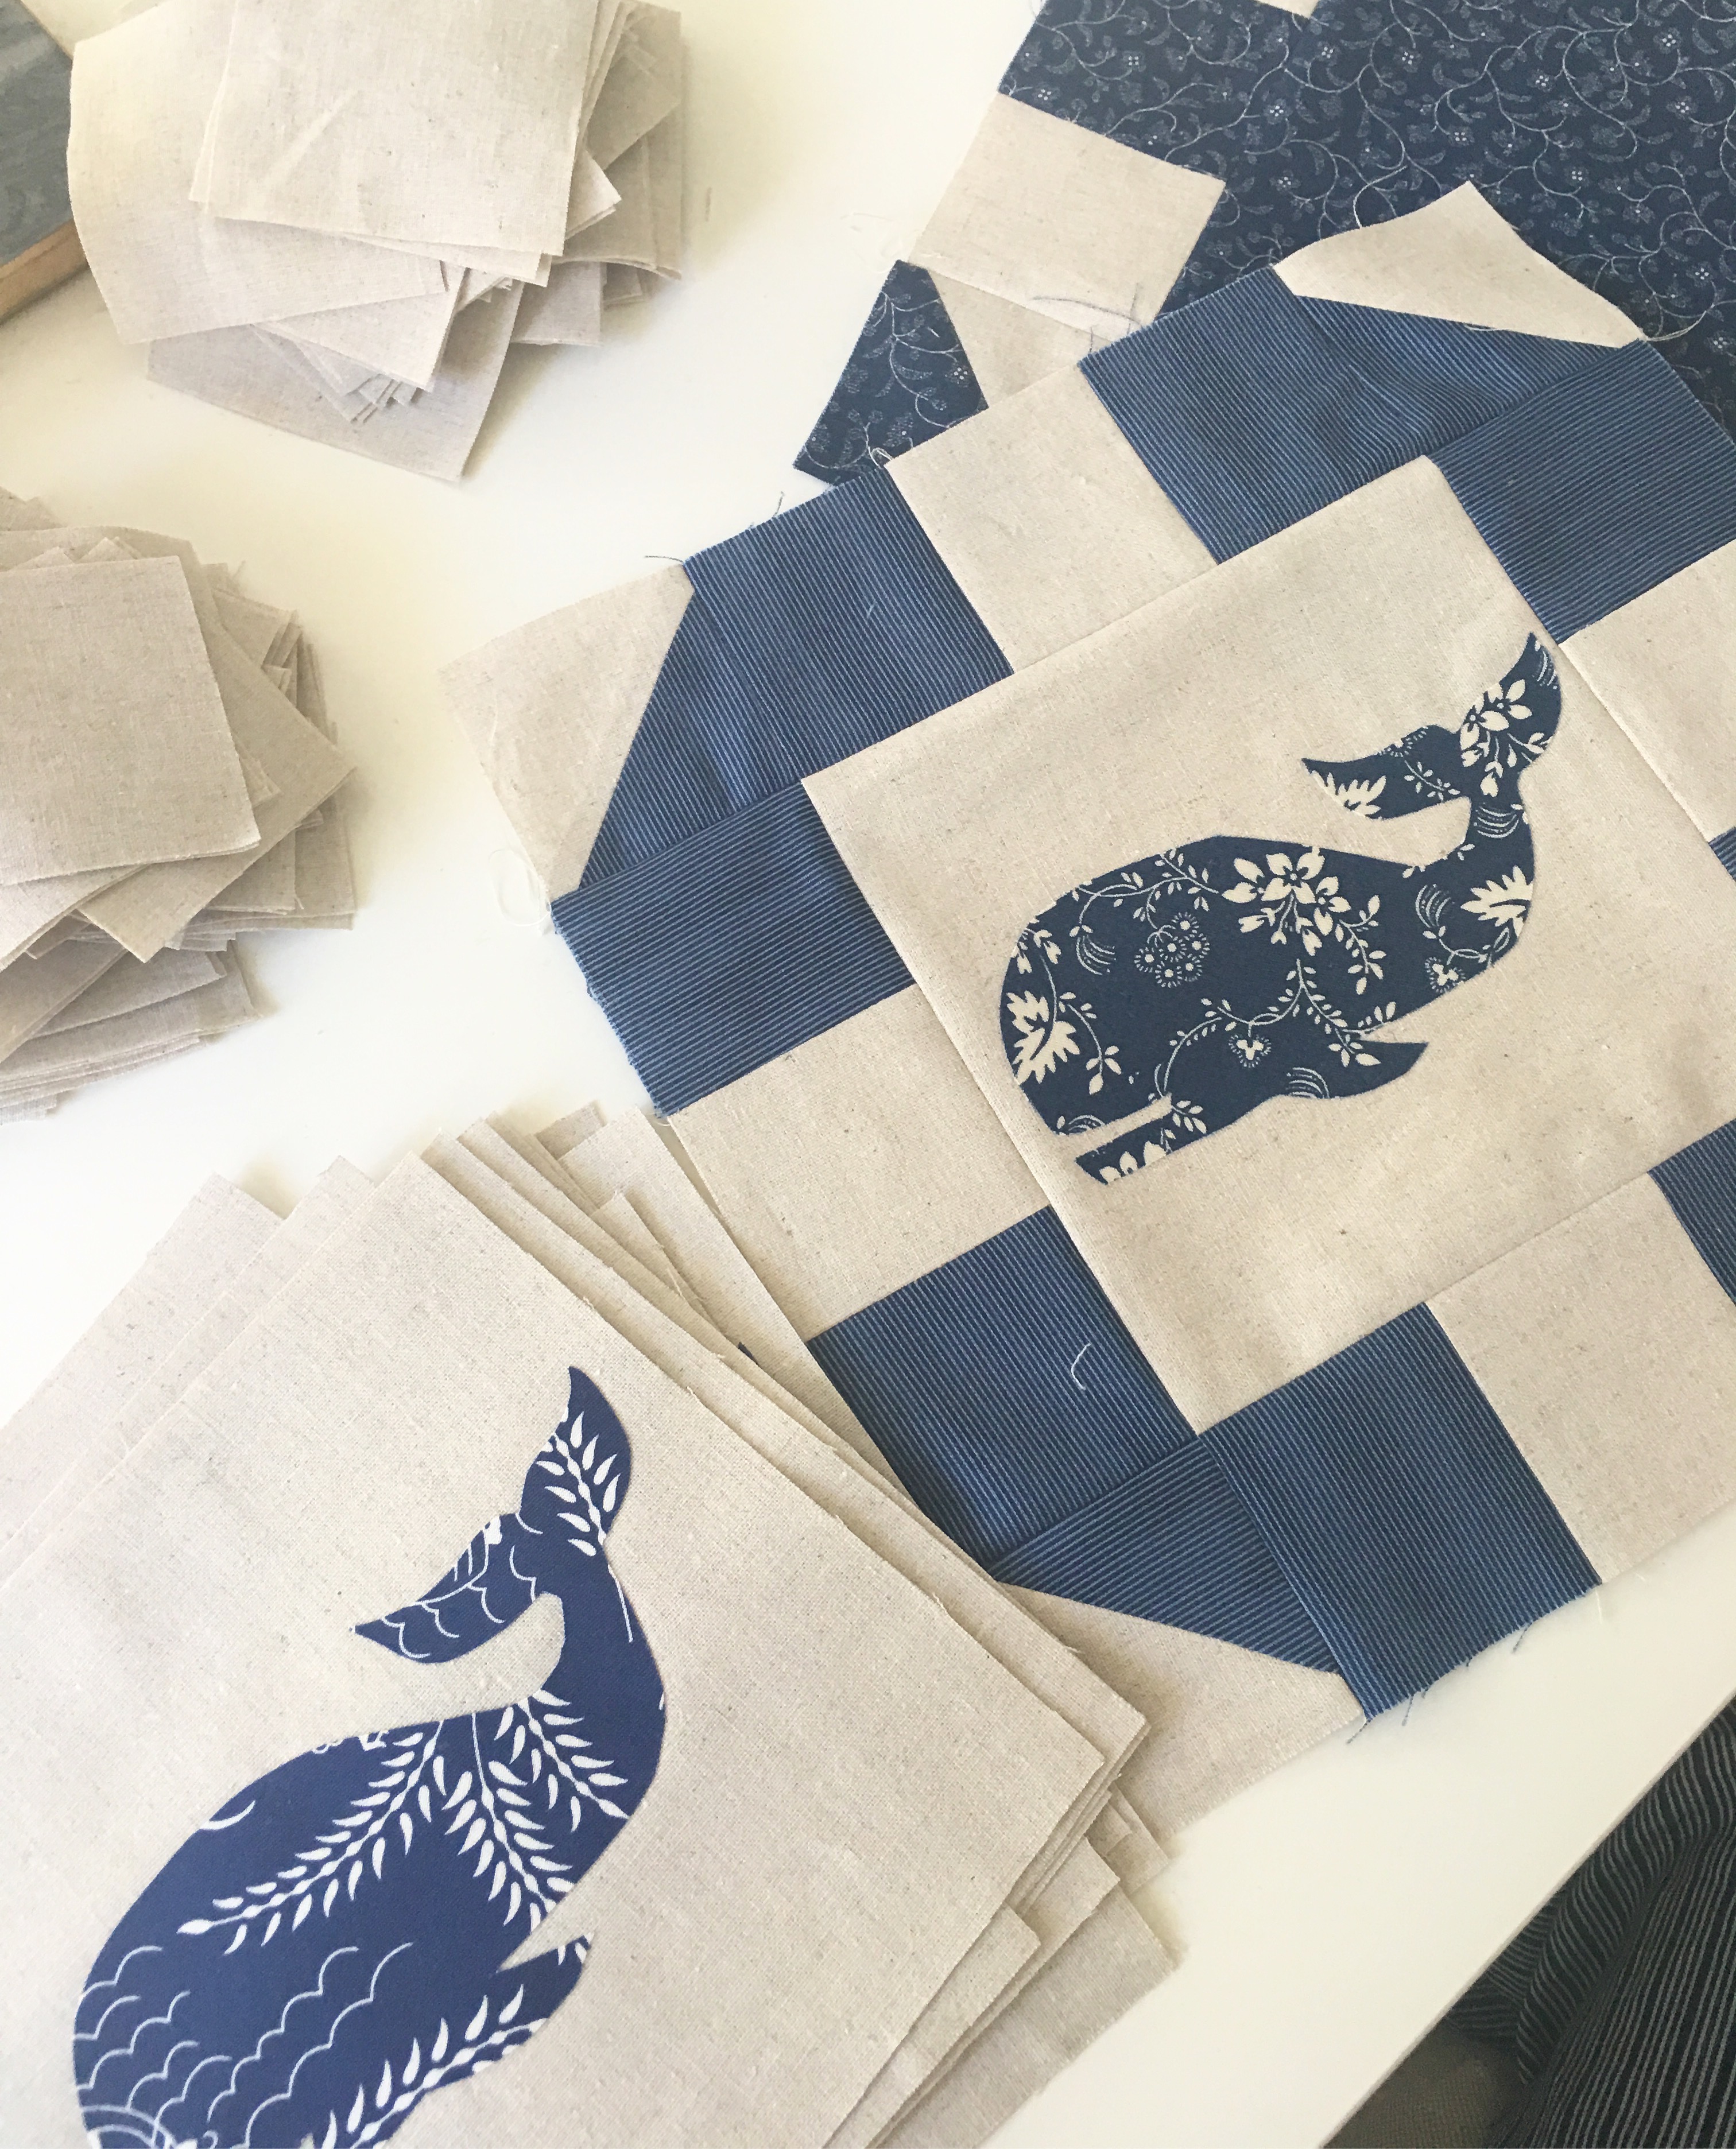
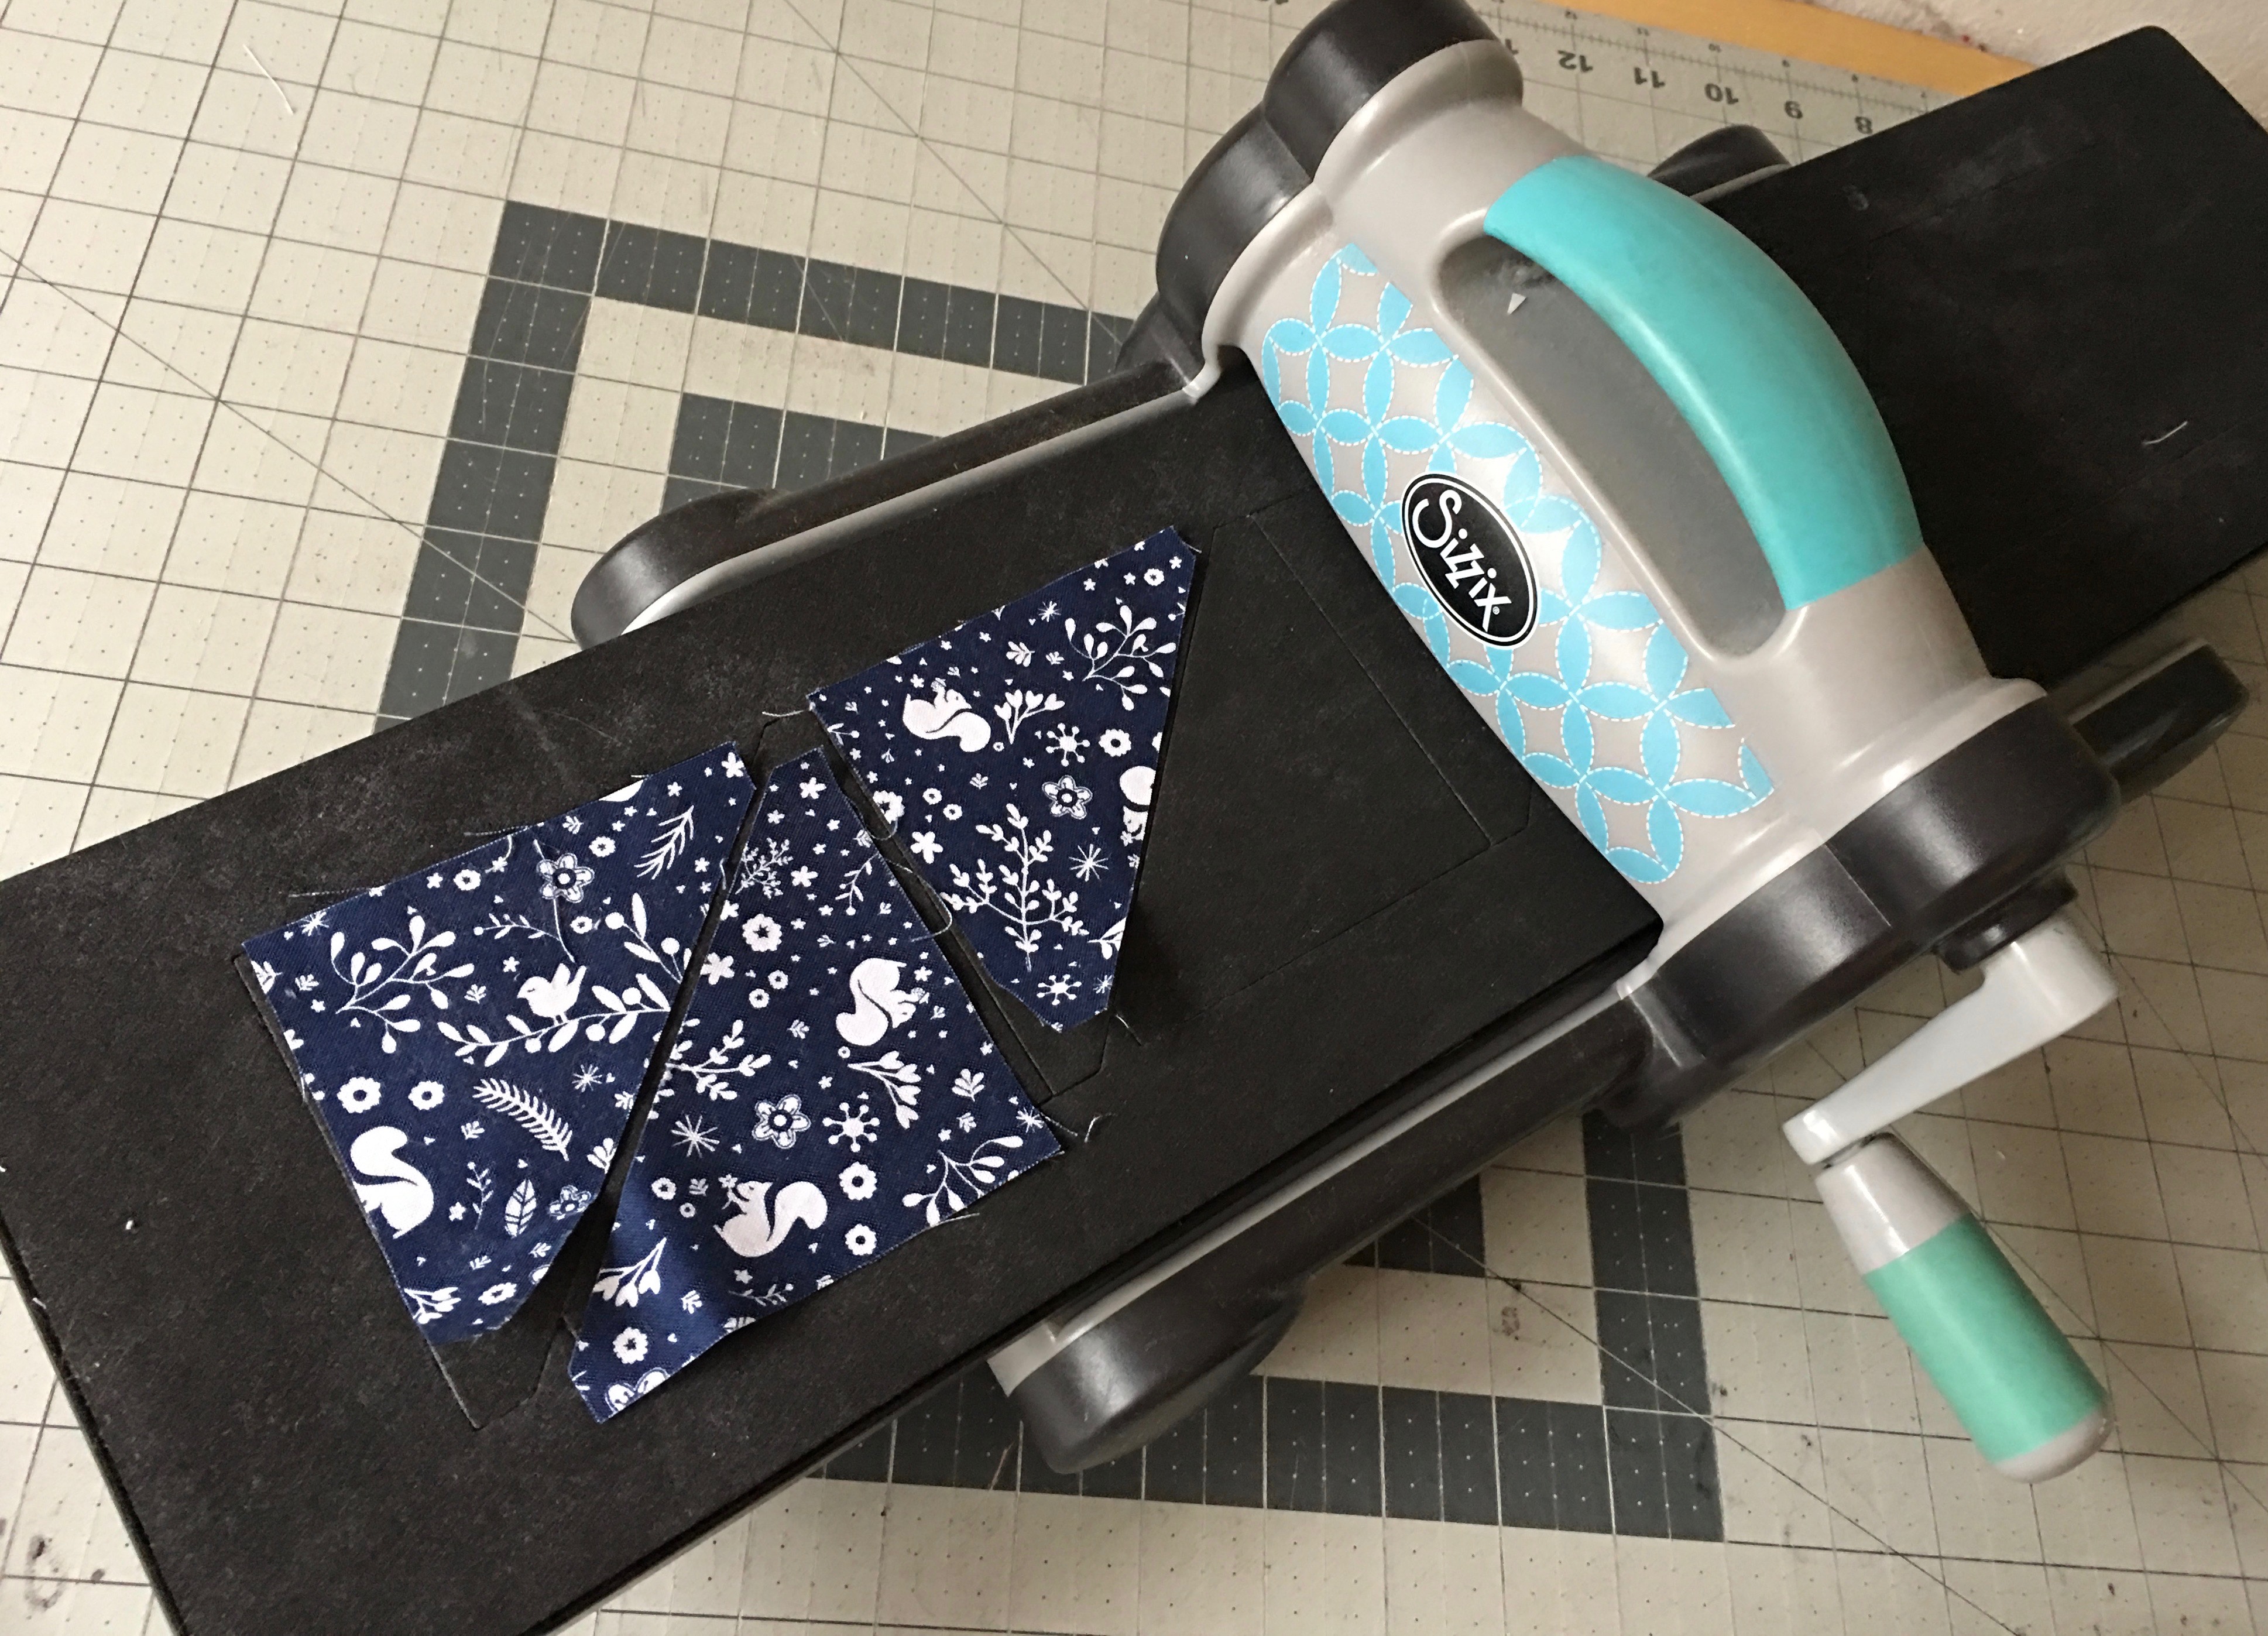
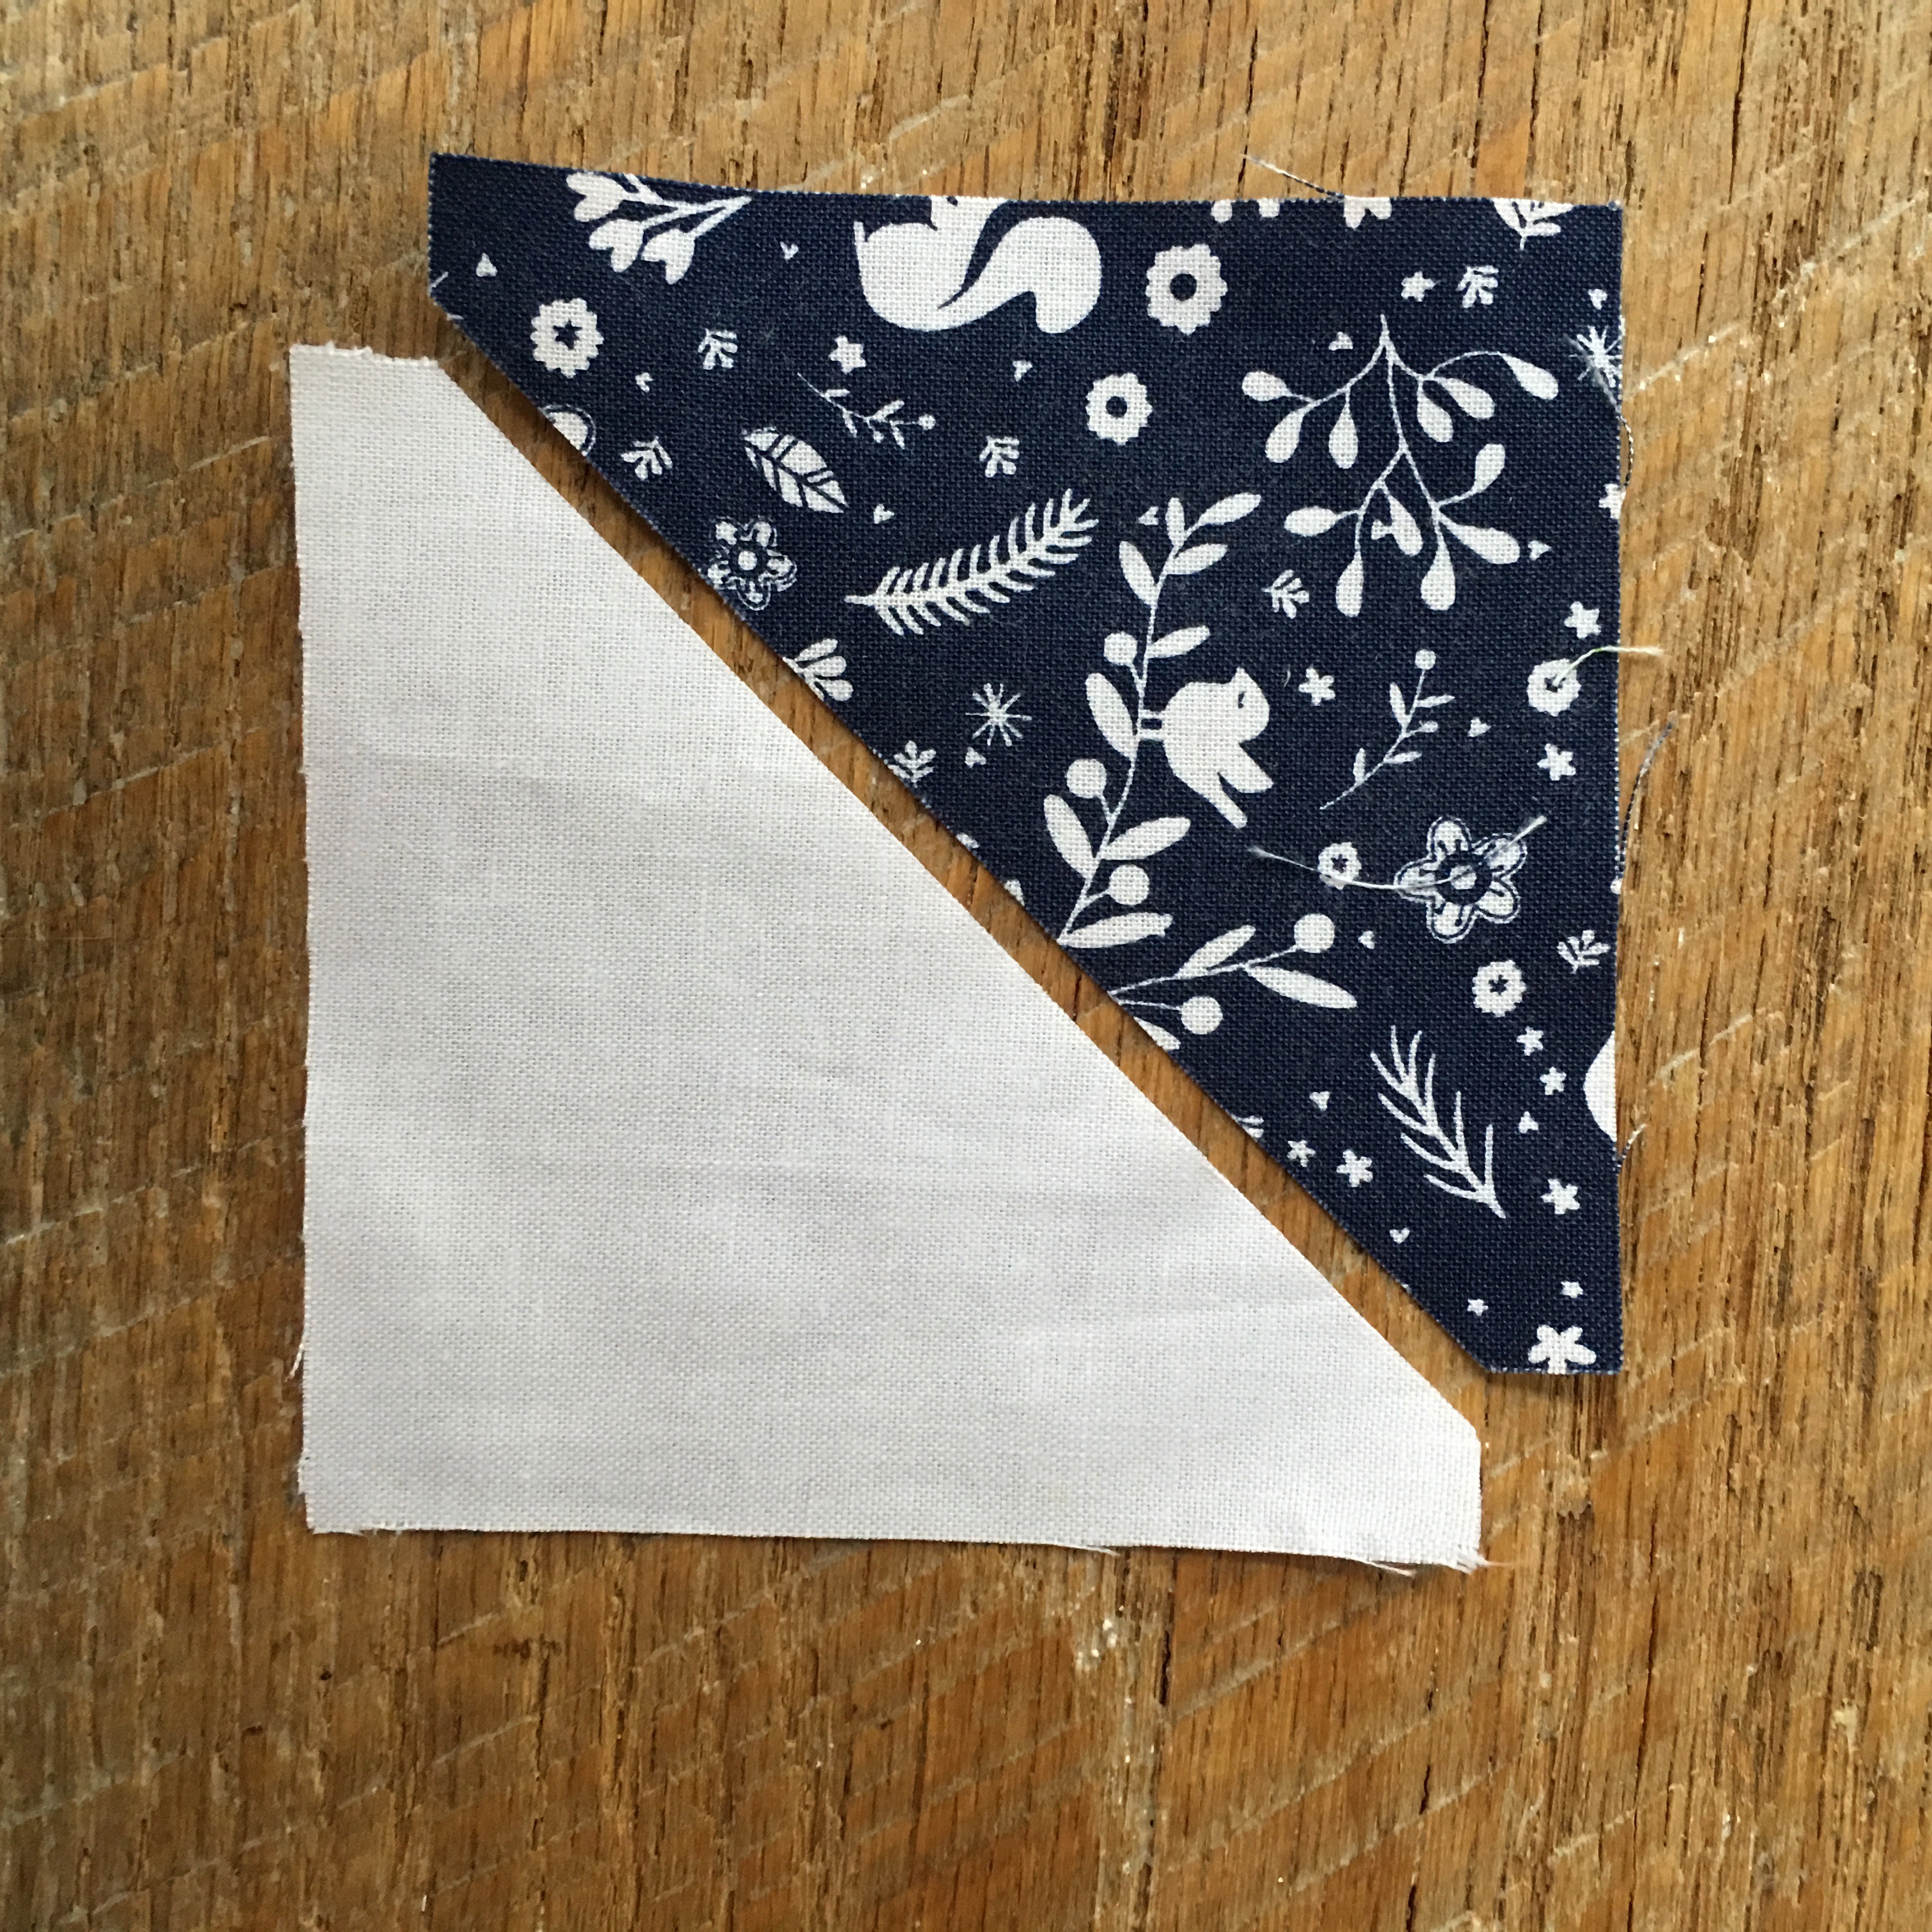
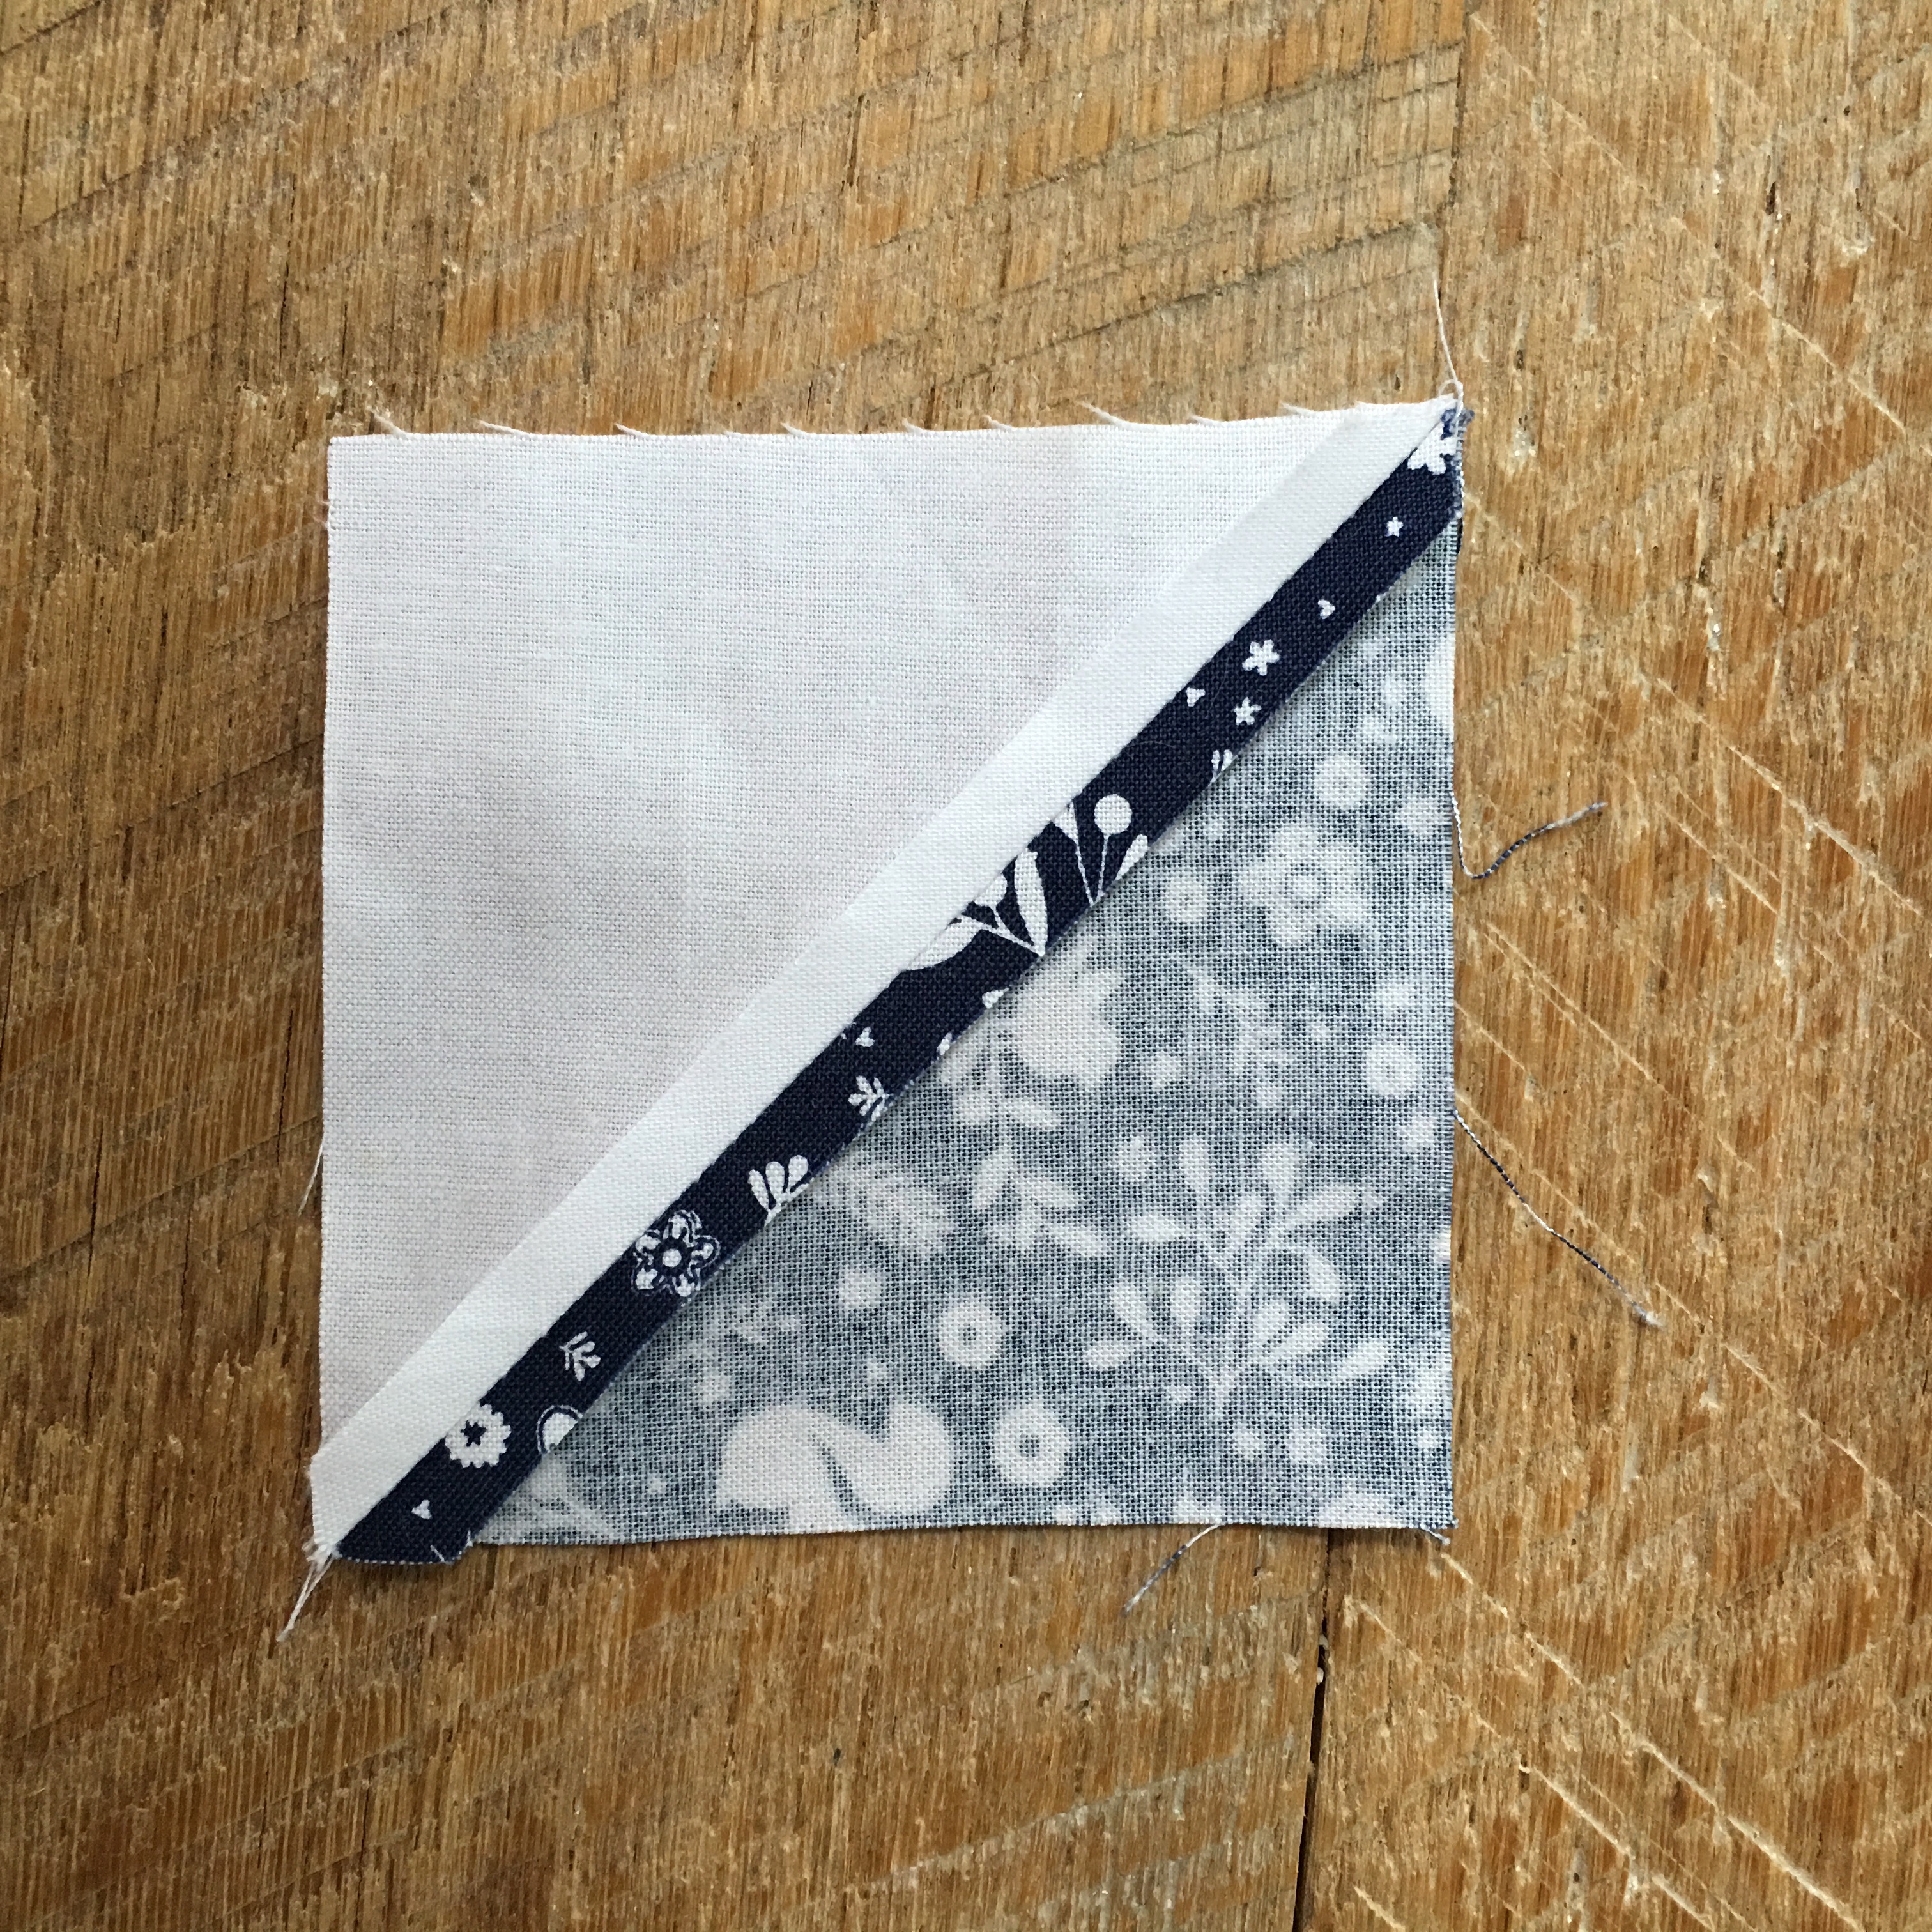
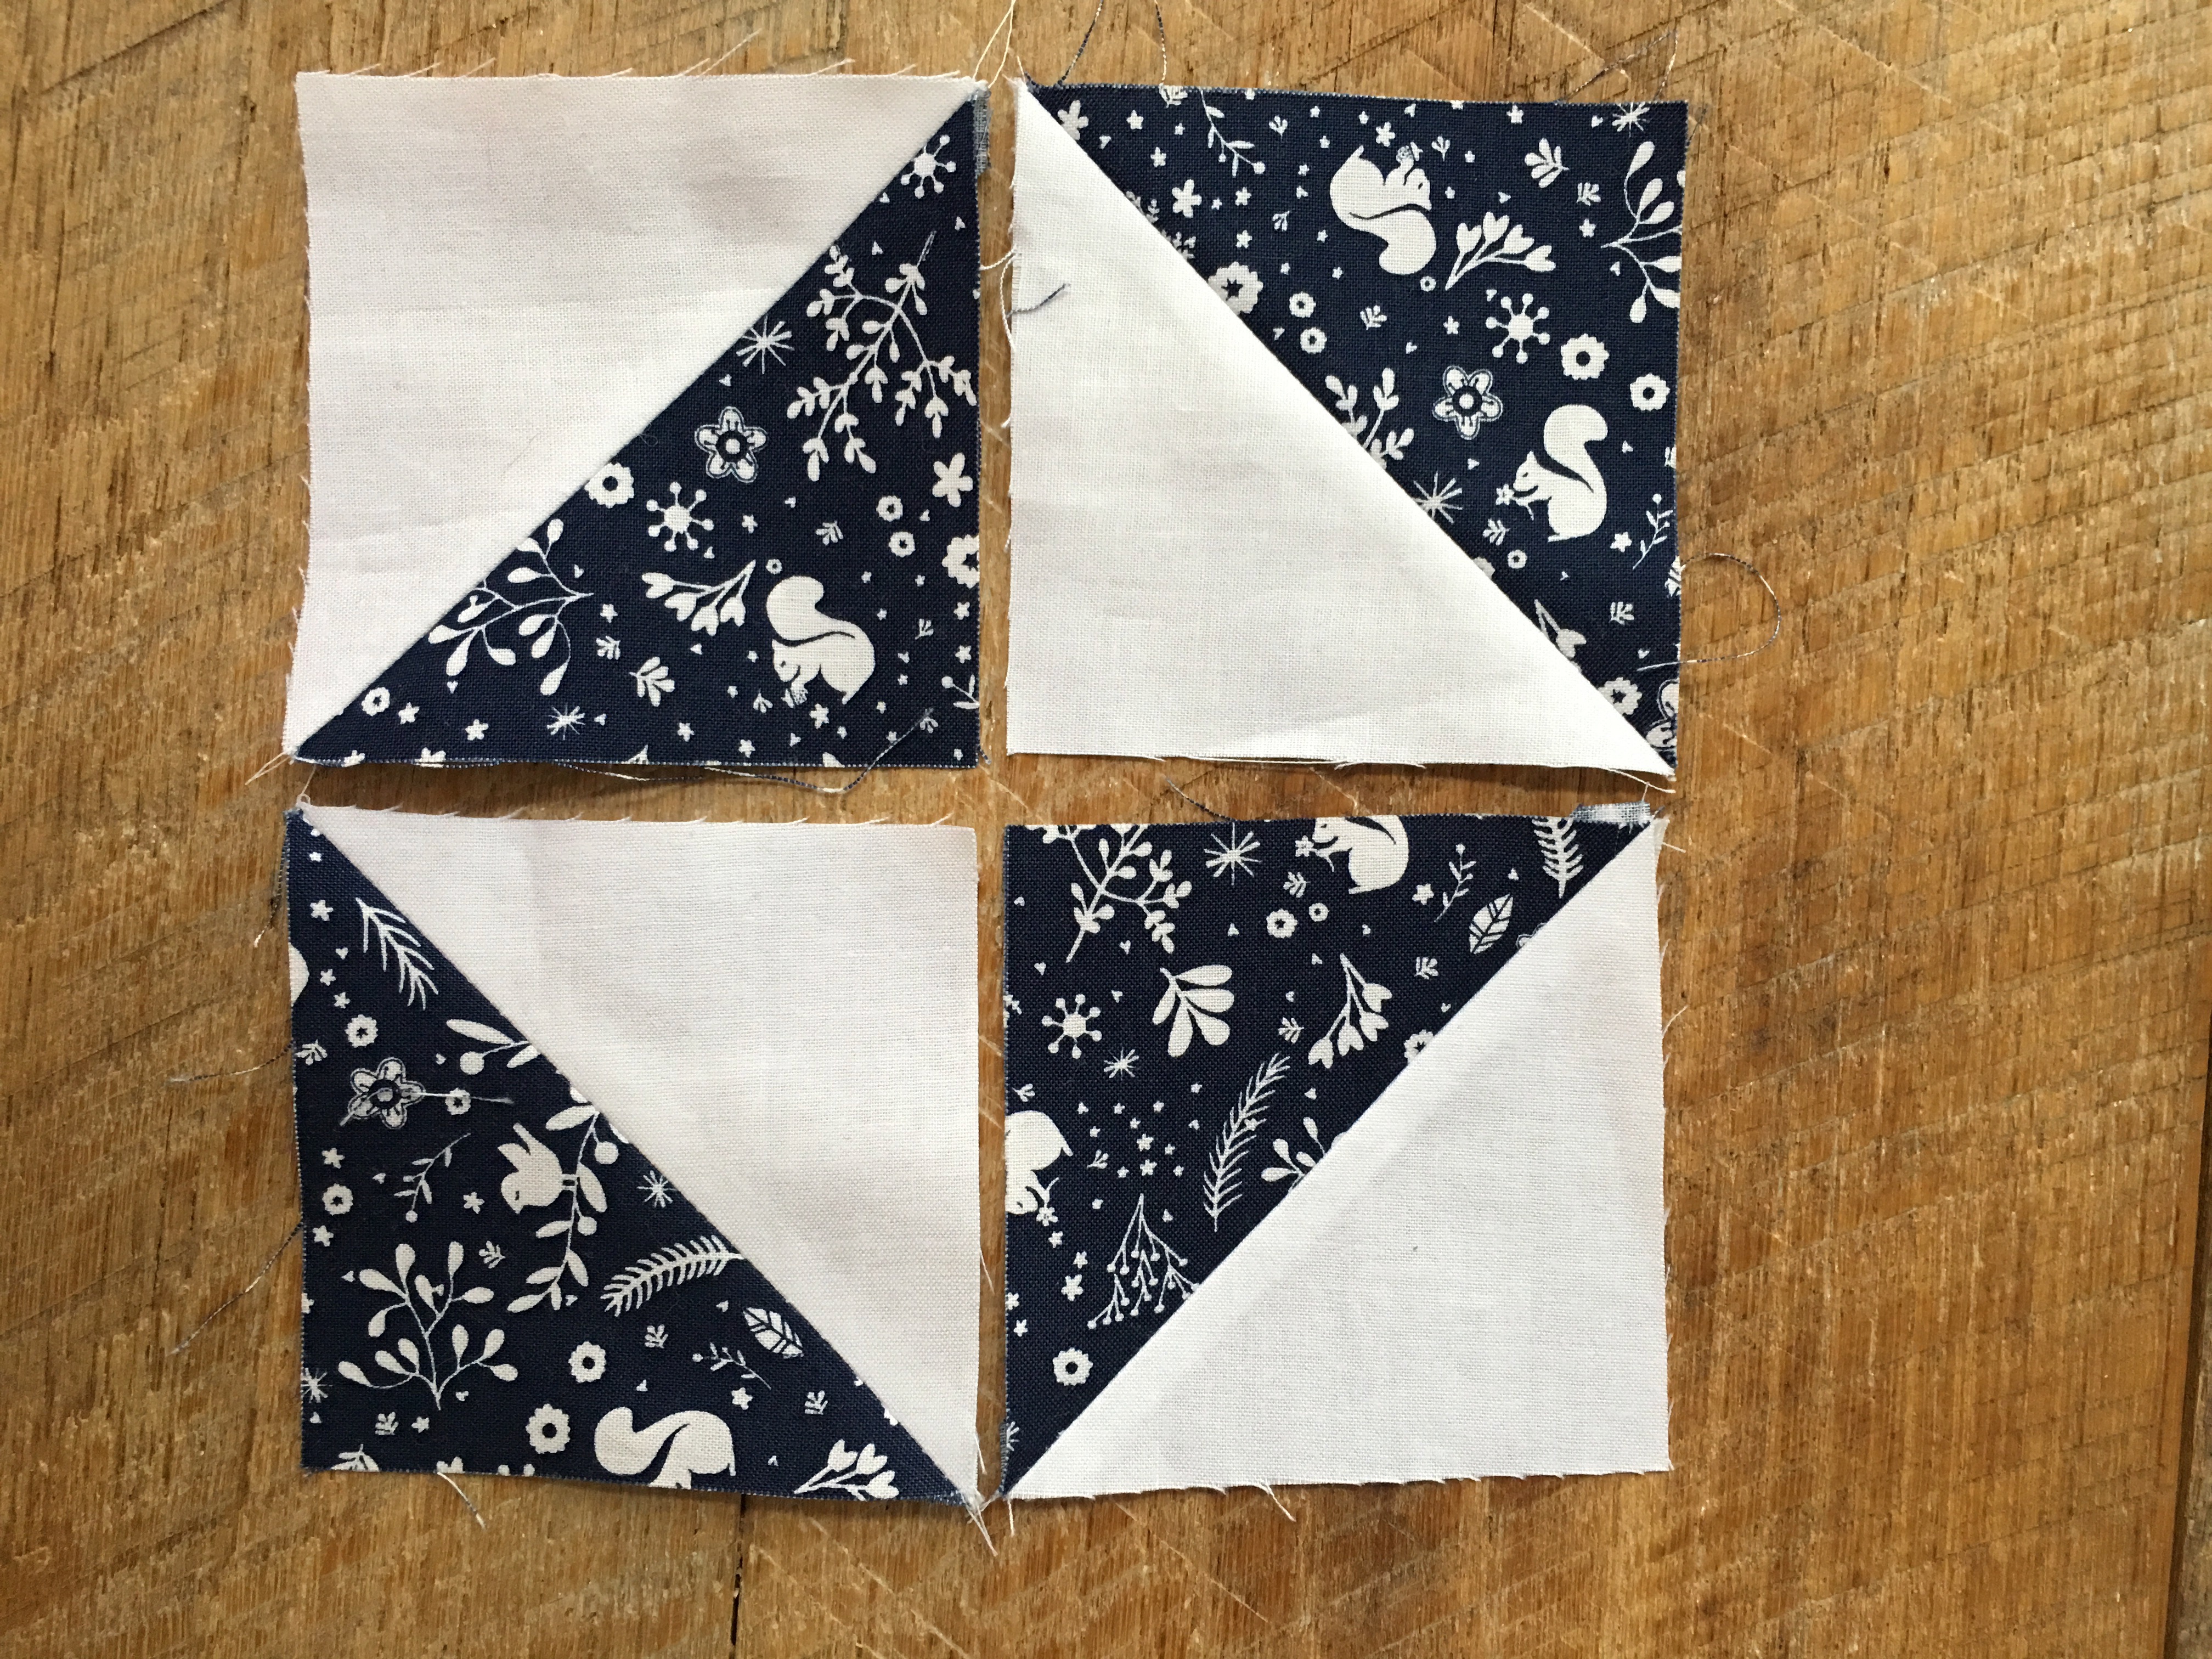
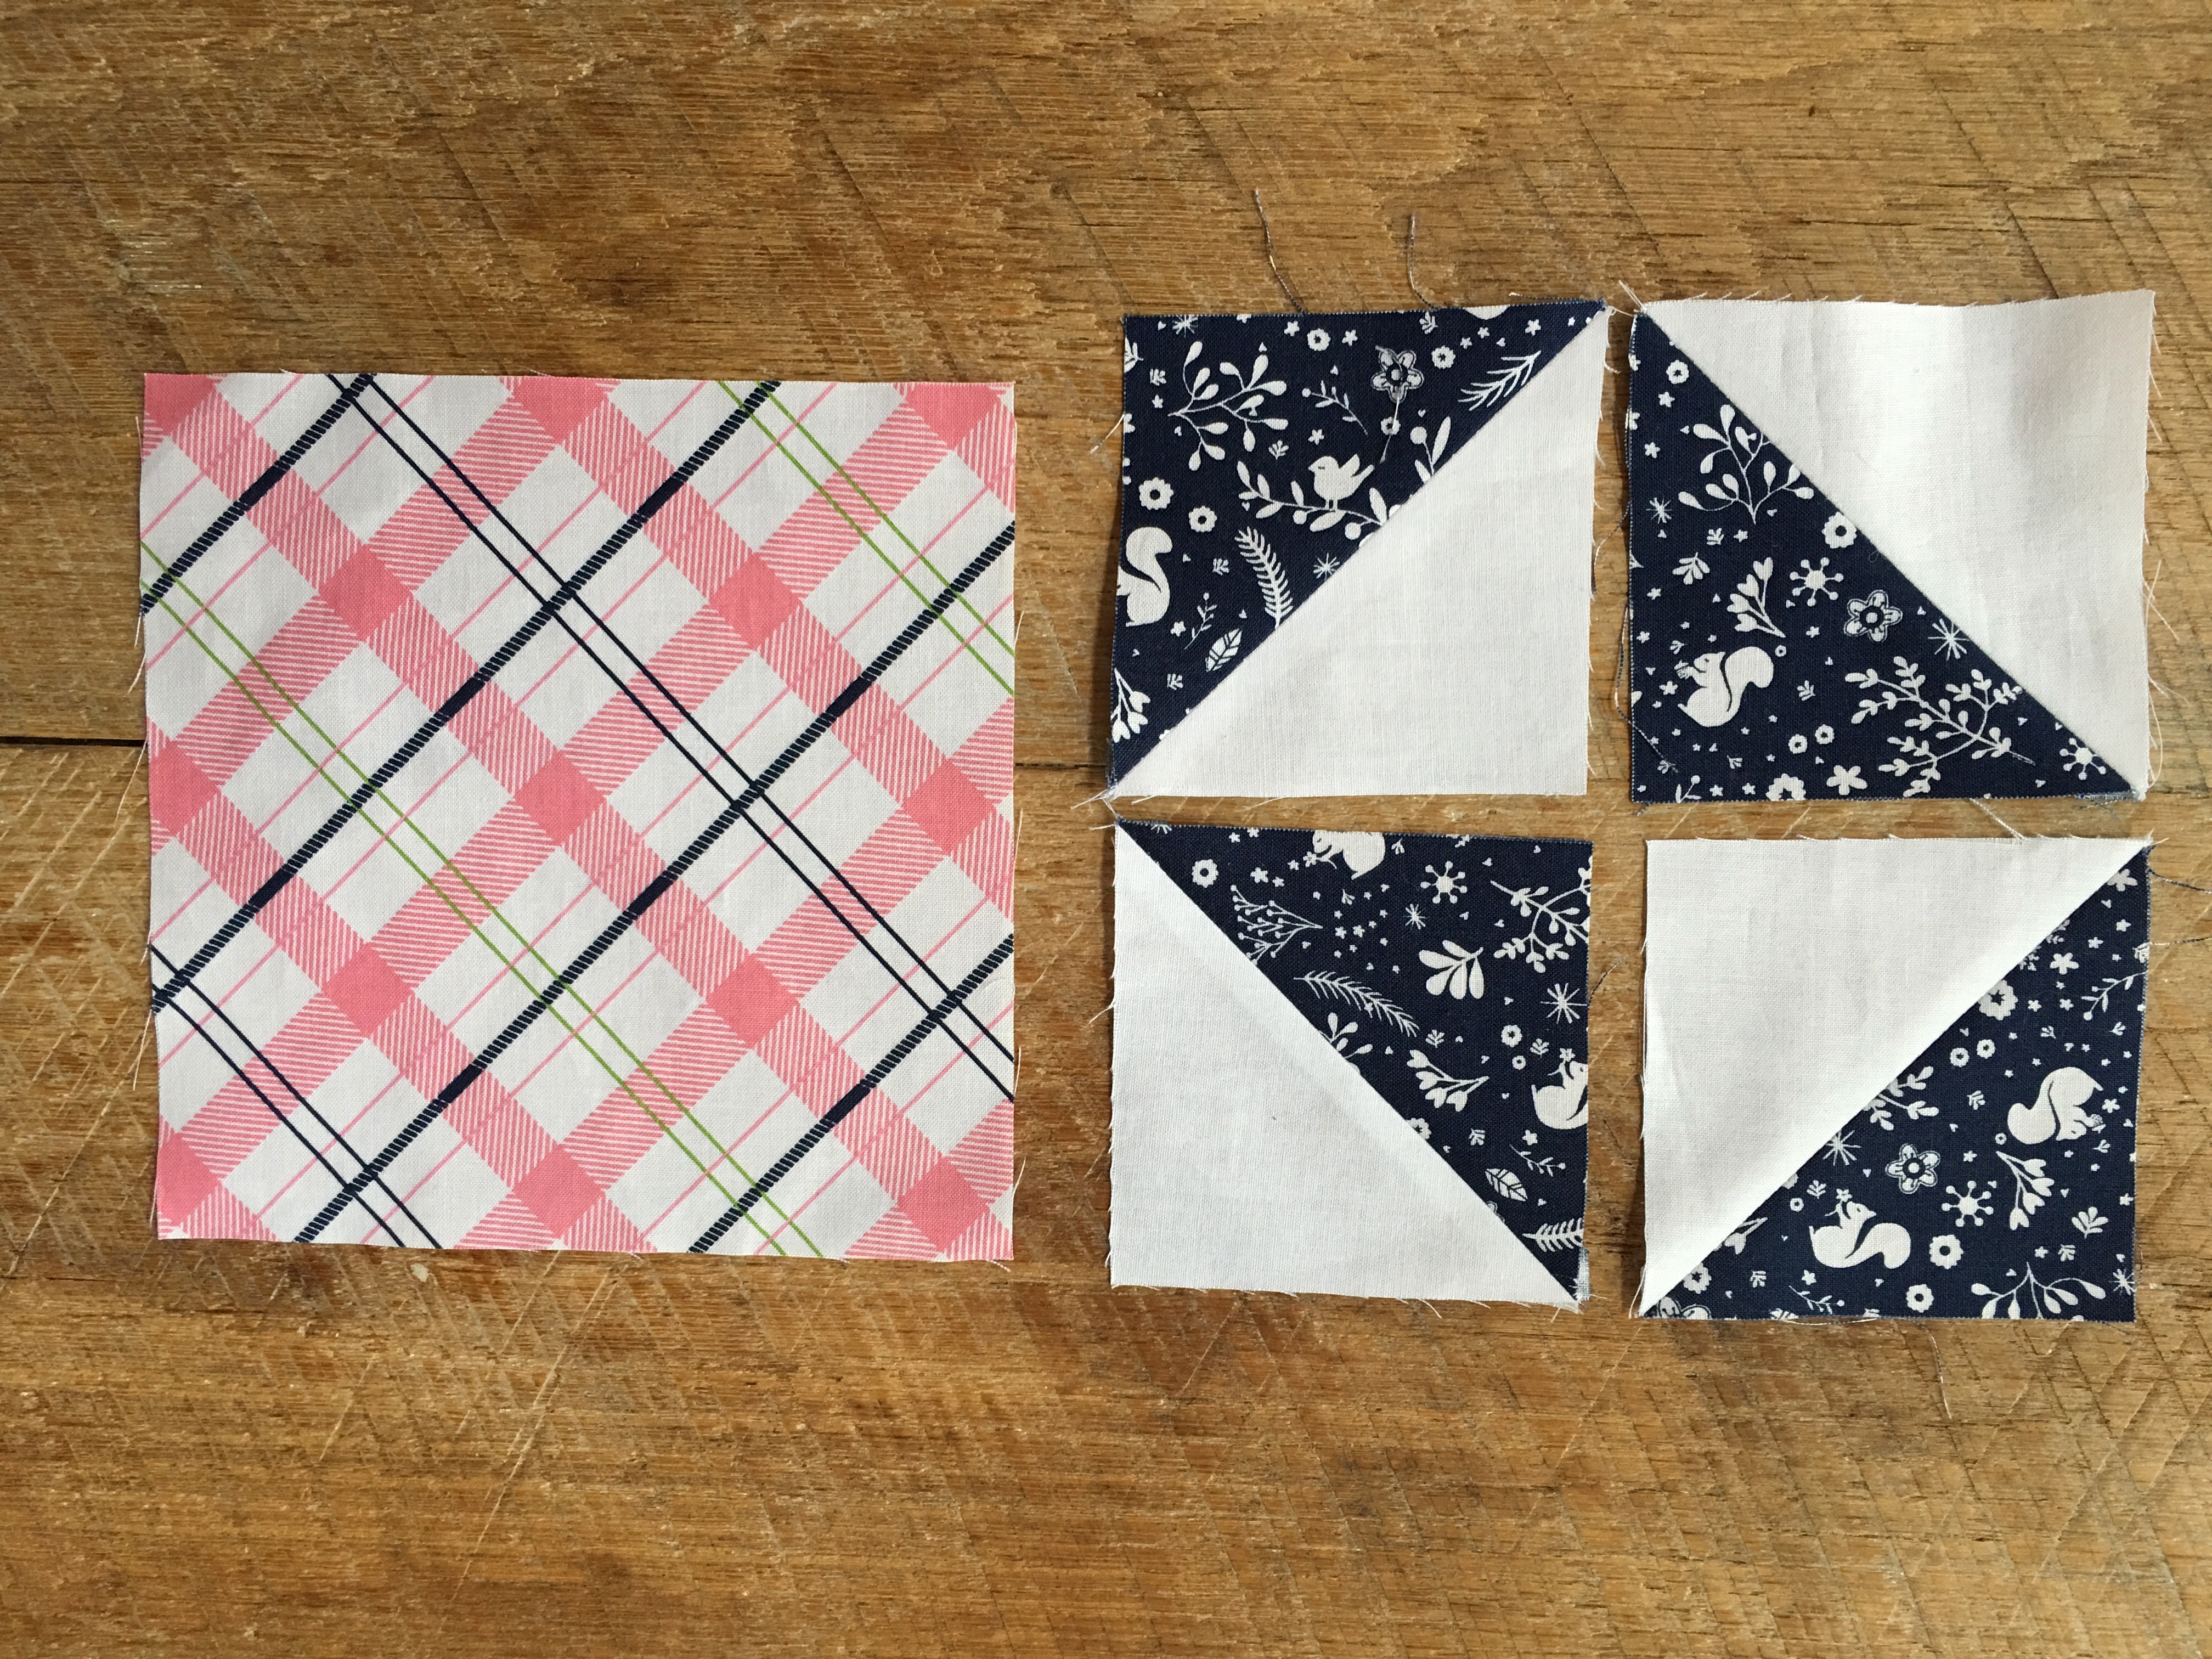
The blocks are super fun to make!

IMG_0675

I started this project when I was in Utah visiting Amber from Gigi’s Thimble!  We had so much fun sewing together!

IMG_0848

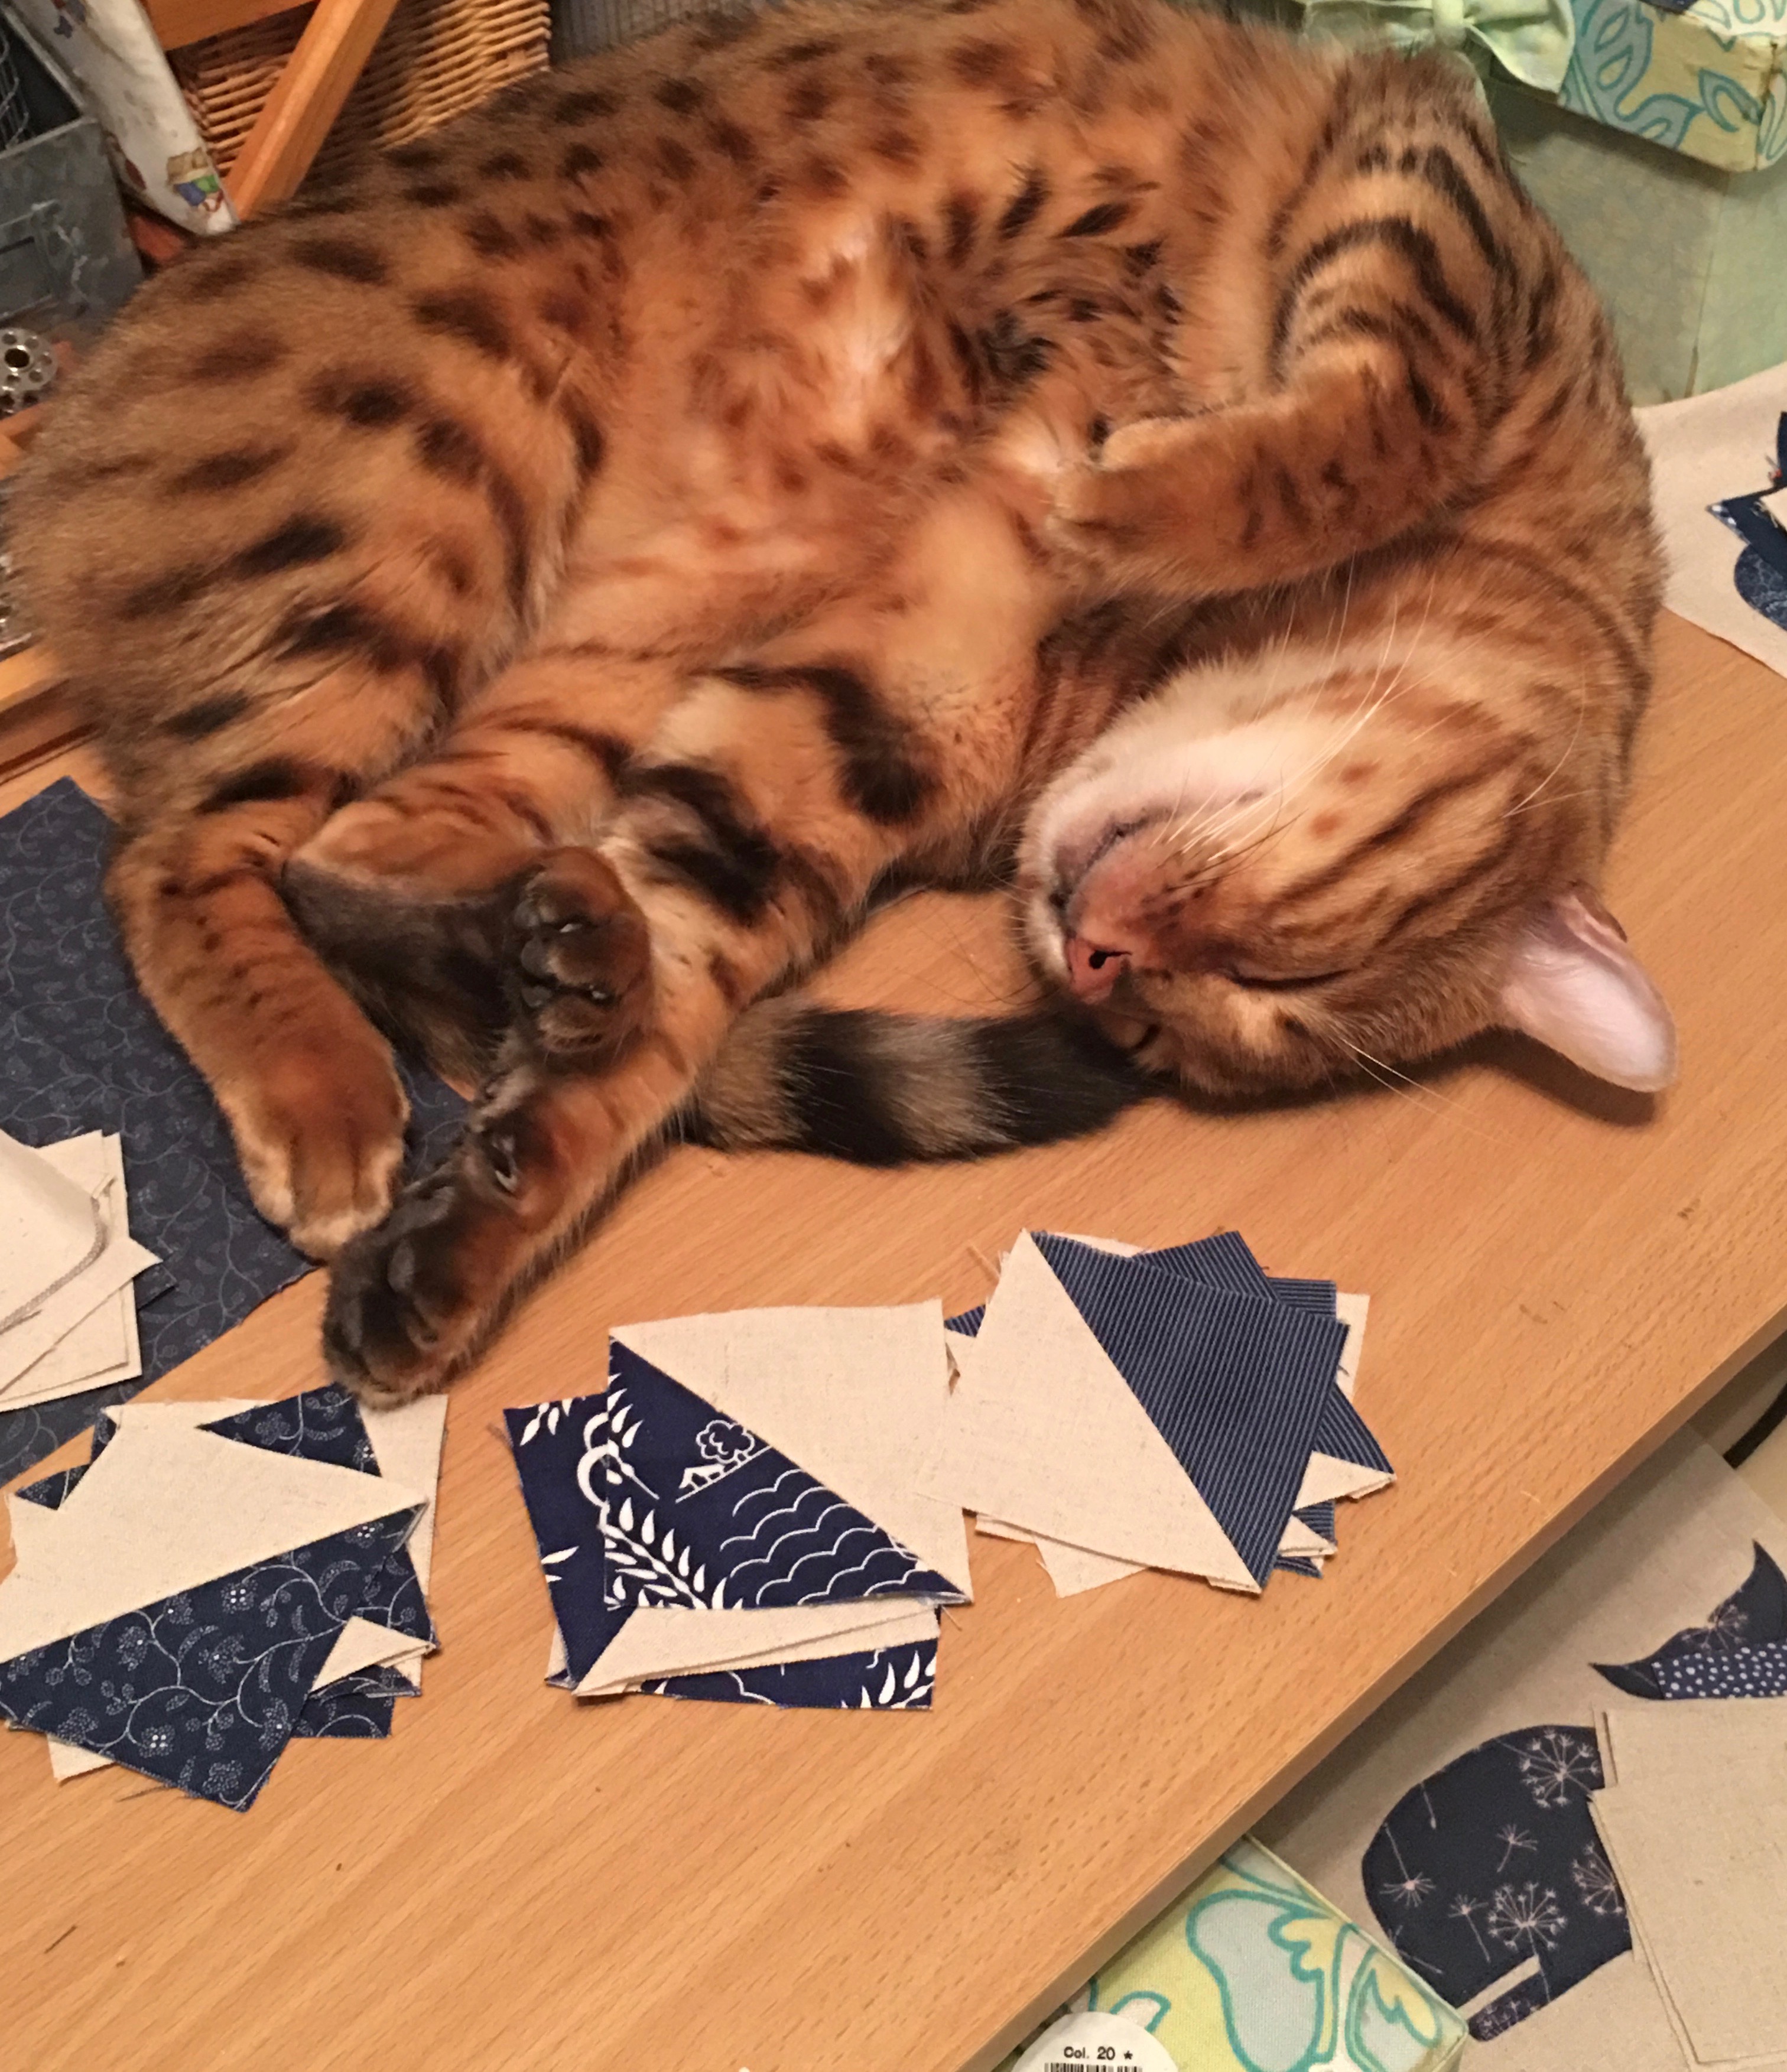
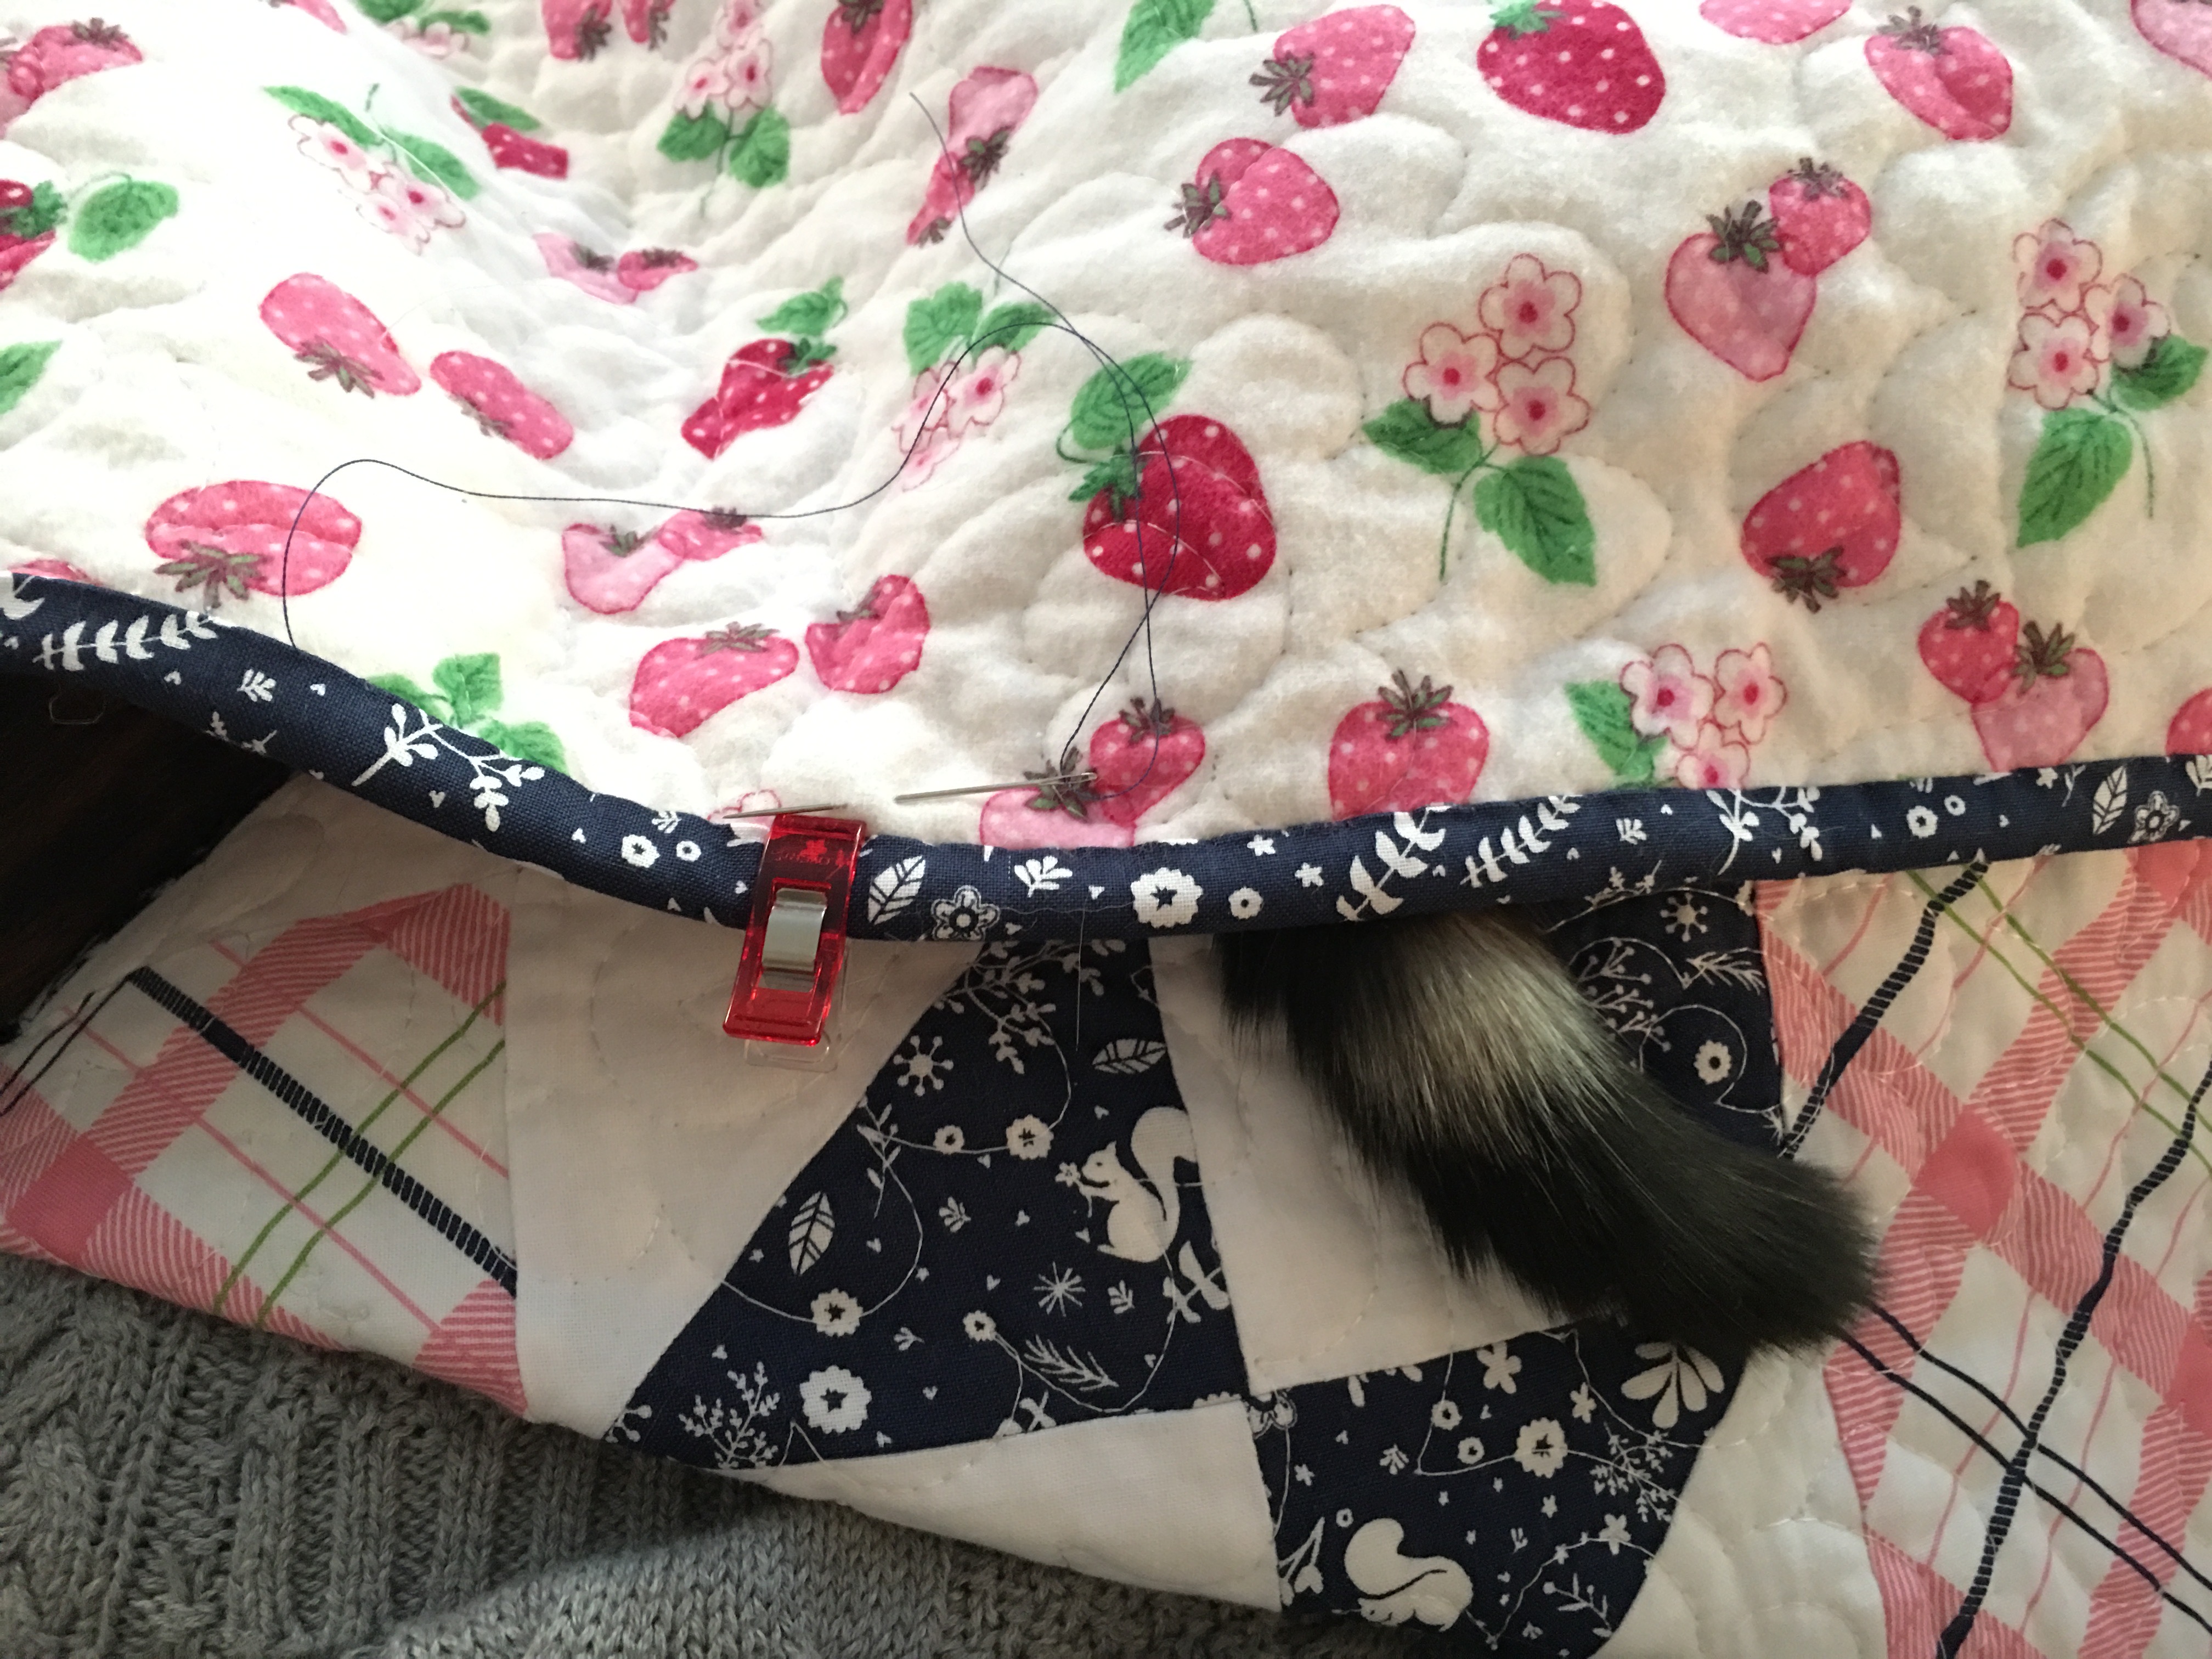
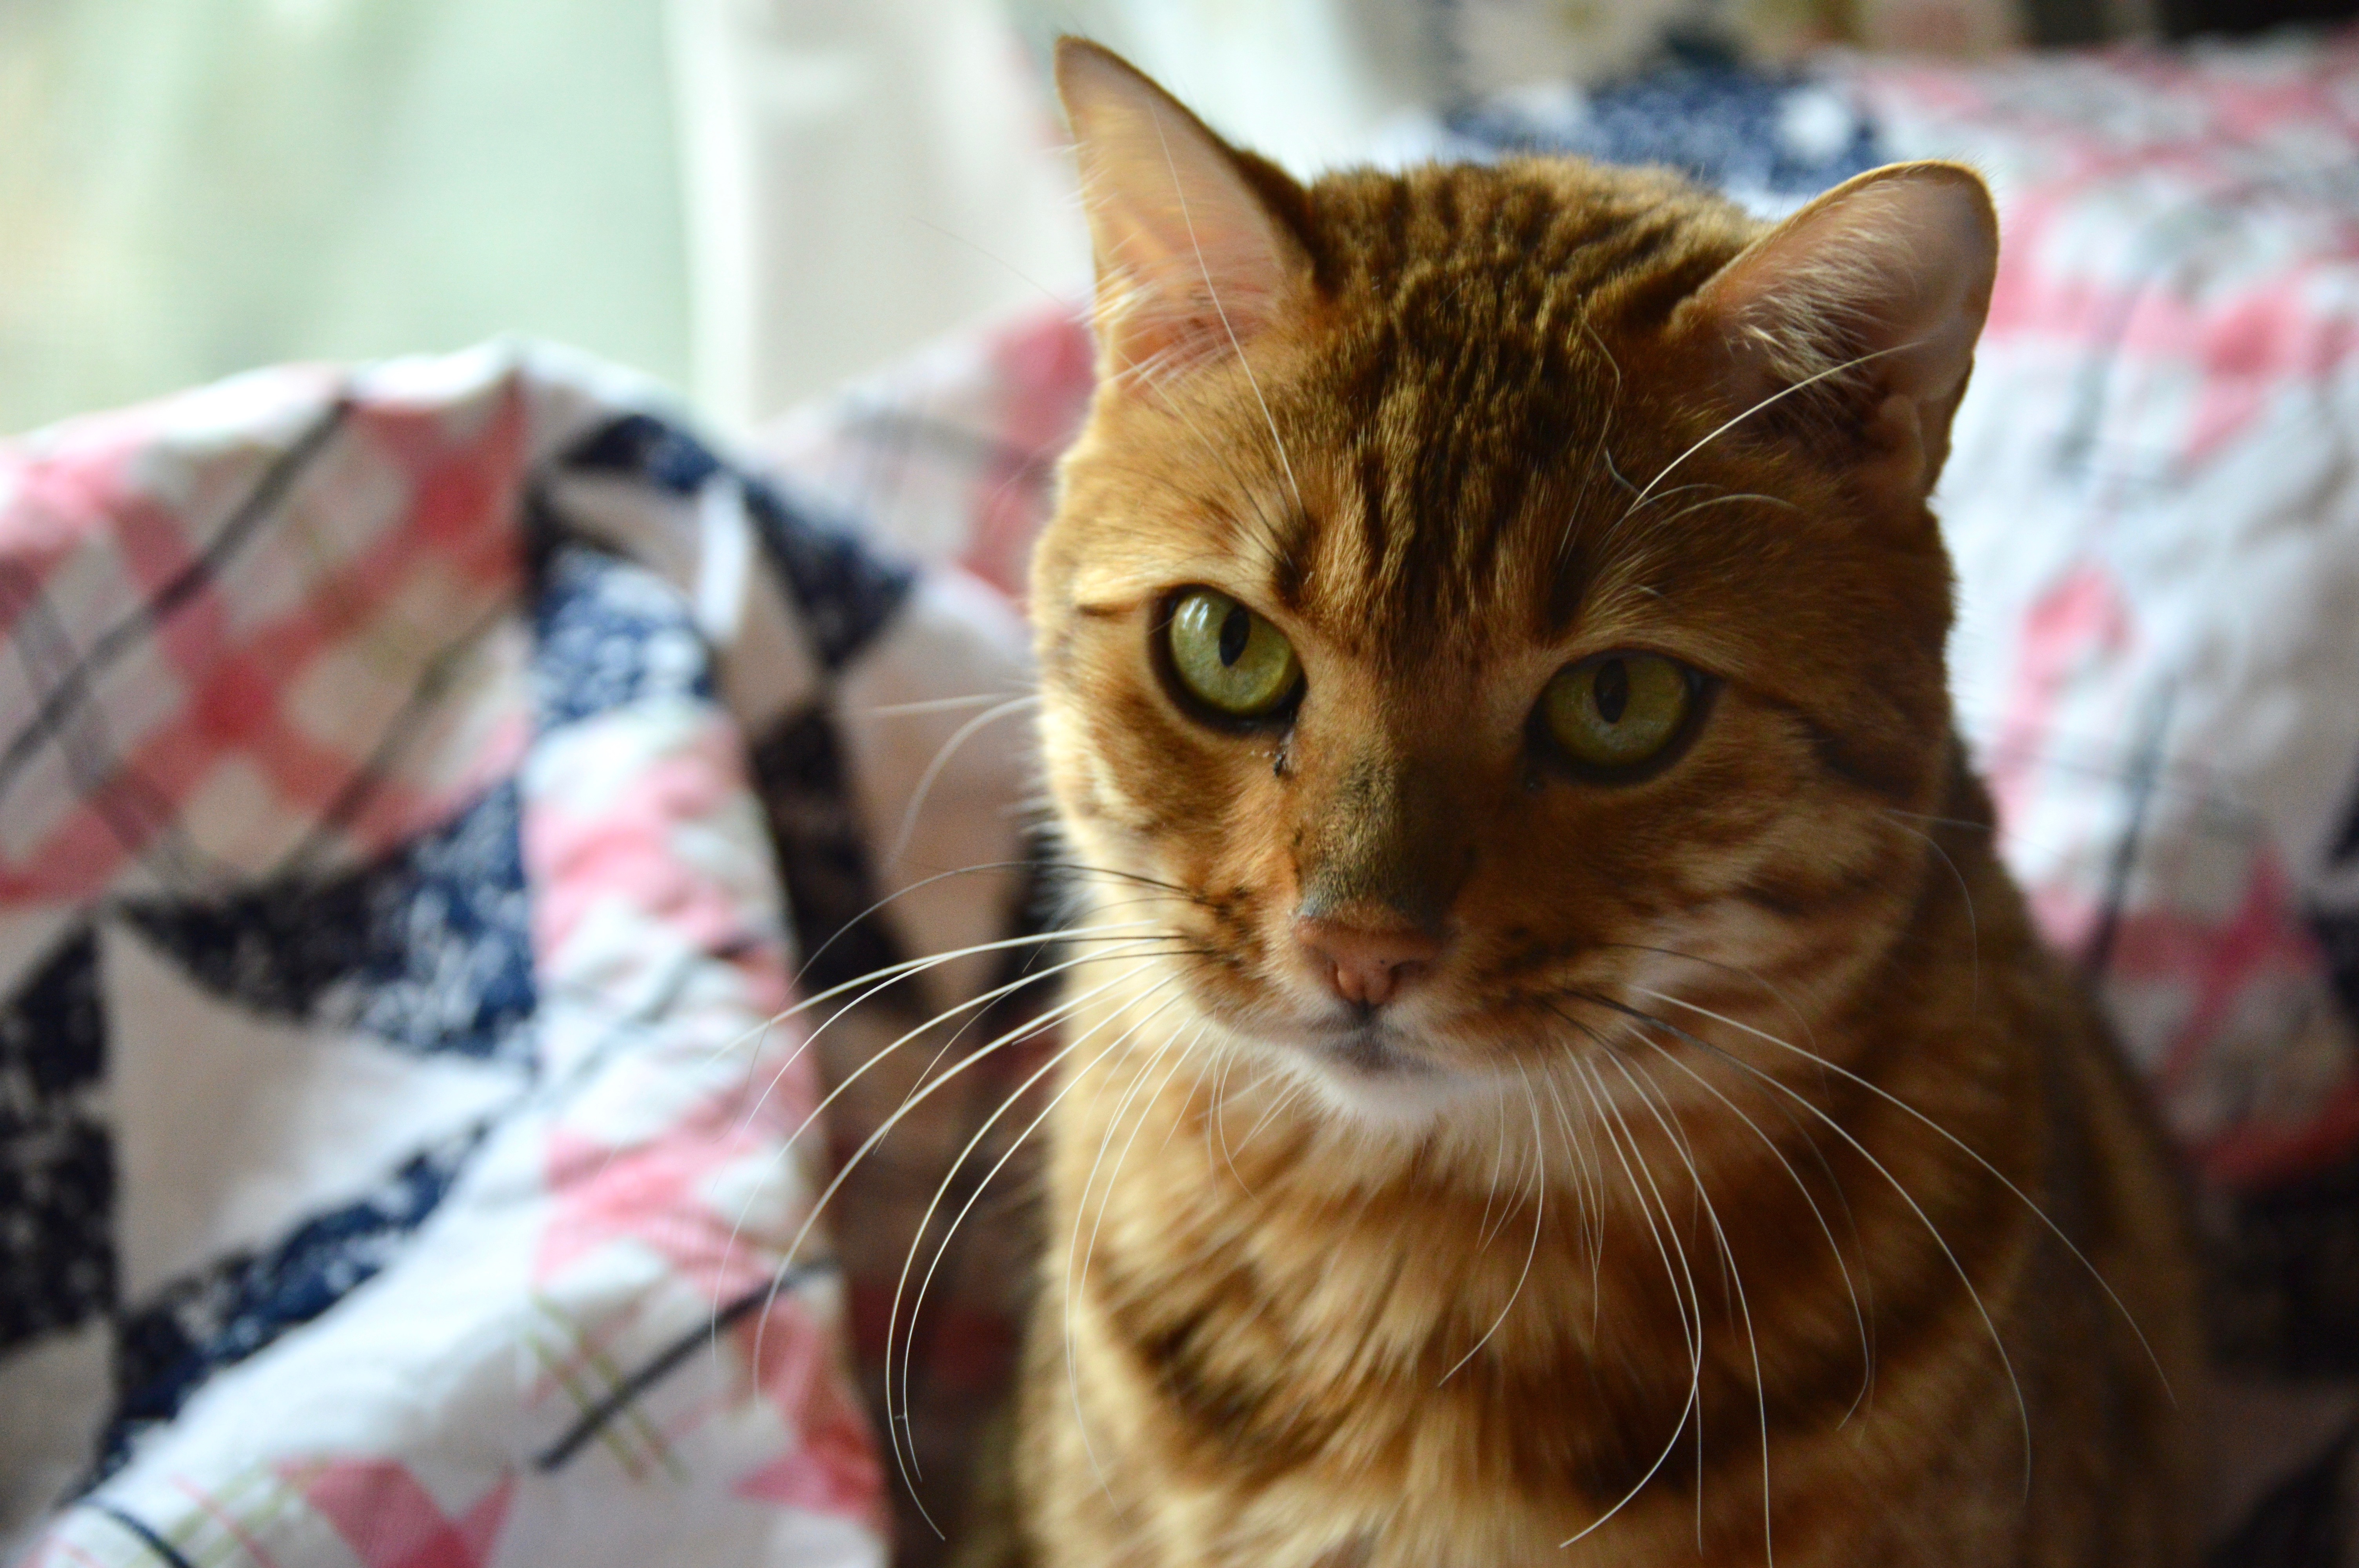
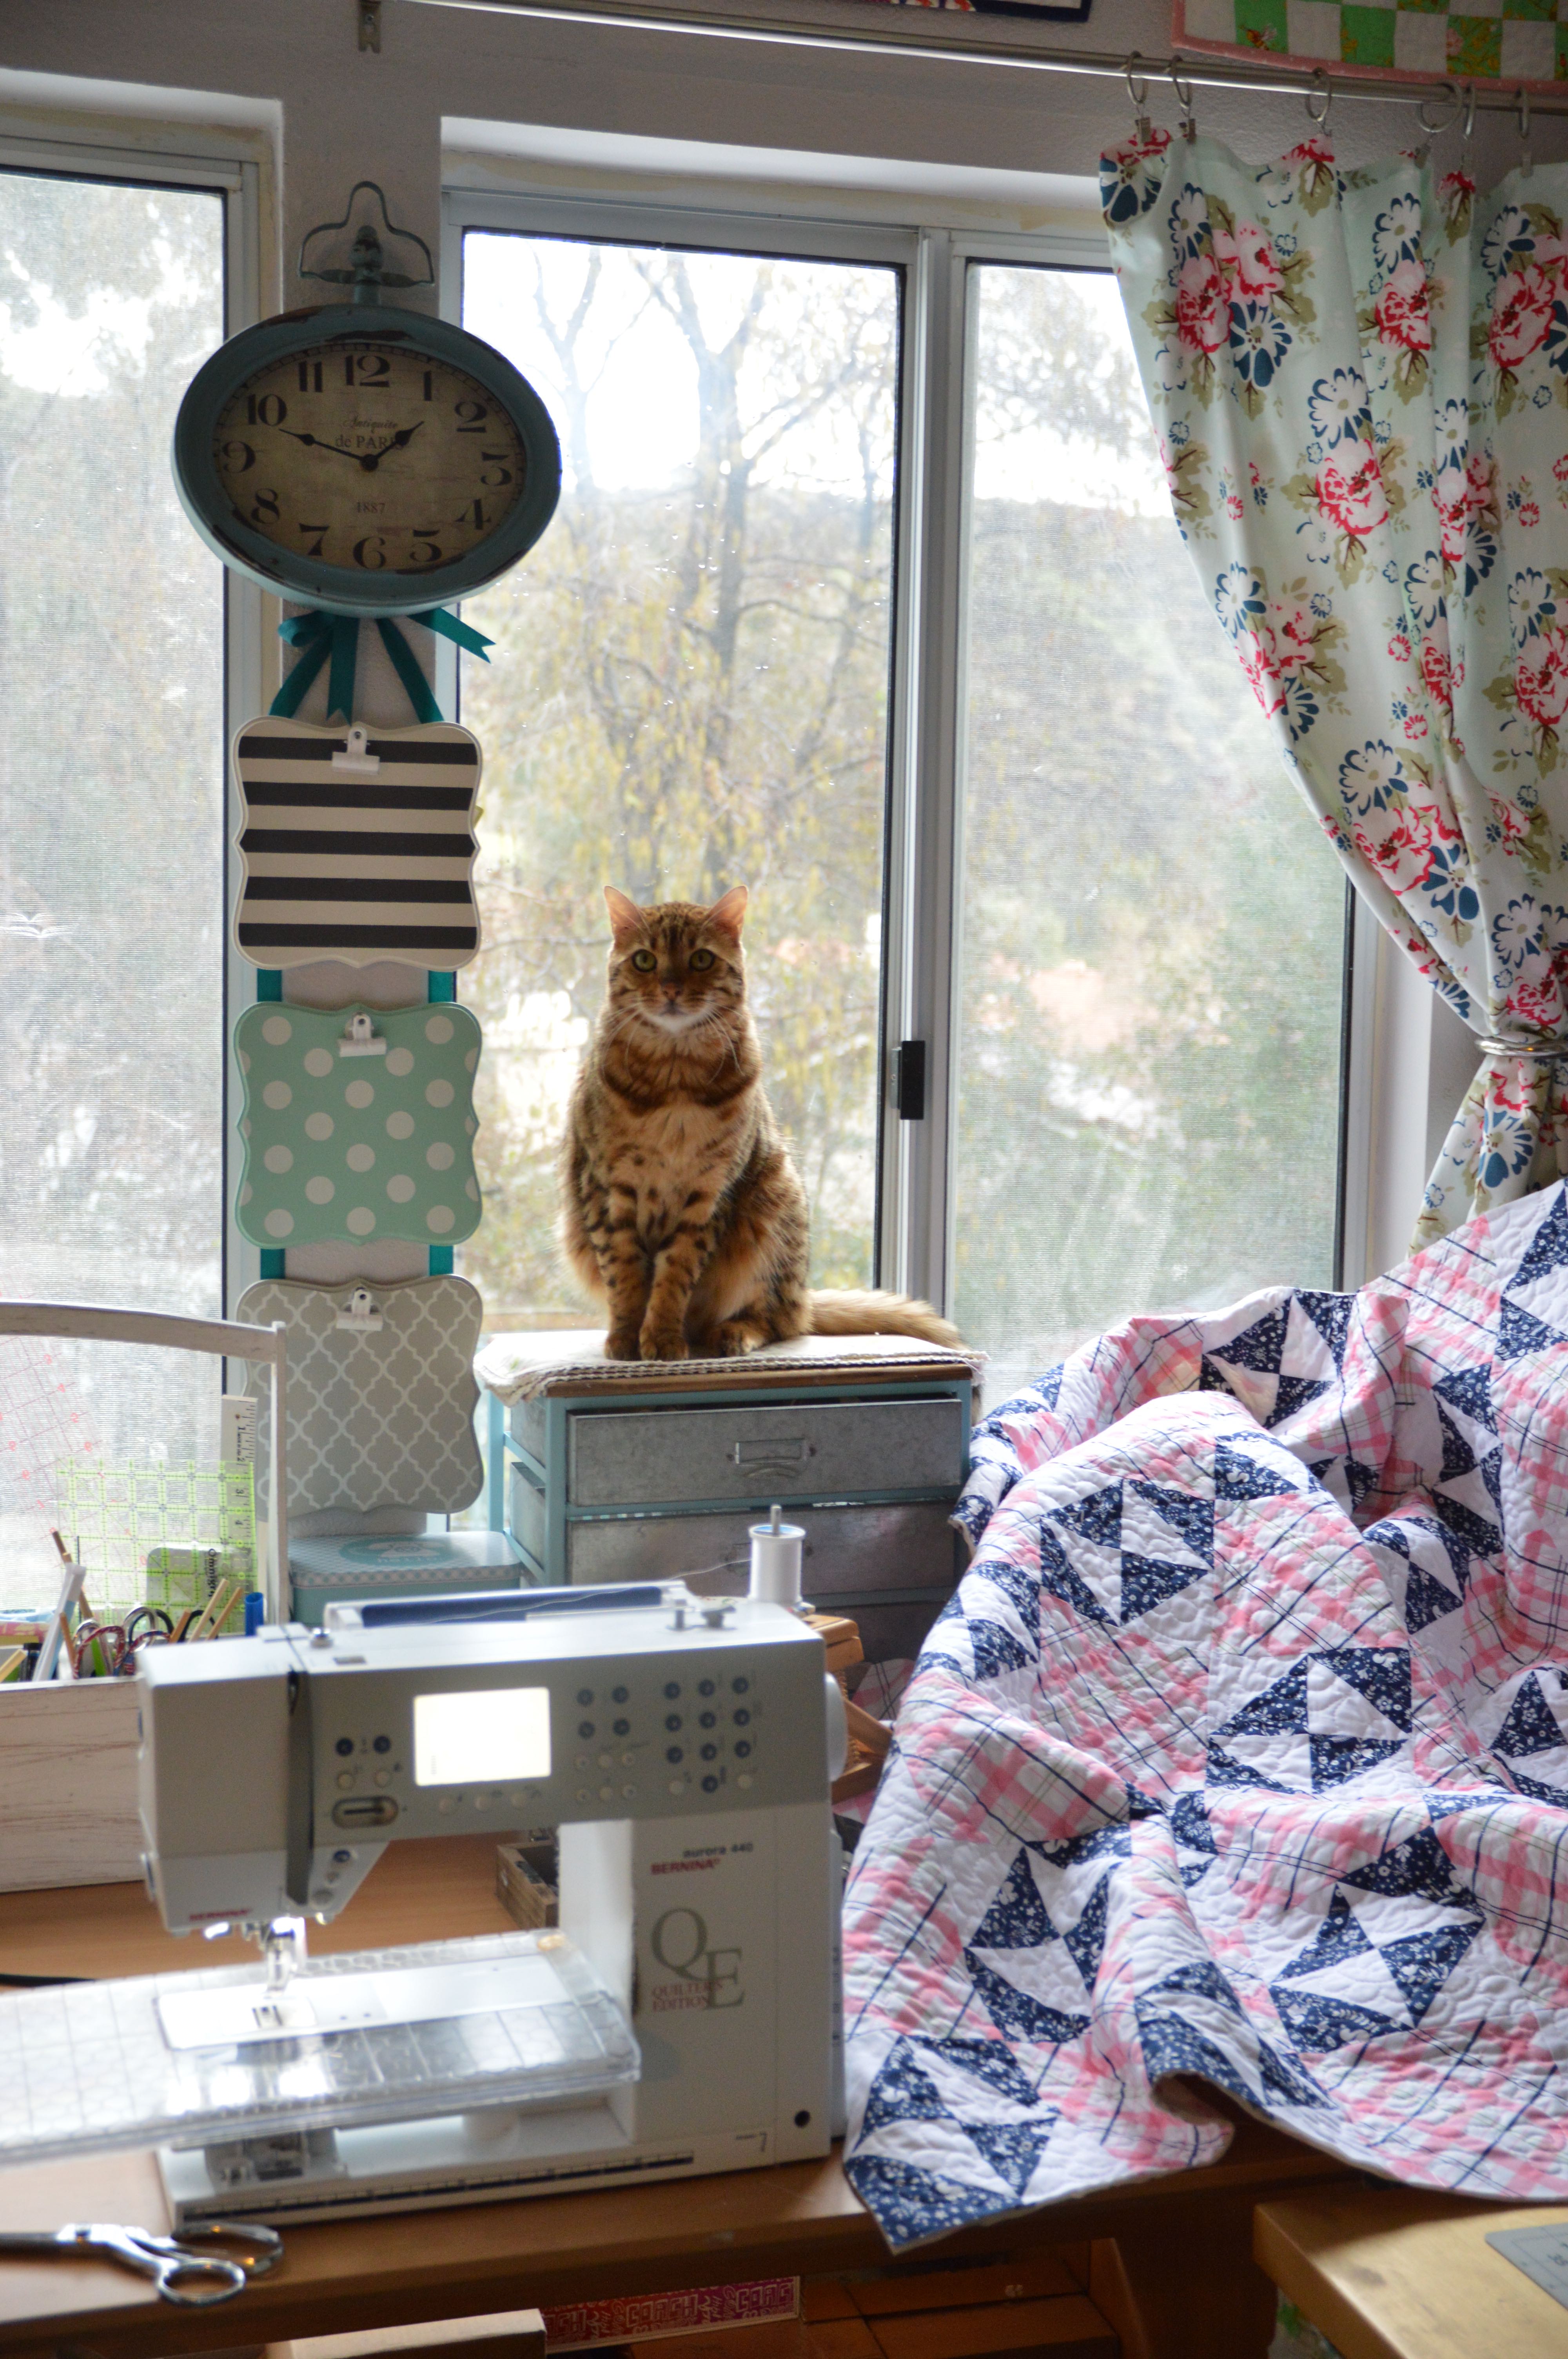
Then the quilt project moved home to California where Mufasa stayed up late with me to help me sew!  Actually I stayed up late and he slept on the blocks!

IMG_0874

I loved seeing each block come together!  I love all the different Navys!

IMG_0888

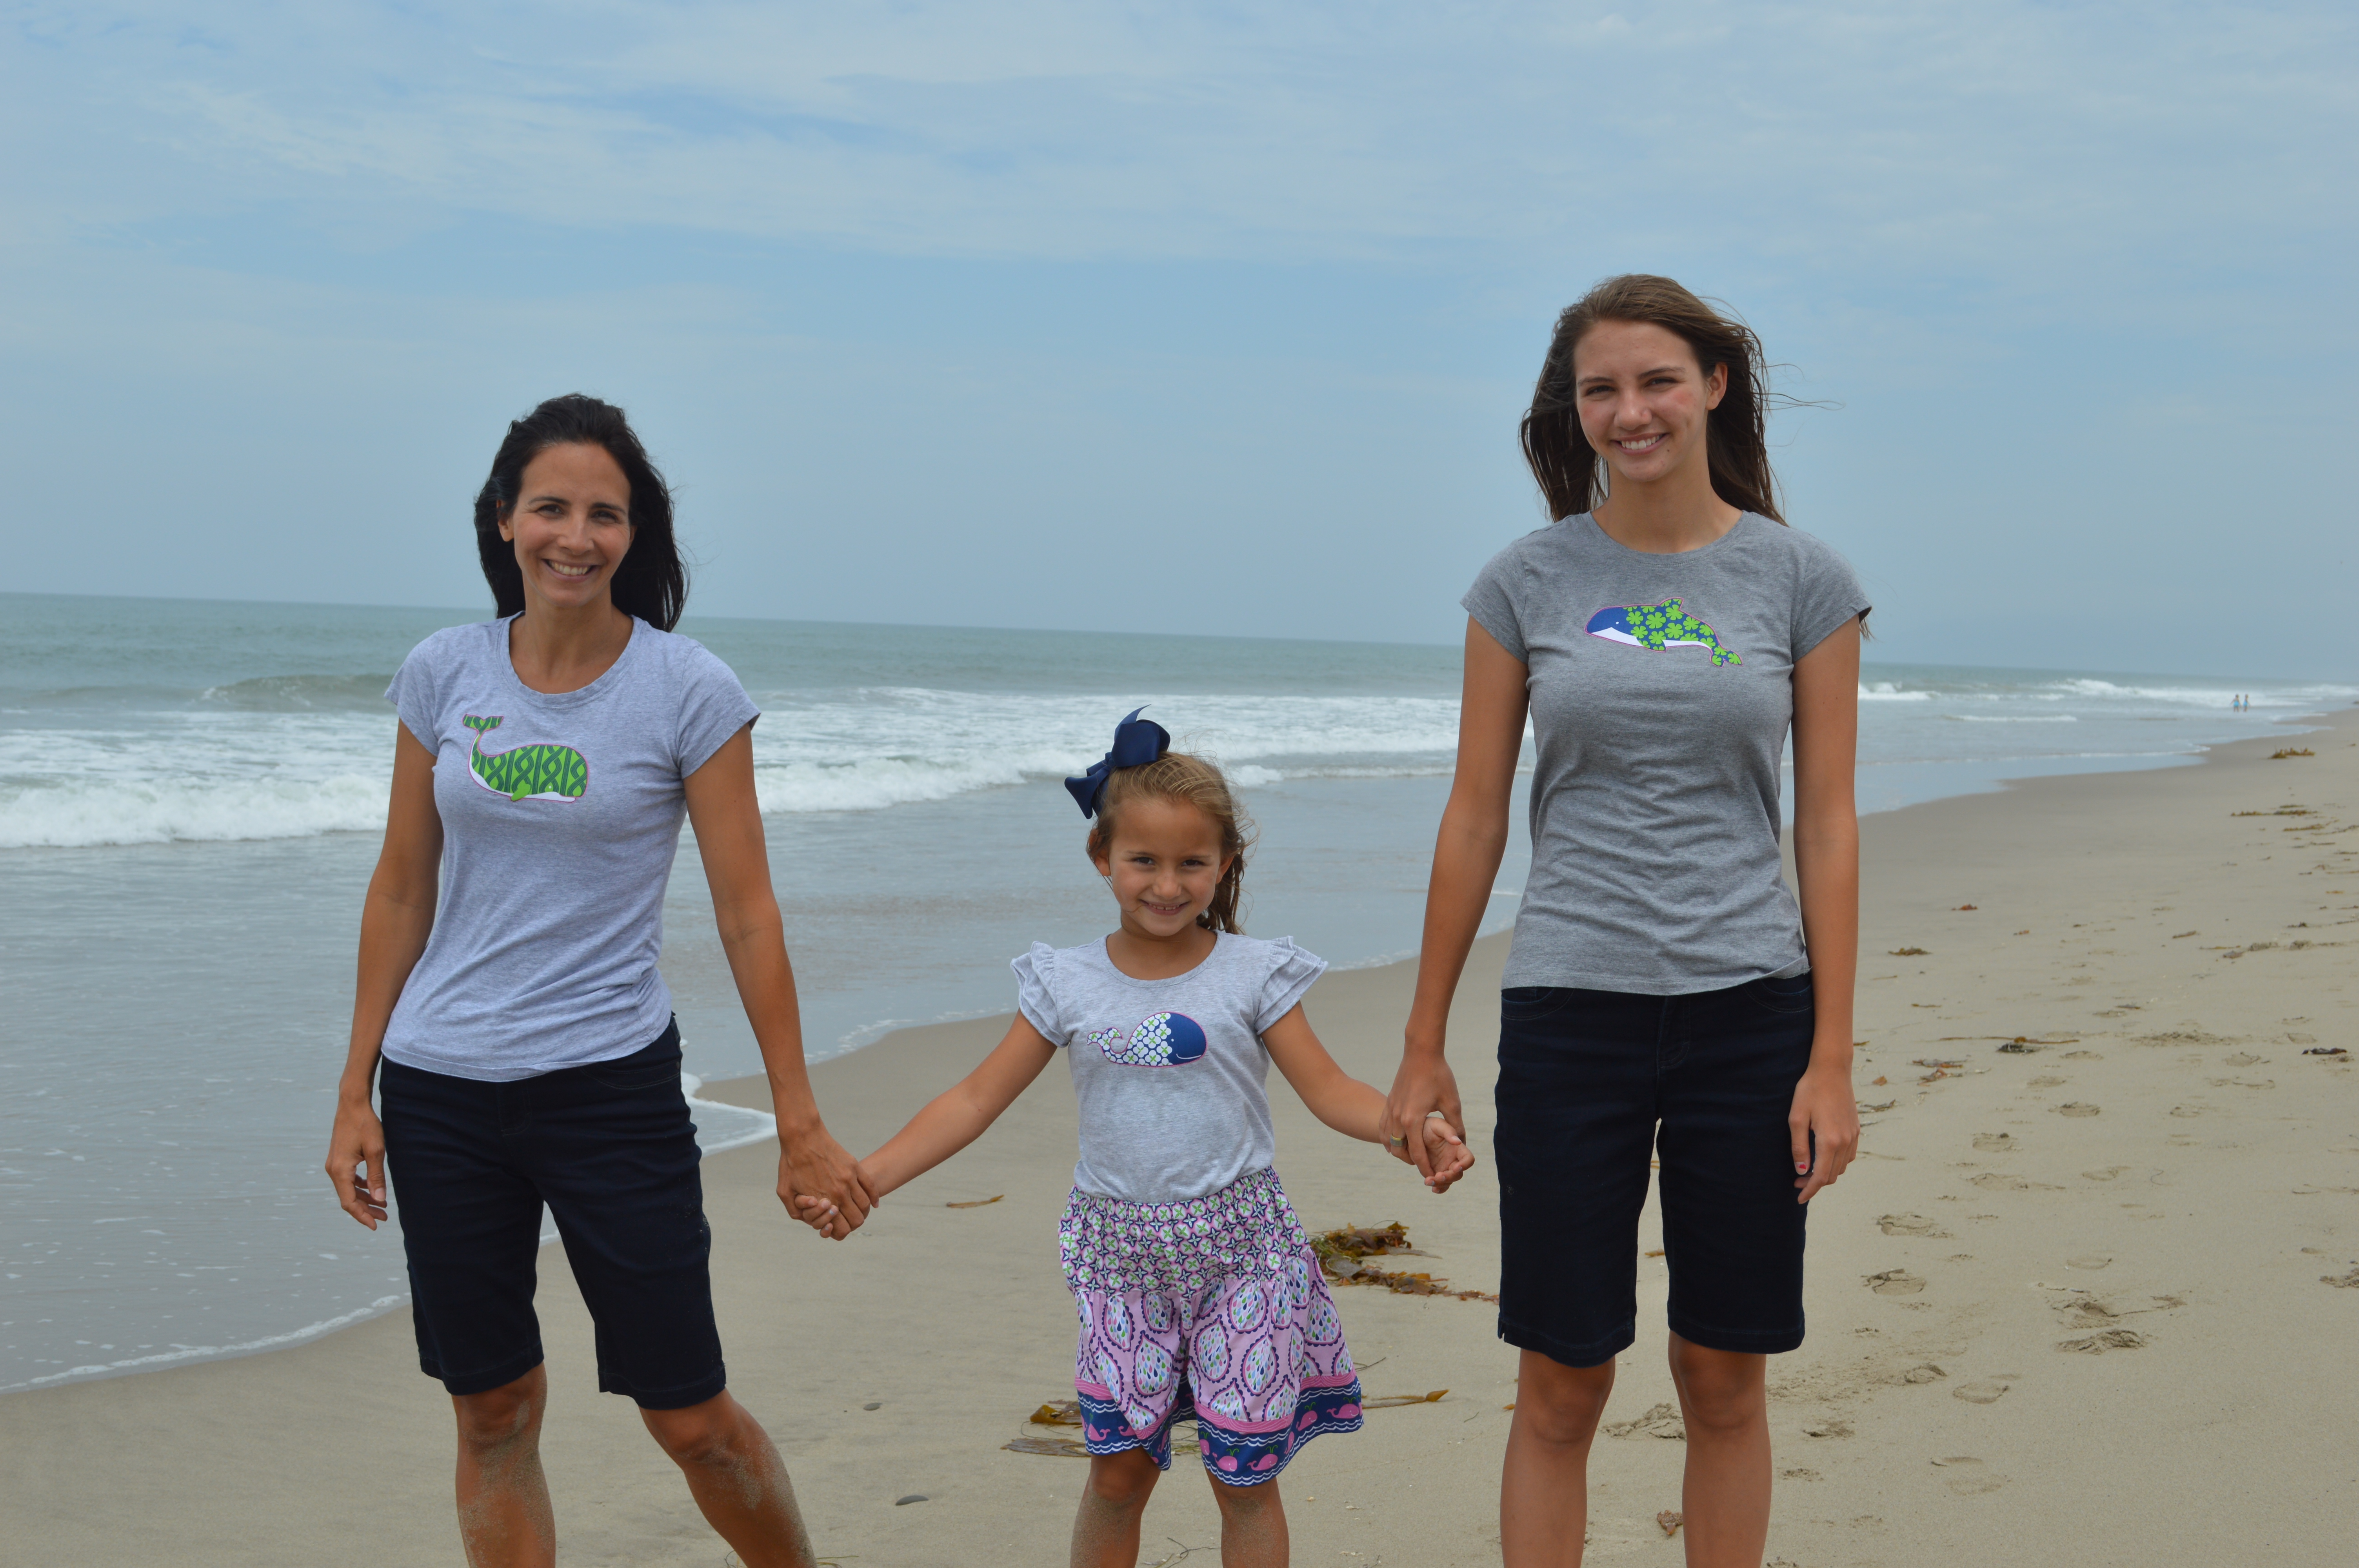
I love having my daughter lay out my quilt blocks, she has a good eye for spacing colors!

blue whale quilt 8

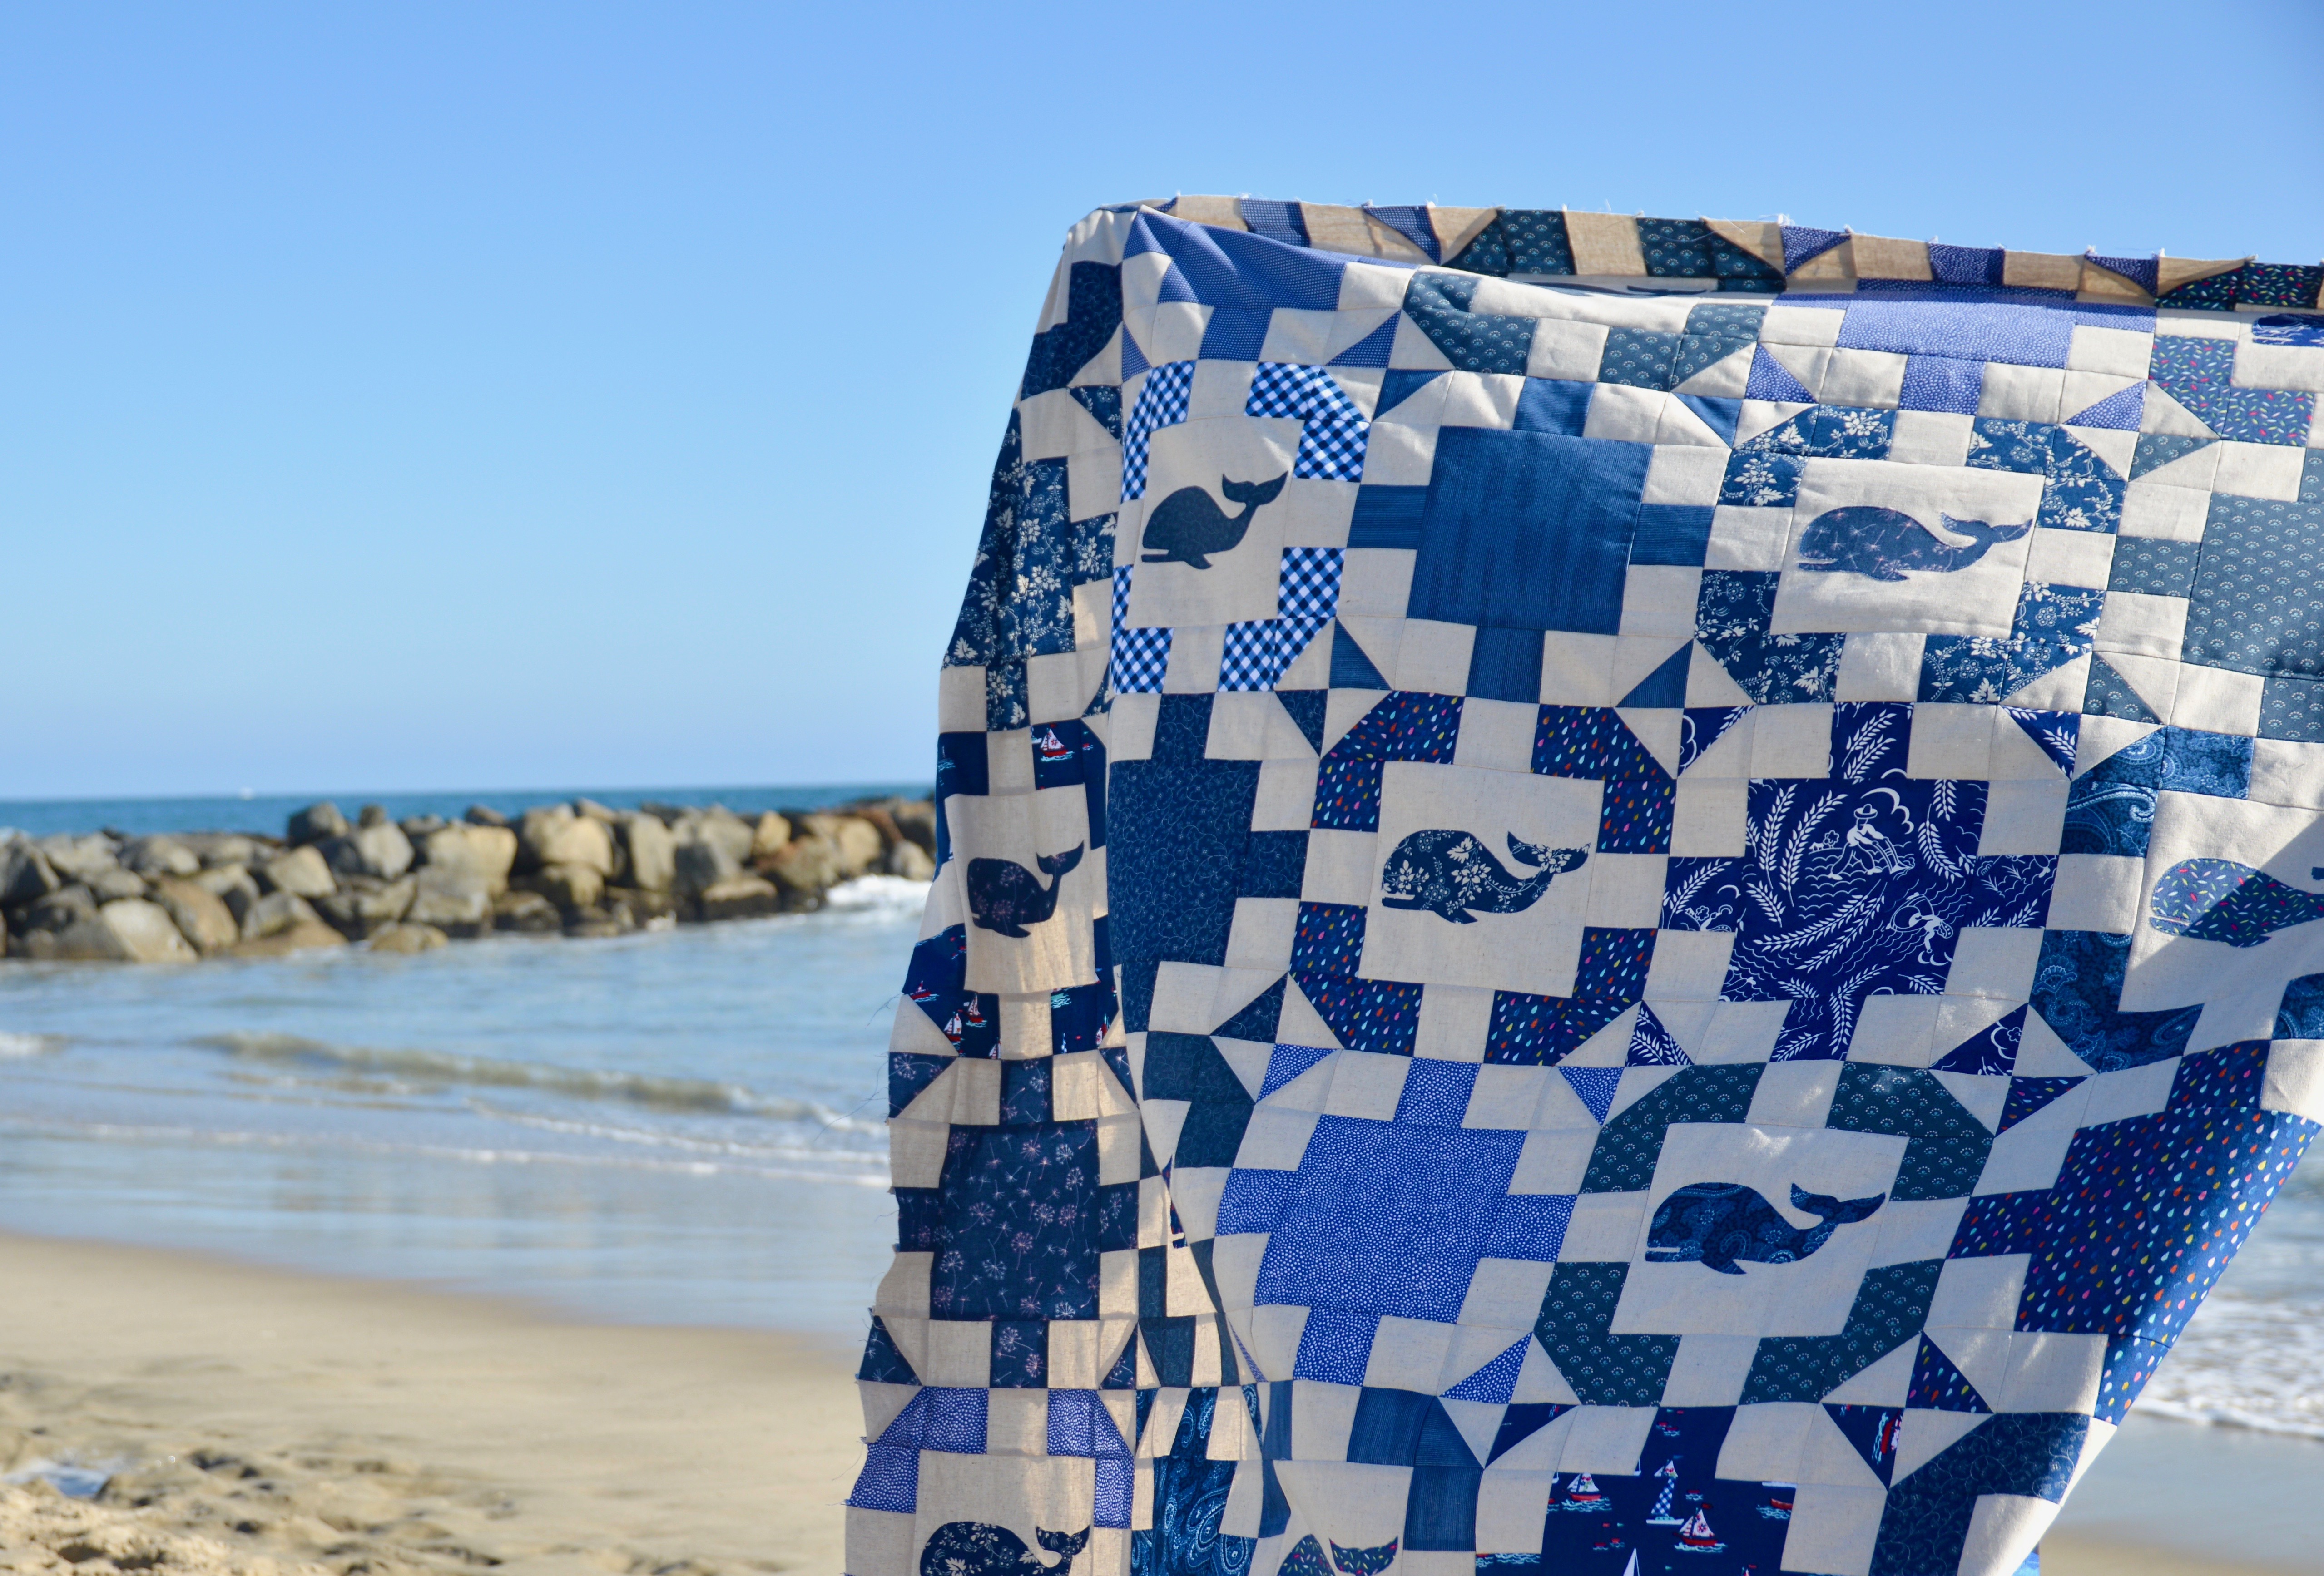
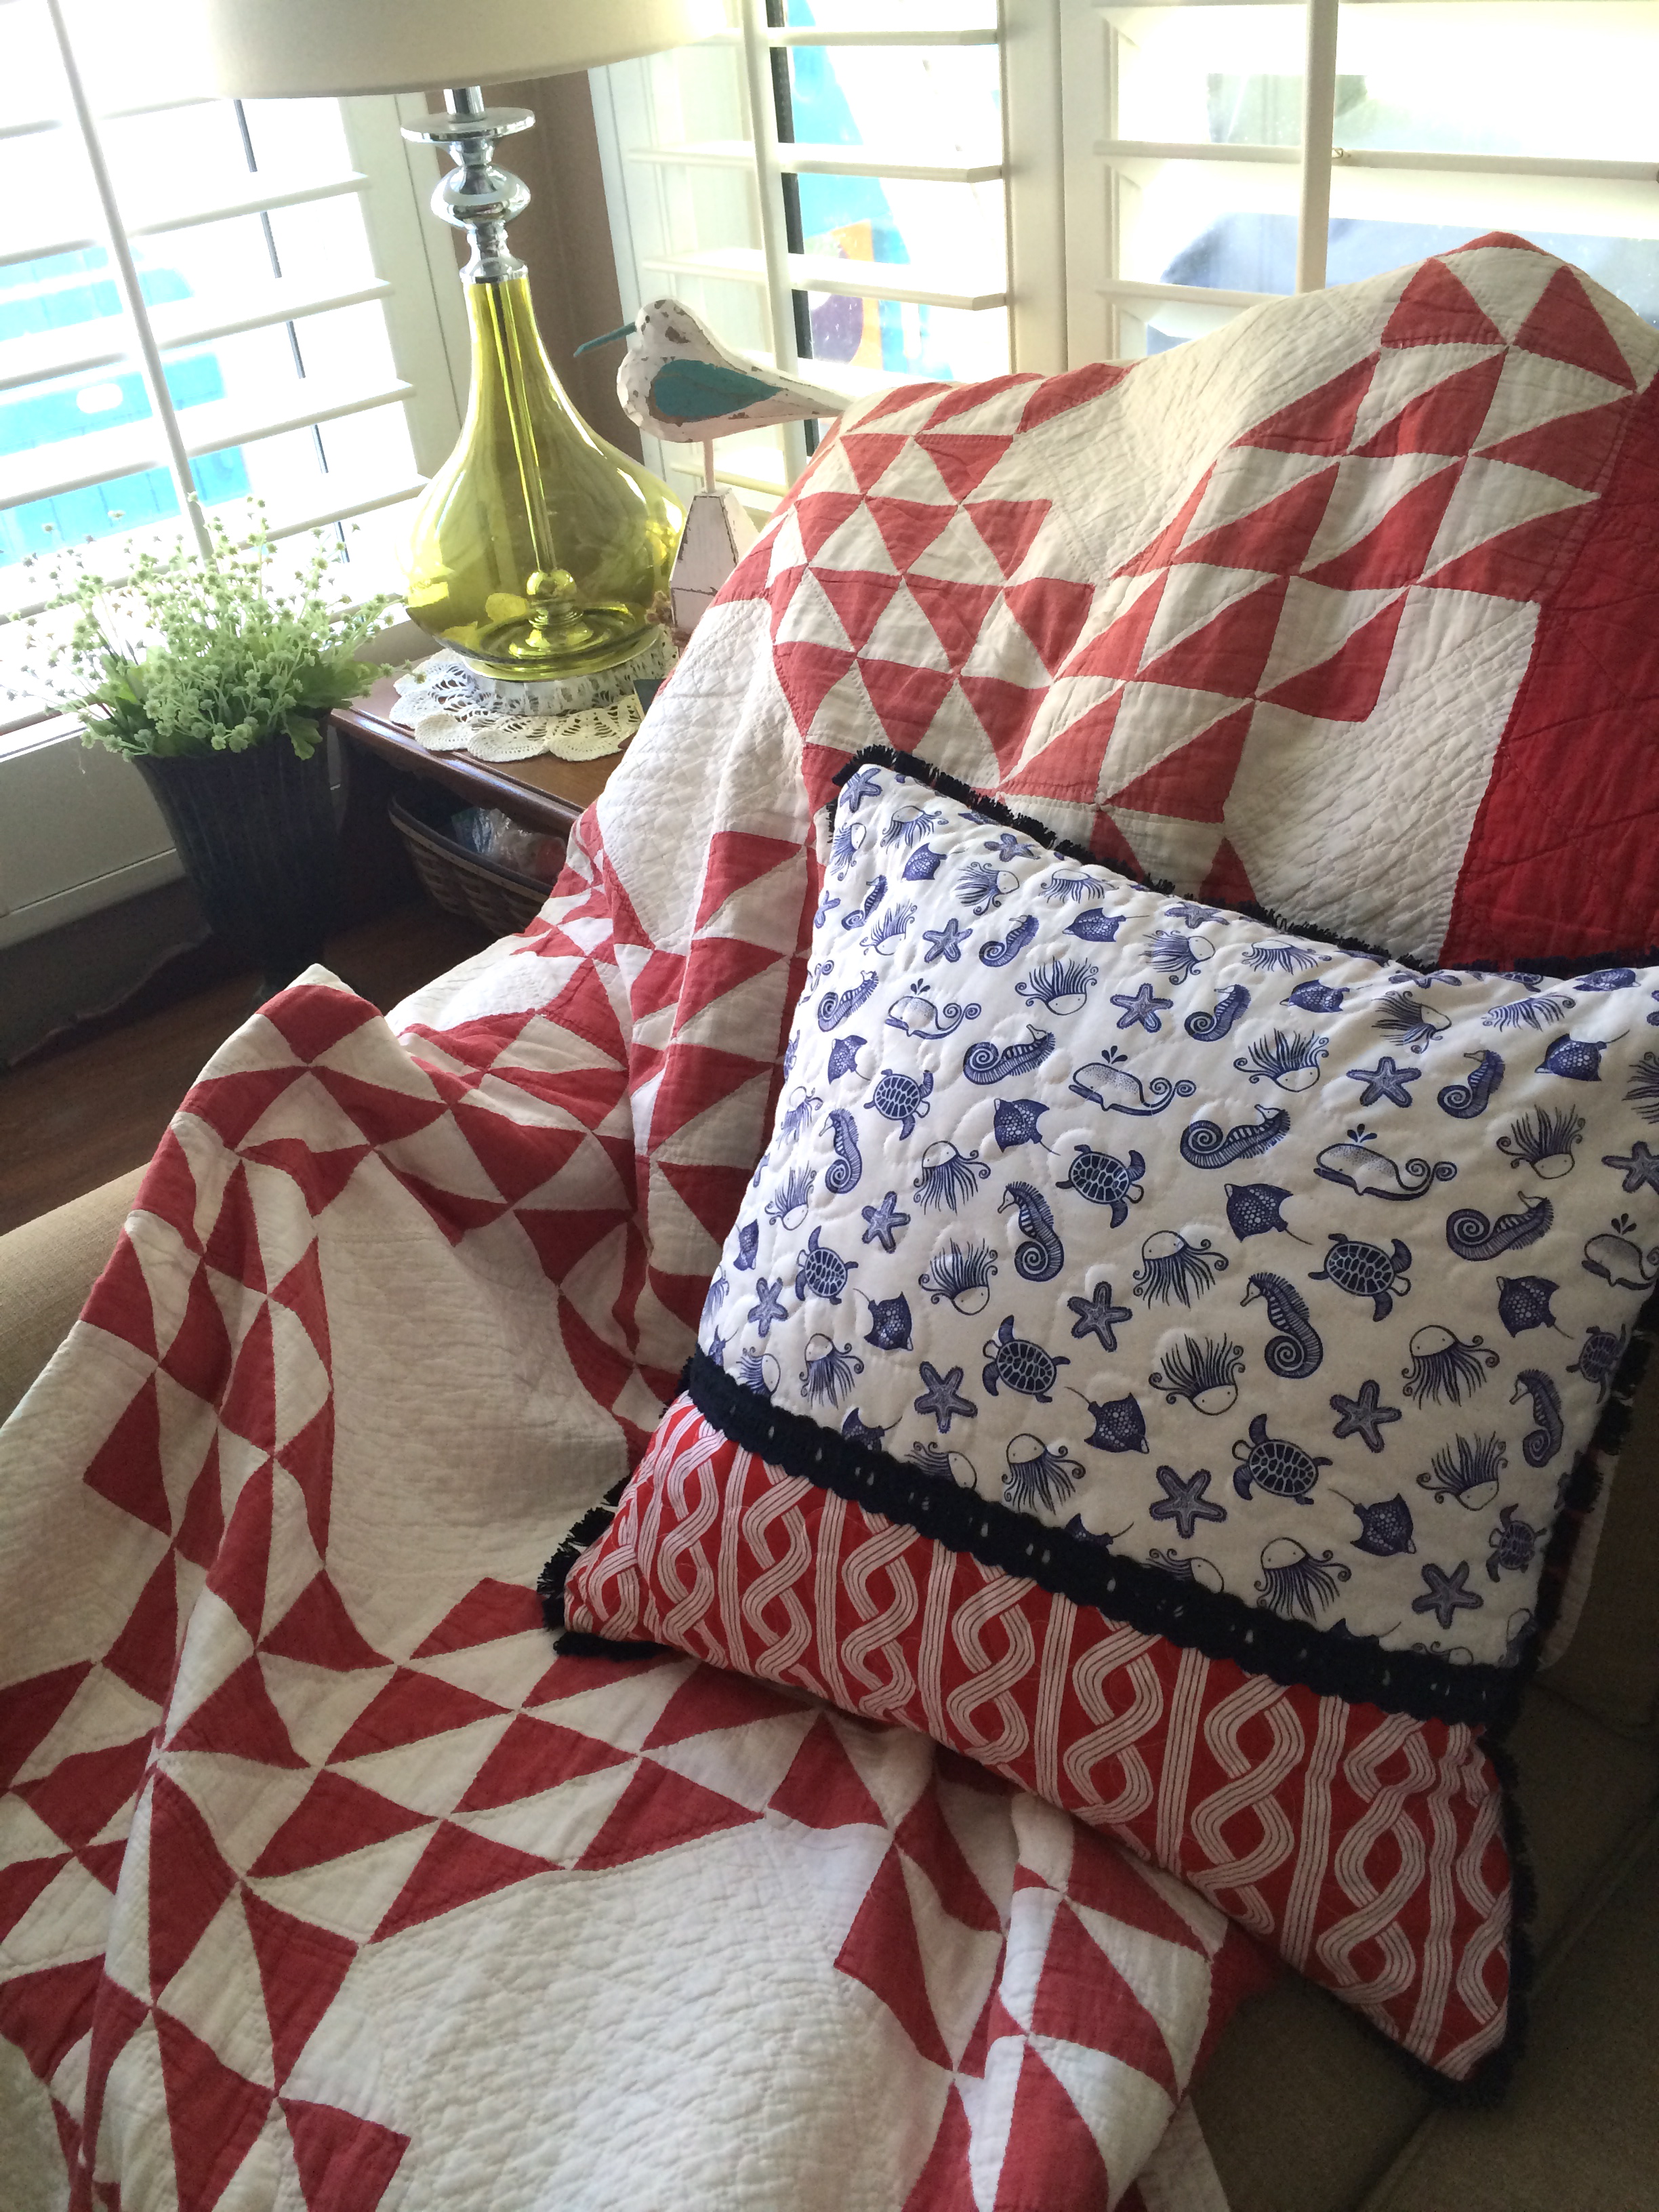
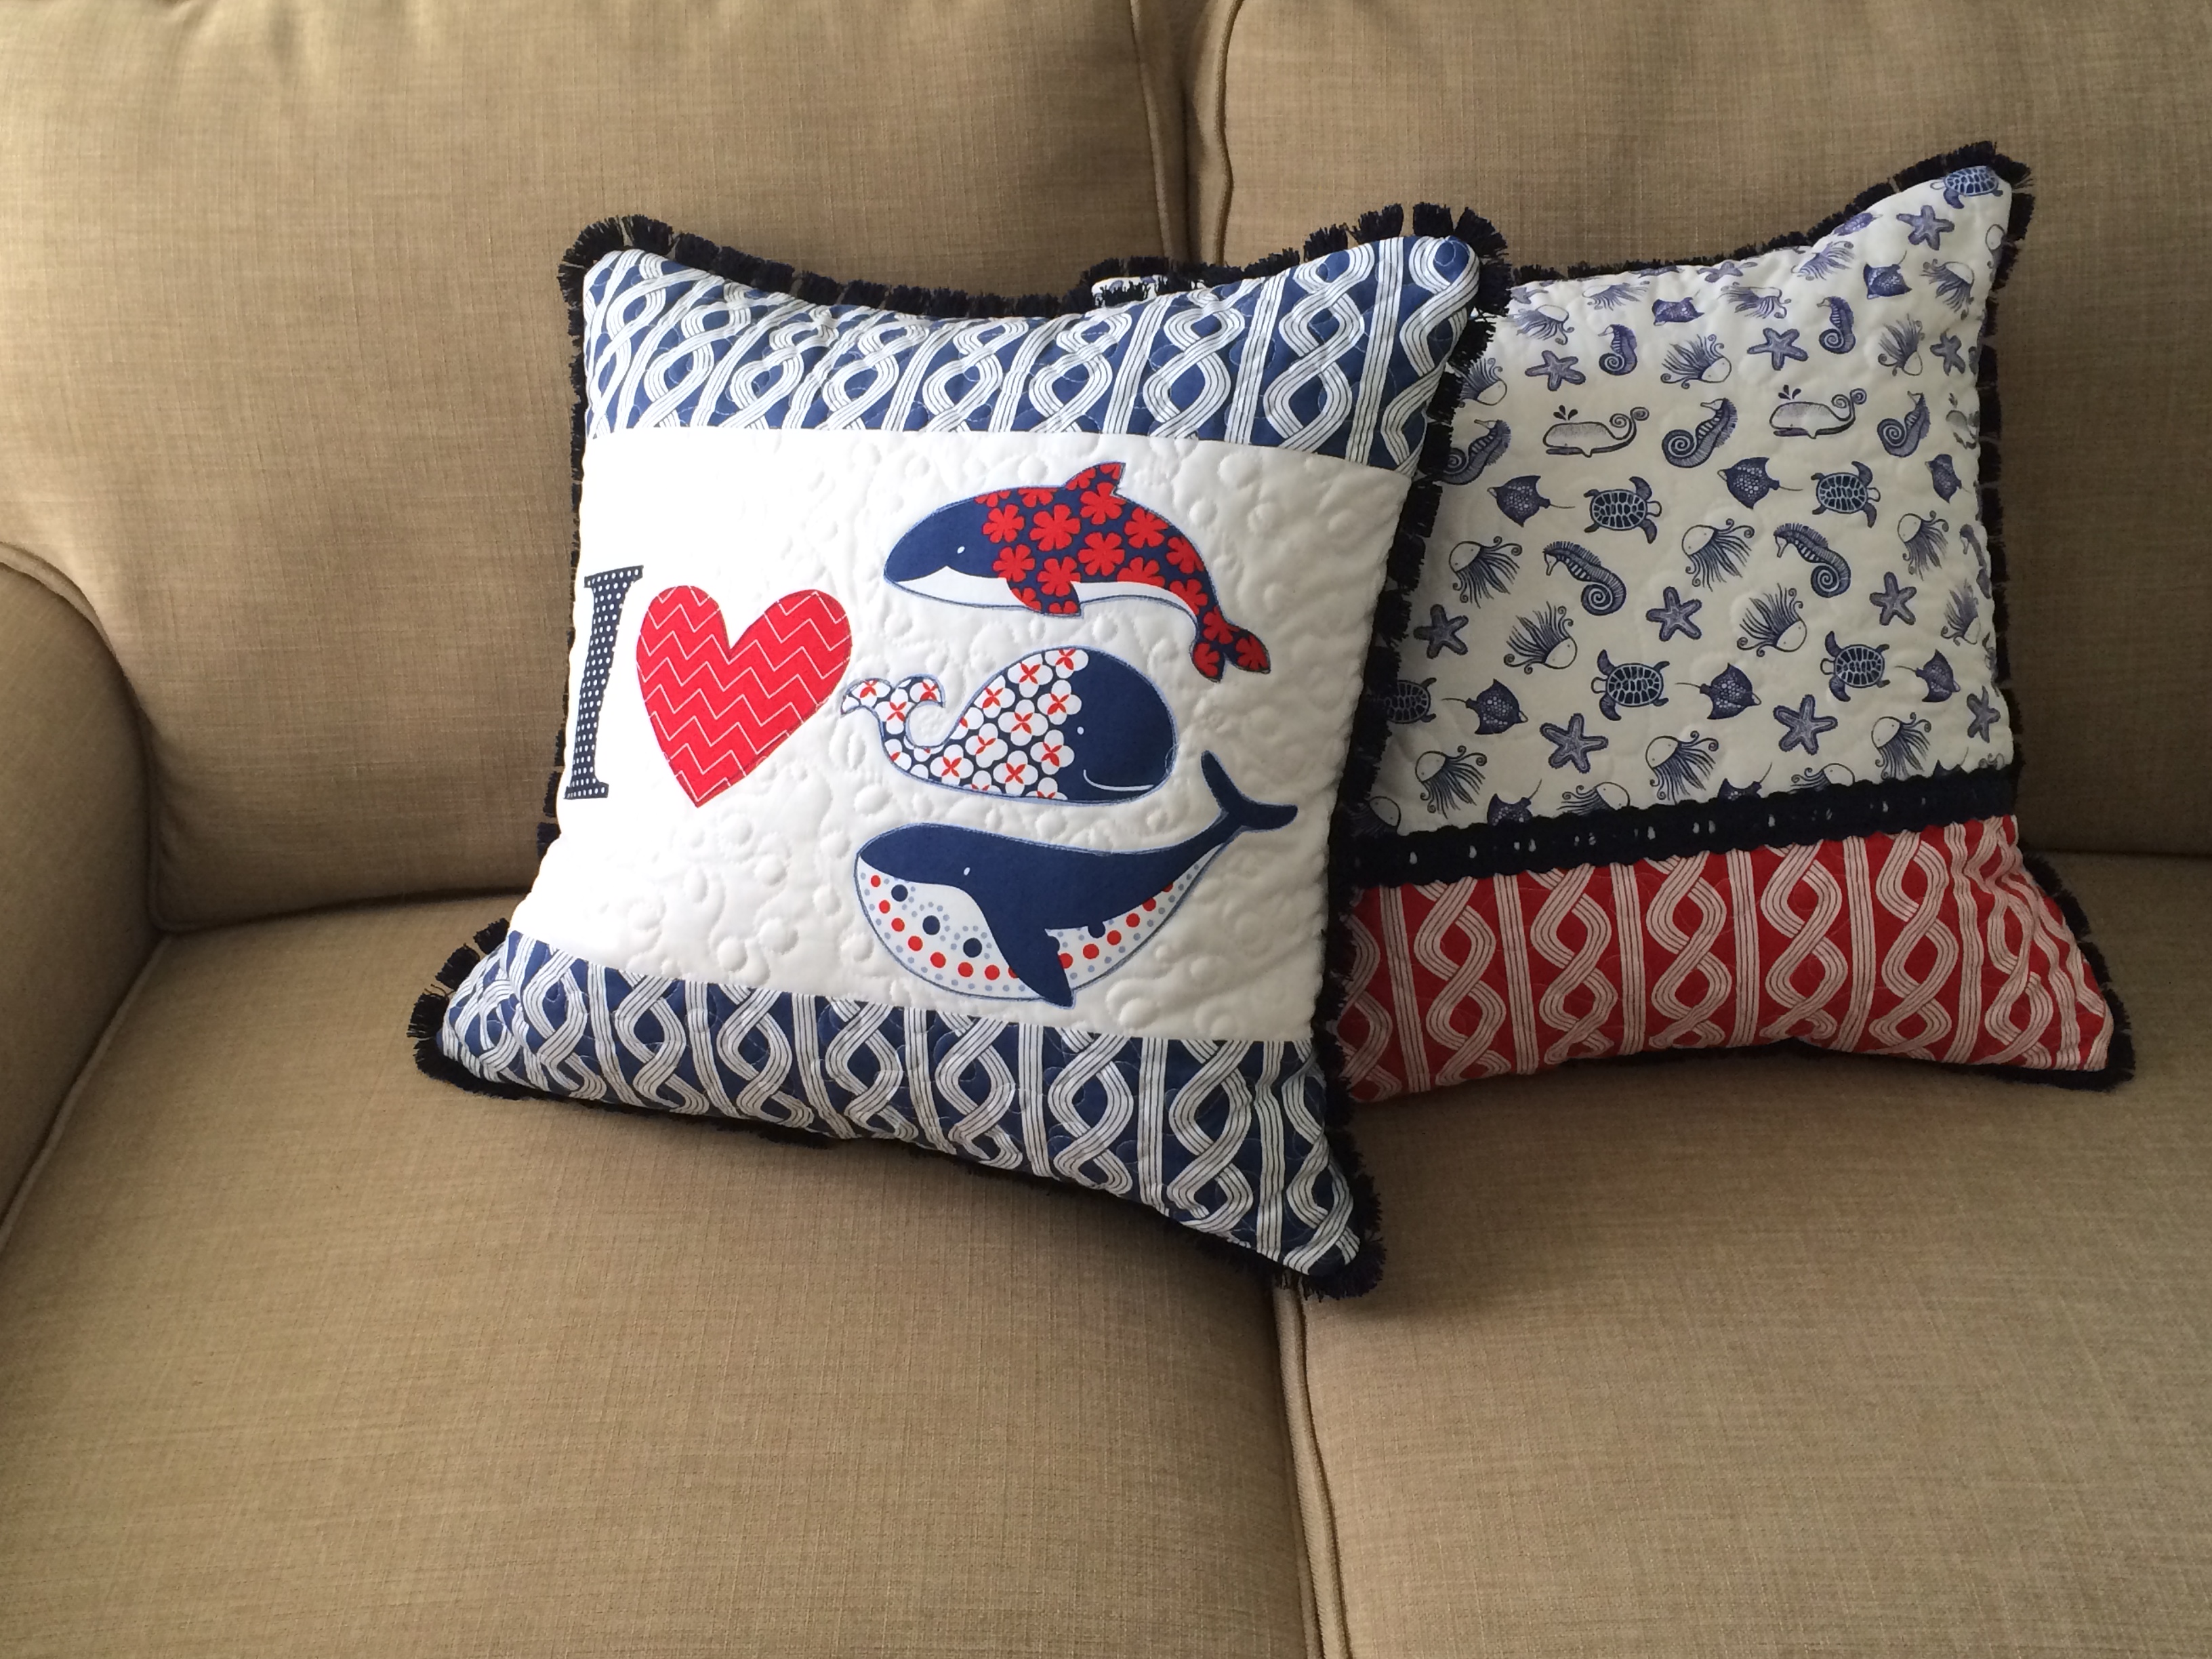
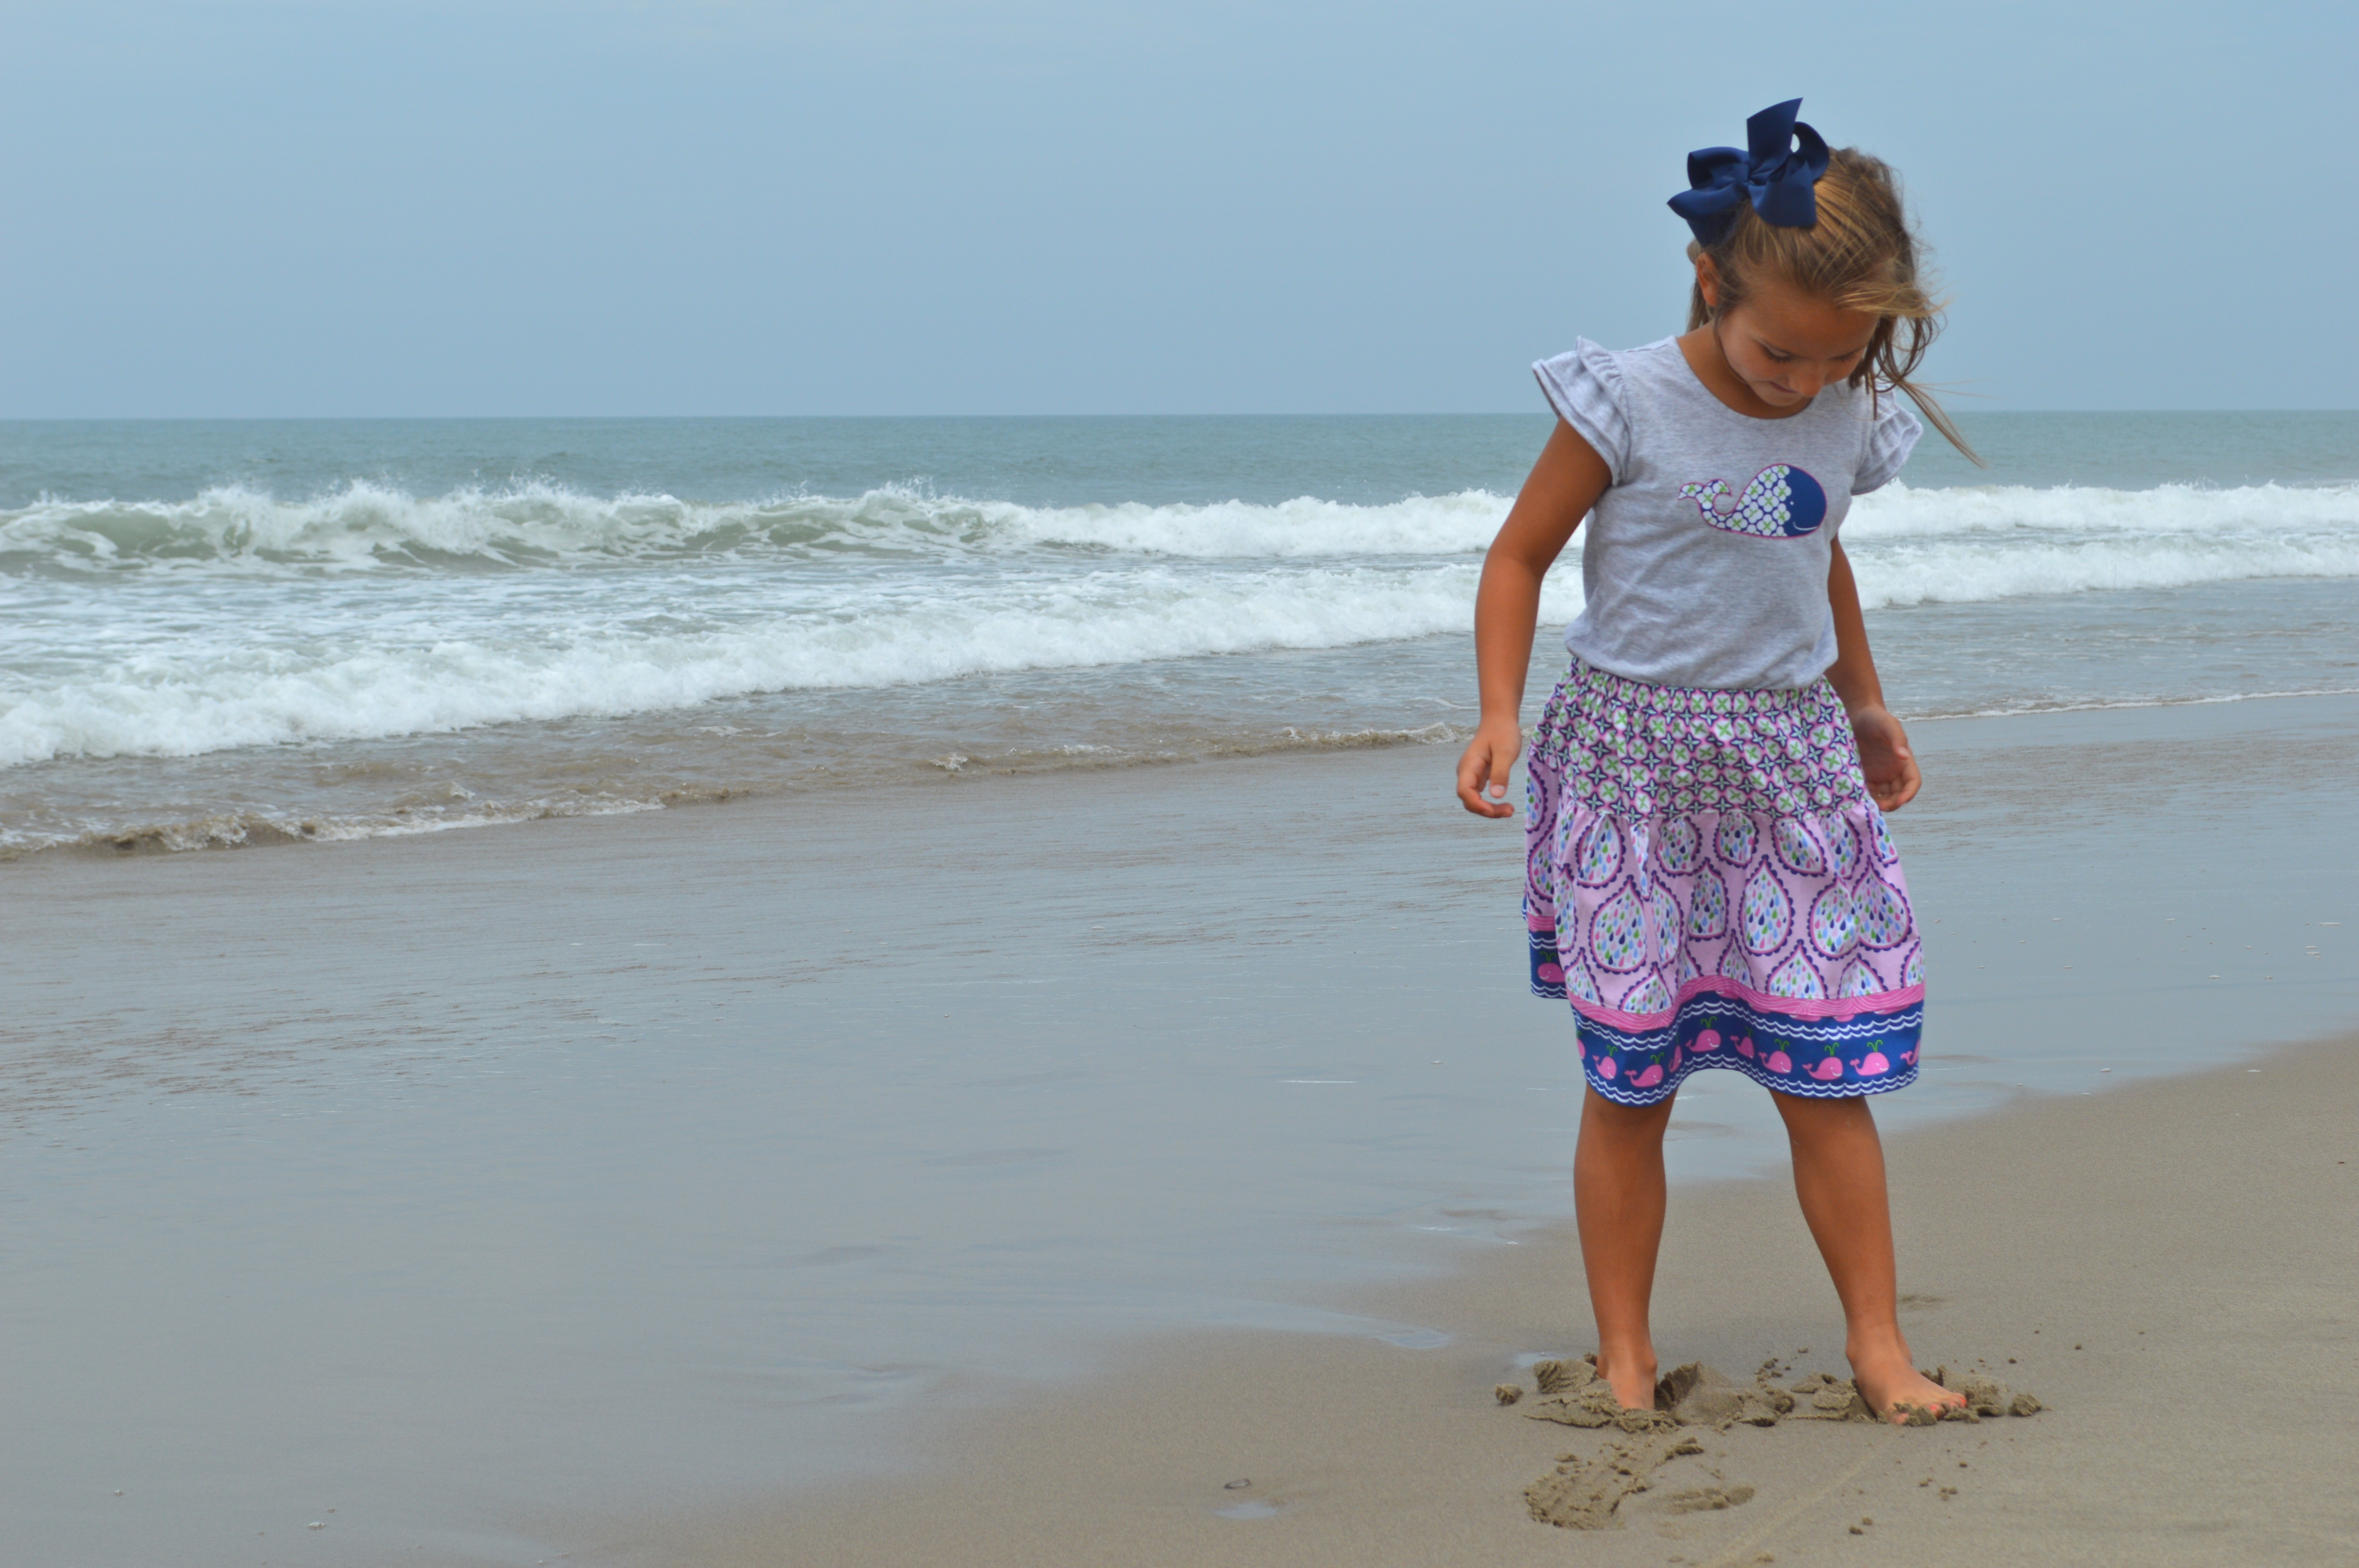
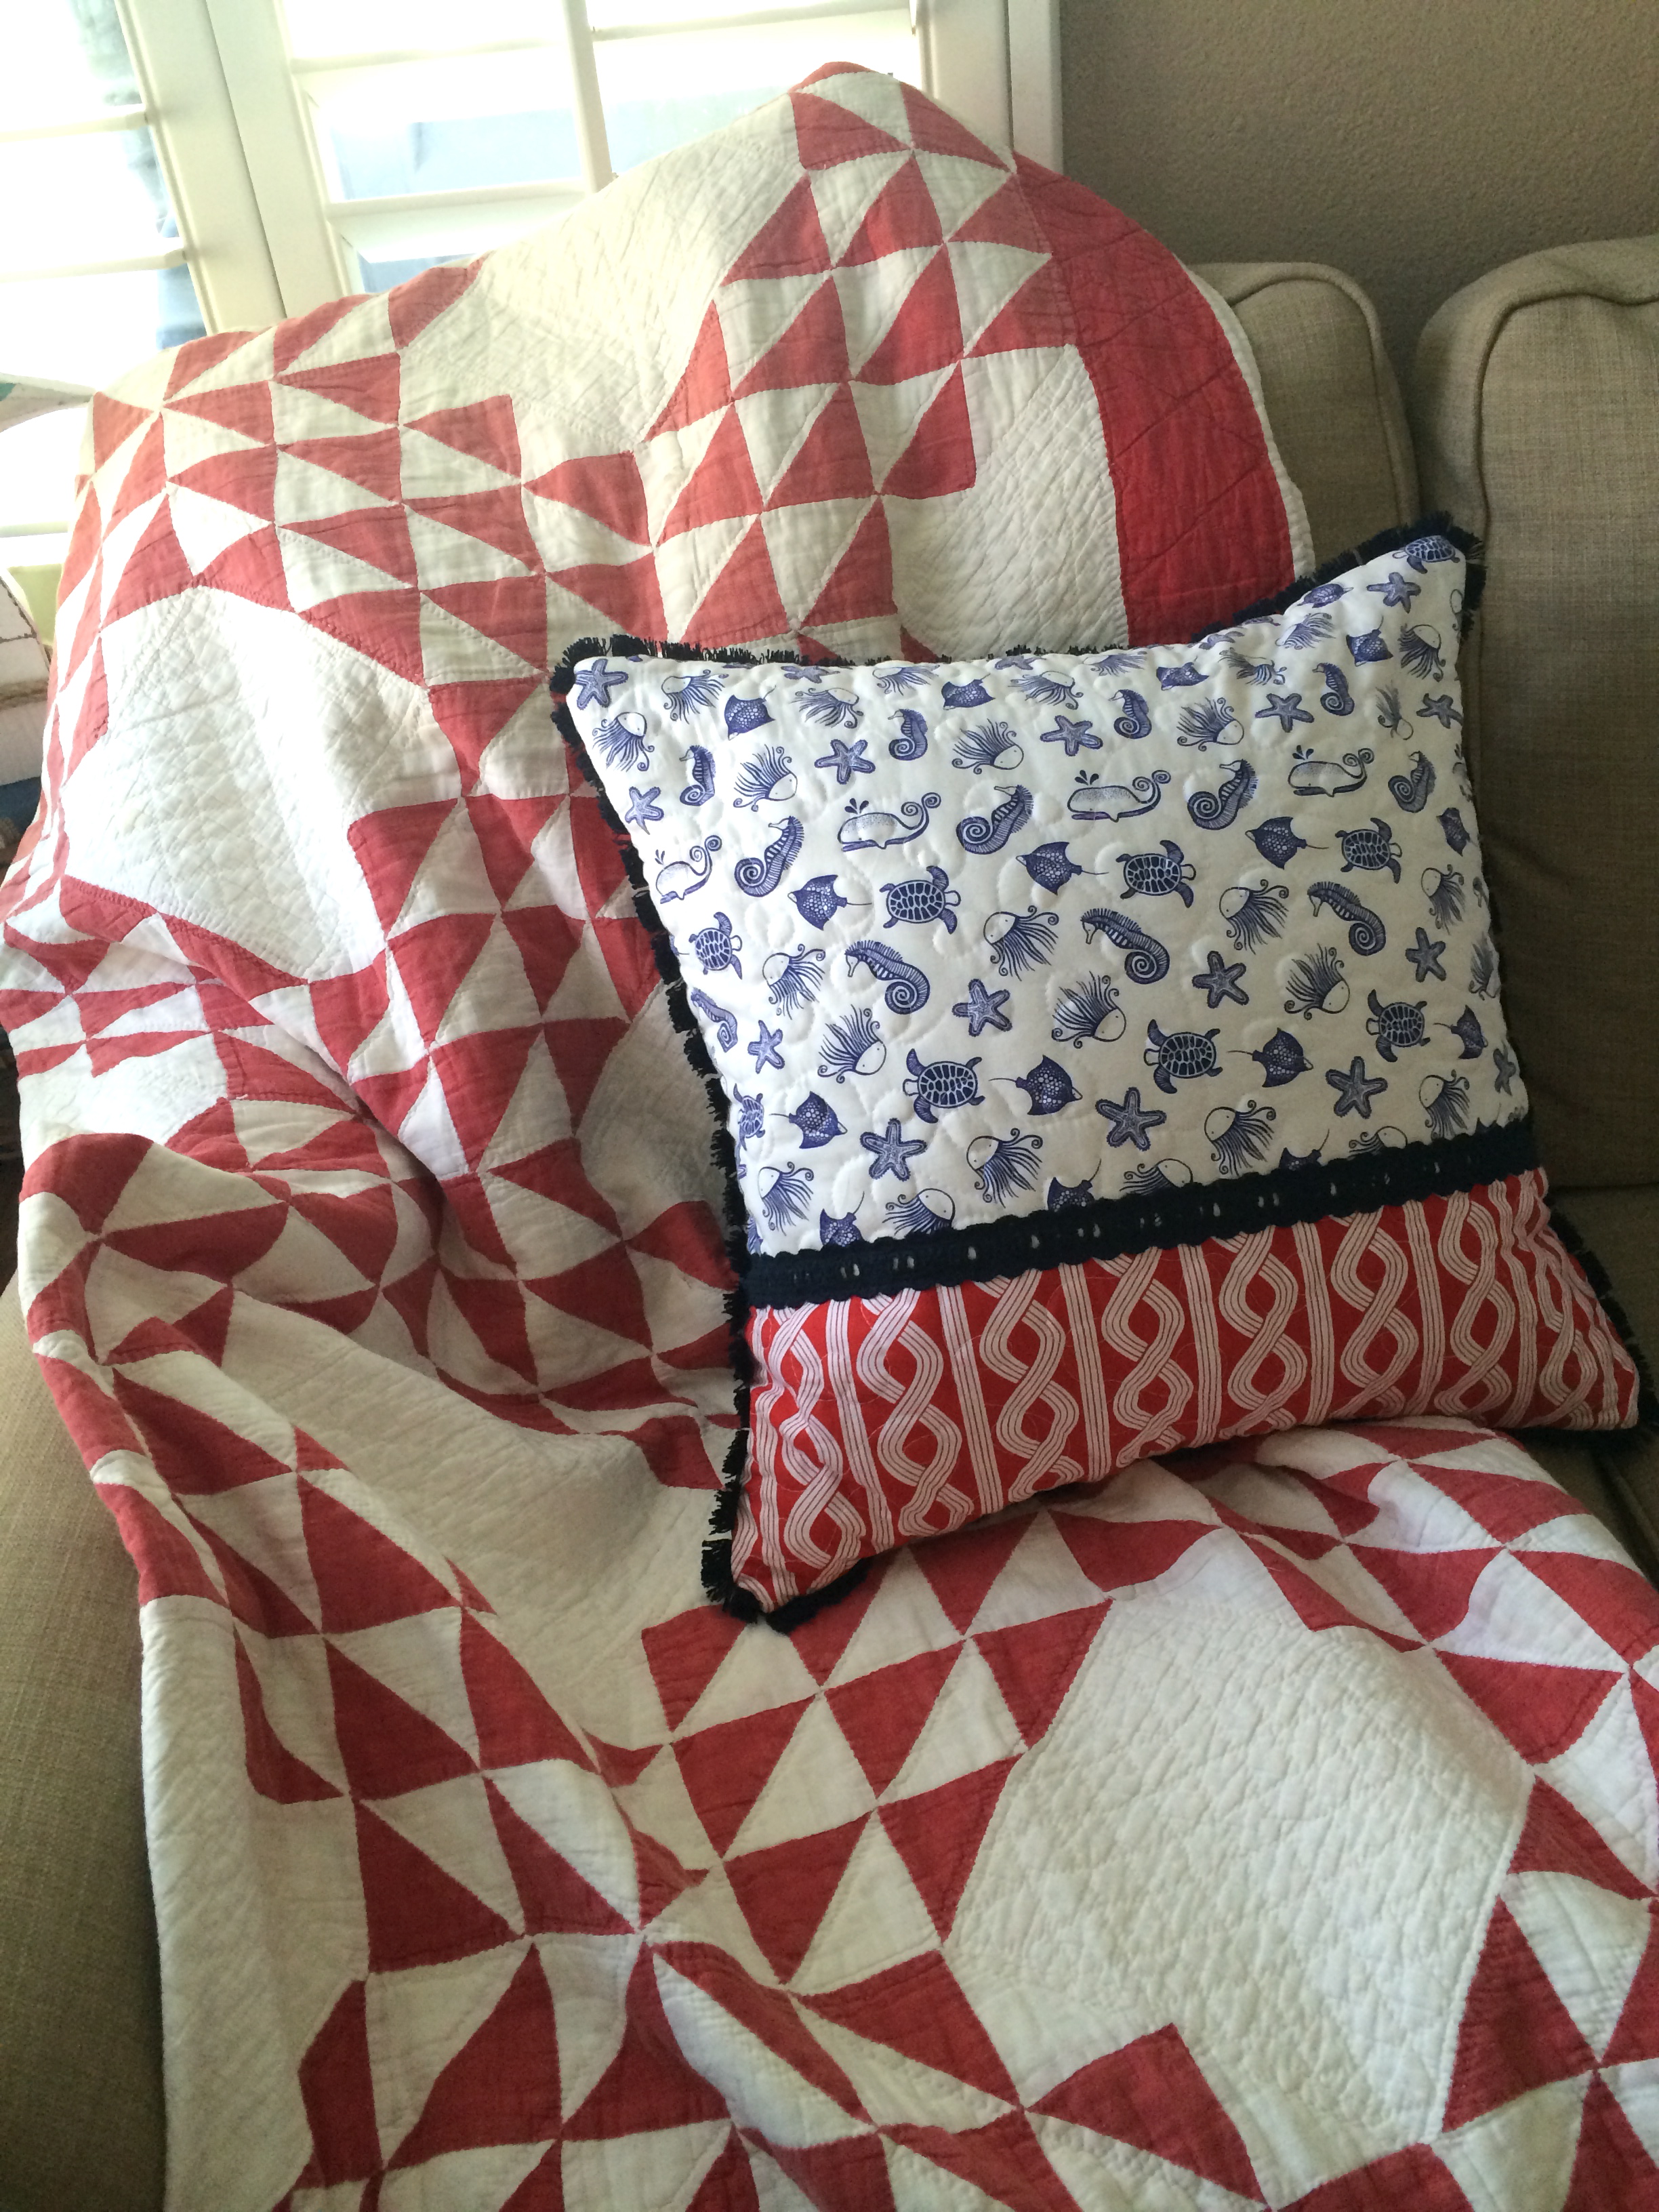
This quilt feels like a little piece of the ocean in my home!  So, even if you don’t live near the beach, you can feel like you do!
blue whale quilt 3

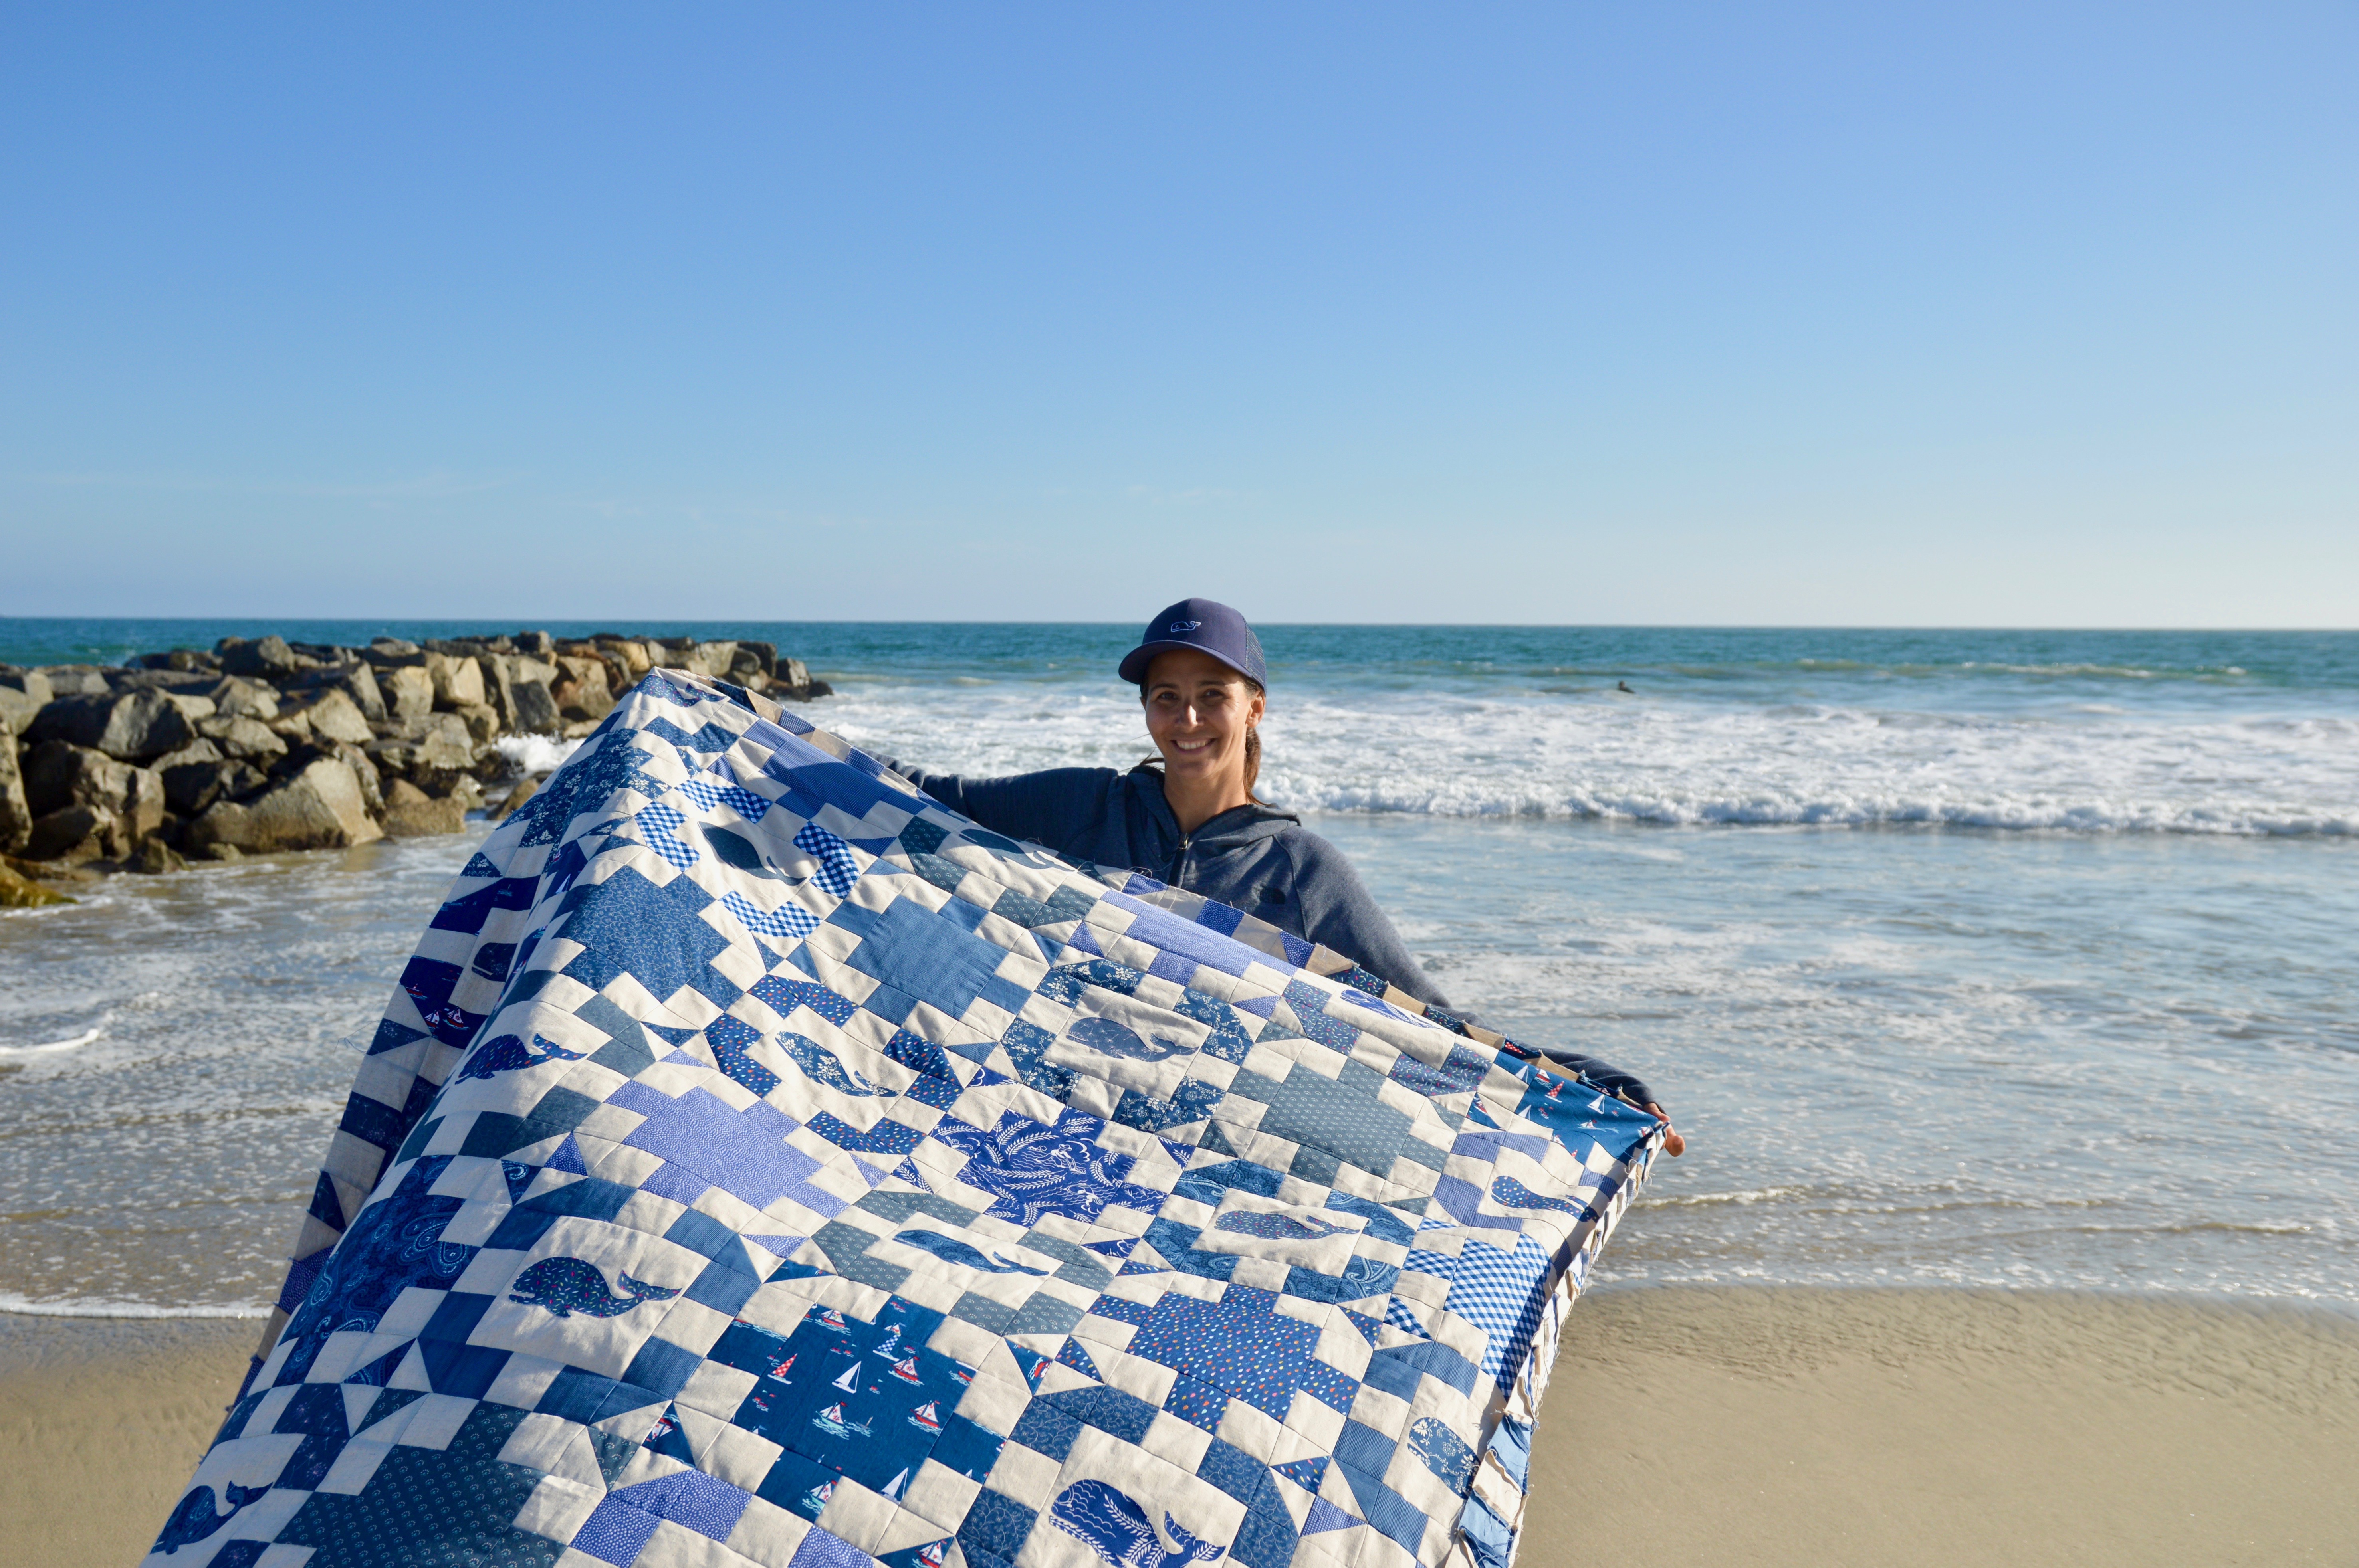
I hope you love it!!!!  Happy July, Happy Summer!!!!!!

2018-july-bundle-450

Preppy Plaid Tote Bag & Quilt Tutorial

Enchanted blog logo

I am so totally excited to be a part of the Enchanted Blog Tour sponsored by Riley Blake Designs!  You can see the entire collection designed by Dodi Poulsen of Two Sisters at Squirrel Hollow by clicking here 🙂
preppy plaid

When I saw this new fabric line from Riley Blake Designs called Enchanted, my heart stopped.  I took one look at this pink, navy and white plaid and immediately I was transported to a Cape Cod dream!  Sailboats, lobsters, quaint homes and preppy boys on vacation from Harvard 🙂

DSC_0188


IMG_9070
Ok Ok, so I’ve never been to the Cape but a girl can dream right?  I knew I wanted to design something that let this preppy plaid be the focus and something that would be perfect for my sailboat (hahaha).

DSC_0167

I came up with a simple quilt pattern that uses plaid, navy and white.  When only two prints arrived in the mail I began to panic wondering if I had made a terrible decision to make a quilt using only two prints!  I decided to go with my instincts and make the quilt……and I am totally in LOVE!!!!

This quilt really lets the plaid shine in and it’s a great pattern to use if you fall in love with a single fabric print.  The accent blocks are made of 4 half square triangle blocks.

DSC_0213

…..and the quilt fits nicely inside this preppy plaid whale tote bag – made with denim, plaid, and Heat n Bond Fusible fleece.  So, are you ready to set sail for the Cape?  Grab your fabrics and lets get sewing!

DSC_0154

Preppy Plaid Quilt

1/4″ seams 

Supplies

2 yards plaid print

1 yard navy print

1 yard white

Begin by cutting the plaid into (40) 6.5″ squares.

Using the navy blue print and white print sew (160) half square triangles (HST) that measure 3.5″.  You can use any method you like.  I use my Sizzix half square triangle dies!  It is super fast, super easy and no squaring up – just perfection!!

IMG_9037

Die cut 160 navy HSTs and 160 white HSTs.

IMG_9038

Sew the navy and white HSTs right sides together using 1/4″ seam.

IMG_9043

Press seams open.  Continue until you have 160 HSTs.  It’s probably a good idea to put on a movie while doing this!

IMG_9042

Lay out 4 HSTs to make the pattern above.  Sew together as you would a 4-patch.  Press seams open.  Finished block will measure 6.5″.  Make 40 of these blocks.

IMG_9045

Cut 40 squares measuring 6.5″ out of the plaid.

DSC_0121

Sew the blocks together (1/4″ seams) as you would a checkerboard, alternating each block.  Make sure the pieced blocks are going the same direction.  Press the seams toward the plaid.  There are 8 blocks across and 10 rows down.

IMG_9046

Baste (I always use Spray n Bond basting spray)

IMG_9056

Quilt.

IMG_9075

Bind.

DSC_0142

Love.

DSC_0089

Mufasa and I love sewing on rainy days!!

DSC_0098

DSC_0220

Tote Bag Instructions

I used my pattern, Quilted Tote Bag, for the measurements.  I followed the pattern pretty closely with the following exceptions:

  • I added an appliqué to the main bag.
  • I used denim.
  • I did not quilt the bag; I stabilized it with fusible fleece.
  • I came up with a new way to sew the handles (continue reading)
  • I omitted the inside pocket
  • I simplified how to make the bag bottom

Supplies

Denim (2) 20″ x 10.5″

Plaid (2) 20″ x 9.5″

Lining (2) 20″ x 19.5″

Plaid for handles (2) 5″ x 28″

Heat n bond medium stabilizer (2) 5″ x 28″

Heat n Bond Fusible Fleece (2) 20″ x 19.5″

Piece of plaid for the whale

Heat n Bond Lite

Appliqué the whale  Click HERE for the whale pattern.

IMG_9093

You can print the whale directly on Heat n Bond Lite EZ print sheets, or trace the whale onto Heat n Bond Lite.

Heat set the whale to the wrong side of the plaid fabric.

Cut out the whale.  Peel off the backing paper.

IMG_9094

Press it onto one of the denim pieces, centering.  Using 1/4″ seams, sew the denim piece to the plaid piece to make the bag front and back.  Press seams.

IMG_9099

Fuse the Heat n Bond Fusible fleece to the wrong side of the bag front and the bag back.  Add some accent stitching along the seam.

Bag Handles

Fuse the stabilizer to the wrong side of each of the handle strips.

Press in half lengthwise.  Open up and press the long ends in to meet the center.  Press.  Then press in half again.  This makes a super sturdy handle!

IMG_9095

Topstitch along both of the long edges of each handle.

IMG_9096

IMG_9097

Continue following the bag instructions from this tutorial to complete the bag.  To make the bag bottom, cut a 3″ notch out of the bottom corners of the bag and the lining.

IMG_9100
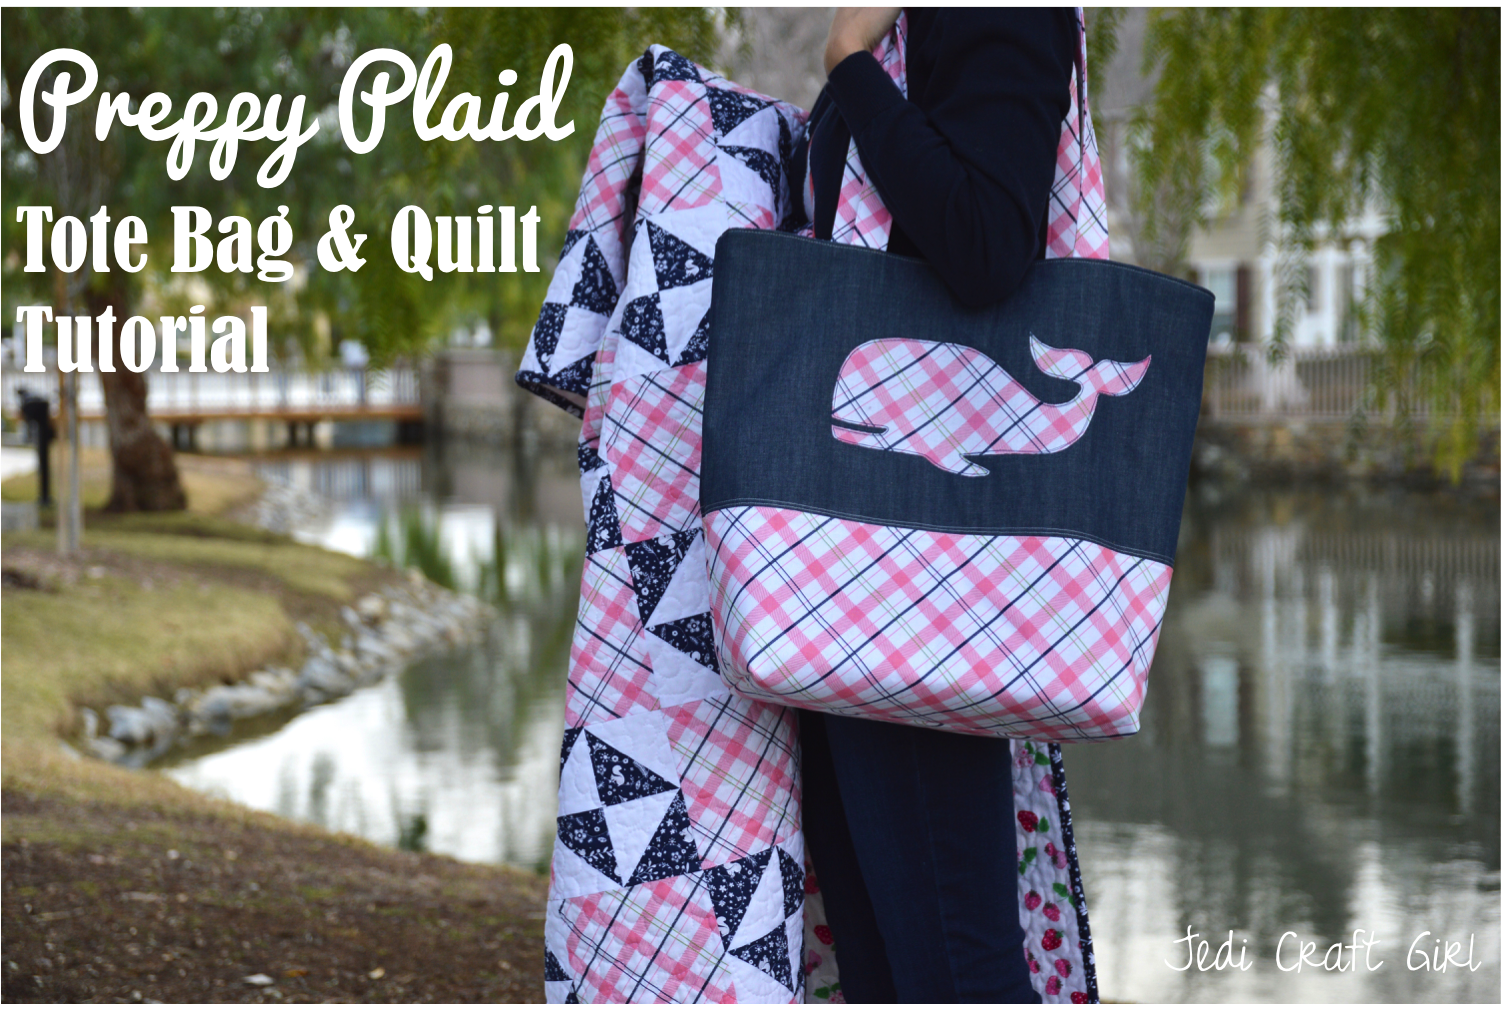
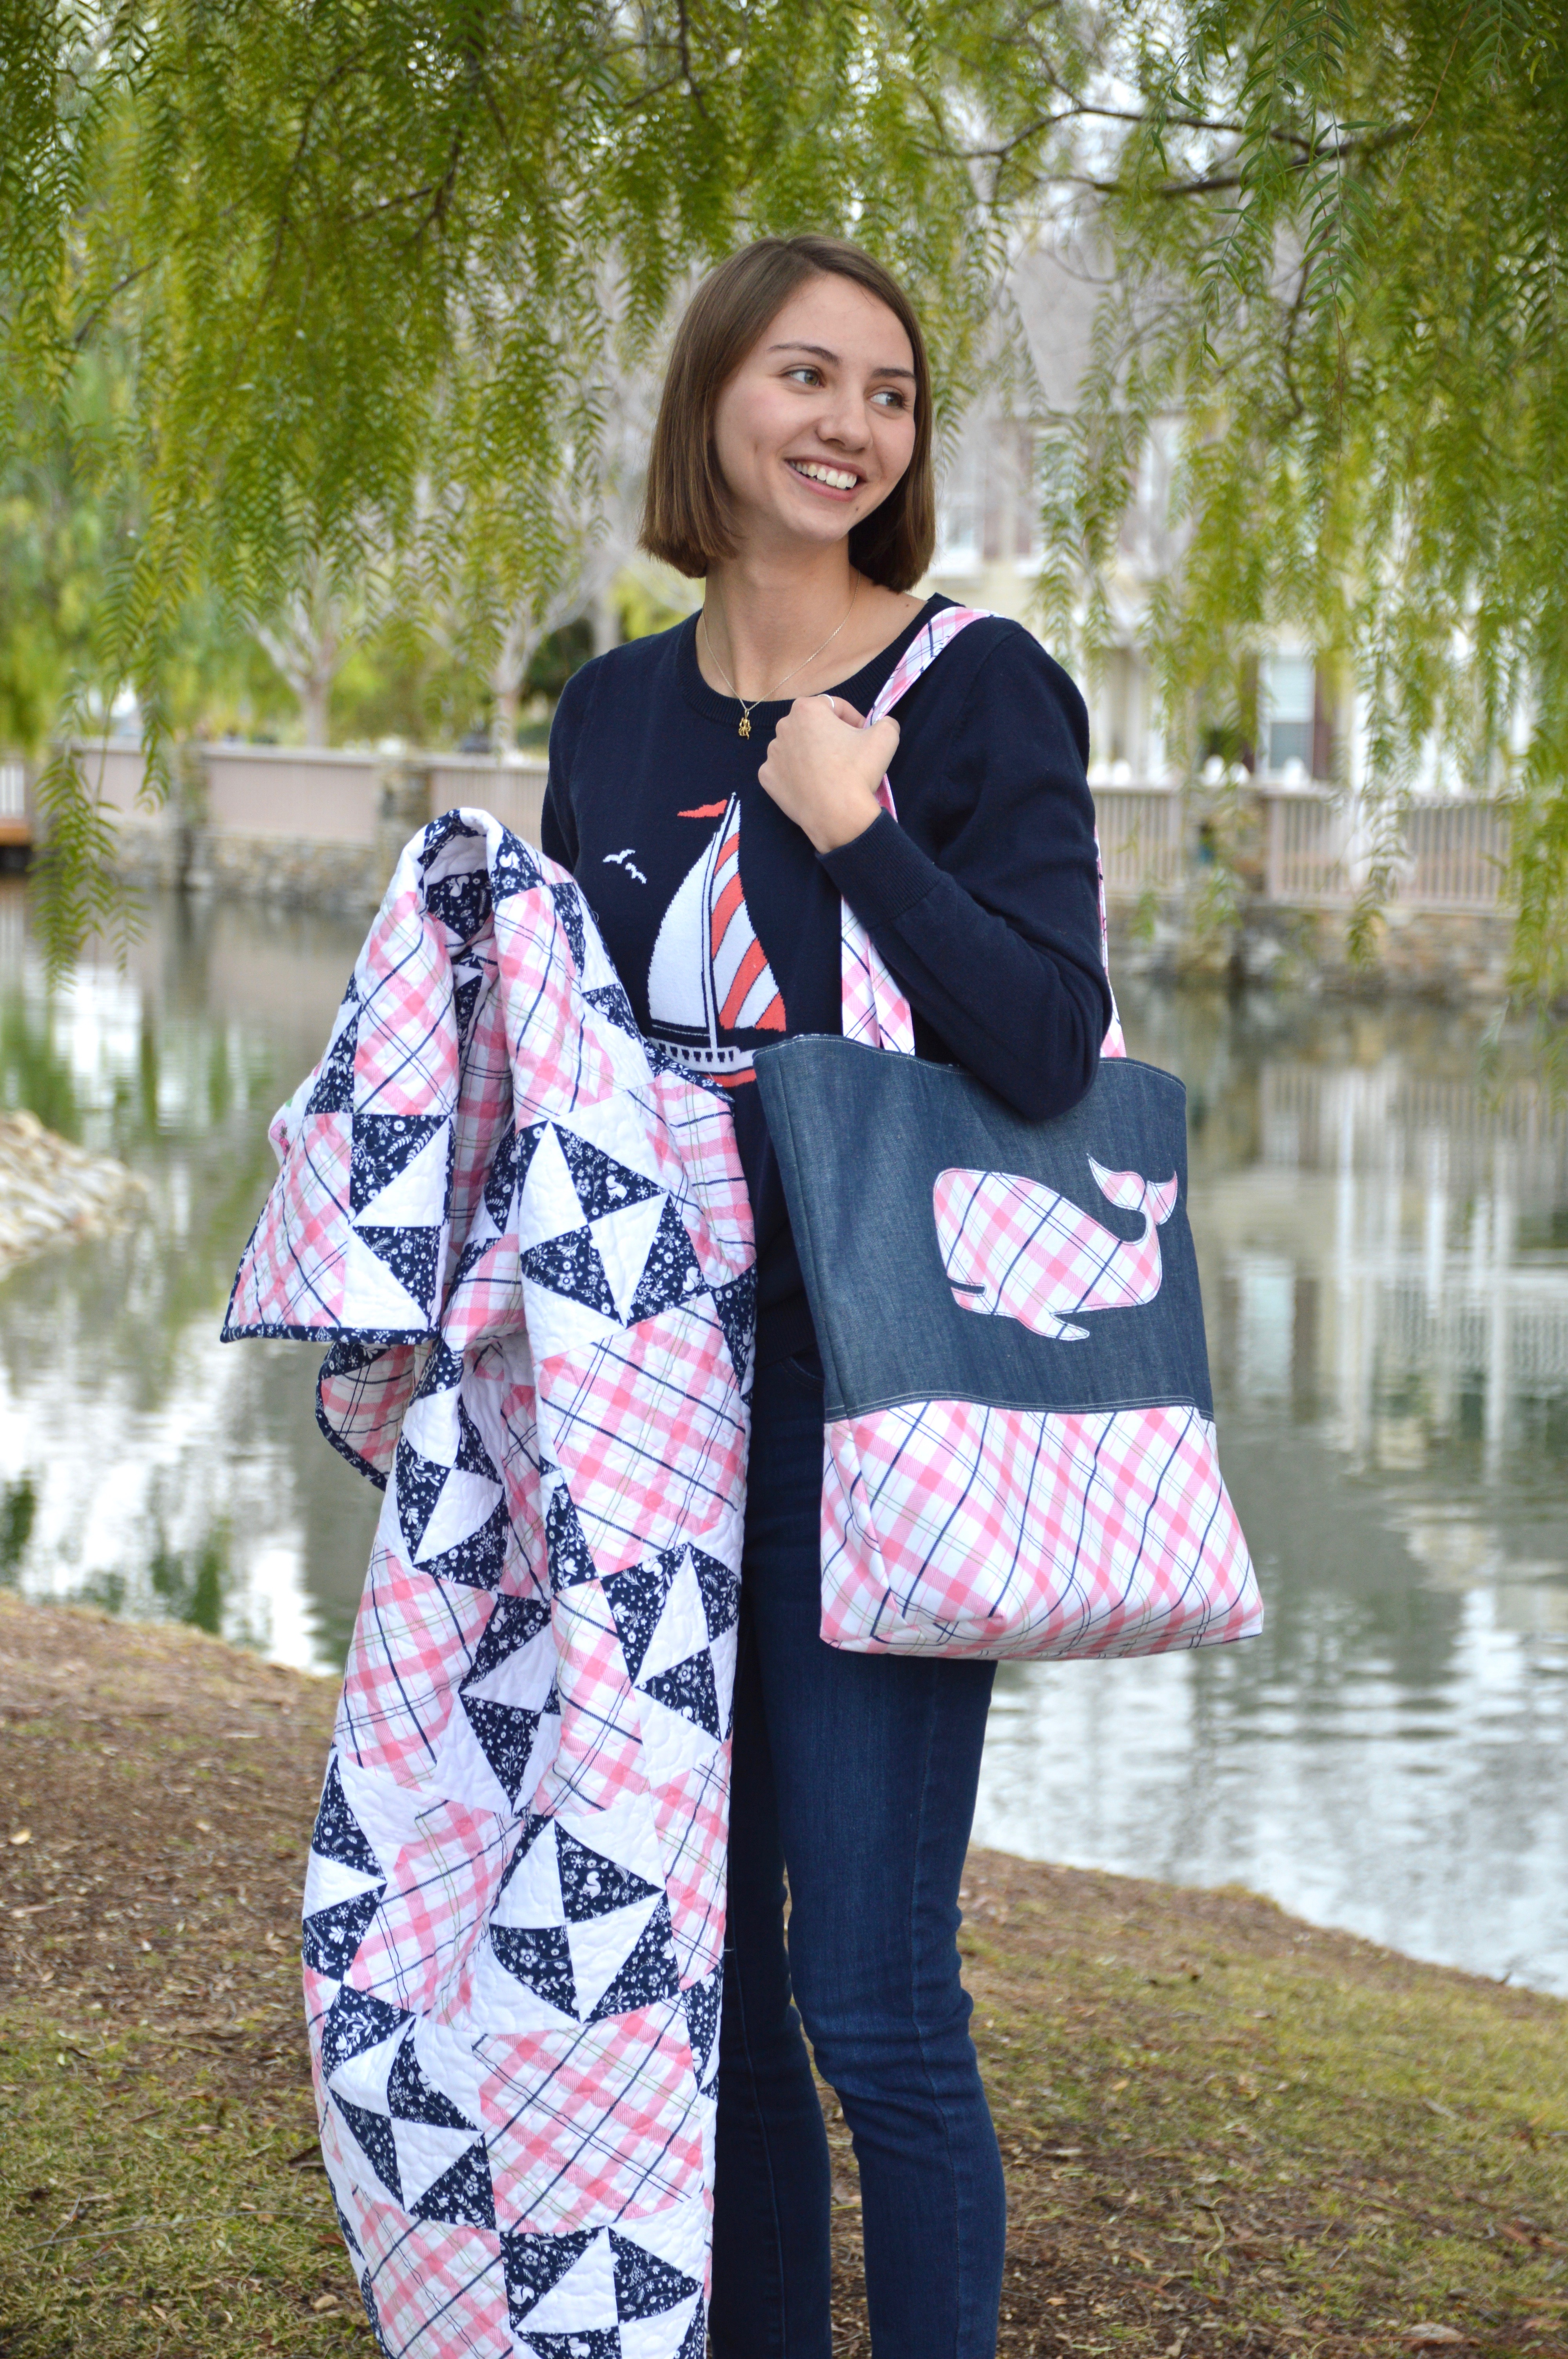
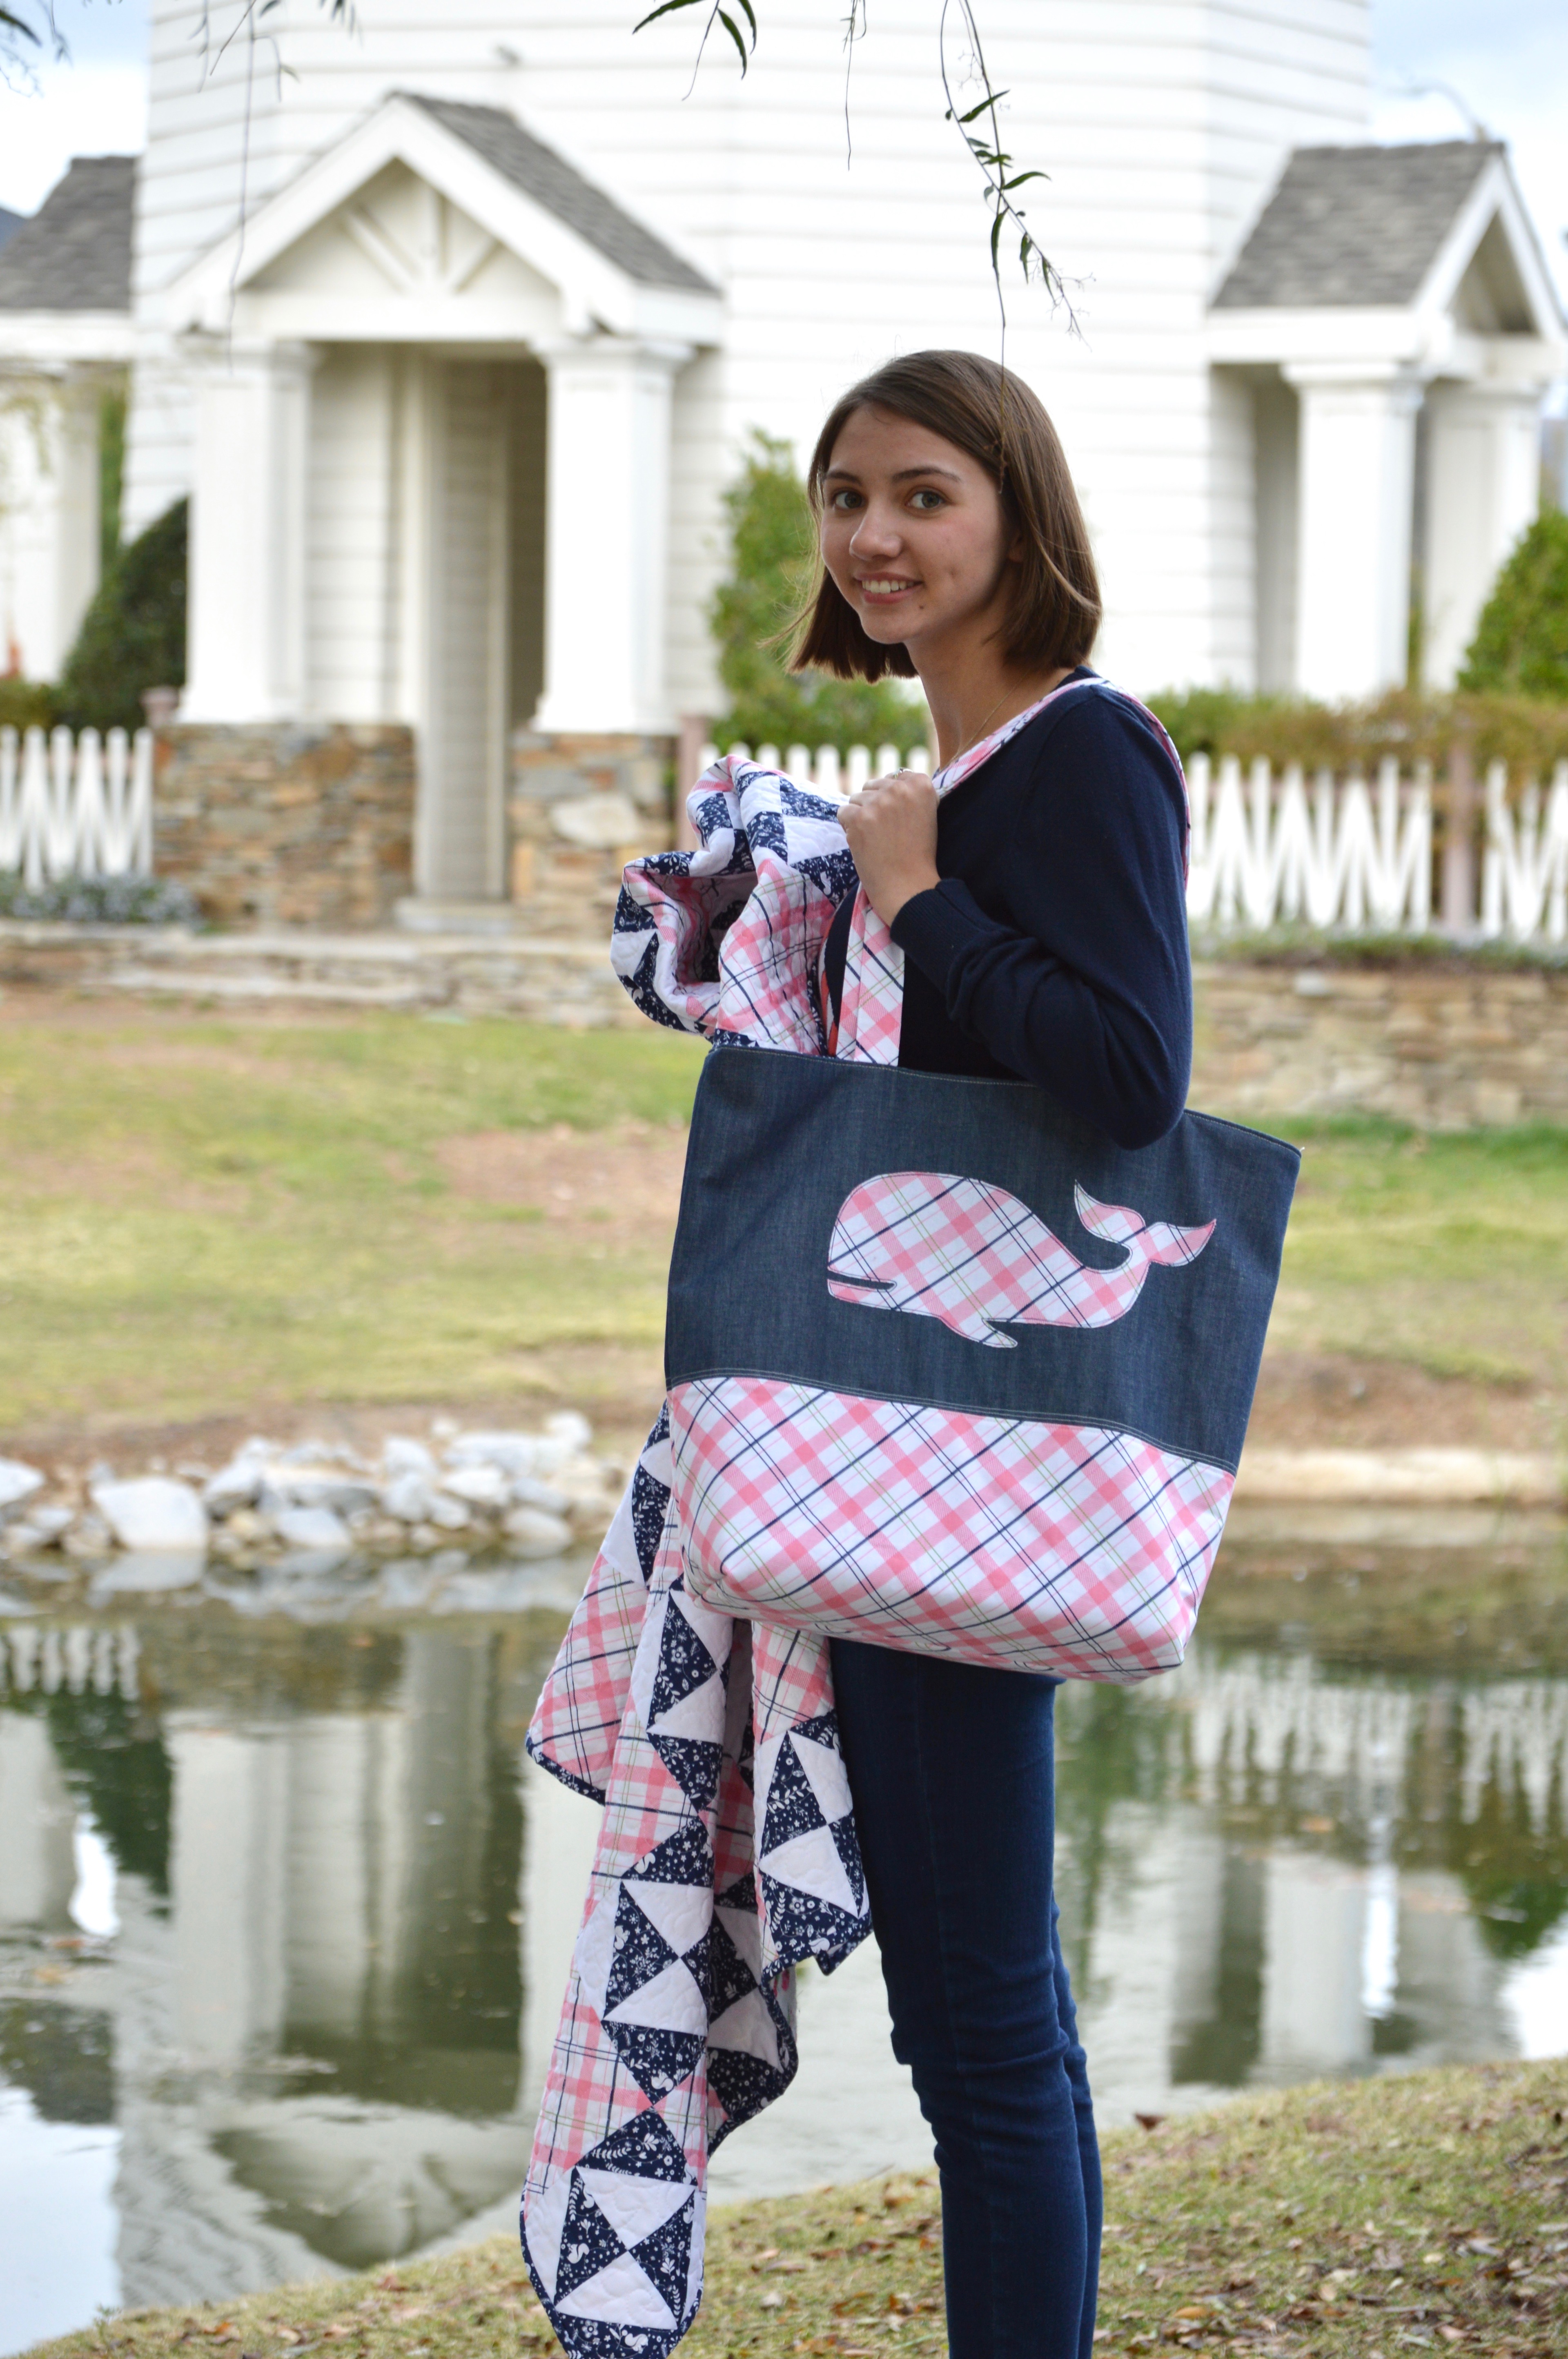
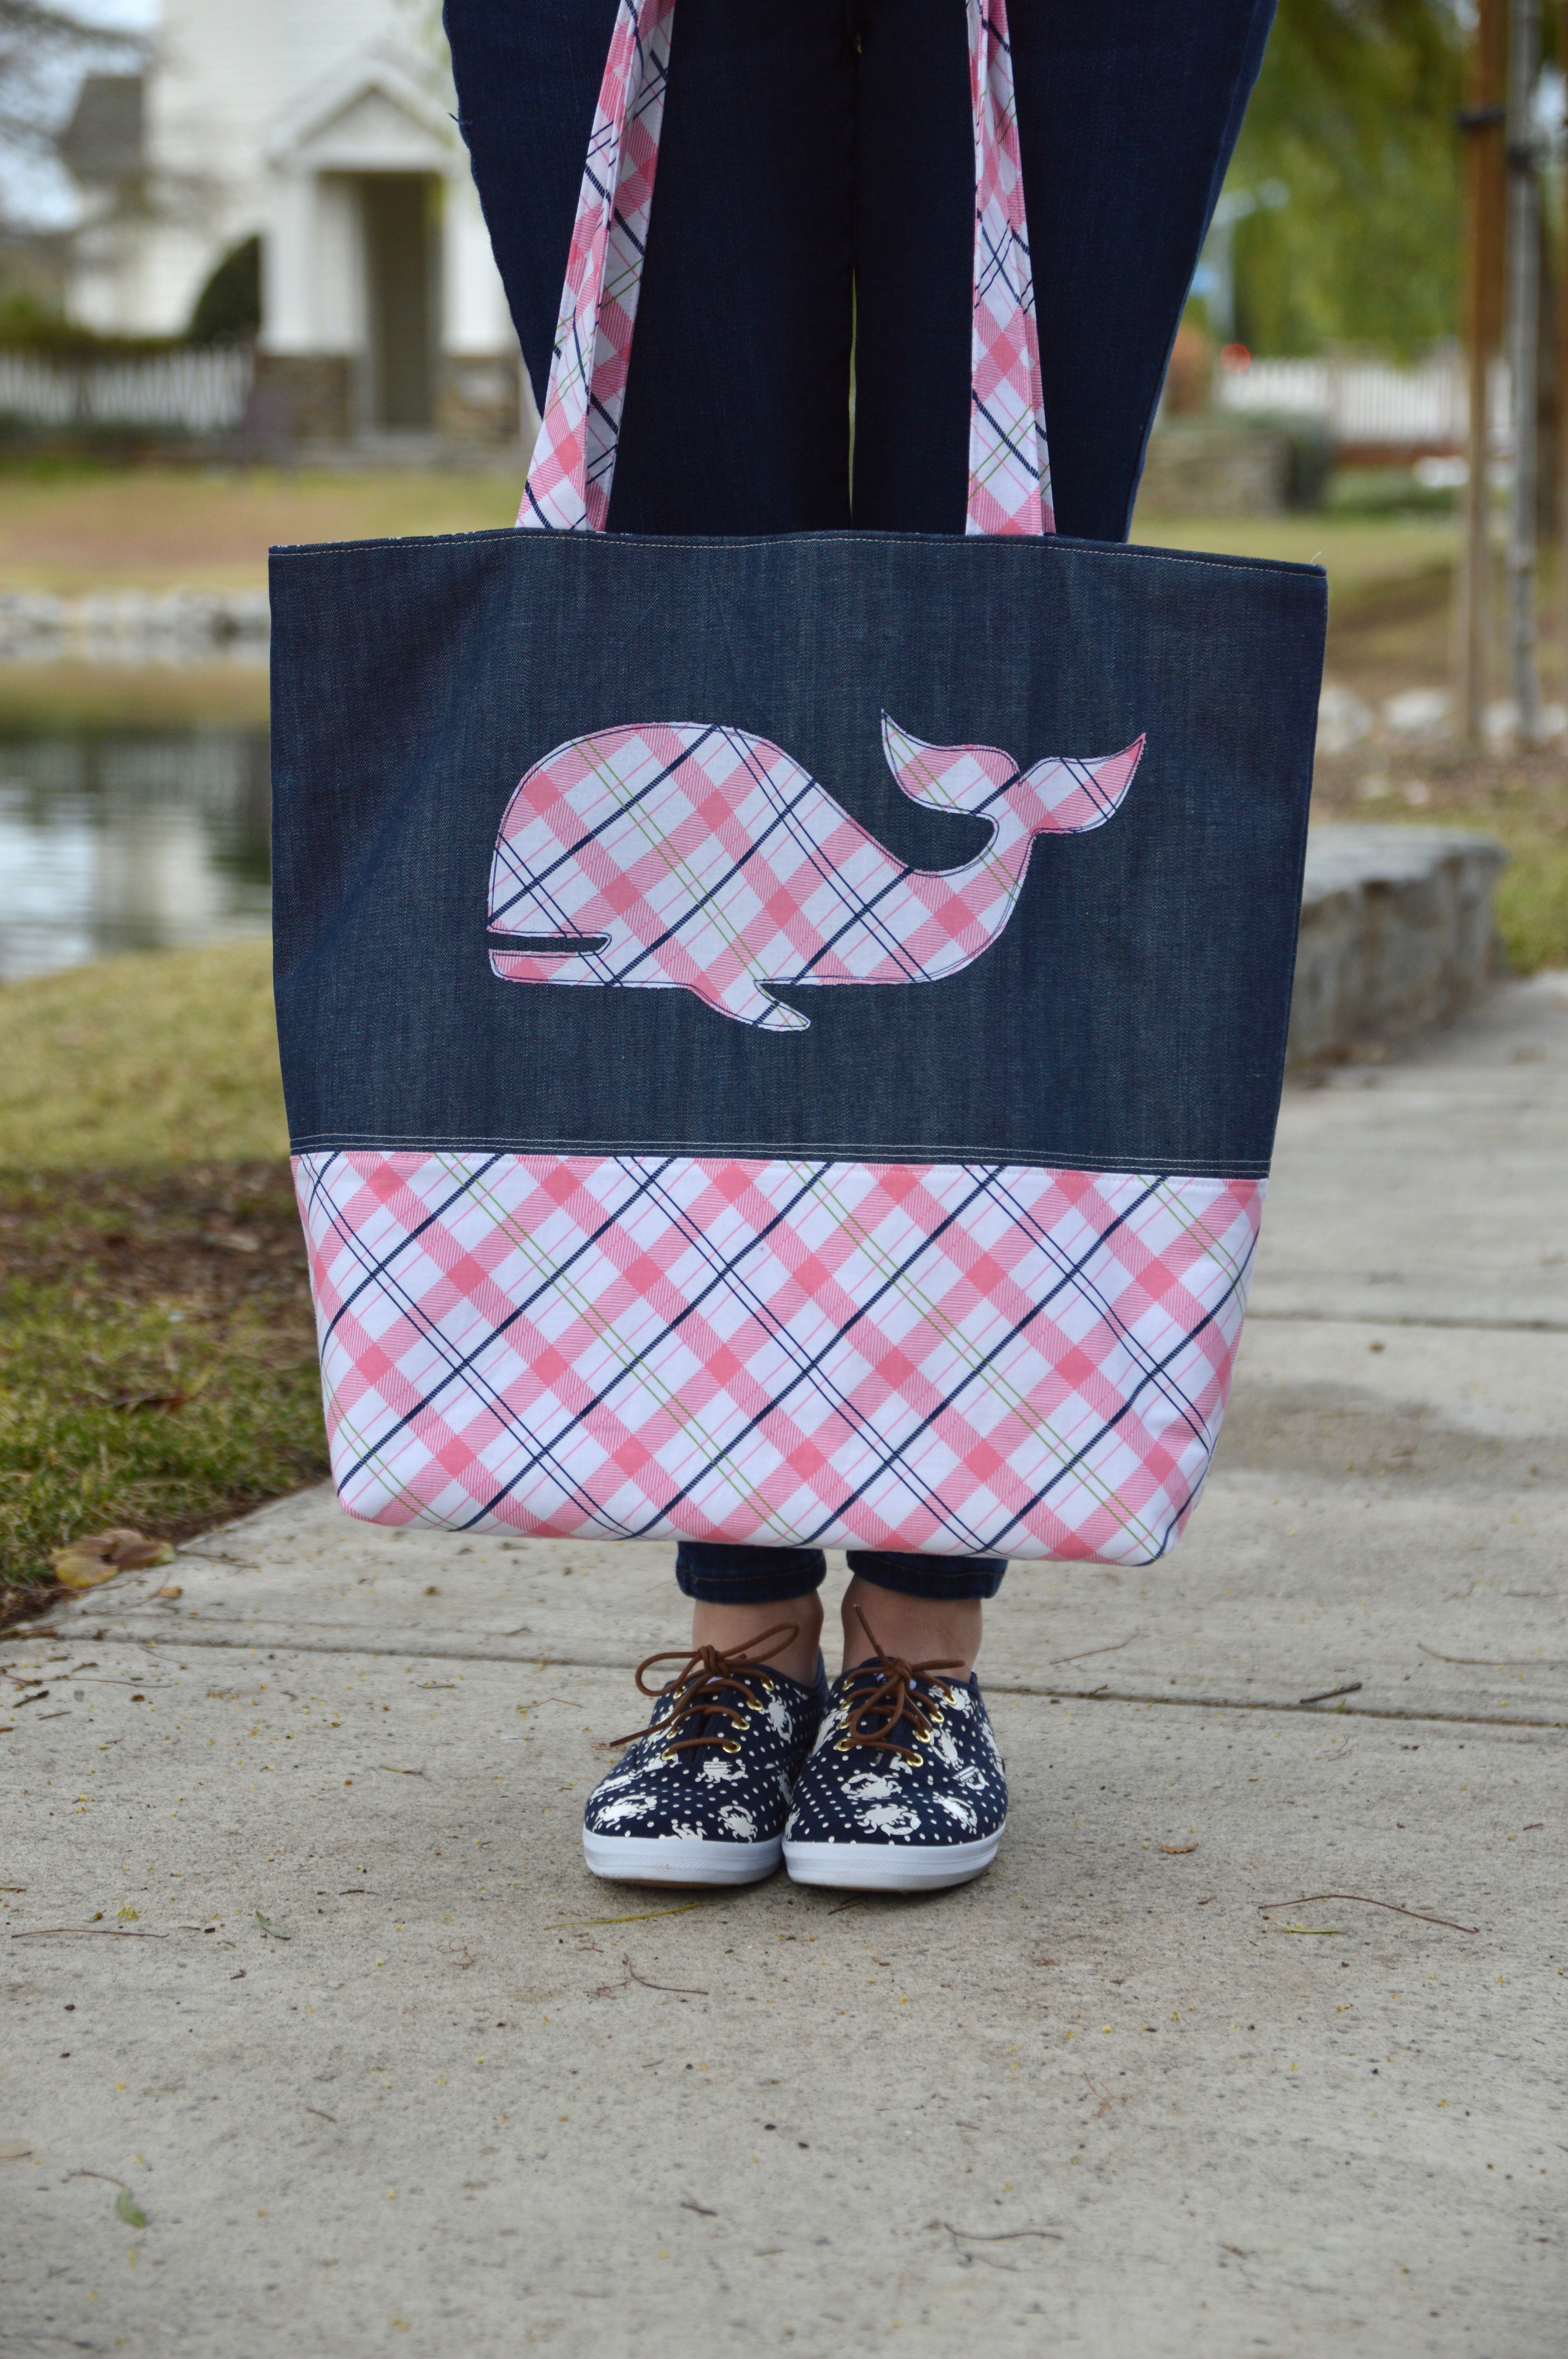
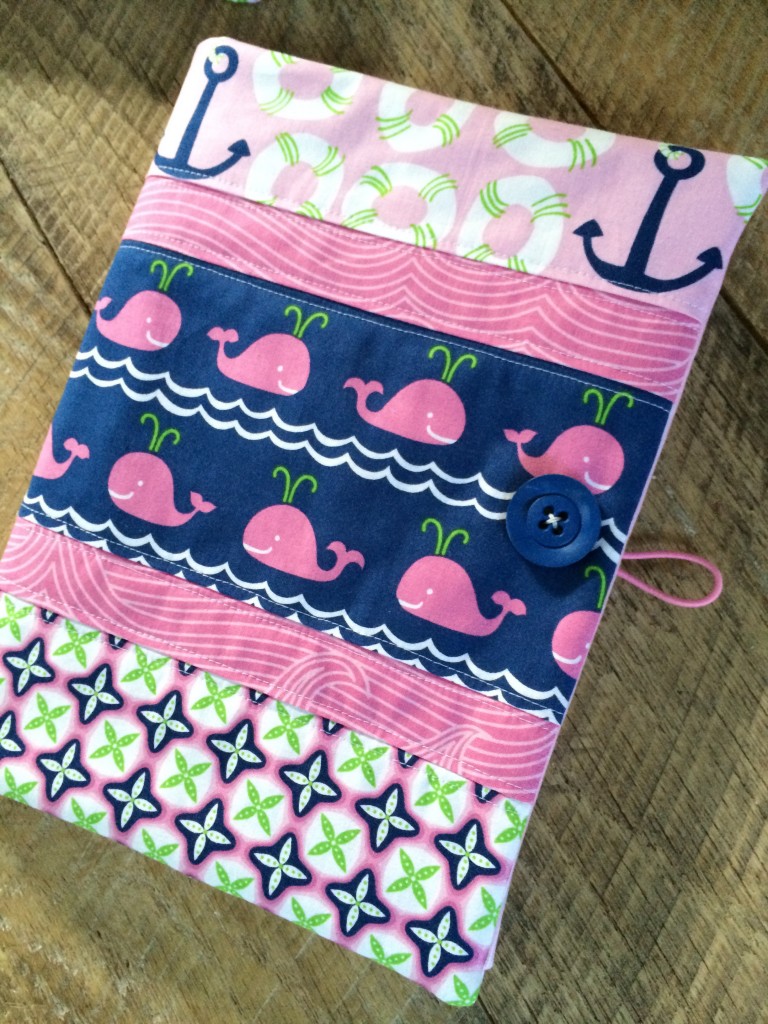
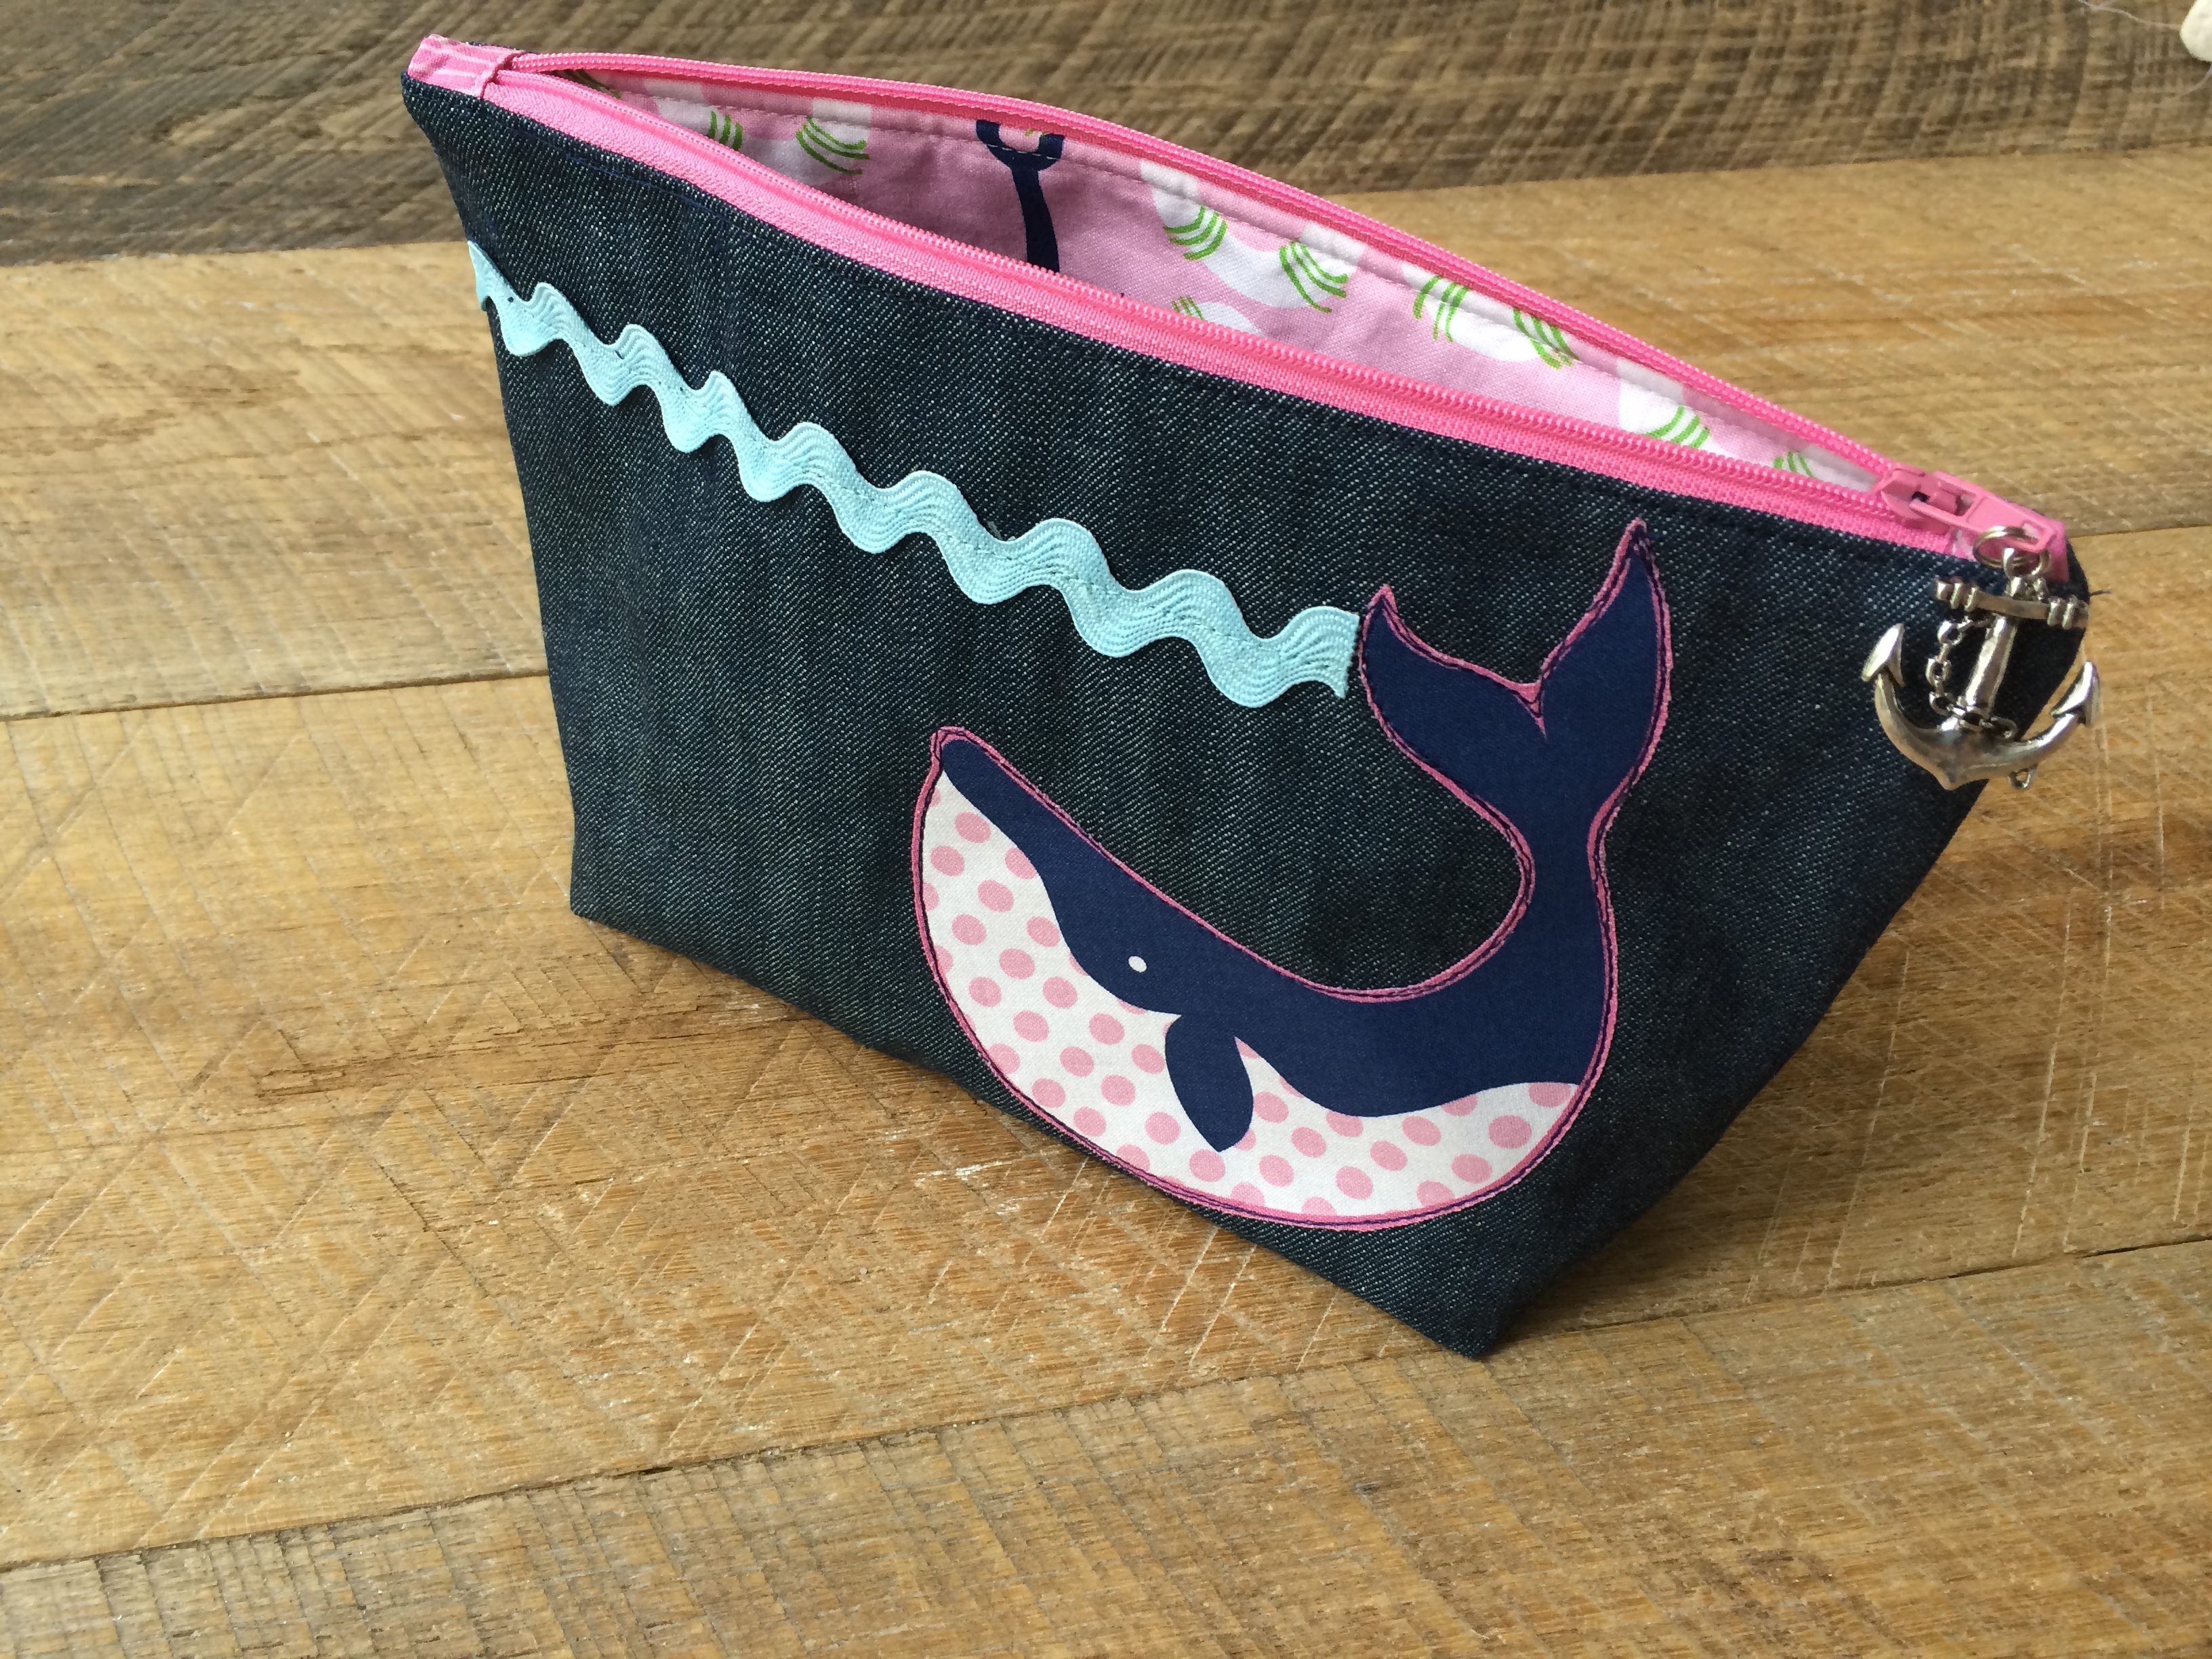
I am so in love with this tote bag!  It is such a great size, and if feels sturdy and it is super preppy plaid cute!!
DSC_0136
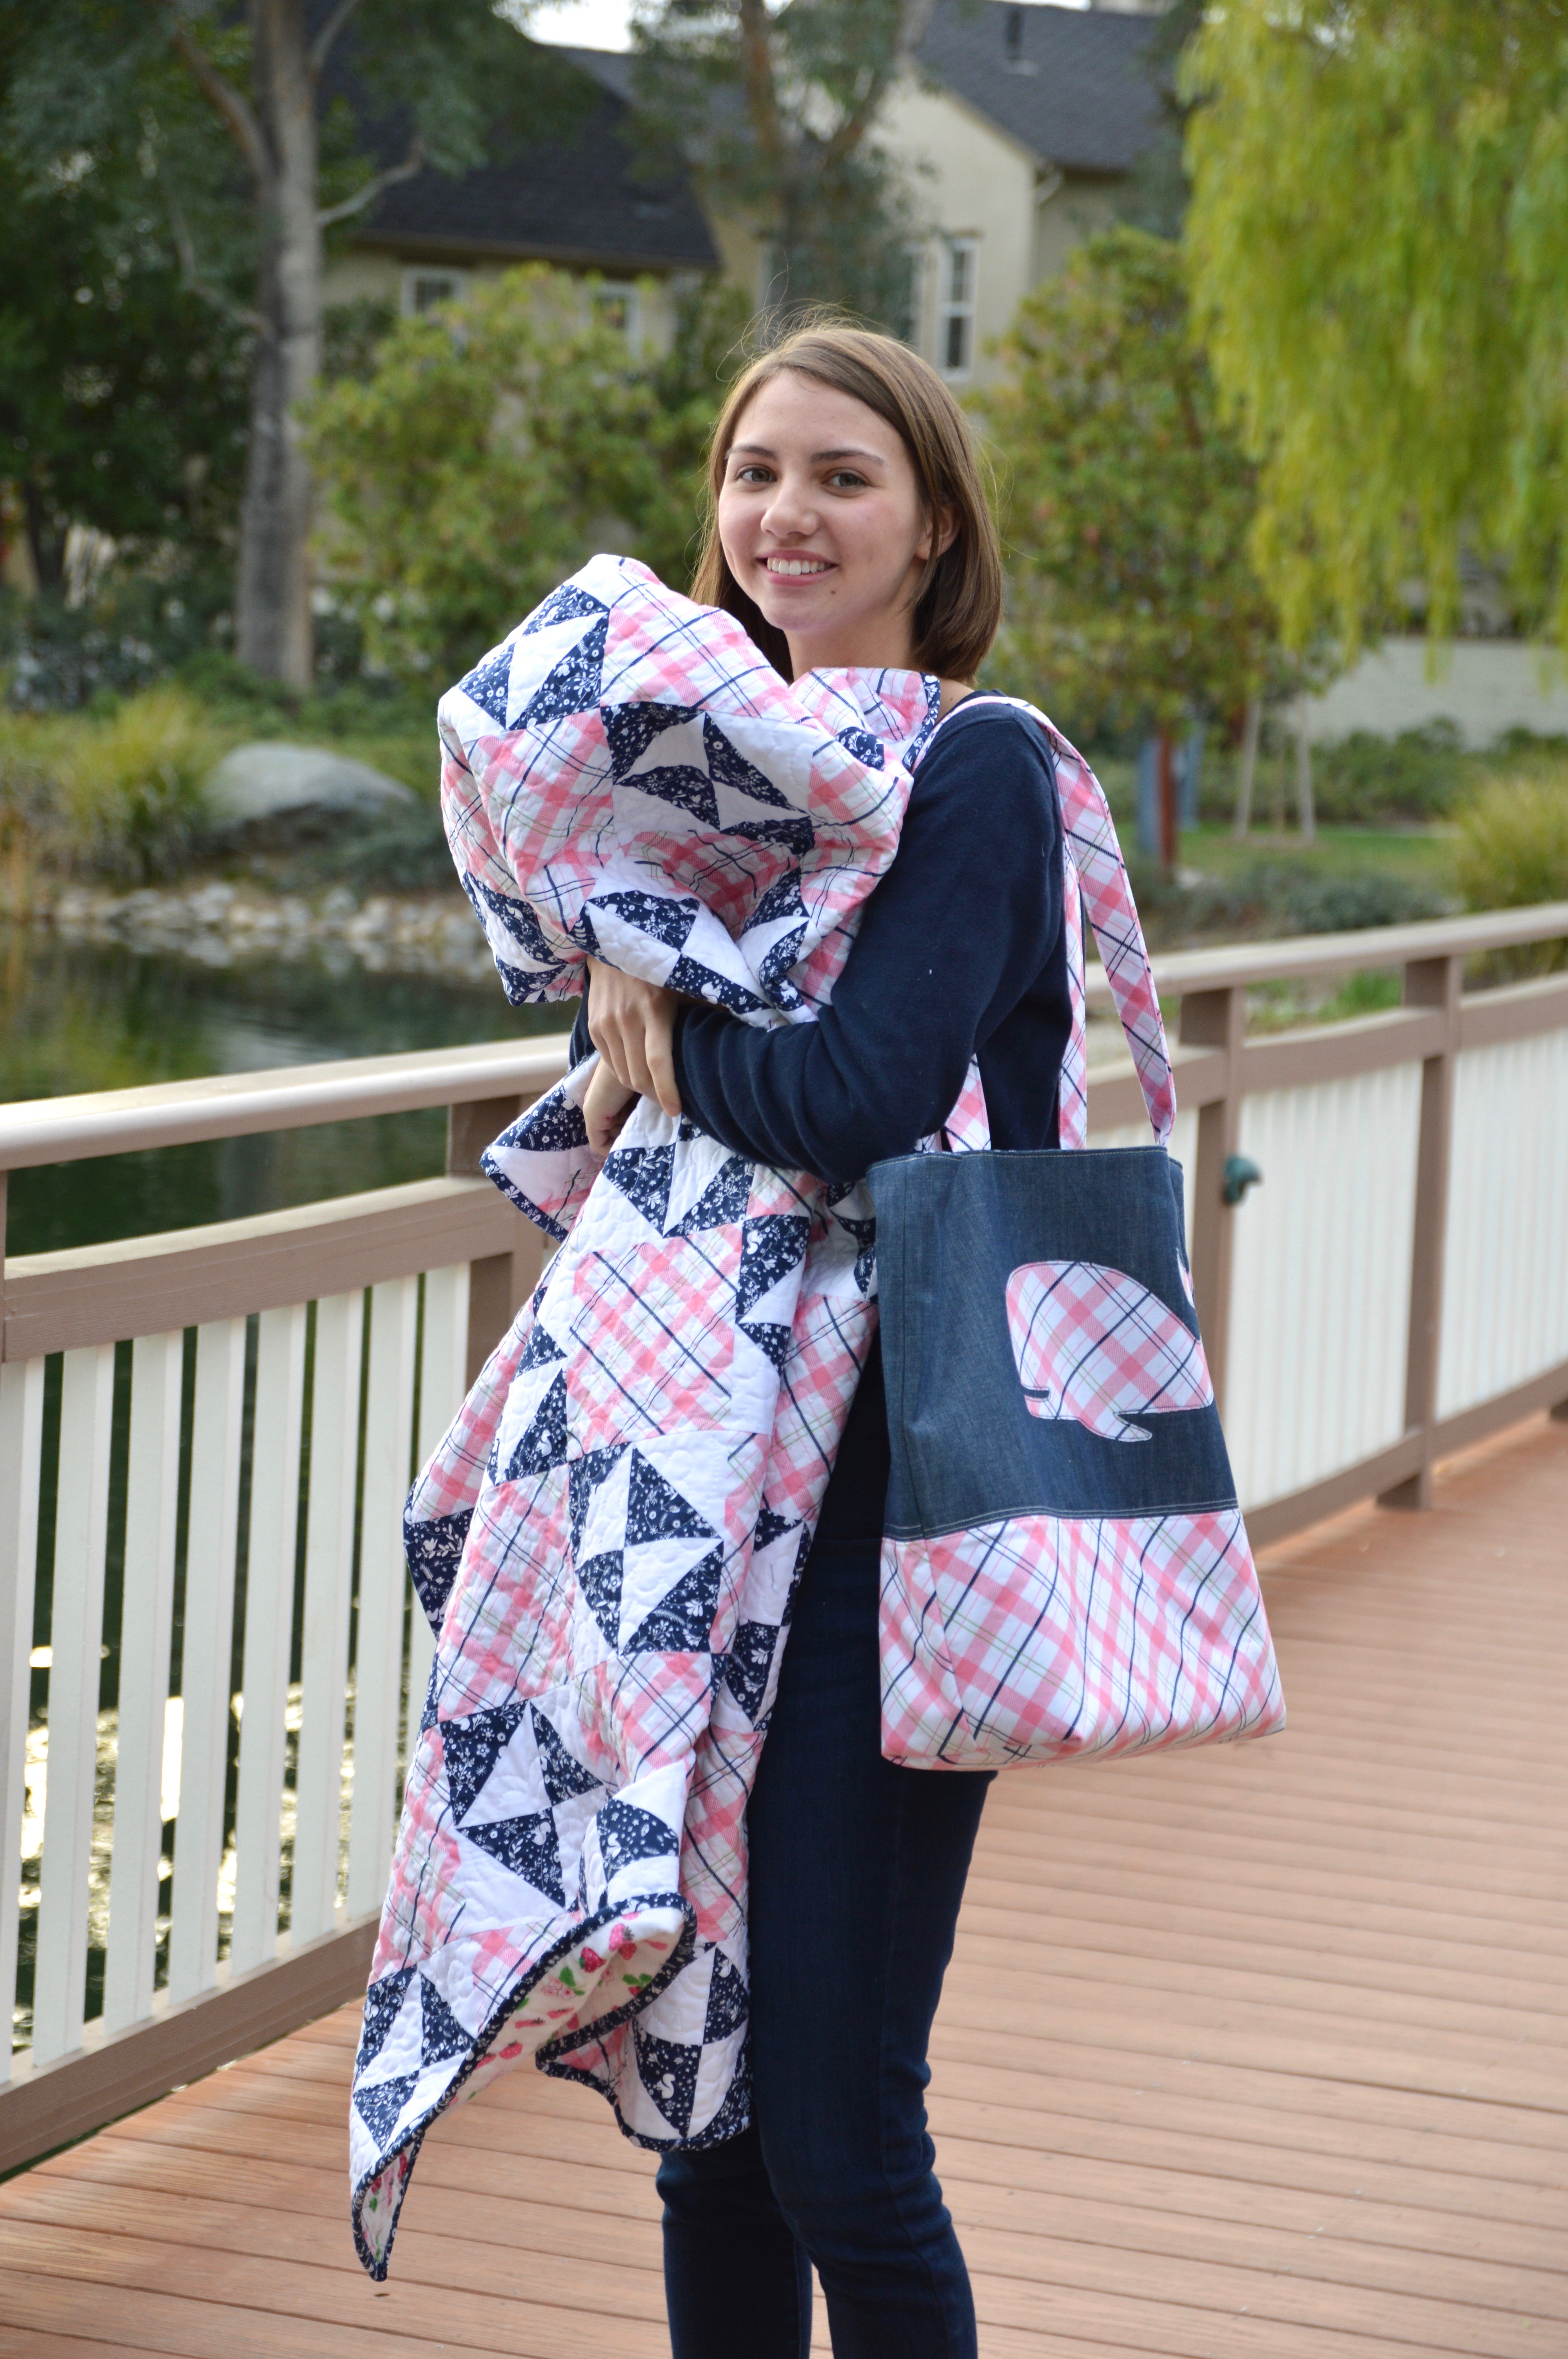
I’m ready for an Eastern Seaboard Vacation!!!
Together they make the Perfect Preppy Plaid Pair!!!!!
DSC_0110

Enchanted logo 2

Be sure to check out these amazing designers to see what they’ve created using Riley Blake’s Enchanted Fabric!!!

Blog Tour Schedule

Monday, Jan 23rd – Little Londyn

Tuesday, Jan 24th – Jedi Craft Girl

Wednesday, Jan 25th – Loose Threads

Thursday, Jan 26th – Meags and Me

Friday, Jan 27th – Pretty by Hand

Monday, Jan 30th – Tie Dye Diva

Tuesday, Jan 31st – Two Sisters as Squirrel Hallow

Wednesday, Feb 1st – Striped Swallow Designs

Thursday, Feb 2nd – Izzy and Ivy

Friday, Feb 3rd – Ellis and Higgs

Monday, Feb 6th – Aurifil

Tuesday, Feb 7th – The Crafy Quilter

Wednesday, Feb 8th – Two Sisters at Squirrel Hallow

Thursday, Feb 9th – Jina Barney Designz

Friday, Feb 10th – Riley Blake

You could win a bundle of Enchanted fabric by visiting Dodi’s blog, Loose Threads (www.sashgals.com) and leaving a comment.

One entry per blog post, per day of the Blog Tour, there on Loose Threads.

Enter every day to increase your chance of winning!!!

True Blue Summer Satchel


summer satchel
I love summer! Isn’t it the best!!!! In our family we have lots of outdoor actives and camps scheduled. Sometimes I need to carry a few items around that I can have quick access too, like my clipboard, water, bug spray and flashlight. I came up with this pattern for a cross-body satchel. It’s not complicated and sews up quick – it would be fun to make one for the whole family – you can match at your family reunion!IMG_8140_2

I used Heat n Bond® Medium Weight Fusible Stabilizer to give the bag more stability. Don’t you just love these whales by Blend Fabrics!!!
IMG_8136_2


Here is how you can make one:

Supplies:

1/2 yard outer bag
1/2 yard lining
1/3 yard bag strap
1 yard Heat n Bond® Fusible staibilizer

Cut:

(2) outer bag 15″wide x 16″ tall
(2) lining 15″wide x 16″ tall
(2) stabilizer 15″wide x 16″ tall
(2) Strap 5″ x WOF


IMG_8108_2

Fuse the HeatnBond® stabilizer to the wrong side of the (2) outer bag pieces.IMG_8109_2

With right sides together, pin all the way around the outer bag, leaving the top open. Do the same with the lining pieces. Sew using 1/3″ seam all the way around leaving the top open. You should have (2) bags, one outer and one lining.IMG_8110_2

To form a pleate in the bottom, cut a 1″ notch out of the bottom corners of the outer bag and the lining.IMG_8111

Match seams, pin, and sew 1/4″ seam, backstitching to start and stop.IMG_8112

Sew the (2) 5″ strap pieces together end to end. Press the seams open. Measure how long you want your strap. Mine was 48″. Cut at the desired length. Fold in half, right sides together and sew 1/3″ seam all the way down.
IMG_8113

Turn right side out, press and top stitch.IMG_8114

Baste (1/8″) the ends of the strap centering on the side seams on the right side of the outer bag.IMG_8115

Place the lining inside the bag so that right sides are facing each other. Match side seams and pin all the way around.IMG_8116Sew 1/4″ seam all the way around the top of the bag leaving a 3″ opening. Turn bag right side out and press. Sew a 1/8″ top stitch around the bag top, sewing the opening closed.
IMG_8117_2

IMG_8130

IMG_8122

To add a little detail to the fabric, I used Deco Foil™ Transfer Adhesive and followed the loops on the fabric. After it dried I rubbed the Deco Foils™ on the adhesive. You can add a little shine to any project this way!!

IMG_8142

Sizzix Whale Bookmark Tutorial

whale bookmark tutorial

In celebration of Earth Day, today, I thought I would share this fast and fun tutorial for a whale bookmark using the Sizzix Whale Die.  I have loved whales my whole life.  I remember as a little girl saving up my money to buy a $5 gold colored whale necklace; I was so excited because a portion of the money would go to the “Save the Whales” fund.

sizzix whale bookmark 8

Here’s what you need to make the bookmark:

scrap of aqua, gray dots, and red fabrics

Heat n Bond Fusible Fleece

Sizzix Whale Die

Heat n Bond Lite fusible applique

Grommet or large eyelet

scraps of ribbon/trim

Instructions

Begin by cutting the aqua fabric (2) 4″ x 10″

Cut the Fusible Fleece the same size, 4″ x 10″

(sorry for the photo quality, I do my best work late at night!!!!)
sizzix whale bookmark 2

Draw an angle in the upper corners to form the shape of a tag.  Notice where I positioned my lines in comparison to the grid:

sizzix whale bookmark 4

Iron the fusible fleece to one of the aqua pieces on the wrong side.  Plaace right sides of the bookmark pieces together. Sew around the bookmark,using a generous 1/4″ seam.  Leave an opening along the side for turning.  Trim the edges close to the seam and clip corners.  Turn right side out, press.  Top stitch.

sizzix whale bookmark 5

For the whale and heart appliqué pieces, iron the Heat n Bond Lite to the wrong side of the gray fabric.  Cut out a rectangle roughly the size of the Sizzix Whale Die.  Run it through the Big Shot or Fabi Machine.  For the heart, I cut it freehand.  Peel the backing paper off.sizzix whale bookmark 3
Position the appliqué pieces as desired.  Iron in place.  Top stitch around the whale and the hart.
sizzix whale bookmark 6

When you are finished, add a grommet or eyelet and tie ribbons through it.

sizzix whale bookmark 10

It also doubles as a cat toy!!!sizzix whale bookmark 7

I think it’s the cutest and I totally needed an new bookmark!!!
sizzix whale bookmark 9
sizzix whale bookmark 11

Summer Nautical Pillows

summer throw pillow tutorialI know most of the stores have their fall and even Christmas decorations out on the shelves,  but we still have one more week of summer vacation left and I am embracing every minute of it!  Summer is my favorite!  I love being with my children all day and just being FREE!!!!!  I had to get in one more summer sewing project.  I decorated my family room with a few nautical pops here and there and my couch was begging for some nautical pillows!  These sew up in a snap!


Sea Critters Pillow (20″):

Don’t you just love this fabric from Dear Stella?  We love sea critters at our house!

Cut the sea critters fabric 13.5″ x 20″

Seersucker Twist Red from Blend fabric 7″ x 20″

cotton batting 21″ or larger

20″ navy blue lace trim

2 yards navy fringe trim

20″ square Denim for the back

20″ or longer Zipper

accent fabric 4.5″ x 20″

20″ pillow form

Spray n Bond for basting
nautical pillow tutorial


Sew them together using 1/4″ seams.  Using Spray n Bond basting spray, baste the pillow top to the batting.nautical_pillow_tutorial_1

With the two pieces basted you can quilt as desired.  Straight lines would be cute, I was impatient and free motion is faster for me 🙂nautical_pillow_tutorial_2


Trim off the excess batting
nautical_pillow_tutorial_3


Add the navy blue lace trimnautical_pillow_tutorial_4

Sew the navy blue fringe to the right side of the pillow.  I found it easier to use my walking foot.  Curve the corners.
nautical_pillow_tutorial_6

Prepare the back of the pillow.  I have found this is the fastest way to finish a pillow.  For the tutorial on how to do this, click HERE.  I cut the back 20″ and then cut 3″ from the top for the zipper placement.  The chevron piece is cut 4.5″ and then folded in half.

nautical_pillow_tutorial_5

Now that the back is ready, place the right sided together, with the zipper open, and sew all the way round the pillow using 1/4″ seams.  Turn and insert the pillow form.
nautical_pillow_tutorial_7

I Heart Whales Pillow (20″)

This is very similar to my pink I Heart Whales pillow found HERE.  Follow those directions for the Heat n Bond Applique.

nautical_pillow_tutorial_10

Cut the solid white 10.5″ x 20″

Cut (2) Seersucker Twist Blue from Blend fabric 5.25″ x 20″

“I Heart” pattern click HERE

Whales from Blend’s True Blue fabric line

Prepare the appliqué pieces (directions HERE).  Iron the pieces to the solid white fabric.  Sew the blue fabrics to the white fabric using 1/4″ seams.
nautical_pillow_tutorial_9

Using Spray n Bond, baste the pillow top to the cotton batting and quilt.  Instead of appliquéing the images on before quilting, I sewed around each image in navy thread during the quilting process to give the pieces a little pop.

nautical_pillow_tutorial_11


I finished this pillow the same way as the Sea Critters pillow with the same navy trim.

I love the backs of the pillows!nautical_pillow_tutorial_12

nautical_pillow_tutorial_13


Whaley Whale Quilt Tutorial

whale quilt tutorial

Did I happen to mention I love whales and I love this True Blue fabric line from Blend?  (haha)  The fabrics needed to come together in a quilt and I LOVE how it turned out.  Here it the pattern if you would like to make one – it is a quick quilt for sure!!

Finished Quilt Size: 40.5″ x 51″

Whale fabric 1 yard

Blue Wave fabric 0 .5 yards

White fabric – 1 yard

Coordinating prints (5) – fat quarters or quarter yard cuts

Spray n Bond Basting Adhesive


Begin with the whale strips….

Cut (3) 10″ x WOF Whale strips

Cut the blue wave fabric into (3) 4″ x WOF strips.

whale quilt true blue blend
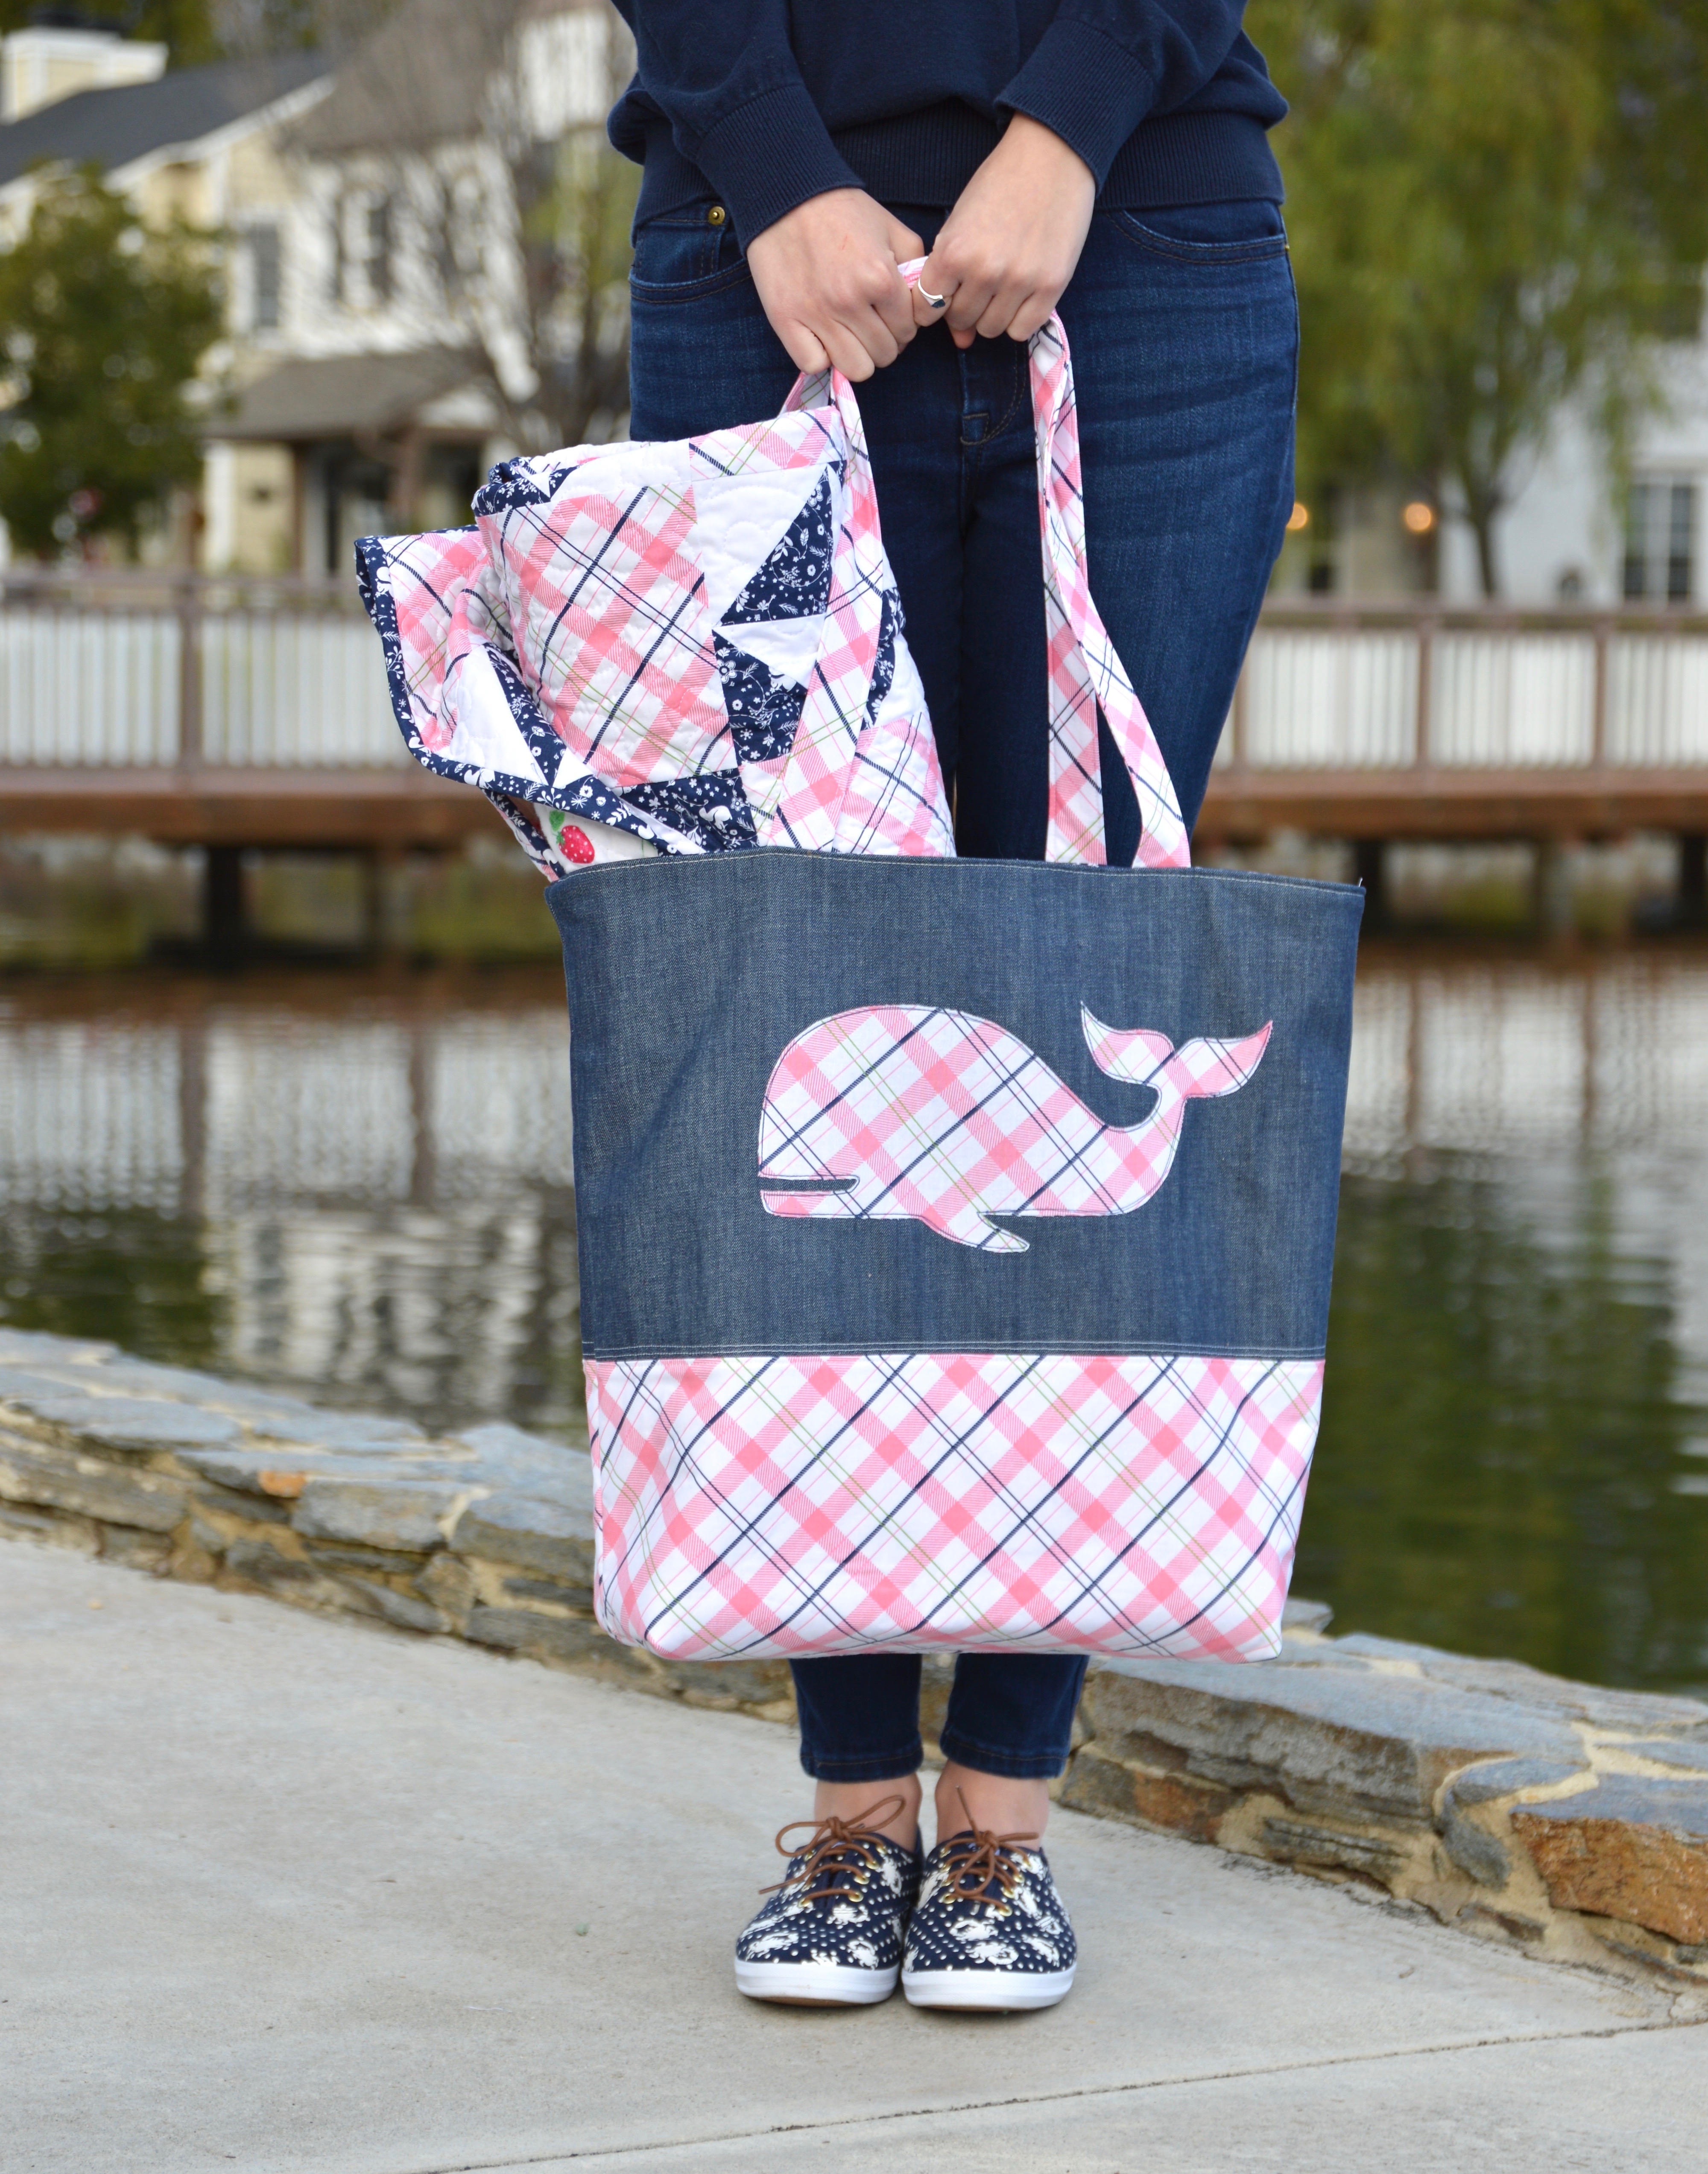
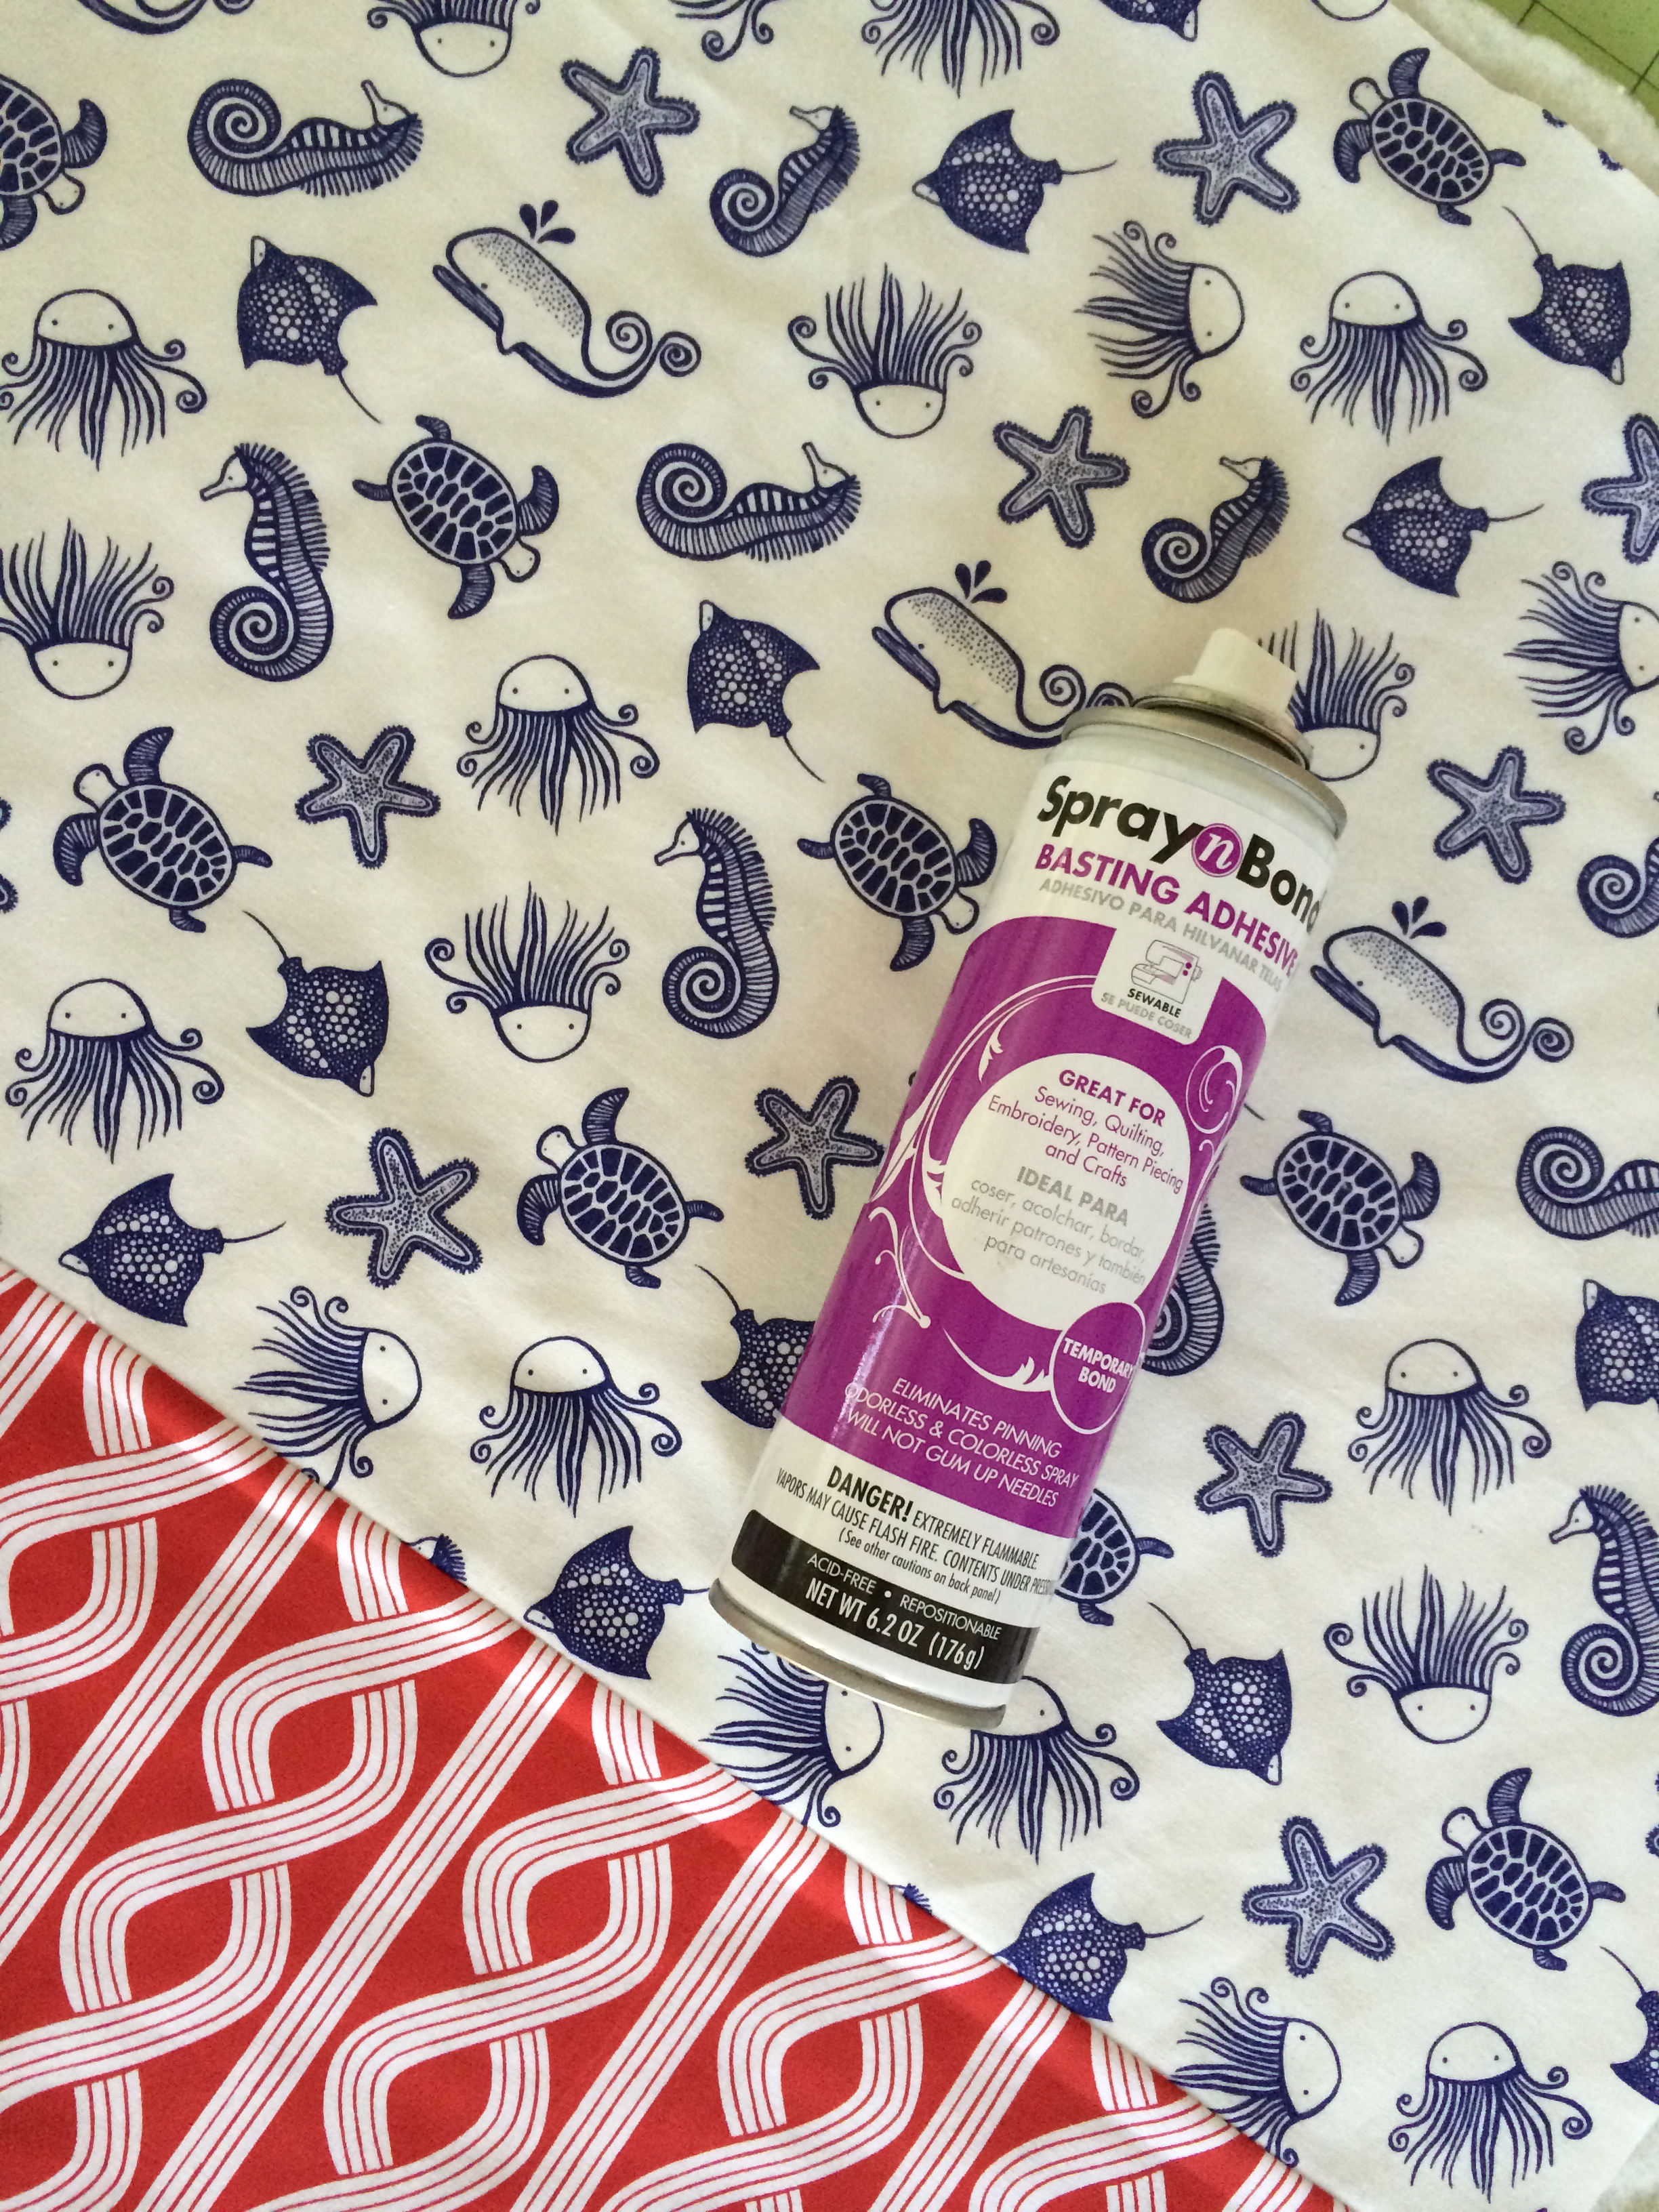
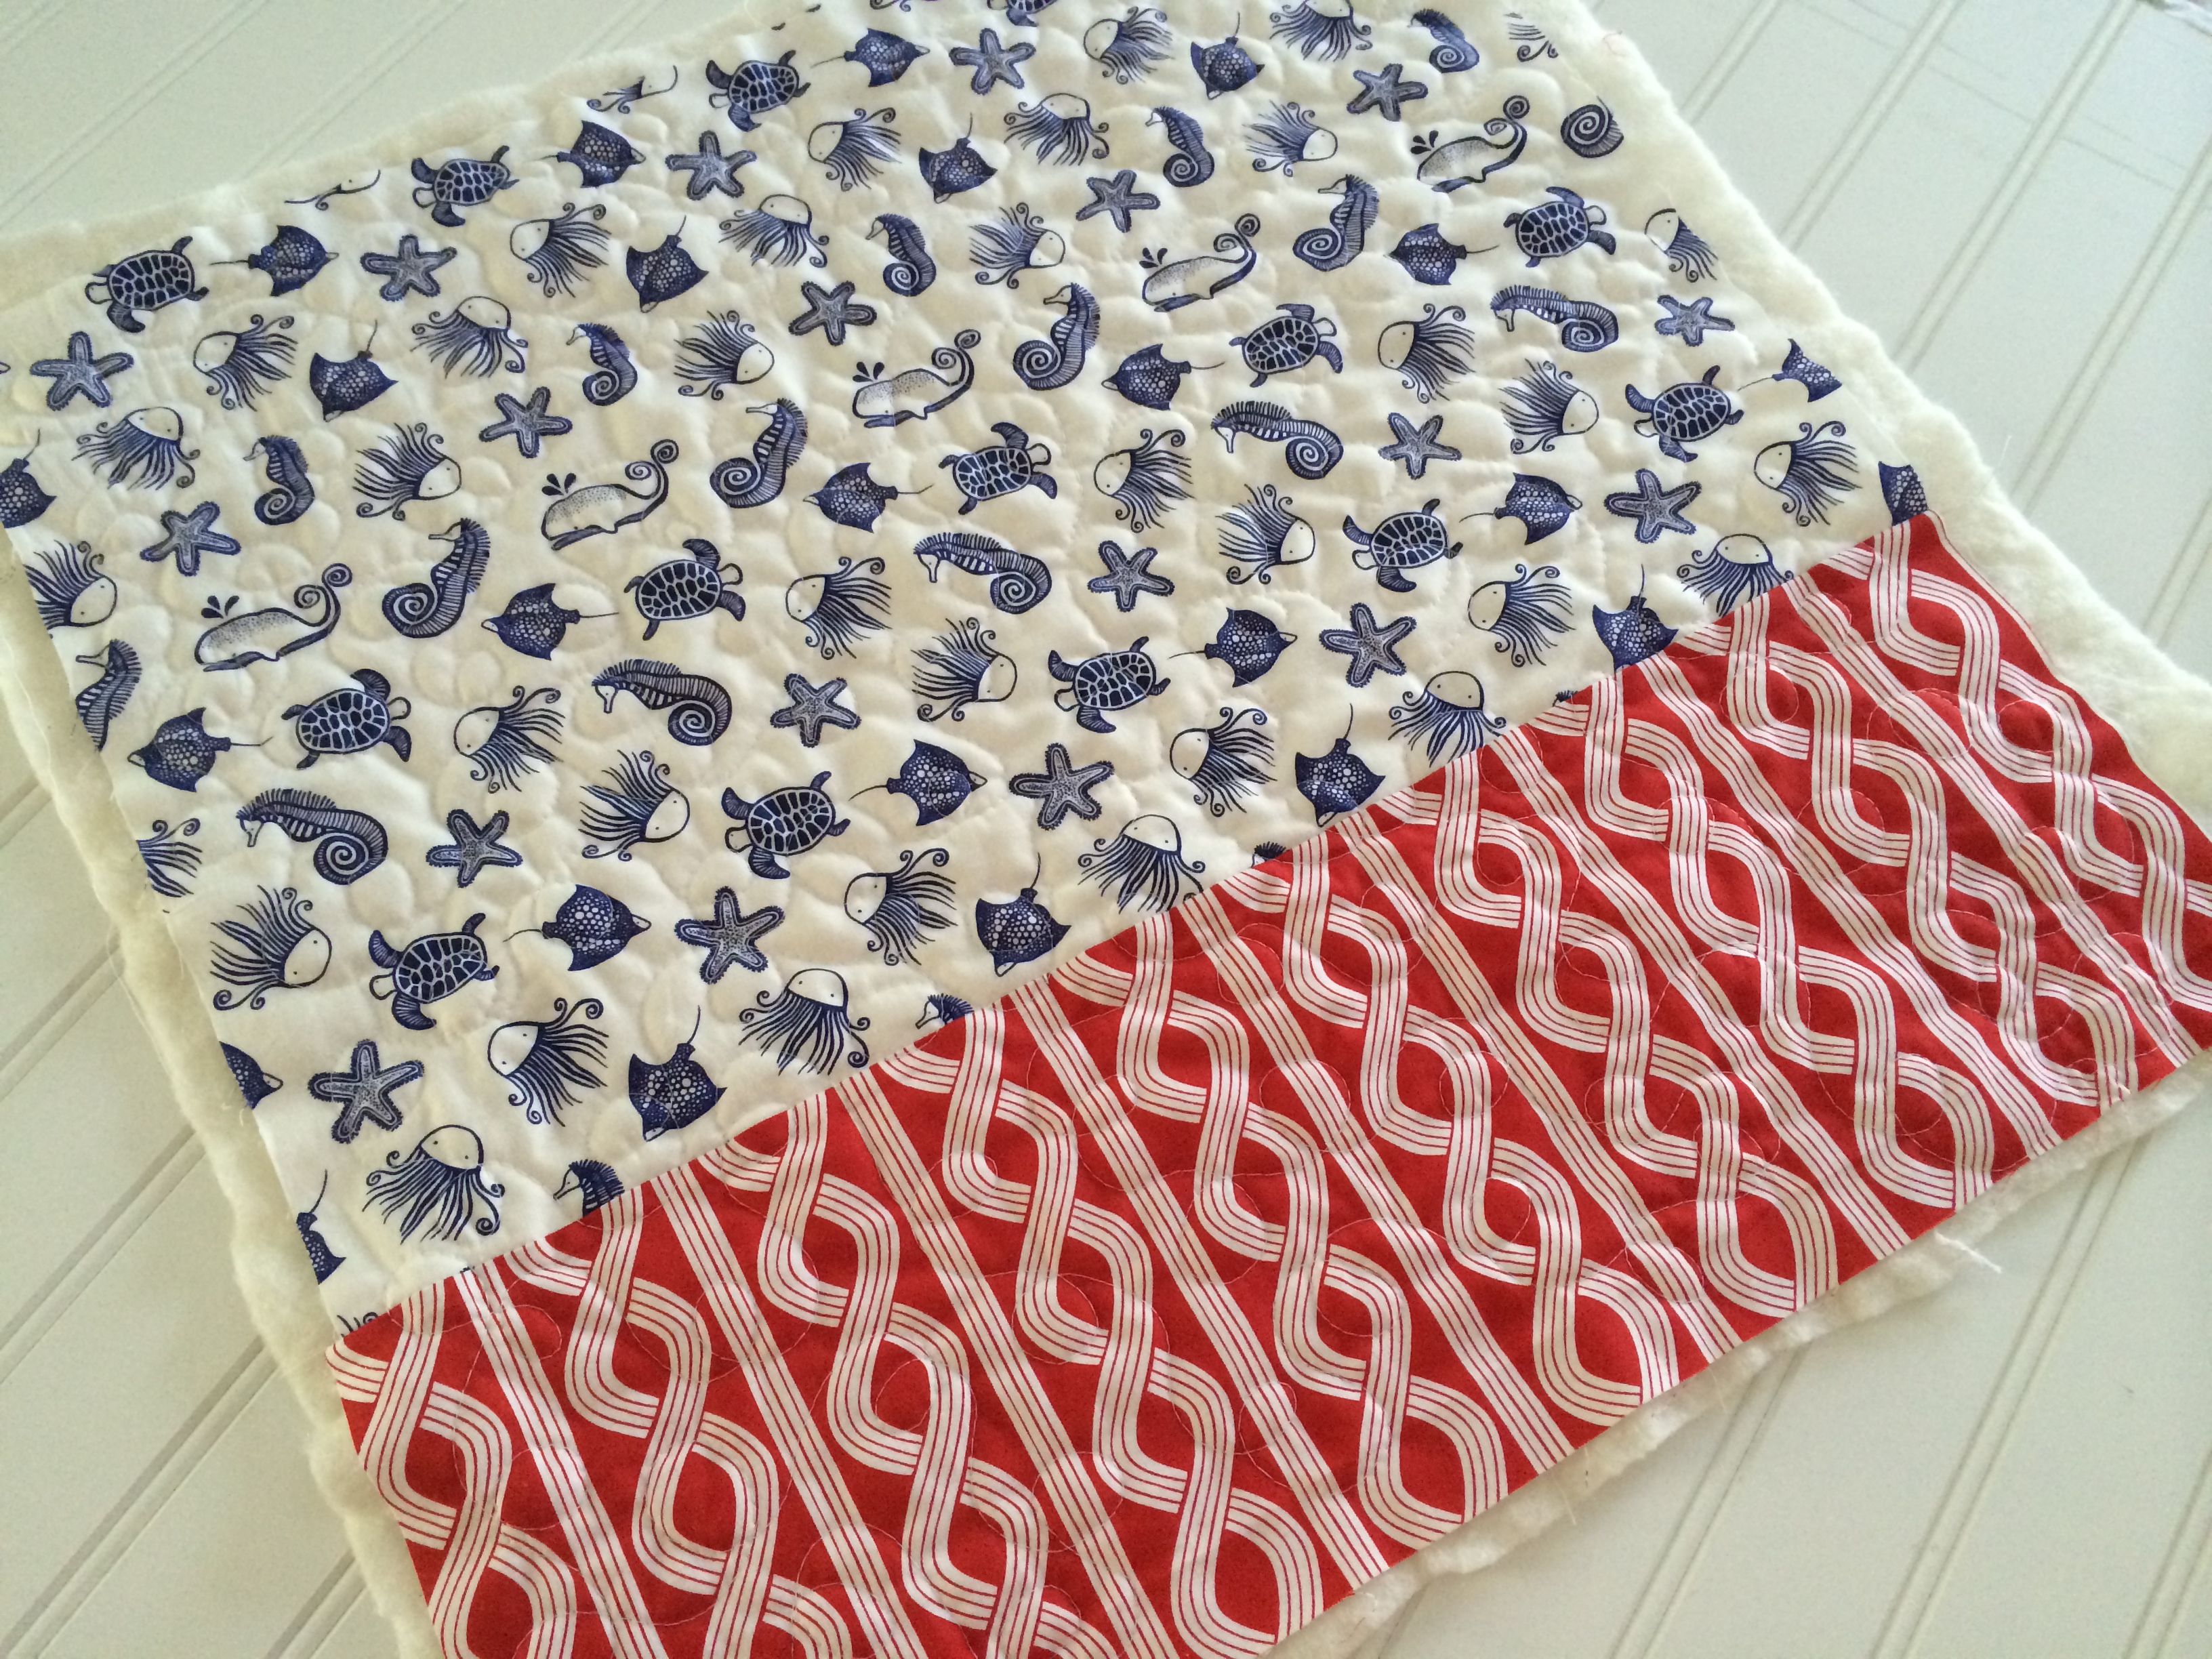
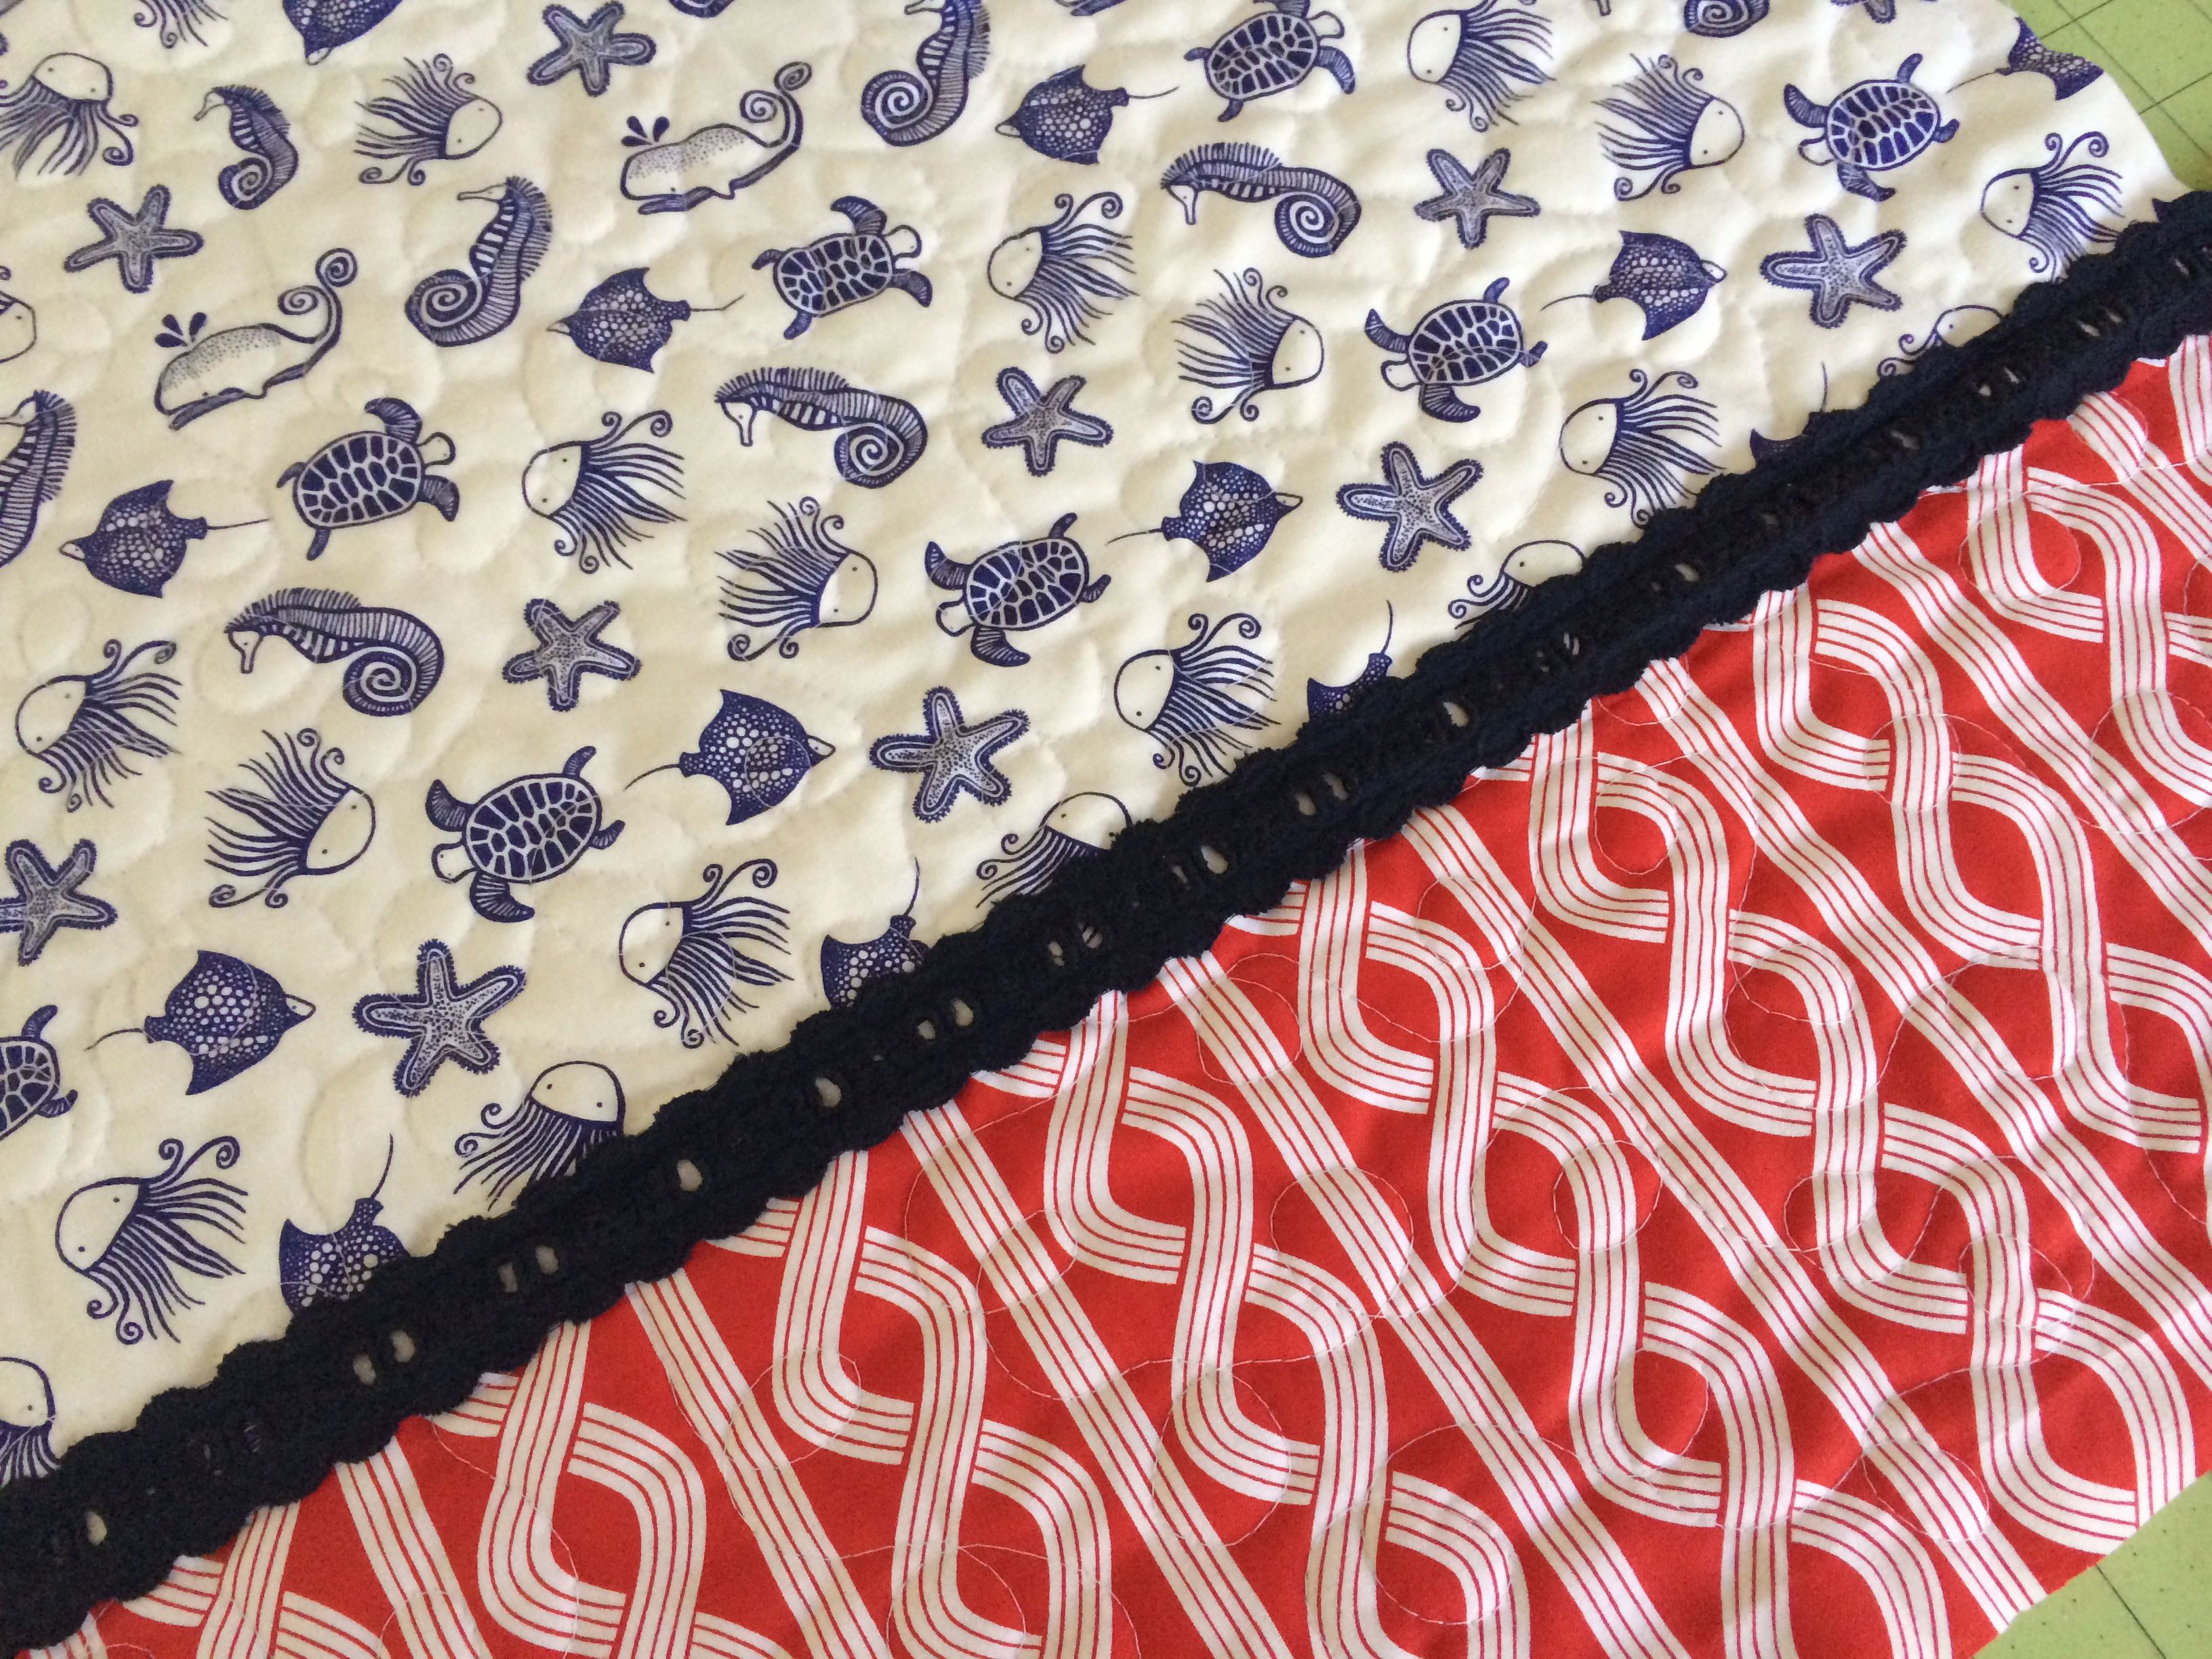
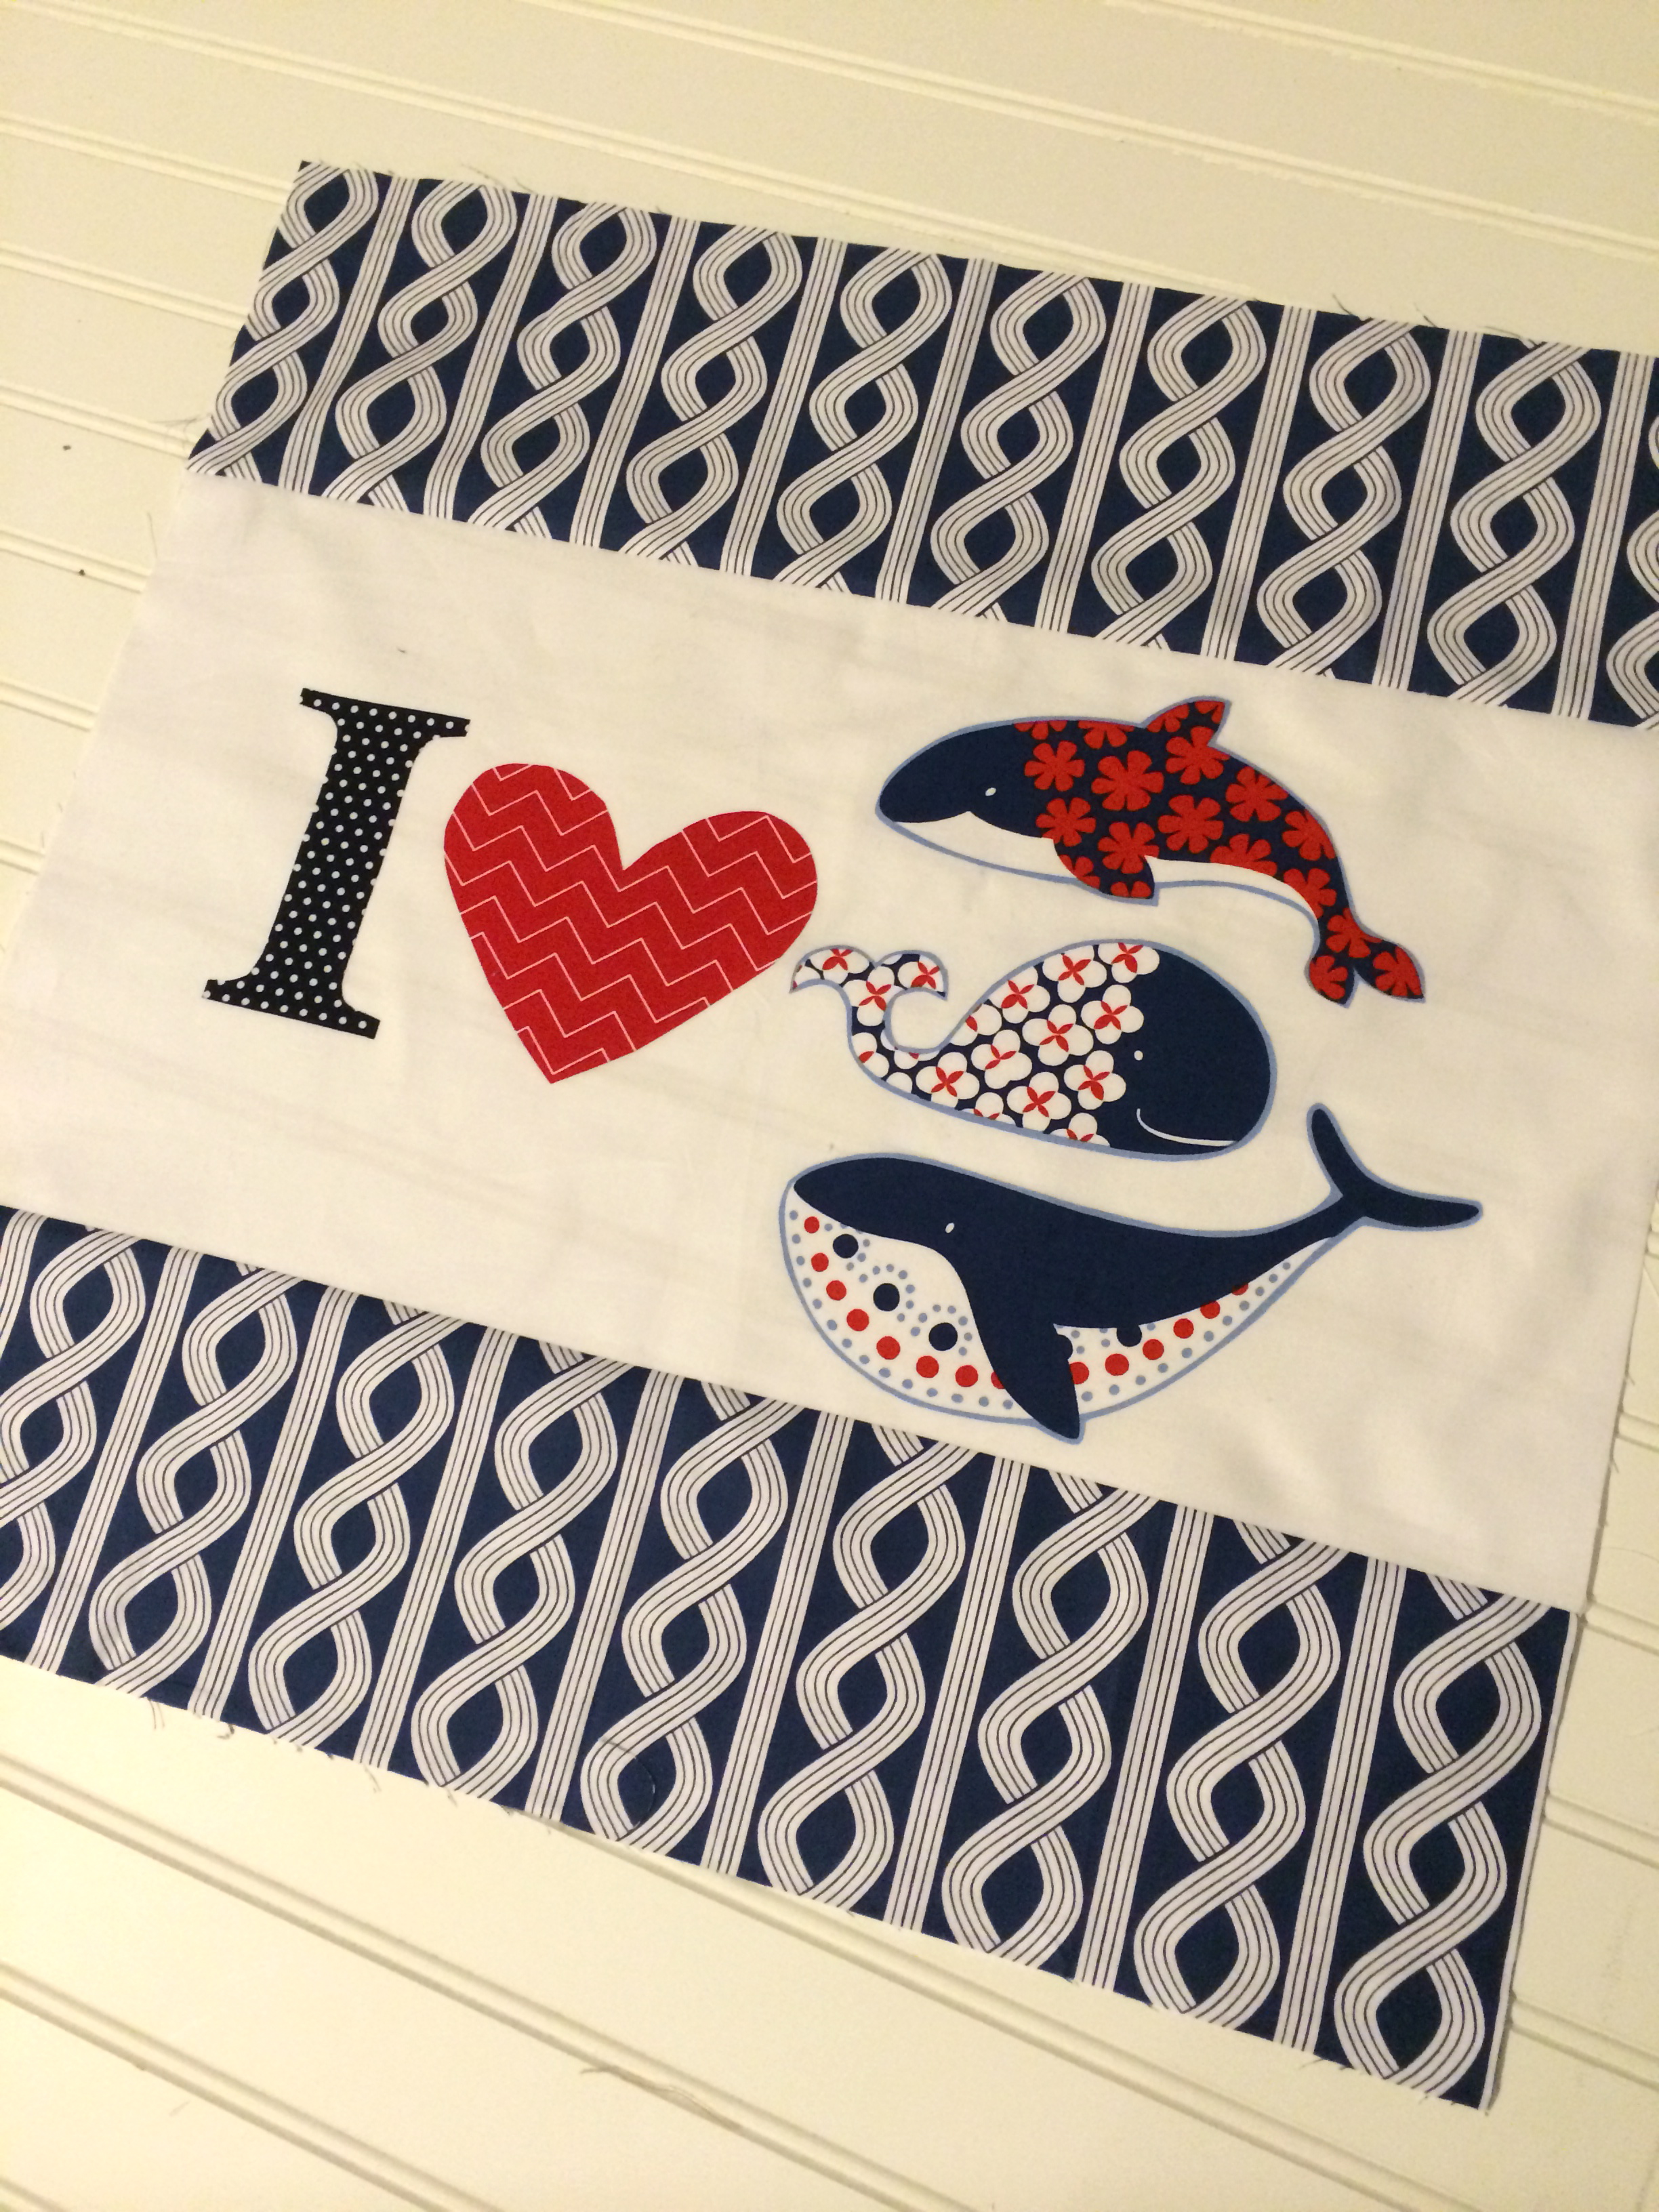
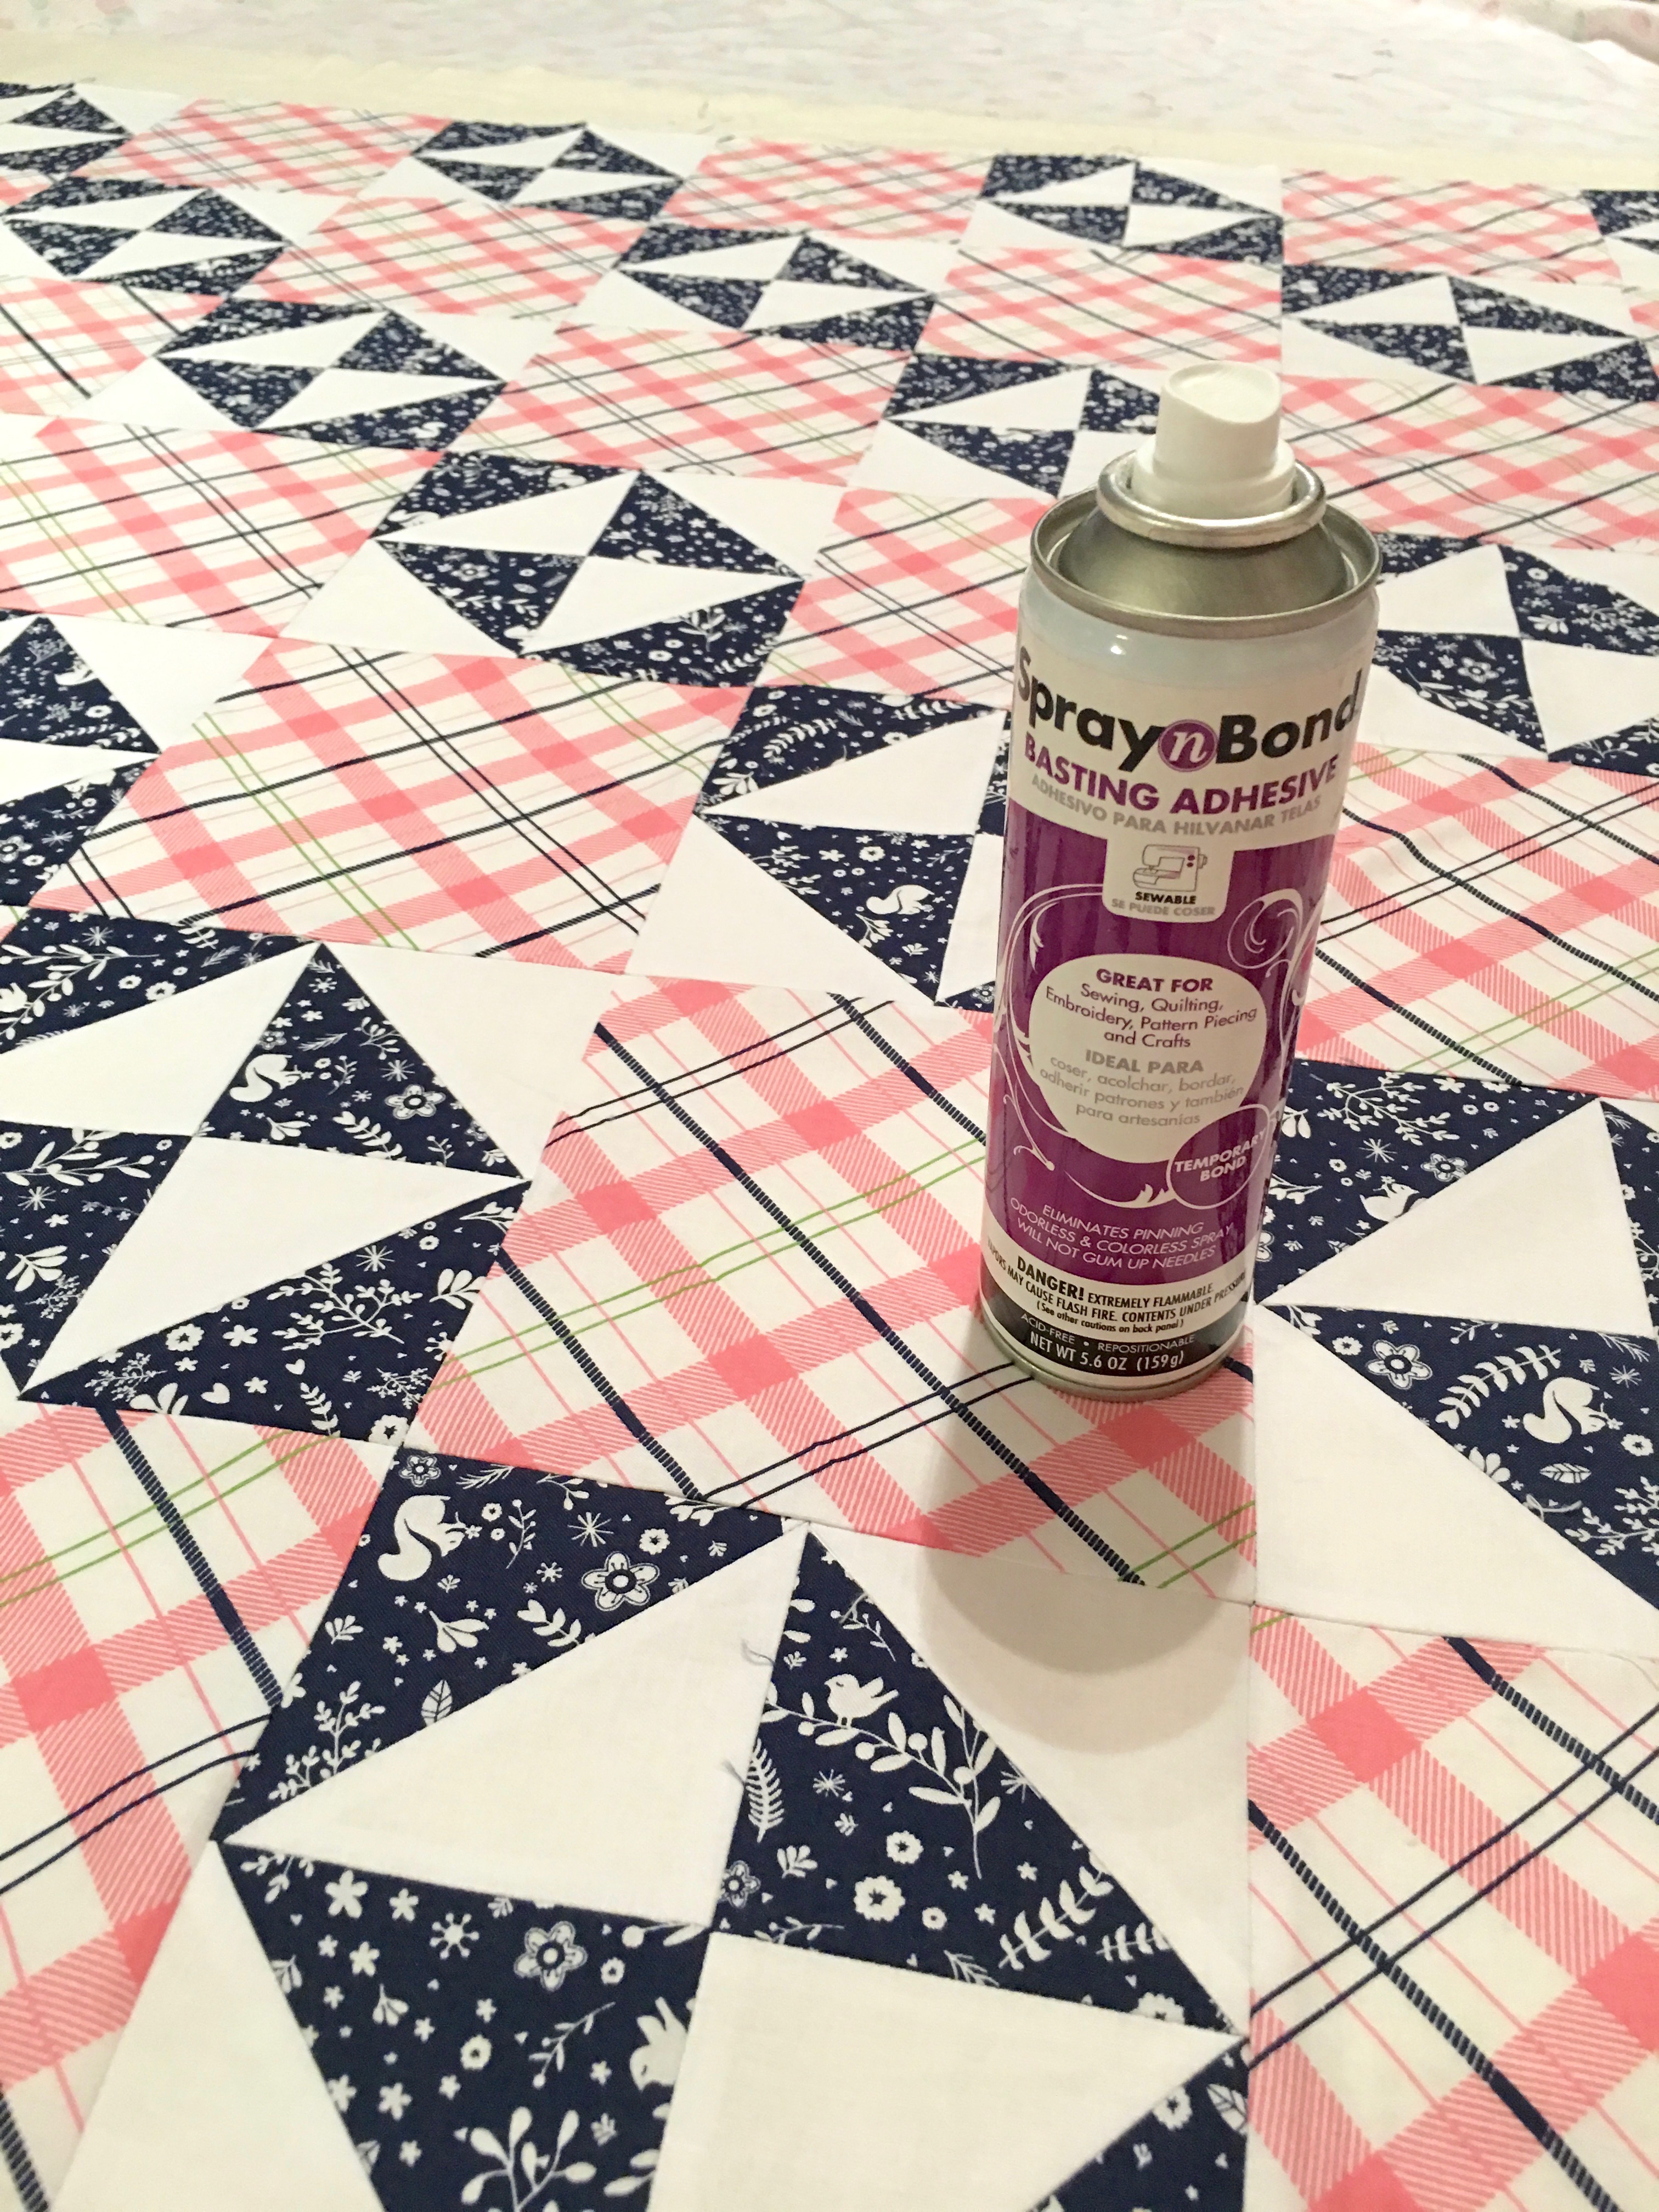
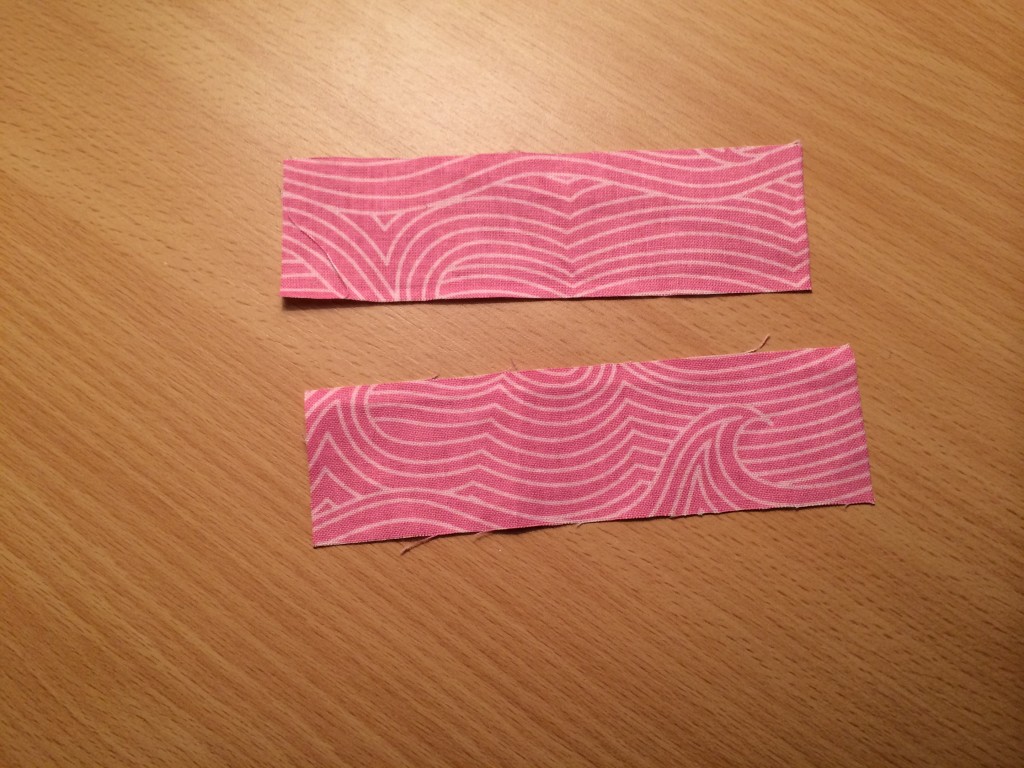
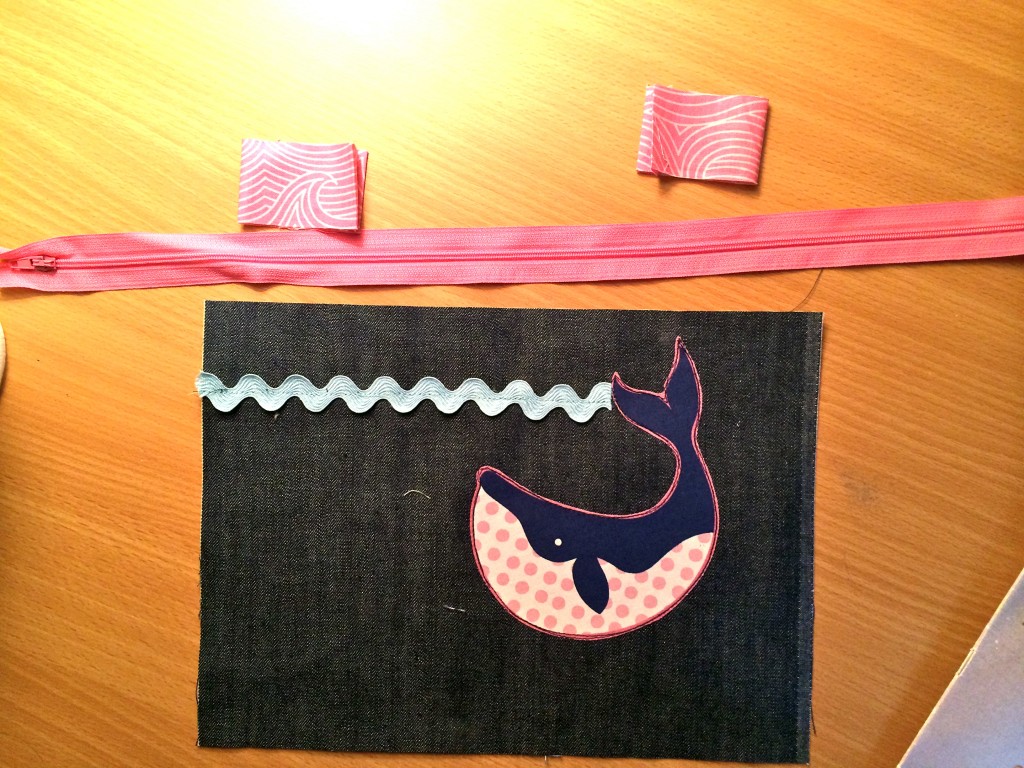
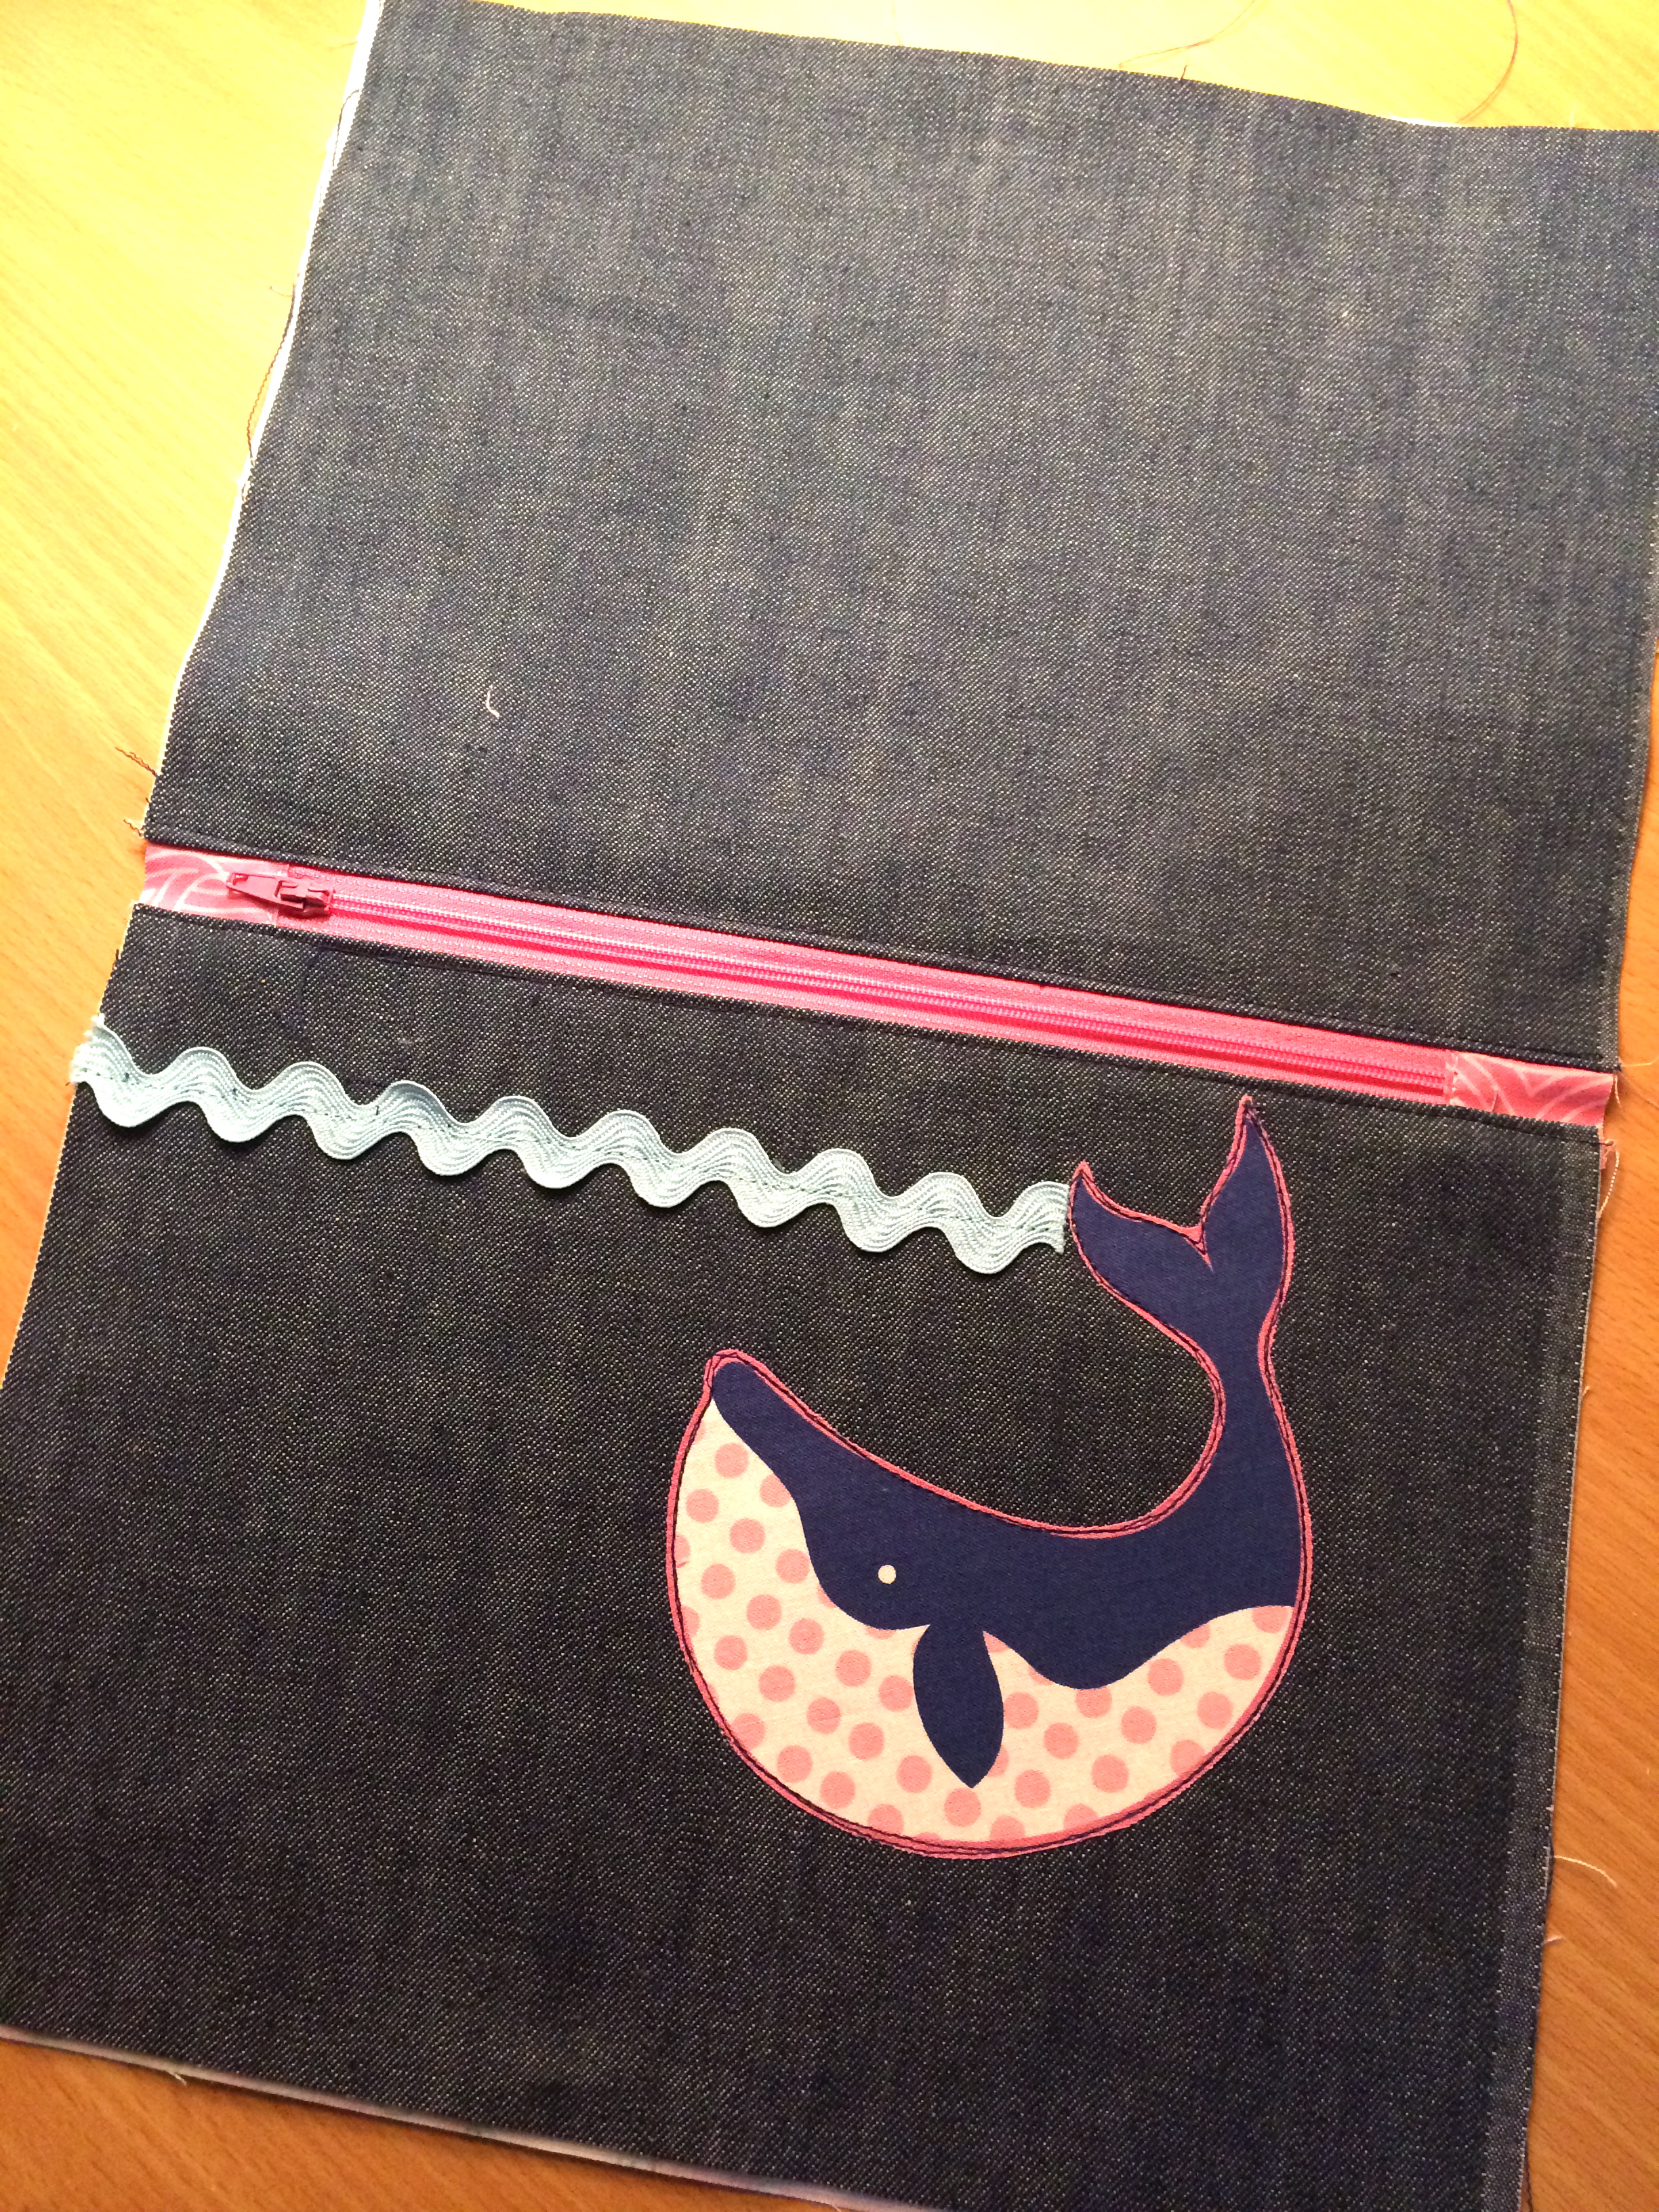
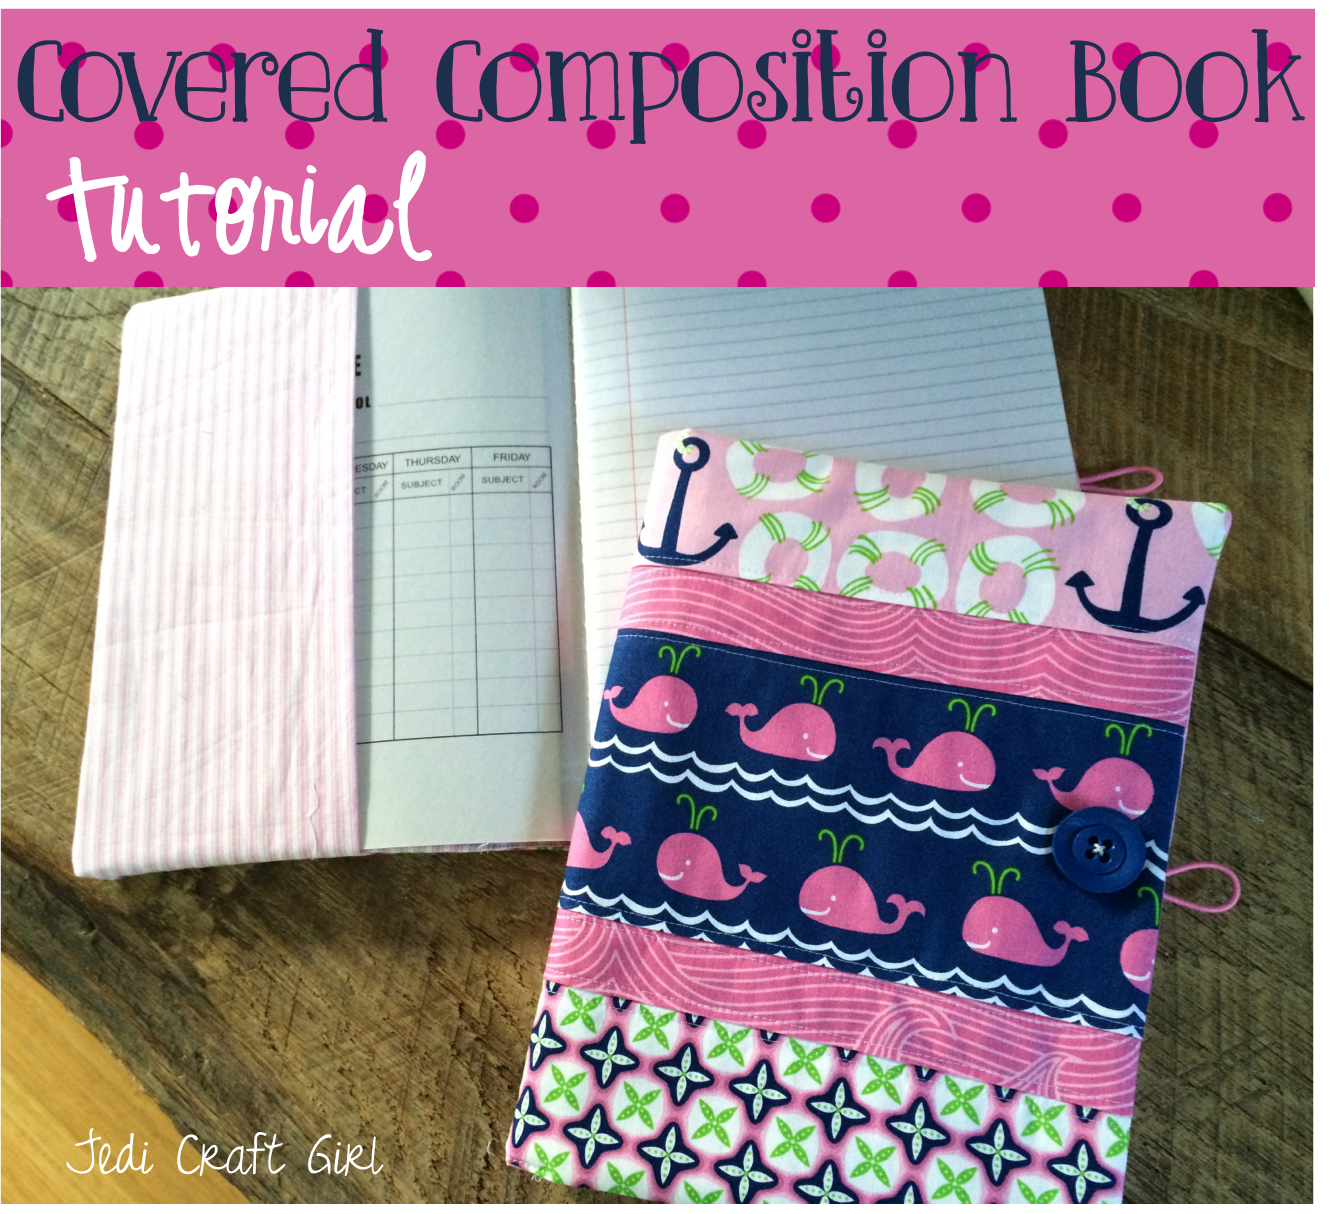
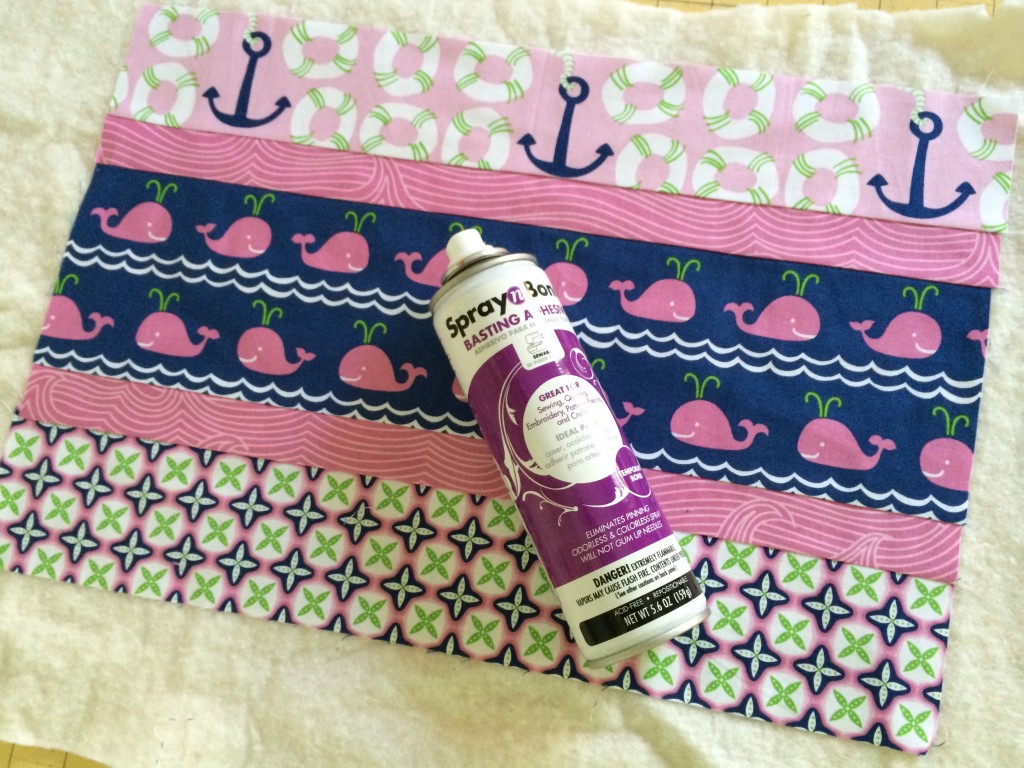
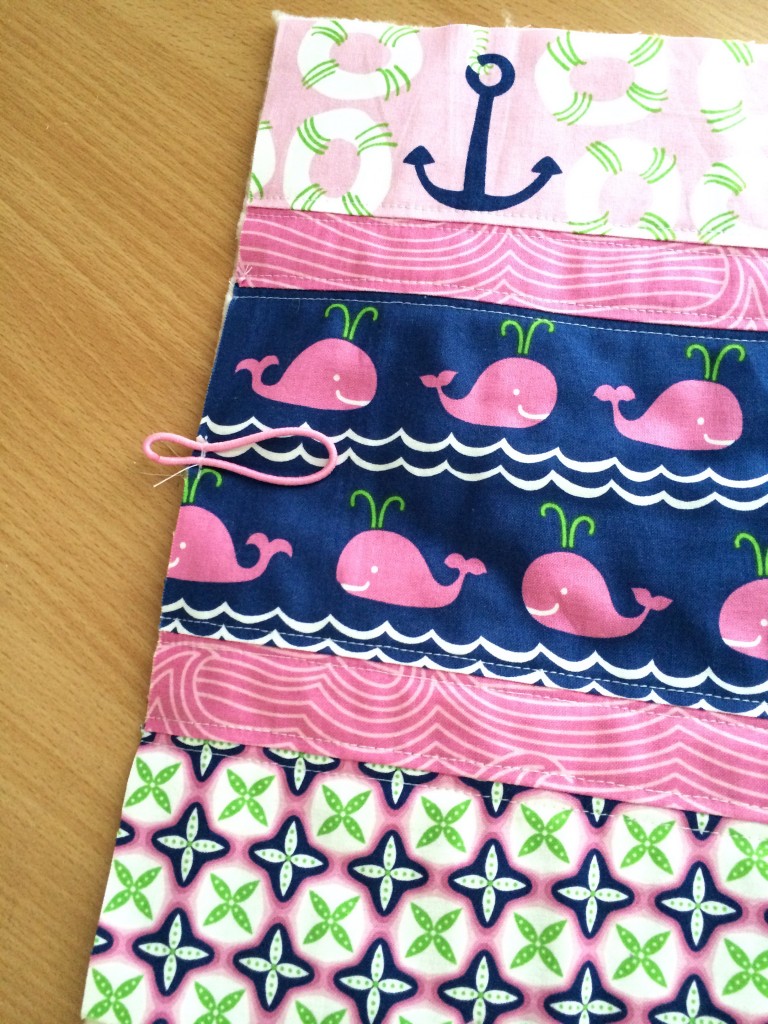
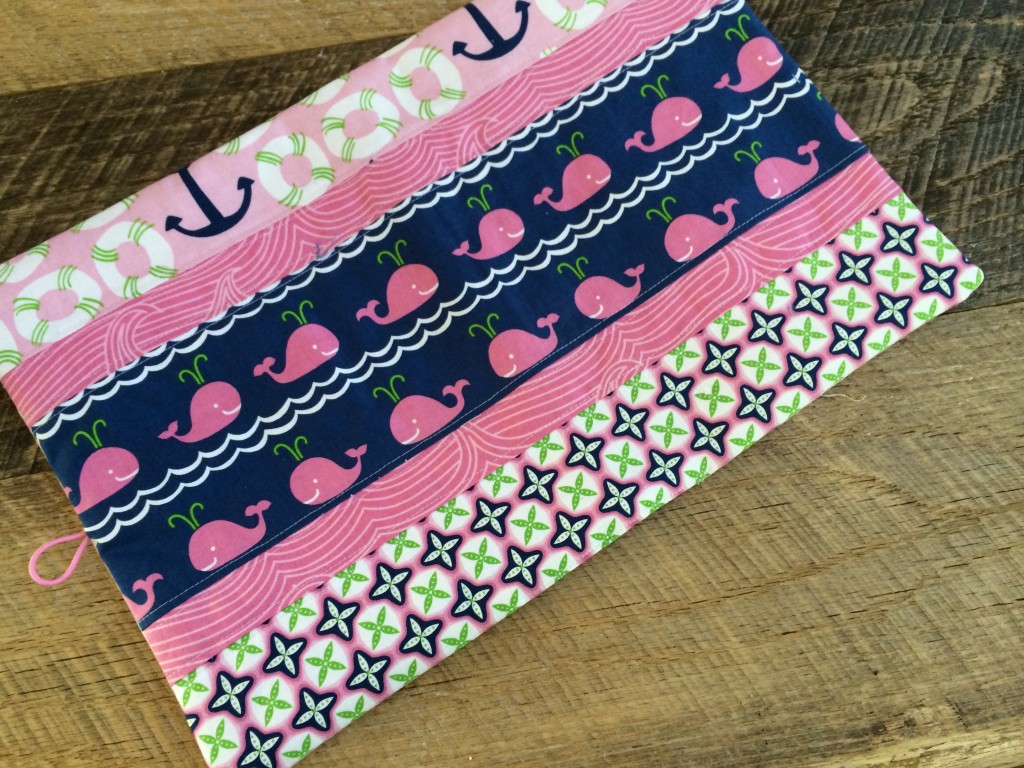
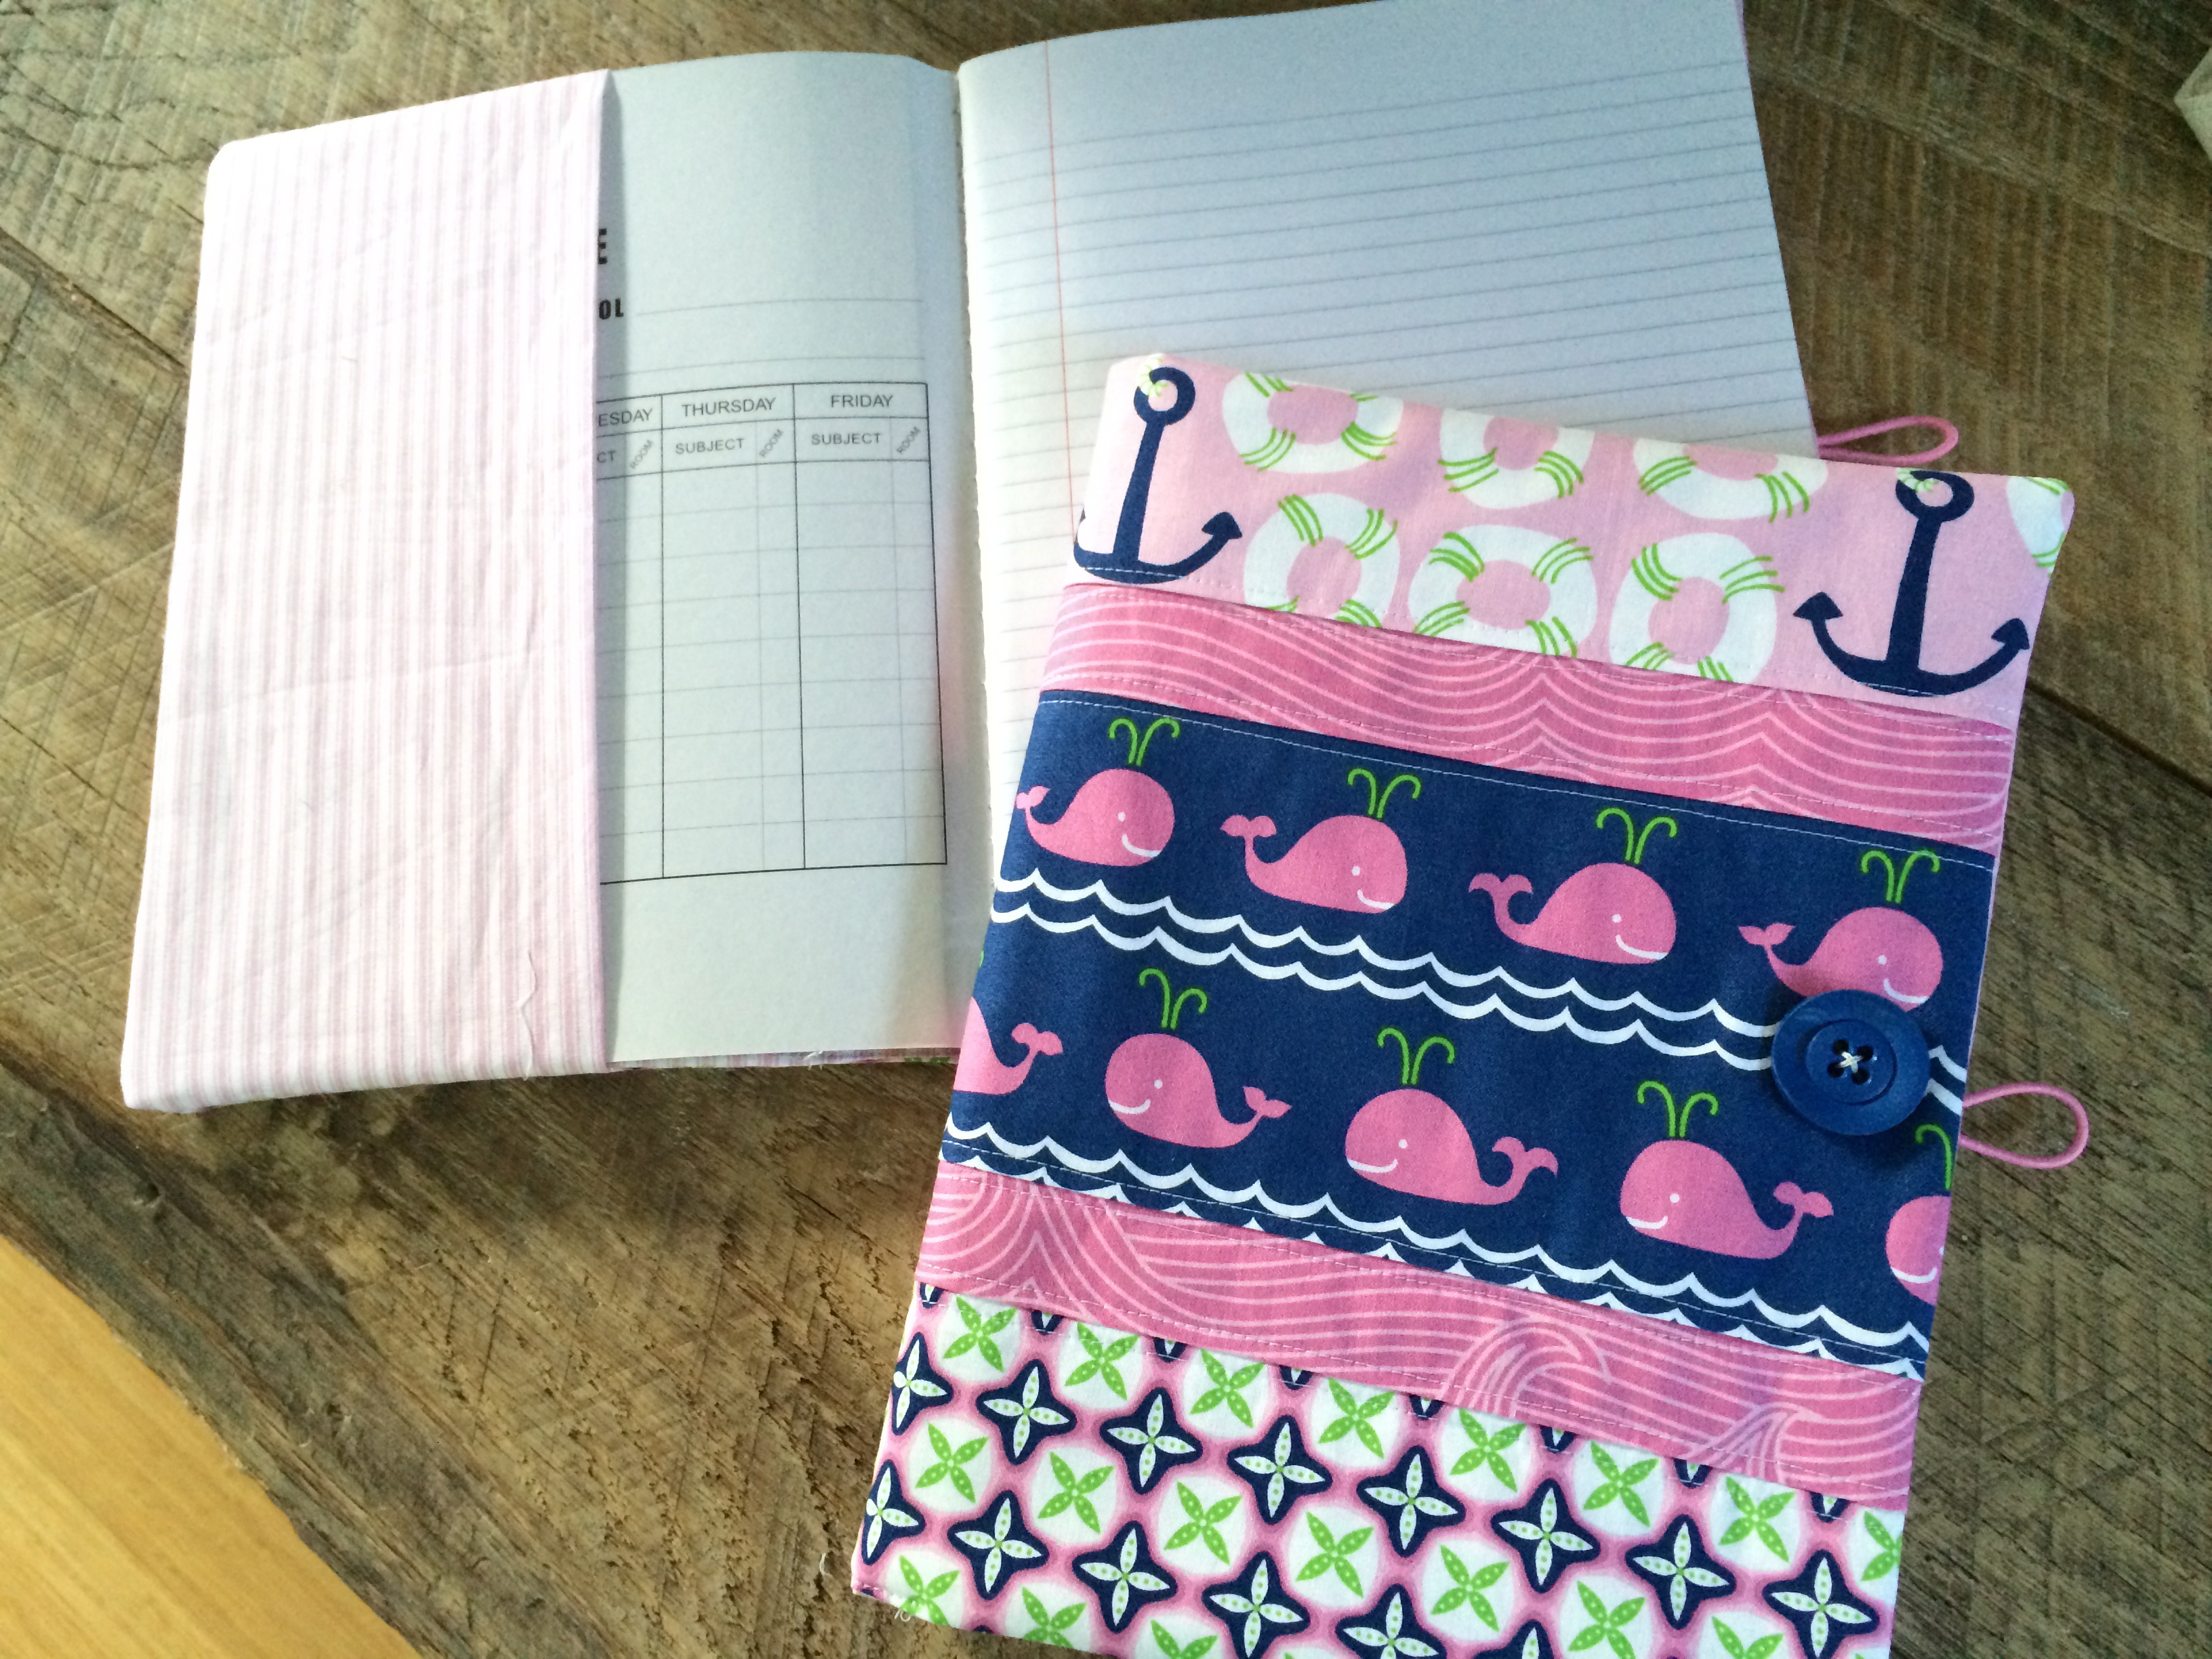
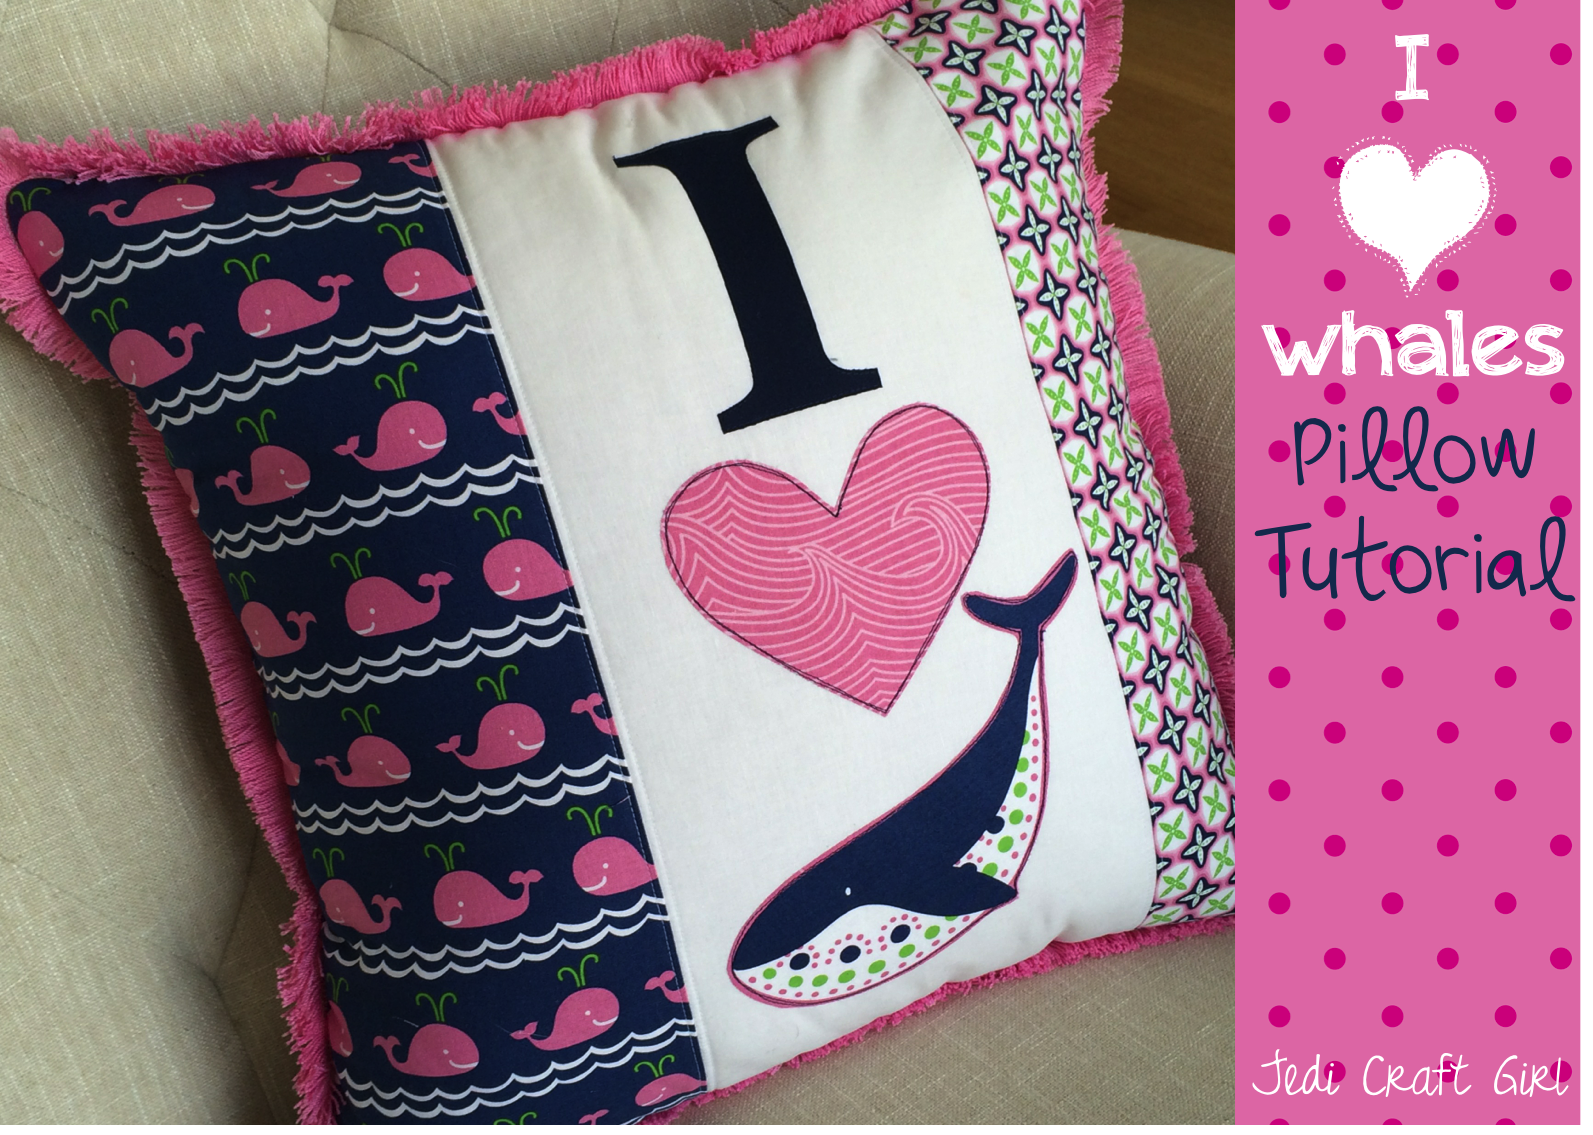
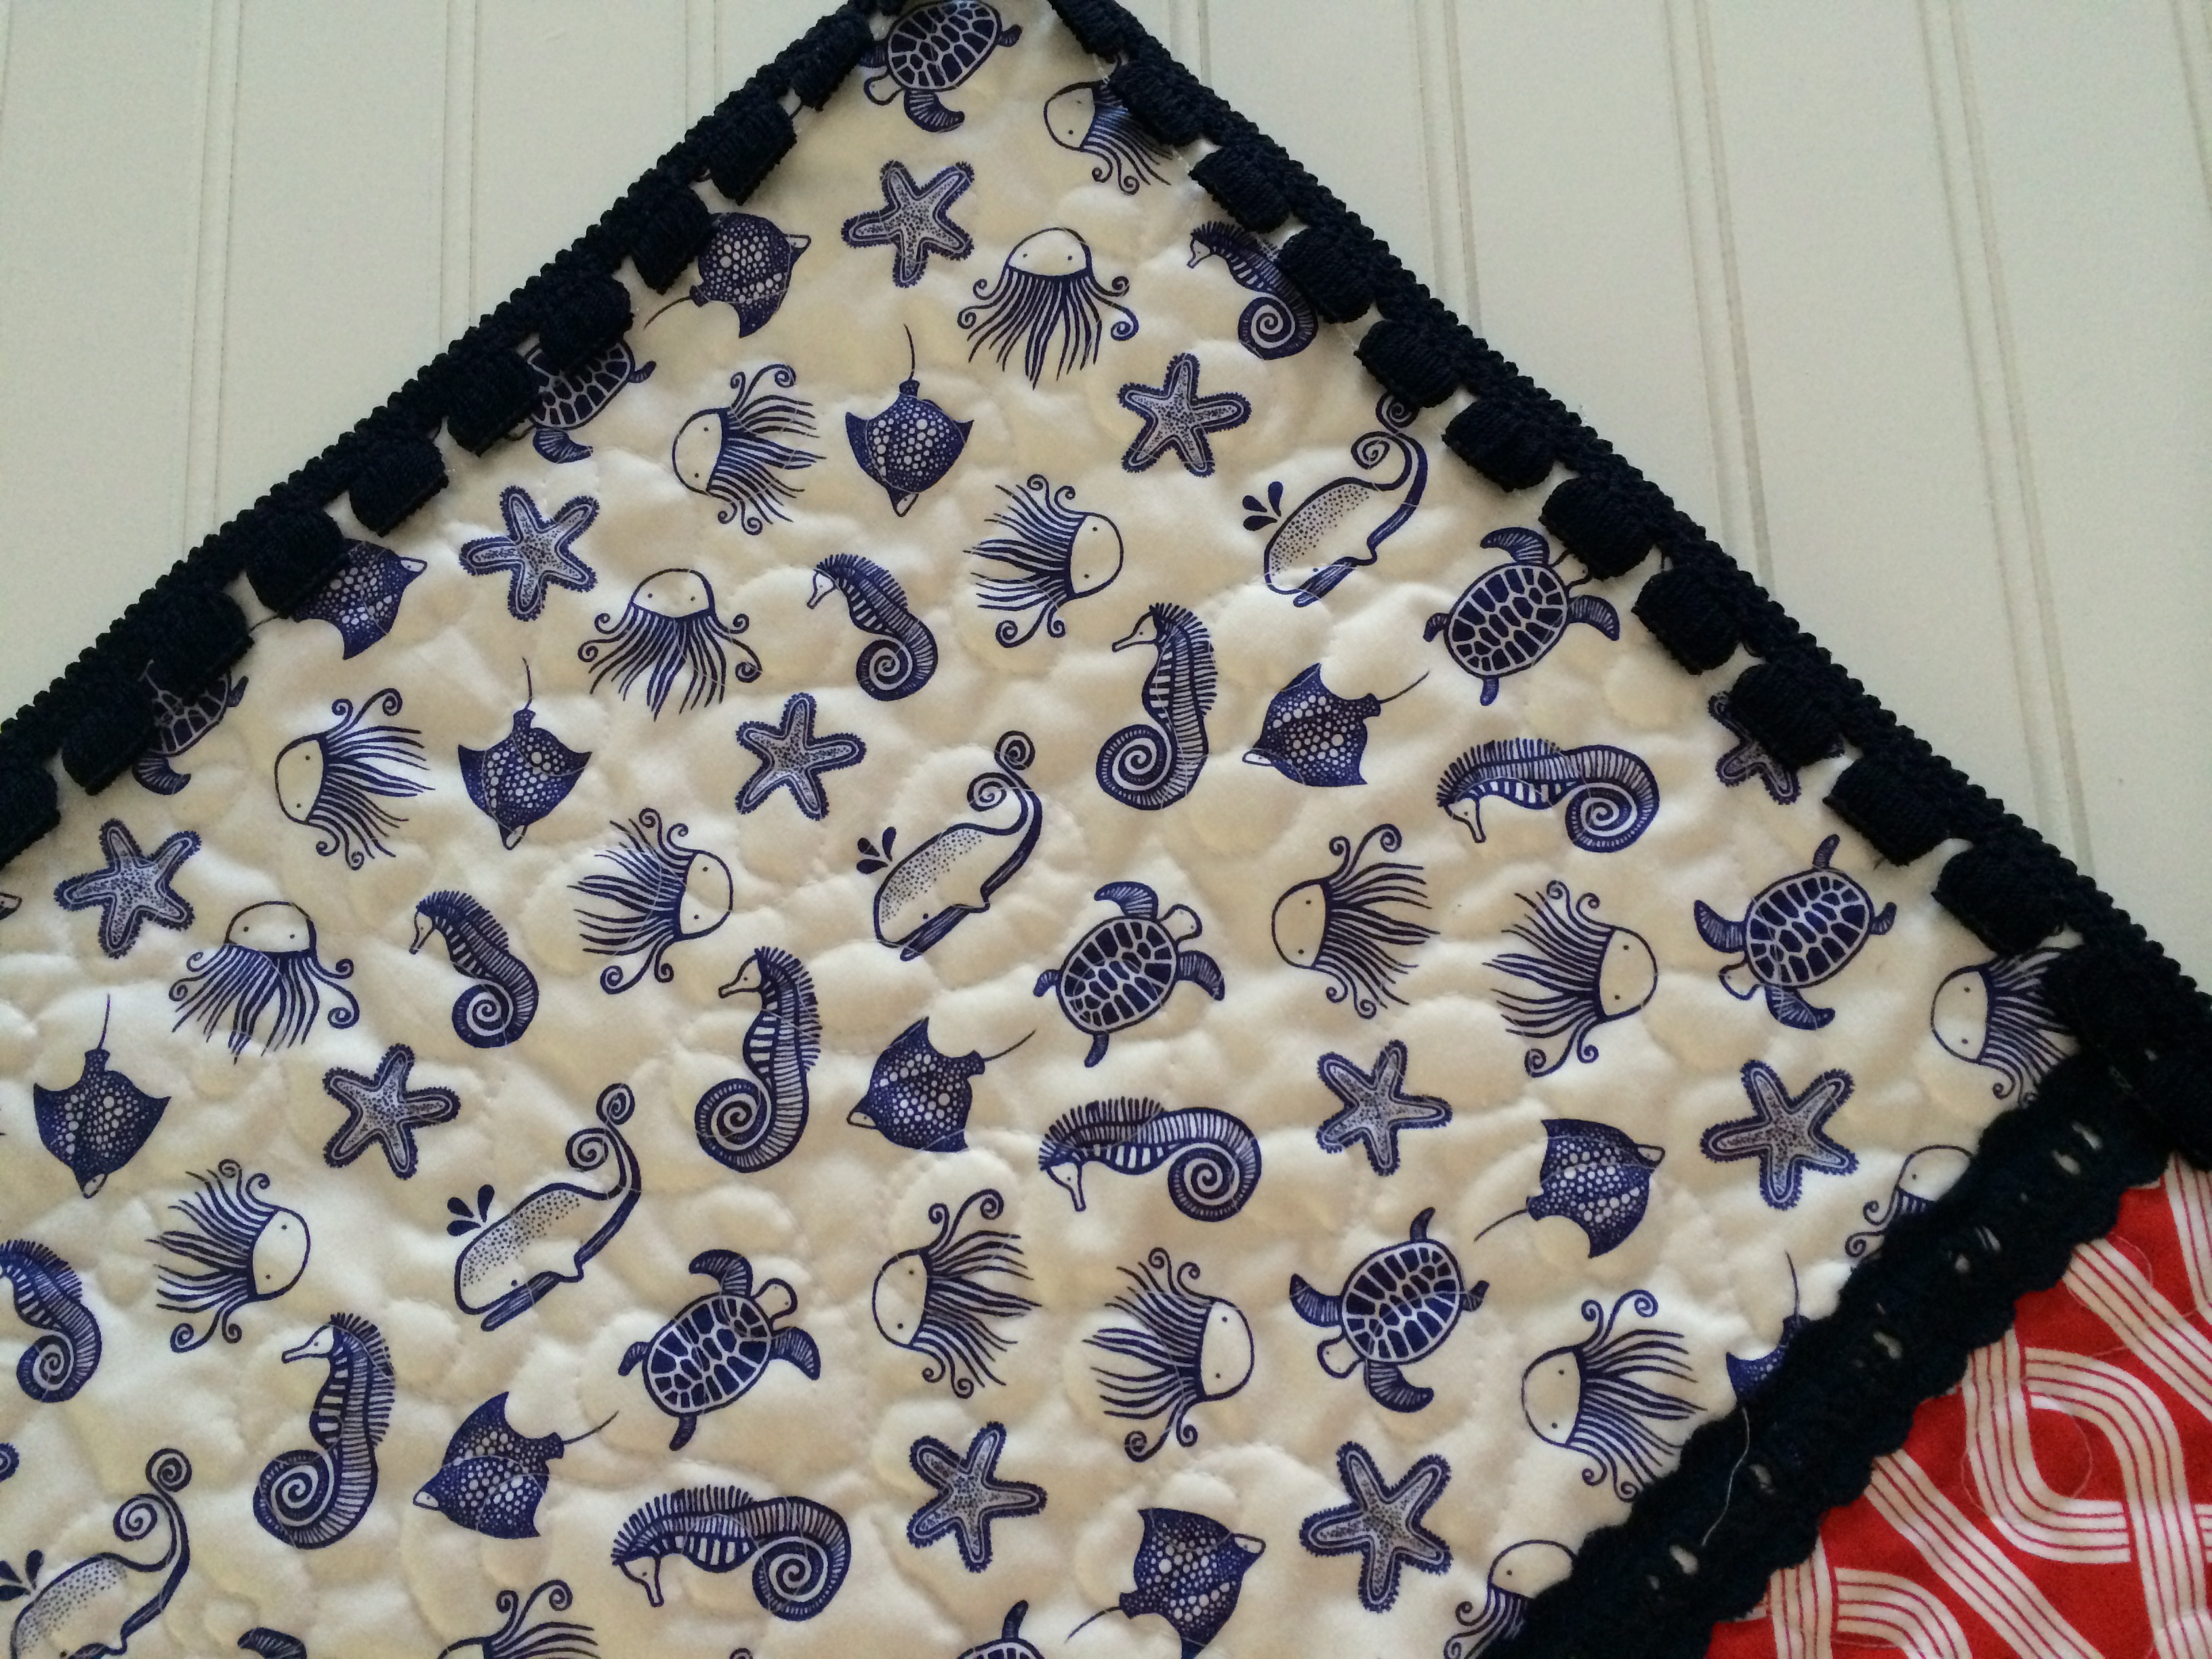
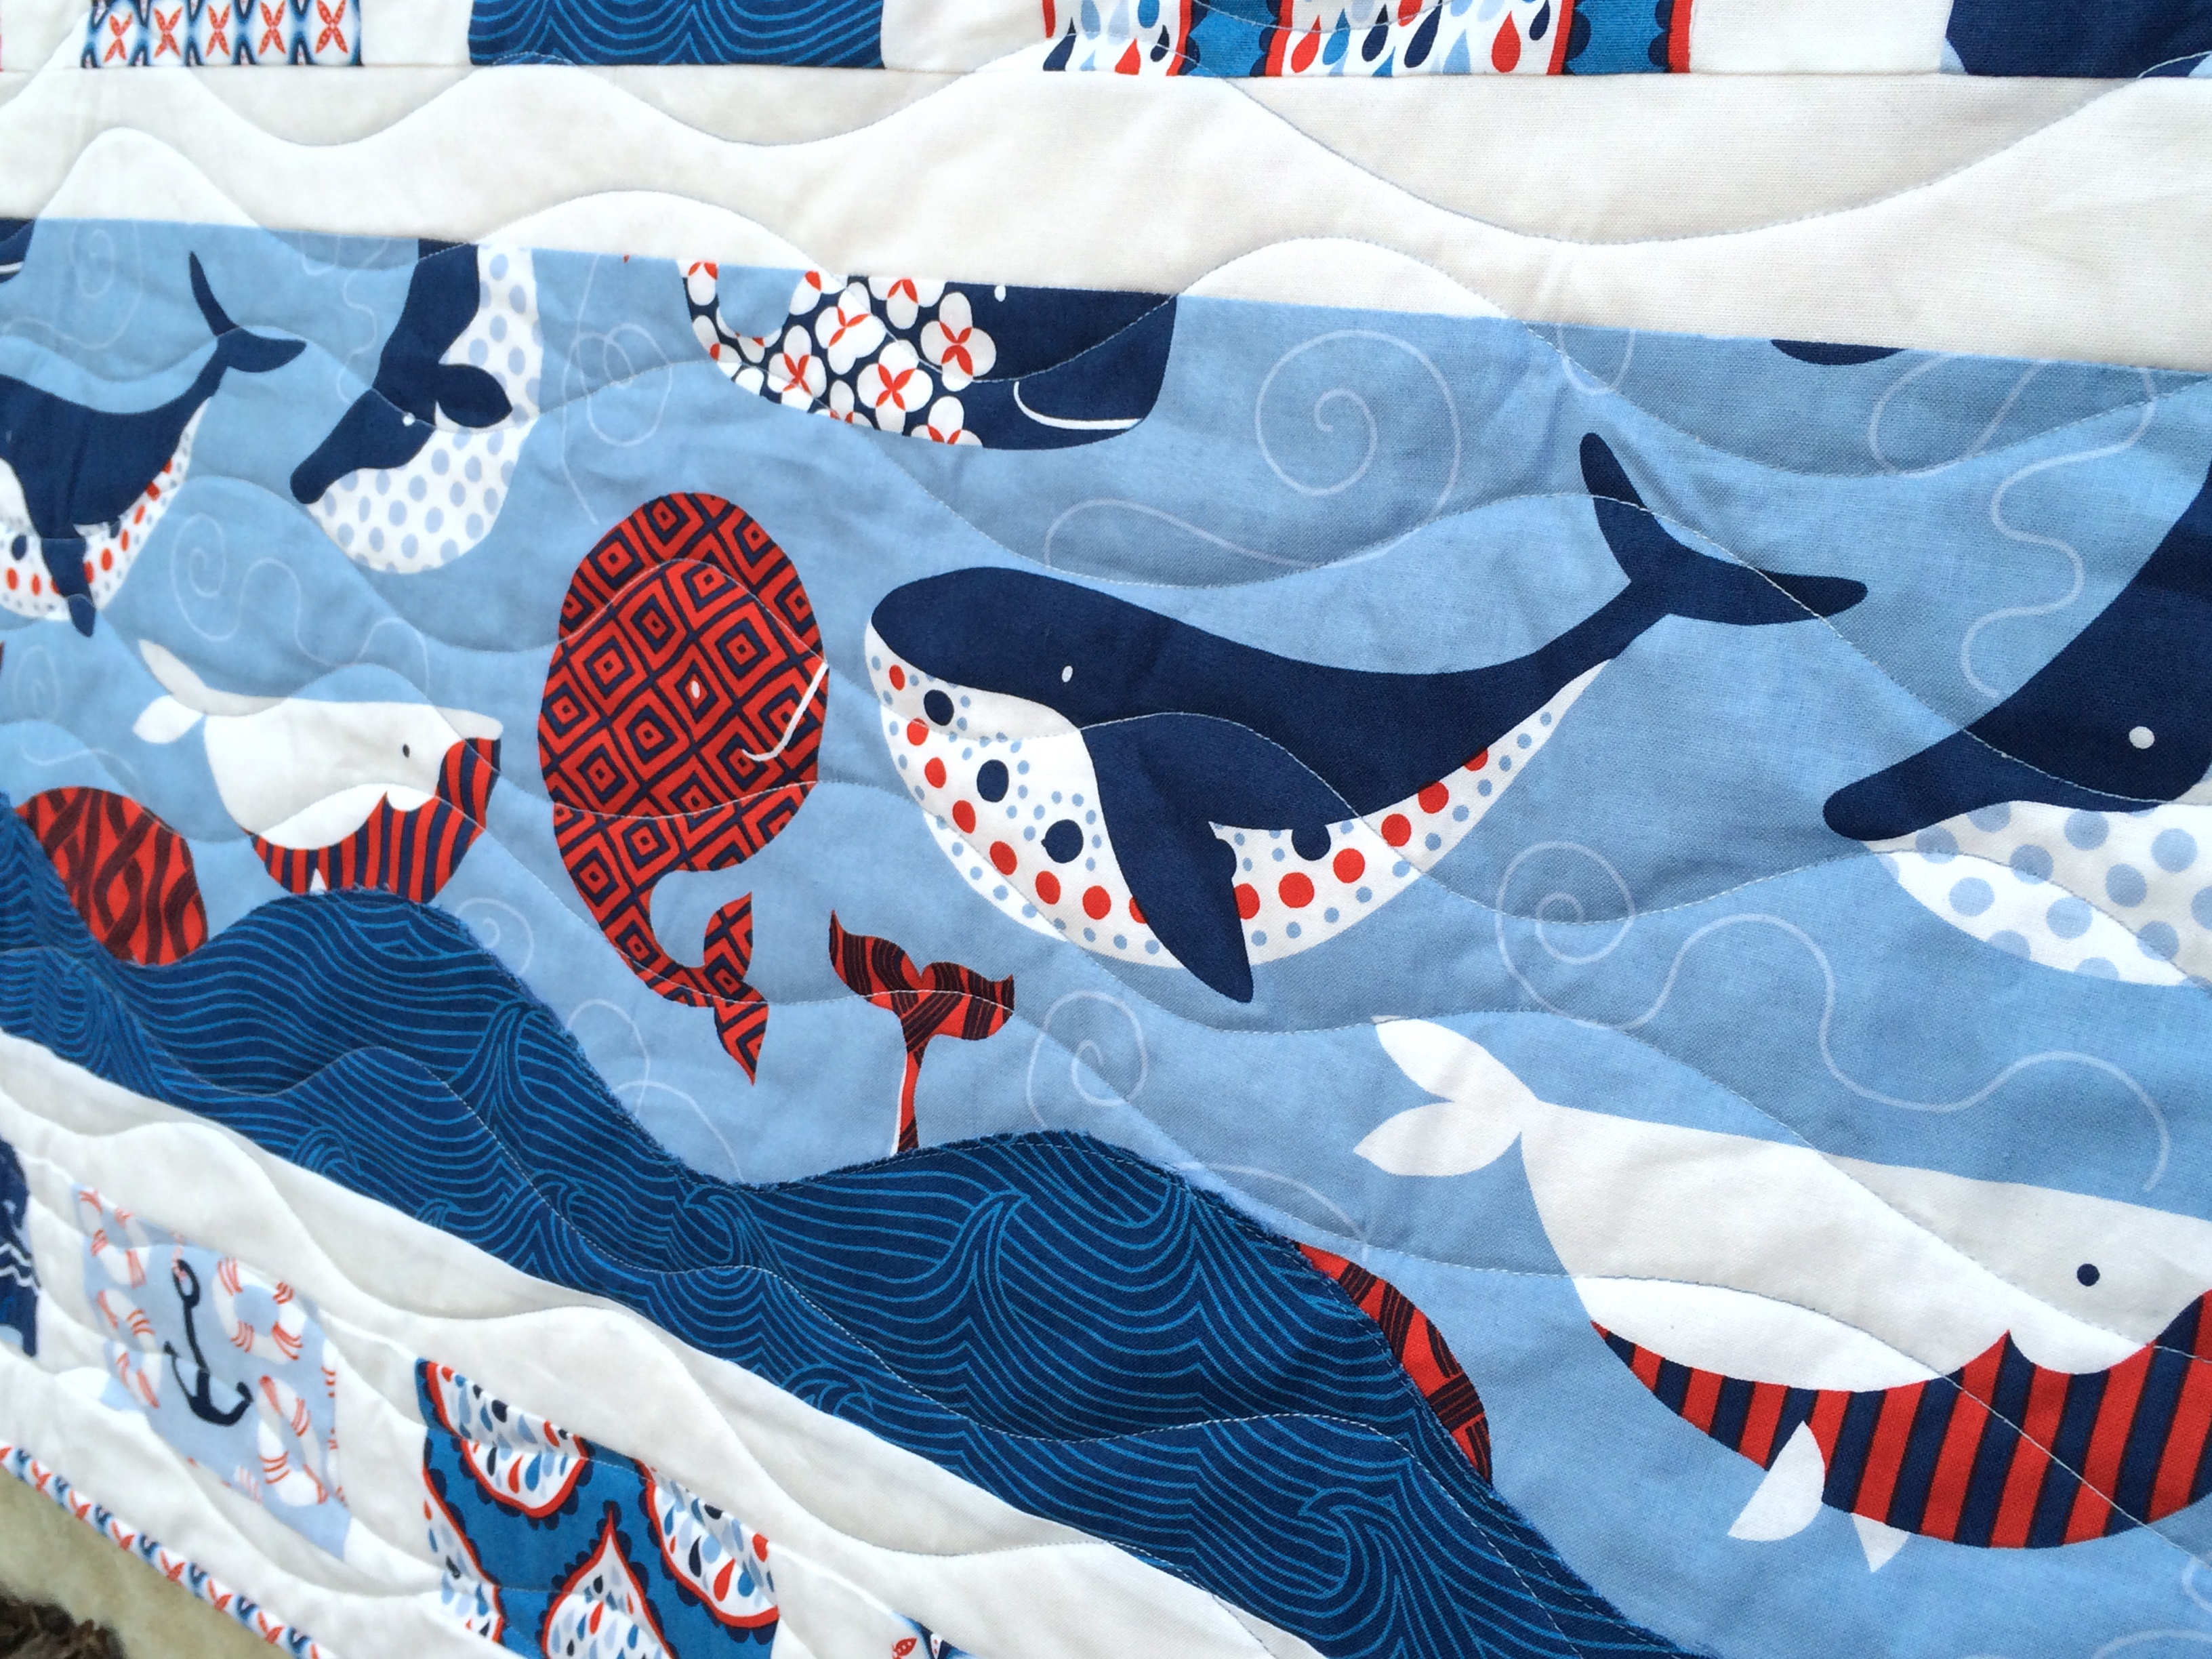
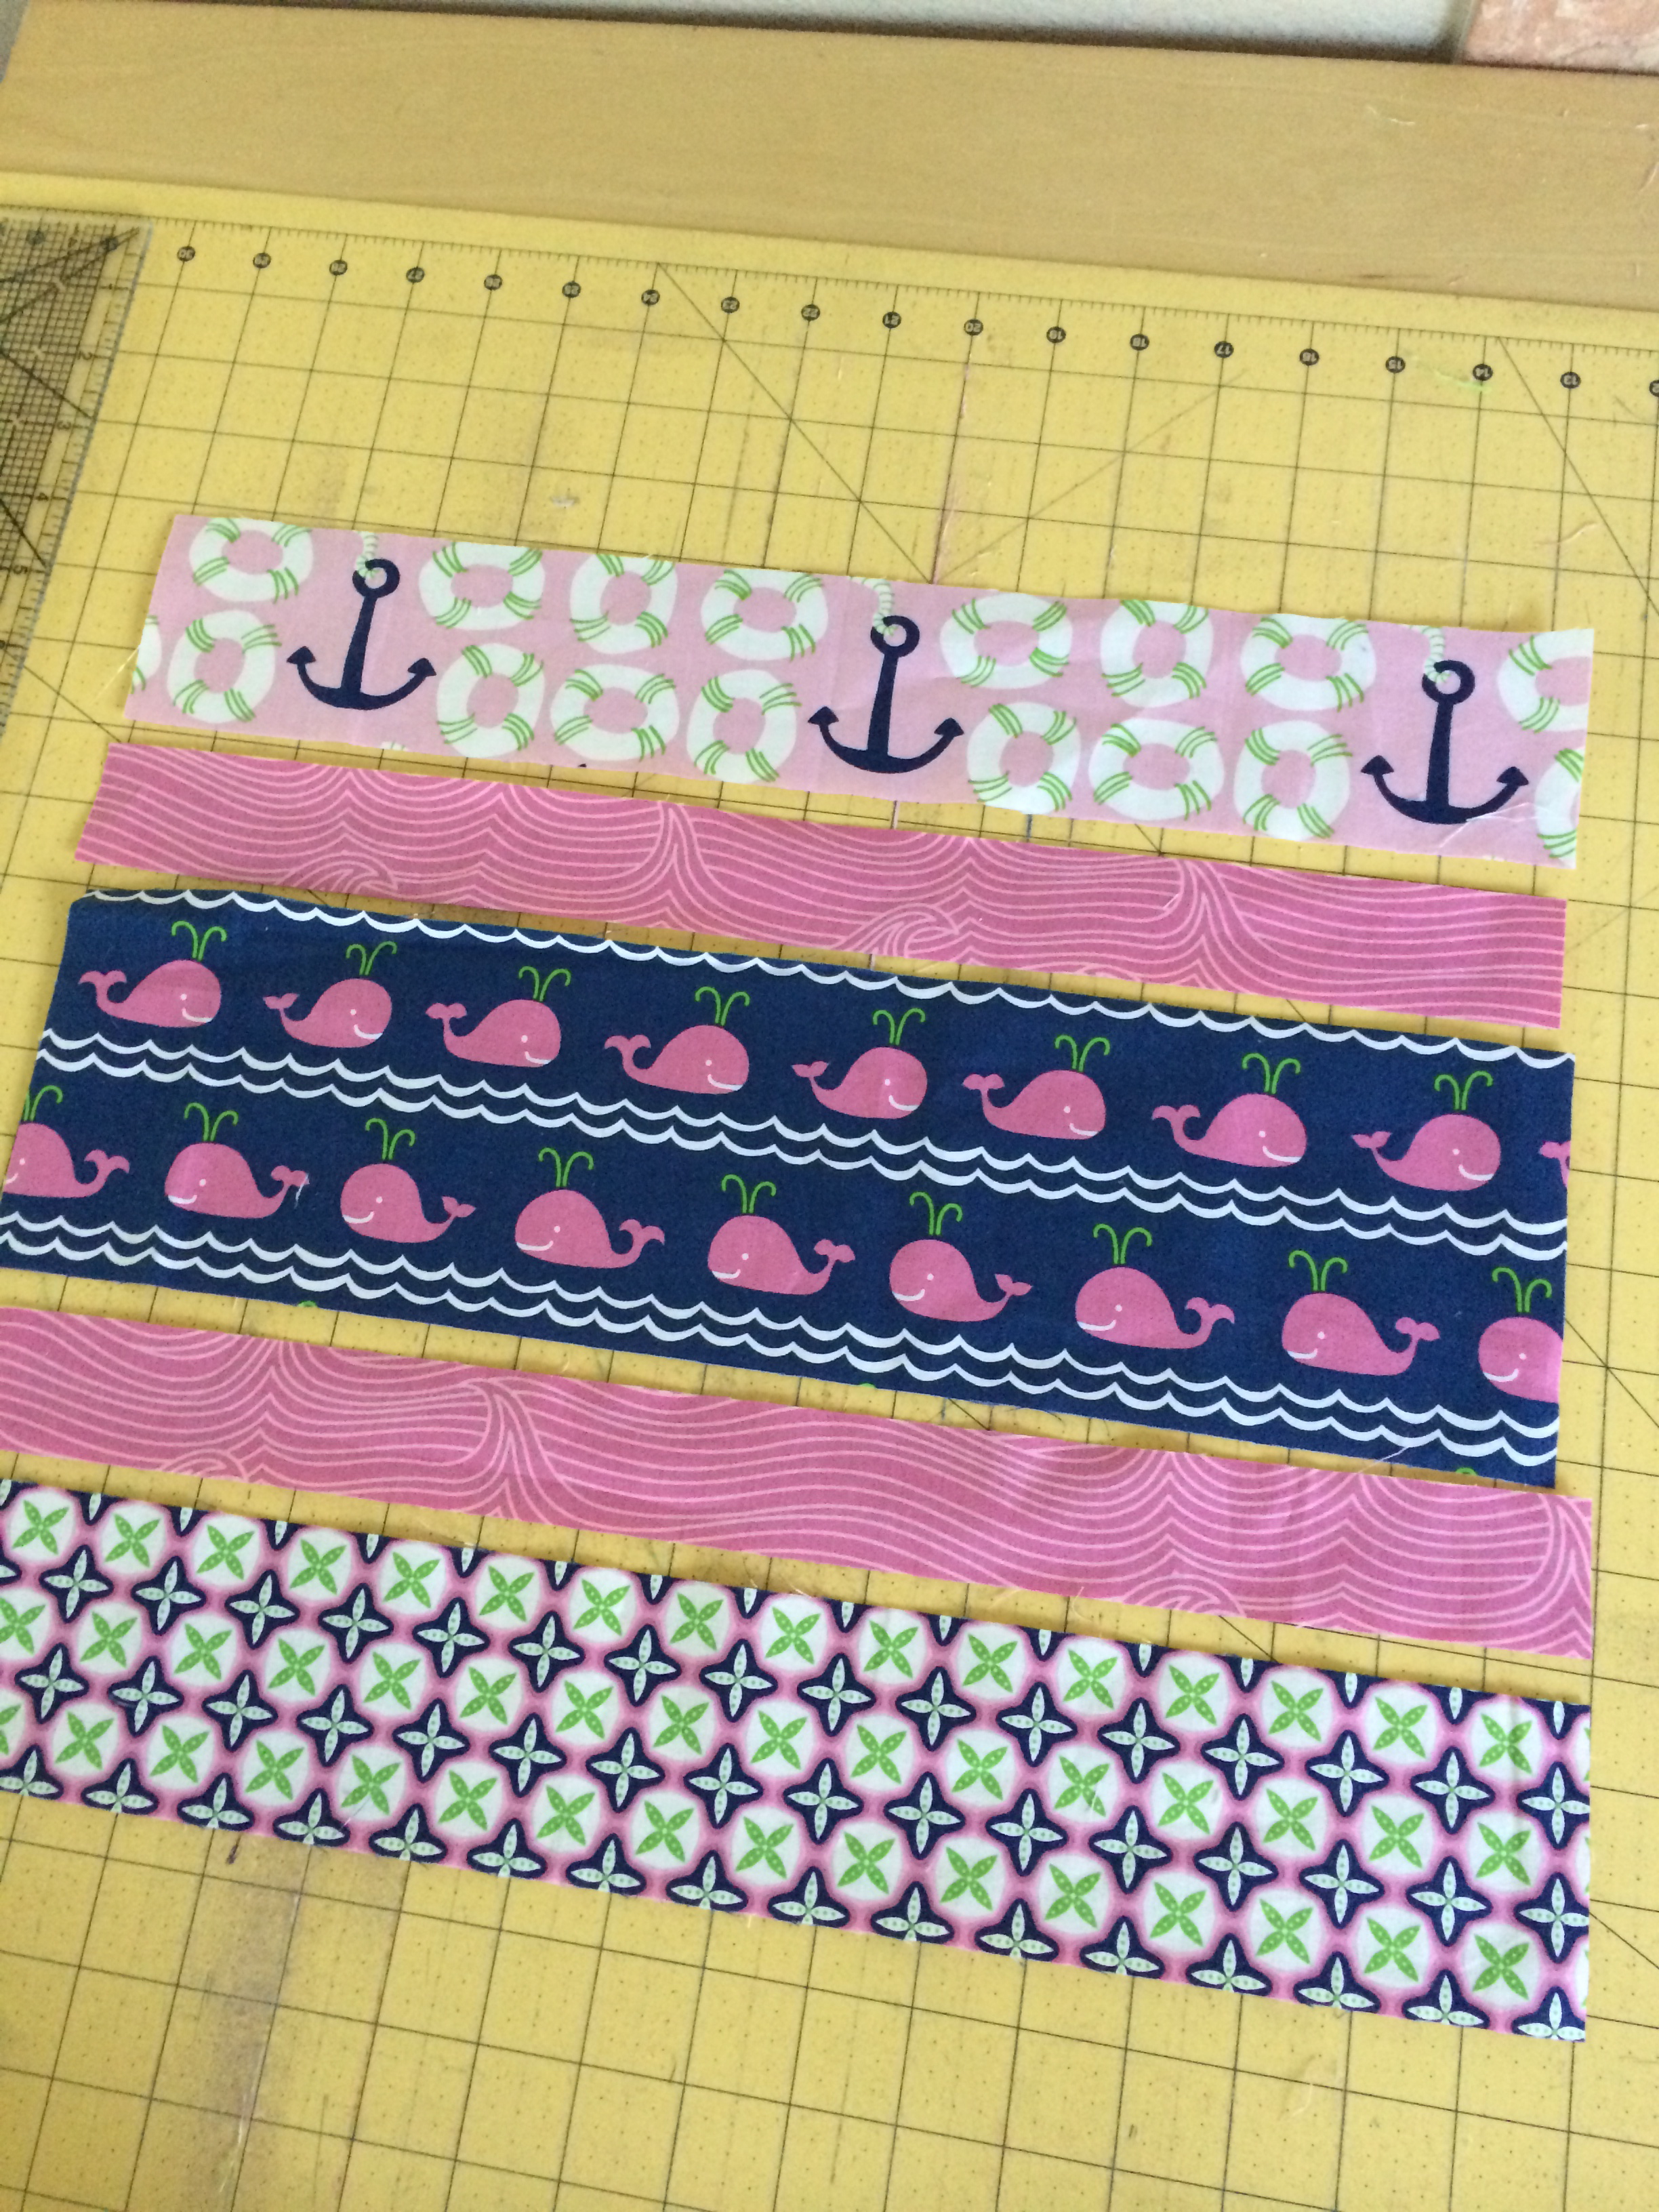
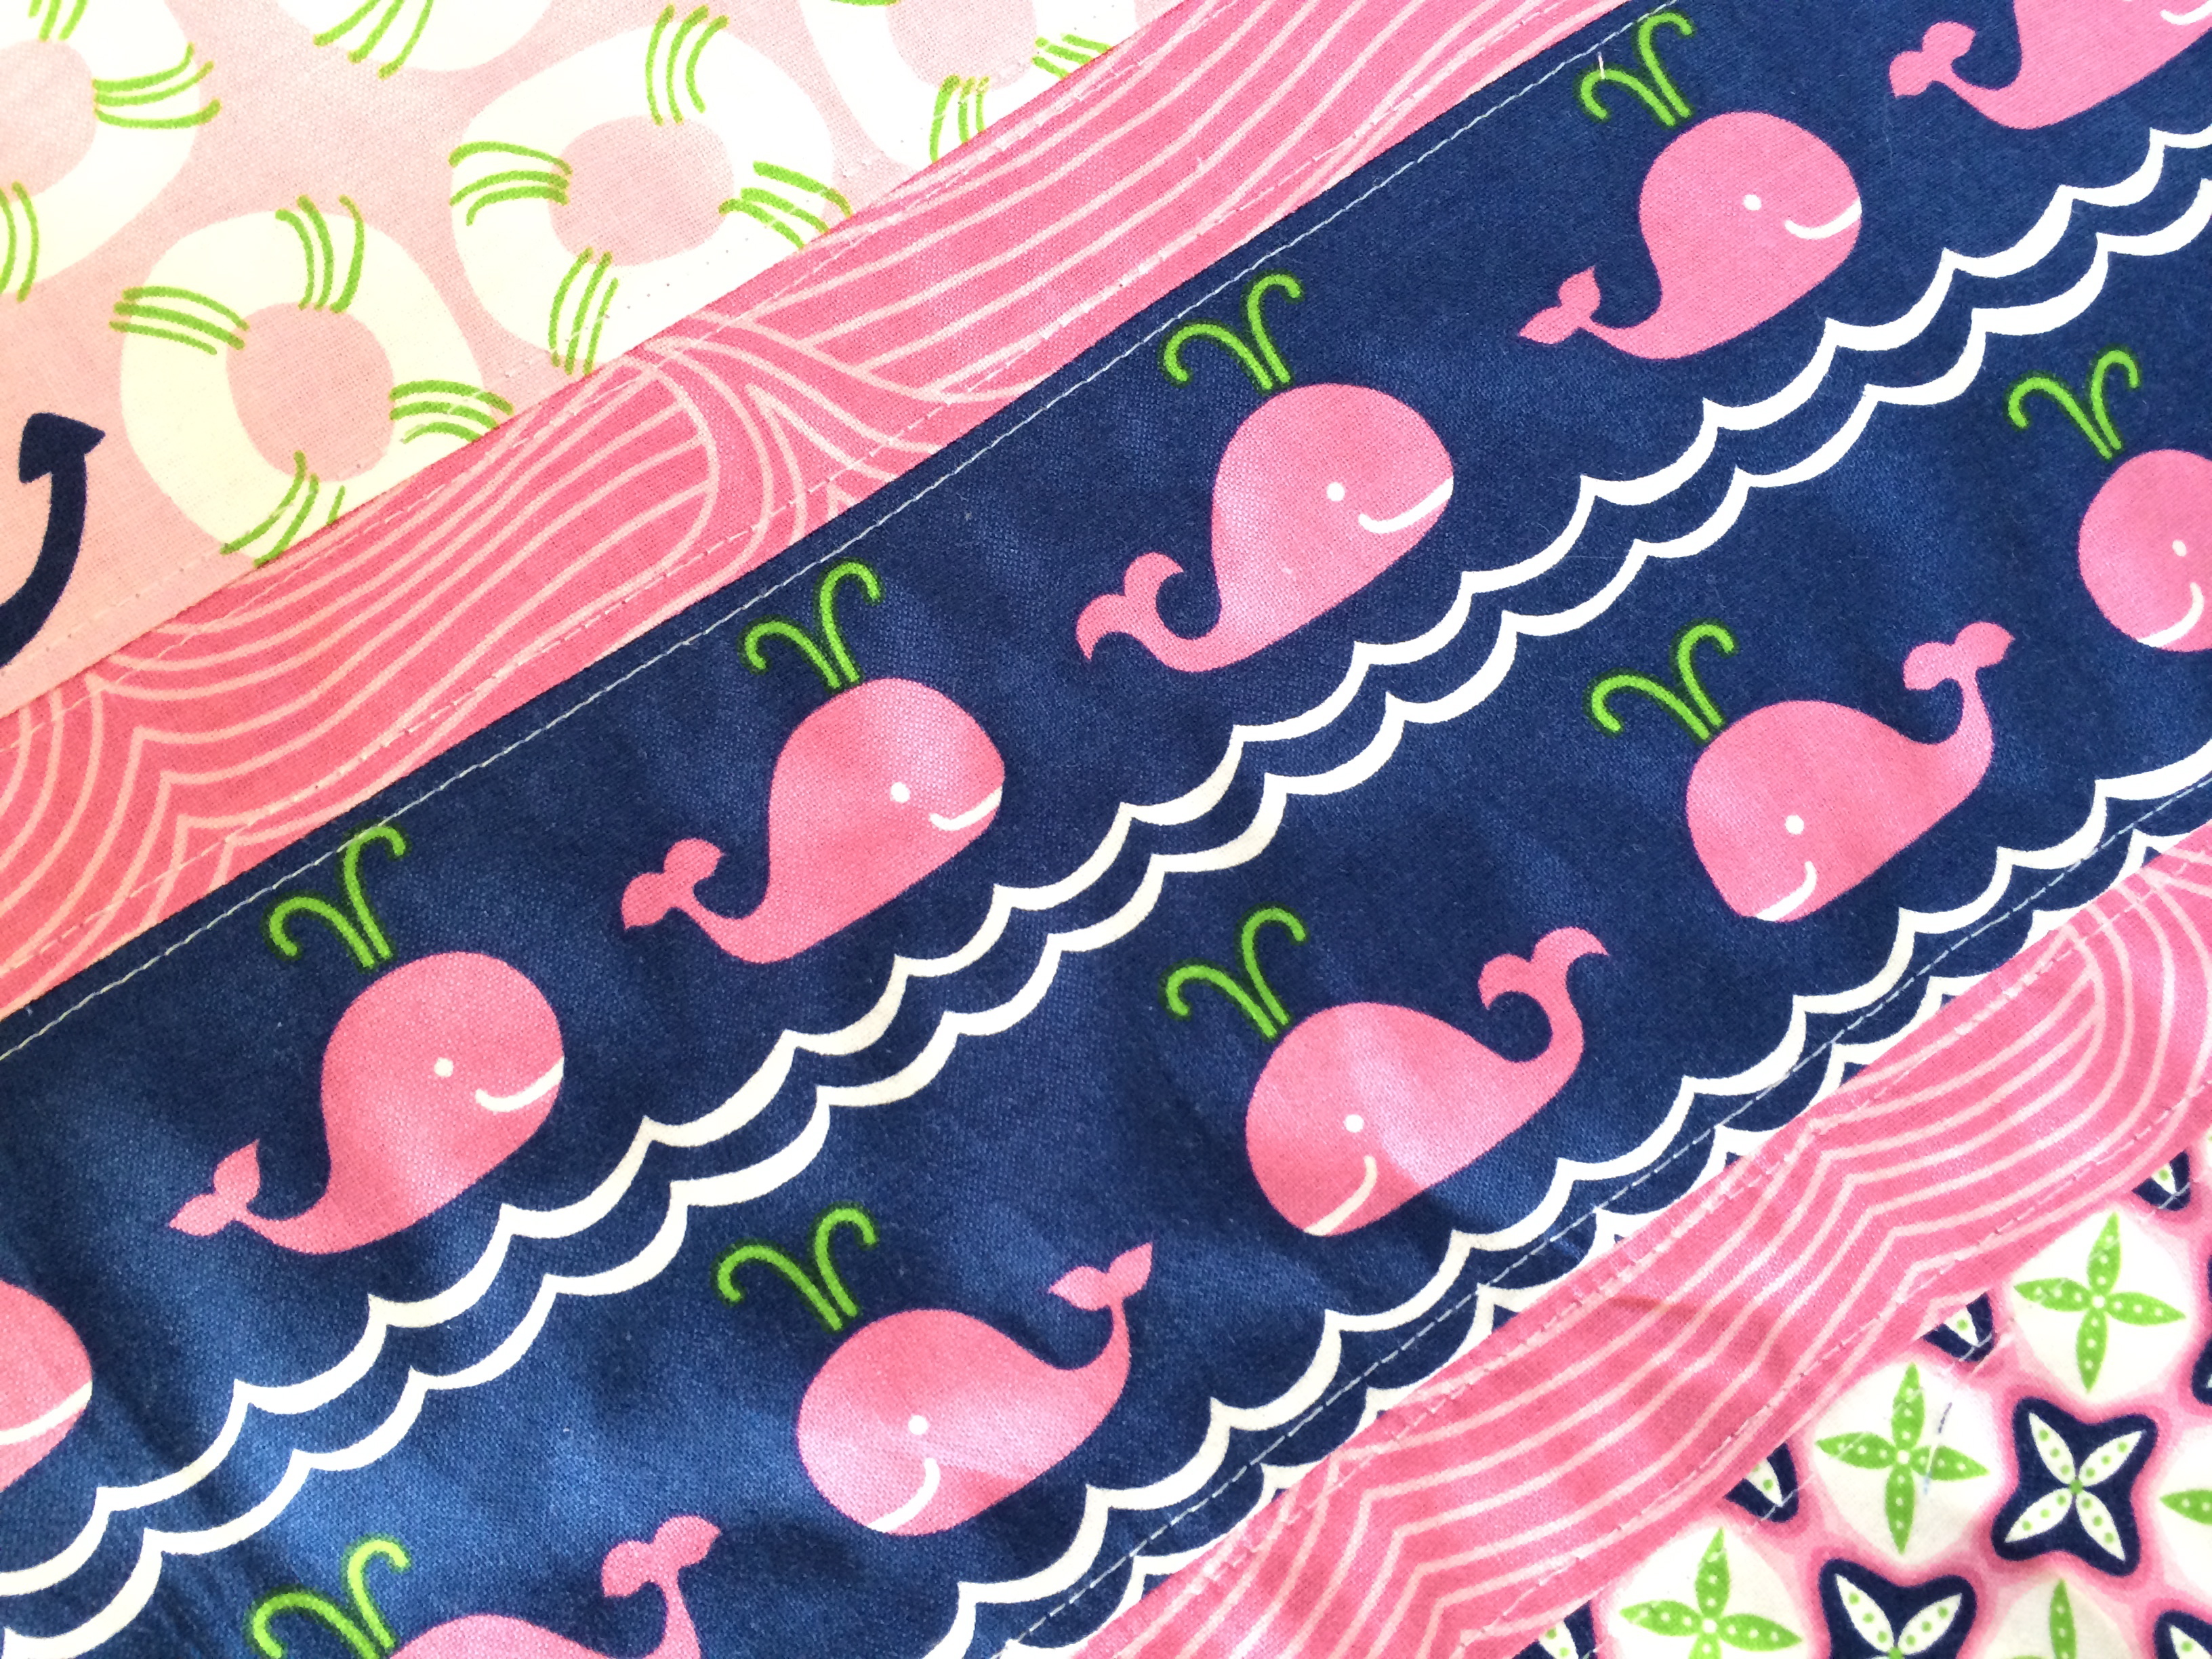
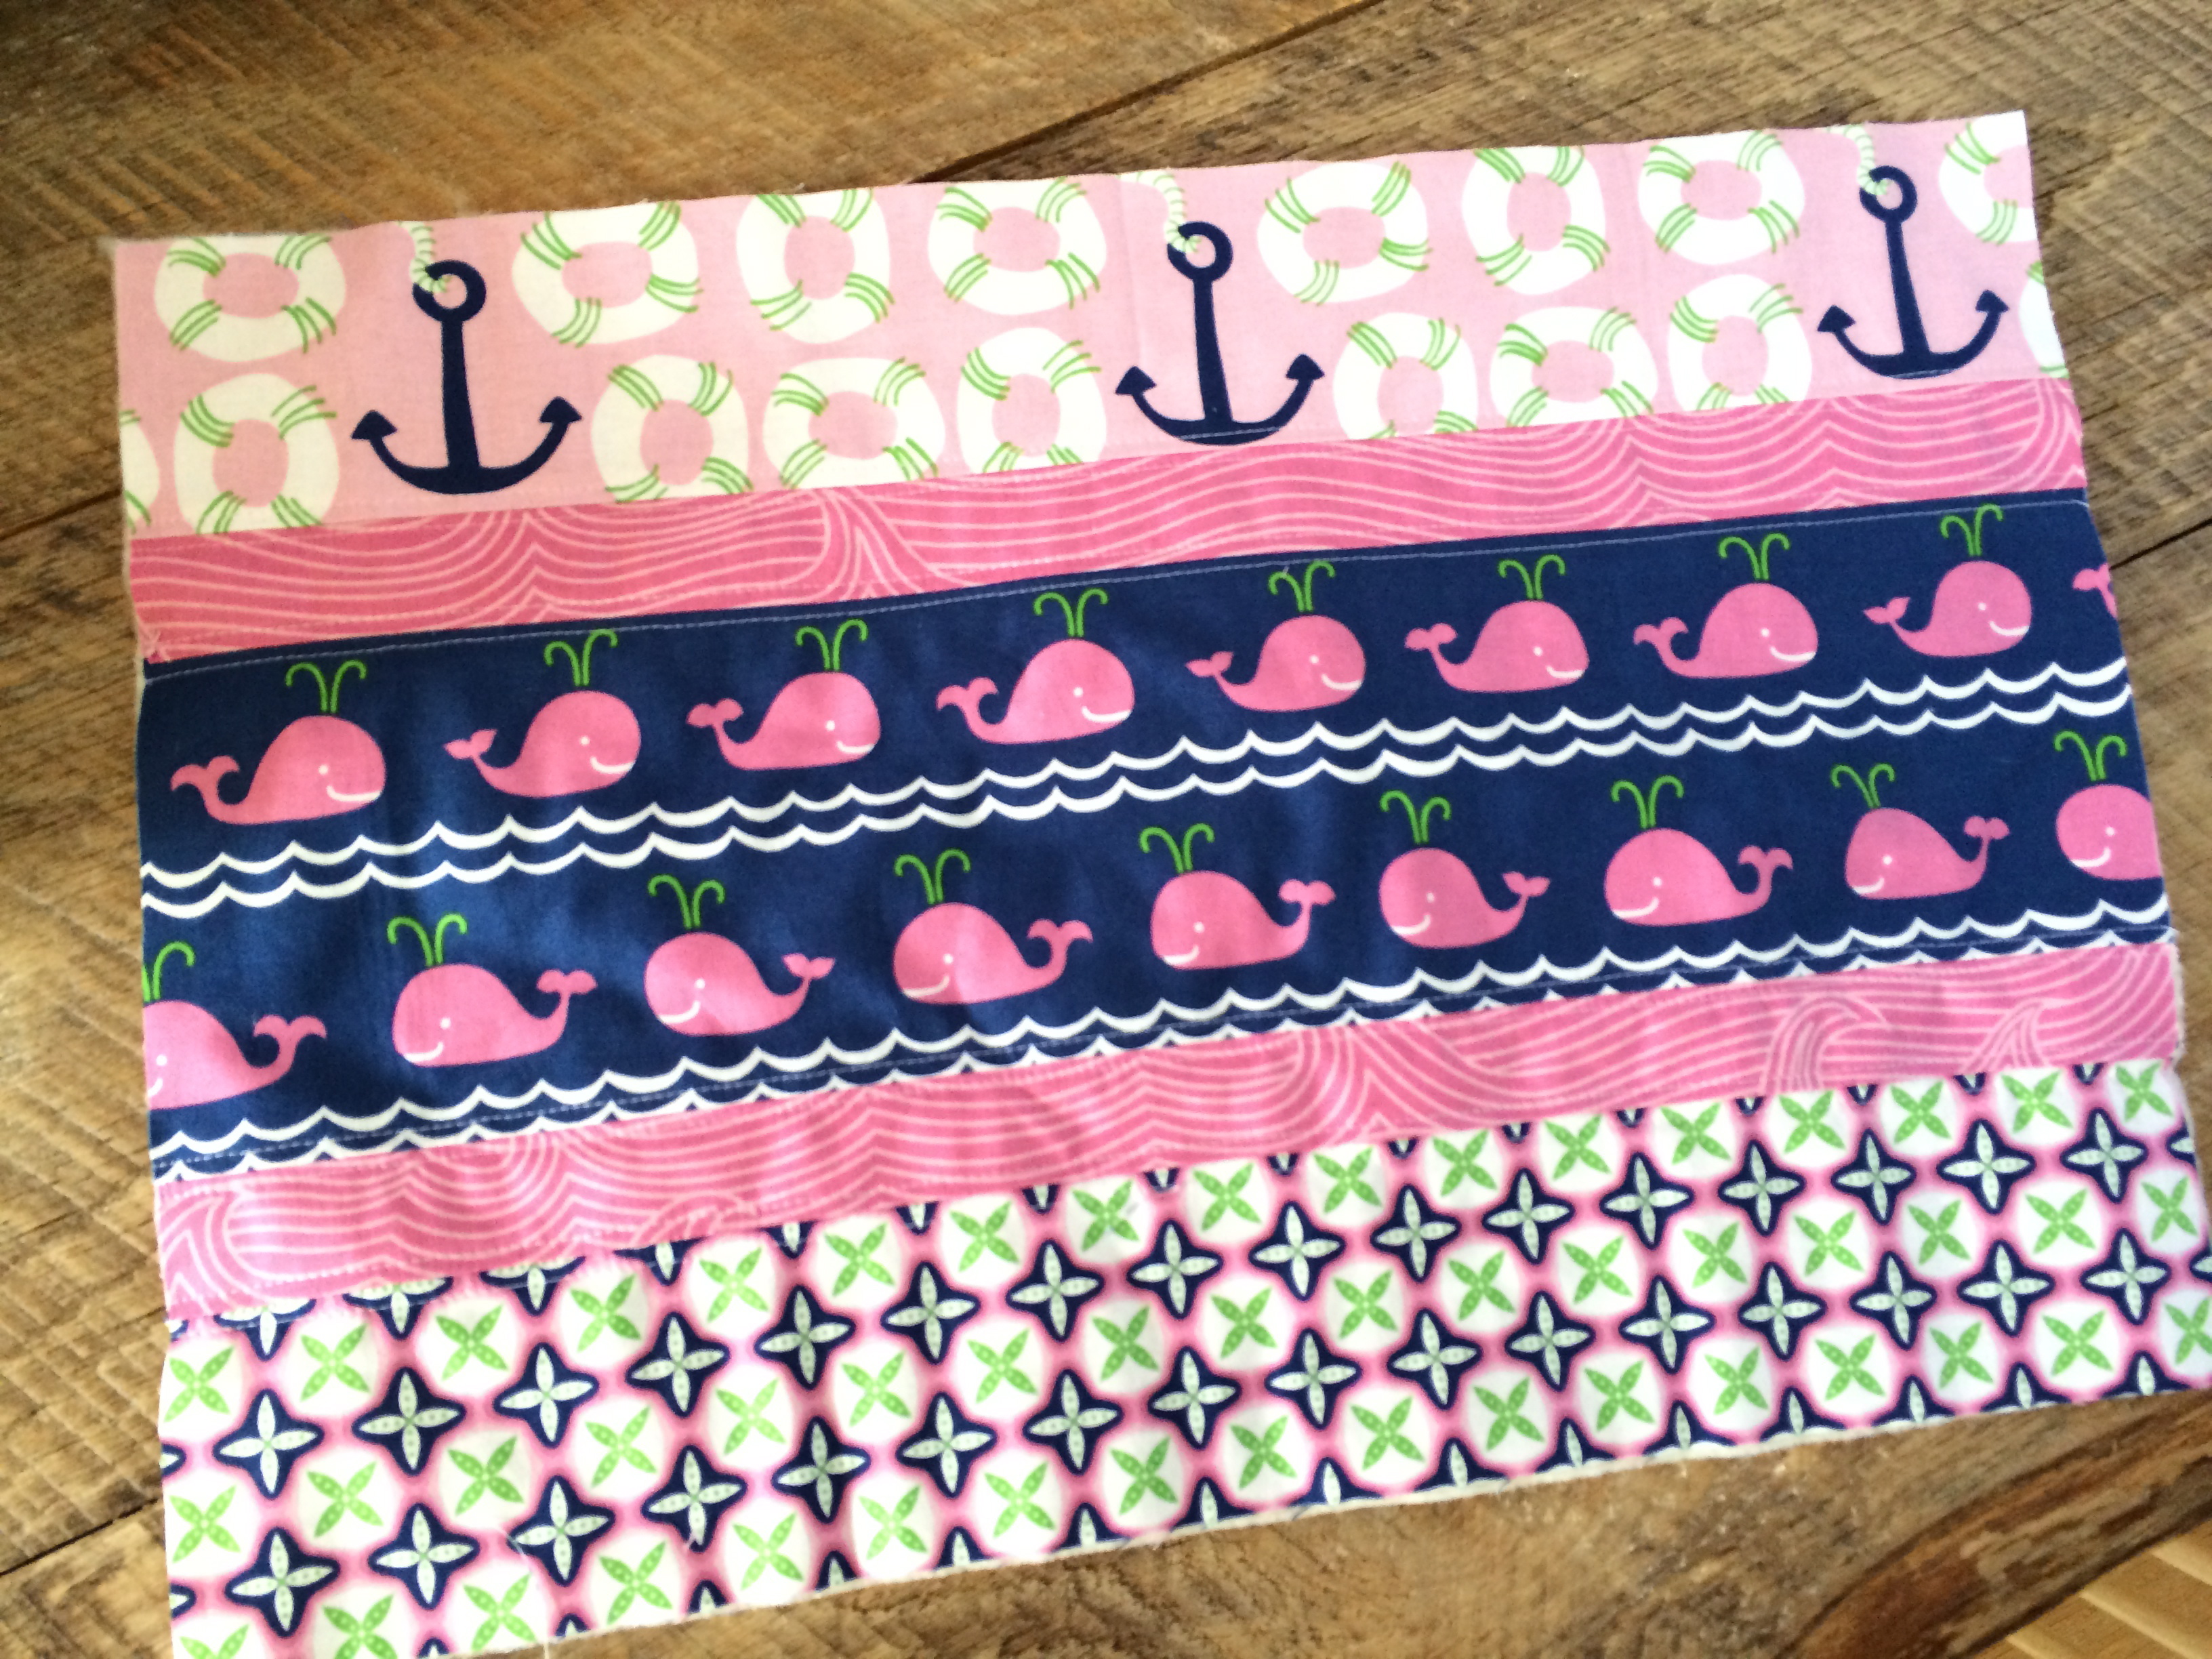
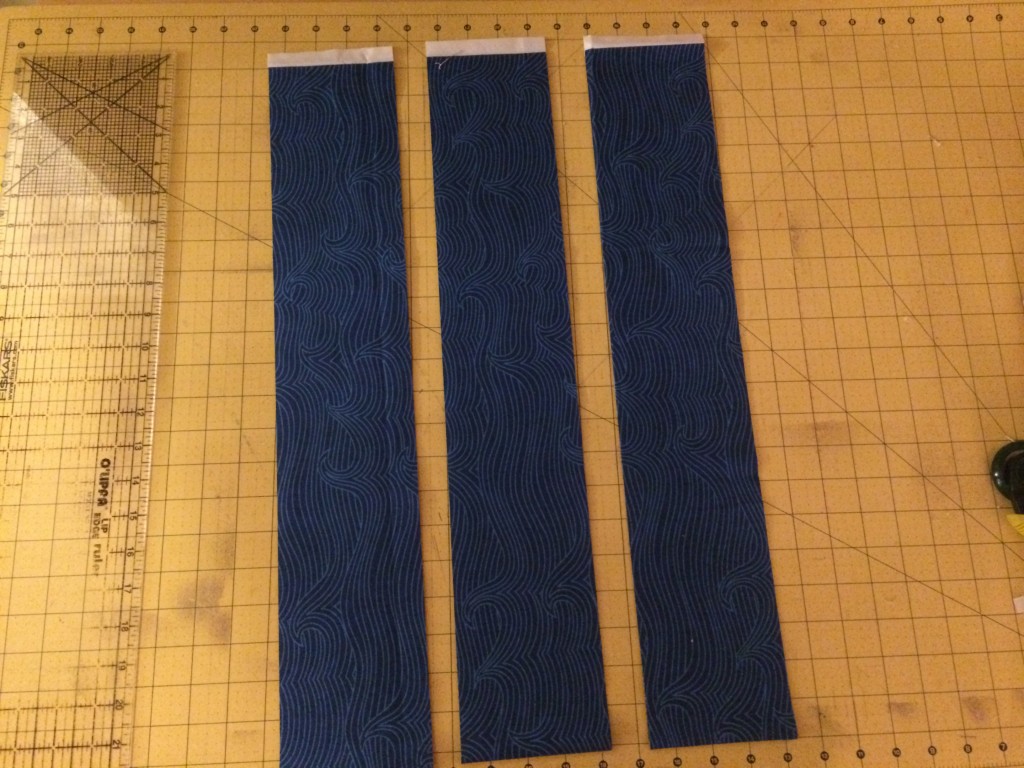
Free hand cut a wavy edge to each blue strip.  You can do it!!  Just let the scissors cut where they may.  Mine are not perfect, but neither are real waves.  Mine are all different heights and depths.  Using the Spray n Bond, spray the wrong side of the blue waves and align with the bottom edge of the whale strips.  Do this to each of the 3 whale and wave strips.IMG_9733

whale quilt true blue blend_3Top stitch close to the top of the waves in matching thread.  I love how the whales look like they are swimming in the waves!

IMG_9741


Prepare the block strips:

For each strip set……

Cut (7) white rectangles 2″ x 3.5″

Cut (5) patterned rectangles 5.5″ x 3.5″

whale quilt true blue blend_2

Using 1/4″ seams, sew a white rectangle to the sides of each of the 5 patterned rectangles:

Press seams toward the dark.

whale quilt true blue blend_5

Cut (2) 2″ x WOF strips of white and sew them to the top and bottom of the rectangle strip set.  It should look like this:

Make (4) of these.

whale quilt true blue blend_6

Measure the finished length of the rectangle strip and cut the whale strips to be the same length.

whale quilt true blue blend_7

Lay the rows out like this and sew the rows together:

IMG_9739


I quilted mine with random wavy lines similar to the blue wave strip.  This was my first time ever using a Long Arm Quilt Machine!  My friends over at Quilt EZ let me have a spin on one of their machines!  The stitch regulator is a dream 🙂

whale quilt quilting

whale quilt Blend True Blue 15
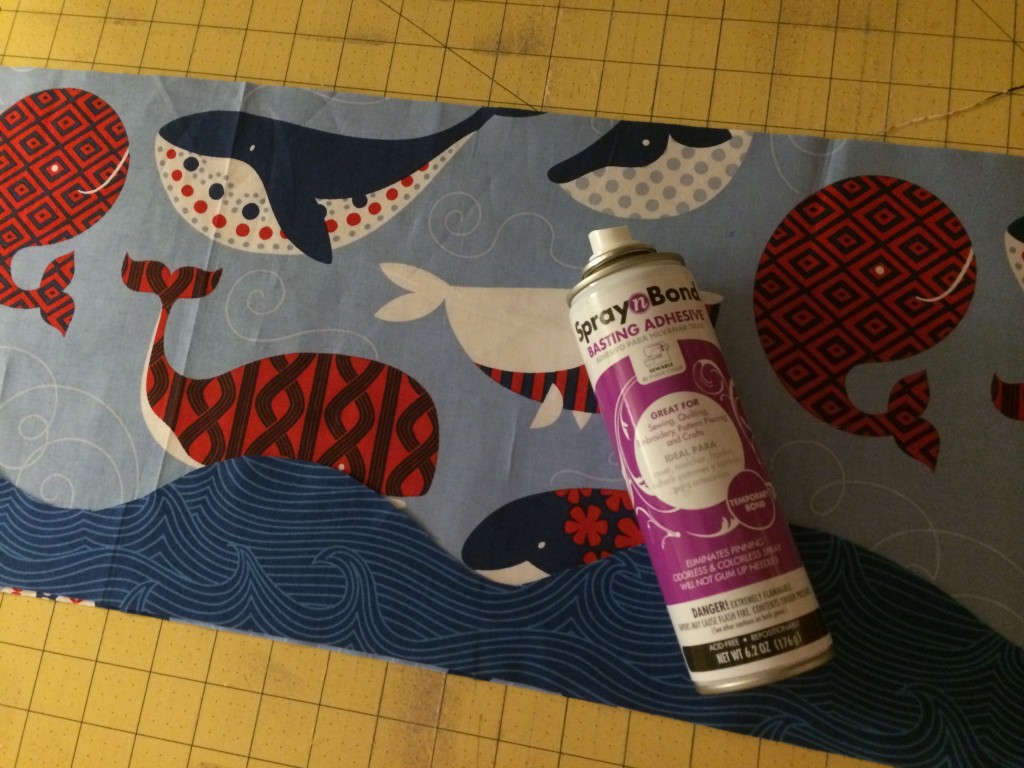
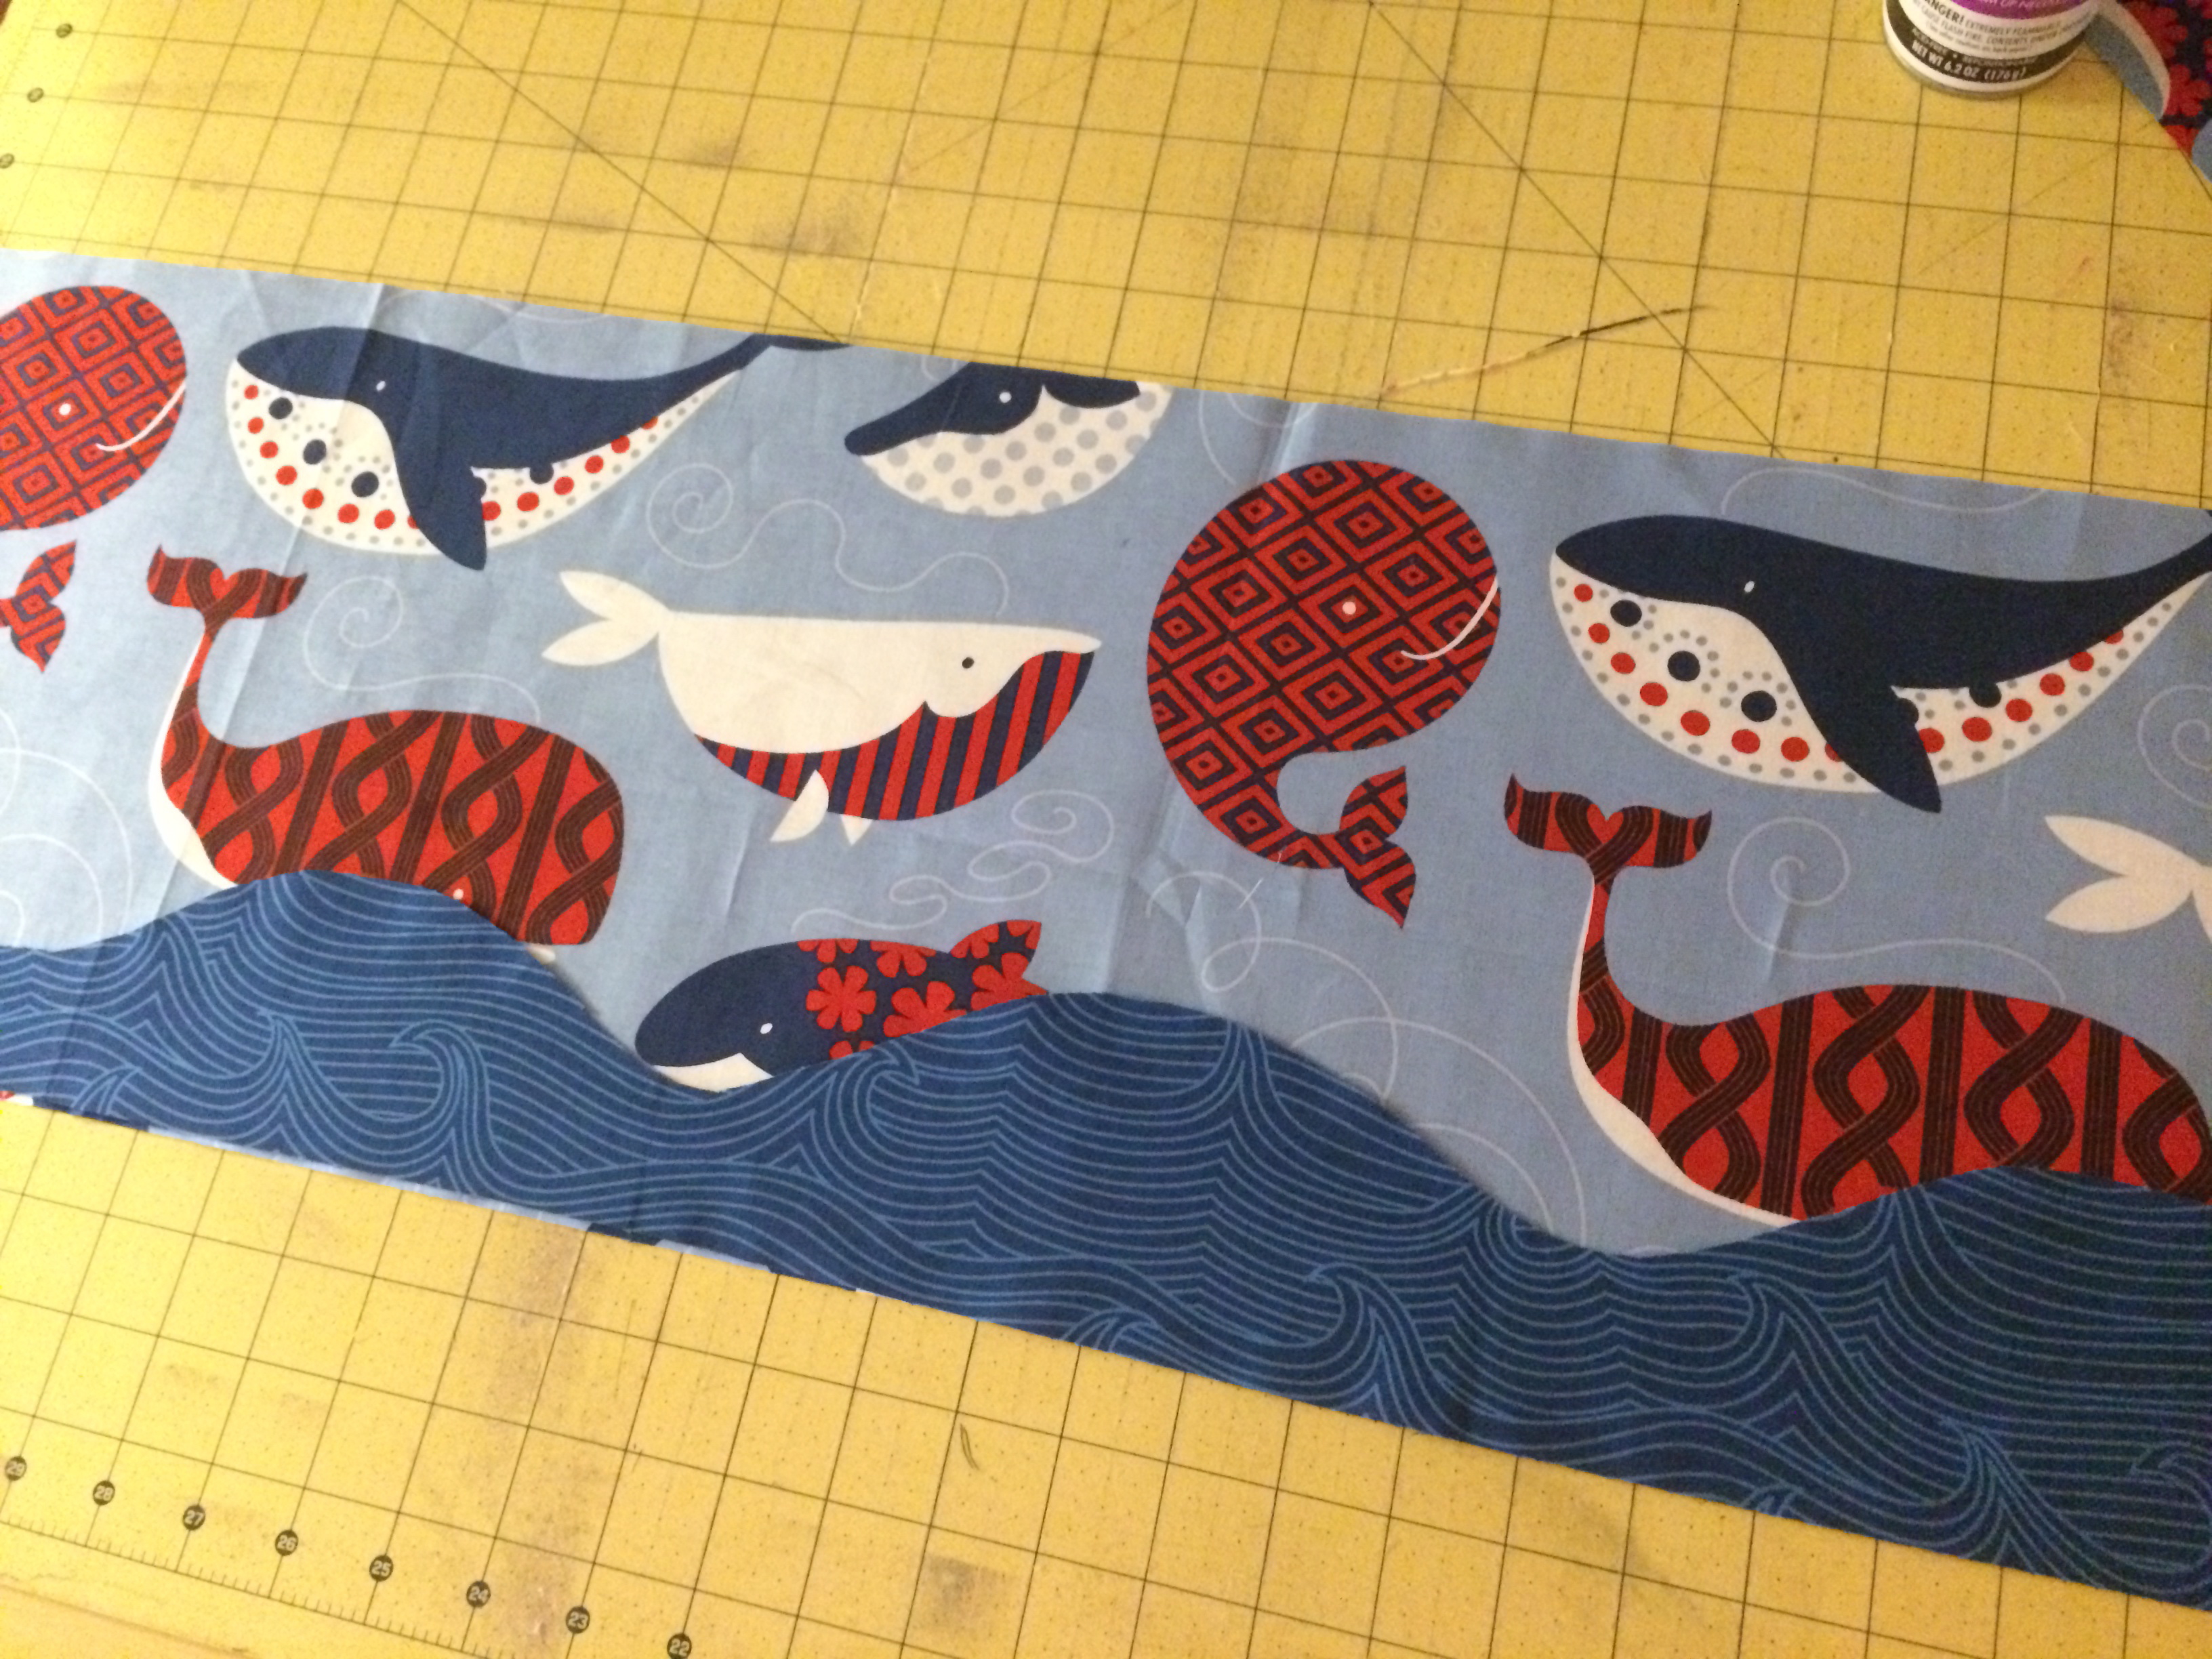
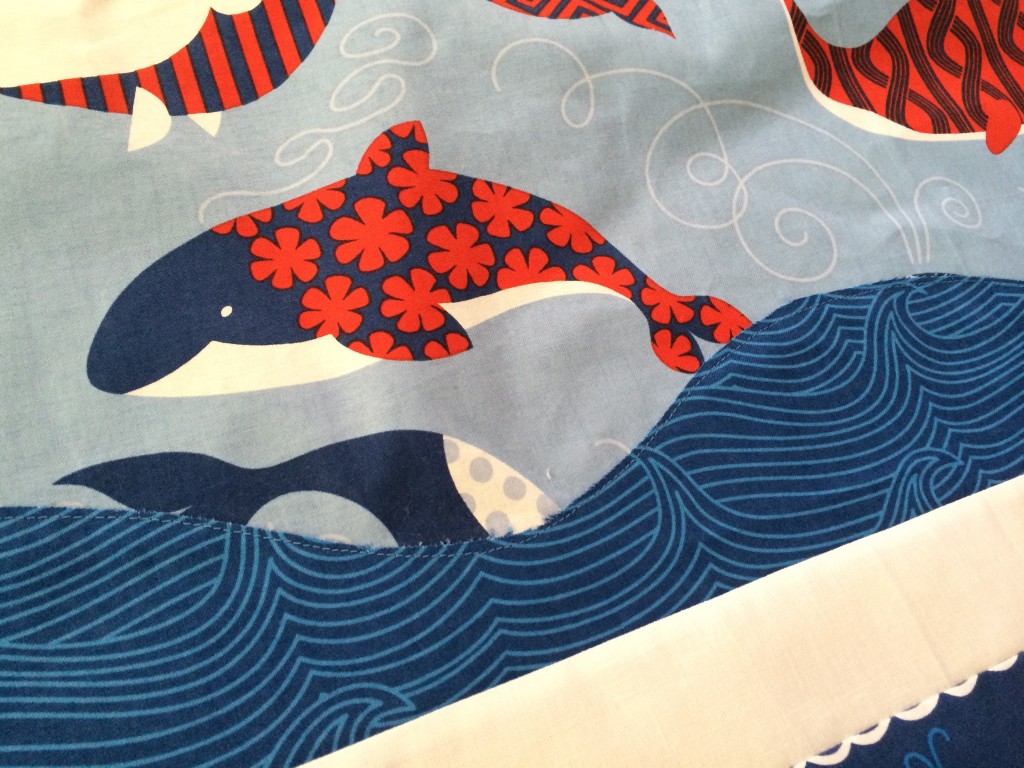
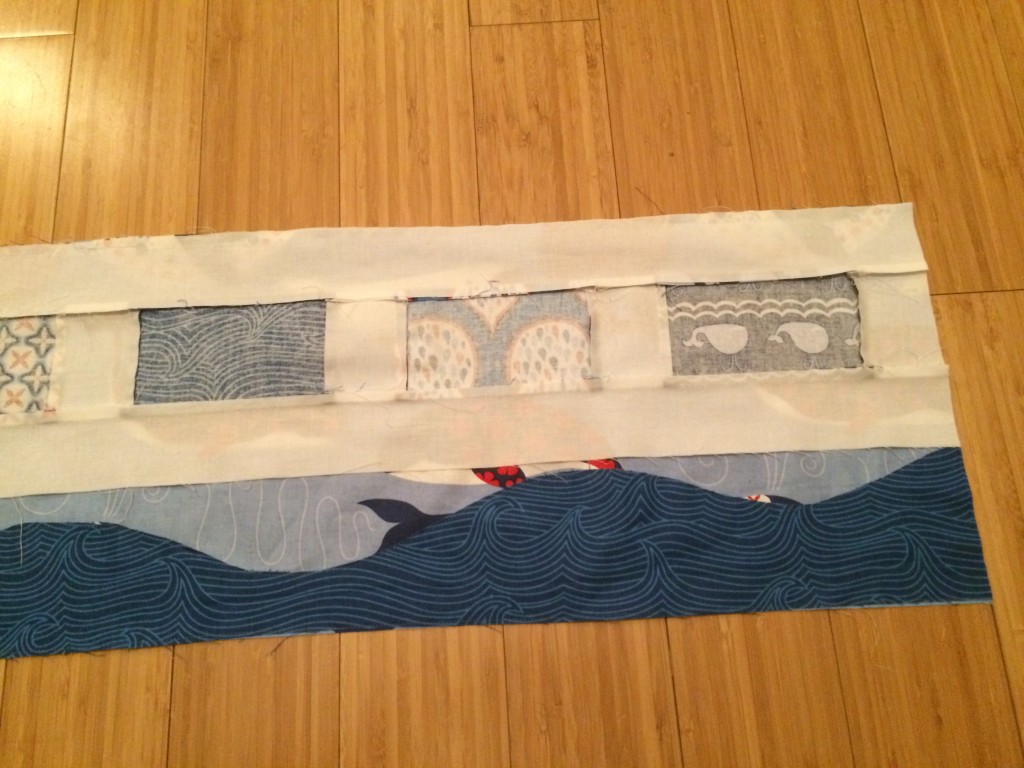
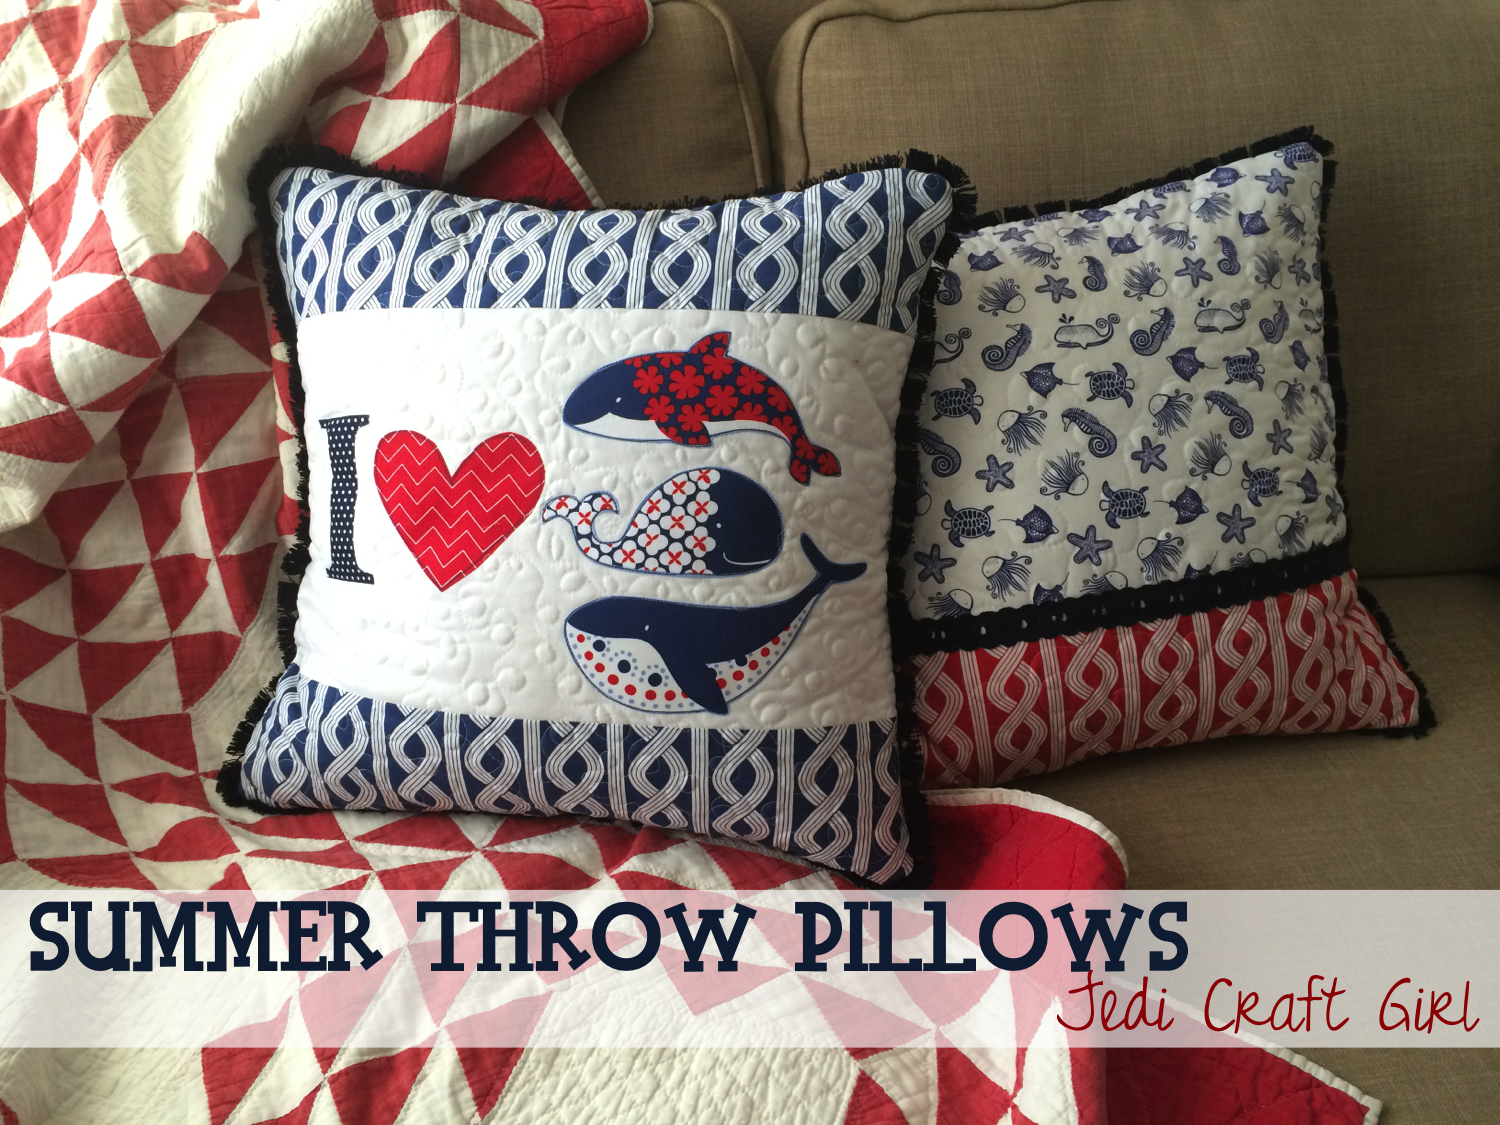
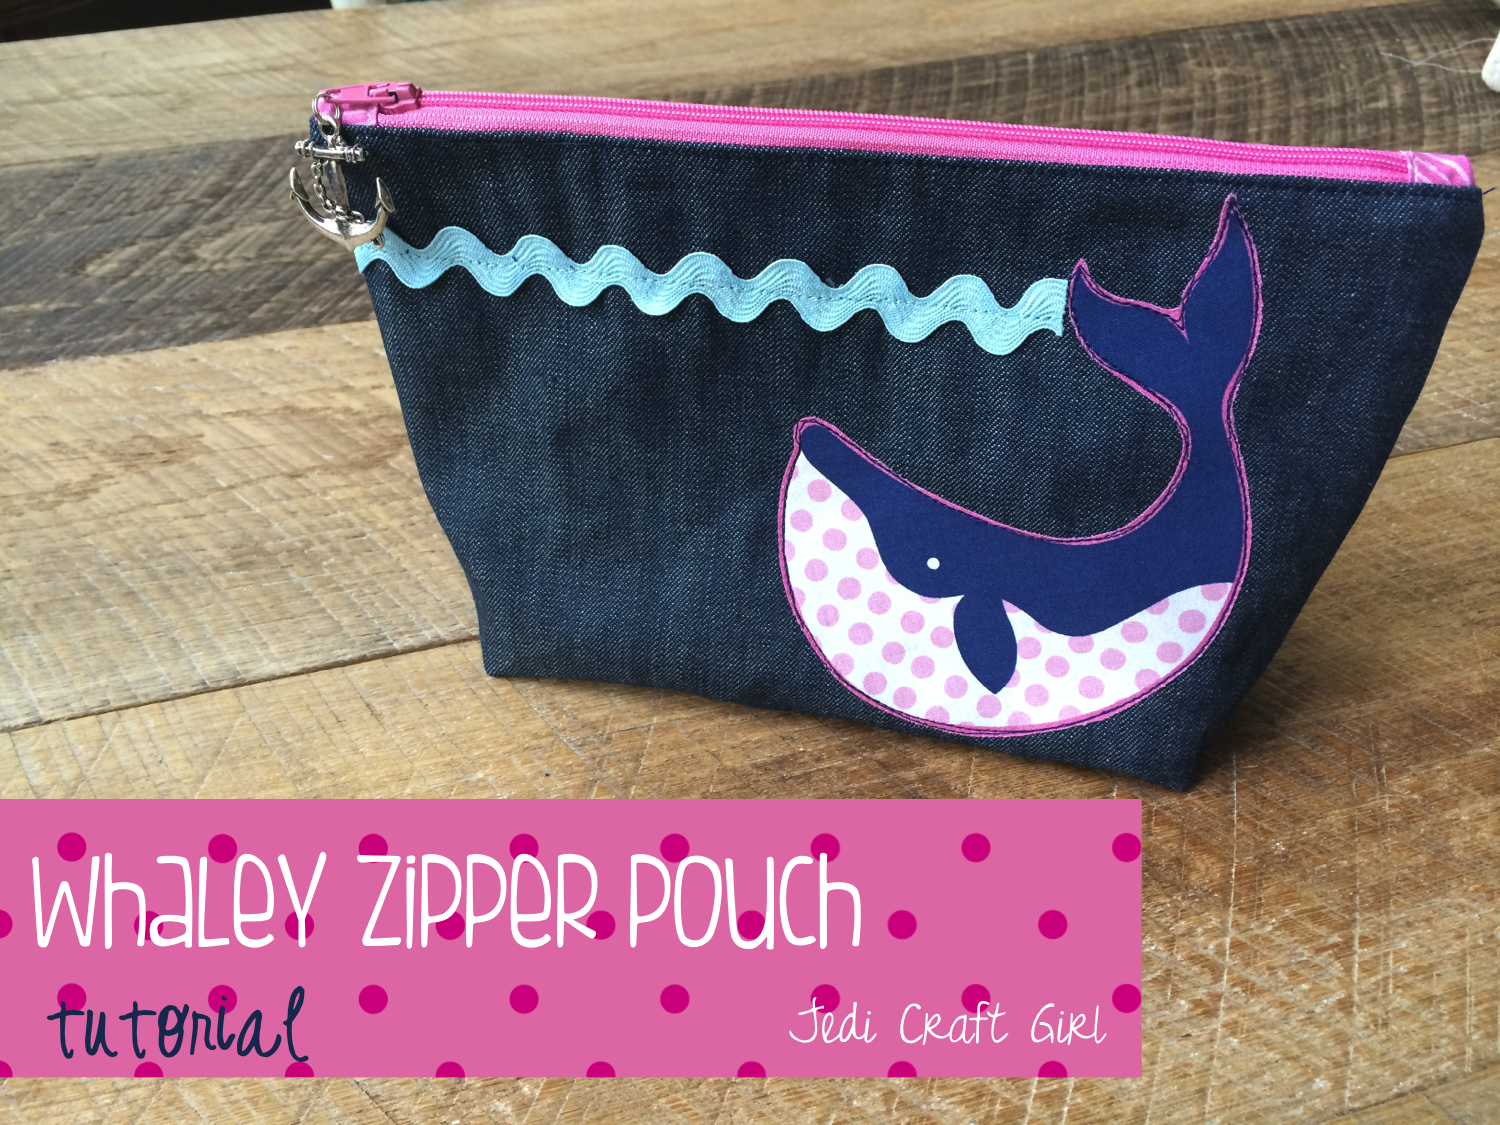
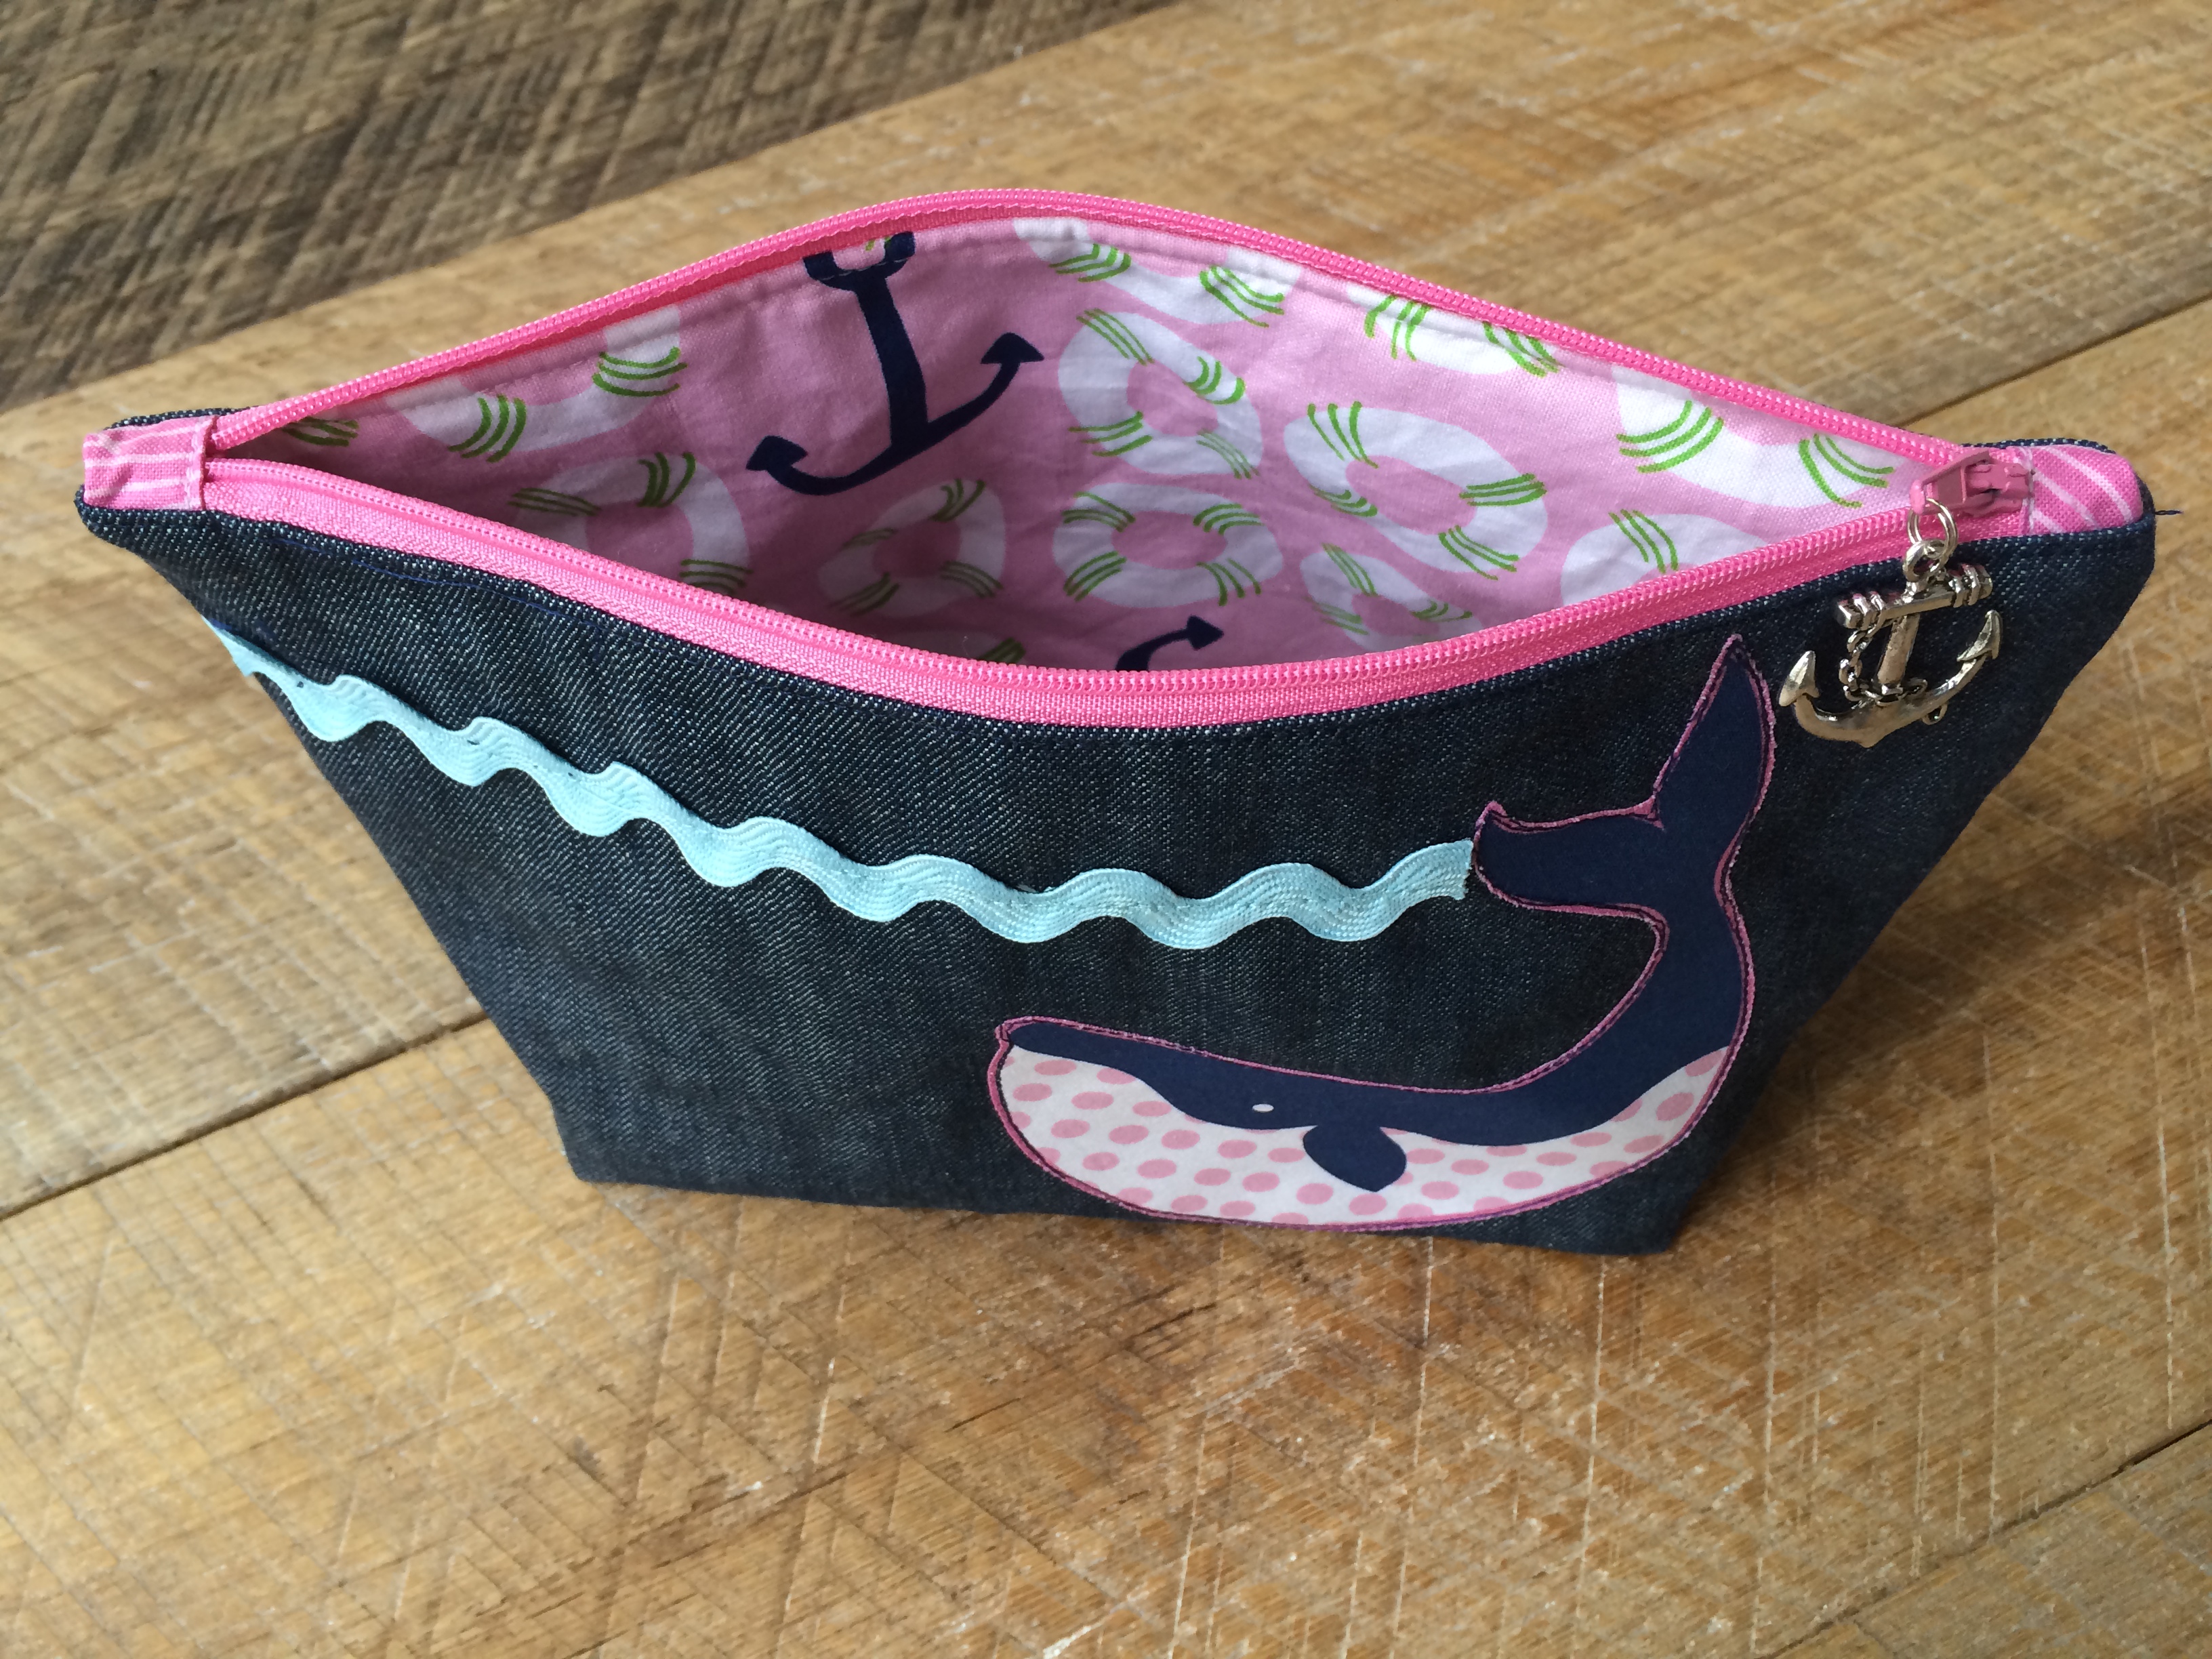
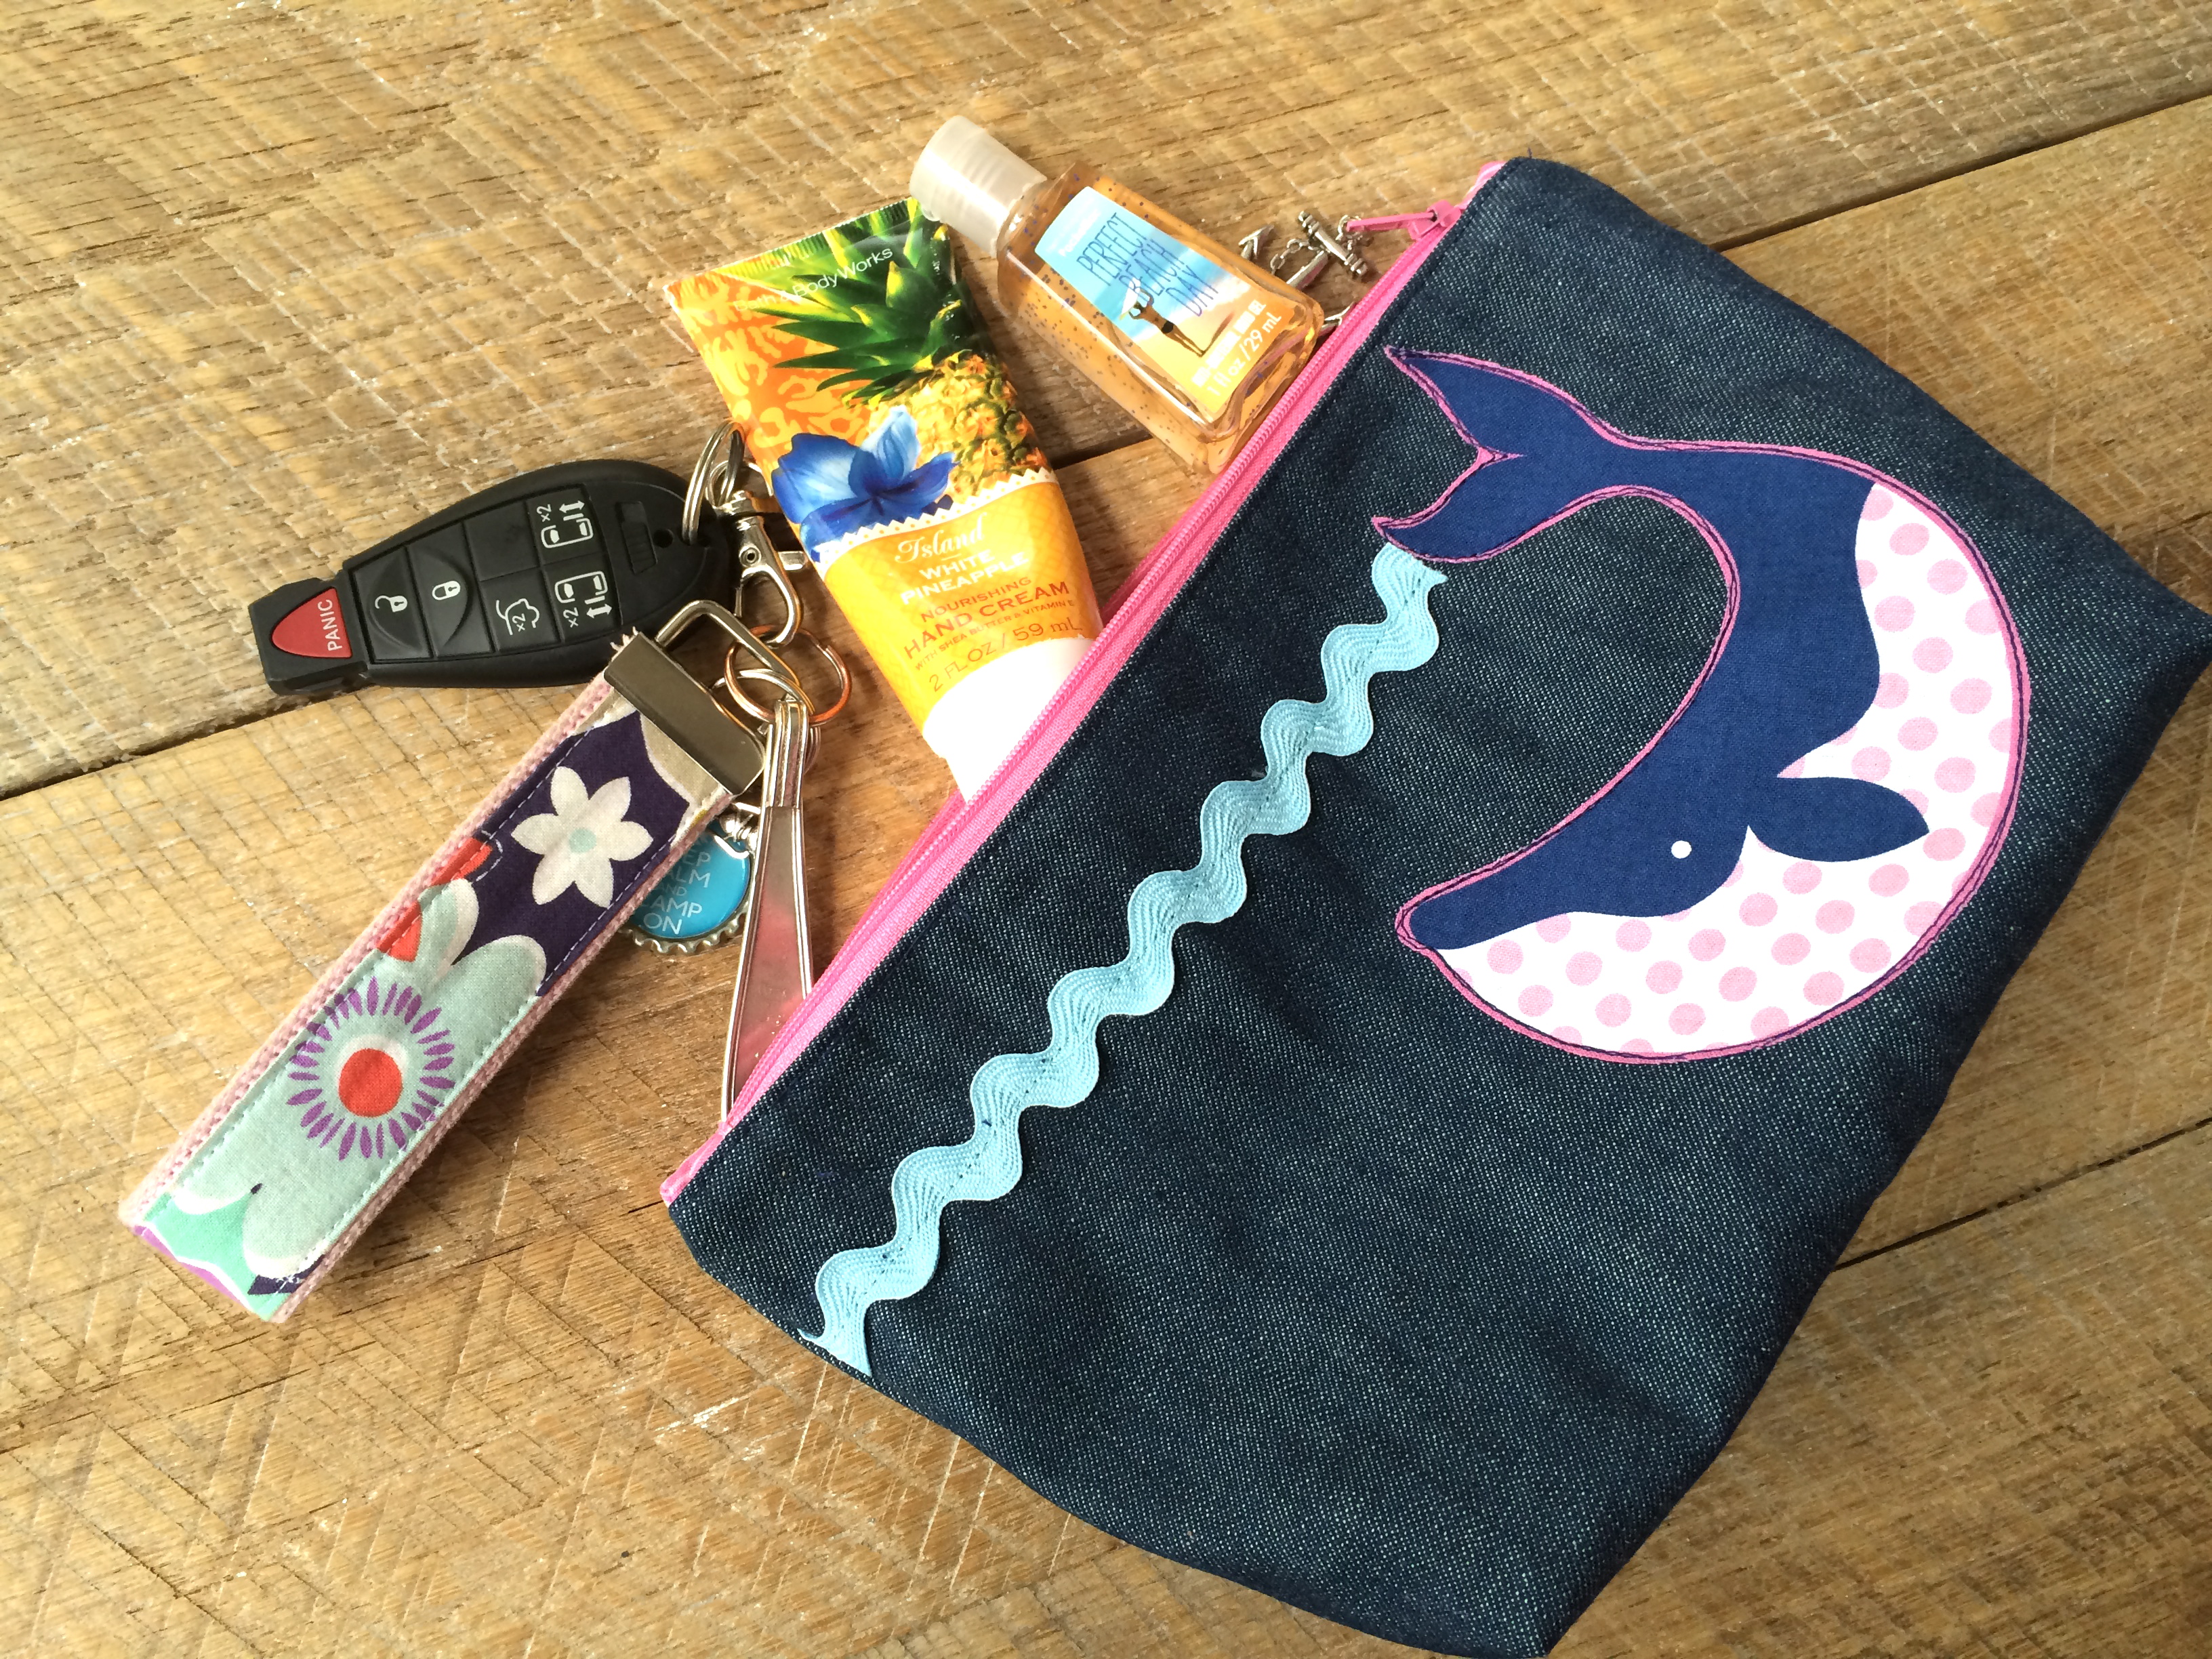
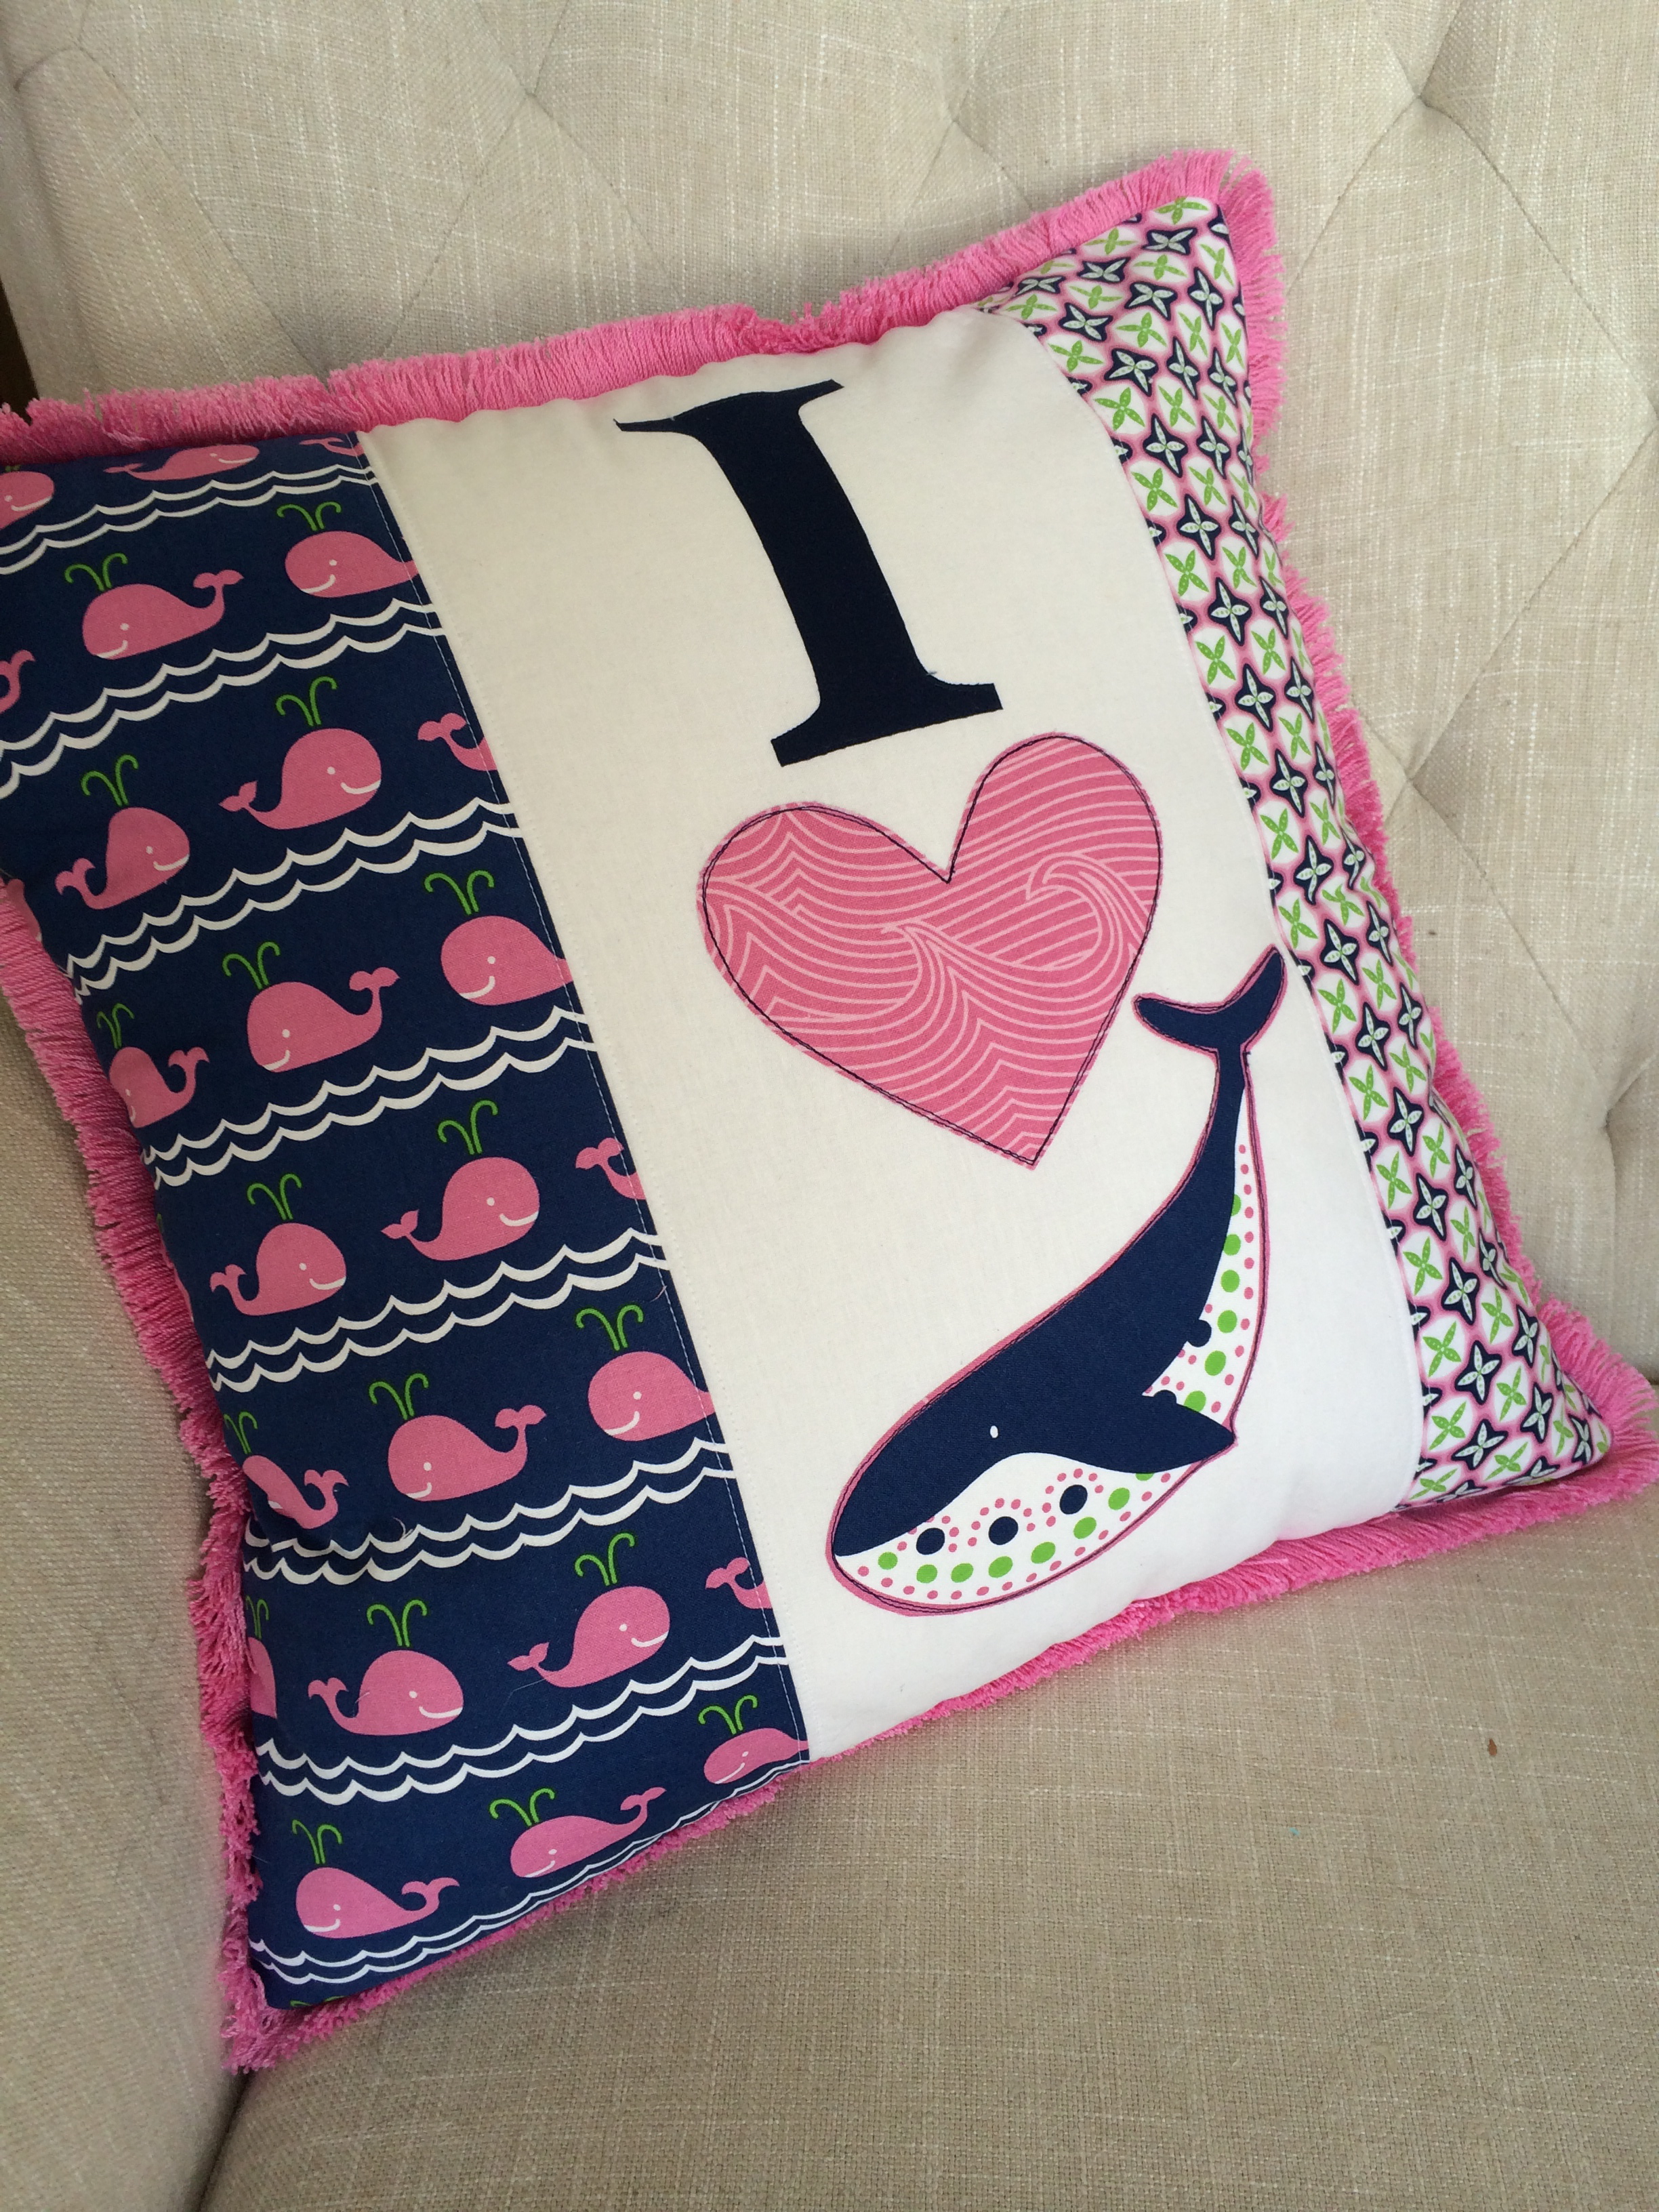
Did I mention I love whales?

whale quilt Blend True Blue 21

whale quilt Blend True Blue 23


whale quilt Blend True Blue 20

whale quilt Blend True Blue 12

whale quilt Blend True Blue 10

Whaley Zipper Pouch

whale zipper pouch true blue blend fabrics


If you know me at all, you aren’t surprised that a whale zipper pouch would be apart of “Whale Week”!  I have gotten so much use out of my 1/2 yard of True Blue Whales fabric by Blend!!!  I love the little anchor charm I found to use as the zipper pull.  The lining of the bag is super cute with lifesavers and anchors on it!!

This tutorial is more of an overview, if you want extra details and you are new to making zipper pouches, check out My favorite zipper pouch tutorial.


Supplies:

Fat quarters or large scraps for the outer bag and lining

scraps for zipper tabs

Medium or light weight fusible stabilizer

Heat n Bond LIte

zipper

scrap of ric arc

Cut the denim outer bag, bag lining and stabilizer 8″ x 11″ (2) of each.  Fuse the stabilizer to the wrong side of the lining fabric.

IMG_9646

Iron the heat n bond lite to the wrong side of the desired whale.  Fuse and cut the whale out.  Position the whale as pictured below.  Sew an accent piece of ric rac.

IMG_9649

Cut 2 zipper tabs 1.5″ x 4″.  Pres the ends under 1/4″ and then press in half.IMG_9650

Here you can see the 2 zipper tabs.  (Sorry about the lighting, it was 11:00 pm).

whale ziper pouch tutorial

Measure the zipper and the tabs so you have 1″ on each side of tabs (there will be extra).  Sew the tabs to the ends of the zipper. Again, click HERE for more details on this process.  Cut the folded piece of the tab and cut out the excess zipper.  The goal with this is to reduce bulk in the seams.

whale ziper pouch tutorial_2


Flip the zipper over and match with the top edge of the whale piece.  Place one of the lining pieces right side down and align all the edges.  Don’t worry about the zipper tabs, we will even them up in a minute.
whale ziper pouch tutorial_3


Sew using a zipper foot.  Press and do the same thing to the other side of the zipper so it looks like this:whale ziper pouch tutorial_4

Top stitch 1/8″ along the zipper.  Trim the excess tab fabric.  Match right sides with right sides and pin all the way around.  MAKE SURE ZIPPER IS OPEN  Sew using 1/4″ seam leaving a 2.5″ opening on the side of the lining fabric.whale ziper pouch tutorial_5

After you’ve sewn all the way around cut a 1.5″ notch out of each corner of the bag.whale ziper pouch tutorial_6

Match bottom seams and sew a 1/4″ seam:


whale ziper pouch tutorial_7

Turn right side out and top stitch side opening.  Yea!  It’s done!

whale ziper pouch tutorial_12
whale ziper pouch tutorial_10


It’s the perfect little pouch to tuck inside a beach bag with all the little stuff that might get lost.whale ziper pouch tutorial_11

Whale Composition Book Cover

covered composition book tutorial whales

I love composition books and I have written several tutorials for them.  I use these cute covered books for everything: journals, notes, reminders, etc.  Do you use a sewing journal?  I am always writing patterns or changing existing patterns and I take notes as I go.  This has totally saved me as I have all the notes in one place.  Here is my current sewing journal – with only a few pages left in it:
whale_composition_book_true_blue_13


This is an example of how fabulous my notes and sketches are 🙂  After I have all my notes and the project is finished, I type it up as a tutorial or pattern online.  It’s time for a new composition and I’m feeling “whale-y!whale_composition_book_true_blue_12


This is the composition book I am using – make sure you measurements are 9 3/4″ x 7 1/2″
whale_composition_book_true_blue_8

Supplies:

composition book

scraps of fabric

1/3 yard fabric for lining and flaps

batting

spray n bond basting spray

hair elastic

button

You can create any design as long as it measures 16/5″ x 11″ when you are finished

Anchor fabric 3″ x 16.5″

pink accent fabric (2) 1.25″ x 16.5″

whale fabric 4.5″ x 16.5″

flower fabric 3″ x 16.5″

Piece them together in this order using 1/4″ seams:

whale_composition_book_true_blue

Press the seams in one direction.  Using basting spray or pins, baste the top to the batting.  Quilt as desired.  I quilted 1/4″ lines on both sides of the seams.  Square up the batting after quilting.

whale_composition_book_true_blue_2

Take the hair elastic and baste it 1/8″ in the center on the left side of the book cover.  Like this:

whale_composition_book_true_blue_5

For the lining, cut a piece 16.5″ x 11″

For the flaps cut (2) 11″ x 10″ and press in half

Lay them out like this:

whale_composition_book_true_blue_6

Lay right sides together and pin all the way around.  Sew using 1/2″ seam allowance leaving a 3″ opening at the bottom to turn.

whale_composition_book_true_blue_7

Turn right side out and press.  Top-stitch the opening closed.

whale_composition_book_true_blue_9

Insert the composition book and mark where you want the button.  Remove the book and sew the button on with a needle and thread – inside the flap.  It’s hard to see my button because it is blue.

whale_composition_book_true_blue_10

And you’re done!!  Perfect gift for just about anyone!!

whale_composition_book_true_blue_11


Save

True Blue Whale Skirt & Top


true blue blend fabric whale skirt
I can’t get enough of these whales from Blend Fabrics!! We are all sporting whale shirts!  I think we will be wearing these to Sea World when we go 🙂
whale skirt whale shirt true blue_9
The fabric is cute enough that all you need to do is add some Heat n Bond to the back side of the whale, cut it out and then iron it to what ever you want!
whale skirt whale shirt true blue_11

whale skirt whale shirt true blue_10


After I ironed the whale to the T-shirt, I top-stitched around the whale twice.  Sally needed a complete whale outfit (I am pretty sure if I had enough fabric I would have sewn myself a whale skirt!!)

true_blue_blend_fabric_skirt 
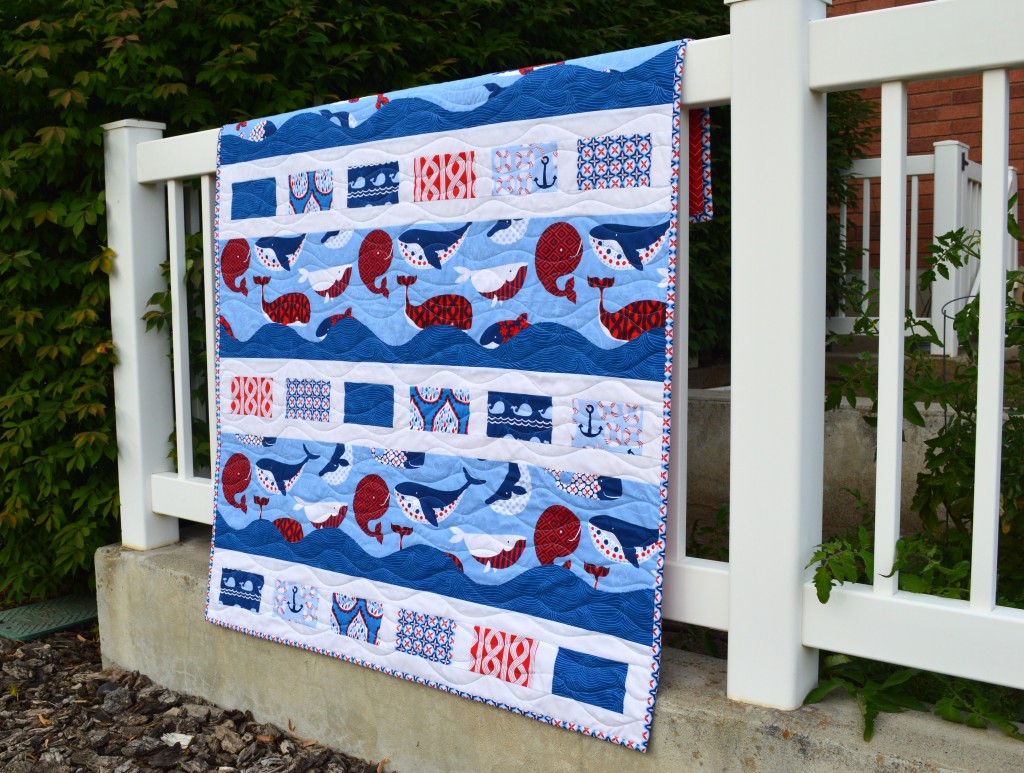
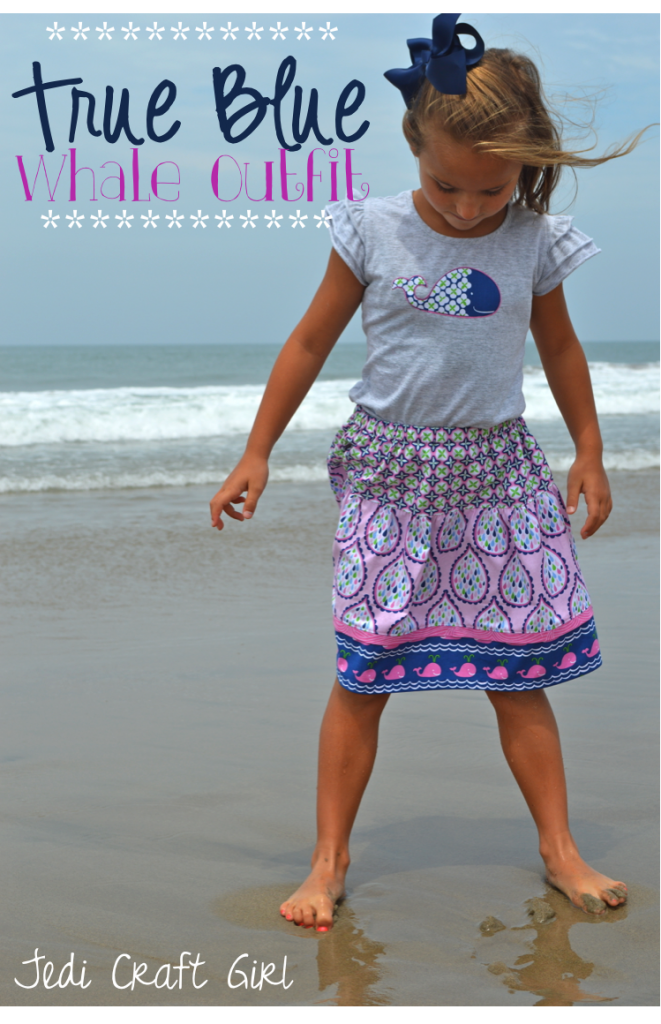
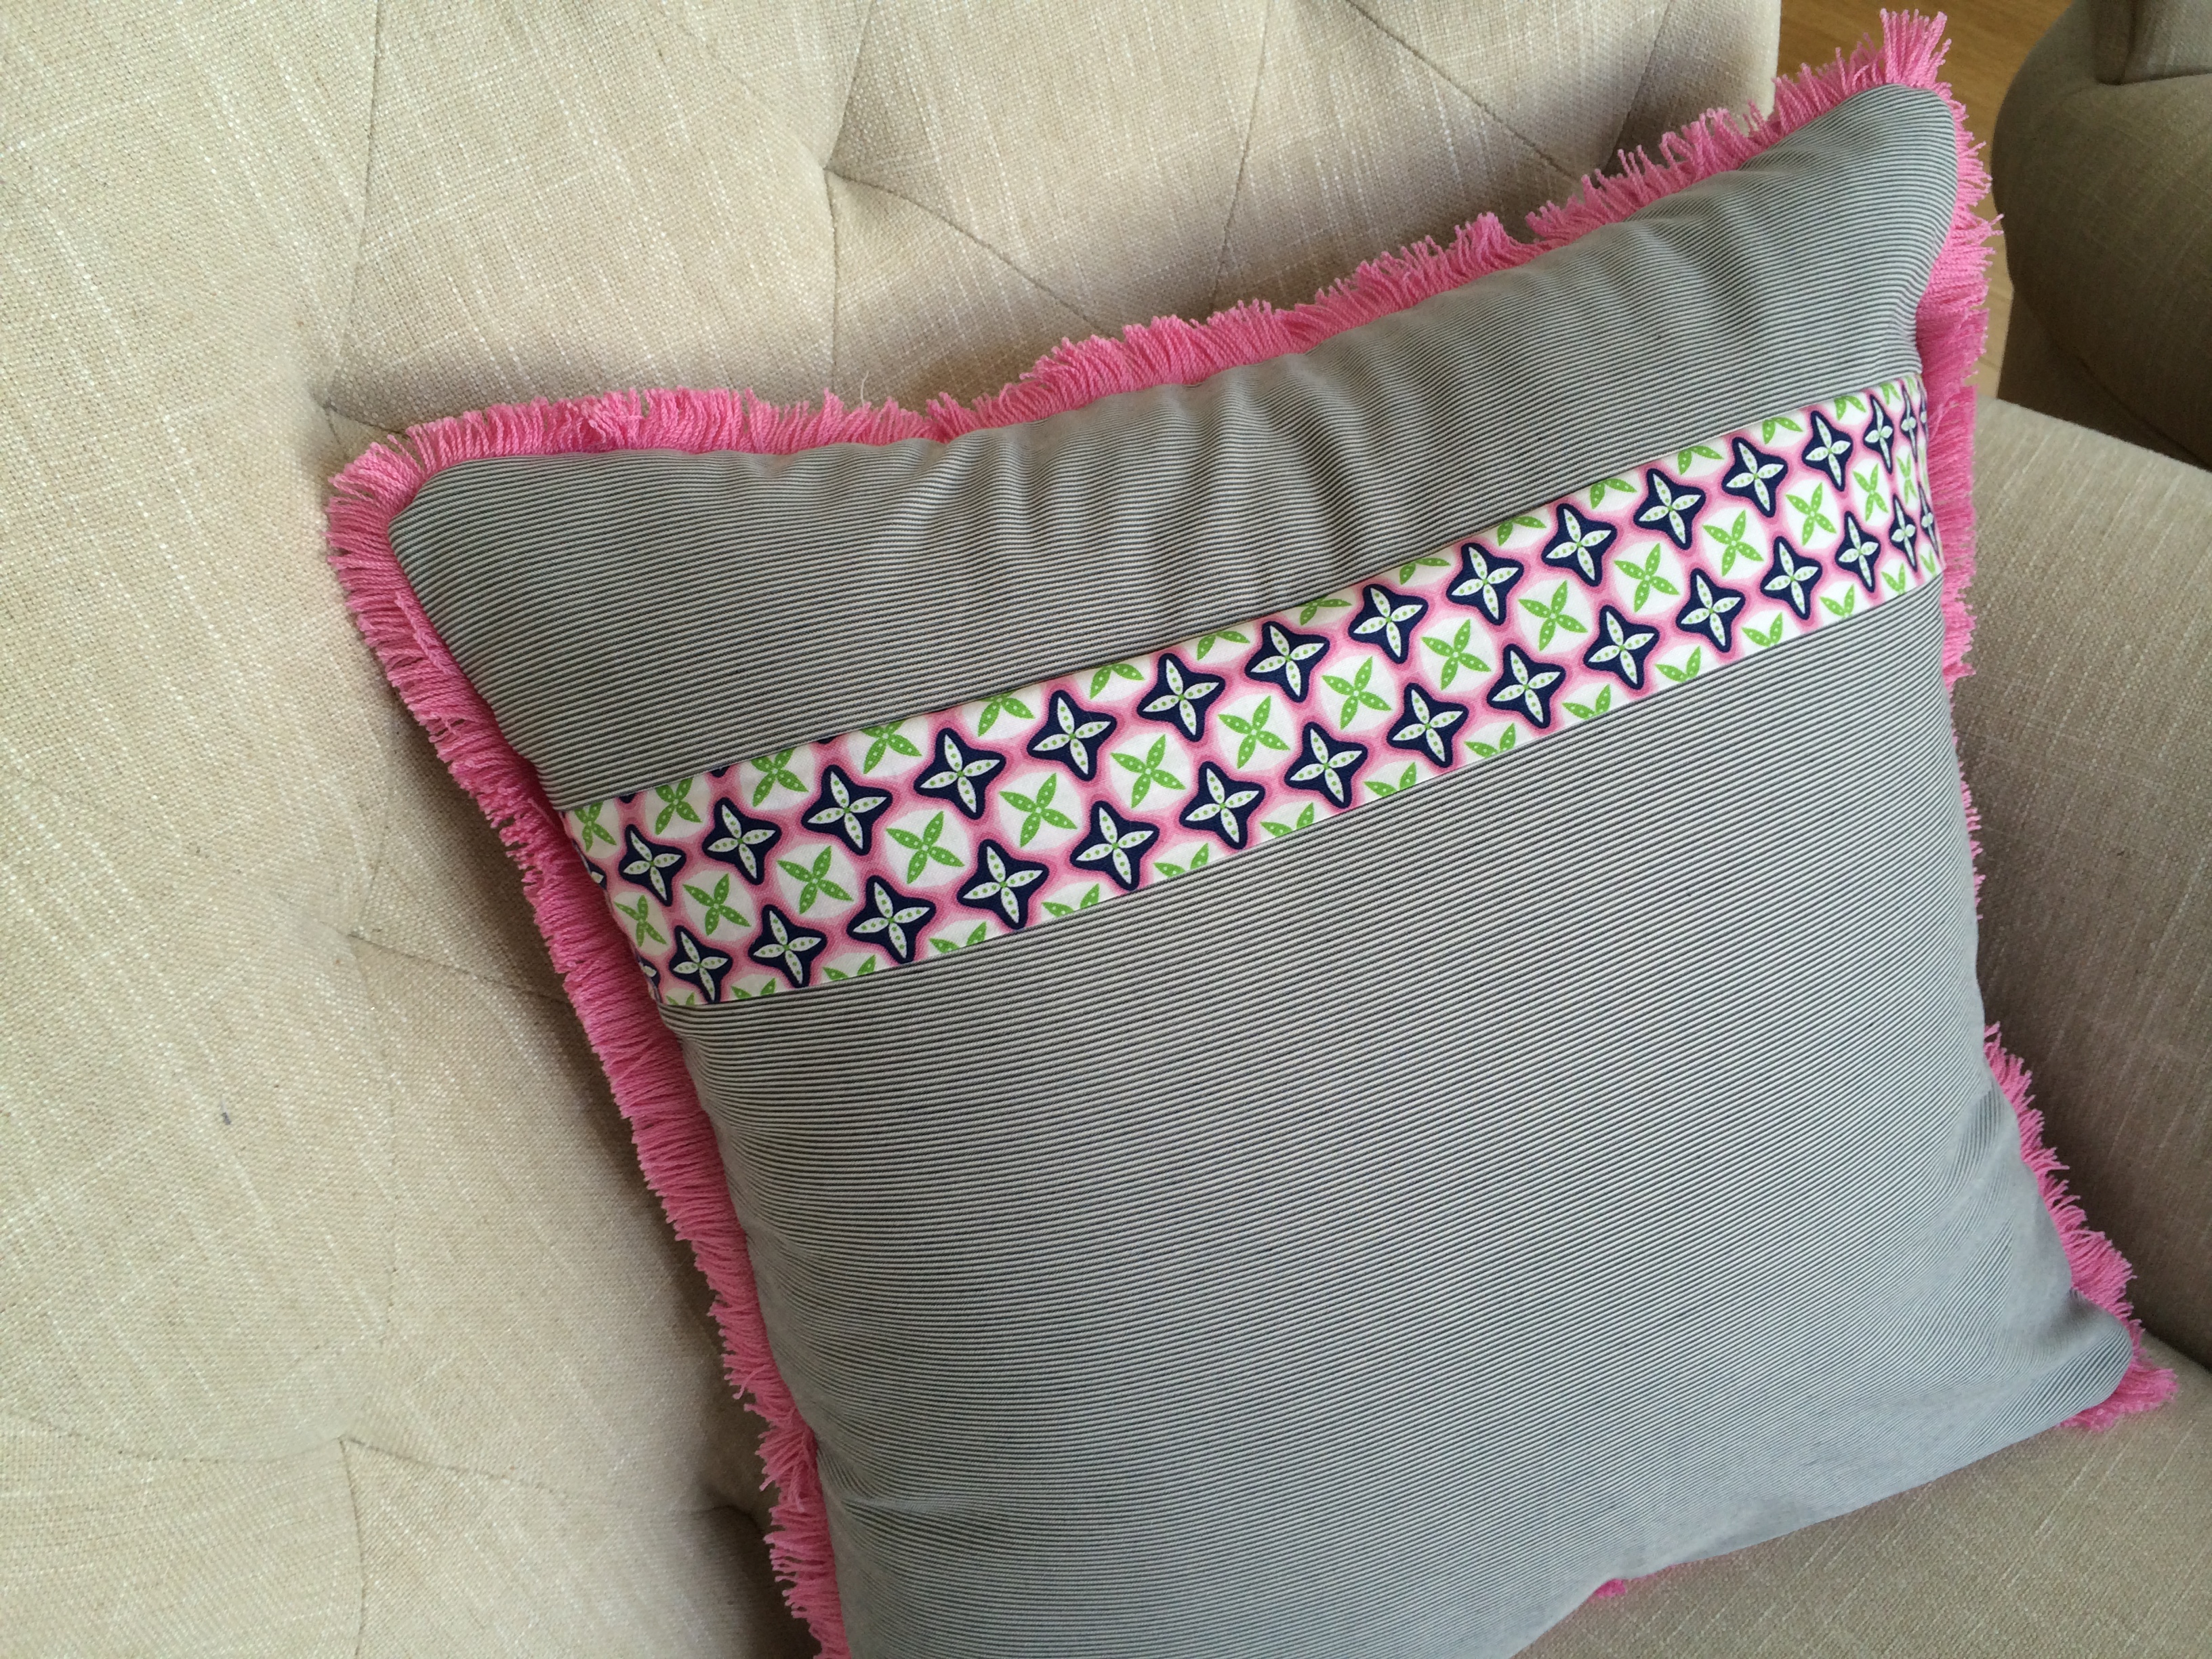
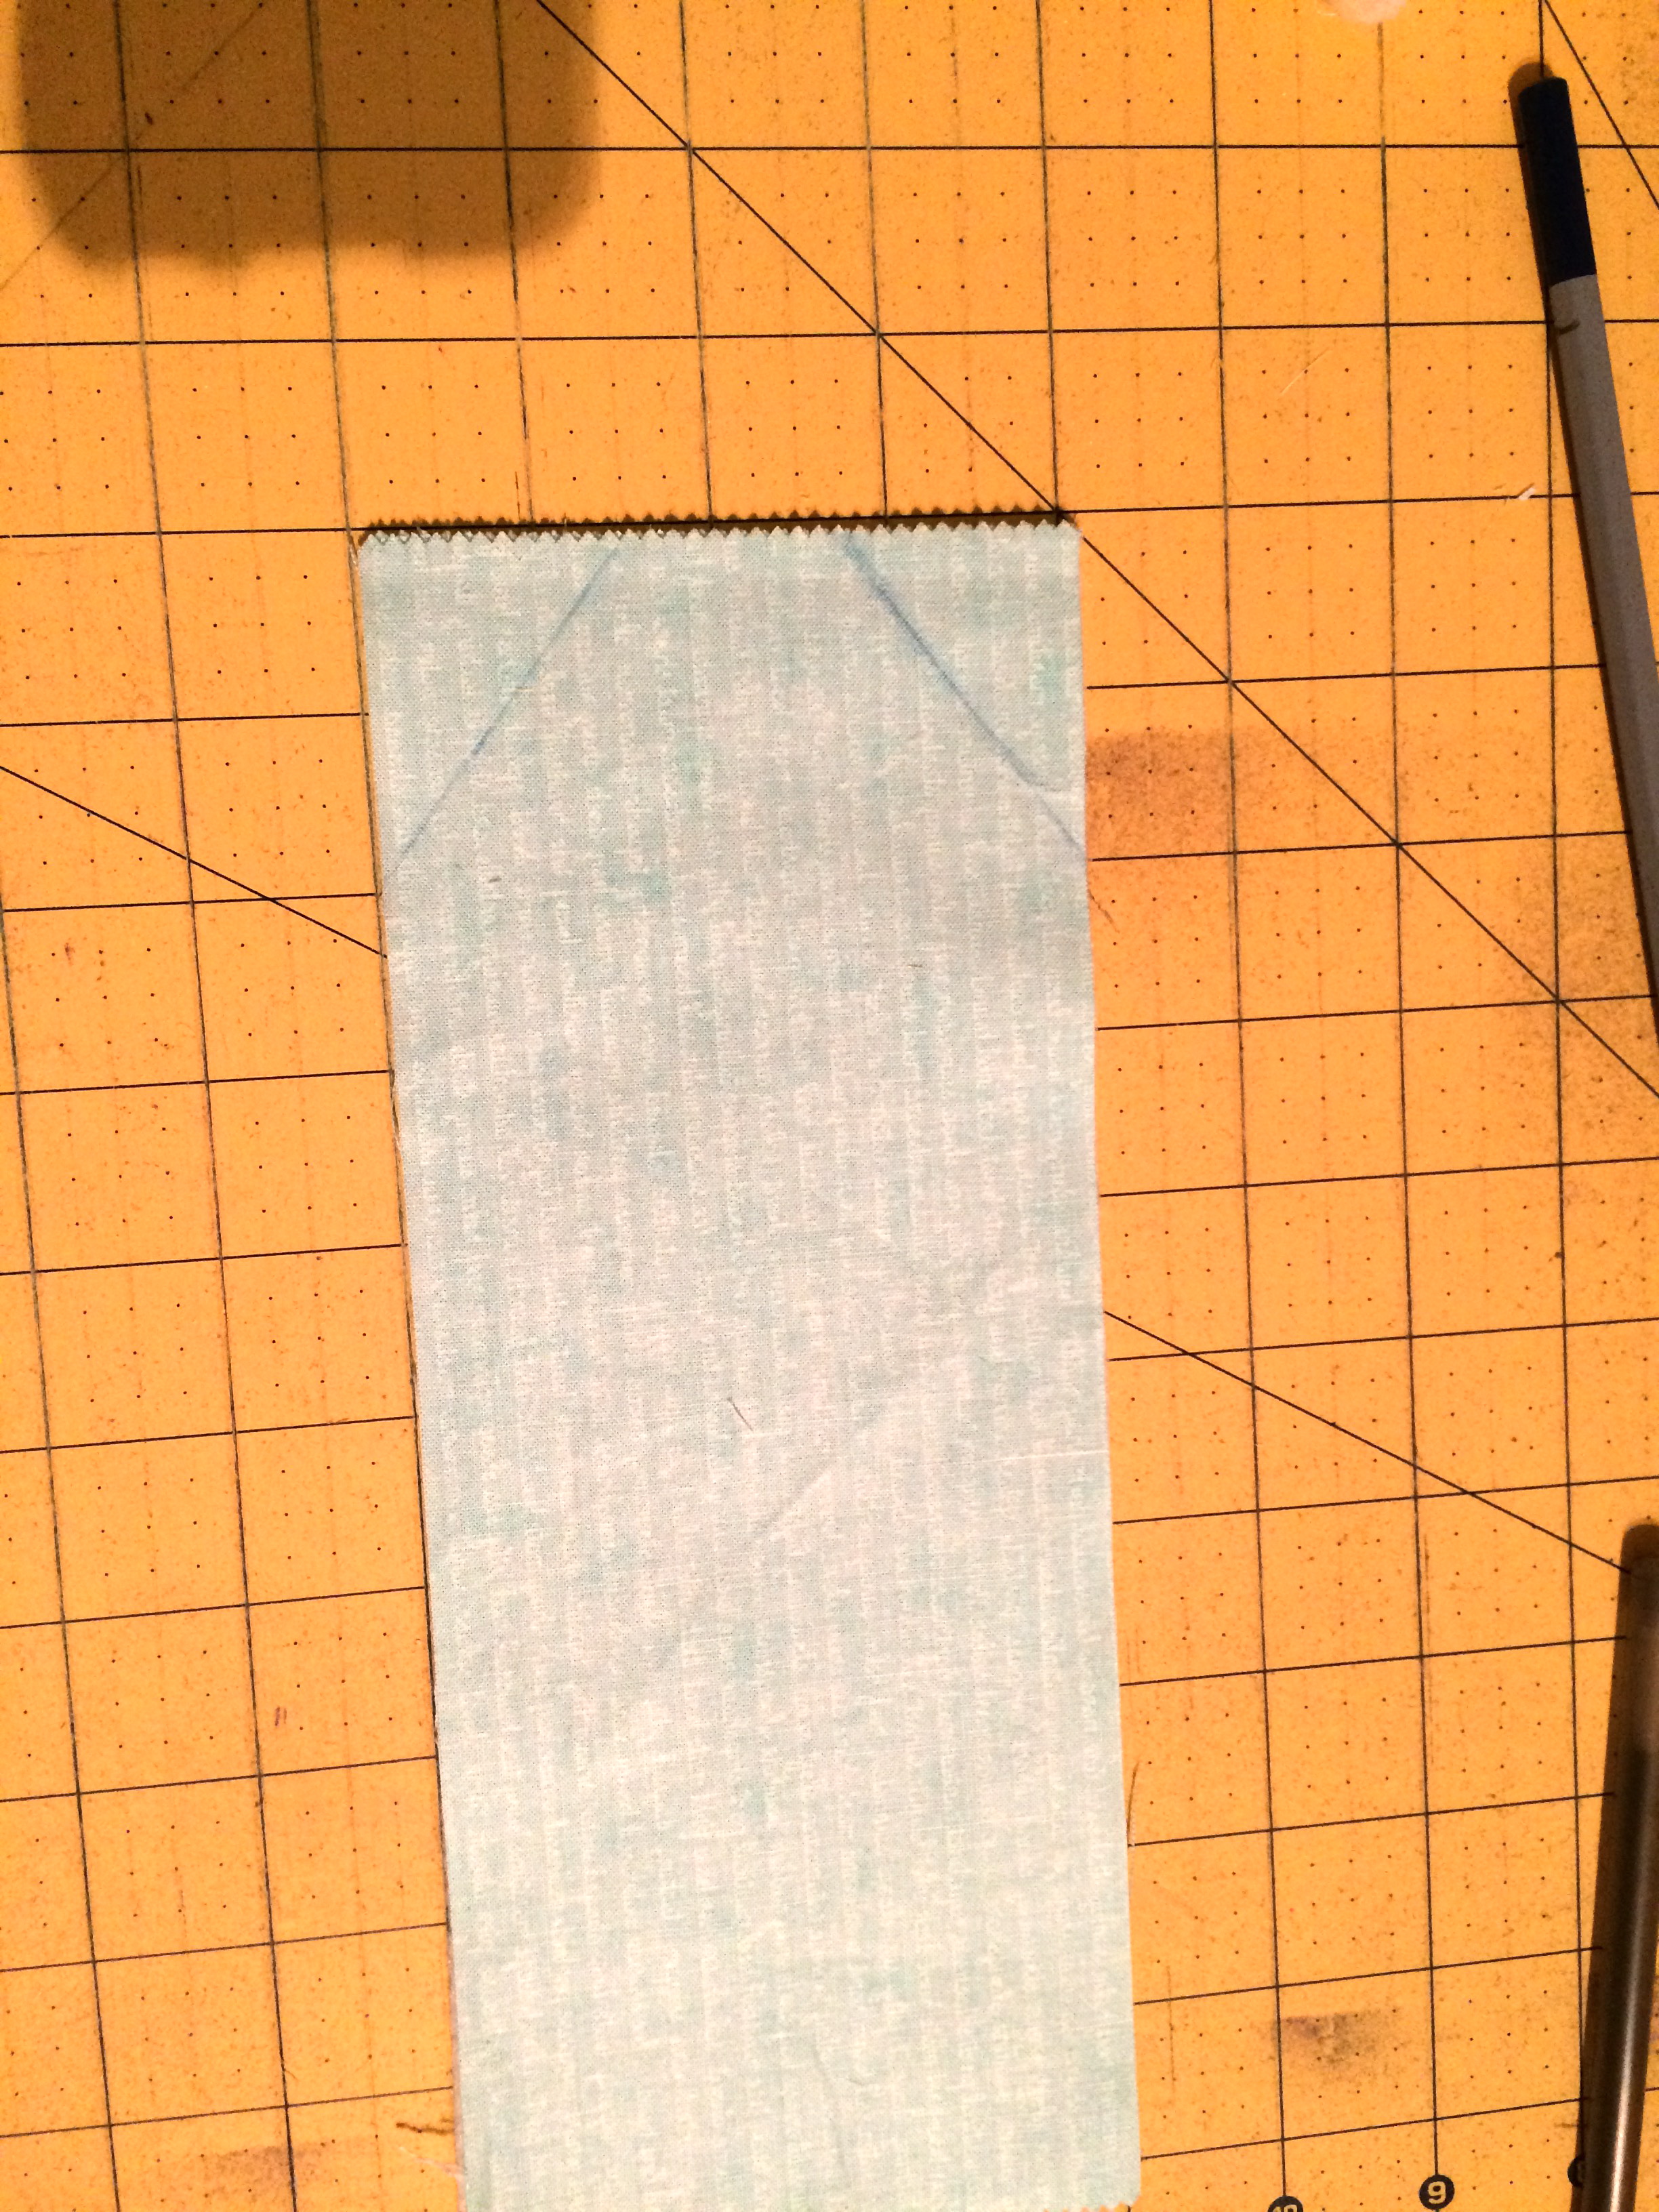
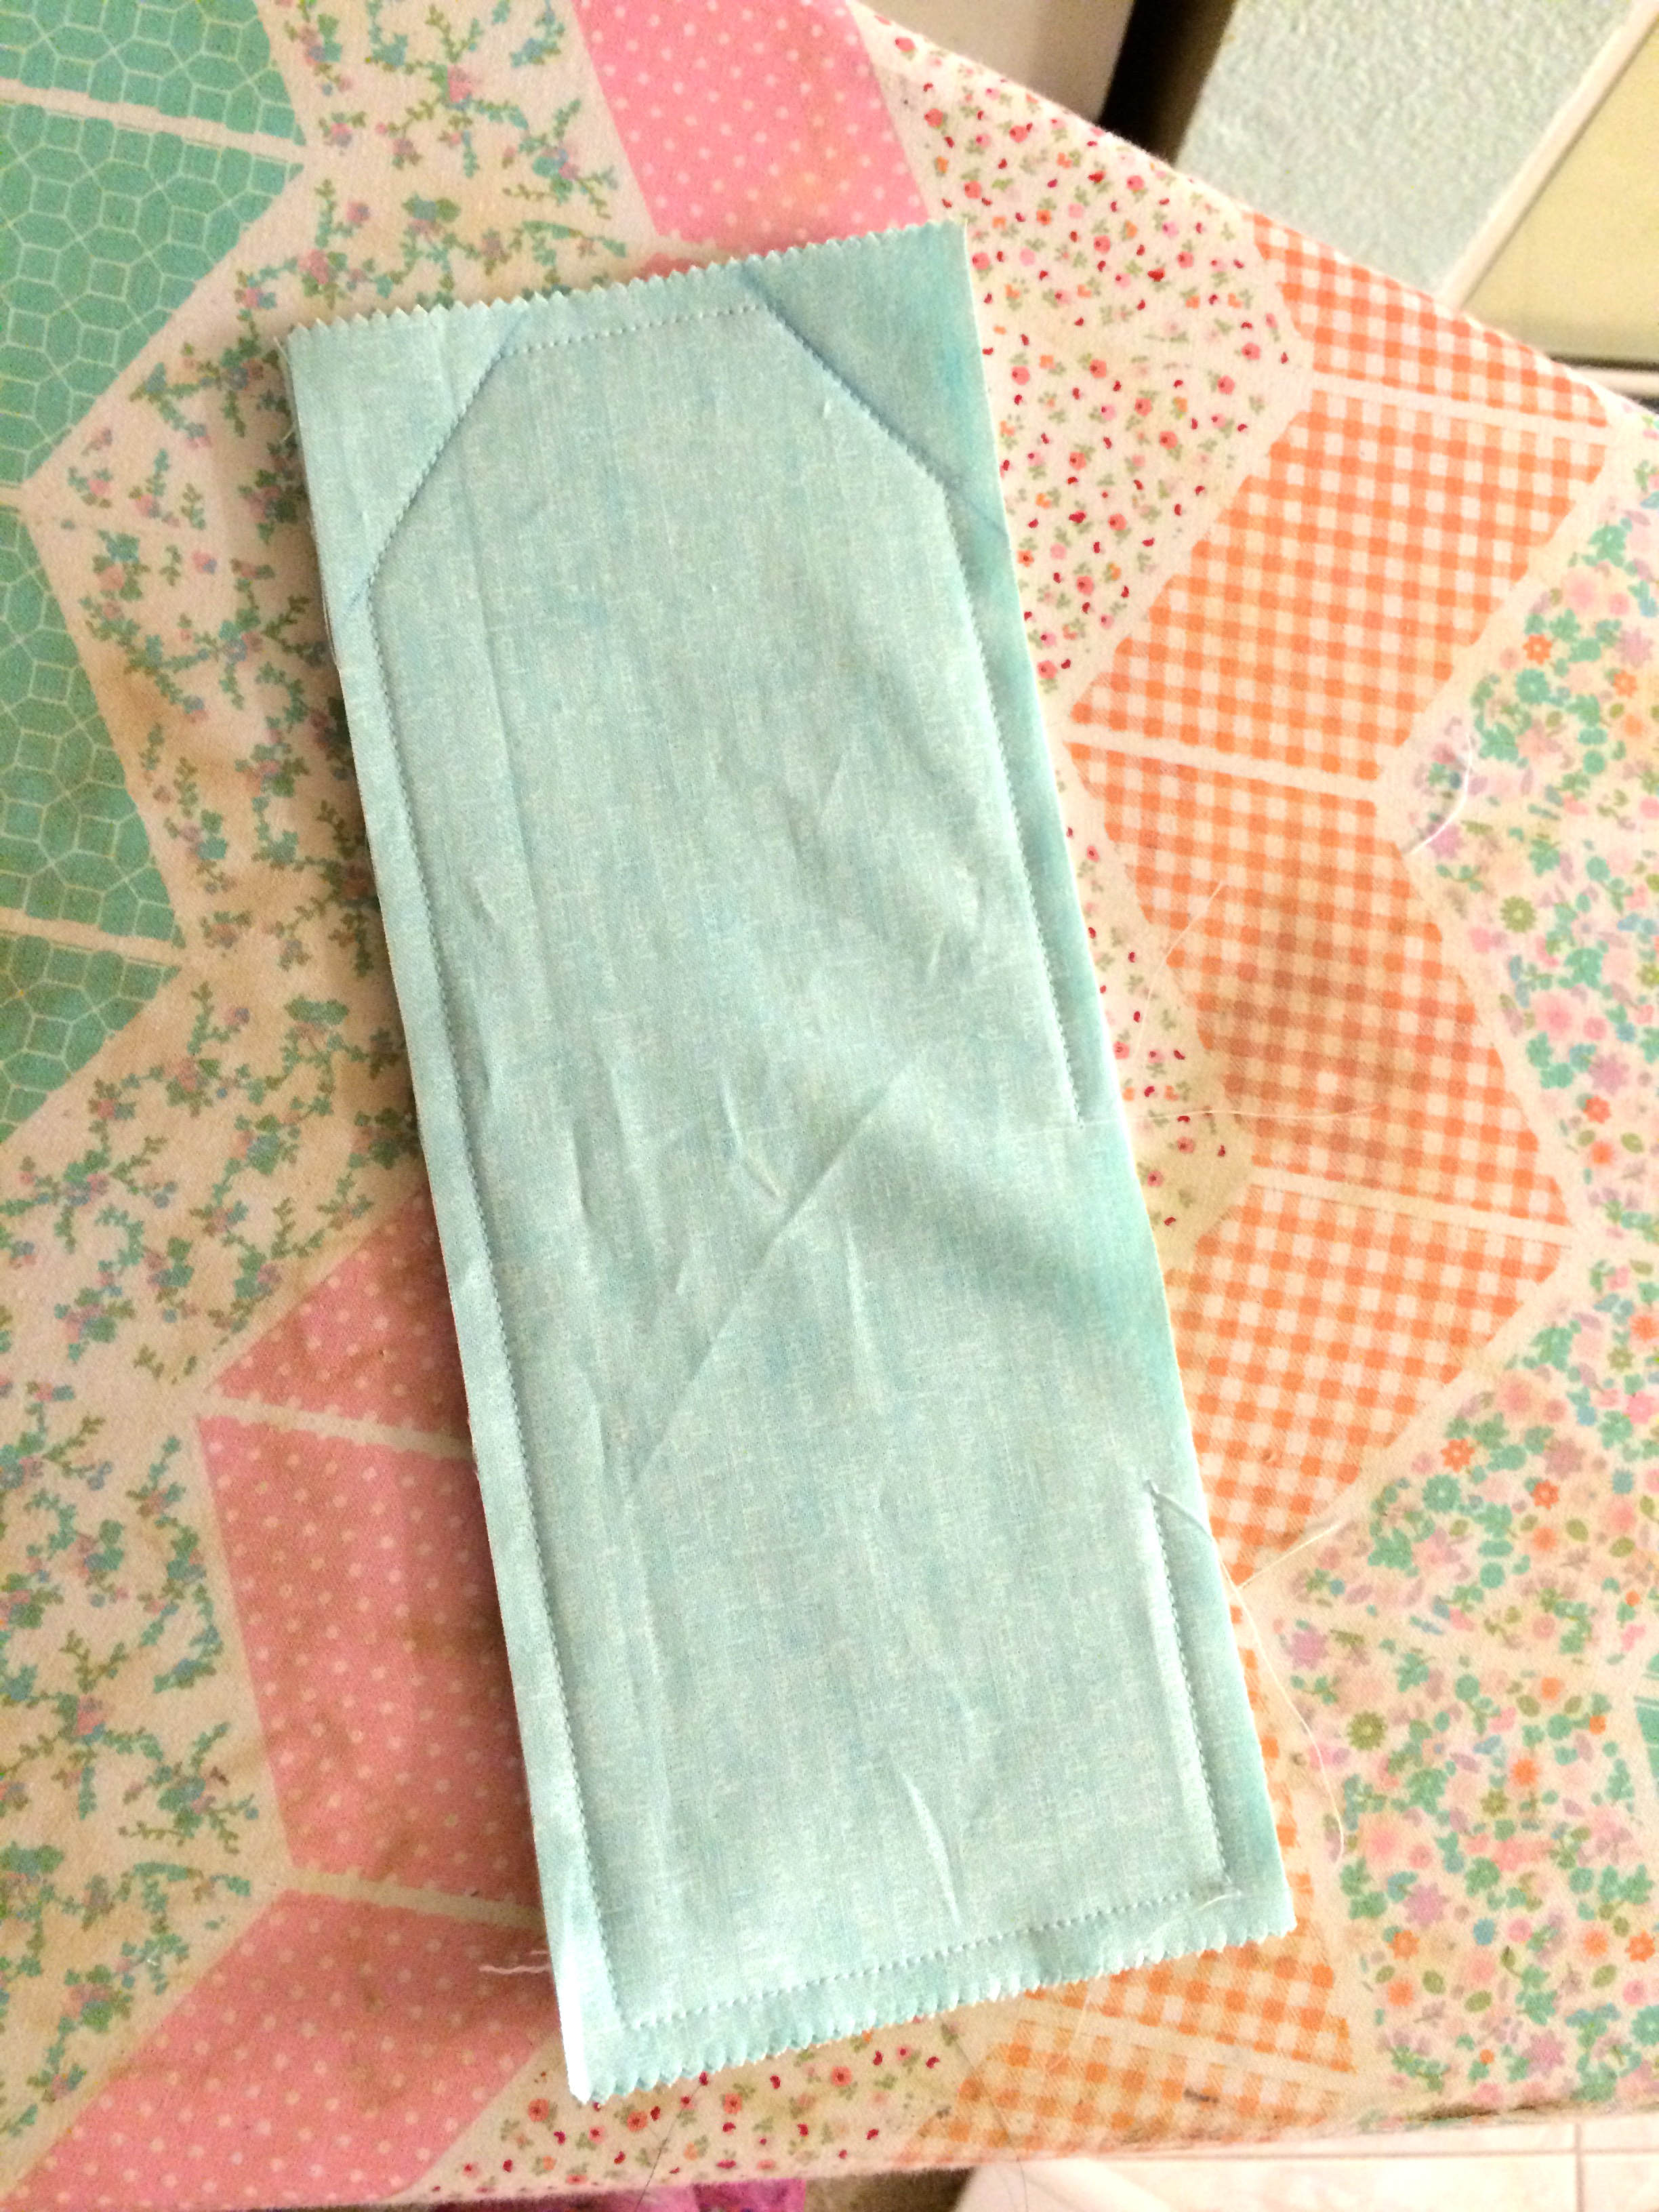
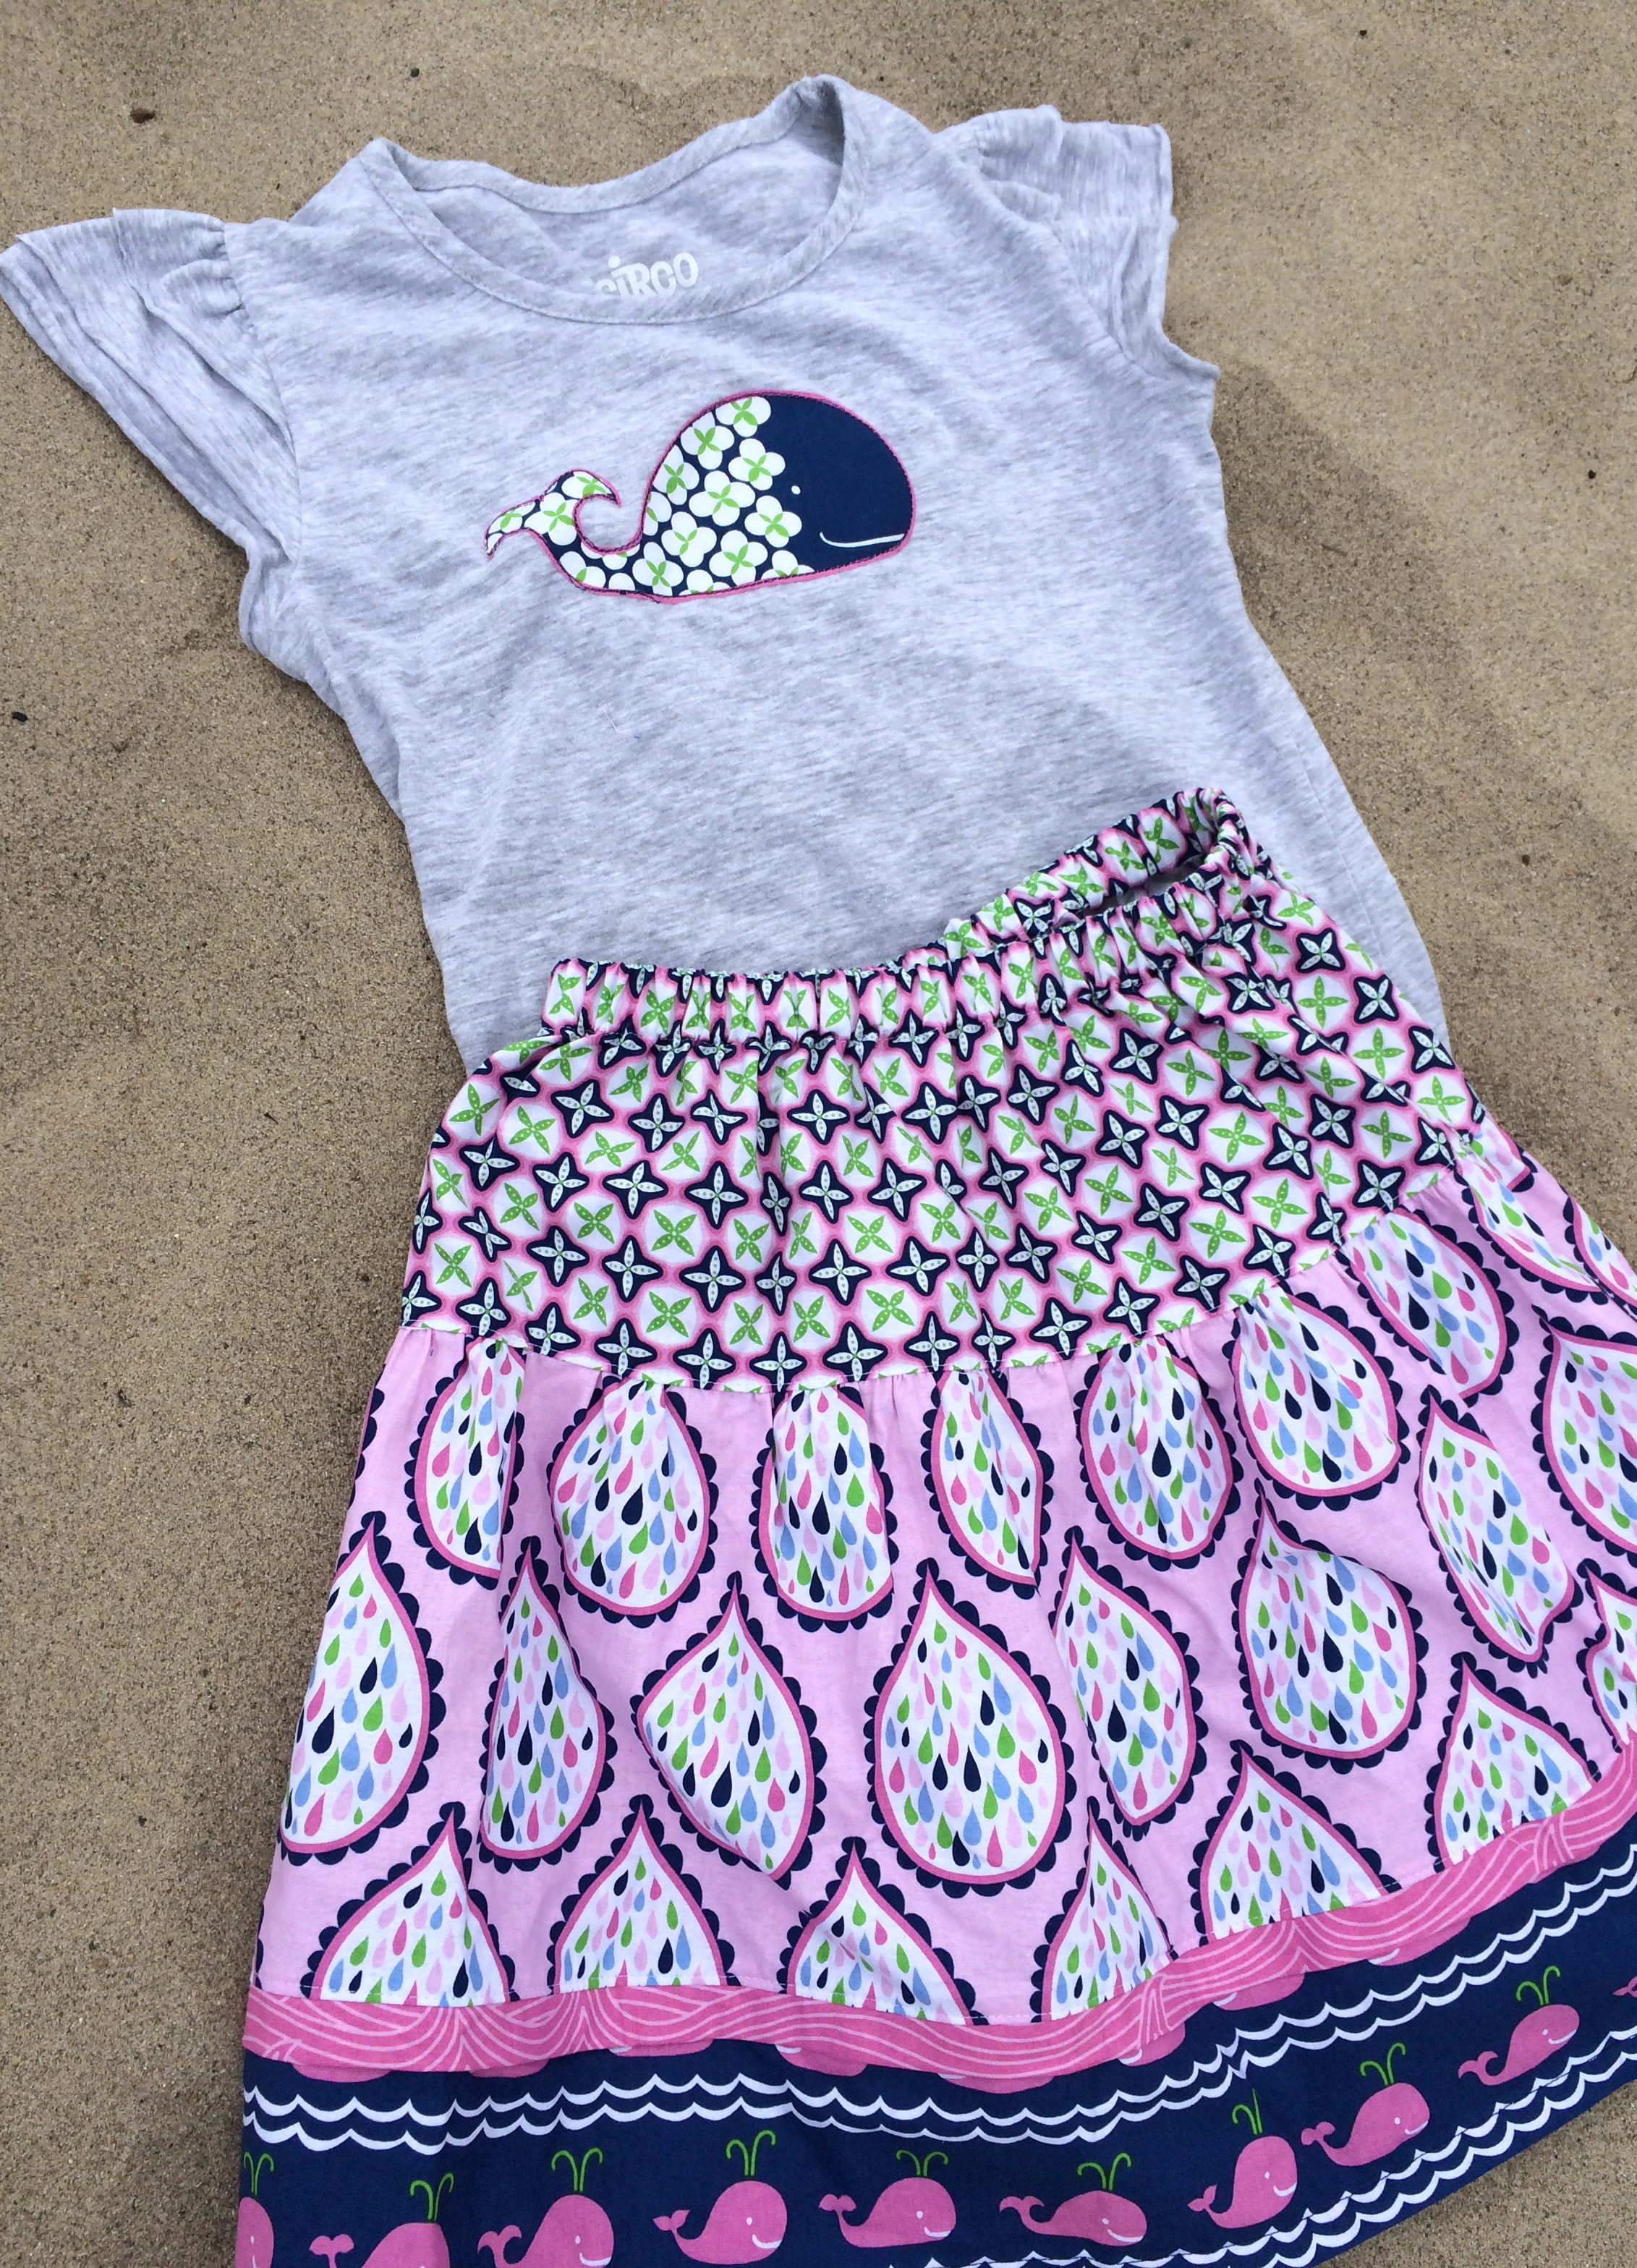
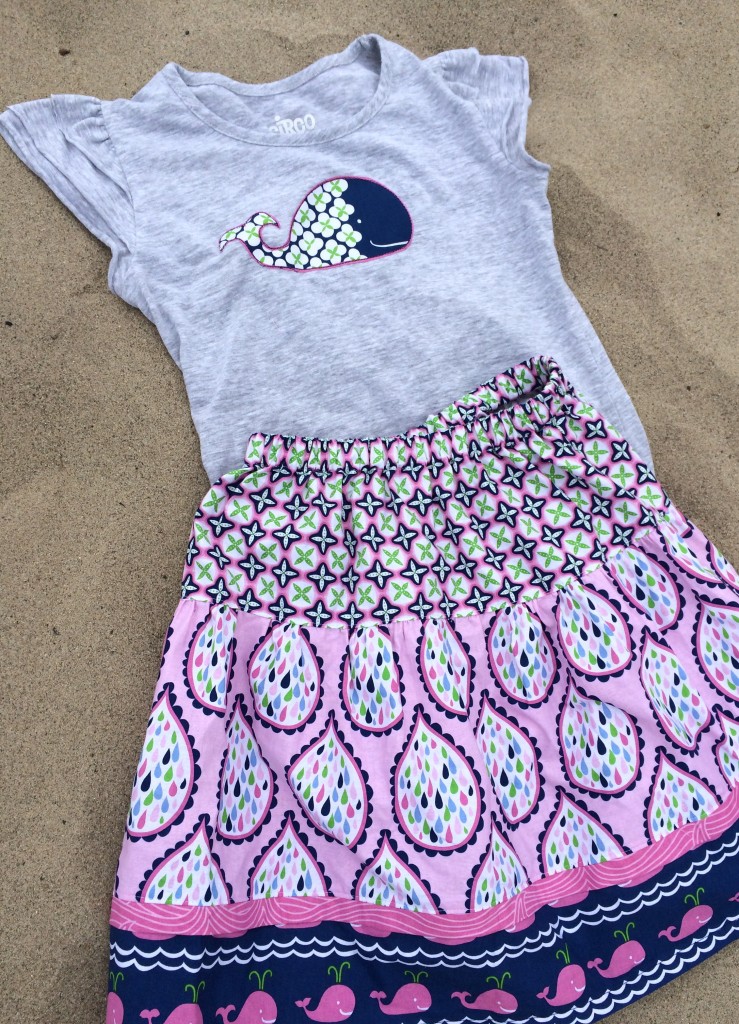
I used skirt “A” from the pattern book Little Sassy Skirts.

sassy skirts 
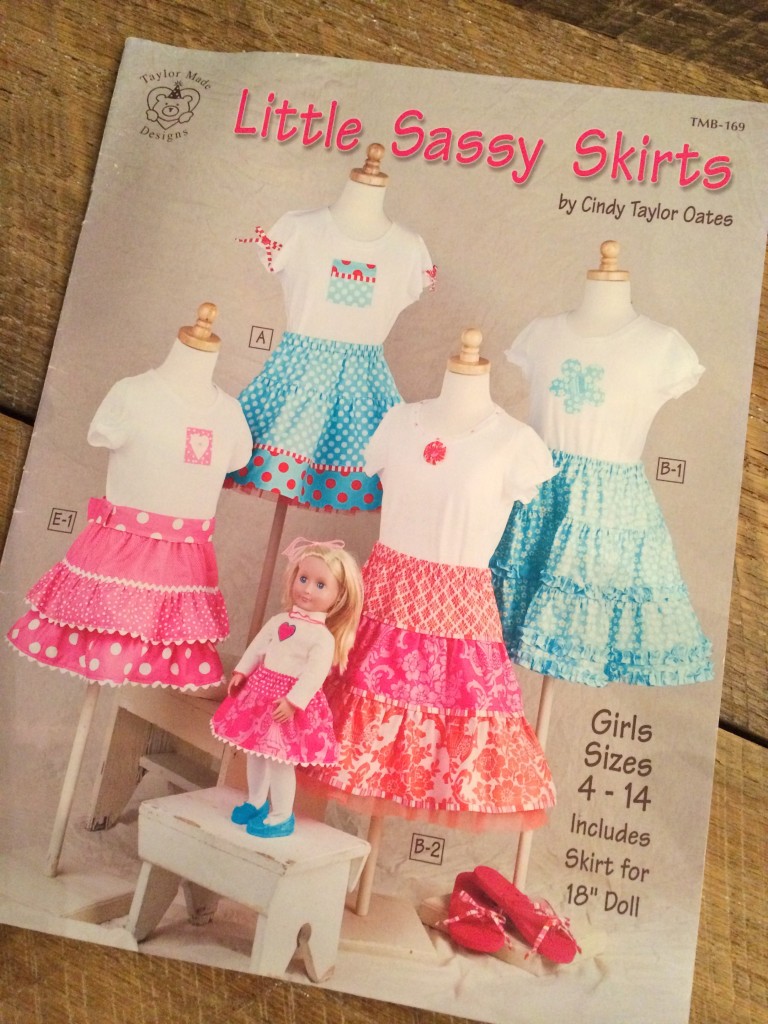
I have made these skirts over and over.  The patterns are easy to follow and everything is done with rotary cutter measurements (a quilters dream!).  This skirt is fun because you don’t have to have a lot of yardage, I only had half yards of the
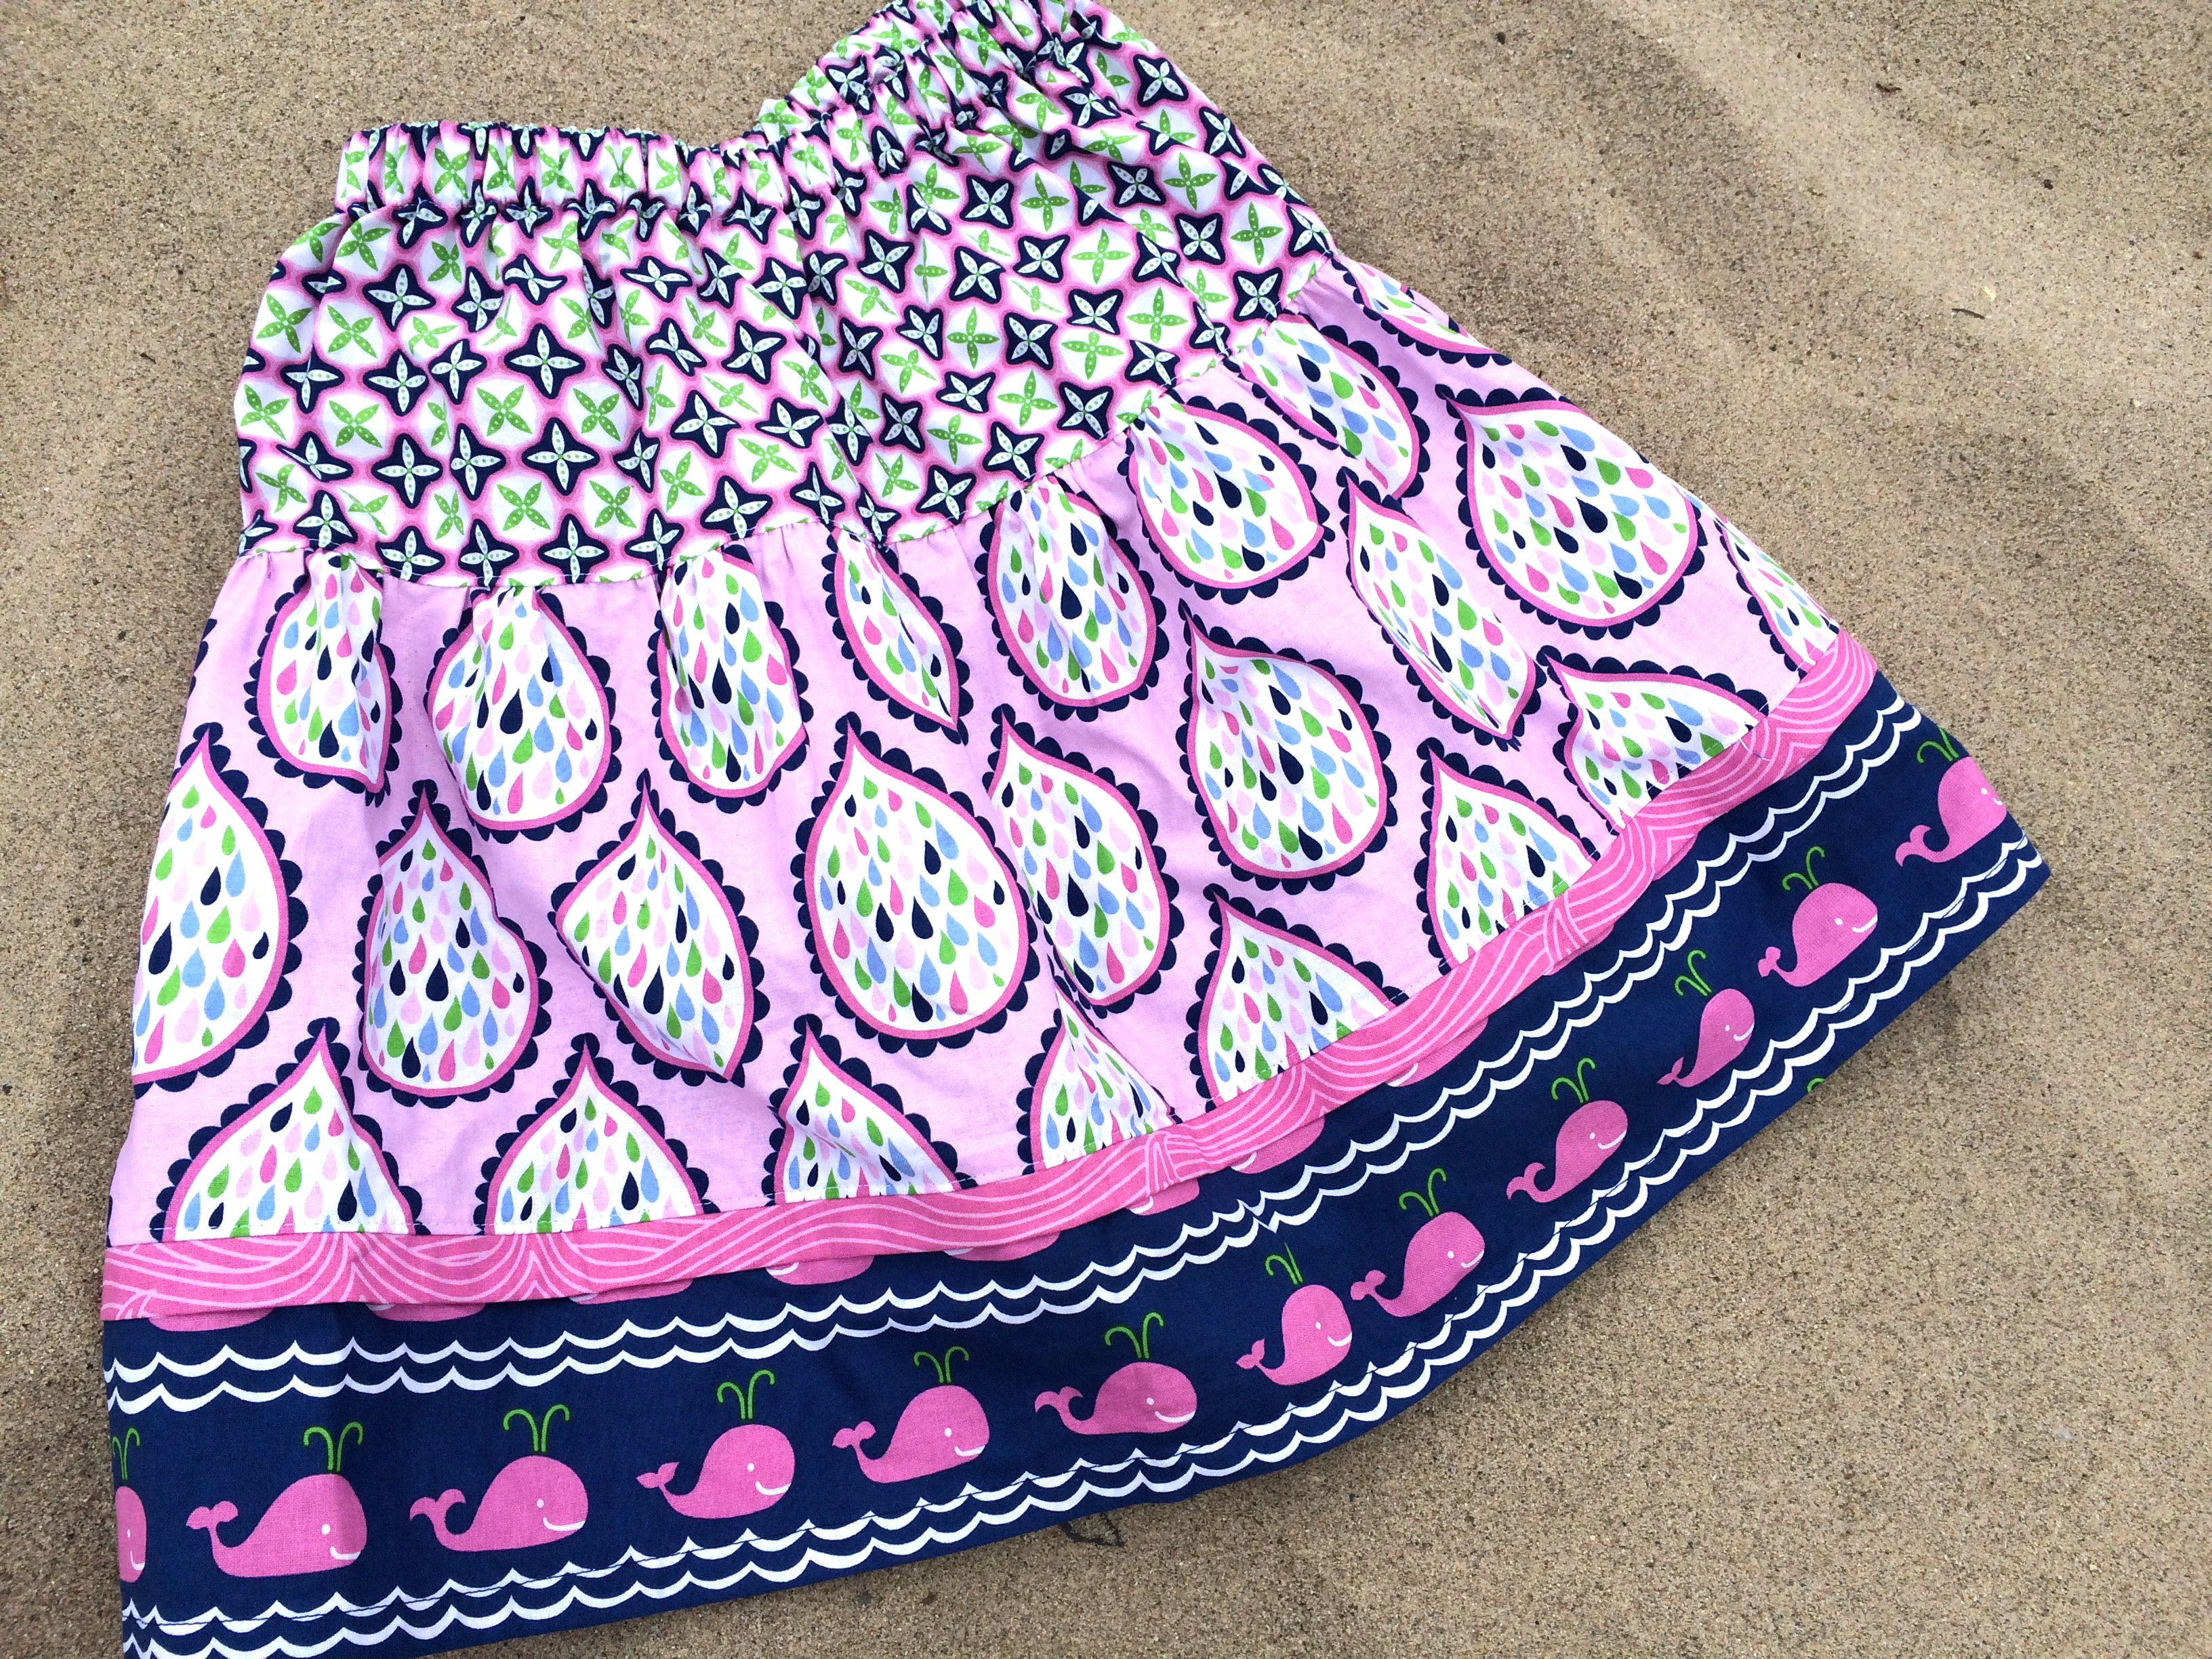
 True Blue prints and I love the 4 prints all pieced together!
true_blue_blend_fabric


We had such a fun day at the beach!  It was beautiful!  I love summer and I love whales 🙂 whale skirt whale shirt true blue

whale skirt whale shirt true blue_2

DSC_0895

I Heart Whales Throw Pillow

i love whales pillow tutorial


Isn’t this the cutest fabric?  It’s from the True Blue fabric line by Blend.  Everyeday this week I will be featuring a project using fabrics from this fabric line – all with a whale theme!!i love whales pillow tutorial_2

I totally LOVE whales and I have loved them since I was like 4 years old 🙂  I thought this pillow was super fun and I love the colors!  My tutorial is over at the Therm O Web blog – so hop over there if you want the instructions to make your own!!

i love whales pillow tutorial_18

i love whales pillow tutorial_17

i love whales pillow tutorial_16