Called To Serve

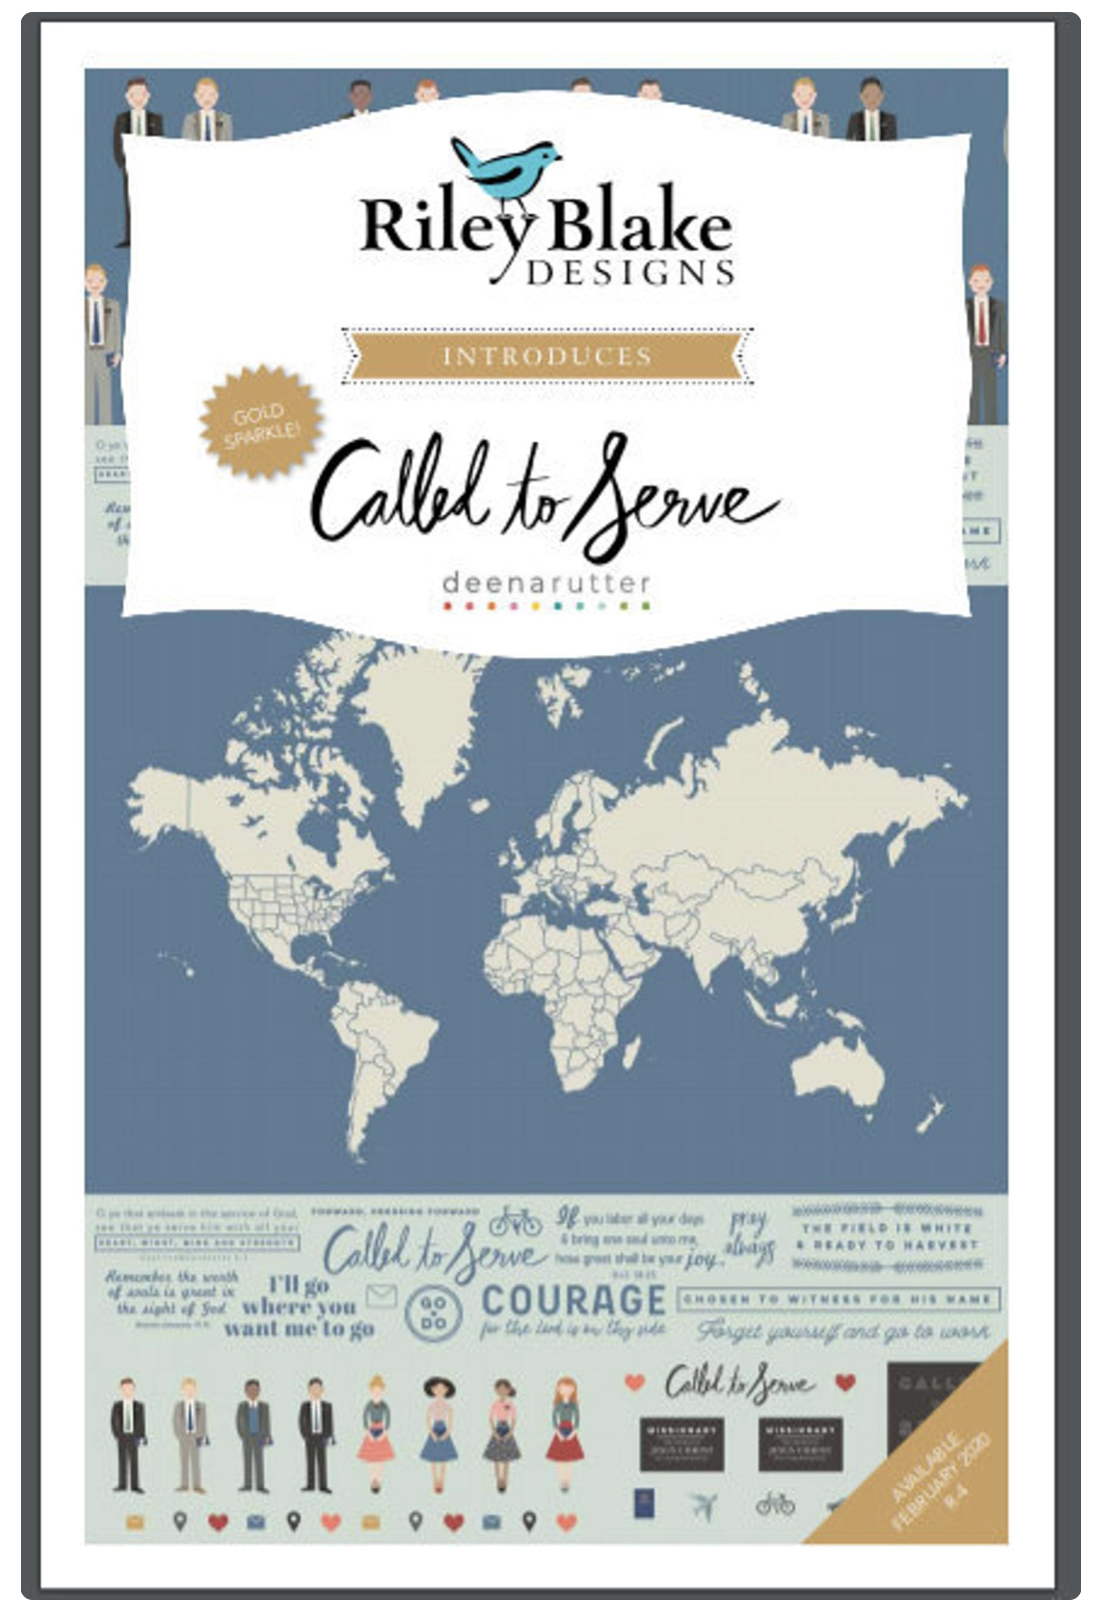
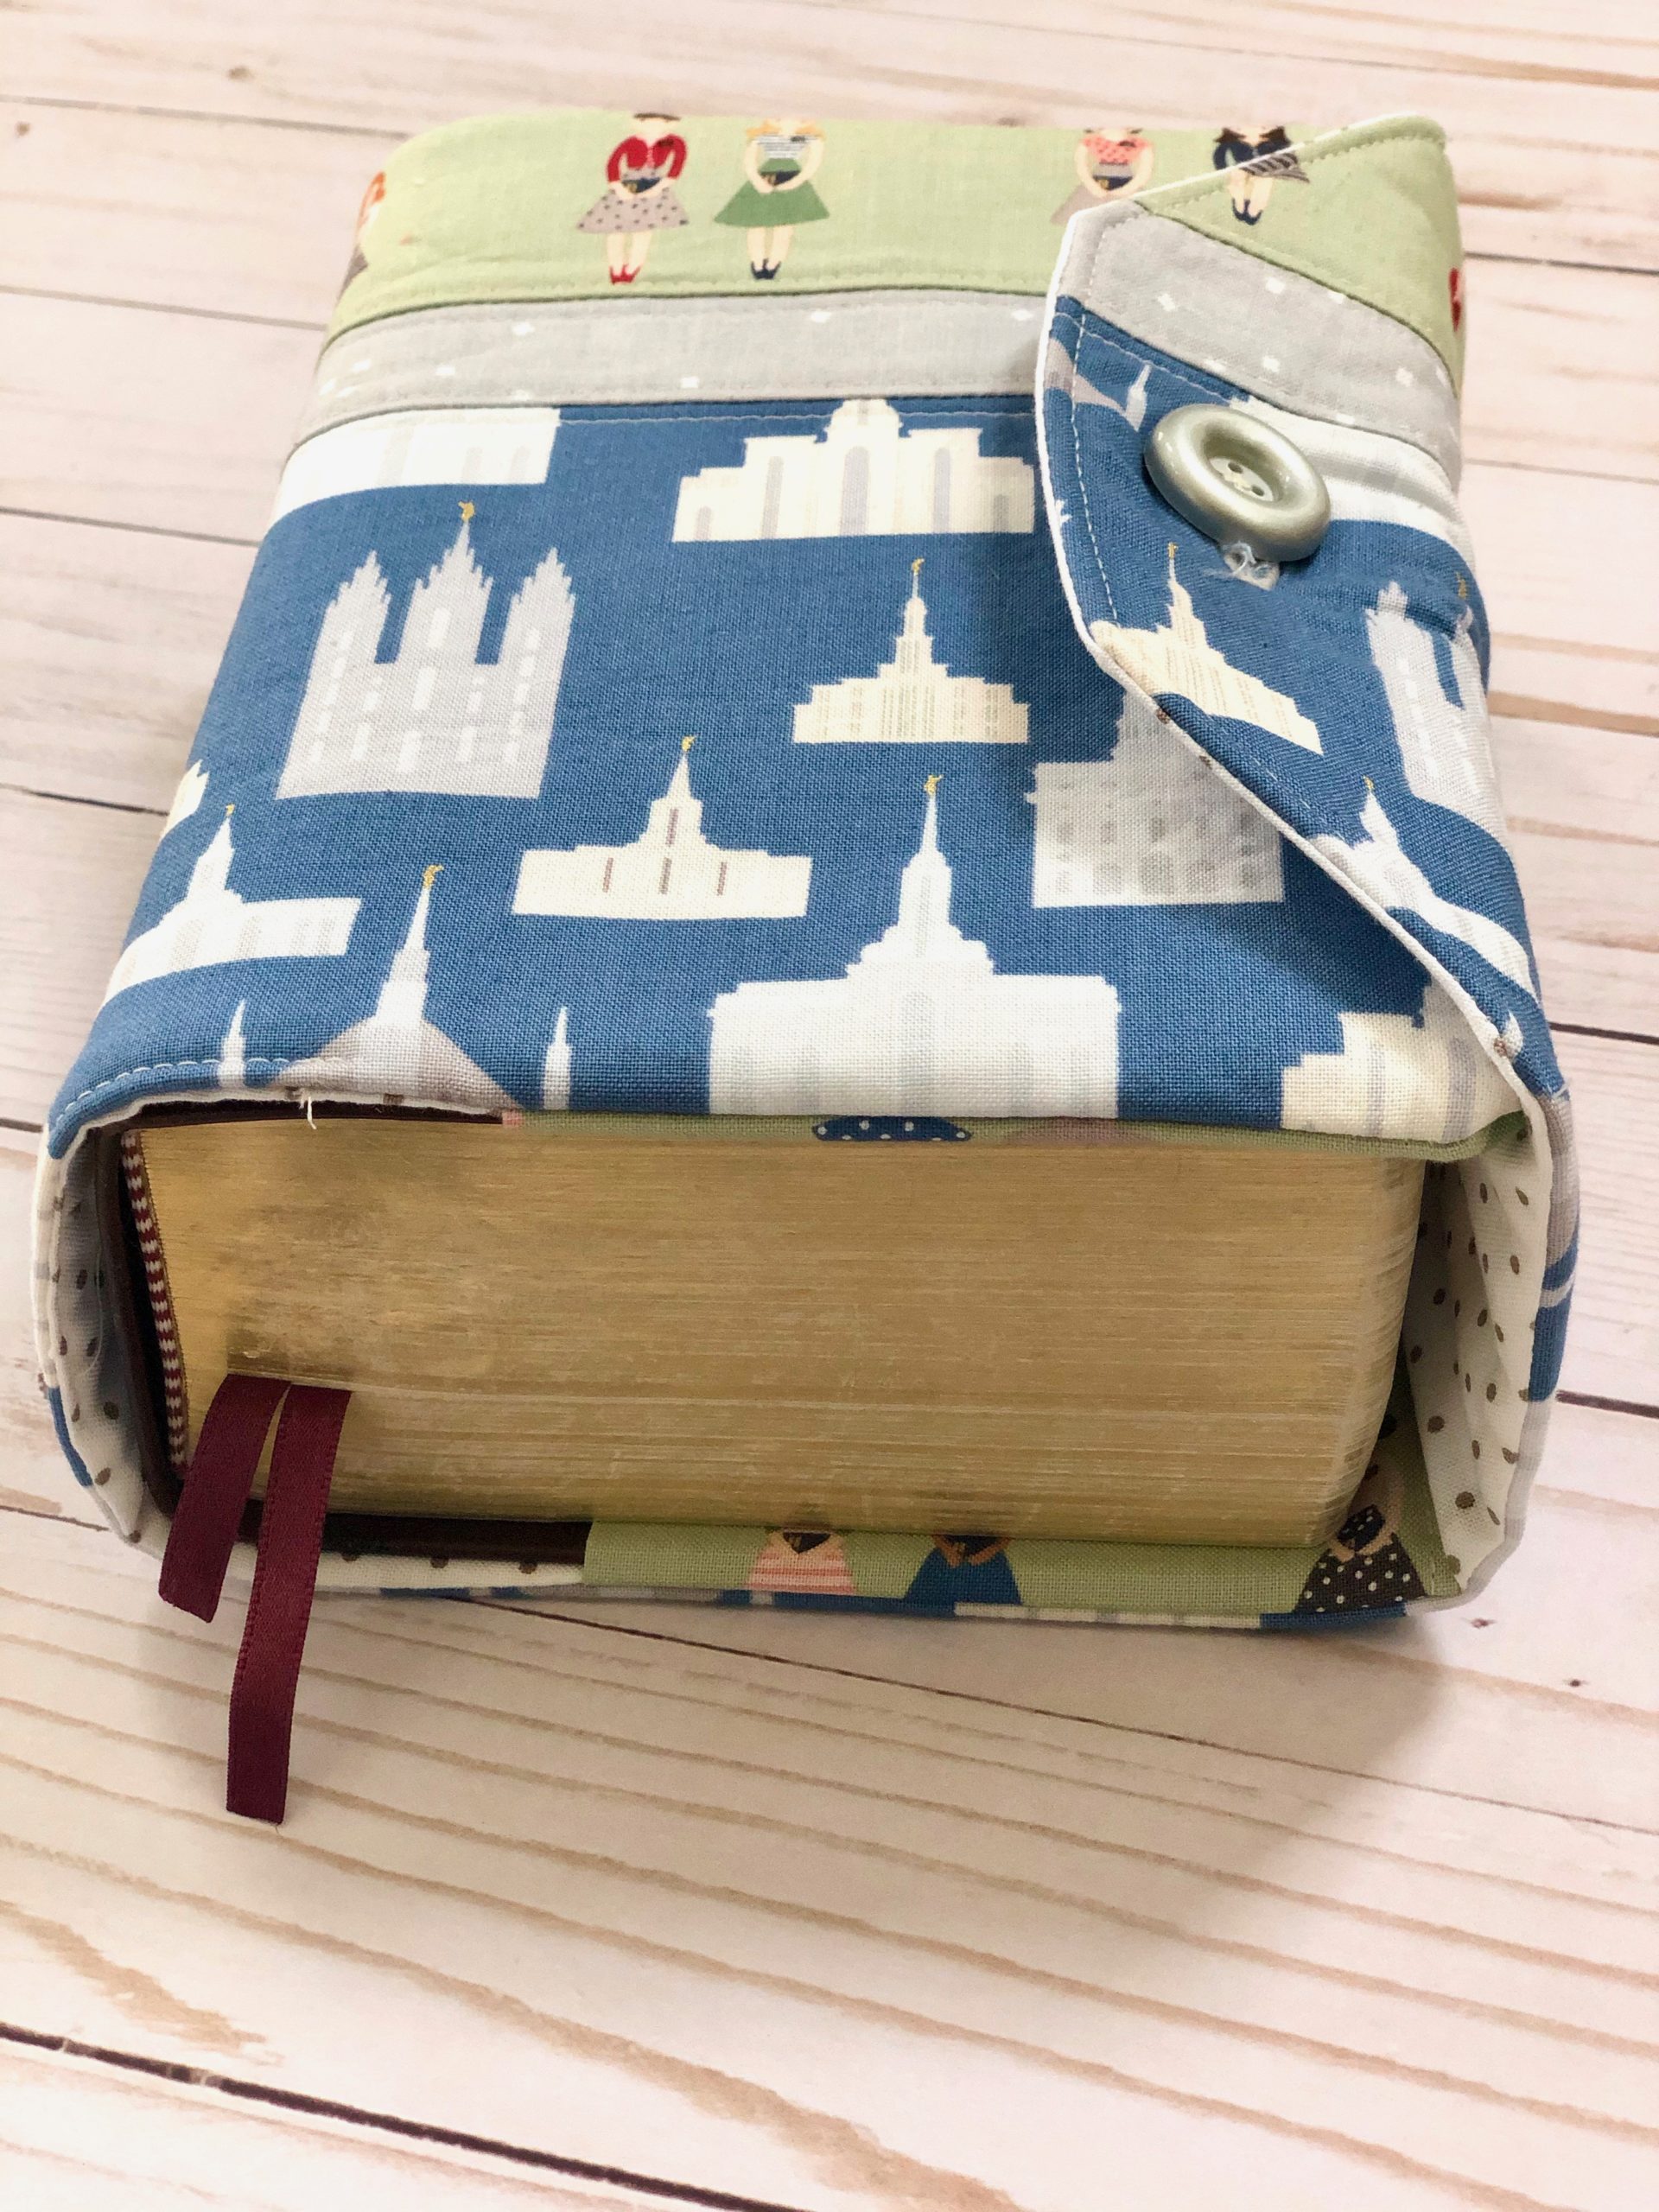
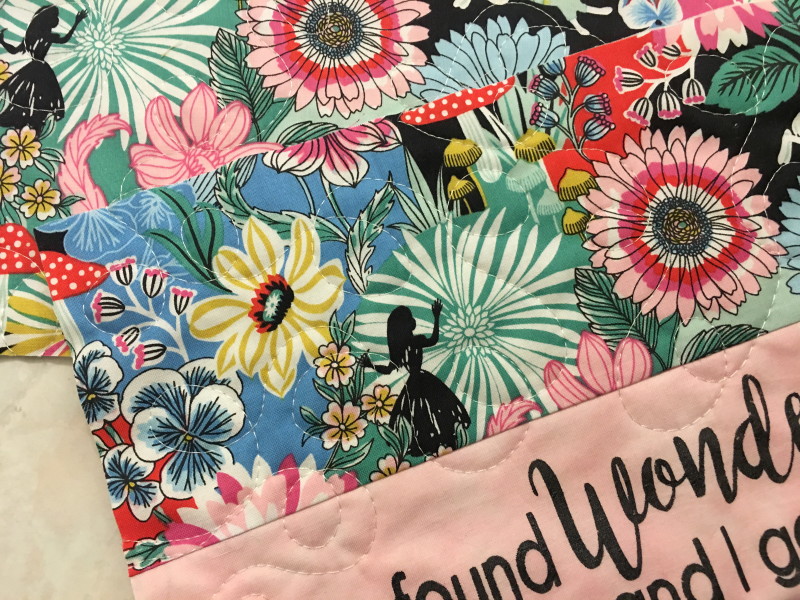
How cute is this “Called to Serve” fabric by Riley Blake Designs? I love everything Deena Rutter designs and this time her designs hit so close to home!  My daughter is serving a mission in Manchester England!  Of course I had to make a few little projects to send to send to her!

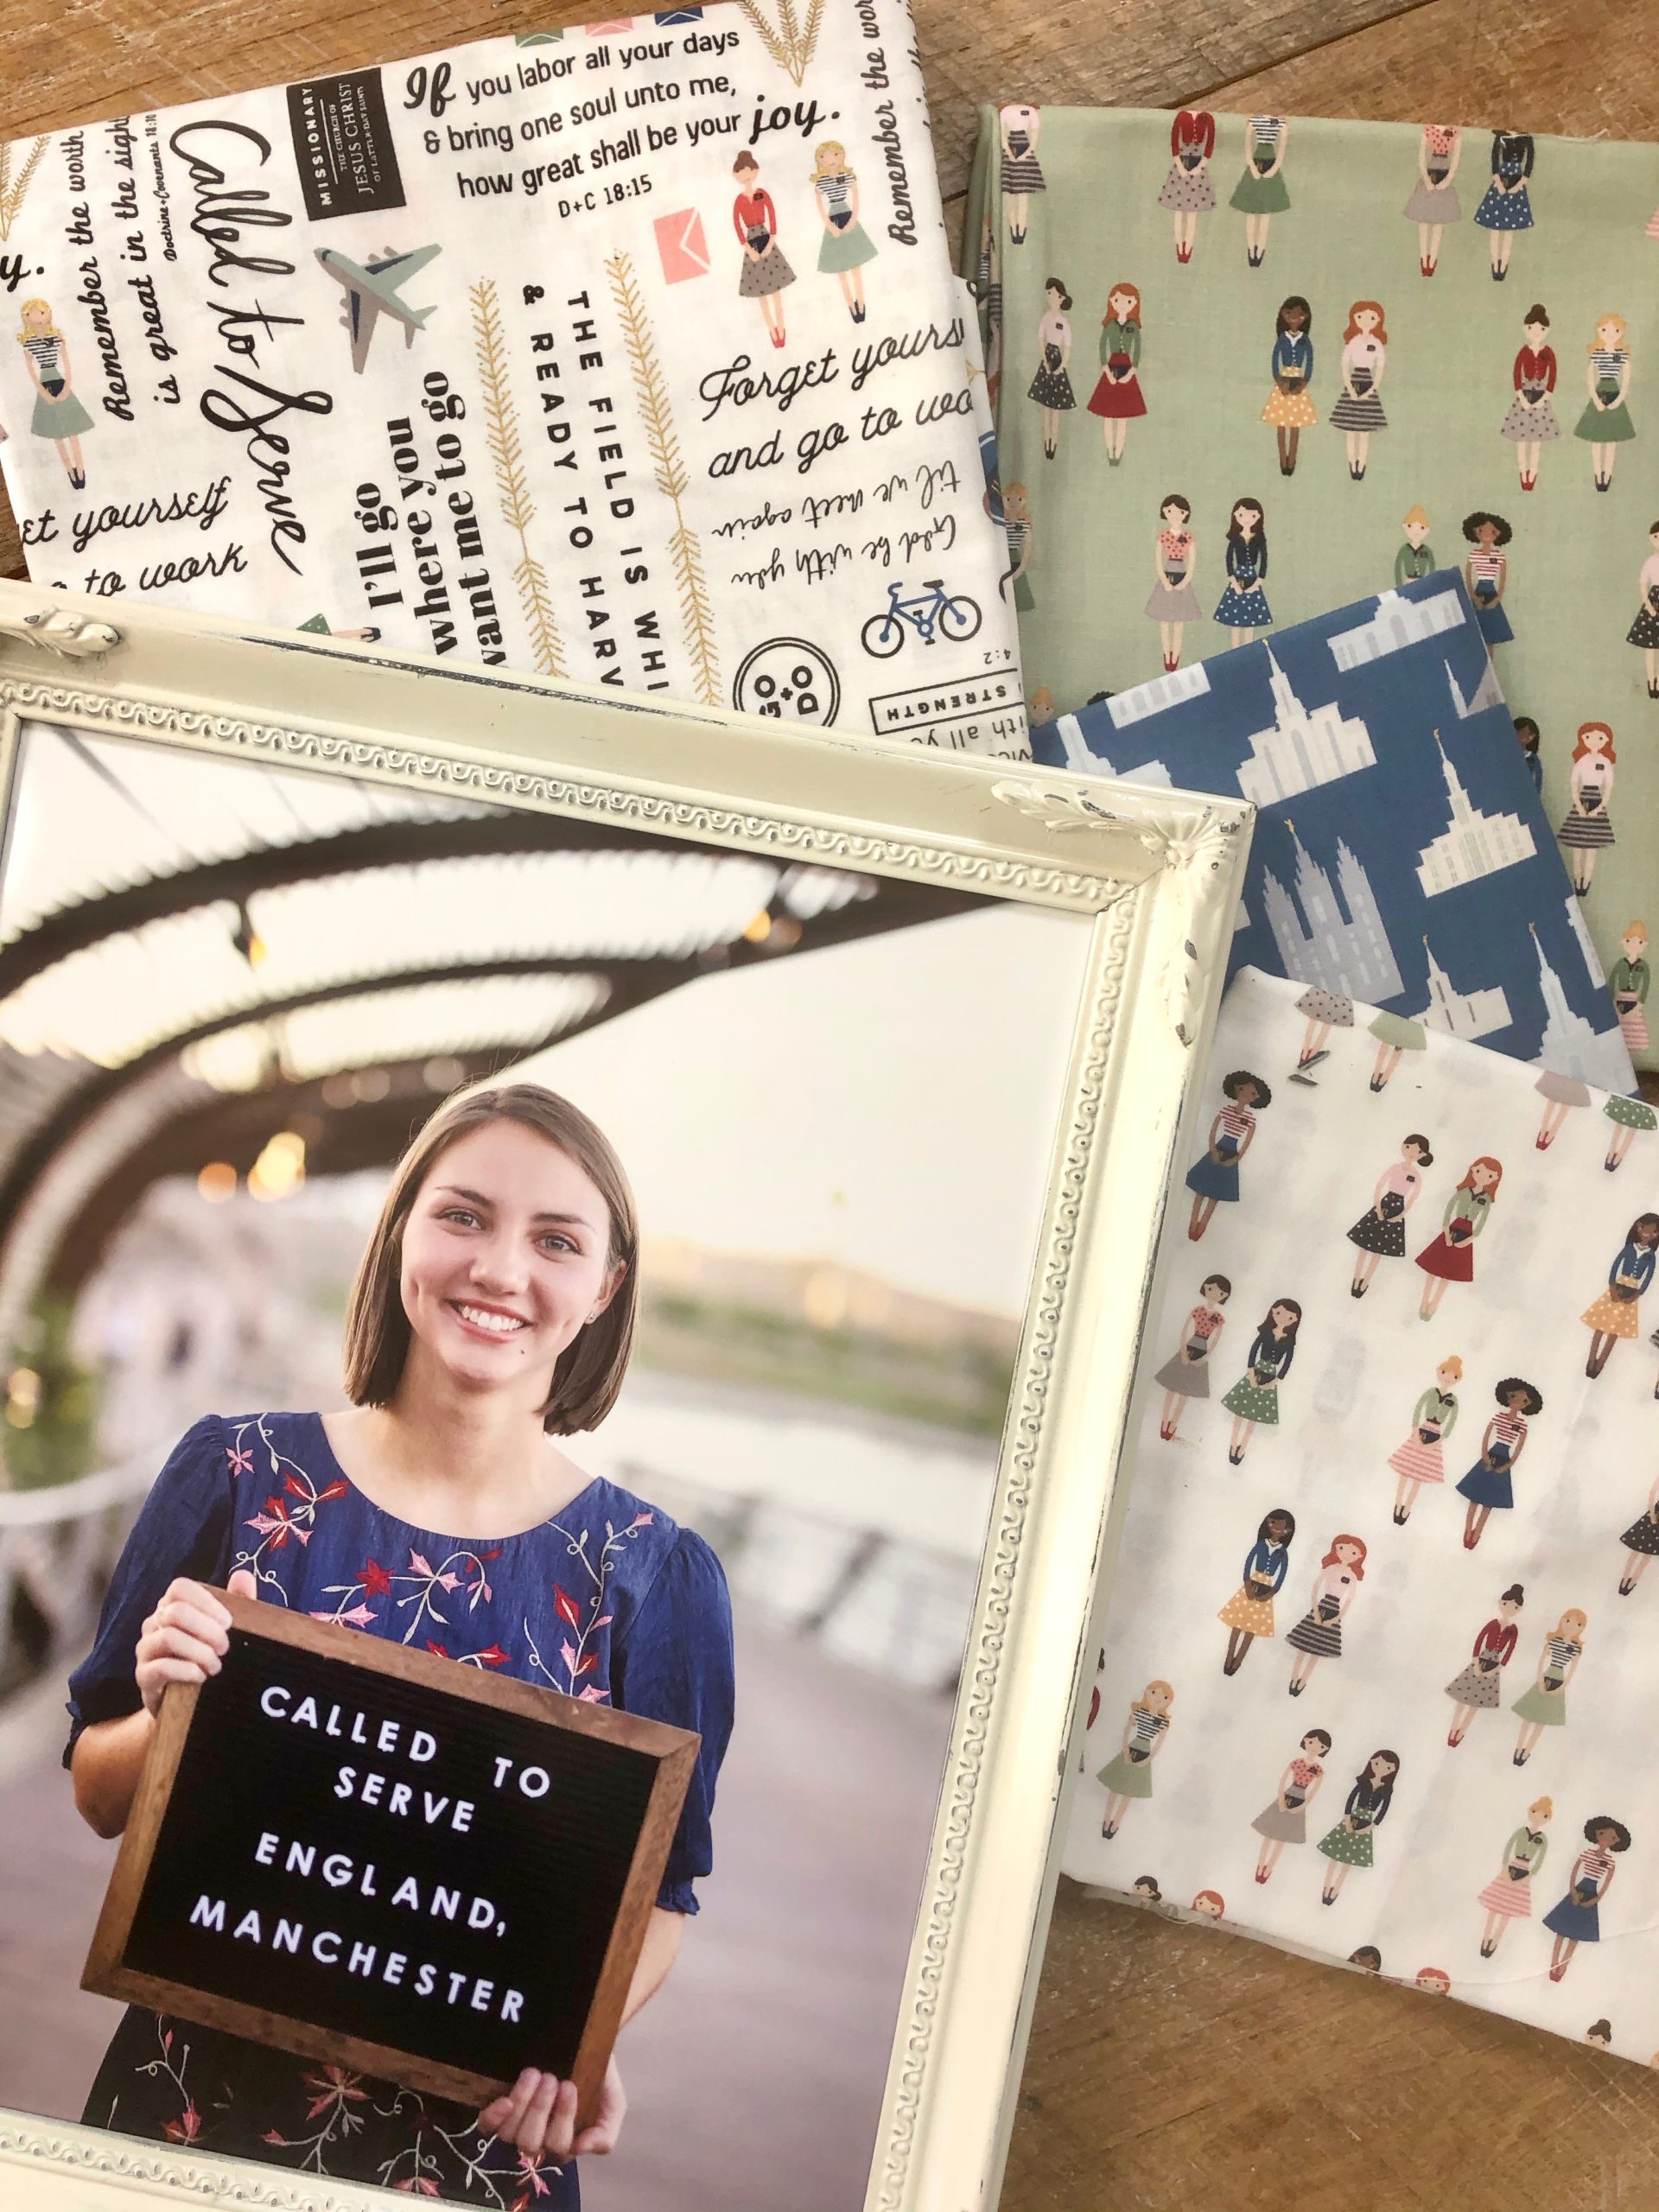
The fabric comes in a “sisters” version and an “elders” version. I have a little stack stashed away for next year when my son leaves. Also included in the fabric line is a panel of a world map and some fun missionary phrases.

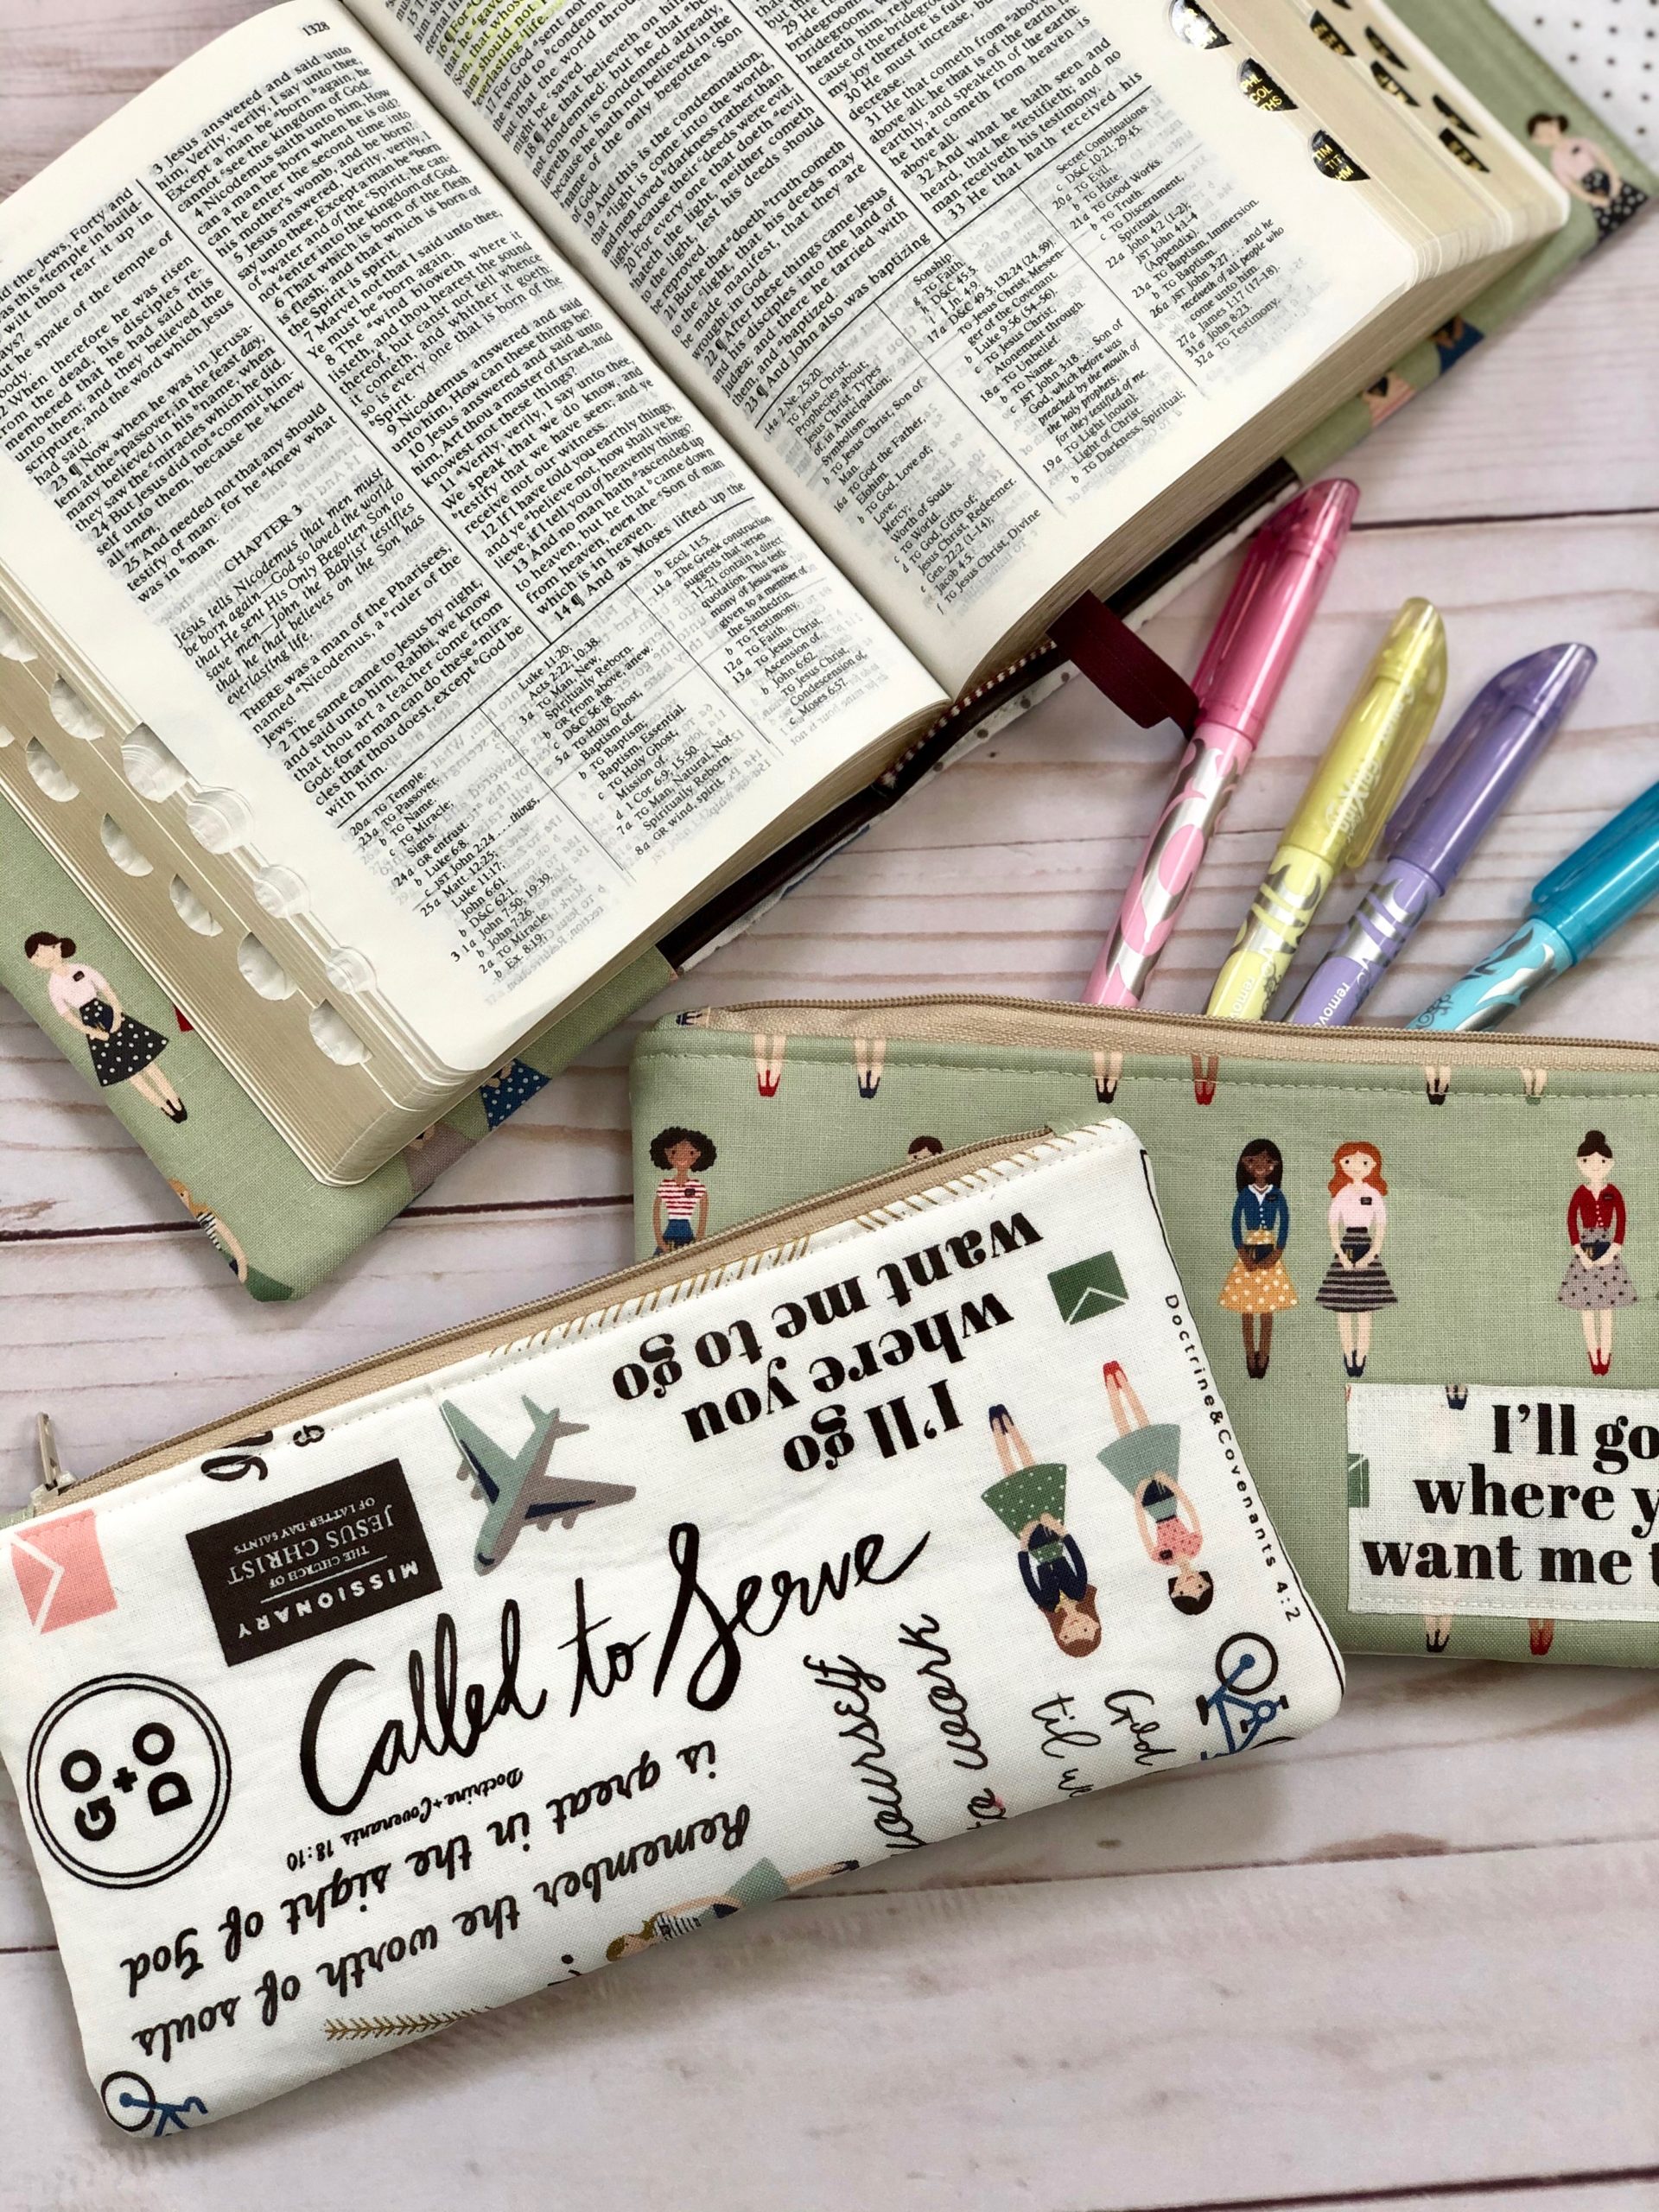
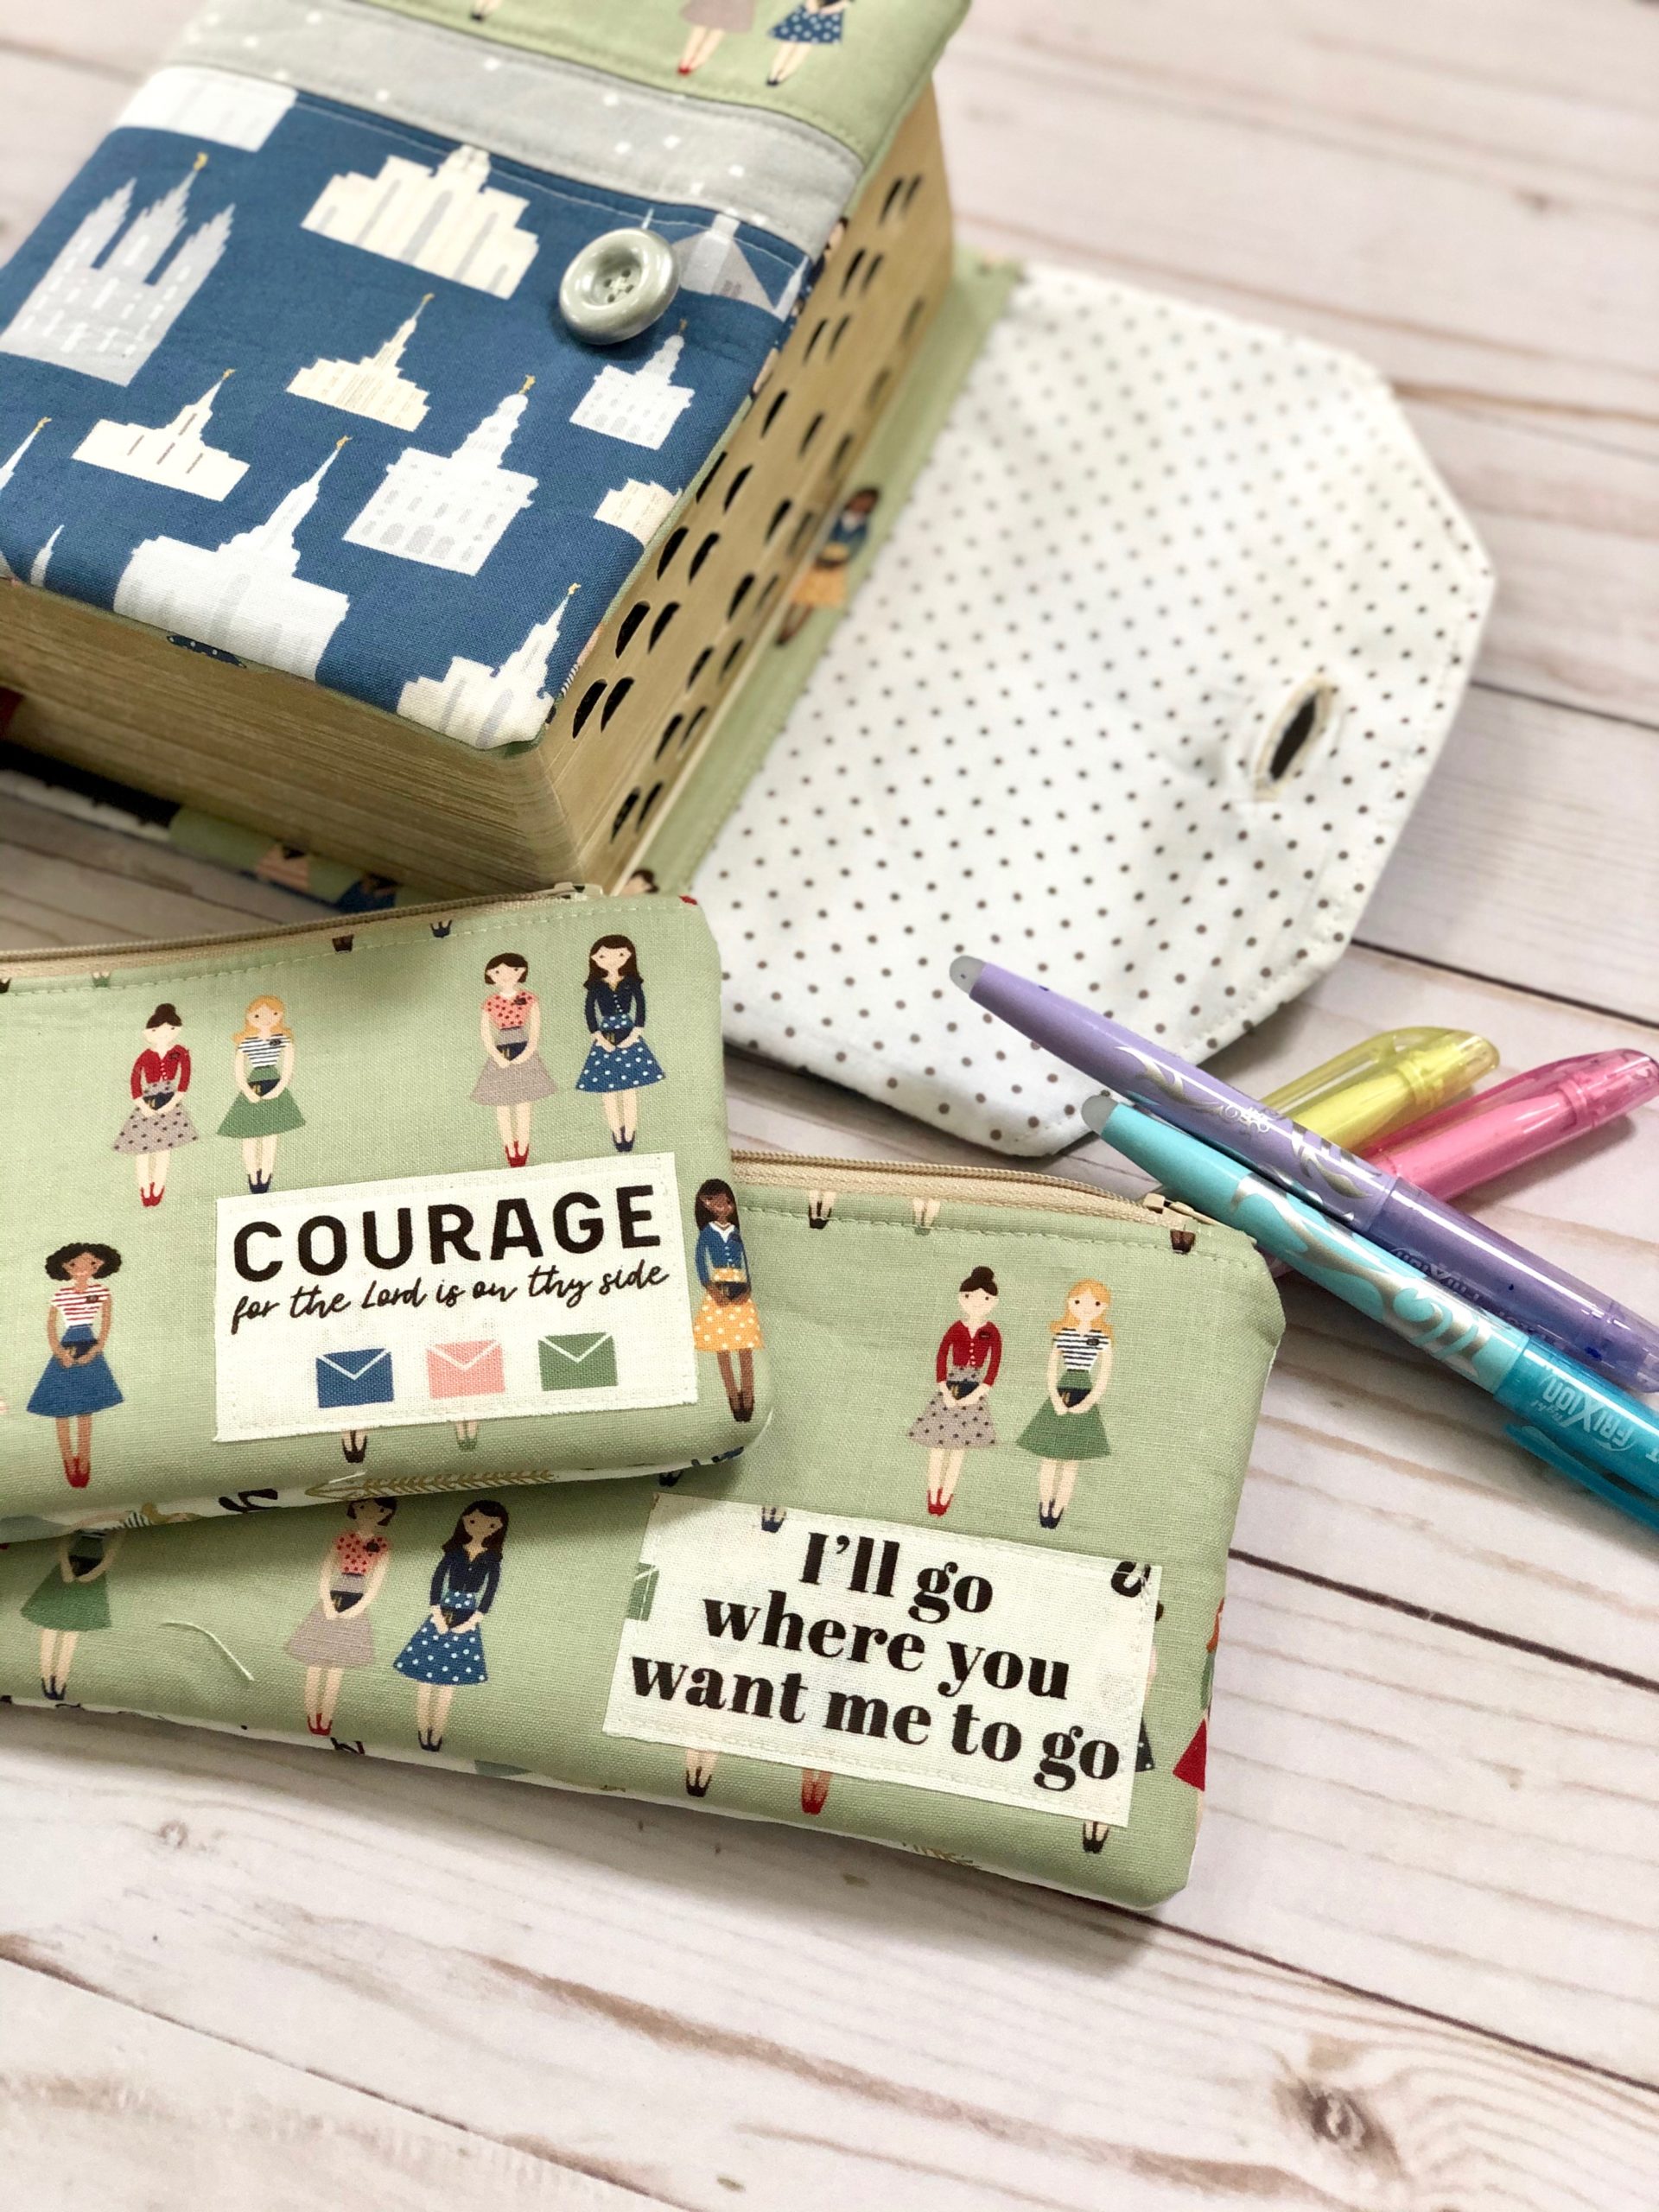
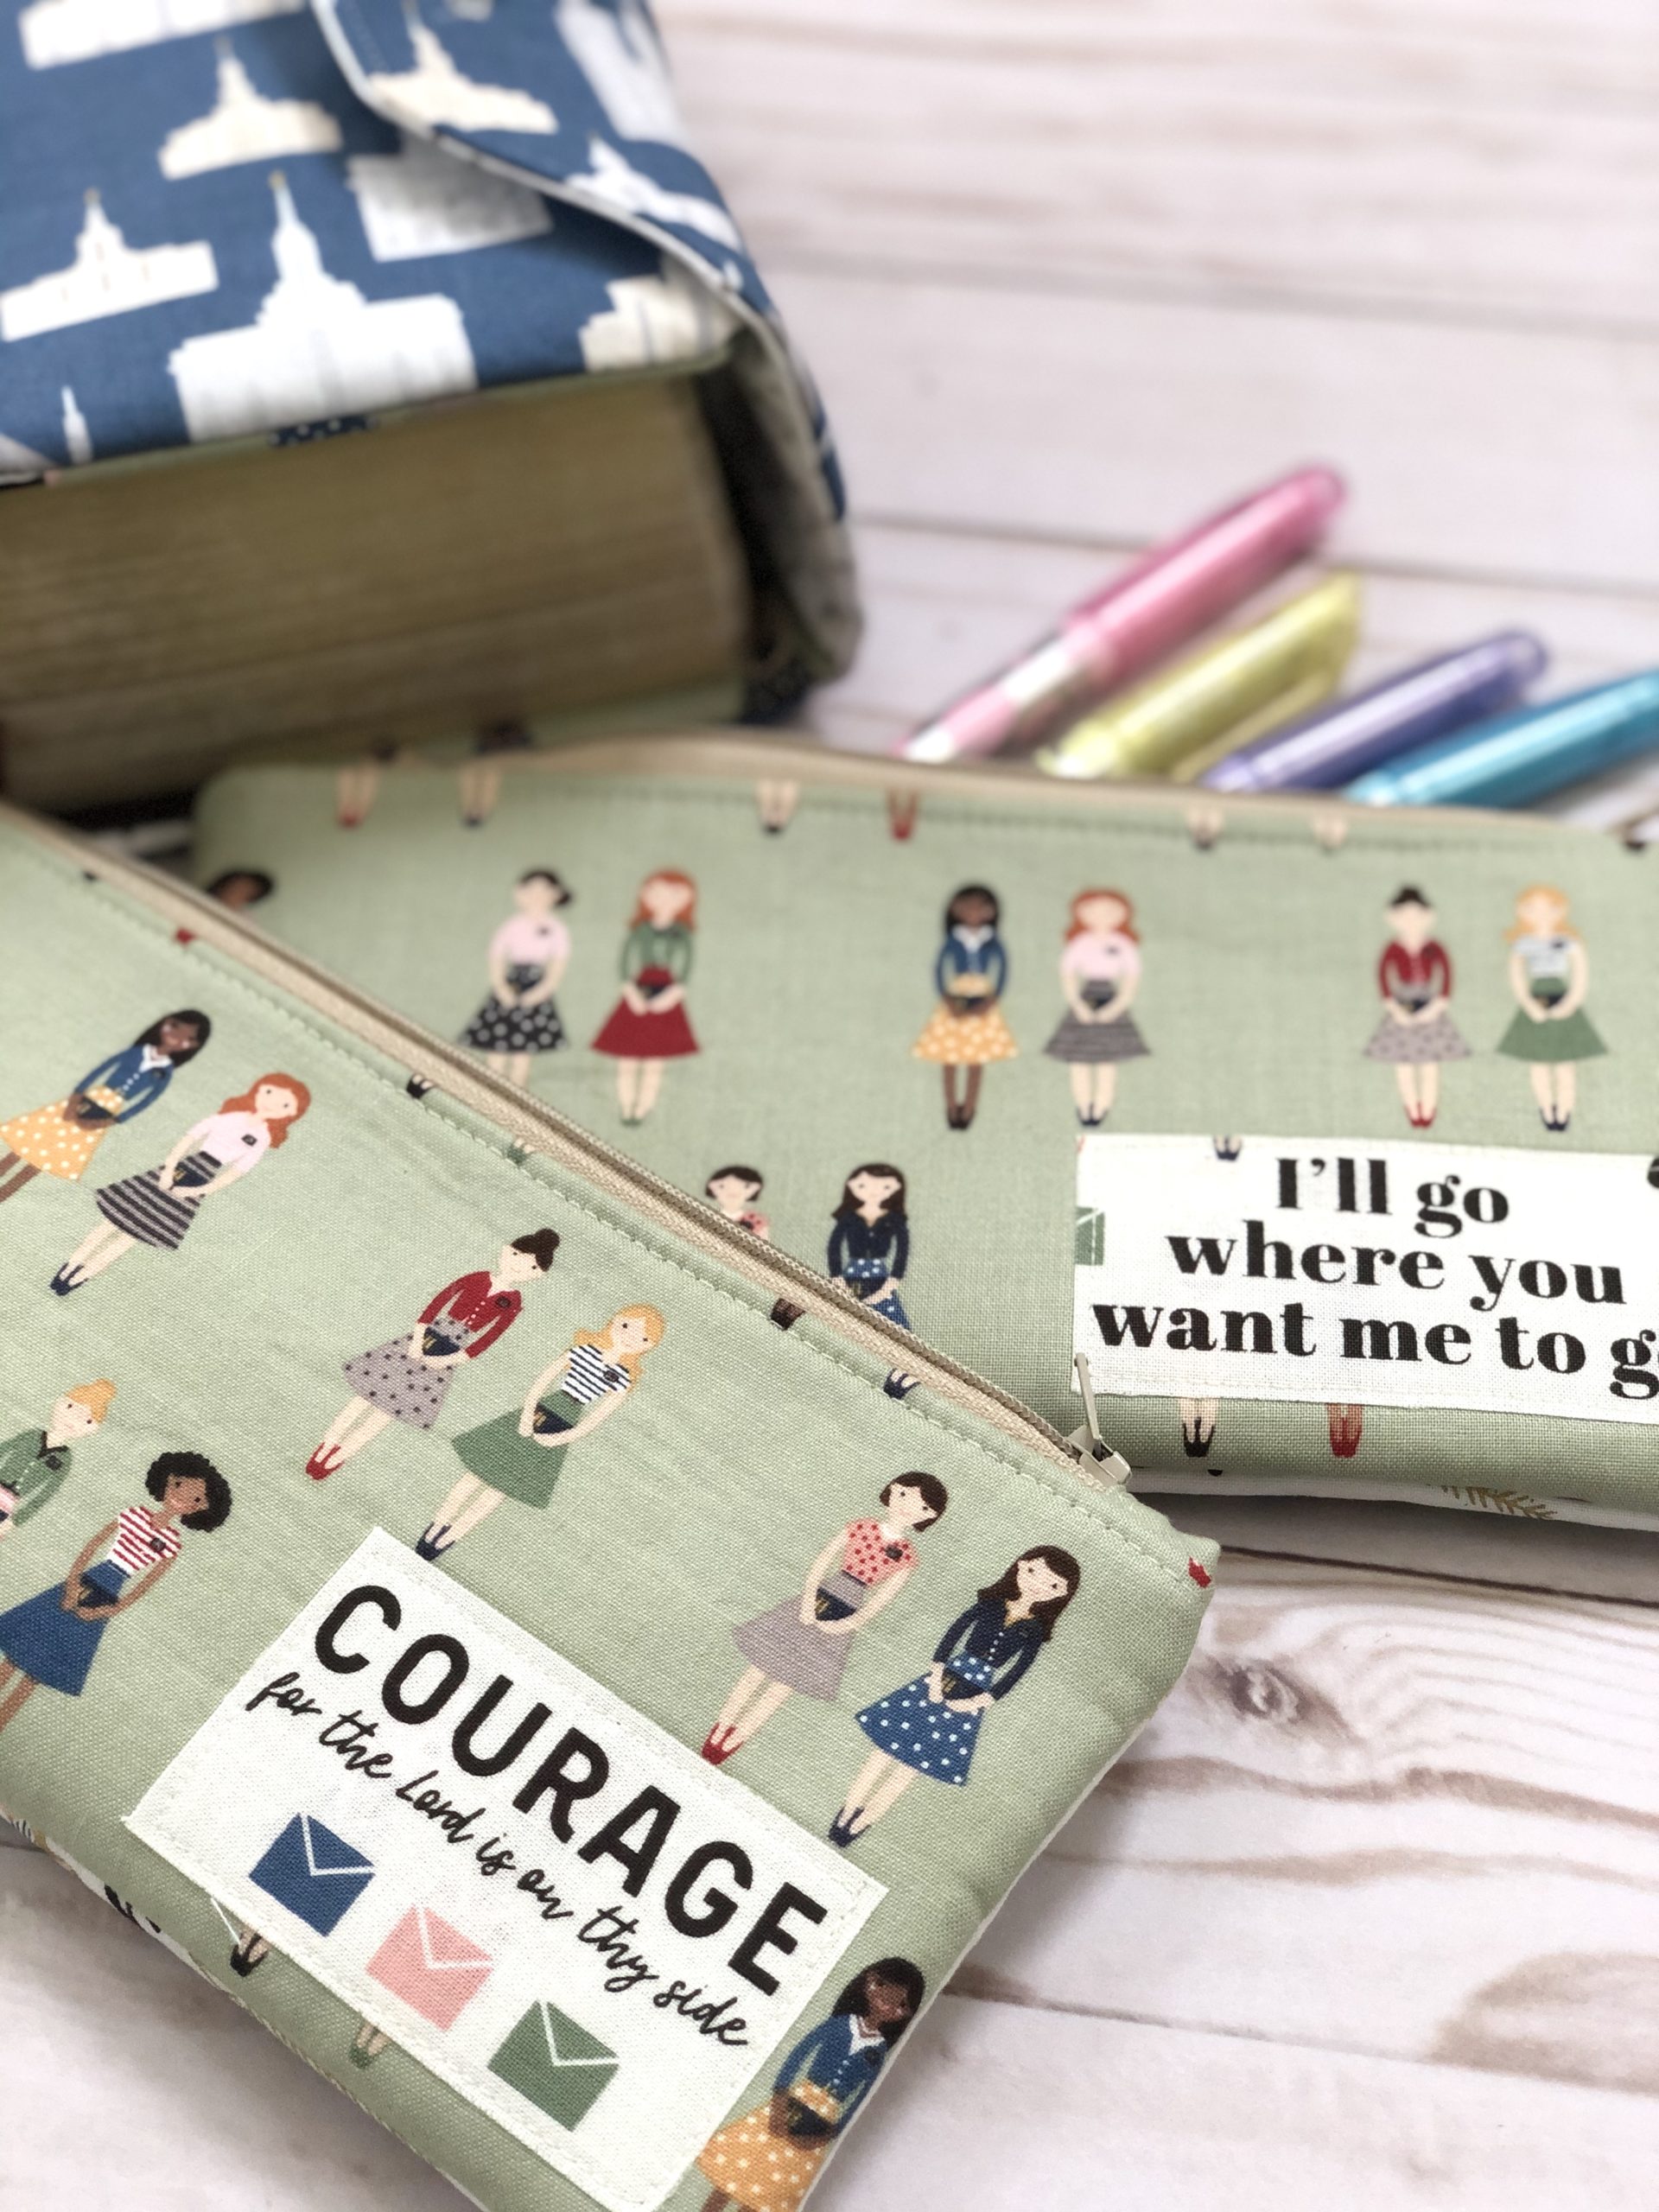
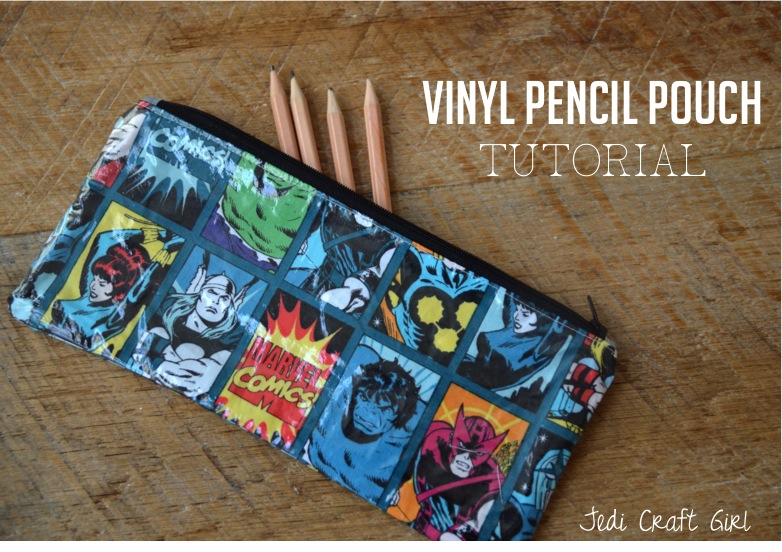
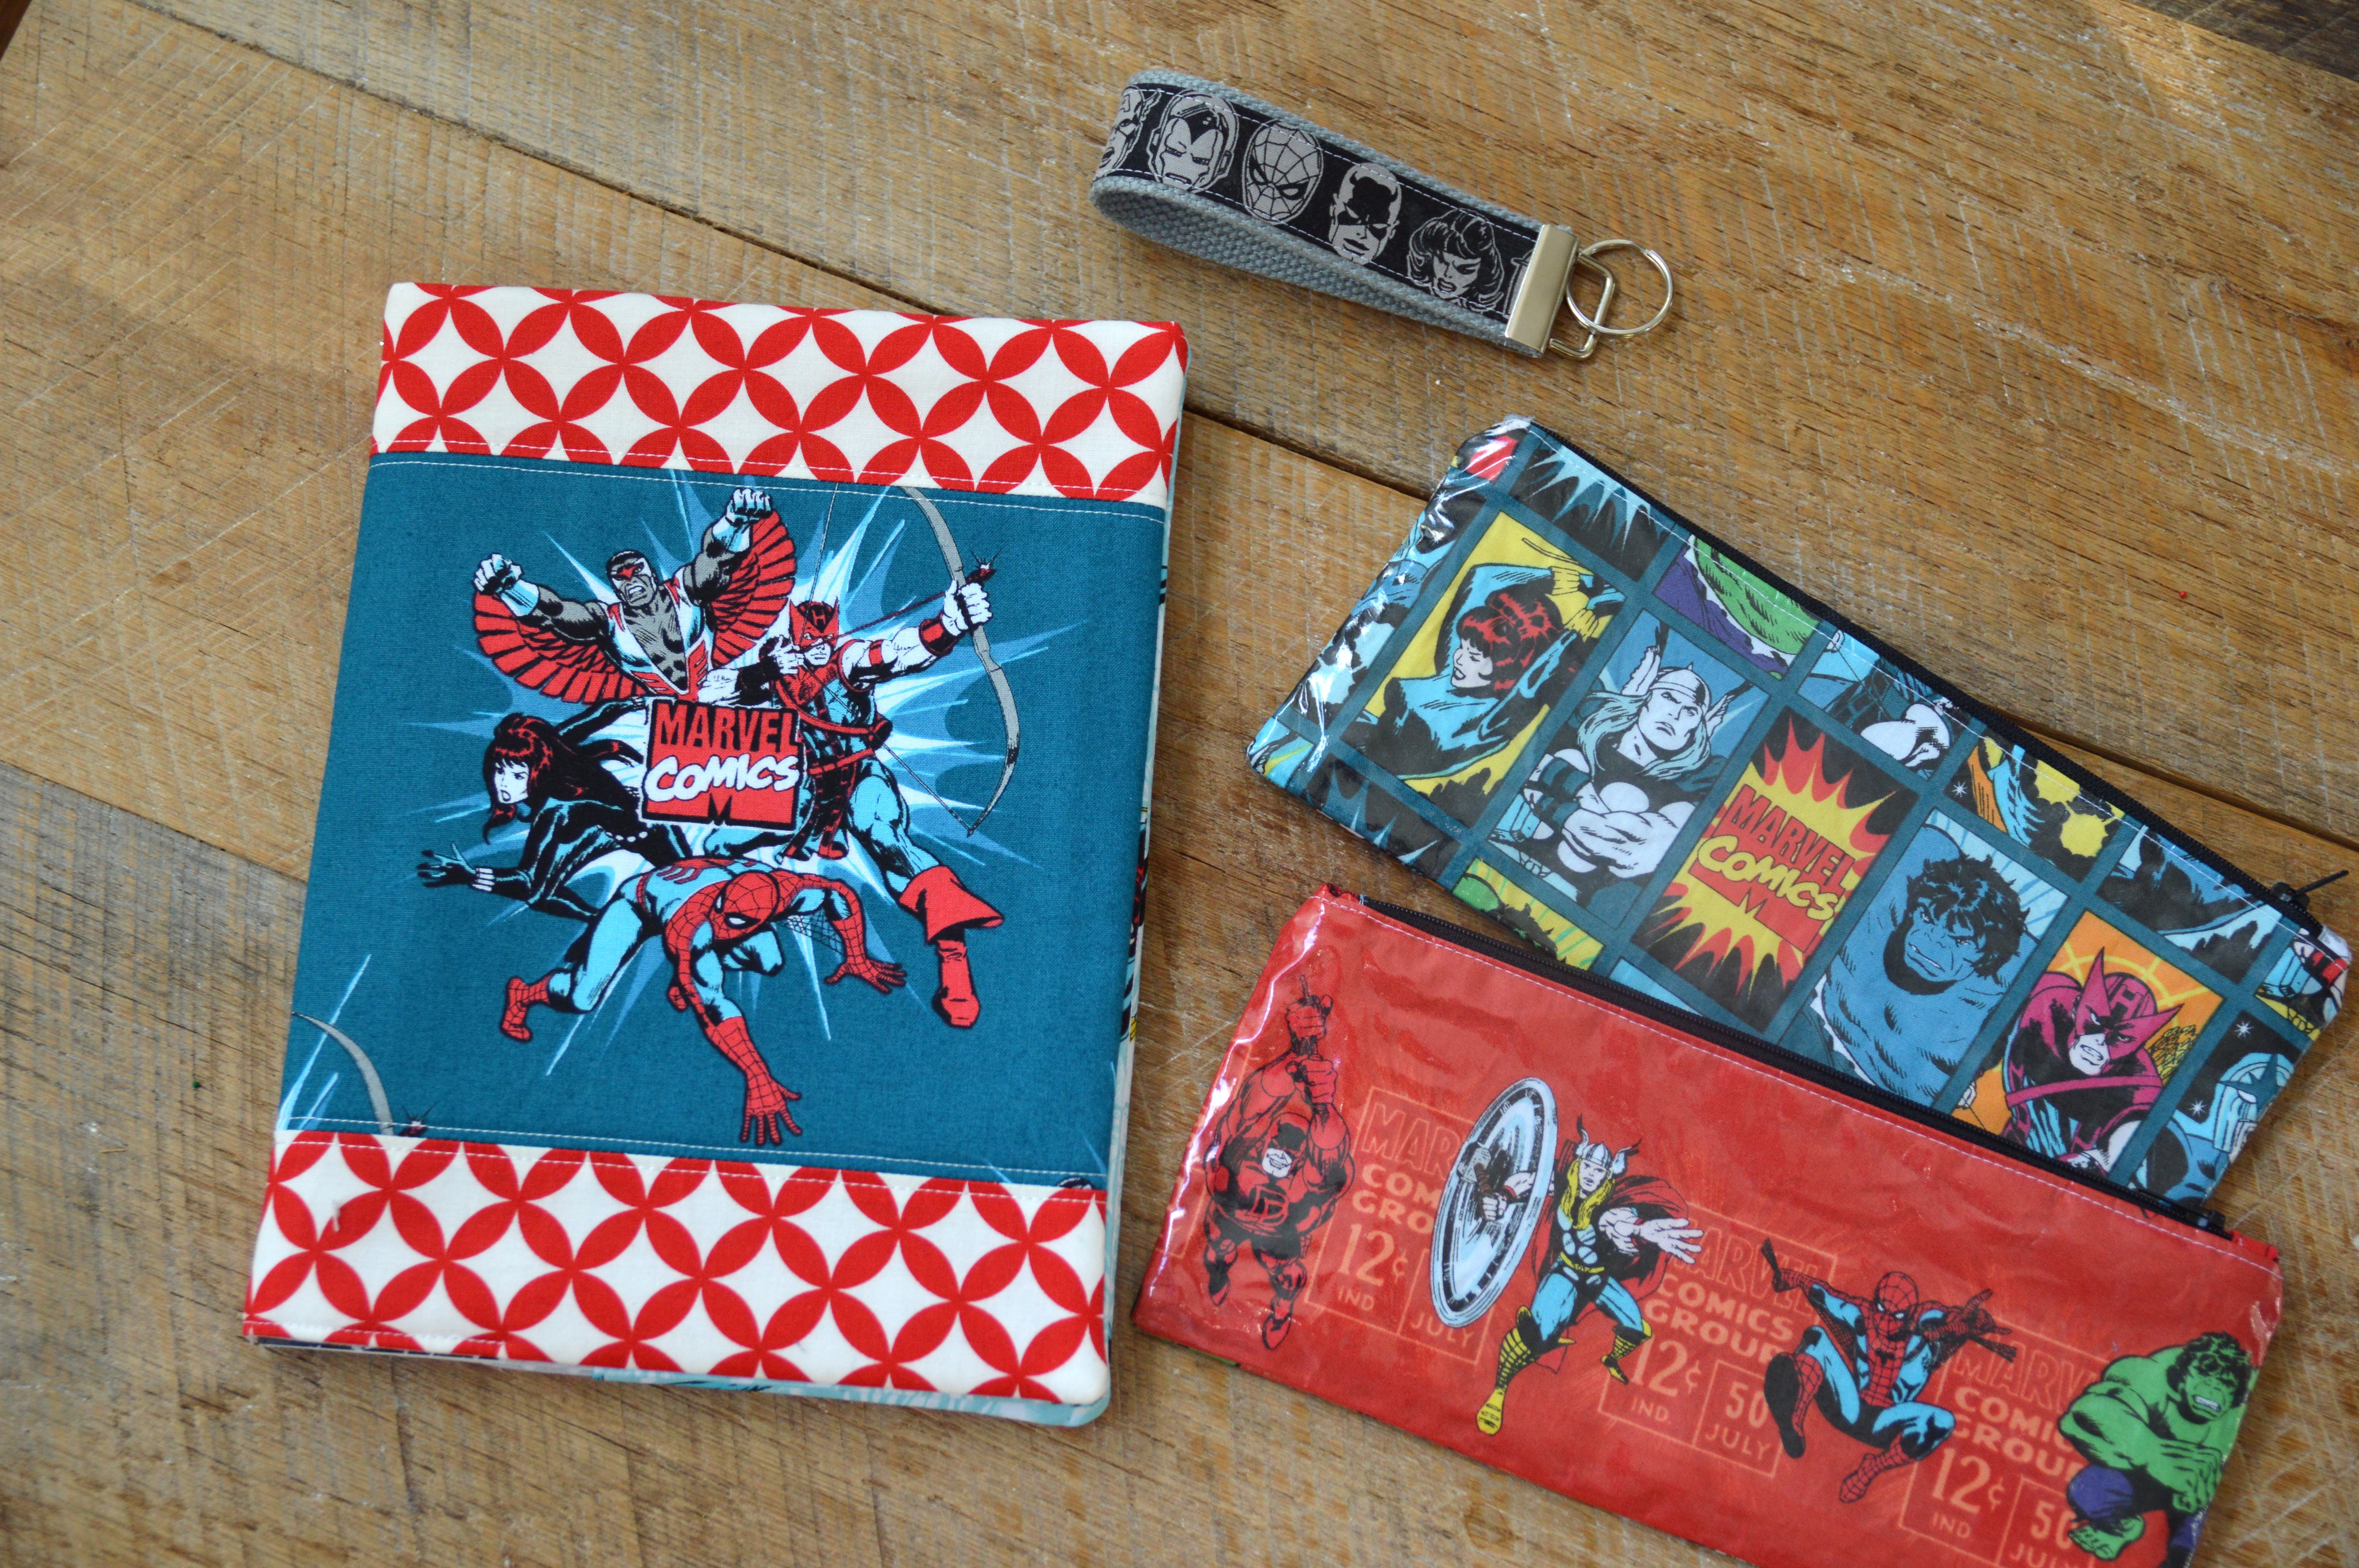
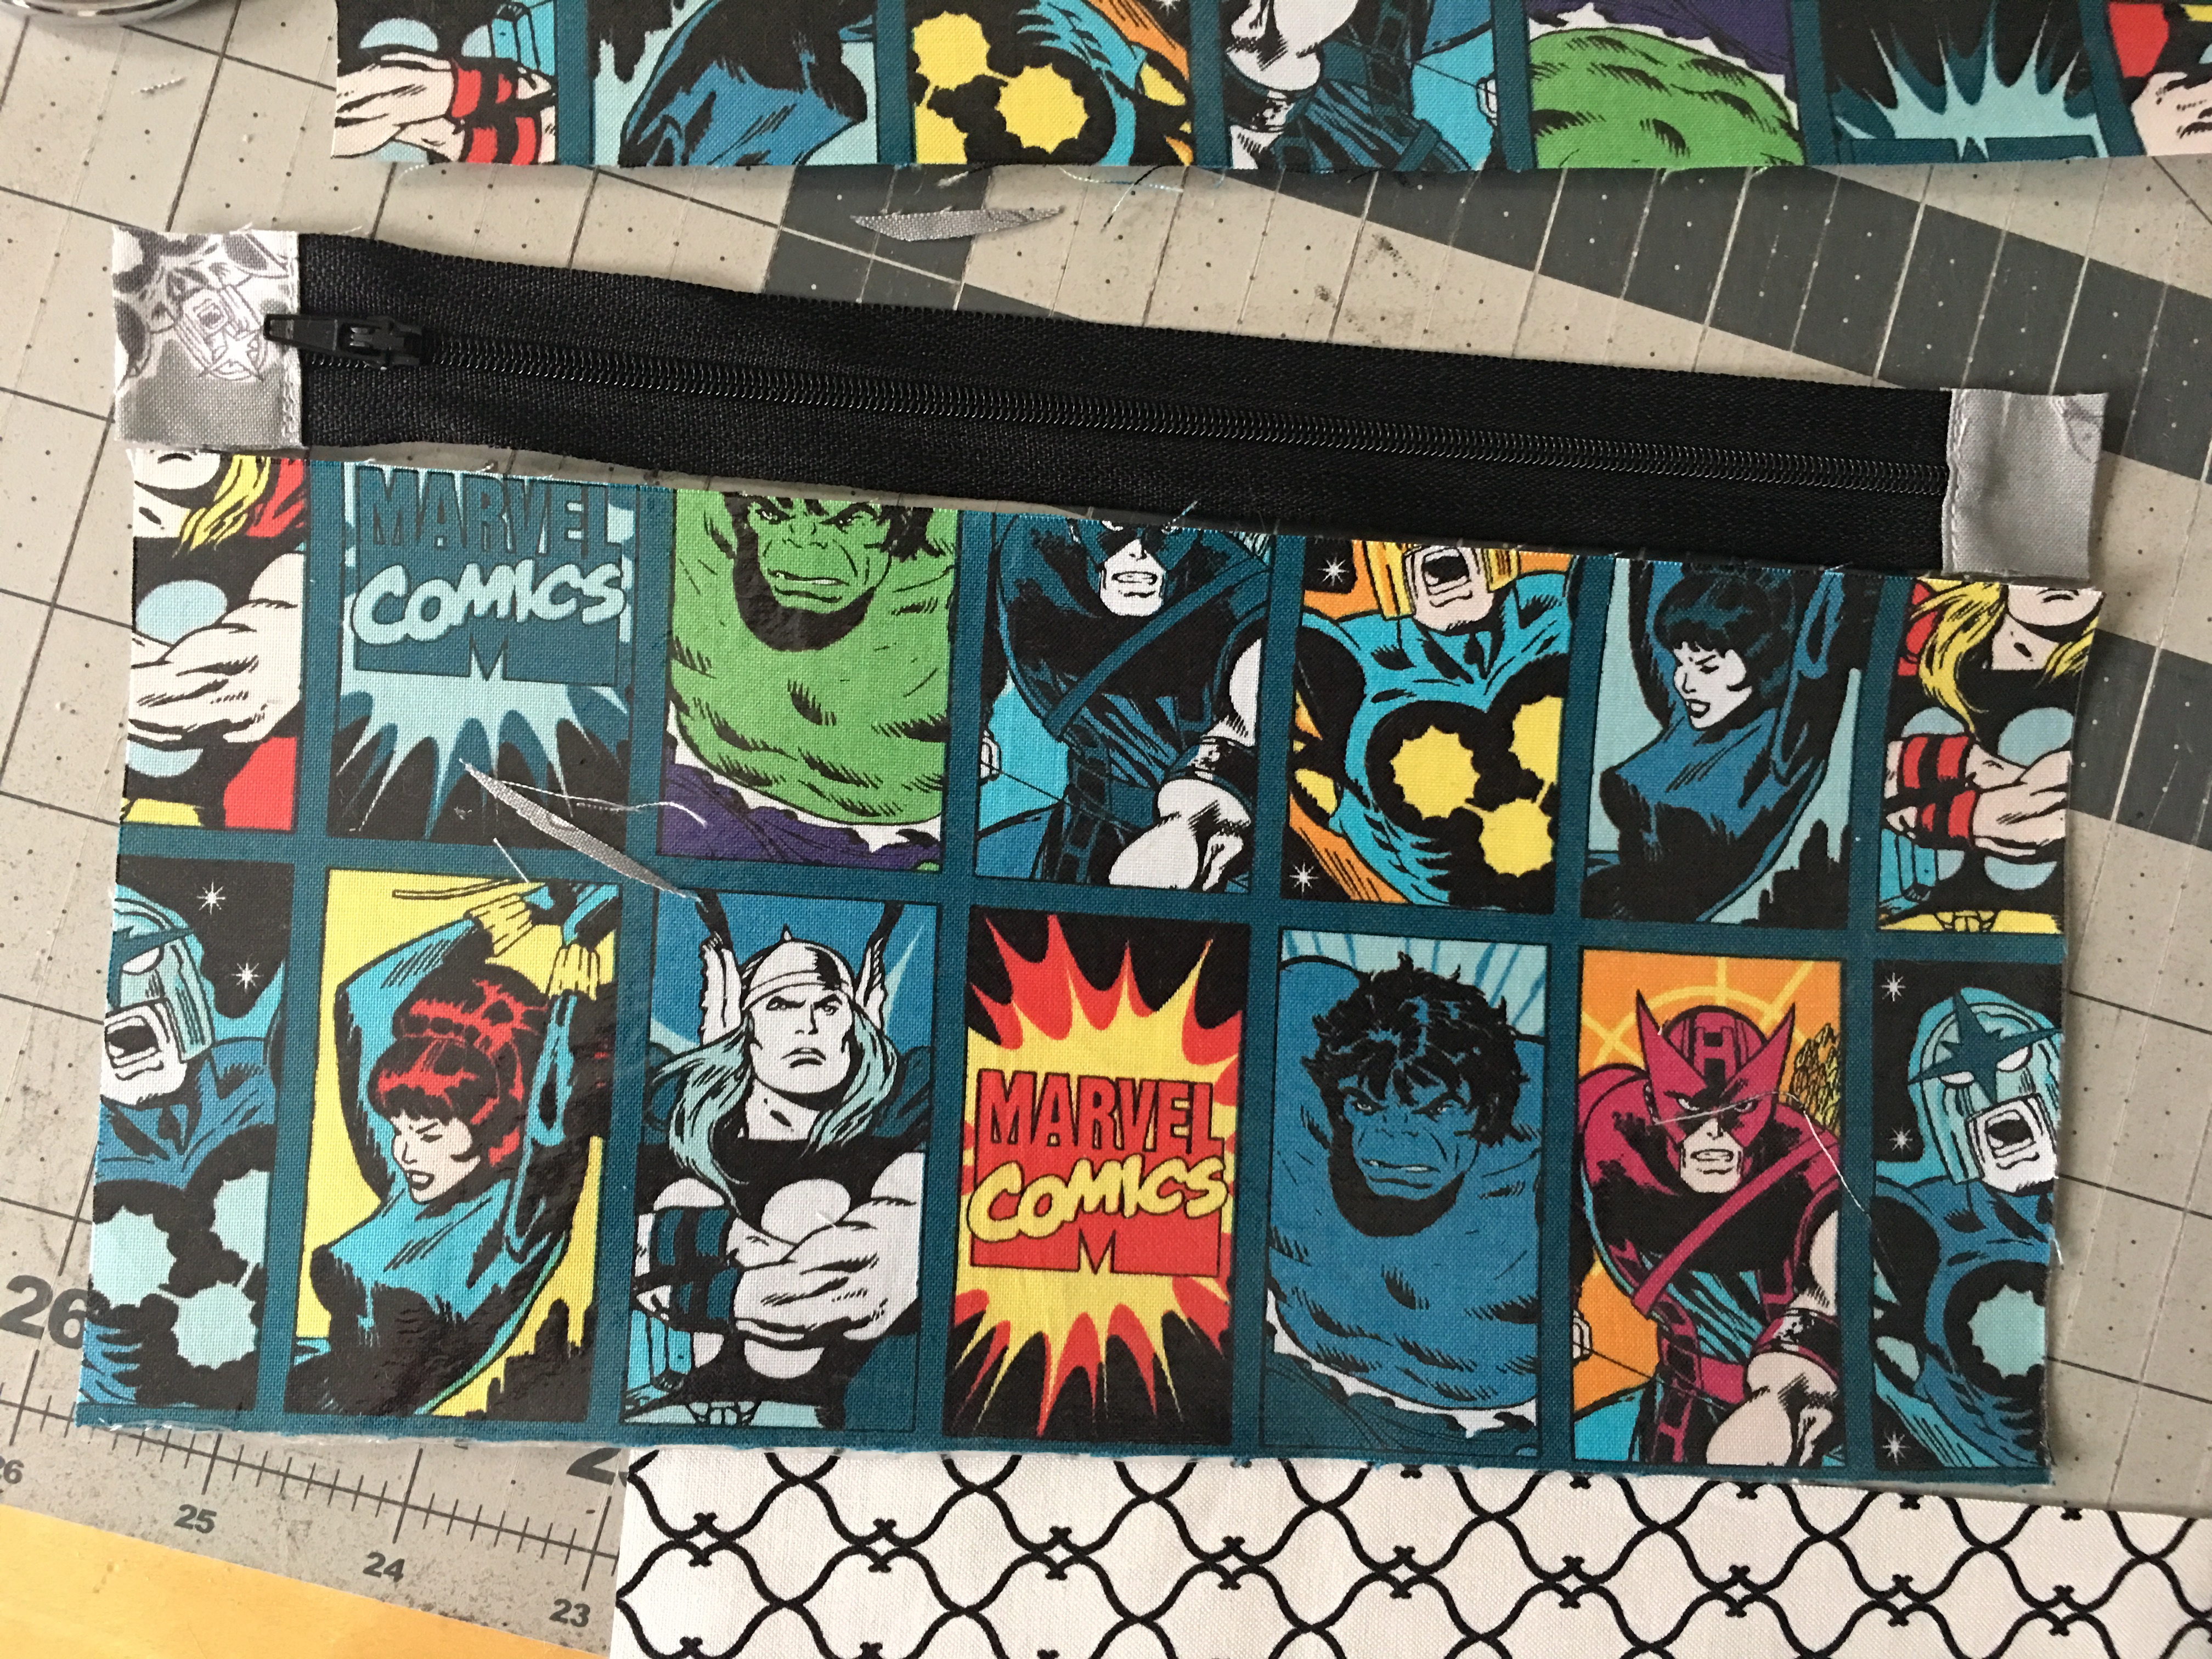
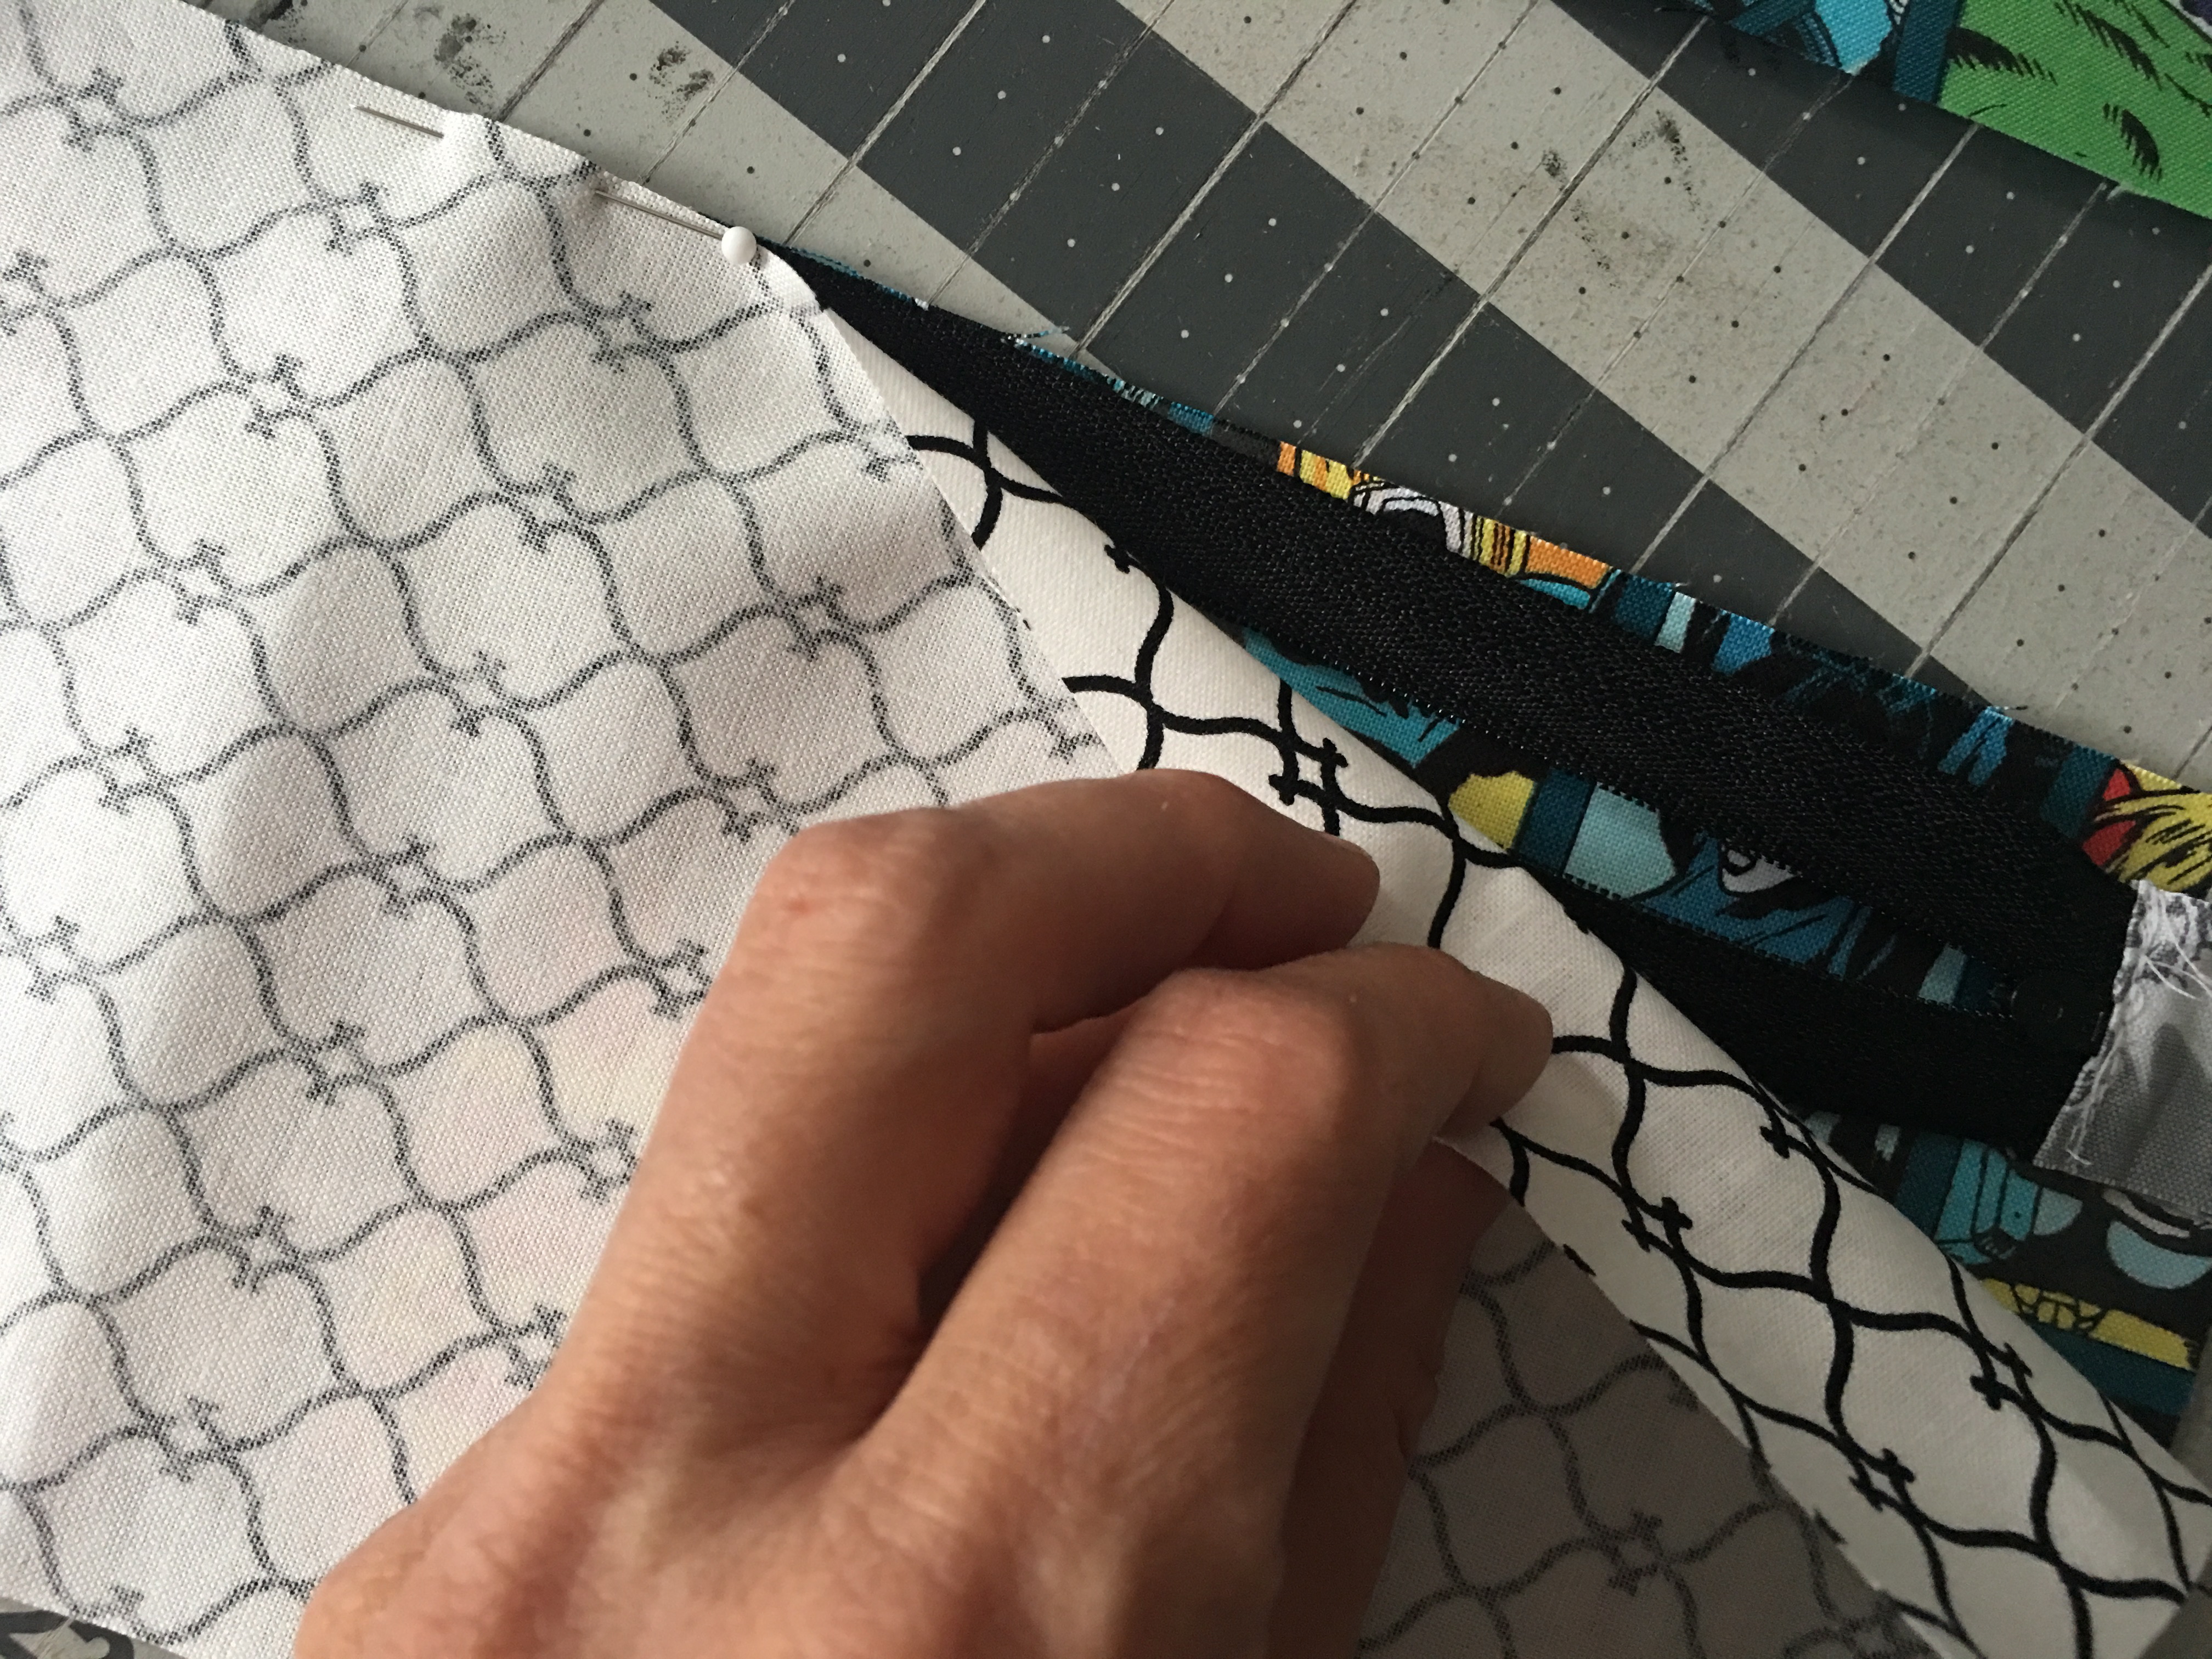
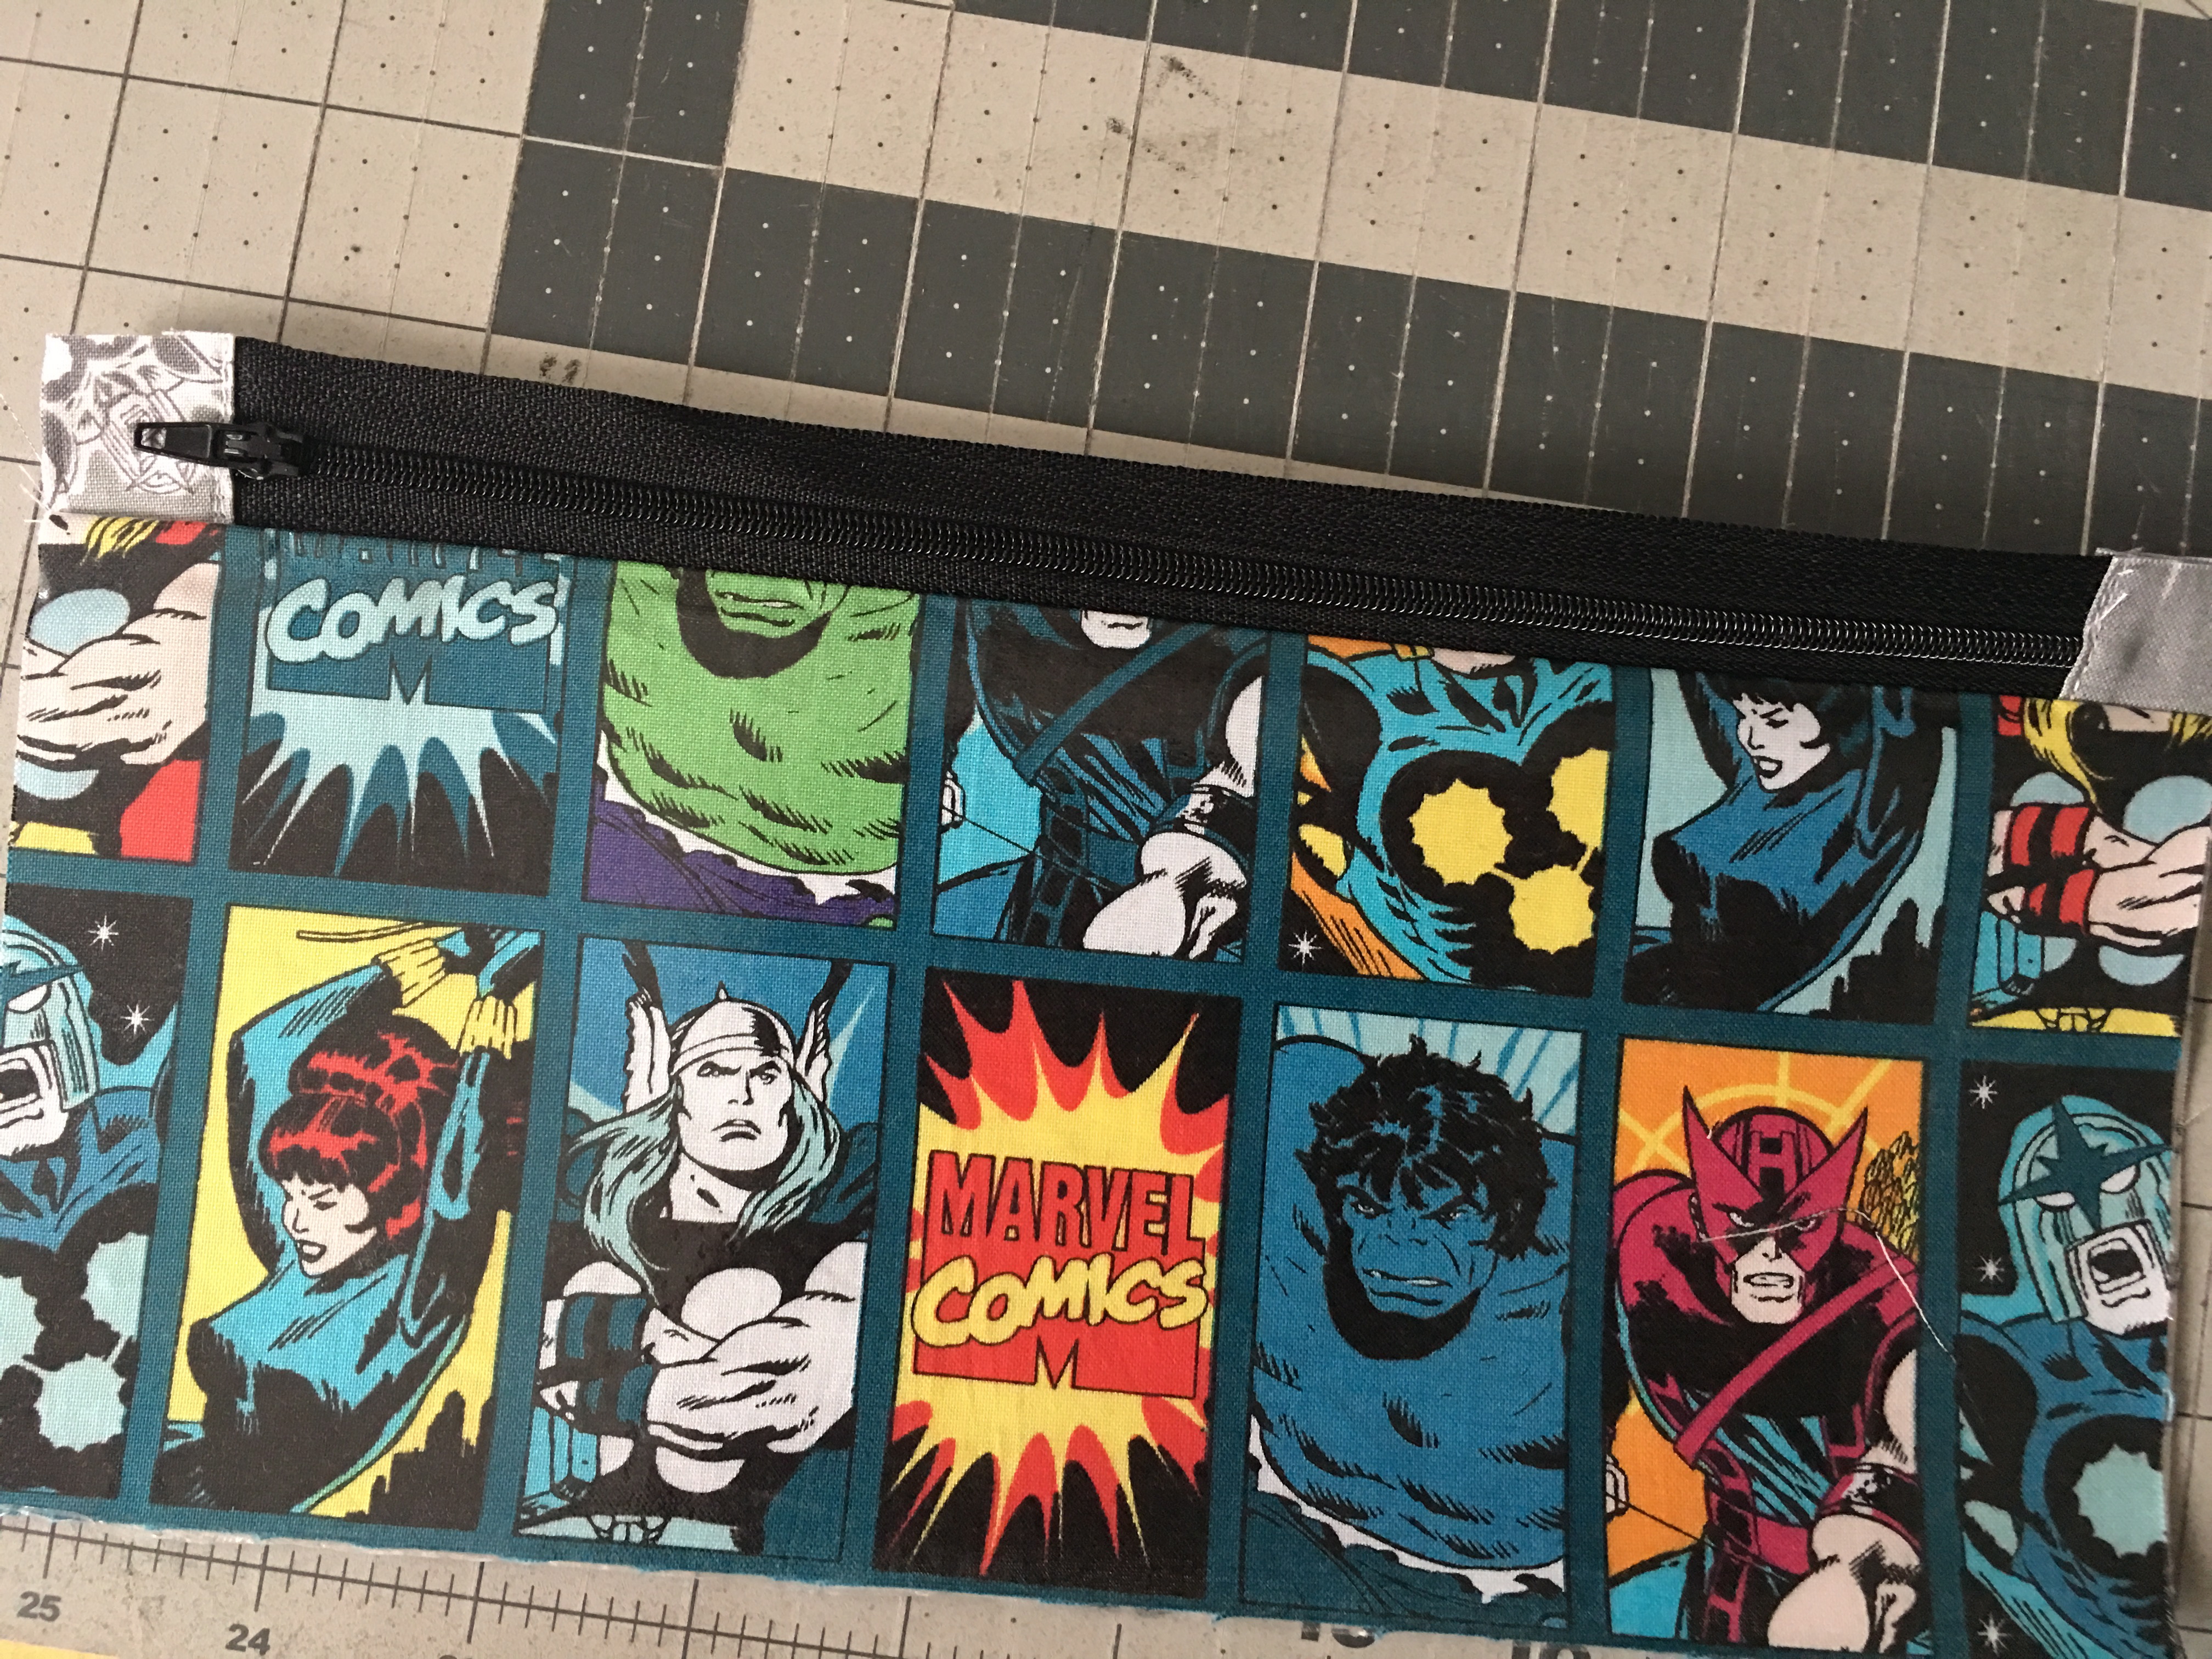
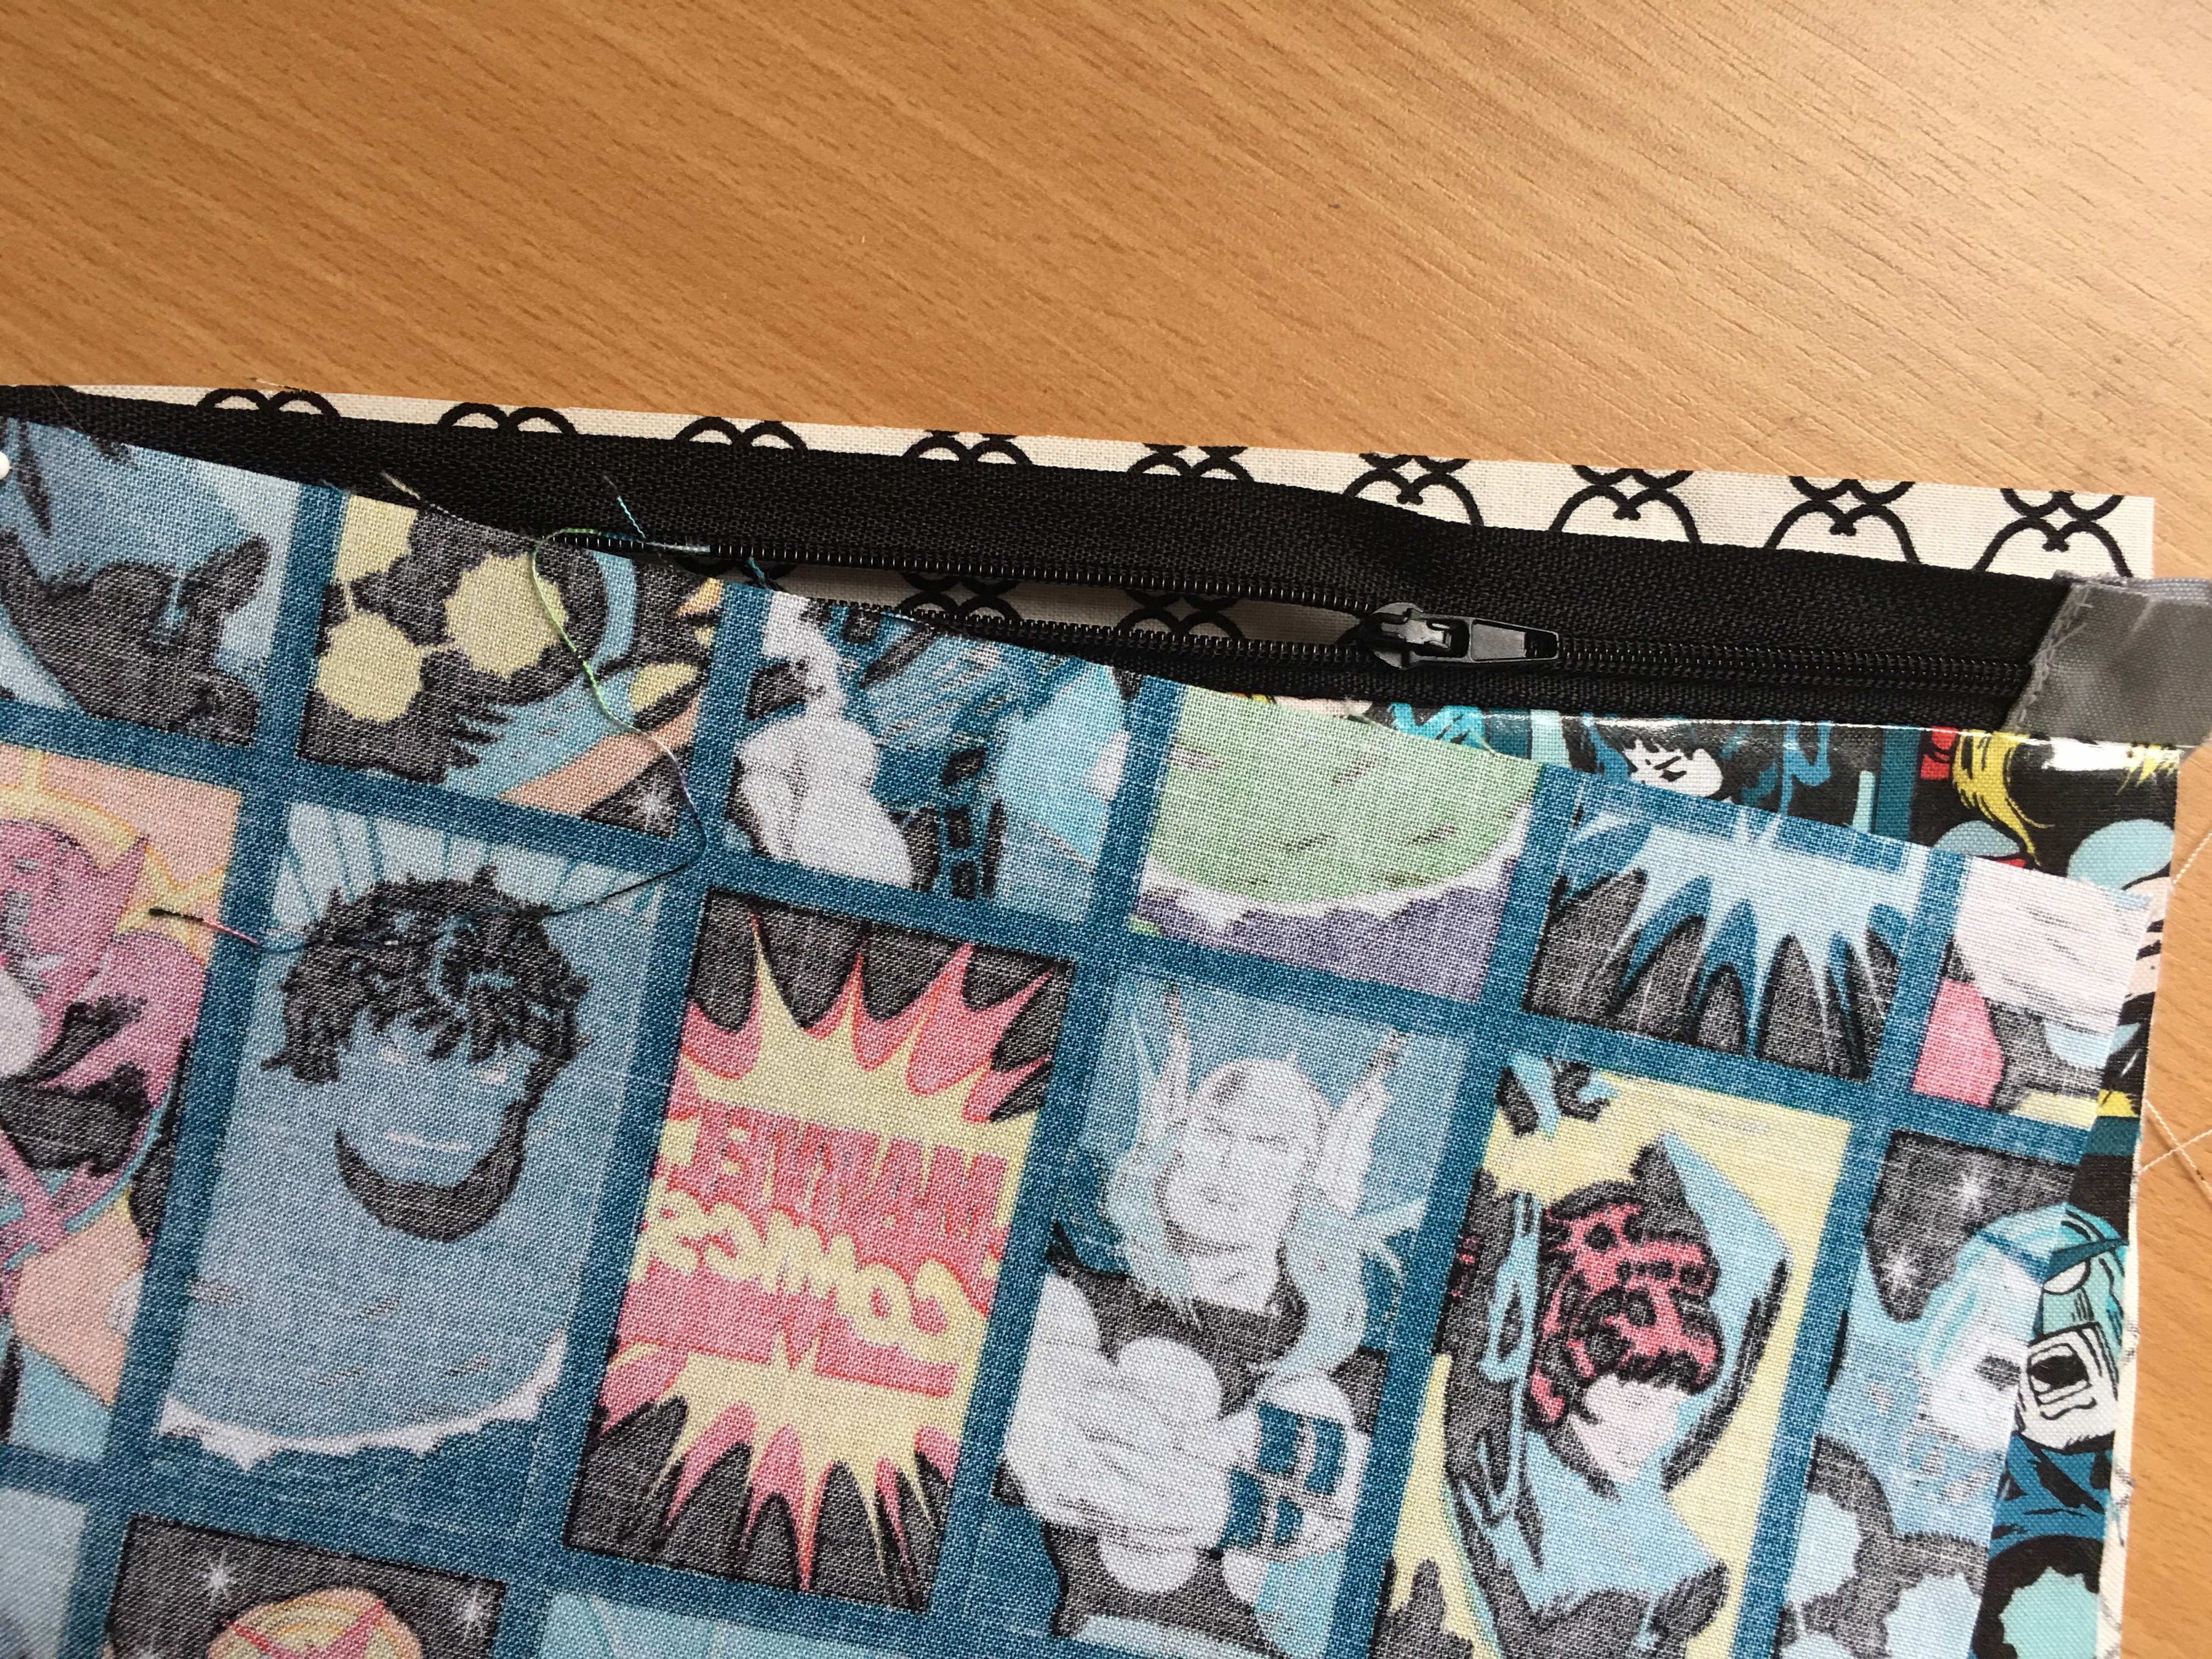
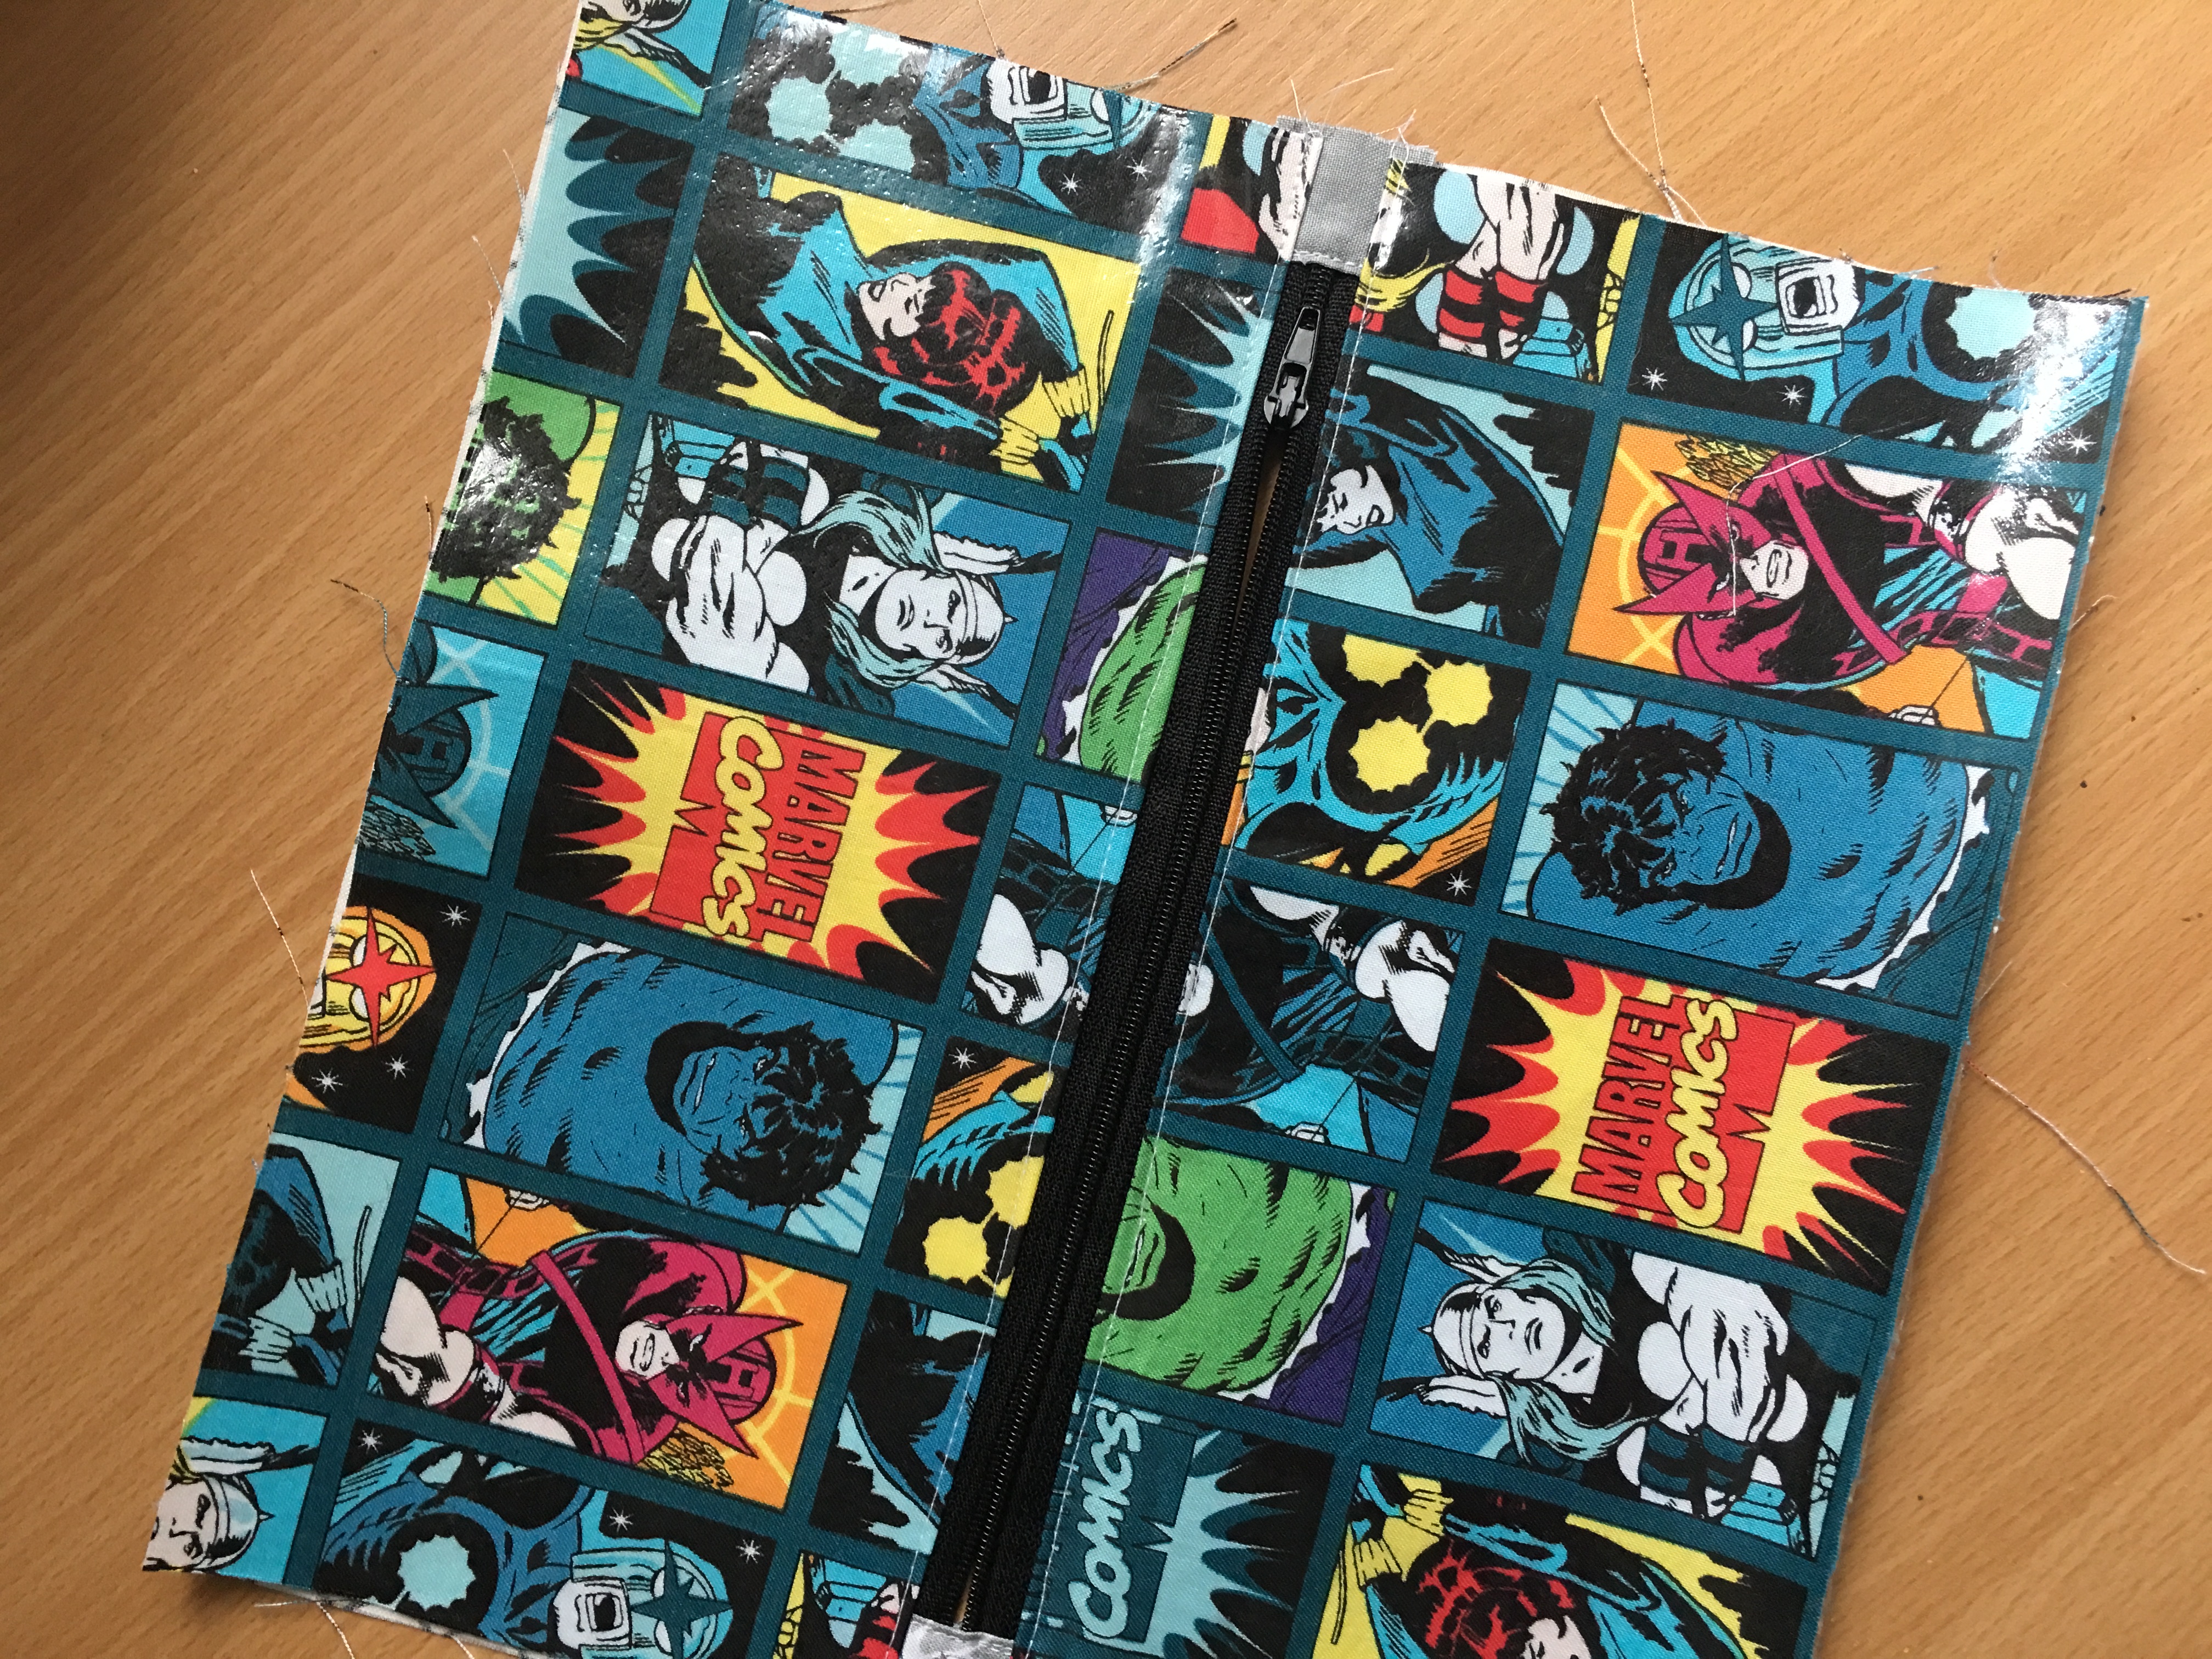
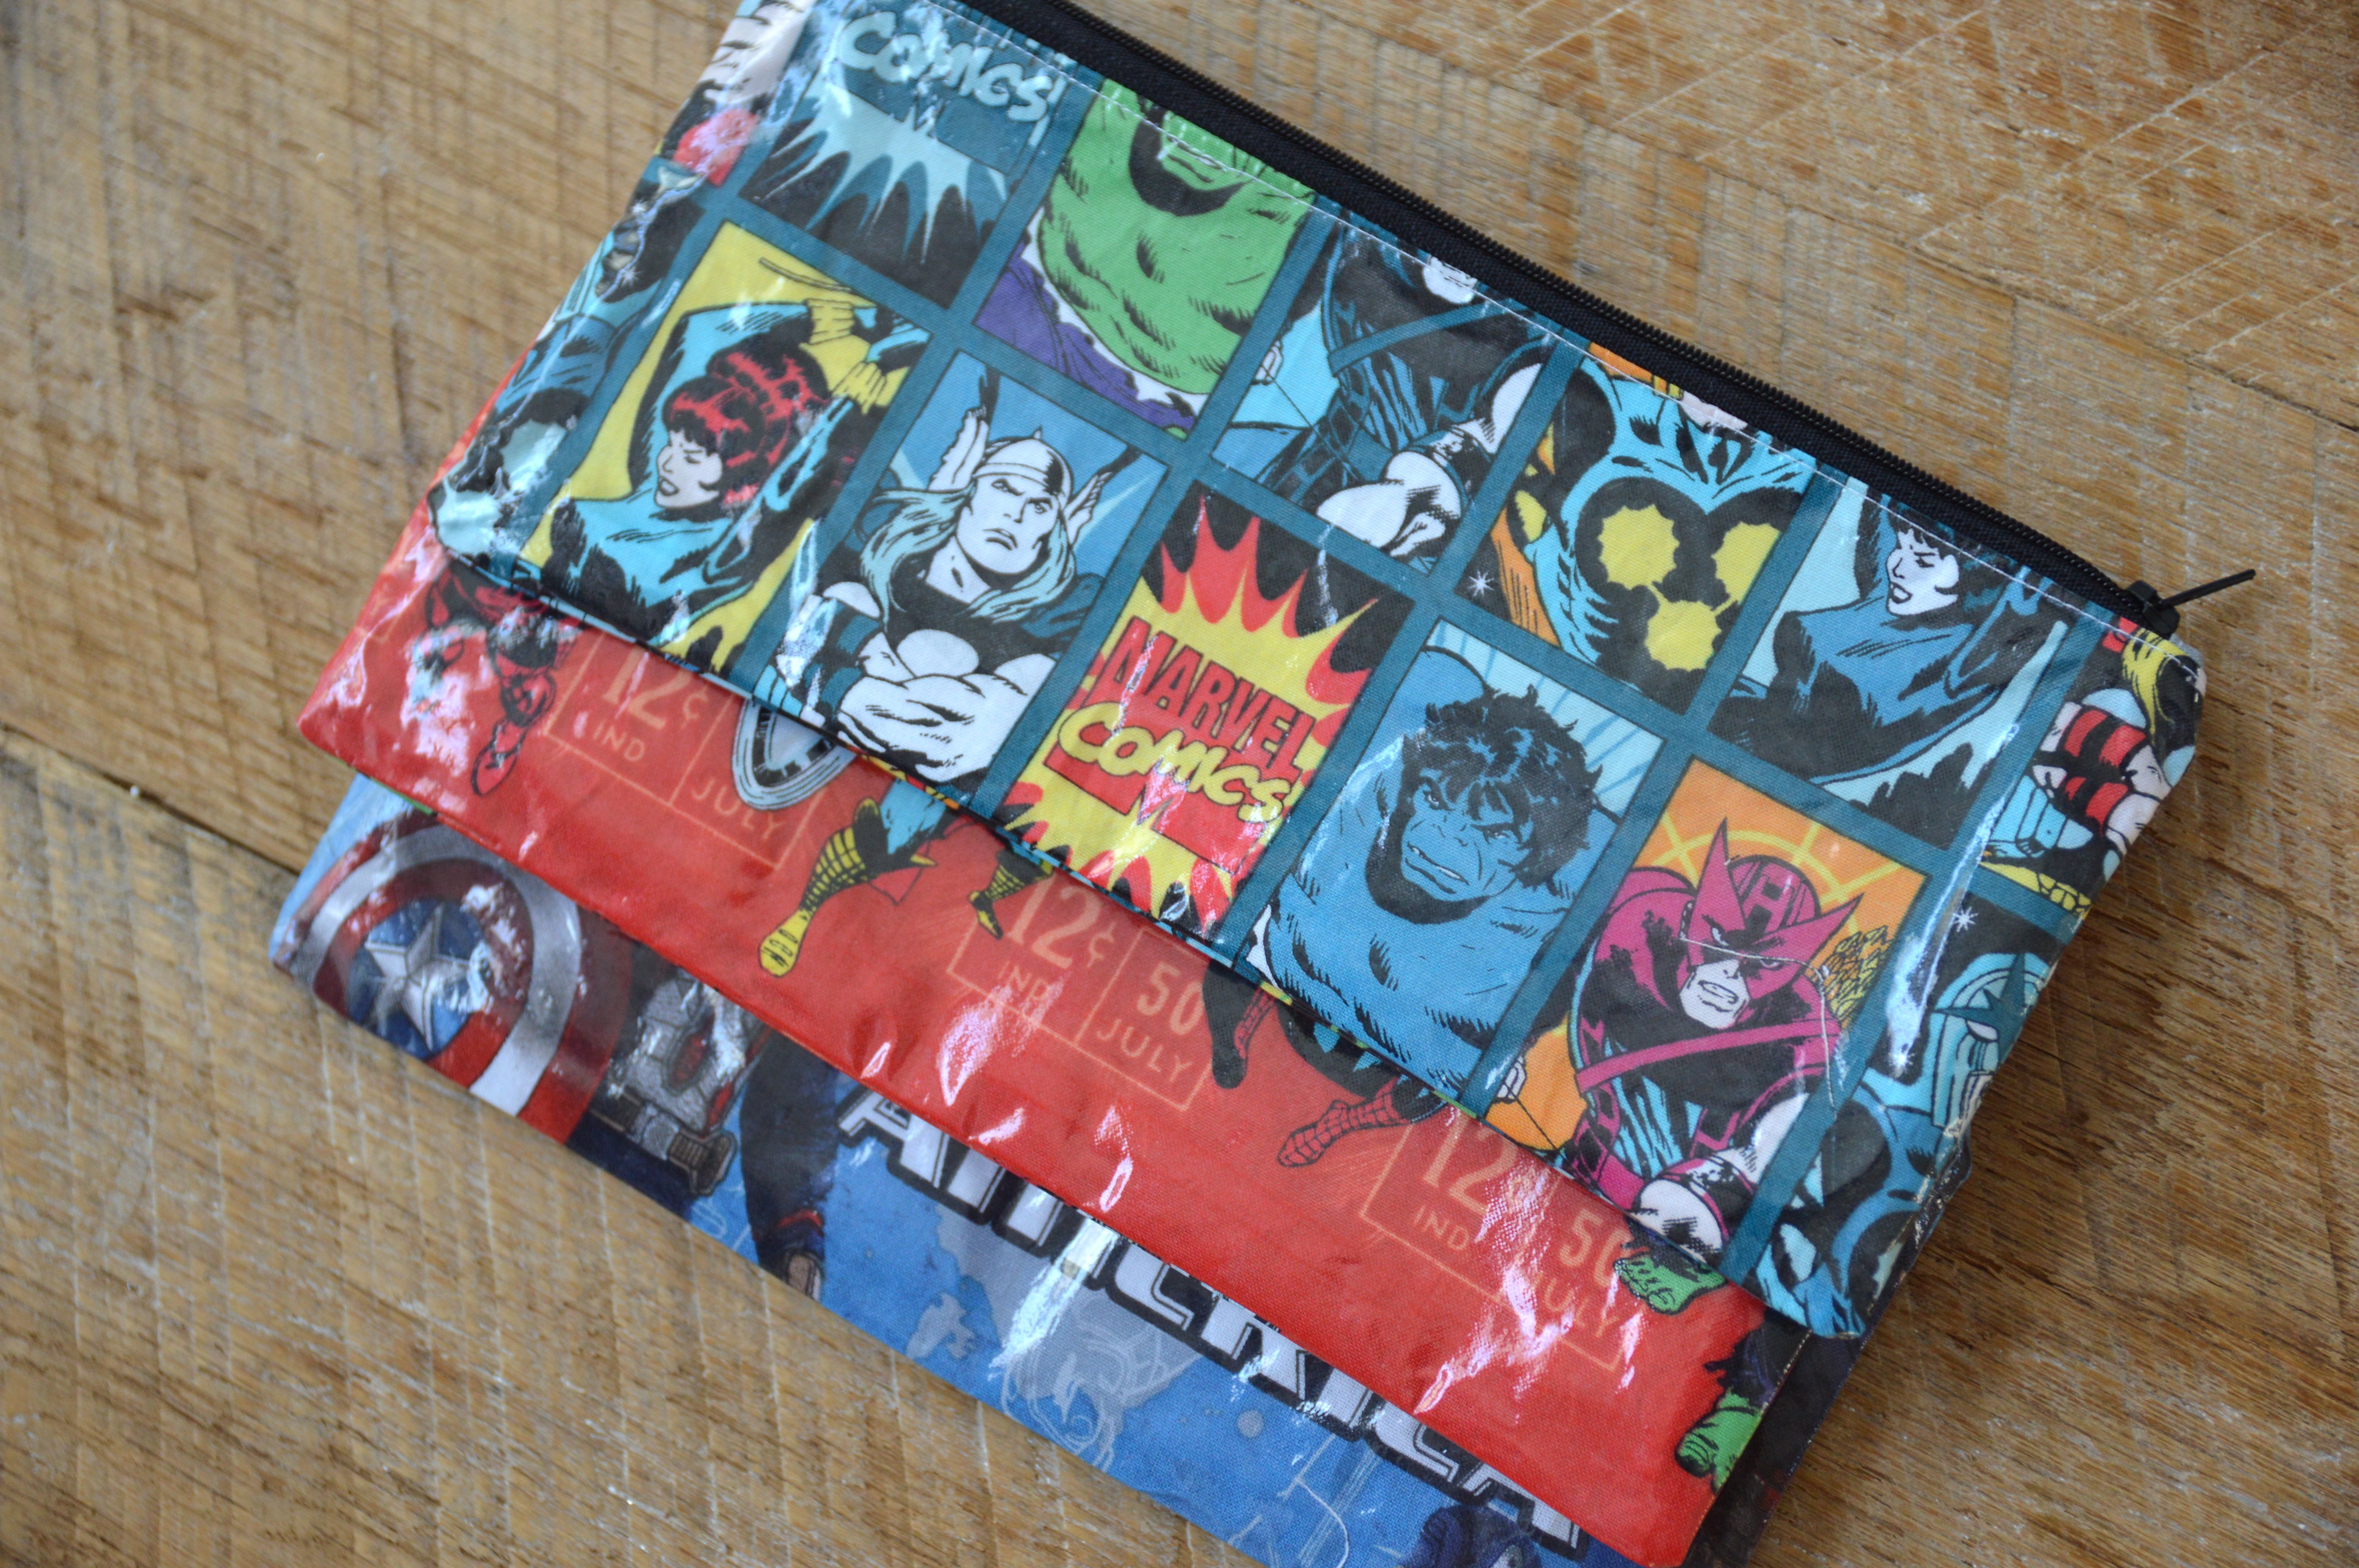
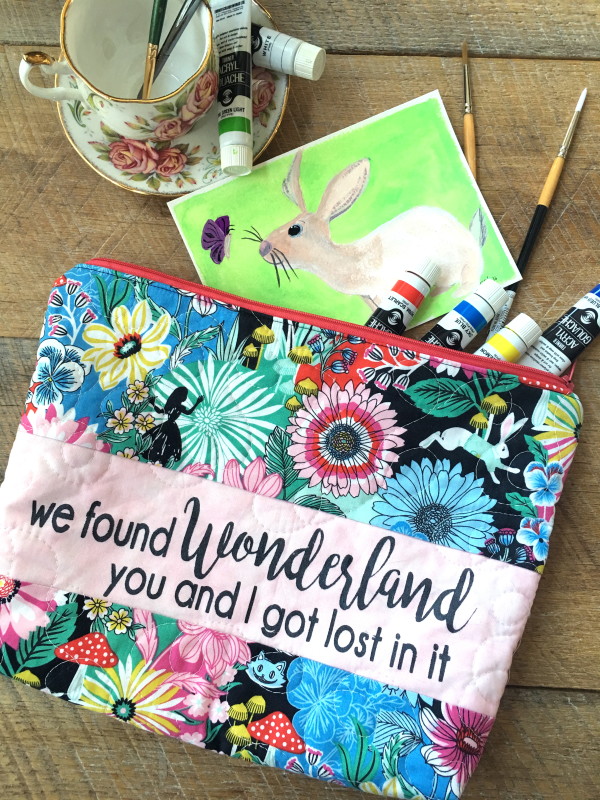
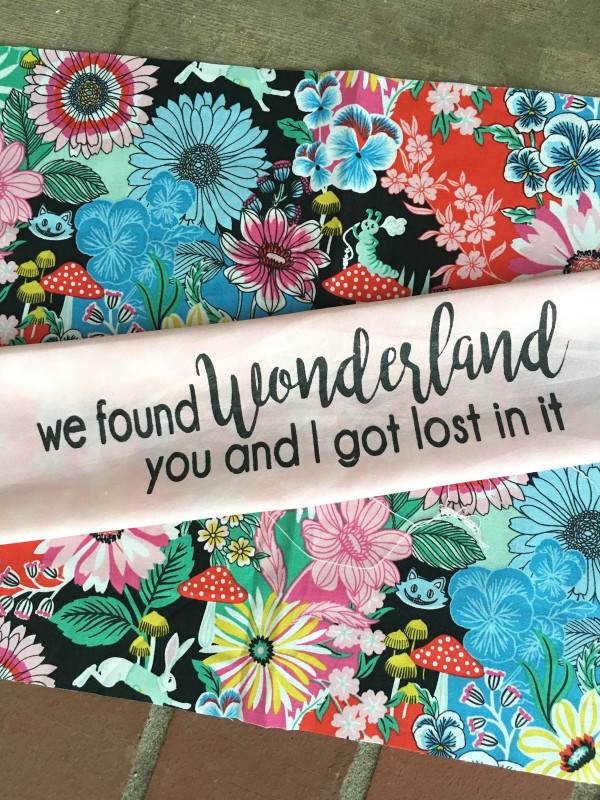
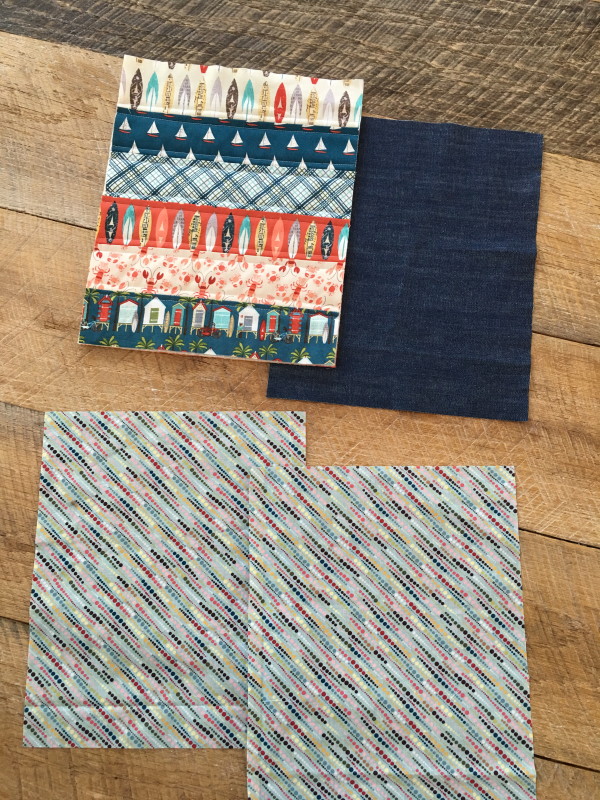
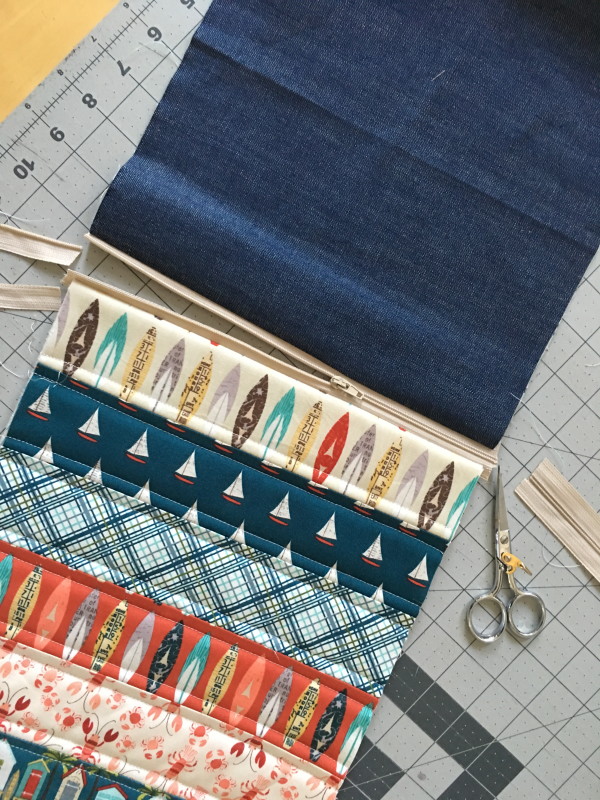
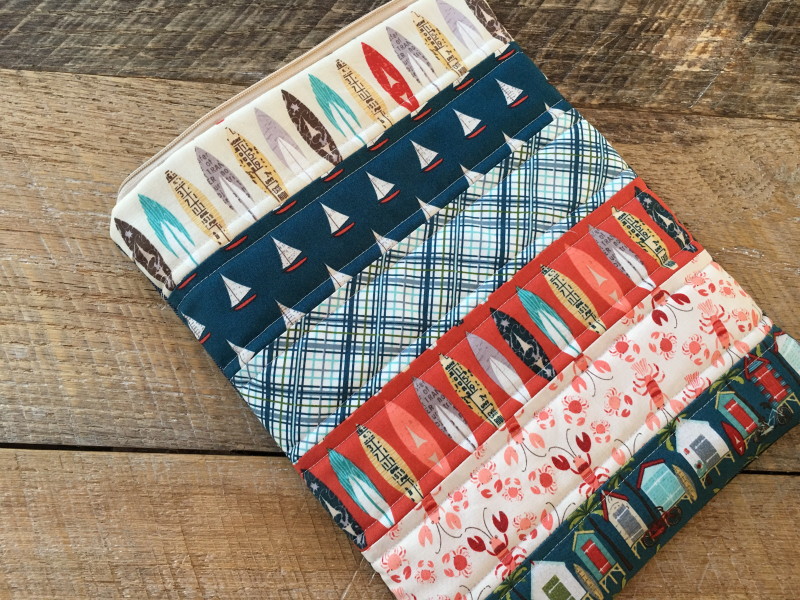
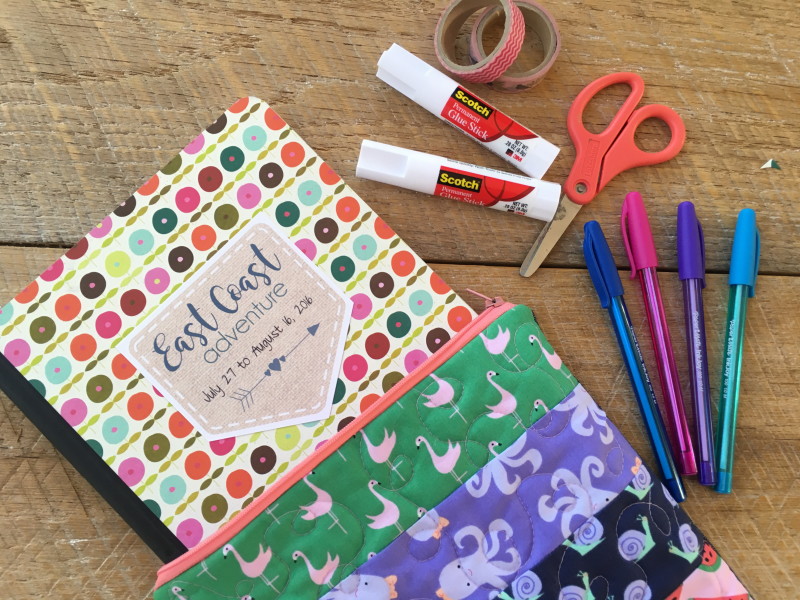
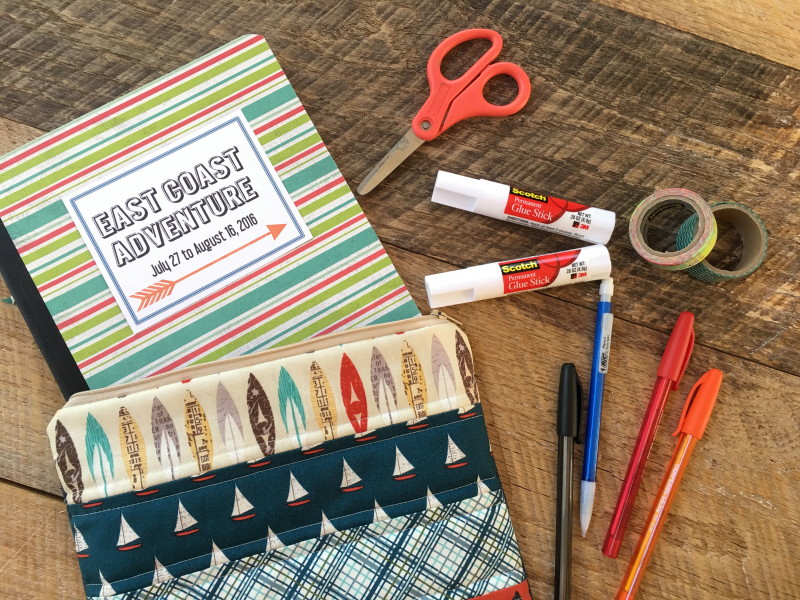
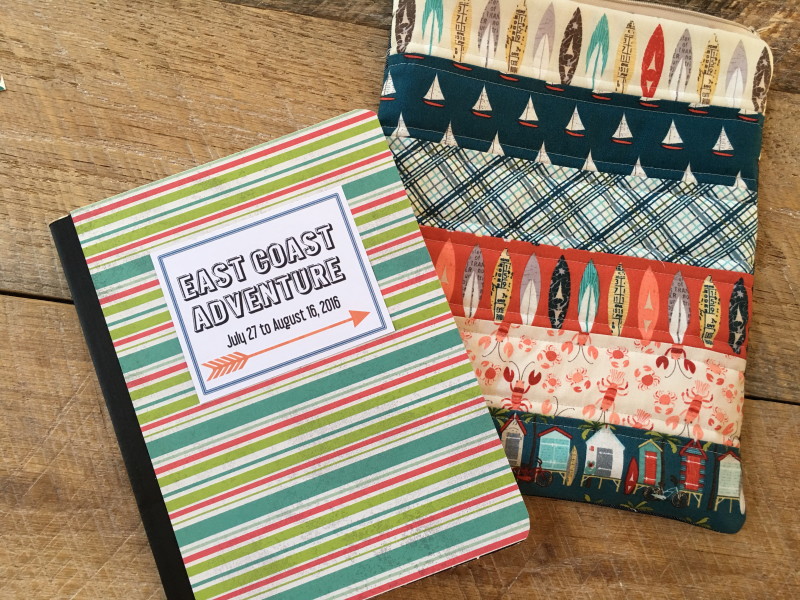
I made two pencil pouches: one for Ella and one for her companion. To make the zipper pouch, follow this tutorial. I fussy cut some of the words and appliquéd them to the front of the zipper pouch.

I also made this cute scripture cover. You can follow this tutorial to make one.

I’m so excited to get these in the mail! If you’d like to learn more about Missionaries for the Church of Jesus Christ of Latter Day Saints, click HERE.

Vinyl Leopard Zipper Pouch Tutorial

vinyl leopard zipper pouch 6

I love everything leopard print!  It reminds me of Mufasa my cat who is also leopard print!!!
vinyl leopard zipper pouch tutorial

I was in Los Angels a while ago and I found this super cute leopard print vinyl!  It has a little gold shimmer to it even!  I sewed up these fun little pencil pouches and here is how you can make one!  The bag is inspired from my friend Jennifer’s tutorial.

vinyl leopard zipper pouch

Cut the vinyl 8″ square

You will need a zipper that is at least 12″ long.  The zippers I buy are the same price for any length so I always buy 20″ ones!


vinyl leopard zipper pouch 2

Pin one edge of the vinyl square along the zipper as pictured above.

vinyl leopard zipper pouch 4

Using a zig zag stitch, sew along the edge of the vinyl.vinyl leopard zipper pouch 1

I found it helpful to use an open foot so I could see where the needle was sewing and how the vinyl was lining up.
vinyl leopard zipper pouch 3

Pin the opposite edge of the vinyl to the other side of the zipper, making sure both sides are even.  Pin in place and sew with a zig zag stitch.  This is where a longer zipper is helpful so you can unzip the zipper to sew the second side.
vinyl leopard zipper pouch 5

Trim the zipper ends to 1″ overhang and tuck them in the sides.  Pin to hold.  Sew each side using a zig zag stitch and backstitch to start and stop.

That’s it!  You can totally make one in 5 minutes!  Ready, set, go!
vinyl leopard zipper pouch 7

You can use any kind of vinyl.  Here are some pencil pouches I made with clear vinyl, colored zippers, and colored thread.vinyl pencil pouch

70’s Inspired Zipper Pouch

Retor HeatnBond Zipper Pouch

gingham girls zipper pouch 4
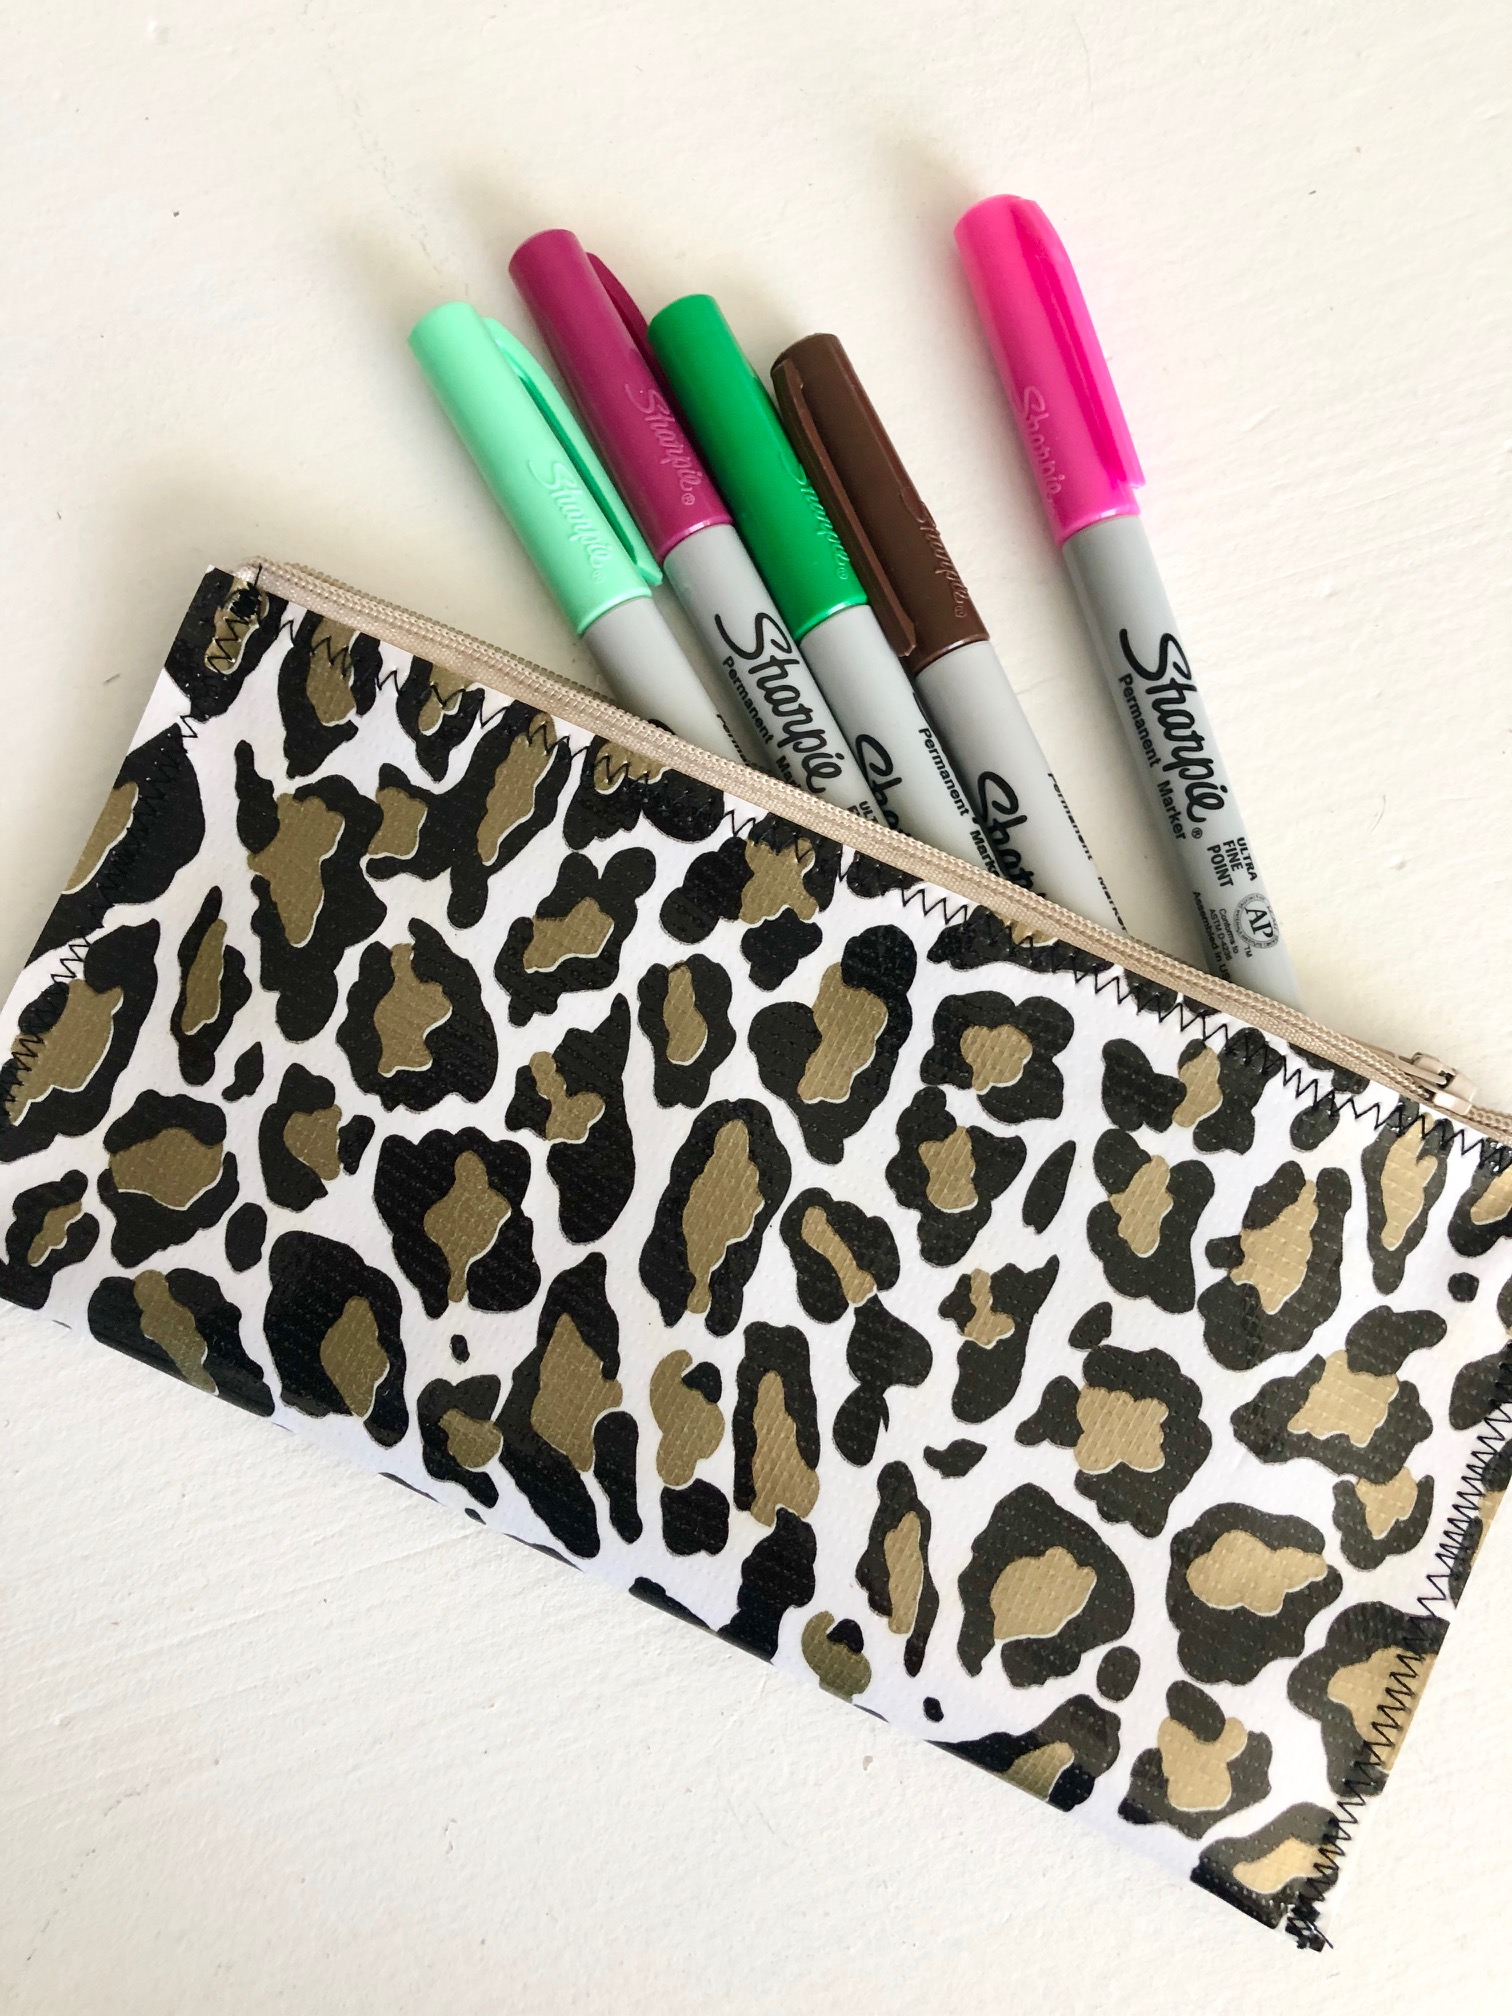
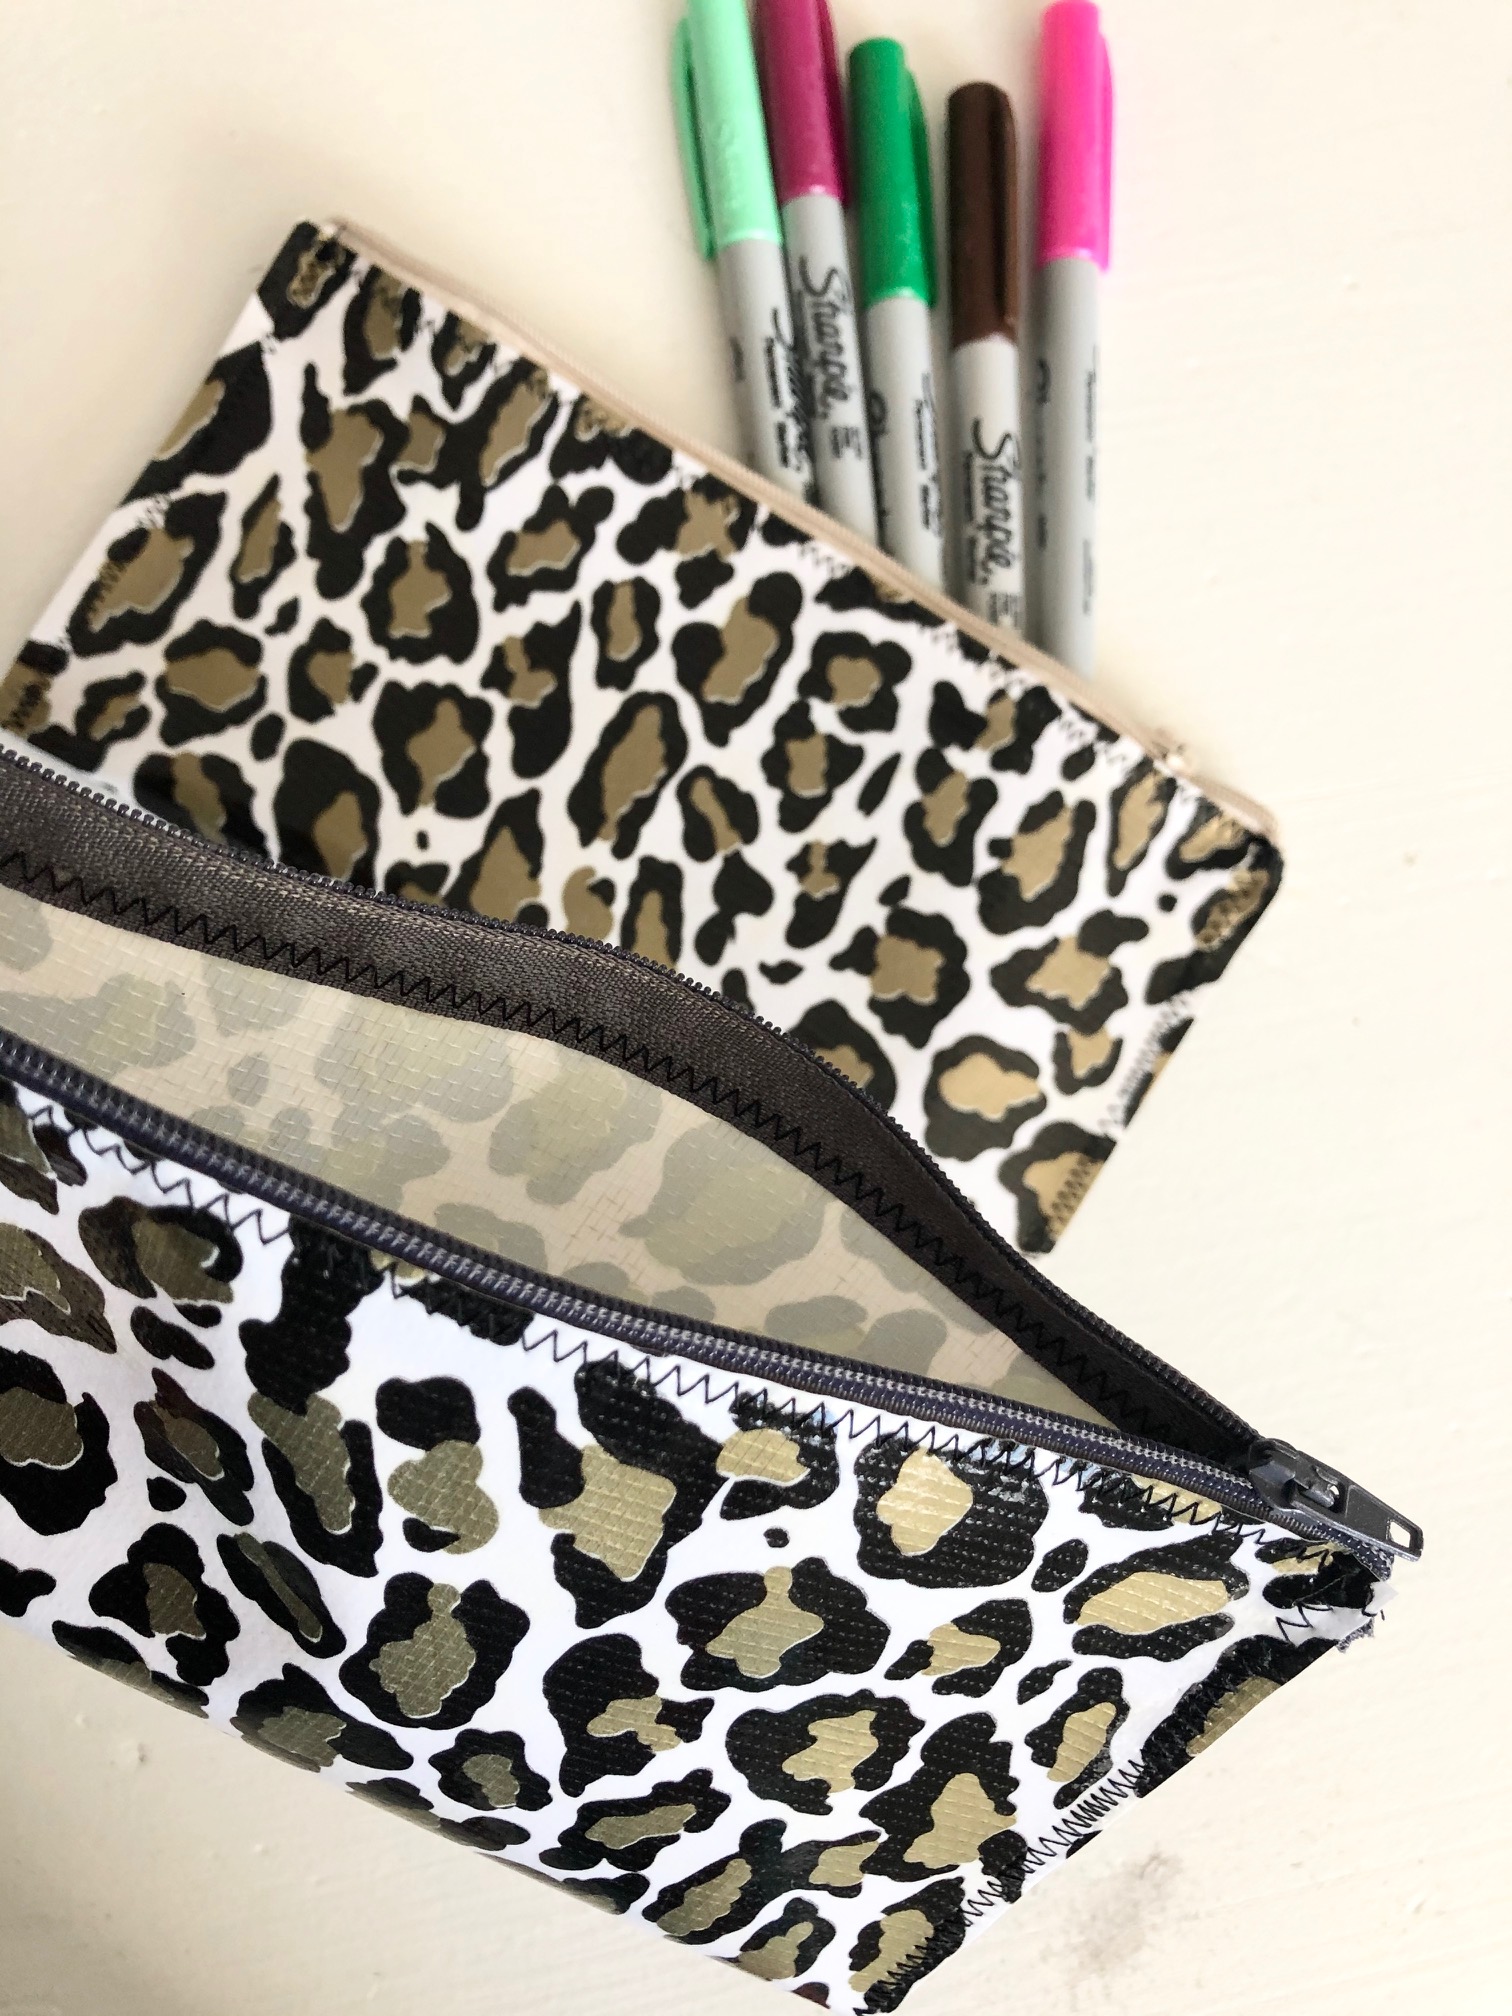
I am loving Amy Smart’s latest fabric line Gingham Girls by Penny Rose Fabrics!  This 1970’s inspired fabric has my name written all over it and so does this project!  And my name is a total 70’s name so it totally works!!  Here’s how you can make one!

70’s inspired Zipper Pouch with HeatnBond® Fusible Fleece

IMG_1995

Why I use HeatnBond® Fusible Fleece for my Zipper Pouch projects

It doesn’t shrink and holds it’s shape

It fuses to the fabric so quilting is not required

It is soft, yet sturdy

It holds up great in the wash

Zipper Pouch Supplies:

Scraps of fabric yielding (30) 2.5″ squares
Dark chambray 4.5″ x 10.5″
(2) rectangles 8.5″ x 10.5″ lining fabric
(2) rectangles 8.5″ x 10.5″ fusible fleece
HeatnBond® Lite Fusible Adhesive
Scraps for applique
14″ or longer zipper
Scrap for zipper end
All seams 1/4″

IMG_2002

[line]

Zipper Pouch Instructions:

Begin by sewing (20) 2.5″ squares in 4 rows of 5 squares (above) press seams alternately.

IMG_2004

Sew the back unit by sewing (2) rows of 5 squares together.  Before sewing the chambray piece on, appliqué the name first.  Fuse HeatnBond Lite to the wrong side of the name fabric and the daisy fabric.

IMG_1999

Die cut the letters (or cut by hand). Peel off the backing paper and position letters on chambray.

IMG_2005

Heat set in place.

IMG_2006

Outline stitch around each letter and the flower in navy thread.  Sew the appliqué piece to the 2-row patchwork unit.  Press toward chambray.

IMG_2001

Cut the HeatnBond Fusible Fleece.

IMG_2007

Fuse the fleece to the wrong side of both the patchwork units.  Add some decorative stitching if desired.

IMG_2008

I added a seam along the chambray to give it an accent and I quilted diagonal lines in the patchwork.

IMG_2009

Now that the zipper pouch front and back are ready, you can finish the pouch by following this tutorial for inserting the full access zipper and finishing the bag.

I am so in love and so happy to have a new zipper pouch just for me!!!
gingham girls zipper pouch 2

Perfect to brighten up the inside of my purse and to hold all my cosmetic items.

gingham girls zipper pouch 5gingham girls zipper pouch 6

The back is so scrappy and cute!gingham girls zipper pouch 7I dug out a few of my dresses from when I was little (in the 70’s) – doesn’t this fabric just blend right in!!  So fun!!!

gingham girls zipper pouch

Jewelry Travel Set {Zipper Pouch}

img_8144

What do you give someone who has everything?  It can be challenging!  I thought my mom would love this fun travel jewelry bag!  It has little individual pouches to put bracelets and necklaces.  They all fit into this quilted zipper pouch.  I used the Wildwood collection from Blend Fabrics.

img_8149

Instead of rewriting this tutorial, here are the links so you can make your own!!

For the little jewelry button pouches I followed THIS tutorial.

For the zipper pouch, I used THESE measurements.  I used quilt batting for the stabilizer and quilted the fabric before sewing the zipper pouch.

To insert the “Open Wide” zipper, follow THESE instructions.  img_8138

This is such a fun little project and I use my set every time I travel!img_8141

Vinyl Covered Fabric Pencil Pouch Tutorial

vinyl-pencil-pouch-tutorial

I love sewing zipper pouches!  This one is the perfect size to keep pens, pencils, and art supplies in.  What’s even more fun is I used Heat n Bond Vinyl to make the outside of the zipper pouch waterproof – it kind of has the look of oil cloth!  The kids were so excited!  They each choose a Marvel fabric for their pouch.  They literally stood by the sewing machine waiting for me to finish them!  These are such great gifts and are so useful!!

marvel-zipper-pouch-tutorial

They go great with my Marvel composition book and Marvel key fob!!  Here’s how you can make one:

Supplies

1/4 yard outer bag

1/4 yard lining

zipper, at least 12″ long

Heat n Bond Vinyl

Instructions:

Cut the following:

(2) 5″ x 10.5″ for outer bag Marvel fabric

(2) 5″ x 10.5″ for lining

(2) 2.5″ x 2″ for zipper tabs

(2) 5″ x 10.5″ Heat n Bond Vinyl

img_7958_2

Cut the outer bag and lining pieces.

img_7959

Cut the vinyl pieces.img_7960

Peel off the vinyl and place the sticky side to the right side of the outer bag pieces.  Cover the vinyl with the paper that was just removed and heat set (on medium heat) according to manufacturers instructions, about 8 seconds then flip over and press for 4 seconds.

img_7963_2 
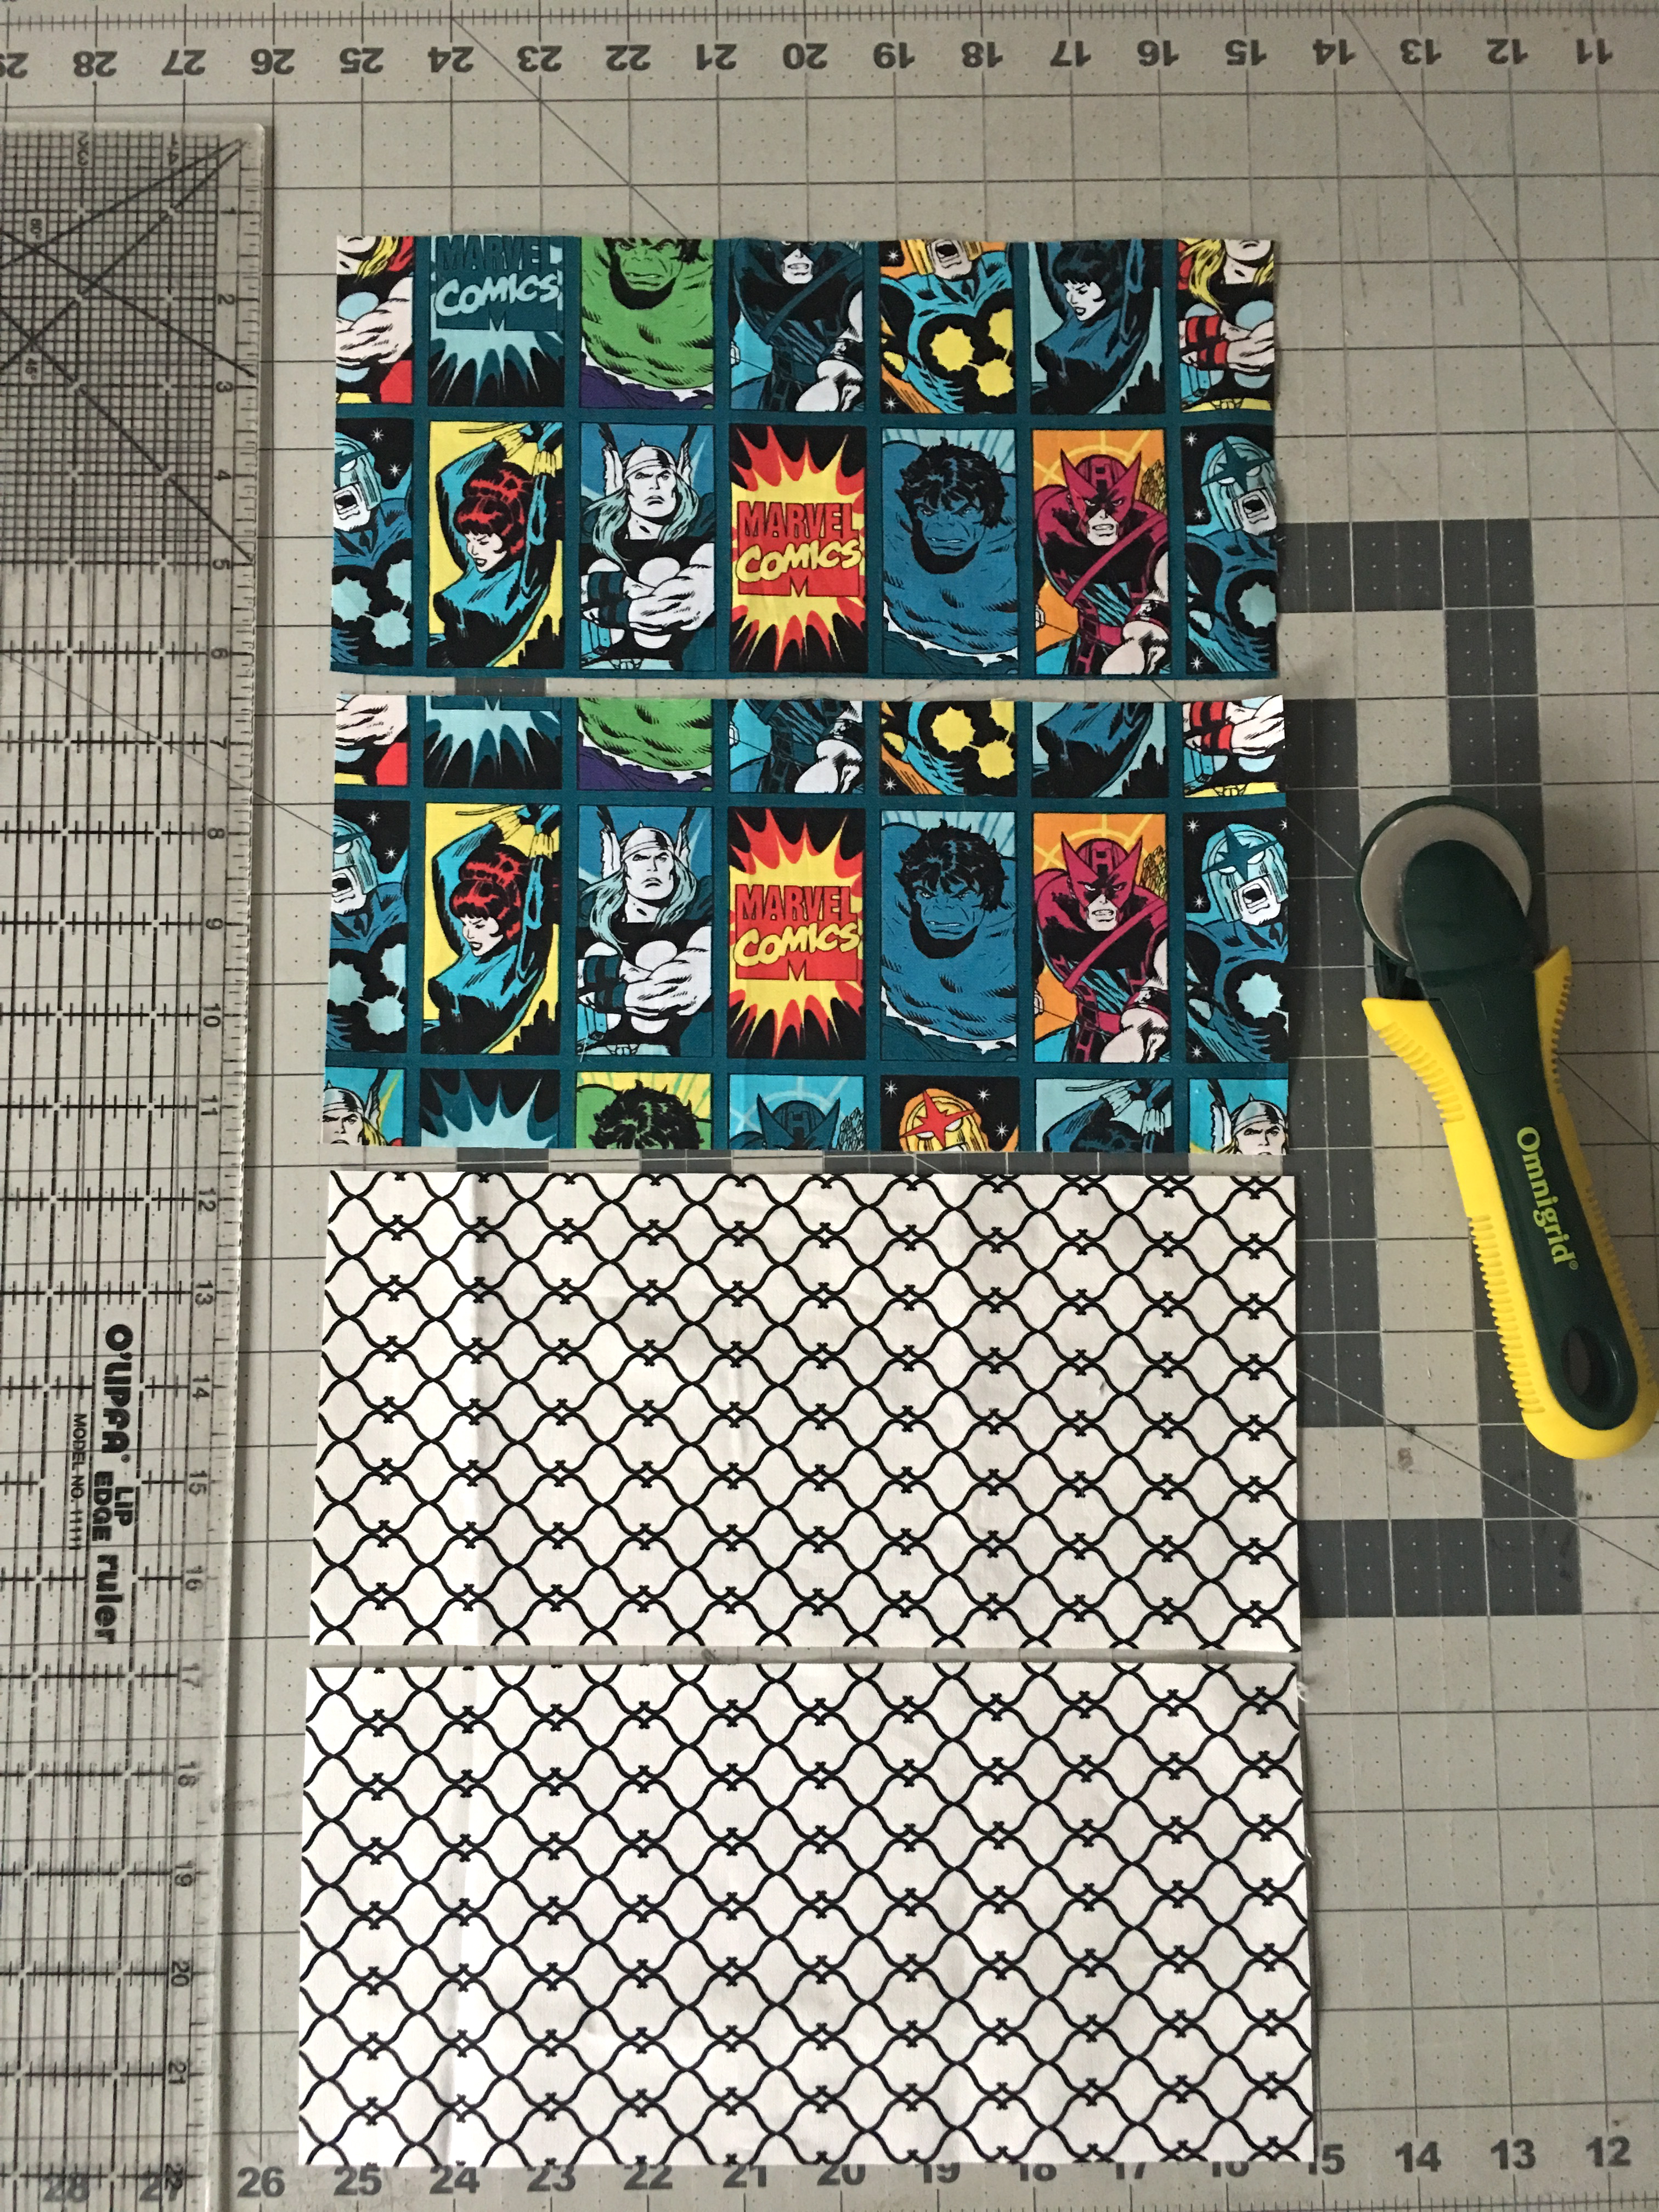
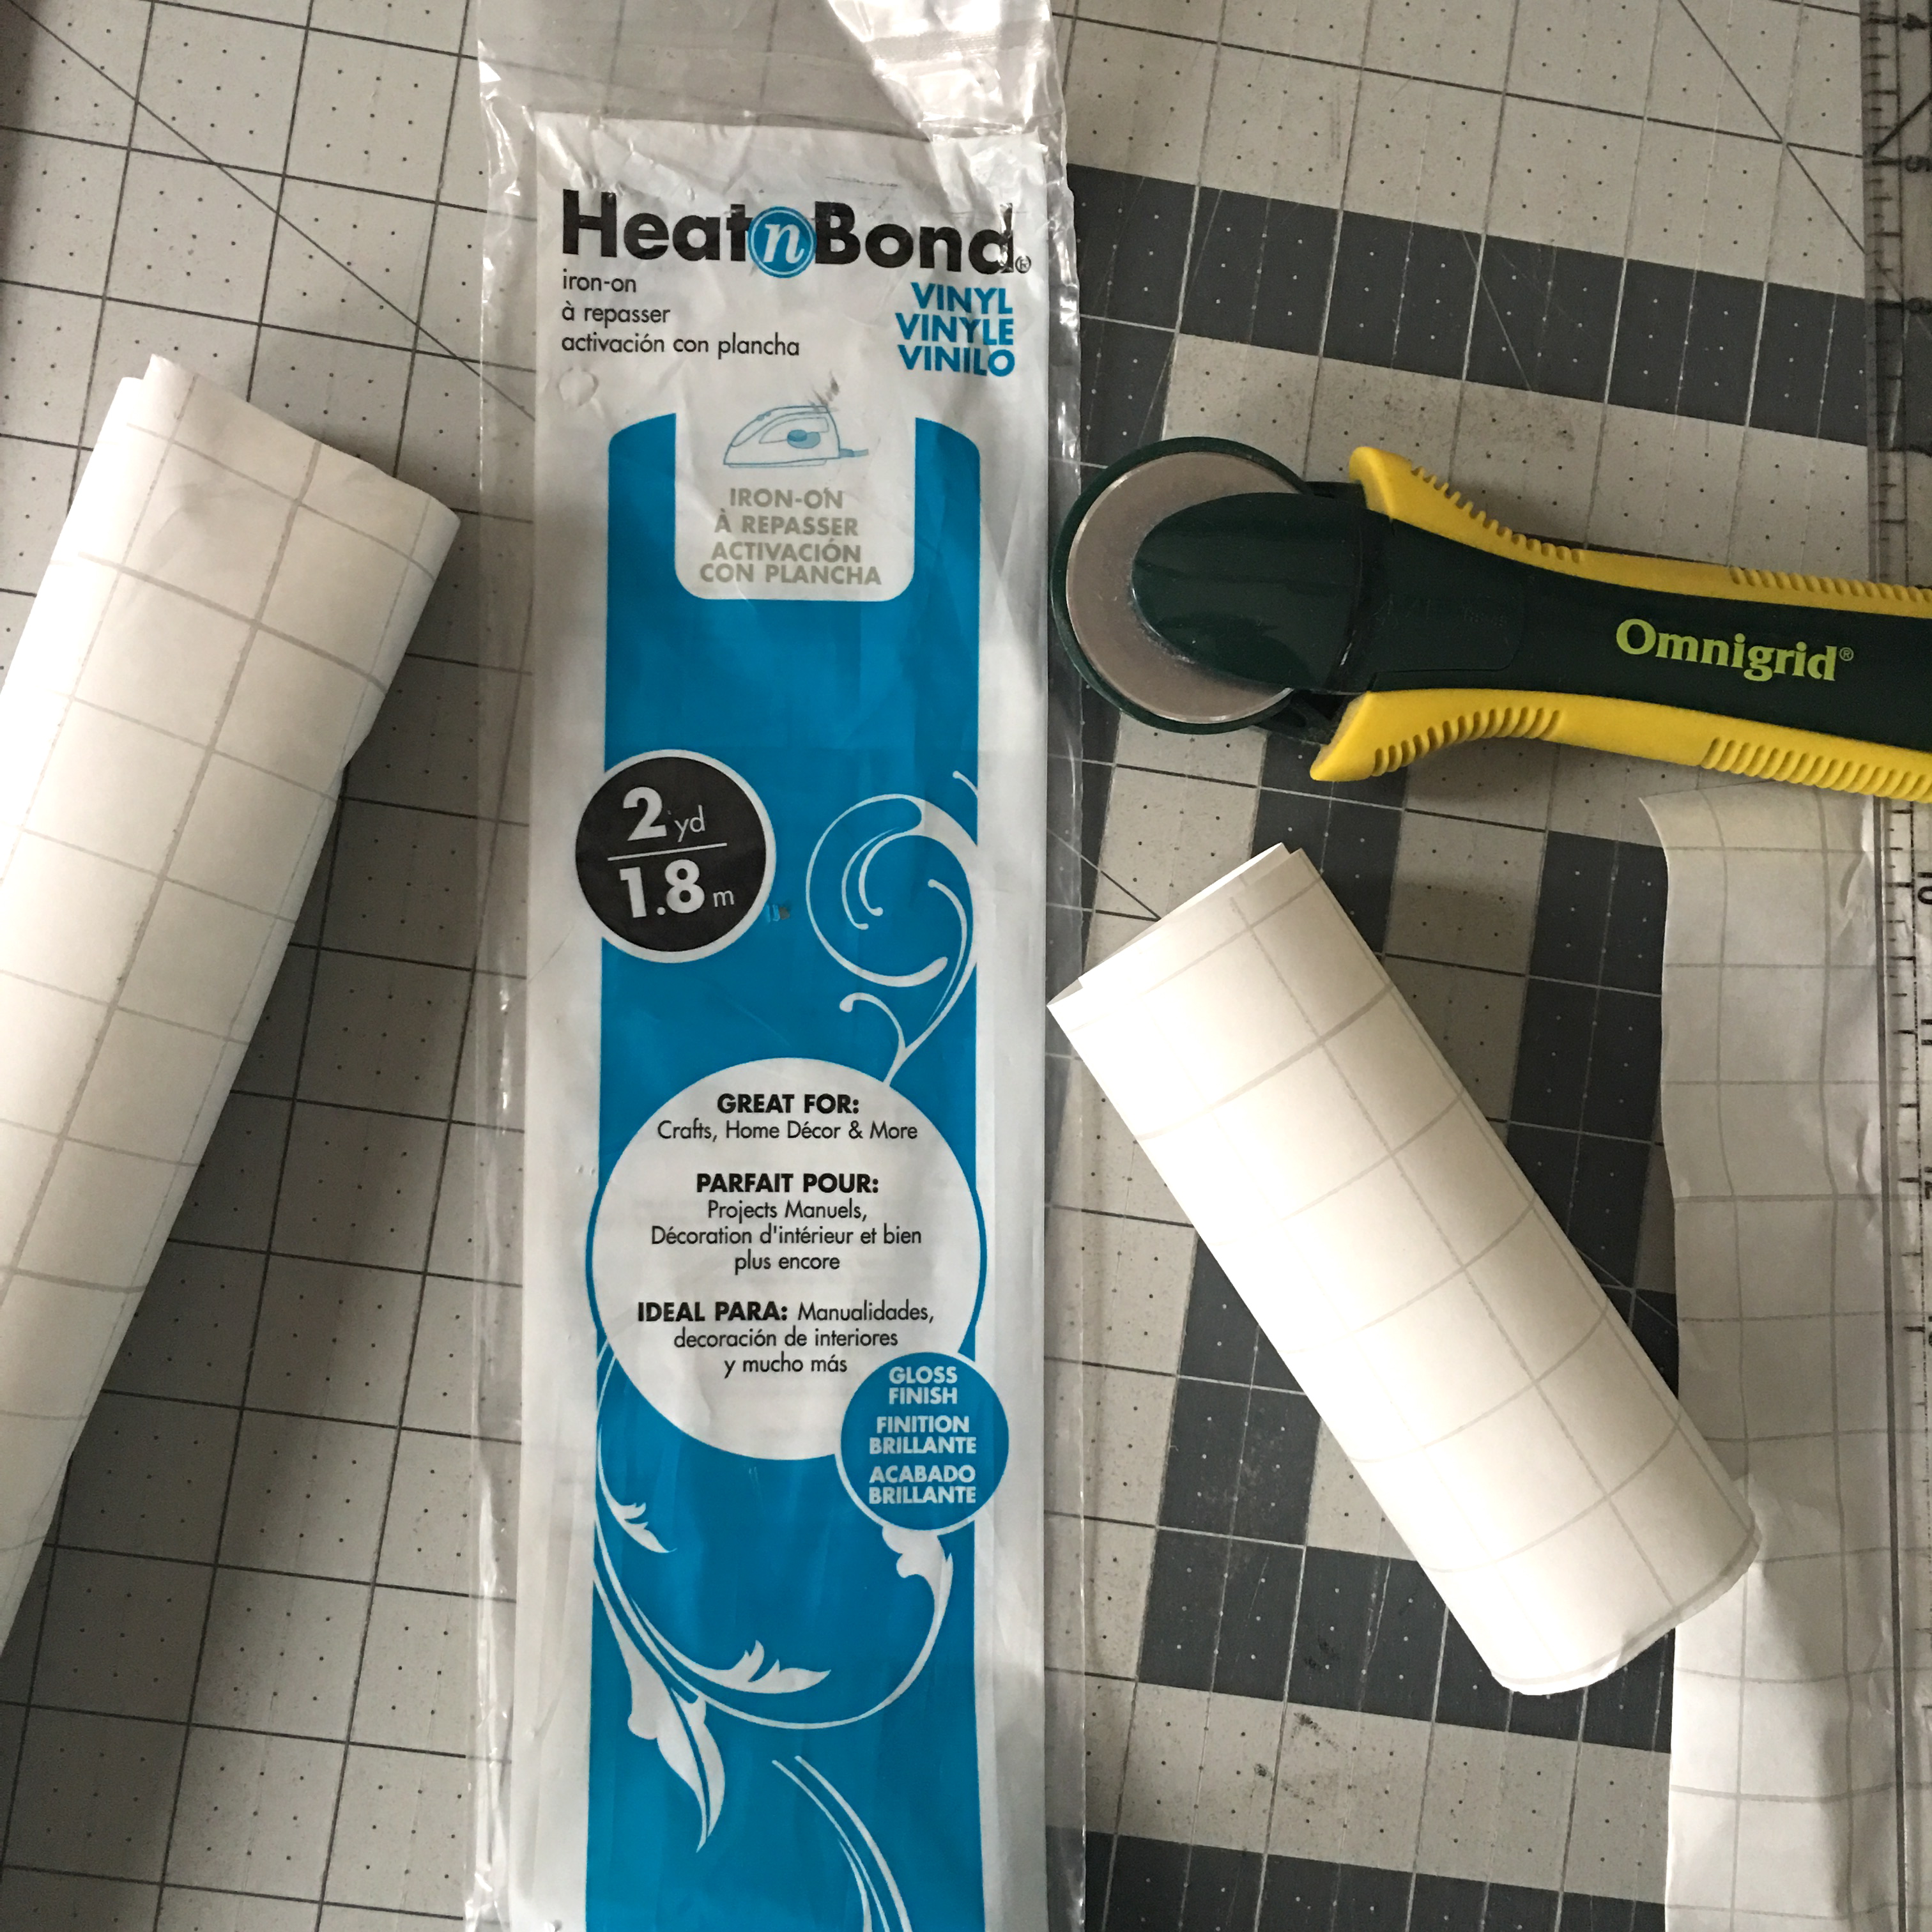
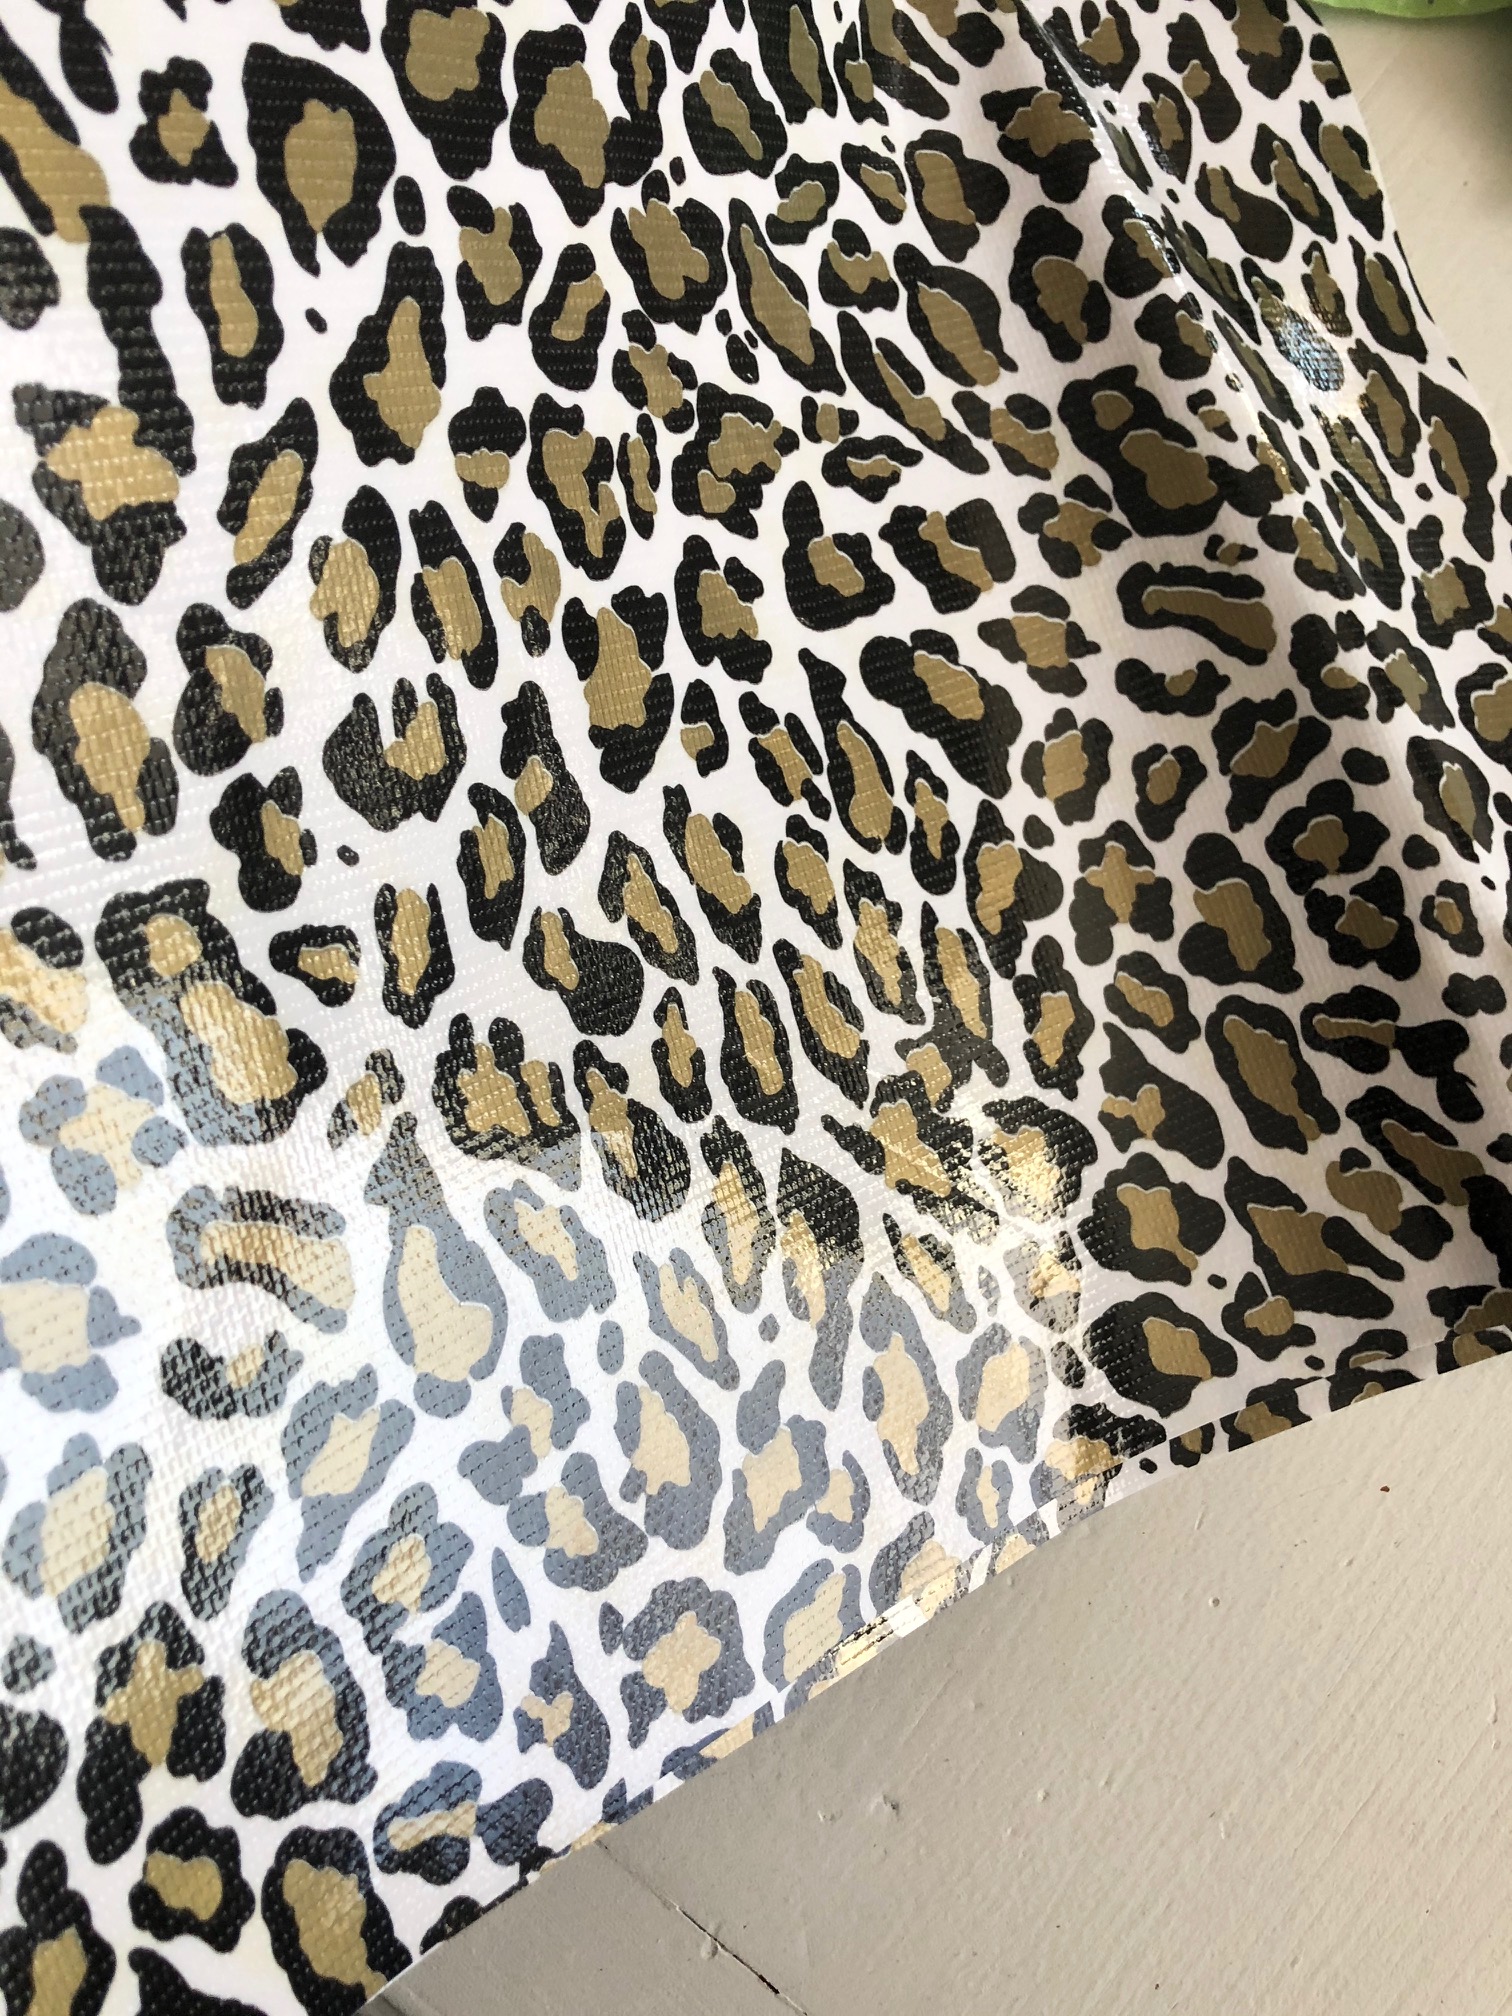
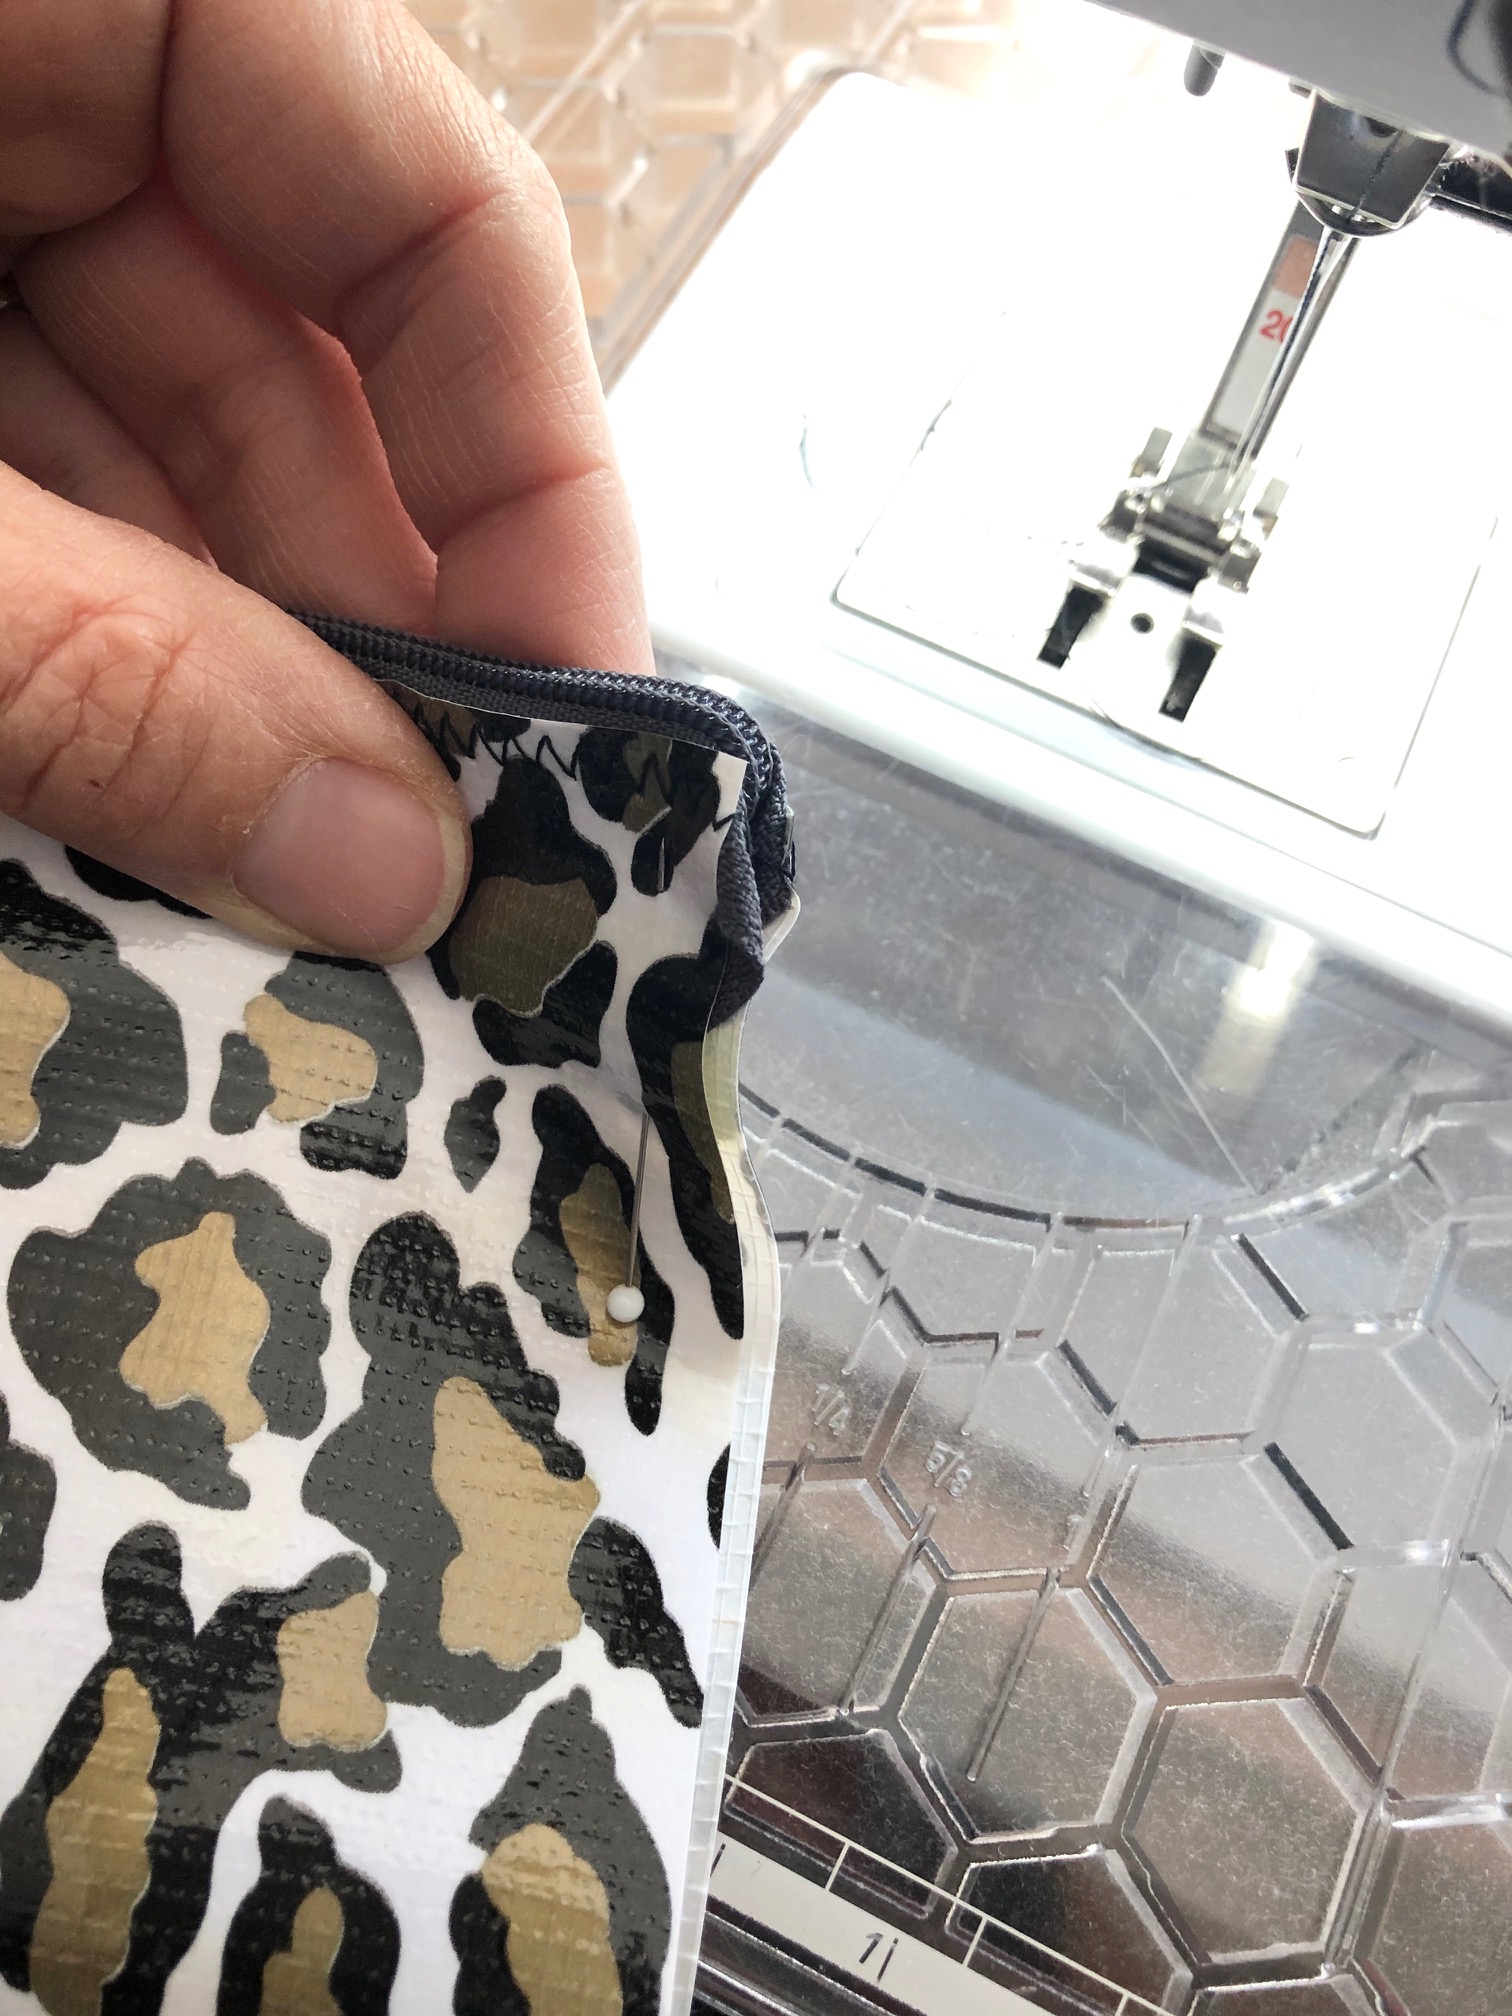
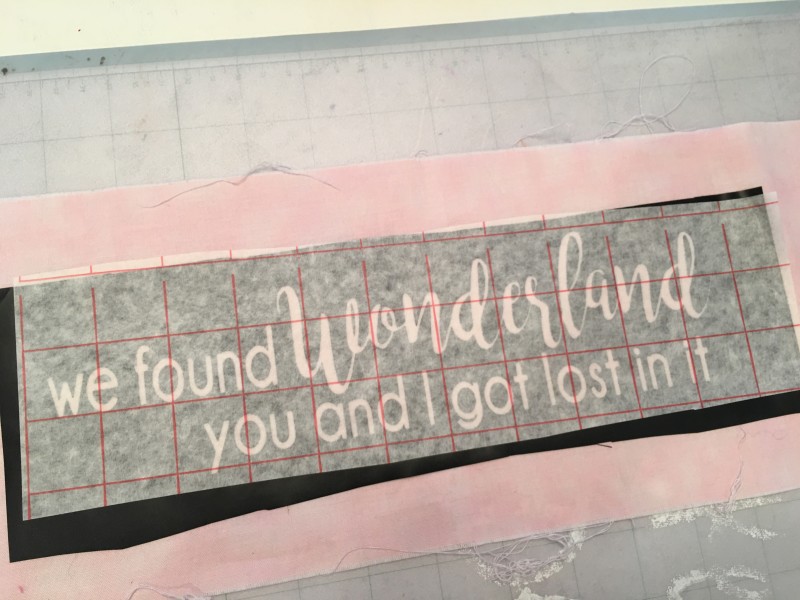
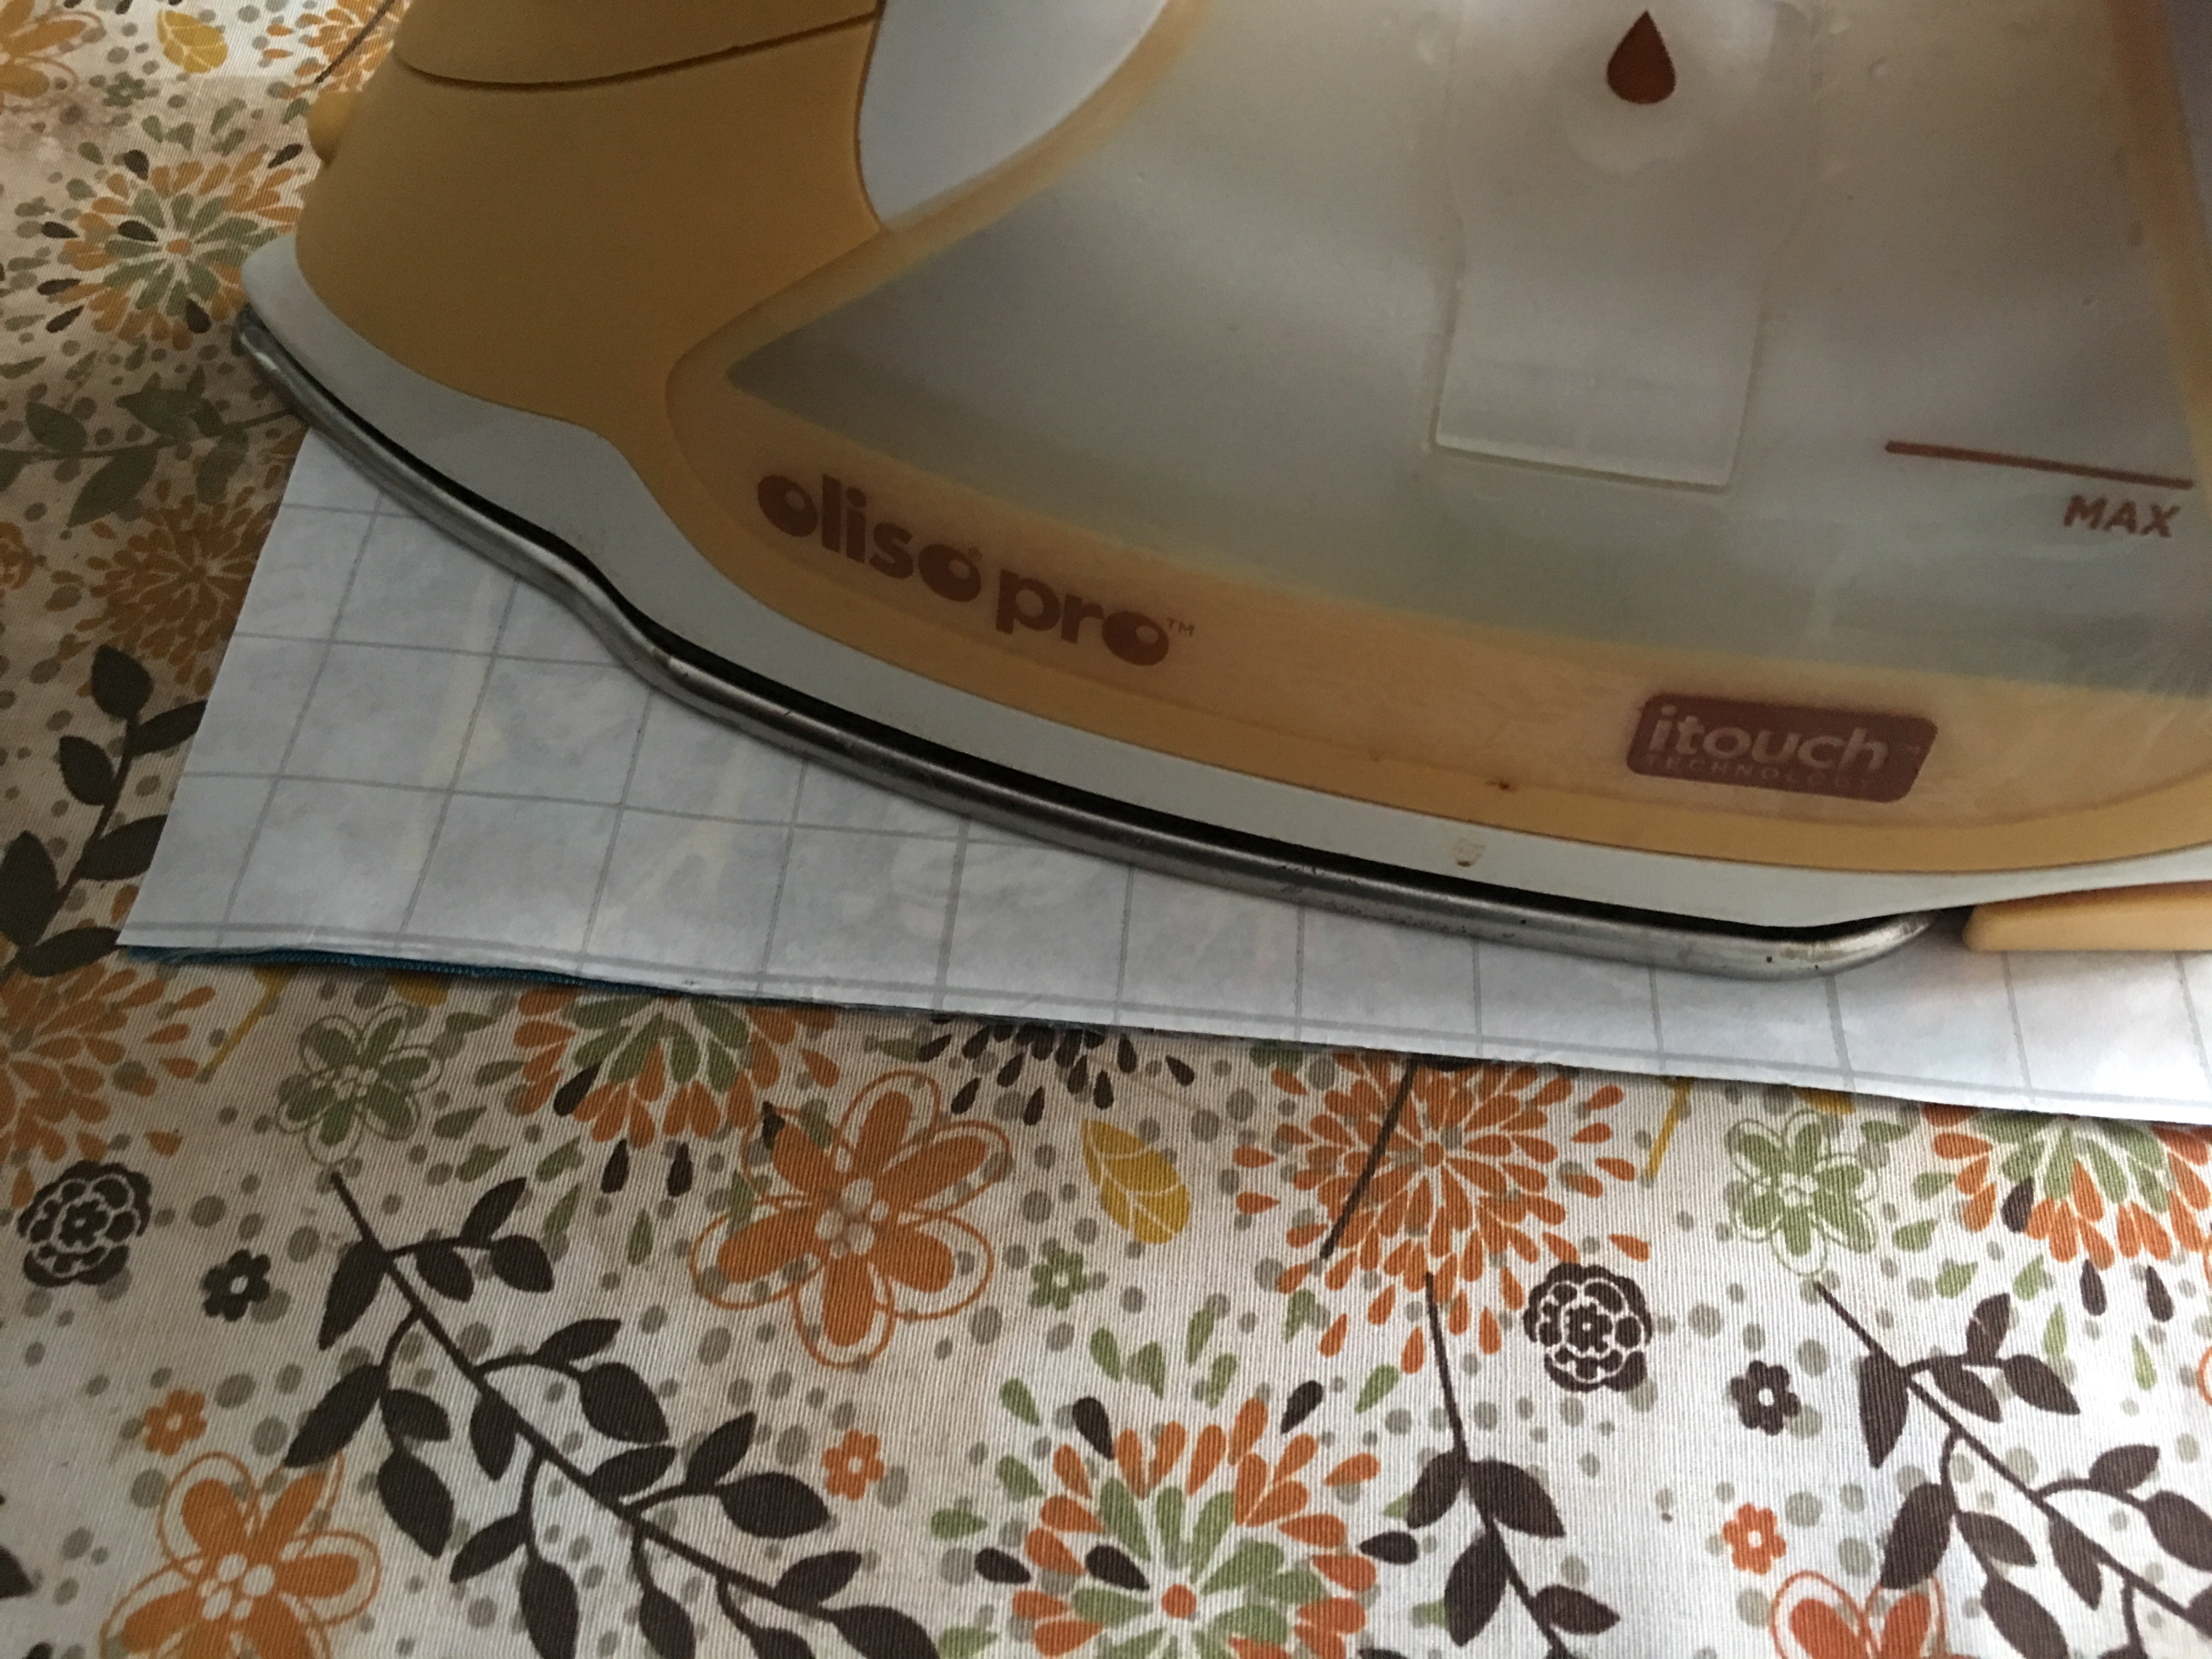
DO NOT touch iron directly onto vinyl.  If you need to press, cover with the paper first.img_7967_2

The outer pieces are now covered in vinyl and have a whole new look!!!  It’s so much fun!!!!

Now it’s time to sew in the zipper.

Press the zipper tabs 1/4″ in on the top and bottom and then press in half:

img_7969

Trim the metal end off the zipper and insert the end into one of the tabs.  Sew 2 seams along the edge:

img_7971

Cut open the zipper tab and cut out the zipper.  Trim the zipper tab to be the same width as the zipper.img_7972

Now measure the zipper to the zipper pouch.  You need to have 1″ of zipper tab on each side.  Measure the zipper and cut the other end off to where it needs to be.  Sew the second zipper tab on.  Make sure not to cut the zipper pull off 🙂    Cut open the zipper tab and cut out the excess zipper.img_7974

Lay the zipper right side on top of the Marvel piece.  Lay the Lining piece on top of that right side down.  Match all the raw edges.  See photo below:

img_7975

Using a zipper foot, sew the zipper in.  Finger press.img_7976

Now position the second Marvel piece right side down and the lining piece on the bottom, right side facing up, like this:img_7977

Basically you are making sure each piece is right sides together with it’s matching piece.  Line up all the raw edges and sew using the zipper foot.  Finger press.img_7978

Sew 1/8″ along both sides of the zipper.img_7979

With the zipper partially open, match the Marvel pieces right sides together and the lining pieces right sides together.  Pin all the way around.  Sew using 1/4″ seam all the way around leaving a 3 inch opening in the bottom of the lining.  Clip corners and turn right side out.  Top stitch the opening closed.  The vinyl gets a little scrunched while turning, so place the pressing paper on top of the vinyl and lightly press out the wrinkles.

dsc_0531

Ta Da!!  Now go sew up a bunch of these!!!!

With Save

Save

My Favorite Zipper Pouch

zipper-pouch
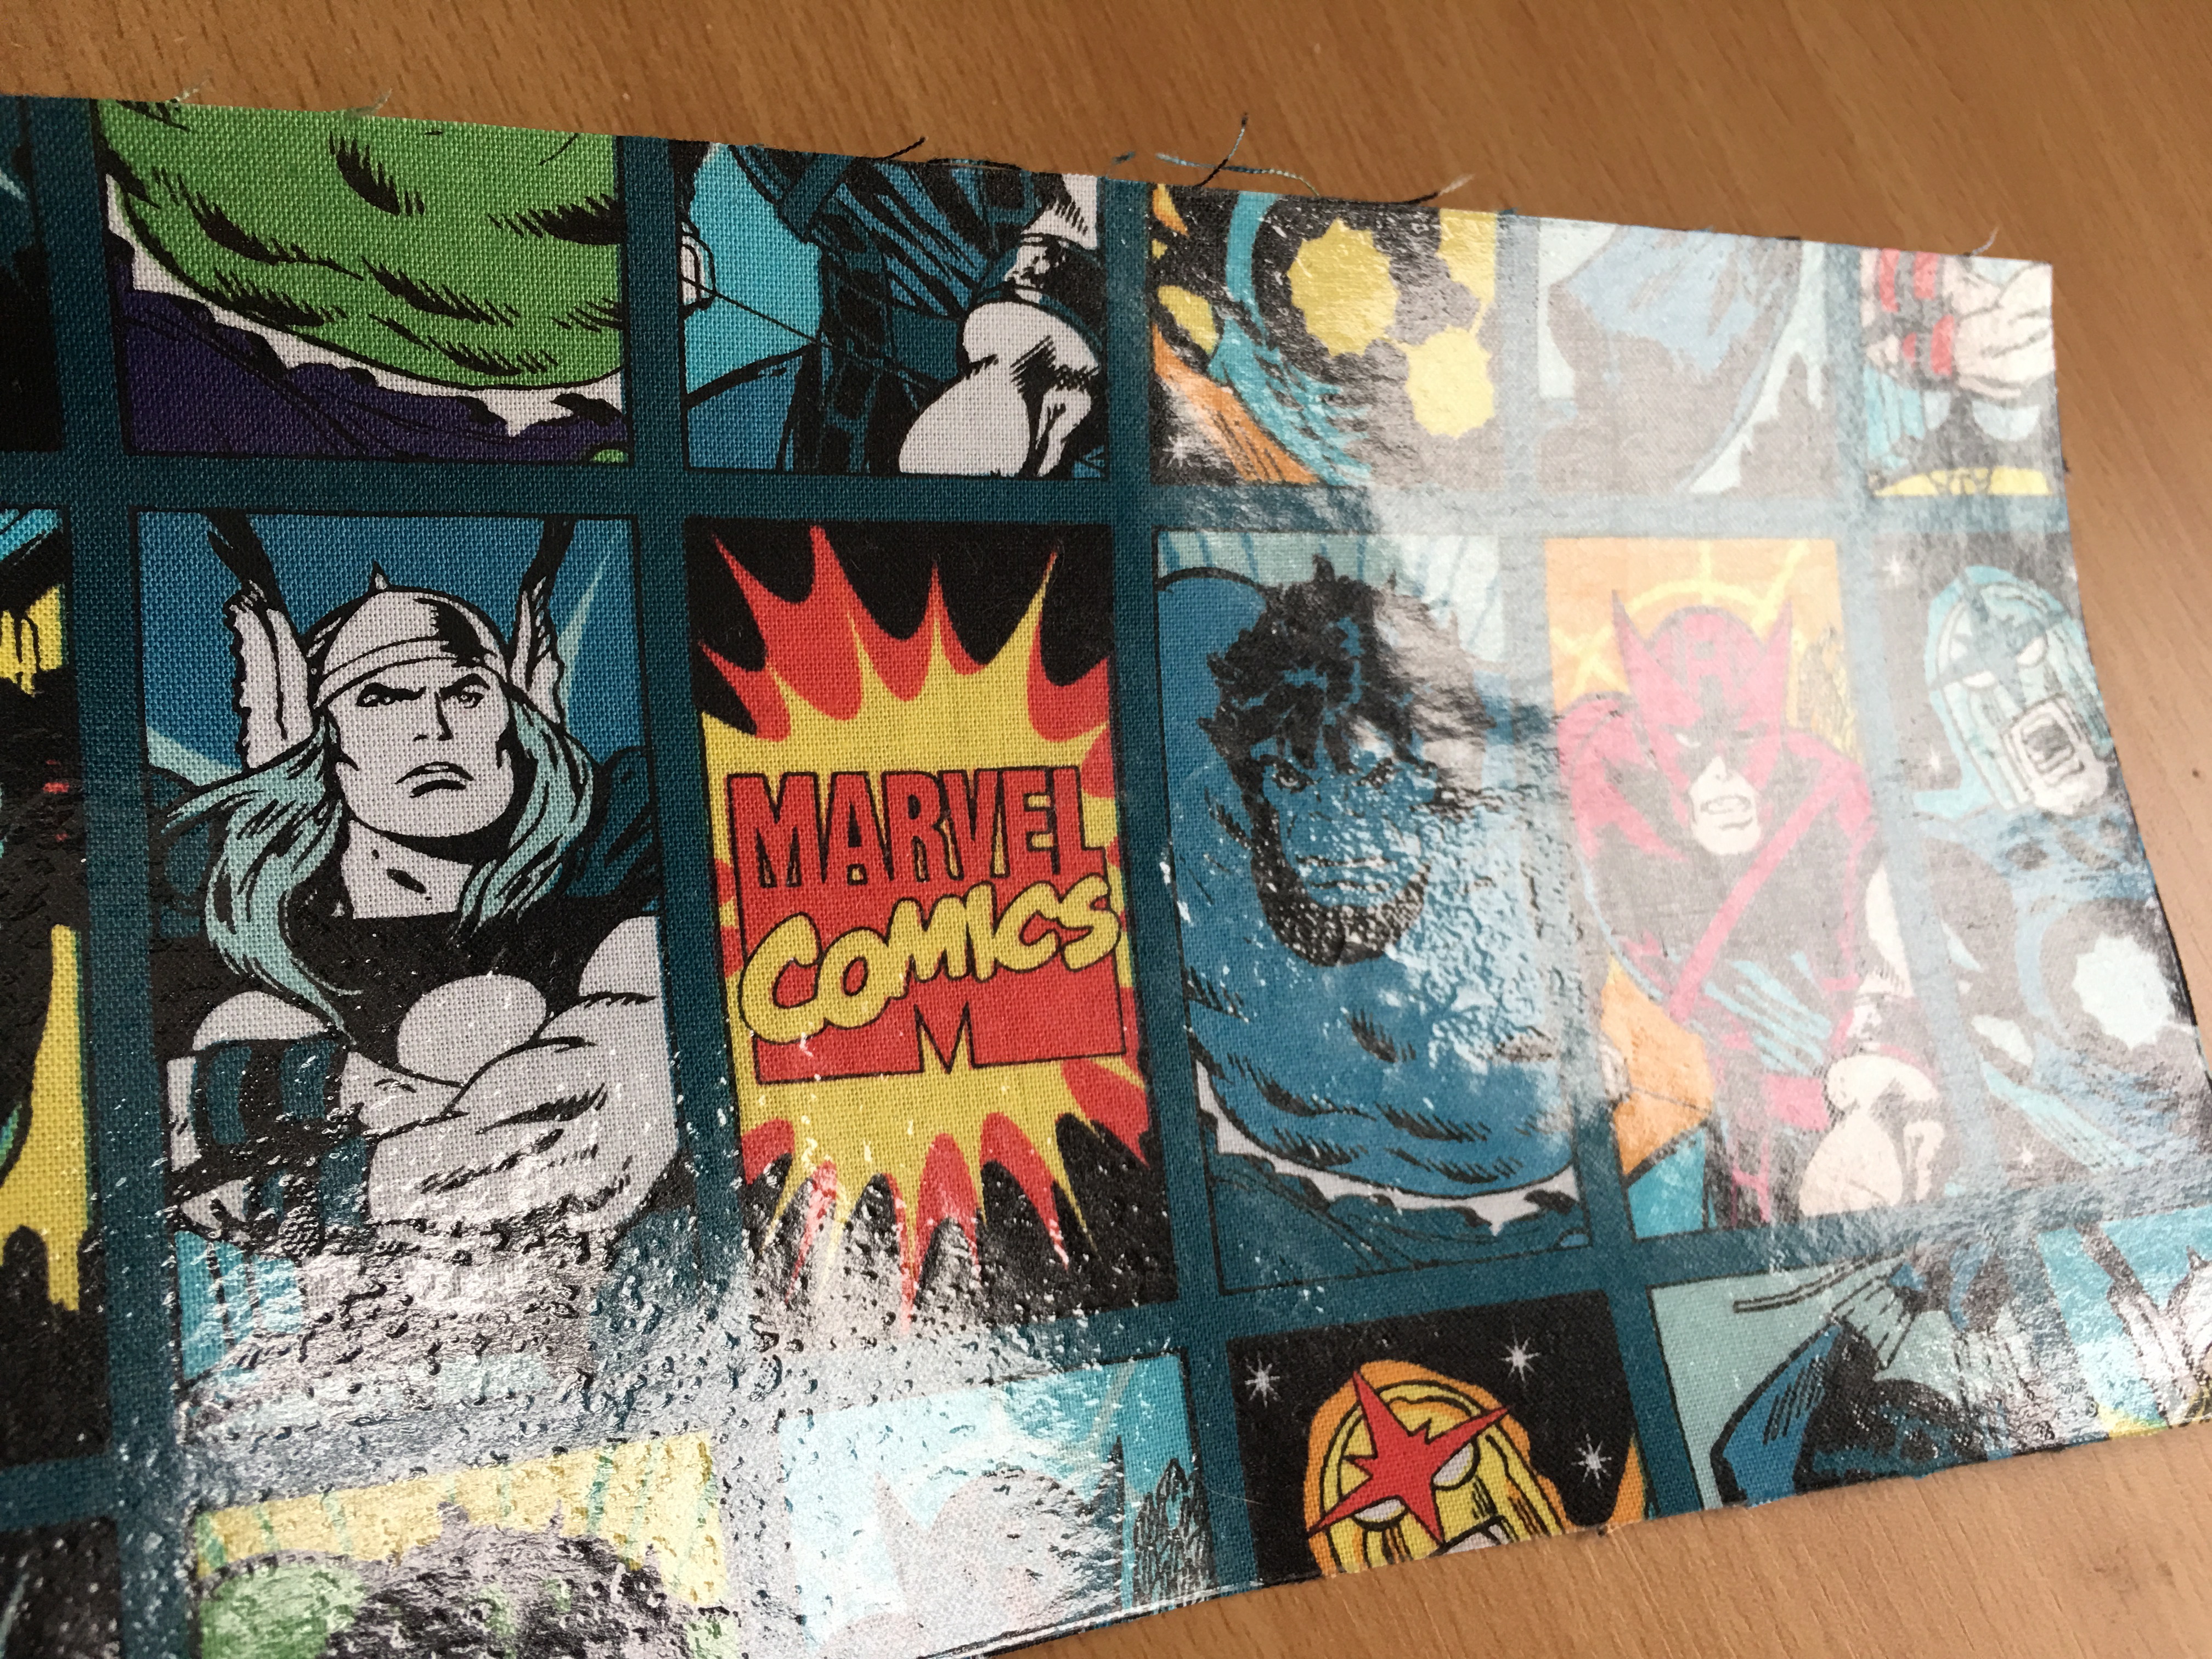
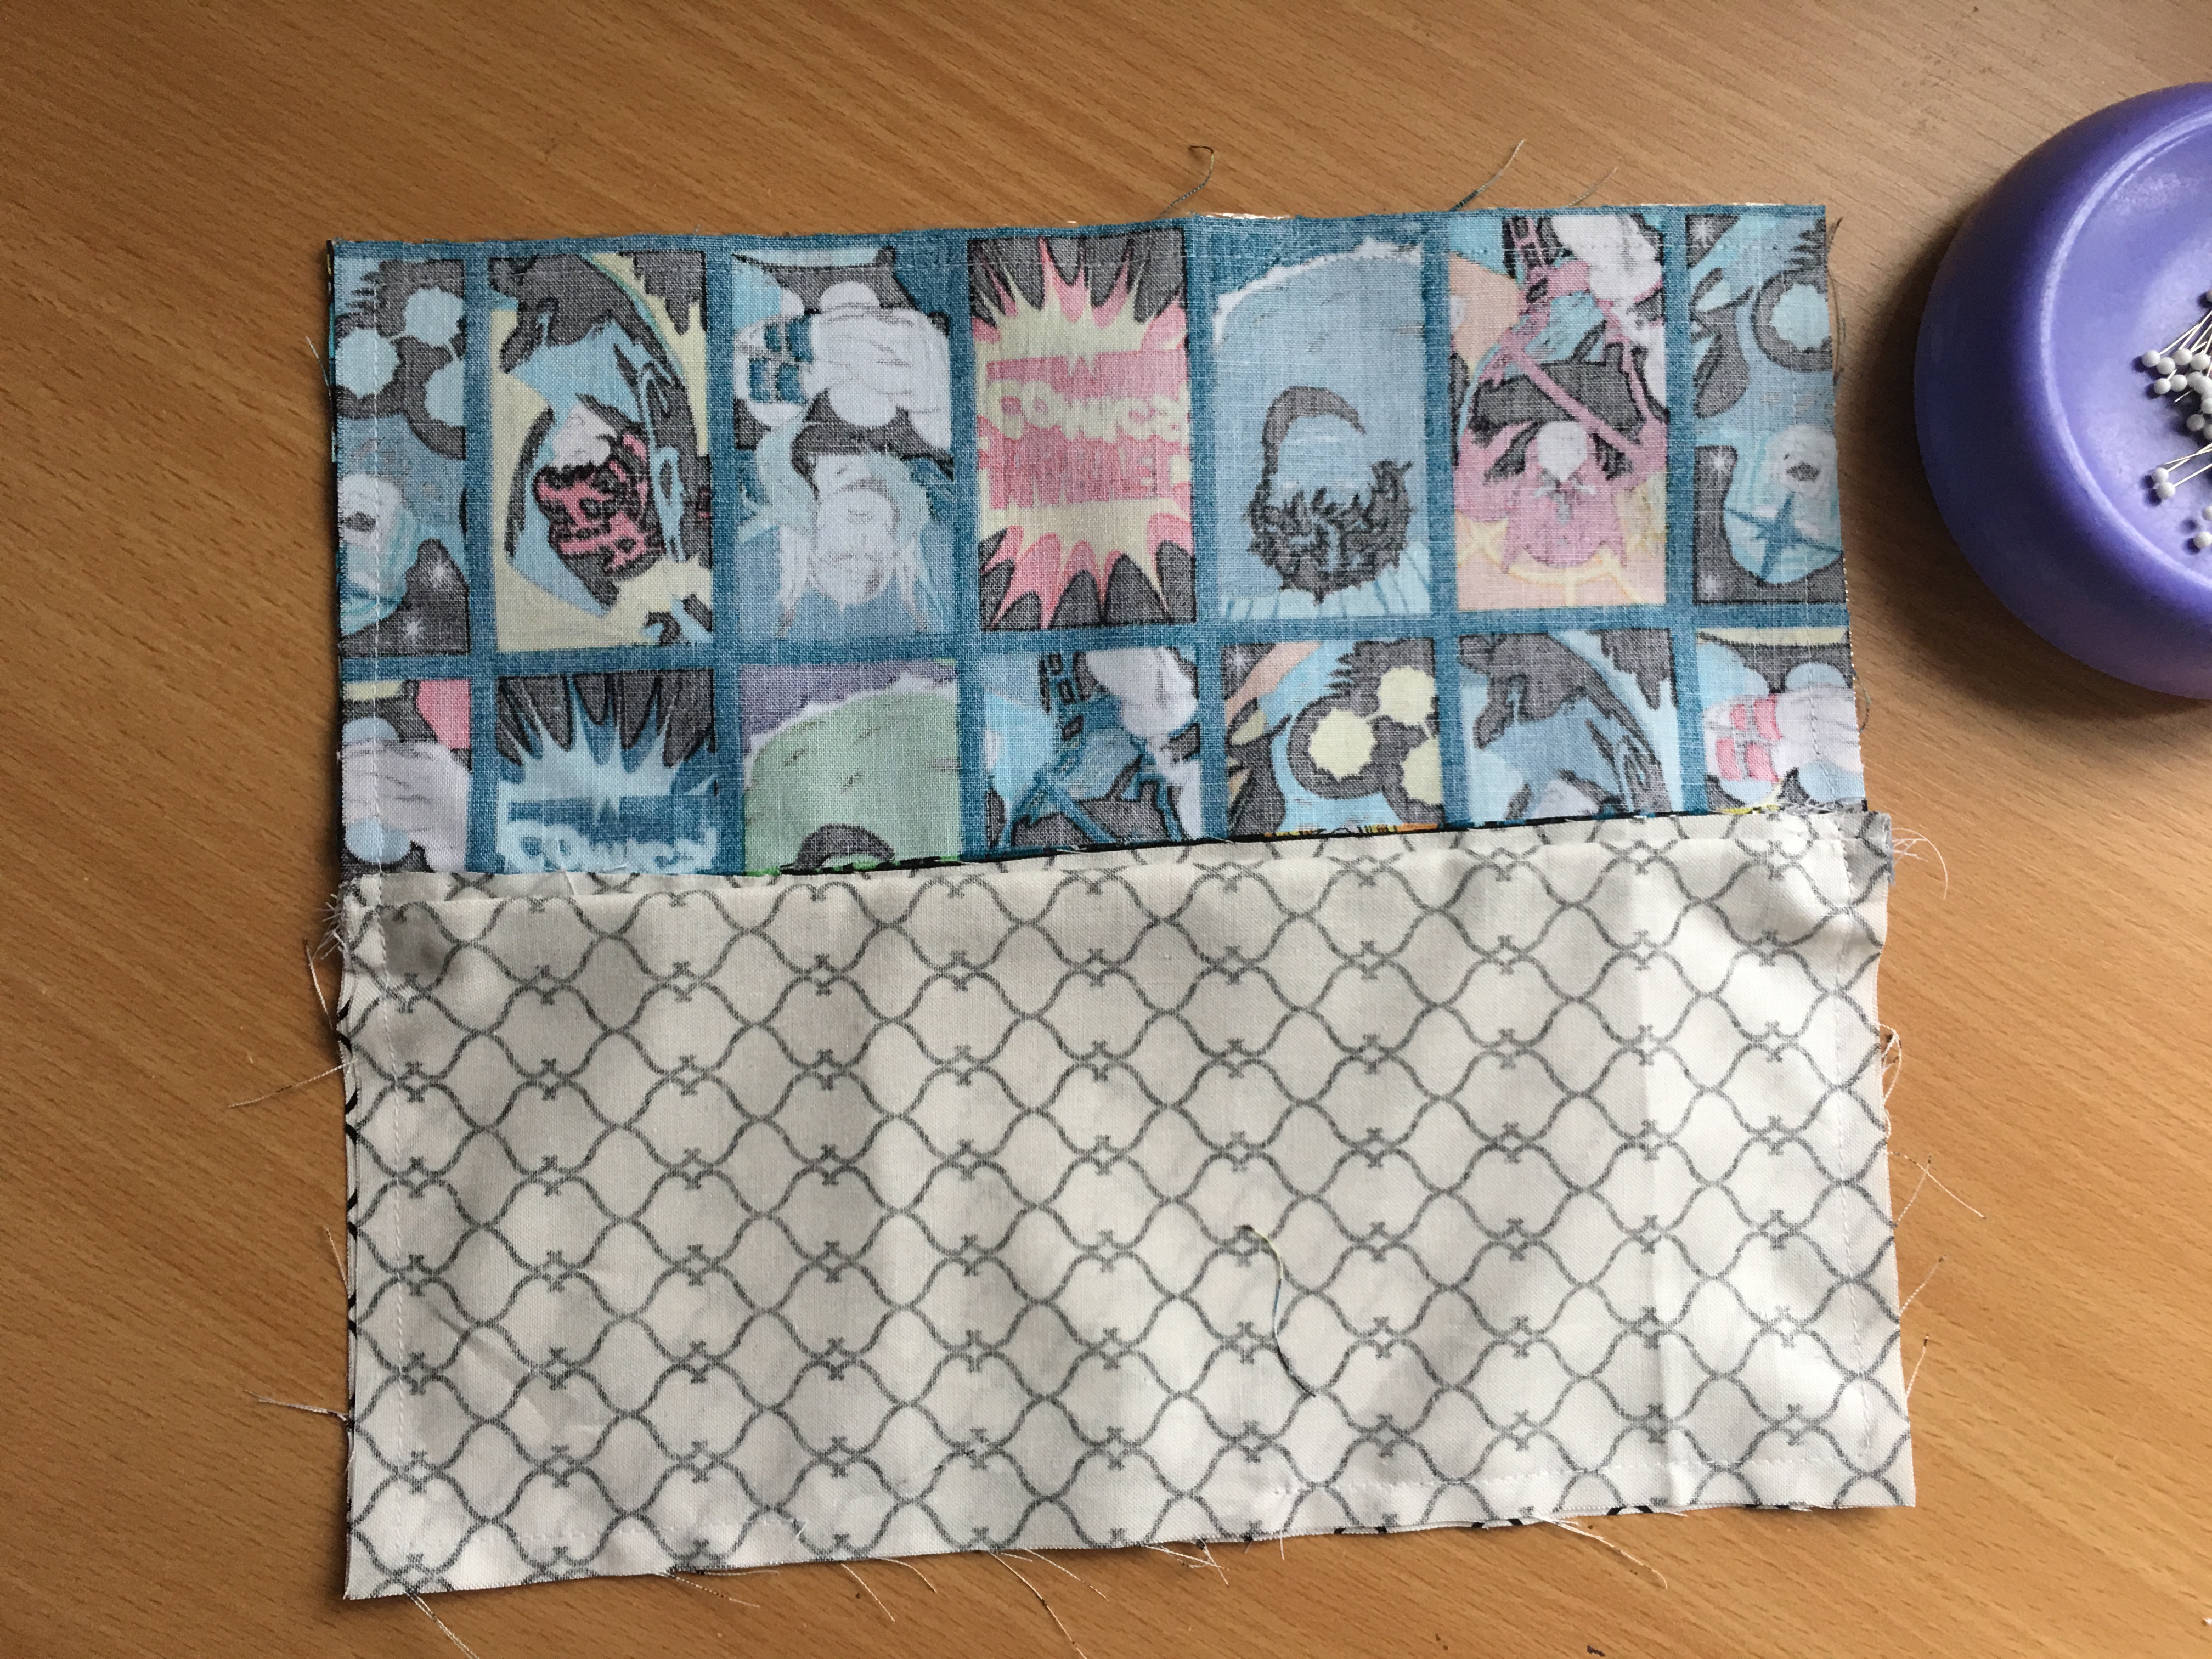
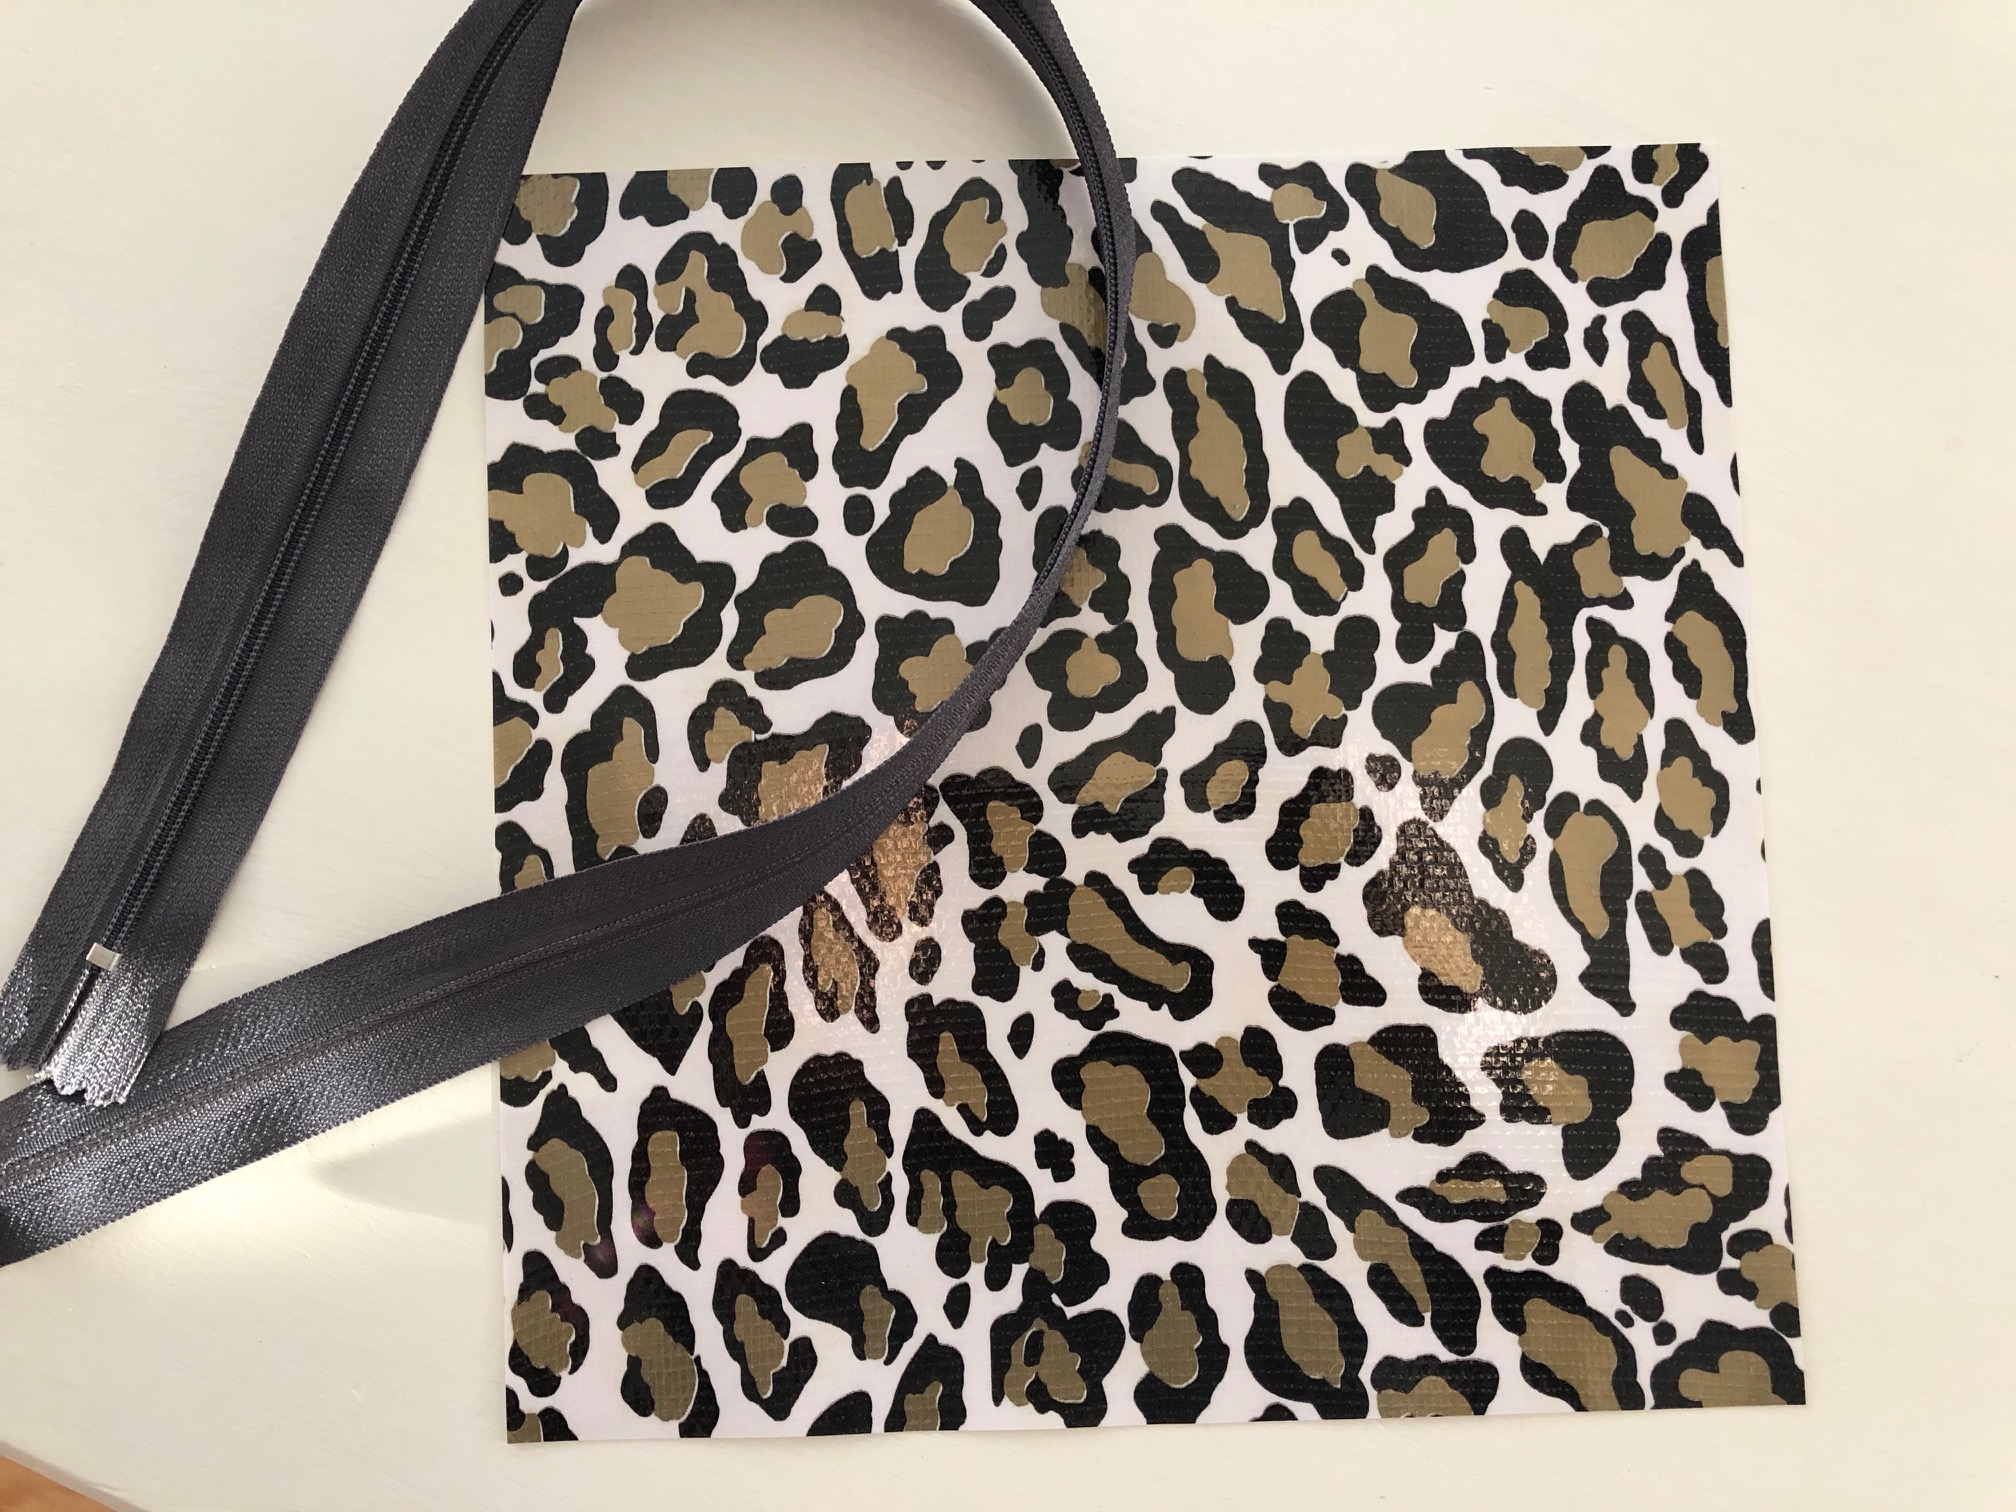
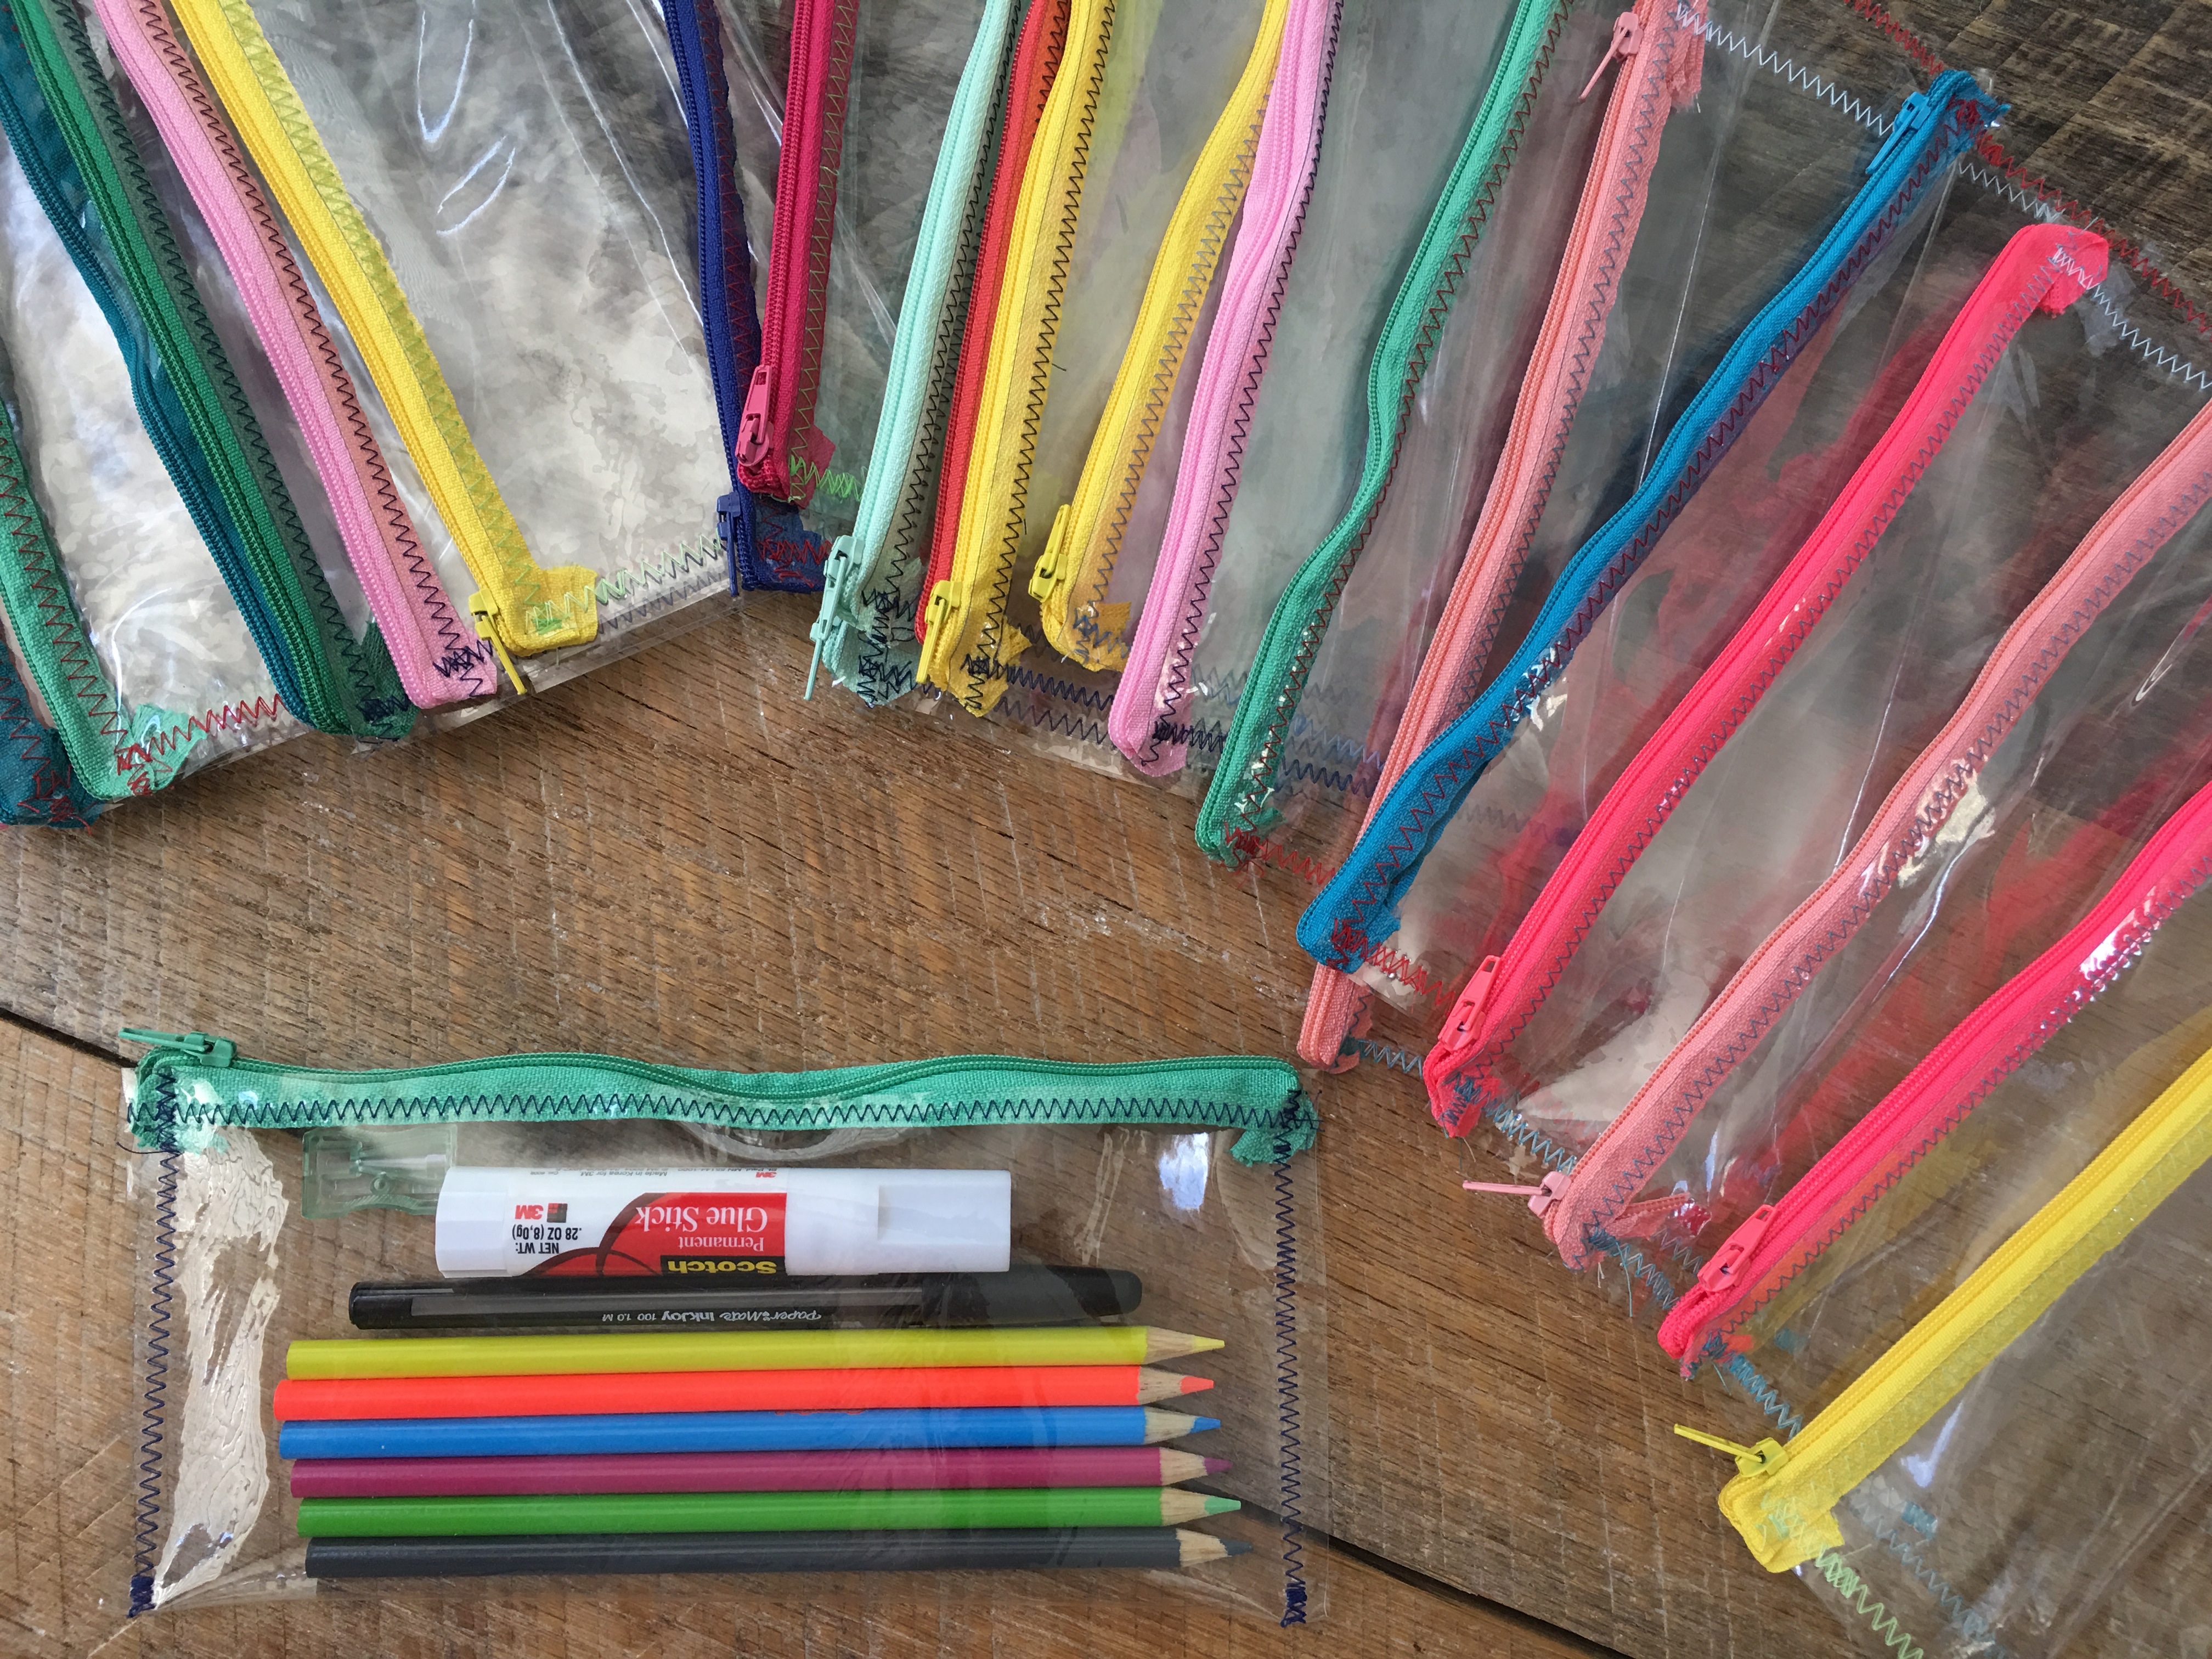
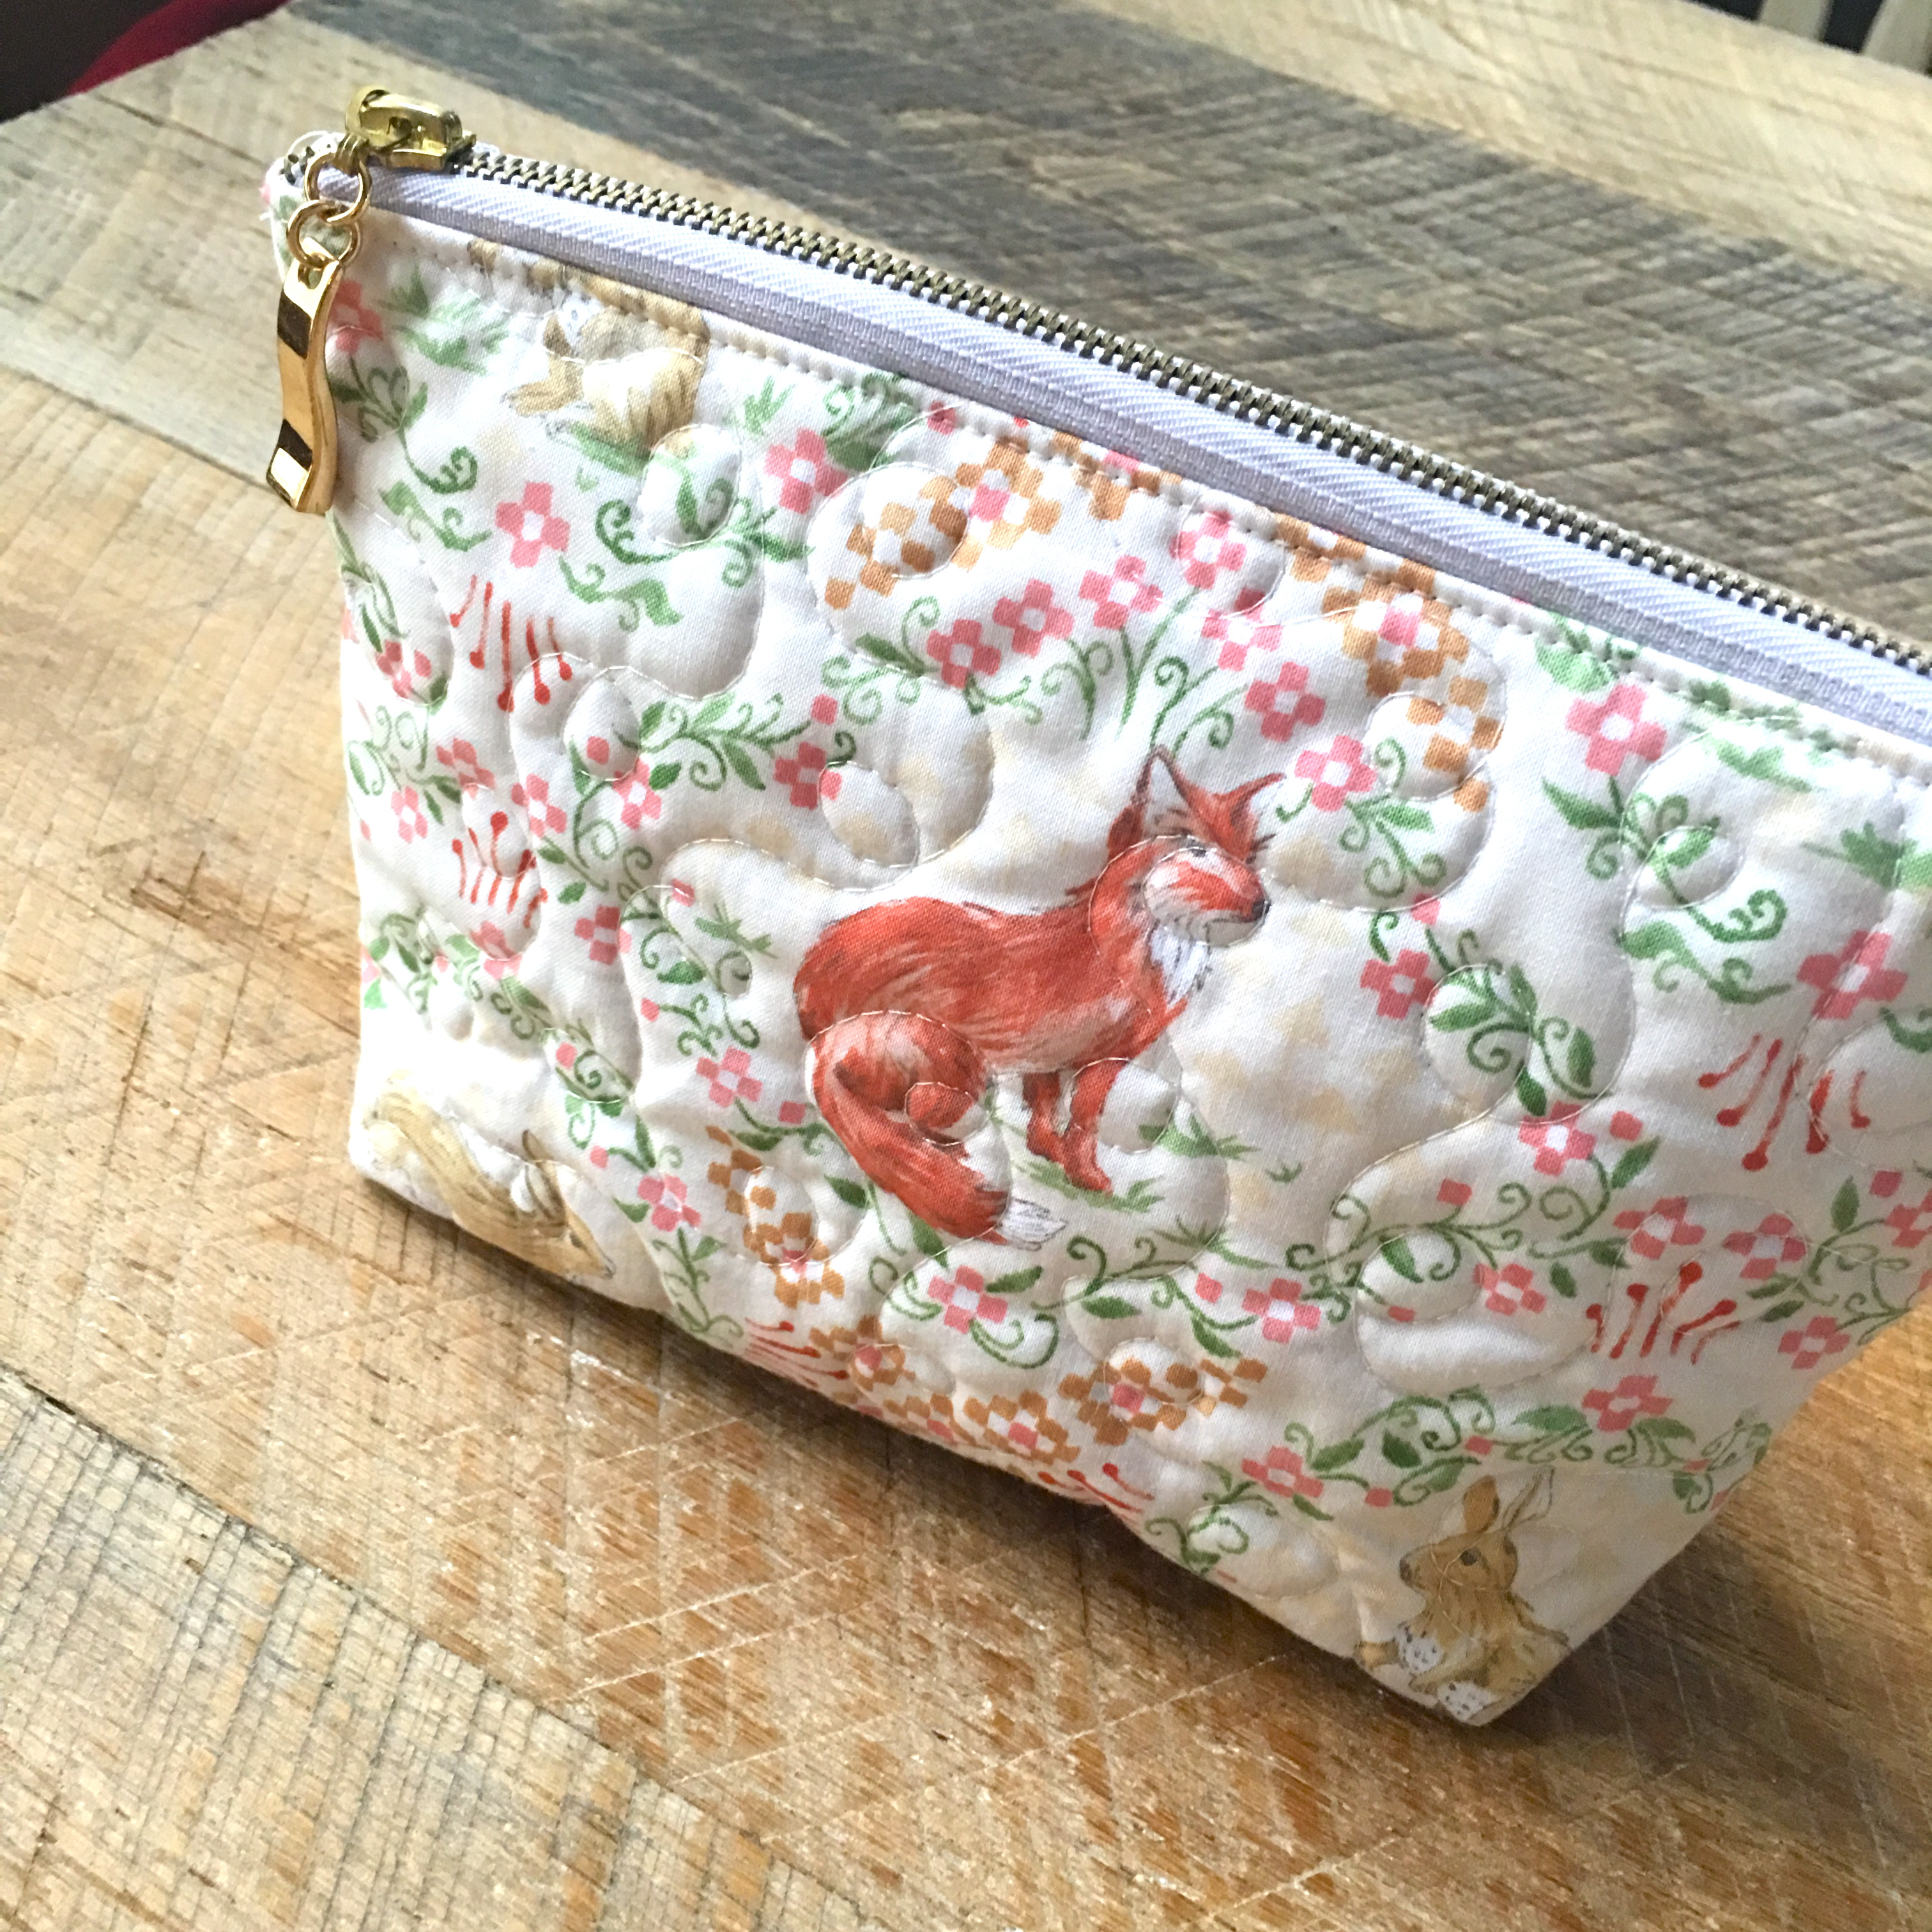
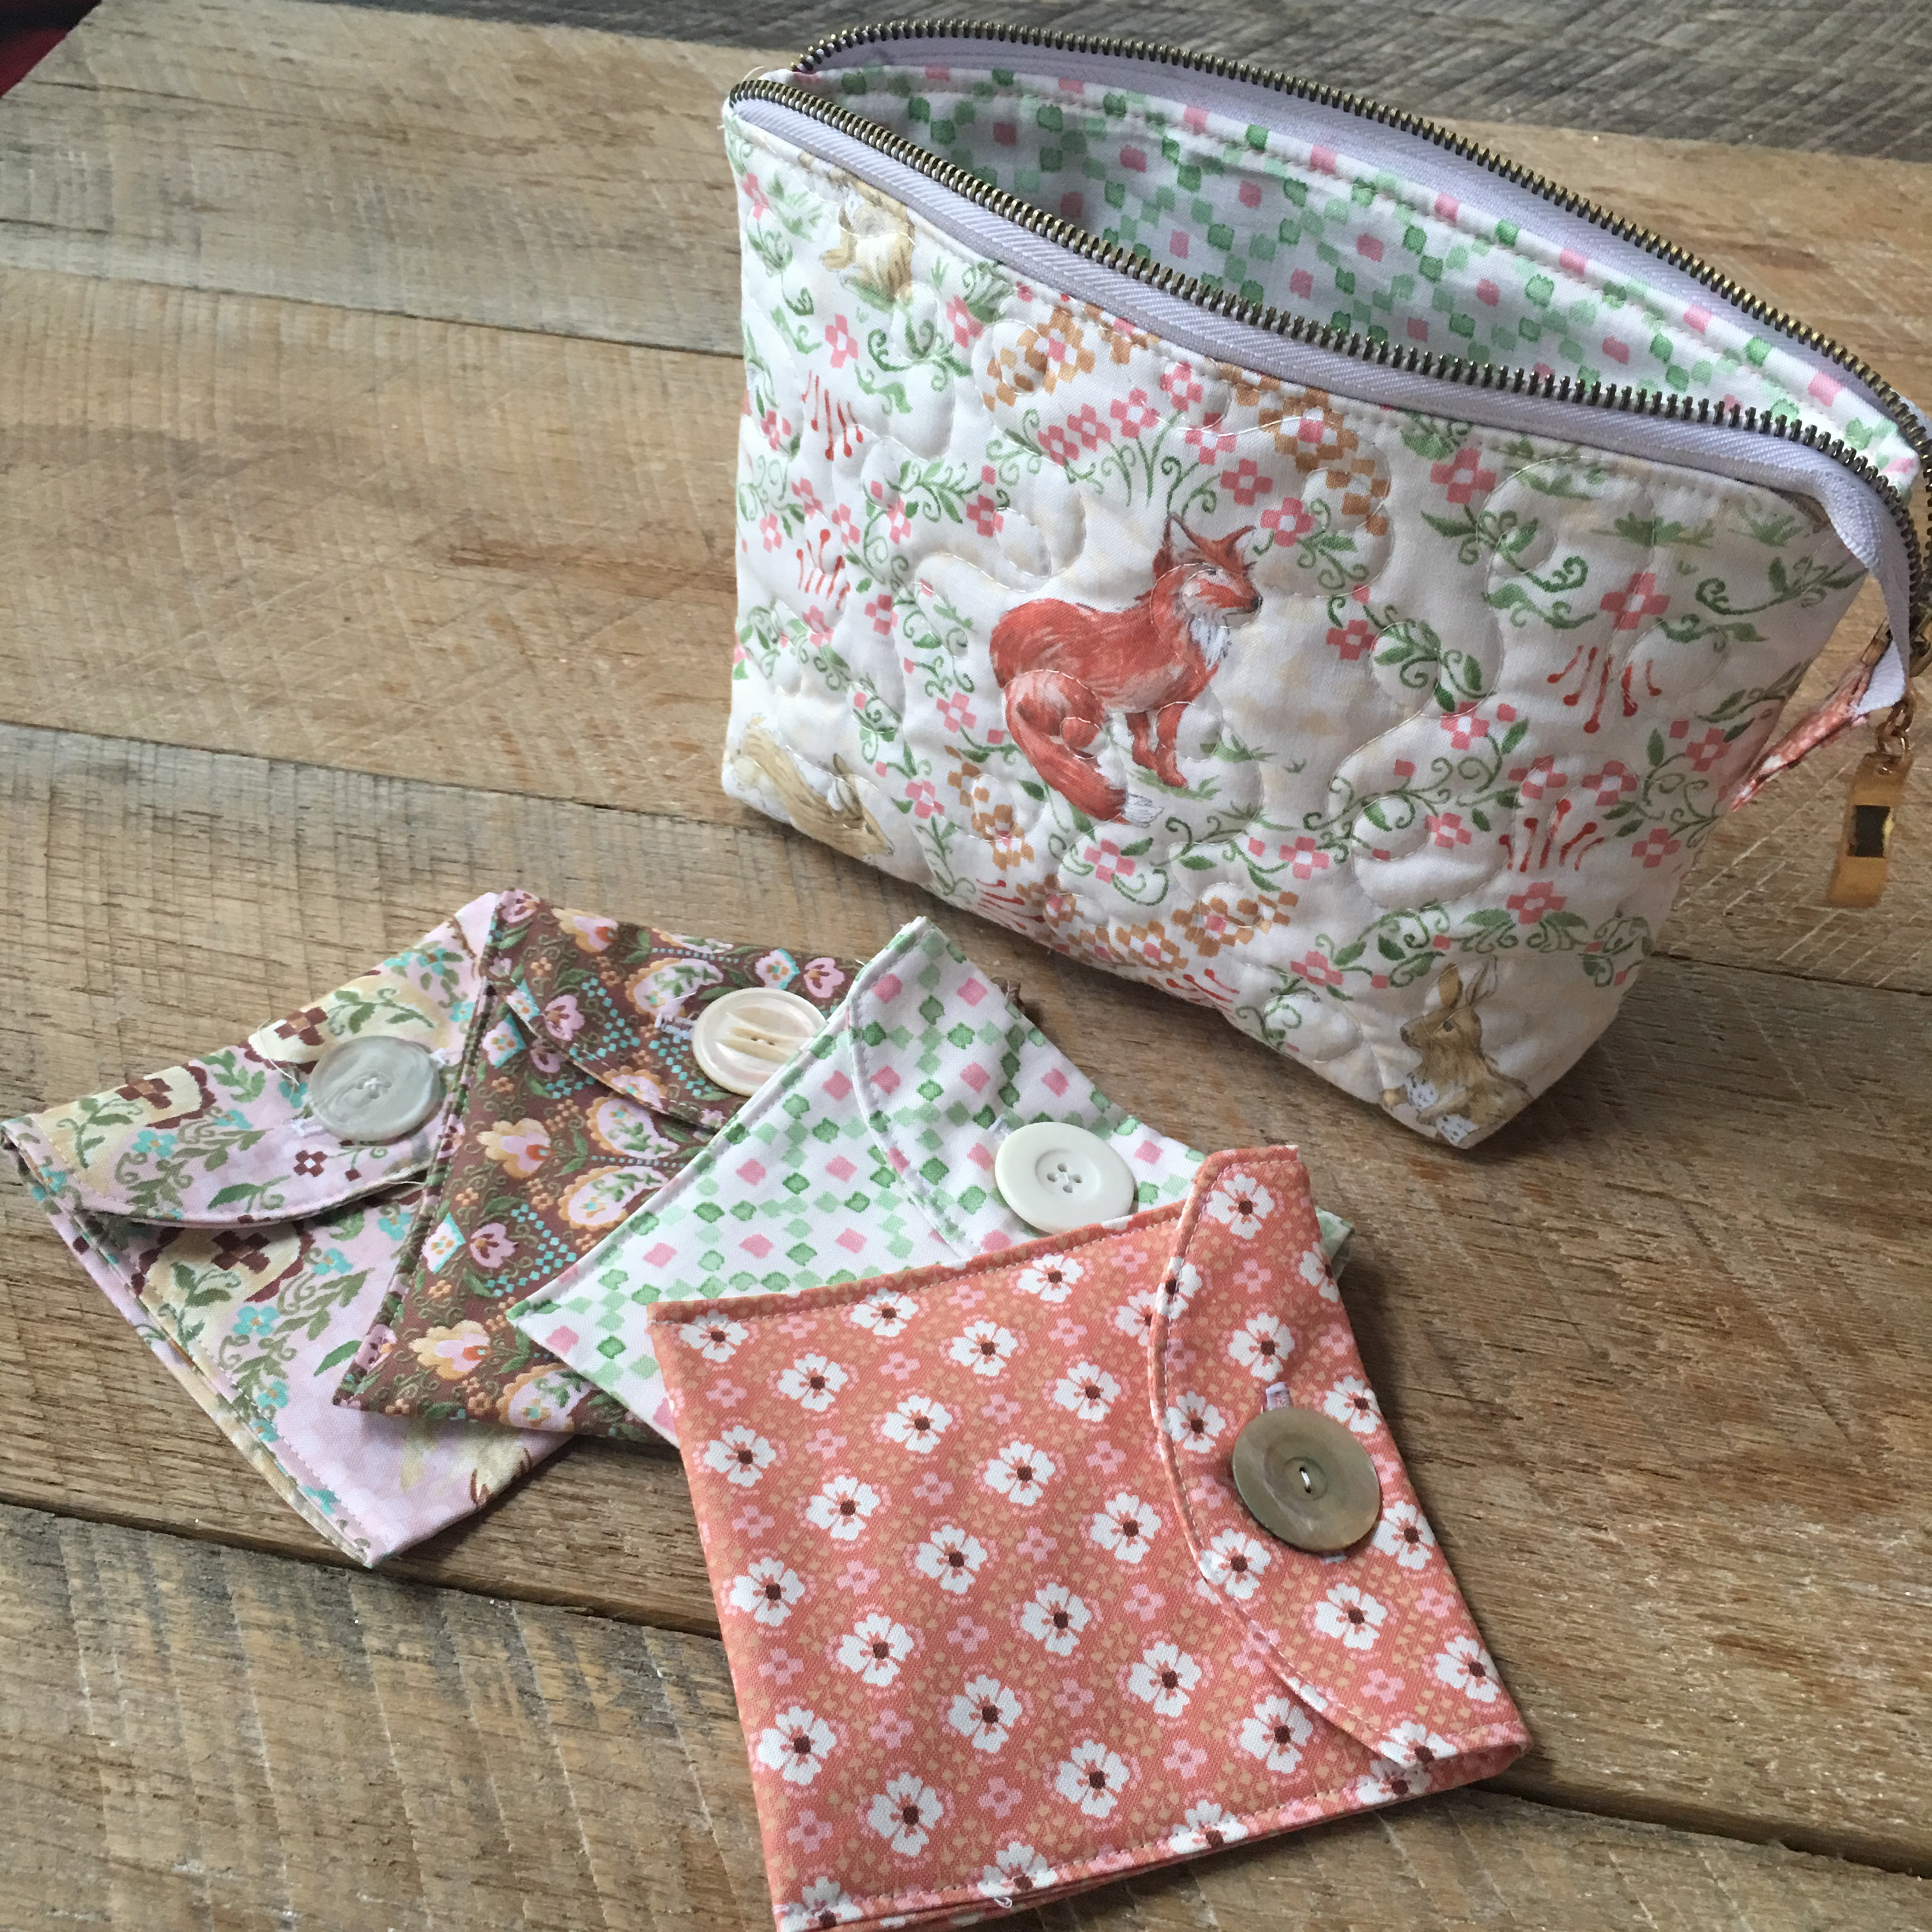
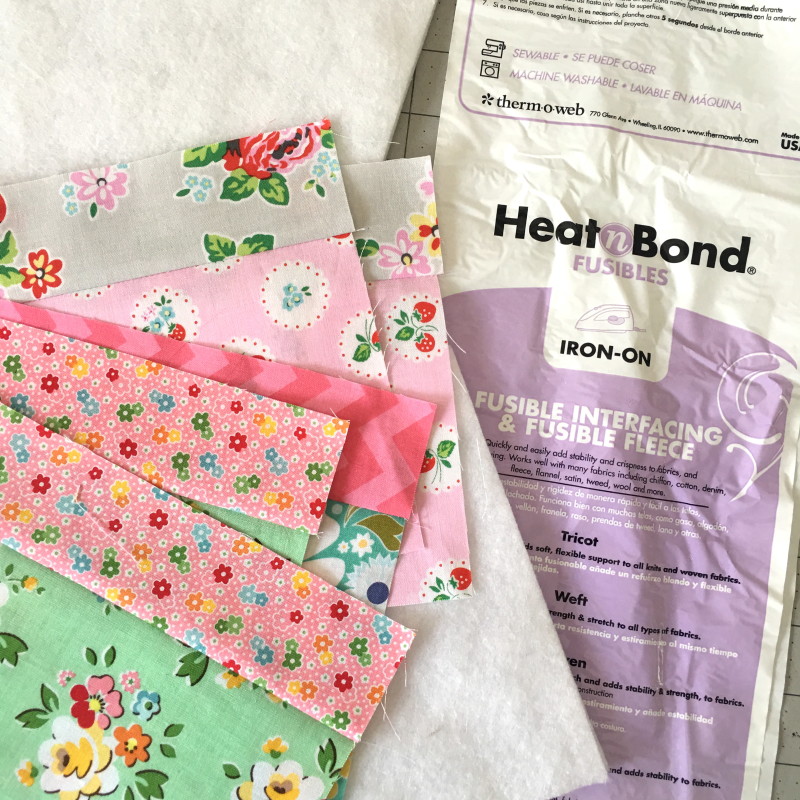
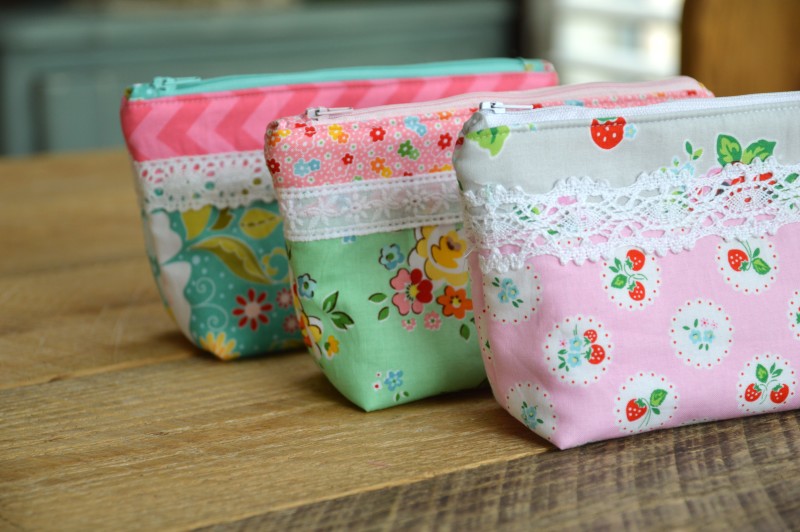
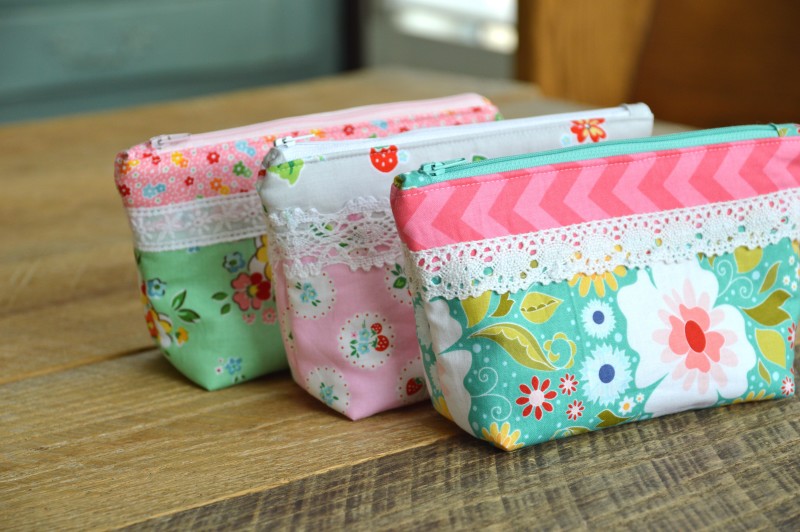
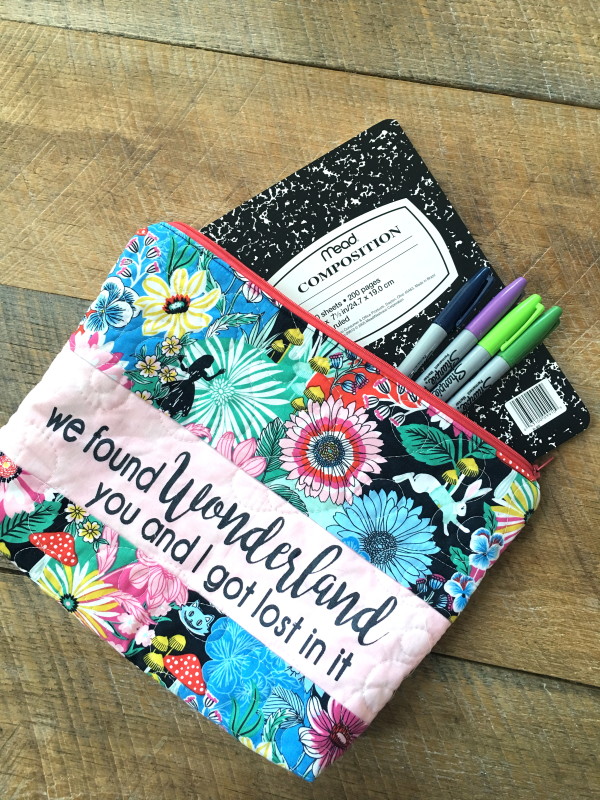
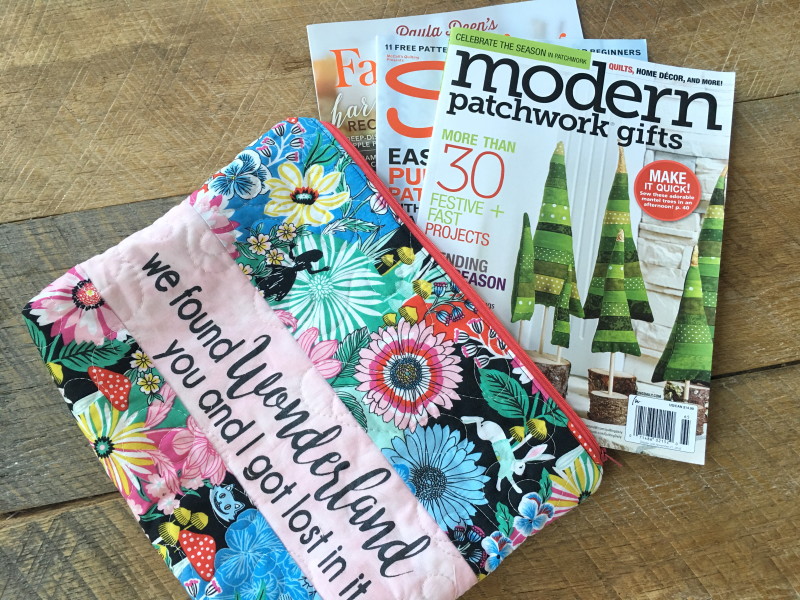
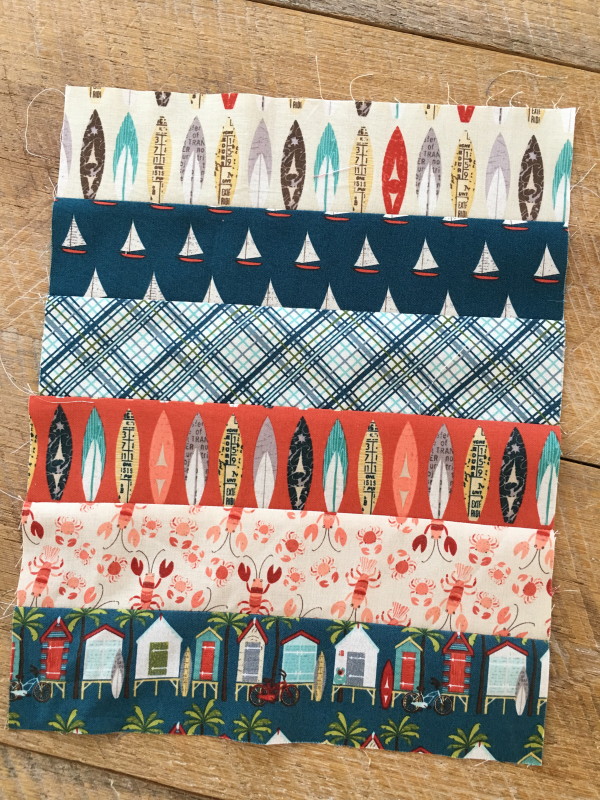
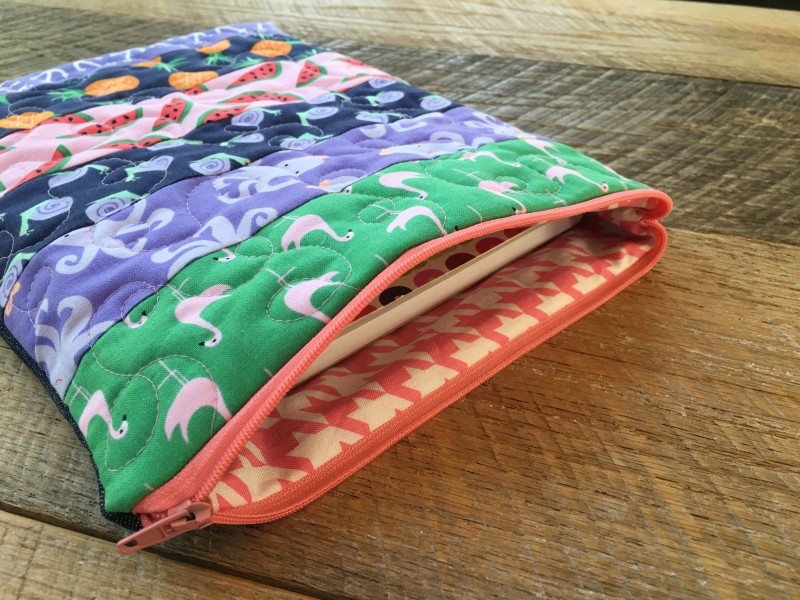
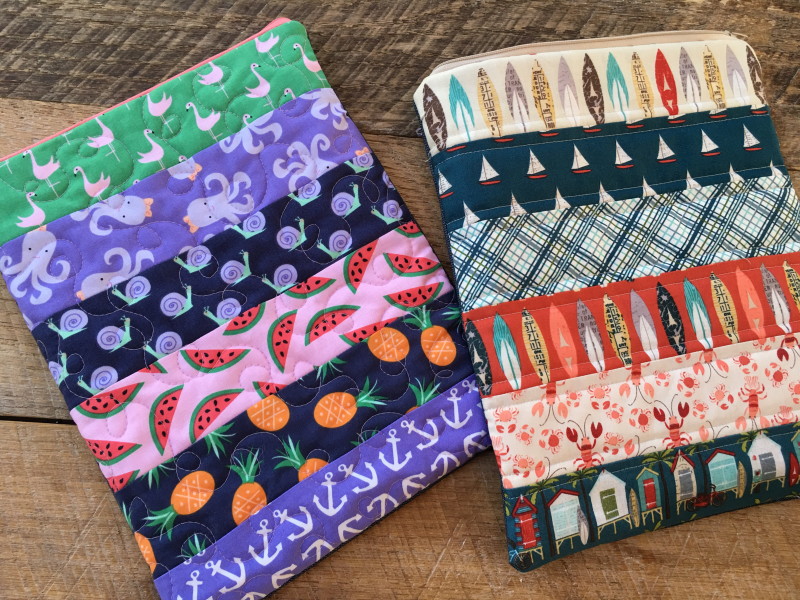
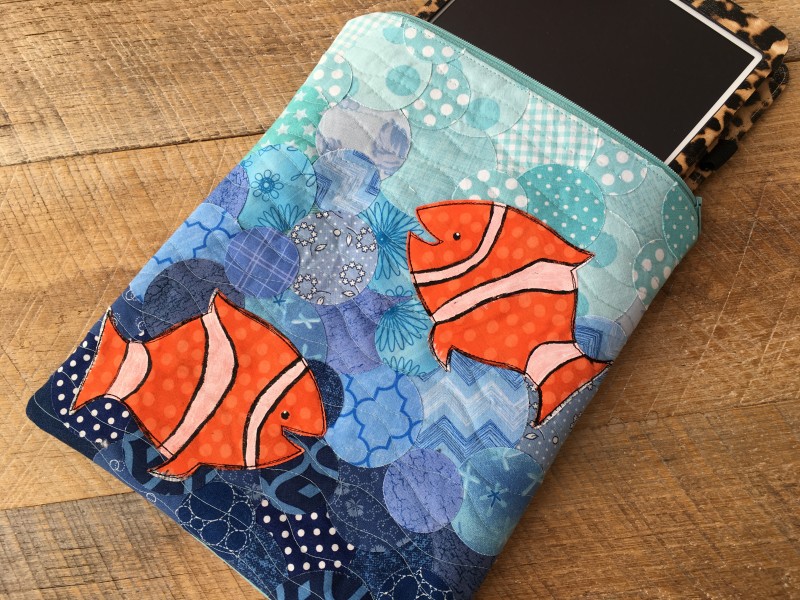
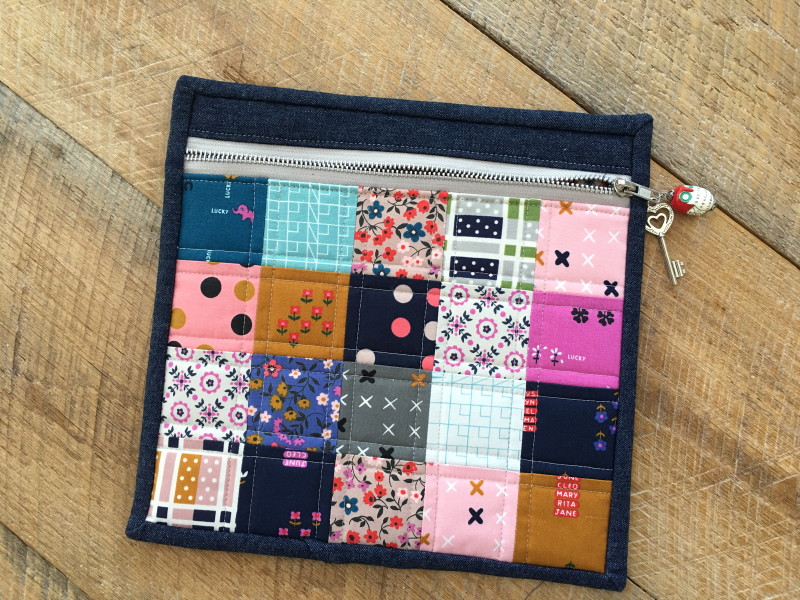
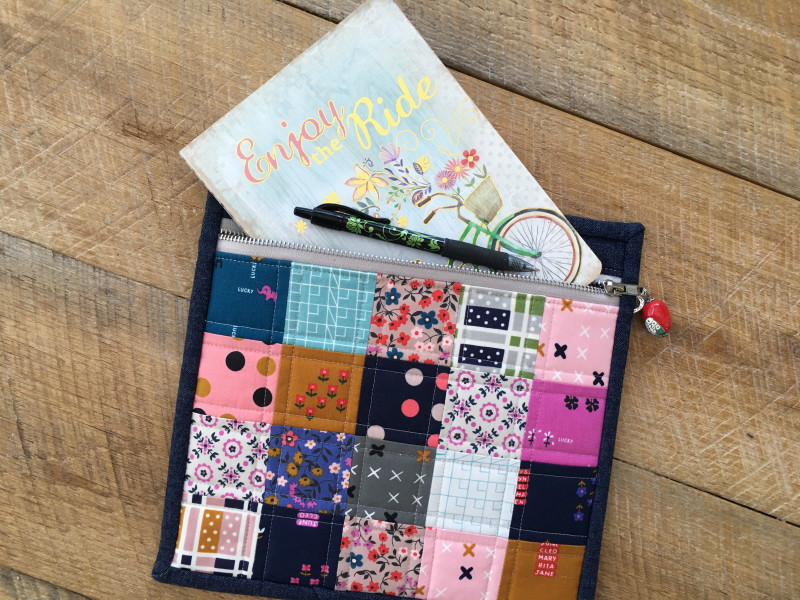
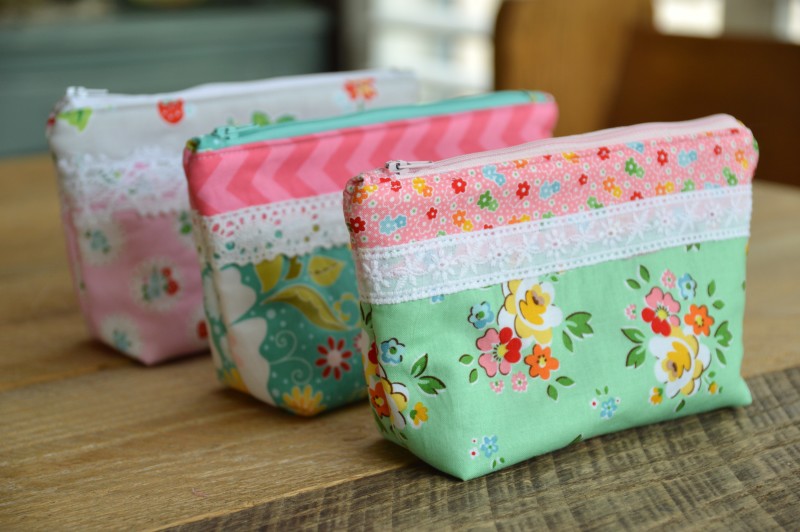
It’s been a while since I made zipper pouches!  I needed 3 gifts to give for the September birthdays on Sally’s soccer team.  Instead of going to the store and spending money on the gifts,  I stayed home and sewed these darling zipper pouches!  I used My Favorite Zipper Pouch Tutorial.

zipper-pouch-3

The fabrics are from my Riley Blake Stash: Backyard Roses and Strawberry Biscuit are a few I used.

img_4316

The inside of the zipper pouch is Fusible Fleece from Therm O Web.

zipper-pouch-2

zipper-pouch-5

Since I had a yard of the pink chevron, I used in inside each of the pouches.

zipper-pouch-4

I think the girls loved them!

zipper-pouch-8

Save

Save

We Found Wonderland Zipper Pouch Tutorial

WonderlandBlogHop

IMG_3488

IMG_3478

This Wonderland fabric by Blend Fabrics totally reminded my daughter of the Taylor Swift song “Wonderland” so I came up with this little project that I’m sure your daughter will love!  I love this size zipper pouch because you can use it to put journals and writing supplies in, sketchbooks and art supplies, small sewing projects, coloring books and crayons – it’s just a great project size!!

I first cut the words out of vinyl on my Cricut to create a stencil.  I placed it on light pink fabric and used a metalliac black fabric paint to stencil.IMG_3474

Cut the theme print and pink prints according to the measurements below:

Screen Shot 2016-09-01 at 11.39.42 PM

Sew together using 1/4″ seams allowances.  Press.

Cut the backing piece 11″ x 14″ – which is slightly larger.  It will get trimmed down in a minute.

Fuse the outer zipper bag pieces to Heat n Bond medium weight stabilizer.

IMG_3480

Next spray baste the two pieces to cotton batting.IMG_3481

Quilt each piece as desired.IMG_3482

Because quilting tends to alter the measurements, trim both pieces to measure 13 1/2″ x 10 1/2″.

Cut two lining pieces these same measurements: 13 1/2″ x 10 1/2″.

To finish the bag, follow these instructions for inserting a zipper and sewing the pouch.IMG_3483

Before turning right side out, cut a 1″ notch in each of the 4 corners.  IMG_3484

zipper pouch tutorial. 19
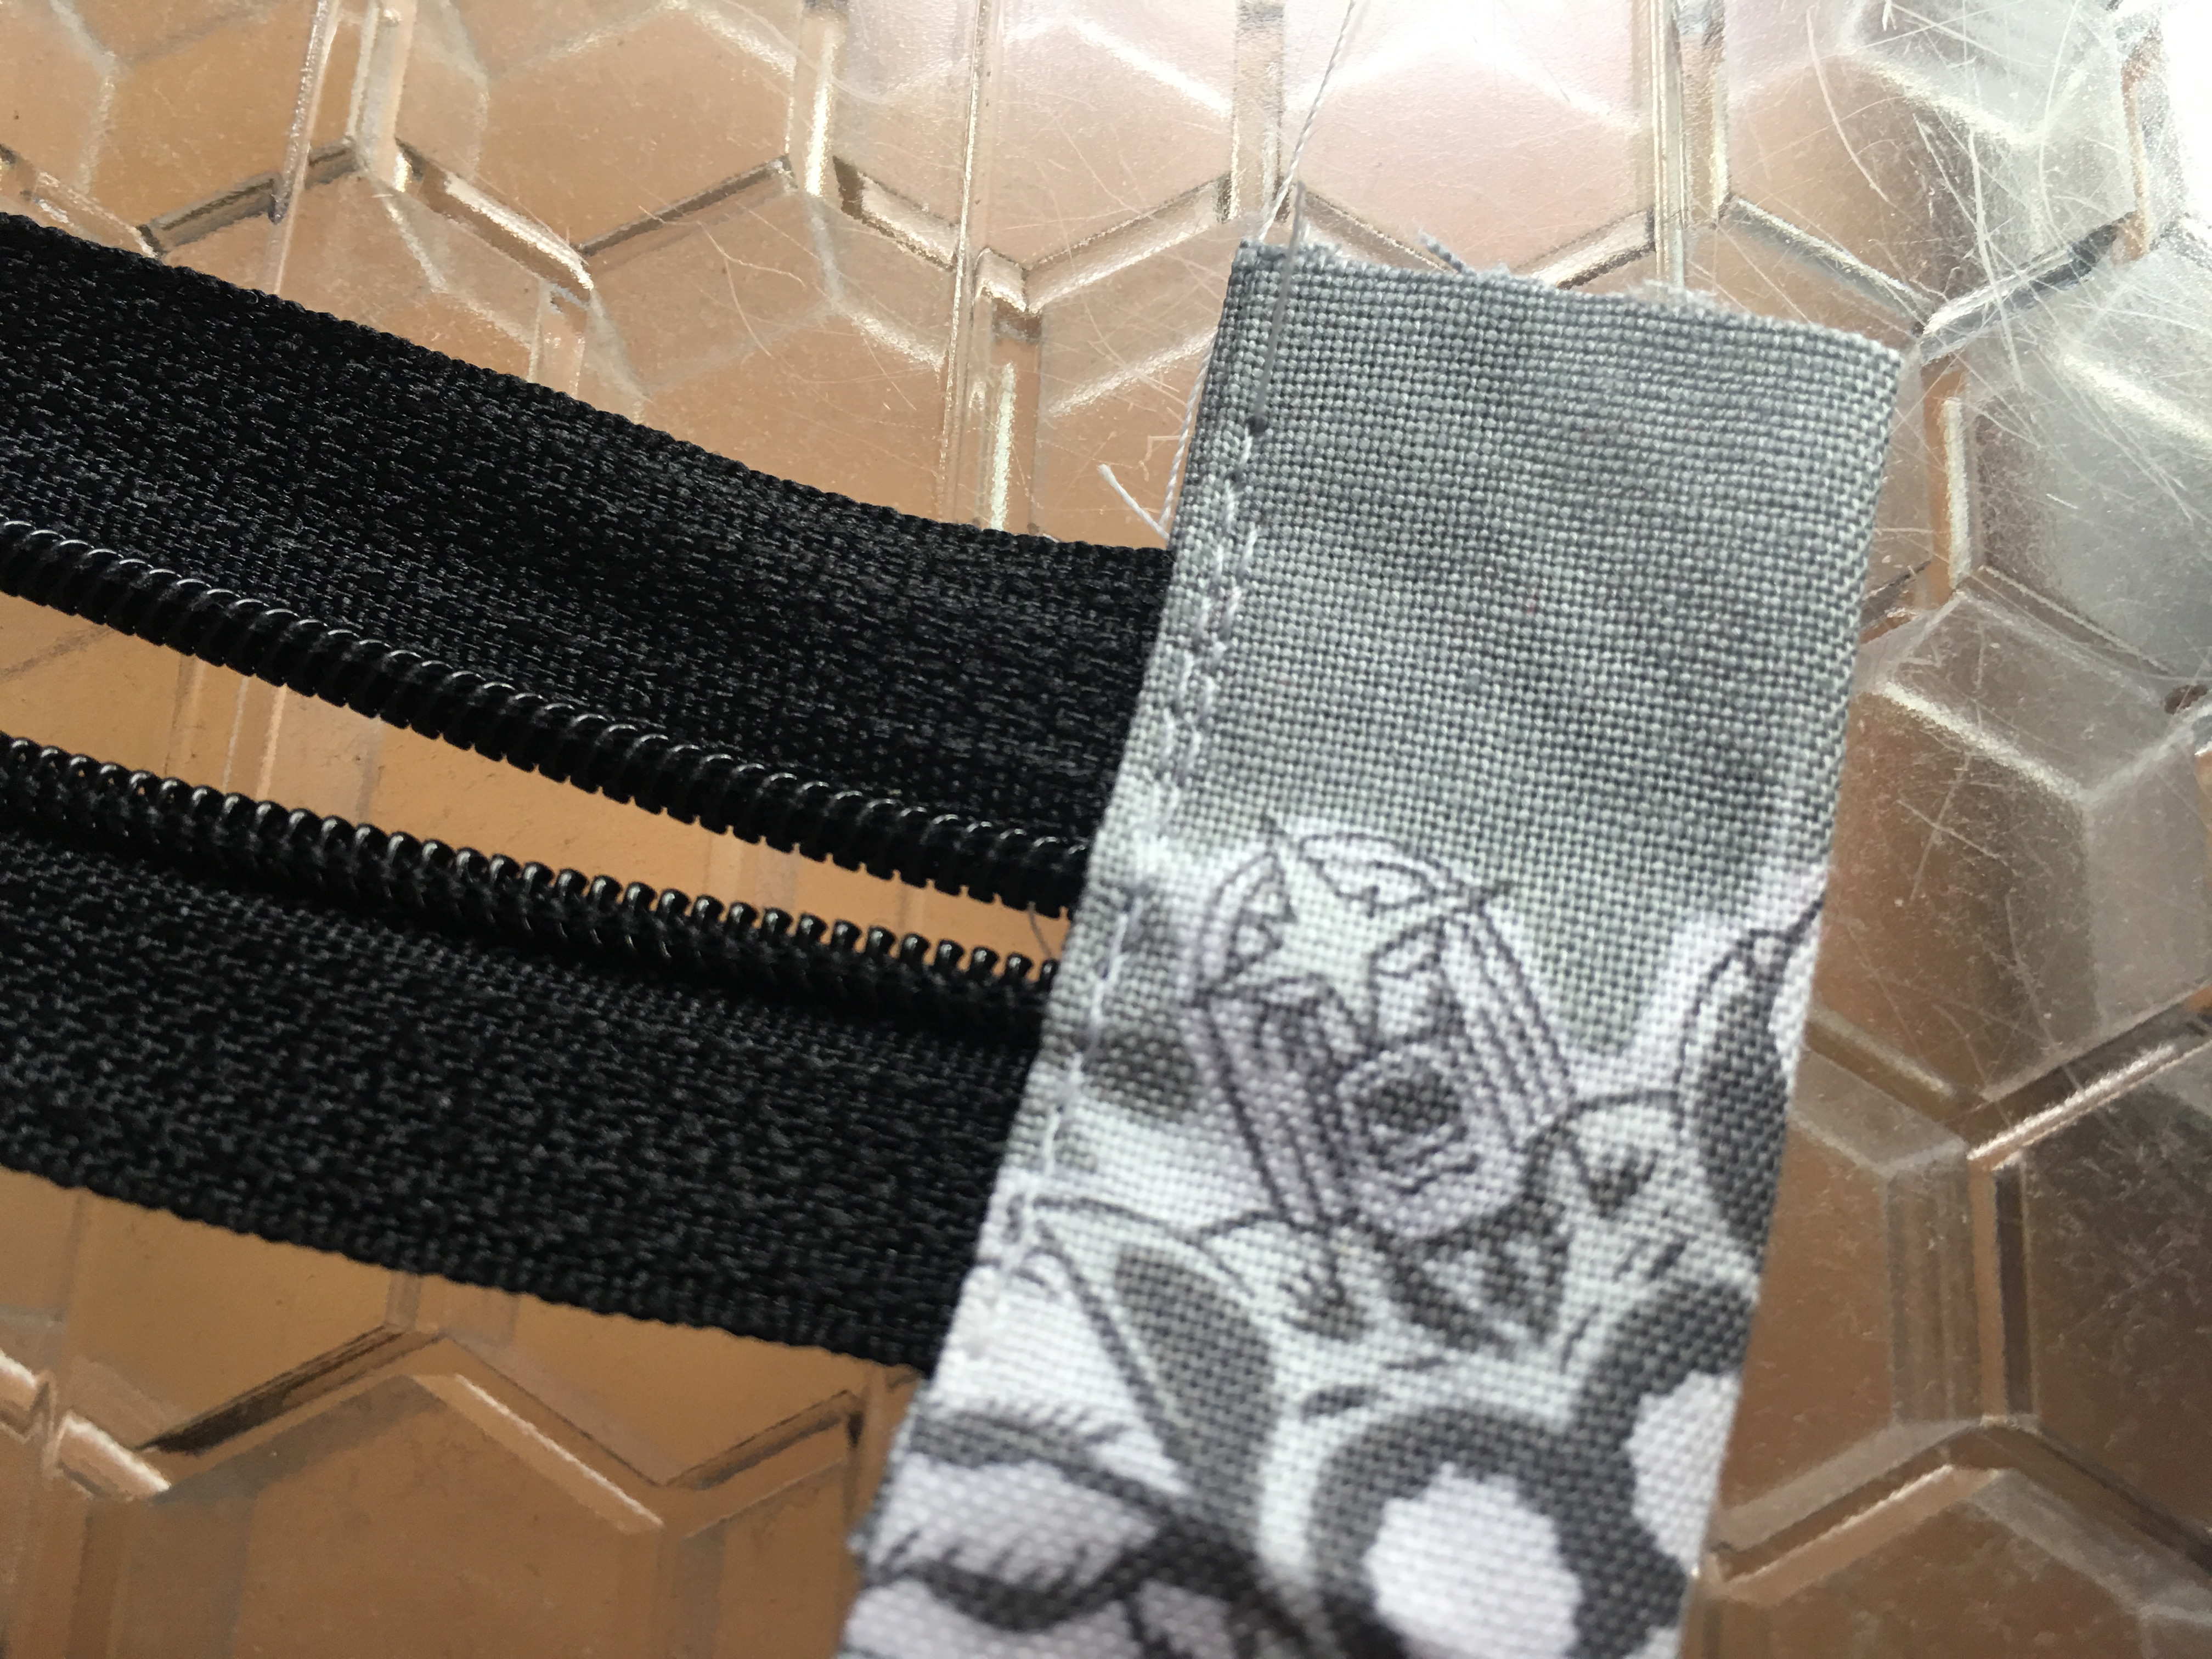
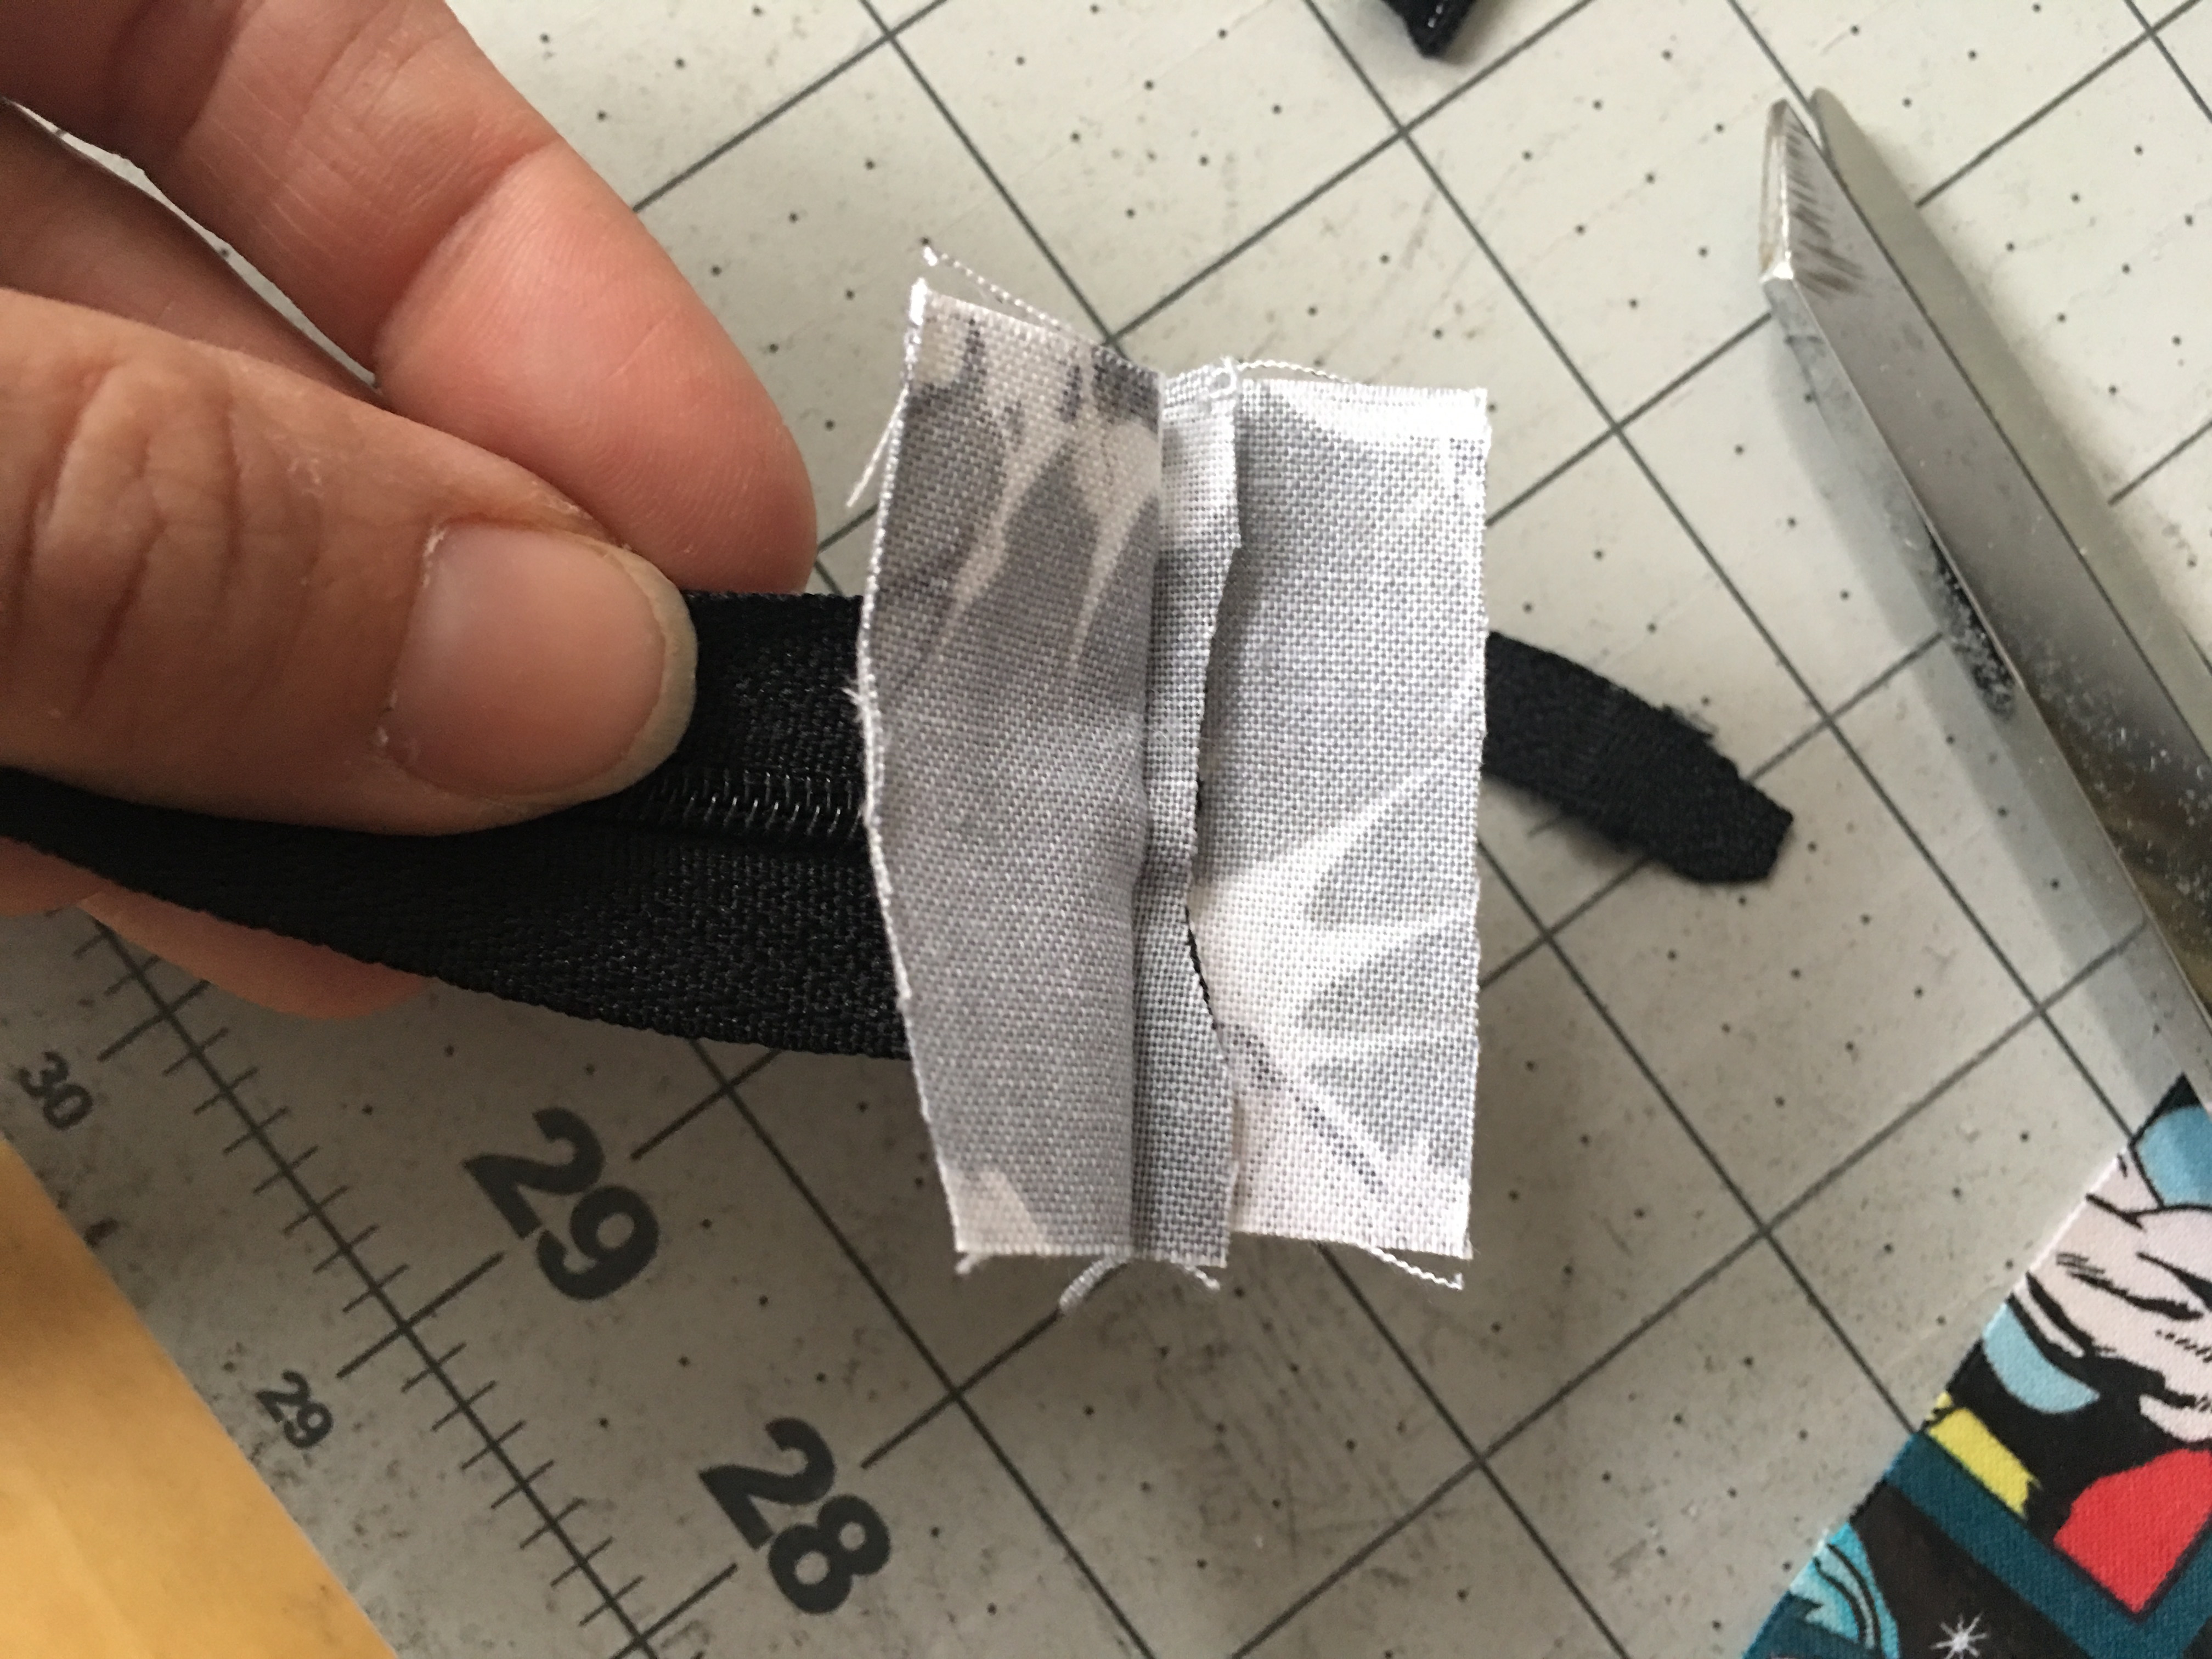
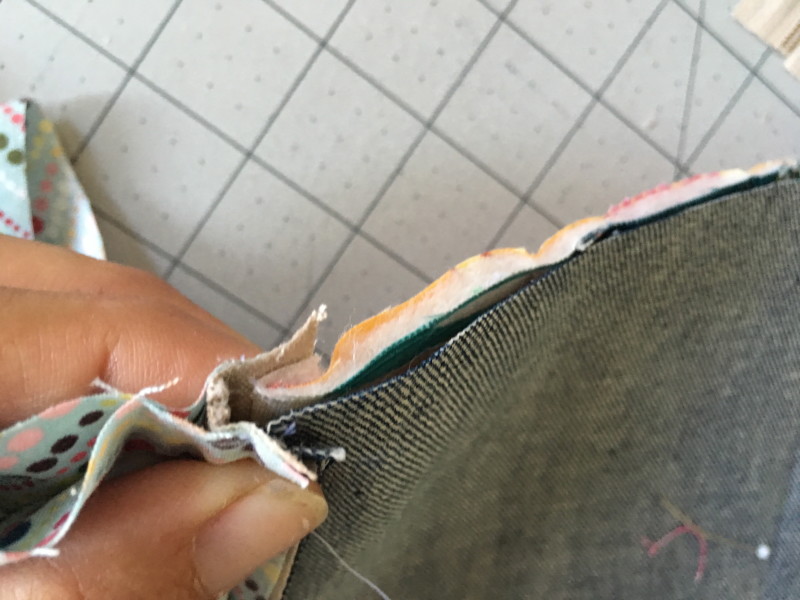
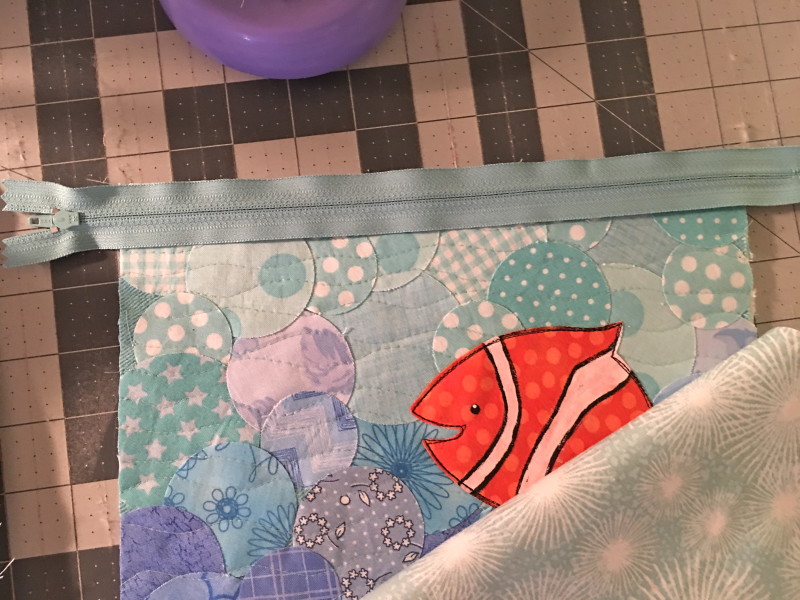
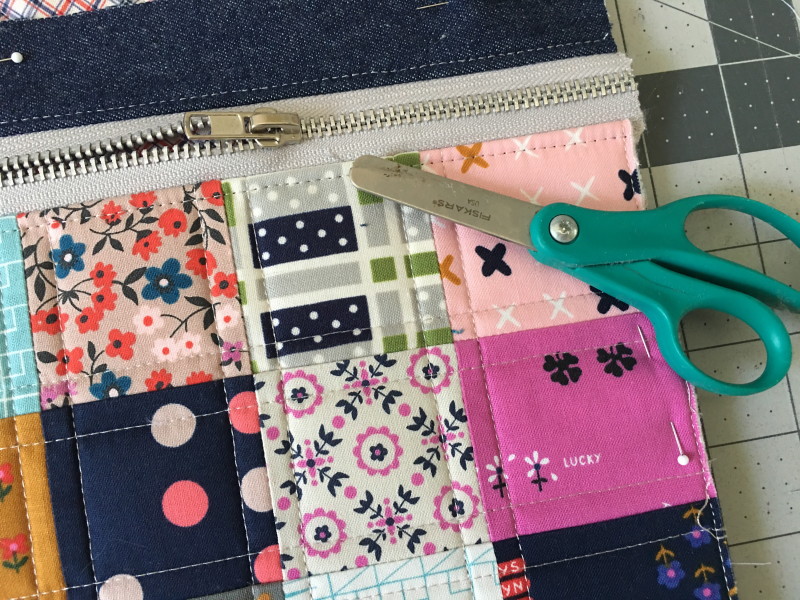
The above photo is from another tutorial but you can see how the notches should be at each corner.

zipper pouch tutorial. 20
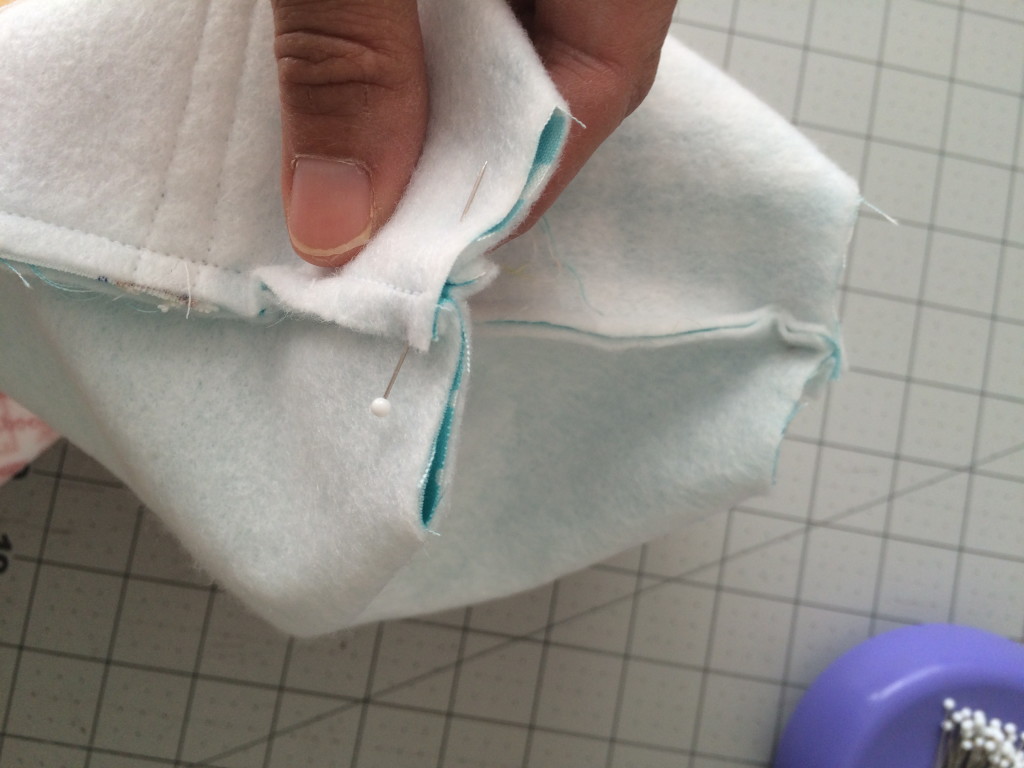
Fold each notch so the two seams align, pin, and sew 1/4″ seam along raw edge.  Do this to each corner.

IMG_3501

Ella loves her bag!  Look at all the things you can use it for:

IMG_3490

Journaling supplies, art supplies, or even your favorite magazines on a road trip!

IMG_3499

Composition Book Zipper Pouch

comp book zipper pouch

I had this great idea for my kids to keep a summer vacation journal.  I got each of them a composition book and covered it with patterned paper.  I thought it would be fun for them to have a zipper pouch to keep the journal in along with glue sticks, pens, pencils, scissors, washi tape, etc.  That way when we are traveling they can write down their experiences and also include post cards, maps, brochures, ticket stubs, and other memorabilia of our trip.  They were super excited to pick their own fabrics!  Here’s how you can make one!!

Supplies:

Front: (6) 2.5″ x 10″ strips

Back: 12″x 10″ piece of denim

Lining: (2) 12″ x 10″ coordinating fabric

12″ or longer zipper

All seams 1/4″

Begin by cutting the 2.5″ x 10″ strips for the front.  You will need 6.

Sew together and press.

IMG_0415

Ryan choose Off Shore by Riley Blake Designs.

IMG_0416

Sally choose these fun prints from Dear Stella.

Once the strips are sewn it’s time to quilt.

IMG_0417

Baste the pieced front to the batting.  For a little extra stability I add an additional piece of fabric to the back of the batting – one that will not be seen.  So I use fabric I don’t like.  Quilt.  Square up.  Depending on how much you quilted, your measurements might have changed a touch.  The piece before quilting should measure 12″ x 10″.  If it has changed, make a note and use this measurement to cut the denim back and the lining pieces.IMG_0418

IMG_0420

Now it’s time to install the zipper.  If you need more assistance on the zipper, I have a whole section of zipper pouch tutorials that will have more detail.    IMG_0421

Lay the front piece face up.  Align the zipper face down.  Add one of the lining pieces also face down.  Make sure all the top edges match.  Pin.  I buy my zippers extra long so there is zipper hanging off on both sides – not to worry 🙂IMG_0422

Using a zipper foot, sew 1/4″ along the raw edges.IMG_0423

Now repeat with the other side.  Lay the denim face up.  Position the bag front and zipper face down.  Lay the second piece of lining face down as well.  Align all top edges, pin, sew.IMG_0425

Press the fabric along the zipper.  I usually top stitch 1/8″ away from both sides of the zipper.  In my haste to get these done super fast I forgot this step.  Position the zipper in the center of the bag and trim off the excess zipper.IMG_0426

Match the lining pieces right sides together.  Match up the denim and front pieces right sides together.  Pin all the way around.  Here is what it looks like where the zipper ends meet.  IMG_0427

Sew 1/4″ all the way around the bag leaving a 3″ opening on one of the lining sides.  Turn right side out and top stitch the lining closed.  Press.

IMG_0432

I love how they turned out!  My kids are thrilled as well!!IMG_0428

Now we are ready for a fun adventure!IMG_0430

IMG_0436

IMG_0431

IMG_0439   IMG_0434

Clownfish iPad Case Tutorial

ipad case clownfish sizzix

My family LOVES the Finding Dorey movie!!  When Sizzix released this new fish die at Quilt Market I knew it was for me!

Screen Shot 2016-05-27 at 10.12.26 AMUsing this new die and the circle die you can create this fun pouch.  I wanted a case that would fit my iPad.  Then my daughter decided she wanted it 🙂

IMG_8457

It also fits a few composition books or the medium size coloring or sketch book.  If you would rather a different size, simply change up the measurements to fit your needs!  Lets get started!

IMG_8410

Being by choosing a variety of blue fabrics from dark to light.  Fuse Heat n Bond lite to the back of each fabric (I cut mine in 5″ squares for easy die cutting).  Die cut the circles.  I used the circle die that has 1.5″, 2″, and 2.5″ circles.IMG_8412

Make sure your Sizzix obsessed cat is nearby to assist 🙂

Cut (2) 10″ x 12″ pieces of denimn weight fabric.  I used Crossroads Denim.  Here is where you can change the measurements if you want.  This is a generous size for the iPad. I wanted it to fit with my sweet leopard print case 🙂IMG_8415

Peel off all the backing papers and begin arranging the circles, overlapping so no background fabric is showing.  I started at the bottom with the dark blues.  IMG_8417

Once it is how you like, press with a hot dry iron.IMG_8424

Spray baste this to the cotton batting and quilt as desired.  I quilted random wavy lines throughout.  I am so in love with this!!!IMG_8426

Do the same with the back piece.IMG_8435

Die cut 2 fish going opposite directions, again, using Heat n Bond Lite.

IMG_8438
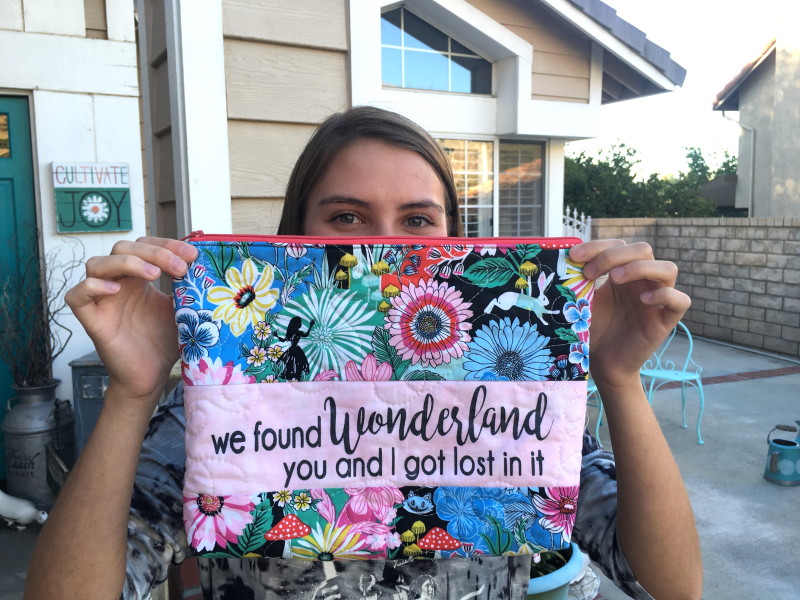
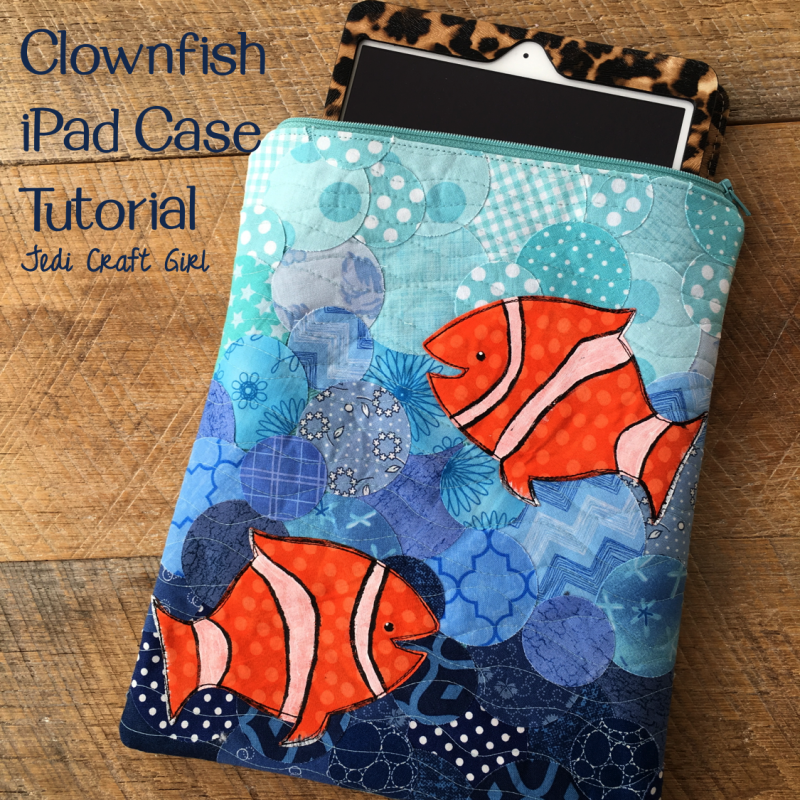
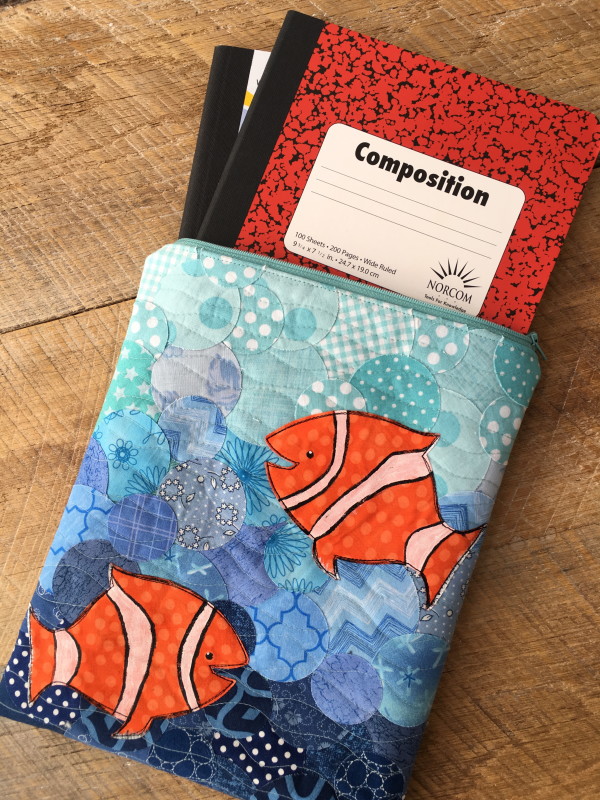
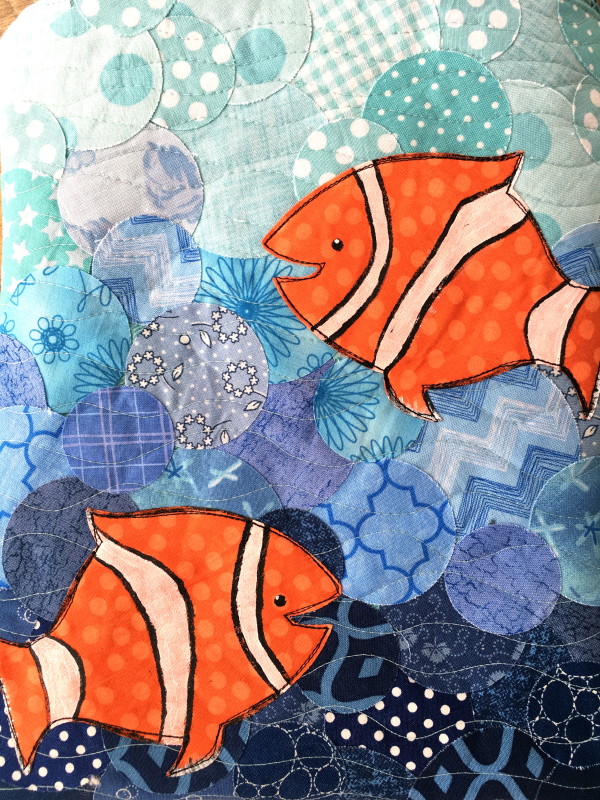
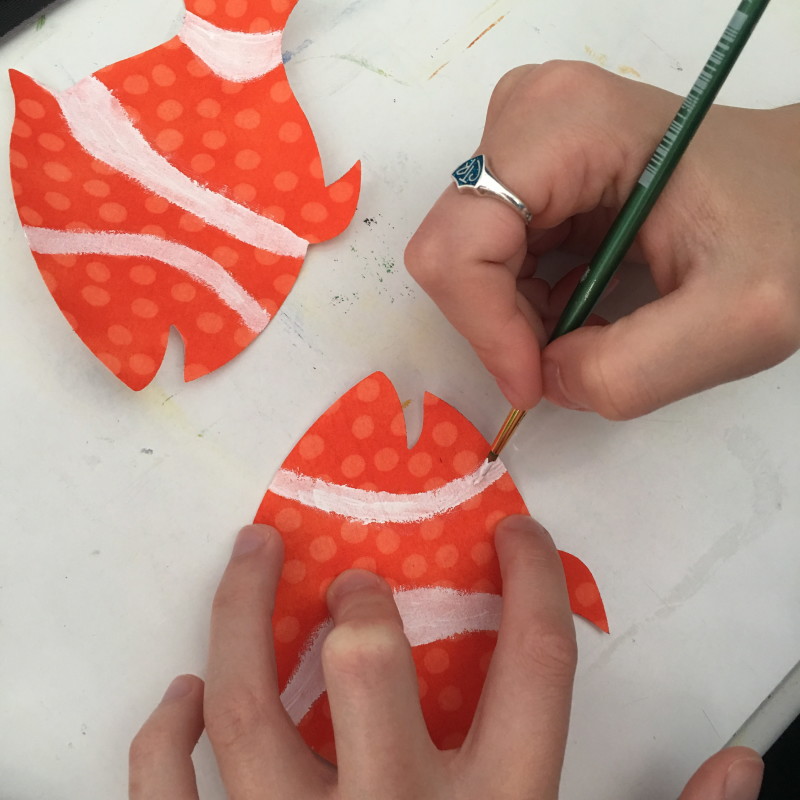
If you want you can paint a little detail on the fish.  We used regular acrylic paint.

IMG_8442

Position the fish and heat set into place.  Stitch around each fish 2 times.IMG_8436

Cut 2 pieces of the backing fabric the same size as the outer bag fabric.  I always remeasure the outer bag pieces after quilting because it will shrink a little.   IMG_8447

Sew a zipper in the top.  You can use this tutorial for inserting a zipper into a zipper pouch and finishing the bag.IMG_8454

I love how it turned out.  I can’t wait to use this circle background technique on a mini quilt!!IMG_8456

Simple Zipper Bag {Fat Quarter Shop}

IMG_8535

Today I’m sharing my version of the Simple Zipper Bag pattern from Fat Quarter Shop.  They just released this fun and instructional video with all the measurements and instructions so you can make your own!!

I selected a charm pack of Cotton + Steel and I sub-cut the pieces into 2.5″ squares.

IMG_8524

IMG_8534

I used a super soft Crossroads denim for the back and the binding.

I followed the instructions almost exactly – only making a few changes.  I didn’t have the Soft n Stable so I used my trusty stabilizer trick:  Heat n Bond medium weight fusible stabilizer and then Spray n Bond basting spray to adhere it to quilt batting.  It gives such a nice feel!

IMG_8515

I used a chunky metal zipper which I love!  You just have to be careful when sewing over the metal teeth.  I used the hand wheel and not the foot control to gently sew over the metal teeth.  Then I used the junkiest scissors I could find to trim it down.

IMG_8522

This size pouch is perfect to hold a journal or small sketch book and writing or drawing supplies.  It would also be perfect for embroidery projects!IMG_8528

Mufasa loves the pouch too!!  I can hide cat toys in it!IMG_8541Hop over to these wonderful blogs to see more versions of the Simple Zipper Bag!!!

Tina from Emily Ann’s Kloset

Jessee from An Art School Dropout’s Life

Erin from Why Not Sew?

Kitty from Night Quilter

Leanne from She Can Quilt

Vanessa from Lella Boutique

Amanda from Jedi Craft Girl

Sherri from A Quilting Life

Cristy from Love You Sew

Leslie from Seasoned Homemaker

Tiffany from Tiny Seamstress