Quilt Design Board DIY

quilt design board diy 7

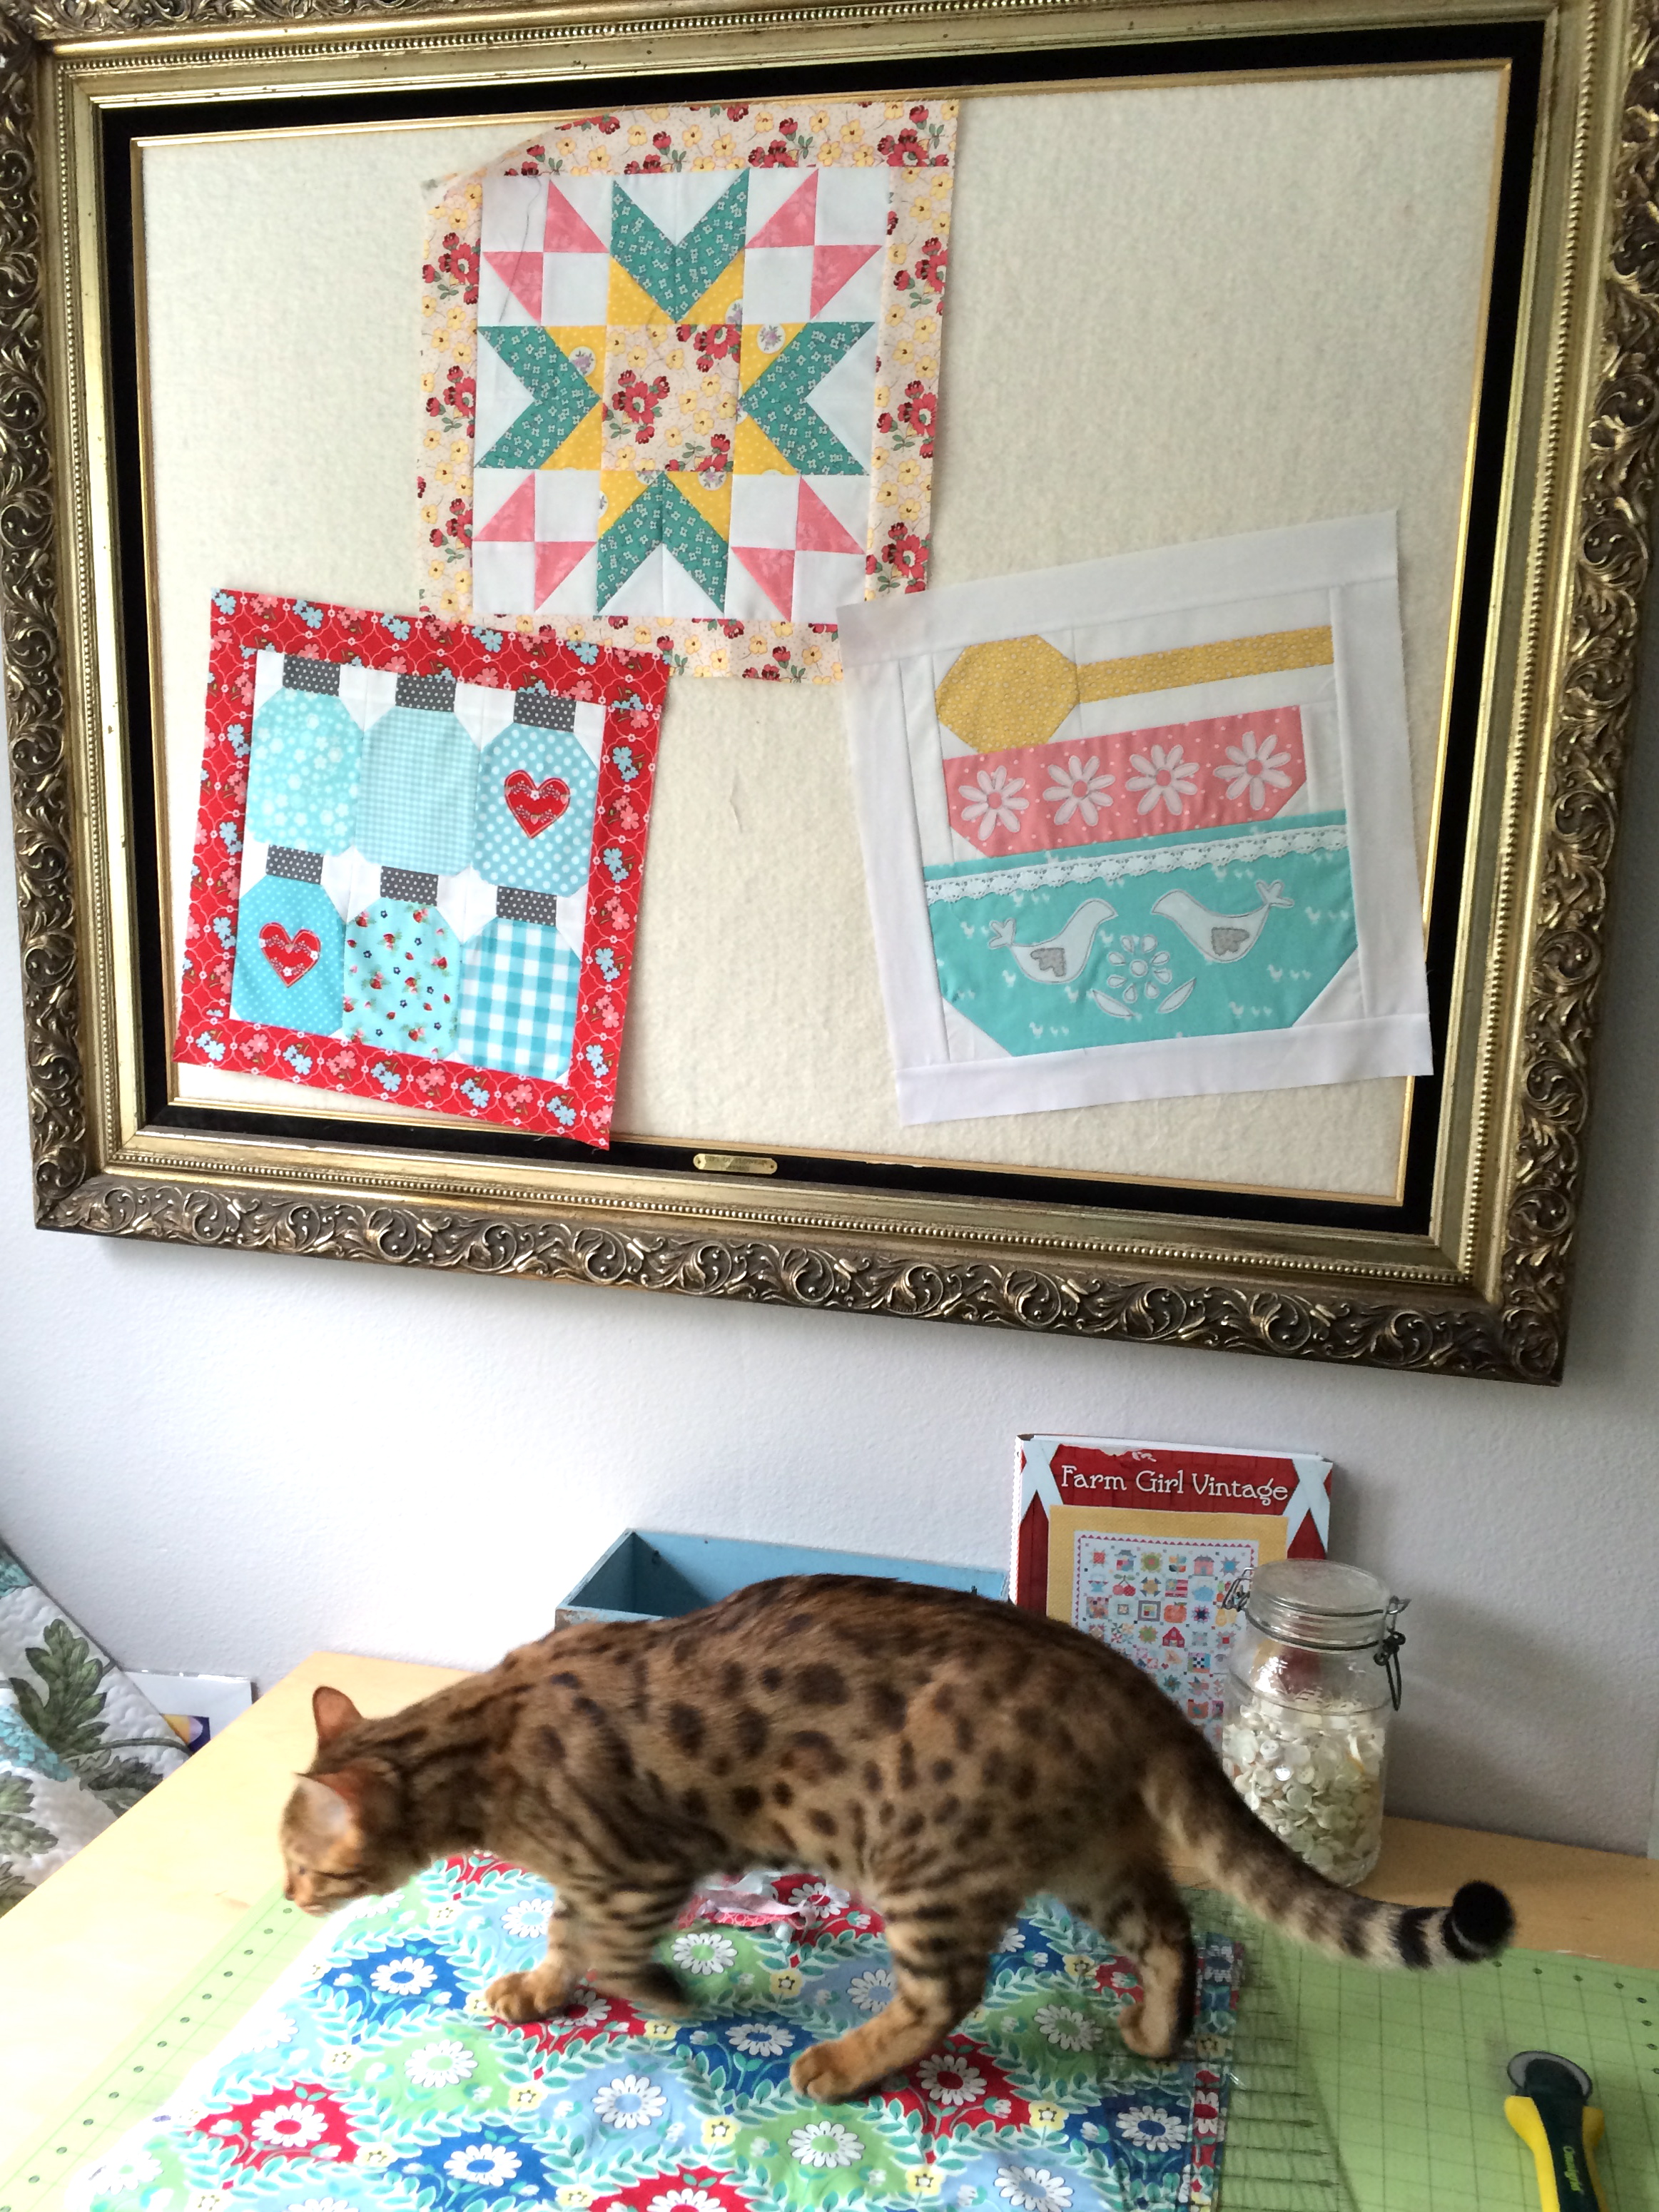
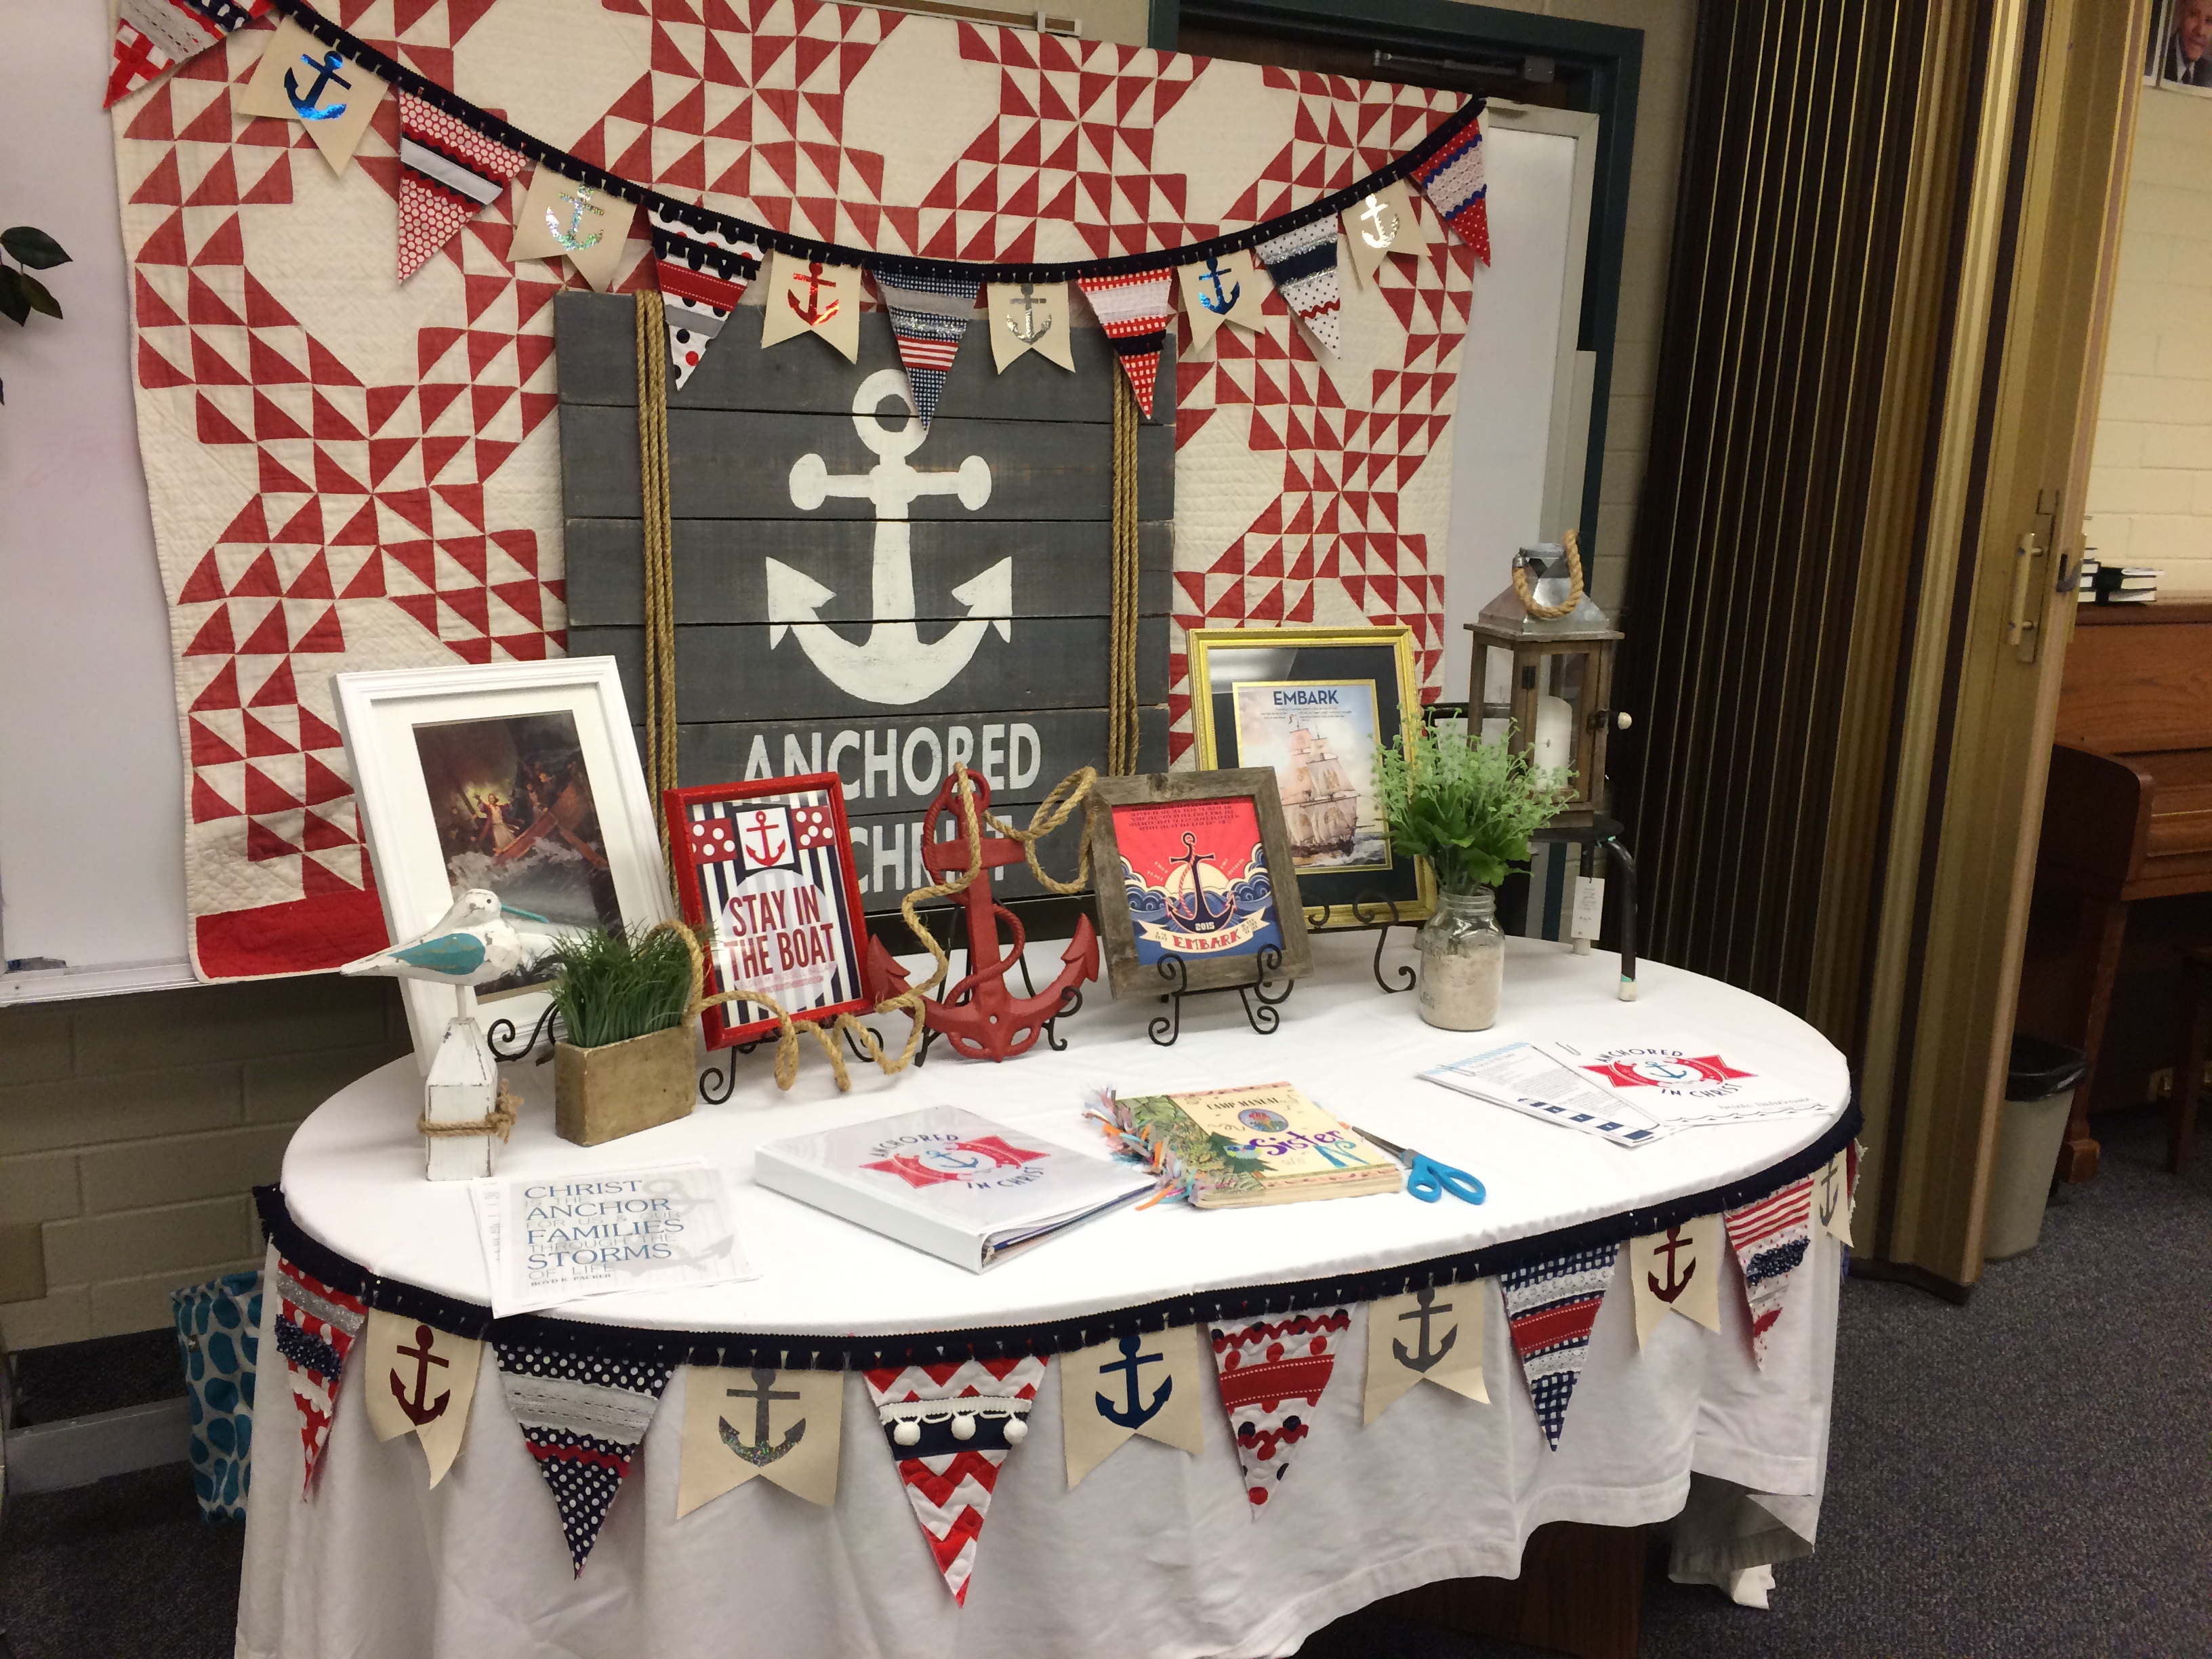
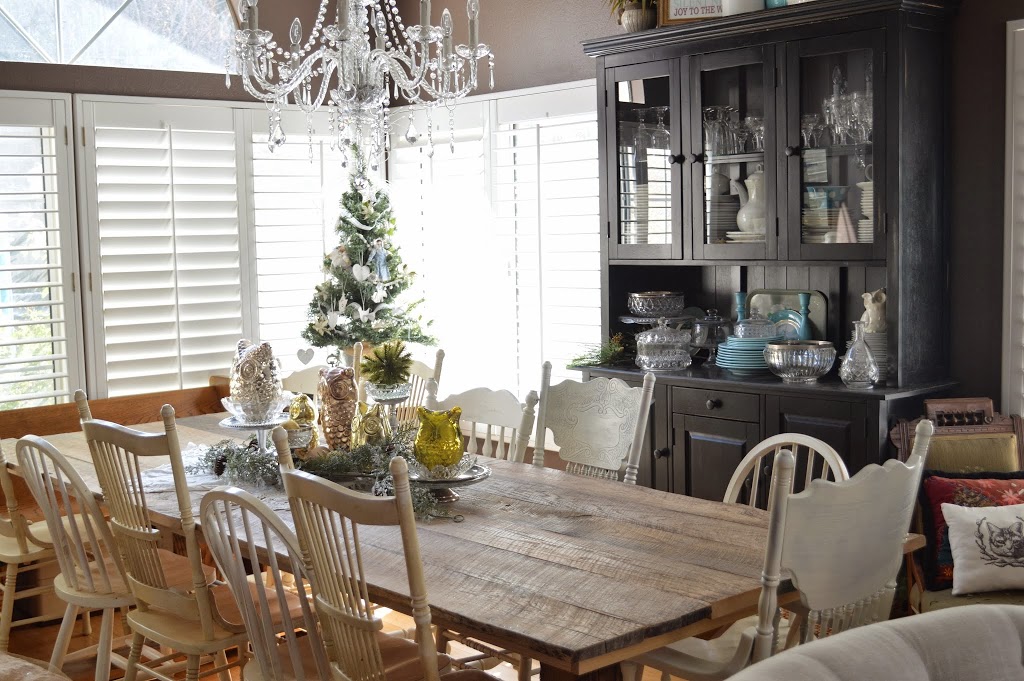
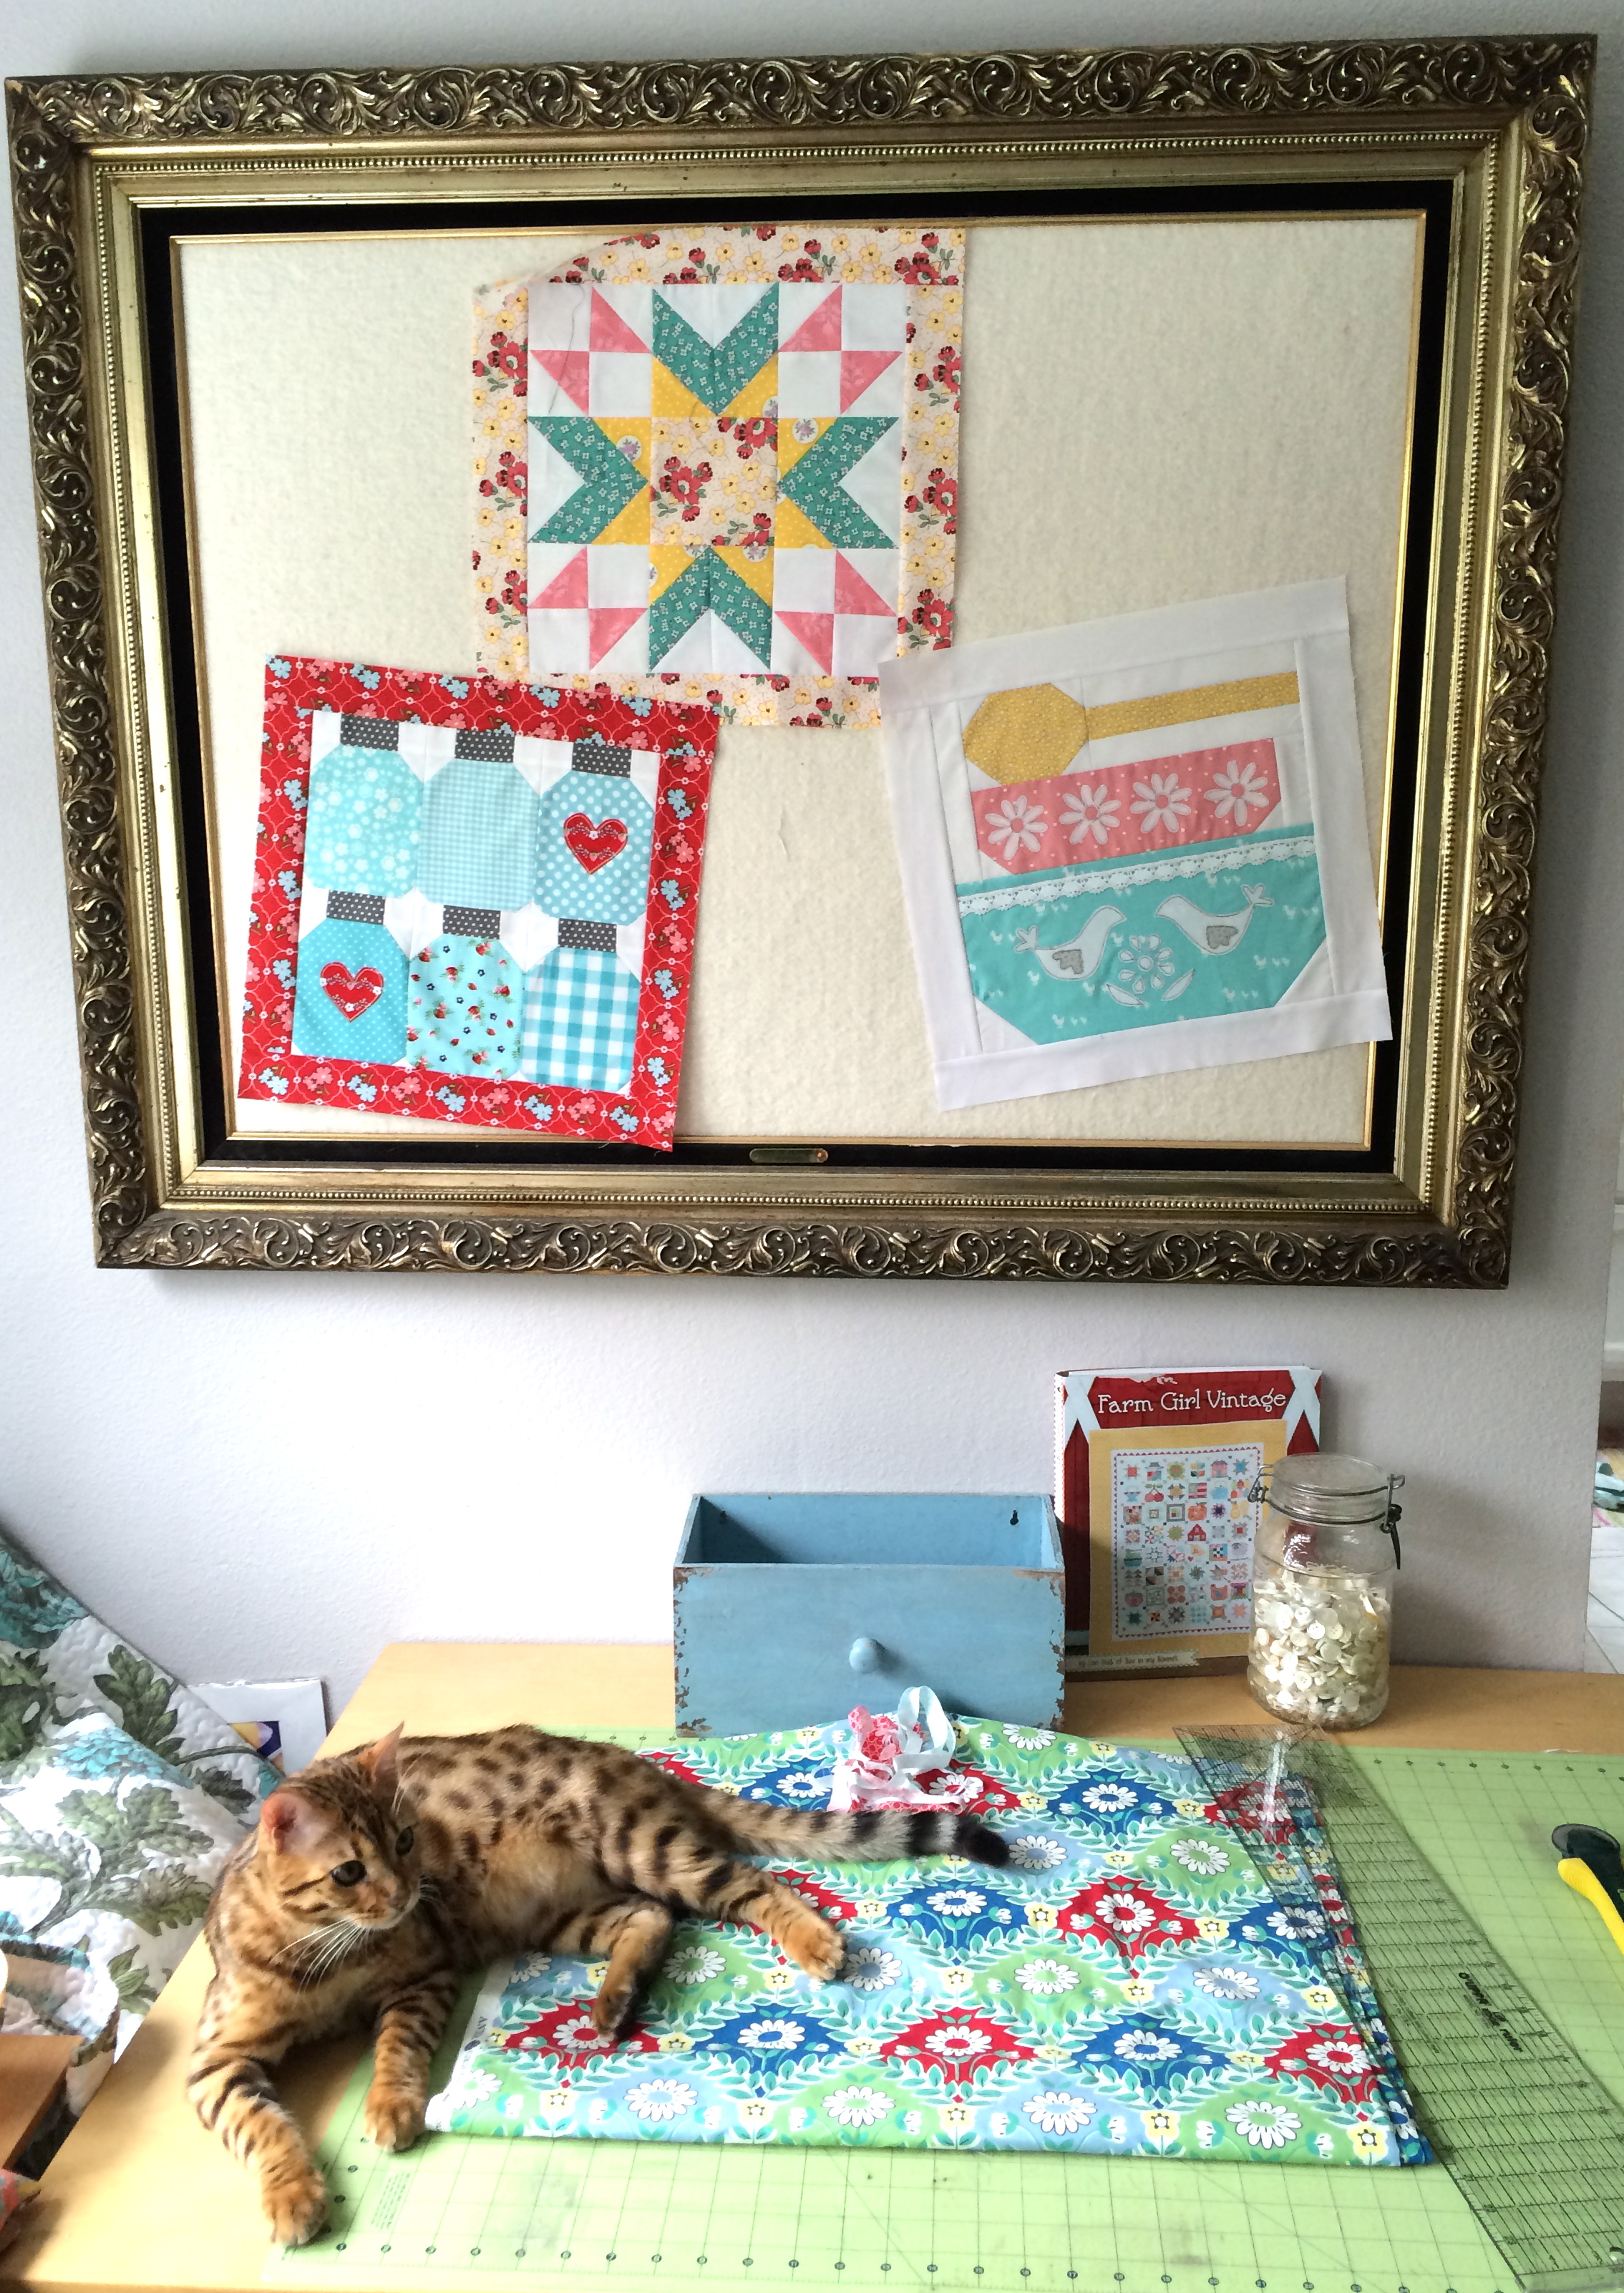
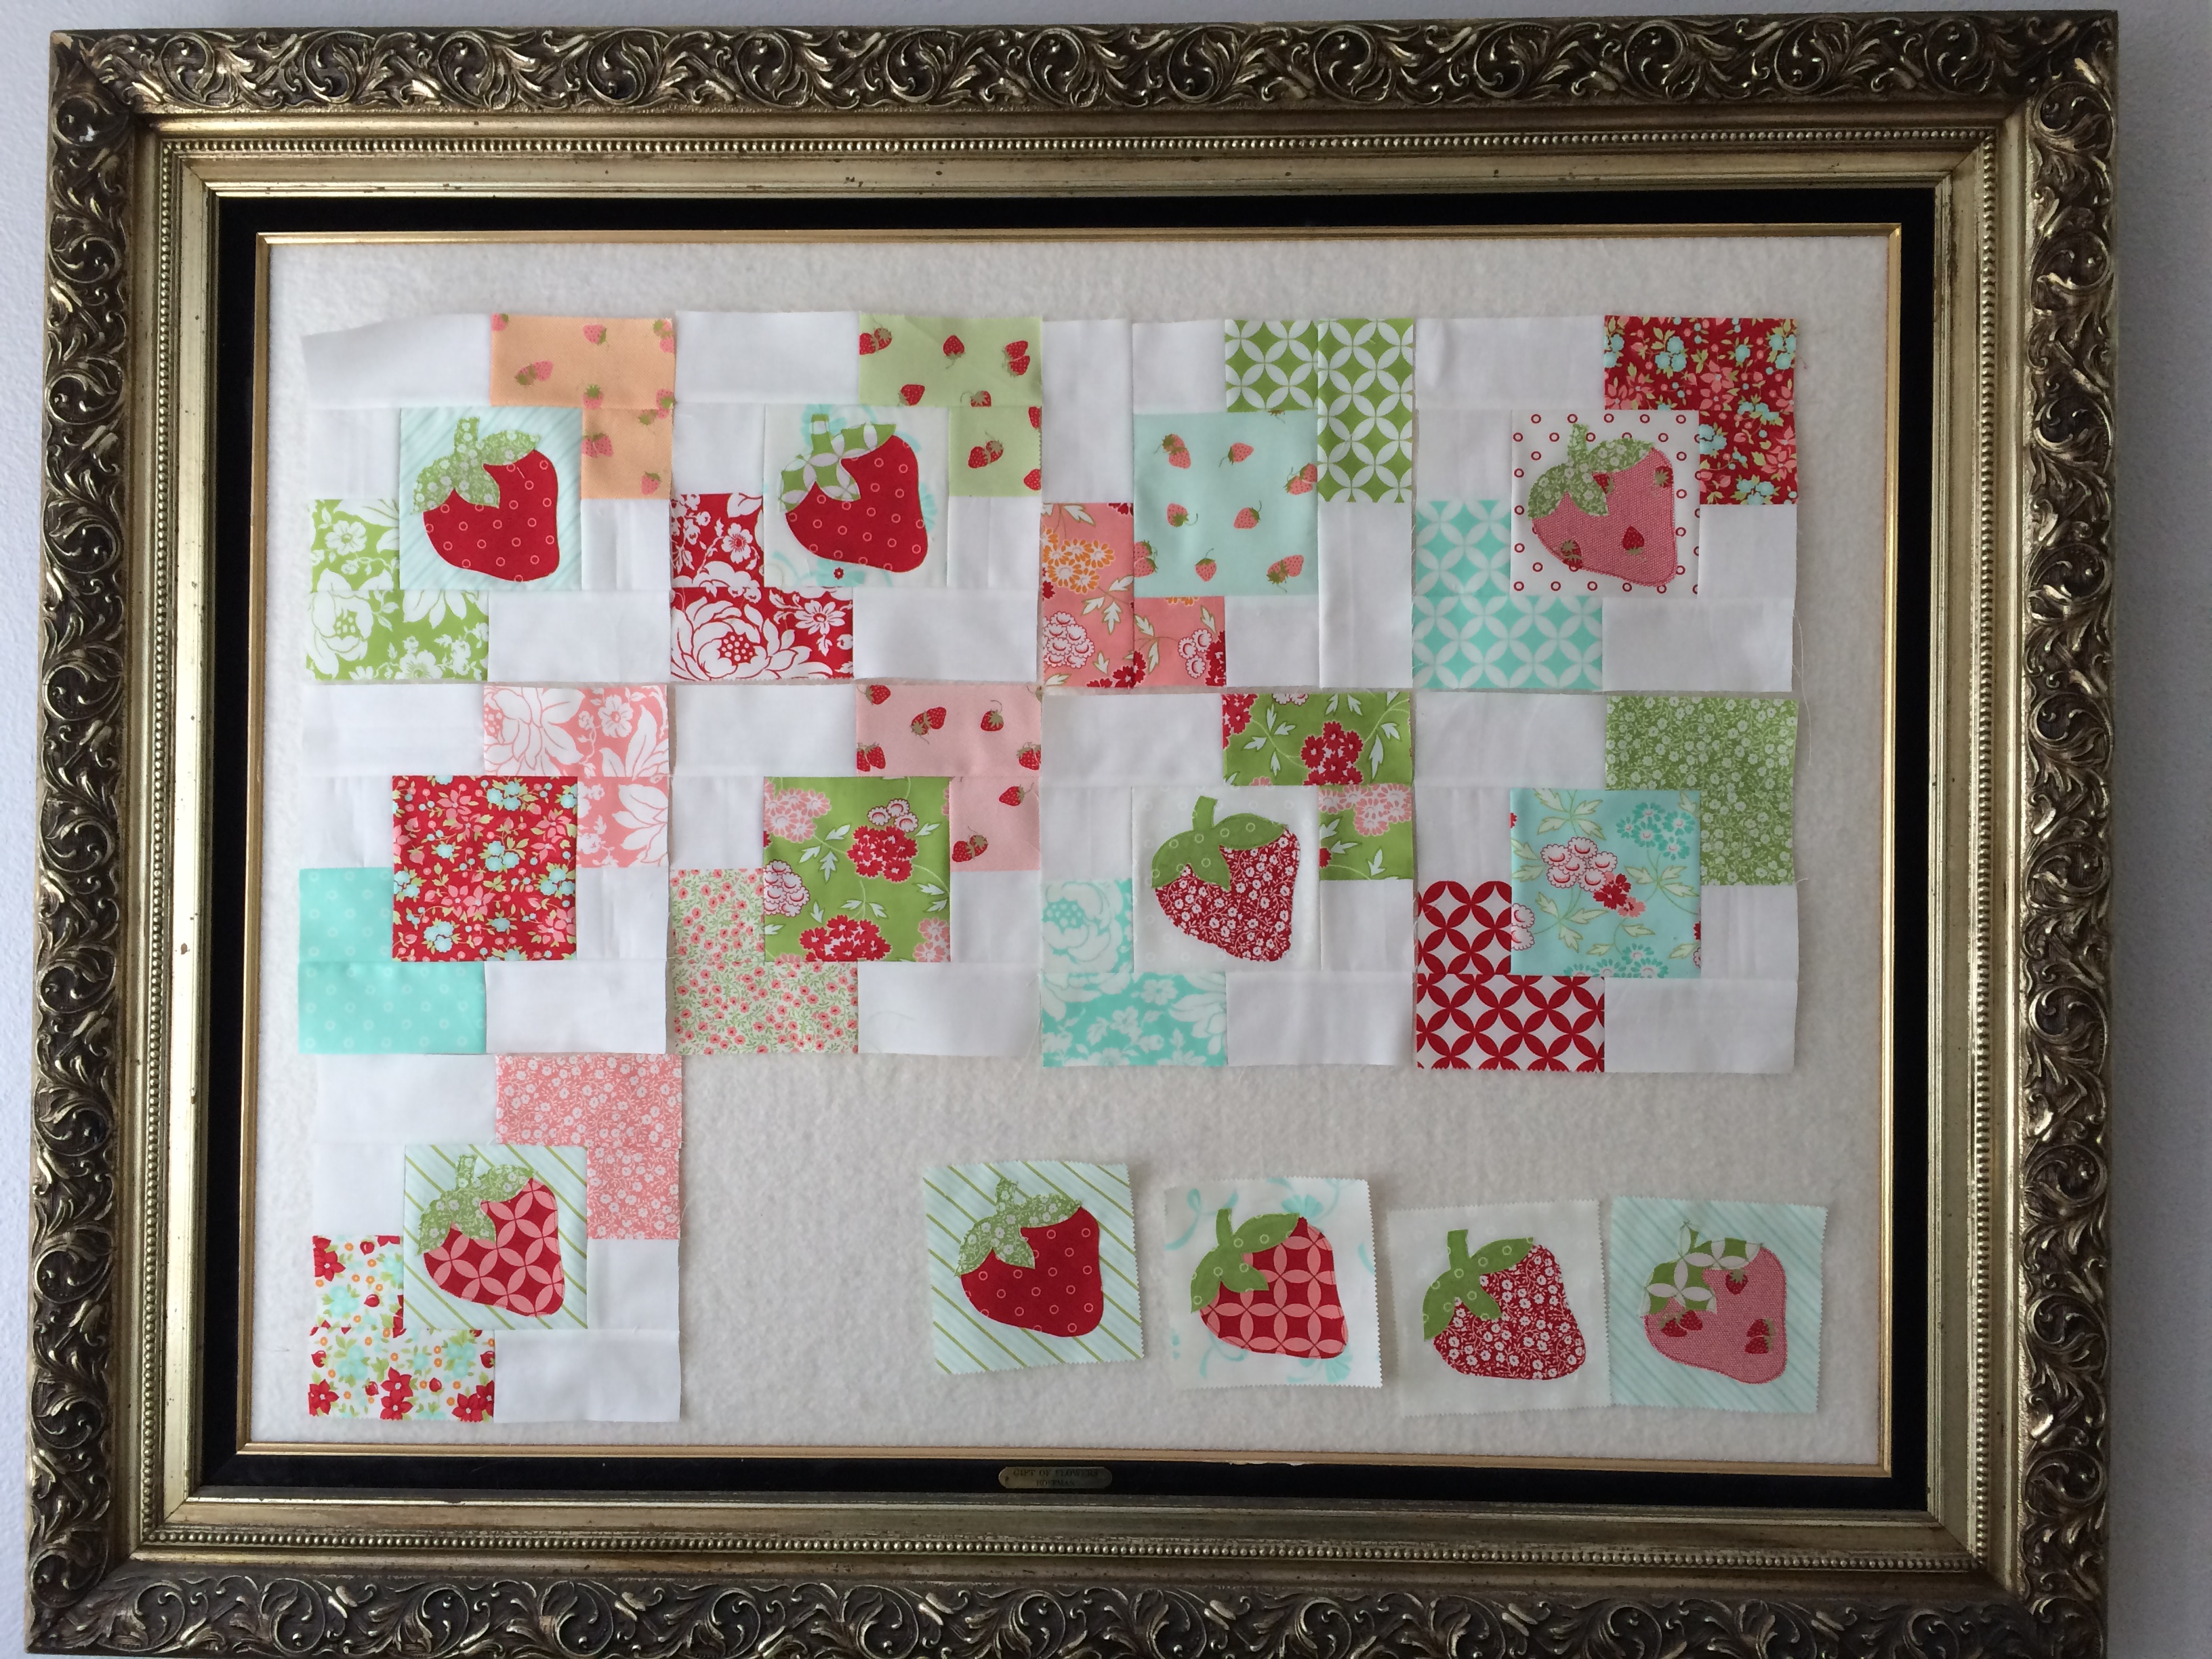
I purchased this rather large frame off of Craigslist last year.  It’s been sitting in my garage and I didn’t know what to do with it.  The other day I though, “Gee it would be nice to have a quilt block design board!”  The hamsters in my brain began spinning their little wheel and I put 2 and 2 together!  Here’s how you can make one!

IMG_7564

quilt design board diy

Supplies:

a large frame with an ugly picture 🙂 – you can totally paint the frame, I liked the vintagey metallic of this frame

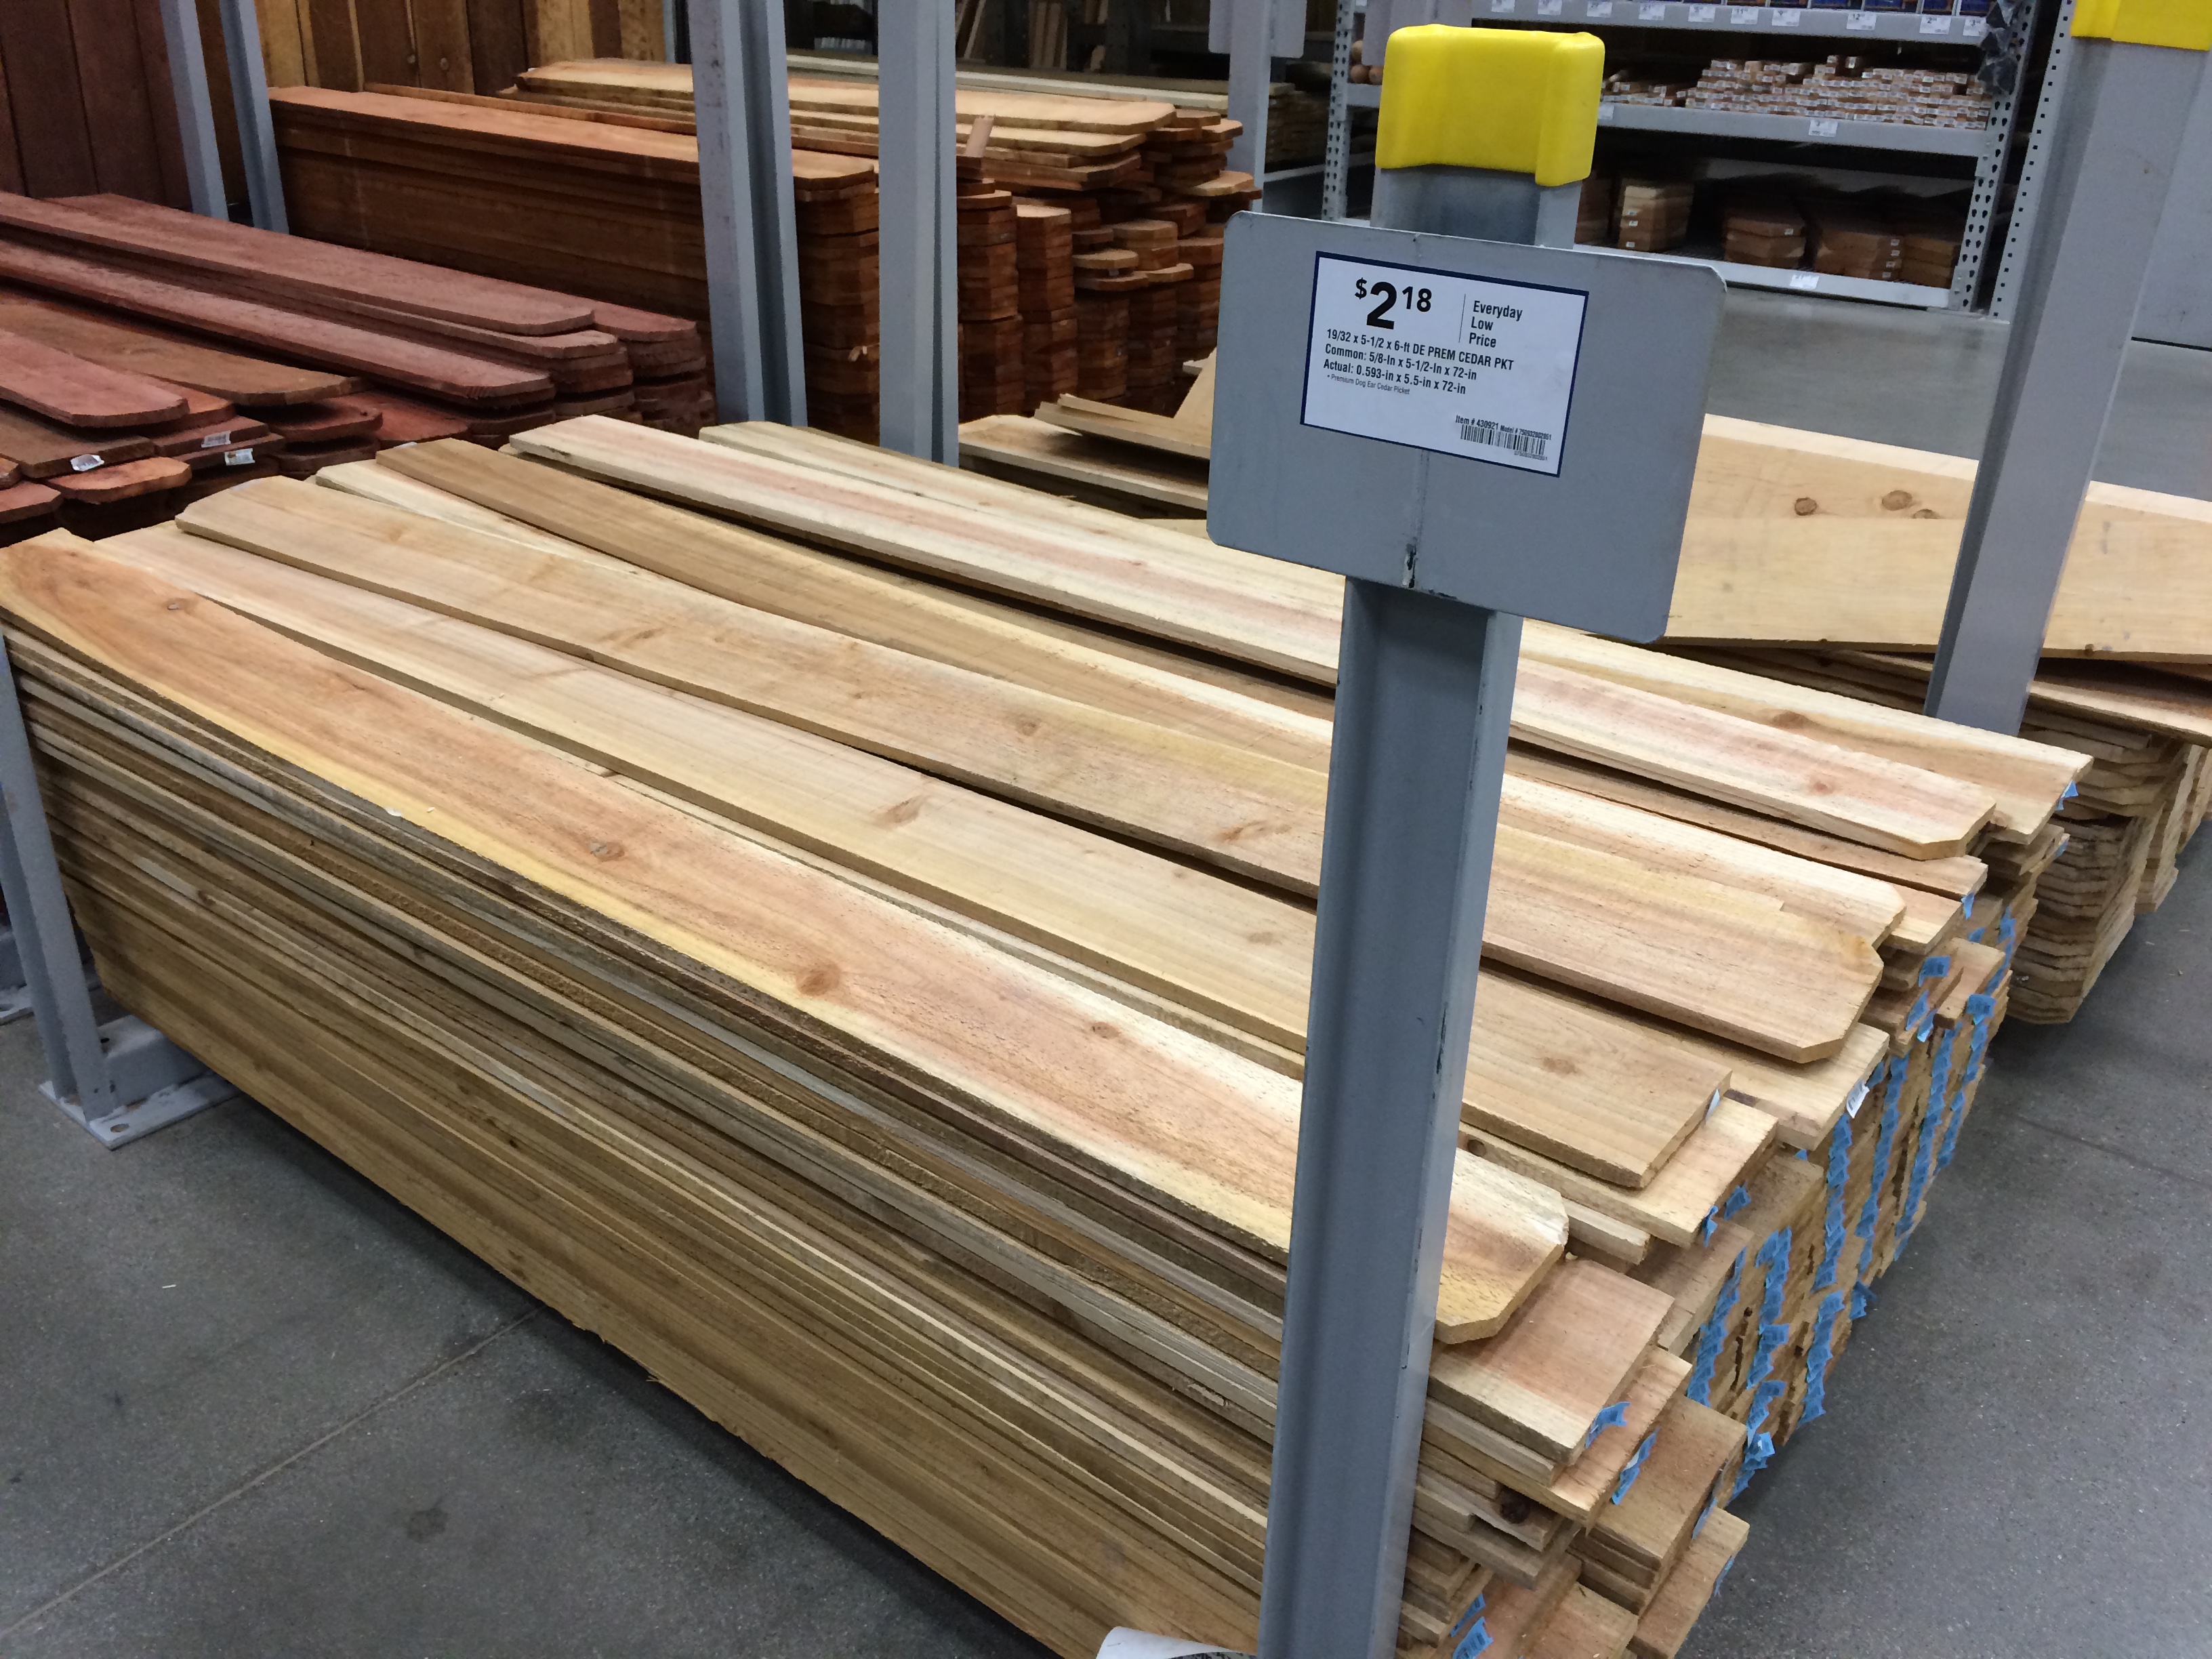
If your frame is empty, you will need a piece of 1/4″ plywood that is cut to fit inside the frame

Batting, enough to fill the frame plus 2.5″ on each side 2 times

Hot glue

Nails

quilt design board diy 3

Begin by laying the picture or plywood on the cotton batting.  Cut around the picture leaving about 2.5″ on each side.  Then cut another piece of batting the same size.

Place the picture or plywood in the center of the first piece of batting.  Begin hot gluing around the edges and adhering the edge of the batting – pulling so the batting is taught.  Continue gluing all the way around.  Then repeat this process with the second piece of batting, pulling and gluing and burning your fingers.
quilt design board diy 2

I was a little worried the picture with 2 layers of batting would be too thick for the frame, but it fit perfectly, it almost didn’t need to be secured.  Insert the batting covered board into the frame.  Hammer a few nails around the frame to secure.  Then add picture hanging wire, making sure it’s the proper weight for the frame.  Tada – done in about 5 minutes!!!

quilt design board diy 5
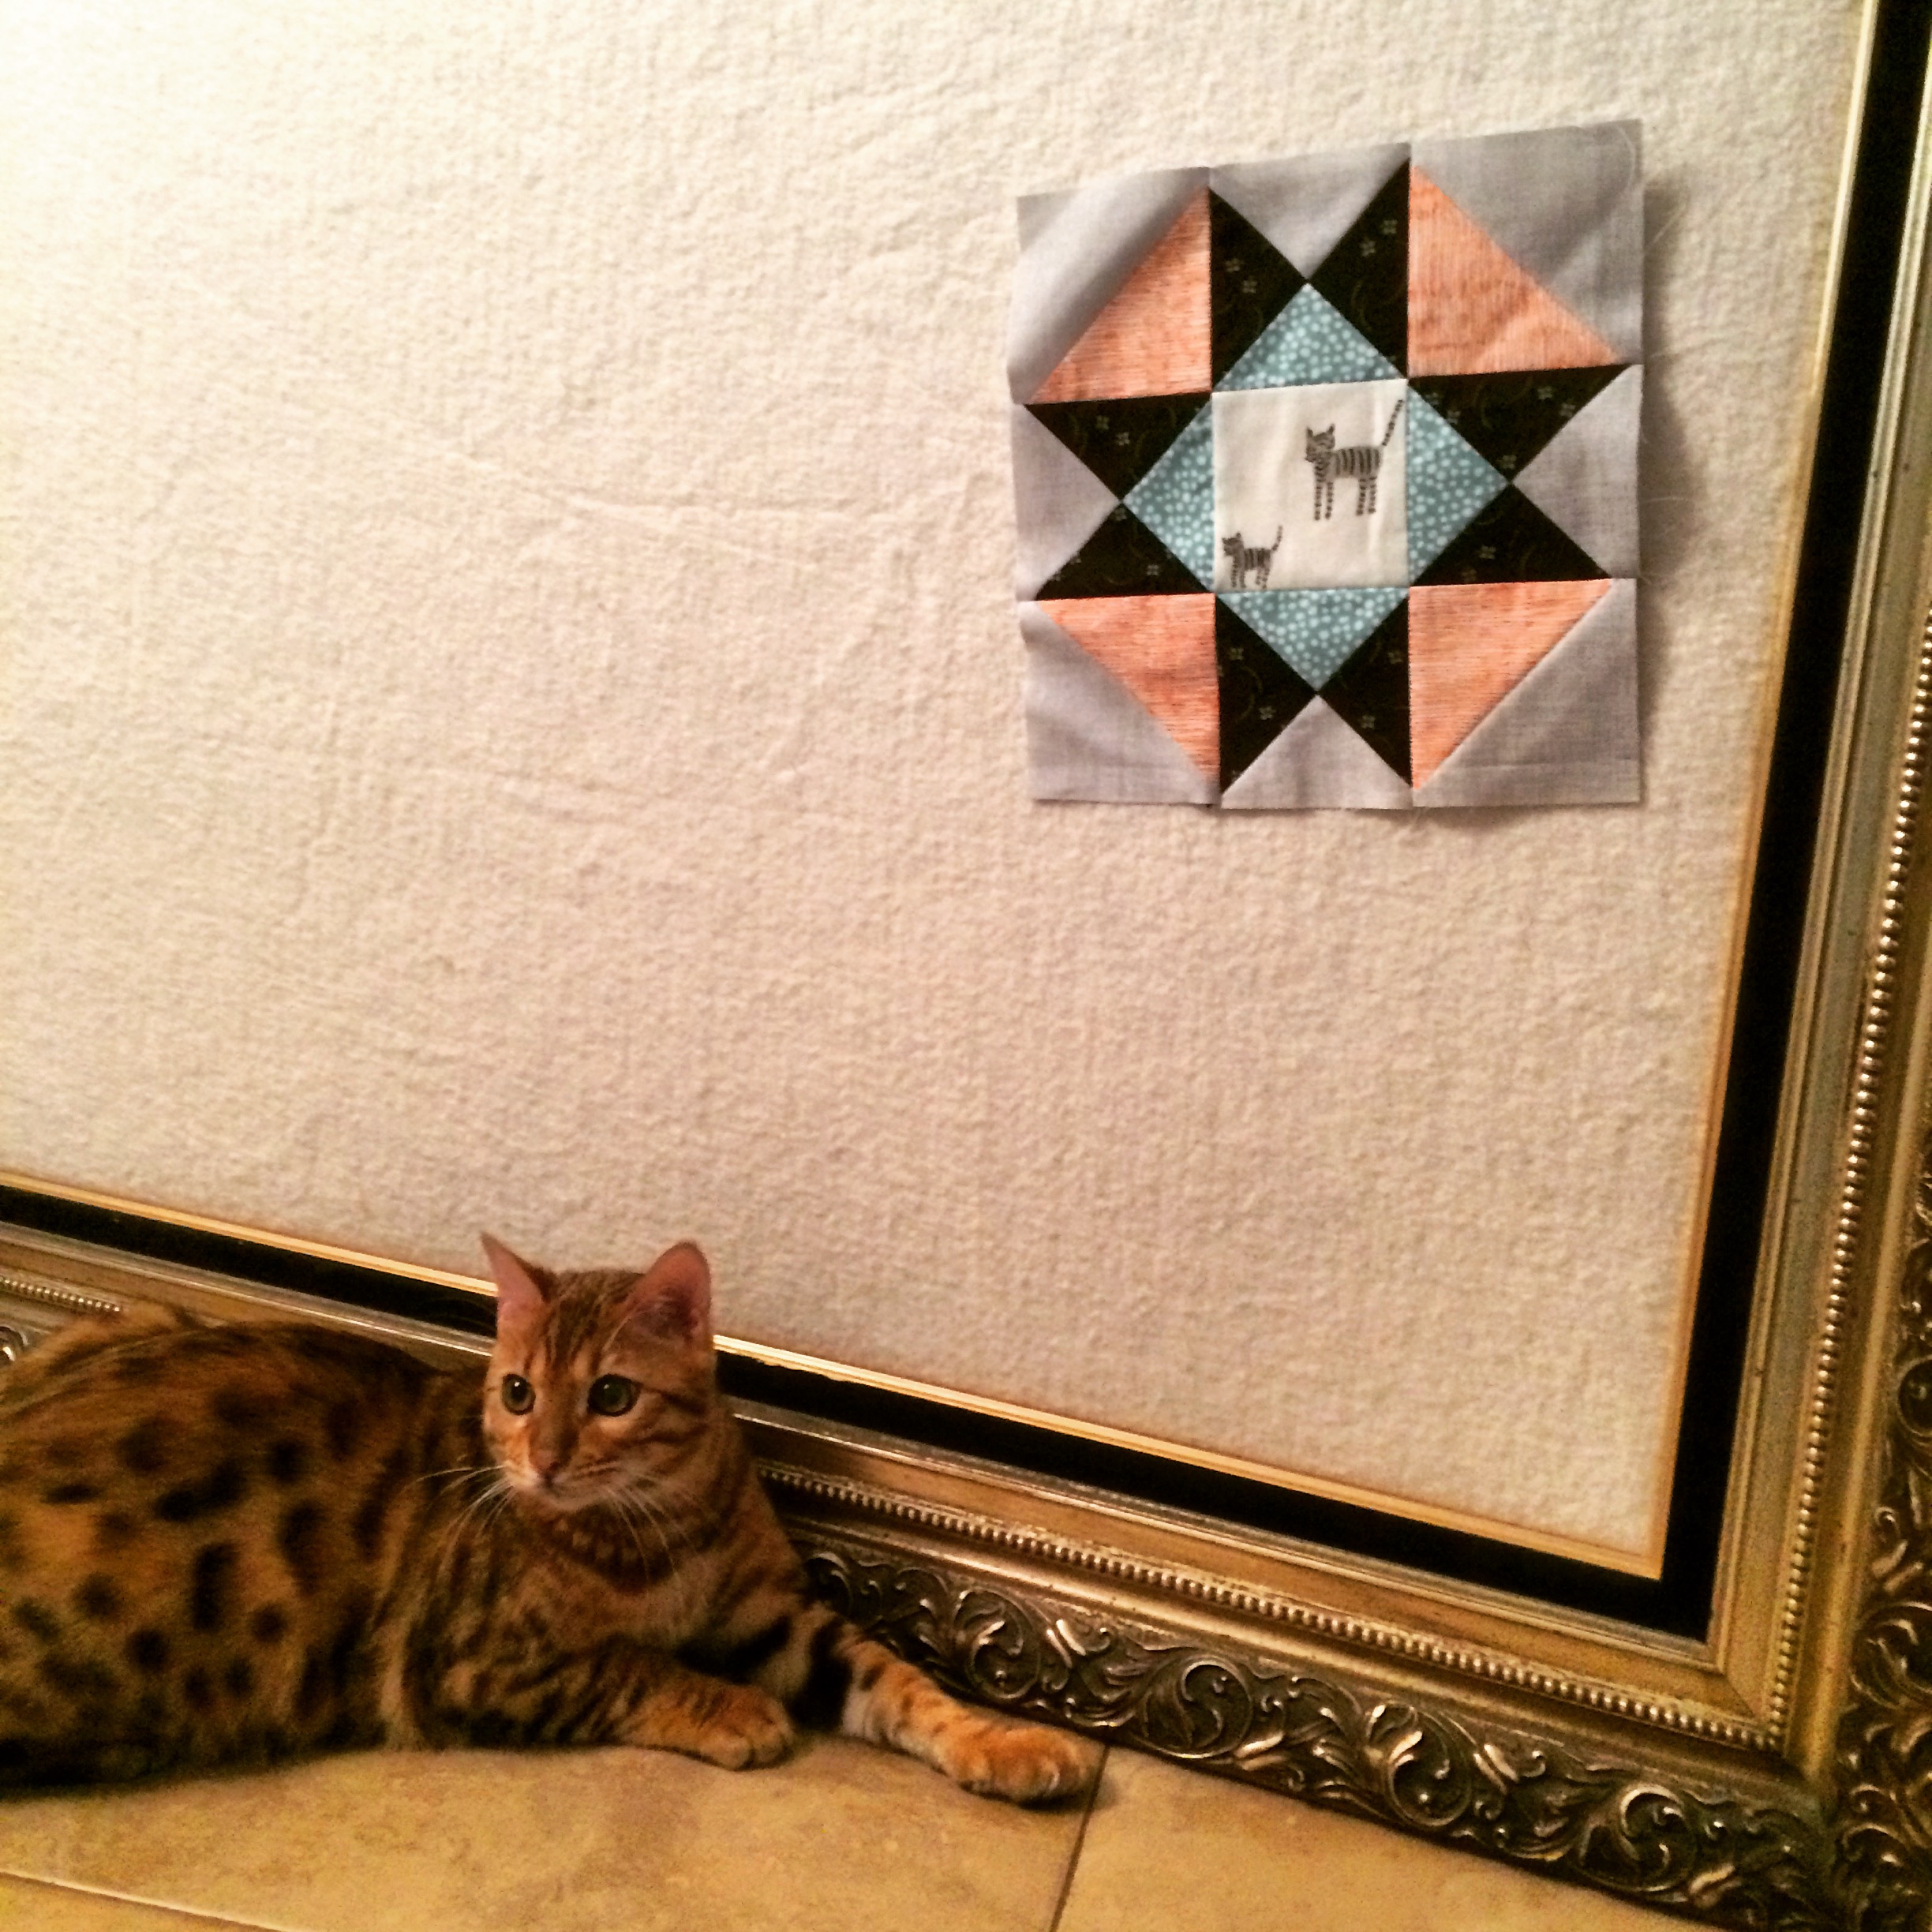
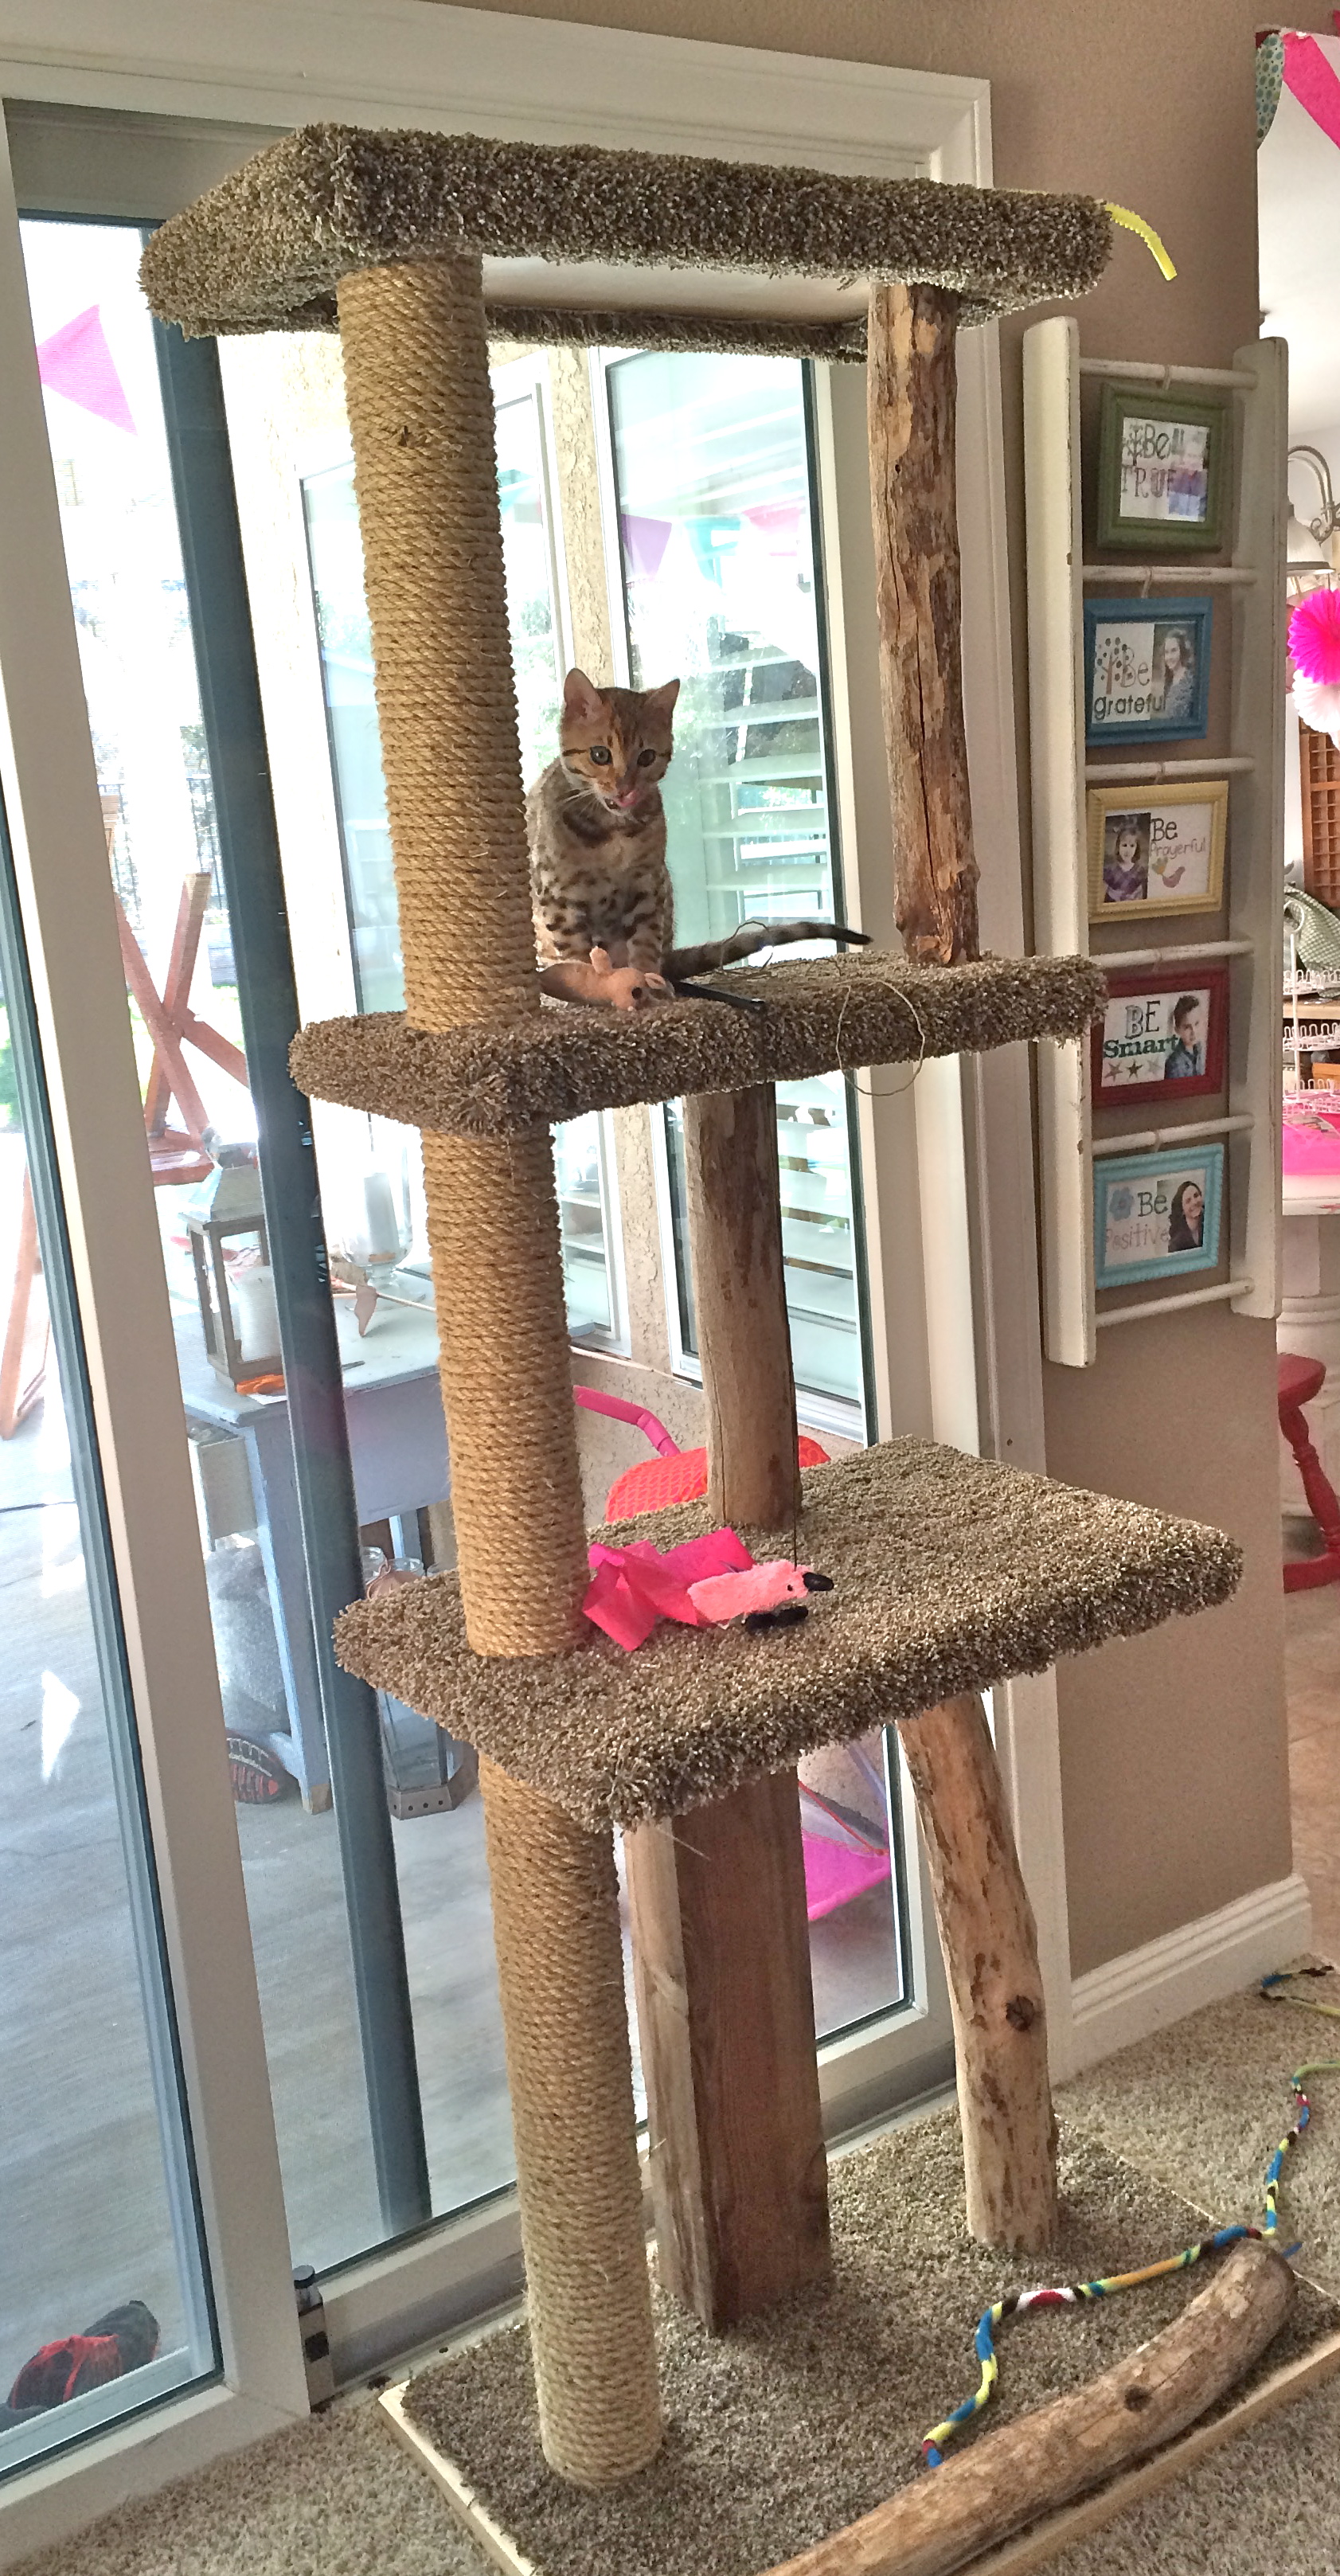
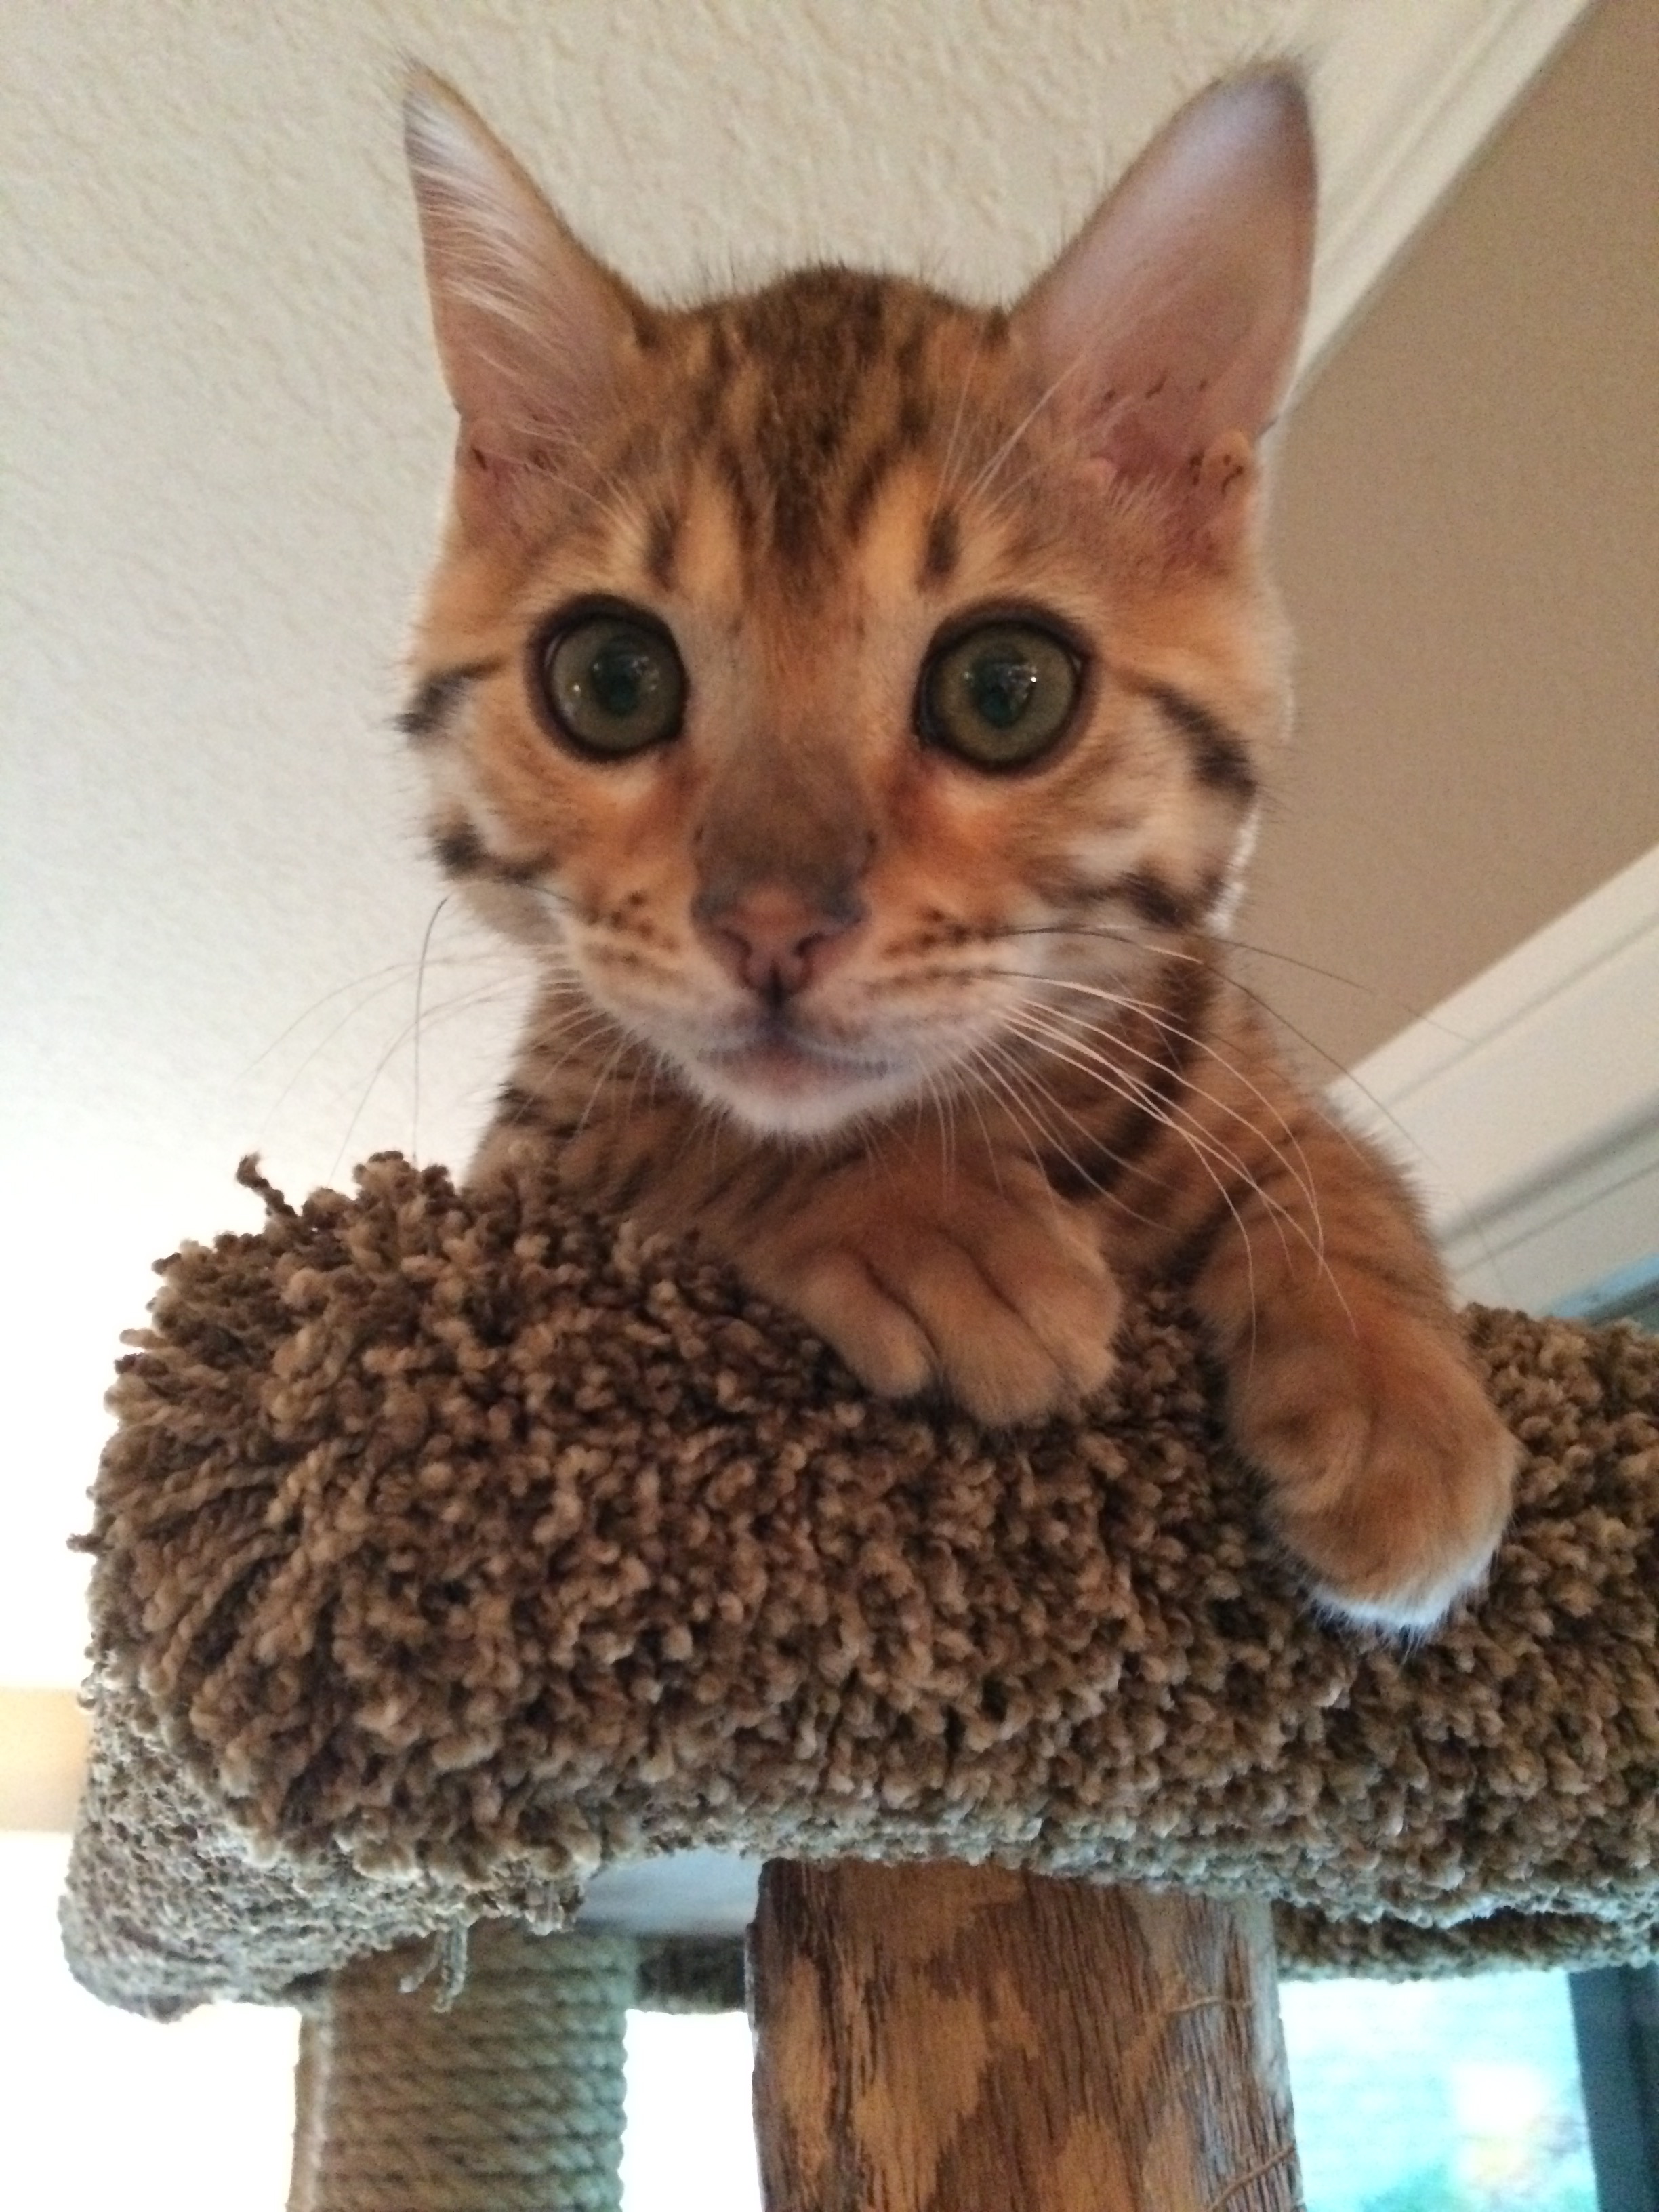
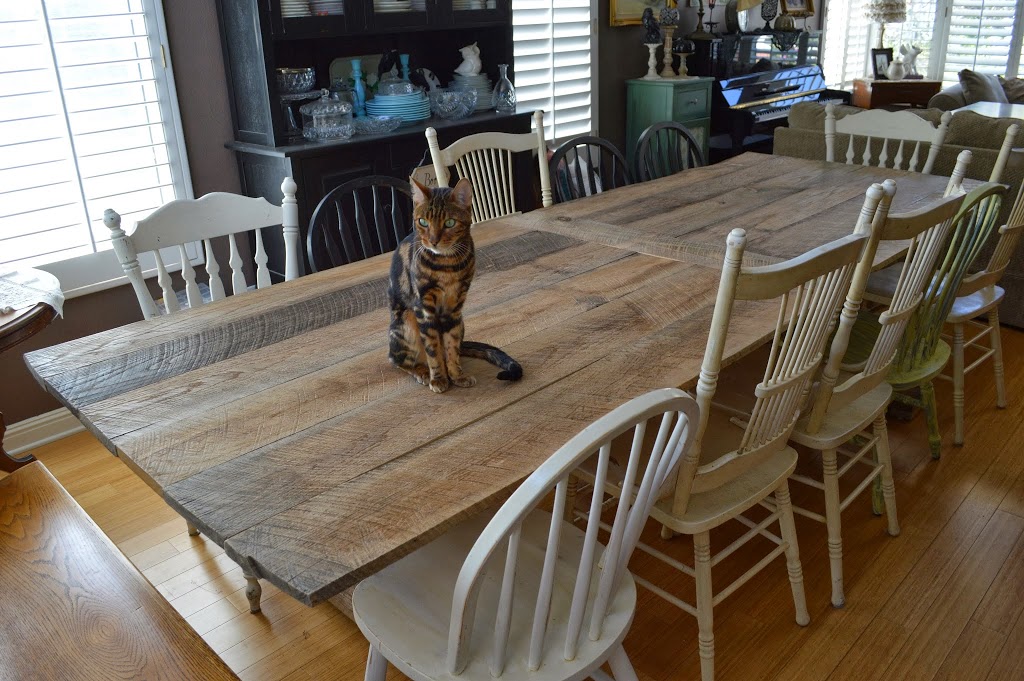
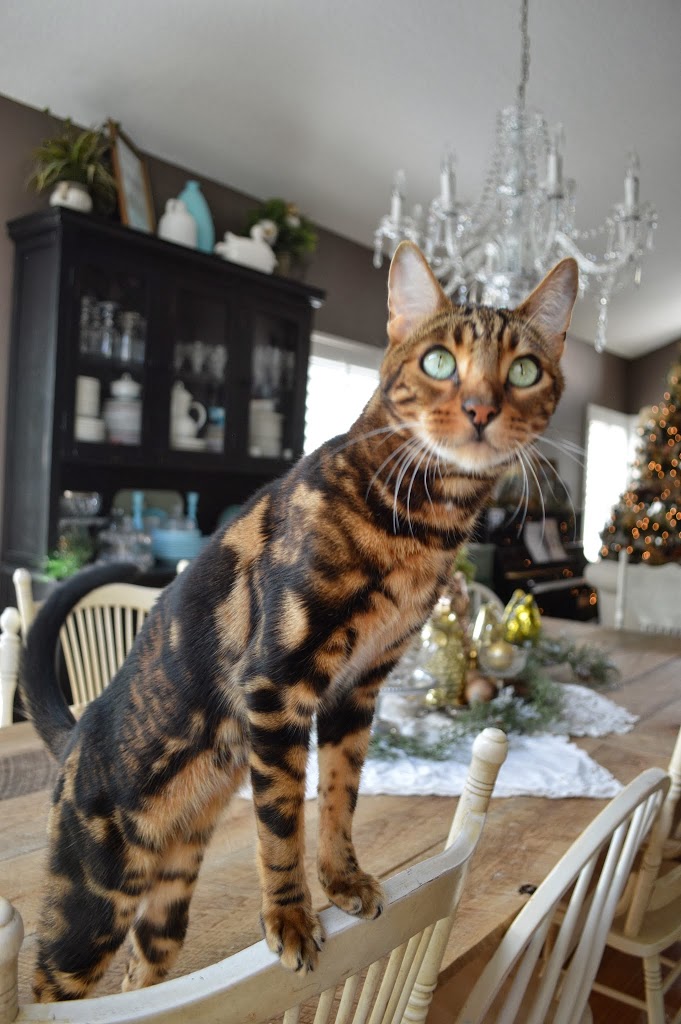
Baby Mufasa approves!  I had to hurry and hang it so he wouldn’t claw it!!
quilt design board diy 6

It’t perfect to display all your blocks in progress.  I like that mine is always different depending on what I’m working on.  It’s like having a new picture everyday!

IMG_7566

Anchored In Christ Wood Sign {DIY}

wood anchor sign 9

I wanted to share with you how I made this fun wood nautical sign – for under $20!  I am our Stake Young Women Camp Director (for girls age 12-18).  This year our theme is Anchored in Christ. I wanted a large wood sign that I could use to promote our theme at all our planning meetings.  This sign can easily be changed to say was ever you want 🙂

I started by purchasing this cedar fencing at the home improvement store.  You only need 3 boards.wood anchor sign 7


Its cheap and rustic – just what I wanted!!wood anchor sign 8


We  (my husband cut and I watched) cut them into 3 foot pieces, 6 total.  We cut the little angled pieces off the end so they were all flush.IMG_7361

Then we cut (2) 1″x 2″ pieces of wood slightly shorter than the sign.  I put wood glue along the boards and then screwed the 1″ x 2″ boards in as pictured.  Let dry.

IMG_7360

I bought a dark gray stain and stained the front.  Because I can’t draw or write pretty, I cut the words on my vinyl cutter and made a stencil.  I stenciled the words in white paint. wood anchor sign

I found an anchor outline on the internet and blew it up really big.  I printed it off in sections and then taped it together.  Yes, pathetic – why can’t I just draw!

wood anchor sign 2

Once all the pieces were taped together, I cut out the anchor.wood anchor sign 3

Then I drew around it with white pencil.  All that was left was to paint in the lines (I can kind of do that) with white paint.

wood anchor sign 4I added some rope along the sides.  This was my display for our first leader meeting where we kicked off the theme.  I love all things Nautical, in case you were wondering 🙂

wood anchor sign 5

wood anchor sign 6


Mother’s Day Pom Pom Pen Bouquet

pom pom pens

I can’t believe how fast May is flying by!  And Mother’s Day is this weekend!  I thought this project would be great for moms or for Teacher Appreciation Week which is also going on here in our schools!  It’s pretty simple to make and the kids can get in on the fun!

Have you ever heard of Flower Power Vases?  I hadn’t until the cute little company sent me 2 vases to try out.  They wanted to see my thoughts  – so this is NOT a paid tutorial, just my thoughts and ideas 🙂flower power pom pom  8

First of all, the little vases come in many colors.  They all have this special grippy thing in the bottom to hold cut flowers.

slideshow_4

flower power pom pom  2

Of course they are perfect for cut flowers (and they fit in the cup holder of a car)….I wanted to turn it into a little crafty gift.  Here’s what you need:

Pens, yarn, hot glue, small pom pom maker, and the Flower Power Vase.  I added a chalkboard label so you can change the word on the vase.

flower power pom pom

Begin by adding a dot of hot glue to the end of the pen to secure the yarn.  Wrap and wrap and wrap until you get to the other end of the pen and add another dot of hot glue.

flower power pom pom  3
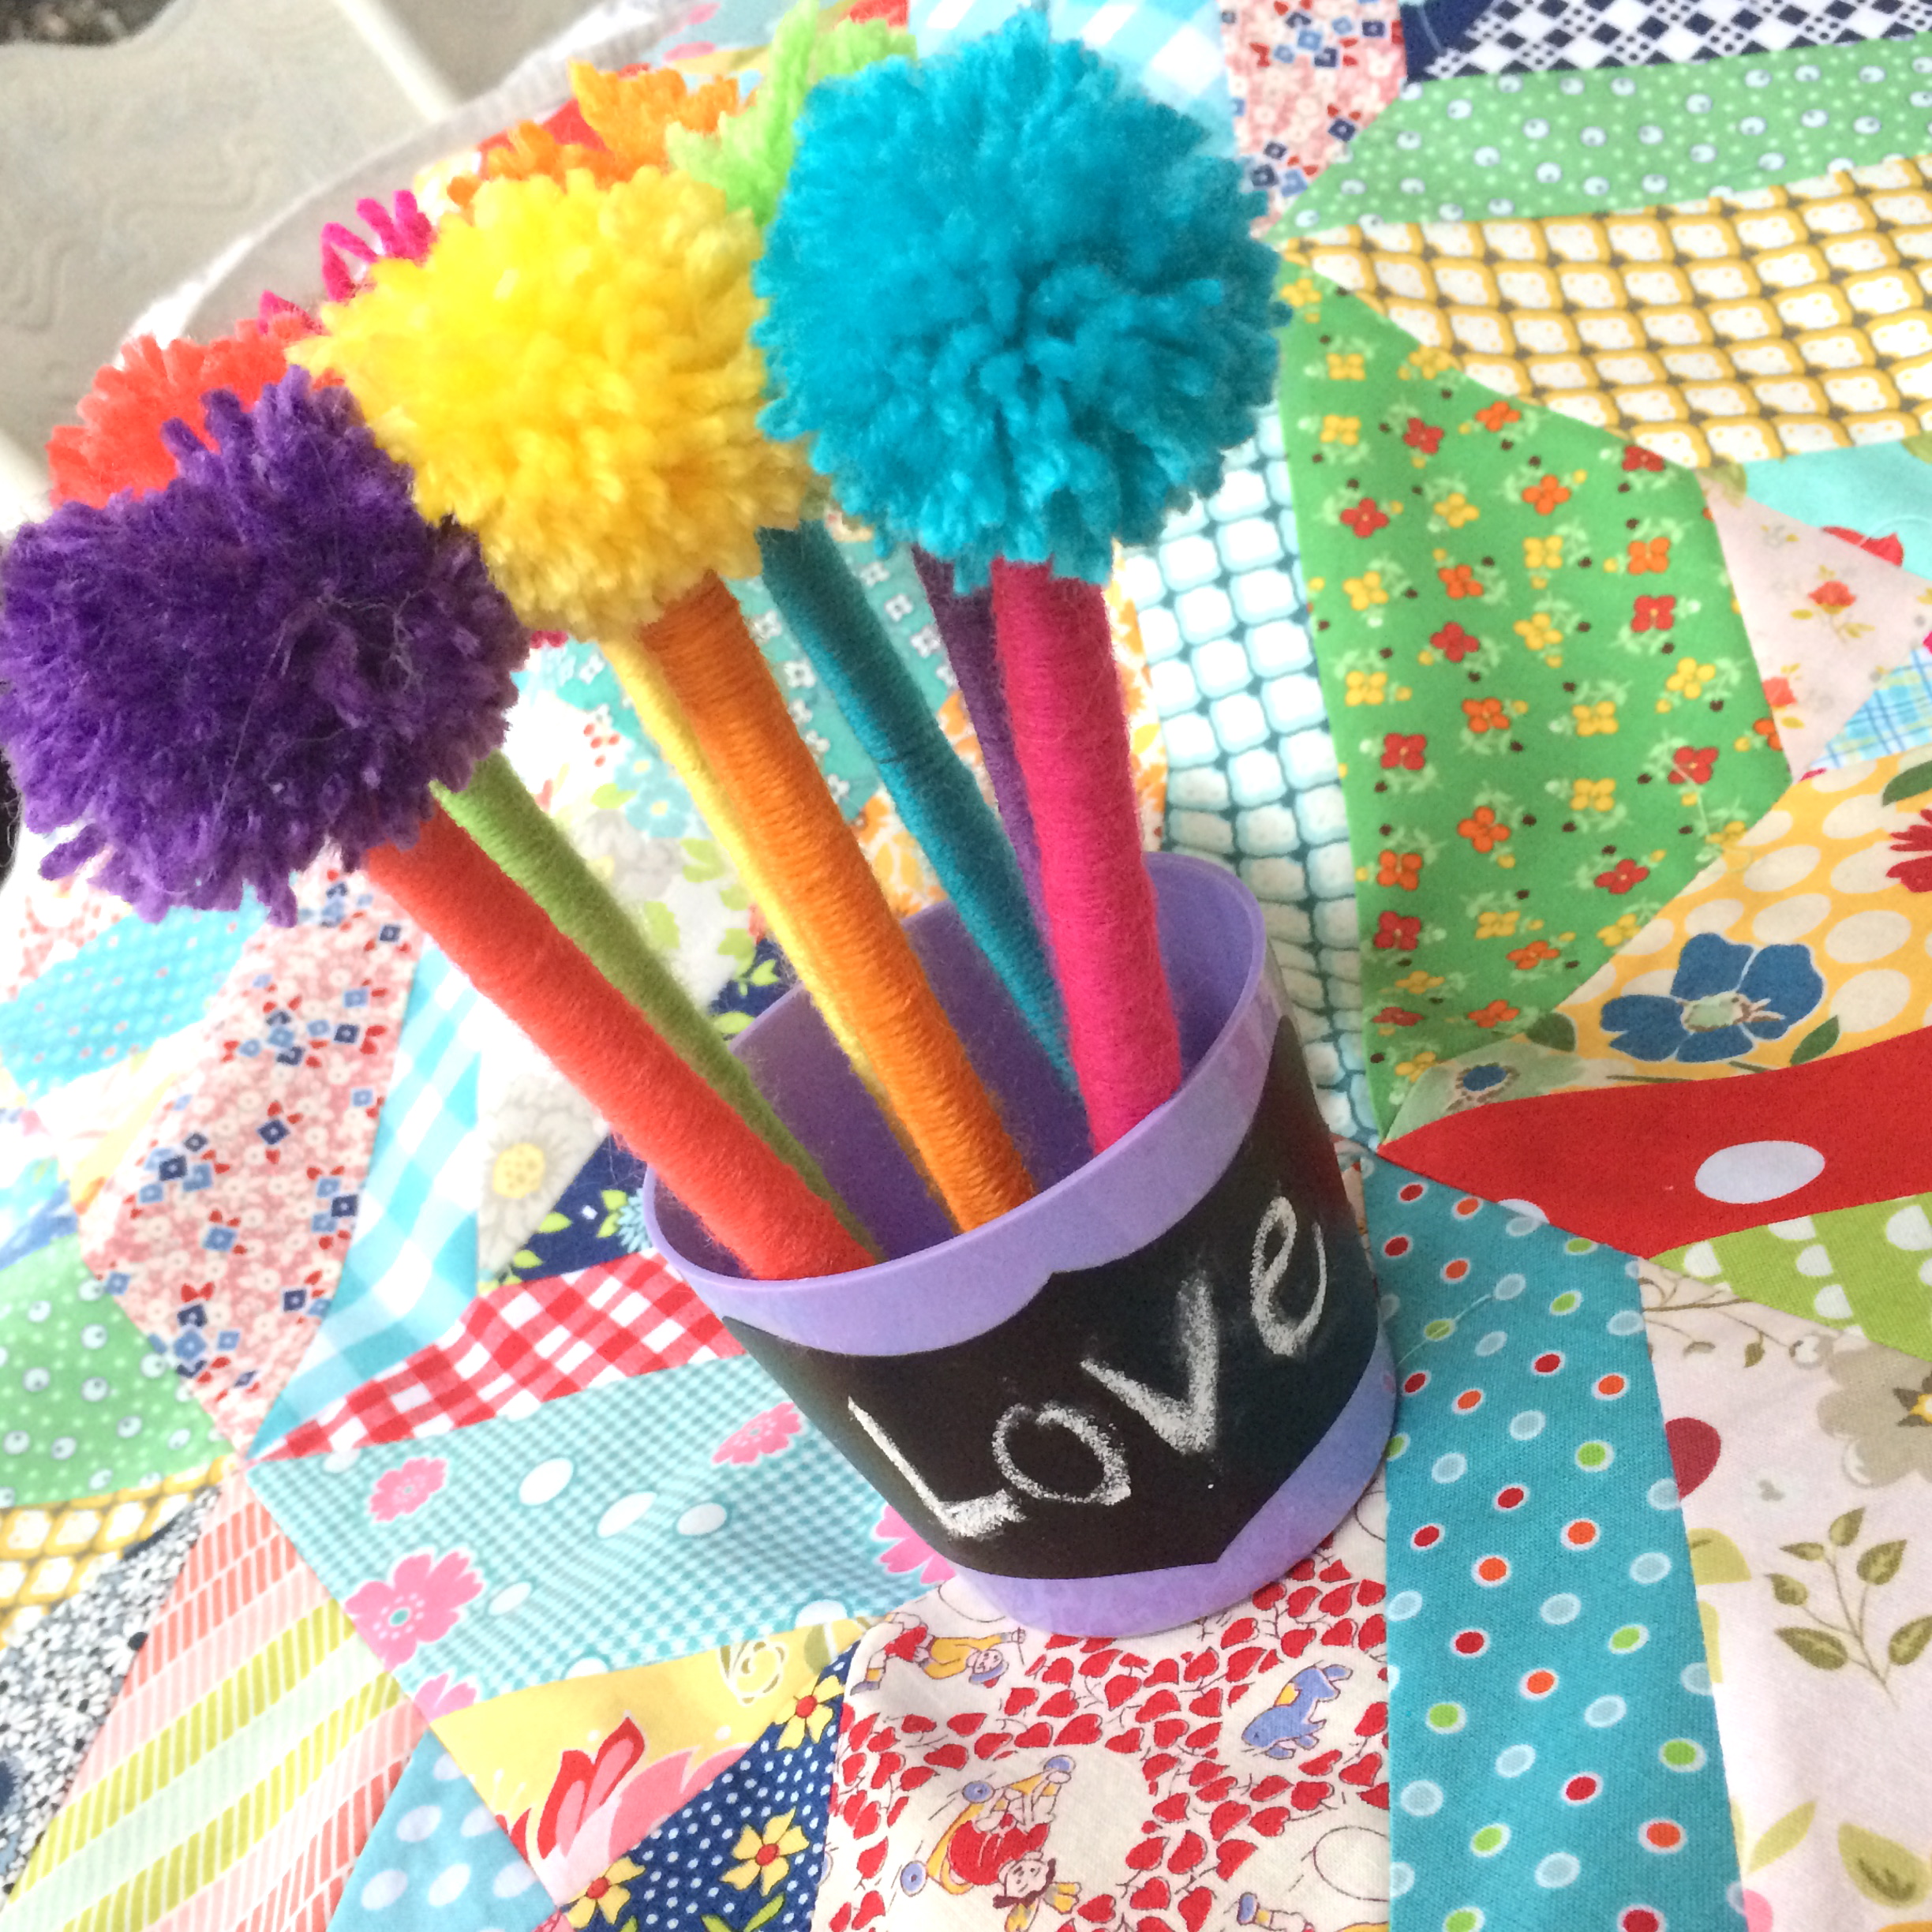
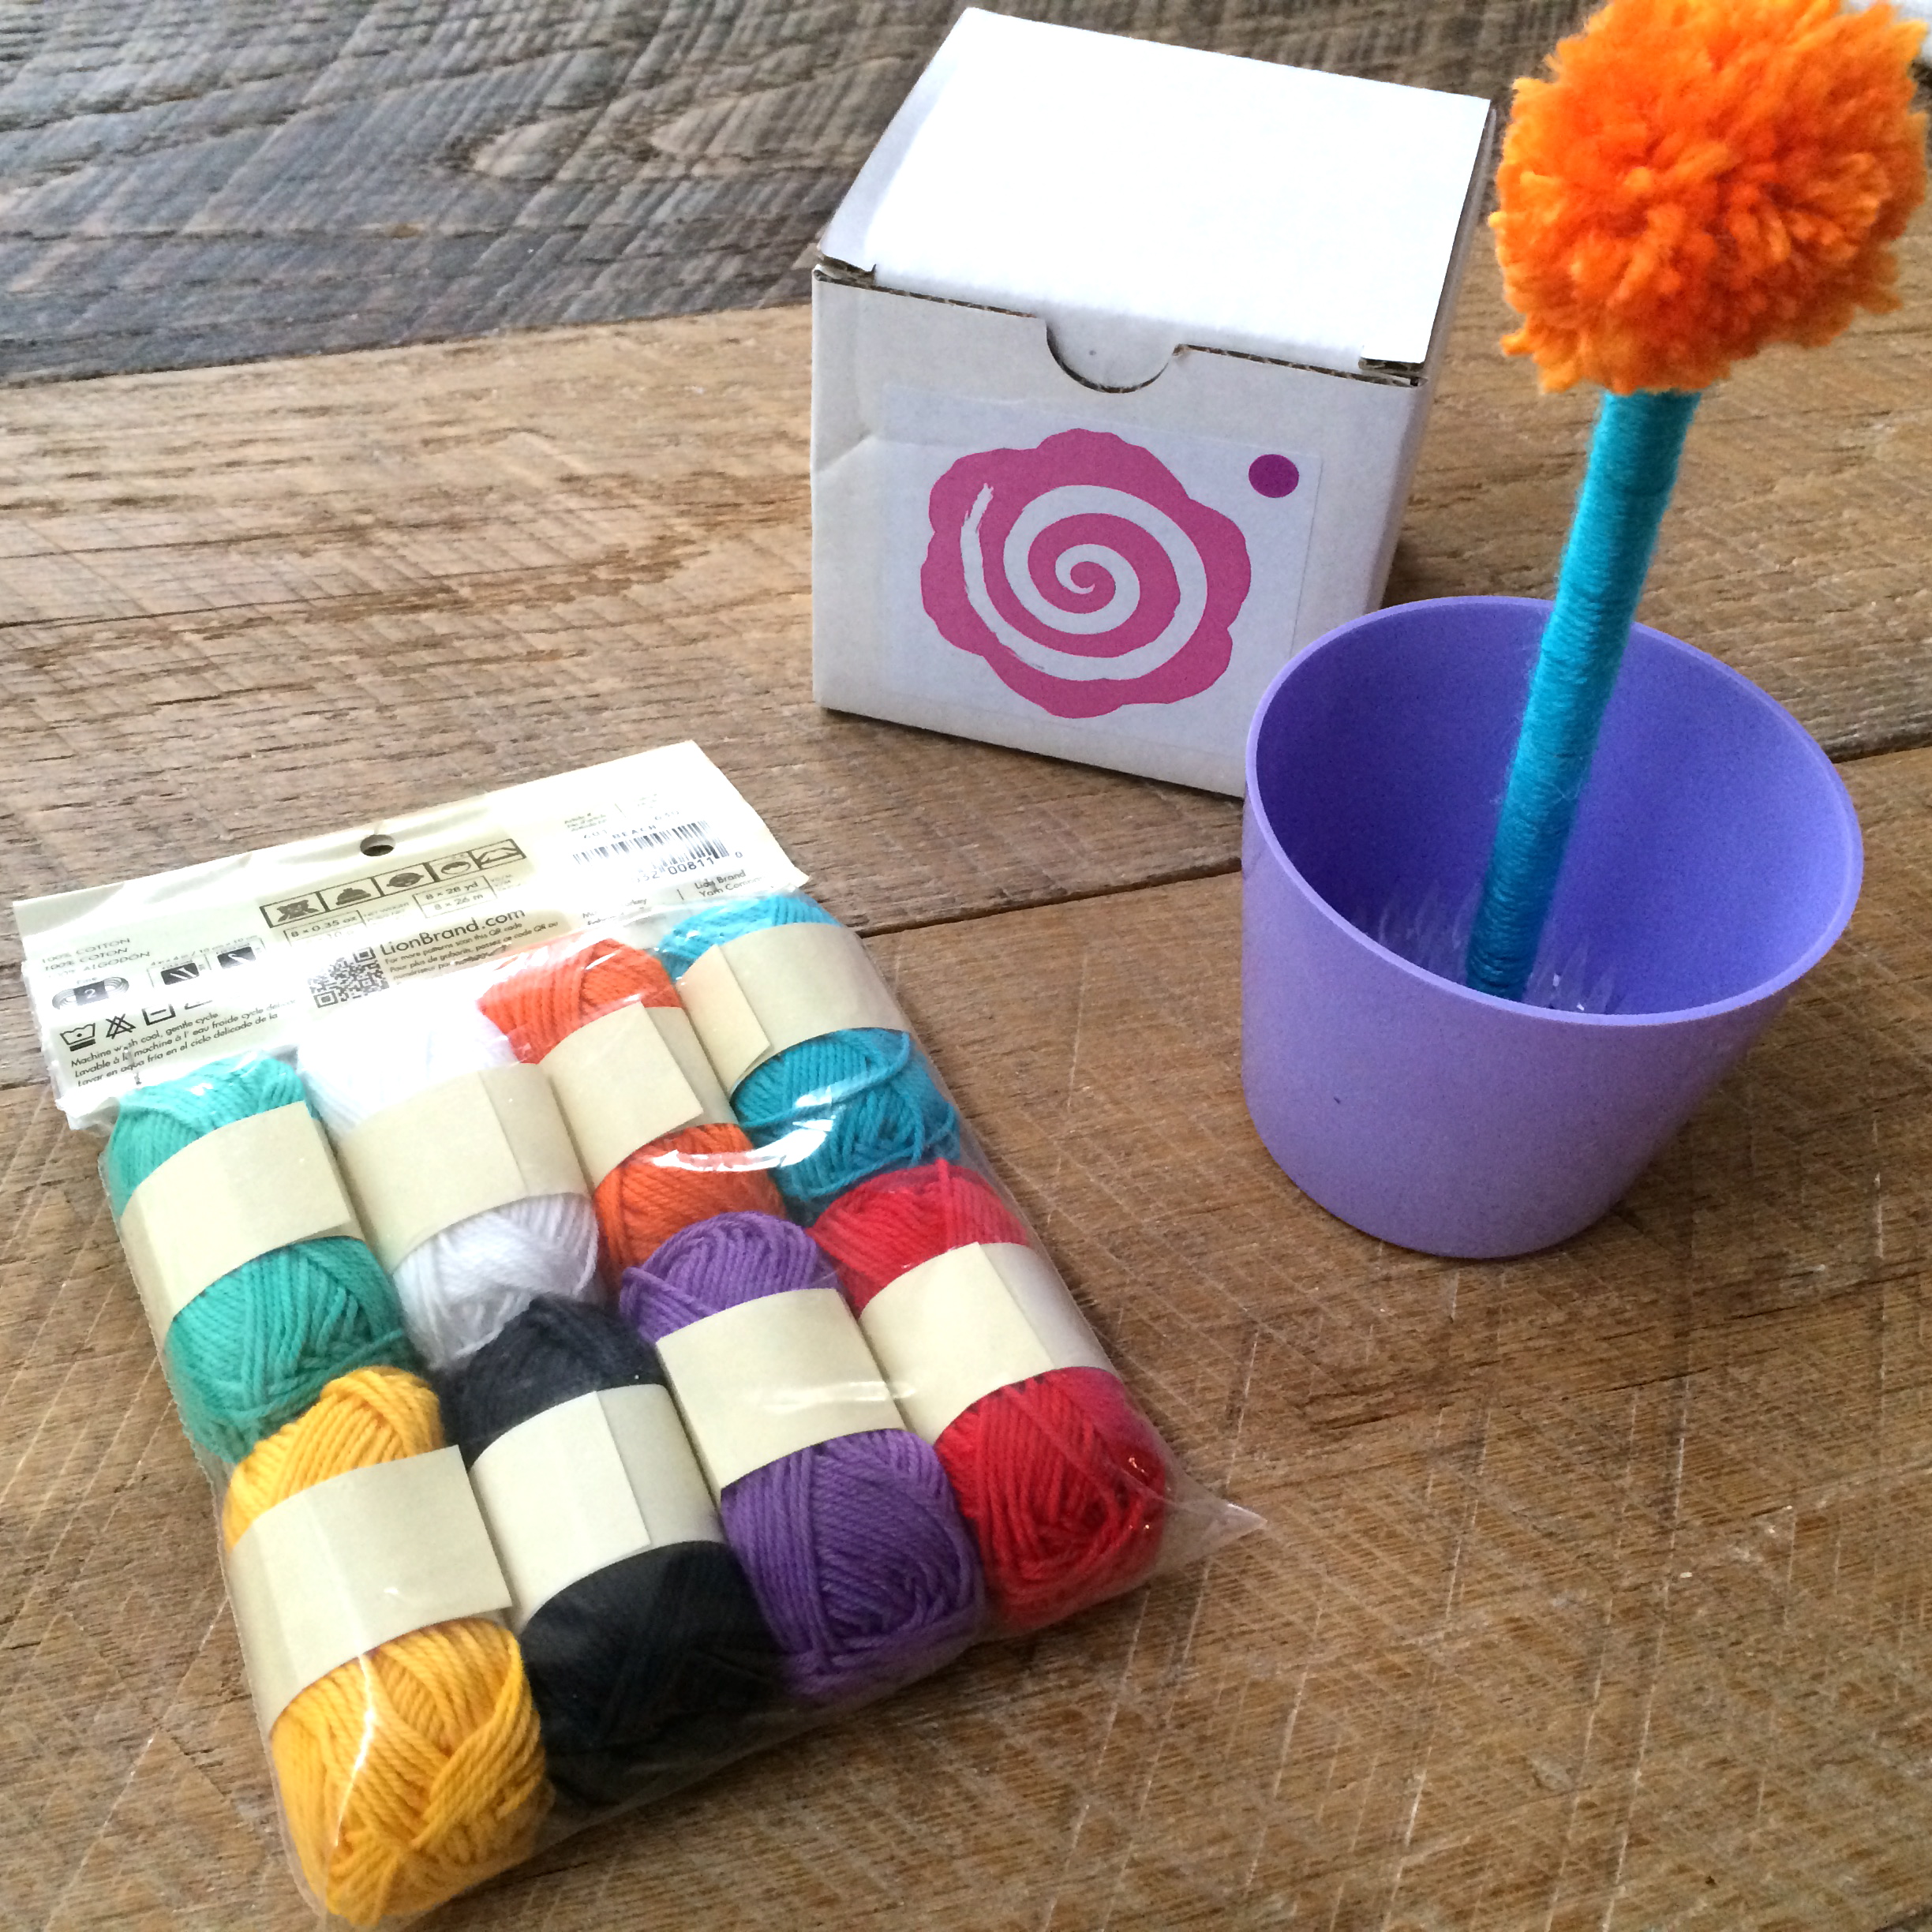
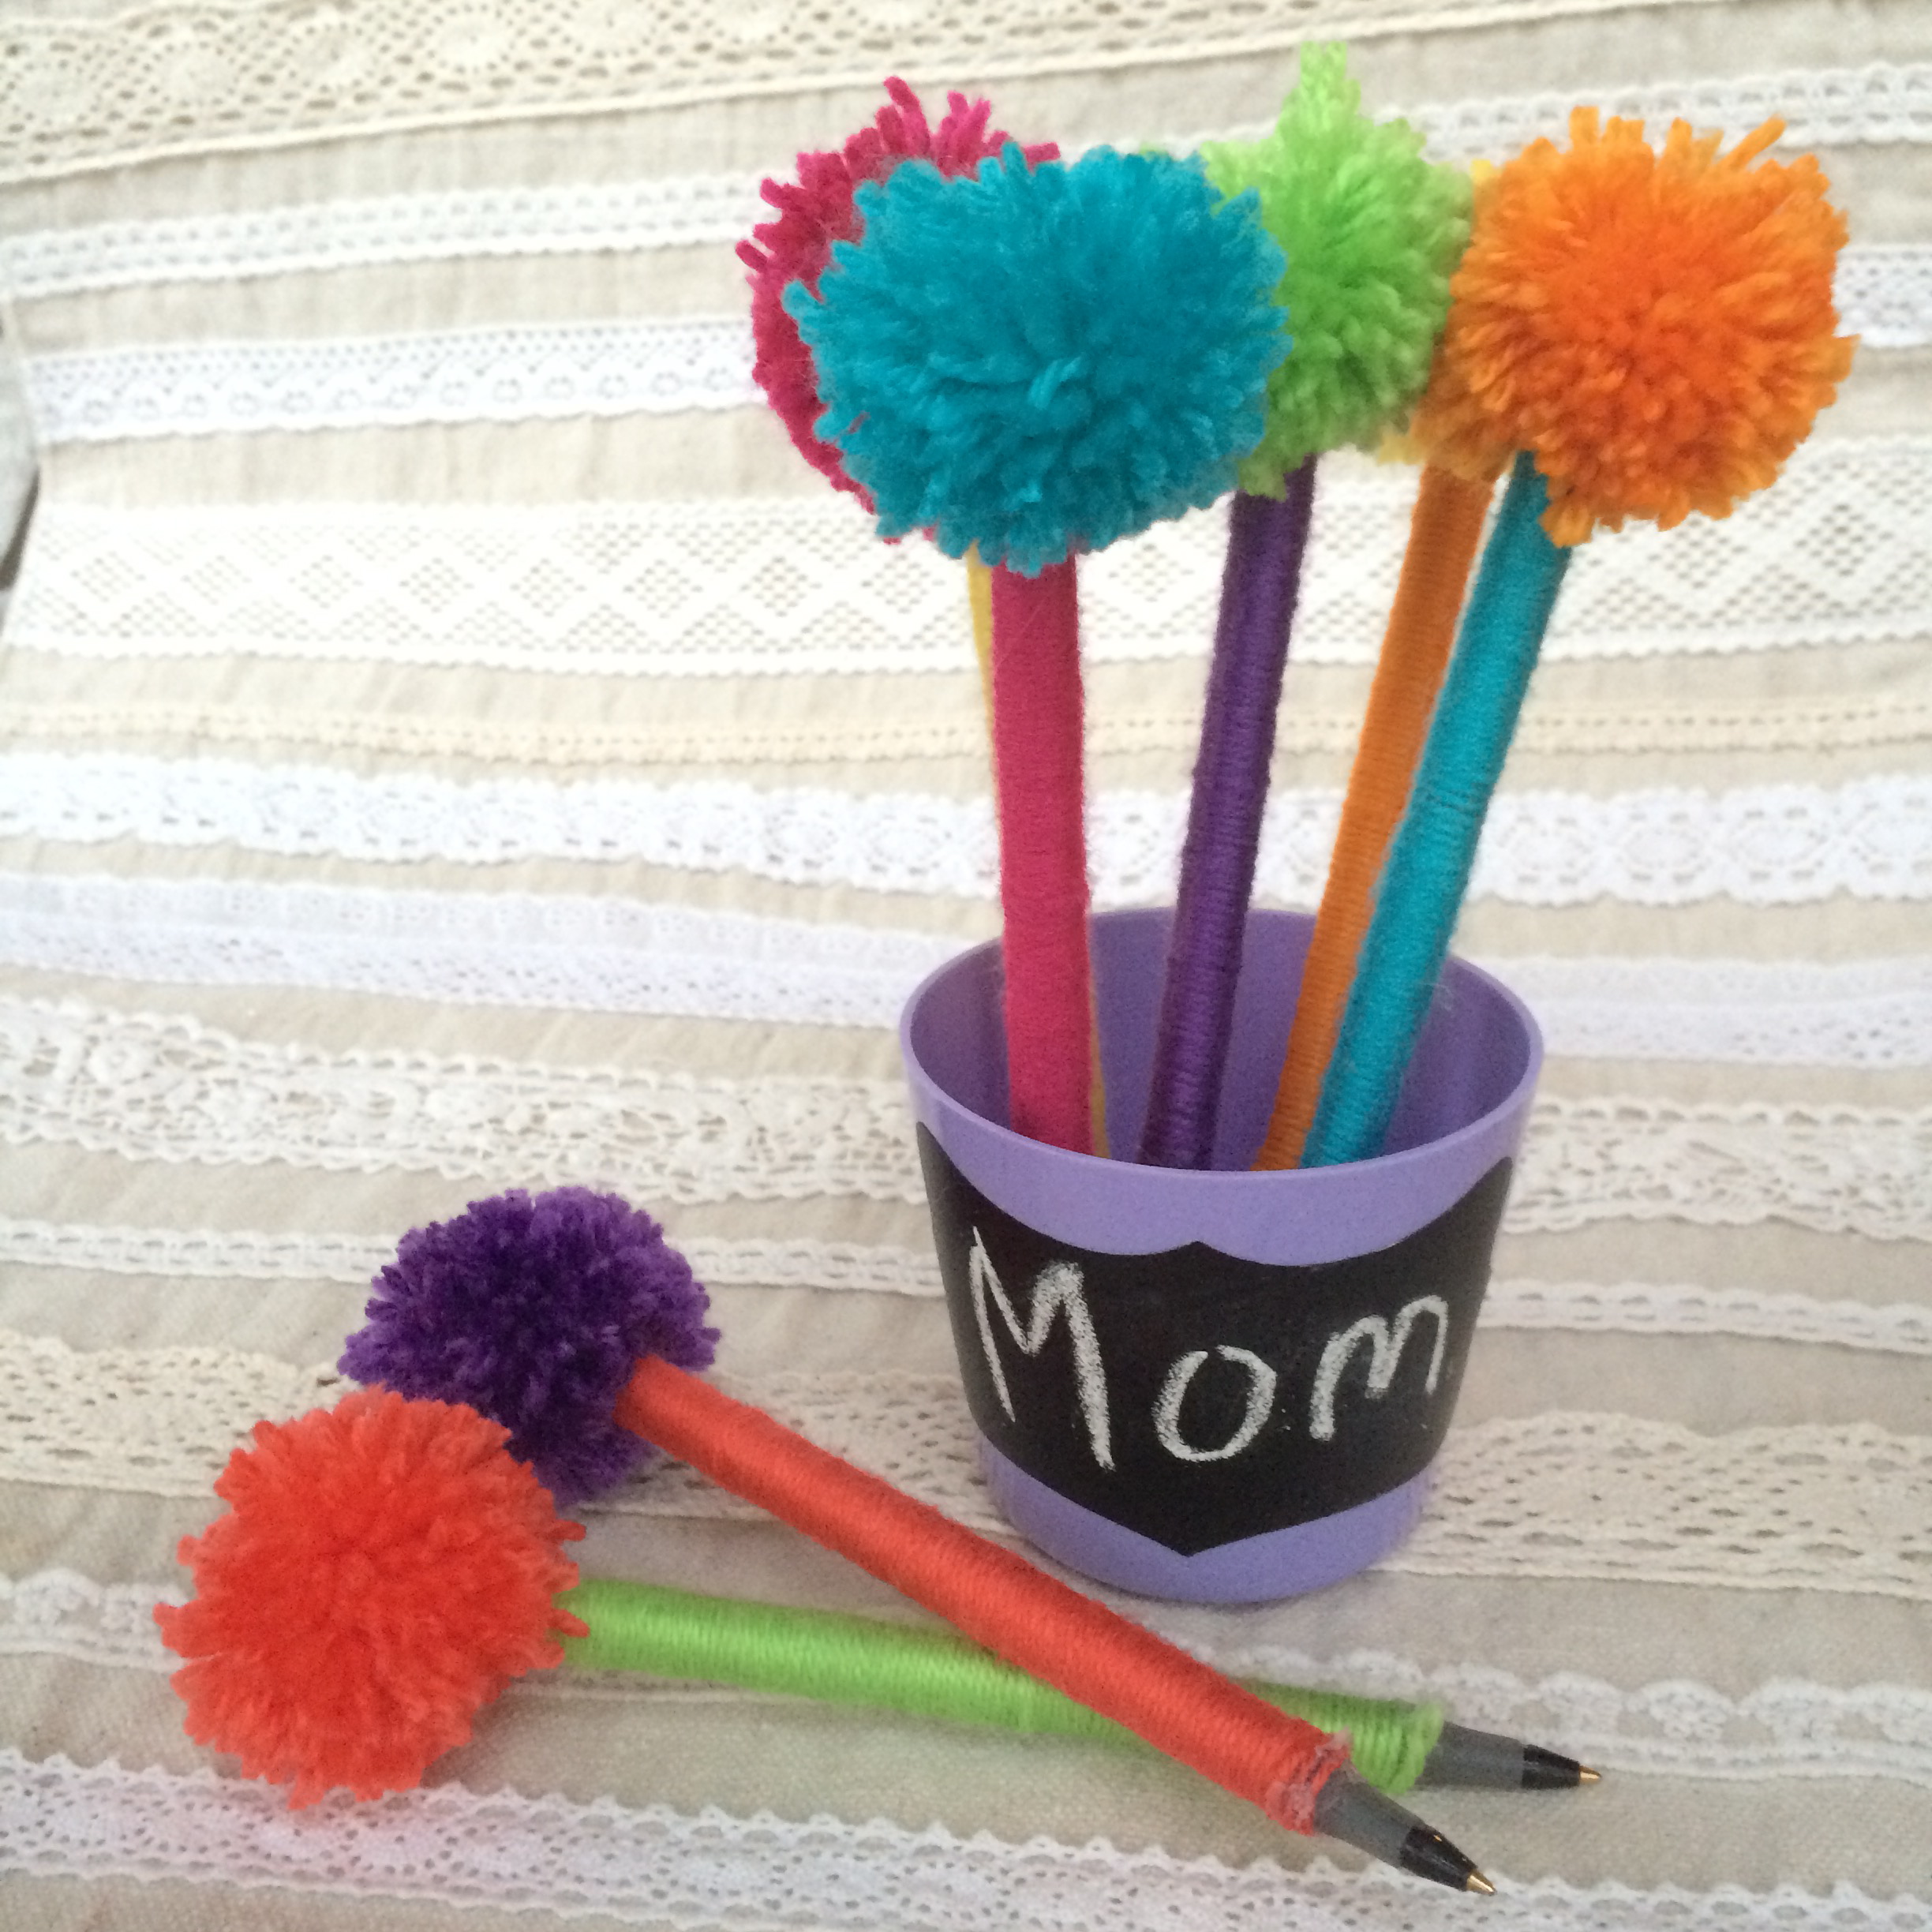
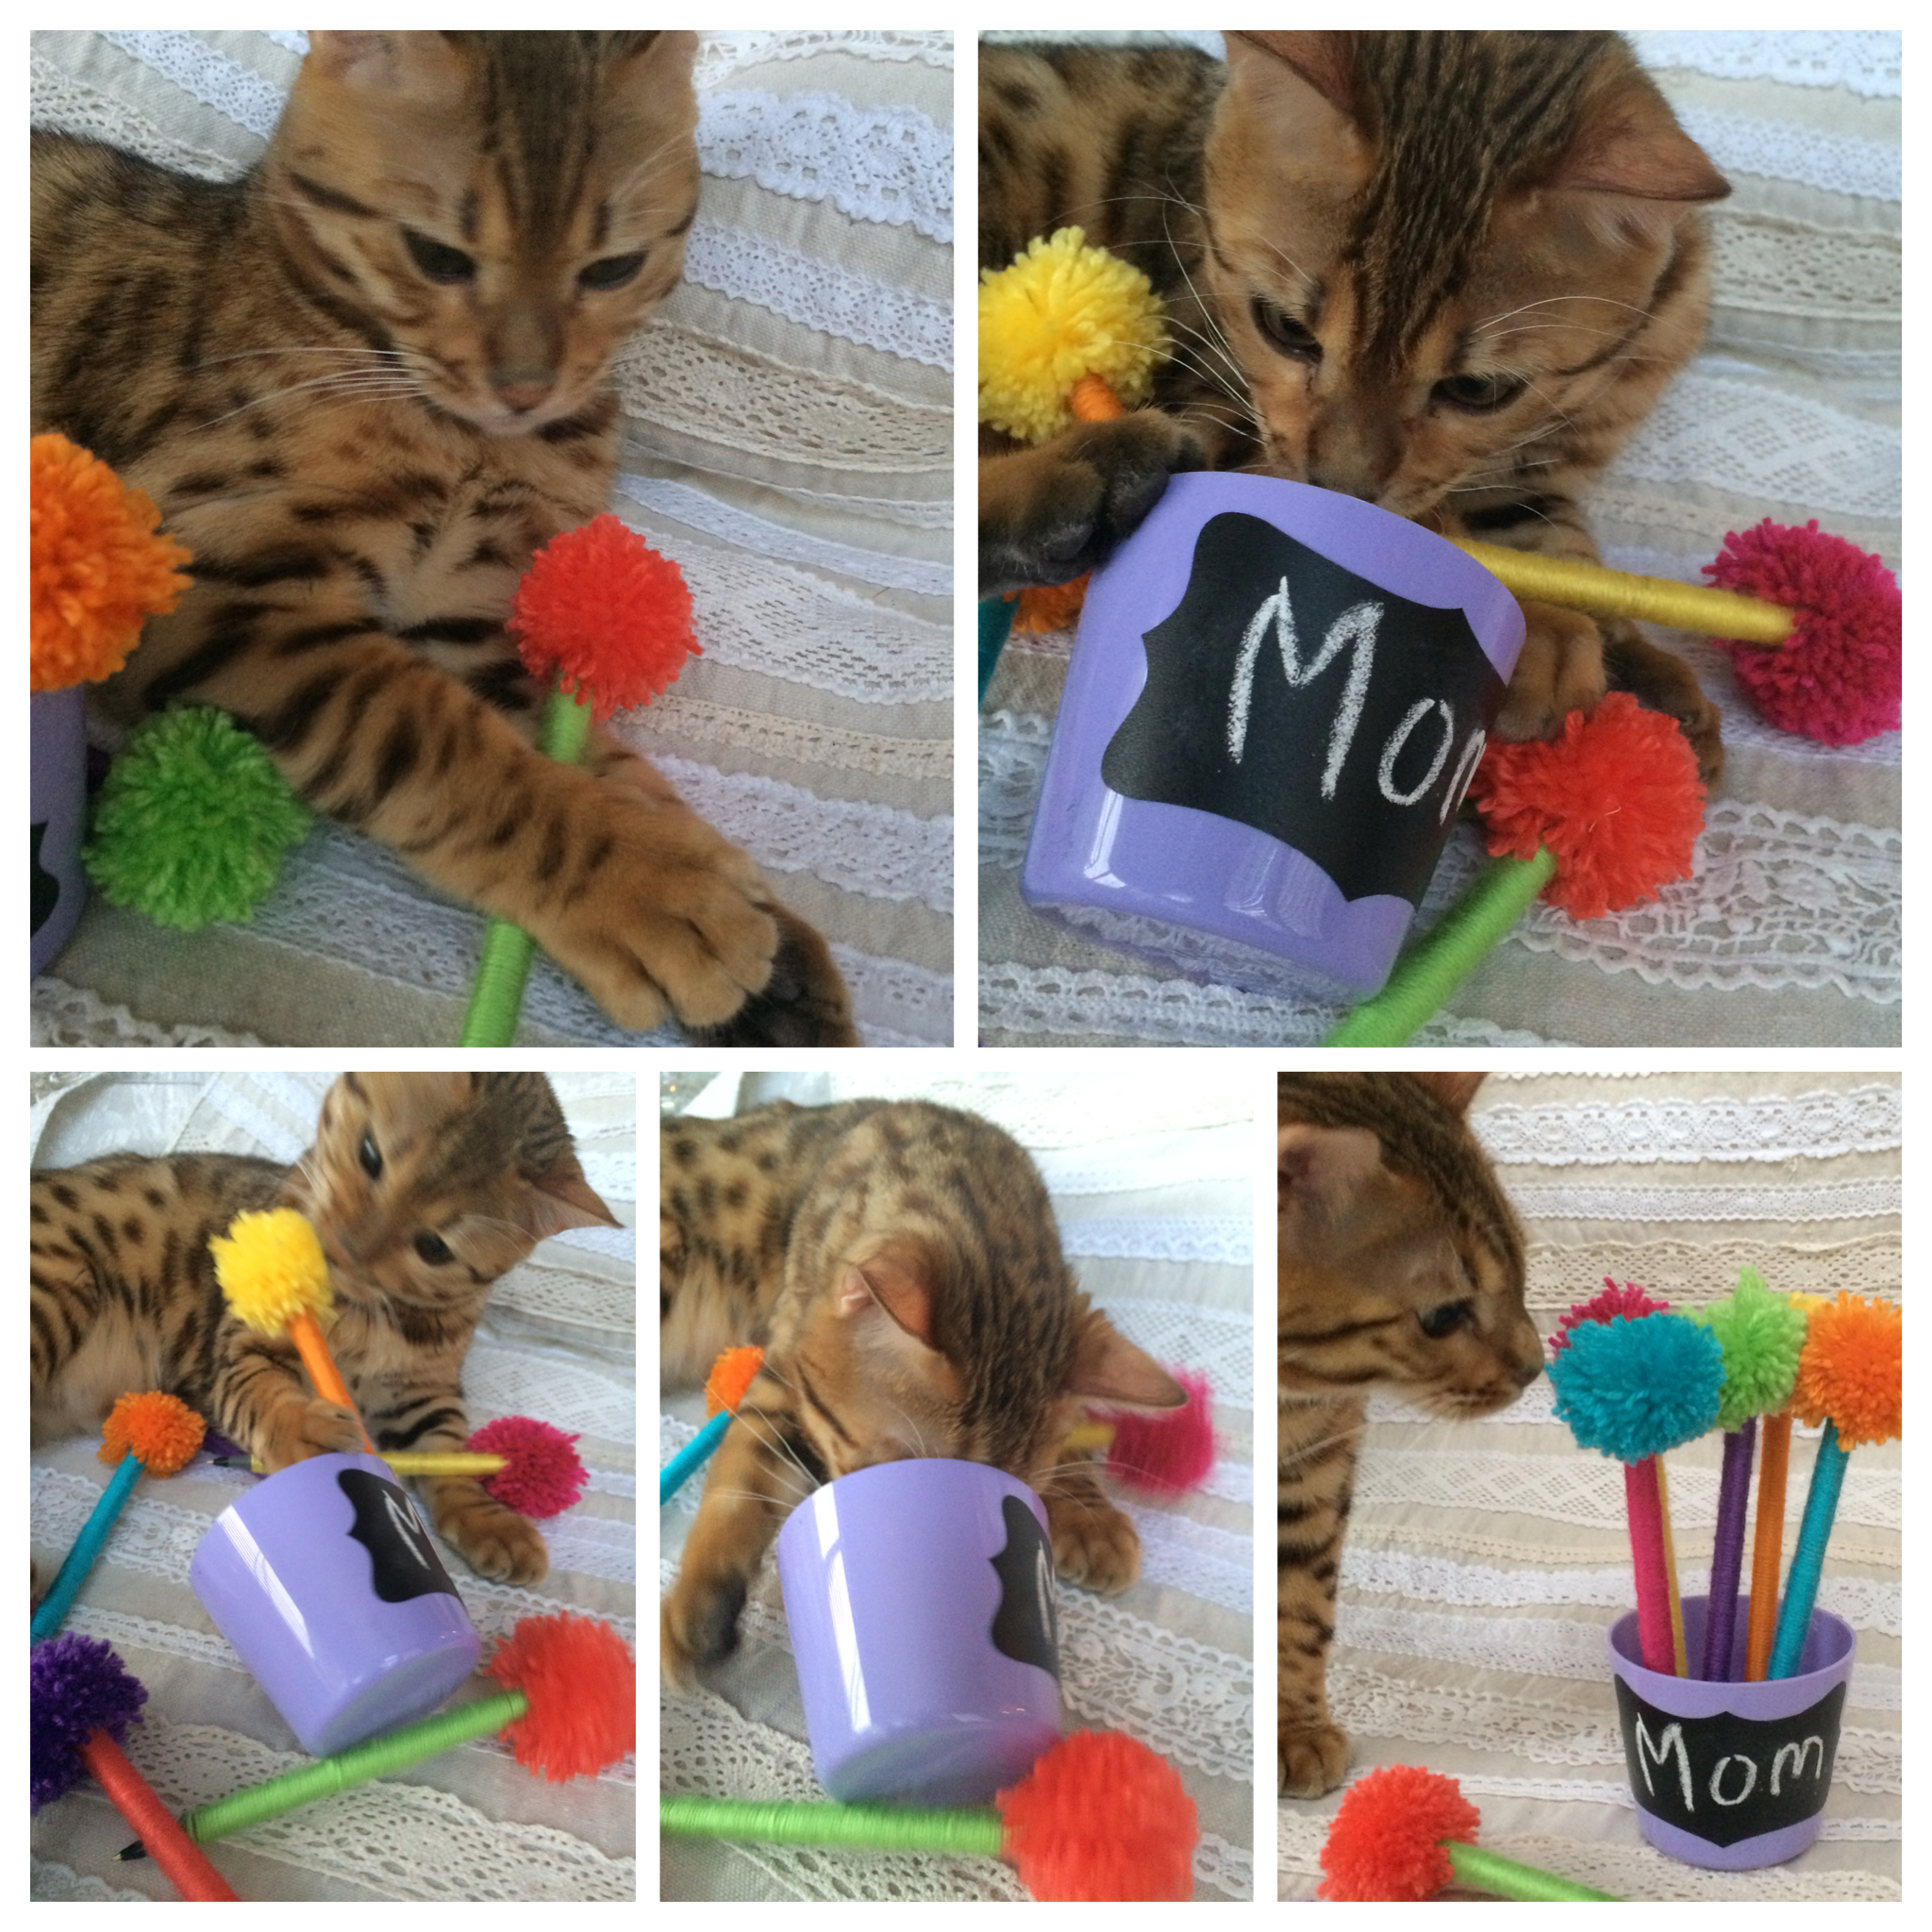
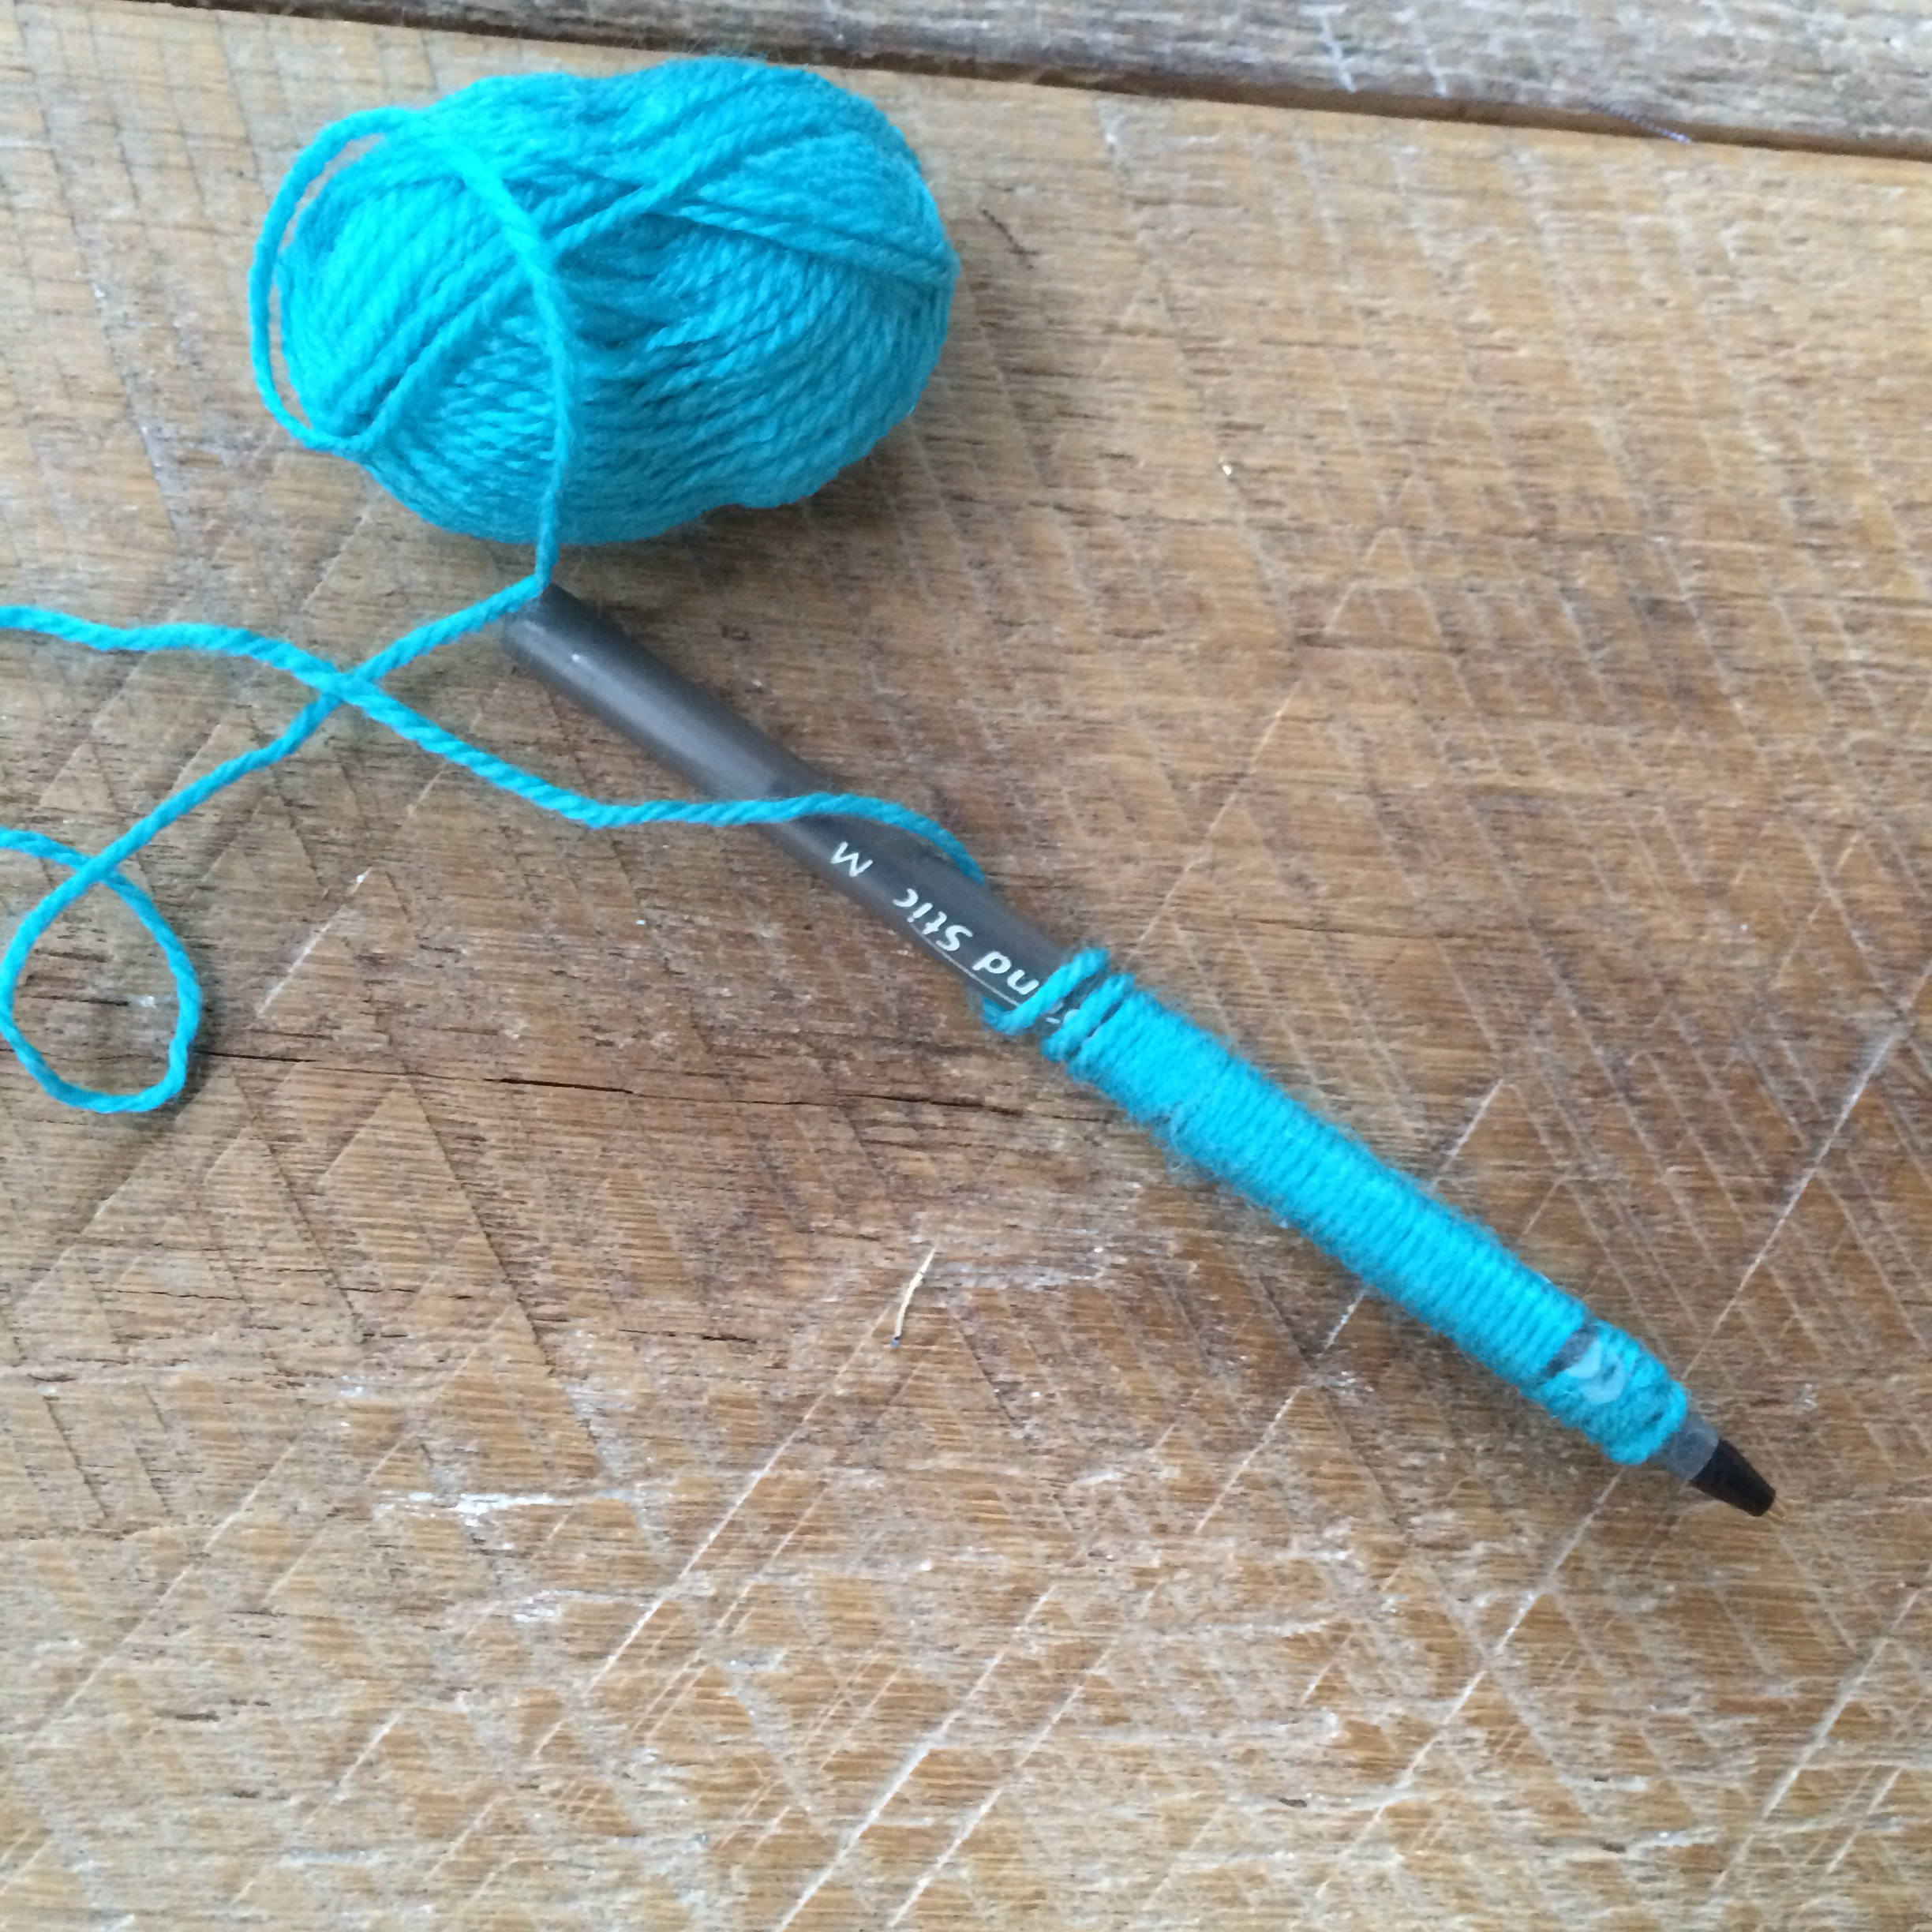
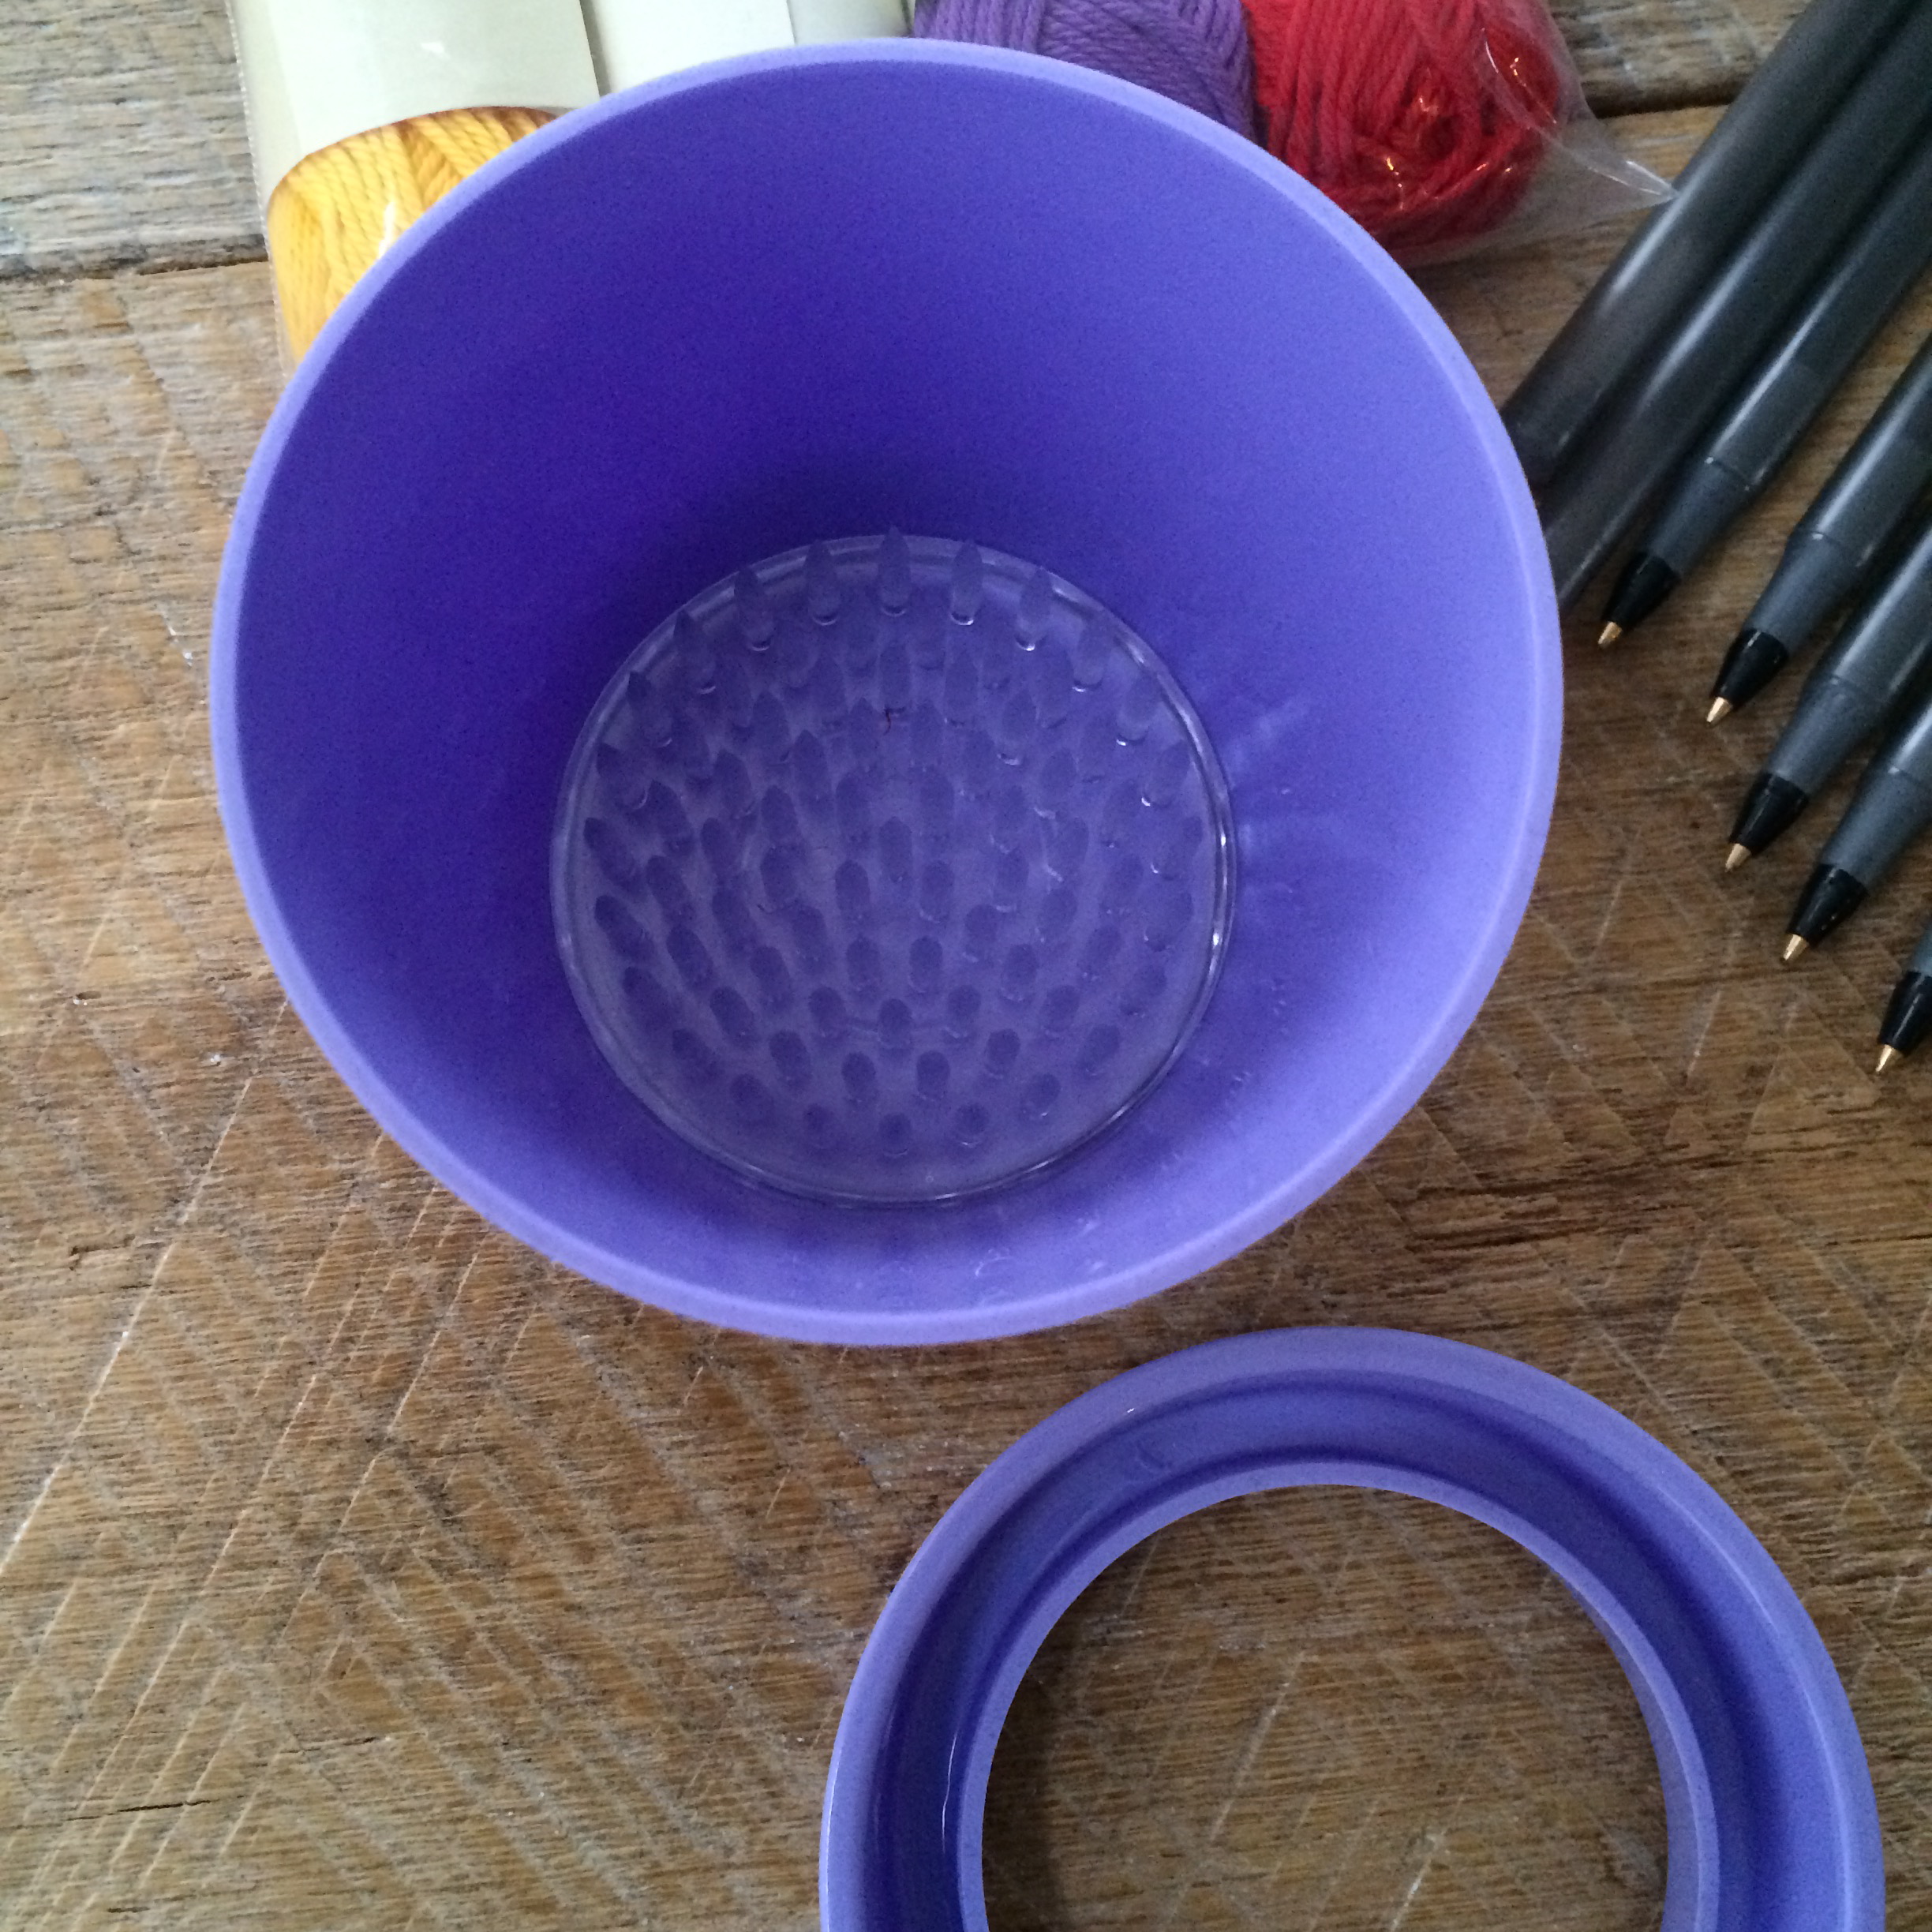
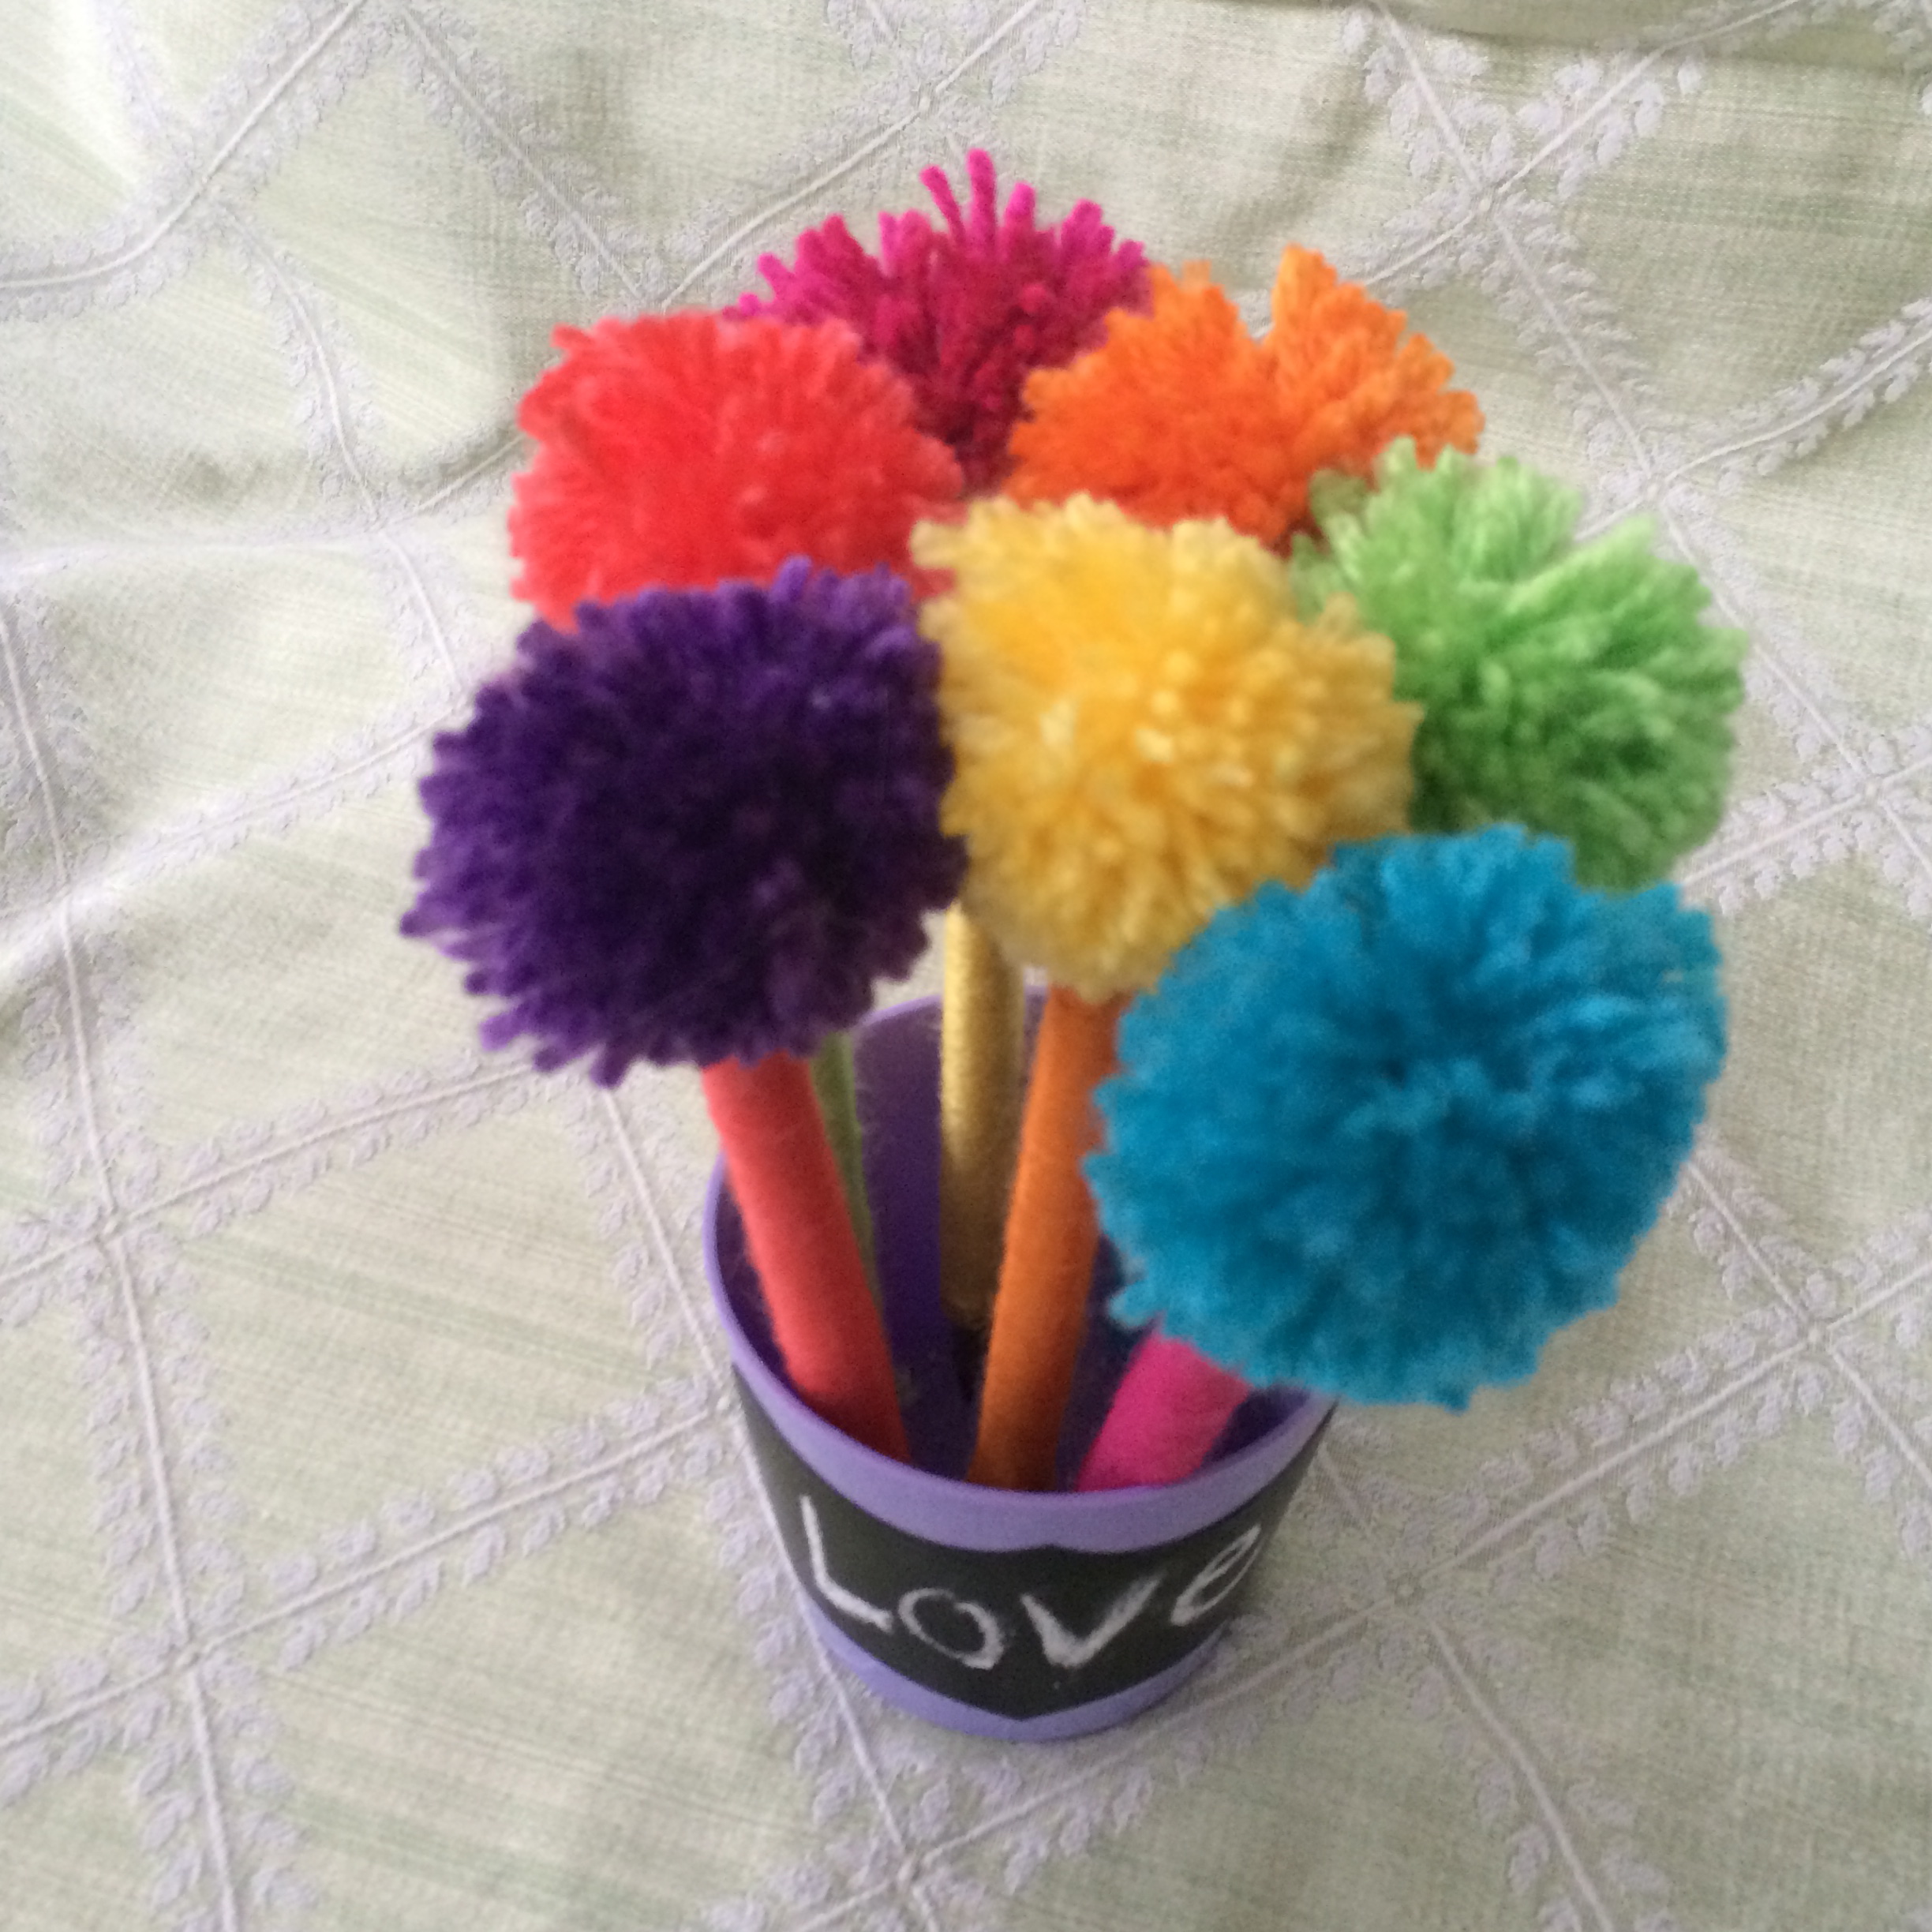
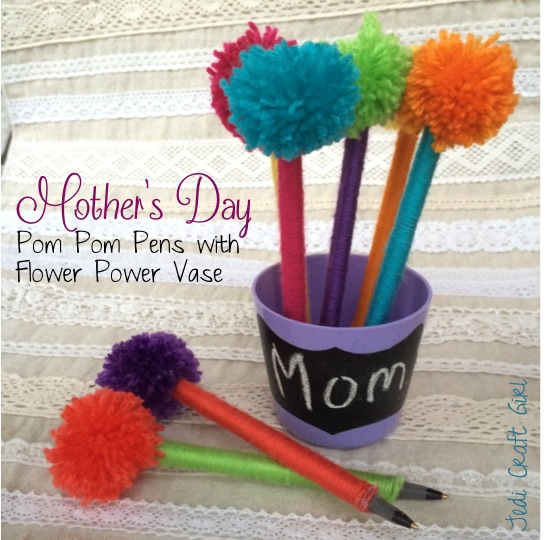
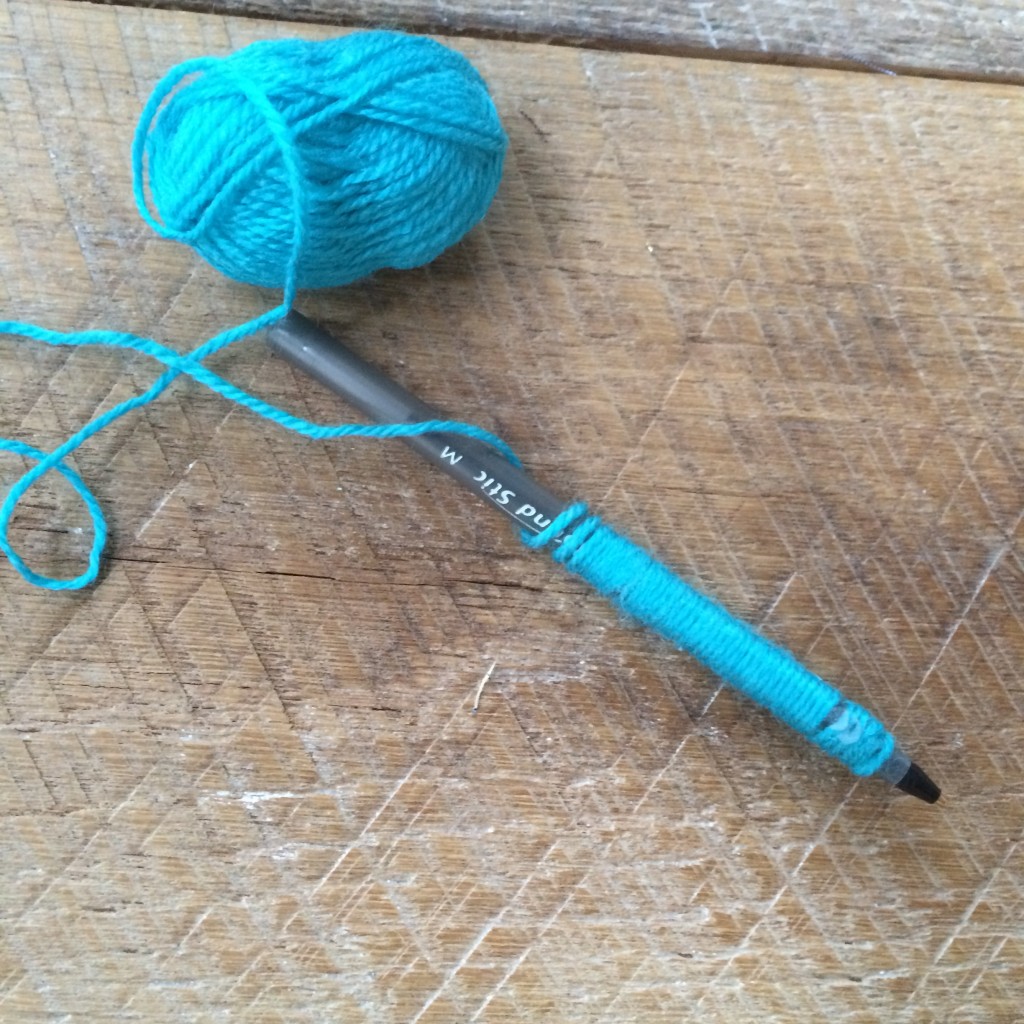
Take the yarn and make a small pom pom.  I love the pom pom makers you can buy at craft stores.  My daughter made all of them for me….easy peasy!  Hot glue a pom pom to the end of the pen.  Continue this process until you have 7 or so pens.

flower power pom pom

I first wrote the word “Love”, then changed it to “Mom”.
flower power pom pom  9

flower power pom pom  10

I think they are super fun!  And when your mom looses all the pens, she has a cute little vase to keep fresh cut flowers in!!!  They would also be super cute sitting on a teacher’s desk!  Or in my sewing room!  I need one!!!

flower power pom pom  12
logo
These also make GREAT cat toys!!!!!
IMG_6797

DIY Soccer Banner – Meet the Stingrays

diy soccer banner

With spring soccer beginning I thought I would share our last season soccer banner.  We were the Stingrays and we had an awesome season!  In our town, most teams pay over $100 for a custom airbrushed soccer banner.  With a team of only 7 players, this seems to be a lot of cost per family.  This homemade version was much more cost-effective and it was cuter than any airbrushed banner I’ve seen.  We received compliments on it all season long.  You can use canvas or a heavy duty drop cloth as the background fabric.  Click HERE for step by step instructions.  There is not a predetermined or set banner size.  I usually use the width of the fabric as my guide.  Cut the desired size of the banner.  Notch the top 2 corners about 4″ and then fold the sides and the top in and sew a seam.  This leaves a space open in the corners for the PVC elbows.  It’s not fancy at all.  Then we cut the PVC pipe to fit the measurements of the banner.soccer banner 2

I spray painted several blue paints on the canvas to give it a watery look.  I drew the stingray shape on some tissue paper and then cut them out of felt.  I used a combination of Fabric Fuse and hot glue to adhere the stingrays.  I added a little bow on the tail.  The eyes, eyelashes and mouth are cut out of felt.  I printed the letters out on Heat n Bond EZ Print sheets.  I cut out the letters and used fabric fuse and hot glue to attach the letters.  (normally you can just iron the letters but the paint makes it difficult.)  The names are written with black metallic puffy paint.  It was fun to use puffy paint, it always reminds me of high school cheerleading days 🙂  I found a soccer ball image from an internet search and printed it on Heat n Bond transfer sheets.  I then ironed the soccer ball to a piece of felt and glued it to the banner.

I painted stingrays on the coaches T-shirts so they matched.

soccer banner 6

Whats fun about this banner is at the end of the season, during our team party, we cut the banner up and each girl got to take her stingray home.soccer banner 3

This year we are the Bengals.  I better get working on the banner!!!
soccer banner 5

soccer banner diy

DIY Cat Post

IMG_3273We have a baby Bengal Kitten in our home, his name is Mufasa and he is super spoiled!  Pretty much my life is devoted to keeping him happy and teaching him everything he needs to know.  Part of raising a well adjusted cat is having places for them to scratch, climb, and perch.  I looked online and I couldn’t find exactly what I wanted.  I sent hubby to the home improvement store and last Saturday he spent the day creating the perfect cat post for Mufasa.  I will explain a little how we made it; if you are somewhat handy, you can follow along!

We began with a wood base 29″ x 19″, a 6 foot 2″x3″ and an oak log (bark removed).  Here you can see they’ve been attached to the base.  (We recommend not using particle board).

diy cat post

We cut a piece of corrugated plastic pipe the same length as the 2″x3″ and slid it over.  We used long staples and some liquid nails to anchor the post to the 2″x3″ at the bottom.  We cut a board smaller than the base and cut out a circle for the pipe to extend through.  This was secured to the oak log.

diy cat post. 2

diy cat post. 3

Making sure everything is level.

diy cat post. 4

Here you can see where the staples were inserted to secure the tube to the 2×3.

diy cat post. 5

We put Liquid Nails on the pipe and wrapped sisal rope tightly around.

diy cat post. 6

We anchored the sisal with a staple.

diy cat post. 7

diy cat post. 8

This is a good job for the kids to help out with!

diy cat post. 9

We continued in the same manner adding 2 more perches.  We needed something extra on the lower level for support, so we added another piece of wood.

diy cat post. 11

Next we covered all the perch surfaces with carpeting.  We had to create a kind of template to cut out where the pipe and the wood pieces were.  We used Liquid Nails and staples to secure.  On the bottom level we didn’t wrap the base in carpet, but added some wood pieces to finish off the edges.  The upper perches we wrapped in the carpet.
diy cat post. 12

It looks great and we couldn’t wait to bring it in the house and let Mufasa play on it!

diy cat post. 13

diy cat post. 14

That crazy little kitten climbed it all the way to the top!  It was his first time ever climbing something that high!
diy cat post. 16

We put it in front of the sliding glass window so he can perch and look outside.  He LOVES it!!!!diy cat post. 17

Deco Foil Hanging Heart {DIY project}


deco foil hanging heart valentine
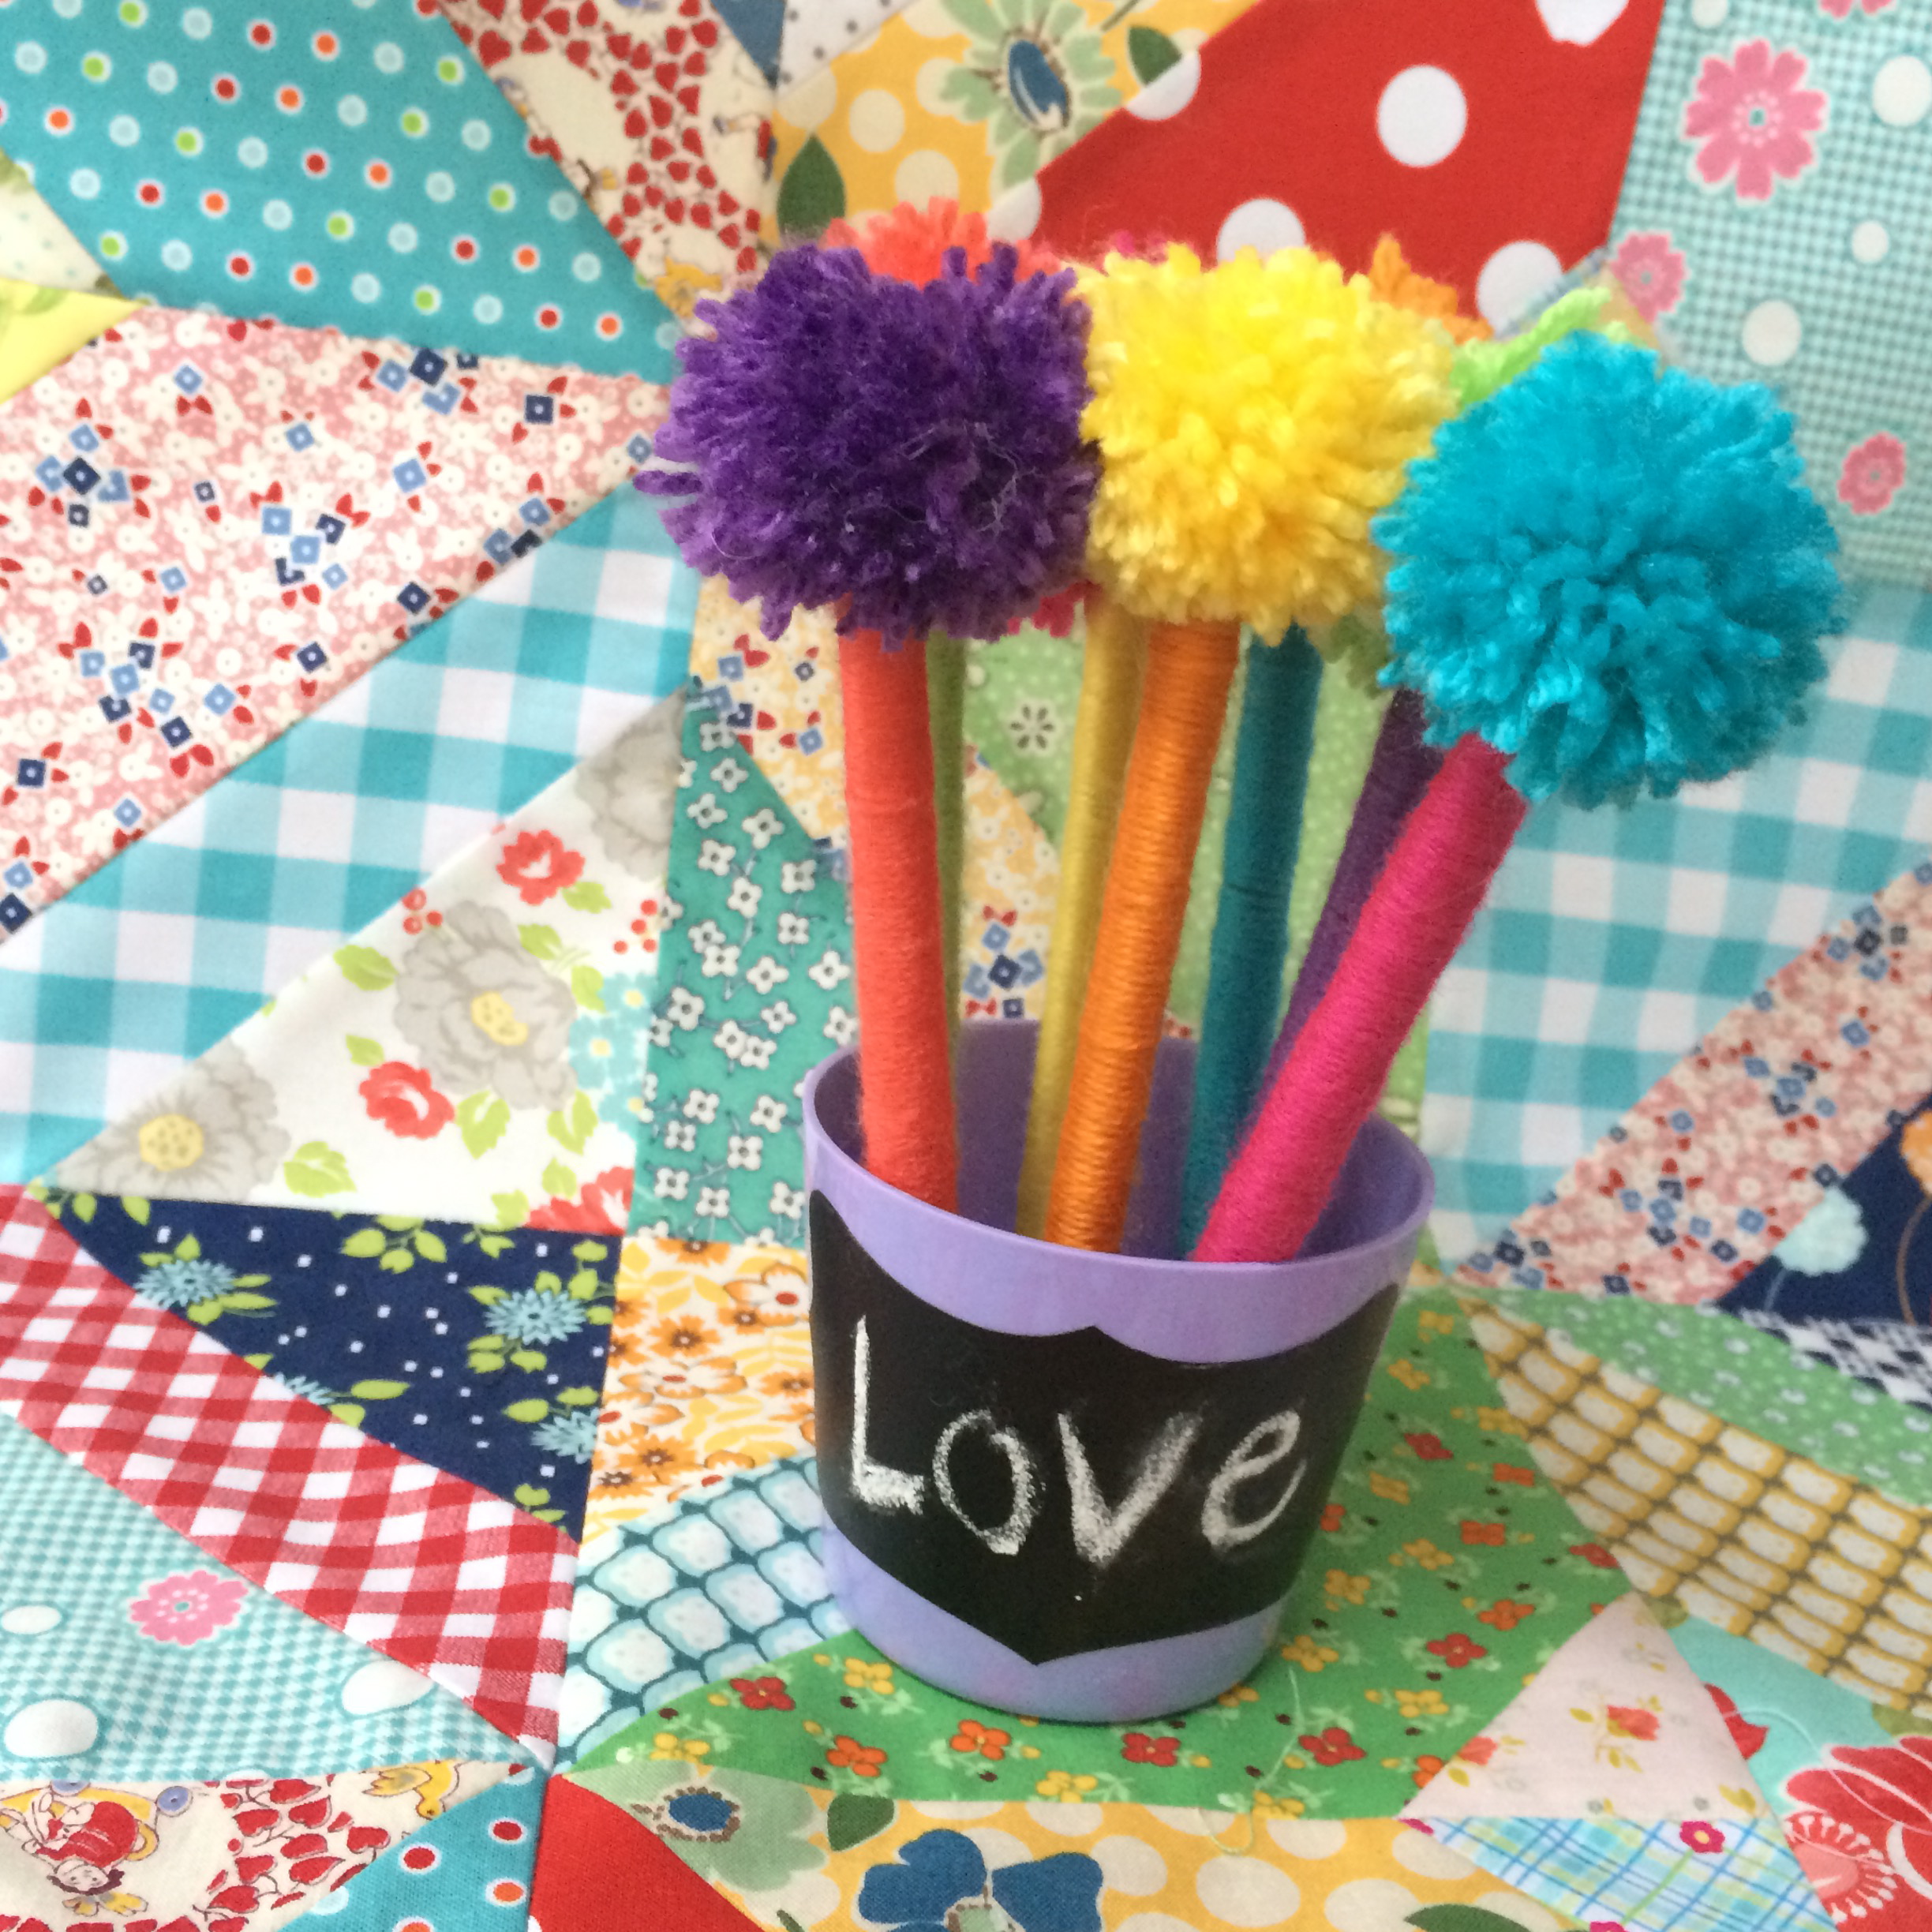
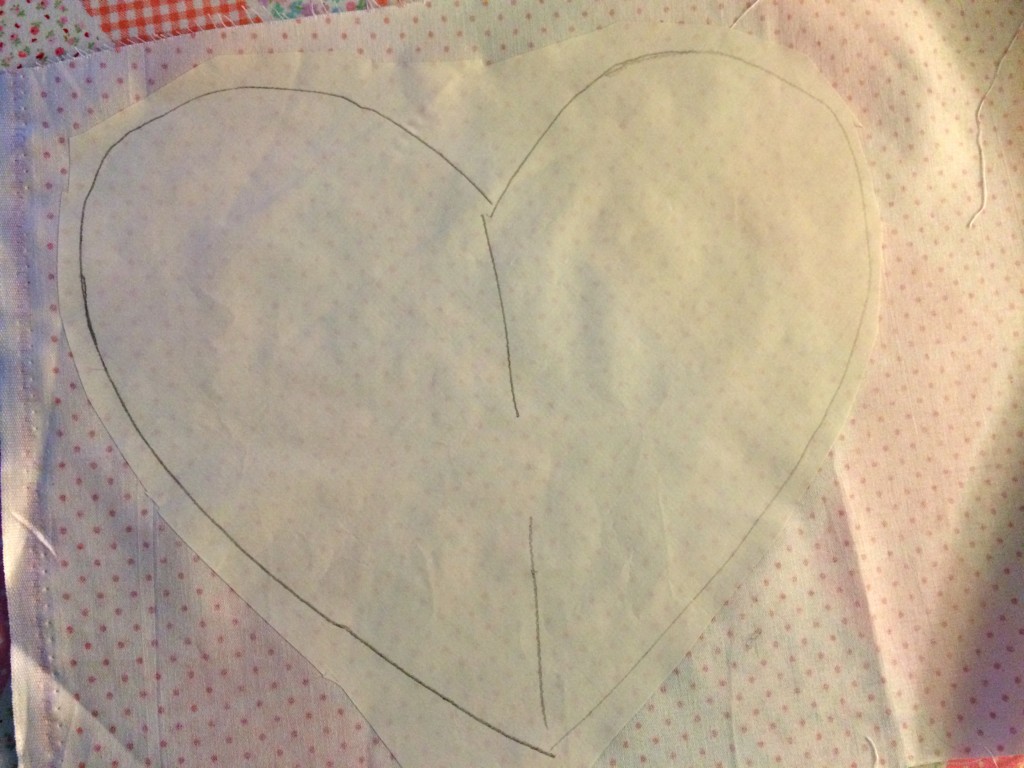
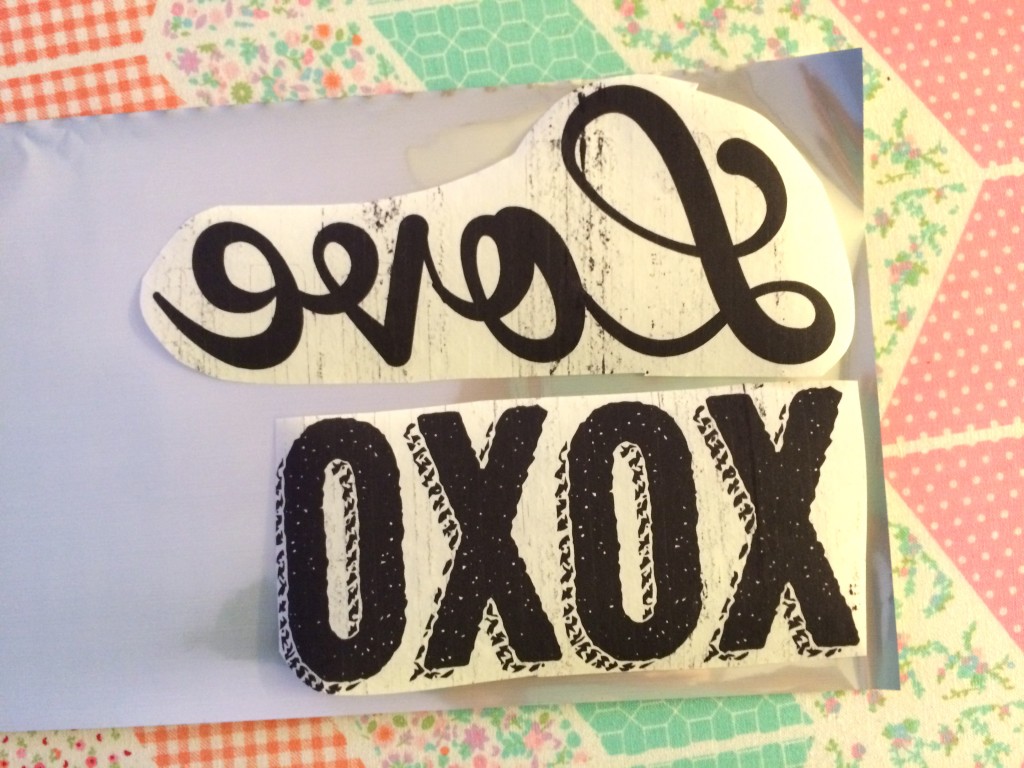
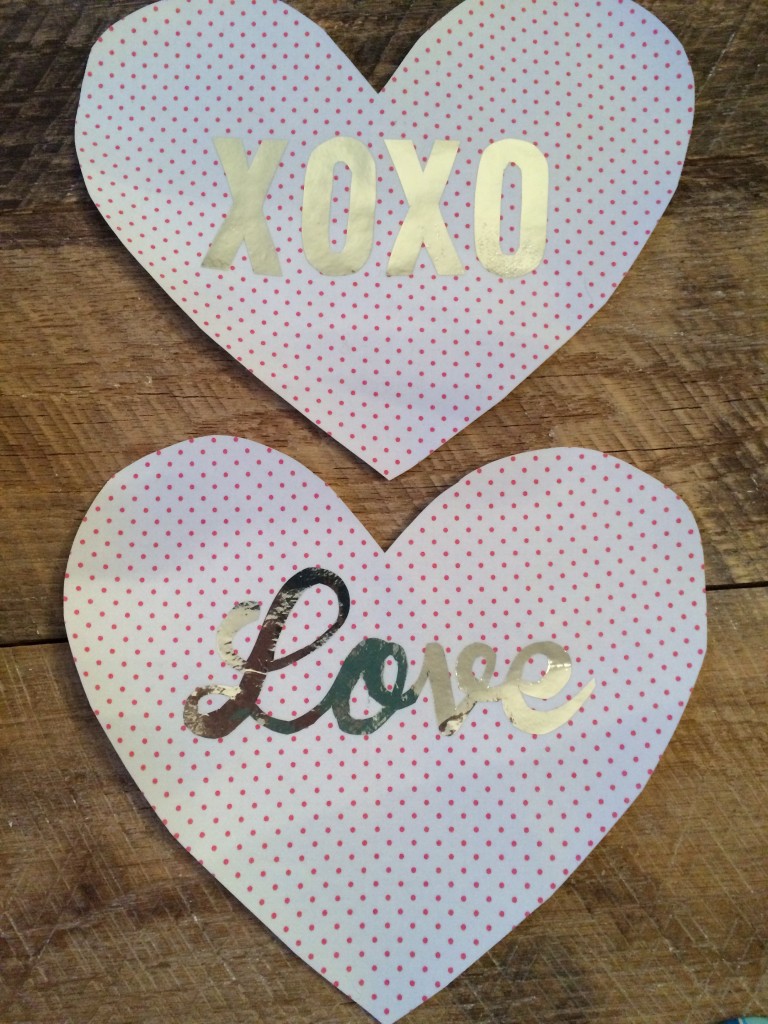
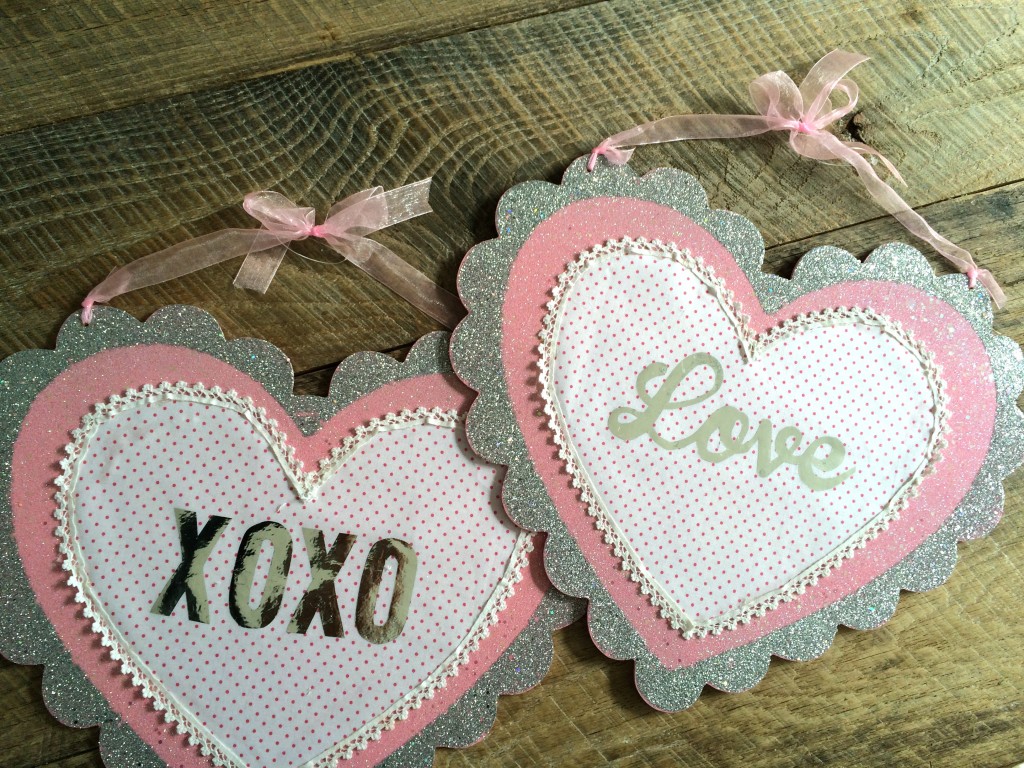
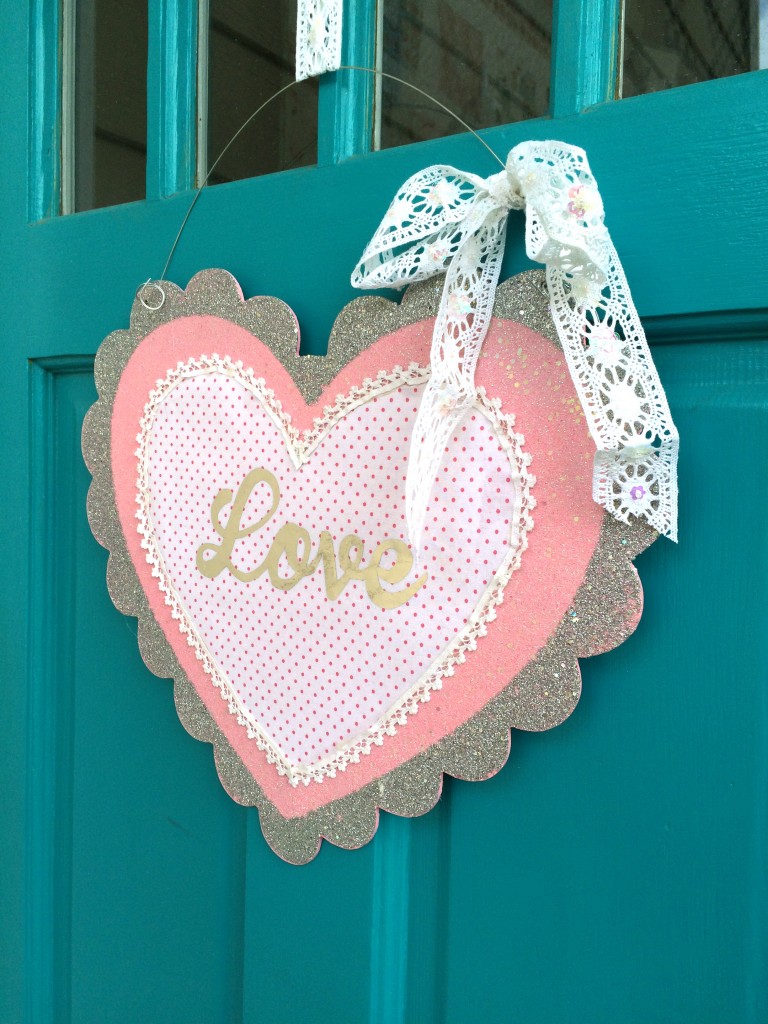
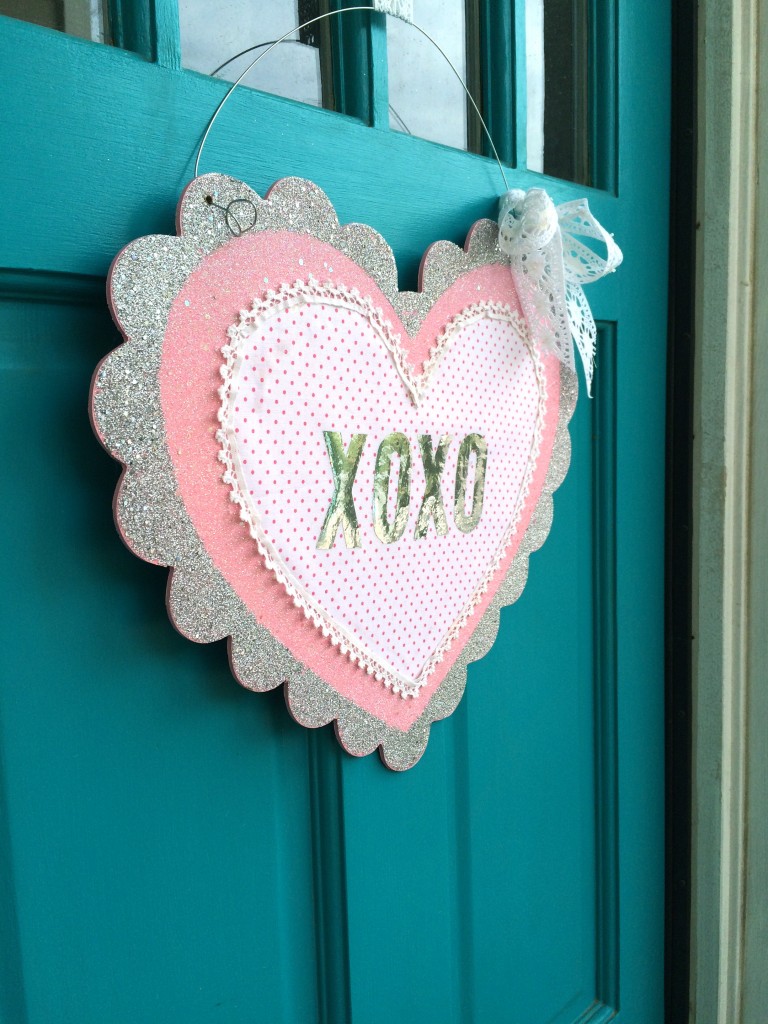
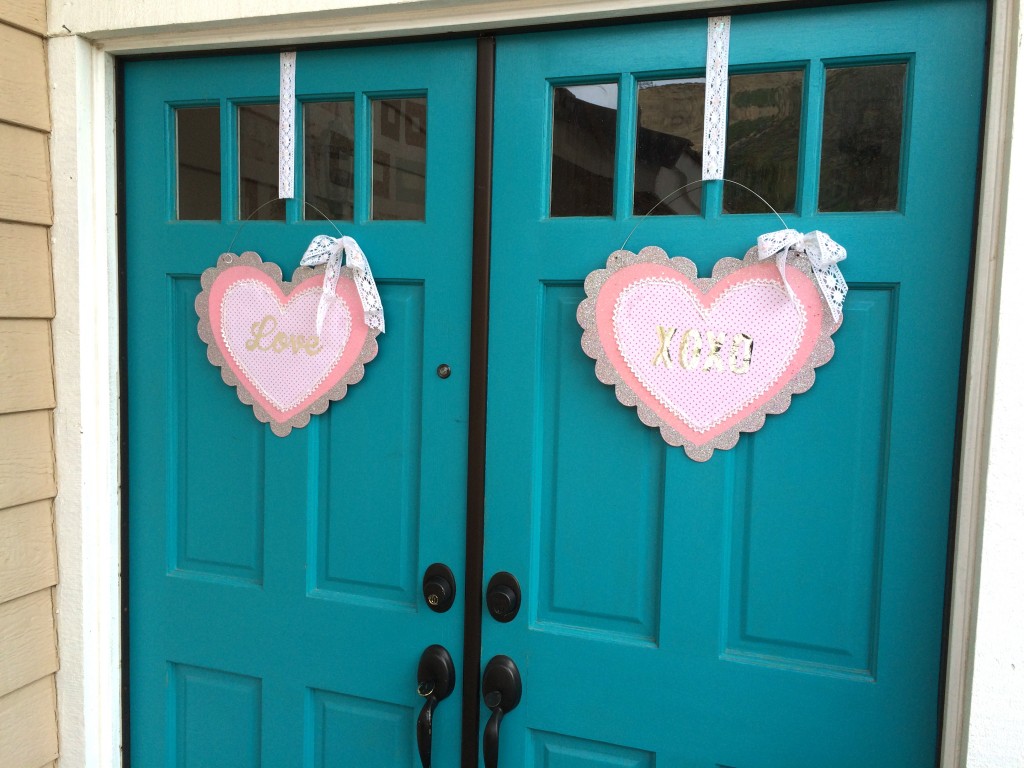
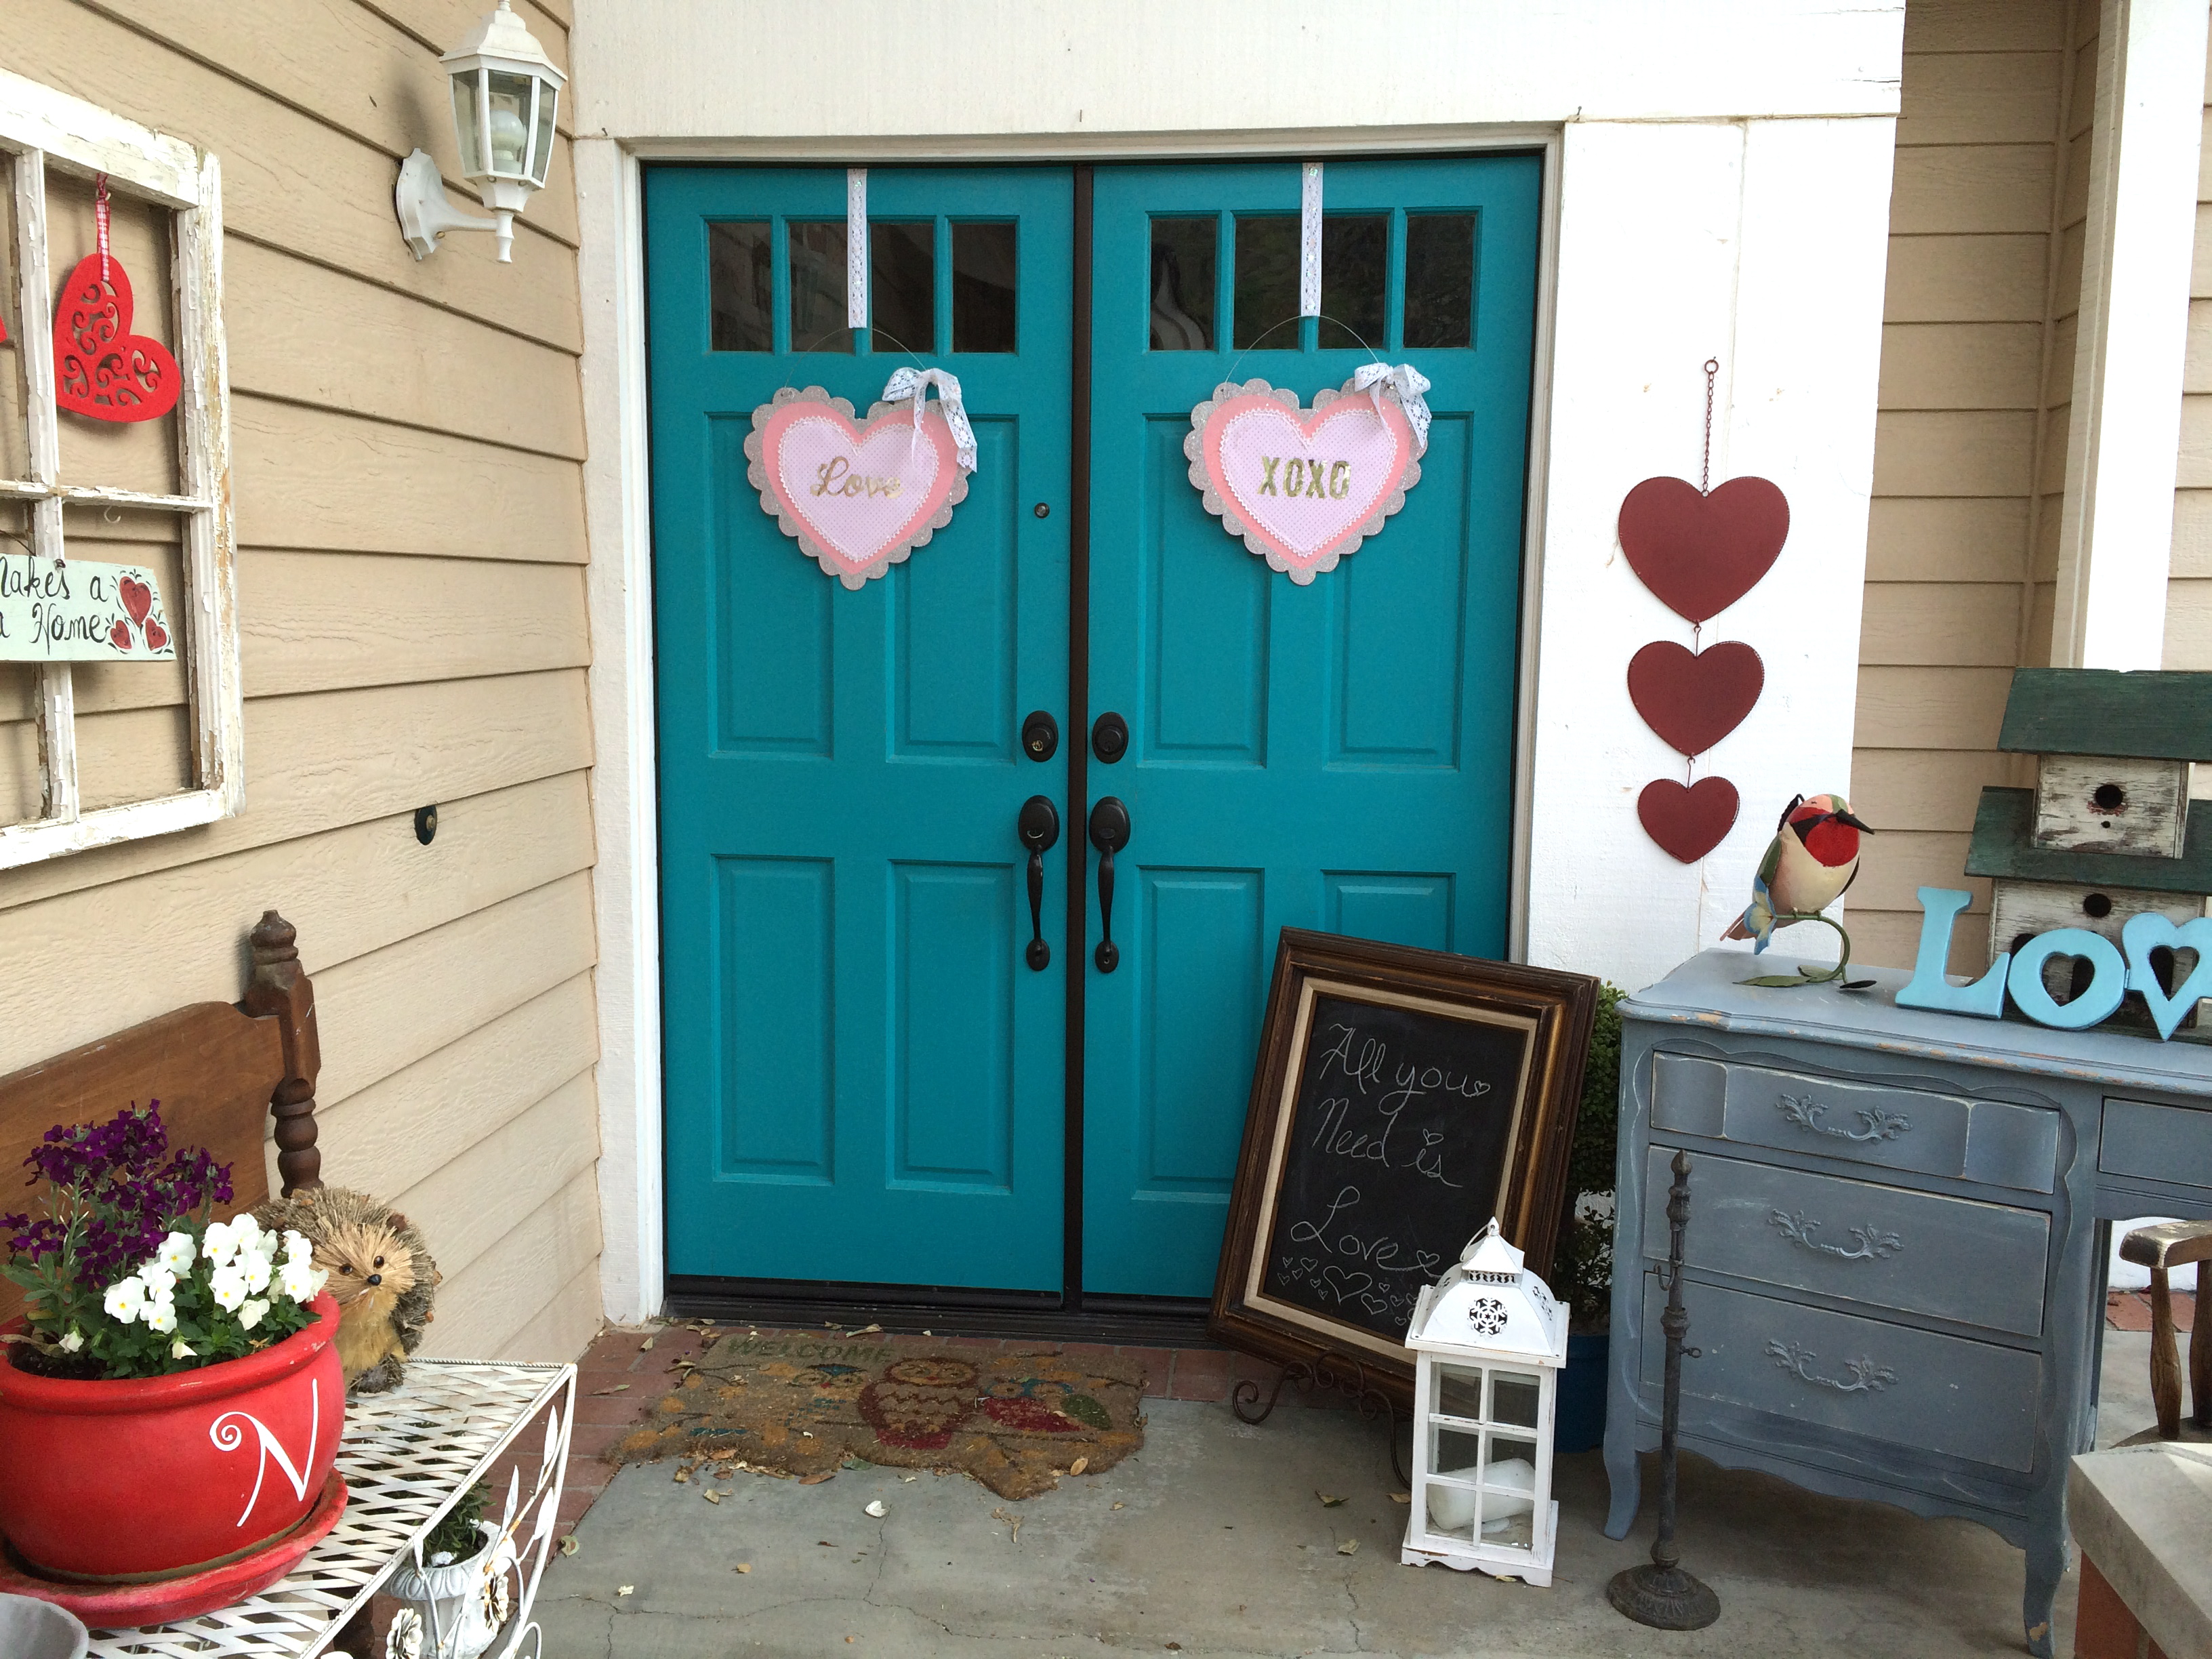
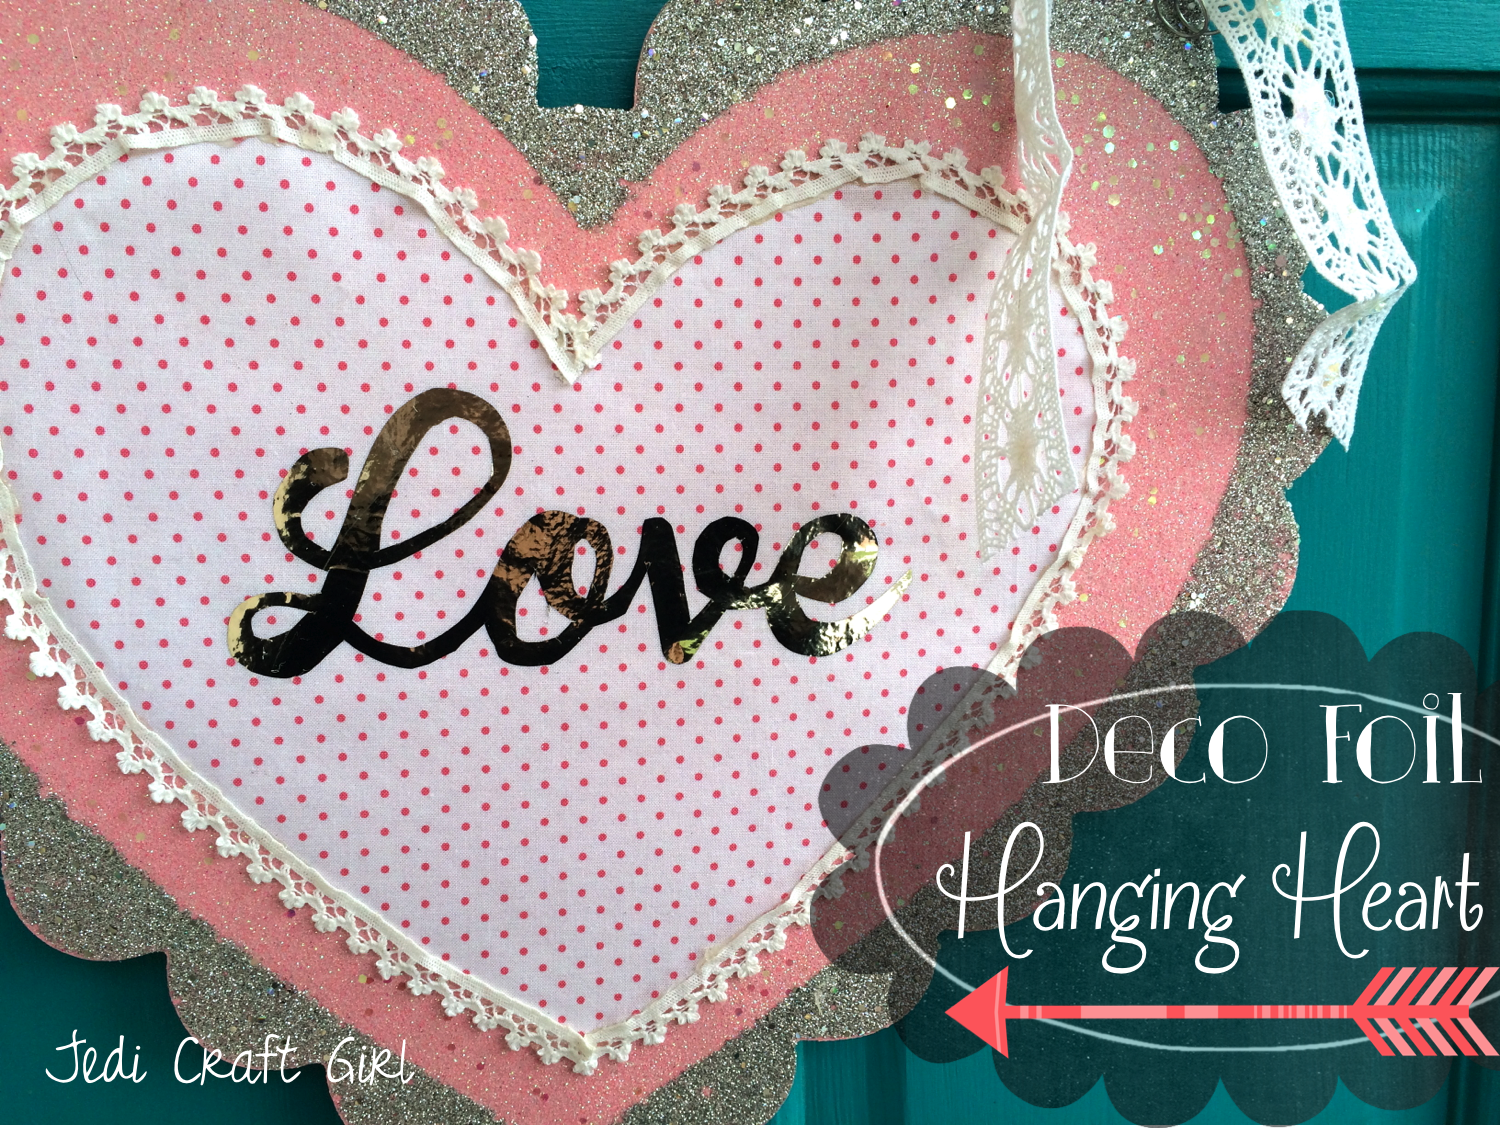
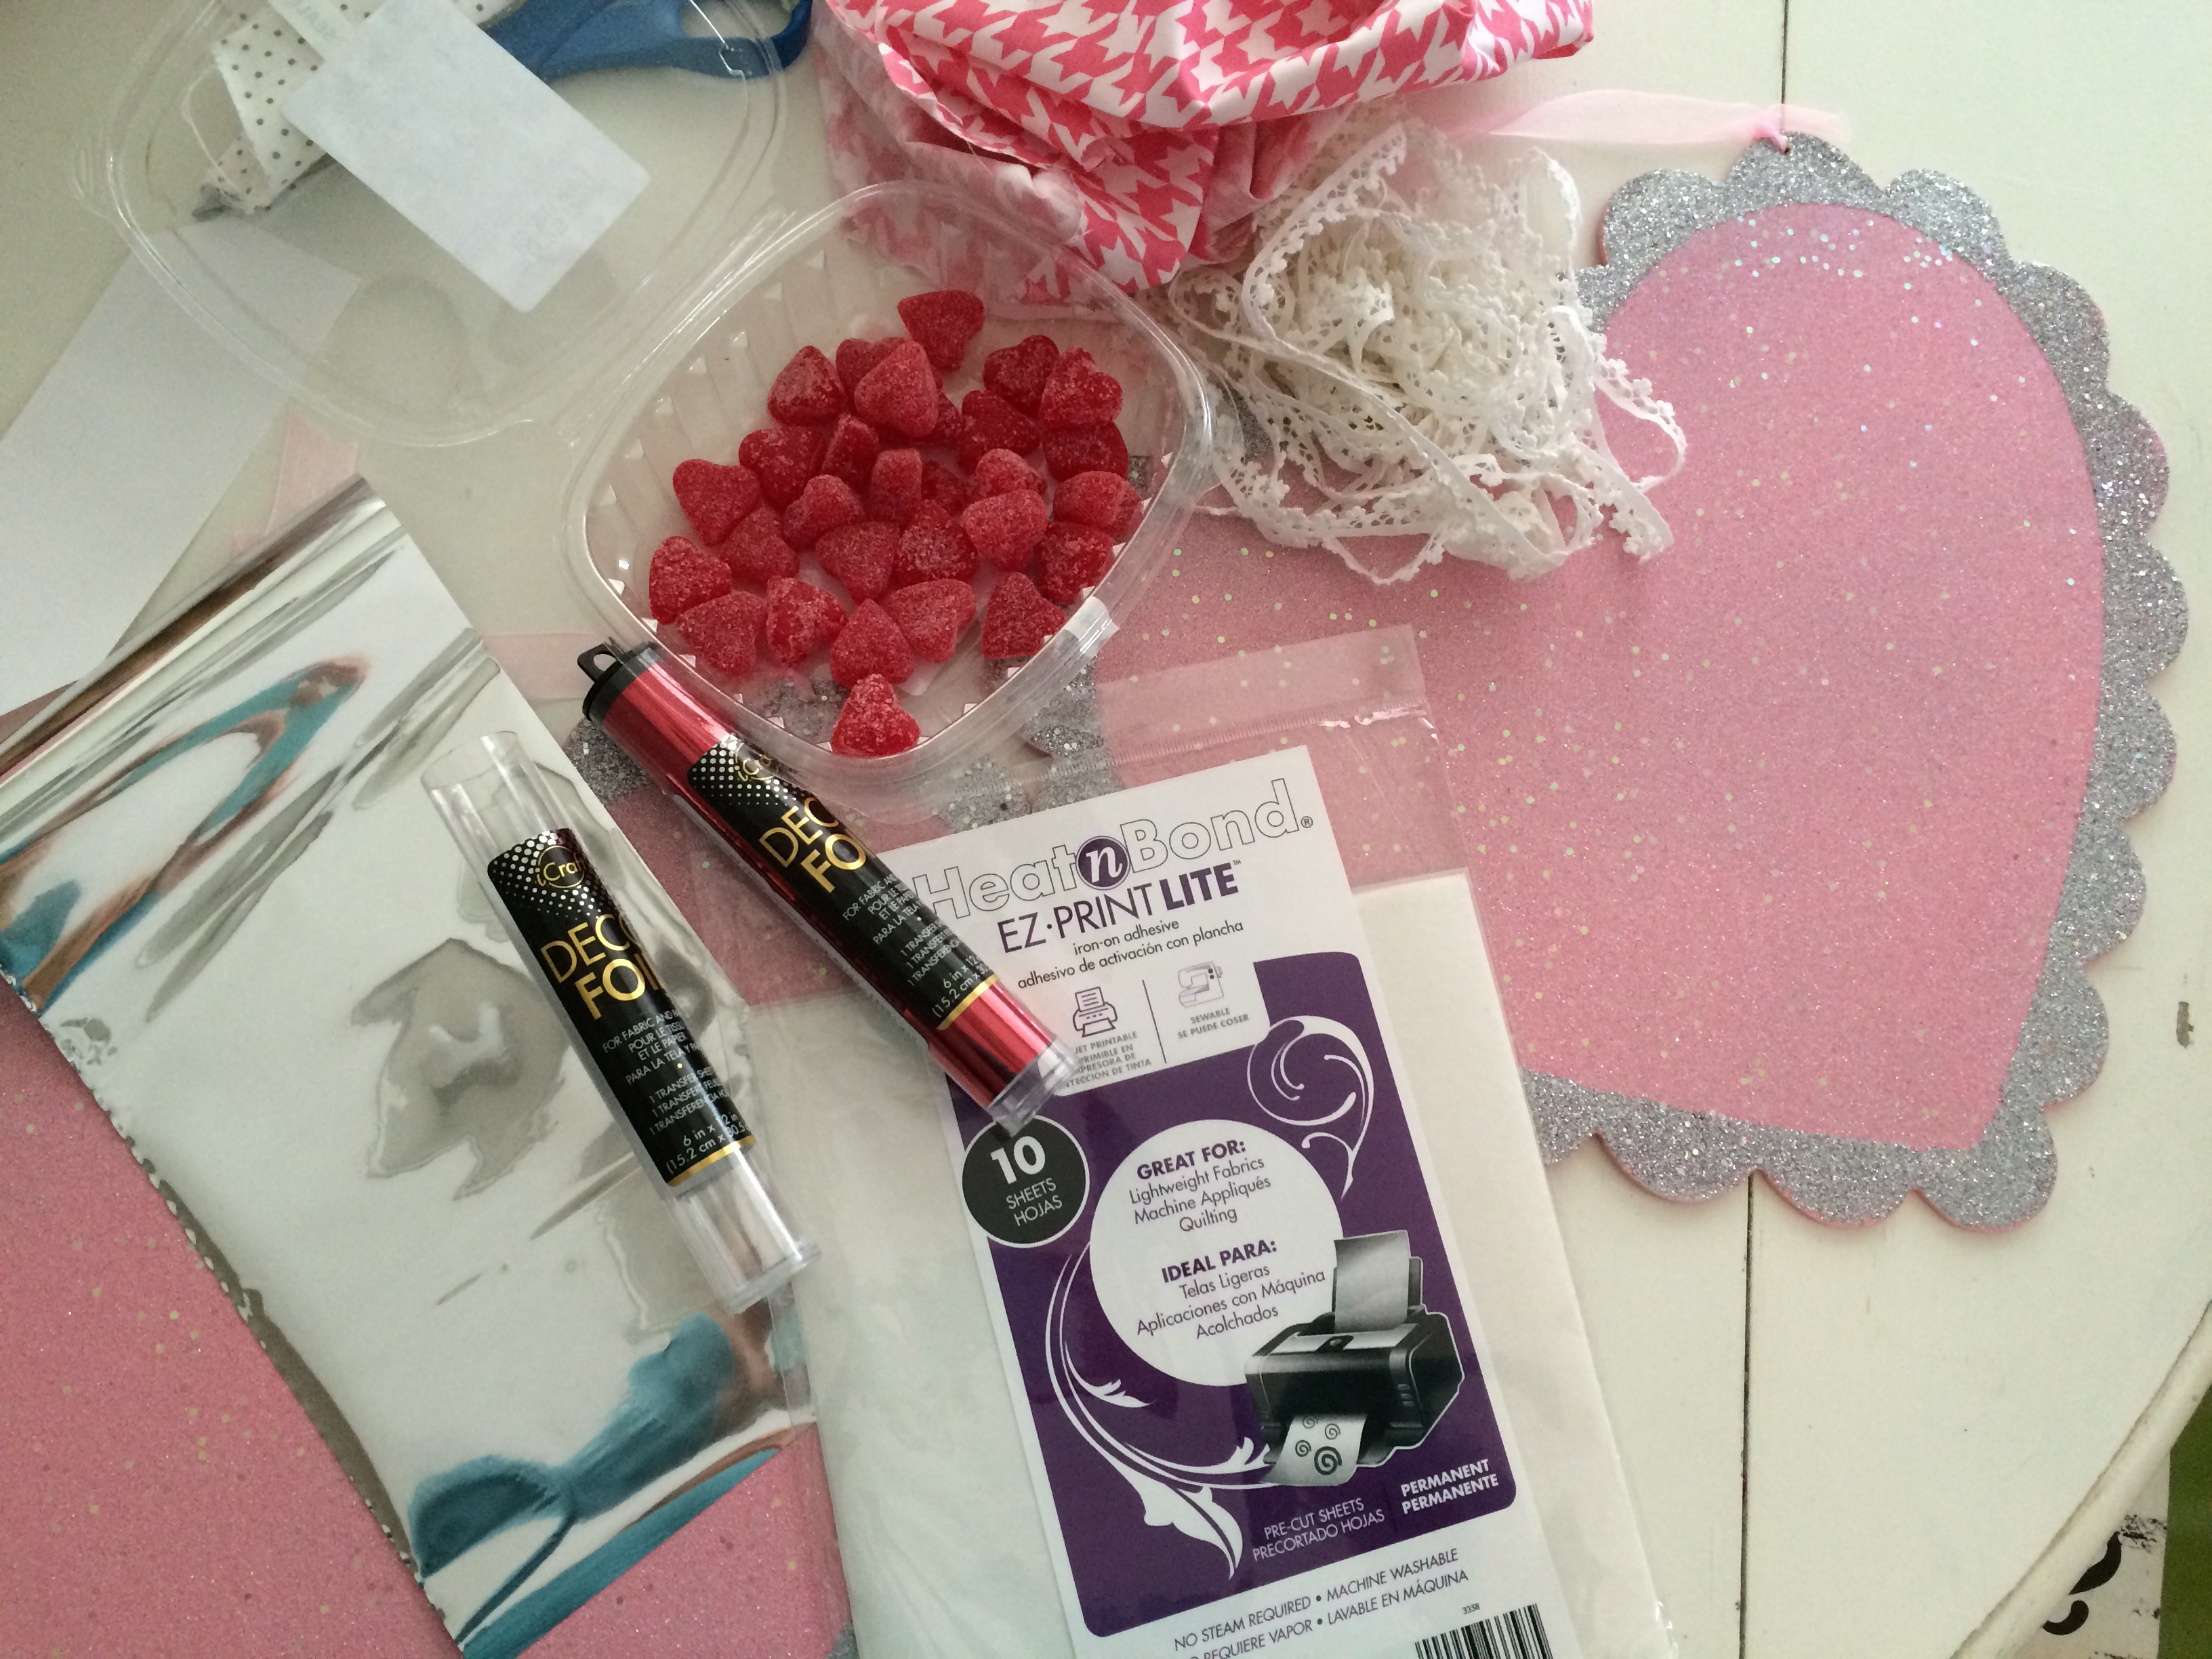
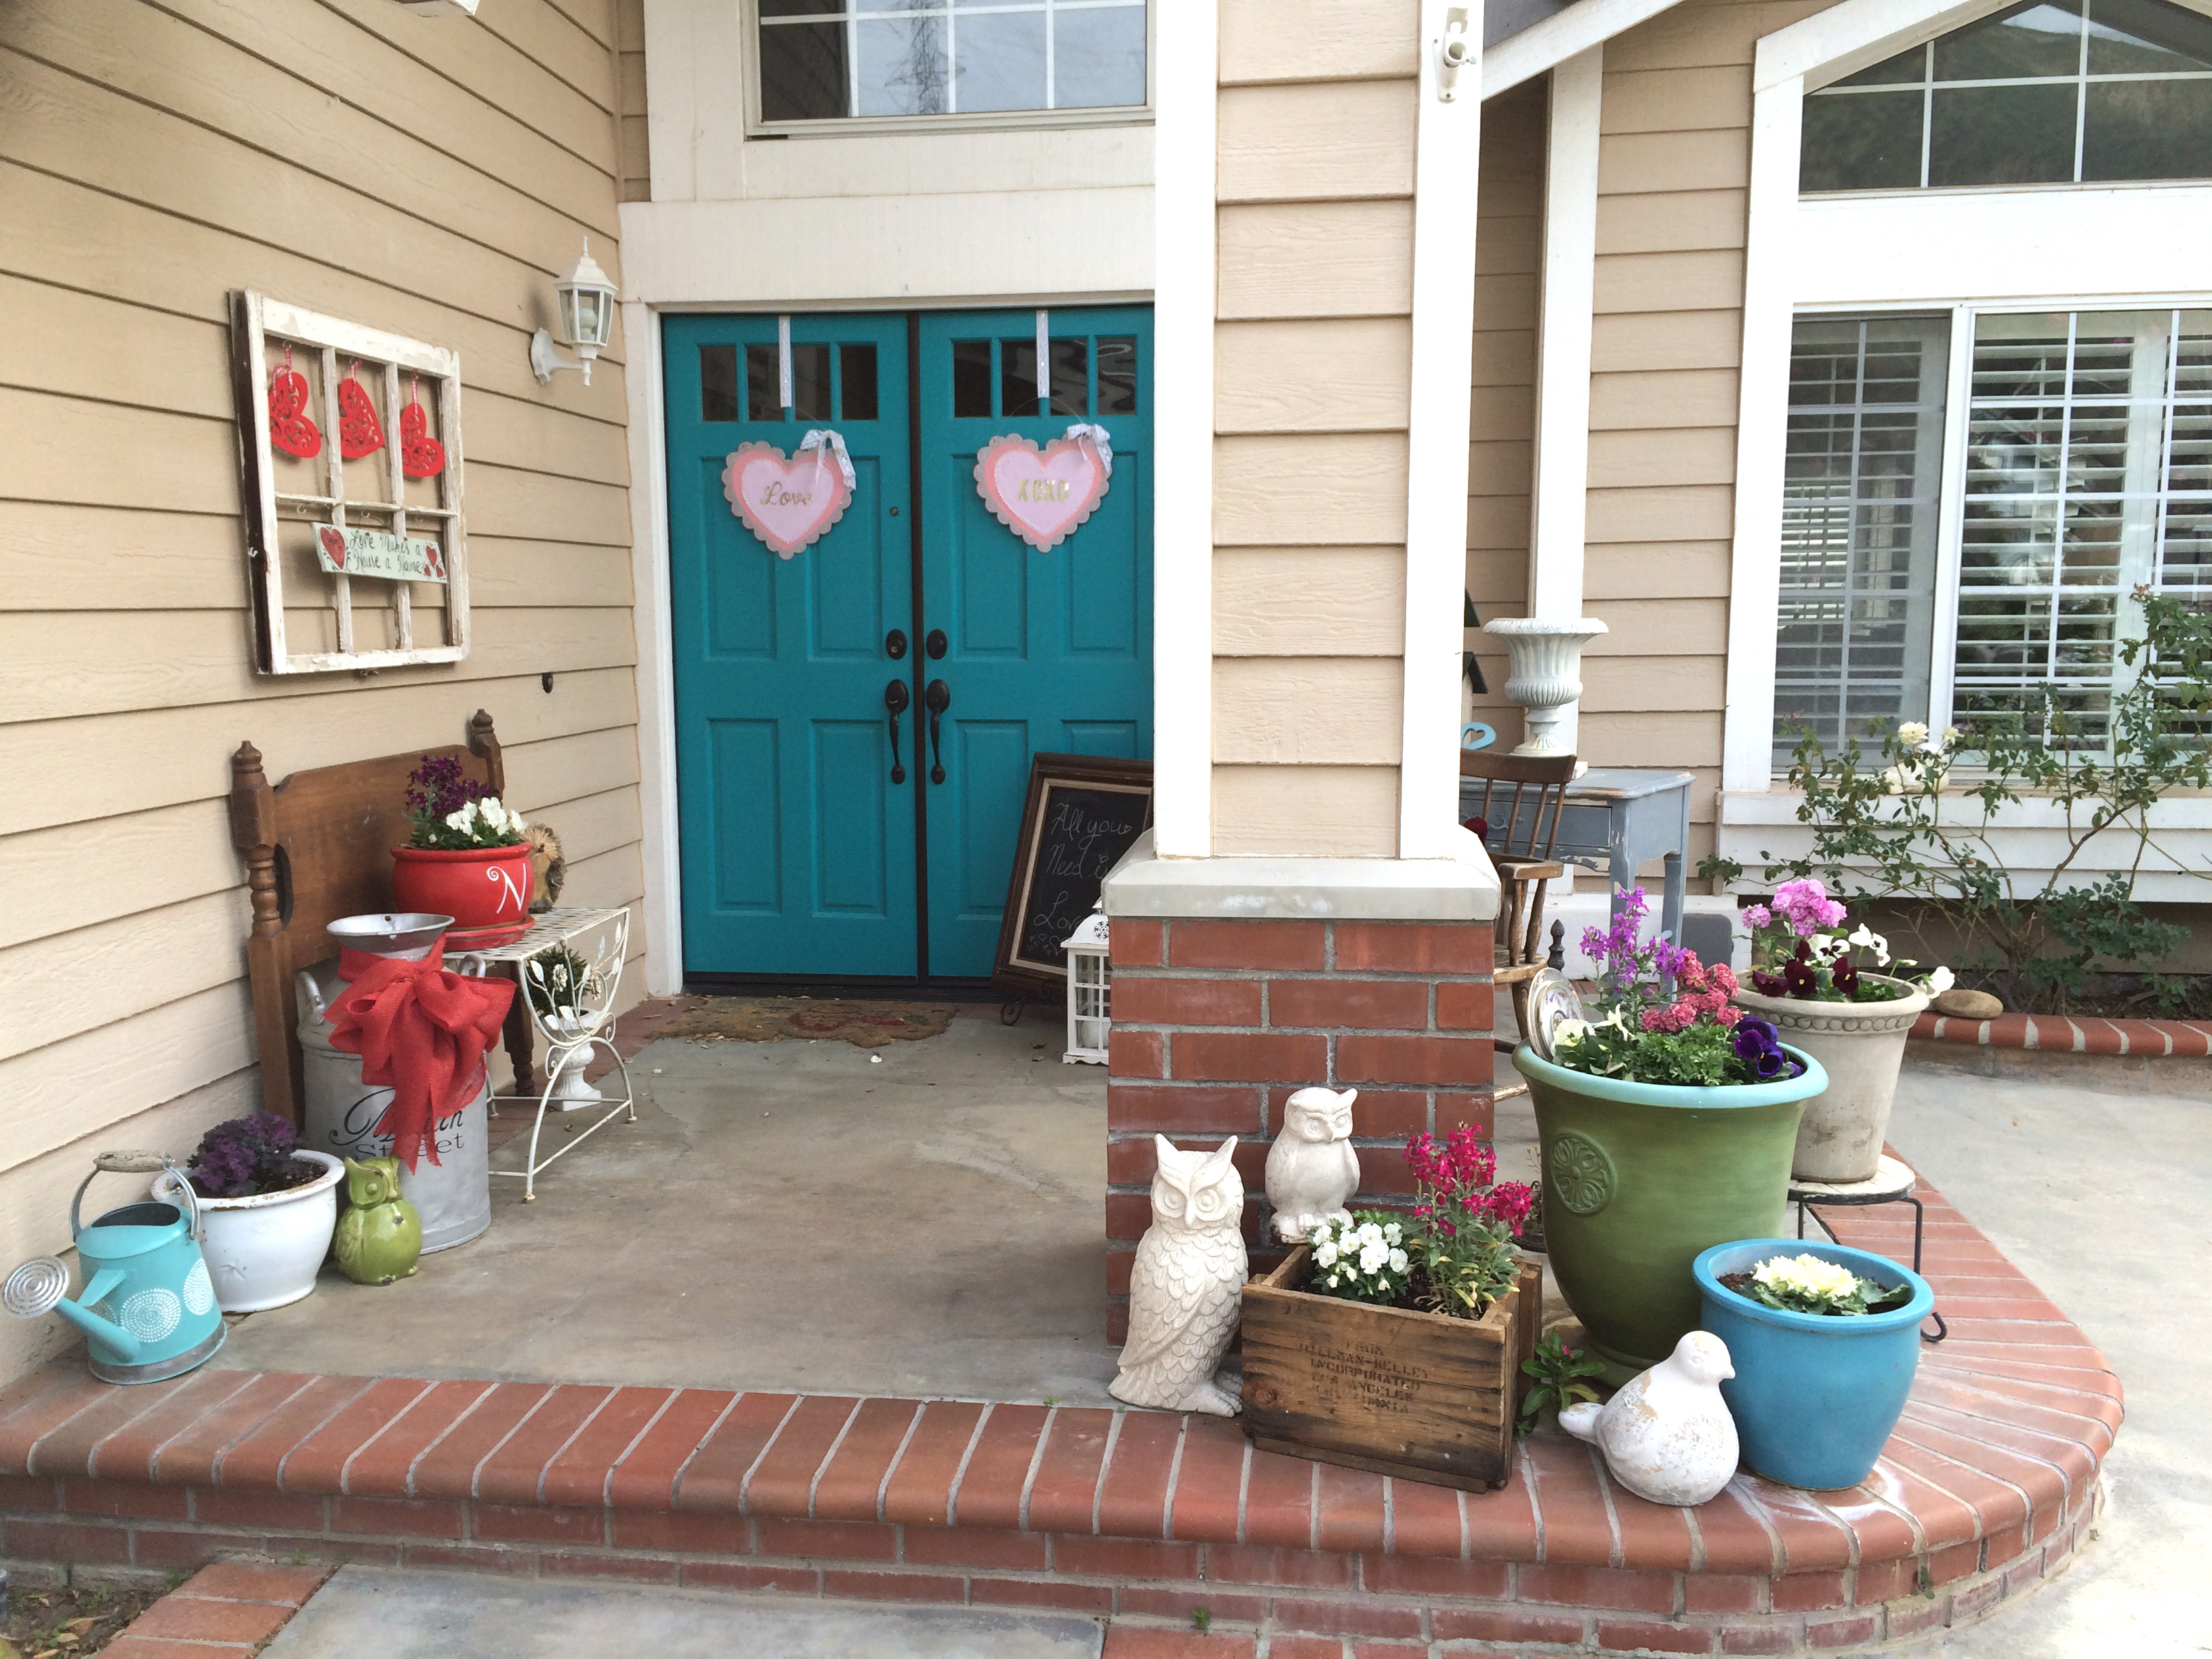
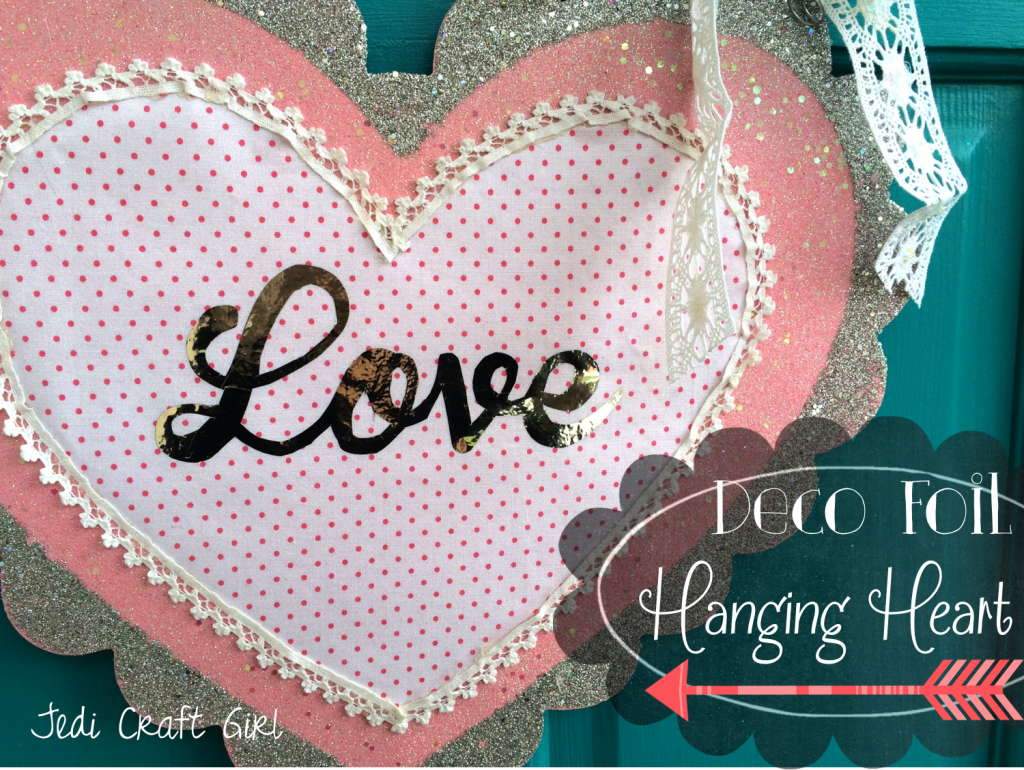
I didn’t quite know what to hang on my front doors this Valentine’s Day season.  Do any of you have the problem of having 2 front doors?  It’s always a delllama, do I hang just one item on the door we use, leaving the other one bare?  Do I hang two of the same thing?  Two different things?  If I hang 2 wreaths, does it look like my doors have eyes?  I came across these sparkly scalloped wood heart hangers at the craft store and I thought they might solve my front door problem.  They were just screaming for some embellishment, don’t you think?  I ran around the house, gathering items that might be cute all while eating cinnamon gummy hearts (highly addictive).  If you don’t have wood heart hangers like these, you can add this heart to a pillow, a frame, or pretty much anything!  Here goes!!
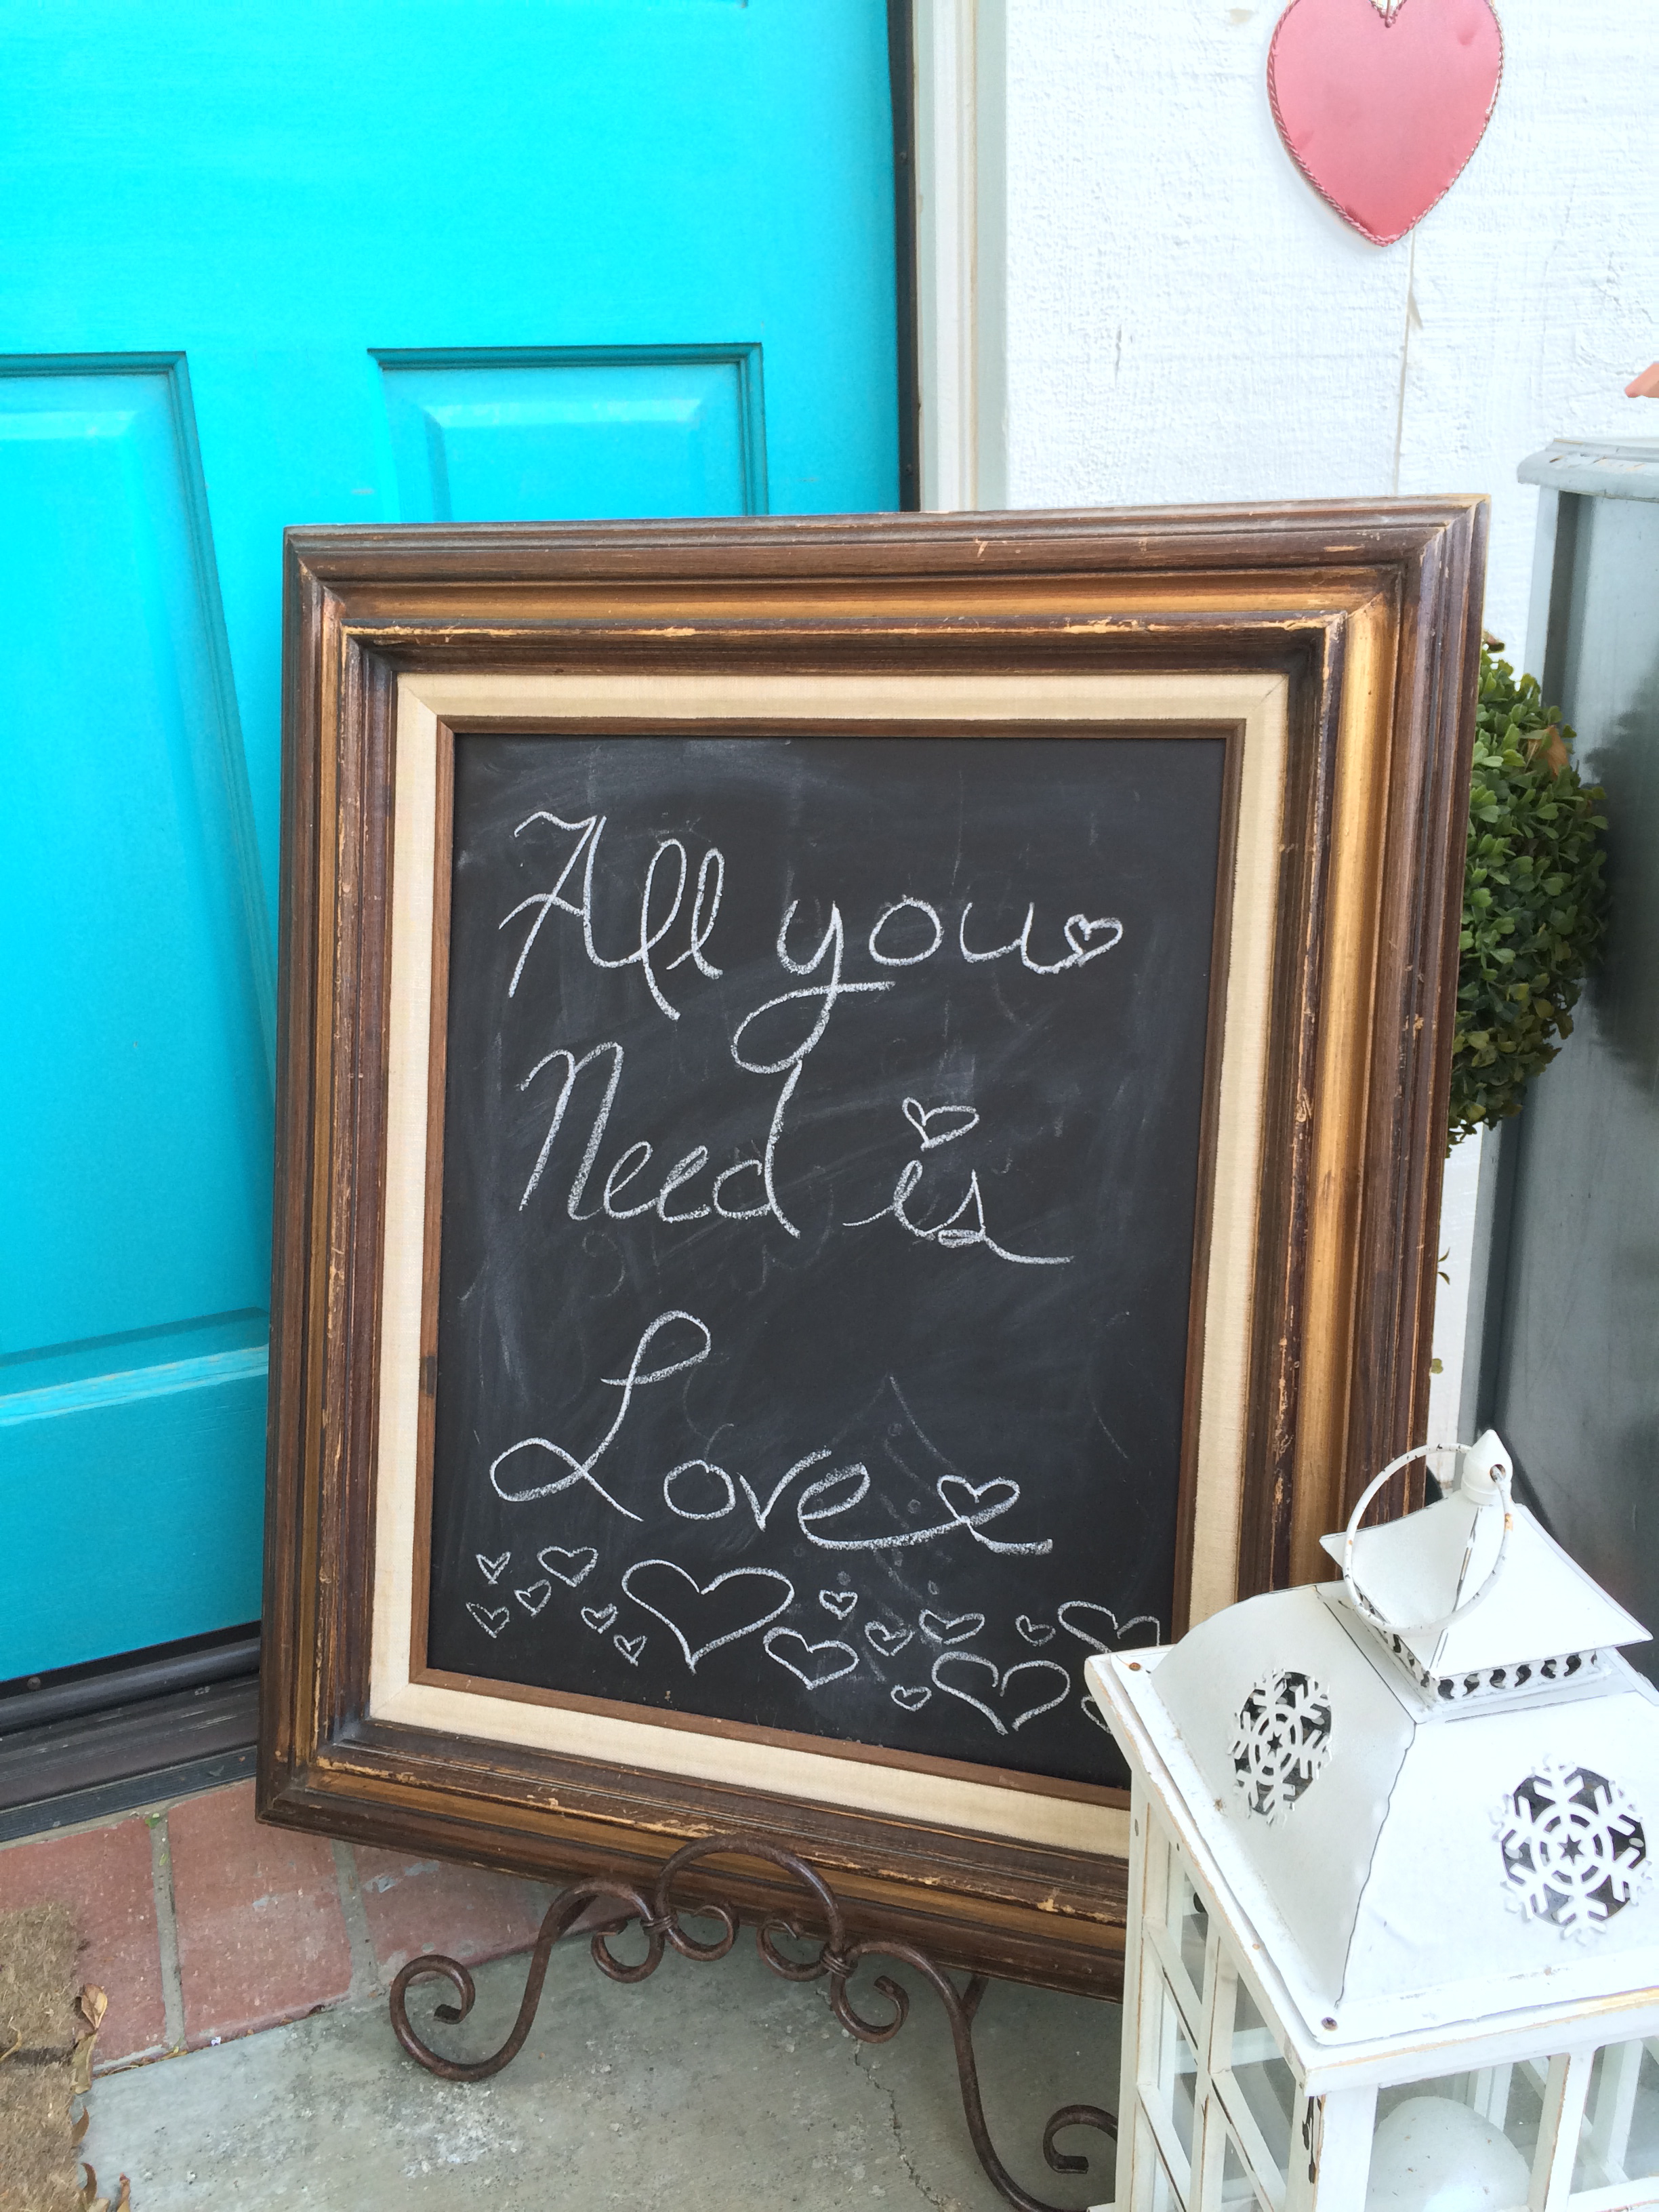
foil valentine craft

Supplies:

fabric scraps for the hearts, I used Riley Blake Designs small dots, pink & white

a few yards of small lace and larger lace to hang

Heat n Bond Lite EZ Print sheets

Heat n Bond Lite

Deco Foil silver
10942962_10205726136972927_6418707949747214144_o


Don’t you just love all the colors this Deco Foil comes in?  This was my first time using it, I was a little intimidated; now it’s my new favorite product!

Begin by drawing your desired heart shape onto the paper side of the Heat n Bond Lite.  Roughly cut around the heart and iron it to the wrong side of the fabric.  I choose to use Heat n Bond Lite rather than fusible stabilizer because I like the texture it creates when applied.  Leave the backing paper on.foil valentine craft 2

Print out the words in reverse onto the EZ print sheets.  You can download the words like I used or make up your own.

foil valentine craft 1


Press the words to the wrong side of the Deco Foil.  Then cut out with scissors.  The XOXO were easy to cut, the Love was a little intense, I might not choose such an intricate word to cut with scissors next time 🙂  But I like how it looks.
foil valentine craft 7

Once the letters are cut out, peel off the backing paper and place the words as desired.  I covered my letters with tissue paper because I was afraid to put the iron directly on the foil.  Press into place.

foil valentine craft 9

I LOVE the foil!  I can’t wait to try it on more projects!  To finish the heart, peel off the backing paper of the heart.  Center it on the wood heart.  Using hot glue, glue the lace all the way around the heart.  You will burn your fingers many times while doing so 🙁  If you have another favorite glue, you might try that.  I was in a hurry 🙂  You could also use any kind of trim: ric rac, small tinsel, pom poms, ruffles, etc.  I wasn’t in love with the cheap ribbon hanger the hearts came with, so I snipped them off and added some wire.

valentine foli craft

I added a lace bow and also hung it with lace.  I don’t have a wreath hanger, so I tack the lace with a tiny nail to the top of my door.  Maybe that’s not a good idea?

foil valentine craft 4

foil valentine craft 5

foil valentine craft 3

A little peak at my front porch….

valentine front porch 2

chalkboard frame front porchMy teenage daughter is in charge of all the chalkboard writing in our home.  It’s too nerve racking for me!

I found this desk literally on the side of the road.  I spray painted it grey and made it look rustic and it lives on my front porch.  In the spring I have flowers growing out of the drawers!!  I also found the chair on the side of the road.  People probably think my porch looks junky – I like it!!


repurposed desk diy

valentine front porch

Garage Sale Halloween Wreath {DIY}


garage sale halloween wreath


I have two front doors and I never know what to hang on them.  Do I just hang one wreath?  Do I leave them plain?  Oh, and it can’t be anything heavy that will scratch the paint when the wind blows or the door opens.  And one more thing, I don’t want to spend a lot of money, because I like to spend all my money on fabric 🙂  That being said, I found these red berry wreaths at a garage sale for $1 each.  I actually think these might have really been my wreaths from 20 years ago 🙂  I knew they had some Halloween potential.Halloween Wreath 2

Black spray paint is your best Halloween decorating friend.  One coat of shiny black spray paint, some chevron ribbon left over from last year and a black crow…..It’s the perfect CHEAP Halloween wreath for my door.

halloween wreath diy craft

Halloween Wreath 1
And there are two of them!  Cheap, won’t scratch, and spooky!Halloween wreath 3 Halloween wreath 4


G

Rustic Farm Table Reveal

It’s finally here – the day I have been waiting for!  My rustic farm table is finally finished!!  This project all started when I got the crazy idea to sell my dining room set to my friend and use the money to purchase reclaimed lumber and have my husband build me a table!  It all started in February…..

Living in California, reclaimed lumber is hard to find and it is expensive!  I called and researched places that sold reclaimed wood.  There wasn’t too many to pick from in the LA metro area.  We ended up driving out to the valley where this guy had a huge garage/yard full of lumber.  We choose Michigan Oak that was used in a subfloor of a barn.  I am guessing its 60 to 80 years old.  For the price of my dining room table & 8 chairs – I got a truck load of lumber.  Seems reasonable!!

Oh the projects we could make!!!!

The wood sat in our back yard for about 6 months while we gathered the right tools, additional lumbar, etc….and while my husband came up with a plan for the construction.  Then, one day in September, it happened, the table started coming together.

We constructed it in 2 sections.

I am not going to write too much detail on the construction.   If you want to build one, leave me a comment, and I can send more detailed instructions 🙂

These are the pedestals for the table.
Here it is all finished.  It took 3 men to get it into the house!  It is super heavy!  I wasn’t sure what type of protective finish to put on the top.  I didn’t want a shiny or thick polyurethane.  I looked into linseed oil, but didn’t feel good about that choice.  I went with Minwax finishing wax.  I have used it before and it turned out to be the perfect finish for the table.  It still feels like the original wood and will repel moisture.
The chairs are mismatched: some are chairs I had and others are from my adventures garage sailing!  They are white, antique white, heirloom white, and ivory. 

 I love that the table seats 14 people!  5 on each side and 2 on each end.

This photo really shows all the different tones in the wood – I love that darker piece.

I bought a new chandelier to go over the table – that was a project in itself.  I ordered it from Amazon.  I really like it – it just took a long time to rewire everything because the wire it came with was way to short.  It is really bright and sparkly!  This is me adding each crystal one at a time!

Marbles also loves the table!!
 

Amanda

Outdoor Table Re-Do

My friend gave me her mother’s kitchen table.  It’s not your average kitchen table…..It’s HUGE and ROUND!!!  I think the table originally cost $$$$.  It was in bad shape when I got it.  The mom had caught a floral arrangement on fire and burned part of the table.  Then she cleaned it with some harsh cleaner and it reacted with the finish, turning it into a sticky mess!  Of course we’ll take the table!!!
I didn’t get a good before picture – but this is it after hubby took it apart.  I just love power tools!!!  We plained it down pretty good – it took the burn mark right.  Then finished with light sanding to get it really smooth.  I didn’t bother sanding the base – it is getting paint!
Meet my new favorite stain – Rust-Oleum’s “Driftwood”.  That’s exactly what it looks like!  It’s perfect for this project because it will be living outside!
That’s me!!  Of course I do all my DIY projects in tie-dye!!
We took out the rotten fake wood inlays and prepared the surface for tile!!
And here it is with super cute 1″ tiles.  It makes me think of the ocean!!  Don’t you love the Lazy Suzan on top!  My kids LOVE this – we’ve never had one before!
I sealed it with Rust-Oleum’s Ultimate Spar Varnish.  It has maximum weather protection!!
I love that it can seat 10 people comfortably!

I couldn’t resist painting the base a bright turquoise color!  Spray paint, of course!!

It’s pretty bright, but the outdoors can handle it!!


I love how it turned out – it’s totally me!!

Amanda

DIY Soccer Banner Tutorial

This is my first soccer banner ever!  I had no idea what I was doing and I was determined to use only materials I had on hand.  This is what I came up with! We are the Daisies (white) and there are 5 girls on our team.  So – 5 daisies on the banner!  Not too hard!!

Start with canvas or duck cloth.  I was happy I had bought this in the fabric district for $2 a yard!  Only it was a tan/cream color – not very 5 year old!  Luckily I had just purchased NEON pink spray paint!  I hemmed the edge of the canvas then spray painted it with the neon pink.

Neon pink does not photograph very well in bright sun.  I like how it finished kind of patchy, I have quilting fabric like this.  (it’s nice to know you can spray paint anything!!)

I got out my Therm O Web Heat n Bond and traced the block letters and daisies.

Iron the Heat n Bond to the wrong side of the fabric and cut out on the line.

Peel off the paper and lay out the words.

I was afraid to iron directly on the spray paint so I grabbed an old piece of fabric and laid it on top.  It took a few seconds to get the Heat n Bond to melt.

I put an old towel on the tile floor then laid out the rest of the banner.  I ironed it on the floor – I didn’t want to move it to the ironing board.

I sewed around all of the appliqué pieces in black thread.  On the daisies I sewed around 3 times.

If I would have time, I would have hand stitched the names, but I had 10 minutes left before team pictures, so a sharpie did the trick in putting the girls names on the flowers.

I love it!!!  The neon really makes it!

 My husband assembled a PVC pipe stand and we took it to our first game on Saturday!!

Amanda