Christmas Gift Idea

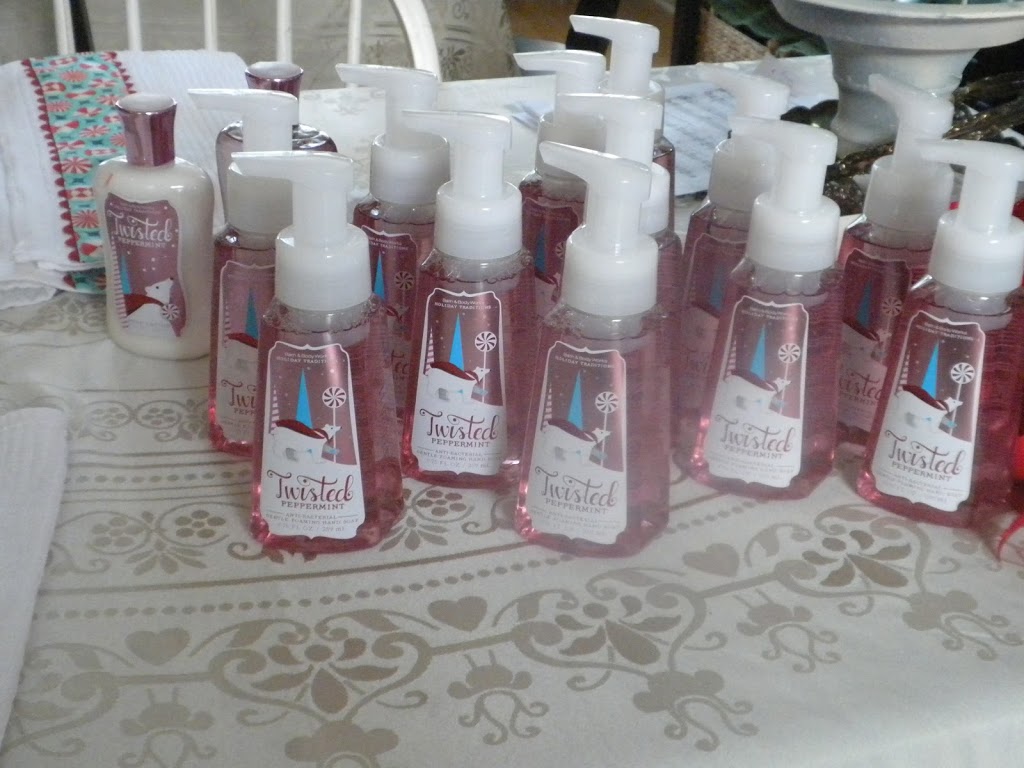
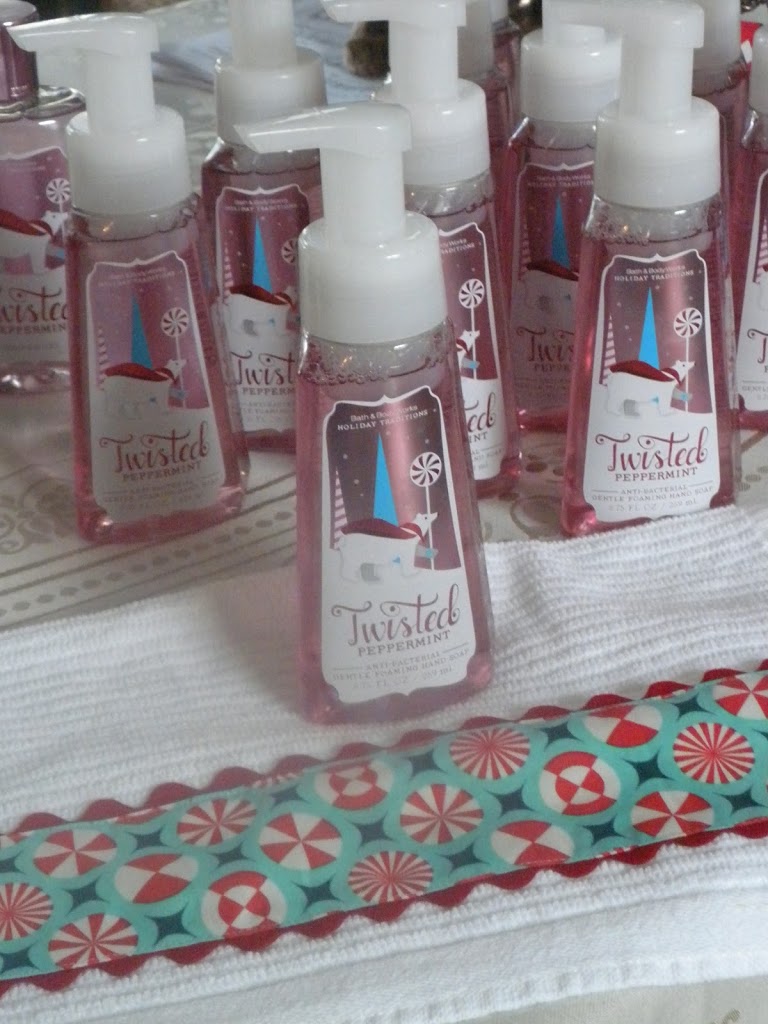
It’s my favorite time of year at Bath & Body Works!  Time for Twisted Peppermint everything!  I decided these yummy soaps would make cute gifts for people in hubby’s office and people at school.  So, I bought every soap they had (more than pictured here….yes, I am crazy!)

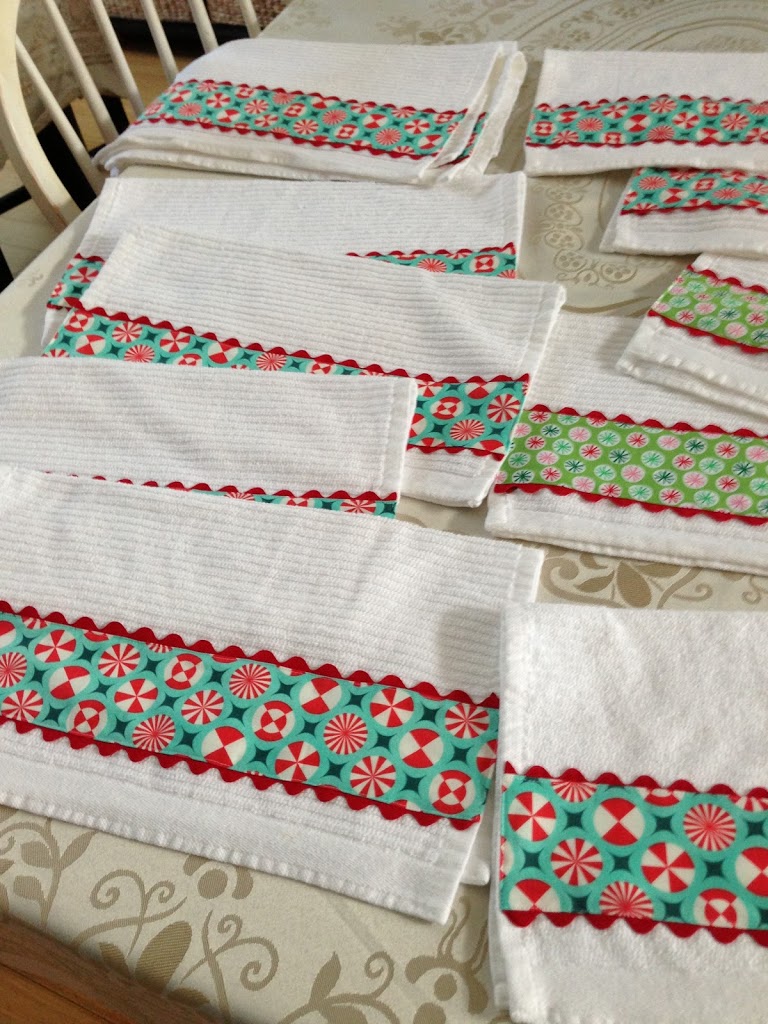
Then I bought these white dishcloths and sewed peppermint fabric and red ric rac on the bottom.  Super cute!

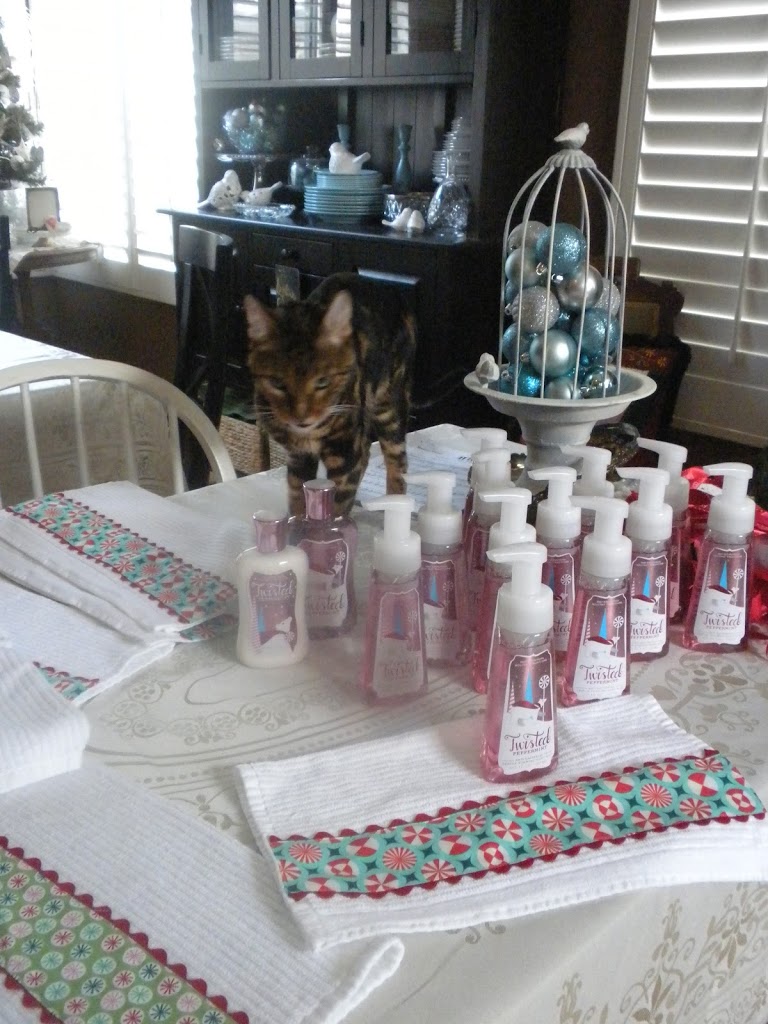
 I put them in cellophane bags and tied with a ribbon.  I would love to get this gift from someone – and I hope the recipients enjoy theirs!


Glitter Volleyball Christmas Ornaments


 I needed a little gift for the girls on our Volleyball team.  Here is what I came up with!  I started with a chipboard coaster.  I got mine at Michael’s.  I spray painted them white.

Then I got out a gray Sharpie and had my daughter draw the volleyball lines.  These would be cute for any sports – basketball, baseball, soccer, etc.

 I cute out all the player’s names in red vinyl and punched a hole in the top.

 Then, my favorite part, the clear glitter.  I could use this stuff on everything I own.  It is great because you can see through it – but it gives it a sparkly finish.

 Get out the Elmer’s glue (or any similar) and brush over the top of the ornament – making sure to cover it completely.  Sprinkle on the glitter & now they are super cute!

 I attached a little ribbon and let them dry completely.
 They are pretty cute!

 The fun thing is I left the backs plain so the girls could all sign the back of the ornament.

Quilted Halloween Pillow

I made this Halloween pillow for a friend.  I love how it turned out.  I love making pillows with lots of different fabrics.  I cut random strips of coordinating Halloween fabric and sewed them together.  Next I trimmed the finished piece to measure 17″ (to fit a 16″ pillow form).  I quilted the pillow front in vertical seams 1″ apart.  I added a black jersey ruffle (from an old T-shirt) and sewed a gathered flower!  I could make 100 of these!!


Quilted Tote Bag Tutorial


This is my favorite tote bag.  Of course I didn’t invent the quilted tote 🙂  Here is my tutorial for how I made this one.  Hope you love it!

Supplies:
1/3 yard main outer fabric
1/3 yard bottom contrast outer
3/4 yard muslin or other light weight for the back of the quilting
3/4 yard bag lining
1/4 yard handles
quilt batting
911 feather weight interfacing (optional)
1/3 yard contrasting fabric for pocket (optional)

Instructions
Cut your main outer fabric (top piece) 2 pieces 10.5″ x 20″
Cut your bottom contrast fabric 2 pieces  9.5″ x 20″
Sew these two pieces together and press. 

I pin basted my two outer bag pieces and straight lined quilted every 1 inch.  You can quilt how you want it.  I actually used an old sheet for the back of this part – you will never see it – it just adds stability to the quilting.

Quilt both pieces

Cut your lining (2 pieces) 19.5″x20″.  (I had to cut 1/4 inch off the 19.5″ piece because the outer bag shrunk from the quilting.  So mine measured 19.25″ x 20″)  Iron the fuseable Pelon to the wrong side of your bag lining fabric – this is optional.  Once I finished mine, I thought this step really wasn’t necessary.

Next, prepare your pocket. Cut 2 strips 6.5″ x 20″.  Sew the two pocket pieces right sides together.

Sew 1/4 inch along the top and bottom – leaving edges open.

Turn and press.  Top stitch along just the top of the pocket piece.

Pin the pocket band where you want the pocket to hit.  I pinned mine 7 inches from the top of the bag.

Now sew along the sides and the bottom using a narrow 1/8 inch seam allowance.  Then sew lines going down the pocket piece to form the pockets.  I just eyeballed mine.  Some are narrow for pencils, others are wider.

Prepare the handles.  Cut 2 strips 28″ x 4″.  If your fabric is thin, iron fusable interfacing to handle pieces before sewing.  This fabric was kind of canvas-like.  Fold longways and sew along the side leaving the ends open to turn.

Turn and press both handles.  Top stitch both sides of handles.

Now, pin your outer bag right sides together, matching the side seams.  Also, pin your lining together right sides together.  Sew around both pieces leaving the top open.  I used about a 1/2 inch seam.  Make sure your seam allowance is exactly the same for both bags or they won’t match up!

Place your handles as desired.  Use this point to shorten the handles if you want.  Baste the handles on to the outer bag using a 1/8 inch seam.

Push out the bottom of the bag – while it is wrong side out.  Flatten and measure 3 1/2″ from the point and draw a straight line.  Do this to both ends of the outer bag and the lining.

Pin in place and sew along your line – back-stitching to start and stop.

Trim along your seam about 1/4 inch.

You are almost done!  Now the fun part!  Leaving the outer bag wrong side out, put the lining (right side out) inside the quilted bag.  Match the side seams and pin all the way around the bag.  It should line up perfectly.

Sew a 1/4 inch seam all around the entire bag.

Unstitch a little place on the side lining of the bag to turn the bag right side out.

Turn bag right side out and top stitch the opening closed using matching thread.

Press the lining down so the top of the bag is flat (it will want to puff out the top).

Top stitch using 1/8″ seam all around the bag.

You are done!!!!


Animal Throw Pillows

 I sewed these two pillows for my friend’s birthday gift.  I LOVE the print and they look really cute in her grey & blue family room!  Don’t new throw pillows just make you feel happy!!!

Diaper Change on the Go – Baby Shower Gift

 I have seen different versions of this idea all over Pinterest.  Here is my take on this fun idea!!

 I sewed 5 zipper pouches.  The measurements for the rectangles are 11″x10″ with a 1 1/2′ pleat in the bottom.  They are each lined.  For instructions on making a basic zipper pouch, look HERE, HERE or HERE.  I choose to sew 5 because 10 seemed like a lot!

 Each zipper pouch holds 1 diaper, 1 disposable changing pad, 1 Ziplock of wipes, 1 bottle of hand sanitizer and a trash bag.  This is essentially all the things you need for 1 diaper change.  The idea is the mom can grab one of these on the go and know she is prepared.  As the child grows, you can add in things like baby food, spoon, disposable bib, etc.

 Put them all inside and you are good to go!

 I bought a basket and placed all the pouches in.

Print out a tag & tie it onto the basket

Click HERE for the pdf of the Blue Tag Instructions.
Click HERE for a Pink version

 No, off to the baby shower you go!!