All You Need is Love {and a cat} Quilt Pattern

all you need cover

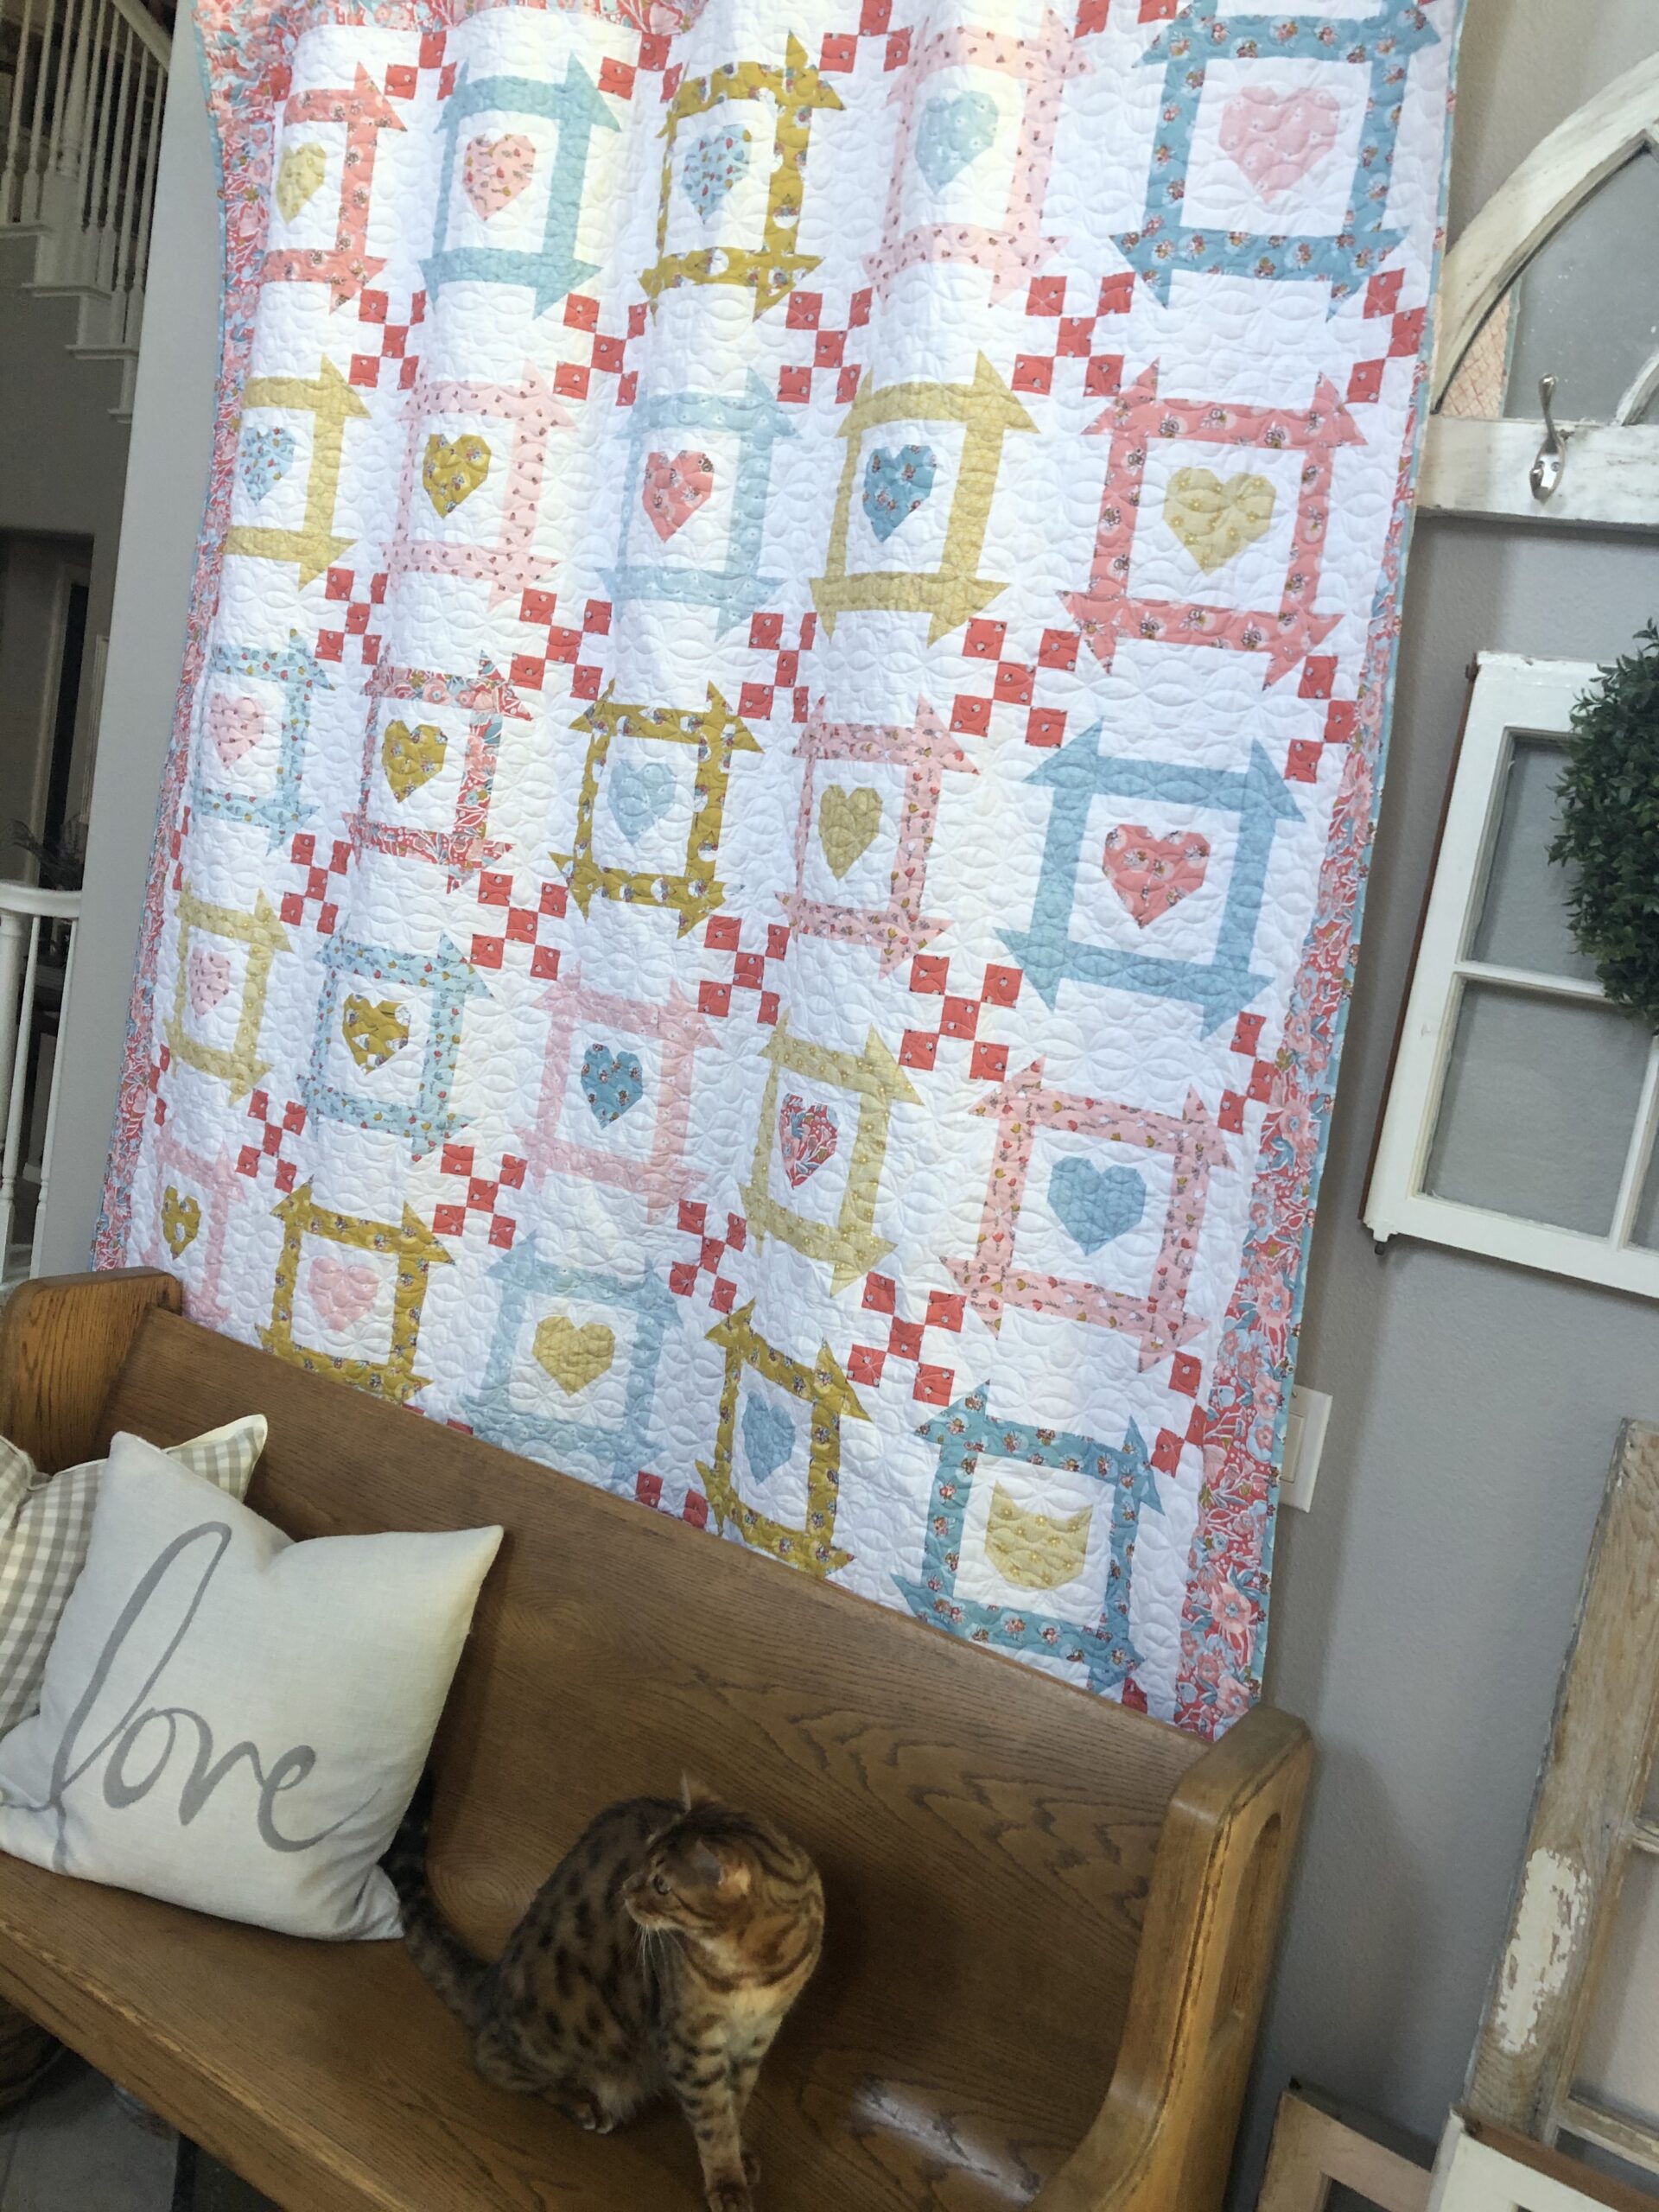
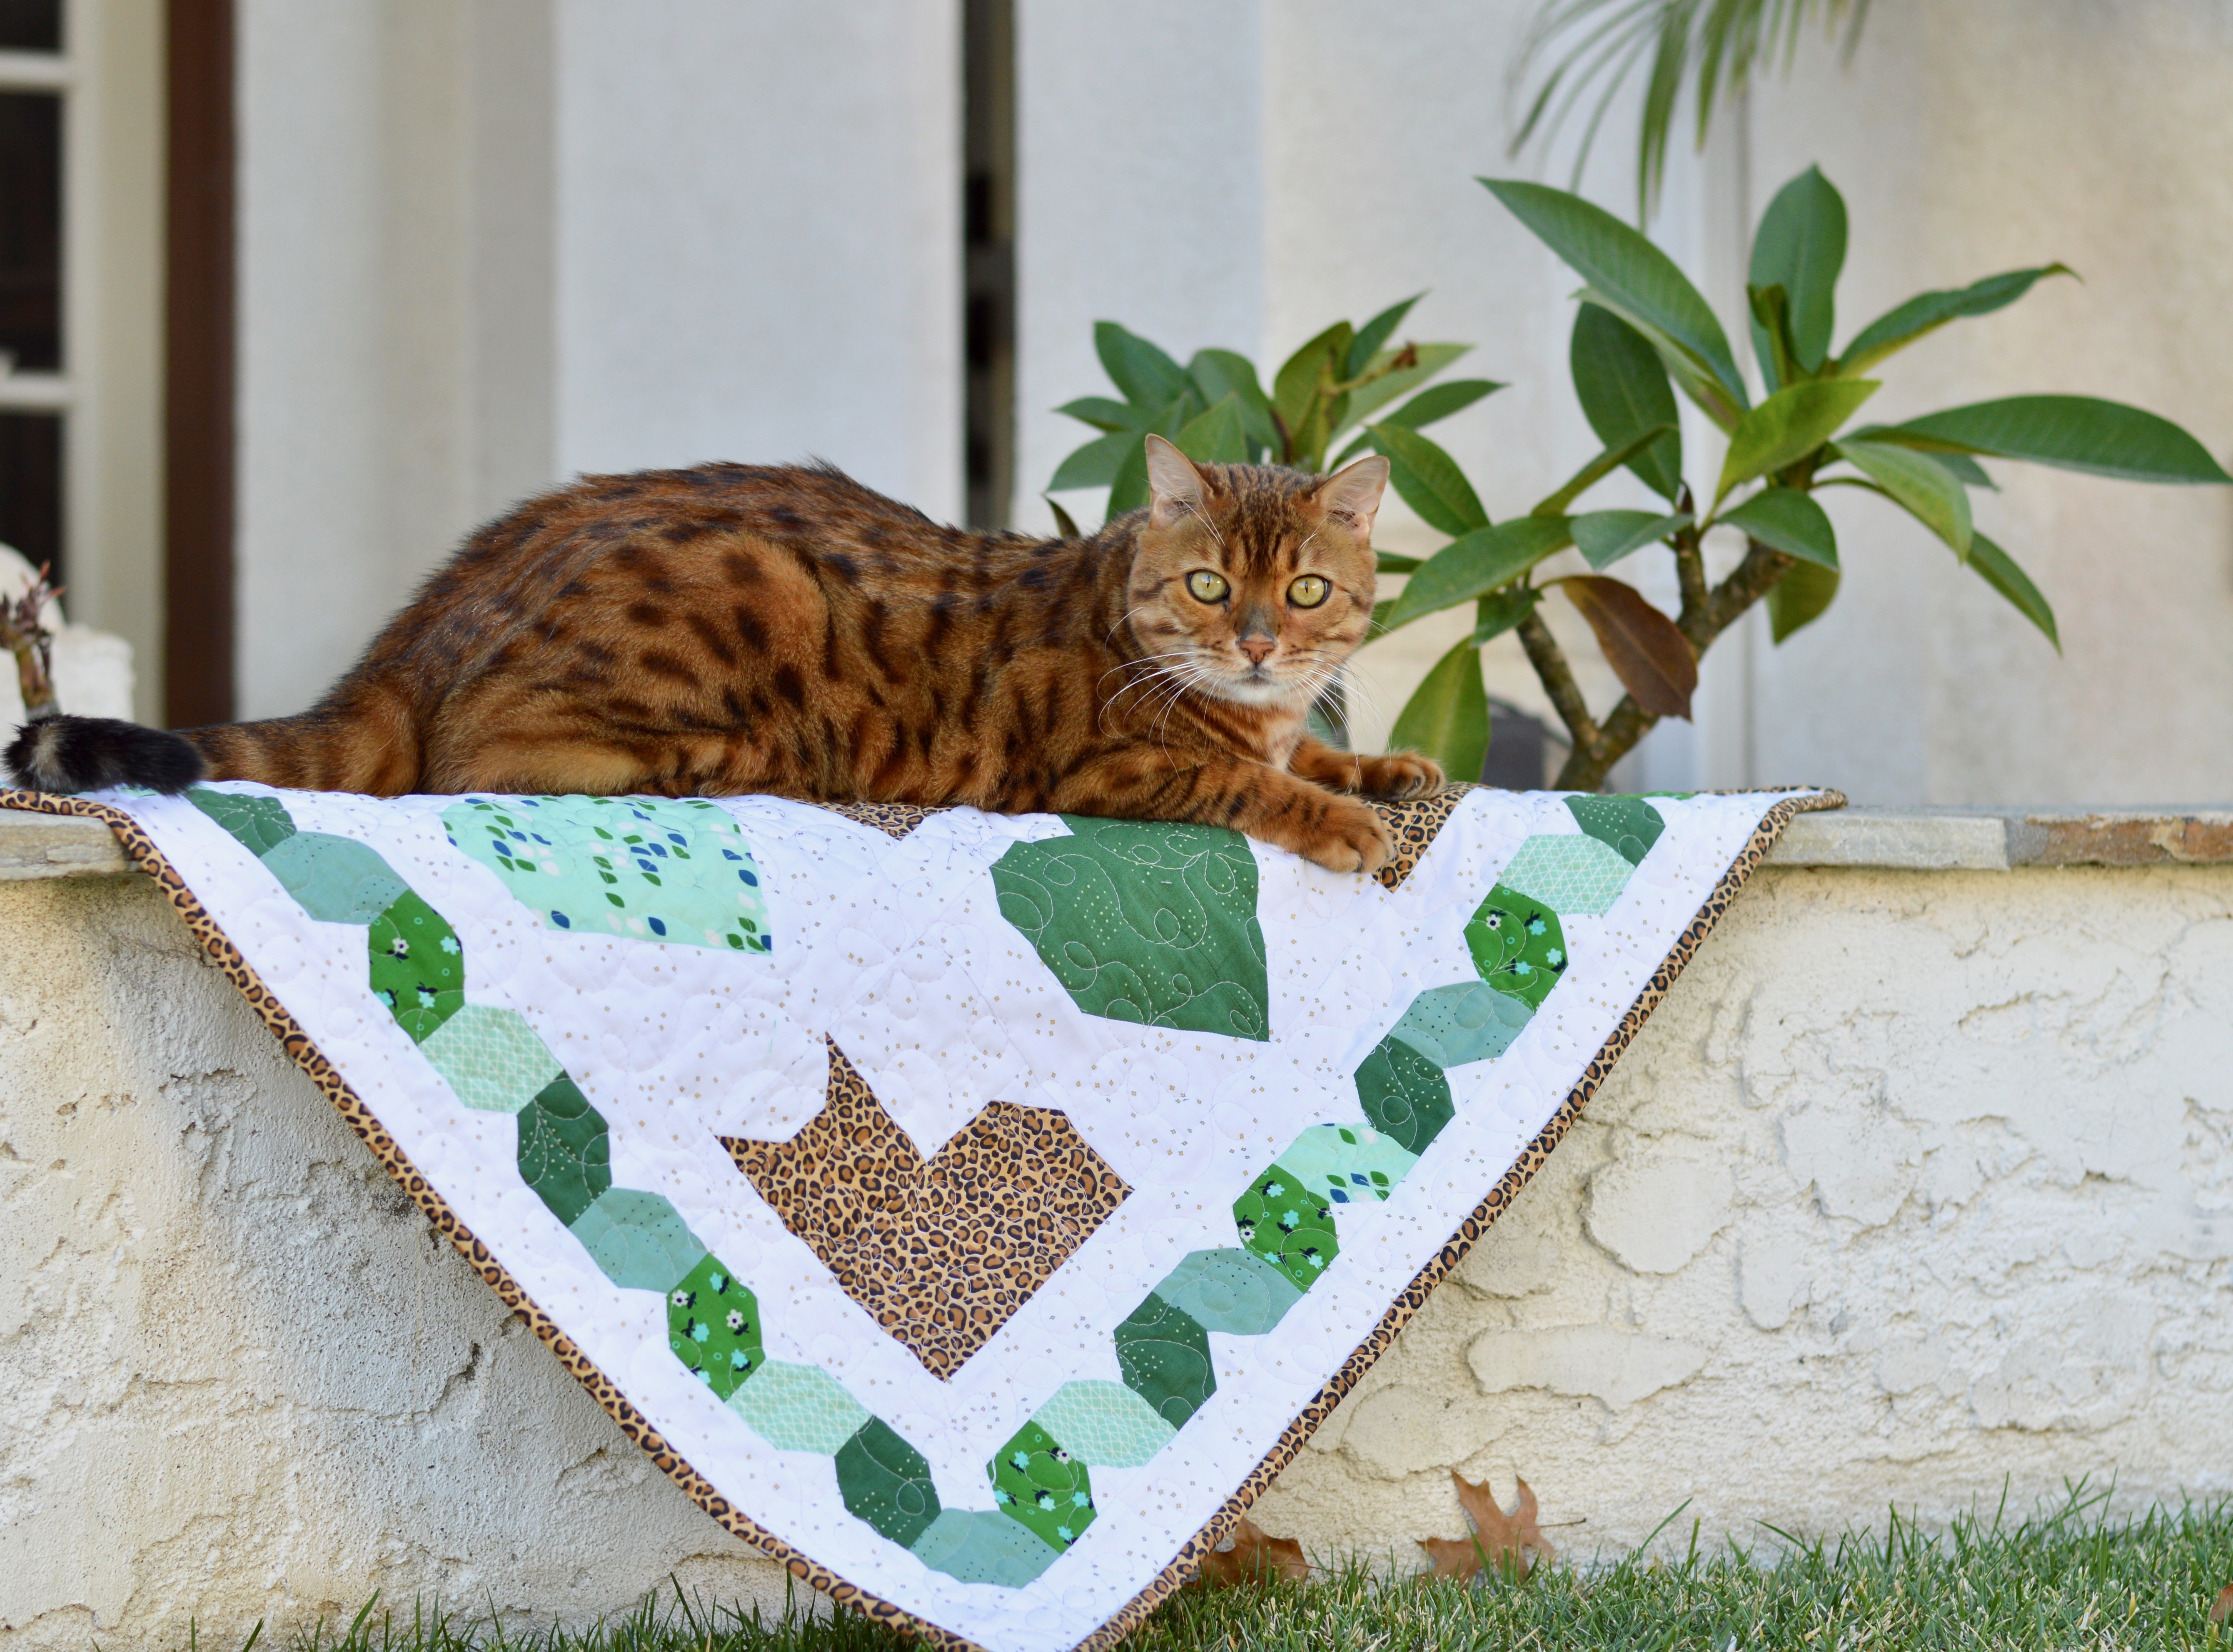
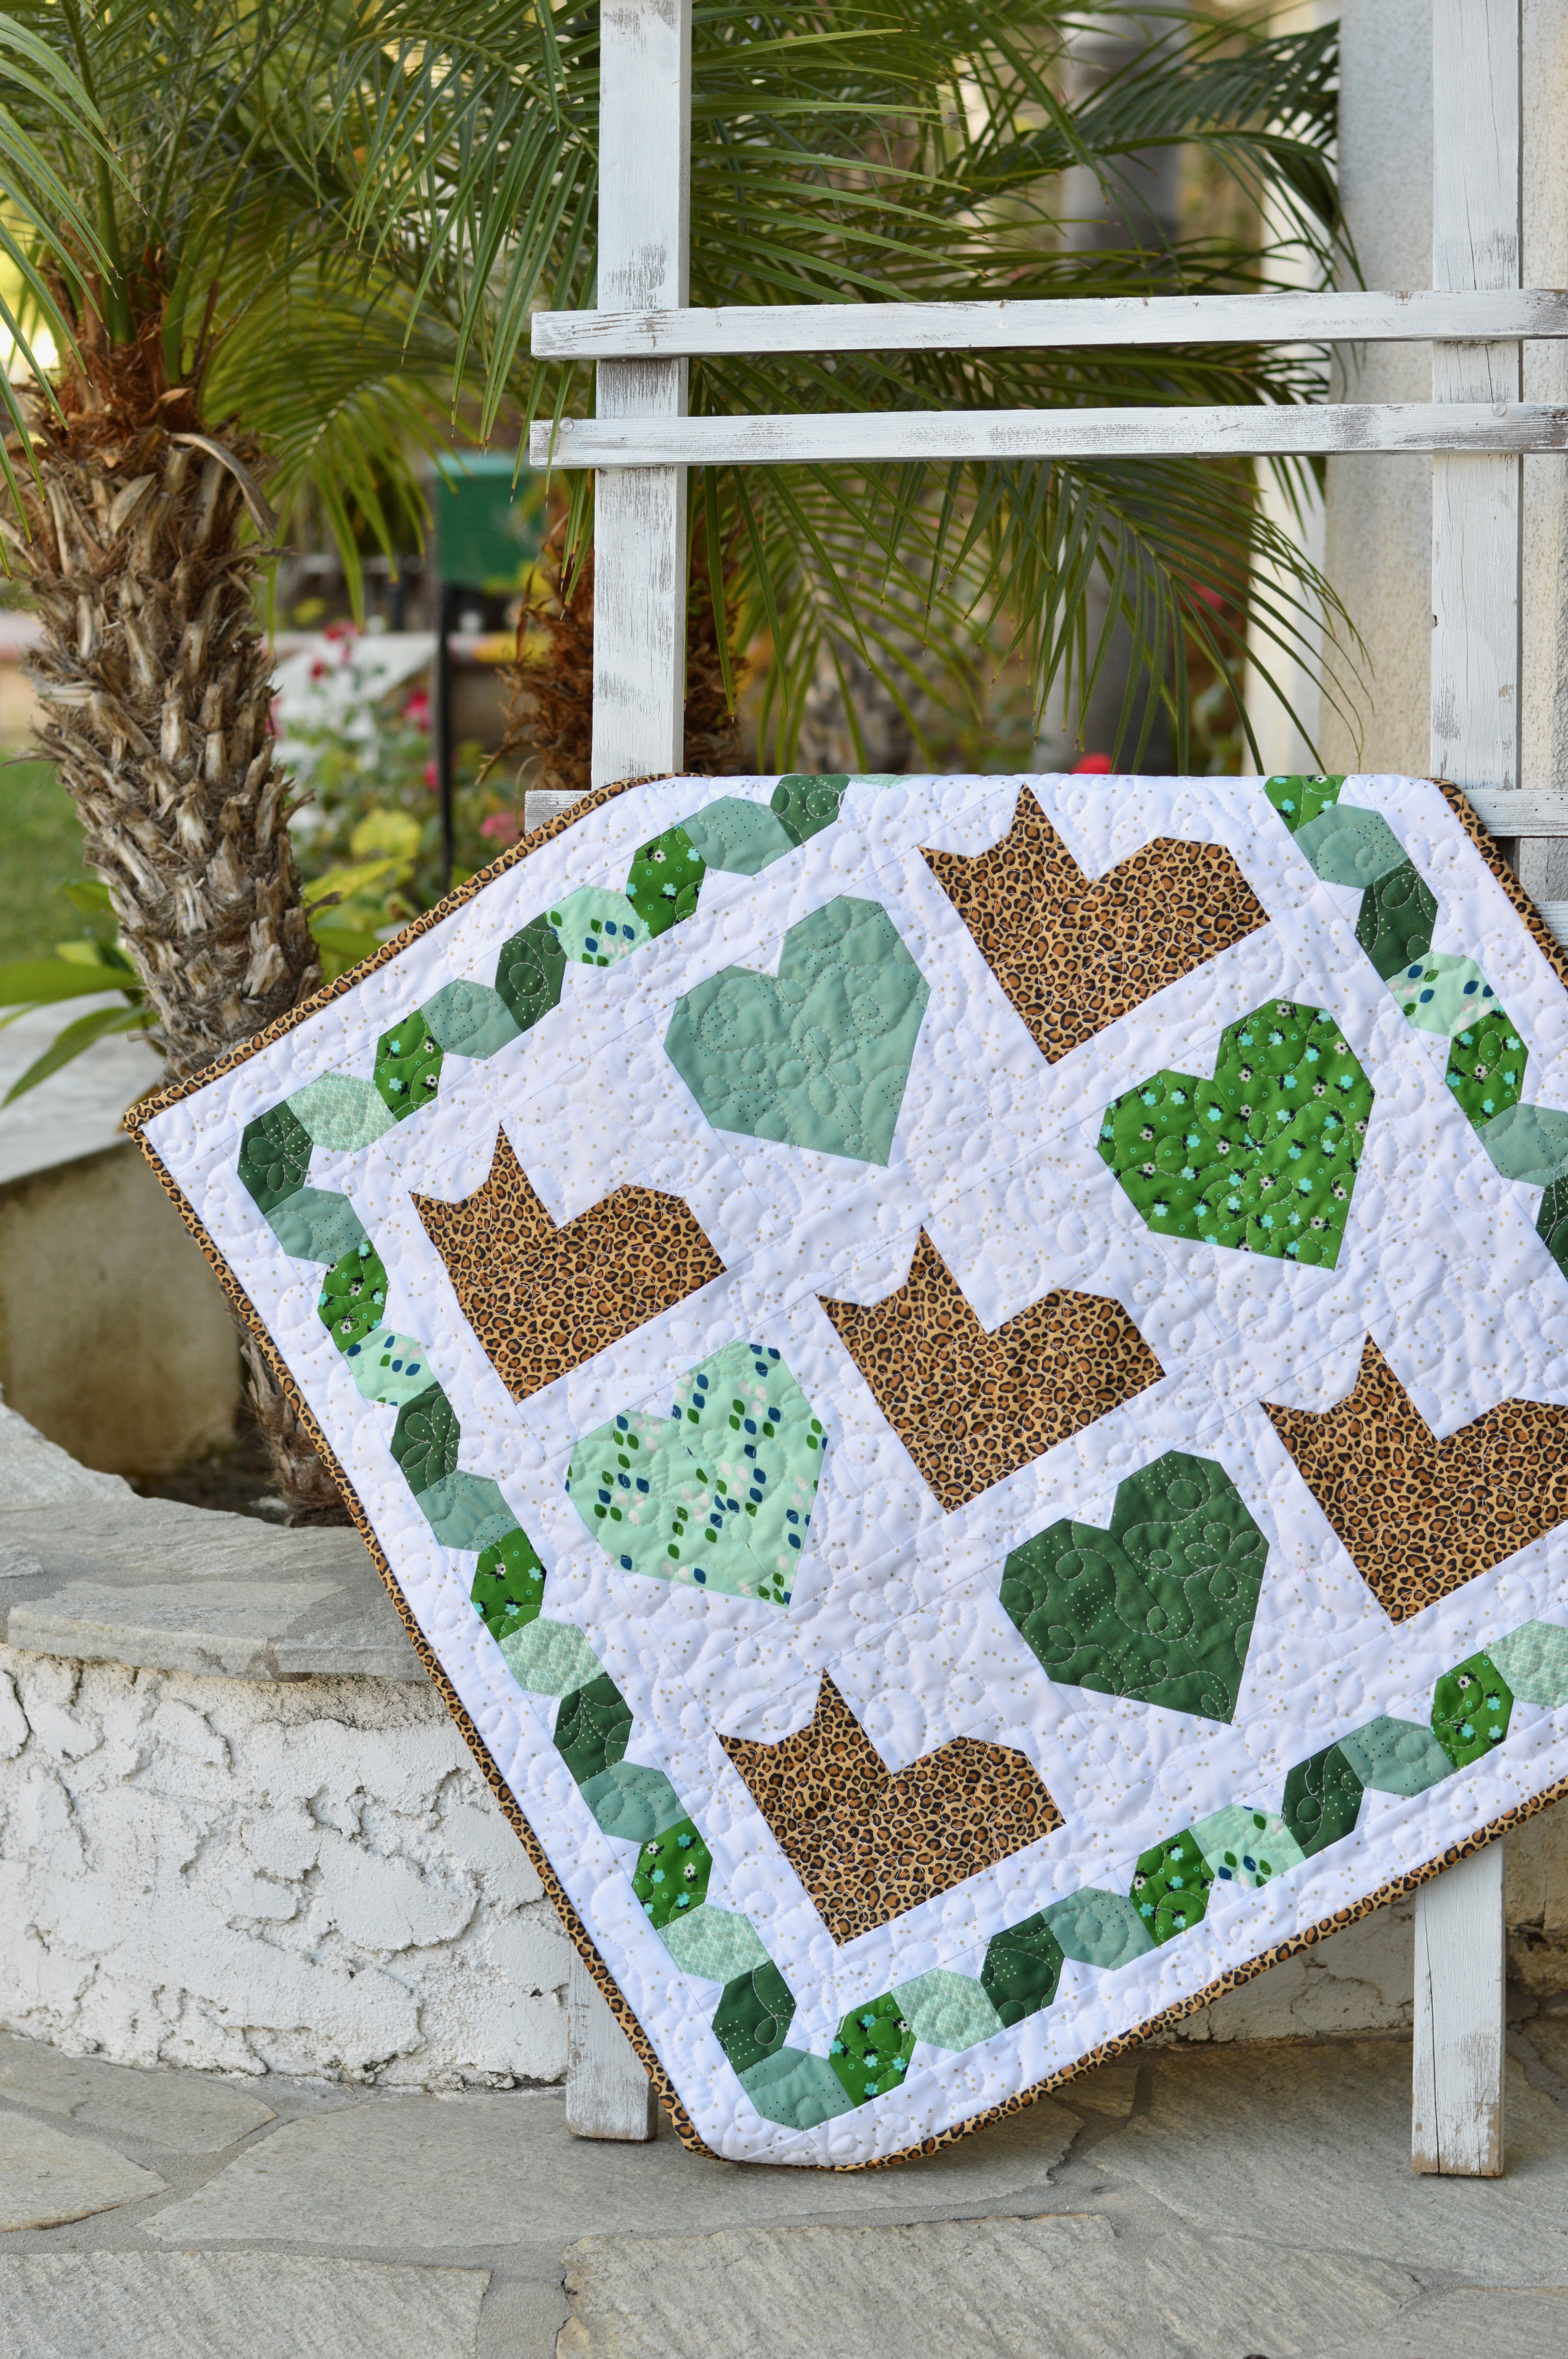
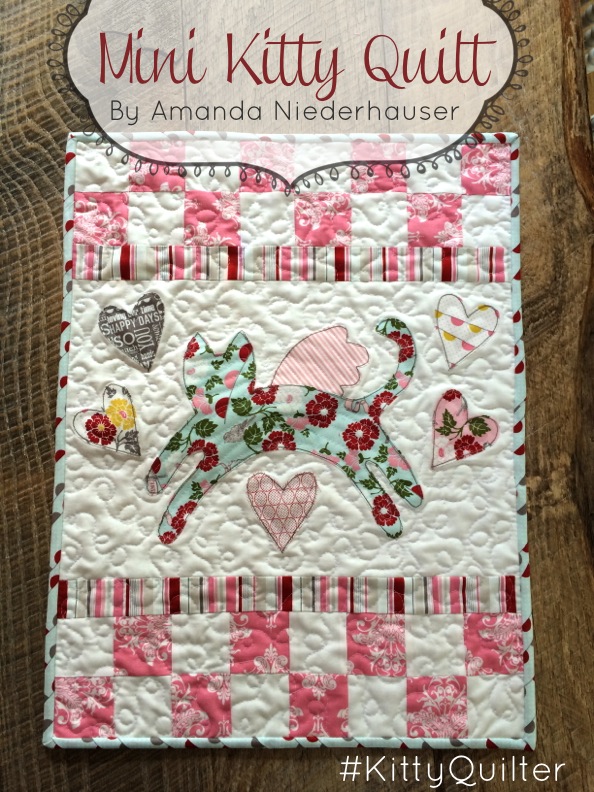
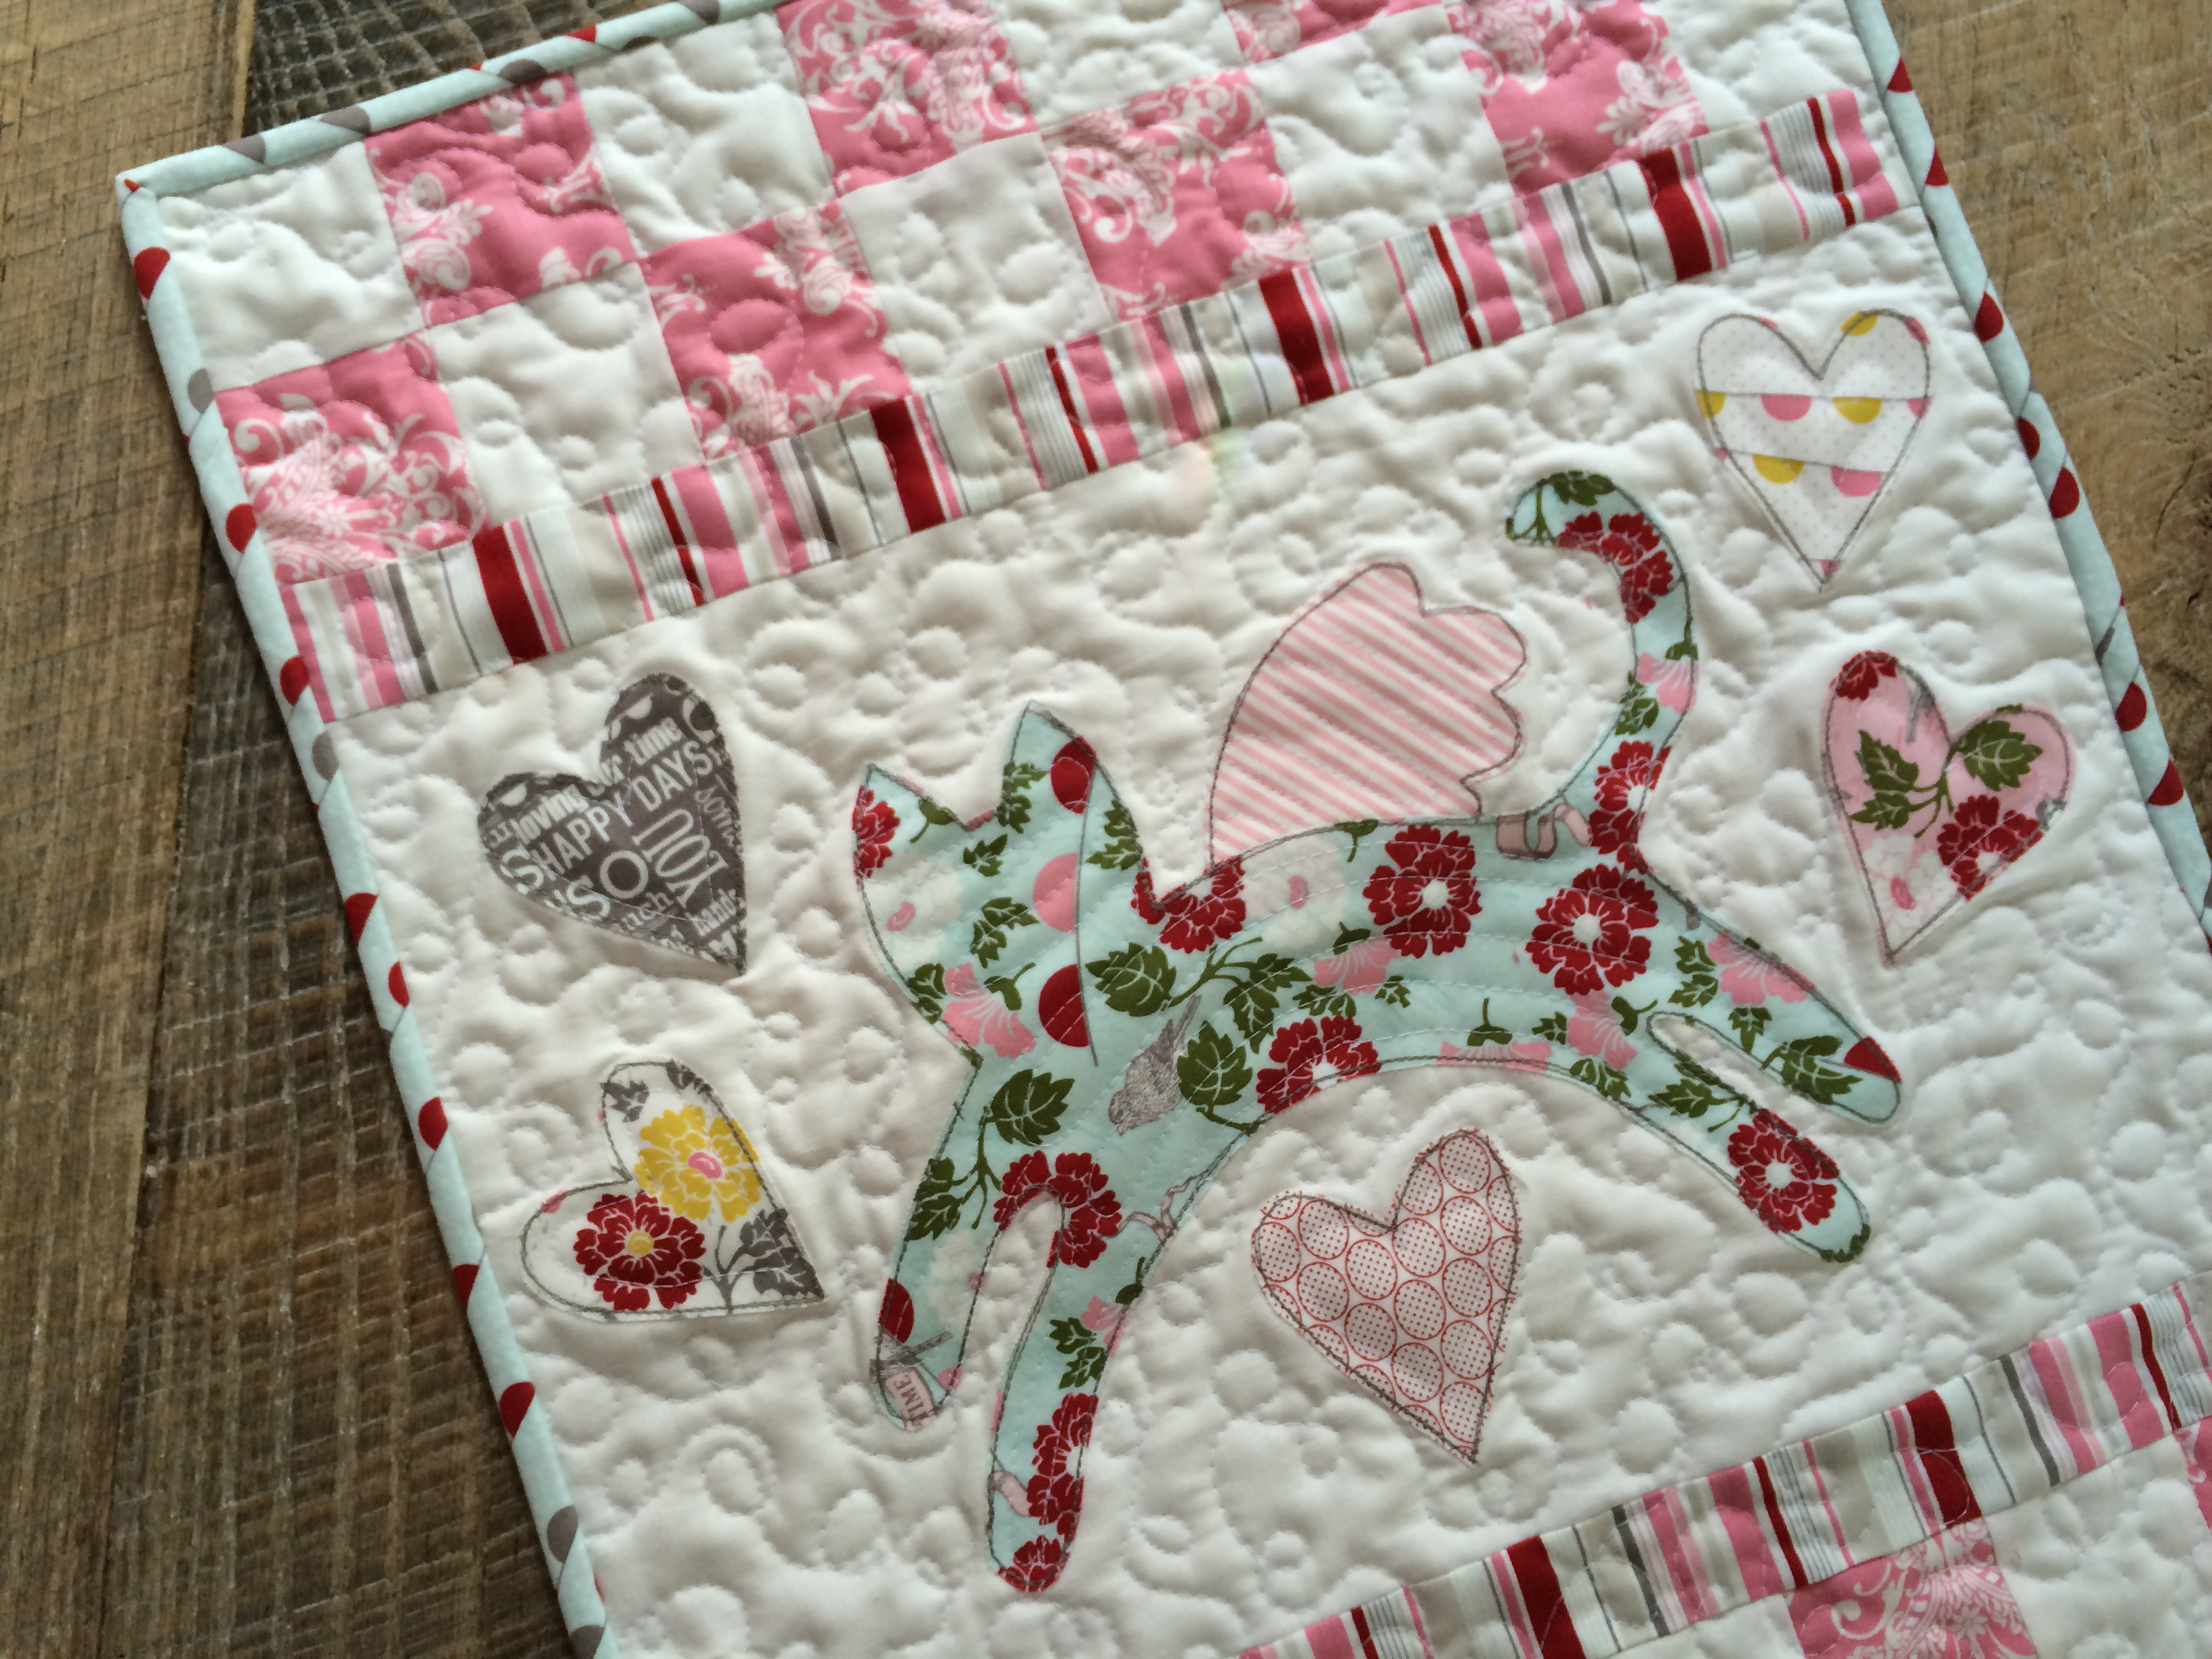
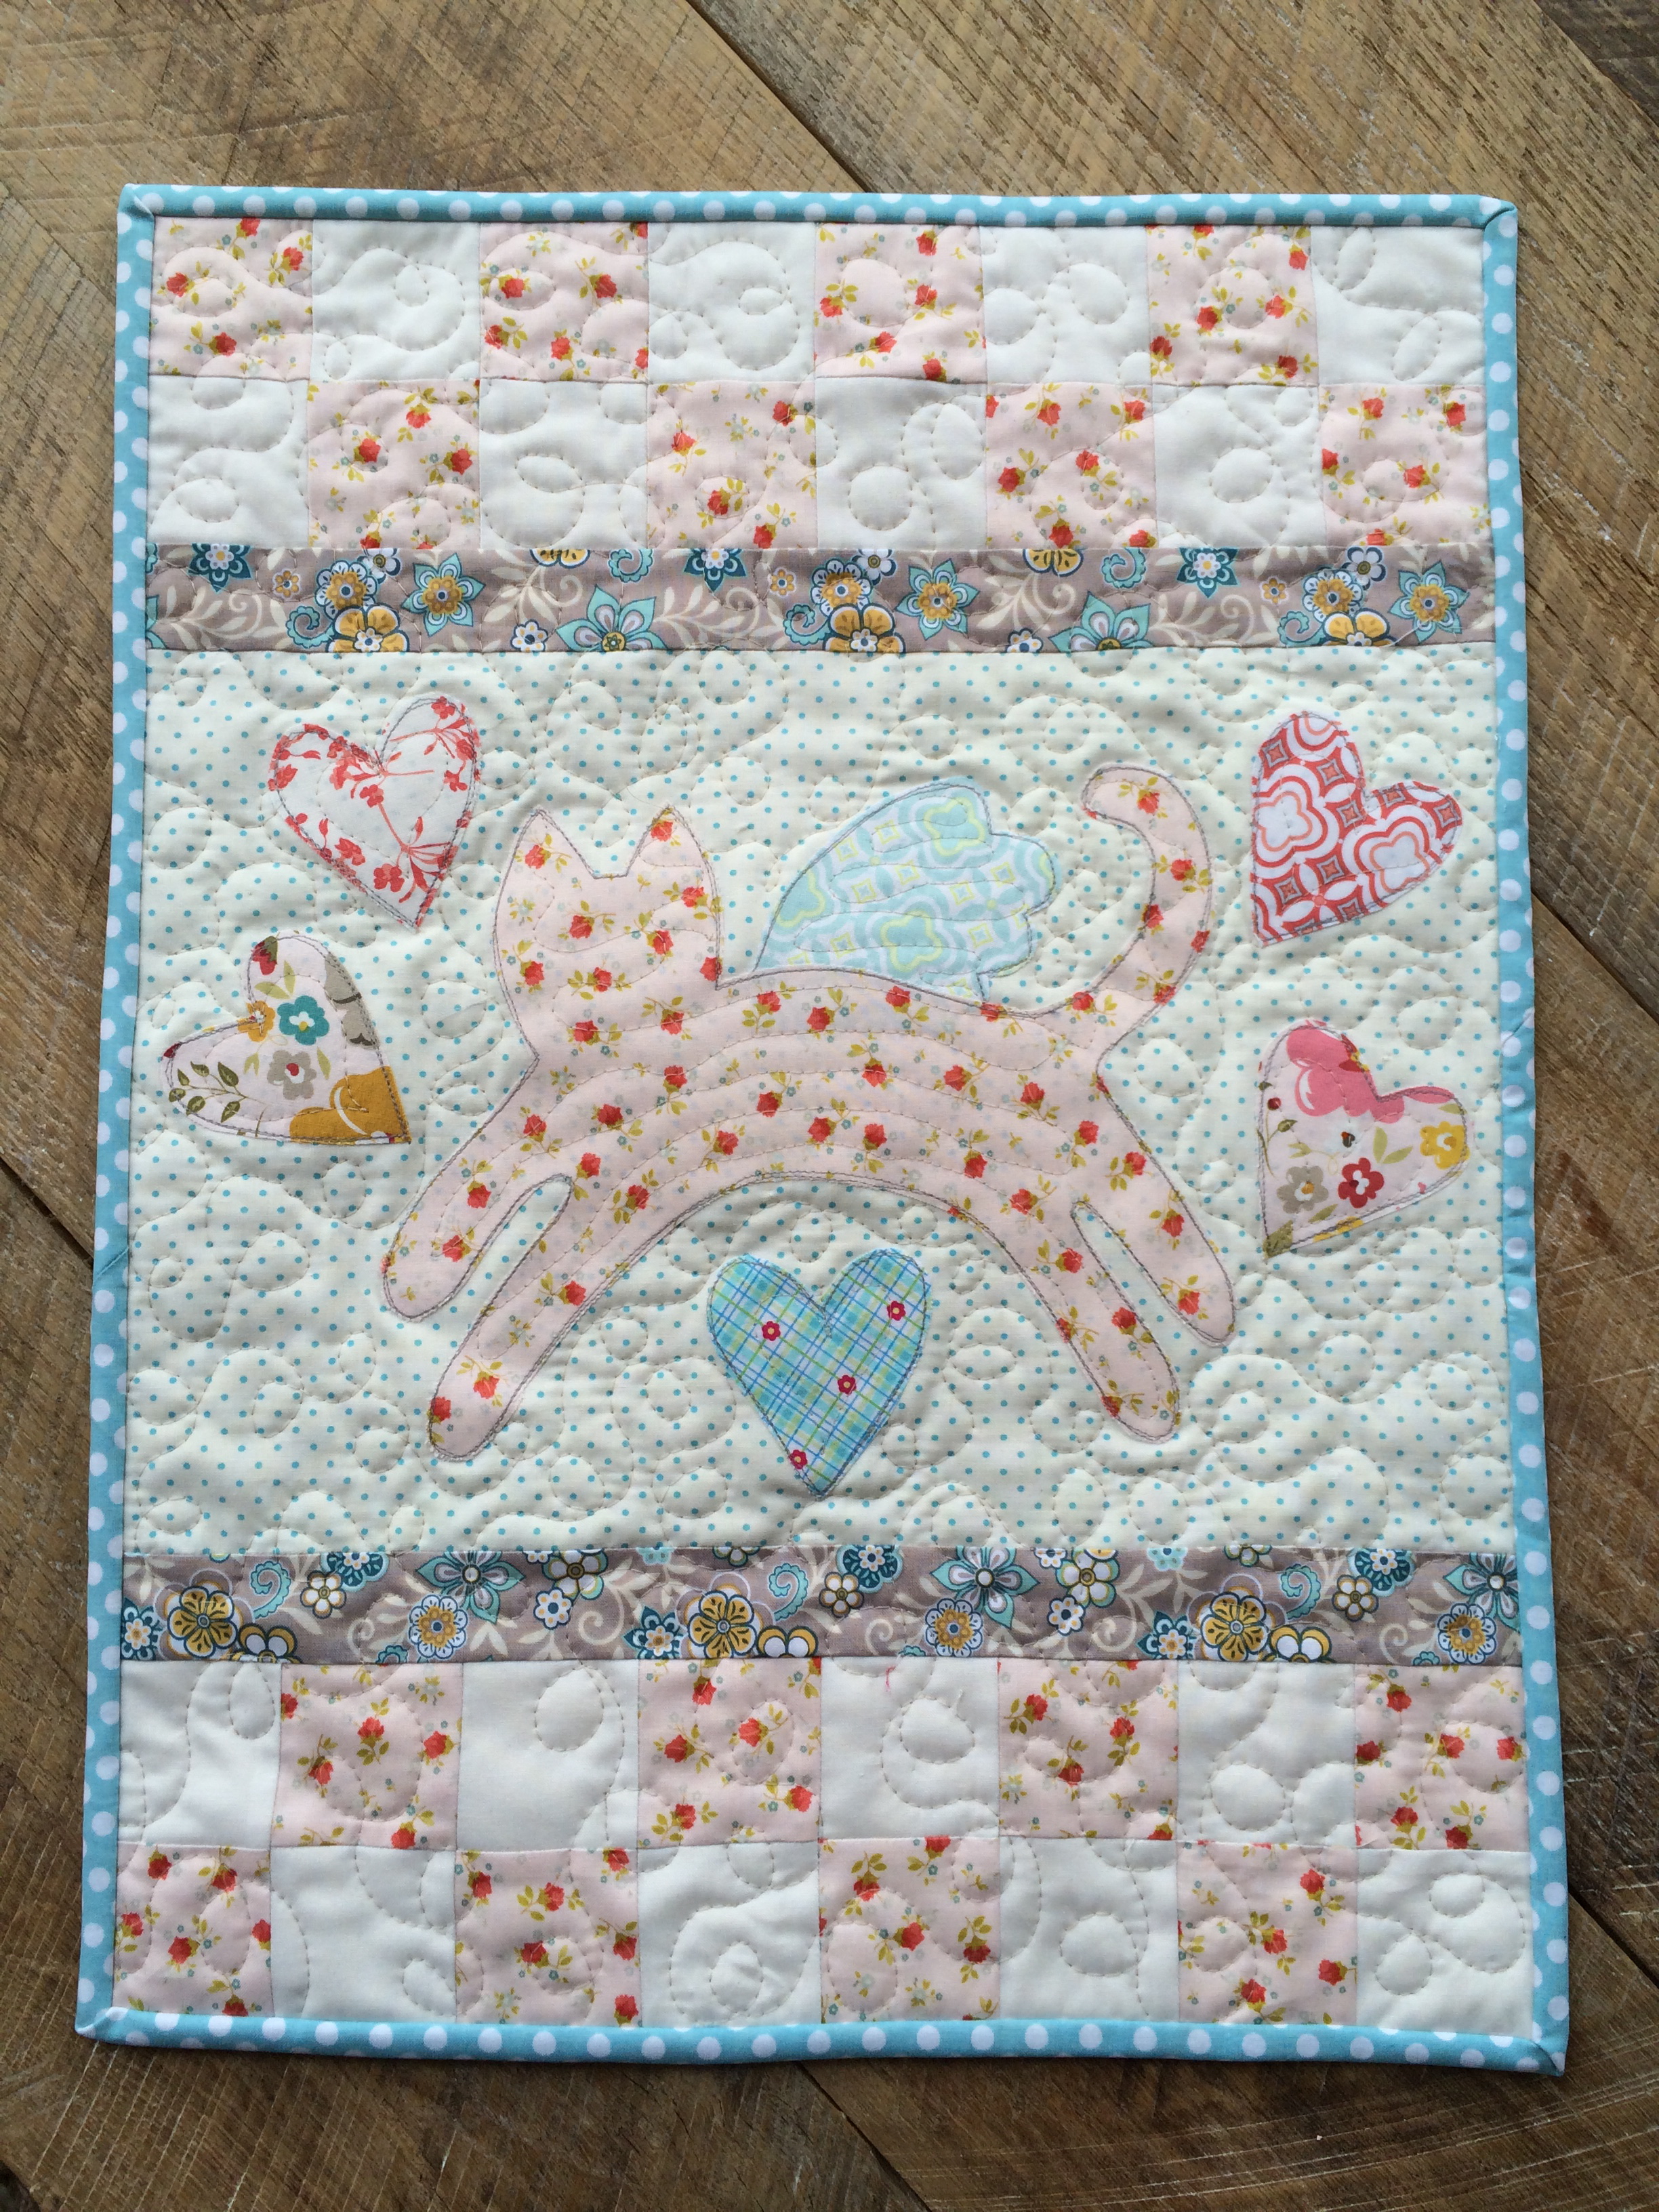
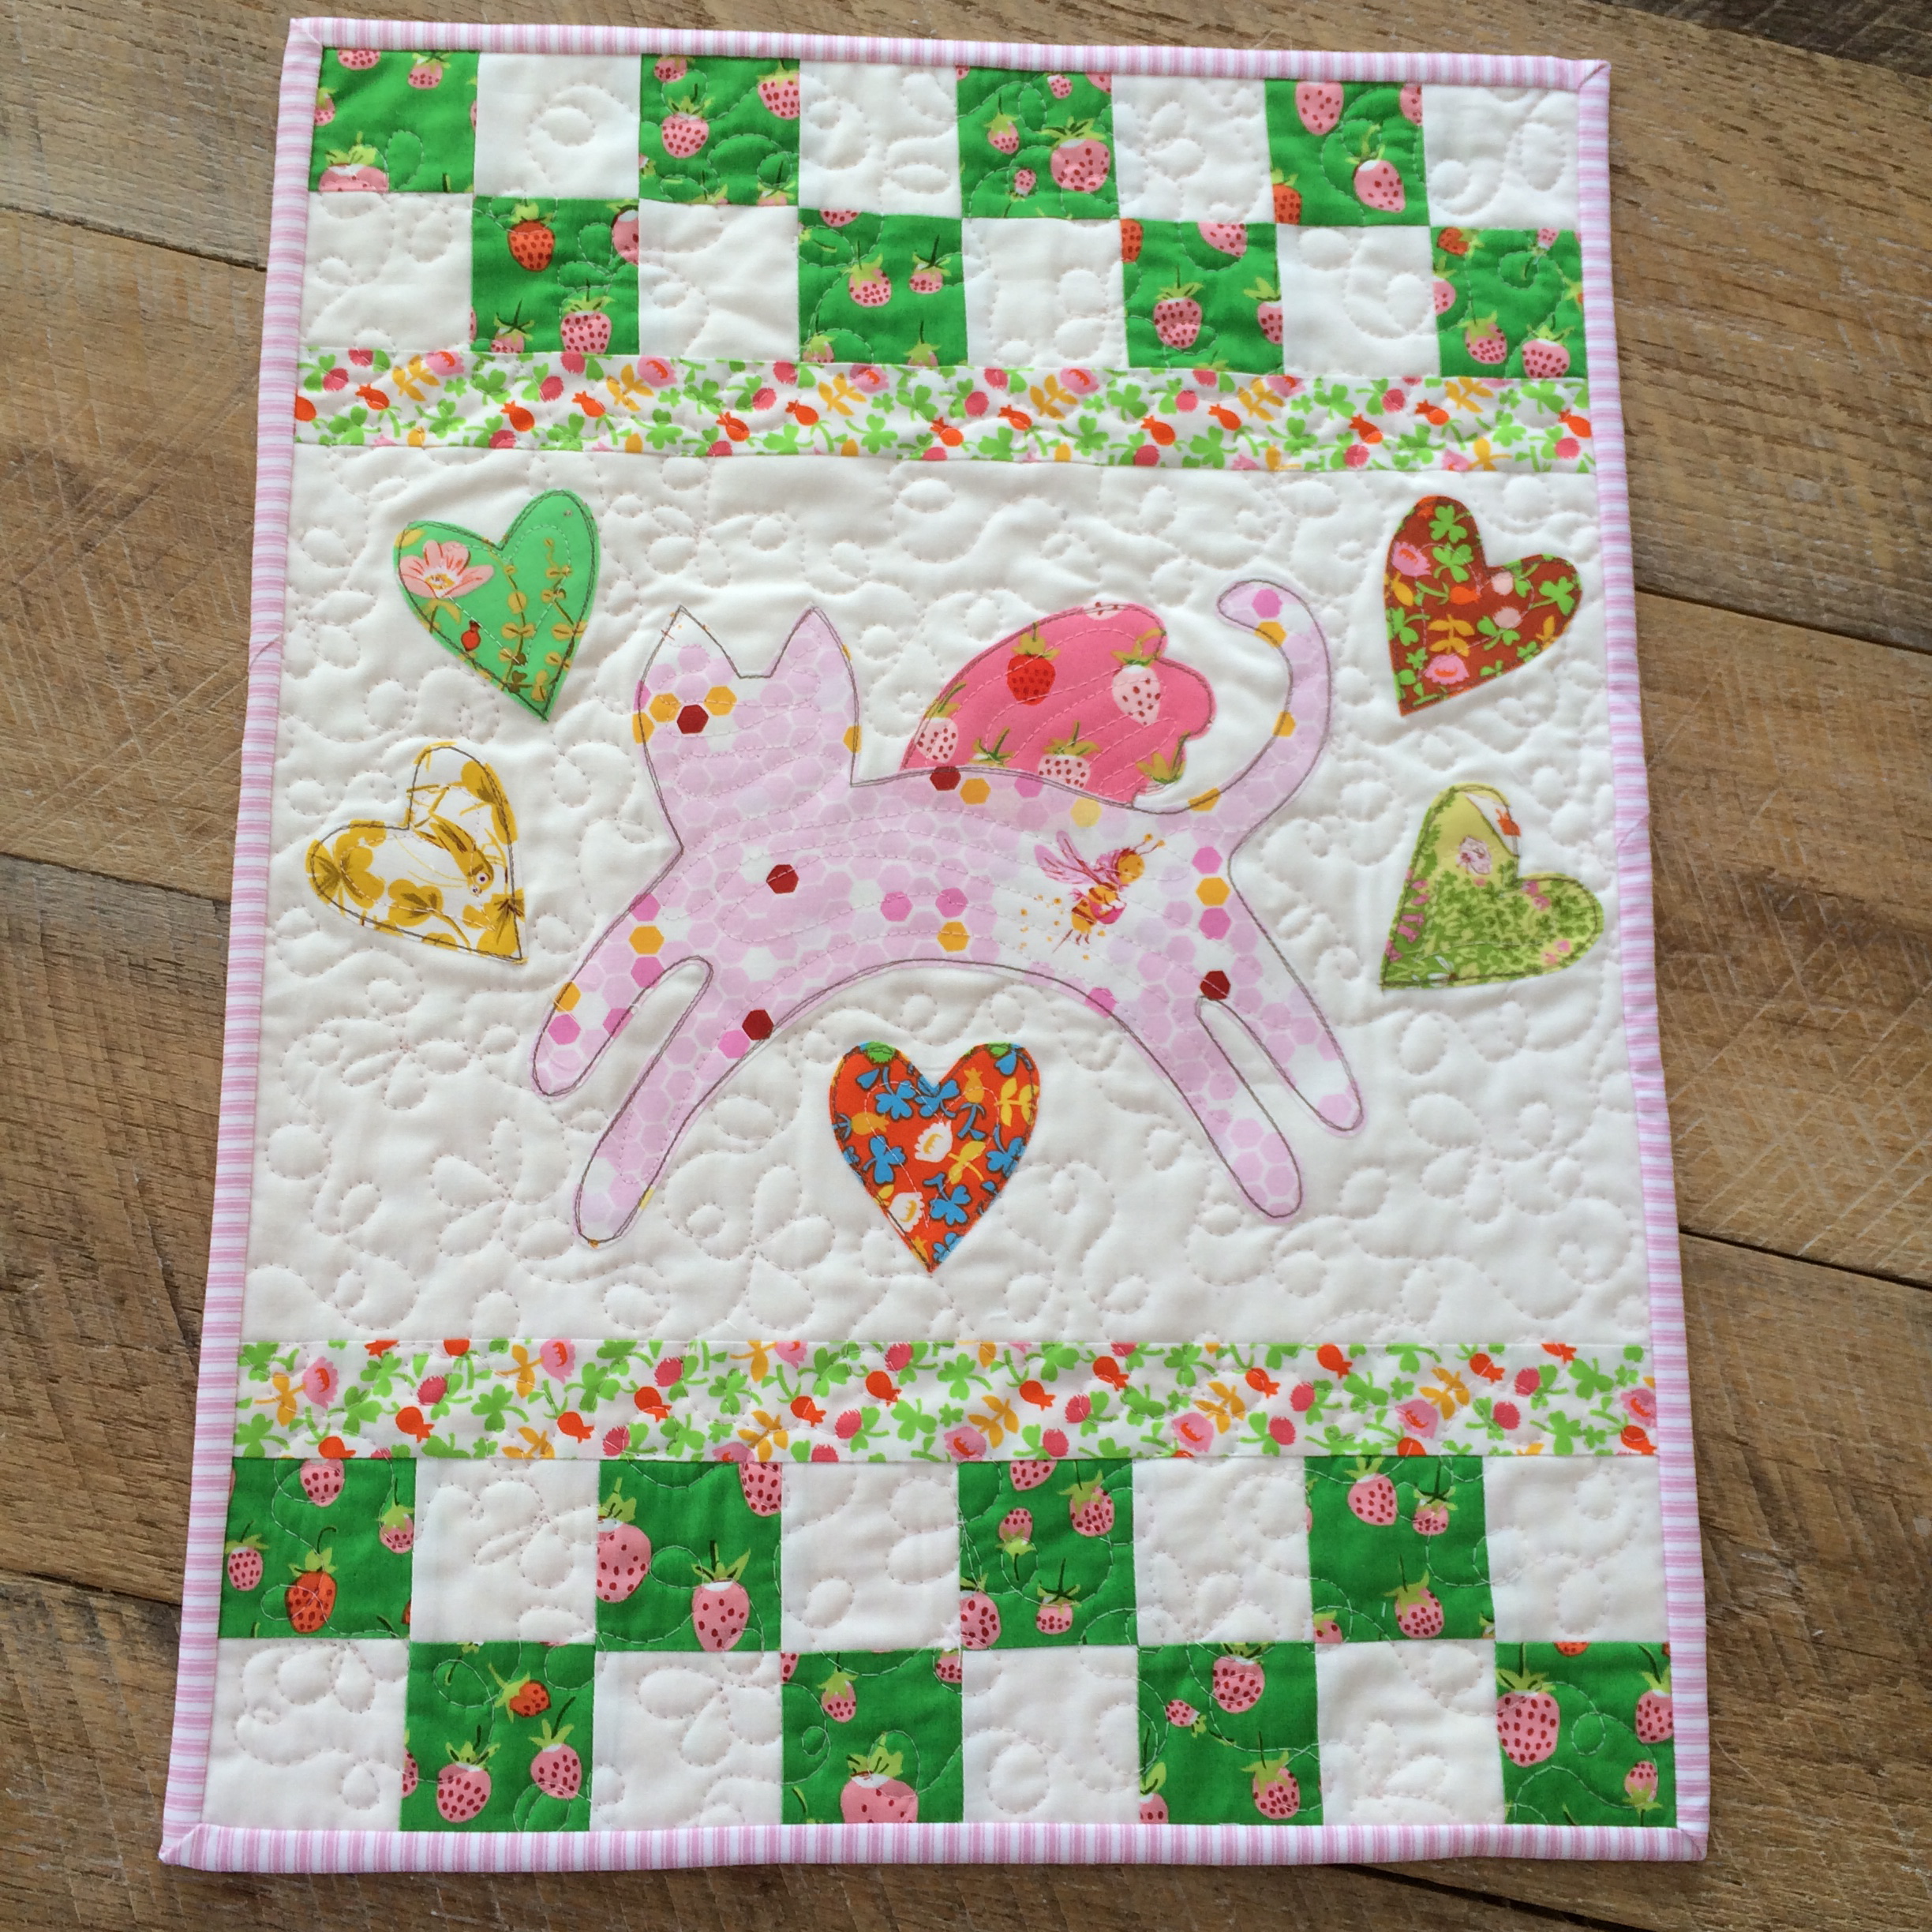
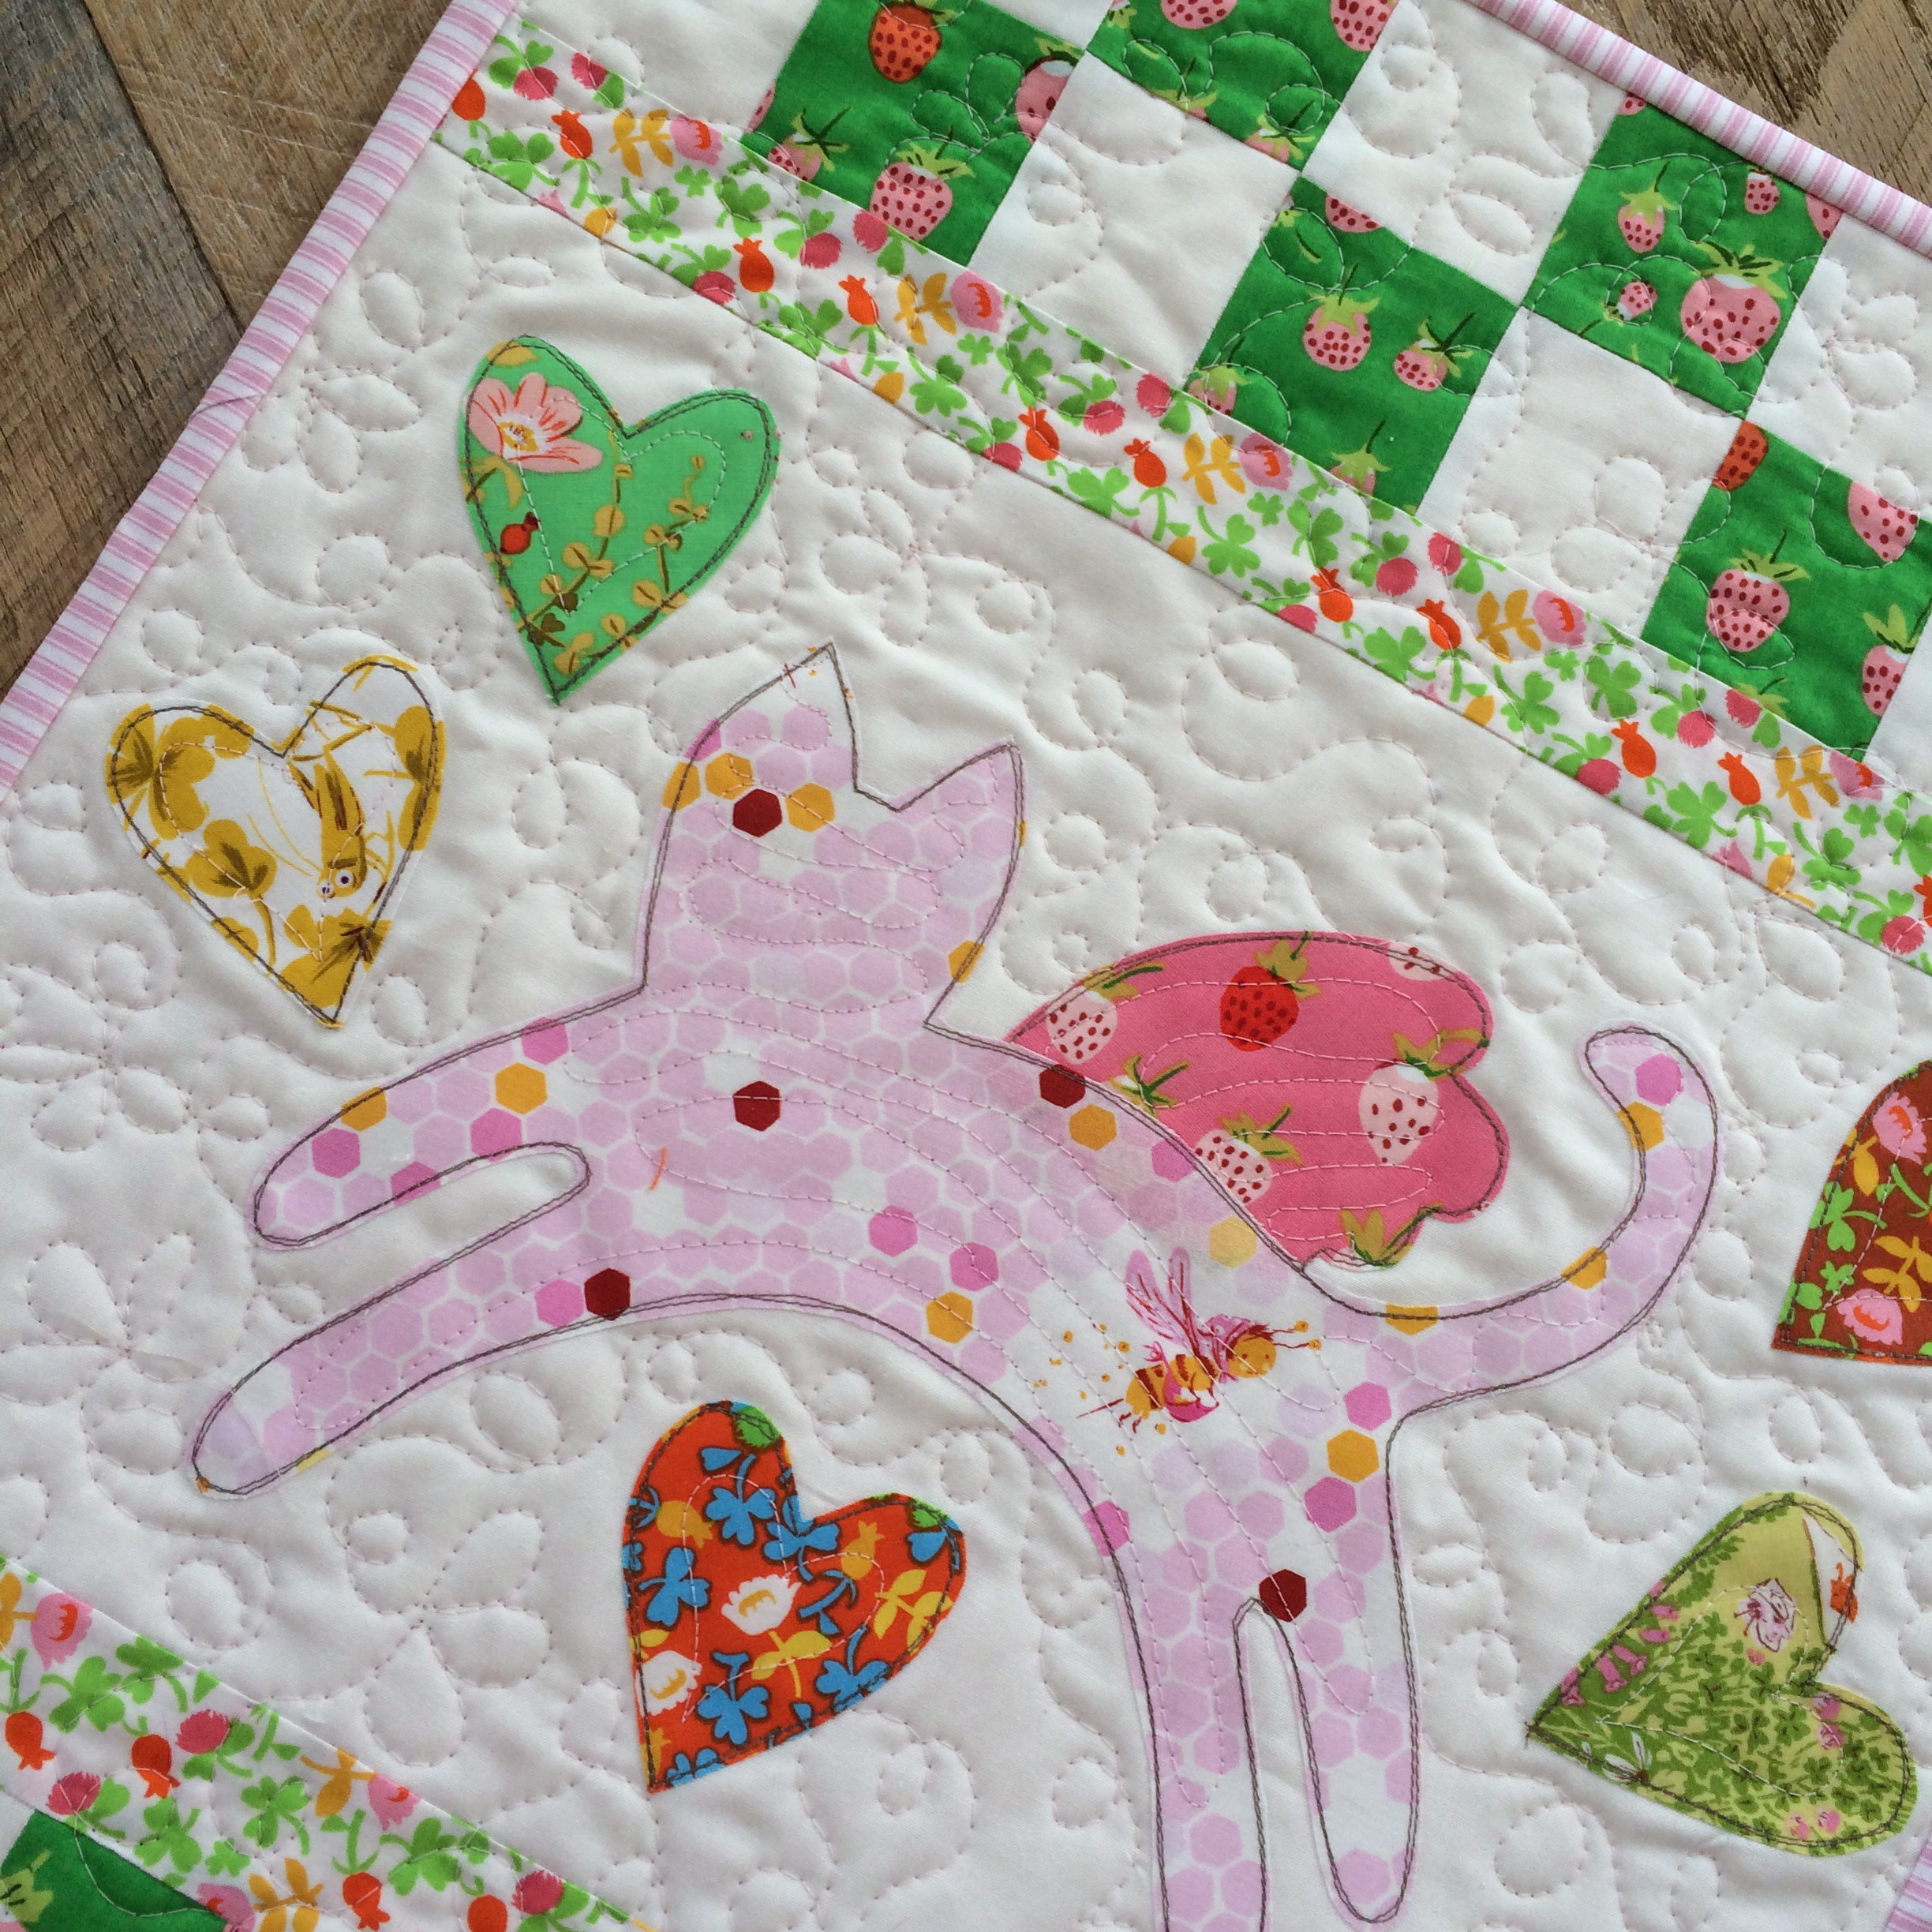
I am so excited it’s finally February!  January is soooooo long!  Getting out all my heart quilts helps me feel happy during a long and dreary January.  Each year I write a new heart themed pattern and here is 2020’s!!!

DSC_0242

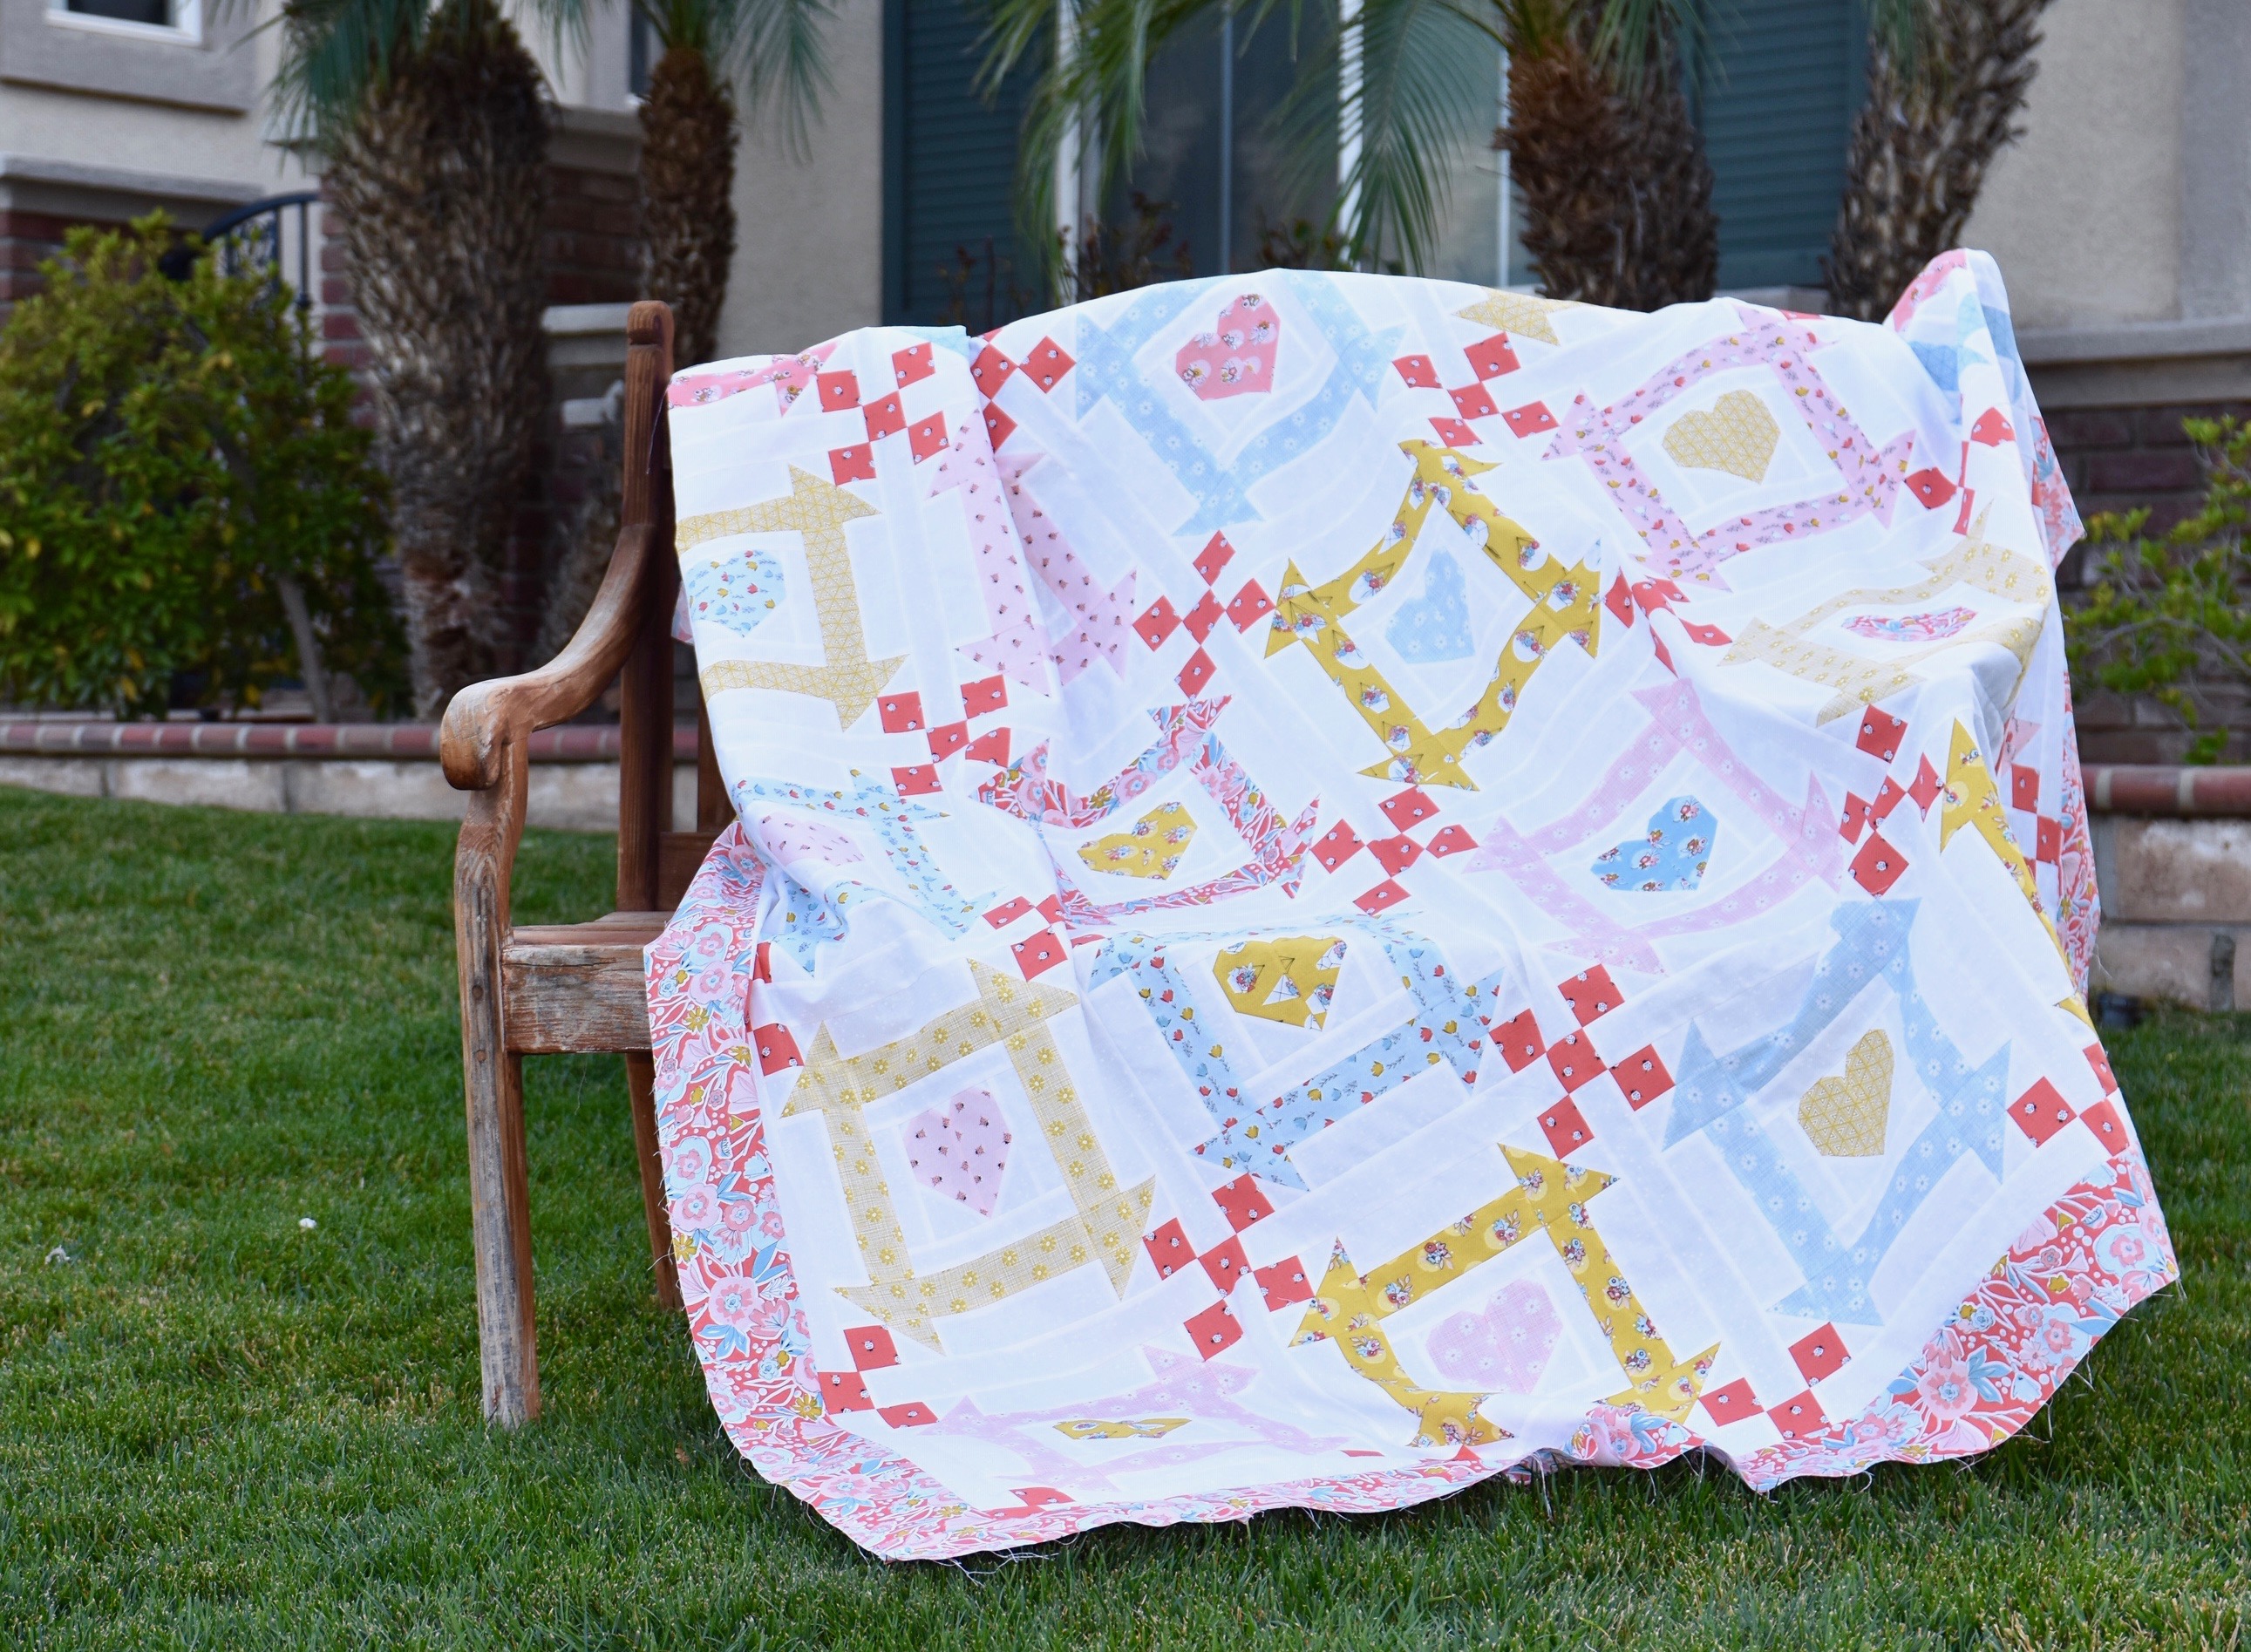
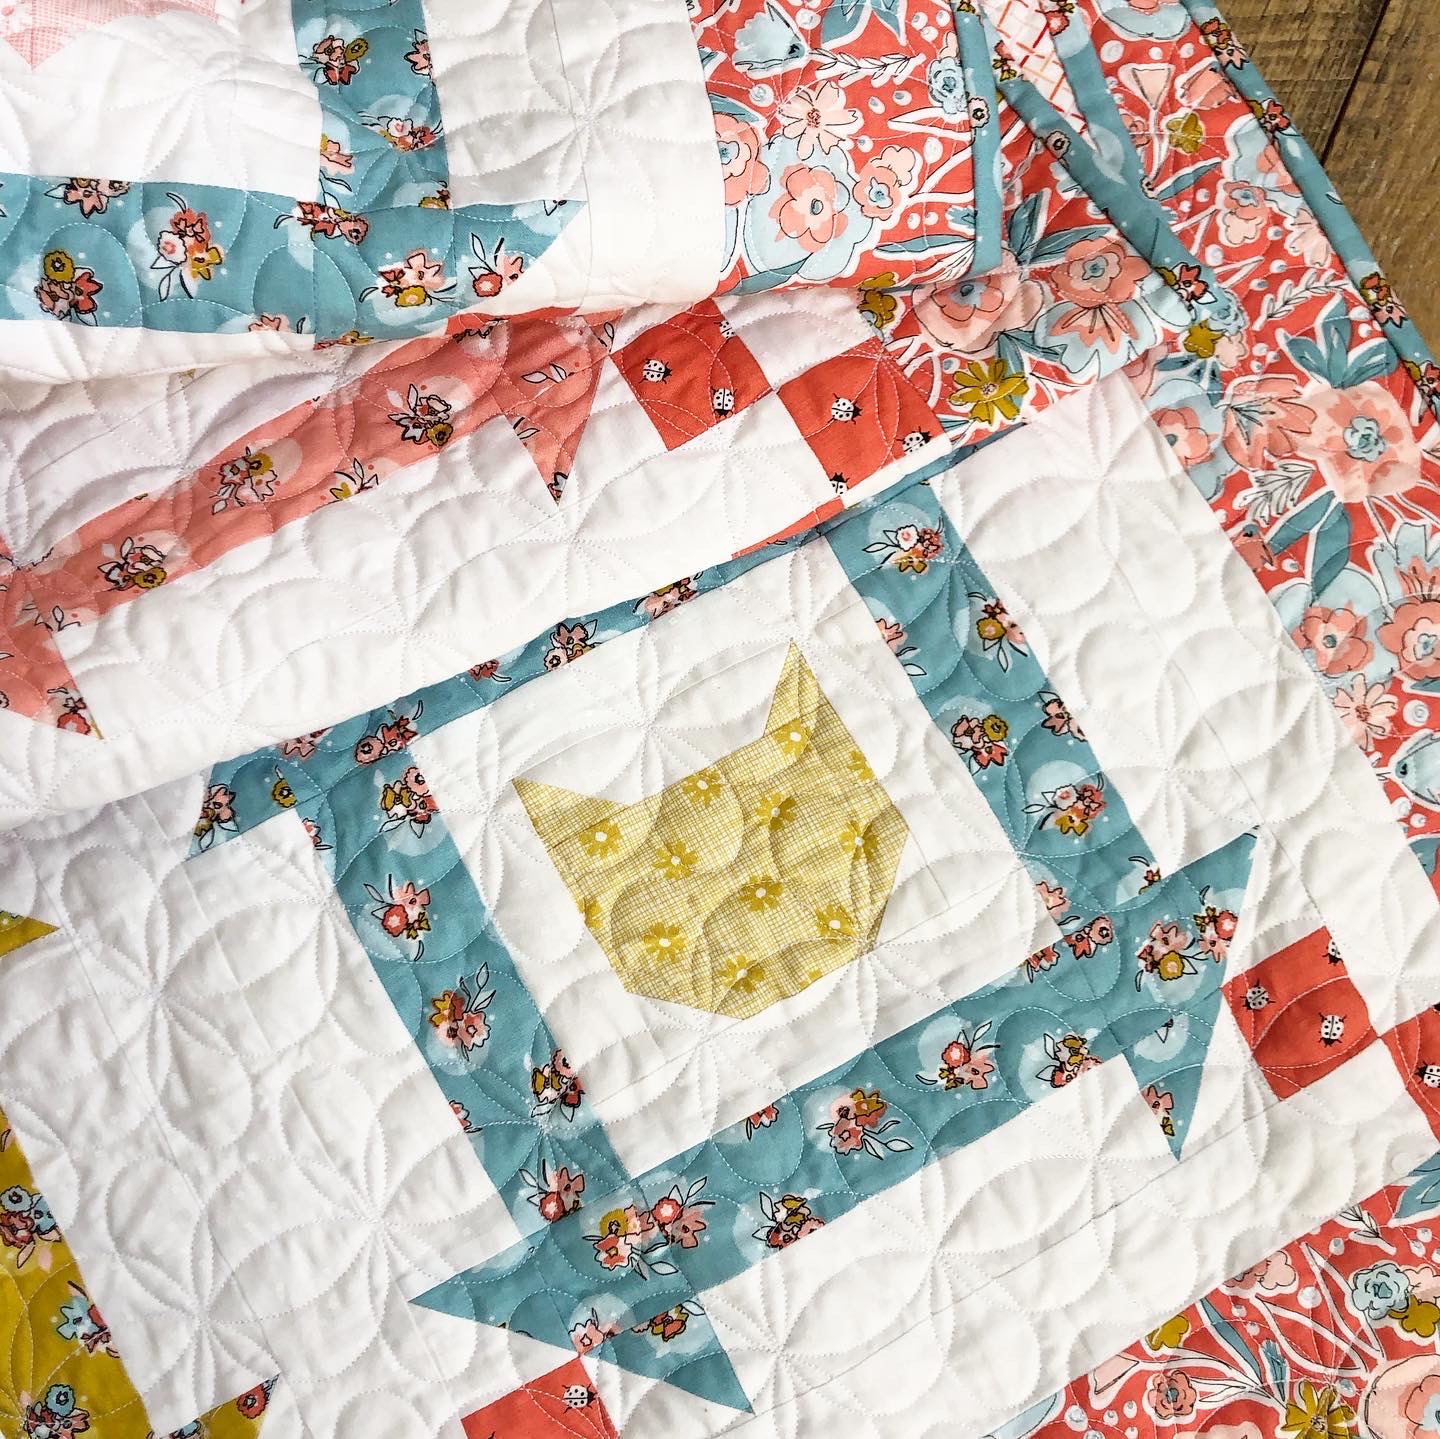
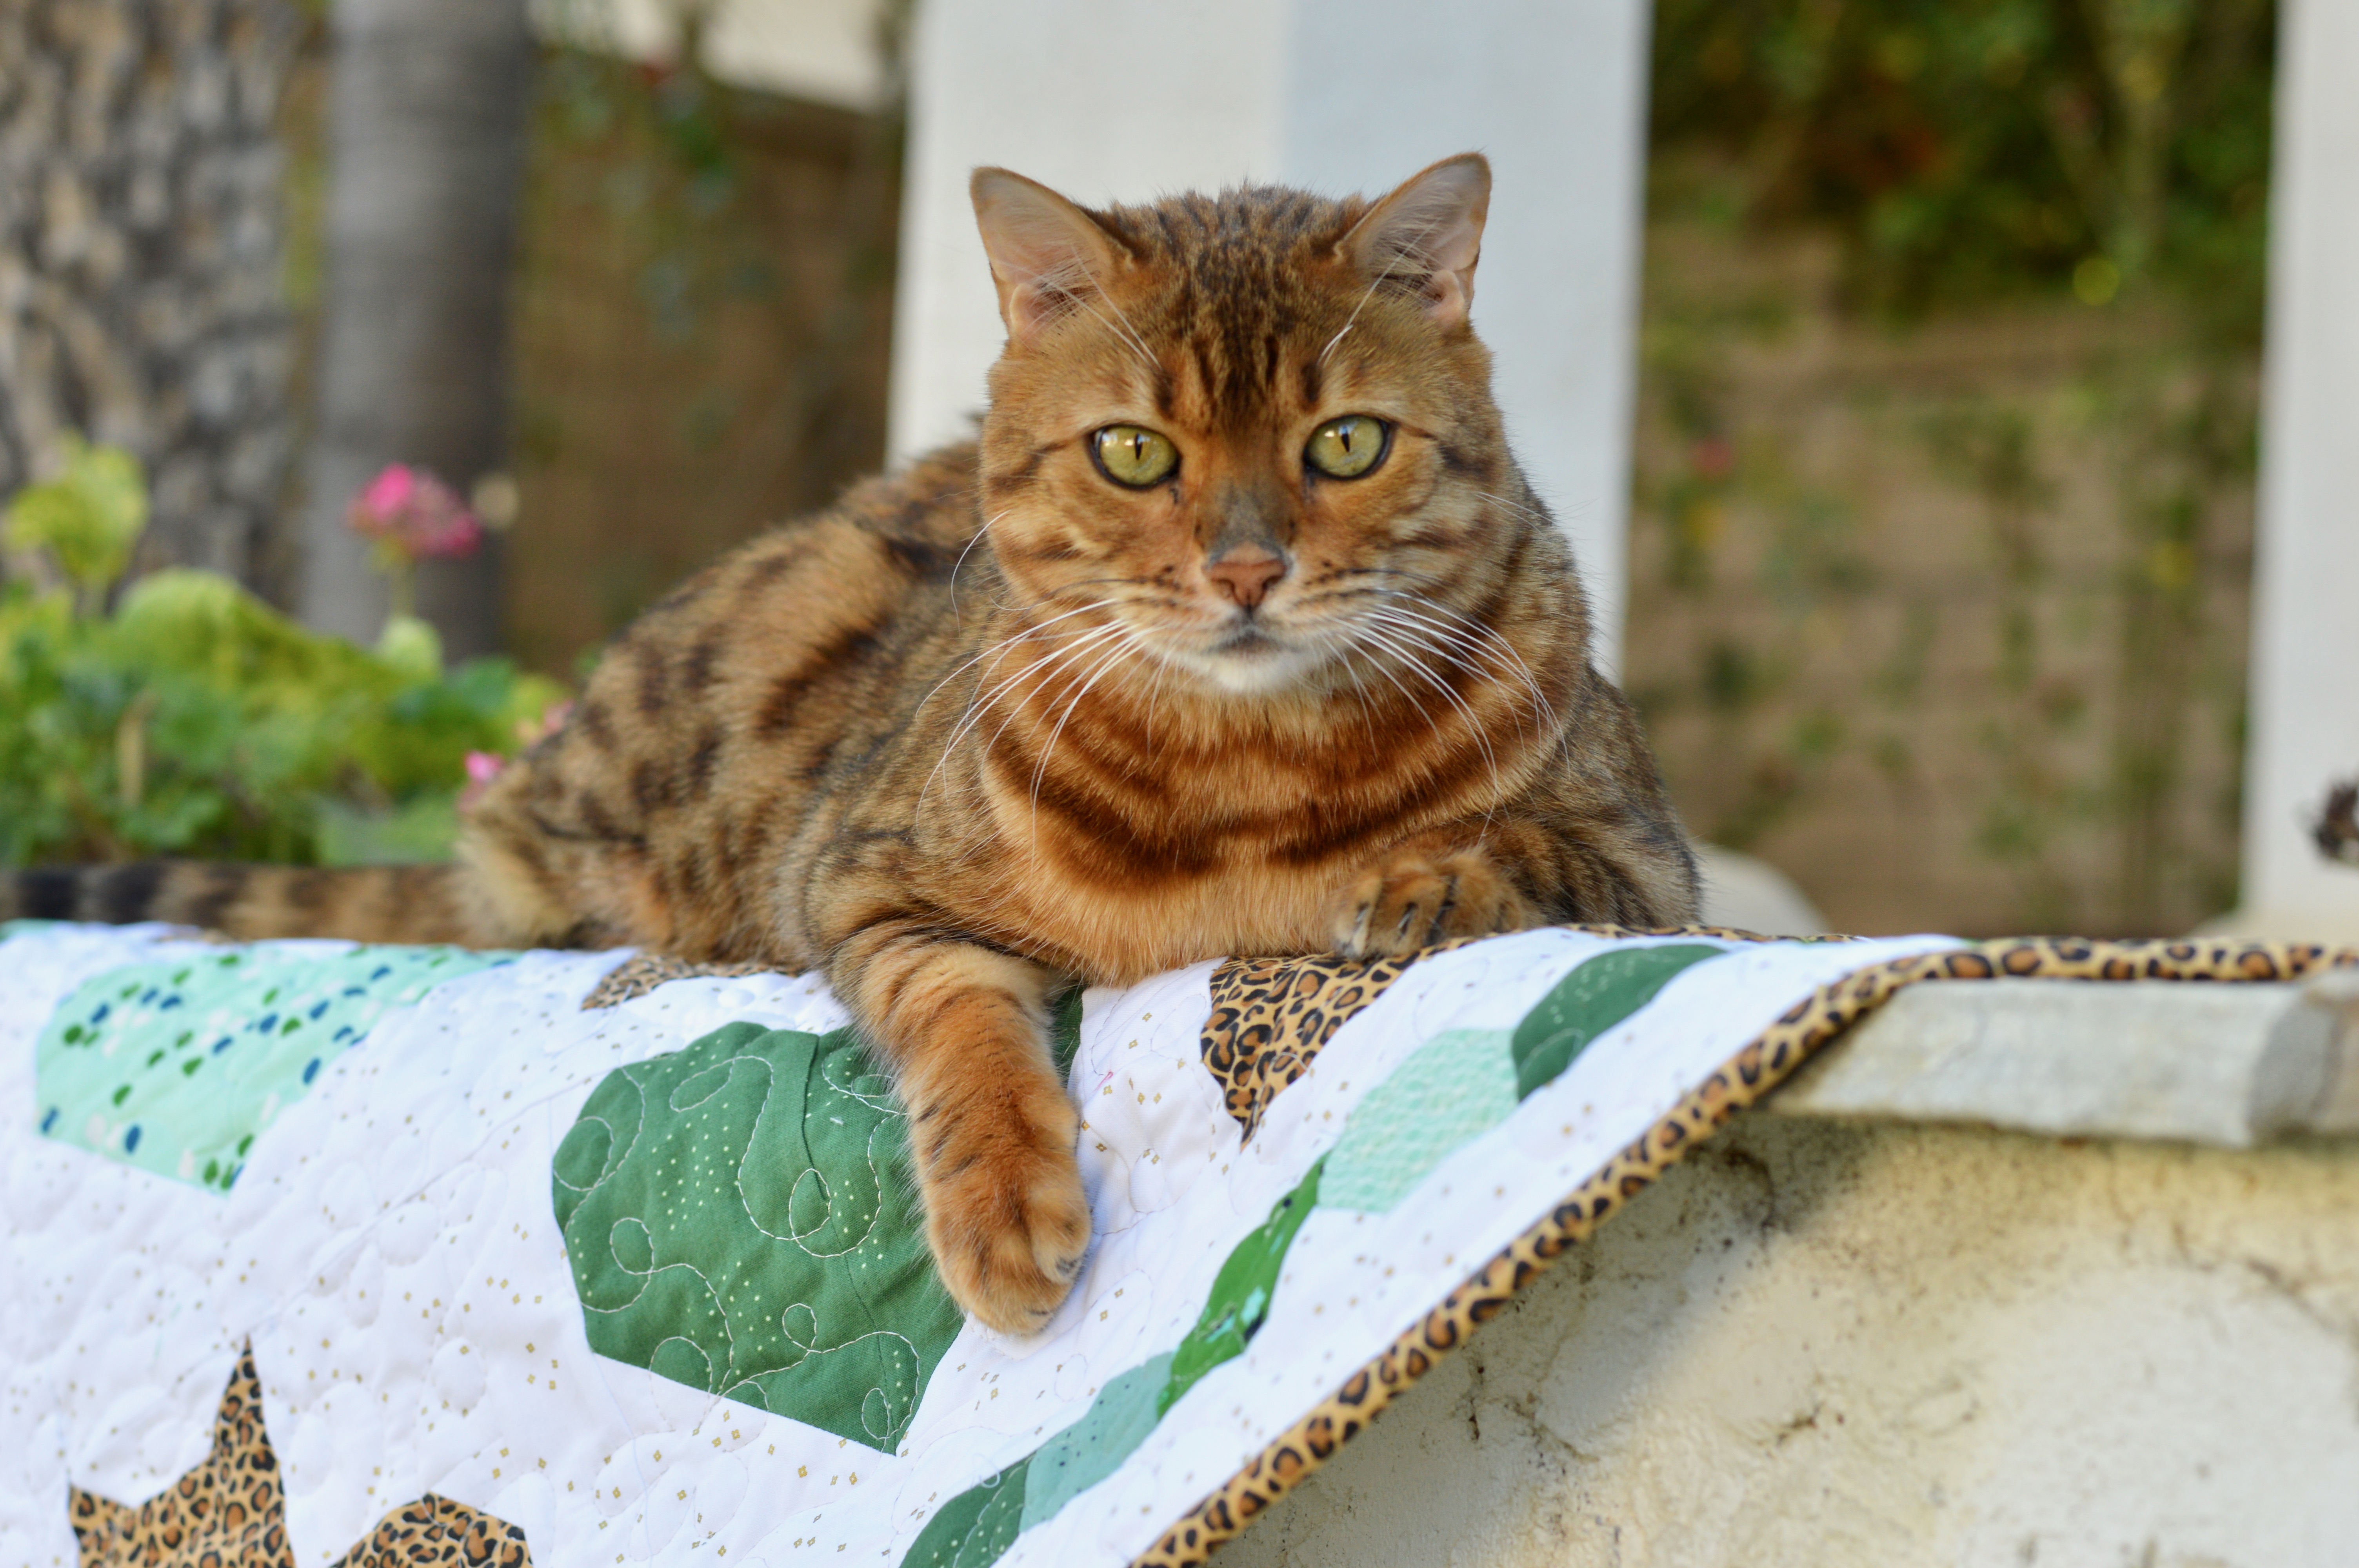
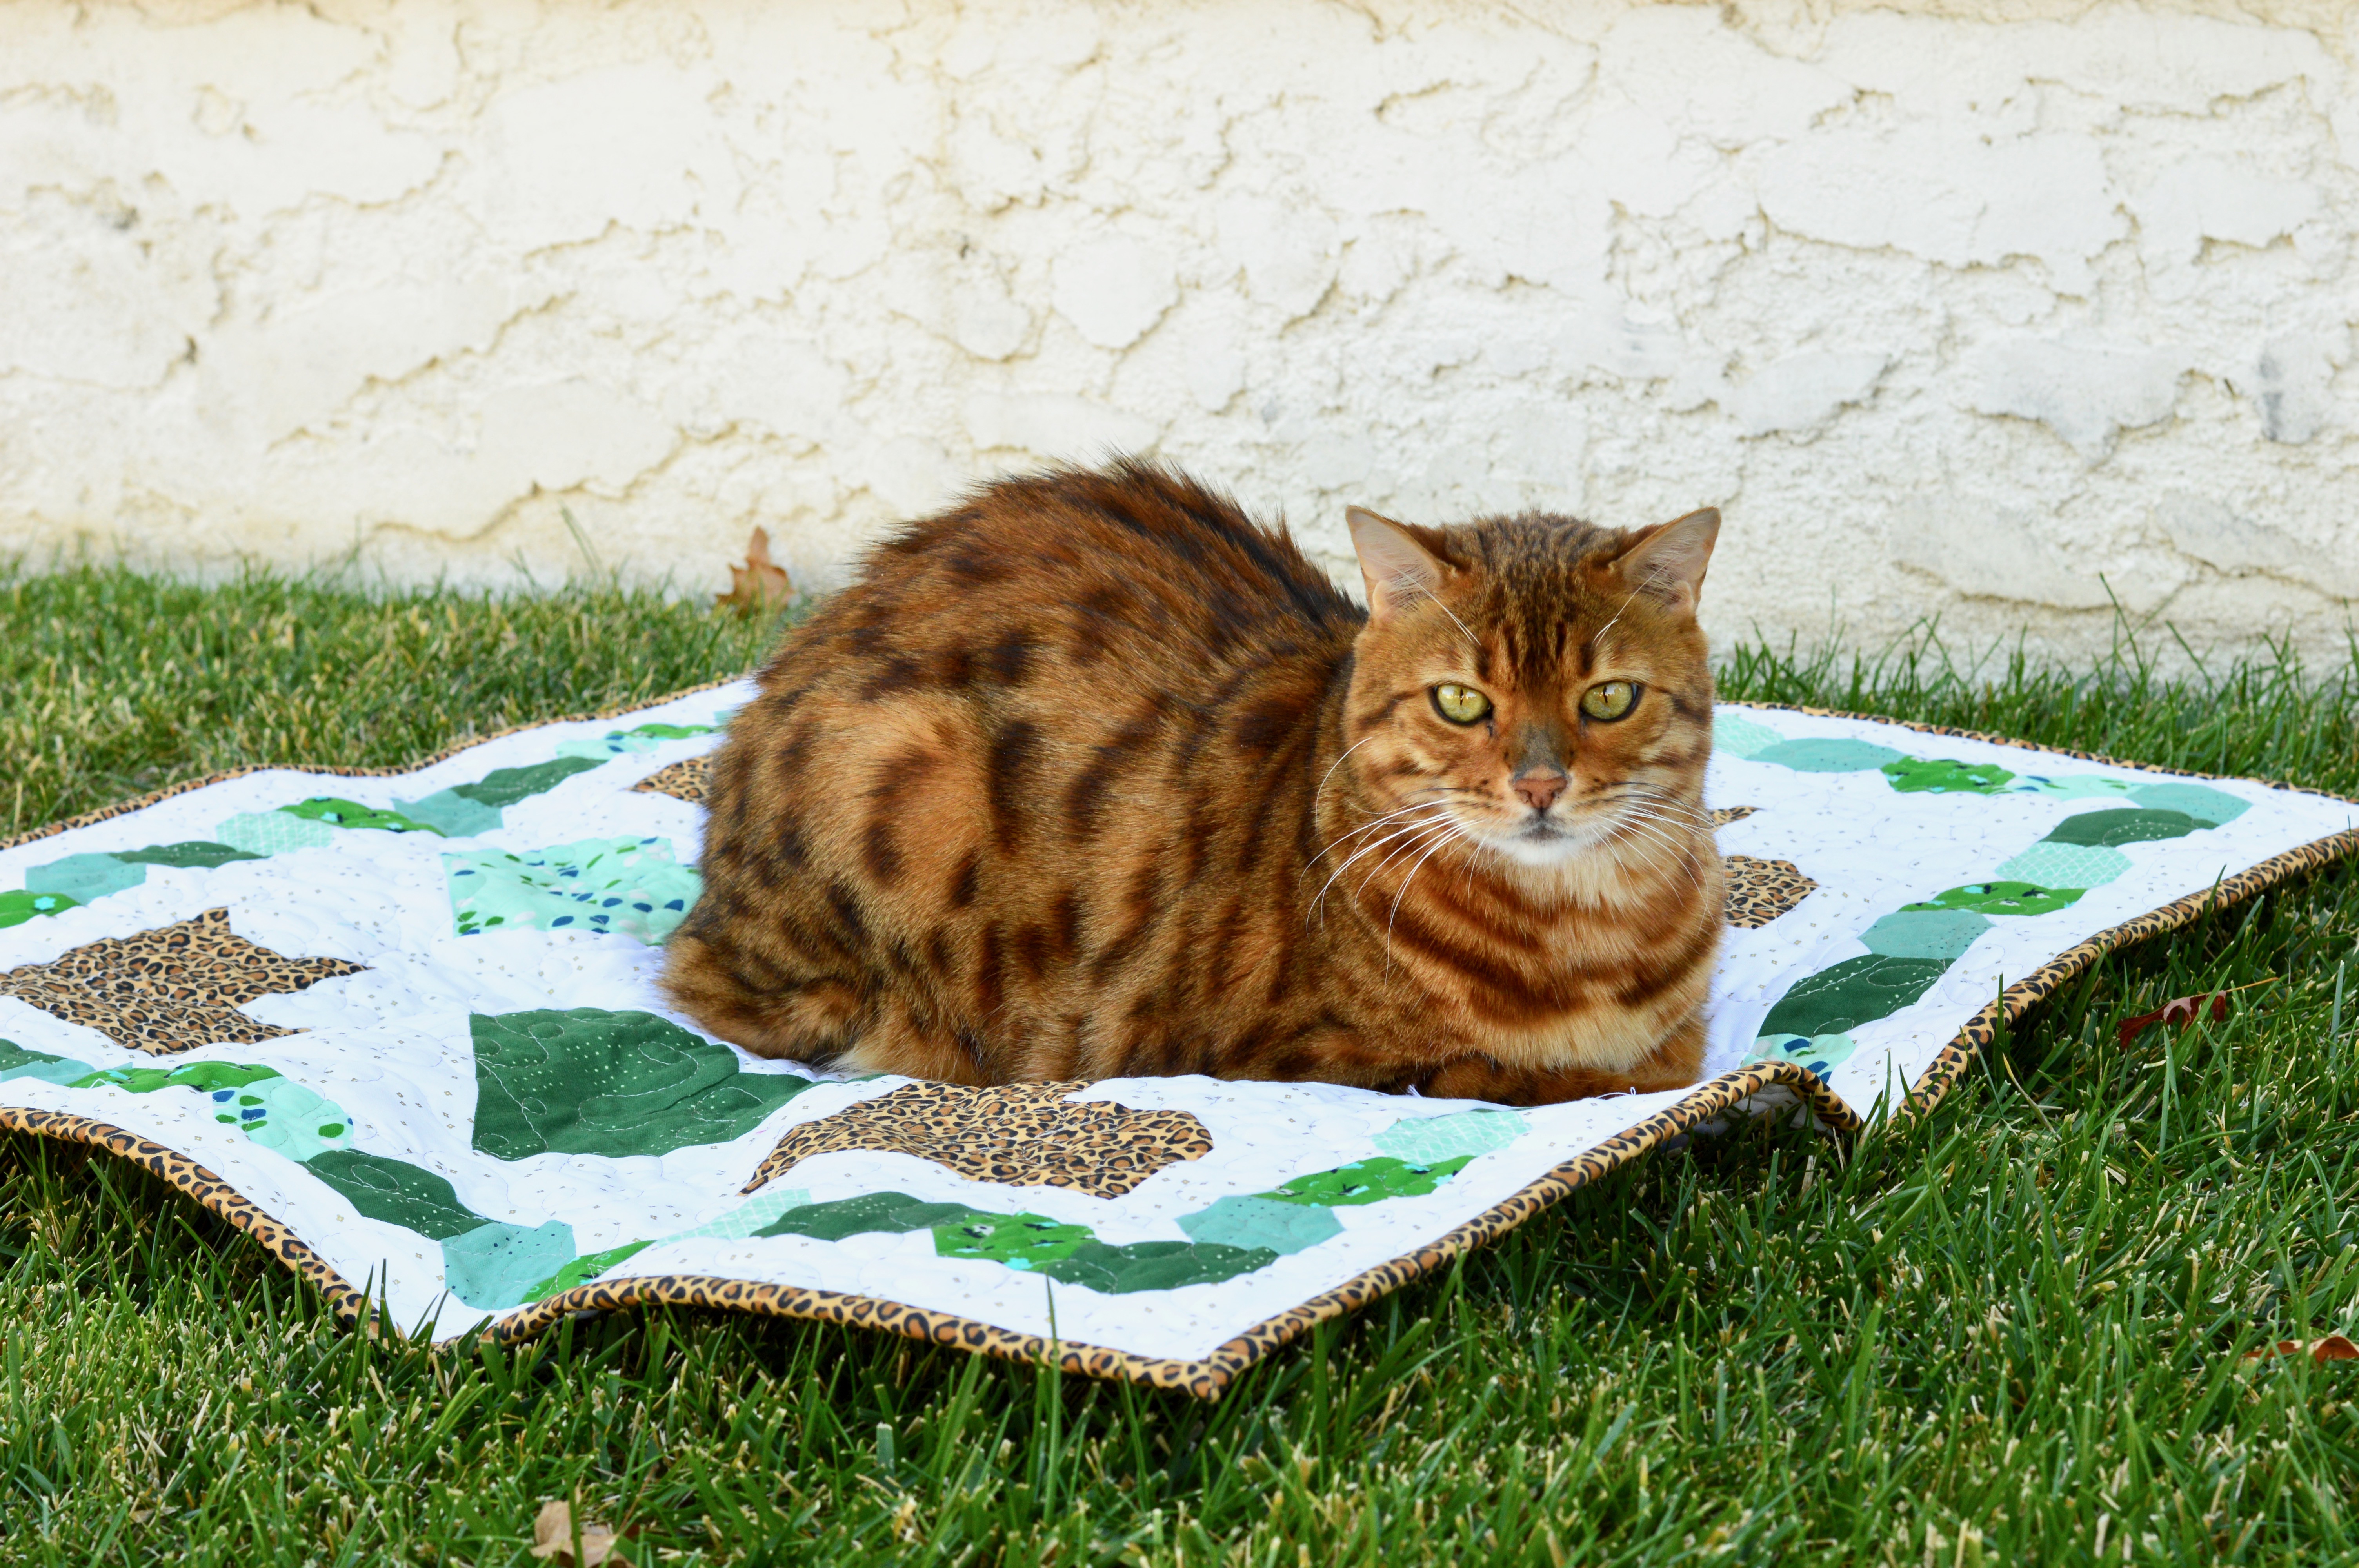
I’m so in love with it!  I was designing the quilt pattern with 25 Churn Dash blocks and hearts for the center when I realized this quilt NEEDS a little feline!  So in the bottom corner is an optional kitty cat block!  The quilt pattern is available for PDF instant download in my Etsy Shop.

DSC_0134

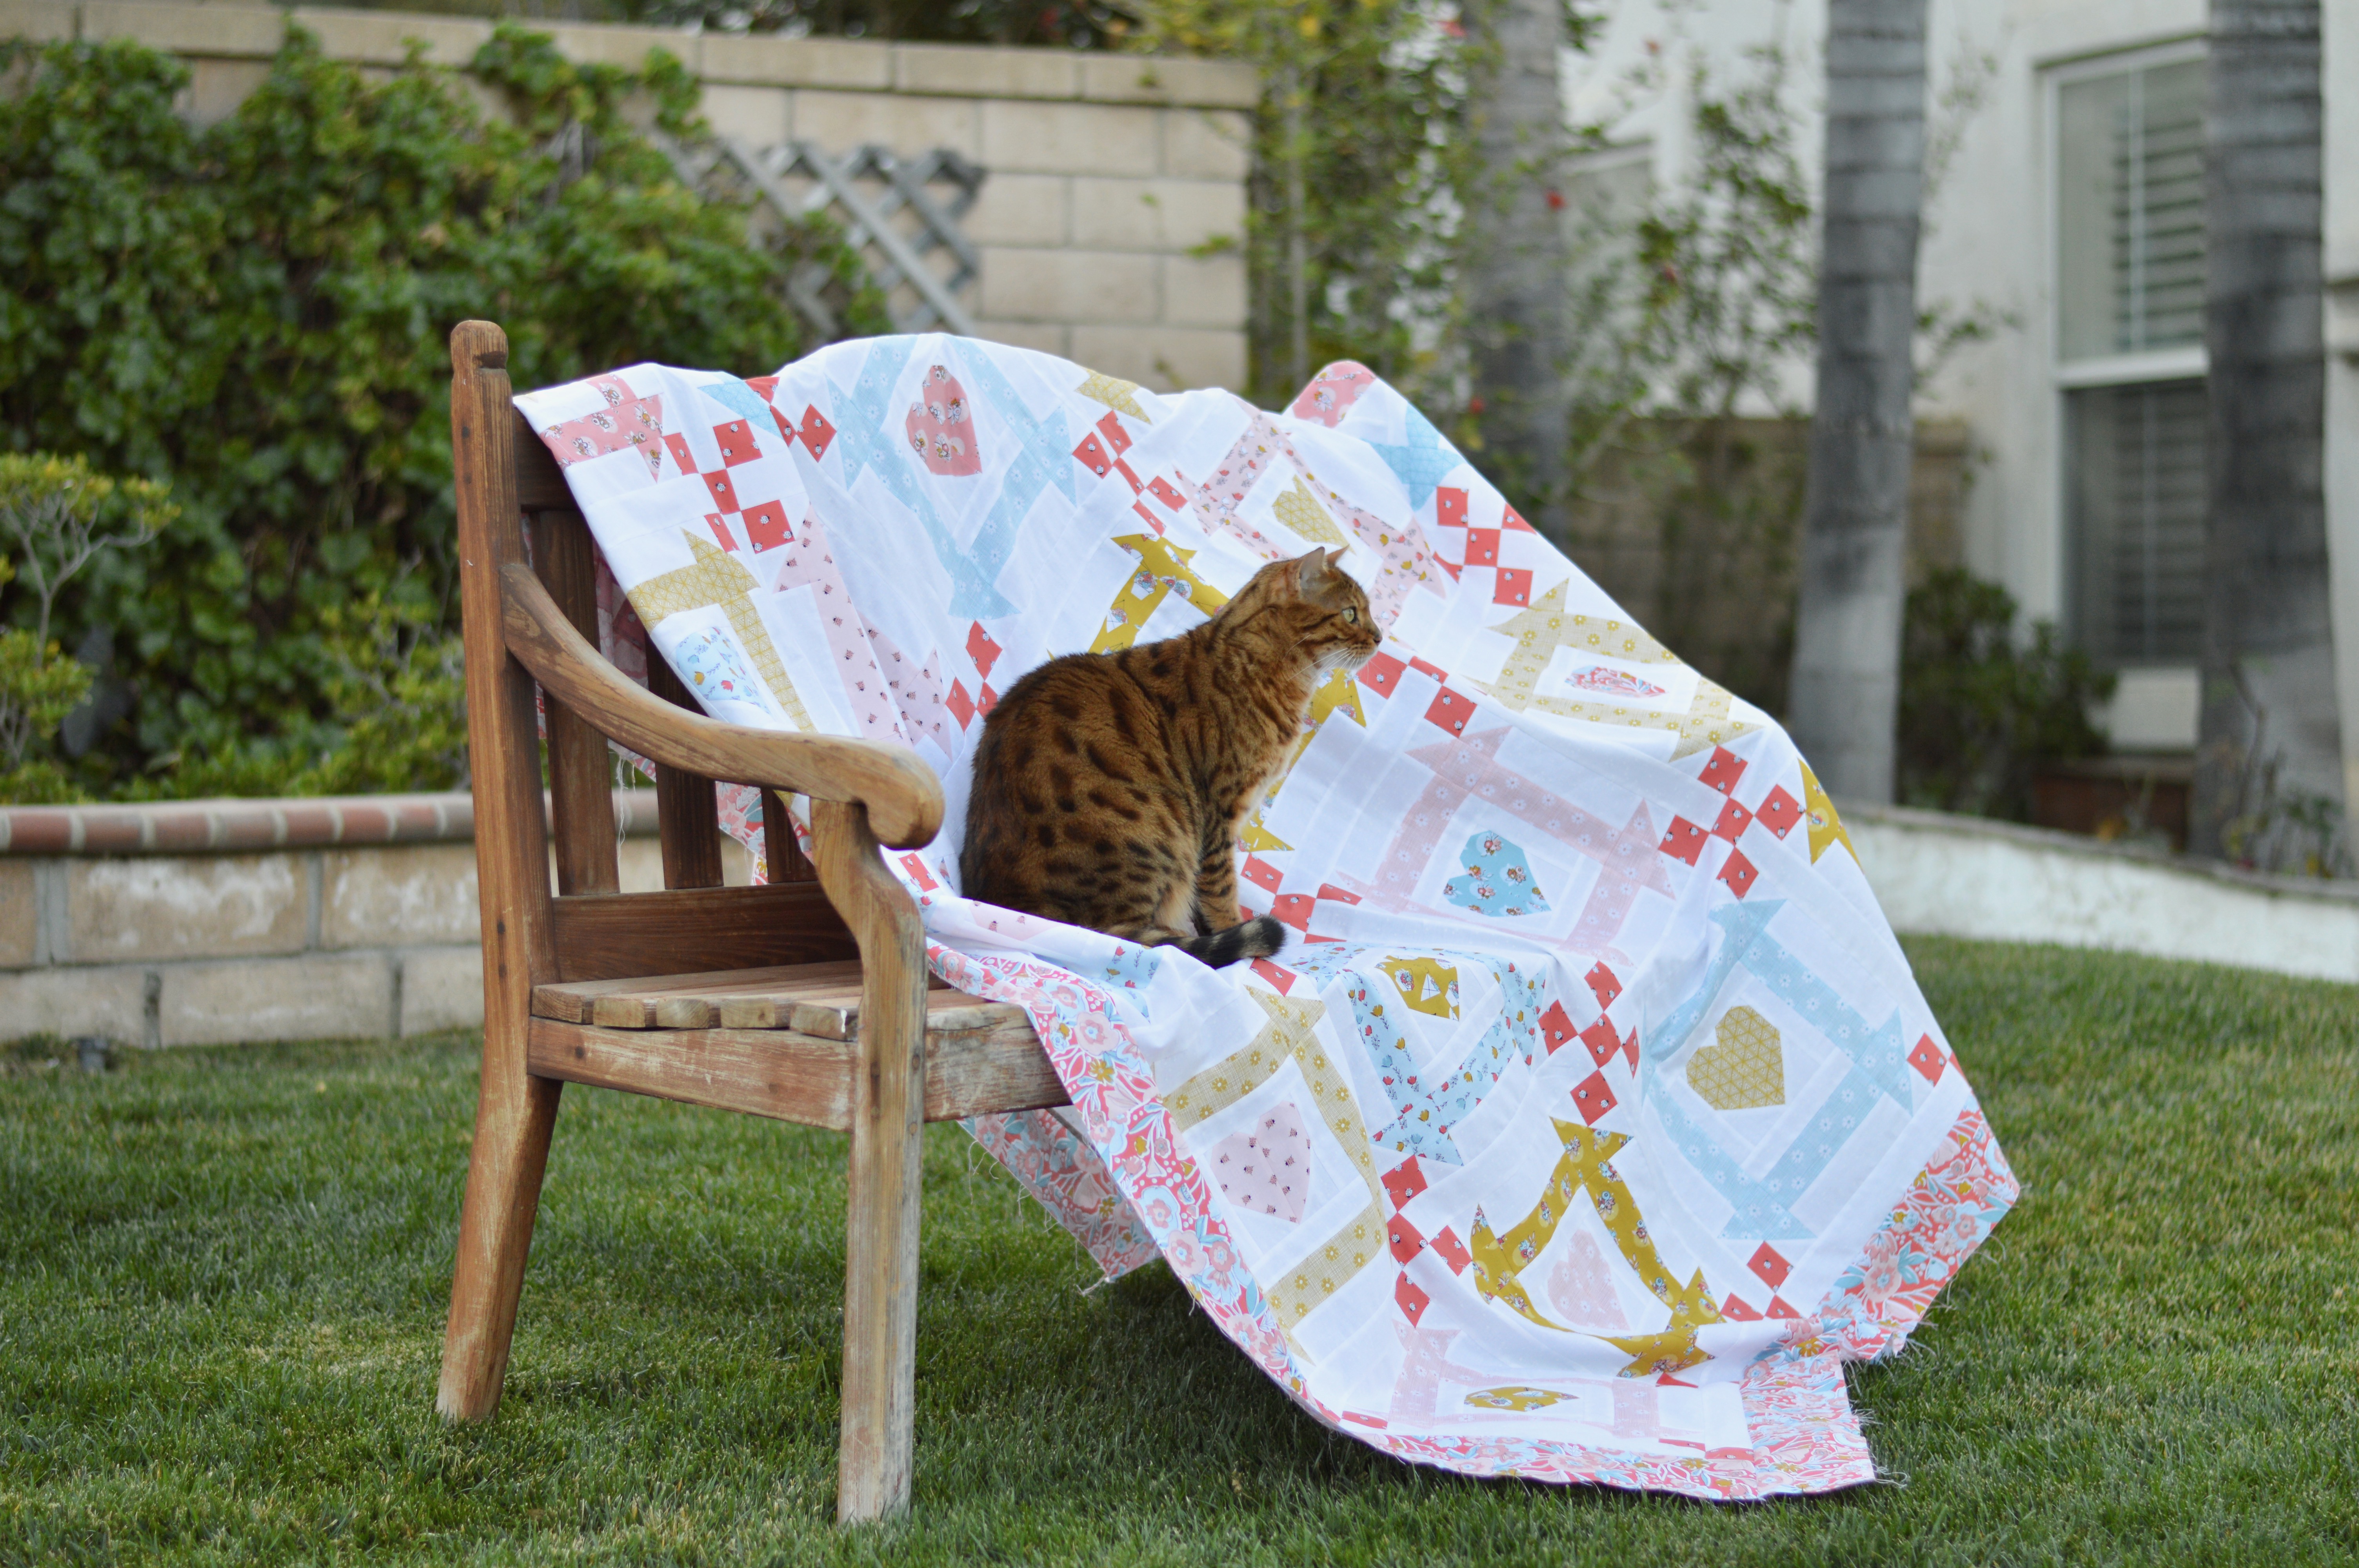
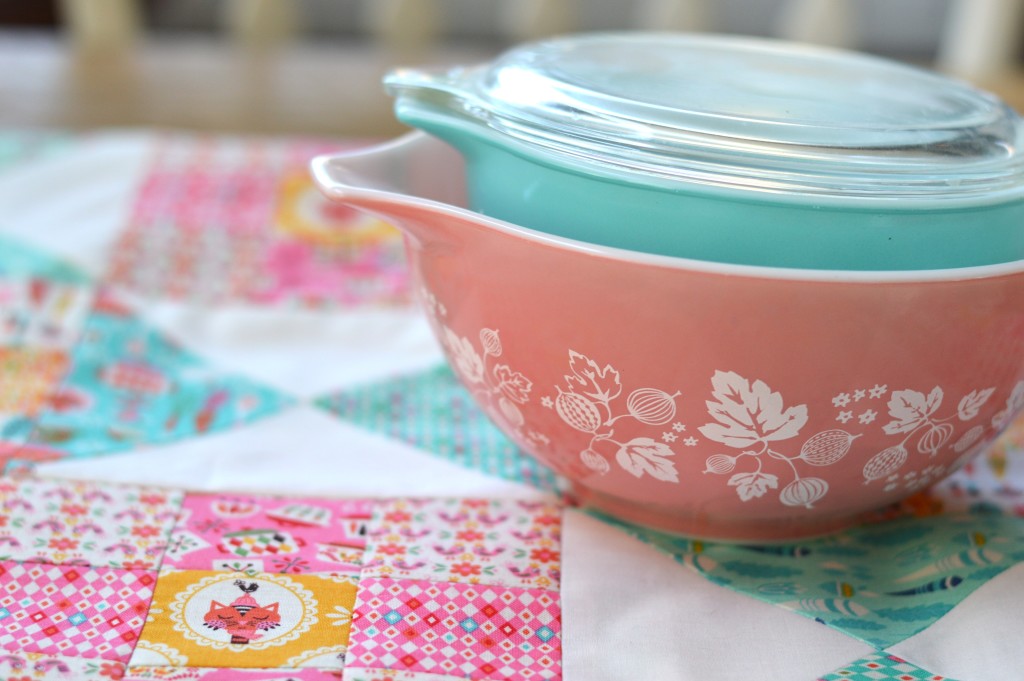
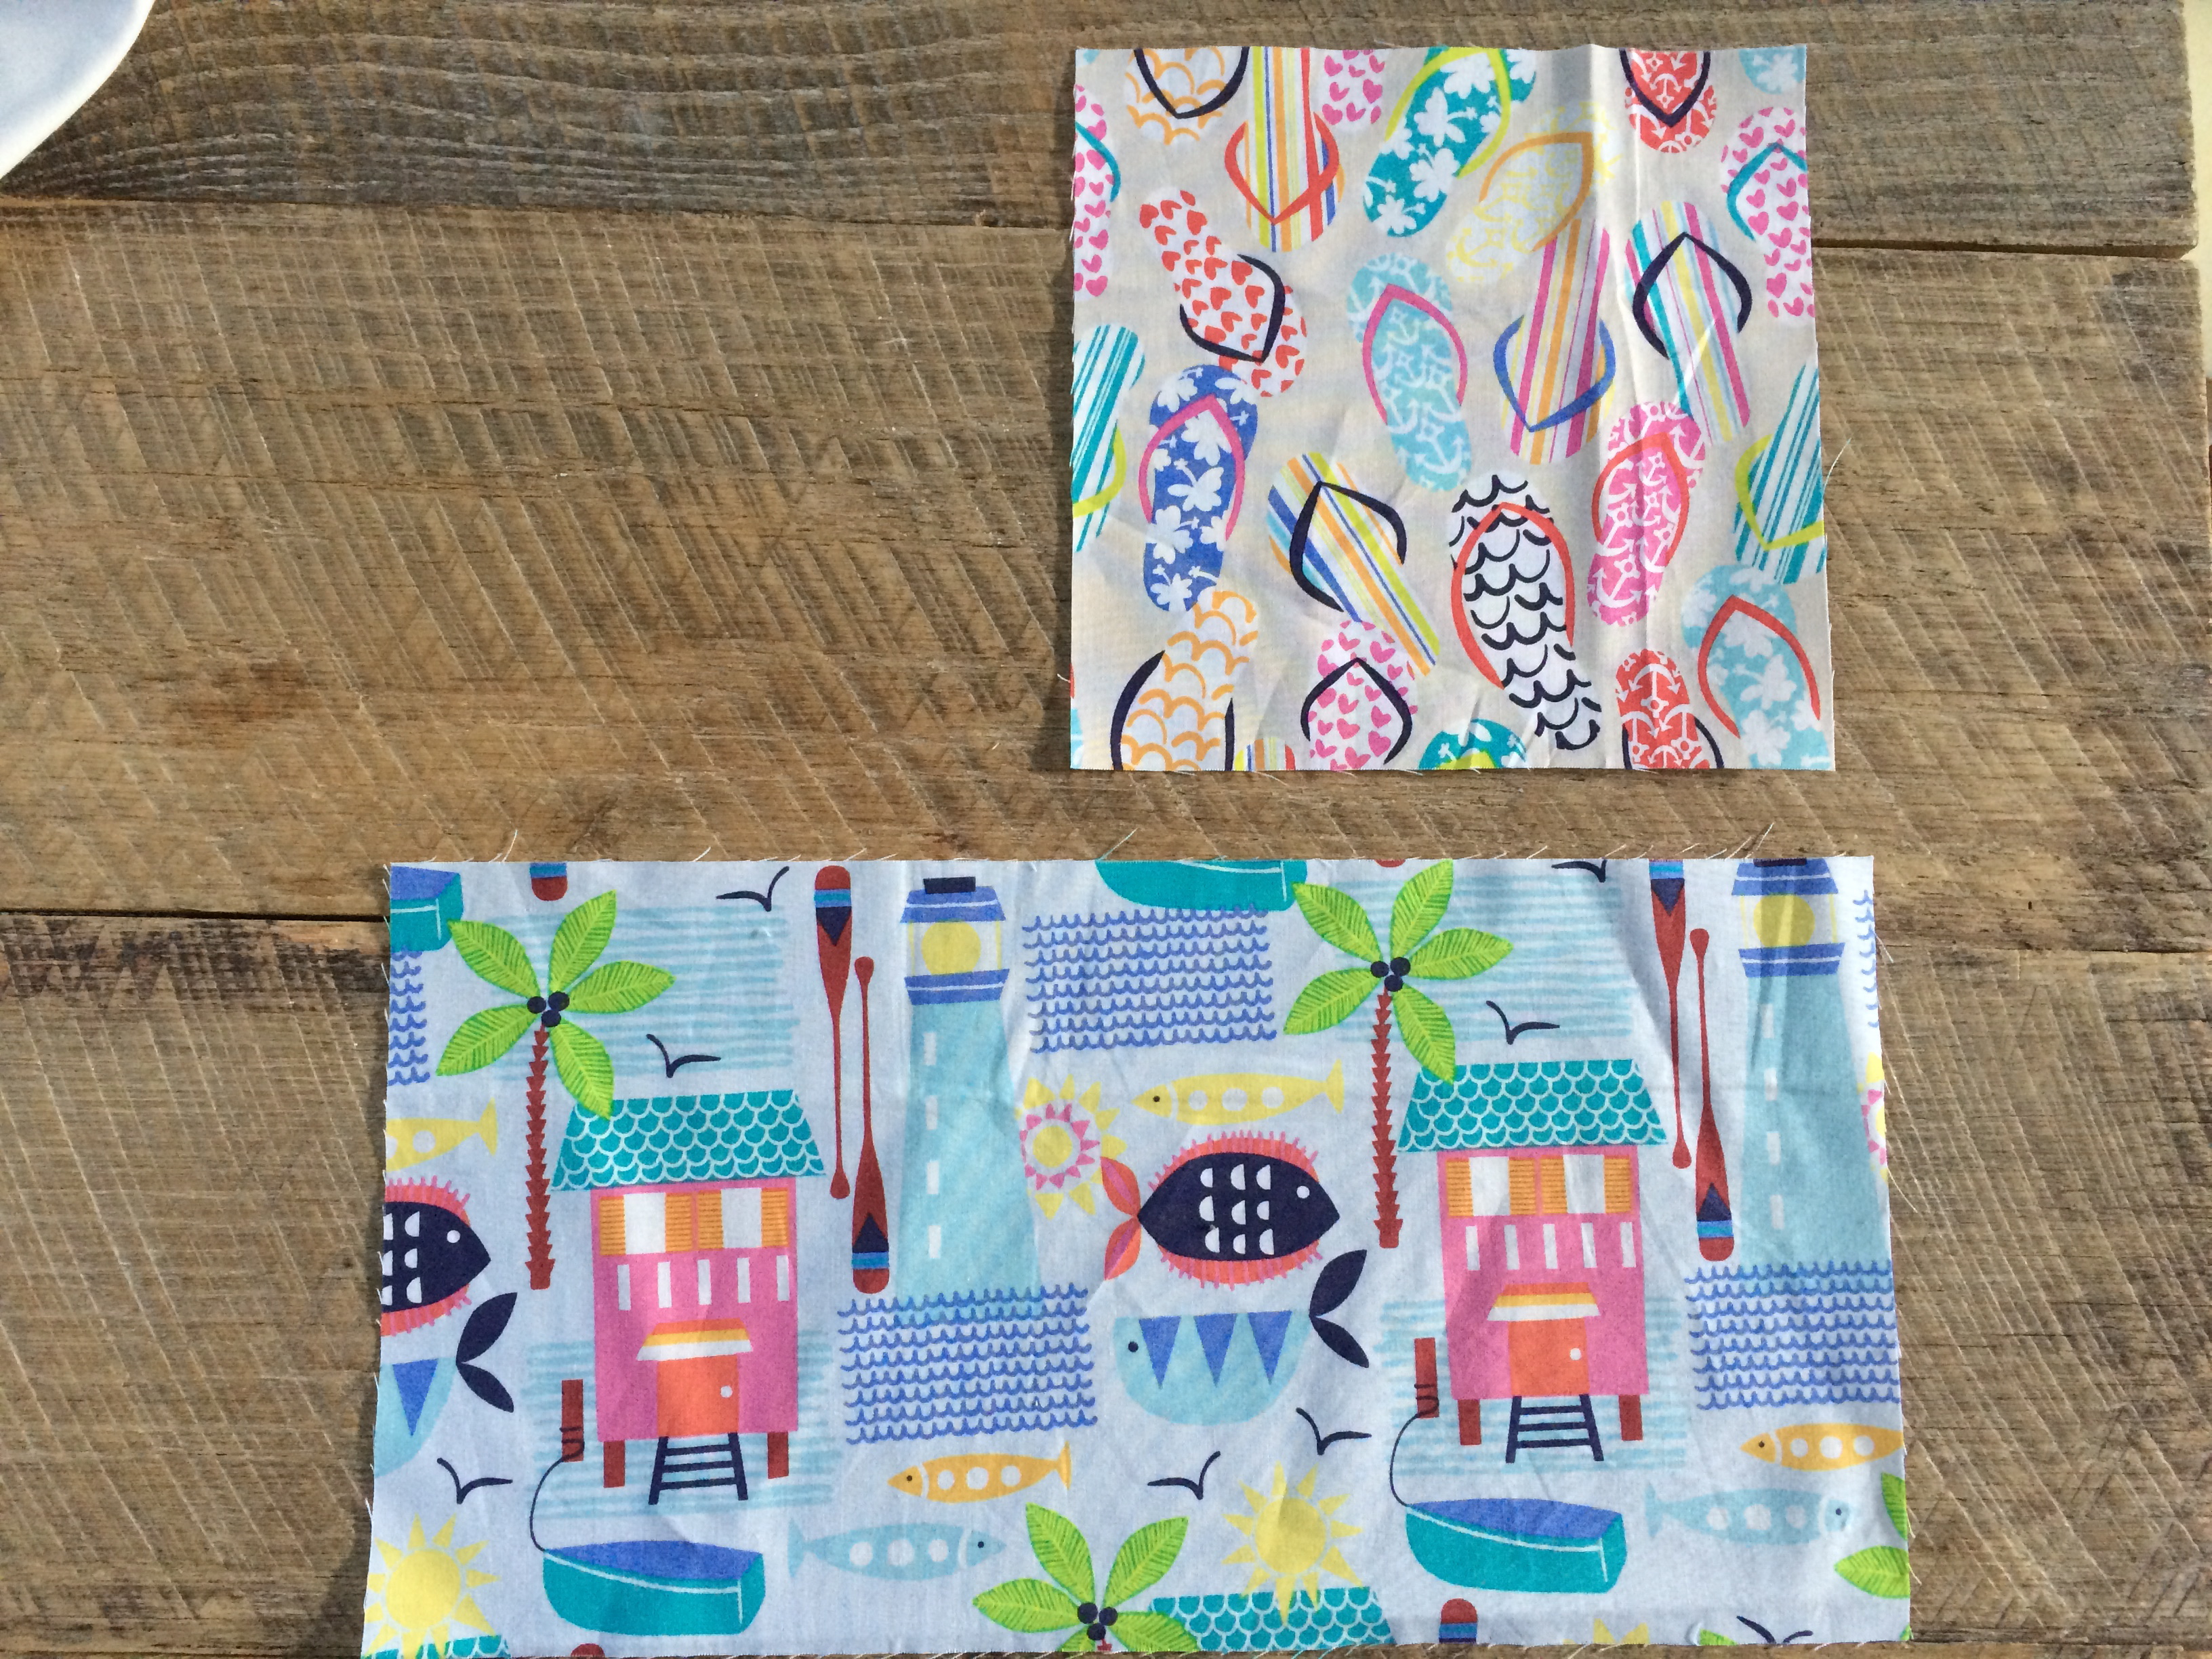
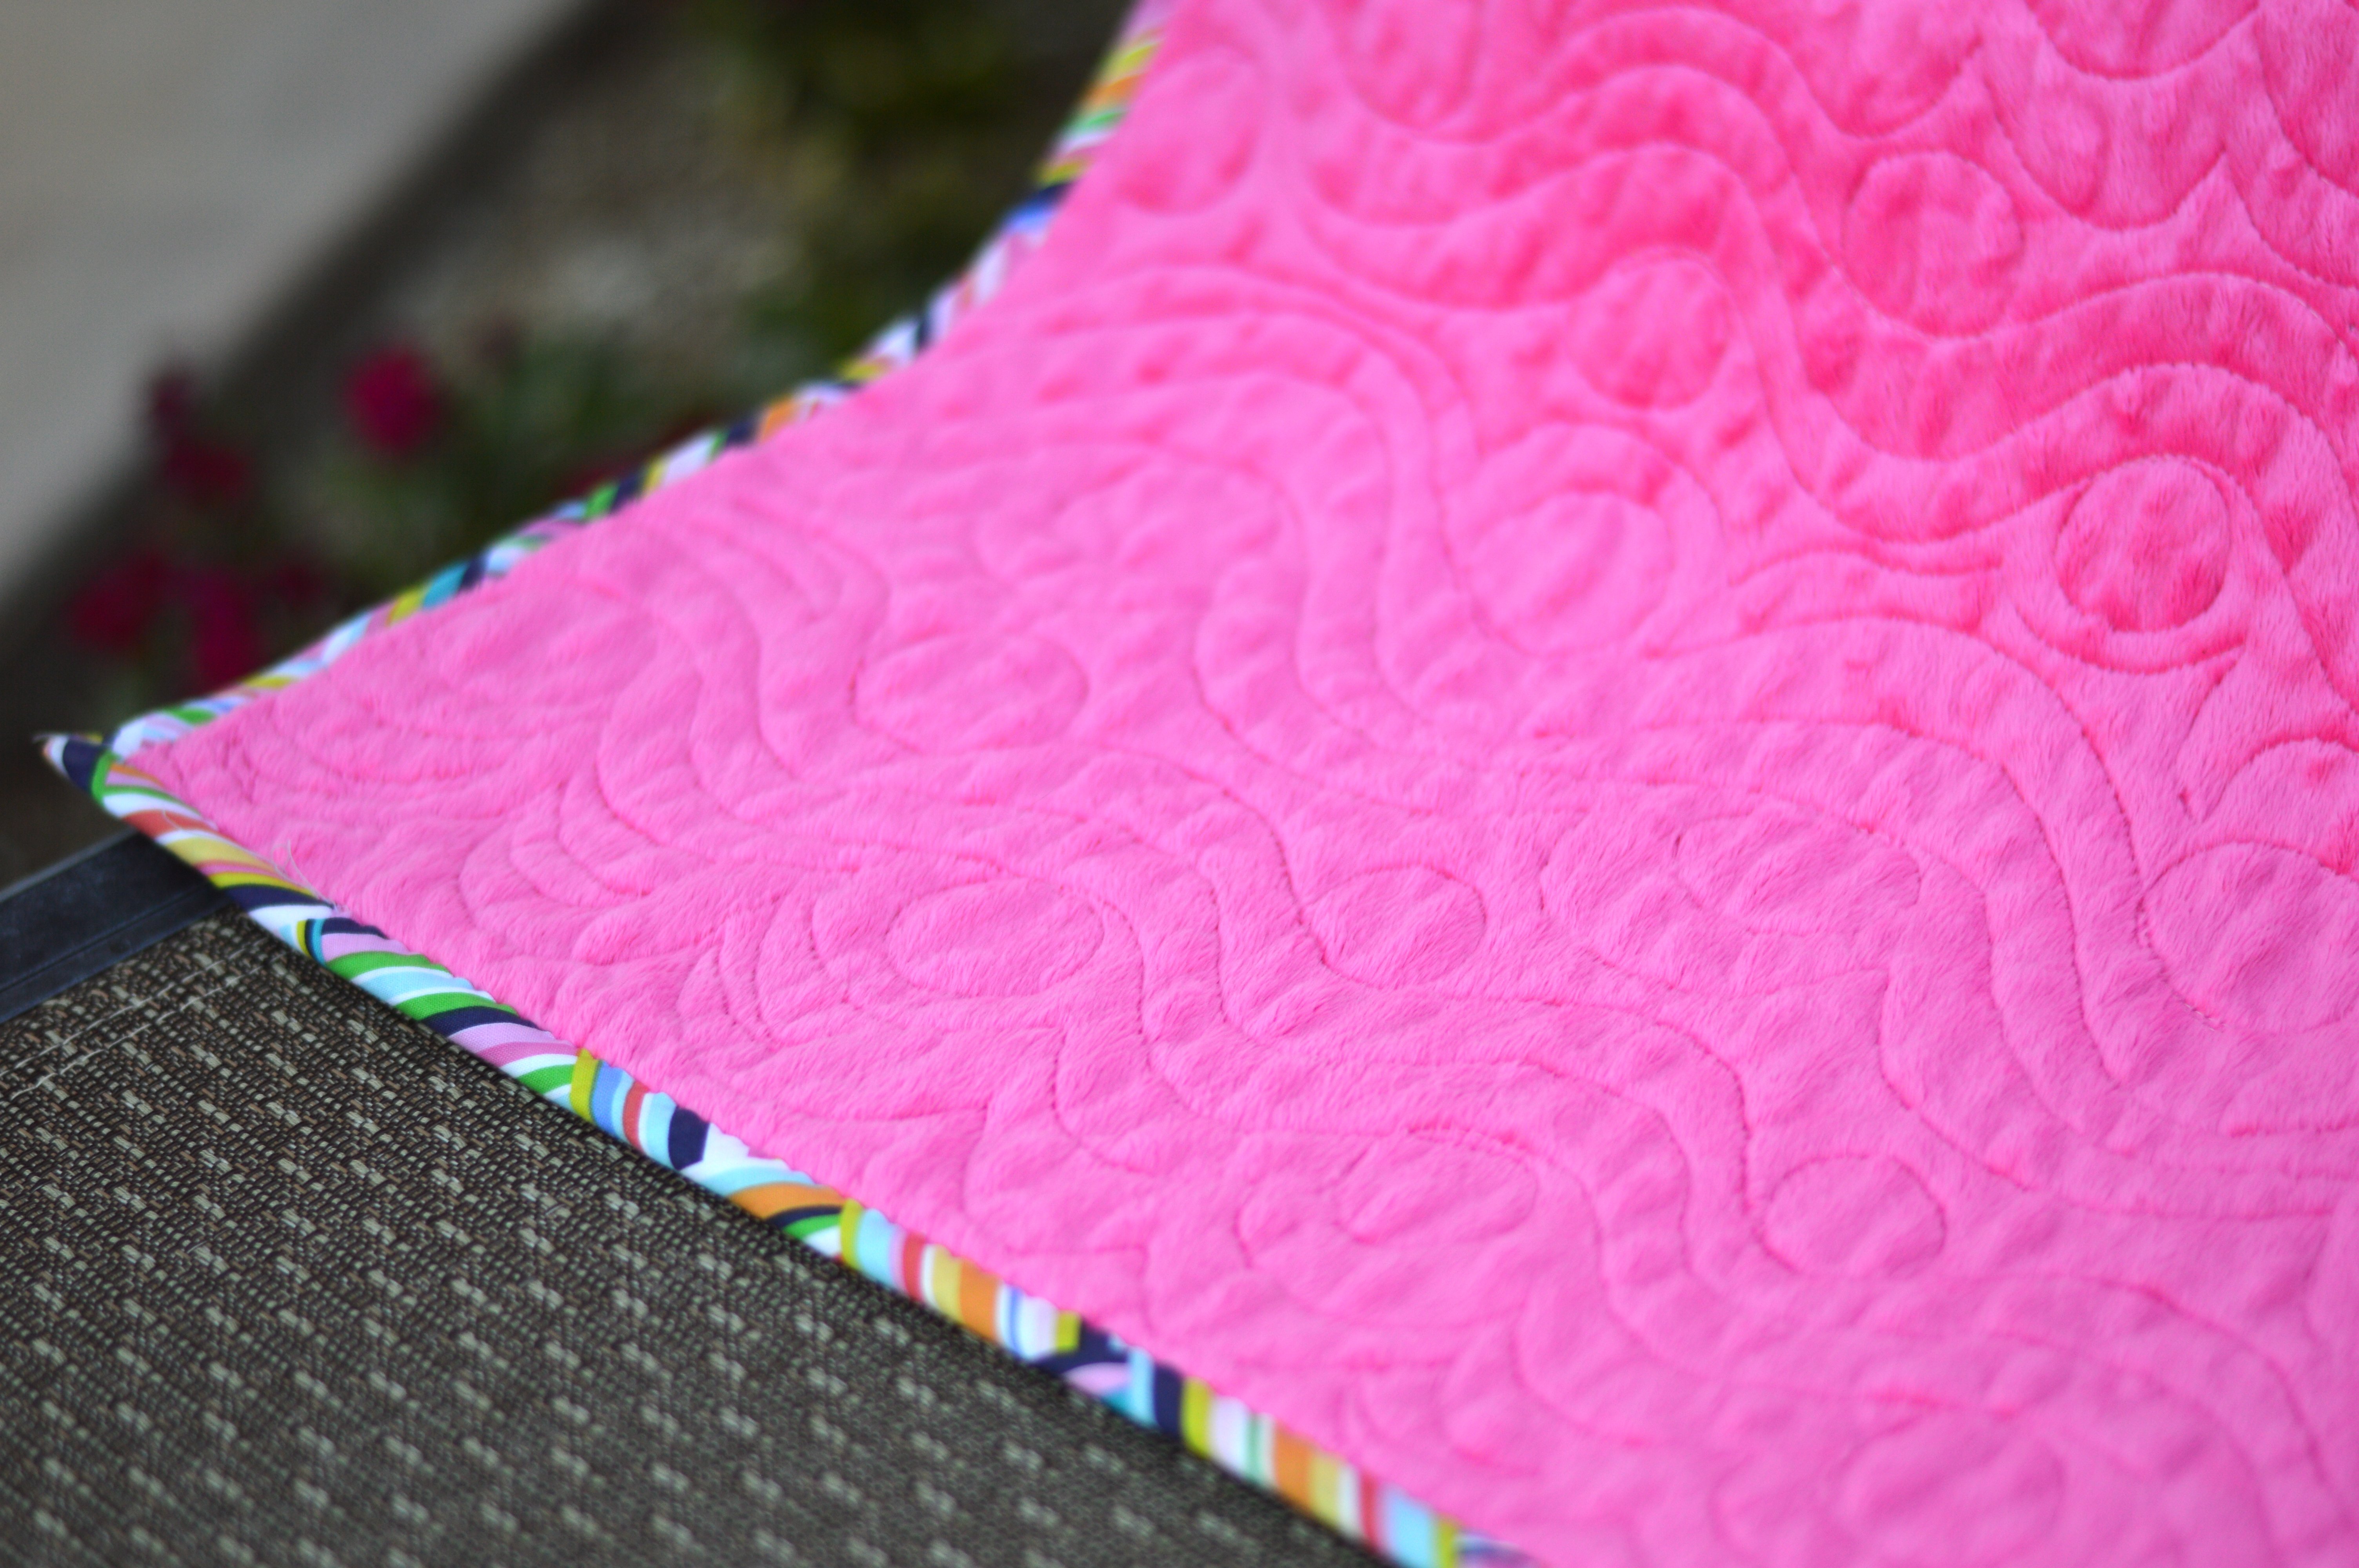
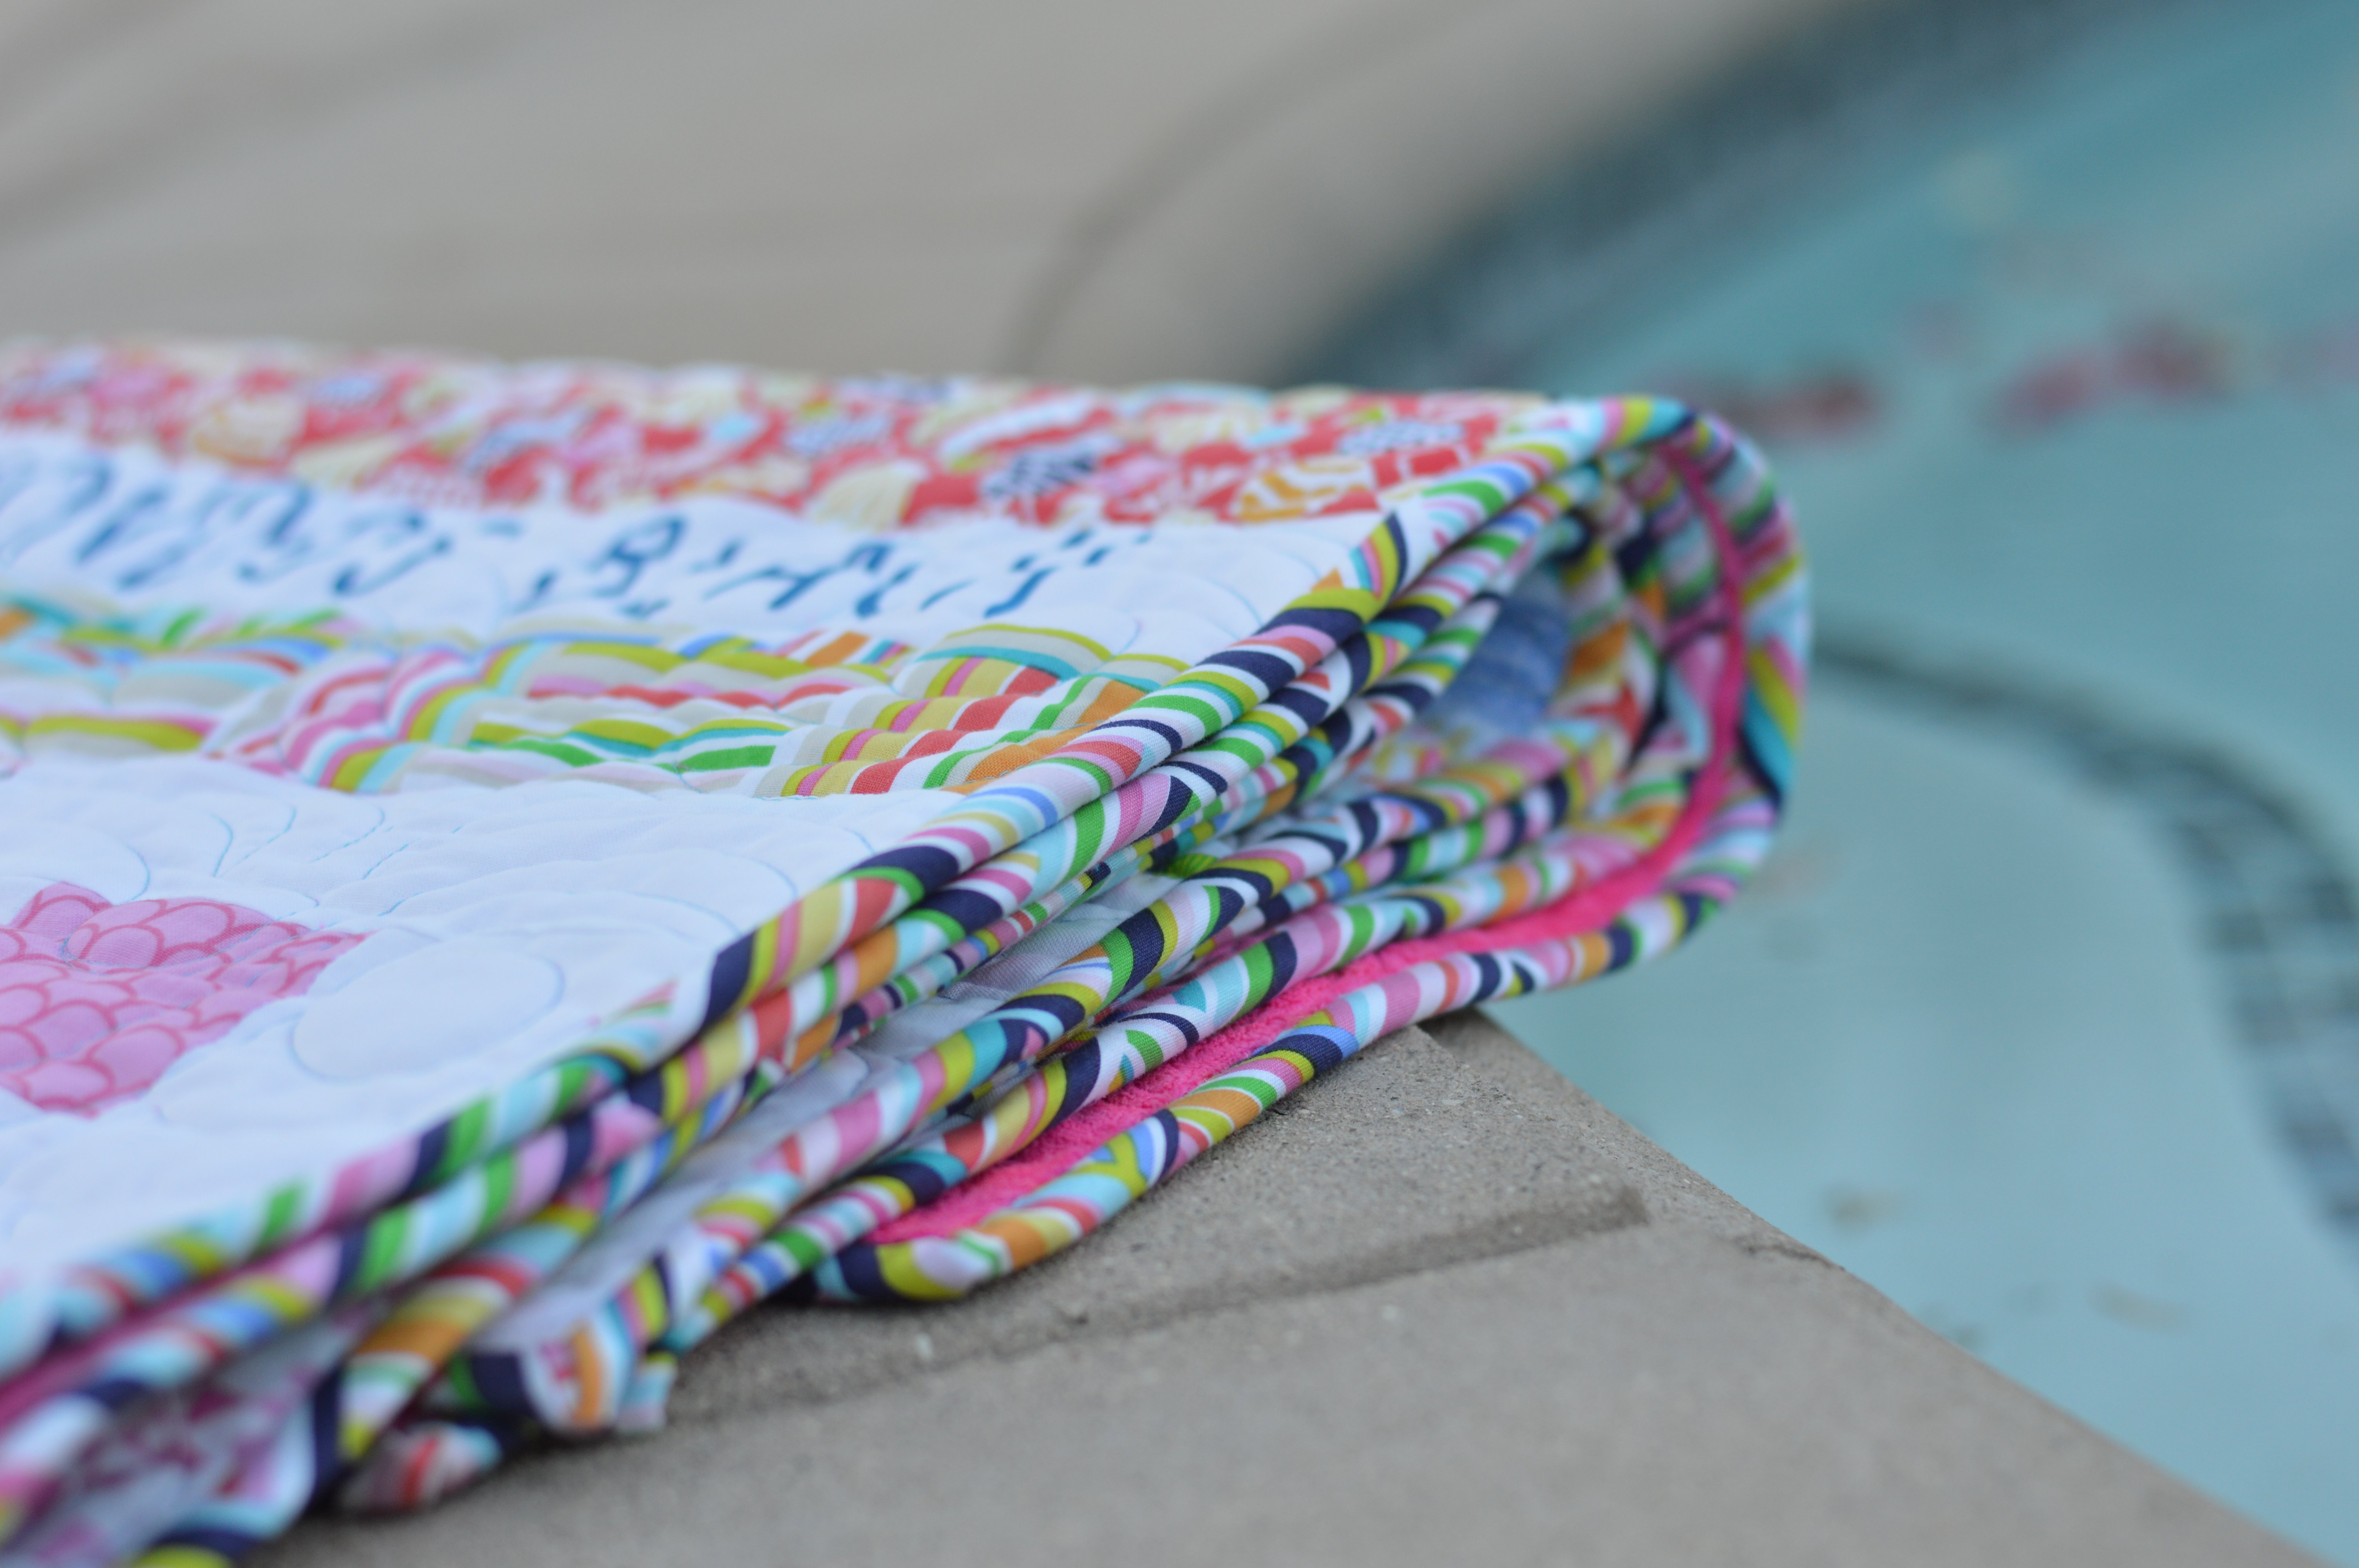
The fabrics are so delightful!  I love the pink, blue, gold, coral combination.  The fabric line is called Petals and Pots by Riley Blake Design.  For the white background I used Riley Blake Blossom white on white – which I am super in love with!!!


IMG_4068

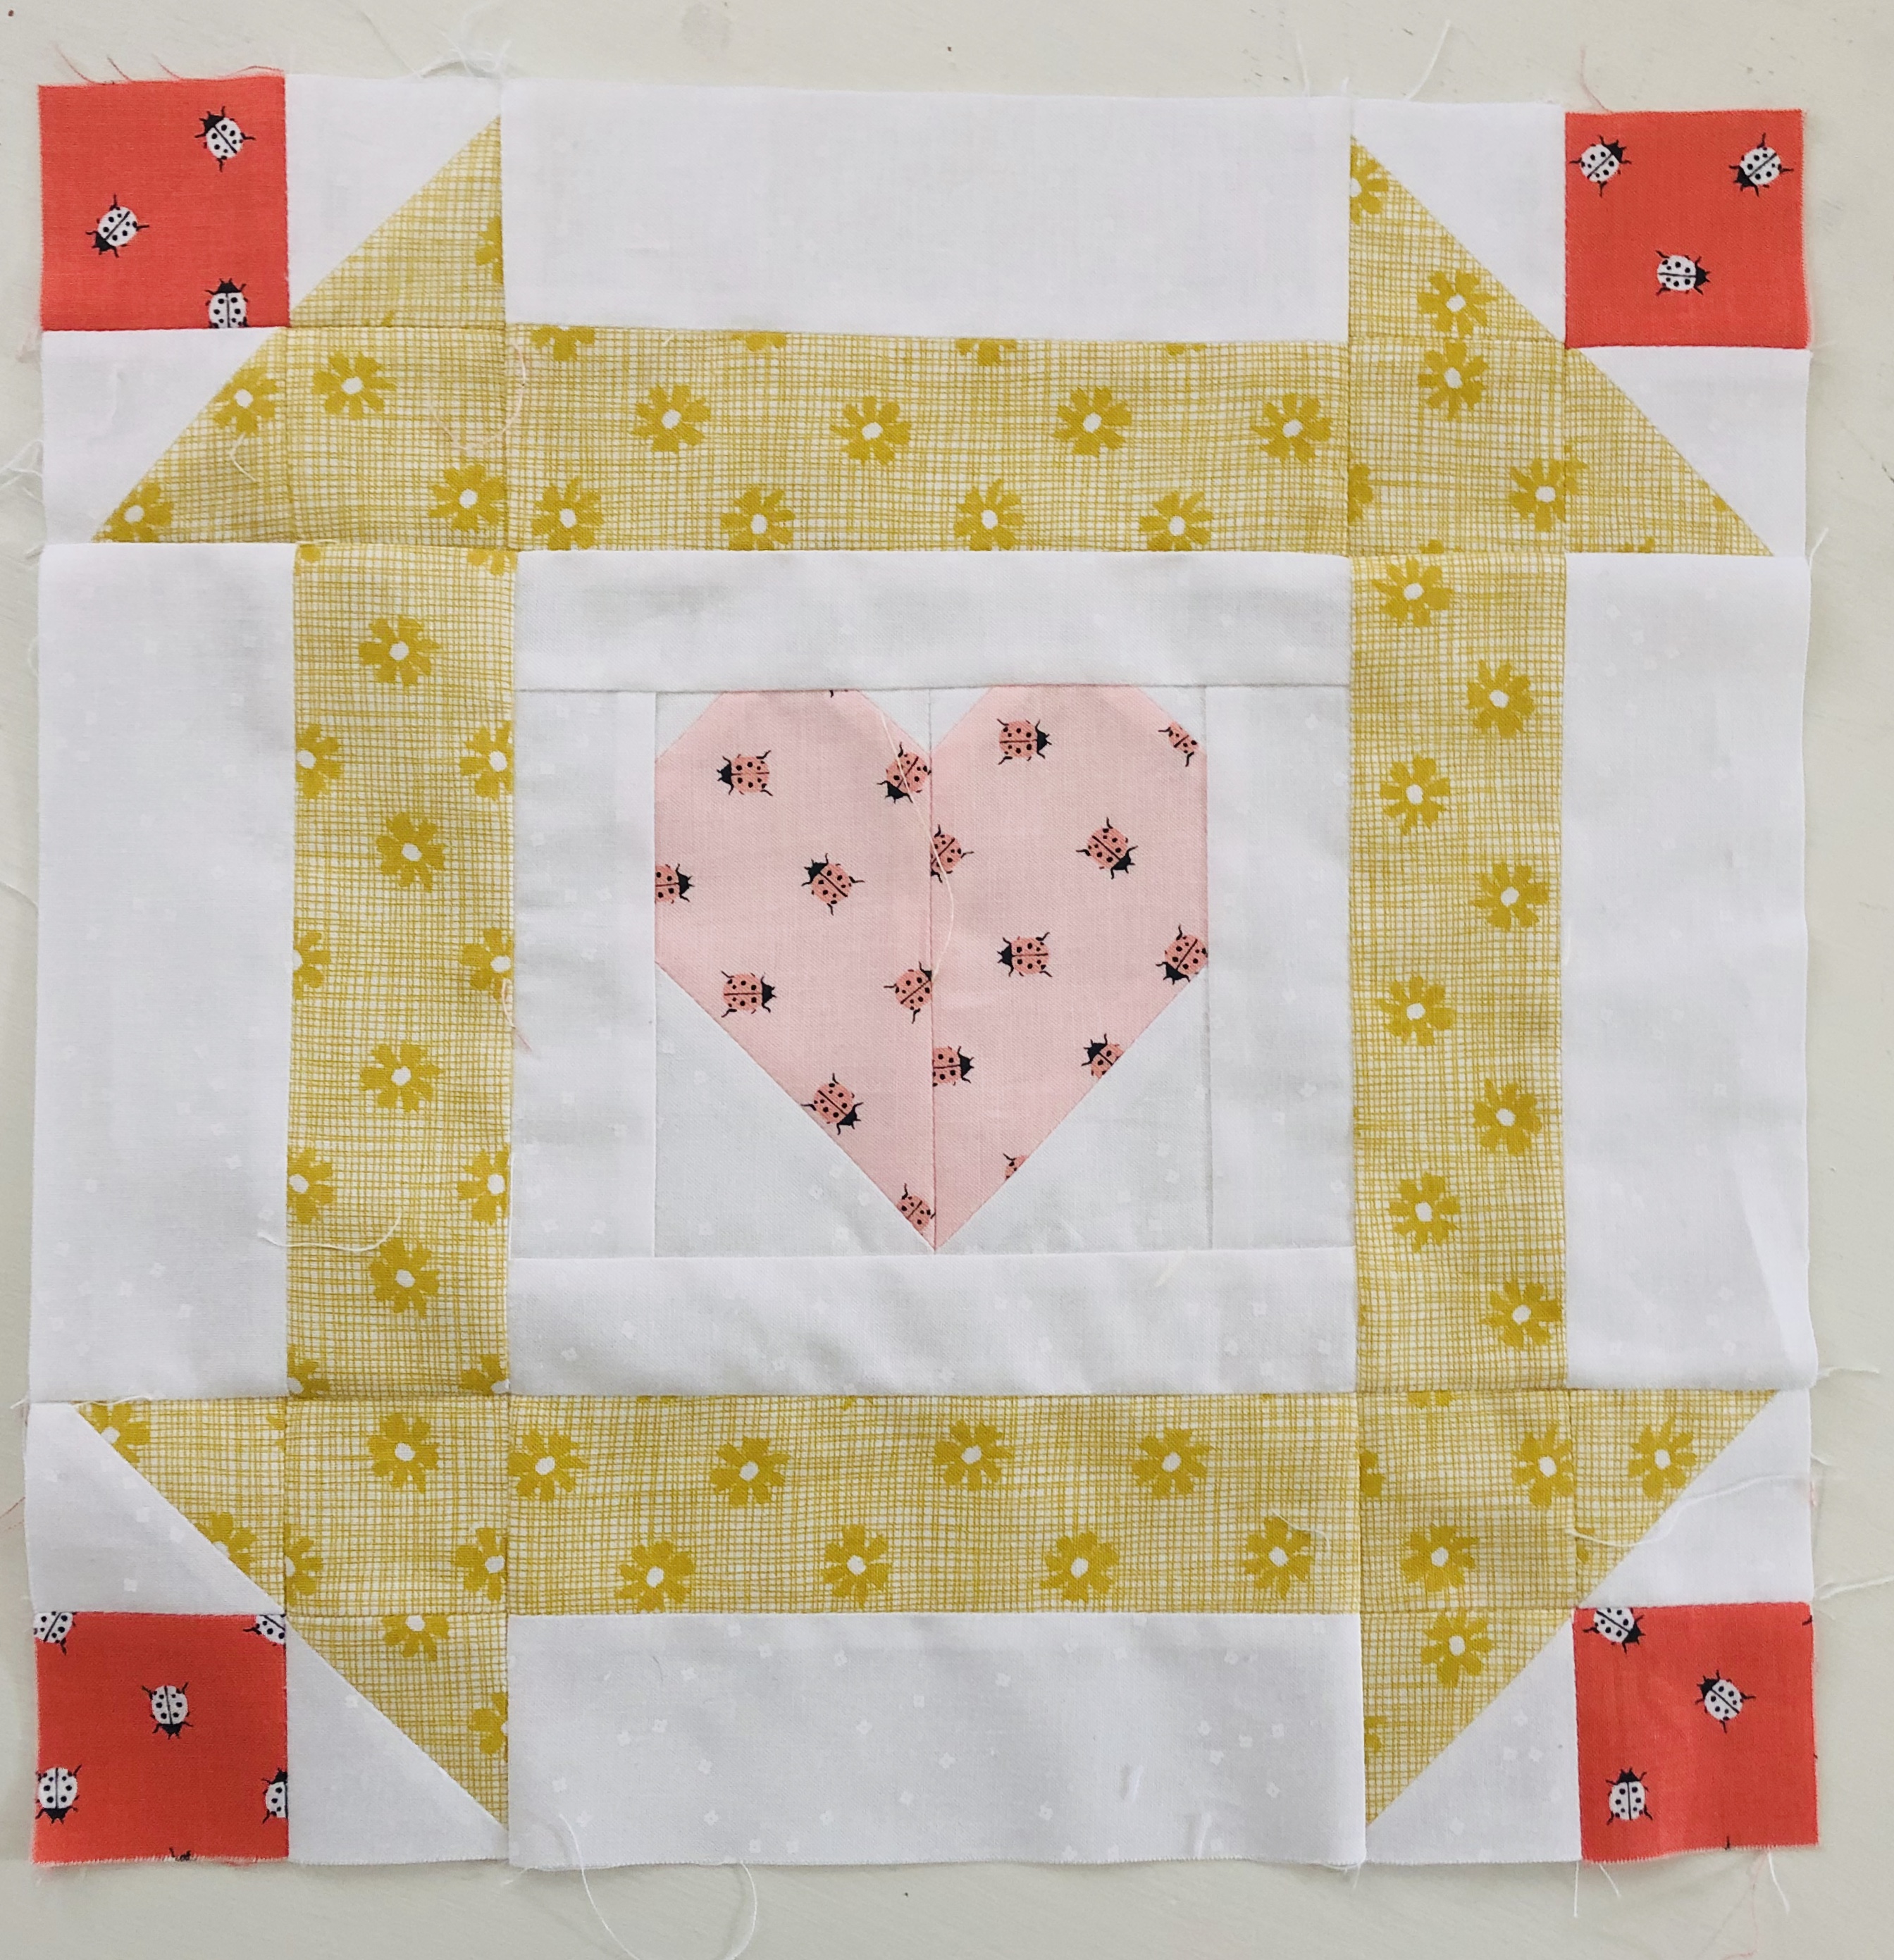
The quilt pattern is written for fat quarters and you get 2 quilt blocks per fat quarter.

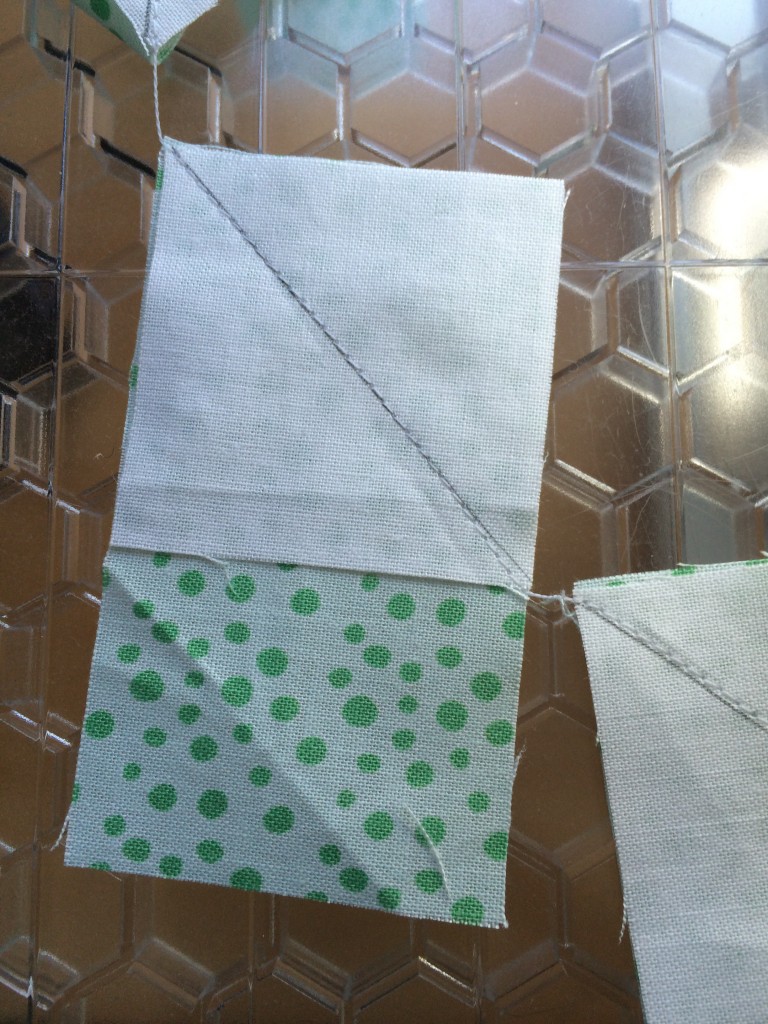
Also, I used an easy piece method which means you only have to cut squares and no cutting triangles!
IMG_4070

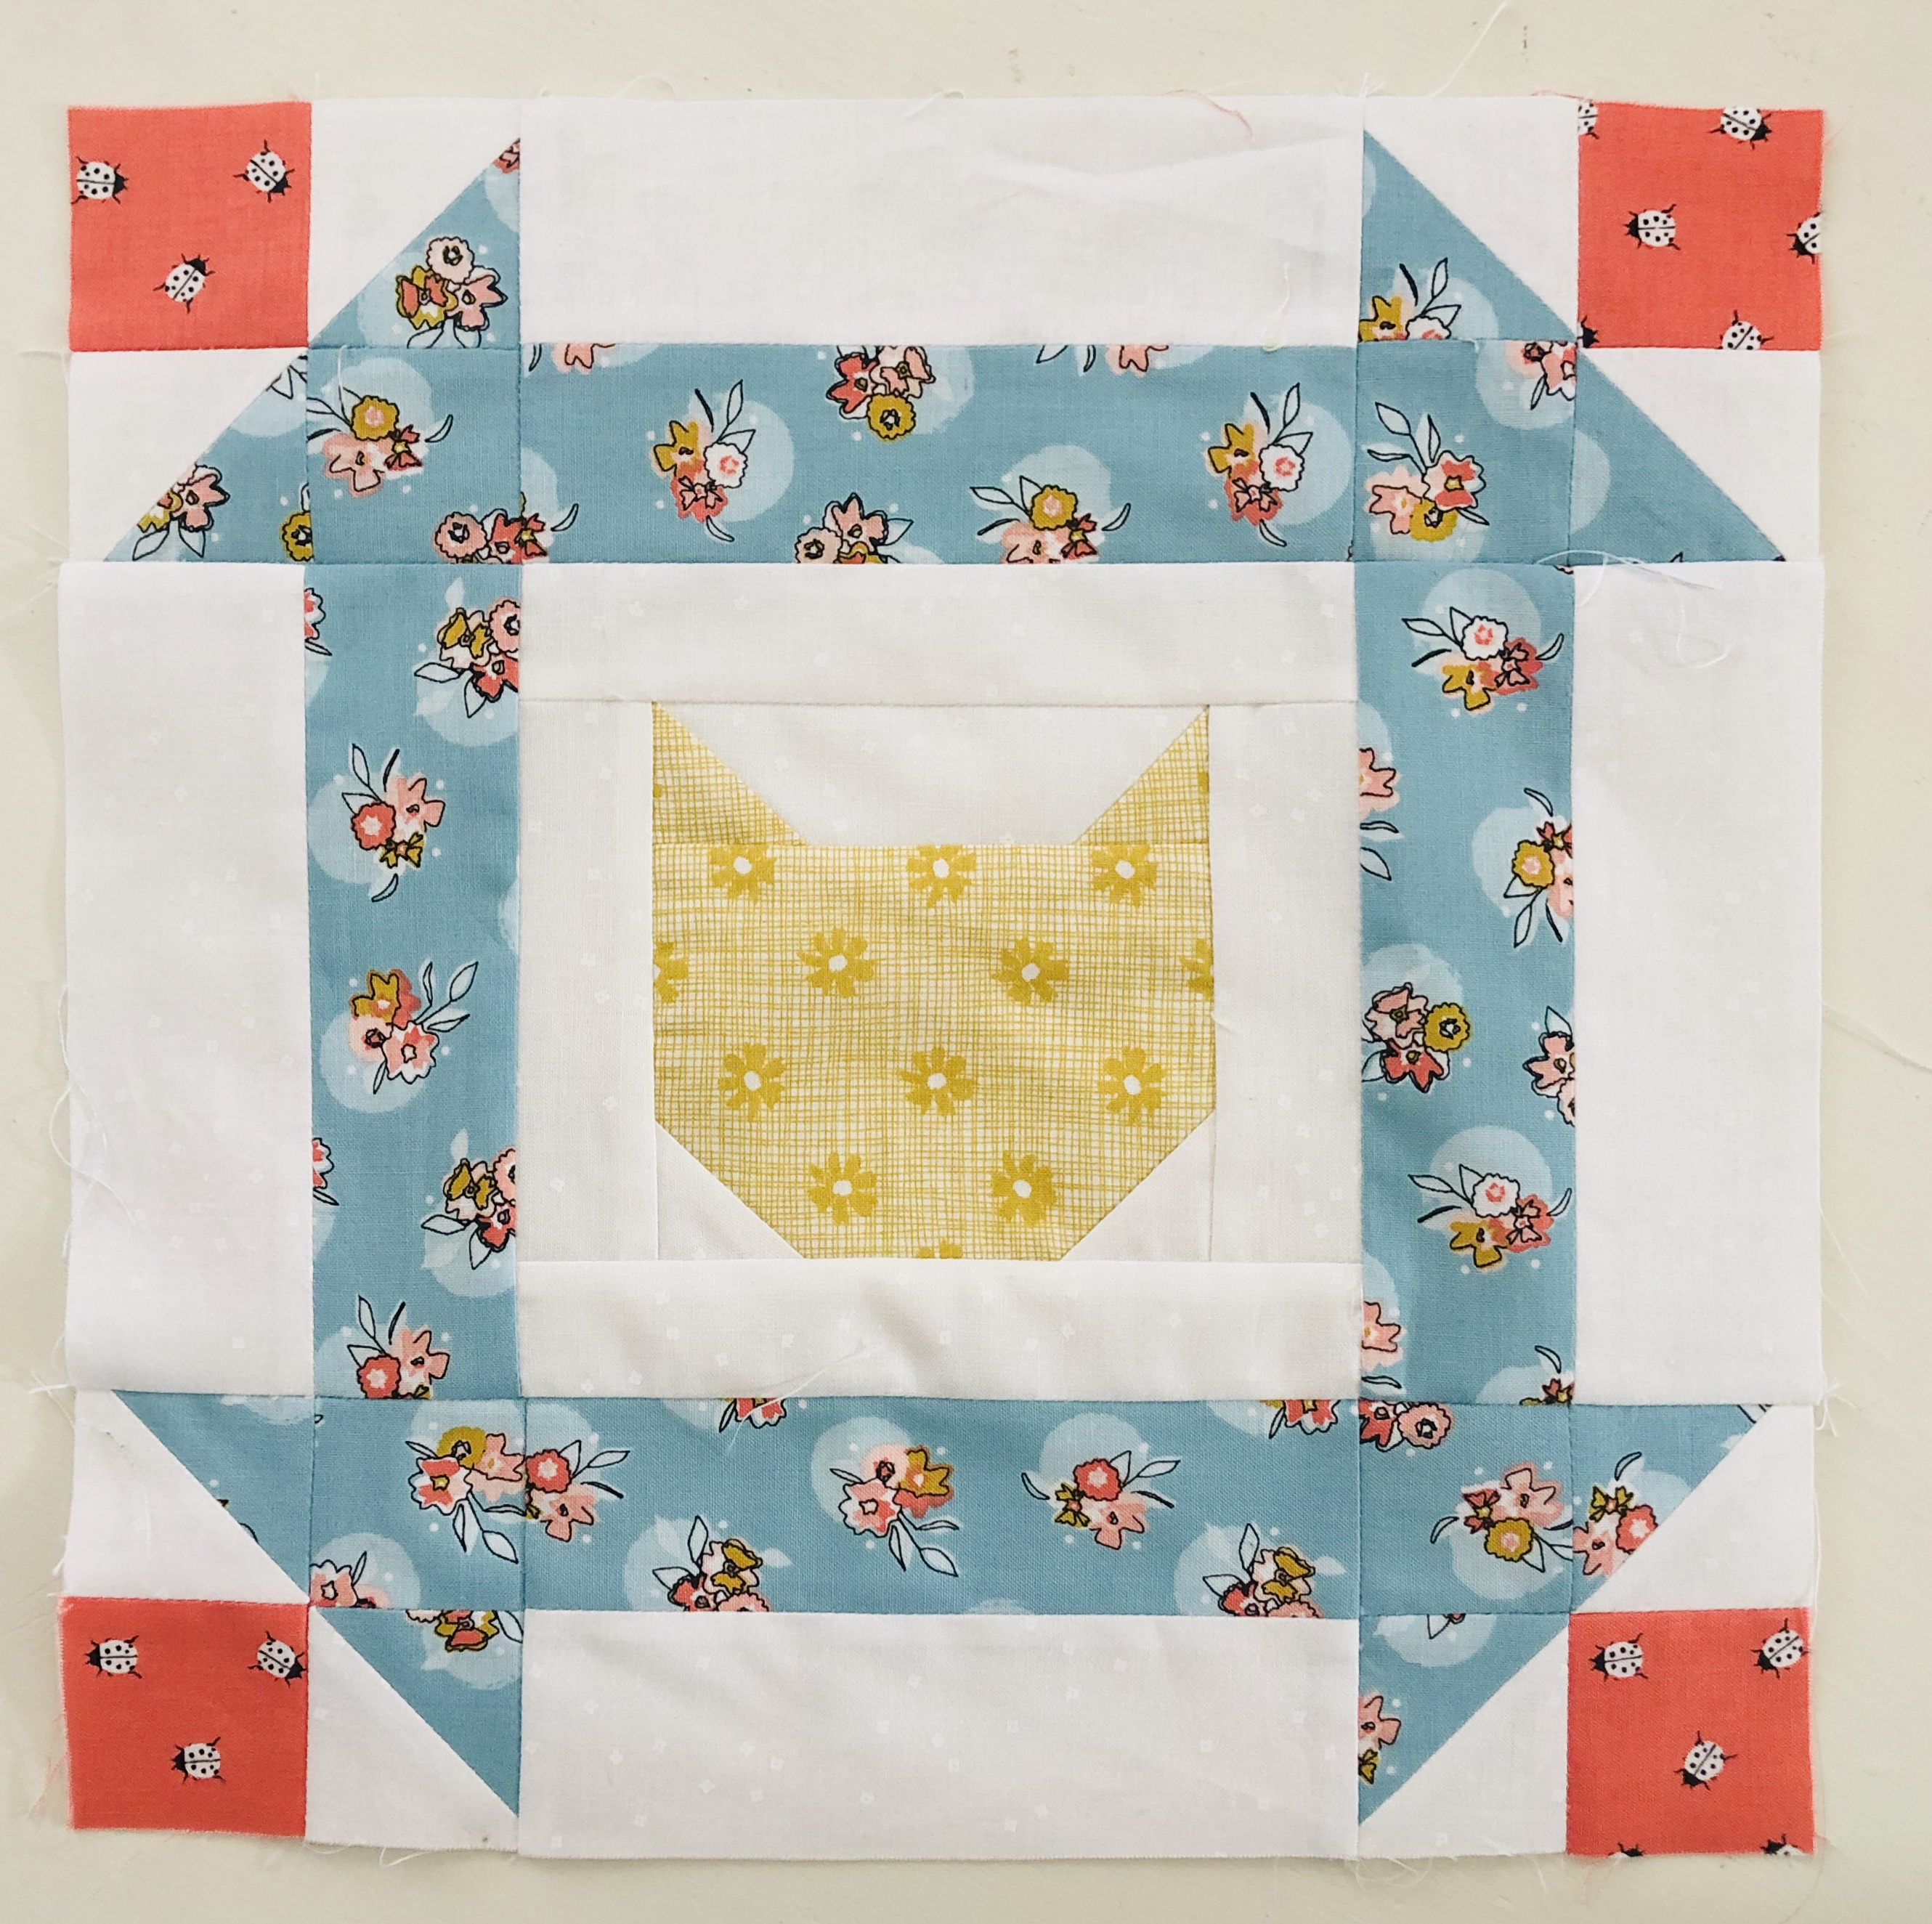
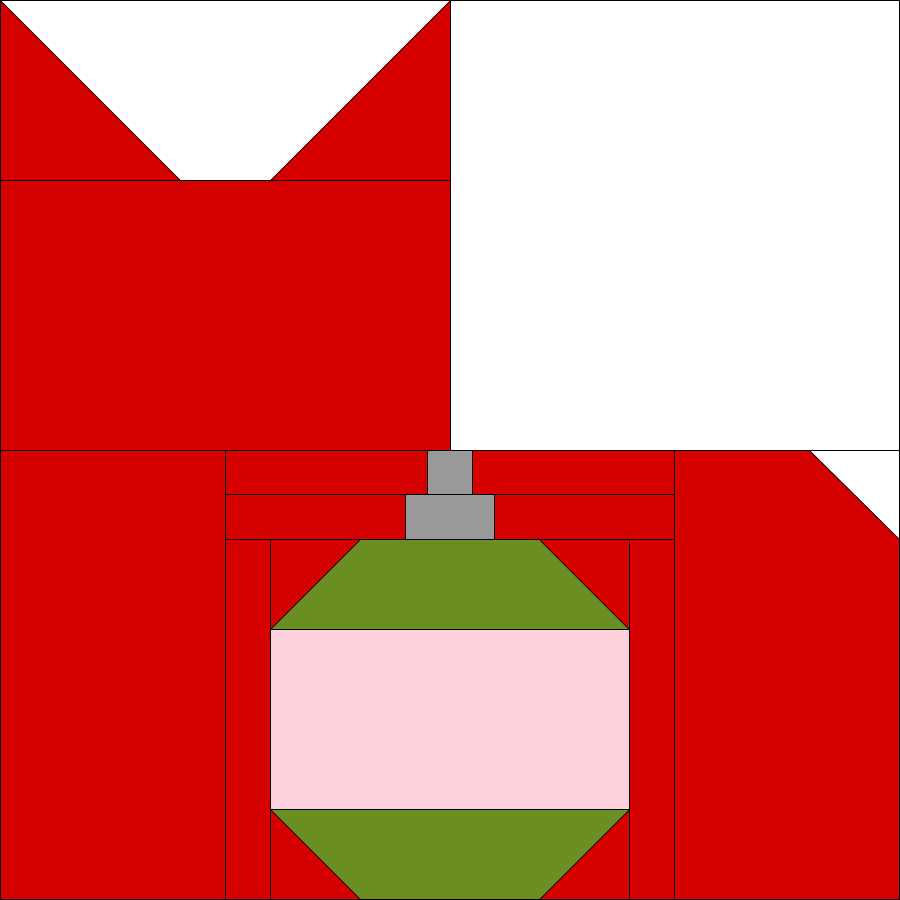
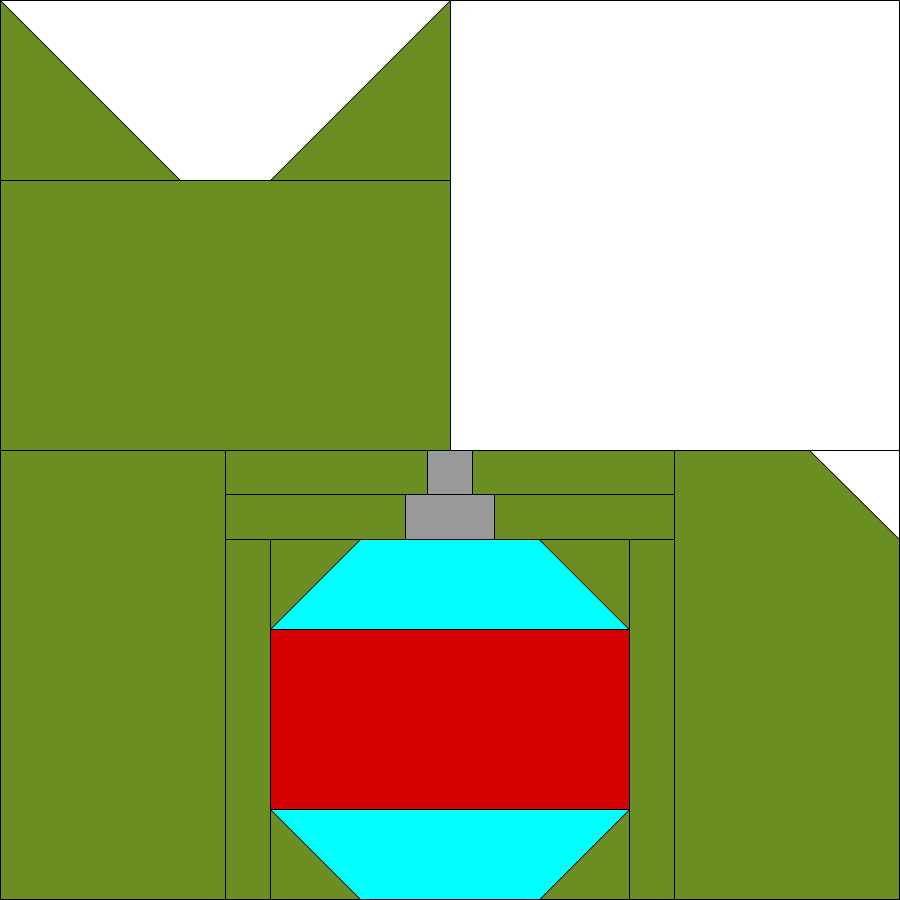
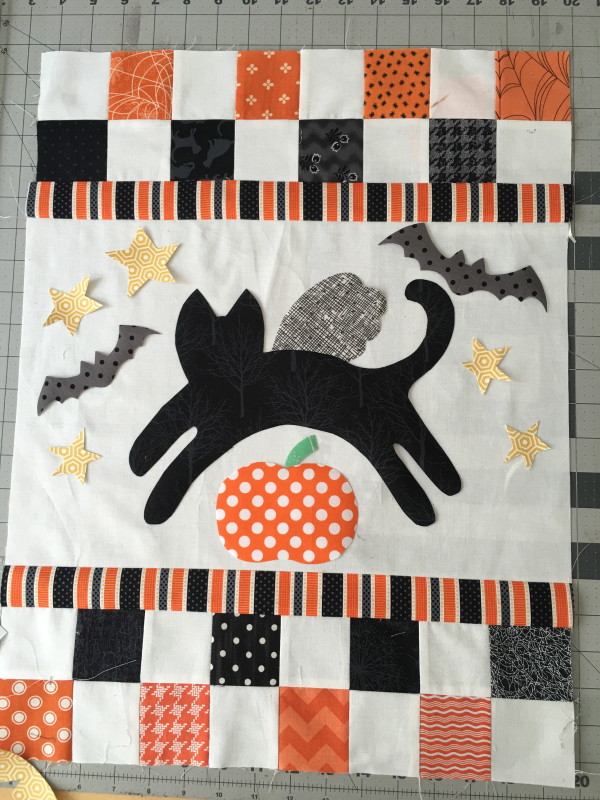
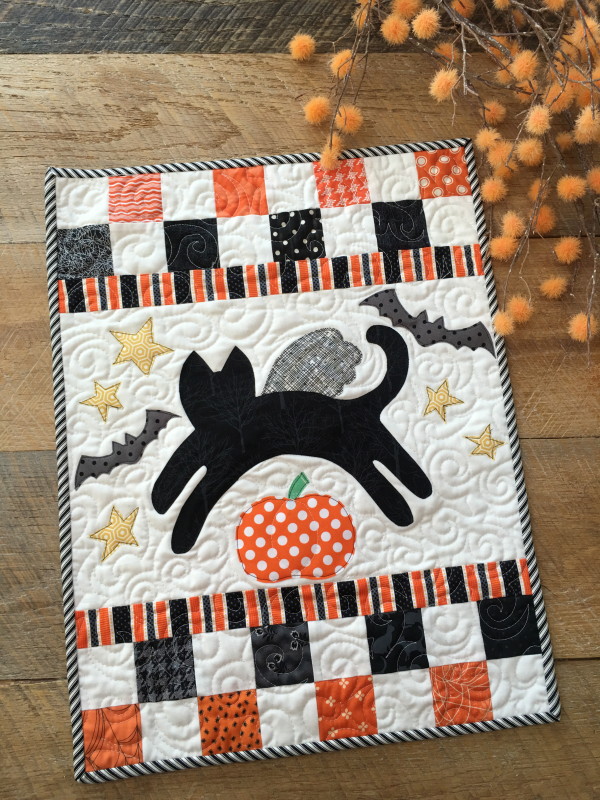
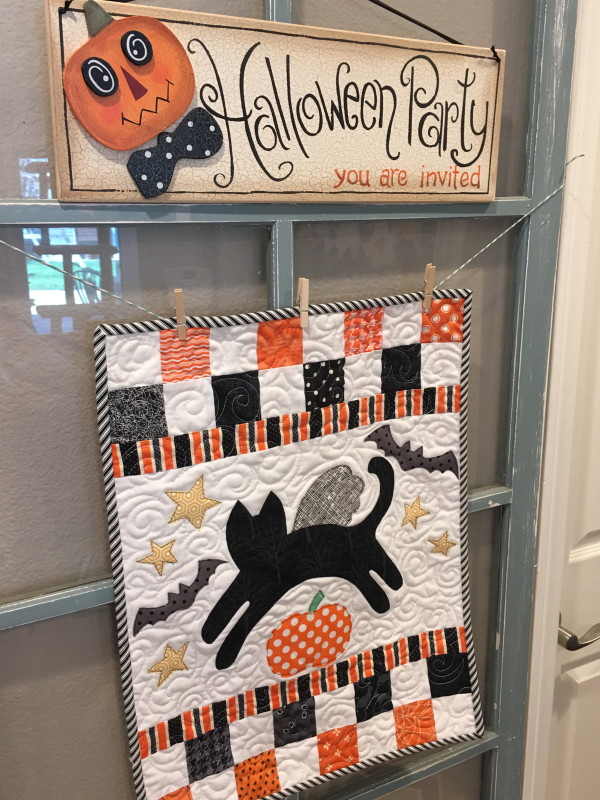
I can totally see this quilt in Halloween colors and only cats!

DSC_0201

I hope you love this quilt and it brings a little brightness to winter time.
DSC_0162

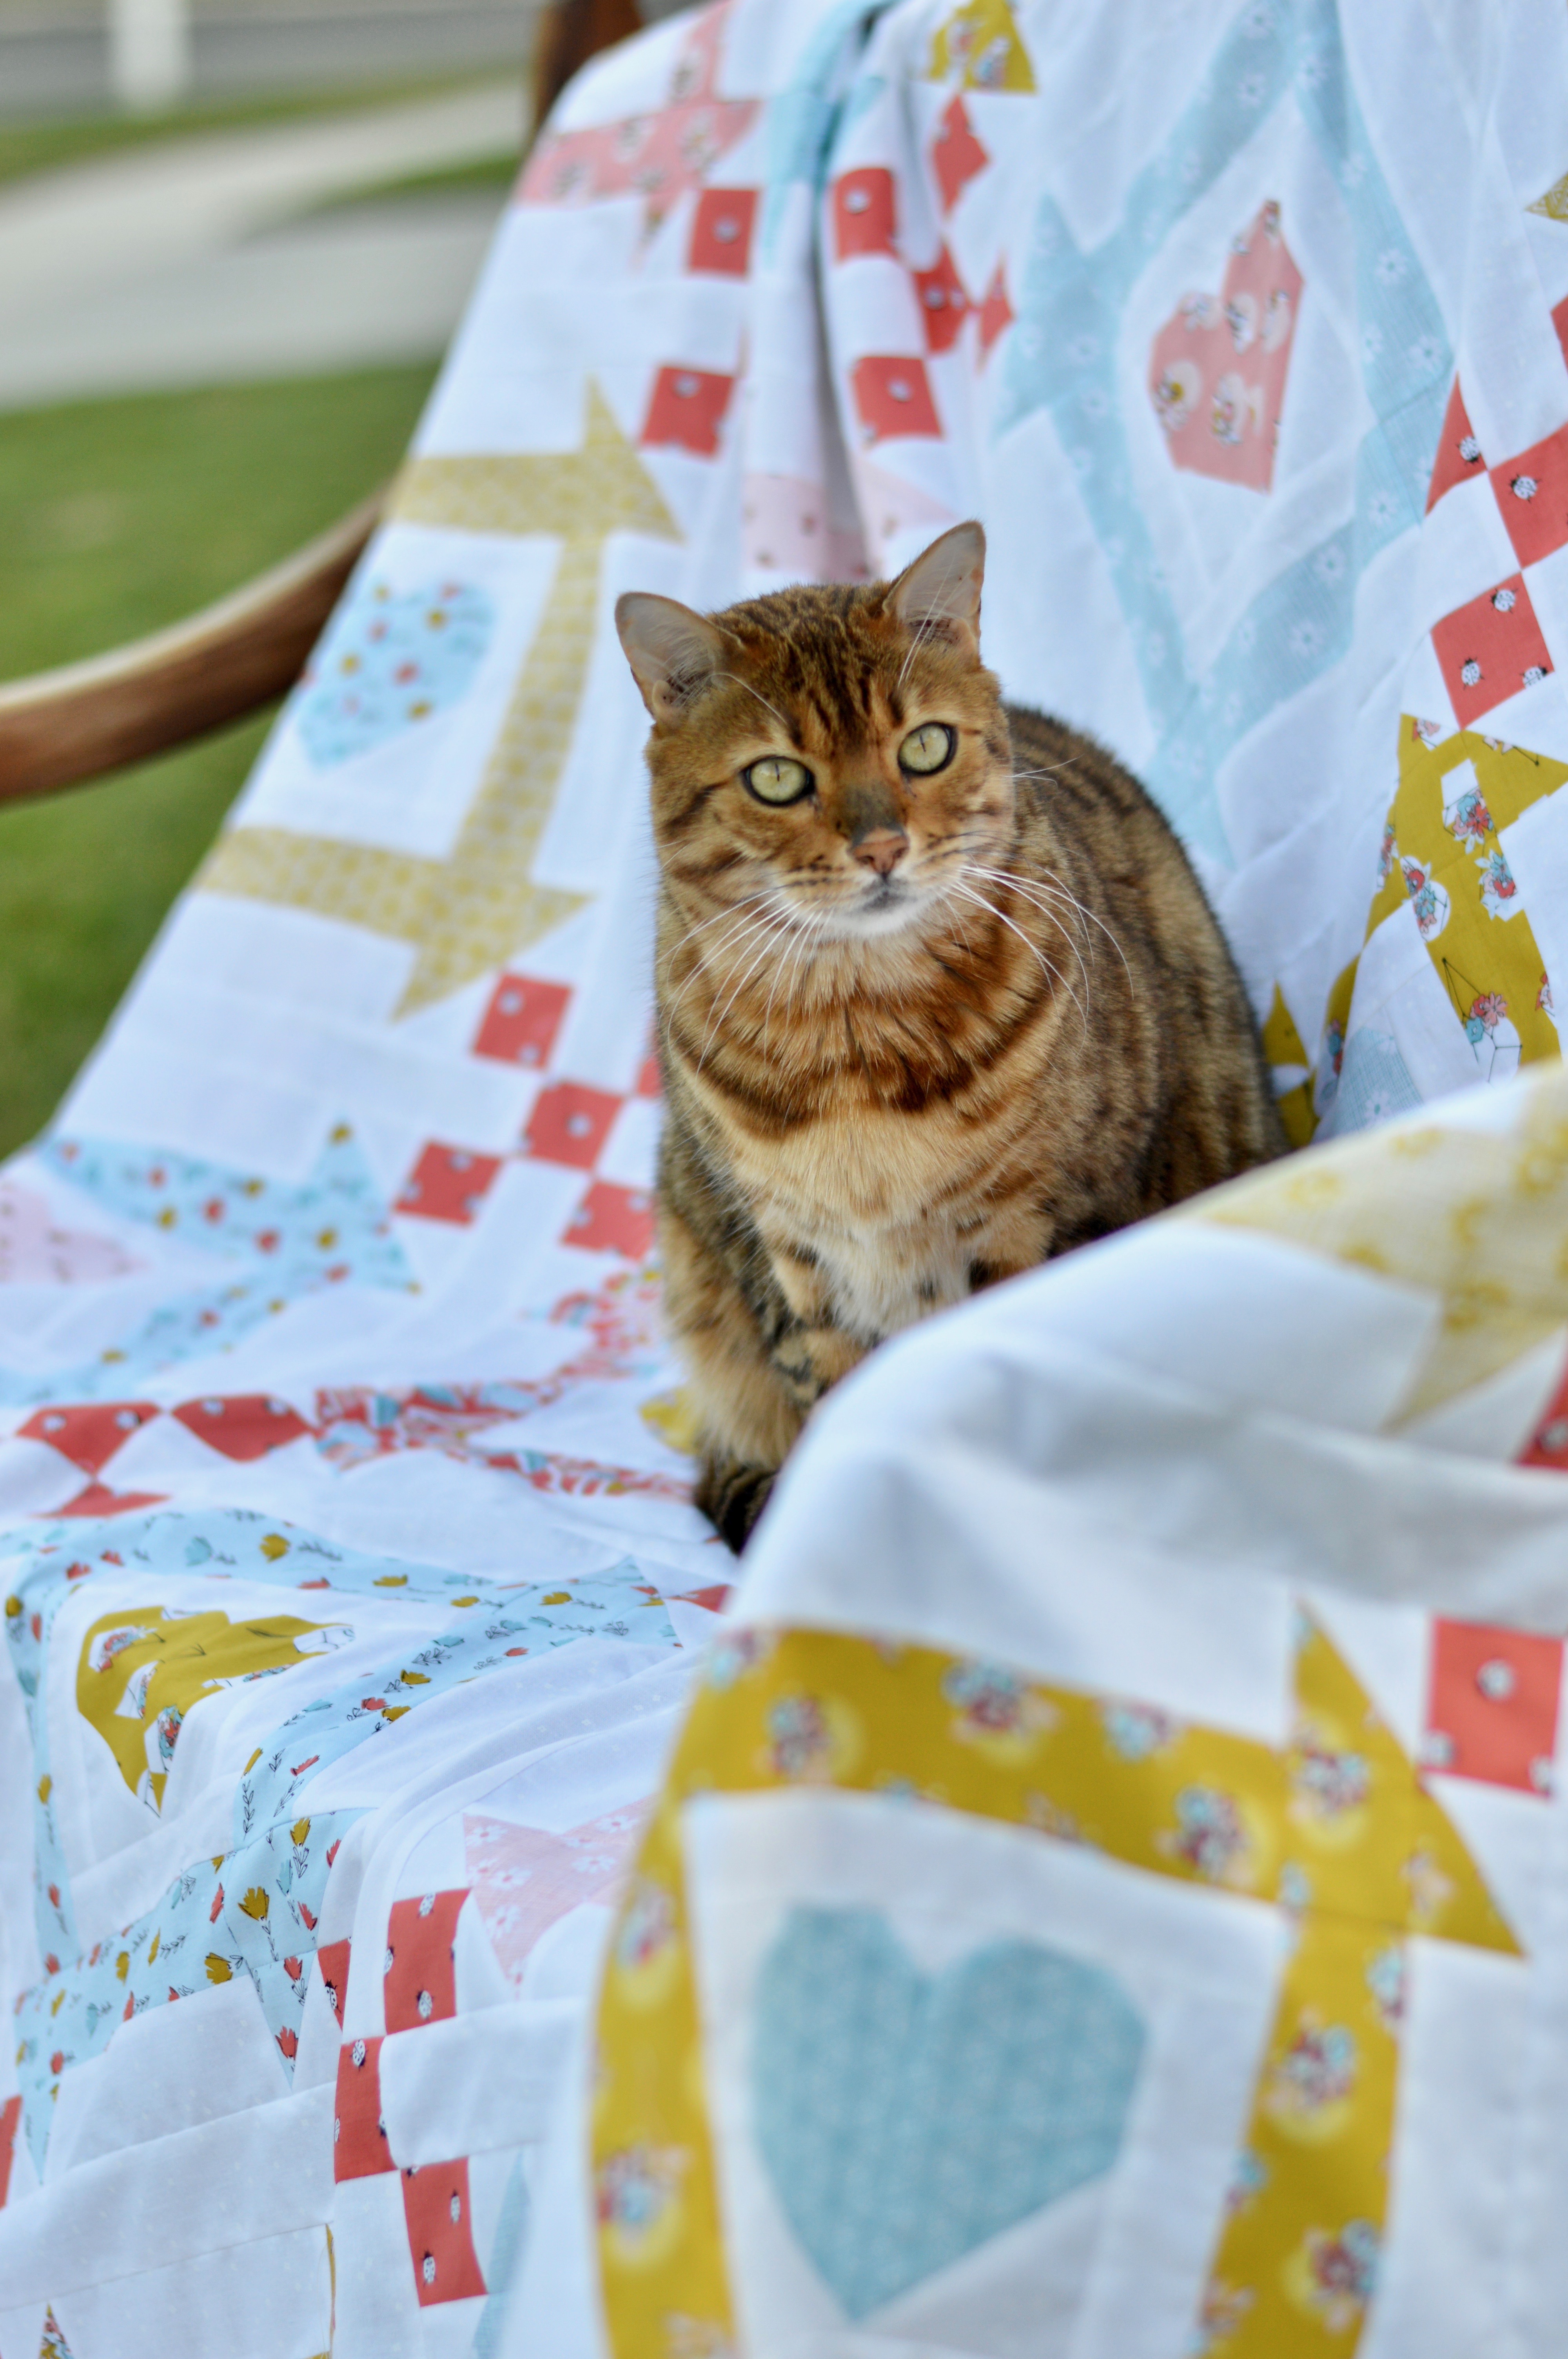
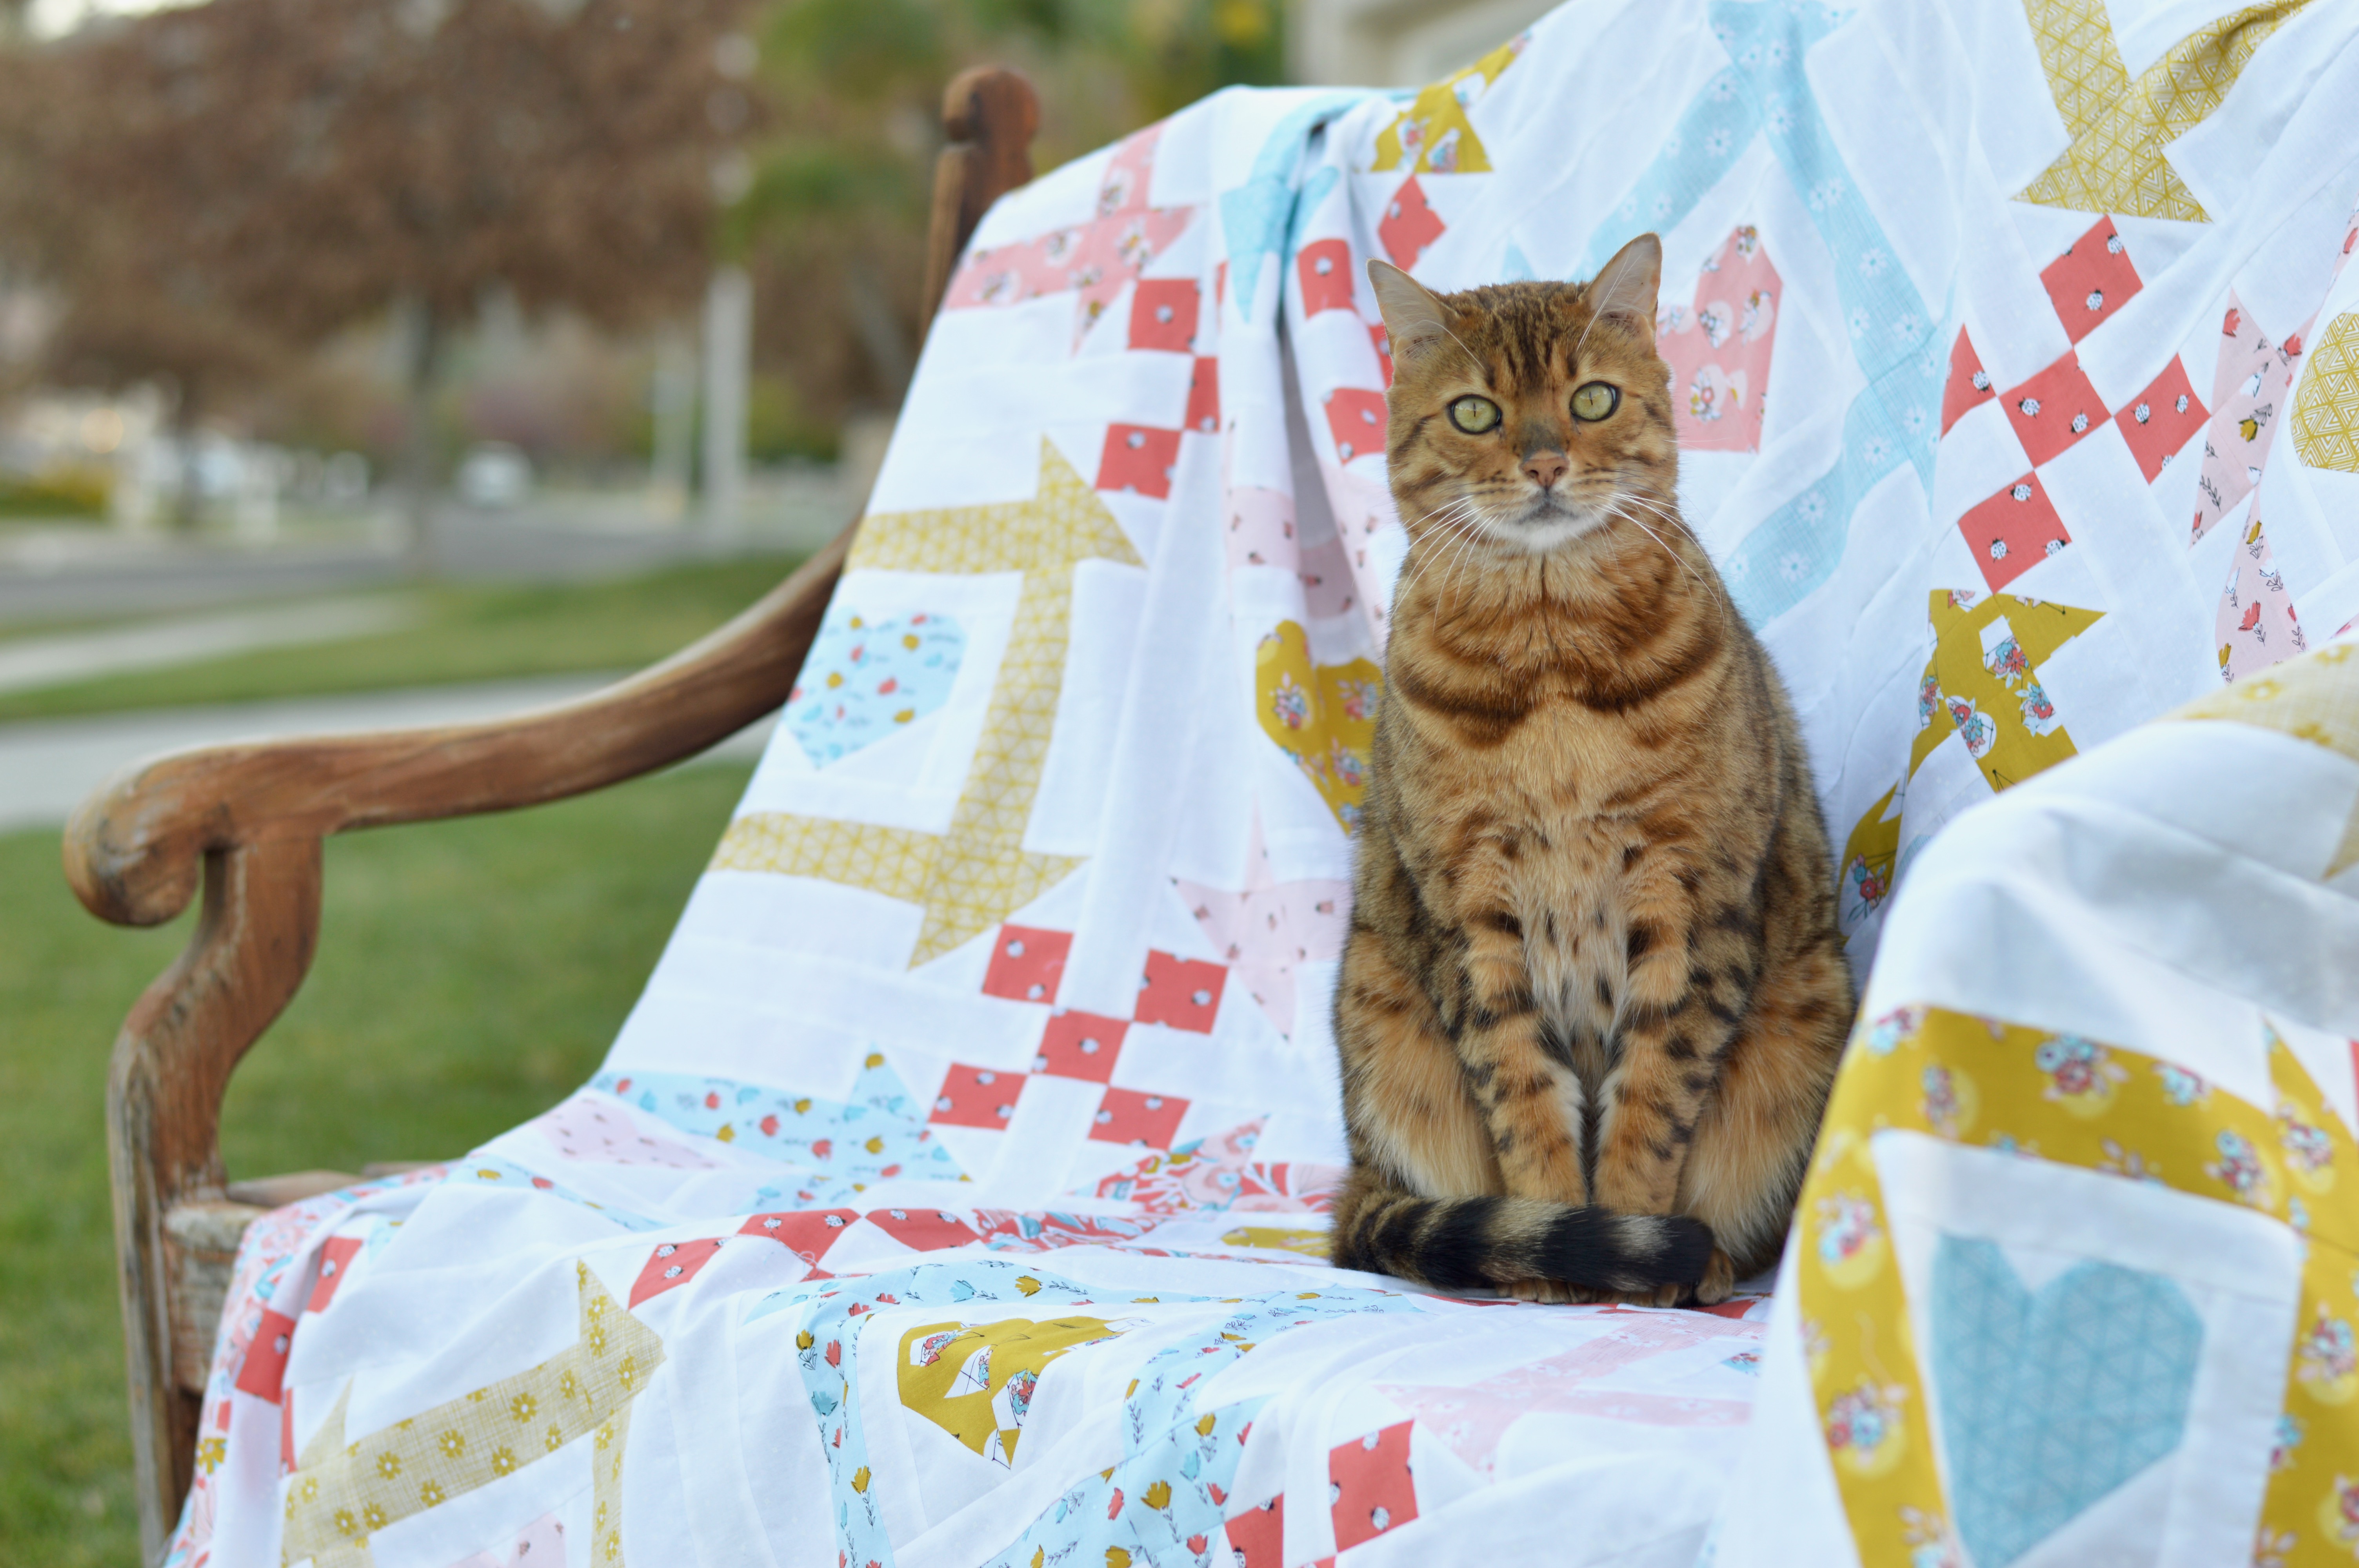
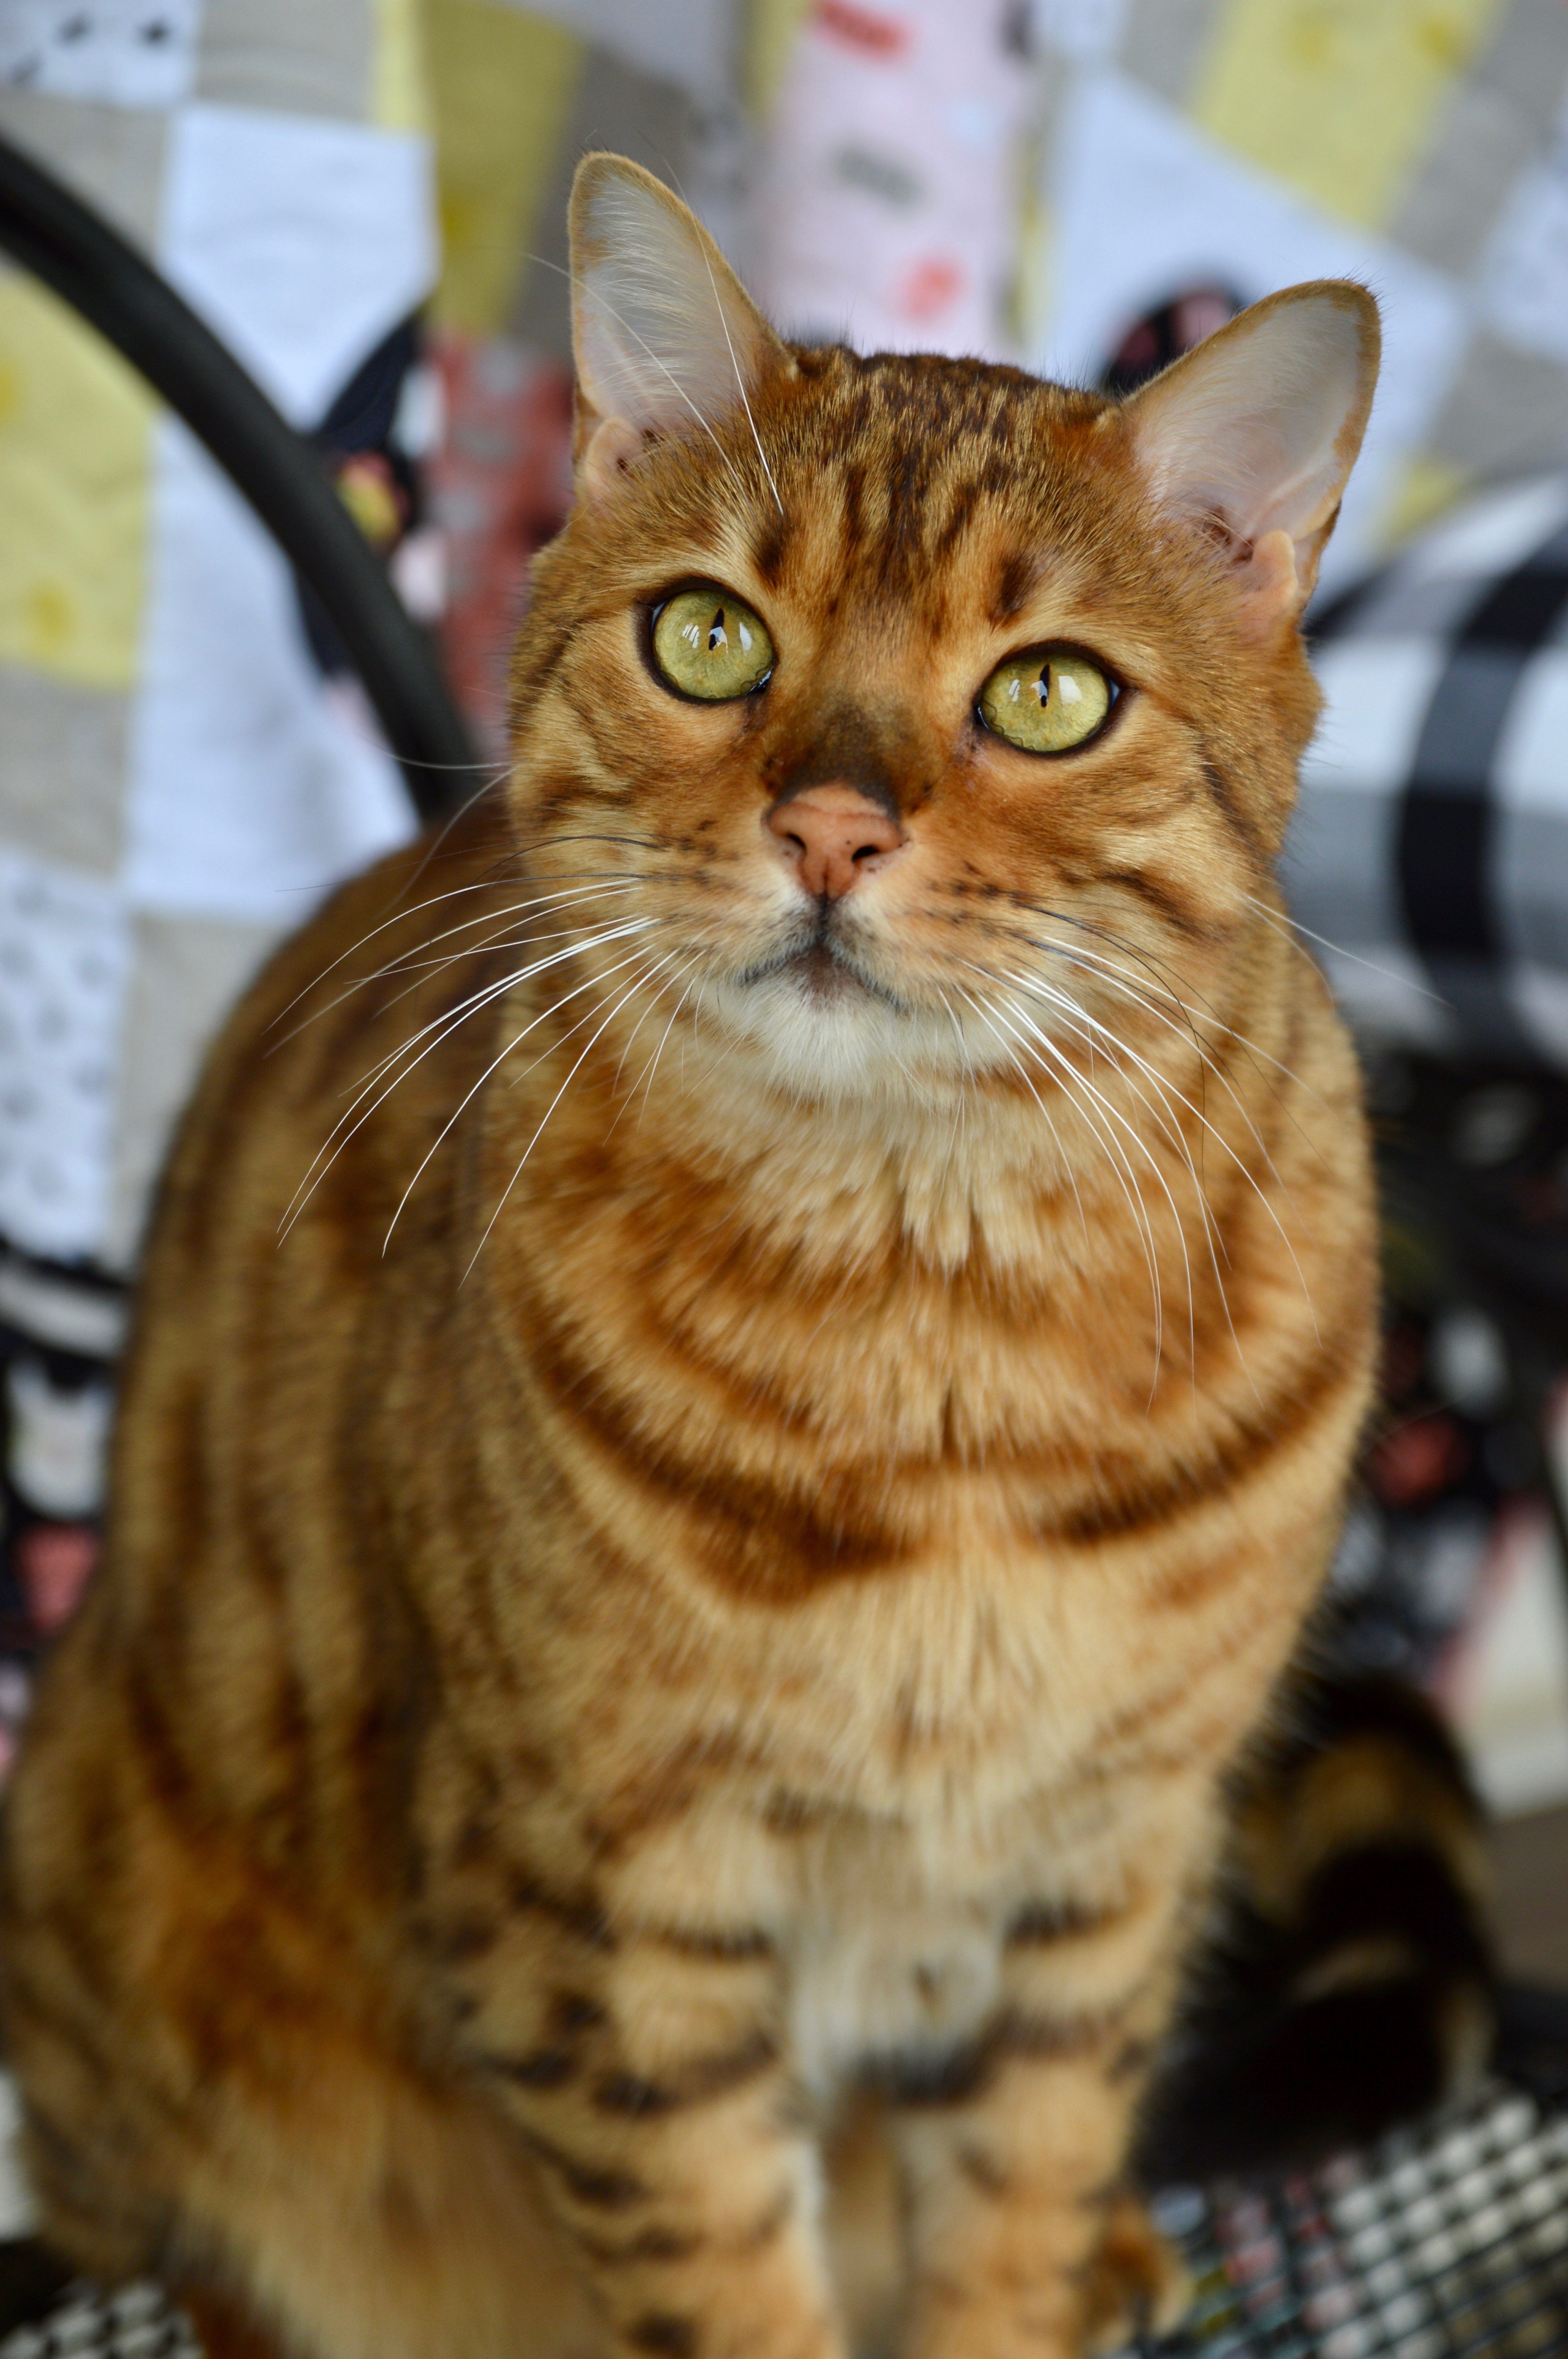
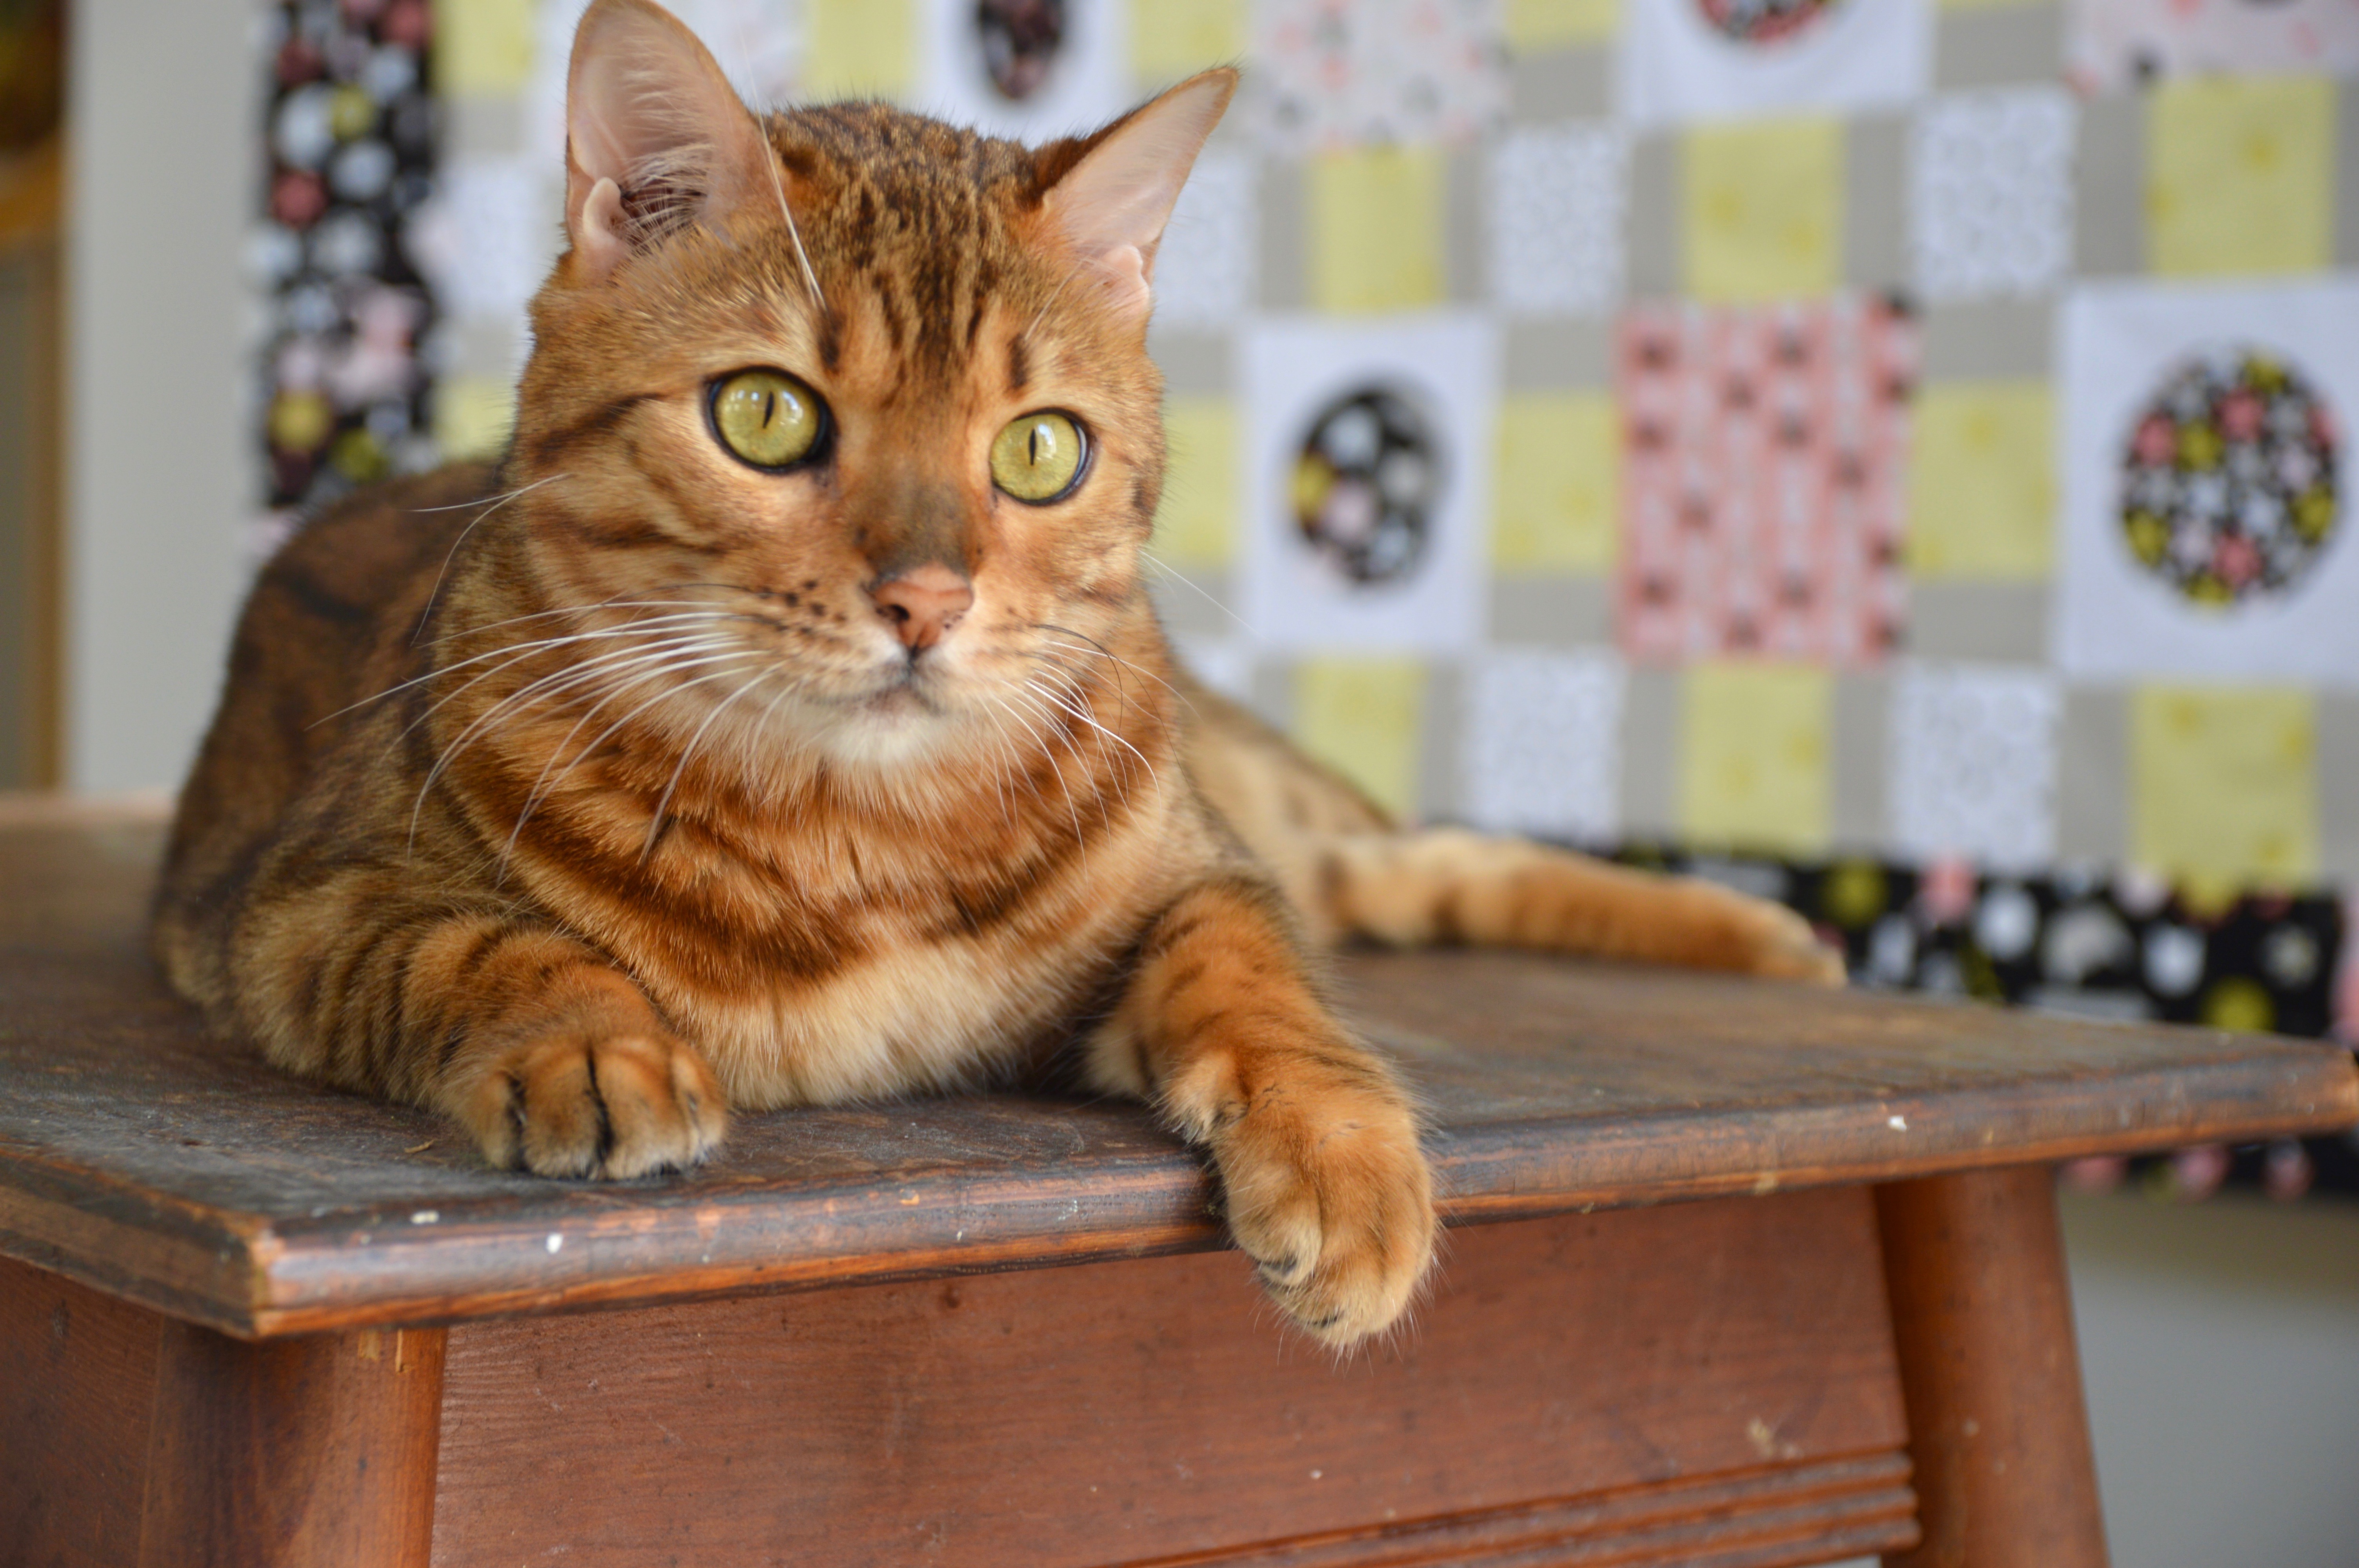
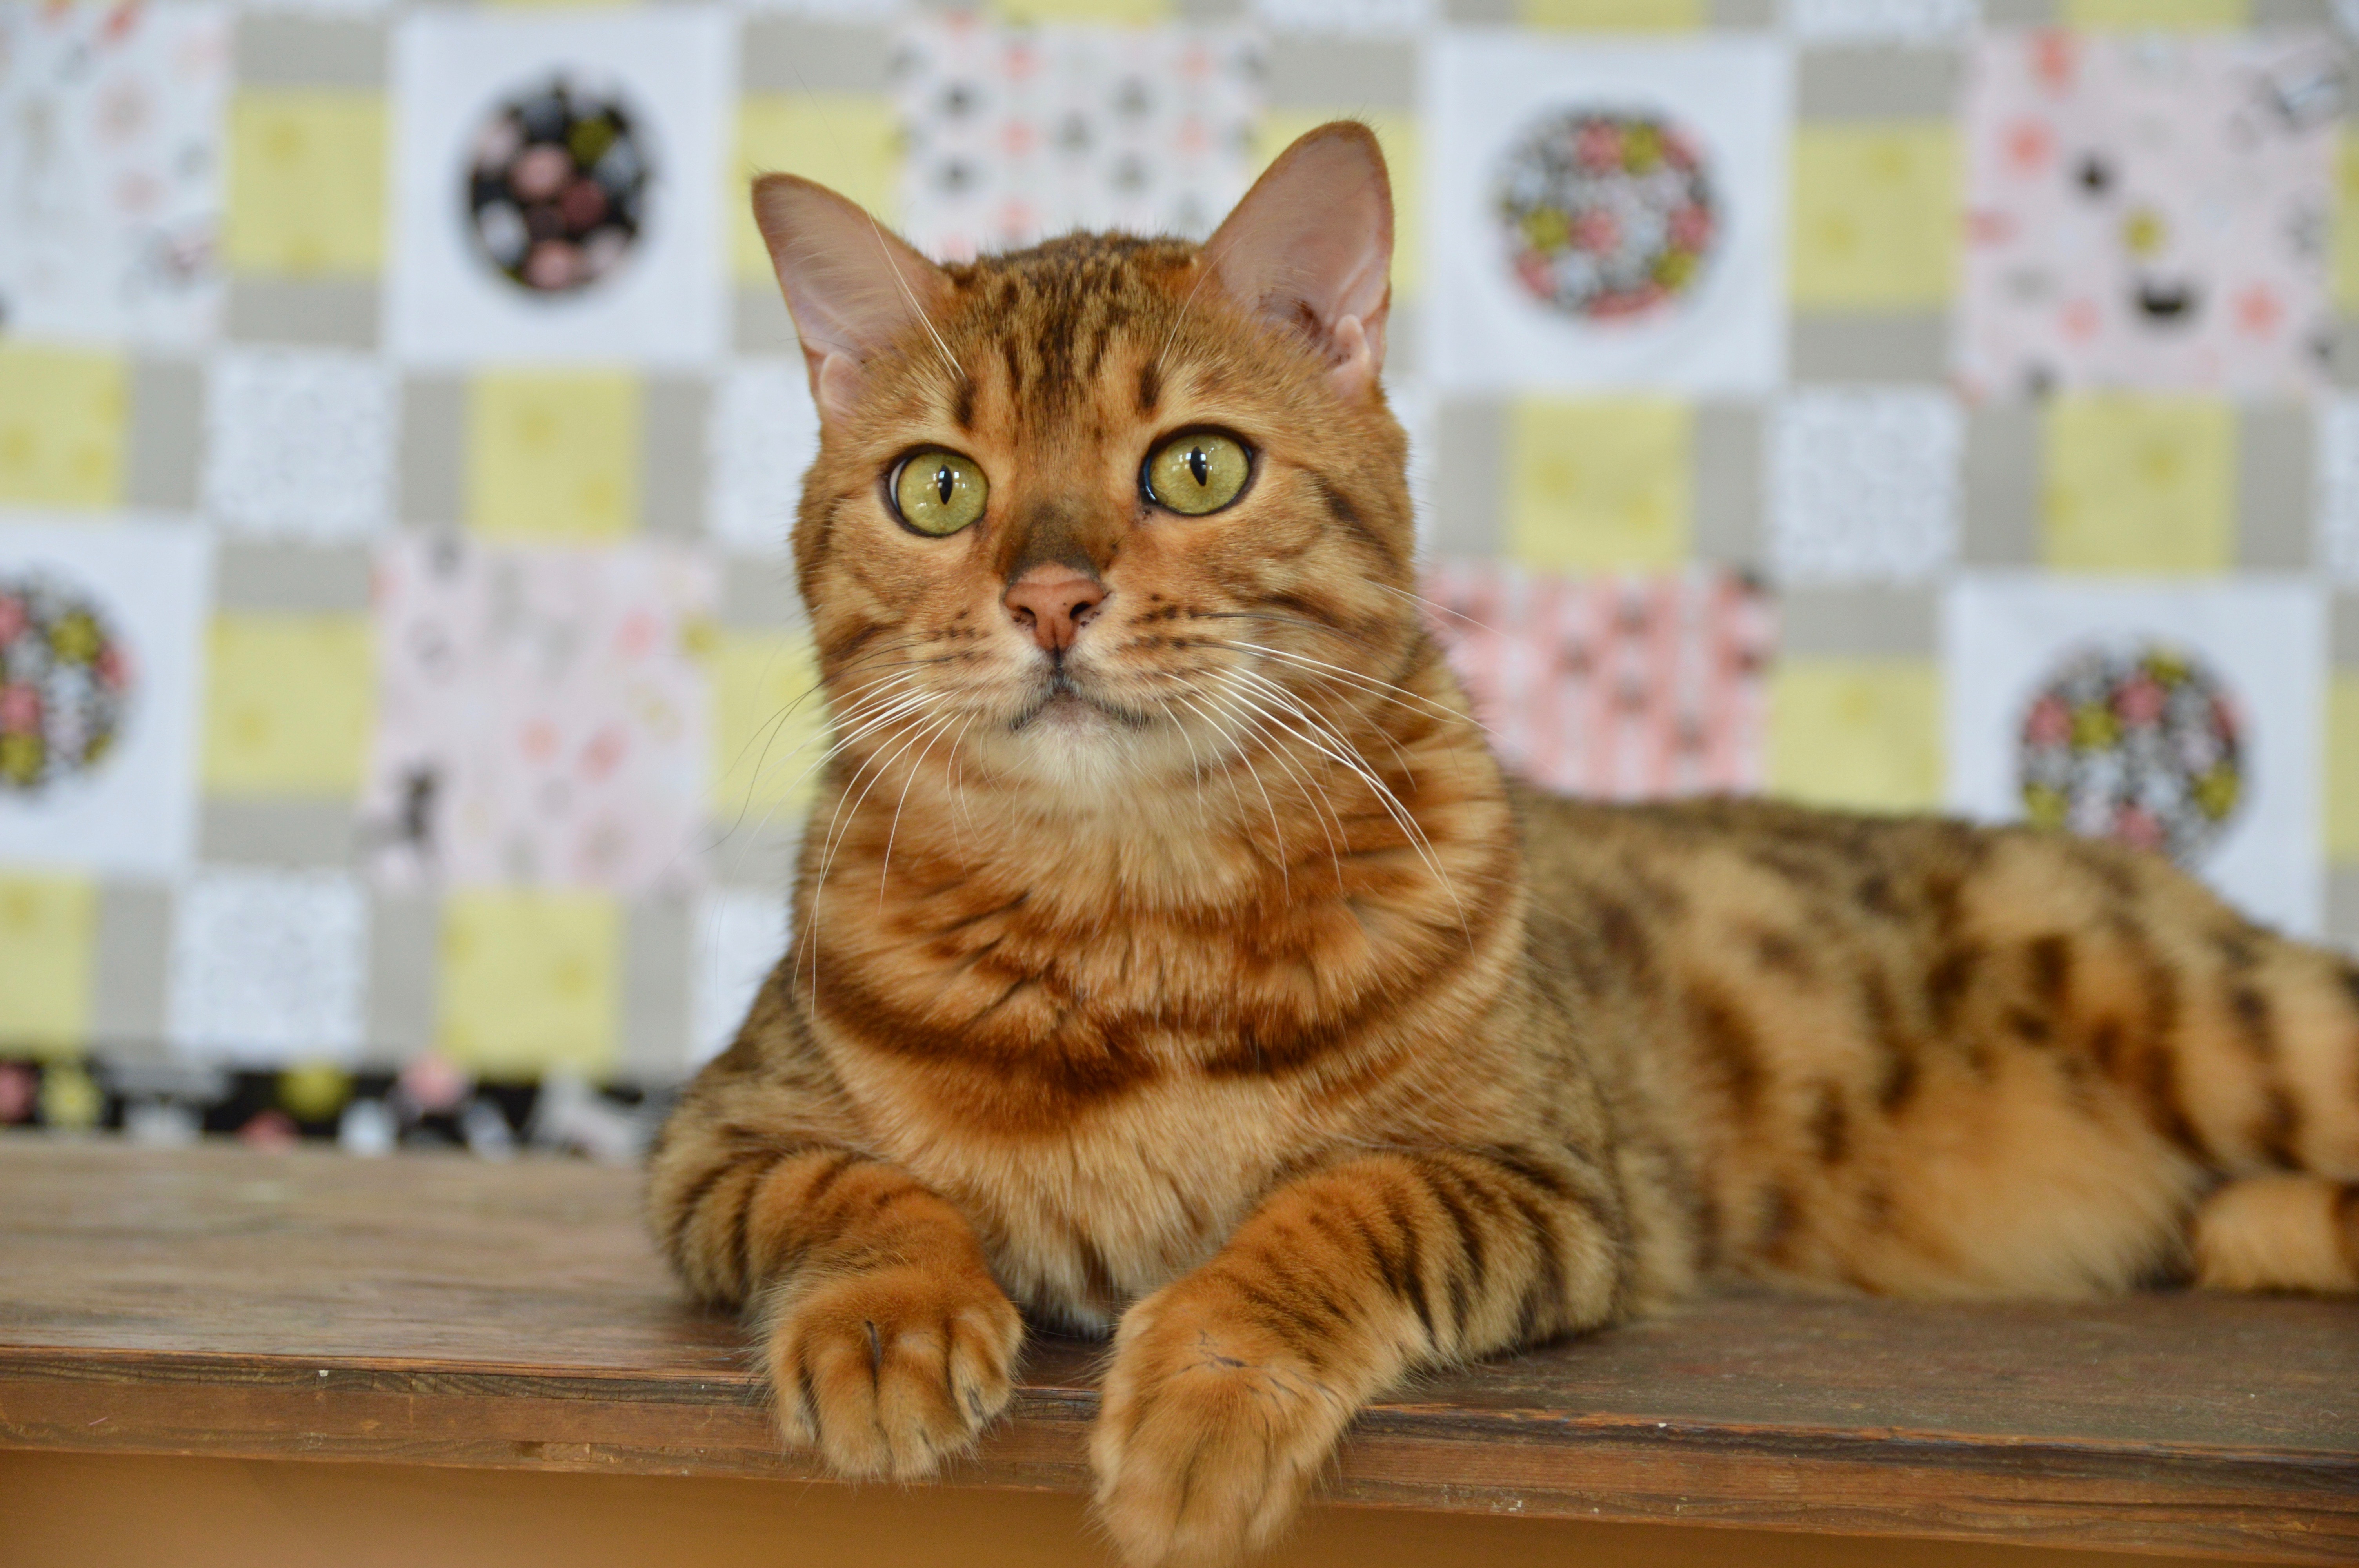
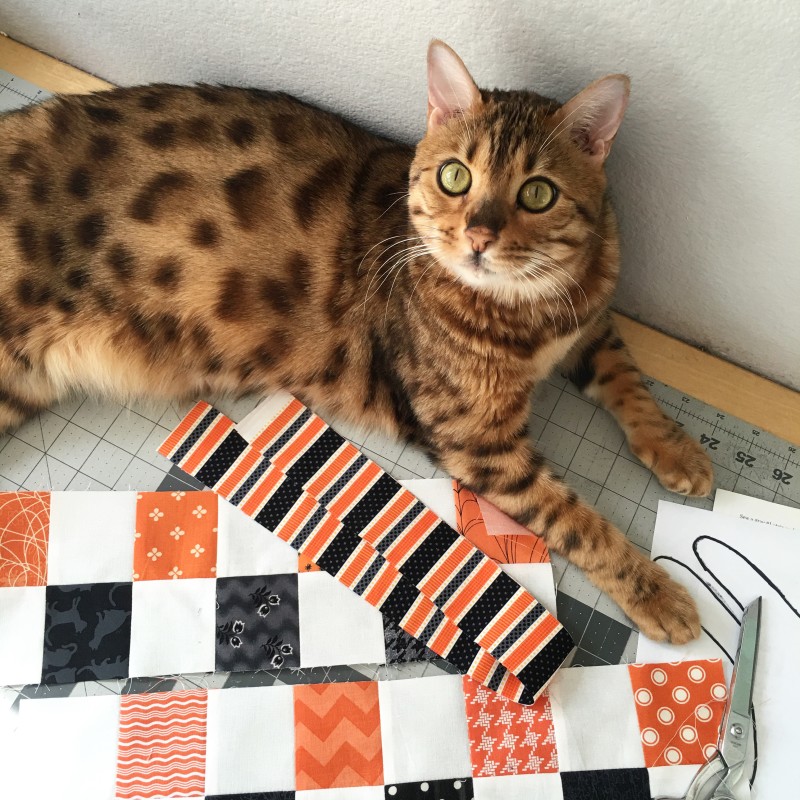
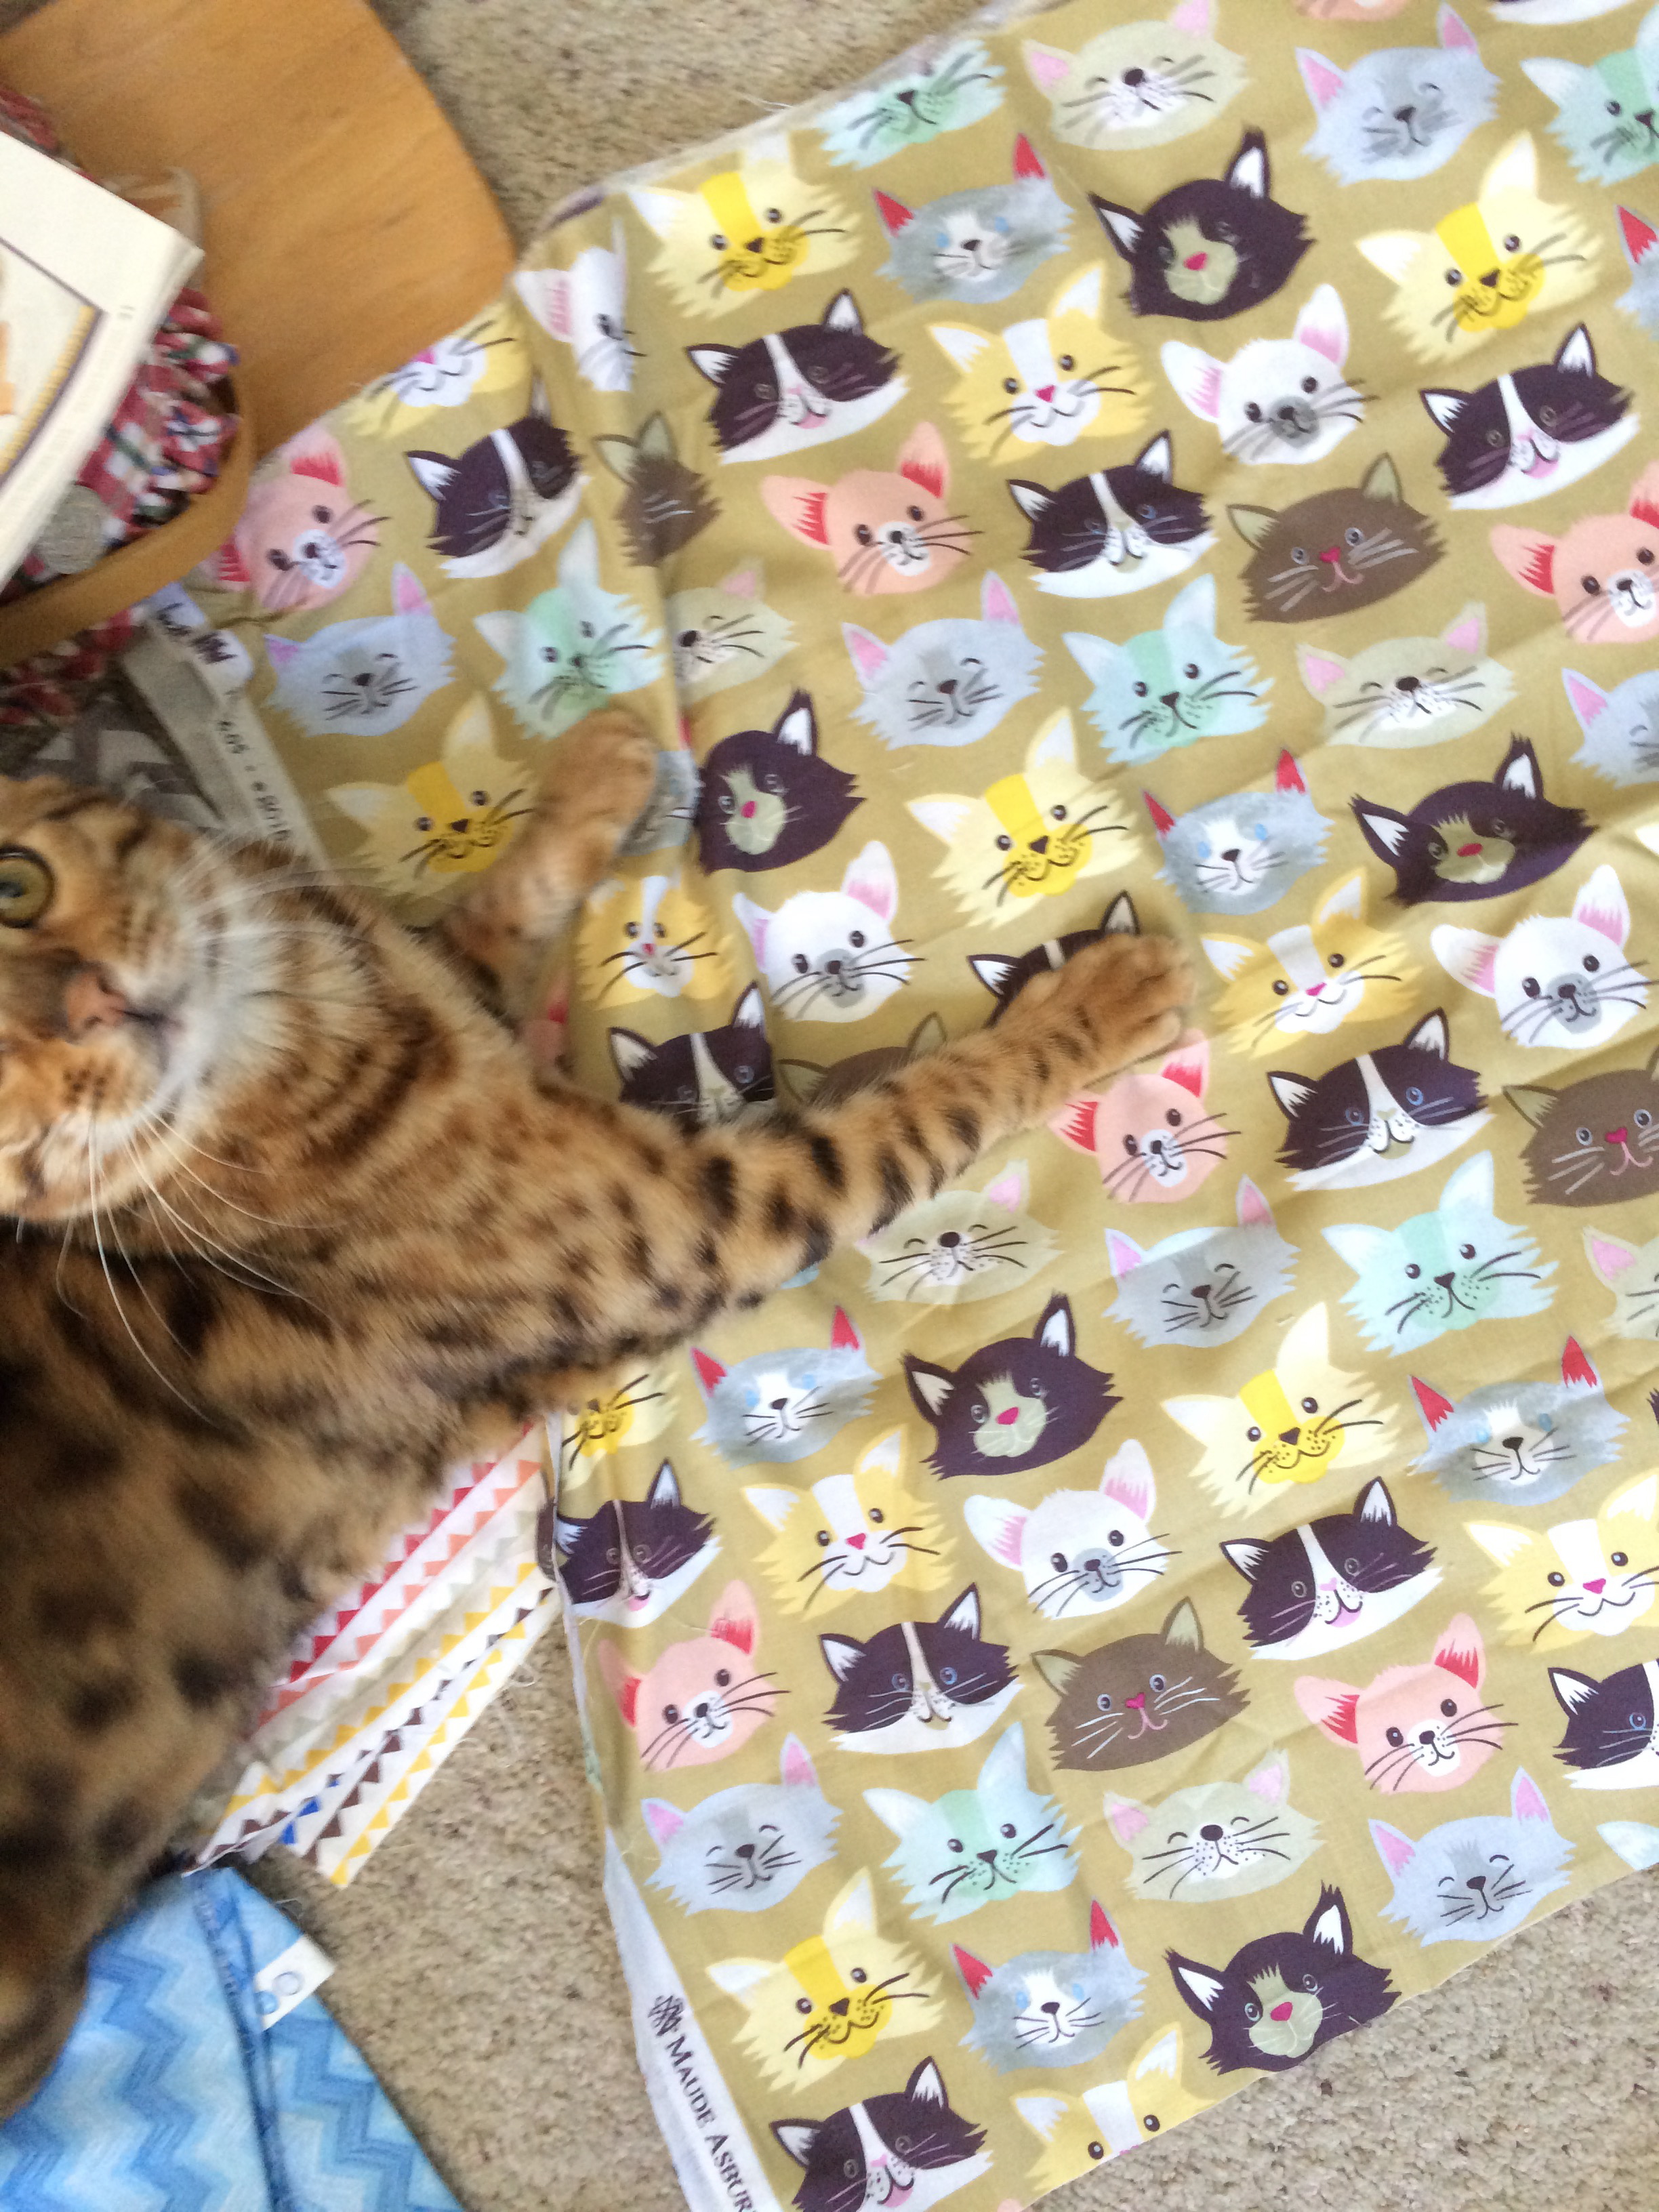
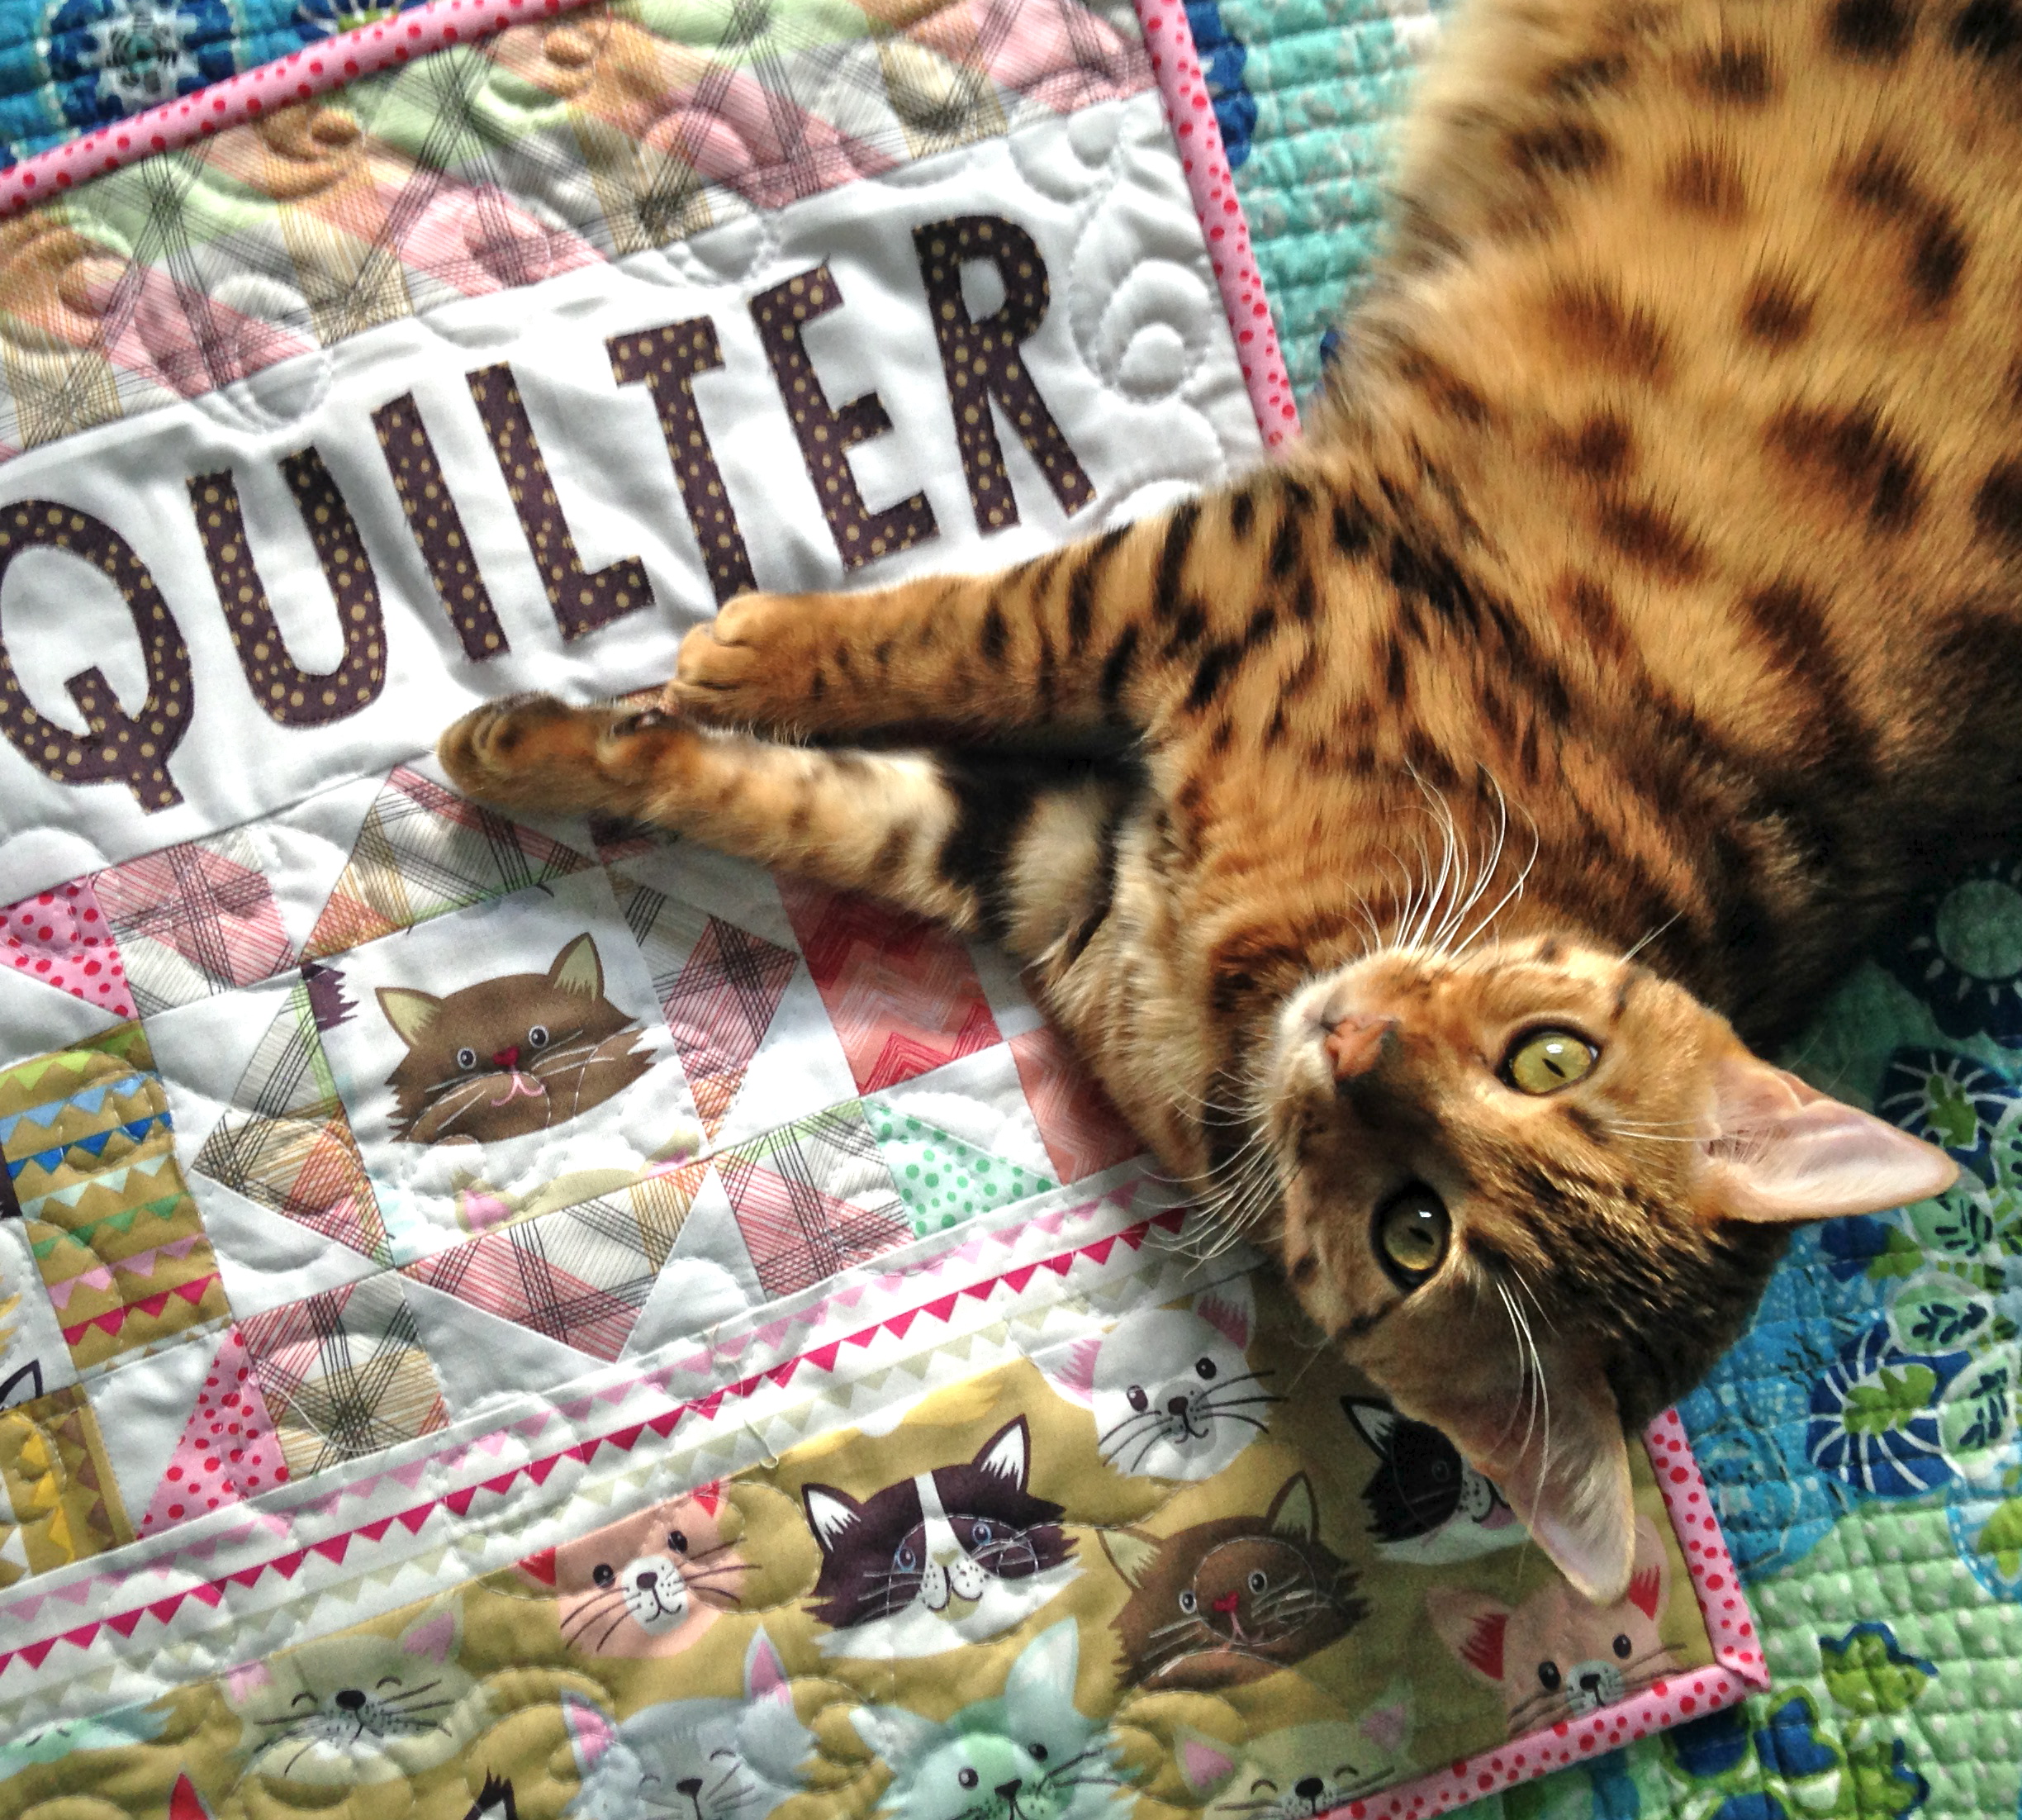
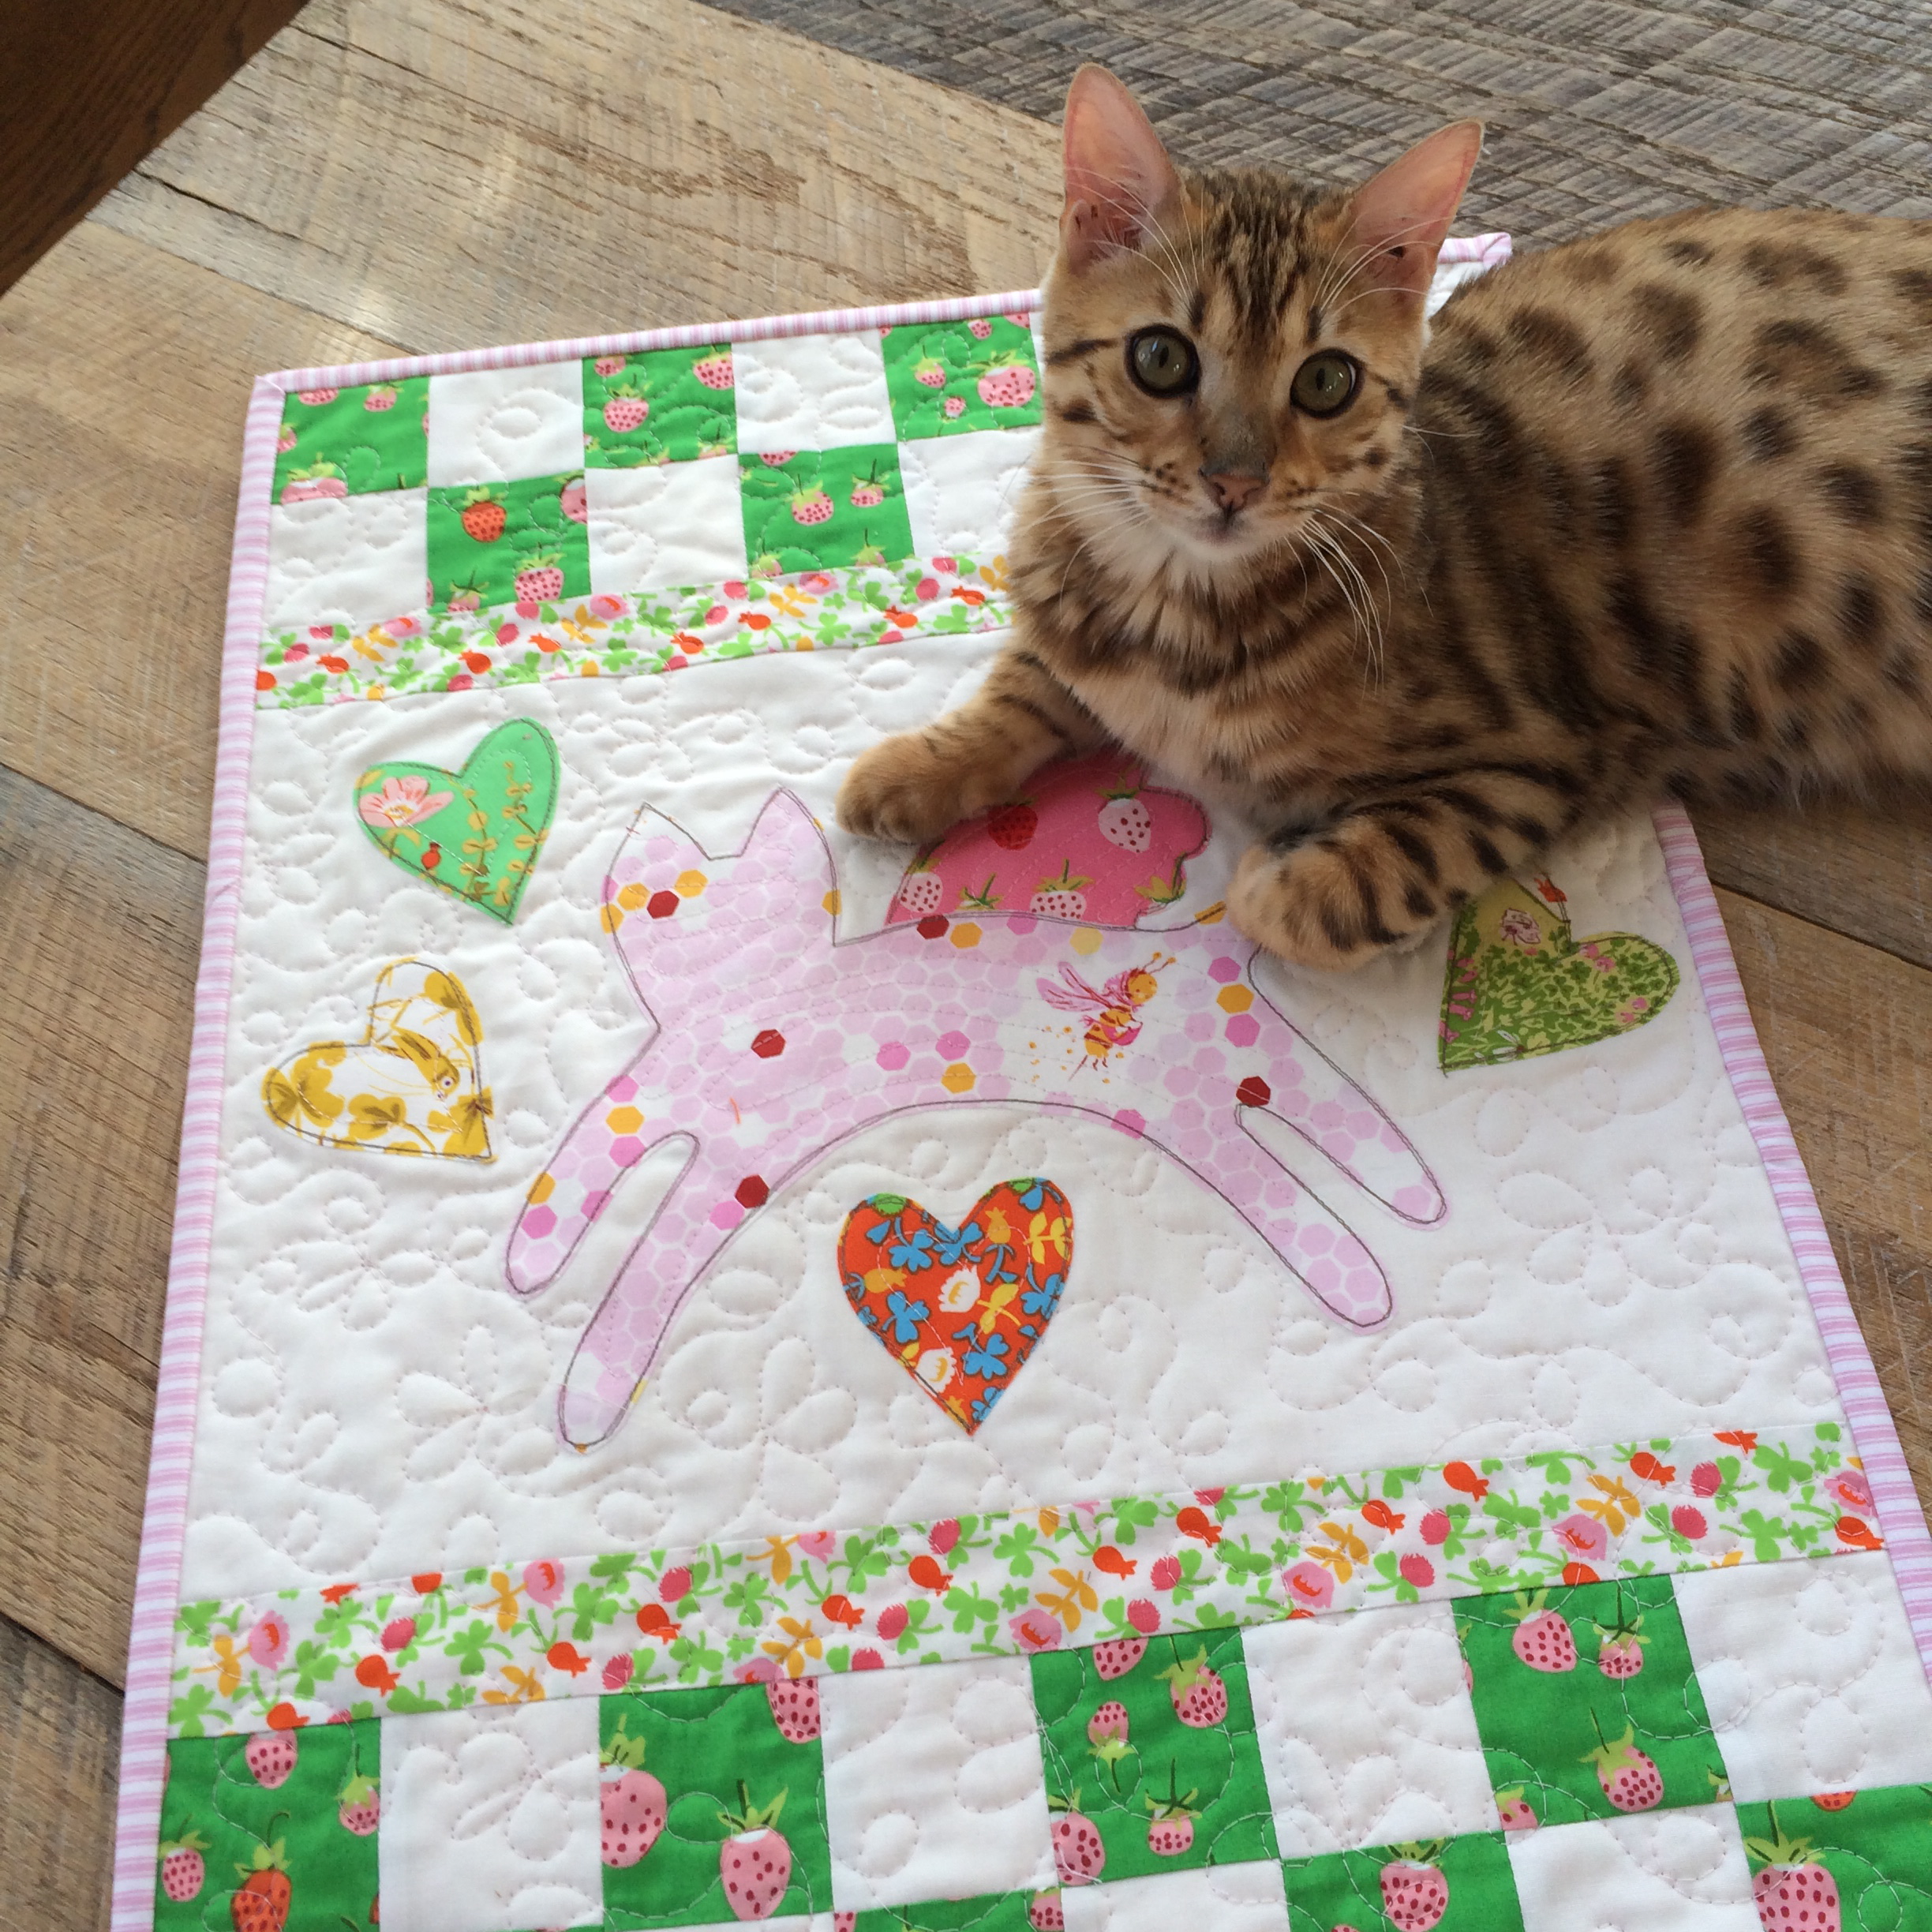
Mufasa loved modeling this quilt!  He’s so good, he just sits there and doesn’t try to run away.

DSC_0187

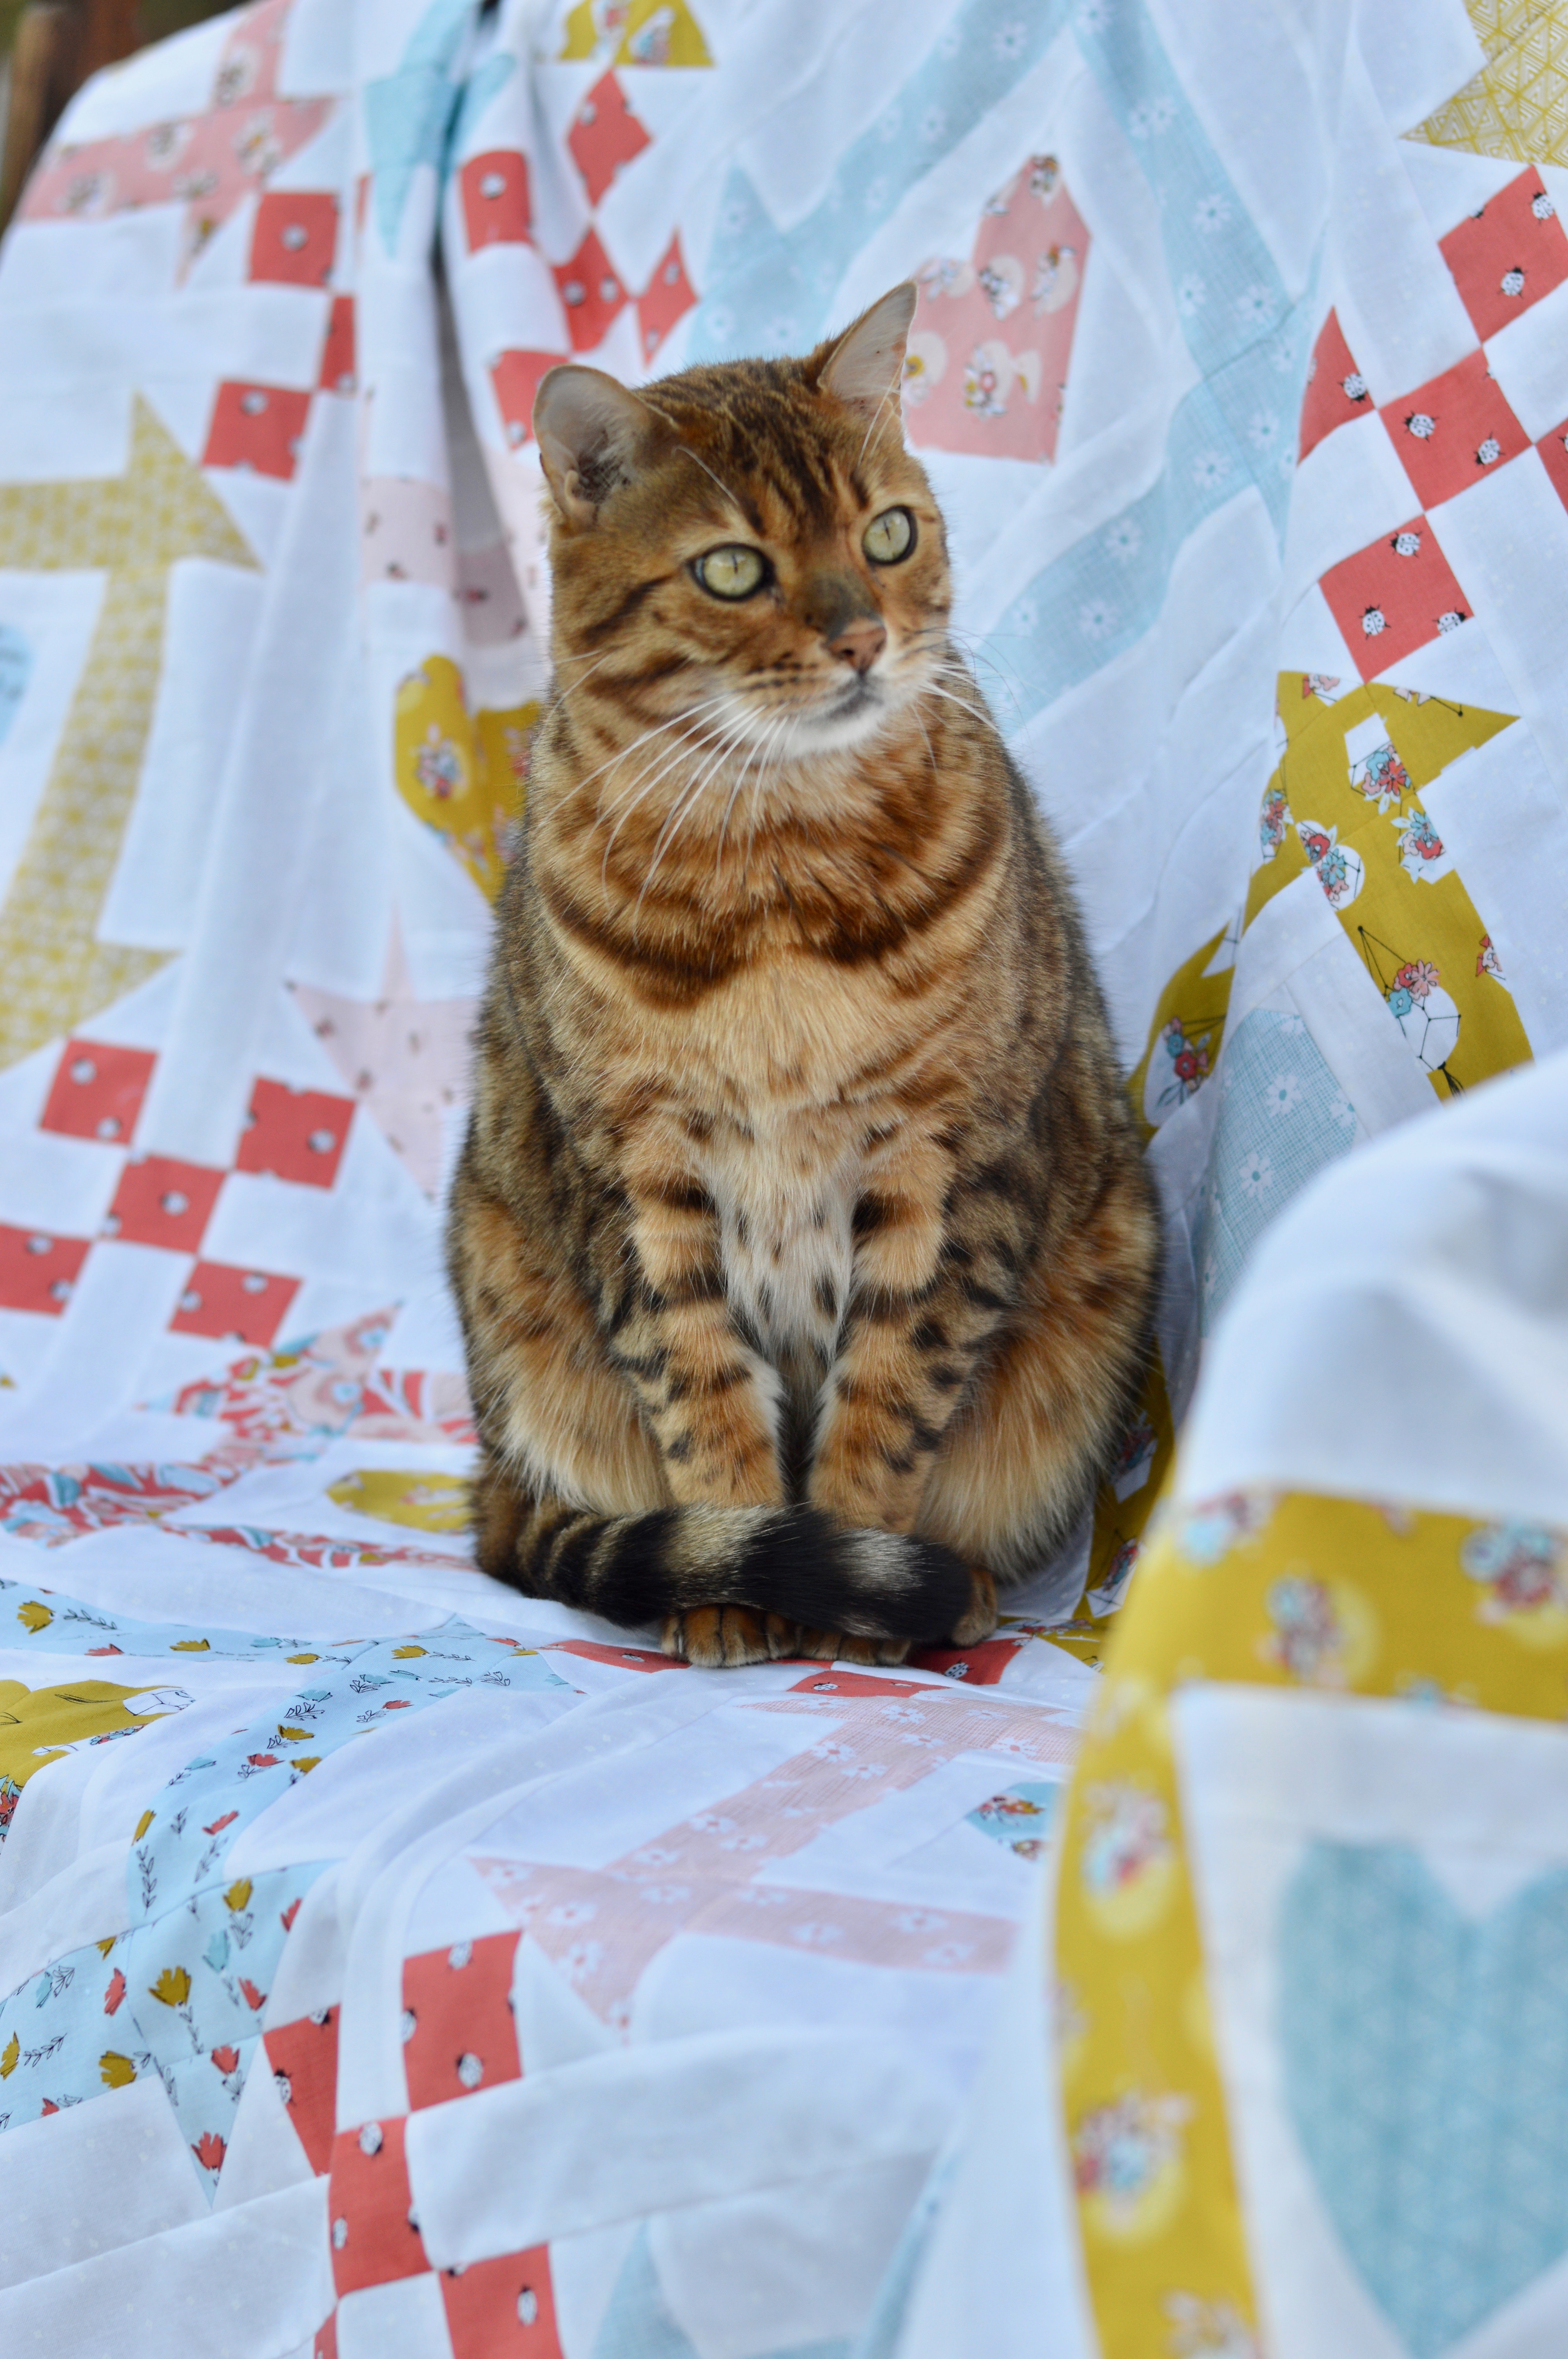
Look at his tail wrapped over his paws 🙂
DSC_0195

Happy Birthday Mufasa

bangal cat

Today is Mufasa’s 5th birthday!!  We are celebrating all day!  He is the best cat in the whole world!!!

cat quilt block

I made him his own little quilt.  5 leopard print kitty blocks for each of the 5 years.
cat on quilt

Leopard cat blocks are my new favorite ever!  I love the green hearts and accents – they totally match his eyes!

cat quilting

Mufasa is such a good little quilt model!

DSC_0200

Those paws!!!
Cat Quilt Pattern

If you’d like to make your own Kitty Love Quilt you can find the pattern in my Etsy shop.  You can easily swap out the hearts and cats and use any fabrics you like!  It really does make a purrrrfect cat birthday quilt!

DSC_0198
DSC_0207
DSC_0235
DSC_0277

kitty love quilt pattern pdf

Bouncing Off The Walls Quilt Pattern

DSC_0671
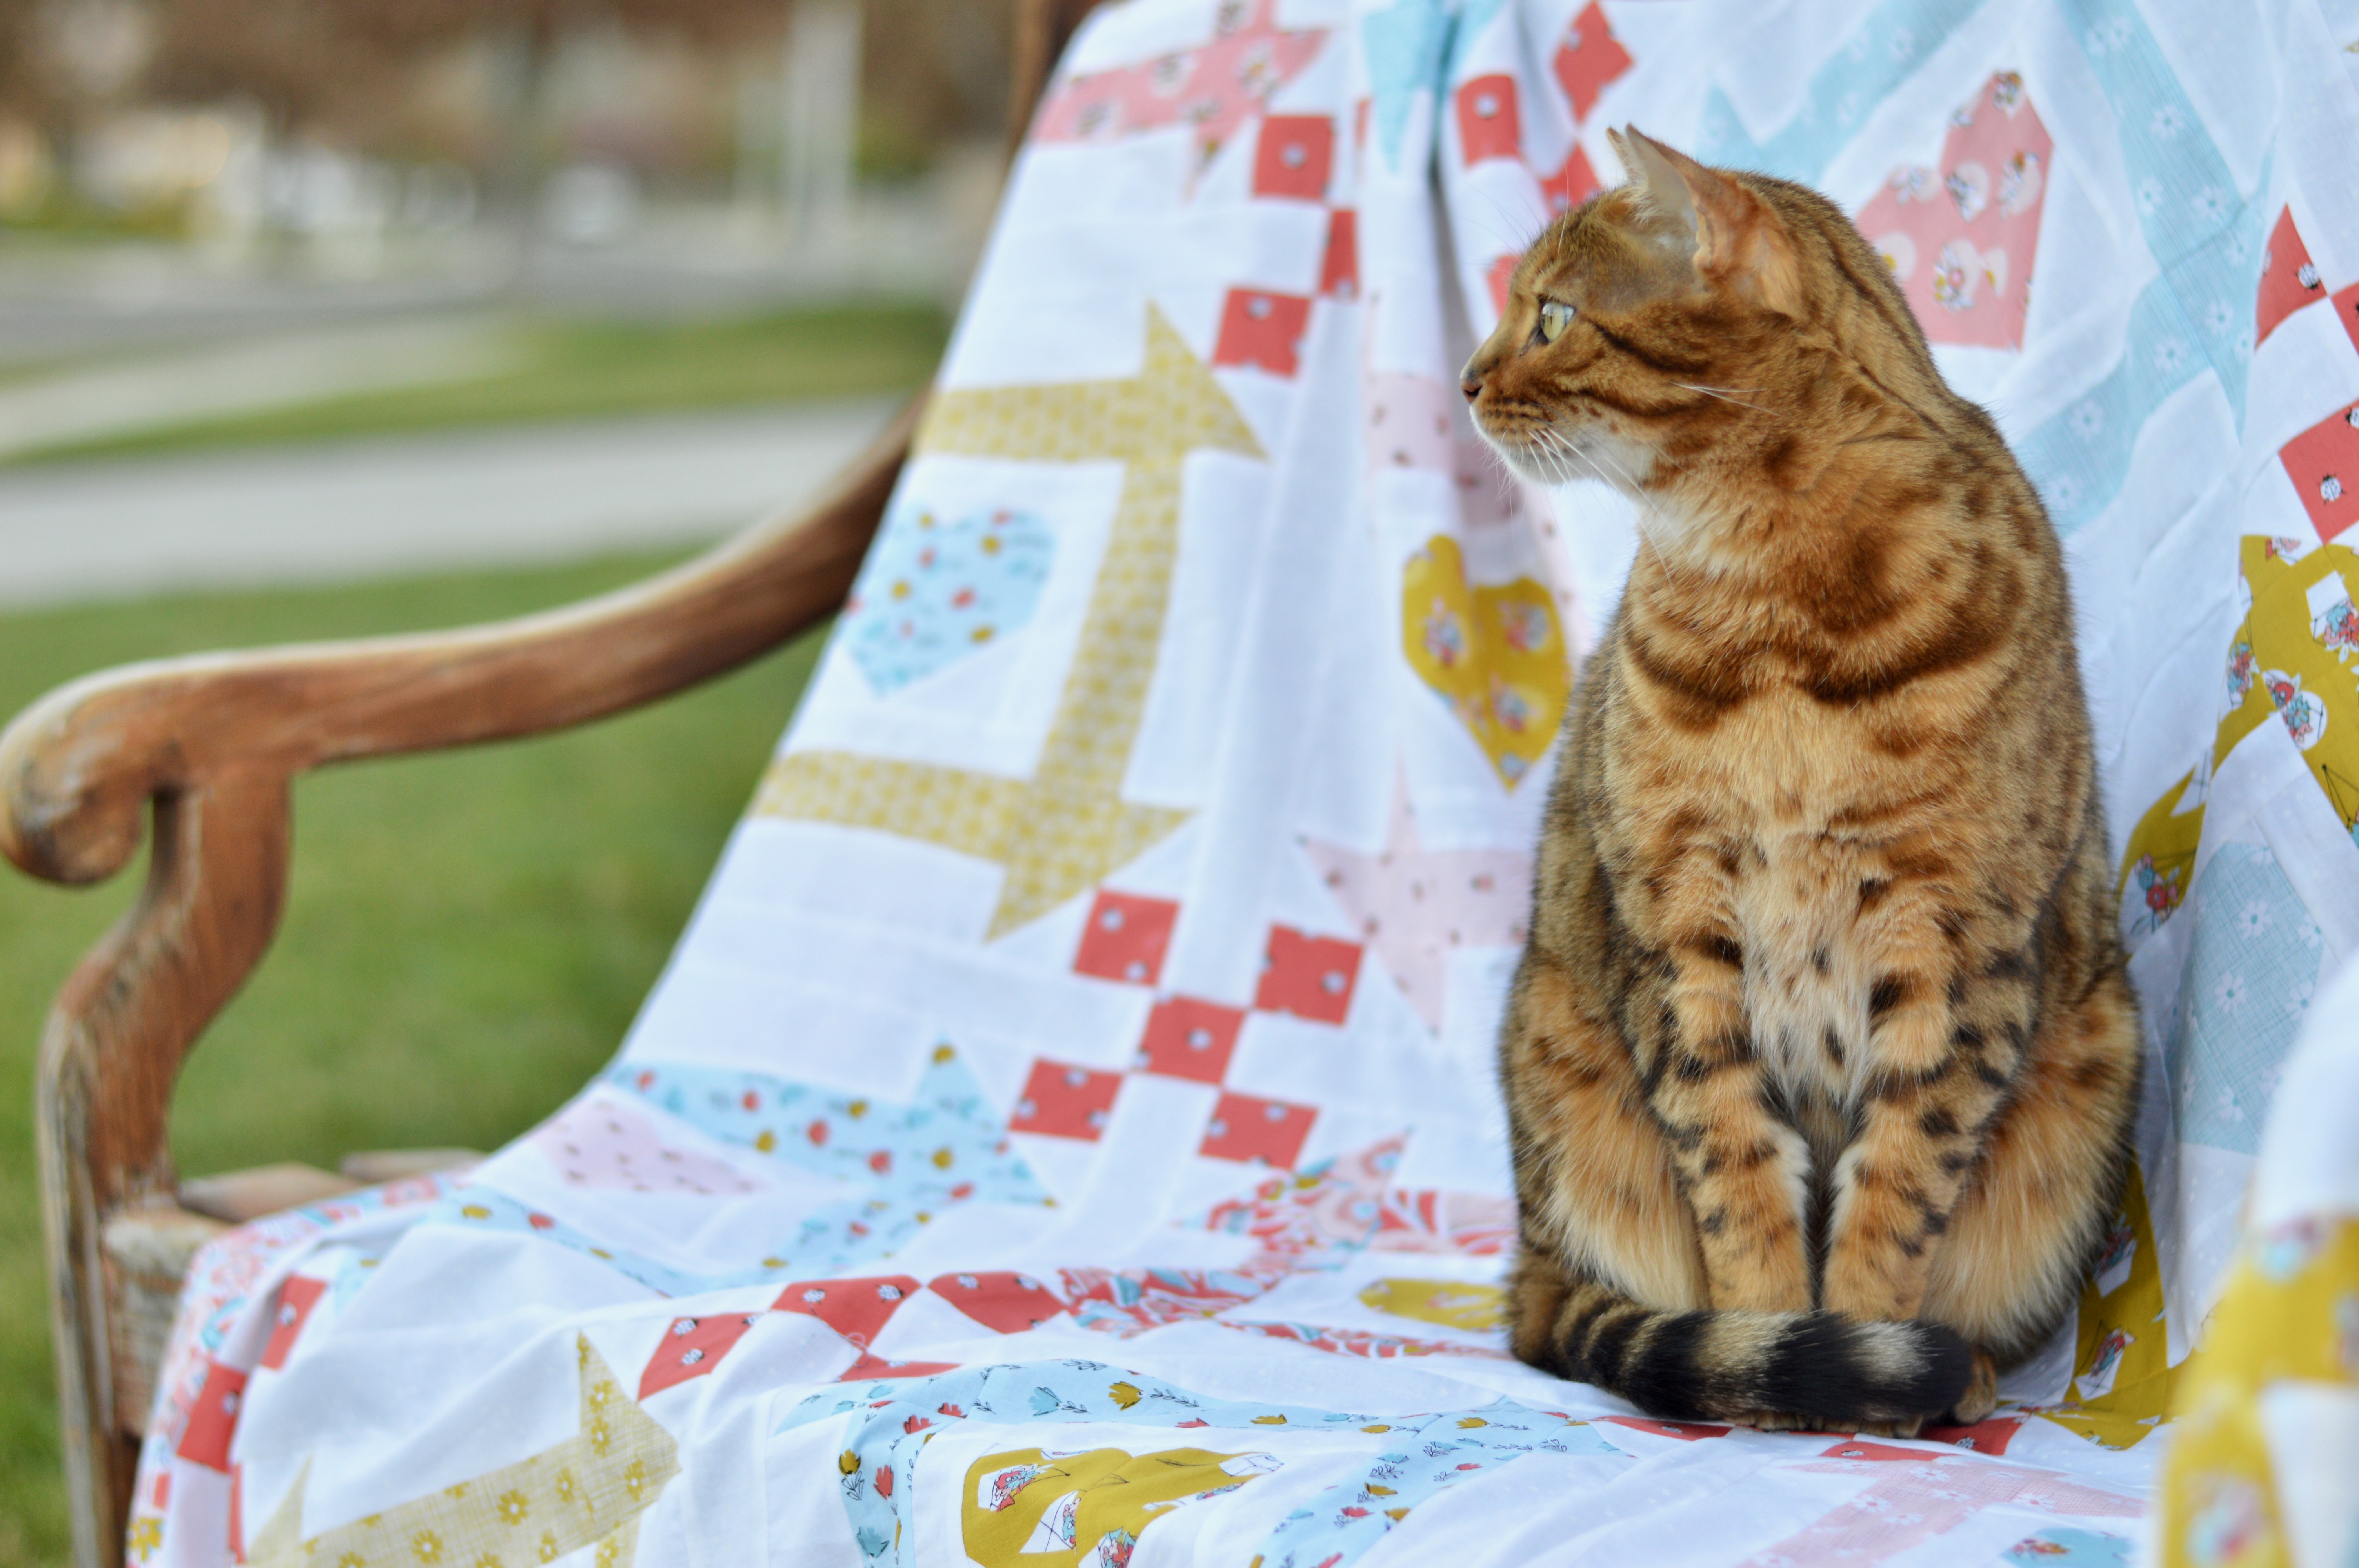
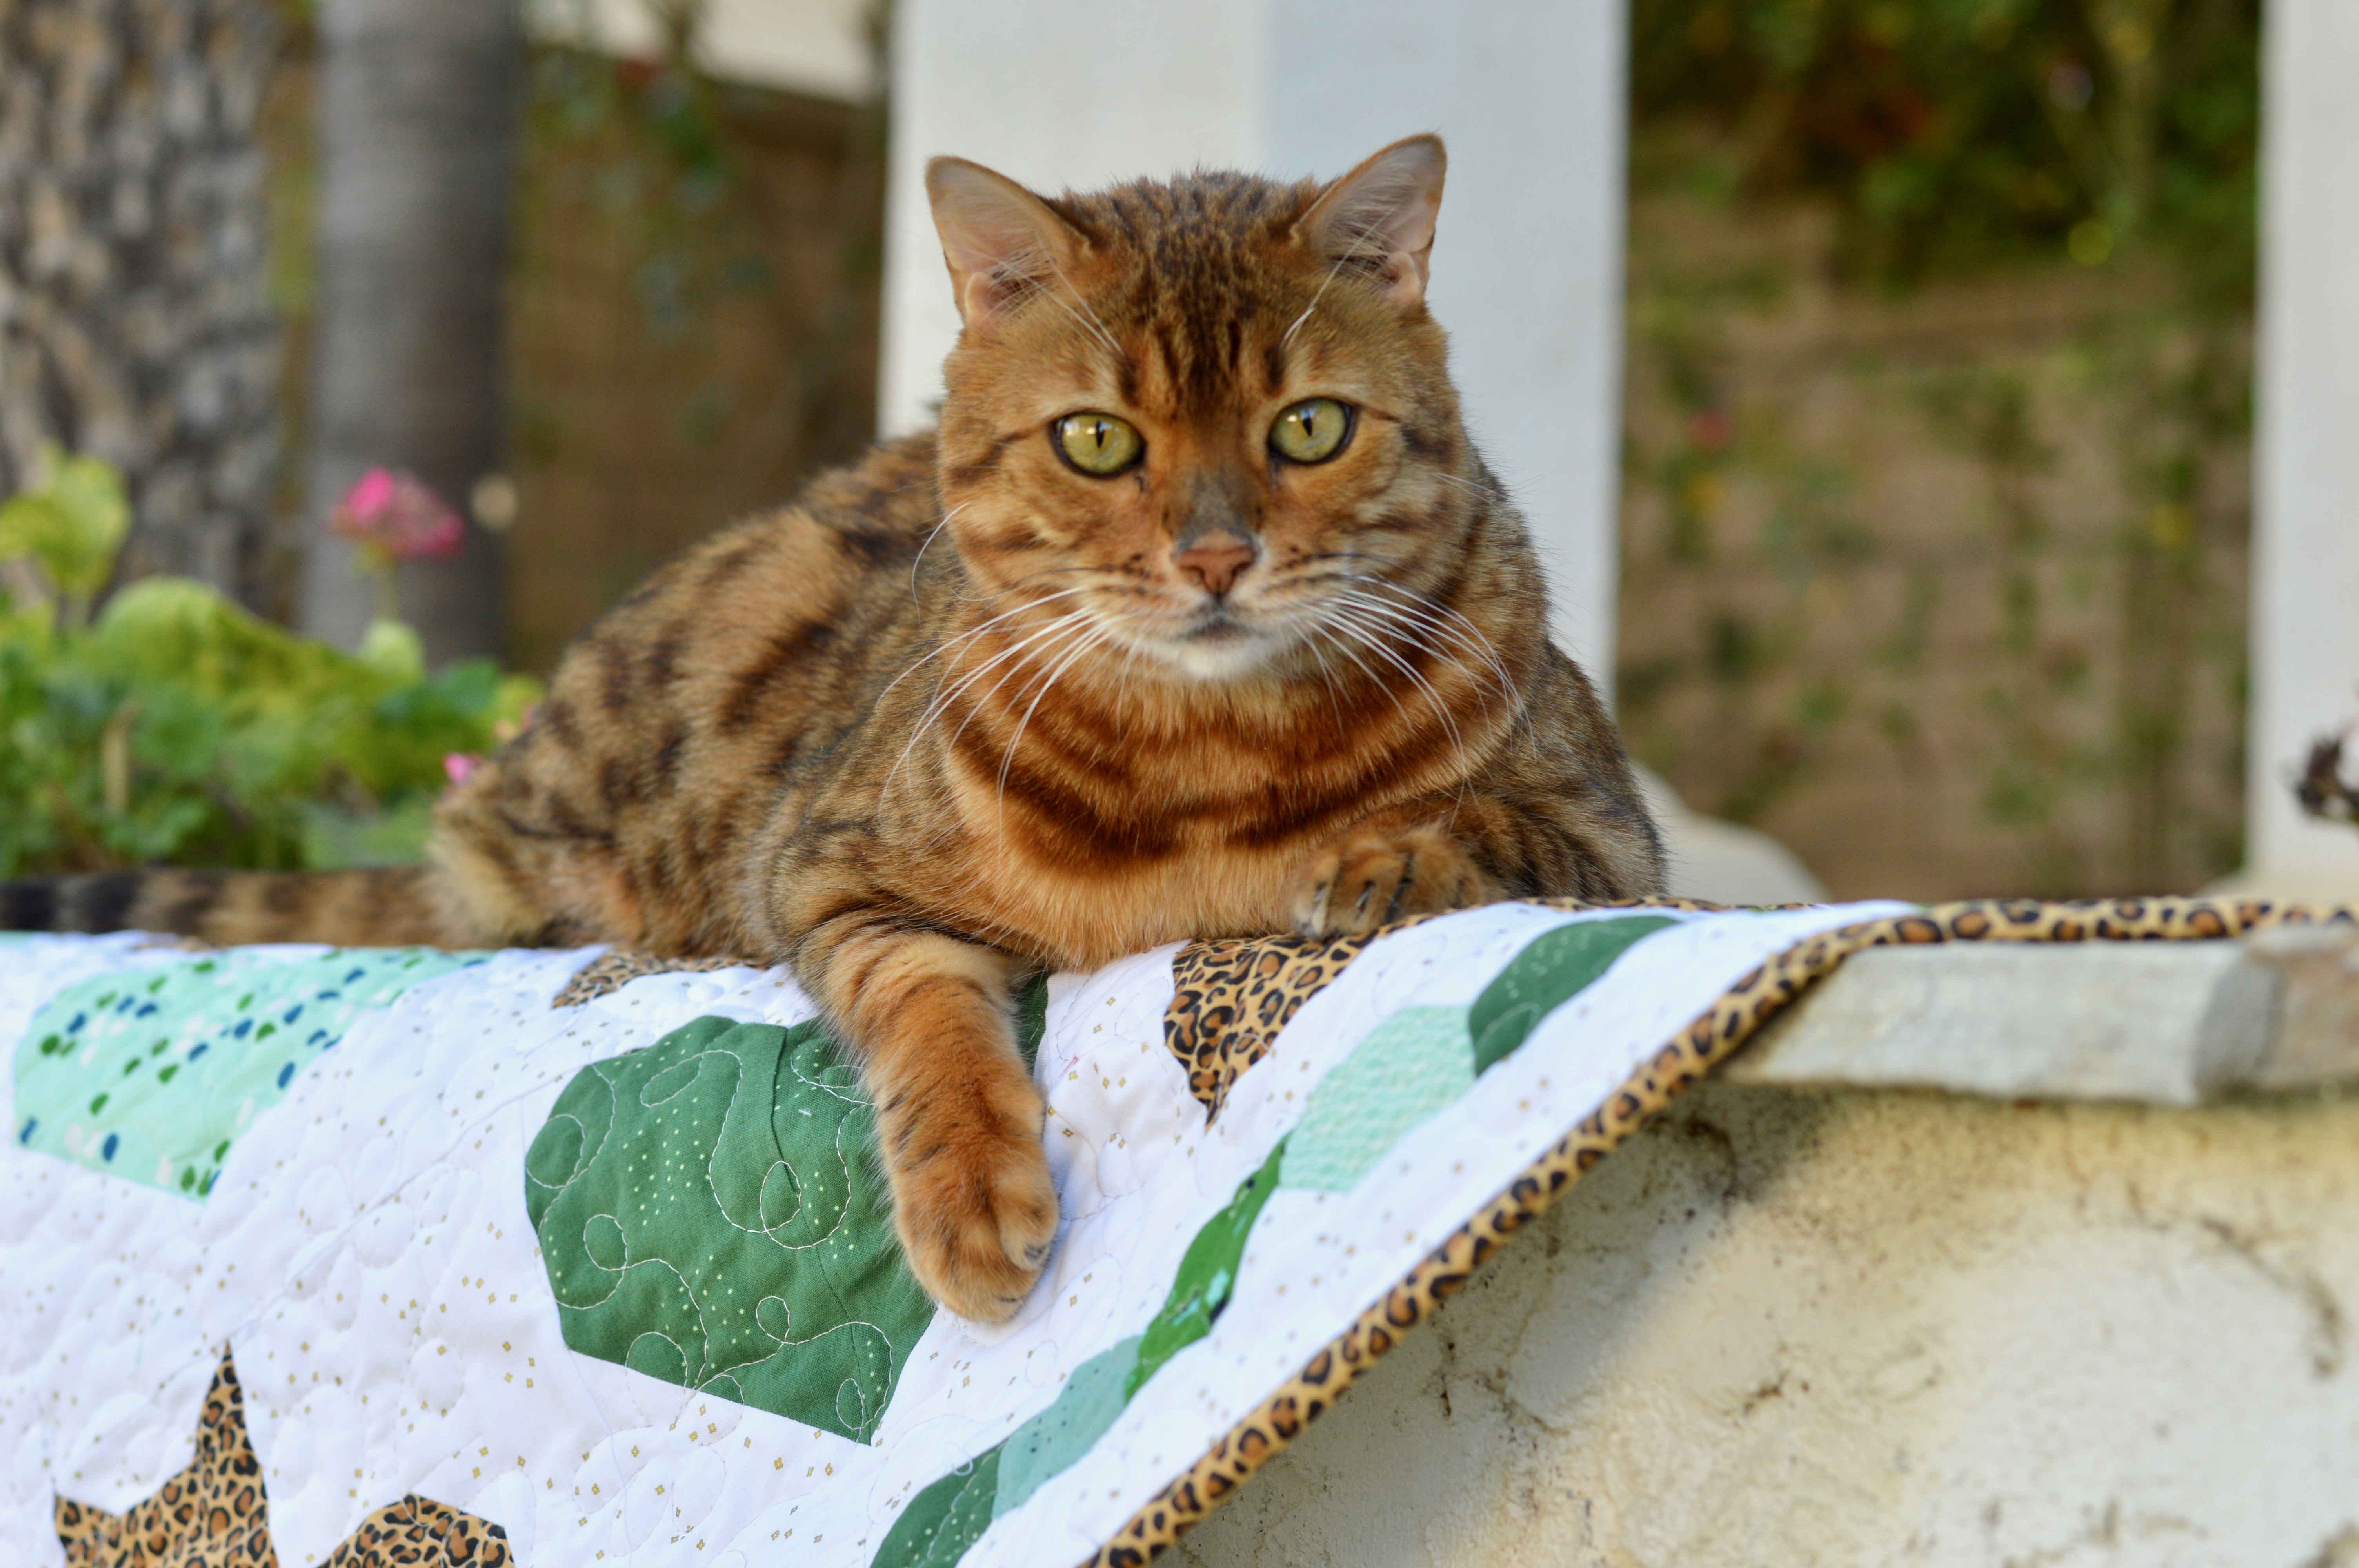
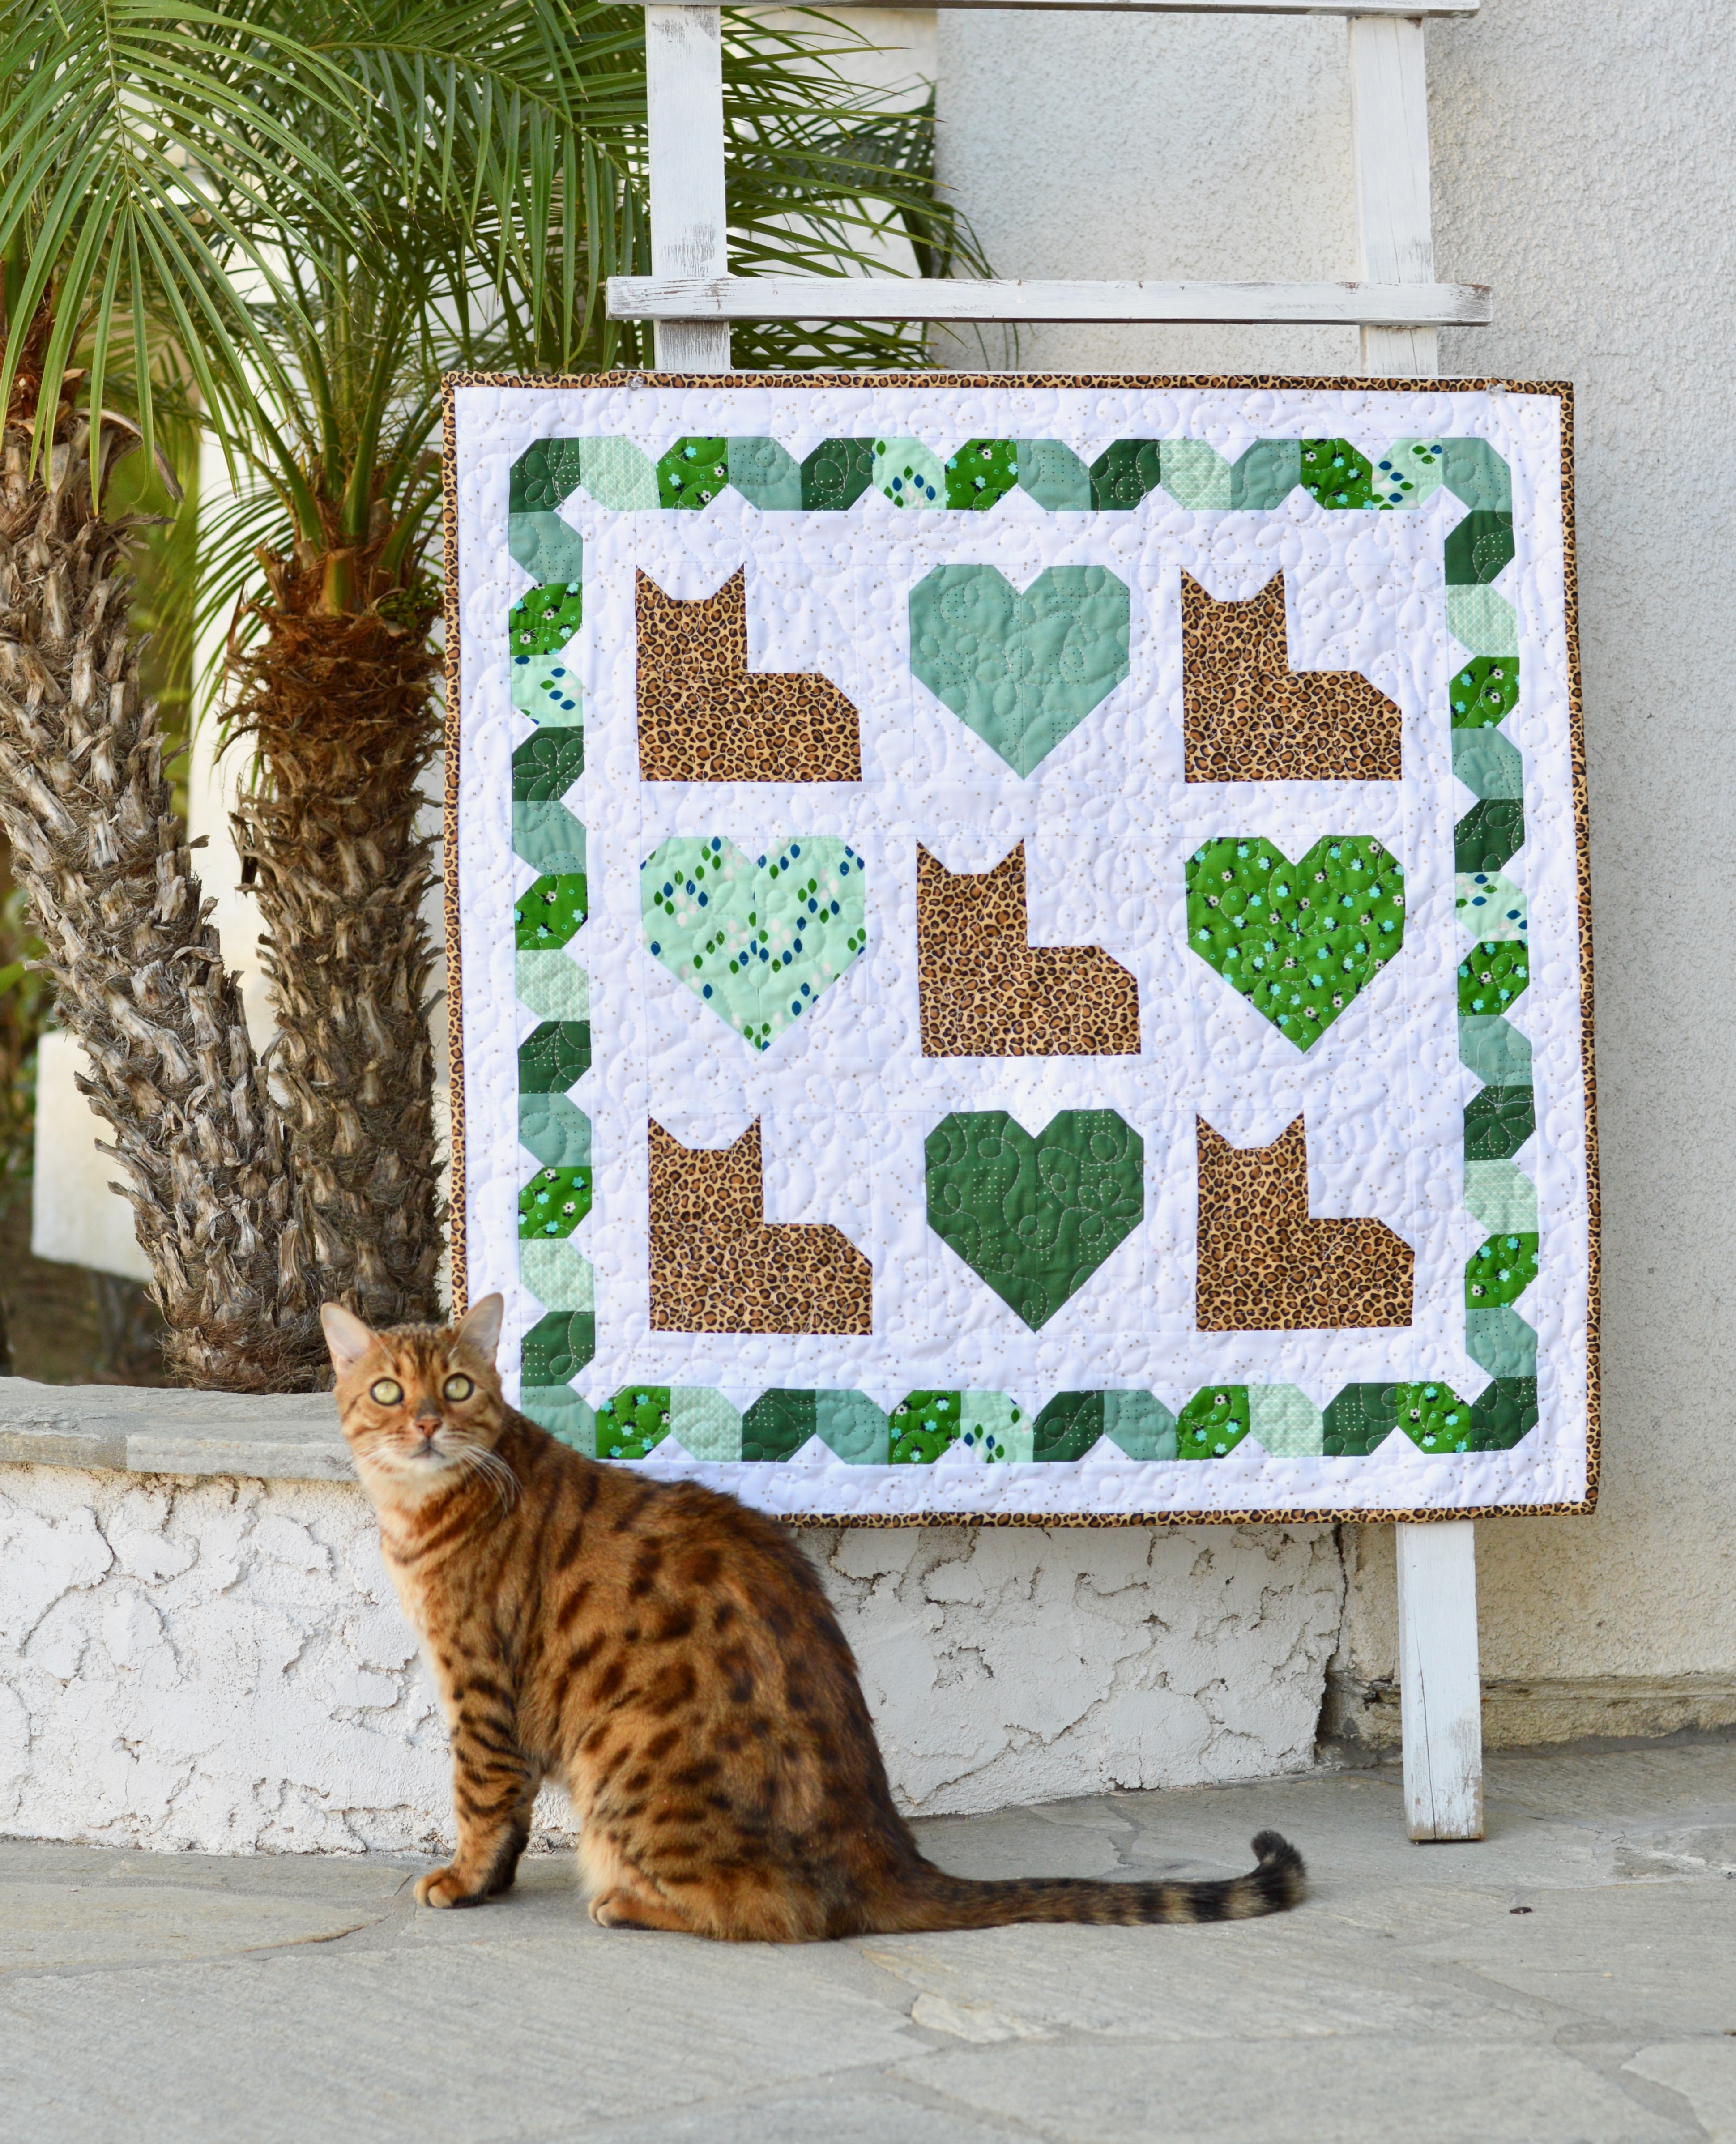
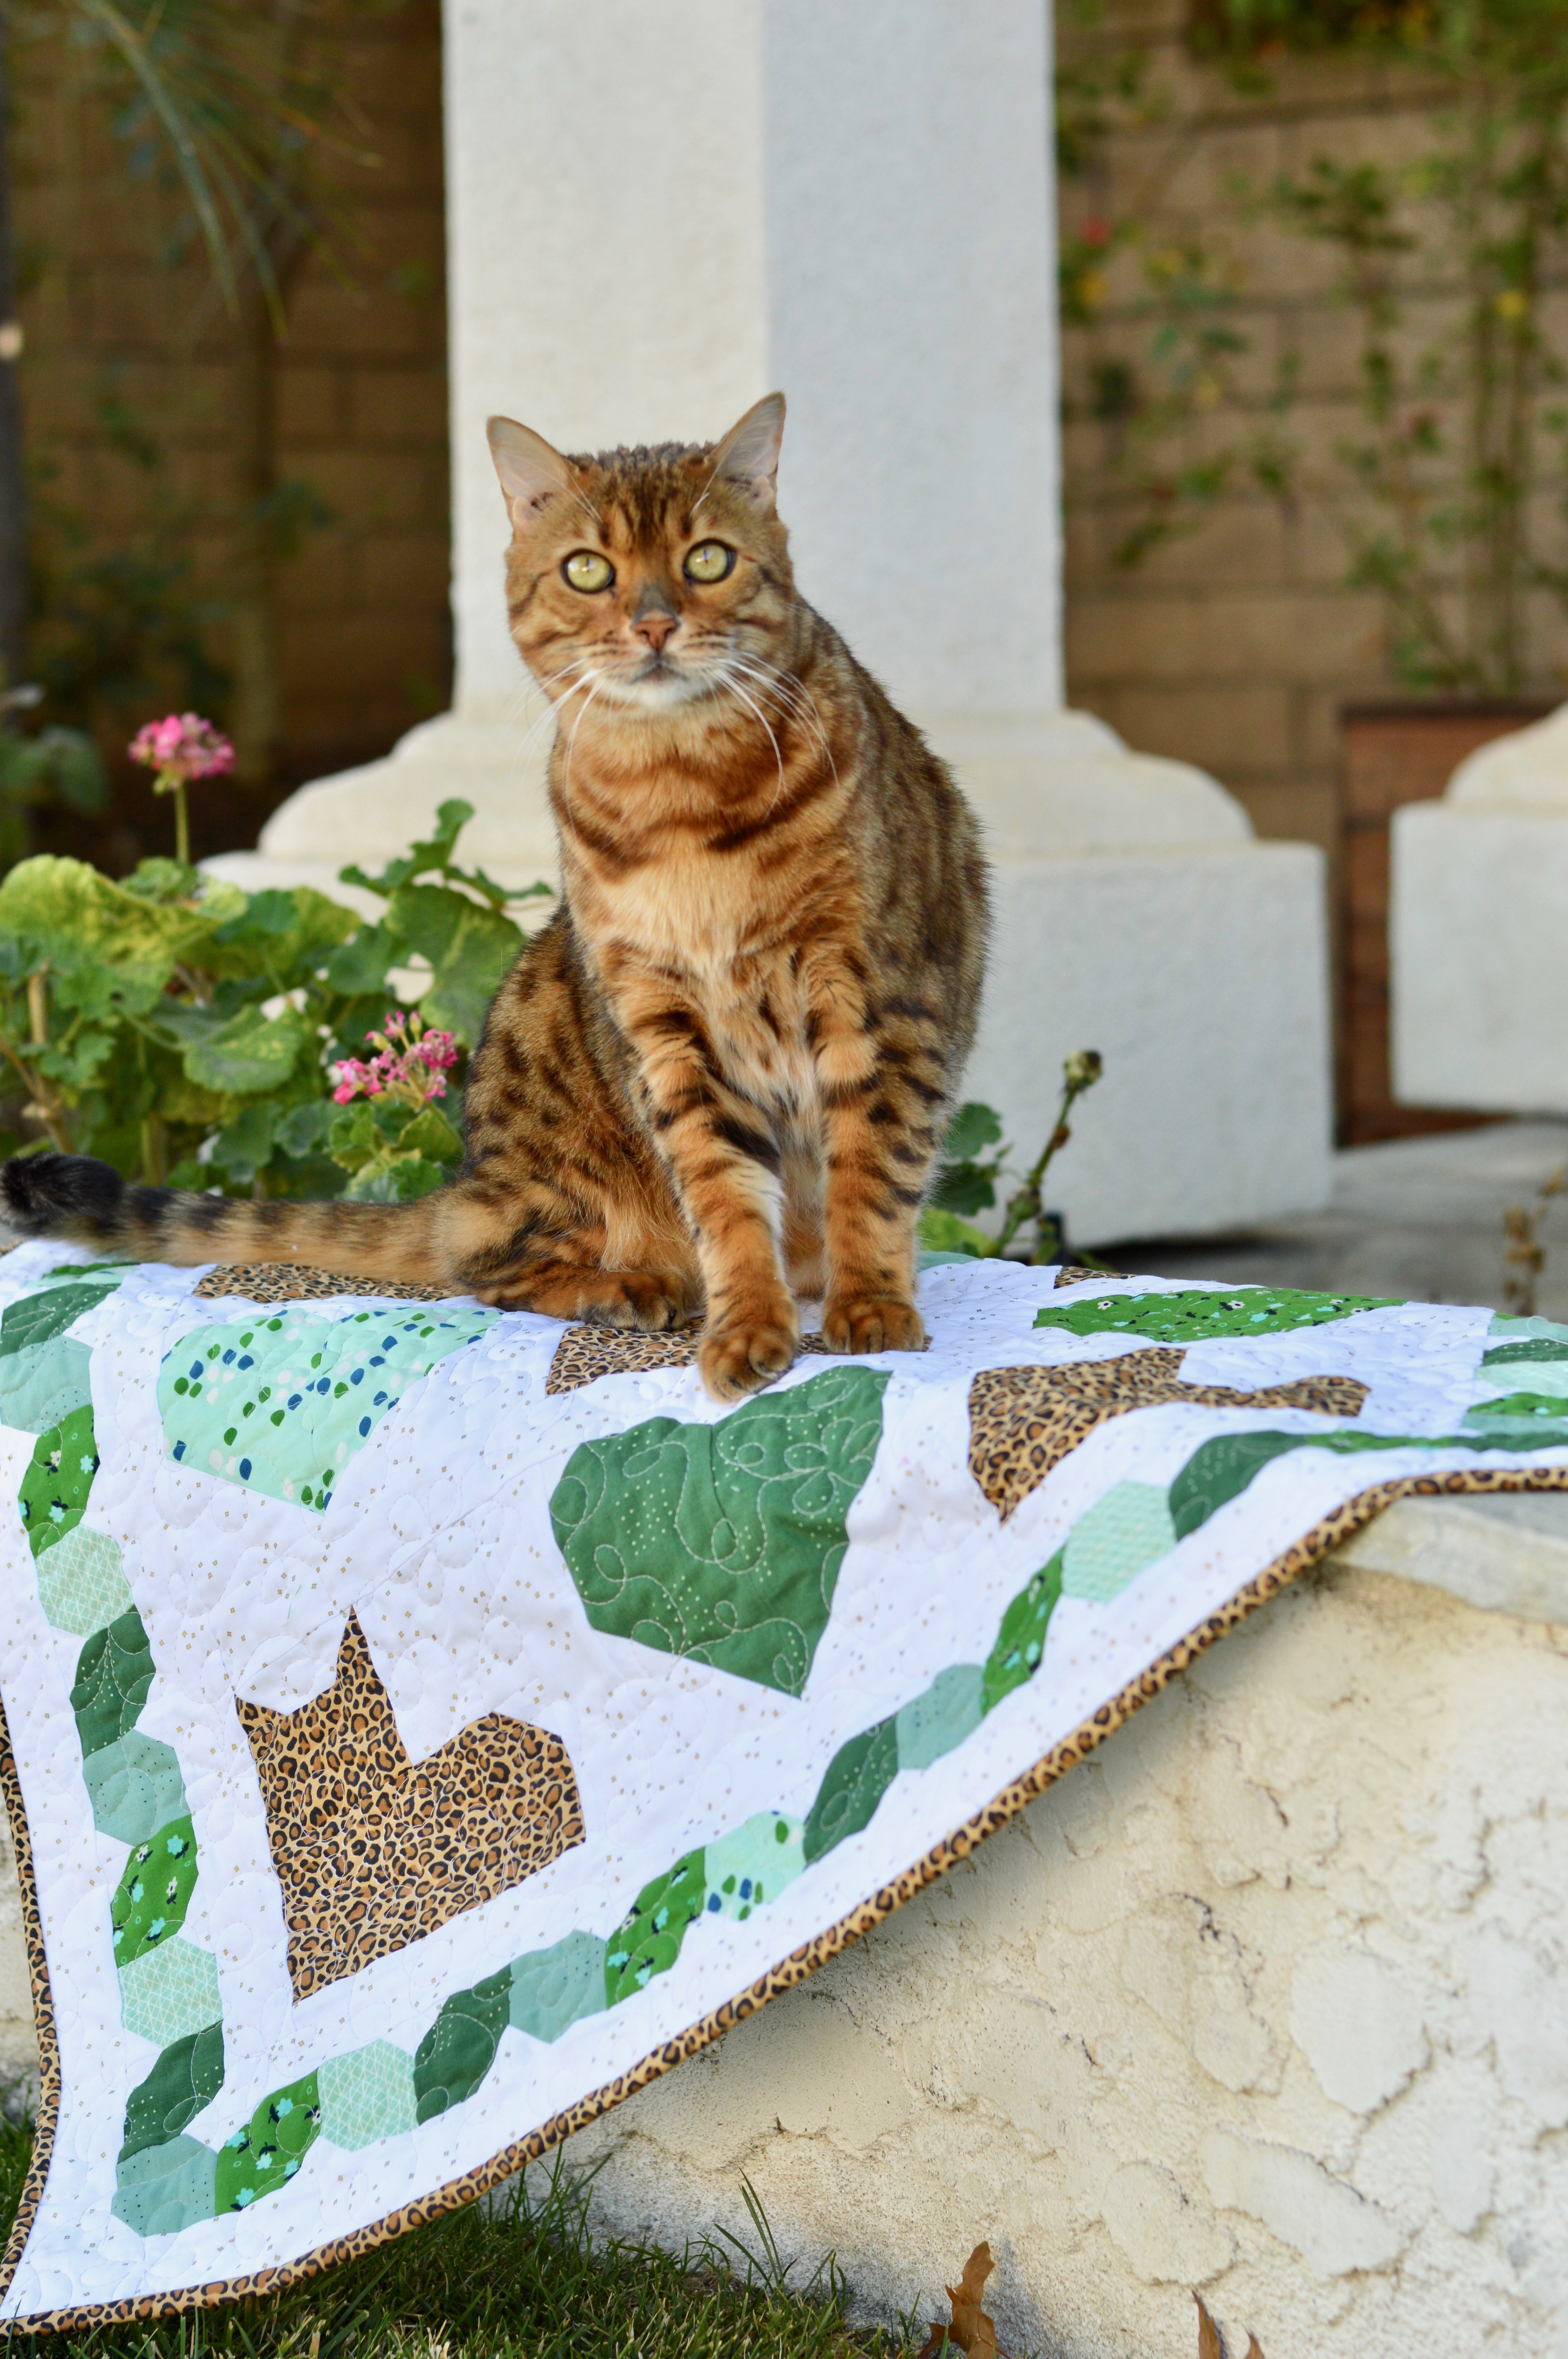
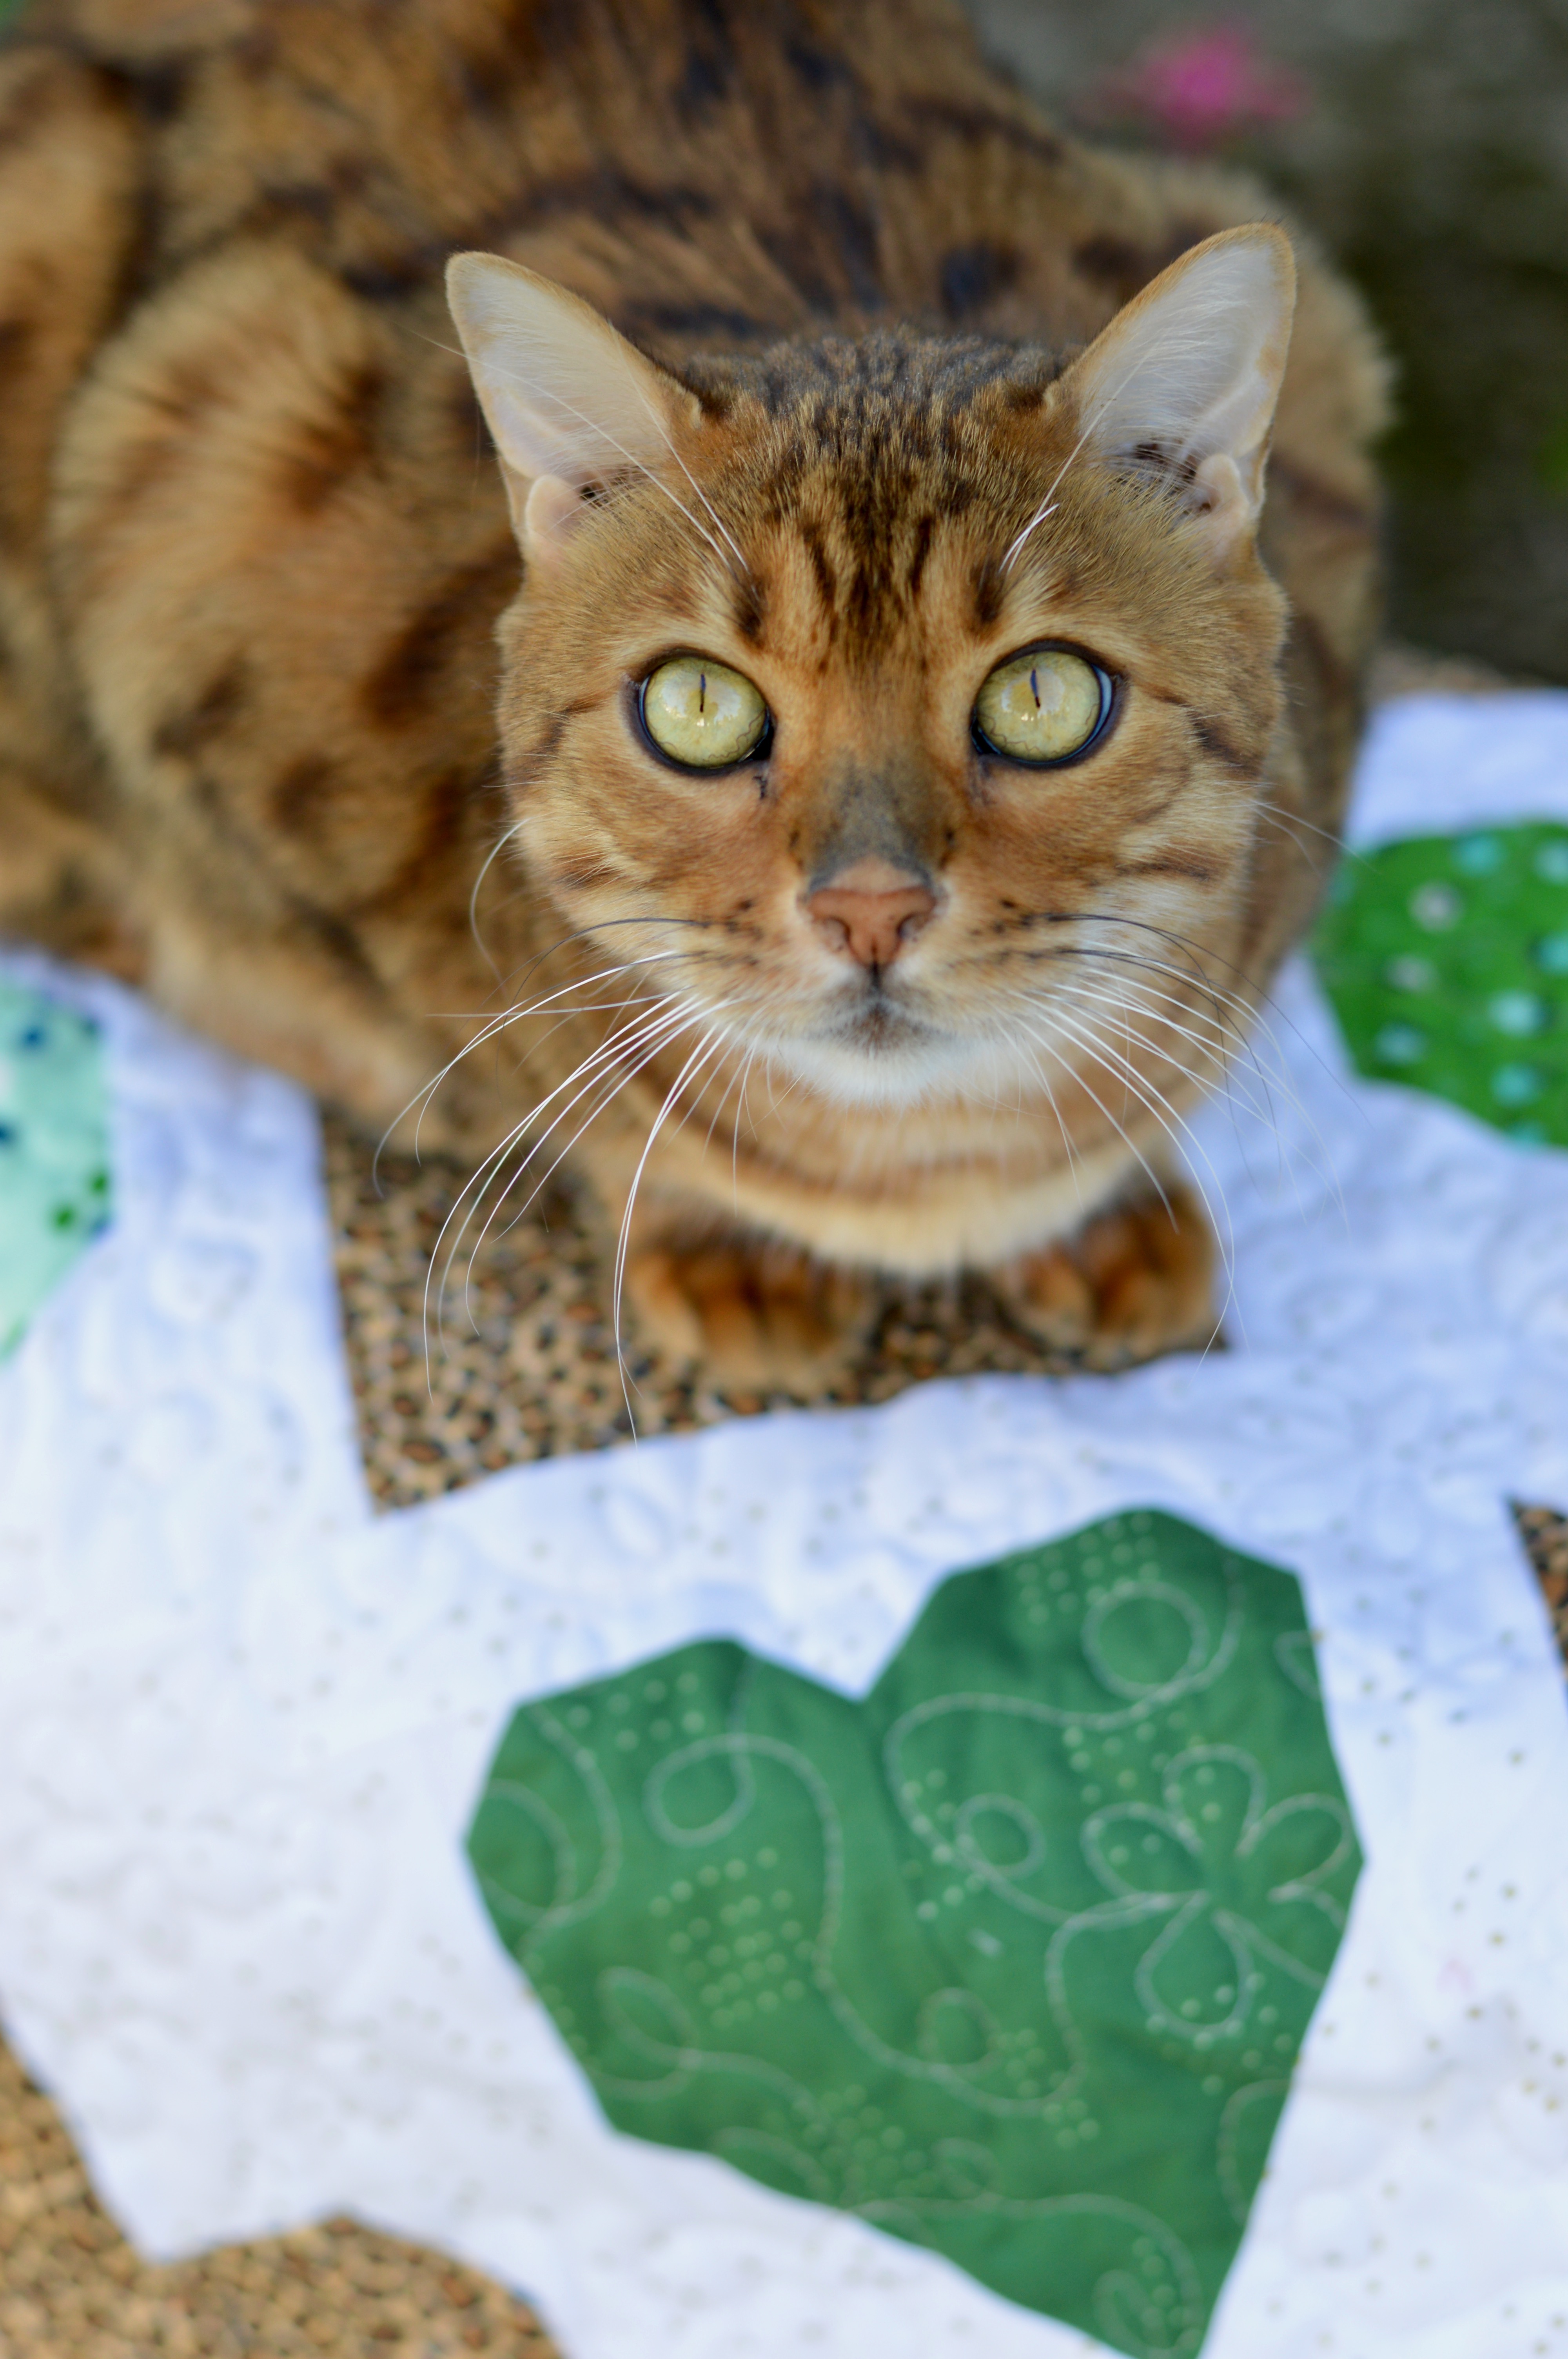
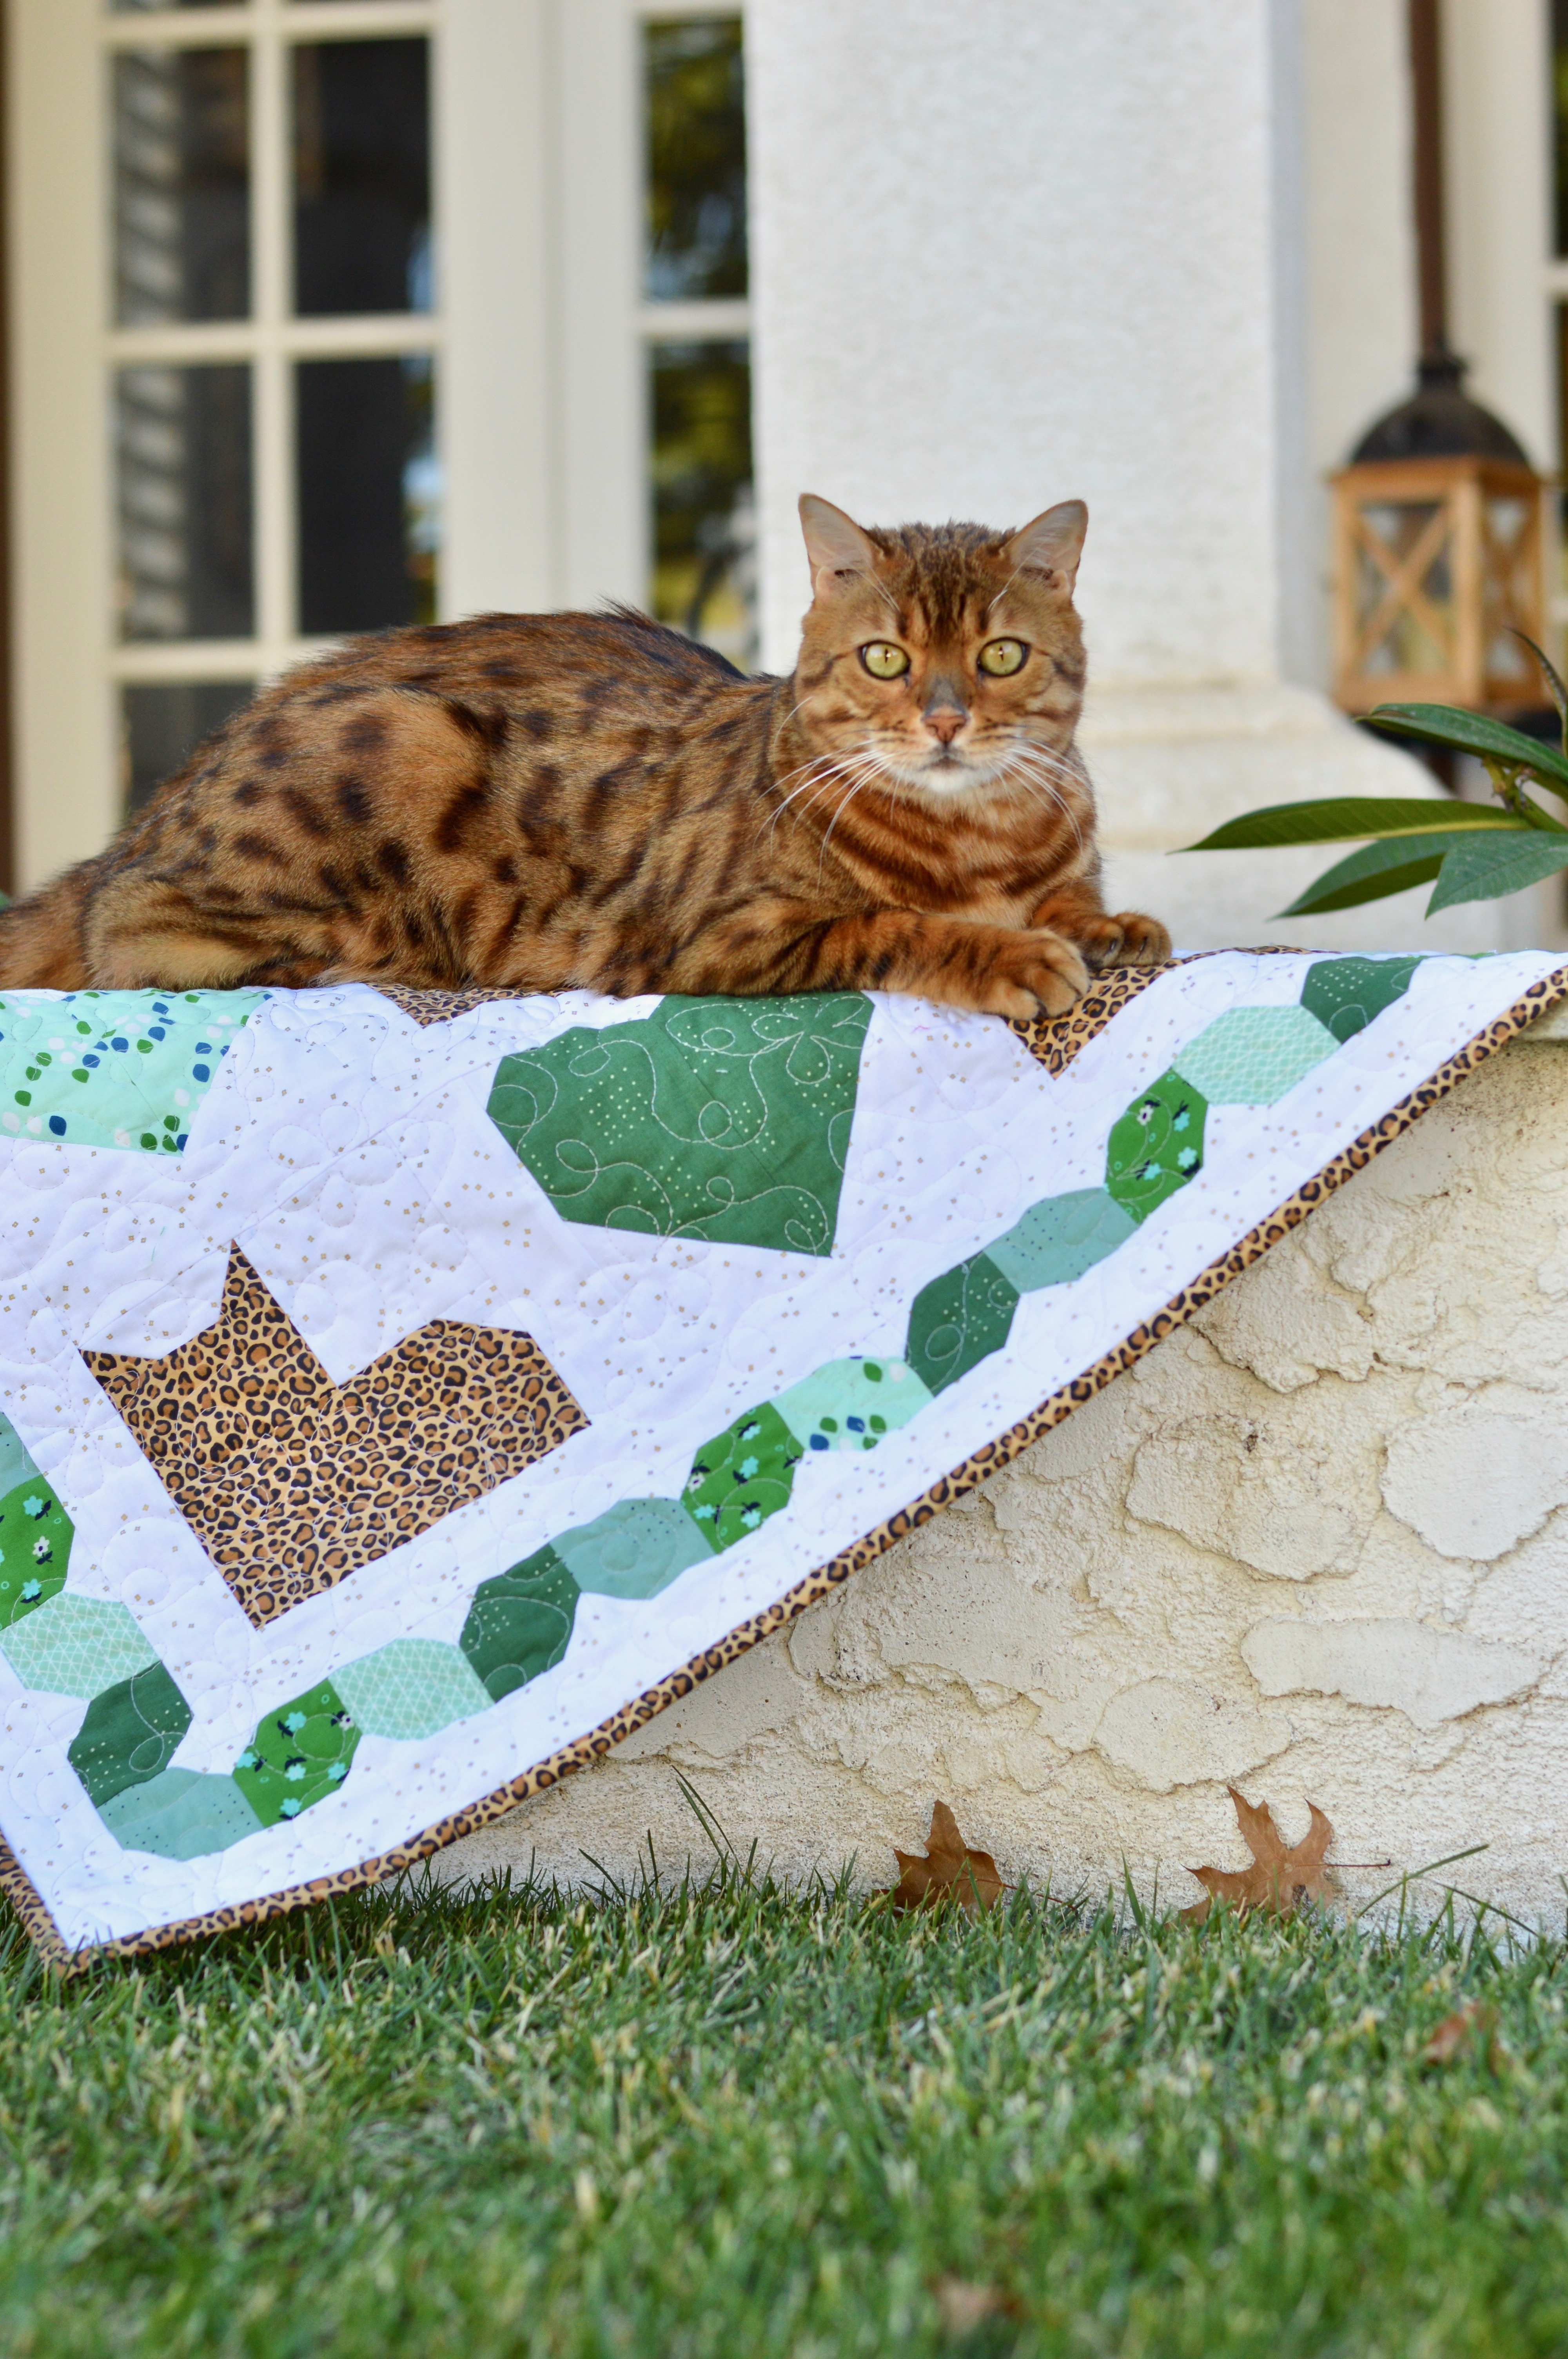
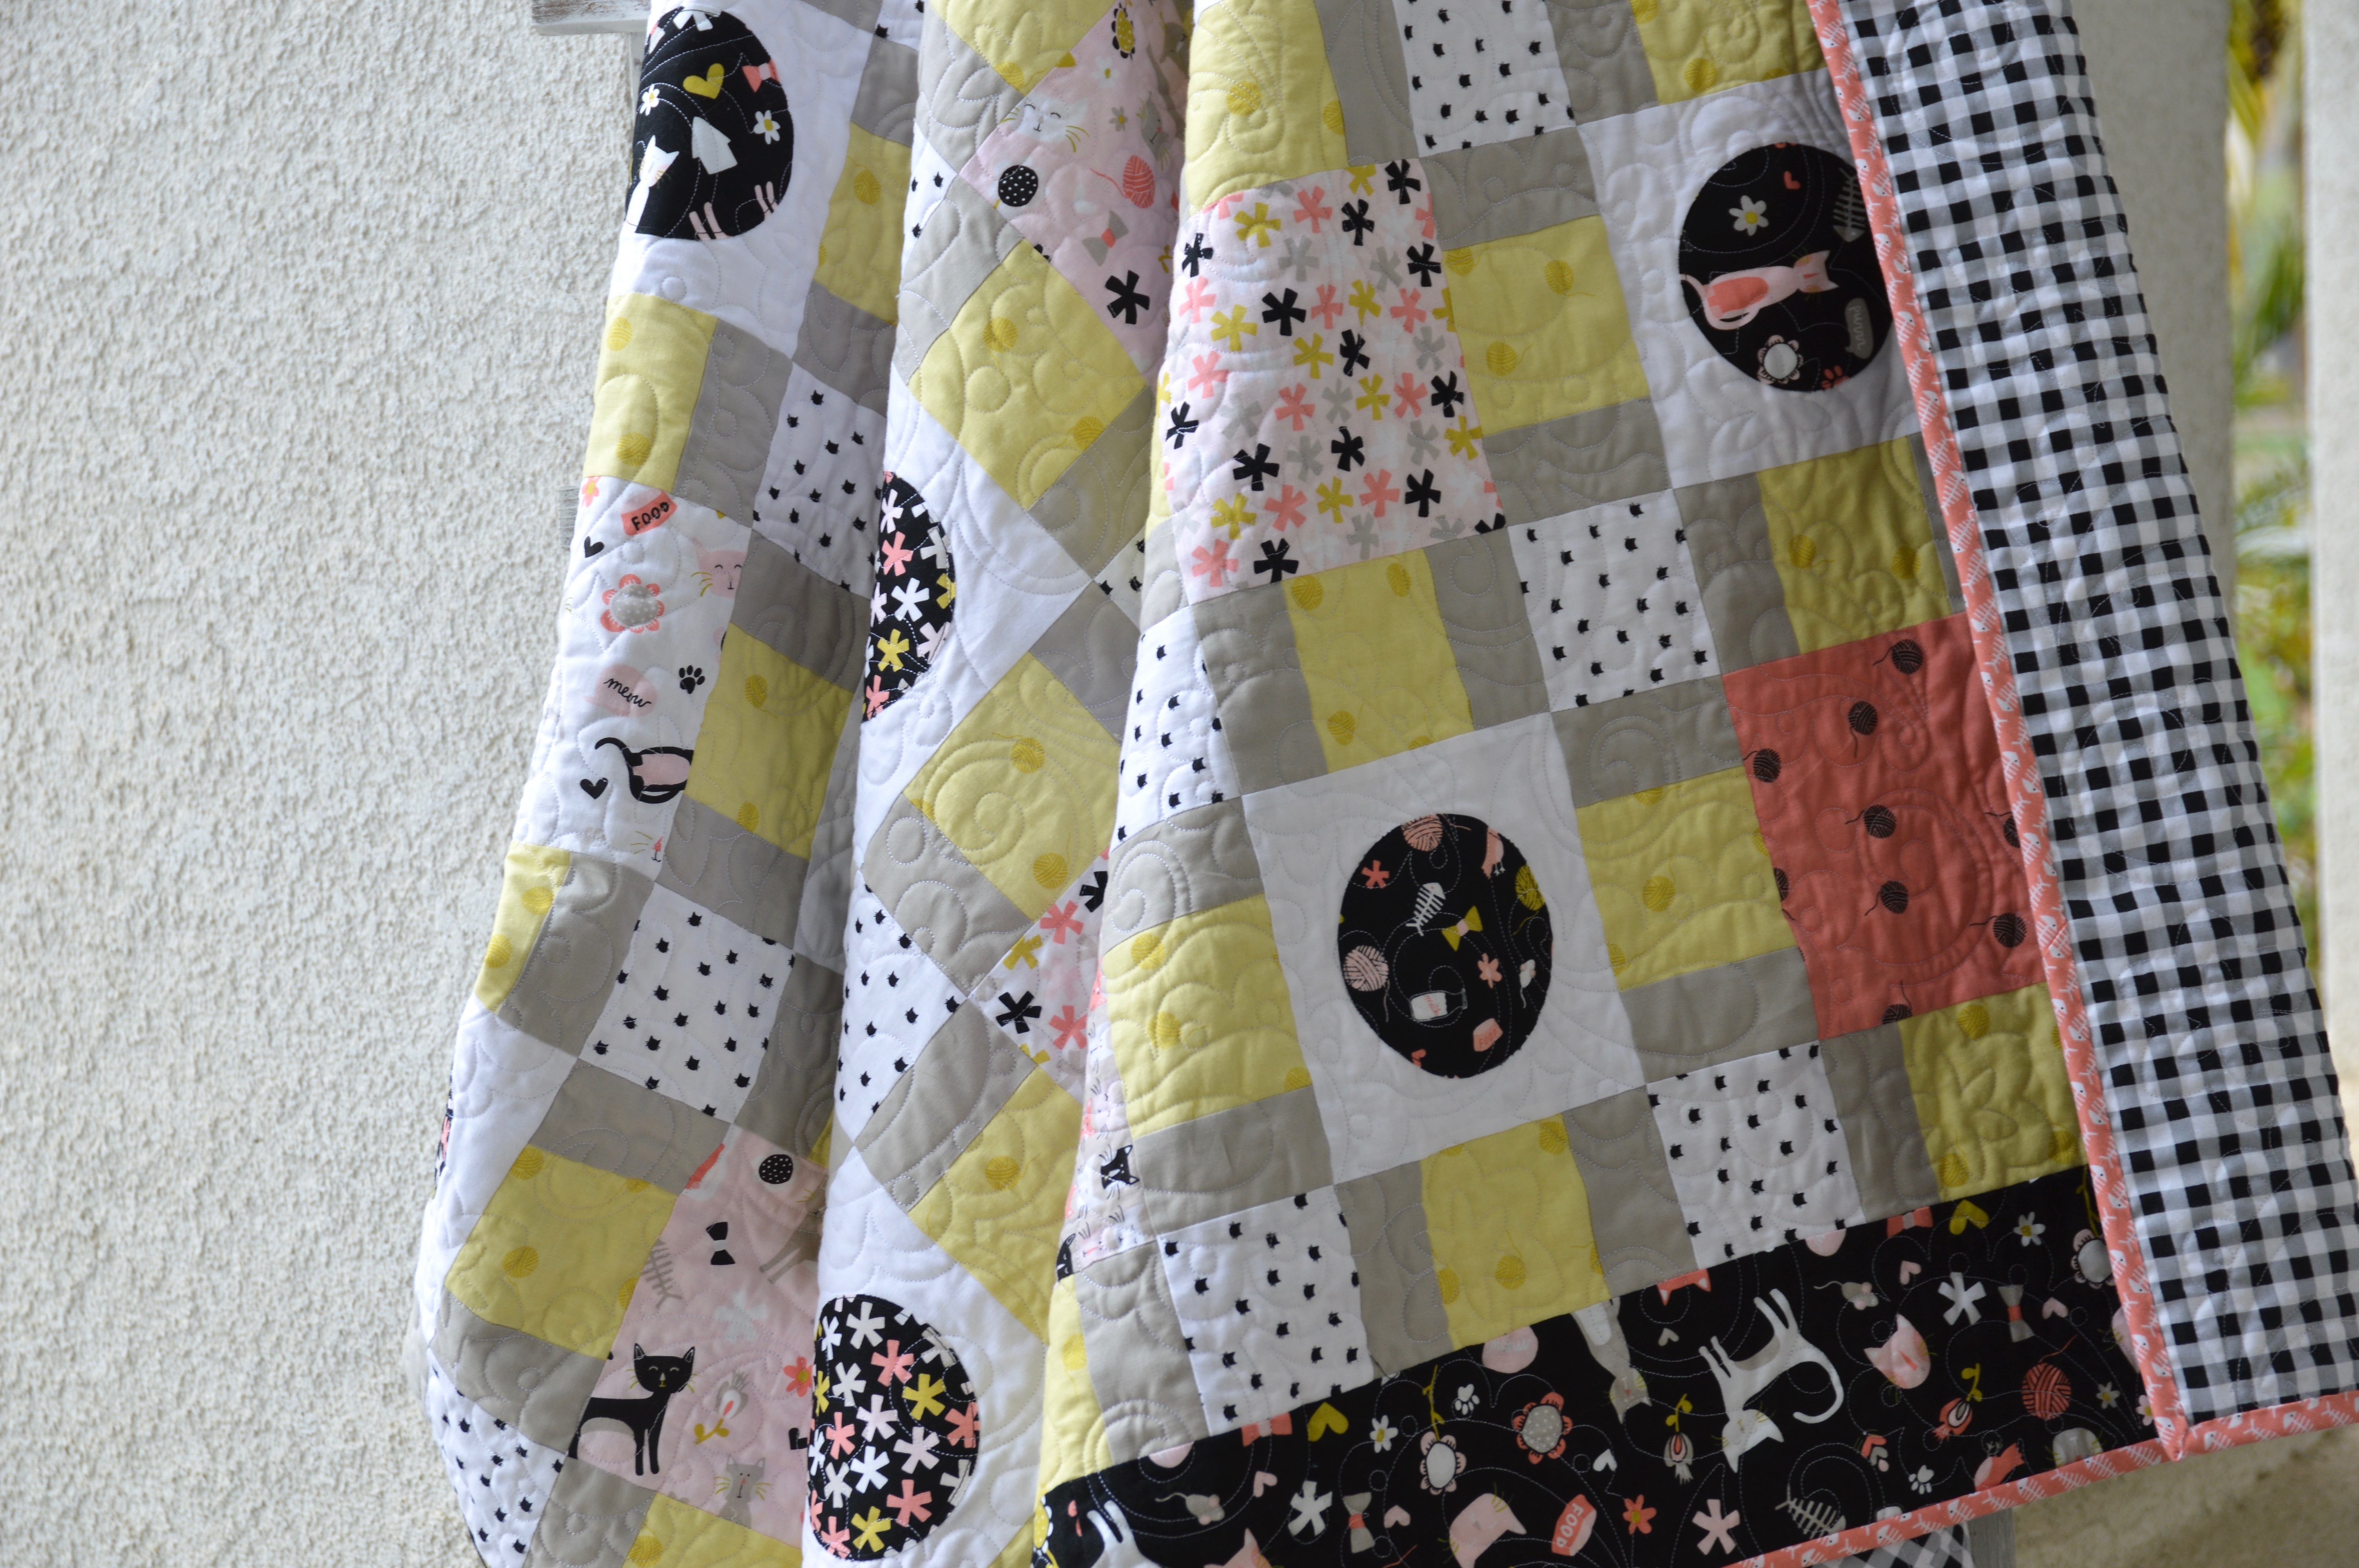
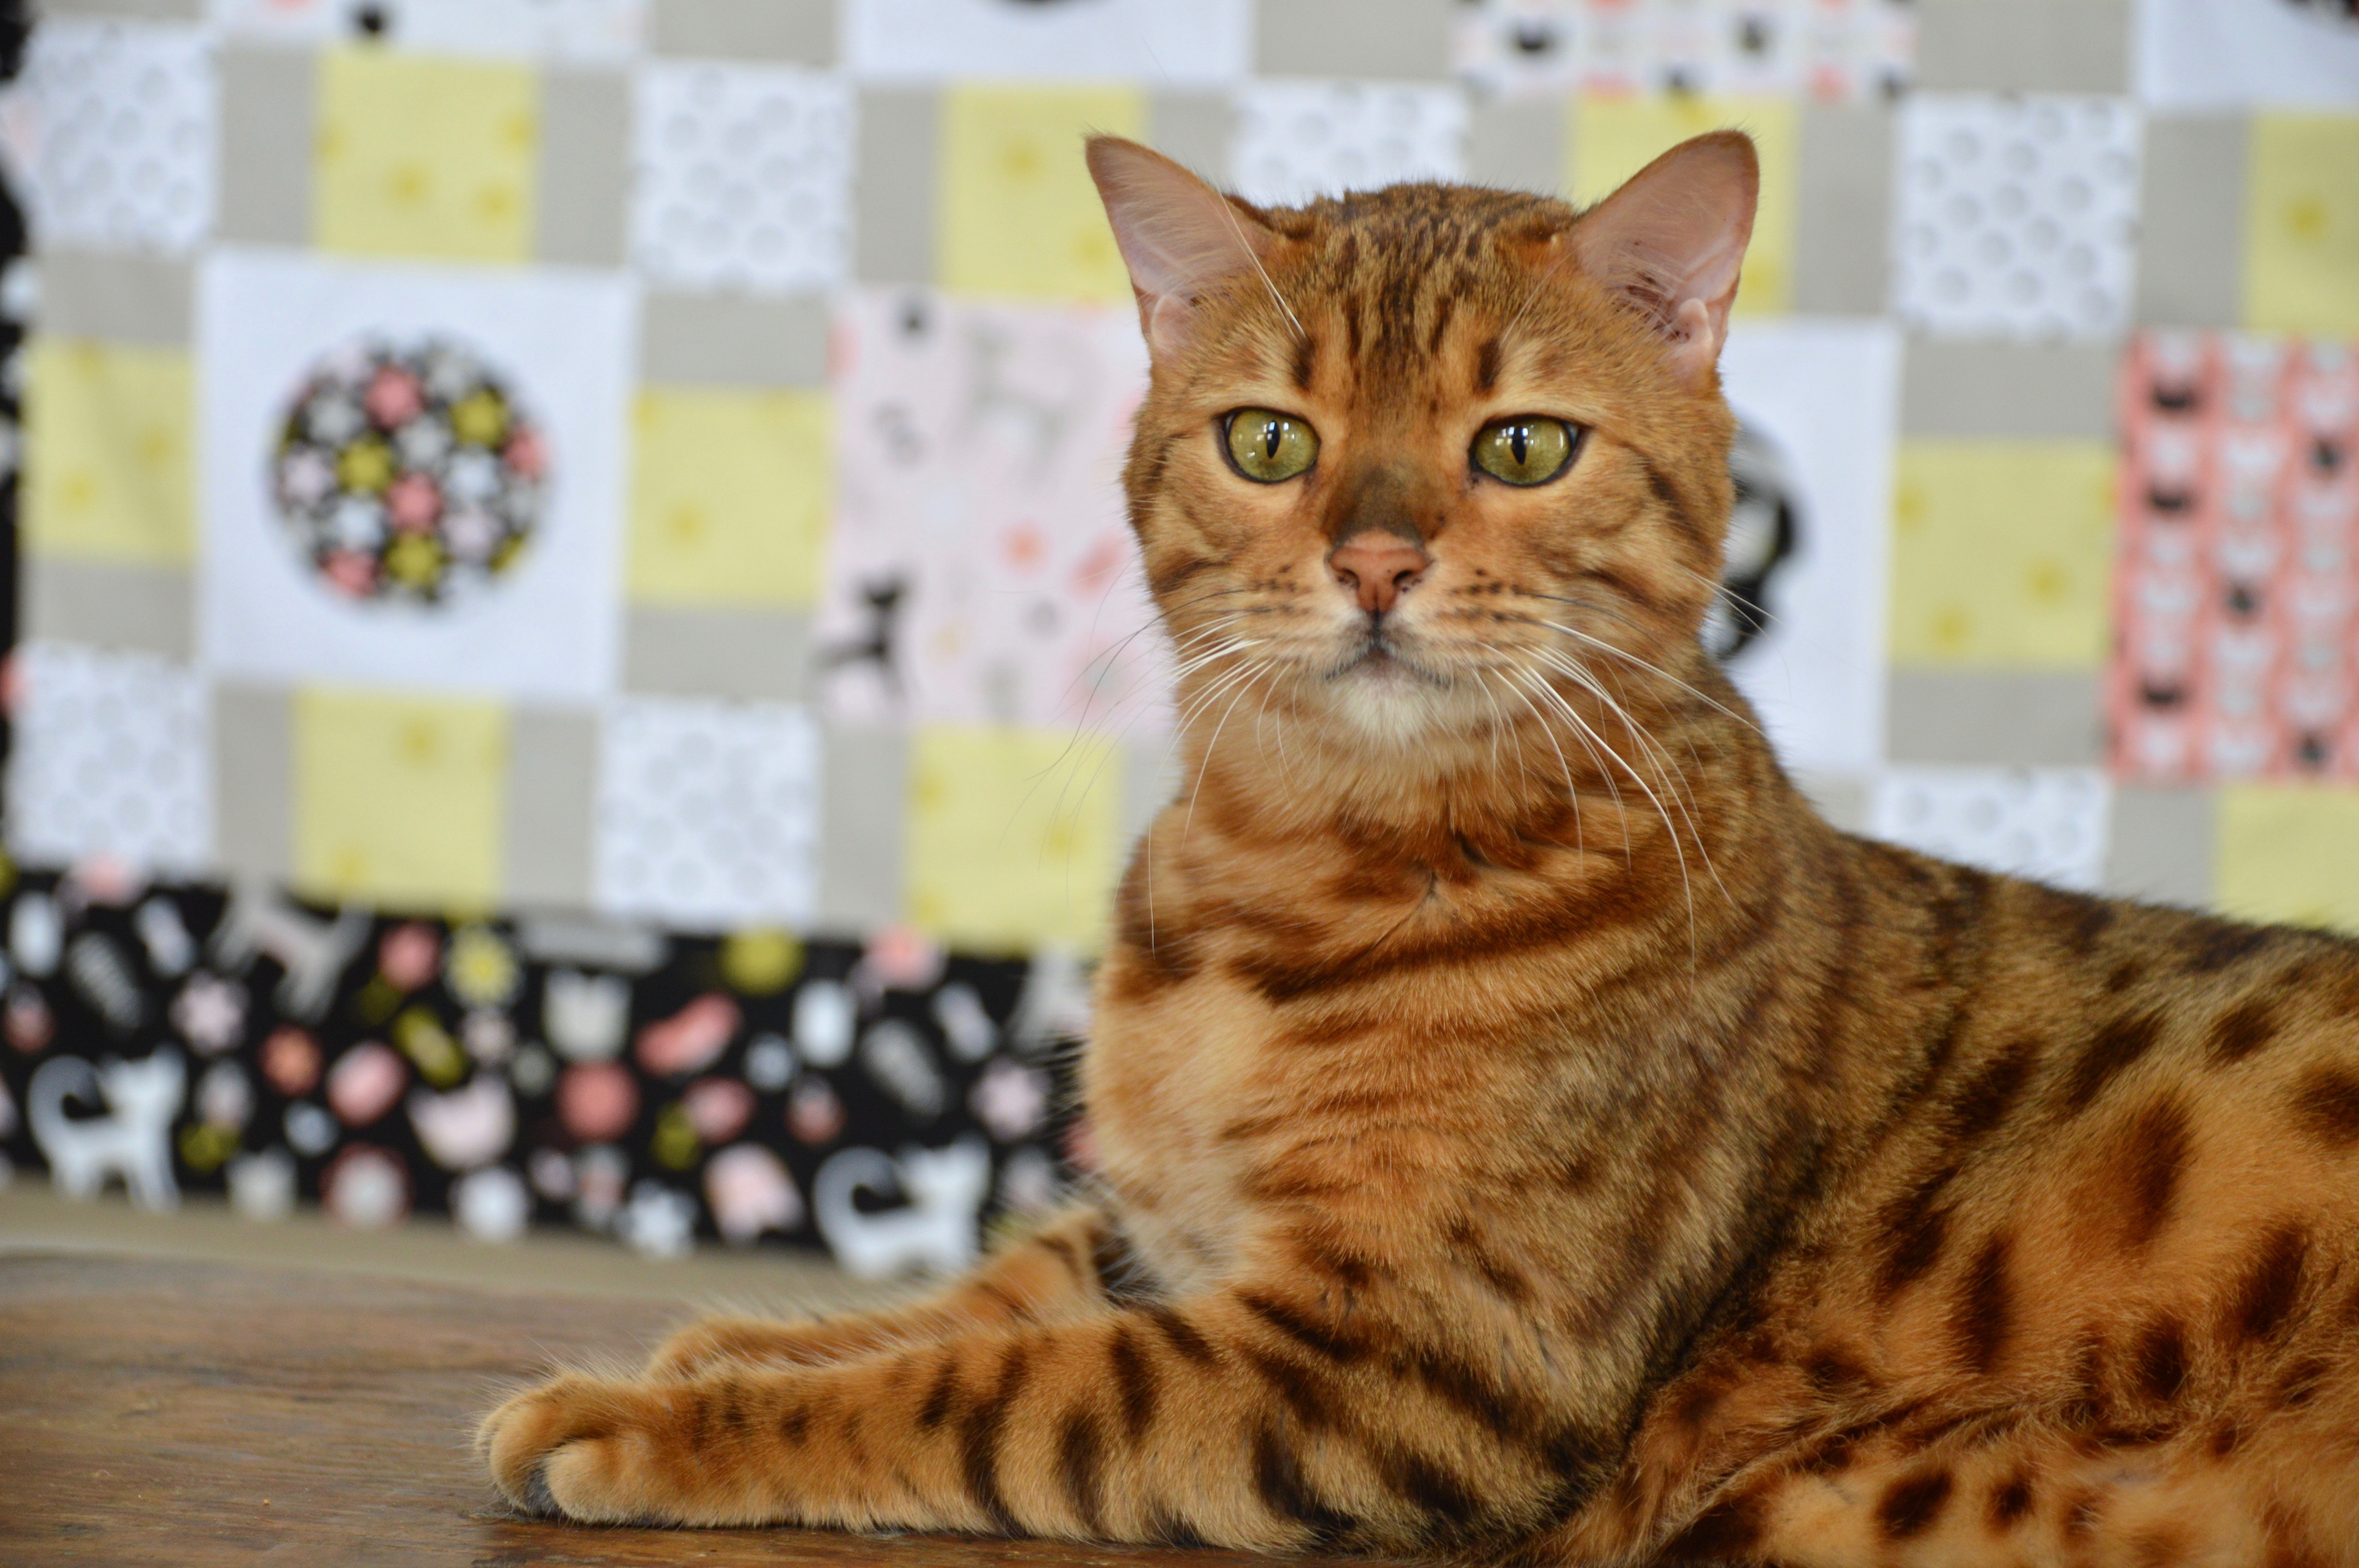
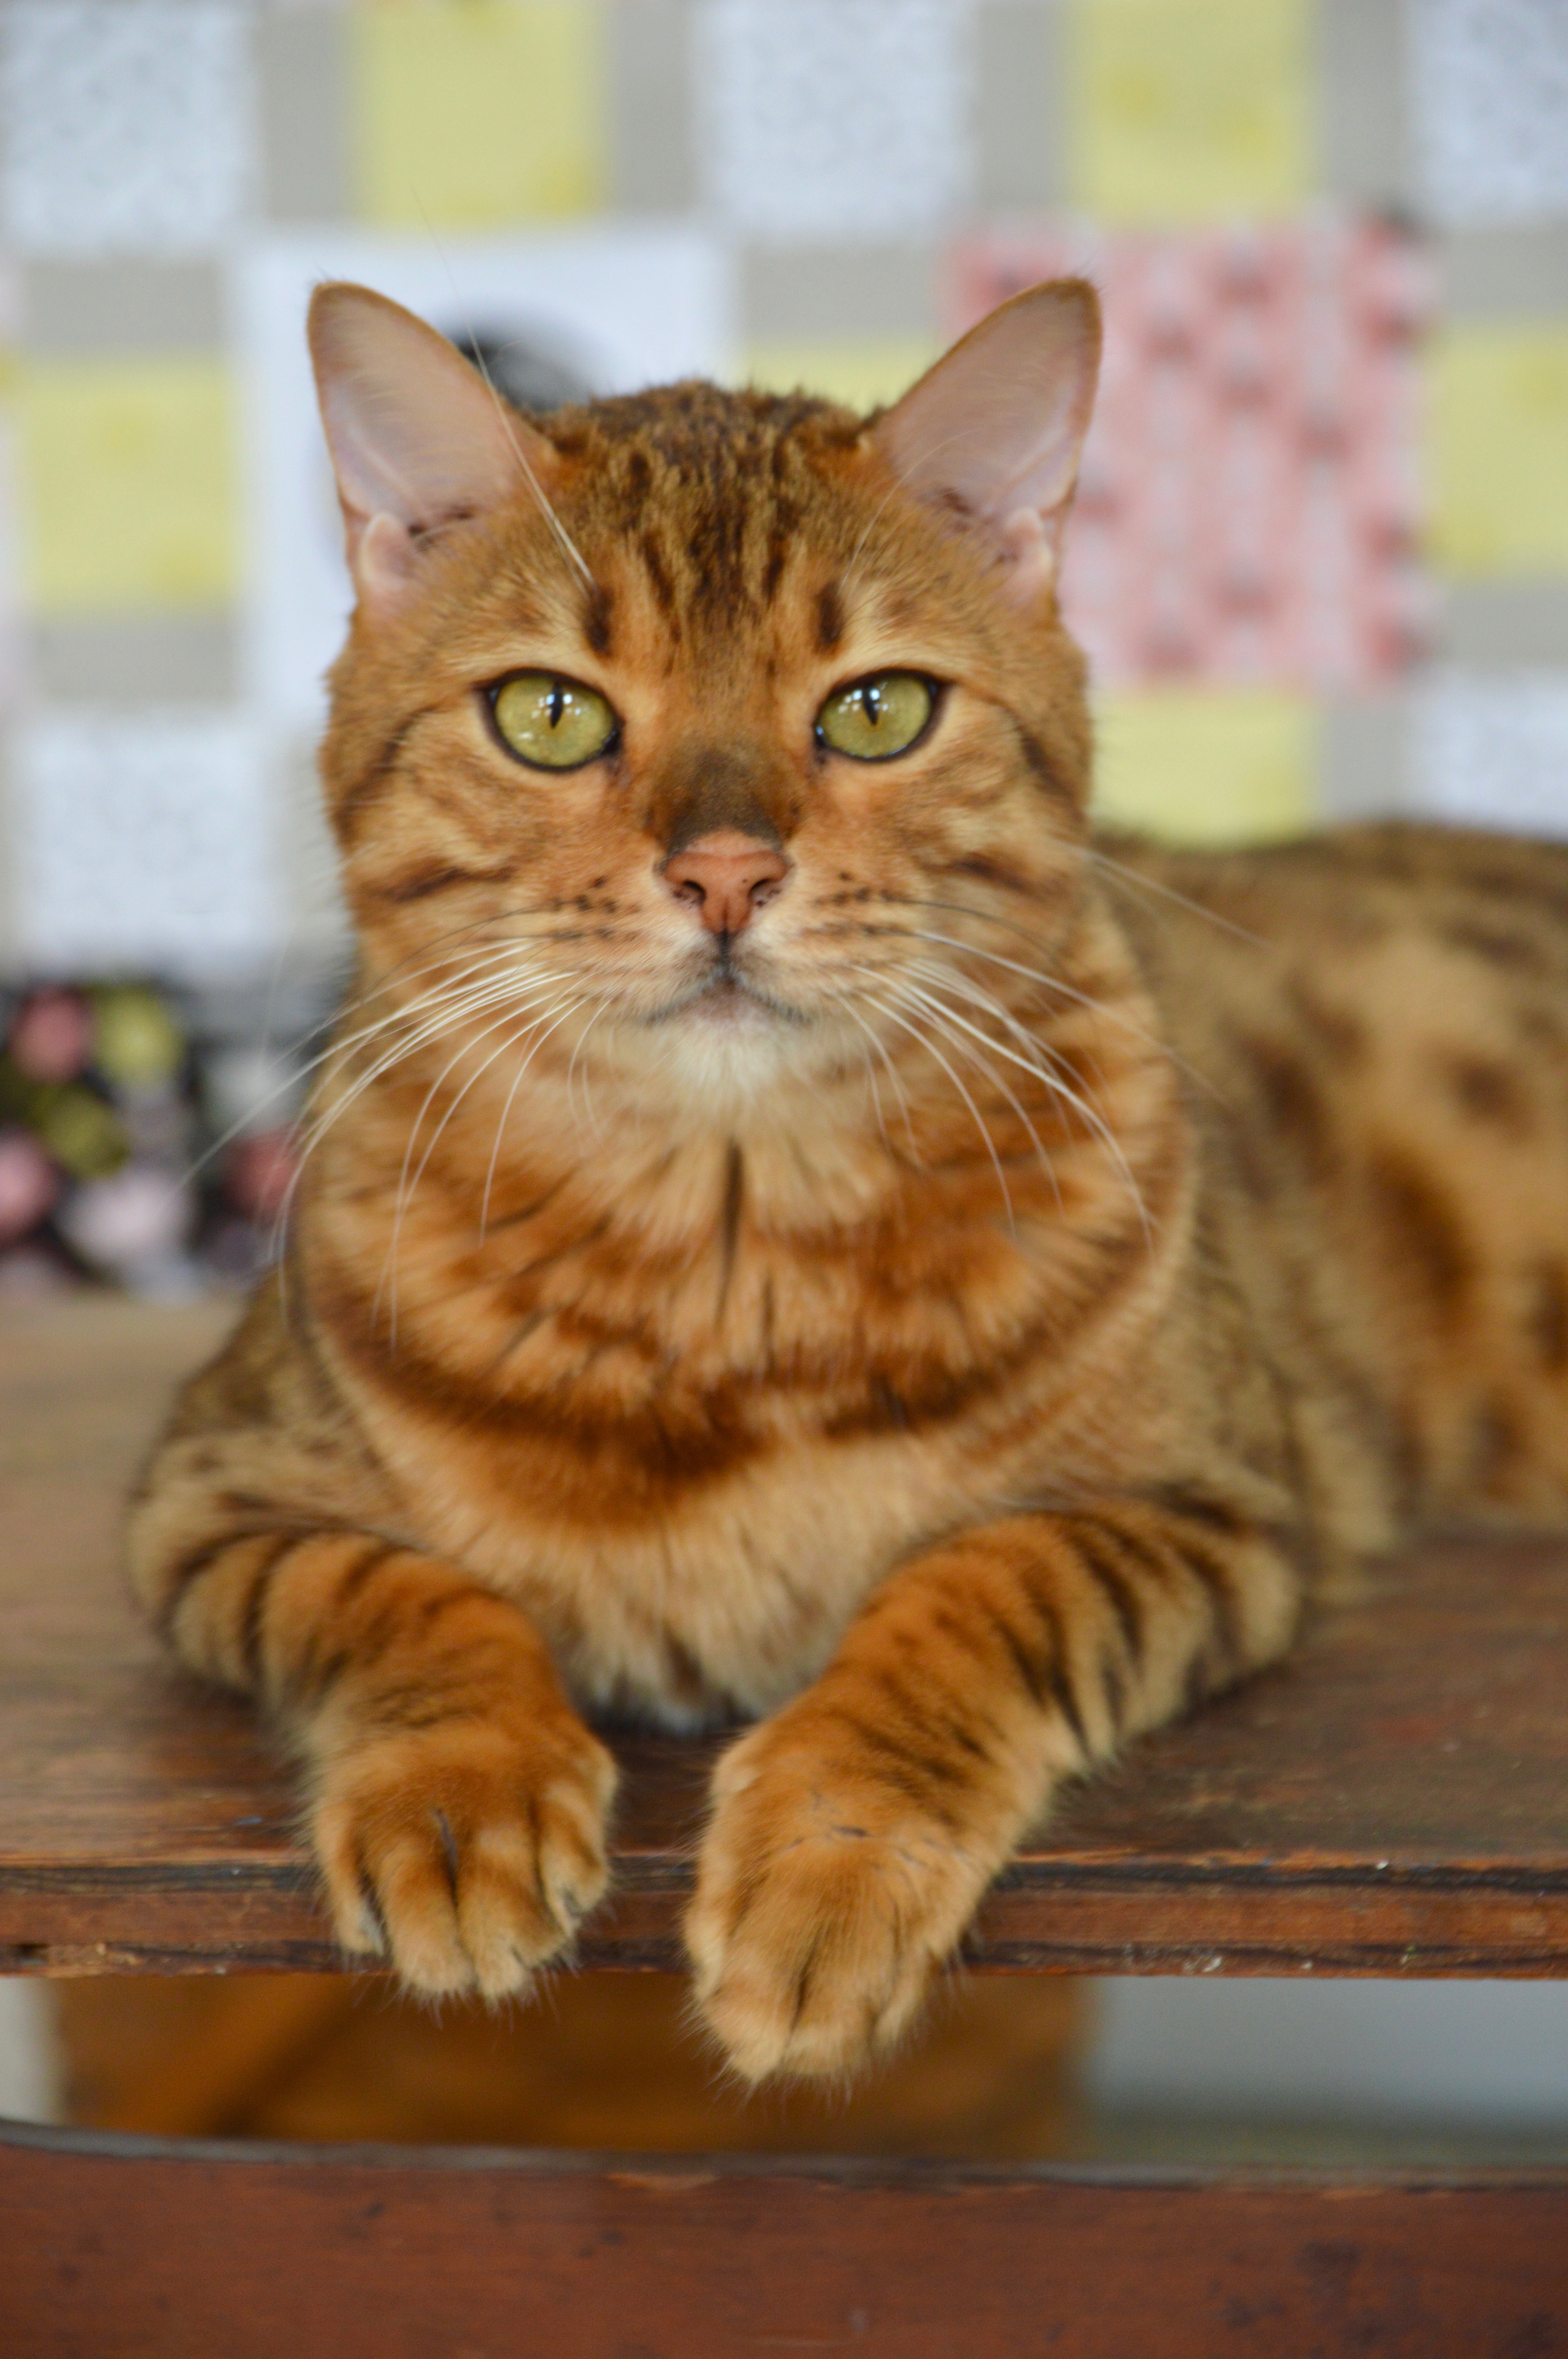
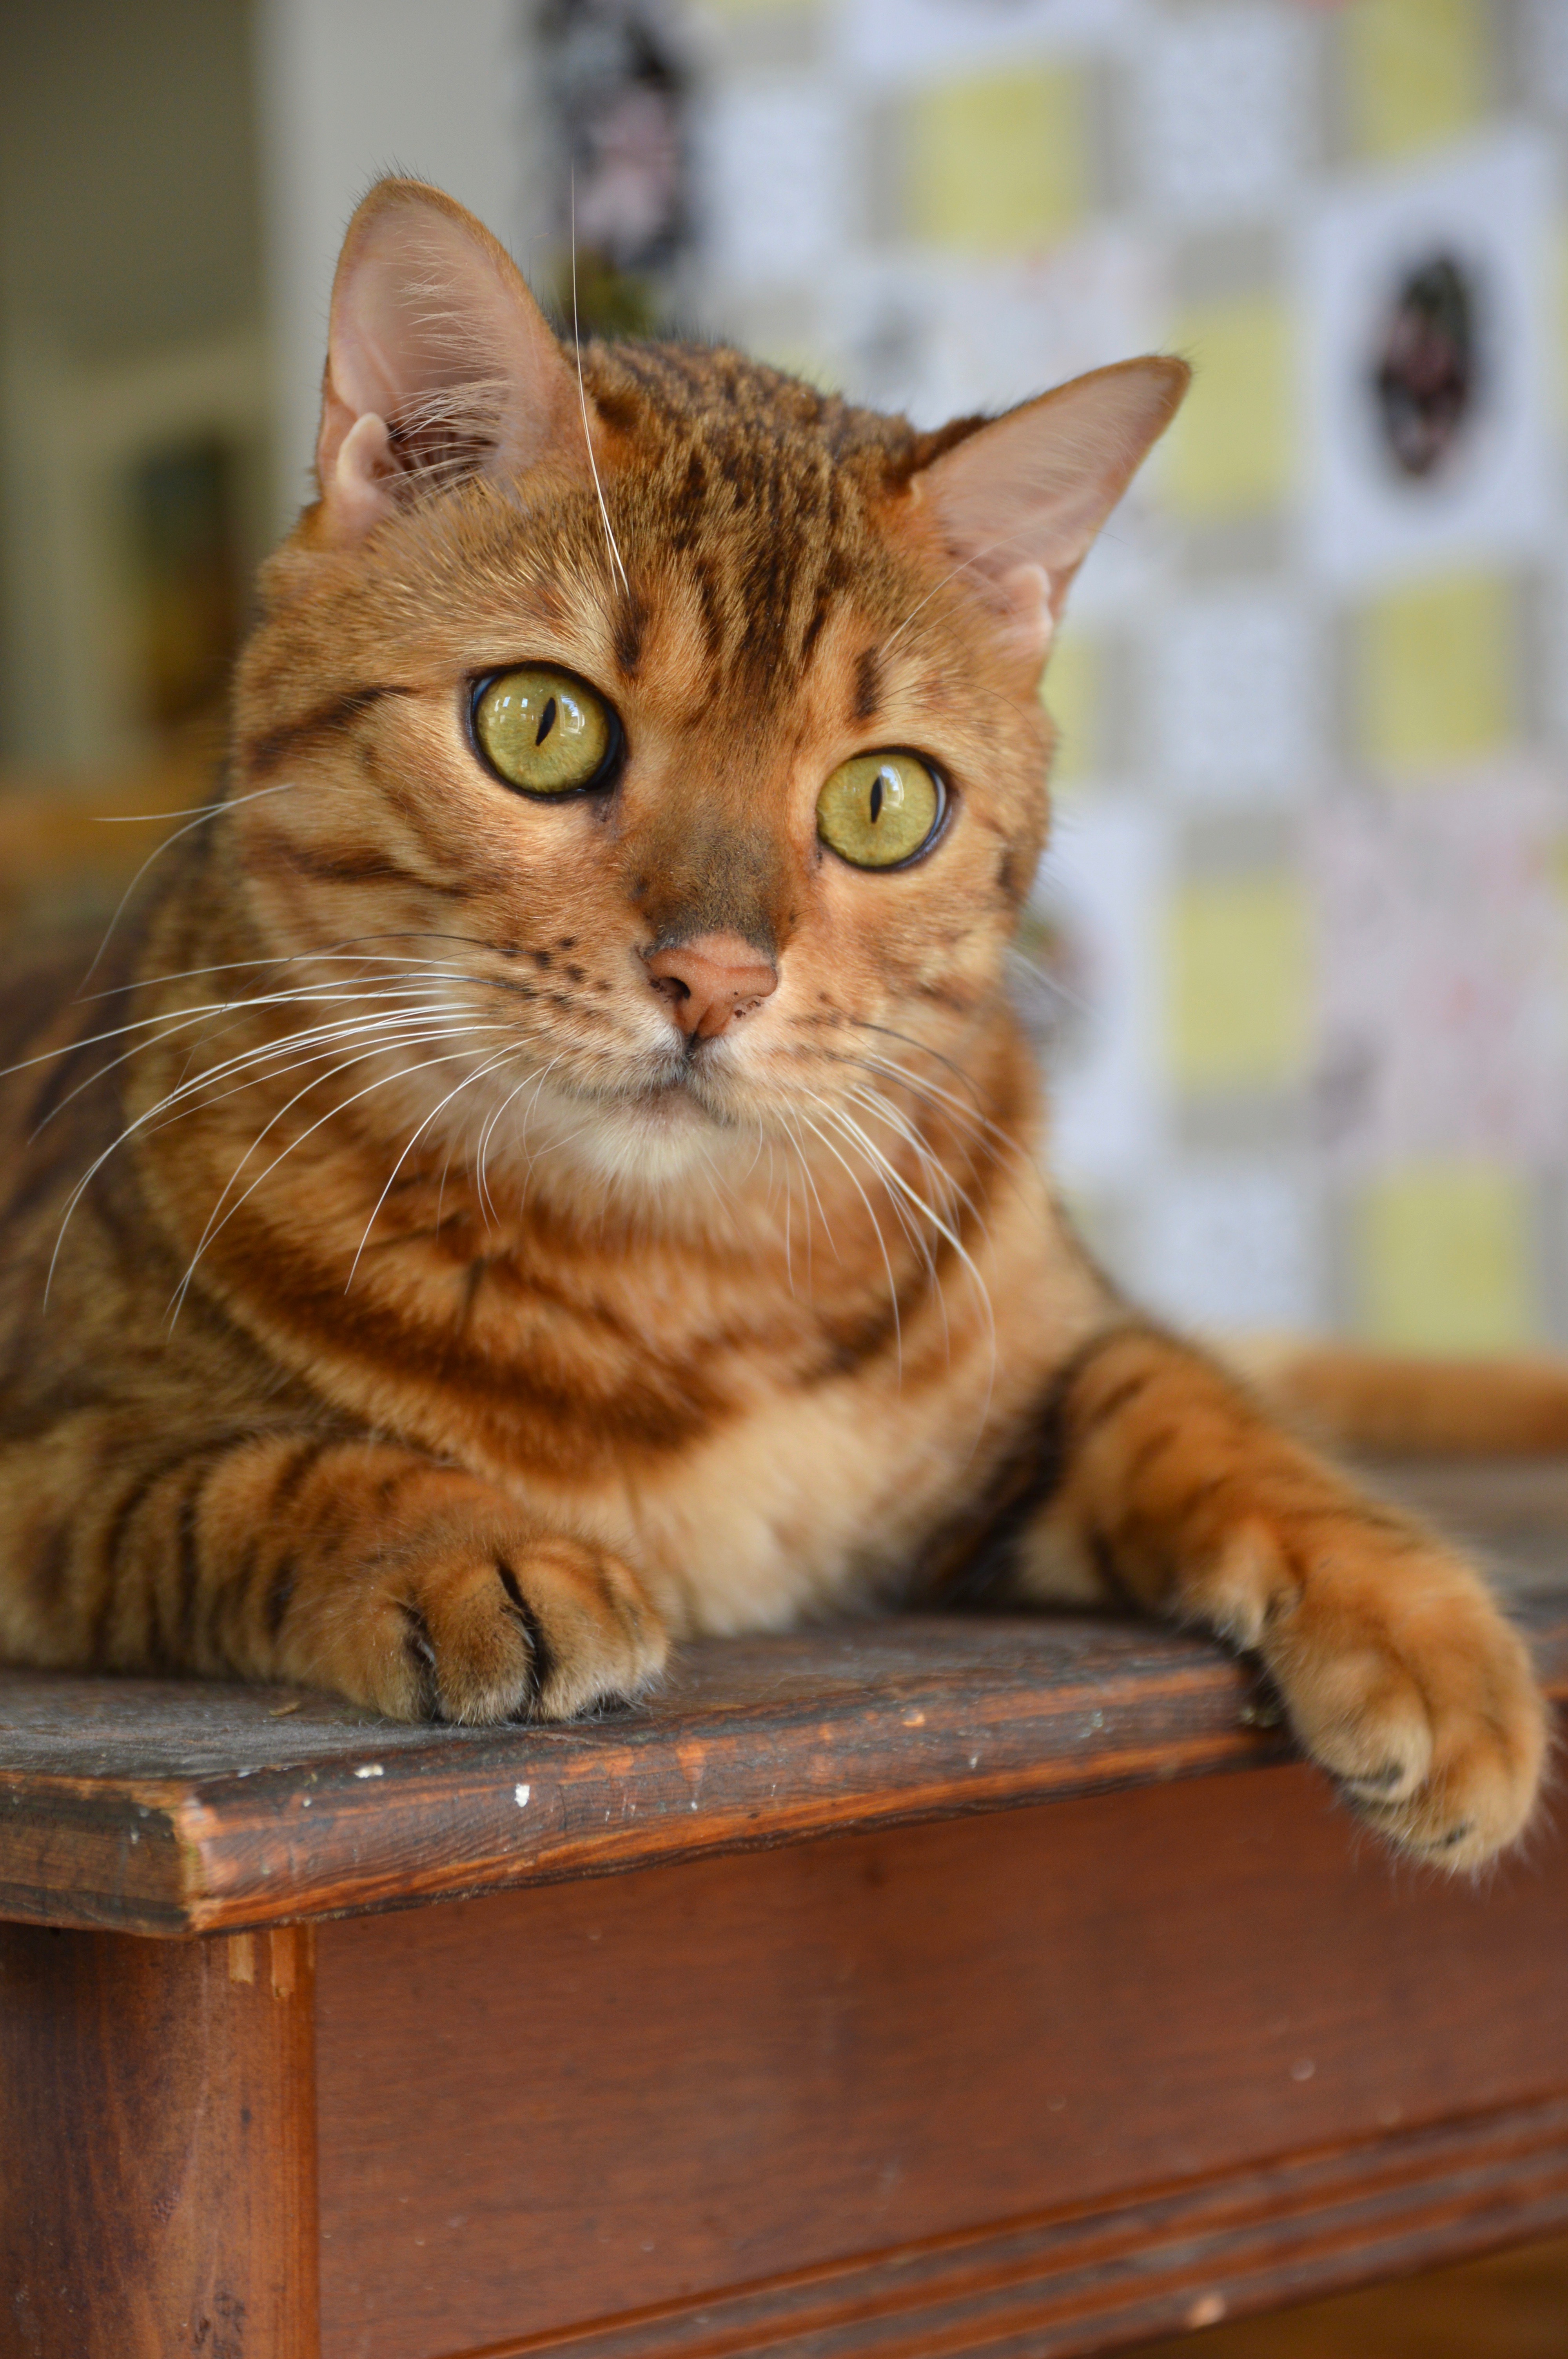
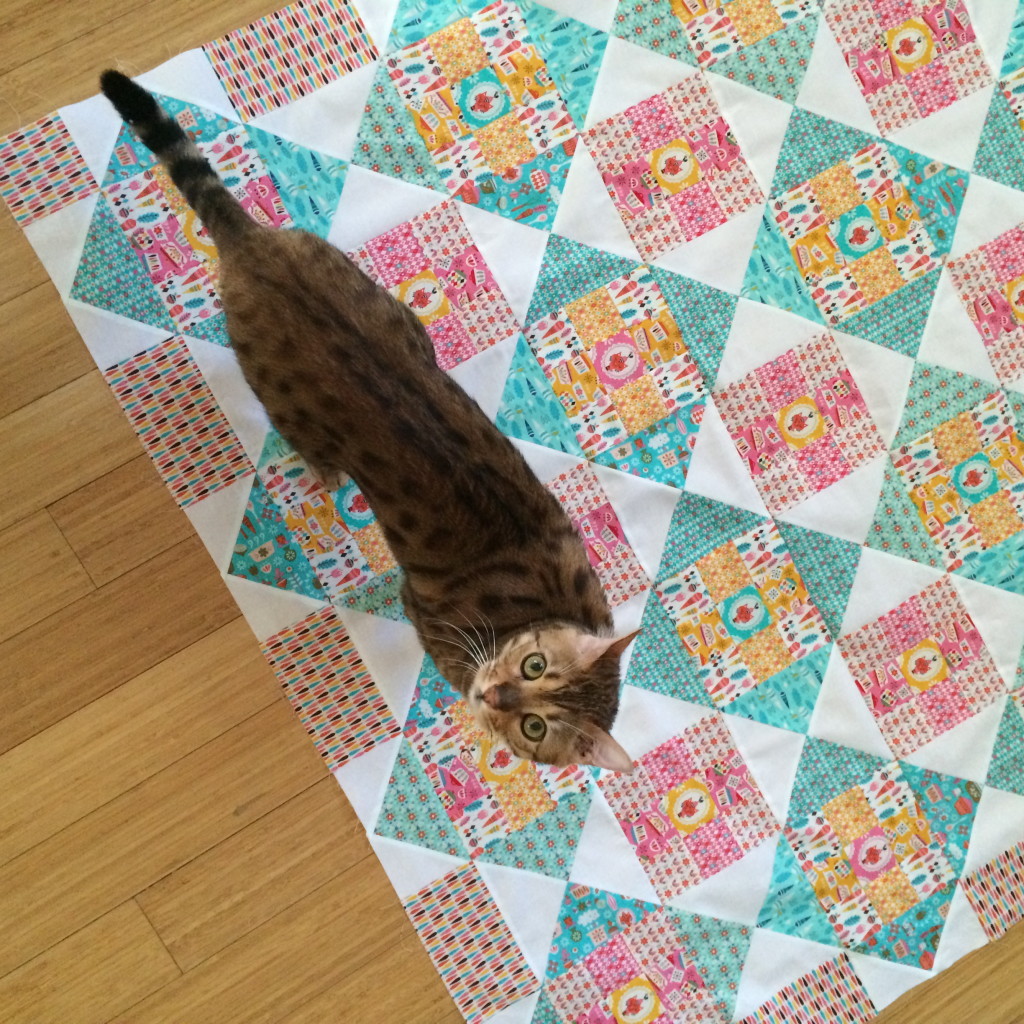
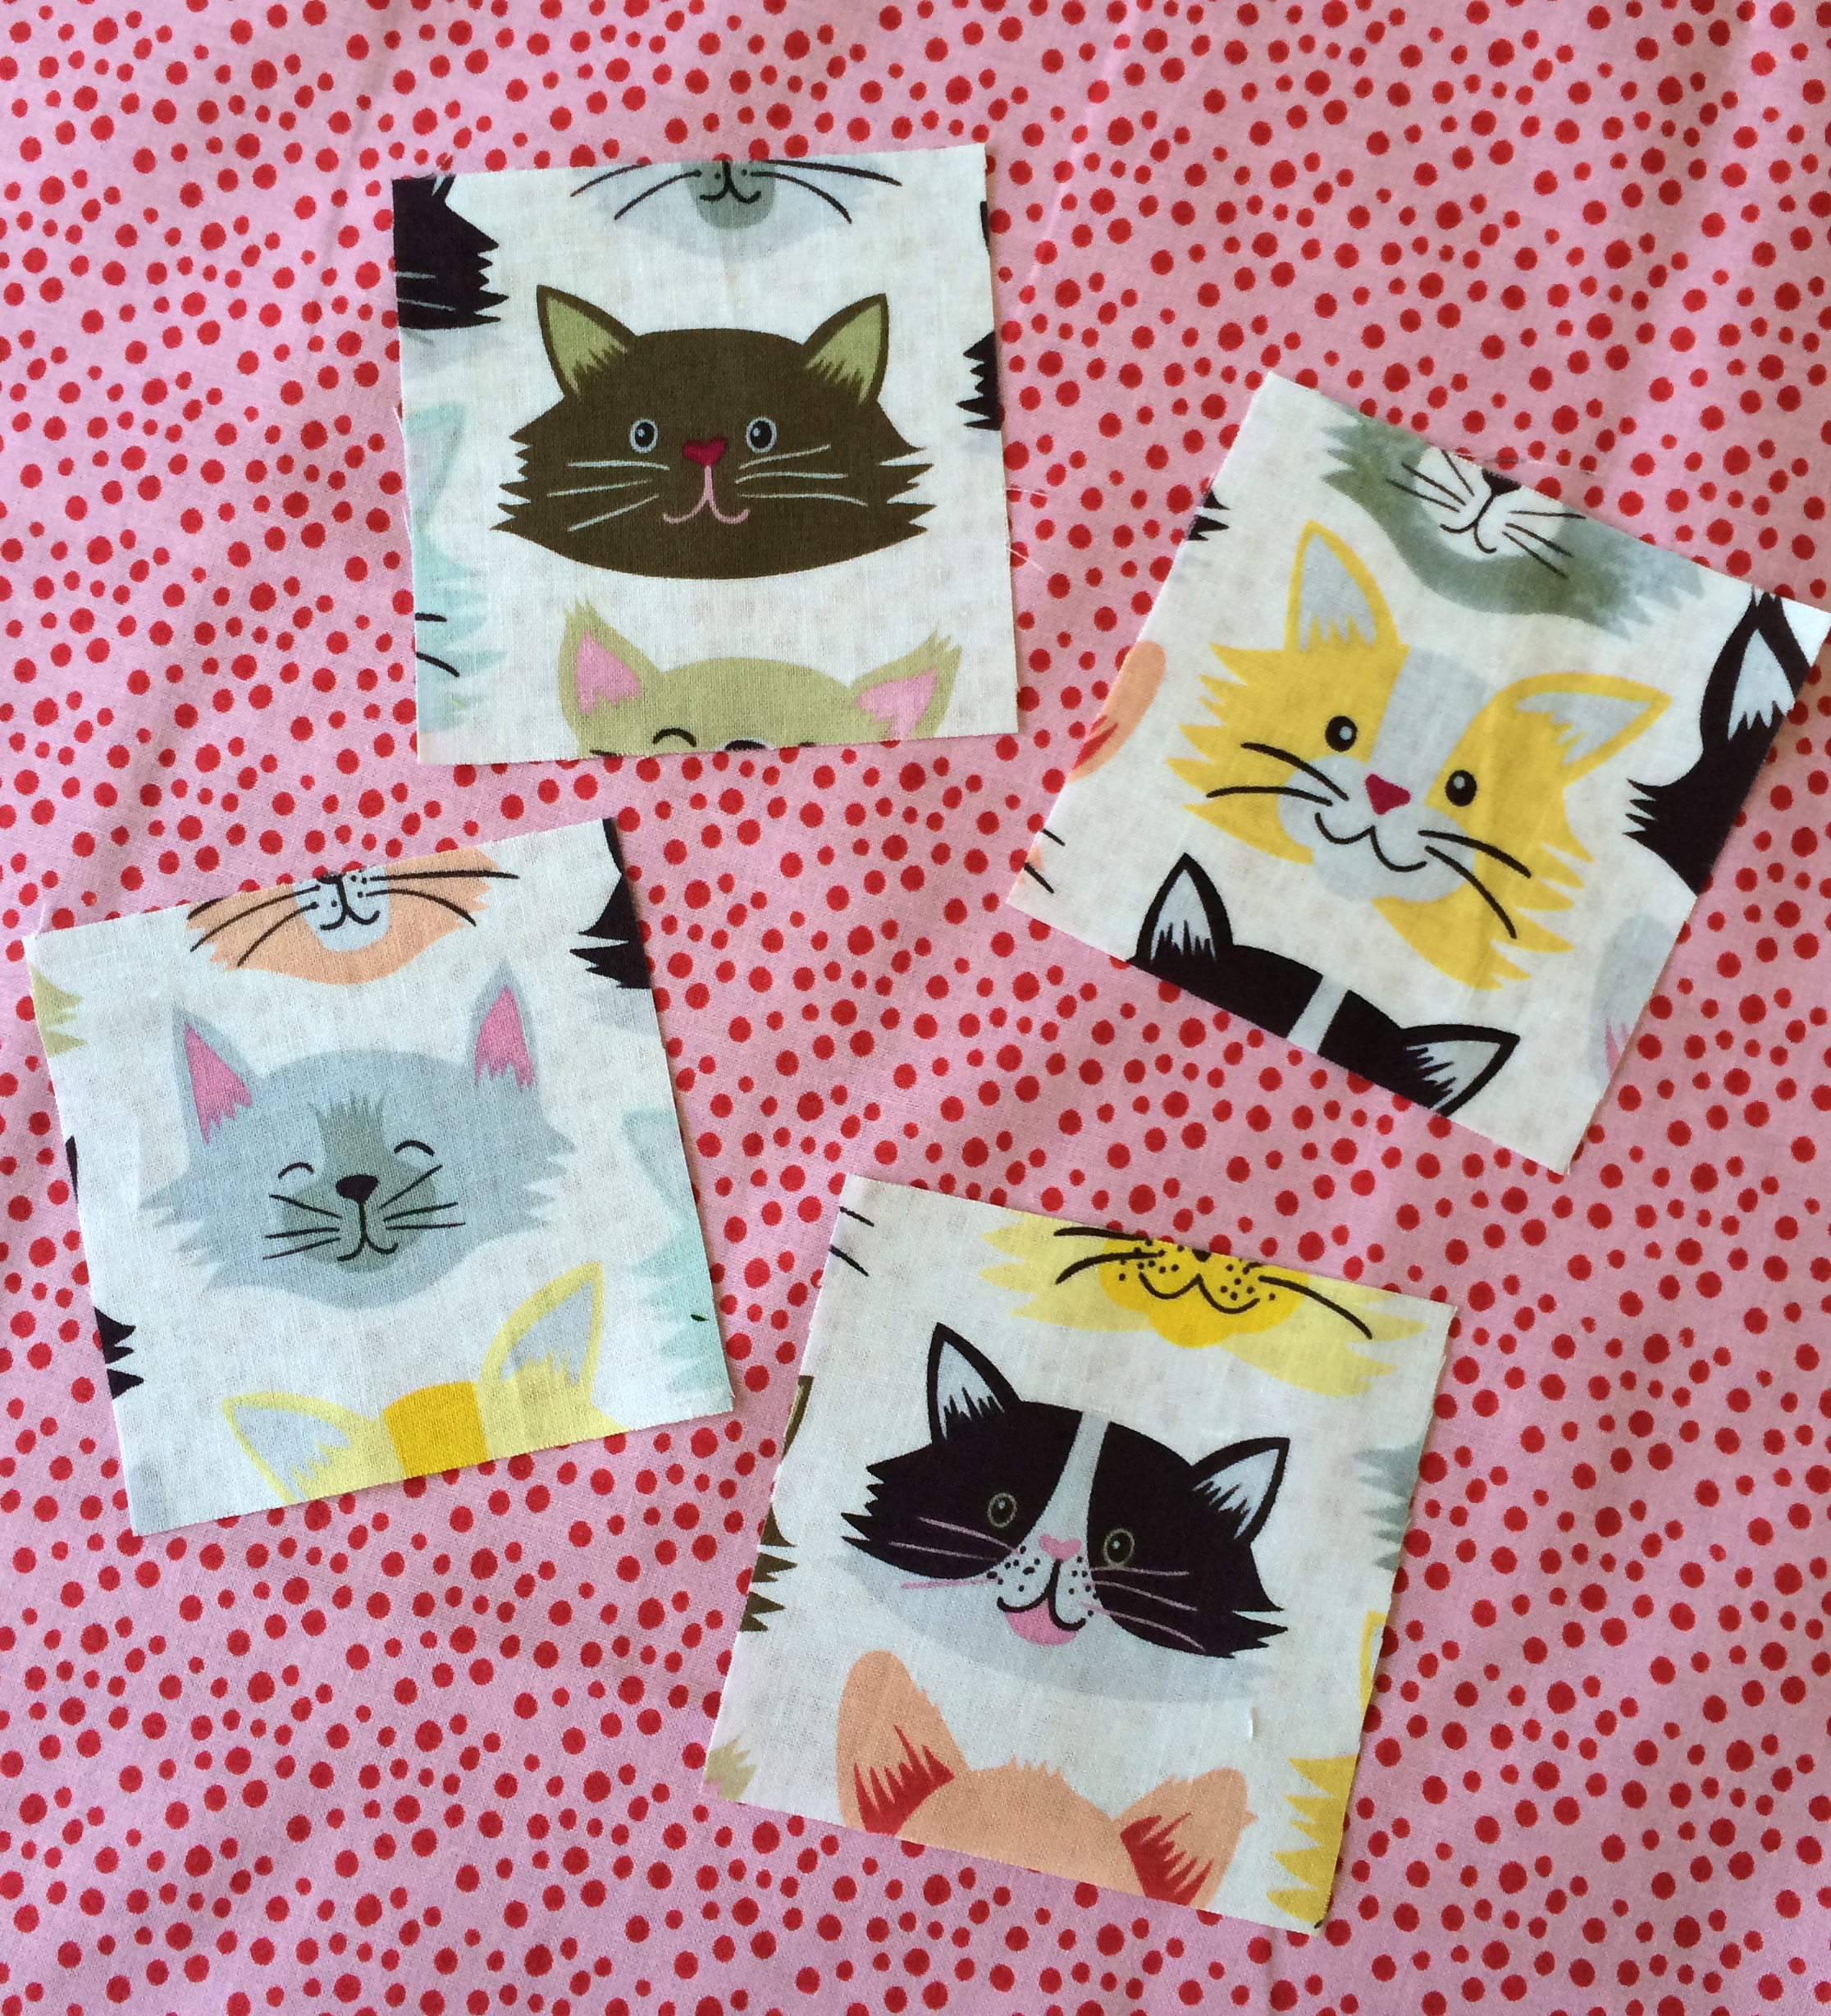
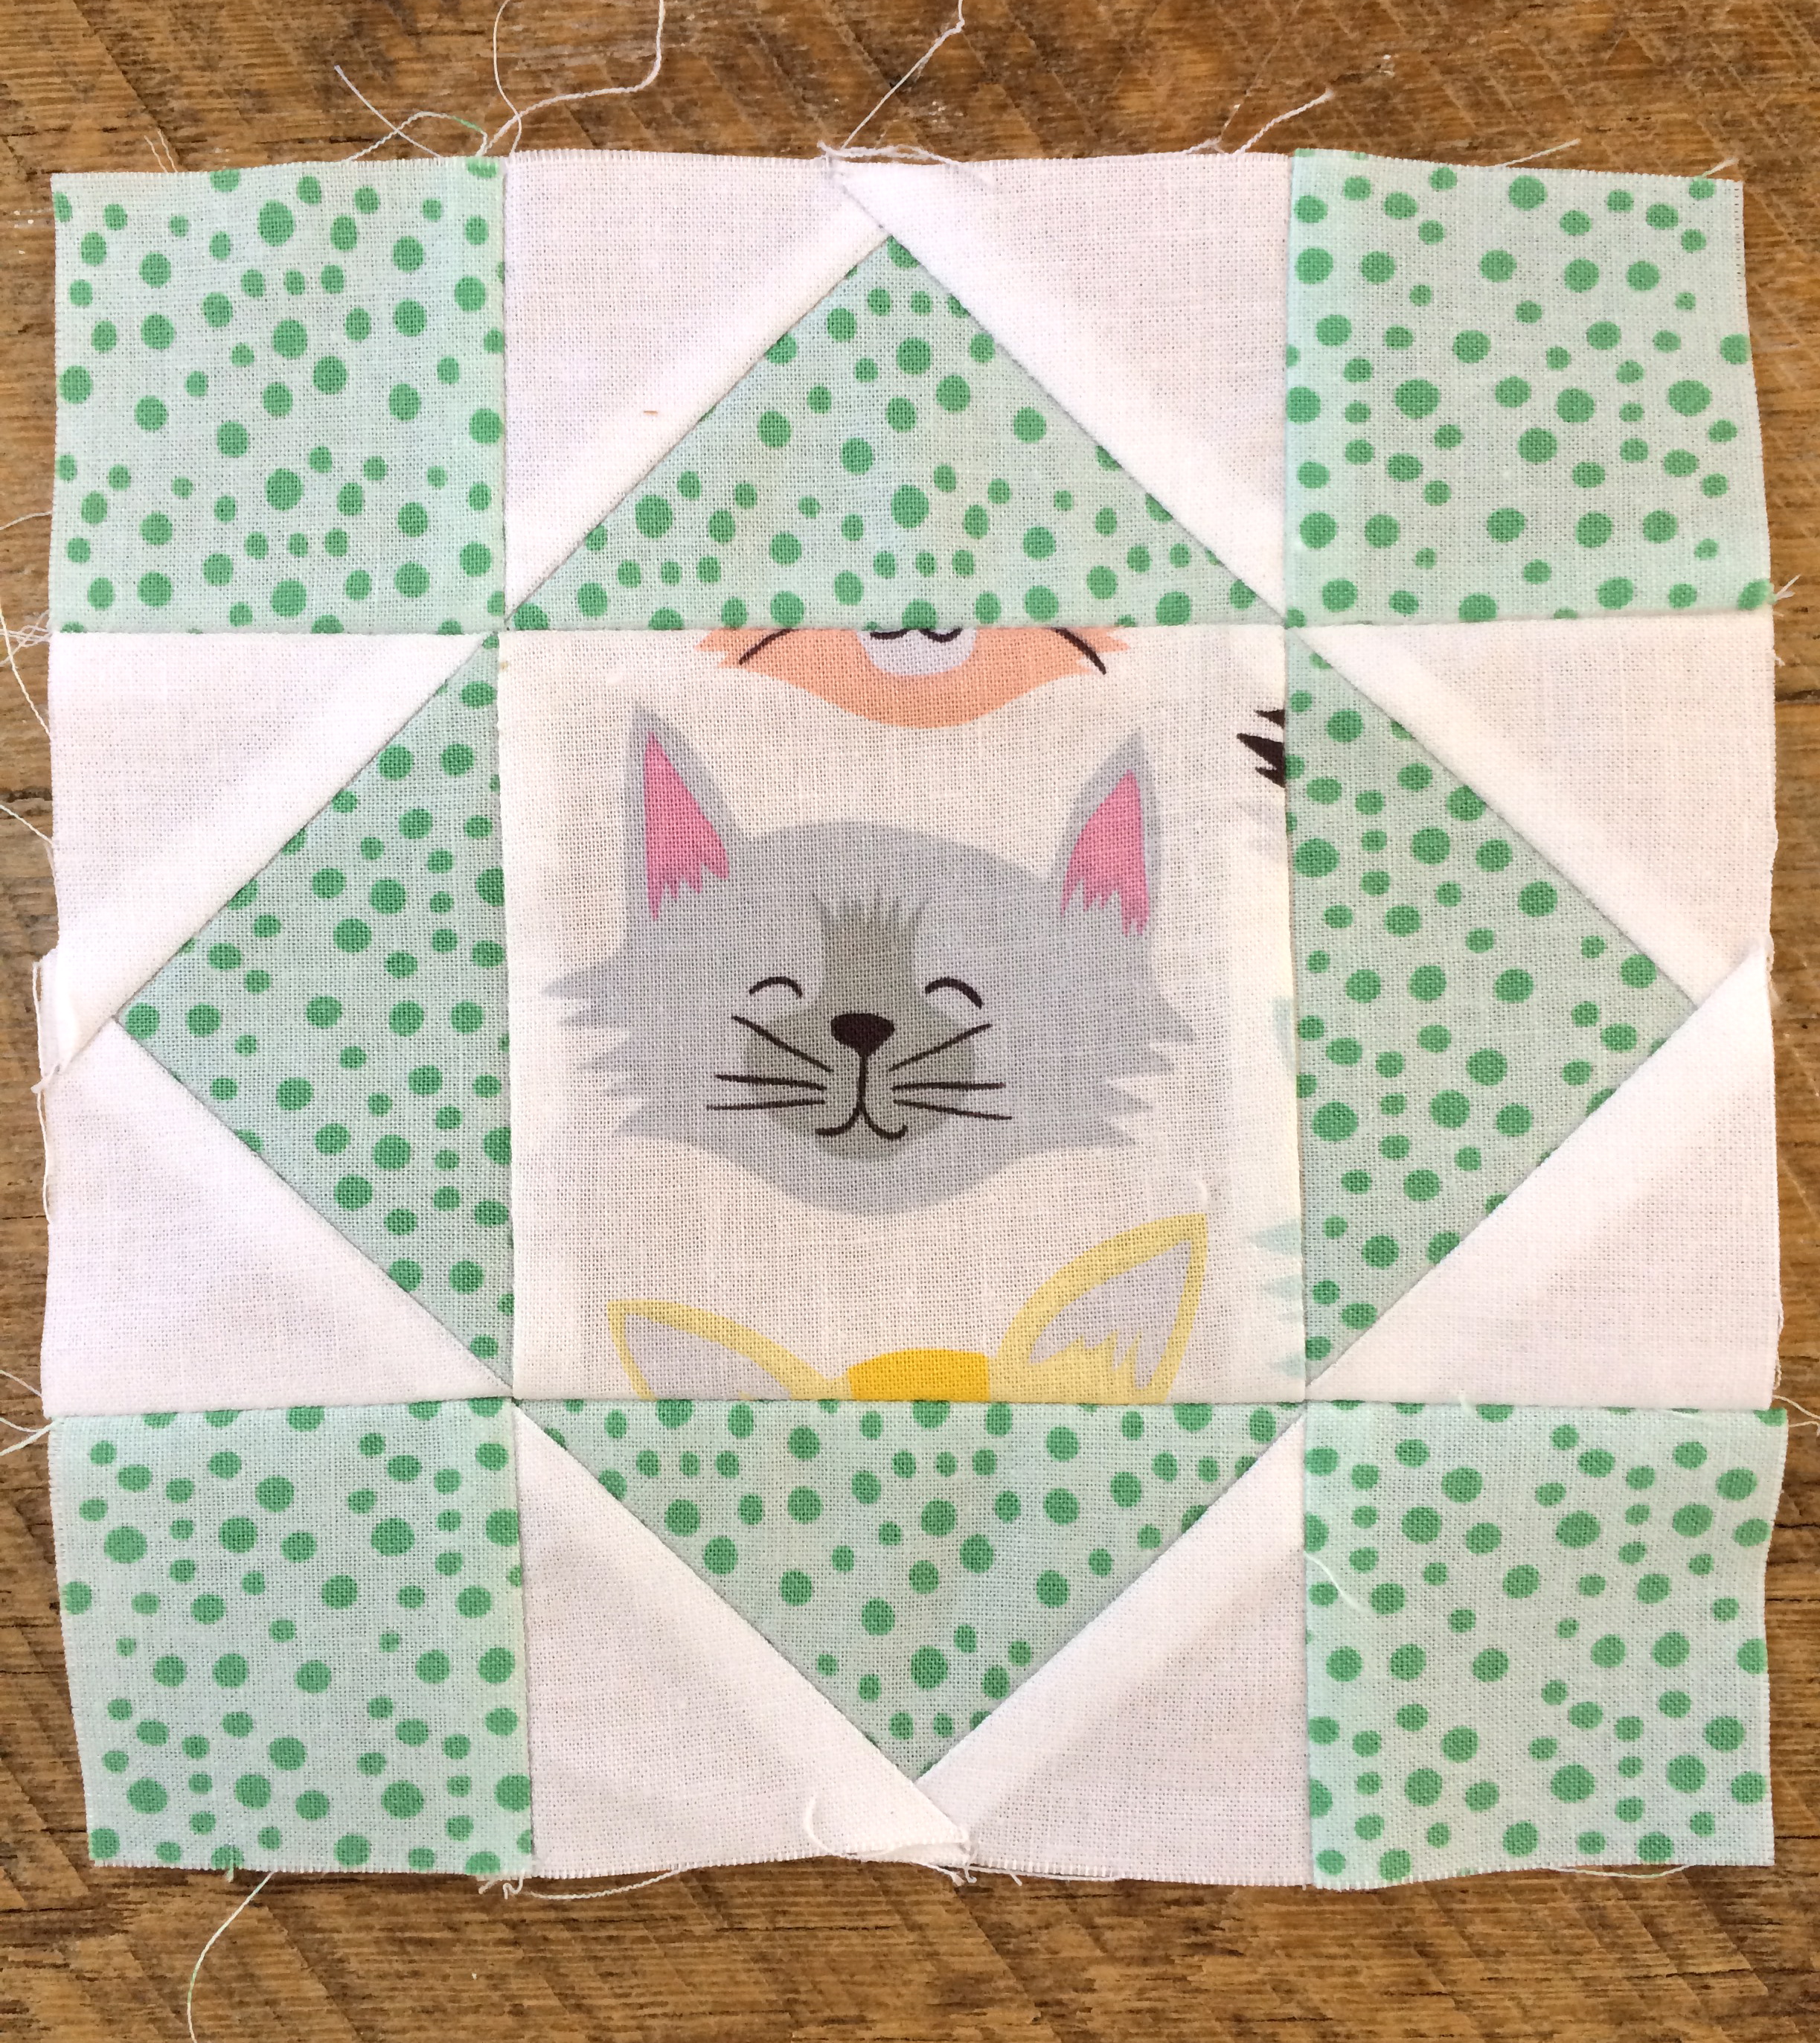
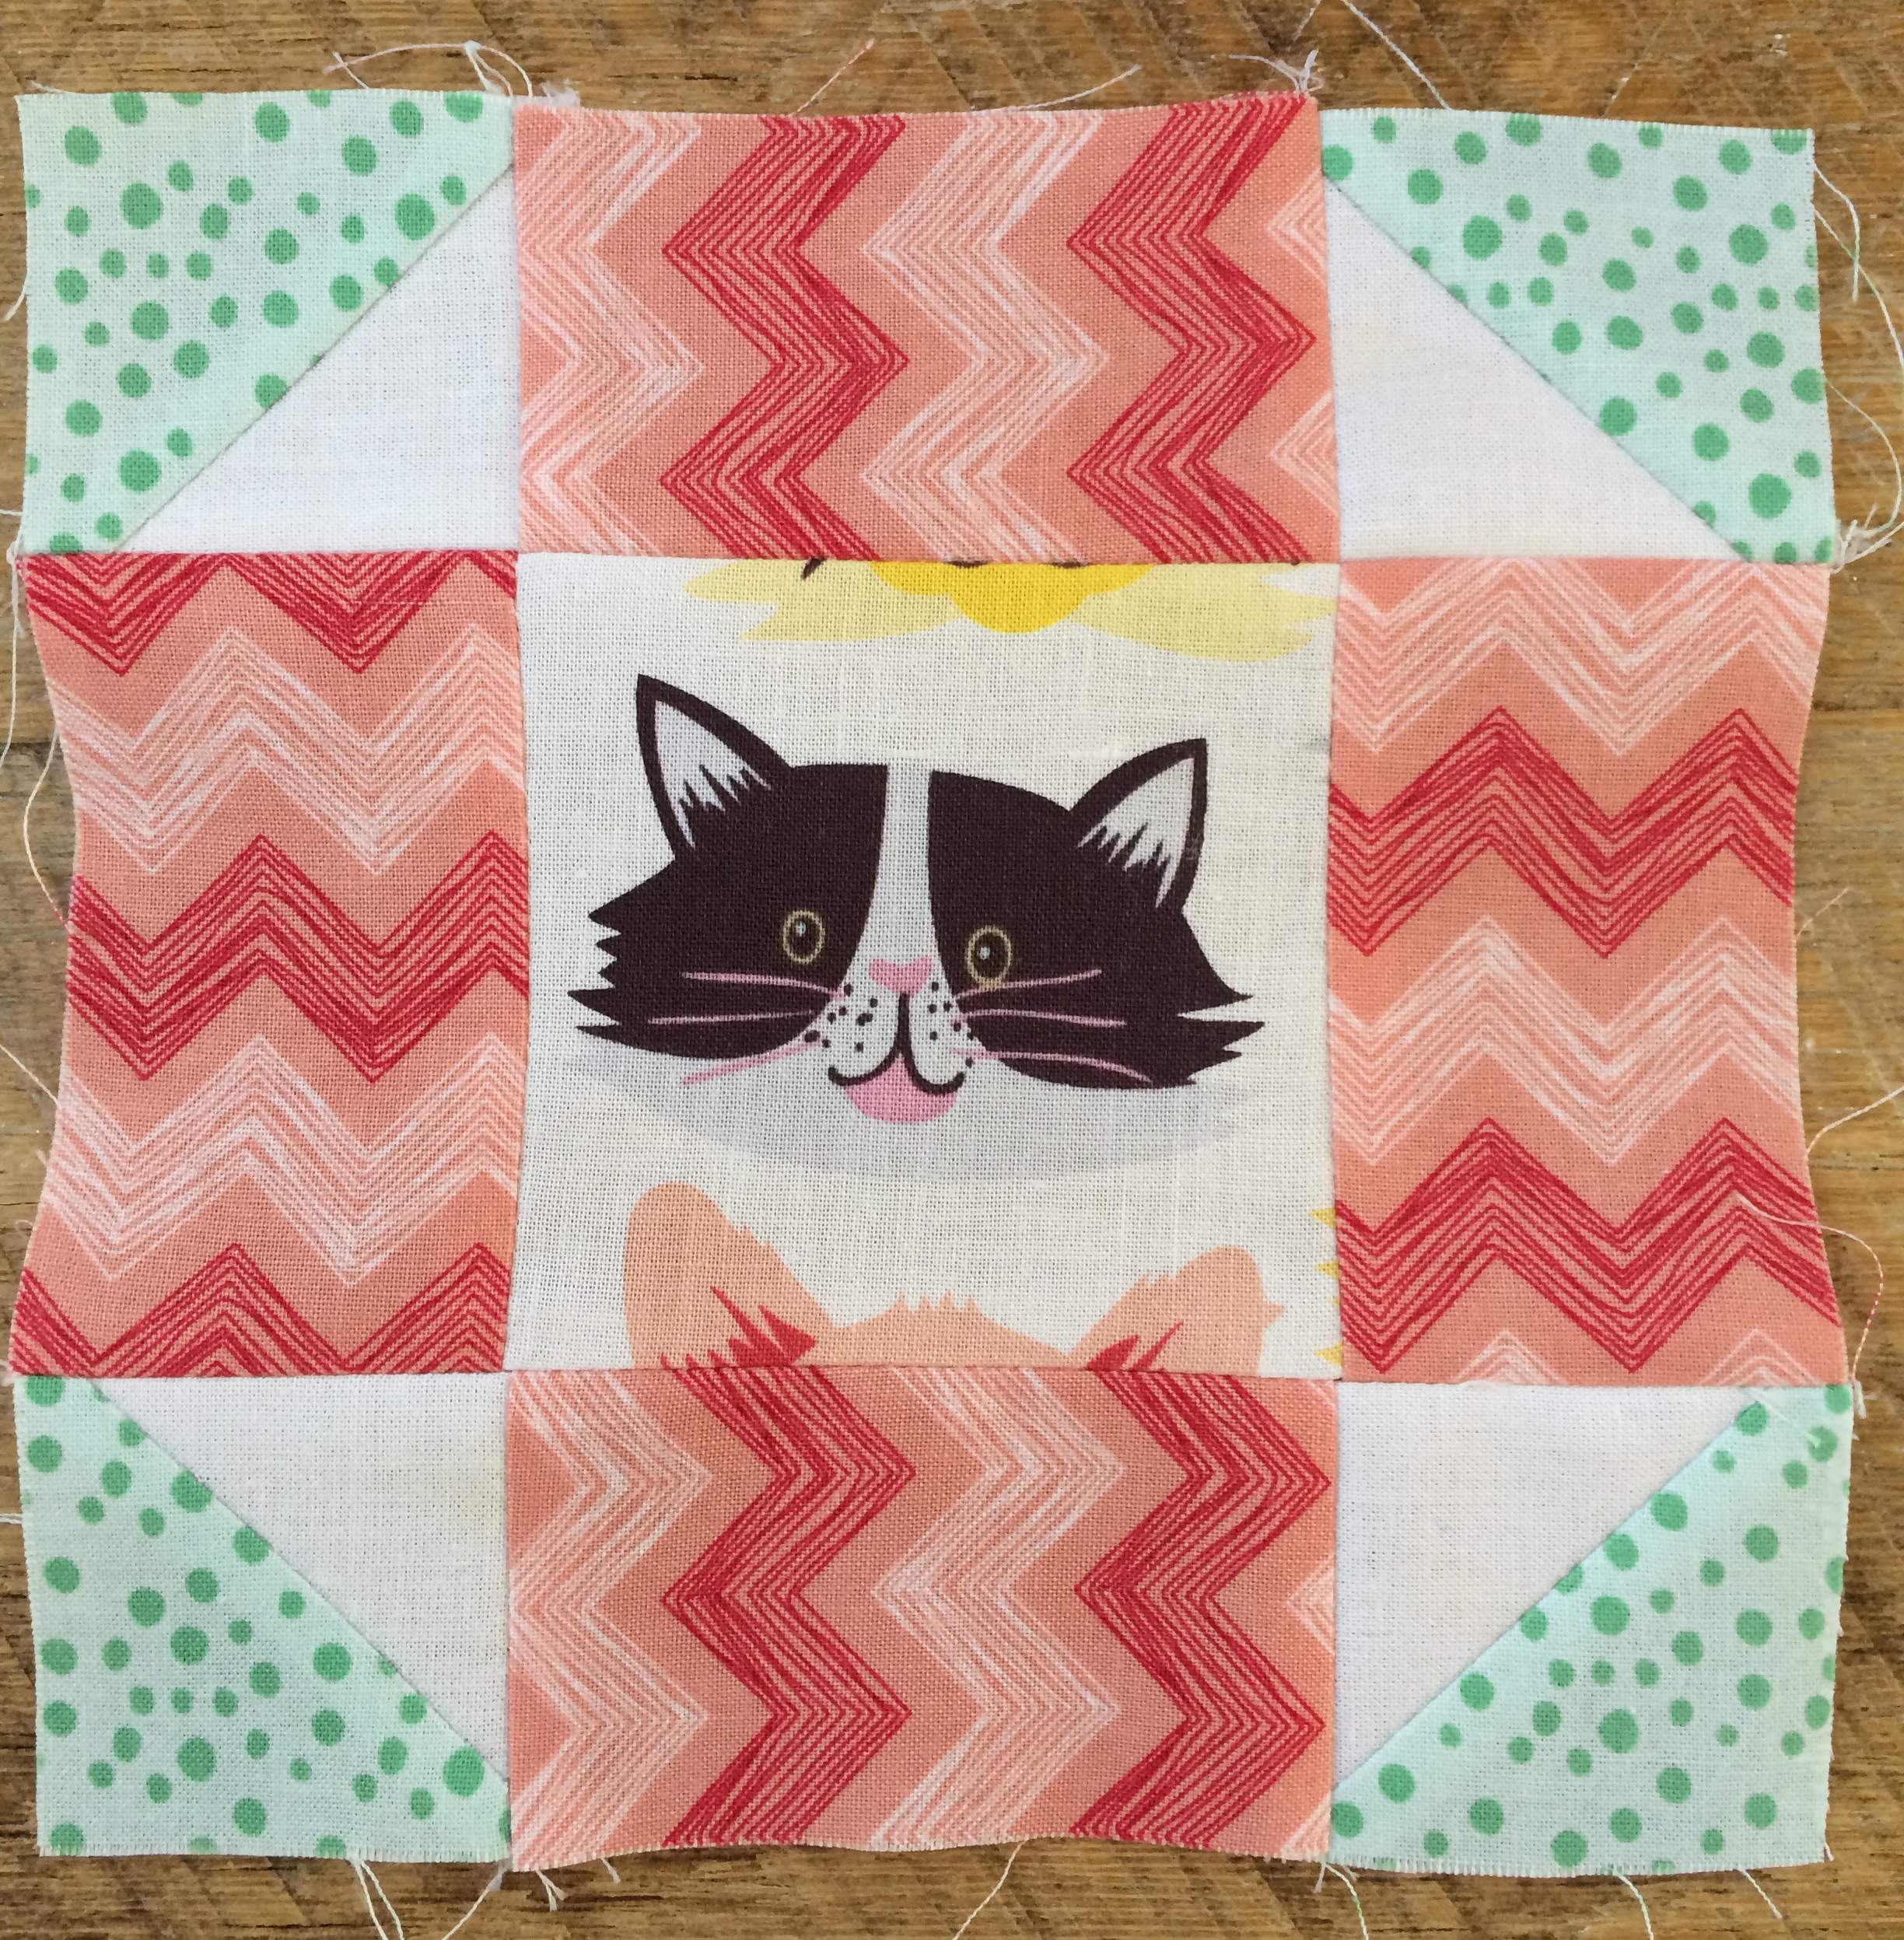
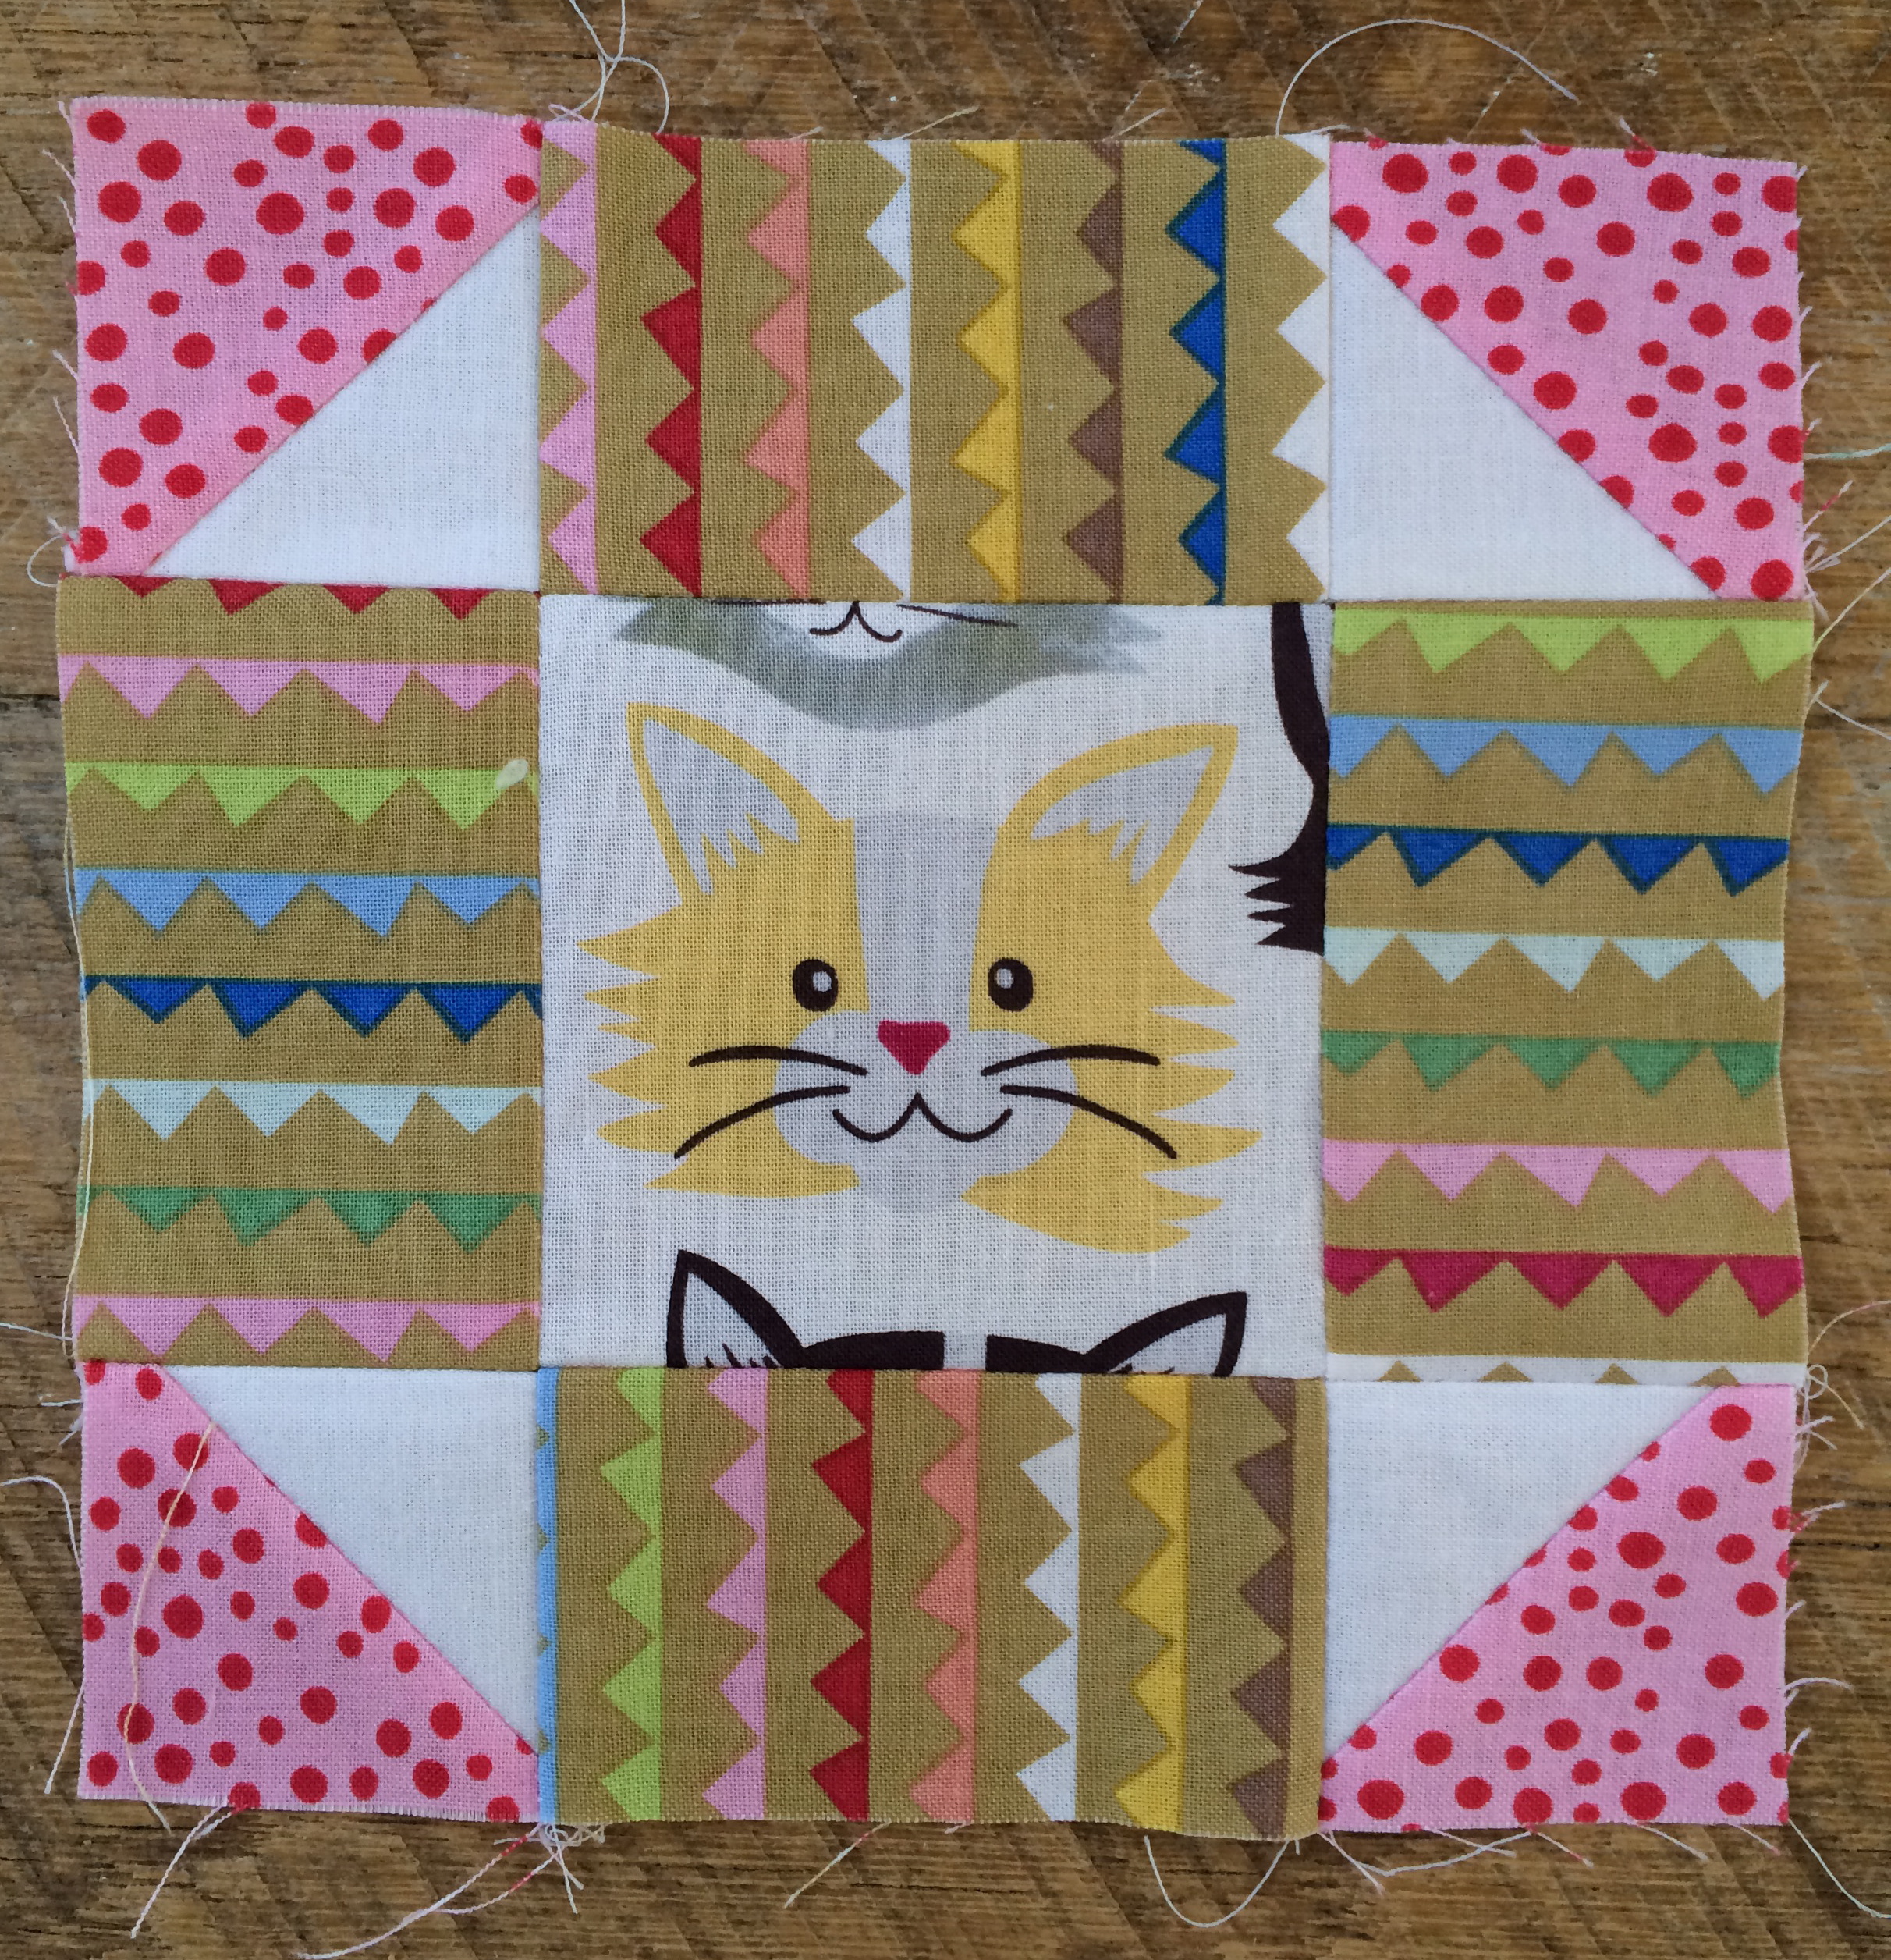
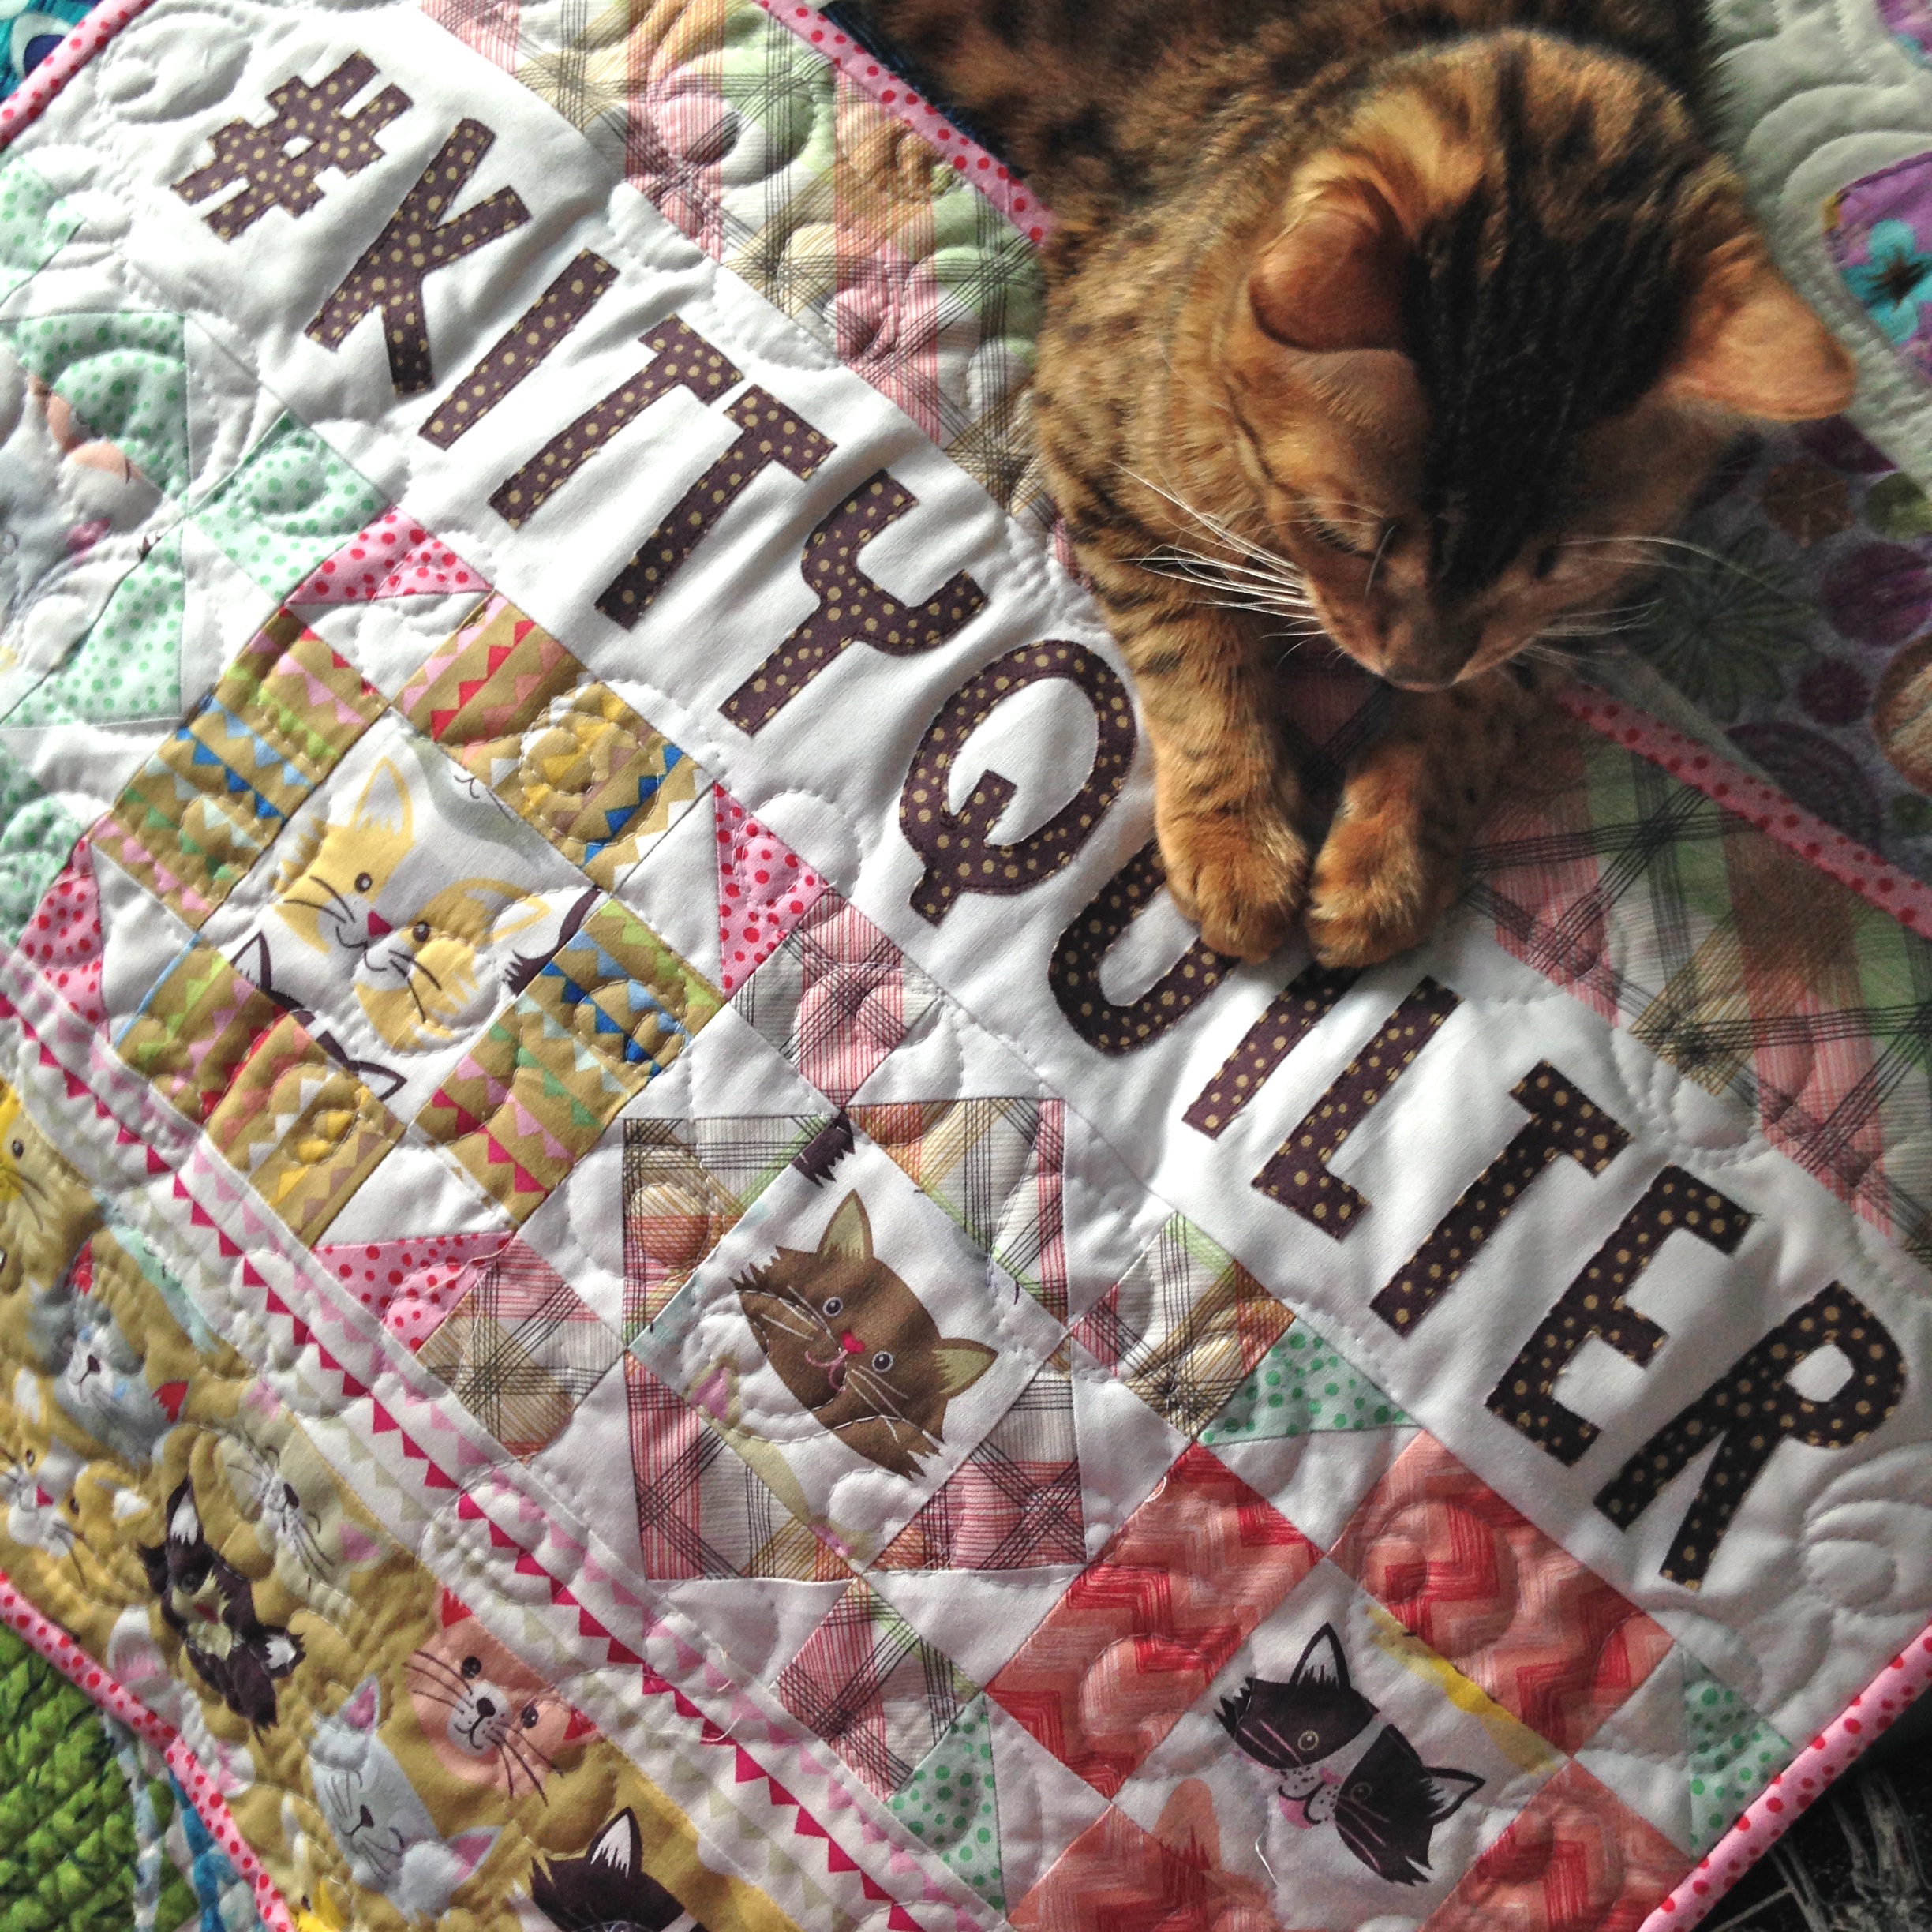
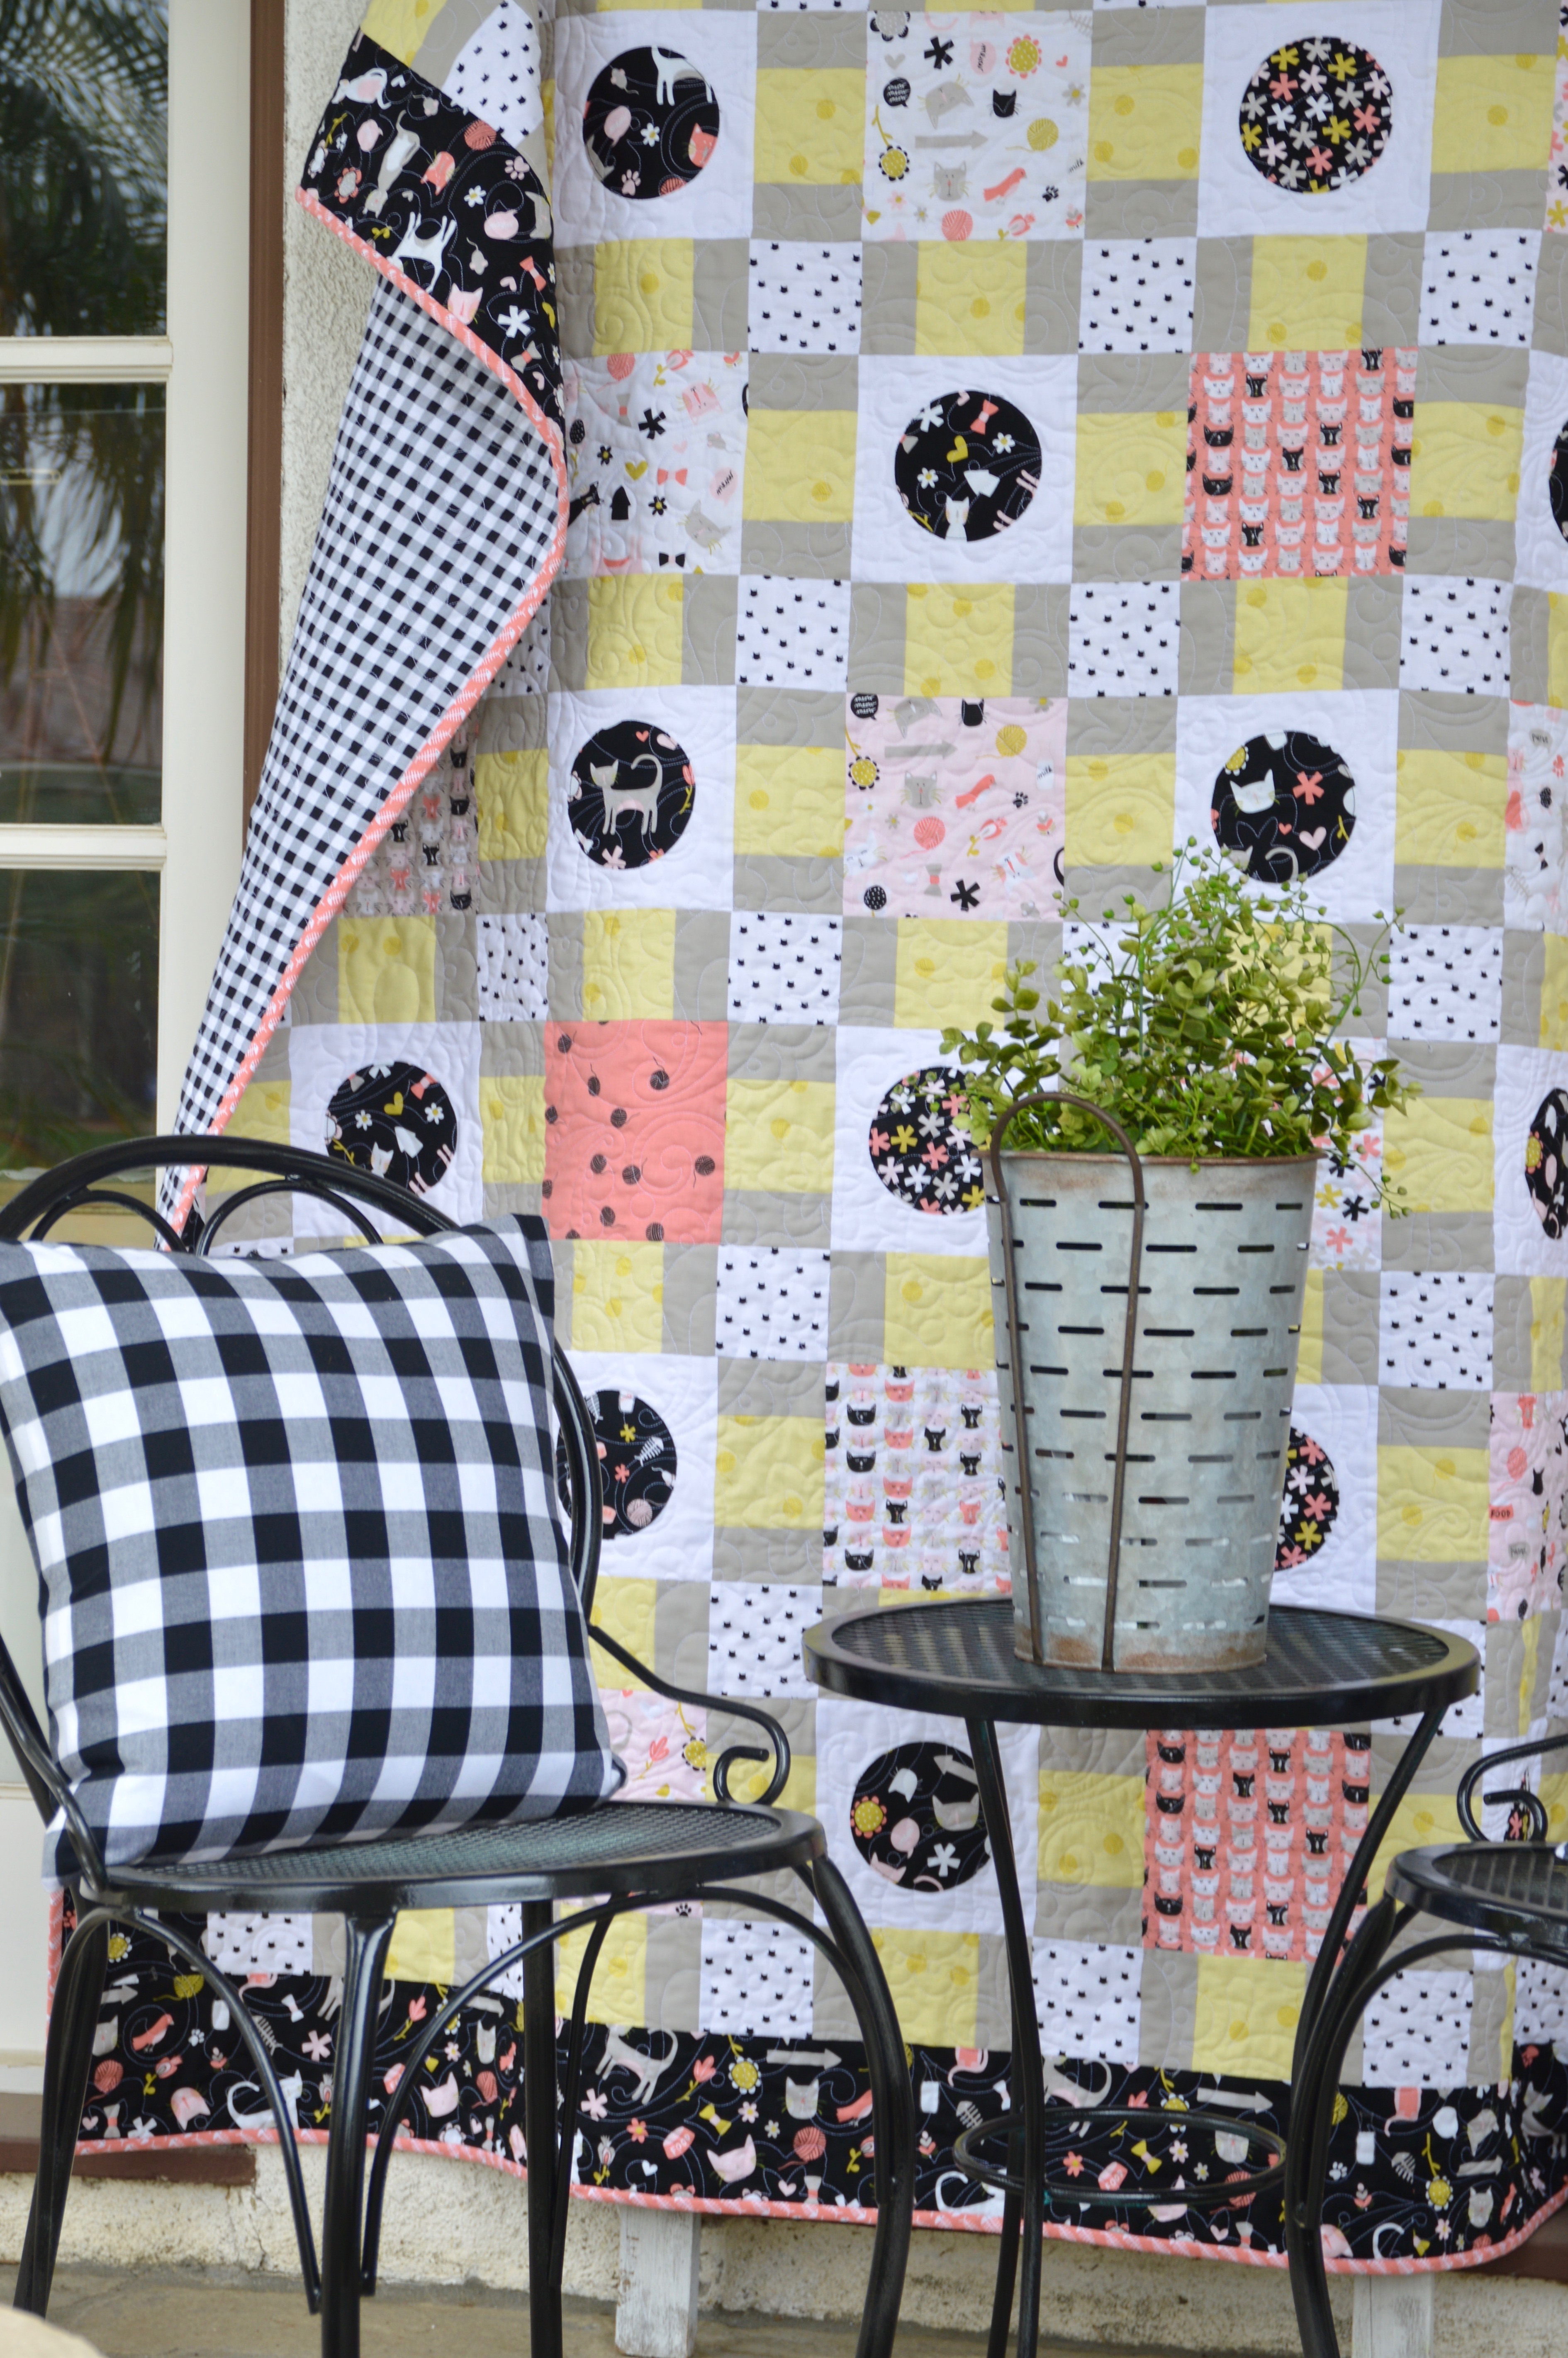
You know me and cats – so when I saw this fabric from Riley Blake Designs called MEOW I fell in love!!!  I created this quilt pattern to showcase all the amazing and whimsical prints in this fabric line.  I hope you like it :). Mufasa sure does 🙂category6580

DSC_0721

What I love about this quilt is that you don’t have to cut up this adorable fabric into tiny bits and it still has a nice “pieced” feel.

DSC_0707

I called this pattern Bouncing Off The Walls because that’s how Mufasa likes to play!  I throw bouncy balls and they bounce every where and he chases them like a maniac!

DSC_0726

The quilt measures 66″ x 75″ which is a great throw size.  The pattern is fat quarter friendly and the circles are machine appliquéd for a quick finish!  This pattern is a great way to use your favorite theme prints – you know me and theme prints!!!

You can purchase the PDF pattern for instant download in my Etsy shop.

DSC_0731

Sally and Mufasa are fighting over who will get the quilt – its totally MINE!!

DSC_0667

I hope you love this quilt and have fun putting your own personality into it!  Be sure to tag me on Instagram @jedicraftgirl and use the hashtag #bouncingoffthewallsquilt

DSC_0729


DSC_0493
And now get ready for the Mufasa photo shoot….
DSC_0444

He’s just so handsome 🙂
DSC_0450

DSC_0451

DSC_0455
DSC_0485

DSC_0512

Happy quilting with your cat!!!

I Love Cats {Christmas Version}

cat quilt

I couldn’t resist turning my I Love Cats pattern into a Christmas quilt!  Who doesn’t love red & green cats with ornaments!

You can download the ornament pattern by clicking HERE.

Simply switch out the heart block from the original pattern with the ornament block!

IMG_4320

You can find the pattern for the mini quilt by clicking HERE.cat block 3

I feel like these two cats need names…..cat block 2 
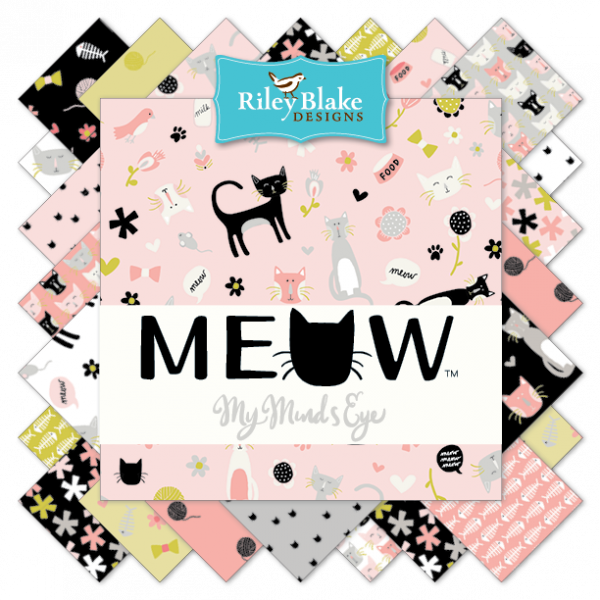
They are so fun to make!


Mini Kitty Halloween Quilt Pattern

img_3710

It’s a little SPOOKY around here!  Mini Kitty is getting a Halloween makeover!  I love this little pattern so much and wanted to give it a little pop for the fall.  Mini Kitty is now leaping over a pumpkin with bats and stars in the background.  If you’ve already purchased the pattern you can download the Halloween applique shapes for free HERE.  The Halloween PDF is also included with each Mini Kitty pattern purchase in my Etsy shop.

mini-kitty-cover

The original Mini Kitty pattern was created as a gift for a friend after the loss of a sweet kitten.  You can read more about it HEREimg_3688

Instead of using only 2 colors for the checkerboard border, I used 8 different oranges and 8 different blacks.  I really love the polka dot pumpkin!

img_3686

Mufasa was very helpful on this project and choose the colors all by himself 🙂

img_3706

I love how it turned out and I have the purrrrfect place to hang it!  img_3714

Vintage Kitchen Blog Hop and Quilt Tutorial

catinthekitchen

I am so thrilled to be part of the Vintage Kitchen Blog Tour!  Andrea from Jolijou has designed this amazing vintage inspired kitchen theme fabric!!  You can see all the wonderful prints here on the Riley Blake Designs Website.vintage kitchen quilt 5

It is the perfect colors of vintage Pyrex dishes.

vintage kitchen quilt 2 
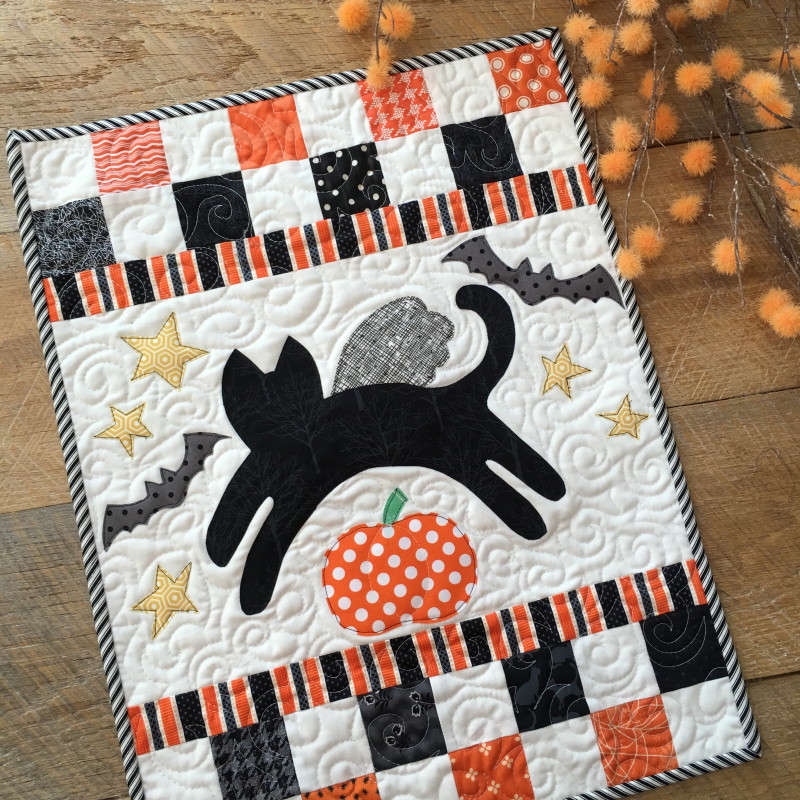
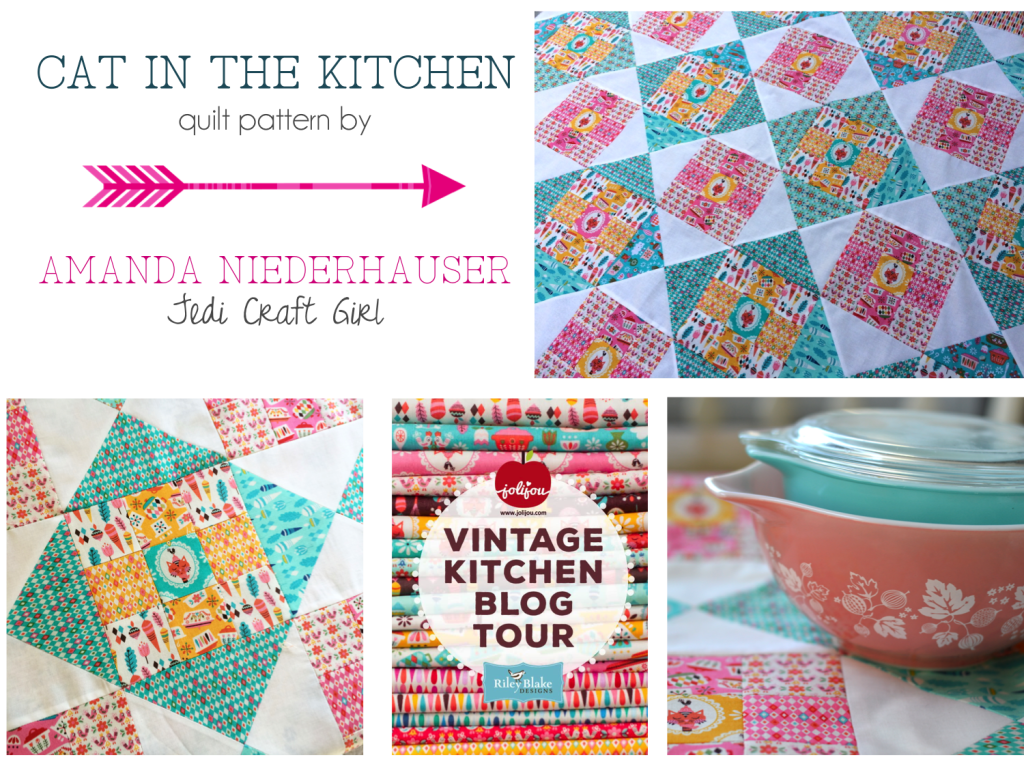
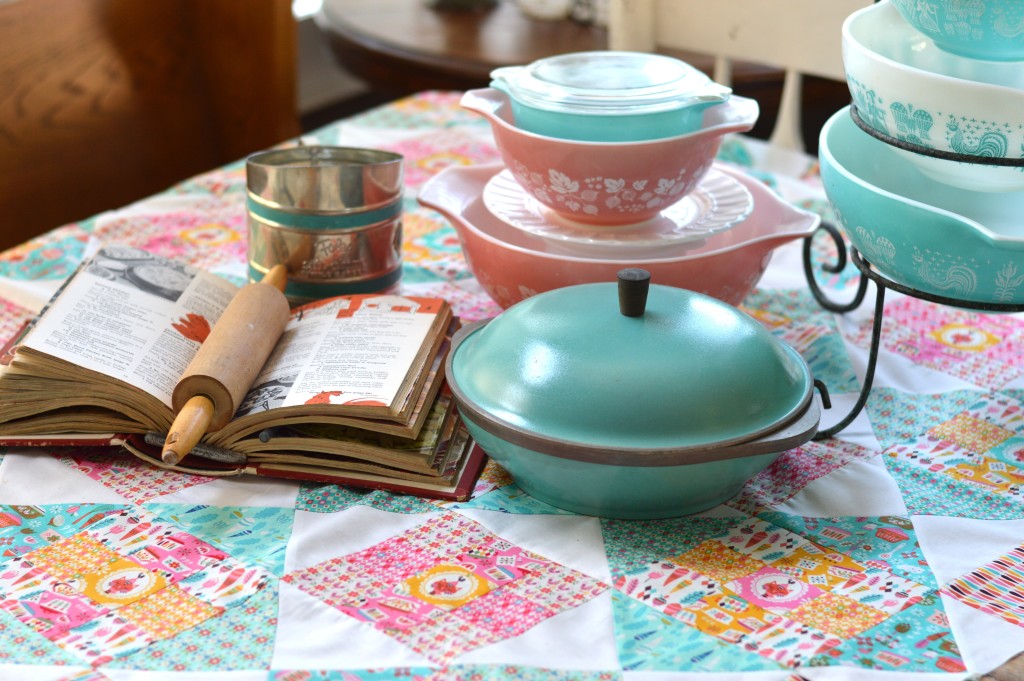
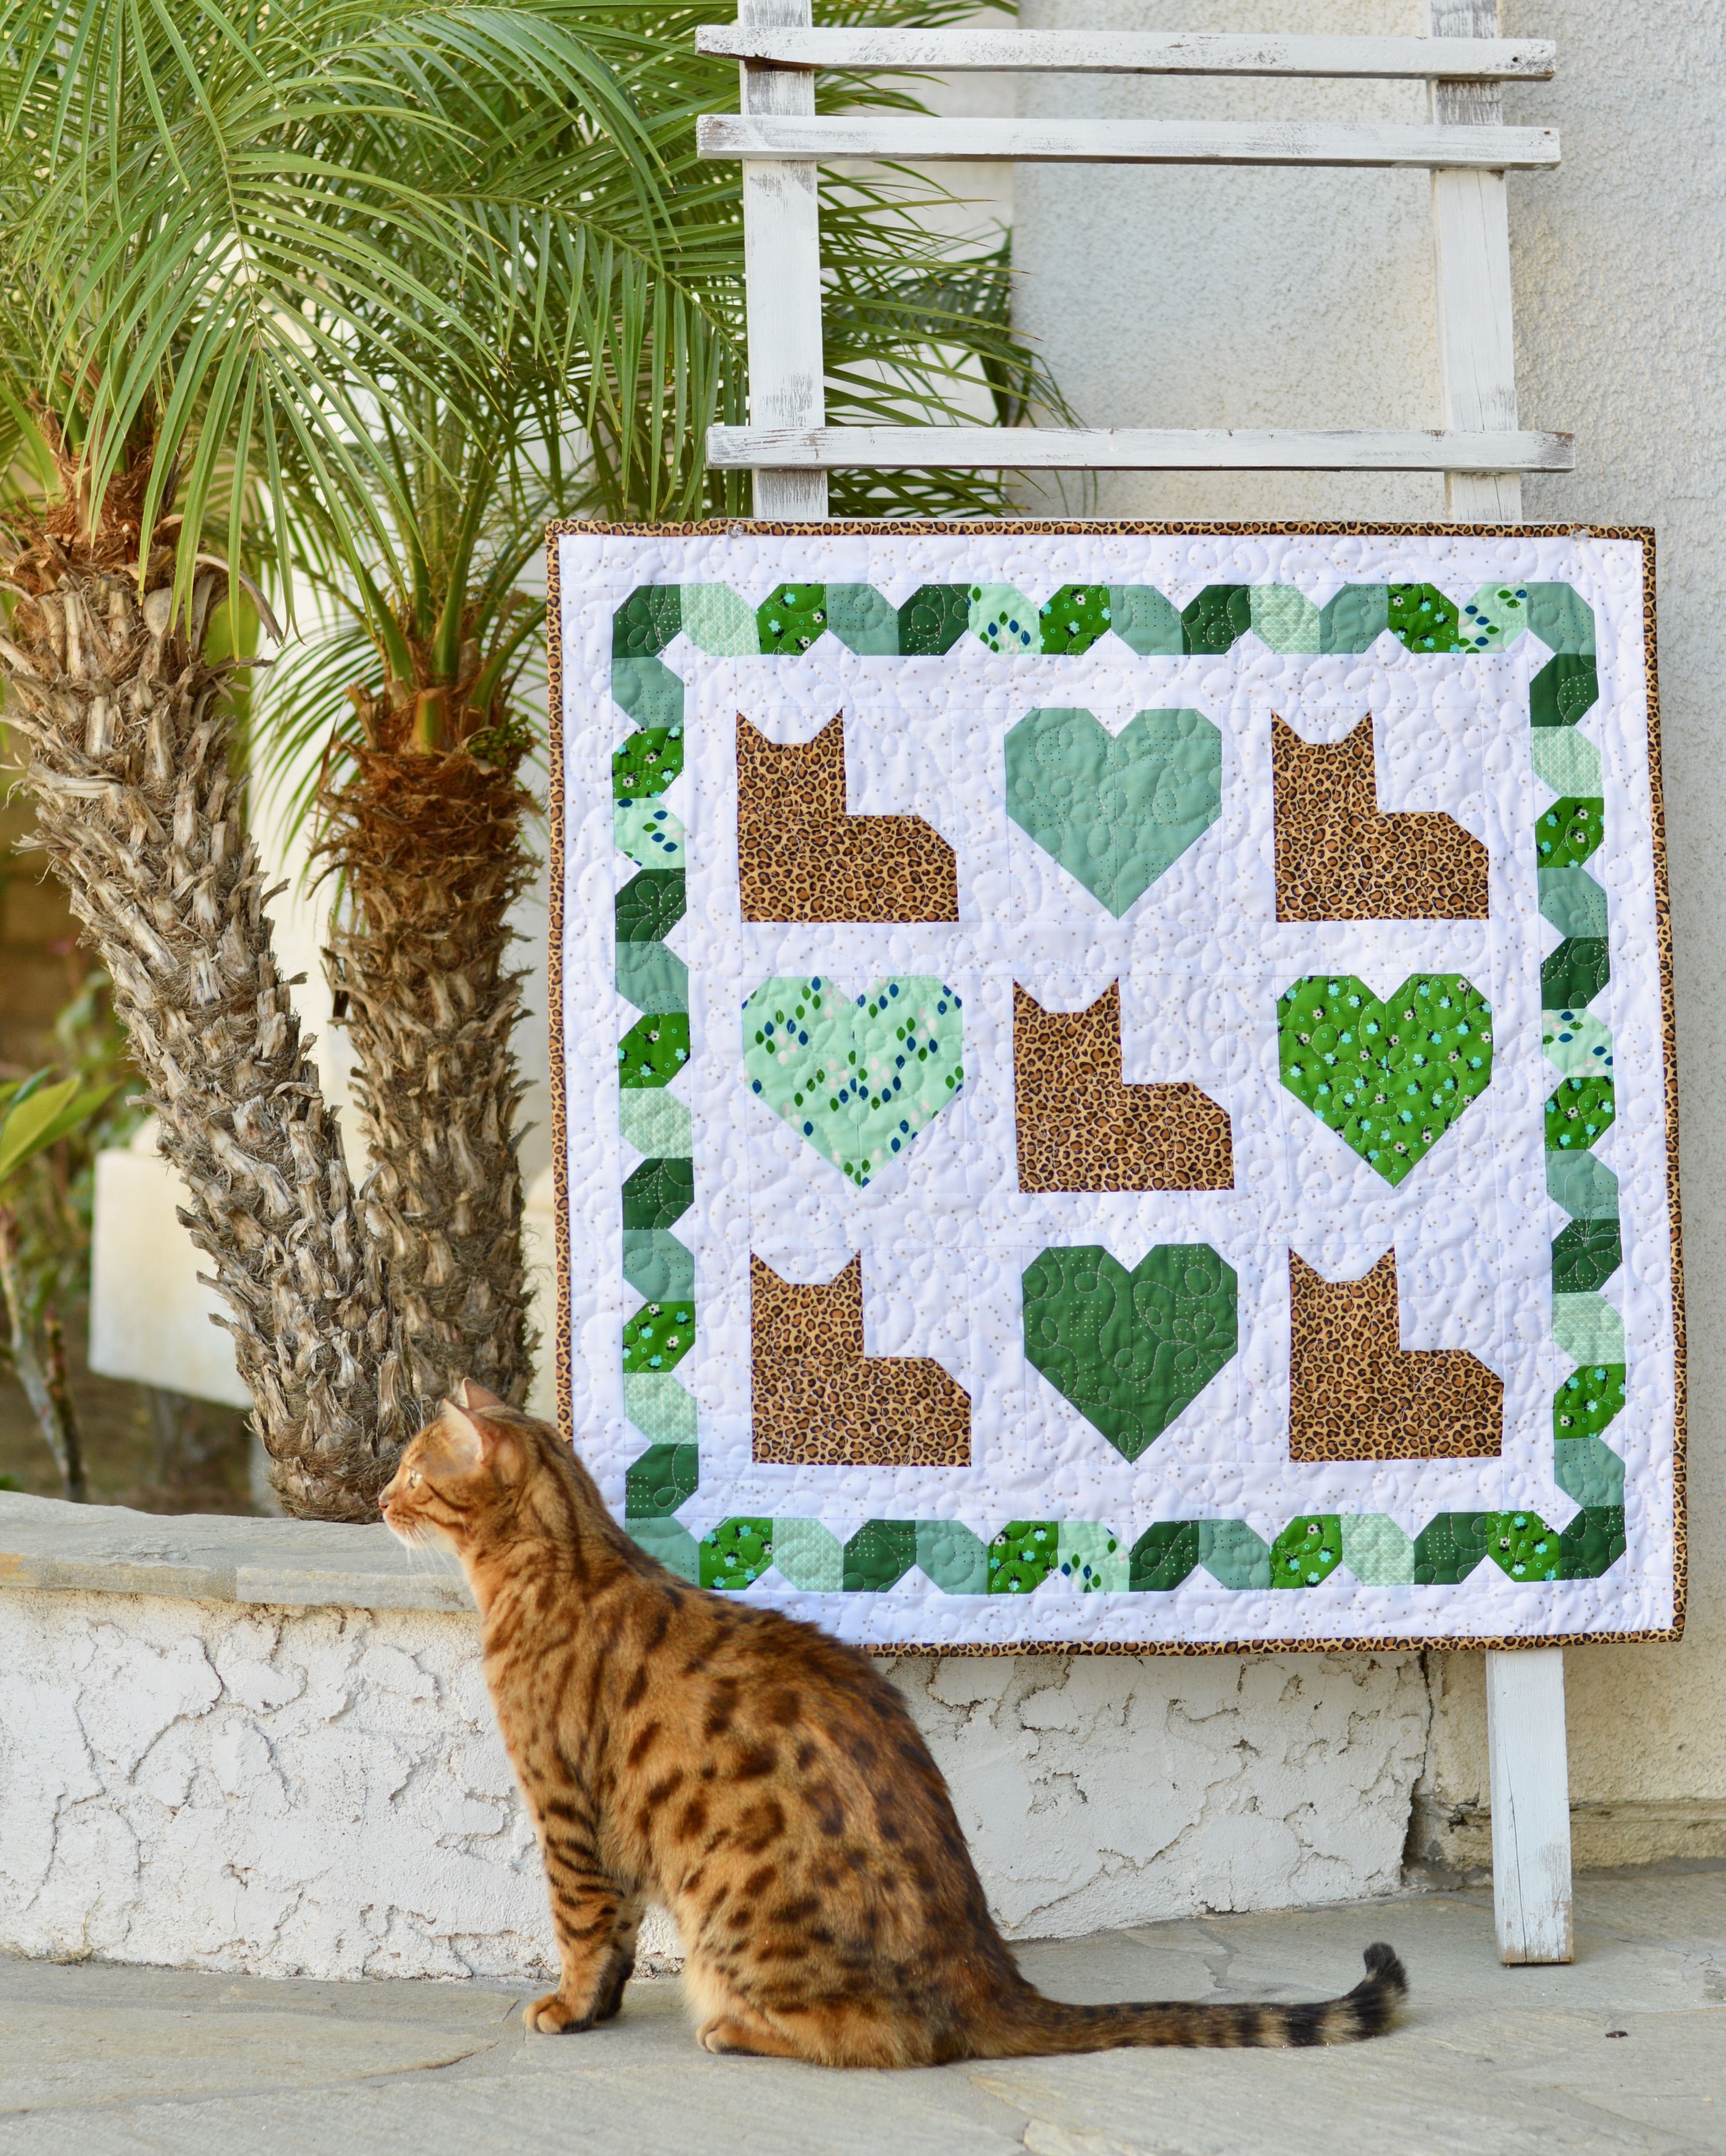
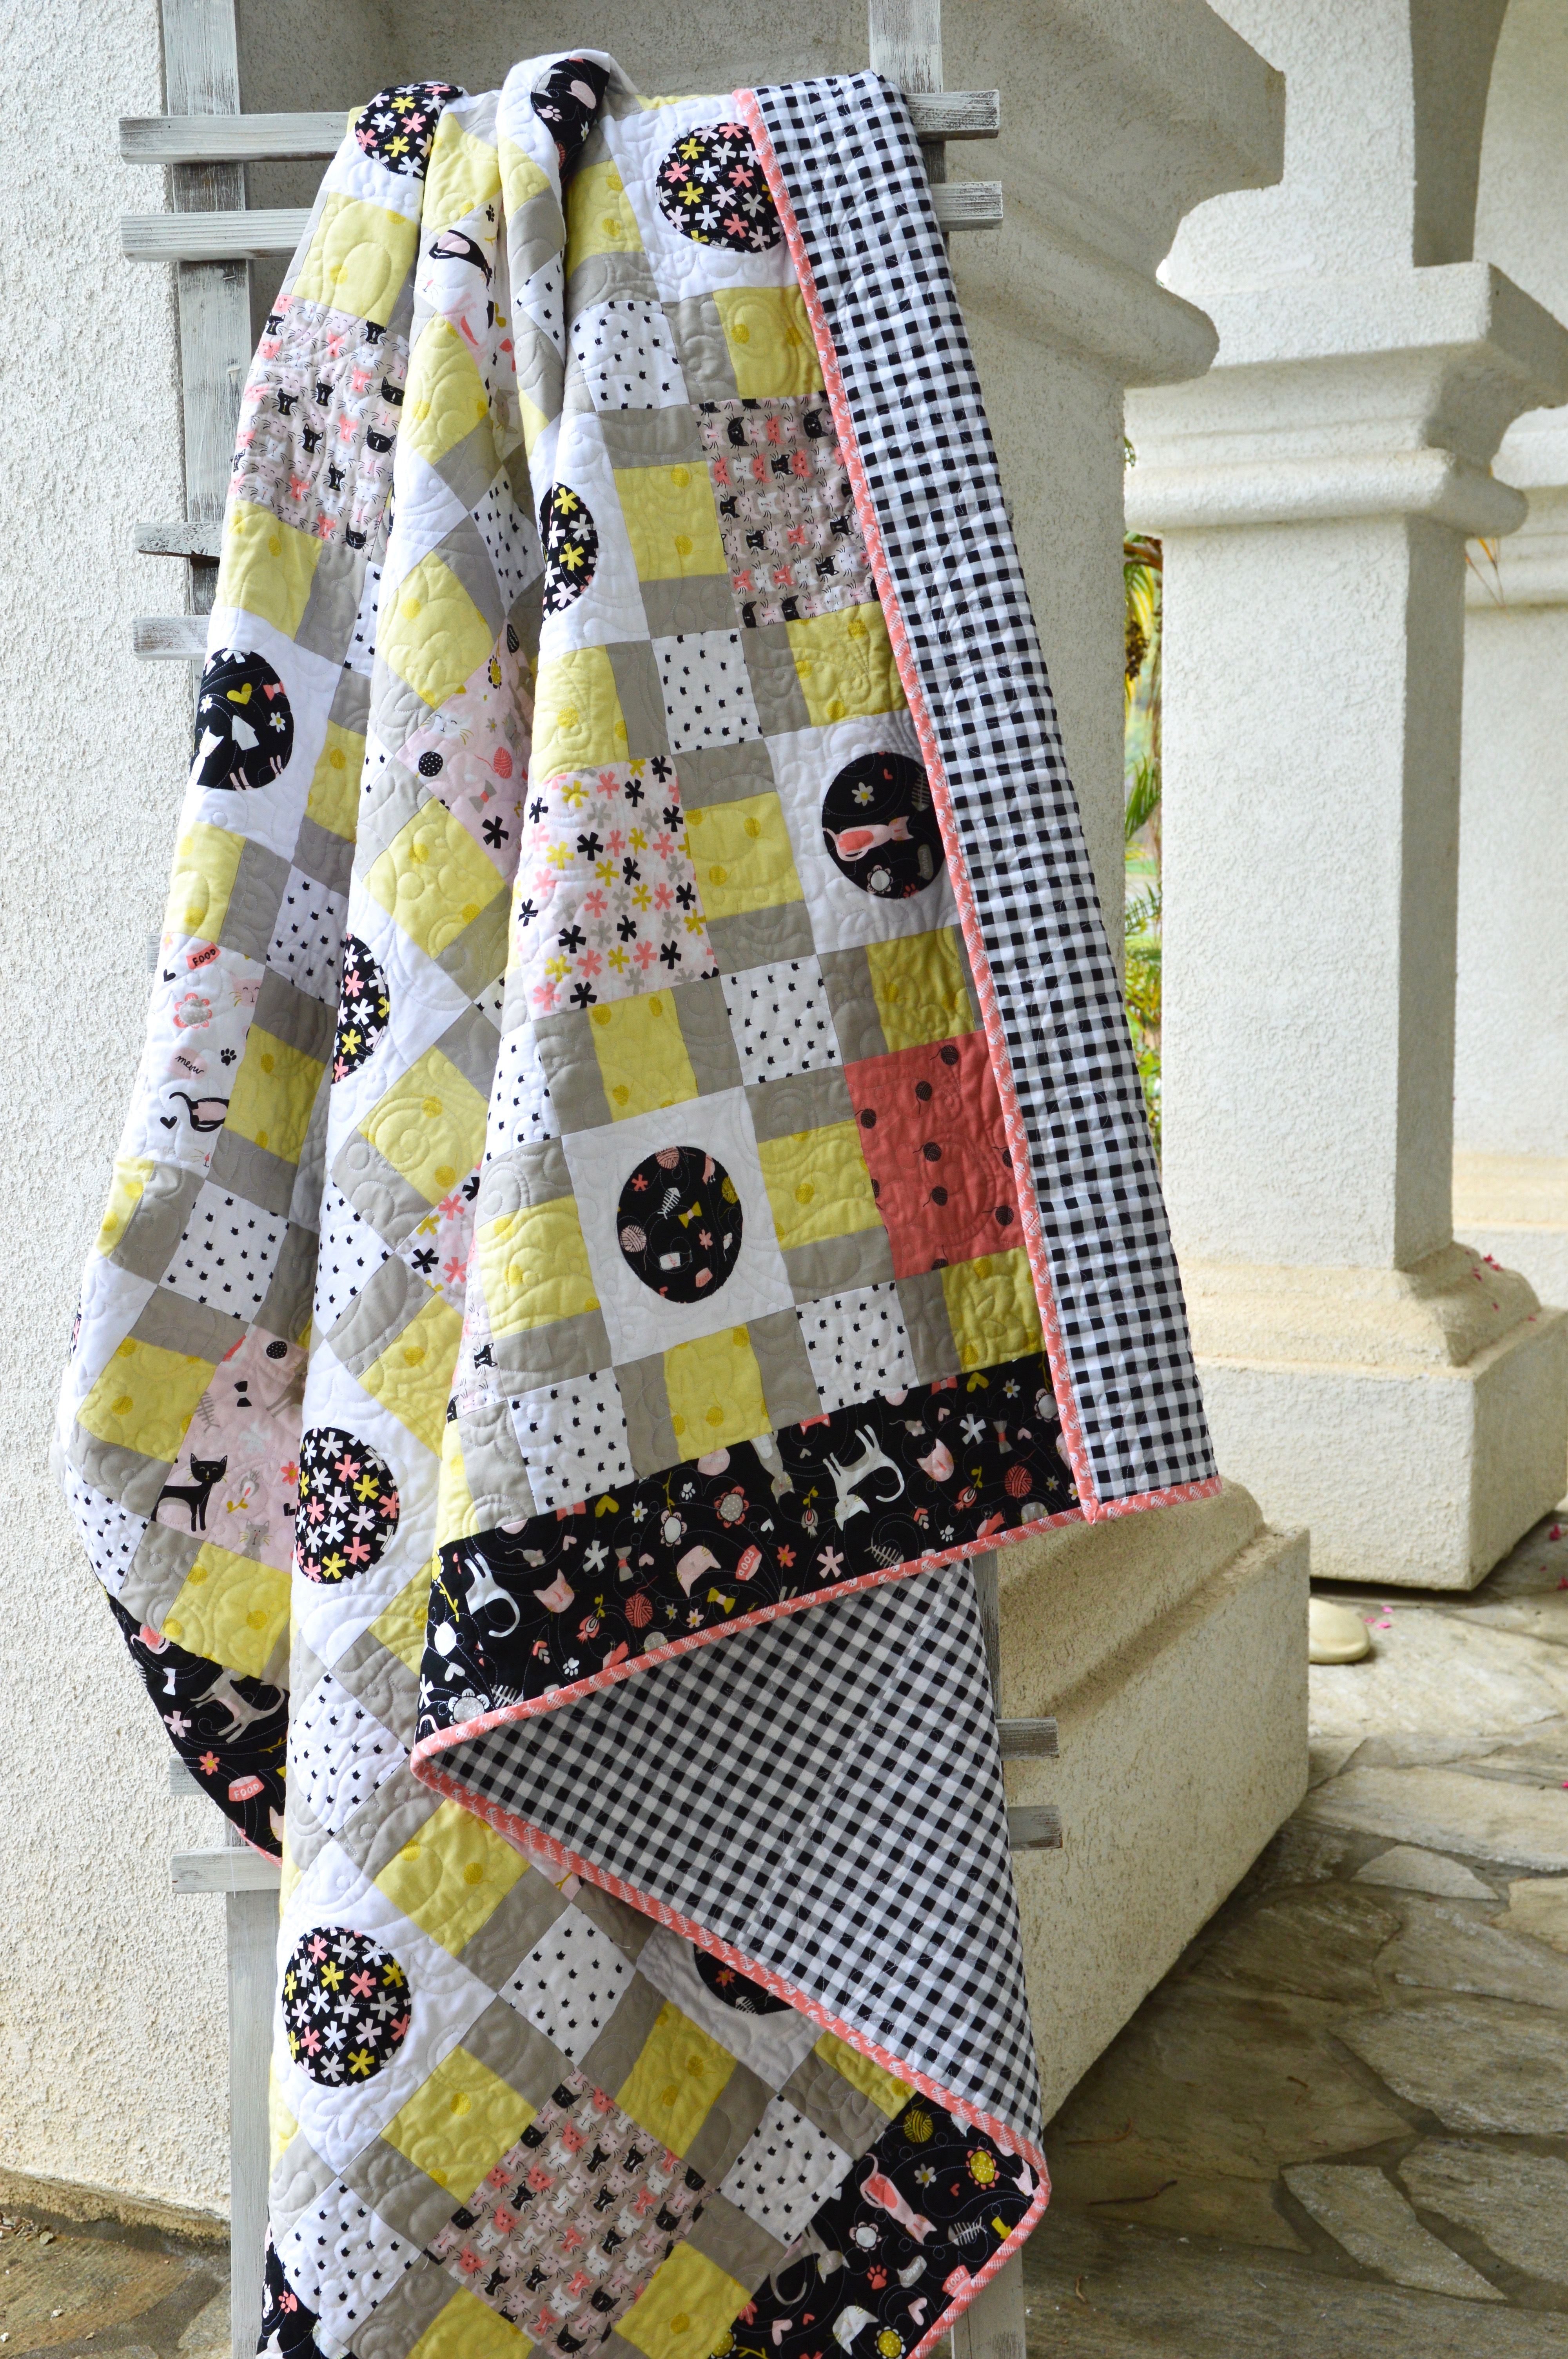
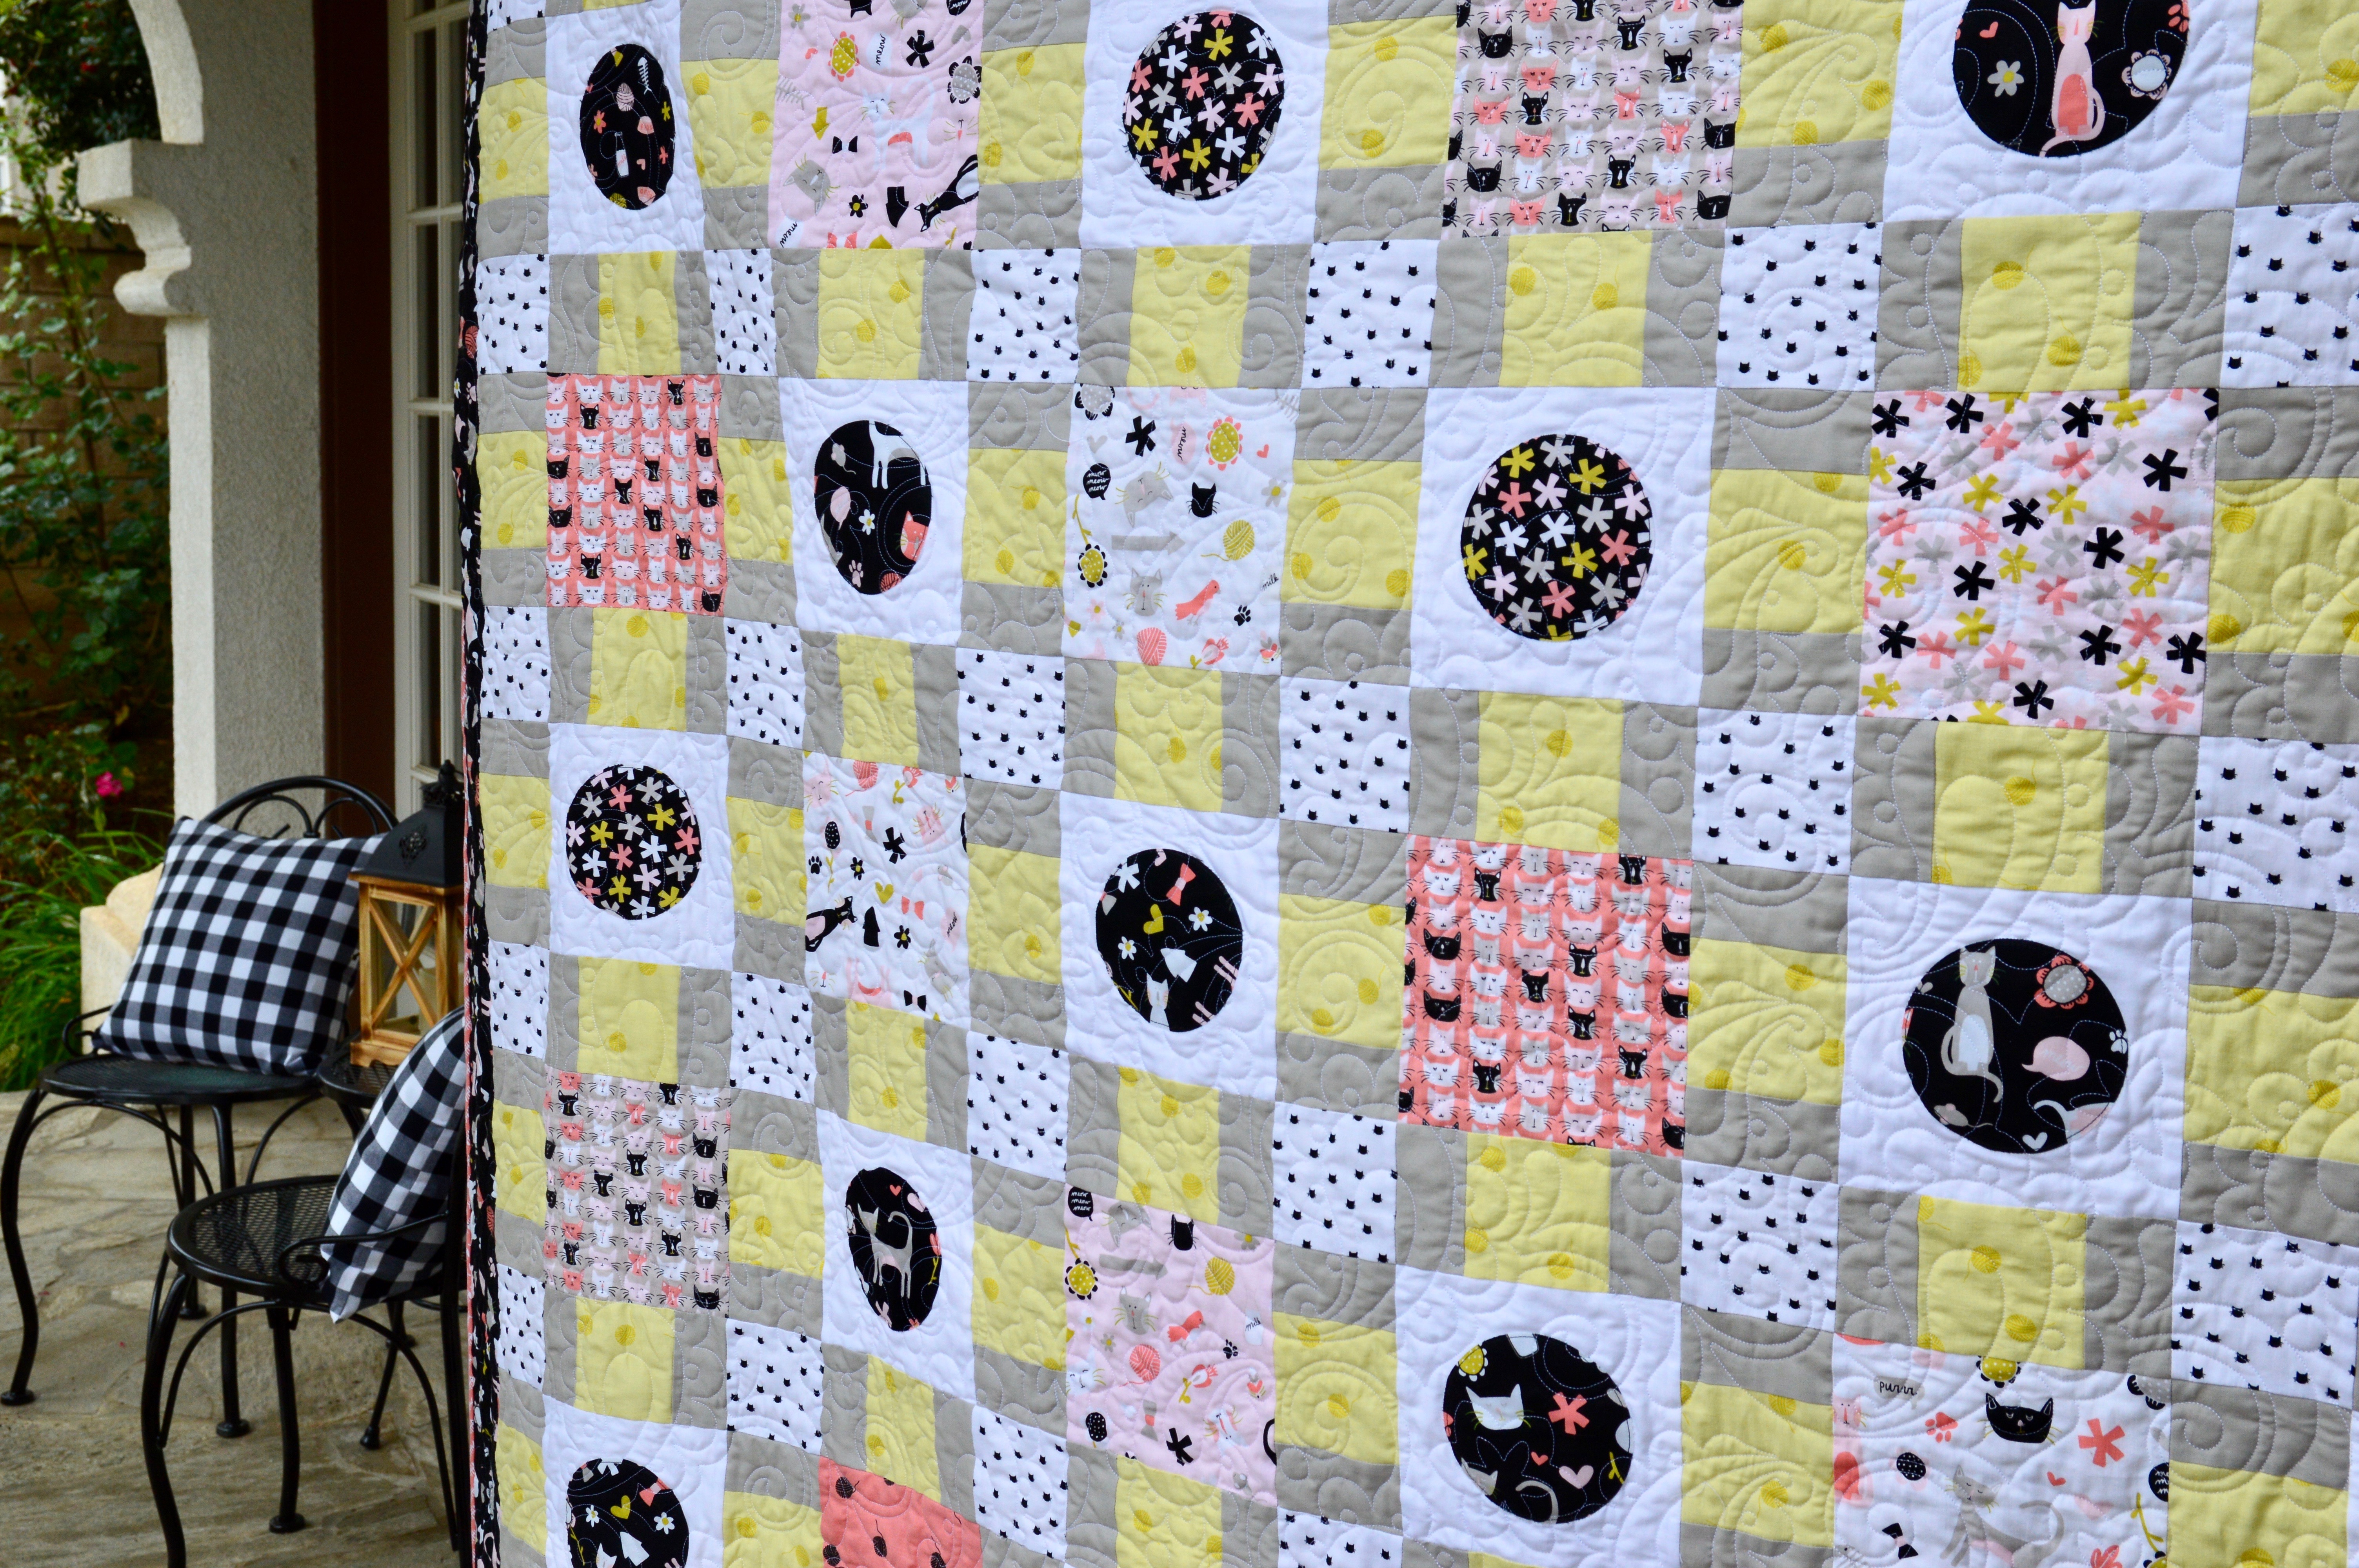
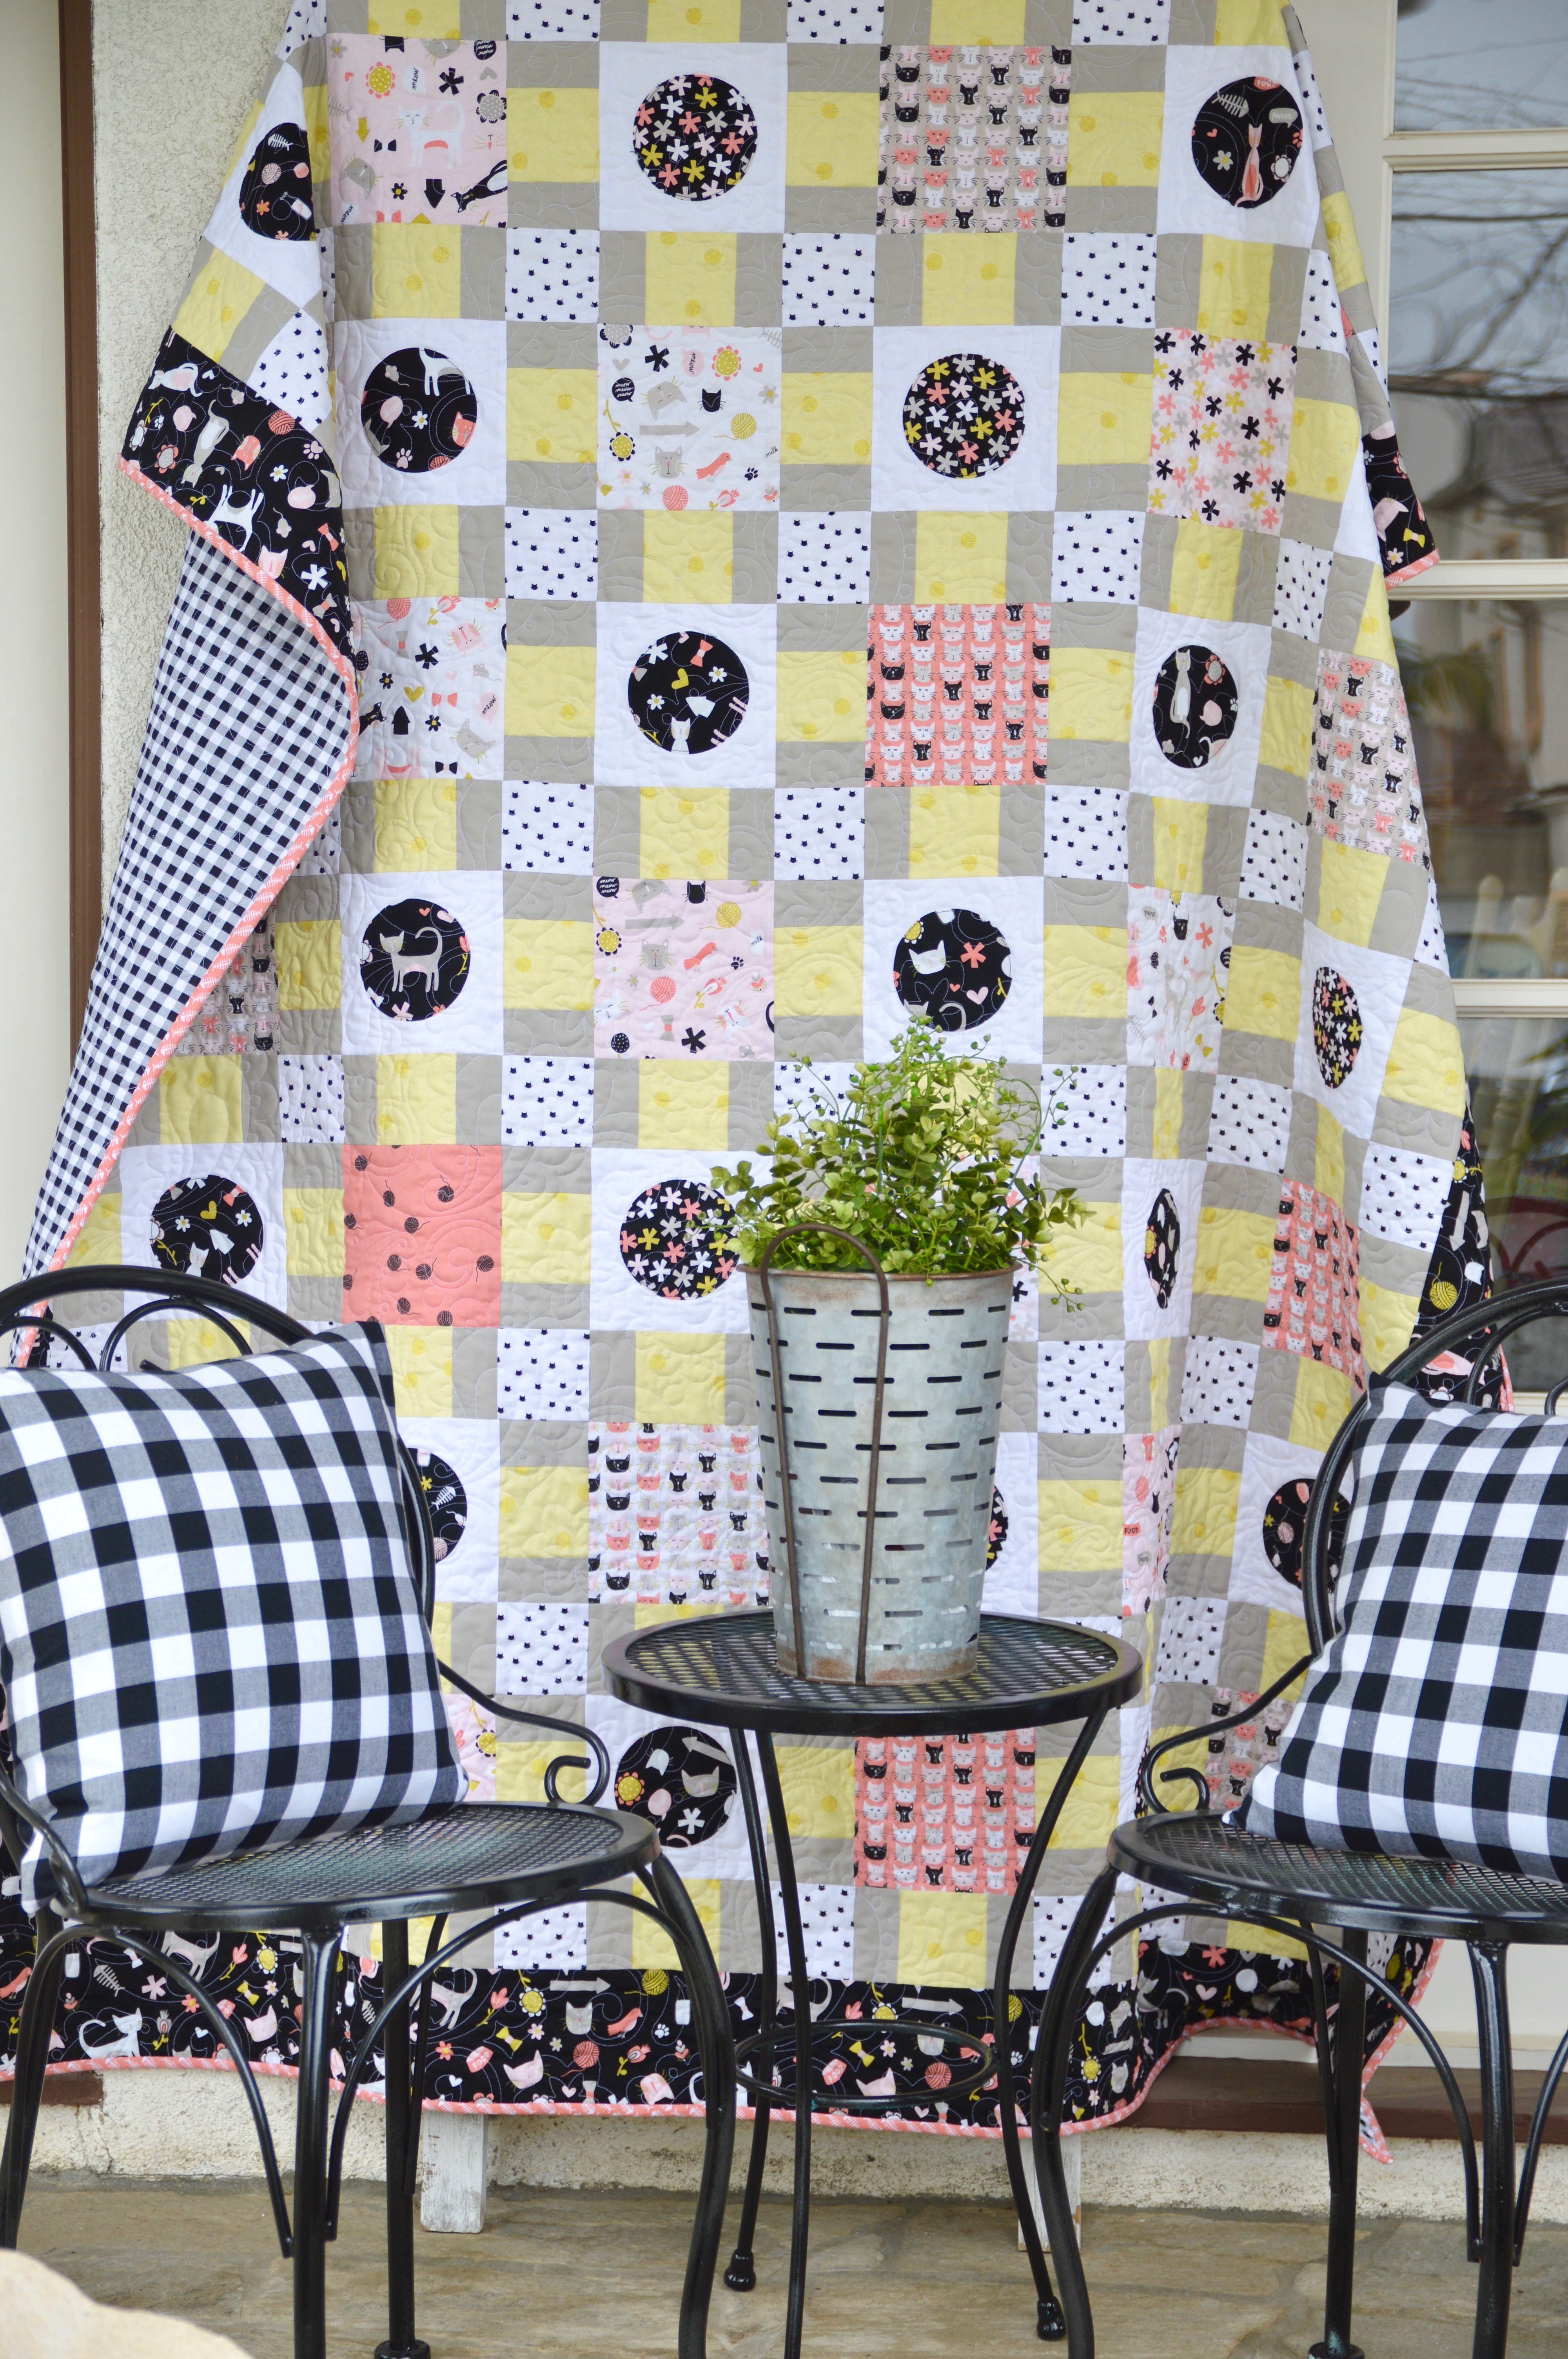
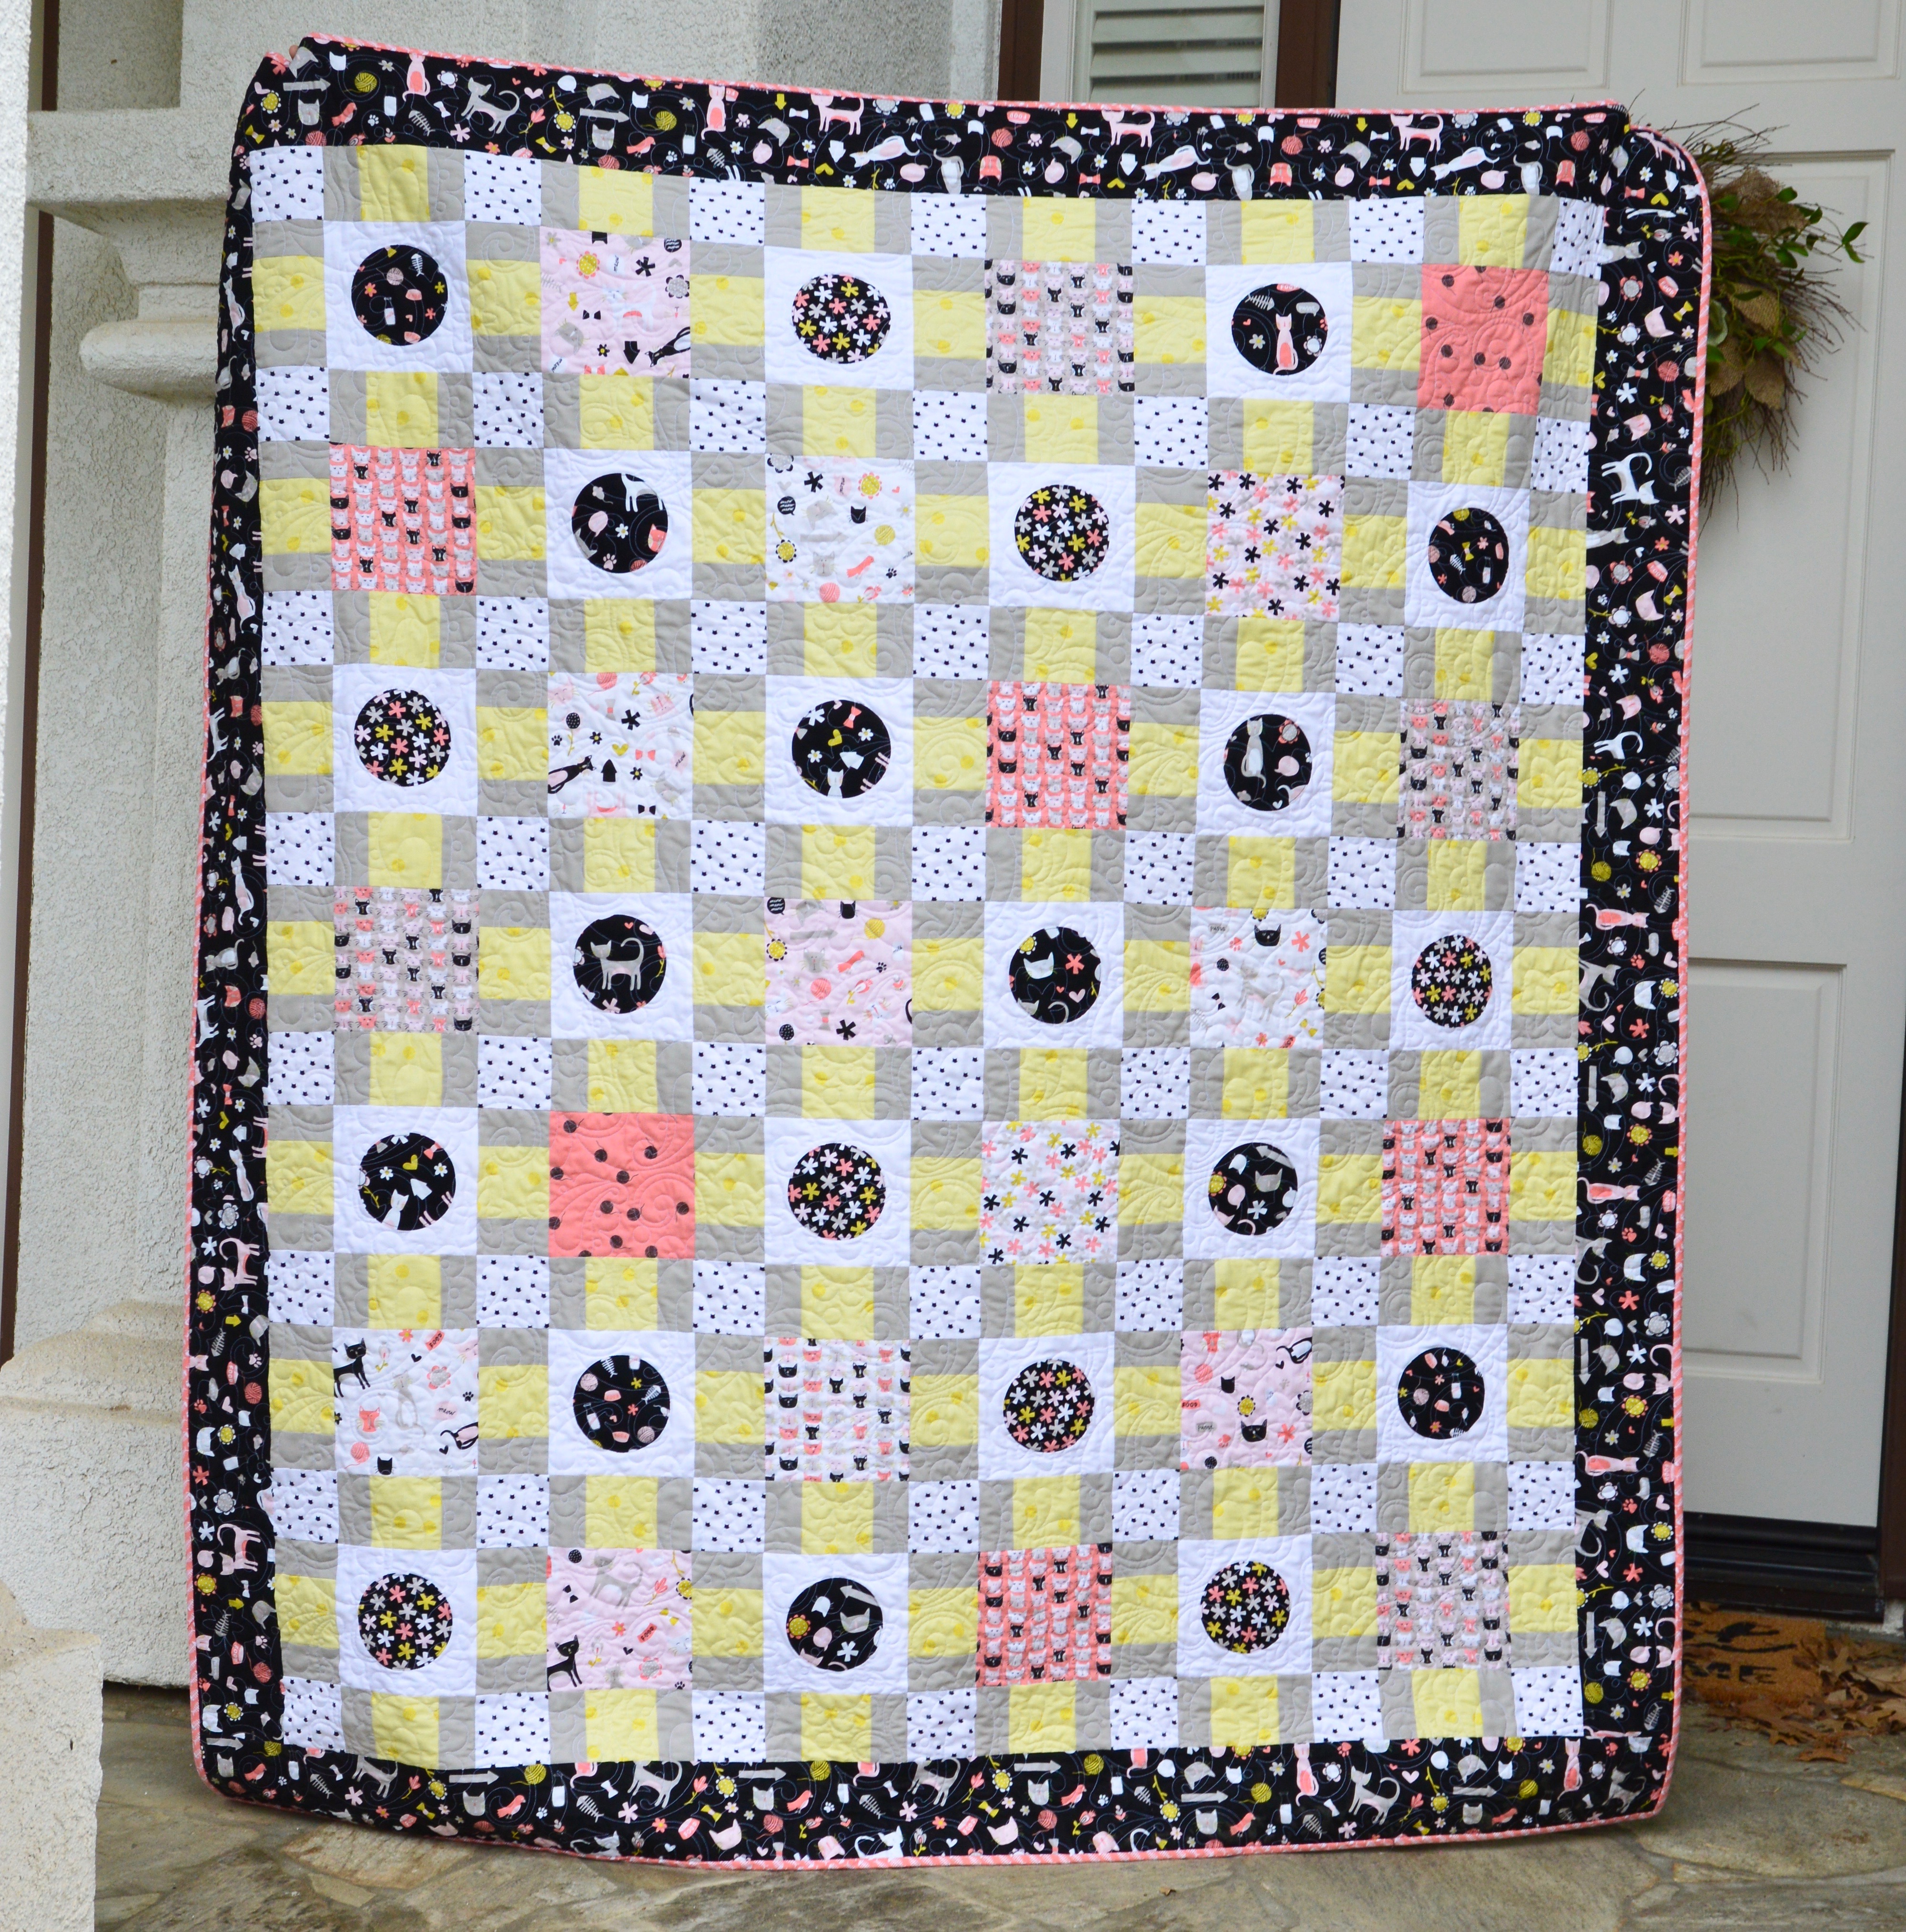
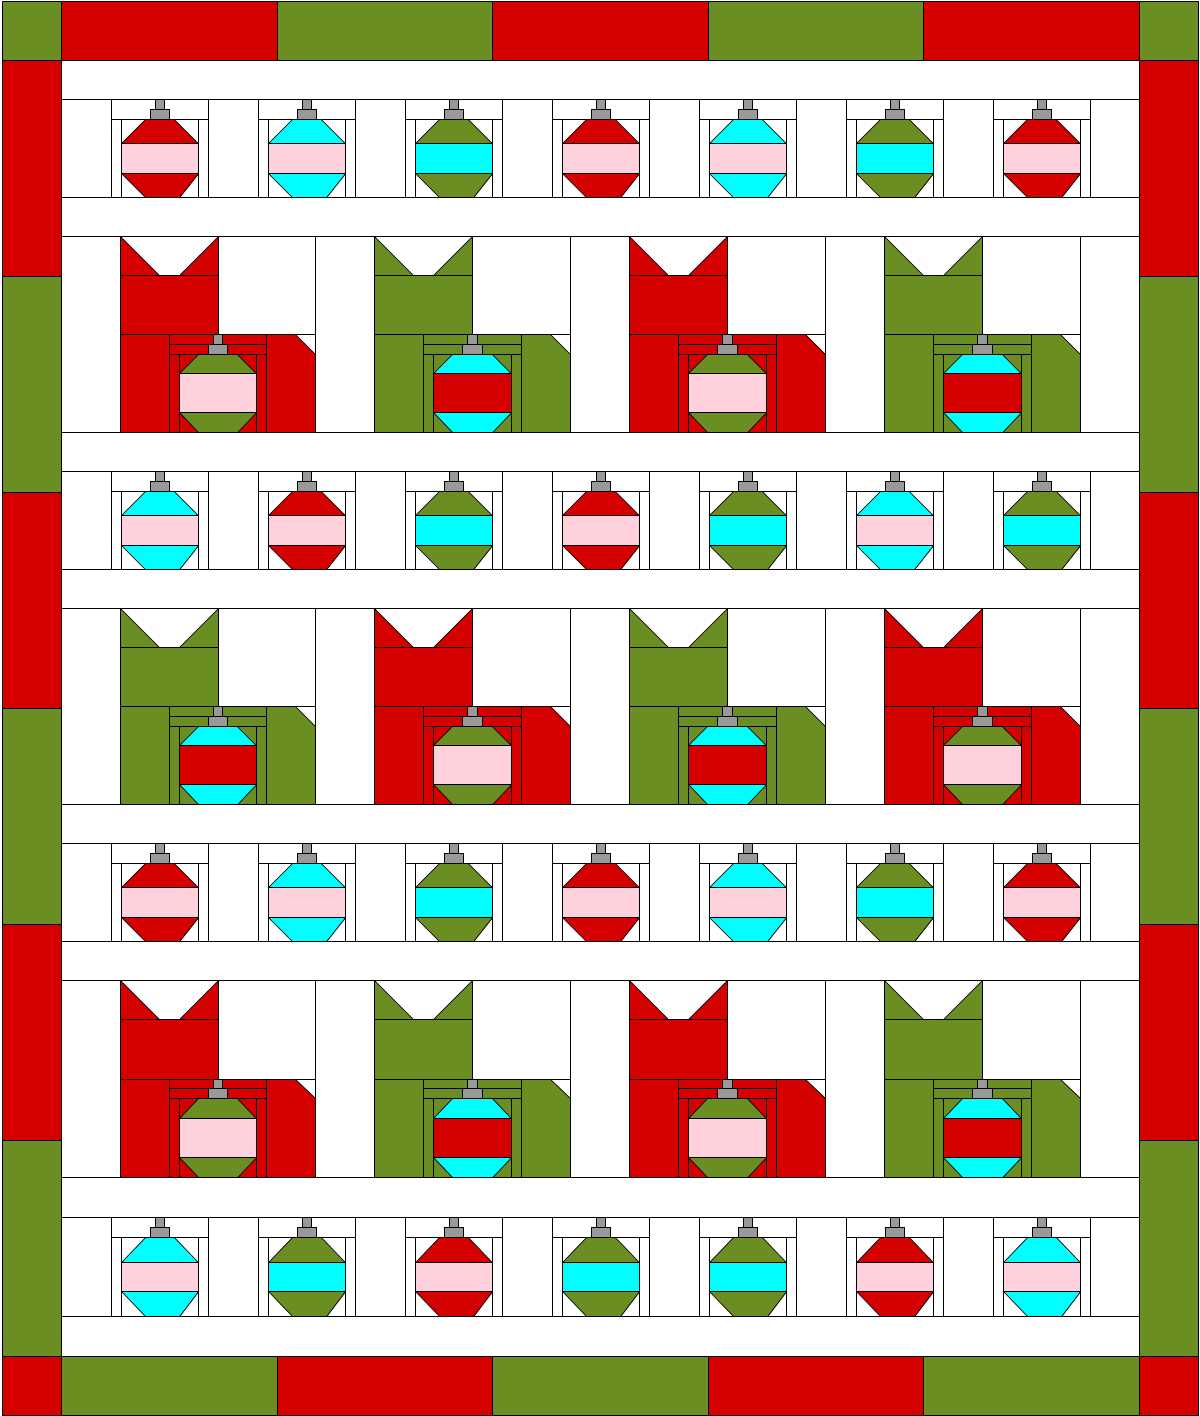
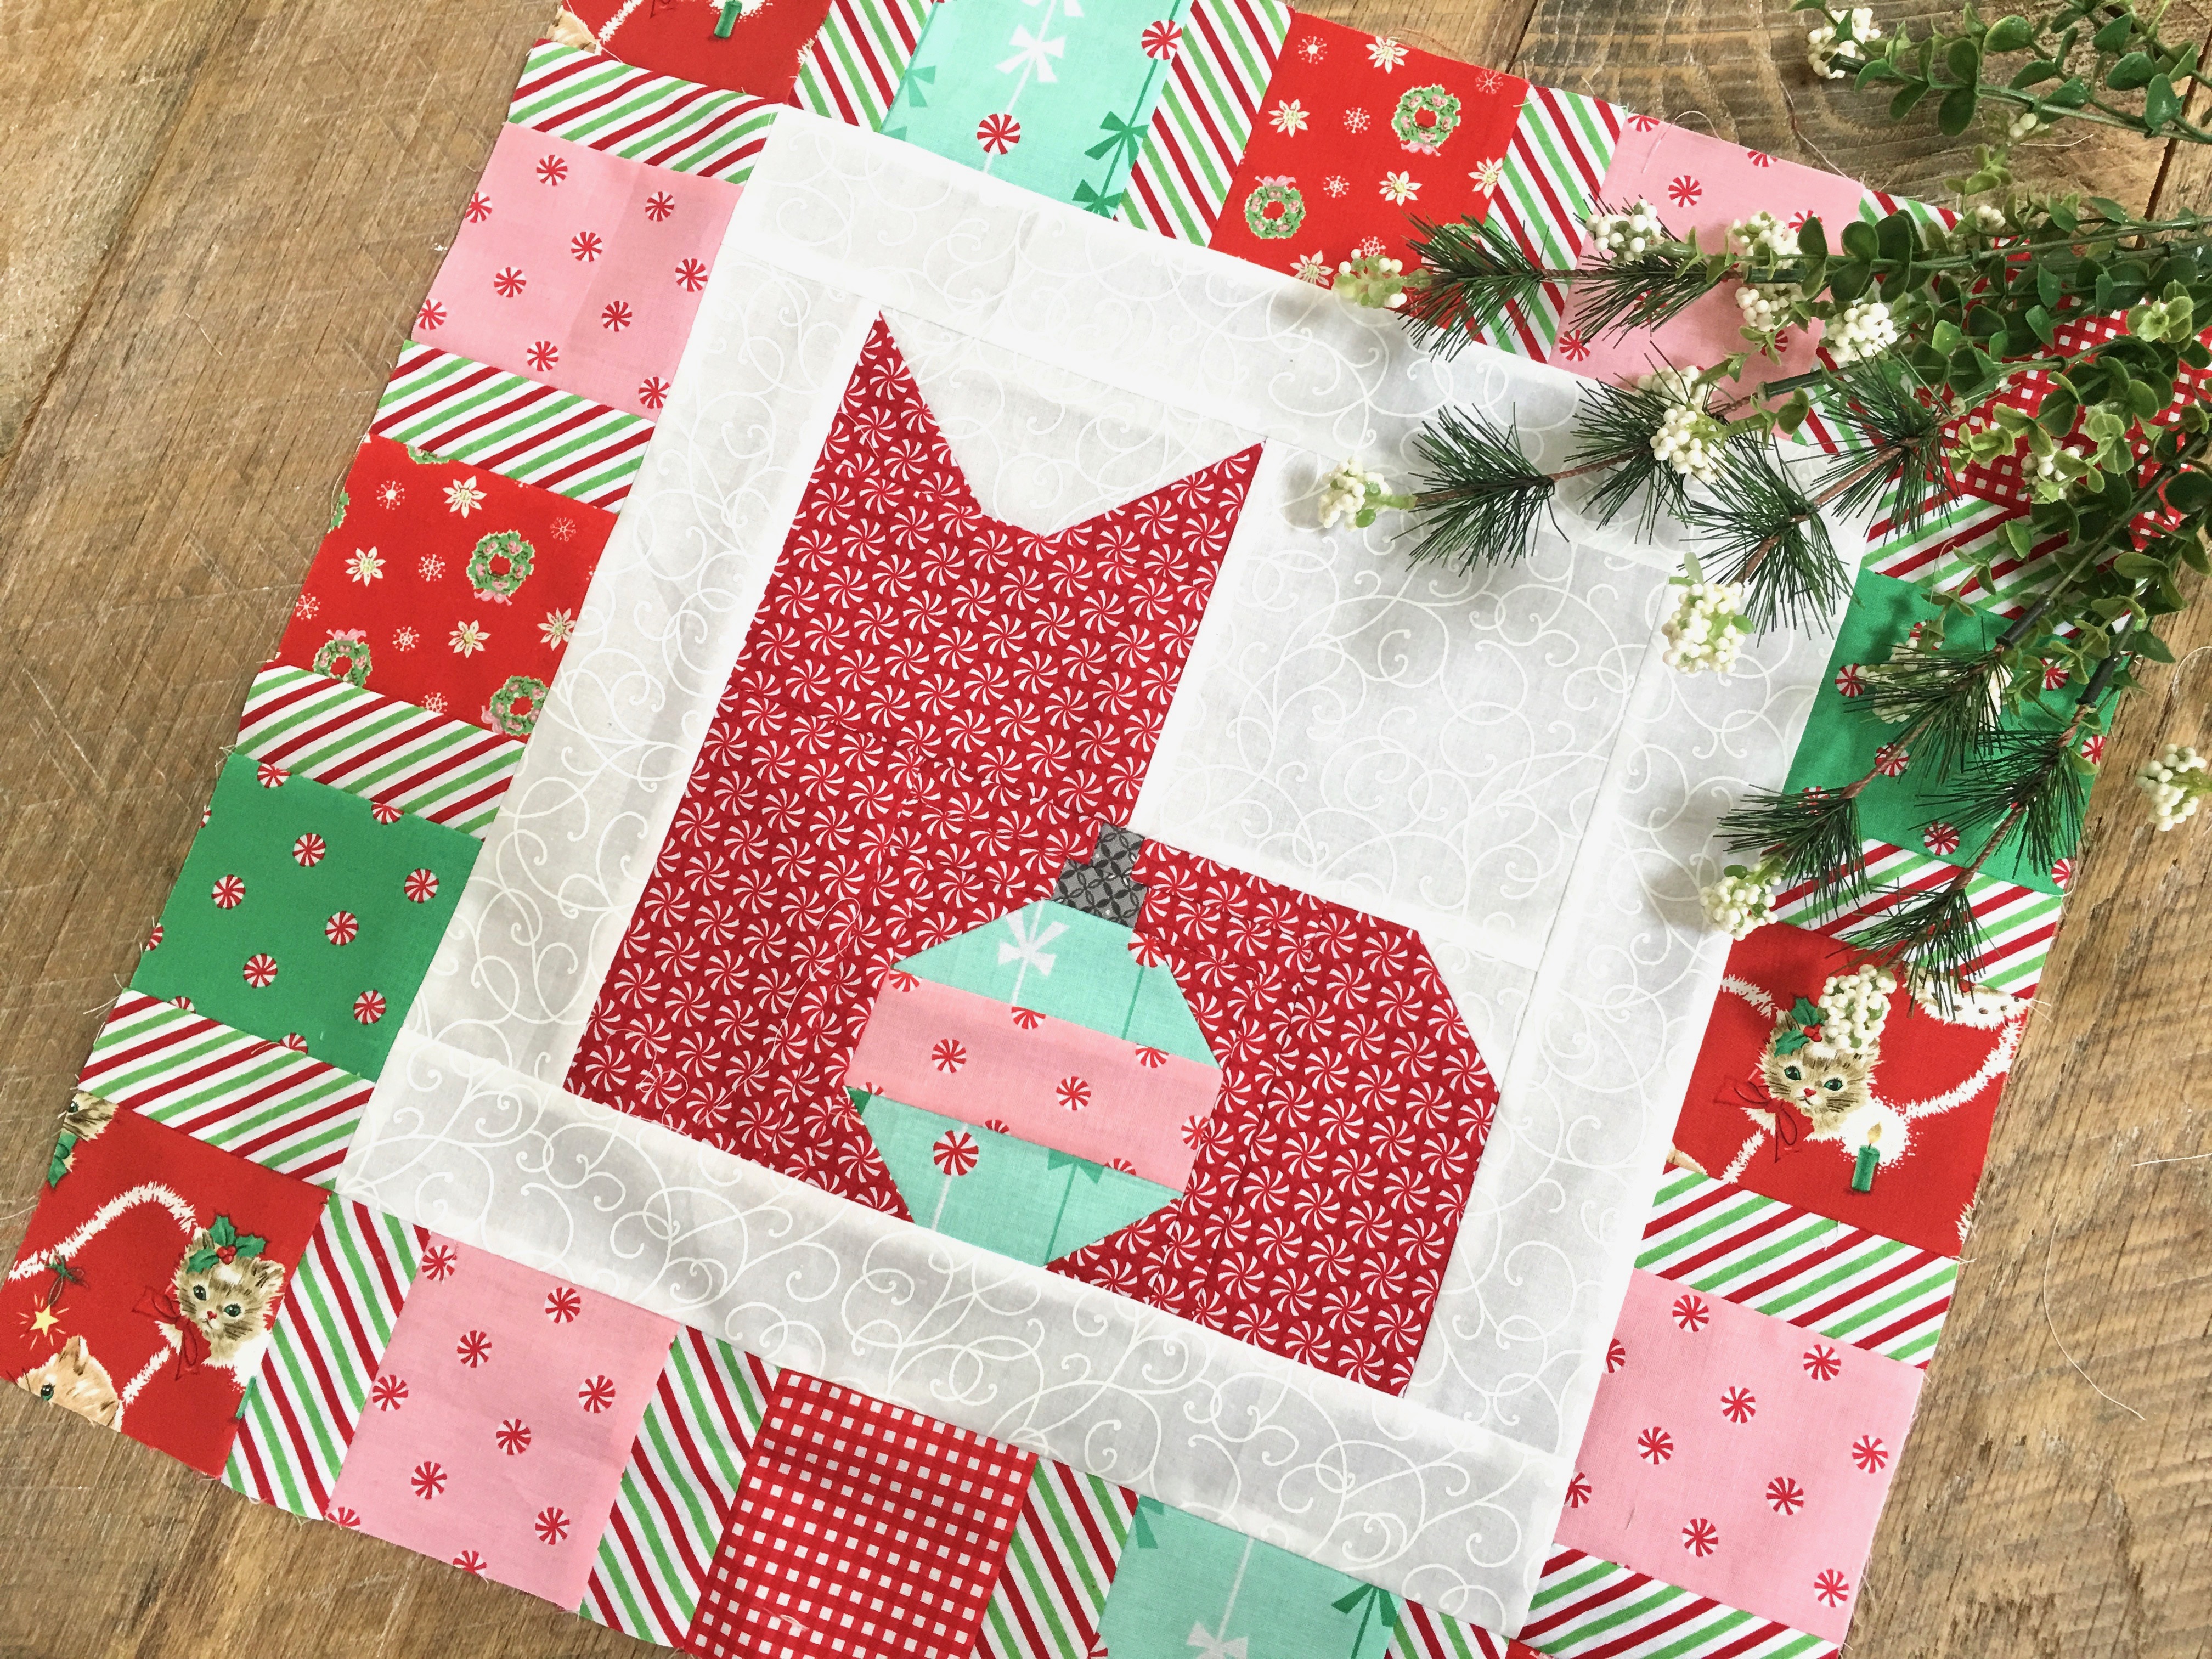
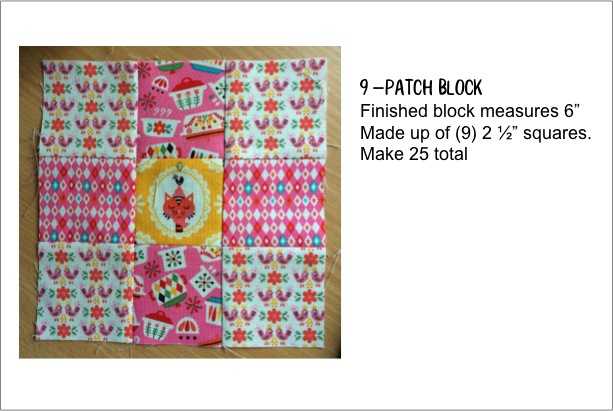
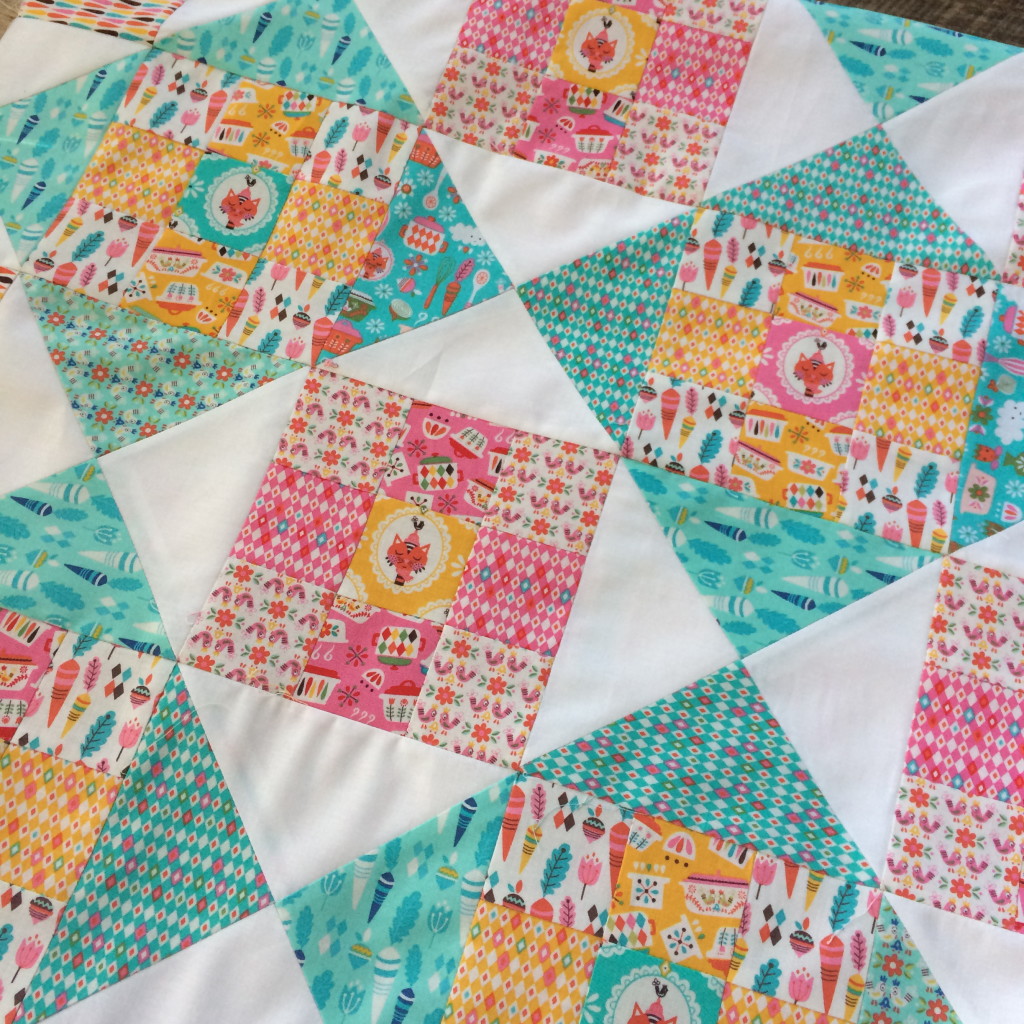
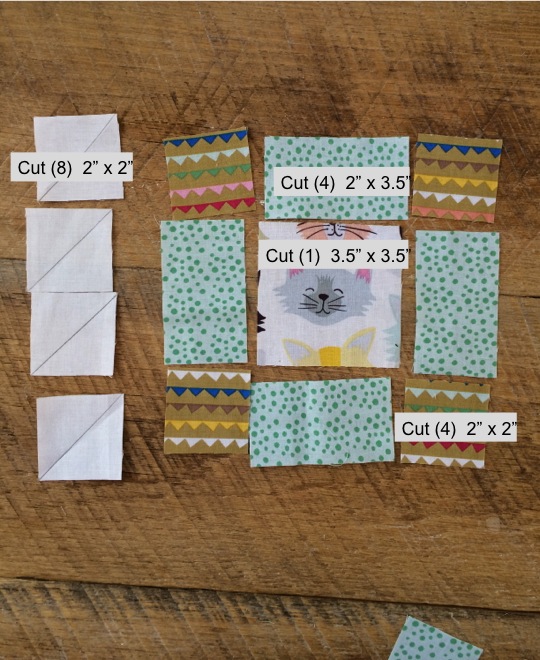
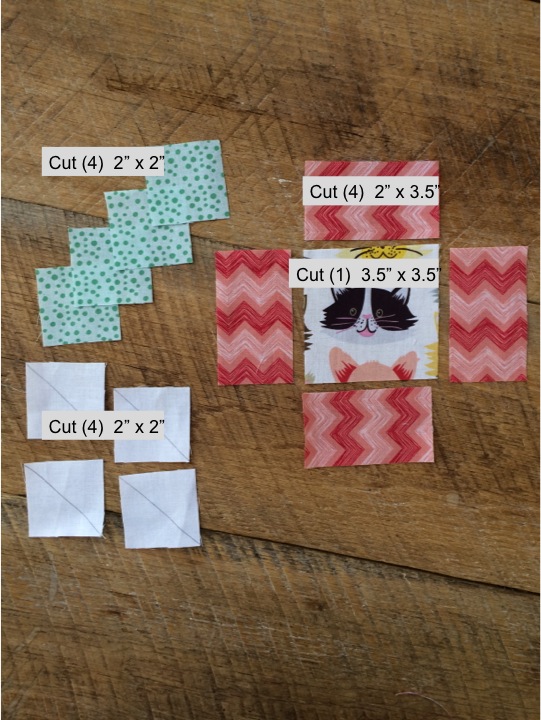
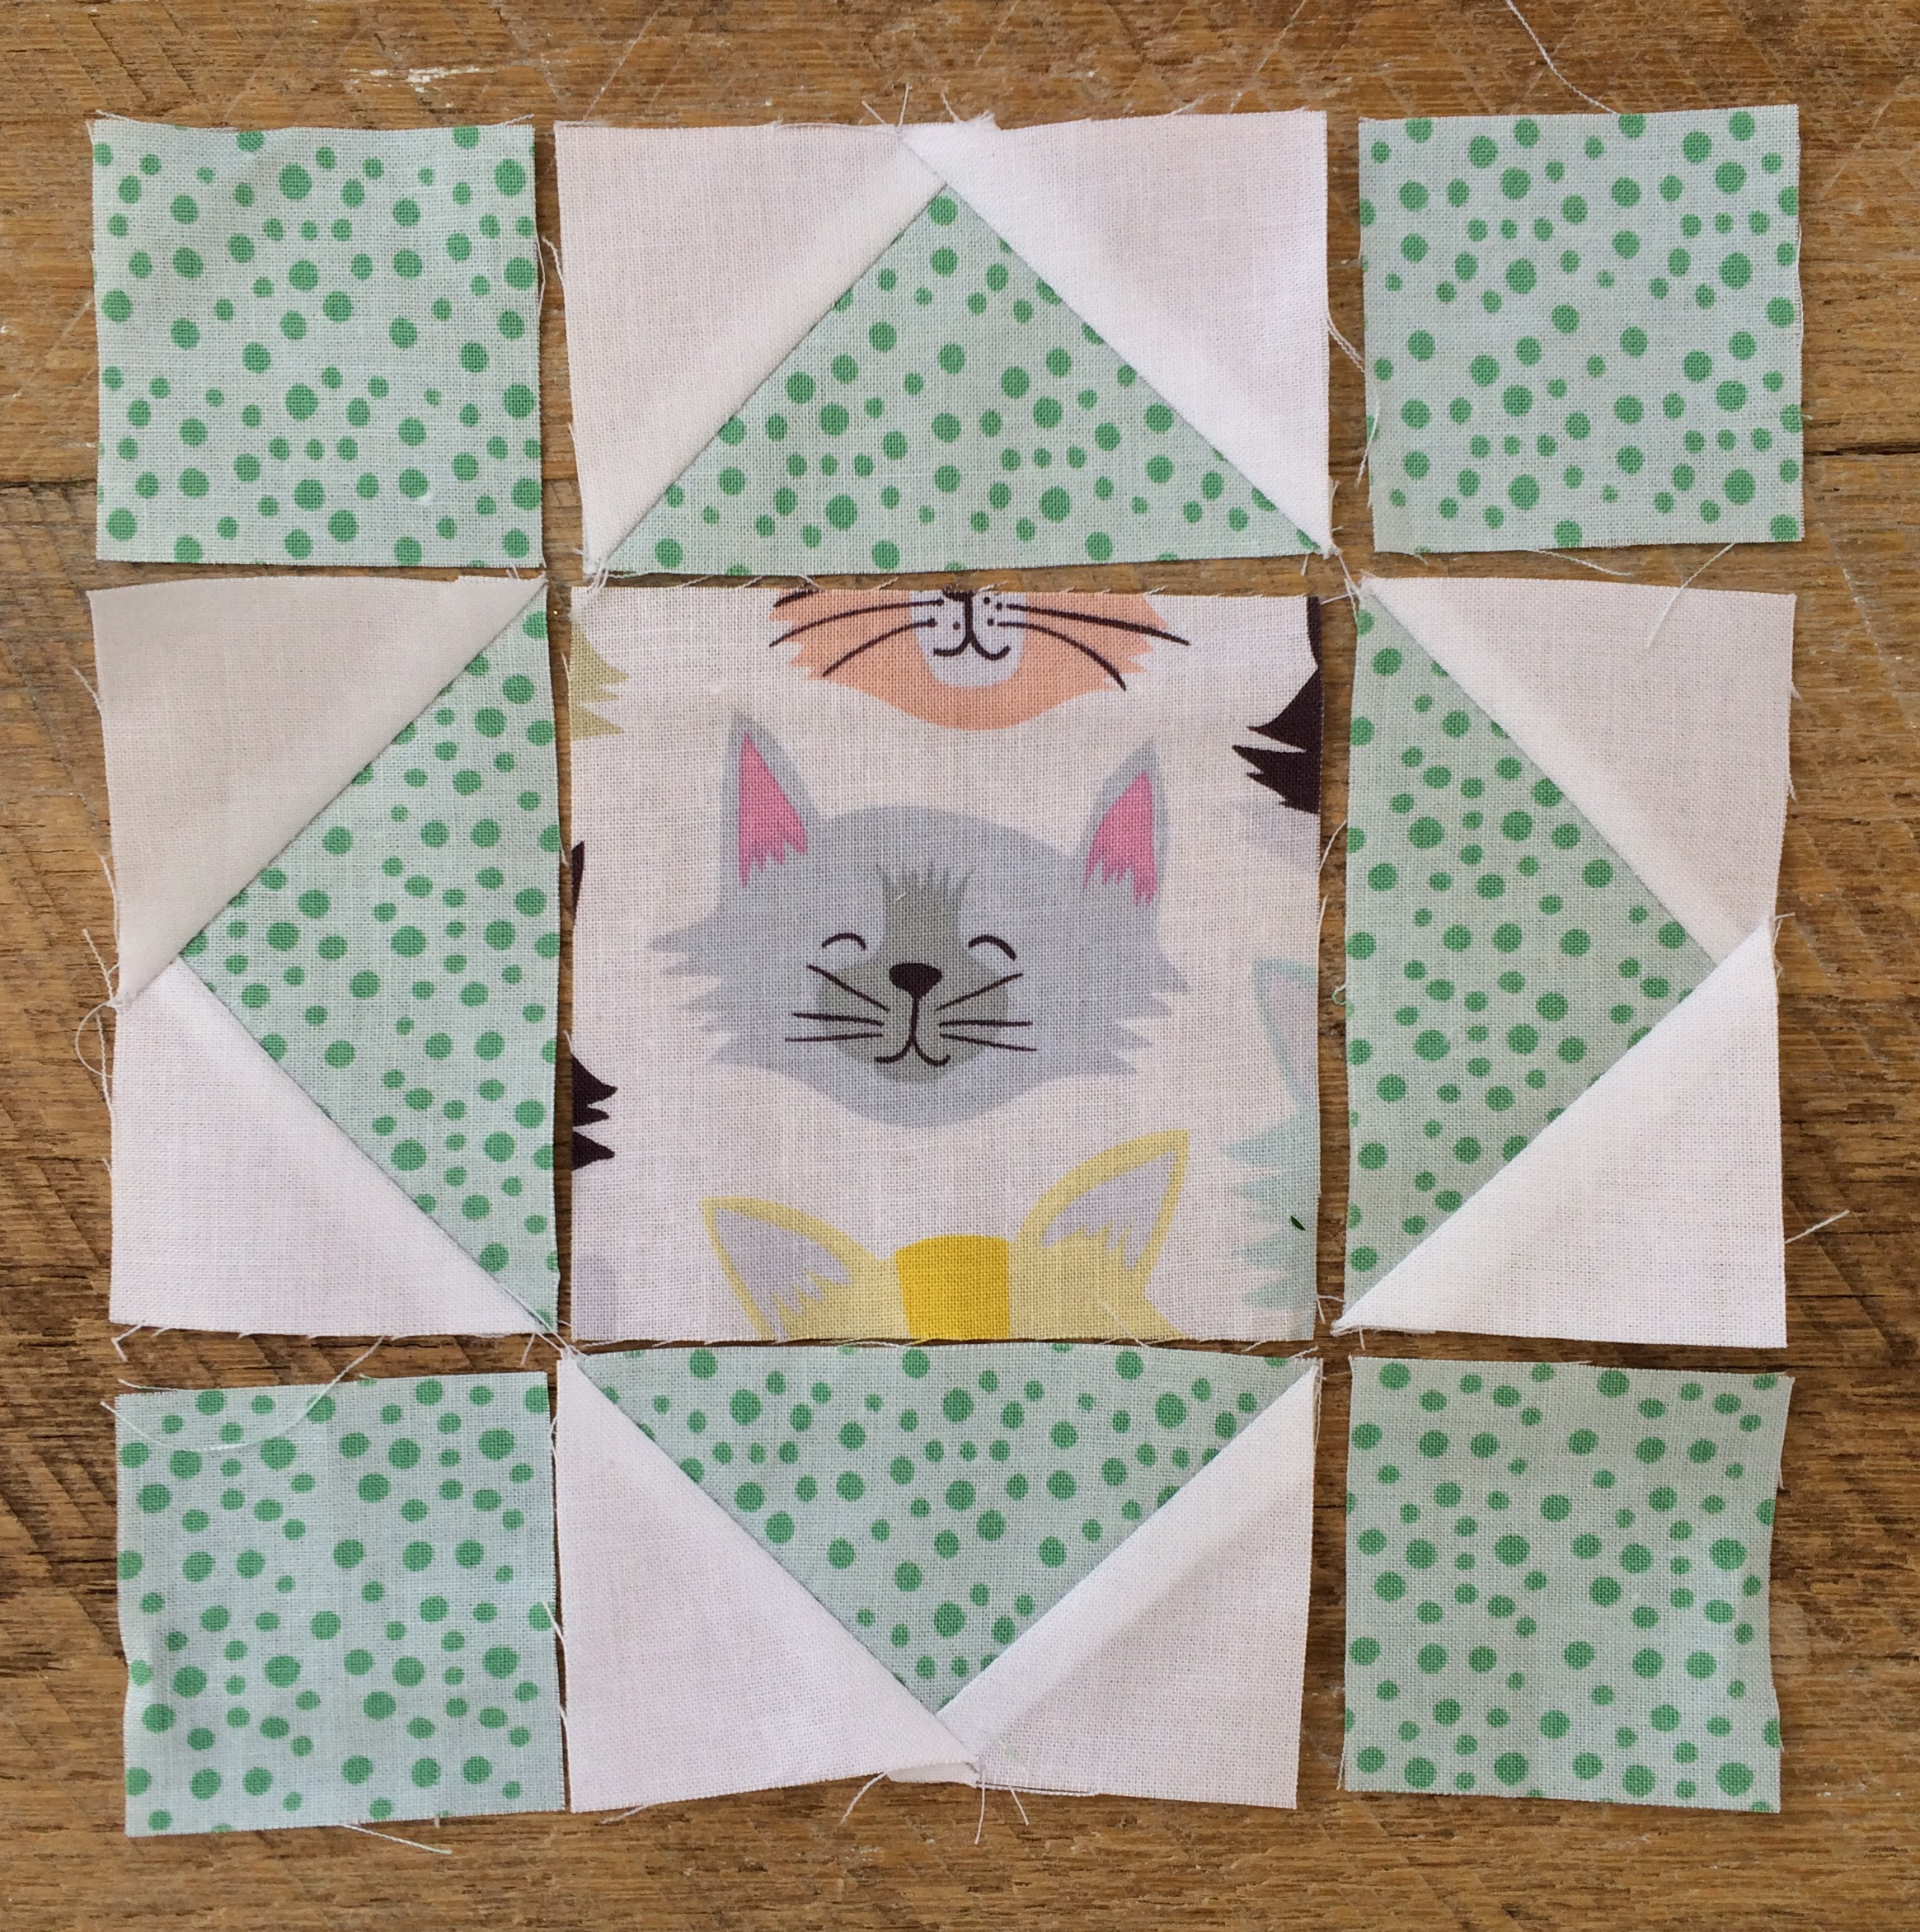
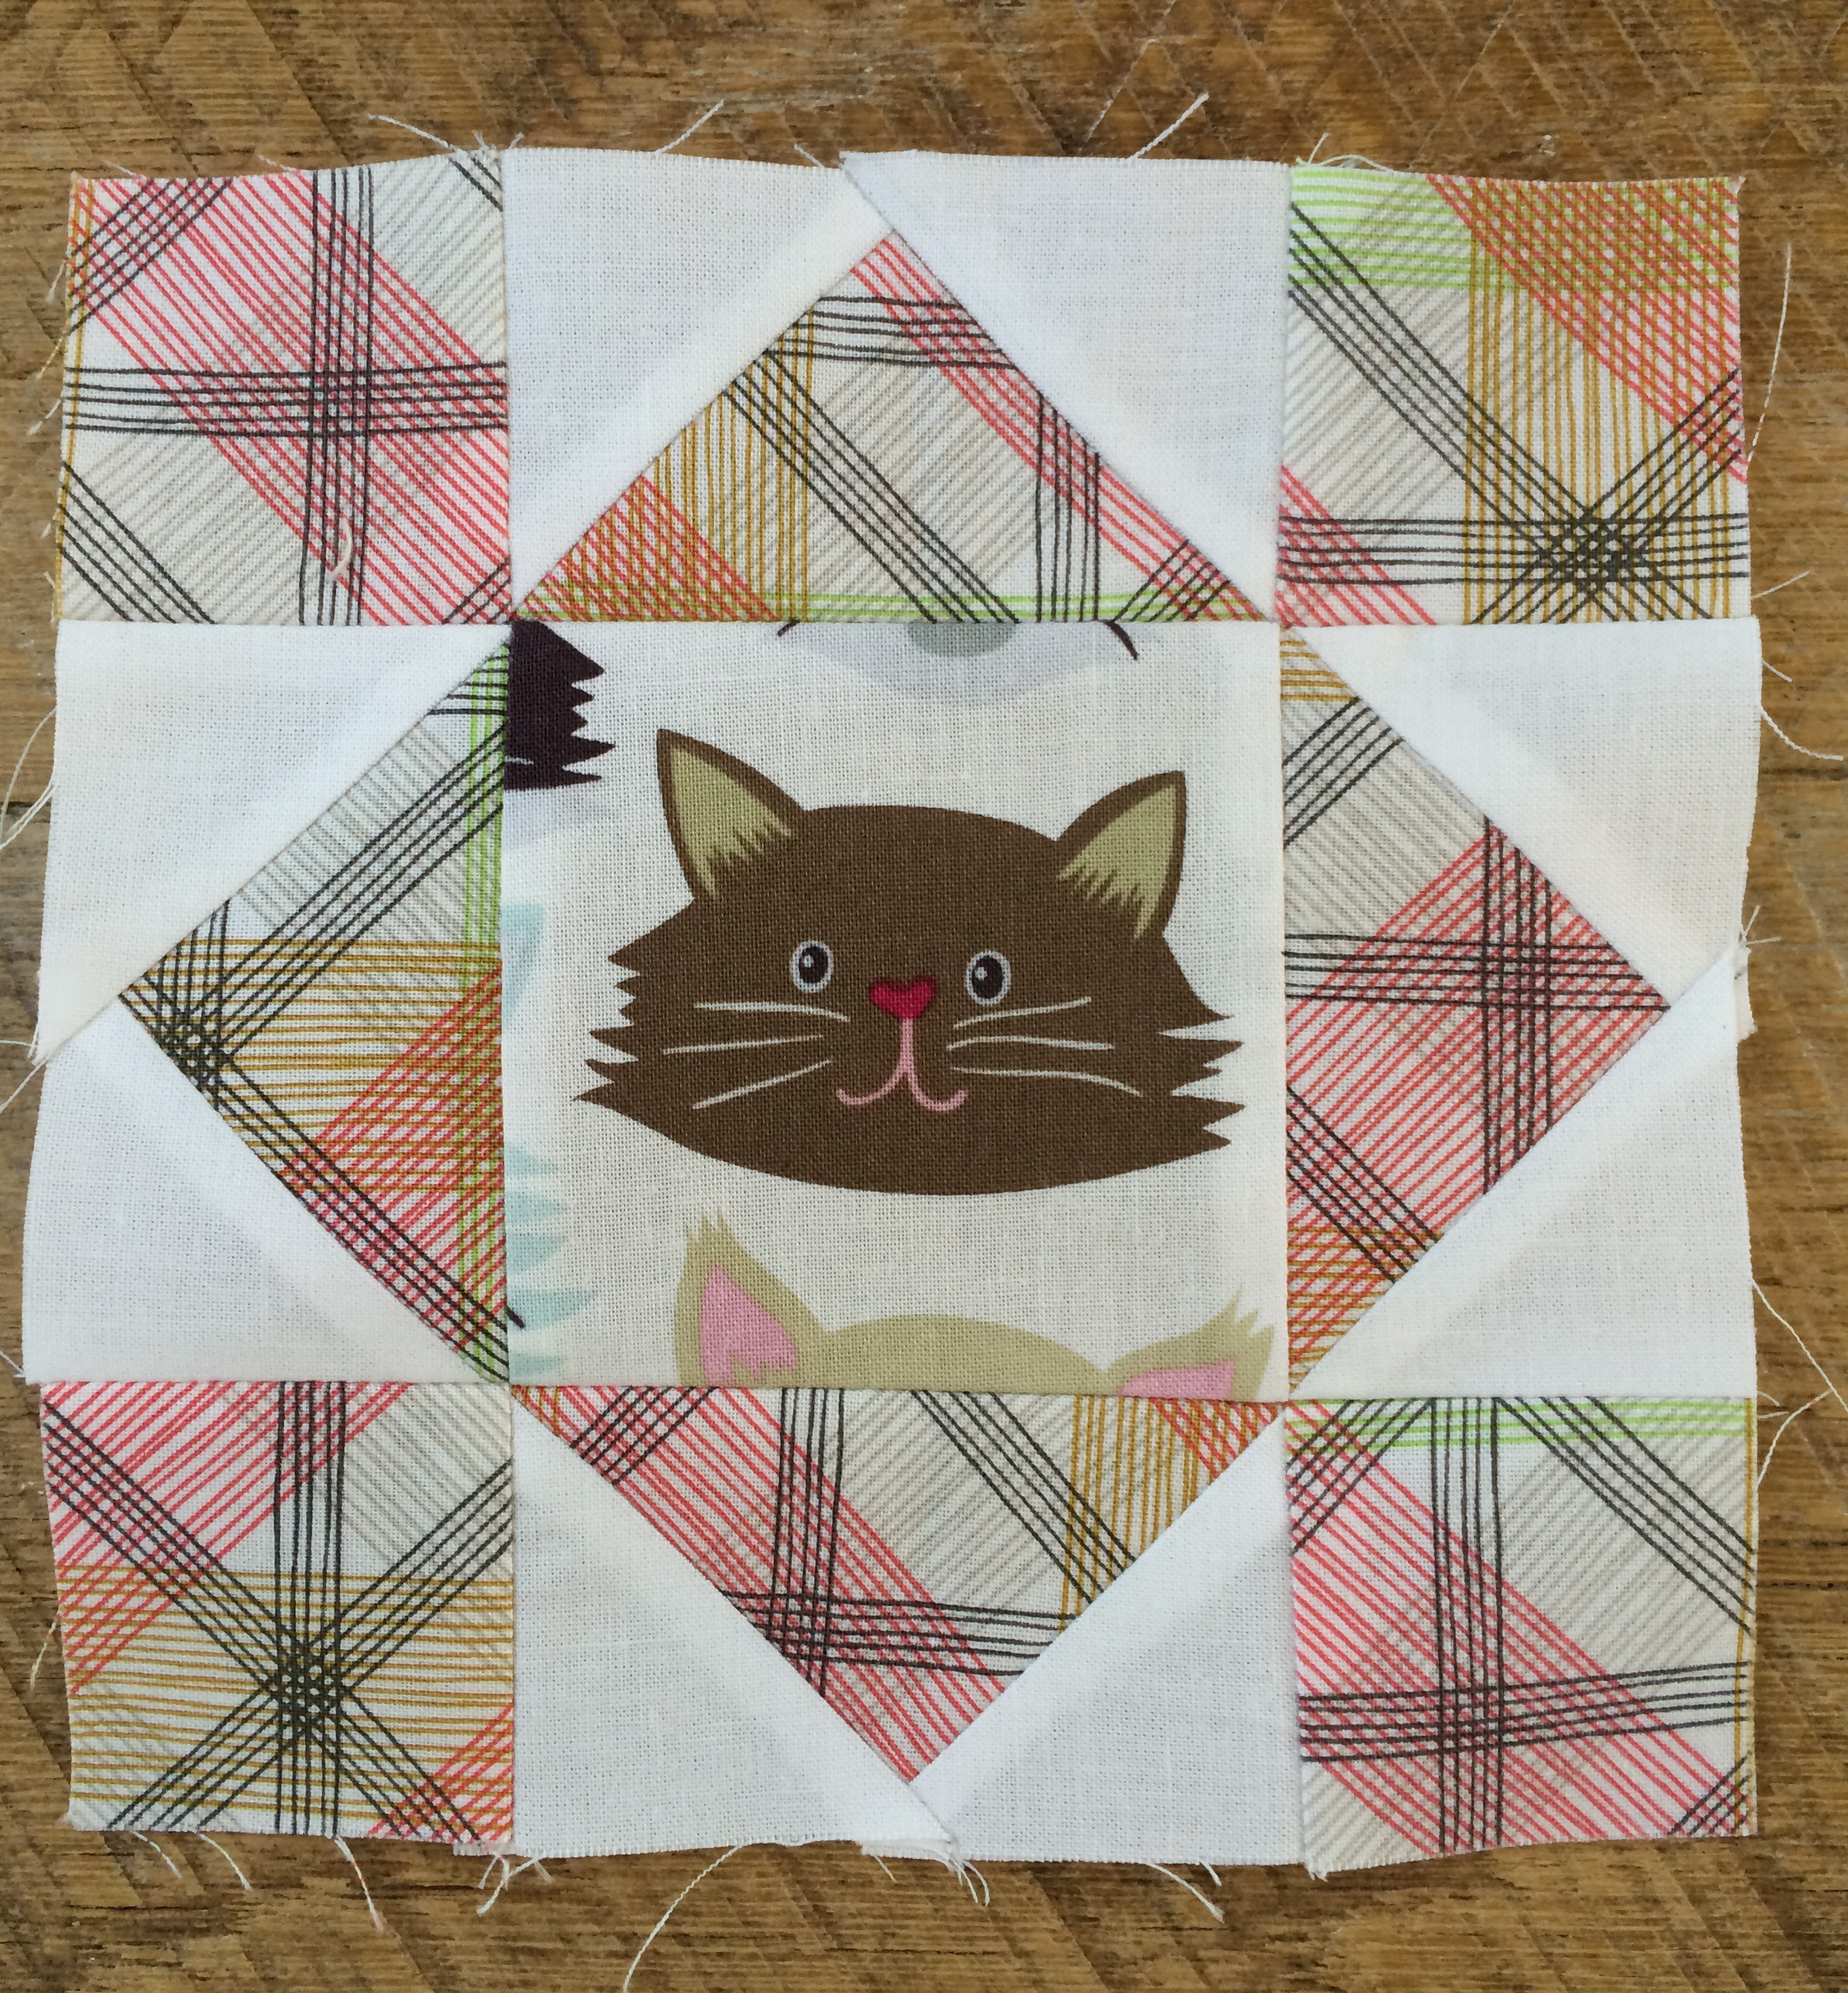
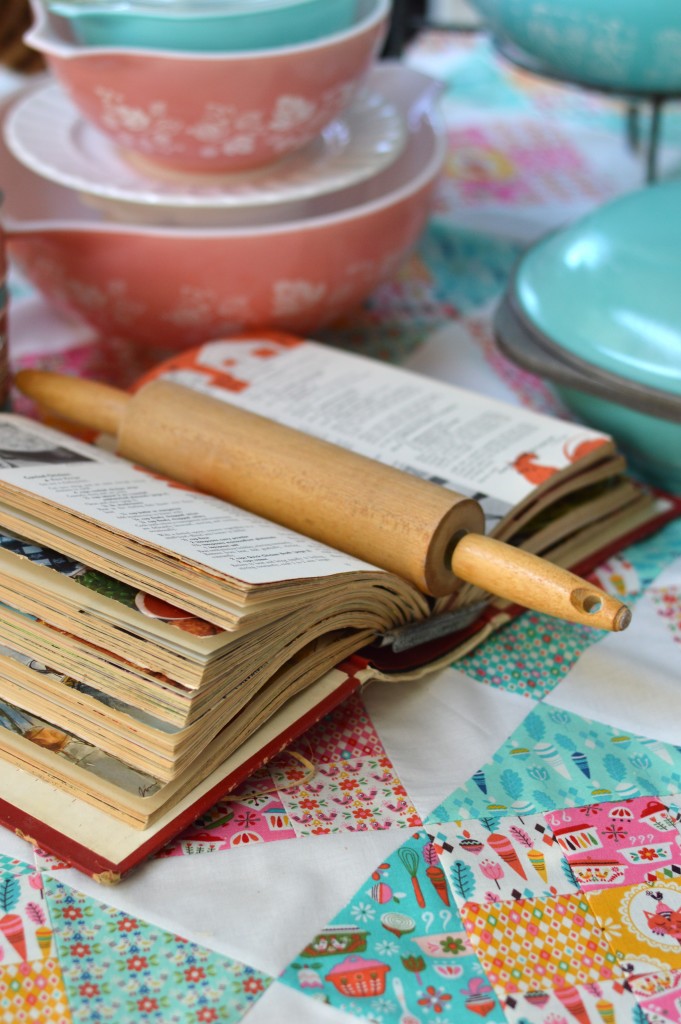
I created this quilt called “Cat in the Kitchen”.  It is made up of hourglass blocks and 9-patch blocks.  What could be more fun!! IMG_5395
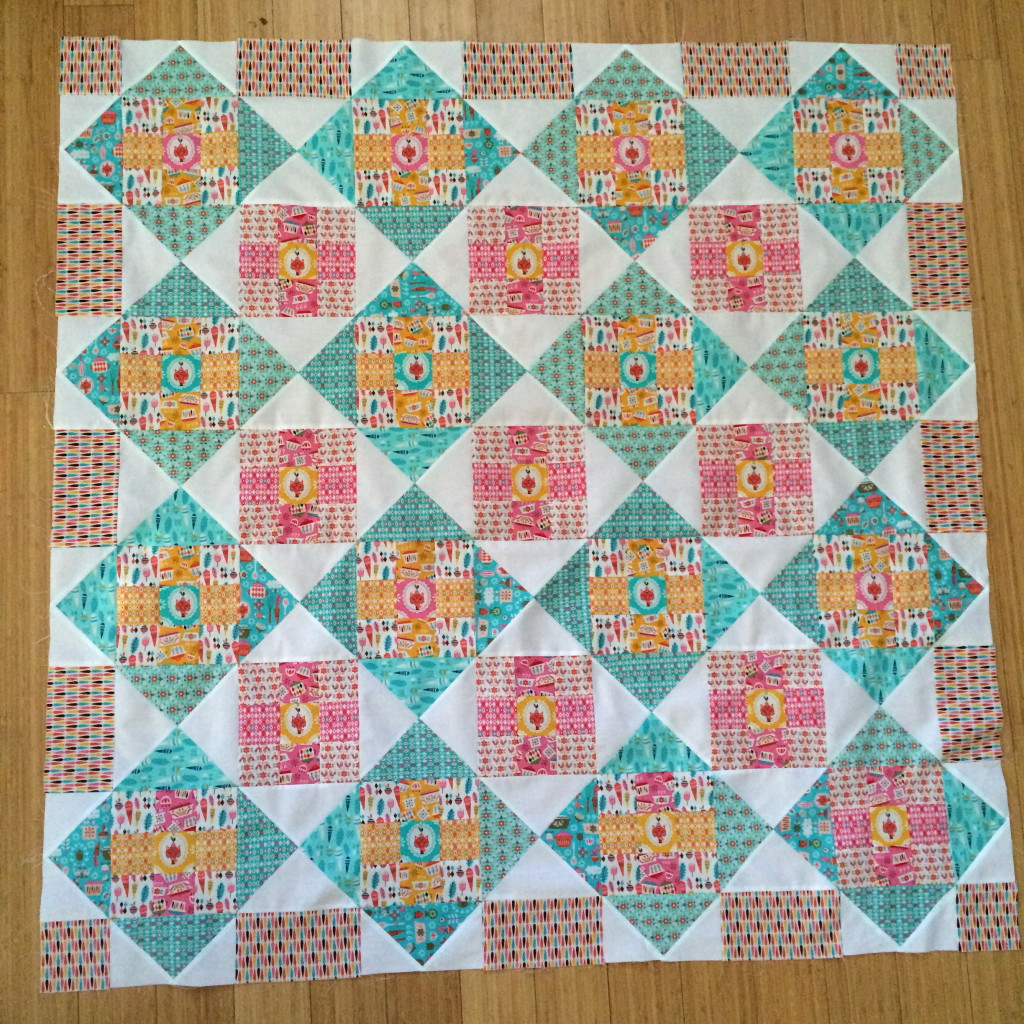
Each of the 9-patch blocks has a kitty in the center – just like in my kitchen….with Mufasa constantly in the center of it all.

vintage kitchen quilt 
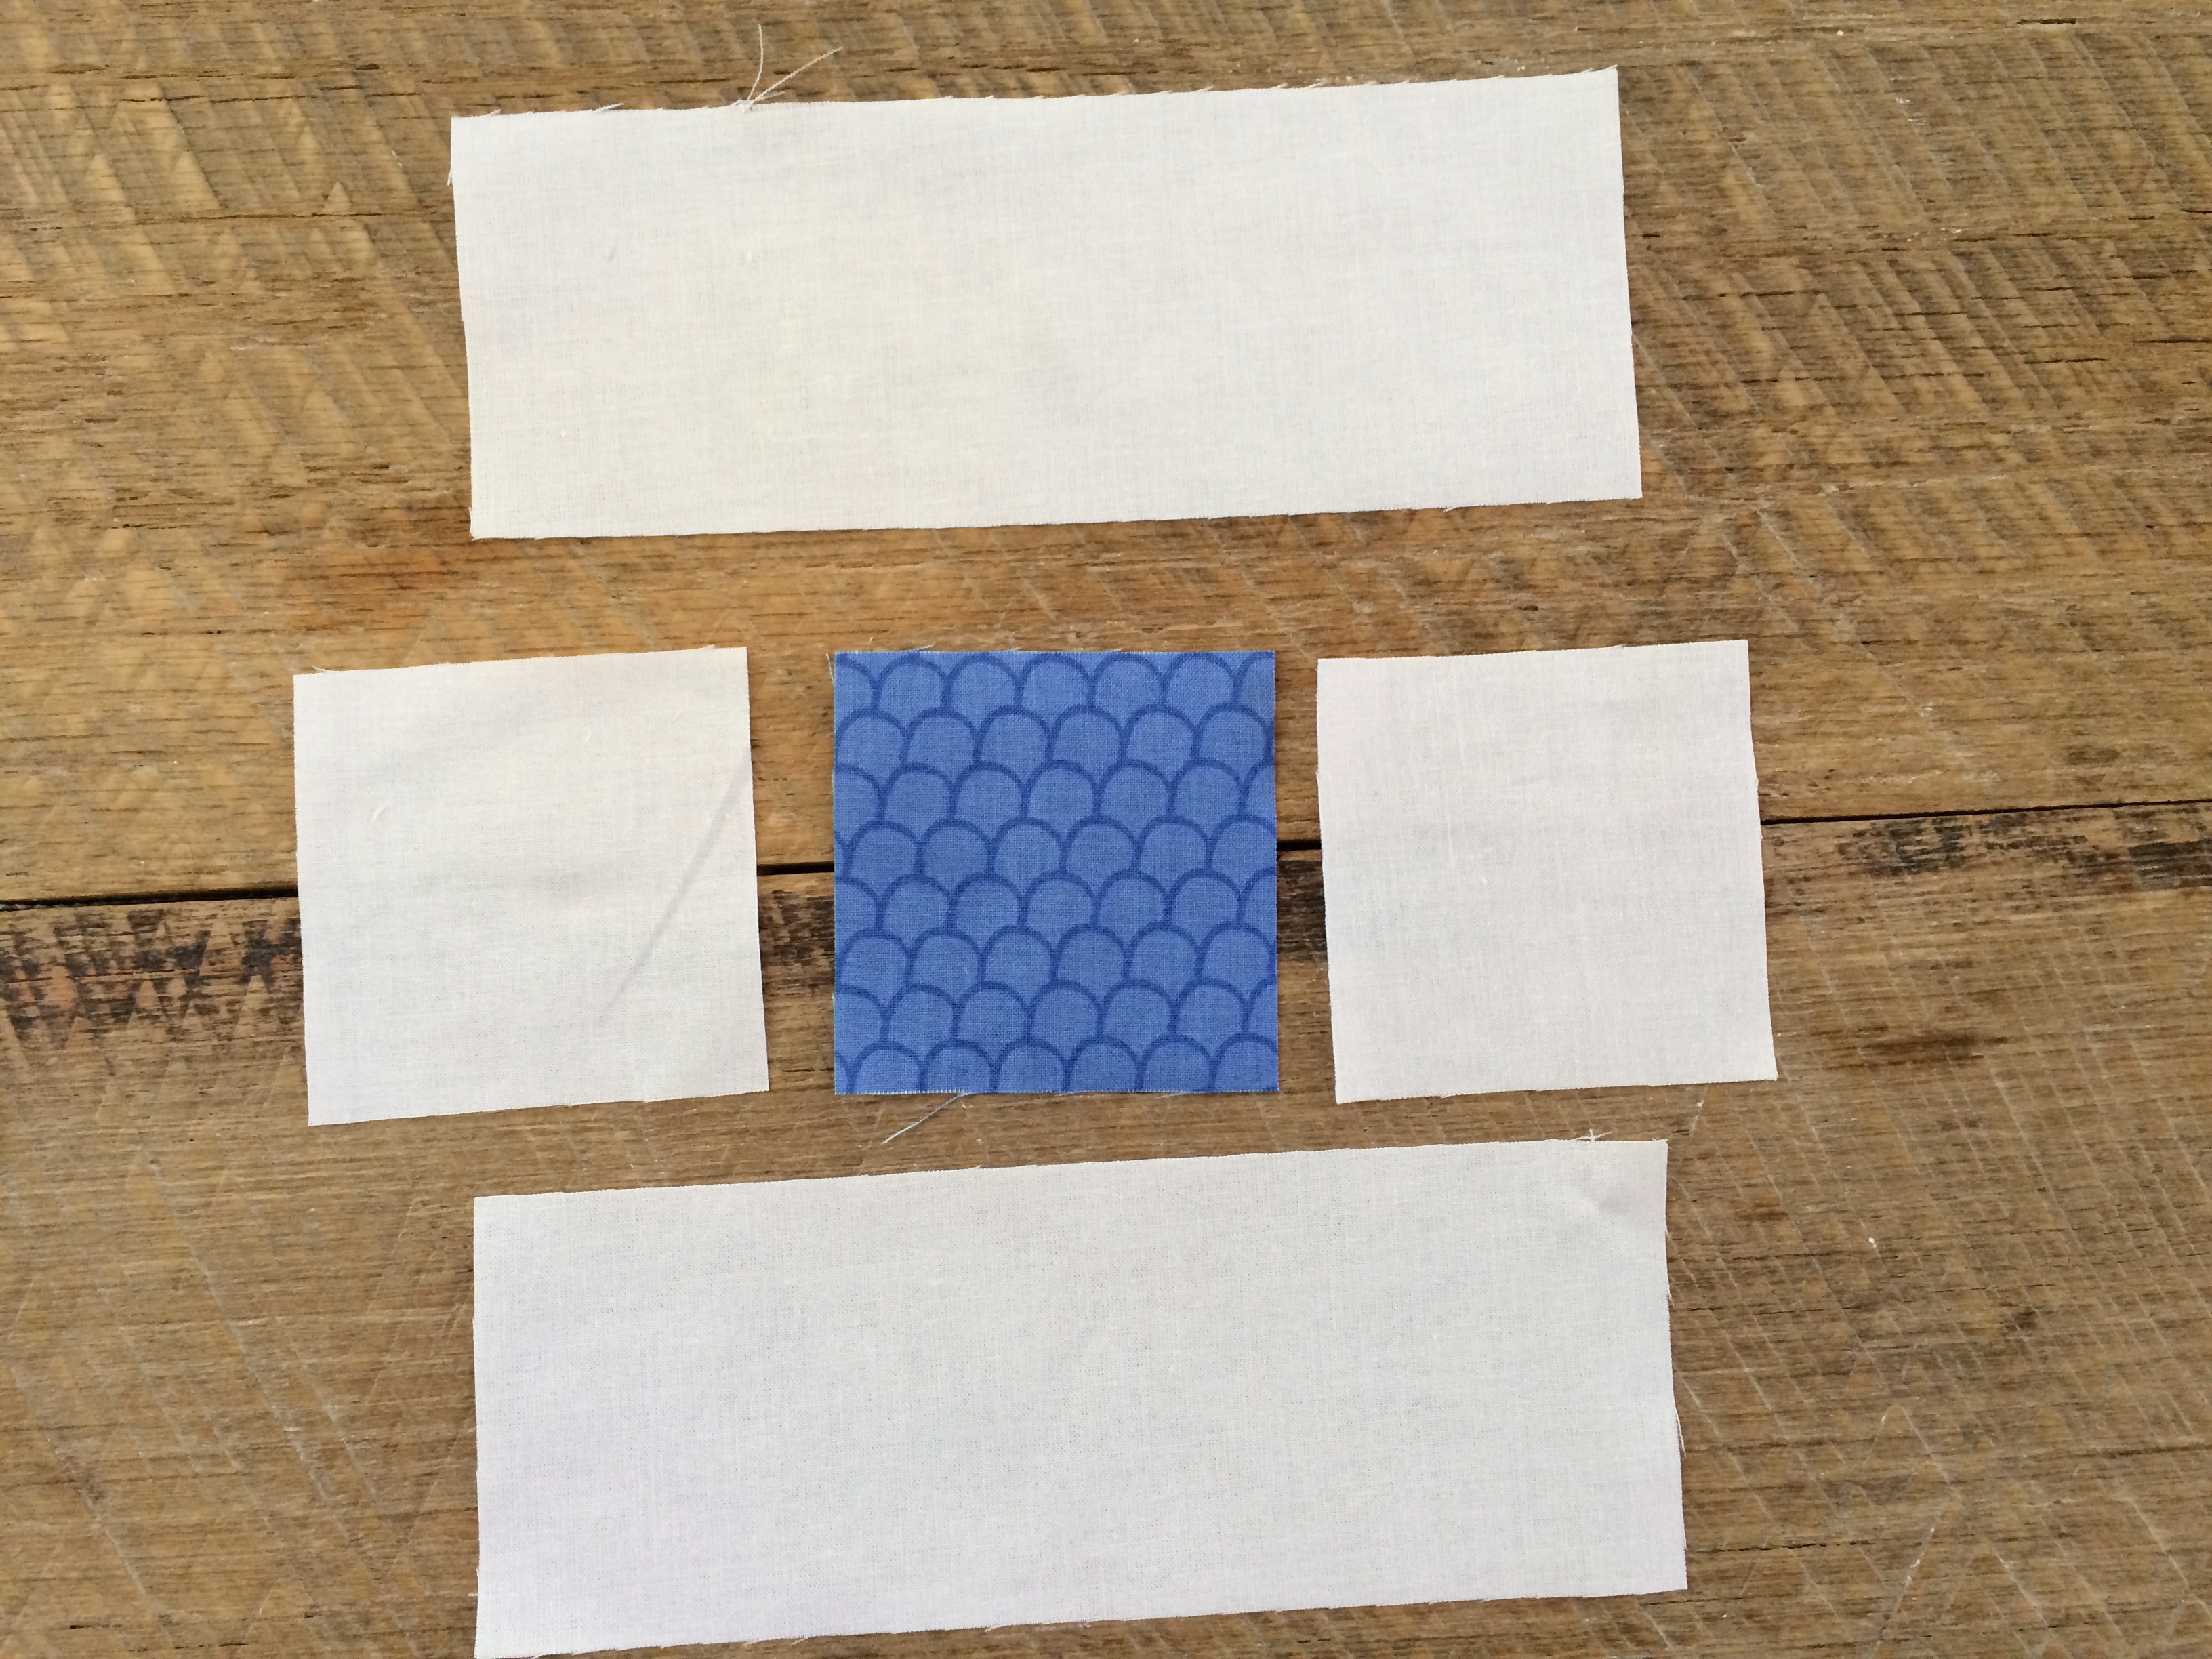
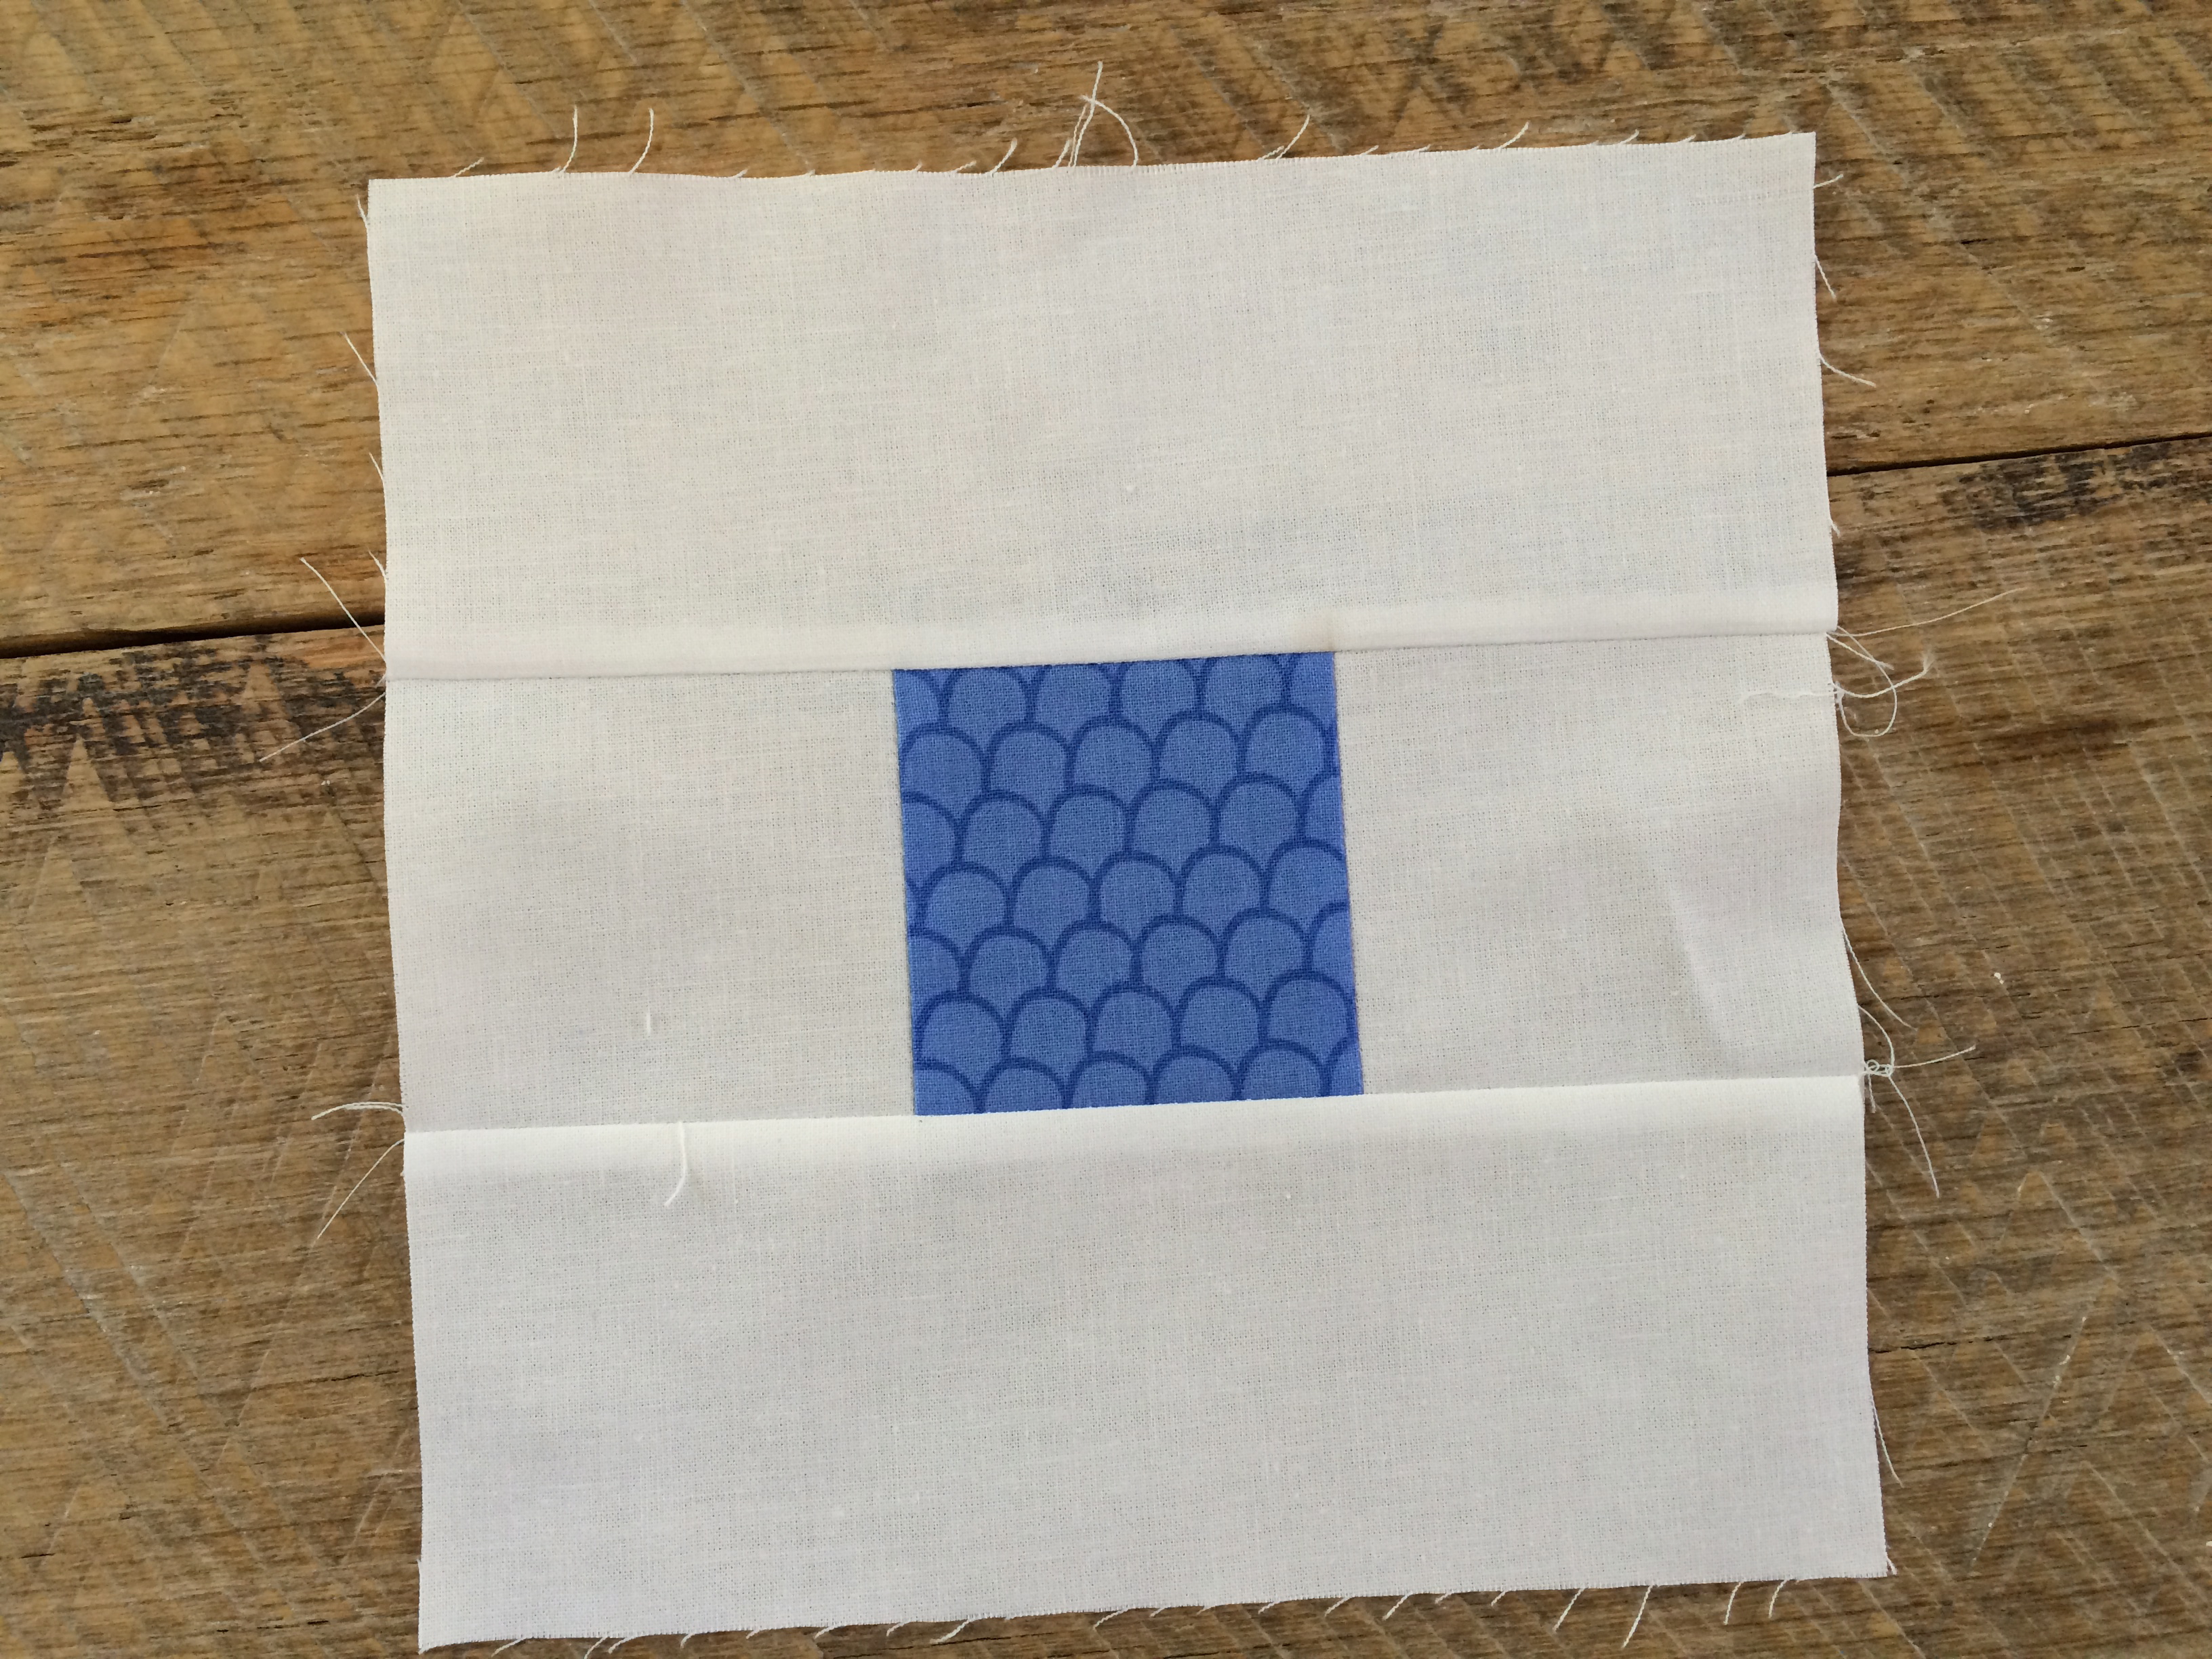
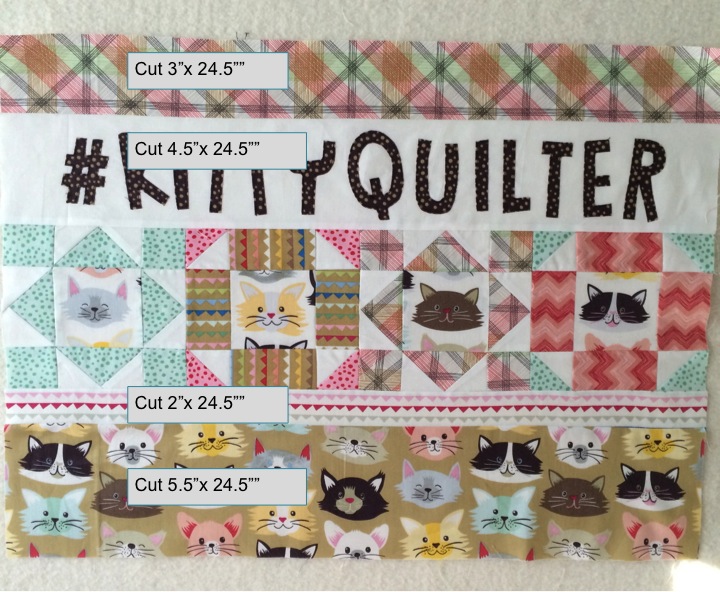
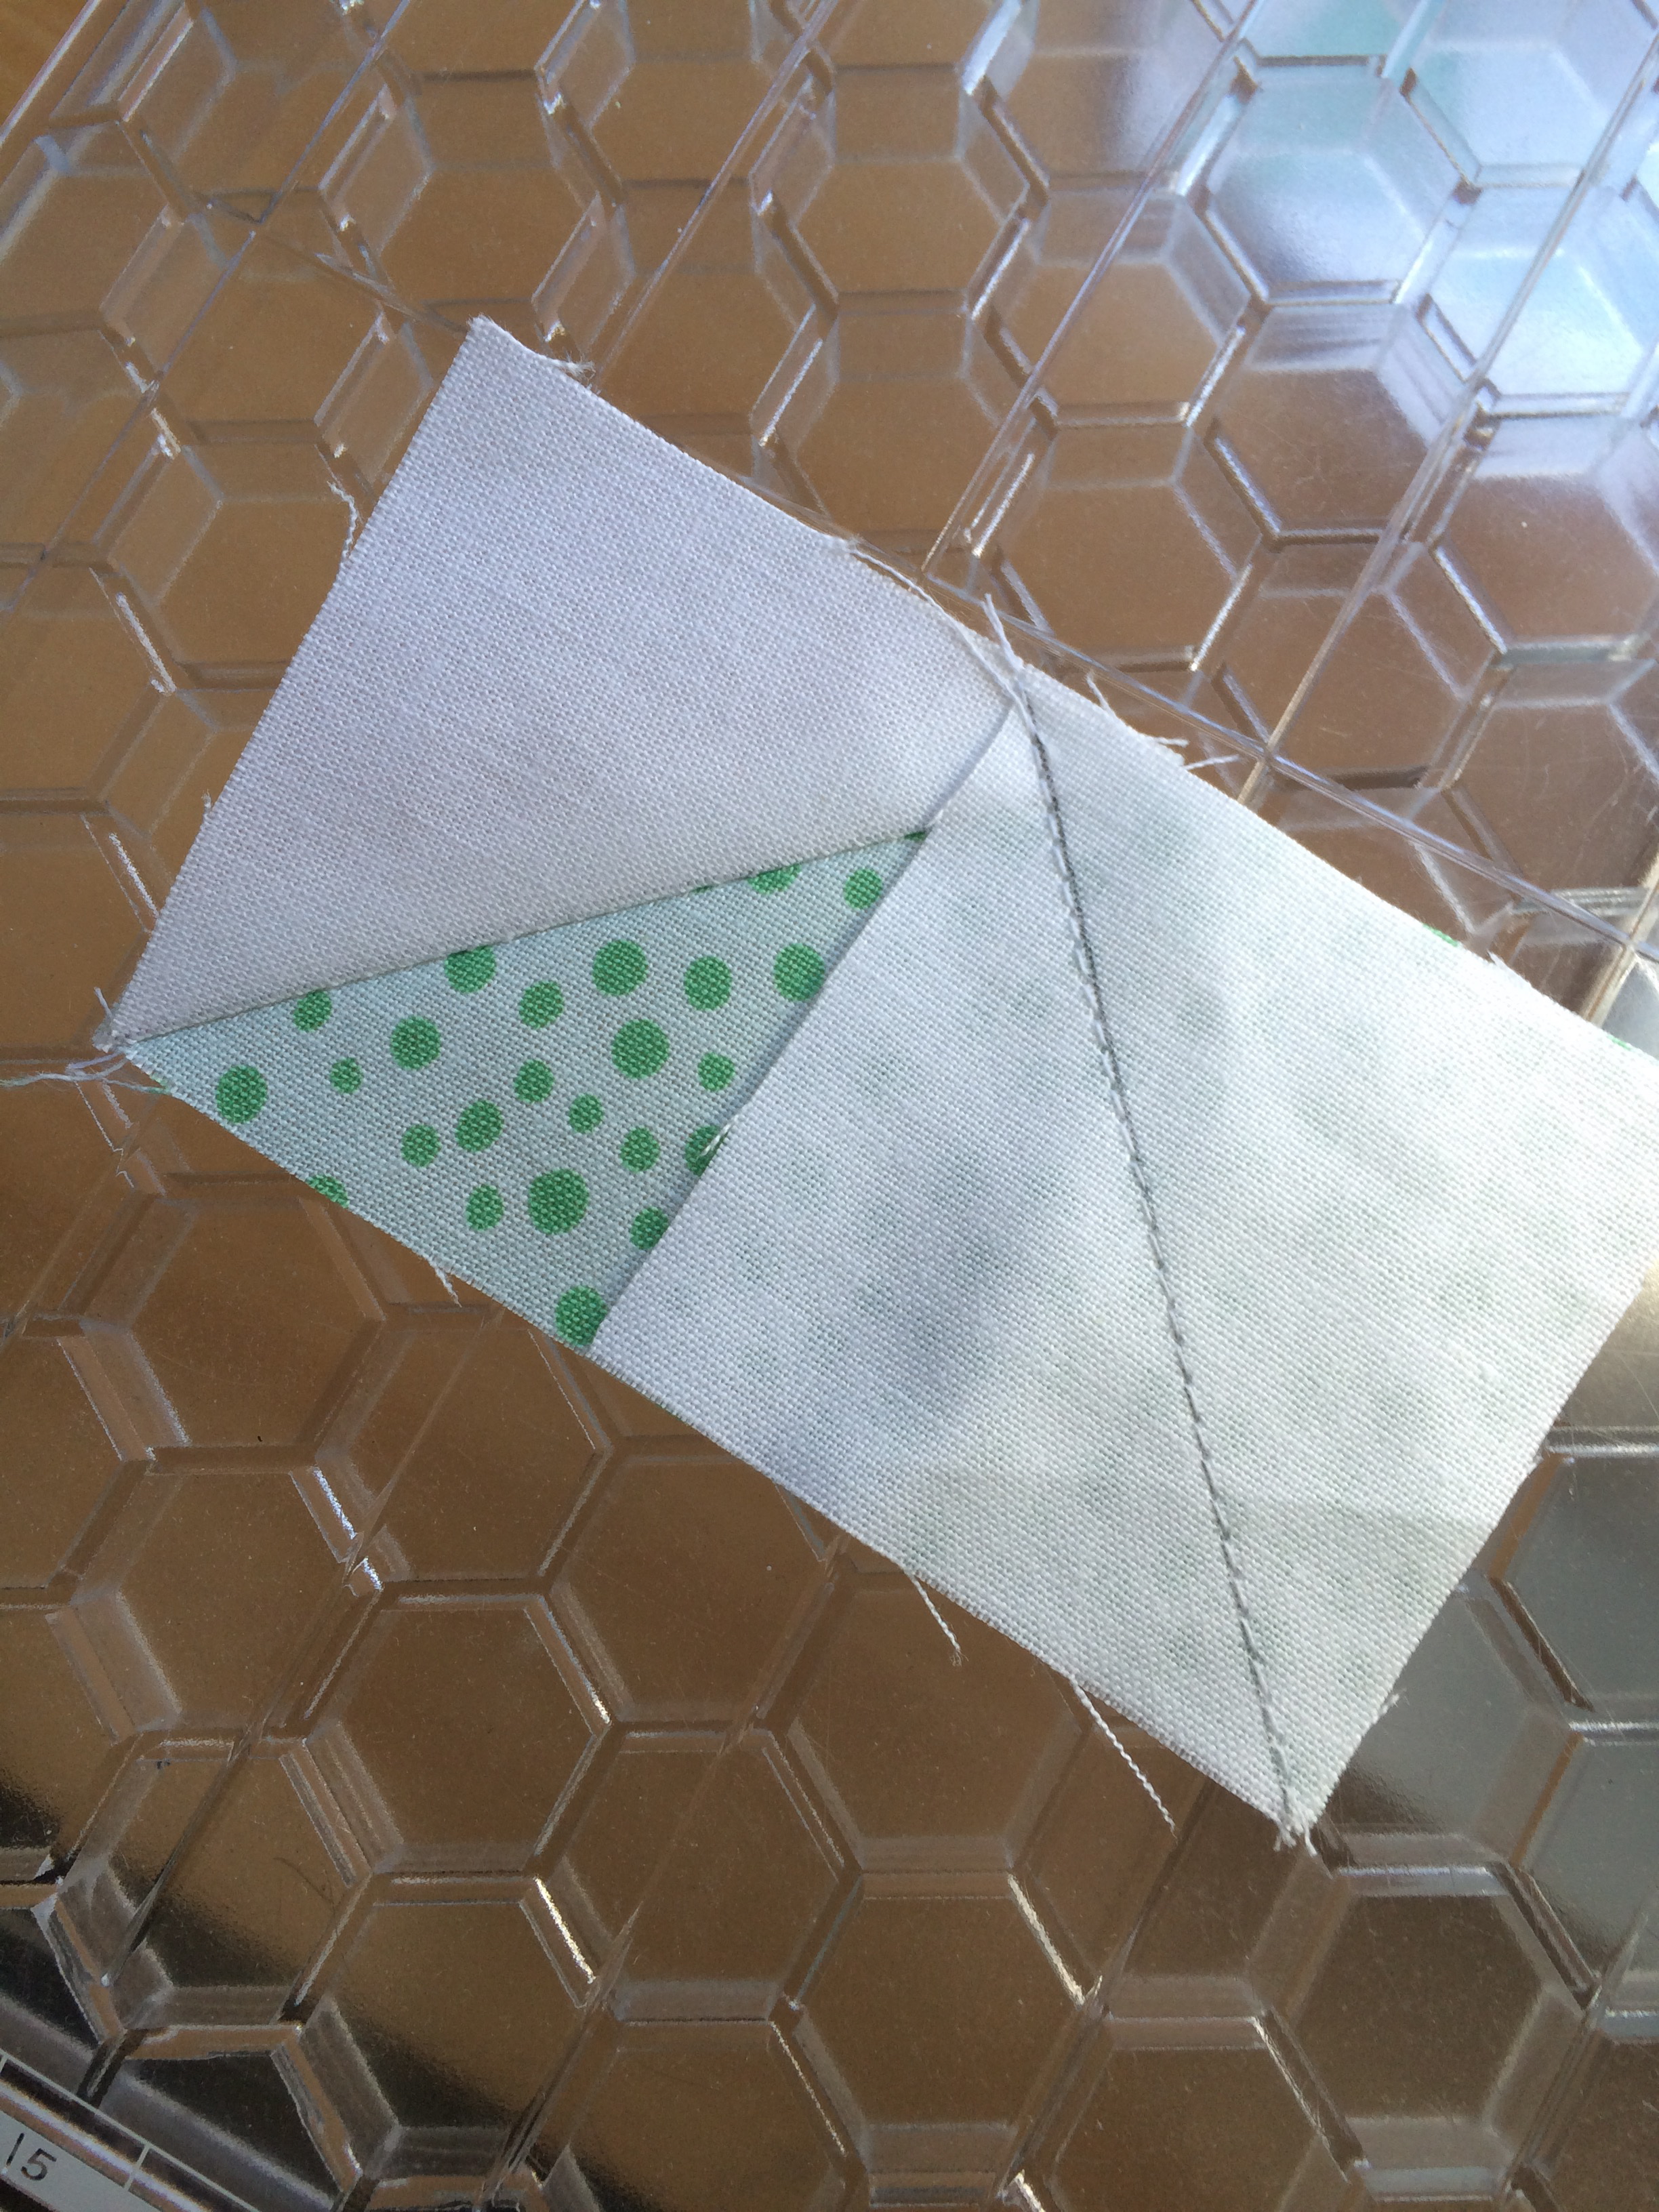
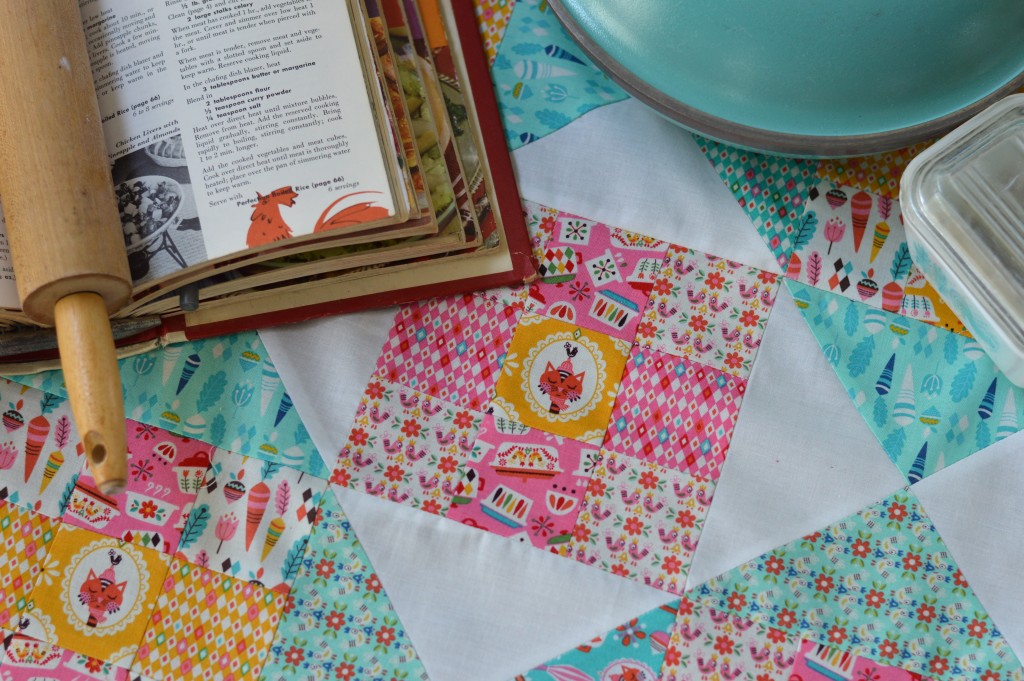
I have created a few little instruction guides to help you put this quilt together.

 Supplies:
Assortment of Vintage Kitchen fabrics 1/3 yard each (4 blues, 2 pinks, 3 low volume, 2 yellow, cats, and others to mix in)
Solid White 1 1/3 yard
3 yards backing
1/2 yard binding
Begin by creating the hourglass blocks and 9-patch blocks.  All seams are 1/4″.

hourglass instructions

9 Patch Block – pinks & yellows with cats in the center.

9patch

The edges of the quilt are finished with flying geese blocks and rectangles.  flying geese
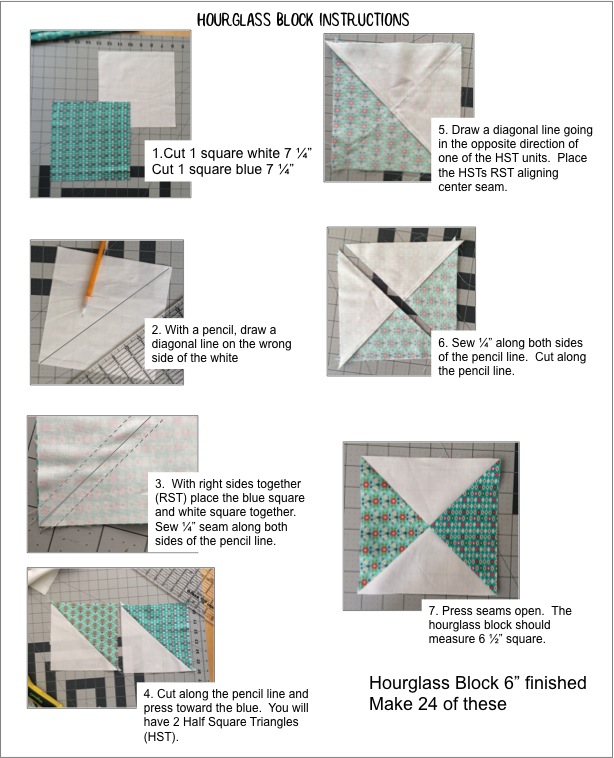
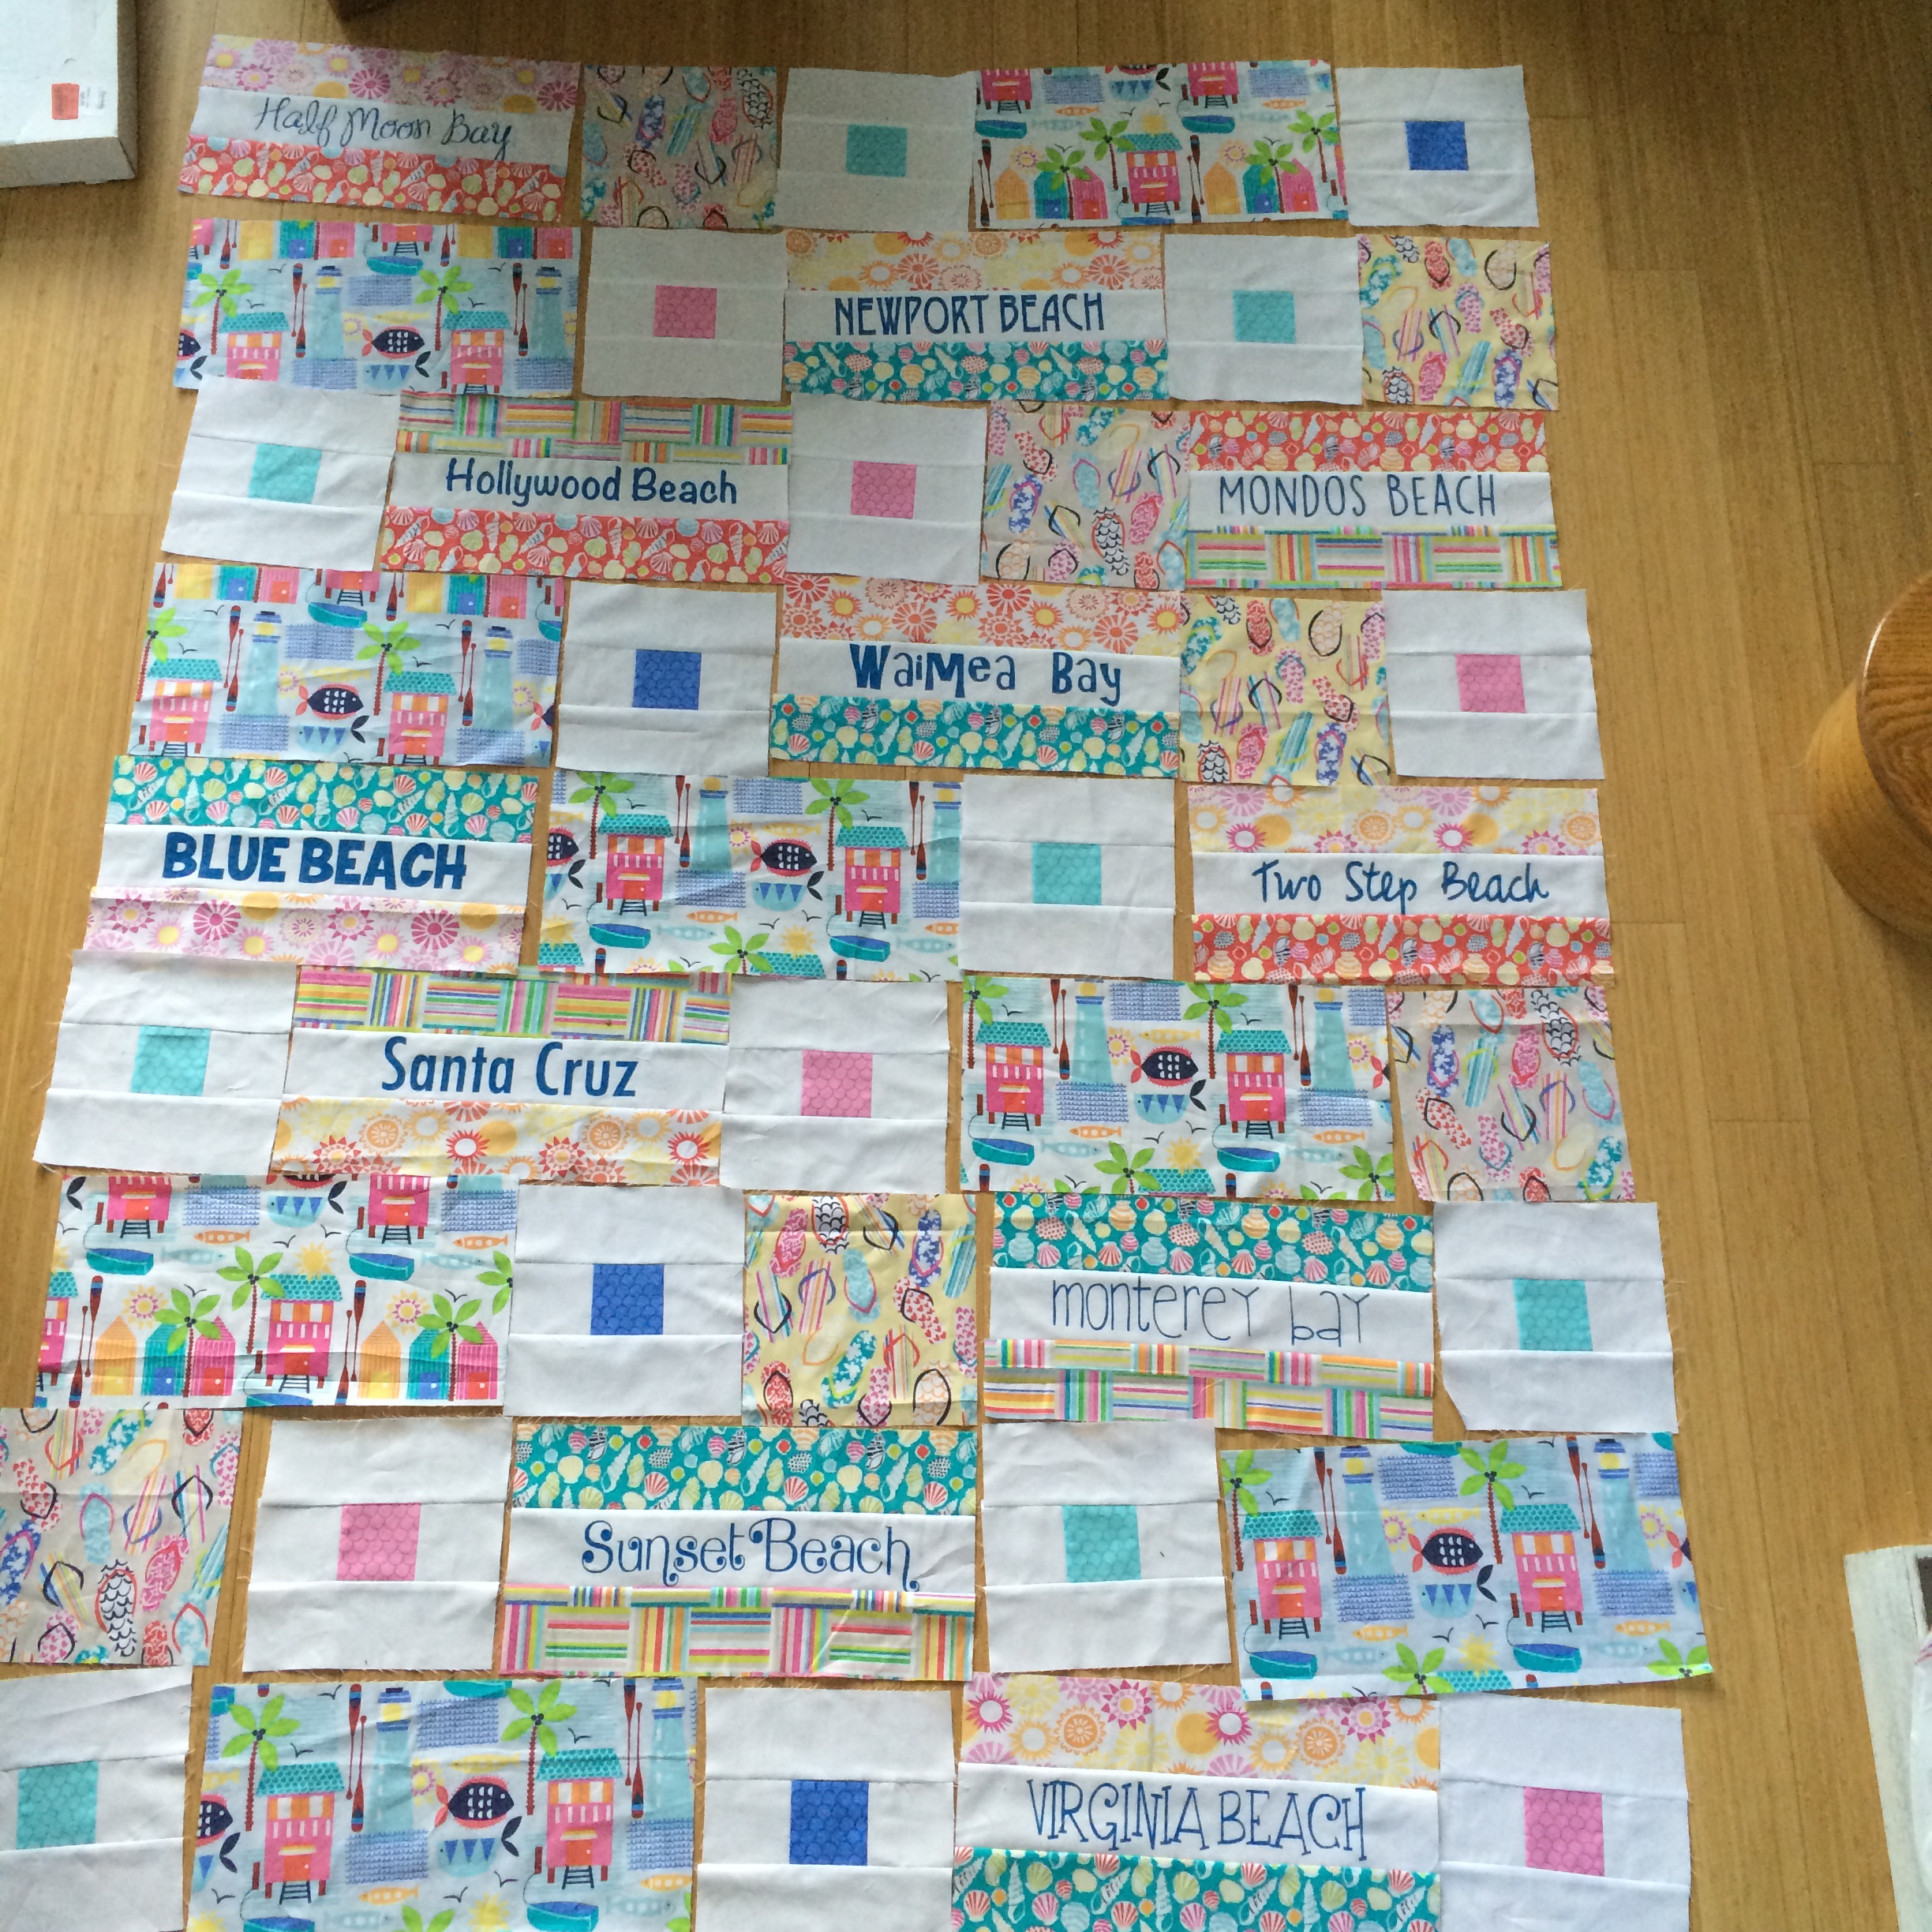
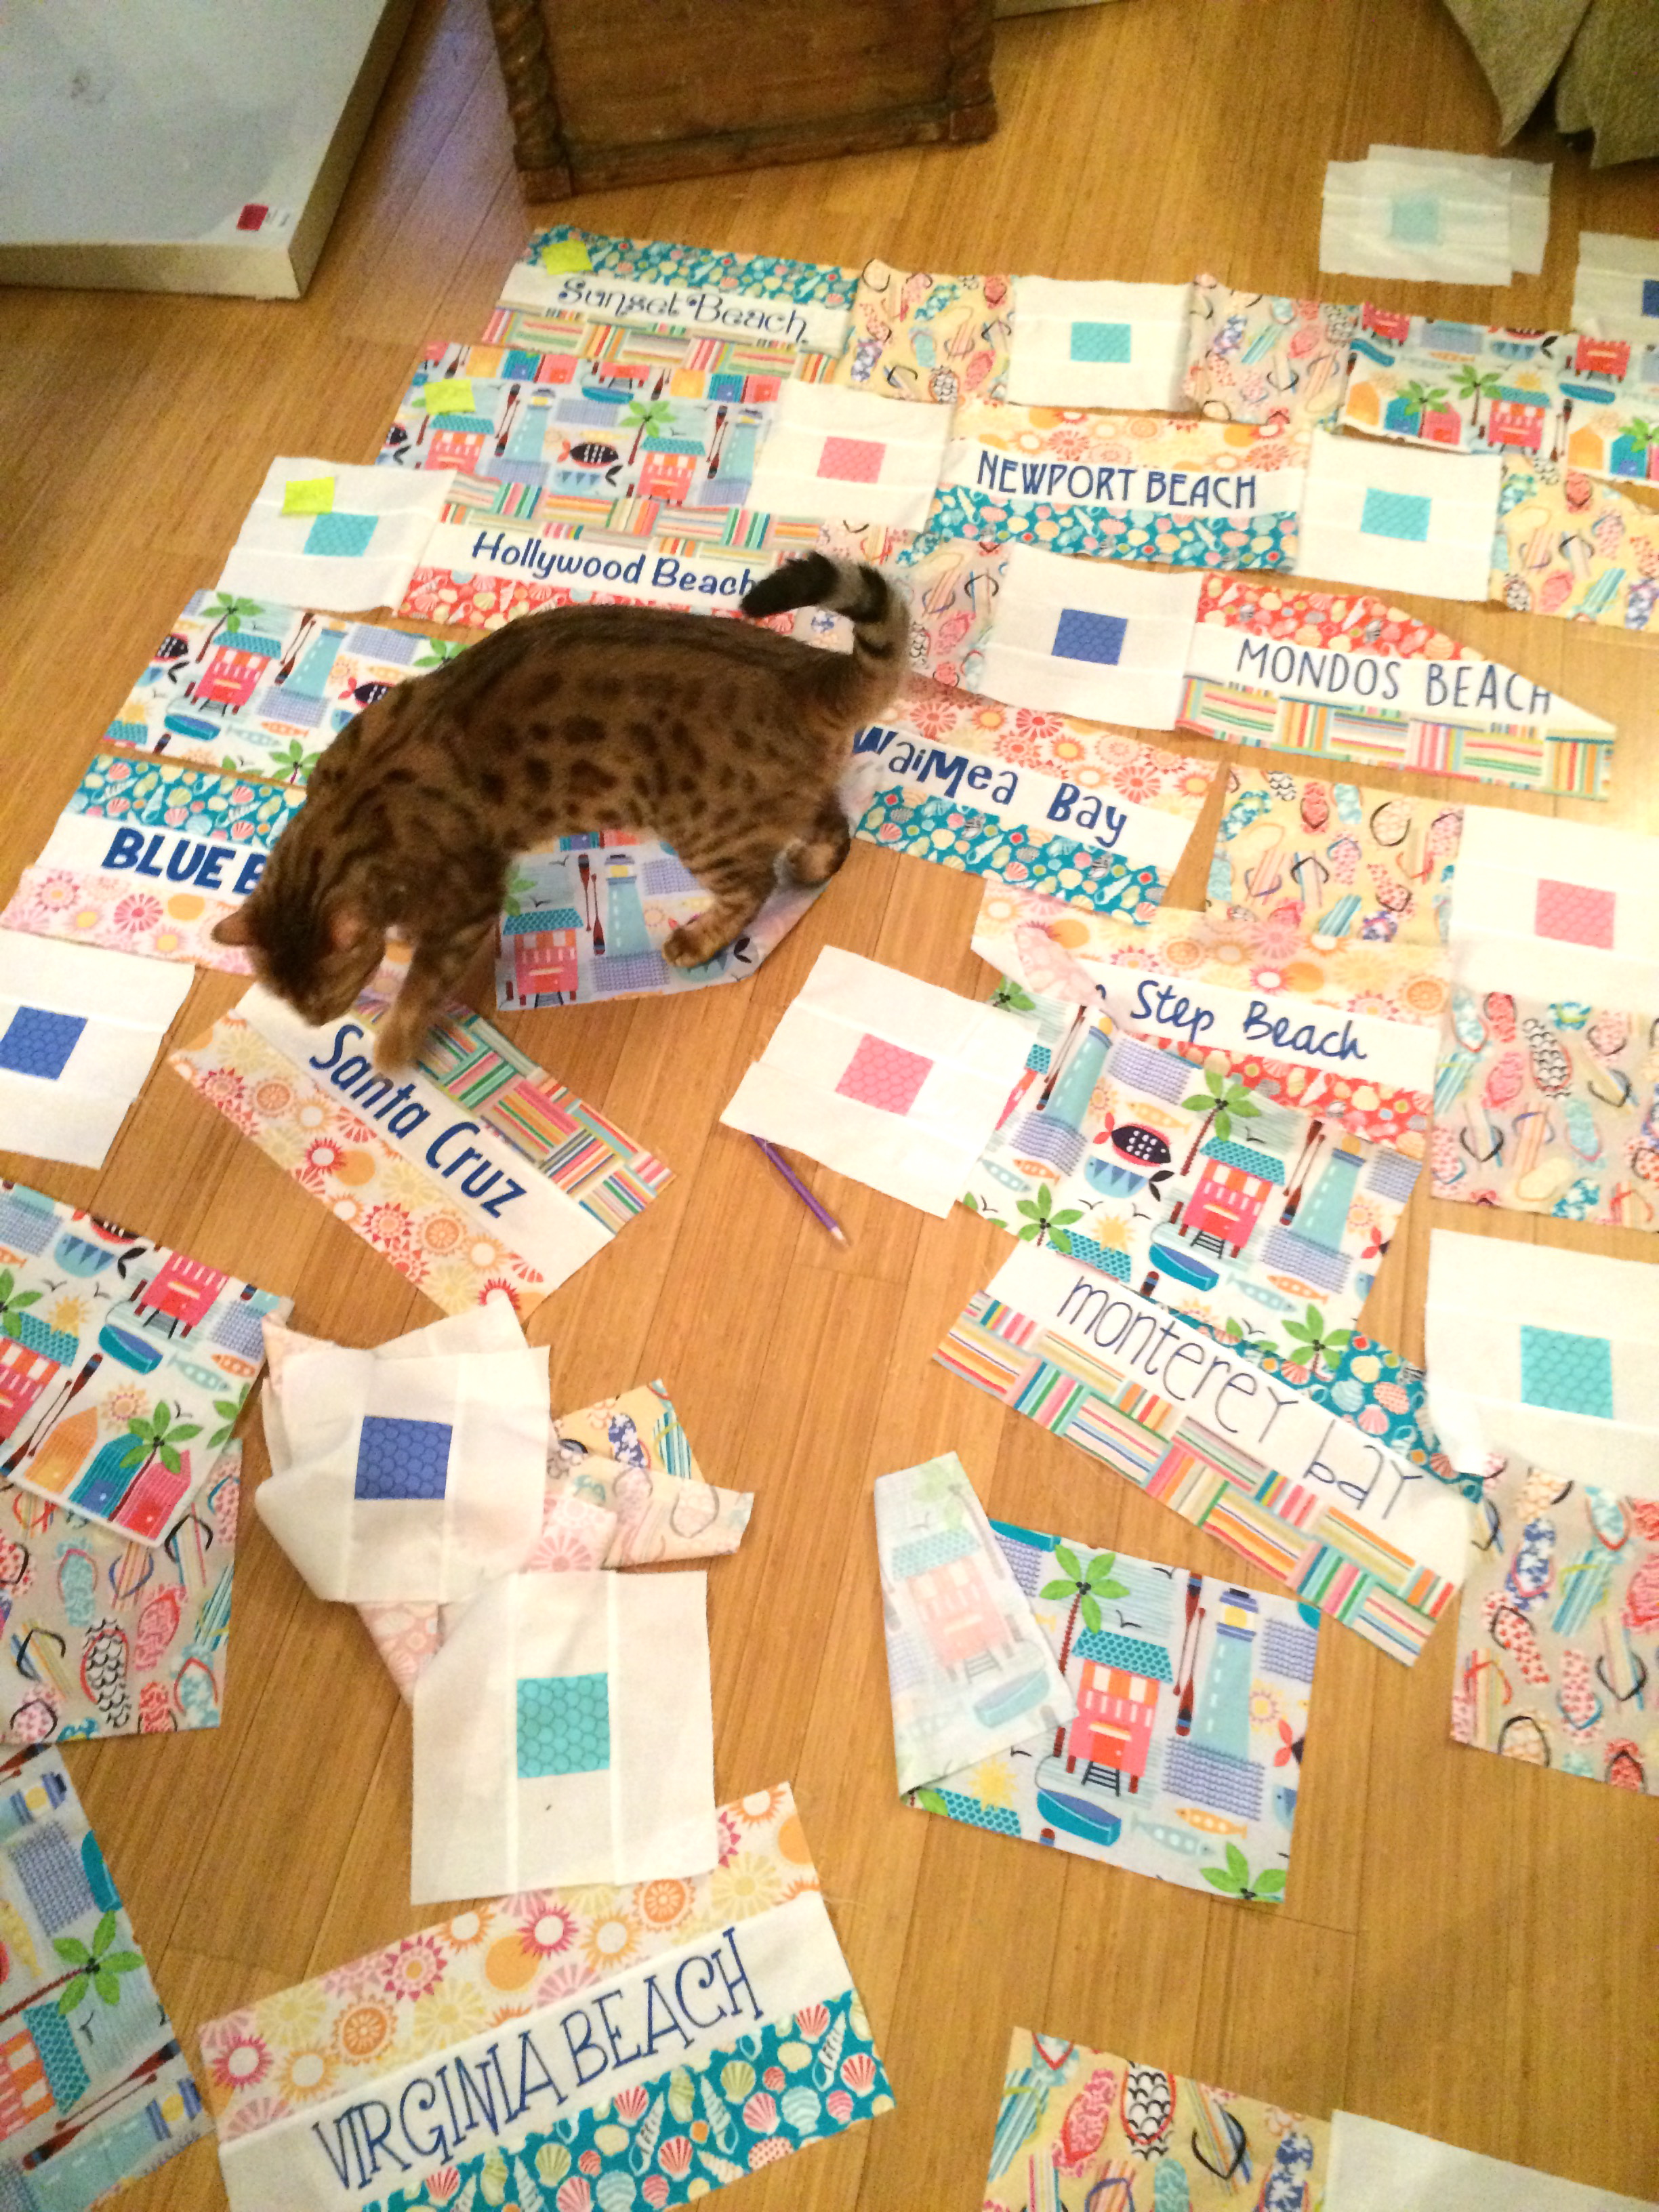
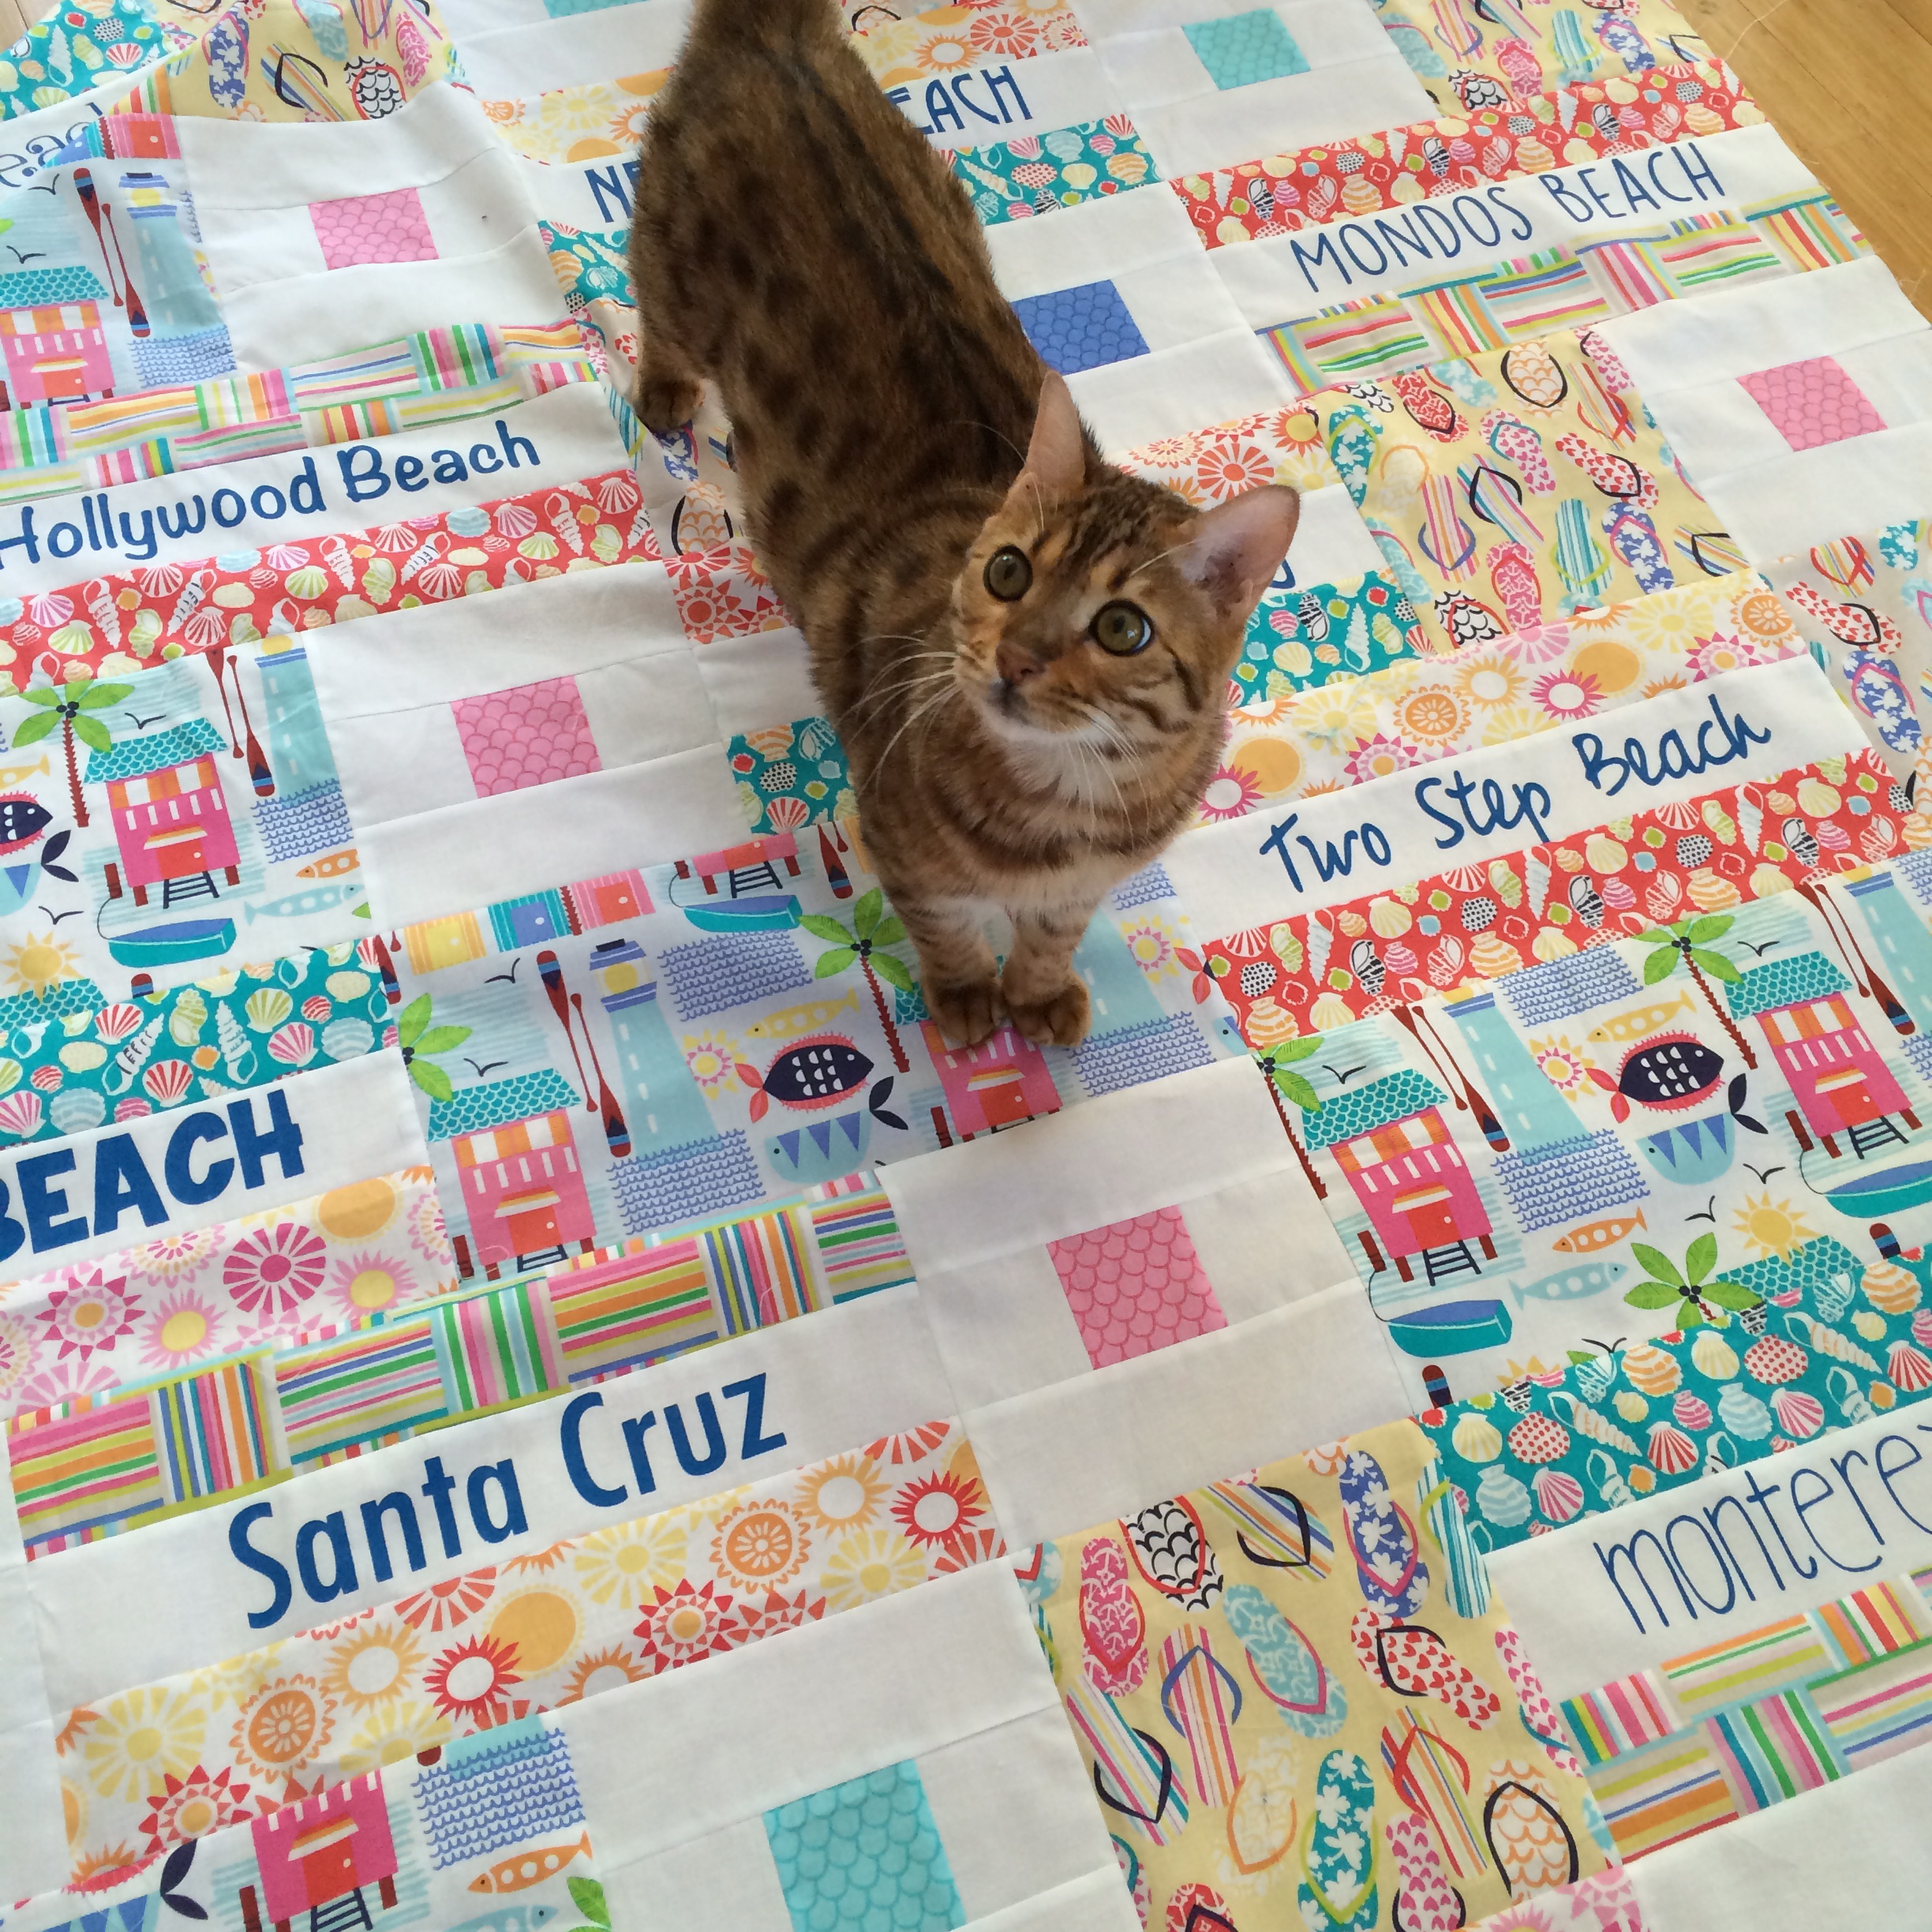
Lay out the quilt as suggested below:
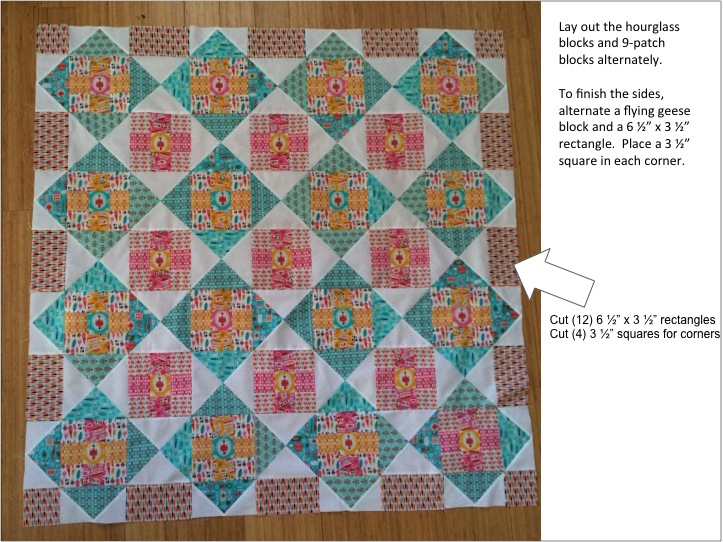
quilt layout

Assemble the quilt together in rows, pinning at each intersection and pressing.  Make sure your cat walks all over it for inspection before you quilt it!!!

IMG_5398

I am so happy with how this quilt came together!  The fabrics were so much fun to sew with!  My mind is just racing with more ideas of fun things to sew with this fabric!!!

IMG_5412

Check out all the other amazing projects that my friends are making as part of this blog hop!!vintage kitchen quilt 6

blog tour

3/7/2016

Julia – Riley Blake Designs

www.rileyblakedesigns.com/blog

3/7/2016

Andrea – Jolijou

www.jolijou.com

3/8/2016

Nina – Hedi

www.hedinaeht.blogspot.de

3/8/2016

Anja – Nähkitz

www.naehkitz.de

3/9/2016

Swafing Fabrics

www.blog.swafing.de

3/9/2016

Carrie Beri Bee Designs

www.beribeedesigns.com

3/10/2016

Herzenssachen

www.linababedierste.blogspot.de

3/10/2016

Andrea – anlukaa

www.anlukaa.blogspot.com

3/11/2016

Emma – Frühstück bei Emma

www.fruehstueckbeiemma.blogspot.com

3/11/2016

einchen – doppelnaht

doppelnaht.blogspot.com

3/14/2016

Anorina – Samelias Mum

www.sameliasmum.com

3/14/2016

Bev – Flamingo Toes

www.flamingotoes.com

3/15/2016

Amy – Diary of a Quilter

www.diaryofaquilter.com

3/15/2016

Julia – lillesol & pelle

www.lillesolundpelle.com

3/16/2016

Andy – A Bright Corner

www.abrightcorner.com

3/16/2016

Sabine – farbenmix

www.farbenmix.de/inspiration

3/17/2016

Simone – KaeptnStupsnase

www.kaeptnstupsnase.com

3/17/2016

Sarah – Mädchenkram

www.mein-maedchenkram.de

3/18/2016

Melissa Corry

www.happyquiltingmelissa.com

3/21/2016

Jessica Stewart

www.snickerdoodlestew.com

3/21/2016

Bine Guellich

www.waseigenes.com

3/22/2016

Lindsay Wilkes

www.thecottagemama.com

3/22/2016

Sandra – Flaupa

www.flaupa.blogspot.com

3/23/2016

Amanda Niederhauser

www.jedicraftgirl.com

3/23/2016

Ina – pattydoo

www.pattydoo.de

3/24/2016

Ruth Sodl-Warter

www.rogeruethsgarden.com

3/24/2016

Marissa – Rae Gun Ramblings

www.raegunramblings.com

My Favorite Beach Quilt {Blend Sun-sational}

my favorite beach quilt        It’s still August and I am going to enjoy every last minute of summer!  I love the Sun-sational fabric line from Blend Fabrics.  Just looking at them makes me feel like I’m enjoying summer at the beach.  I am a California girl who was raised loving the beach.  Through the years my family has come to love many beaches.  I thought it would be great to include the names of these beaches in the quilt.

my favorite beach quilt blend fabrics 108 It makes it so personal!  I used SoSoft Fabric Paint by DecoArt.  I purchased at my local Beverly’s Fabric and Craft store.  I’ve painted on T-shirts and fabric before with acrylic paint.  It kind of leaves a rough texture after it dries.  I wanted something soft that would blend nice with the fabric.  This totally did the trick!  After it dried I could hardly feel it was paint – it just felt like the fabric!

decoart sosoft paintHere is how you can make this quilt:

51″ x 64″ Finished quilt

Supplies:

Fat quarters of assorted beach prints

1.5 yards white cotton fabric

1/2 yard for binding

3 yards backing

So Soft fabric paint

Vinyl stencils

This quilt is made of up 4 “blocks”.  Two are rectangles and two are squares.  Below is the cutting instructions for each block.  You can make this quilt larger or smaller, or mix up the blocks to create a totally different pattern!

You will need:

(11) Beach Name Blocks

(15) Squared Blocks

(9) 8″ square theme print blocks

(8) 8″ x 15.5″ theme print rectangles

cutting instructions beach quilt

Once everything is cut prepare the stencil for the beach names.  I cut vinyl on my Cricut and peeled out the inside of the letters to leave a vinyl stencil.  Each beach name is a different font.  I put the vinyl on the 3″ x 15.5″ white strip and stenciled using the SoSoft paint.  I let dry completely then removed the vinyl.  I made sure to heat set the paint while I was pressing the block.

sunsational beach quilt blend fabrics 2

Once the paint is dry, sew the beach name block together. 1/4″ seams throughout.

sunsational beach quilt blend fabrics 6I love how they turned out!  Do you have any of the same favorite beaches as we do?

sunsational beach quilt blend fabrics 4Sew the squared blocks together by sewing a white square to both sides of the center blue square.  Press.  Add the top and bottom rectangles, press.

sunsational beach quilt blend fabrics

sunsational beach quilt blend fabrics 3Cut the remaining theme print blocks, you can use as many theme prints as you want!

sunsational beach quilt blend fabrics 7  Next comes the fun part – laying it out.  I played with several different patterns until I decided on this one.  There is not really a pattern to it, kind of random 🙂

sunsational beach quilt blend fabrics 9  It’s always a good idea to photograph your quilt layout, especially if you have a #kittyquilter in your home!  Mufasa!!!!!sunsational beach quilt blend fabrics 10Sew the blocks together in rows and the rows together, matching seams that intersect.  Make sure #kittyquilter inspects all finished work!!  Quilt as desired.sunsational beach quilt blend fabrics 11I put minky on the back and had my friend use her long arm quilting machine to quilt it.  I love the pattern she did!!

my favorite beach quilt blend fabrics 106The binding is cut on the bias, my favorite way to make binding!!

my favorite beach quilt blend fabrics 100

my favorite beach quilt blend fabrics 104I’m so ready for a beach vacation now!!!

my favorite beach quilt blend fabrics 102

my favorite beach quilt blend fabrics 107Thanks for stopping by!!!  Surfs up!!!

my favorite beach quilt blend fabrics 105

#kittyquilter Mini Quilt Tutorial


kitty quilter mini quilt

Hey there all you crazy cat quilter friends!  I have a fun mini quilt for you!!  I love using the hashtag #kittyquilter on Instagram.  There is something about felines and quilting that just go so well together!  Baby Mufasa is involved in every step of the quilting process: choosing fabric, cutting, basting, and binding – he’s right there!

kitty quilter mini quilt 15

This fun little quilt sews up fast.  The fabrics are from Blend Fabrics’ Best in Show fabric line.  I am sew in love with the kitty faces fabric – I ordered more yardage to make a skirt!!!   You could easily make this with your favorite cat theme print fabric.

This quilt has 2 different traditional quilt blocks: Kitty in the Corner and King’s Crown.  I choose kitty in the corner for obvious reasons and I choose King’s Crown because Mufasa means King!  Isn’t that the cutest!!  Let’s get started!  (1/4″ seams throughout)

Supplies:

1/4 yard of a variety of coordinating fabrics including cat theme print

Heat n Bond Lite EZ print Sheets

#kittyquilter letters

batting

1/2 yard backing

1/4 yard binding

Fussy Cut (4) Cats

Choose the cats you want in the center of the blocks and cut them 3.5″ square.

kitty quilter mini quilt 2

Kitty in the Corner Block 6.5″ finished

Make (2) of these

Cut the fabric according to the diagram pictured below.  I don’t know about you, but I love when measurements are shown in pictures and not in a long list of cutting instructions.

kitty in the corner quilt block diagram

Draw a diagonal line on the wrong side of the (4) white squares.  Match a white square and a patterned square right sides together and sew on the pencil line.  Cut 1/4″ away from the seam.  Press to the dark.  Do this with each of the (4) white blocks and (4) patterned blocks.  This makes (4) half square triangle (HST) units.  Arrange them as pictured below and sew as you would a traditional 9-patch.

IMG_7601

Kings Crown Block 6.5″ finished

Cut the fabrics according to the picture below.  Make sure to cut (8) white 2″x2″ squares, I only have 4 in the picture.
kings crown quilt bloock


Draw a diagonal line on the back of the (8) white squares.  Next make (4) flying geese units by laying the white square right sides together with a patterned rectangle, matching up the 3 edges.  Sew on the line as pictured below:

kitty quilter mini quilt 4

Trim 1/4″ next to the seam and press toward the dark.  Place another white square on top of that unit and sew on the line, as pictured below:

kitty quilter mini quilt 9

Cut 1/4″ away from the seam and press again.  The block should look like this:
kitty quilter mini quilt

If you turn the flying geese blocks around it makes a Sawtooth Star pattern.  I love that each of these blocks has the same center measurement and only a variation on the 2″ sides!

Sew the block together and press seams open.

kitty quilter mini quilt 8Happy Cat blocks!!

kitty quilter mini quilt 12

kitty quilter mini quilt 7
Prepare the applique

Print the letters on the EZ print sheets and iron them to the back of the desired fabric.  Cut around each letter and peel off the backing paper.

kitty quilter mini quilt 11

Cut the remaining strips according to this cutting diagram:

#kittyquilter design

Position the letters on the white strip and press in place.  Top stitch around each letter.
kitty quilter mini quilt 13

Sew the (4) blocks together and press seams open.  Sew each of the rows together according to the layout diagram.  Quilt, bind, and let the cat have a nap on it:)

kitty quilter mini quilt 18

Mufasa loves it!  and I hope you do too!!!

kitty quilter mini quilt 14

Choose Happy {quilt pattern}

choose happy cover

Meet my newest quilt pattern “Choose Happy”!!!!!  Its a free pattern available on the Therm O Web Blog.  The fabrics are from Pat Sloan’s newest Moda line called “The Sweet Life”.  They are so bright and cheerful and HAPPY!!!

choose happy quilt 25

Of course my #kittyquilter Mufasa had to get his paws on the project 🙂  The letters and flower are appliquéd using Heat n Bond Lite EZ print sheets.  You can print the patterns from the Therm O Web Blog.  I love pinwheels and I thought they were perfect to use with this fabric!  The center quilting is “pebbles” and the main part of the quilt is loop-de-loos.choose happy quilt 24

This would quilt would be darling on your sewing room wall or as a sweet gift for a friend.  I’m going to sew up another one soon!!!
choose happy quilt 26

Mini Kitty Quilt Pattern Now Available!

minikittycover

Meet Mini Kitty – my very first published quilt pattern!  This little mini quilt has brought me so much joy in my life!  I was inspired to make it as a gift for a friend.  Since then, it has been recreated over and over as gifts, and has even been the inspiration for our #kittyquilter group on Instagram!  I love connecting with friends who love quilting and their fur-babies!!!  My pattern is available to purchase on Etsy at Emily Ann’s Kloset and on Craftsy.  I hope you like it!!!kitty love mini quilt 18

IMG_5464_2

I love all the combinations and variations you can make with this one pattern!!20150404_183528-1024x576
IMG_5462_2

IMG_4660

I really should make one for Baby Mufasa instead of always giving them away 🙂

IMG_4690

IMG_4913

IMG_4925

IMG_4922