Uneven 9-Patch Quilt Pattern featuring Swell Christmas


swell christmas quilt 5

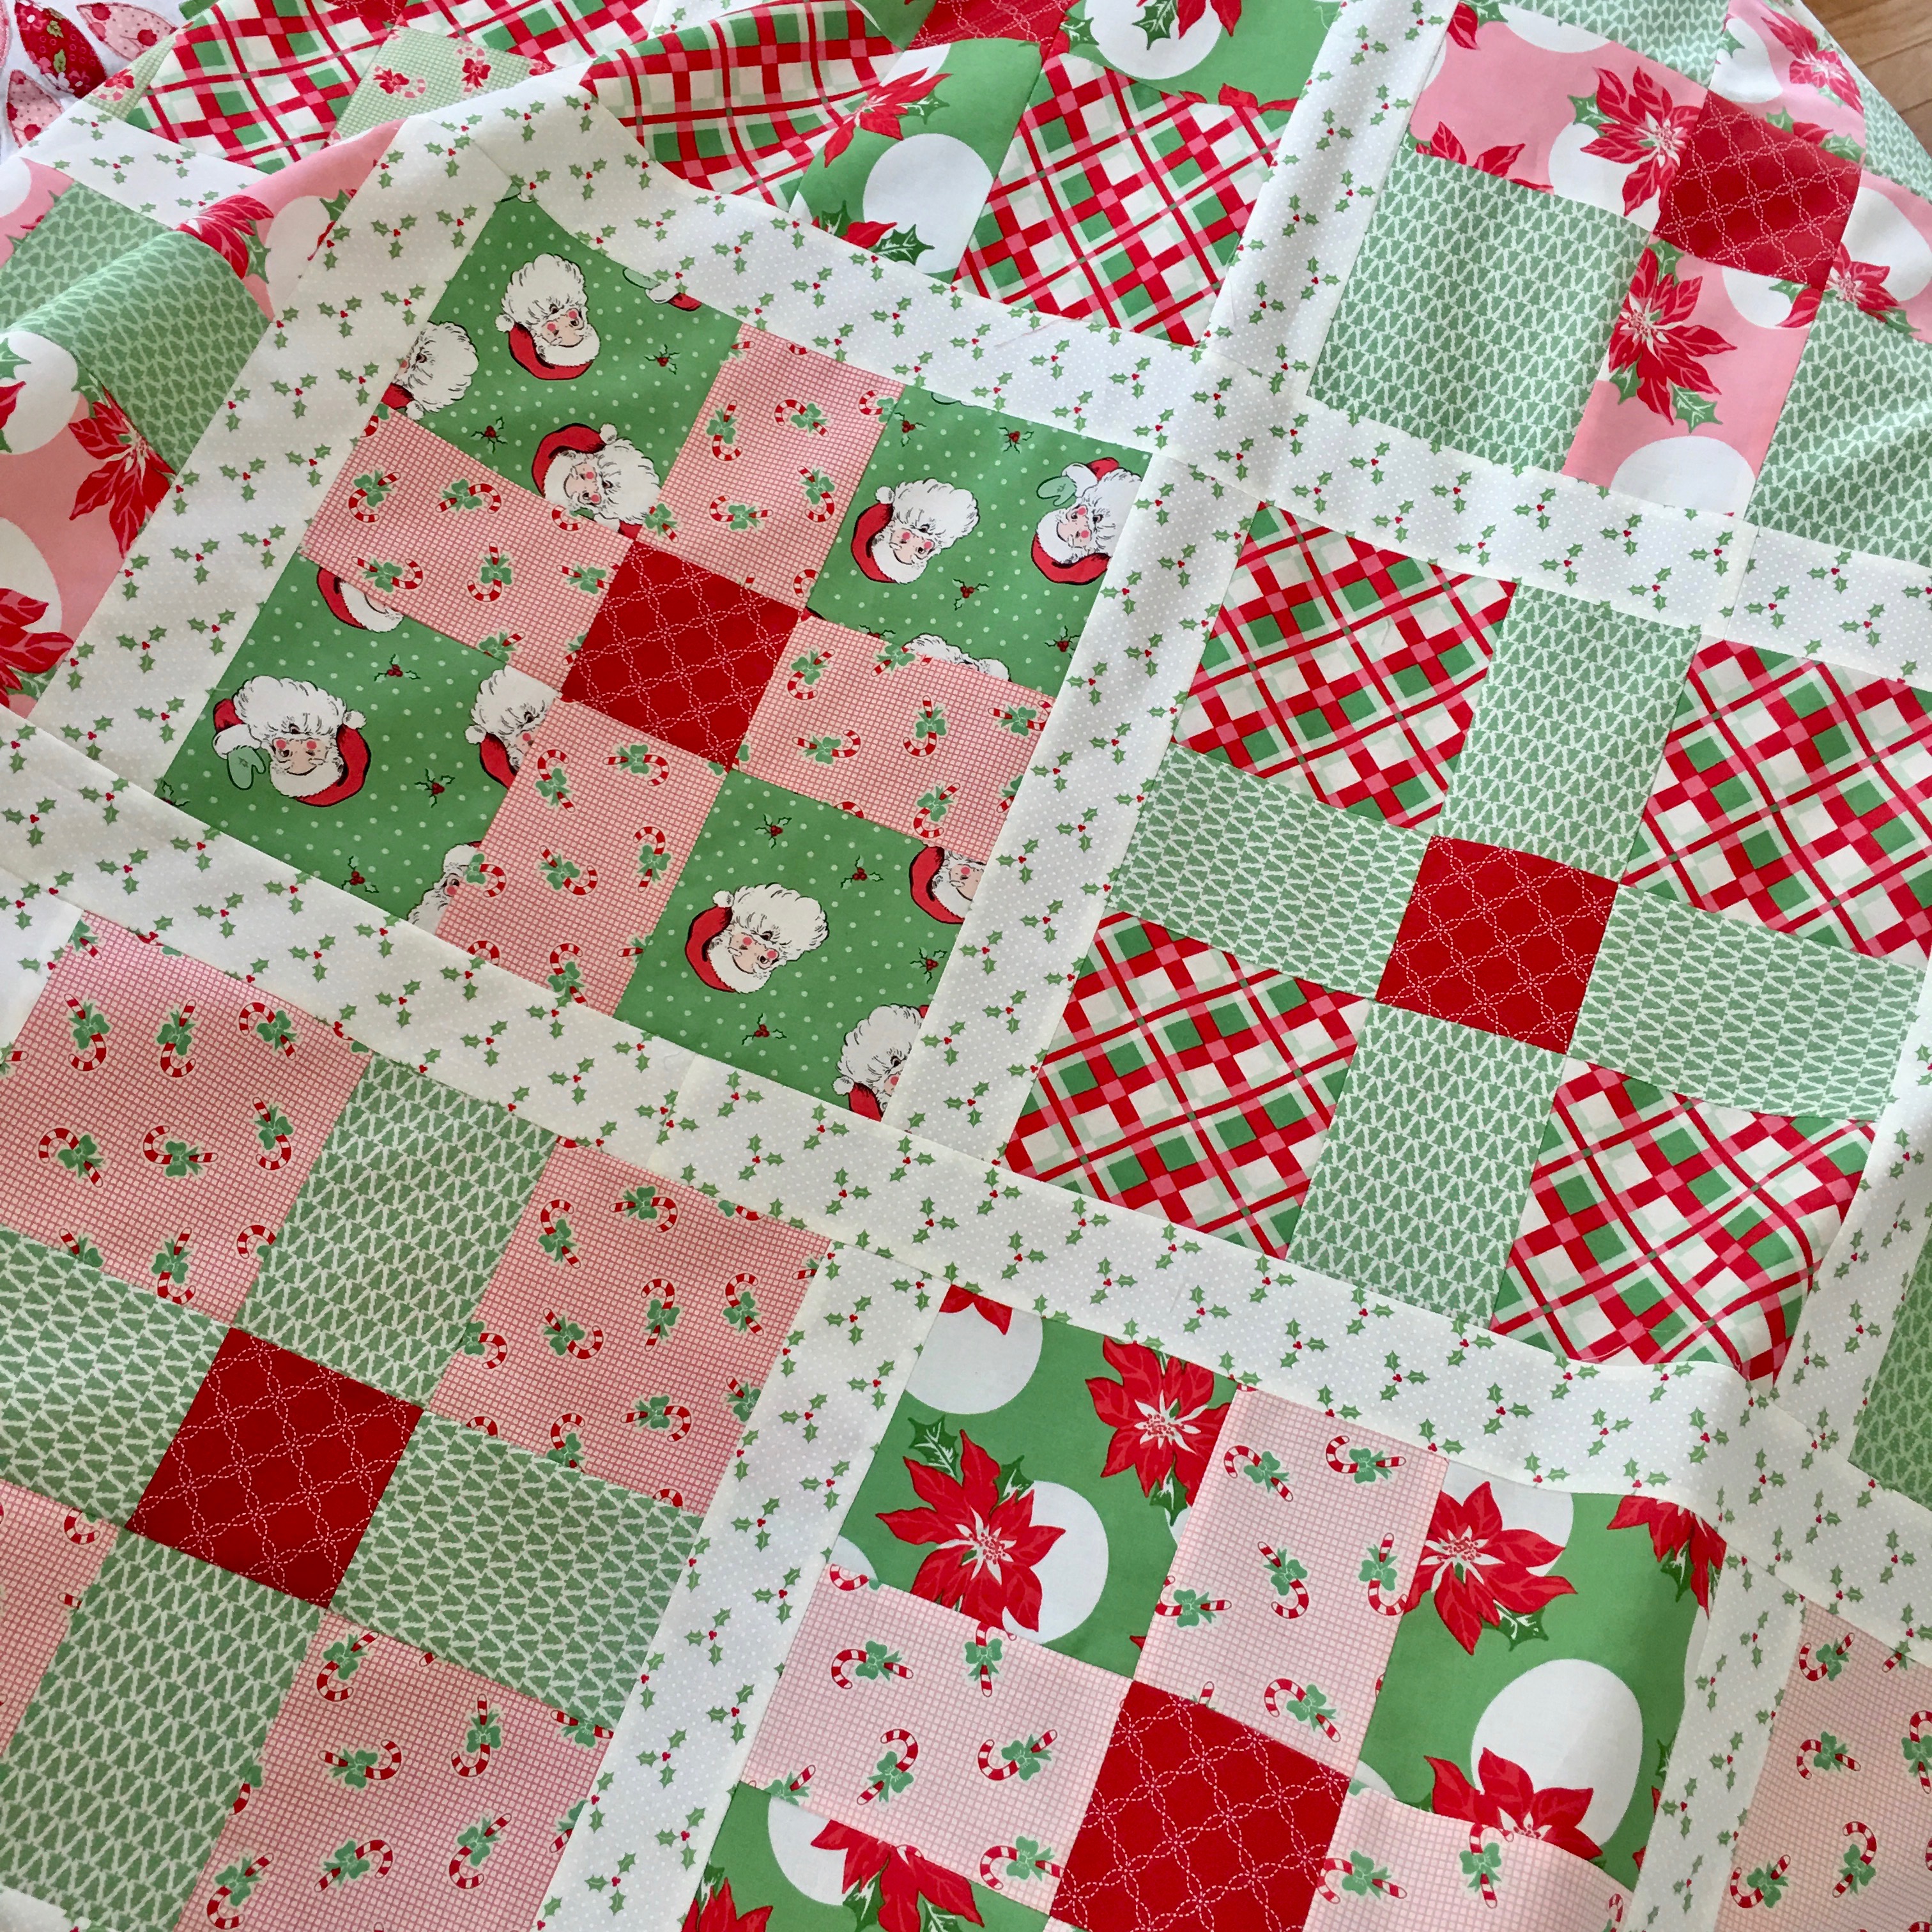
I am so in love with this new fabric line called Swell Christmas by Moda.  It’s the perfect retro/vintage Christmas feel that I love!  I knew I needed a quilt out of this!  It’s so much pressure to determine the right pattern to make the fabrics shine.  I knew I didn’t want to cut it up into small pieces, yet wanted something a little more interesting than just squares.  I’m thrilled at how this quilt pattern accomplished both!!  9patch

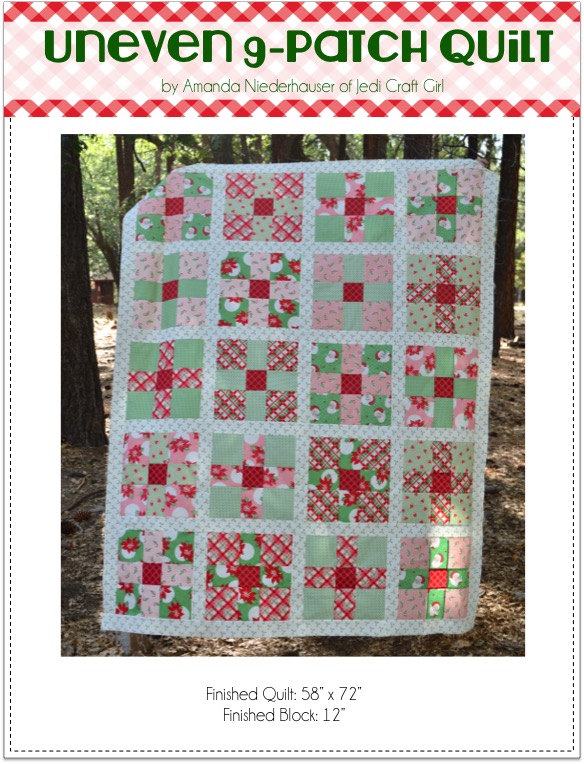
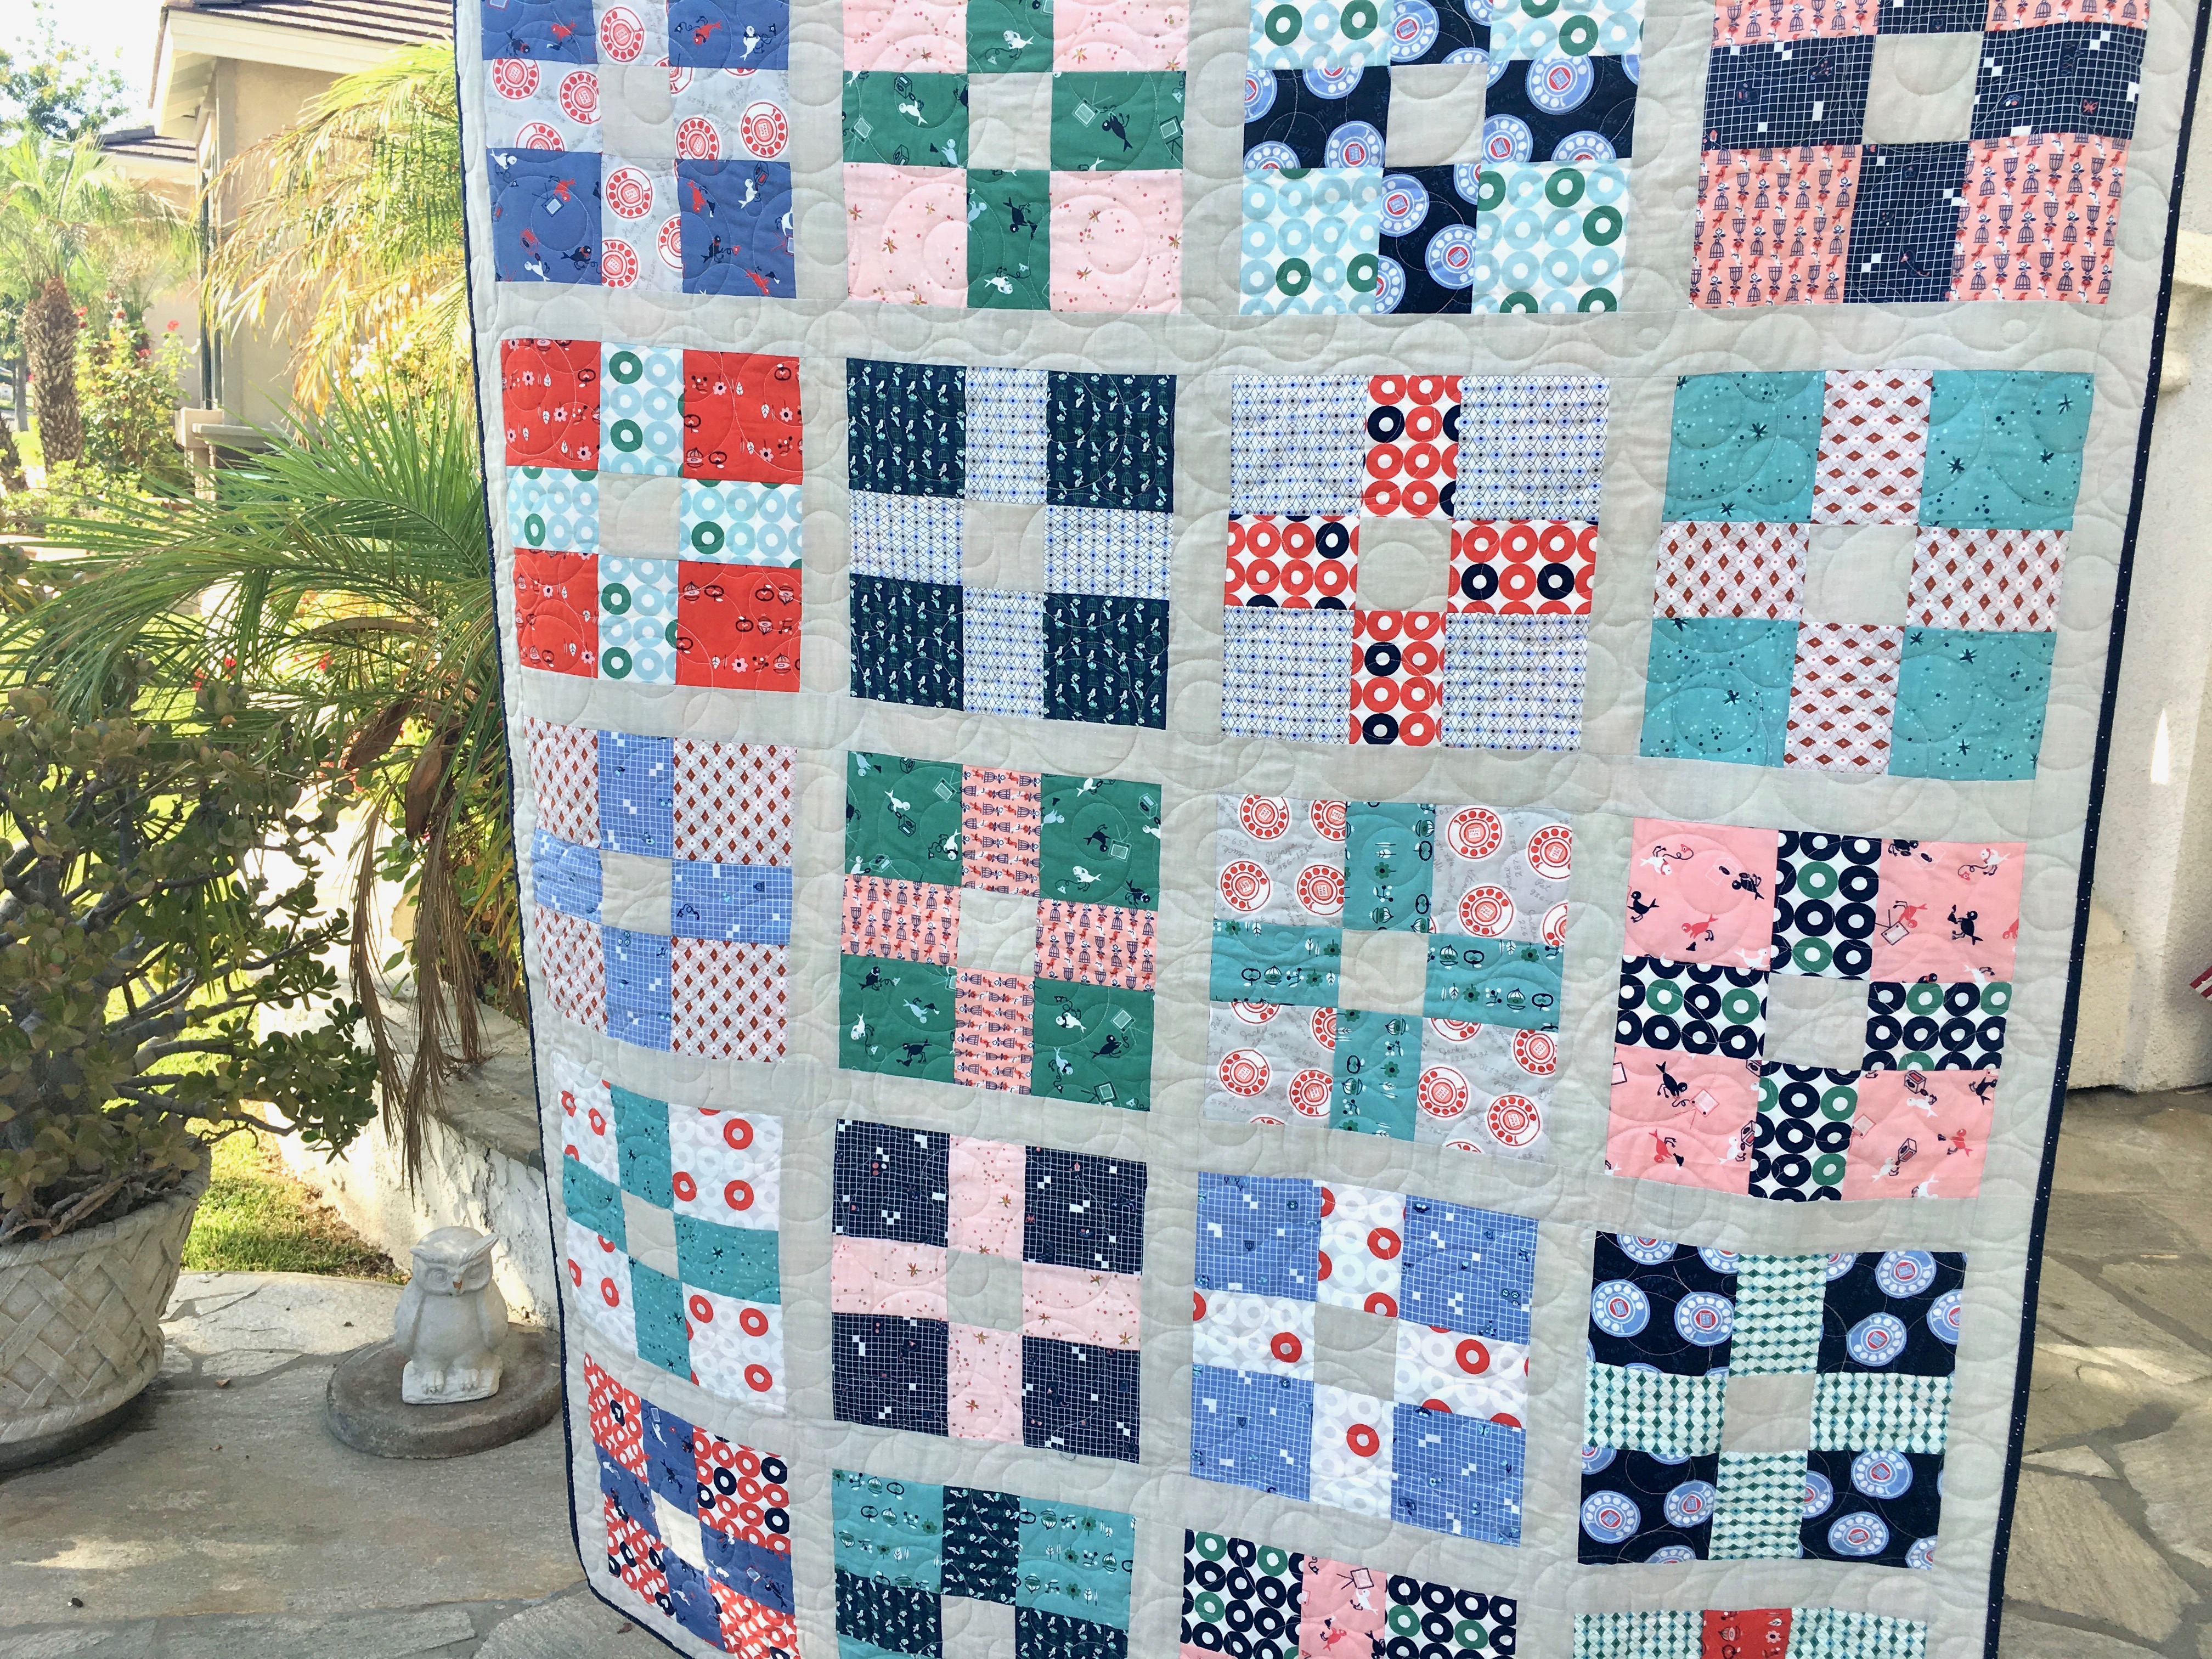
My latest pattern, Uneven 9-Patch is such a fun pattern, especially to use with larger prints or theme print fabrics.  The quilt measures 58″ x 72″ and the blocks are 12″.  This version uses 1 red fat quarter and 10 Swell Christmas fat quarters with 1 1/2 yards sashing fabric.

swell christmas quilt 2

You can purchase the pattern in my Etsy shop for instant PDF download!swell christmas quilt 3

Seriously these colors are the best!!!!!

swell christmas quilt 6

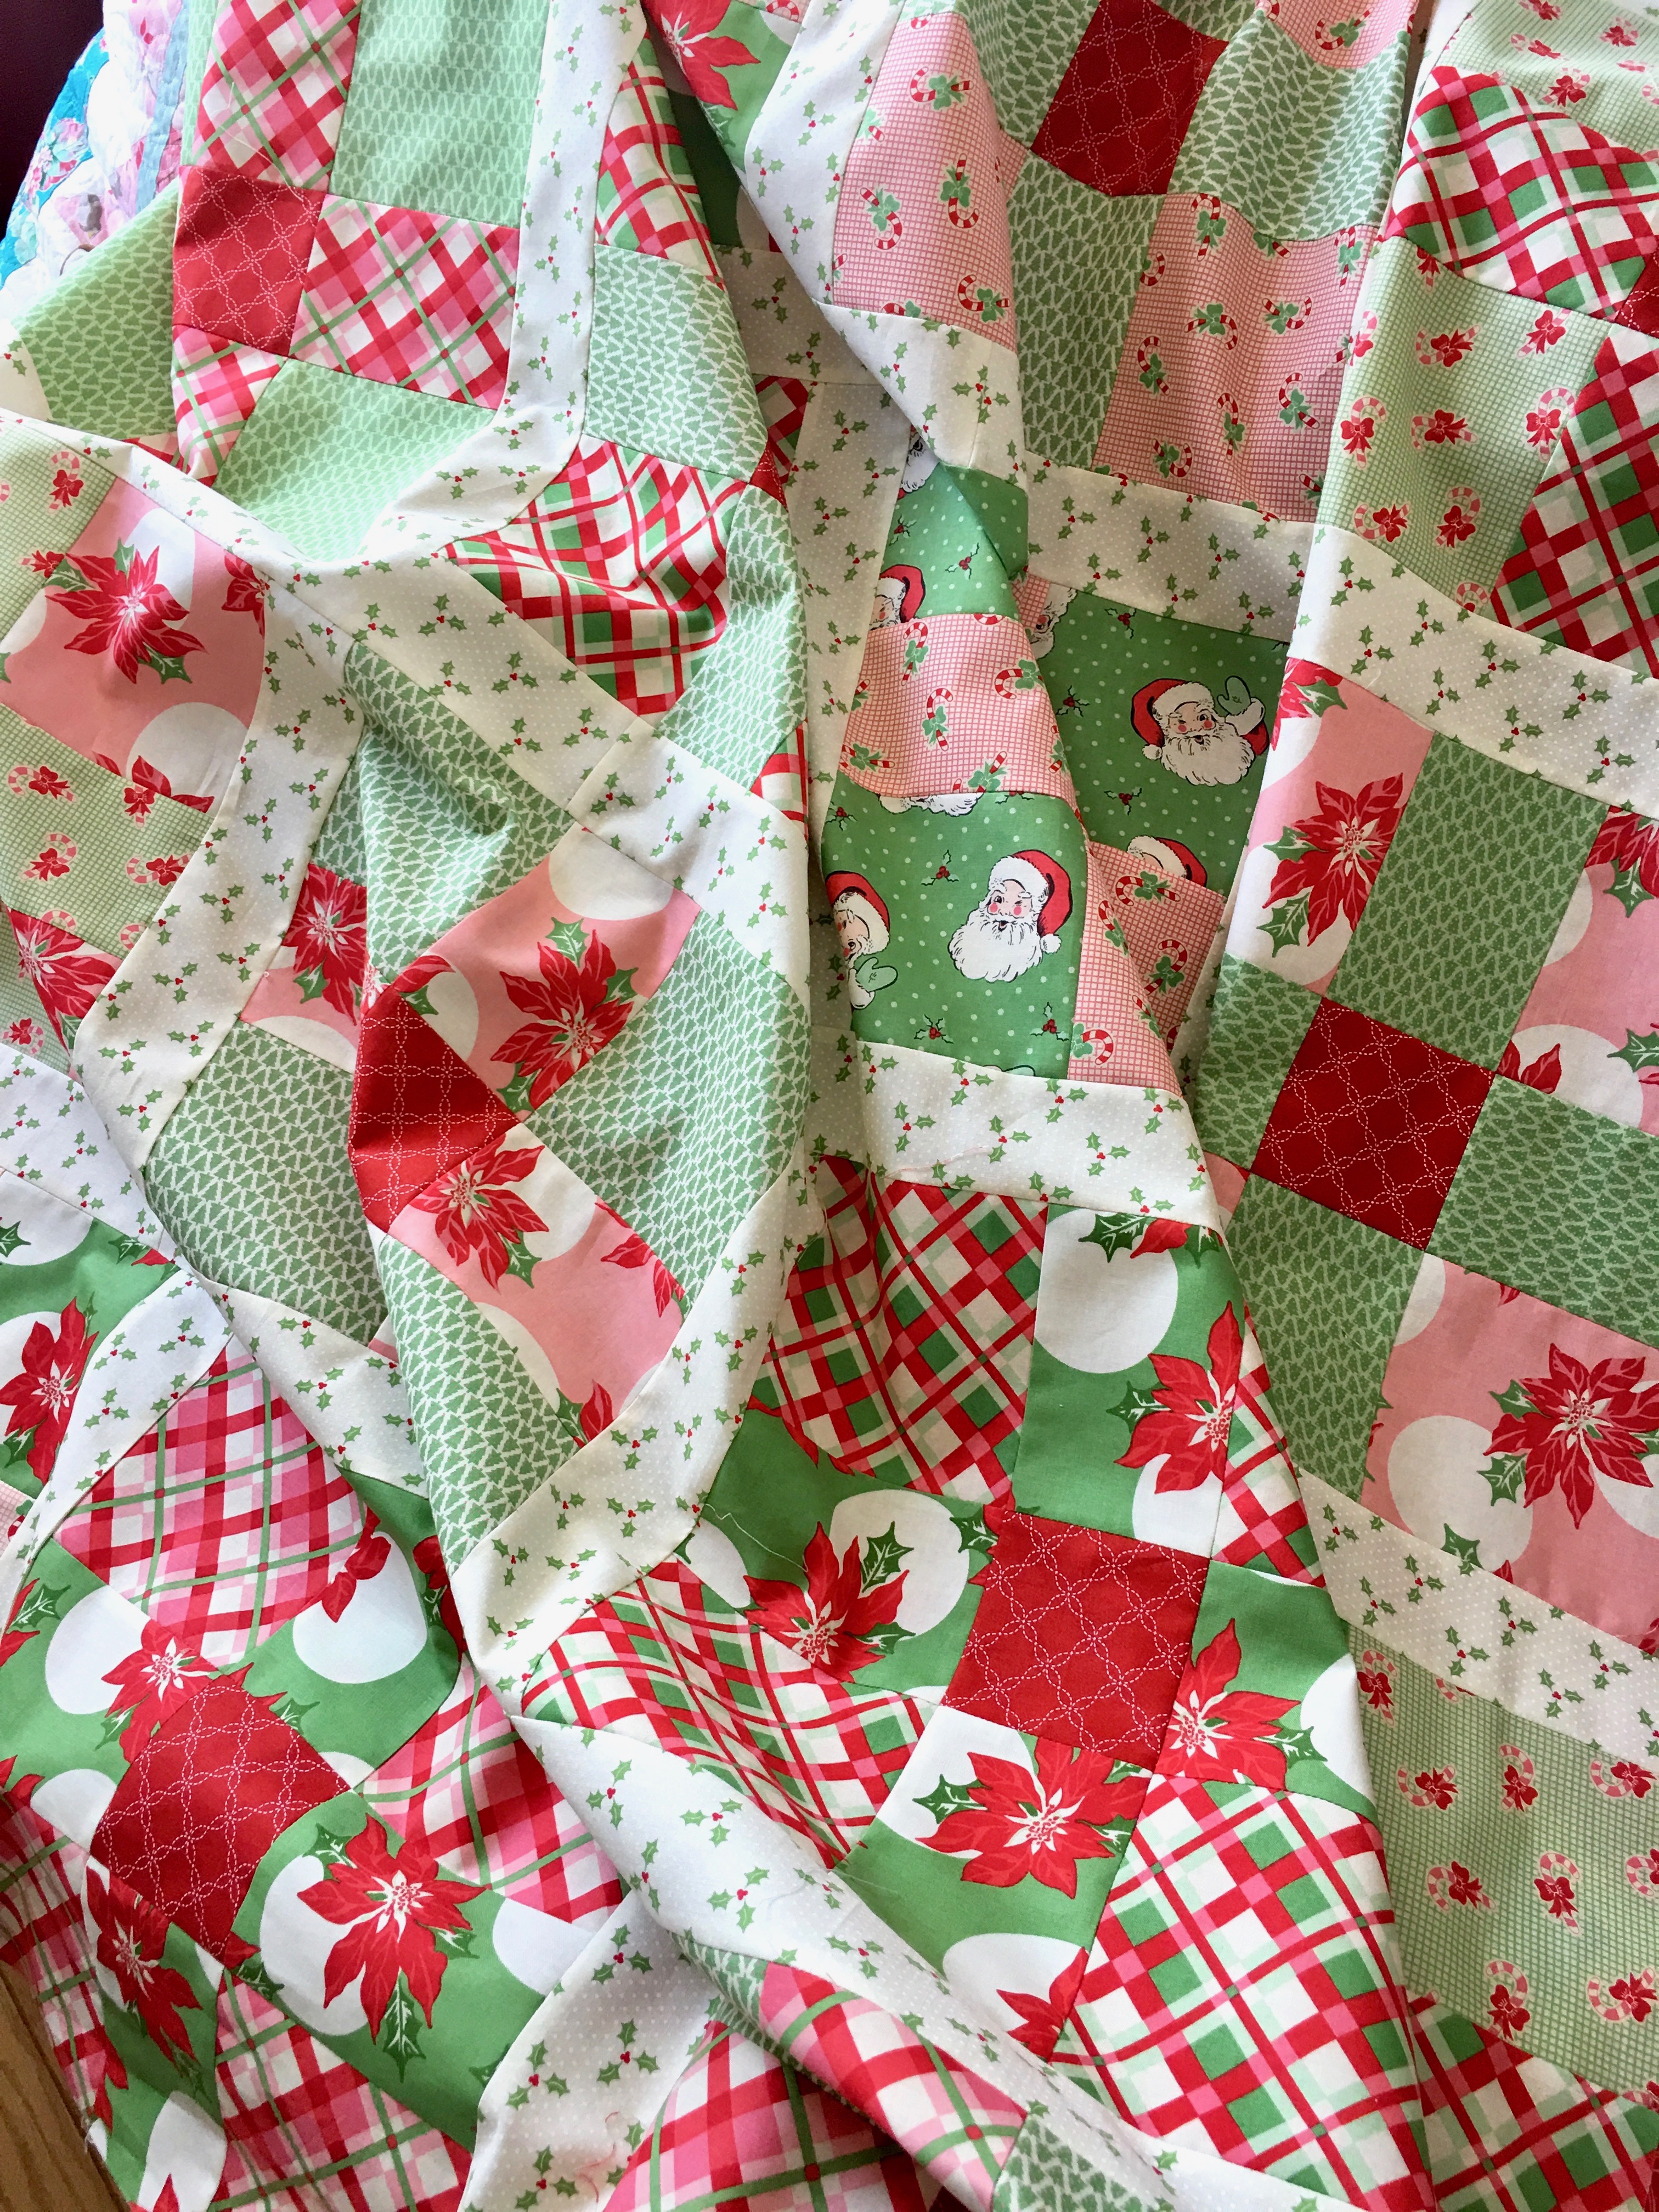
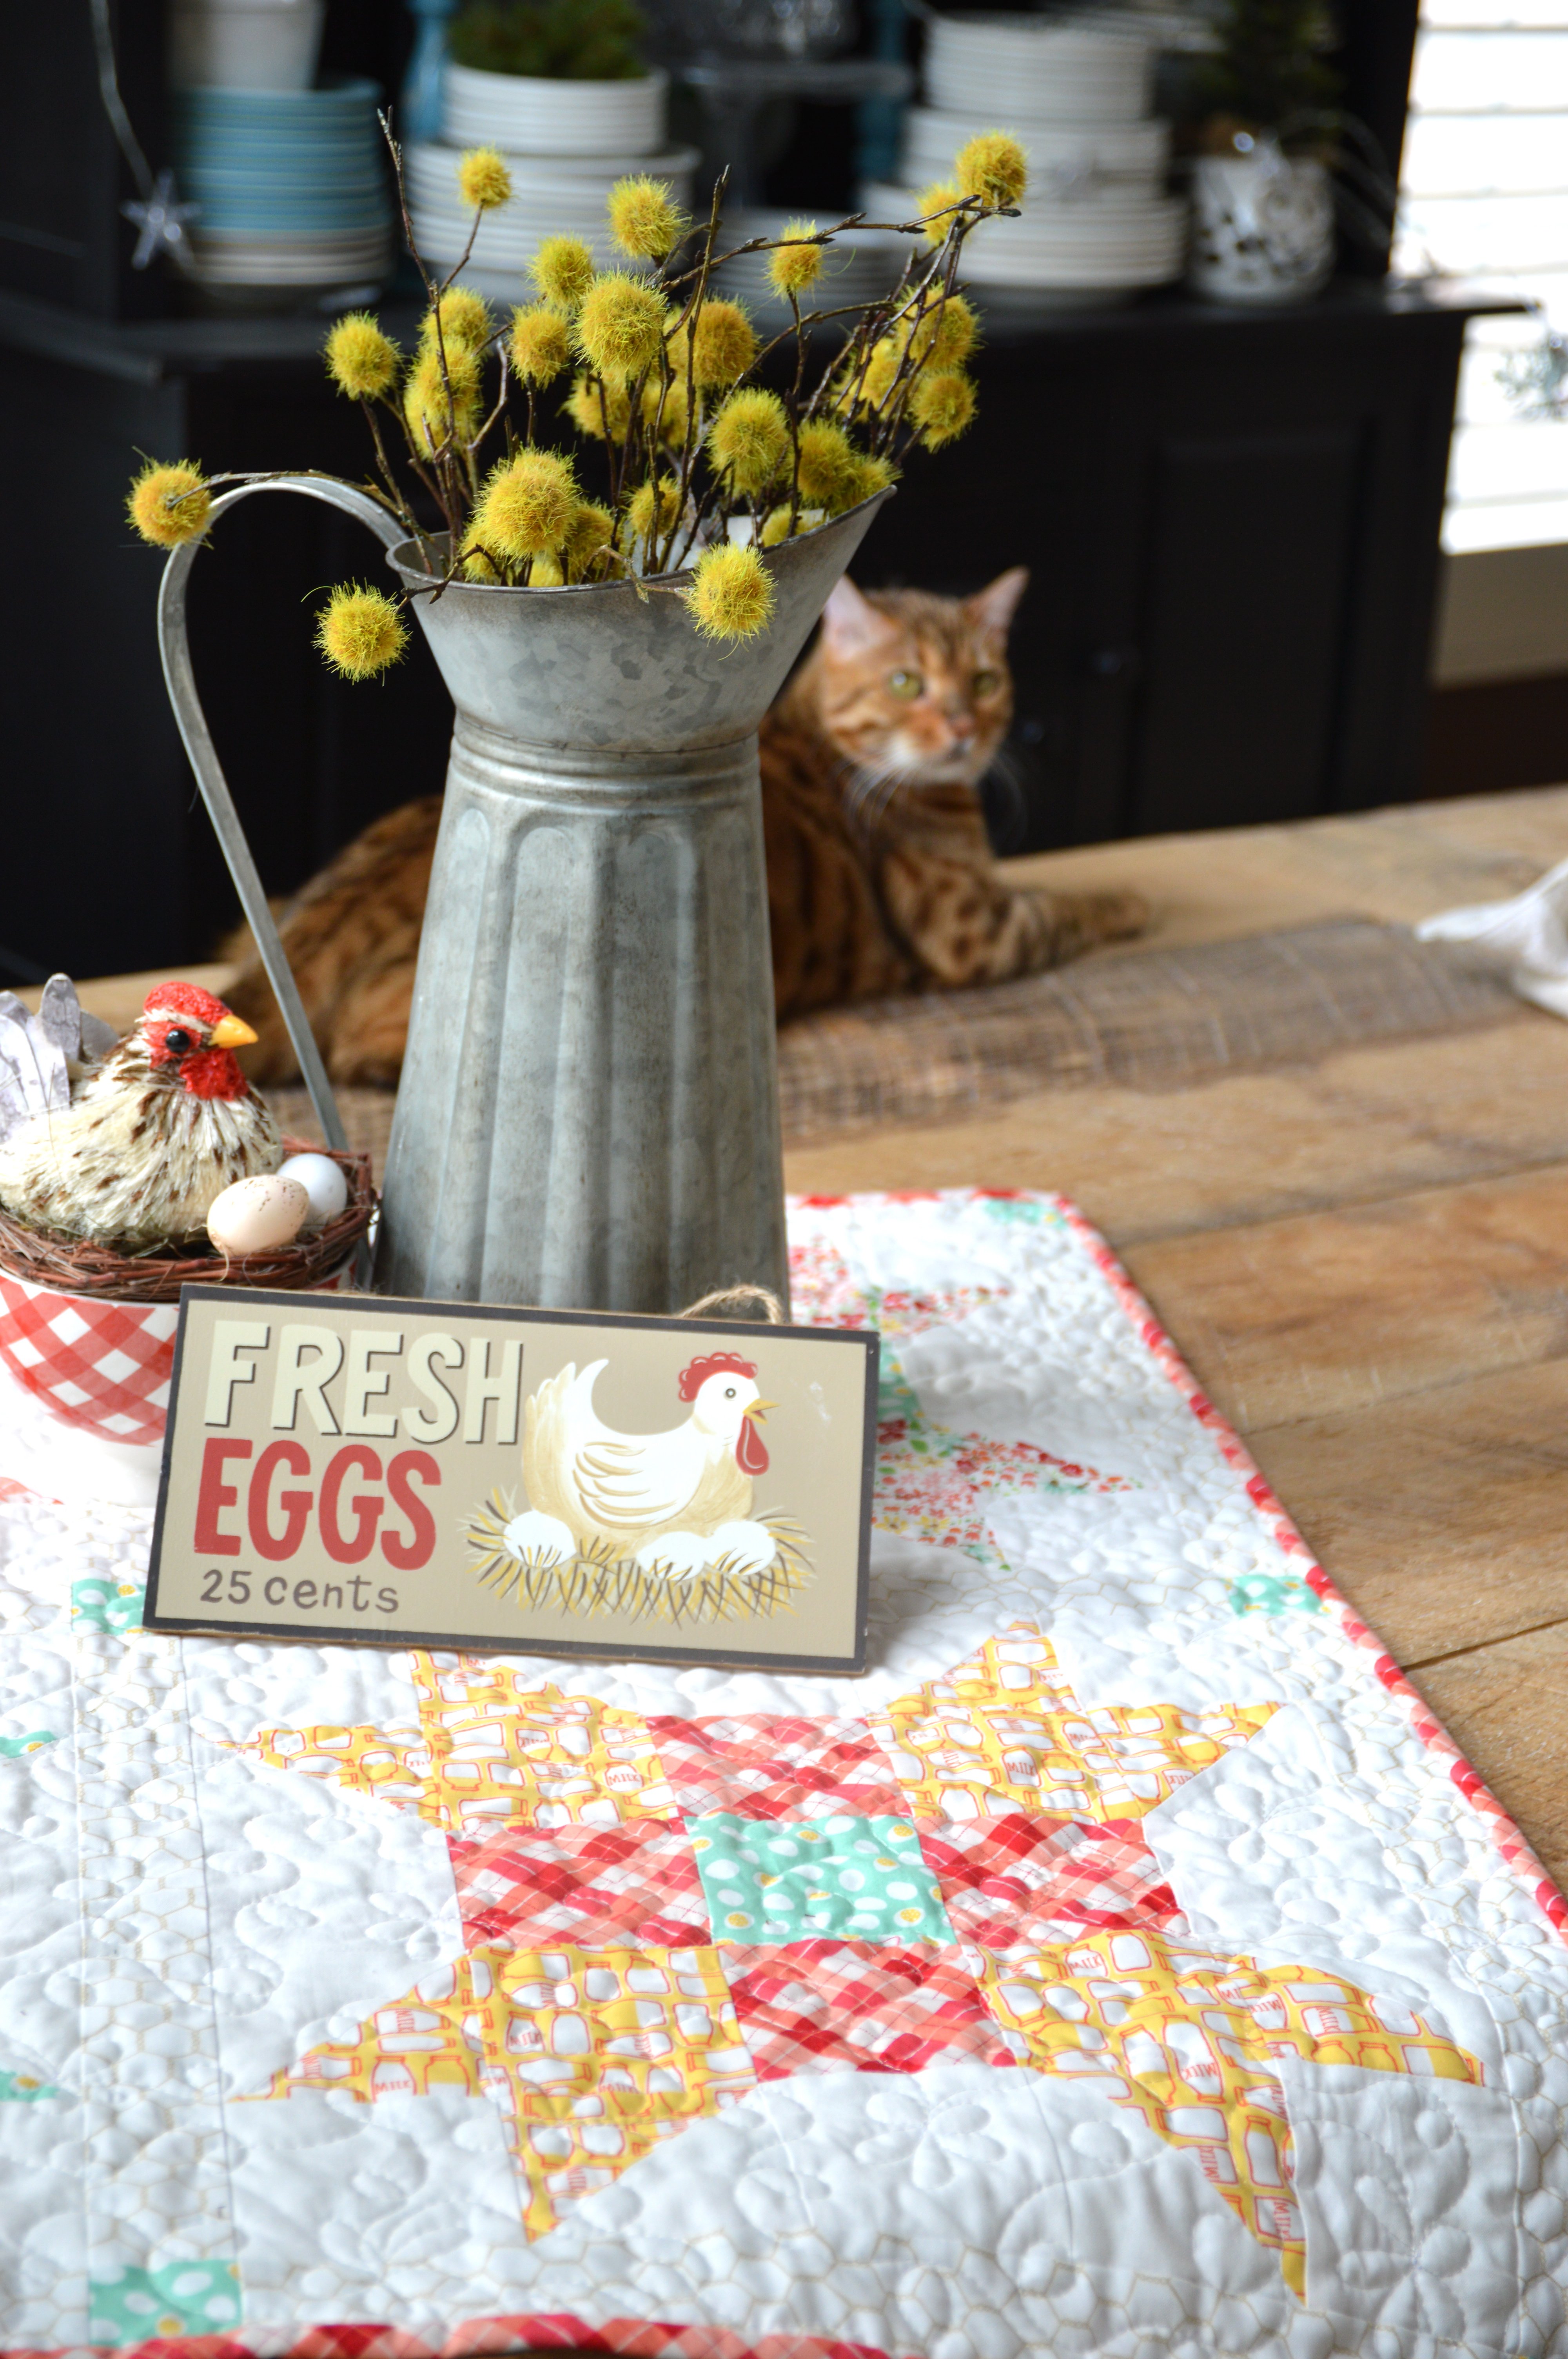
I’m so not ready for Christmas but I know I will be happy come December to have a new quilt to pull out and enjoy!swell christmas quilt 7

swell christmas quilt

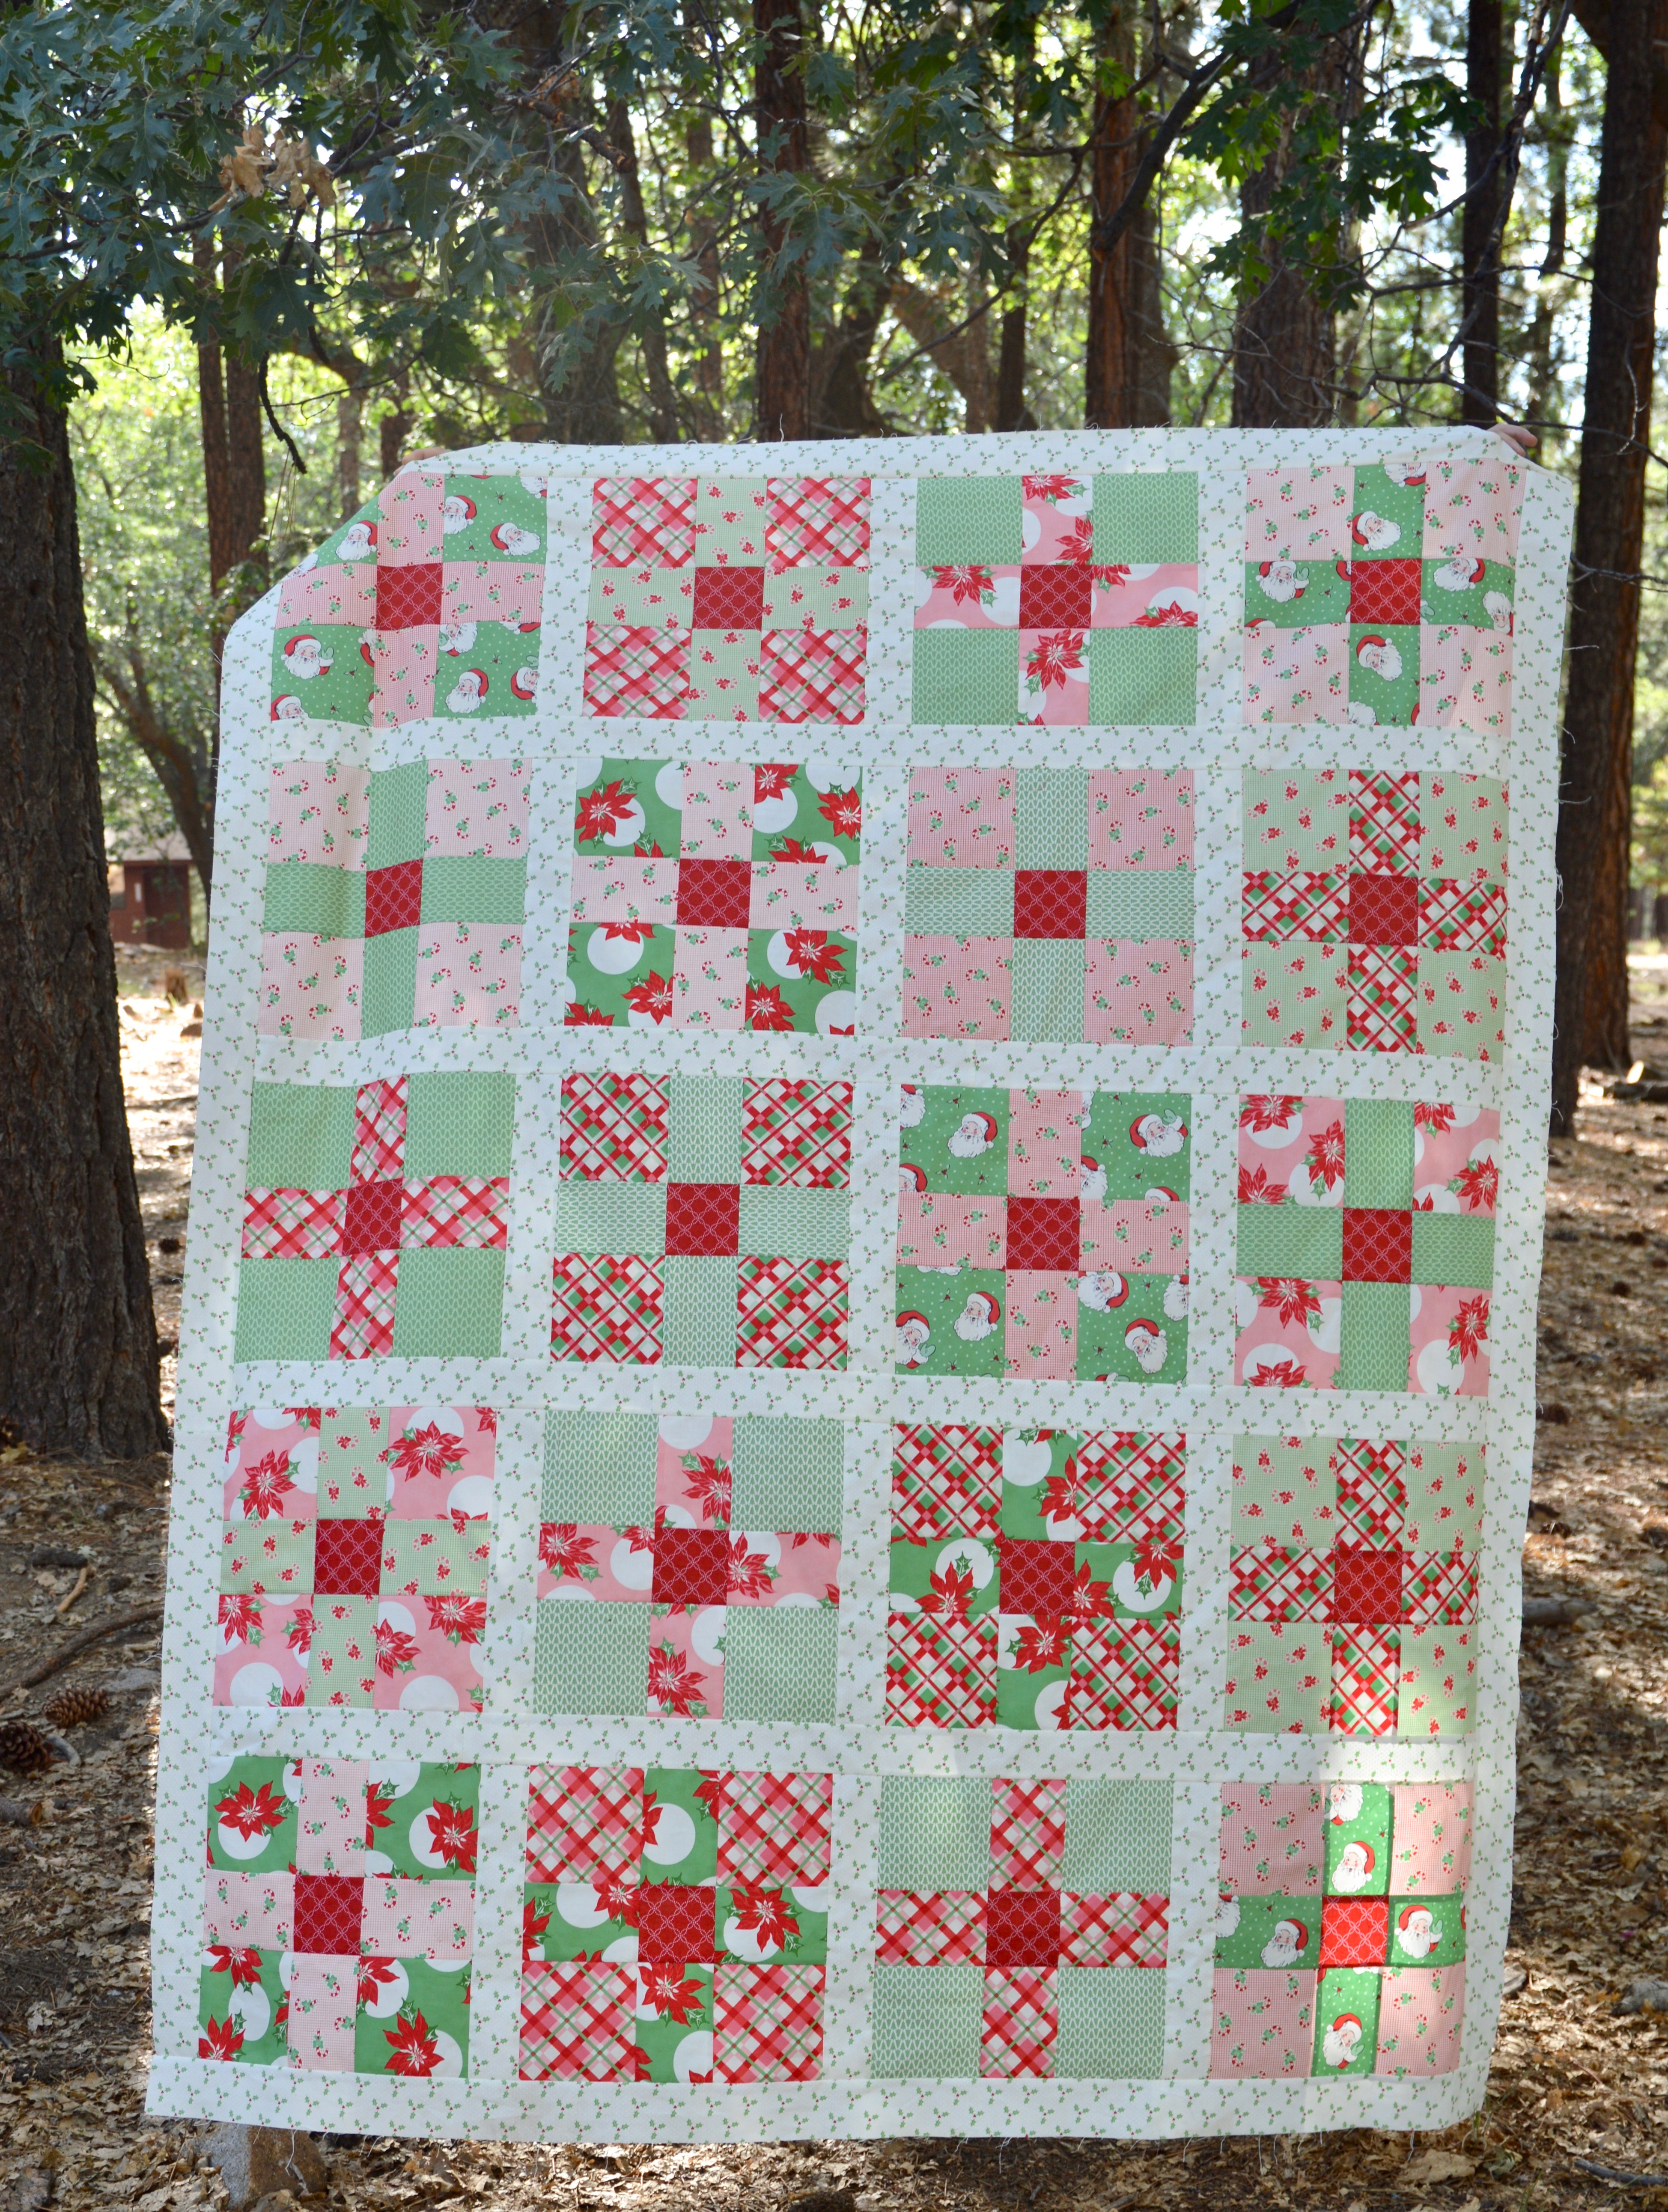
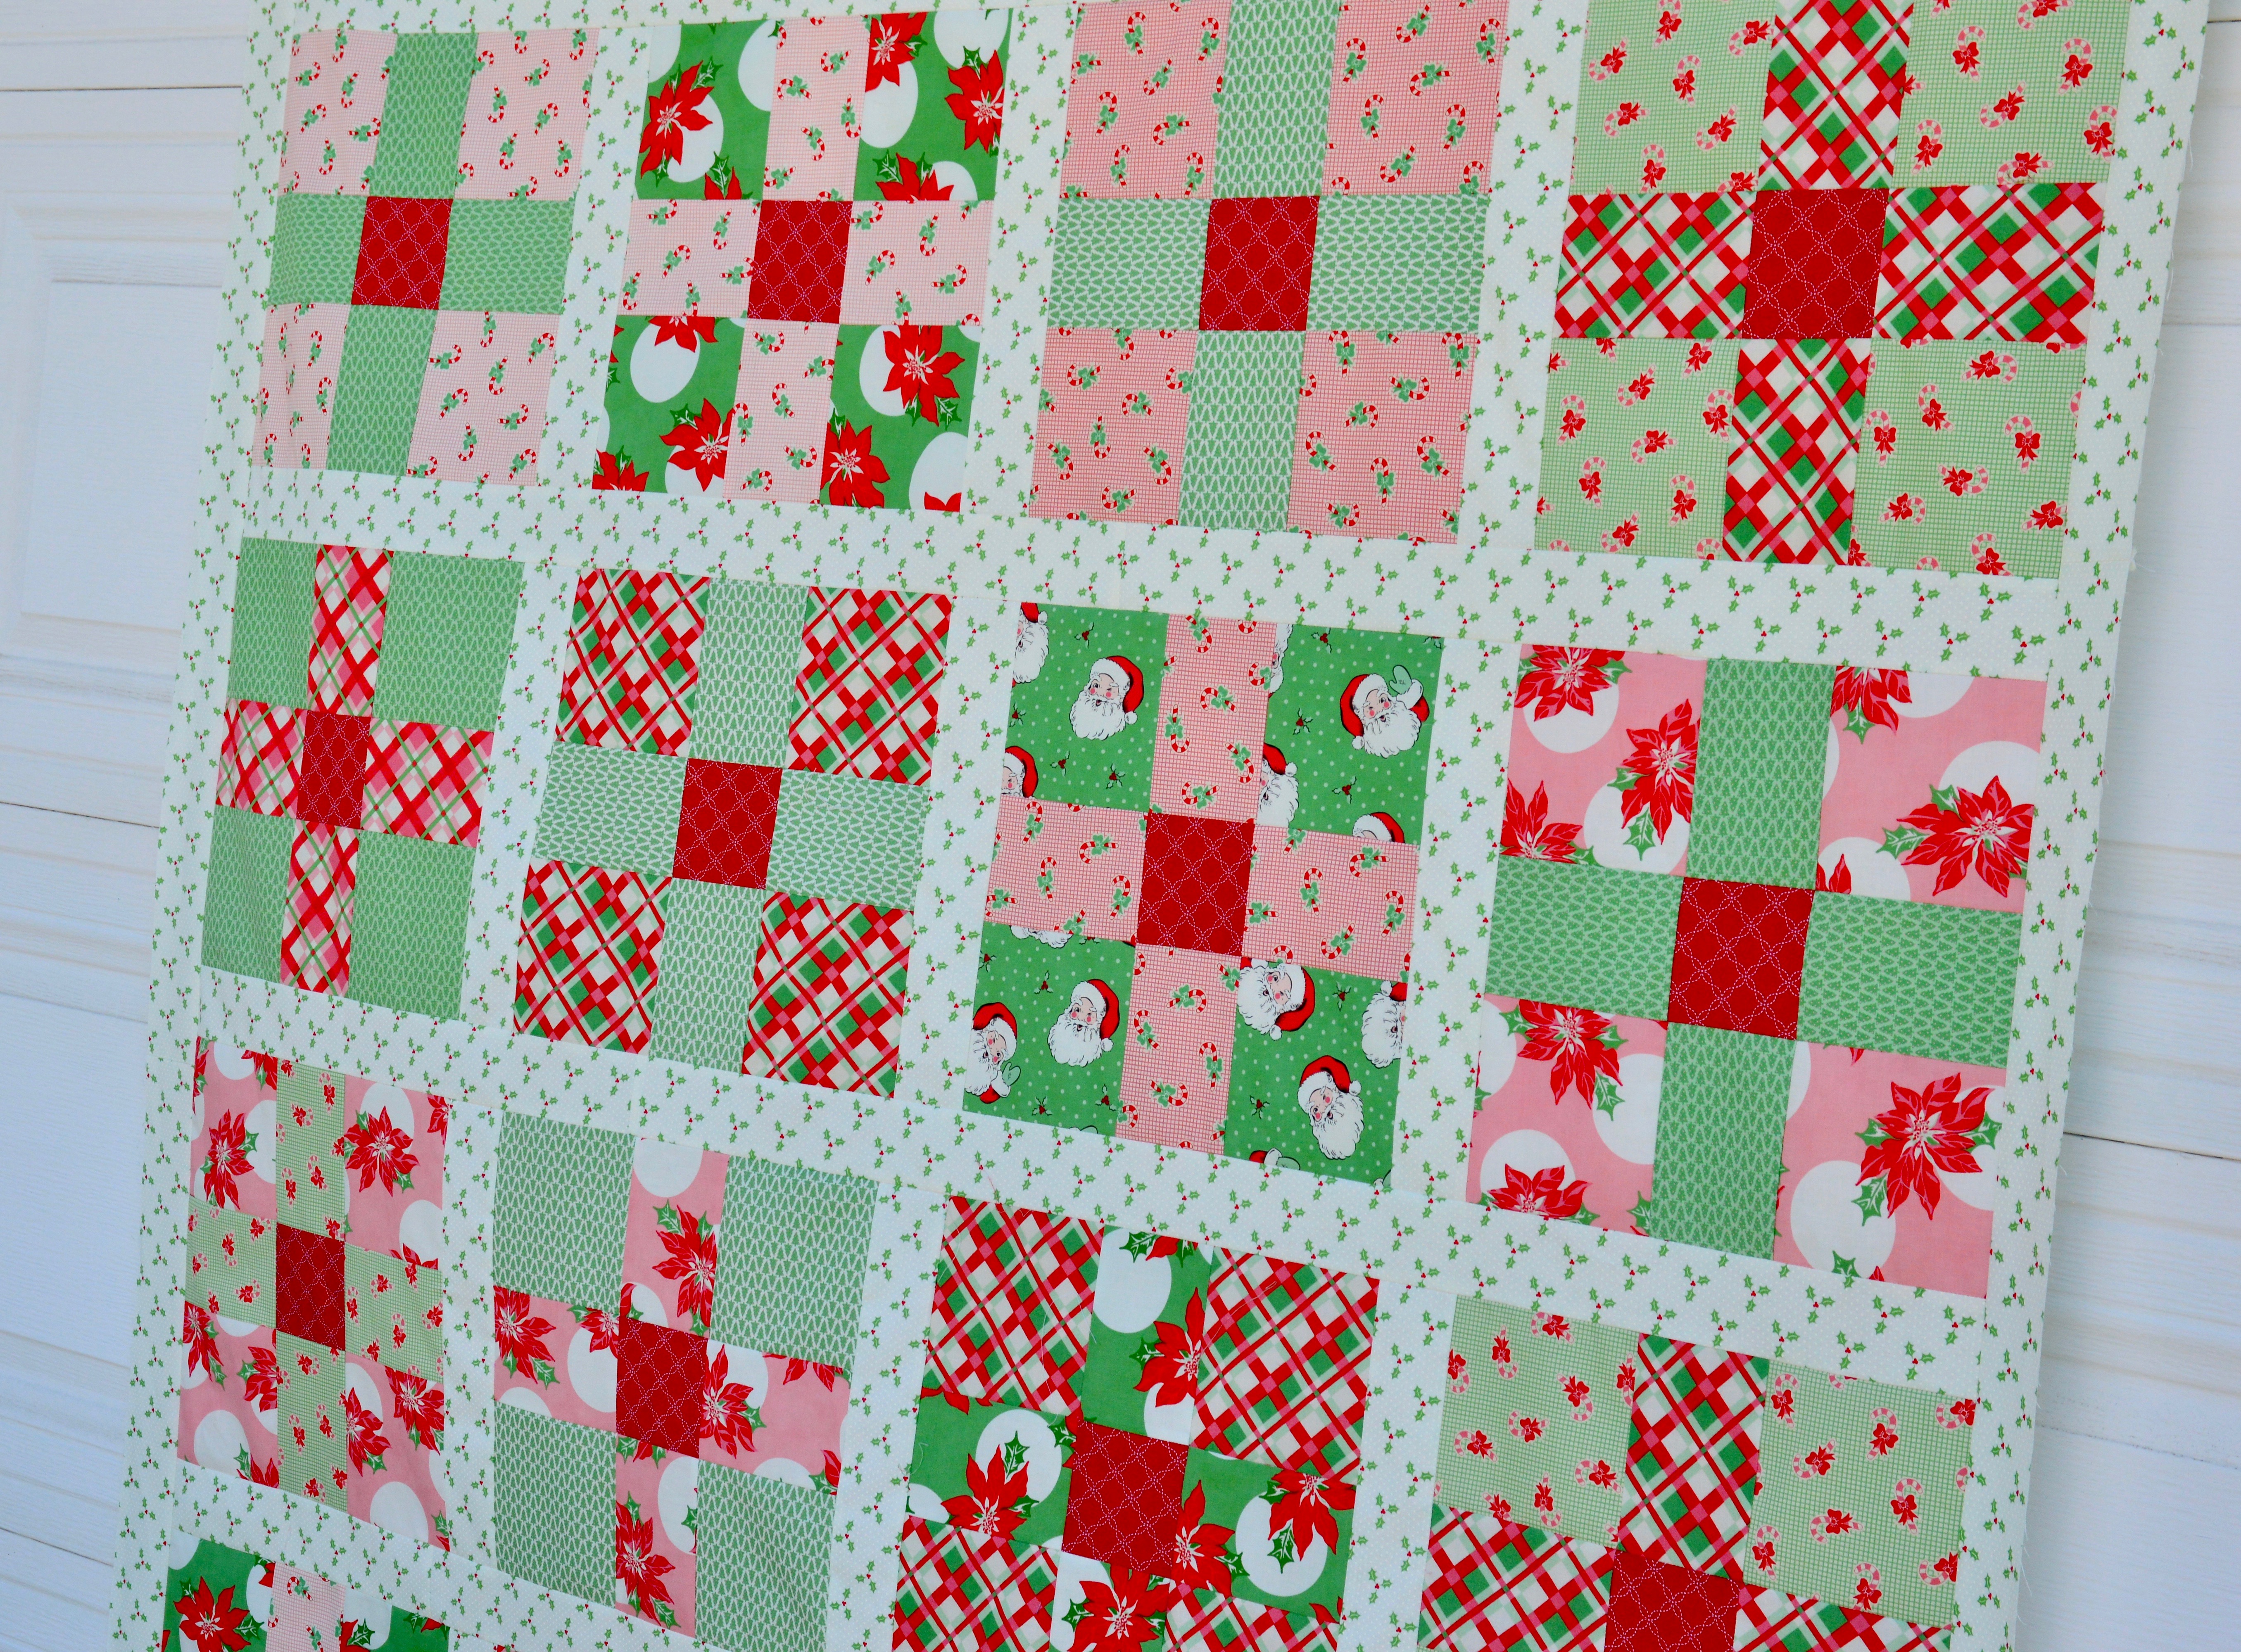
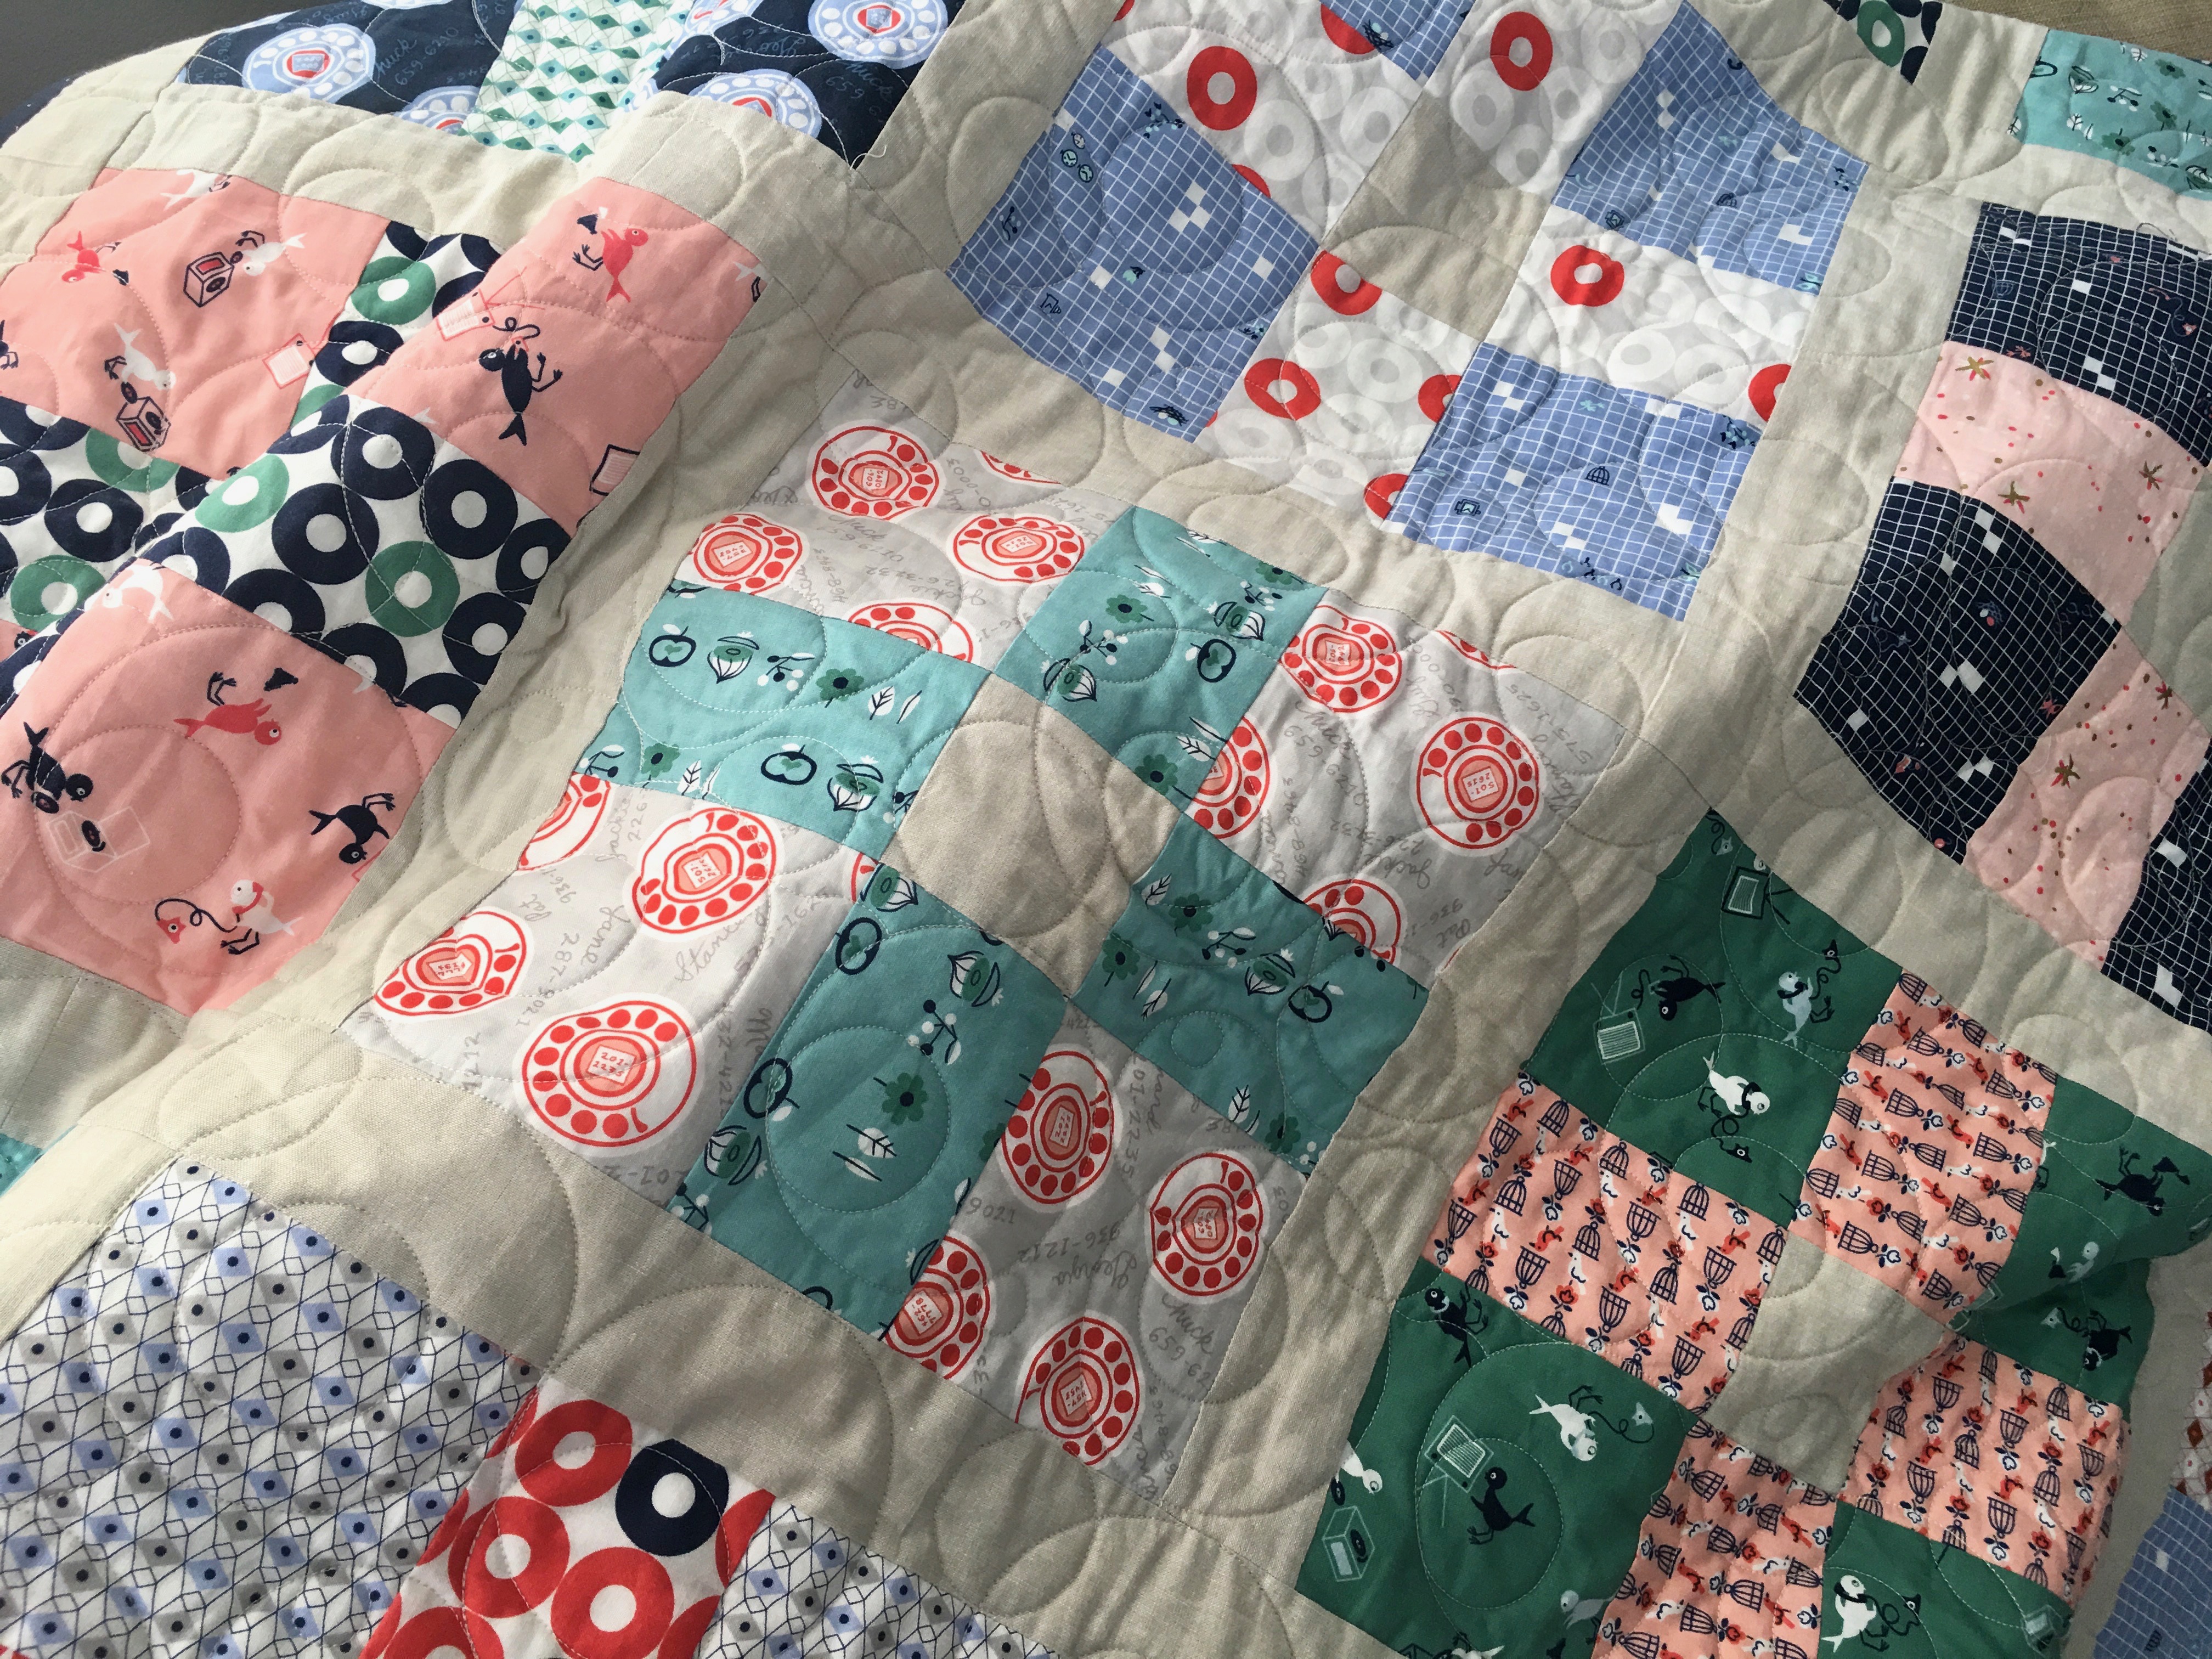
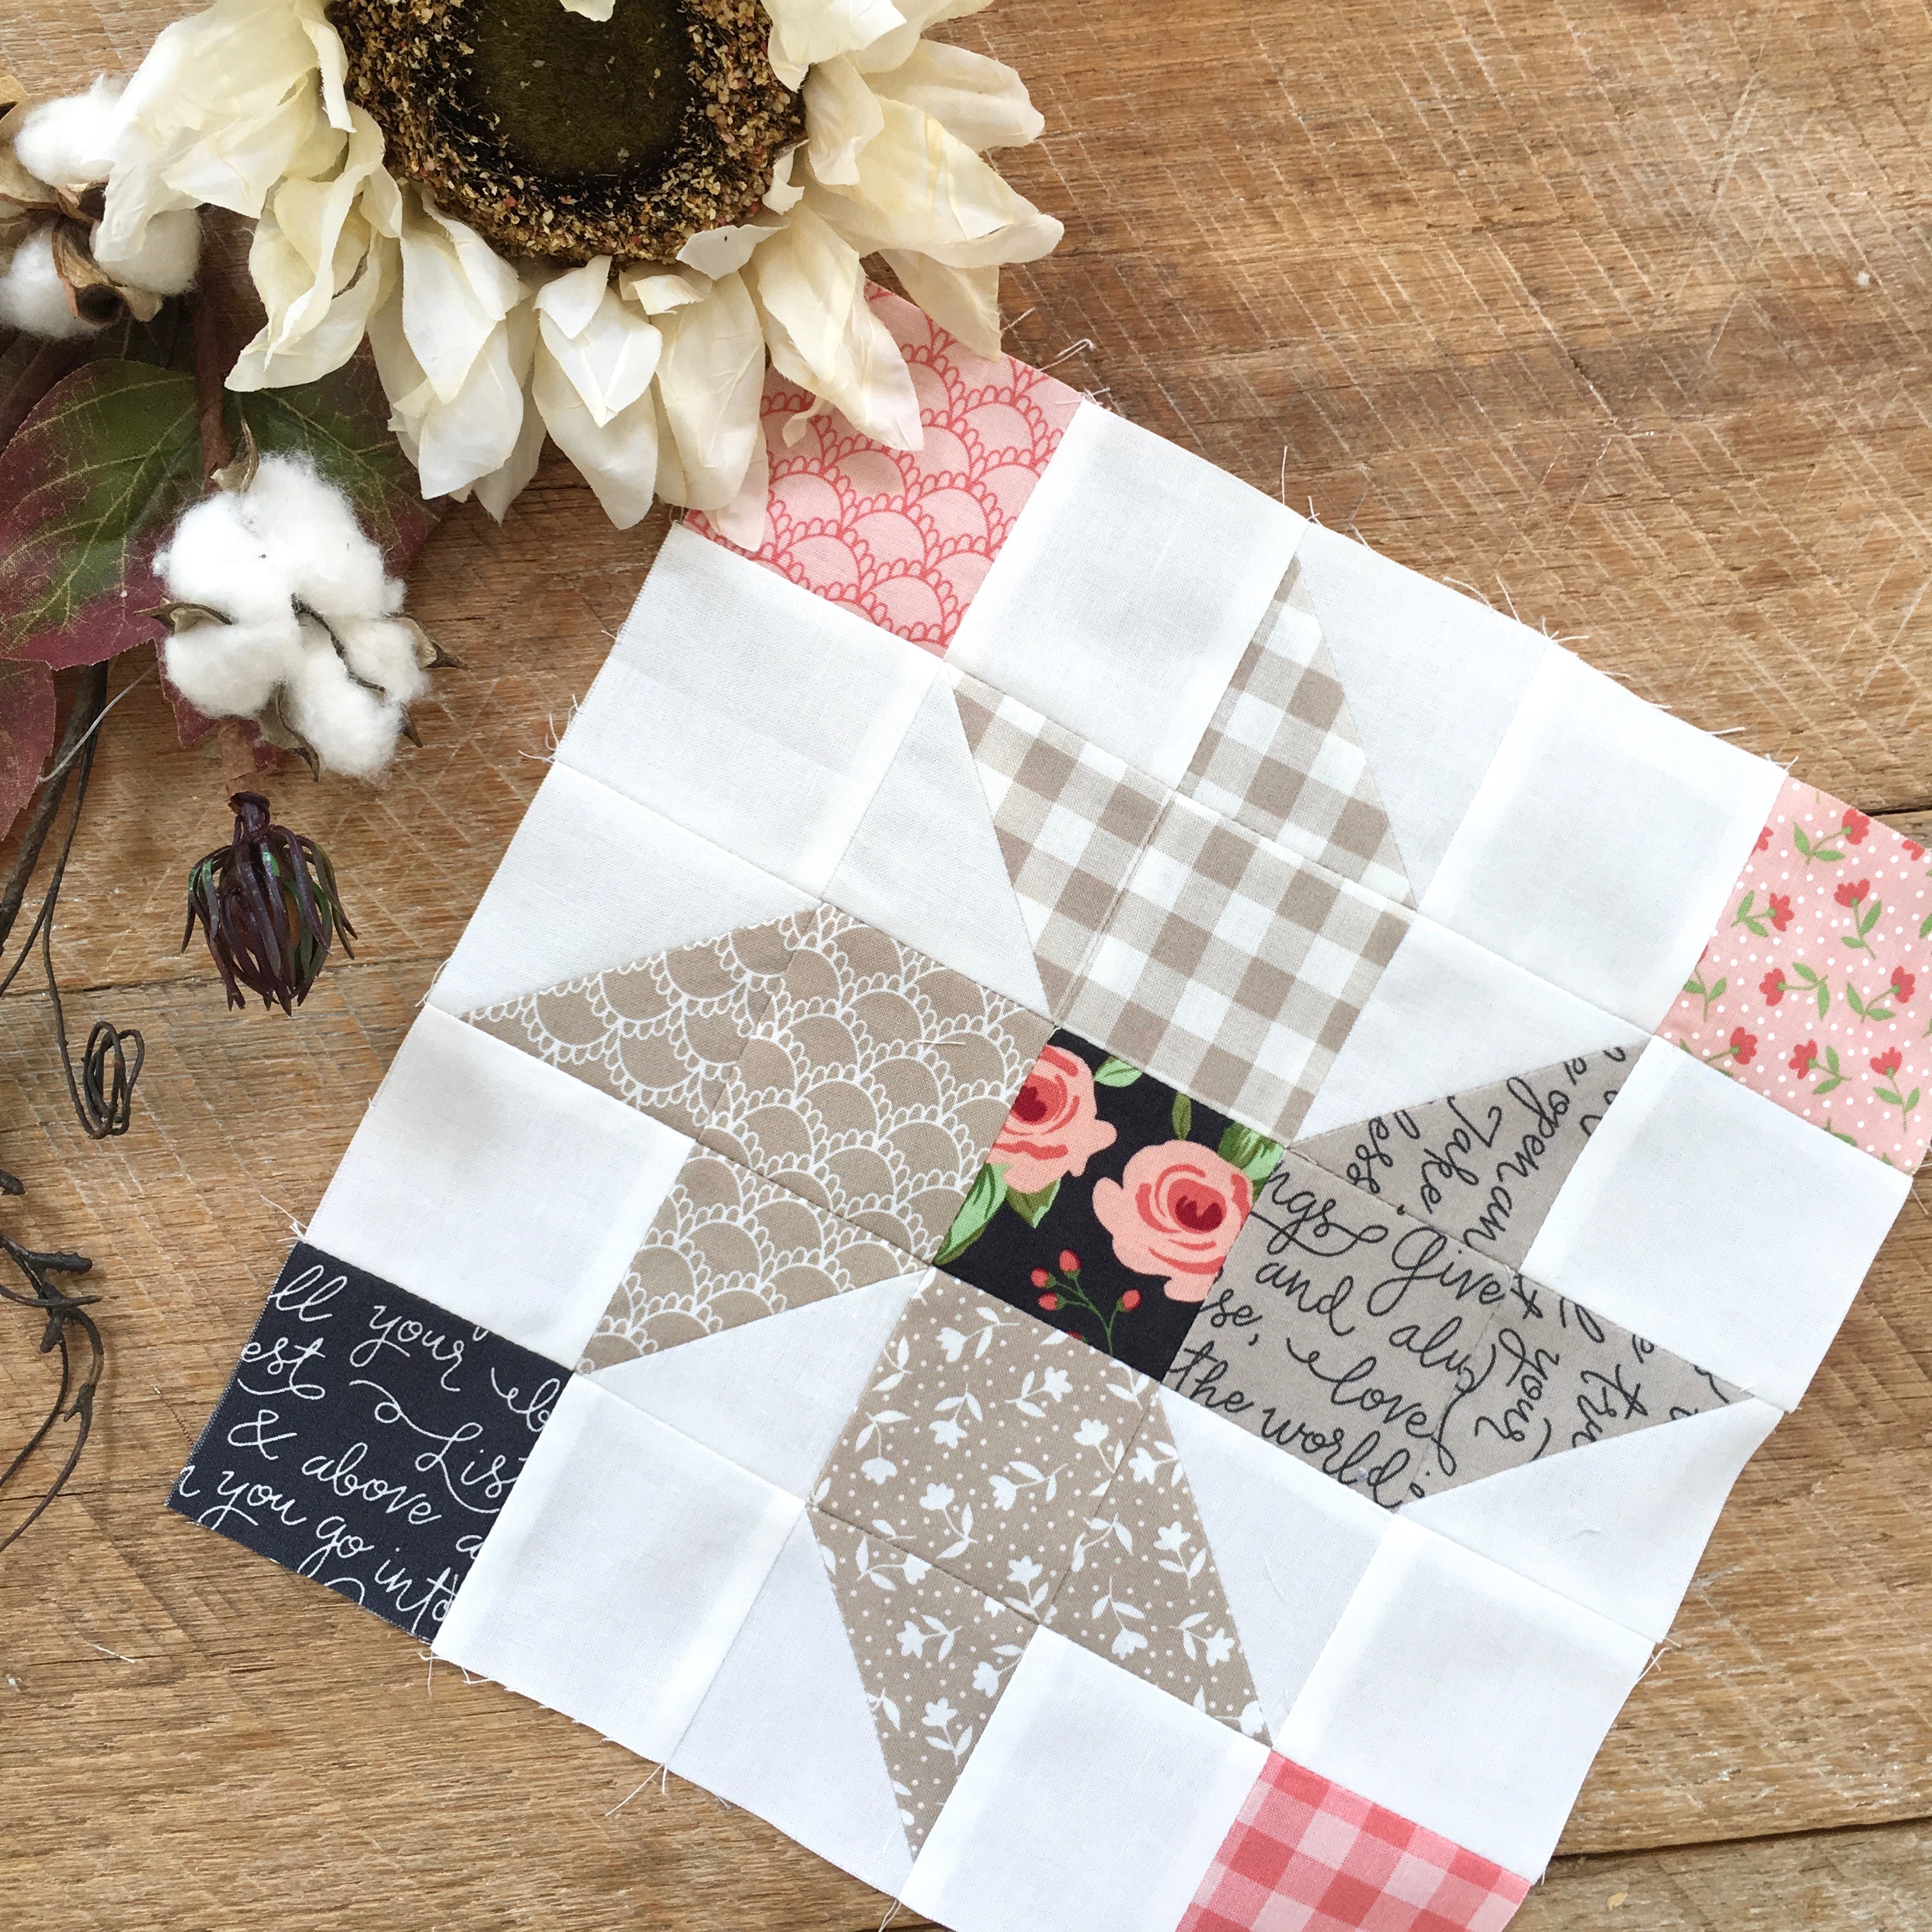
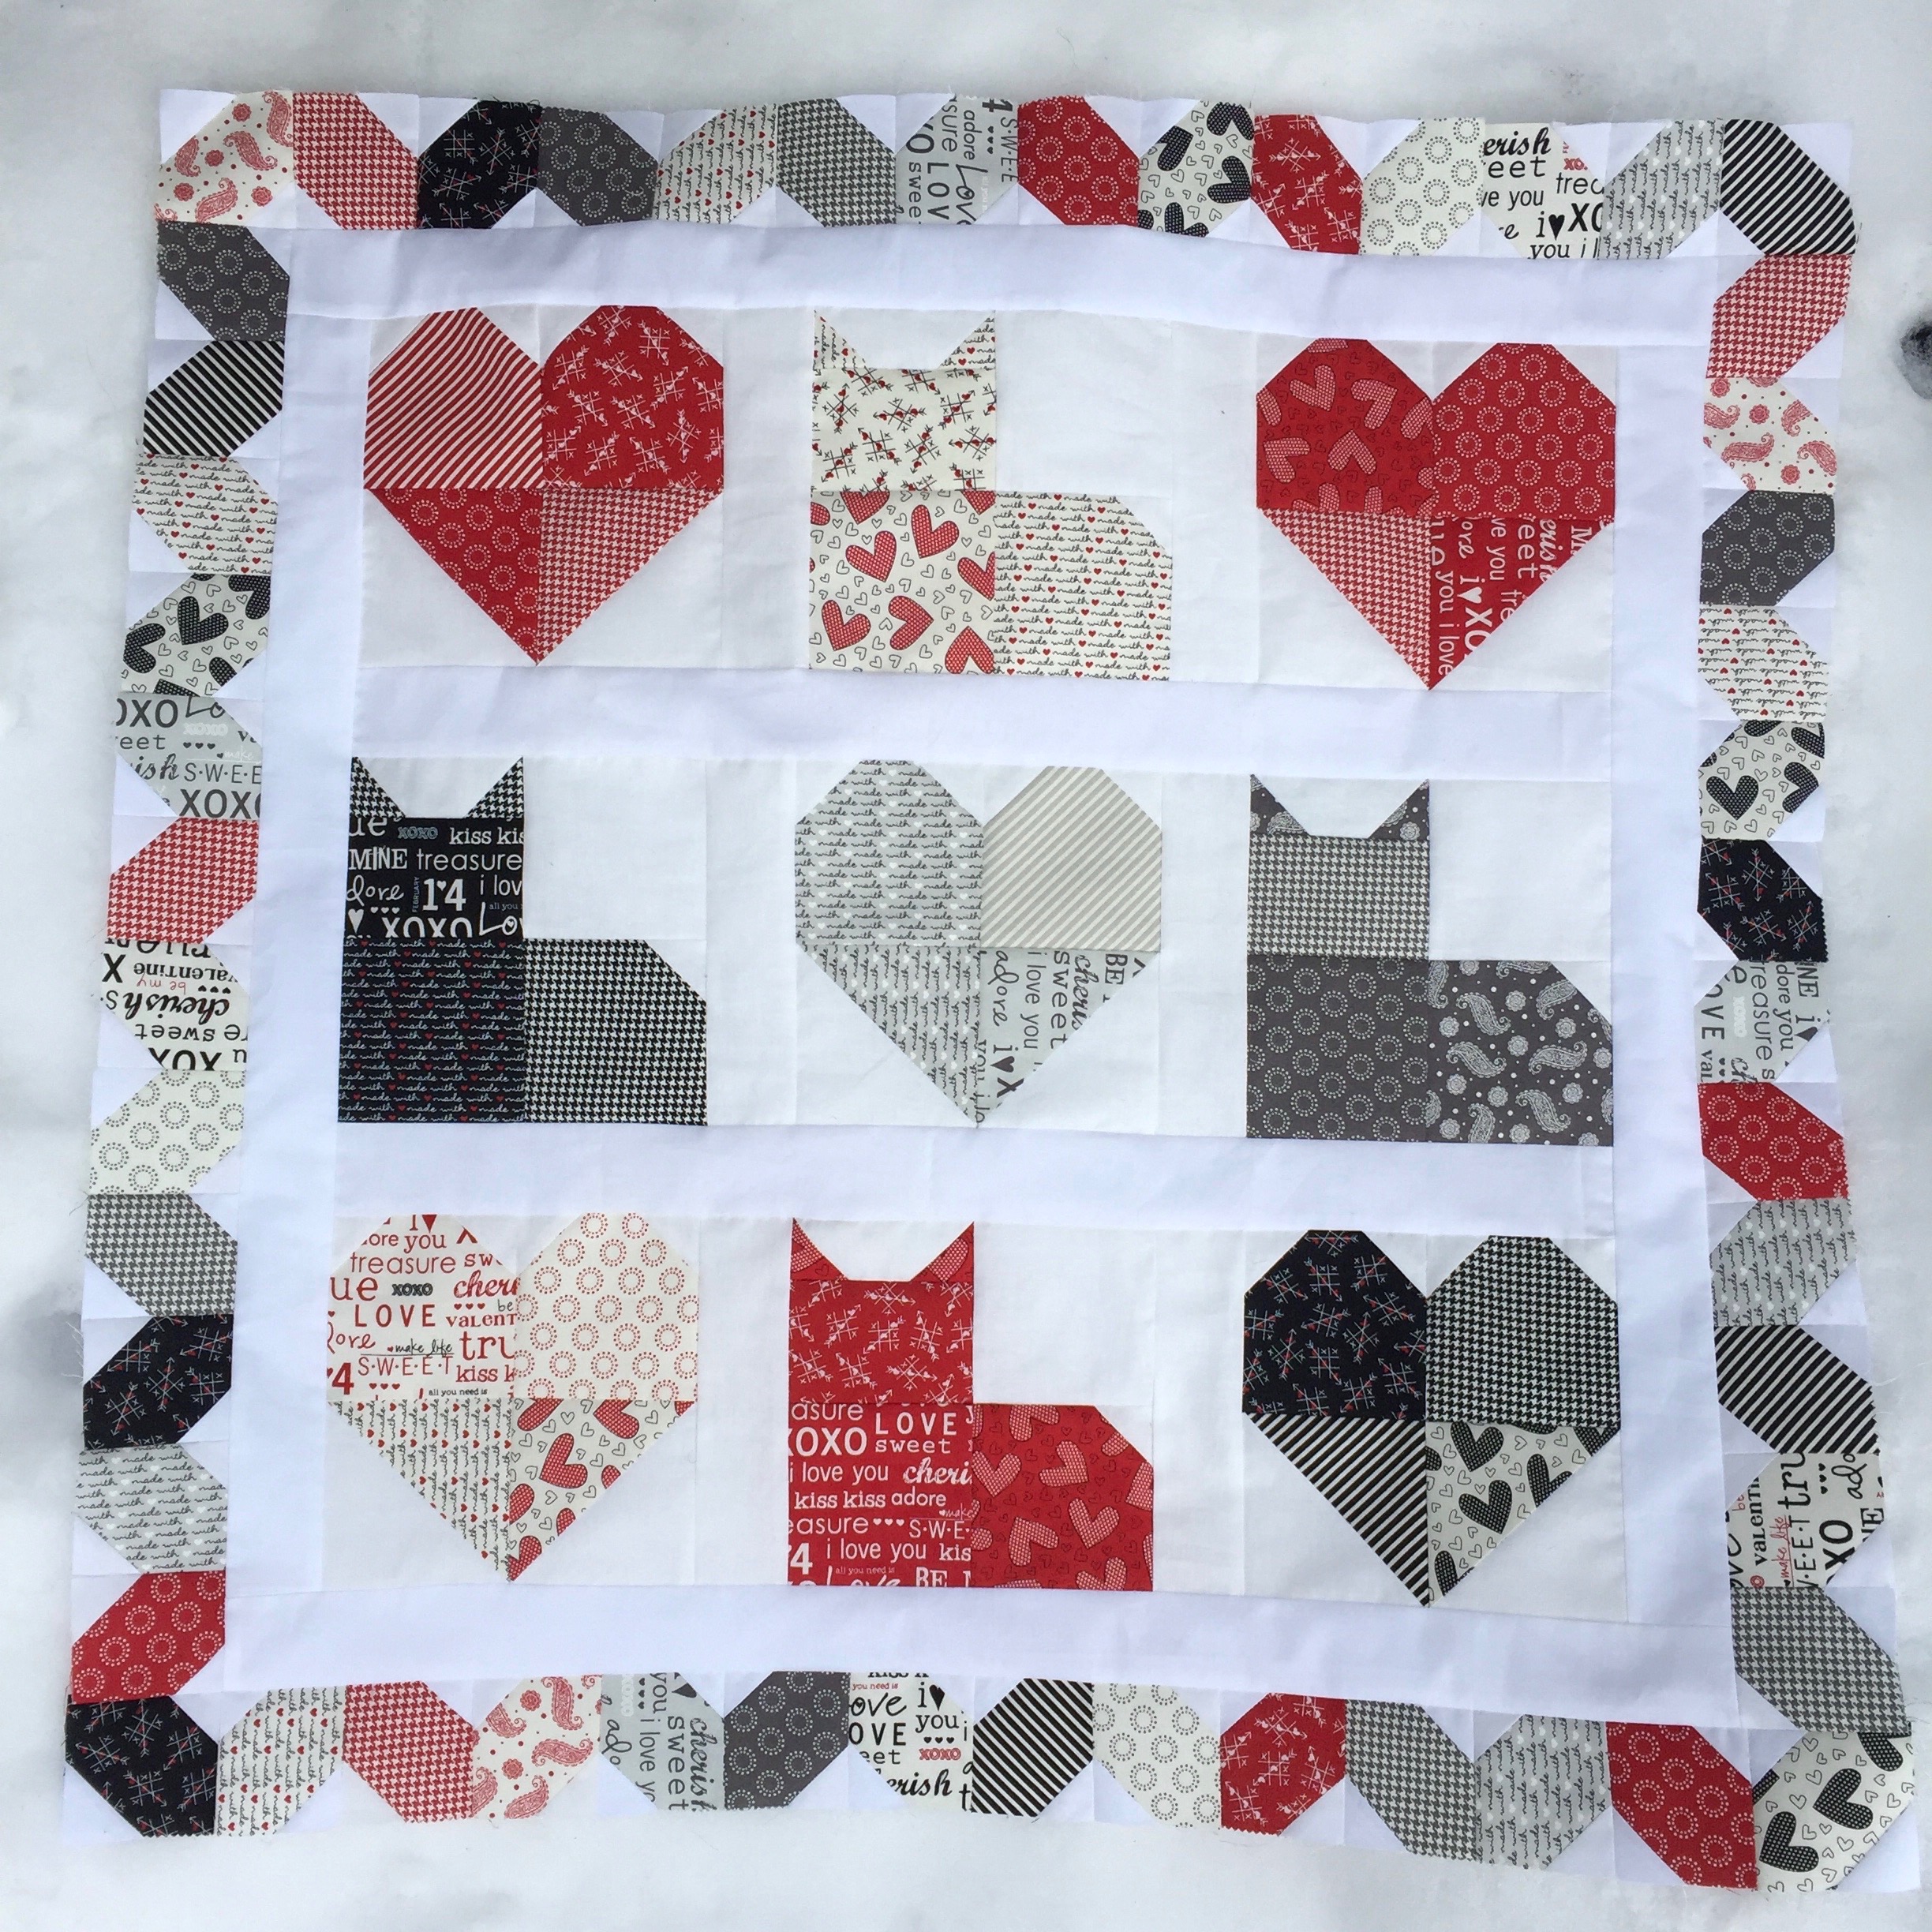
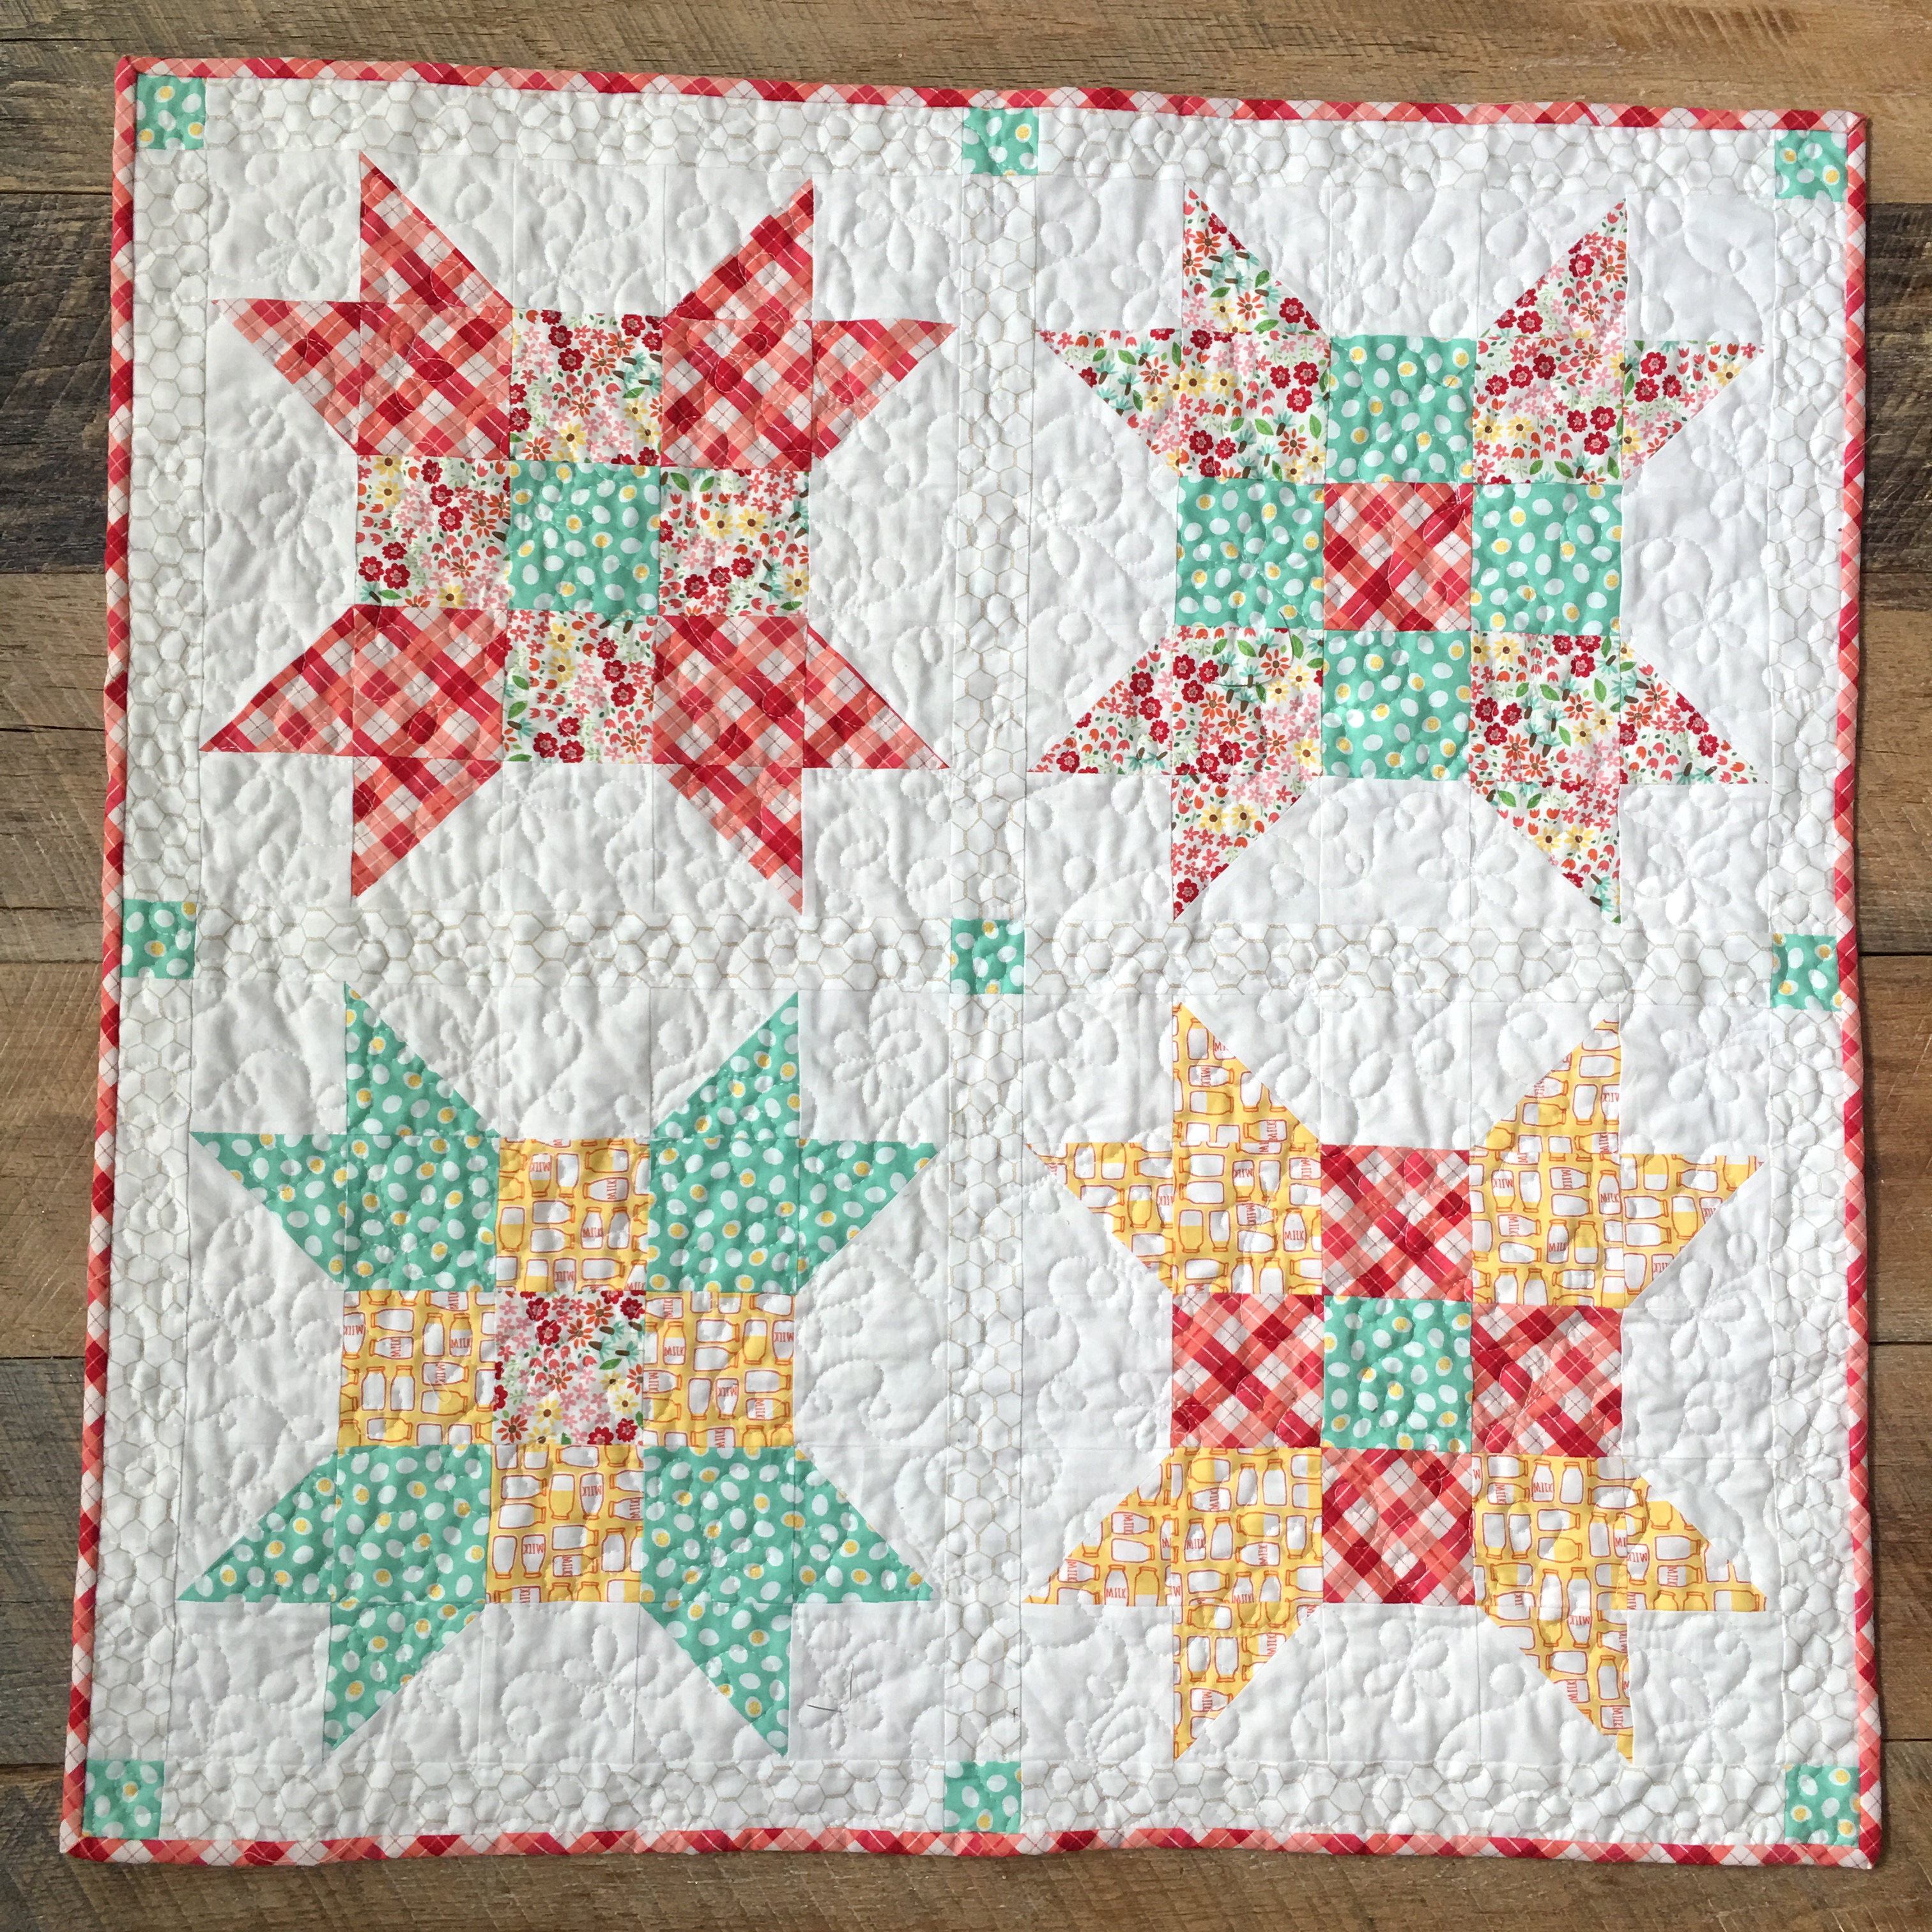
Each block is made up of 2 prints and a red center square.IMG_1344

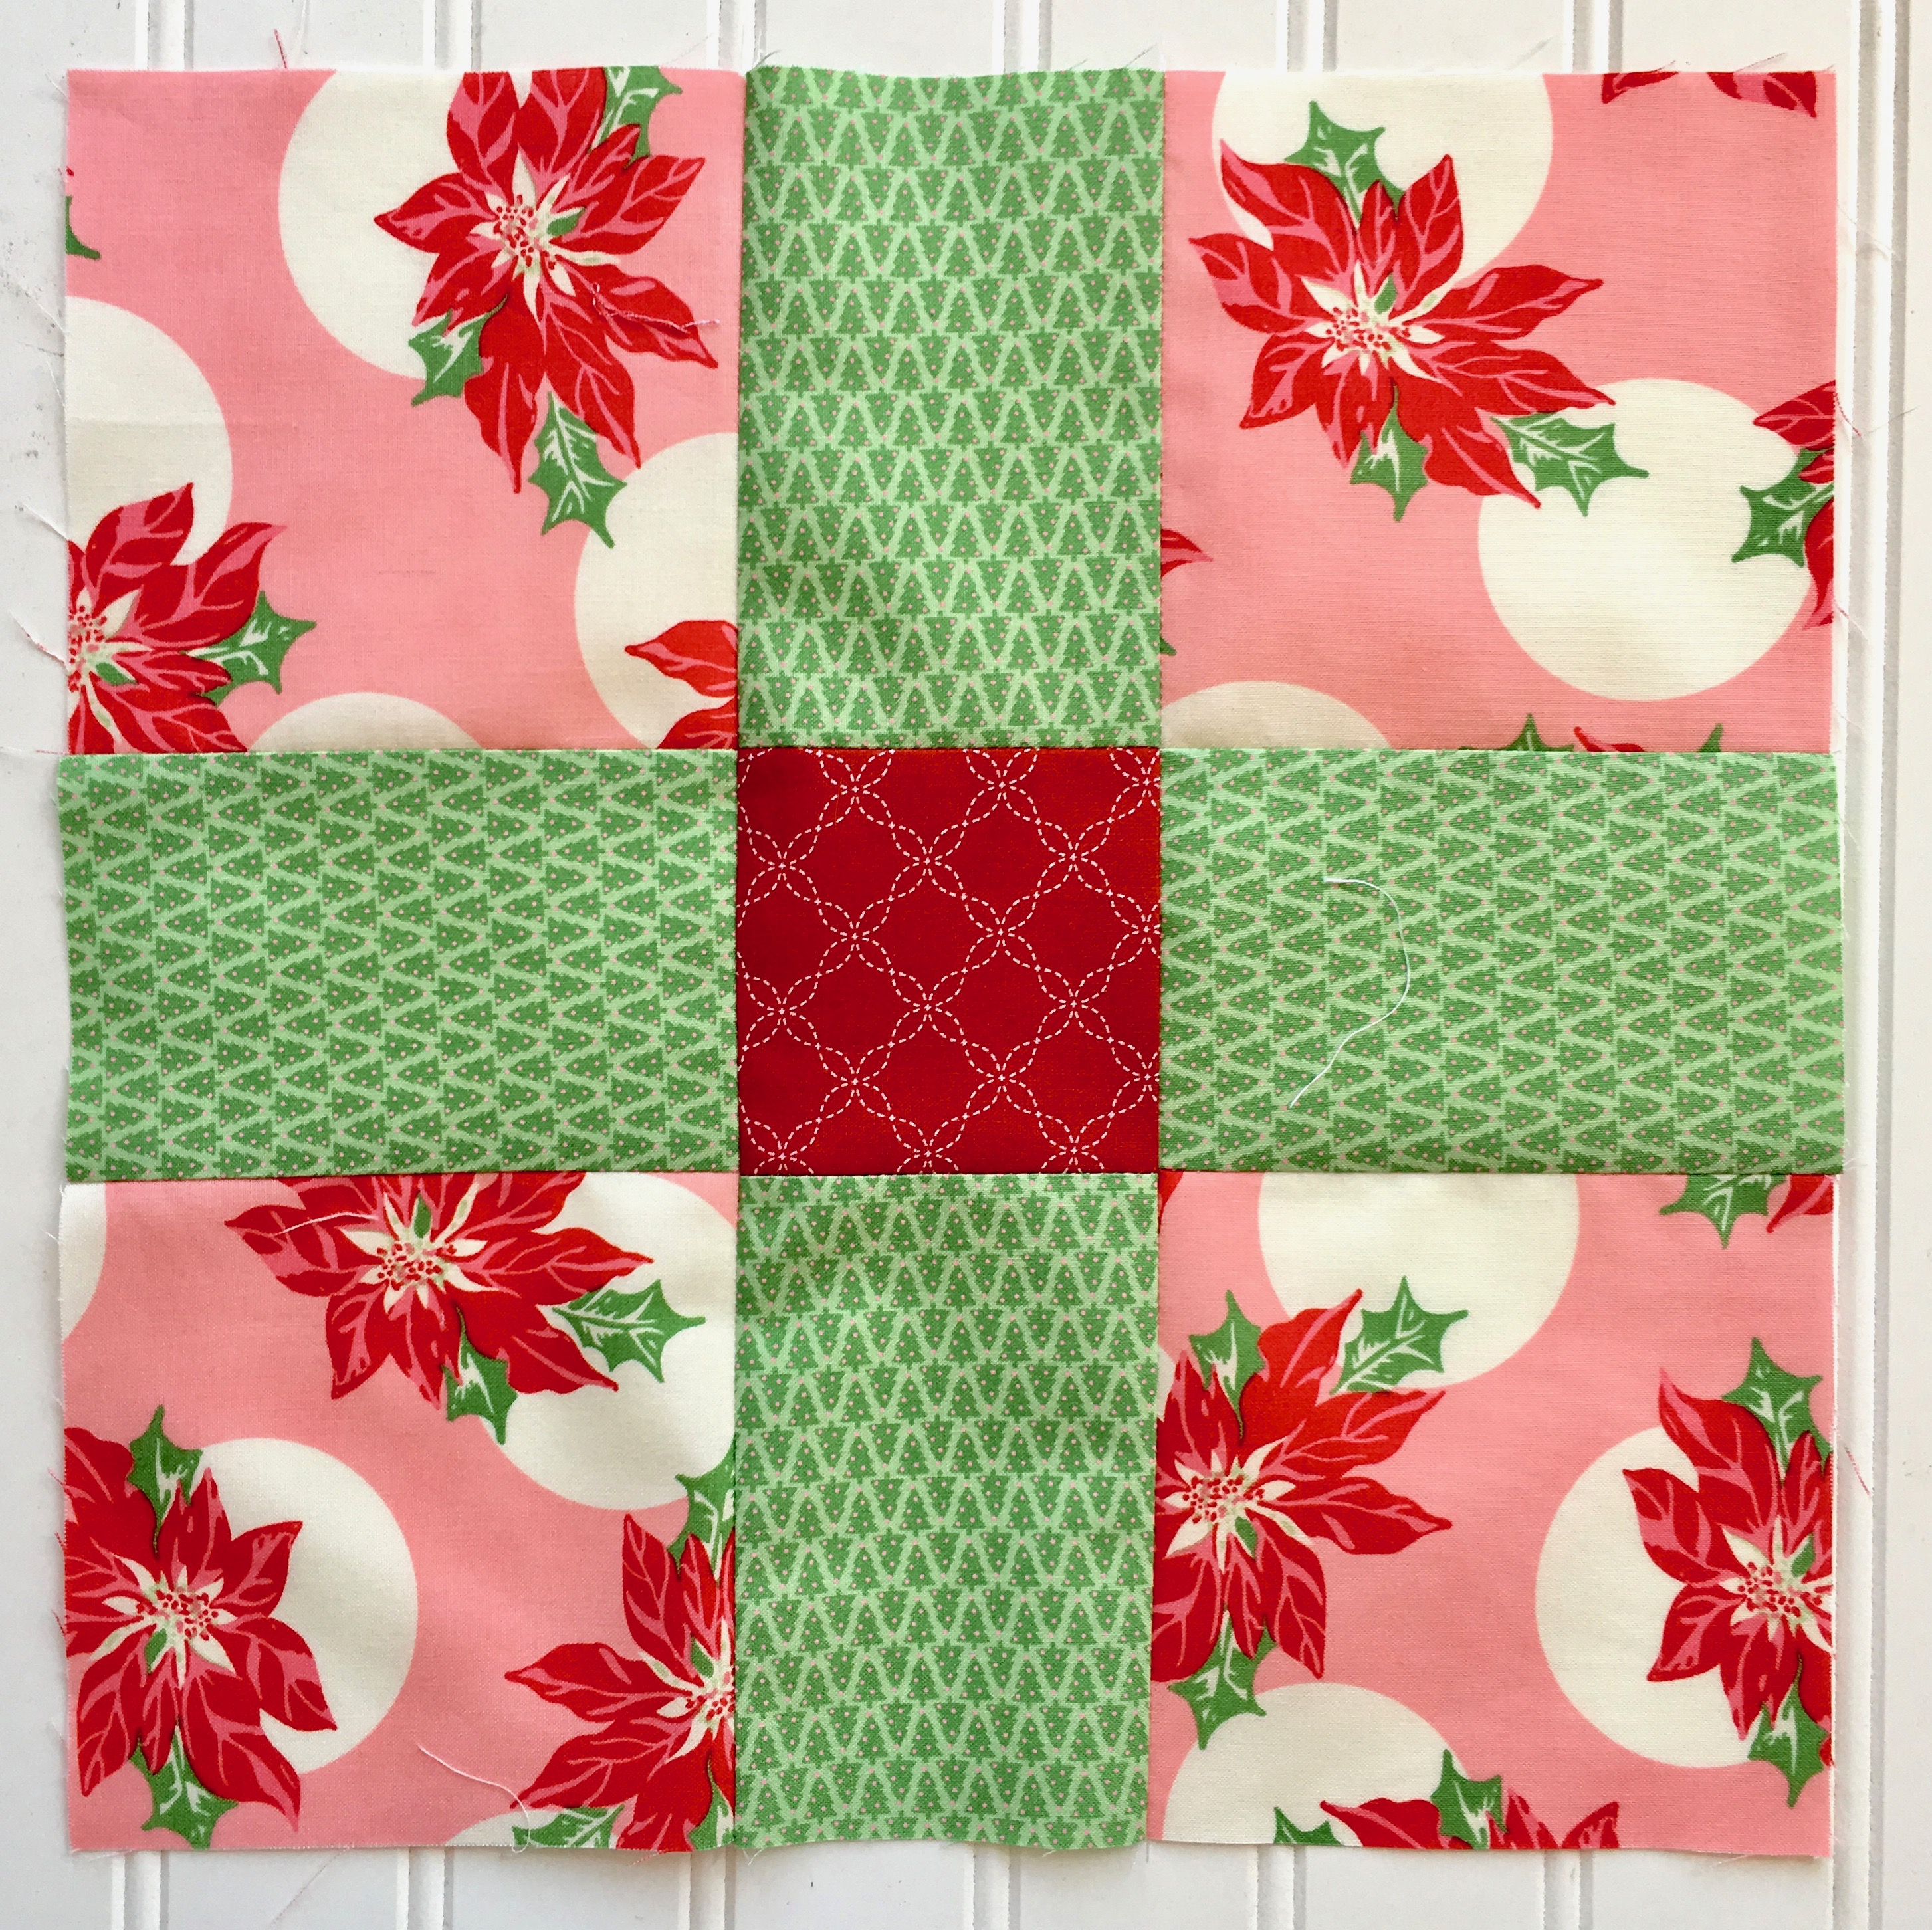
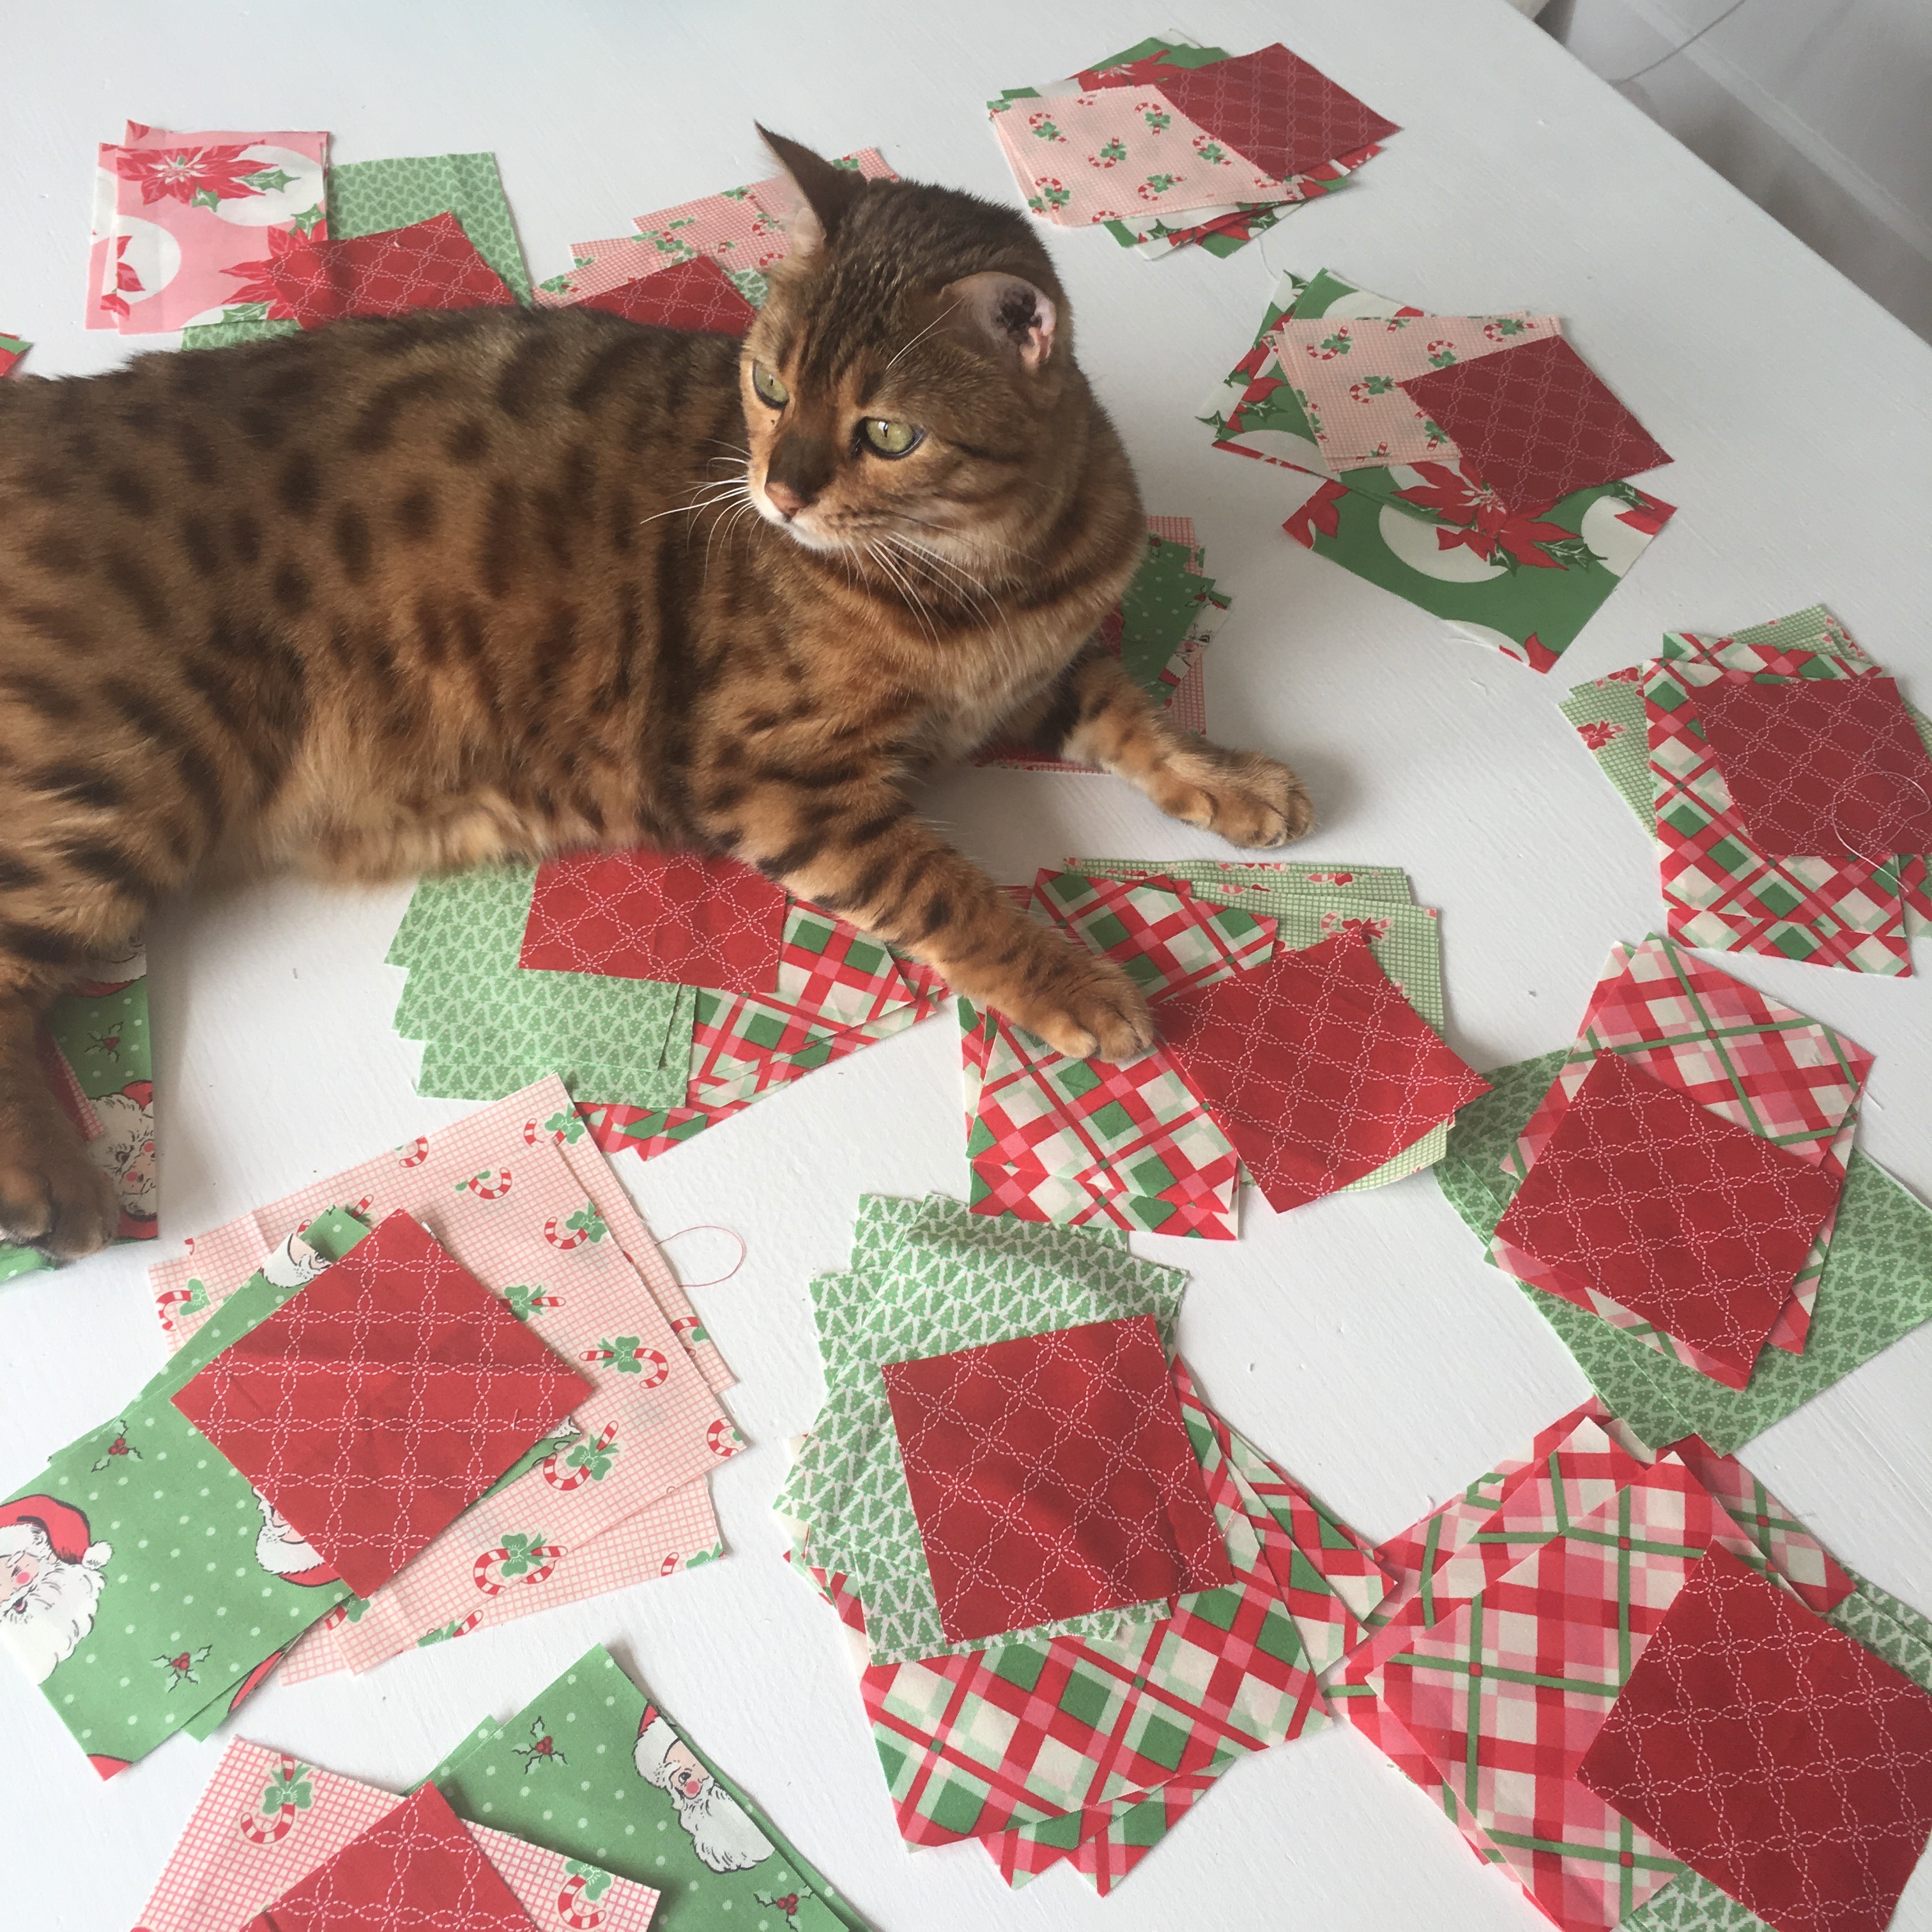
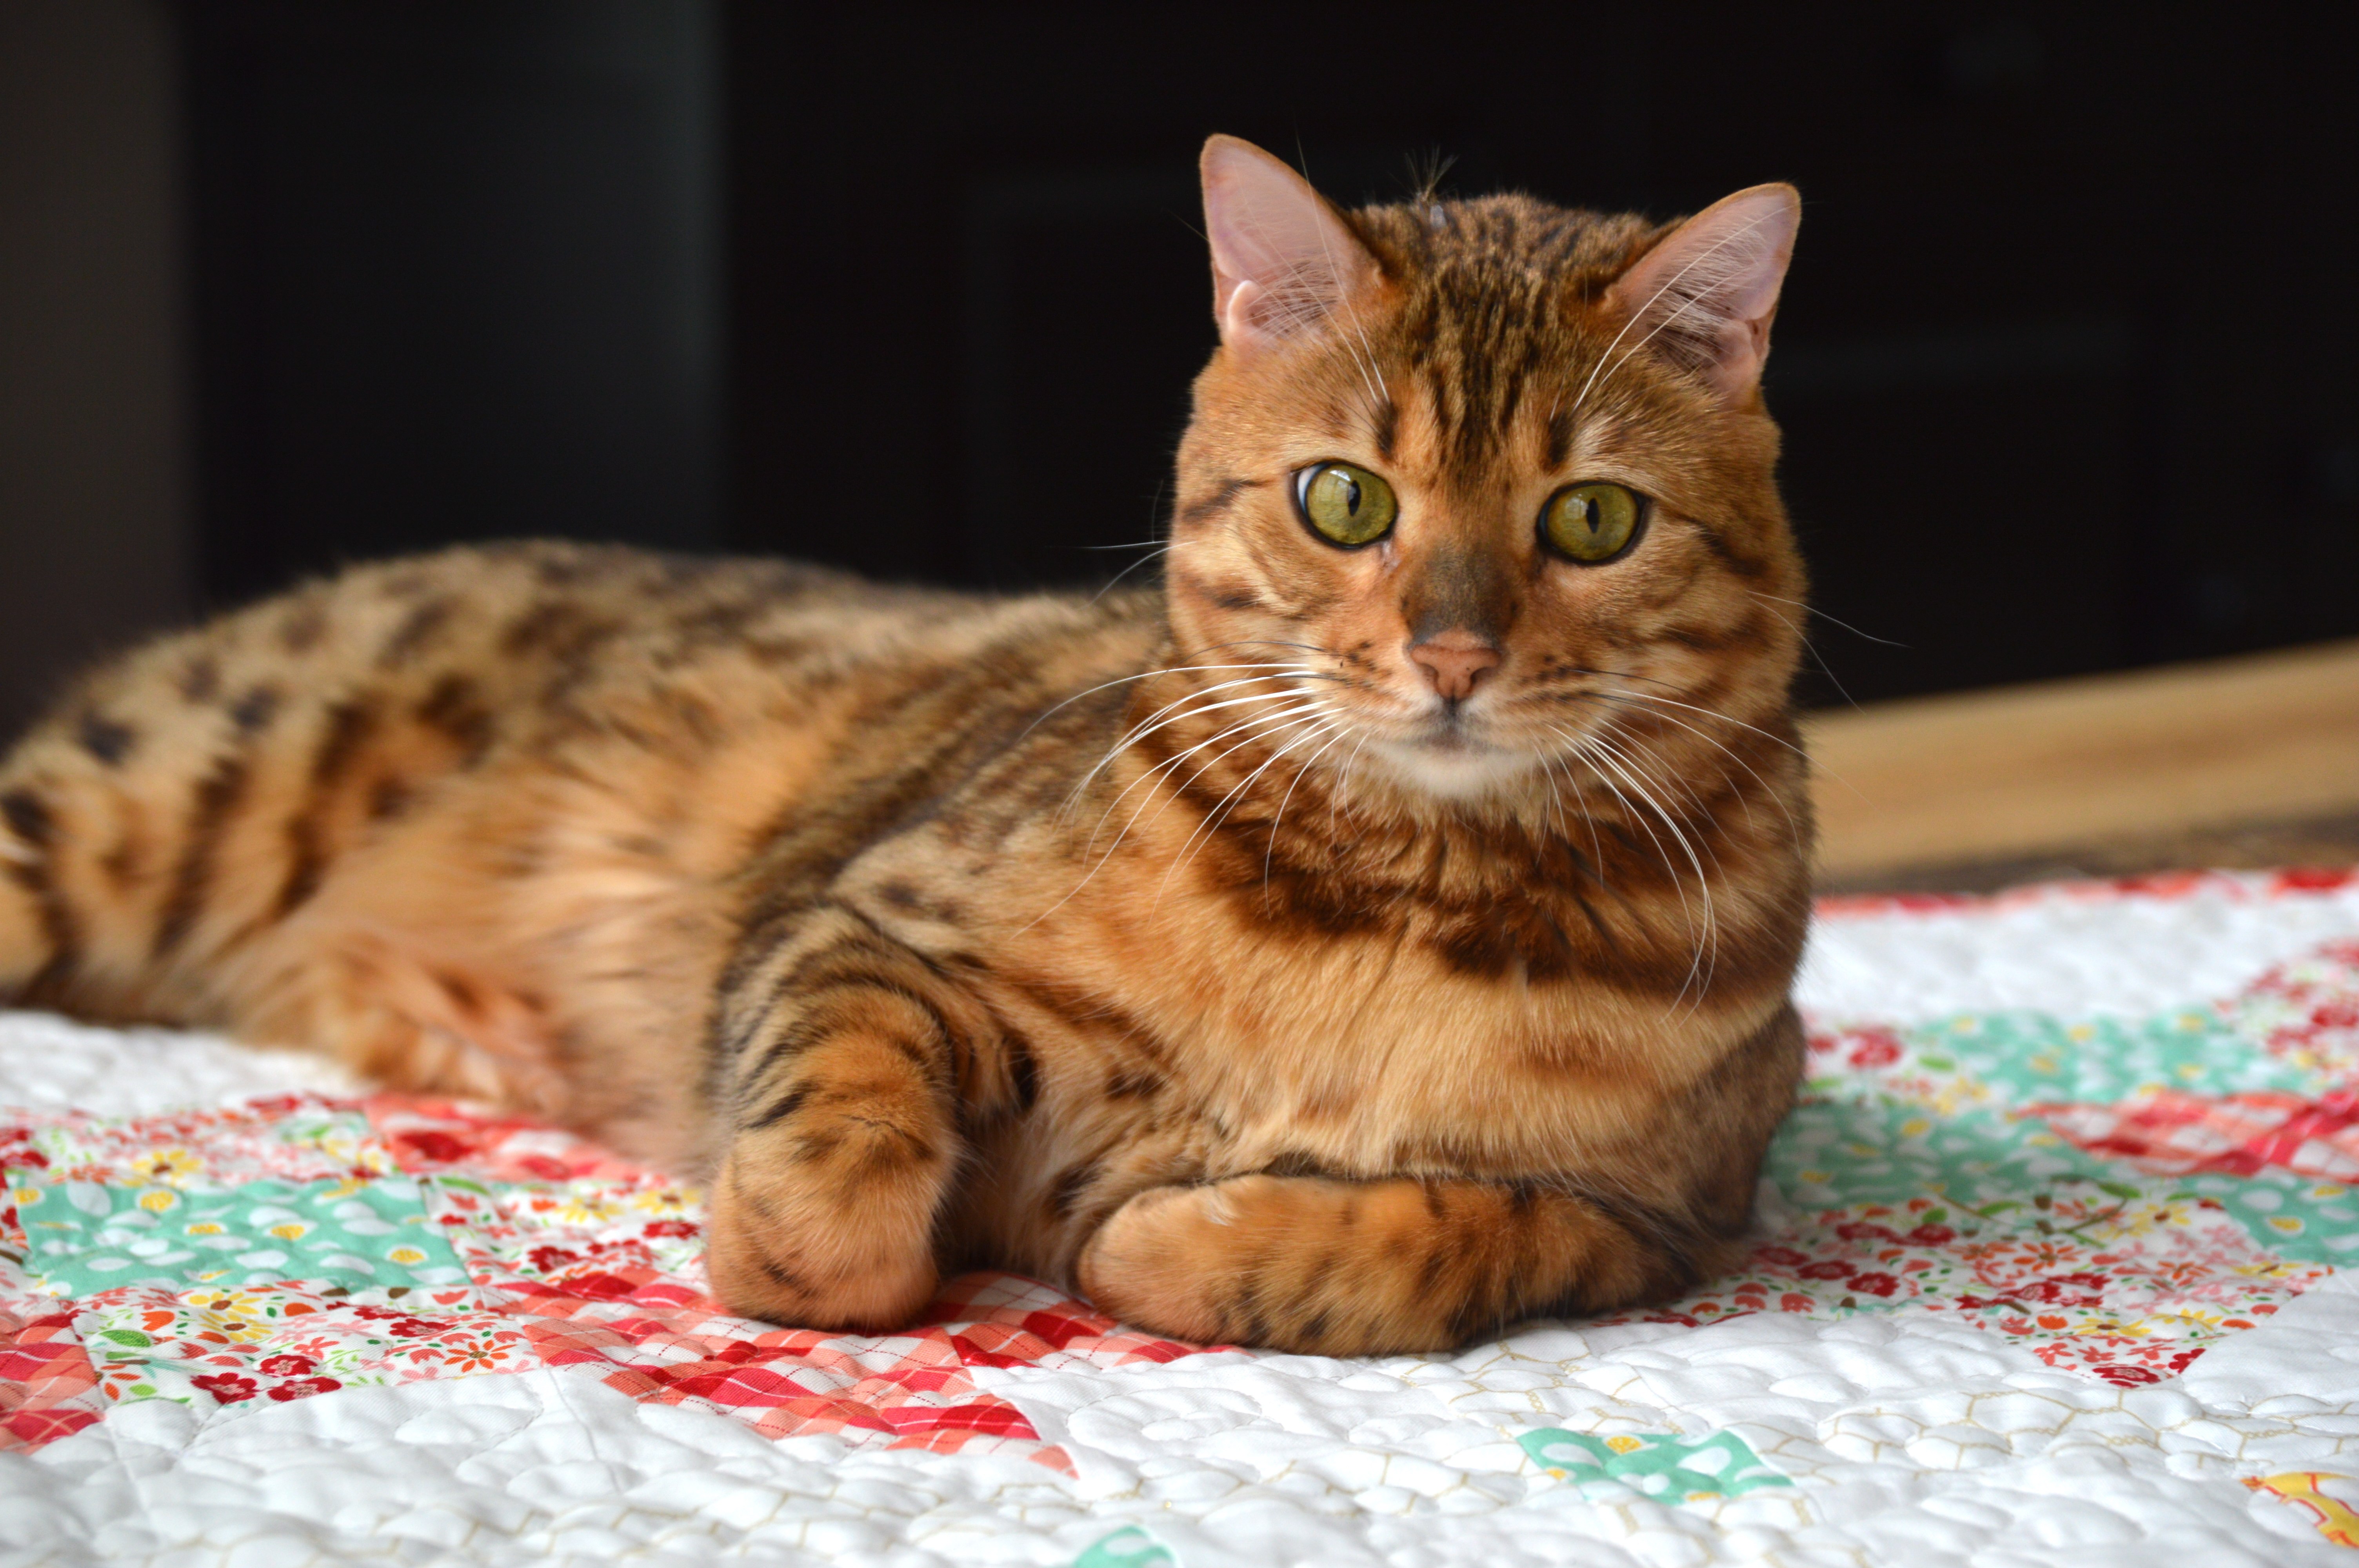
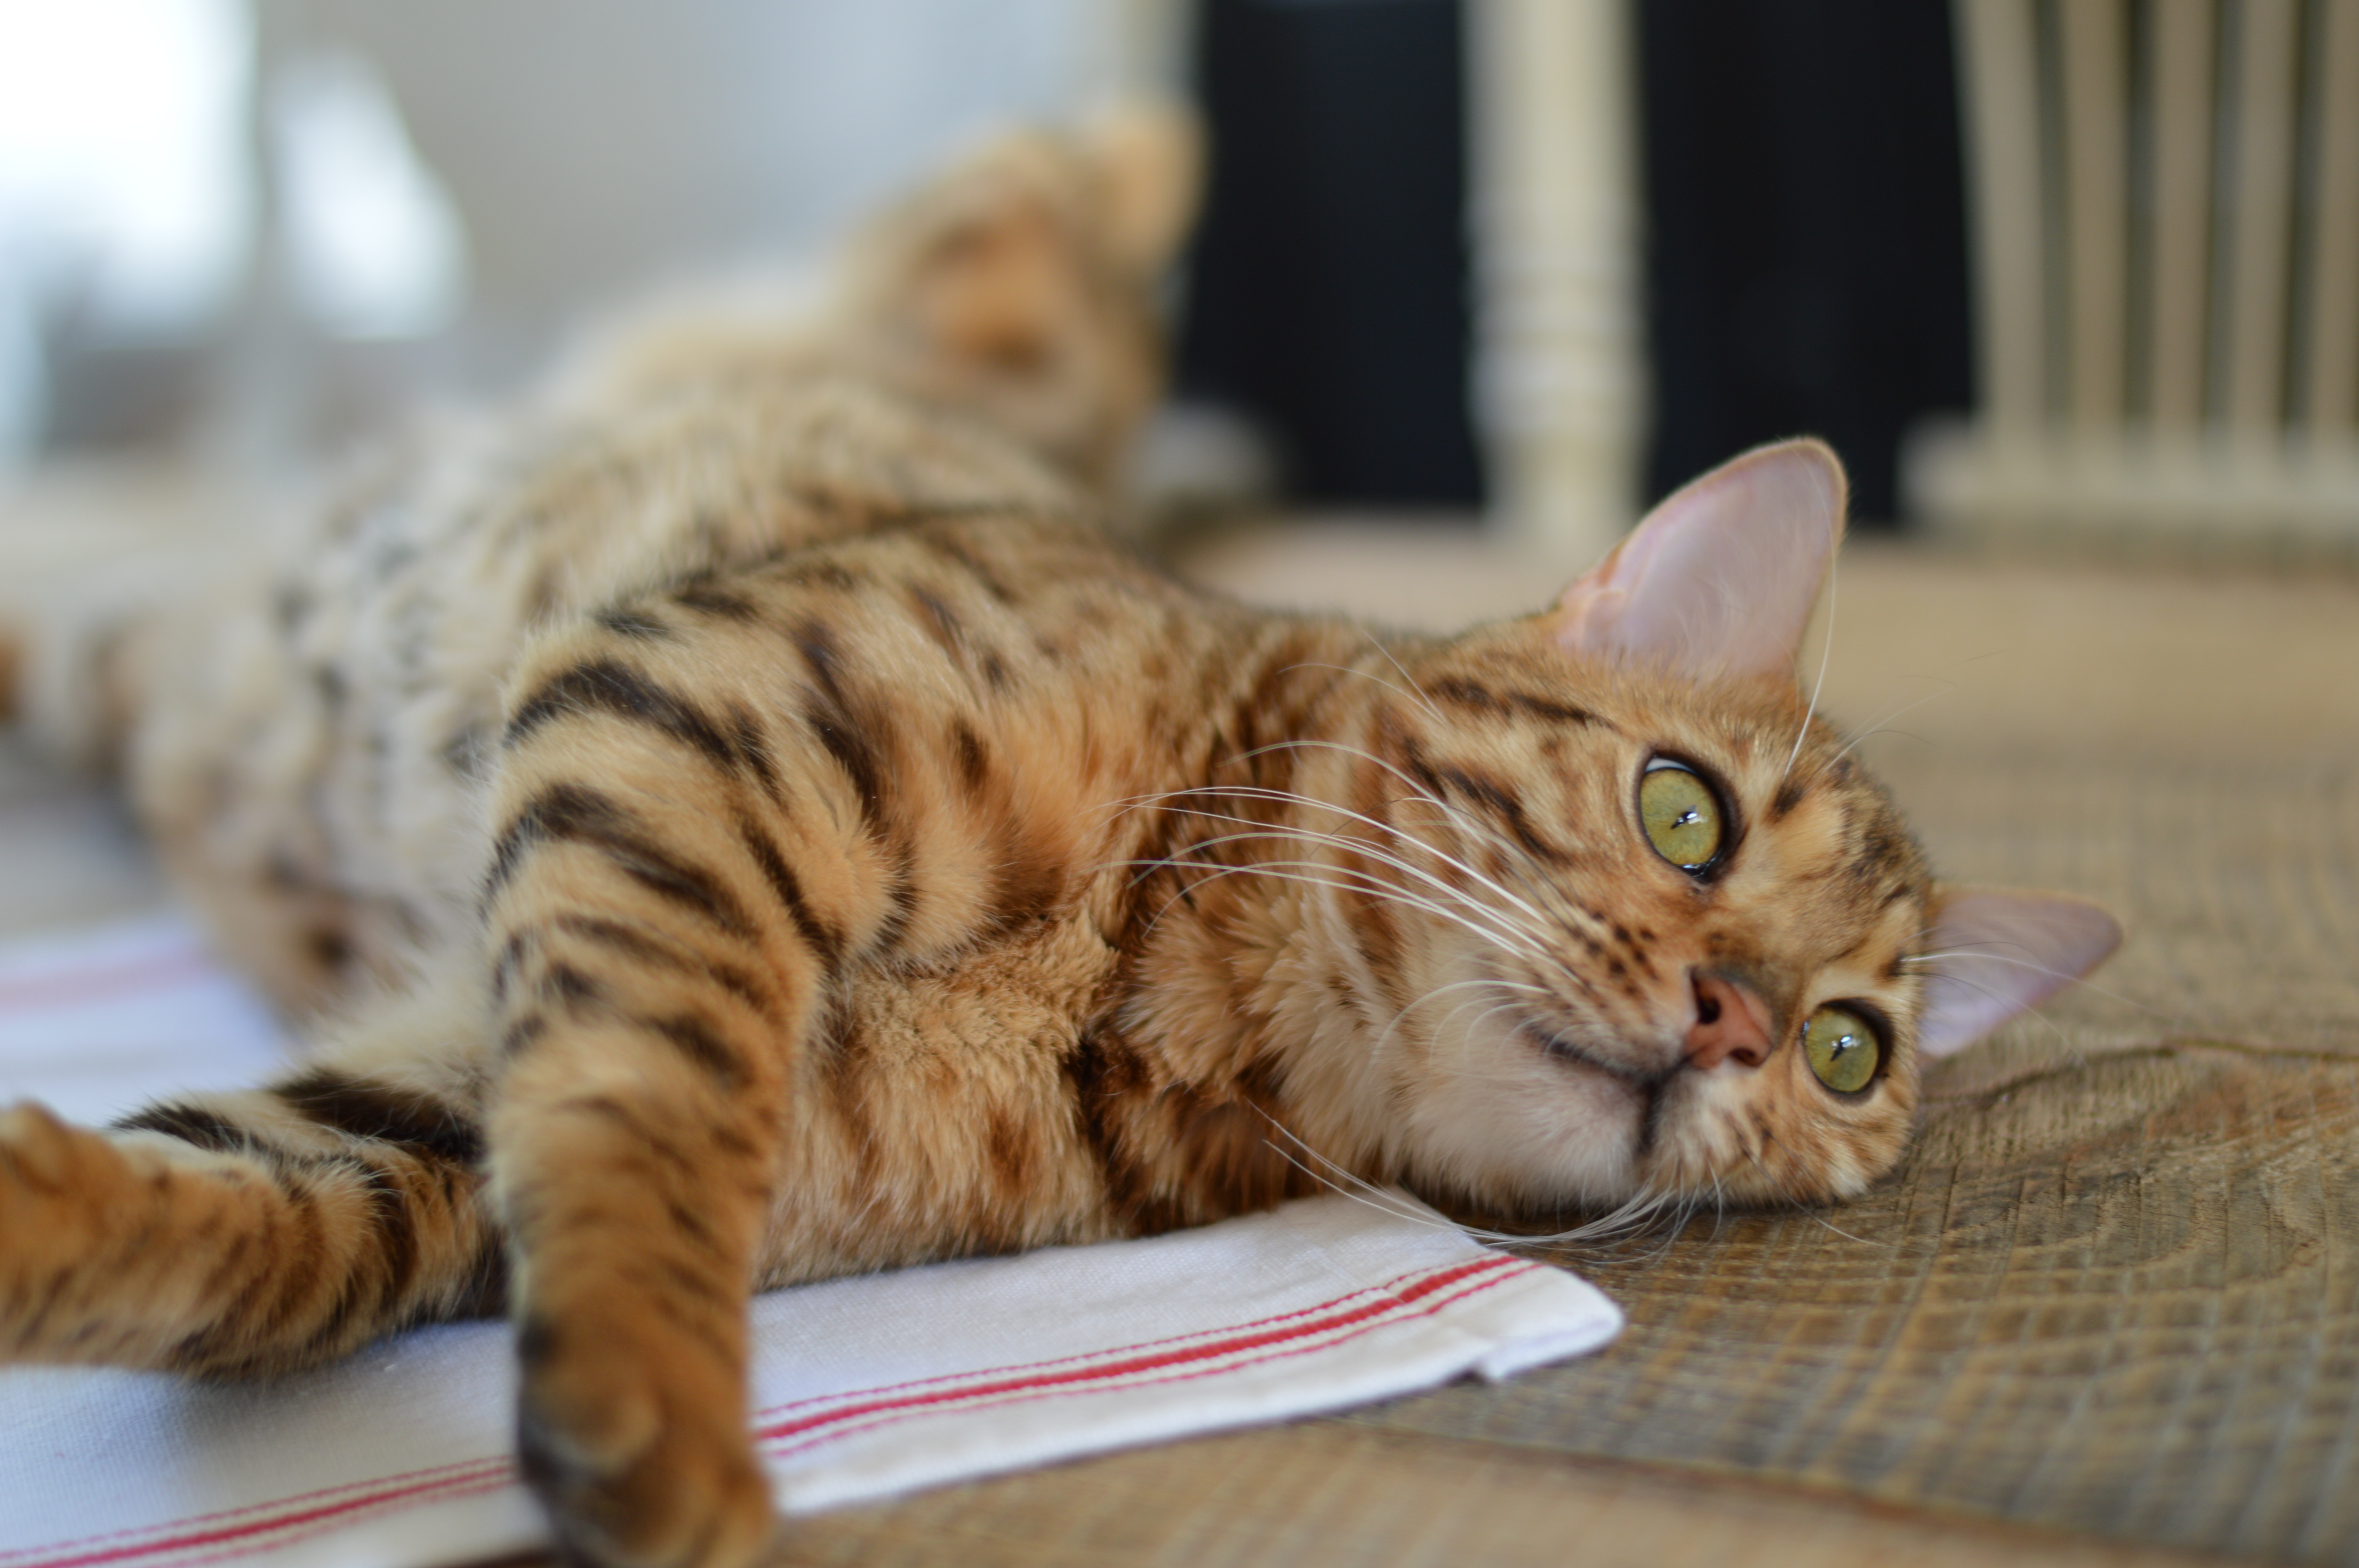
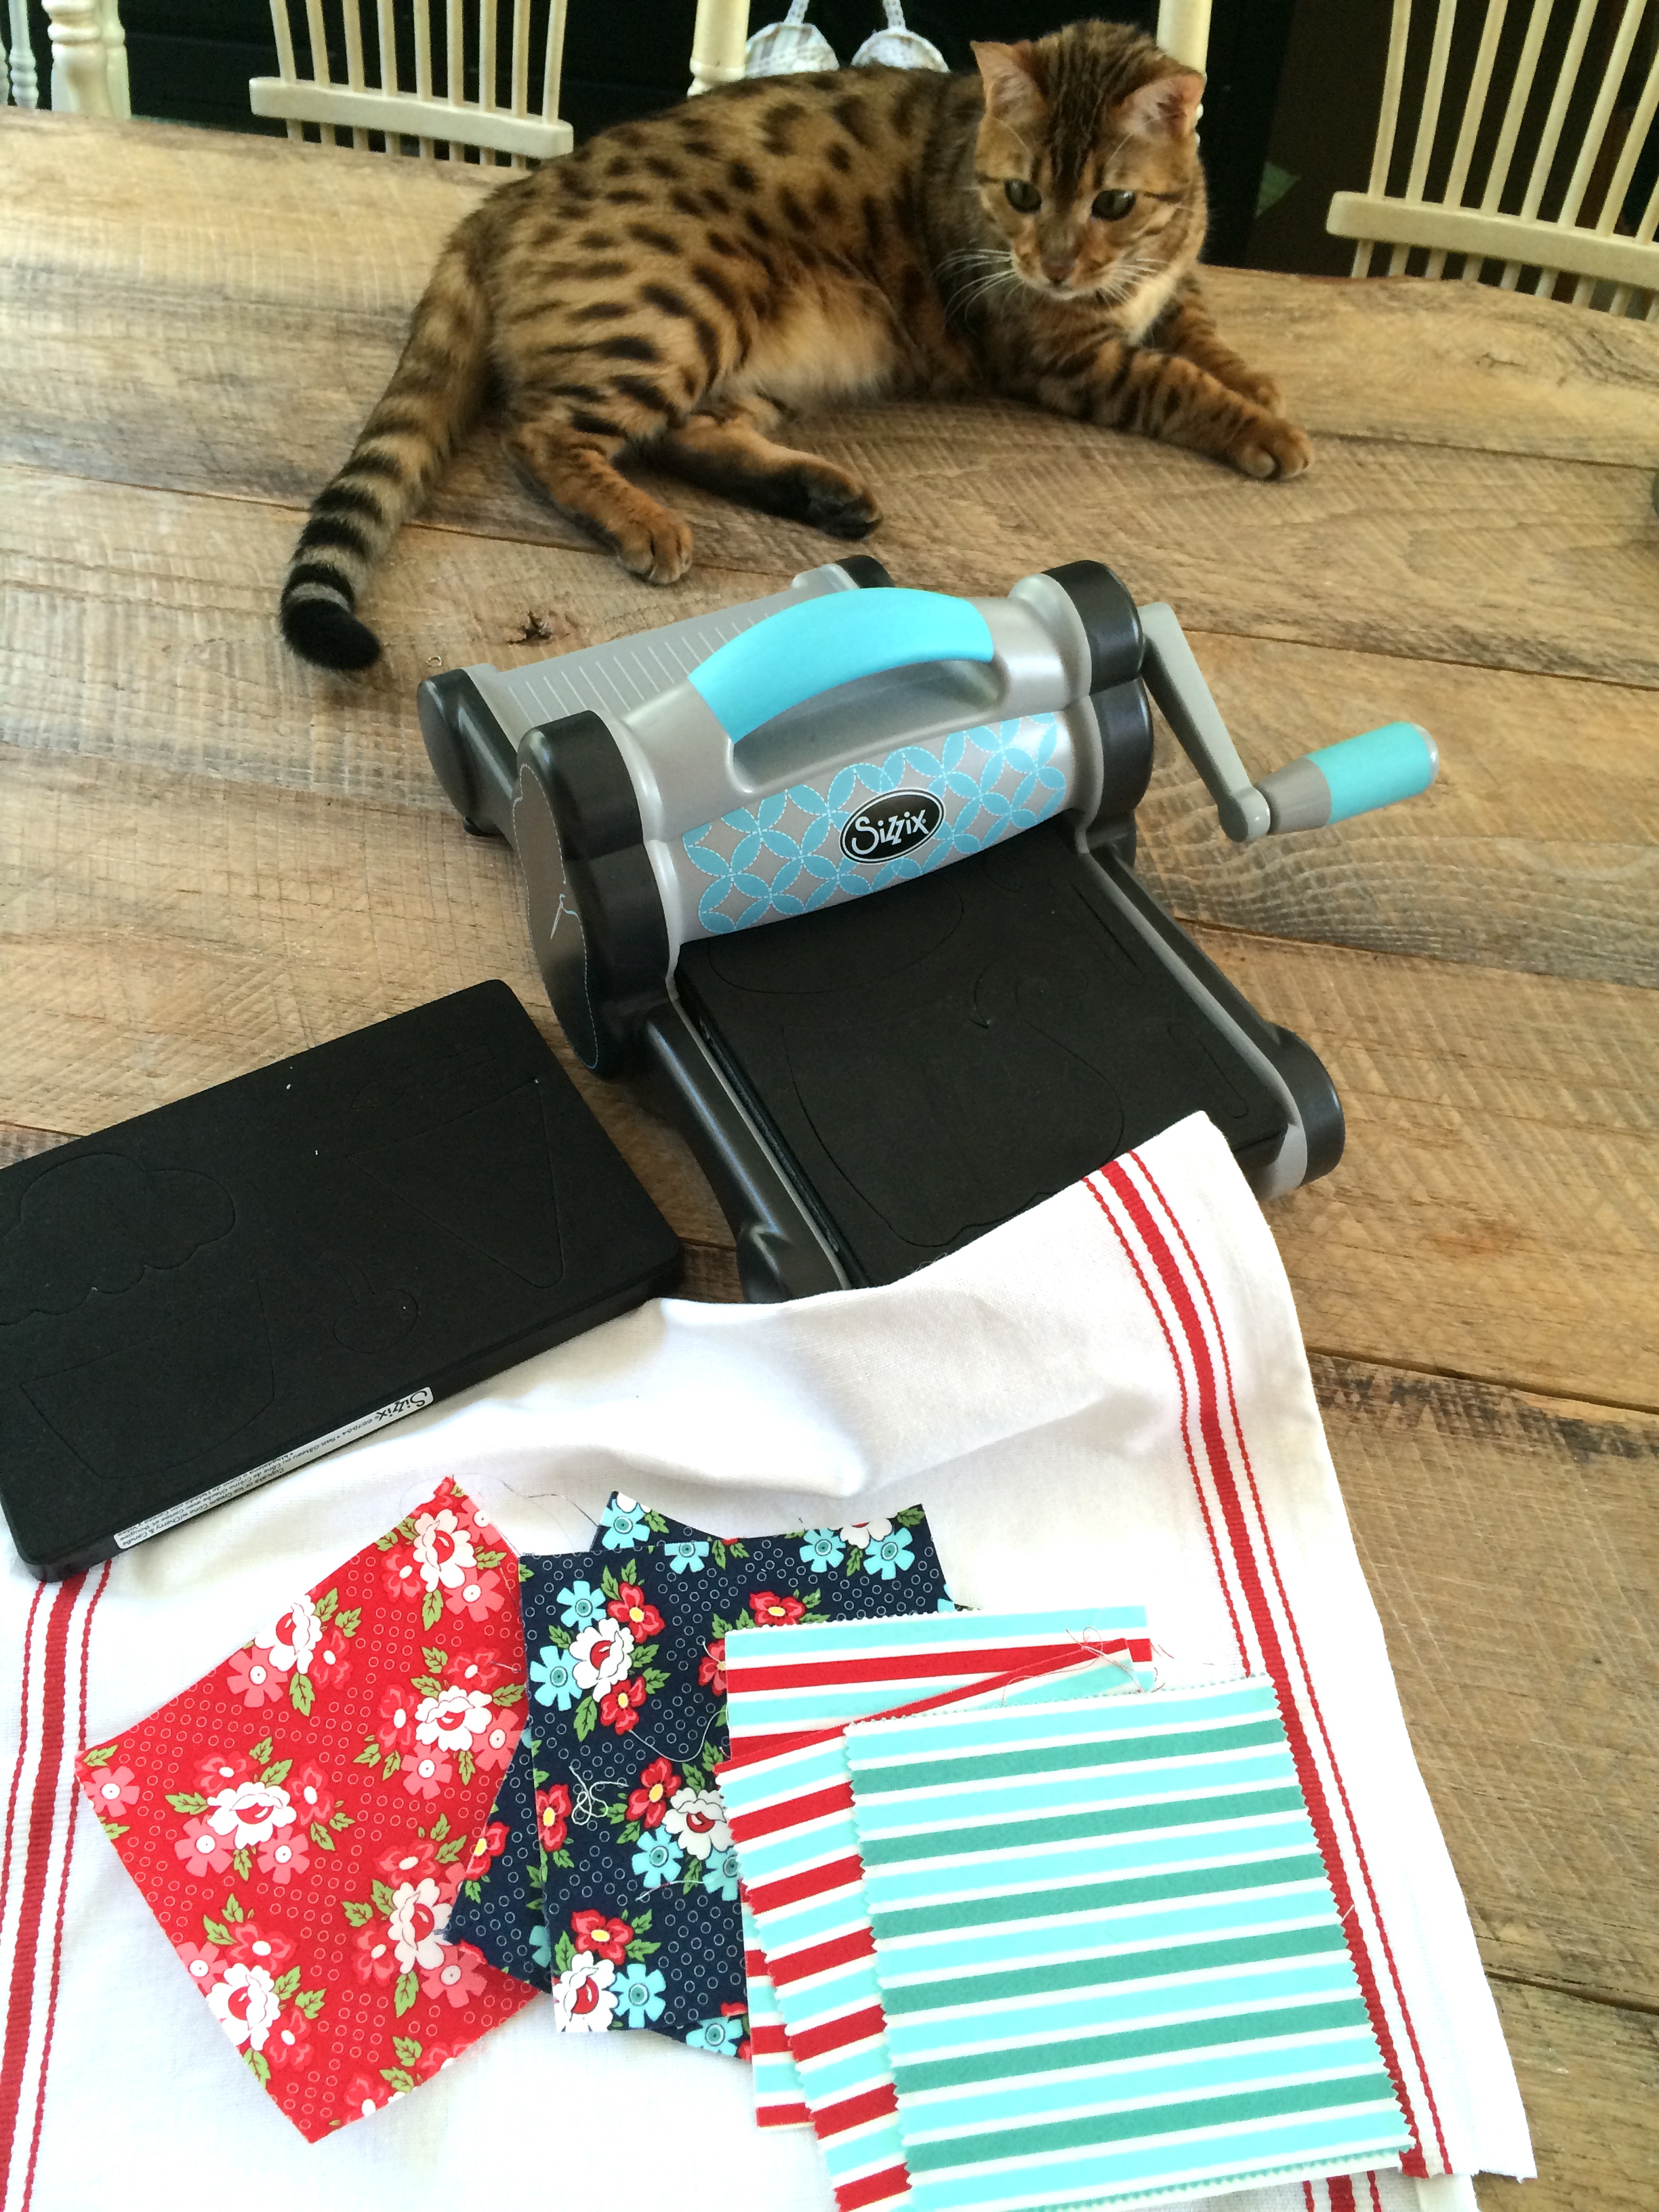
Baby Mufasa was very helpful in the process.  He’s good at grading all the pieces!
IMG_1286

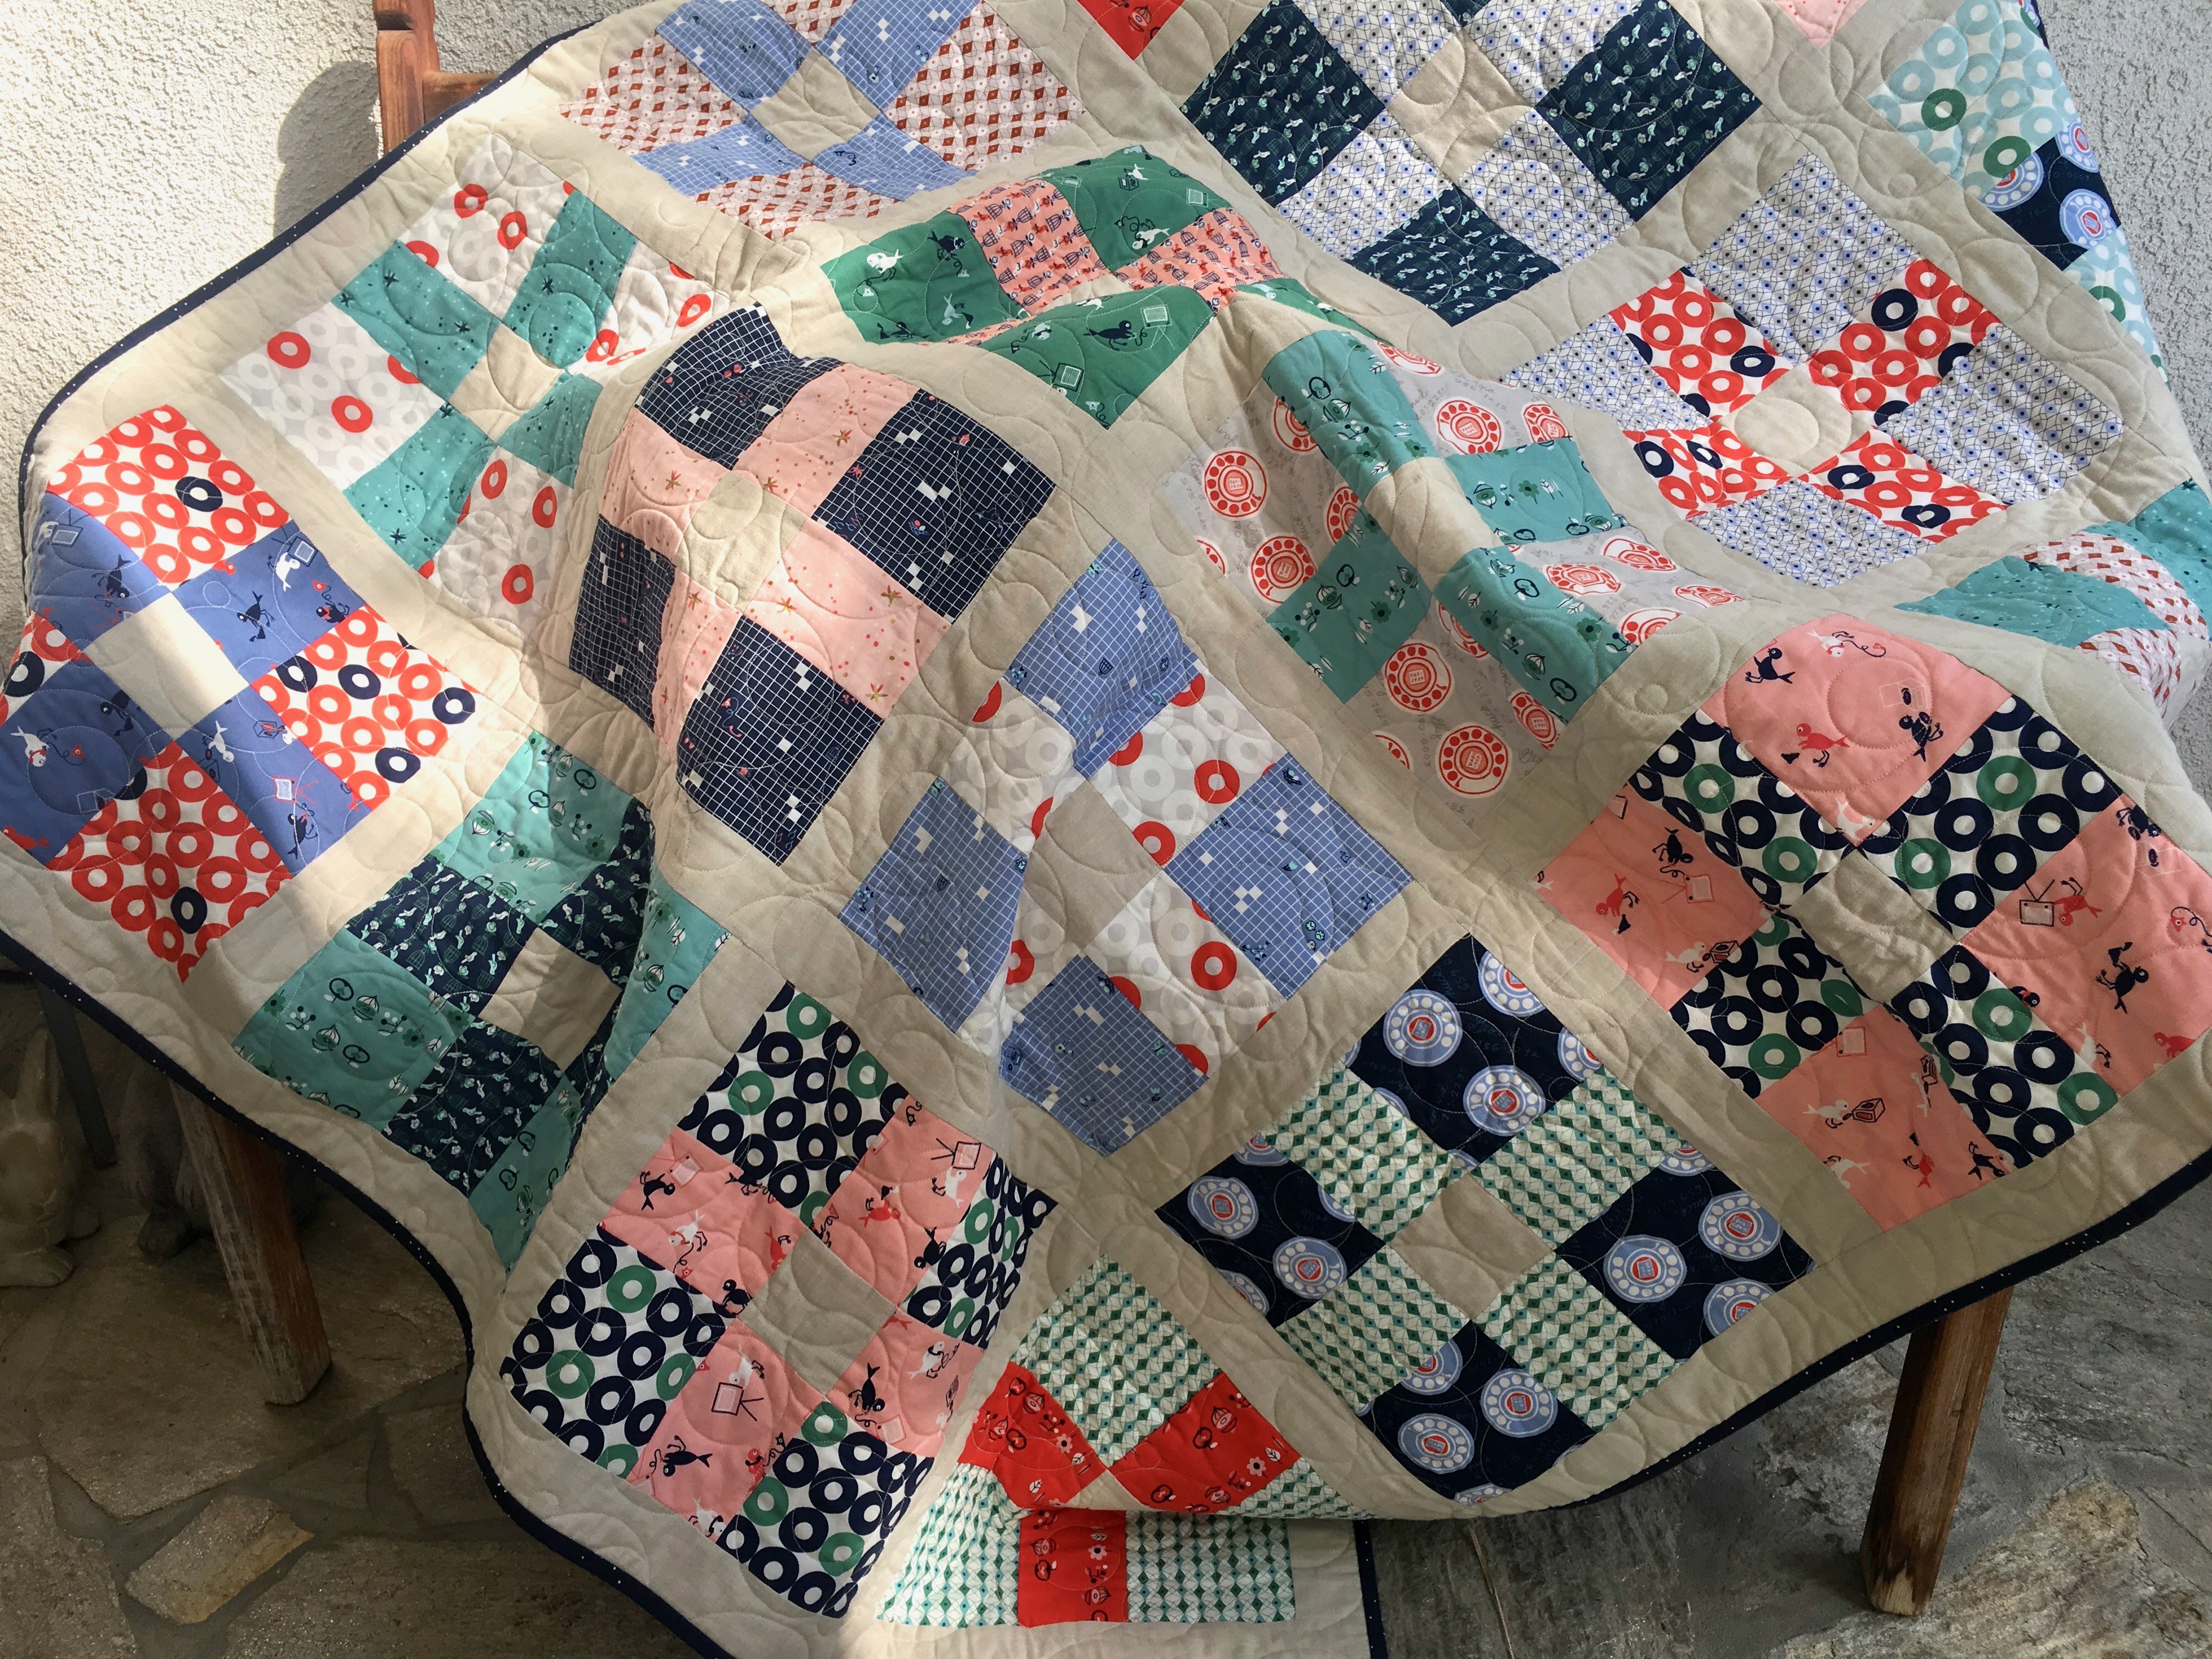
Here is another version of the Uneven 9-Patch.  This version uses 20 fat eights instead of 10 fat quarters.

cotton + steel quilt

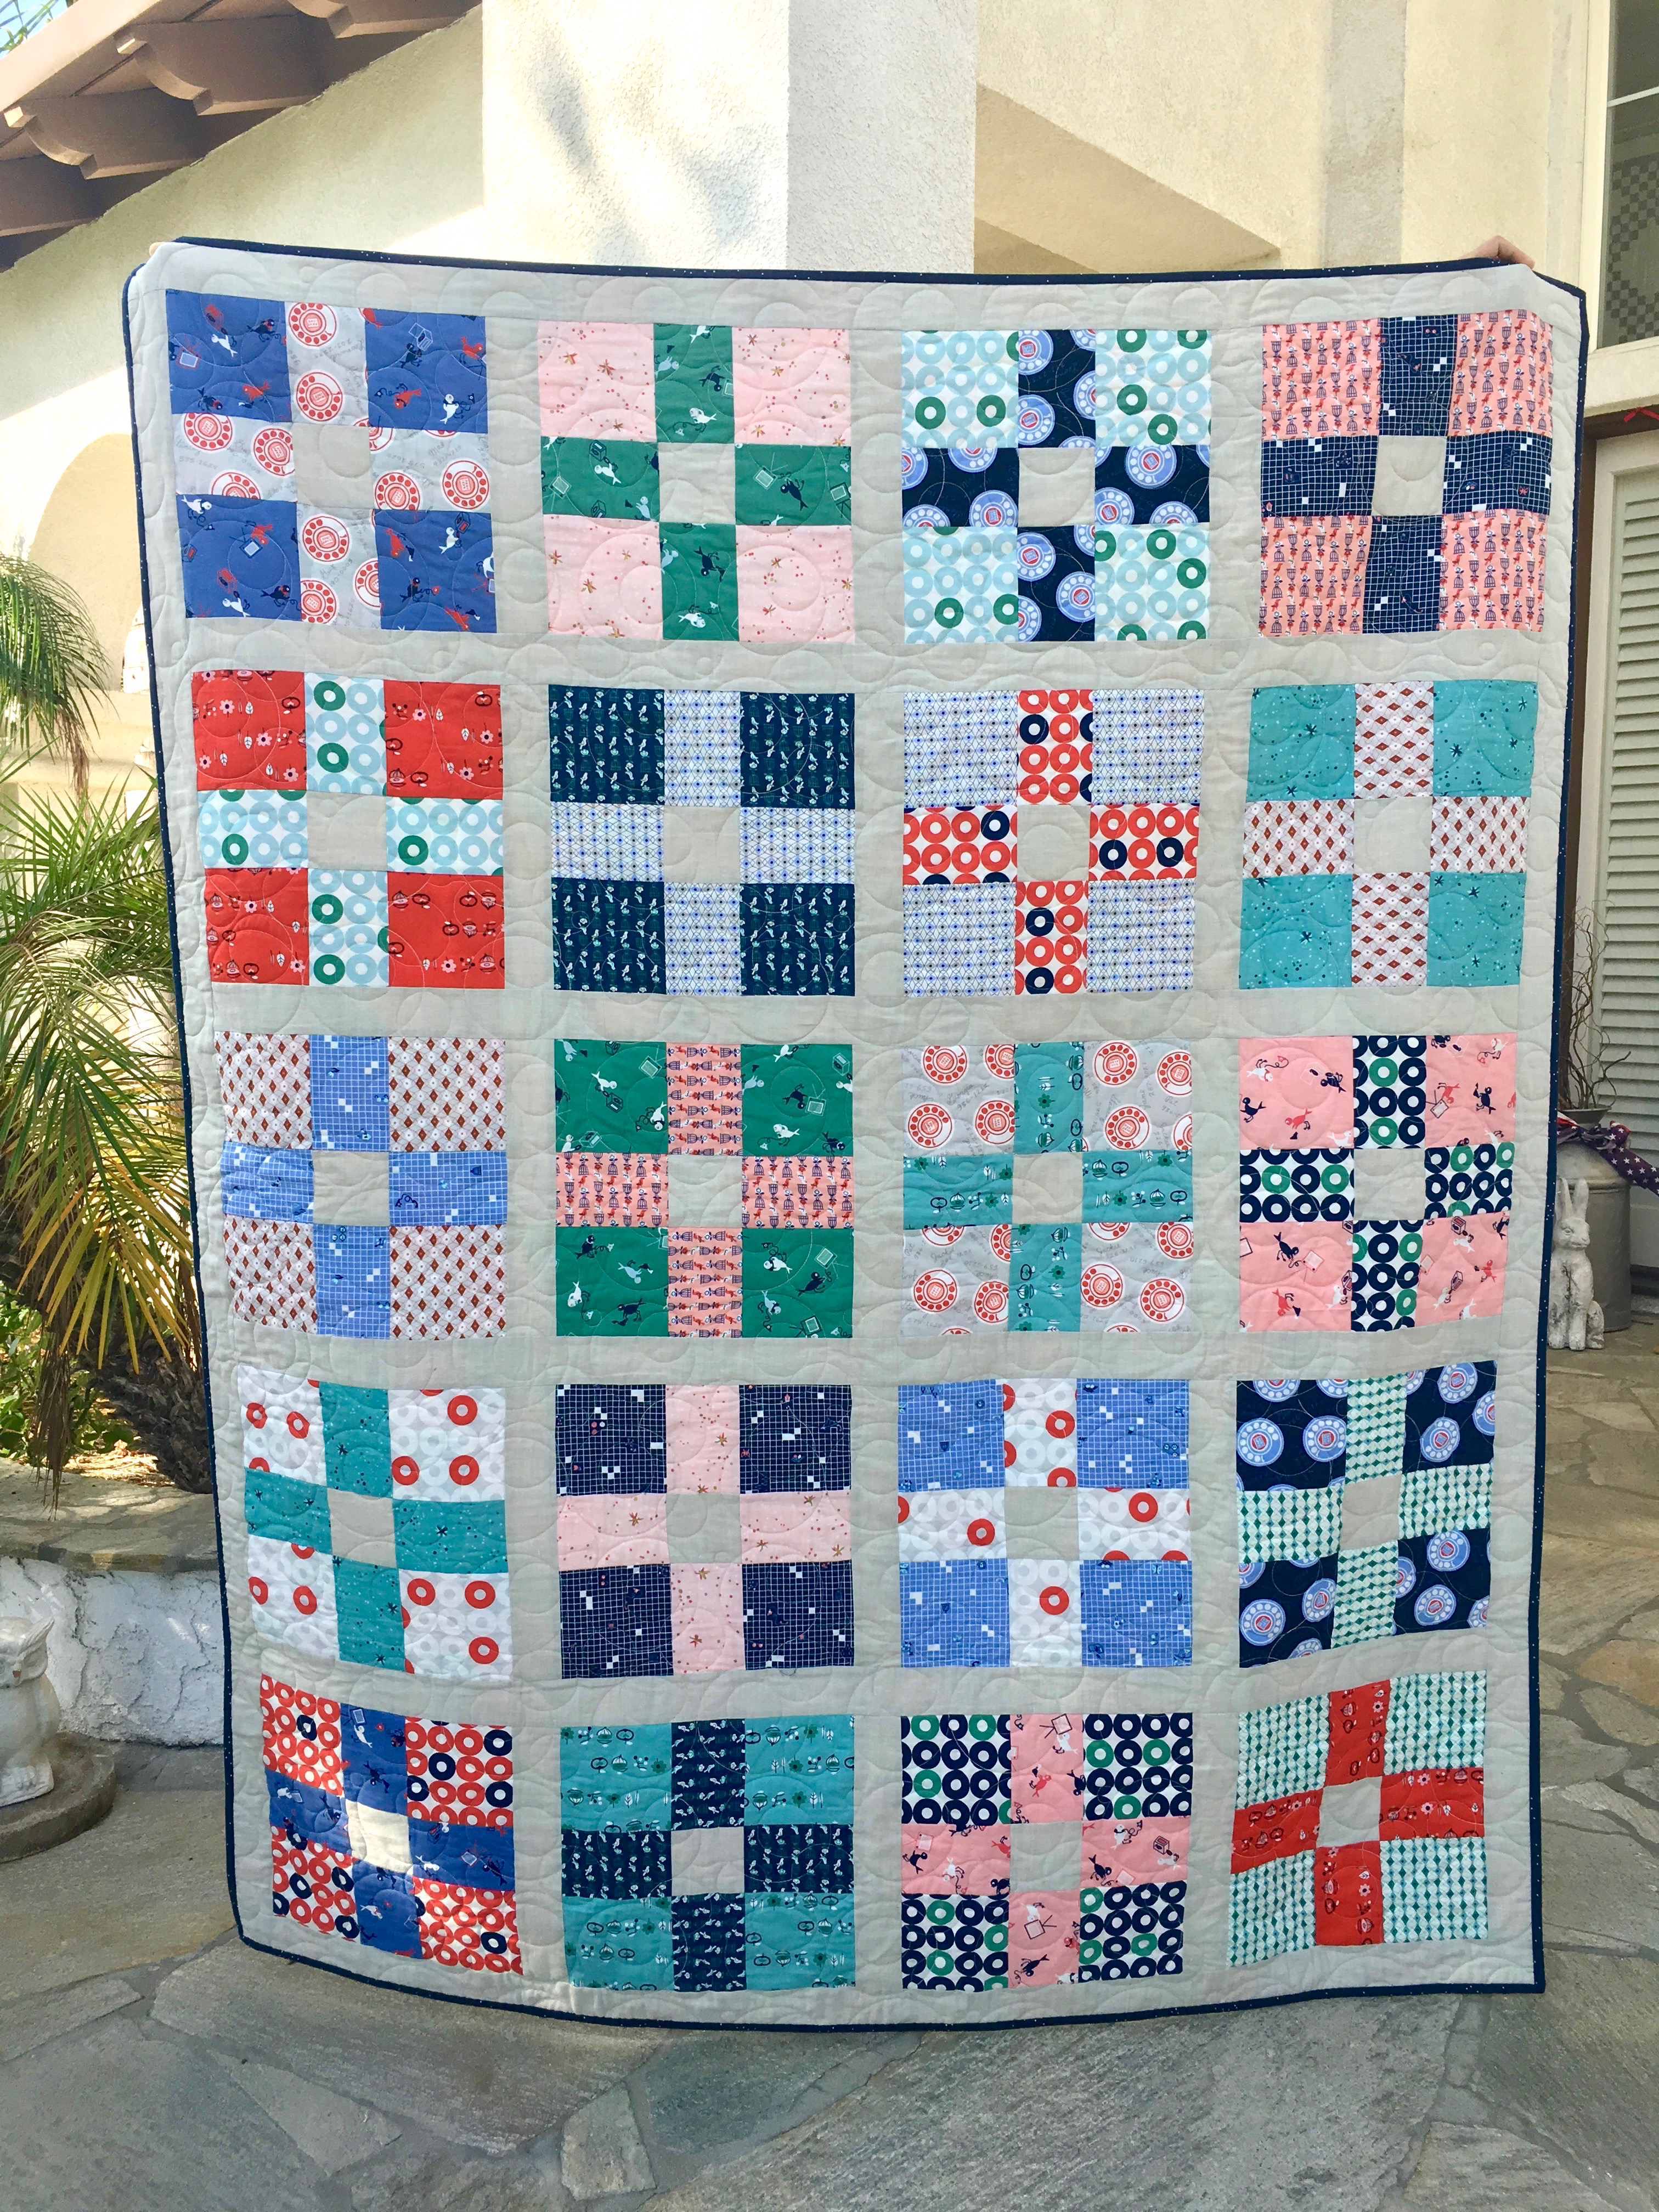
I love that a fat eighth bundle of this Cotton + Steel fabric, plus background fabric, makes this entire quilt!! I  love that I can make this quilt top in a day!  Totally my kind of quilt!

cotton + steel quilt 2

The quilting is so amazing on this!!  I use @quilterlove66 on Instagram!

cotton + steel quilt 5

This is also a great pattern for beginners because it’s as easy as sewing 5″ squares together yet looks more interesting!

cotton + steel quilt 4

Late Bird Quilt Pattern

late bird quilt pattern 4
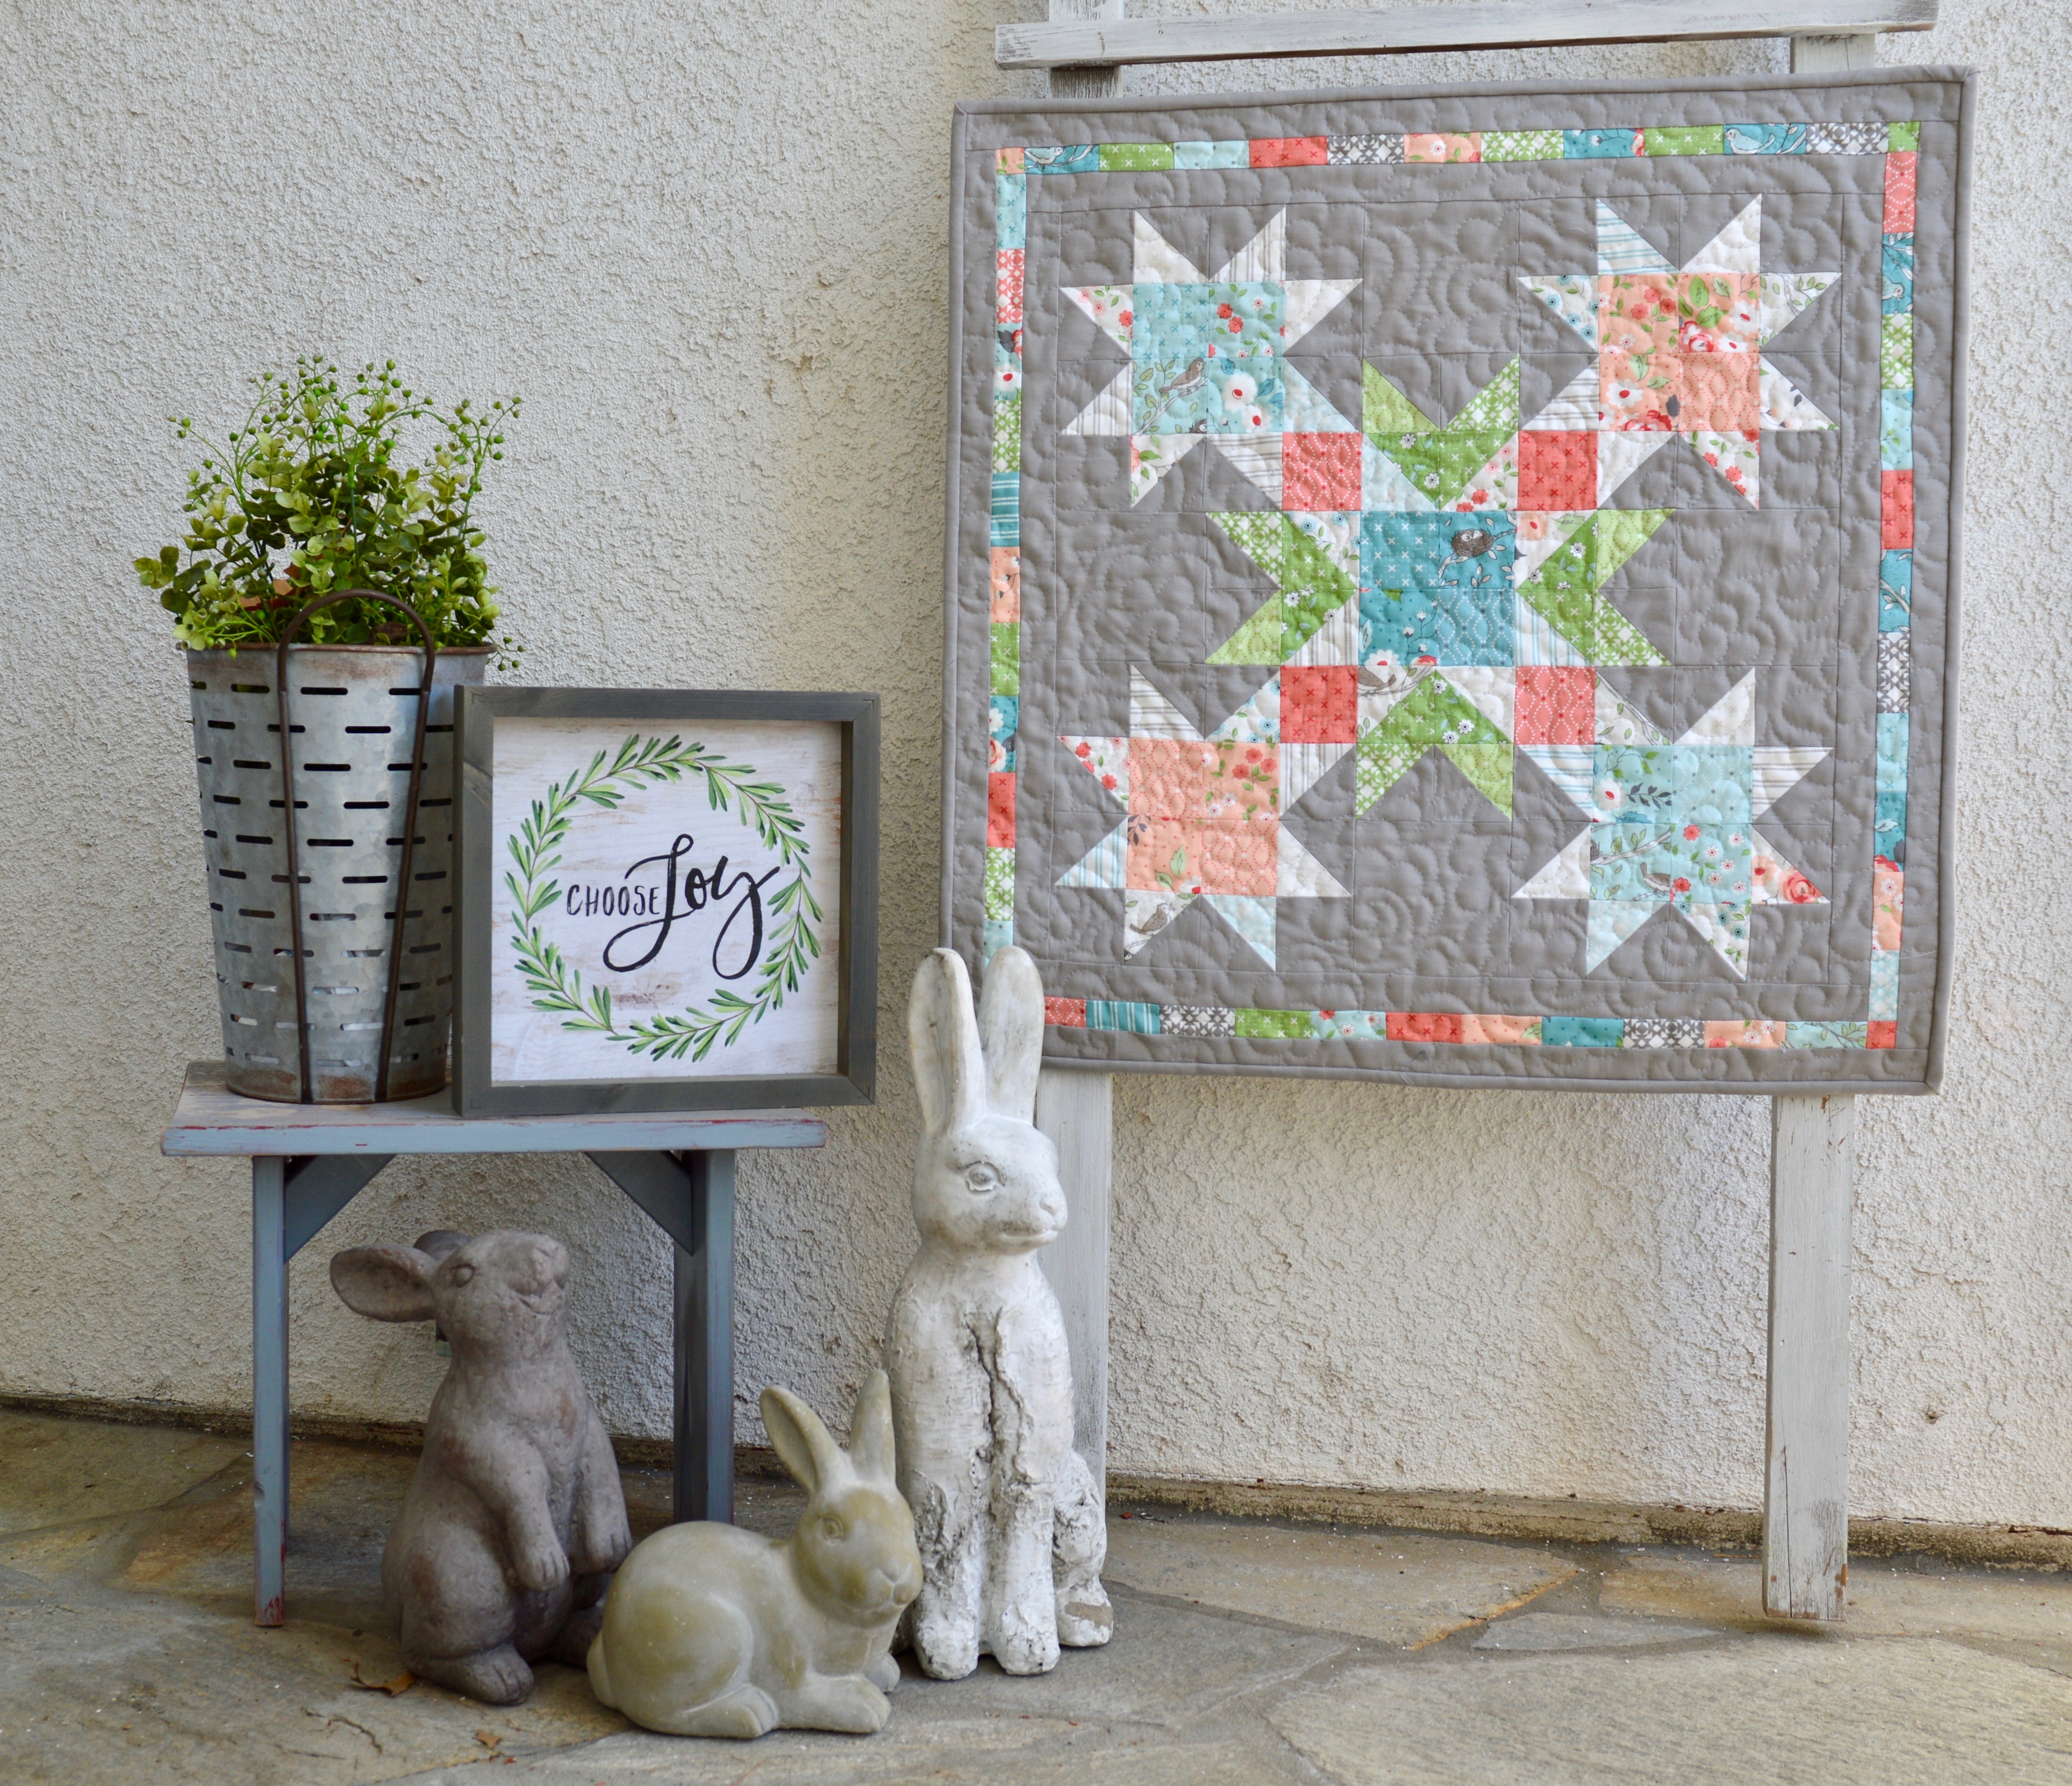
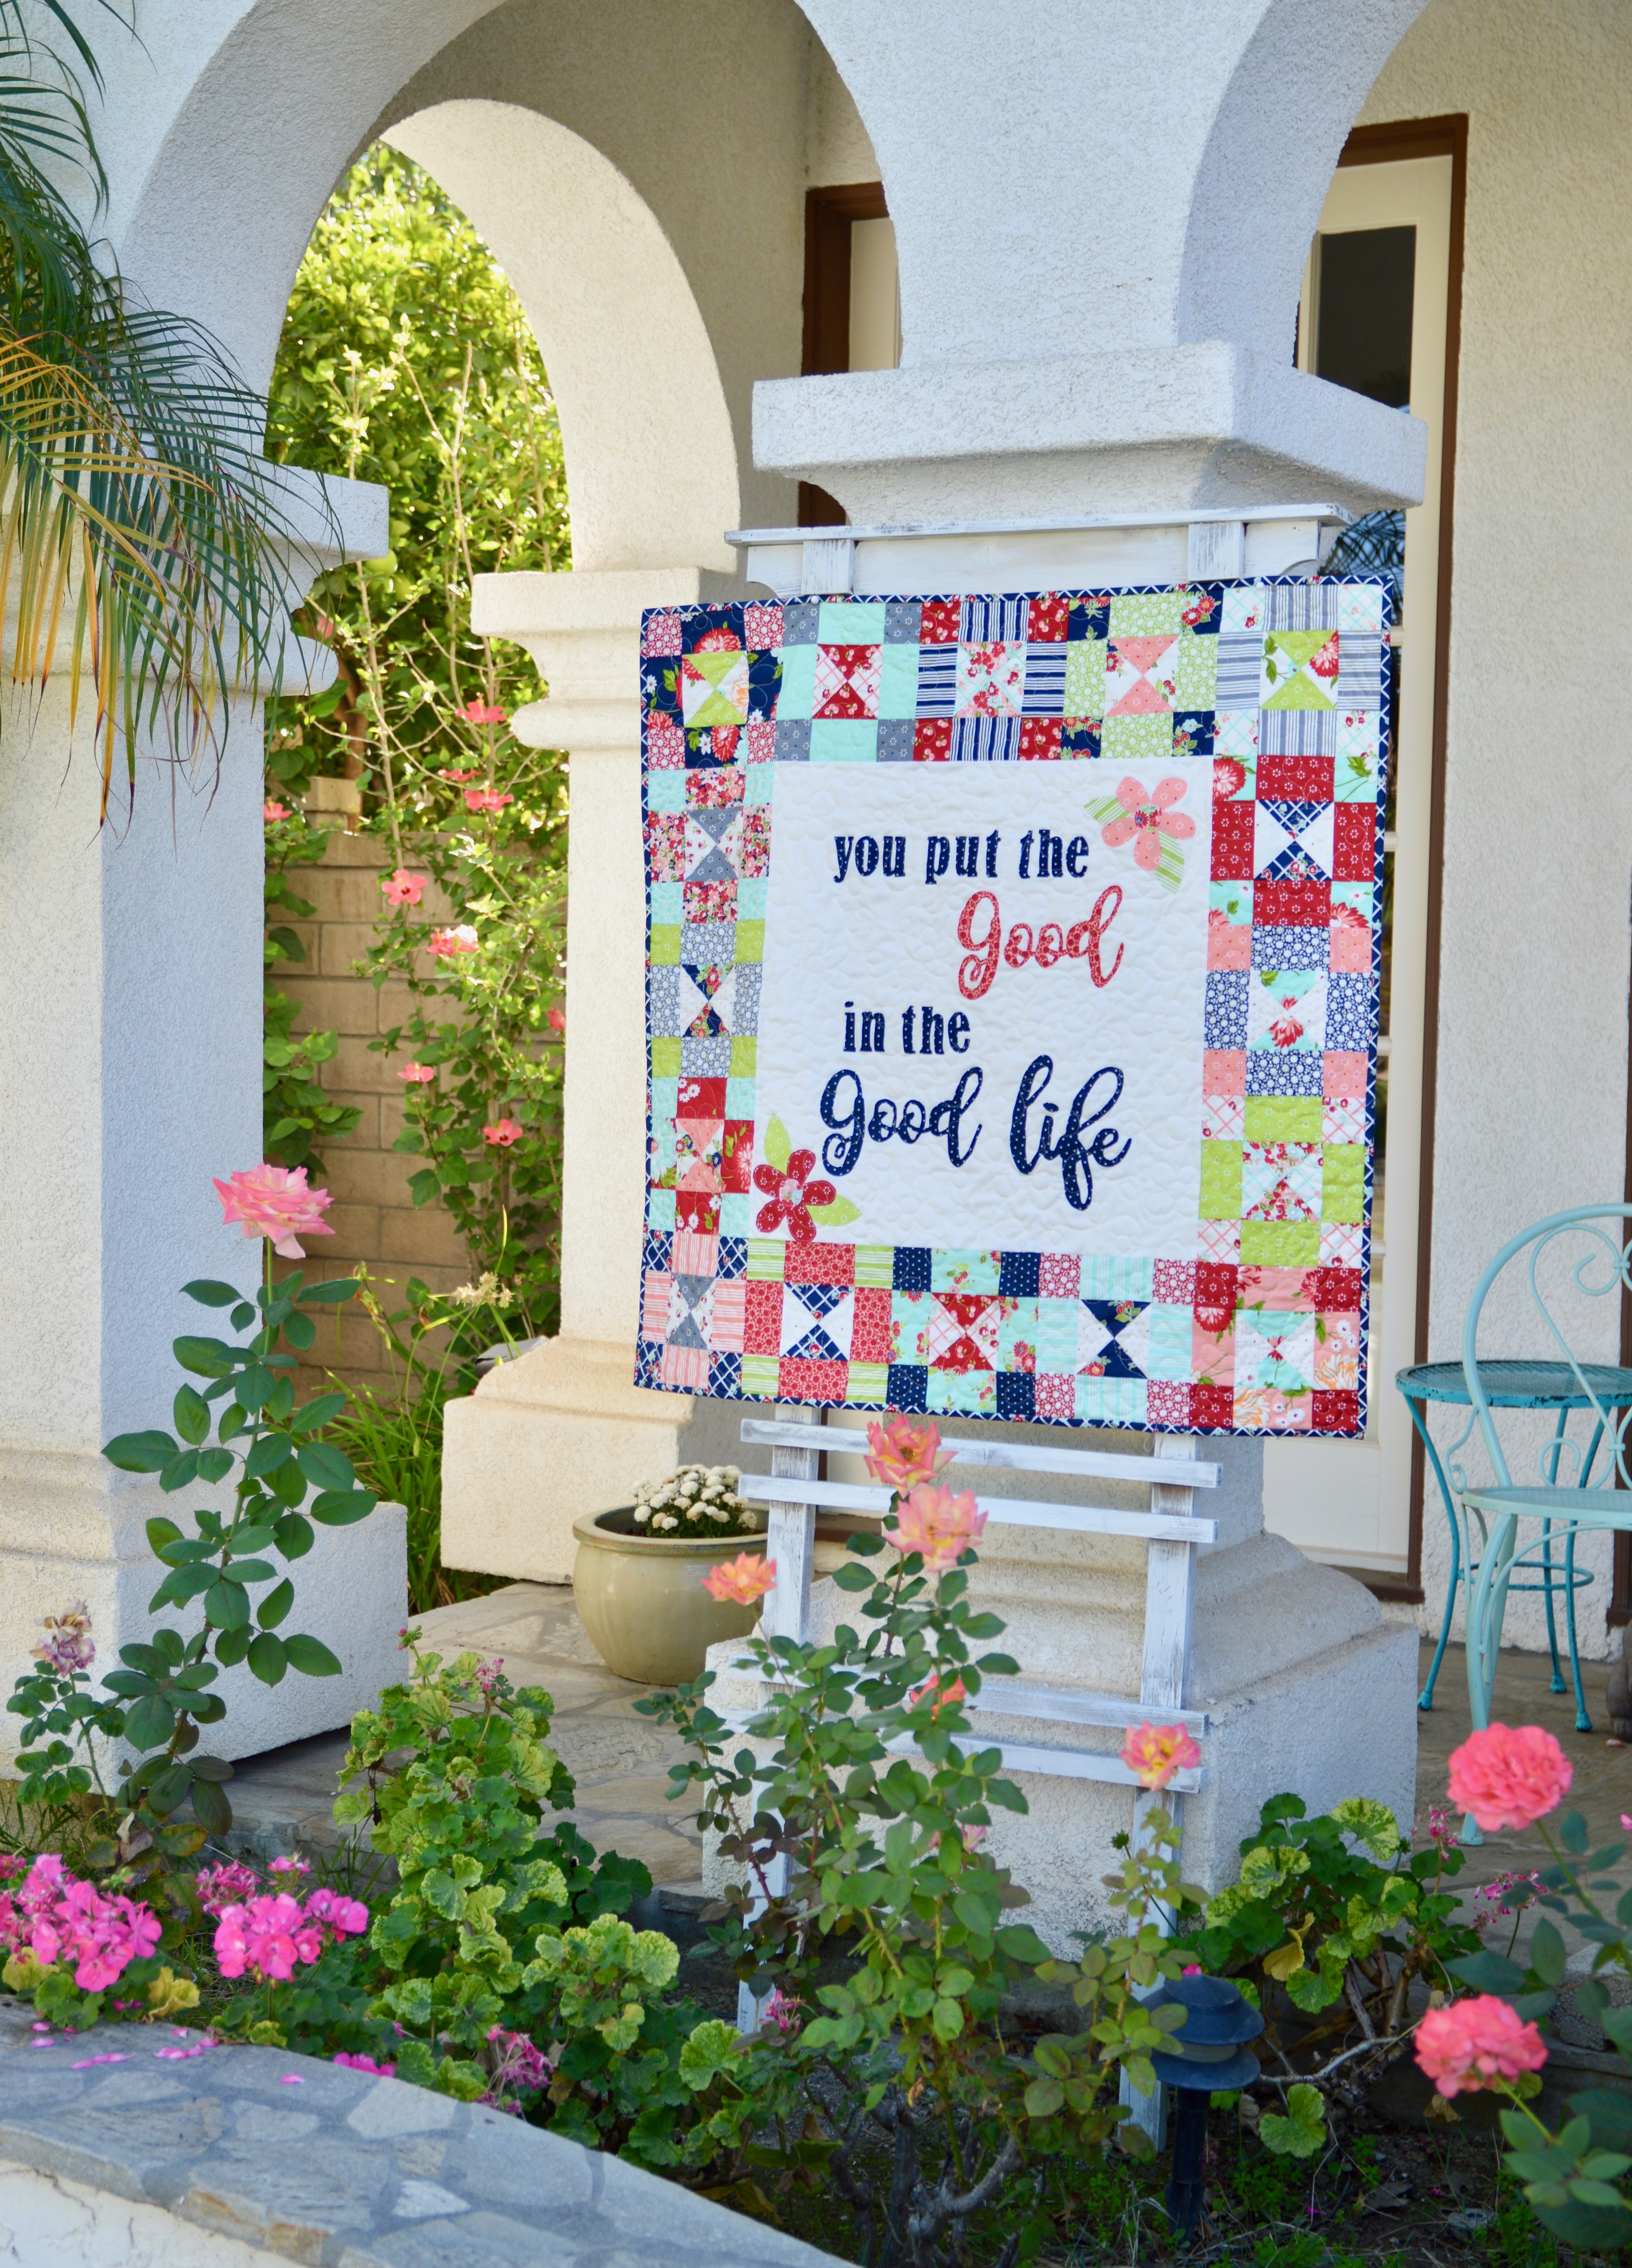
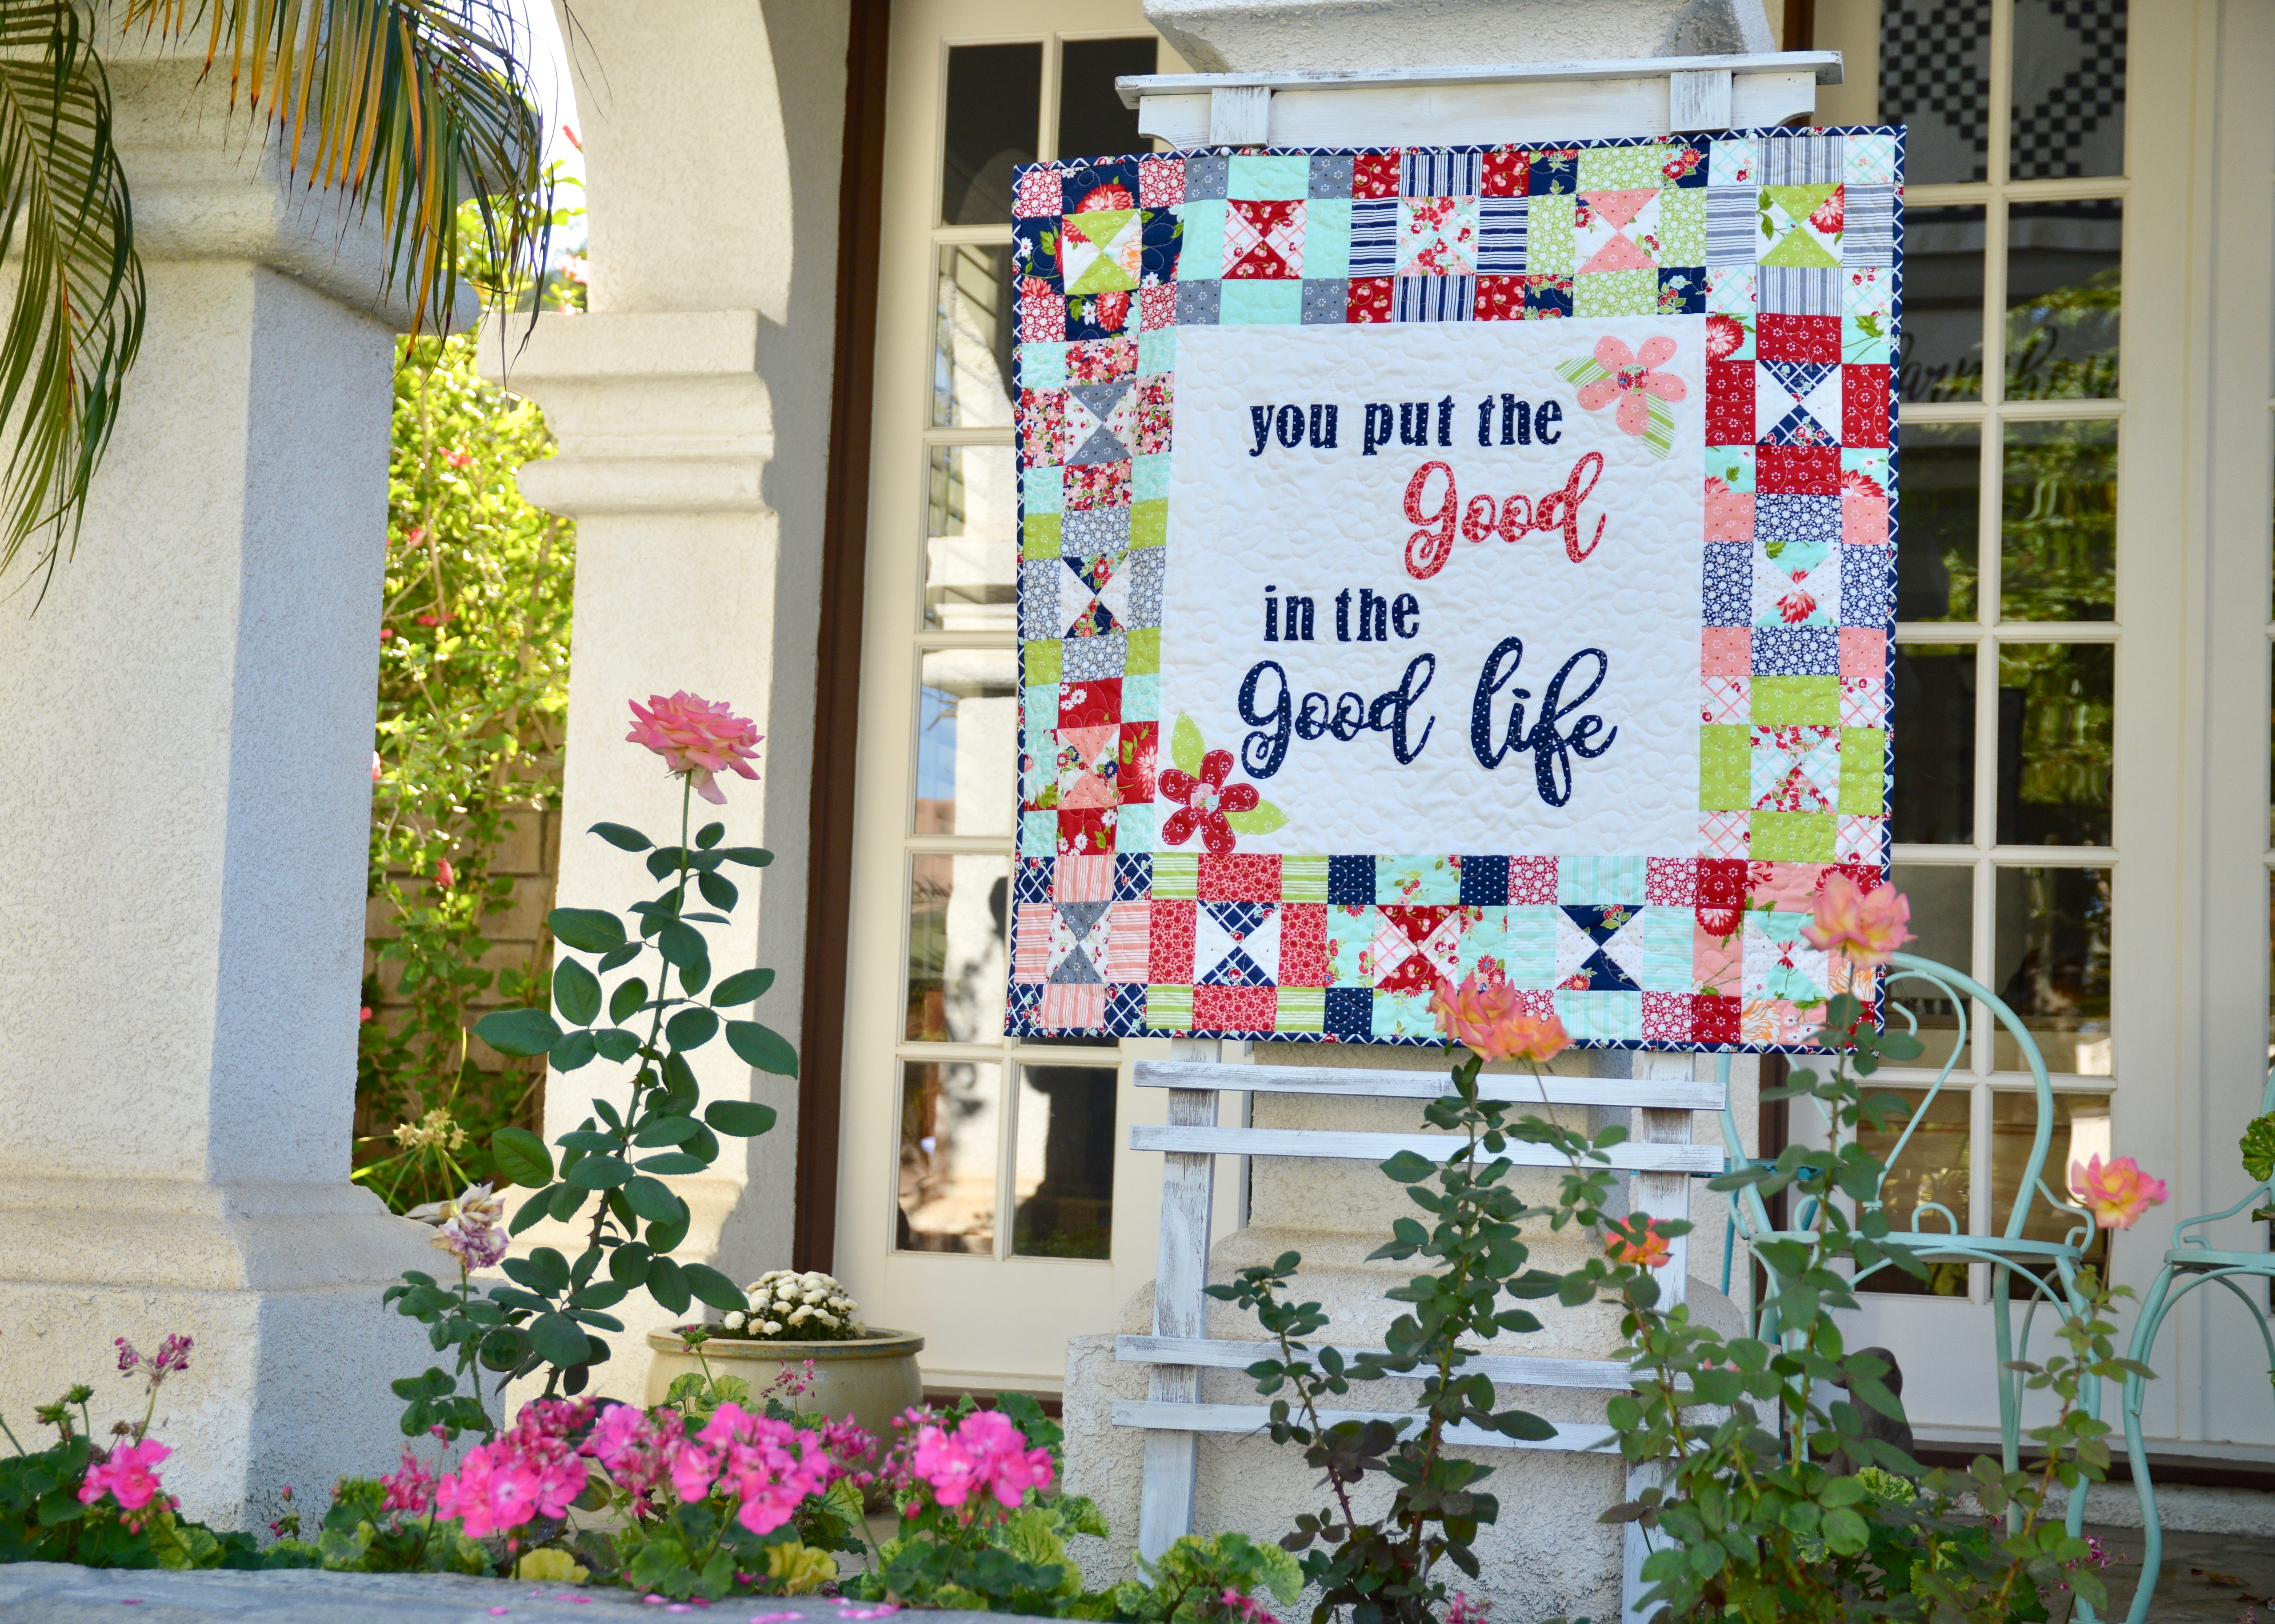
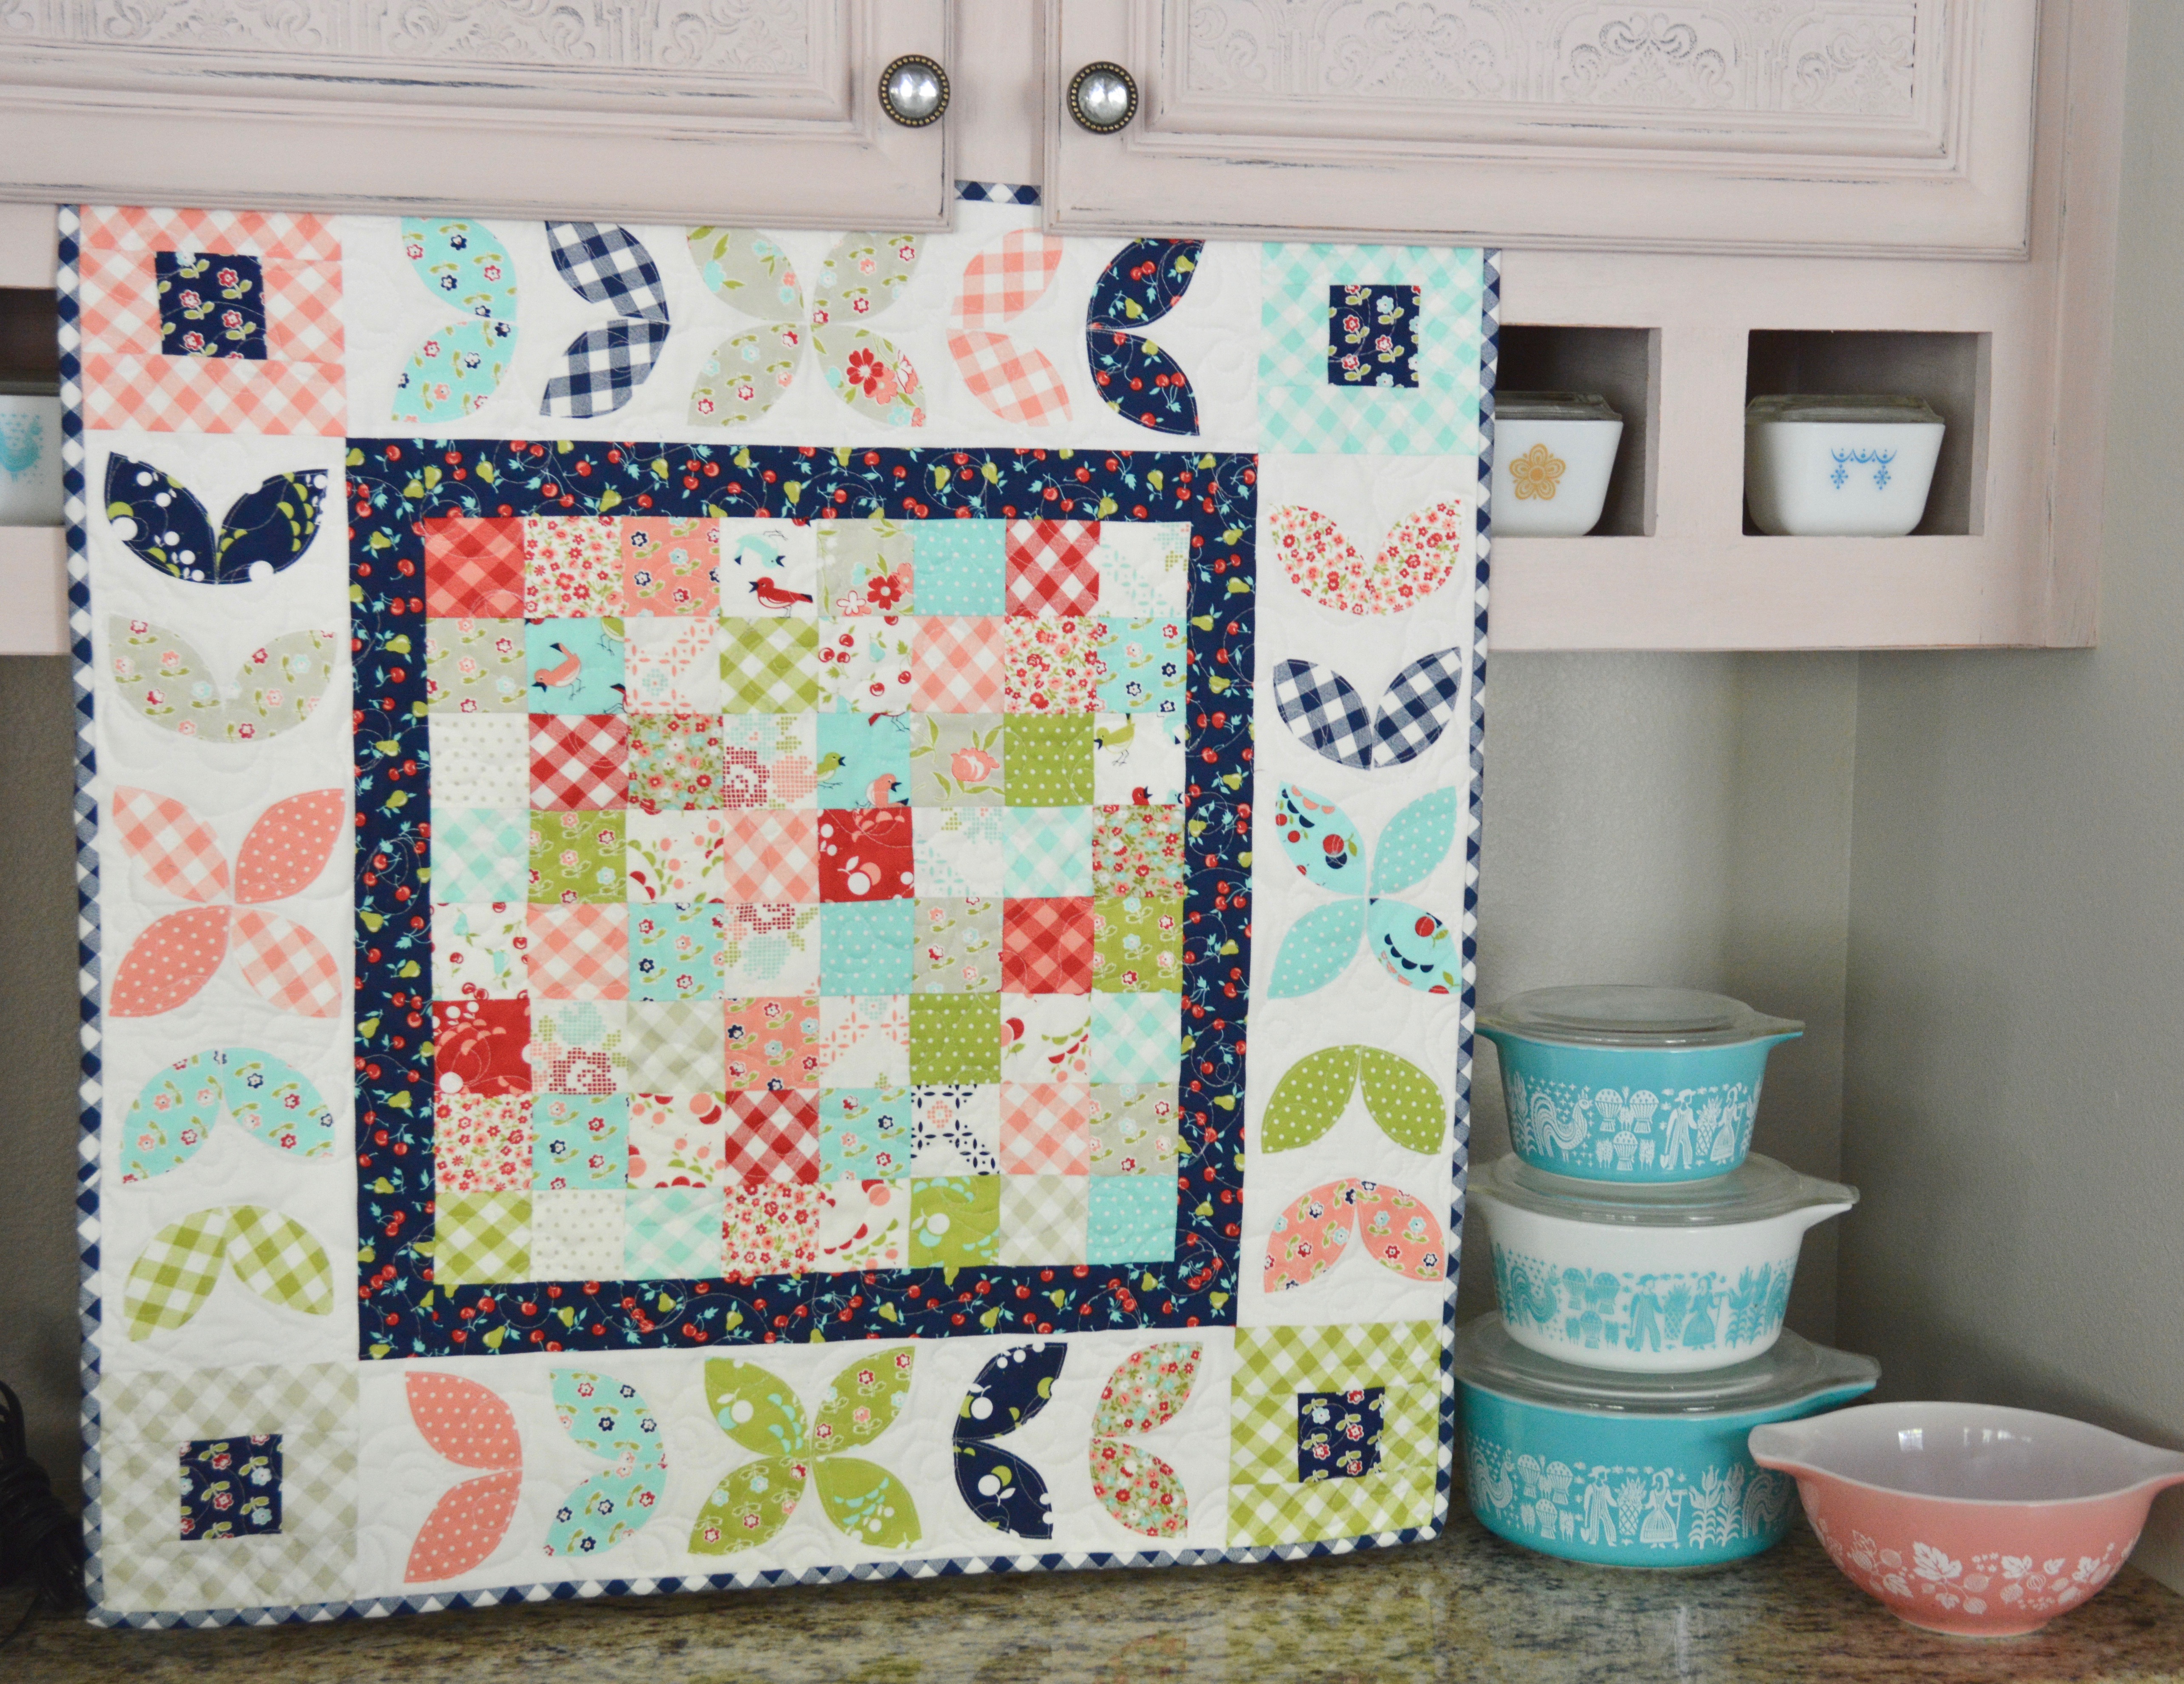
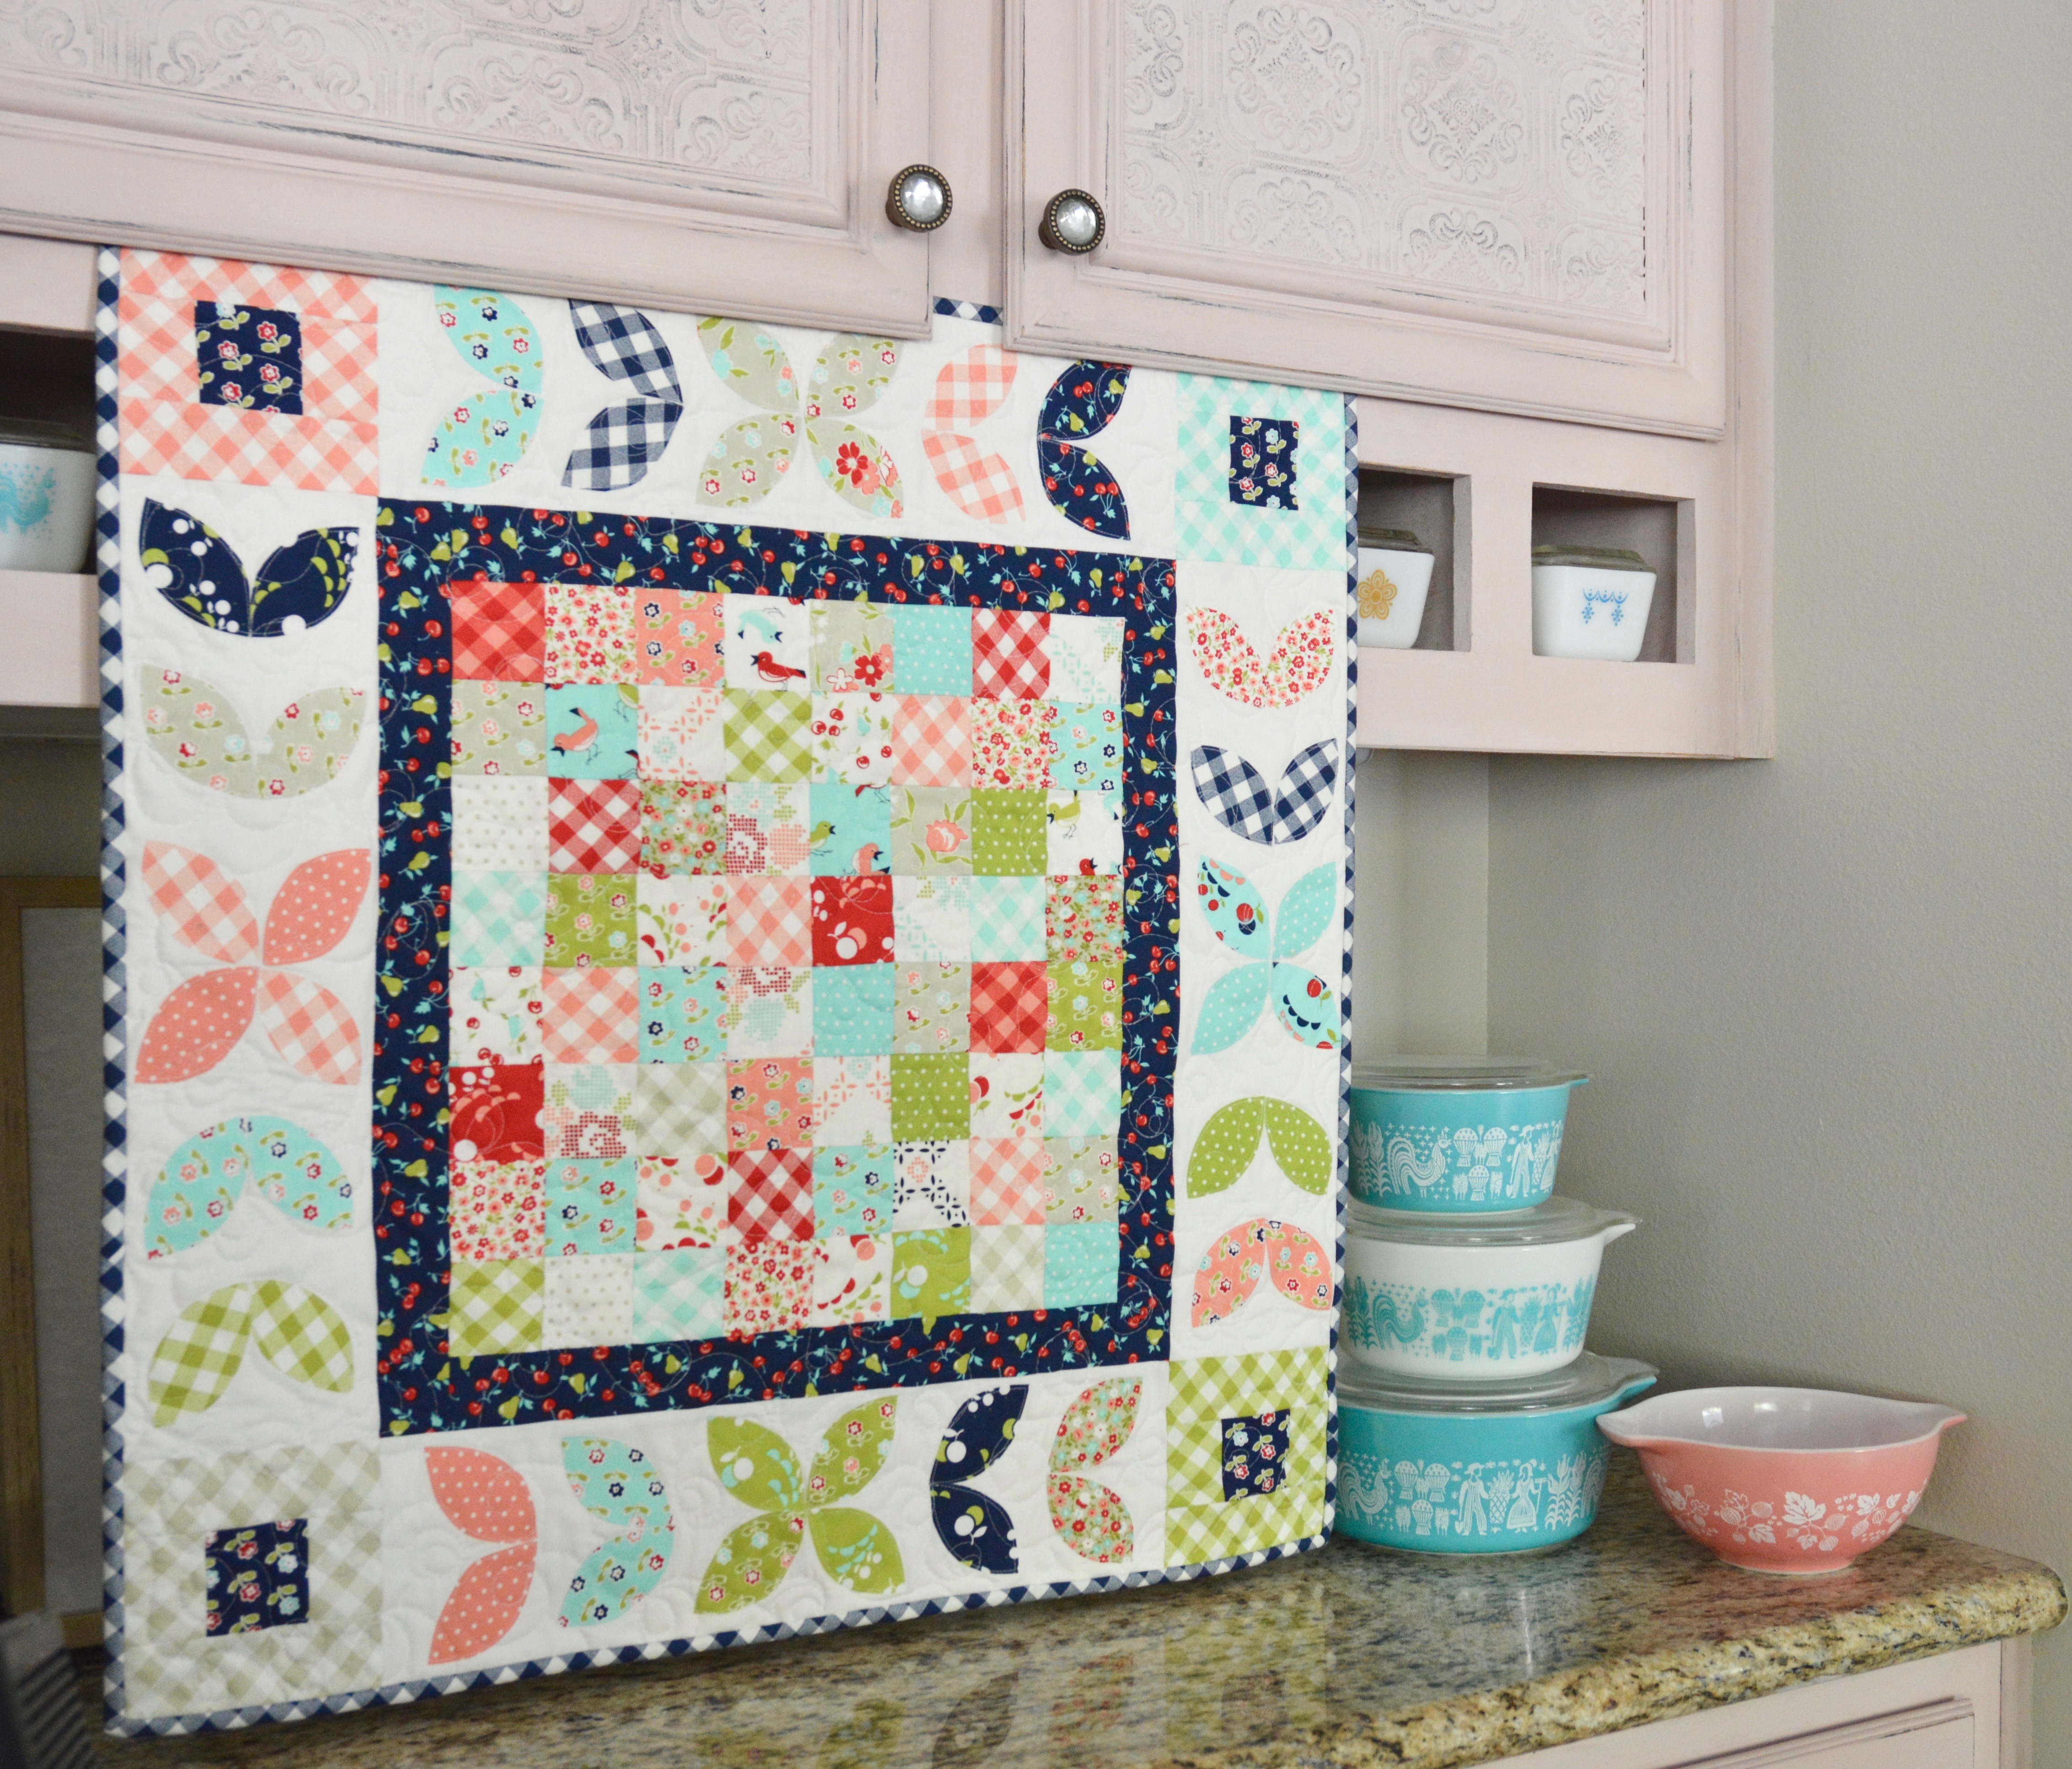
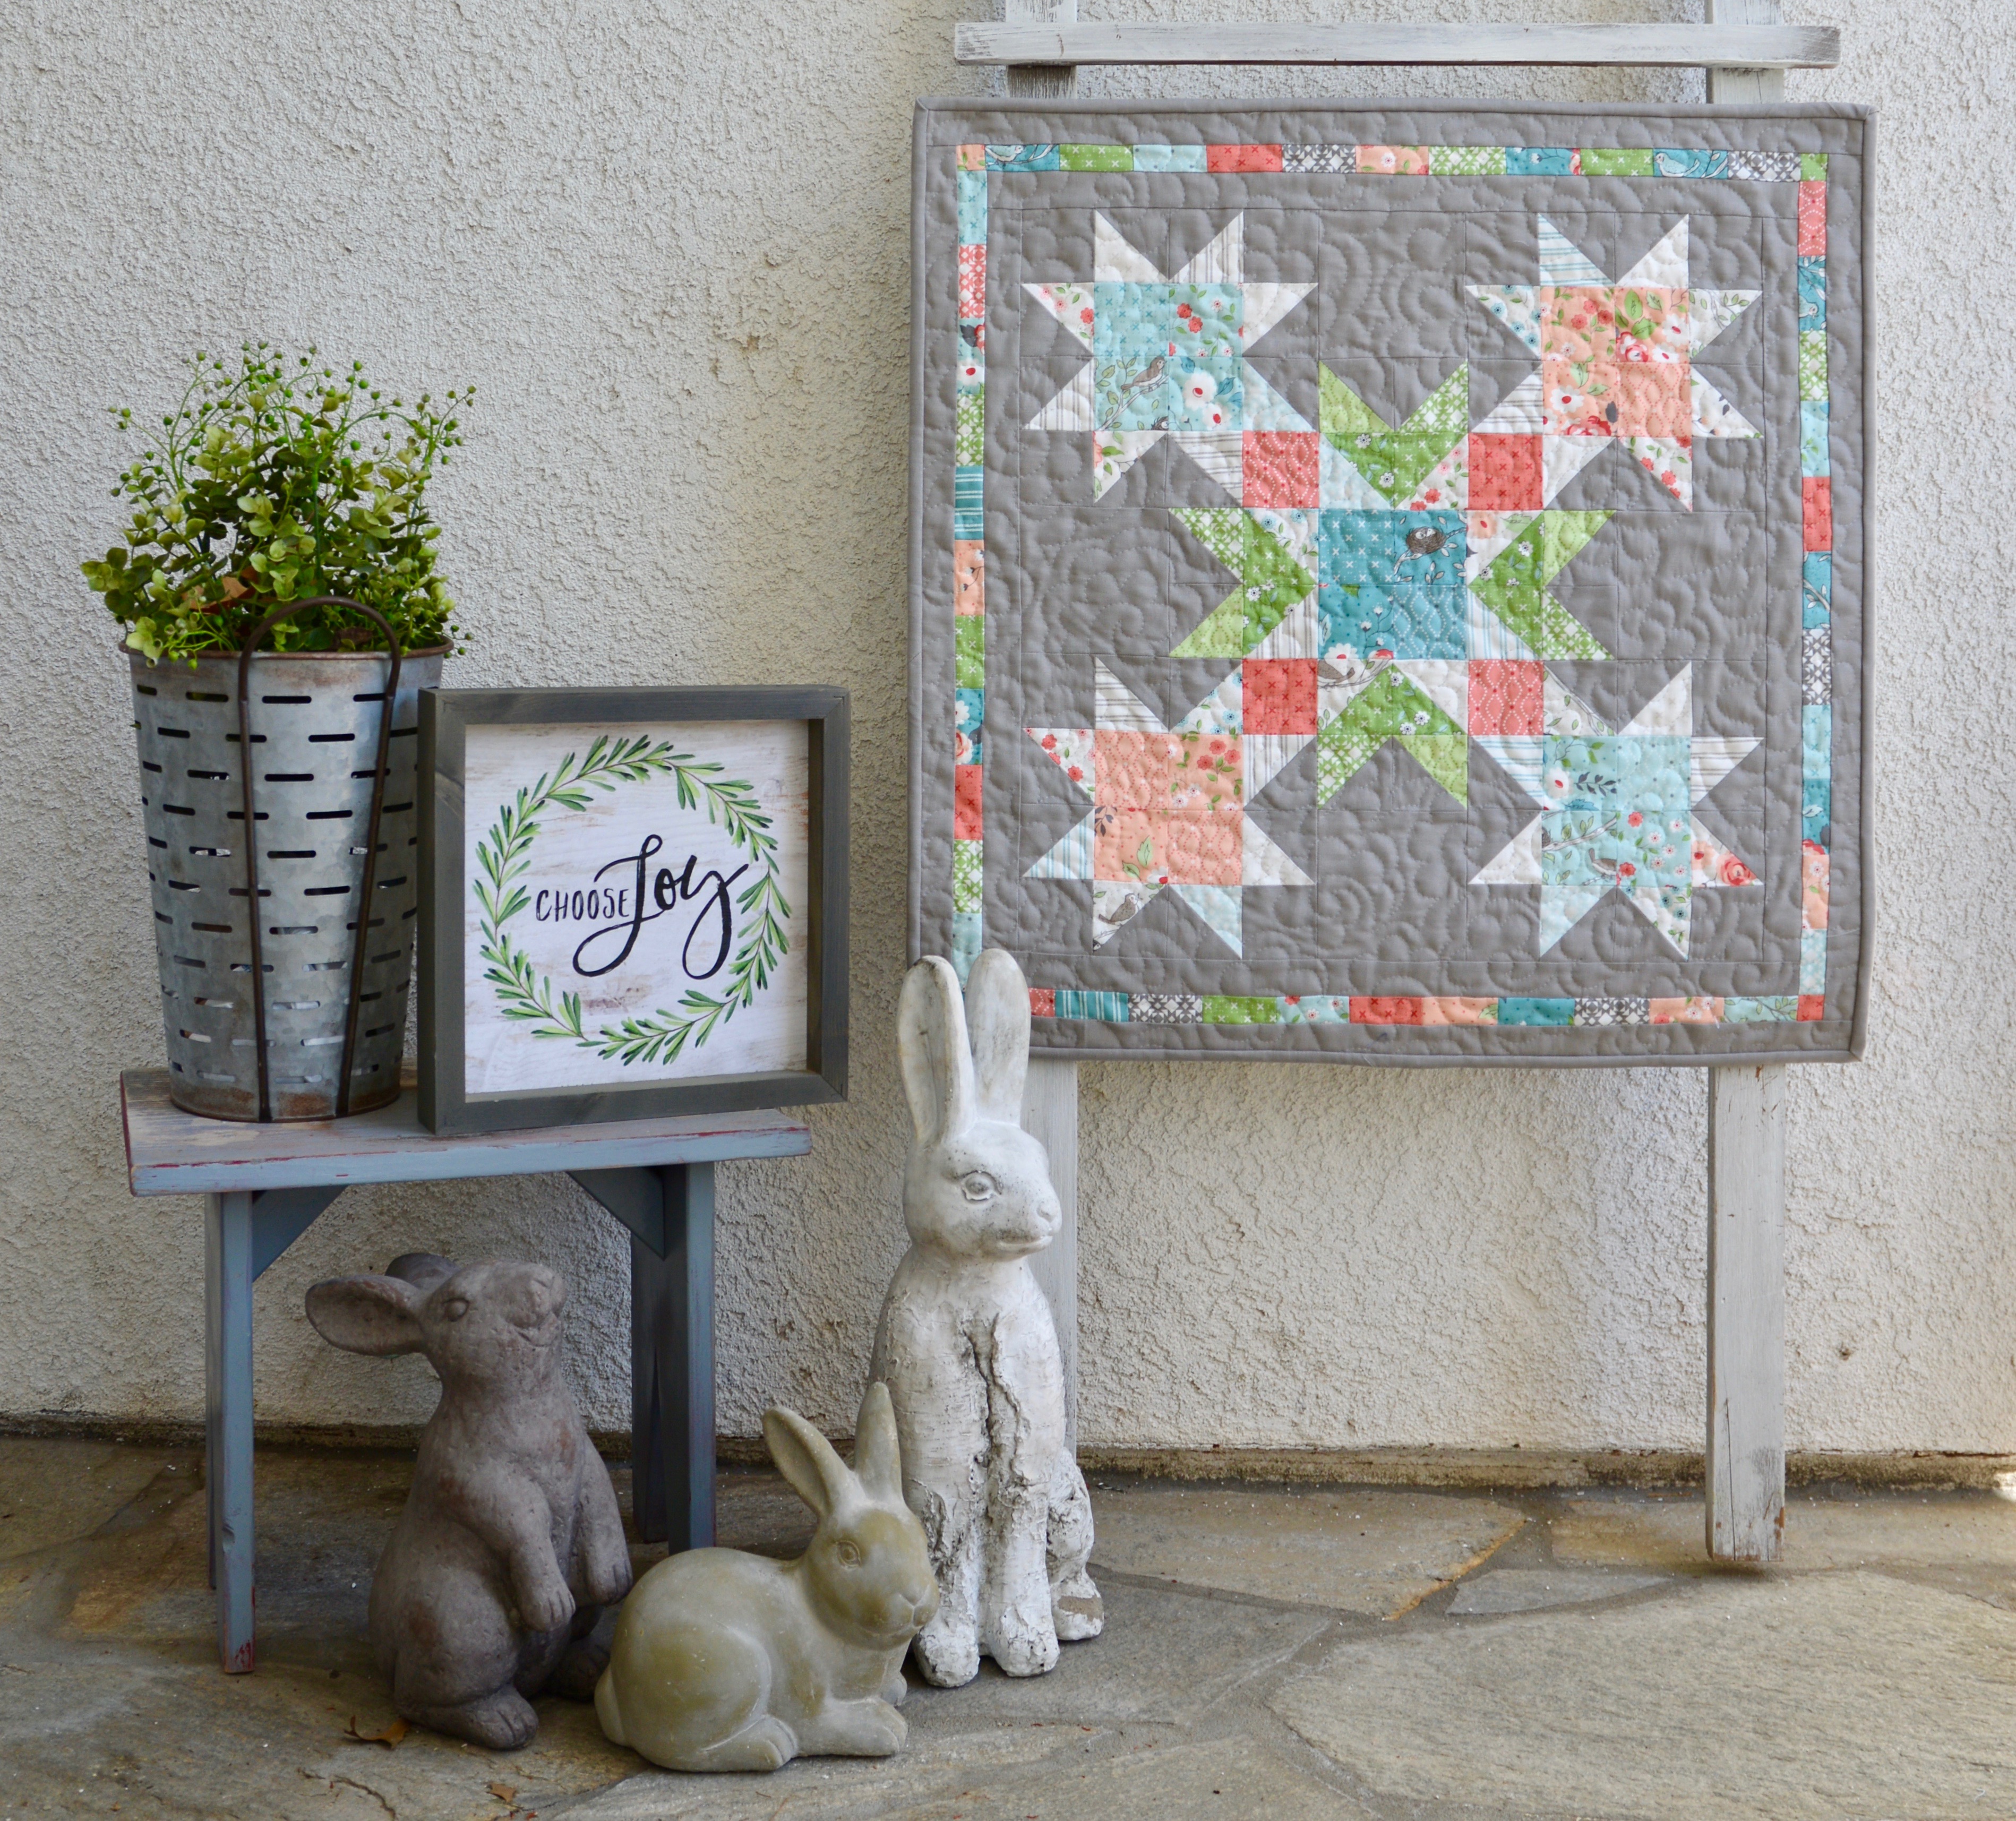
I love spring, spring colors, flowers, birds, pretty much everything about spring!  When I saw Lella Boutique’s new fabric line Nest, I fell immediately in love!

nest fabric moda
When I’m not sure what I’m going to make I tend to buy charm packs because its a fun little sample of all the fabrics for only about $10.

late bird quilt pattern 10
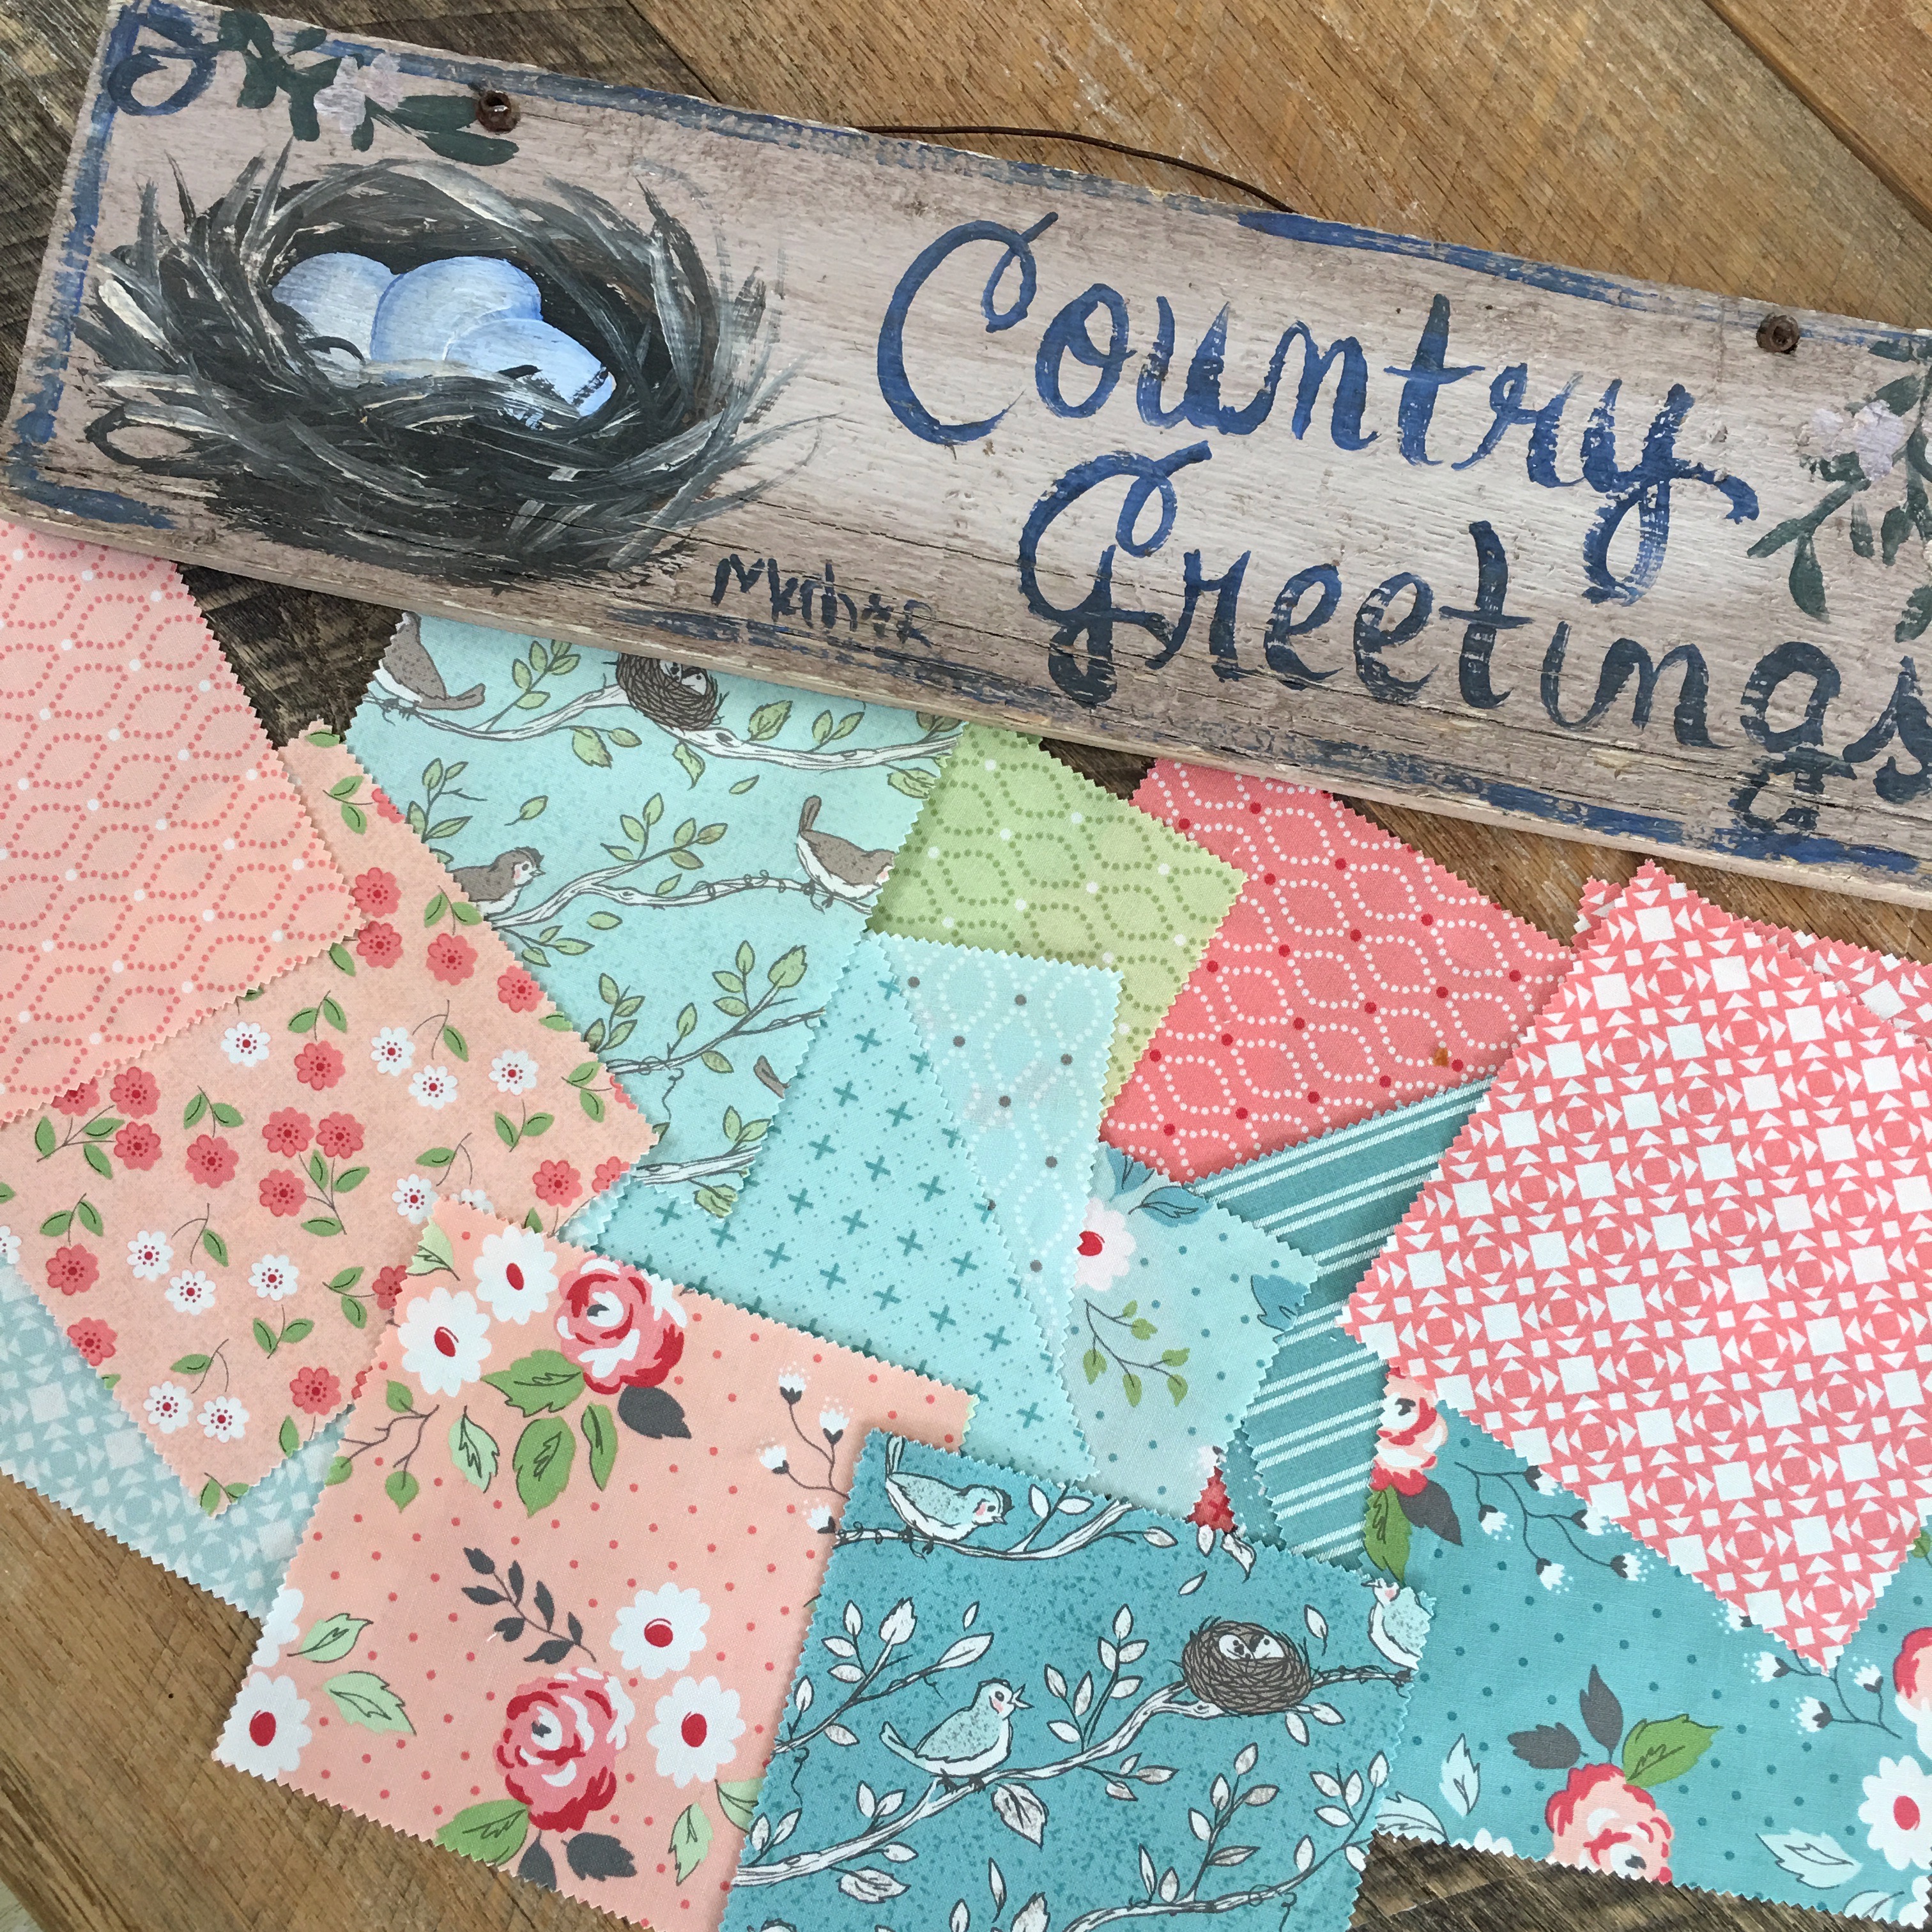
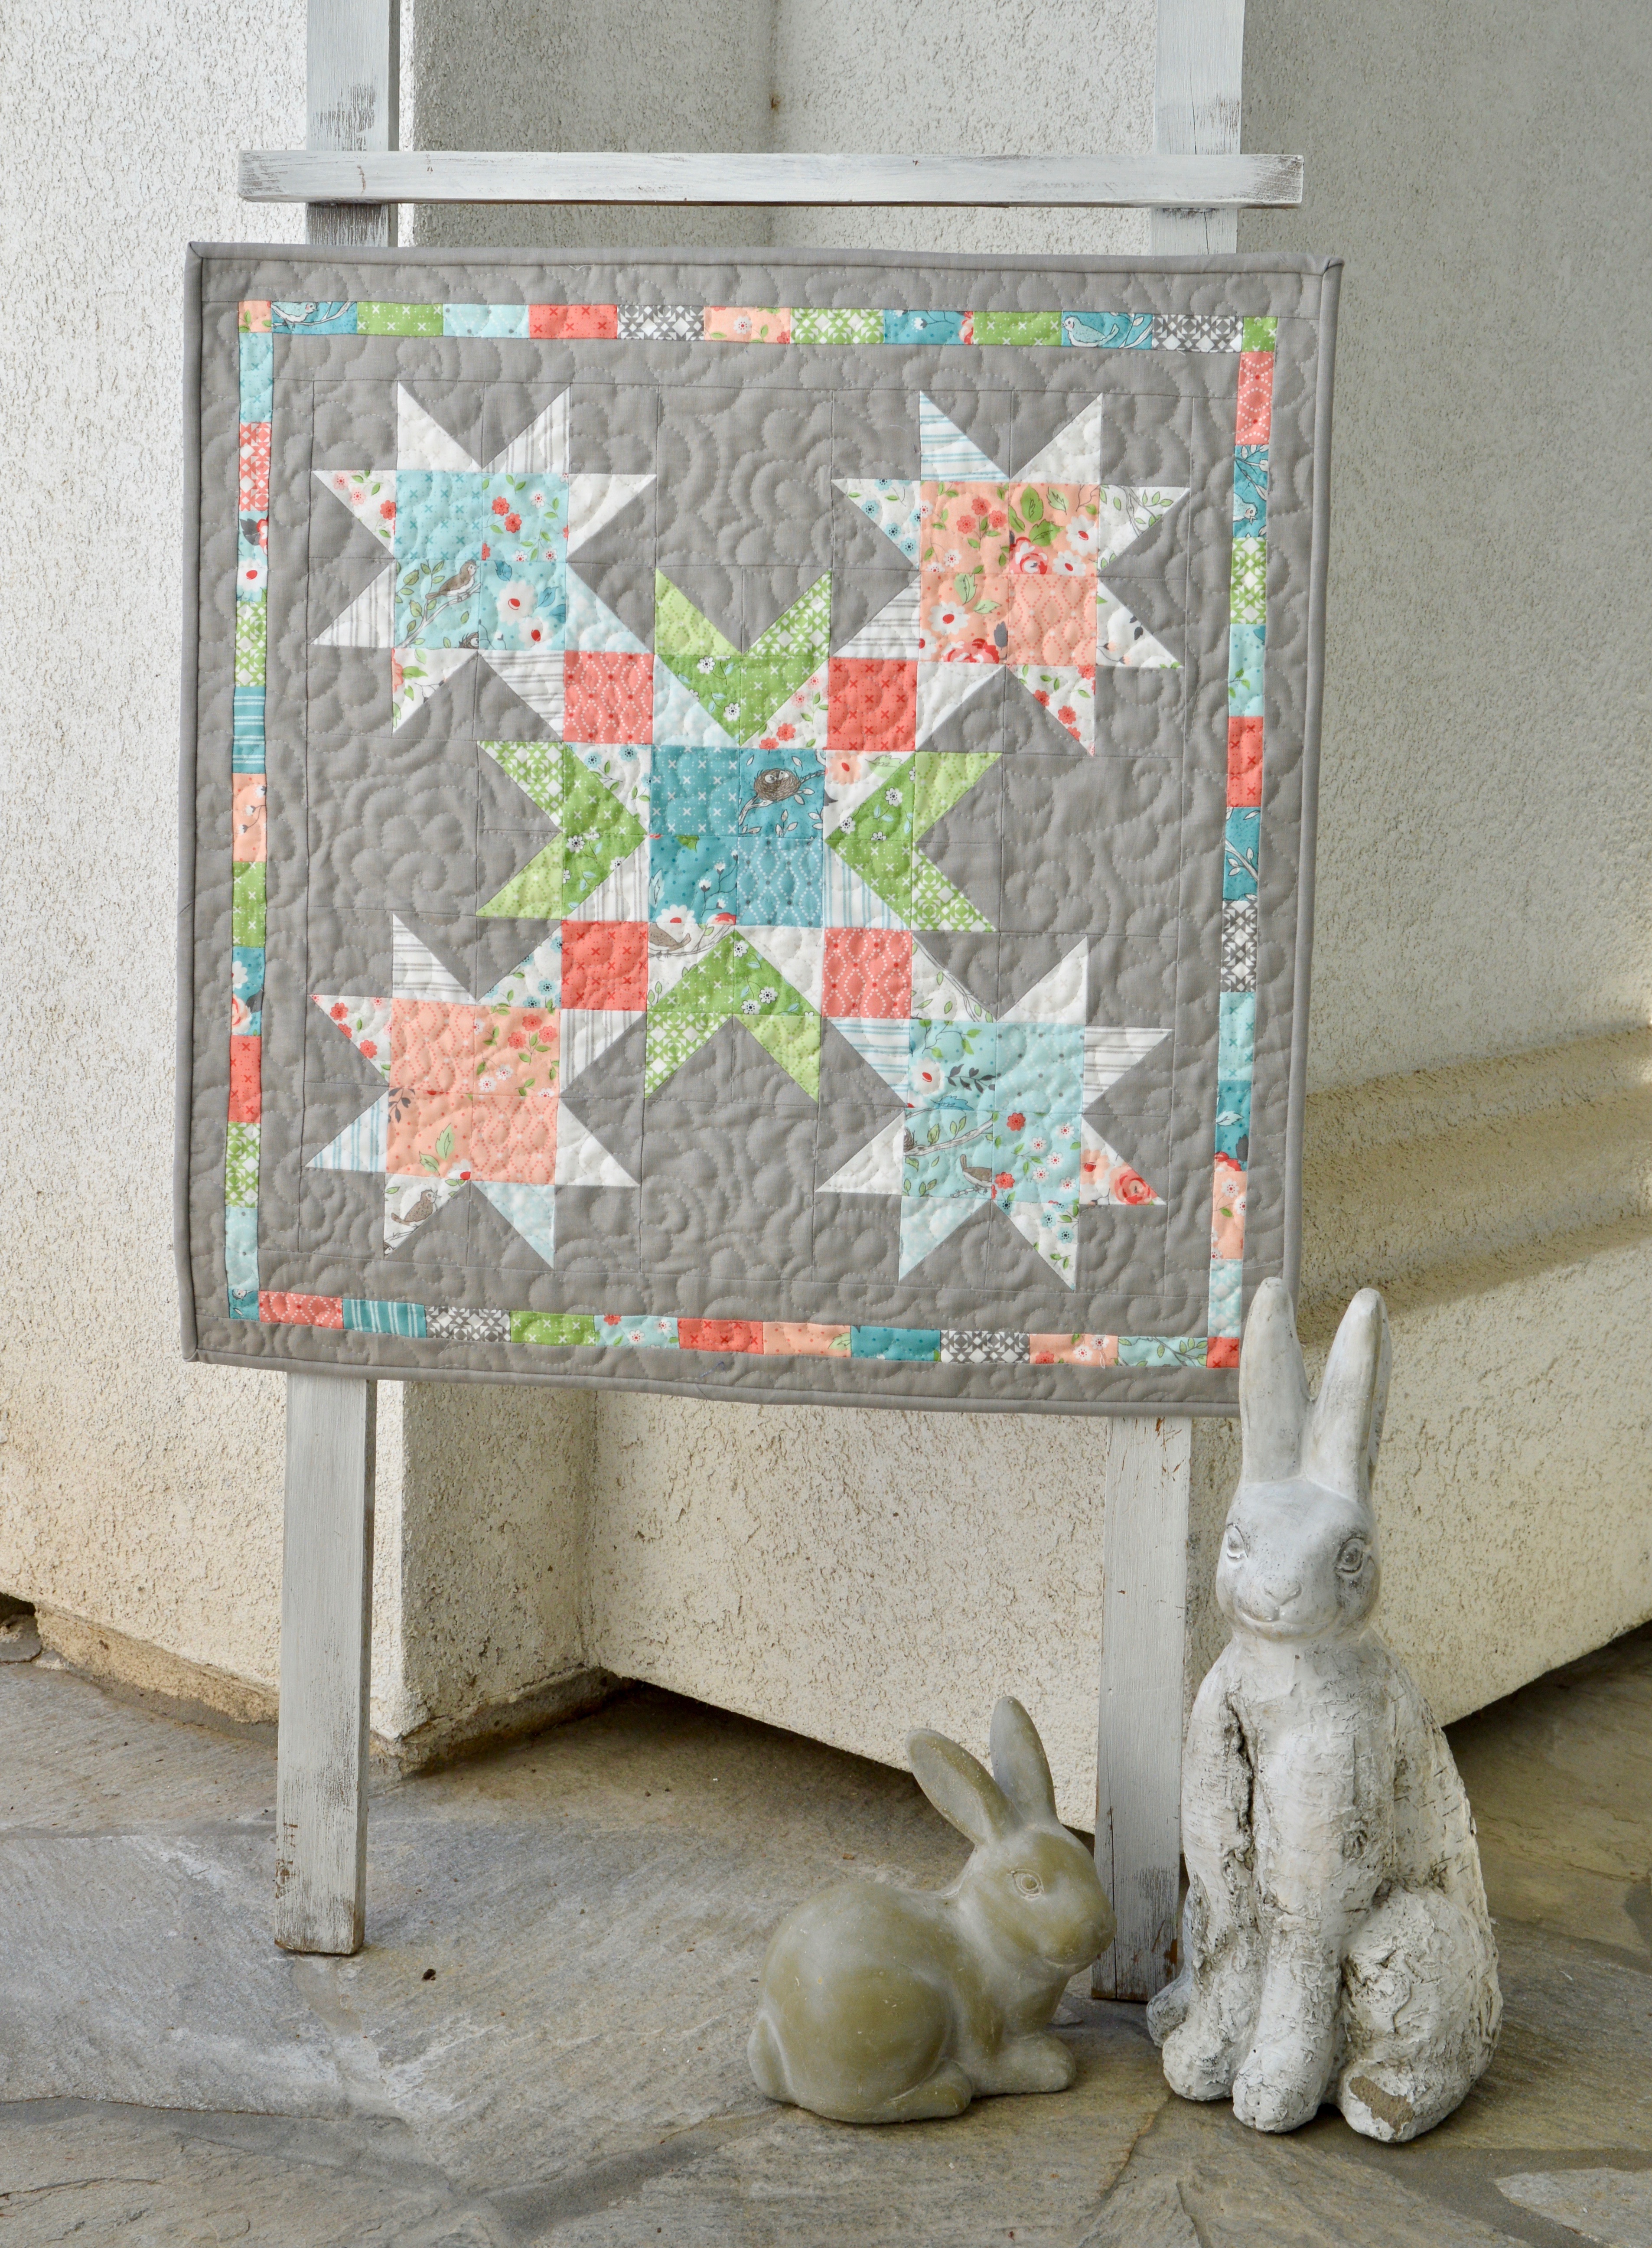
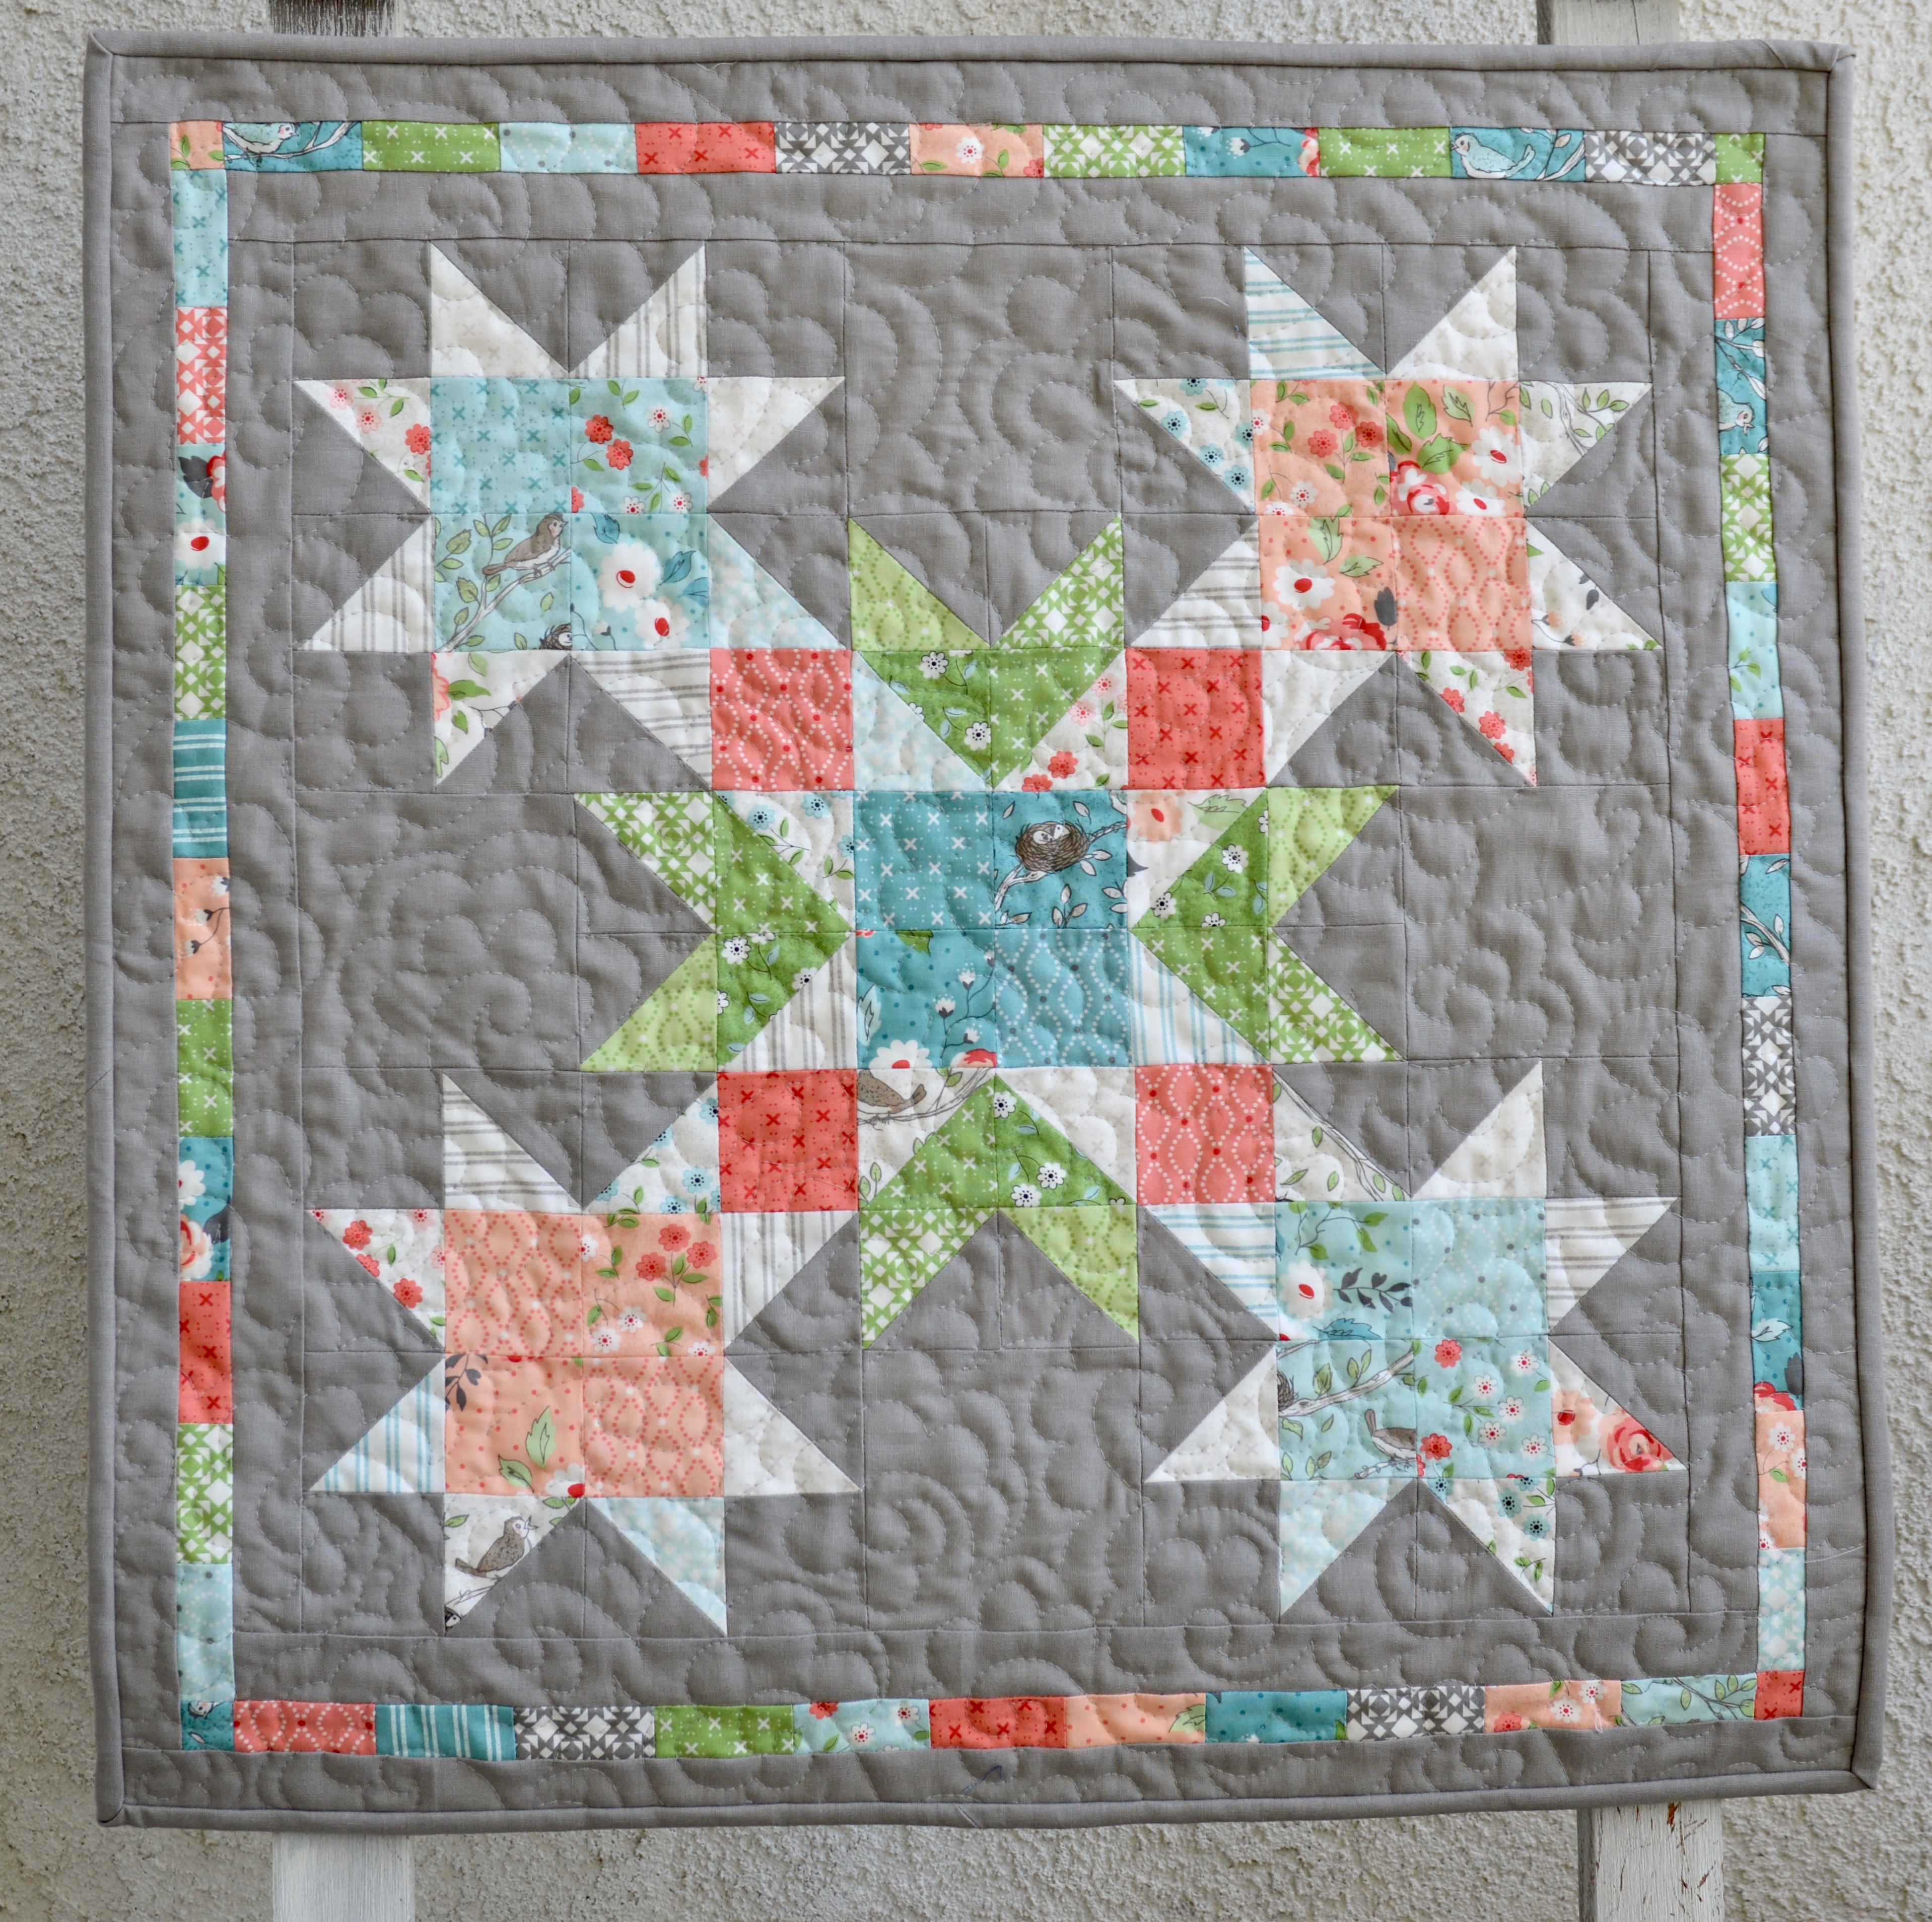
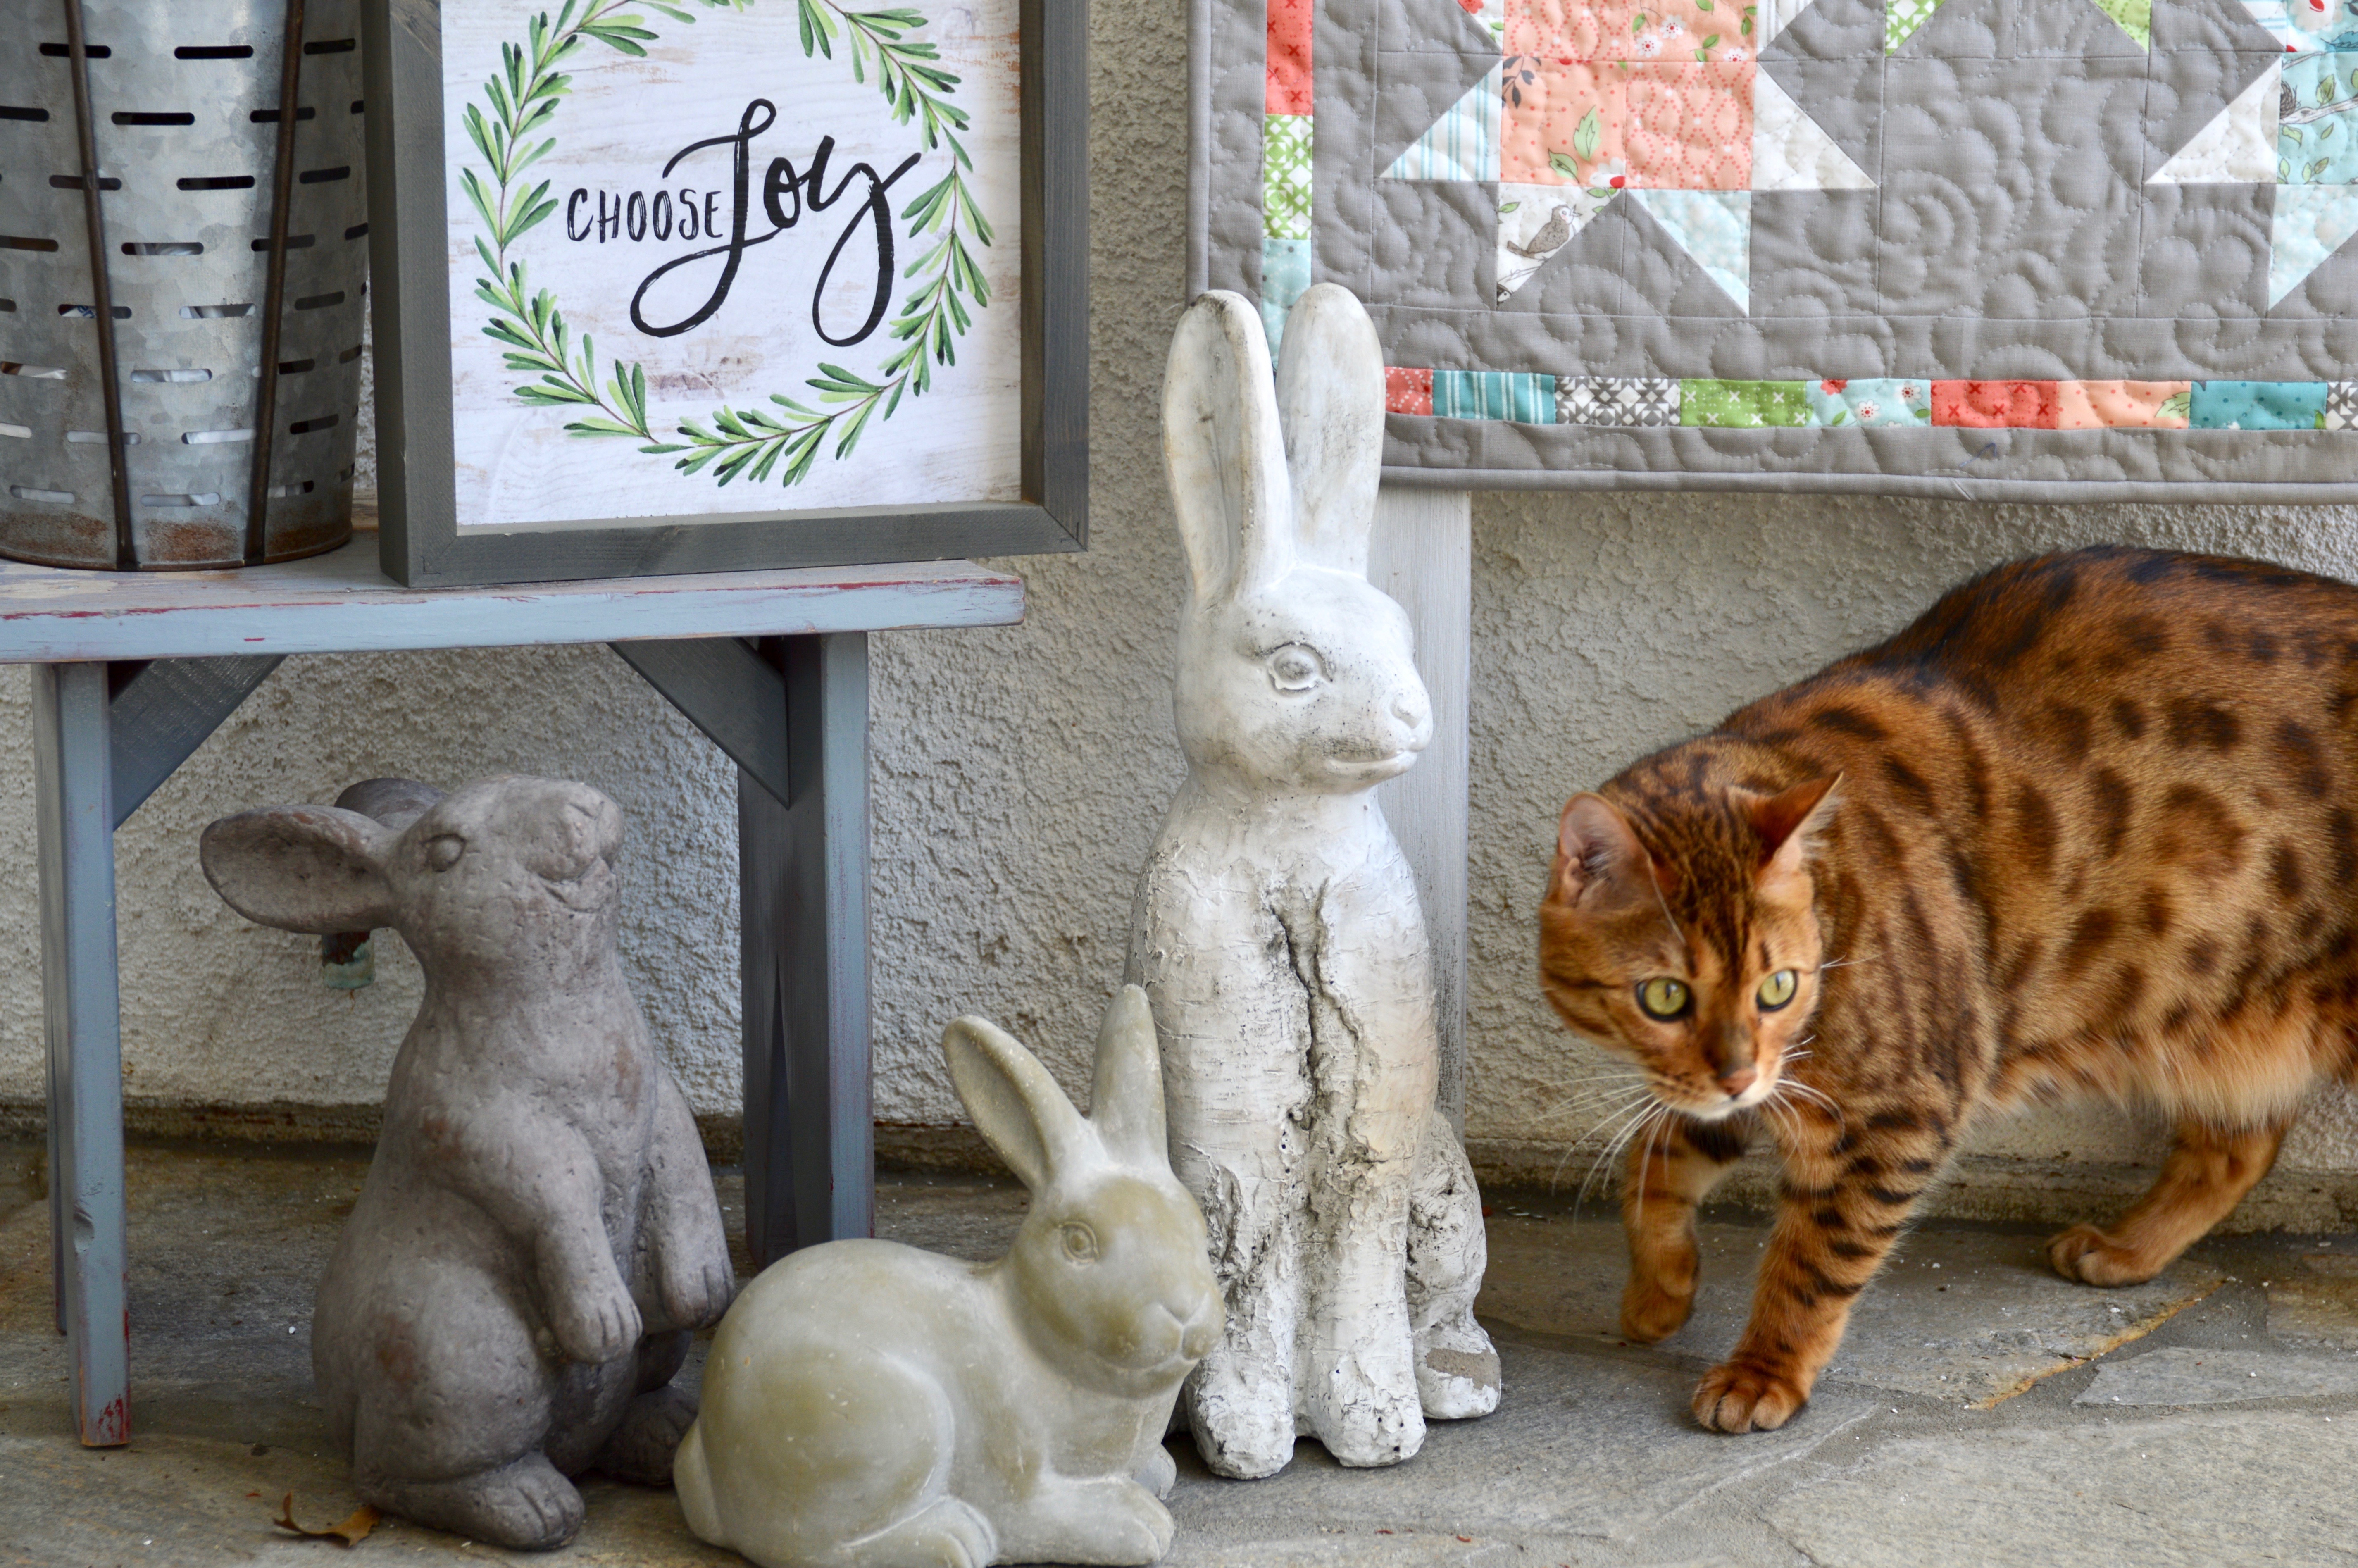
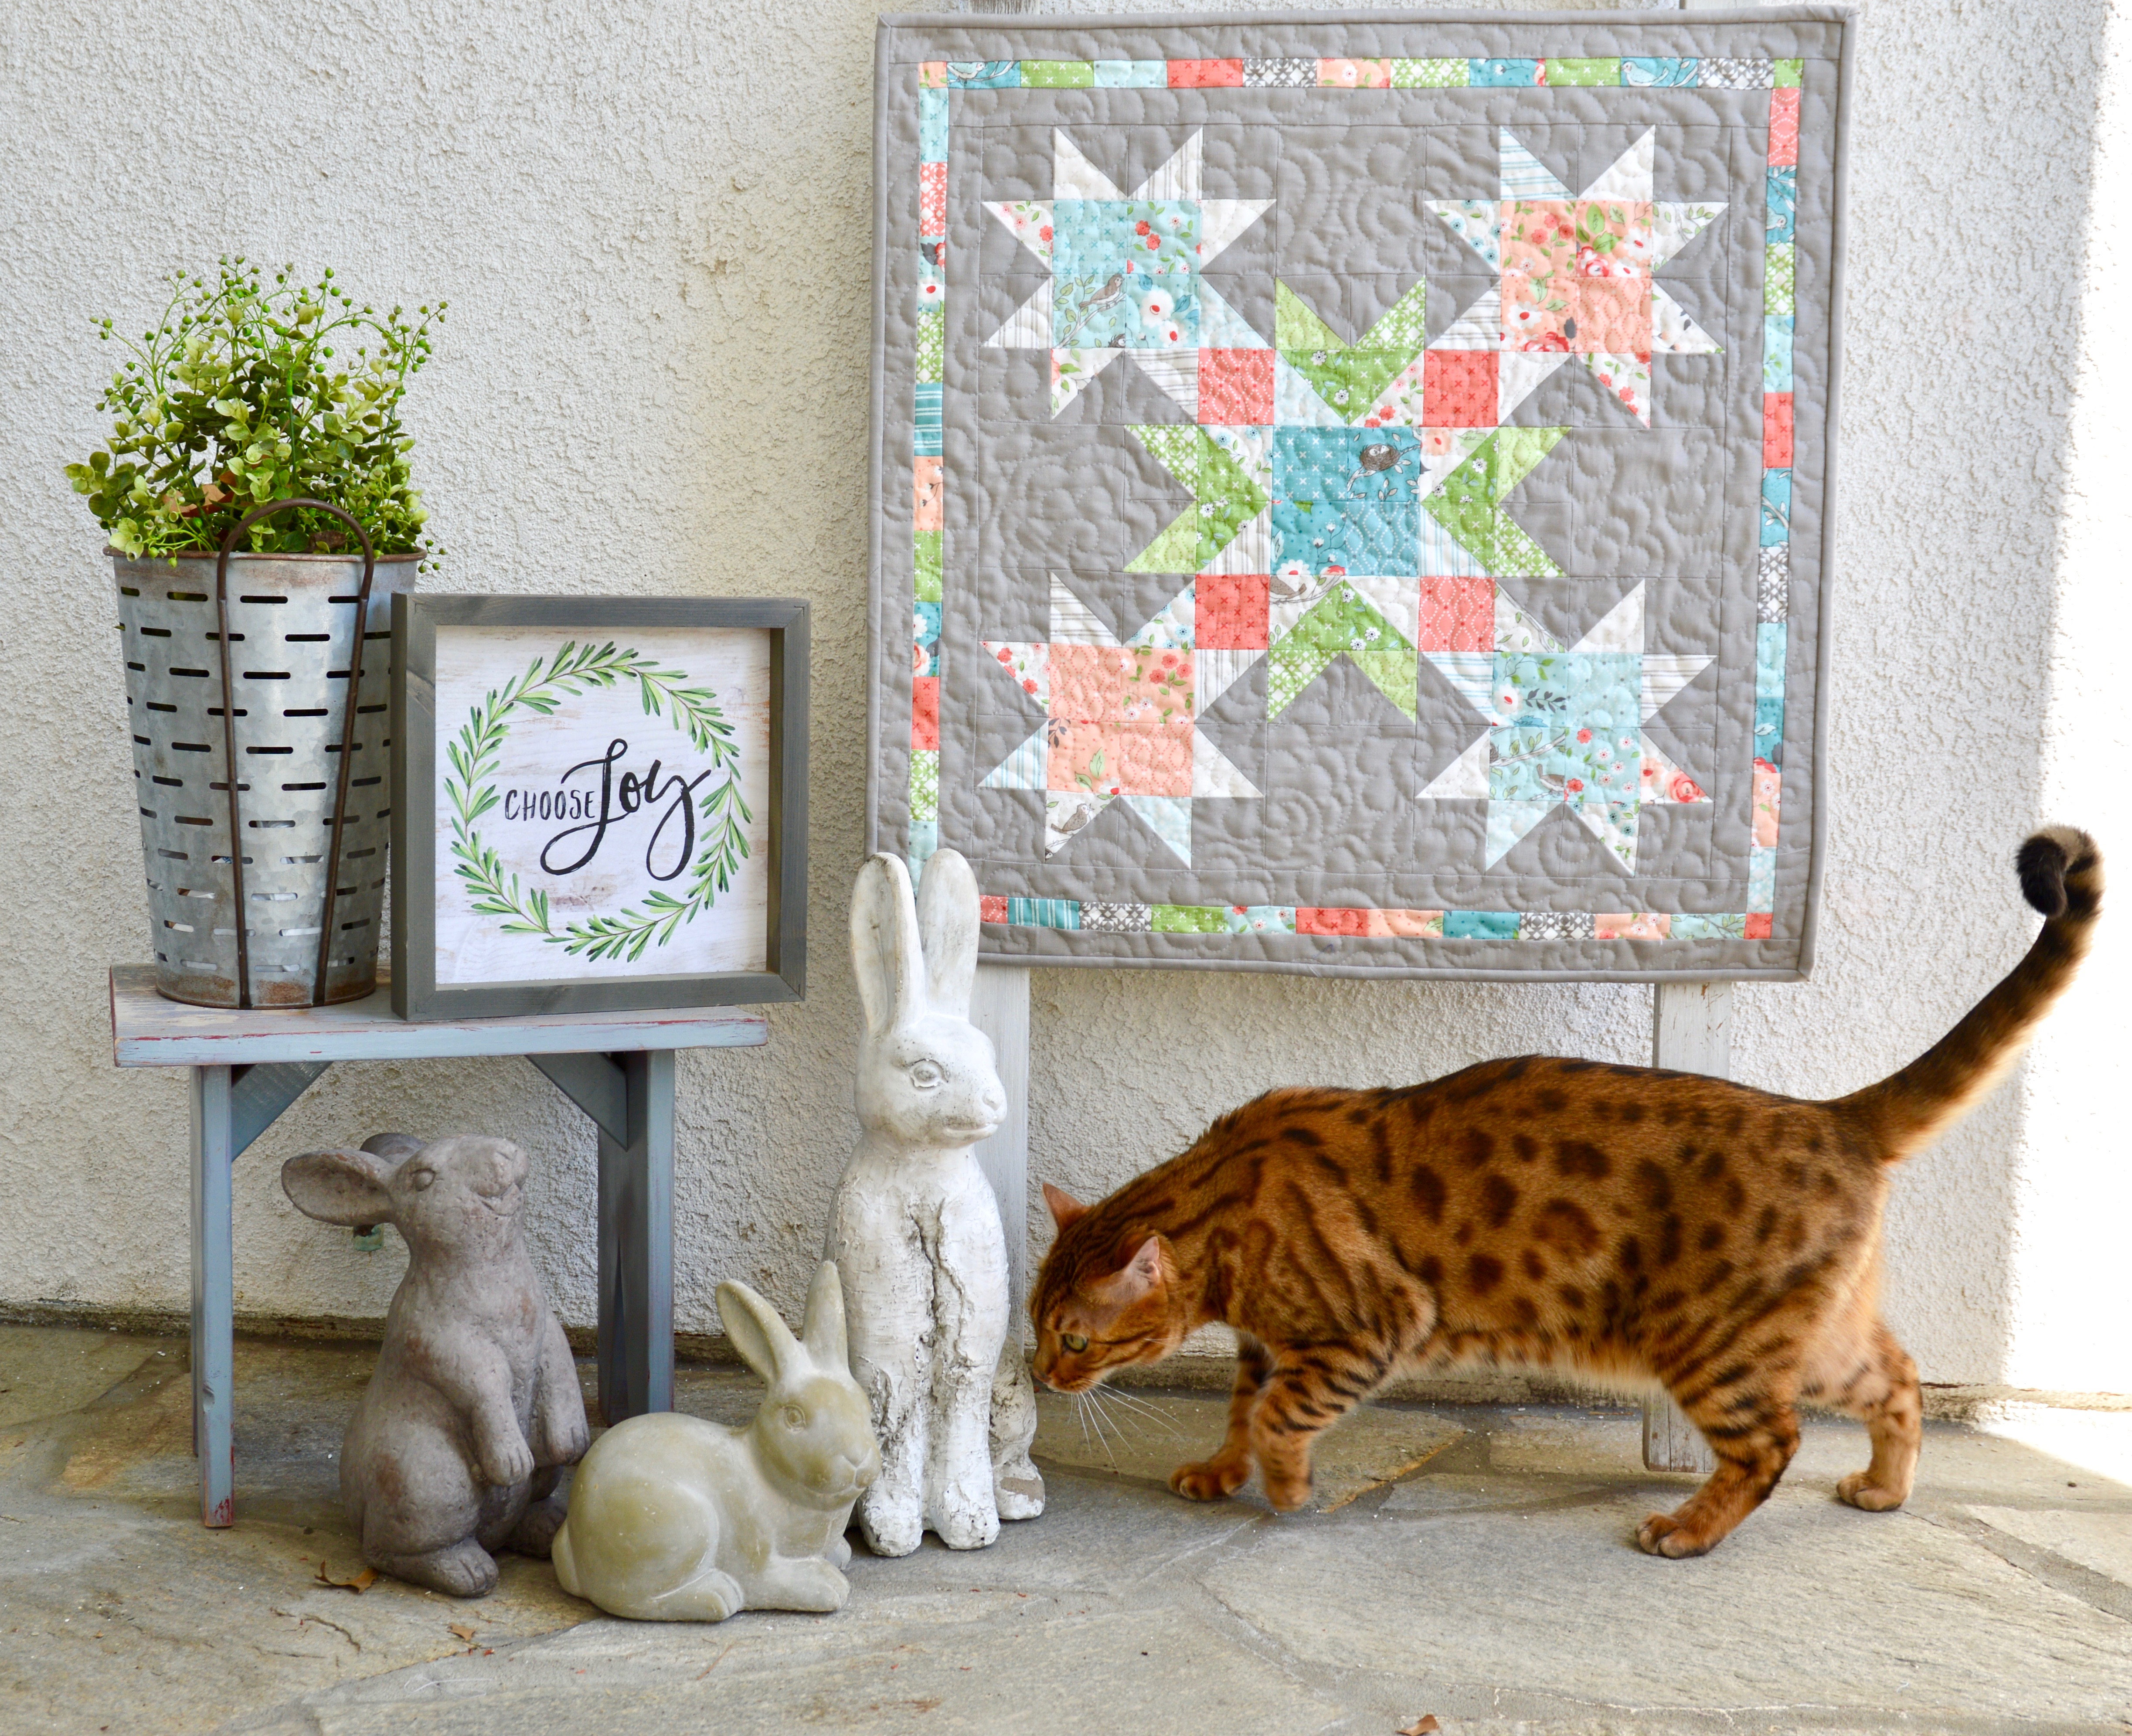
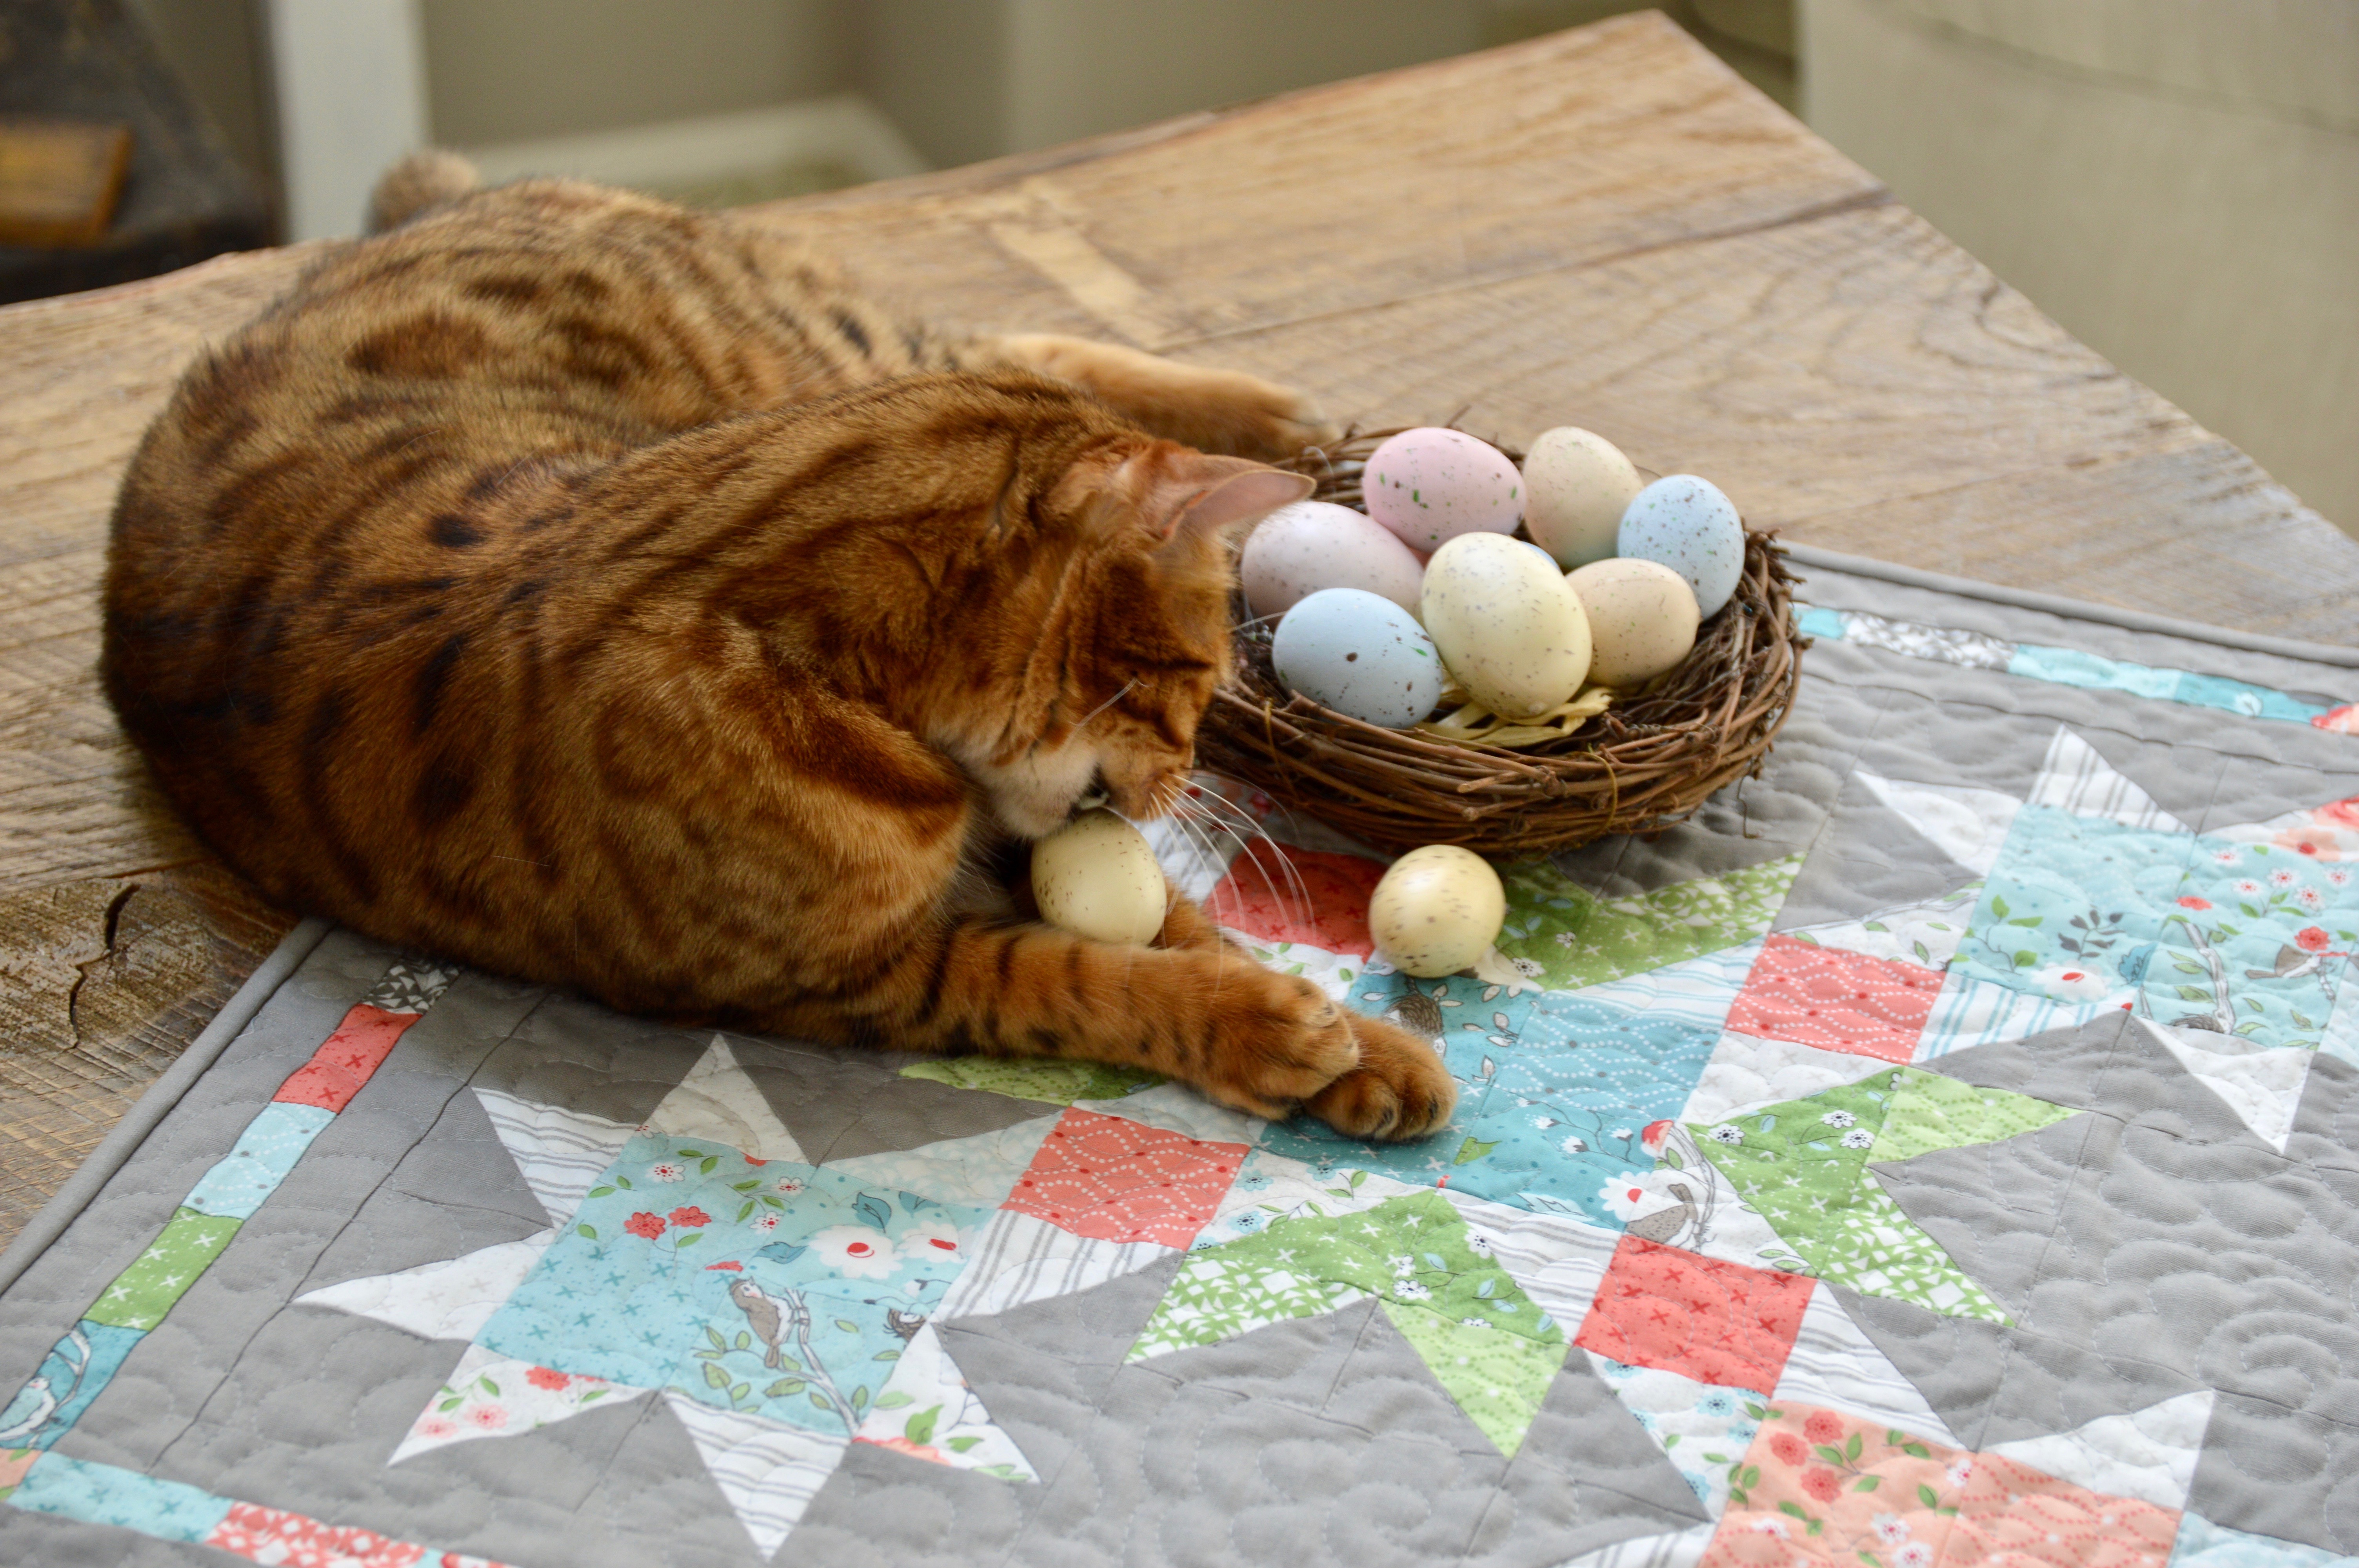
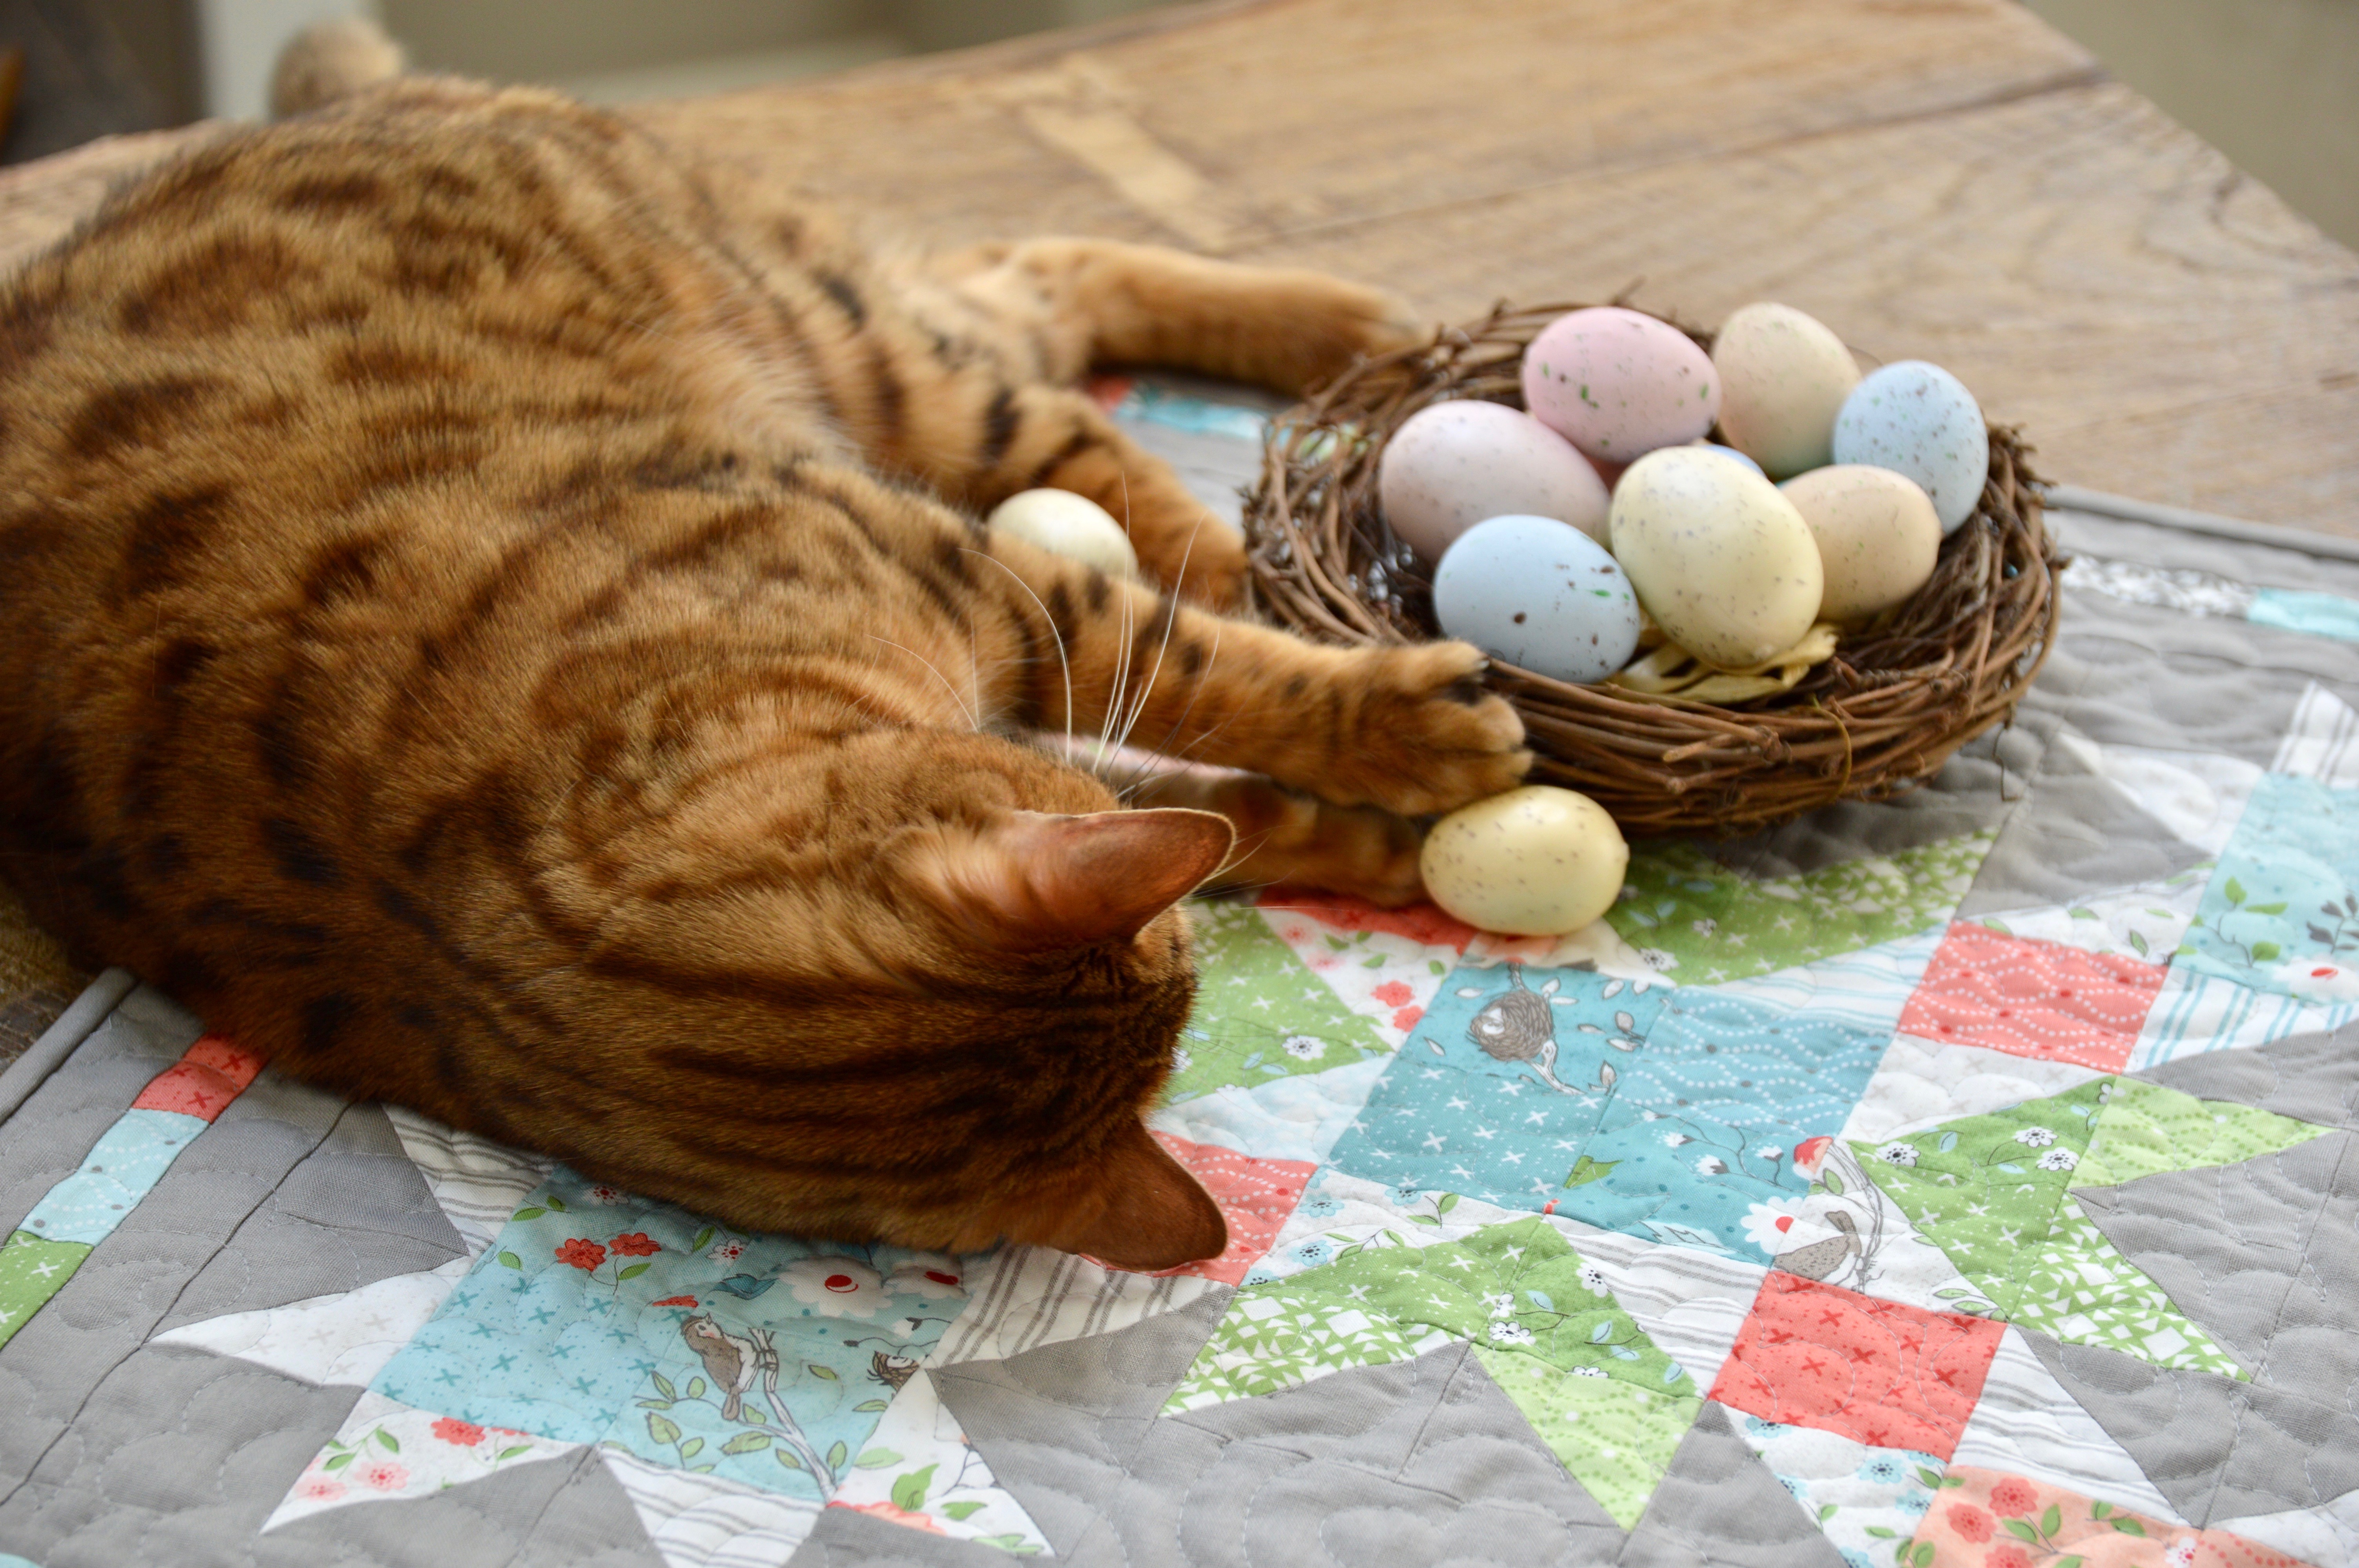
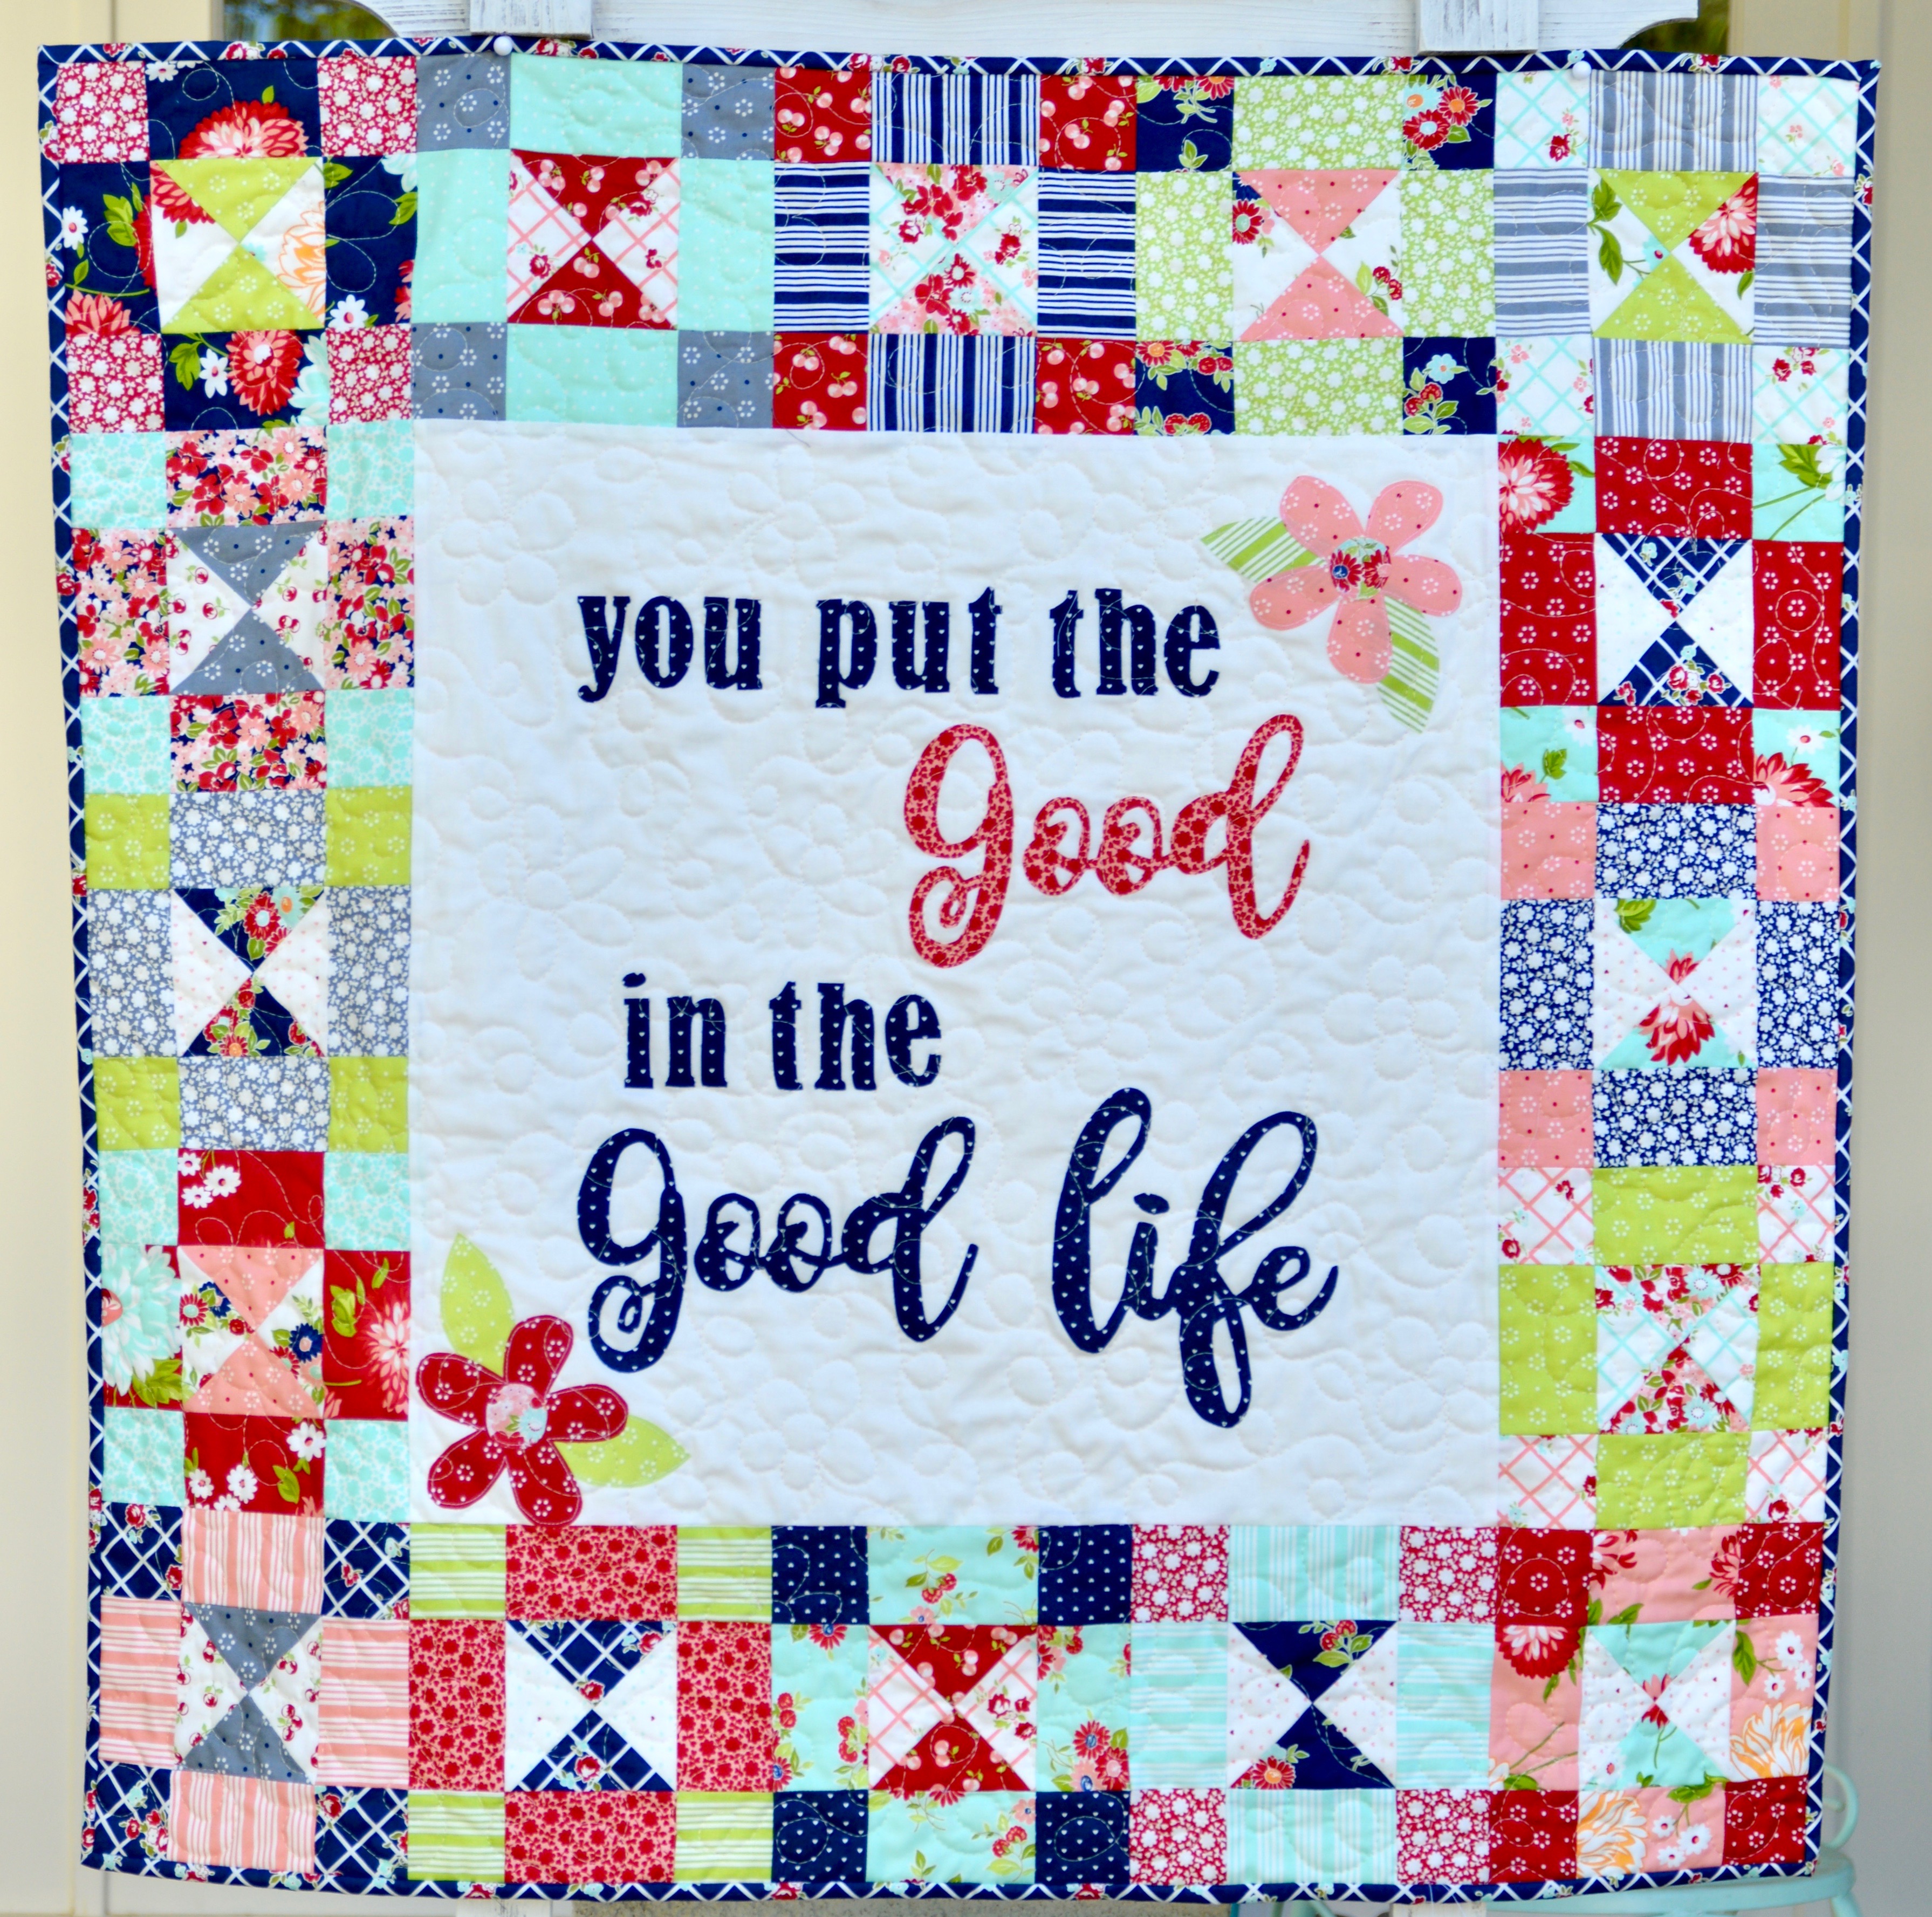
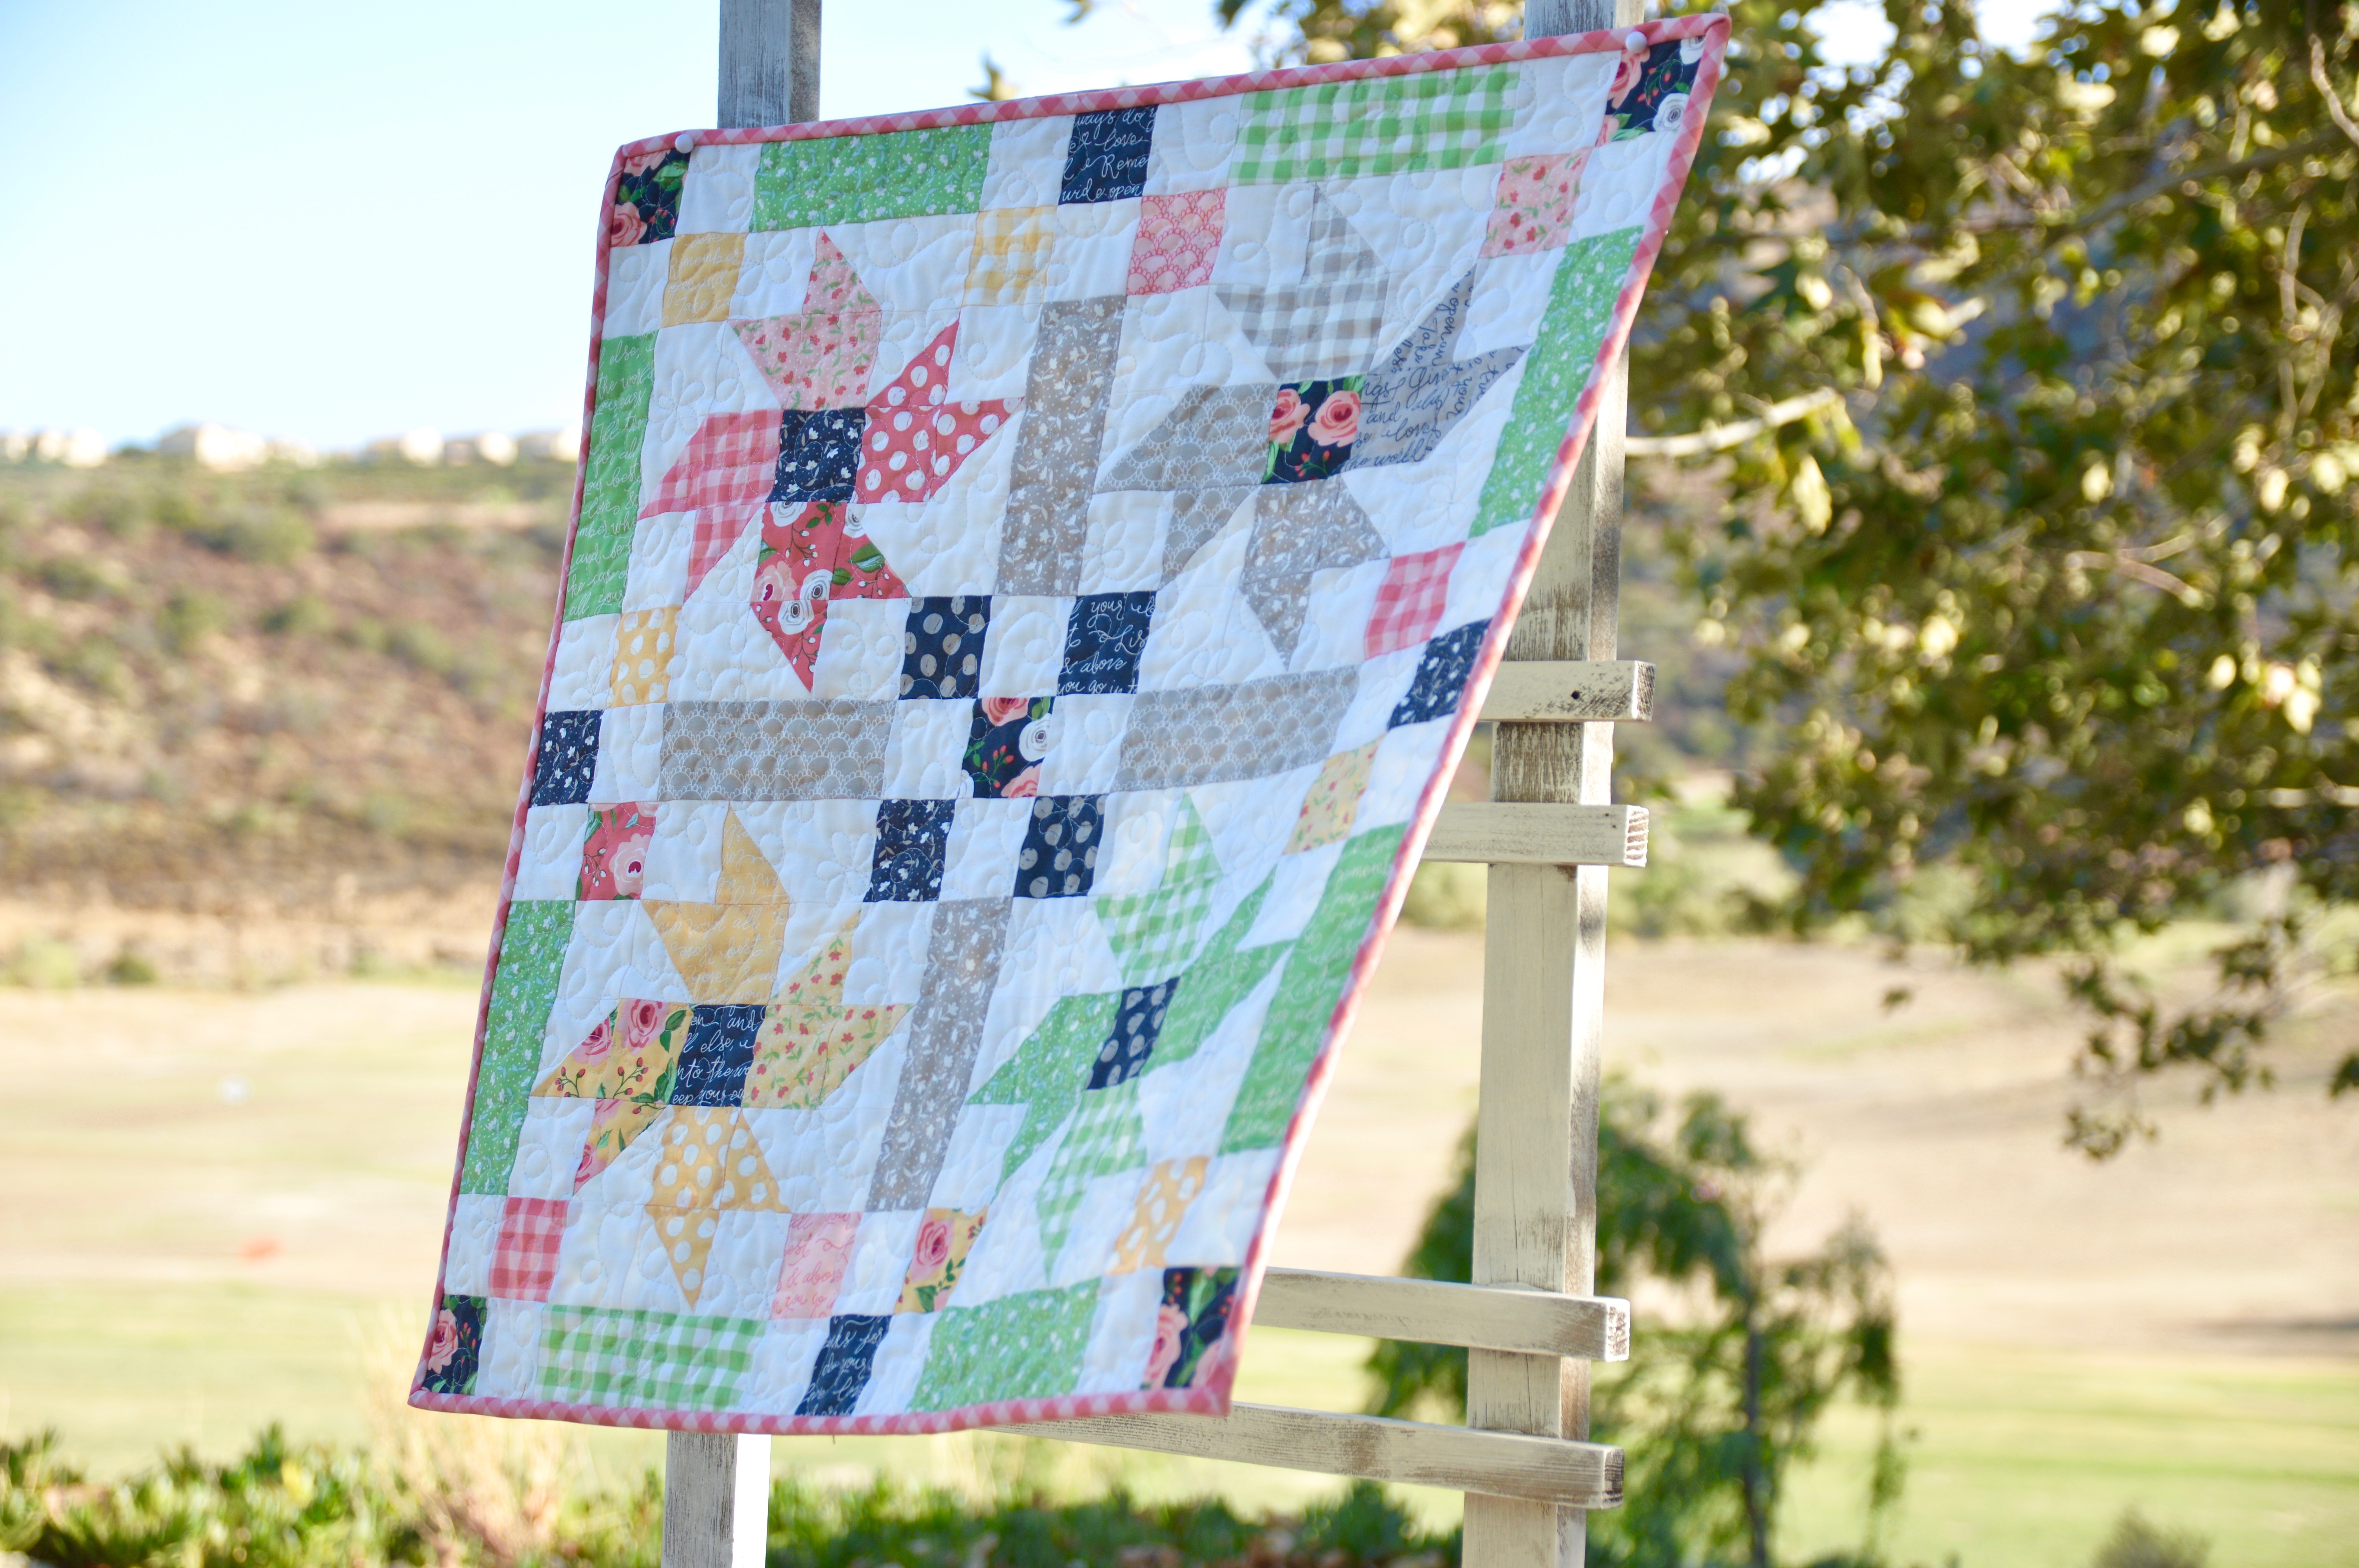
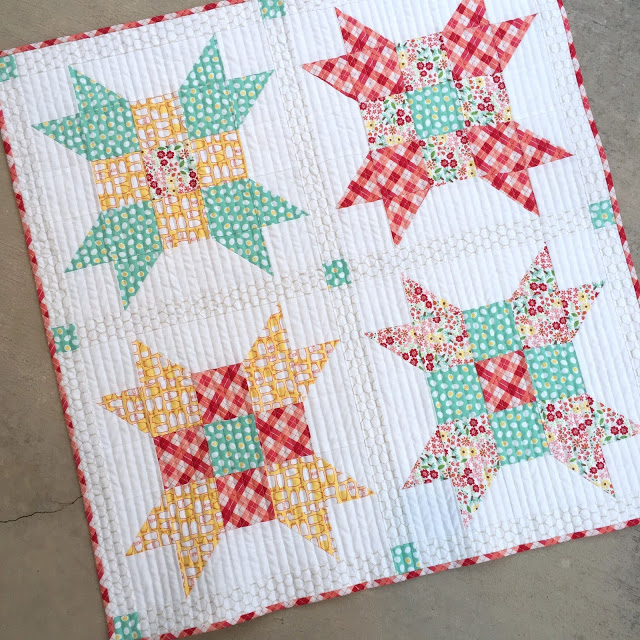
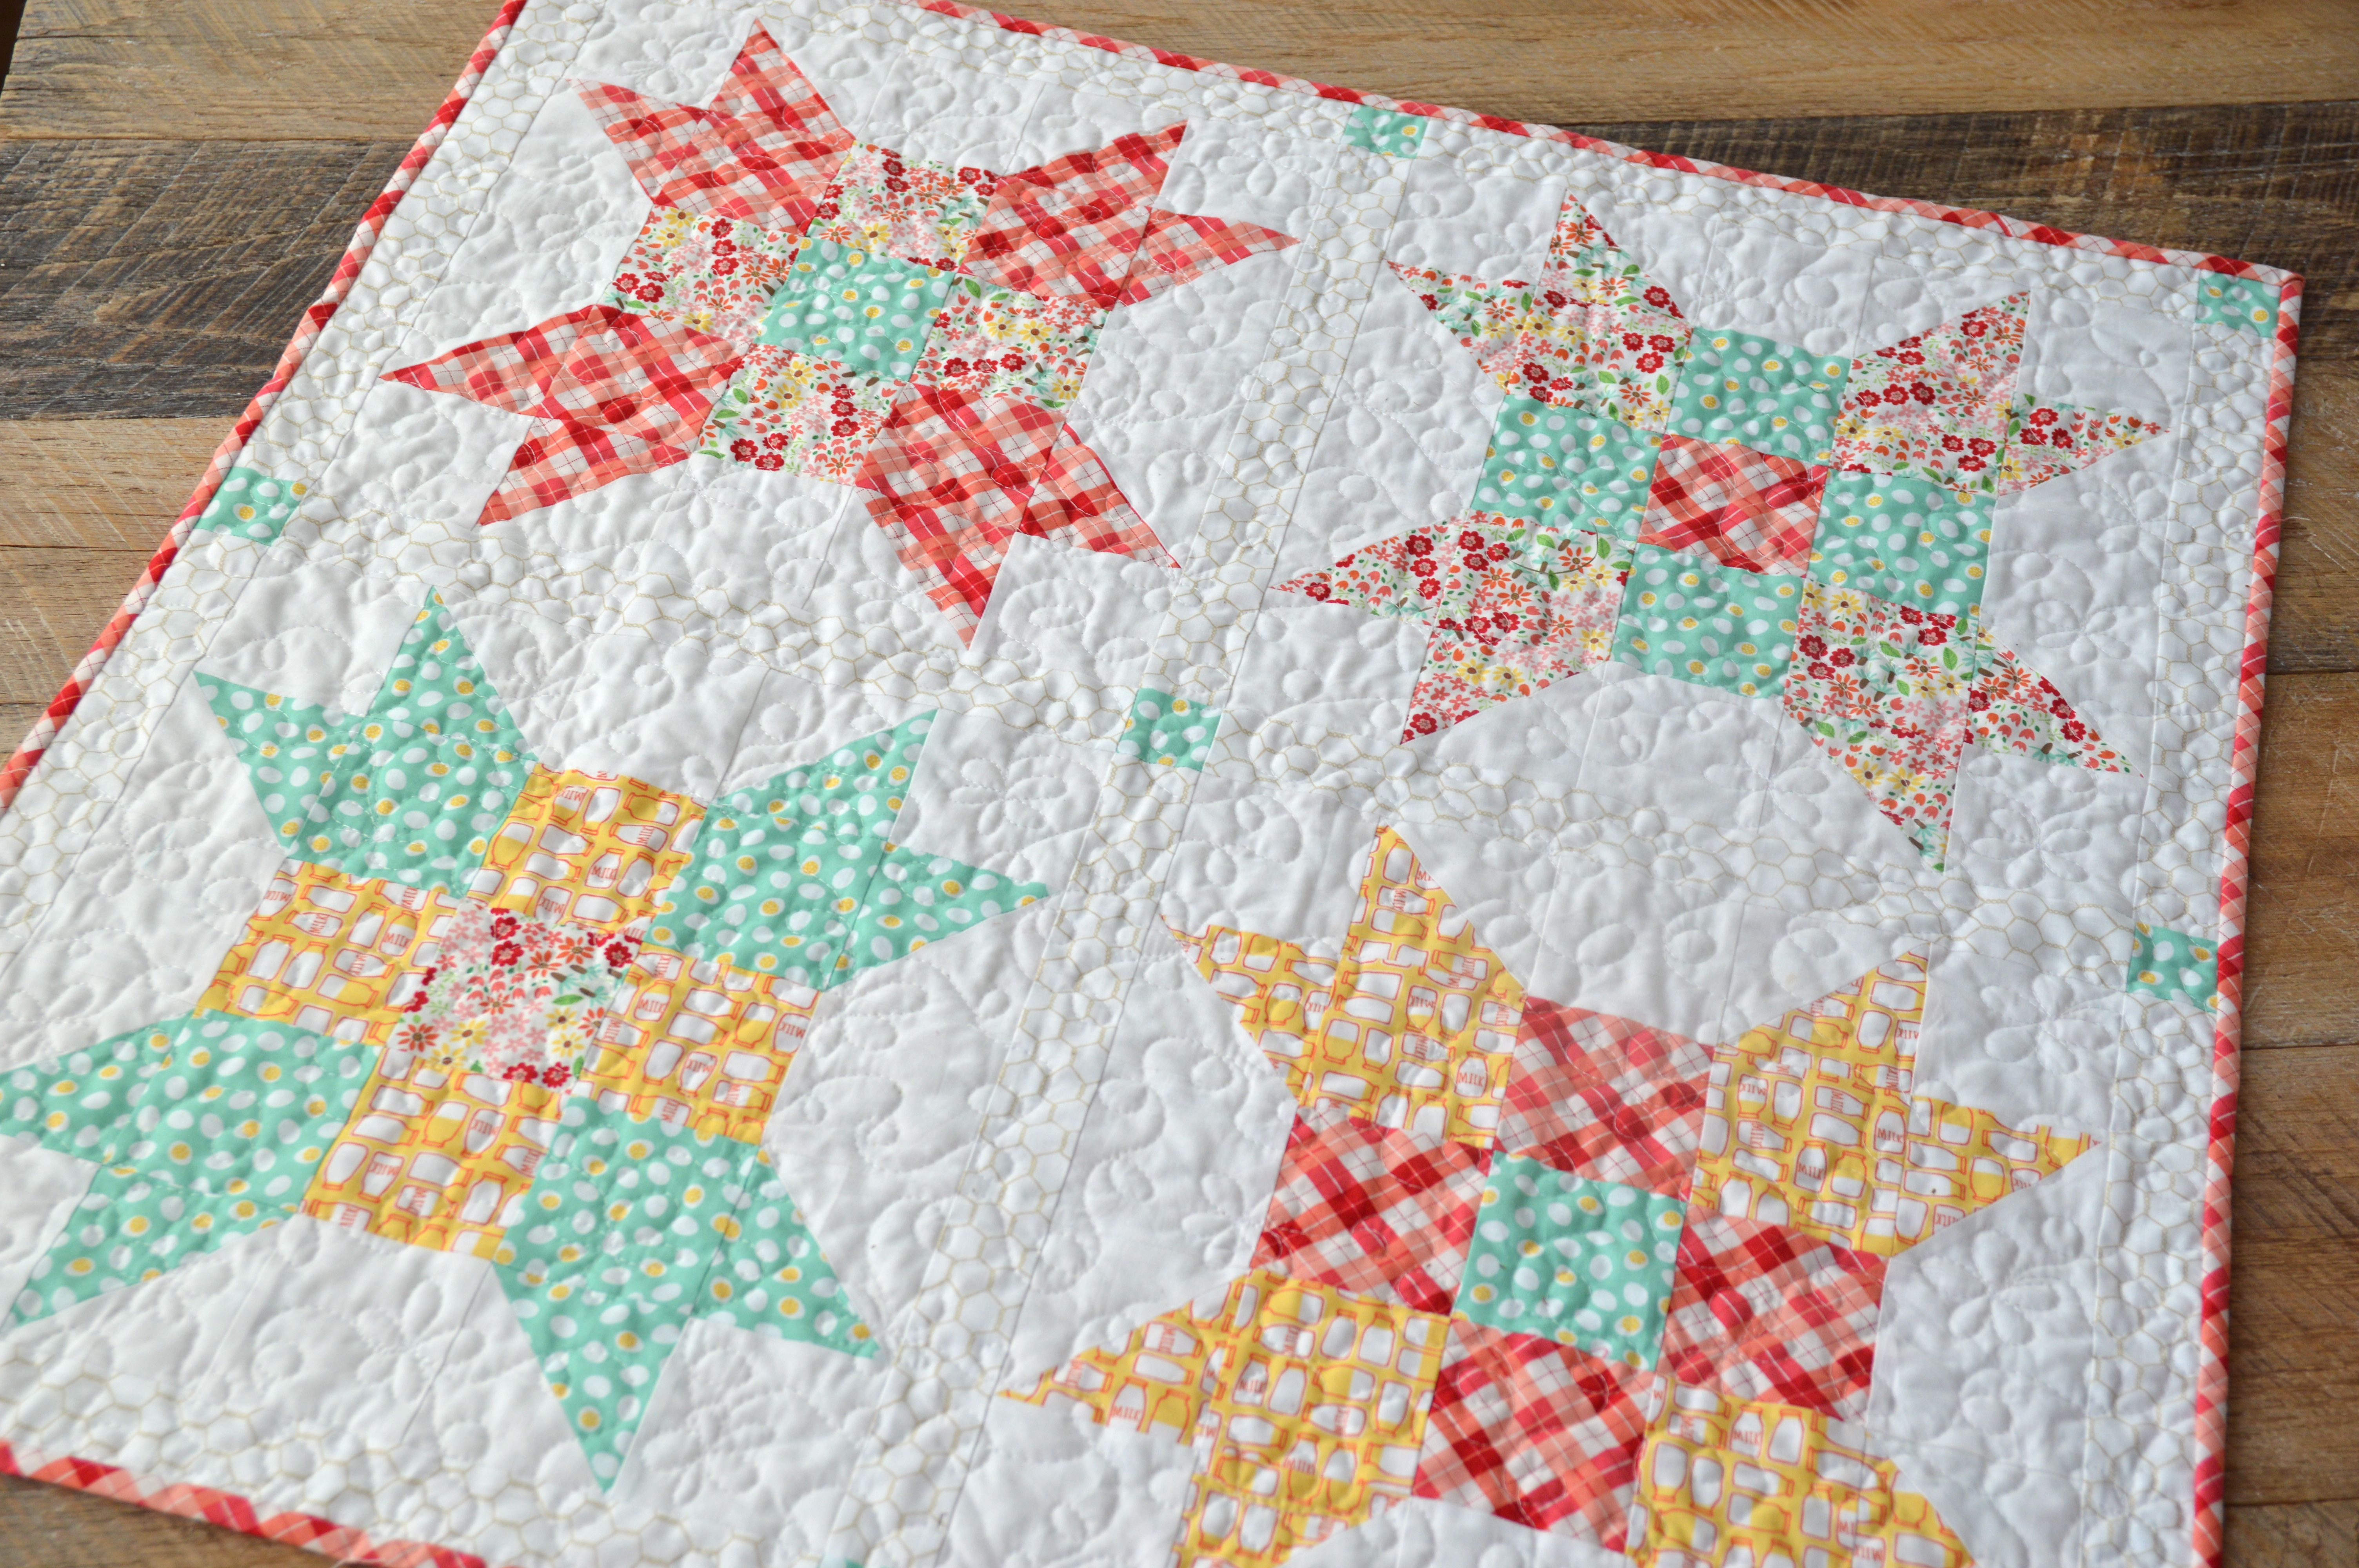
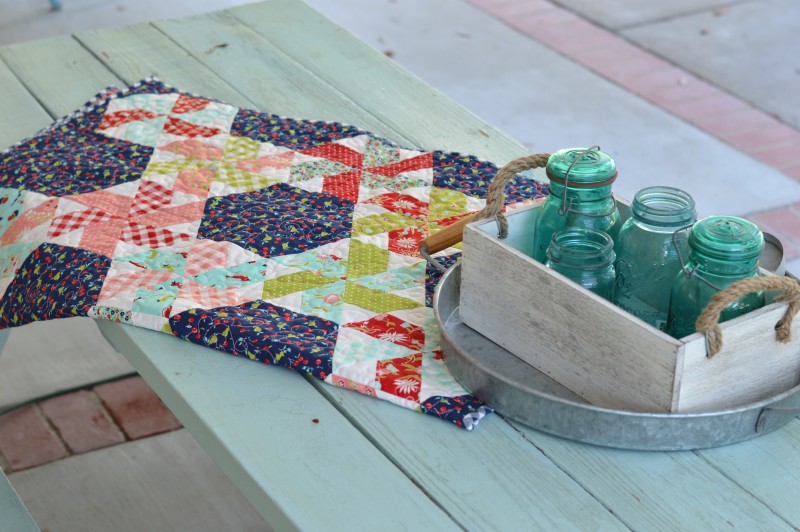
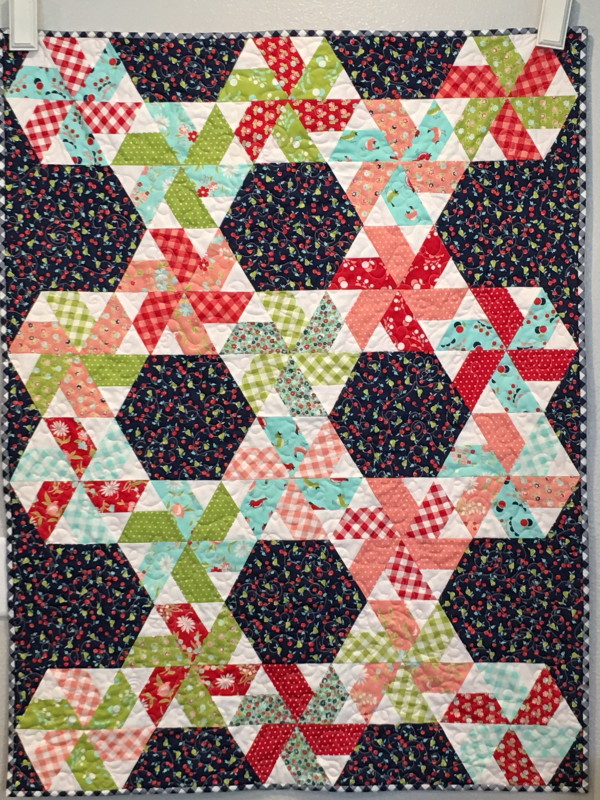
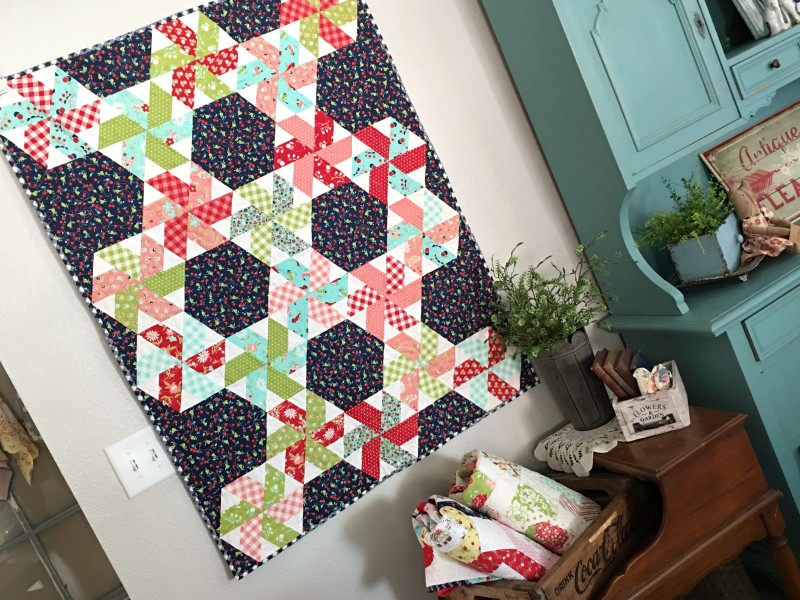
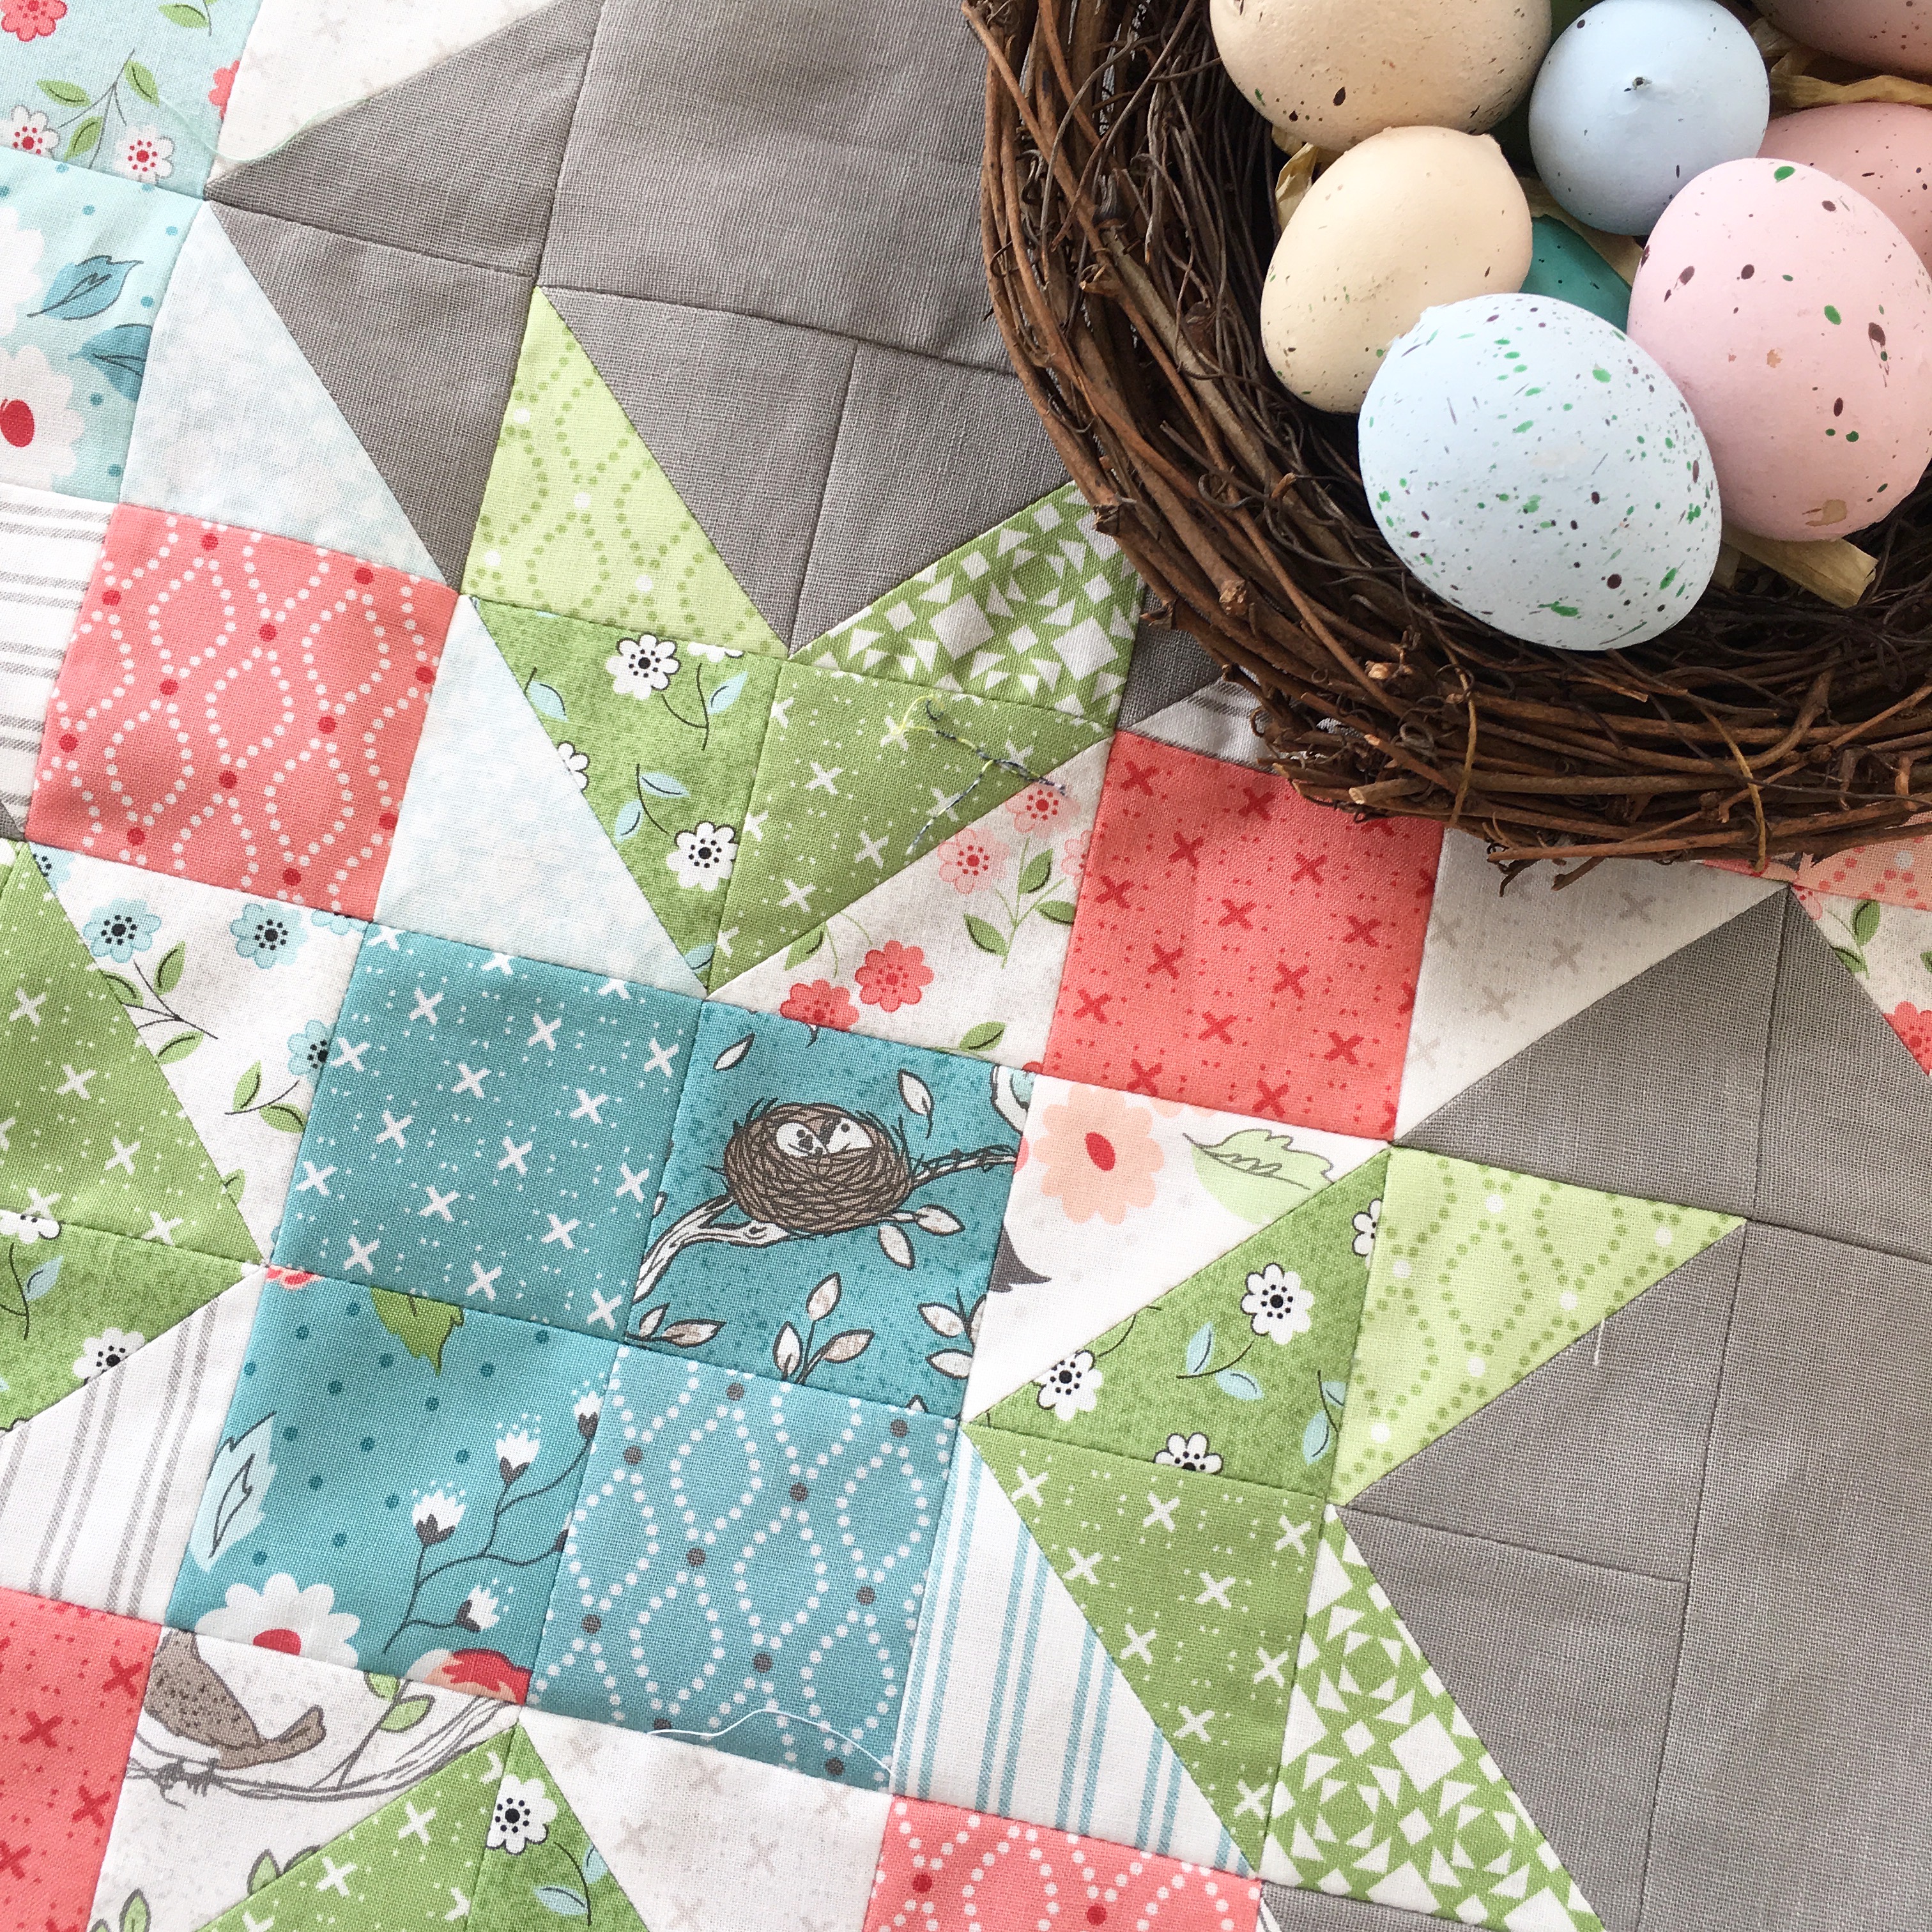
So I set out to design a wall quilt using only my charm pack and background yardage.  I love how it turned out!

late bird quilt pattern 8

I named the quilt Late Bird because when I was in kindergarten you were either an “early bird” or a “late bird” meaning you would have early or afternoon kindergarten.  I was a late bird and I think I’ve always been a late bird!  Early bird is totally not me!!!

late bird quilt pattern 19

All that’s required is 1 charm pack, 1 yard of background fabric and 1 yard backing fabric!!!  The quilt measures 25 1/2″ square and is perfect to hang on a wall or place on a table – or for a cat mat as you will see at the bottom of the post!

nest fabric quilt

You can purchase the full color quilt pattern in my Etsy shop for instant download.

I love the little scrappy border!!  It’s fun to see how much you can do with a charm pack!!!

late bird quilt pattern 7

I hope you love this quilt and even more I hope you love making it!

late bird quilt pattern 16

late bird quilt pattern 13

And now for the Mufasa photo shoot – it’s beginning to be a tradition with each quilt finish!  I’ve got to keep him busy!!
DSC_0138
He’s wondering whats with all the rabbits!!!

DSC_0150

late bird quilt pattern 5

late bird quilt pattern 2

late bird quilt pattern 23

late bird quilt pattern 20

late bird quilt pattern 6

late bird quilt pattern 21

The Good in the Good Life Quilt Pattern

the good in the good life quilt

In our family we have a little saying….well actually it’s song lyrics….. “You put the GOOD in the GOOD LIFE.”  I knew I had to use the Good Life fabric from Moda and I knew the quilt had to have words.  So meet my newest quilt pattern!the good life quilt 2

This whimsical quilt measures 37″ square and is perfect to hang on a wall, place on a table, or give as a gift to someone who puts “good” in your life :). The border is made entirely from charm squares, which is super fun because I collect charm packs!  It’s available in my Etsy shop as a PDF download for only $5.00!!the good life quilt pattern 2

The letters are machine appliquéd.  Yes, you have to cut them all by hand, but it’s kind of fun!  I put on a movie, sat down with my scissors, and it went by fast!the good life quilt pattern 4

I thought I would be a nerd and pose with my quilt while my 9 year old took my picture….hahah!the good life quilt pattern 7

The blocks are super fun to make and I love that you can use all the fabrics in a charm pack.the good life quilt pattern 5

the good life quilt pattern 8


Country Flowers Quilt Pattern

DSC_0590

I’m so excited to announce my newest quilt pattern Country Flowers!!  This charming little quilt is inspired by fields of flowers in the country.  I live in the city but dream of country life and love to fill my home with country inspired quilts, art, and vintage finds.
country flowers

You can find the pattern in my Easy shop by clicking HERE.  The little quilt measures 26″ and is perfect for hanging on a wall or placing on a table.  And it makes and adorable gift.

DSC_0574

I am so in love with this fabric collection from Moda called Farmers Daughter.  It so makes me want to move to the country.

DSC_0591

The pattern is a PDF download with full color instructions and diagrams.  The quilt is made of 4 blocks measuring 10″ and some fun sashing.

IMG_3396

I think you’re going to love this!!  I do!

DSC_0587

So let’s take a quilting journey to the country together!  Be sure to post your photos and sew along by using the hashtag #countryflowersquilt on Instagram.
DSC_0627
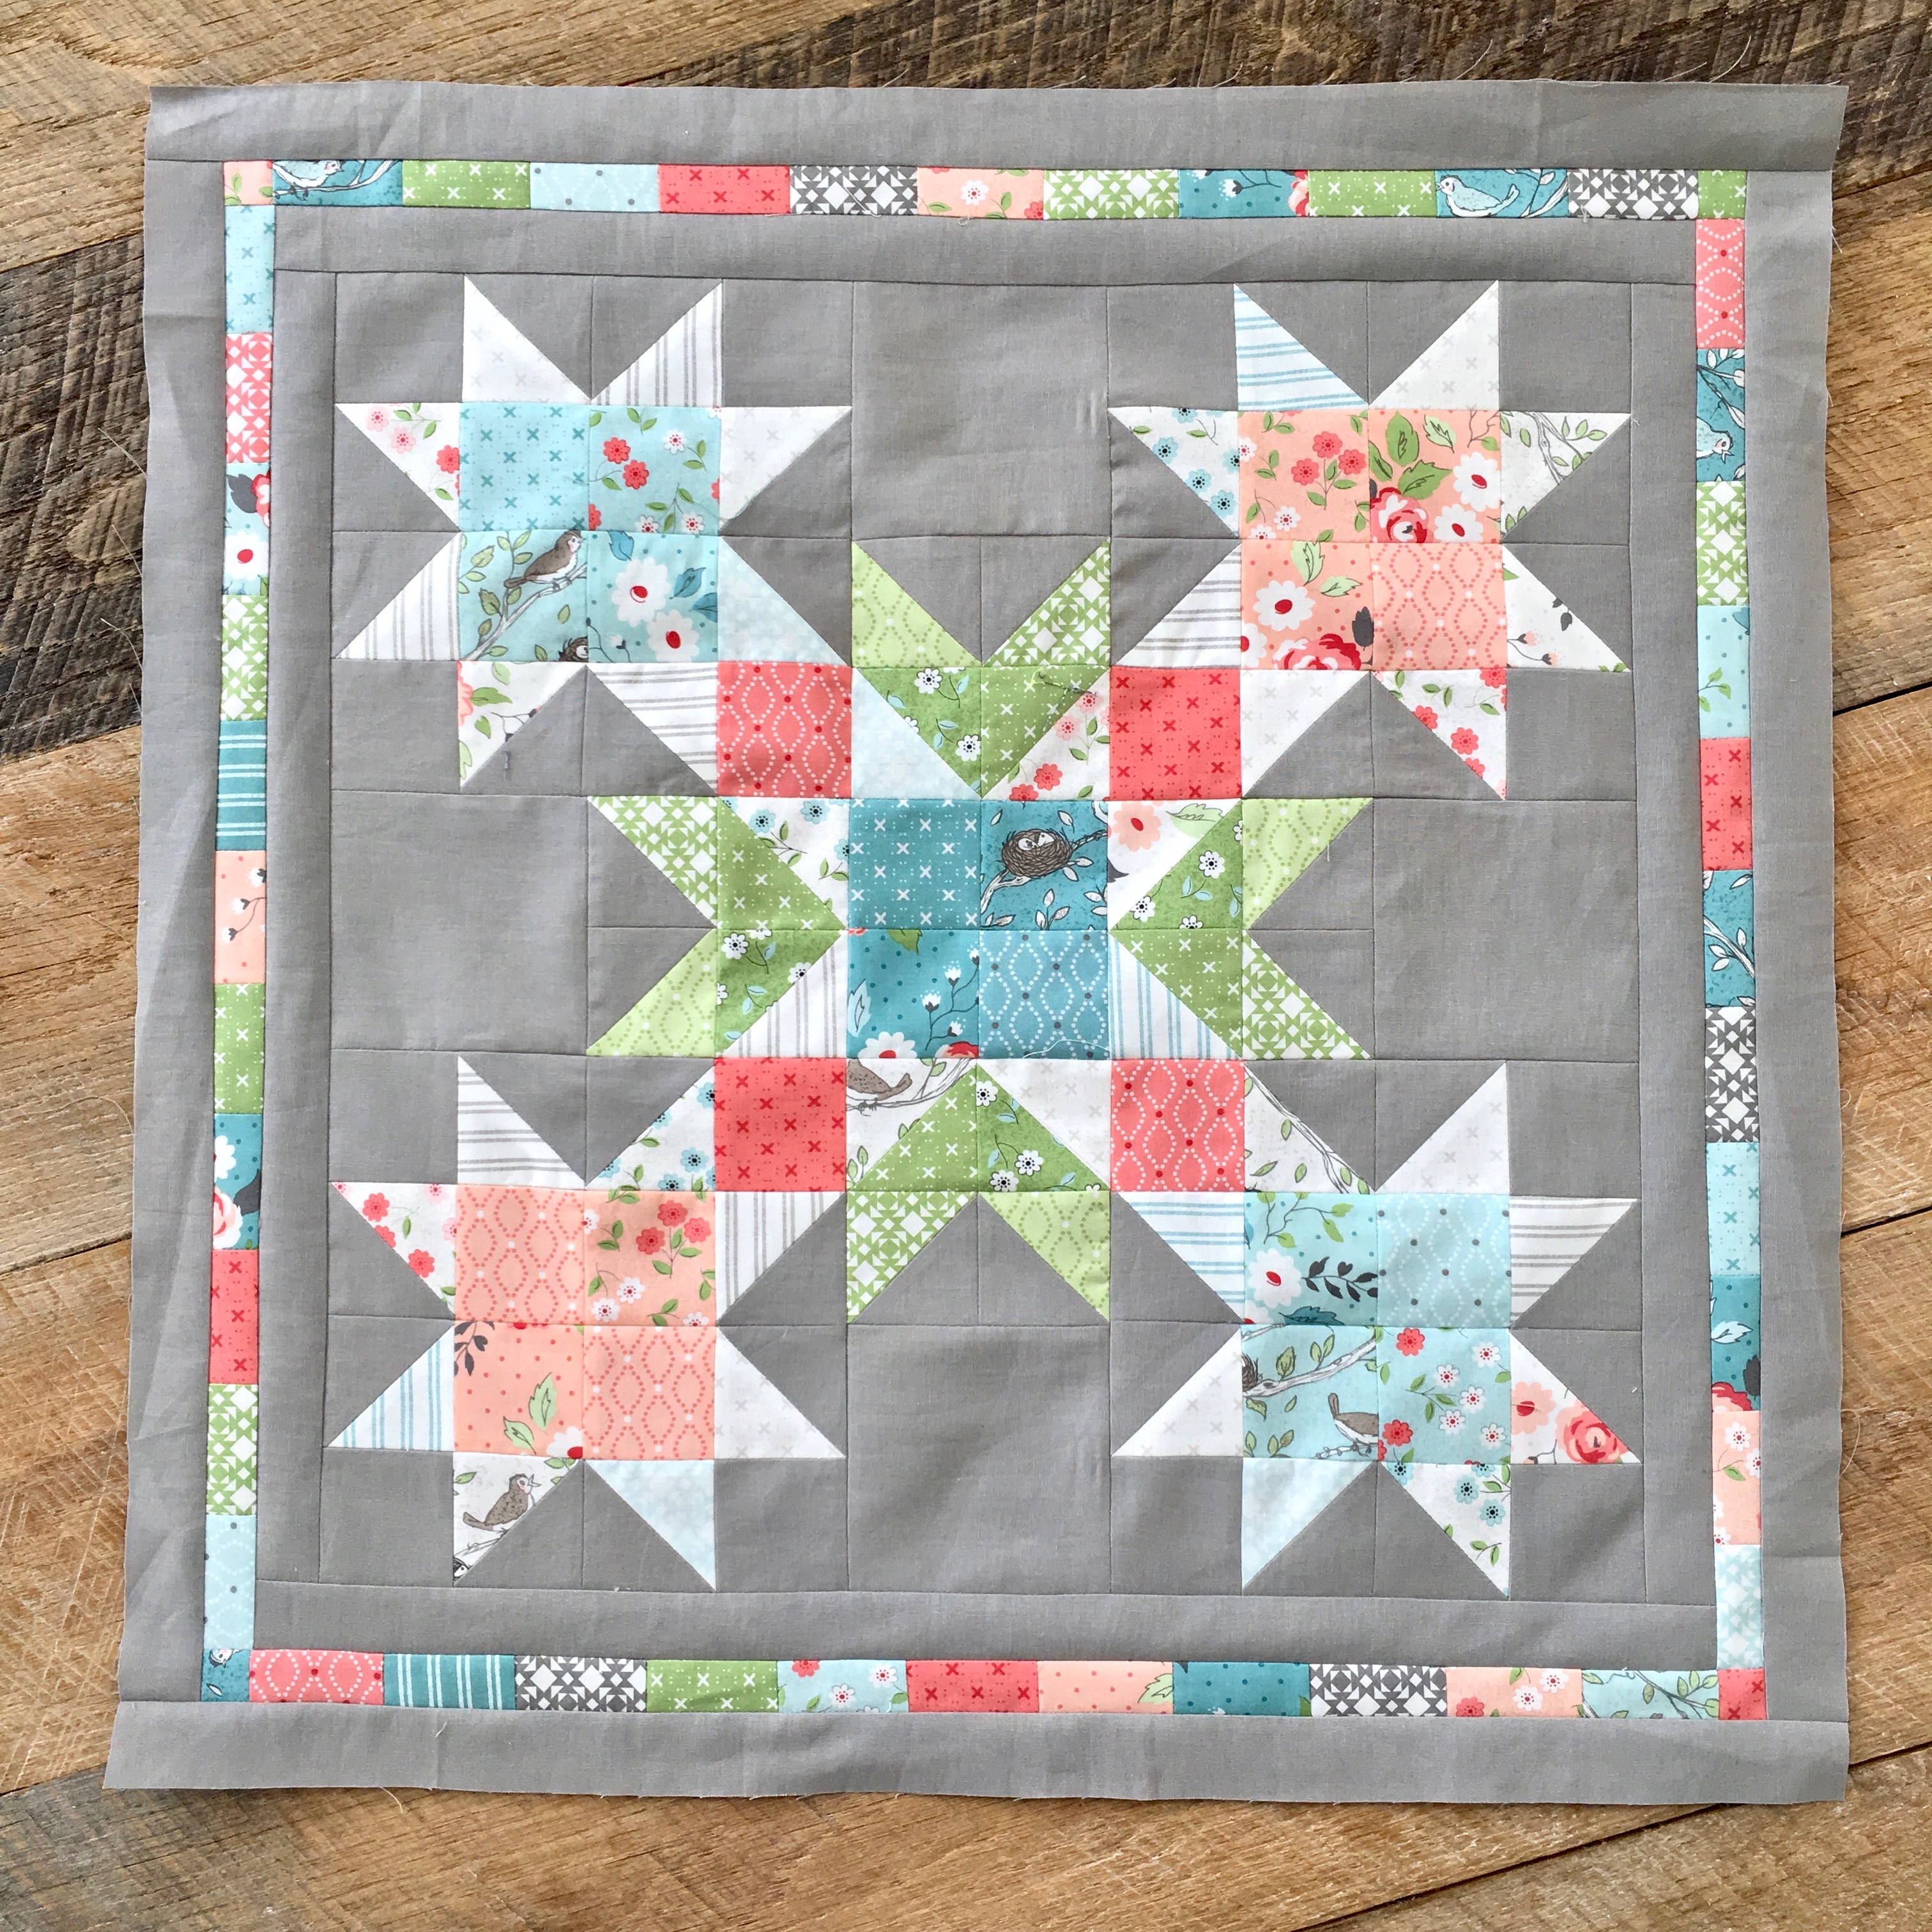
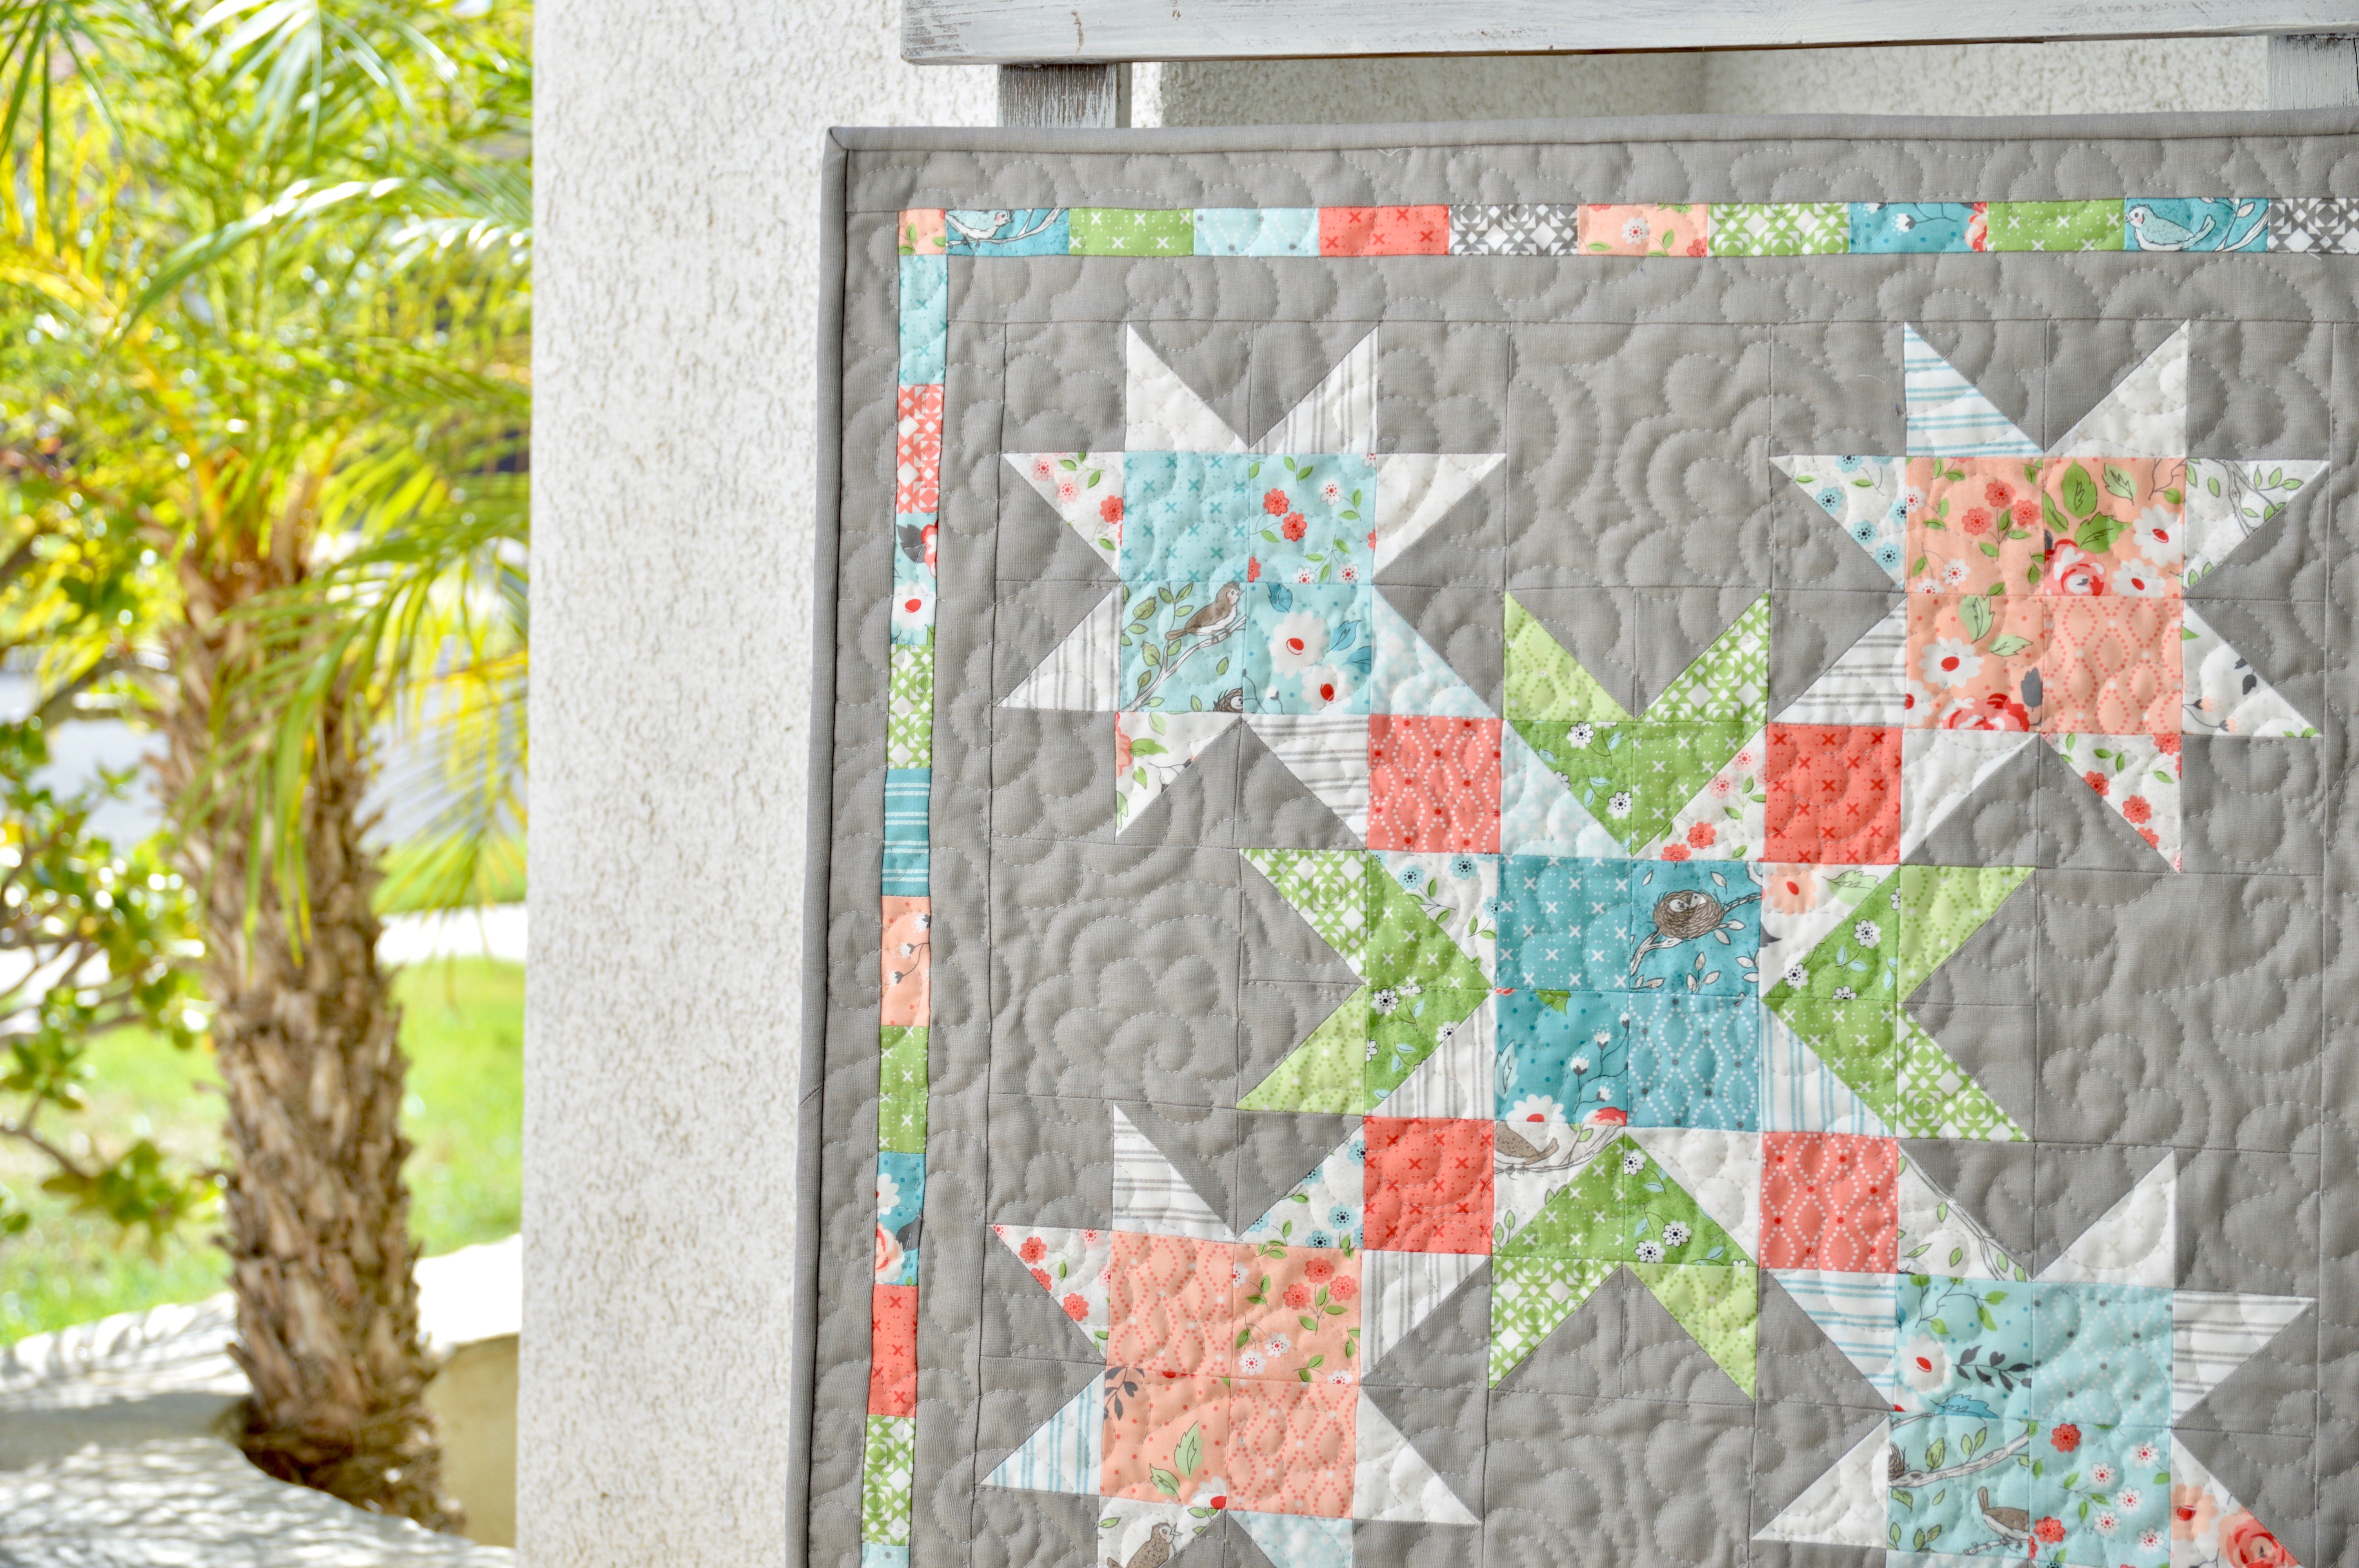
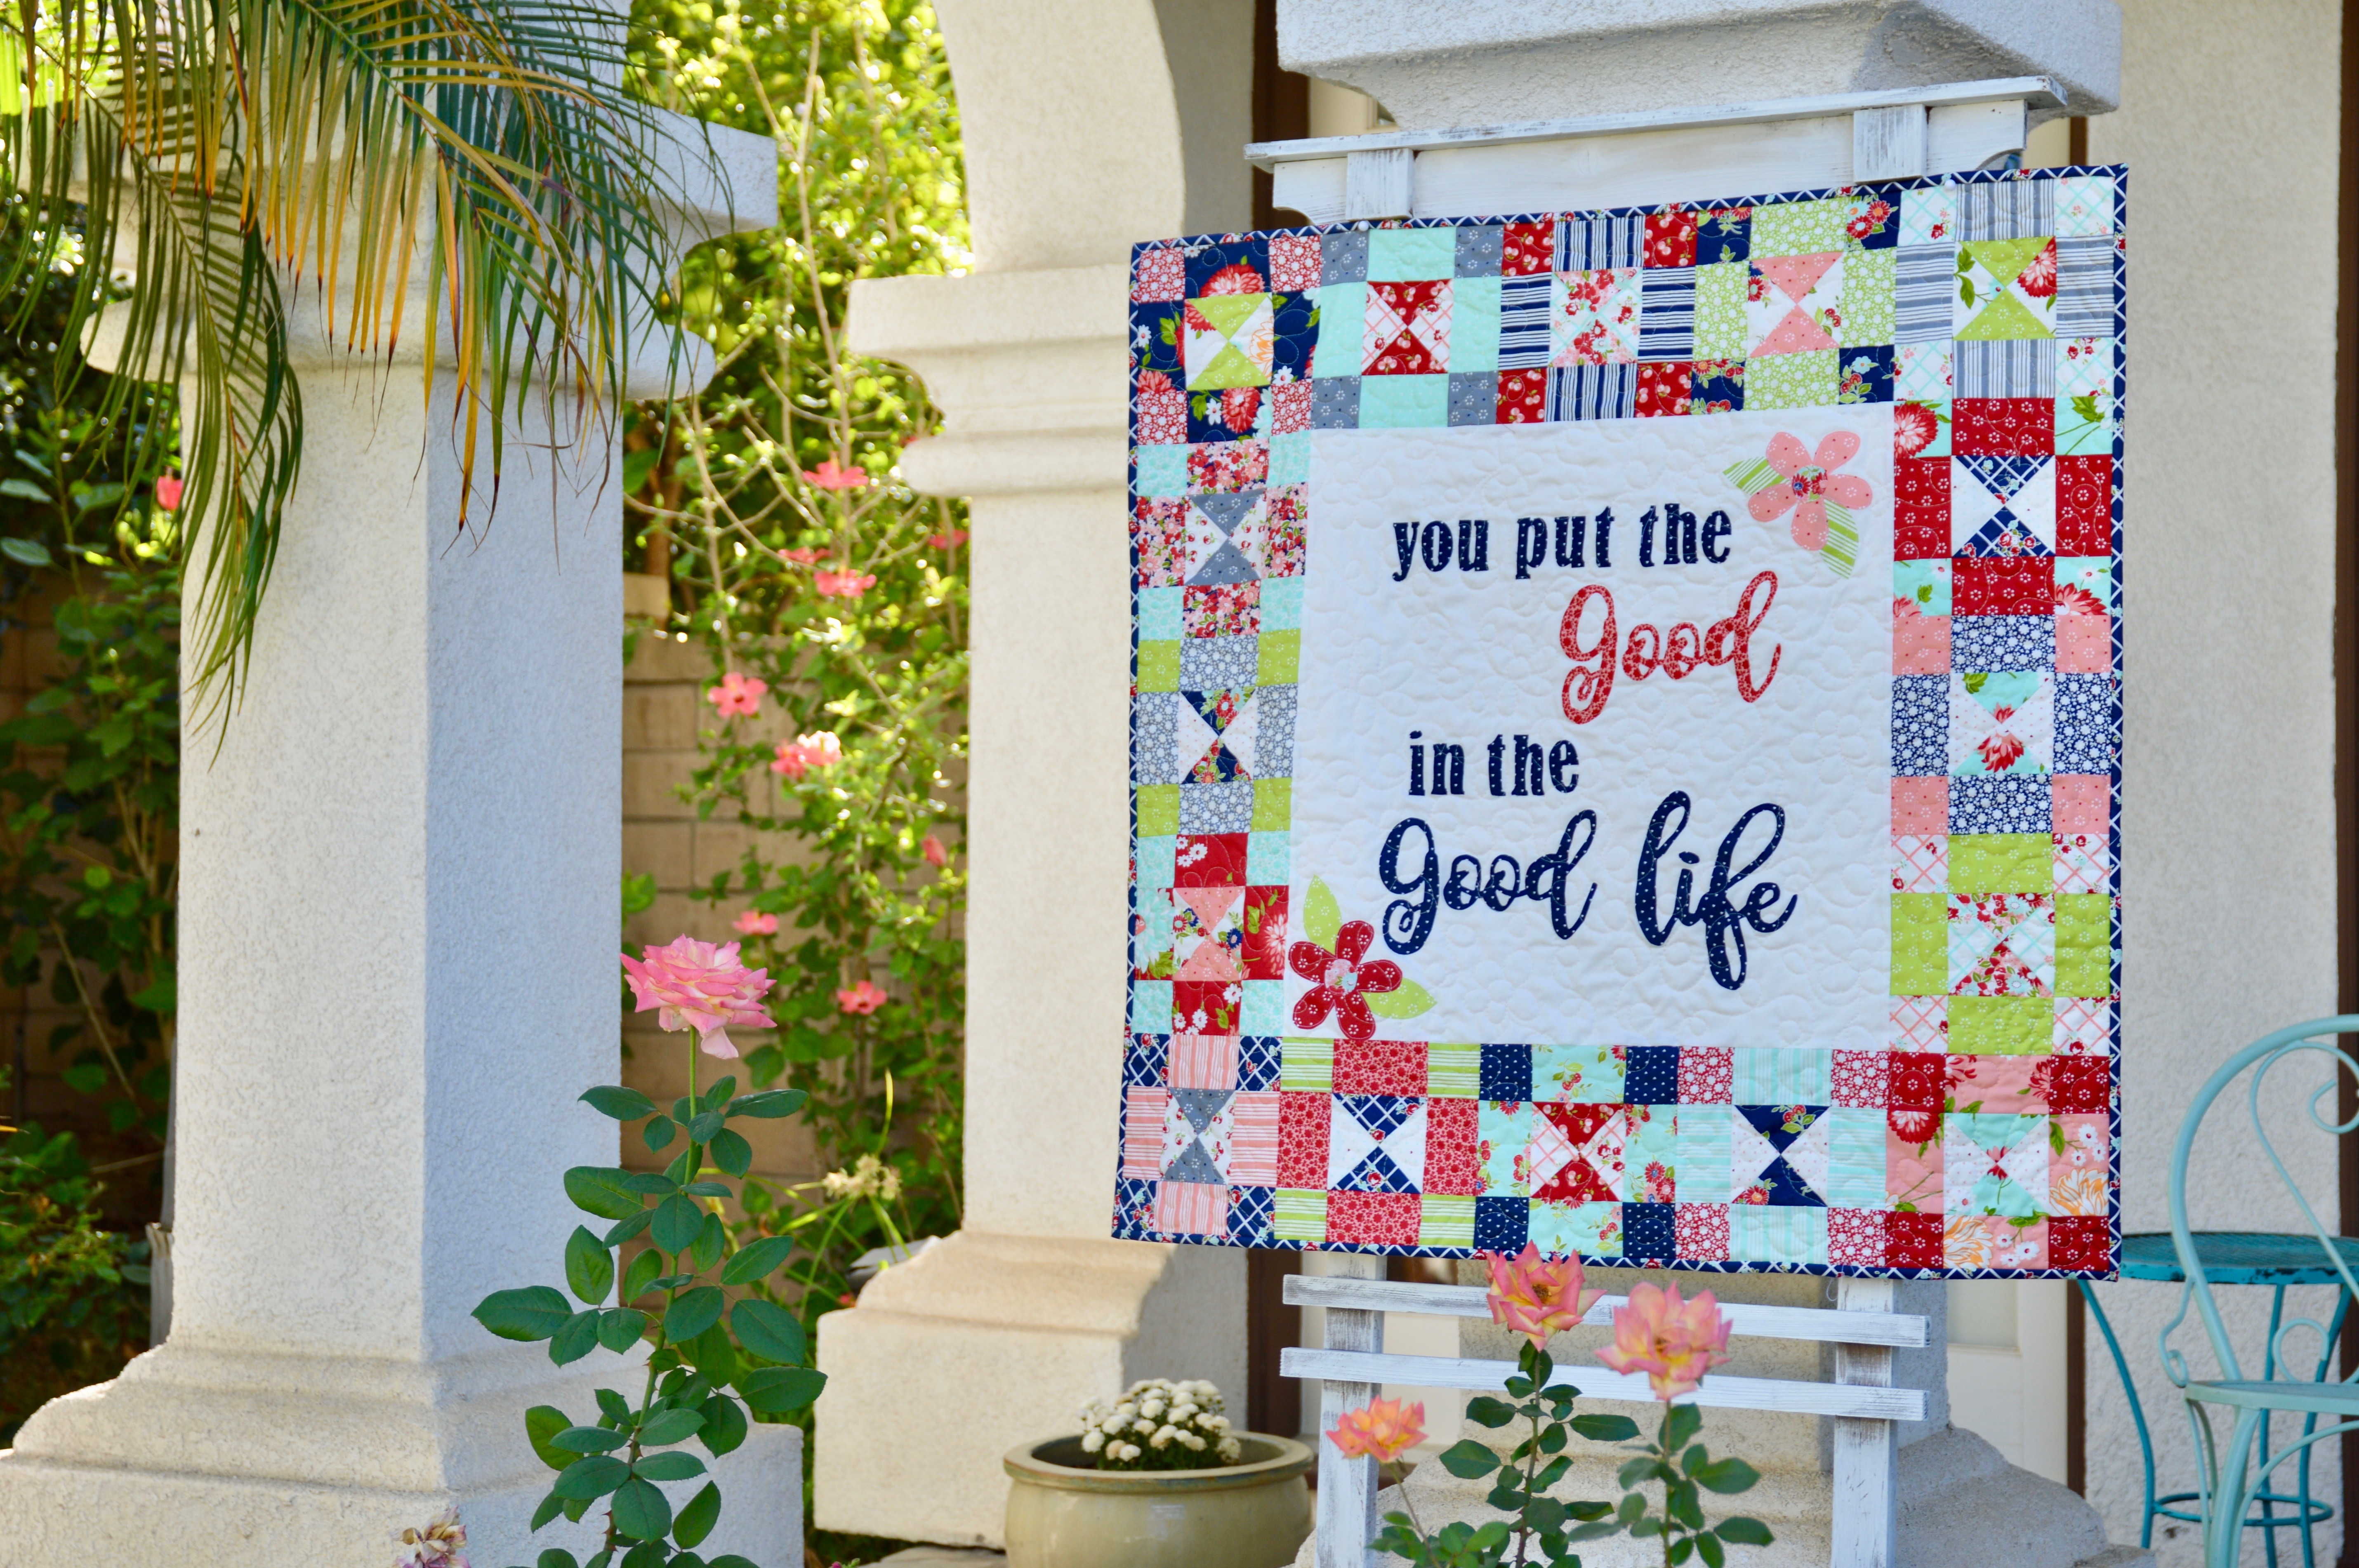
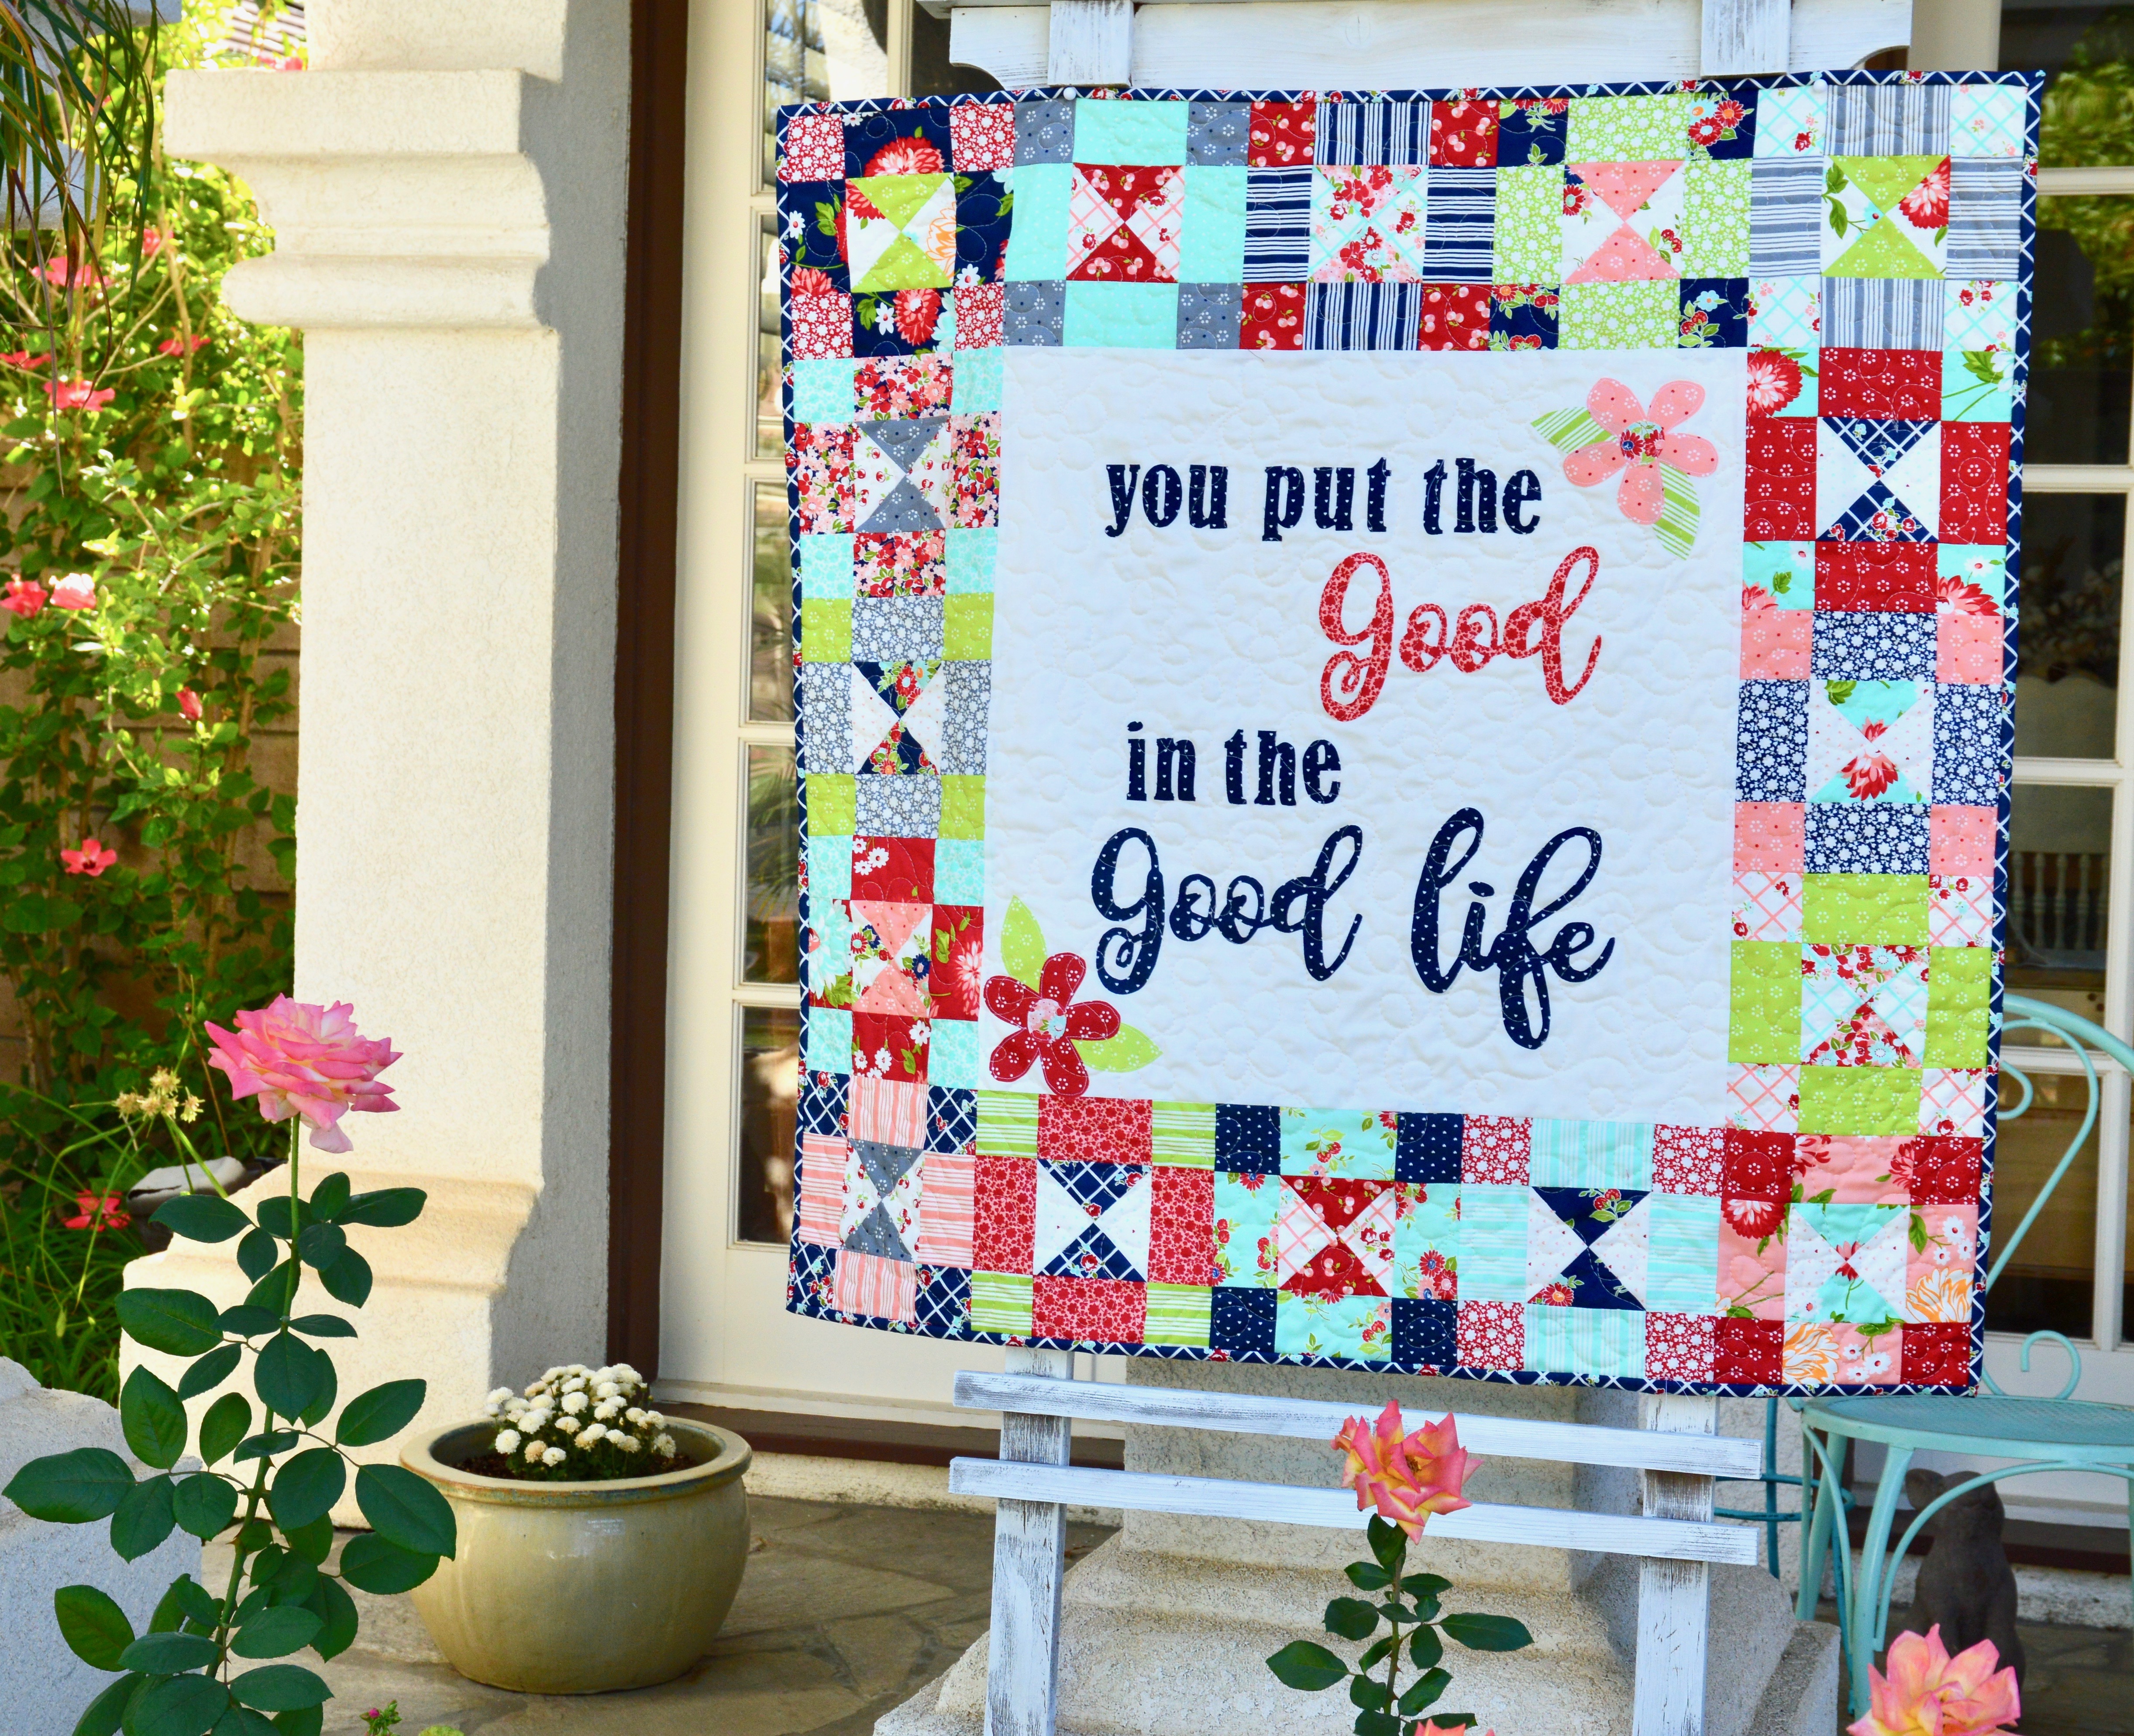
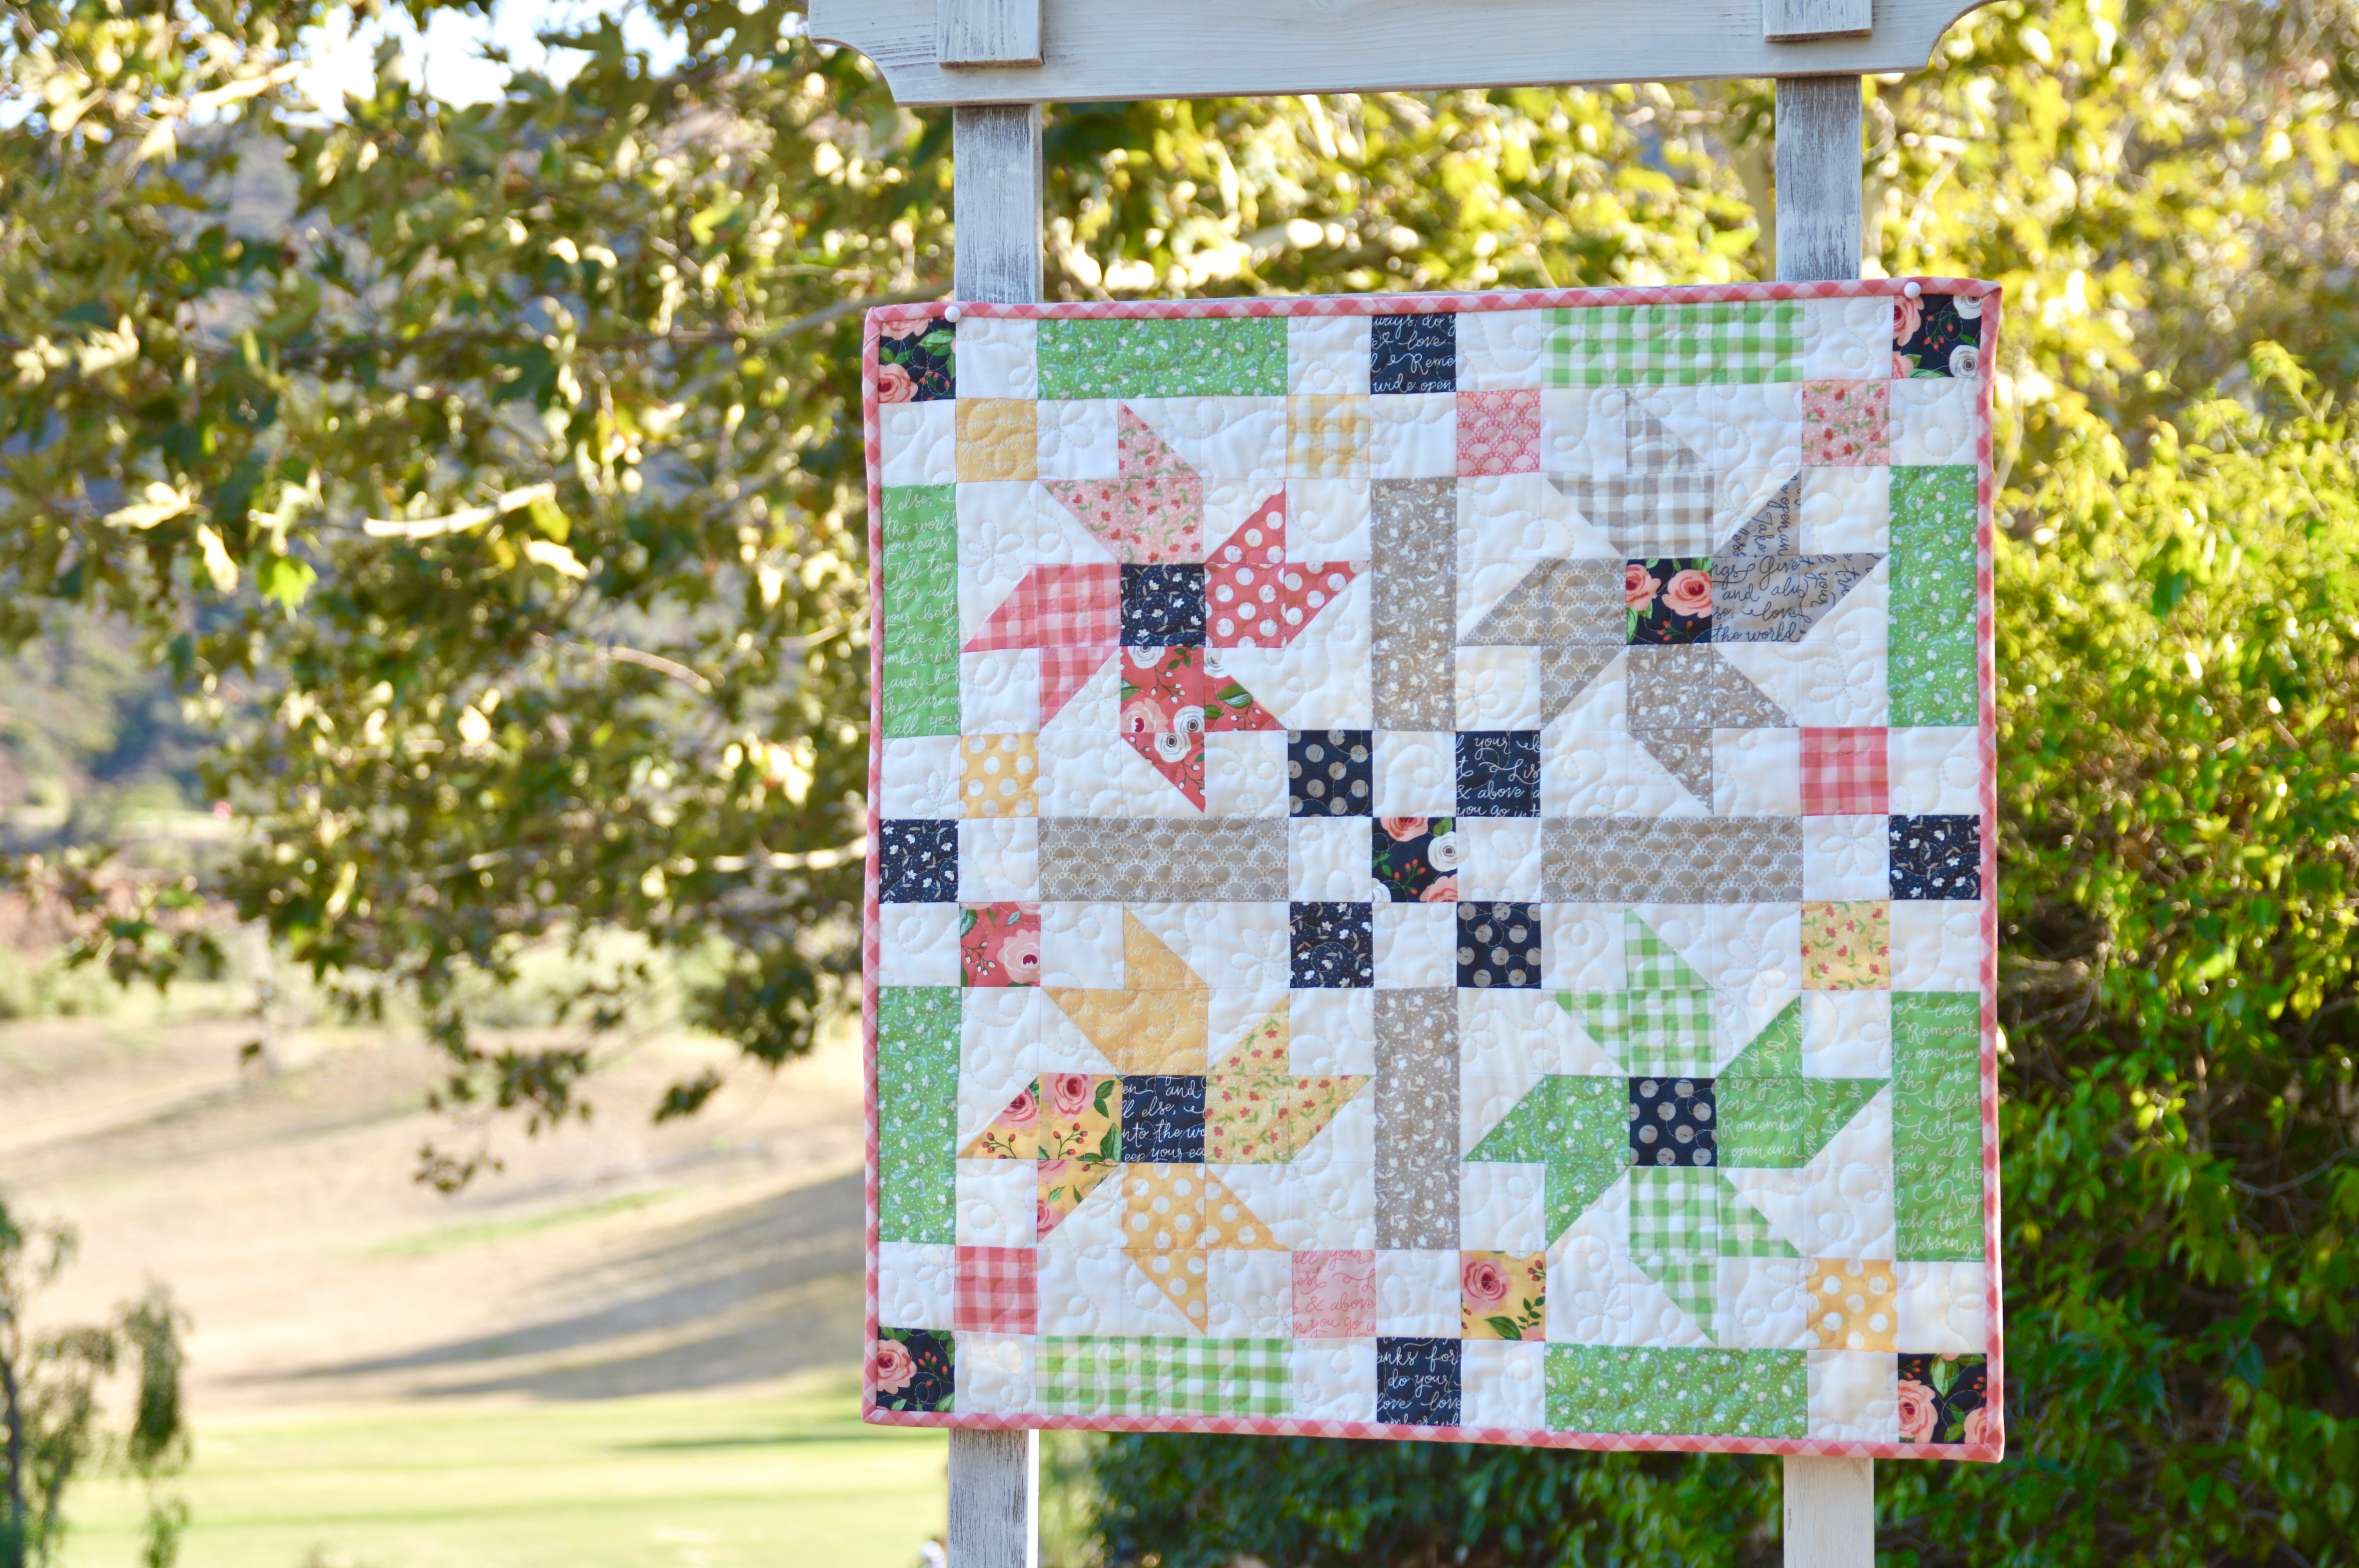
Thanks for stopping by!

Orange Peel Applique Quilt

Orange-Peel-Quilt

I am super excited to be sharing this mini quilt today!  I needed a little something for my new kitchen and I didn’t have much time…..summers are so crazy, right!!  I love the look of orange peel appliqué but wanted this project to be done in a few hours – Heat n Bond Lite to the rescue!

DSC_0164

I dove into my stash of Moda Vintage Picnic scraps – which are just the perfect colors to patch my Pyrex collection!

Vintage Orange Peel Mini Quilt with HeatnBond® Lite

Finished quilt 24″ square

Here’s what you need to get started:

Lots of scraps!!!  I used all my Vintage Picnic scraps for this quilt
Heat n Bond® Lite for the appliqué – yes those orange peels are machine appliquéd – who has time for hand stitching in the summer!
1/3 yard of white/off white background fabric
1/8 yard navy inner border fabric
Spray n Bond® Basting Spray
1/4 yard binding fabric
1-yard backing fabric
cotton batting


Vintage Orange Peel Mini Quilt with HeatnBond Lite Instructions:

Get started by cutting all those scraps into (64) 2 1/2″ squares.  No pattern here – just scrappy!

Lay them out in 8 rows of 8.

Piece together in rows, pressing each row opposite so the seams come together nicely.  Sew the rows together and press.

IMG_0931

I love patchy quilts!!!!

IMG_0933

For the inner navy border cut:

(2) 2″ x 16 1/2″ strips

(2) 2″ x 19 1/2″ strips

Sew the border to the sides of the scrappy unit, press.  Then to the top and bottom, press.
DSC_0126

For the orange peel, print off the orange peel pattern.  Make sure it measures 3″ from end to end.

orange peel

Trace the orange peel onto the HeatnBond Lite 48 times.

IMG_0946

Cut out around each orange peel and press to the wrong side of the desired fabric – scrap buster style!!!

IMG_0934

Cut out each orange peel and peel off the backing paper.

Cut the white fabric:

(4) 5 1/2″ x 19 1/2″

Position the orange peels as shown in the photo.  Heat set in place.  Sew around each orange peel using a straight stitch.

IMG_0947

Make the corner blocks:

corner block

Using the above measurements, construct 4 blocks for each of the 4 corners.

IMG_0953

Sew an orange peel unit to each side, press.

Sew a block unit to the ends of the remaining orange peel unit, press.

IMG_0959

Sew the remaining orange peel units to the top and bottom of the quilt.  Press.

Baste the quilt with SpraynBond Basting Spray for speedy results.  I quilted the quilt with an all over double loop de loop pattern.  Bind and enjoy!DSC_0144

I am super in love with this scrappy little quilt and love how it looks in my new kitchen!!!DSC_0134

DSC_0157

Four-Patch Heart Mini Quilt

I can’t get enough valentine sewing!  I think its just the pick-me-up I need during wintertime!  I created this fun mini quilt that is perfect to hang on a wall, put on a table or give to someone you love.

4 patch heart cover
IMG_9234

The finished quilt measures 26″ square and is made up of 4 quilt blocks that measure 10″.
IMG_9178

These fabrics from Moda are sure to brighten your day!  The line is called Just Another Walk in the Woods – and it’s ADORABLE!!! Don’t you just love cracking open a Jelly Roll!  It’s a little bit magical!

IMG_9177

4-Patch Heart Mini Quilt Featuring Heat n Bond Lite

Here’s what you need to get started:

1/2 a Jelly Roll (or equivalent)
1/3 yard background fabric
Aurifil Threads – 2530 &
Heat n Bond® Lite EZ print sheets
1/2 yard for backing
1/3 yard binding – or you can use left over Jelly Roll Strips

Click Here to download the heart Pattern

All seams 1/4″


IMG_9186

Begin by cutting 15-18 of the jelly roll strips into 2 1/2″ squares.

Cut the background fabric:

  • (4) 6 1/2″ squares
  • (16) 2 1/2″ squares for block corners
  • (32) 2 1/2″ squares for Half Square Triangles (HST)
4-Patch Applique Hearts

Select (4) groups of (4) fabrics for the hearts.  I selected like colors for each heart but you can make it scrappy if you want!  Sew the group of 4 fabrics together in a 4-patch, pressing seams.

IMG_9183

Print (or trace) 4 hearts onto Heat n Bond Lite.

Cut out 1/8″ around each heart.

IMG_9182

Center the heart on the wrong side of each 4-patch.  Heat set.

IMG_9184

Cut out each heart and peel off the backing paper.  Fuse hearts to the center of the (4) white 6 1/2″ squares. Sew 2 times around each heart with a straight stitch.  Set aside.

IMG_9192

HSTs –  Half Square Triangles

You can make the HSTs however you prefer.  I used my Sizzix machine for quick cutting.  They need to measure 2 1/2″ when they are finished.  You will need a total of 32 HST to make the 4 blocks.

(Quick HST instructions: Draw a diagonal line on the wrong side of the (32) 2 1/2″ back ground squares.  Pair right sides together with a 2 1/2″ square cut from the jelly roll fabric.  Sew along the diagonal line.  Trim 1/4″ along the seam and press toward the dark.)

IMG_9189

Follow the chart below to construct the block:

heart block

Use the (16) background 2 1/2″ squares for the block corners and (16) low volume 2 1/2″  squares from the Jelly Roll for the center squares.

Make 4 blocks.  I chose a color for each block, but you could totally mix up the colors and make them all scrappy!!

IMG_9200

Once the blocks are finished, take the remaining 2 1/2″ squares from the Jelly Roll and piece the sashing and borders. Press all seams open.

Sew (2) strips of 5 squares for the short sashing.  Press

Sew (3) strips of 11 squares for the top, middle, and bottom sashing. Press

Sew (2) strips of 13 squares for the side sashing.  Press

heart block sashing

Make sure to match each seam and pin.

IMG_9210

Use Spray n Bond® for quick basting!  I can’t live without it!!!

IMG_9229

Quilt as desired.  Bind.
IMG_9245

IMG_9236
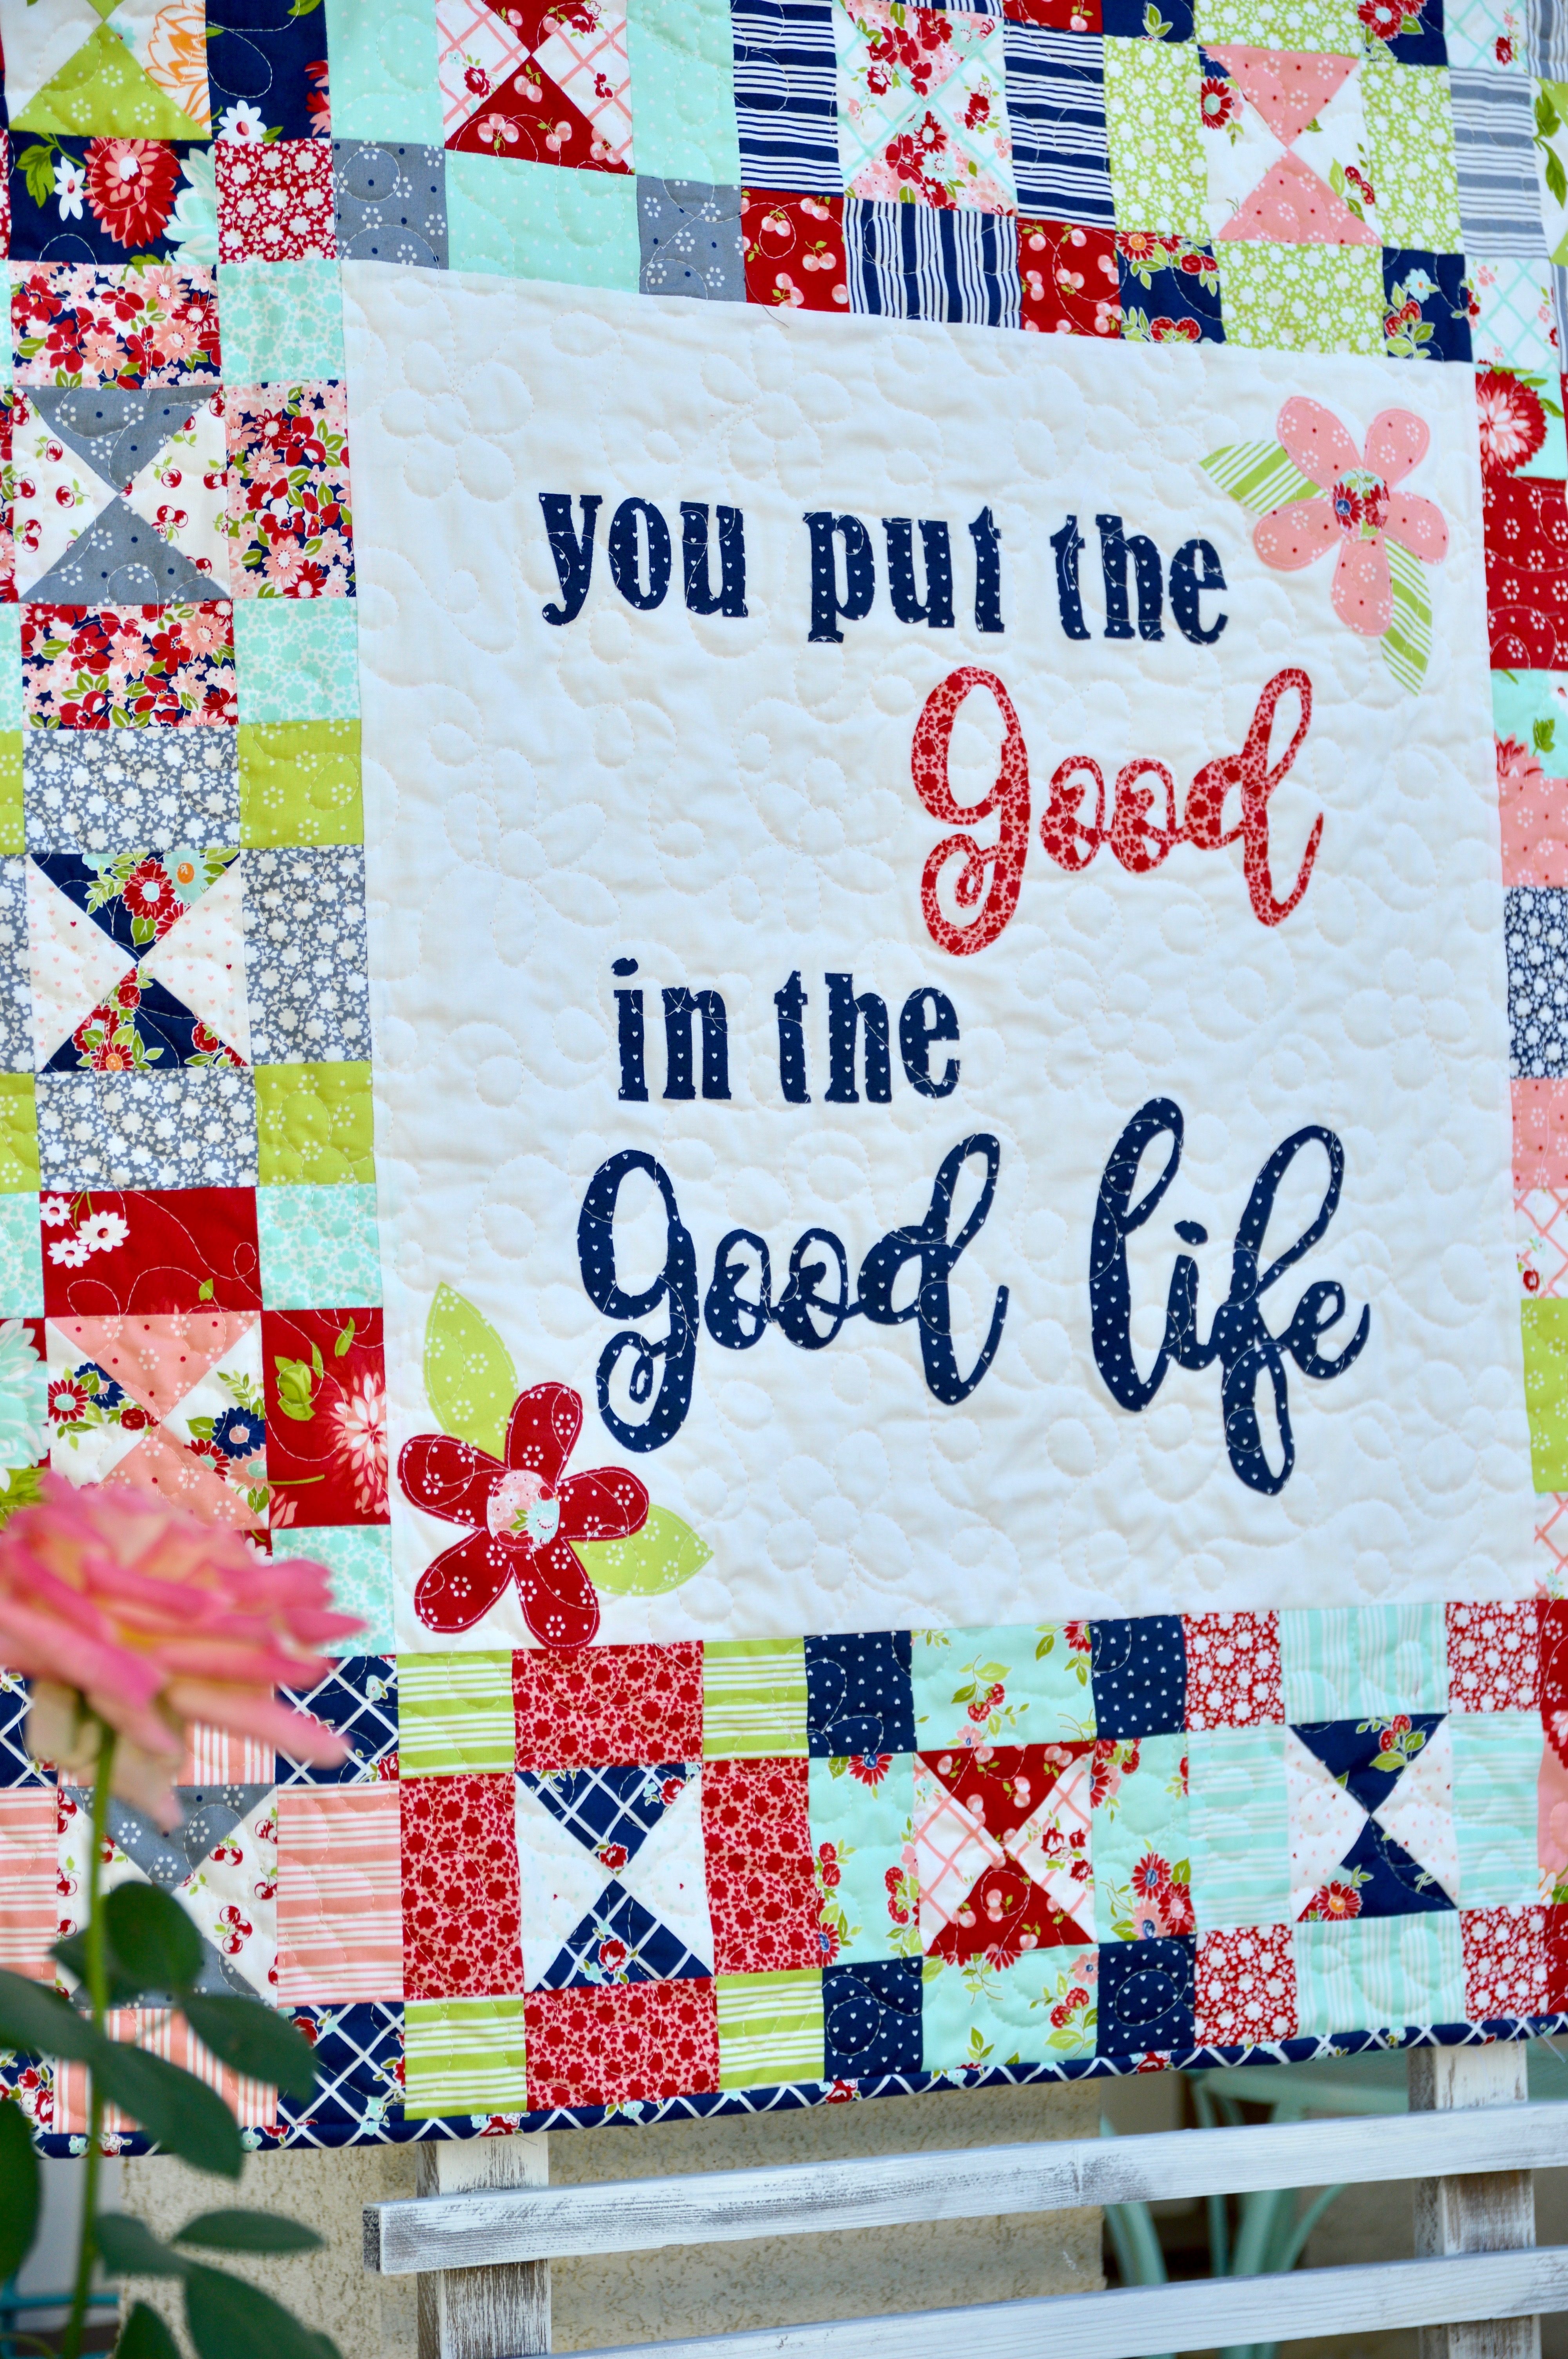
I hope you love making this!!
DSC_0302

Kitty Love Quilt Pattern is Here!!

screen-shot-2017-01-10-at-12-07-43-pm

It’s here!  It’s here!  My latest quilt pattern, Kitty Love!!!   January is feeling quite dreary!!!  I created this cheery Valentine pattern to brighten things up around here!  It is available for purchase in my Etsy shop.  The pattern is a PDF and has full color instructions and diagrams.  dsc_0861

I made this quilt with a variety of Bonnie & Camille fabrics by Moda: Vintage Picnic, Hello Darling, Vintage Modern and Day Sail.

img_8676

This quilt measures 31″ square and is perfect to hang on a wall or put on a table.  What I love about this pattern is that it is super versatile!  I have included instructions to sew the quilt with charm packs and background fabric!  I love my friend,  Tina’s version – she made 5 heart blocks and 4 heart blocks all with charm squares!!

img_8693

img_8691

Also included in the pattern is a pumpkin block so you can make balck cats and orange pumpkins for Halloween!!

img_8610

Mufasa is totally thrilled with this fun quilt and I know you will be too!!!

img_8638

Five Fat Quarter Fun {Free Quilt Pattern} Fresh Eggs

5 fat quarter fun logofresh eggs 
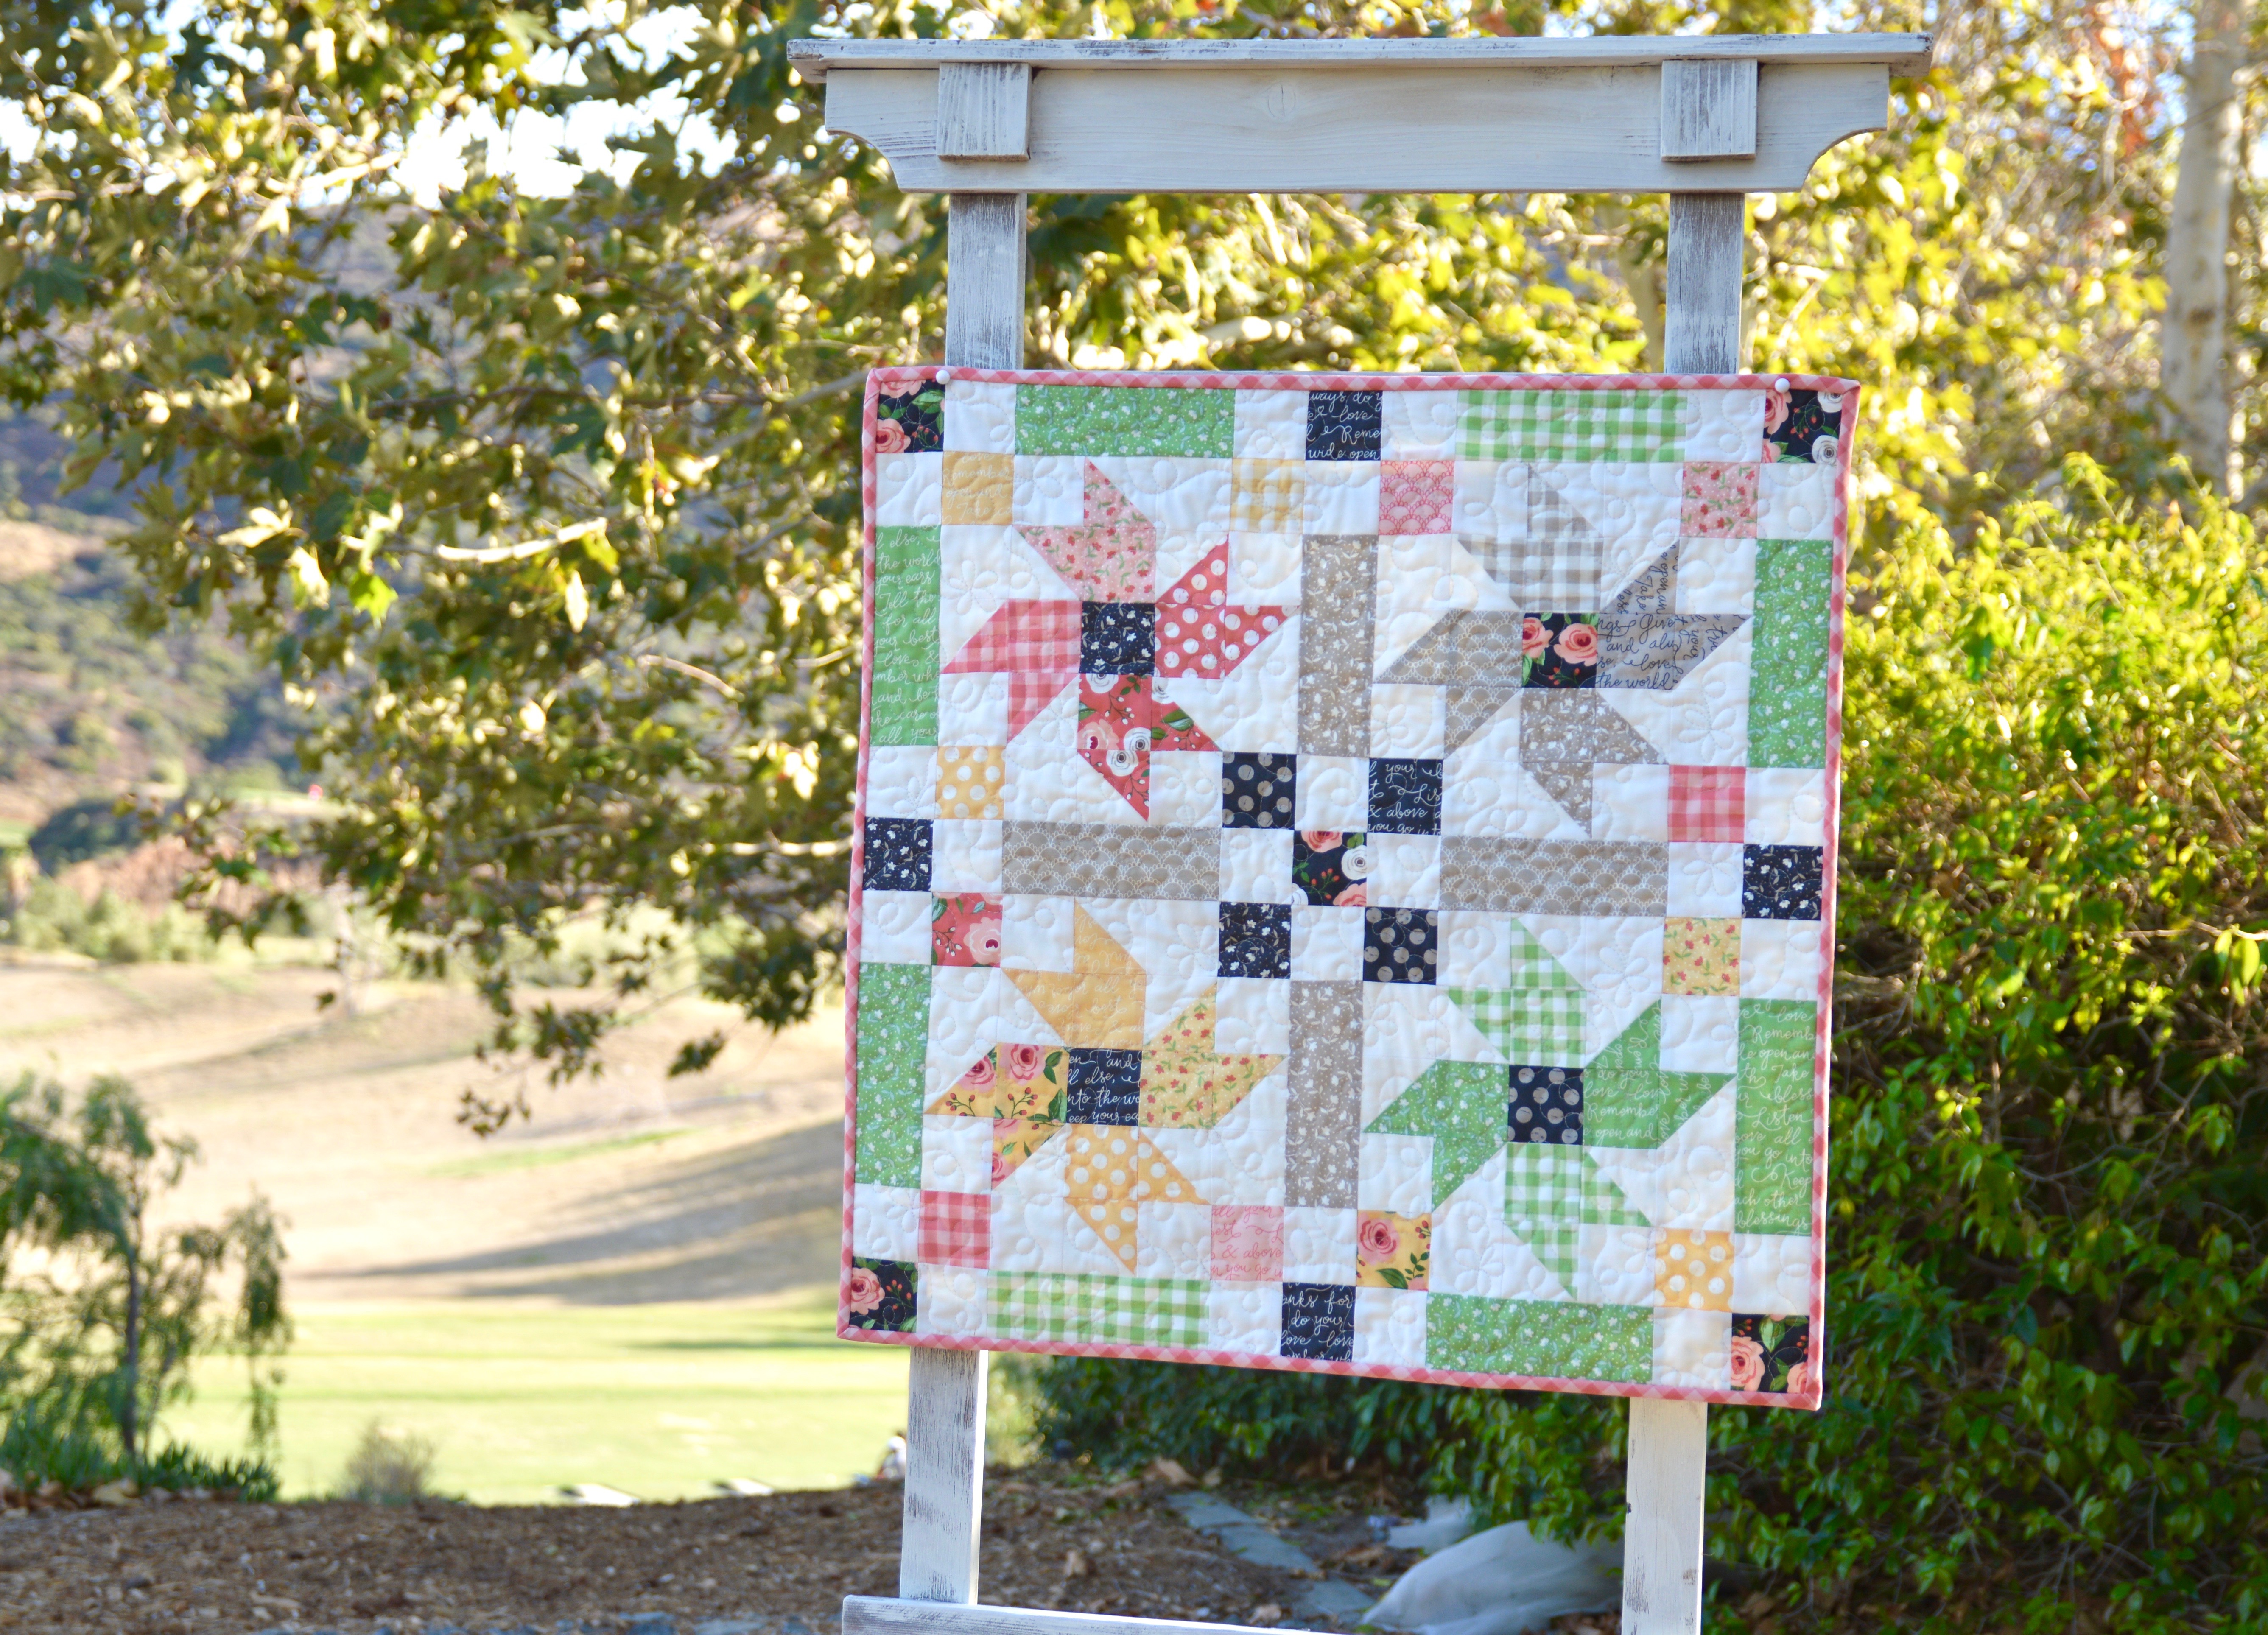
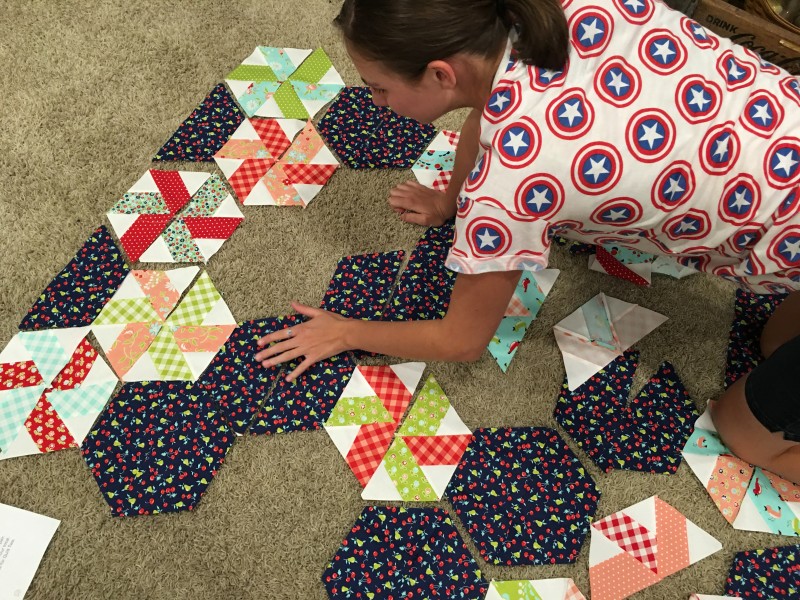
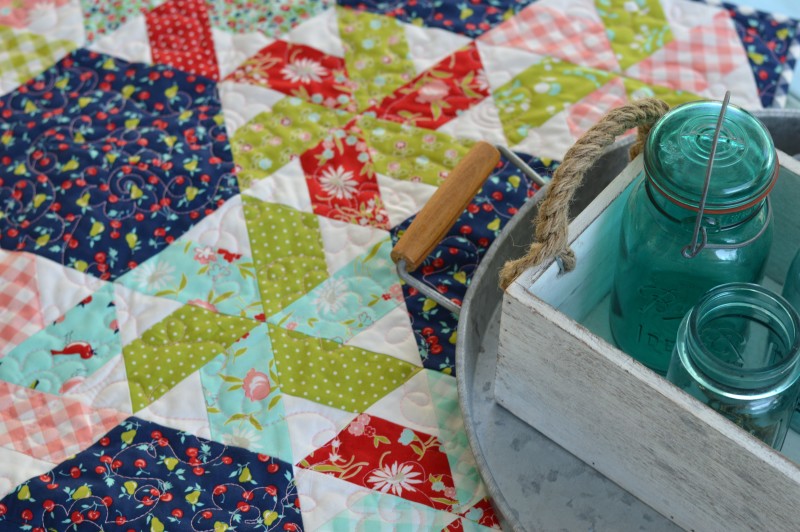
It’s so fun to loose yourself at the local quilt shop!! Sometimes it’s hard to know what to buy with so many amazing choices! Fat Quarters are a fun way to bring a little sampling home with you! This pattern was created after Amber, from Gigi’s Thimble, and I met up at a quilt shop while in St. George, Utah. All you need is 5 fat quarters and some background fabric to put the top together! It’s even more fun when you shop and sew with friends!!  You can download the PDF by clicking HERE.

5-fq

img_7561

The finished quilt measures 34″ square and is perfect for a table or to hang on the wall!

mufasa

Or it makes a purrrrrfect cat bed 🙂

five-fat-quarter

I love Amber’s version – she did straight line quilting 🙂

IMG_2507

5-fat-quarter

Click HERE for an index of all the Five Fat Quarter Fun Patterns!!

Save

Save

Save

Little Ruby Quilt Along – Finished Quilt

LittleRuby-Quilt

This has been such a fun quilt along from Fat Quarter Shop!  You’re not too late if you want to make this quilt!  I’ve attached each of the videos below if you would like to make one.  If I’m being honest, this kind of quilt (one that requires special rulers and templates) is so NOT my style.  BUT I have to say I have TOTALLY LOVED making this quilt!

IMG_9641 
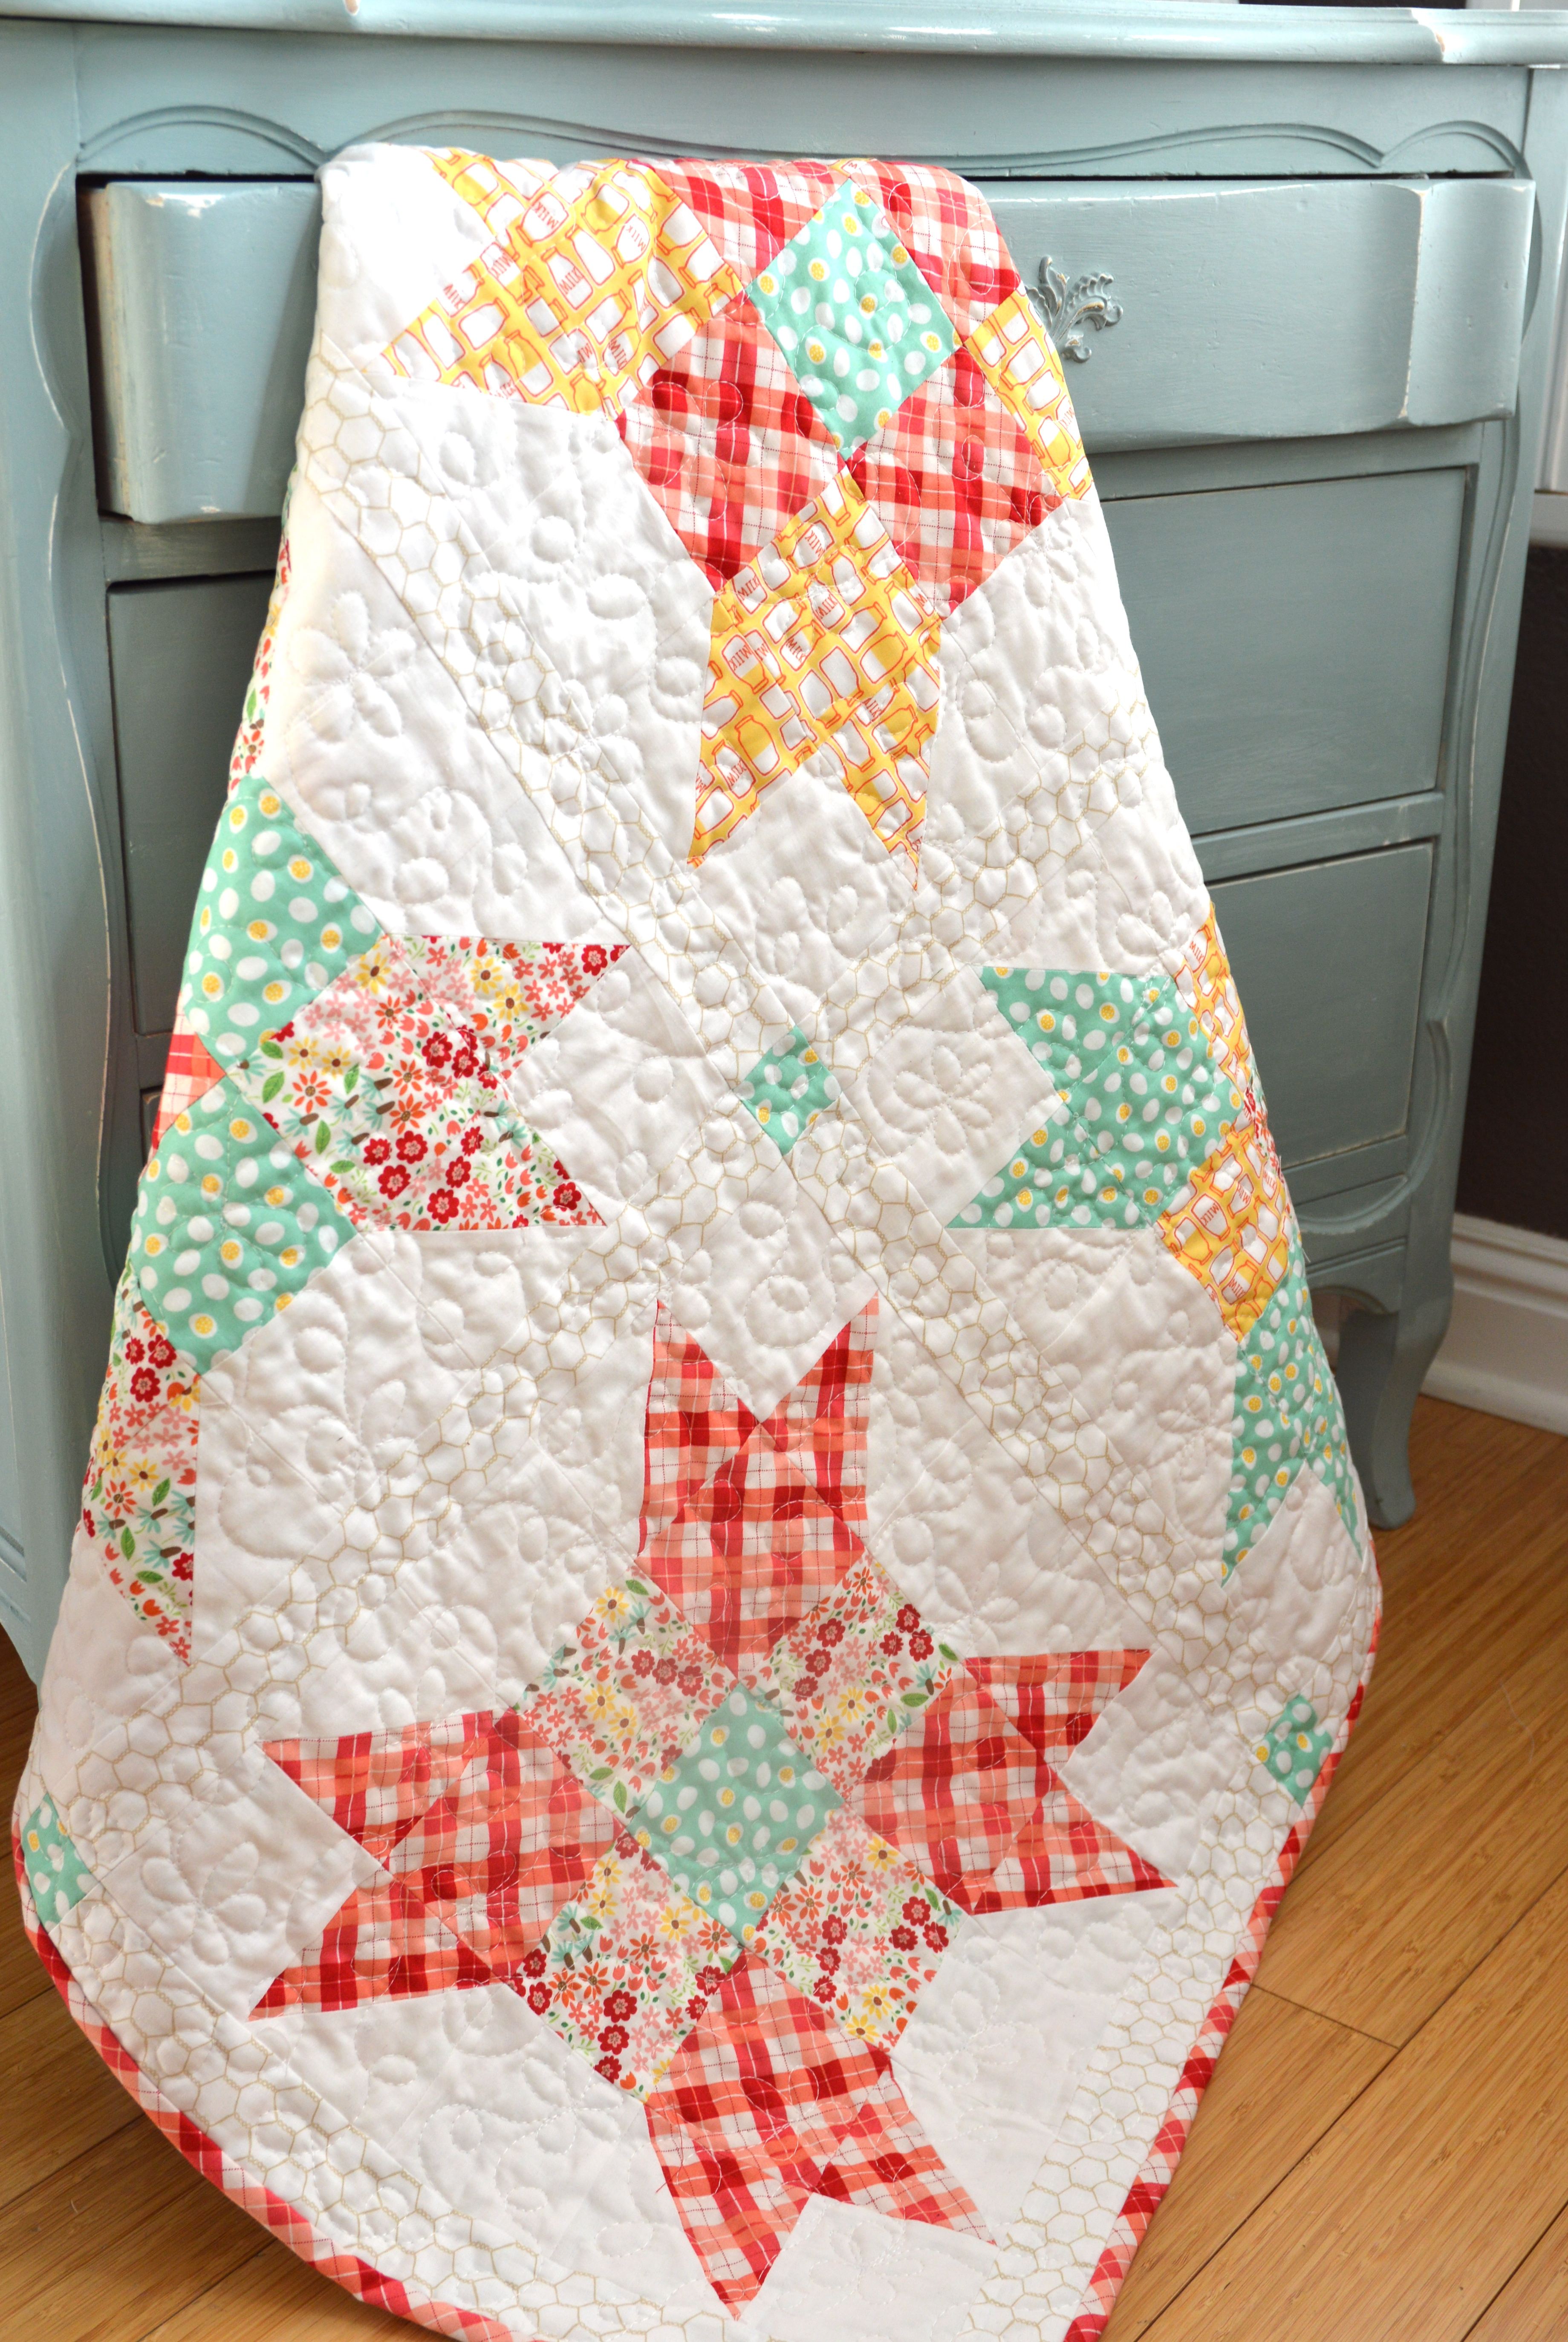
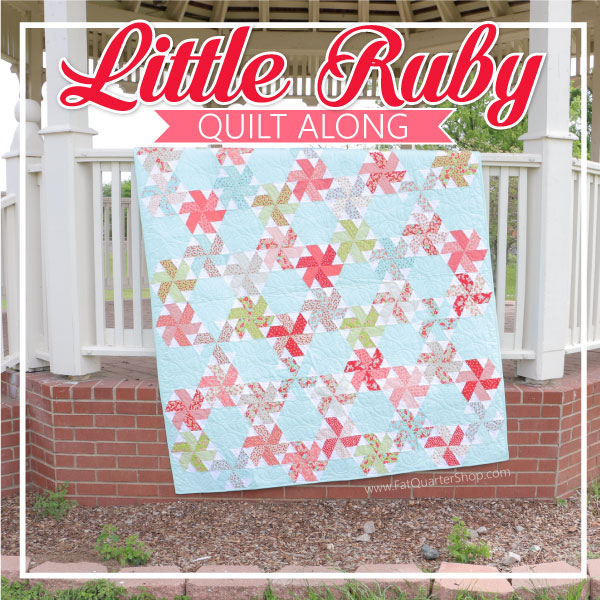
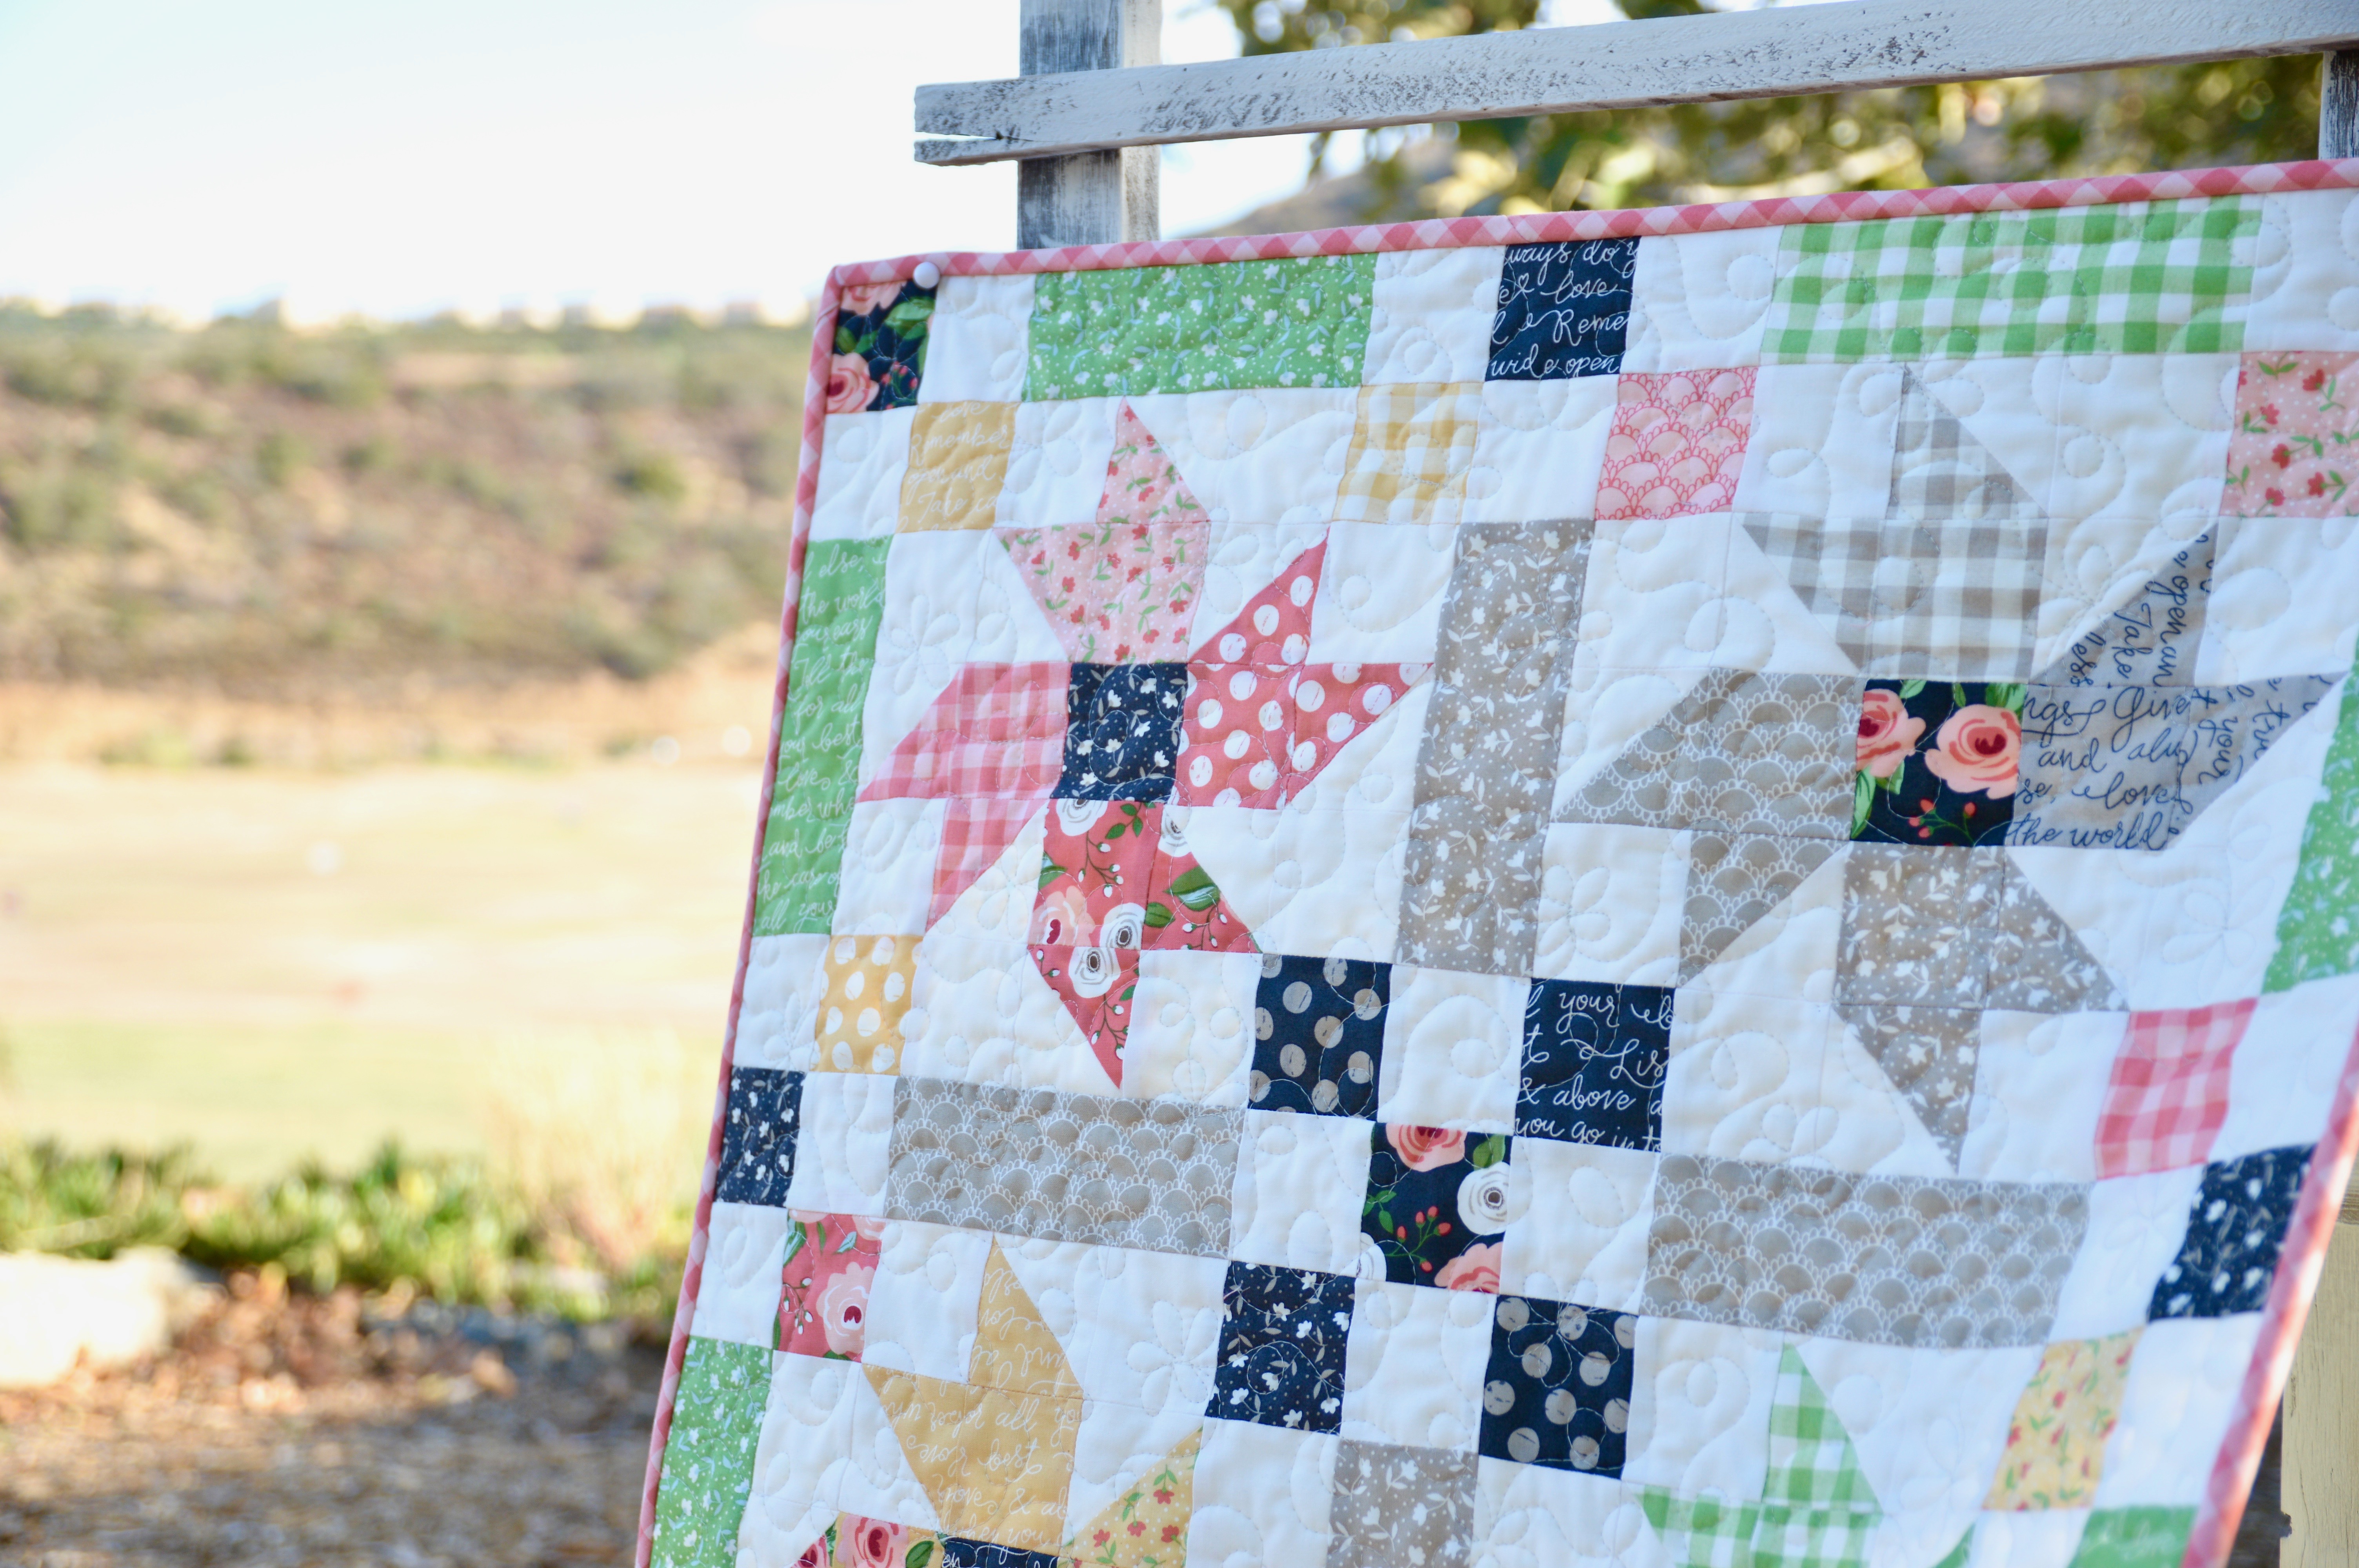
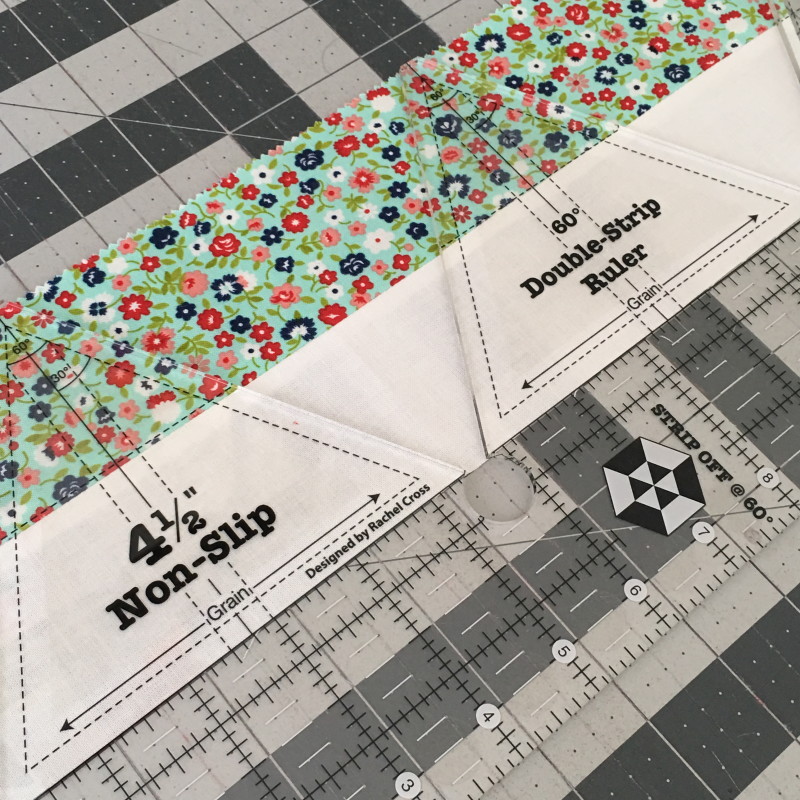
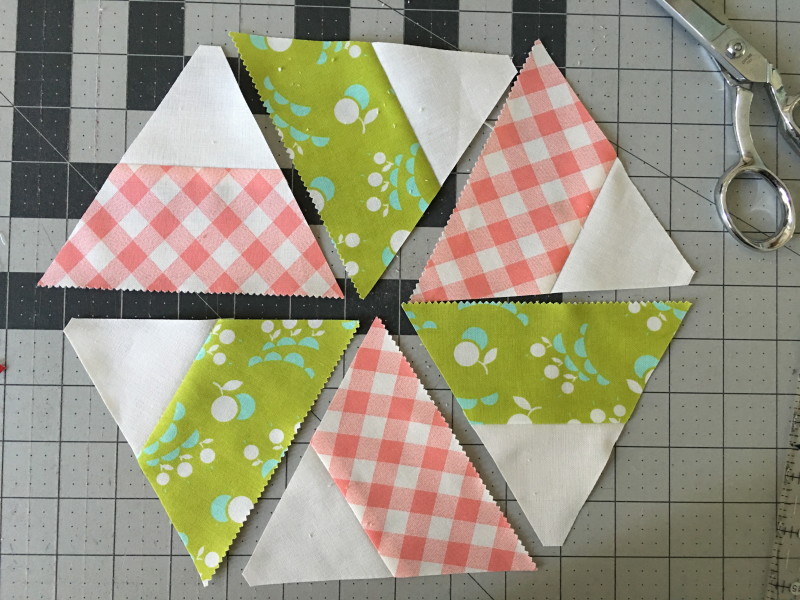
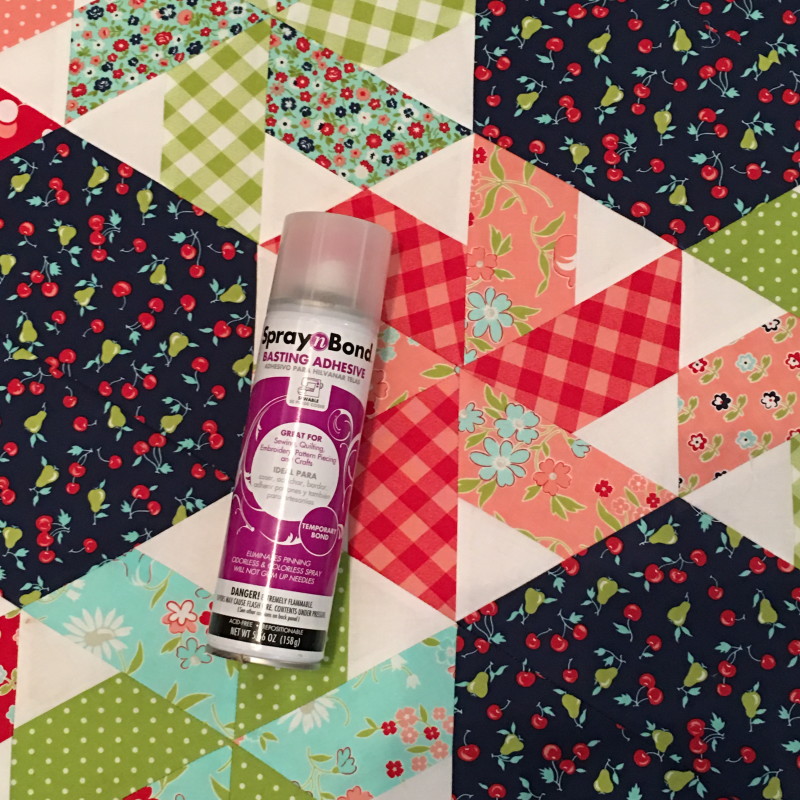
It’s so good to jump out of your comfort zone and try something totally new!  You will love how fun this quilt is – the templates make everything fit together perfectly.

little ruby quilt vintage picnic moda fabric

Click for Fabric requirements 🙂

vintage picnic little ruby quilt 4

Here’s a little overview of the pattern.IMG_8848

The pattern calls for 2 1/2″ strips.  You sew them together and use this cook ruler to cut the exact size triangle.  vintage picnic little ruby quilt 6

The triangles spin around to form a pinwheel type pattern – cool huh 🙂vintage picnic little ruby quilt 7

I read all the instructions and watched the videos and still managed to sew my first 2 triangles together the wrong way – 3 times – YIKES!  Once I got that out of my system it was smooth sailing!vintage picnic little ruby quilt 8

I love having Ella around because I hand her a stack of blocks and she puts them together for me.  We did a little experimenting with the pattern for fun.

The blocks sewed together like a dream.  I just love this fabric!vintage picnic little ruby quilt 10

I used my Spray n Bond basting spray to baste the quilt and then machine quilted myself using a loopy floral design.

vintage picnic little ruby quilt 3

I love bias gingham binding!  The great thing about Vintage Picnic is that the gingham is printed on the bias so it saves fabric and is easy to cut!

vintage picnic little ruby quilt 13

I am thrilled with my Vintage Picnic fabric choice.  I will be keeping this quilt out all summer long!  I did modify my quilt slightly in that I made it a touch smaller.

vintage picnic little ruby quilt 11

vintage picnic little ruby quilt 5 
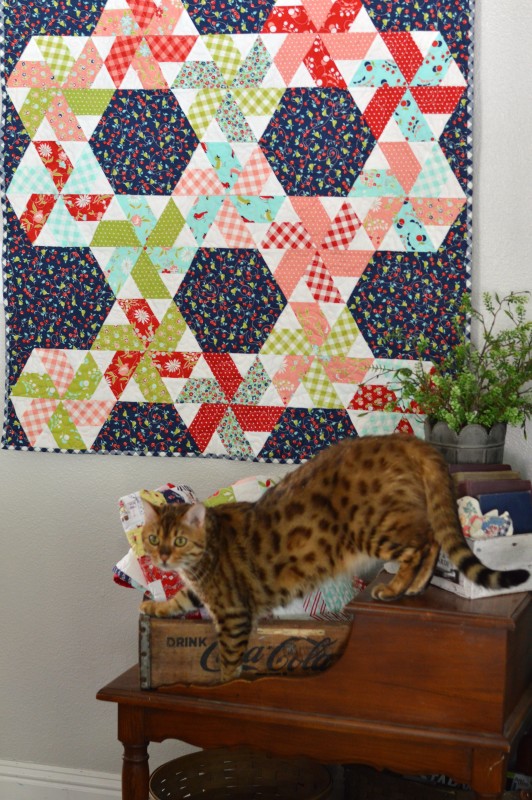
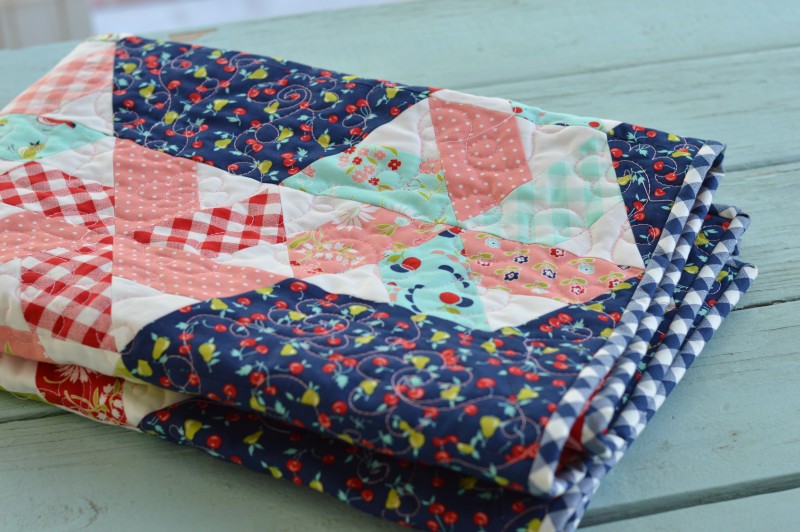
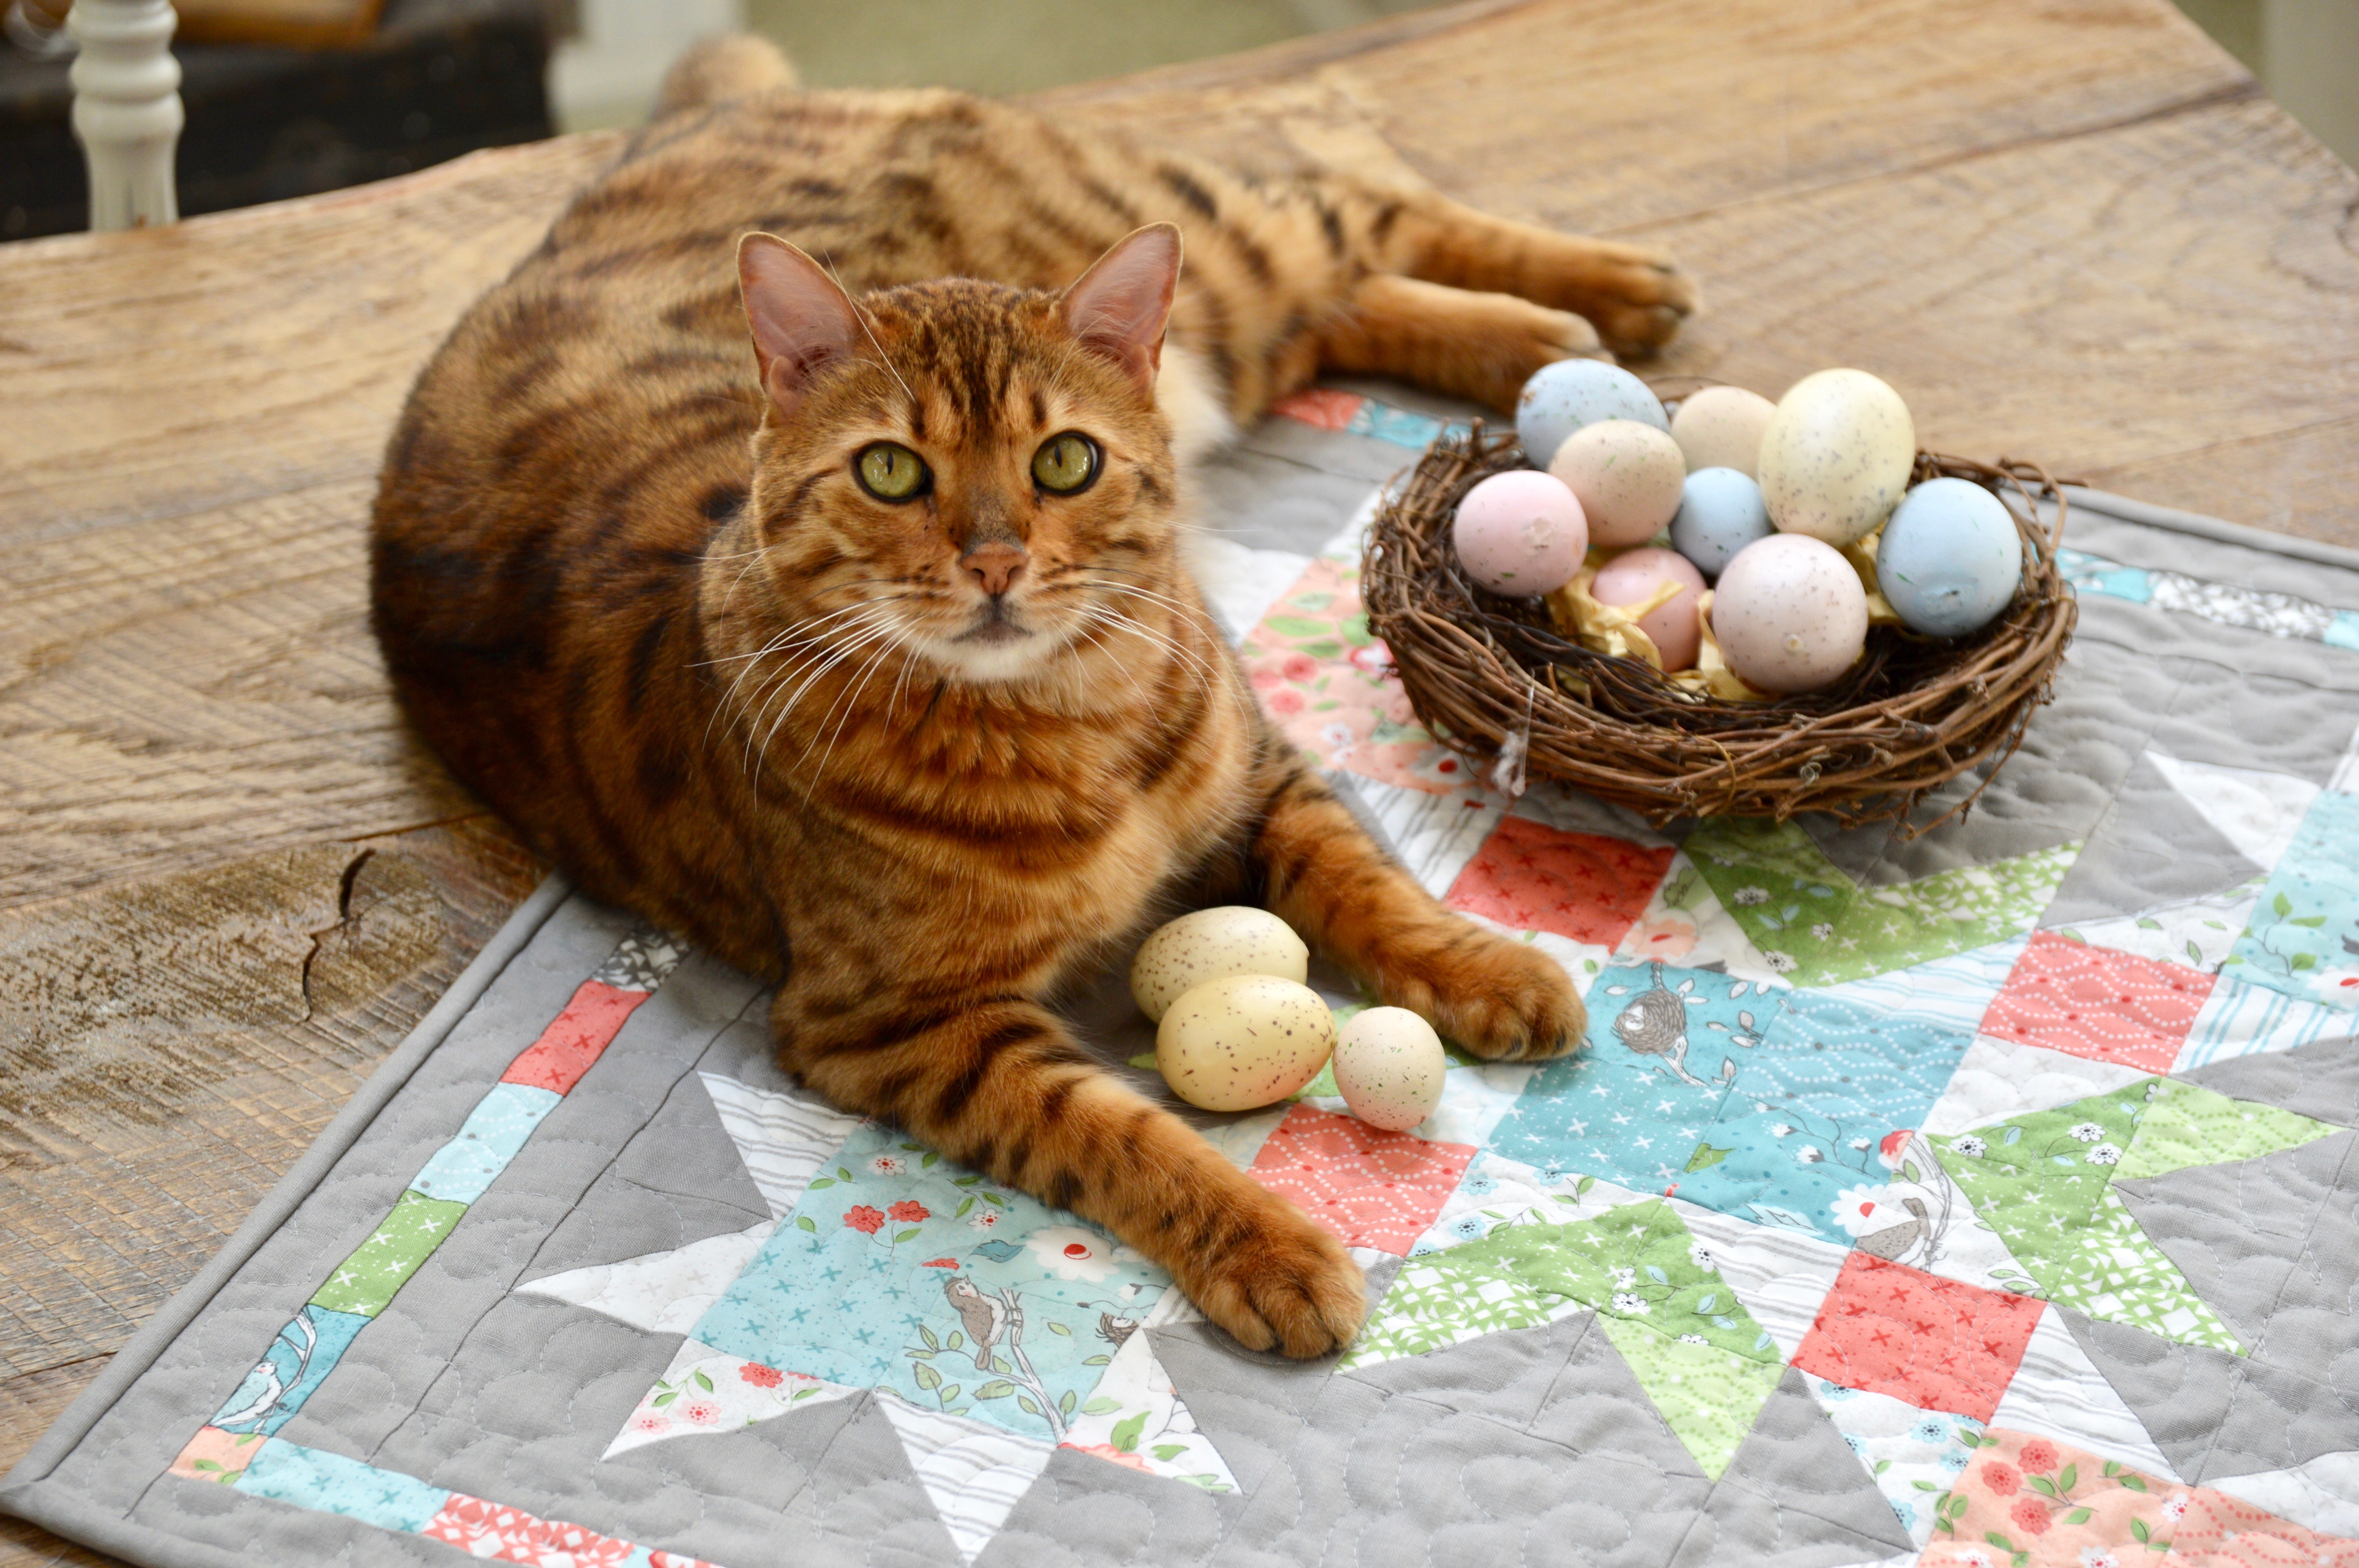
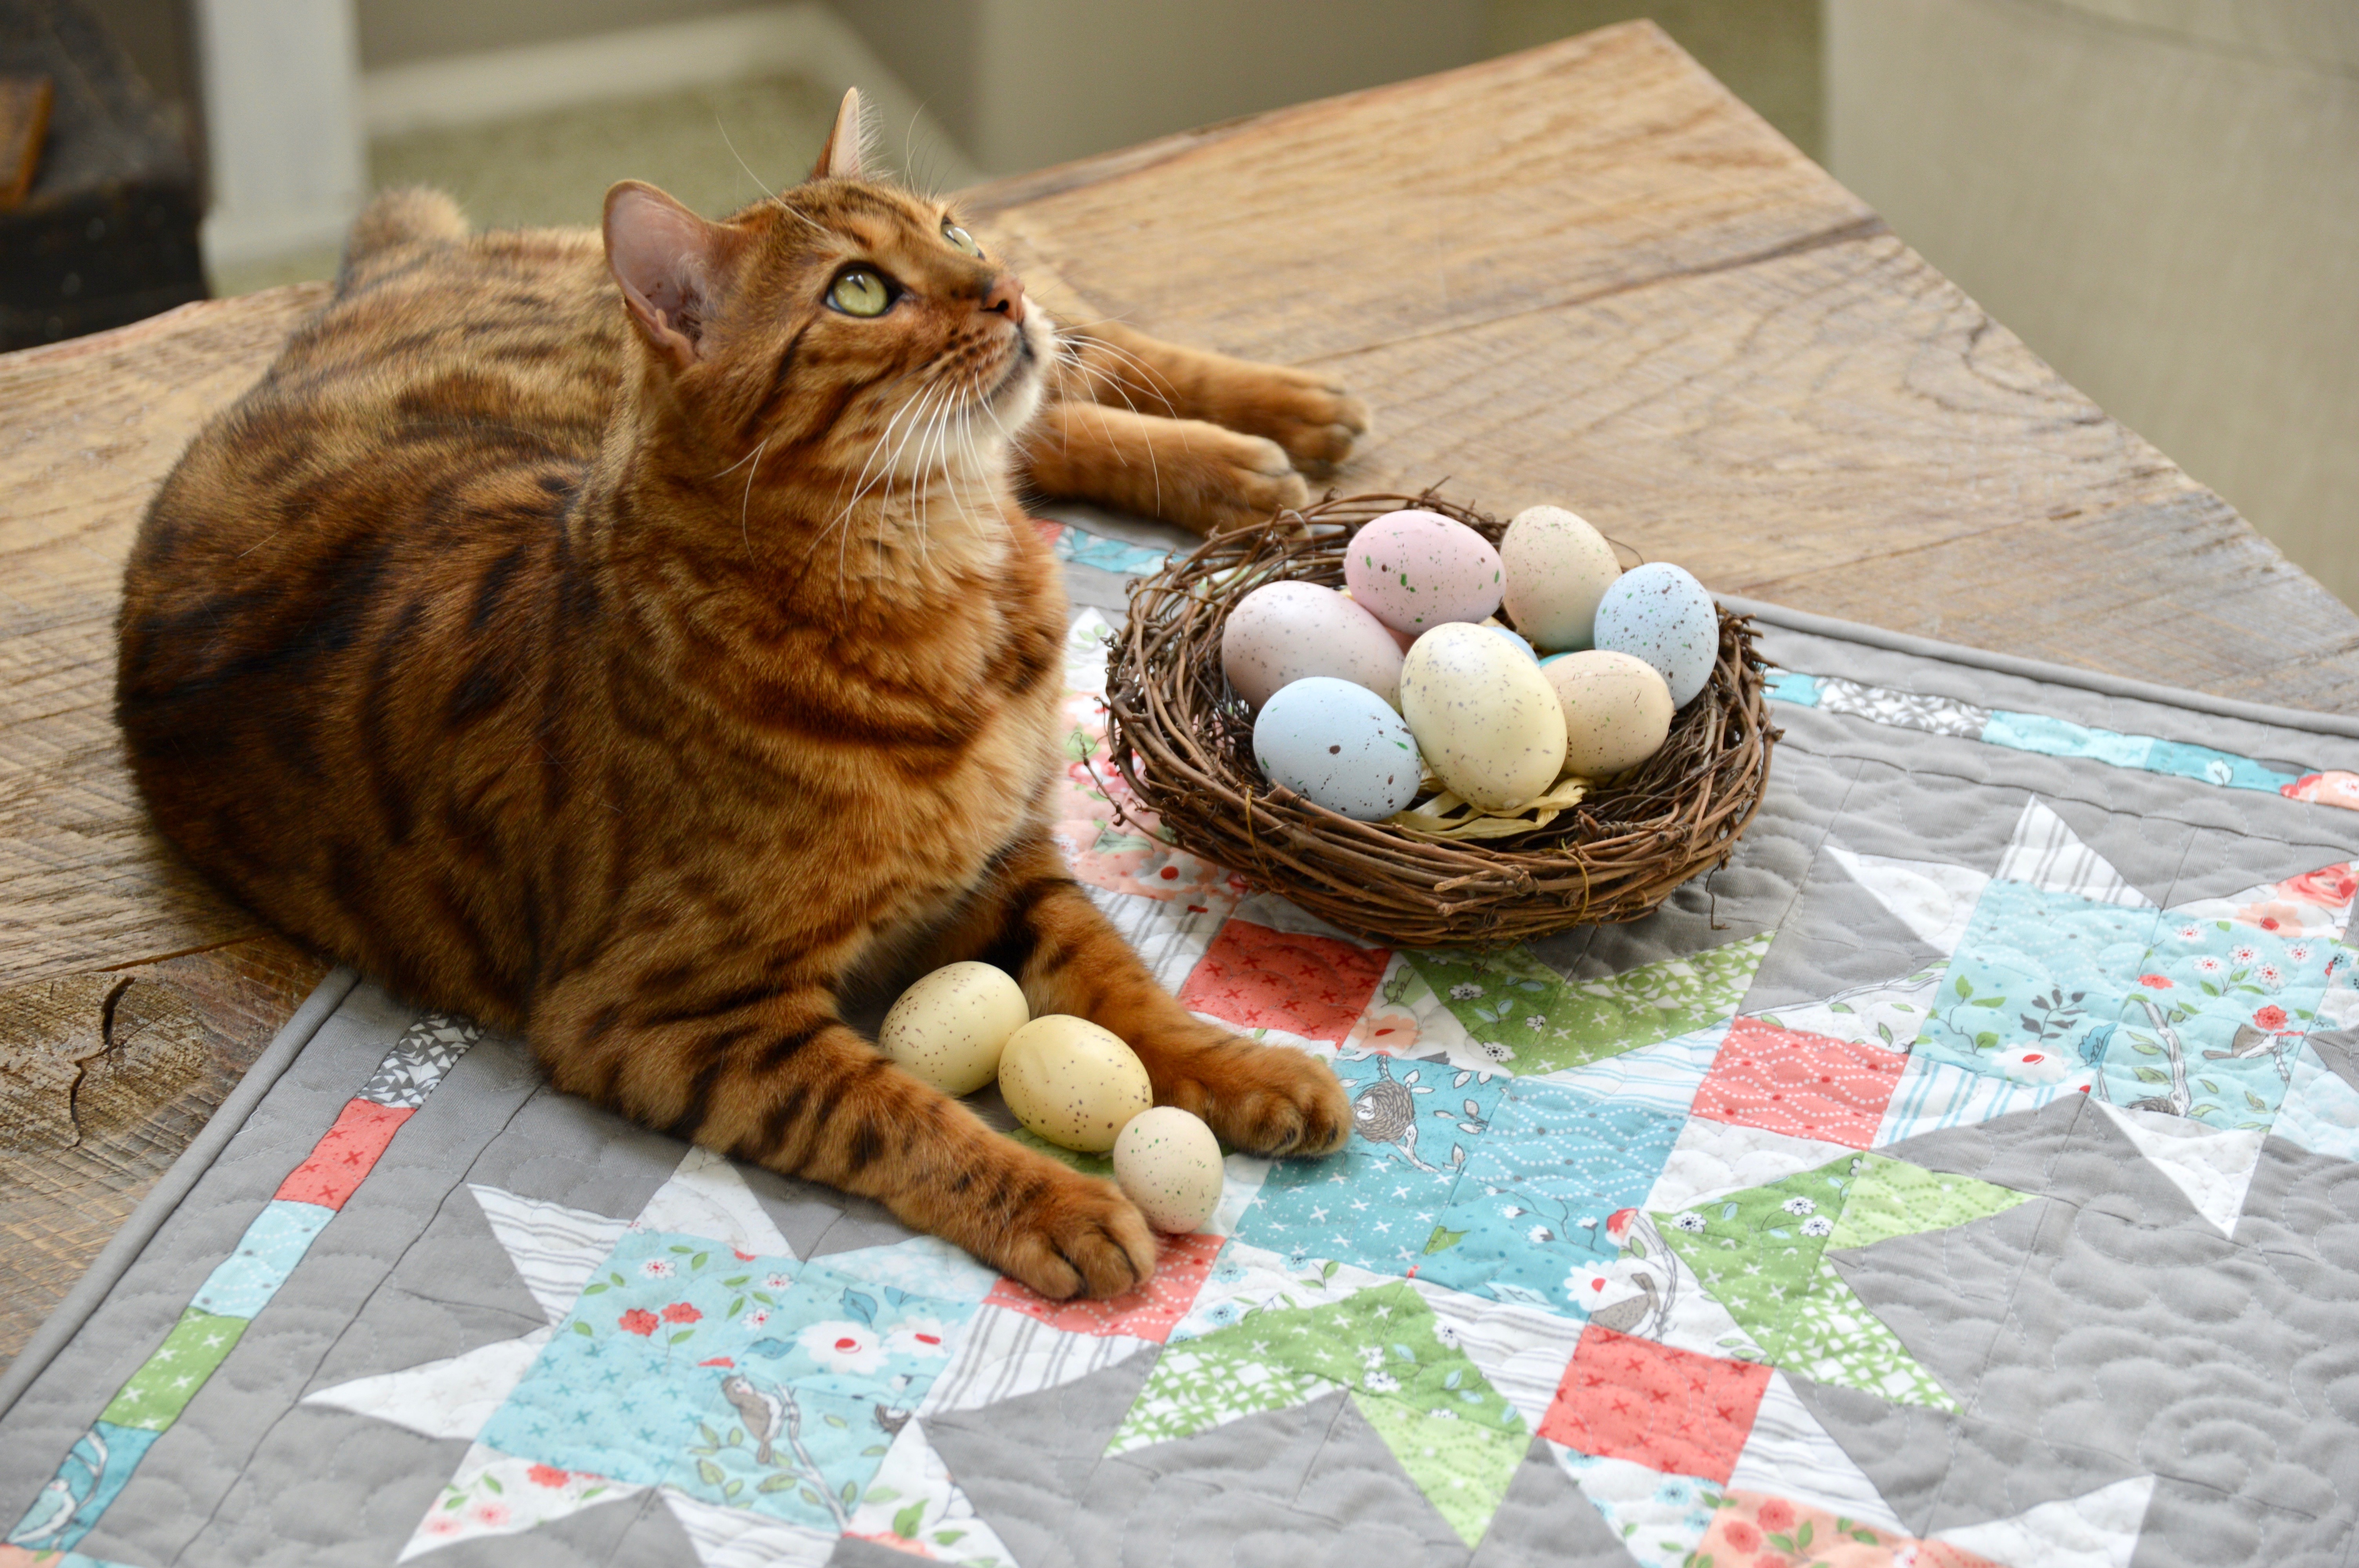
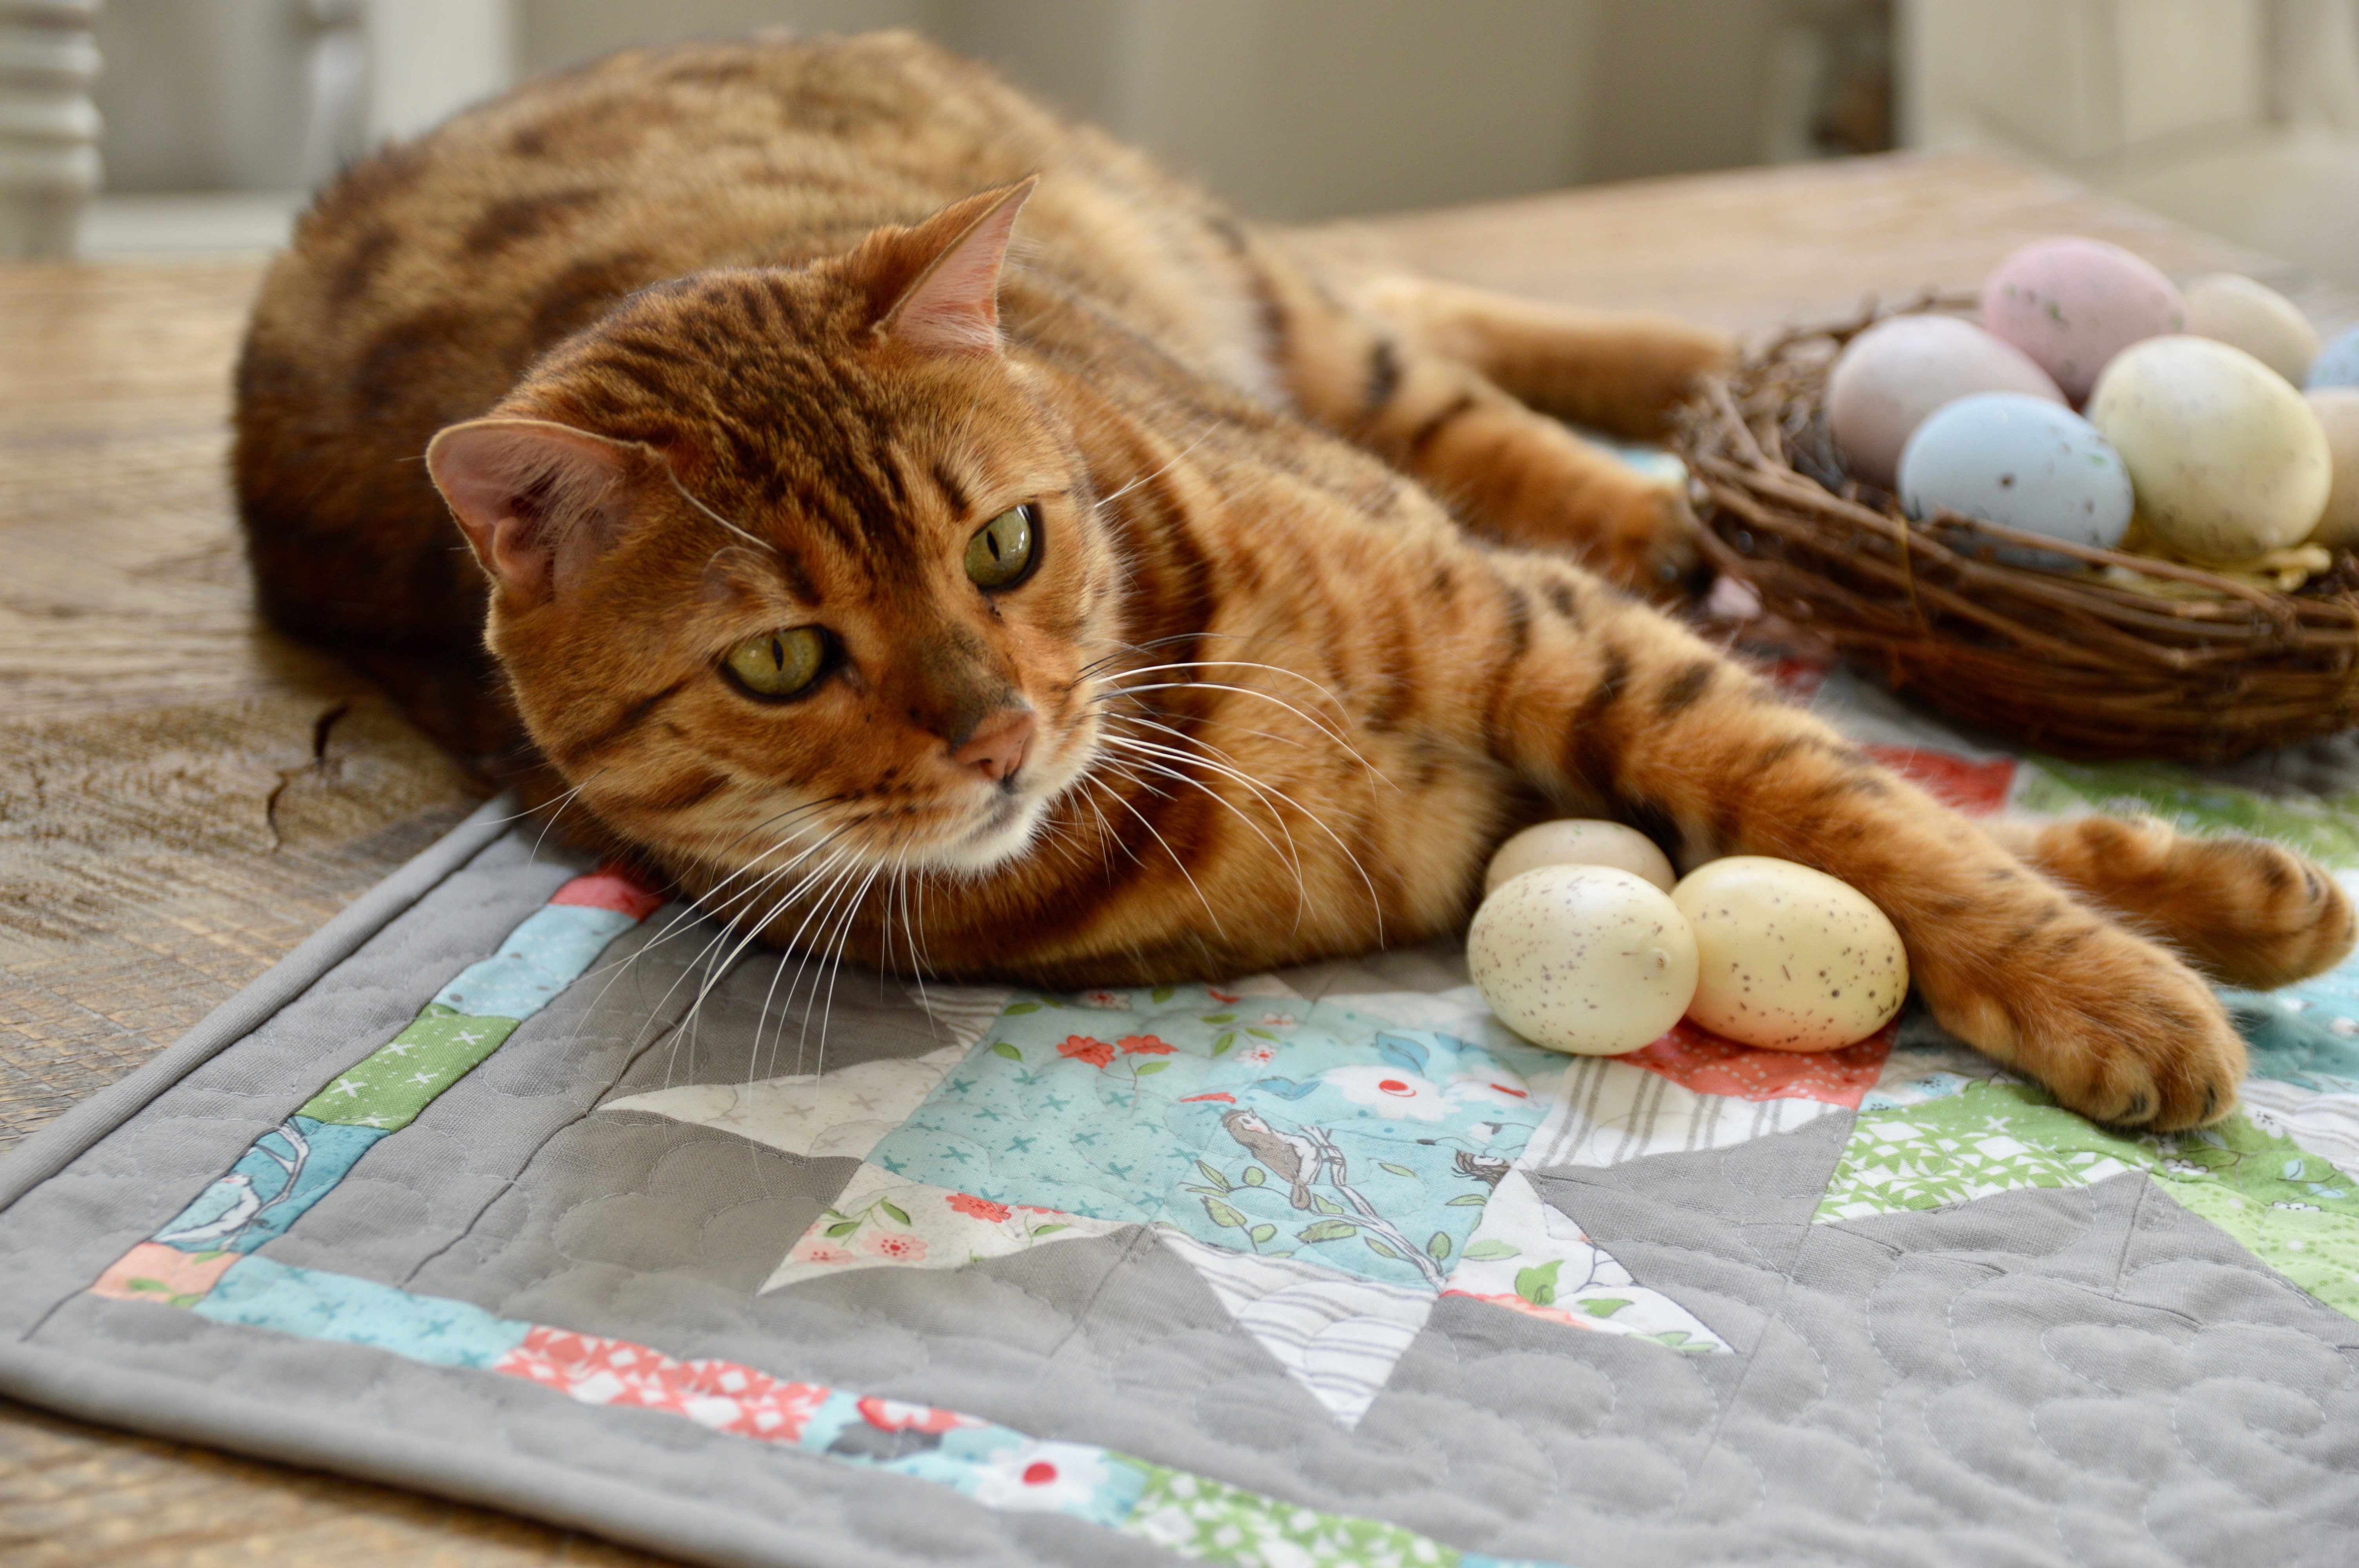
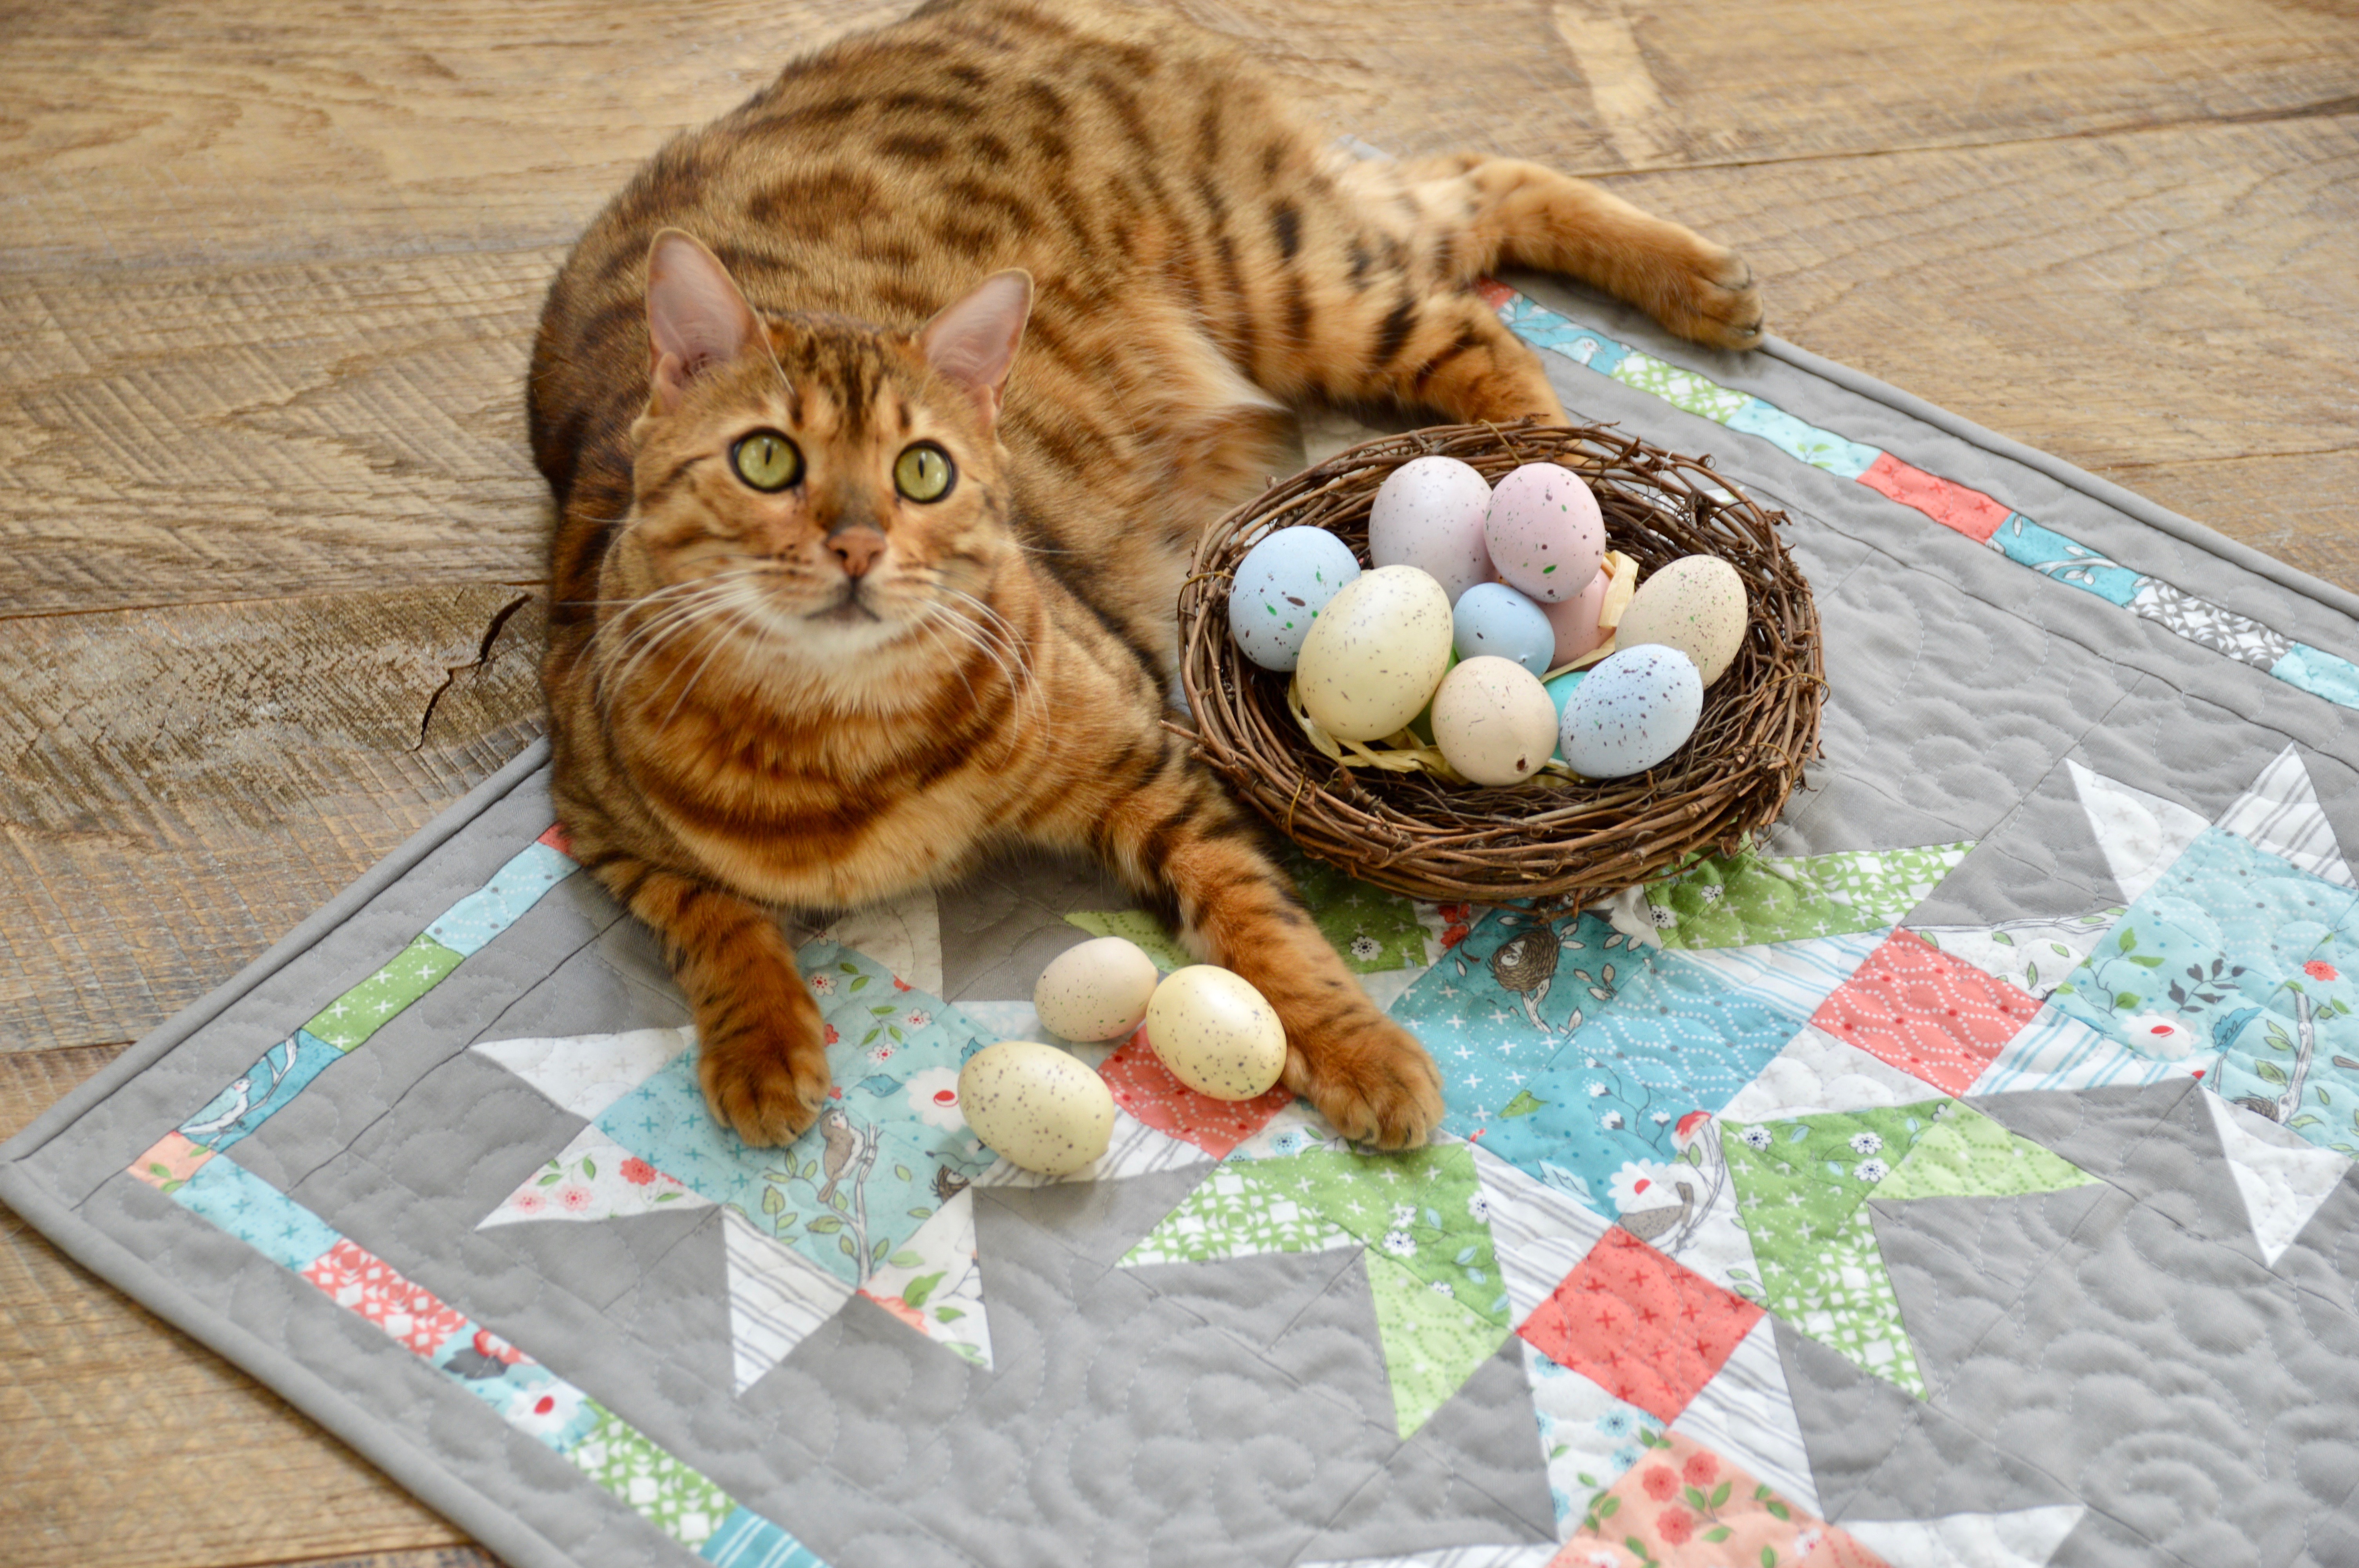
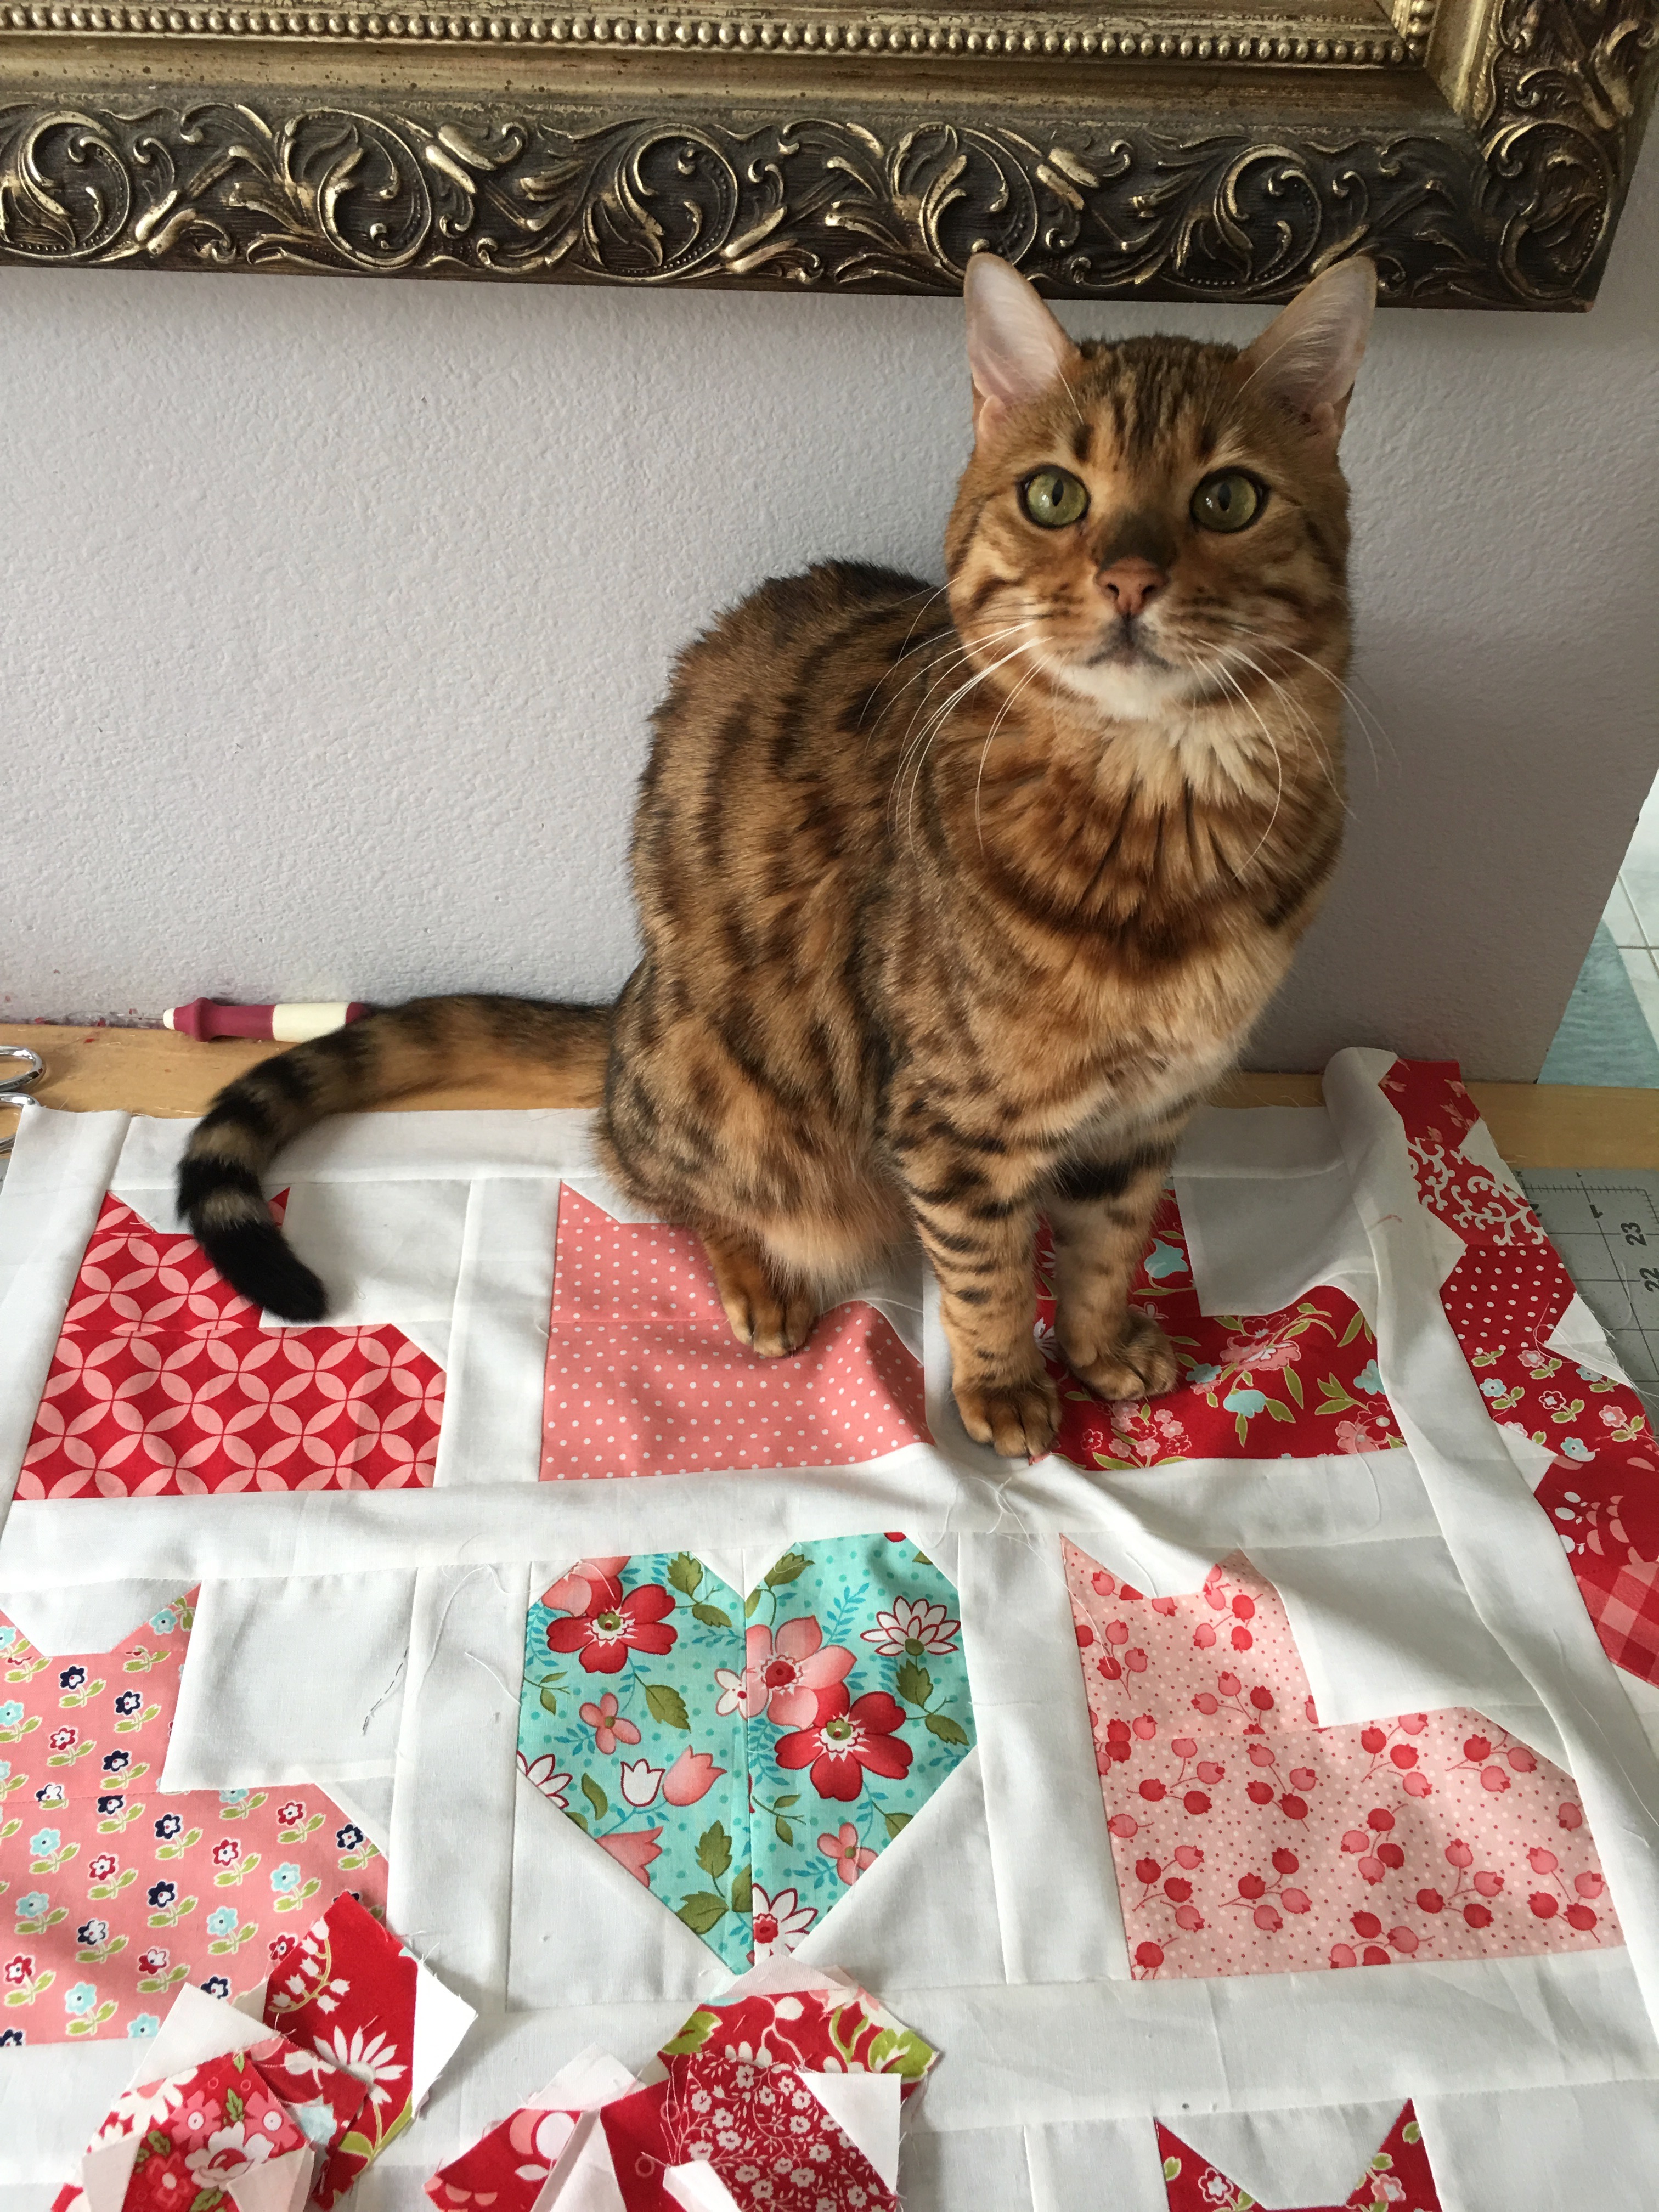
Mufasa seems pretty comfy on the new quilt!

vintage picnic little ruby quilt 14


Be sure to check out the completed quilts from these amazing bloggers!

Melissa from Happy Quilting
Angie from Gnome Angel
Erin Cox from Why Not Sew
Andy from A Bright Corner
Heidi from Buttons & Butterflies
Pat from Pat Sloan
Peta from She Quilts a Lot
Heather from Quilt Story
Megan from Quilt Story
Amanda from Jedi Craft Girl
Gerri from Planted Seed Designs
Sherri from A Quilting Life
Rebecca from Bryan House Quilts
Sherri from This & That Patterns
Jemima from Tied with a Ribbon
Alyce from Blossom Heart Quilts
Stephanie from Modern Sewciety
Brooke from Silly Mama Quilts
Carrie from Moda’s United Notions

Birthday Cat-Cake Towel Tutorial

cat cakes

It’s my birthday today!  To celebrate I made this fun appliqué towel with cat cupcakes – or Cat Cakes as I call them!  I bought this toweling by the yard.  It comes in lots of colors and styles.

birthday cat cupcake applique day sail 16

To make this towel you need:

1 towel or 1 yard toweling

6 charm squares for cats and cakes, I used Day Sail by Moda

3 scraps for candles

Heat n Bond Lite cut into 5″ squares

birthday cat cupcake applique day sail 6
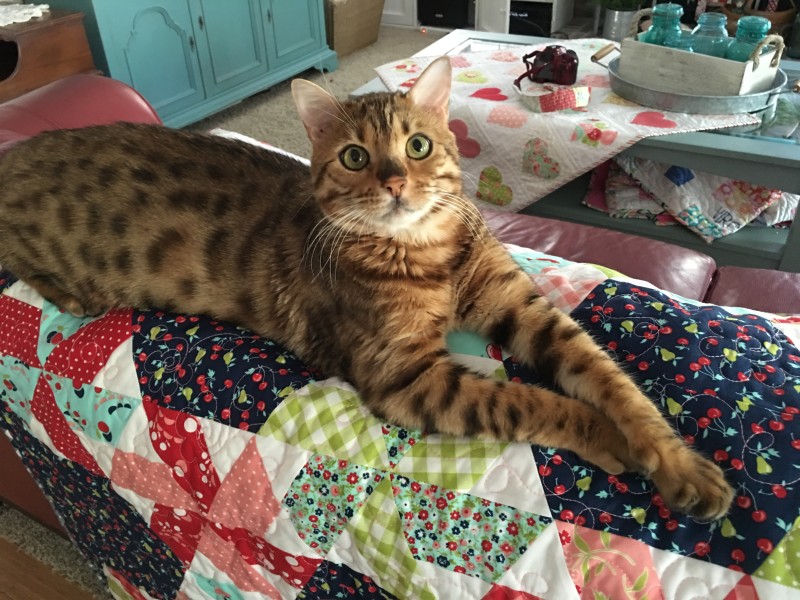
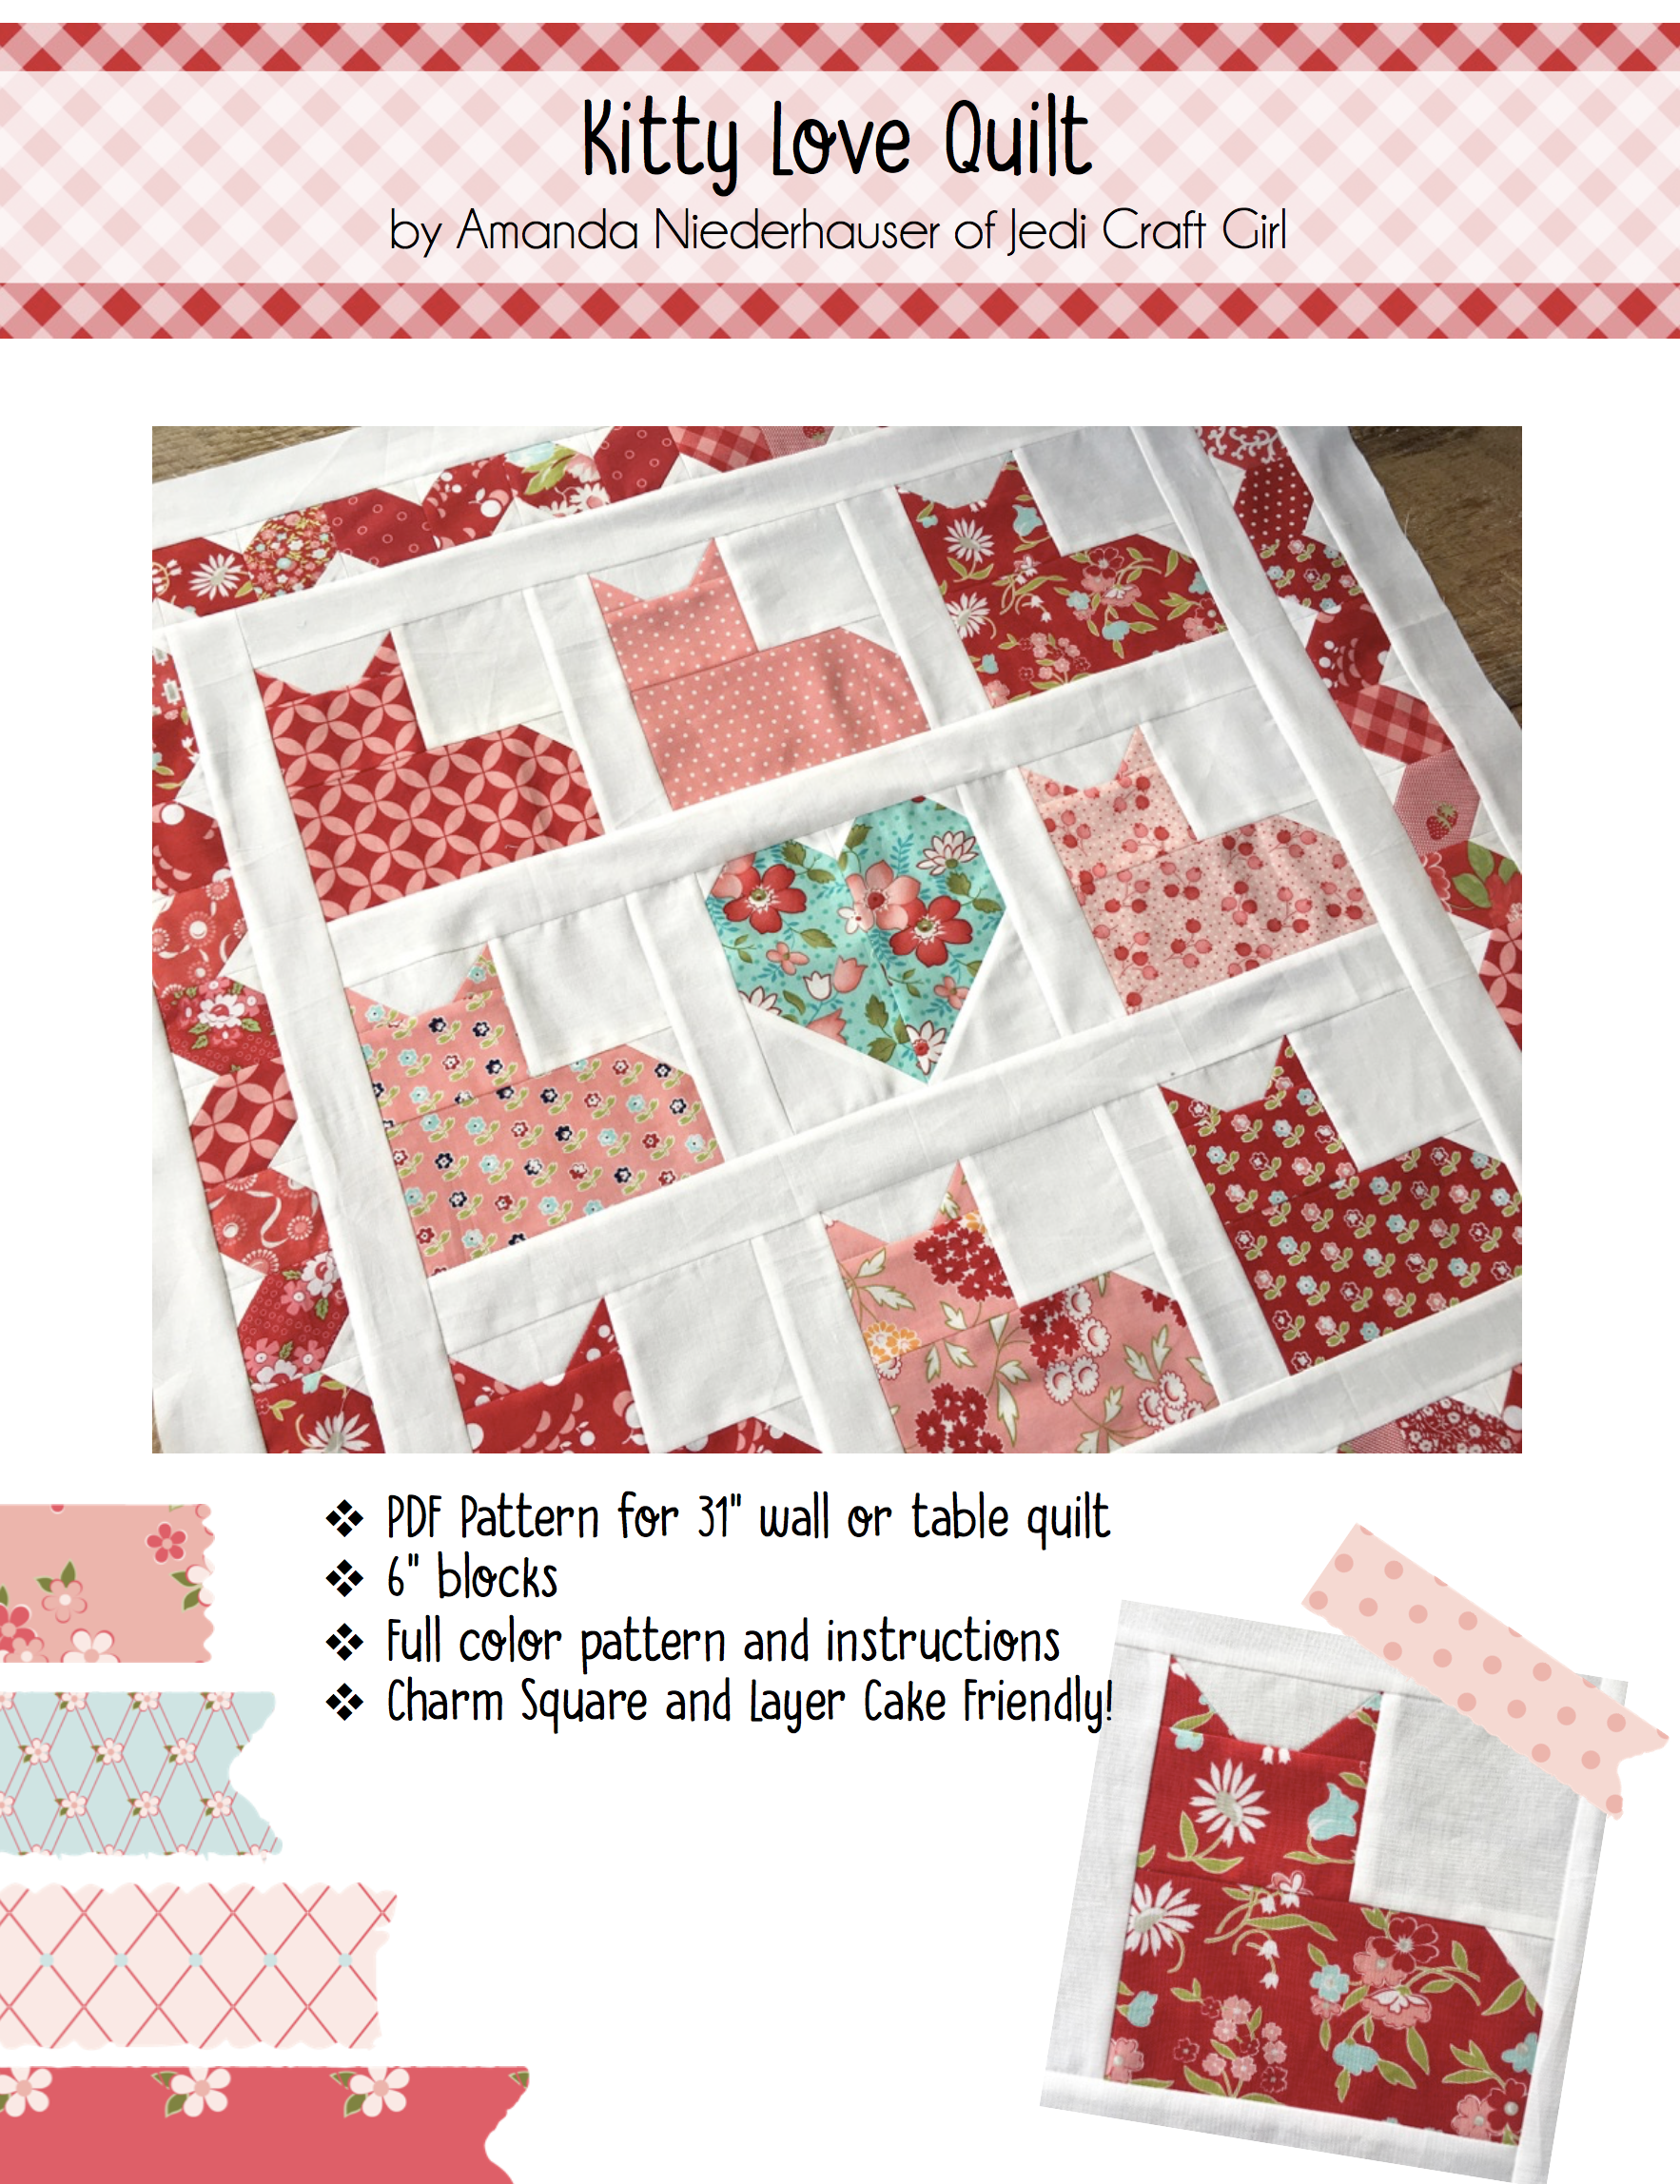
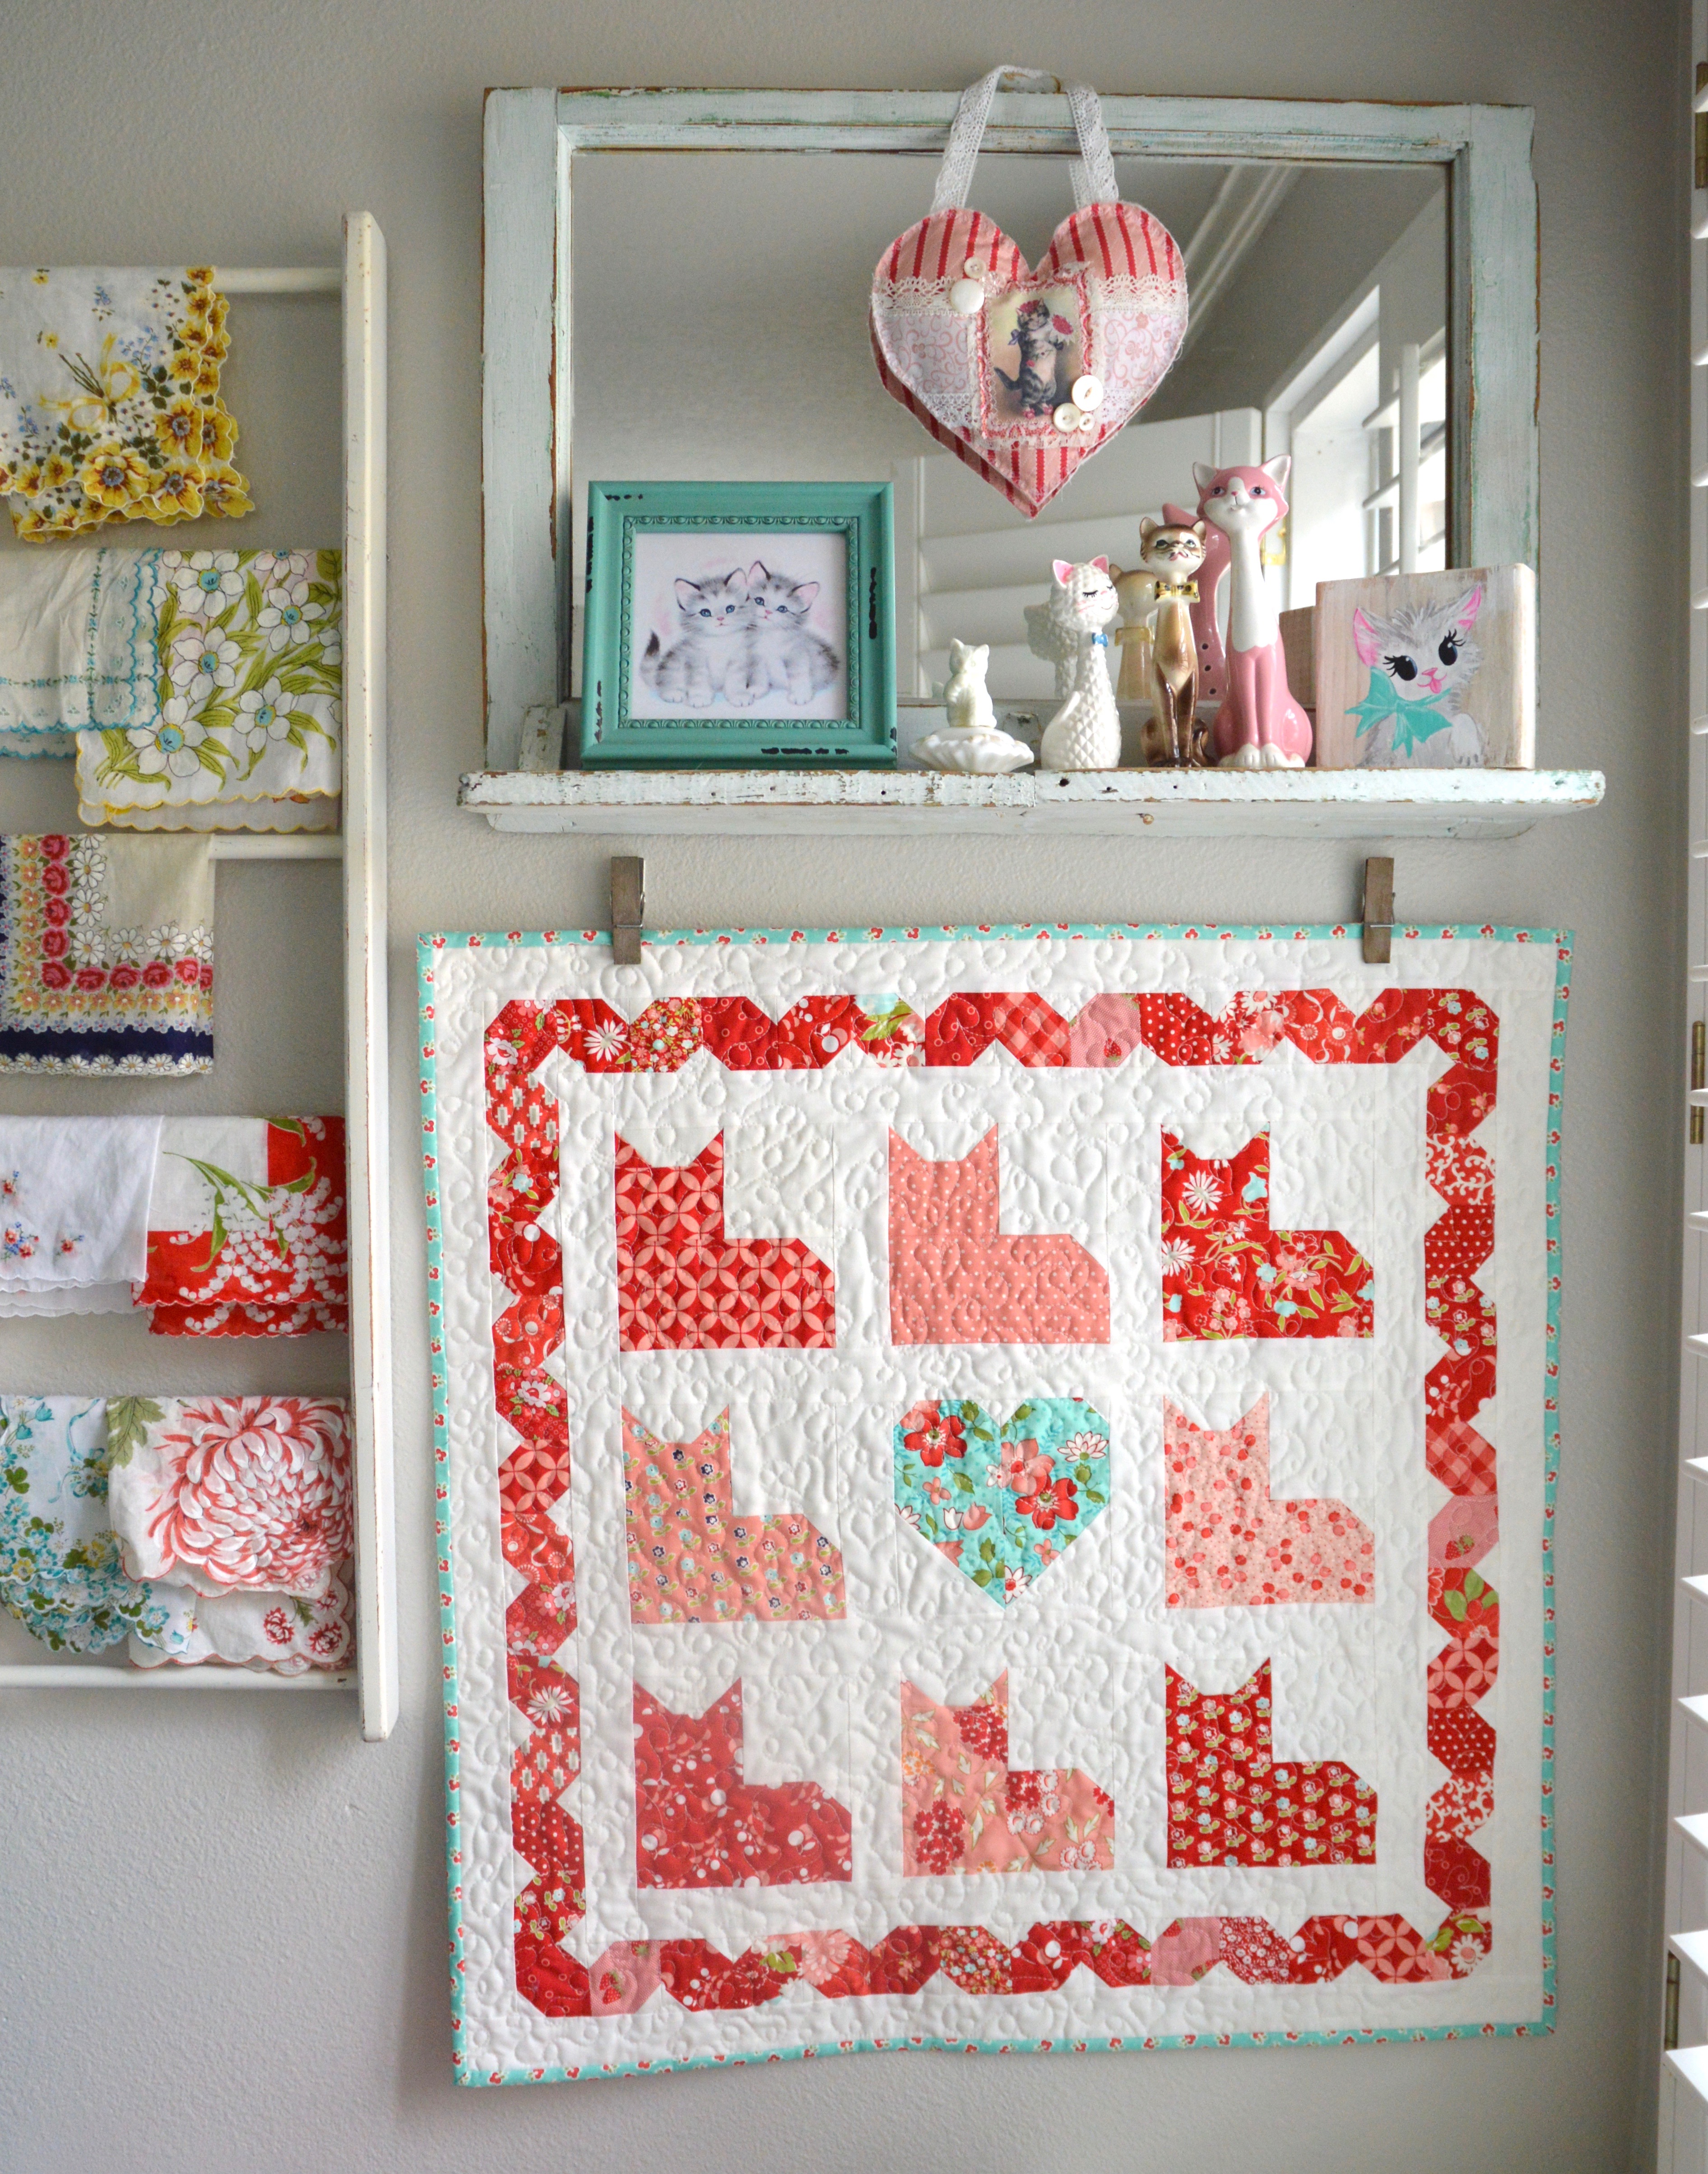
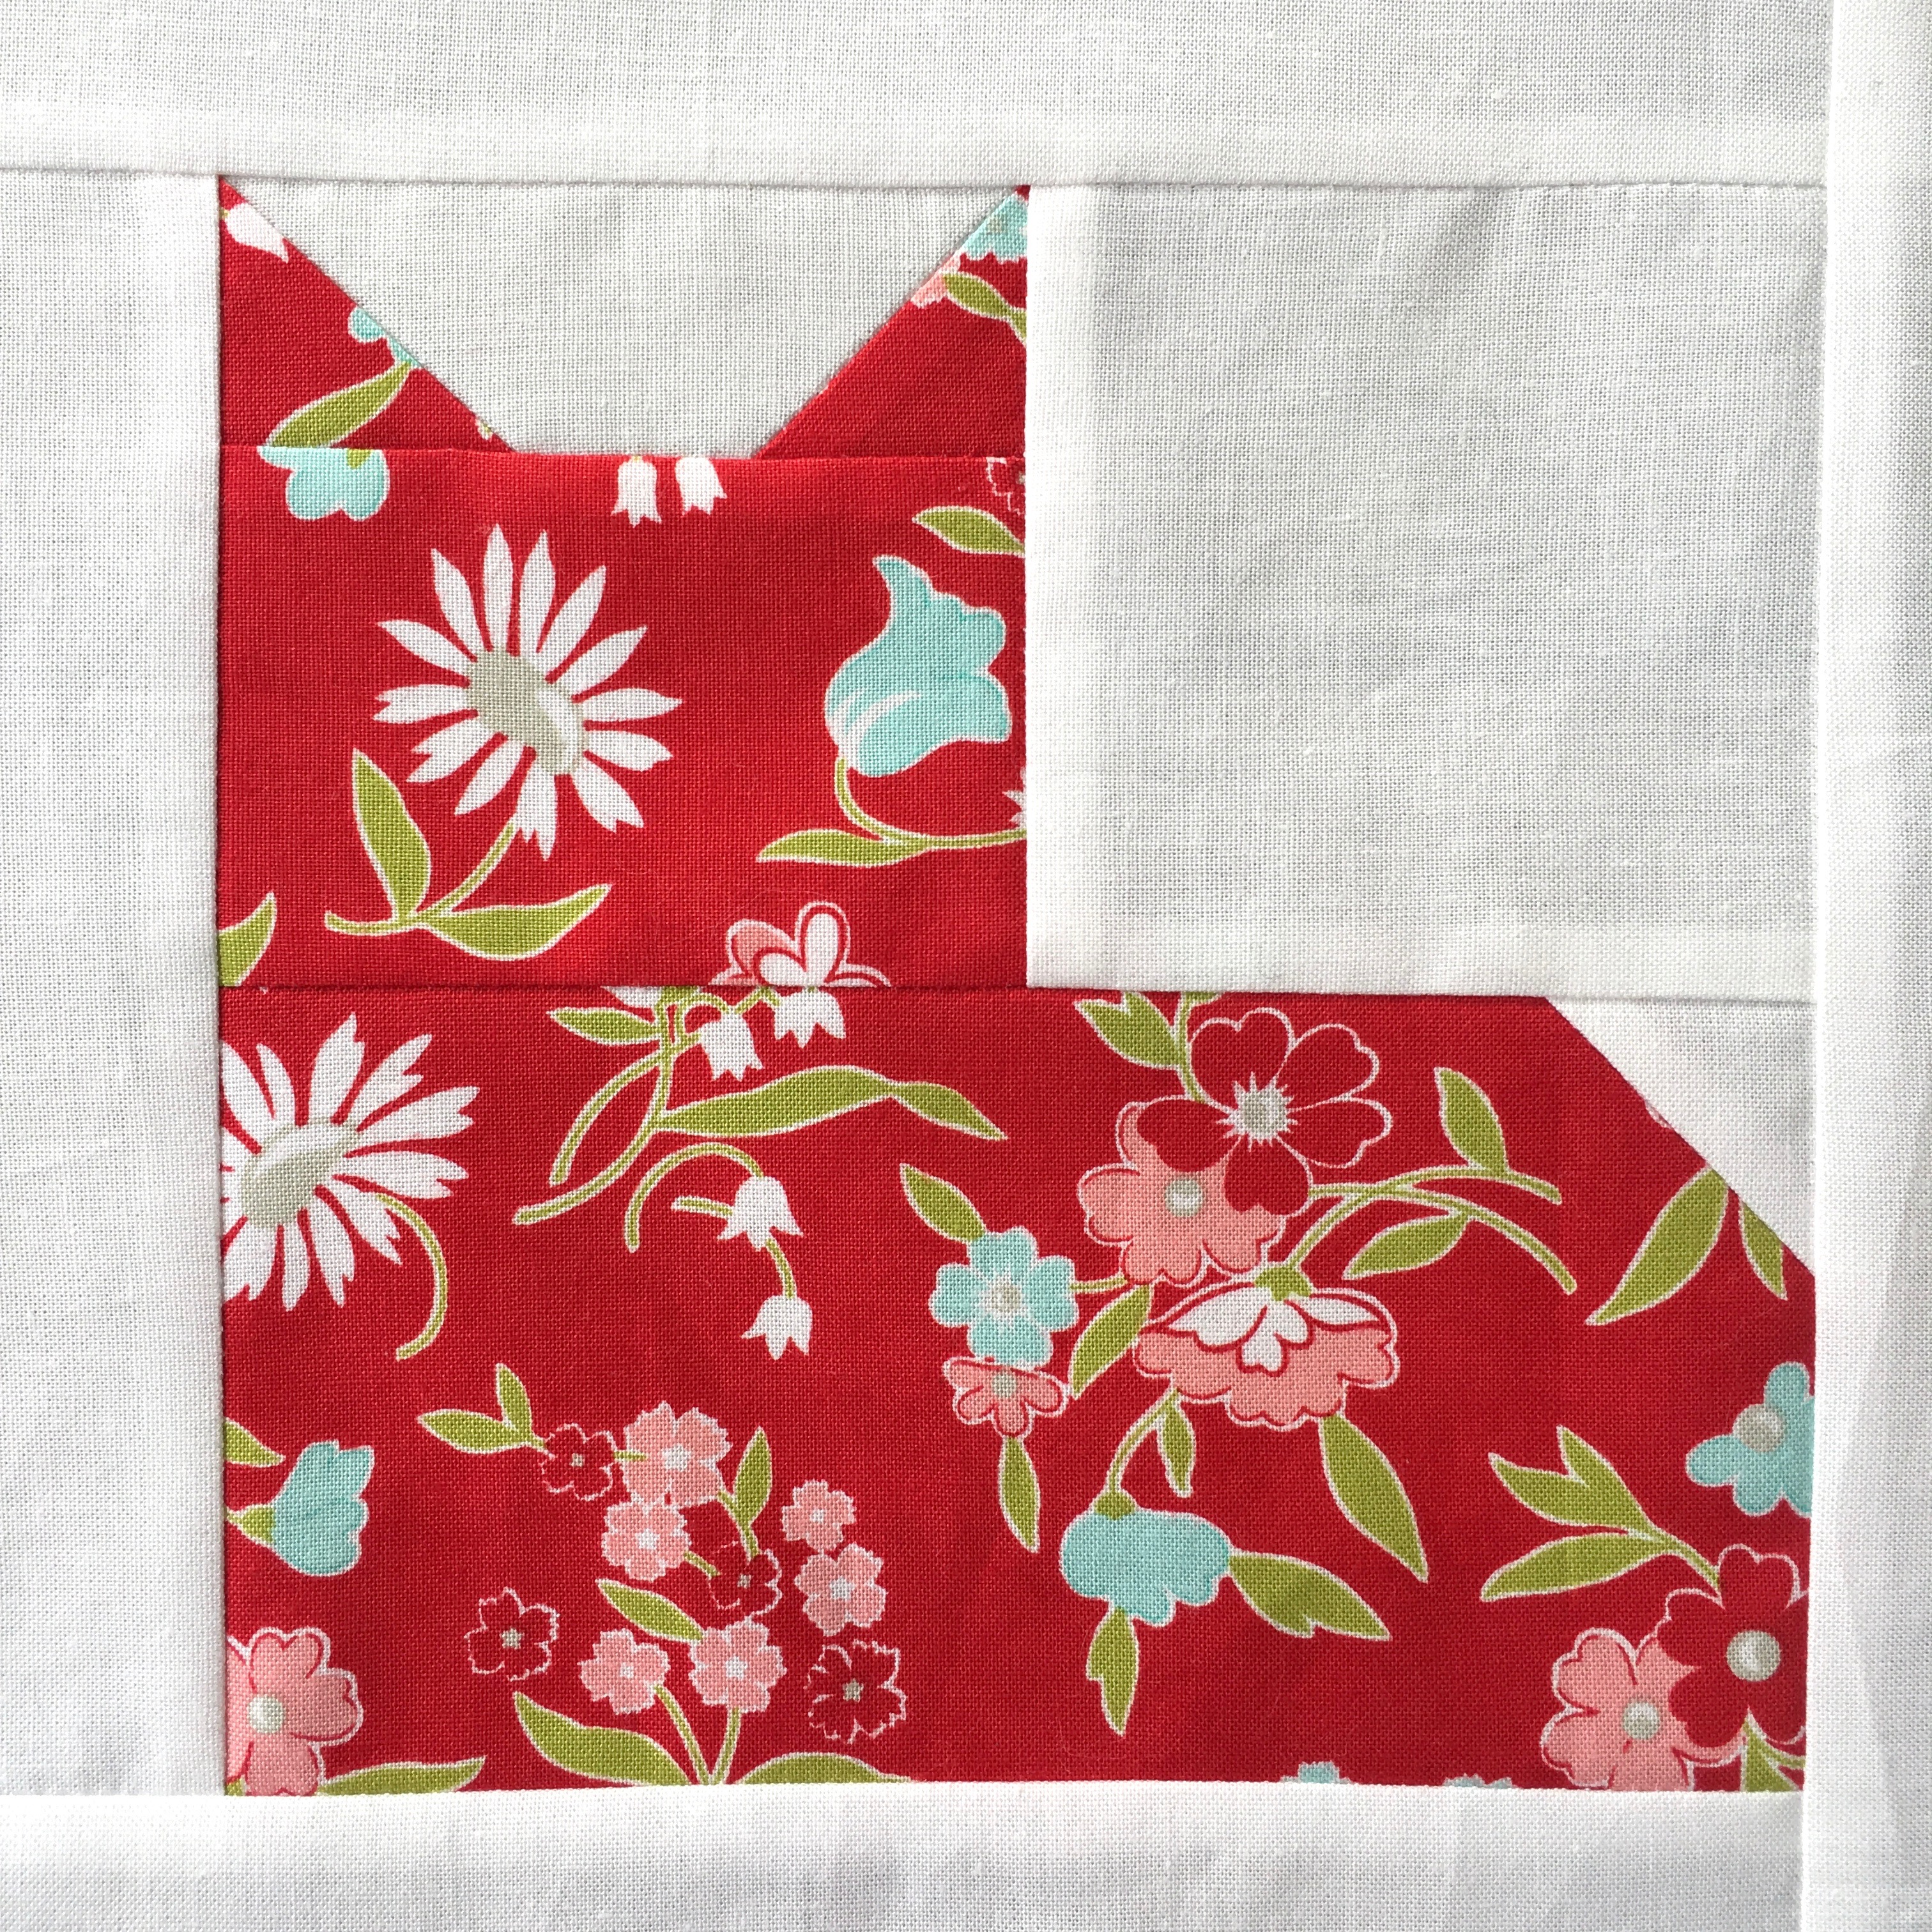
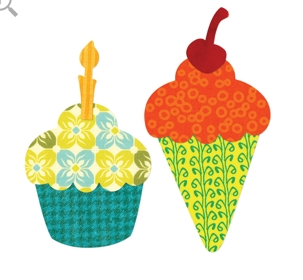
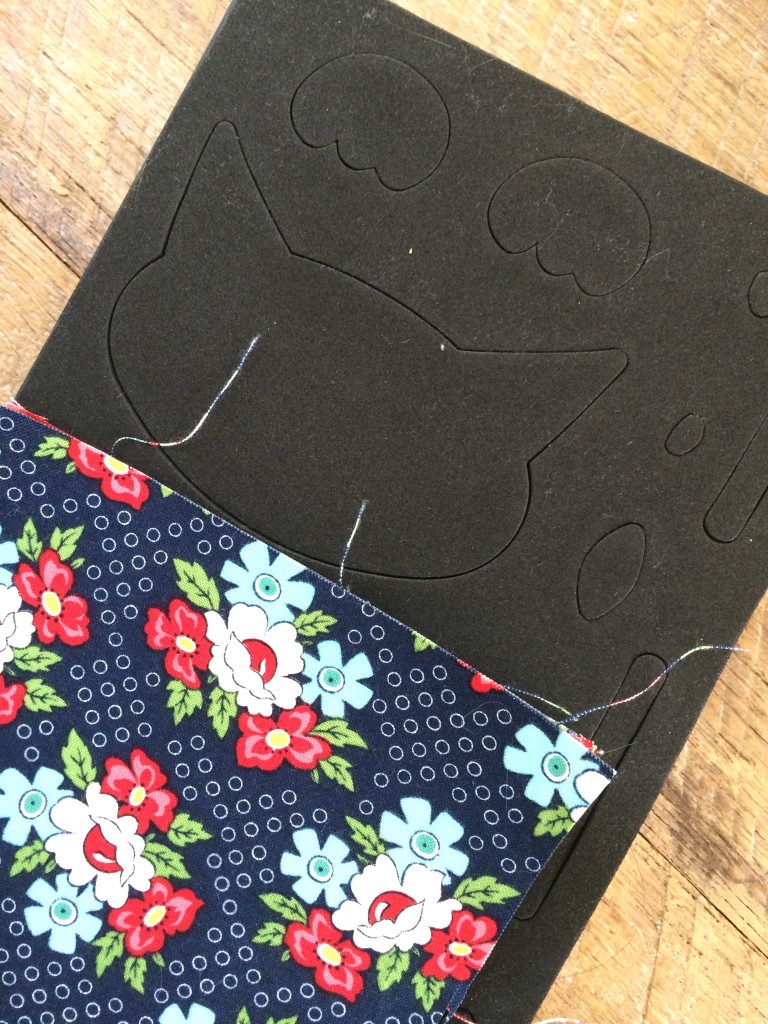
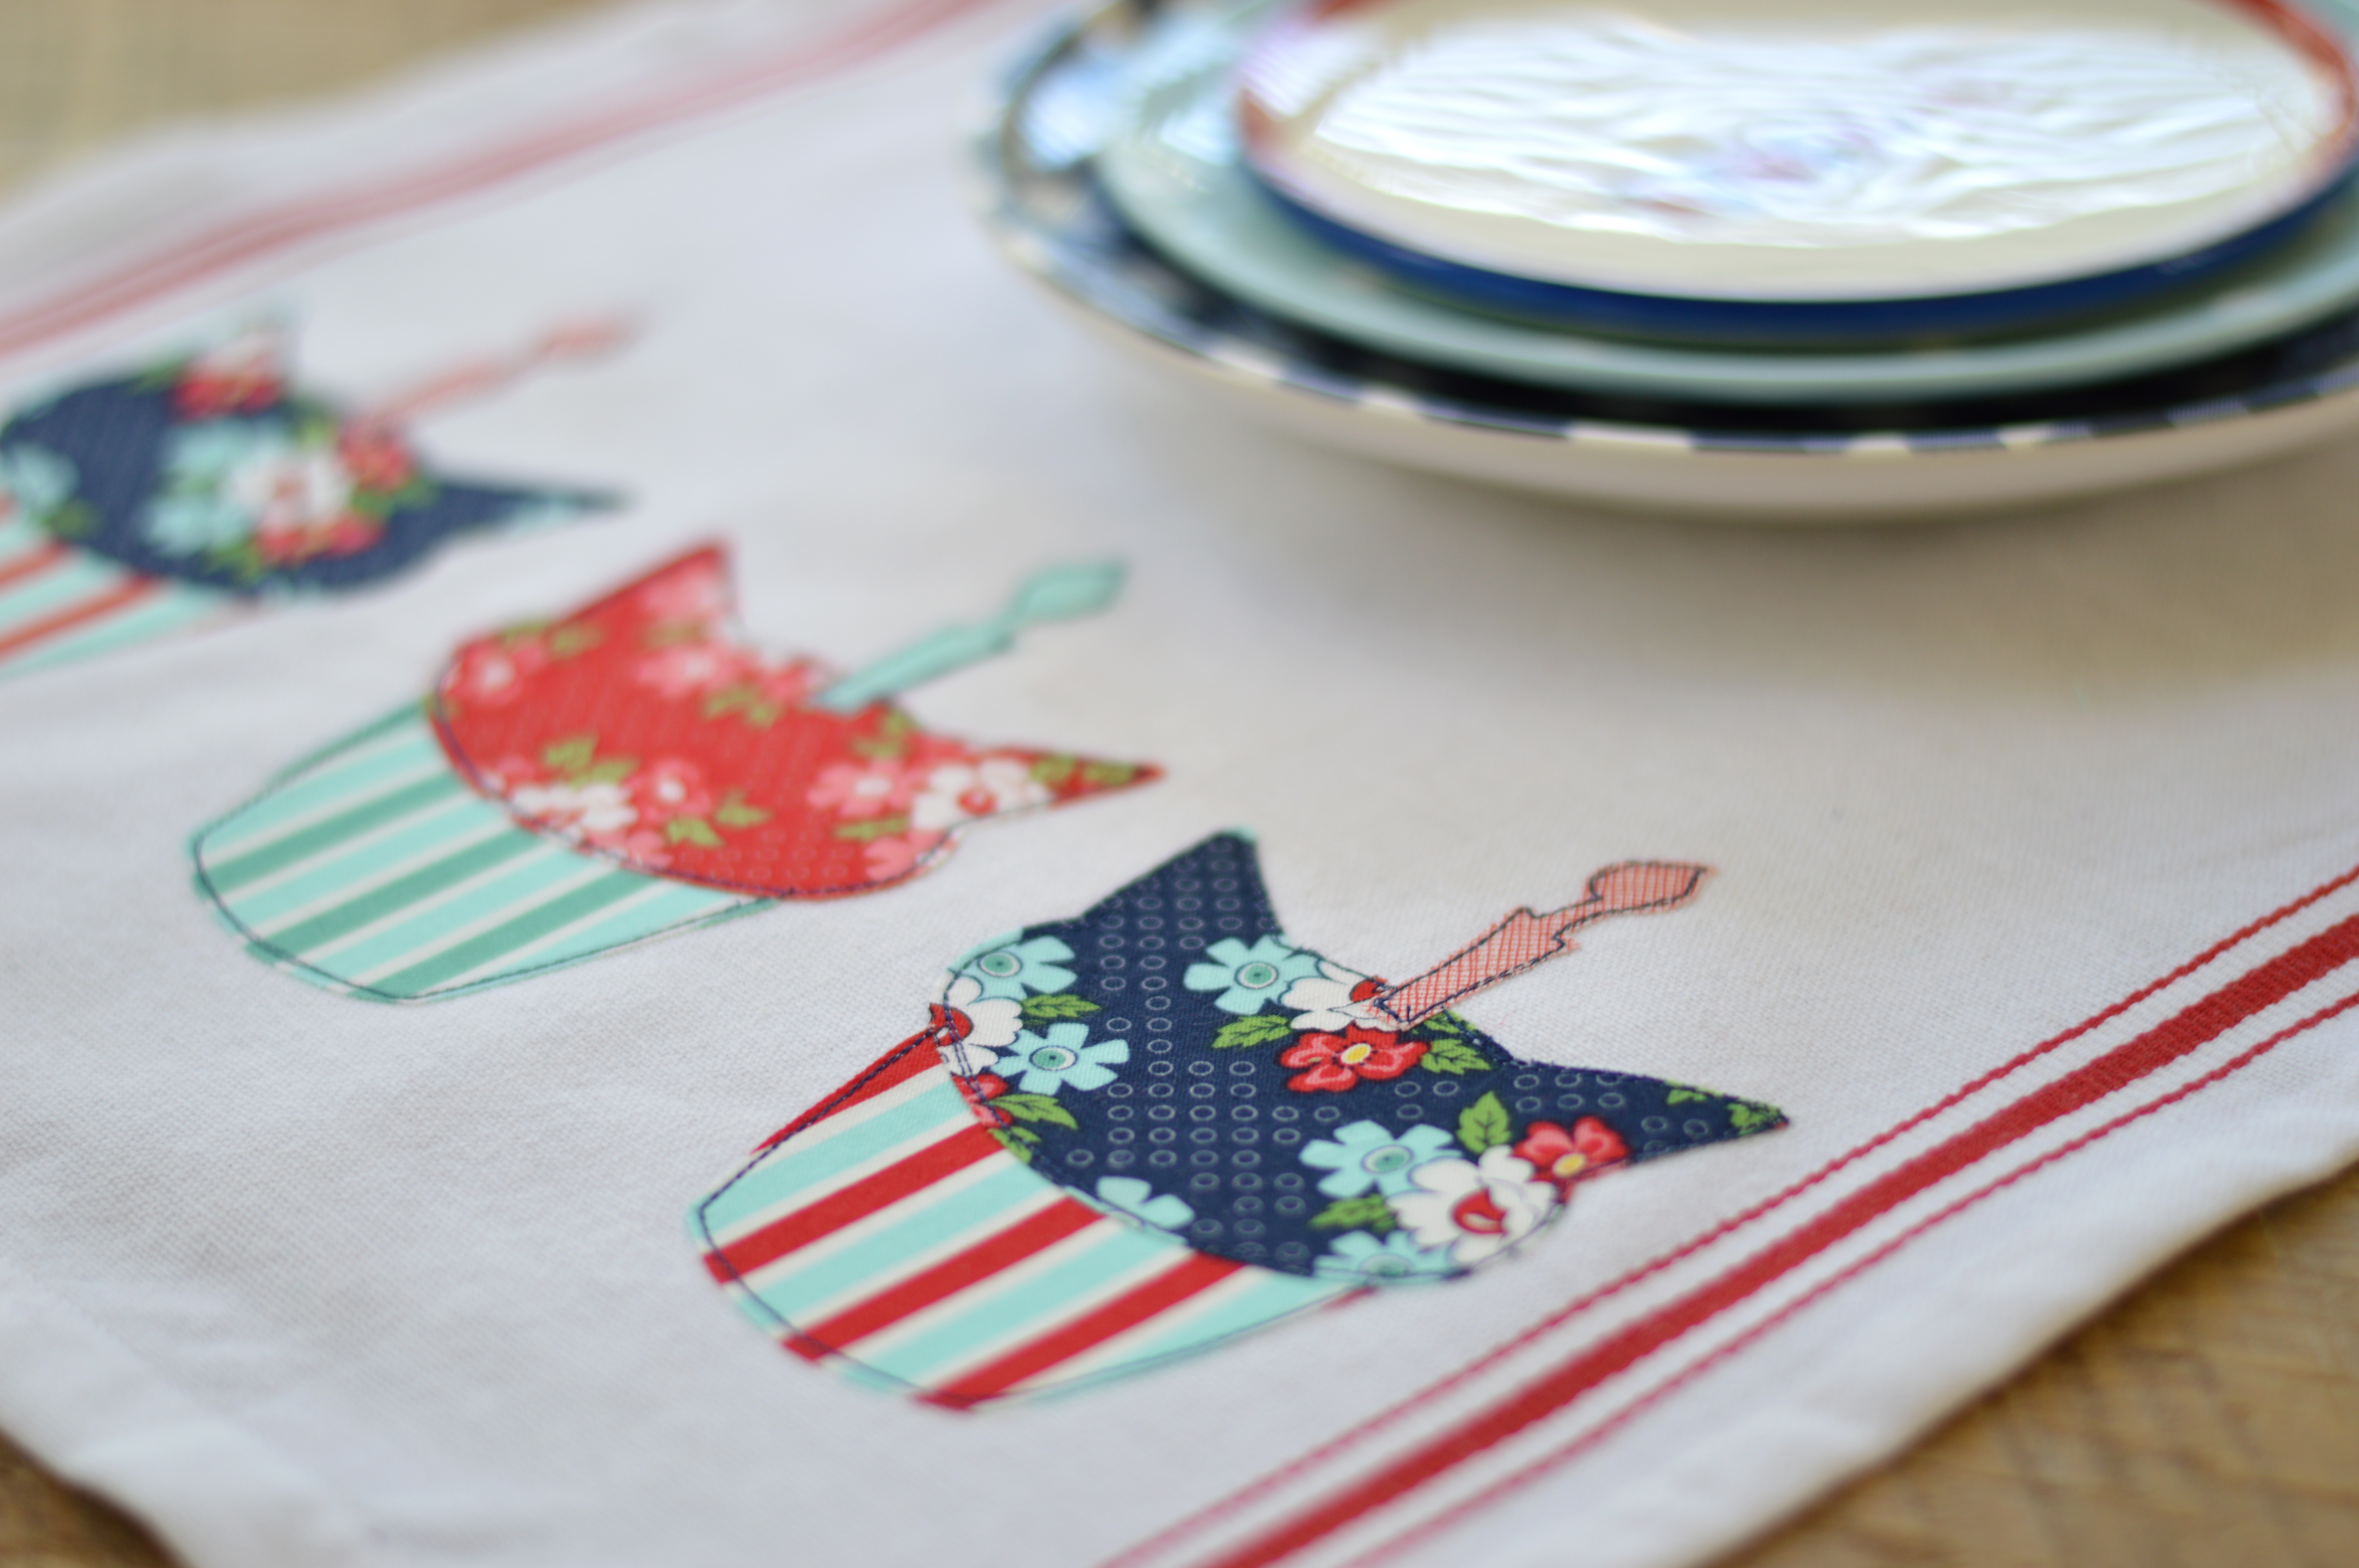
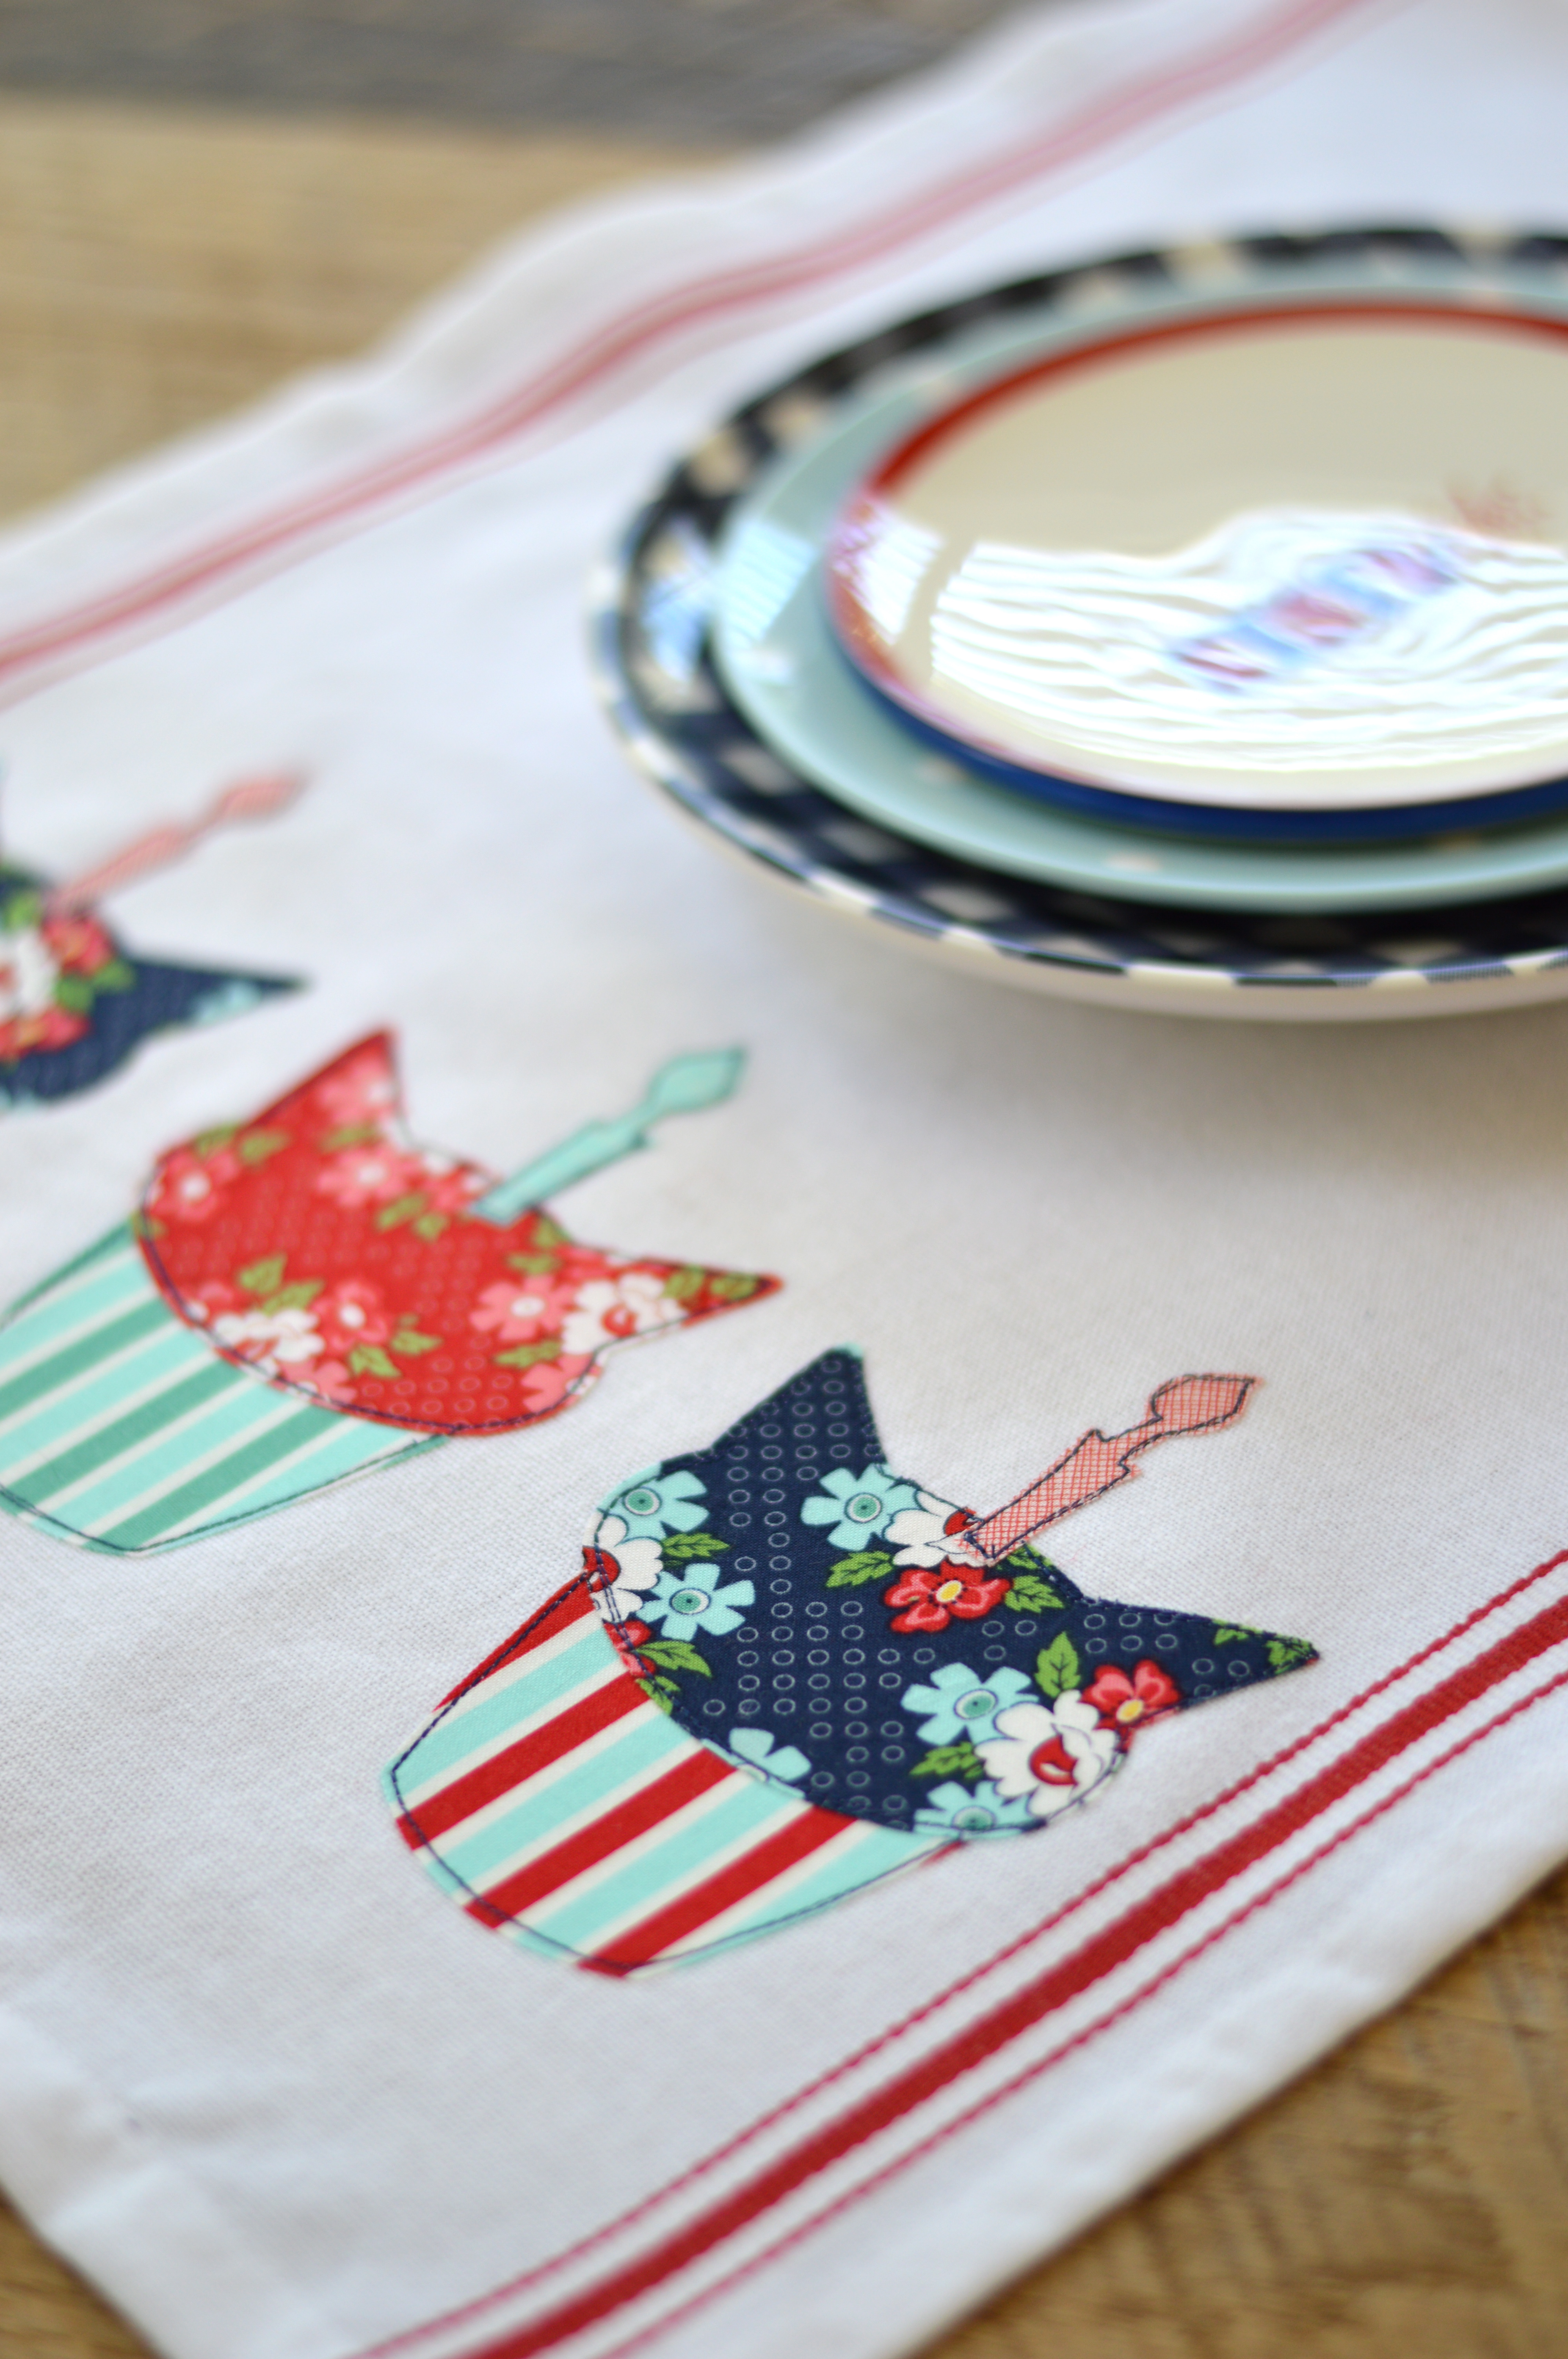
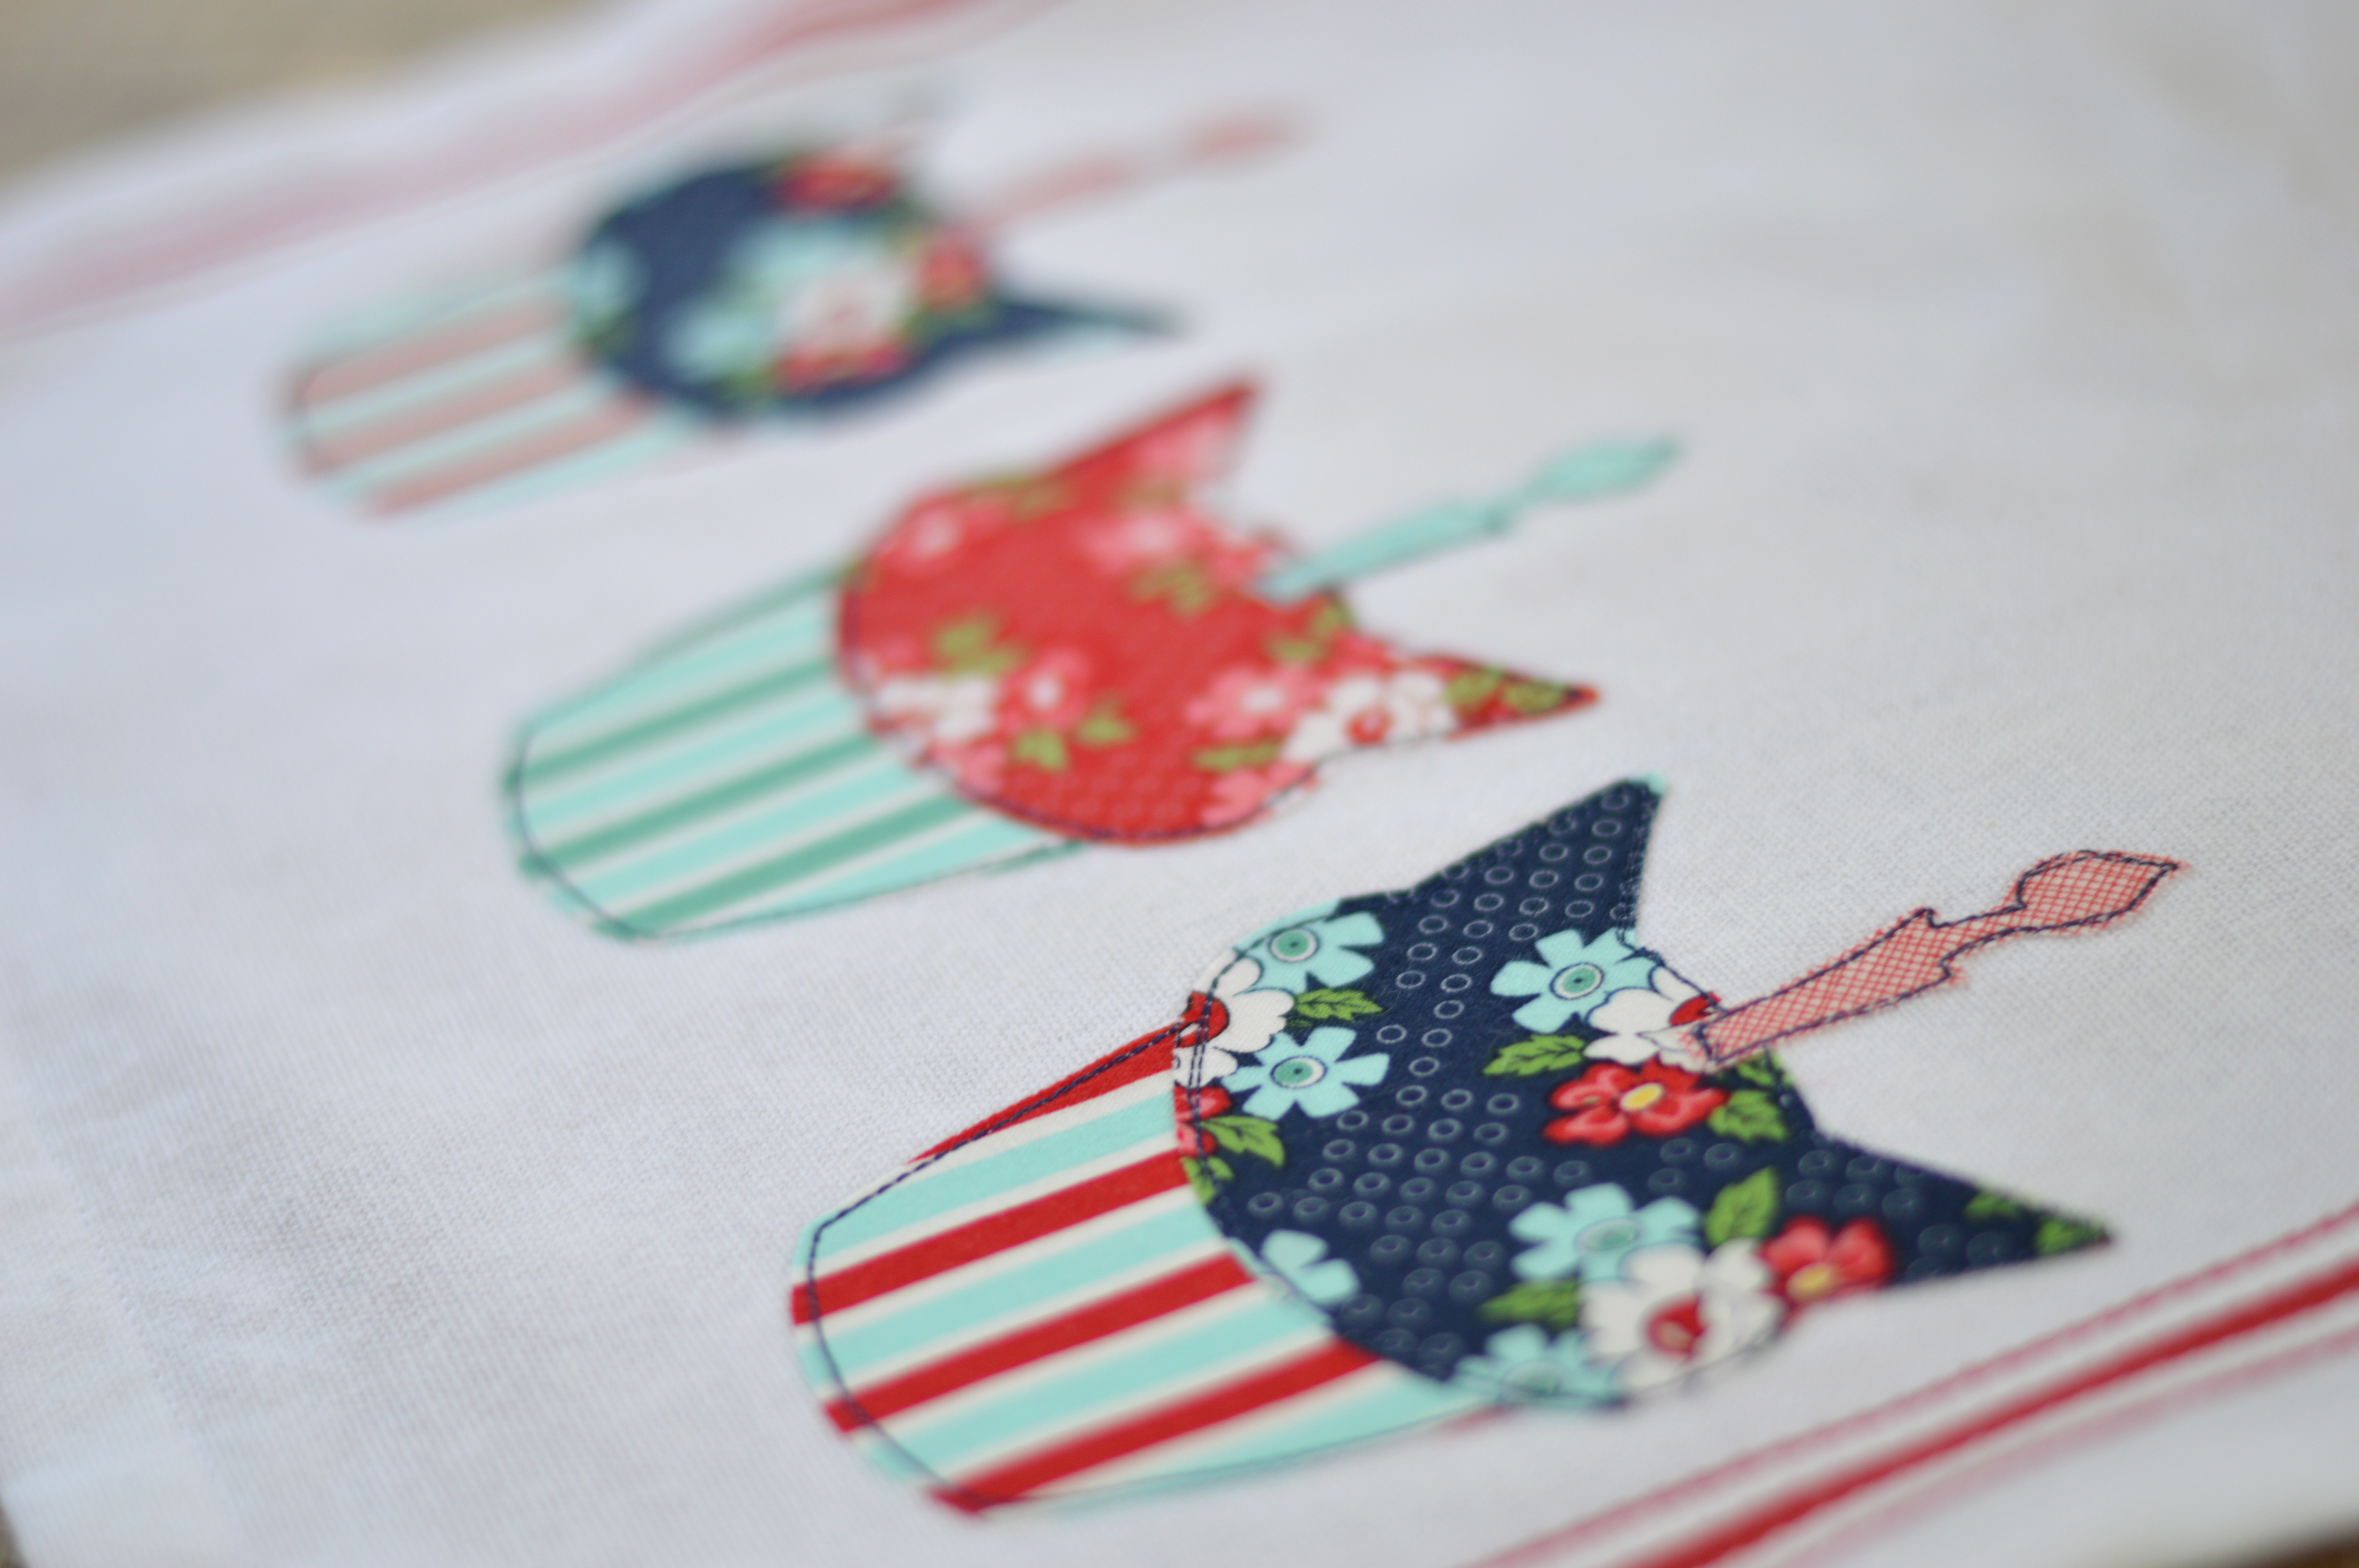
I used the Sizzix cat head and the Sizzix cupcake bottom to create the Cat-Cakes.
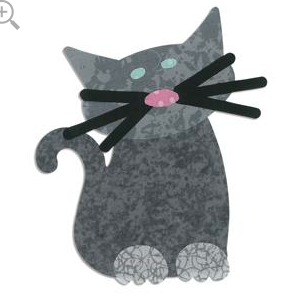
Screen Shot 2015-07-03 at 7.51.52 AMScreen Shot 2015-07-03 at 7.51.21 AMIron the Heat n Bond Lite to the wrong side of the charm squares and run it through the Sizzix Fabi.  Make sure to position the fabric over the desired shape.  I cut out all 3 at once!

birthday cat cupcake applique day sail 9

birthday cat cupcake applique day sail 10


Peel off the backing paper and position the Cat Cakes on the bottom of the towel.  Press to set in place.  Sew around each shape 2 times with navy thread.birthday cat cupcake applique day sail 11

birthday cat cupcake applique day sail 15


Make sure your cat approves 🙂birthday cat cupcake applique day sail 21


If you don’t have a July birthday, make this to celebrate our Nation’s Birthday!!!birthday cat cupcake applique day sail 14


Or make one for your cat’s birthday 🙂birthday cat cupcake applique day sail 2
birthday cat cupcake applique day sail 5

birthday cat cupcake applique day sail 23

Mufasa loves the Sizzix Fabi.  He hears me getting it out and comes running!!!birthday cat cupcake applique day sail 24