Stand in Holy Places Chicken Wire Frame

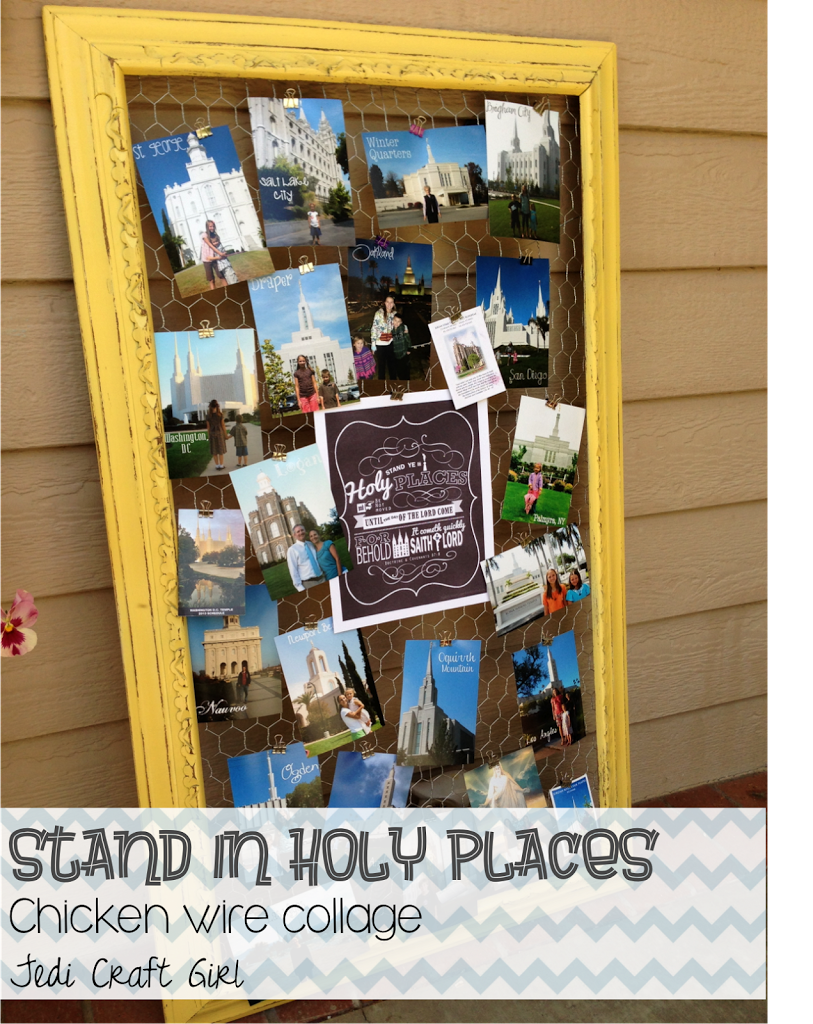
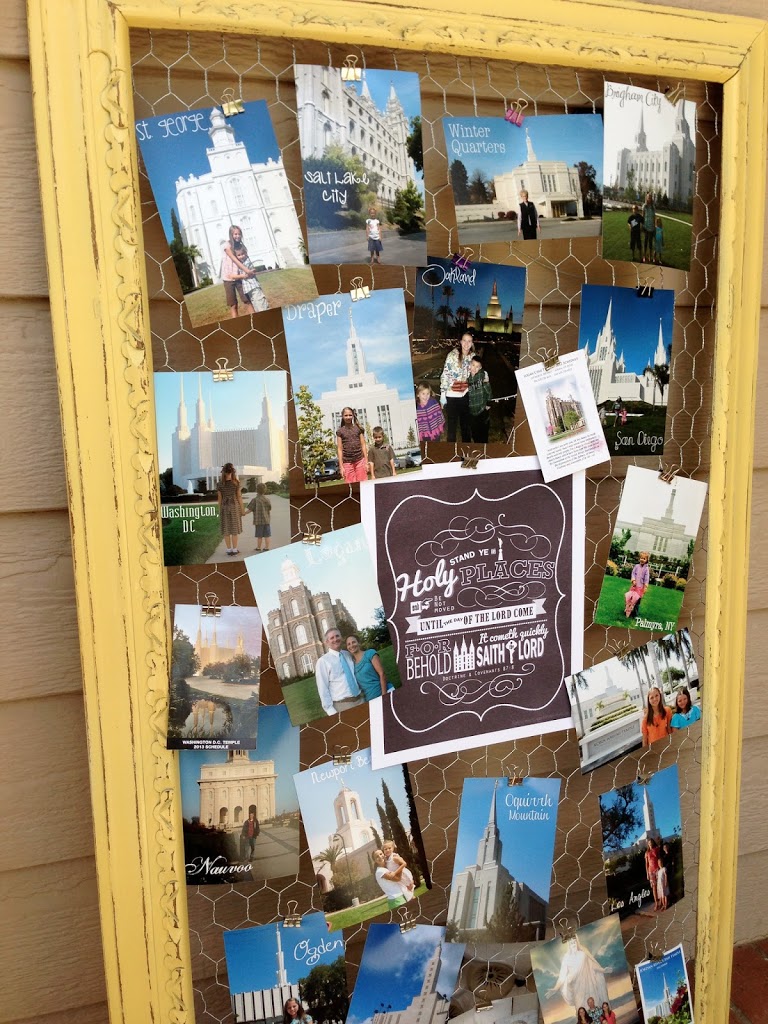
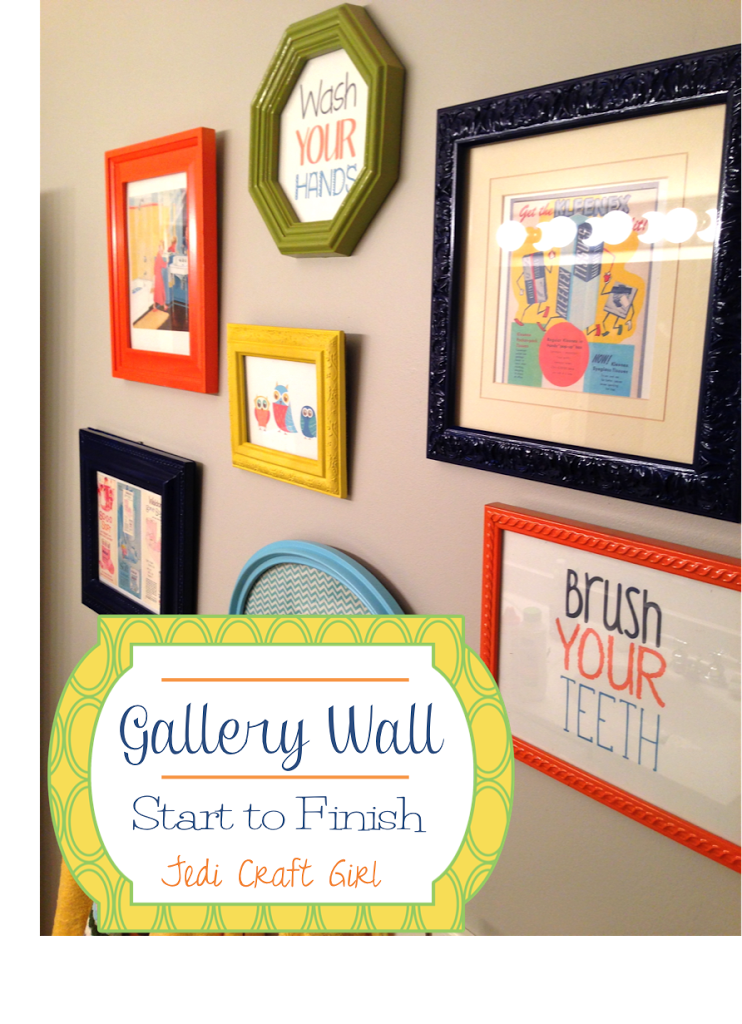
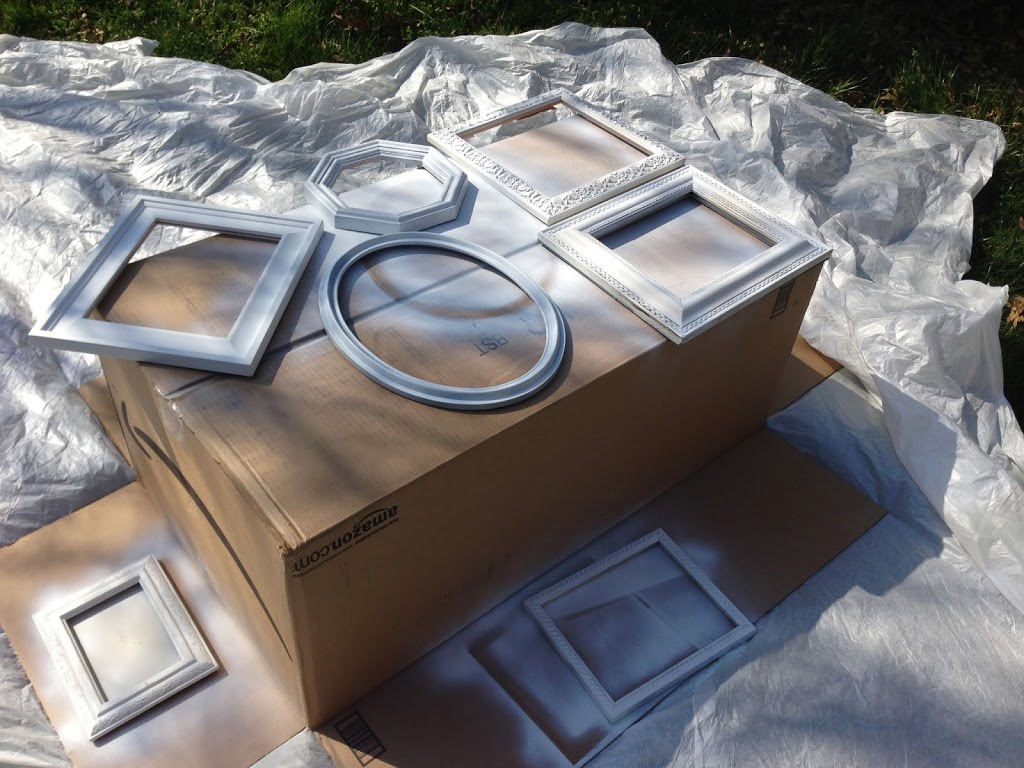
I bought this rather large frame at a garage sale for a few dollars.  I wanted to make it into some kind of collage/bulletin board.  I love chicken wire and this was the perfect frame for it.  All I did was snip the chicken wire with wire cutters the size of the frame.  Then I used a staple gun to secure the wire to the back of the frame.  Took about 5 minutes!!

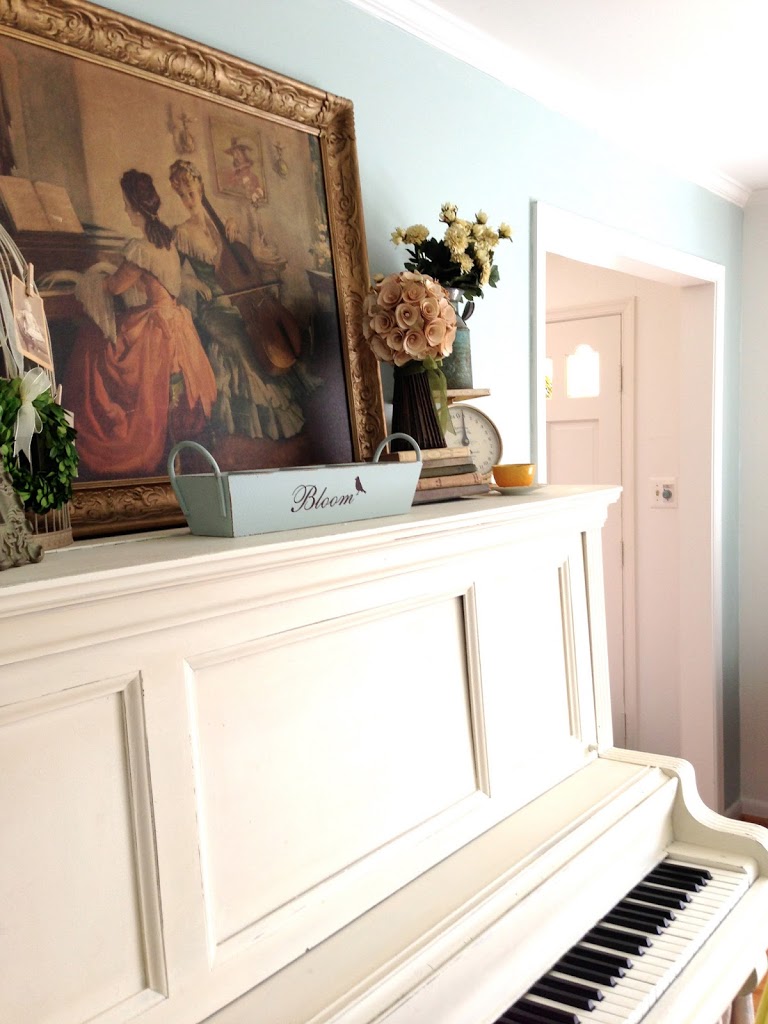
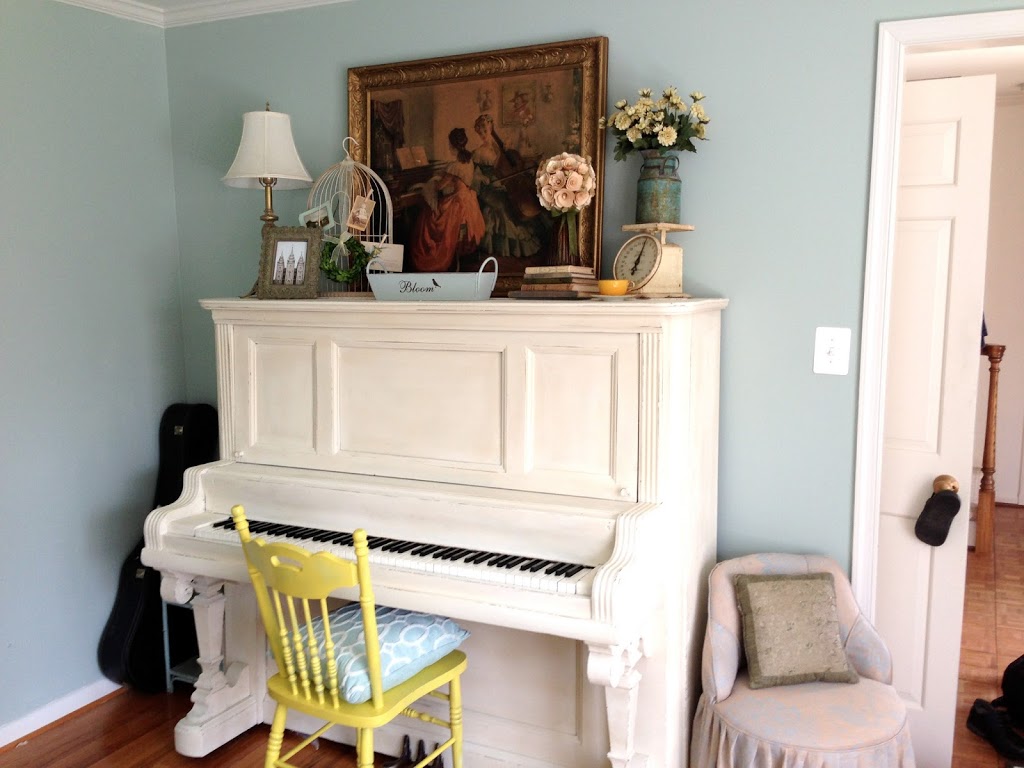
For the past 19 years where ever we have traveled we have made it a point to visit the nearest LDS Temple.  I printed out photos from every temple we’ve been too….from Hawaii to New York!  Since this year’s mutual theme is “Stand ye in Holy Places”, I thought it would be fun to gather all the photos and create a memory board.

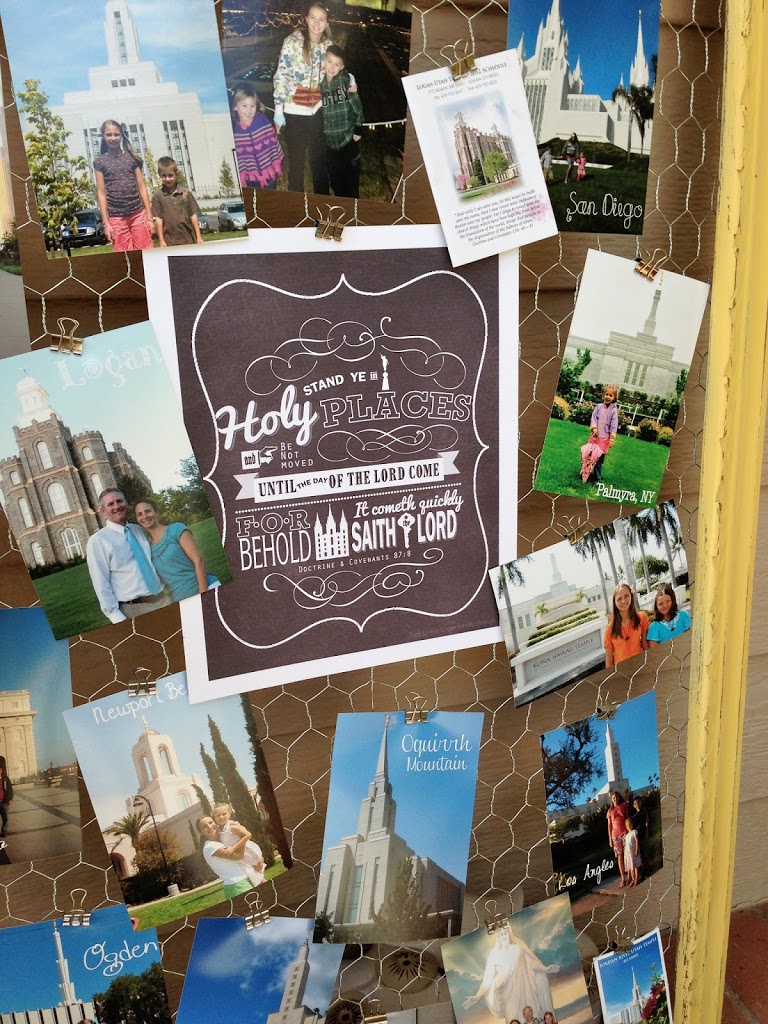
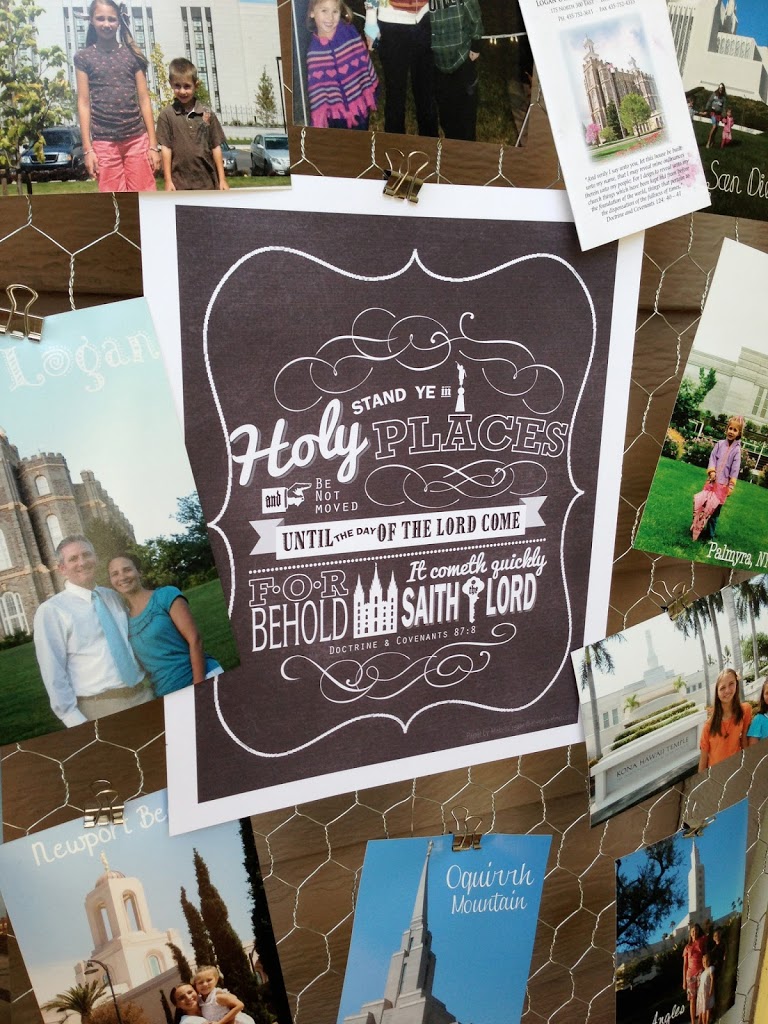
I found this graphic for free at Hang a Ribbon on The Moon.   I used silver binder clips to attach everything to the chicken wire.  The nice thing about this is it is so easy to switch out. The possibilities are endless!

 I have noticed friends who visit my home enjoy looking at all the different temples and where they are located….friends of our faith and friends of other faiths.  Having this hanging in our home serves a reminder of what is important in our family and what we should be focusing on.


Amanda

Gallery Wall Start to Finish

I love putting together gallery walls.  This is the last project I did for my friend’s home in Virginia.  Here is a step by step tutorial for creating one from laying out the frames to how to properly hang the frames. (The wall paint is Home Depot’s Behr Paint in Dolphin Fin)
Step #1 Gather your frames and play around with the layout on the floor.  
For this gallery wall I wanted different sizes, different shapes and different texture frames.  The trick to getting a good layout is to either have it perfectly symmetrical and all frames matching and squared up, or in this case, having none of the frames align.  I was careful not to have the frames line up ant the top, bottom, or in the center.  This picture is not the final layout!  Once you get your layout how you want it – take a picture of it so you can remember!

Step #2 Create Footprints
Get out your old wrapping paper and trace each frame to make a footprint to be arranged on the wall first.

Step #3 Paint
I get all my frames at garage sales and thrift shops.  For this bathroom, I had specific colors in mind to paint the frames: orange, green, navy, and yellow. I always use spray primer first.  It totally helps your paint go farther and cover better!

 Step #4 Attach Wire for Hanging
I took a picture framing class 14 years ago from a gal who framed art for the Smithsonian.  I have never forgot what I learned in that class!

It is best not to use this kind of hanger – it is too hard to get the picture to hang level.

Instead, measure about 2.5″ to 3″ down (depending on the size of your frame) on both sides of frame.  Attach eye screws.  If it is hard to get the eye screws started, hammer a little nail hole first.

Cut a piece of picture hanging wire and loop it through both the eye screws, winding the excess around itself.
It’s ready to hang now!  What is nice about using wire is you can make adjustments to the height of your picture if you don’t get the nail in the right place and it will always hang level.

TIP
If your frame has a stand on the back, you must remove it or it will also hang funny because of an uneven weight distribution.  Take your pliers and rip the thing off!!

Step #5
Clean the glass of each frame and place your art or photo in the frame.  For this gallery wall we choose some fun, retro bathroom prints.

This one is three Waldorf Toilet Paper Advertisements.

This one is a retro bathroom with a child brushing her teeth.

I found this retro Kleenex advertisement and it was in the colors of the bathroom!
Step #6 Tape the footprints to the wall with painters tape
This is important because you get a good feel of how it is going to look.  I actually ended up changing a few frames around from my original design.
Step #7 Use picture hanger nails
I hammered my picture hangers into the wall through the paper so I knew it would be perfect.
 
Step #8 – Hang your frames & admire!
You’re done!  I love how this one turned out!! 

Amanda

Chalk Paint Piano

 Have you seen those darling pictures of painted pianos on Pinterest?  I love how they look – but who in their right mind would paint their piano????  While I was visiting my friend out in Virginia she told me she wanted me to paint her piano….gasp!!!  All I could think about was how I was not going to get paint on the keys, in between the keys, and how was I going to paint around all the intricate parts of a piano.  The best way to deal with your fears is to face them.  And so I did!!!
Here is the piano before.  When she told me it was free, I started feeling better.  Like, even if I mess it up, she’s not really out much money!
The first choice in the right direction was using Annie Sloan Chalk Paint.  This made all the difference in this piece.  It goes on like a dream, you don’t need to prime, and it has that old look which we wanted on the piano.  This quart of paint was just enough for 2-3 coats on the piano.

 The piano needed 2 coats and a light third coat.  I did it in one day.  I brought in a fan to help the paint dry faster.  I didn’t tape anything off.  I used a really good edging brush and was careful not to get it on the keys or drip in between the keys.

Here is the finished product:  It completely changed the look and feel of the room!!


 I lightly sanded the edges so some of the dark color would show through a little.  I didn’t distress it too much.  When the paint was completely dry, I went over it with Annie Sloan Soft Wax and applied it with the wax brush.  The Soft Wax is amazing!  It gives furniture such a warn, homey feel.  It feels like the piano has looked like this for 100 years.  It is hard to explain how great the wax is, you just have to try it!

We had fun decorating the top of the piano.  I dug this old painting out of her basement that she bought for the frame.  I love it!  The two fancy ladies sitting around the piano – who has a painting like this these days!

 We added the yellow chair for a little pop of color.


What do you think?  Are you ready to paint your piano?


Amanda

The Cutest Curtains Ever!!! {tutorial}

 I spent a week in Virginia helping my friend decorate her house.  She has this big window in her front room and it needed some curtains.  Here is how you can make them too!

We bought this 2-pack of canvas drop cloths at the Home Depot.  They were $10 for the pair.  We liked these because they were a little more gray than tan.

Some of the other canvas drop cloths were only 1 in a package.  The ones we bought were perfect because we needed 2 curtain panels.

They ended up being the perfect width for our window.  You may need to adjust the measurements to fit your window.  Measure how long you want them and then add 3″ for the hem.  Make sure to consider how you want to hang them.  Ours were hung with curtain clips on a rod.  Cut off the extra fabric and hem.  Our hem was rolled once then again about 2 1/2 inches.

We bought a Queen size flat sheet at the thrift shop it was on sale for $3.

Snip the sheet at 4″ increments and tear apart.  (Do this the long way so you have enough length to ruffle.)  We used 6 strips per panel.  Adjust depending on the size of your curtains.  The combination of the warn, softness of the sheet and the tearing gave the ruffles a nice vintage edge.

After the strips are torn, cut the hemmed edges off the strips so they are raw on all 4 sides.  Sew a gathering stitch down the center of the 4″ strips.  Gather.

Draw a line 1/3 the way up from the bottom of the curtain.  Then draw a line every 6″ to the bottom of the curtain.  You should have 6 lines for 6 ruffles.

Adjust the ruffle to fit the width of your panel.  Pin the gathered seam along the pencil line.  Continue pinning all 6 ruffles.  Sew a straight stitch over your gathering stitch.  It’s a little awkward because the drop cloth is a little thick. 


 Keep gathering and gathering and pinning and pinning – you can do it!!

 Once you have sewn the ruffles on, they are ready to hang!!  You could easily make a pocket at the top if you don’t want to use curtain clips.  We bought our clips and rod at Target.

We finished our project at 1:00 am.  We hung them up and sat on the couch and admired them for quite some time.  They gave the room such a darling, finished look.

 In my house in California, I have shutters on all my windows, so I don’t think I will be able to have my own set of these curtains in my house.  That makes me sad.  I took lots of pictures so I could remember how cute they turned out!!

Amanda

Gratitude Rocks version 1.2

We’ve had so much fun making these gratitude rocks, I though I would post our latest versions.  For the original post, click HERE.

Step #1 Paint river rocks.

Step #2 Write or paint your name on the rock
Step #3 Cut words out of magazines describing the person whose name is on the rock.   By doing this, you are showing your gratitude for these qualities and talents. 

 Step #4 Use Mod Podge to attach the words to the rock

Step #5 Smile at your rock every time you look at it!!!


Amanda

Onsie Dress Tutorial

 My friend mailed me this “blank” onsie for a baby shower.  It’s a cute idea.  Everyone invited to the shower gets a onsie and they have to decorate/embellish it and bring it to the shower.  I think they are having prizes or something.  That’s a lot of pressure, “Here is a plain onsie, you write a craft blog, so this better be amazing!!”  Is how I felt 🙂  So this is what I came up with.  (I am sure there are lots of tutorials out there with the same idea – this is my take on it.)

Part 1 Bib construction

 Draw a “bib” shape on Heat N Bond Lite Fusable Web.  I curved the top of it to match the curve of the onsie neck.  I didn’t include a pattern because each onsie is slightly different.  You can do it – draw your own!!   Iron it on the wrong side of your fabric.  Then cut along your line and peel off the back and iron it right on your onsie.

 Cut your piece of lace and a matching piece of Heat N Bond.  Iron it to the lace.  Then cut the lace so it matches the curve of the bib.  Iron the lace to the bib piece.


Sew the lace down both sides.  Then sew around the bib portion using a straight stitch.
Next, prepare the ruffle.  Cut a strip of fabric 1 3/4″ x 23″. 
I don’t have a serger so I did a rolled hem on the strip of fabric – which is just turning it twice as narrow as you can and sew along the fold. 

 Now, because I am not using a serger, I zigzagged the opposite side of the fabric so it won’t fray.  (above)

Then roll the edges in and hem.

 Now roll your zigzagged edge over and stitch in place.  I used the zigzag because I will be gathering it and I wanted to reduce the bulk.  Sew a gathering stitch along the edge of the zigzag hem and gather.   It should look like this:

Get out your pins and start fussing with the ruffle to get it to fit.  I use a lot of pins in this process so it fits perfectly.  Make adjustments in the ruffle as necessary.

 Sew the ruffle along your gathering stitch.

You could add buttons along the lace – but I was worried about putting buttons on something for a baby.

Part 2 – Skirt Construction

You can tell from the photos it is getting later and later and I am getting tired-er.  My photos aren’t the best.  Essentially you are making a little gathered skirt and sewing it to the onsie.

Cut your skirt fabric 11 1/2″x 34″.
My onsie is size 3 to 9 months.  (That’s a new size to me.  My youngest is 5 and I never had onsies made that size!)  If your onsie is larger I would add a little to both measurements. 

With right sides together, sew the two edges together to form the back seam.  You will have a continuous piece.  Press the seams open or zigzag the edges.  My seam allowance was a generous quarter inch.  It doesn’t really matter on this project.

(Maybe I should iron my fabric!!)  The skirt is top-stitched to the onsie (you could cut the onsie apart and sew it to the shirt portion like a T-shirt dress, but then you wouldn’t have the onsie diaper cover which is what I love about this dress.)  Because it is a top-stitched skirt, you need a rolled hem on the top of the skirt piece so it doesn’t fray.

Now we are ready to gather.  Sew a gathering stitch around your skirt waist about 1/4 inches below your top hem.  Pictured below:

 Gather your skirt and ease it around the waist of the onsie.  You can choose where you want this.  Mine was 2 1/2″ below the armpit.   I drew a light line in pencil so I could see where to pin the skirt.  Pin your ruffled skirt following your line making sure to evenly distribute the ruffles.  When you are happy with how it looks, sew it along your gathering stitch.  I covered my seam by sewing ric rac.  You could sew ribbon or lace or your favorite trim….or not.  It doesn’t look that bad with just the seam.

Dress Hem:  You can hem the dress how ever you like.  I was going to sew a small ruffle along the hem in coordinating fabric but I ran out of time.  So I did a lace hem.  I sewed the lace and pressed it out and top stitched it down.  You could use ric rac, or other decorative trim, or you can sew a regular hem.

Here it is!!  I also sewed a matching flower for the baby’s head – but I finished it on my way out the door to mail it – so no photo 🙁

Amanda

Painted Armoire


 I bought this armoire on Craig’s List on Saturday.  I needed something for my 5 year old’s room – the mess is out of control in there!  I paid $125 for it – she originally wanted $200 so I felt like it was a pretty good deal.  (I am used to garage sale prices!!)  The armoire was from an antique store in Beverly Hills – sold!! 

I got it home and immediately sanded it and painted it…in the dark!  I might be the world’s most impatient person!
 
By Monday morning 3 coats of paint had been applied.

I decided to distress it a touch.  I like the “shabby” feel of it.  I love the detail of the flowers – perfect for the princess Rapunzel room!!

 When I was done with the distressing, I rubbed Minwax Finishing Paste on it – it’s my FAVORITE way to finish furniture.  I love the feel it gives it!


 It is hard to photograph in my daughter’s room – but we got it all moved in last night – yea!!!


Amanda

Sprinkles, Sprinkles & More Sprinkles


Don’t laugh at me, but the state of my “Sprinkle” organization has been bothering me for quite some time.  I don’t have a fancy remodeled kitchen like in my dreams.  I have builder-grade cabinets from 1989 which I have painted twice.  Do any of you have this small little cabinet above the hood in your kitchen with the vent occupying most of the space?  This is what mine looked like:

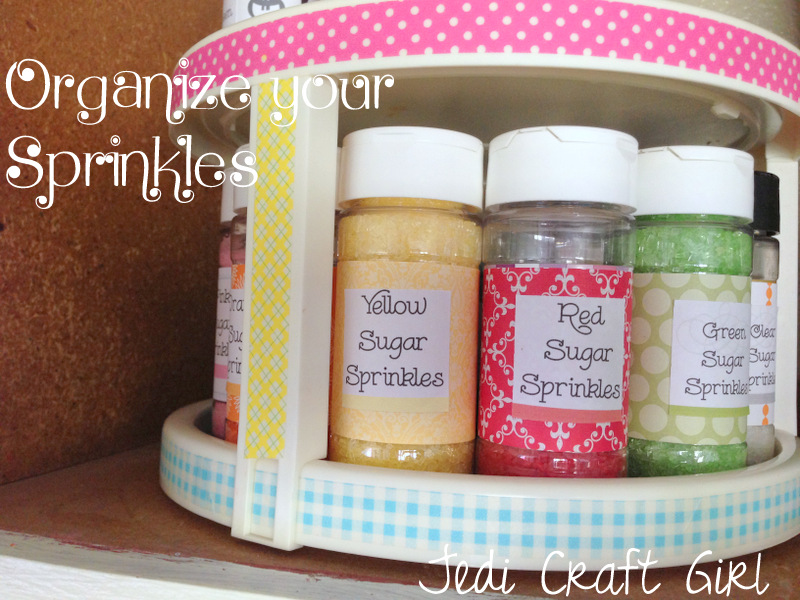
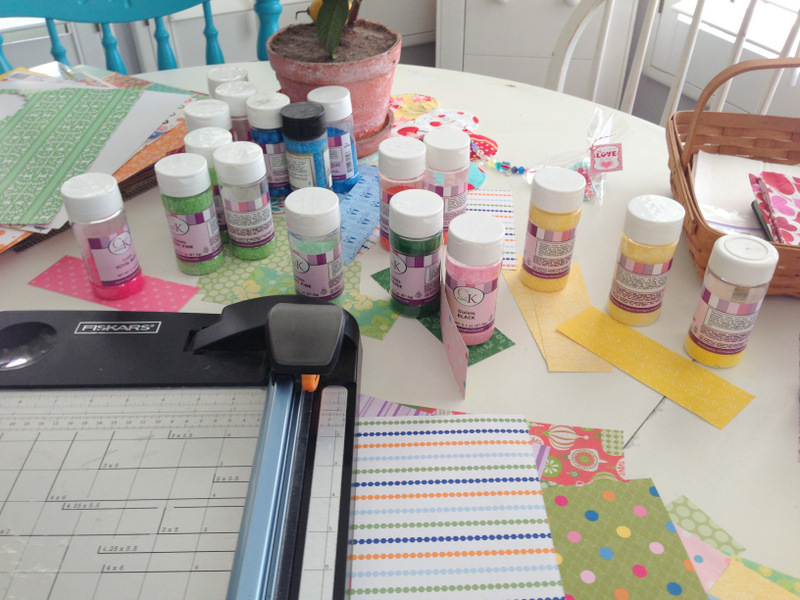
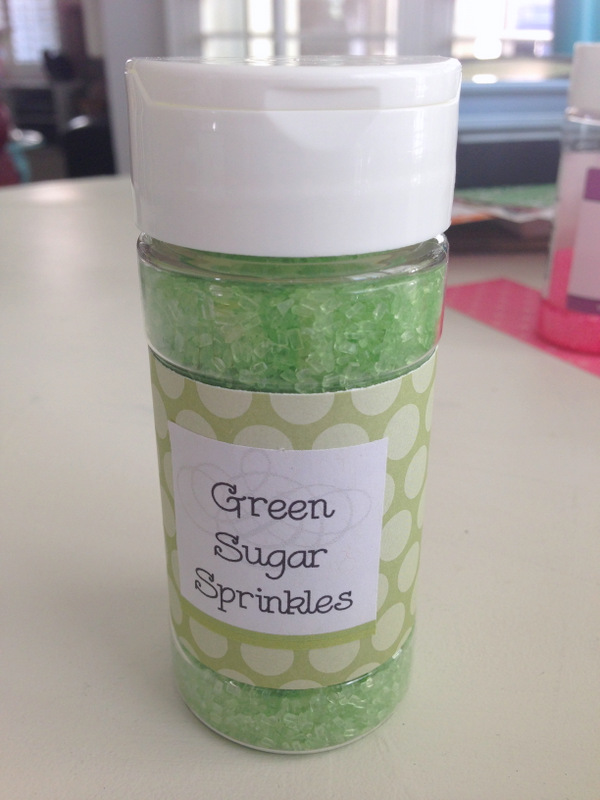
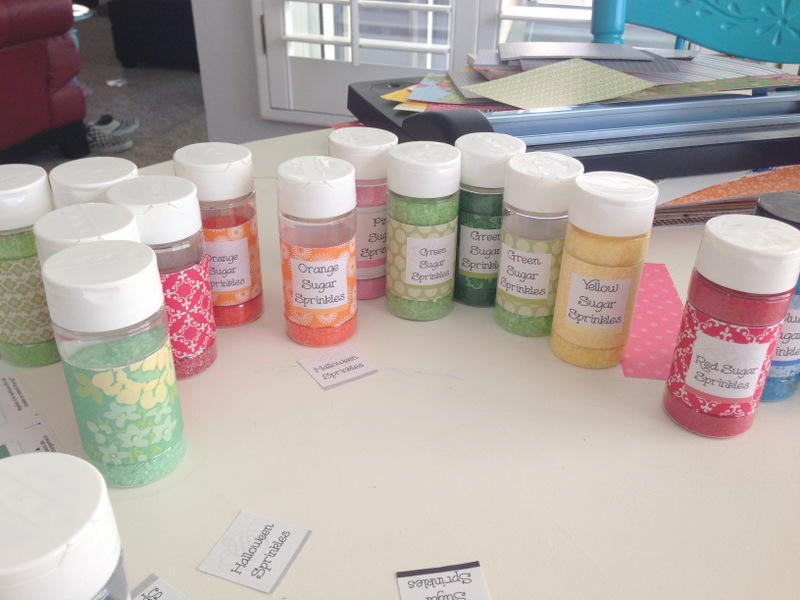
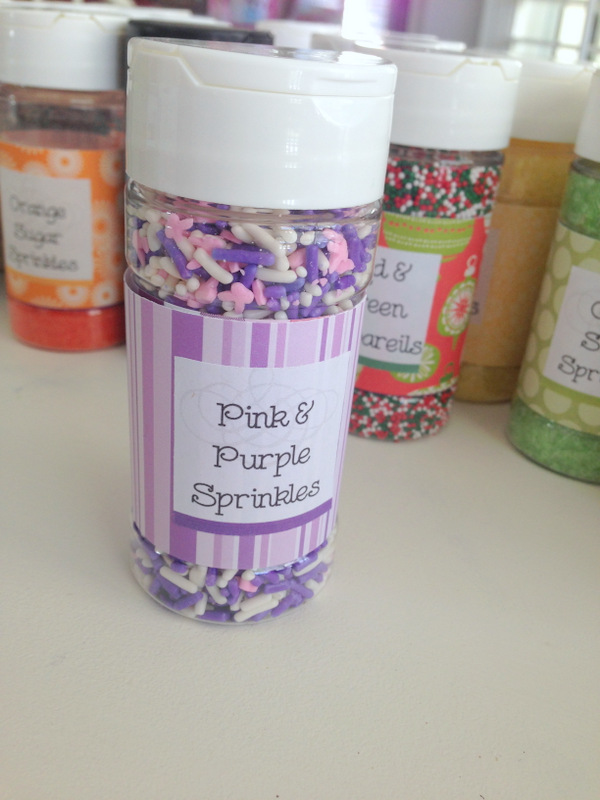
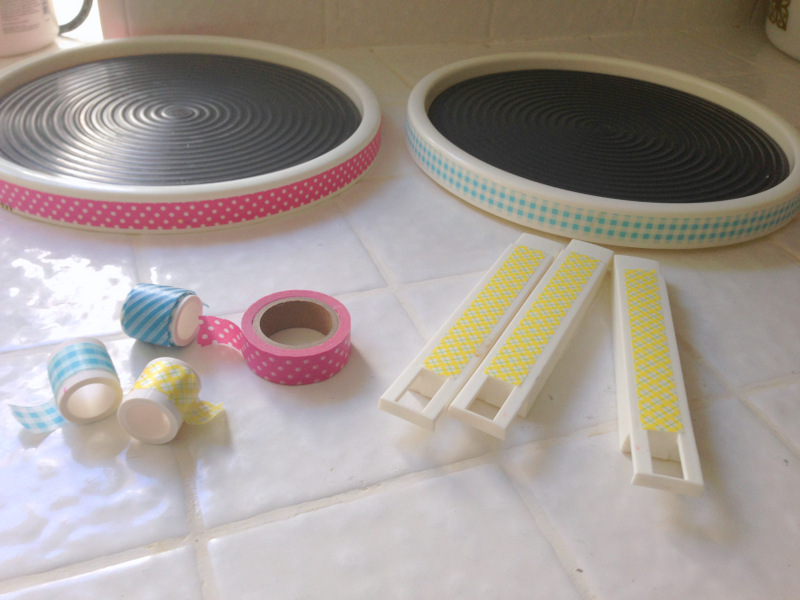
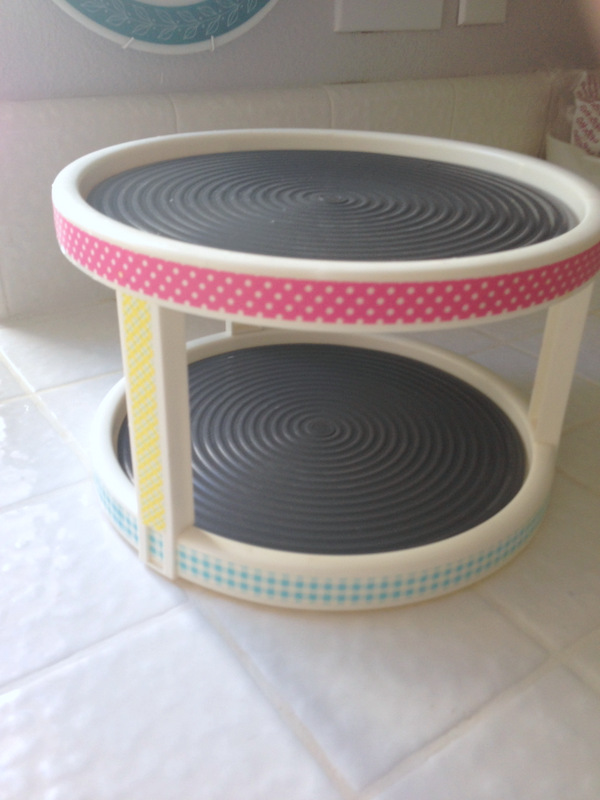
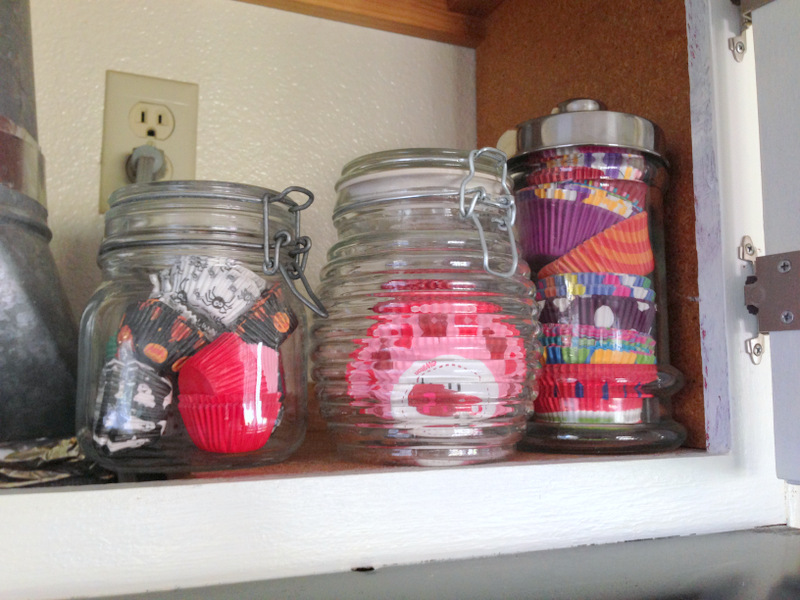
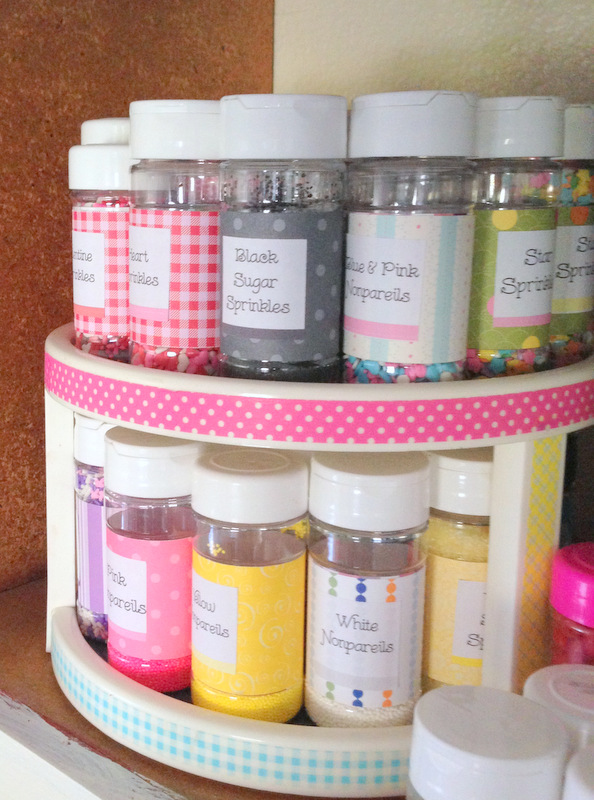
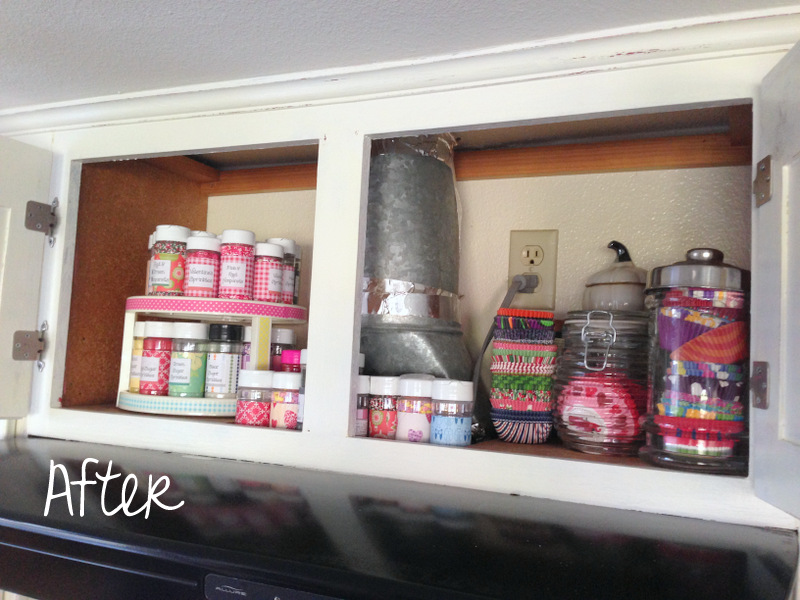
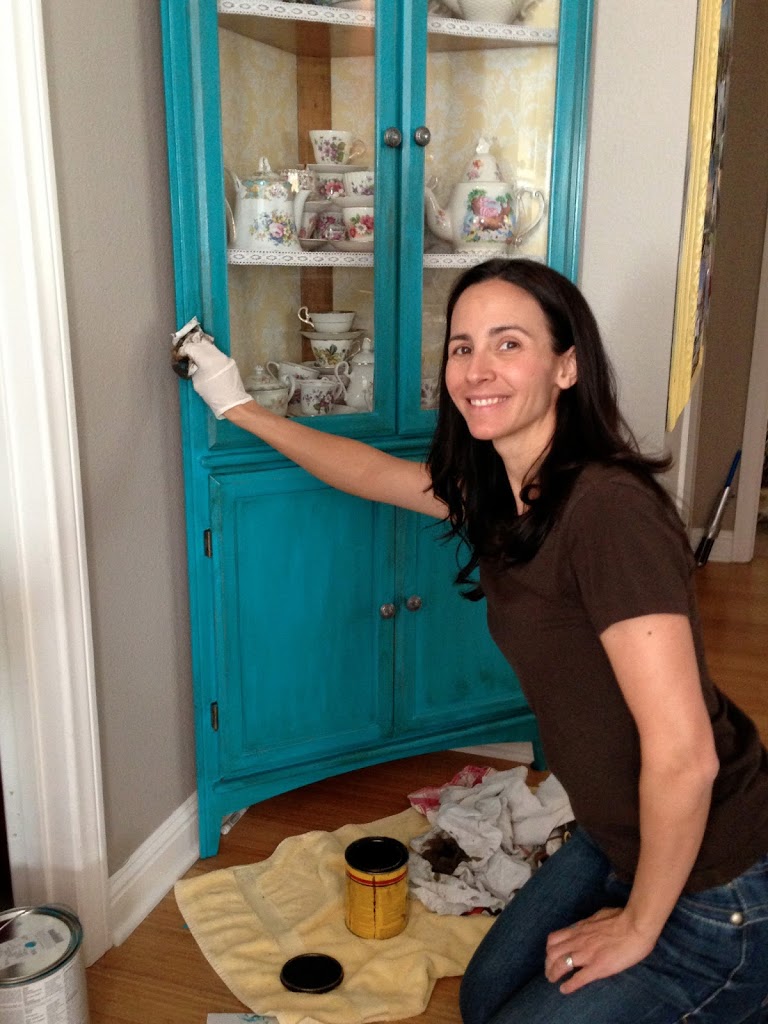
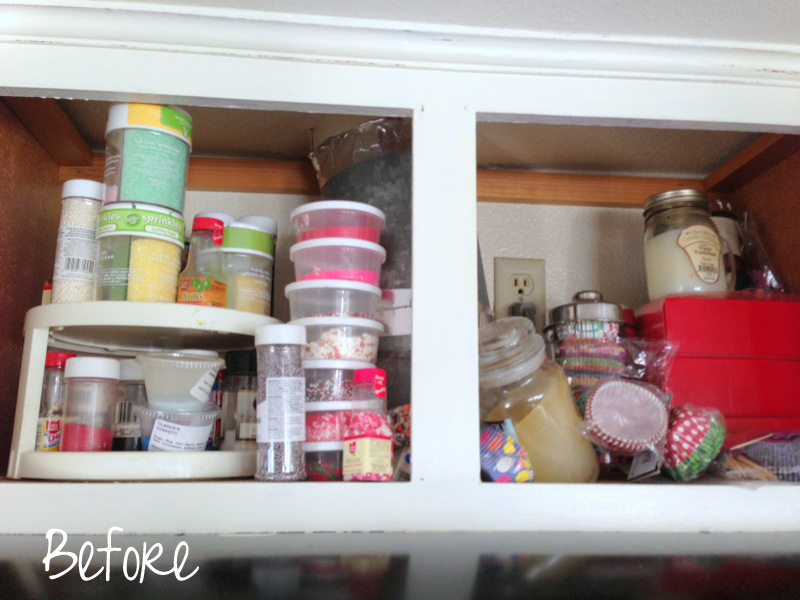
Often times I would open the cabinet and sprinkles would actually fall onto my head.  (By the way I love sprinkles and I pride myself on having a selection fitting every holiday.)
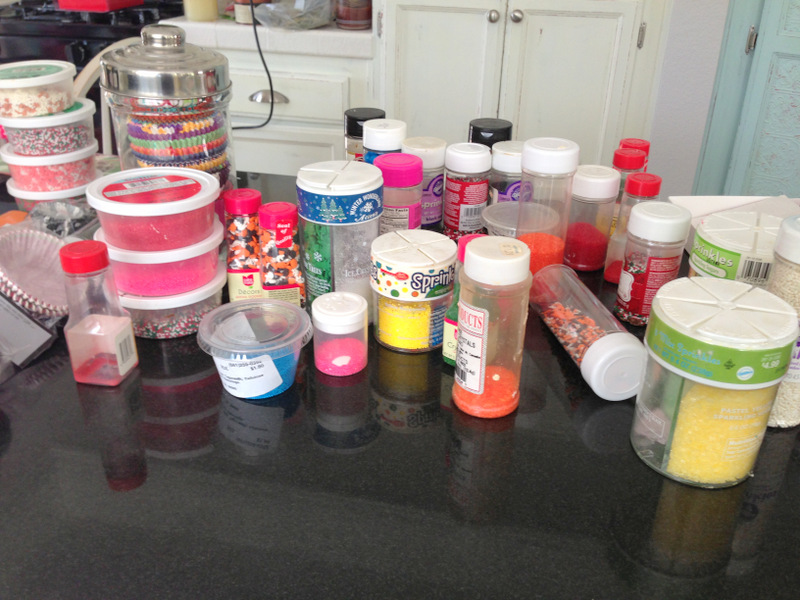
 I emptied the contents to my counter:
 I have sprinkles in every possible container, tub, or shaker thing-a-ma-jig.  My friend gave me all these empty shaker bottles and I knew that was my answer.  All the sprinkles needed to fit into like-sized containers…and so the process (a day’s work) began.
 

 I emptied all my sprinkles into their own same-sized bottle and tossed the original packaging.

 The only problem was all the labels on the new containers were all different and I wasn’t going to spend a week removing them.  Enter in scrapbook paper and sticky strip.

 I cut a 2″ x 6″ strip out of paper that matched the sprinkles in the bottle.  I didn’t want all the bottles to look the same with fancy Martha Stewart labels.  I like that look, but when it comes to sprinkles I need to grab and go!  Color coded bottles were just the answer!  Green sprinkles get green paper, etc.

I went to the Avery label website and printed off custom labels to attach to each bottle.

 It is starting to look happy in here!!!

 I planned on returning my sprinkles to my double-decker Lazy Susan.  Only it needed a bit of sprucing up.  Enter in Washi Tape.  In a matter of seconds I transformed a very boring item into something bright and cheerful!

 Next, all the cupcake papers needed homes and one jar was not enough.  I could have bought all matching jars, but I didn’t want to make a trip to the store so I used what I had.  It works.

 (The inside of the cabinet is not the cutest – yes, that is the actual wall you see inside the cupboard – QUALITY!!)

 I grouped the sprinkles by color, then by holiday.  That should work for now.  It won’t make the cover of a magazine or anything, but it makes me feel happy when I peek in there…..and it makes me want to bake something yummy!!


Amanda

Painted Tea Cabinet

 I have been wanting to paint this cabinet for quite some time.  I can’t believe I finally did it!

 This is how it looked before.  It was stained one color.  Enter in Sherwin-Williams “Splashy”.  Only my new favorite color!

I decided to tackle this project at 10pm Saturday night.  That’s just how I work.  I took the doors off the hinges and lightly sanded – I mean LIGHTLY sanded.  This piece does not get a lot of wear.  I didn’t even prime (gasp).  I wanted some wood showing through.
 (Do you like the cereal boxes used to hold the doors off the floor!)
After it was painted I rubbed a walnut stain on the painted parts and then quickly wiped it off.  It took the “Splashy” down a notch and made it look a little more vintage.


 I bought some glass knobs which give it just the right touch.

 I added wallpaper to the back of the cabinet.  I cut the wallpaper to fit the dimensions on my rotary cutter.  I followed the manufacturers instructions on adhering the wallpaper.  It was quick and easy.

 
Whose ready for a tea party?

Amanda

Lace Banner

 I have this old fashion radio in my entry way.  I have this curvy part to my stairs and it is the perfect item to fit there.  I wanted to break up the brown a bit so I sewed this lace banner.  It was super easy. 

 I simply cut triangles out of lace and sewed them together using ecru crochet lace.  Super cute!

 I may not always keep this here – but it’s fun for a while!

Amanda