Heat & Bond One Direction Concert T-Shirts

one direction concert t-shirt_7

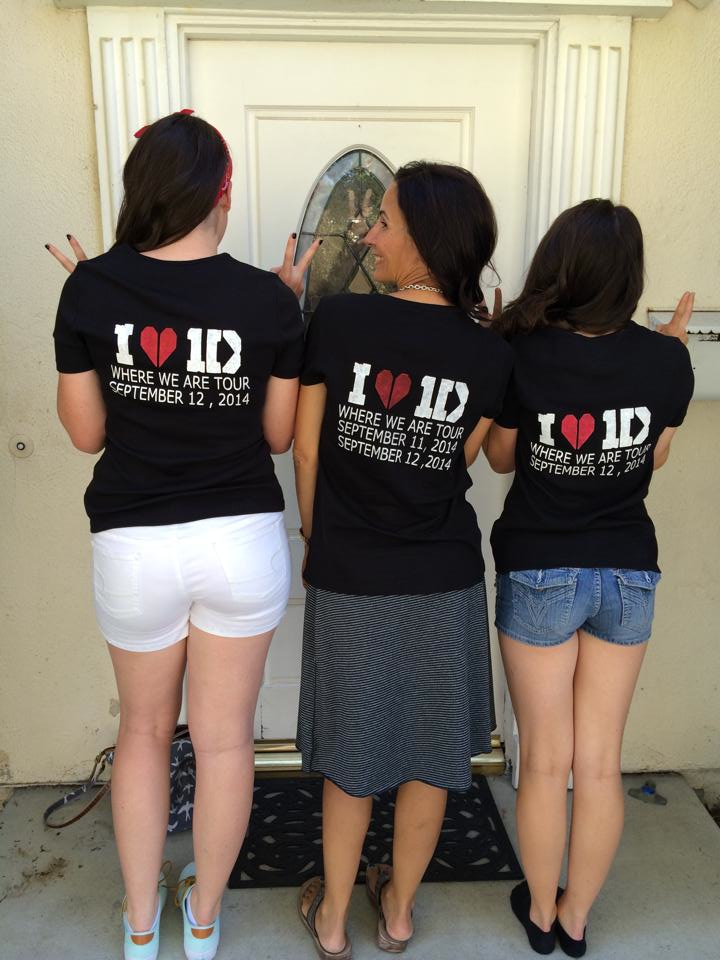
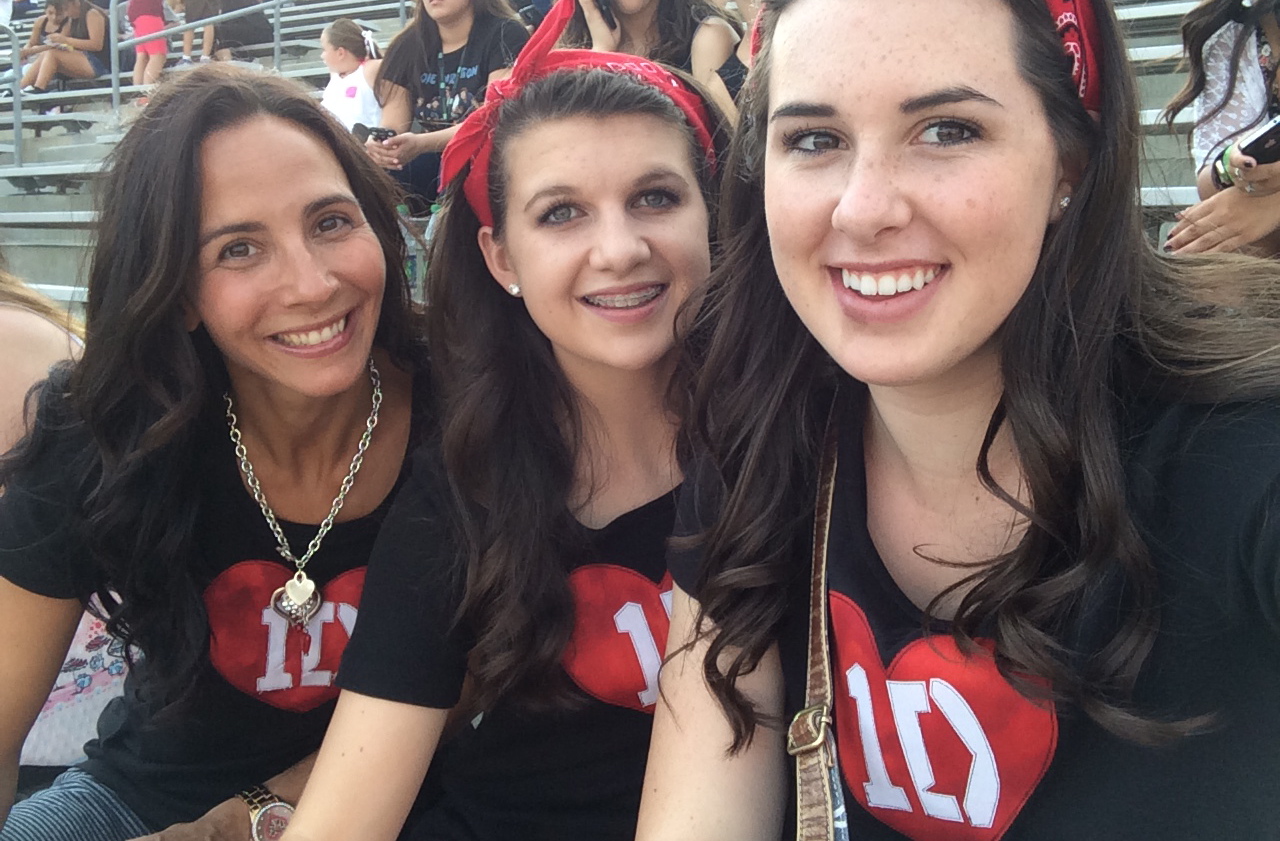
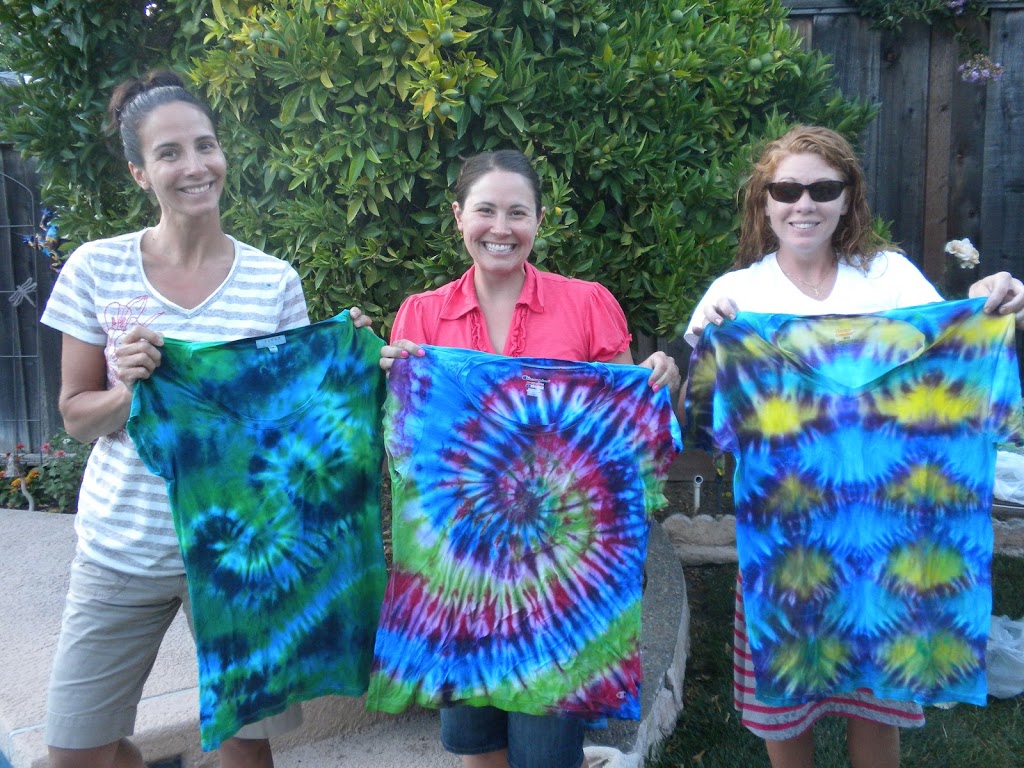
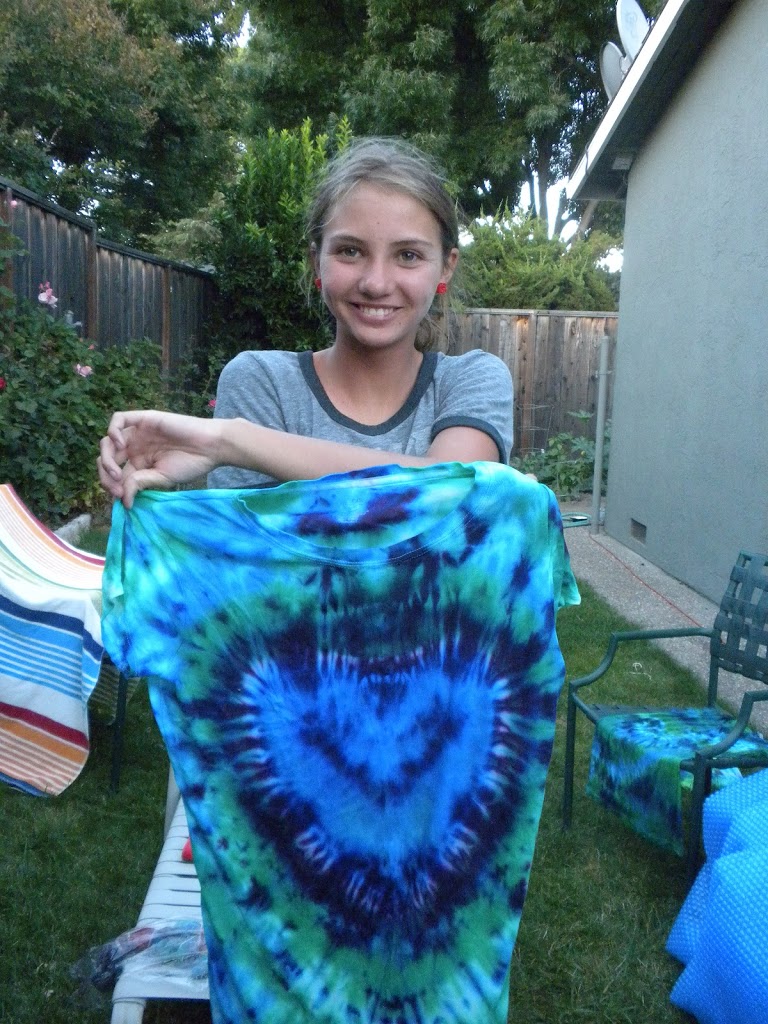
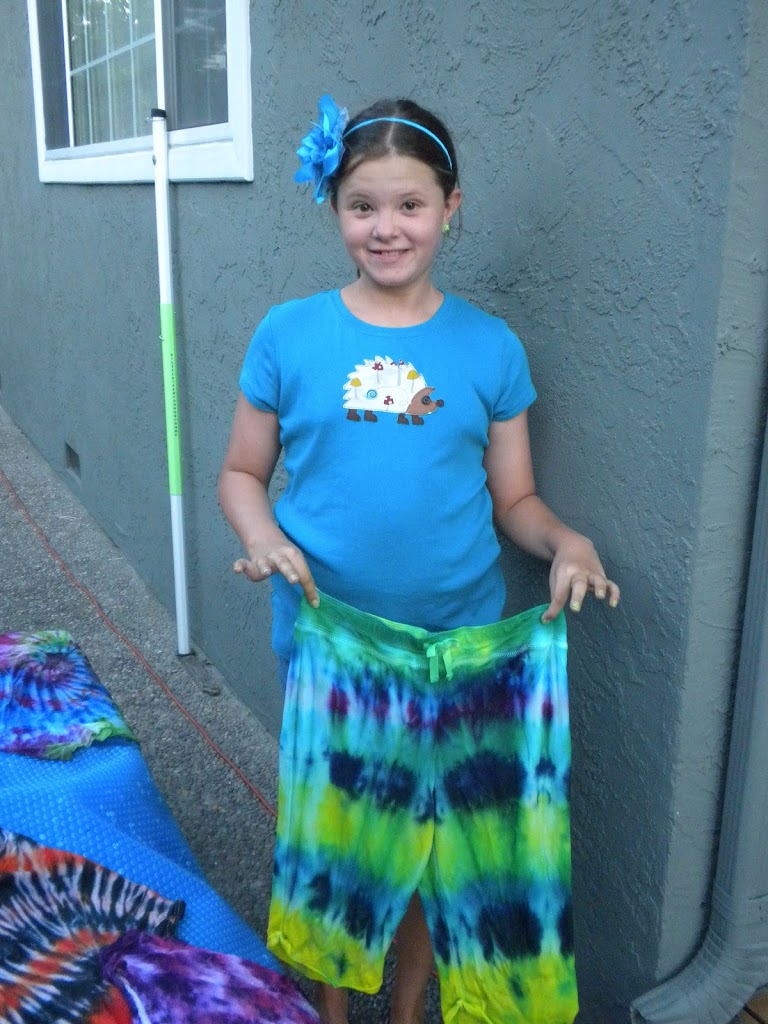
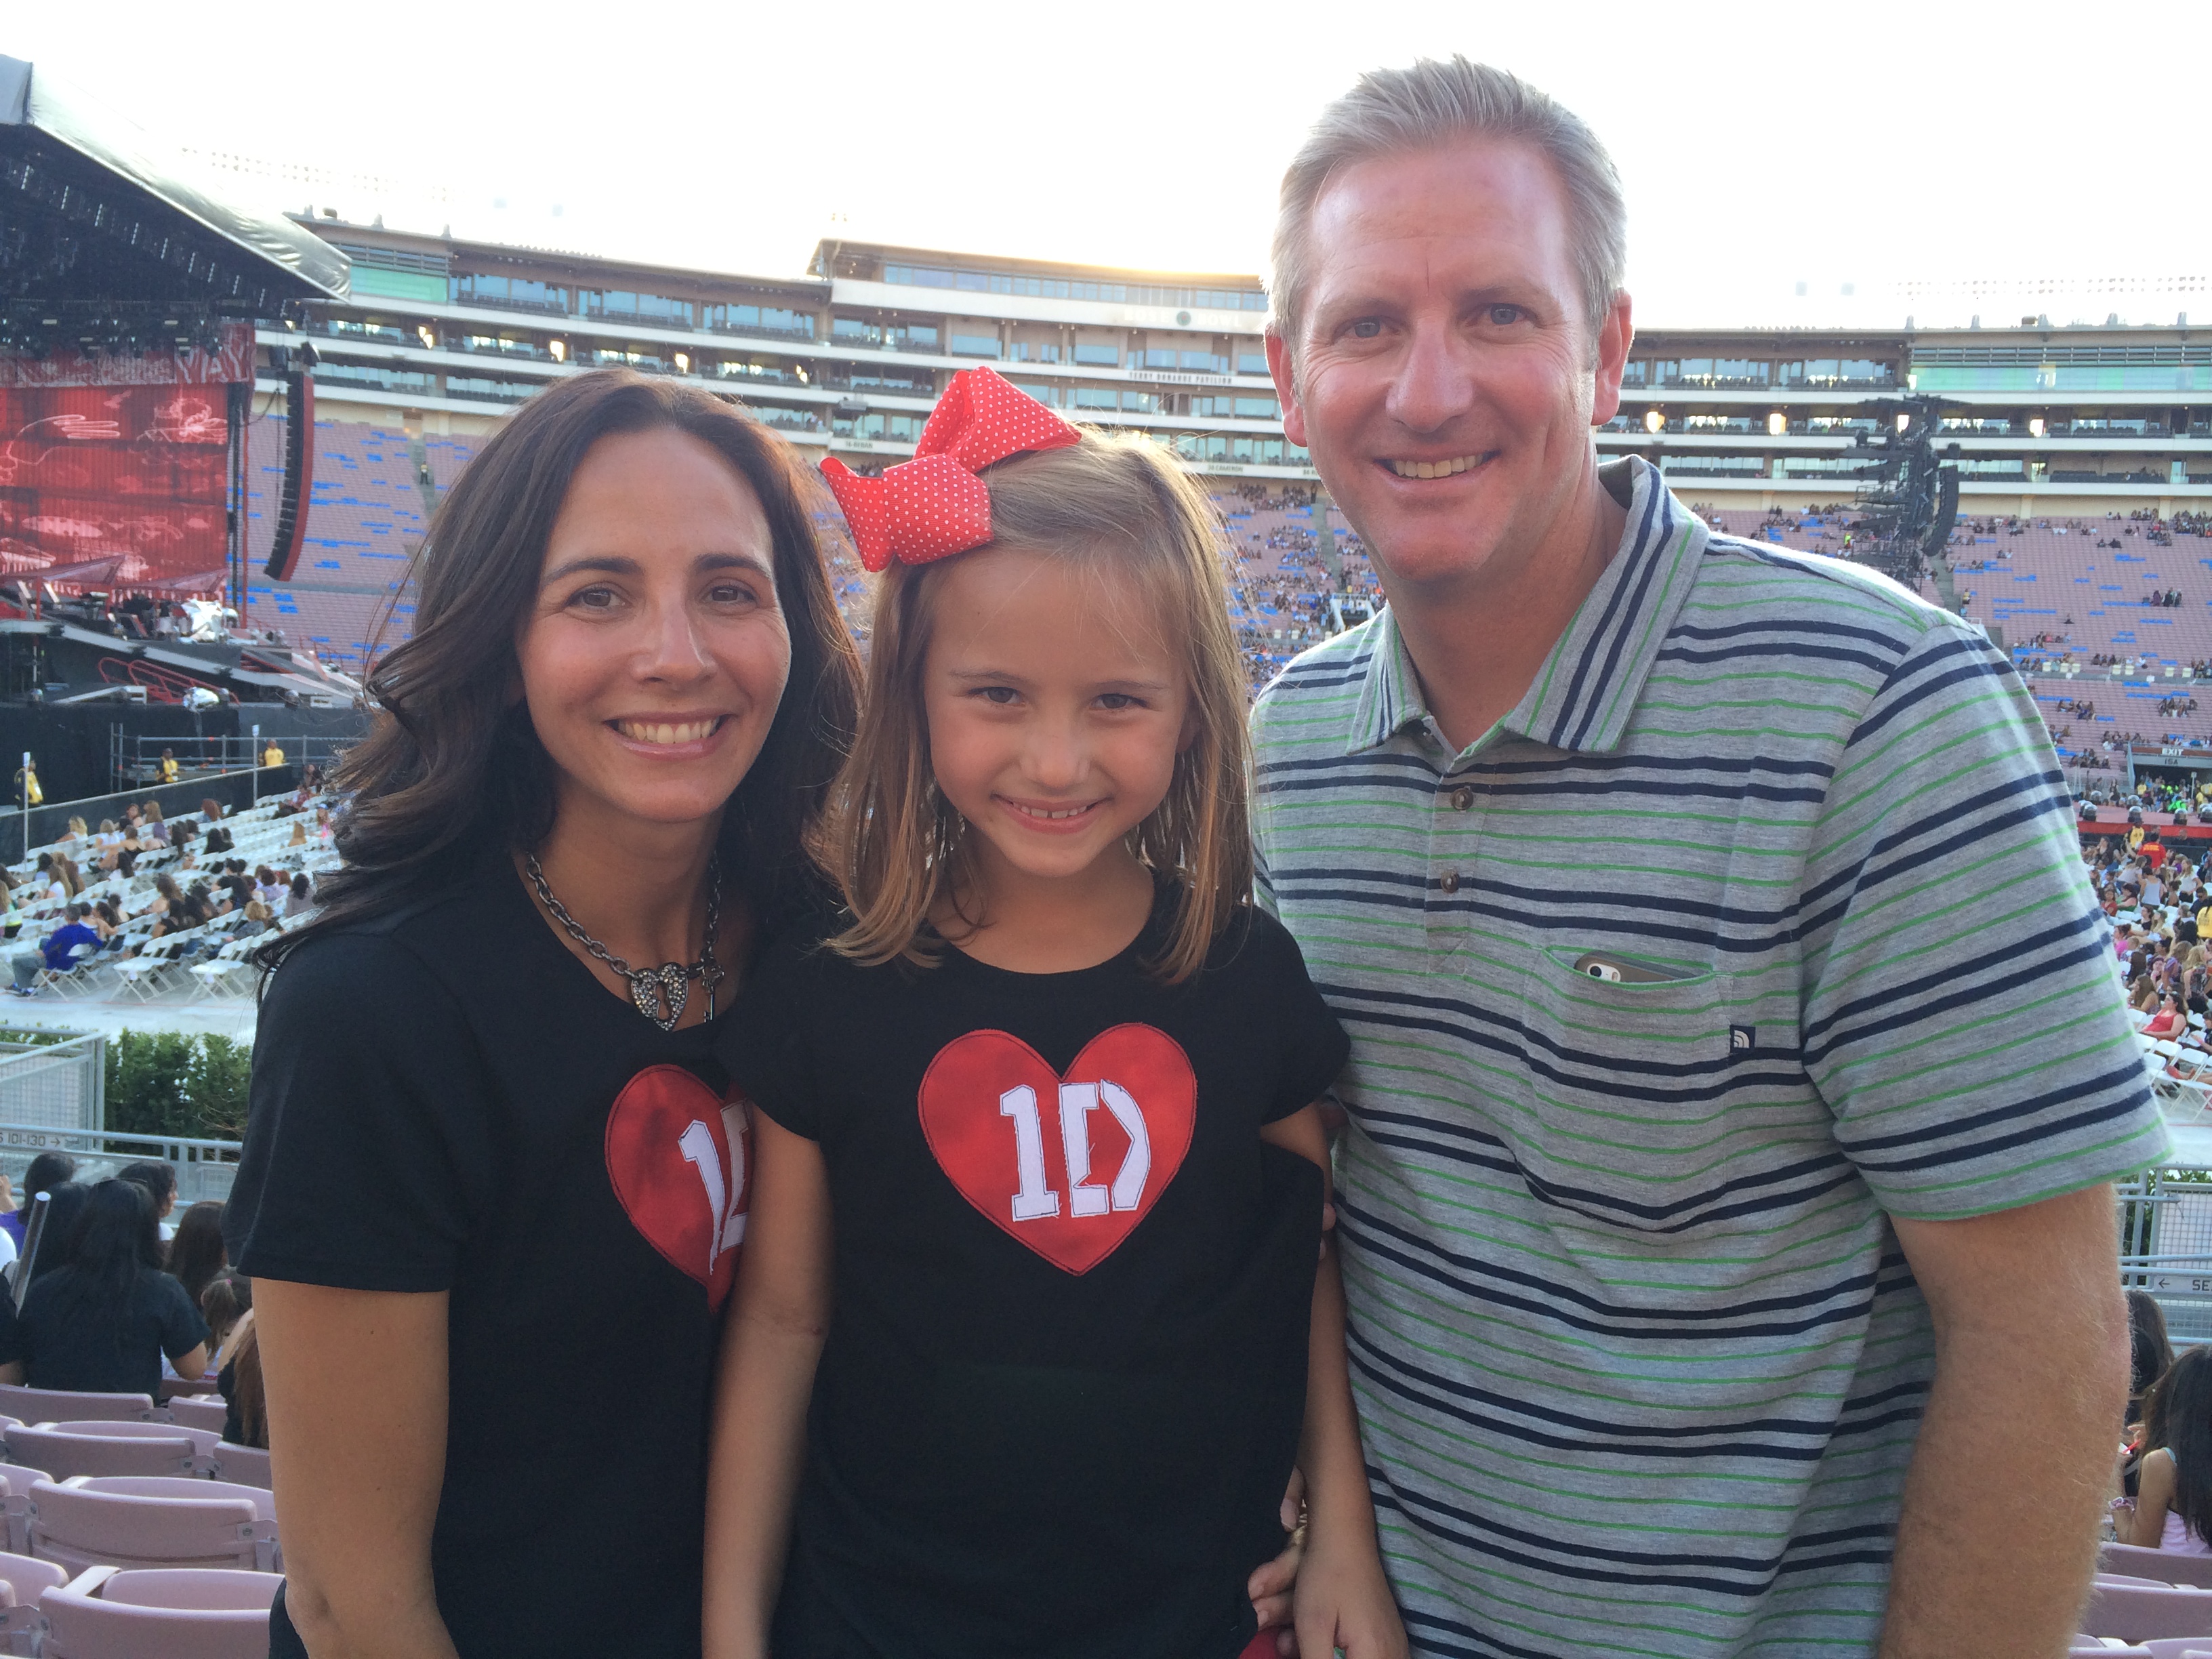
In celebration of One Direction’s  release of their new song, Steal My Girl, I thought I would share how to make your own 1D concert T-shirt.  I love going to concerts and we always make some kind of fun T-Shirt to celebrate the occasion.  (click HERE and HERE for Taylor Swift Concert T-shirt ideas) A few weeks ago One Direction was playing at the Rose Bowl so my husband and I took our 6 year old daughter.  To quote her, “This is my dream come true!”

Then the following night I took some cute girls (so their moms wouldn’t have to go) and we rocked out!  Yes – I am officially a One Direction Groupie!

DIY one direction concert t-shirt 2

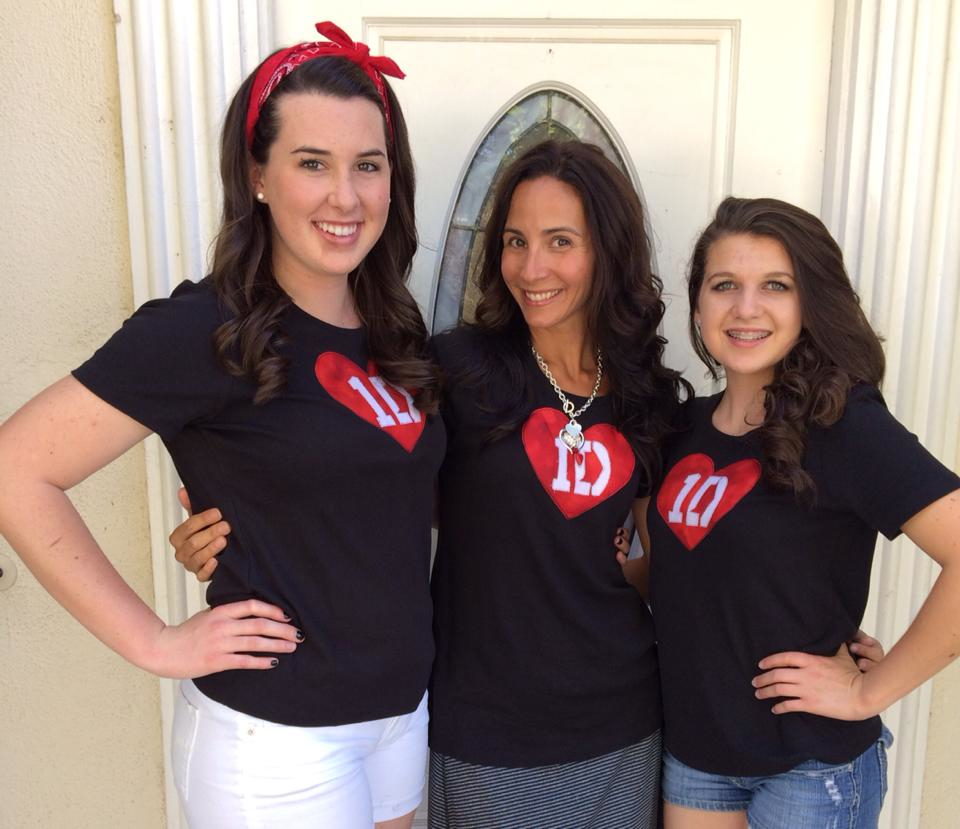
Here is how you can make your own shirt!!

Supplies:

Small piece of red fabric

Small piece of white fabric

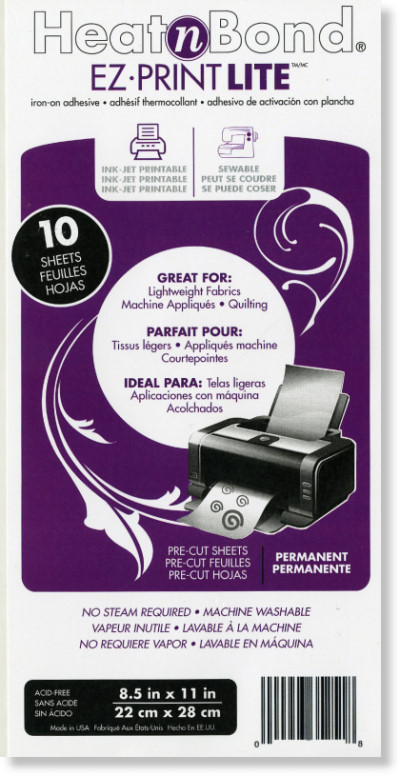
Heat n Bond Lite EZ print sheets

Black T-Shirt

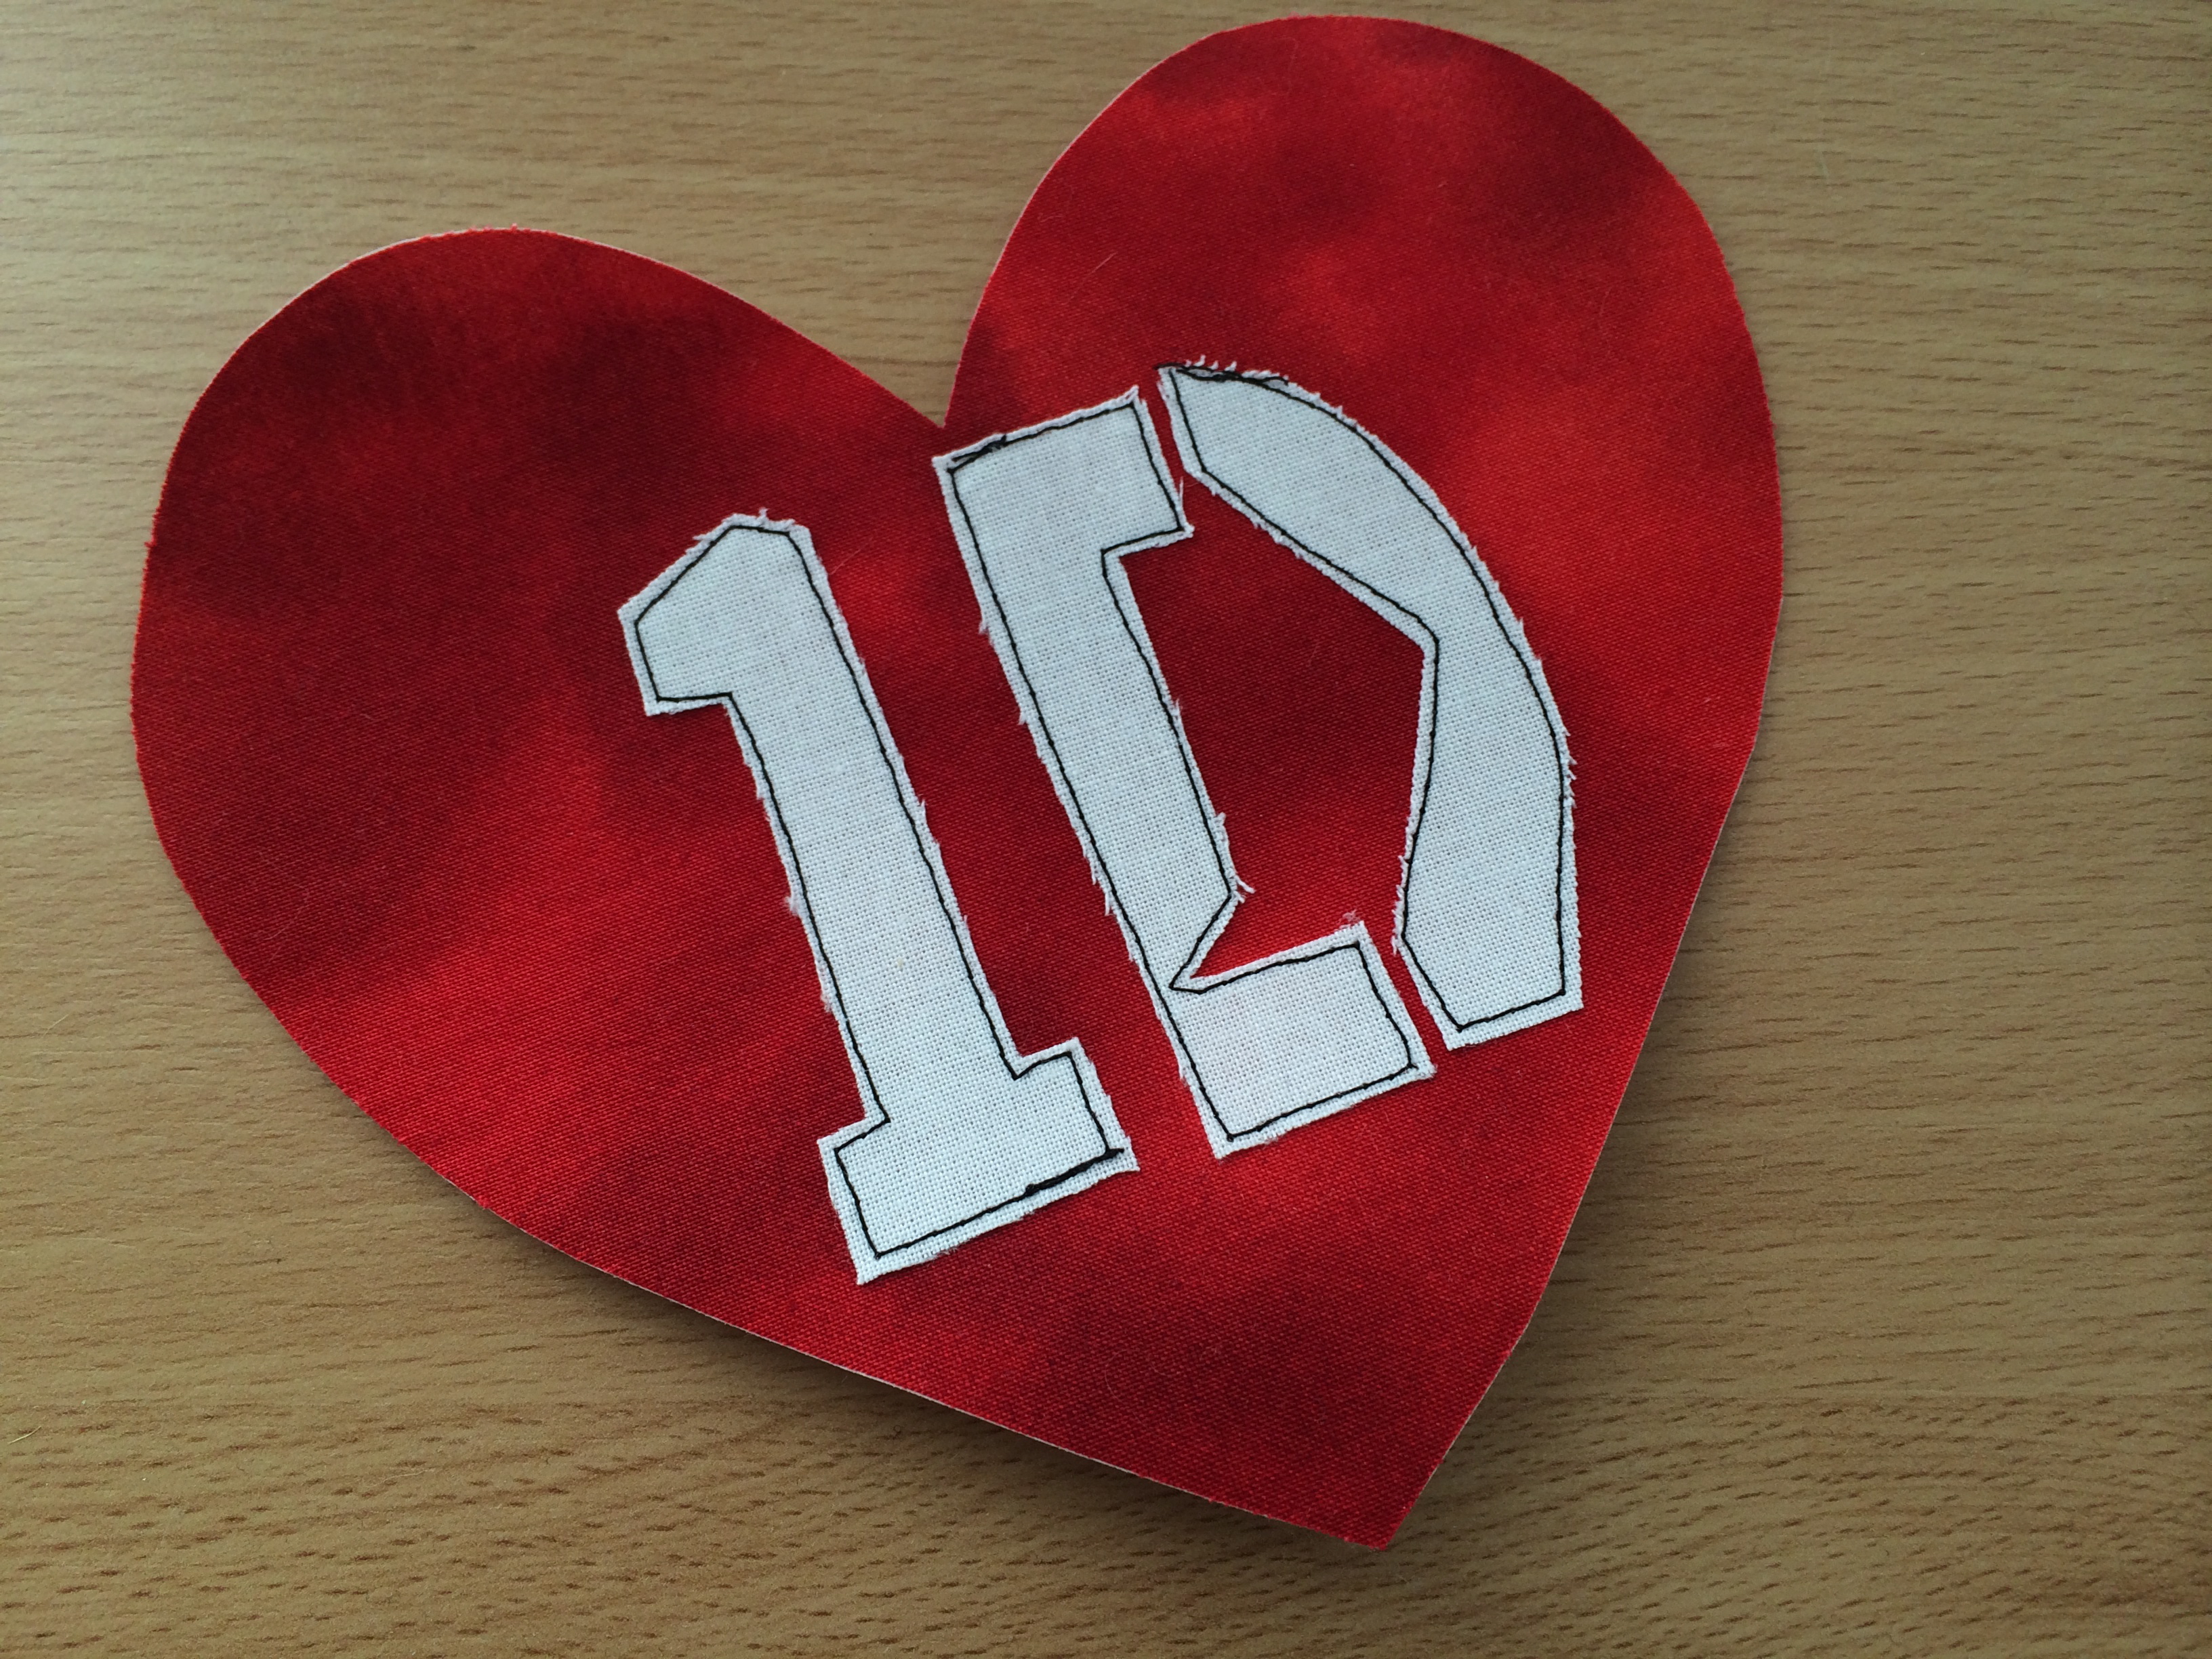
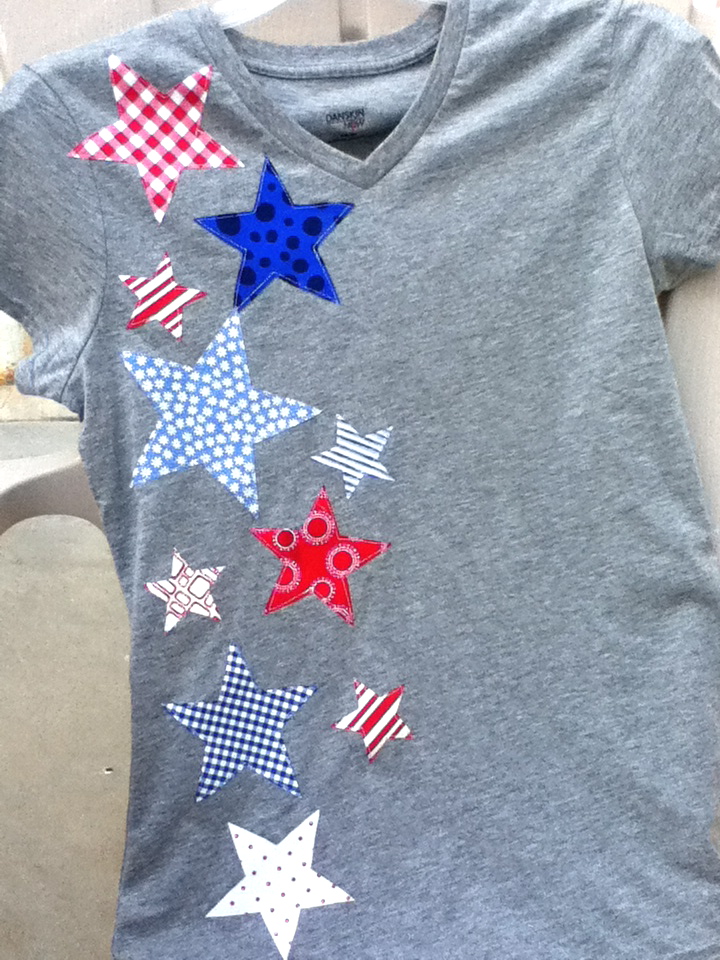
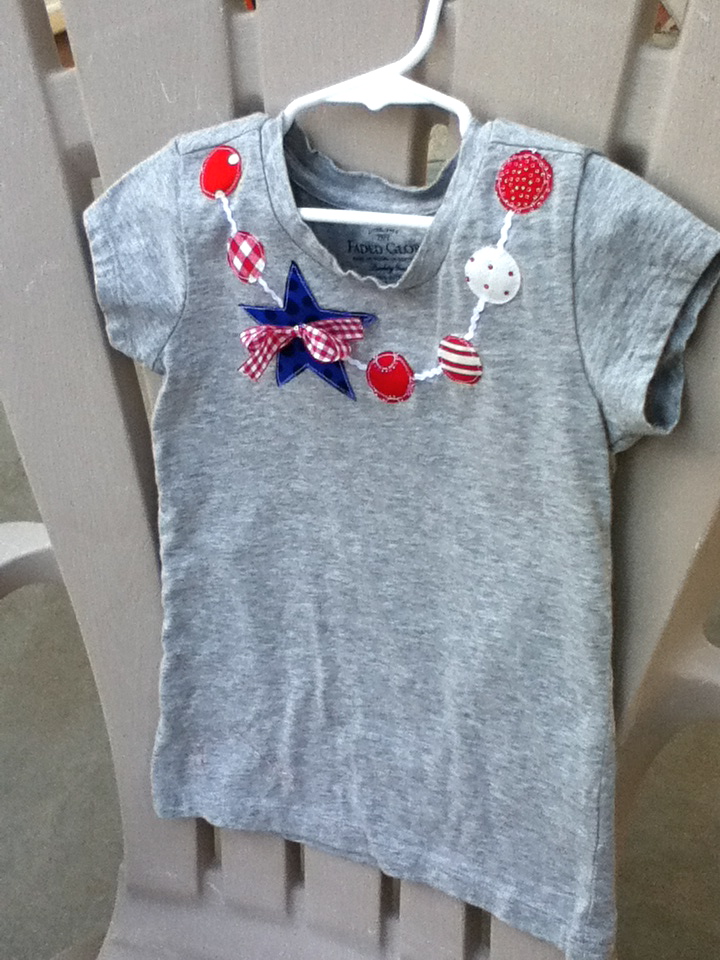
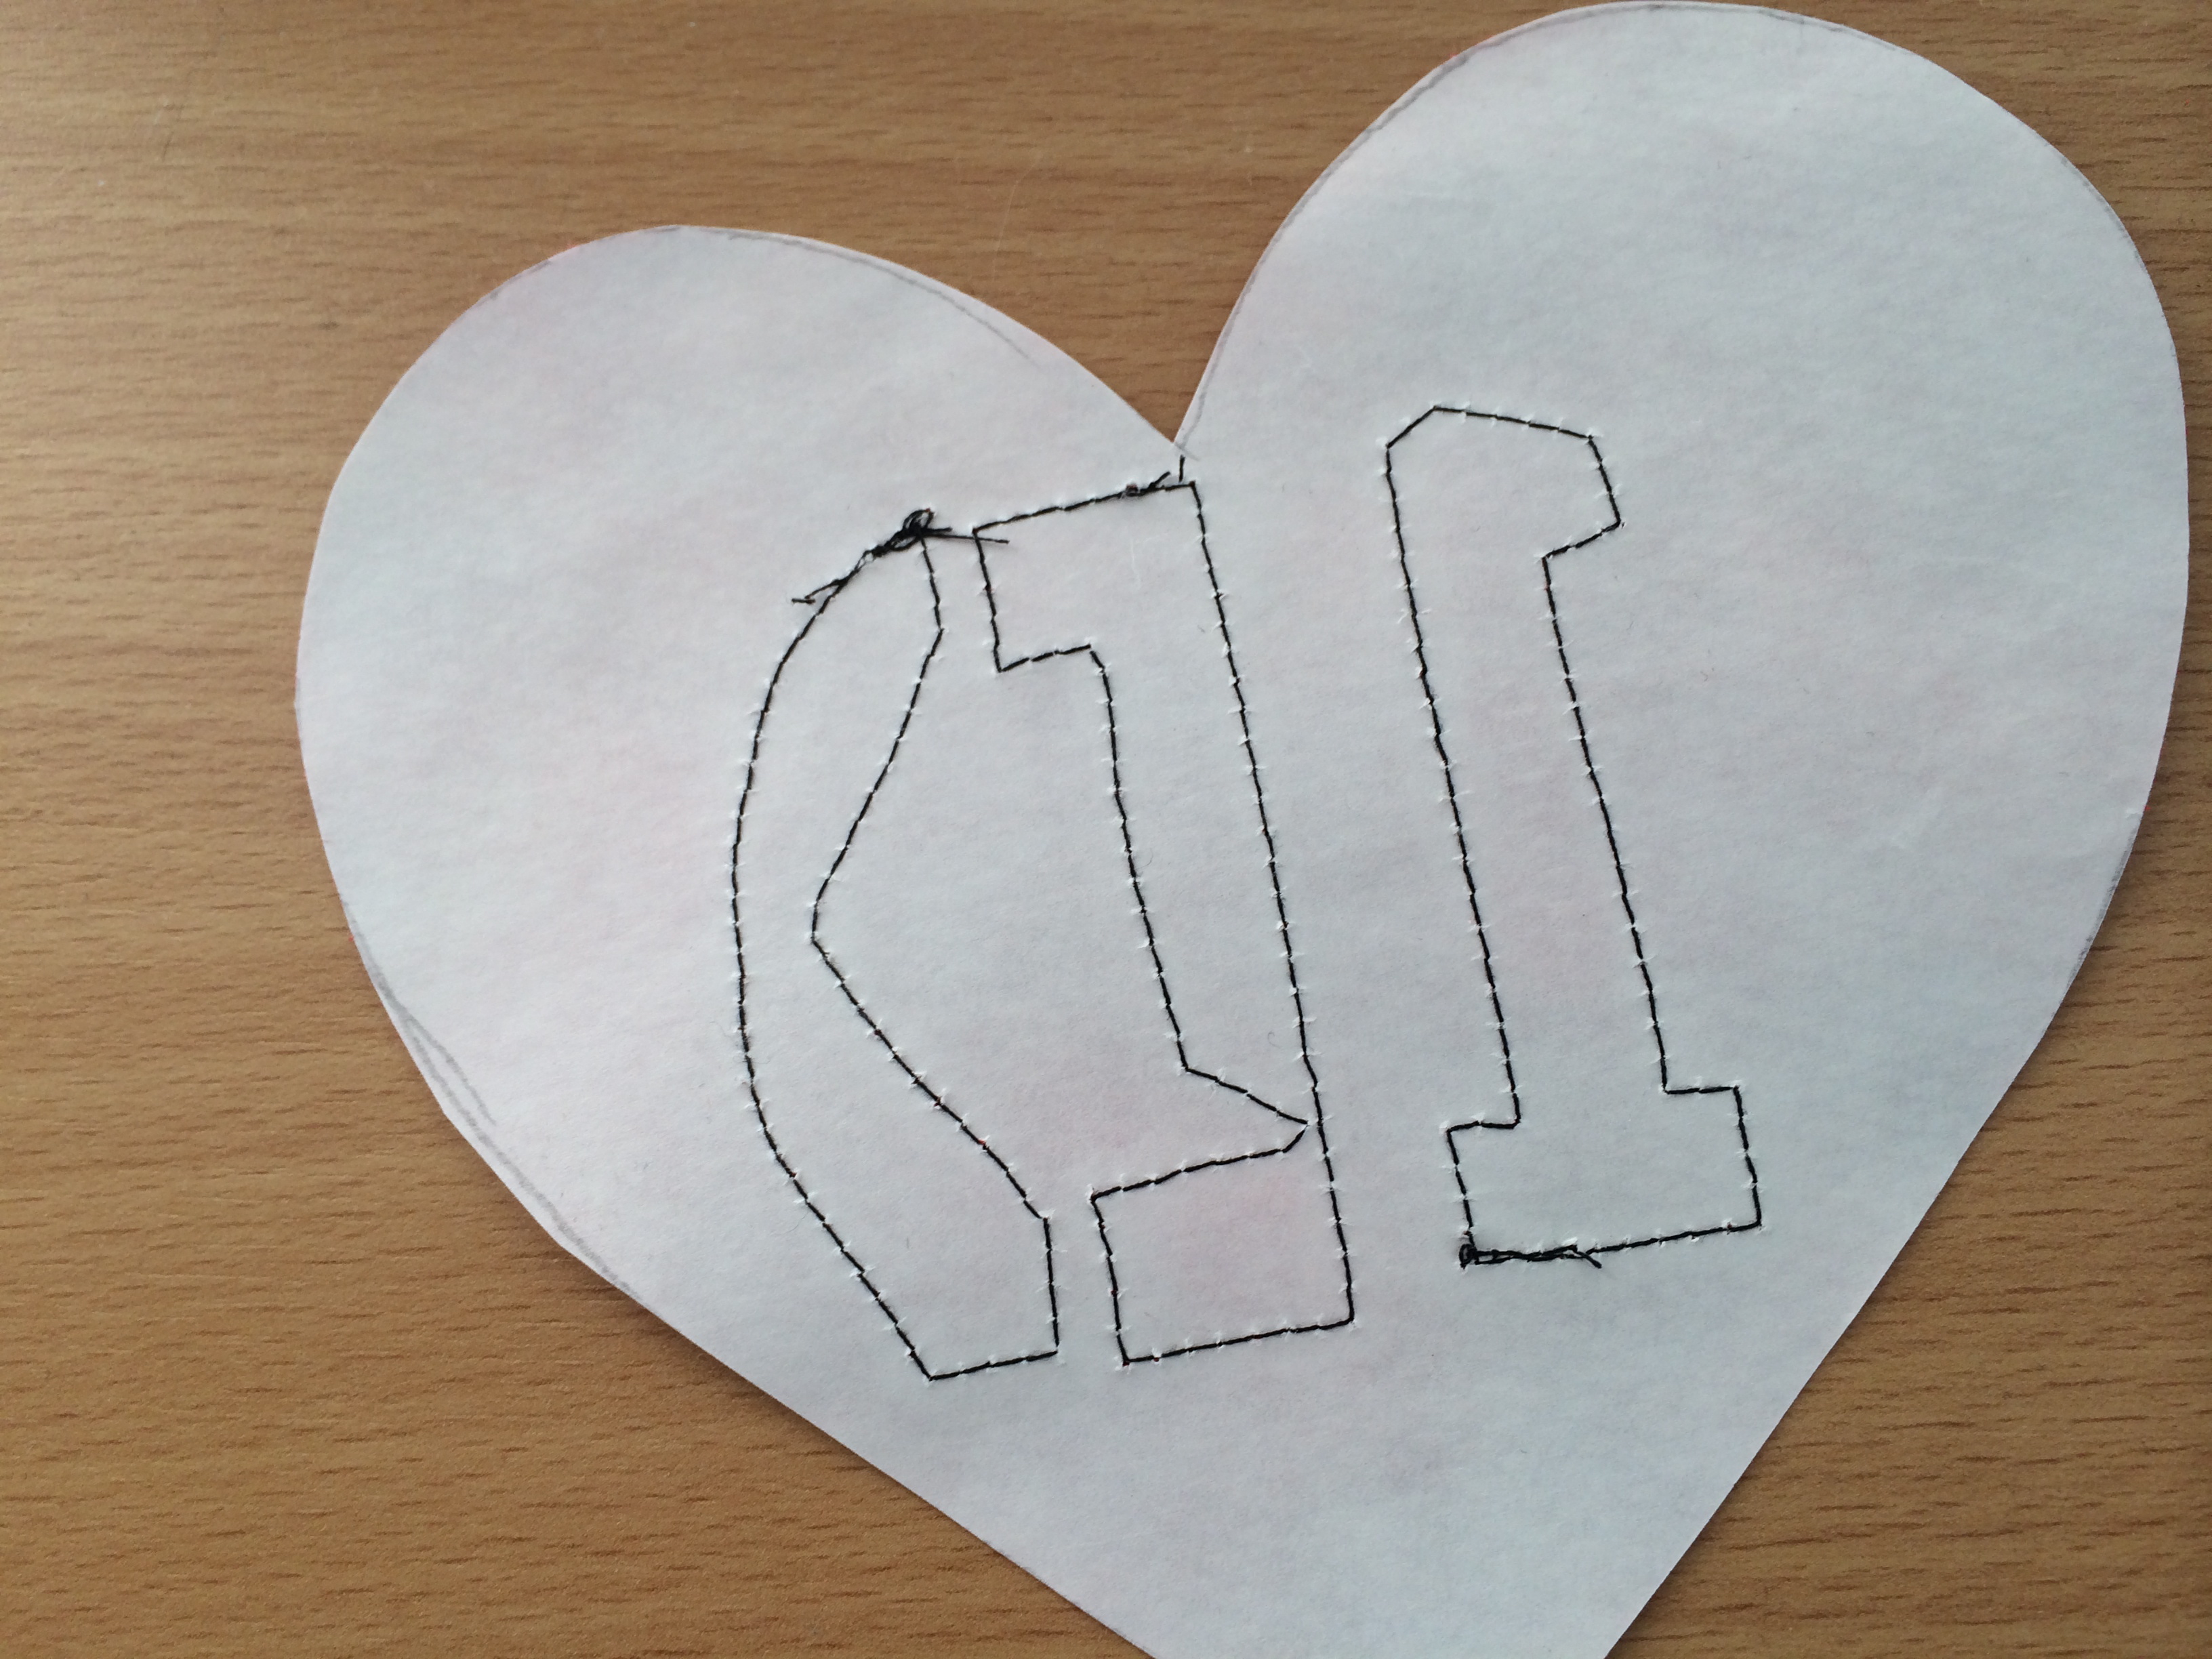
Begin by printing a heart and 1D logo in reverse onto the EZ Print Lite sheets.  These sheets are great because you can run them through your printer and not have to draw the pattern.  I created the heart in MS Word and googled the 1D logo – easy peasy!  Once you print the images, roughly cut out the heart about 1/4″ away from the heart.  Press the heart to the wrong side of the red fabric.  Do the same with the 1D.  Cut out the heart and 1D on the pattern lines.

HeatNBond_EZPrintLite

Next peel off the backing on the 1D and press onto the heart.  Leave the backing on the heart for now.
one direction concert t-shirt

I thought it would be easier to sew the 1D and then iron the heart onto the T-shirt – it’s hard to maneuver a T-shirt in a sewing machine – especially a small, child’s t-shirt.  Sew around the 1D in black thread.

one direction concert t-shirt_3

This is how the back should look:
one direction concert t-shirt._2

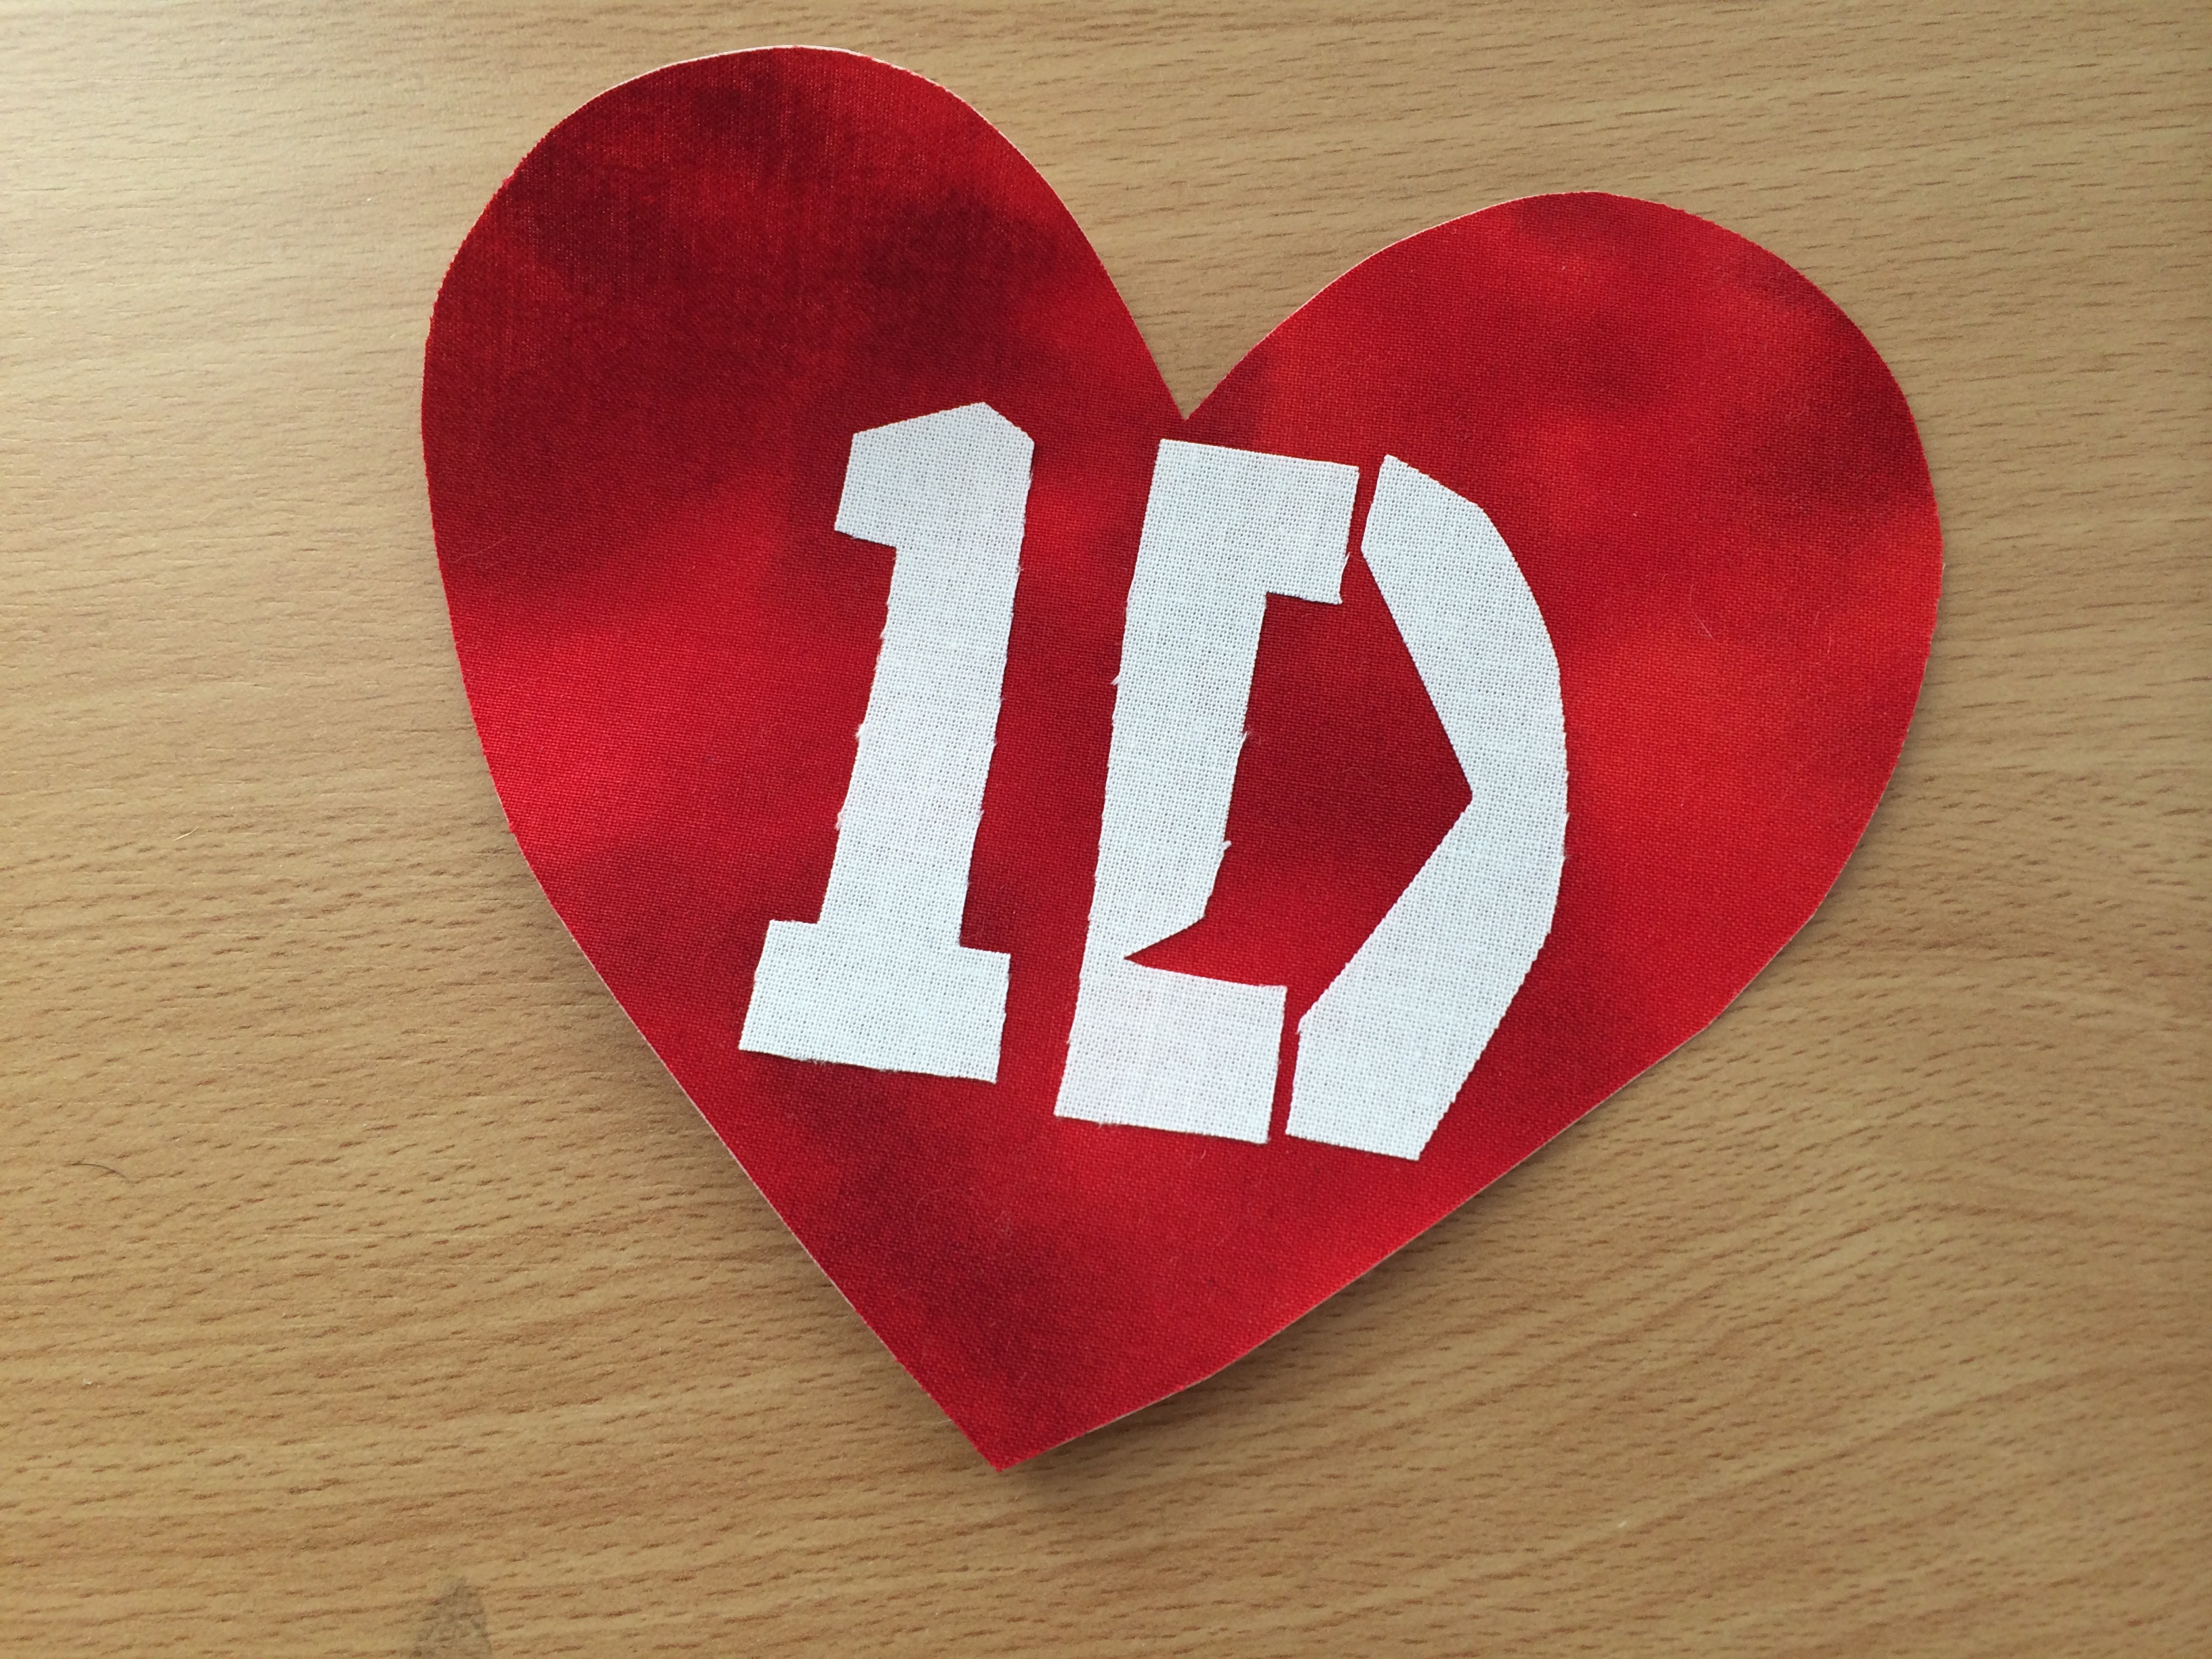
Now, peel off the backing paper on the heart.  It may take a little time to peel off all the paper in-between the letters.  Now, press the 1D heart onto the black T-shirt.  Sew around the heart twice in black thread.one direction concert t-shirt._3


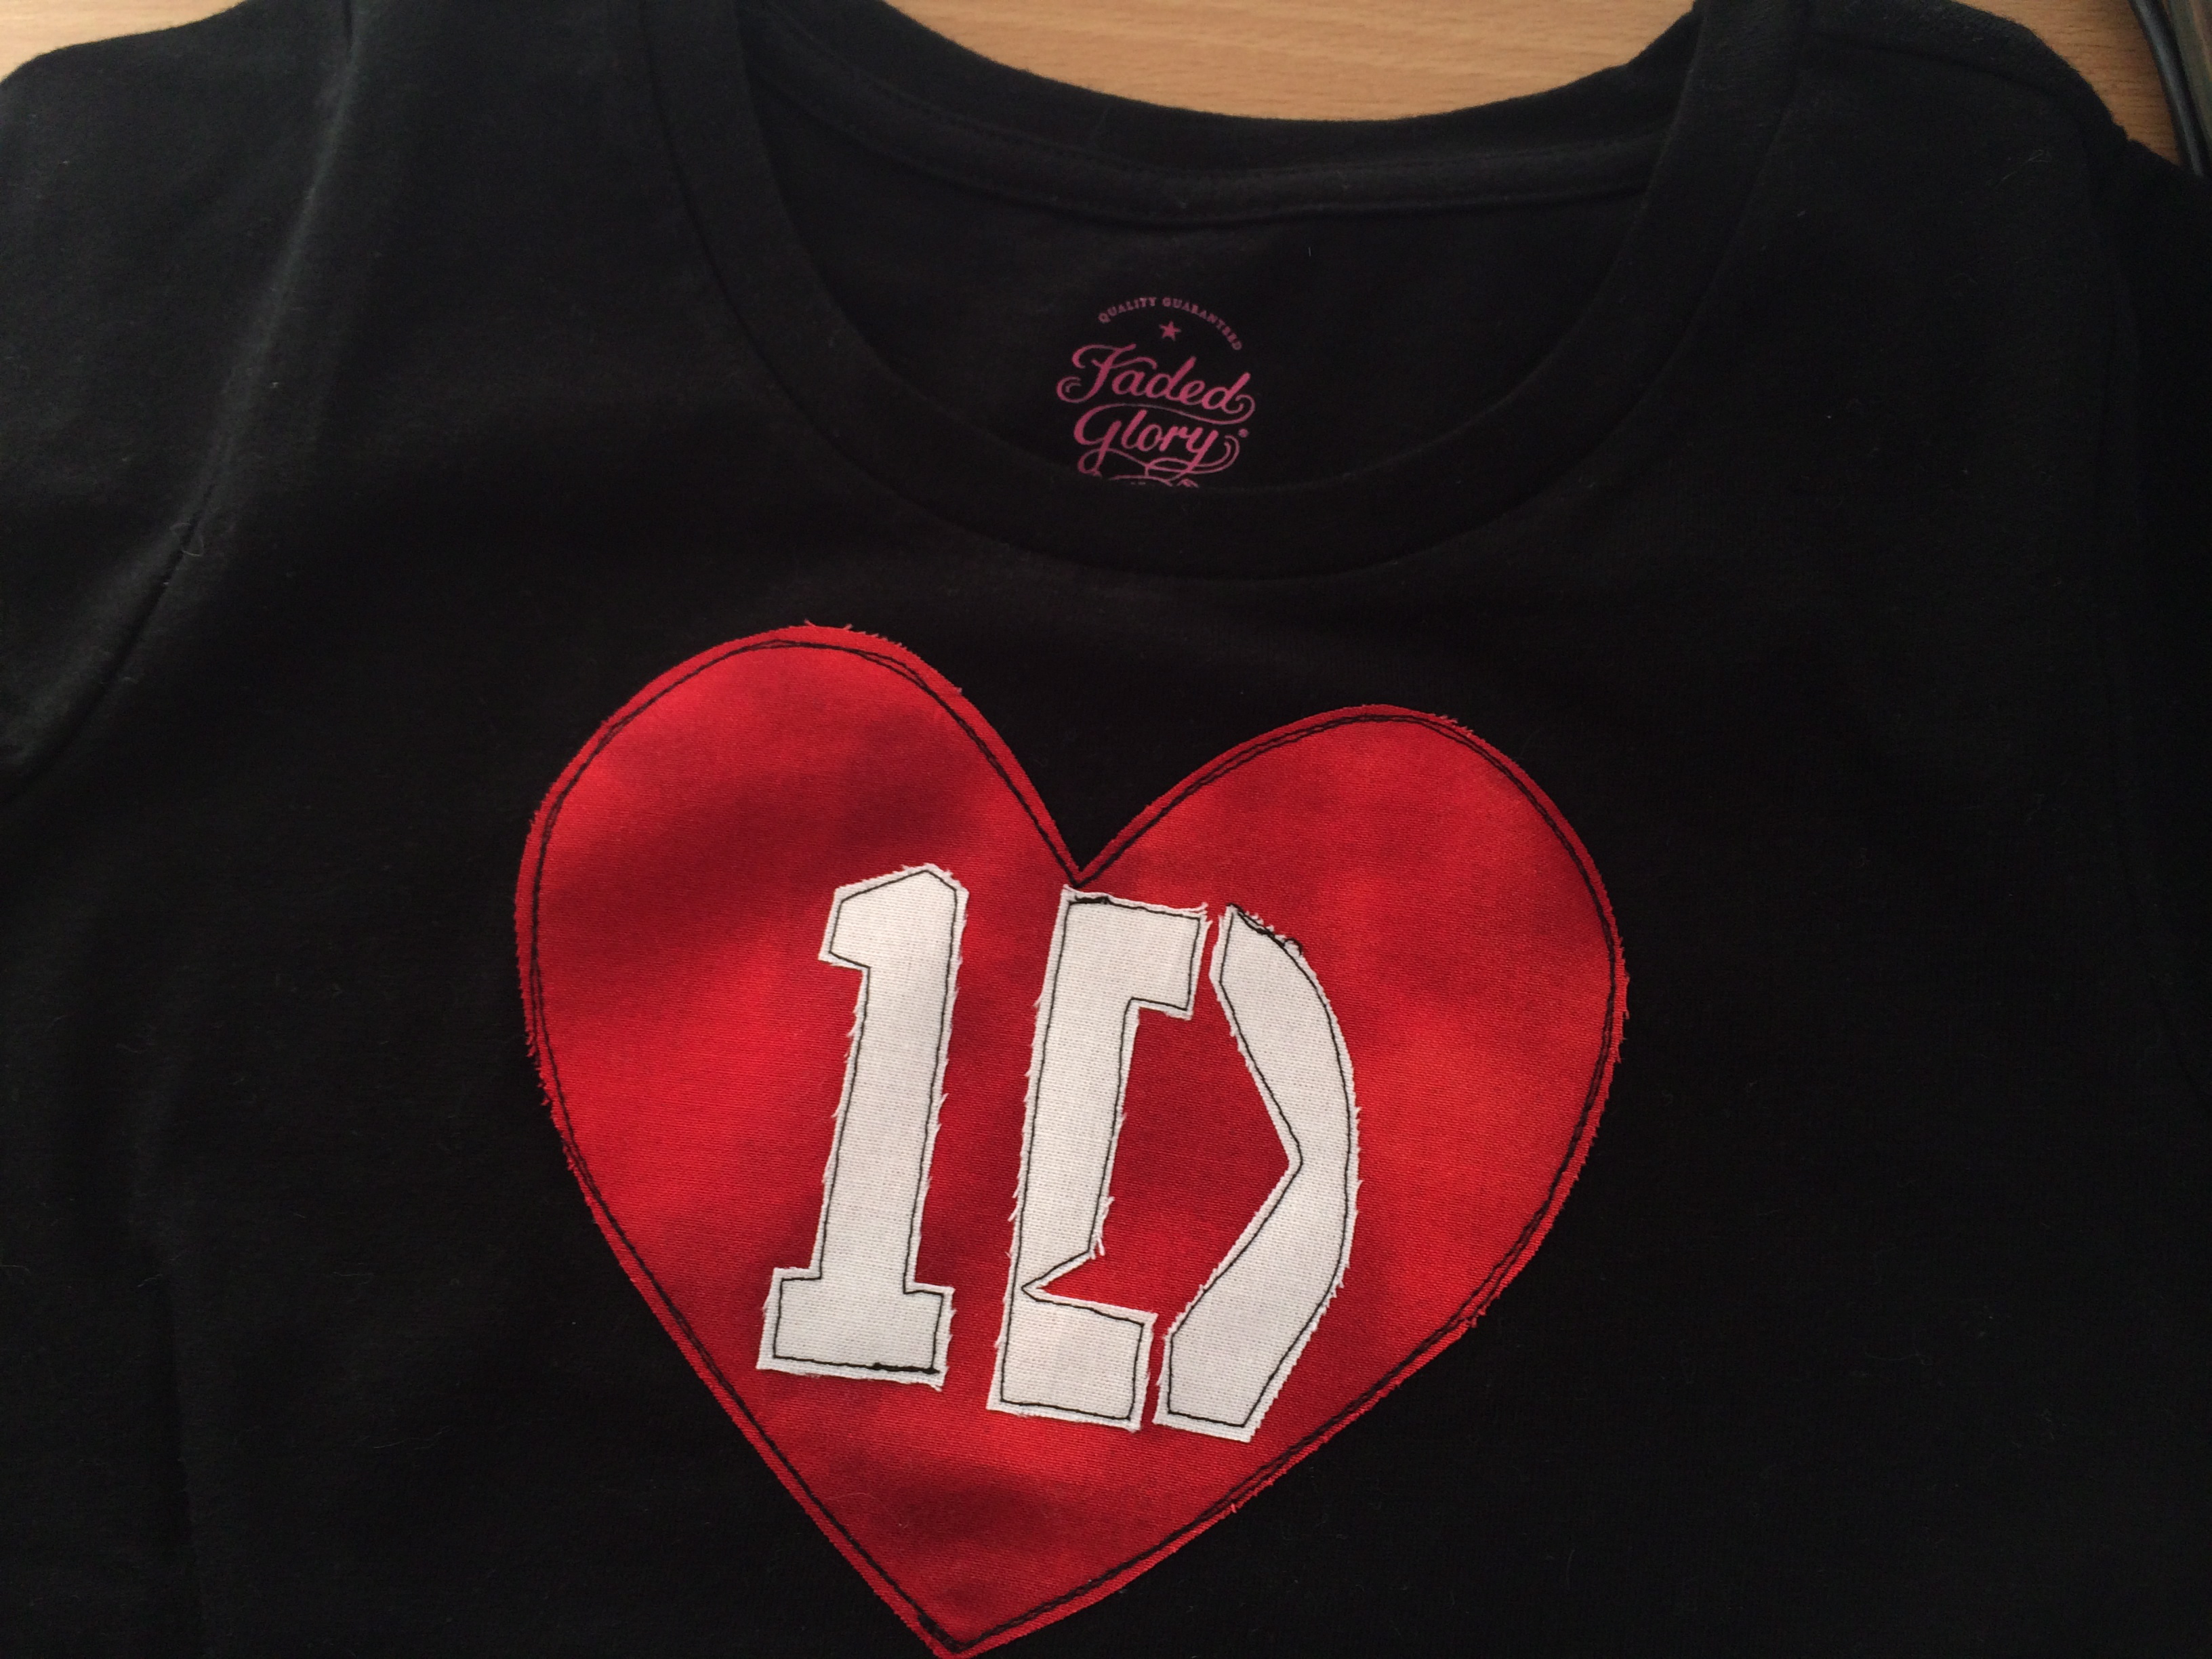
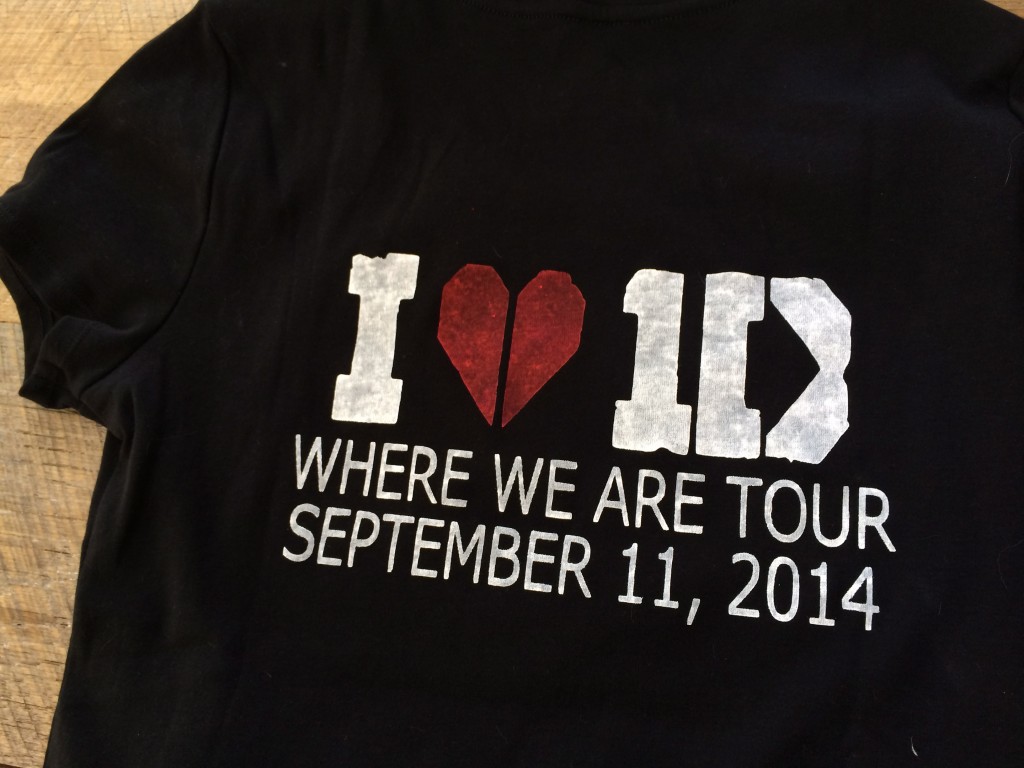
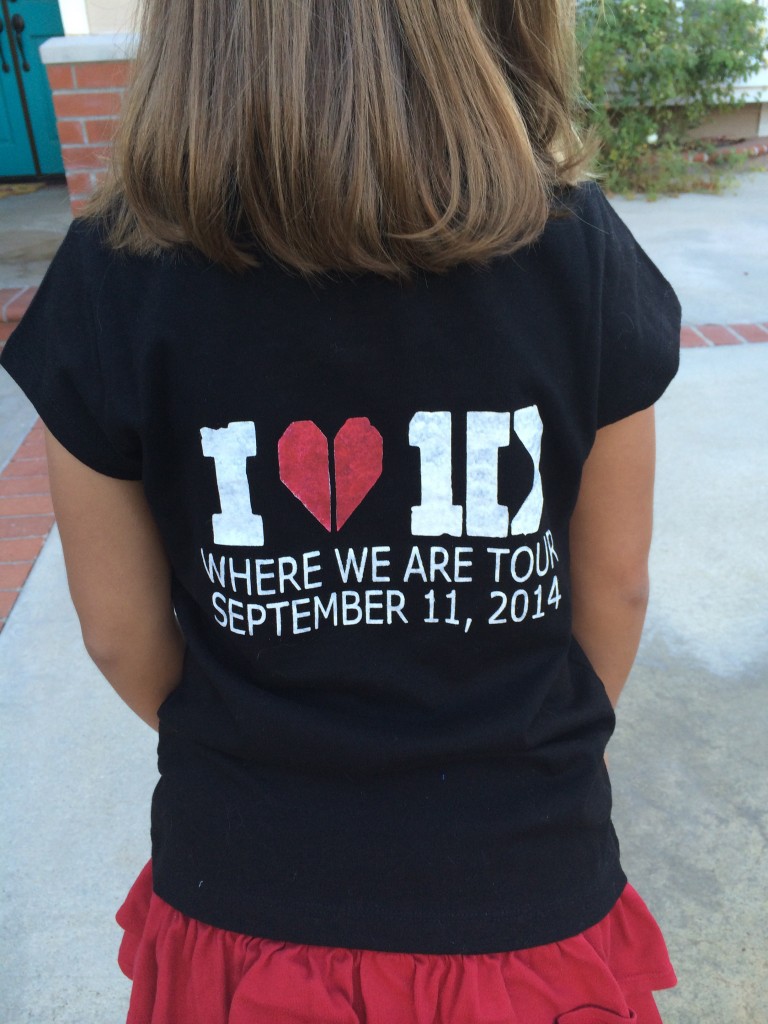
I love to personalize my concert T-shirts with the date of the concert.  I cut out the words on my cricut in vinyl.  Then I removed the letters to leave a “stencil”.  I put the vinyl stencil on the T-shirt and using a stencil brush and craft paint I stenciled the letters.  Let the paint dry completely then remove the vinyl.  It looks pretty good!!
one direction concert t-shirt diy

one direction concert t-shirt_5

DIY one direction concert t-shirt
one direction concert t-shirt_8
We had too much fun!  Here is a little video clip!!

1D Concert Clip
 

True Blue Whale Skirt & Top


true blue blend fabric whale skirt
I can’t get enough of these whales from Blend Fabrics!! We are all sporting whale shirts!  I think we will be wearing these to Sea World when we go 🙂
whale skirt whale shirt true blue_9
The fabric is cute enough that all you need to do is add some Heat n Bond to the back side of the whale, cut it out and then iron it to what ever you want!
whale skirt whale shirt true blue_11

whale skirt whale shirt true blue_10


After I ironed the whale to the T-shirt, I top-stitched around the whale twice.  Sally needed a complete whale outfit (I am pretty sure if I had enough fabric I would have sewn myself a whale skirt!!)

true_blue_blend_fabric_skirt 
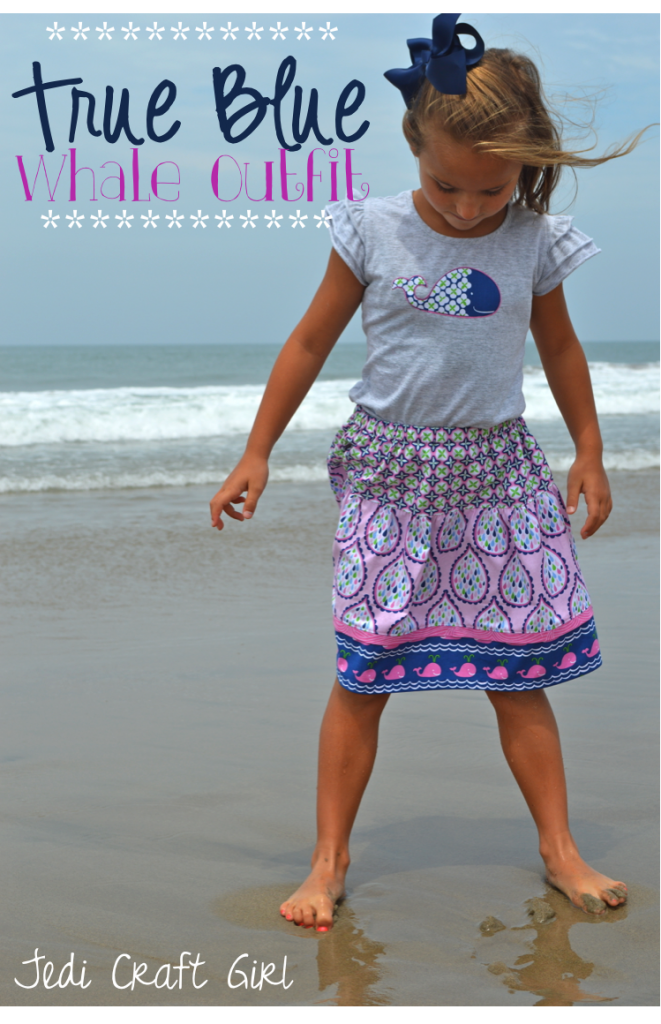
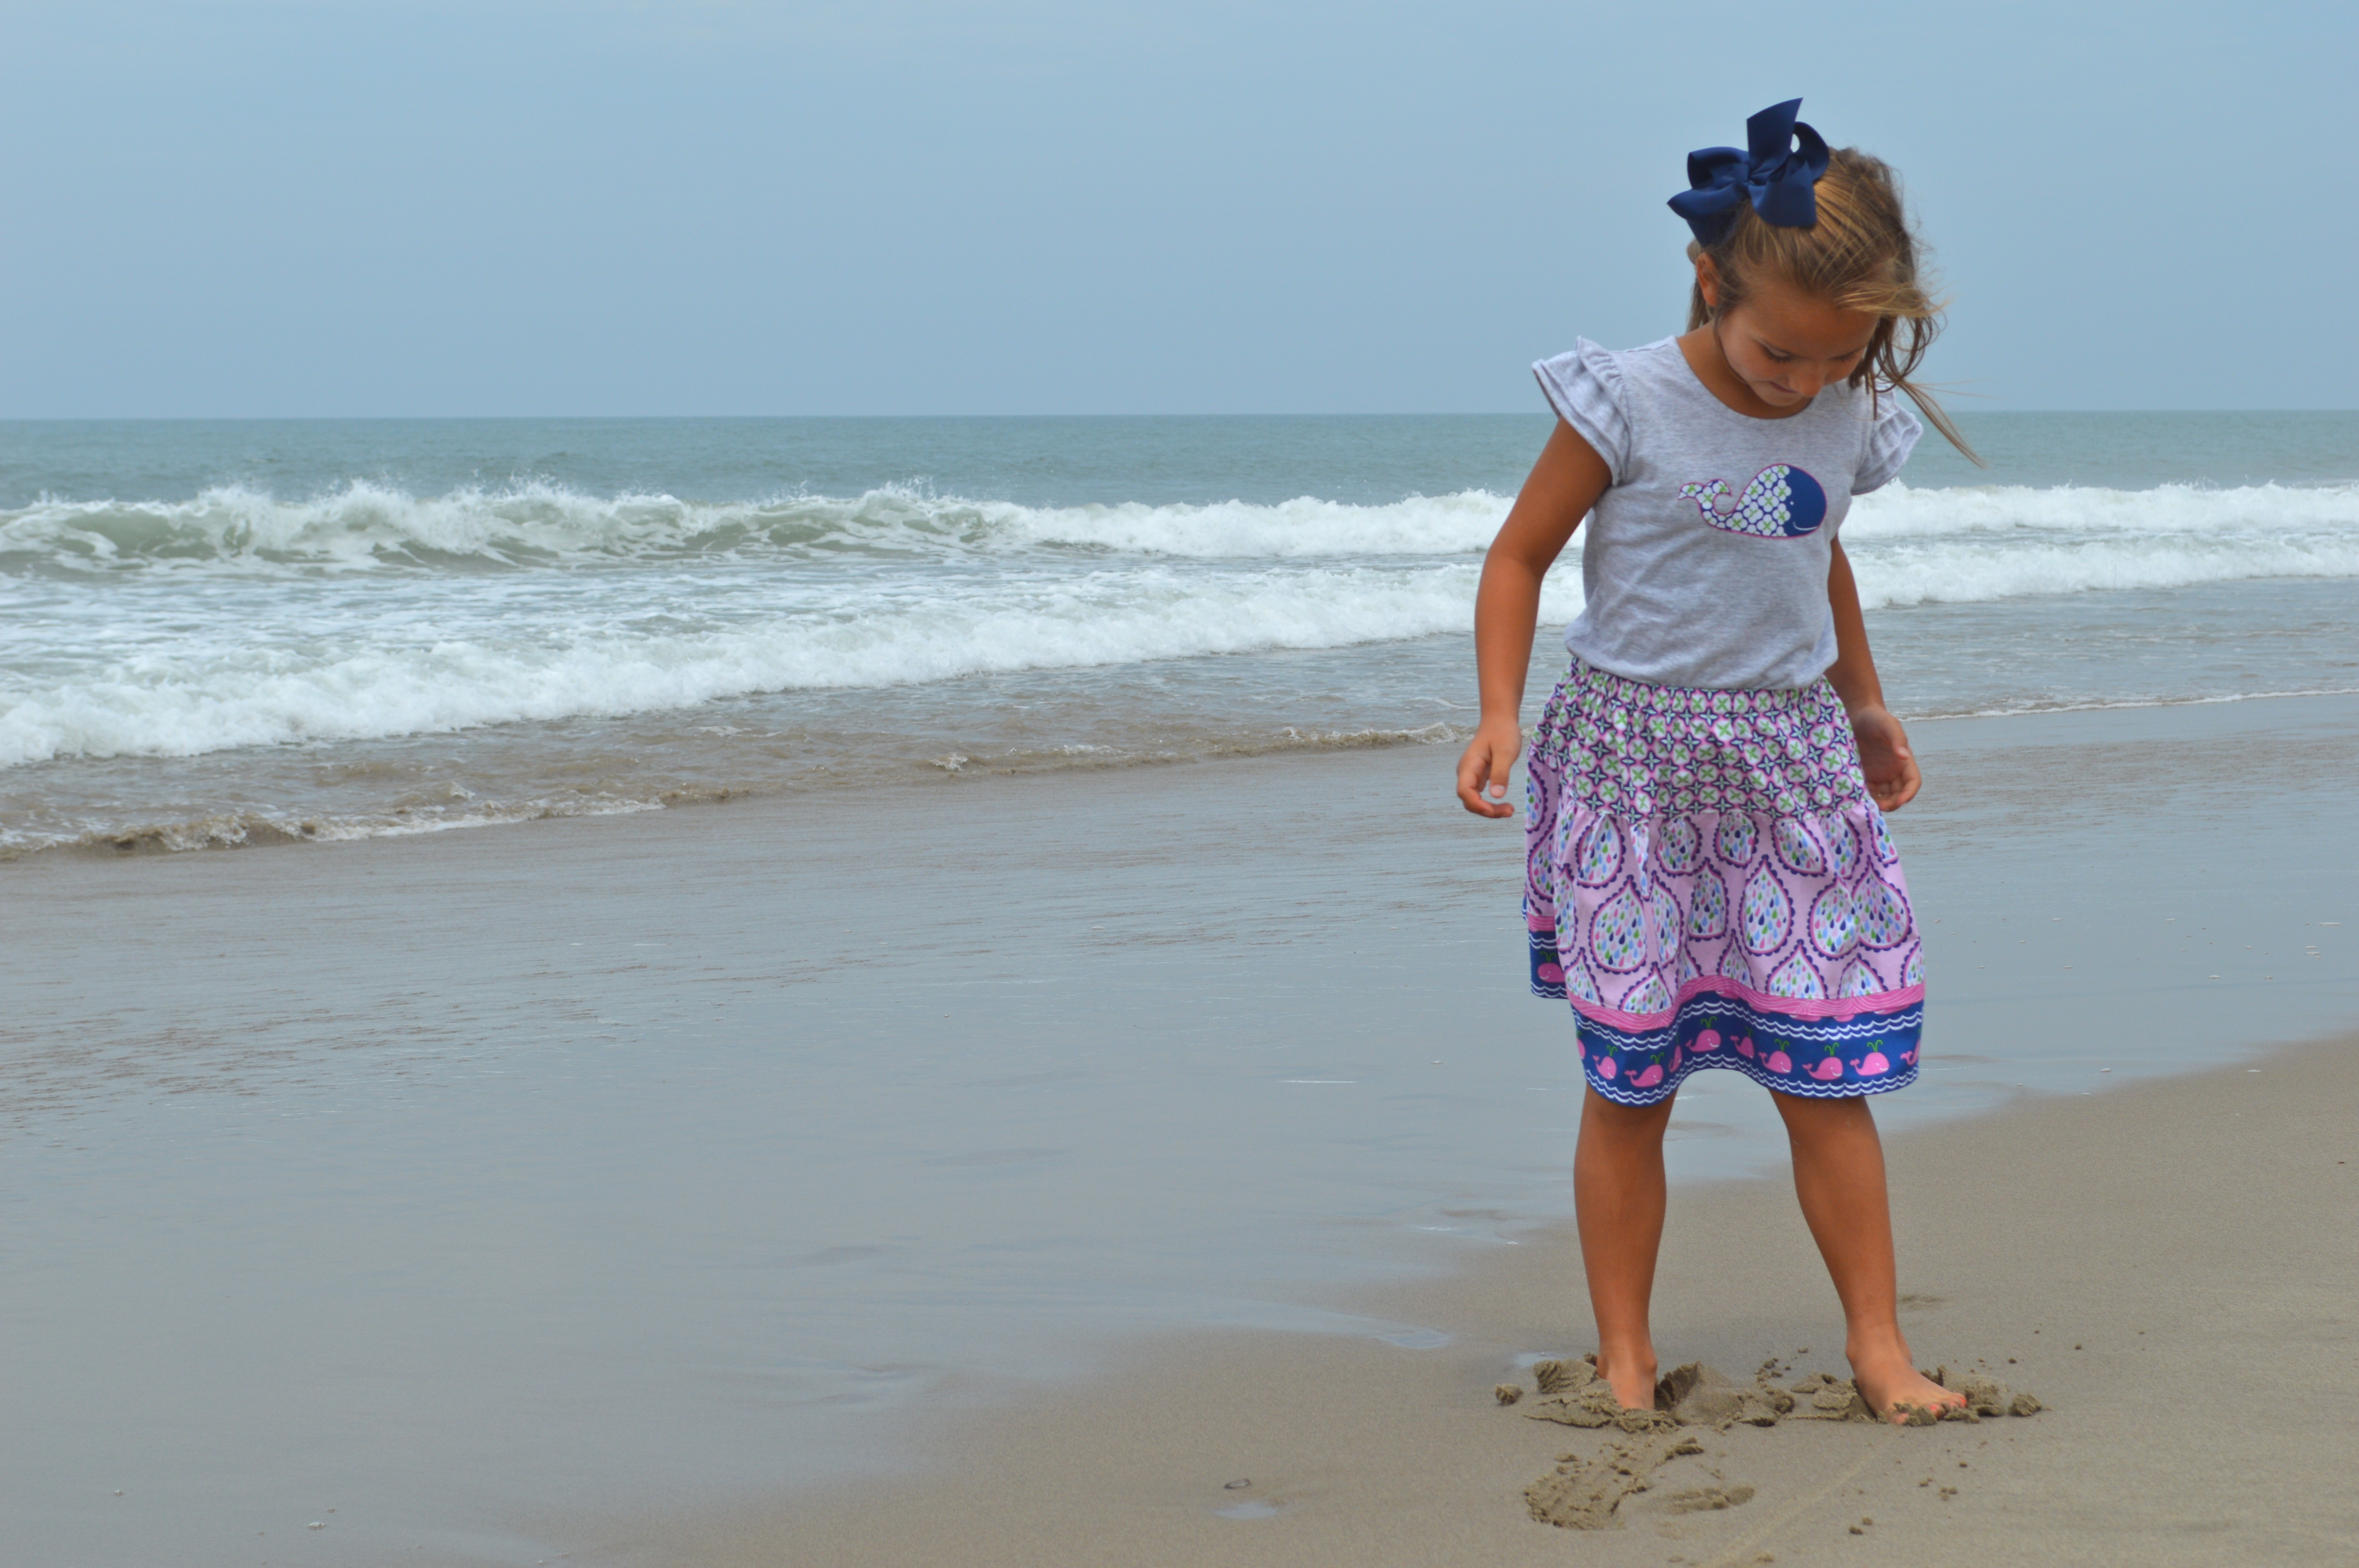
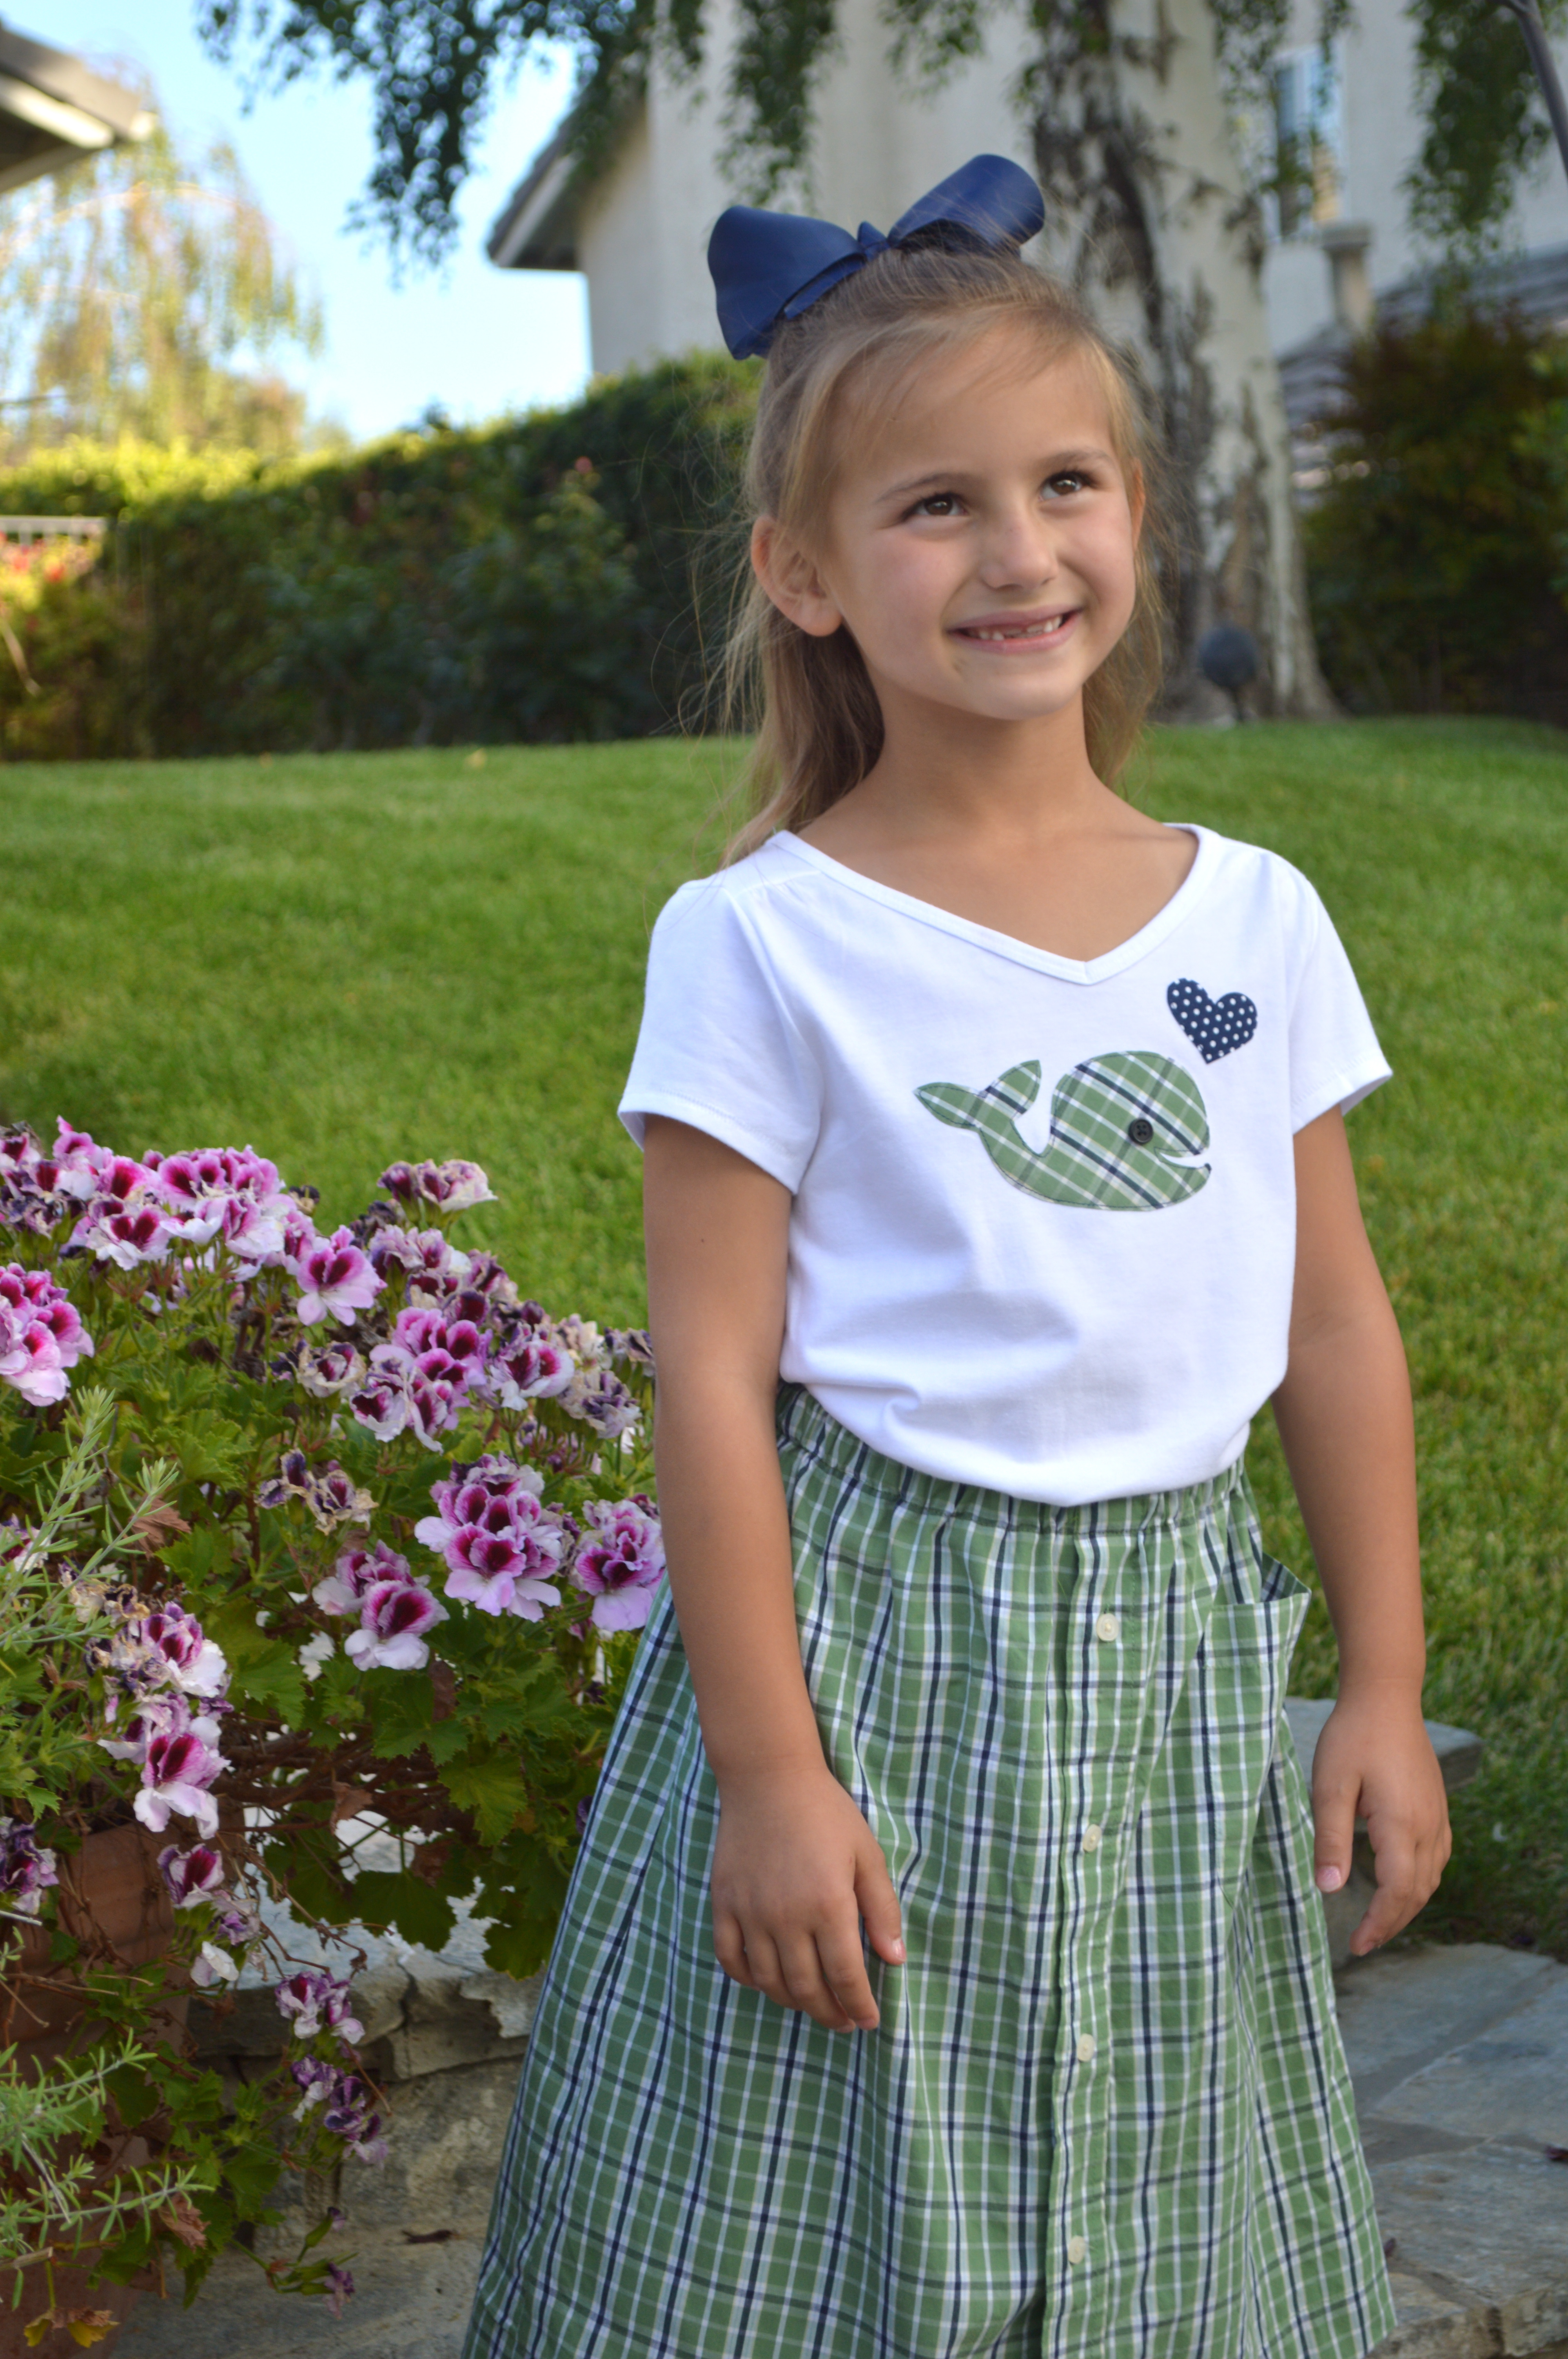
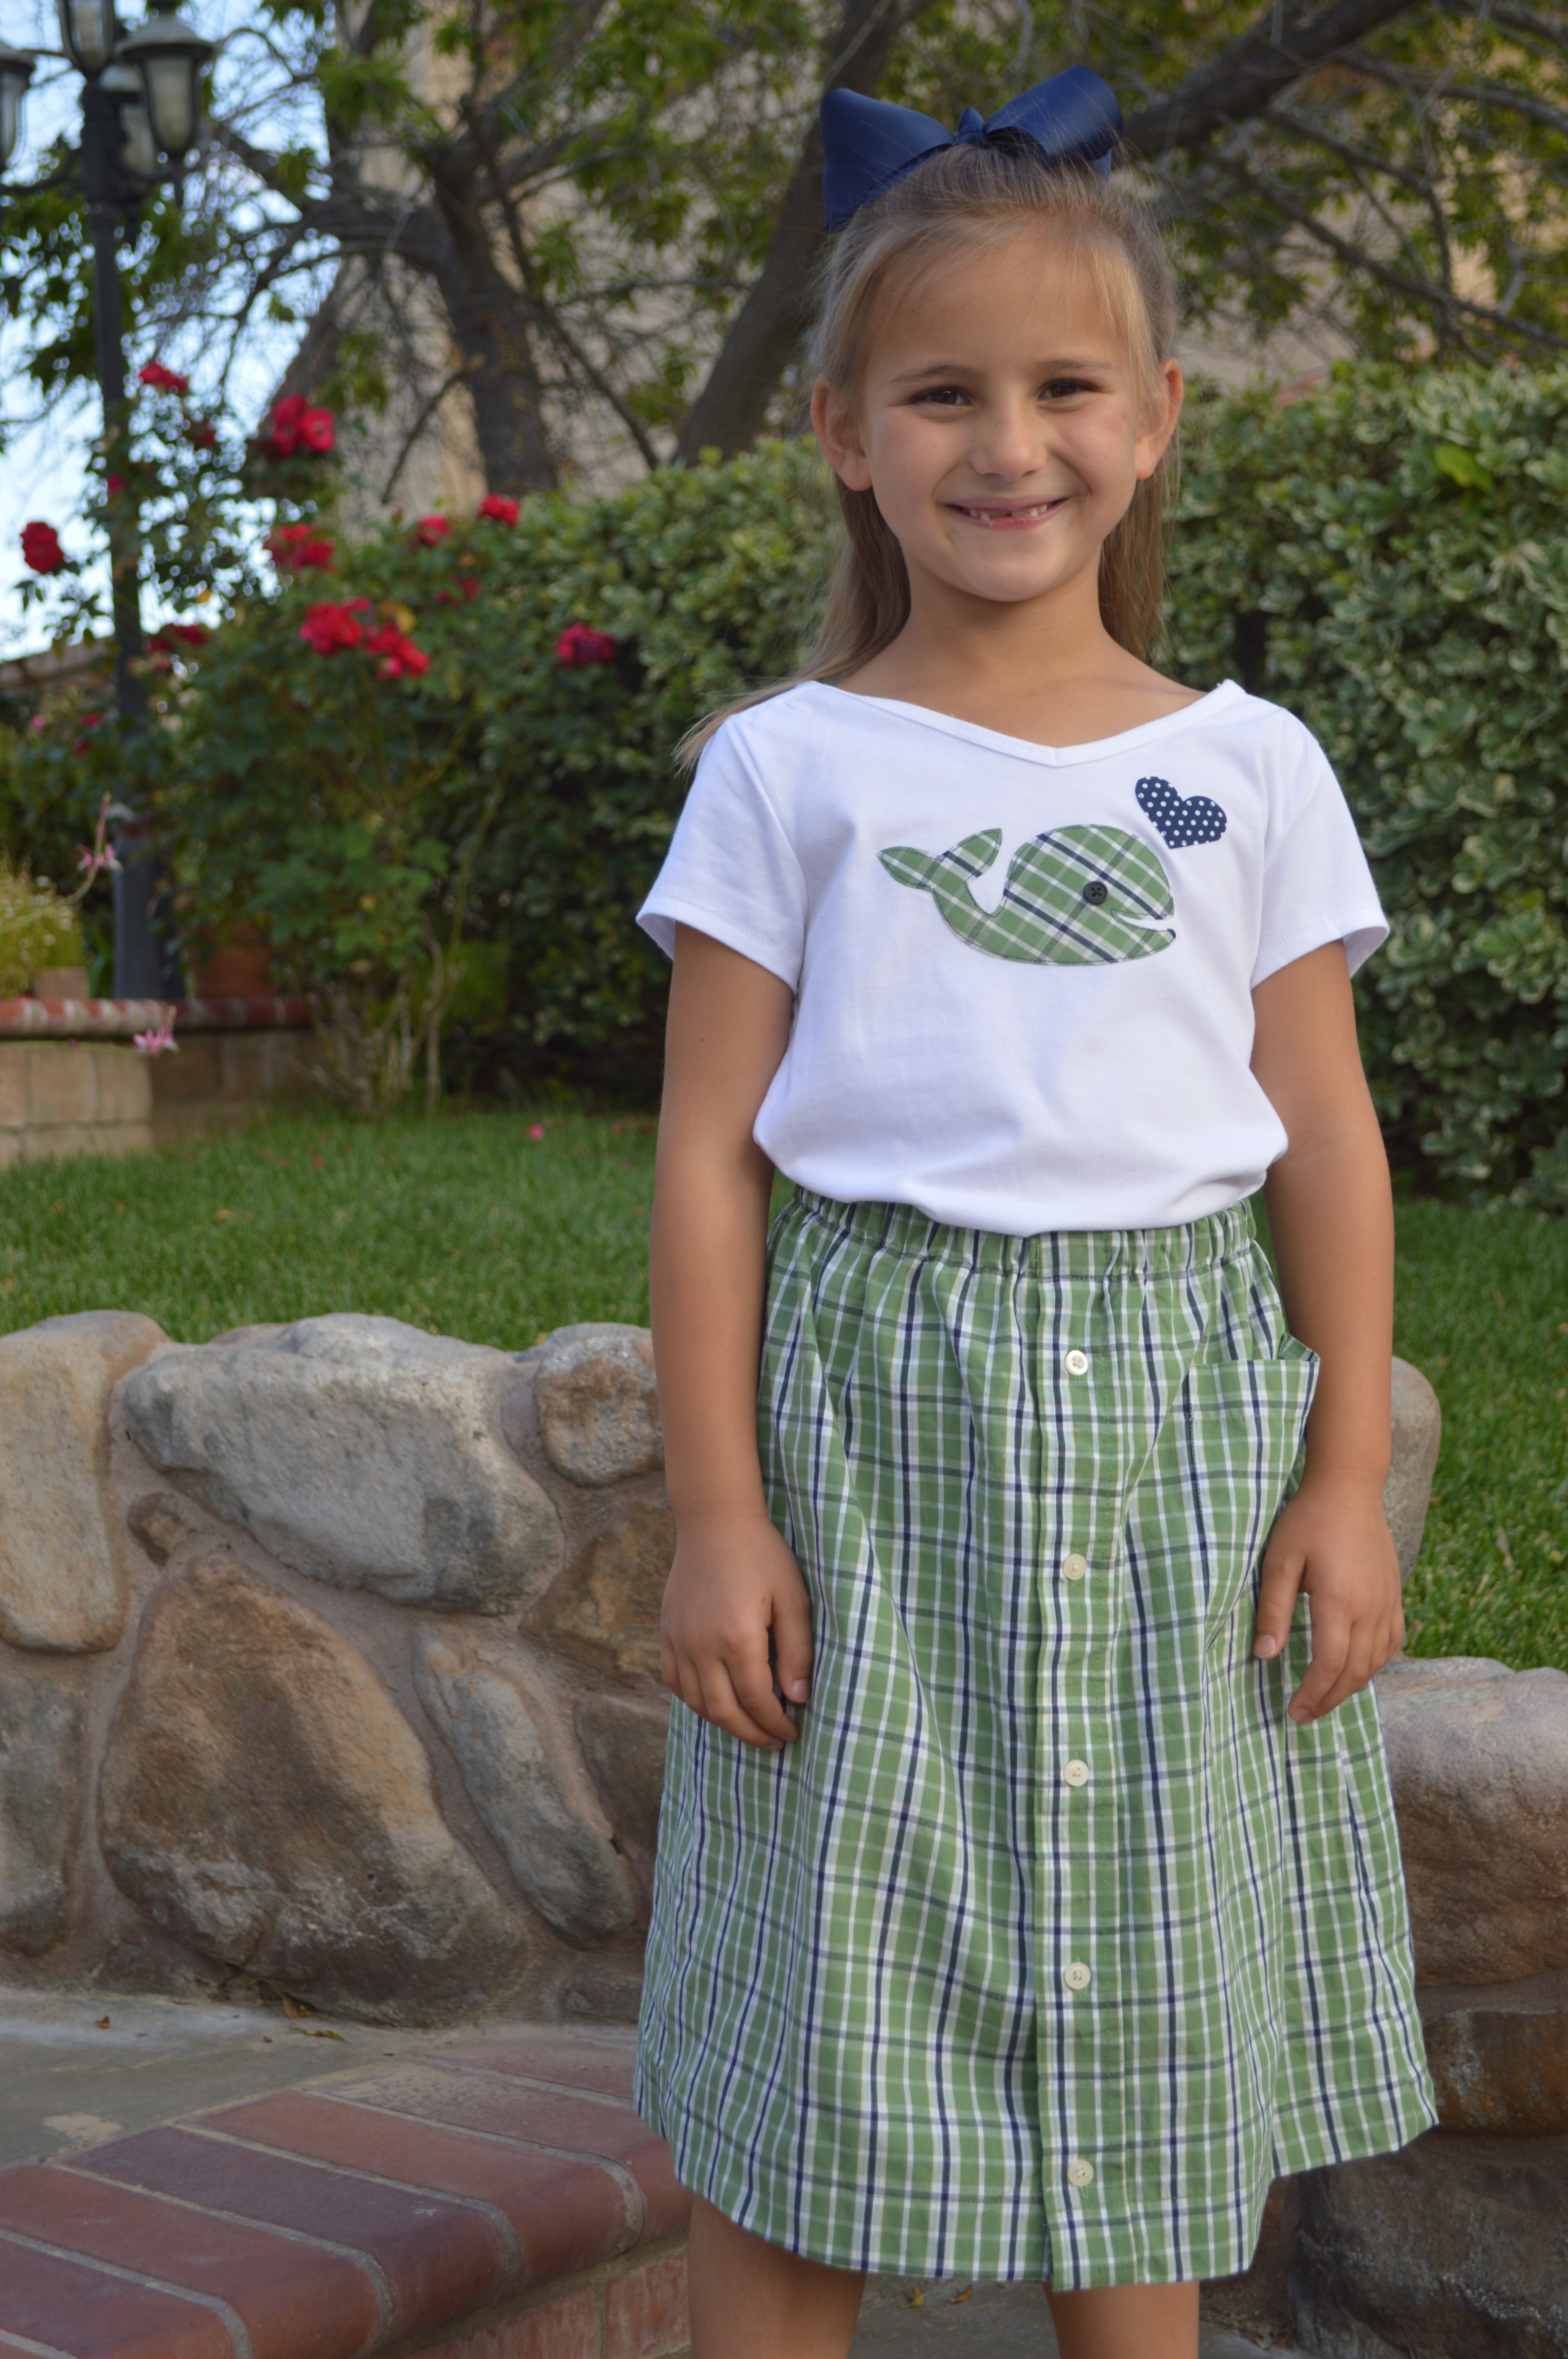
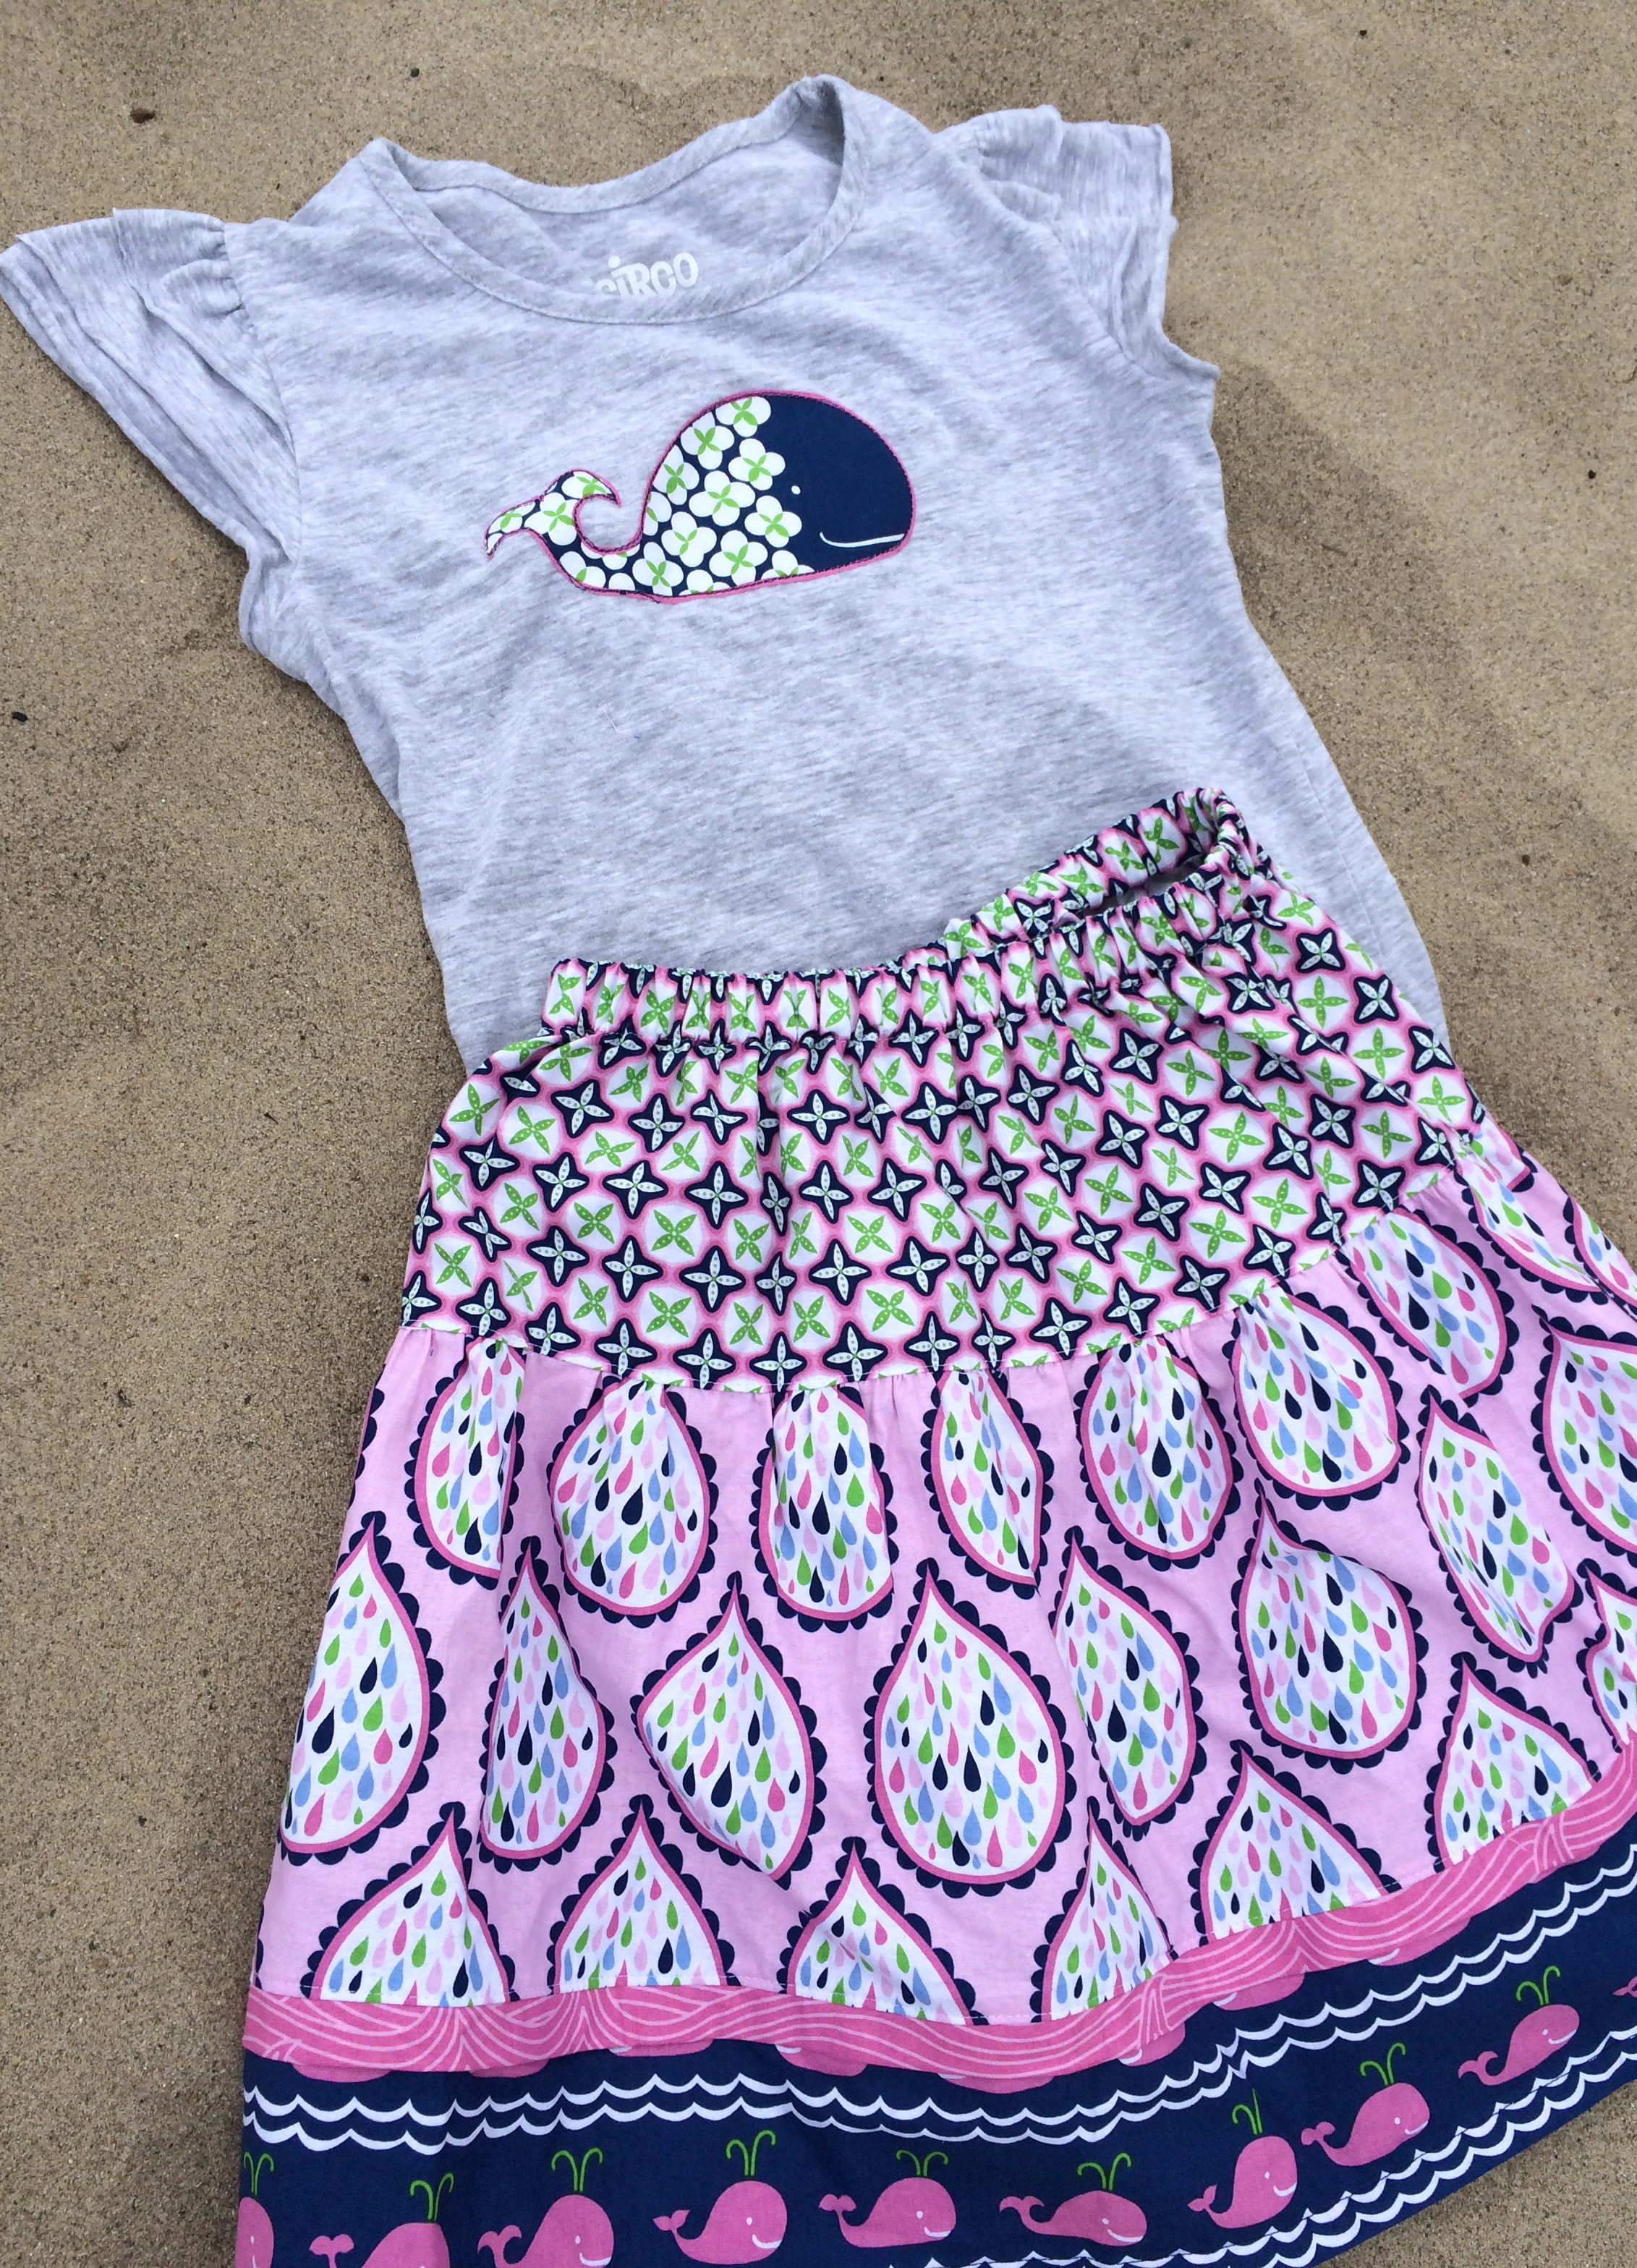
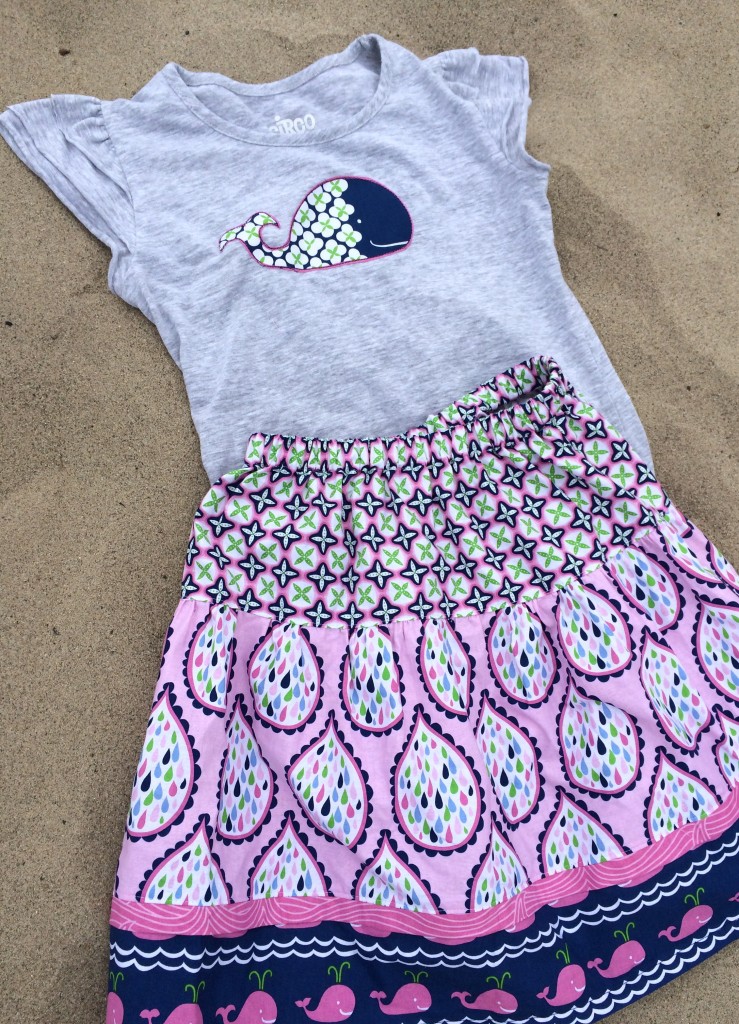
I used skirt “A” from the pattern book Little Sassy Skirts.

sassy skirts 
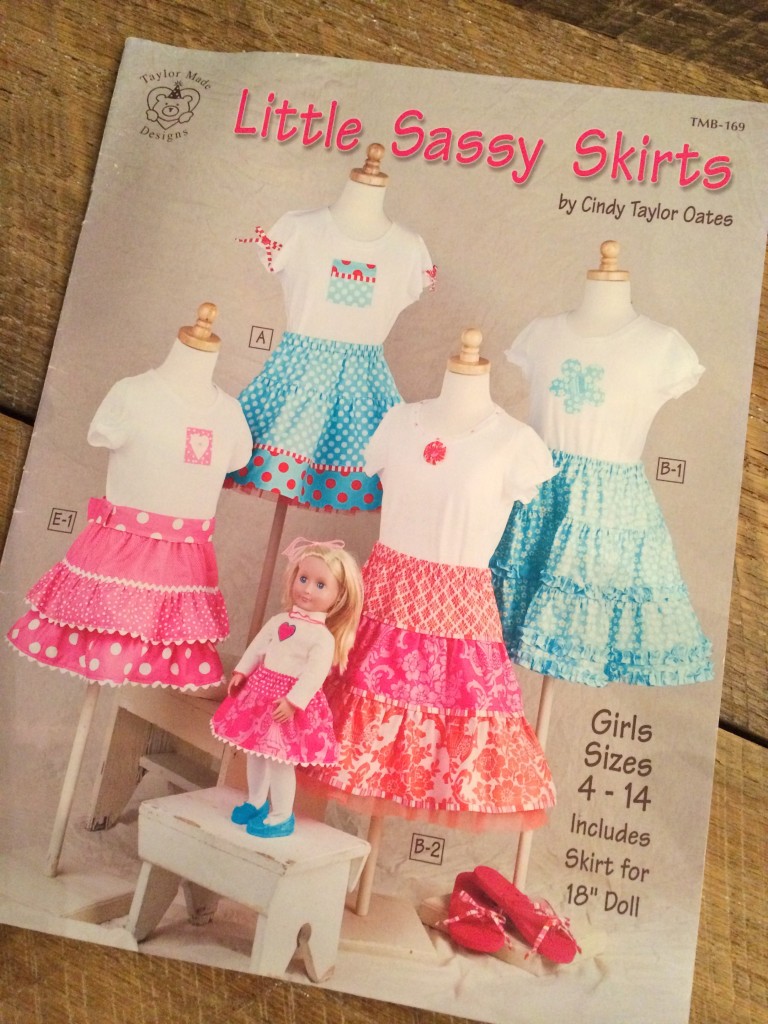
I have made these skirts over and over.  The patterns are easy to follow and everything is done with rotary cutter measurements (a quilters dream!).  This skirt is fun because you don’t have to have a lot of yardage, I only had half yards of the
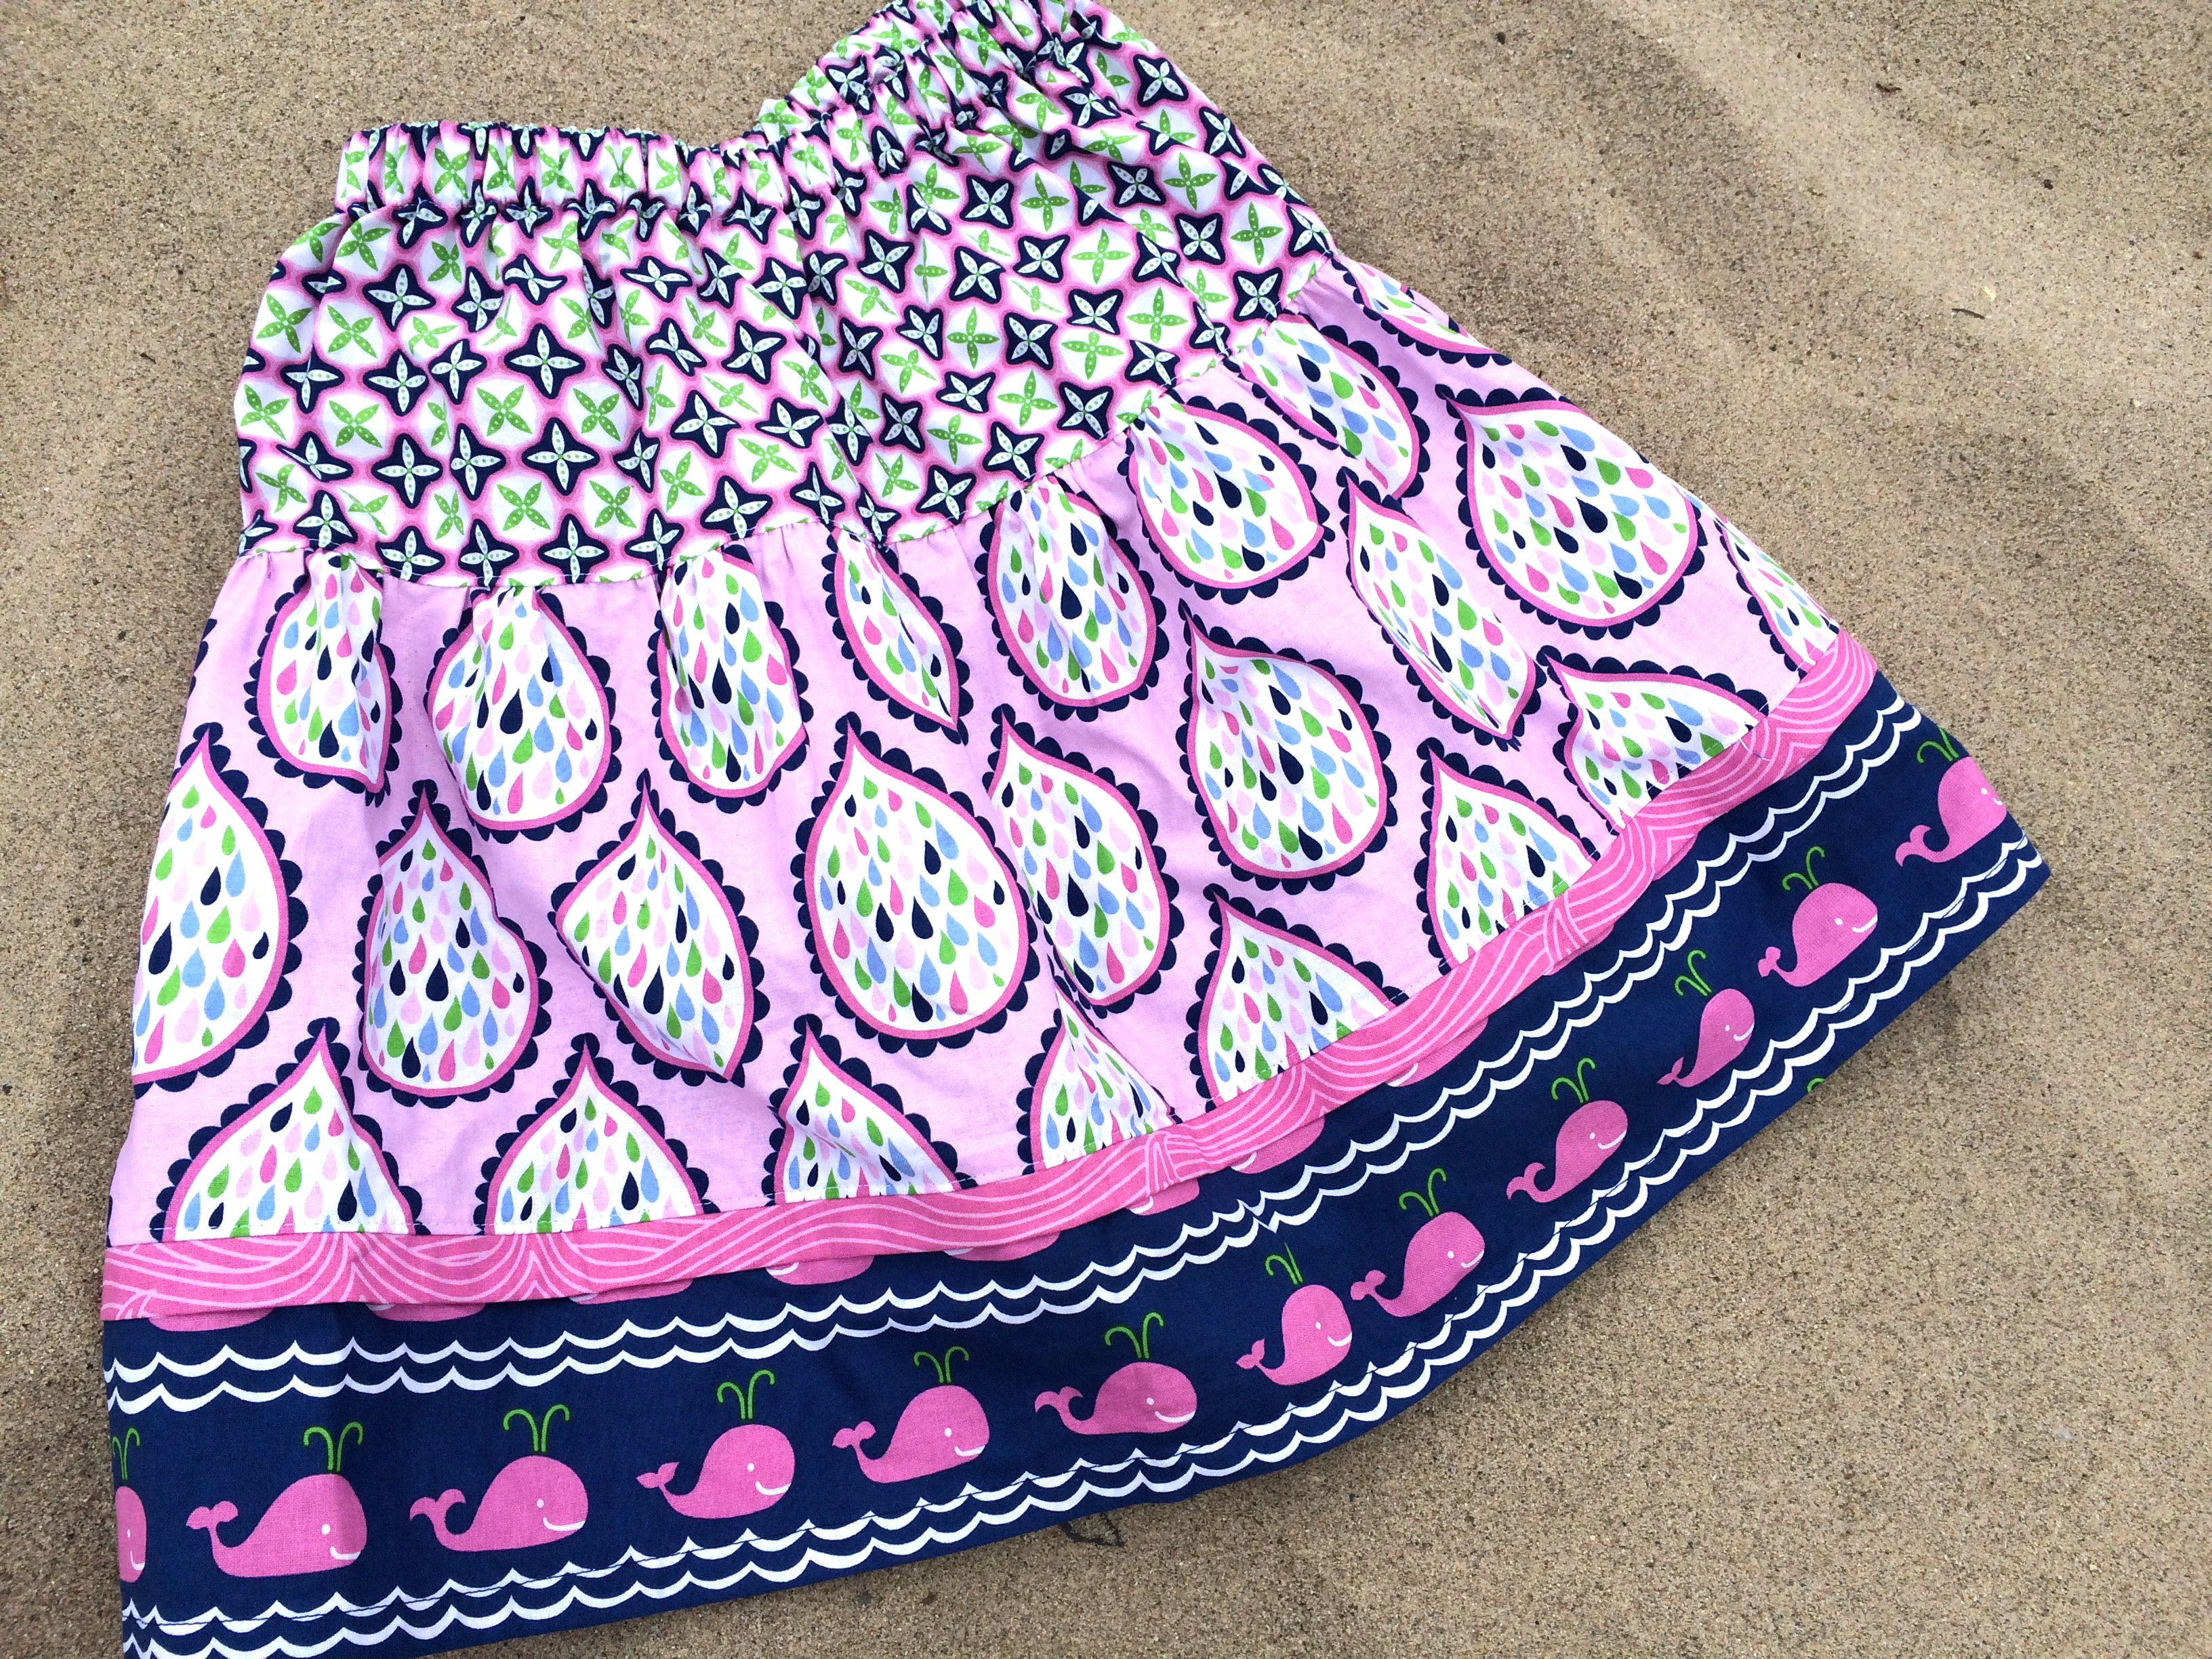
 True Blue prints and I love the 4 prints all pieced together!
true_blue_blend_fabric


We had such a fun day at the beach!  It was beautiful!  I love summer and I love whales 🙂 whale skirt whale shirt true blue

whale skirt whale shirt true blue_2

DSC_0895

Men’s Shirt Re-Fashion

menshirt


I found this pattern for making a girls skirt out of a men’s button front shirt in this book, Never Been Stitched.  The book is full of fun new sew or low sew projects.  Great for involving kids!

neverbeenstitched


Essentially you get a men’s shirt and cut it up, creating a skirt.  I bought a size XL shirt and it made a size 8 girls skirt.IMG_8390

Sally wasn’t too thrilled about the idea until I made this cute whale shirt to go along with it.  I used some of the left over fabric and used Heat n Bond EZ sheets that you run through the printer.  Click HERE for the whale pattern.
DSC_0455
I even used the existing front pocket from the shirt to be a high side pocket on the skirt.
DSC_0363

4th of July Shirts

 I am totally excited!  Everyone’s 4th of July shirts from last year still fit & I don’t have to make new ones!!!!  Yea!!!

All of these made possible using Heat n Bond fusible appliqué!!  My favorite stuff EVER!!

Amanda

3 Minute T-Shirt

 I bought this skirt at Crazy 8.  We went to wear it only to find all we had that matched was a plain Navy Blue T-shirt.  With 5 minutes till preschool, I had to hurry.  Plugged in the iron, drew a strawberry on some Heat n Bond, ironed it to the shirt – quick stitching and done!  I think I clocked in at 3 minutes!!

I LOVE Heat n Bond!  If you haven’t used it – you MUST!  It makes applique so easy!  If you want to make one of these strawberry shirts, here is the pattern.

Amanda

Tie-Dye Insanity

Tie-Dye Round 3!
The tie-dye addiction continues.  This round started because we needed a few gifts & thought it would be fun to give a tie-dye shirt….and you can’t just die 2 shirts – you have to die a whole bunch so you don’t waste the die.  Here’s how they turned out.
Oh – we tried something different – this time we did not soak the shirts in Soda Ash.  We did learn that you CAN’T tie-dye a dry shirt like it says on the package.  We spritzed the shirts with water so they were damp.  I am thinking the Soda Ash step might be vital after all…hmmmmm.
 
 Three swirls down the side
 Colorful stripes
 Center circle – I love this one
 Center swirl
 Off-center swirl – boys
 Off-center swirl – girls
 More swirls
 Boy’s Bulls Eye
 Top and bottom swirl
 Top swirl& scrunch bottom
 Little Girl Stripe
 Triple swirl & scrunch – love it!
 Top & bottom swirl – love this too
 Ella’s heart – looks like an alien – don’t know why she gave it eyes!
 Swirl for Hannah

Overall I say they turned out good.  Right now they are drying – then I will rinse them in cold water – hopefully all the colors stay!

More Tie-Dye Craziness


 One batch of tie-dye was just not enough.  So we launched into our second batch – which included more shirts!  This time we dyed almost 50 – yes we are crazy!  We followed the same steps as before. 

 It helps to wear tie-dye while tie-dying…just in case you spill 🙂

 The hardest part is waiting over a day to unwrap them & see what they look like!  I will try to post better photos of each of our favorite shirts!

The rest of our vacation we wore our shirts everywhere we went.  We attracted just a little attention!


Tie Dye Madness


I have been out of town for a while & now I am back!  On my trip to visit my family we discovered a new craft!  Tie Dye!  I must WARN you…. Tie Dye is extremely addicting so read the rest of this post at your own risk 🙂  Here’s how it’s done:


FIRST: Scour every Wal Mart, Target, Discount store for white shirts, white shorts, white dresses, white skirts, white fabric….you get the picture!


 SECOND:  Wash and dry all the white clothing.

 My sis with a large basket of clothes

THIRD:  Soak the white clothes in Soda Ash – just follow the directions on the box.  (I think this step is optional – but we opted to use it)

 FOURTH:  Wring out the Soda Ash and let the clothes dry until just damp – you don’t want them dripping wet

FIFTH:  Now the fun part begins!  Time to swirl, twirl, fold, and scrunch….oh and tie!  We looked up ideas and pictures on the internet for patterns.  You kinda just go for it & hope for the best.  That is where the addiction comes in – there are so many possibilities & they are so fun to do!


 We like to alternate swimming and tying!  Above is my sis-in-law Megan & brother.

SIXTH:  Mix the dye according to the directions – we used the Tulip brand they sell at Wal Mart & Michaels.  You have to work fast on the next part because the dye is only active for up to 45 minutes!  We had about 35 shirts to do – yikes!

 I guess we did too much swimming because it got dark & we ended up dying all the shirts in the dark with flashlights!  I don’t recommend this 🙂  You have to have a clean surface for each side of the shirt – so we had to hose off the area to keep it dye free.  It was a little crazy.

SEVENTH:  Dye the shirts.  You are supposed to put the light colors on first, then add darker colors.  There are lots of fun pictures & videos on the internet showing different ways to color them.  After a while we were just squirting dye at random!

After you dye the shirts, tie them up in a plastic bag and let them sit for at least 24 hours – longer is better.   Then the fun part begins – it’s like Christmas!  Unwrap each shirt and behold your creations!!

 Megan’s SF Giants shirt

 Tie Dyed fabric
 Megan’s scallop

 Melinda’s single swirl
 My triple swirl


 Ella’s Heart
 Mallory’s striped shorts

 Logan’s spiral
Final Note:  After you unwrap your shirts hang them up to dry completely.  Ours were still pretty wet & drippy.  Once dry, rinse them in the washer (no soap) and dry.  I am careful to wash tie-dye together just in case it runs or bleeds in the wash.

4th of July Ruffle Shirt Tutorial

I had fun making these patriotiec ruffle t-shirts.  They sew up really quick & don’t they look festive!
First you need to rummage through everyone’s closet or a garage sale and find red, white, and blue old t-shirts.  
 Next, using your rotary cutter, cut the shirts into 1 1/4″ strips. 
  
I used my Bernina foot #16 – the “Ruffle” foot.  I LOVE this foot!  It is so much fun to use.  Set the tension on 10 and bump the stitch length all the way up.  Then hit the gas & it ruffles for you!  If you don’t have a ruffle foot, just ruffle the strips by sewing gathering stitches.

Once you have all your ruffles made, lay them on your shirt and pin in place.  WARNING: You might want to try the shirt on at this point.  I did not try the shirt on and just sewed the ruffles.  I found they hit my chest in a weird place – so I UN-STITCHED them & made them shorter.  Uggggh

Sew the ruffles on following the stitching on the ruffle.  I used matching thread so the stitches wouldn’t stand out so much.

And now you are ready for a picnic, a parade, or a party!!


4th of July t-Shirts

 While my sister was here visiting we made nine 4th of July T-shirts.  We decided to go with gray T-shirts so the Red, White & Blue would all stand out.

 The USA shirts are for the boys age 3 and 8.  I painted the fireworks on using THIS technique – it involves stamping with pipecleaners!  Then I appliqued the USA letters on the shirts.  We wanted it to look very “boy” – it’s challenging to make boy shirts without getting too cutesie!  I think they worked!

The Star shirts are for the girls age 12 & 11. 

I love the “necklace” shirt.  These are for the girls age 4 and 7.  I secretly want one for me!!

The cupcake shirt is for Hallie who is almost 1.  
The mommies needed shirts too.  I decided to go with a ruffle shirt instead of applique.  I have been saving old T-shirts like crazy to use for ruffles – so it was time I actually used some.  Click HERE for the tutorial on how to make this fun, festive,  ruffle shirt.