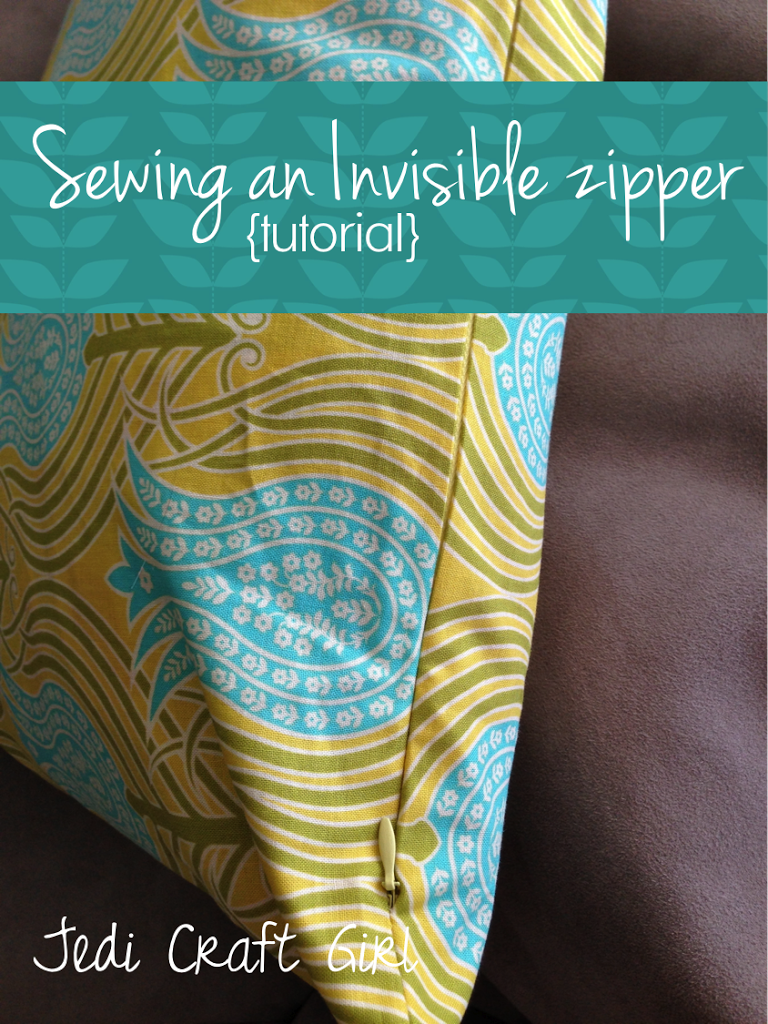
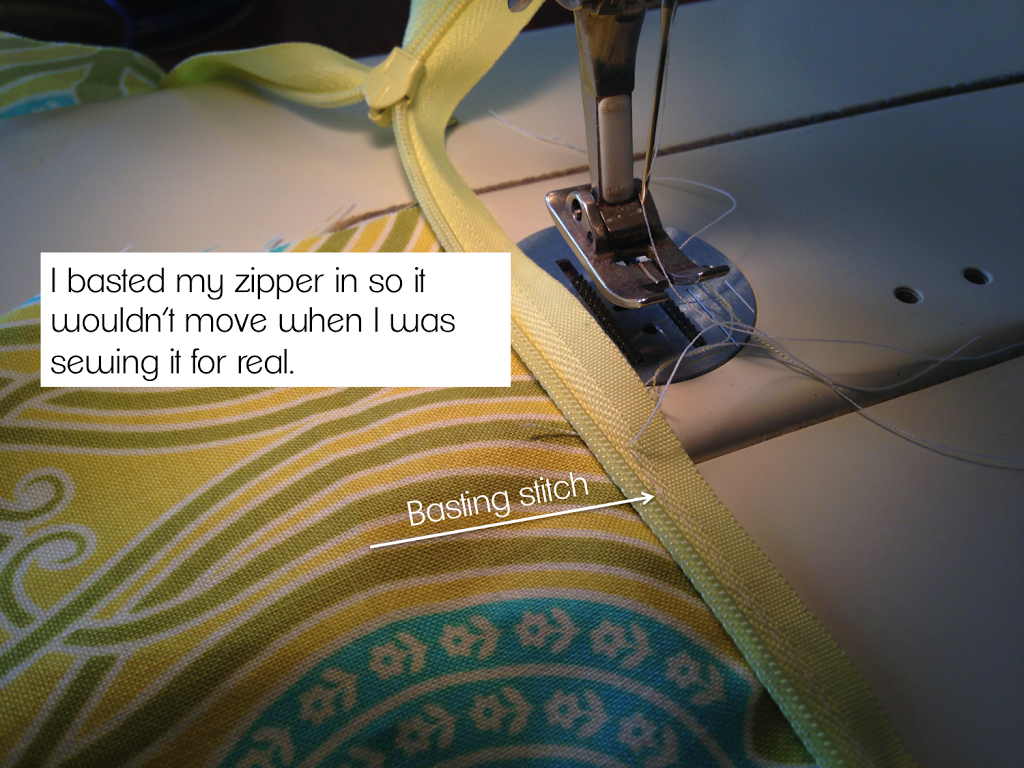
I love finishing my pillows with invisible zippers! Once you try it you will love it too!
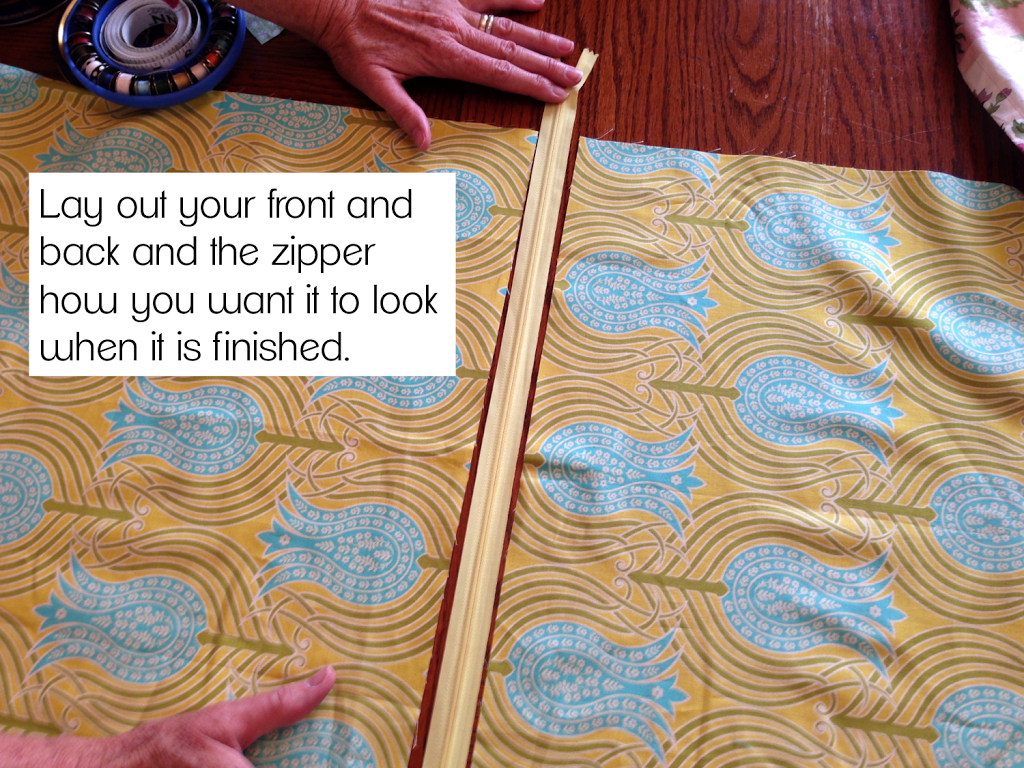
I cut my pillow squares the exact size as my pillow inserts (I try to always use 20″ pillow forms)
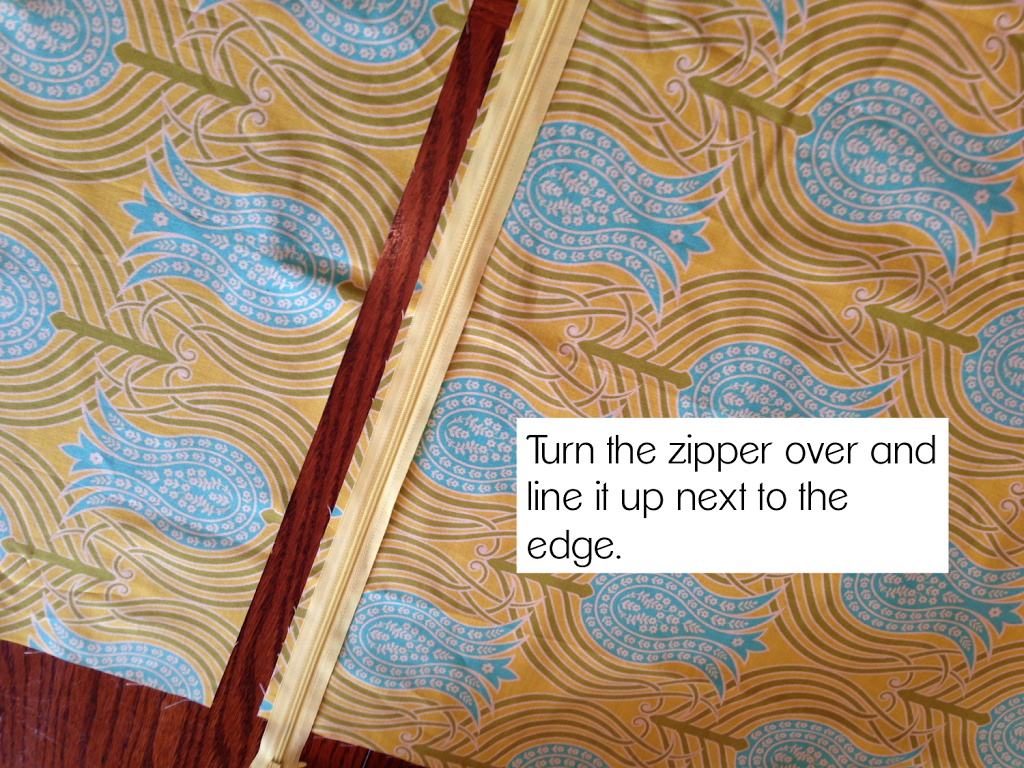
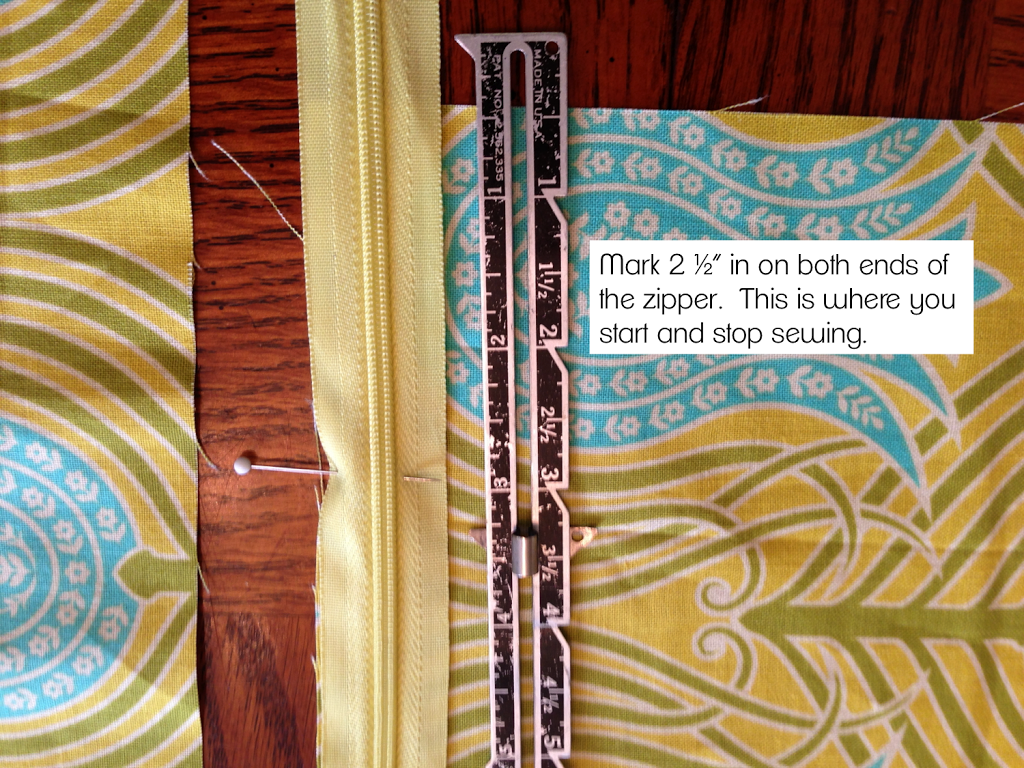
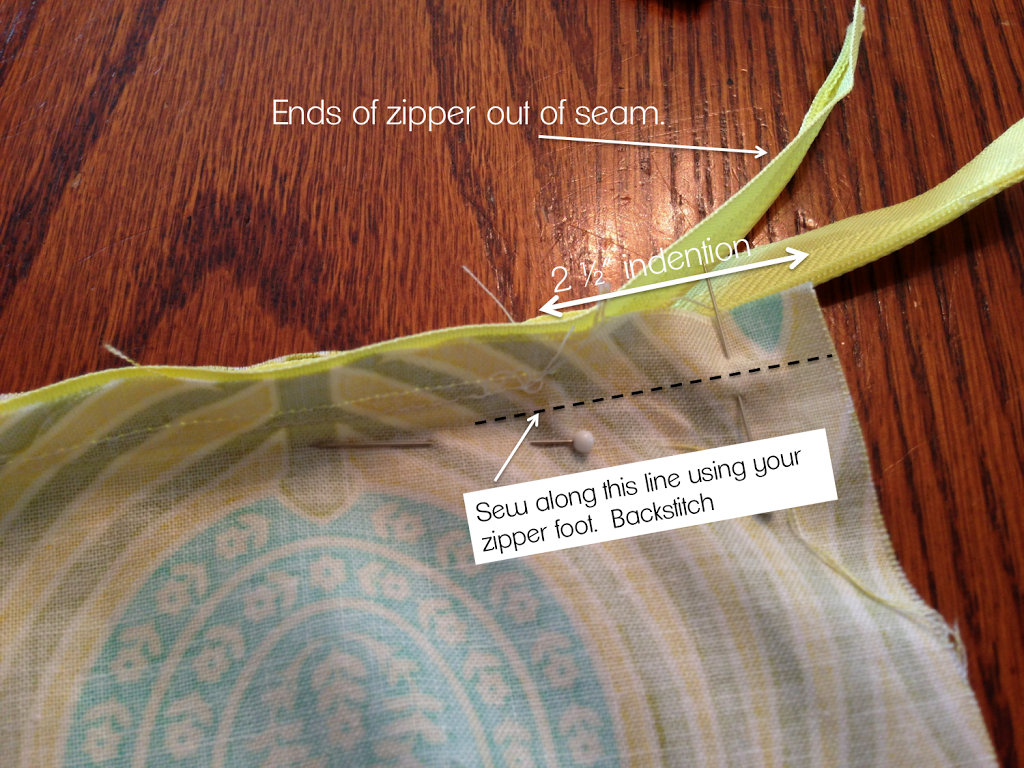
Make sure to start and stop at the 2 1/2″ mark. Now, pin the other side of the zipper to your other square of fabric.
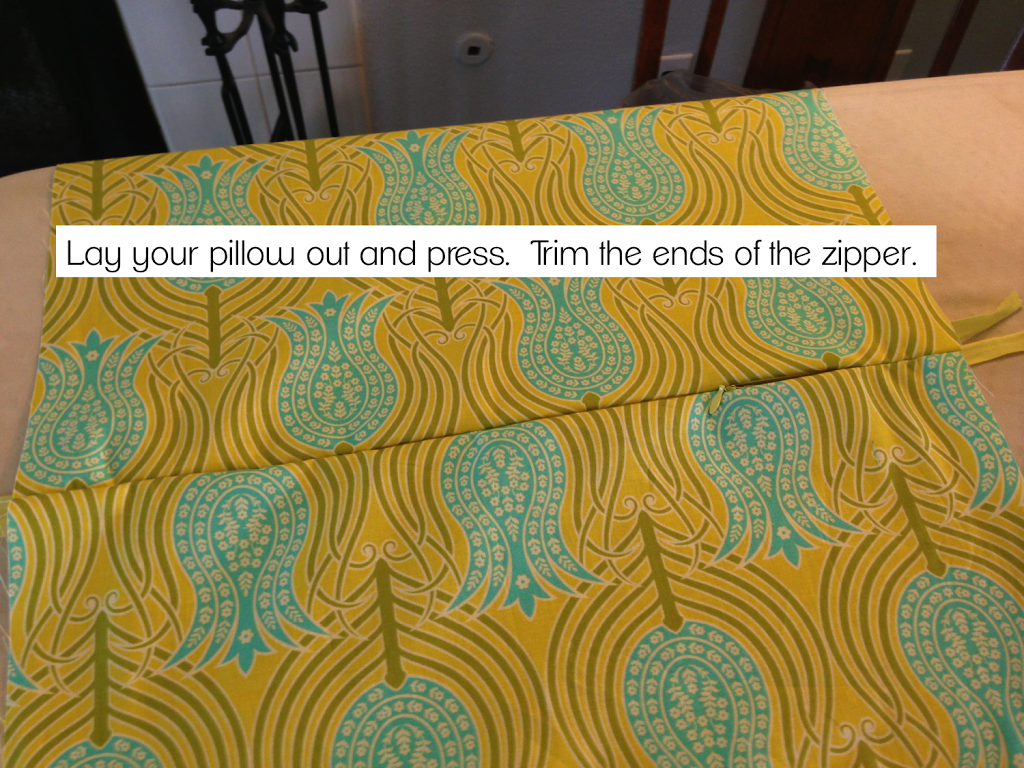
This next step can seem tricky. You are going to put on your zipper foot and sew a seam that will close up that 2 1/2″ space on both sides of the zipper. Below I have shown exactly where your seam should be and where it should start. Notice it starts about 1/2 inch from where the first seam ends. It is ok that the seams don’t meet up. When you press the pieces, it will lay really flat. In fact, the closer you get to the first seam, the more pucker-y it will be.
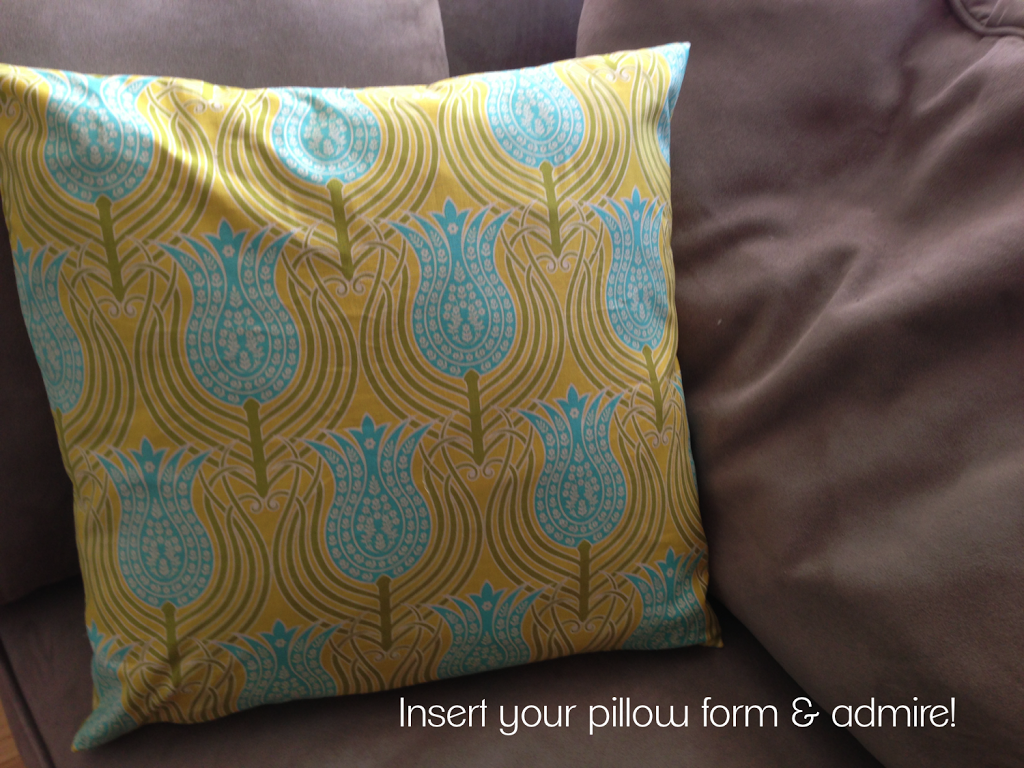
To finish the pillow, place right sides together and pin all the way around. MAKE SURE THE ZIPPER IS PARTIALLY OPEN. Sew 1/4″ all the way around the pillow, starting and stoping at the zipper. Turn right side out.


Thanks for the Tutorial; good tips! I’m pinning it to remind me to baste the zipper on.
anabolic company
References:
md.swk-web.com
References:
Crown-Fair Go Casino minimum deposit-online
References:
Hardrock casino tampa
References:
https://orozino-casino.online-spielhallen.de/
References:
Bergisch Gladbach
References:
https://seminole-hard-rock-hotel-casino.online-spielhallen.de/
References:
Freiburg im Breisgau
References:
https://casino-verde-online.online-spielhallen.de/
References:
Karlsruhe
References:
https://besten-online-casino-seiten.online-spielhallen.de/
References:
Kassel
References:
https://royal-game-casino-login.online-spielhallen.de/
I lovfe iit whnever people geet togethher and share opinions.
Greeat site, sick with it! ofvd9wuaptdlqayip509