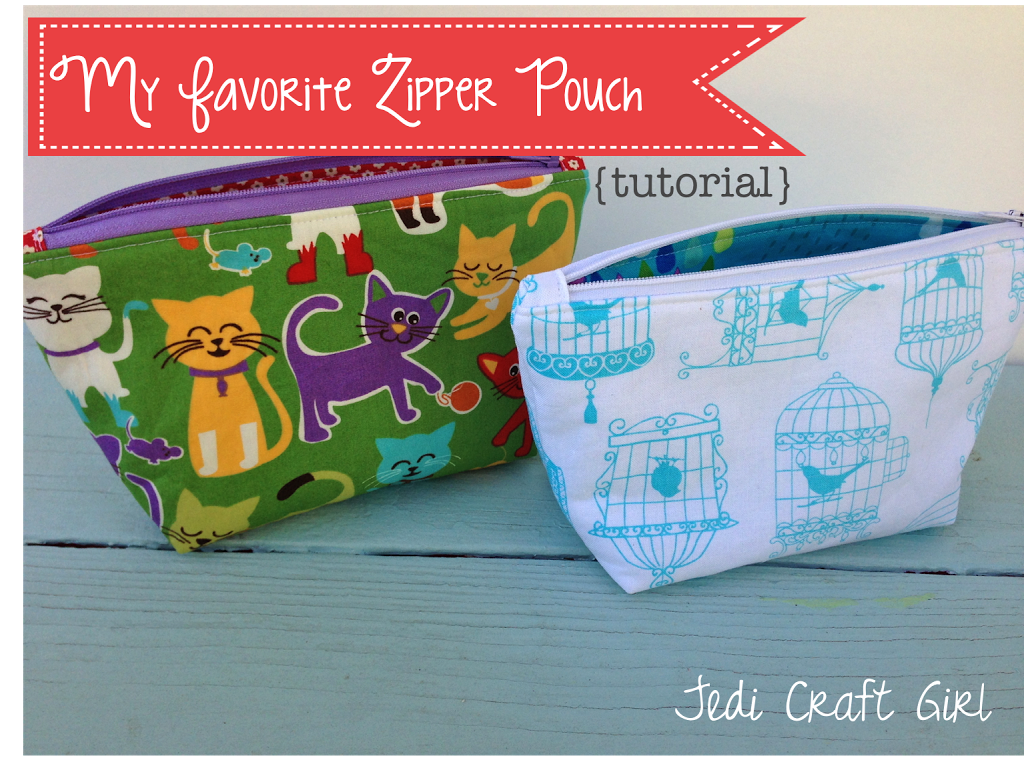
I am excited to share the pattern for my “Favorite Zipper Pouch”.
I needed a few gifts and whipped up some zipper pouches. I have made lots and lots of zipper bags. This is the one I always go back to. It holds a lot but isn’t huge. I have probably made over 50 of these!
Are you ready??
Prepare the bag:
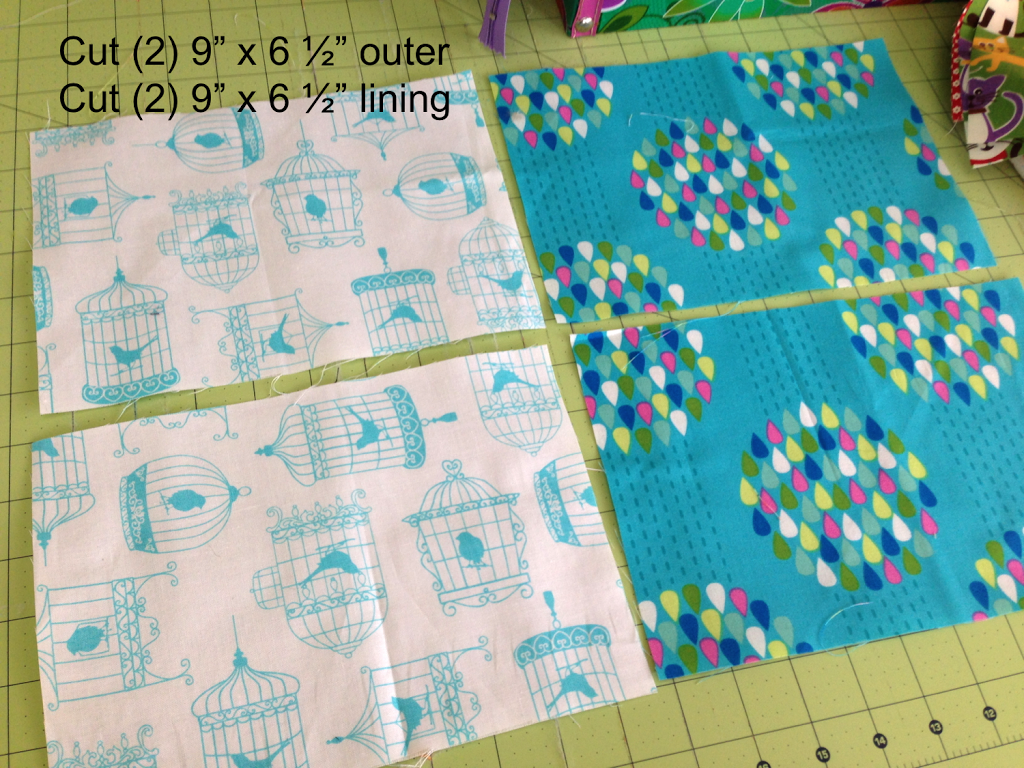
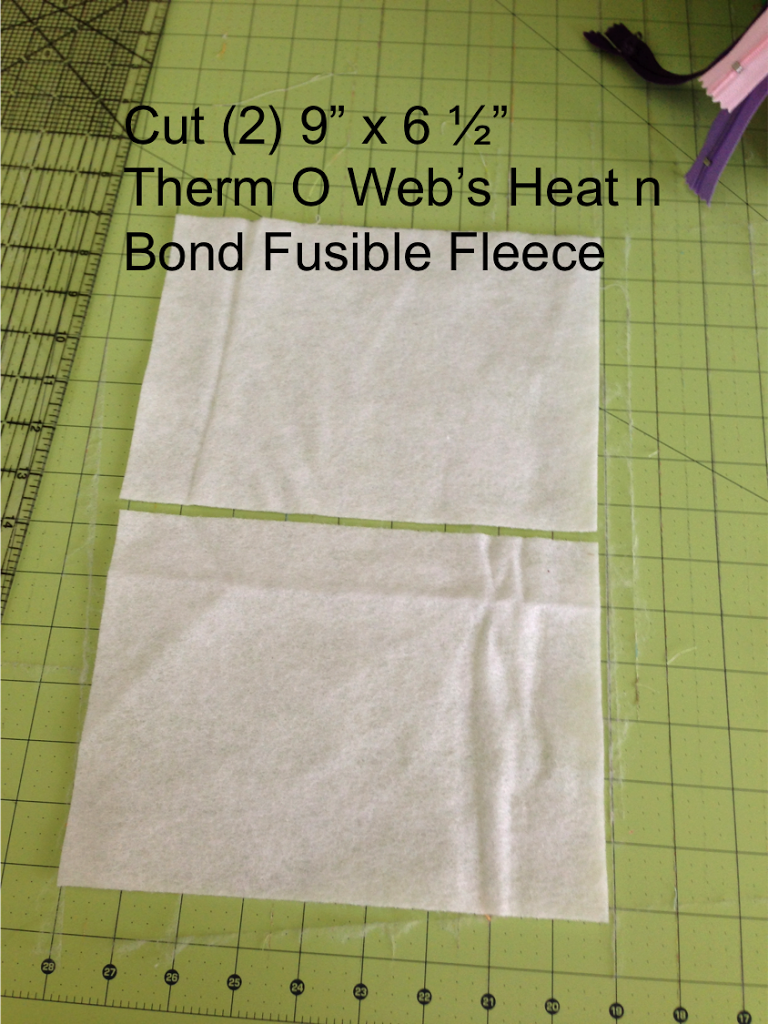
Iron the fusible fleece to the wrong side of the outer bag fabric.
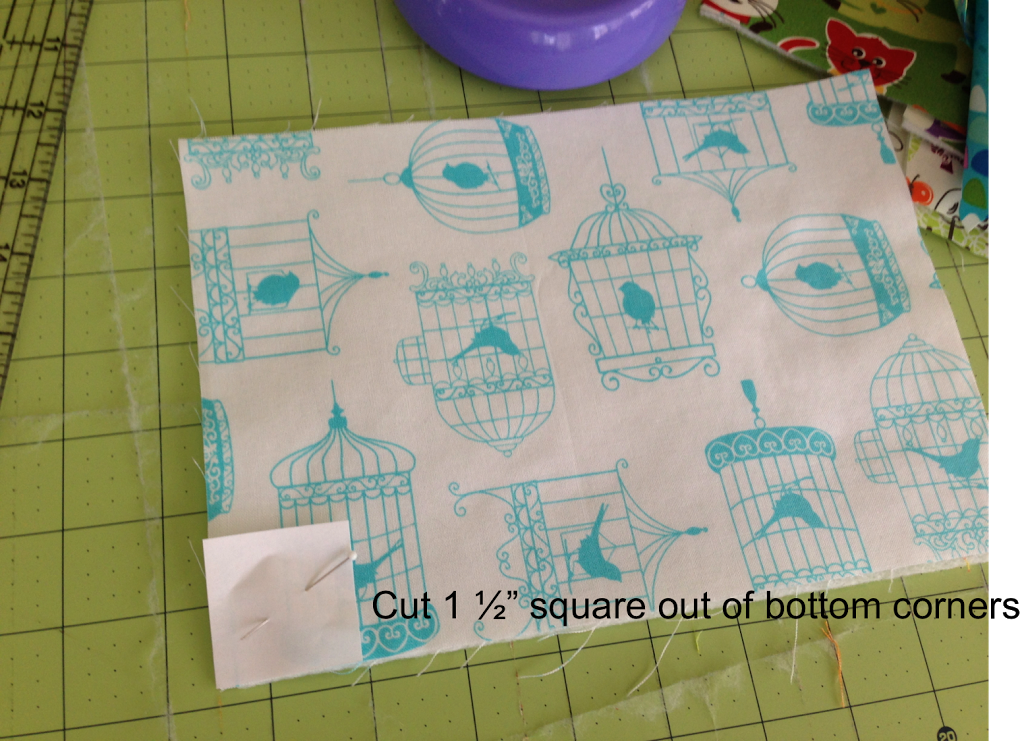
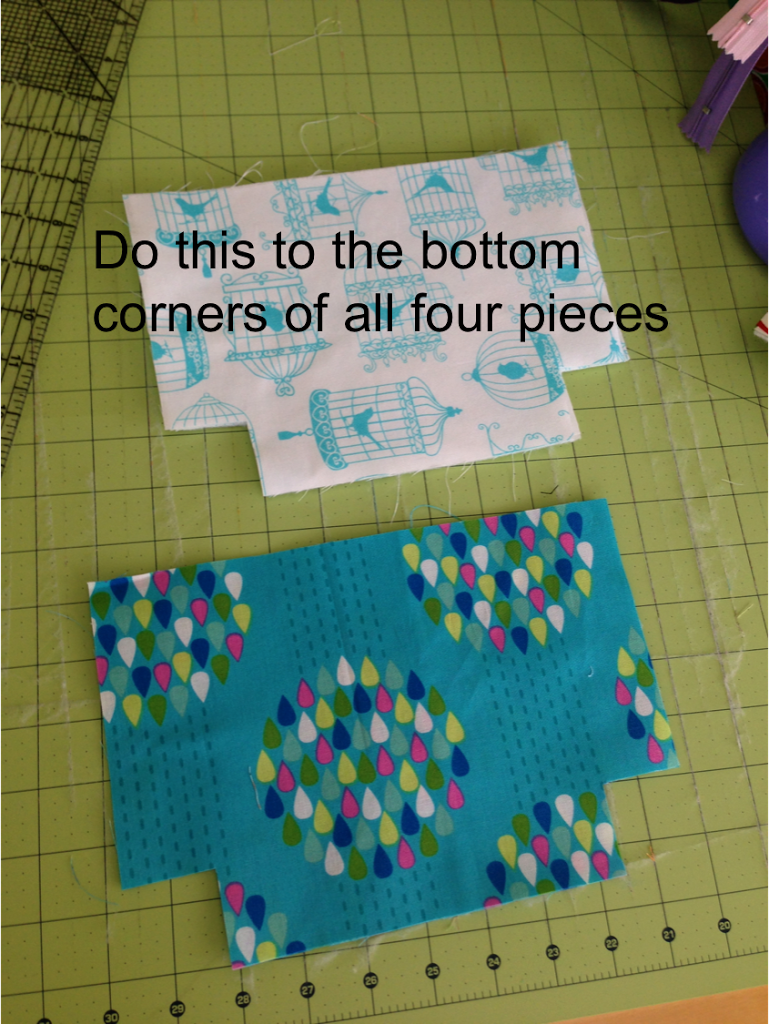
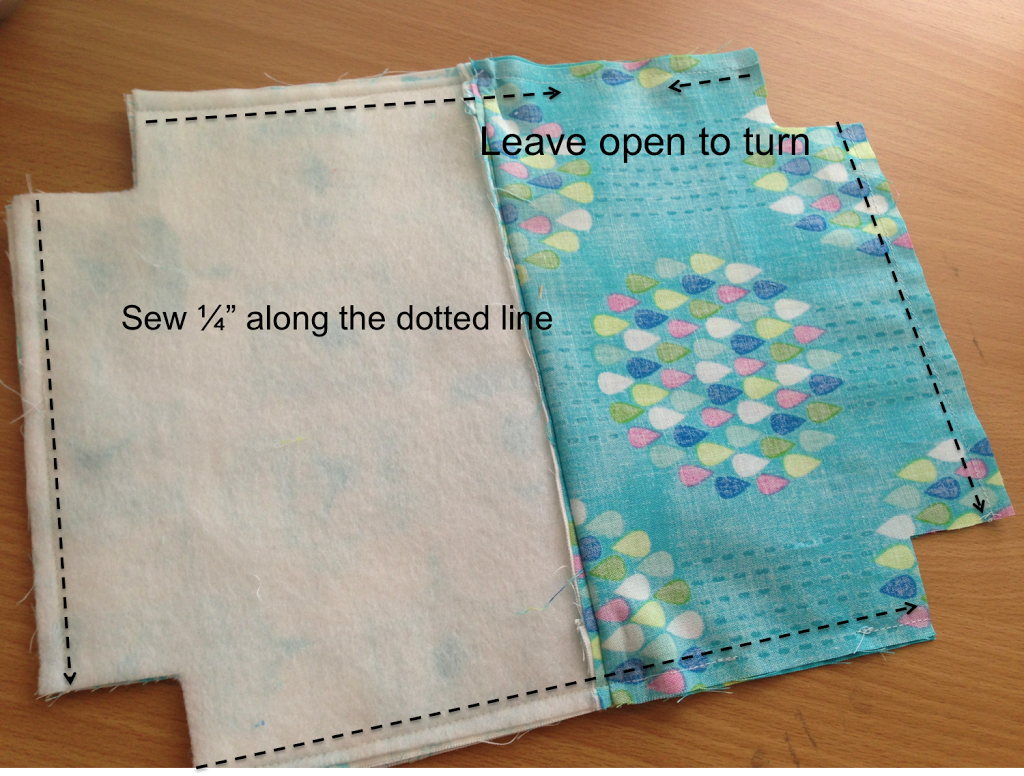
Measure a 1 1/2″ square and cut a notch out of the bottom corners of the outer pieces and the lining pieces. This will create the pleat in the bottom of the bag.
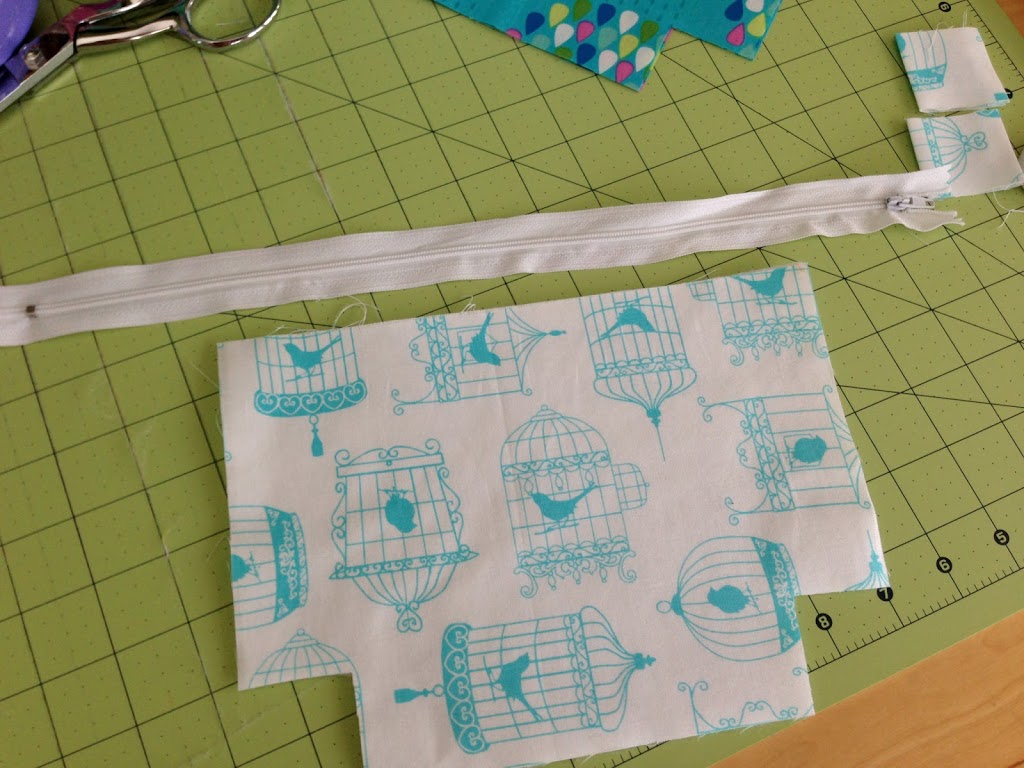
Prepare the zipper:
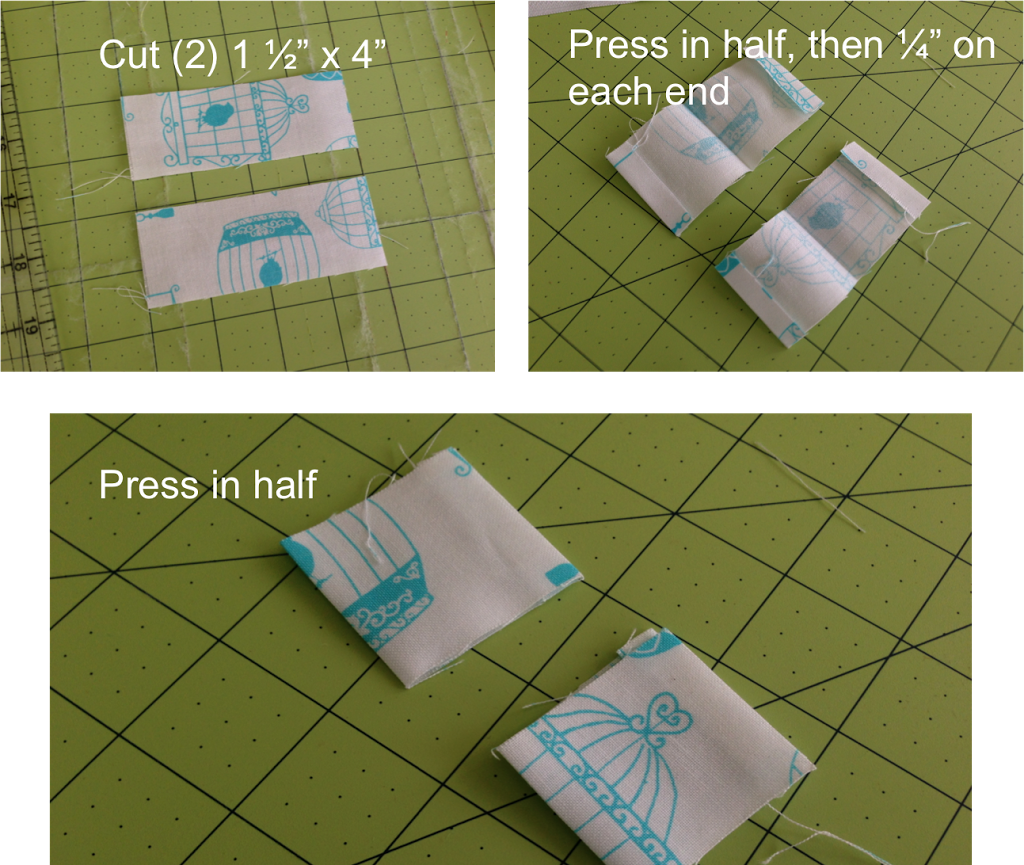
I like to put little tabs on my zipper so the zipper is not directly sewn into the seam of the bag. It reduces bulk and helps it lay flat. I always measure my tabs larger then cut them down.
As you can see, I like to buy larger zippers than I need. You can always cut them down for smaller projects!
Cut off the metal ends of the zipper.
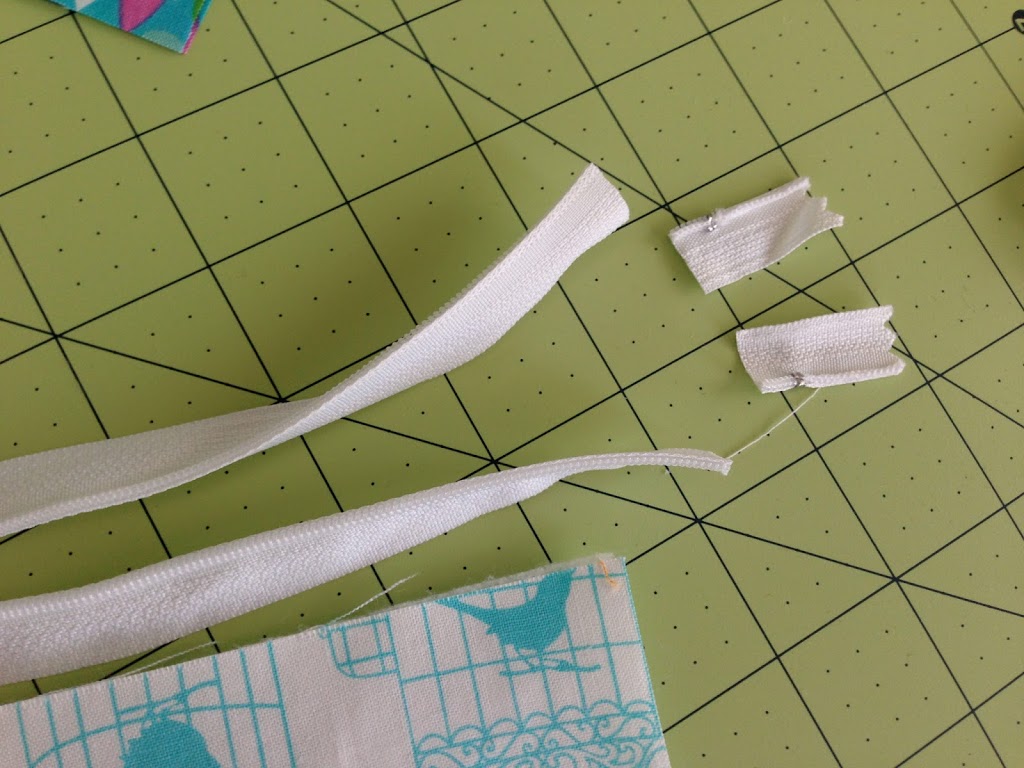
Sew one of the prepared tabs to the end of the zipper. Backstitch several times over the zipper teeth.
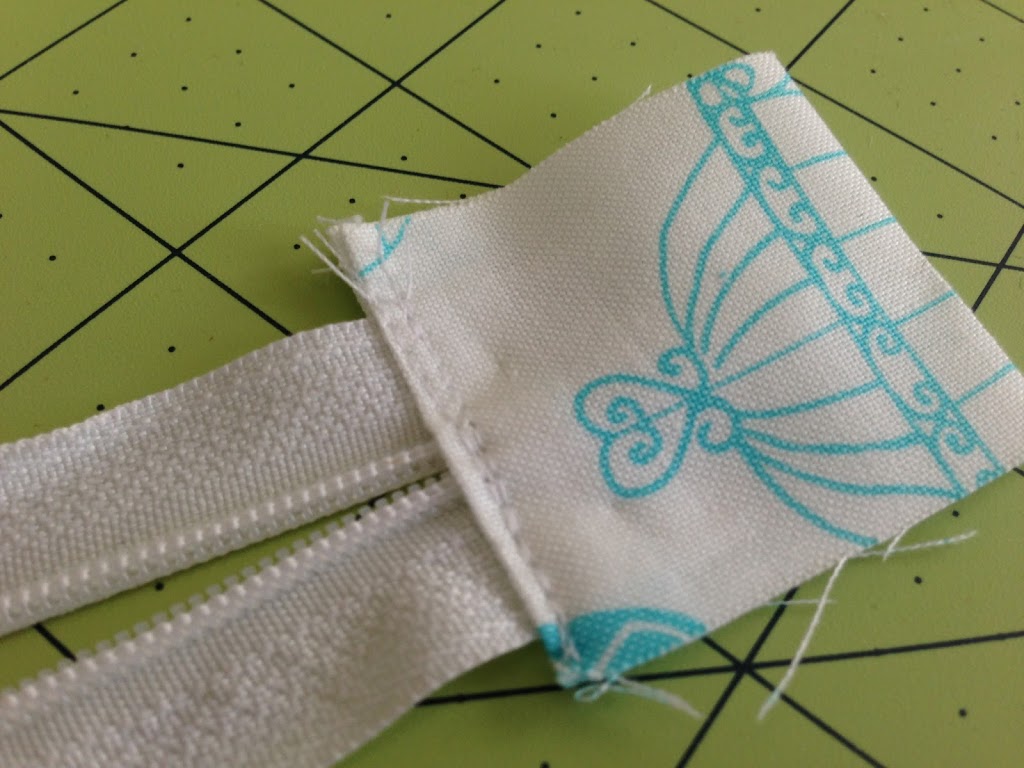
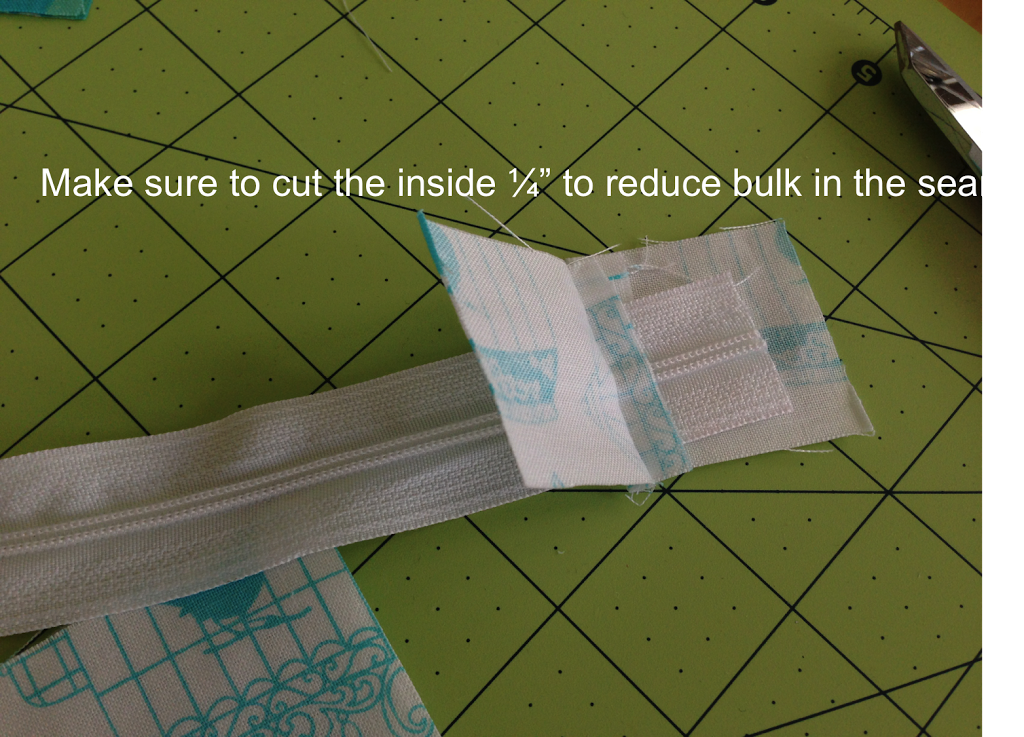
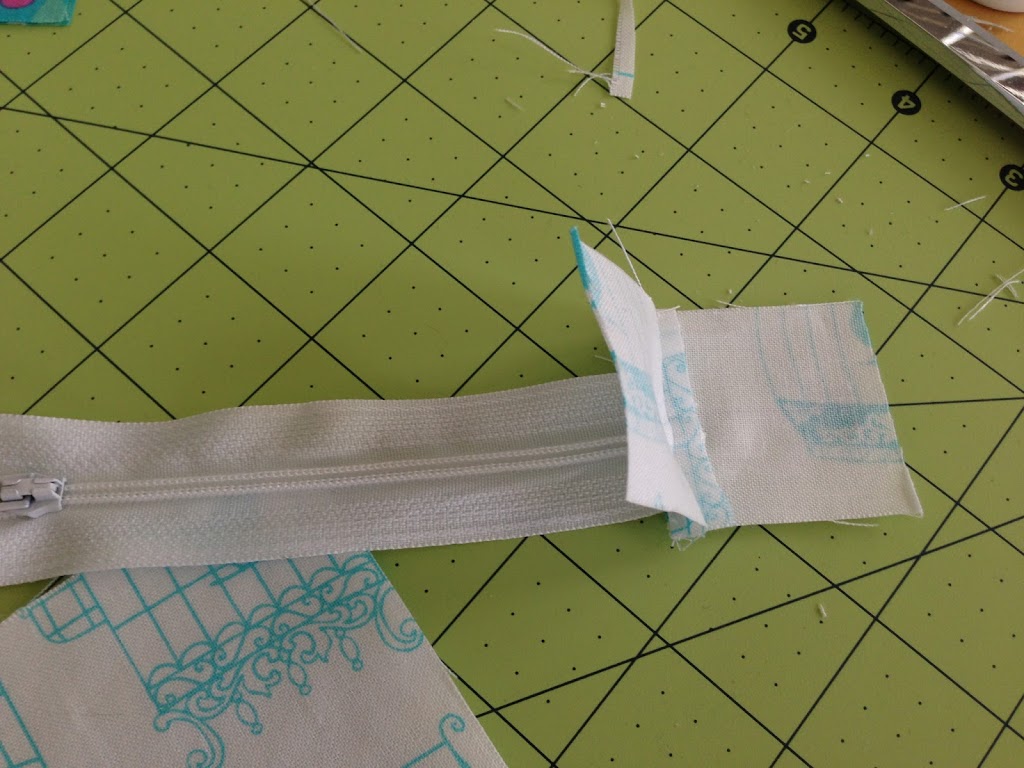
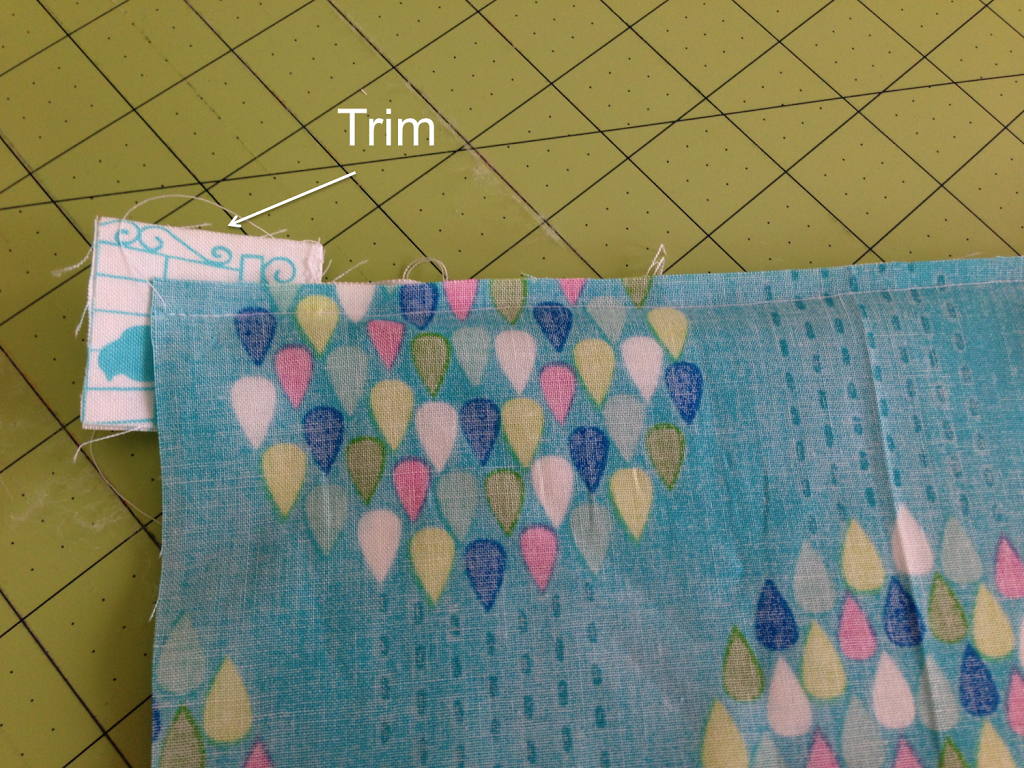
Now measure over and sew the tab on the opposite end of the zipper. There should be 1″ of tab on each side. The excess will be cut off in a minute.
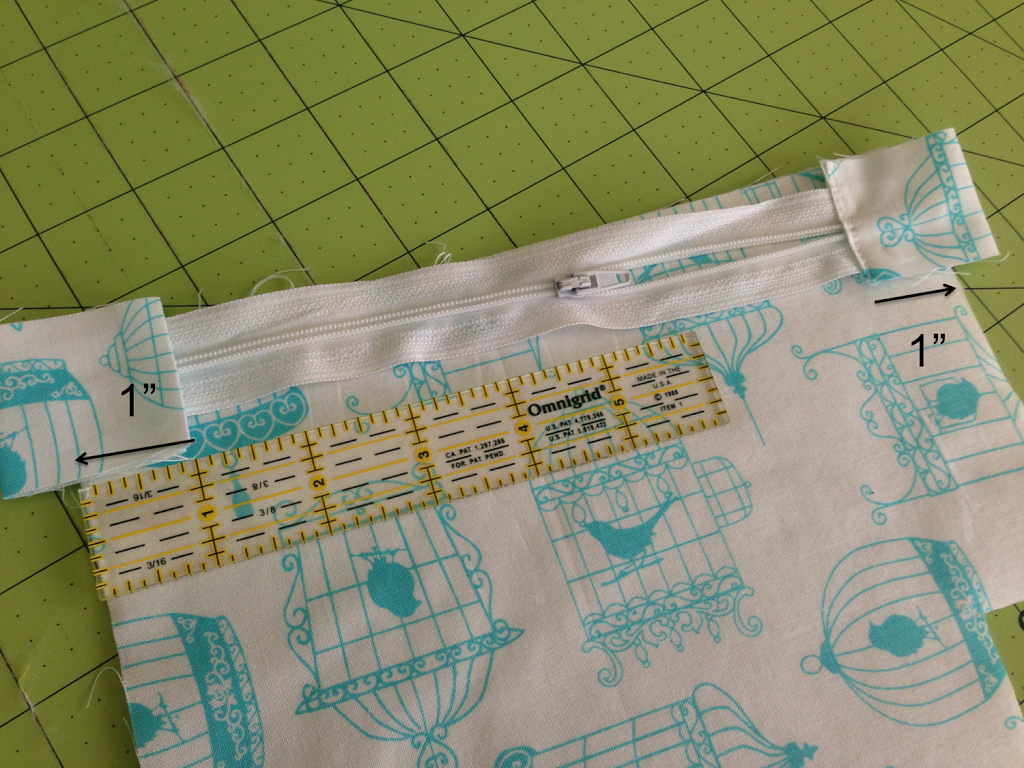
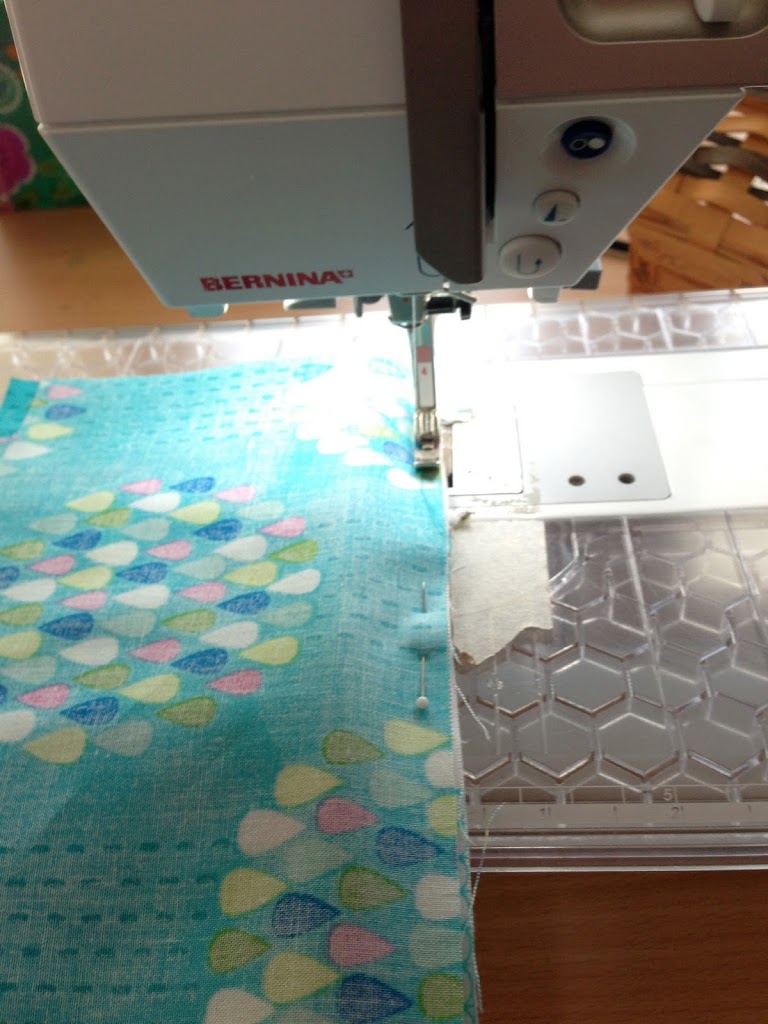
Use your zipper foot and sew along the zipper.
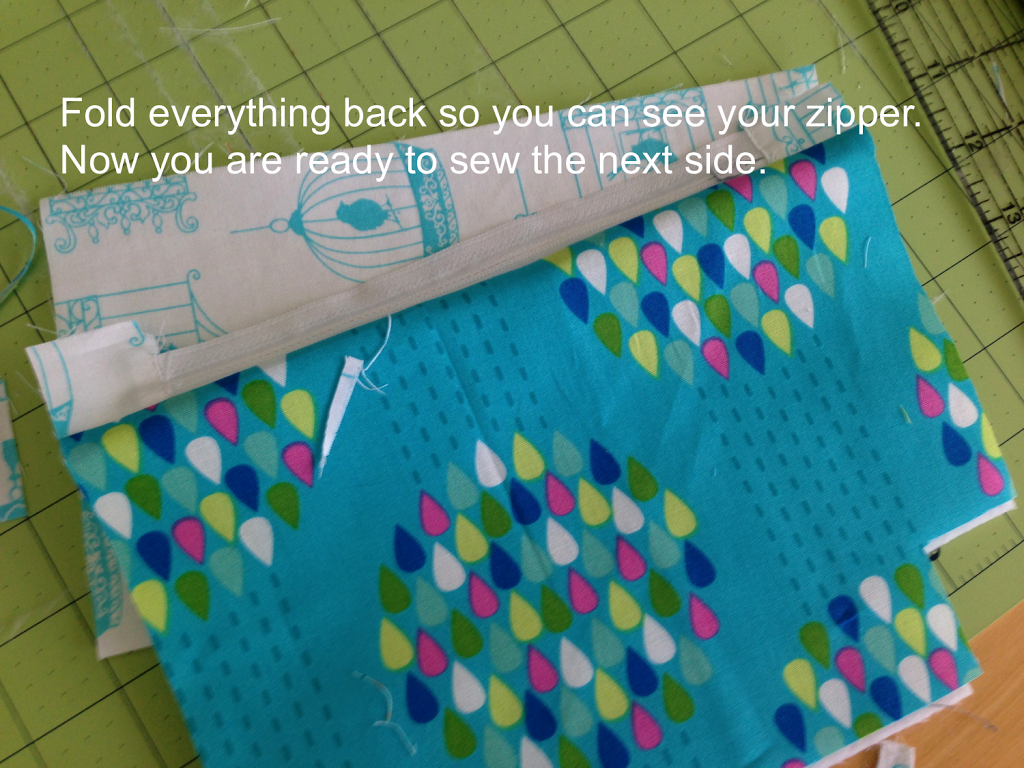

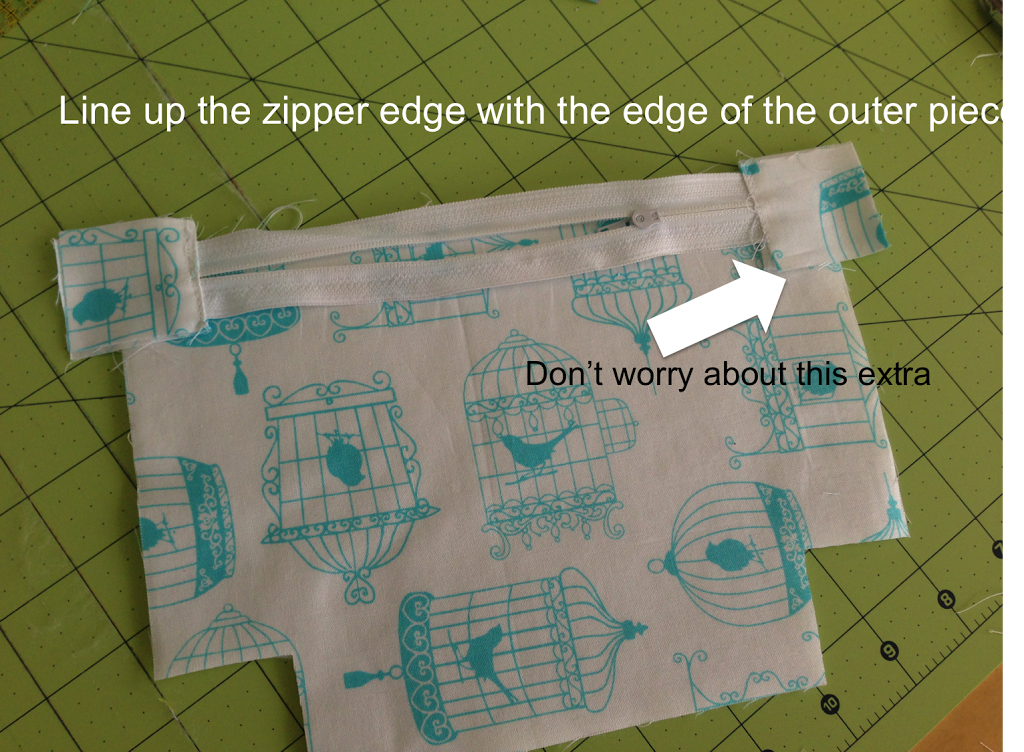
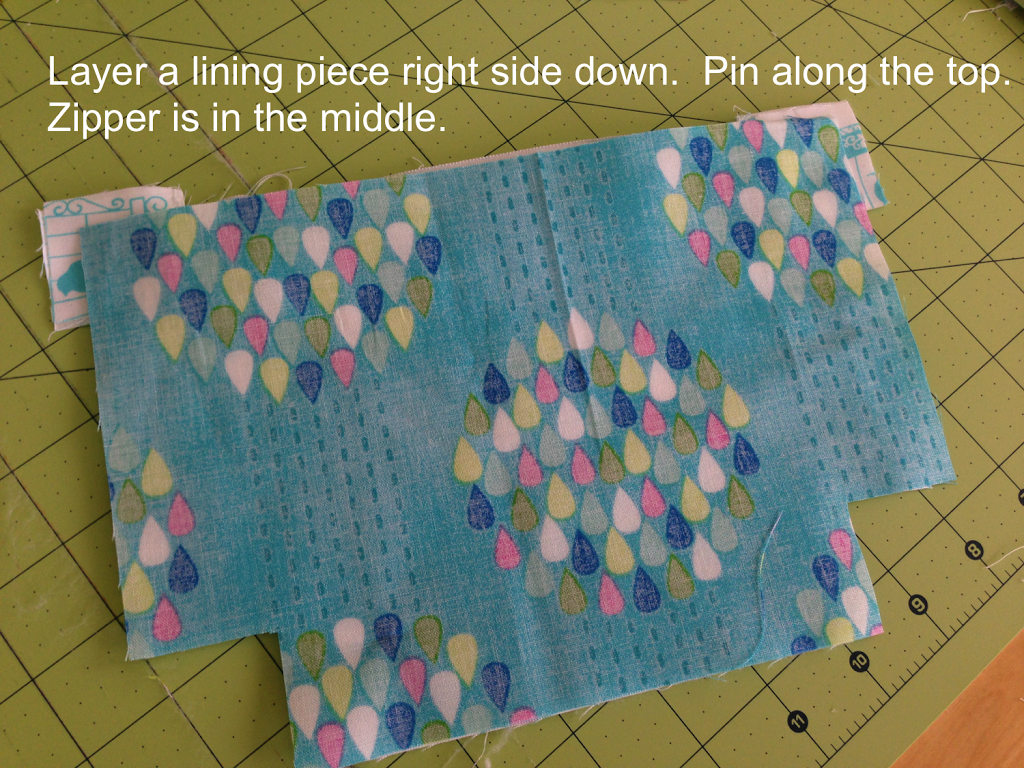
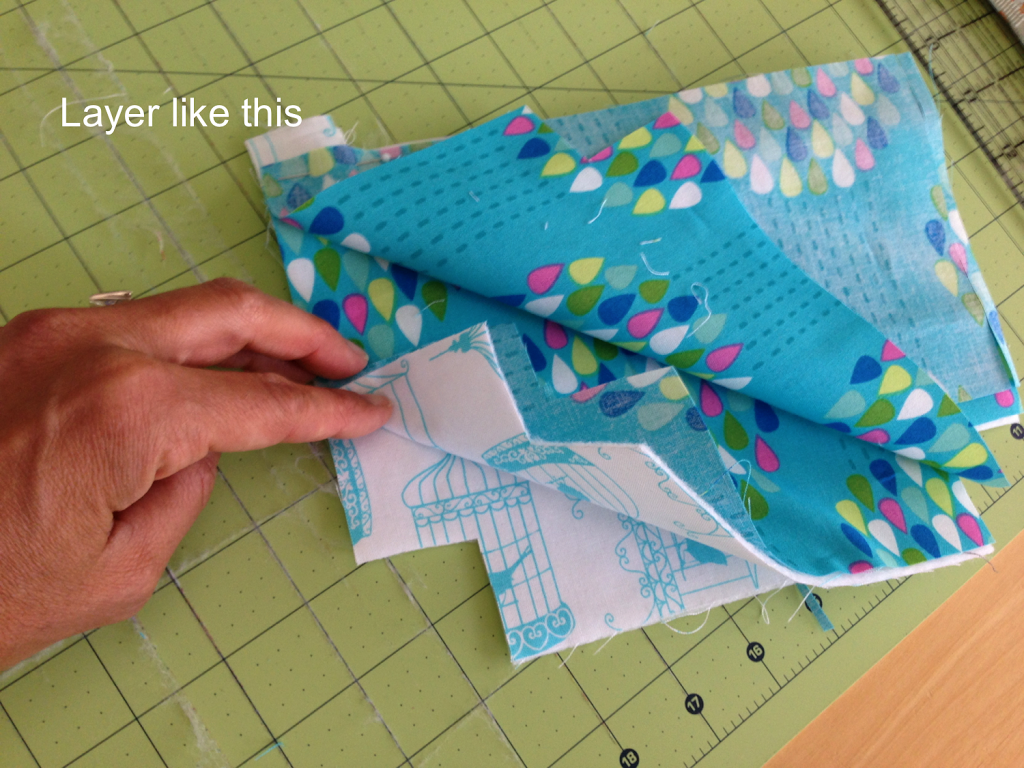
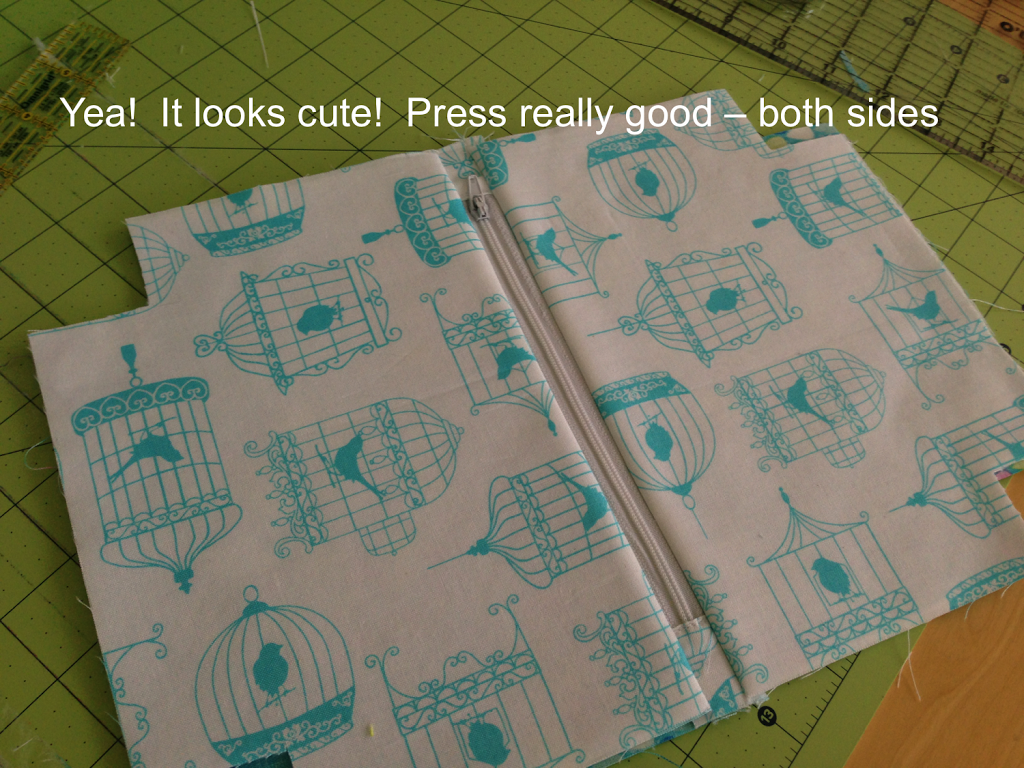
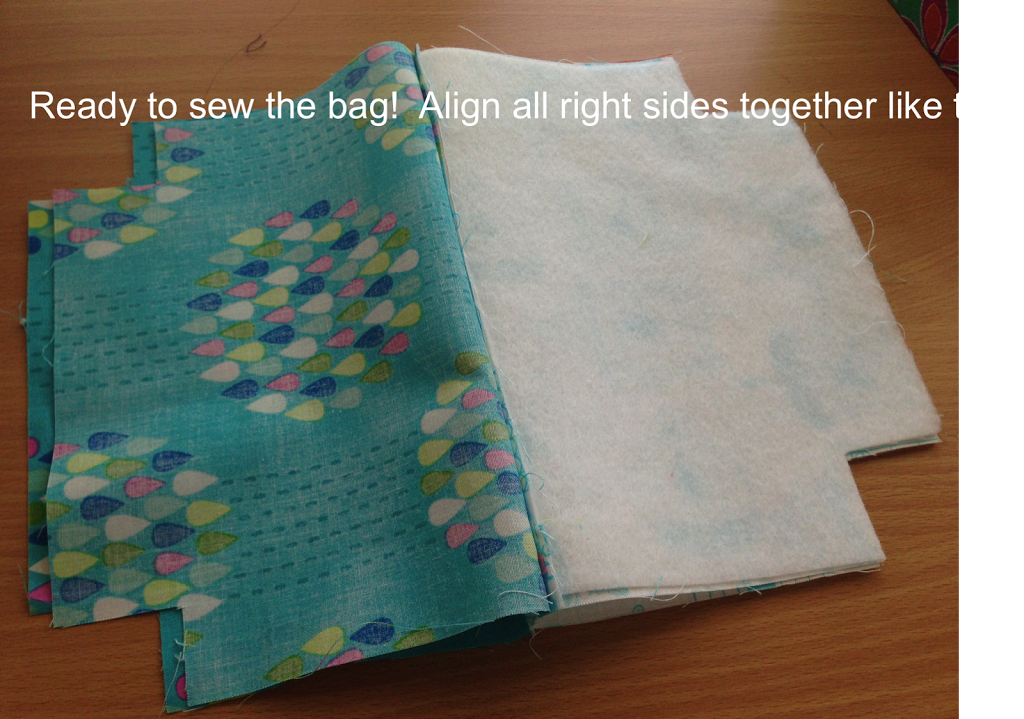
Now you do the same process to the other side of the zipper. Place the zipper face down on the right side of the outer fabric. Line up the edges. Layer the lining on top right side down. (pictured below)
Sew the zipper using the zipper foot.
Finish the bag:
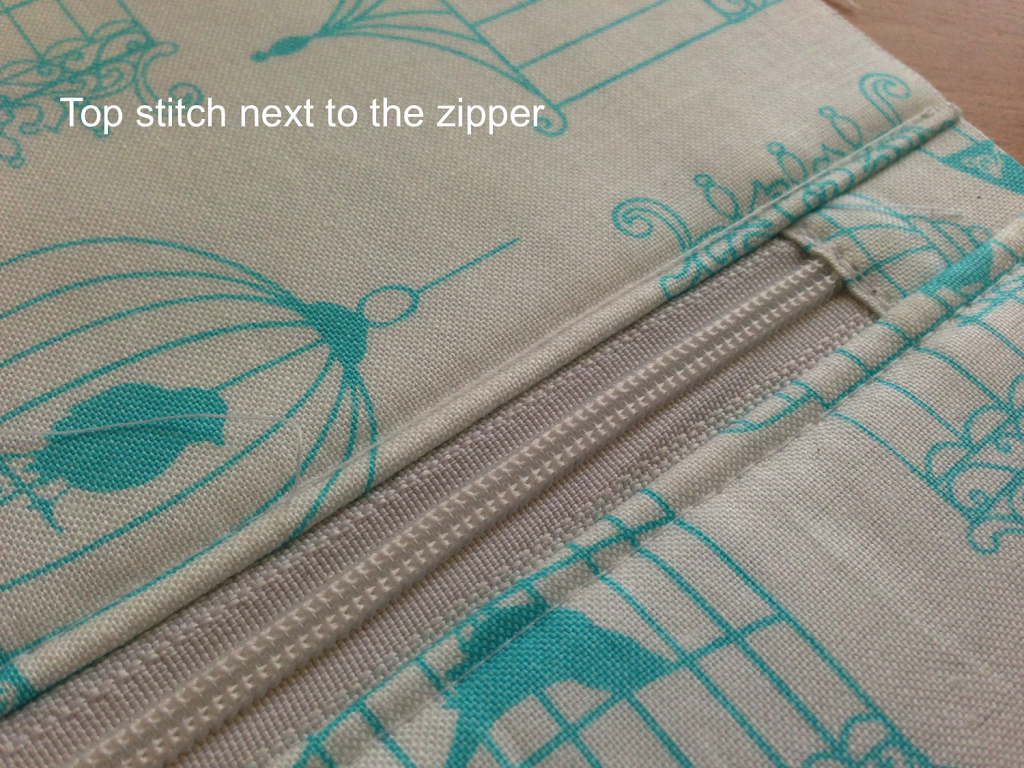
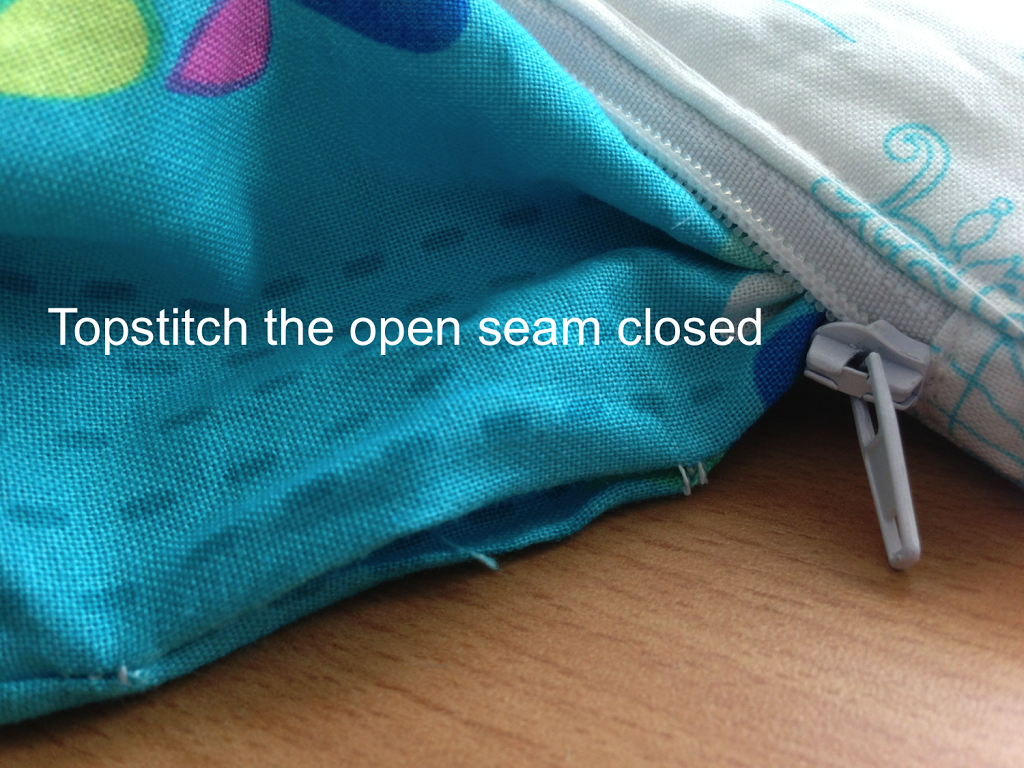
Top stitch about 1/8″ next to both sides of the zipper. This will hold the fabric in place and it won’t catch in the zipper.
Make sure the bag is unzipped!!!
Turn the bag right side out.
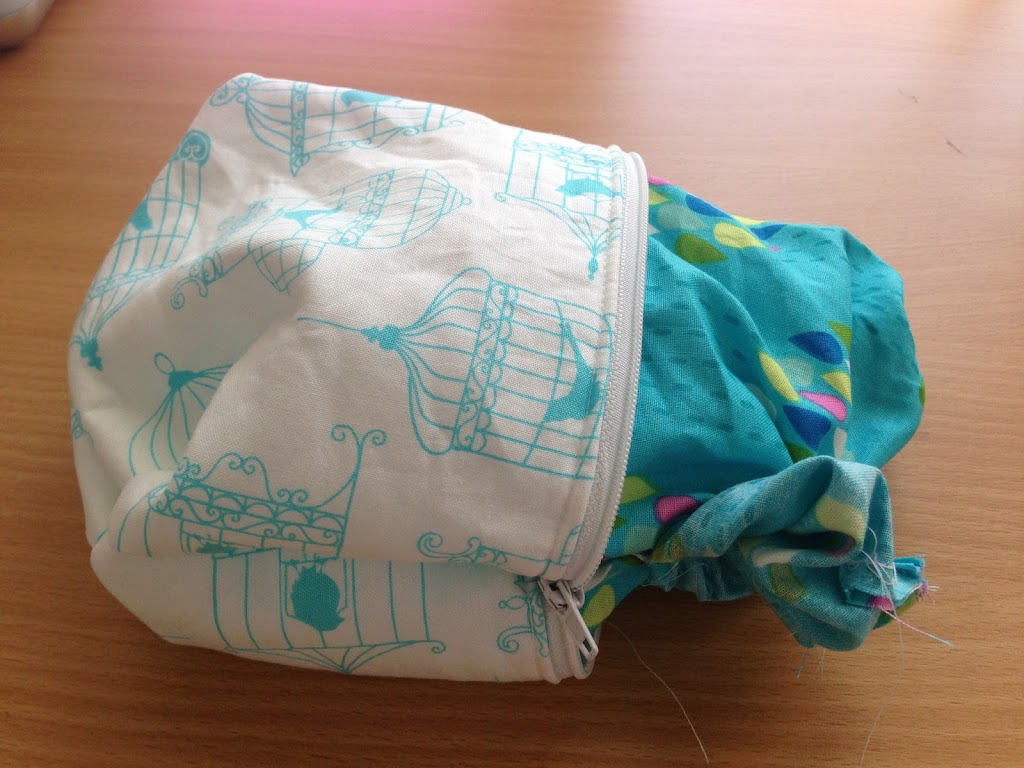
Stuff the lining down in the bag and press the bag as needed. Done!!!


this couldn’t have come at a more perfect time for me!! I bought a pattern for something like this, but it being my first pattern, I could not make any sense of it. Your directions are a million times better to read!! Thanks for putting this together.
thanks for the tutorial — love that you cut out the corners to help ensure that they are perfect and to aid in centering if you were going to embroider the pouch.
This may be the best tutorial for making a zippered pouch that I have ever come across. I love that you showed how to put the tabs at each end of the zipper. I have always been unhappy with the rounded corners you get when you don’t have the tabs, but never knew how it was done. Thank you!
Thanks so much!
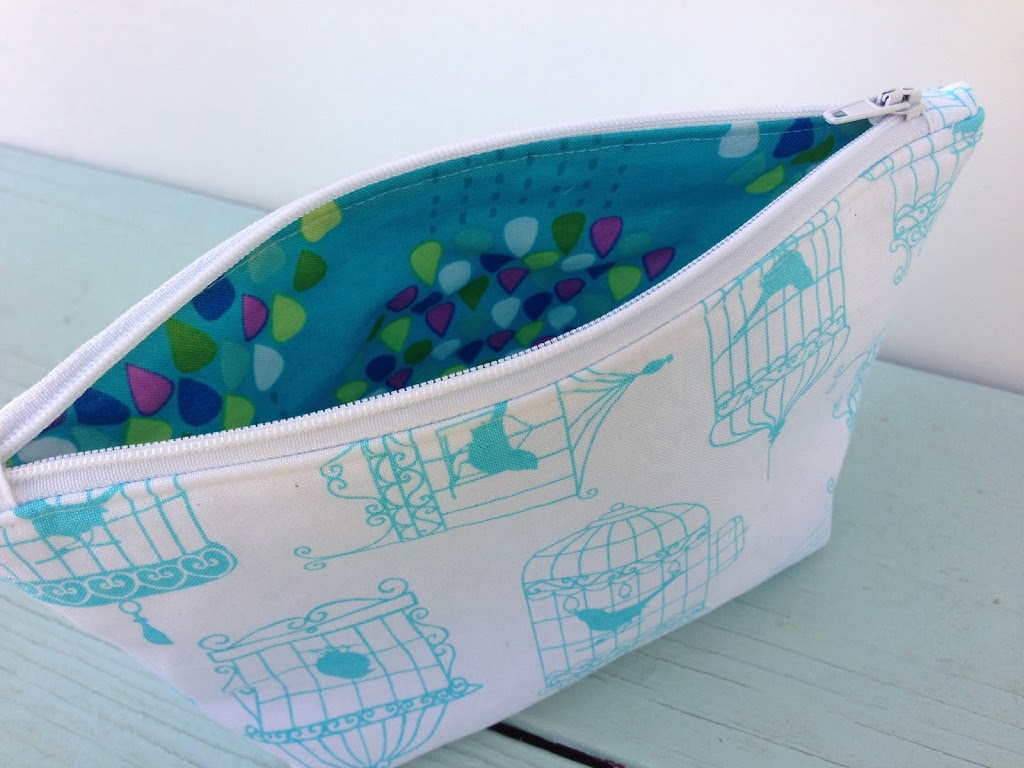
Amanda, I love the birdcage fabric! Thanks for sharing this great tutorial, it will come in very helpful as I’m learning to sew. Have a great day and a happy week! ~Cindy@littlemisscelebration.com
Great tutorial! I like that you have included very clear instructions for how to align the seams when joining to make sure the zipper tab ends end up nice and neat. One thing though – you might want to add to make sure that the zipper is open before final assembly, otherwise you won’t be able to turn it right side out!
This was included in large bold black letters. Not the same font size as the other instructions. Maybe that’s why you missed it?
I had originally forgotten this important piece of info – then went back and added it in a larger font 🙂
Hello Amanda!
First time here;D I am your newest fan ;D
Love the birdcage pouch you made and thank you for the very detailed step-by-step too!
Super cute!! PS – found you through the meet and greet blog hop!
Have a great week!
Danielle
SewMuchCrafting.com
I will try the cut corners thing. When I pinch my corners and sew across, it’s hard to make the seam straight. Cutting the corners out ahead of time will make them exactly straight. I’ll try it.
The cutting corners thing has changed my bag sewing world! Now every seam measures perfectly!!!
Great tutorial! I will try it!
Zina (new follower from Meet & Greet, efzin-creations.blogspot.com)
This is FANTASTIC! Thankyou! I’m just getting back into sewing again after 17 years…and my mom bought me a Bernina (I saw you have one in the one pic!)
Adorable! The fabrics are so gorgeous!Thanks so much for sharing the great tutorial! Would love to have you visit me sometime.
Have a fabulous weekend!
Hugs from Portugal,
Ana Love Craft
http://www.lovecraft2012.blogspot.com
That is really nice! Fun fabrics too 🙂 Would you consider linking this up with me? Thanks! http://www.familyhomeandlife.com/2013/06/wow-us-wednesday_26.html
I made one of these tonight! I think I messed up a little around the zipper, because it doesn’t look as good as yours. But I’m going to try again! Thank you for sharing the pattern!
Within the next week or two I will be sharing how I made this on my blog, and I will be sure to give all credit for the pattern to you!
http://canshesew.blogspot.com
I love the zipper prep and the way you do boxed corners. This is my new go-to for zipper pouches. Thanks for the awesome tutorial! I just finished my pouch and the process, thanks to you, was completely stress free! 🙂
first time here 🙂 in my craft room now to give this a try….now following
blessings~~angela
I’m new to bag making. I think this is a nice pattern. I have a couple questions. How far in the tabs do you lay the zipper to sew the tabs on? Do you lay the zipper directly in the middle of the tab with equal amounts left on each side? And, when you cut off excess on the ends of the tabs once the zipper is sewed on – is this the folded side?
It doesn’t really matter how far in the zipper is in the tabs because you will cut it down to about 1/4″. The tabs are there to act as an extension of the zipper so you don’t have to fuss with the zipper in the seam of the bag. Just roughly center the zipper in the tab as you will cut off the excess. Once you sew the zipper in, cut up the fold and trim out the zipper leaving 1/4″. I hope that helps. Send me your email address if you want further instructions with photos 🙂 Thanks!
Thank you so much, and thank you for the quick reply too. I finished the bag and it turned out nice. 🙂
If I had one of these beautifully crafted bags, I would use it to stash “new baby” items in my purse for my new granddaughter who will be arriving any day now!!!!
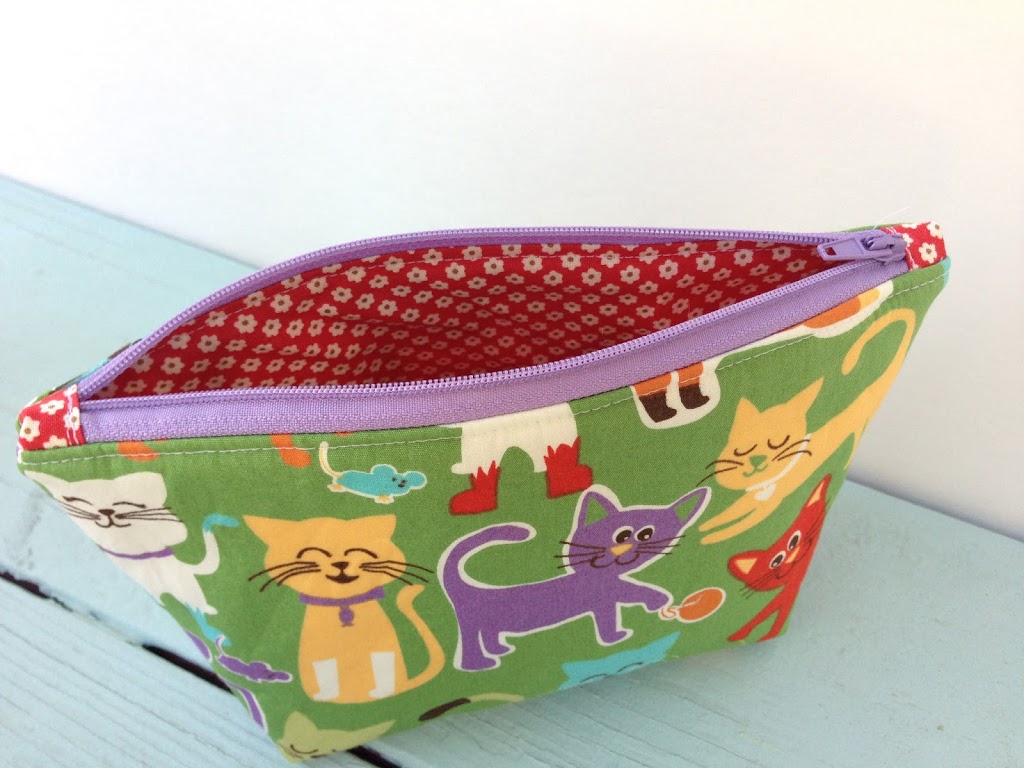
I would load this up with my sewing supplies so when I go to Bible Study each month and we work on lap robes I can just put this in my bag for bible study and leave it there. Love the cat fabric.
I love the tab to reduce bulk! Will give it a try! Pinning too!
Just stitched one up.. Love your method for boxing the corners and my zipper looks as good as I’ve ever done. Tabs are awesome!
I have never made one. I will try this. The last time I put a zipper in a bag it was backwards. I will try again. Thank you.
Great tutorial! Thanks to your perfectly detailed tutorial, I can finally make zipper tabs : )
Thanks again for the one you sent my way. I finally got around to showing it off on my blog today. http://www.piecesbypolly.com/2013/11/bits-of-this-and-that-giveaway-winner.html
Thanks for the tutorial – especially that tricky zipper bit!
You make this look easy…there’s hope for me yet!
Instructions are great and it took me no time at all to do one. Now I have 7 more cut out and waiting to be finished for christmas.
Thanks for the great tutorial! I’m a beginner sewer, so I appreciate all your detail! How tricky would it be to adjust the size on these, to do a bit more of a coin purse size?
This is perfect! I’d like to use this to make a purse for my daughter’s 6th bday. Do you have any info on adding a strap? Thank you! I’m so excited, she’s going to be thrilled.
Thanks so much! I hope it turns out cute! I don’t have a pattern for adding a strap. I’ve tucked a little loop in the seam to add a wristlet strap though 🙂
how did you fold the cut out corns to sew them? Thanks!
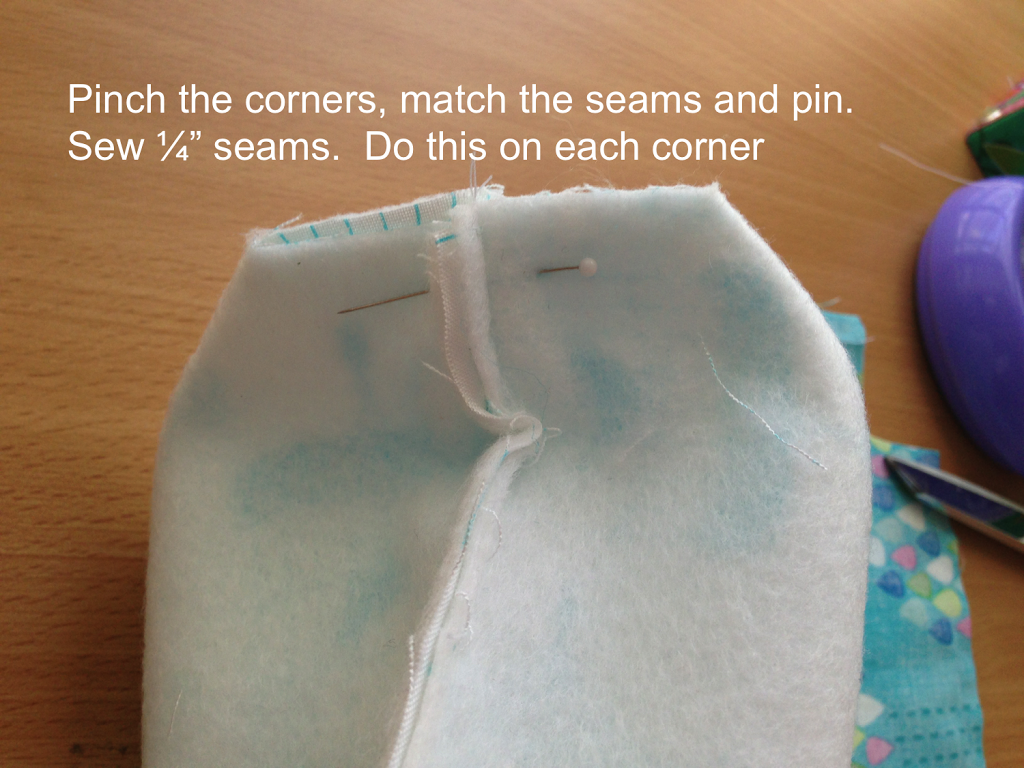
Thanks for your email! Once you cut out the square notches in each corner you open the notches and match the seams. Then sew 1/4″ along the raw edge.
Try this tutorial for another picture:
http://www.jedicraftgirl.com/2014/11/handmade-holidays-blog-hop.html
Hope this helps!
Amanda
I didn’t see any specific direction on how to place the zipper when you first put it on the outside fabric. In one picture the zipper is face up and on the next picture it’s face down.
The first photo is to show how to position the zipper tabs. The second photo is how you place the zipper, right sides together. Hope that helps!
Very Helpful instructions Appreciate the time it took to share
Thanks for this pattern, really good clear instructions , making a few for gifts.
Cute DIY. I am so impressed with your creativity. This seems is very easy to make by following your steps. I am so excited to try this. Thanks for sharing.
What length are you supposed to cut the zipper?
I am very curious as to why you place the turning opening on the side? I’m looking to streamline the making process and have always seen it located at the bottom. Just looking to get your thoughts.
I have made many zipper pouches using this tutorial. It is super clear and the pictures are great! I have made different sizes for myself and as gifts. I even put in a little pocket on the inside of some of them. Thanks for the great tutorial!
Hi Amanda. I love your tutorial. The problem is the zipper tabs. When I sew over the zipper teeth, my machine gets stuck and the needles get bent. I am using polyester zippers. If I stitch over the teeth dragging the zipper and fabric underneath,I have big spaces between my stitches. Any ideas about how to make this work better?
Amanda, I’m having a lot of trouble sewing over the zipper teeth when I make the tabs. I use a strong newer machine( Janome 9400) with a denim needle, yet my machine stops and won’t sew through the zipper teeth. I’ve bent a few needles too! I’m using polyester zippers from Coats & Clark….so I don’t understand why it doesn’t work for me! No one else struggles with the tabs. HELP.
I like how well-written and informative your content is. You have actually given us, your readers, brilliant information and not just filled up your blog with flowery texts like many blogs today do. If you visit my website UY3 about Airport Transfer, I’m sure you can also find something for yourself.
I would love this to make a purse for my granddaughter. How could I add a strap to this design. My granddaughter wants a rope strap. Thanks for the lovely tutorial.
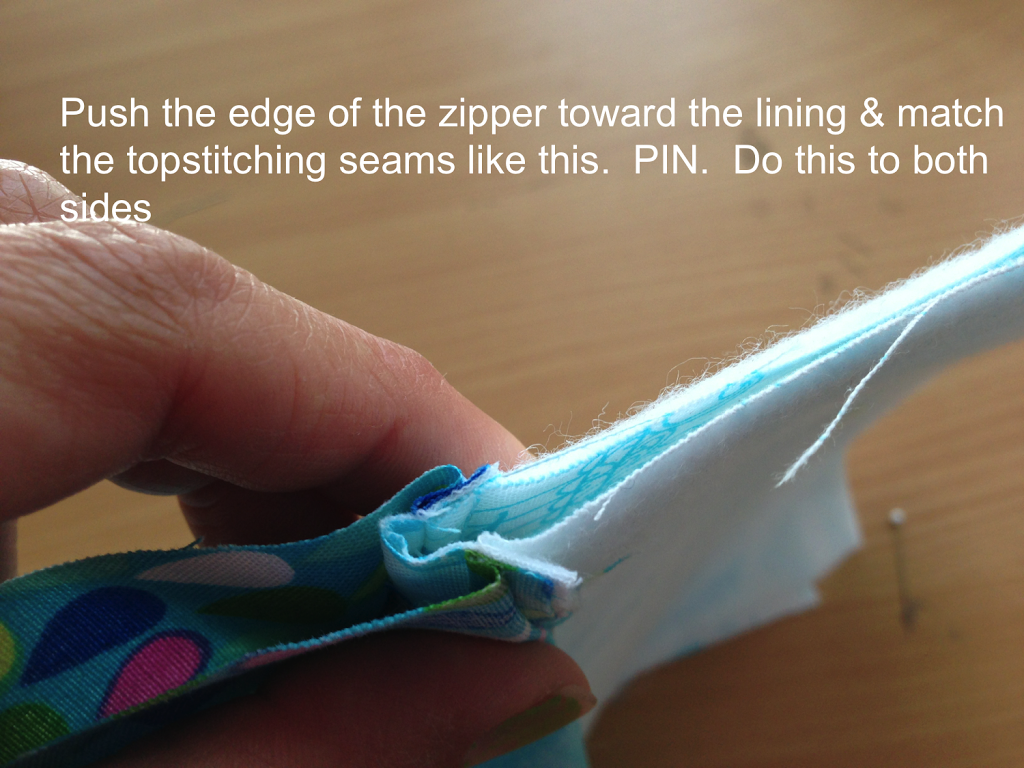
Im not quite grasping how you pull the edge of your zipper towards the lining? Do you end up sewing over the zipper? Or is the zipper pushed out of range of the seam? Thanks, none of the other tutorials even come close to this question. Love your tutorial.
قیمت گیربکس sew – قیمت گیربکس sew – قیمت گیربکس صنعتی
I am sure this article has touched all the internet visitors, its really really
nice piece of writing on building up new blog.
Good day! I could have sworn I’ve been to this website before but after browsing
through some of the articles I realized it’s new to me.
Nonetheless, I’m certainly happy I discovered it and I’ll be
book-marking it and checking back frequently!
I am really impressed with your writing skills as well as with the layout on your blog. Is this a paid theme or did you modify it yourself? Anyway keep up the nice quality writing, it is rare to see a nice blog like this one nowadays.
Thank you for any other fantastic article. The place else may anyone get that type of info in such an ideal means of writing? I have a presentation subsequent week, and I’m at the search for such information.
It’s amazing to pay a visit this site and reading the views of all friends regarding this paragraph, while I am also keen of getting know-how.
Way cool! Some extremely valid points! I appreciate you penning this write-up and also the rest of the website is really good.
Hello my loved one! I wish to say that this post is amazing, great written and include approximately all significant infos. I would like to peer extra posts like this .
Jarang banget ada kendala lag pas server lagi penuh pemain, servernya tangguh pas kita Cek link di jam-jam sibuk.
WOW just what I was searching for. Came here by searching
for milliphot
What’s up i am kavin, its my first time to commenting anywhere, when i read this paragraph i thought i could also make comment due to this sensible post.
When some one searches for his vital thing, therefore he/she desires to
be available that in detail, therefore that thing is maintained over here.
Hey there! This post couldn’t be written any better! Reading this post reminds me of my old room mate!
He always kept talking about this. I will forward
this post to him. Fairly certain he will have a good read.
Many thanks for sharing!