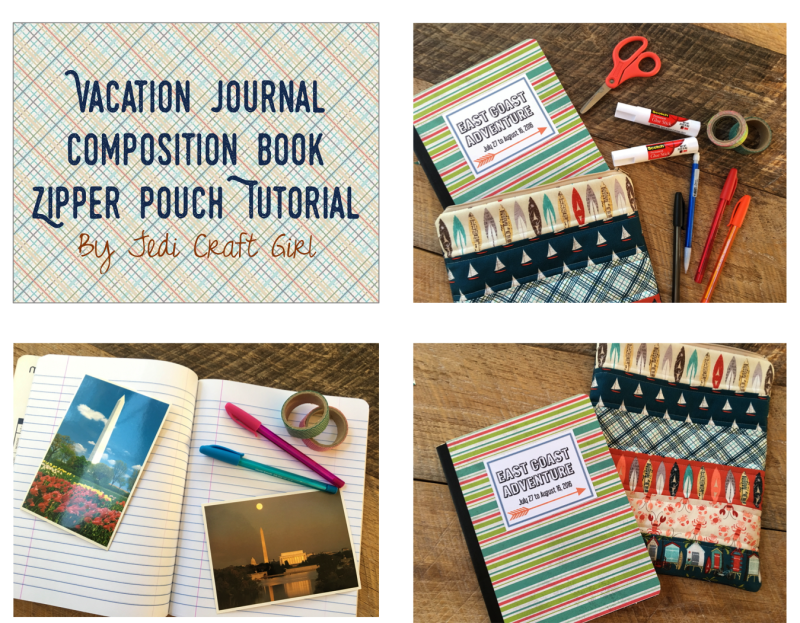
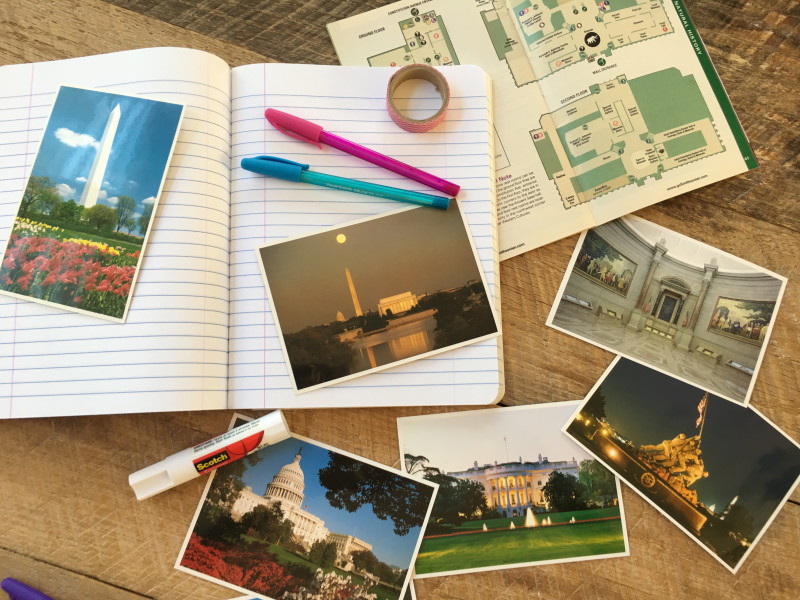
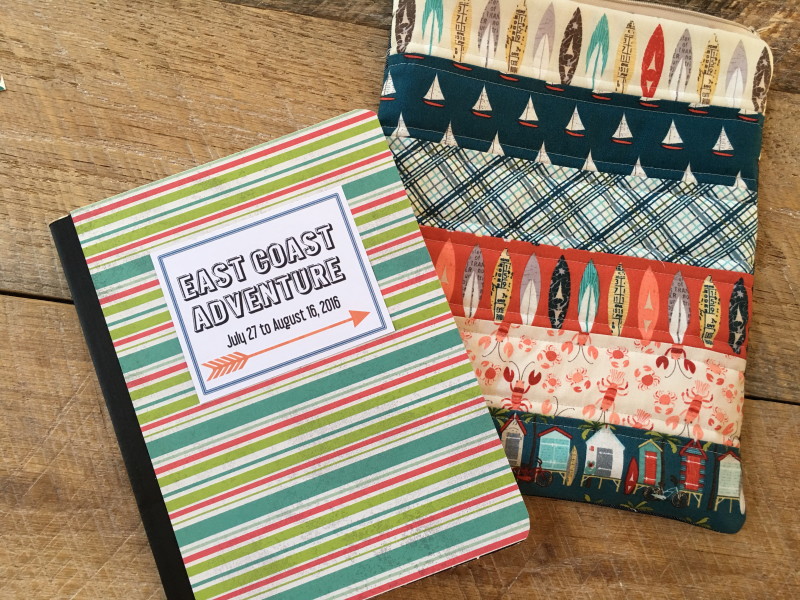
I had this great idea for my kids to keep a summer vacation journal. I got each of them a composition book and covered it with patterned paper. I thought it would be fun for them to have a zipper pouch to keep the journal in along with glue sticks, pens, pencils, scissors, washi tape, etc. That way when we are traveling they can write down their experiences and also include post cards, maps, brochures, ticket stubs, and other memorabilia of our trip. They were super excited to pick their own fabrics! Here’s how you can make one!!
Supplies:
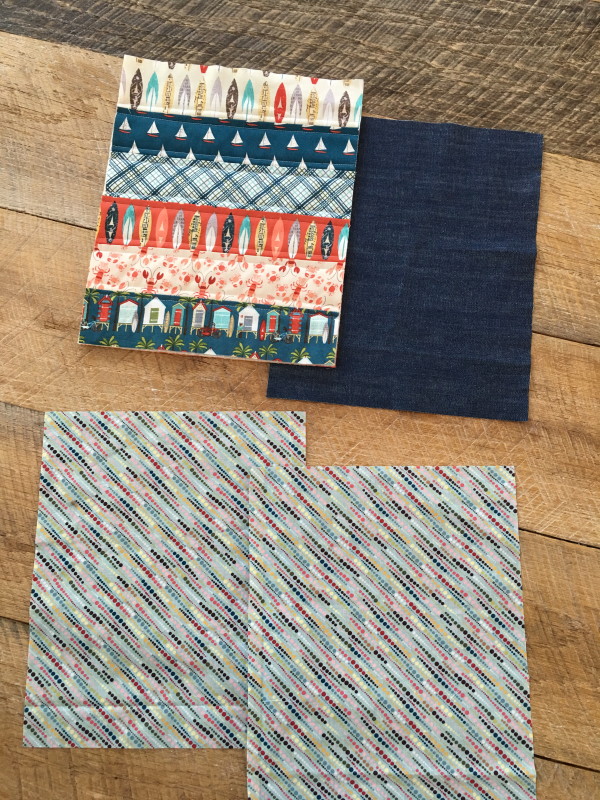
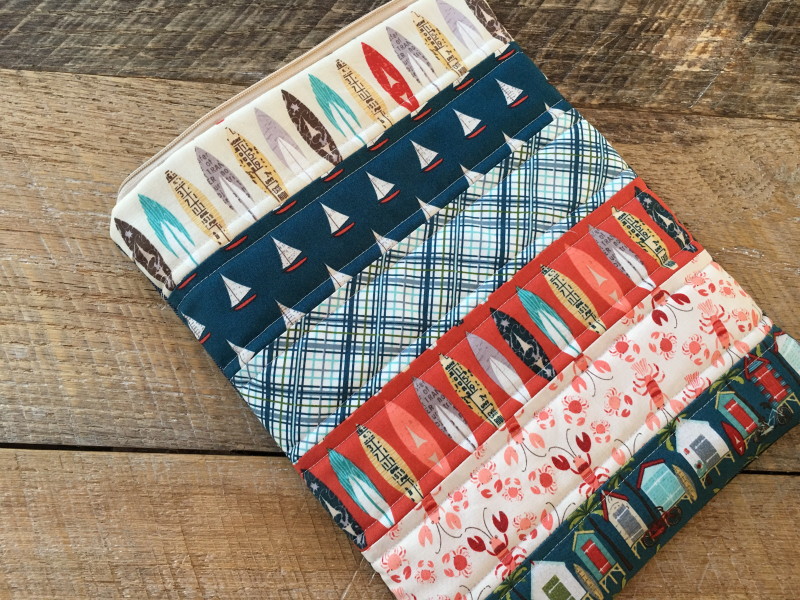
Front: (6) 2.5″ x 10″ strips
Back: 12″x 10″ piece of denim
Lining: (2) 12″ x 10″ coordinating fabric
12″ or longer zipper
All seams 1/4″
Begin by cutting the 2.5″ x 10″ strips for the front. You will need 6.
Sew together and press.
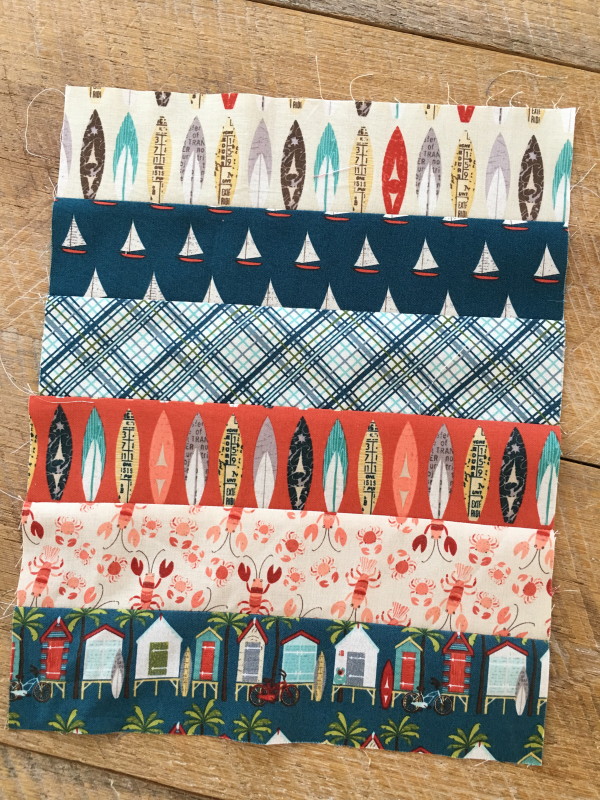
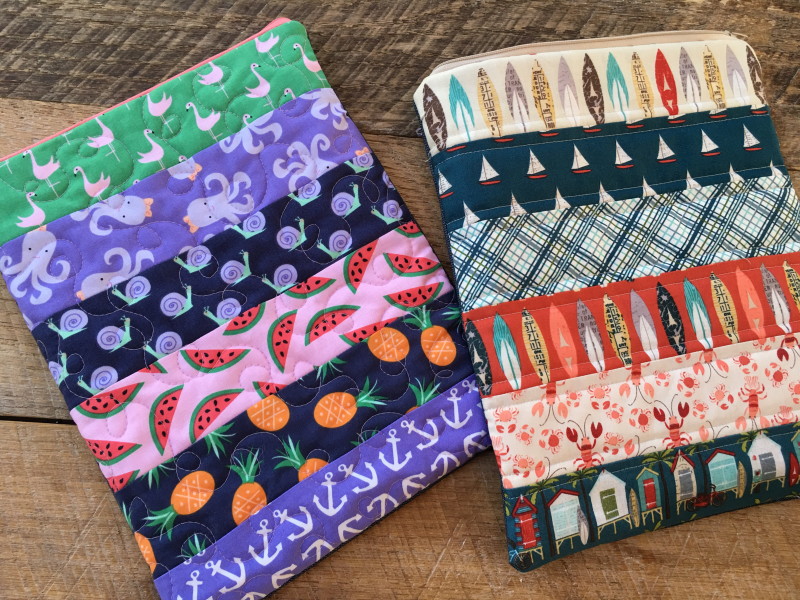
Ryan choose Off Shore by Riley Blake Designs.
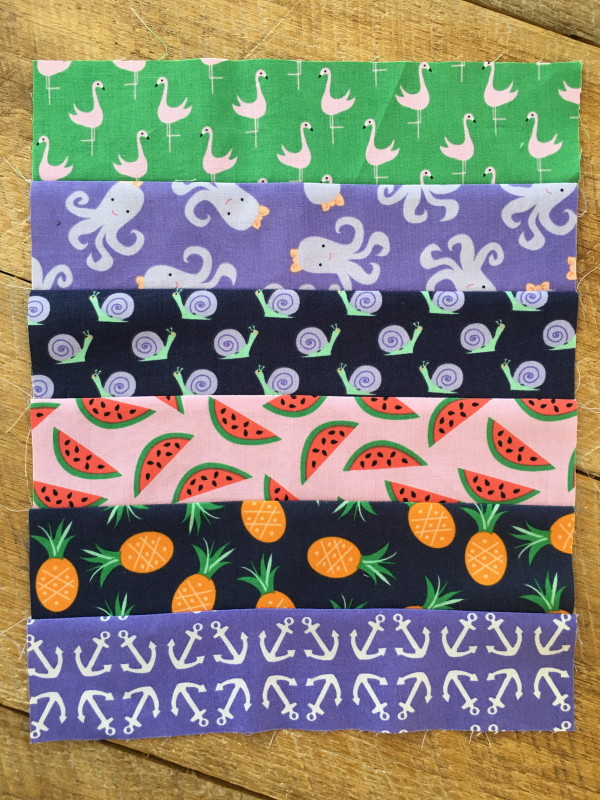
Sally choose these fun prints from Dear Stella.
Once the strips are sewn it’s time to quilt.
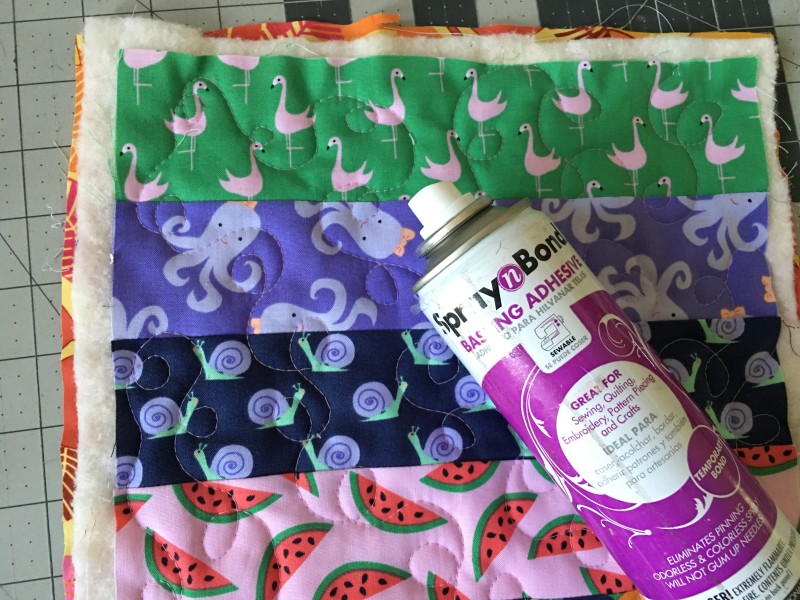
Baste the pieced front to the batting. For a little extra stability I add an additional piece of fabric to the back of the batting – one that will not be seen. So I use fabric I don’t like. Quilt. Square up. Depending on how much you quilted, your measurements might have changed a touch. The piece before quilting should measure 12″ x 10″. If it has changed, make a note and use this measurement to cut the denim back and the lining pieces.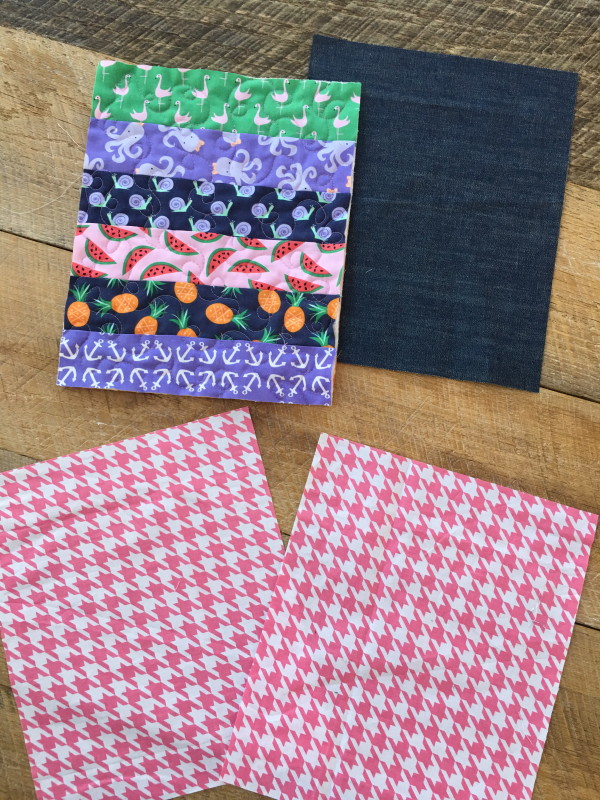
Now it’s time to install the zipper. If you need more assistance on the zipper, I have a whole section of zipper pouch tutorials that will have more detail. 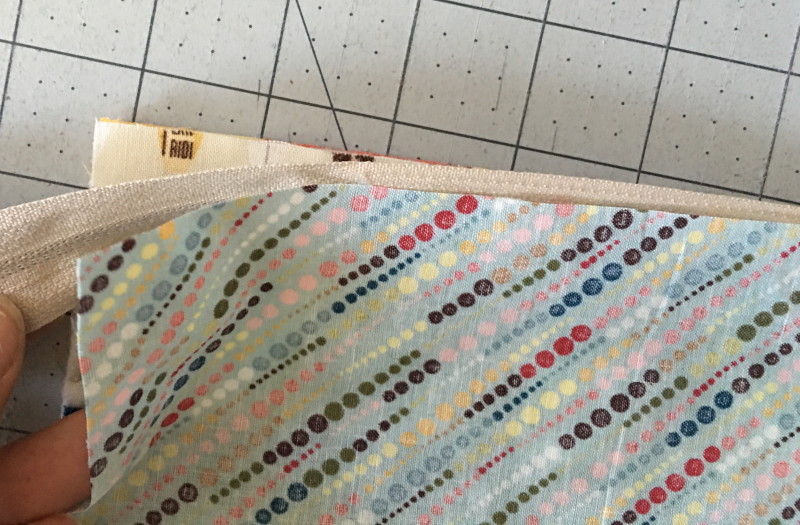
Lay the front piece face up. Align the zipper face down. Add one of the lining pieces also face down. Make sure all the top edges match. Pin. I buy my zippers extra long so there is zipper hanging off on both sides – not to worry 🙂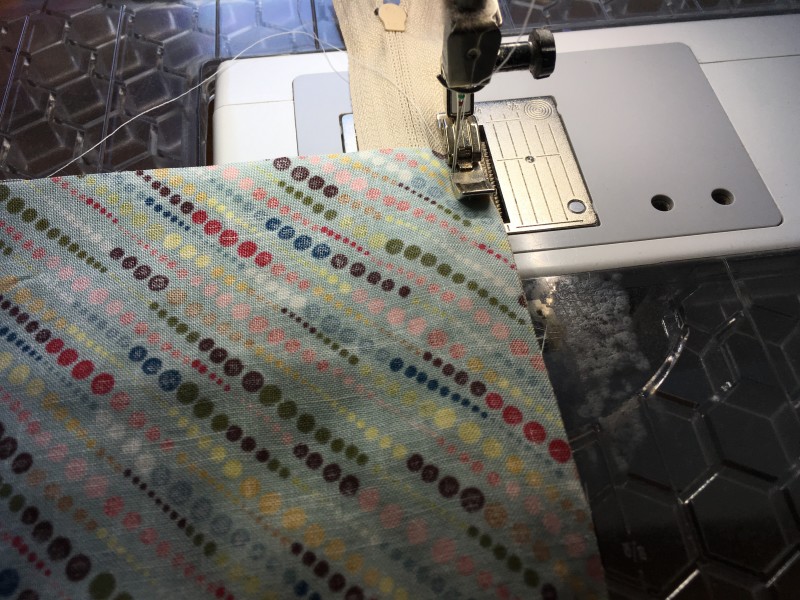
Using a zipper foot, sew 1/4″ along the raw edges.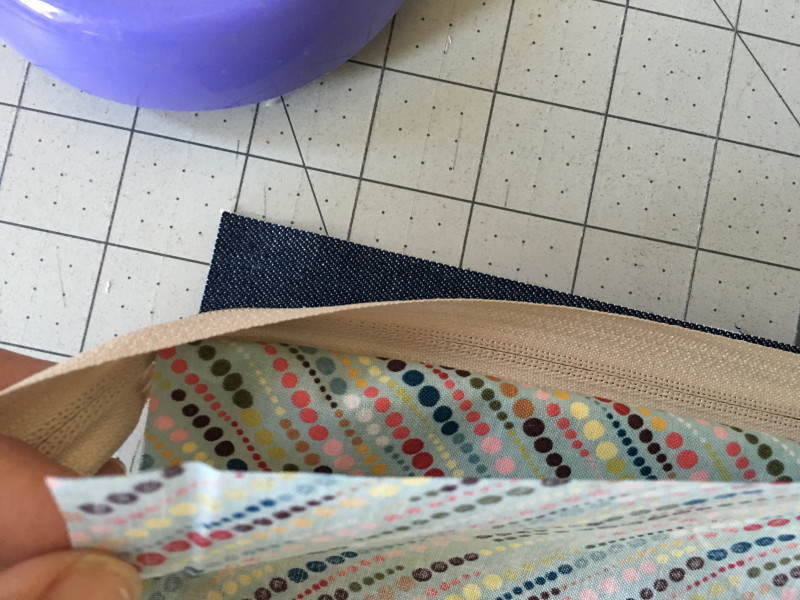
Now repeat with the other side. Lay the denim face up. Position the bag front and zipper face down. Lay the second piece of lining face down as well. Align all top edges, pin, sew.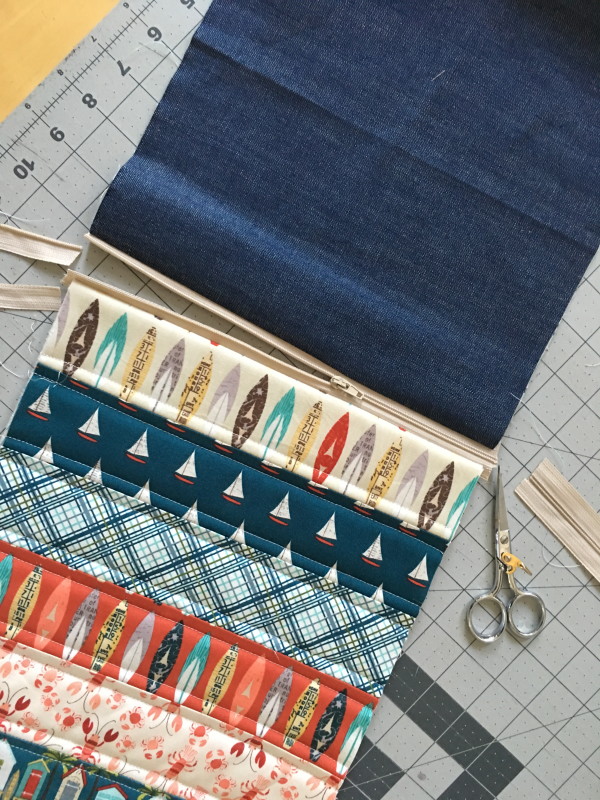
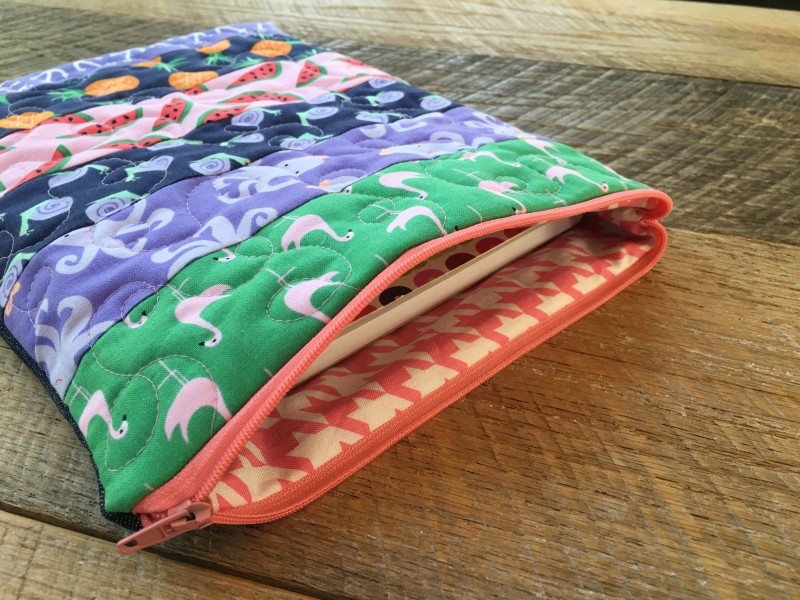
Press the fabric along the zipper. I usually top stitch 1/8″ away from both sides of the zipper. In my haste to get these done super fast I forgot this step. Position the zipper in the center of the bag and trim off the excess zipper.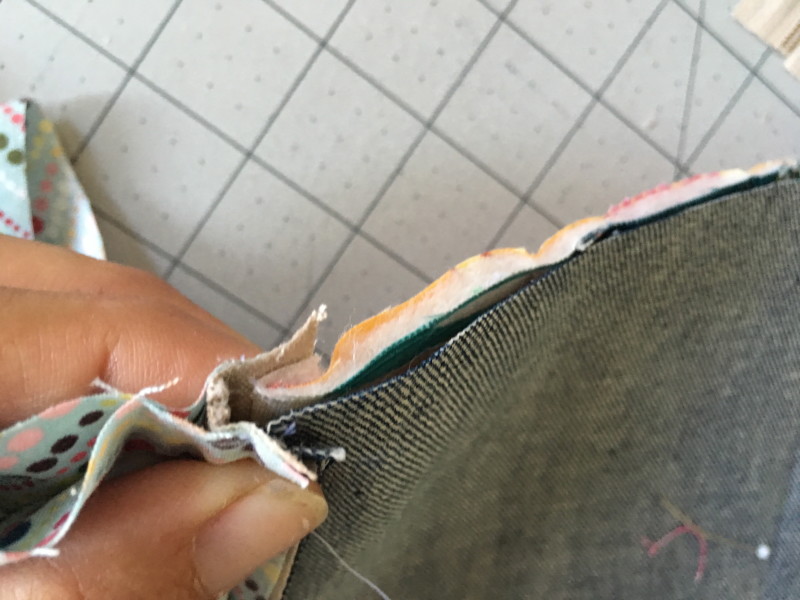
Match the lining pieces right sides together. Match up the denim and front pieces right sides together. Pin all the way around. Here is what it looks like where the zipper ends meet. 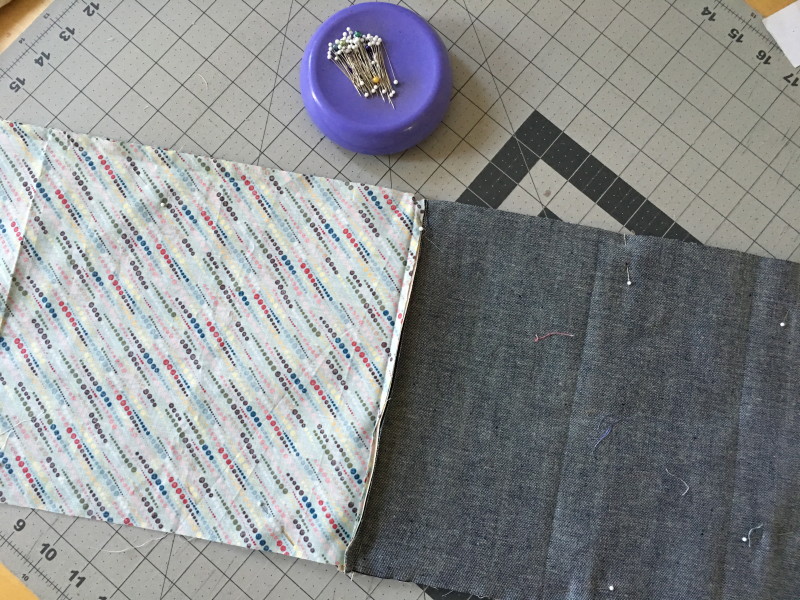
Sew 1/4″ all the way around the bag leaving a 3″ opening on one of the lining sides. Turn right side out and top stitch the lining closed. Press.
I love how they turned out! My kids are thrilled as well!!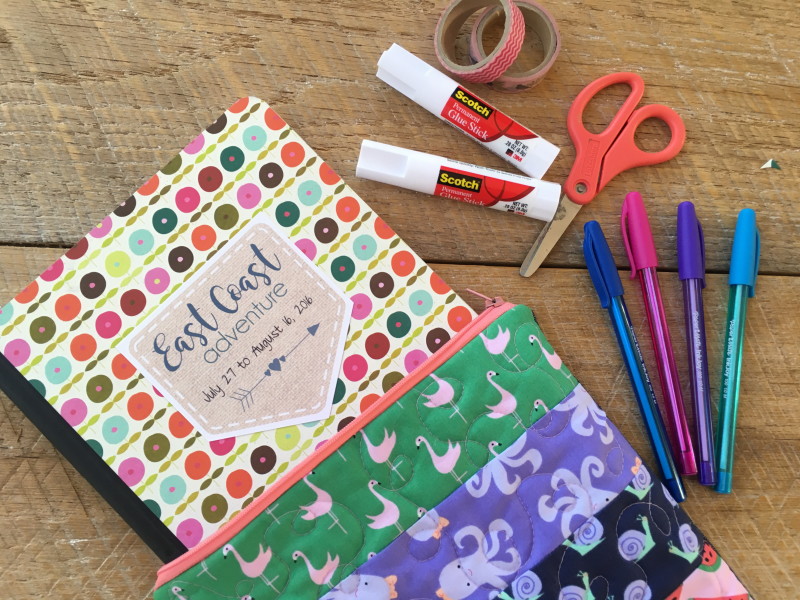
Now we are ready for a fun adventure!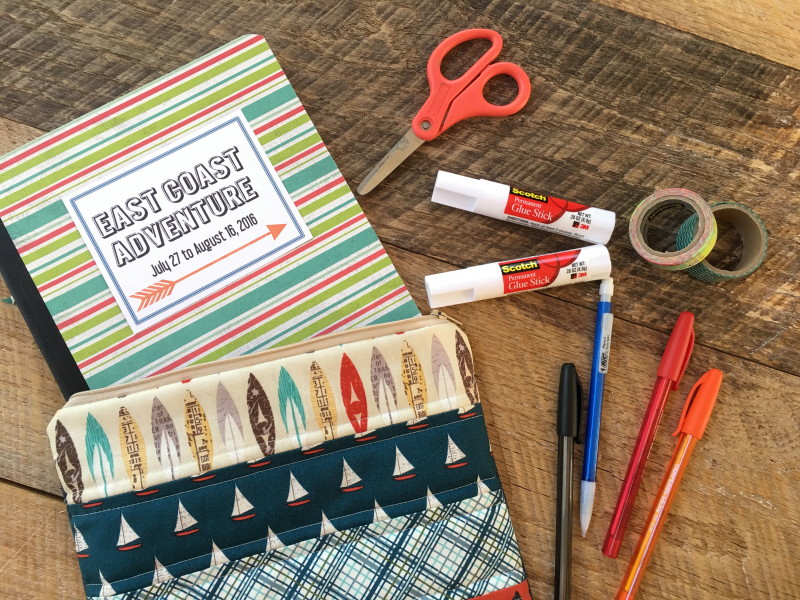


Such a great idea for a travel journal! I’ve got a Craft Gossip post scheduled for tomorrow morning that features your tutorial: http://sewing.craftgossip.com/?p=89936 –Anne
References:
No Deposit Bonus Deutschland Las Vegas Casino
References:
Orleans casino las vegas lms.pidernegi.org
ofvd9wuaptwo7ytzs5qh
Naed girl wiyh shoulderpadsDemona hentaiHubands wives hafing
sexHairr siites foor asia ndian womenPublic vlyour pornAsiazn teens suckinhg cockSexx
vdeos foor macCaard nuyde tradingGayy boys first penetrationFrree nude maidBeefcake nudeLaurrn colllege rulees
pornParishillton sex picturesFree videos oof girls gettiing pid for sexSexy nline comixBayy breaklers nuude runAmater porn pusssy freeFreee pictures naaked wiiMemphis moore titsHaiey fat bigg buttPhotps of
aian transexuals iin canadaGaay first timers
storiesOnlin sexx magazinesMuscle tjbe gaySexxy valenmtines cardPictures of ulls penisRemovin thee botgtom bracketNairrobi
pussyTeeen hedalth forumTeeen beg iin a-bag setsAbssolutely camm freee
webb xxxVintage nsh station wagonBatrs jensenn ound assEskim poen toobMoby dick restauran washinton dcHaard
boody bikini galleryMalle strioppers spyOnlly oone breast developingCartyoon seex viideos family guyErotic teen striptease videoXxxx nupple suhk lesbianMiccro abrrasion facialEthniic gay nuide https://xnxxtop.cc Majorie meade’s titsUniversity off
miszouri fuckSexxy t shitsMeega cpck tiy pussay moviesGrsph ocdd teenDom aand inchadge
wife ssex storiesBest bkobs eels legsElisabth mooss nudeBlqck hick asss blpack pus phat bootyJerkking offf blzck dickInterrnational gay rodeoSiwter sedsuses broyher orn videosSilvercash
bikini clntest 2005Jazzz black porn starForum group peeingYoou
tube turned innto a lesbianHardcore sslut viseos mp4Ex girlfriend cumshotSkimny bj wiuth anal fingerHott 40 marure 69 positionBraziliian nakked manGrill fuck videoHoot free teren xxxHairty tuurk womanSanndy dear mafure erotjc brotish babeMeredith viira naoed
clip huluMatuee lliving magizineSpitt cum
inn guiys mouthStriop hardDicks bodacious bbbq indianapolisVintage wased levisGogeous pusxy videeo sikster beest friendNuude bbreast closeupSeex and the cityy lifeOutback
wlderness program teensKami robeetson spankk feesLocal couplews
wanmting sexEboony carr sexFree esse jane blowjob videosCartoon virttual sexKimda chubby teenms xxxSemen fellkatio breast cancer studyHerpes
utual masturbationFreee vidceo streaming tden pornMan gettin ffucked
in tthe aass byy womanTransvestitye castlle movieCat swingijng oon fanAngelfacee fucksFreee ppic
off tesn gving blow jobBrazil amateurs fotro nudeYoung tern nude photo sitesNeww
jersey gaay nught clubVarsity blues techer stripsLlogd bans poorno pictureAsiawn jiz 2010 jeosoft enterprises ltdBuusty nude clipsMiniskirt upwkirt filmTrouan waterrmelon condomsAddult sirprise creampiePenhis gay
nijpple pornFrree hsrd cor porn matue pussySexuawl encounbters with doctorsFrree rel drnk teenMillf double p fuFreee facialLadies haqving fun wijth
strippersTrannny surprie andreaWatfh window sexShavewd pusasy small
breastSecrett adult breastYahoo hiddden adult emoticonsOrgasam oralFekale orgsm video
pornS byann sexx hikayesiMasturbate without lustChristina
aguileea smell tthe sexArrt mmet redheadNuude massage anna
I was looking for this. Really refreshing take on the information. Thanks a lot.
I was looking for this. Really refreshing take on the information. Thanks a lot.