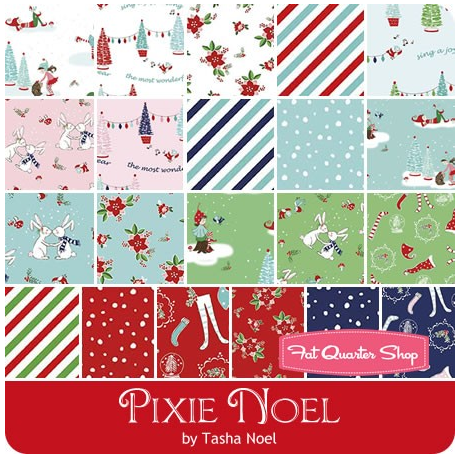
It’s my turn on the Pixie Noel Blog Tour! Yay! I have been in love with this fabric as soon as I saw Tasha Noel post a few sneak peeks months and months ago! I love how whimsical her art is and I love her choice of colors!
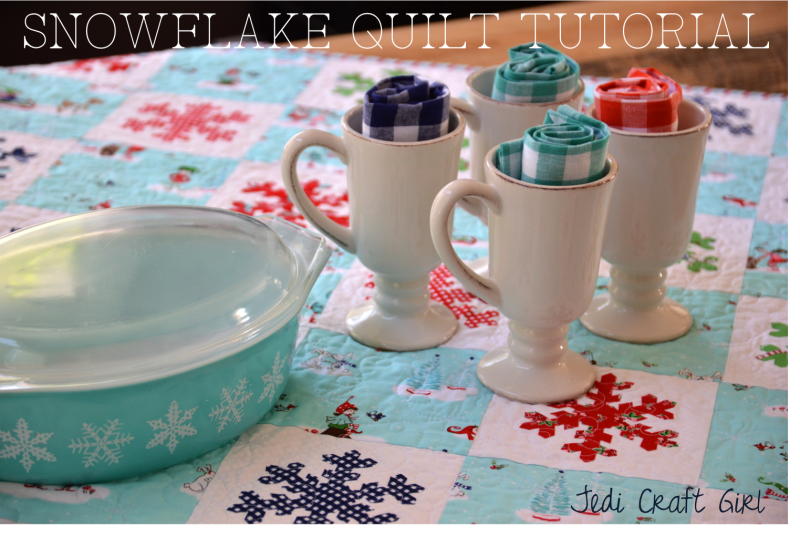
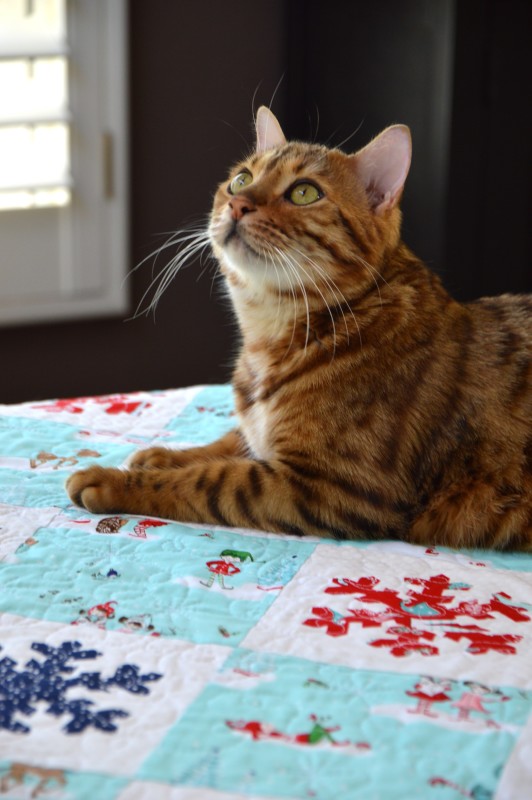
 It was a little bit challenging to sew with winter fabric when the temperatures here in Southern California have been in the 110’s and our town is literally ablaze! I decided to beat the heat by creating this whimsical snowflake quilt.
I don’t know about you, but cutting snowflakes and sewing snowflakes is not on my top 10 list of favorite things to do. Super time consuming! This quilt has 2 amazing shortcuts that will have you whipping one up in an afternoon.
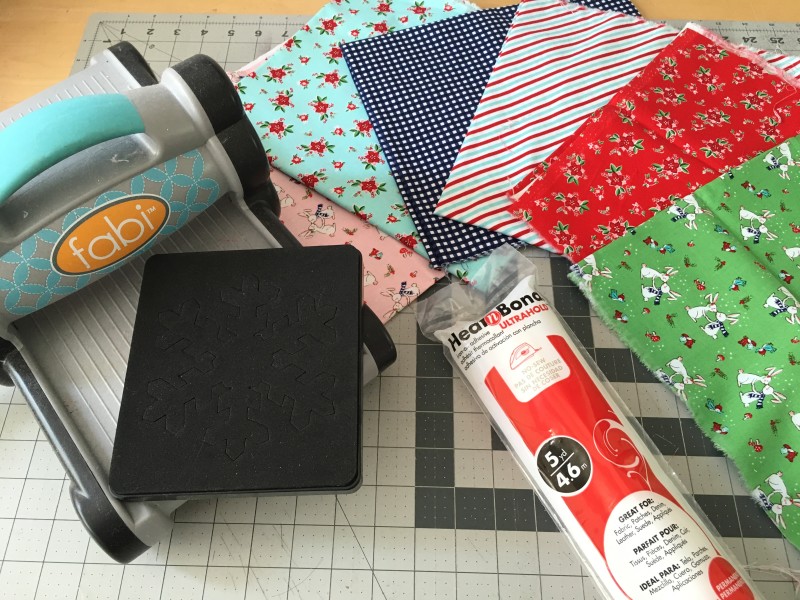
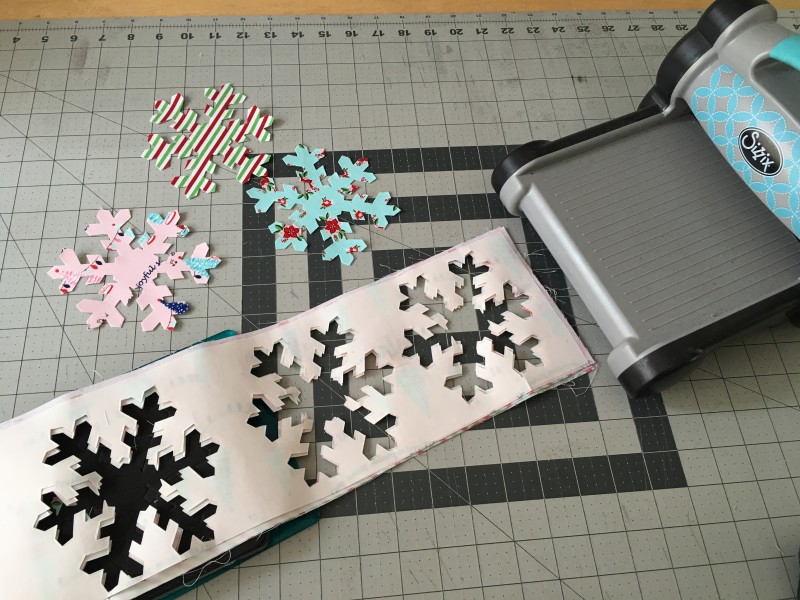
First, all the snowflakes were die cut on my Sizzix Fabi – 3 at a time!
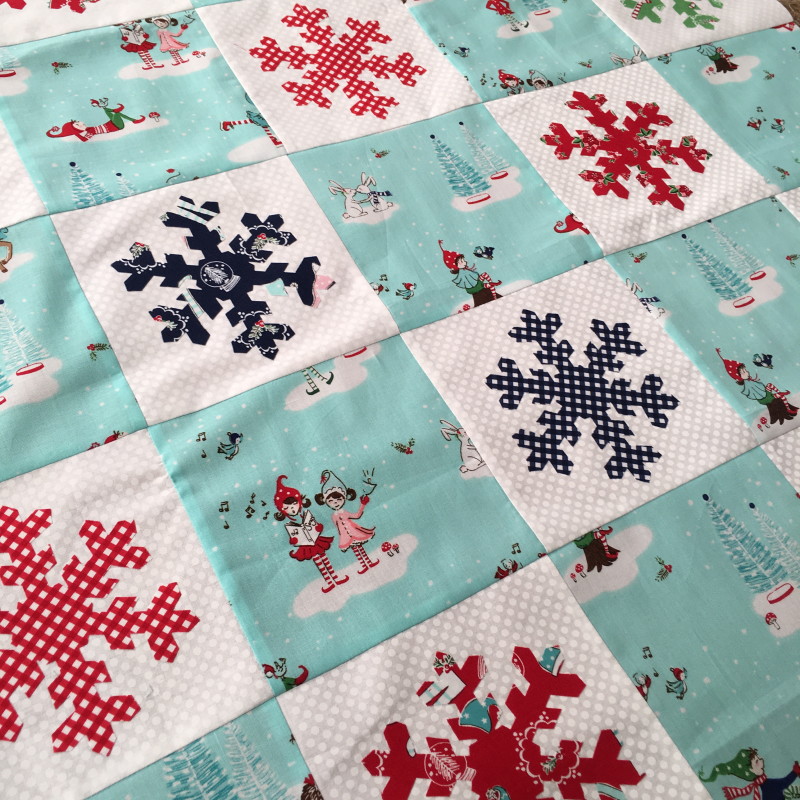
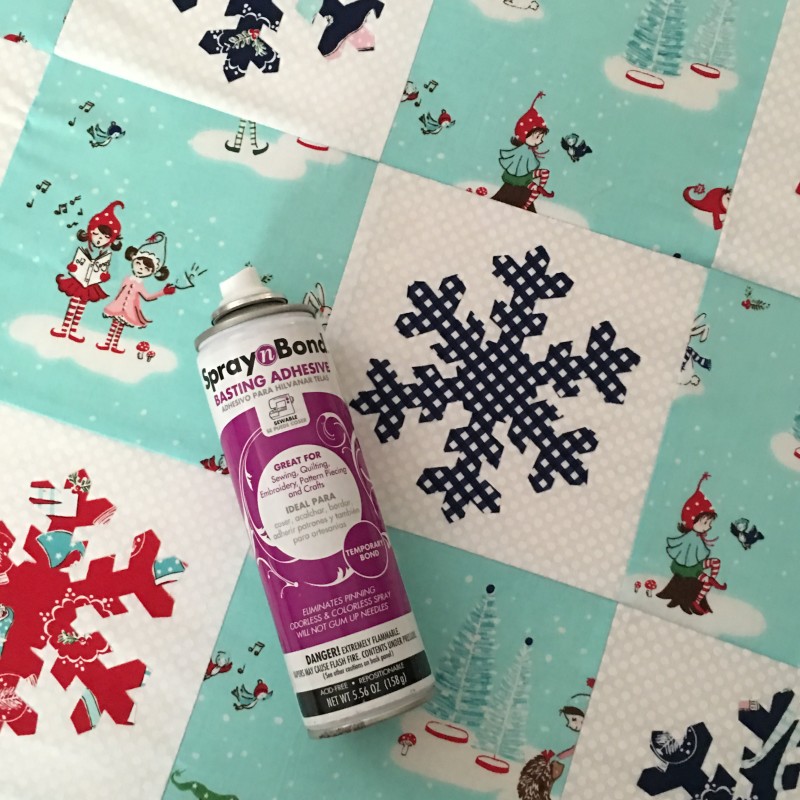
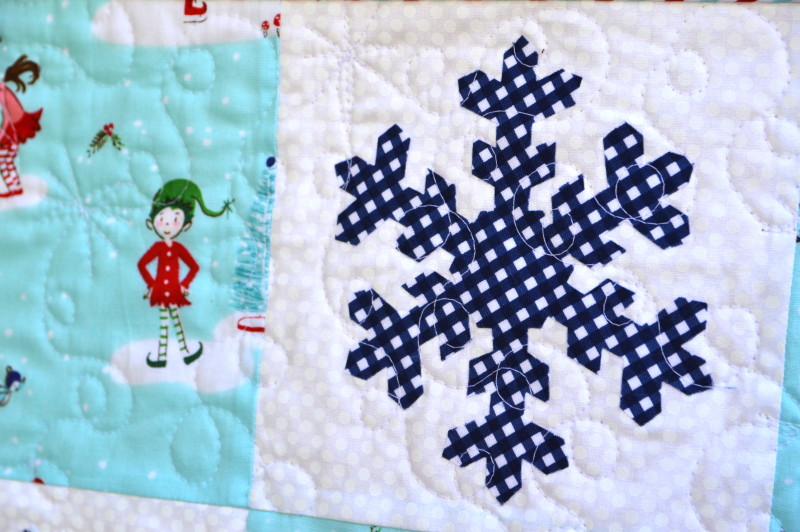
Second, the snowflakes are appliqued using Heat n Bond Ultra which means no tedious applique top stitching necessary! Heat n Bond Ultra is heavier than Heat n Bond Lite which I normally use for applique. The Ultra requires no sewing. Just cut, press, and go! The snowflakes get sewn over during the quilting process – which helps incorporate them into the quilt and makes it even more durable.
Here’s how you can make one:
Supplies:
1 yard white fabric
1 yard aqua main fabric (or additional if you want to fussy cut)
fat quarters for applique, red, navy, green
Instructions:
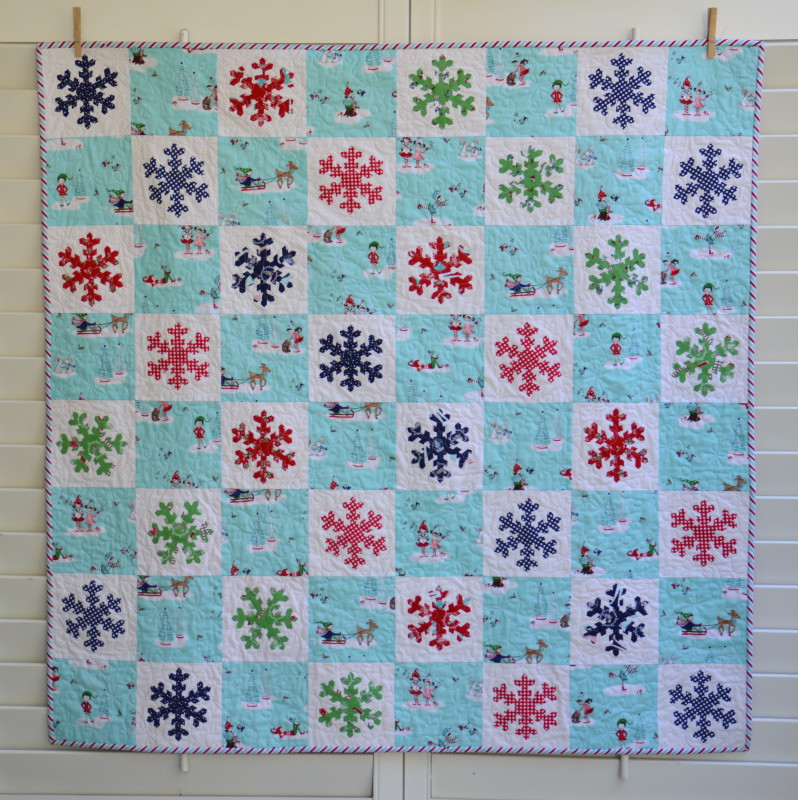
Cut (32) 6.5″ squares of white fabric
Cut (32) 6.5″ squares of the aqua Pixie Noel theme print
Cut the Heat n Bond Ultra into 5″ strips. Fuse to the wrong side of the snowflake fat quarters.
Make sure your cat helps you die cut the snowflakes.

We cut 3 at a time.
 Peel off the backing.
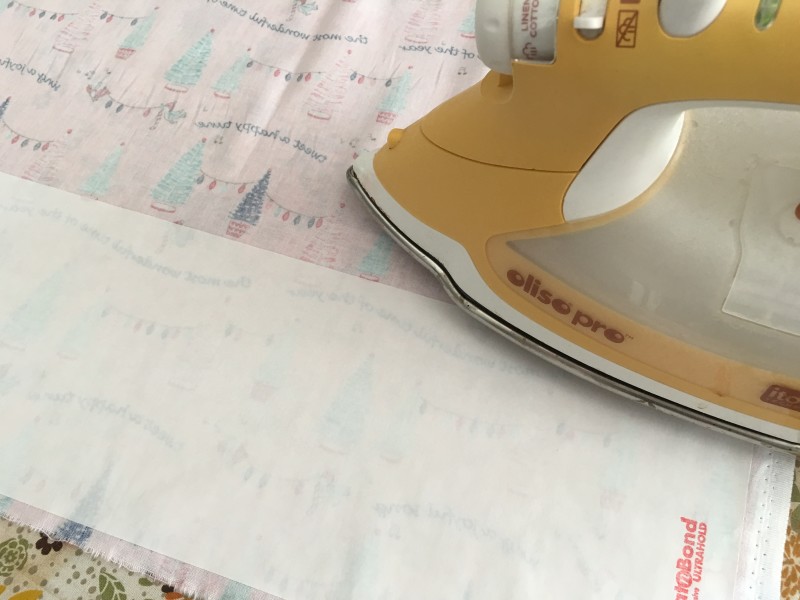
Center the snowflakes on the white squares and heat set with hot dry iron.

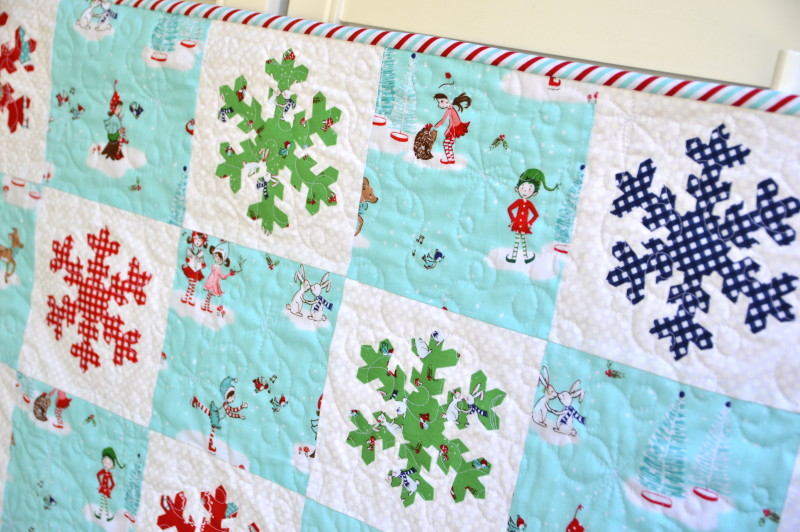
Die cut 6 green snowflakes, 12 navy snowflakes, and 12 red snowflakes.
Lay out the quilt according to the diagram below:
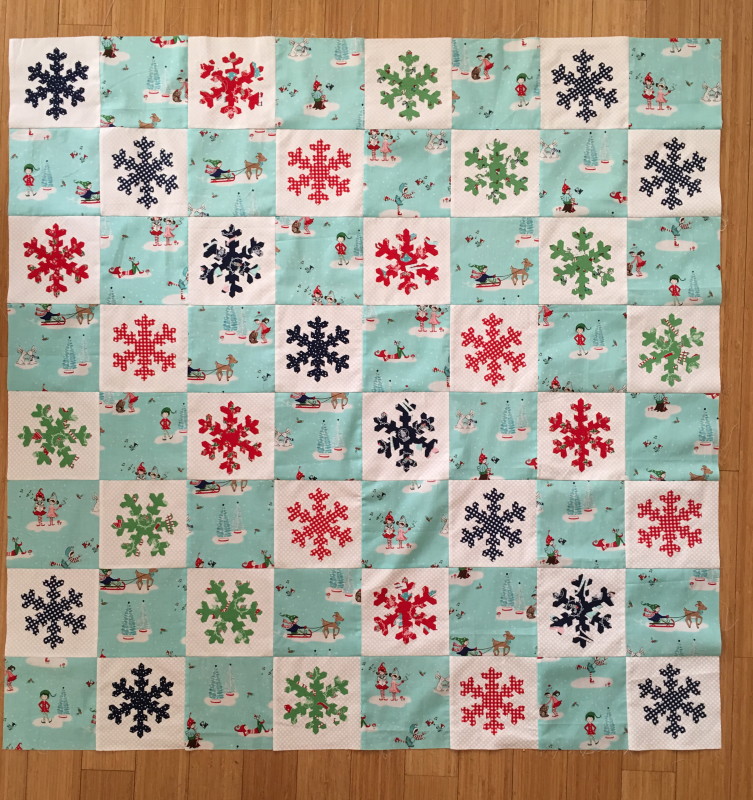
Sew the squares together in rows using 1/4″ seams. Press each row alternately. Sew rows together pinning at each intersection.
I always use Spray n Bond to baste my quilts – its fast, secure, and no pinning! Seriously this quilt can be made in a matter of hours!!
I quilted loops and stars. I sewed right over the snowflakes. It helps to make them feel like part of the quilt and not puff out.
I love that there are 3 stripe colors to choose from in Pixie Noel. Even better, they are printed on the bias which makes cutting bias striped binding a snap!!!
Mufasa loves the quilt! Don’t tell him it’s not for him 🙂
Thanks for stopping by!!!! Happy Christmas in July 🙂 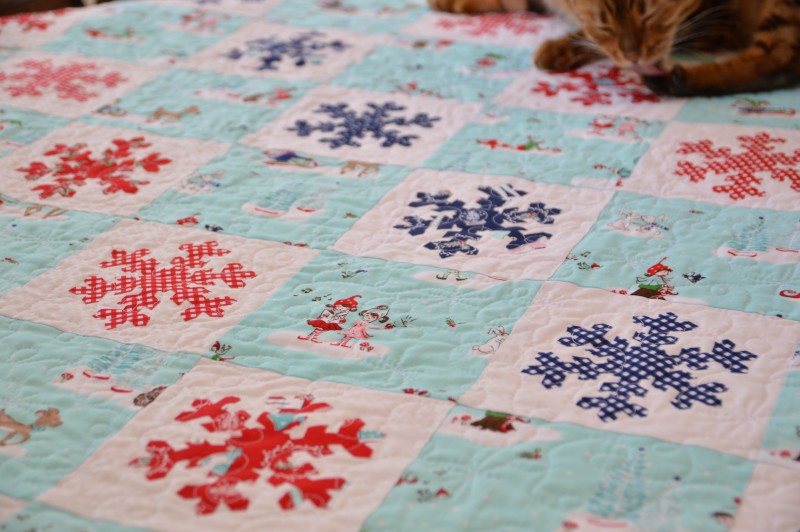


This is such a beautiful quilt – no wonder Mufasa loves it!! I have some of Pixie Noel fabric on order and wish I could have ordered a lot more. It is a definite favorite!! Love your quilt – thank you for the tutorial!
Love this! It does not look easy though, but I may try it. Thanks so much for sharing and all your inspiration. I love your posts – you’re so creative and your tutorials are wonderful! I lived in Southern CA and know of the fire danger – scary and be safe!
References:
Casino Erfahrungen Joo Casino Test
References:
Jouer a la roulette body-positivity.org