
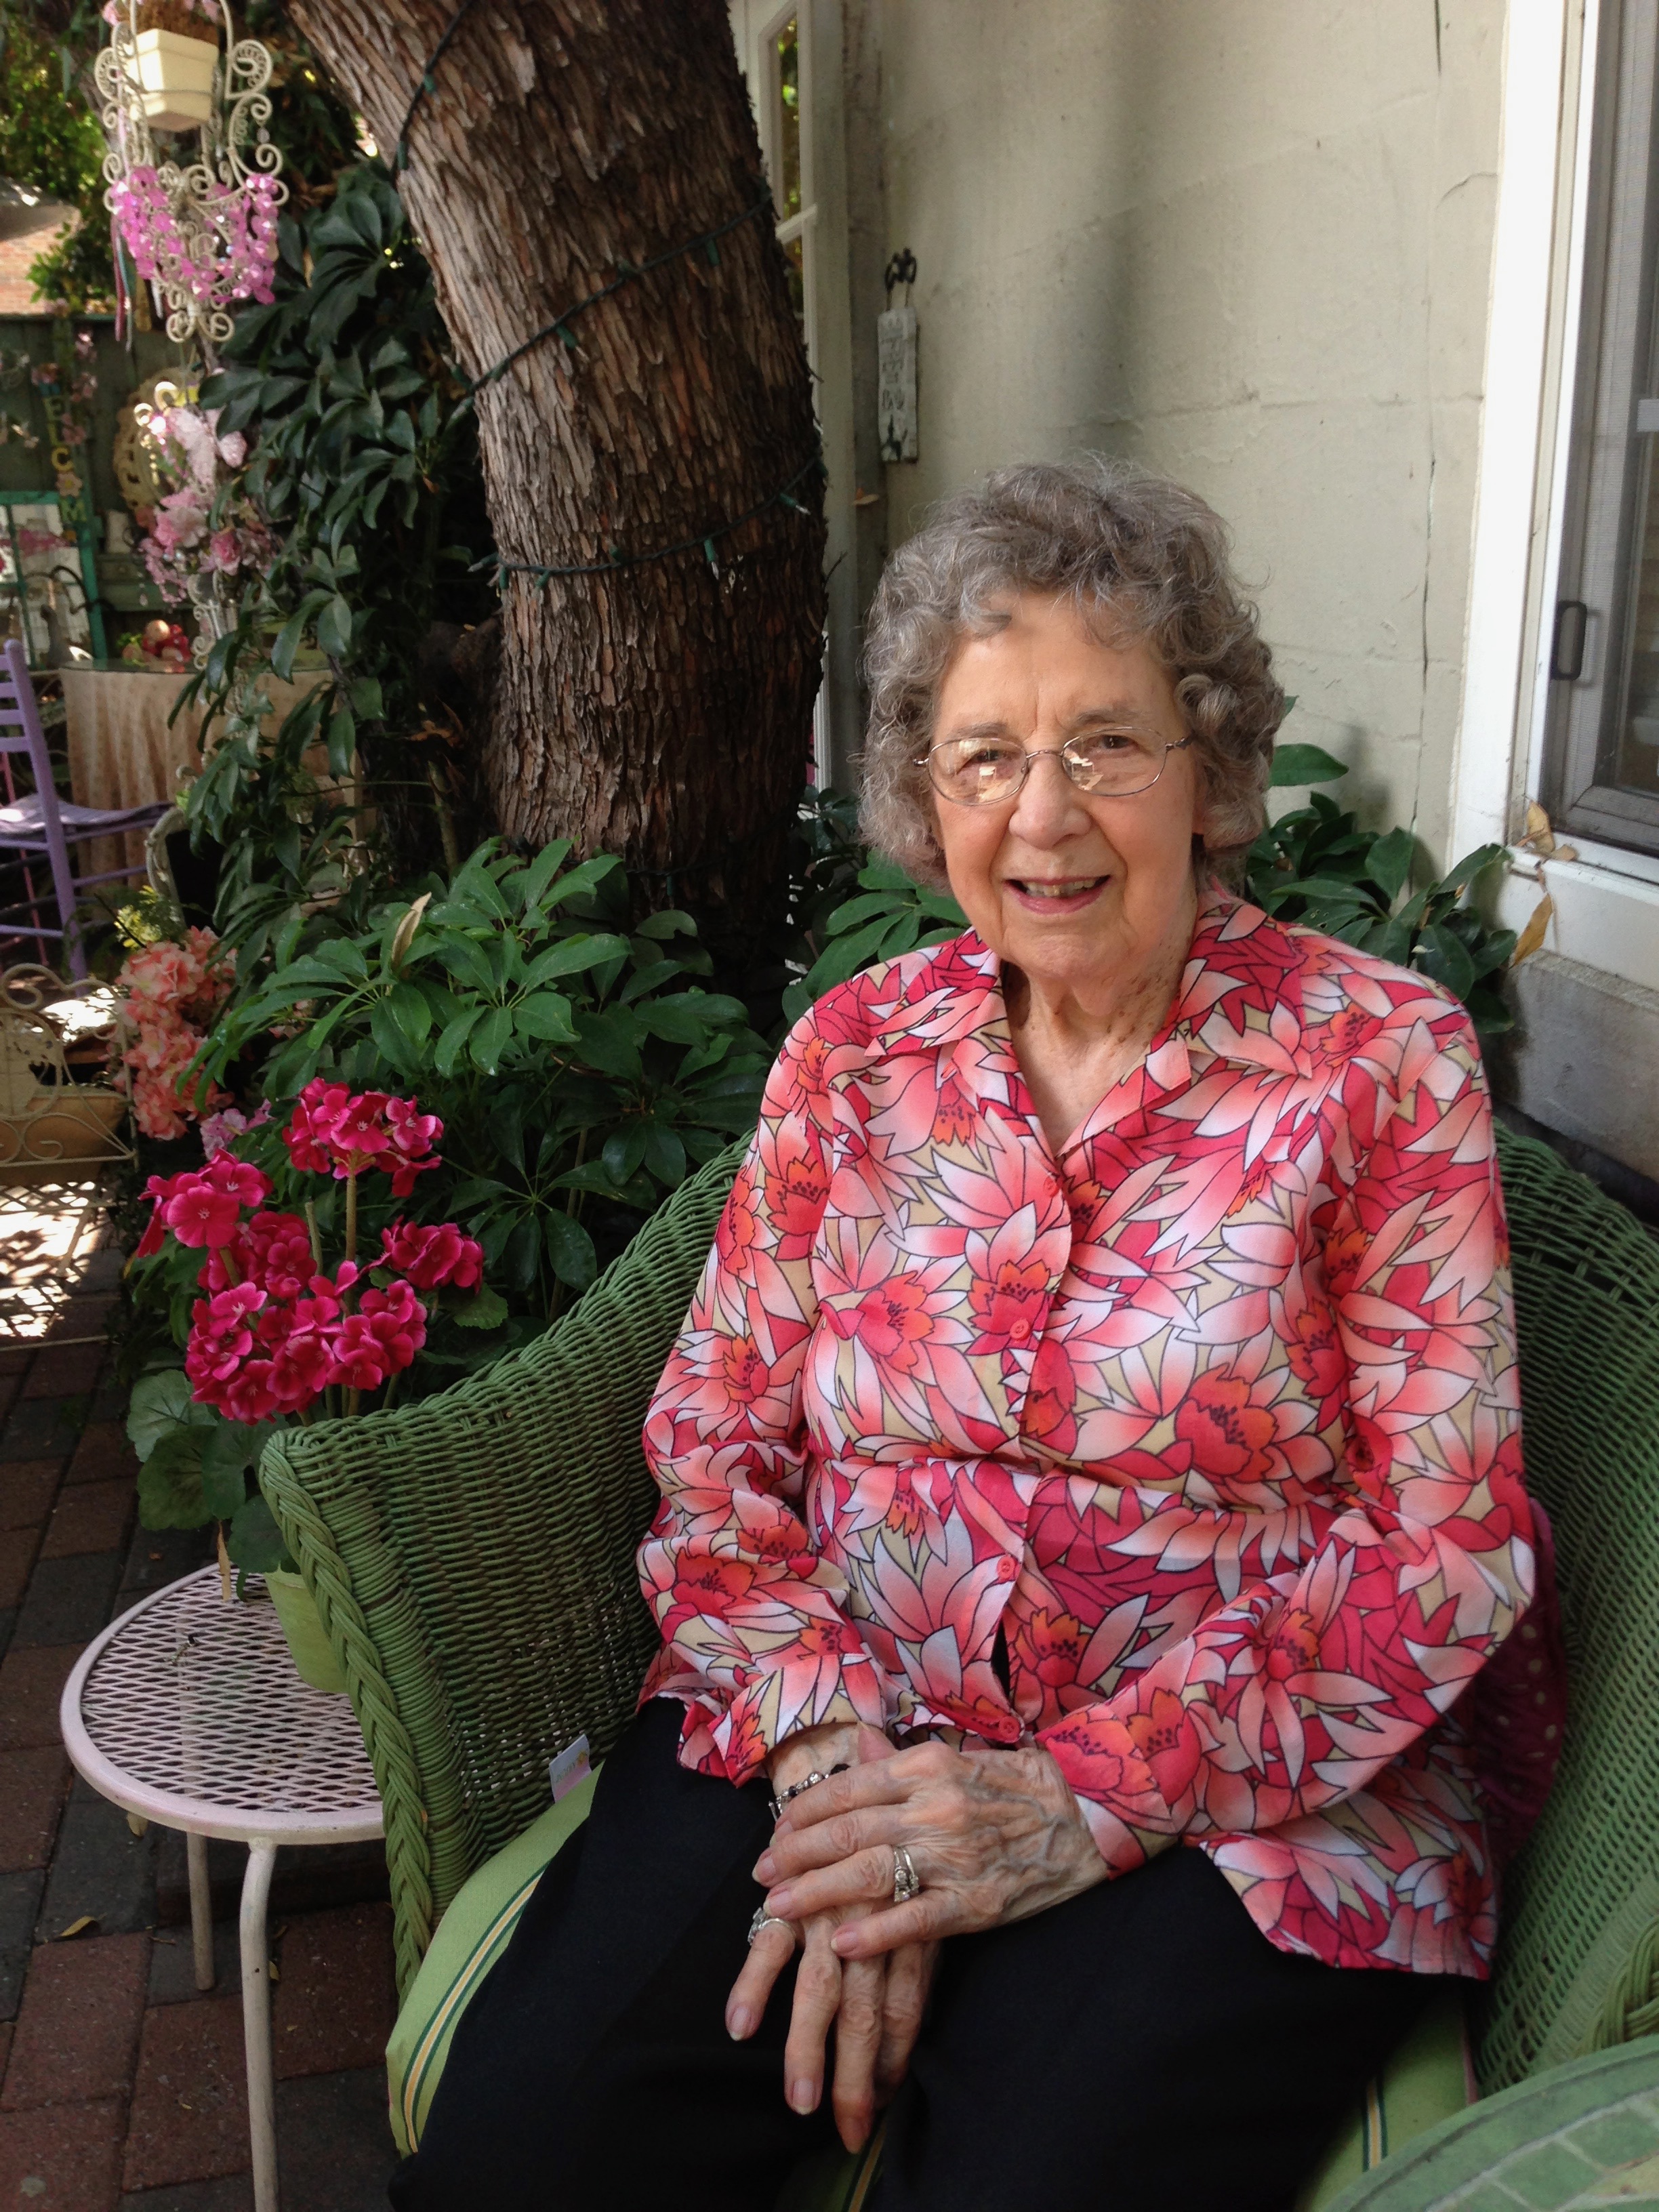
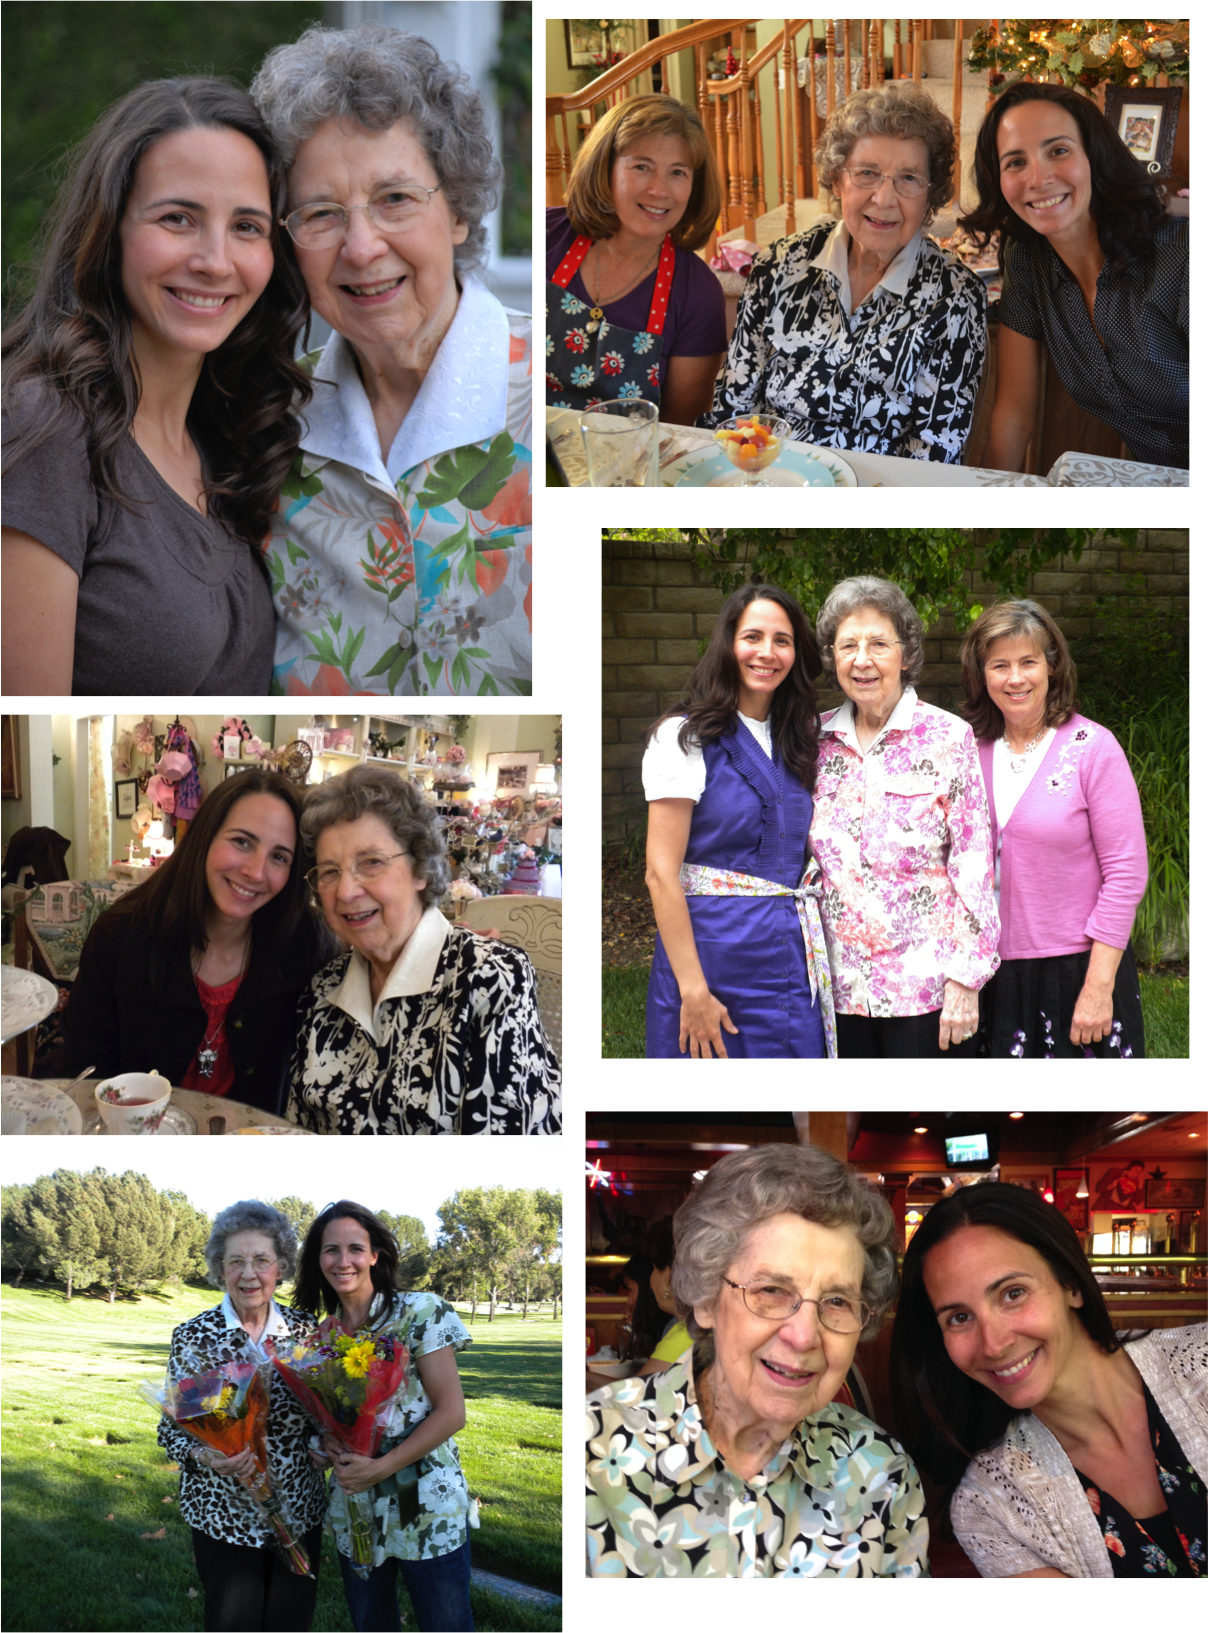
This month our family lost our sweet Nana at age 97.
Nana has been a major part of my life since I was born. She was a woman of faith and love, always caring more for others than herself. She delighted in every day and found joy in the little things.
 We gathered as a family on March 20th, her birthday, to celebrate her life and to say our final goodbyes. She lived an amazing life.
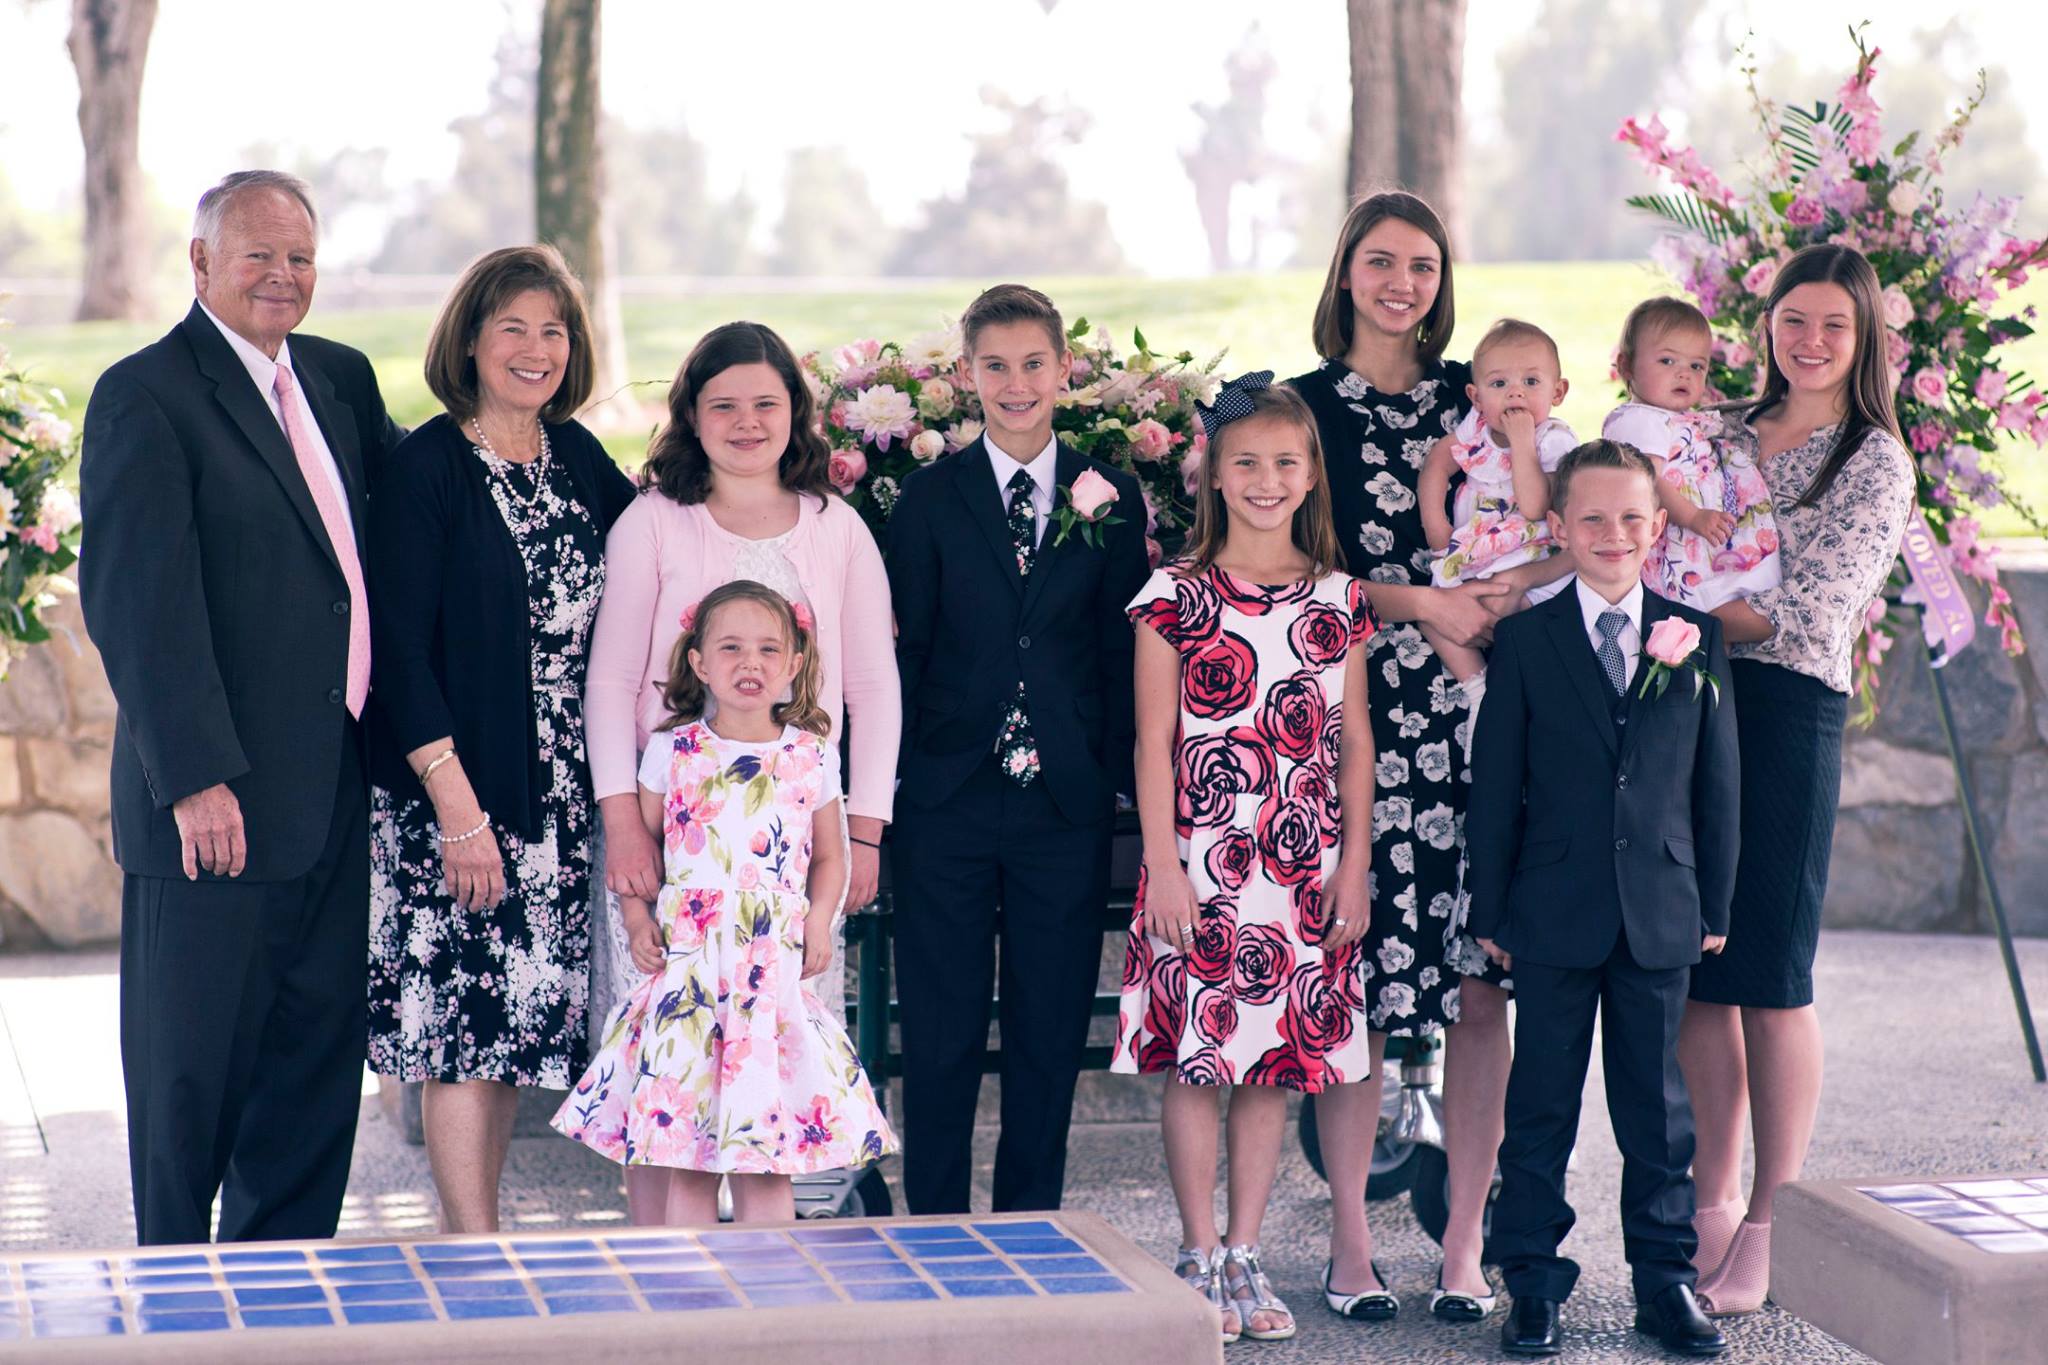
Nana left a wonderful legacy especially to all her great-grandchildren who were blessed to be close to her.
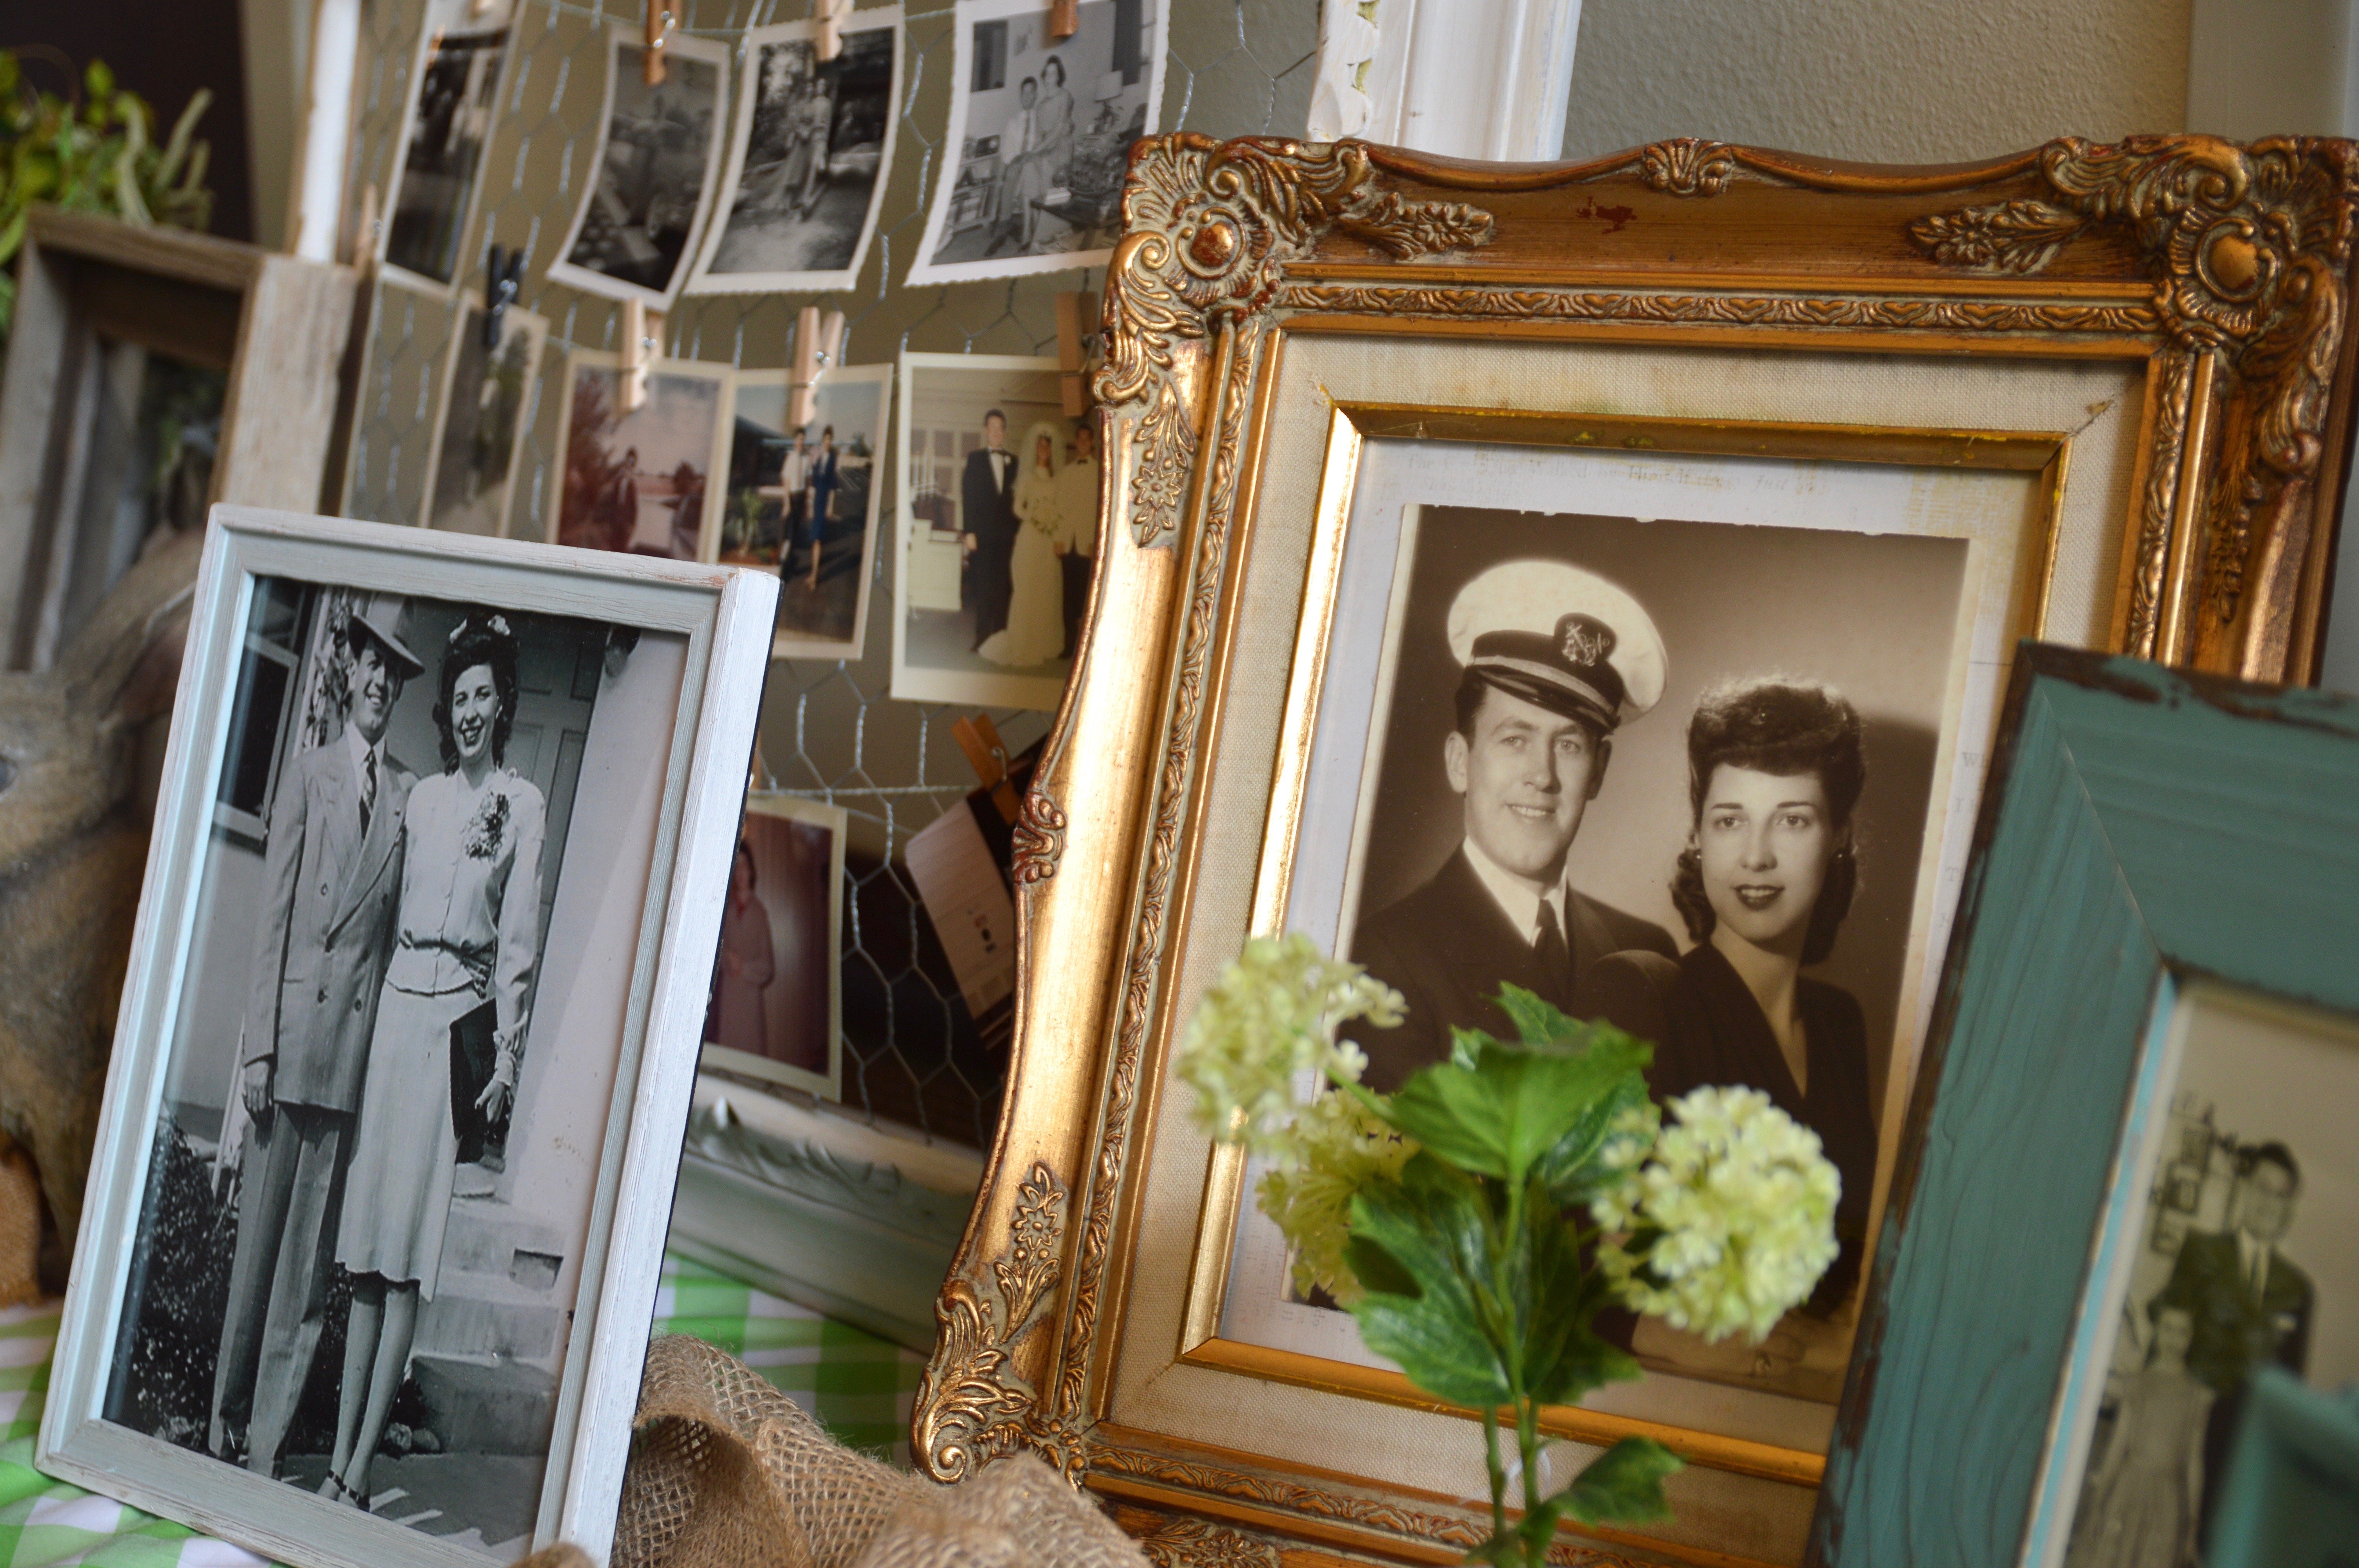
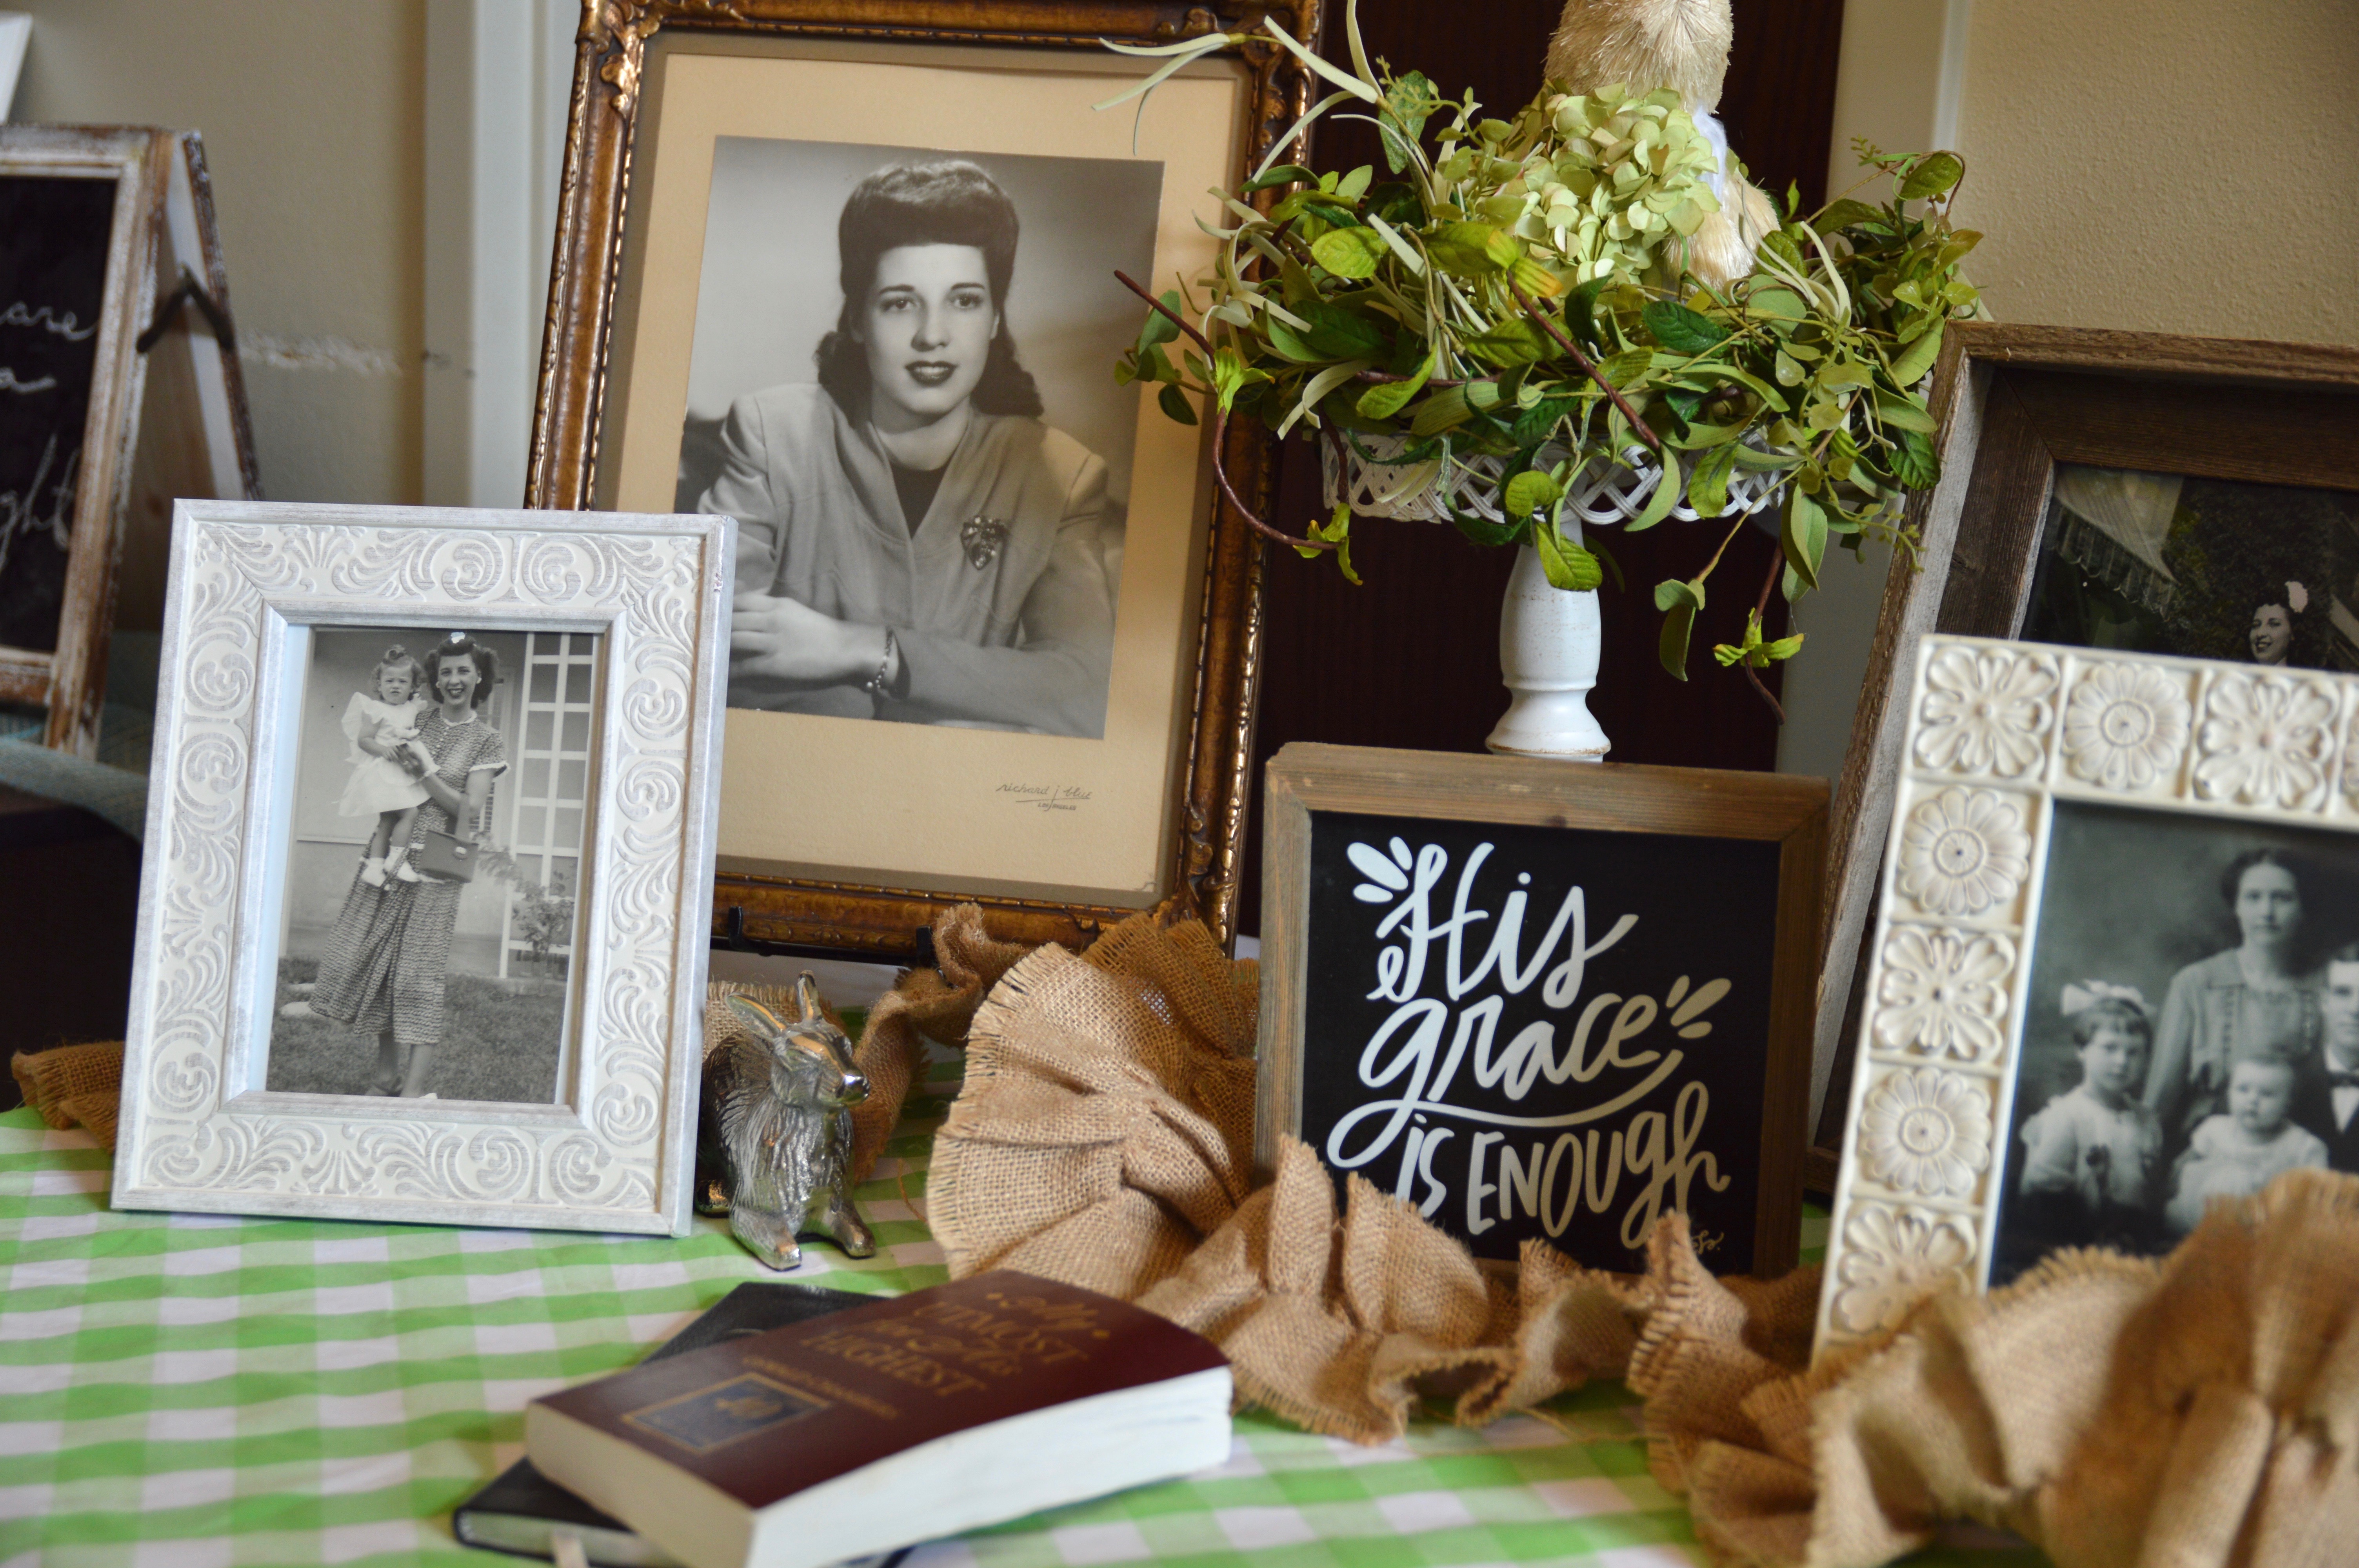
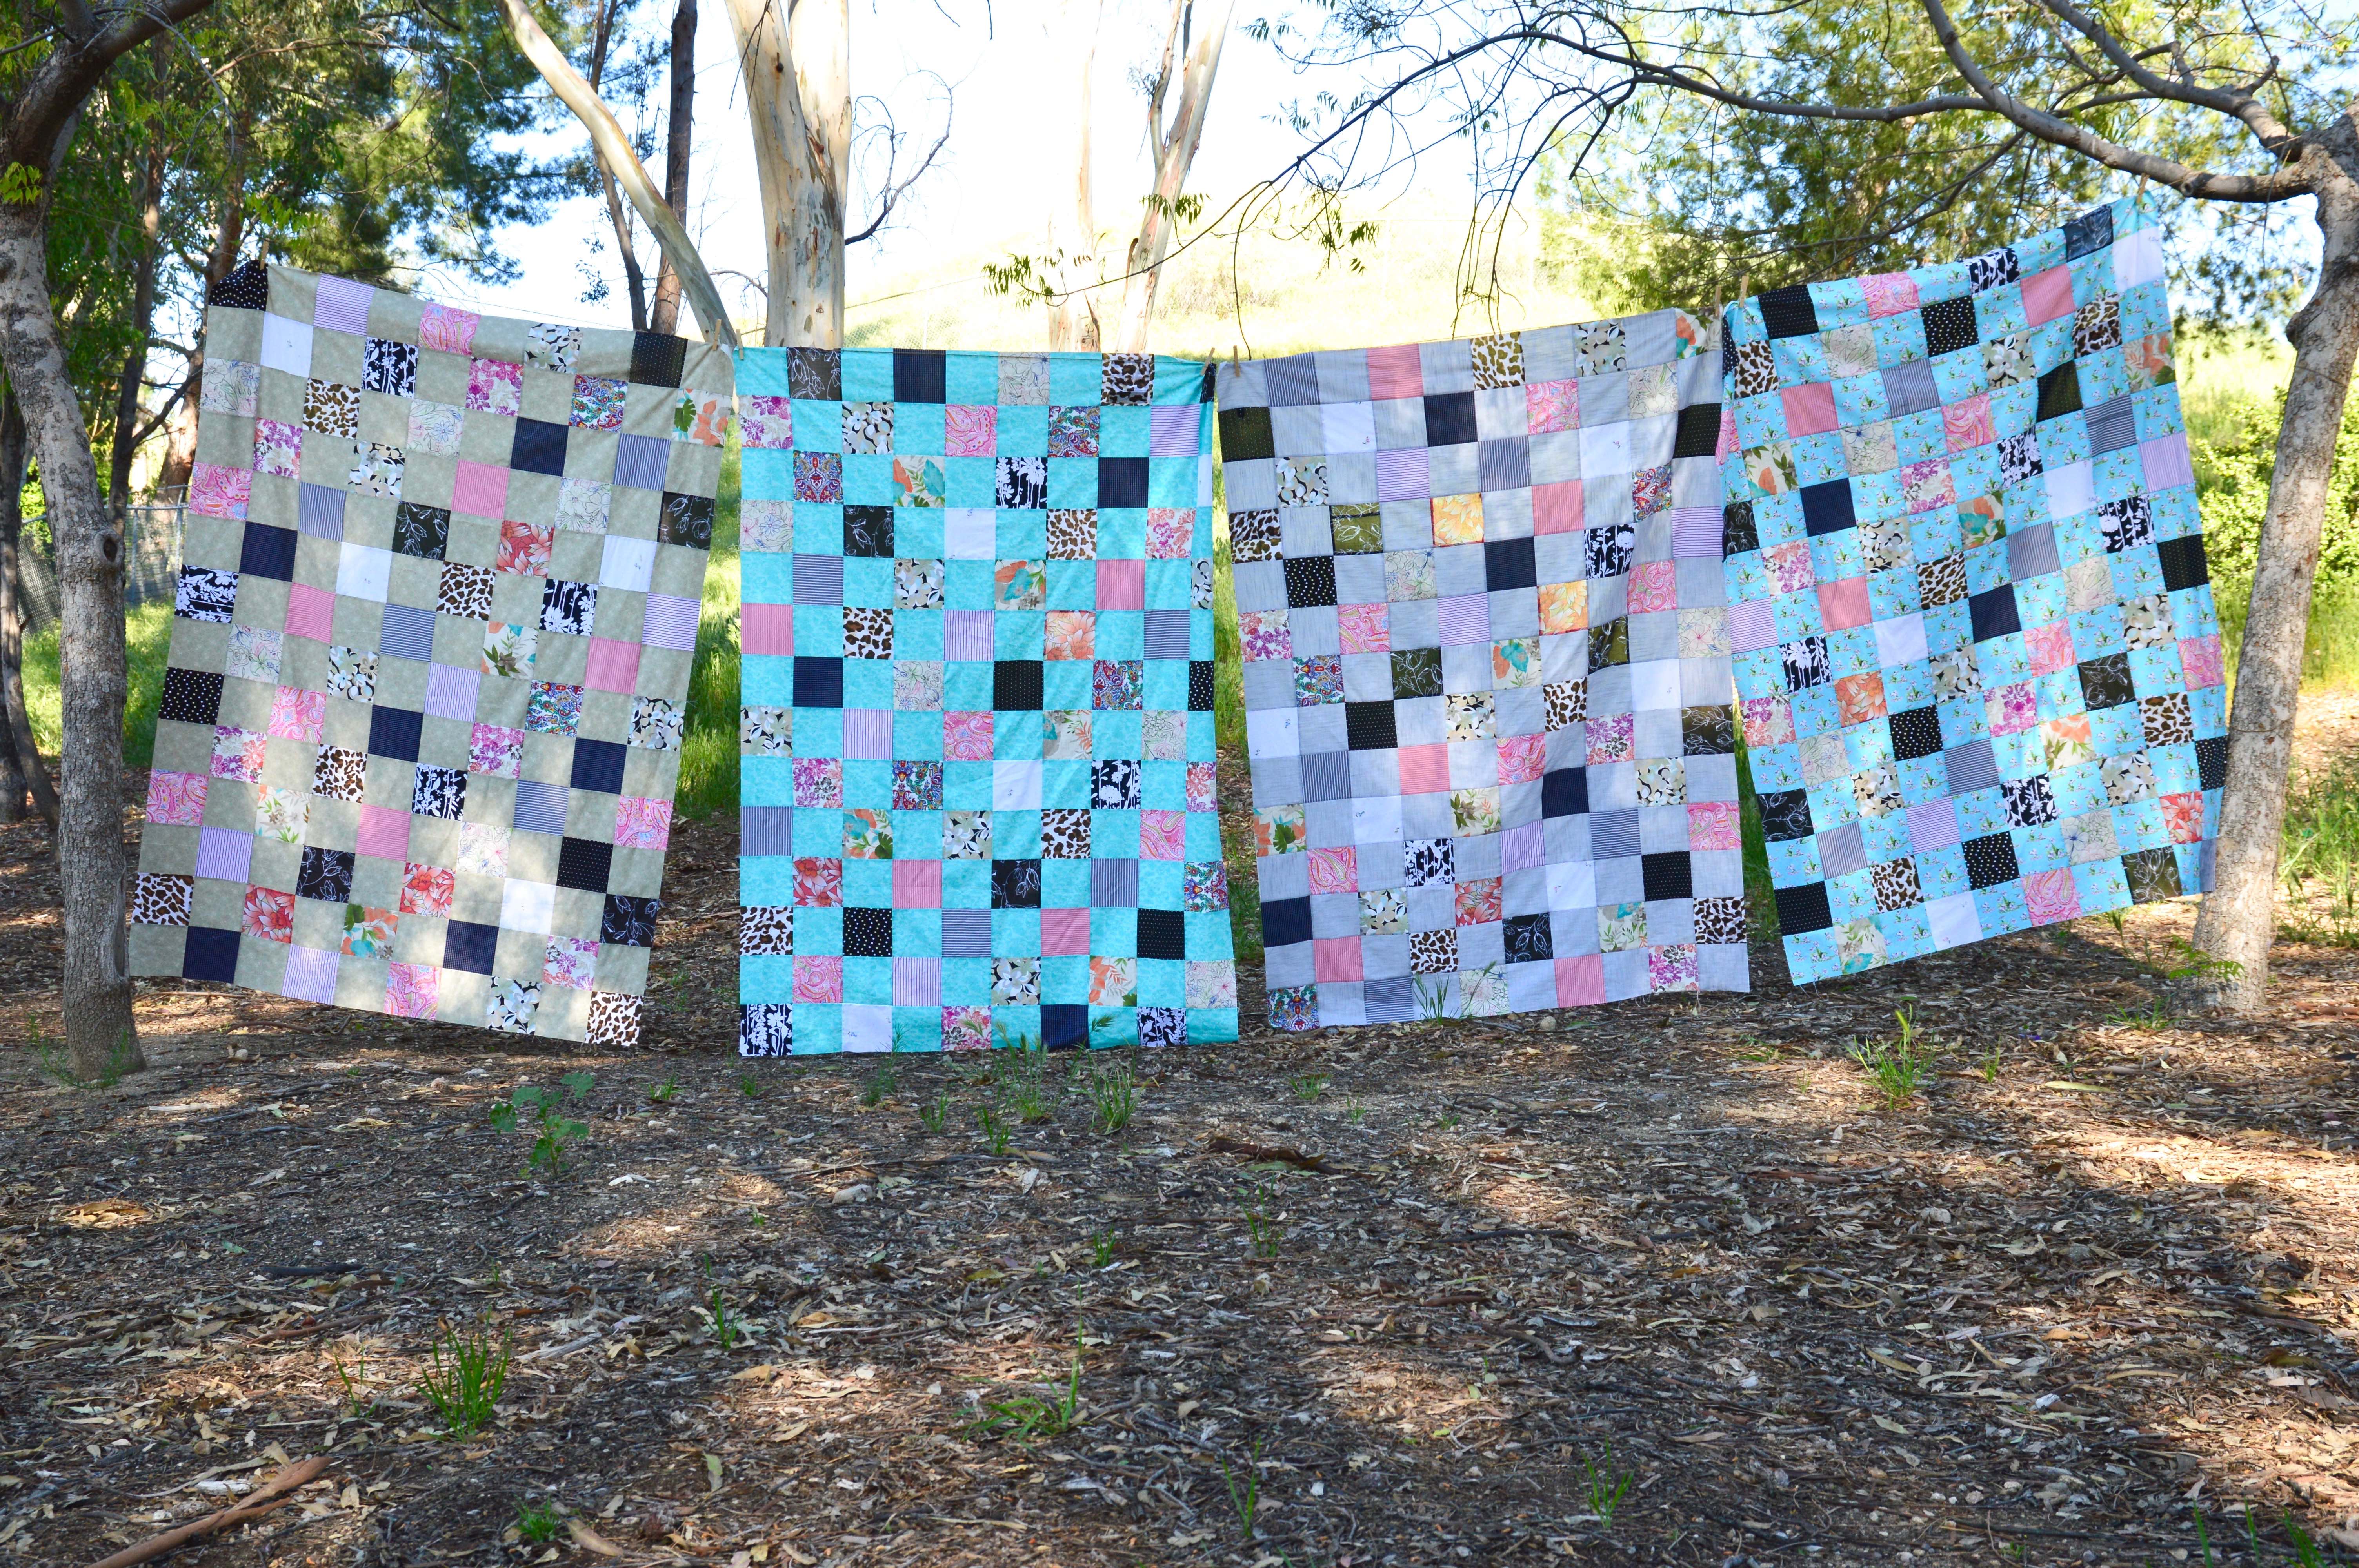
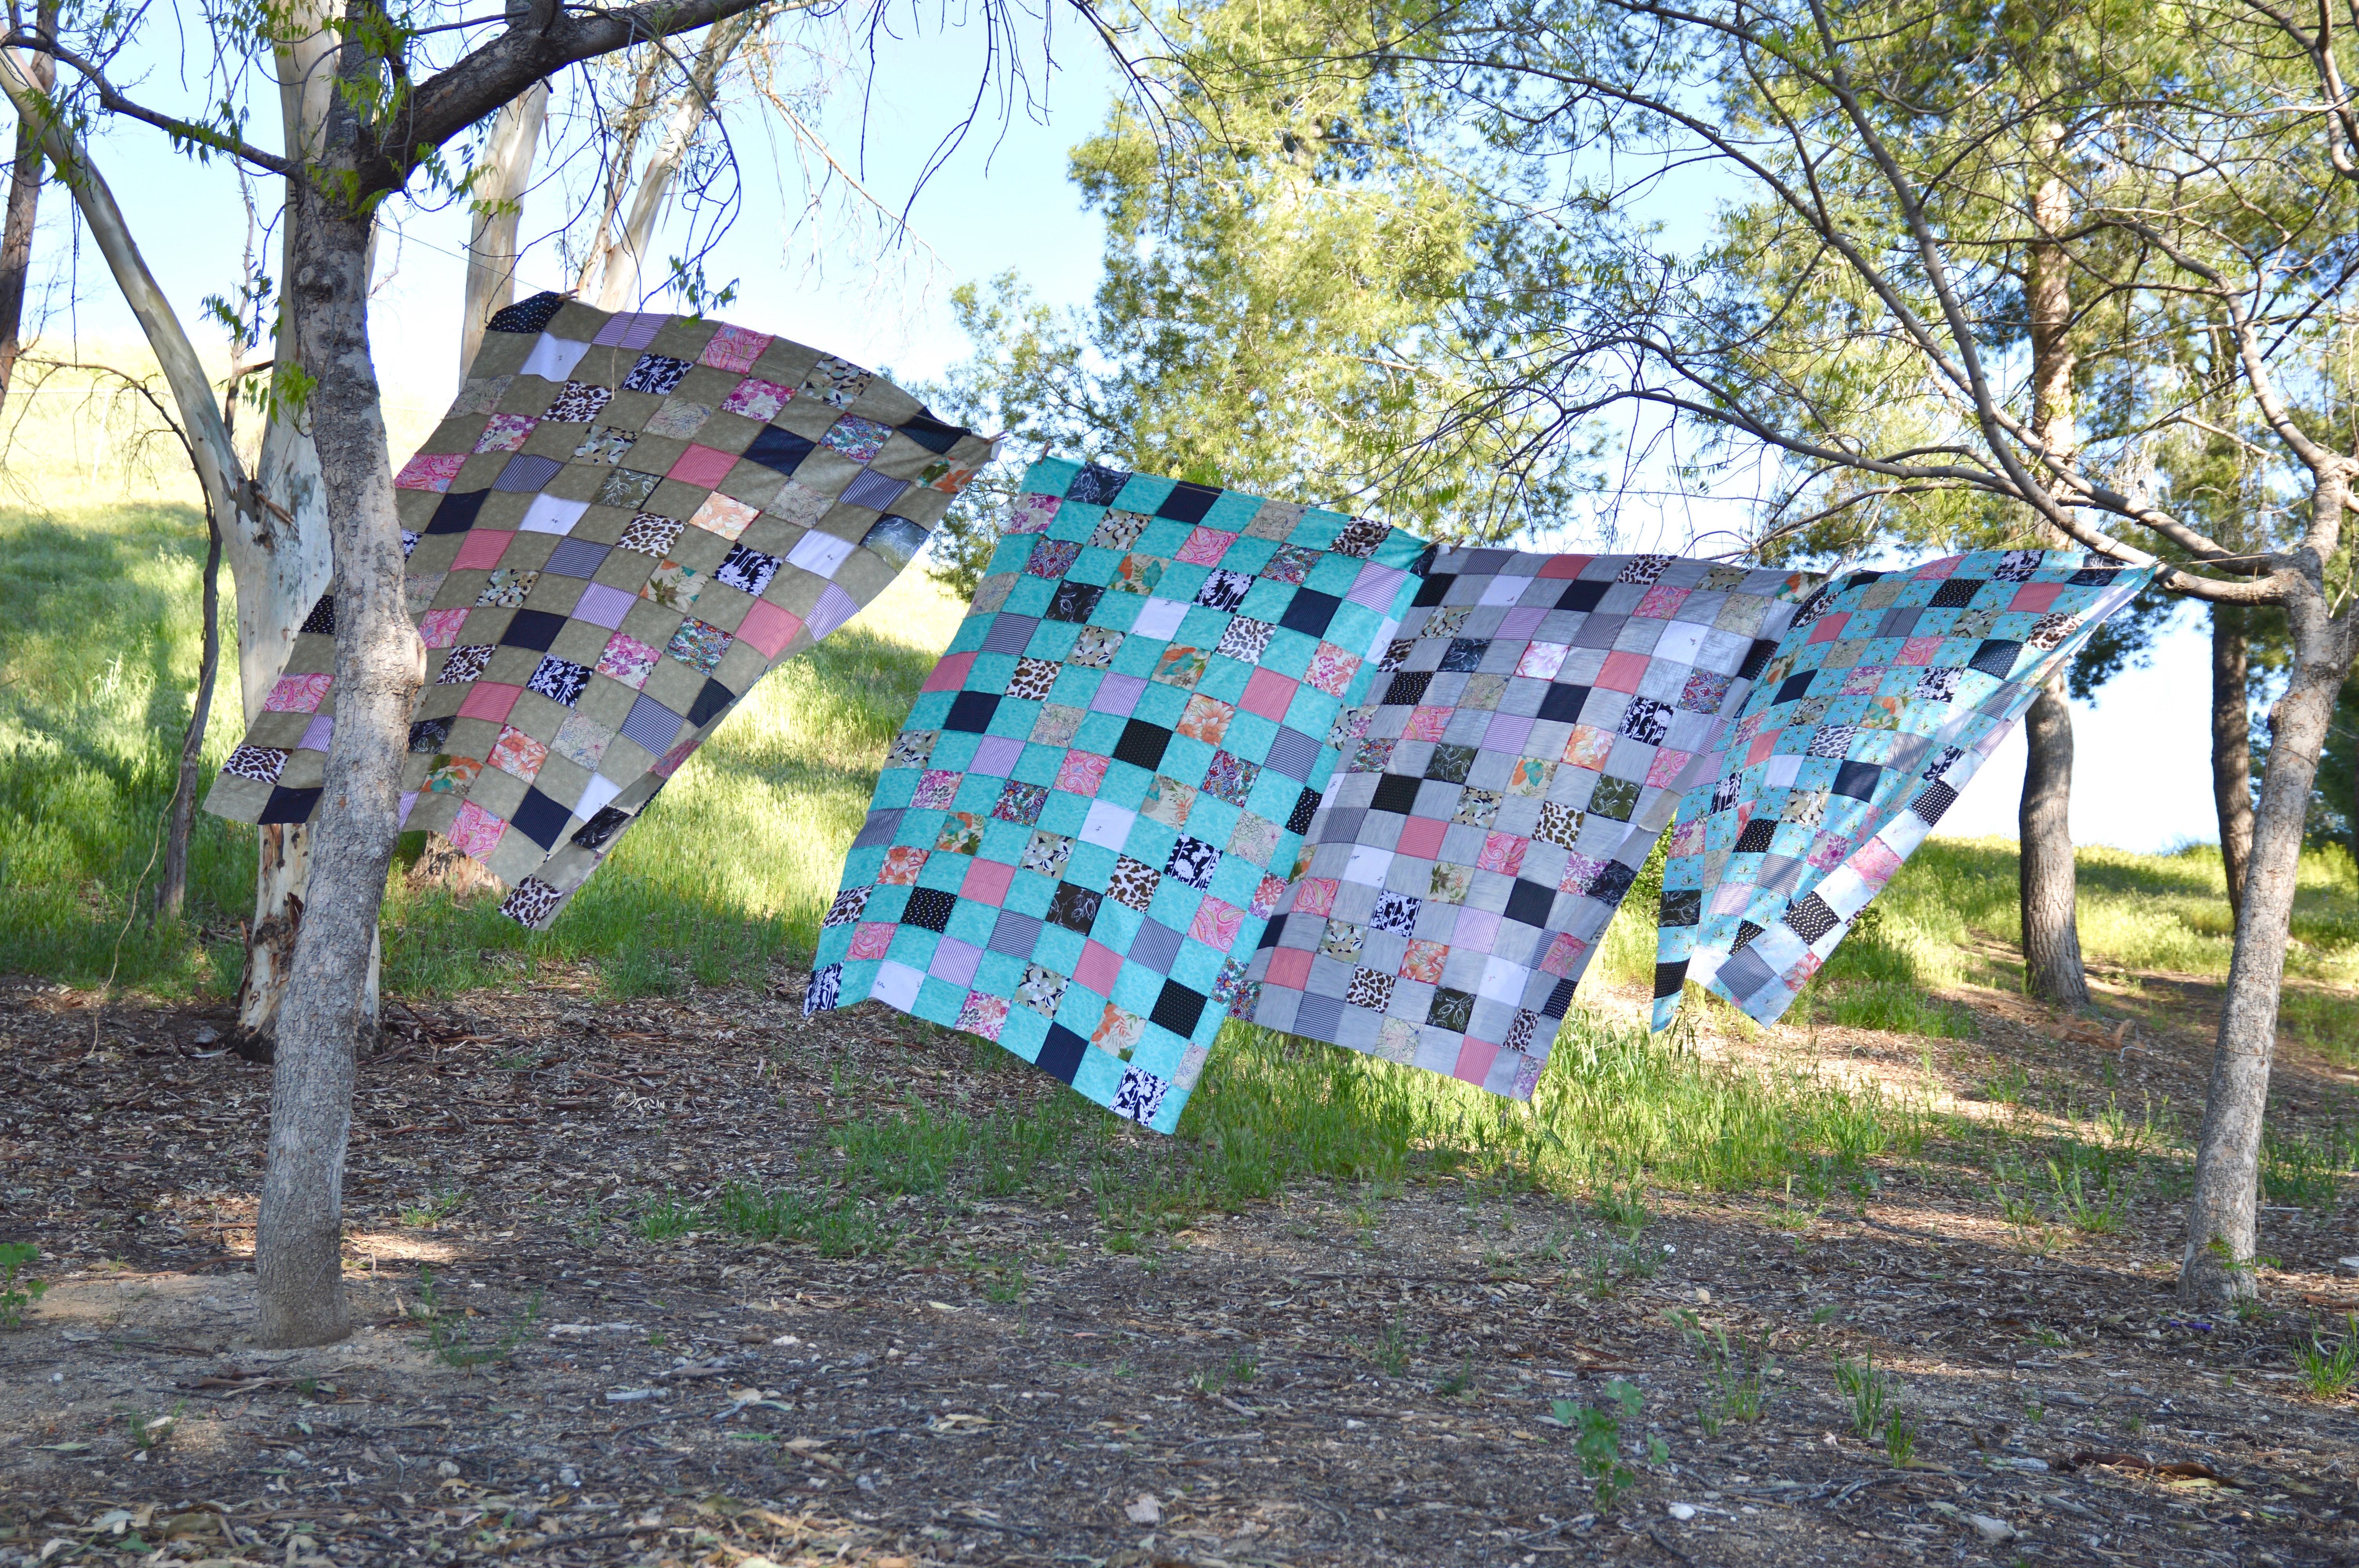
I wanted to make something to remember her by. Nana was always a classy lady and always wore a blouse purchased from Macy’s. She never owned a t-shirt or a sweatshirt, always a crisp blouse with a collar. I had the idea to take all of her beautiful blouses and make them into memory quilts for each of the 4 women in our family.
The process of laundering, pressing, cutting, and sewing all of these blouses was very healing and I needed the hours spent on this project to help me feel close to Nana. I thought it would be fun to share some photos of her wearing the blouses we used in the quilt. She was just the sweetest!
How to Make a Memory Quilt
All seams 1/4″
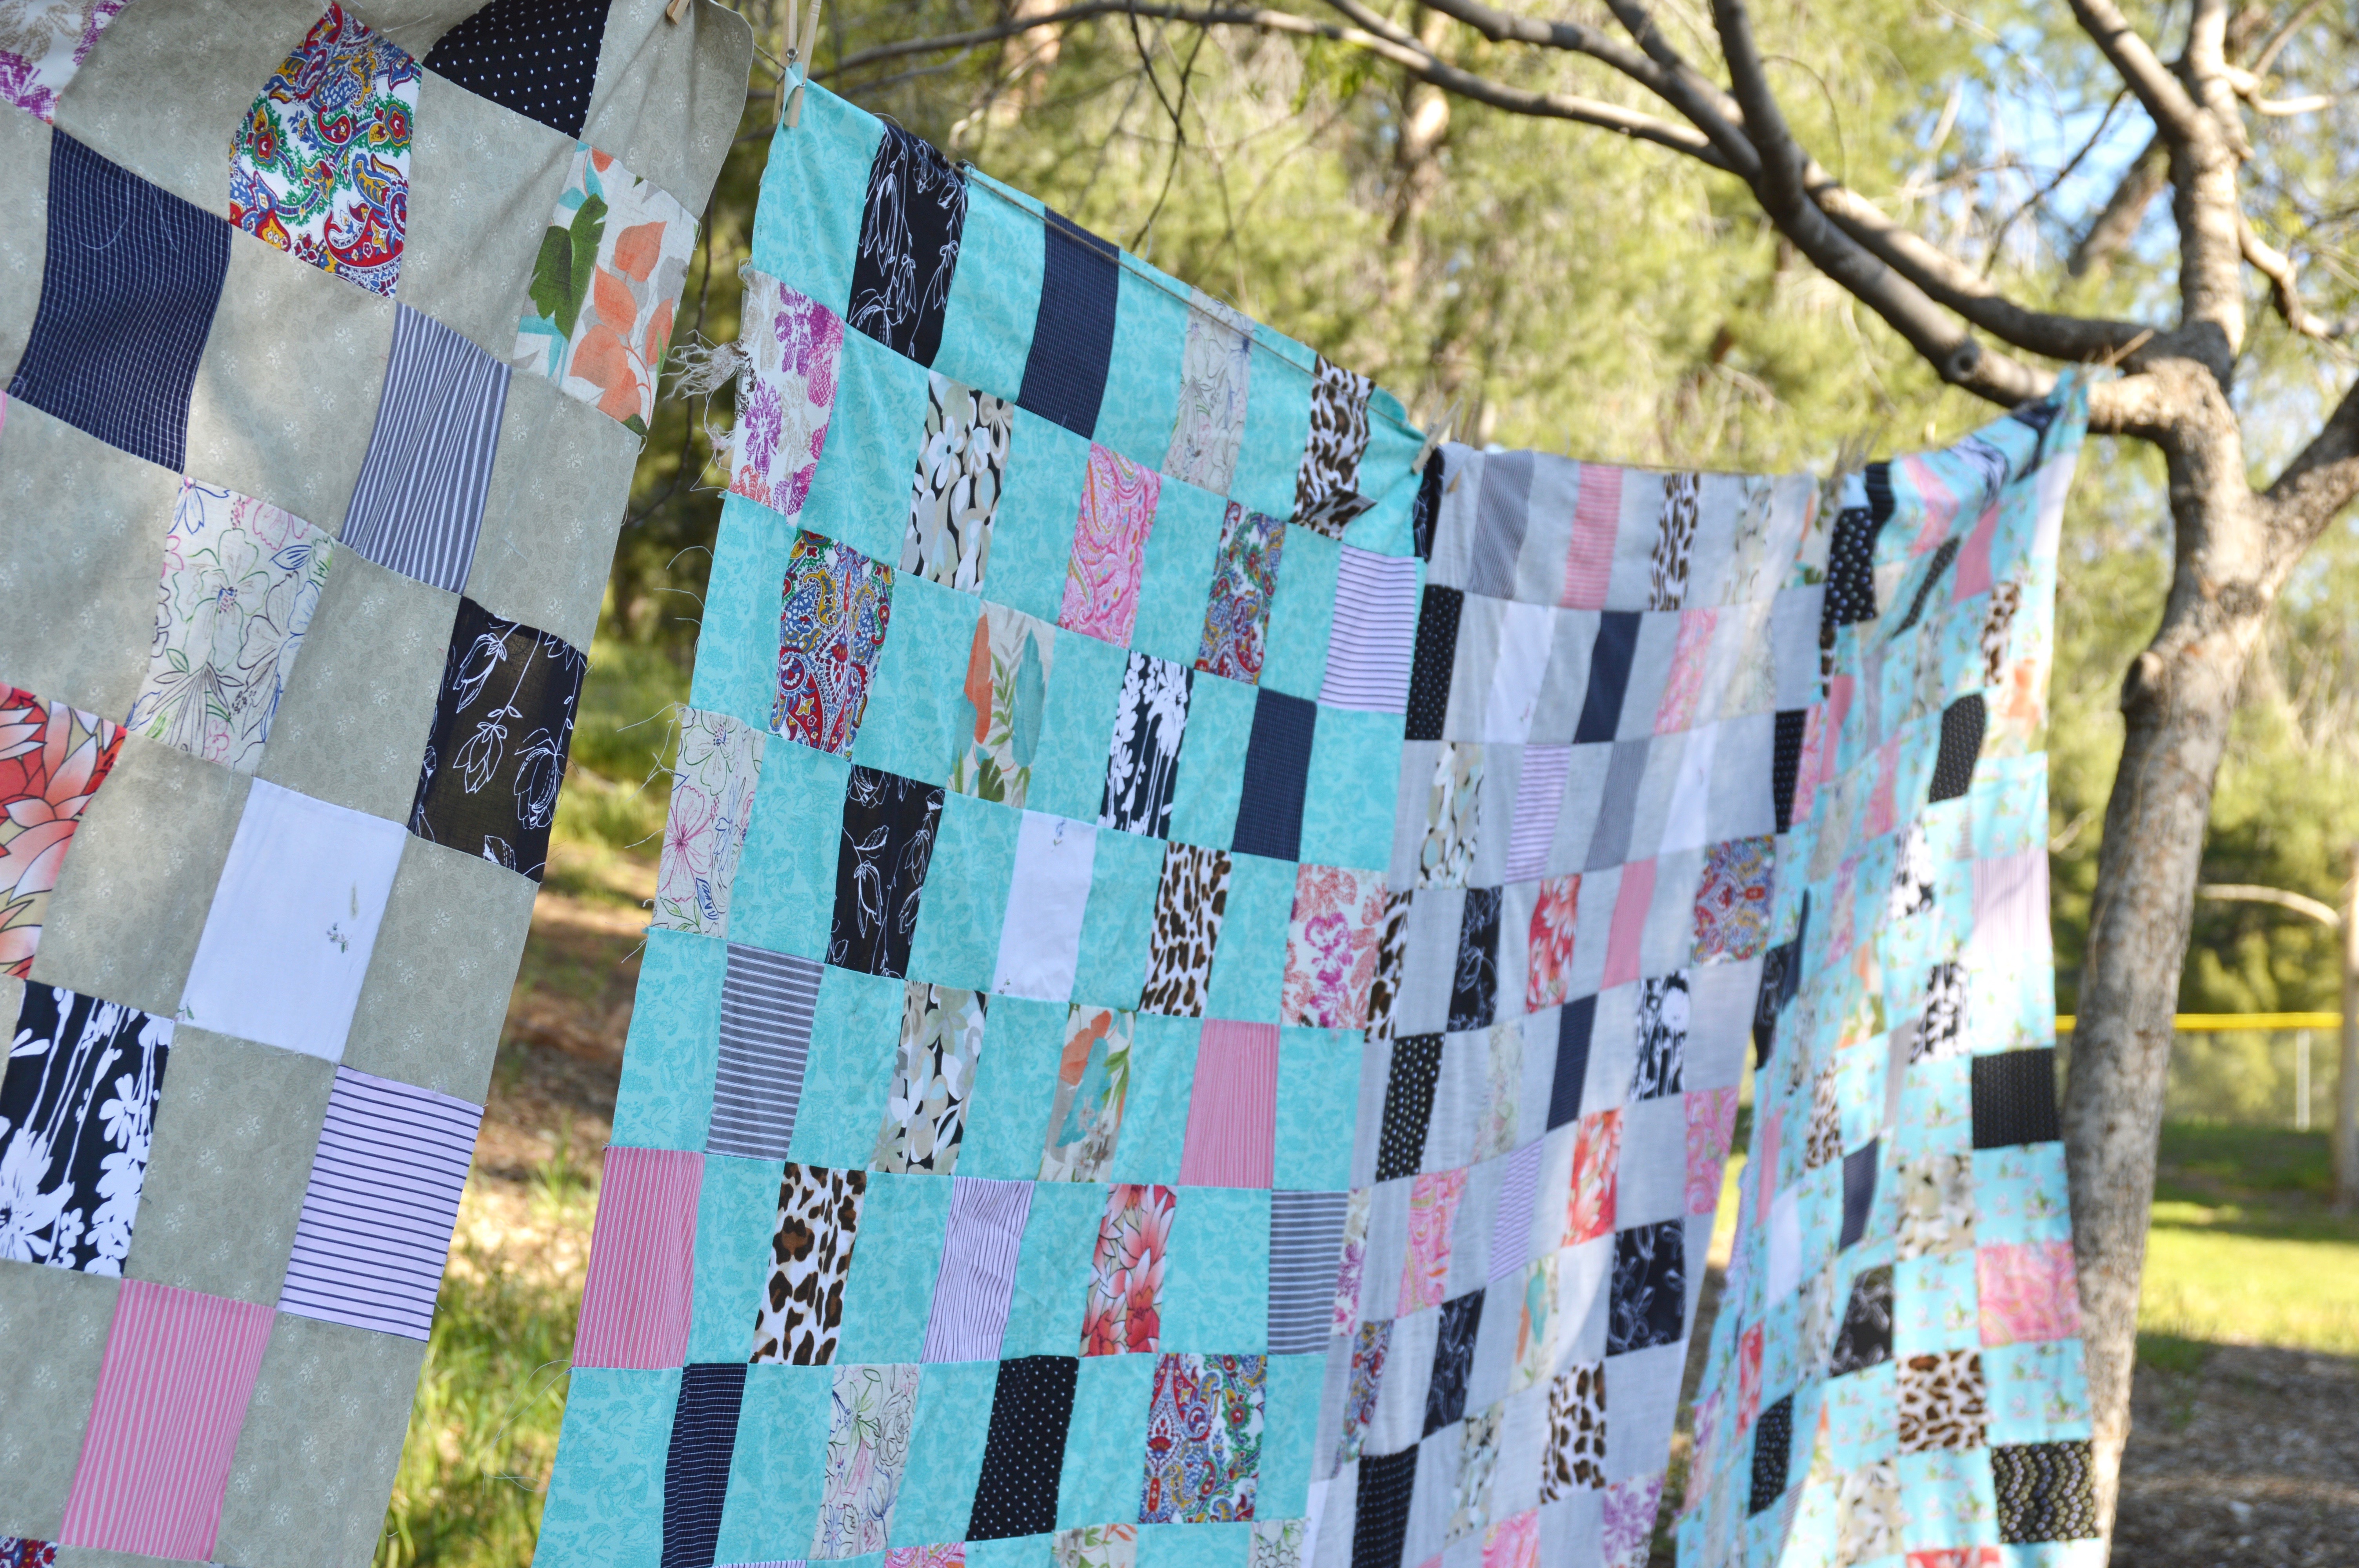
Each quilt is made up of 6″ squares. There are 10 rows by 14 rows. You need 140 squares total: 70 squares from the blouse fabrics and 70 squares from the background fabric.
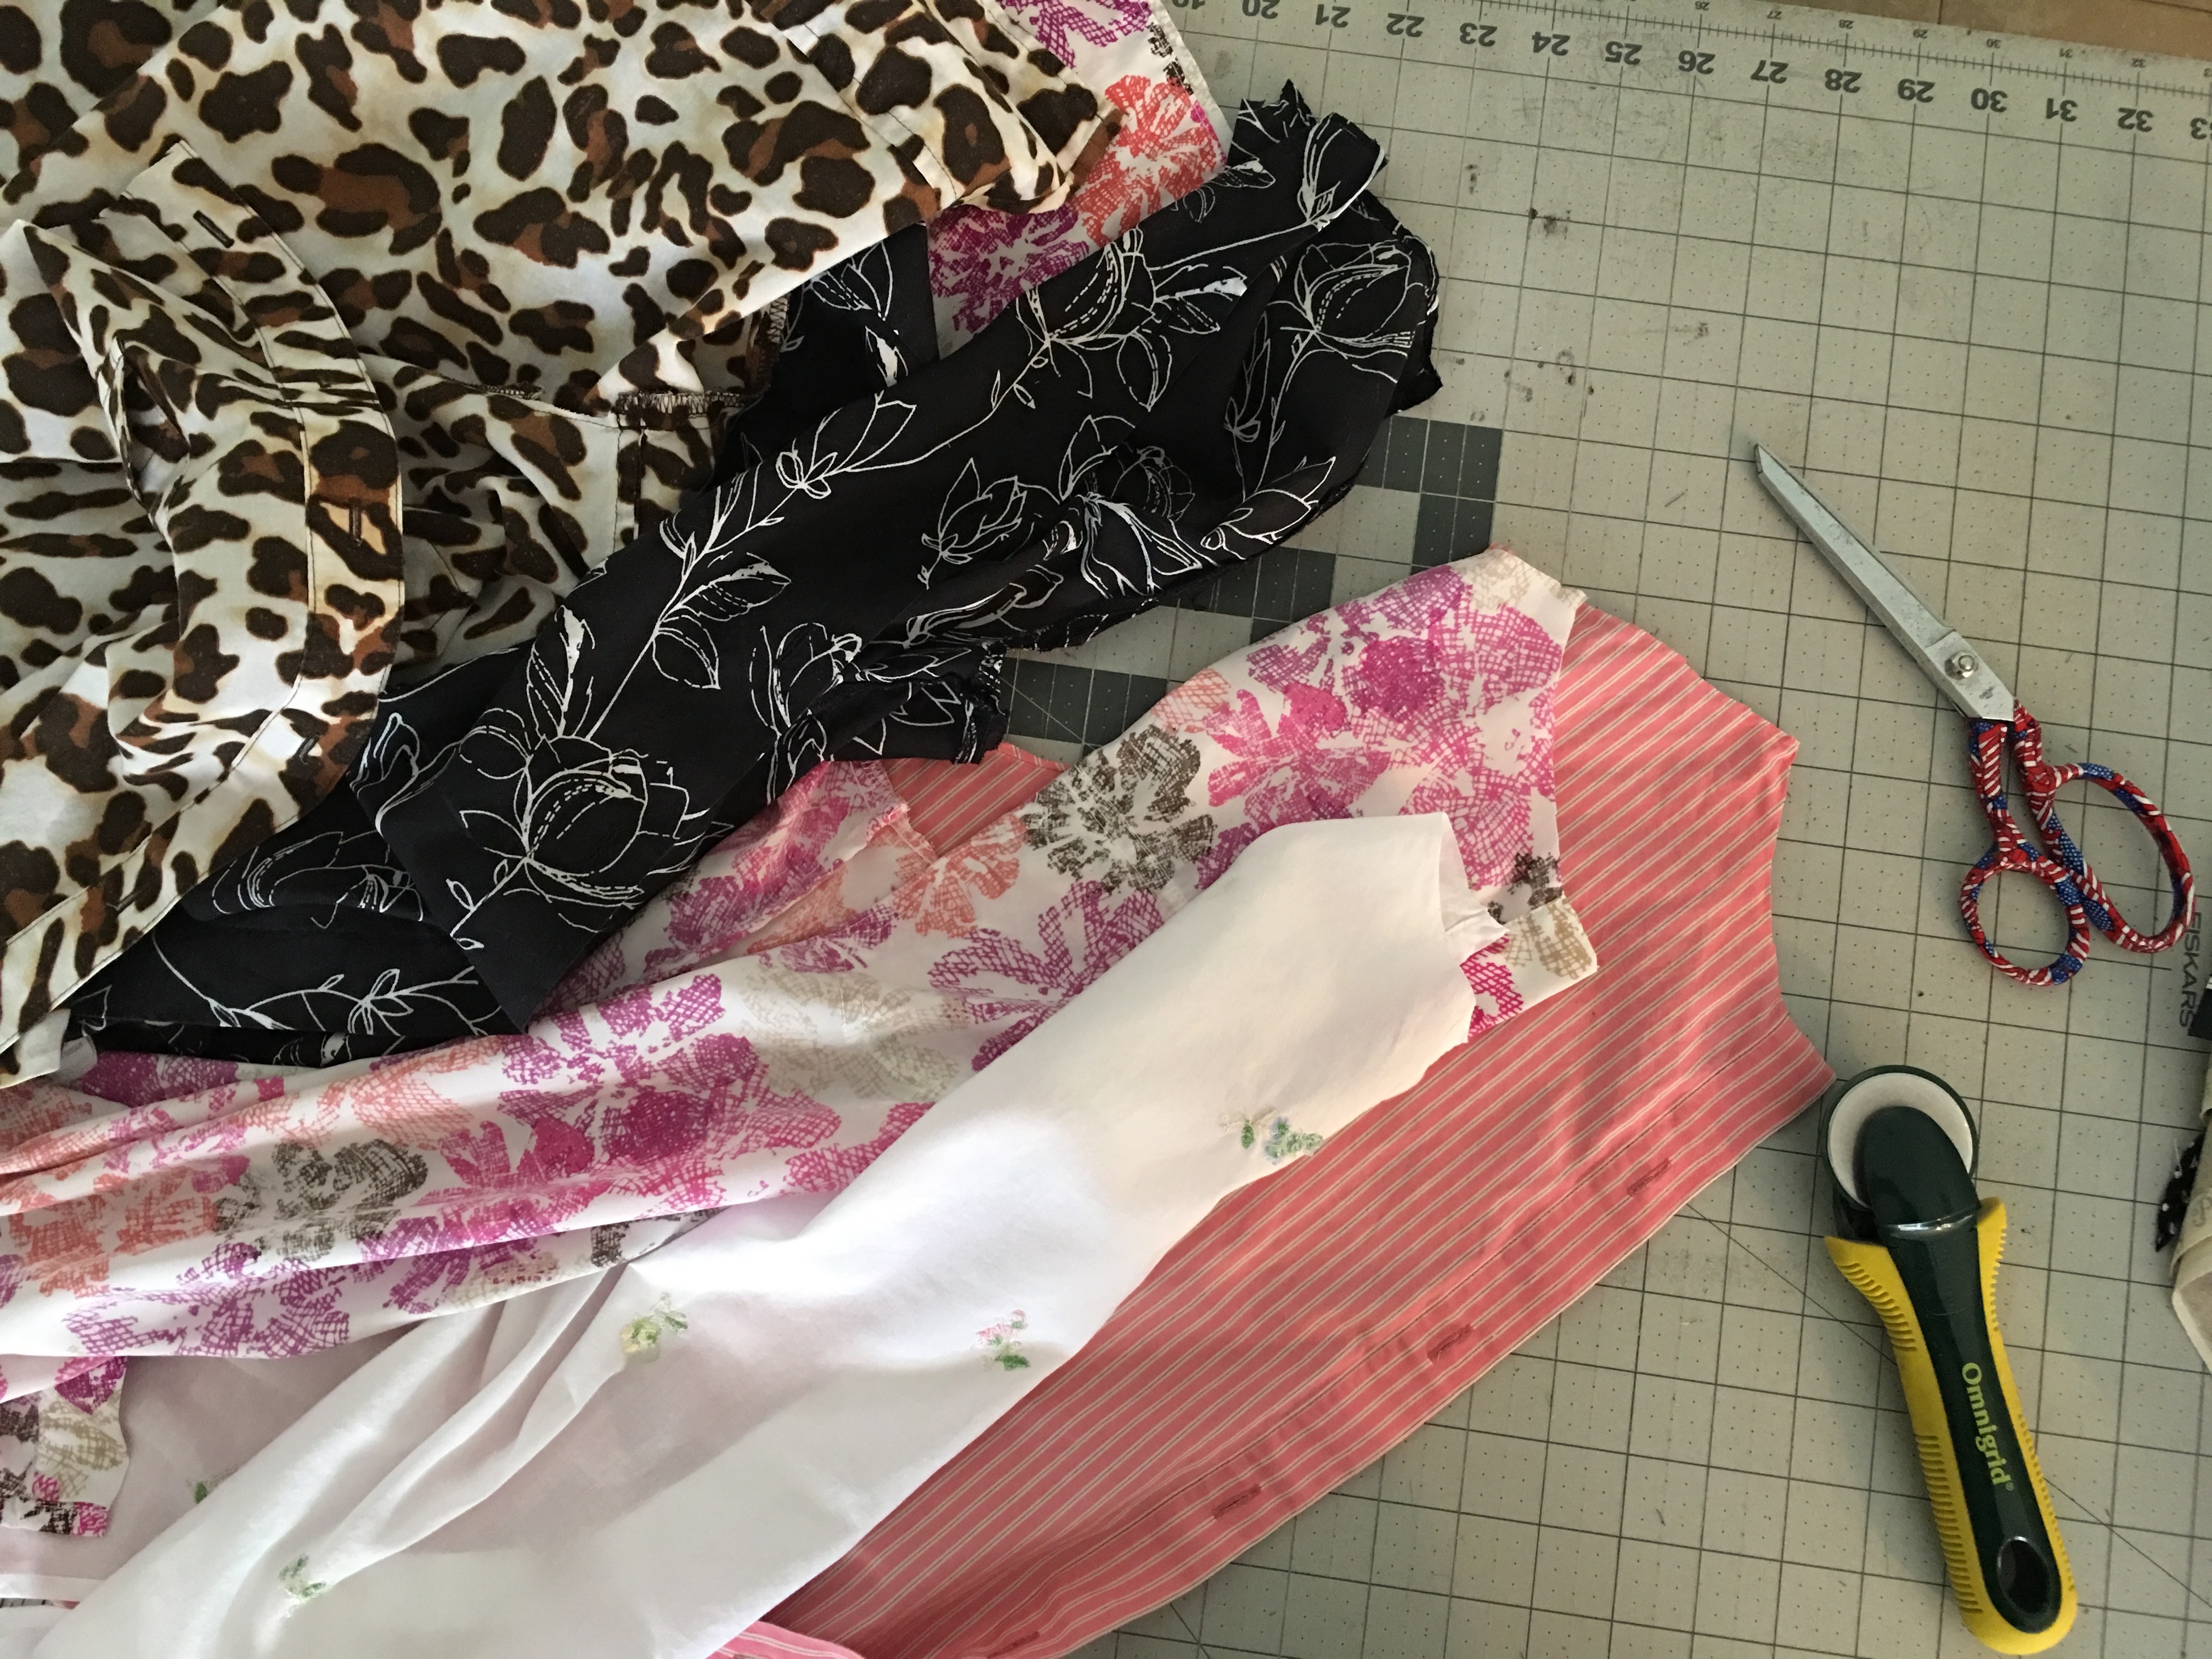
Gather up all the shirts or blouses you want to use and give them a good washing. I tried to use only 100% cotton. I think one was a rayon blend, and a few had a linen blend. If you find you have blouses with stretch in them, you will need to stabilize with a light weight fusible stabilizer before cutting.
Because I was making 4 quilts, I needed my blouse fabrics to go far so I choose a quilting cotton to act as the background for the checkerboard design. You will need 2 yards of the background fabric.
Cutting the Blouses
First cut the sleeve off along the sleeve/shoulder seam.

Next, cut the cuff off along the seam. Discard the cuff.
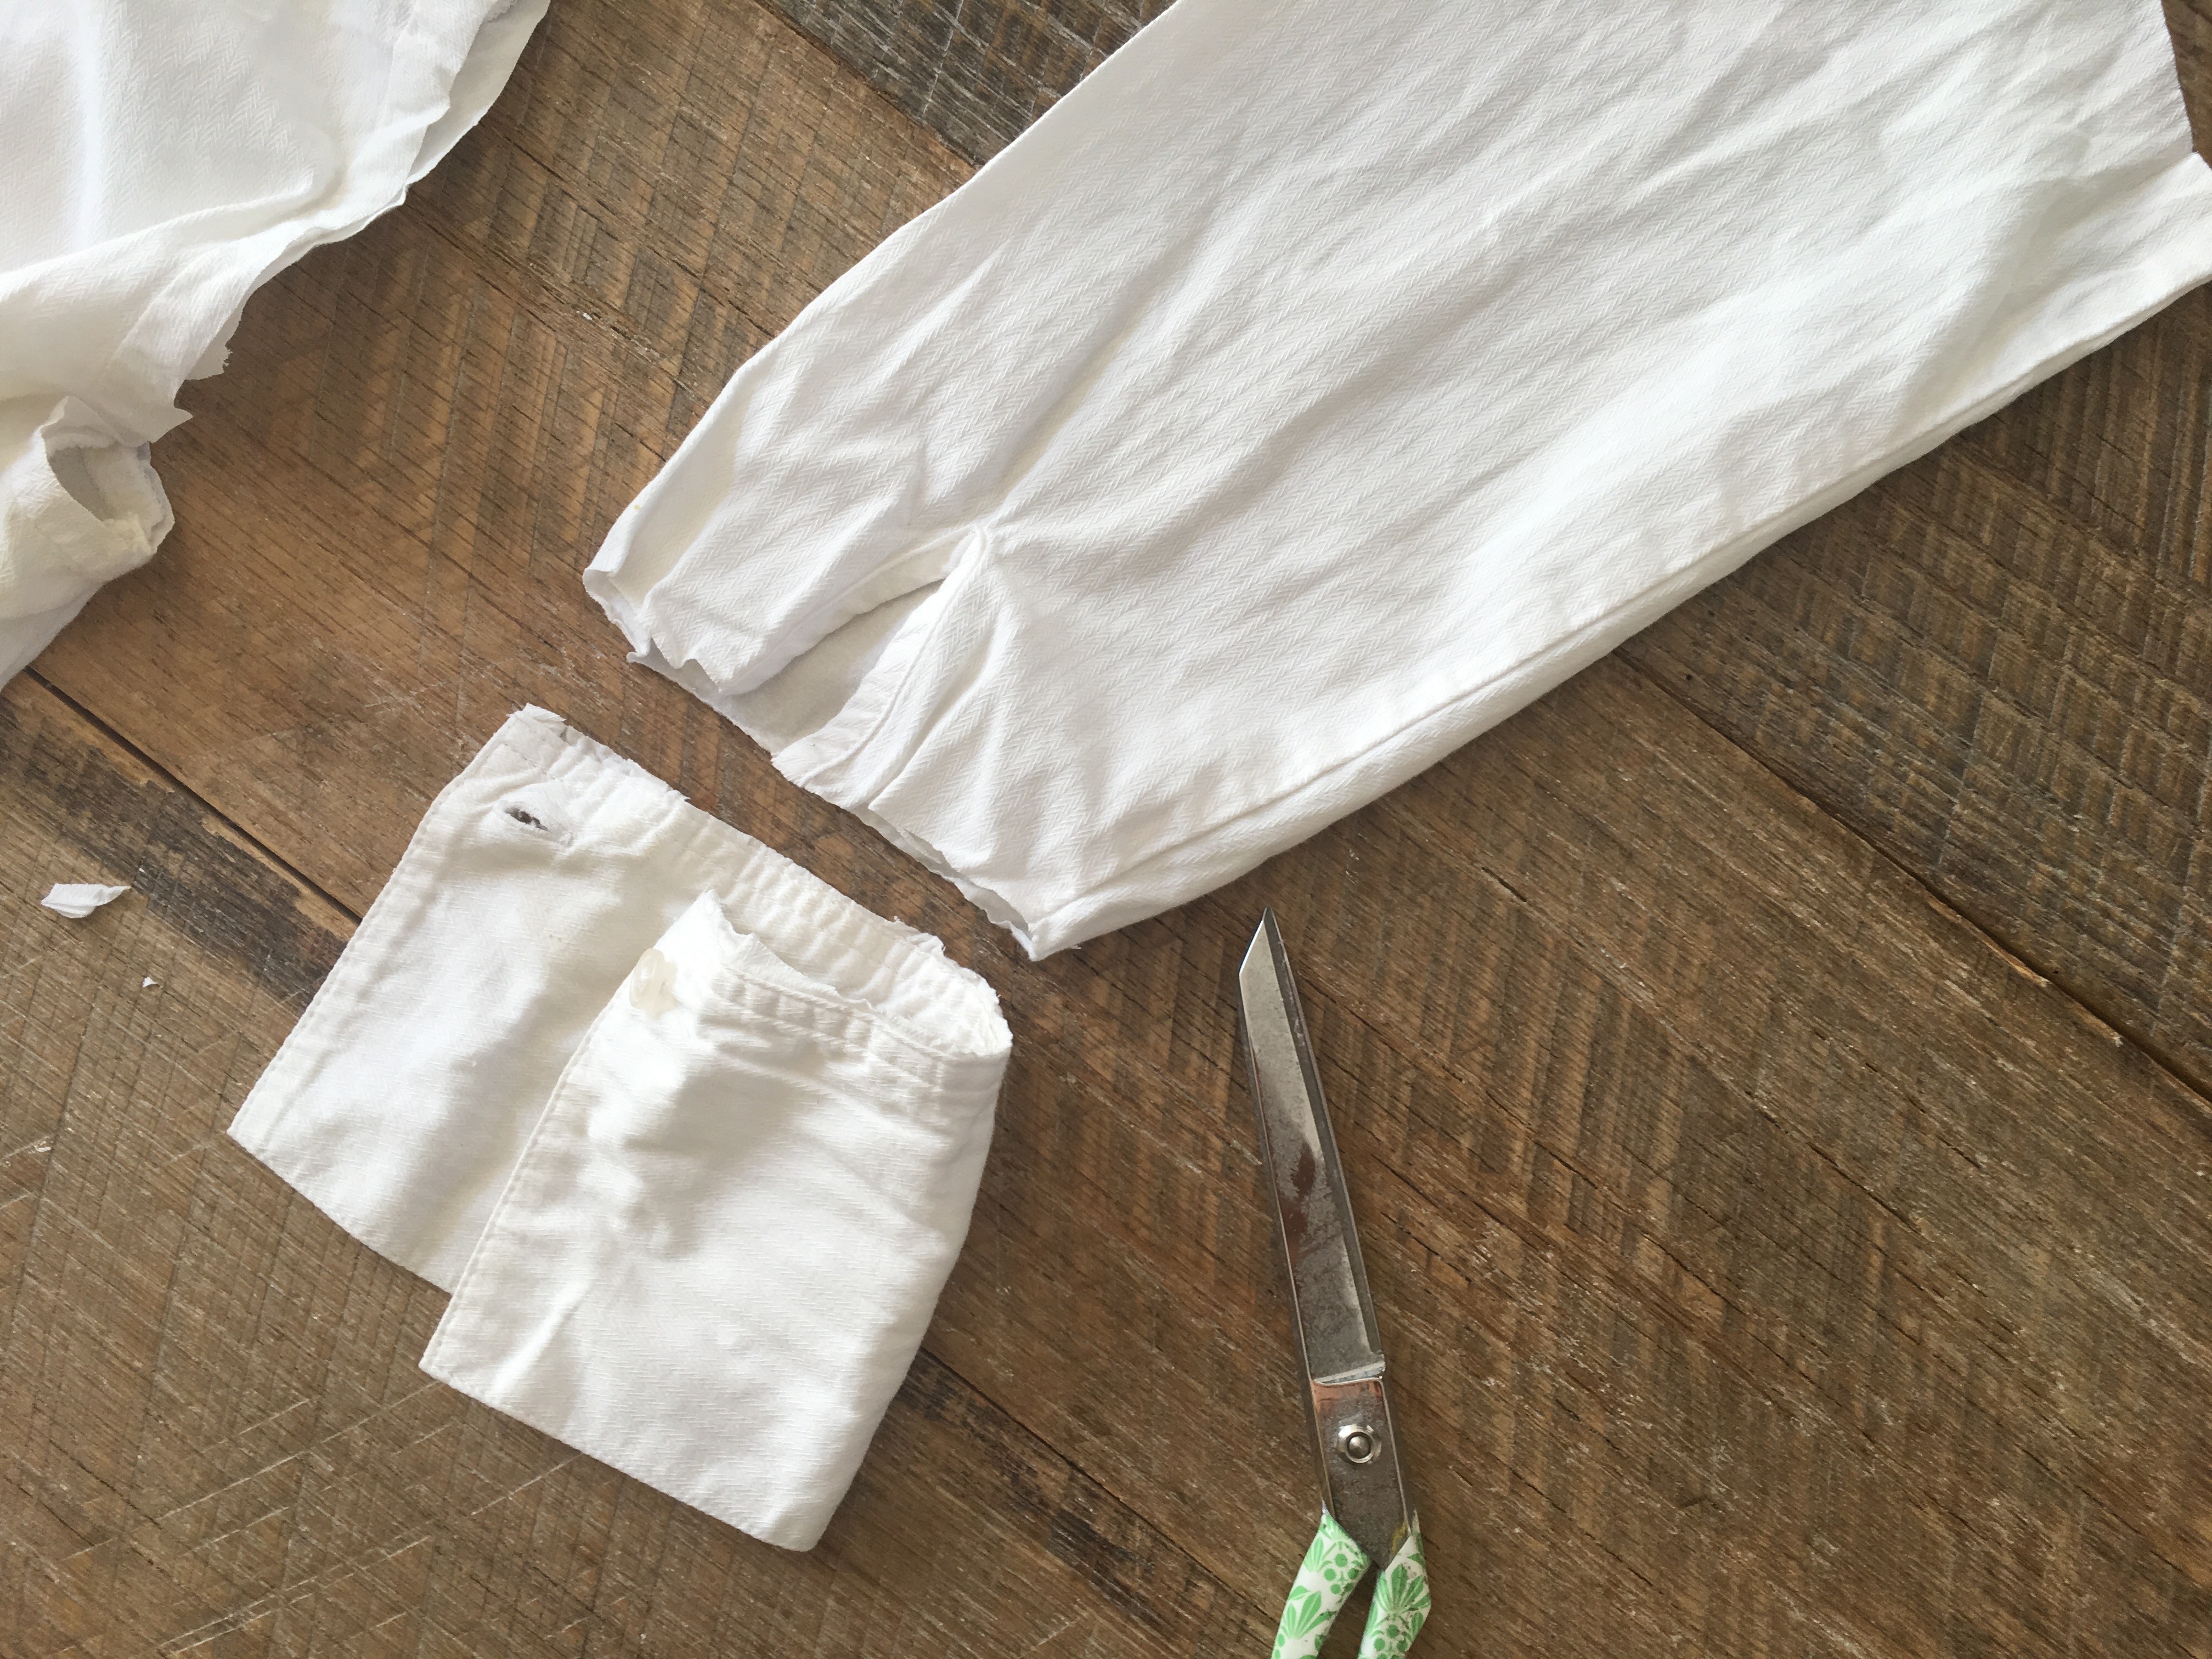
Cut along the sleeve/arm seam and press. This give you a nice flat surface to lay on your rotary mat. I cut four 6″ squares out of each sleeve.
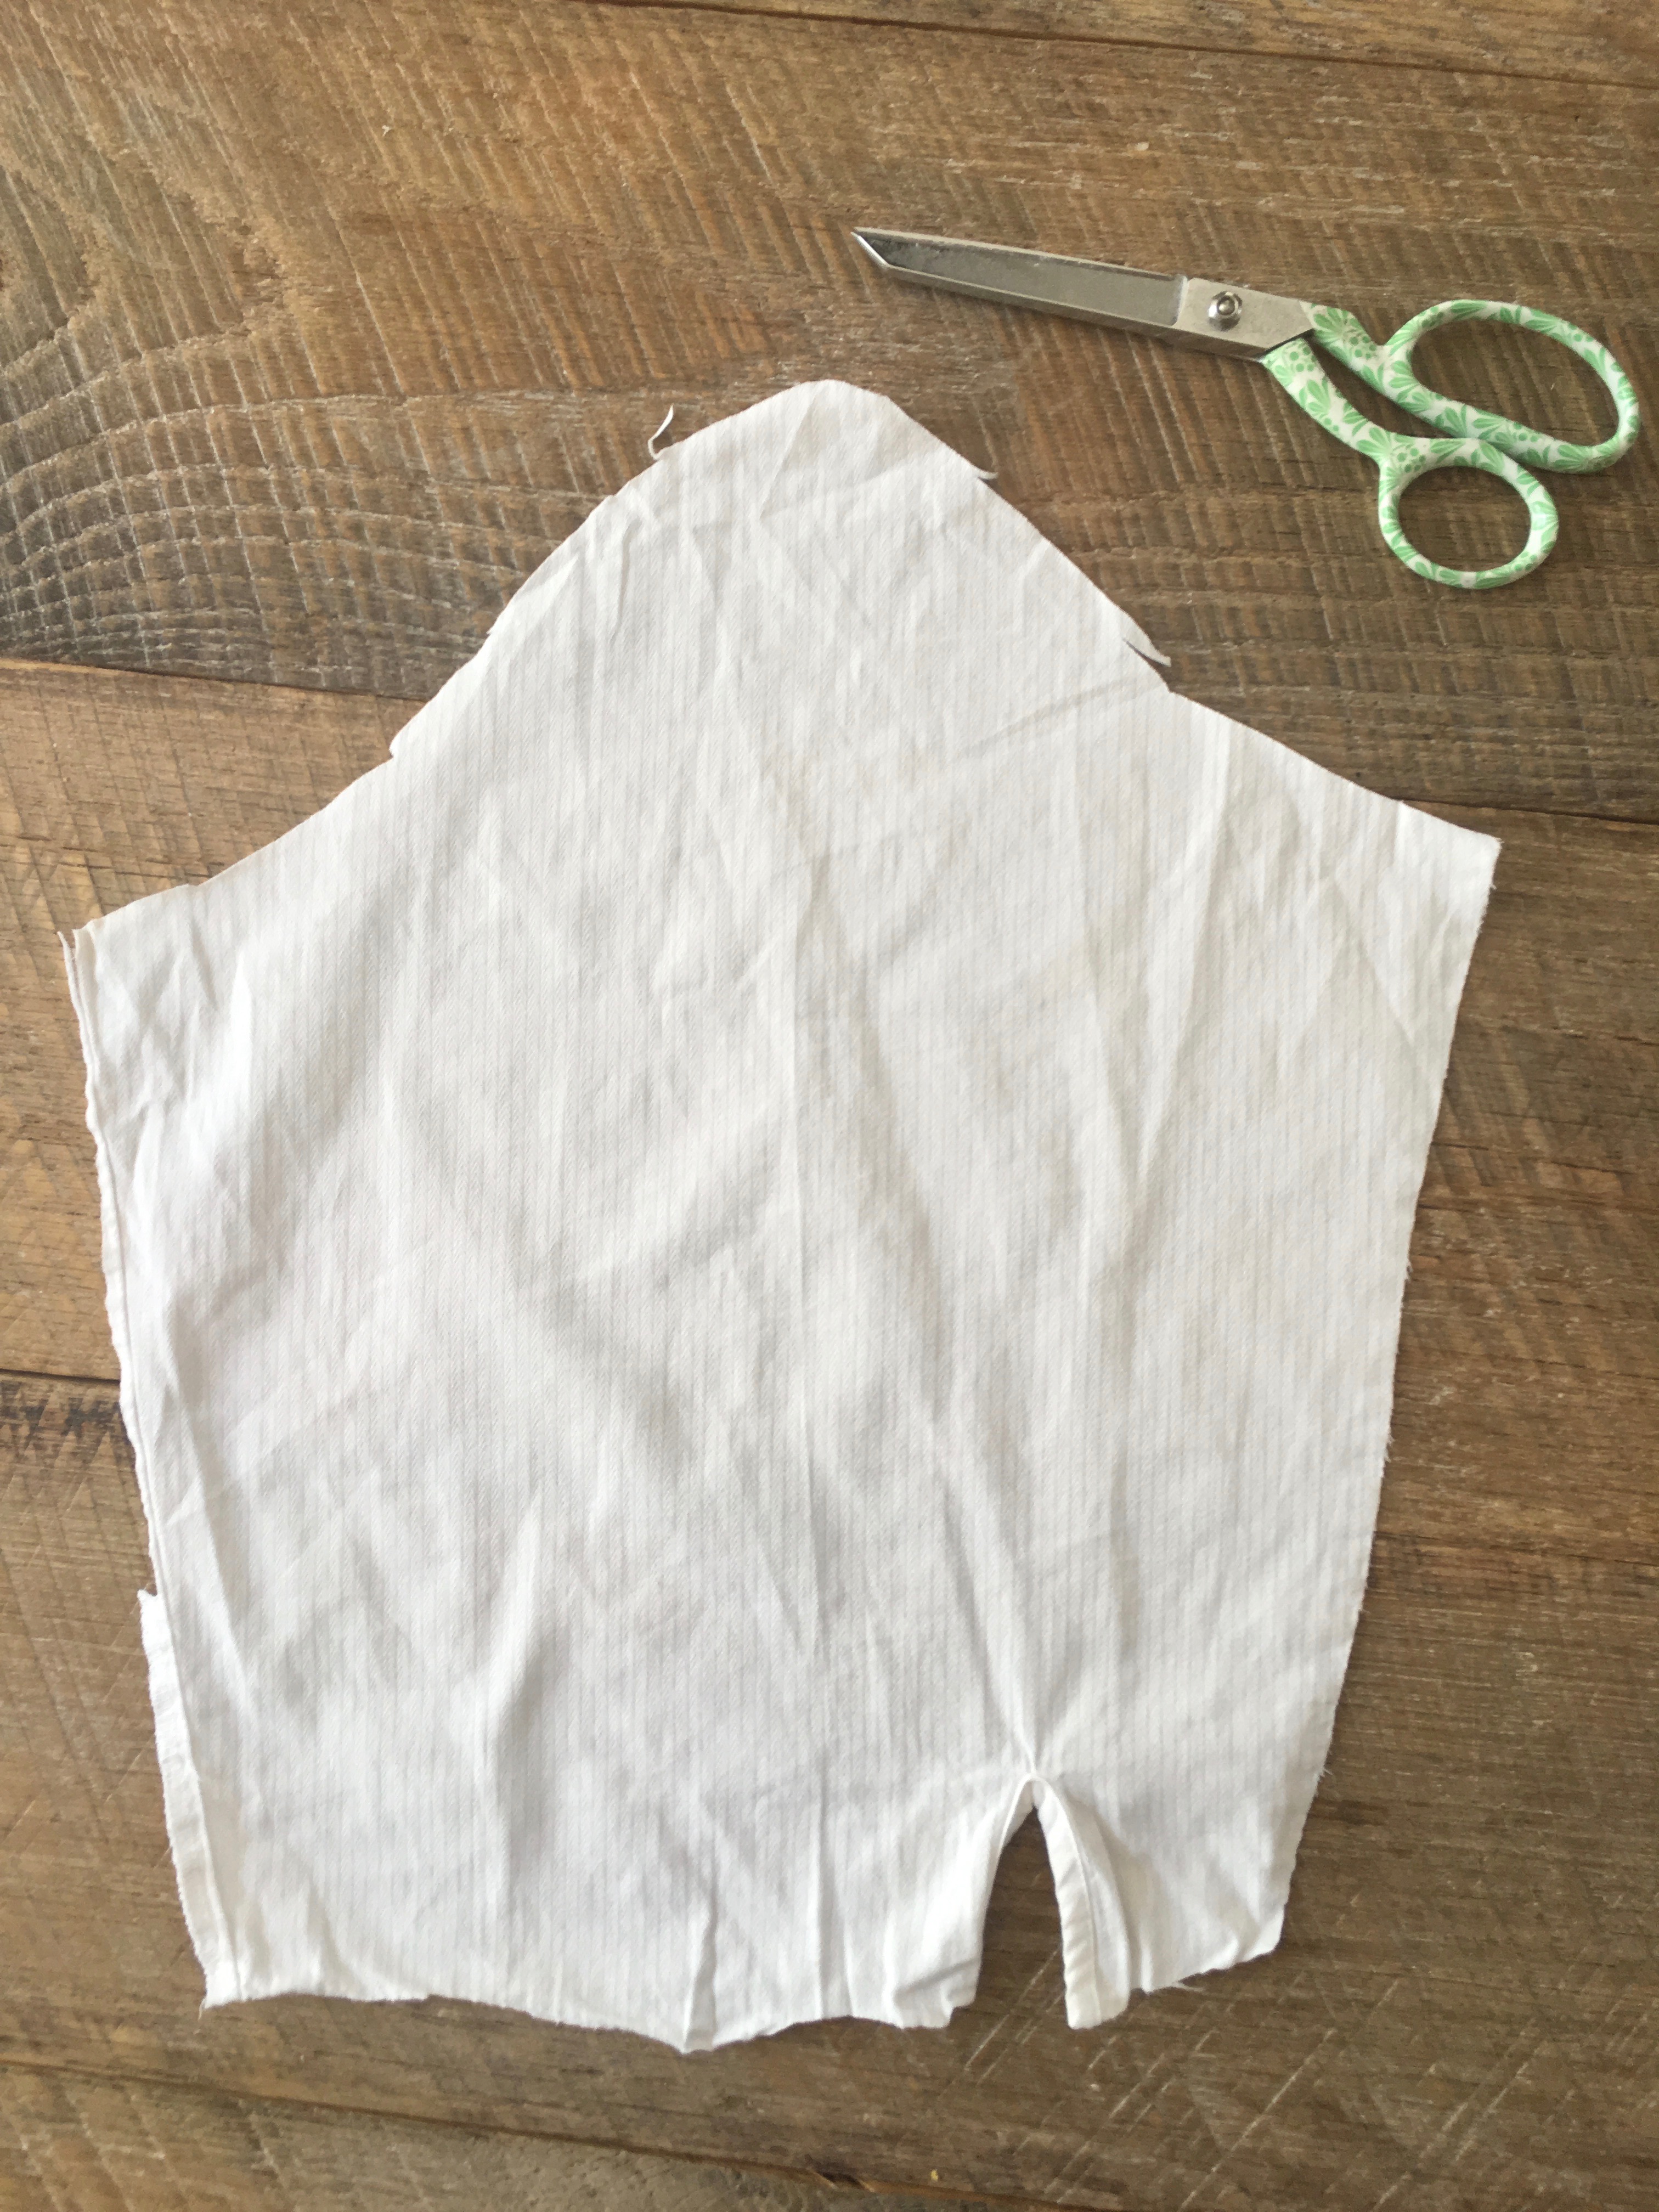
Cut off the button strip and the button hole strip. I am having the quilts machine quilted so I didn’t want any buttons or button holes getting in the way. If you are hand quilting, you could leave elements of the shirt intact to give the quilt character. I had my daughter cut off all the buttons and put them in a little box. I may come up with a keepsake button project in the future!
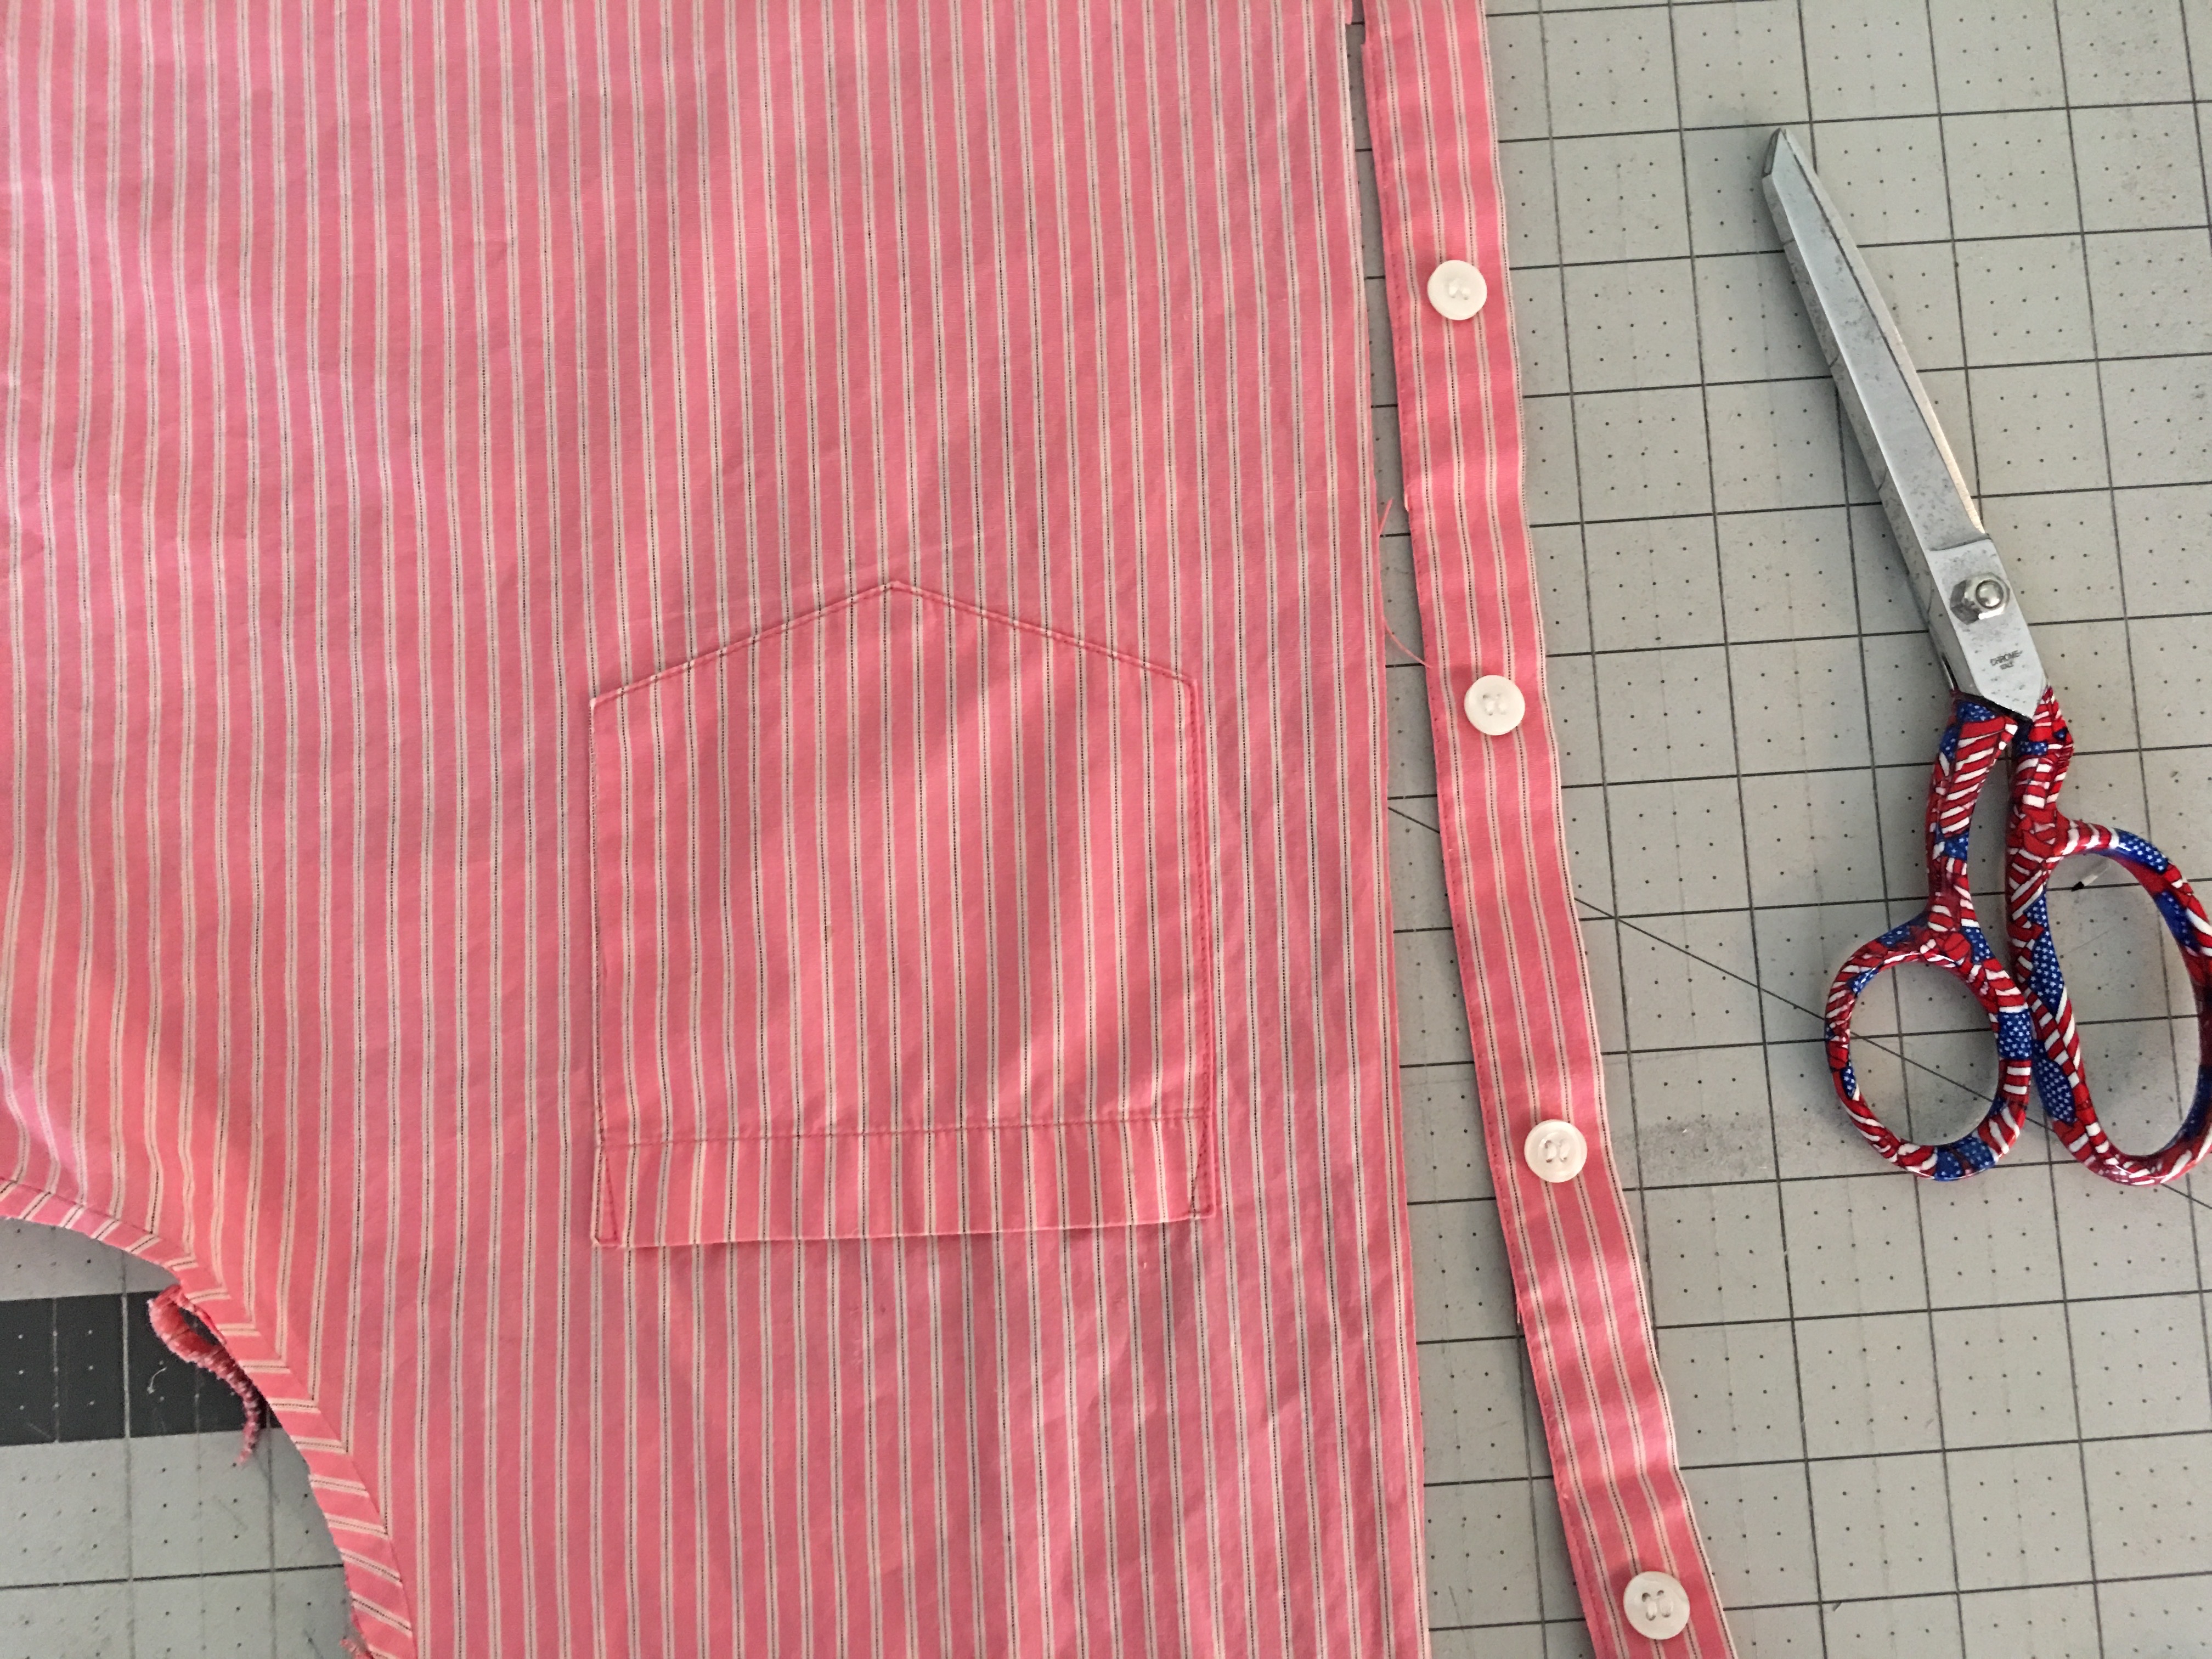 Cut off the collar. If the shirt has pleats in the back you need to cut along the back seam as well so the pleats lay flat.
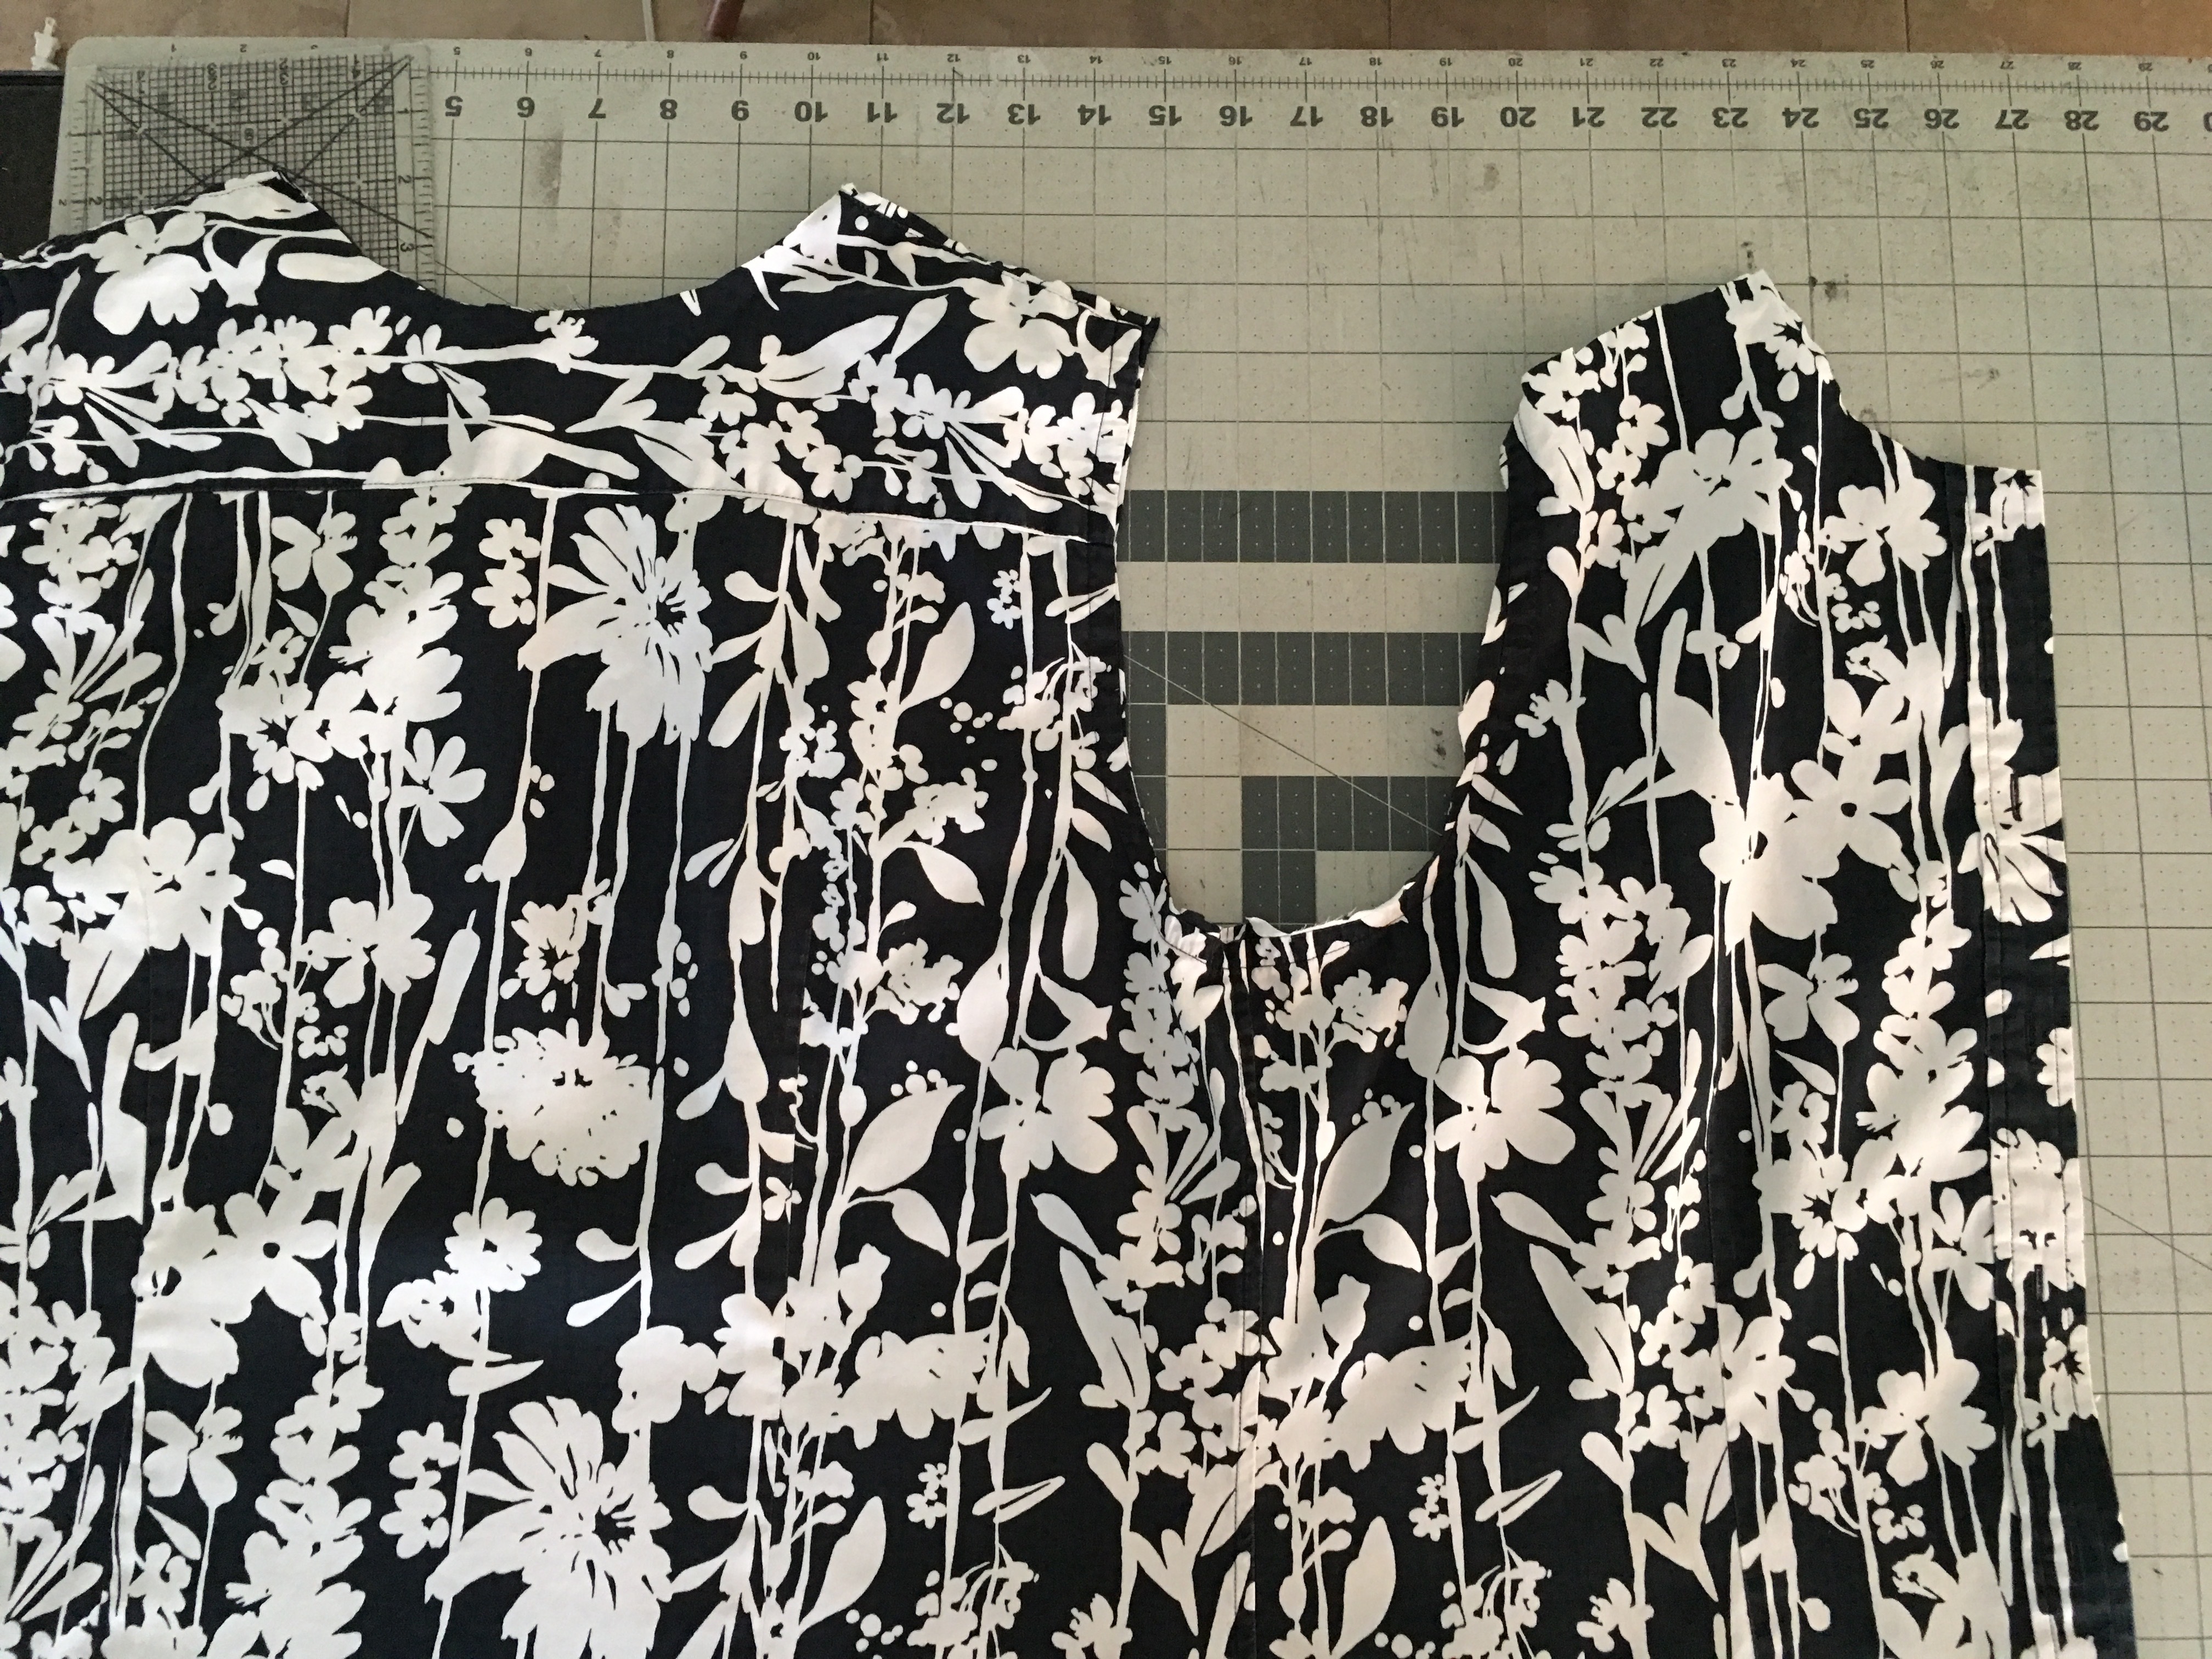
This should give you a nice big piece of fabric to cut from. Start cutting strips of 6″ then cross cut to give you 6″ squares.
A note about darts…..Most of the shirts did not have darts, a few did, however. I did not include the dart in the 6″ block because it made the fabric lay weird and uneven. You could also pick out the seam of the dart so it lays flat.
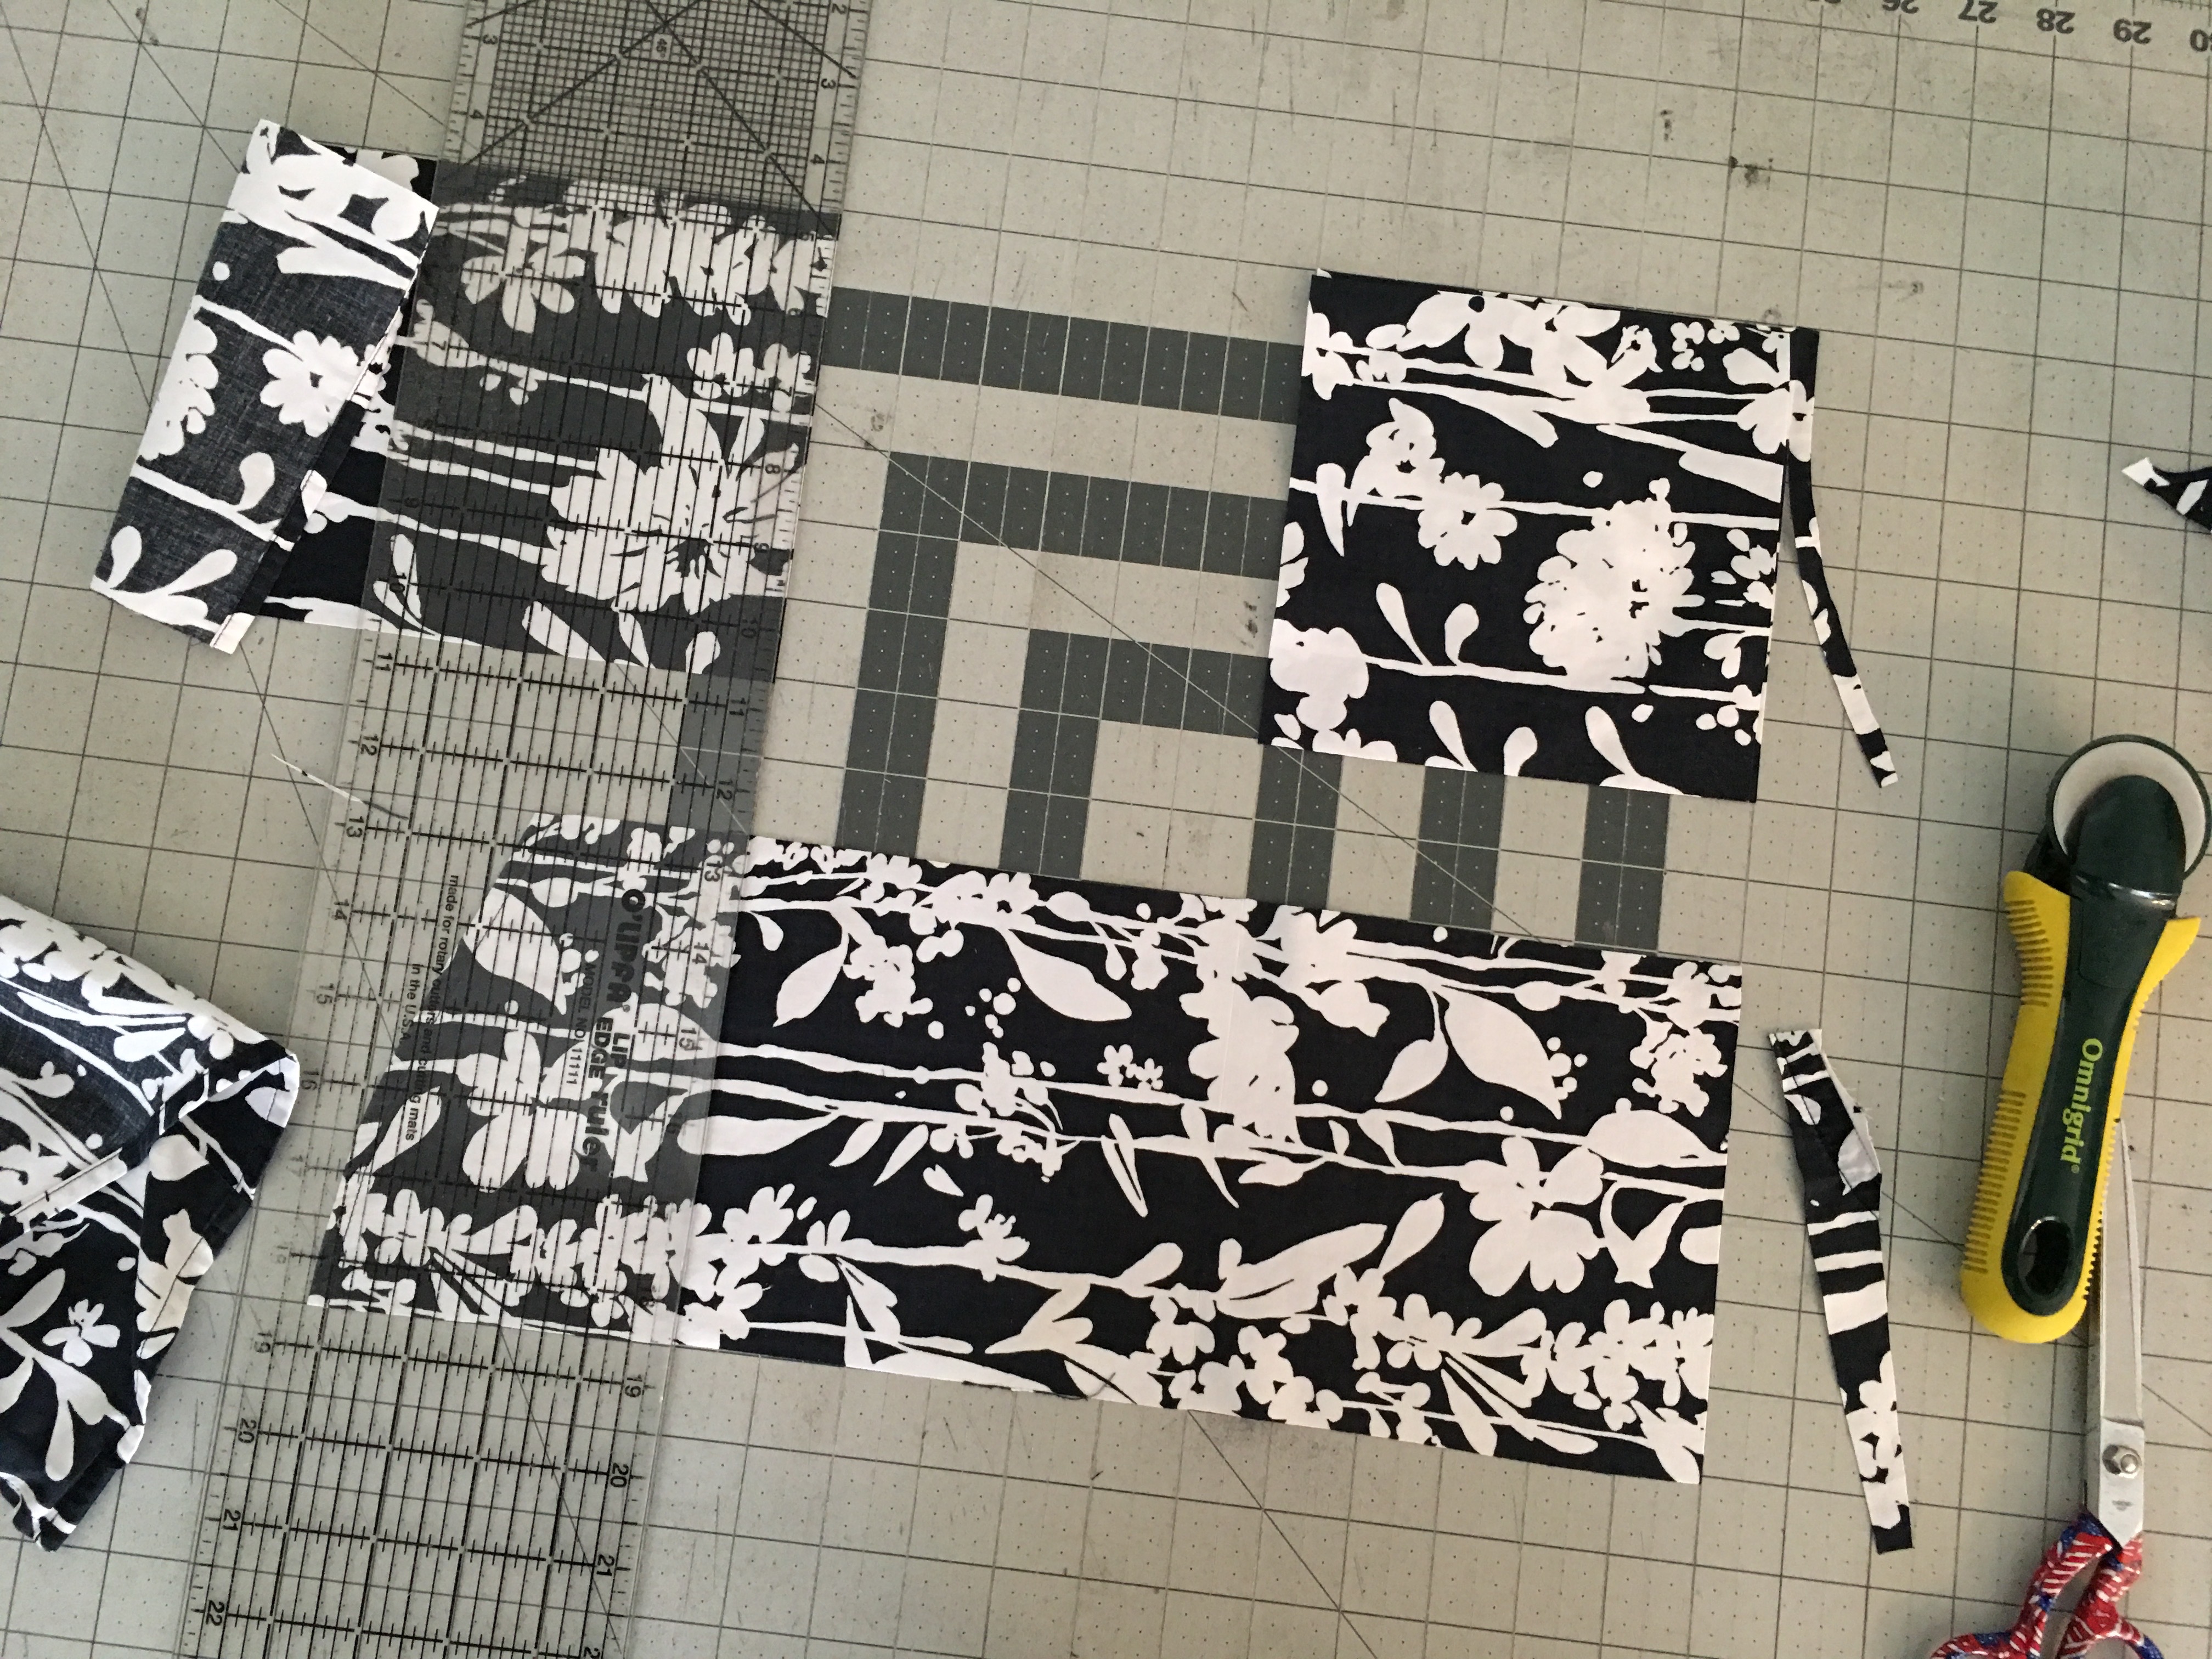
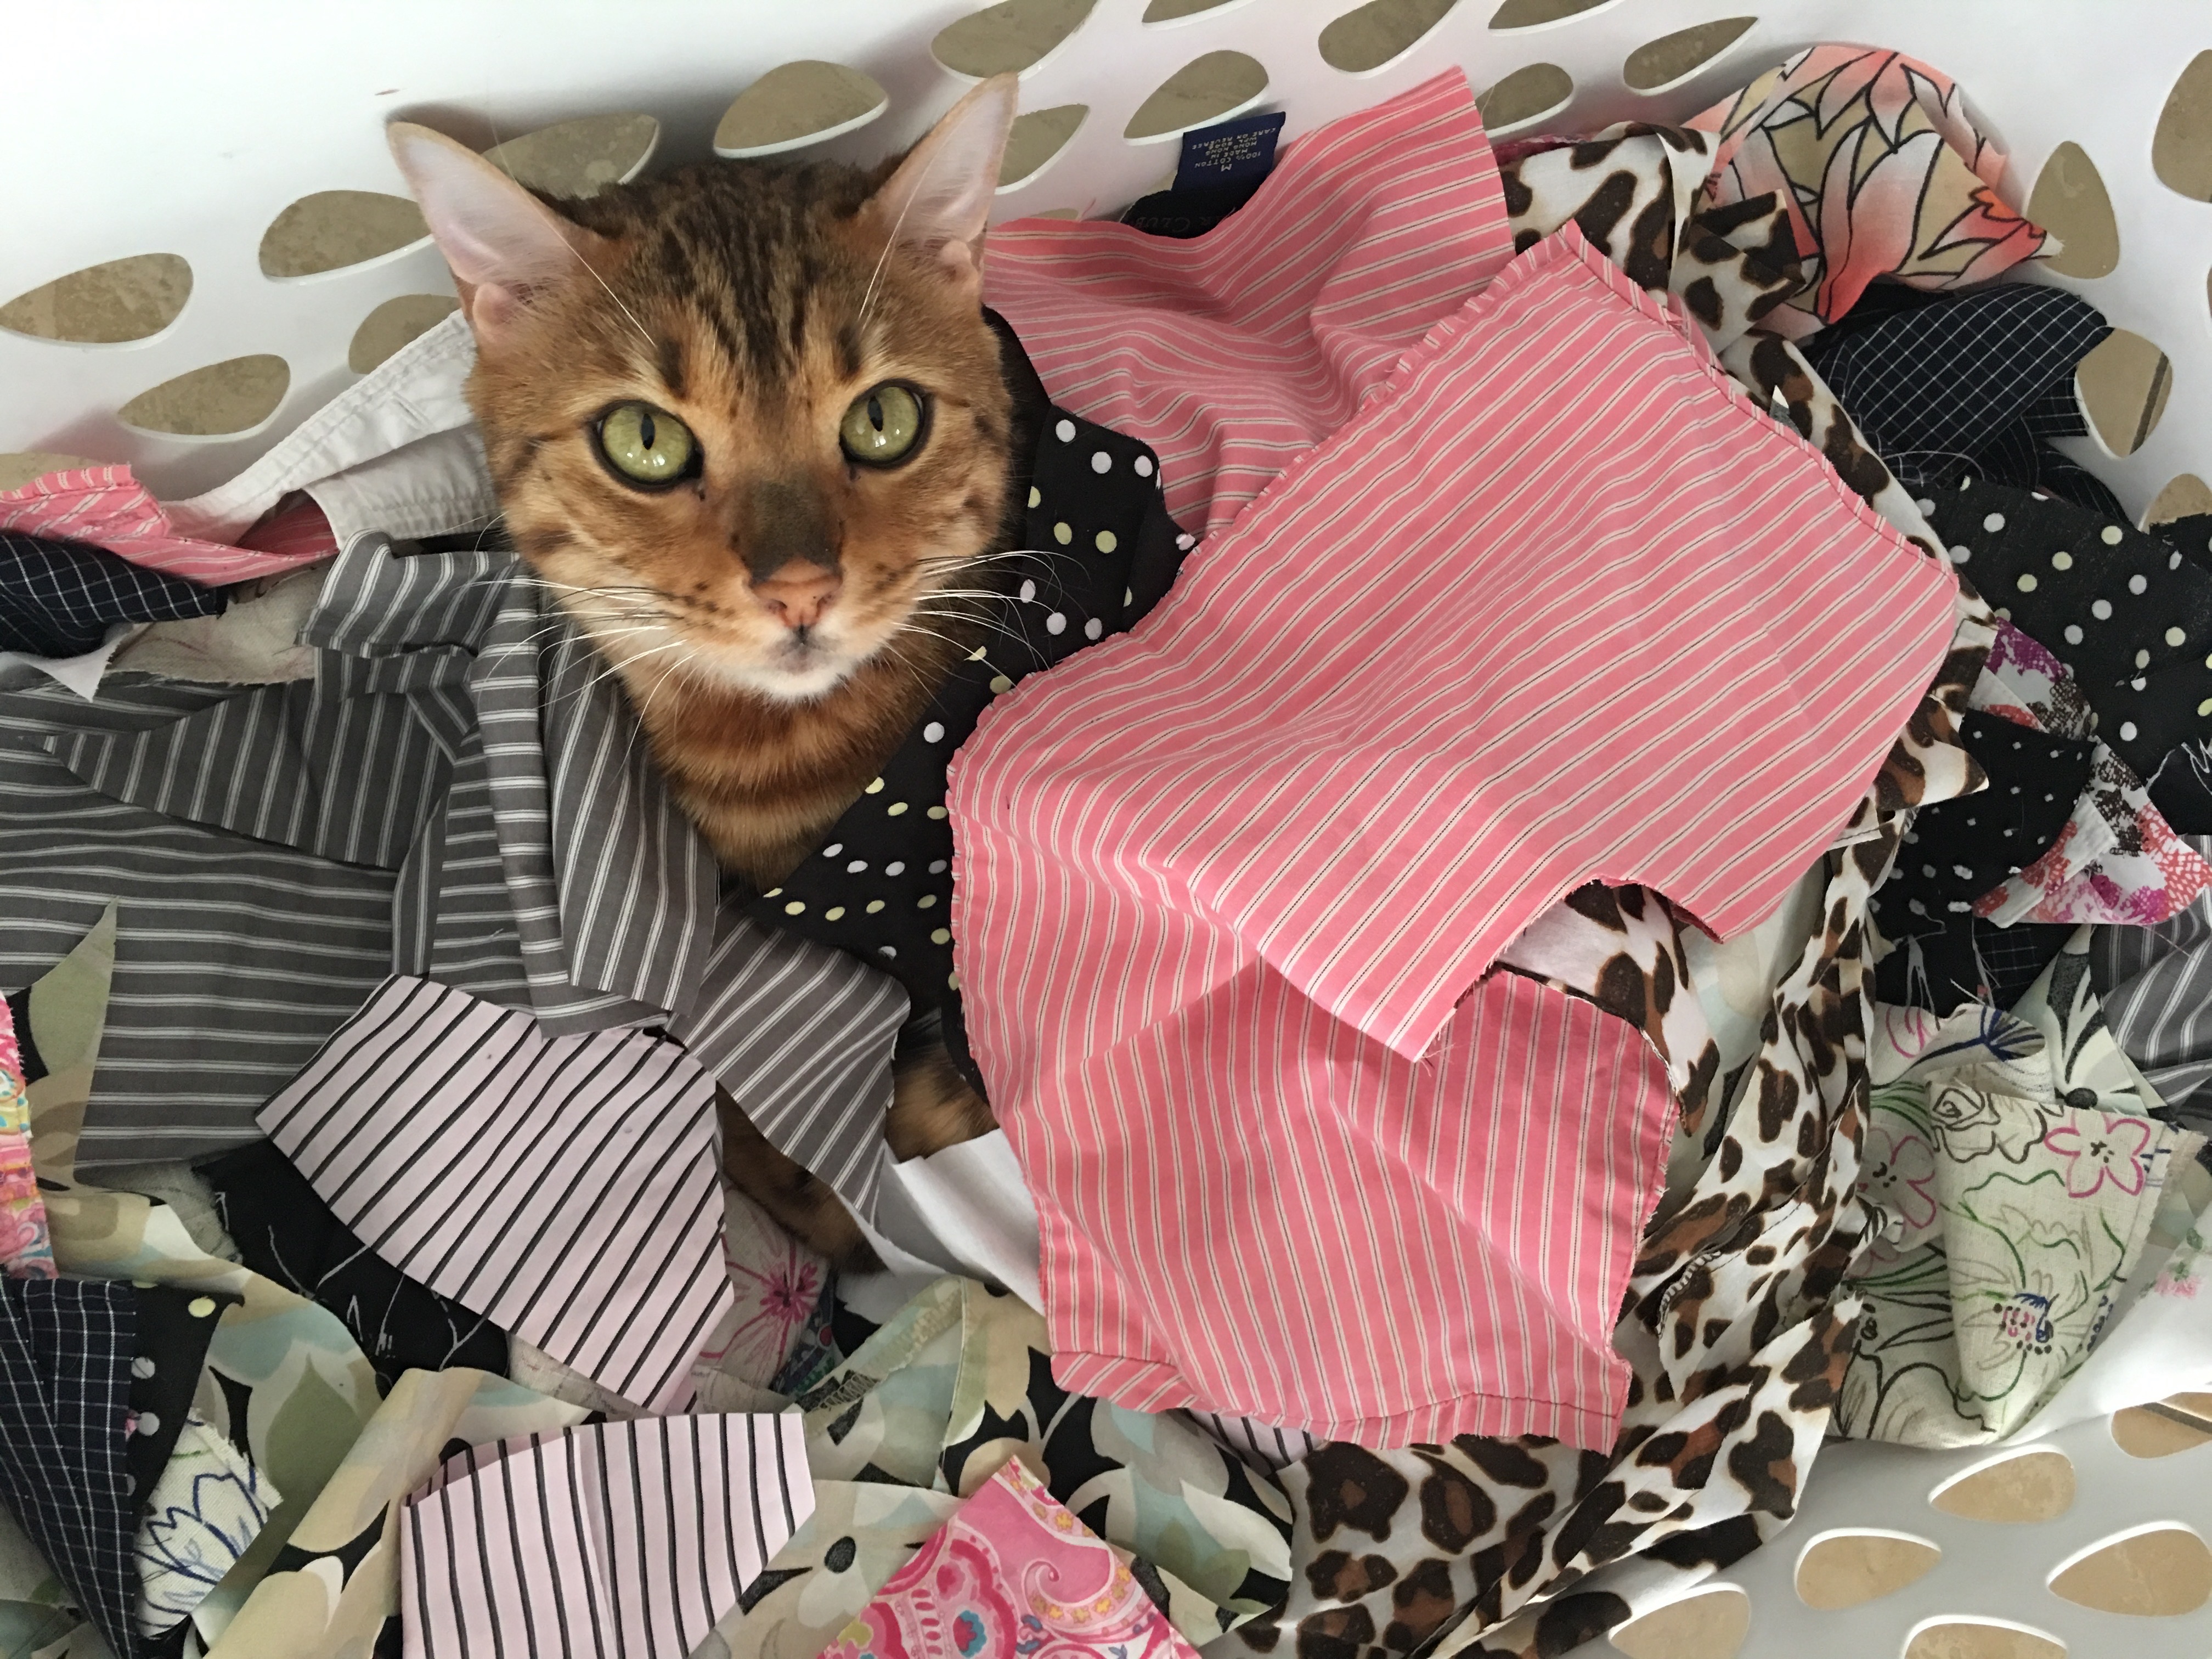
Once you have all your 6″ blouse squares, cut the 2 yards of background fabric up into 6″ squares. I let my girls lay out the quilts on the floor. I wanted them to have a random look, so we tried to space the blacks, and pinks so they didn’t make a pattern. It’s also helpful if you let your cat in on the project 🙂
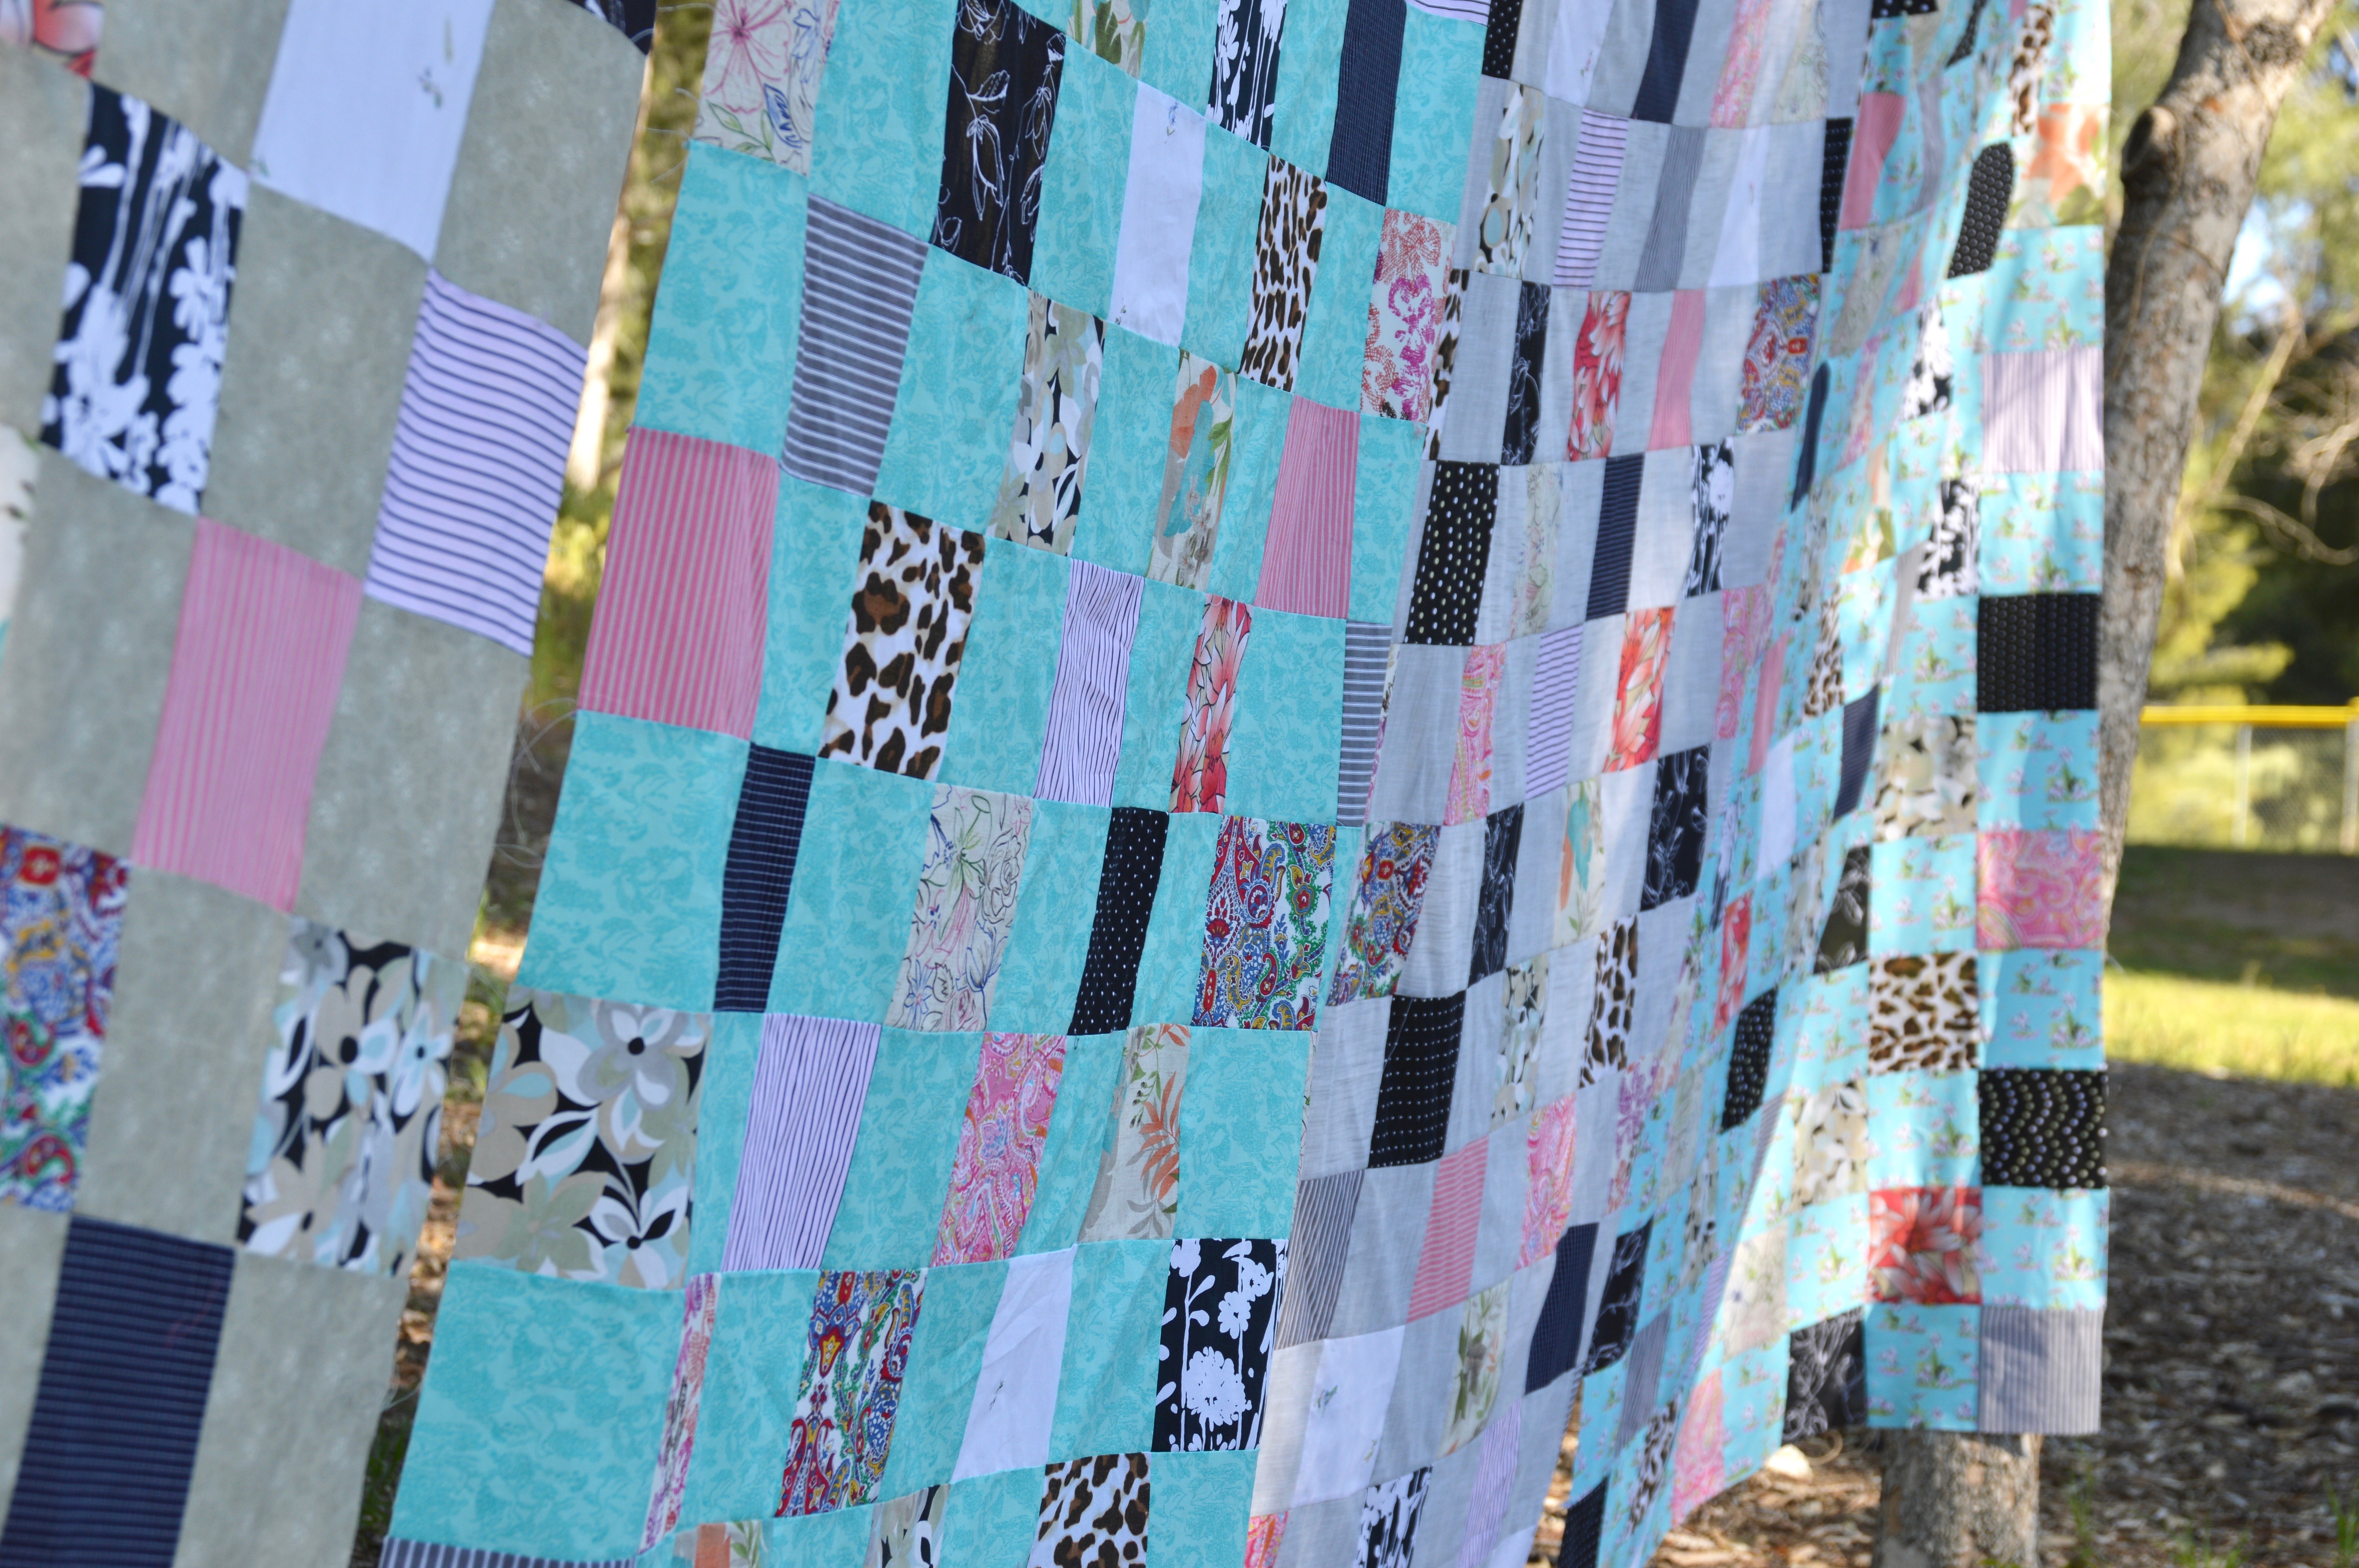
Sew the squares together in rows, and press. I pin numbers on to the first square in each row so I won’t get them mixed up. I pressed the seams toward the odd number and away from the even number. If I do this I don’t get mixed up either! Pin each row together matching the seam intersections. Sew the rows together and press all the seams going in one direction. The finished quilt measures 55″ x 82.5″

I choose matching minky to go on the back of each quilt so they are super soft and cuddly. I envisioned these quilts becoming the quilts the family fights over when it’s movie night or the first quilt you grab when you are going to the park or the beach. They are made to be used & loved so we can think of Nana often 🙂
I hope this inspires you to make something special for your family!
This one is my favorite picture because it looks like it might be on the farm in Kansas where Nana grew up….and now the tears 🙂


Oh Amanda – I can just envision the tears – I am so, so sorry for your loss. It has been 4 years since my mother passed away, and though I have sorted her cloths a few times, I just can’t seem to let go of her last cloths she had. She had such beautiful dresses, tops and pant sets. I wanted to use them in a memory quilt, but could not motivate myself to cut them up yet. I made table toppers with new fabric in mom & dad’s memory, but your quilts have given me an idea. Thank you for this tutorial and I know this has helped in your healing, but it takes time. So often I wish I could still call up my mom & dad or sit across from them and talk about life, but then I remember the lovely memories they left behind and hold fast to those!!
Beautiful. I wish I had been quilting when my grandmother passed away nearly 11 years ago. My mama still has a few of her shirts. I may need to see if I can do this or make a memory pillow with them. The great thing is I have a quilt Grandmama made for me years ago which contains all her and my granddaddy’s old shirts. Just looking at it makes me feel closer to her. I hope your quilt brings you comfort.
liberty slots casino
References:
kbragri.in
anabolic steroids gnc
References:
urlscan.io
what are some of the negative consequences associated with the use of anabolic steroids?
References:
posteezy.com
References:
Hoosier park racing and casino
References:
en.najumary.or.kr
steroids bodybuilding side effects
References:
justbookmark.win
References:
Oaks casino towers
References:
http://shinhwaspodium.com/bbs/board.php?bo_table=free&wr_id=3741396&page=75040
References:
Royal reels https://graph.org/Treasury-Casino-A-Comprehensive-Guide-to-Brisbanes-Iconic-Venue-04-20 payout percentage
References:
Casino san manuel
References:
https://graph.org/Top-Online-Casino-Reviews-04-20
References:
Online vegas casino
References:
https://hotel-casino-las-vegas.online-spielhallen.de/
References:
Osnabrück
References:
https://princess-casino-bonus.online-spielhallen.de/
References:
Remscheid
References:
https://taj-mahal-casino.online-spielhallen.de/
References:
Jena
References:
https://spiel-casino.online-spielhallen.de/
References:
George thorogood
References:
https://graph.org/List-Of-Australian-Poker-Machines-04-27
References:
Wolf run slot machine
References:
https://jobcopae.com/employer/payid-casinos-2026-fastest-withdrawals-tested-0-2h-payouts/
References:
Seminole hard rock casino tampa https://tea.neuron.my/jason026690019/most-trusted-casino-sites-in-usa9041/wiki/Safe-Online-Casinos-Australia-2026-Trusted-AU-Casino-Sites
References:
Rosemont casino https://www.meetgr.com/@tinaf53870831
References:
Slot machine parts https://freeads.sg/profile/jarrodskeats5
References:
Indian head casino http://madk-auto.ru/user/cereallawyer9/
References:
Resort Casino Schweiz https://online-social-casinos.online-spielhallen.de