Caturday Sew Along October

caturday october
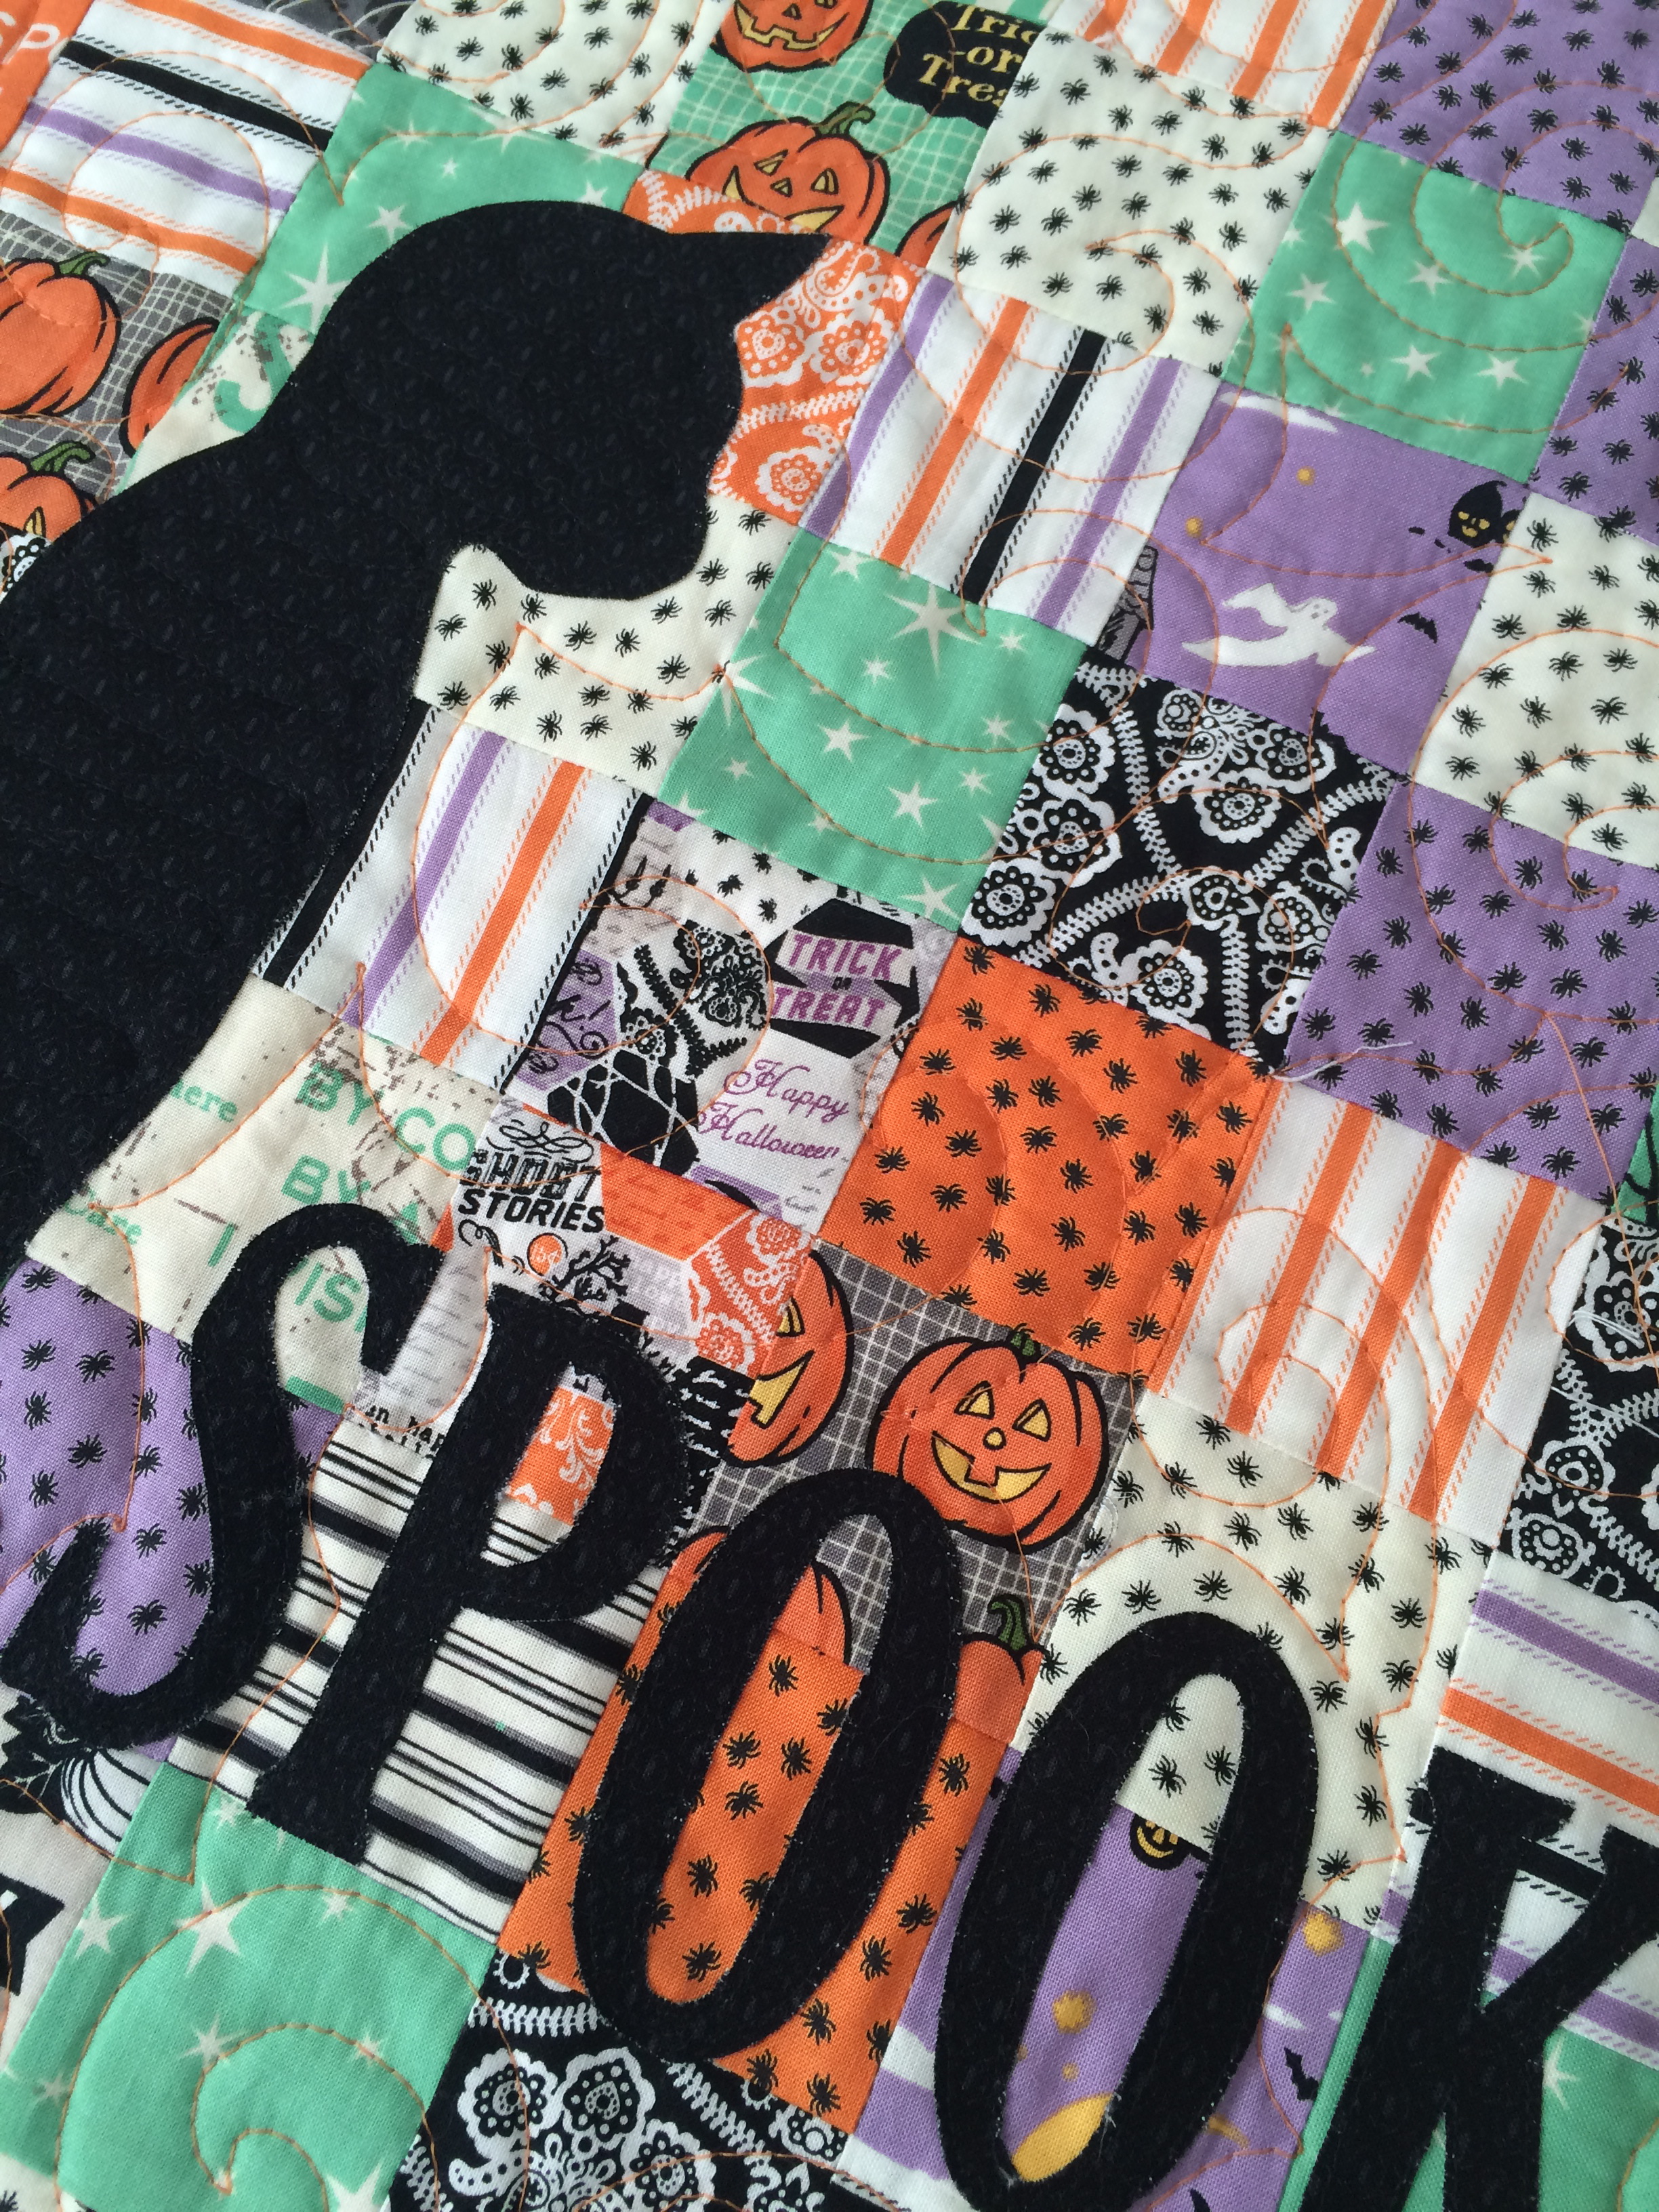
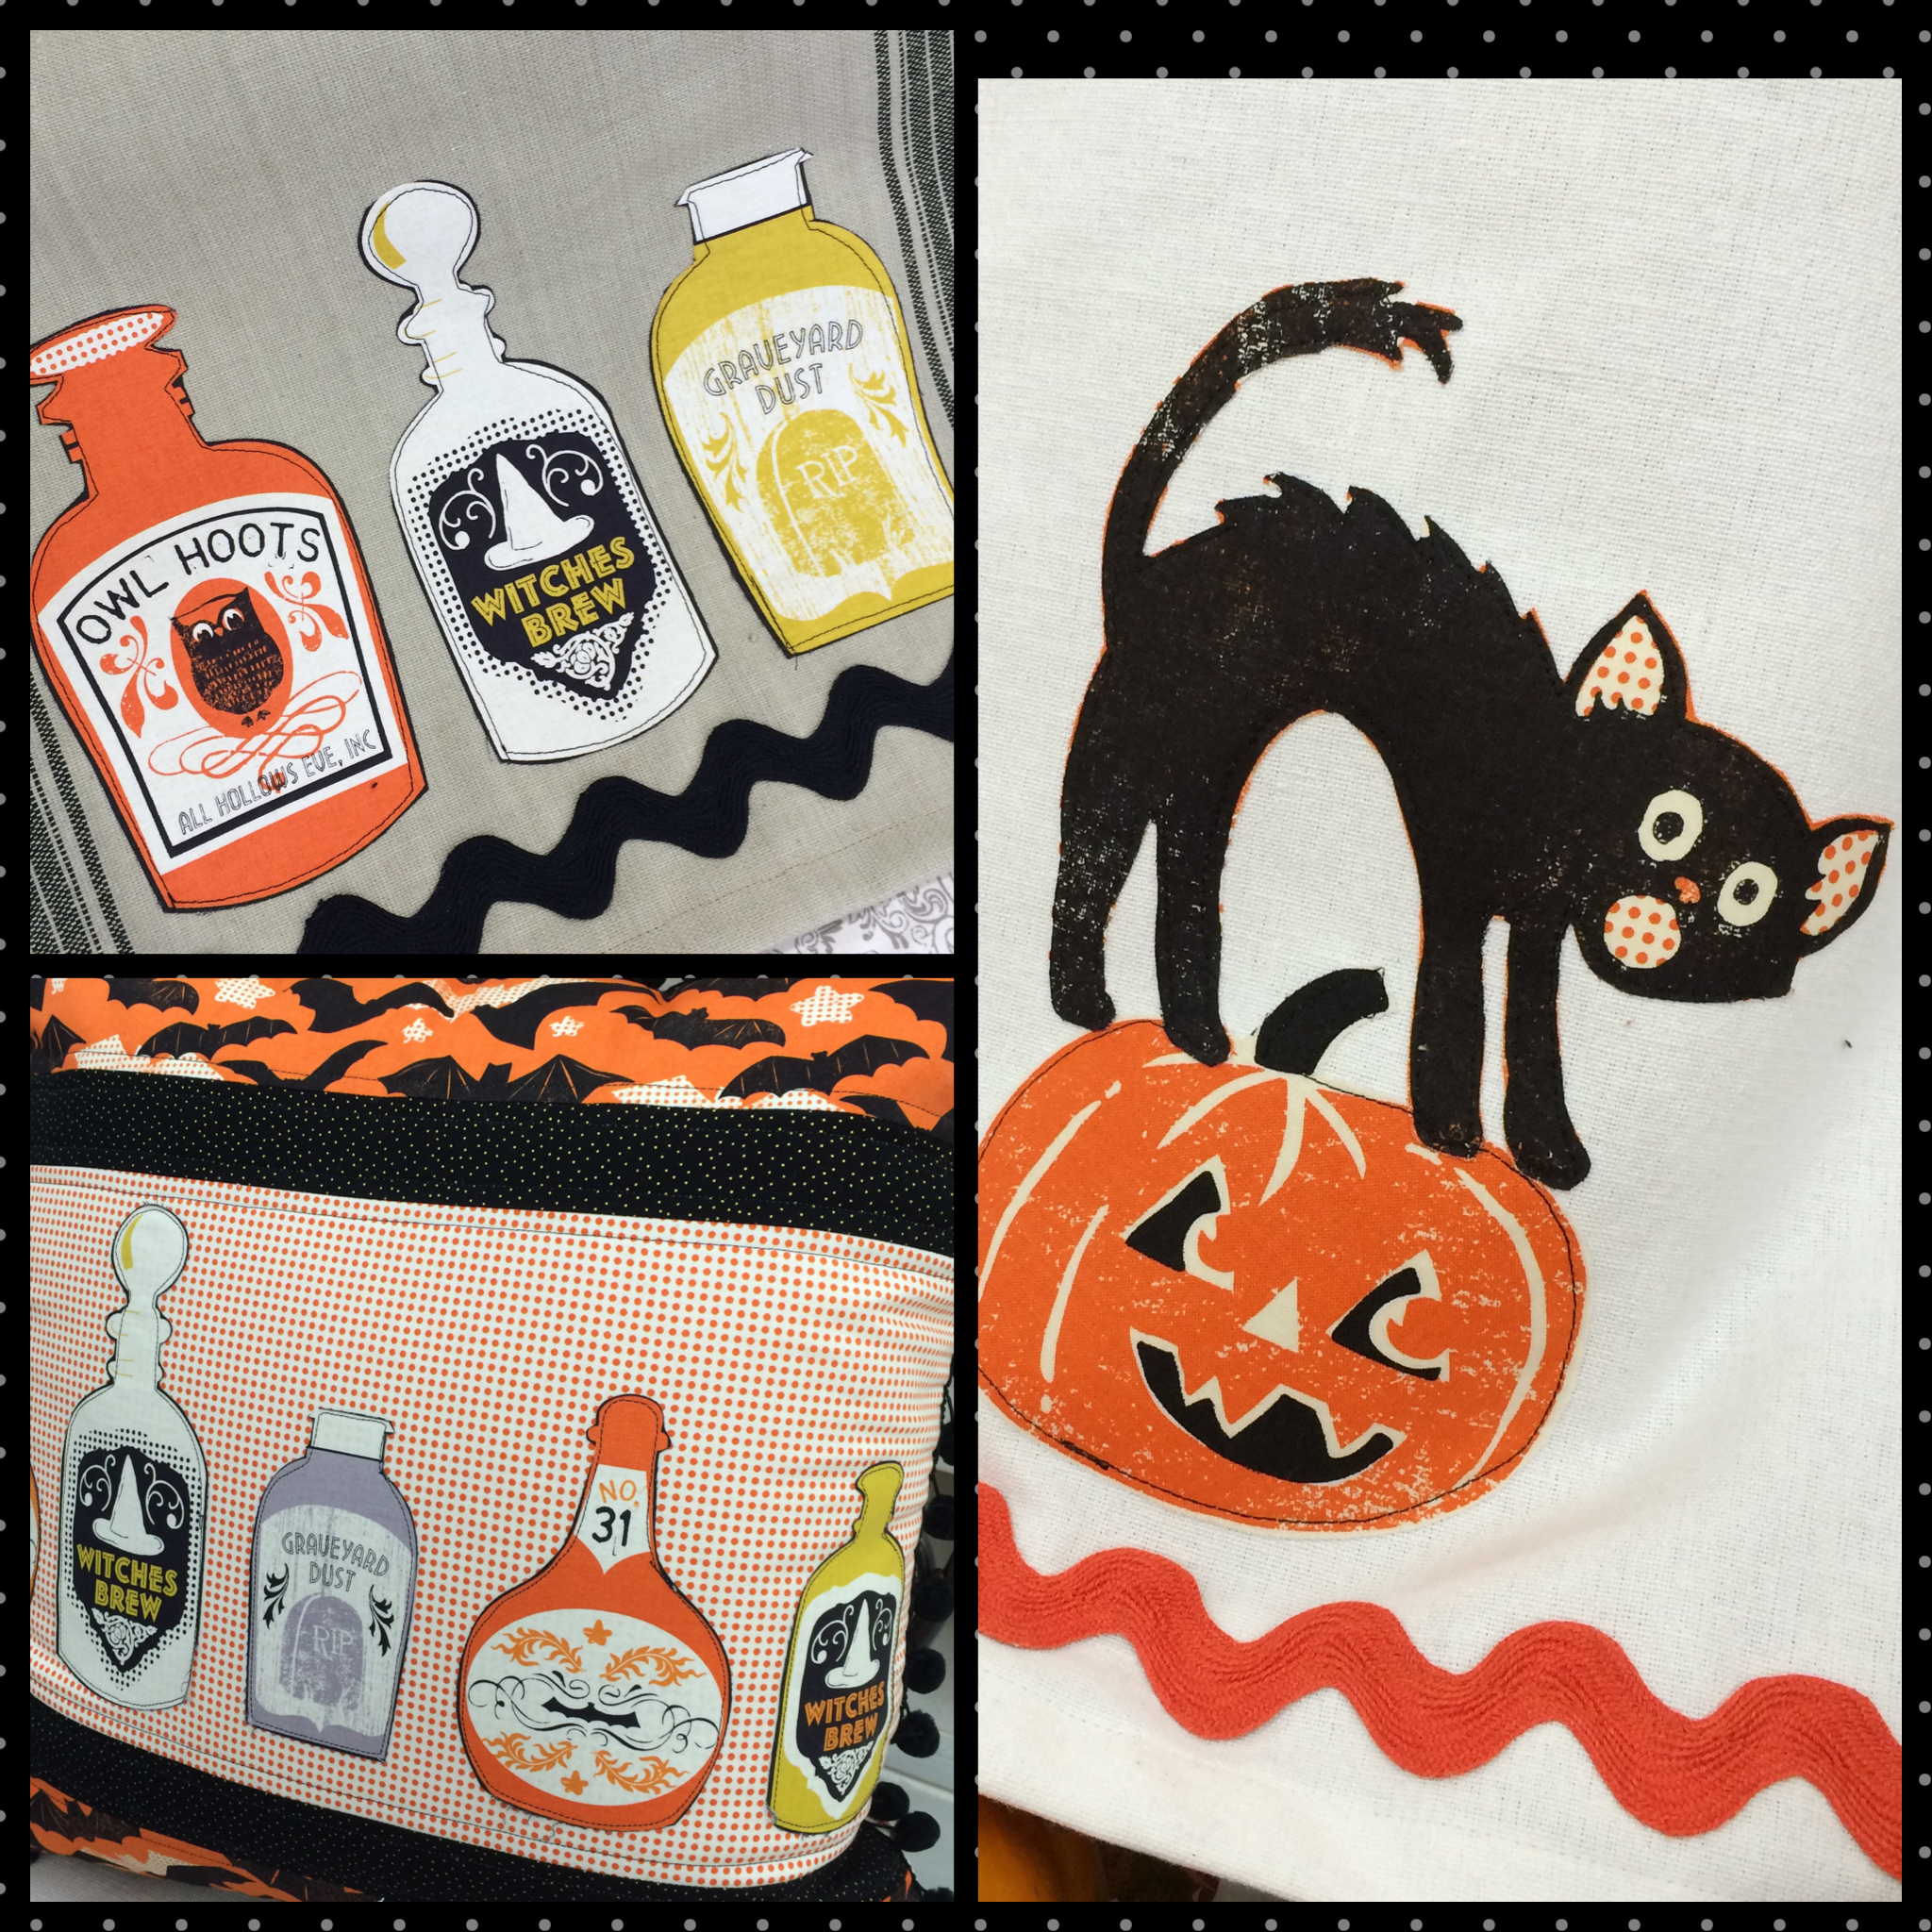
Welcome to the Caturday Sew Along!  I love cats and sewing!!!  I know a lot of you love sewing with your fur babies too!    Each month I will post a cat themed quilting project that we can sew together.  Post your progress on Instagram and tag it with #caturdaysewalong.  For October choose any variation of these three projects that use a cat silhouette and SPOOKY applique.  Click the links for the patterns.

spooky mini quilt tutorial
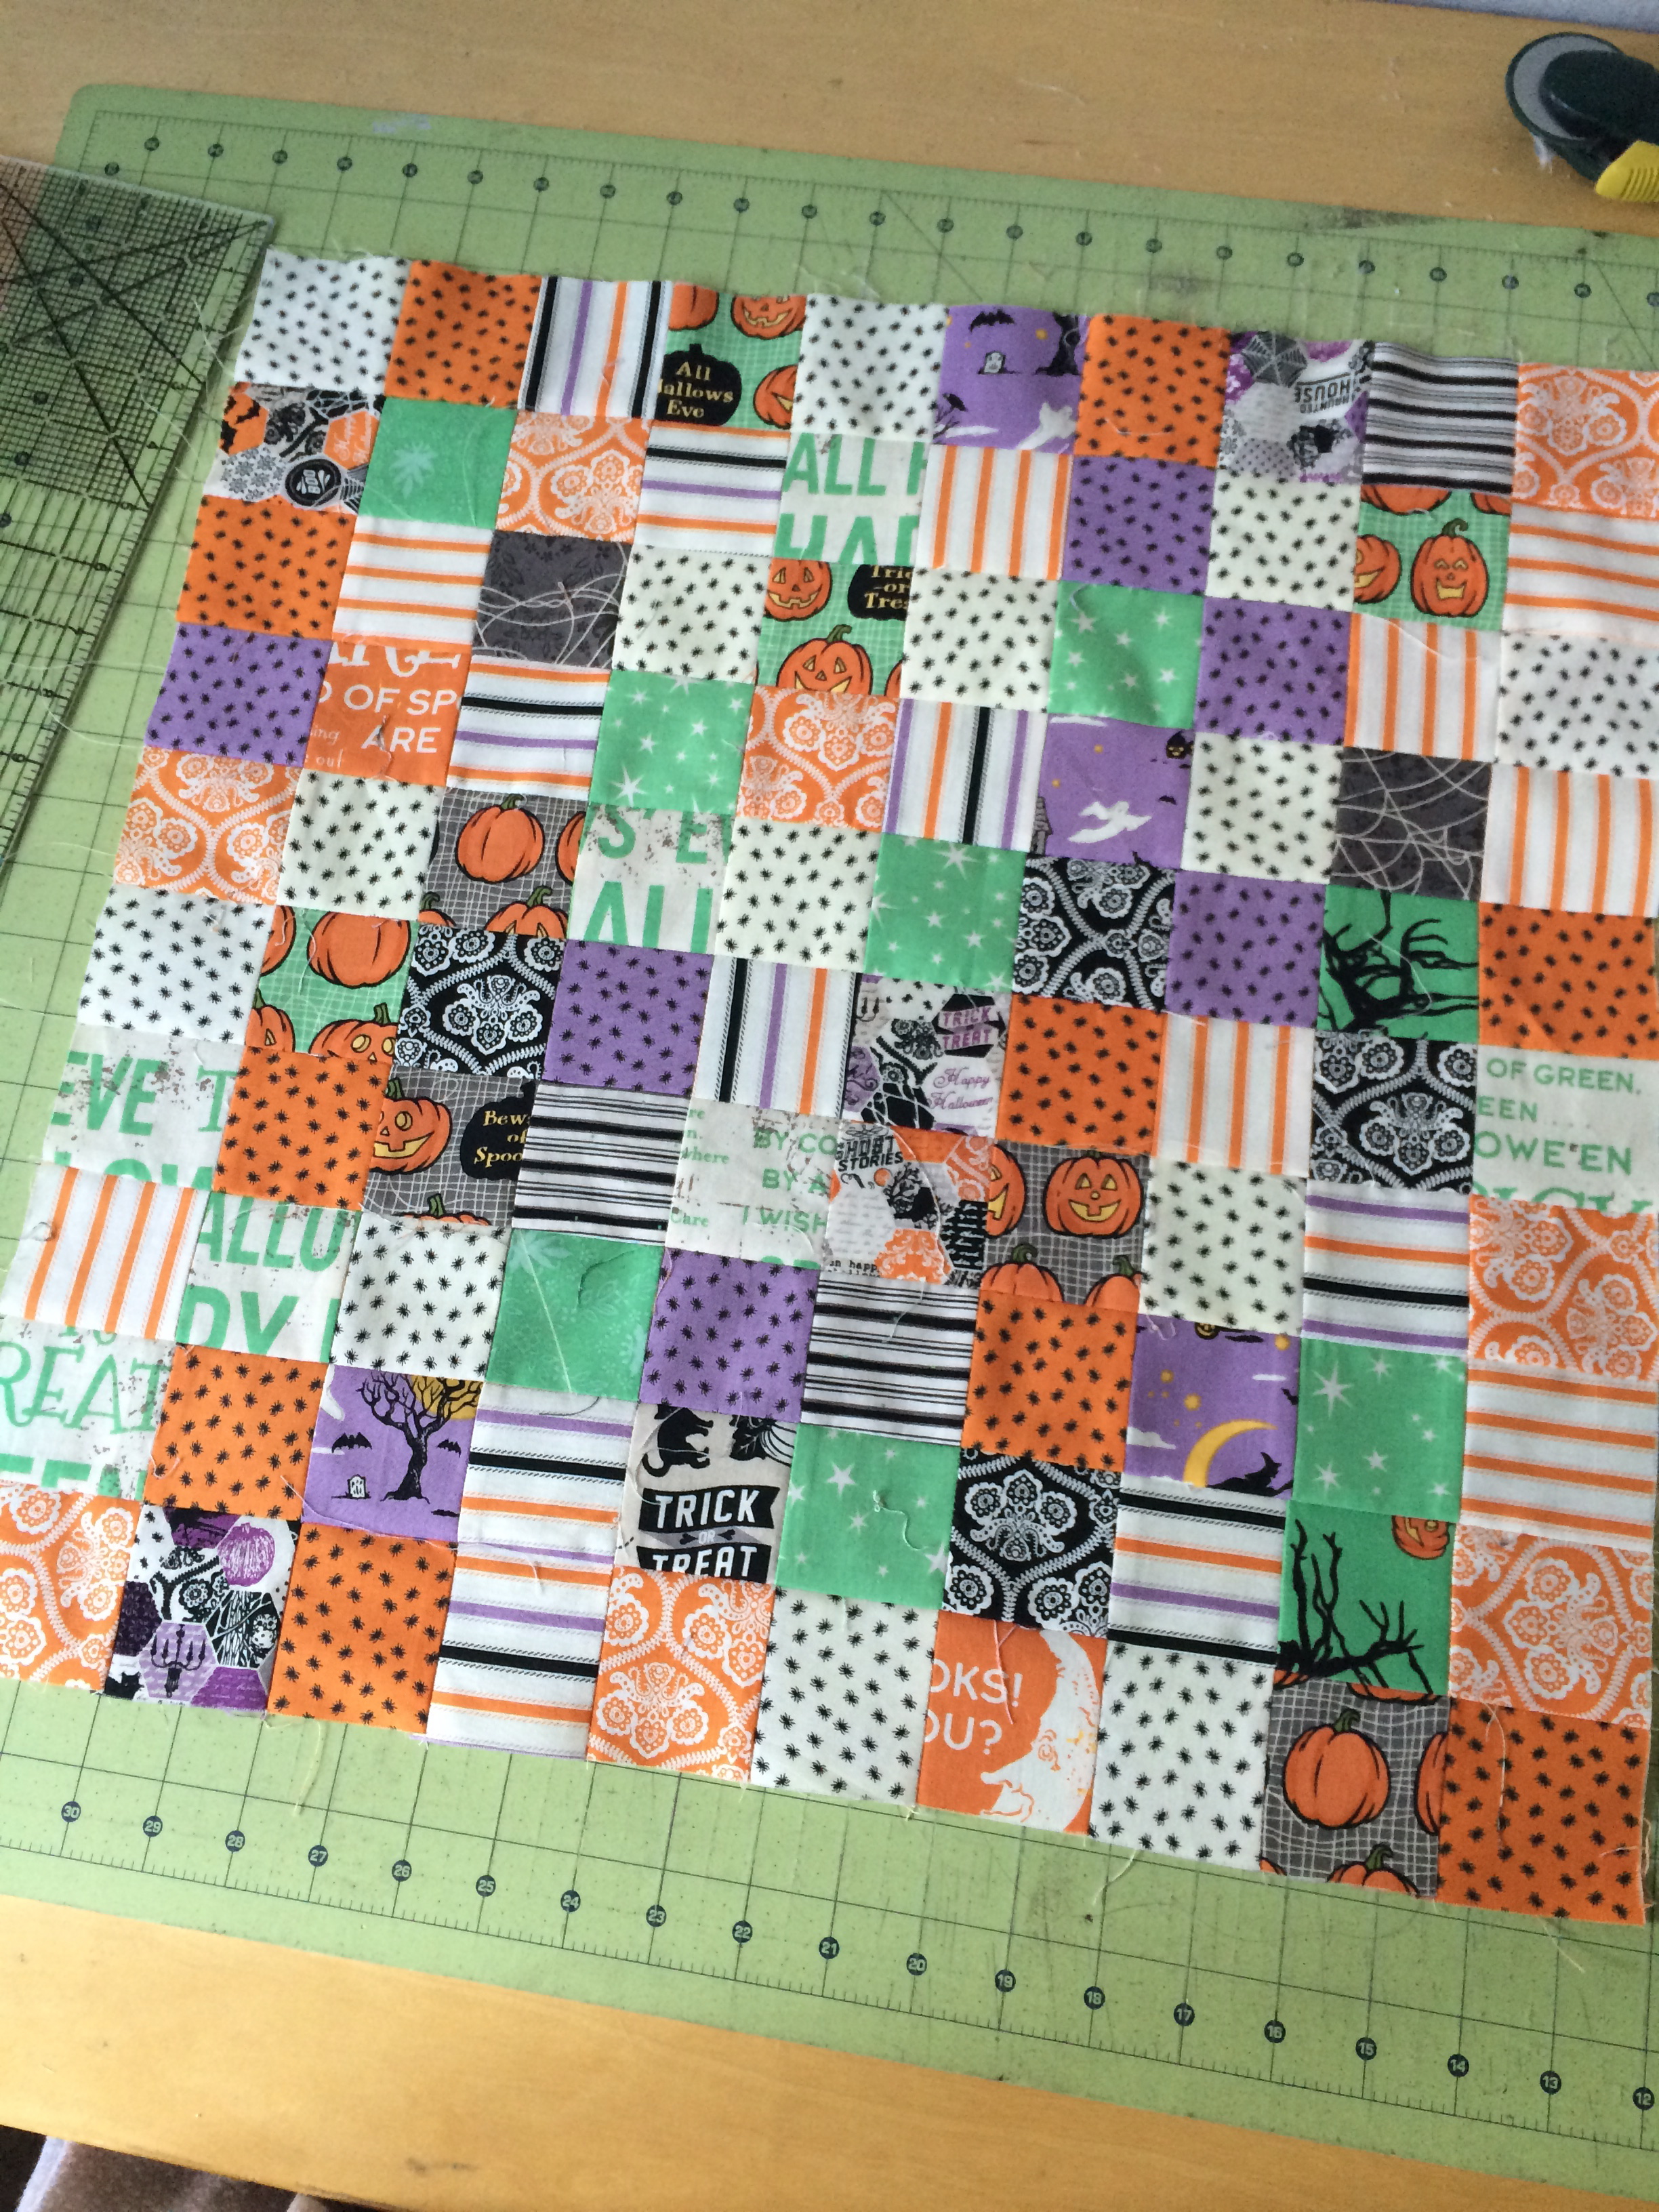
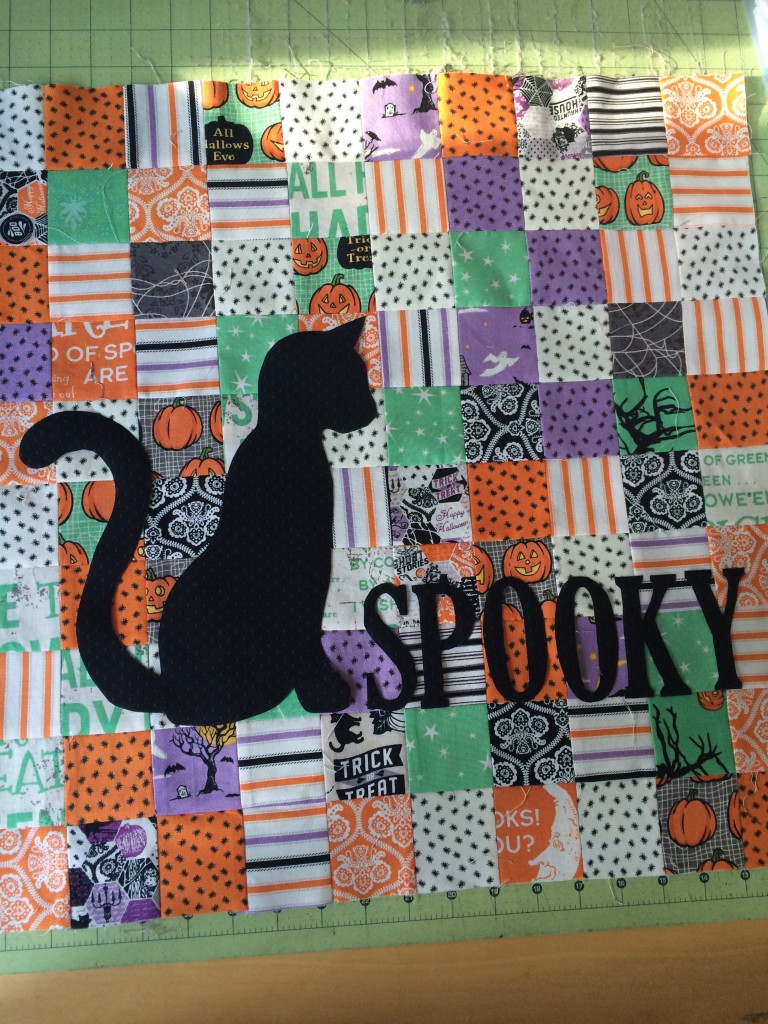
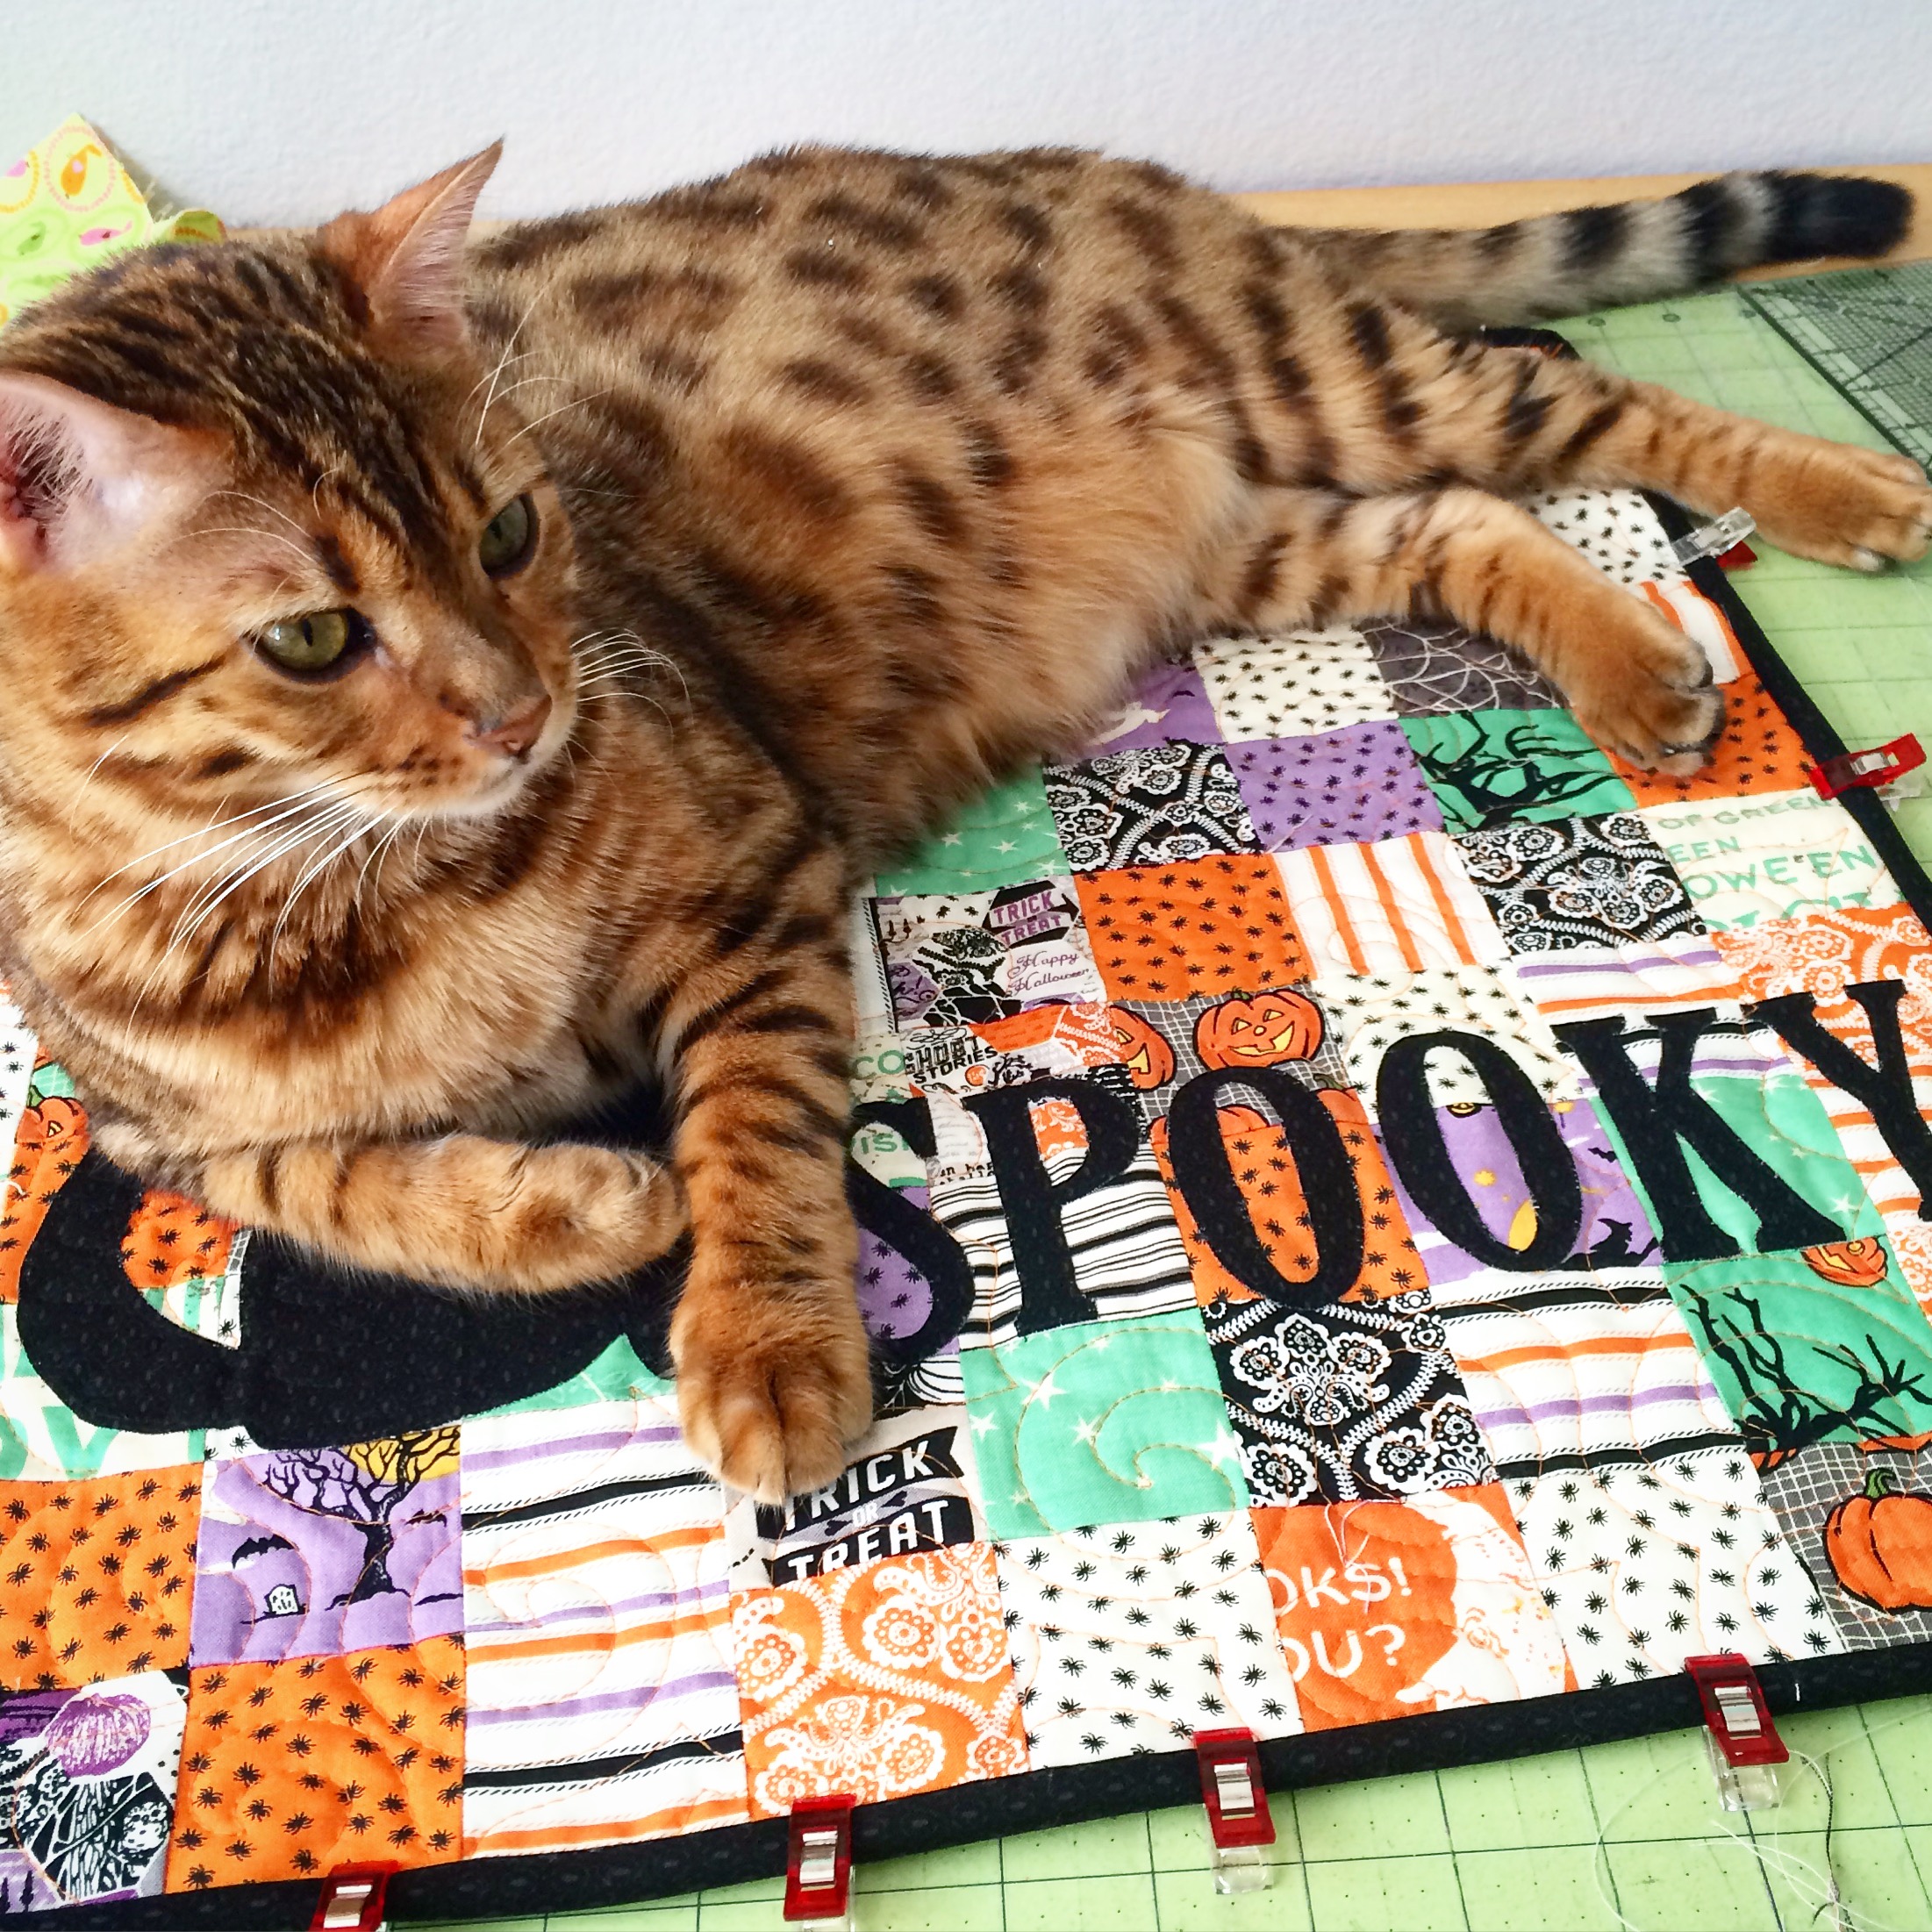
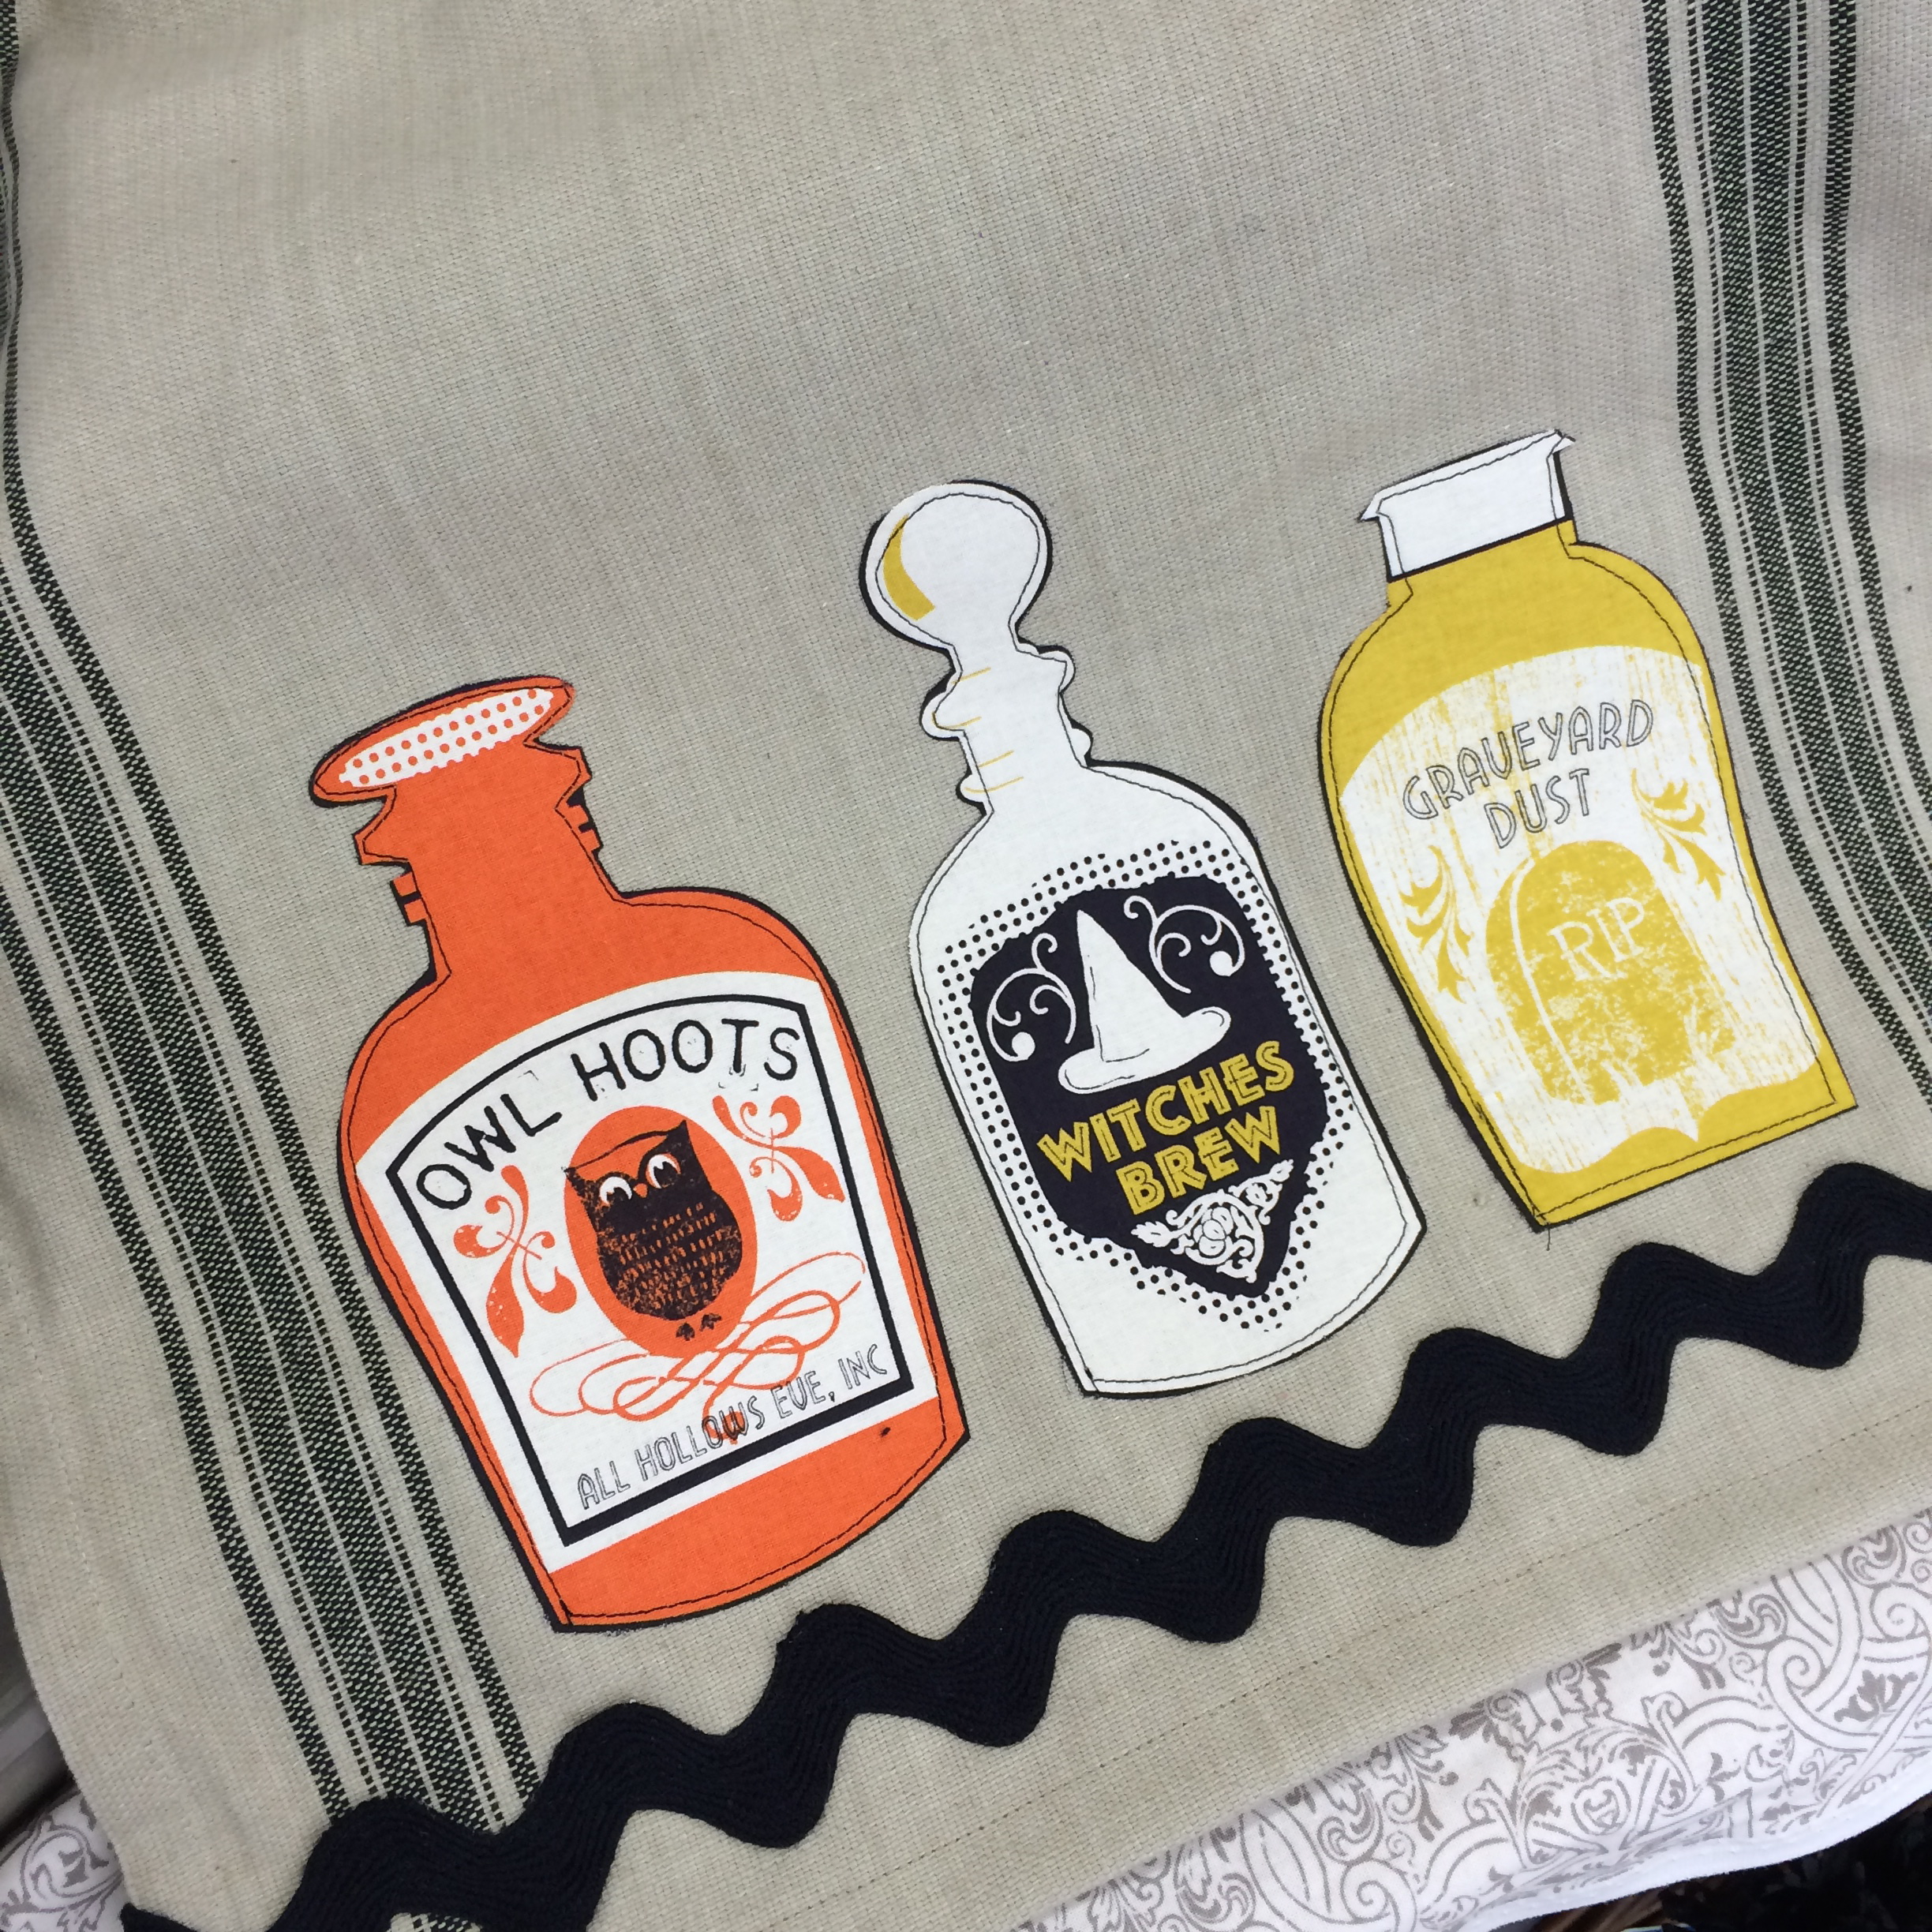
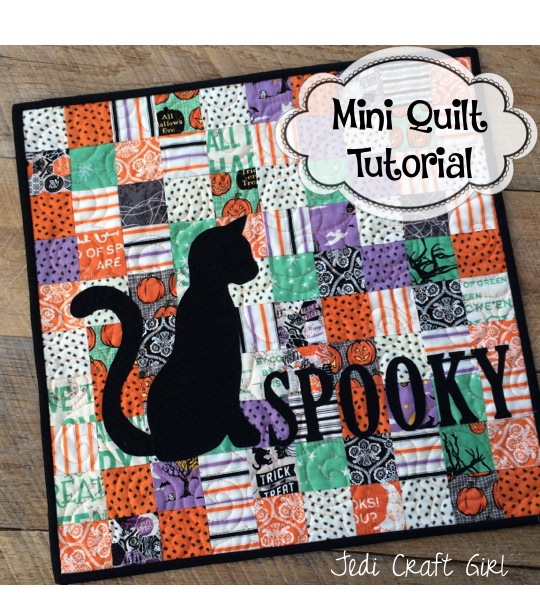
This Spooky mini quilt measures 20″ square and uses 2.5″ squares to complete.  It’s such a fun way to use up those Halloween scraps you’ve been saving!!  Click HERE for the tutorial.

spooky_quilt_tutorial
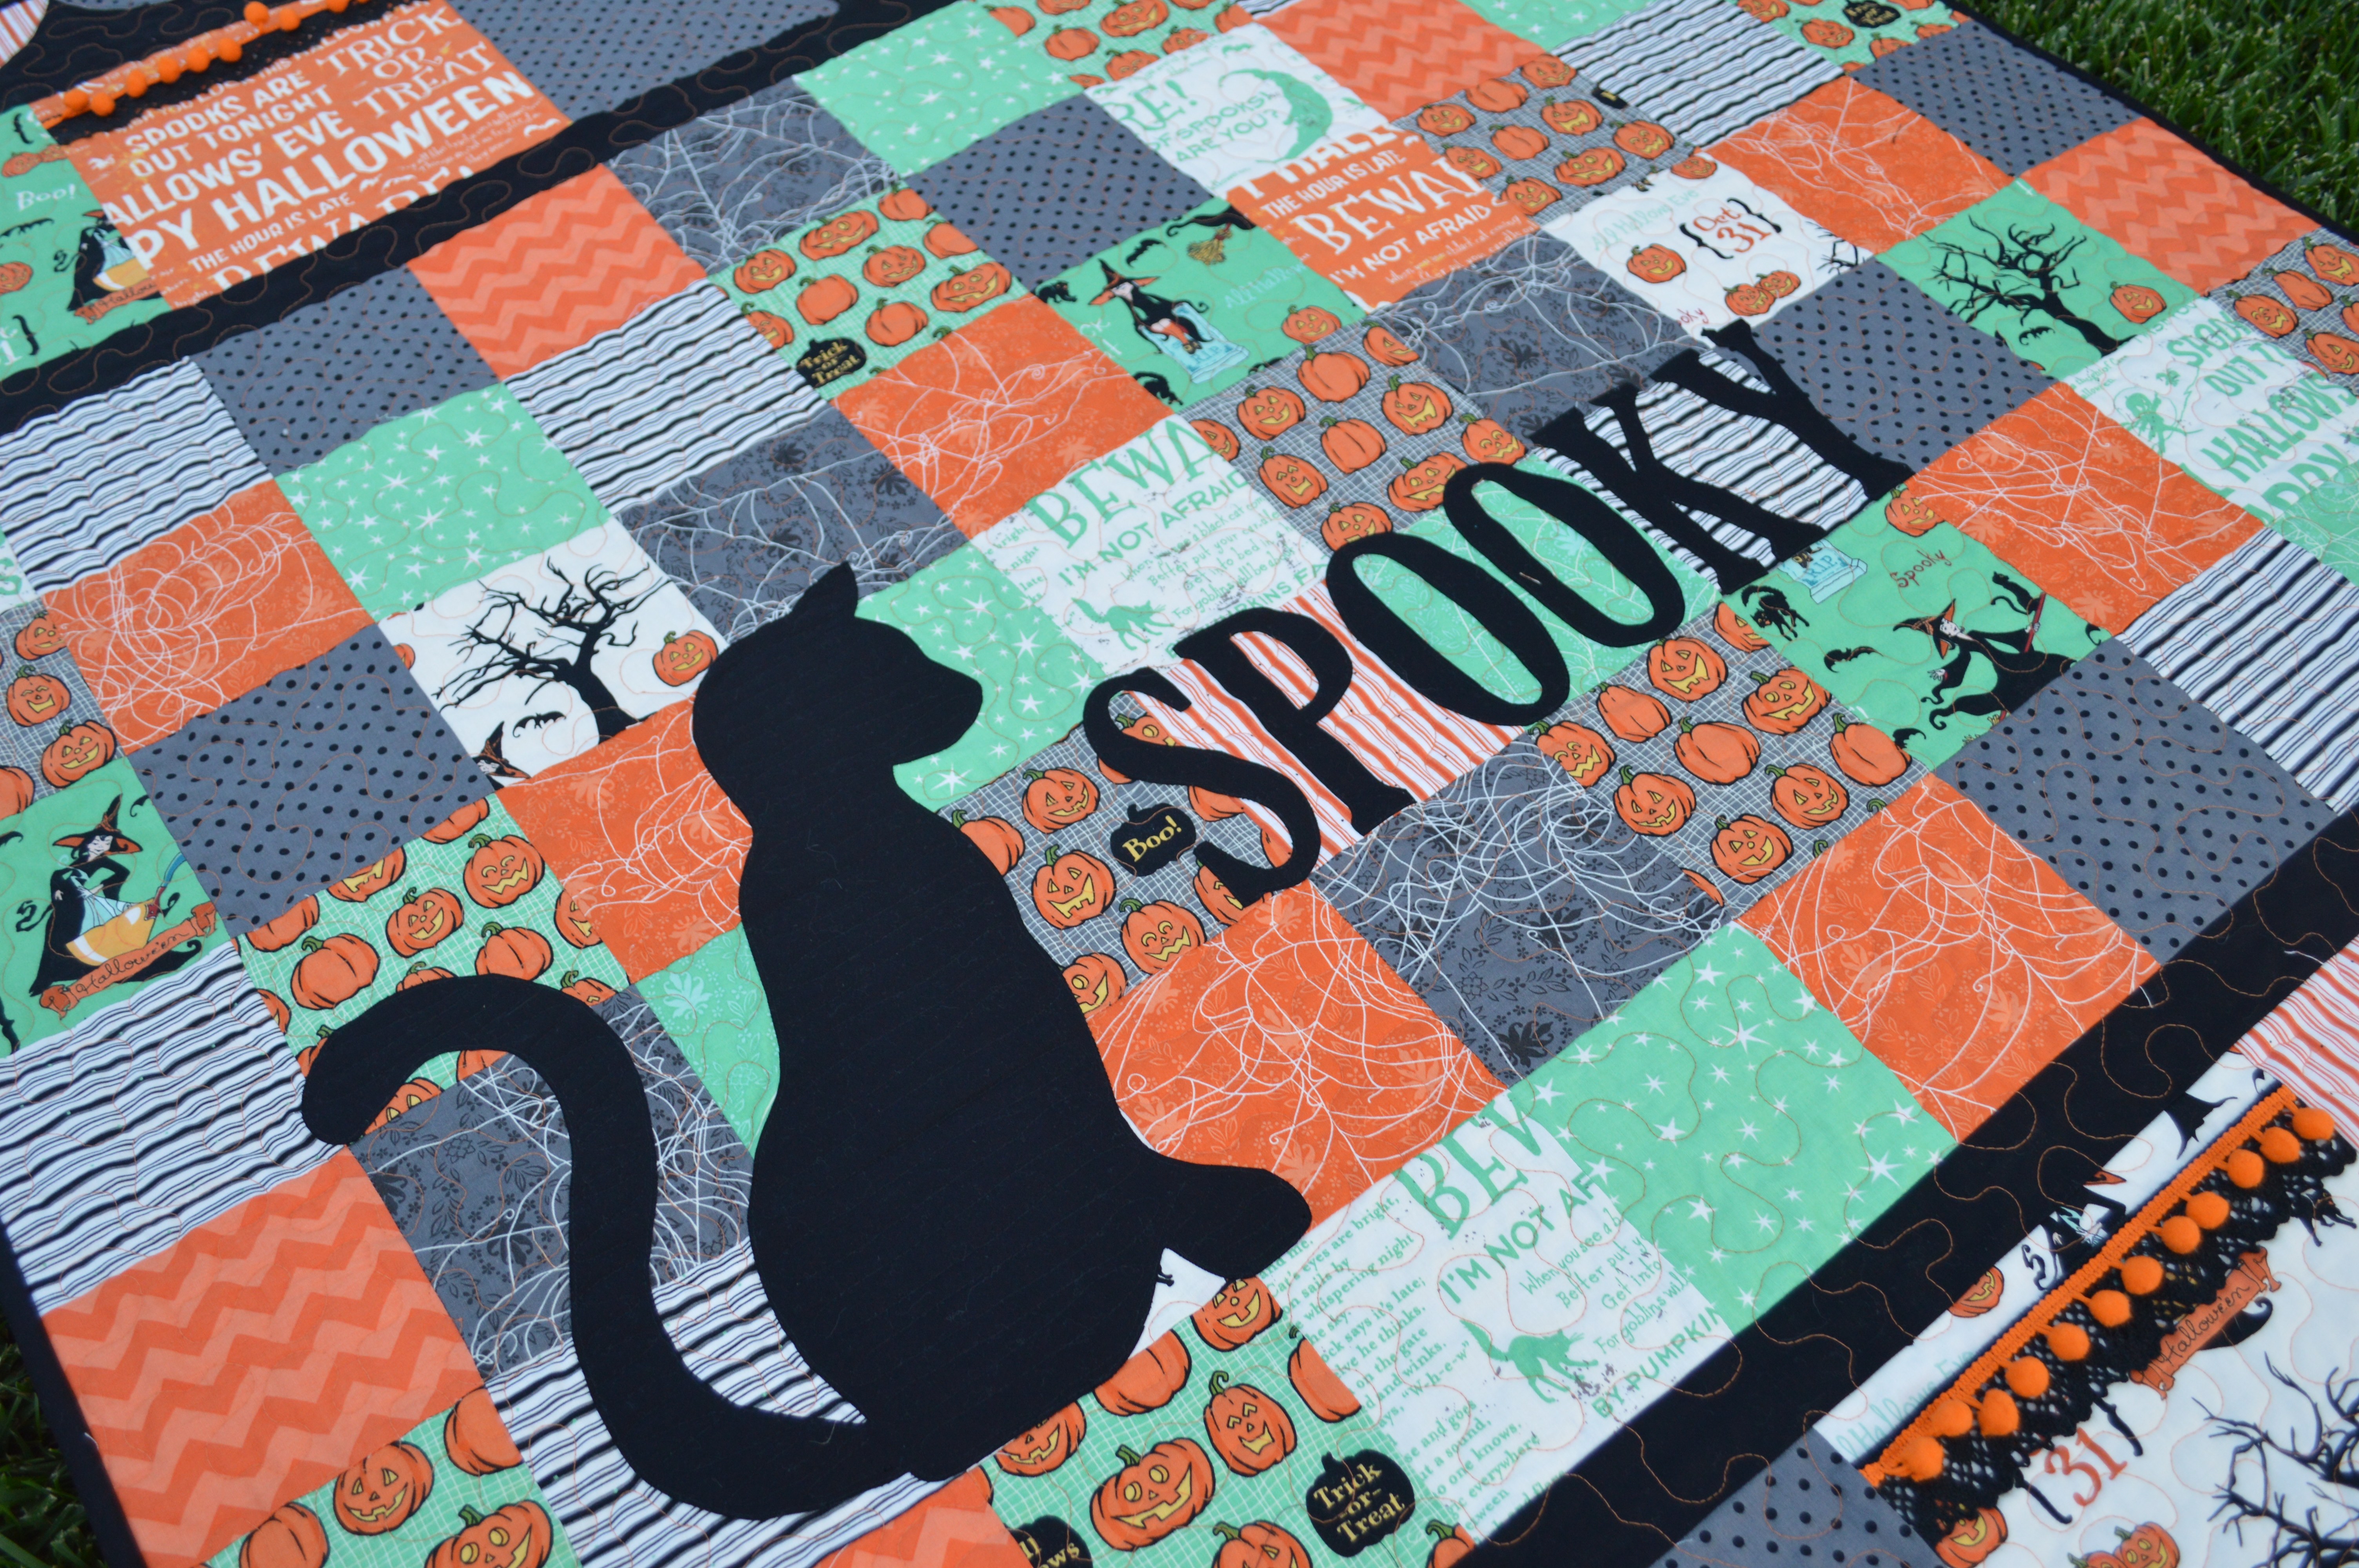
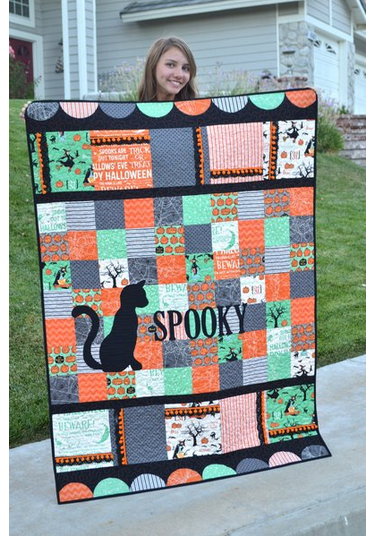
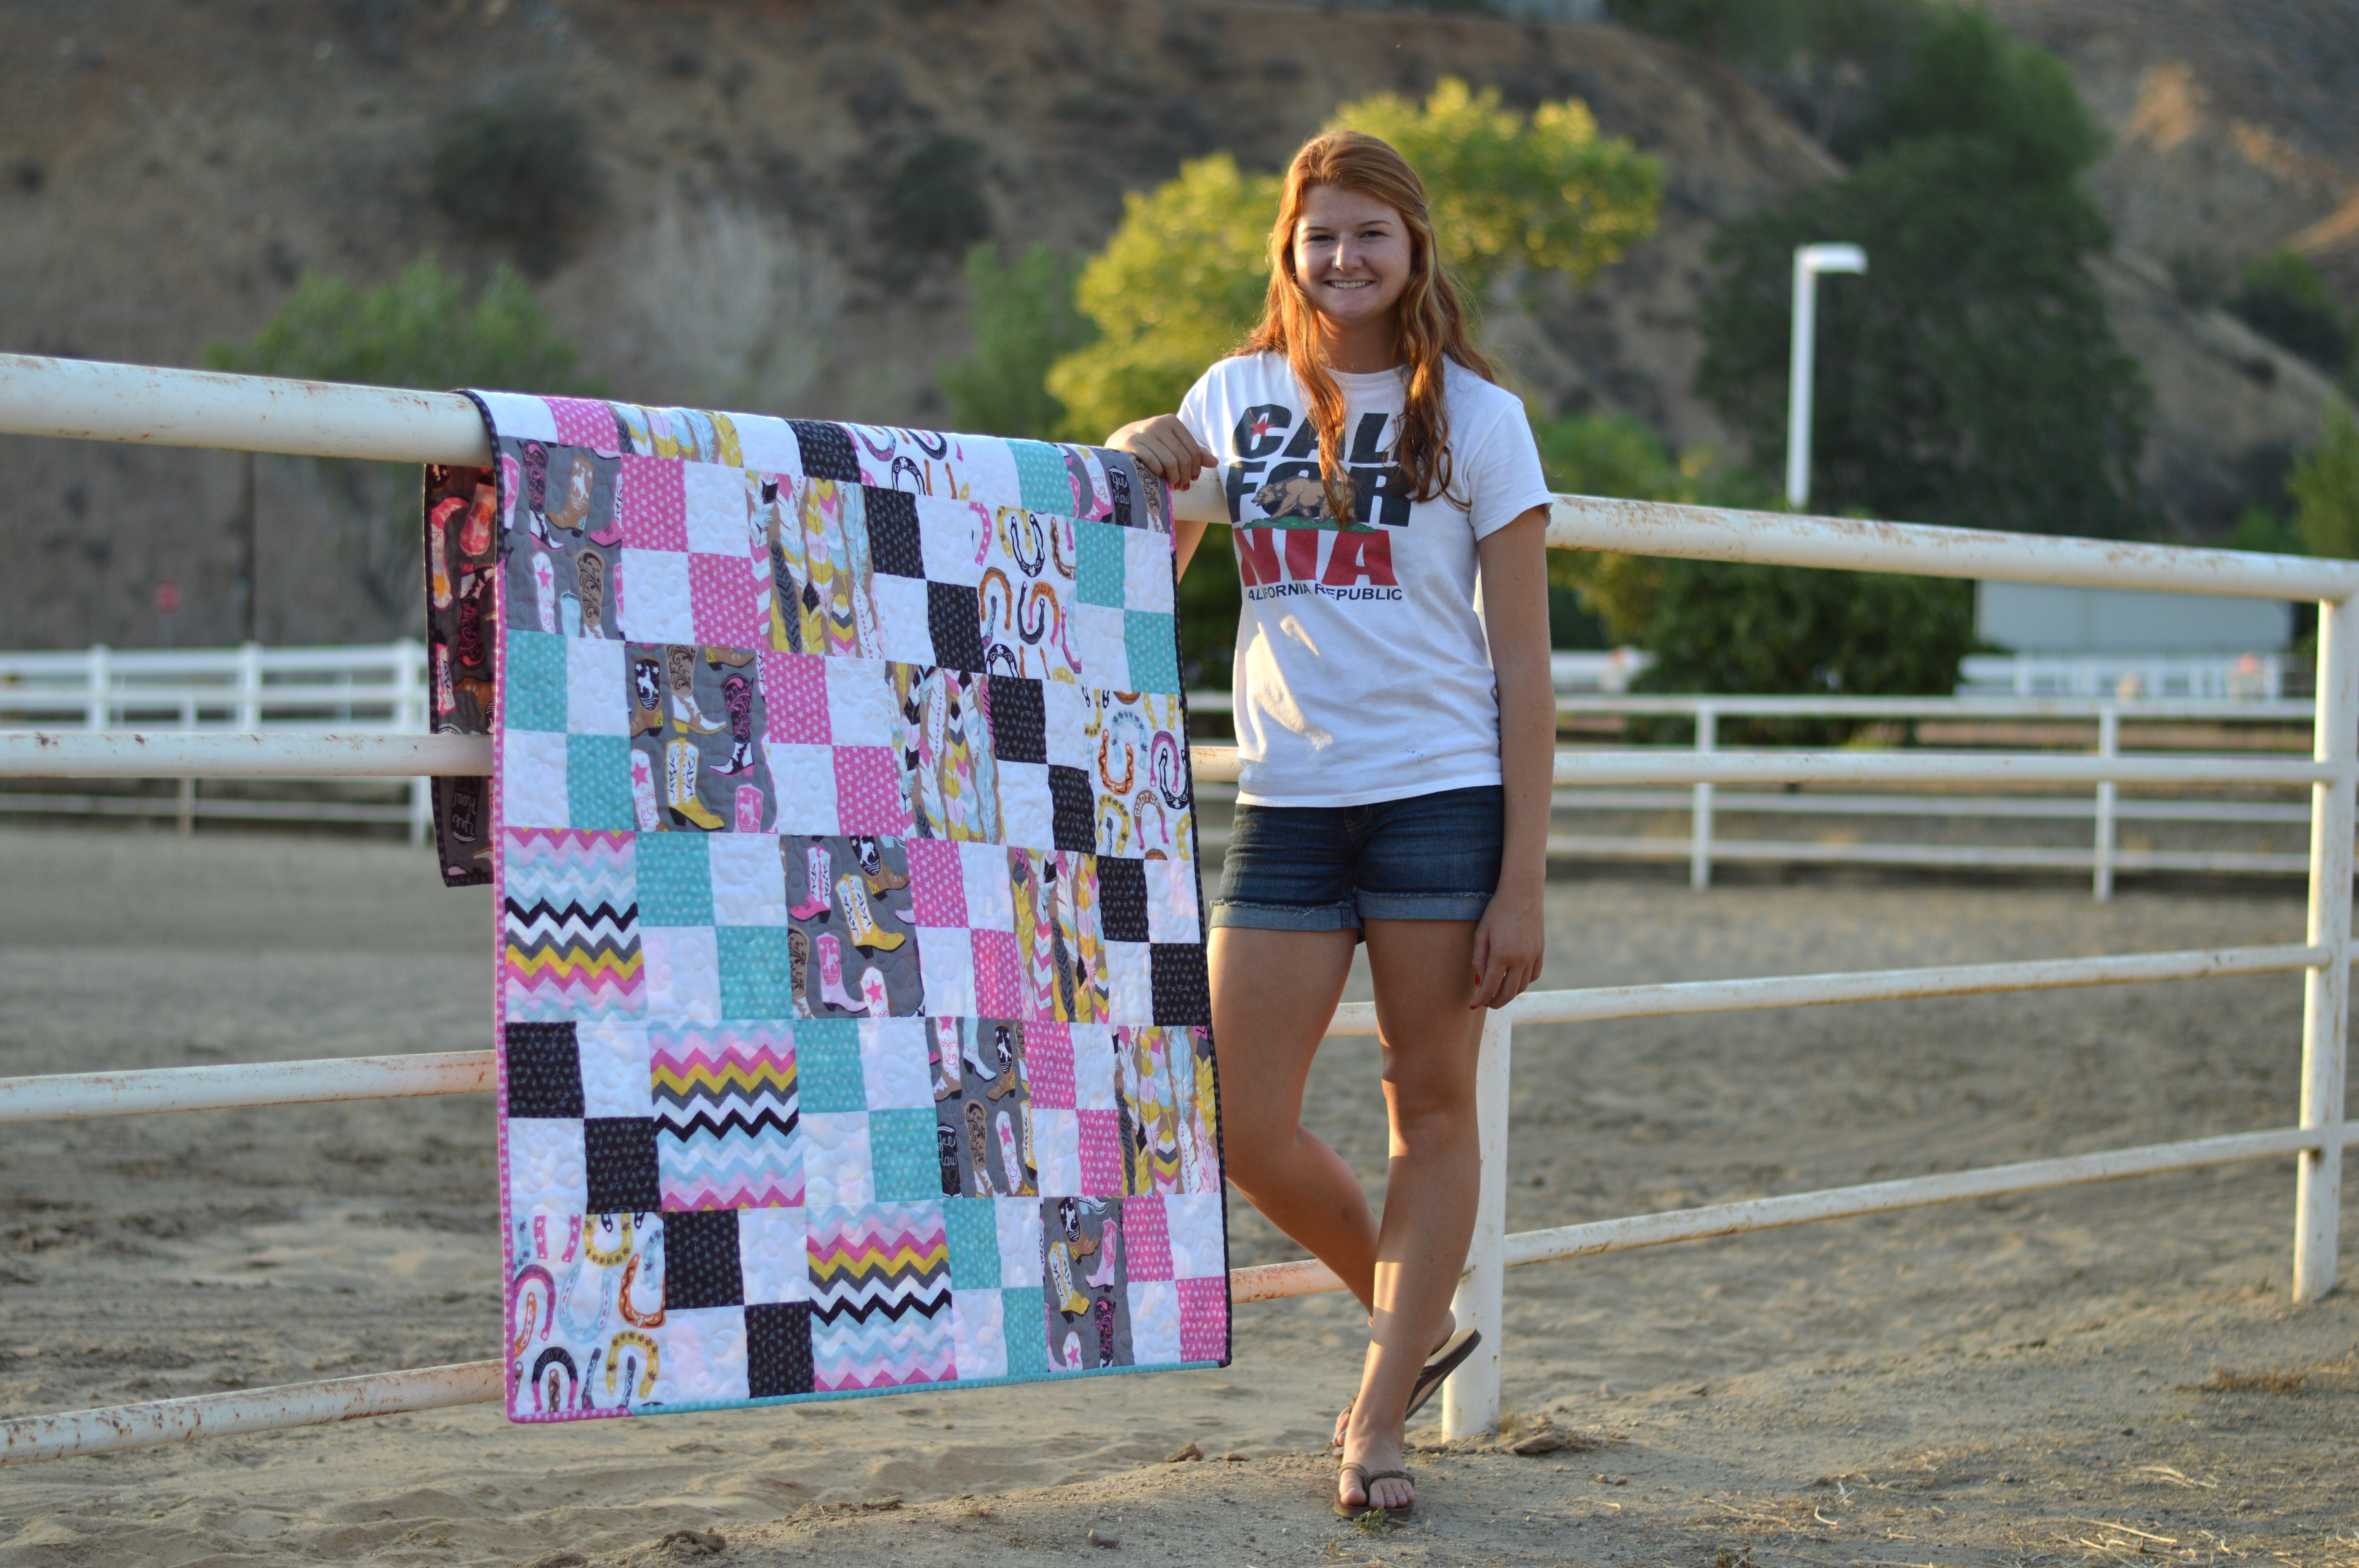
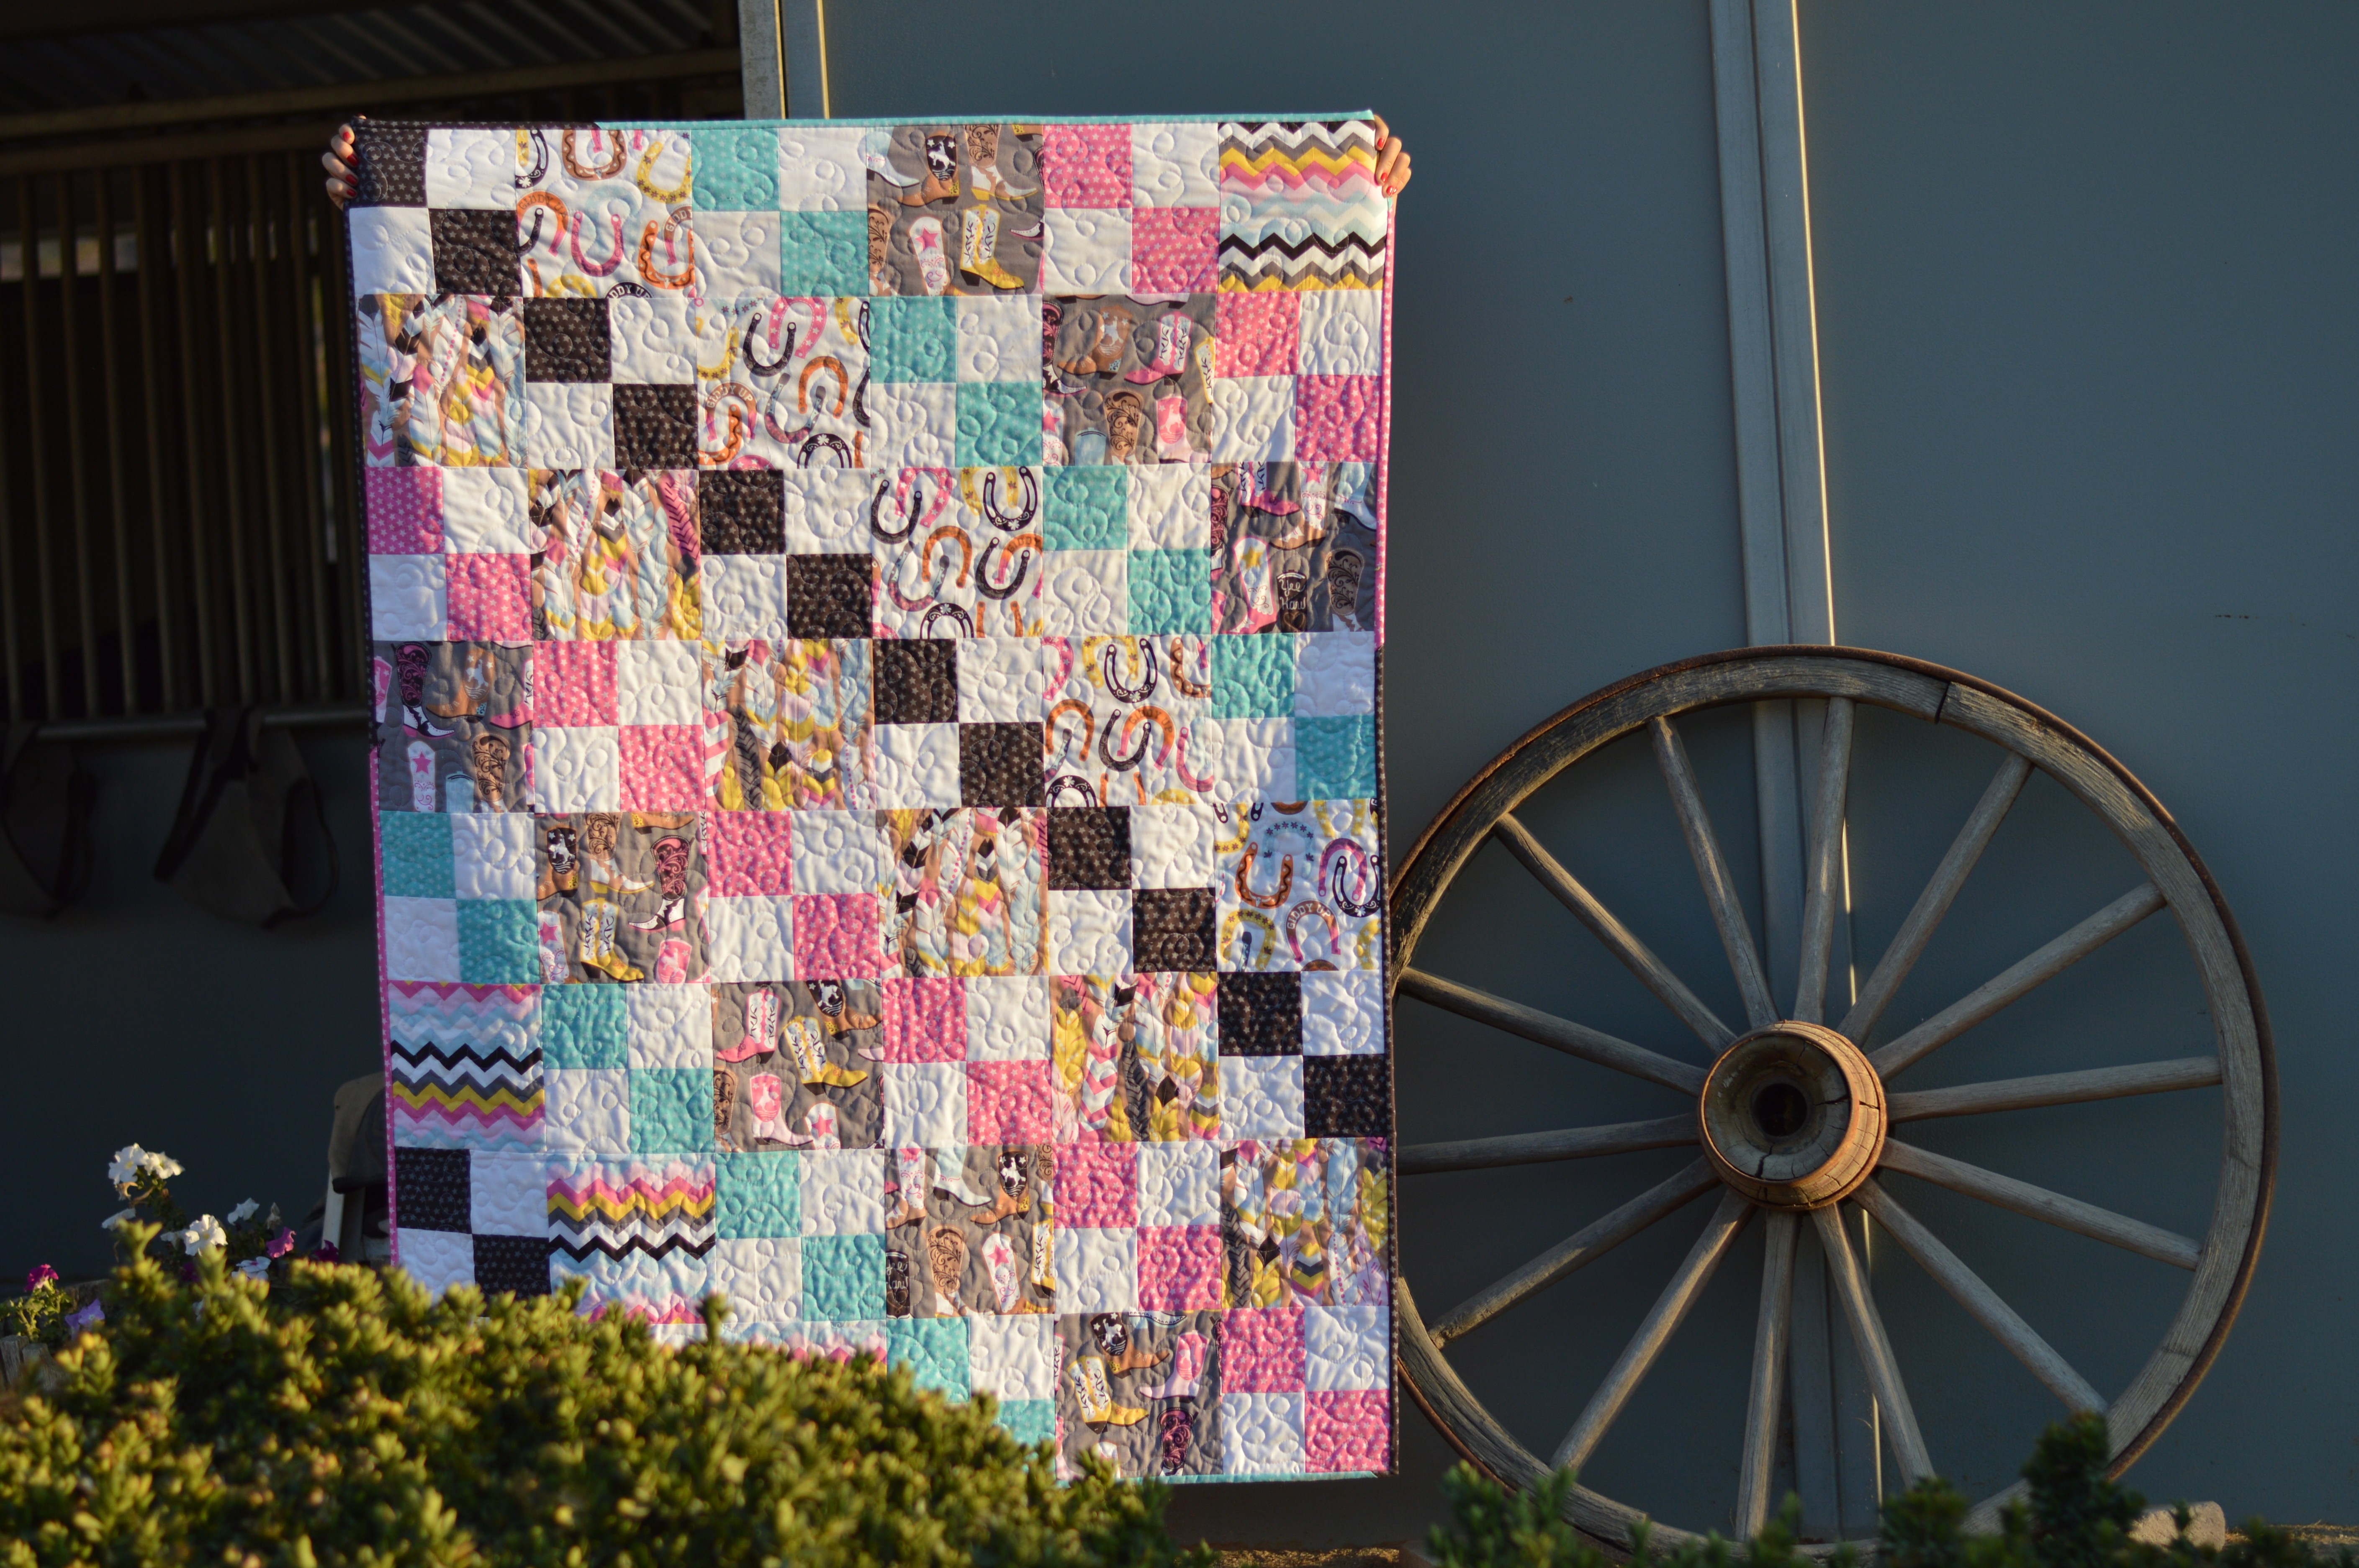
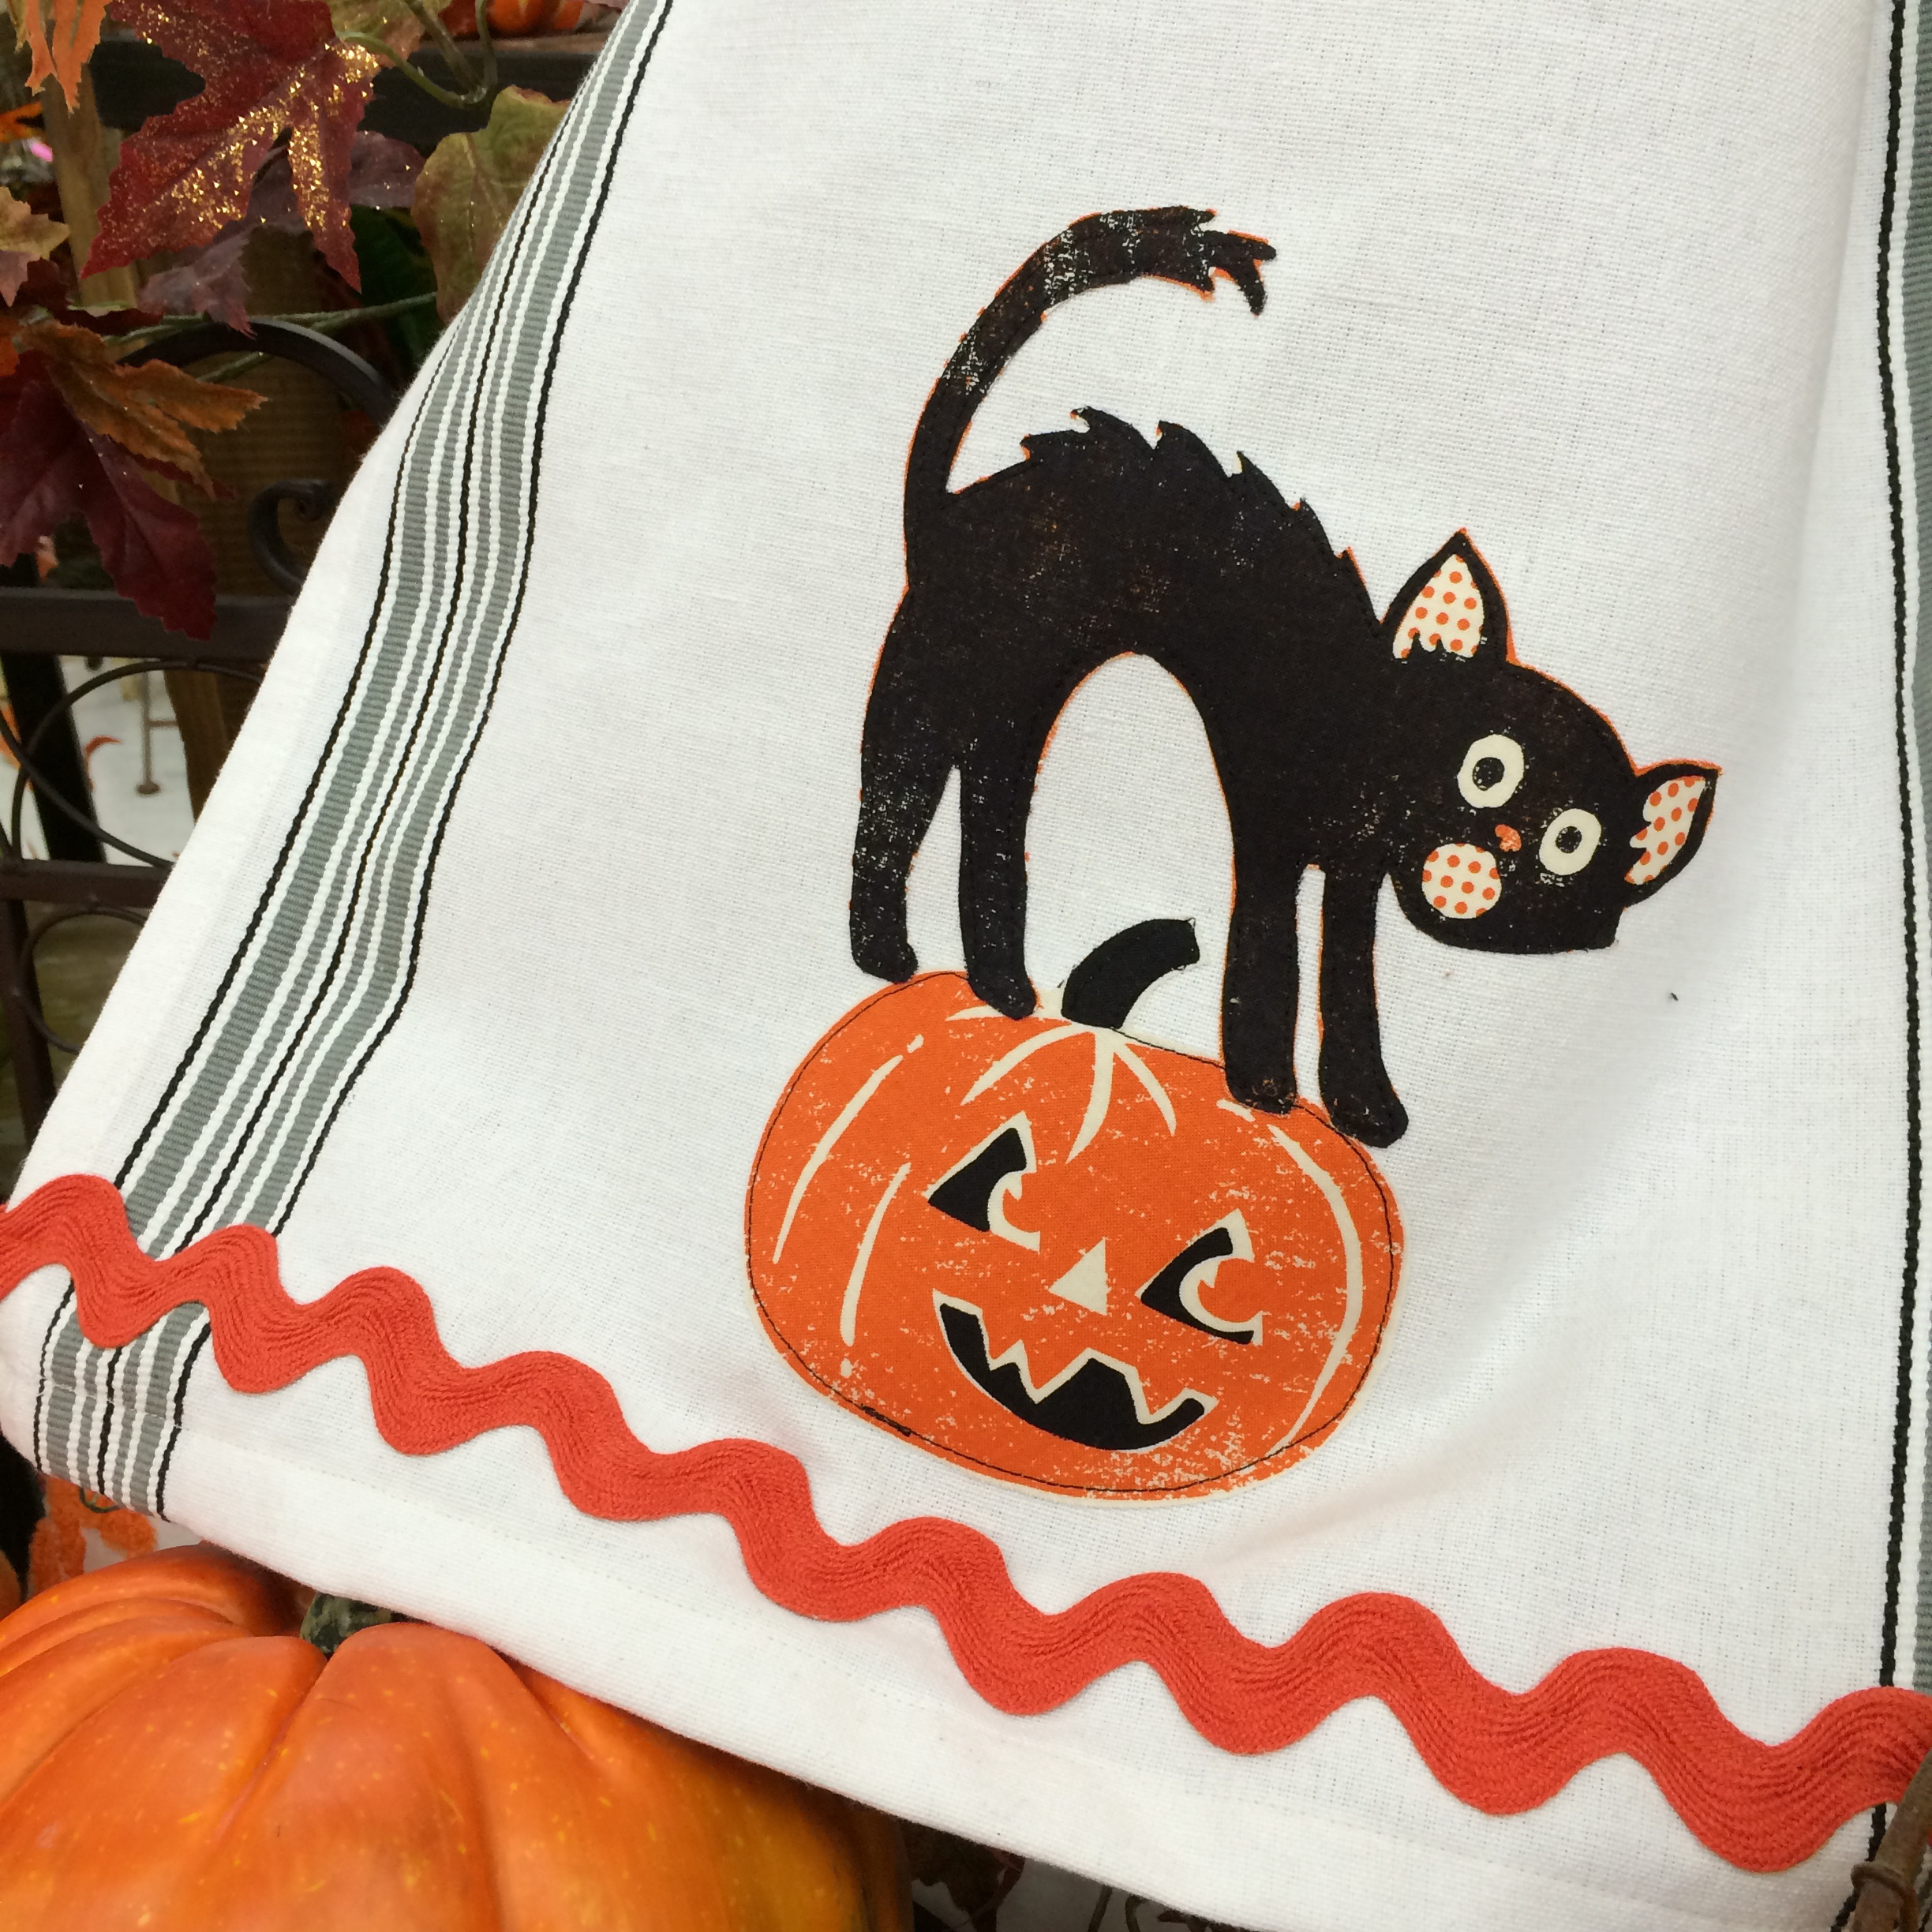
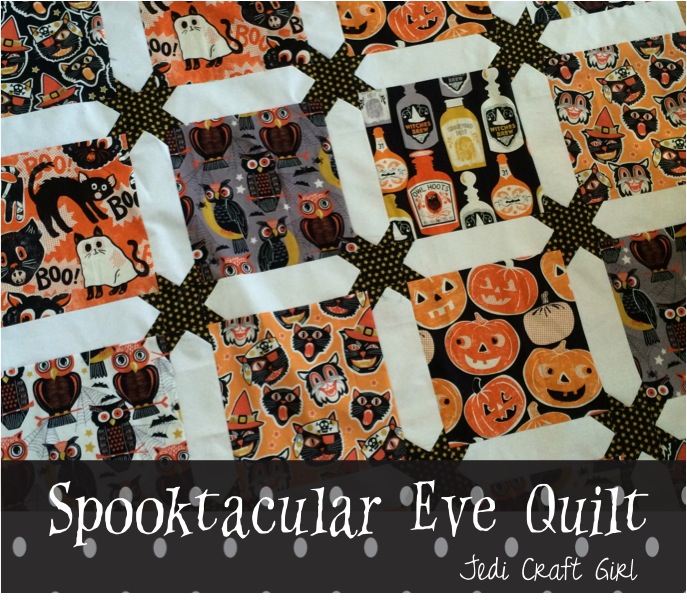
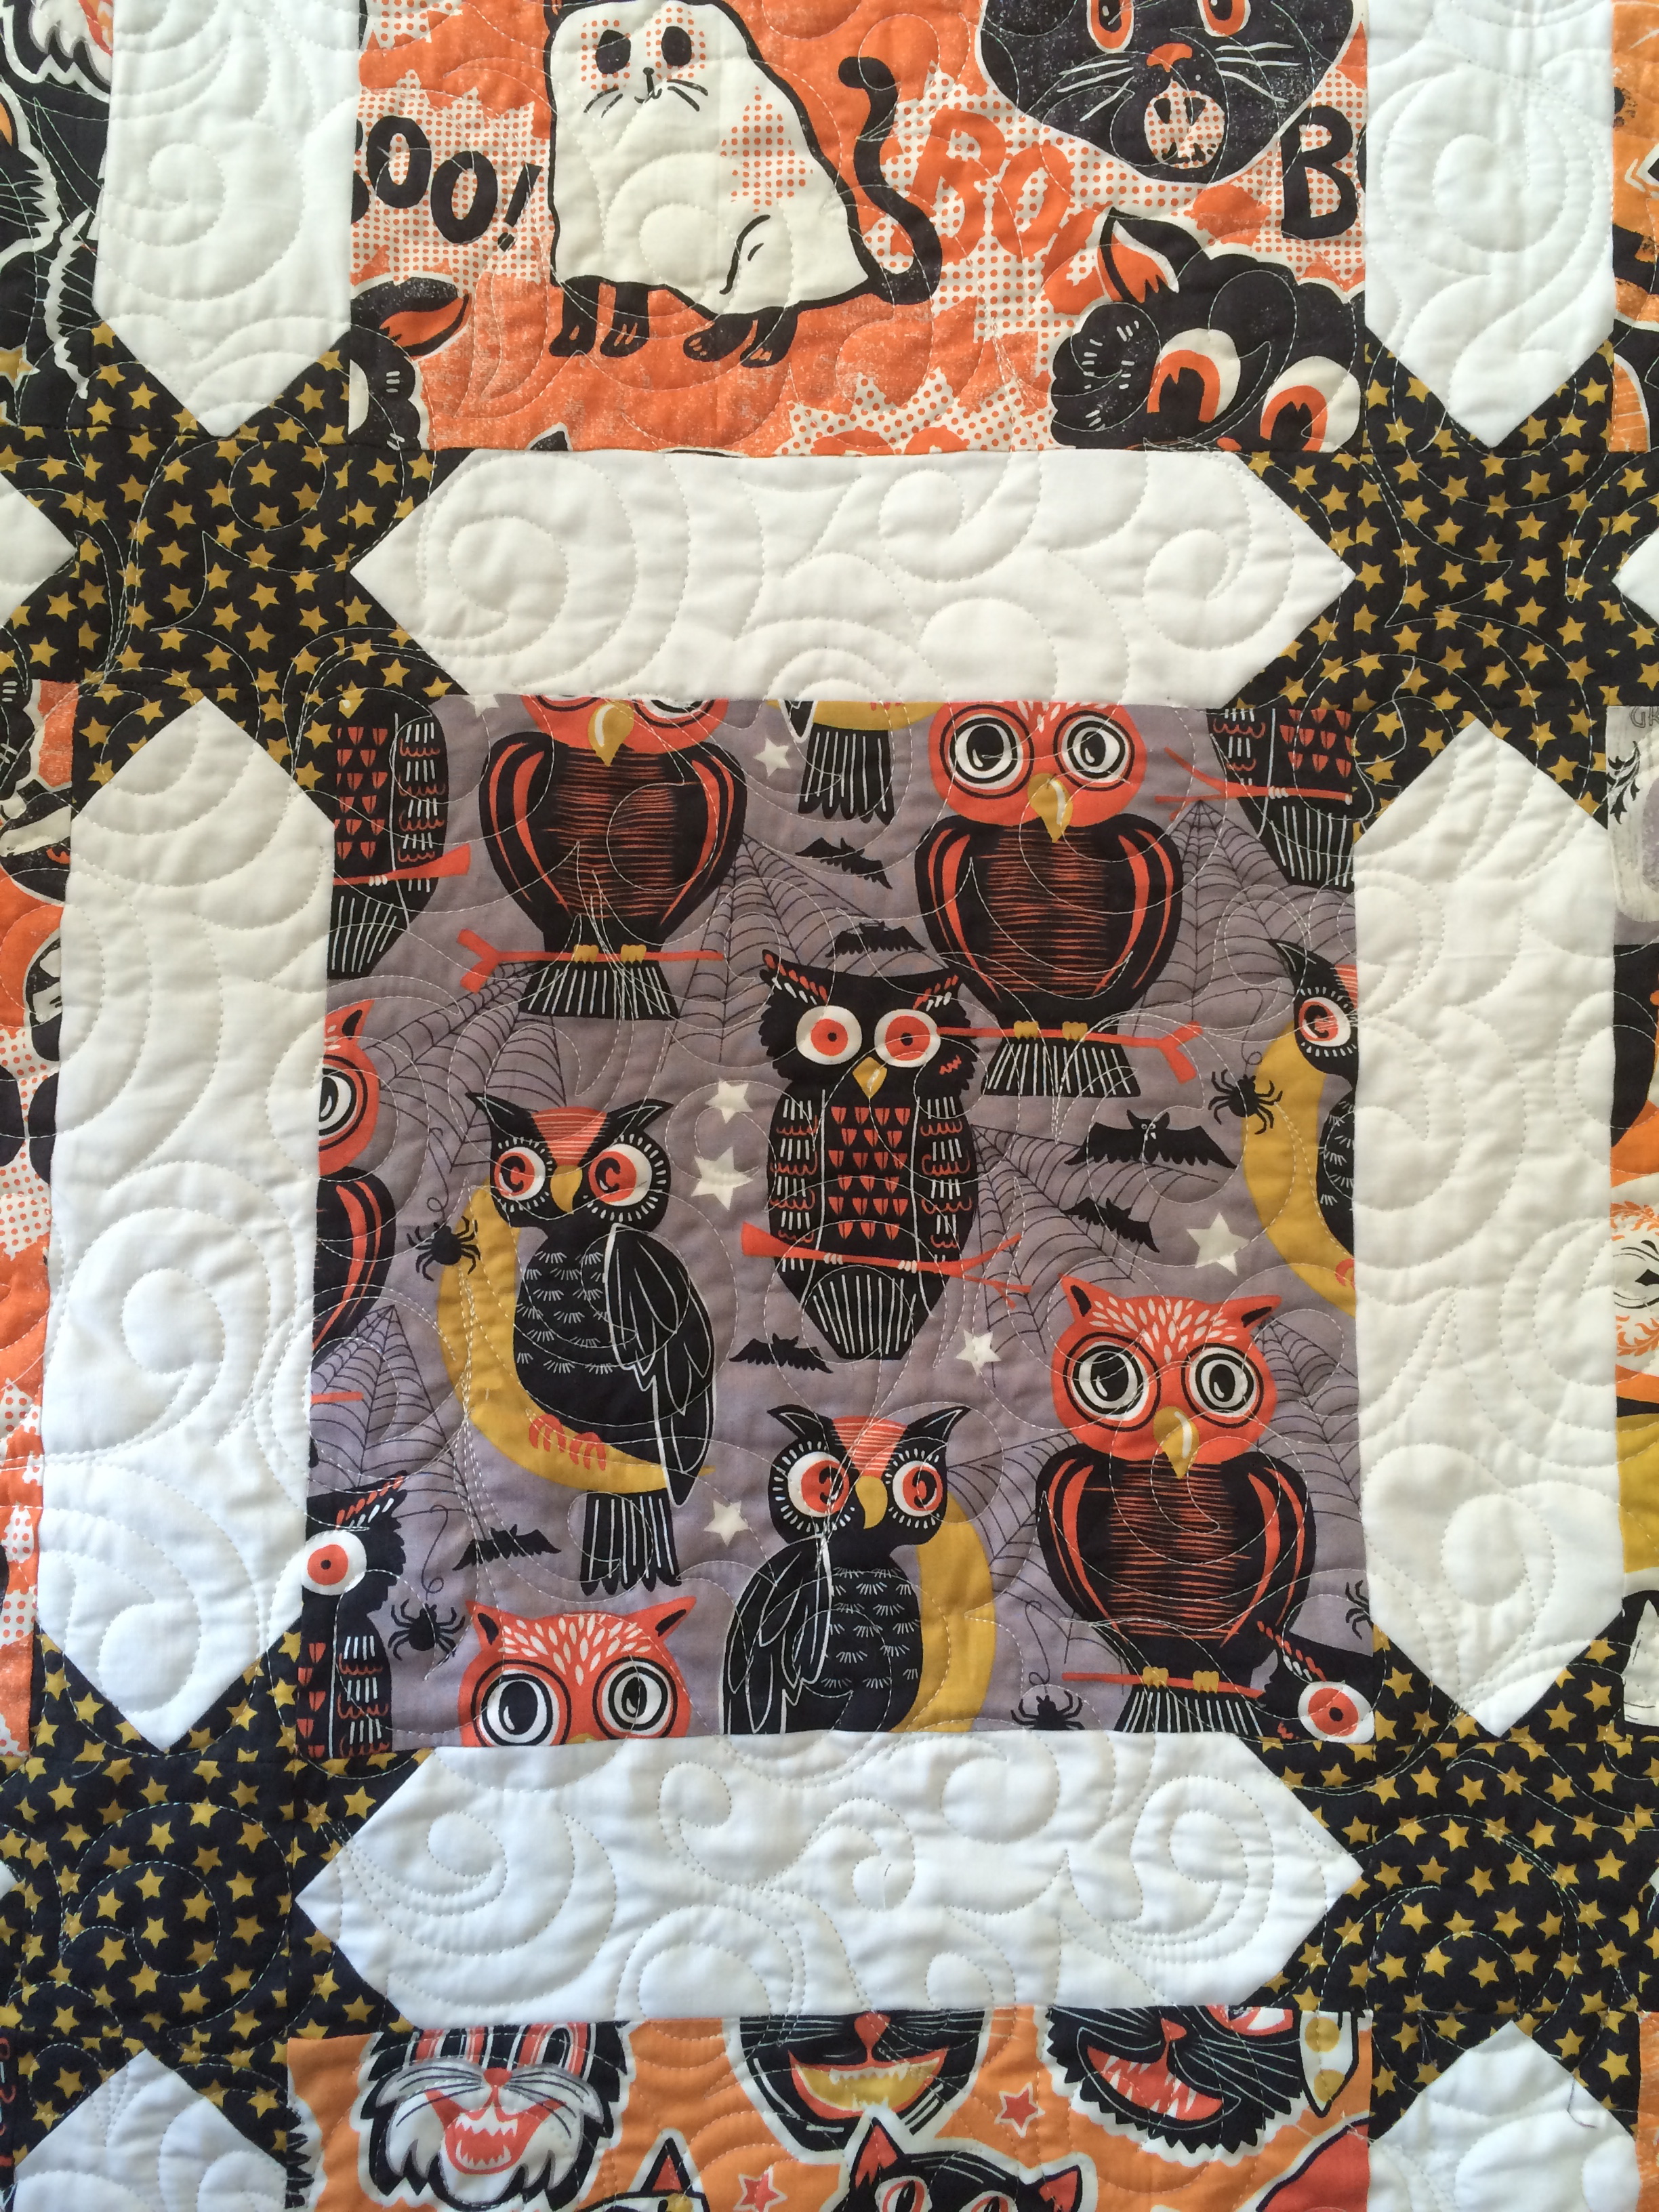
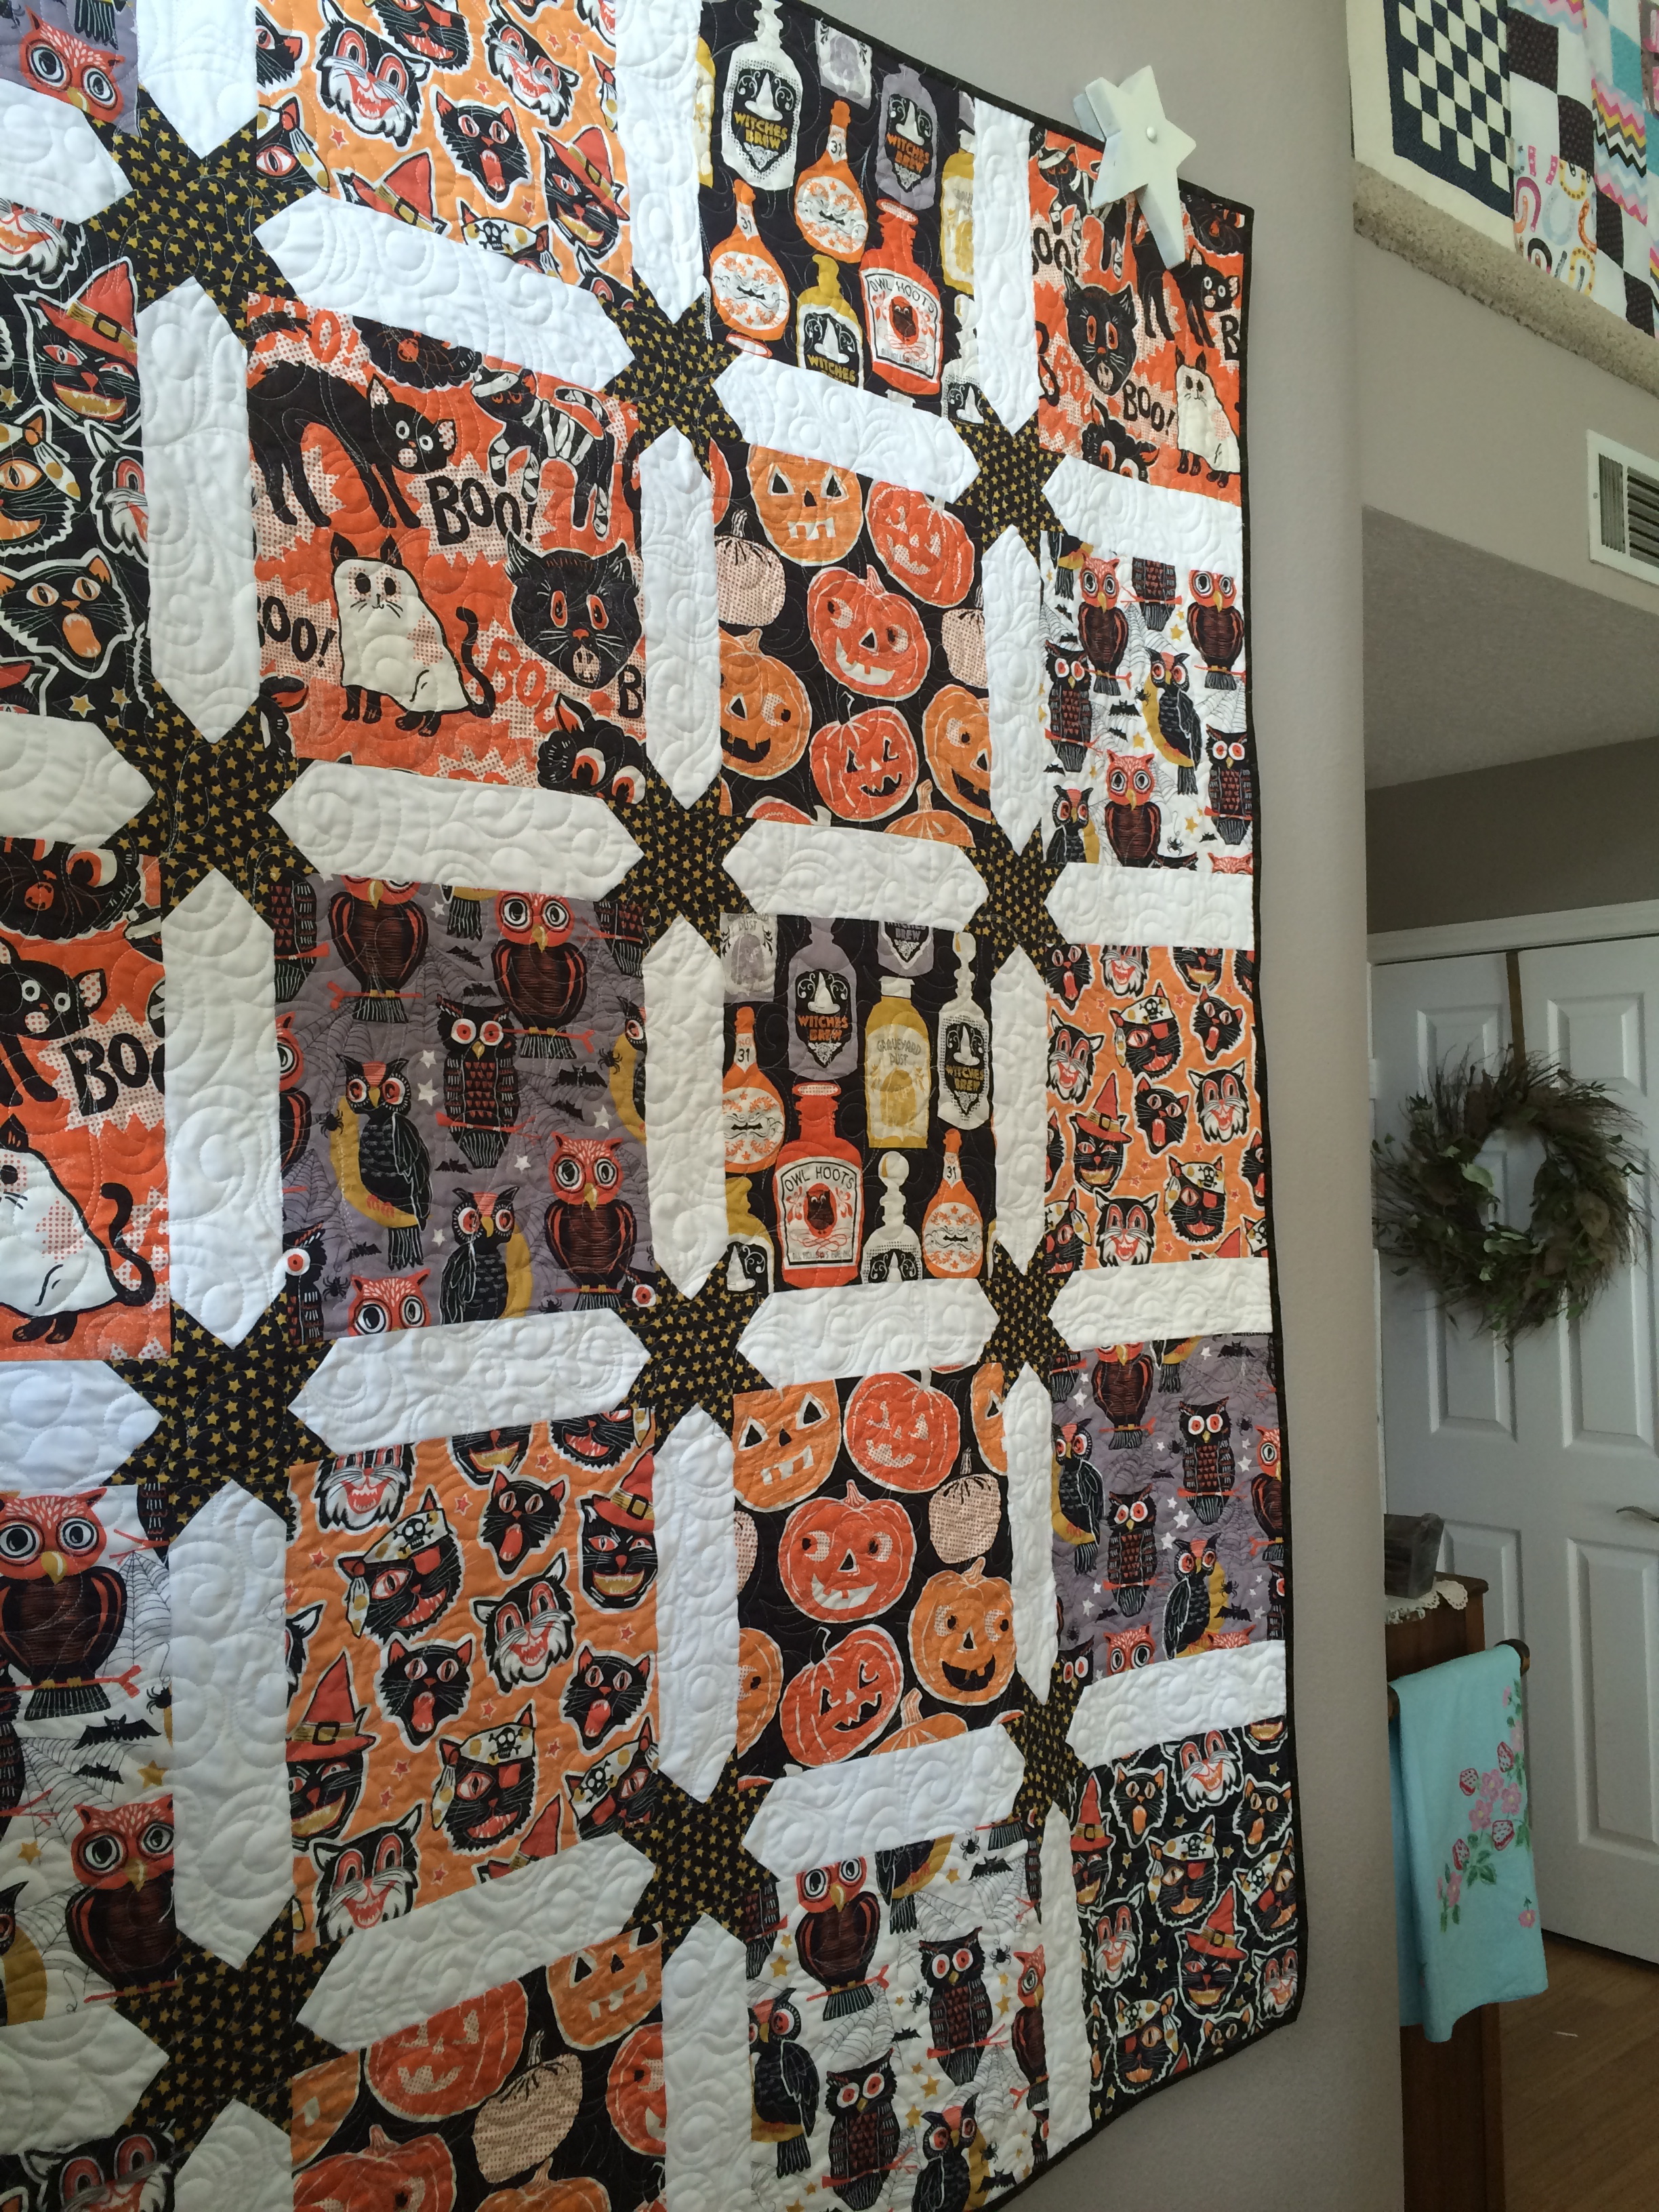
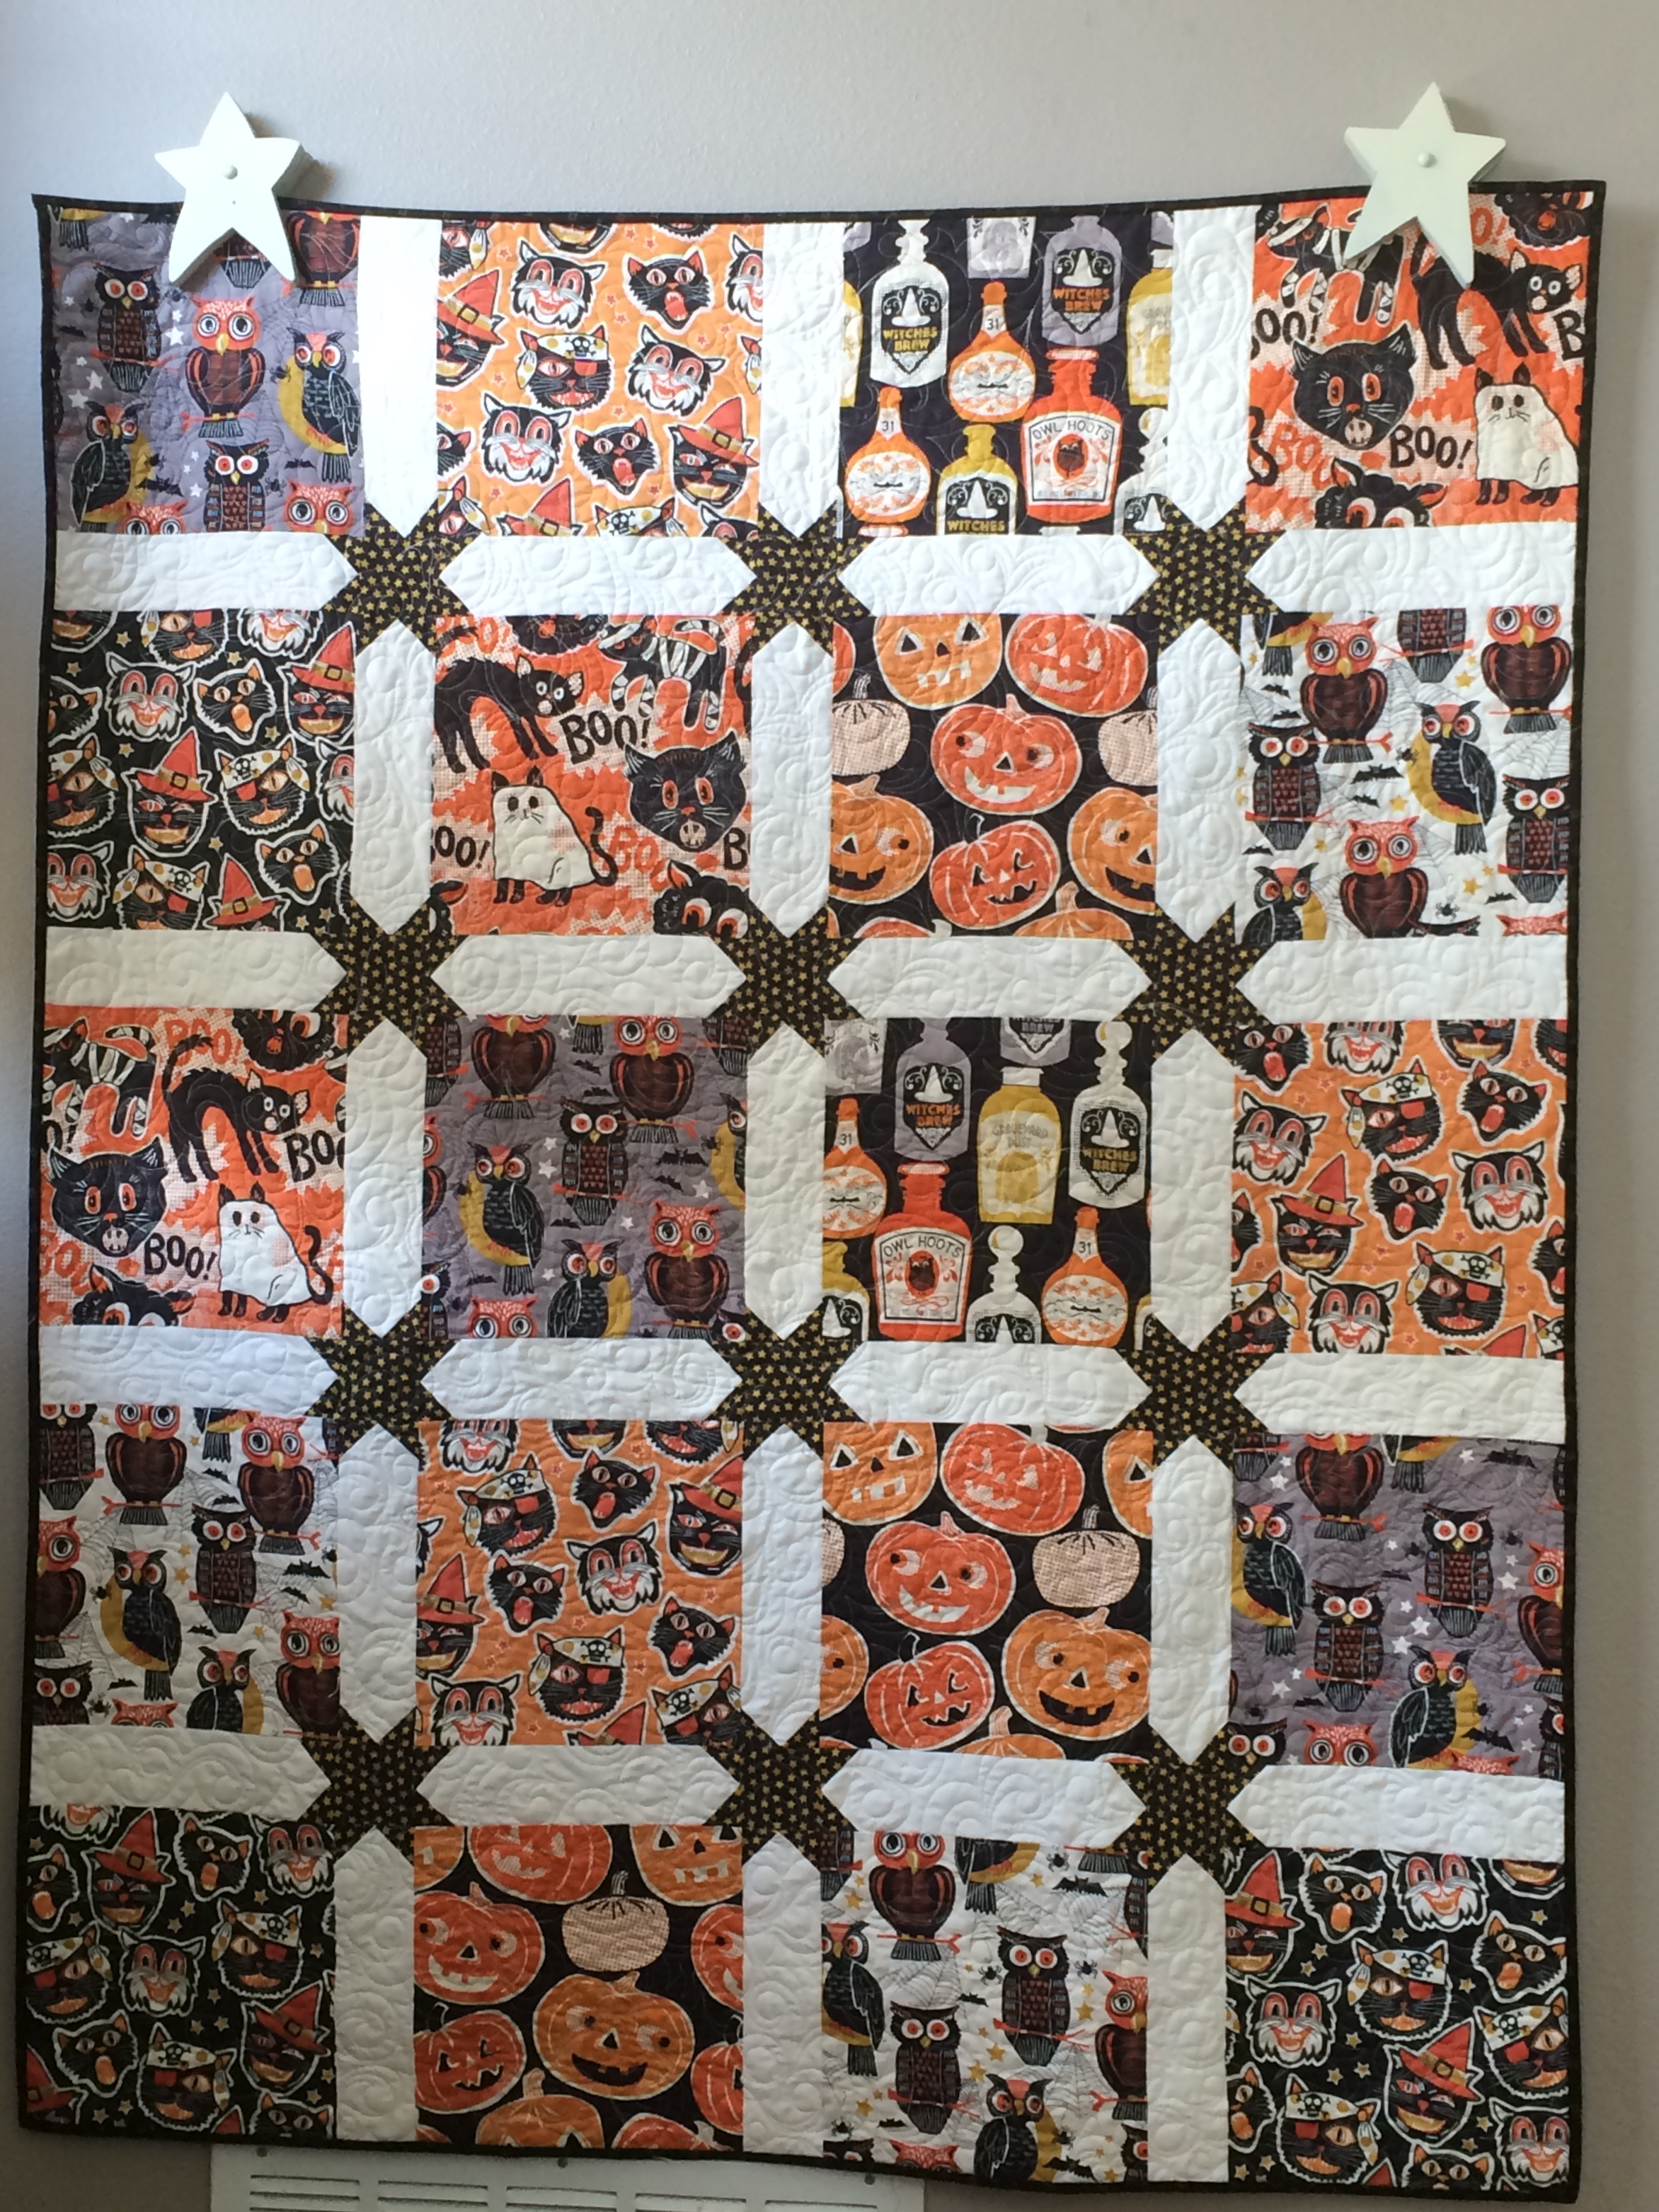
This larger version measures 44″ x 60″ and it uses 5″ charm squares for the center.  It’s my favorite Halloween quilt.  Click HERE for the tutorial.

Halloween_quilt_tutorial_1

spooky Halloween pillow_10
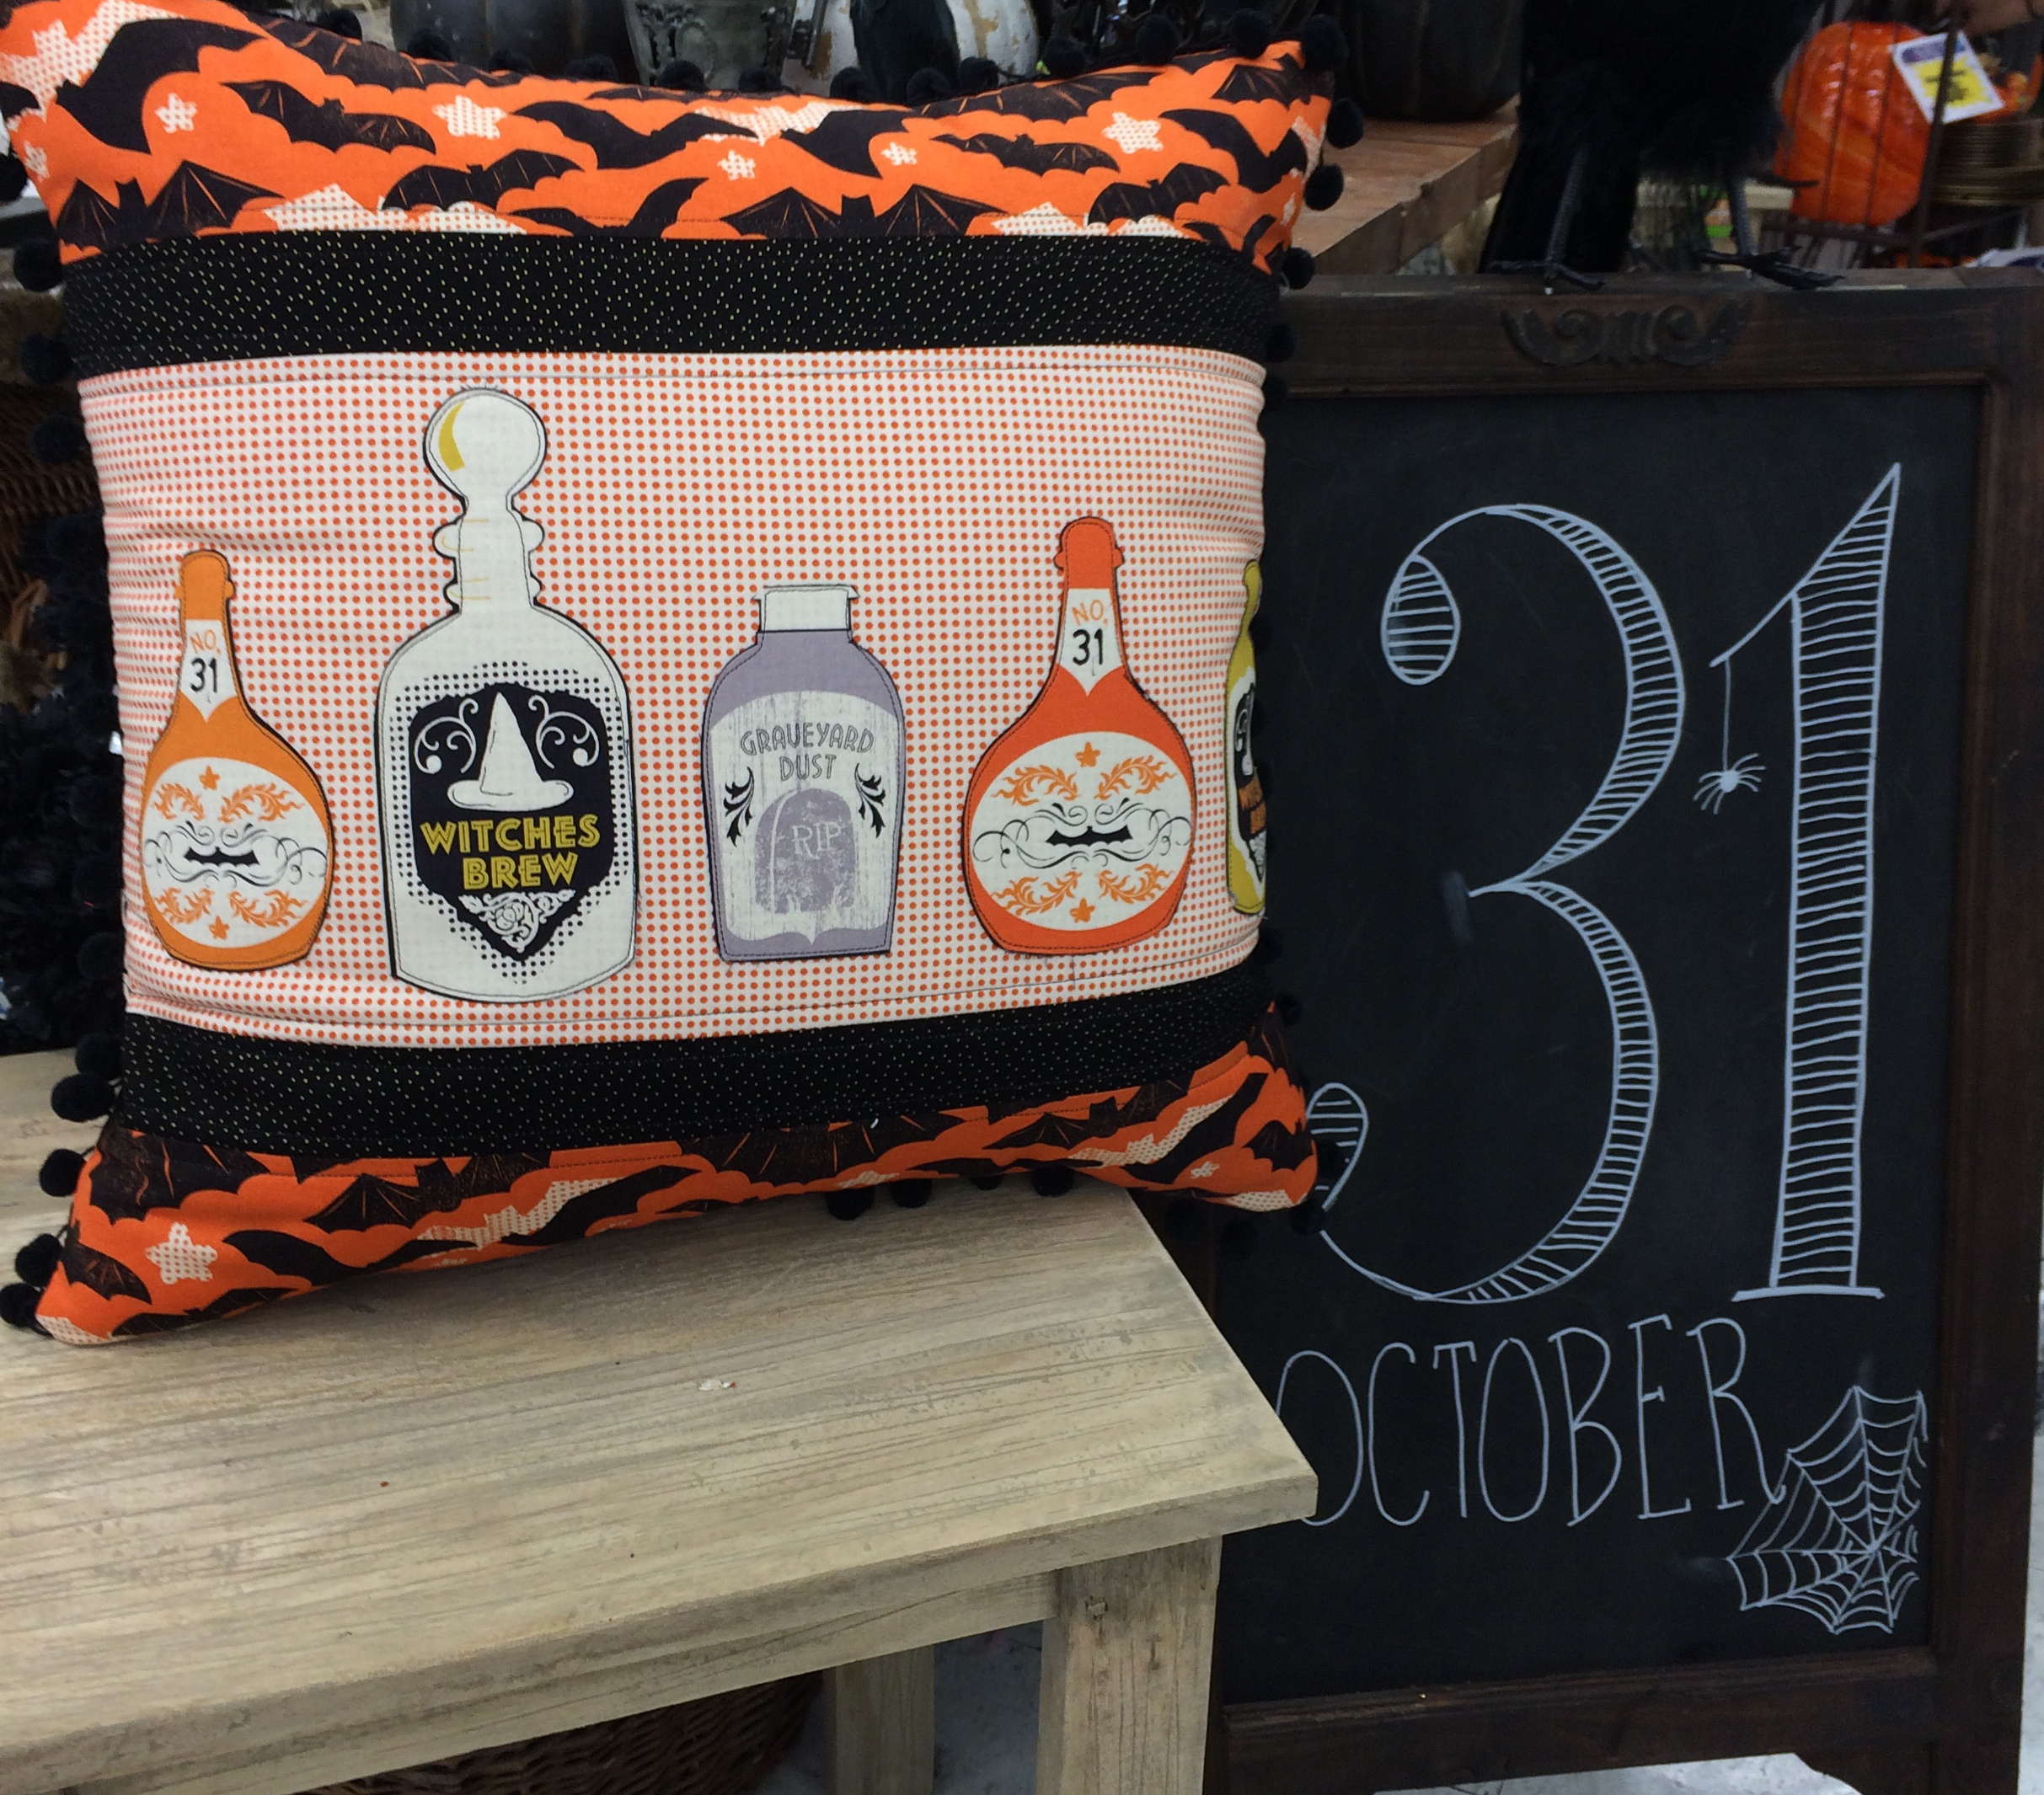
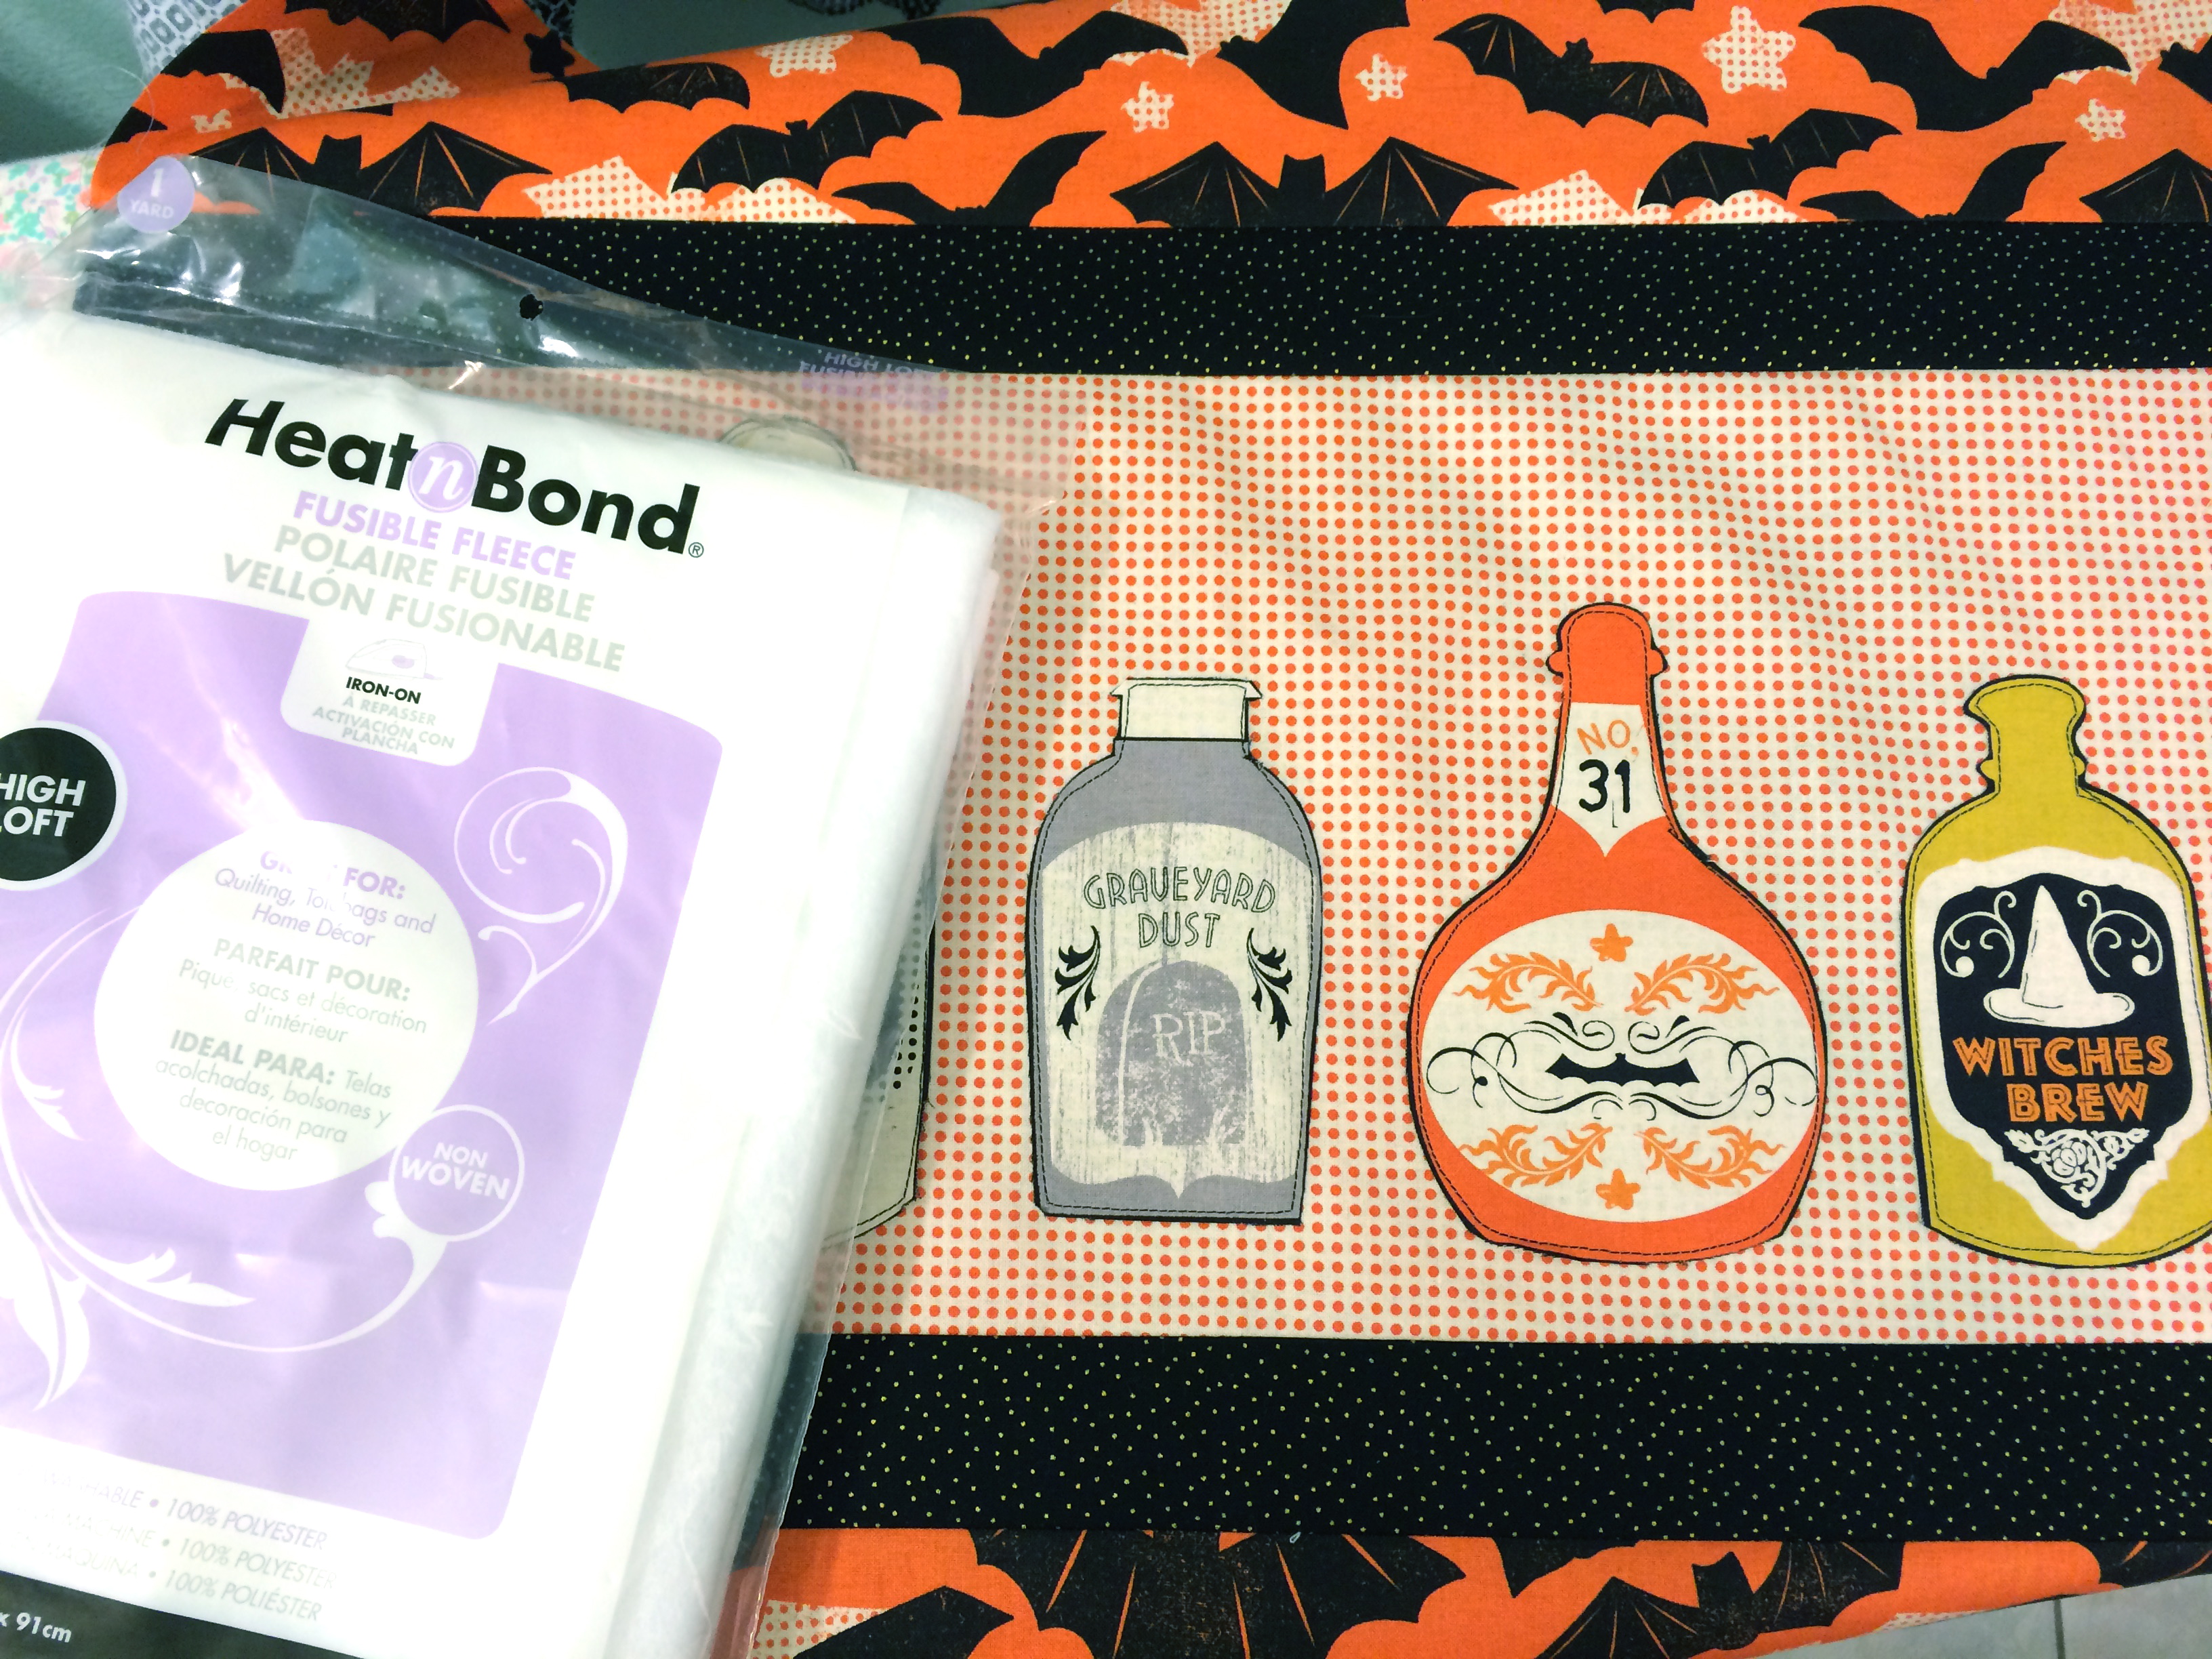
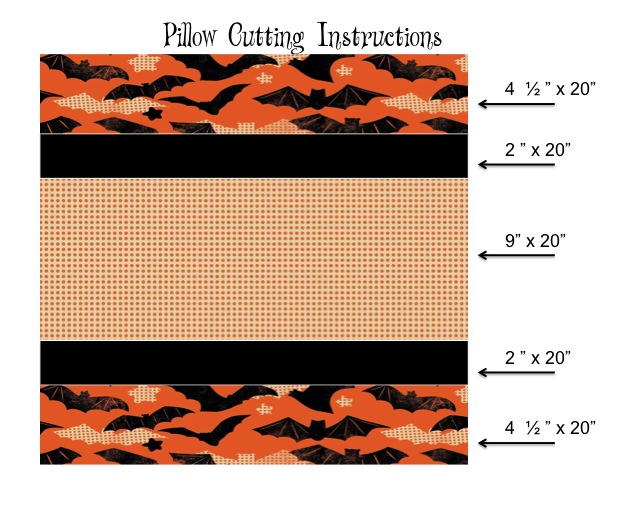
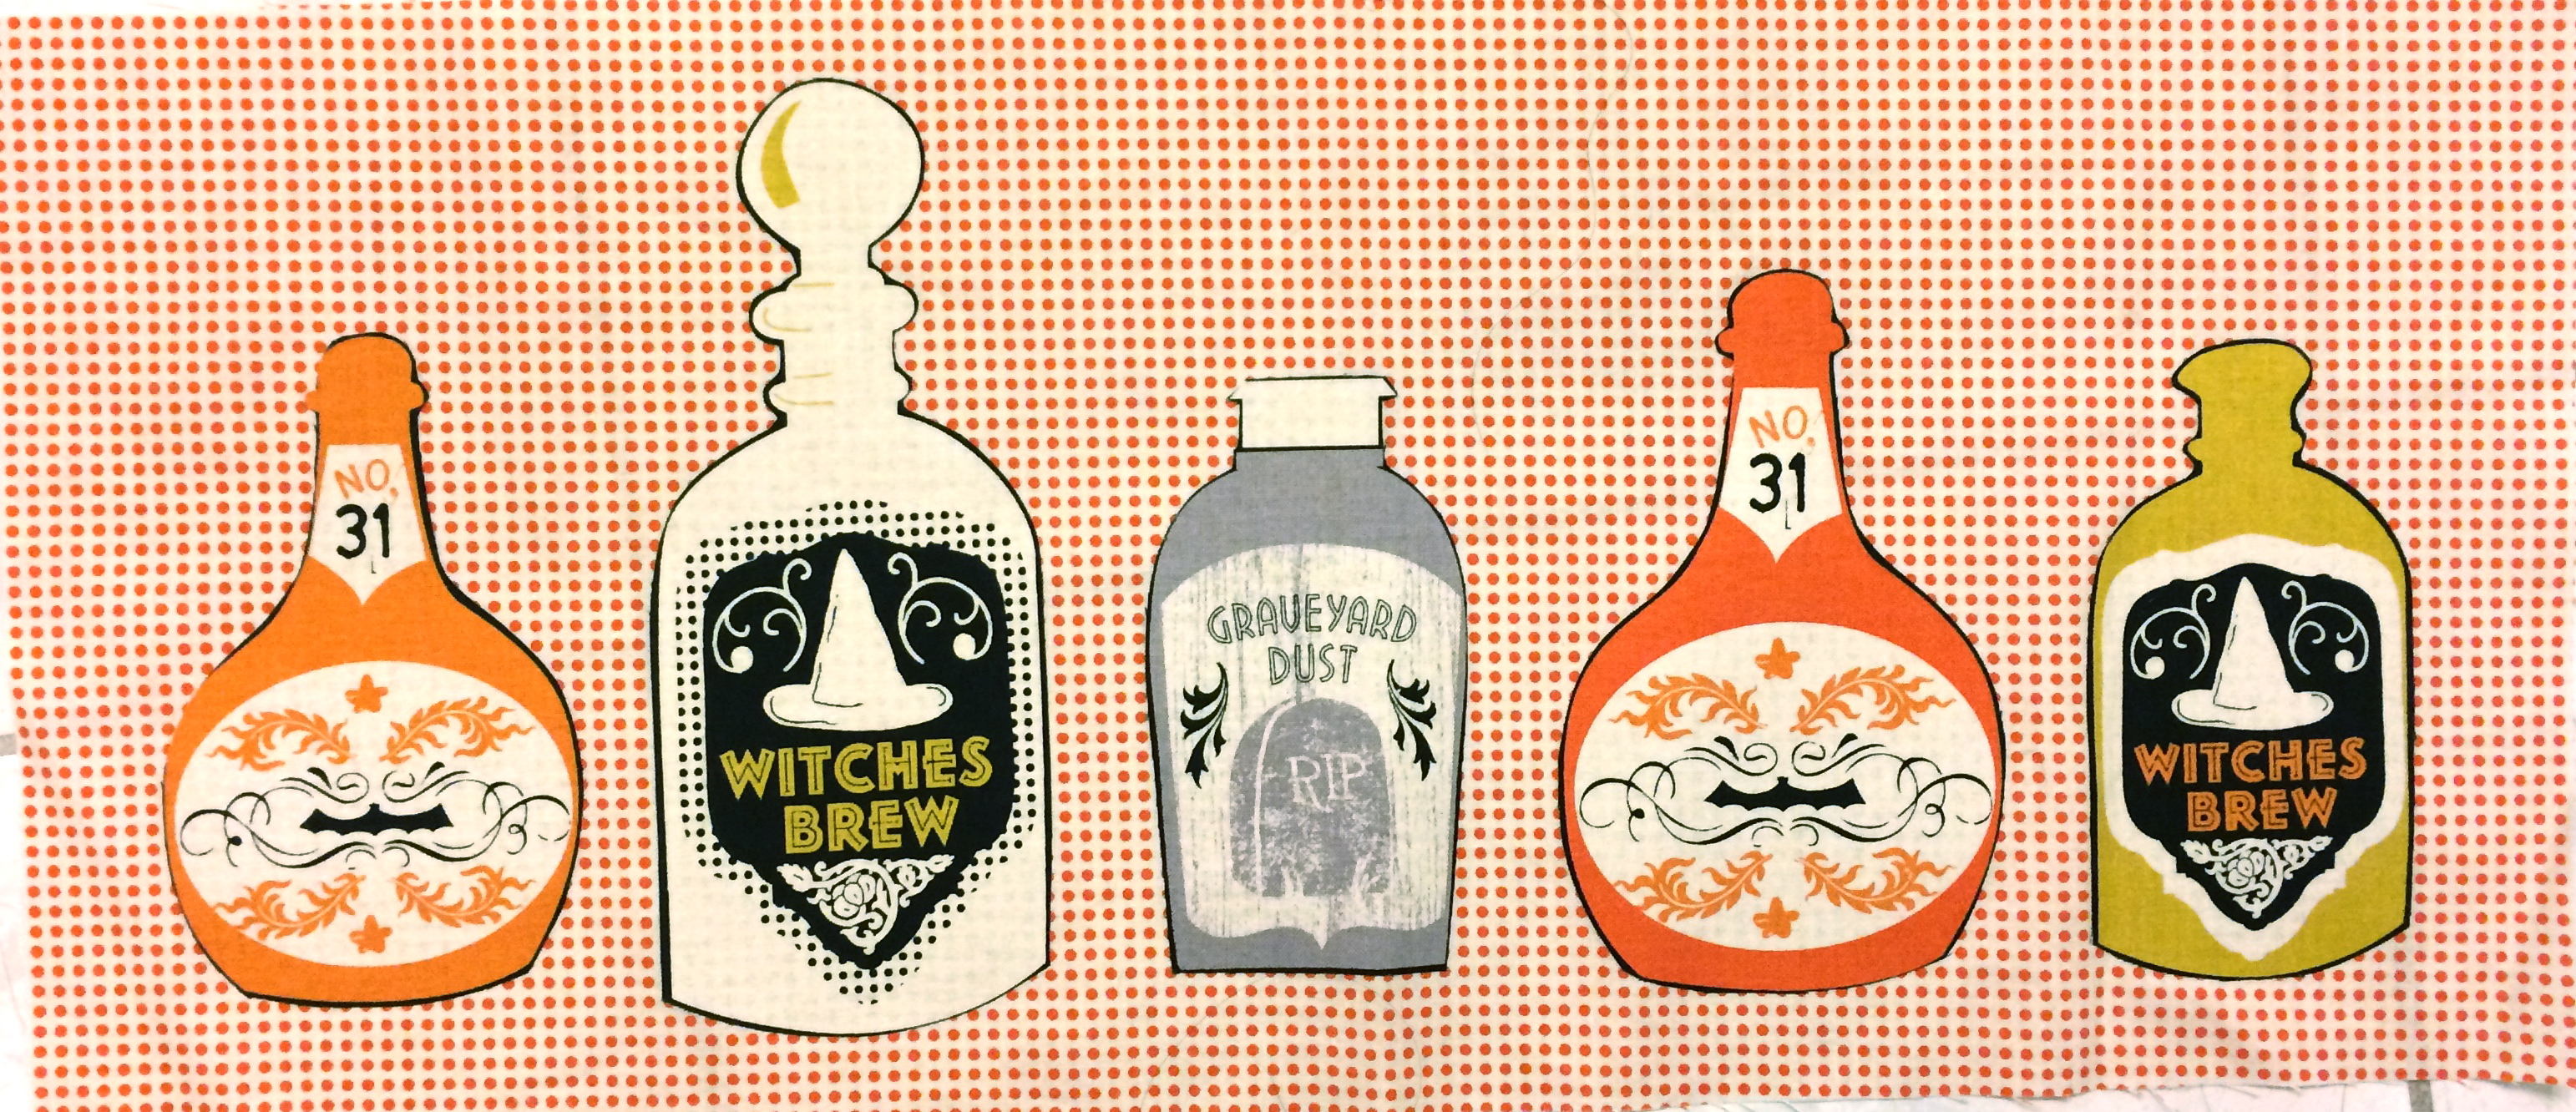
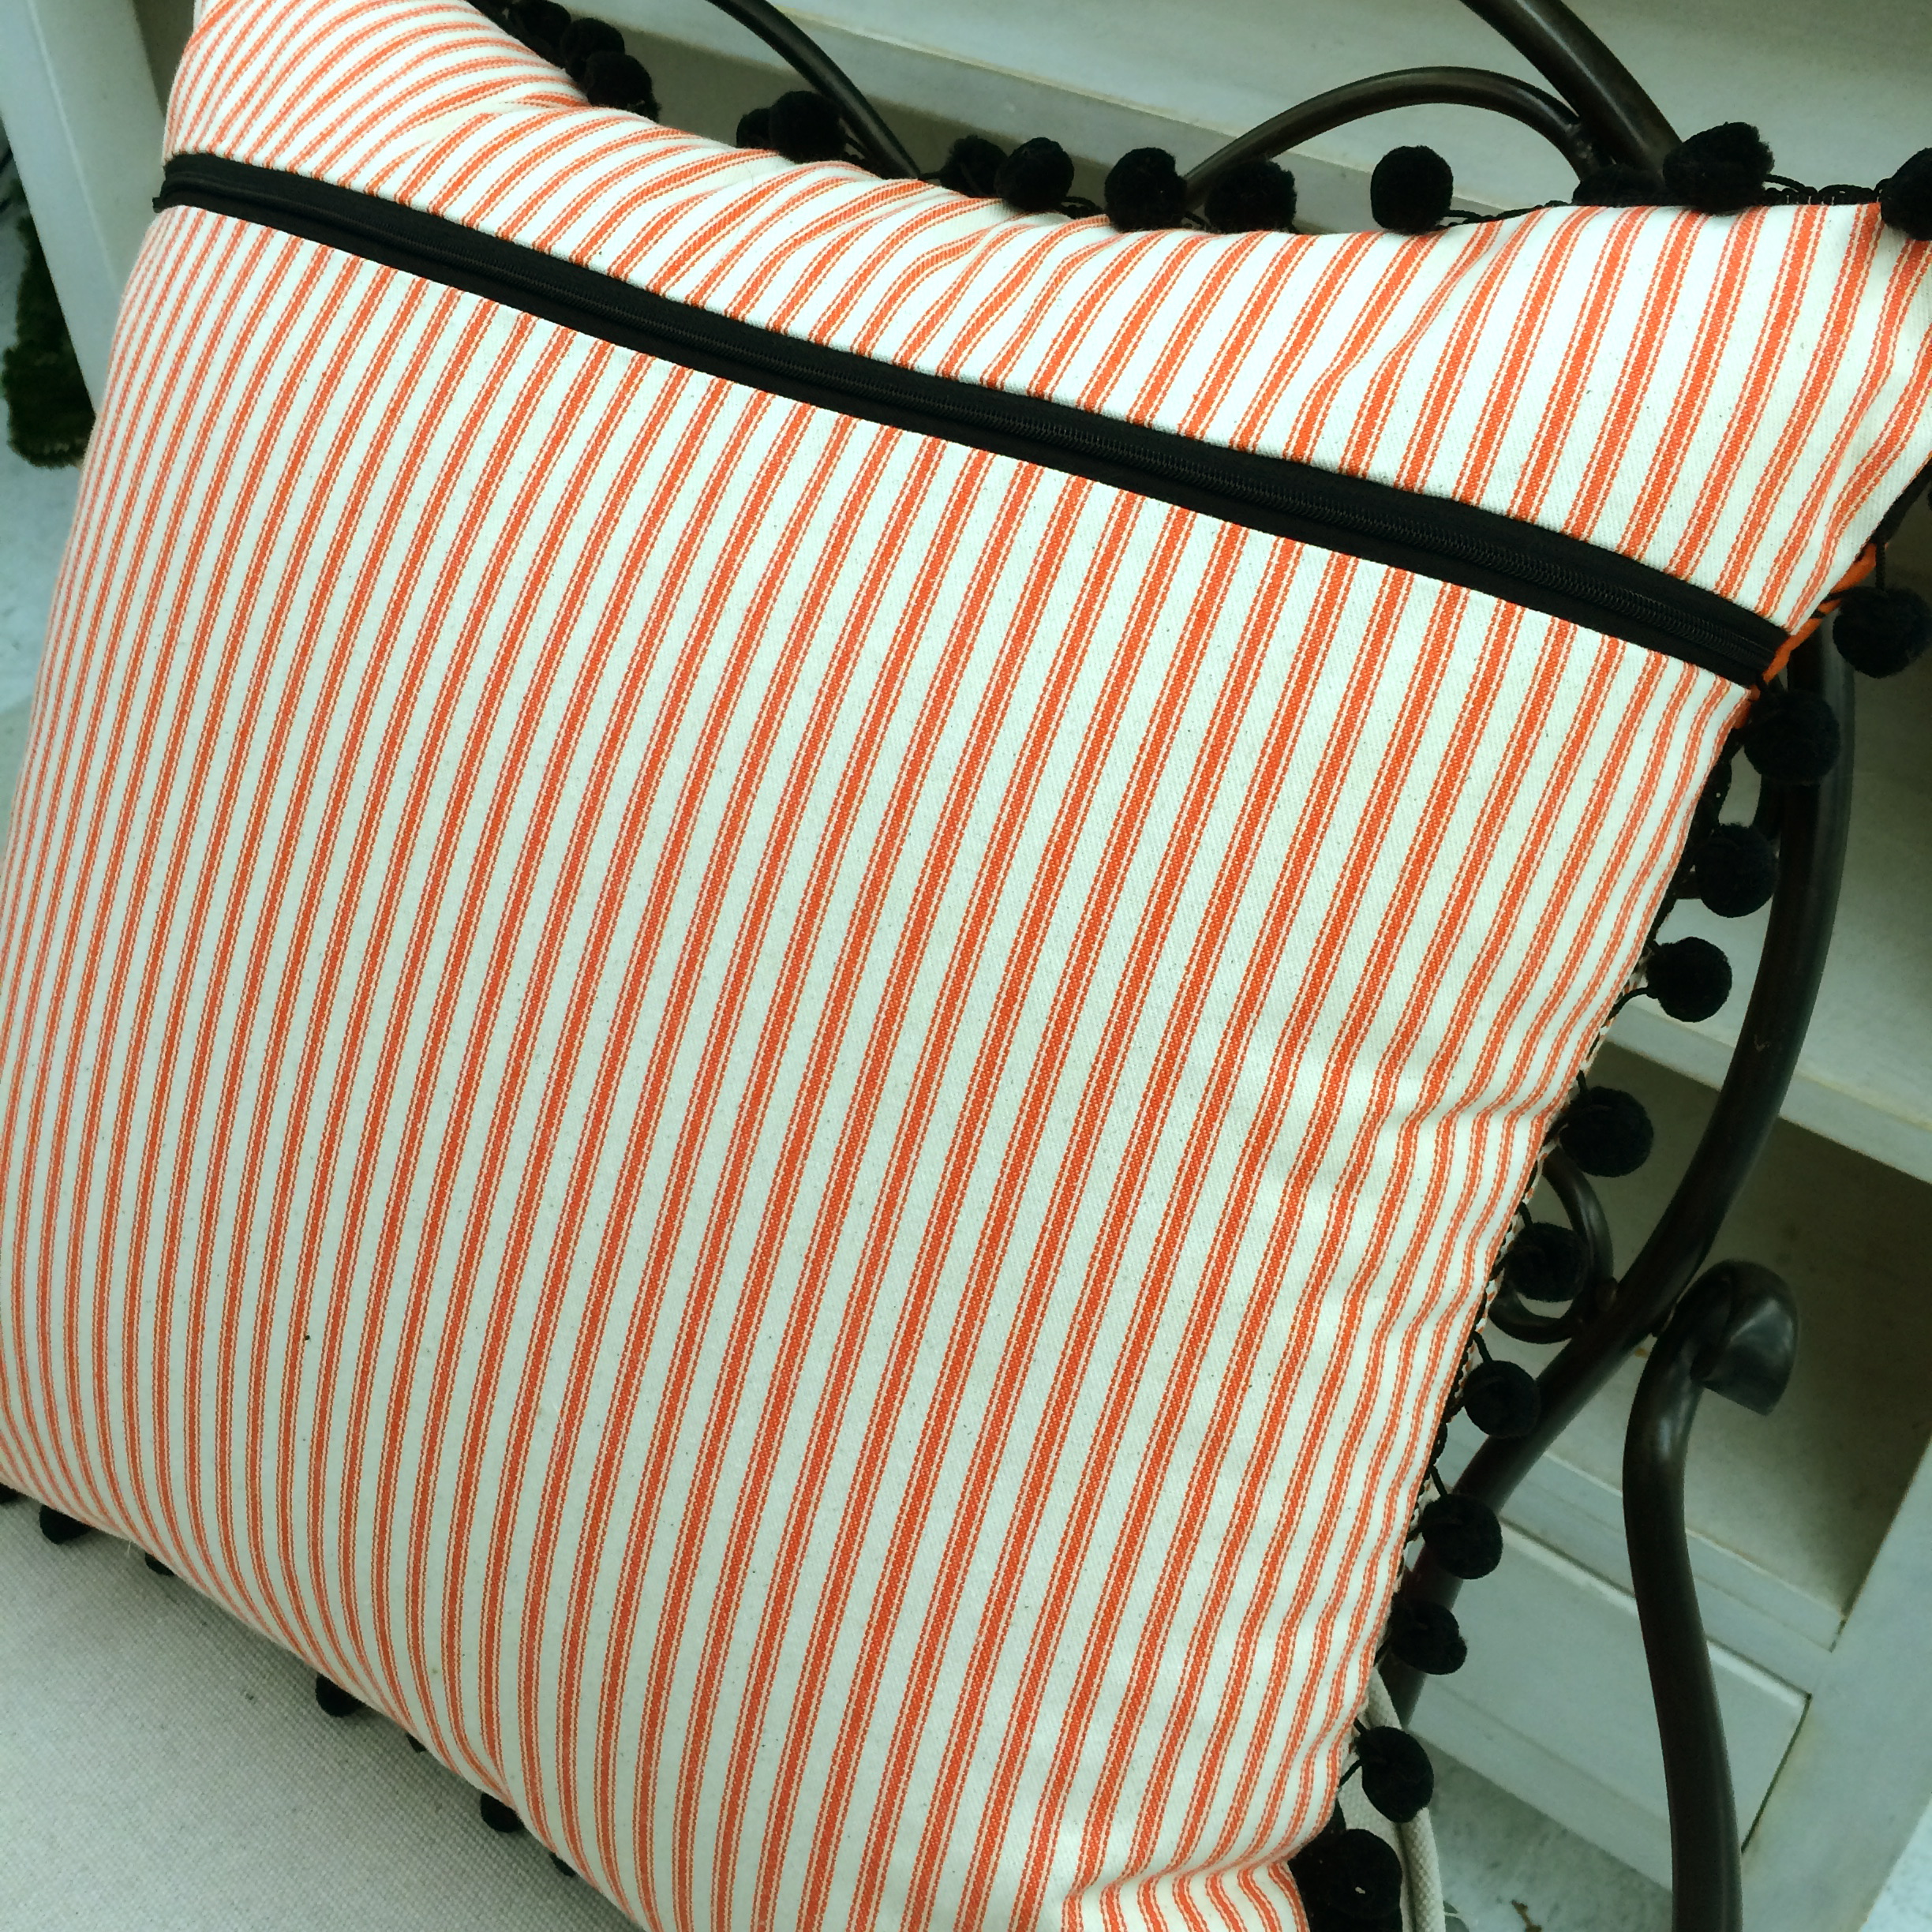
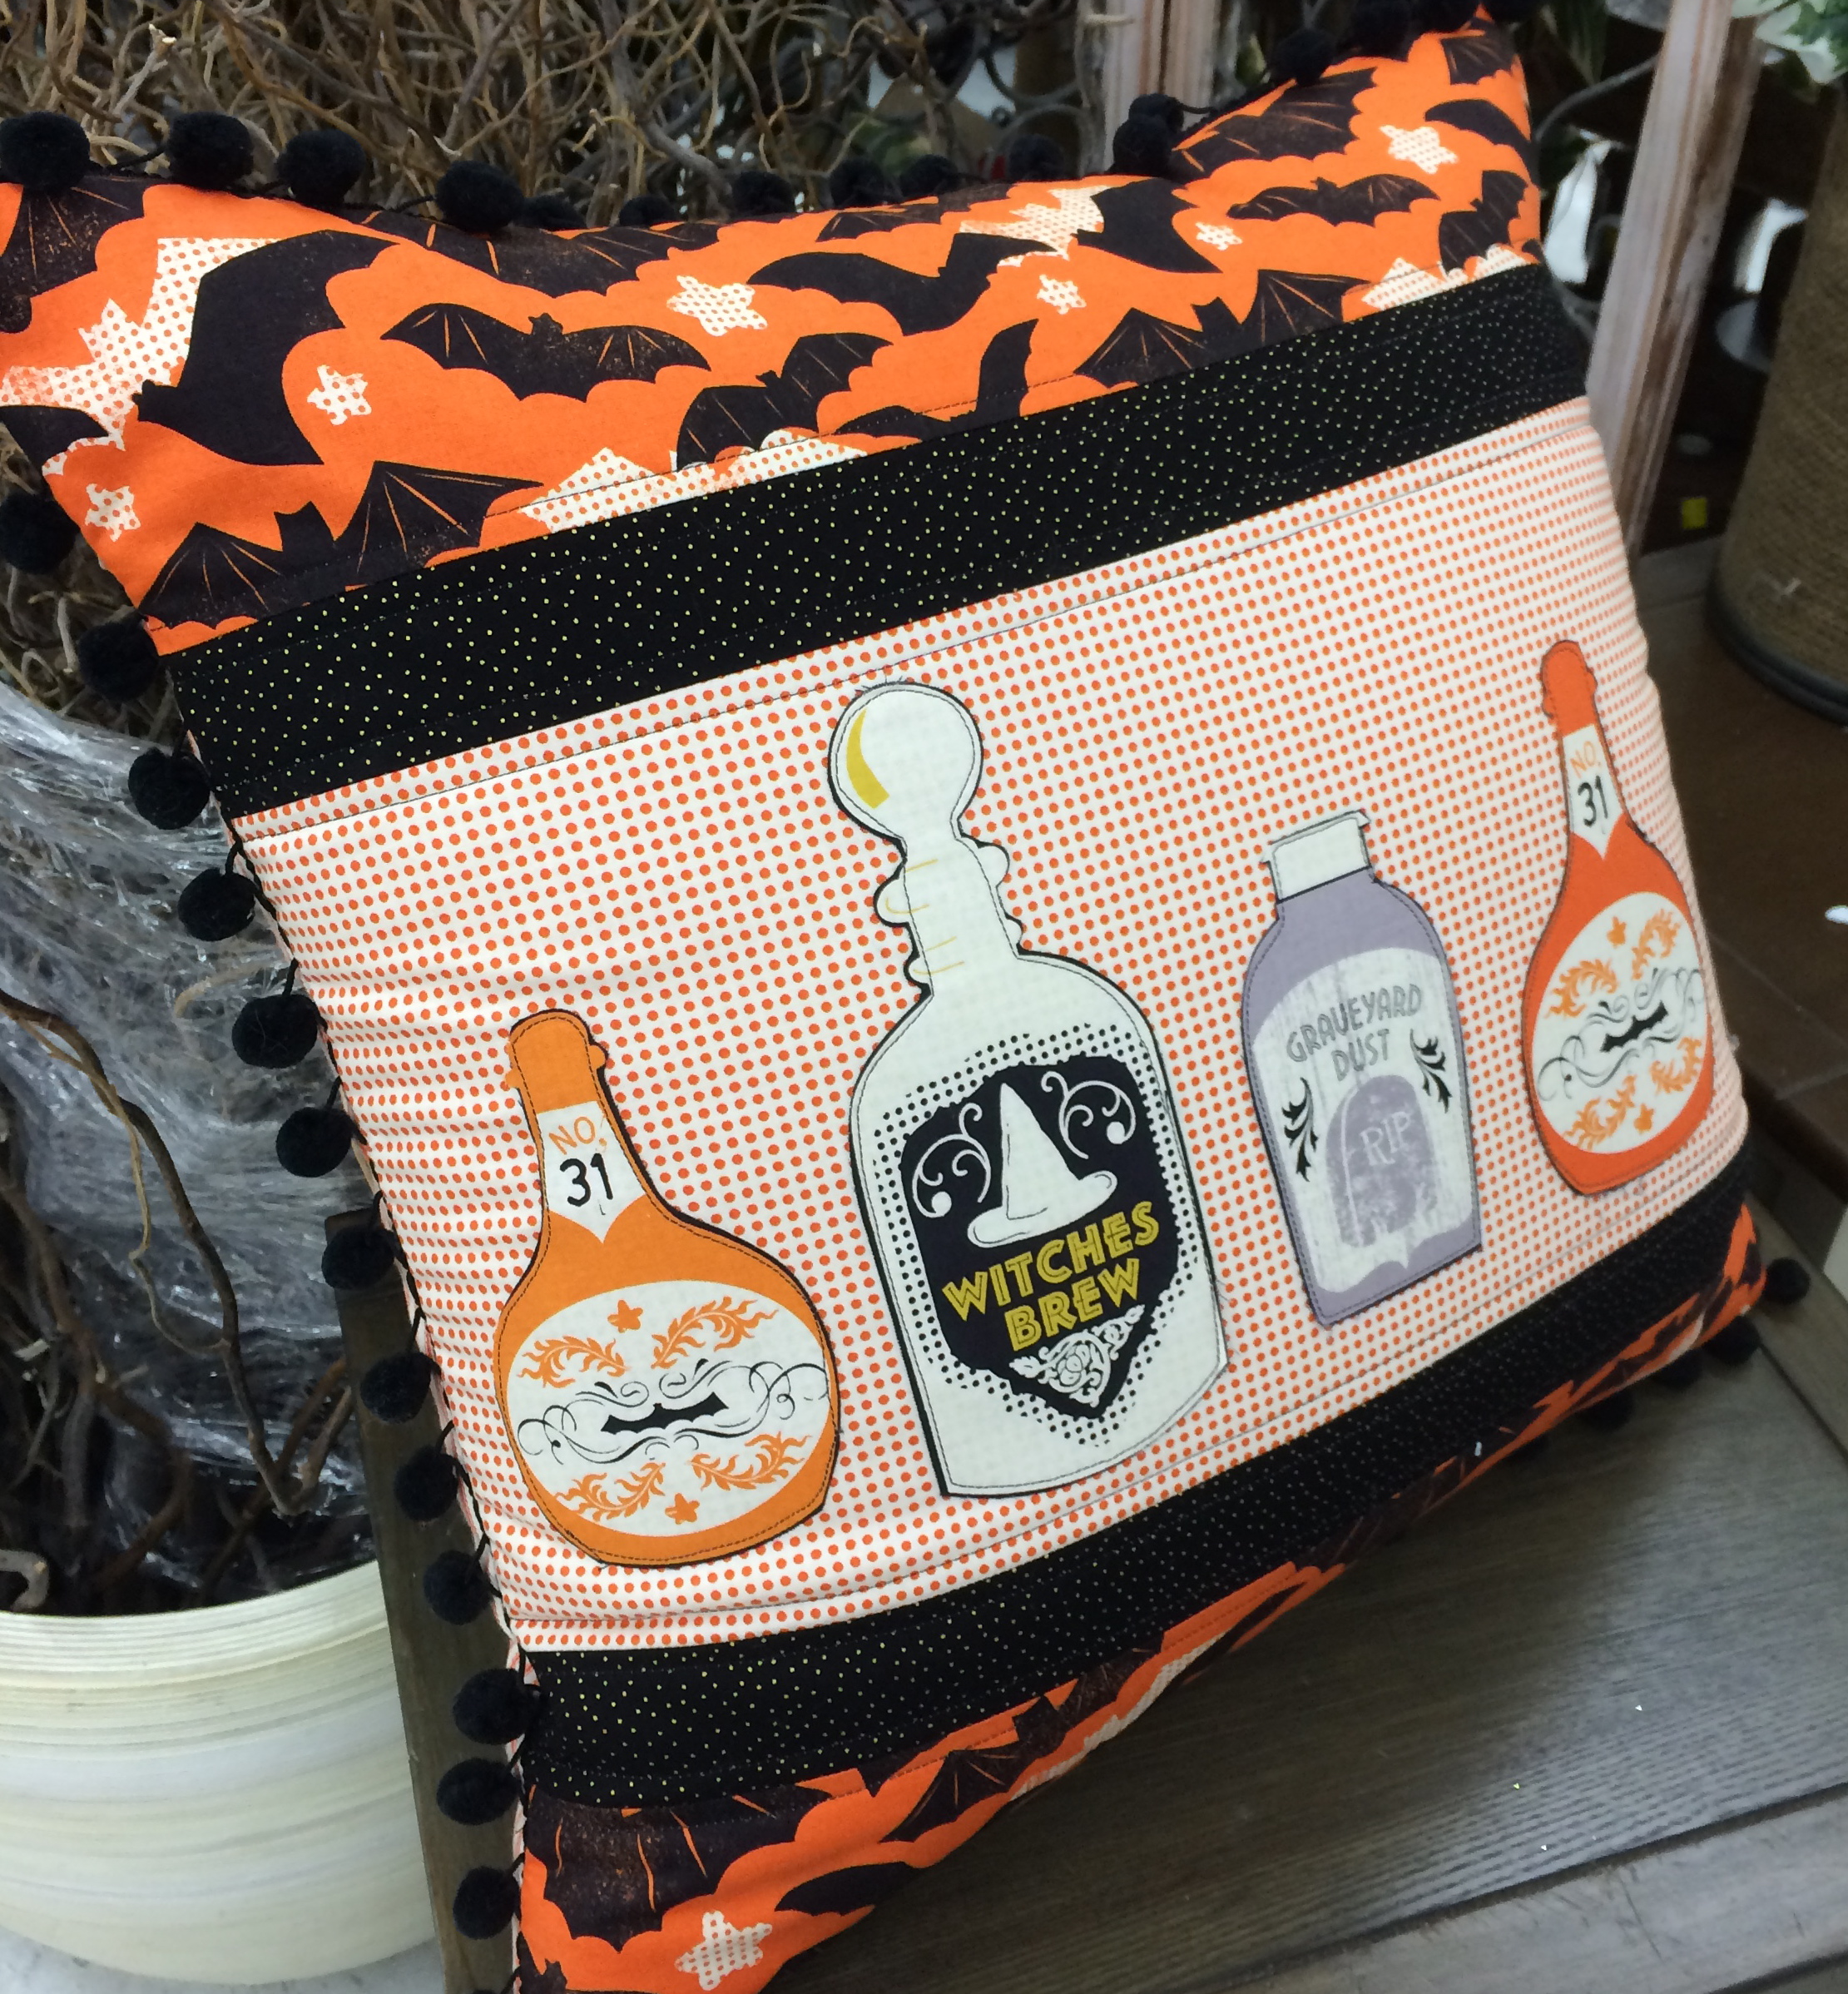
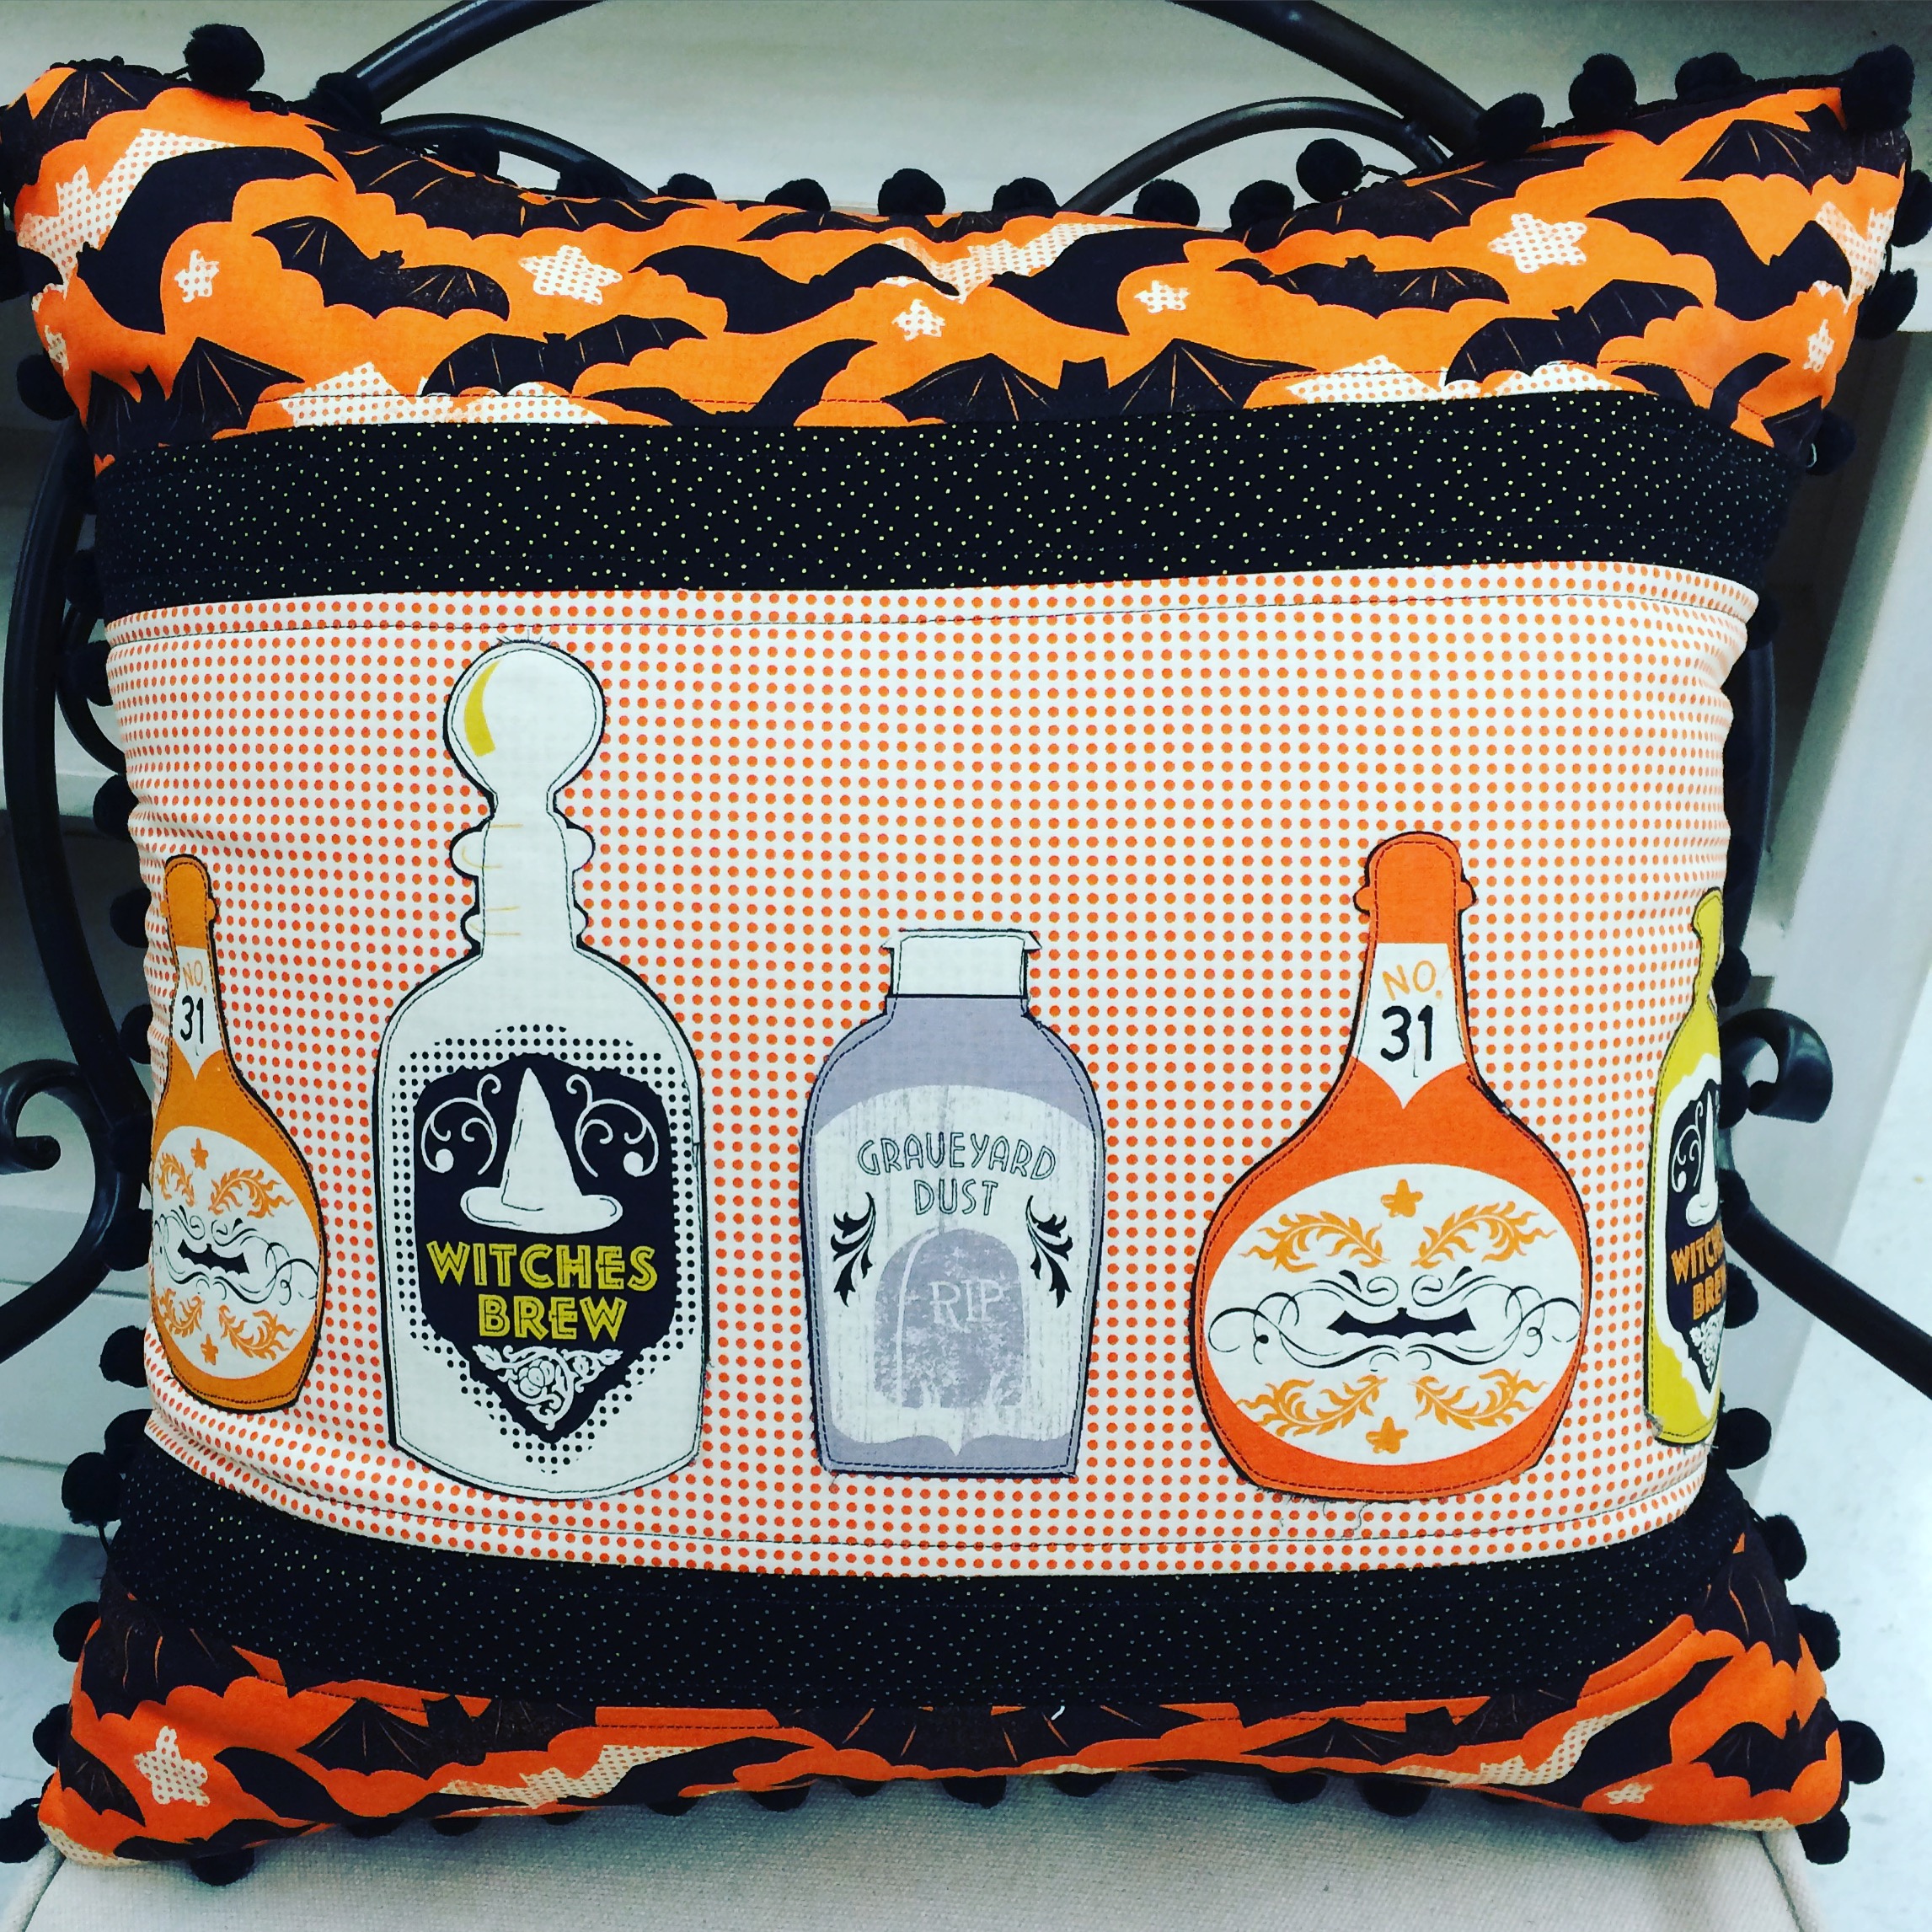
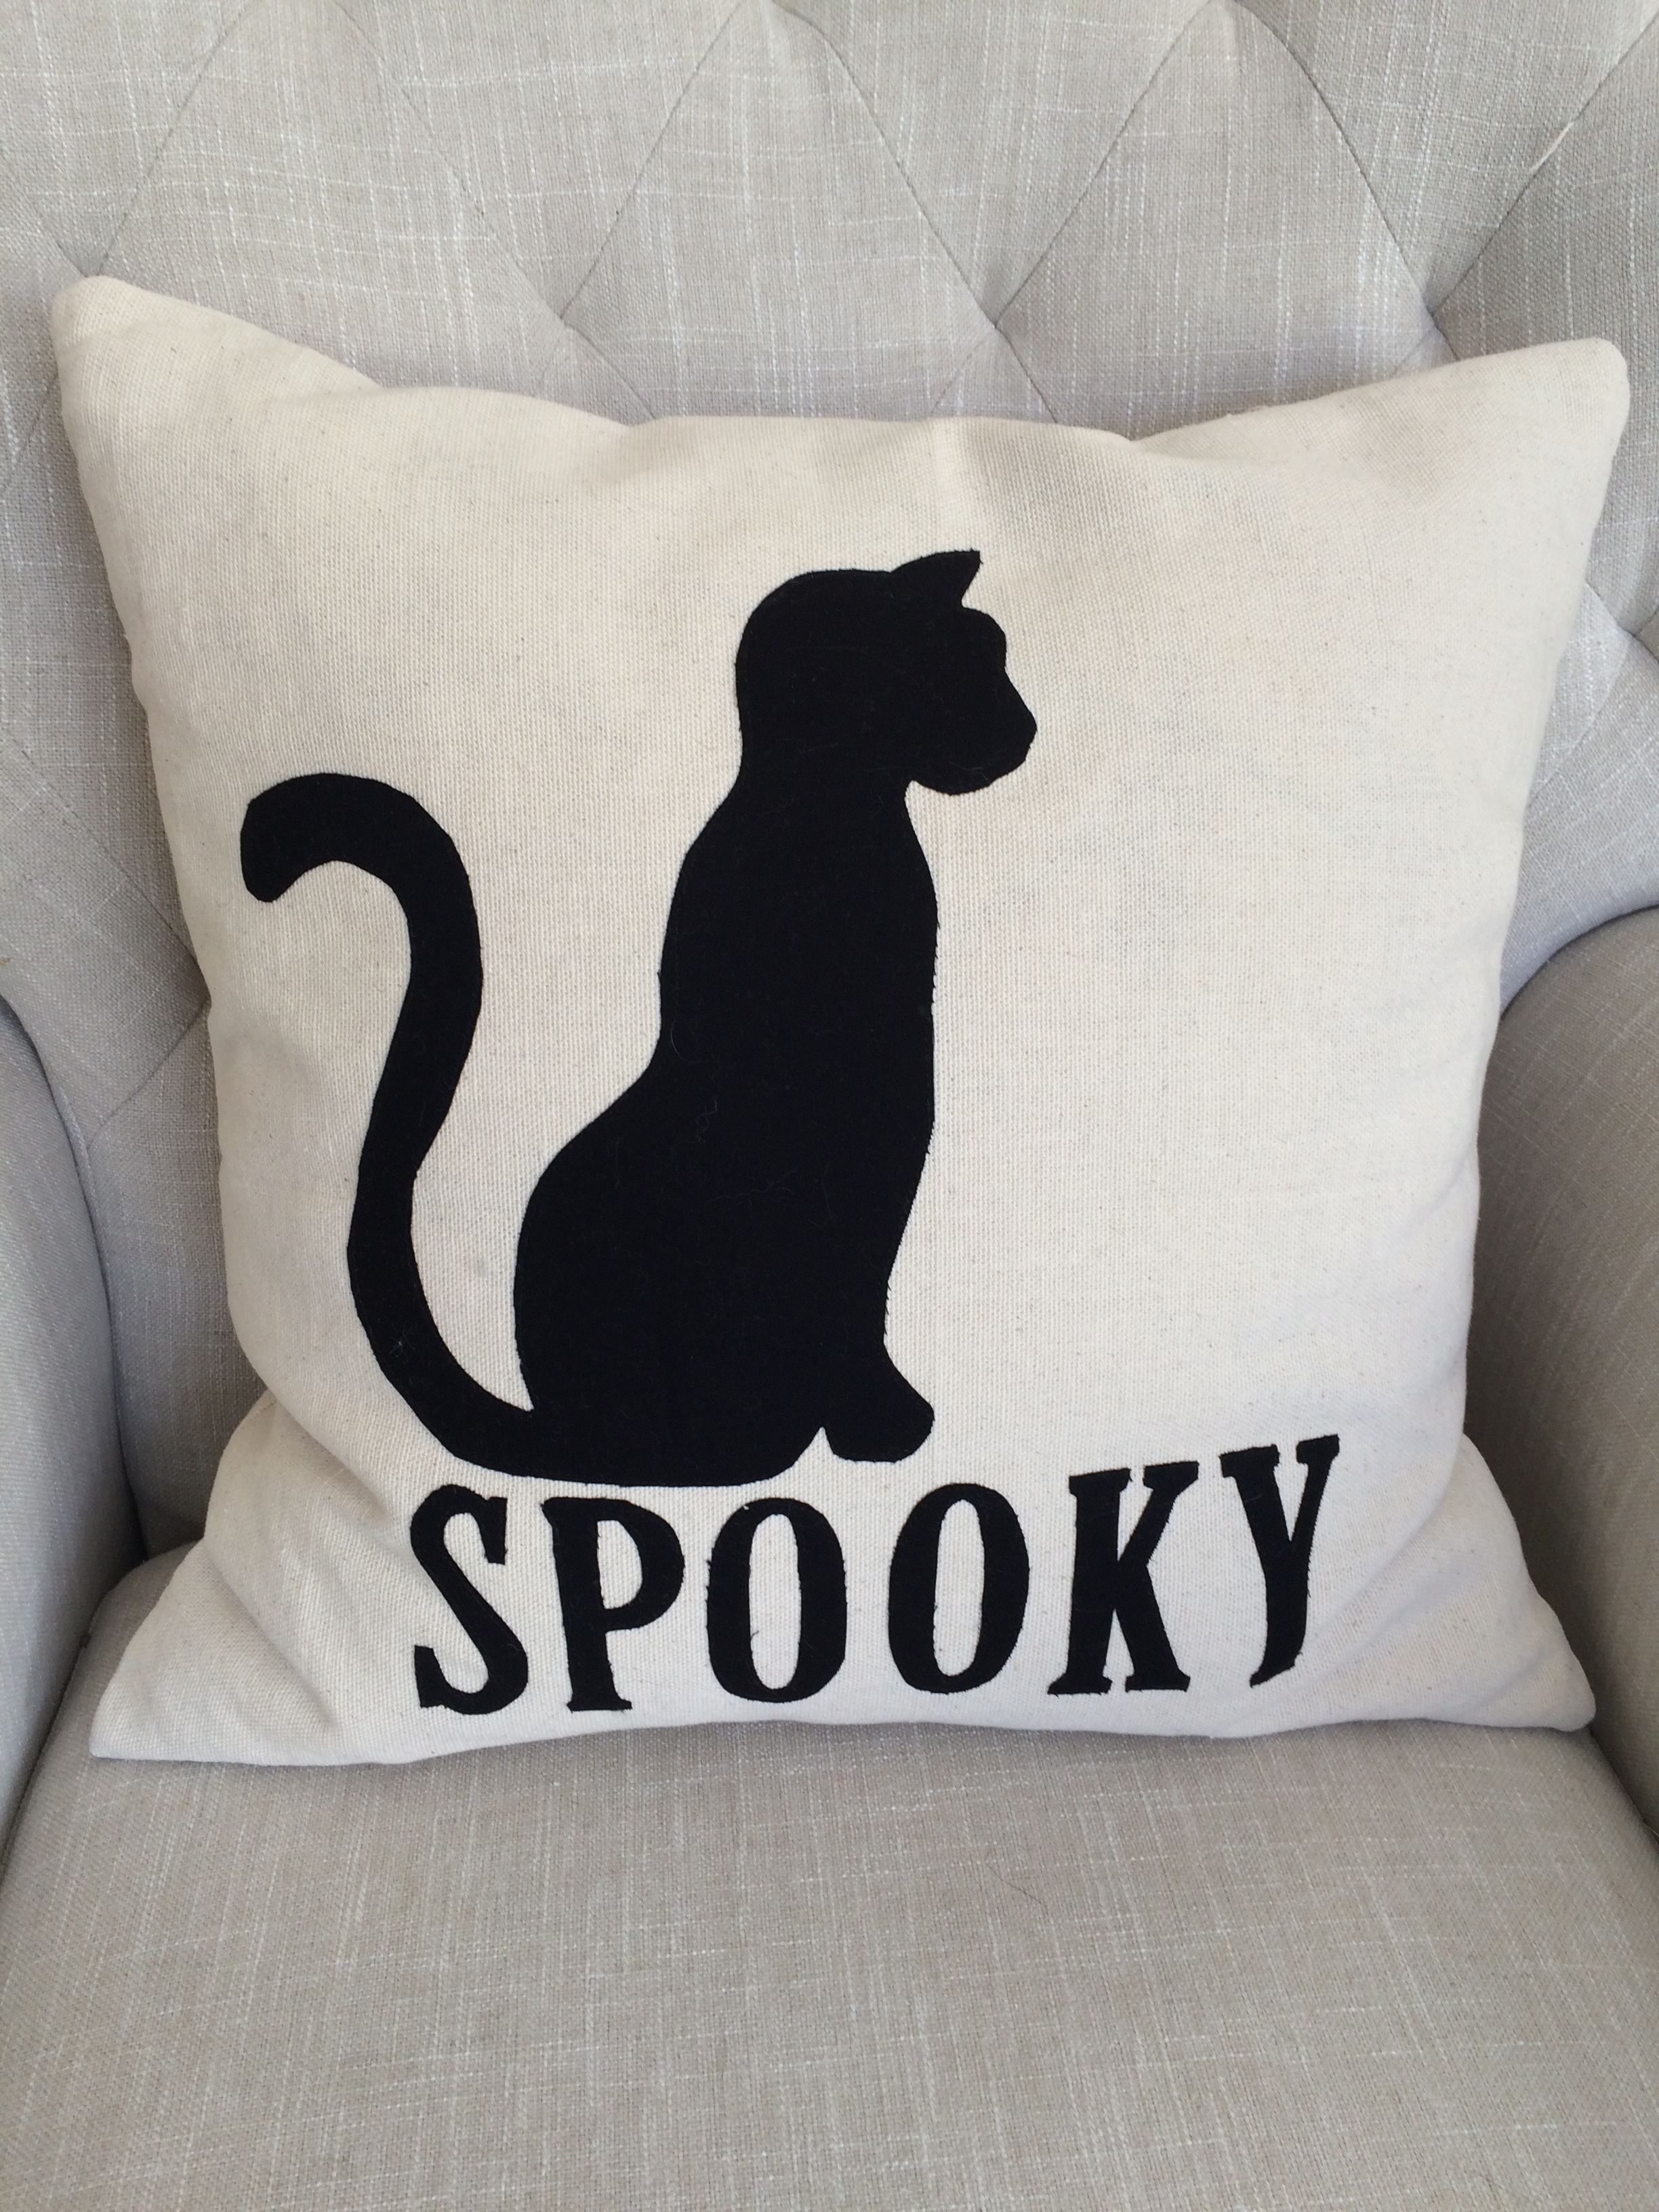
If you find yourself pressed for time but still want to sew something SPOOKY, try this quick pillow tutorial!  Click HERE

Spooky Mini Quilt

spooky mini quilt tutorialI love Spooky Sewing!  Halloween is such a fun time of year and the fabrics are so amazing!  This mini quilt pattern is inspired from a larger pattern I created.   You can find the pattern for the large version on the Riley Blake Designs website.  The fabrics are from last years and this years Riley Blake Designs Halloween fabrics.  They are purrrrfect for Halloween!Screen Shot 2015-09-30 at 2.46.16 PMSupplies:

scraps of Halloween prints

fat quarter or equivalent for applique

2/3 yard for backing

1/4 yard for binding

batting

Heat n Bond Lite EZ print sheets

This small version measures about 20″ square.  It would make a great pillow too!  Begin by rummaging through all your scraps and cut 2.5″ squares.  You need 100 total.  There are 10 rows of 10.  I did mine totally random.  I just grabbed 2 fabrics and sewed them together.

spooky mini quilt I paired all the fabrics then sewed those pairs with other pairs, leaving 10 pairs out.  Once you sew the 2 sets of 2, you have strips with 4 squares.  Pair those up to give you 10 sets of 8 squares.  Then add the reserved pairs to the ends.  This was the fastest way I found.  I lined up the rows the best I could.  I tried to avoid having 2 like fabrics touching.  Press all seams.spooky mini quilt 3

To add the cat applique, click HERE for the cat and HERE for the Spooky.  Print them in reverse.  I like to use Heat n Bond EZ print sheets – no tracing!!!  Once you’ve got your applique ready, iron it into place and stitch around it with black thread.

spooky mini quilt 2All that’s left is the quilting!  I quilted orange swirls.

IMG_0813Add the binding and its done!  This might take a while if your cat decides to have a nap on it!!!  spooky mini quilt 4
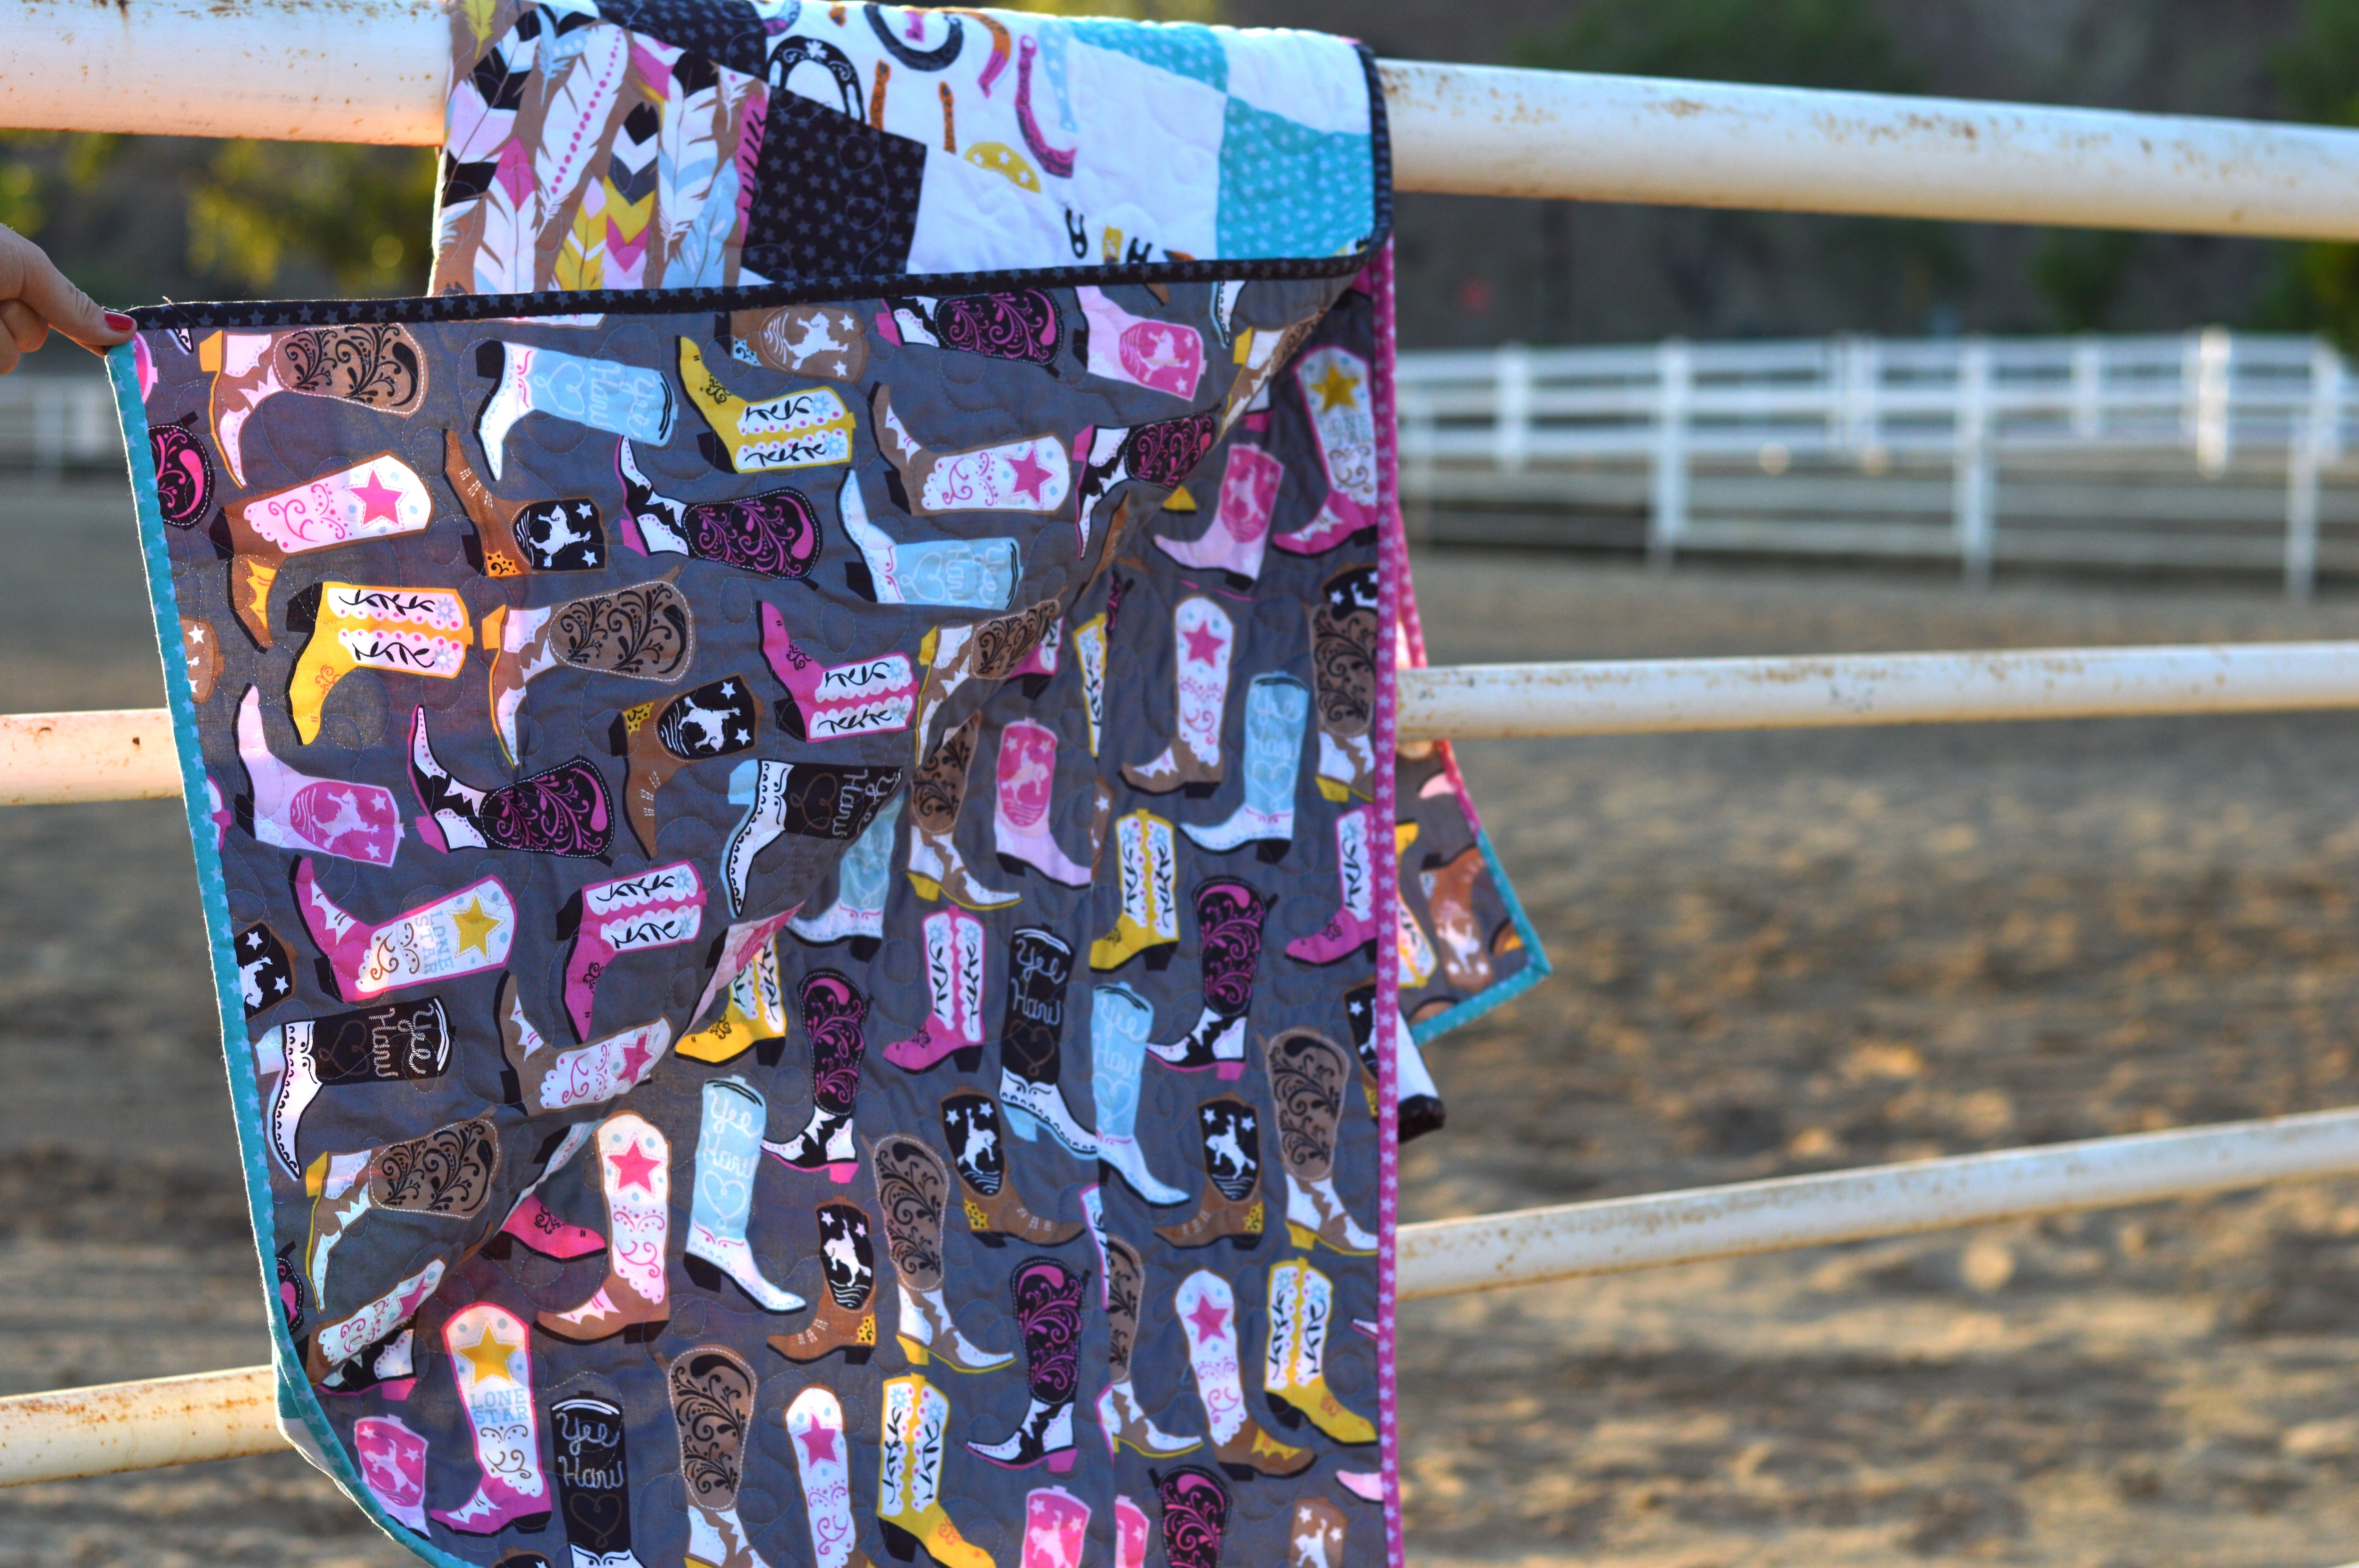
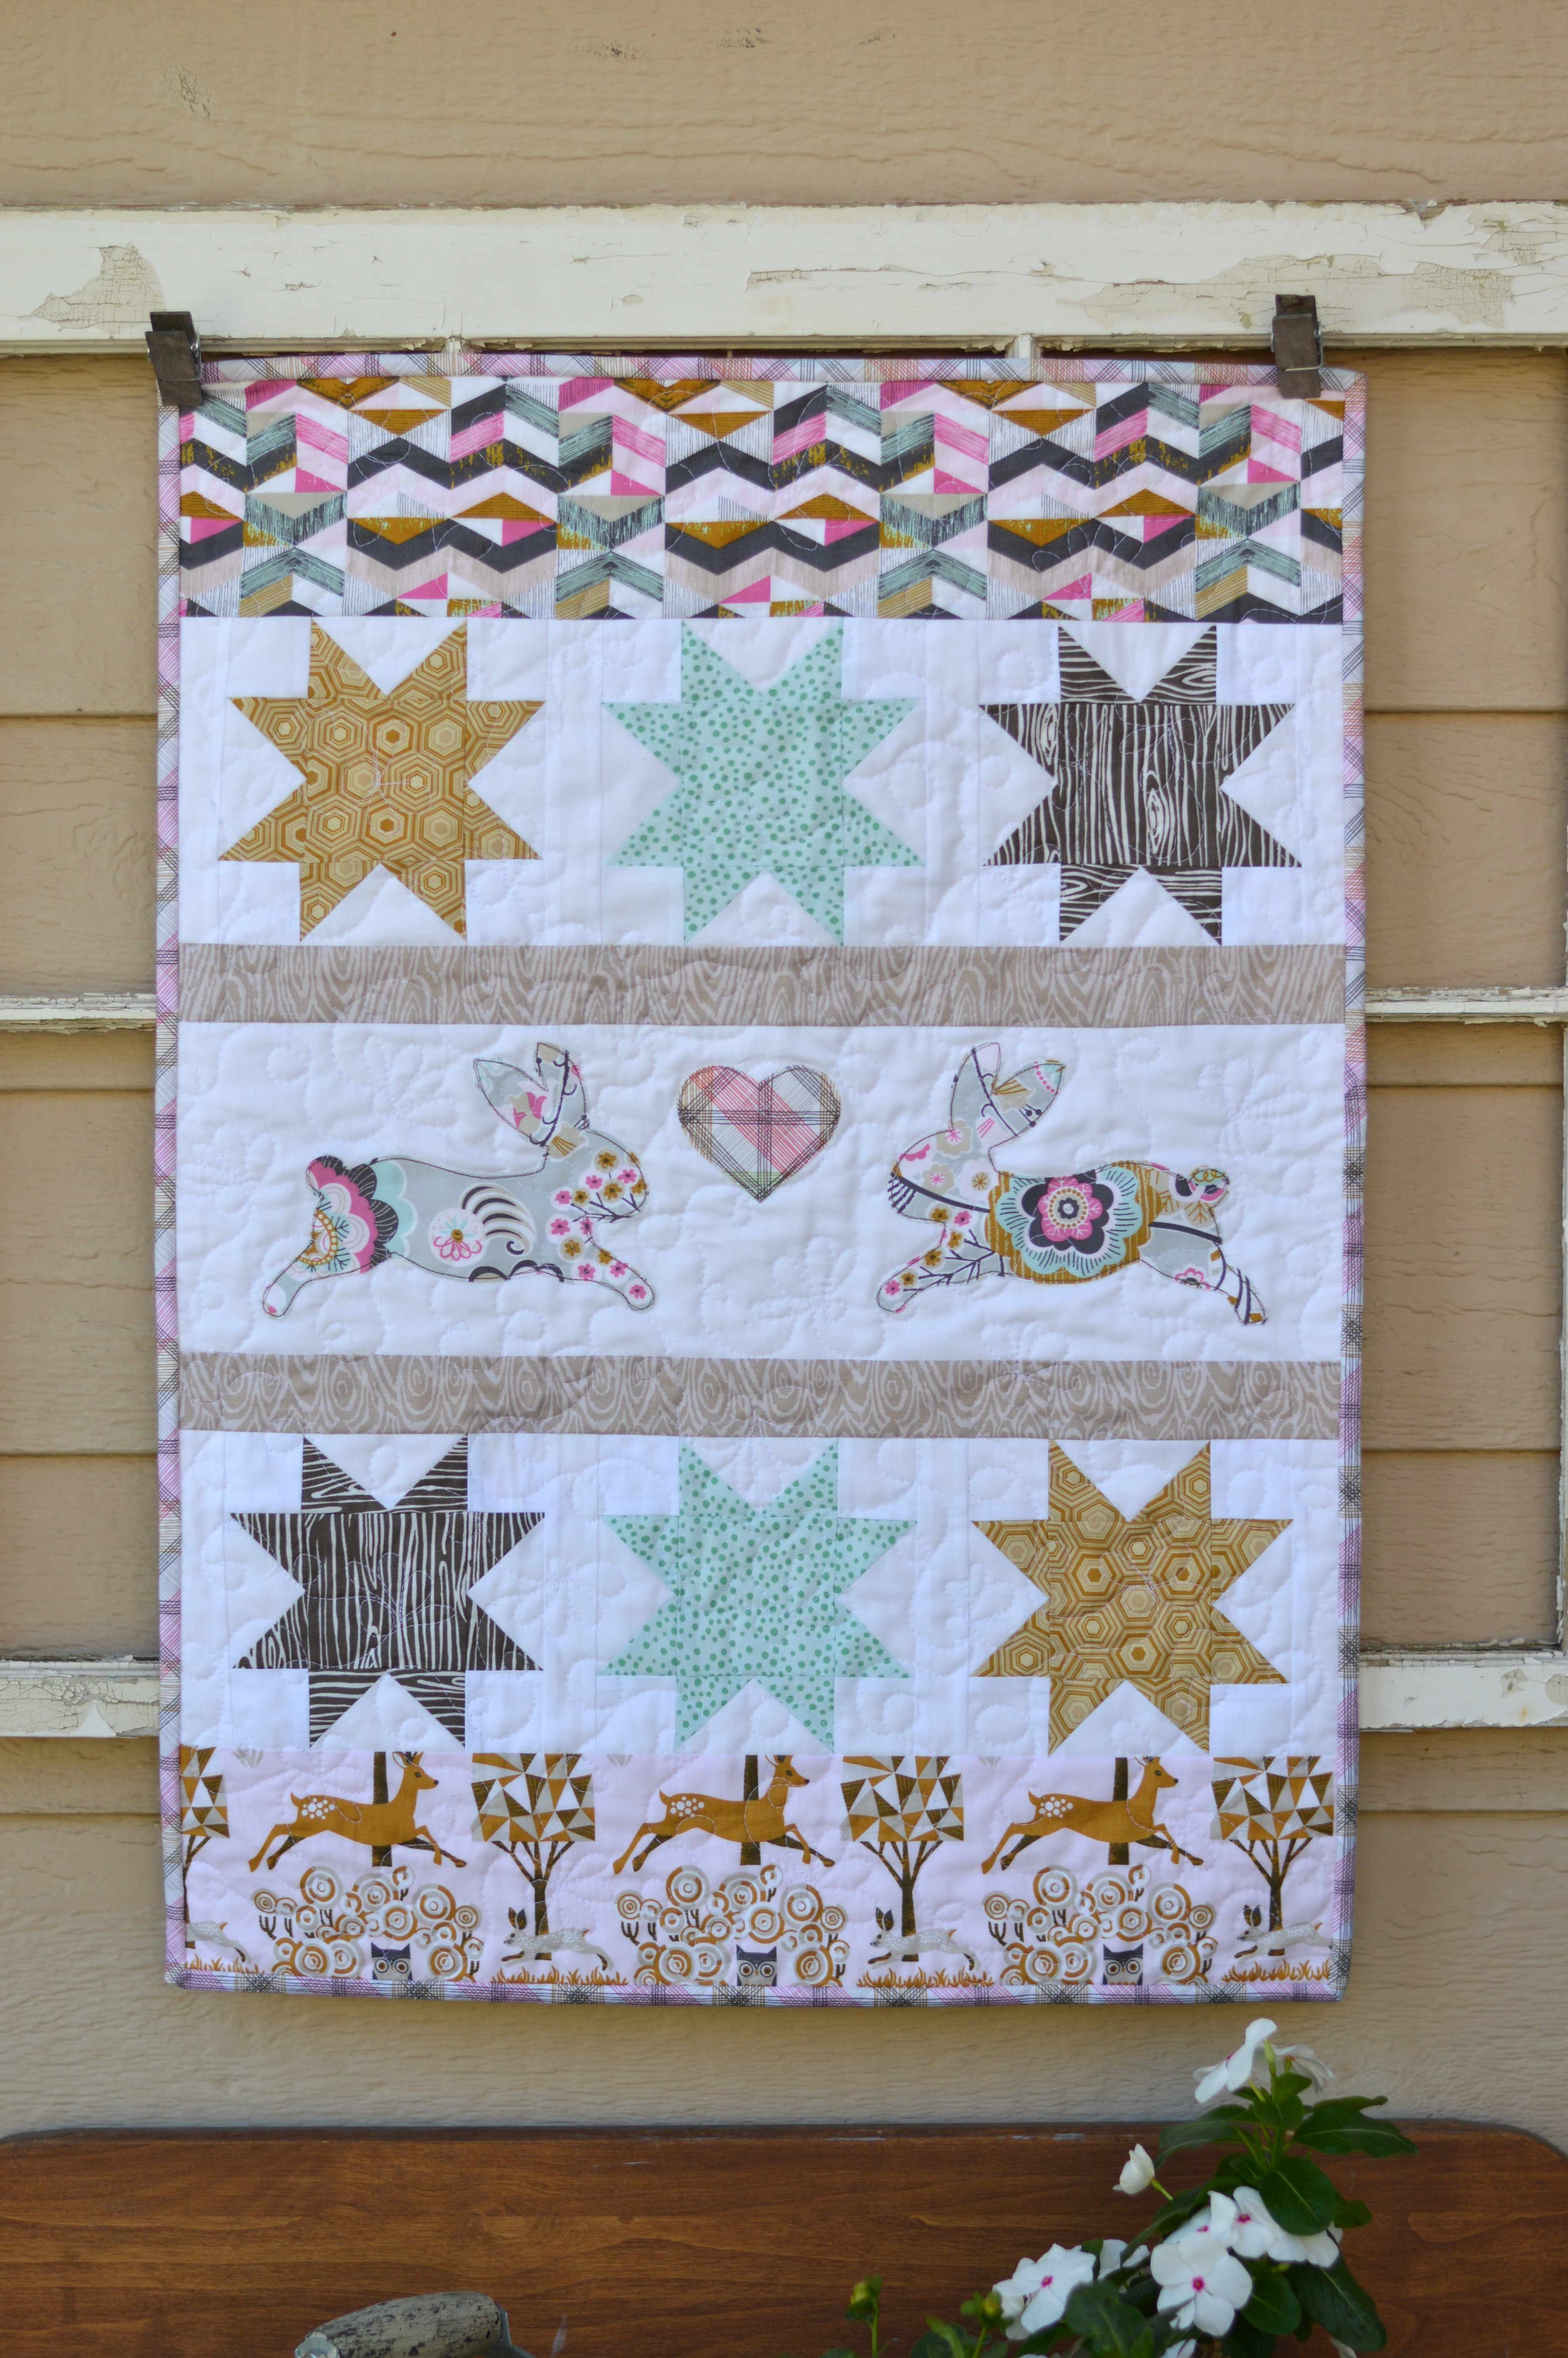
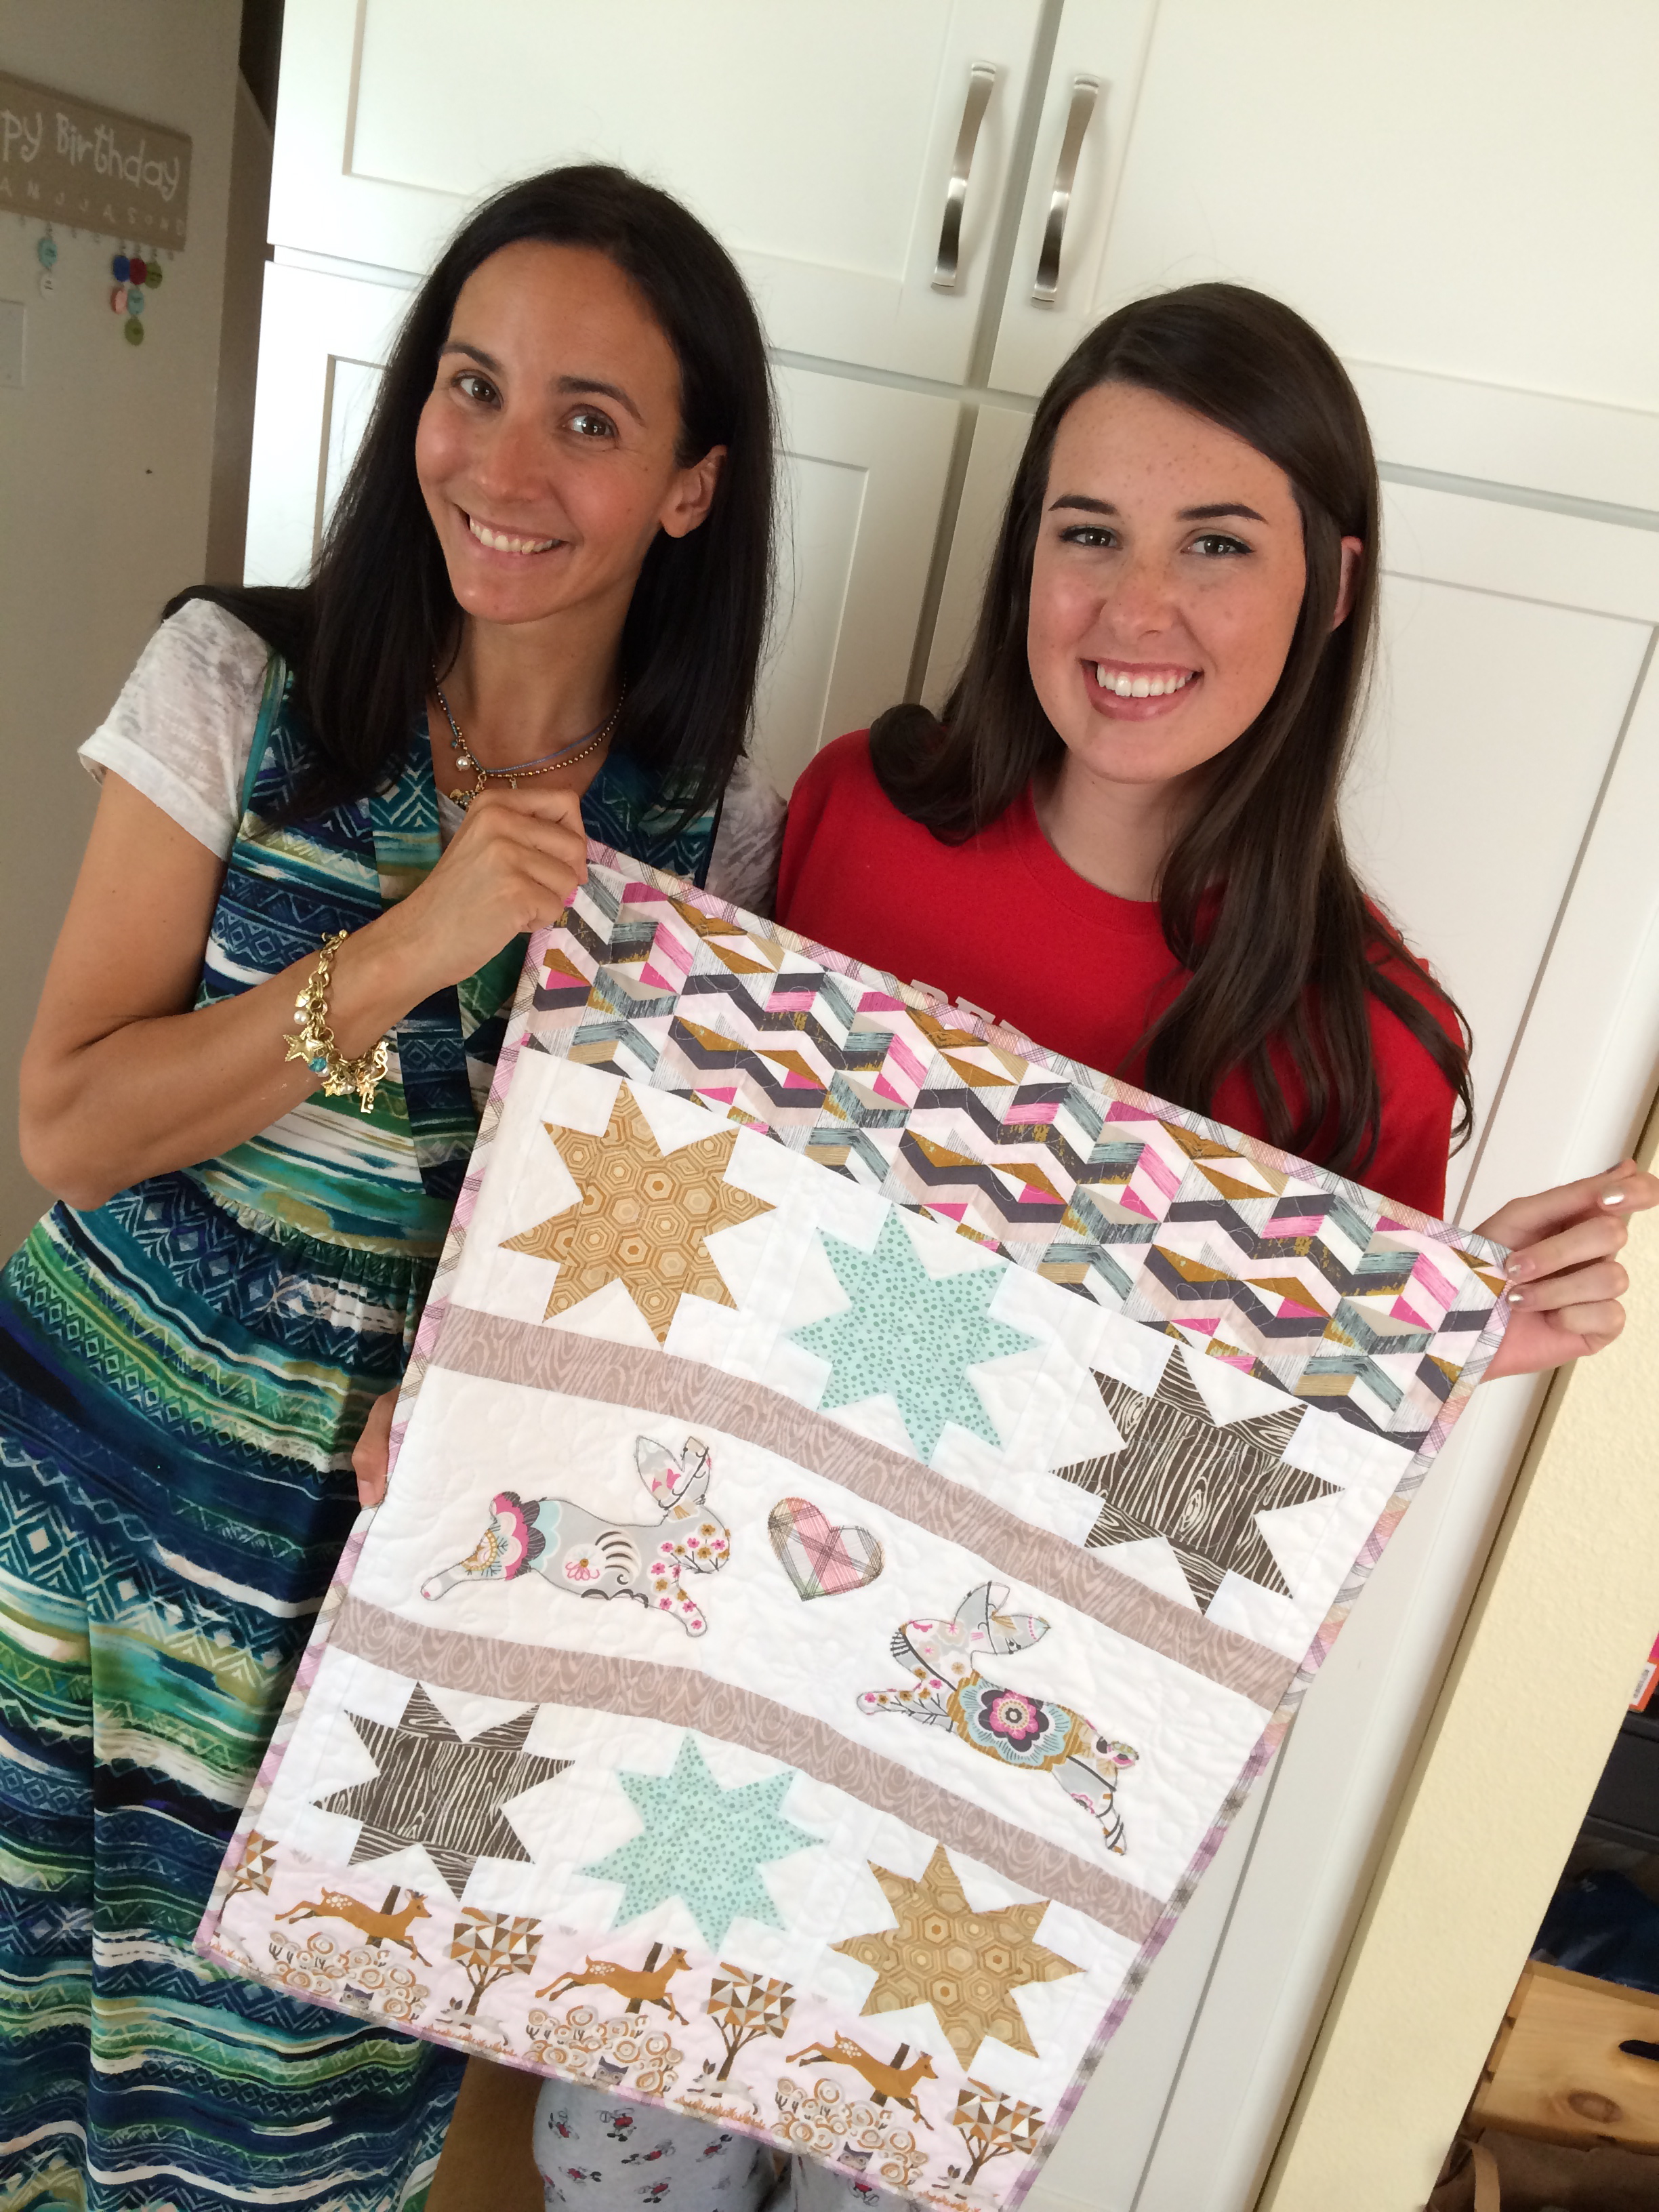
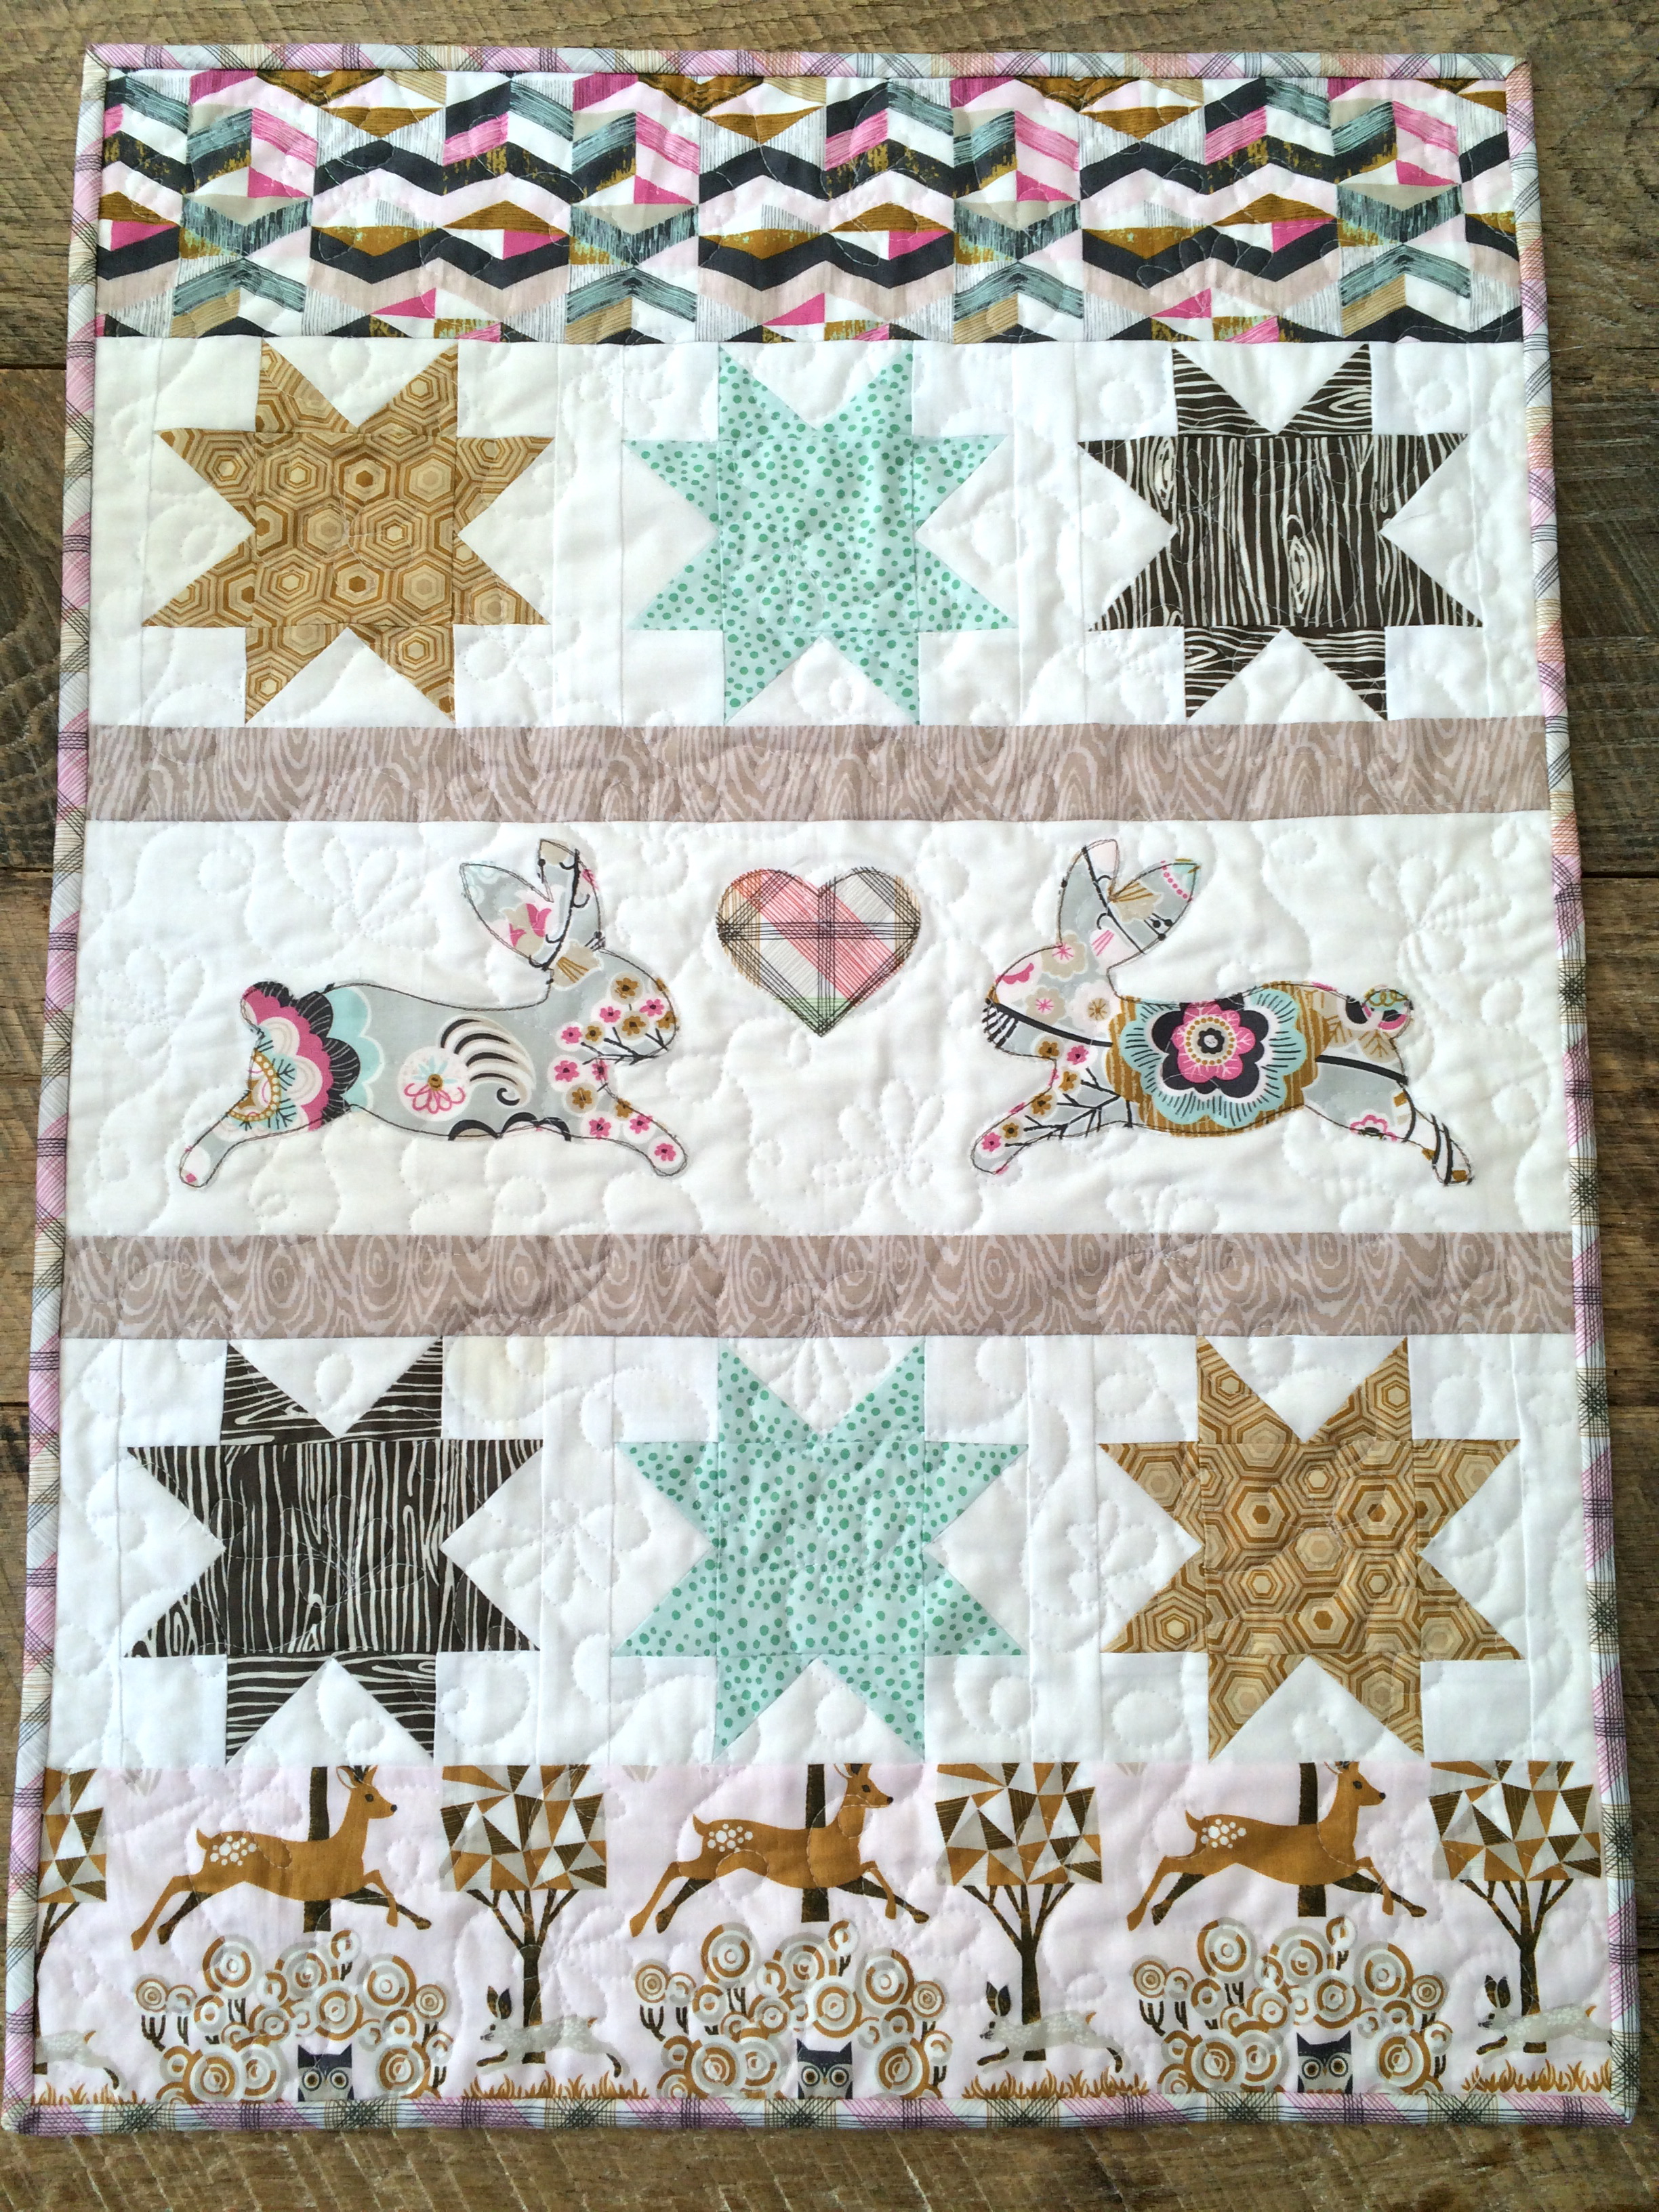
I love it so much!!!!

spooky mini quilt 5

Kids Can Sew! Sizzix Doll Quilt

sizzix doll quilt kids can sewI love getting my girls involved in sewing!  In fact among the requirements for leaving home to go to college are: 1.  you must be able to bake a pie from scratch  2.  you must be able to successfully make the family roll recipe  3.  you must be able to construct a quilt start to finish by yourself!  I’m proud of my teenage daughter as she has mastered all of these skills.  Sally is 7 and we are beginning to sew on the machine.  She LOVES it!  I like projects that she can do most of the work; this one is perfect!

I love using the Sizzix for cutting because she is too young to use the rotary cutter.  This way, she gets to “cut” out her quilt.  She choose all the fabrics and the Sizzix die.  The triangle worked great because it was easy for her to follow.

sizzix doll quilt 6

Once she had chosen all the fabrics, I ironed Heat n Bond Lite to the wrong side of the triangle fabric.  Then I let Sally loose with the Sizzix Fabi.

sizzix doll quilt 5I cut a piece of white fabric the size she wanted.  She positioned the triangles and I pressed them in place.

sizzix doll quilt 3She sat at the machine and I had her practice sewing 1/4″ seams along the triangles.  If she messed up, not to worry, the triangles would be fine.  This was such good experience.  She got to where she could start and stop and lift the presser foot and cut the thread all by herself!

sizzix doll quilt 2Once all the triangles were stitched around, I used Spary n Bond to baste the quilt together.  This allowed for easy quilting and no messing with pins!  sizzix doll quilt 7I wanted her to do all the quilting.  I put the walking foot on and showed her how the machine can “sew by itself” and all she needed to do was steer the fabric, not push or pull it.  Once she saw how fun this was she was off!  I encouraged her to do random lines all over.  I love how it turned out!

sizzix doll quilt 8Mufasa was quite a helper, he slept the entire time behind the sewing machine!sizzix doll quilt 9
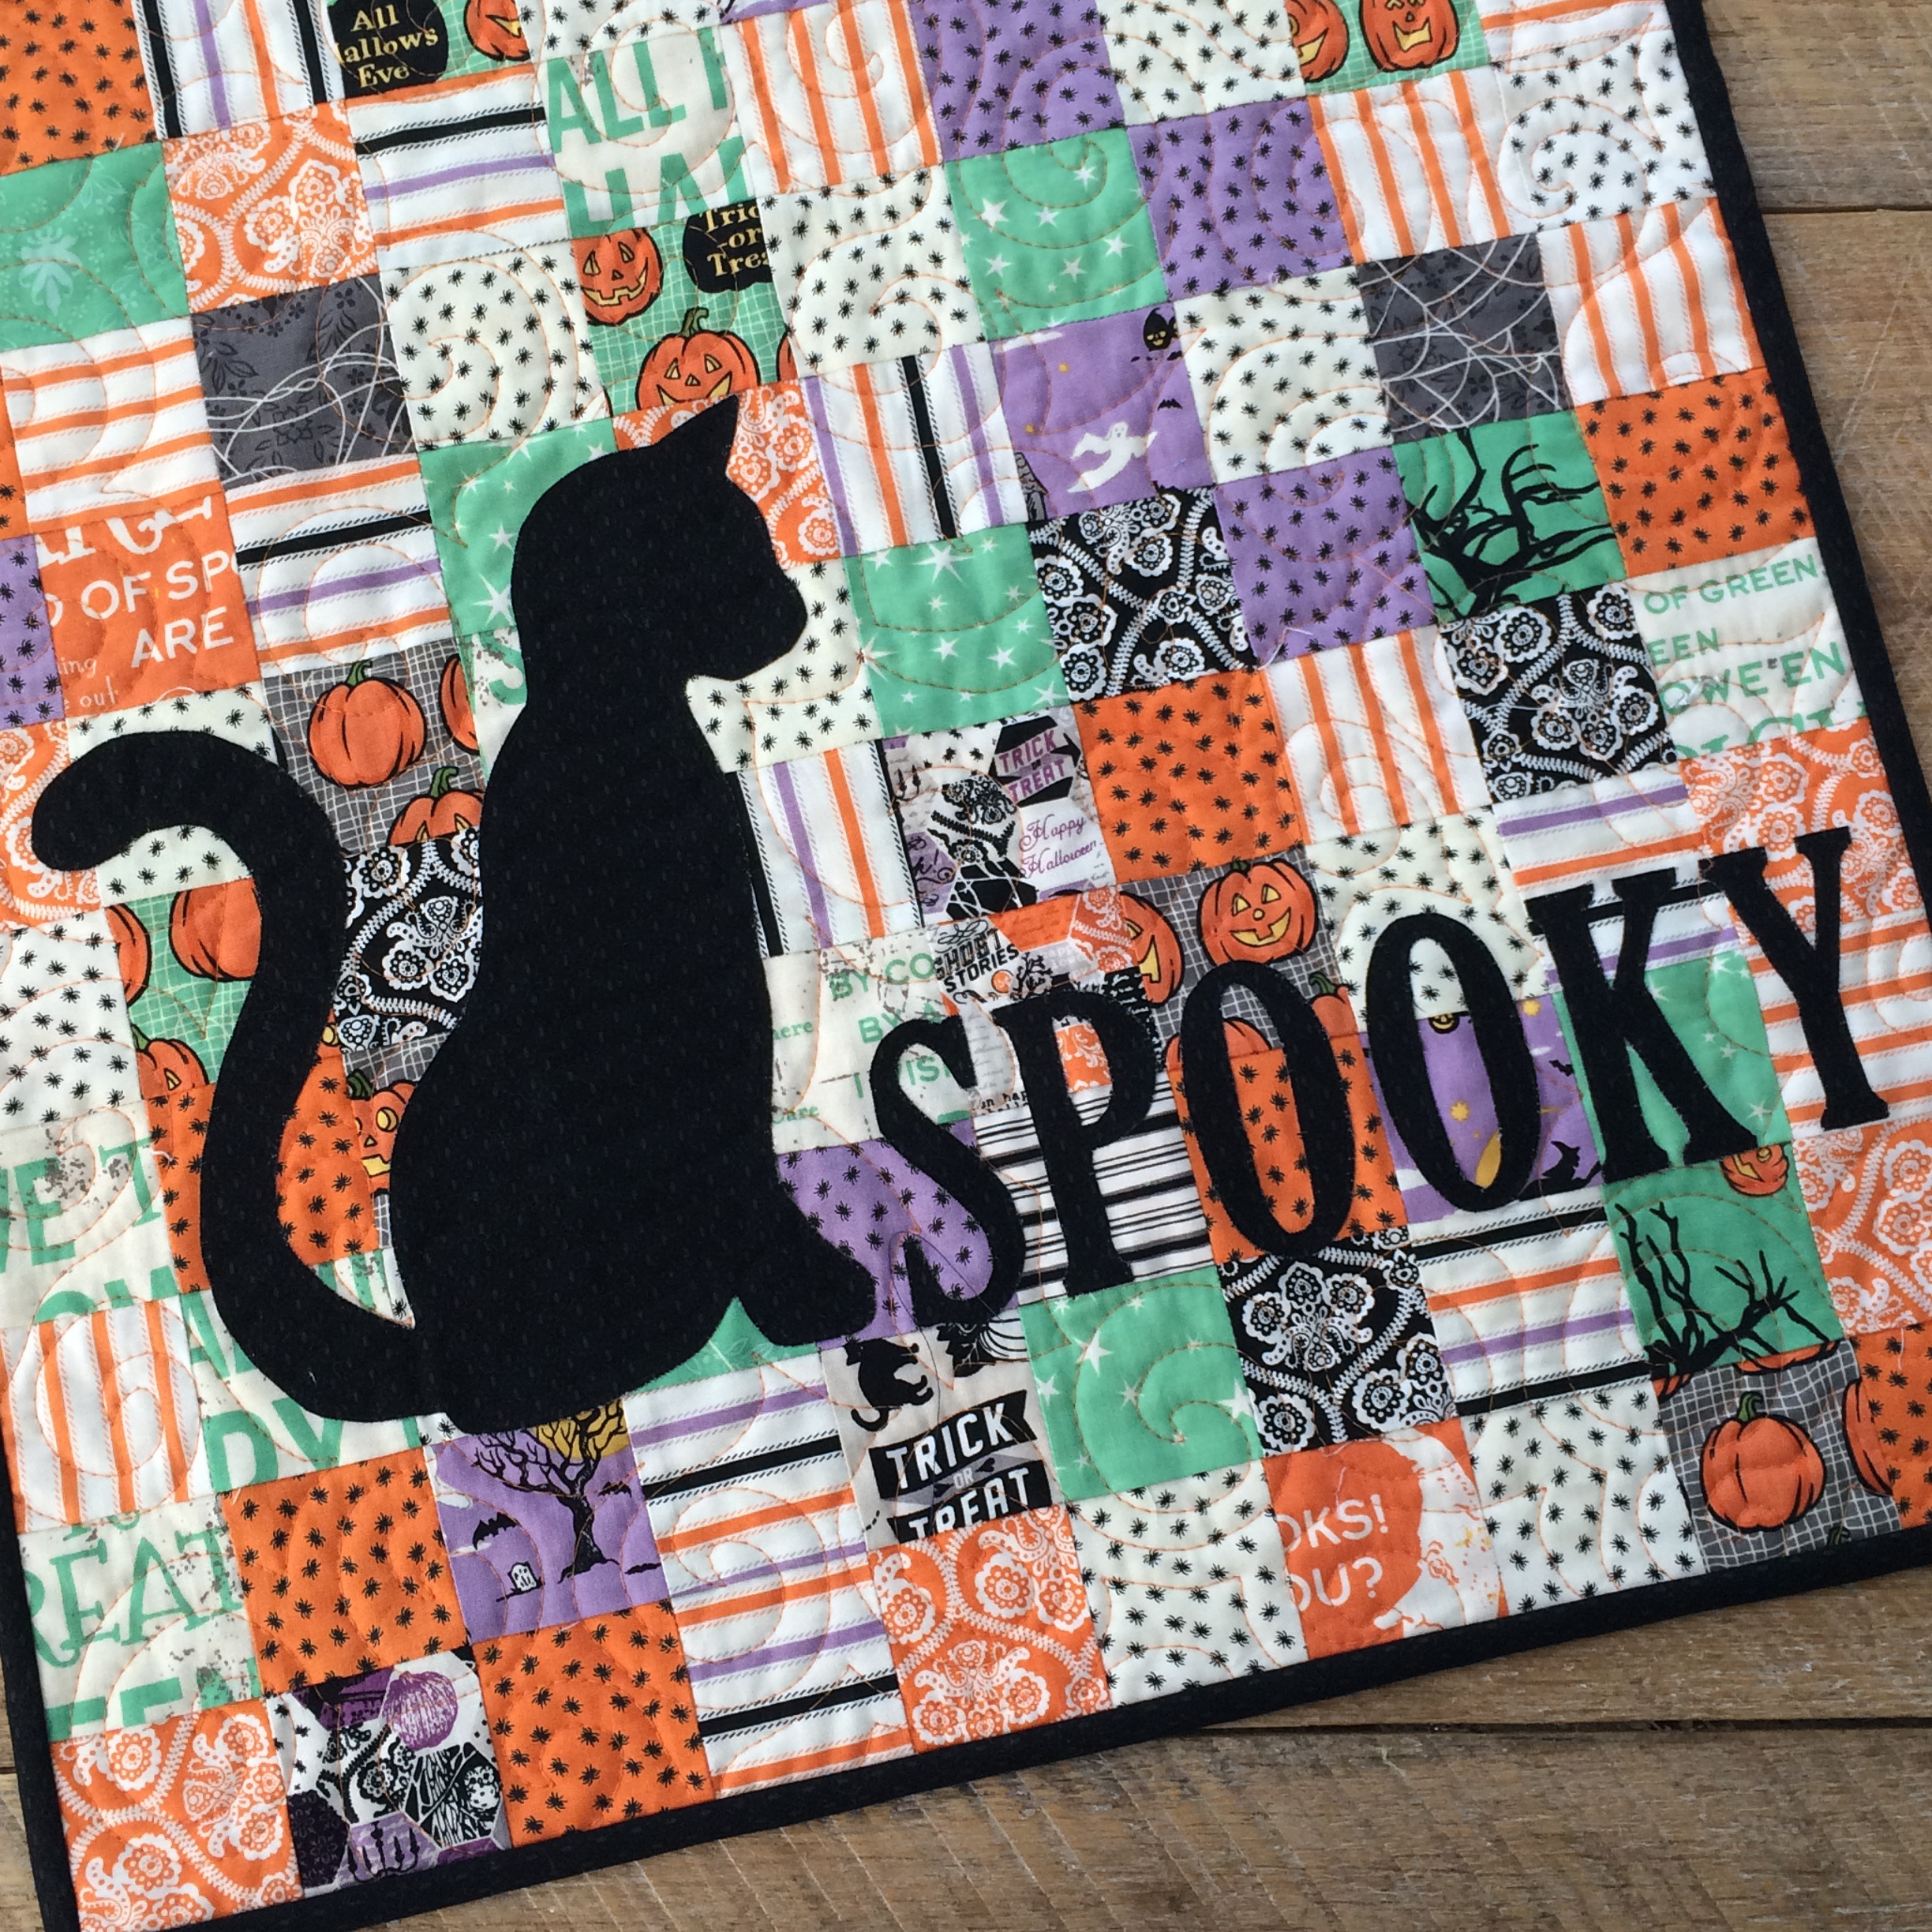
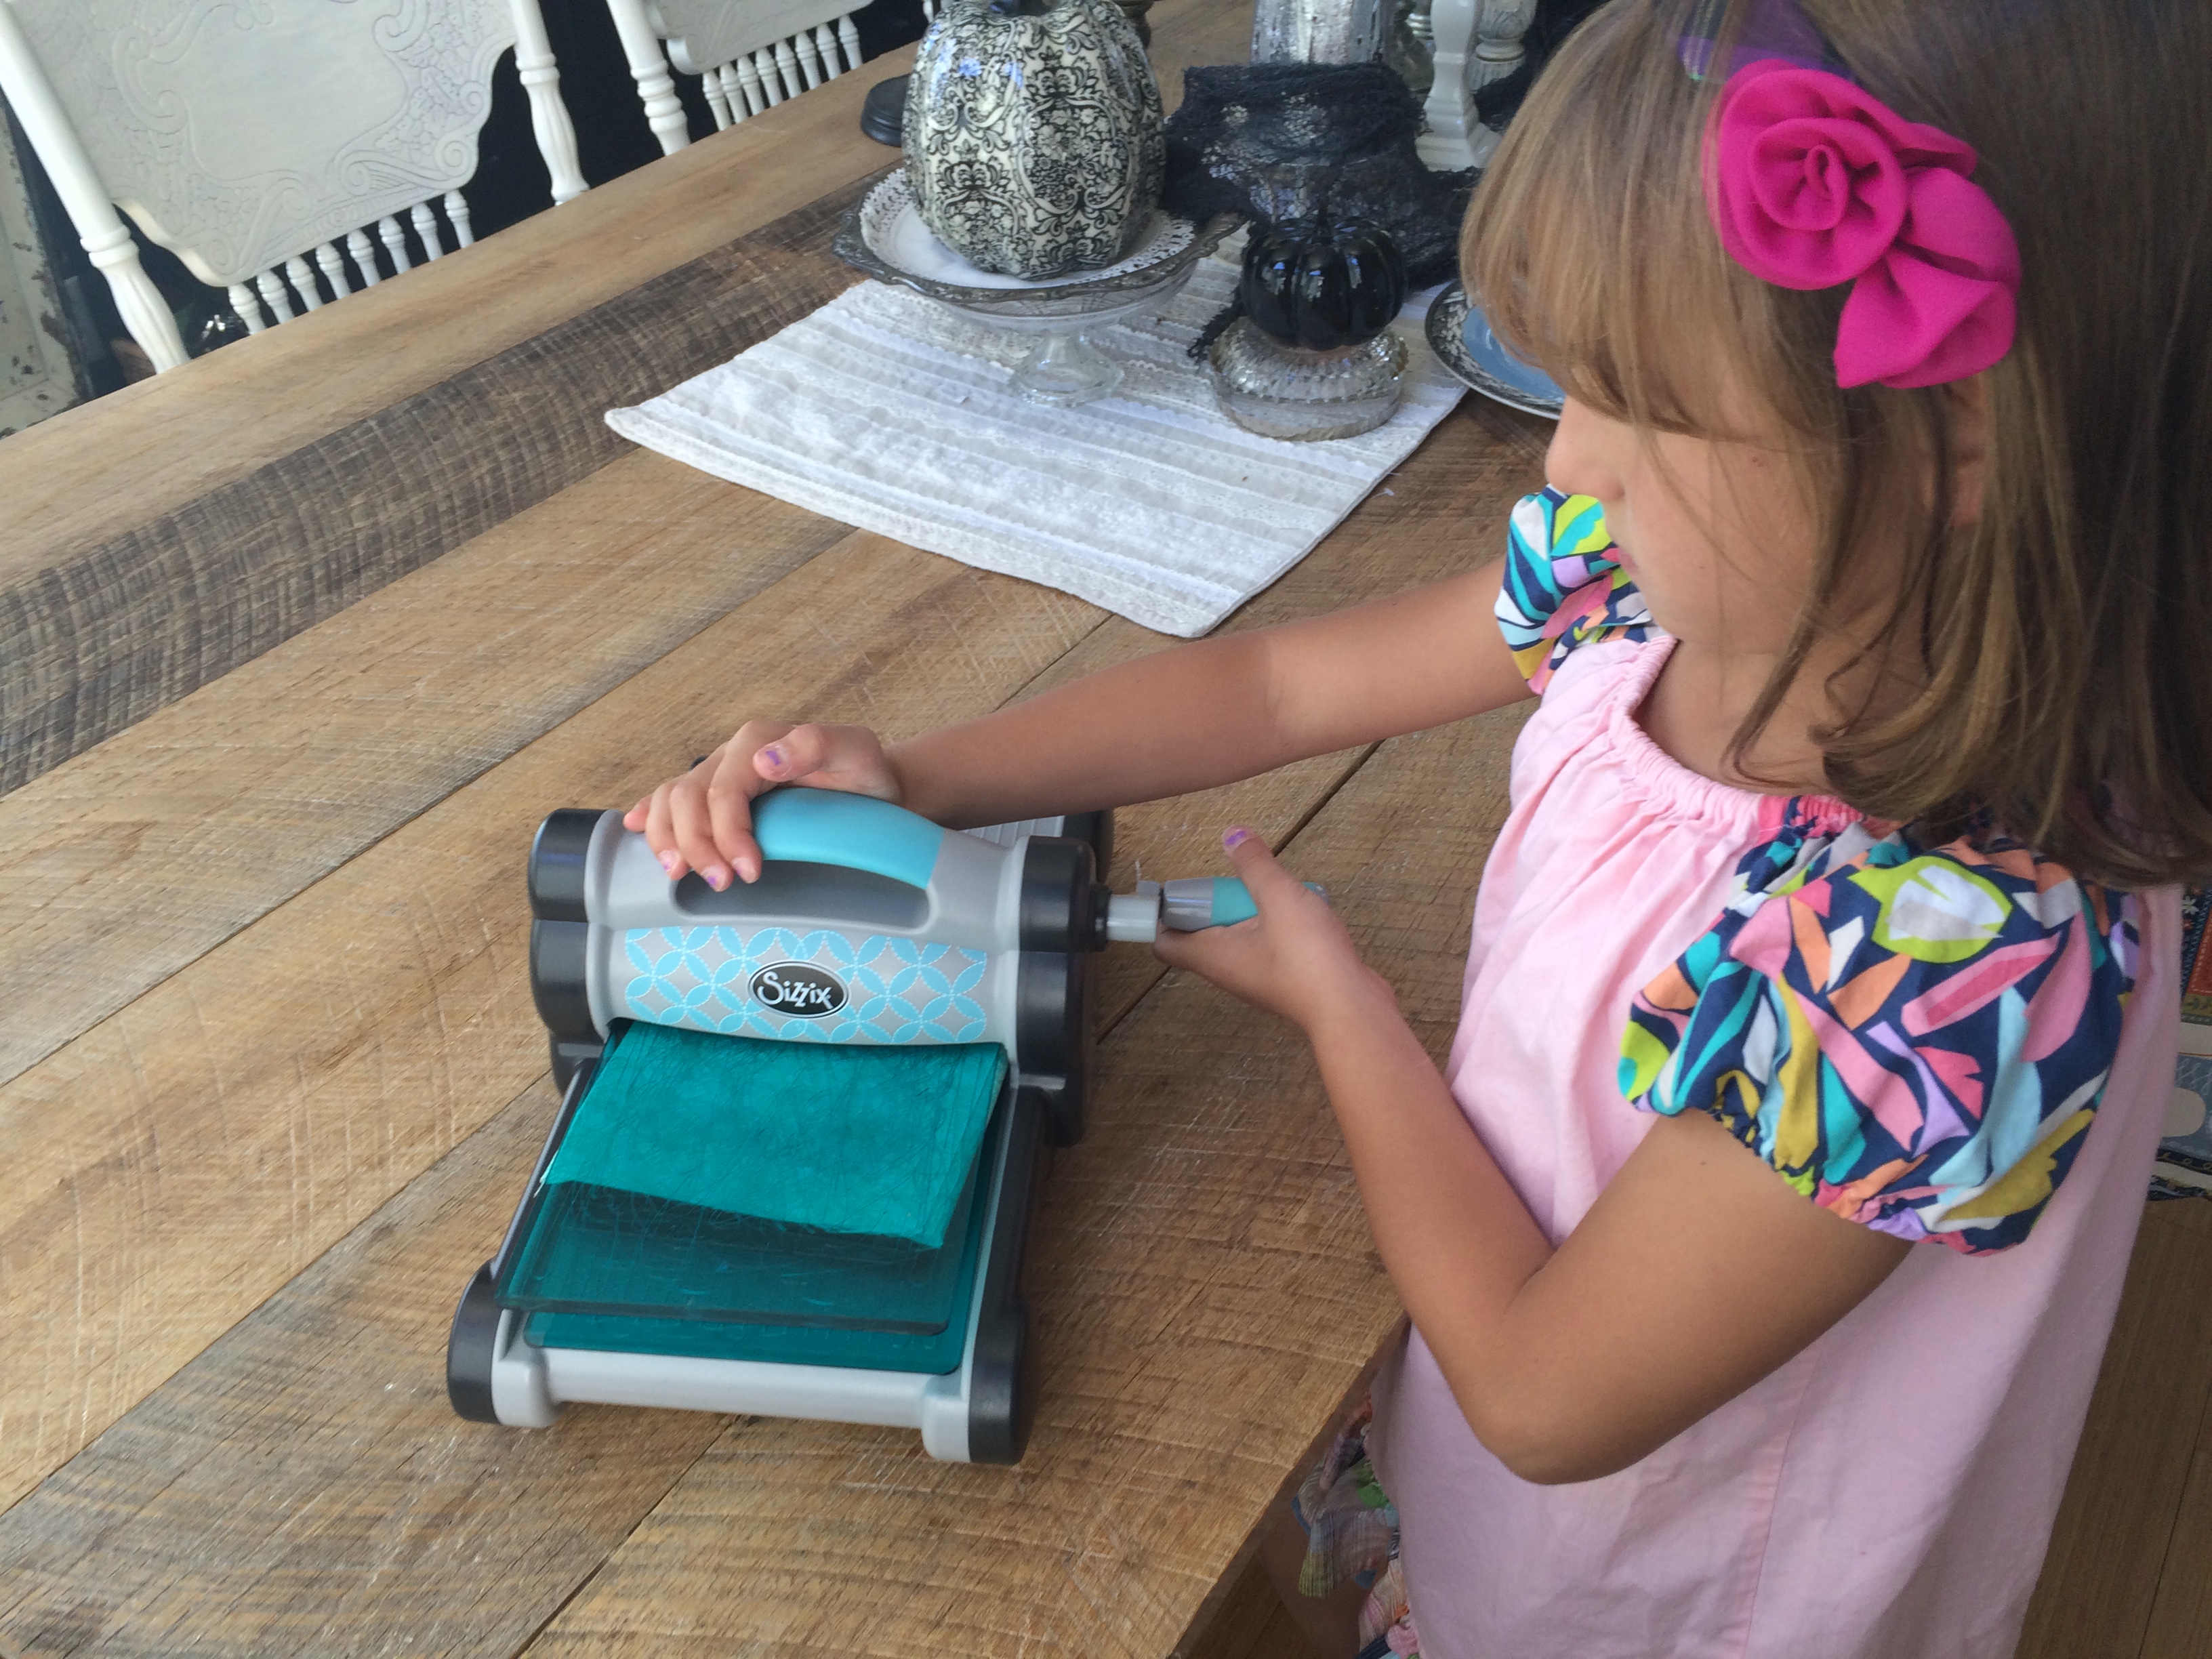
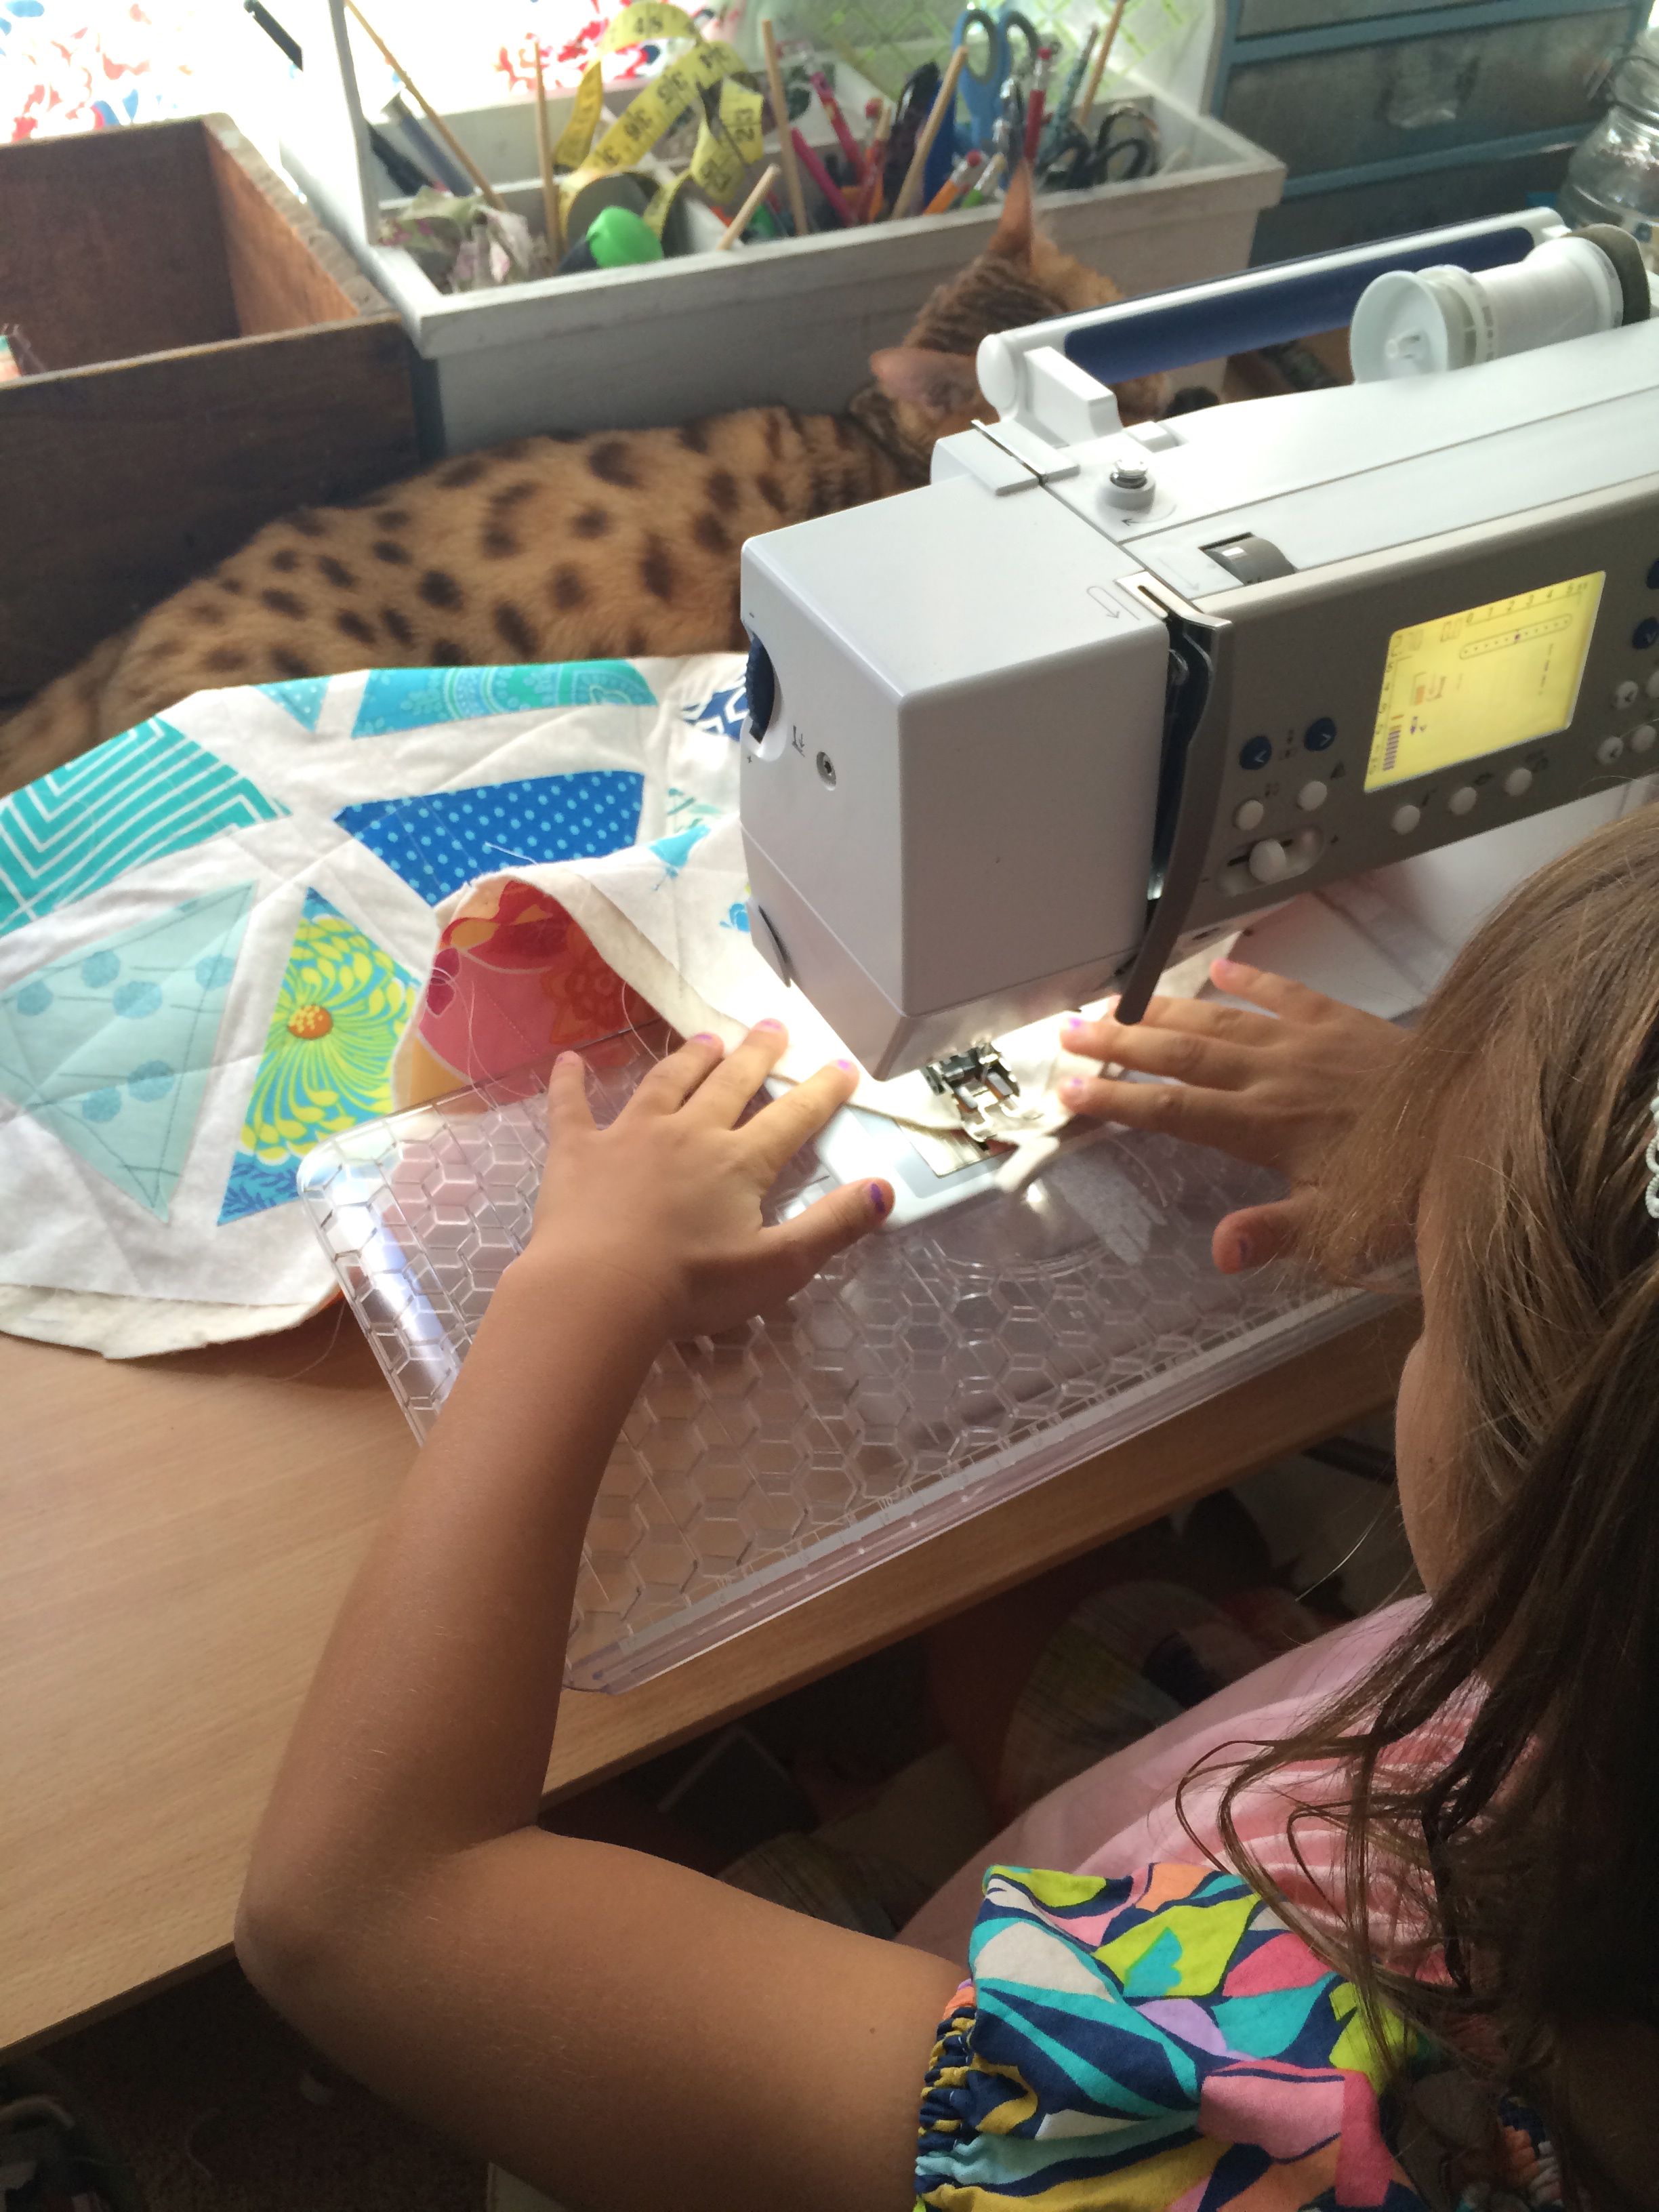
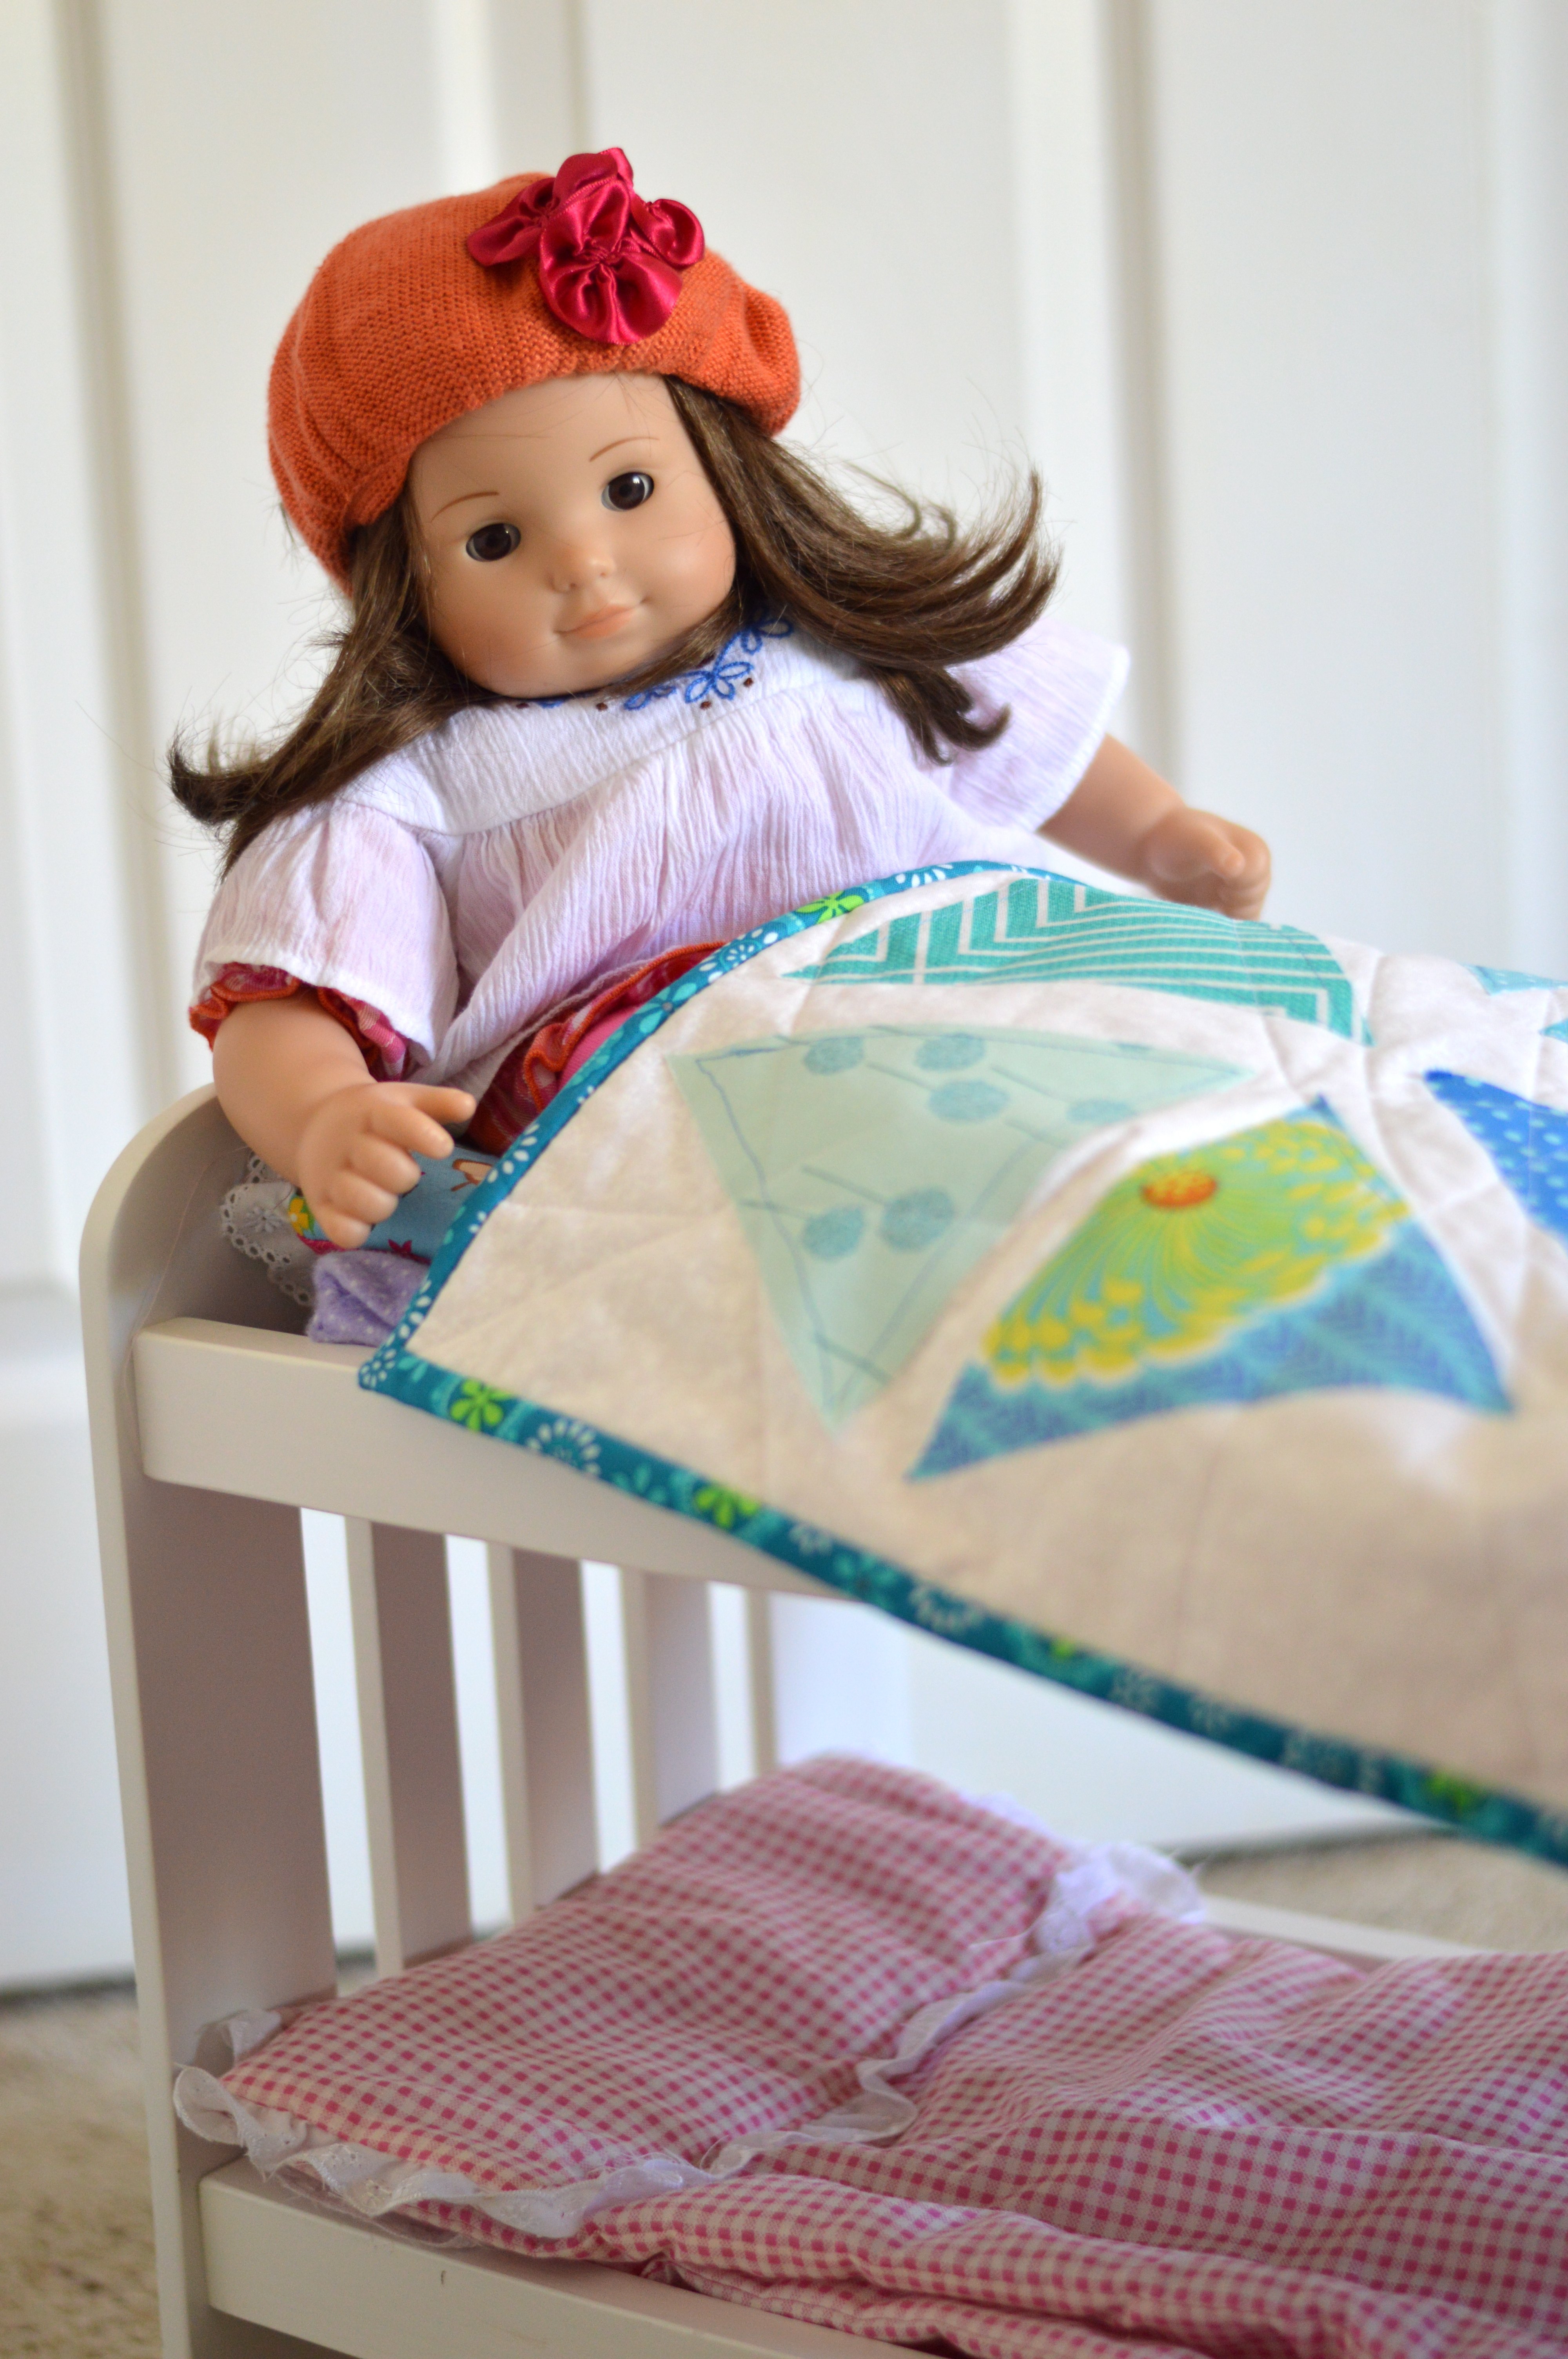
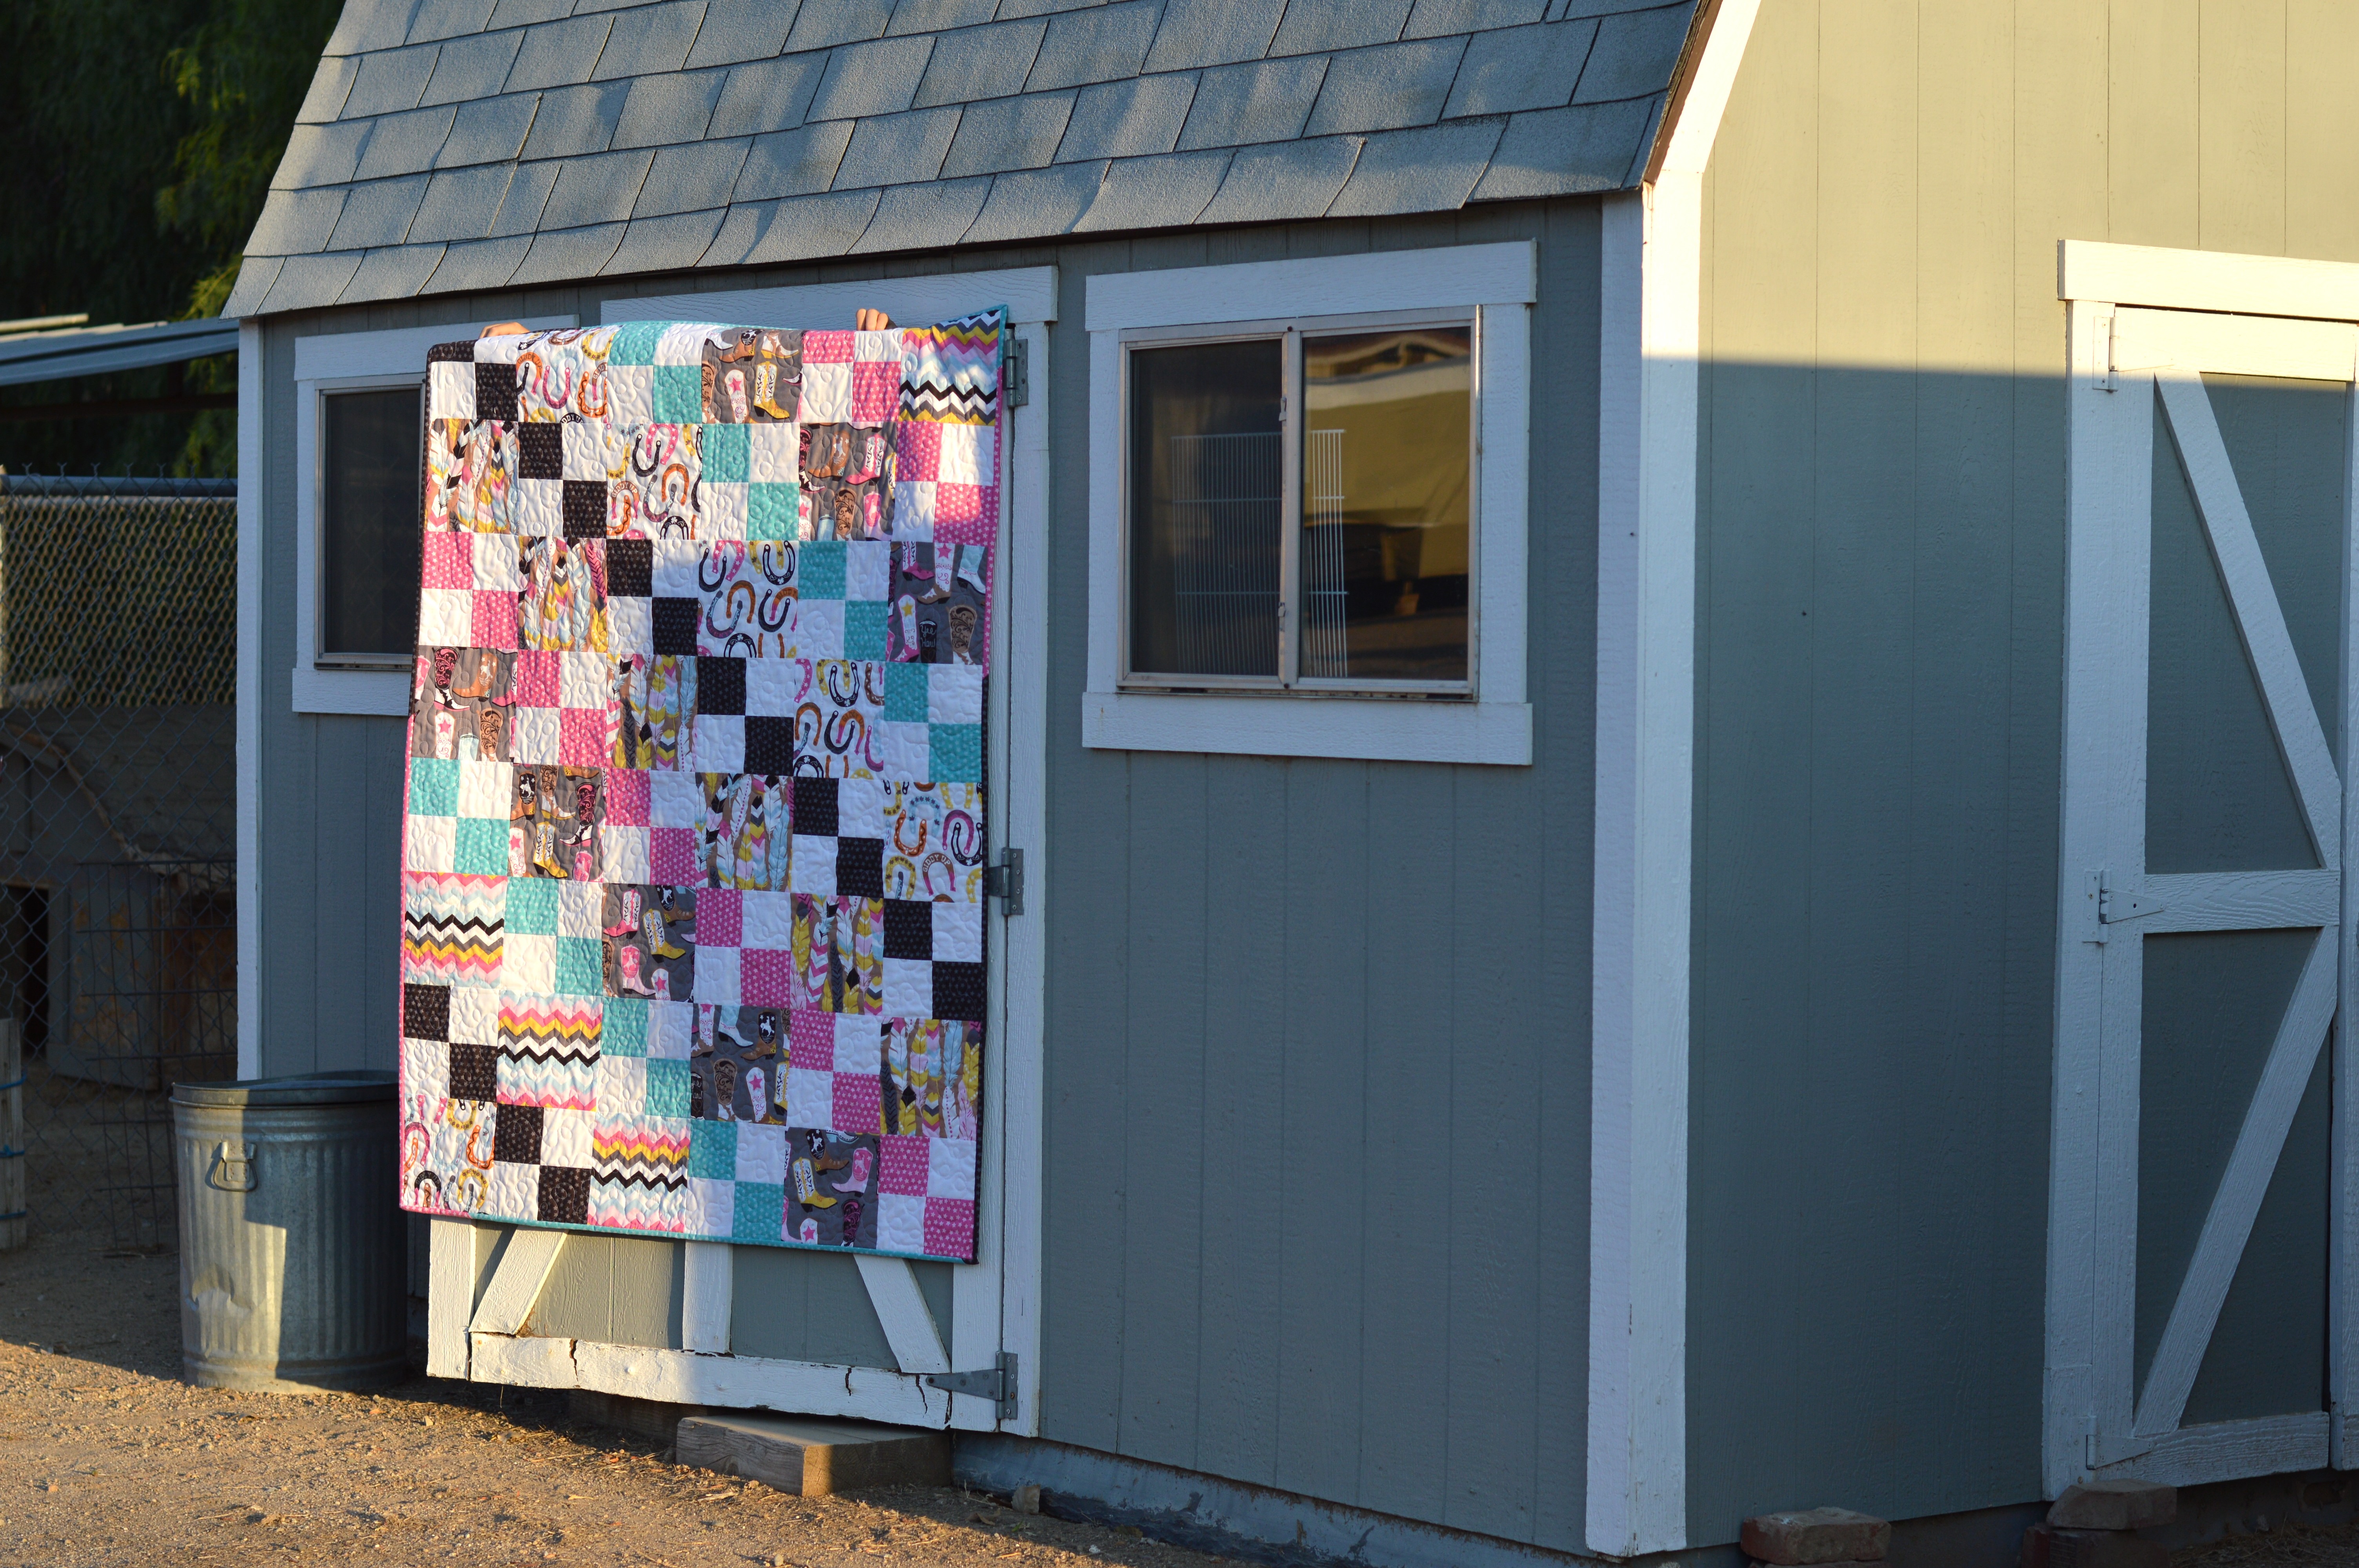
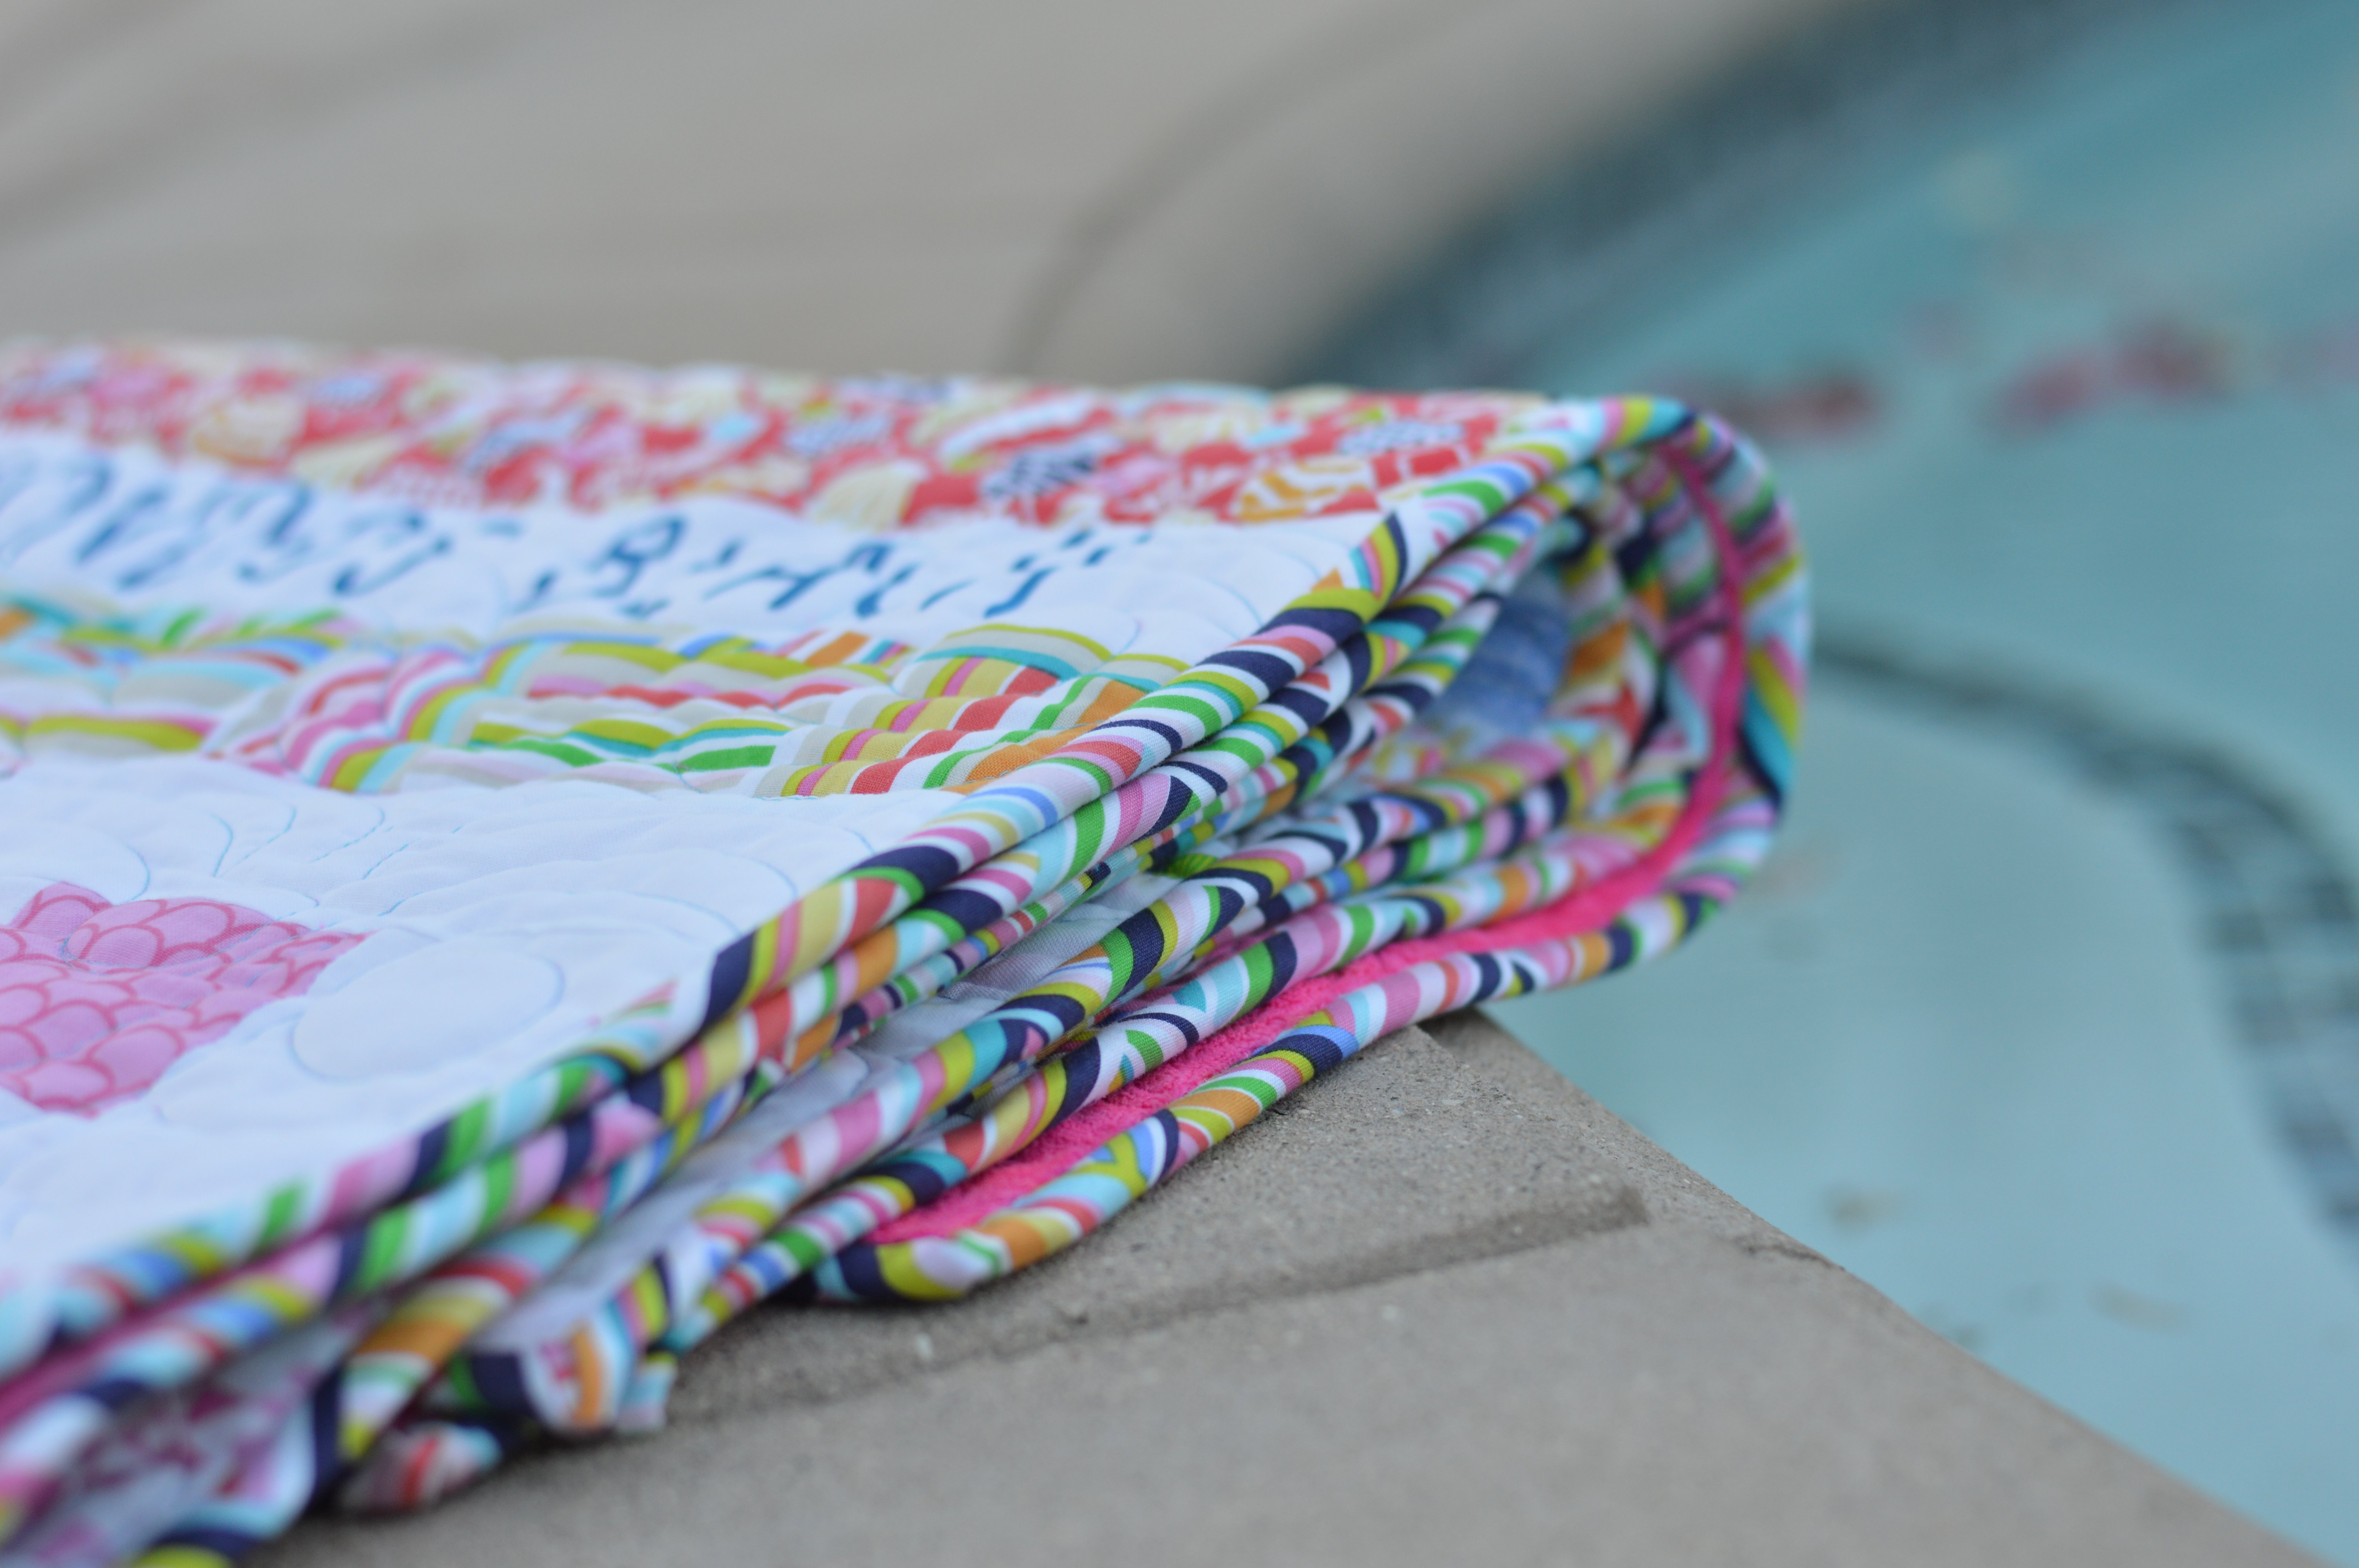
I let her sew the binding on, and I helped with the corners.  I then let her use the binding clips and clip the binding all the way around.  Finally we got out the needle and thread and did some hand sewing.  She did pretty good.  I helped with the hand binding so we could finish sometime this year!IMG_0838

It’s the perfect size for her American Girl dolls and she is thrilled that she made it herself!  Do you sew with your kids?  Sally is excited to begin a new project!

sizzix doll quilt 20


2015 YW Camp Anchored in Christ Re-Cap

Screen Shot 2015-09-28 at 5.14.43 PMGet ready for the worlds longest blog post!  I didn’t know how else to get all the information in, so here goes!  I am our Stake YW Camp Director.  We have stake camp every year and we have about 85 girls who attend.  Our camp is Tuesday through Saturday.  We camp in cabins.  The 4th year girls go on Monday, hike 10 miles and camp in tents the entire week.  I have uploaded a file to dropbox to share with you – it has pretty much every file I printed for camp: itinerary, song book, packing list, etc.  CLICK HERE

yw camp art

LEADER TRAINING

We begin planning camp as soon as camp is over – so 1 year our.  We begin having meetings with our Level Leaders and YCLs in January and meet each month to plan and train.  Our camp is in June.   Here are some of the things we go over:

Screen Shot 2015-09-28 at 5.05.01 PMThe purpose of camp.

Screen Shot 2015-09-28 at 5.06.41 PMCertification

Screen Shot 2015-09-28 at 5.05.47 PM

Responsibilities

BACK TO CAMP NIGHT

Each year we have a “Back to Camp” night which happens sometime in the spring.  This is when all the girls and leaders come together.  We have treats, skits (from the Stake Leaders and YCLs) and we break up into levels so the YW can meet their level leaders.  They play get to know you activities and decide when to have their Pre-Camp level party.

back to camp night

Our theme was nautical and we took every opportunity to have fun with this!  In the dropbox file you can find our leader skit “The Love Boat”.  We wrote a saga that we kicked off at this meeting and then carried it on every night at camp.  Each of the Stake Leaders had a “character” and we had nightly drama that would get resolved.  It was so much fun and the girls LOVED it!!!  We also taught them a short dance to “Sea Cruise”.

Screen Shot 2015-09-28 at 5.01.15 PMScreen Shot 2015-09-28 at 5.03.50 PM

wood anchor sign 5

yw camp anchored in christ LDS girls camp 27

wood anchor sign 9At the Back to Camp Night we had all the crafts on display so the girls could get excited.

yw camp anchored in christ LDS girls camp 6

yw camp anchored in christ LDS girls camp 7PRE CAMP PREPARATIONS

yw camp anchored in christ LDS girls camp 4
I made each of the Stake Leaders a covered composition notebook to use throughout the planning process to keep track of camp stuff.

yw camp anchored in christ LDS girls camp 25

I made each of the Stake Leaders a messanger style bag so we could keep our clip board and other items handy.

yw camp anchored in christ LDS girls camp 44

Each leader going to camp received a notebook with all the camp information in it.

yw camp anchored in christ LDS girls camp 23

All cruise ship staff need a logo clipboard!  I stenciled the logo on with craft paint.

yw camp anchored in christ LDS girls camp 31

The Stake leaders had matching shirts for each day.  This totally helps the girls locate us and for us to locate each other.  I suggest bright colors!!

THE LANYARDS AND BUTTONS

yw camp anchored in christ LDS girls camp 39

We decided instead of giving out random handouts and toys and candy that we would focus our money and efforts on lanyards.  The stake leaders each helped sew 100 lanyards.  The colors coordinated to what each level’s theme was.  And each lanyard had a laminated name tag.  Then the button making began.  I ordered 2000 button kits and began busily designing graphics for each one.  My friend Brittany helped me out big time.  Together, along with our kids, we got all 2000 buttons made!yw camp anchored in christ LDS girls camp 18
yw camp anchored in christ LDS girls camp 19We gave out buttons for Everything!  KP, fire starting, mini classes, nightly themes, nurse, the 4th year hike, etc.

yw camp anchored in christ LDS girls camp 20

yw camp anchored in christ LDS girls camp 21

yw camp anchored in christ LDS girls camp 22The girls went crazy for these buttons and by the end of the week their lanyards were completely full!

yw camp anchored in christ LDS girls camp 28

yw camp anchored in christ LDS girls camp 29Our camp shirts were amazing!  One of our counselors is a fashion designer in LA!  She rocked it on the design!!

WELCOME ABOARD!

welcome aboard

AT CAMP

You can download our camp itinerary if you want to know how everything plays out.  I will touch on the highlights here.

Upon check-in each girl received her lanyard, camp shirt, and a banana.  Here is a list of the themes for each level – they were all to choose a theme based on a ship/

1st year – The Good Ship Lollipop

2nd year – Noah’s Ark

3rd year – Sea Cows

4th year – the Black Pearls

YCL – the SS Minnow

Each lanyard and banana coordinated with the theme.

yw camp anchored in christ LDS girls camp 36

Every morning, we would meet for flag and have breakfast.  After breakfast each level would have scripture time where their leader would give them assigned scriptures to read.  We found this was more productive than just having the girls read at random.  After, the YCLs assigned to each level would share a 15 minute spiritual message.  This was a great opportunity for the YCLs to connect with their levels.  During this time the level leaders would meet in the lodge for a “Staff Meeting”

yw camp anchored in christ LDS girls camp

From there the day would progress: hikes, first aid, certification, swimming, rock wall, canoes, crafts, archery, and BB guns were all in the rotations.

yw camp anchored in christ LDS girls camp 42

yw camp anchored in christ LDS girls camp 43

yw camp anchored in christ LDS girls camp 37

SHIPS & ANCHORS

We take very seriously the #1 purpose of YW camp, “to draw closer to Heavenly Father and His son Jesus Christ.”  During the day we had what we called “Ships & Anchors”.  These were mini classes taught by the Stake YW Presidency.  Each class was taught 4 times and the girls would rotate.  These were amazing!  It’s hard to put it into words.  When you are up in the mountains, talking about spiritual things in a small group miracles happen and testimonies are strengthened.   Of course each girl received a pin that related to each class.

campfireCAMPFIRE

Our campfires start out fun and silly with LOTS of singing and our Love Boat Saga Skit.

skitWe pretty much wrote each nights skit during dinner.  I loved our characters!  I was Destiny, the girl who was on the cruse to find LOVE!

harry

Then we sing our theme song as a transition into getting spiritual.   Each night we plan a different spiritual presentation.  The first night we kicked off our 1 year campaign to memorize The Living Christ.  Each of the stake leaders memorized a portion of The Living Christ and recited it.  In between sections we had musical numbers that coordinated.  Next year at camp we will all stand and recite The Living Christ together.  The following night we had 3 speakers talk about a scripture story that pertained to water/boats.  They were all amazing!  Another campfire activity was that we handed out envelopes with questions inside.  Each girl was to go a little ways off and read the question and write some answers – these were pondering questions.  At the bottom of the paper it directed the girls to go to one of 5 groups.  Each stake leader was assigned a group and we went to a location and had a discussion.  We each were assigned a nautical flag.  Have you ever read the meanint of nautical flags?  Total gospel parallels.  We came back to the campfire and each level sang a song they had prepared.  The final night is testimony meeting.

DEVOTIONALS

Following campfire each level goes with thier leader and has a devotional lead by their leaders.  These can be some of the most impactful moments of camp.

EVENING ACTIVITY

Because no one is ready to go to bed at 9:00 pm and they are all a little spiritually drained, we host activities in the lodge every night.  Since this years theme was nautical, we treated these activities as ports of call.  Each night we stopped somewhere new!  Here are all the places we visited:

Tuesday night – Hawaii

luau

We decorated the lodge like a luau.  We welcomed each girl with a lei.  We had fresh pineapple juice and coconut cookies for refreshment.  We had a few YW who hula perform and teach everyone some dances.  We had a “friendship” dance where at the end, you would partner up, exchange leis and that would be your SOS sister for the week.  We change our secret sisters up each year.  This year we didn’t want them secret, we wanted the girls to get to know each other.  So we created SERVE OUR SISTERS.  The YW were encouraged to make things at camp and give their sister.  This is such a nice change from buying lots of junk and bringing it to camp.

Wednesday night – Mexico

yw camp anchored in christ LDS girls camp 41

We decorated the lodge to look like a Fiesta.  We all wore Mexican dresses and we had 2 pinatas, churros and chips and salasa.  One of our counselors is a Zumba instructor and she taught the girls some fun zumba dances.

Thursday night – Florida, Disneyworld

yw camp anchored in christ LDS girls camp 32

yw camp anchored in christ LDS girls camp 45

This night each of the stake leaders dressed up like Disney Princesses.  We had each girl choose a princess and we broke into groups and practiced a little routine to the song that goes with the princess.  Then we made a big circle and performed in the center.  The girls love Disney music!  We had made buttons of each of the princesses with origional artwork and each girl got a button from her princess.

Friday night – party

Friday night is kind of a free-for-all.

BEDTIME ROUTINE

Each night the stake leaders hike up and down the camp to sing good night songs to the girls.  This year we created a newsletter to hand out, much like you would receive on a real cruise.  Here is a sample of one of the editions:

Screen Shot 2015-09-28 at 6.09.48 PM

Screen Shot 2015-09-28 at 6.10.00 PM

Screen Shot 2015-09-28 at 6.10.12 PM

Screen Shot 2015-09-28 at 6.10.22 PM

POST-CAMP

Sunday night following camp we all meet together at the church and we present each girl her level award.  The church used to have actual certificates.  Now, I just create them.  They also receive a charm that coordinates with our overall theme and with their level.  We watch the slide show and have refreshments.

Conclusion

Camp is such an amazing experience for all who participate.  I hope some of our ideas help inspire you to plan a meaningful experience for the Young Women you serve.  I love hearing from you so feel free to comment or email me 🙂


yw camp anchored in christ LDS girls camp 2                   yw camp anchored in christ LDS girls camp 34    yw camp anchored in christ LDS girls camp 40      yw camp anchored in christ LDS girls camp 48


Blend Fabrics Luckie Girl Quilt Pattern {free}

luckie girl quilt patternI am so excited to share this pattern with you!  I love theme prints and I am always trying to find ways to make quilts with these wonderful theme prints I collect.  This pattern is super fun, it’s a perfect beginning quilters, and it looks a little more complicated than just sewing squares together.  The fabrics are from Blend Fabrics Luckie Girl Collection.   I am head over heals for these pink, turquoise and gray boots and horse shoes!!  I am sharing this PDF pattern with you for FREE!  Just click HERE!!!

Screen Shot 2015-09-08 at 7.36.11 PMThe boots are the cutest!!  blend luckie girl quilt pattern 7

blend luckie girl quilt pattern 6I made this quilt as a graduation gift for a sweet gal who grew up riding horses and competing in Rodeo.  She’s off to college in Idaho.

blend luckie girl quilt pattern 5

blend luckie girl quilt pattern 9

I hope you have as much fun making this quilt as I did!  blend luckie girl quilt pattern 4

Spooktacular Halloween Towels and Pillow

IMG_9978Kids are in school, mornings are cool and crisp, and I can’t get enough Halloween sewing!!  These projects are super quick and easy.  The images used for the applique are fussy cut from Blend Fabrics Spooktacular fabric line.  I love these big bold Halloween designs!

For the towels…

Supplies

1 yard toweling for each towel, or a finished tea towel

1/2 yard ric rac

Heat n Bond Feather Lite

Desired fabric

spooktacular applique towel 2

Begin by selecting the image you want to applique on the towel.  Cut a piece of Heat n Bond slightly larger than the image.  Iron it to the wrong side of the fabric.

spooktacular applique towel 3Cut out the image.

spooktacular applique towelEven up the toweling and sew a rolled hem on both edges.spooktacular applique towel 4Peel off the backing paper and press into place.  Top stitch around each applique piece.  Add ric rac or other decorative trim.

spooktacular applique towel 5These would make great gifts for friends or teachers!!!

spooktacular applique towel 6 For the pillow….

spooktacular halloween pillow 3

Supplies

quarter yard cuts of the 3 fabrics

1/2 yard ticking for back

Heat n Bond fusible fleece

Zipper

Applique pieces

Heat n Bond Feather Lite

2 .5 yards black pom pom trim

20″ Pillow Form

spooktacular halloween pillow 2Begin by using the method explained above to fussy cut each of the potion bottles.  Use the cutting guide below to cut each of the 3 fabrics.

spooktacular pillow cutting guideApplique the bottles to the center piece

spooktacular halloween pillowNext, sew the strips together using 1/4″seam allowance.  Press seams to one direction.

Cut a 20″ square of fusible fleece and iron it to the wrong side of the pillow front.  You can quilt the pillow at this point.  I added some straight line stitches along both sides of the seams.

Baste the pom pom trim around the pillow, starting and stopping at the bottom center of the pillow and curving the corners.

I like to put zippers in my pillow backs.  For instructions on how to do this, click here.

Sew the pillow front to the pillow back, right sides together. making sure to leave the zipper partially open.  Turn right side out and insert pillow form.

spooktacular halloween pillow 4

spooktacular halloween pillow 5
spooktacular halloween pillow 6

Spooktacular Eve Big Block Quilt Pattern

spooktacular eve halloween quiltI LOVE Halloween fabric!!!  When I met Spooktacular Eve by Blend Fabrics it was Love at first sight!  These patterns have a fun vintage feel which makes them timeless!  I didn’t want to cut into the fabrics too much so I created this Big Block quilt pattern just for you!!!  It’s a fast and easy way to show off those bold prints!

spooktacular eve quilt 6I can’t decide which print is my favorite!  If you would like to make this quilt click HERE for the PDF download version.

spooktacular eve quilt 7I have this quilt hanging in my entry way.  The finished quilt measures 55″ x 70″ which also is a perfect throw quilt size!

spooktacular eve quilt 2Even better – it’s Mufasa approved!!!

spooktacular eve quilt 2 5I hope you love making this quilt!!!

Apple Applique Composition Book Cover Tutorial

apple applique coverBack to School, Apples, Reading & Writing, School Supplies, the smell of pink erasers, lunchboxes, and alarm clocks….

Today I am sharing my tutorial for this applique apple composition book cover.  I have written several composition book cover tutorials, they are my favorite and I can always be found carrying one around.  This one would make the perfect gift to give to a teacher on the first day of school 🙂

apple applique composition book 2

I used the apple die from Sizzix and the fabric is from one of my favorite Riley Blake Designs fabric lines called Apple of my Eye by the quilted fish.  I used Therm o Web Heat n Bond Featherweight and a medium weight stabilizer.  Hop on over to the Therm o Web blog for the full instructions!!

apple applique composition book 7

apple applique composition book 3

apple applique composition book 6


My Favorite Beach Quilt {Blend Sun-sational}

my favorite beach quilt        It’s still August and I am going to enjoy every last minute of summer!  I love the Sun-sational fabric line from Blend Fabrics.  Just looking at them makes me feel like I’m enjoying summer at the beach.  I am a California girl who was raised loving the beach.  Through the years my family has come to love many beaches.  I thought it would be great to include the names of these beaches in the quilt.

my favorite beach quilt blend fabrics 108 It makes it so personal!  I used SoSoft Fabric Paint by DecoArt.  I purchased at my local Beverly’s Fabric and Craft store.  I’ve painted on T-shirts and fabric before with acrylic paint.  It kind of leaves a rough texture after it dries.  I wanted something soft that would blend nice with the fabric.  This totally did the trick!  After it dried I could hardly feel it was paint – it just felt like the fabric!

decoart sosoft paintHere is how you can make this quilt:

51″ x 64″ Finished quilt

Supplies:

Fat quarters of assorted beach prints

1.5 yards white cotton fabric

1/2 yard for binding

3 yards backing

So Soft fabric paint

Vinyl stencils

This quilt is made of up 4 “blocks”.  Two are rectangles and two are squares.  Below is the cutting instructions for each block.  You can make this quilt larger or smaller, or mix up the blocks to create a totally different pattern!

You will need:

(11) Beach Name Blocks

(15) Squared Blocks

(9) 8″ square theme print blocks

(8) 8″ x 15.5″ theme print rectangles

cutting instructions beach quilt

Once everything is cut prepare the stencil for the beach names.  I cut vinyl on my Cricut and peeled out the inside of the letters to leave a vinyl stencil.  Each beach name is a different font.  I put the vinyl on the 3″ x 15.5″ white strip and stenciled using the SoSoft paint.  I let dry completely then removed the vinyl.  I made sure to heat set the paint while I was pressing the block.

sunsational beach quilt blend fabrics 2

Once the paint is dry, sew the beach name block together. 1/4″ seams throughout.

sunsational beach quilt blend fabrics 6I love how they turned out!  Do you have any of the same favorite beaches as we do?

sunsational beach quilt blend fabrics 4Sew the squared blocks together by sewing a white square to both sides of the center blue square.  Press.  Add the top and bottom rectangles, press.

sunsational beach quilt blend fabrics

sunsational beach quilt blend fabrics 3Cut the remaining theme print blocks, you can use as many theme prints as you want!

sunsational beach quilt blend fabrics 7  Next comes the fun part – laying it out.  I played with several different patterns until I decided on this one.  There is not really a pattern to it, kind of random 🙂

sunsational beach quilt blend fabrics 9  It’s always a good idea to photograph your quilt layout, especially if you have a #kittyquilter in your home!  Mufasa!!!!!sunsational beach quilt blend fabrics 10Sew the blocks together in rows and the rows together, matching seams that intersect.  Make sure #kittyquilter inspects all finished work!!  Quilt as desired.sunsational beach quilt blend fabrics 11I put minky on the back and had my friend use her long arm quilting machine to quilt it.  I love the pattern she did!!

my favorite beach quilt blend fabrics 106The binding is cut on the bias, my favorite way to make binding!!

my favorite beach quilt blend fabrics 100

my favorite beach quilt blend fabrics 104I’m so ready for a beach vacation now!!!

my favorite beach quilt blend fabrics 102

my favorite beach quilt blend fabrics 107Thanks for stopping by!!!  Surfs up!!!

my favorite beach quilt blend fabrics 105

Sizzix Natural Wonder Bunny Mini Quilt


natural wonder bunny mini quilt sizzixI love to give handmade gifts, especially quilts.  My friend recently lost her bunny to a hawk.  I know how much it hurts to loose a beloved pet.  I wanted to make her something to show her I really cared so I created this bunny mini quilt.  She totally LOVED it!!

IMG_8870_2
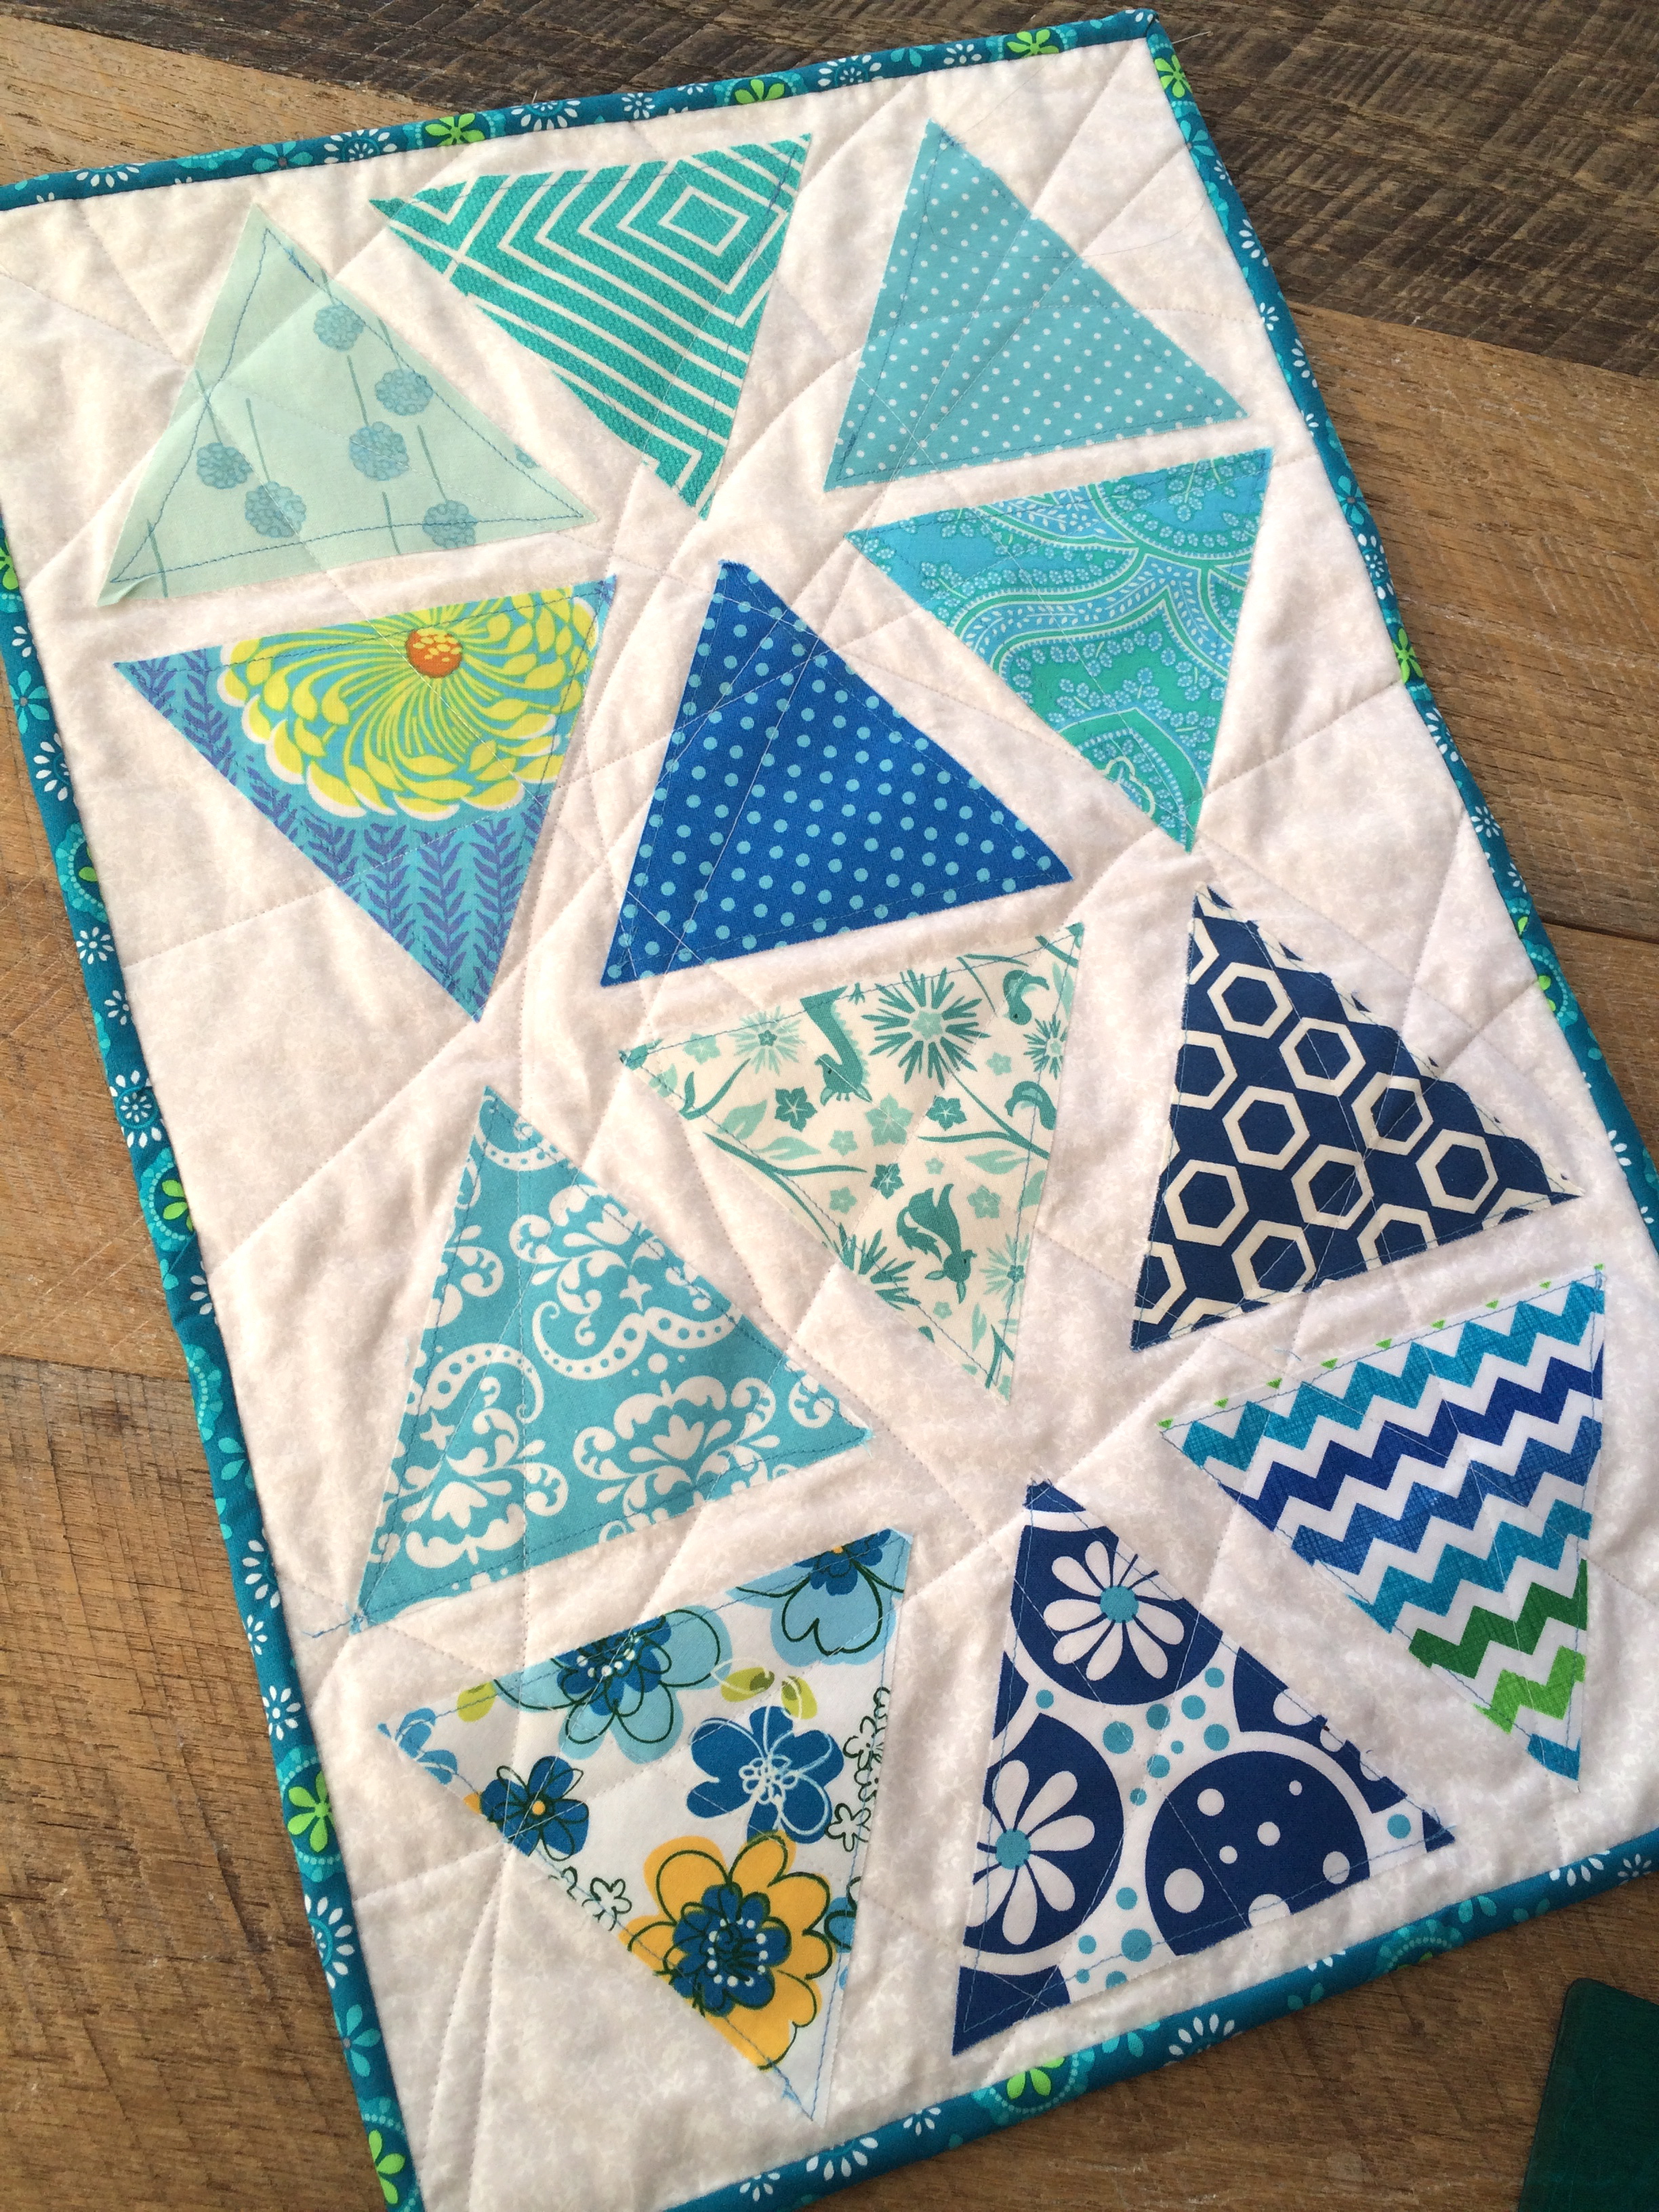
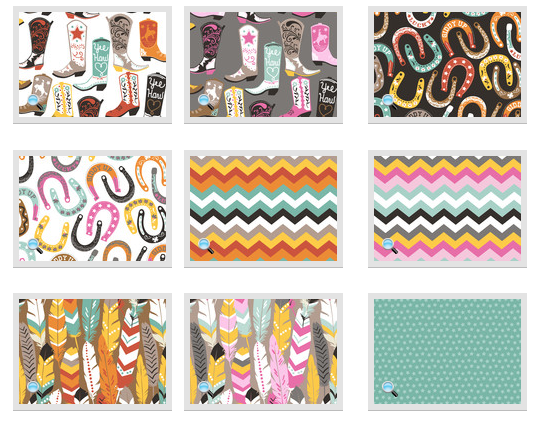
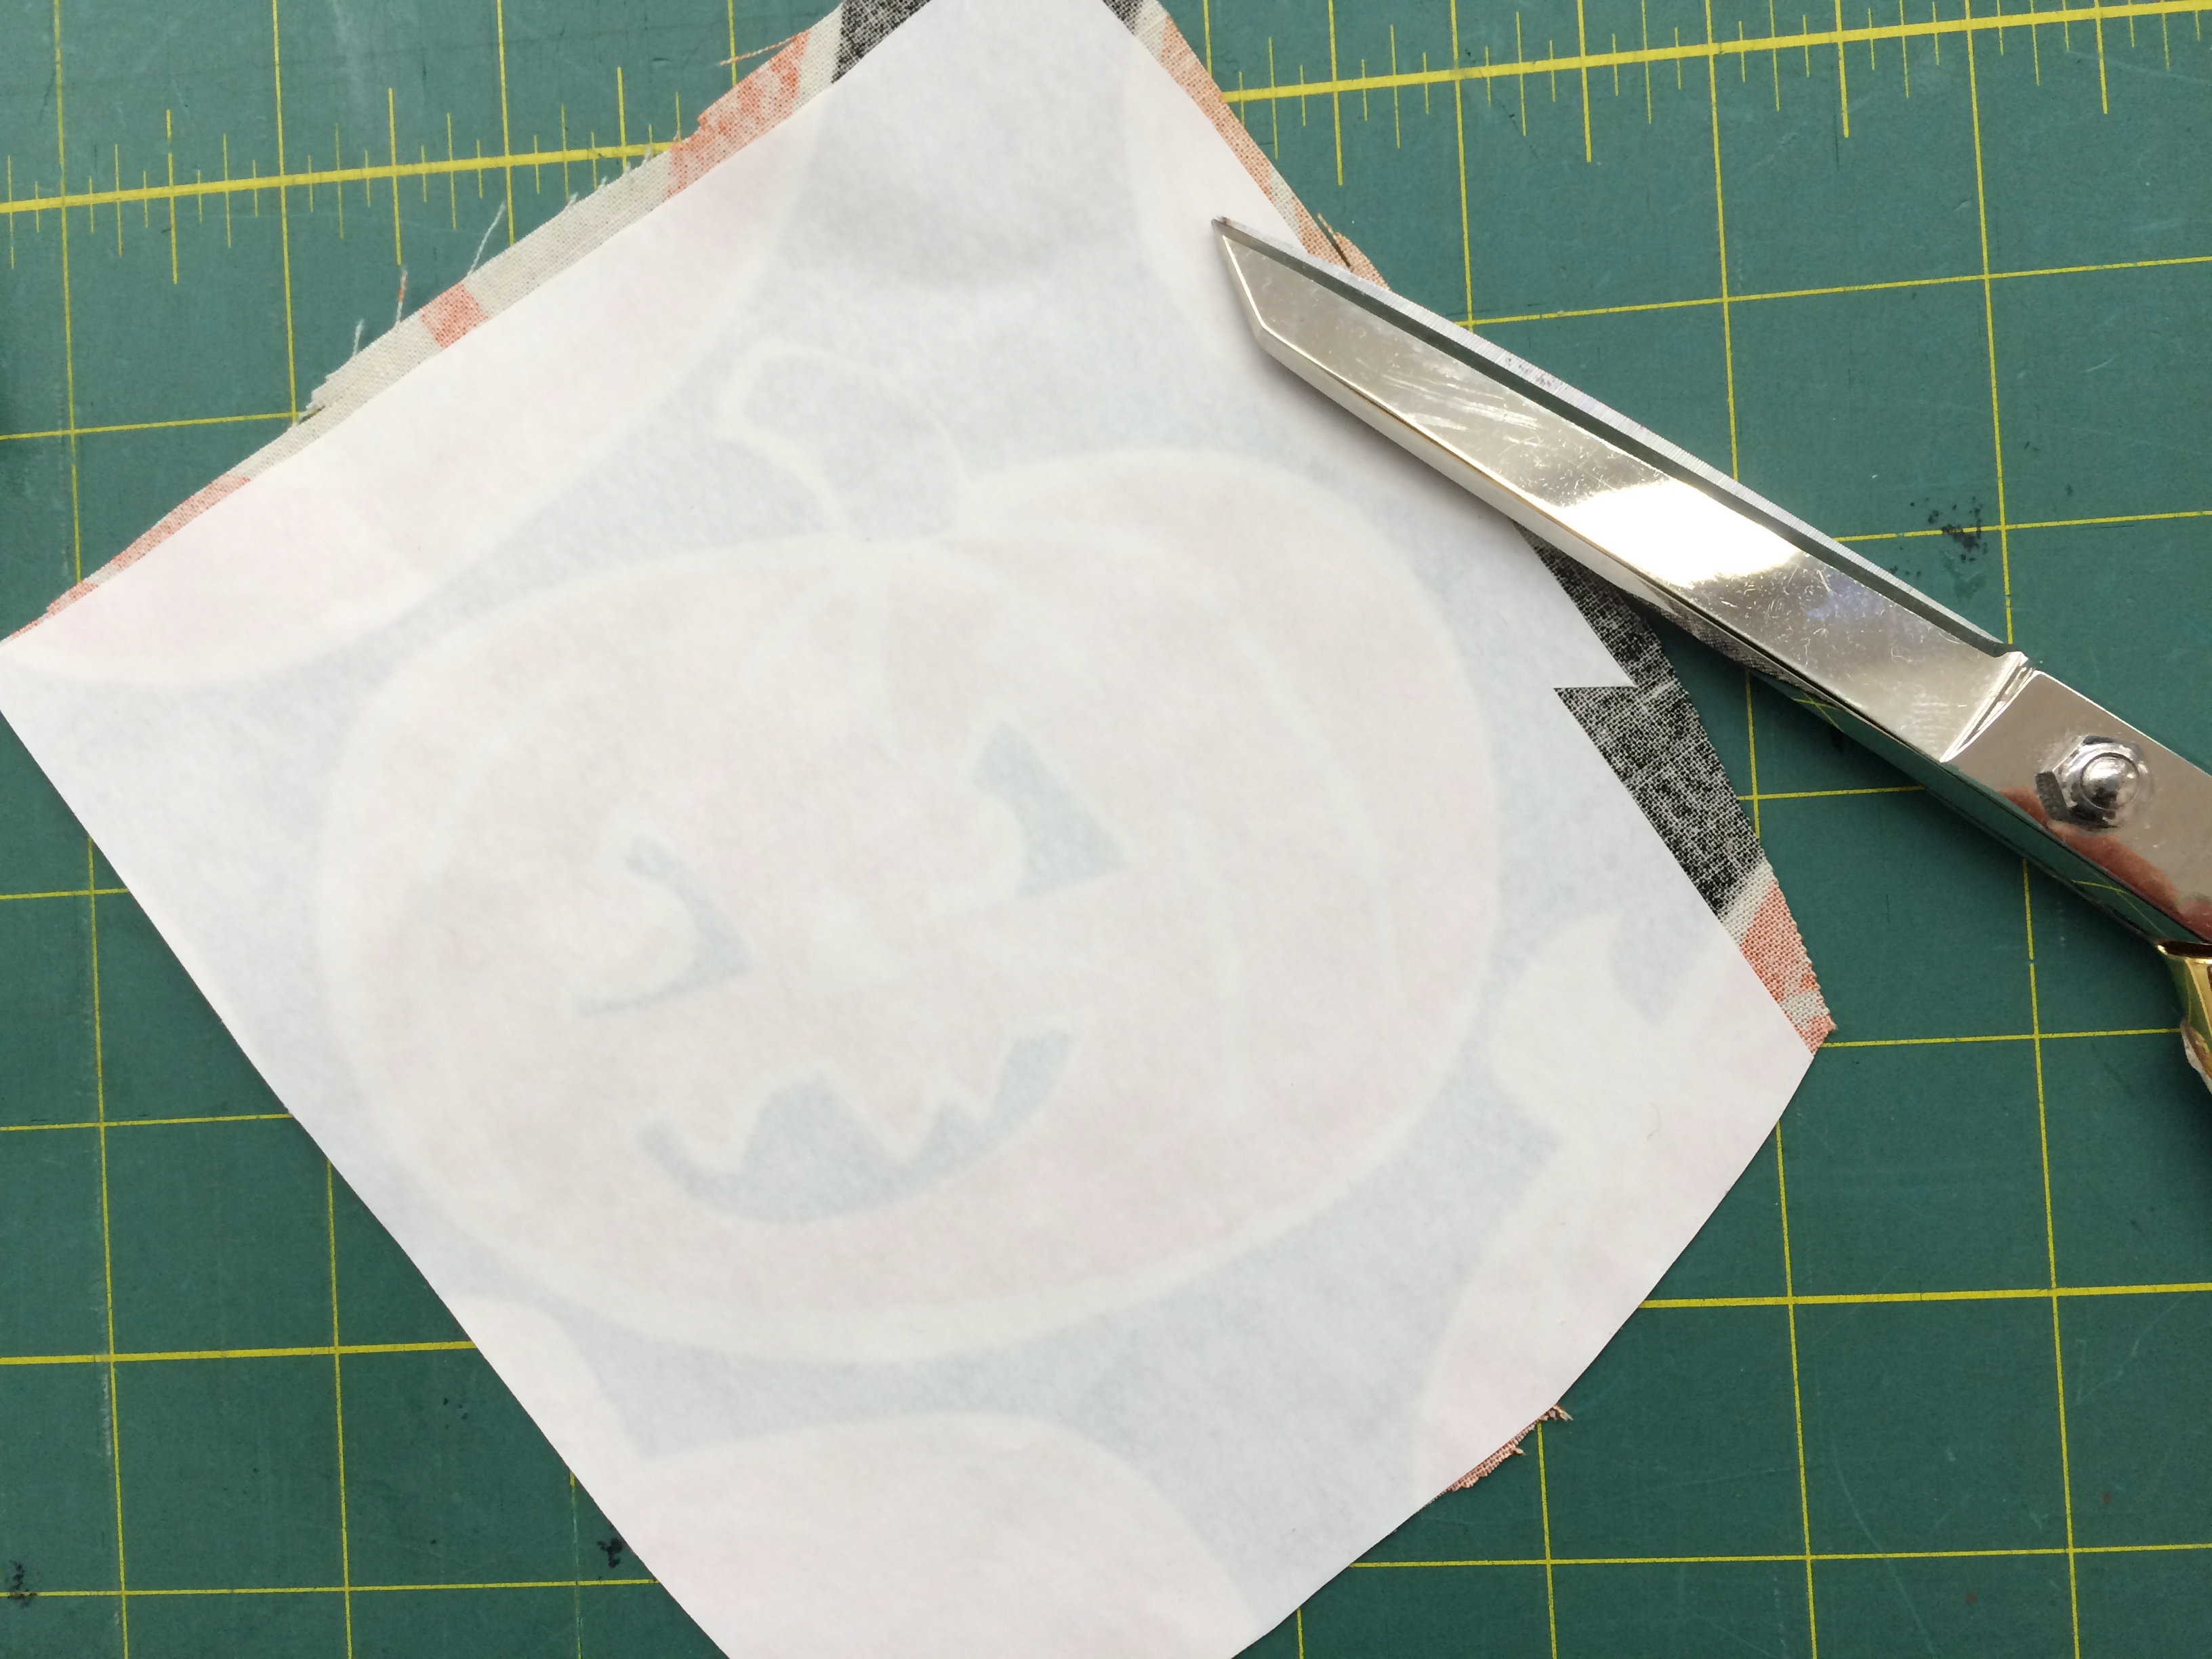
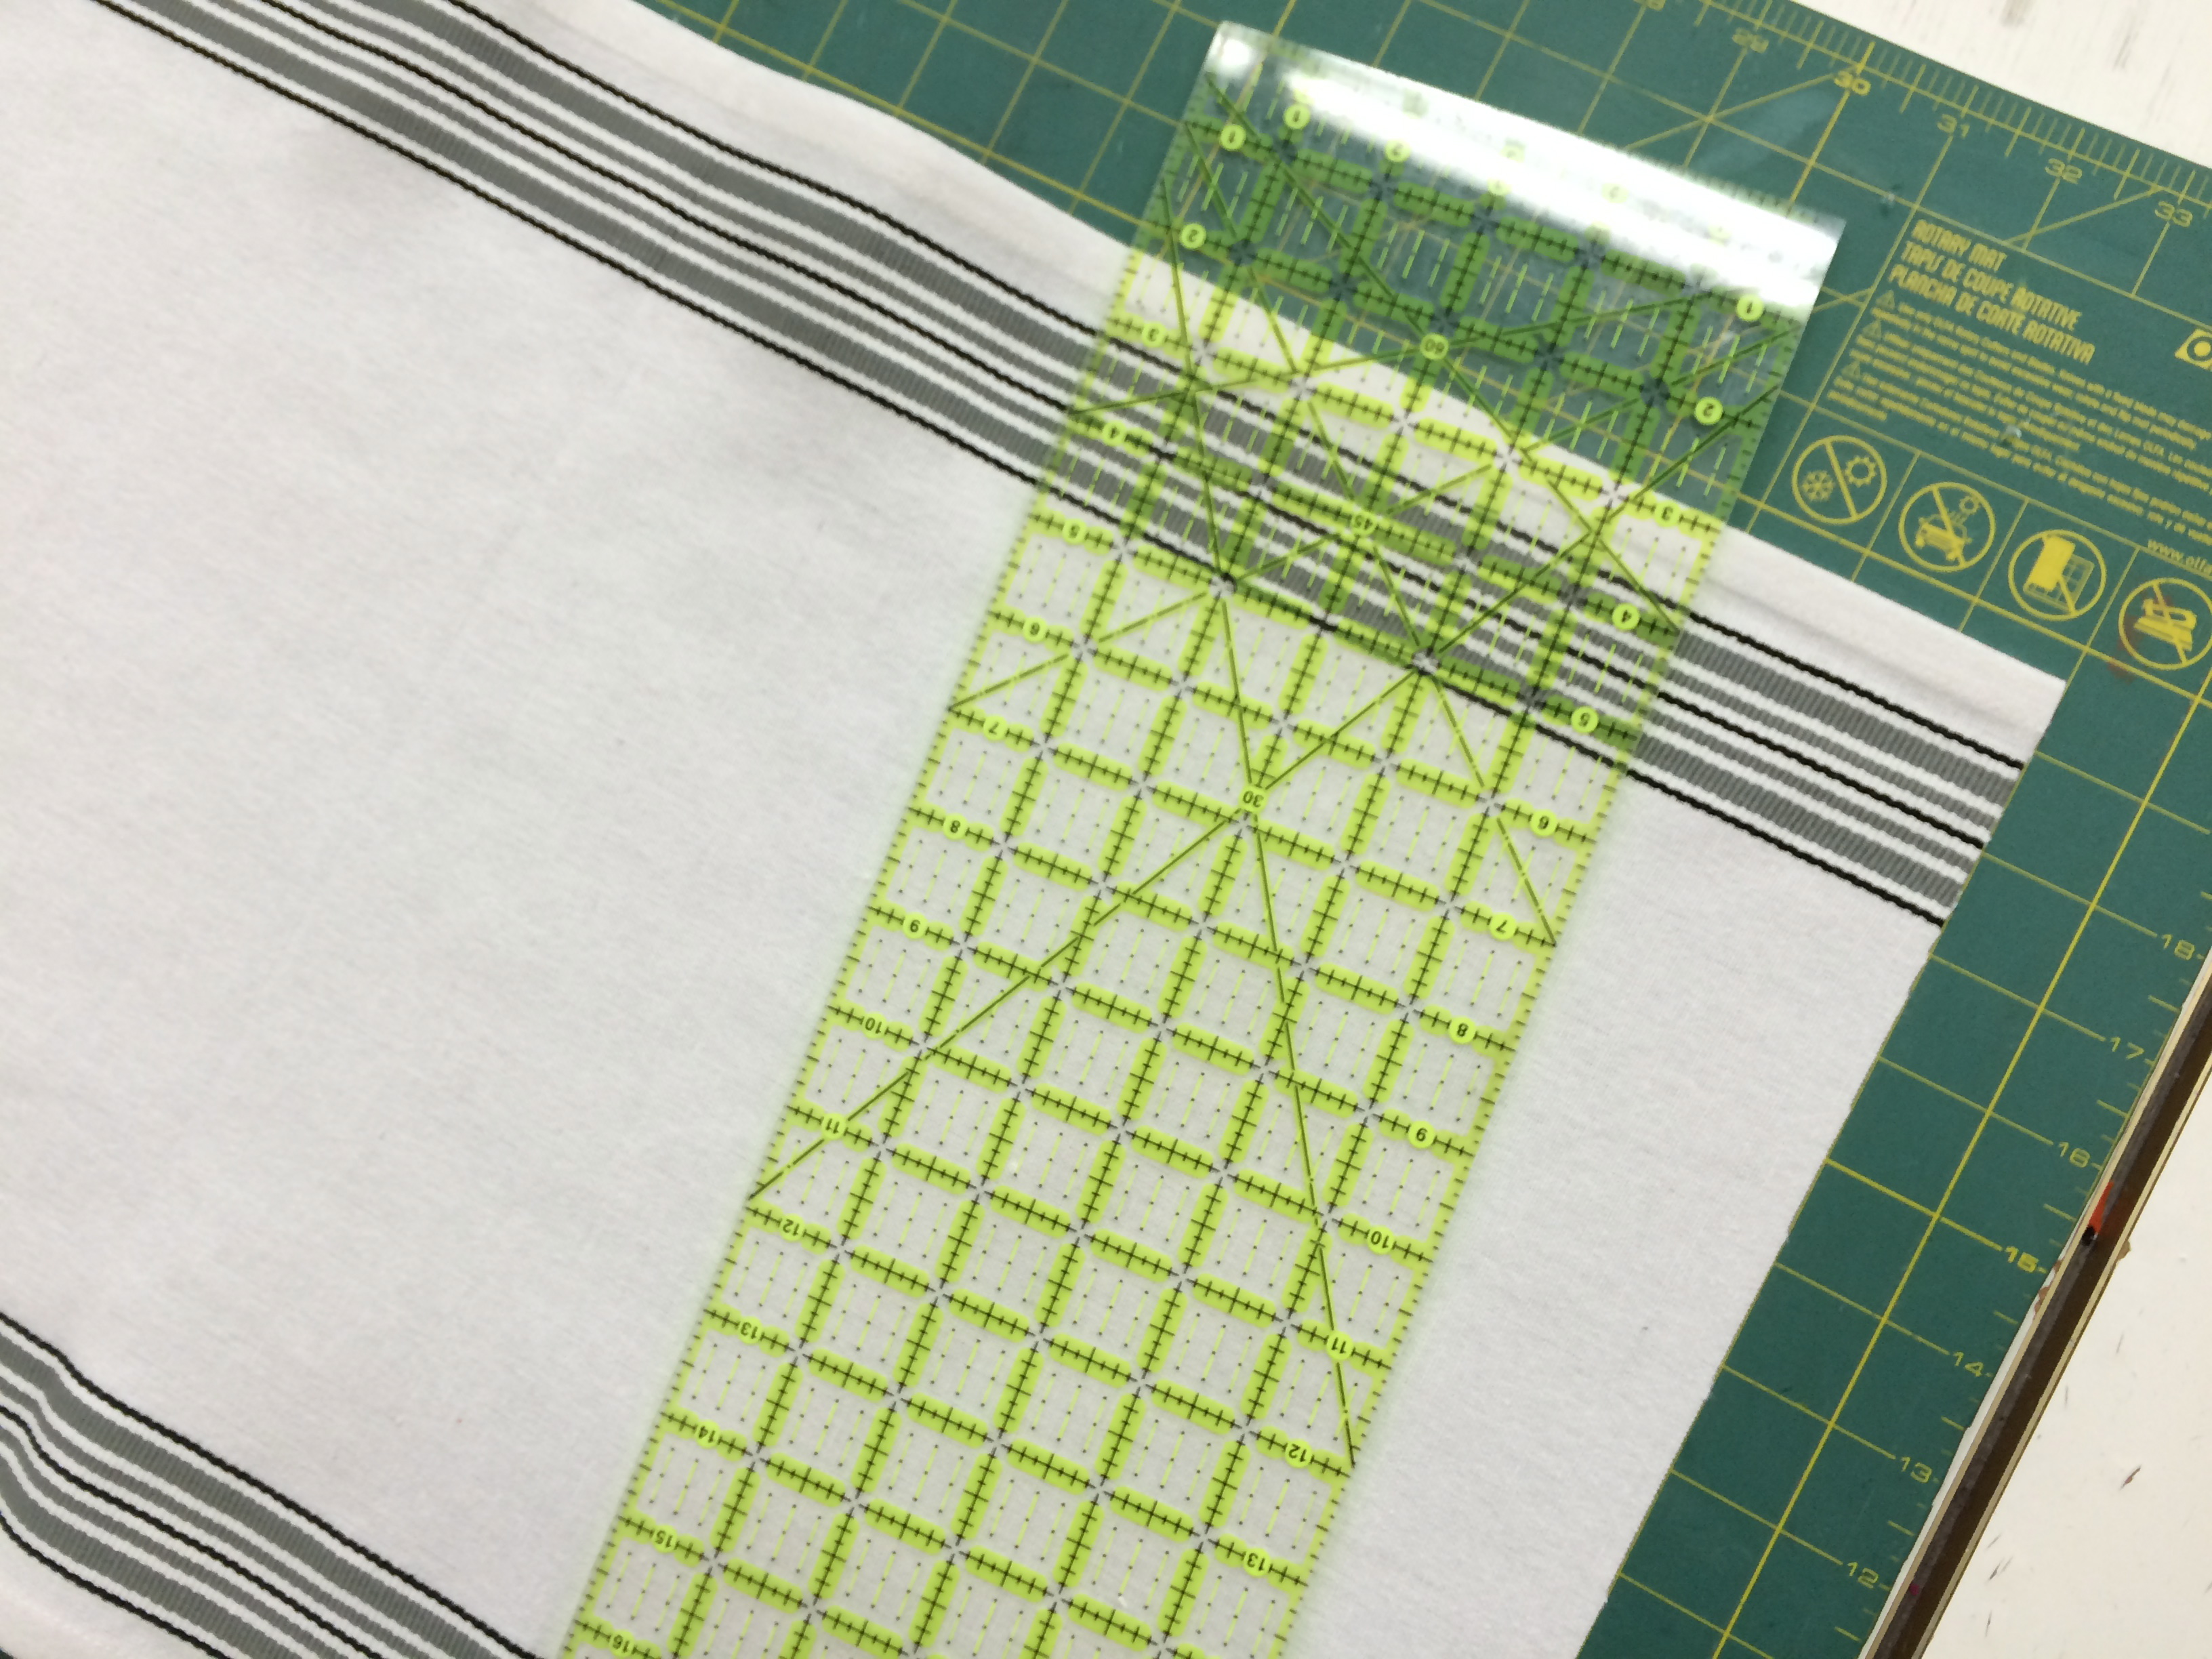
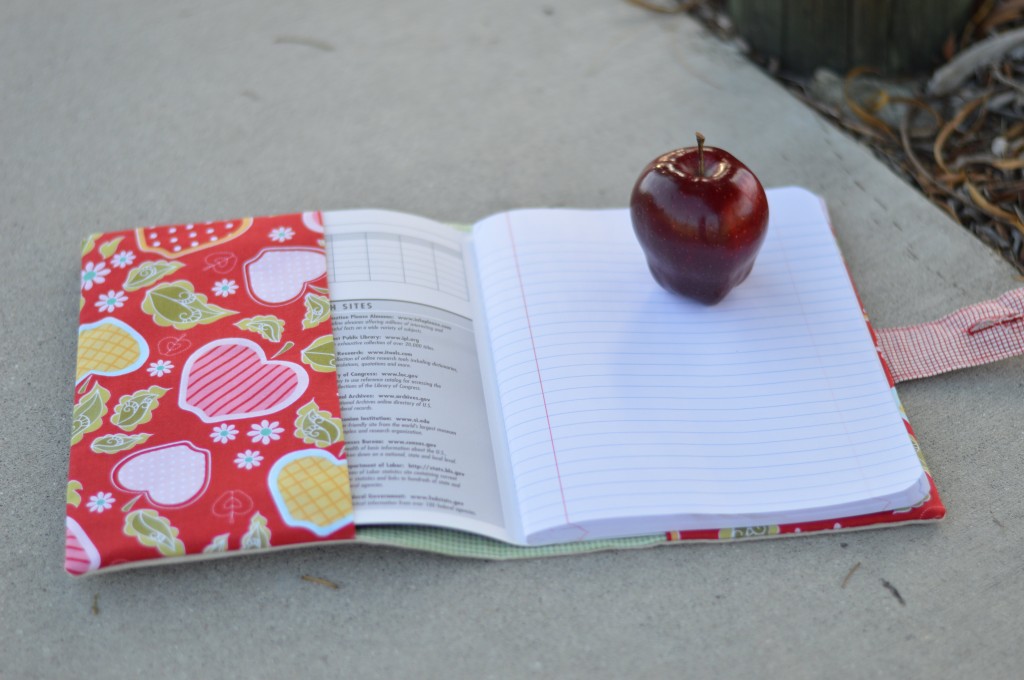
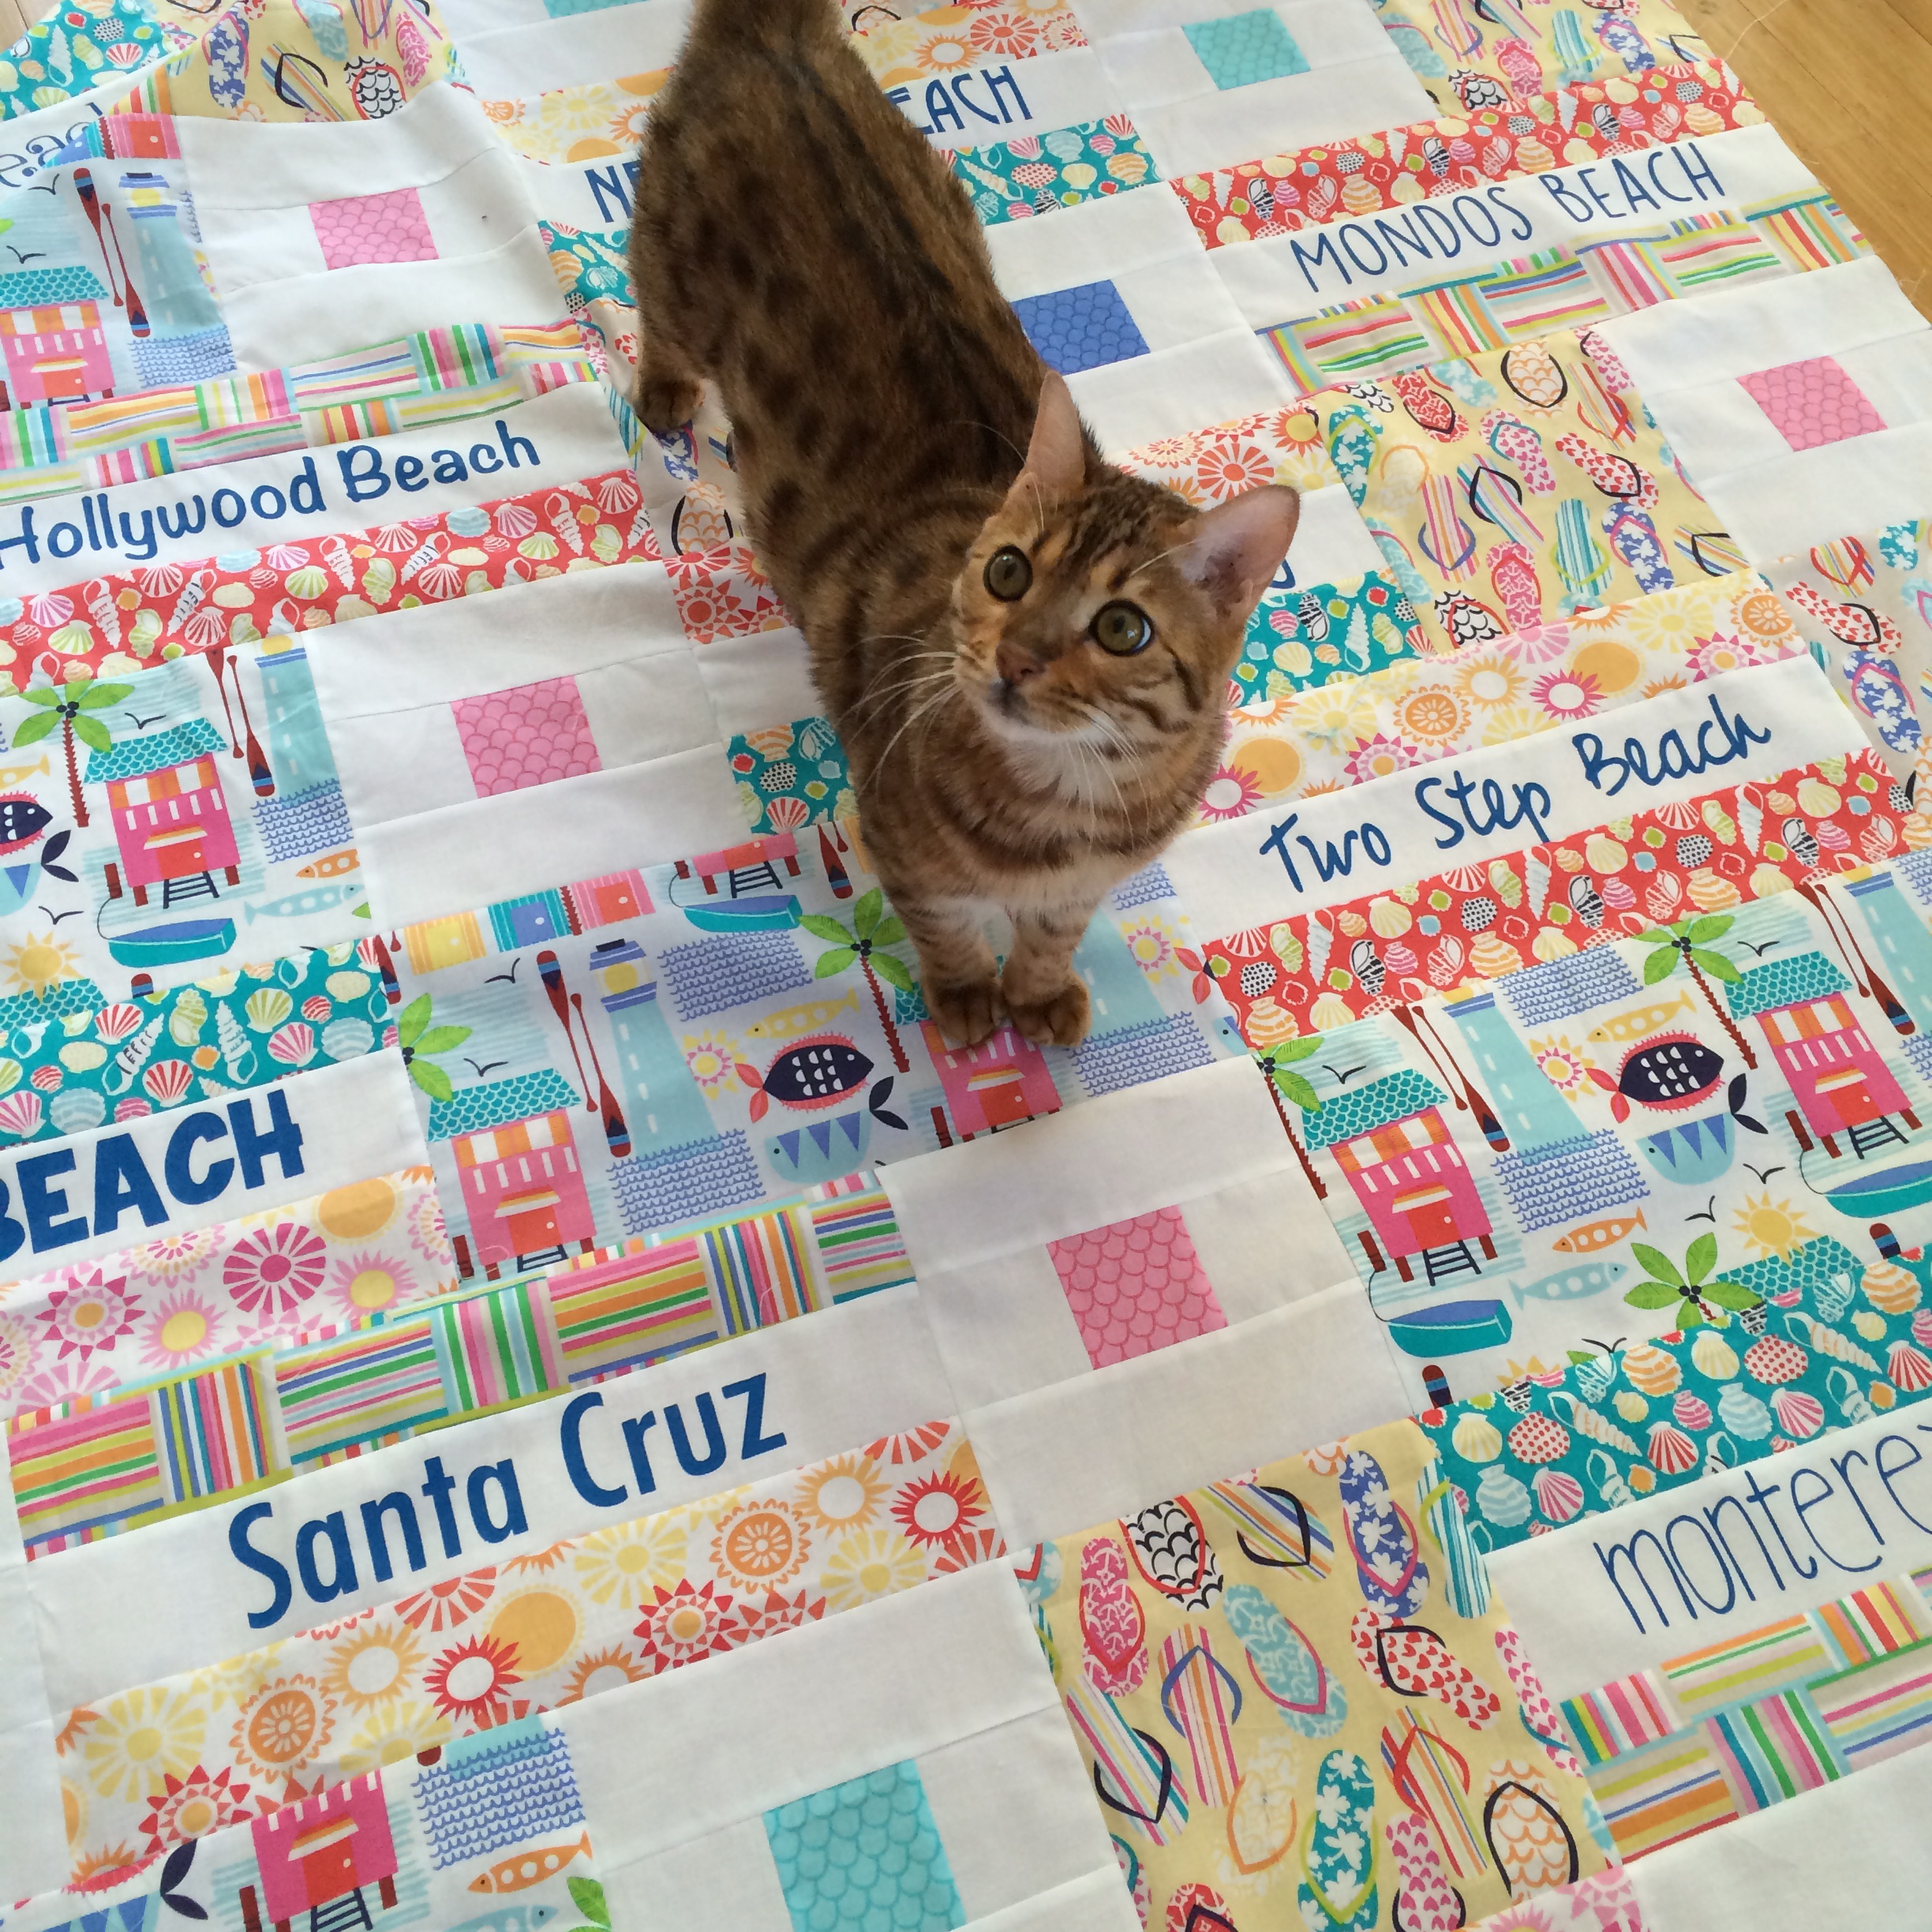
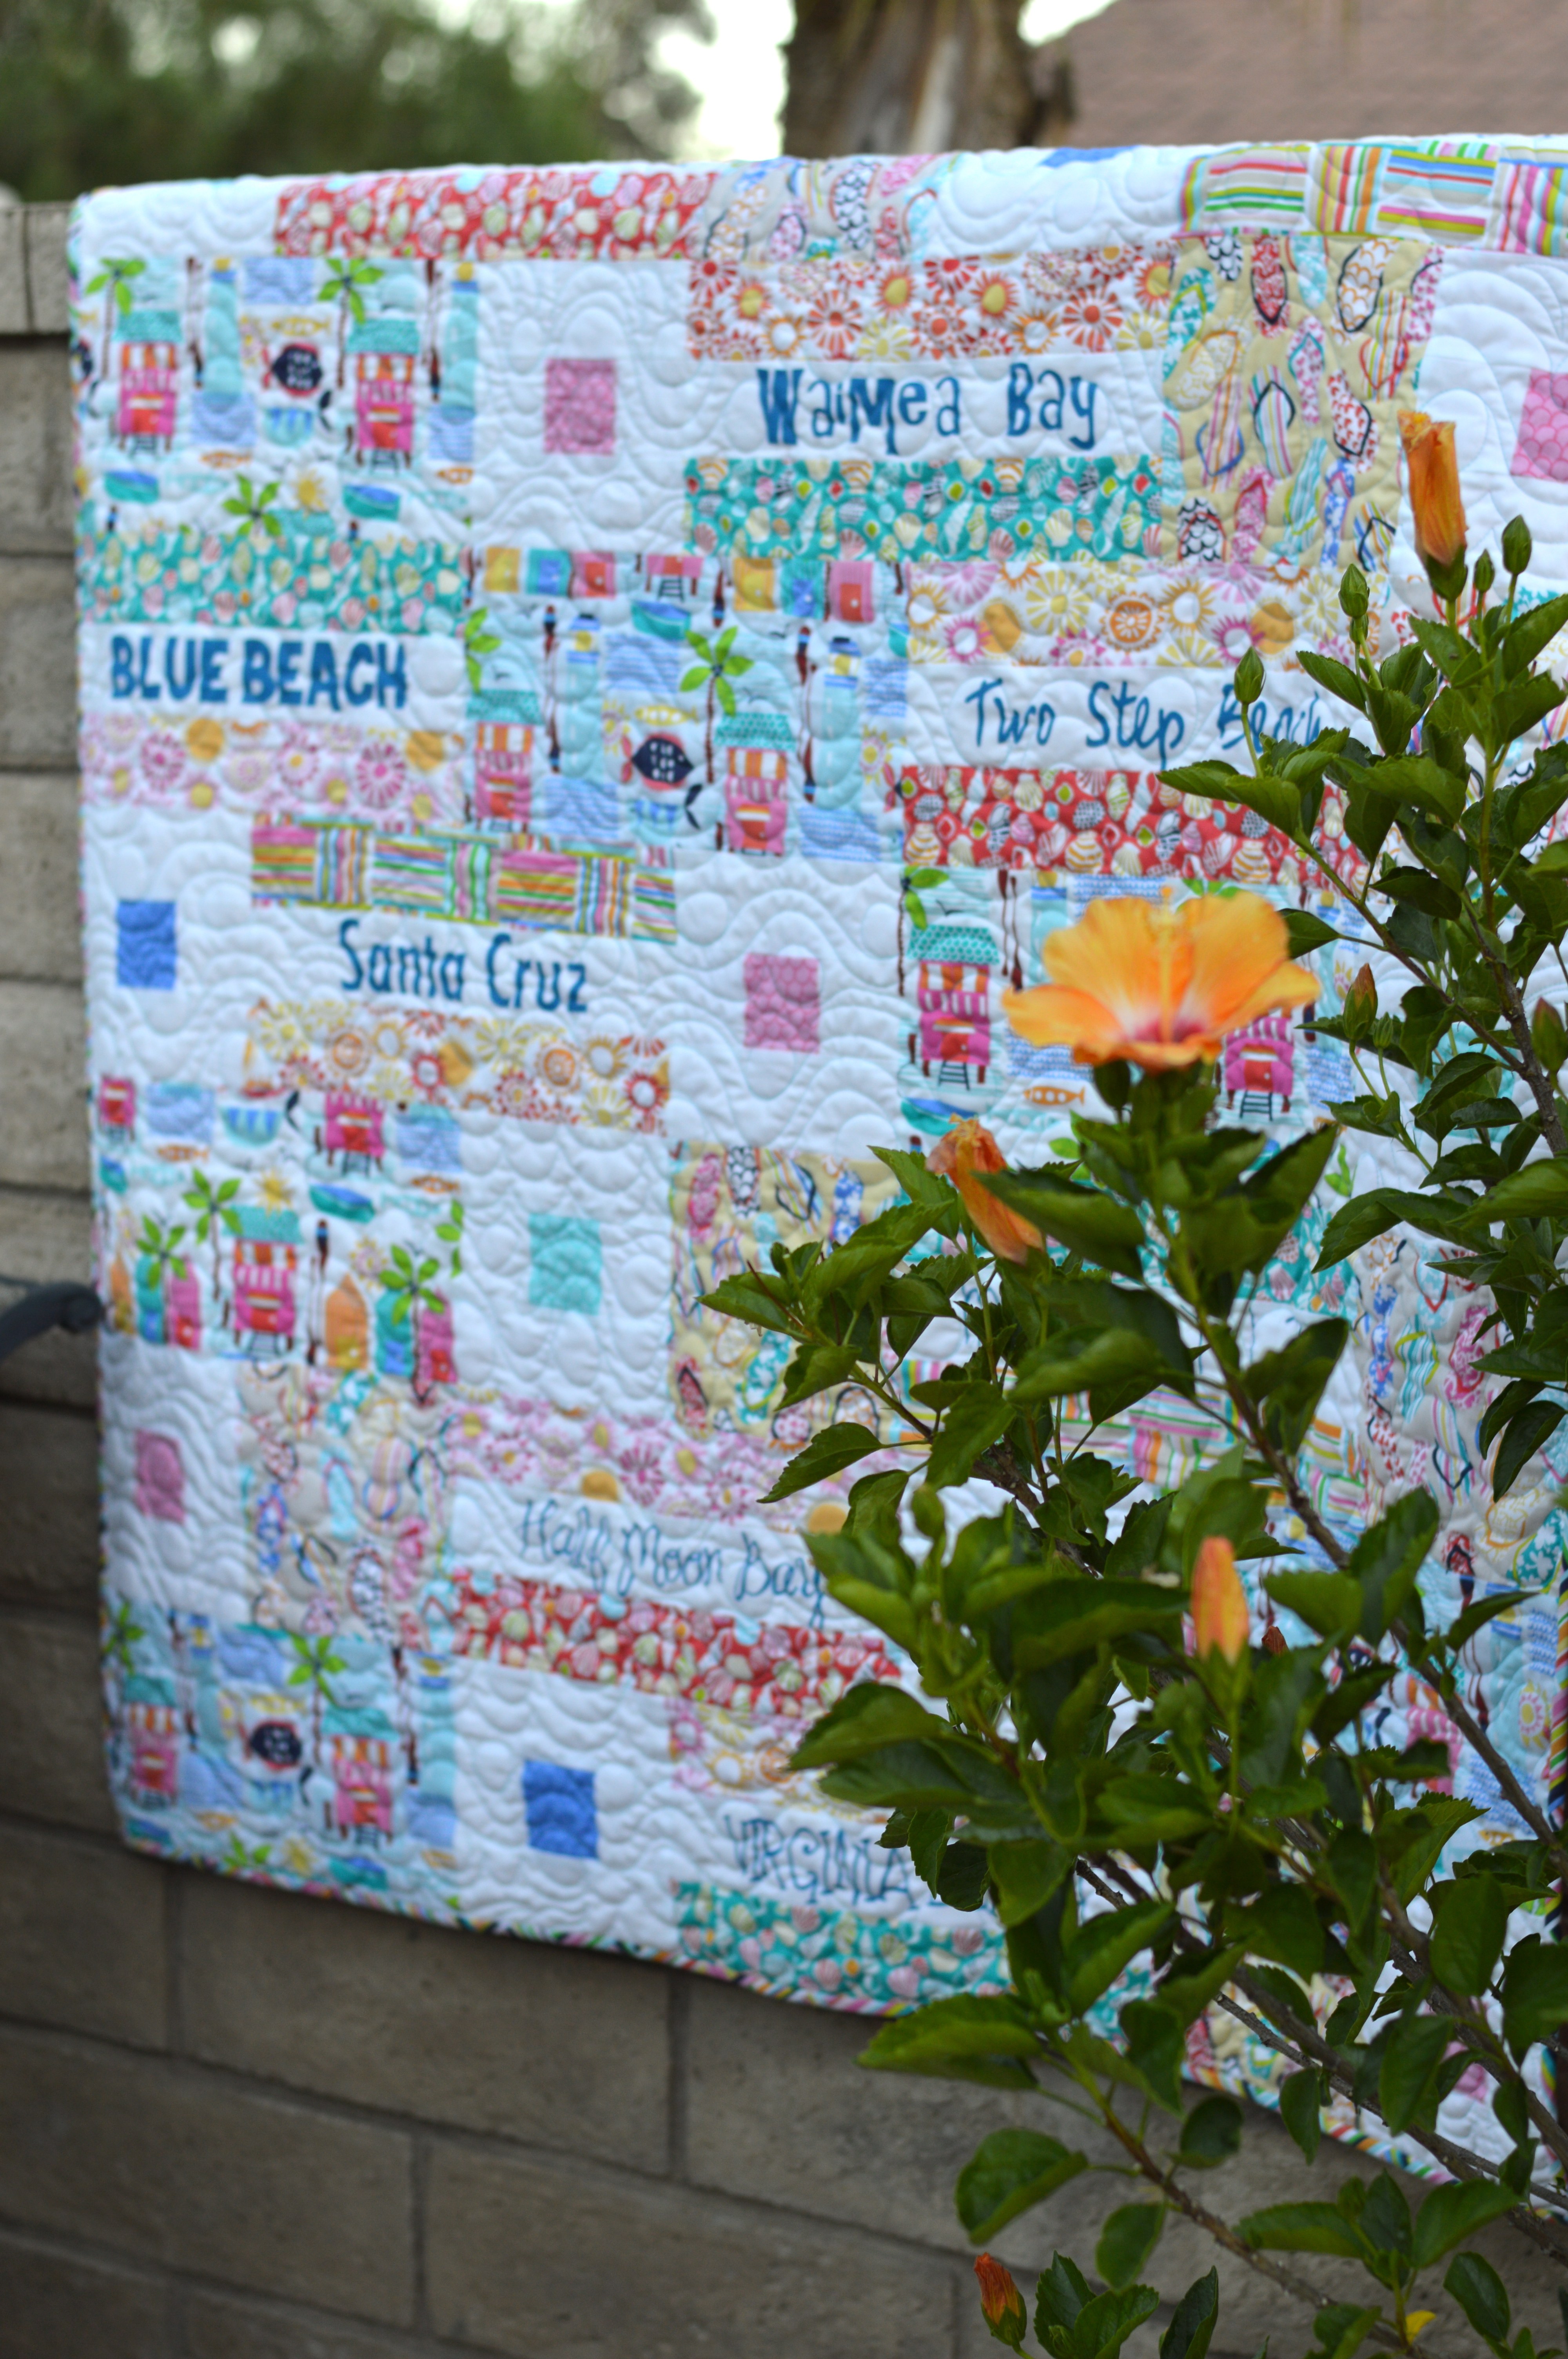
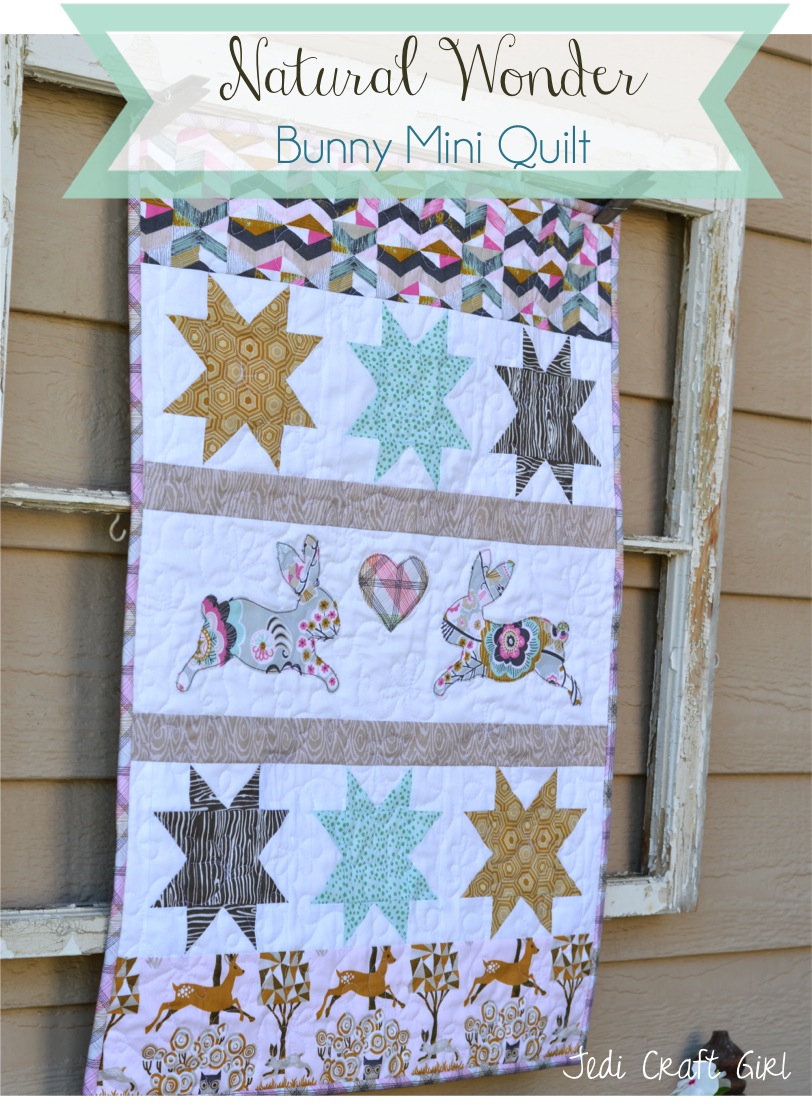
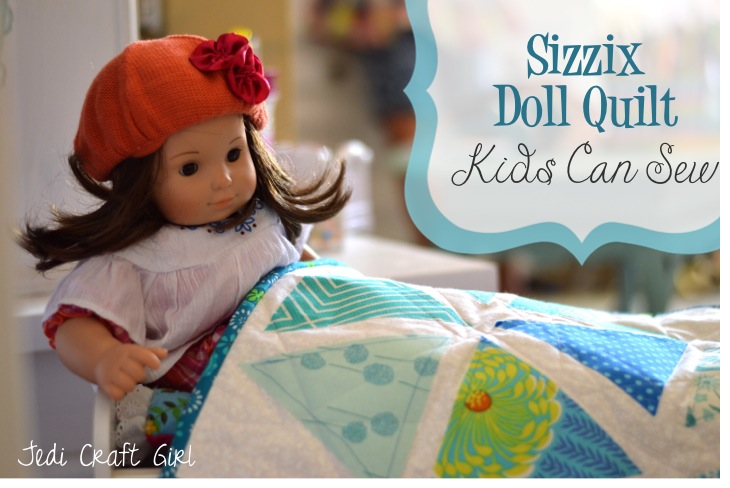
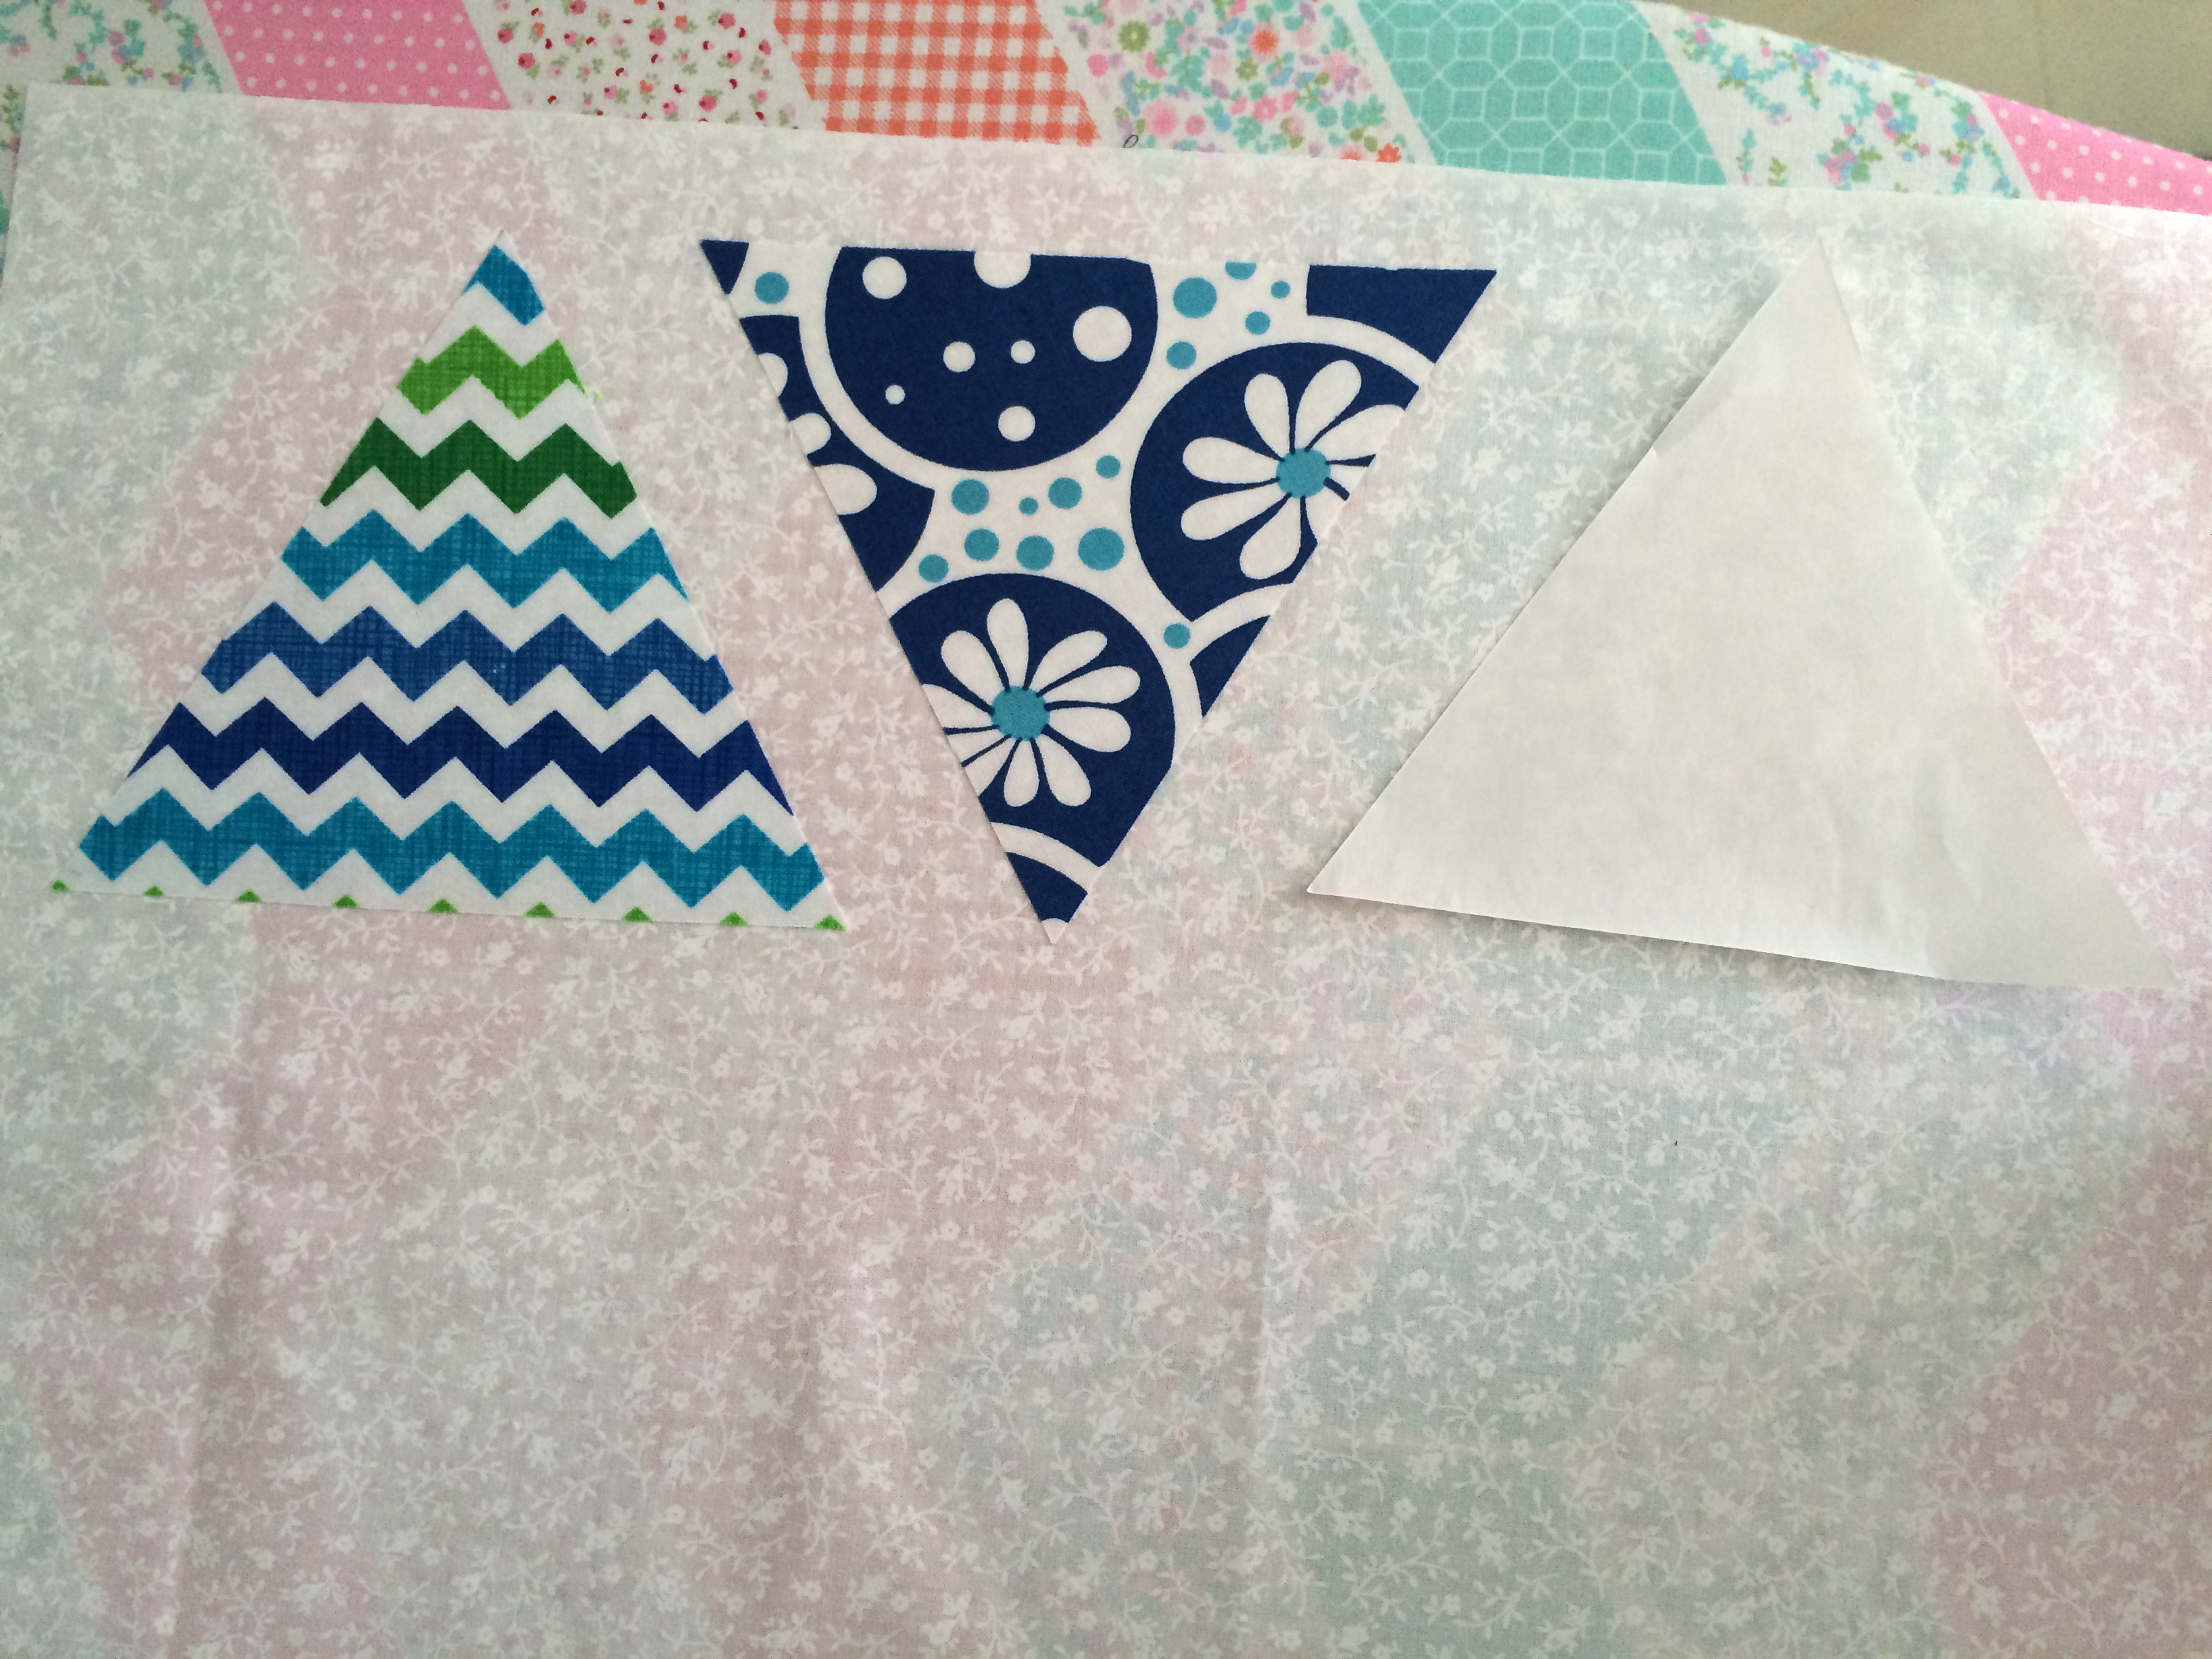
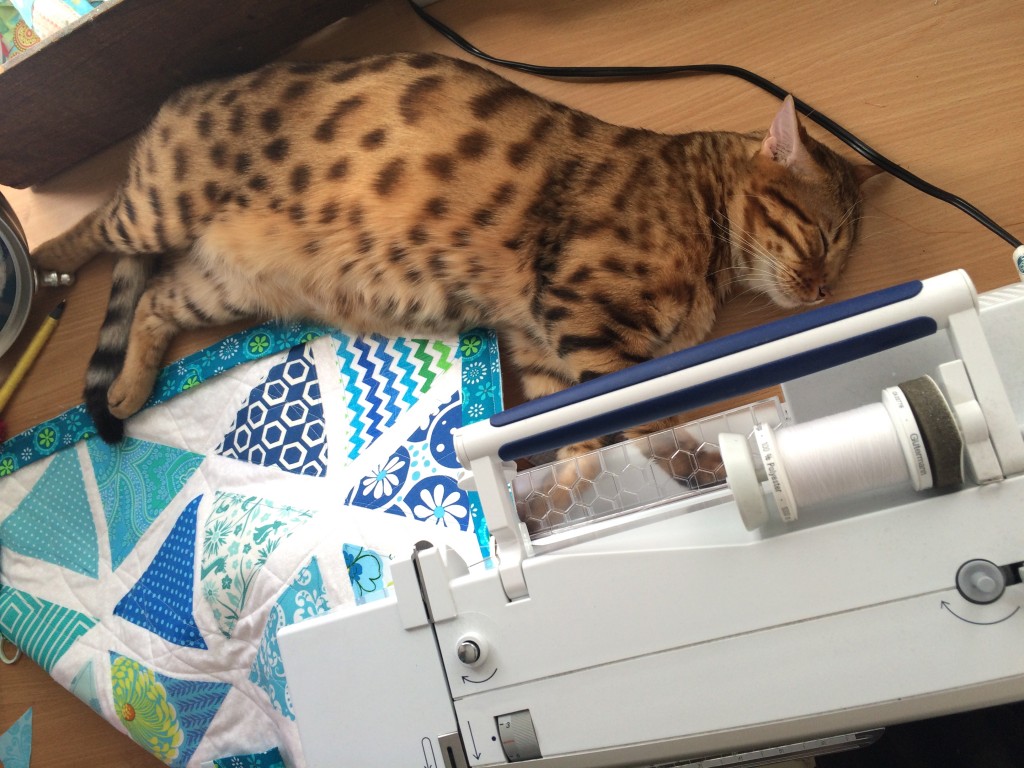
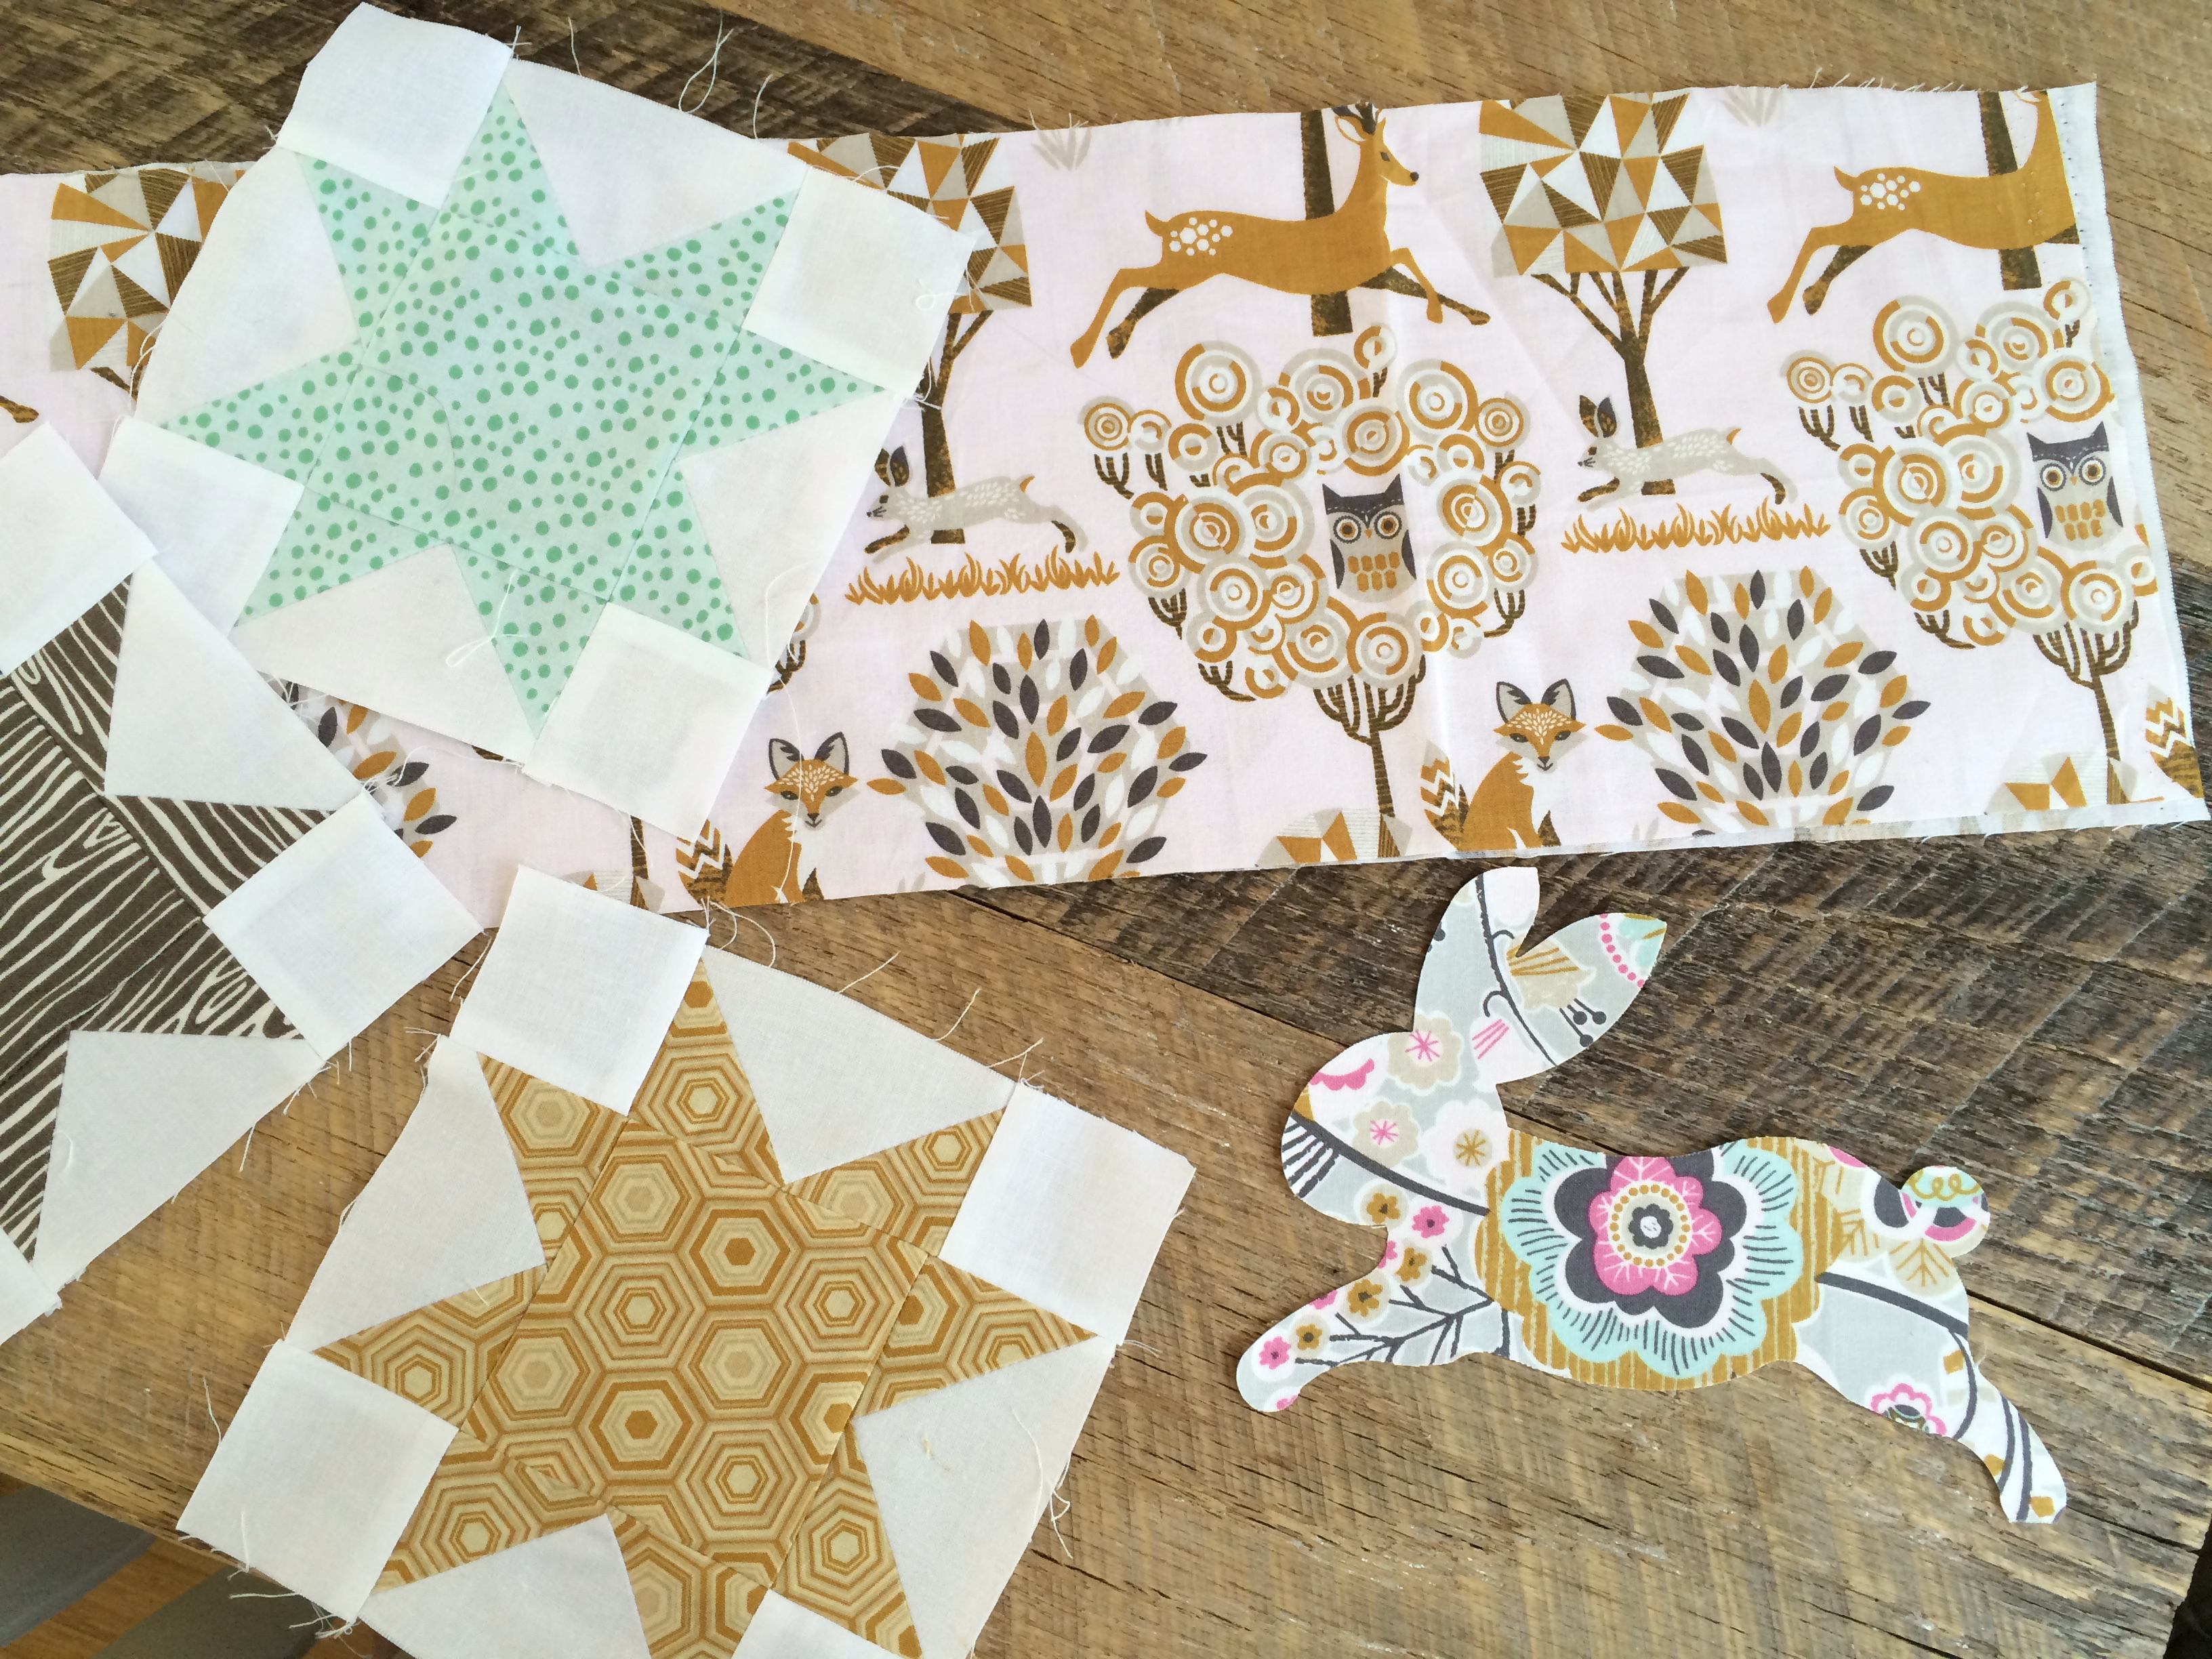
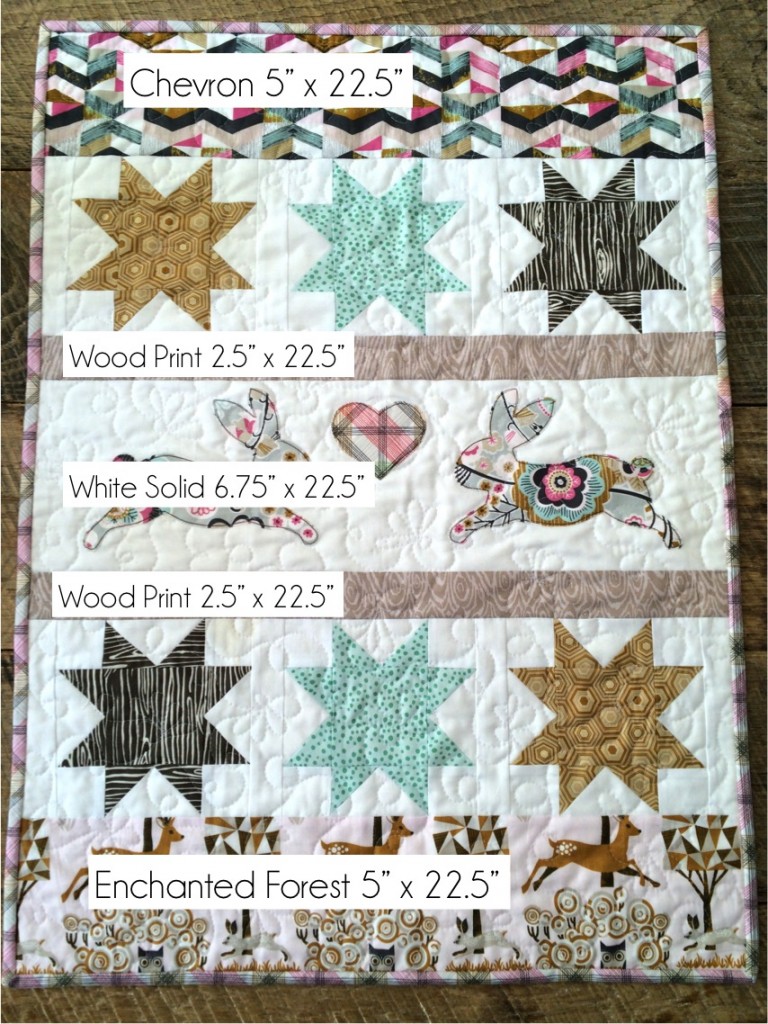
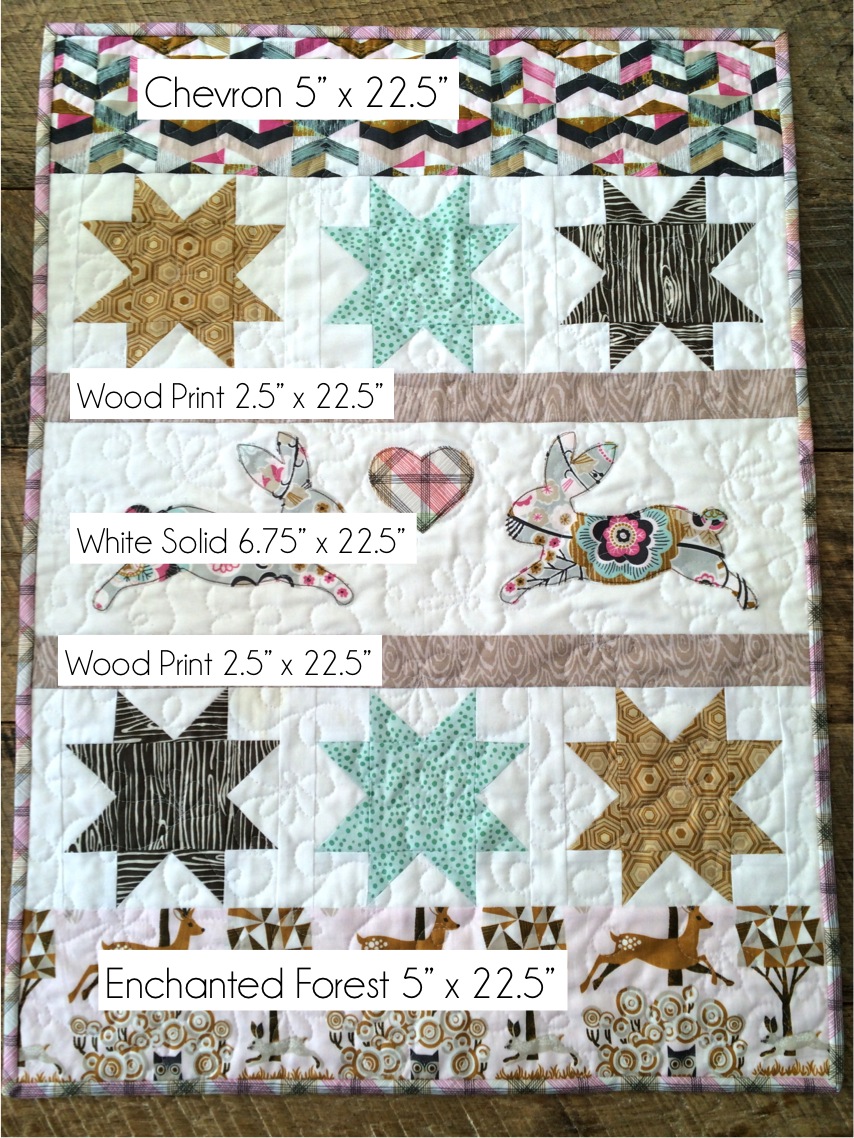
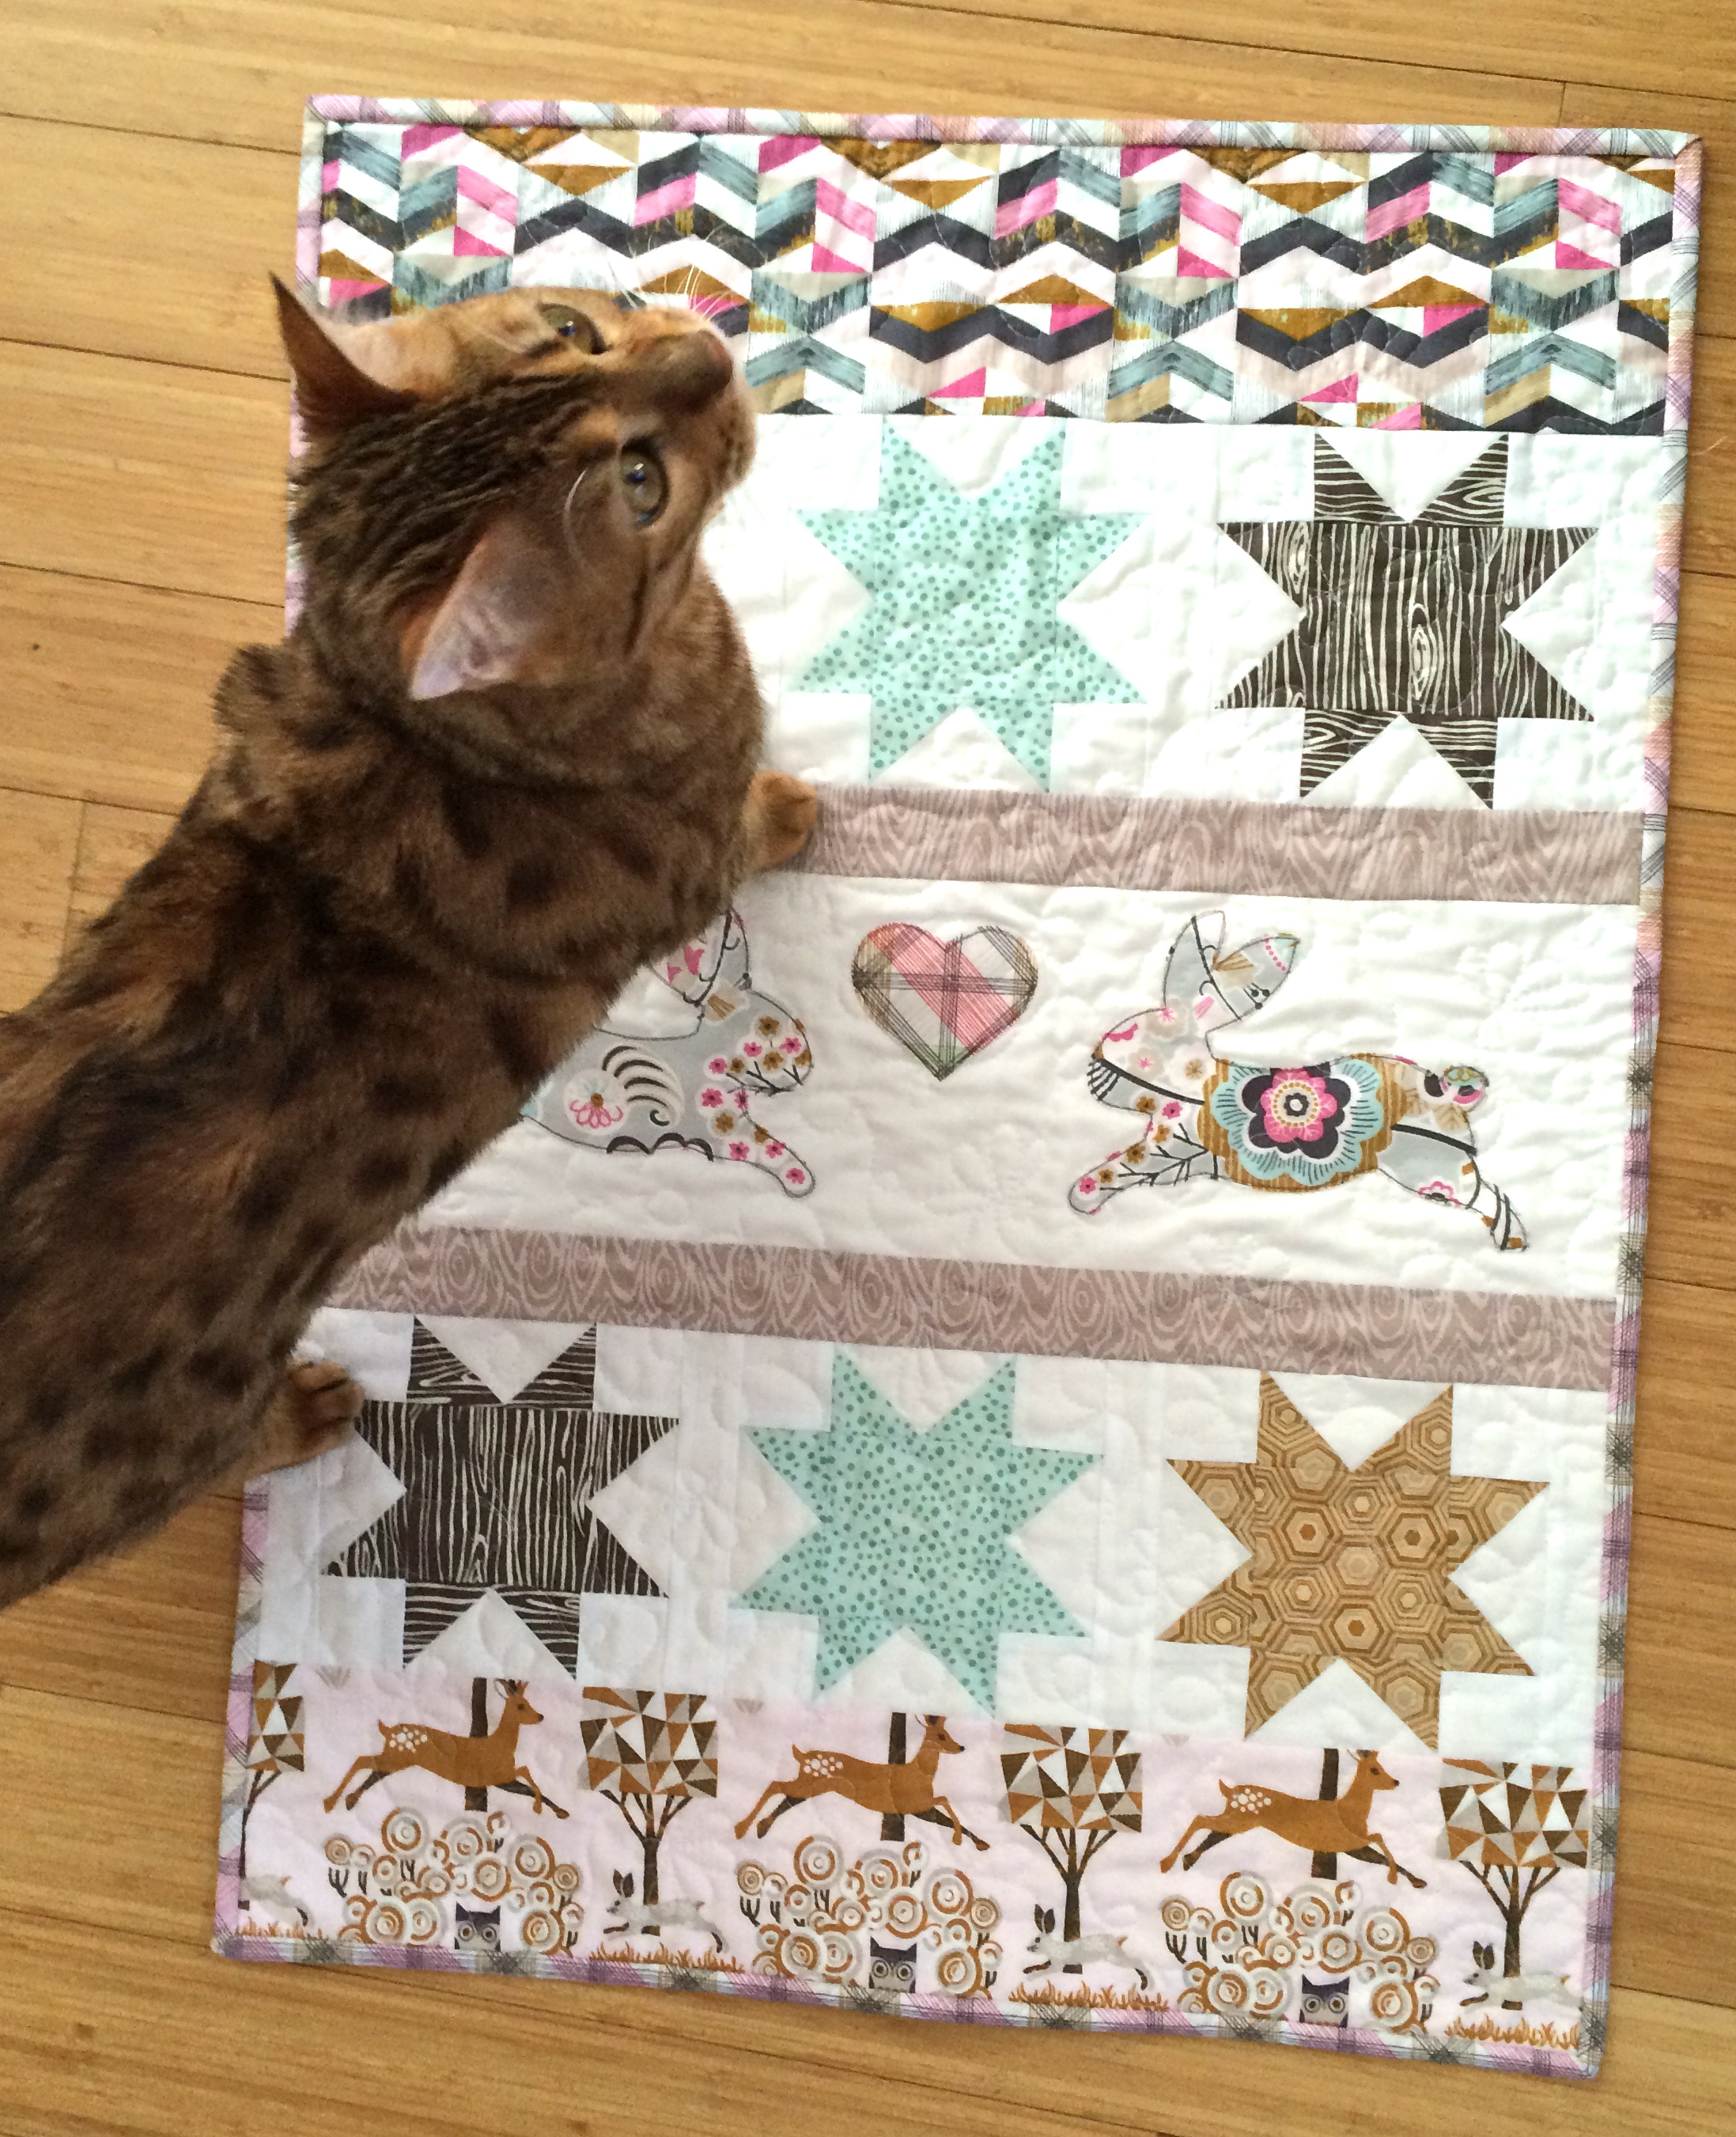
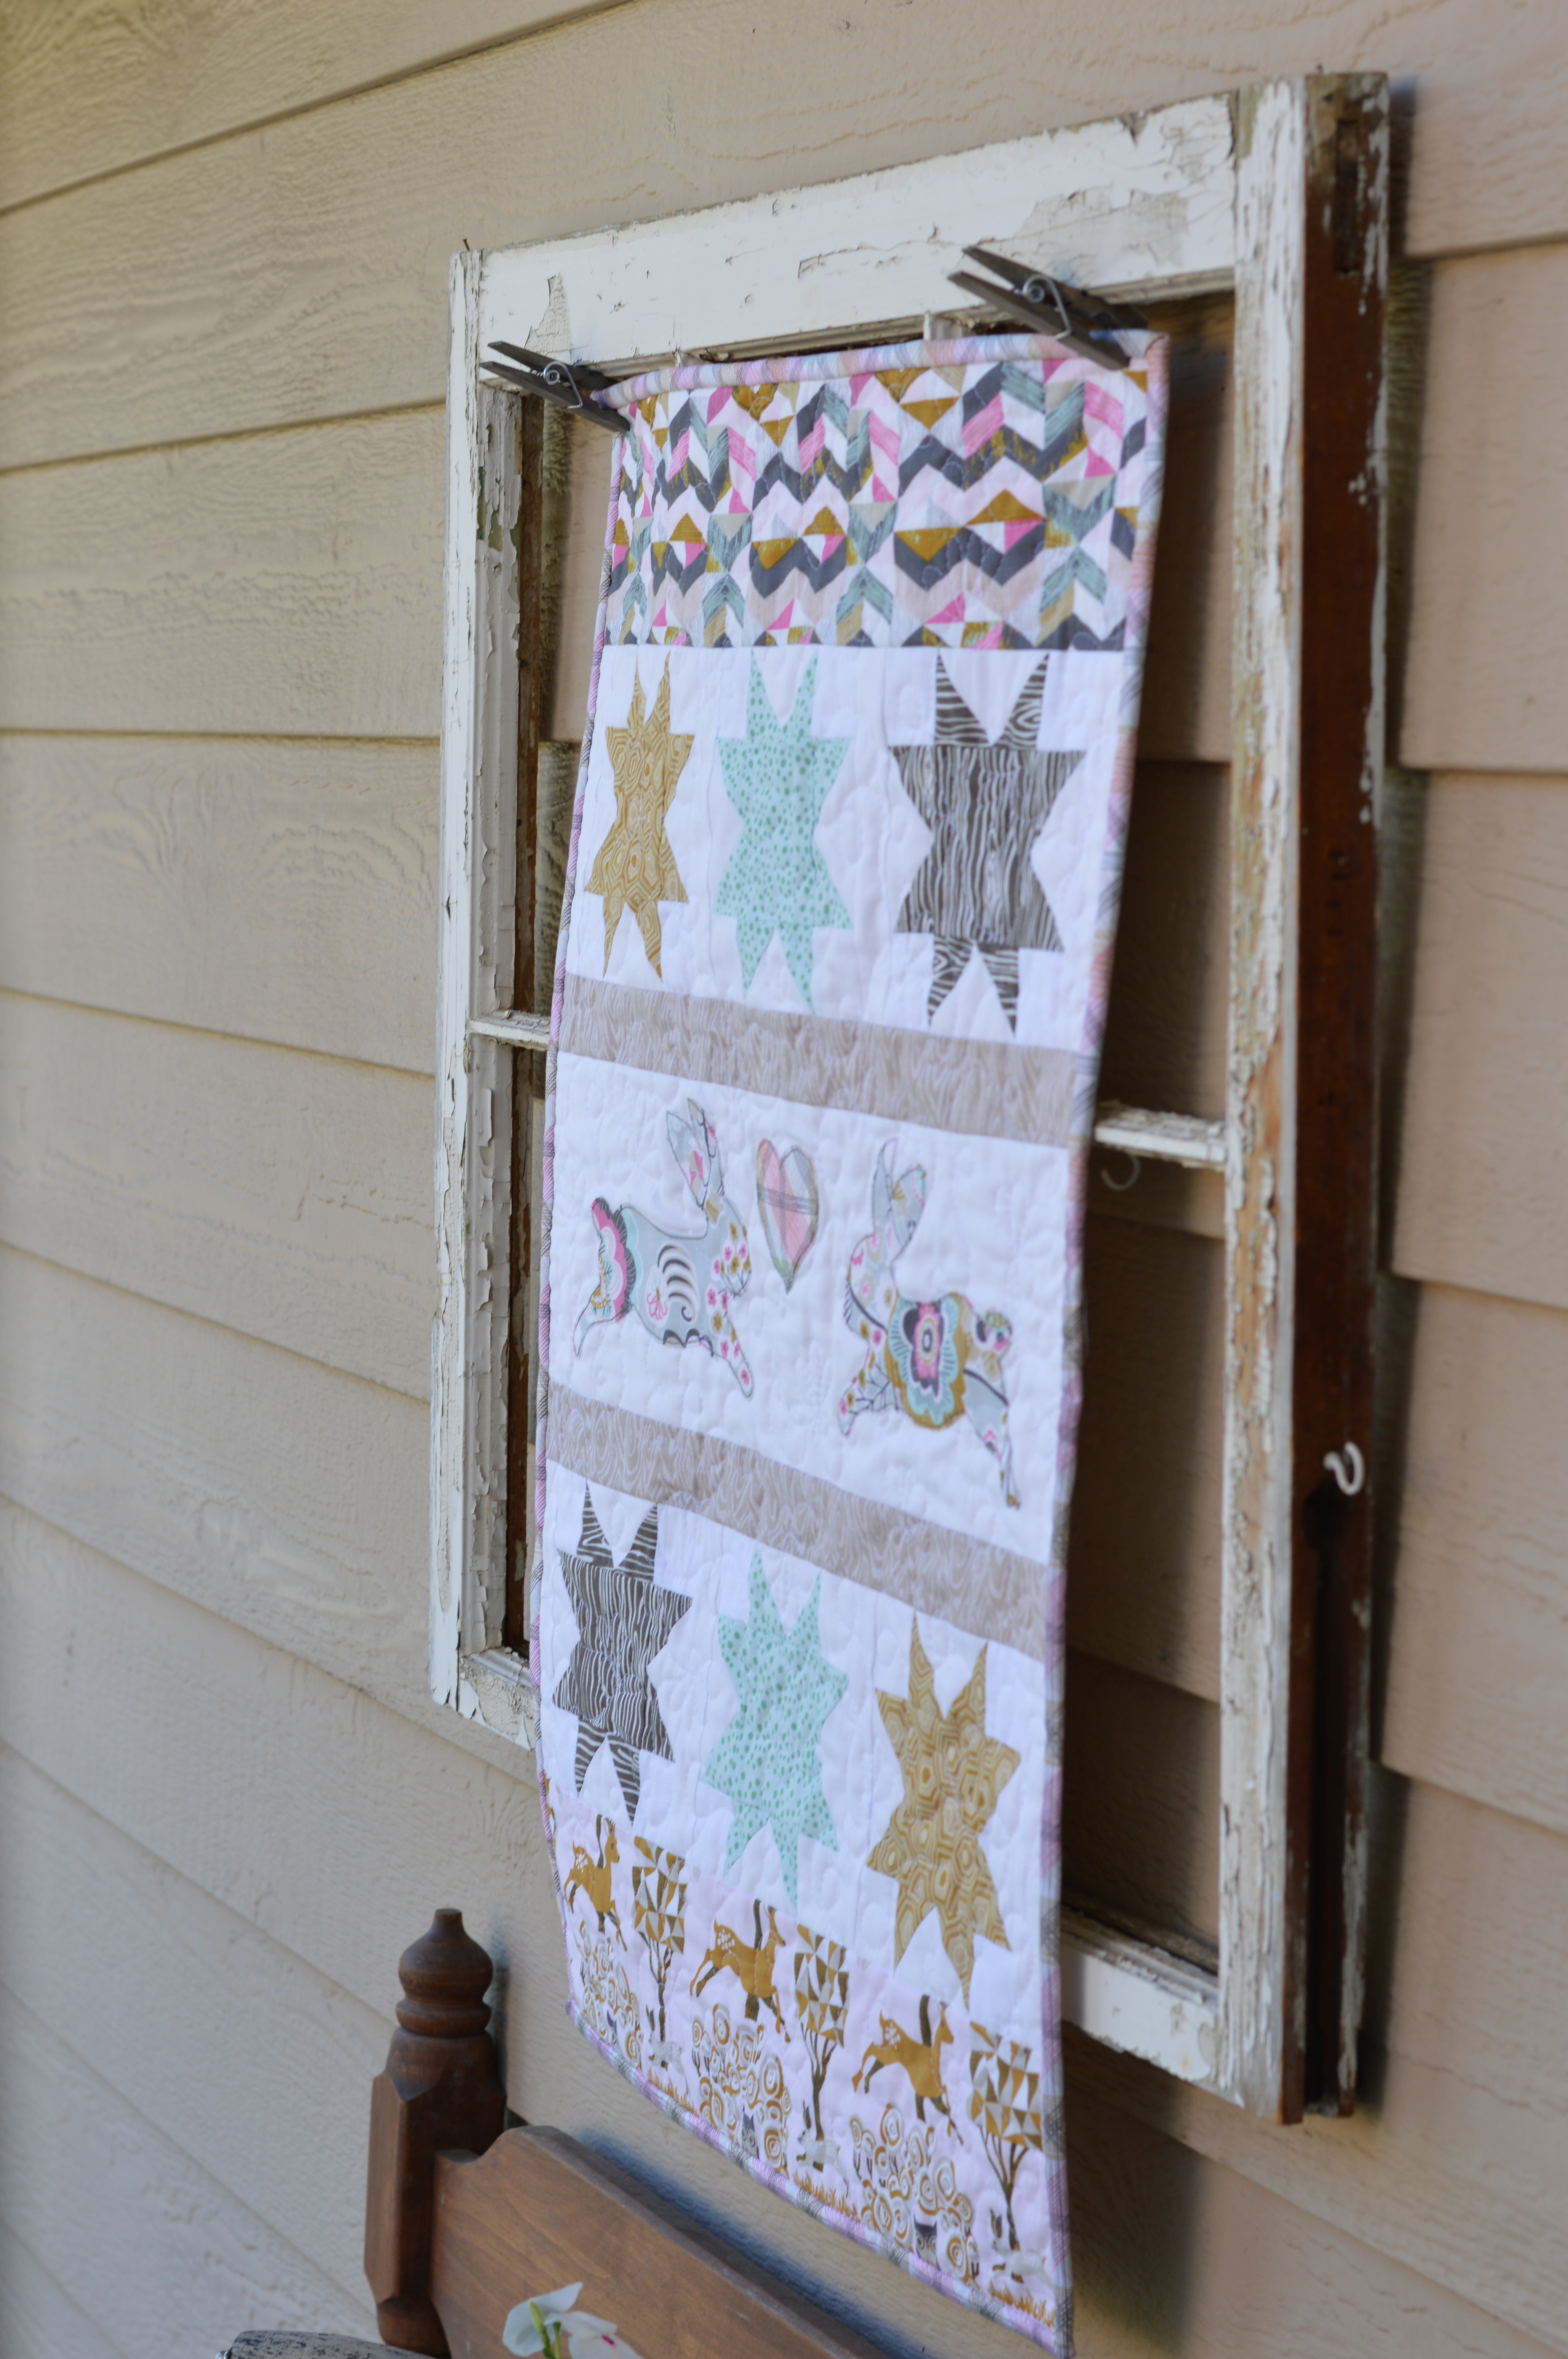
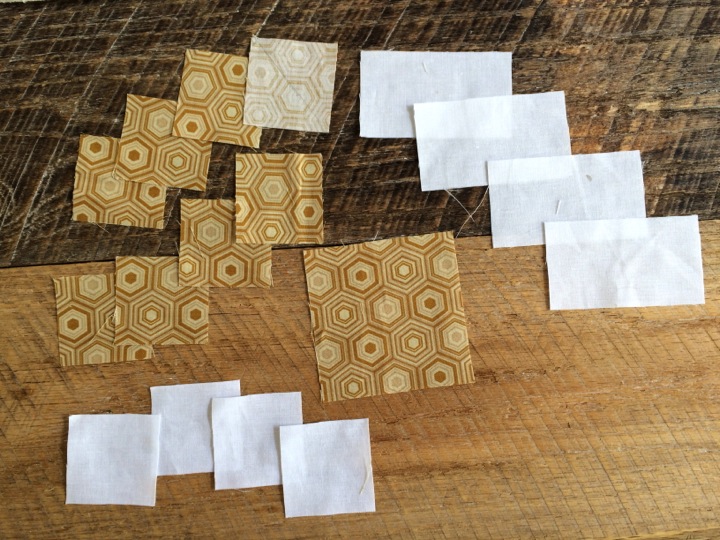
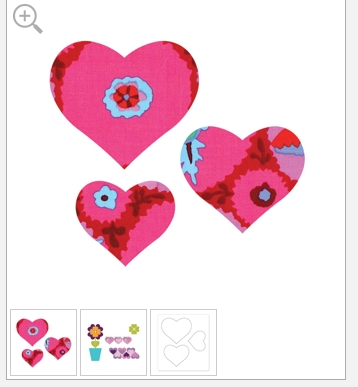
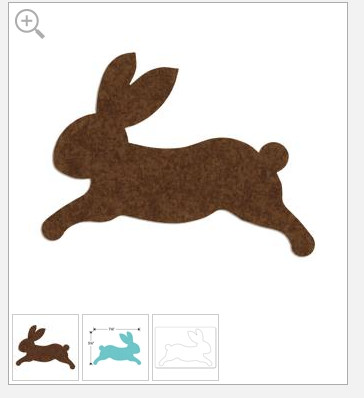
This little quilt features sawtooth blocks and appliqué.  The fabrics are from Blend Fabrics Natural Wonder fabric line.  I love that there are bunnies in the theme fabric.  The colors are soft and natural.  The bunny and hearts are cut with Sizzix dies.  Do you want to make one?  Here’s how!!

sizzix bunny blend natural wonder mini quilt 21/4″ seams used throughout 
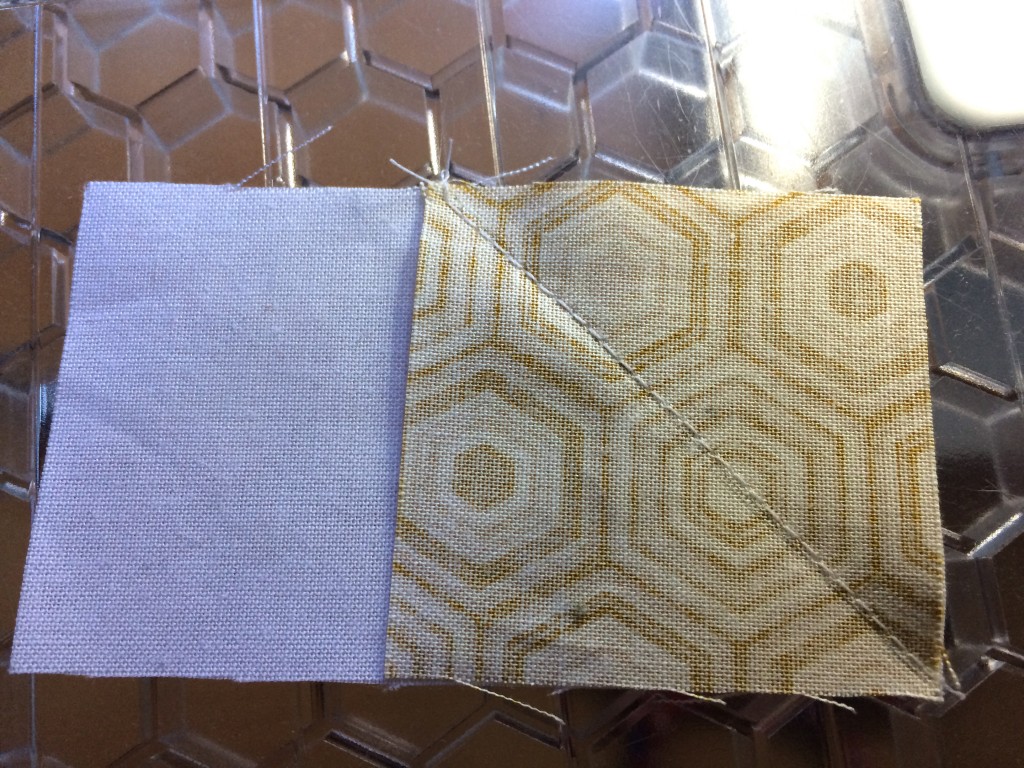
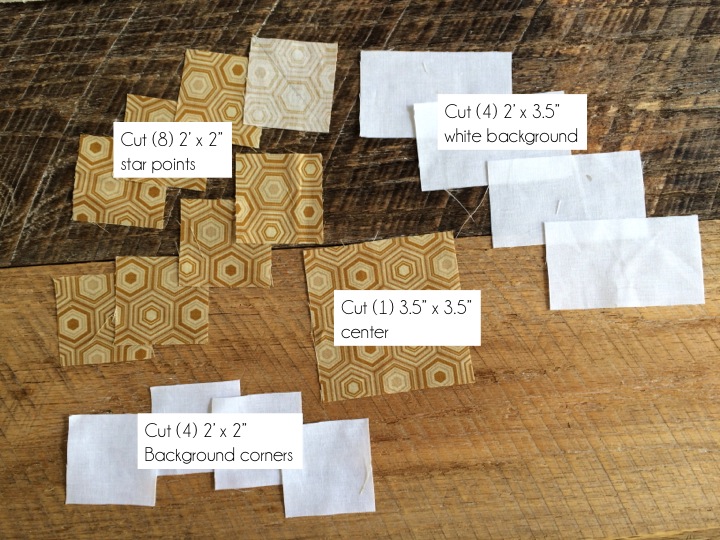
Begin by making (6) Sawtooth Star blocks.  

For each block cut the following measurements:
sawtooth instructionsDraw a diagonal line on the back of each of the 2″ x 2″ star points squares.  Position the 2″ x 2″ square a 2″ x 3.5″ background rectangle right sides together.  Sew along the diagonal line as pictured below:

sizzix bunny blend natural wonder mini quilt 5

Trim leaving 1/4″ seam allowance and press toward the dark.  Repeat the process on the other side of the background rectangle including trimming and pressing.
sizzix bunny blend natural wonder mini quilt 4

Lay the star block out like this:

sizzix bunny blend natural wonder mini quilt 3

Sew the pieces together in rows, and then the rows together.  Press seams open.  The finished sawtooth block is 6.5″

star instructions

Sew the sashing strips creating (2) Star Sets.  Press the seams toward the sashing.

Cut the strips for the quilt following the cutting guide:

blend bunny quilt layout

Bunny Applique

Iron Heat n Bond Lite to the back of the floral print fabric (Deco Park Gray).  Using the Sizzix Fabi and the Bunny Die, cut out two bunnies that face each other.  Using the hearts die, cut the larger heart out of coordinating fabric.


sizzix bunny blend natural wonder mini quilt Screen Shot 2015-07-27 at 11.43.43 AMScreen Shot 2015-07-27 at 11.46.12 AM
Peel off the backing paper and press the bunnies and heart onto the white fabric, centering.  Outline stitch two times in dark gray or taupe thread.  Sew the strips together as shown in the picture.  Press seams and quilt as desired.

sizzix bunny blend natural wonder mini quilt 12

I quilted loop de loos and 4-petal clover flowers in an all-over design.

sizzix bunny blend natural wonder mini quilt 10
sizzix bunny blend natural wonder mini quilt 9

sizzix bunny blend natural wonder mini quilt 8

Make sure your #kittyquilter #kittyhelper approves of the finished quilt before you wrap it up!sizzix bunny blend natural wonder mini quilt 11
sizzix bunny blend natural wonder mini quilt 7

Supplies:

Sizzix Fabi

Sizzix Bunny Die

Sizzix Heart Die

Heat n Bond Lite or Featherweight fusible applique

1/4 yard each of the patterned fabrics from Blend Natural Wonder line

1/3 yard white solid fabric

1 yard backing

1/3 yard binding

cotton batting