Market Tote Pattern

market bag pattern cover

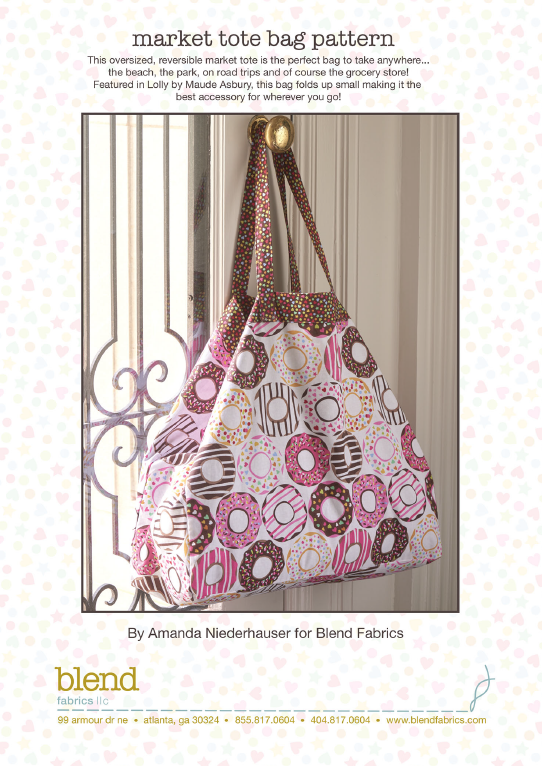
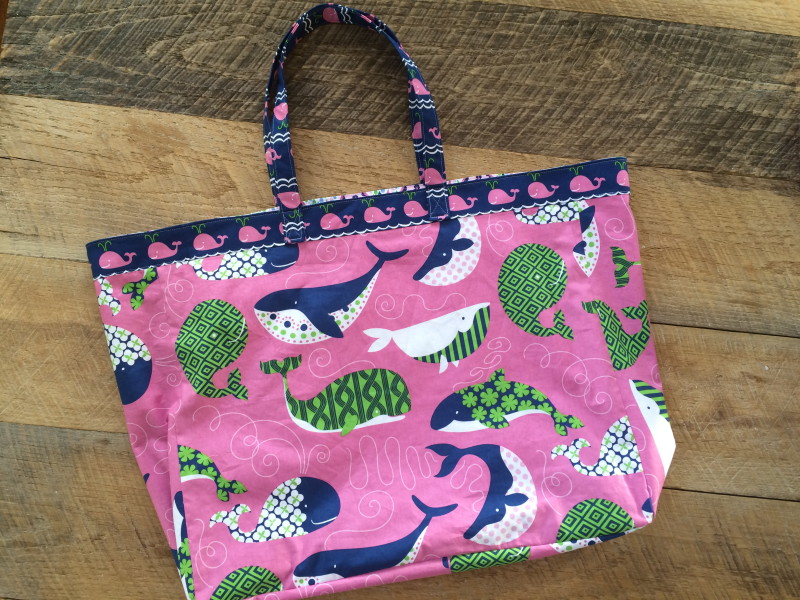
I created this fun and versitile tote bag for Blend Fabrics.  It’s such a great tote because it folds up super flat but then you can fill it with tons of stuff!  It’s perfect for beach towels and swimming stuff, goodies from the farmers market, or a fun day in the fabric district in LA!  You can download the pattern by clicking HERE.

doughnut bag 2

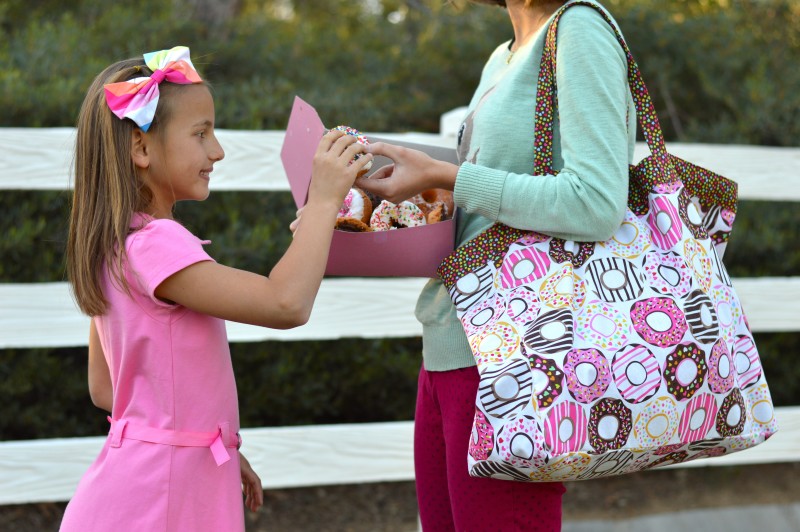
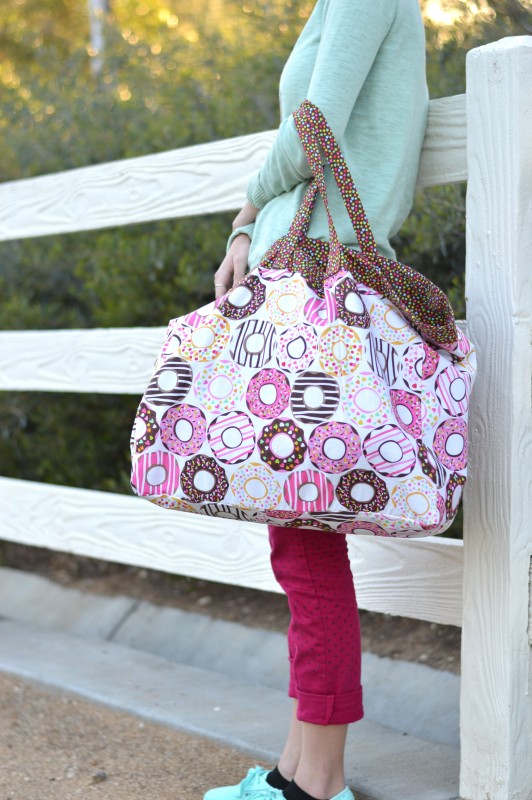
No really, it’s huge!  Sally was thrilled to finally have a photo shoot that involved food!!!  This fabric is called Lolly by Blend Fabrics.

doughnut bag 4

dougnhut bag 3

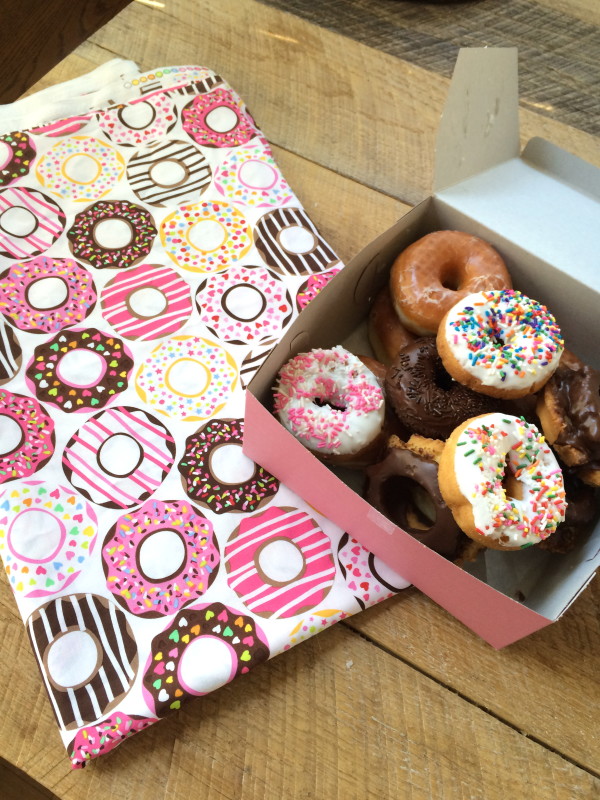
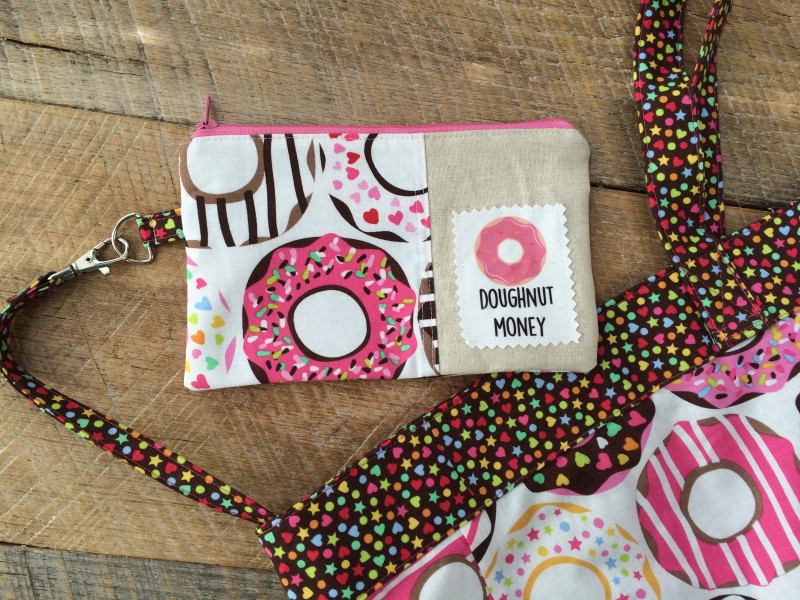
You can make this optional Doughnut Money Pouch.  Download the instructions HEREdoughnut moneydoughnut bag3

I also made a True Blue version of this bag.  doughnut bag

True Blue Summer Satchel


summer satchel
I love summer! Isn’t it the best!!!! In our family we have lots of outdoor actives and camps scheduled. Sometimes I need to carry a few items around that I can have quick access too, like my clipboard, water, bug spray and flashlight. I came up with this pattern for a cross-body satchel. It’s not complicated and sews up quick – it would be fun to make one for the whole family – you can match at your family reunion!IMG_8140_2

I used Heat n Bond® Medium Weight Fusible Stabilizer to give the bag more stability. Don’t you just love these whales by Blend Fabrics!!!
IMG_8136_2


Here is how you can make one:

Supplies:

1/2 yard outer bag
1/2 yard lining
1/3 yard bag strap
1 yard Heat n Bond® Fusible staibilizer

Cut:

(2) outer bag 15″wide x 16″ tall
(2) lining 15″wide x 16″ tall
(2) stabilizer 15″wide x 16″ tall
(2) Strap 5″ x WOF


IMG_8108_2

Fuse the HeatnBond® stabilizer to the wrong side of the (2) outer bag pieces.IMG_8109_2

With right sides together, pin all the way around the outer bag, leaving the top open. Do the same with the lining pieces. Sew using 1/3″ seam all the way around leaving the top open. You should have (2) bags, one outer and one lining.IMG_8110_2

To form a pleate in the bottom, cut a 1″ notch out of the bottom corners of the outer bag and the lining.IMG_8111

Match seams, pin, and sew 1/4″ seam, backstitching to start and stop.IMG_8112

Sew the (2) 5″ strap pieces together end to end. Press the seams open. Measure how long you want your strap. Mine was 48″. Cut at the desired length. Fold in half, right sides together and sew 1/3″ seam all the way down.
IMG_8113

Turn right side out, press and top stitch.IMG_8114

Baste (1/8″) the ends of the strap centering on the side seams on the right side of the outer bag.IMG_8115

Place the lining inside the bag so that right sides are facing each other. Match side seams and pin all the way around.IMG_8116Sew 1/4″ seam all the way around the top of the bag leaving a 3″ opening. Turn bag right side out and press. Sew a 1/8″ top stitch around the bag top, sewing the opening closed.
IMG_8117_2

IMG_8130

IMG_8122

To add a little detail to the fabric, I used Deco Foil™ Transfer Adhesive and followed the loops on the fabric. After it dried I rubbed the Deco Foils™ on the adhesive. You can add a little shine to any project this way!!

IMG_8142

Anchor Pillow Tutorial

anchor pillow tutorial

It’s feeling like summer here in Southern California with temperatures reaching up to 90 degrees!  Let the fun begin!  I’m such a summer girl – I hate to be cold!  In celebration of the wonderful warm weather we’re having I thought I would share this fun nautical pillow with you.  The fabrics are from Blend’s True Blue line which is in reproduction since it was so popular!  Which is great news because it’s one of my favorites!!

anchor pillow 1

Let’s get started!

Supplies:

Fat Quarters or quarter yard cuts of a variety of the True Blue Fabrics

fat quarter or 1/2 yard white fabric for center

2/3 yard backing

2 yards ric rac

Heat n Bond Lite EZ Print Sheets

20″ pillow insert

2.5 yards pillow trim

Anchor Pattern, Click HERE

IMG_6370

Cut the center white fabric 12.5″ x 12.5″.  Print out the anchor on the Heat n Bond Lite EZ print sheets or trace the anchor onto Heat n Bond Lite.  Press the Heat n Bond to the wrong side of the anchor fabric.  Cut the anchor out and peel off the backing paper.  Press the anchor in the center of the white fabric.  Top stitch around the anchor.

IMG_6371

Position the ric rac as picture:

IMG_6372

I used Spray n Bond to hold it in place while I sewed.  You can also use pins.  Sew the ric rac on with matching thread.

anchor pillow diagram

Refer to the above diagram for sewing the patchy boarder.  All squares are 2.5″ and all seams are 1/4″.

IMG_6375

Once the pillow top is complete, spray baste it to the batting and then to a backing.  The backing fabric won’t be seen, it just gives the pillow added stability.  Quilt as desired.

IMG_6376

I quilted mine with wavy lines and then “pebbles” in the center.  After quilting square up each side.  The final measurement should be pretty close to 20″.  You loose a little with the quilting.

Baste the pillow trim onto the pillow top.  Finish the quilt as desired.  I always put a zipper in the back of my pillow and you can follow the instructions in this tutorial.

anchor pillow 4

I love how this pillow turned out and it goes great with all my other nautical sewing projects!  For more nautical projects, click HERE.

anchor pillow 9

anchor pillow 6

Mufasa was especially impressed with this project 🙂

anchor pillow 3

anchor pillow 5


Mid Century Mix Up Quilt Featuring Folk Medley

mid century mix up quilt cover

I feel like I may have been born in the wrong era.  I was raised with parents who were teenagers in the 60’s.  My dad plays the guitar and banjo and there was never a lack of freedom folk songs in our home.  I grew up watching movies and tv from the 60s and have passed this on to my children.  Instead of watching what ever kids and teens watch these days my kids top shows are: Gilligan’s Island, Brady Bunch, I Dream of Jeanie, McHale’s Navy, and the Carroll Burnett Show.  My kids listen to 60’s music stations on Pandora.  I’m doing my best to preserve the past!!  Sooooo when I came across this fabric line from Blend Fabrics called Folk Medley I new it was for me!  I love the retro images, the records, the music notes, and the colors of these fabrics!  I wanted to create a quilt that felt more mid century modern than quilty.  I am so in love with the finished quilt!  It’s exactly how I wanted it!

mid century mix up quilt 4

My goal was to make the quilt using only 1 block but to have a totally random result.  I love how there are shapes within the quilt that were created at random.  Just by looking at it you can’t really pick out the block pattern which I LOVE.  mid century mix up quilt 27

The quilting has a retro feel as well and it was so fun to do although very tiring!

Here is the block pattern.  Yep, that’s all there is to it!  Below are the CUTTING measurements for each piece of the block.

mid century quilt block

mid century mix up quilt 23

Gather your fabrics, I used 10 prints and 1 solid. All seams 1/4 inch.  Finished block 9″ Finished Quilt 54″ x 72″

1/3 yard of the prints

2/3 yard solid (off white)

1/2 yard binding

3 1/2 yards backing

mid century mix up quilt 21

Cut each of the patterned fabrics into strips (3) 3.5″ x WOF.

For the 5″ x 3.5″ rectangles

Using (2) 3.5″ x WOF strips sub cut them into 5″ unitis.

For the 9.5″ x 3.5″ rectangles

Using (1) 3.5″ x WOF strips subcut into 9.5″ segments.

Cut the same increments for the off white solid and then add in additional to your liking.

Sew the 5″ rectangles together first.  Just grab and go – don’t lay out and don’t plan!  Press the seams.  Then sew the 5″ rectangle units on both sides of the 9.5″ rectangle.  Again, totally random.  These are only a few of the block combinations I came up with.  Notice how some like fabrics are right next to each other?  This is good!!

mid century mix up quilt 22

I laid my blocks out so I could take a picture.  But I reccomend NOT laying them out.  Just grab and go!  It’s so liberating!!!  You will need 6 rows by 8 rows for a total of 48 blocks.  (You can totally make this smaller or larger).  Sew the blocks together in rows, press and sew the rows together.

mid century mix up quilt 25

I put flannel on the back of the quilt so it would be super cuddly and soft!  (Always prewash flannels if you use them in quilting!)

mid century mix up quilt 26

Make sure your cat approves 🙂  mid century mix up quilt 24

This pattern is great for larger prints because the strips are a good size.  It also sews together FAST!  This throw size quilt can be made in 1 day!!  I can’t wait to make another one using different fabrics!!

mid century mix up quilt 2

mid century mix up quilt 5

Do you have favorite 60’s folk singers?  I love the New Christy Minstrels!!  They are epic!mid century mix up quilt 6   
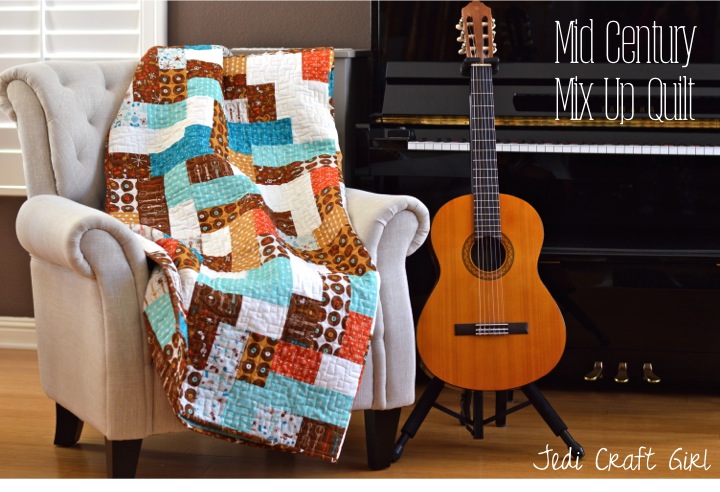
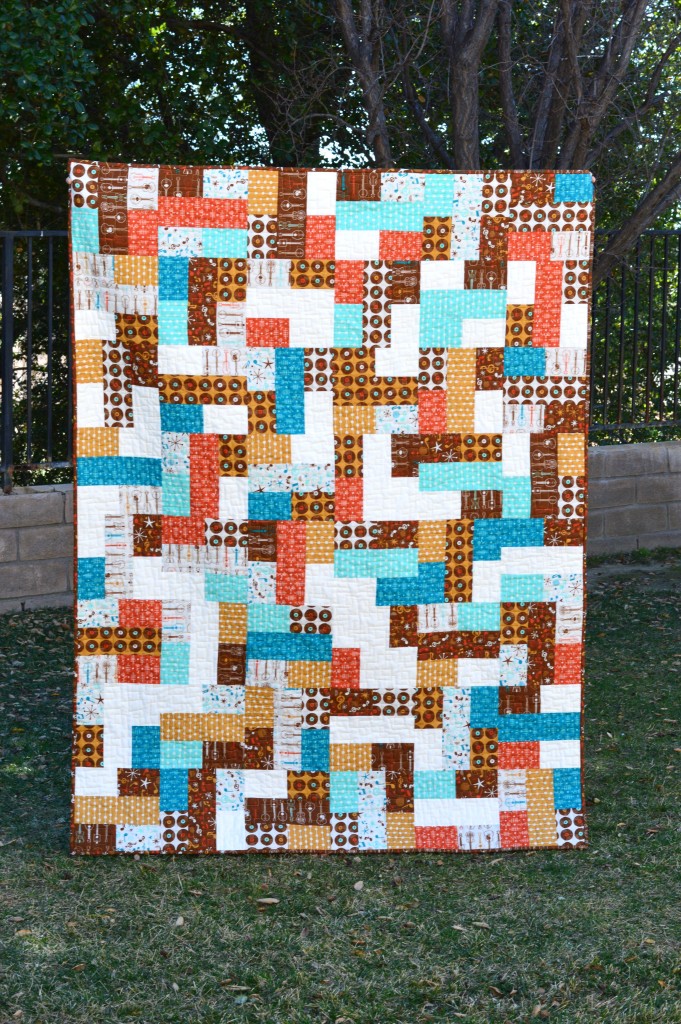
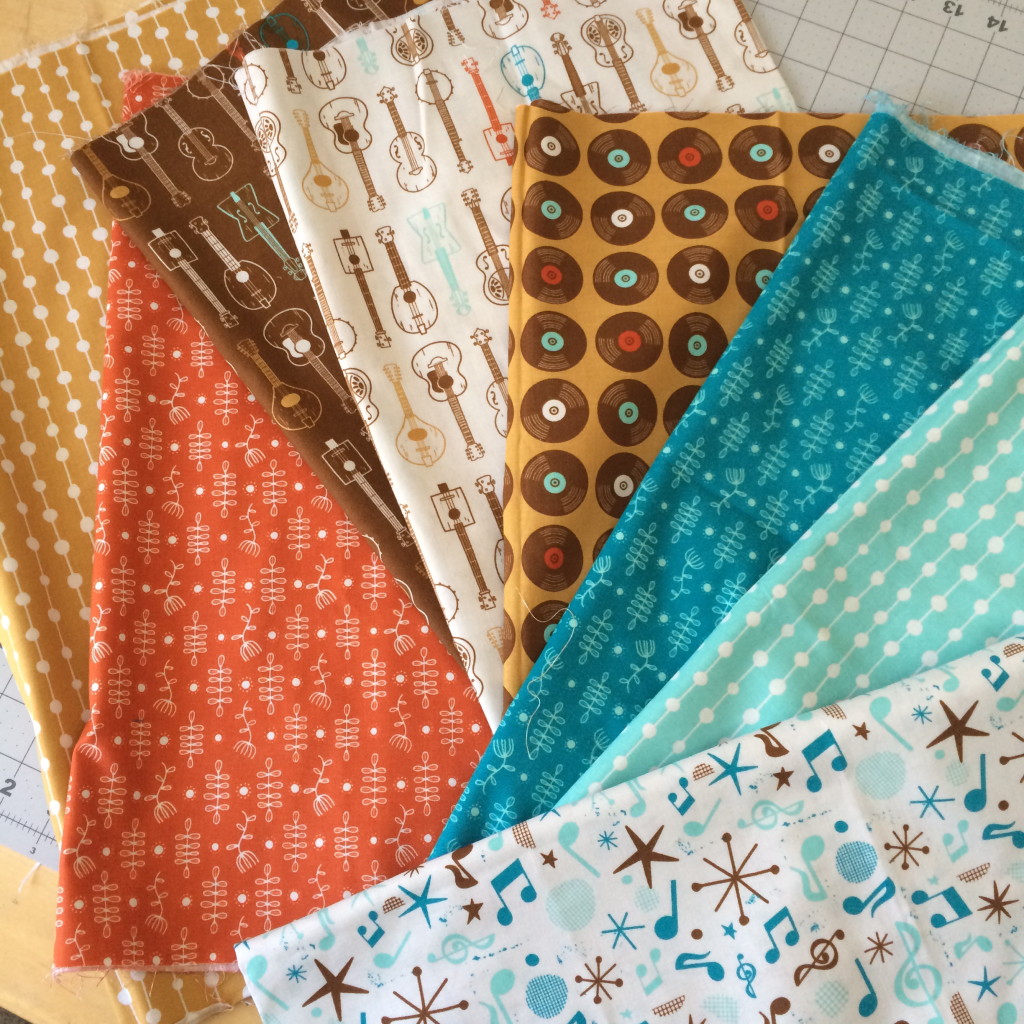
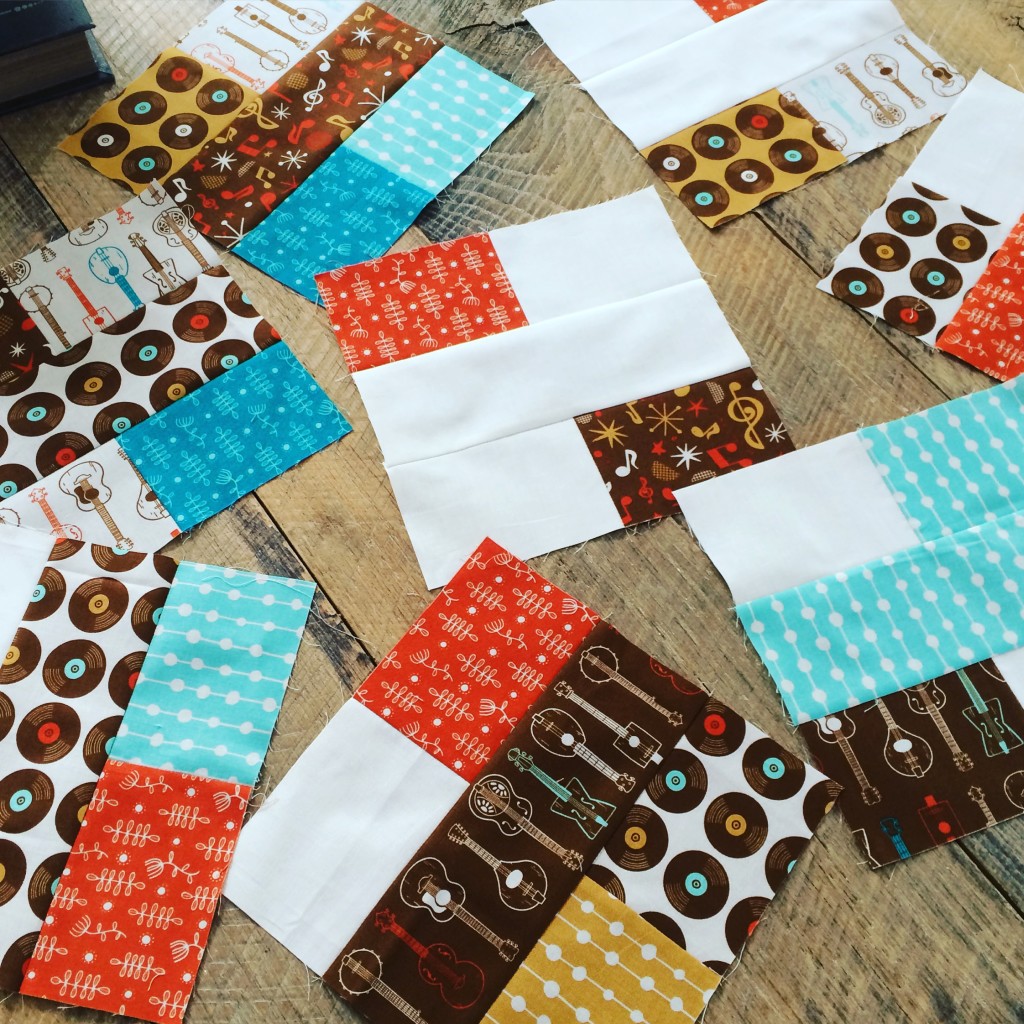
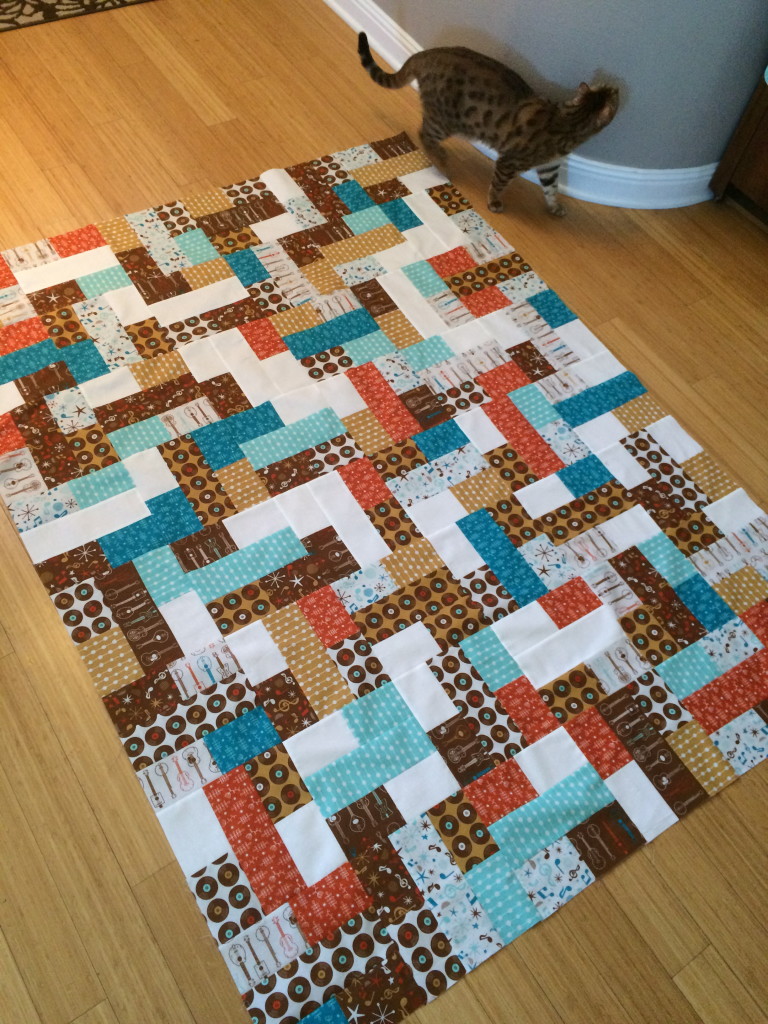
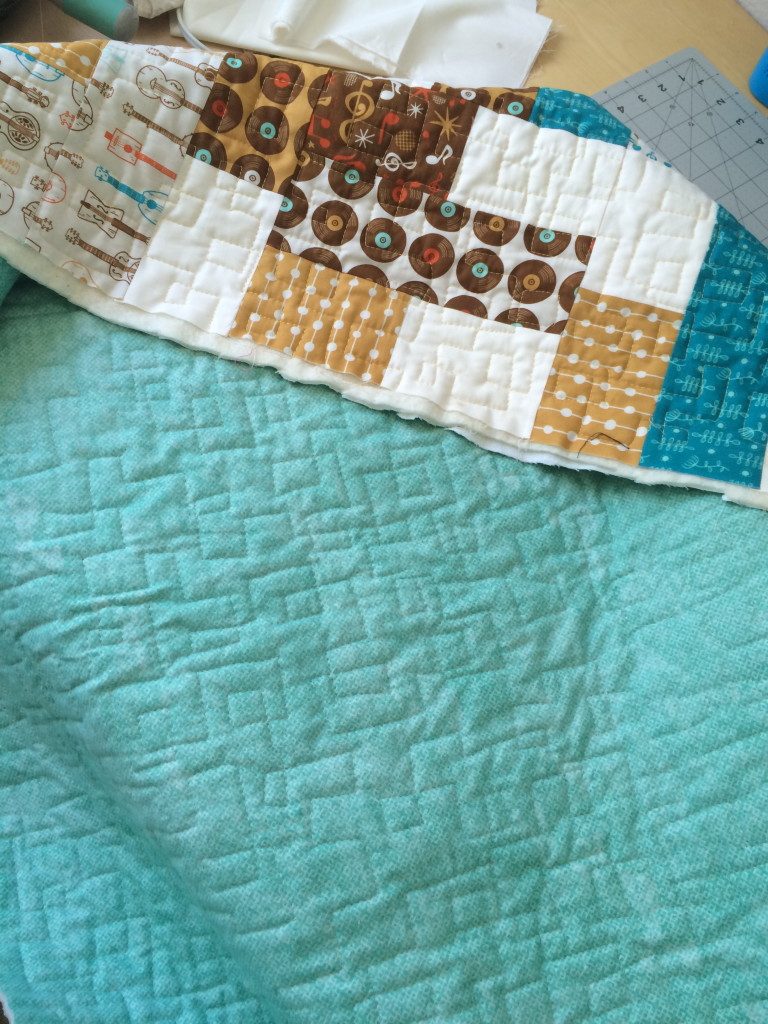
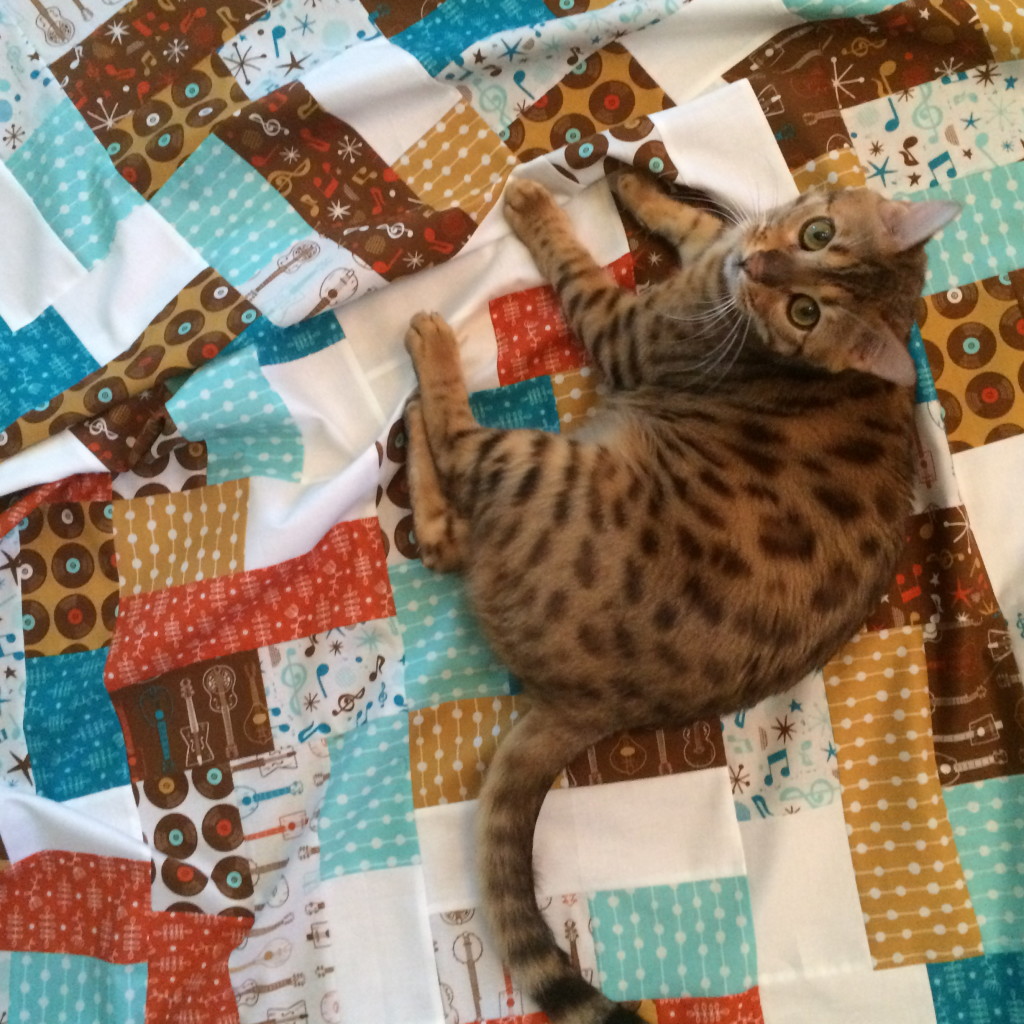
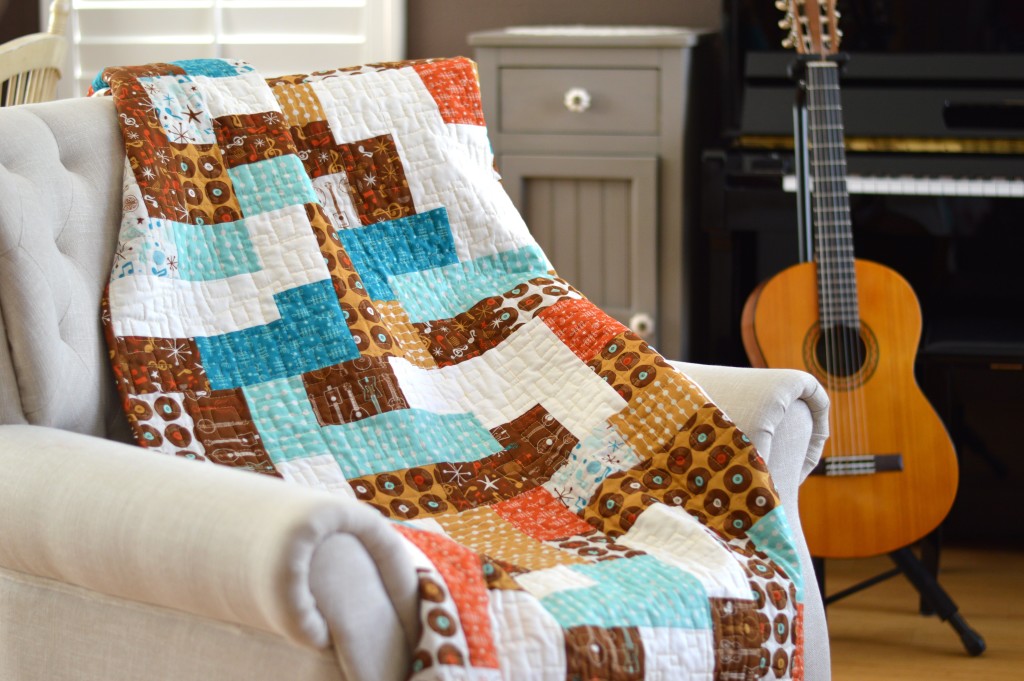
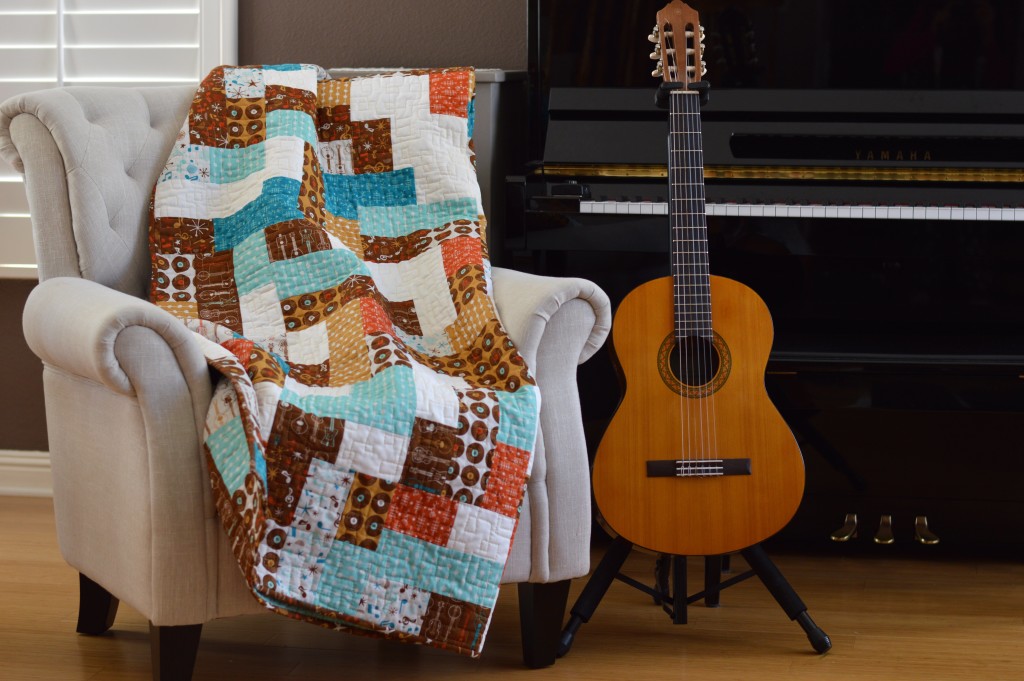
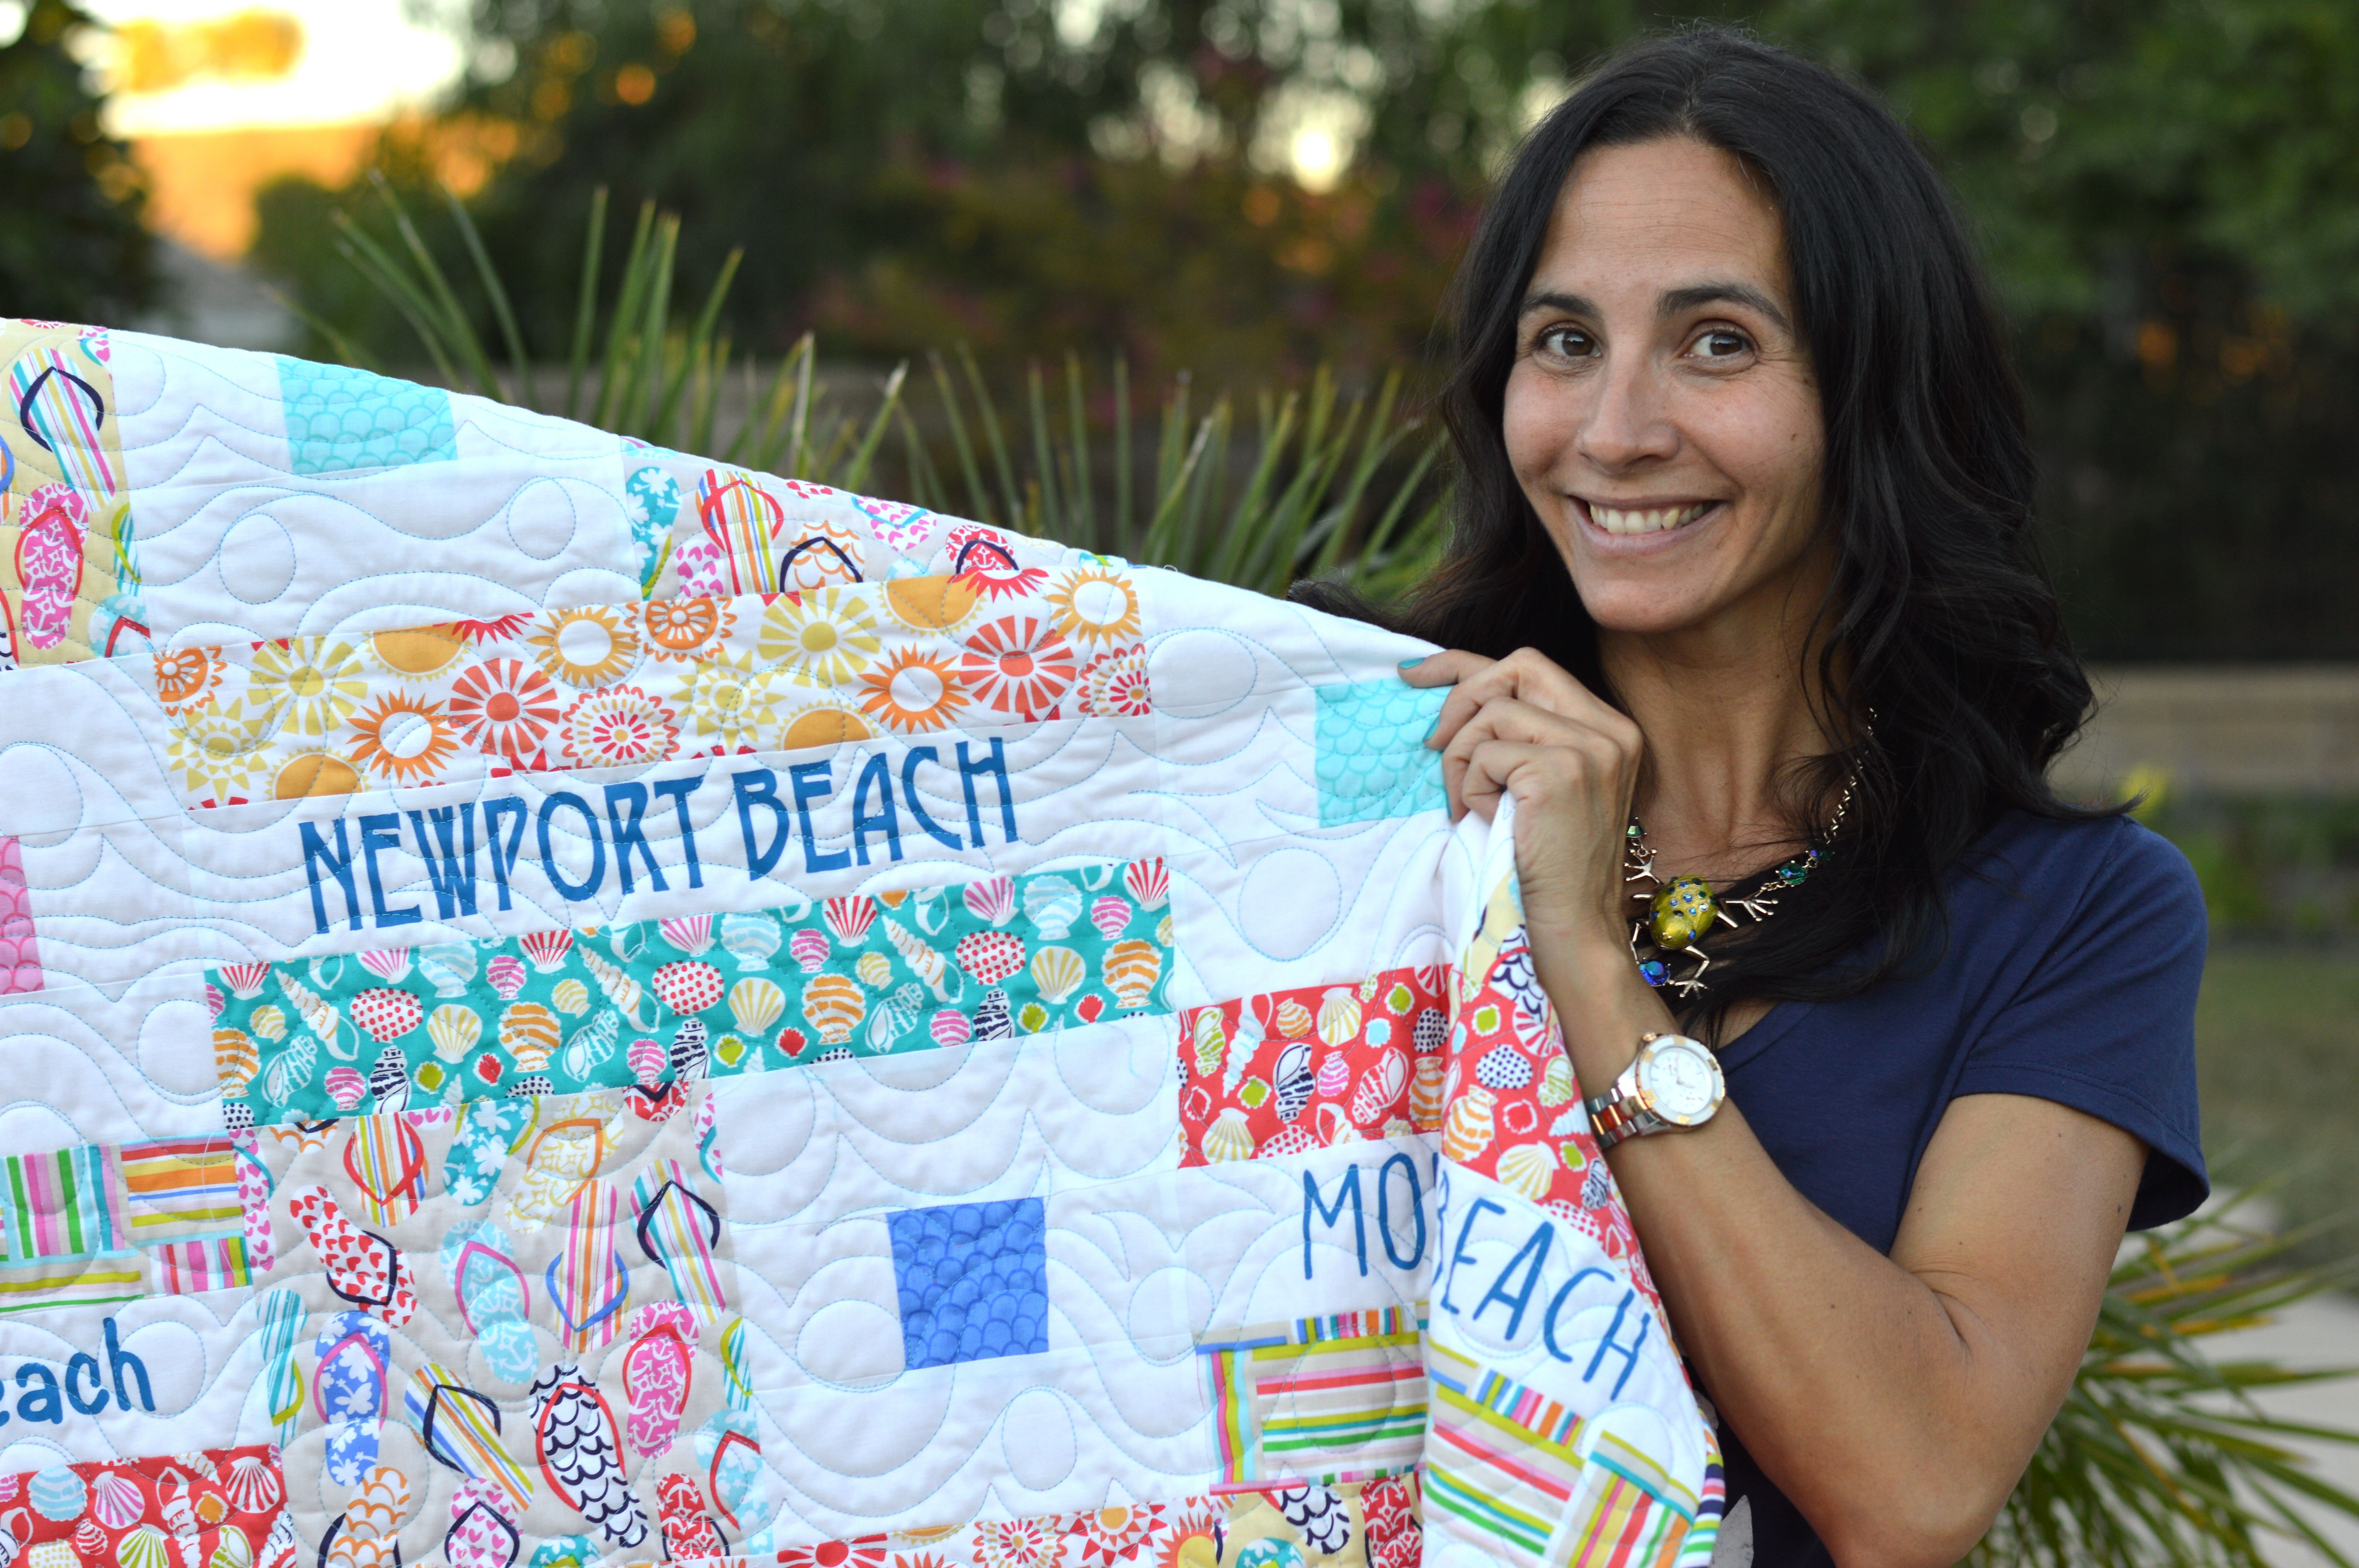
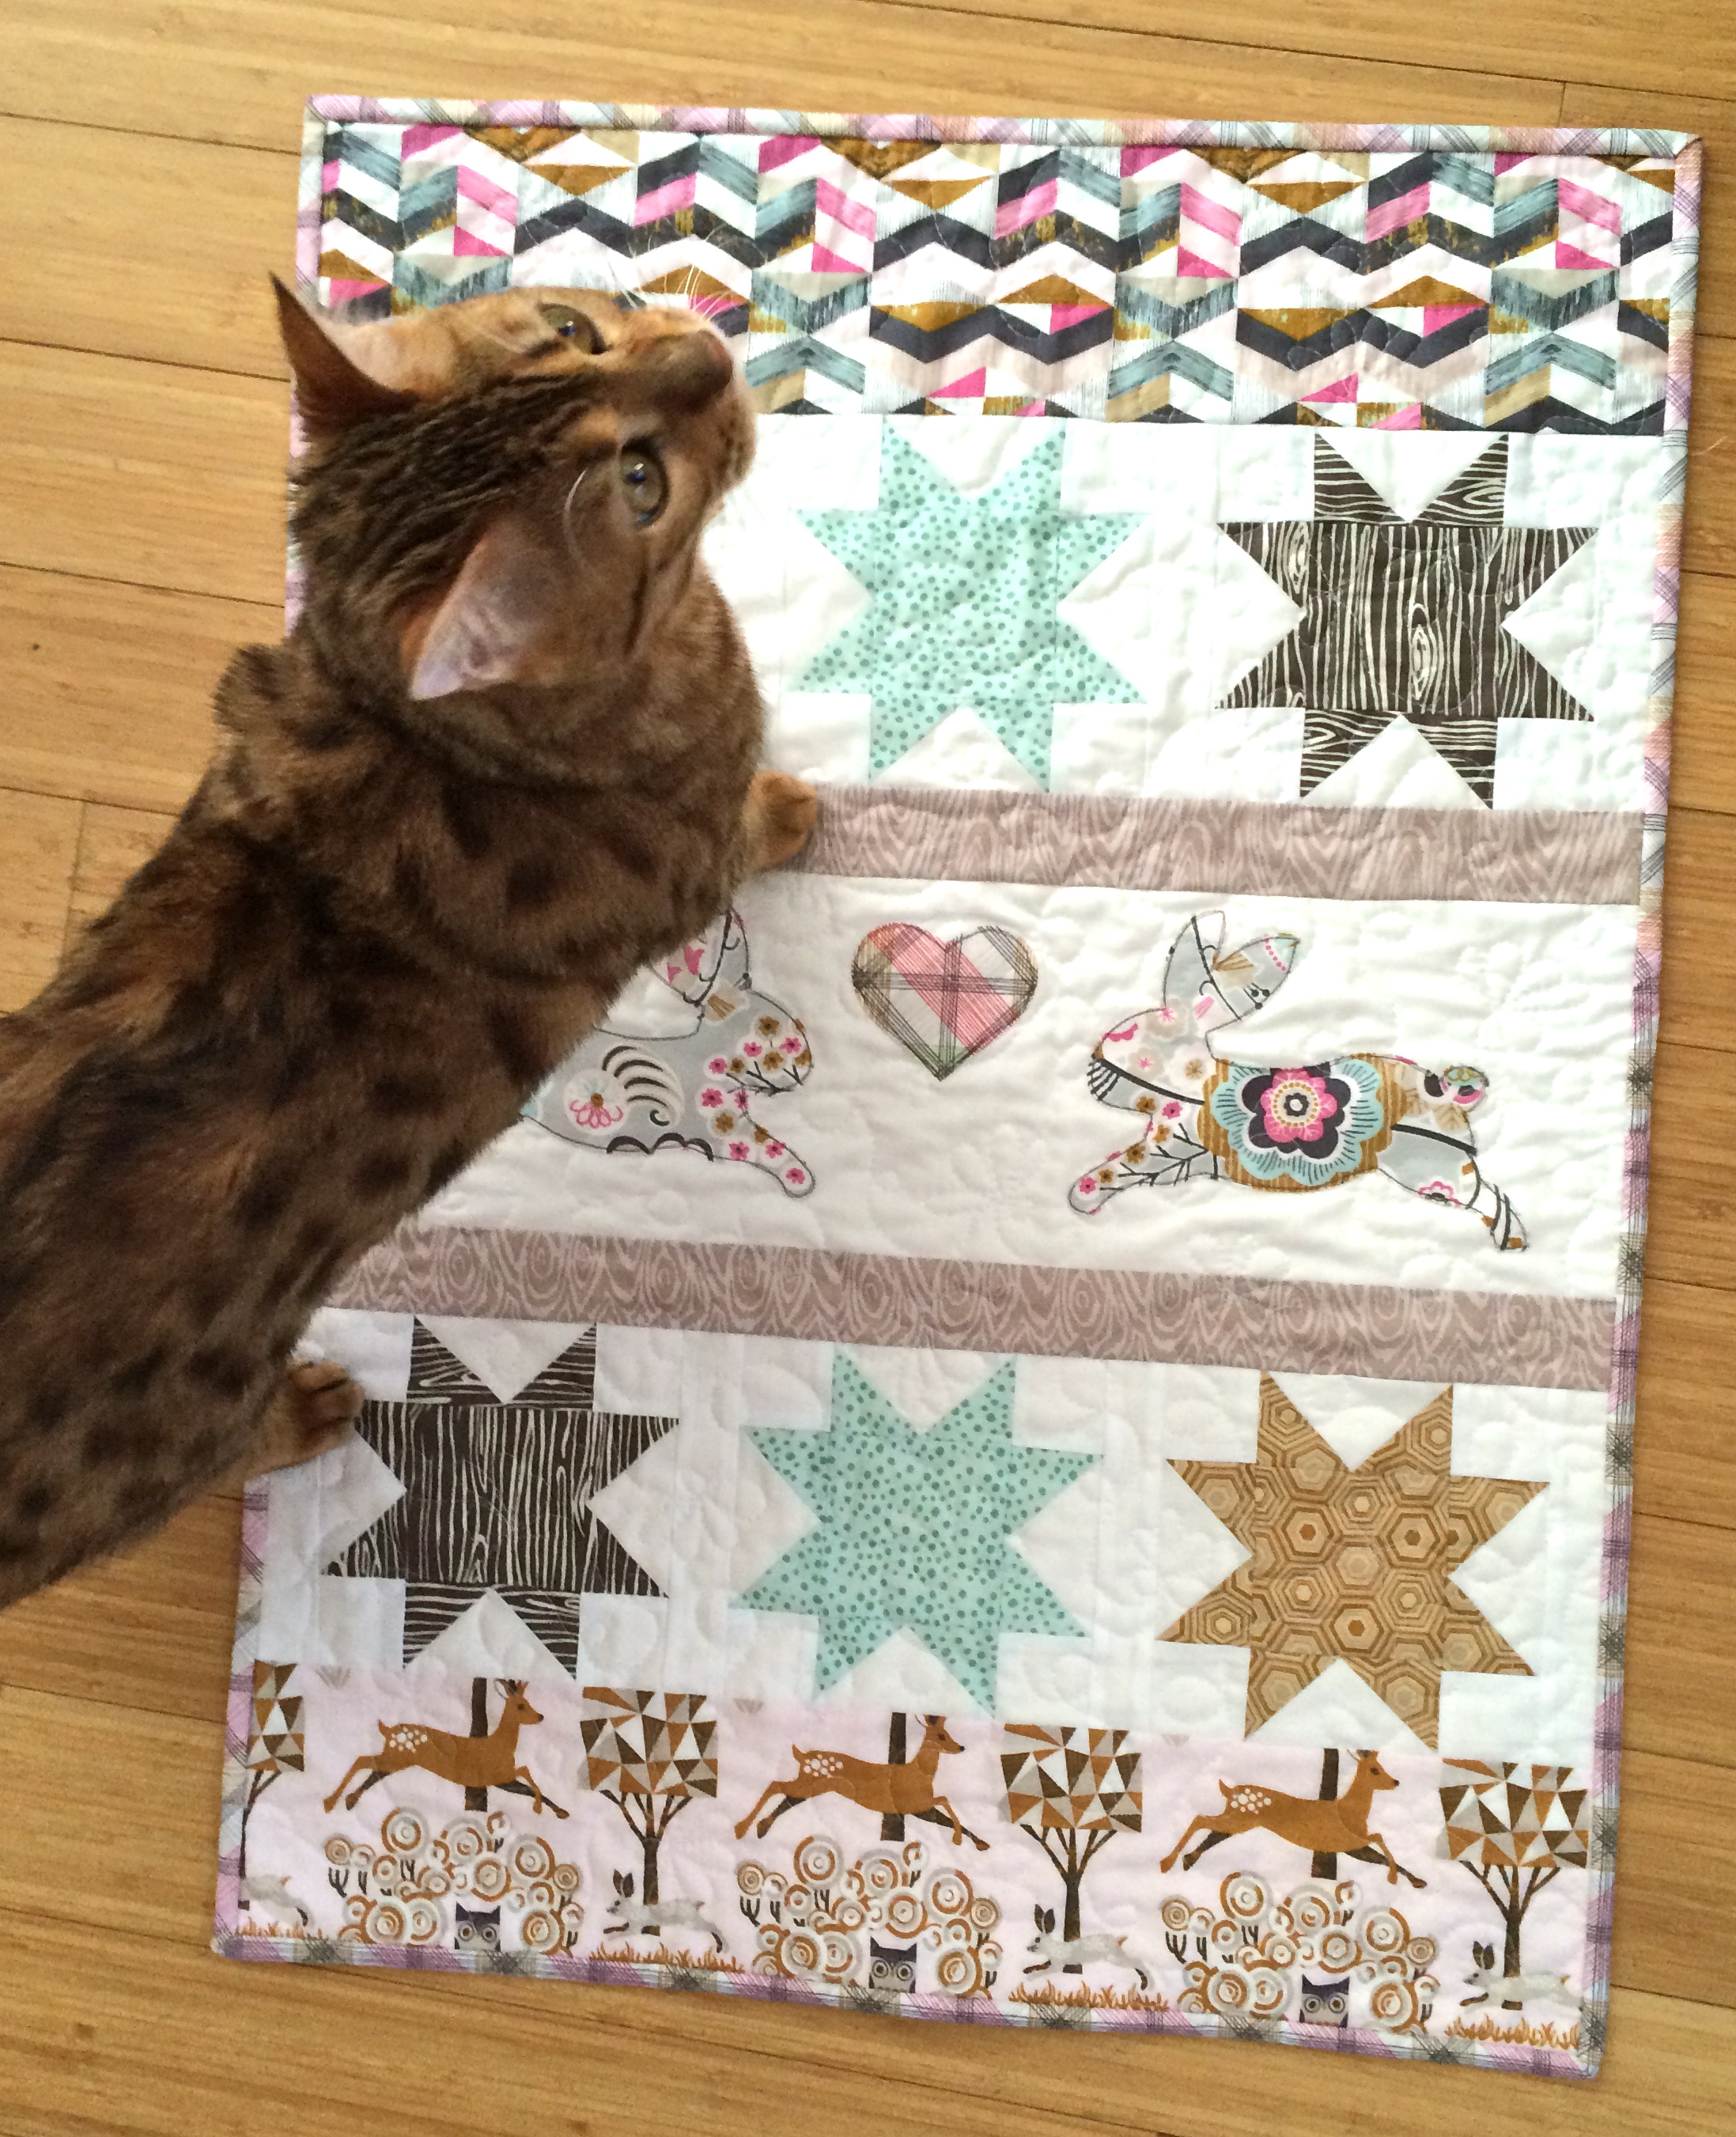
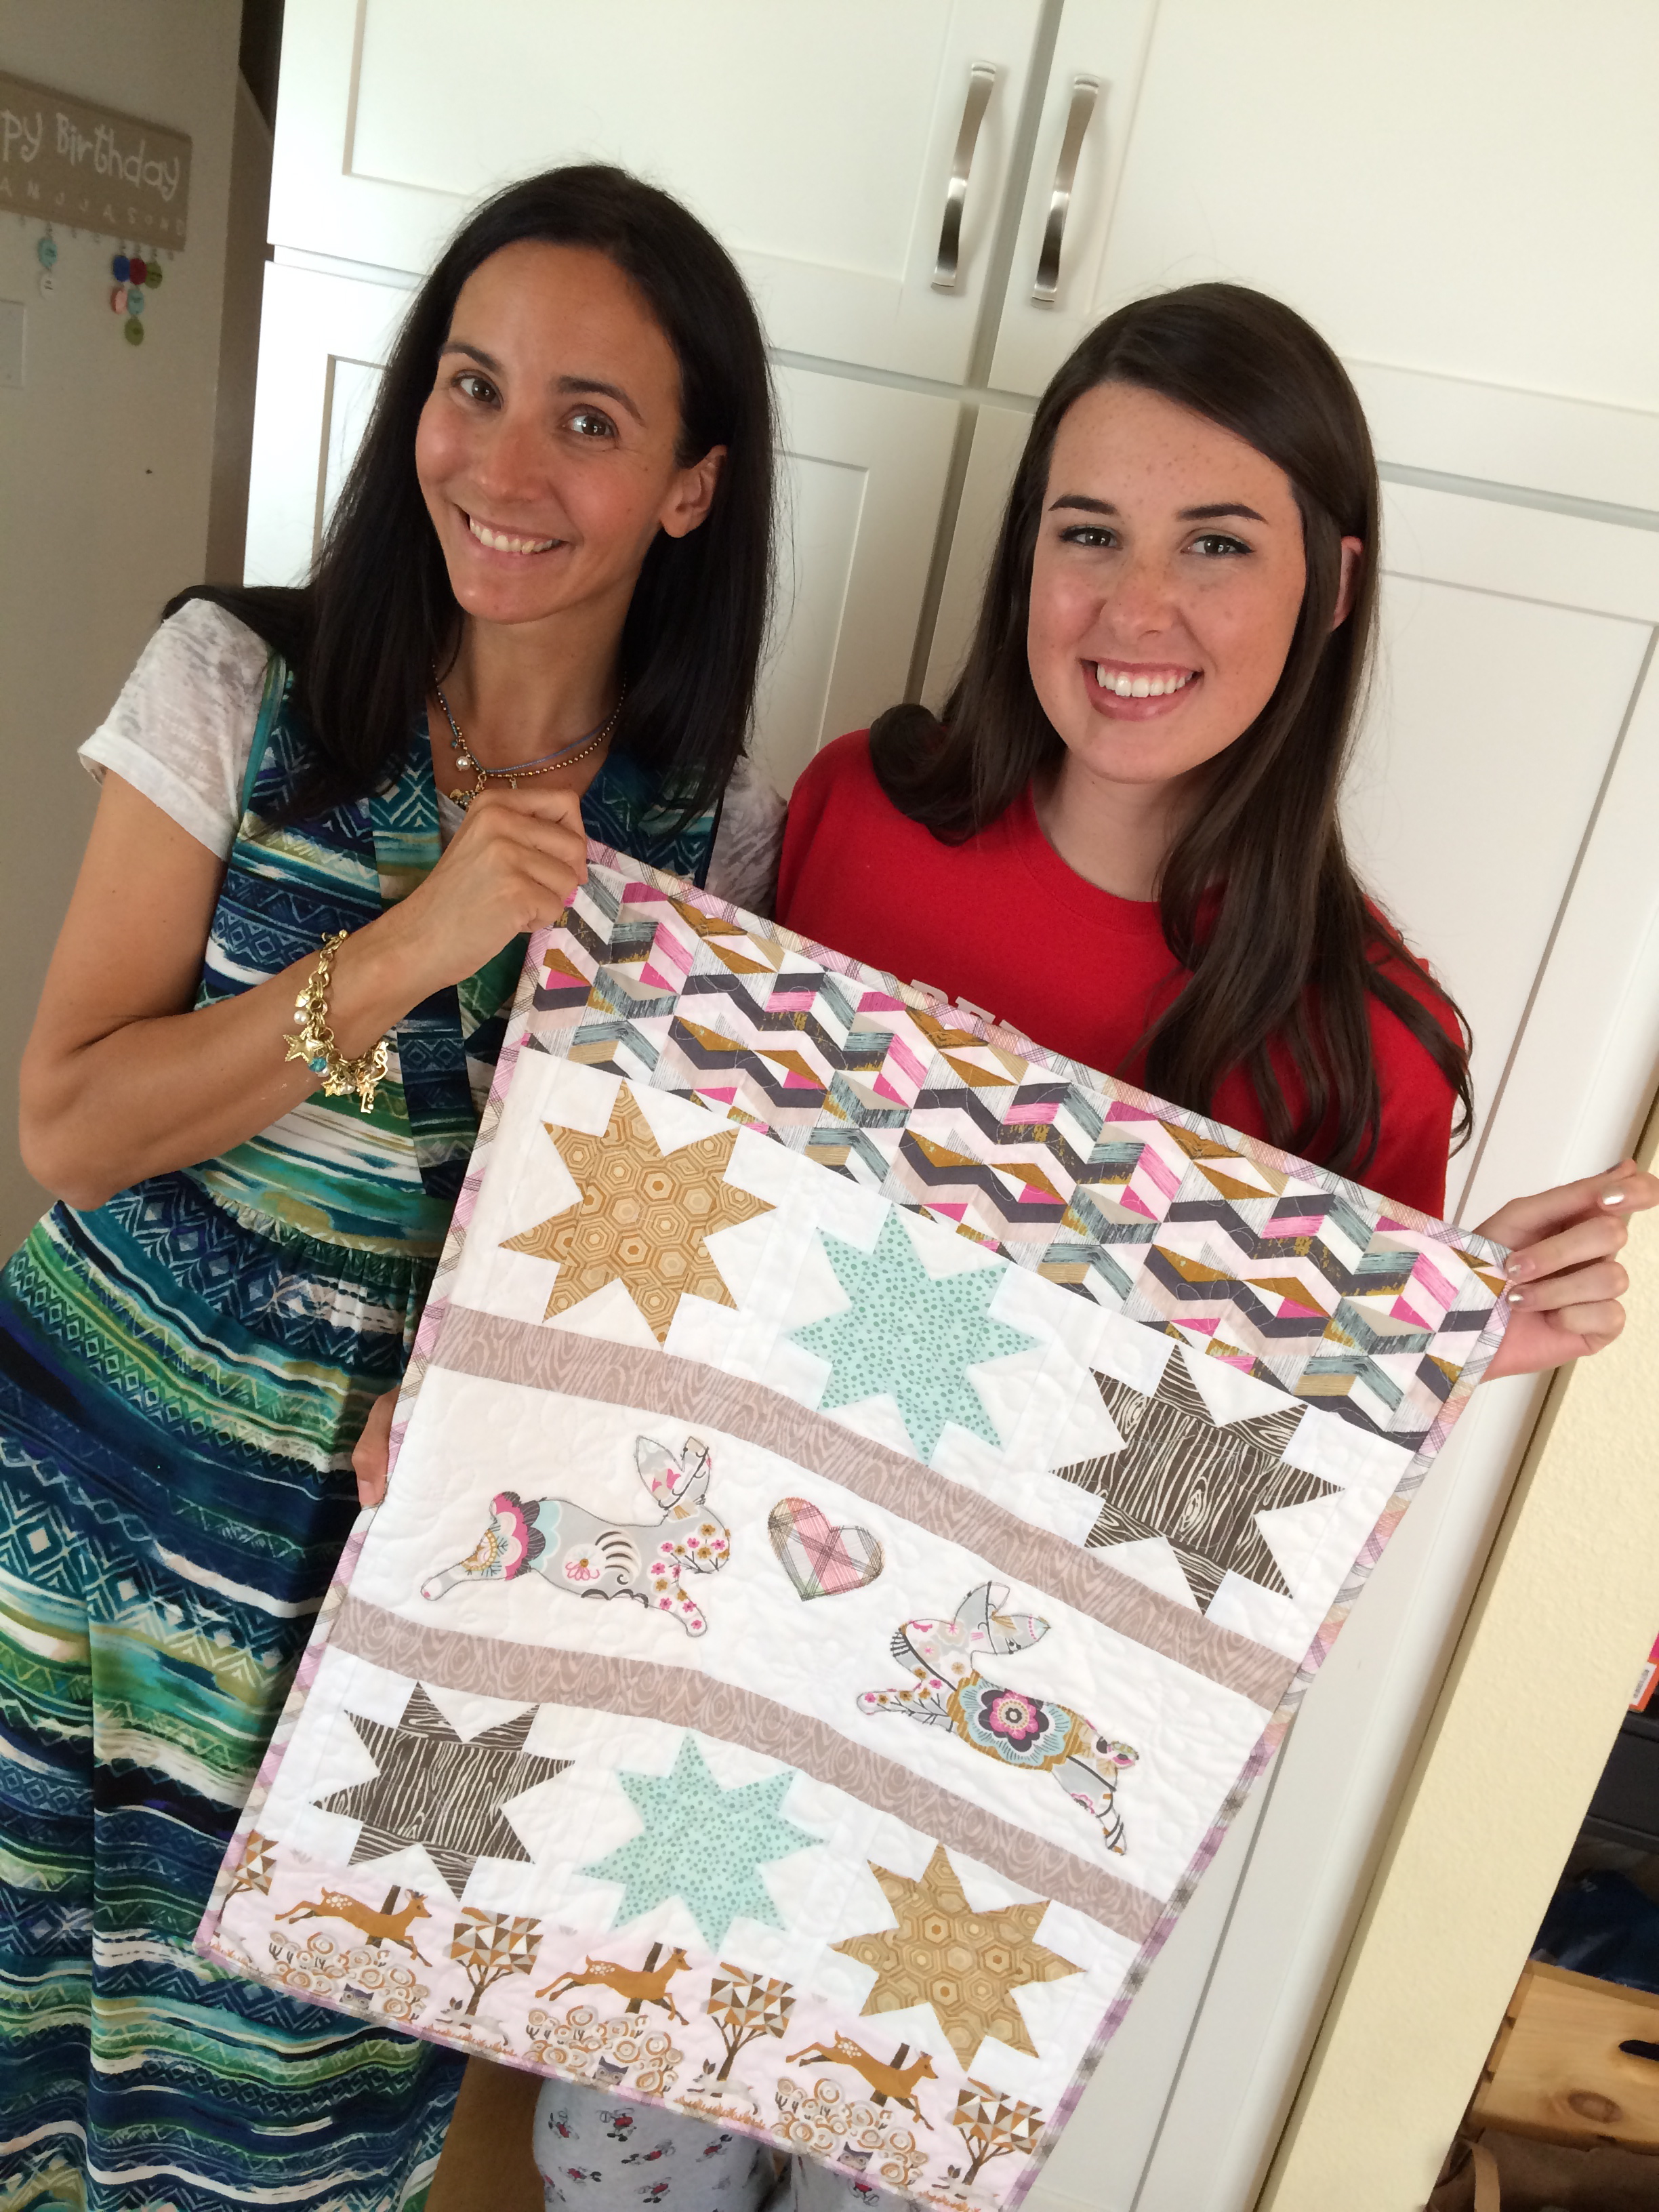
Every year I try and learn the guitar, this quilt is inspiring me to pick it up yet again!!!mid century mix up quilt 3

I hope you love making this quilt as much as I did!  Tag your pictures on Instagram with #midcenturymixupquilt  mid century mix up quilt 1

Blend Fabrics Luckie Girl Quilt Pattern {free}

luckie girl quilt patternI am so excited to share this pattern with you!  I love theme prints and I am always trying to find ways to make quilts with these wonderful theme prints I collect.  This pattern is super fun, it’s a perfect beginning quilters, and it looks a little more complicated than just sewing squares together.  The fabrics are from Blend Fabrics Luckie Girl Collection.   I am head over heals for these pink, turquoise and gray boots and horse shoes!!  I am sharing this PDF pattern with you for FREE!  Just click HERE!!!

Screen Shot 2015-09-08 at 7.36.11 PMThe boots are the cutest!!  blend luckie girl quilt pattern 7

blend luckie girl quilt pattern 6I made this quilt as a graduation gift for a sweet gal who grew up riding horses and competing in Rodeo.  She’s off to college in Idaho.

blend luckie girl quilt pattern 5

blend luckie girl quilt pattern 9

I hope you have as much fun making this quilt as I did!  blend luckie girl quilt pattern 4

Spooktacular Halloween Towels and Pillow

IMG_9978Kids are in school, mornings are cool and crisp, and I can’t get enough Halloween sewing!!  These projects are super quick and easy.  The images used for the applique are fussy cut from Blend Fabrics Spooktacular fabric line.  I love these big bold Halloween designs!

For the towels…

Supplies

1 yard toweling for each towel, or a finished tea towel

1/2 yard ric rac

Heat n Bond Feather Lite

Desired fabric

spooktacular applique towel 2

Begin by selecting the image you want to applique on the towel.  Cut a piece of Heat n Bond slightly larger than the image.  Iron it to the wrong side of the fabric.

spooktacular applique towel 3Cut out the image.

spooktacular applique towelEven up the toweling and sew a rolled hem on both edges.spooktacular applique towel 4Peel off the backing paper and press into place.  Top stitch around each applique piece.  Add ric rac or other decorative trim.

spooktacular applique towel 5These would make great gifts for friends or teachers!!!

spooktacular applique towel 6 For the pillow….

spooktacular halloween pillow 3

Supplies

quarter yard cuts of the 3 fabrics

1/2 yard ticking for back

Heat n Bond fusible fleece

Zipper

Applique pieces

Heat n Bond Feather Lite

2 .5 yards black pom pom trim

20″ Pillow Form

spooktacular halloween pillow 2Begin by using the method explained above to fussy cut each of the potion bottles.  Use the cutting guide below to cut each of the 3 fabrics.

spooktacular pillow cutting guideApplique the bottles to the center piece

spooktacular halloween pillowNext, sew the strips together using 1/4″seam allowance.  Press seams to one direction.

Cut a 20″ square of fusible fleece and iron it to the wrong side of the pillow front.  You can quilt the pillow at this point.  I added some straight line stitches along both sides of the seams.

Baste the pom pom trim around the pillow, starting and stopping at the bottom center of the pillow and curving the corners.

I like to put zippers in my pillow backs.  For instructions on how to do this, click here.

Sew the pillow front to the pillow back, right sides together. making sure to leave the zipper partially open.  Turn right side out and insert pillow form.

spooktacular halloween pillow 4

spooktacular halloween pillow 5
spooktacular halloween pillow 6

Spooktacular Eve Big Block Quilt Pattern

spooktacular eve halloween quiltI LOVE Halloween fabric!!!  When I met Spooktacular Eve by Blend Fabrics it was Love at first sight!  These patterns have a fun vintage feel which makes them timeless!  I didn’t want to cut into the fabrics too much so I created this Big Block quilt pattern just for you!!!  It’s a fast and easy way to show off those bold prints!

spooktacular eve quilt 6I can’t decide which print is my favorite!  If you would like to make this quilt click HERE for the PDF download version.

spooktacular eve quilt 7I have this quilt hanging in my entry way.  The finished quilt measures 55″ x 70″ which also is a perfect throw quilt size!

spooktacular eve quilt 2Even better – it’s Mufasa approved!!!

spooktacular eve quilt 2 5I hope you love making this quilt!!!

My Favorite Beach Quilt {Blend Sun-sational}

my favorite beach quilt        It’s still August and I am going to enjoy every last minute of summer!  I love the Sun-sational fabric line from Blend Fabrics.  Just looking at them makes me feel like I’m enjoying summer at the beach.  I am a California girl who was raised loving the beach.  Through the years my family has come to love many beaches.  I thought it would be great to include the names of these beaches in the quilt.

my favorite beach quilt blend fabrics 108 It makes it so personal!  I used SoSoft Fabric Paint by DecoArt.  I purchased at my local Beverly’s Fabric and Craft store.  I’ve painted on T-shirts and fabric before with acrylic paint.  It kind of leaves a rough texture after it dries.  I wanted something soft that would blend nice with the fabric.  This totally did the trick!  After it dried I could hardly feel it was paint – it just felt like the fabric!

decoart sosoft paintHere is how you can make this quilt:

51″ x 64″ Finished quilt

Supplies:

Fat quarters of assorted beach prints

1.5 yards white cotton fabric

1/2 yard for binding

3 yards backing

So Soft fabric paint

Vinyl stencils

This quilt is made of up 4 “blocks”.  Two are rectangles and two are squares.  Below is the cutting instructions for each block.  You can make this quilt larger or smaller, or mix up the blocks to create a totally different pattern!

You will need:

(11) Beach Name Blocks

(15) Squared Blocks

(9) 8″ square theme print blocks

(8) 8″ x 15.5″ theme print rectangles

cutting instructions beach quilt

Once everything is cut prepare the stencil for the beach names.  I cut vinyl on my Cricut and peeled out the inside of the letters to leave a vinyl stencil.  Each beach name is a different font.  I put the vinyl on the 3″ x 15.5″ white strip and stenciled using the SoSoft paint.  I let dry completely then removed the vinyl.  I made sure to heat set the paint while I was pressing the block.

sunsational beach quilt blend fabrics 2

Once the paint is dry, sew the beach name block together. 1/4″ seams throughout.

sunsational beach quilt blend fabrics 6I love how they turned out!  Do you have any of the same favorite beaches as we do?

sunsational beach quilt blend fabrics 4Sew the squared blocks together by sewing a white square to both sides of the center blue square.  Press.  Add the top and bottom rectangles, press.

sunsational beach quilt blend fabrics

sunsational beach quilt blend fabrics 3Cut the remaining theme print blocks, you can use as many theme prints as you want!

sunsational beach quilt blend fabrics 7  Next comes the fun part – laying it out.  I played with several different patterns until I decided on this one.  There is not really a pattern to it, kind of random 🙂

sunsational beach quilt blend fabrics 9  It’s always a good idea to photograph your quilt layout, especially if you have a #kittyquilter in your home!  Mufasa!!!!!sunsational beach quilt blend fabrics 10Sew the blocks together in rows and the rows together, matching seams that intersect.  Make sure #kittyquilter inspects all finished work!!  Quilt as desired.sunsational beach quilt blend fabrics 11I put minky on the back and had my friend use her long arm quilting machine to quilt it.  I love the pattern she did!!

my favorite beach quilt blend fabrics 106The binding is cut on the bias, my favorite way to make binding!!

my favorite beach quilt blend fabrics 100

my favorite beach quilt blend fabrics 104I’m so ready for a beach vacation now!!!

my favorite beach quilt blend fabrics 102

my favorite beach quilt blend fabrics 107Thanks for stopping by!!!  Surfs up!!!

my favorite beach quilt blend fabrics 105

Sizzix Natural Wonder Bunny Mini Quilt


natural wonder bunny mini quilt sizzixI love to give handmade gifts, especially quilts.  My friend recently lost her bunny to a hawk.  I know how much it hurts to loose a beloved pet.  I wanted to make her something to show her I really cared so I created this bunny mini quilt.  She totally LOVED it!!

IMG_8870_2
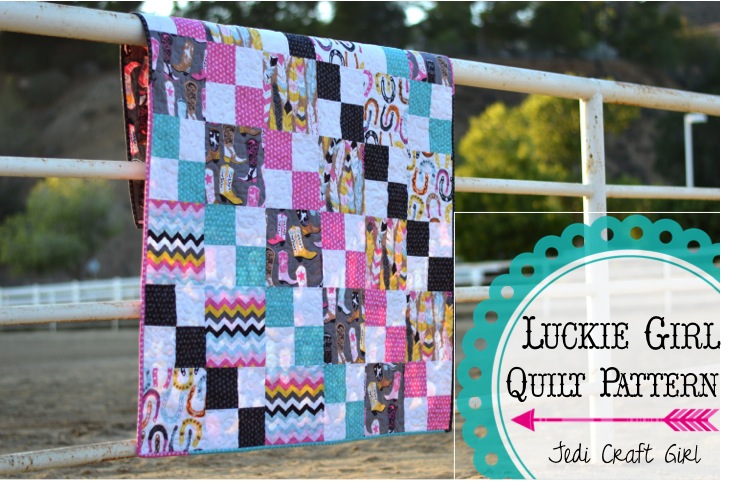
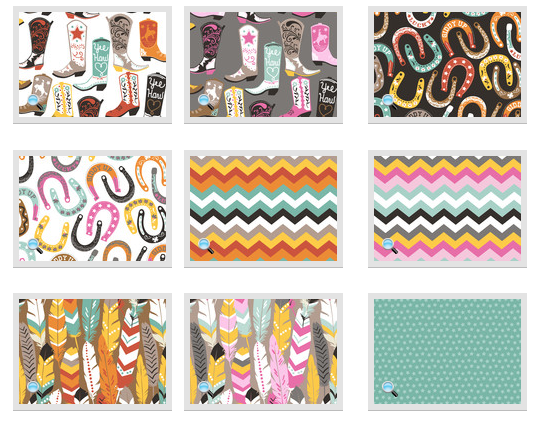
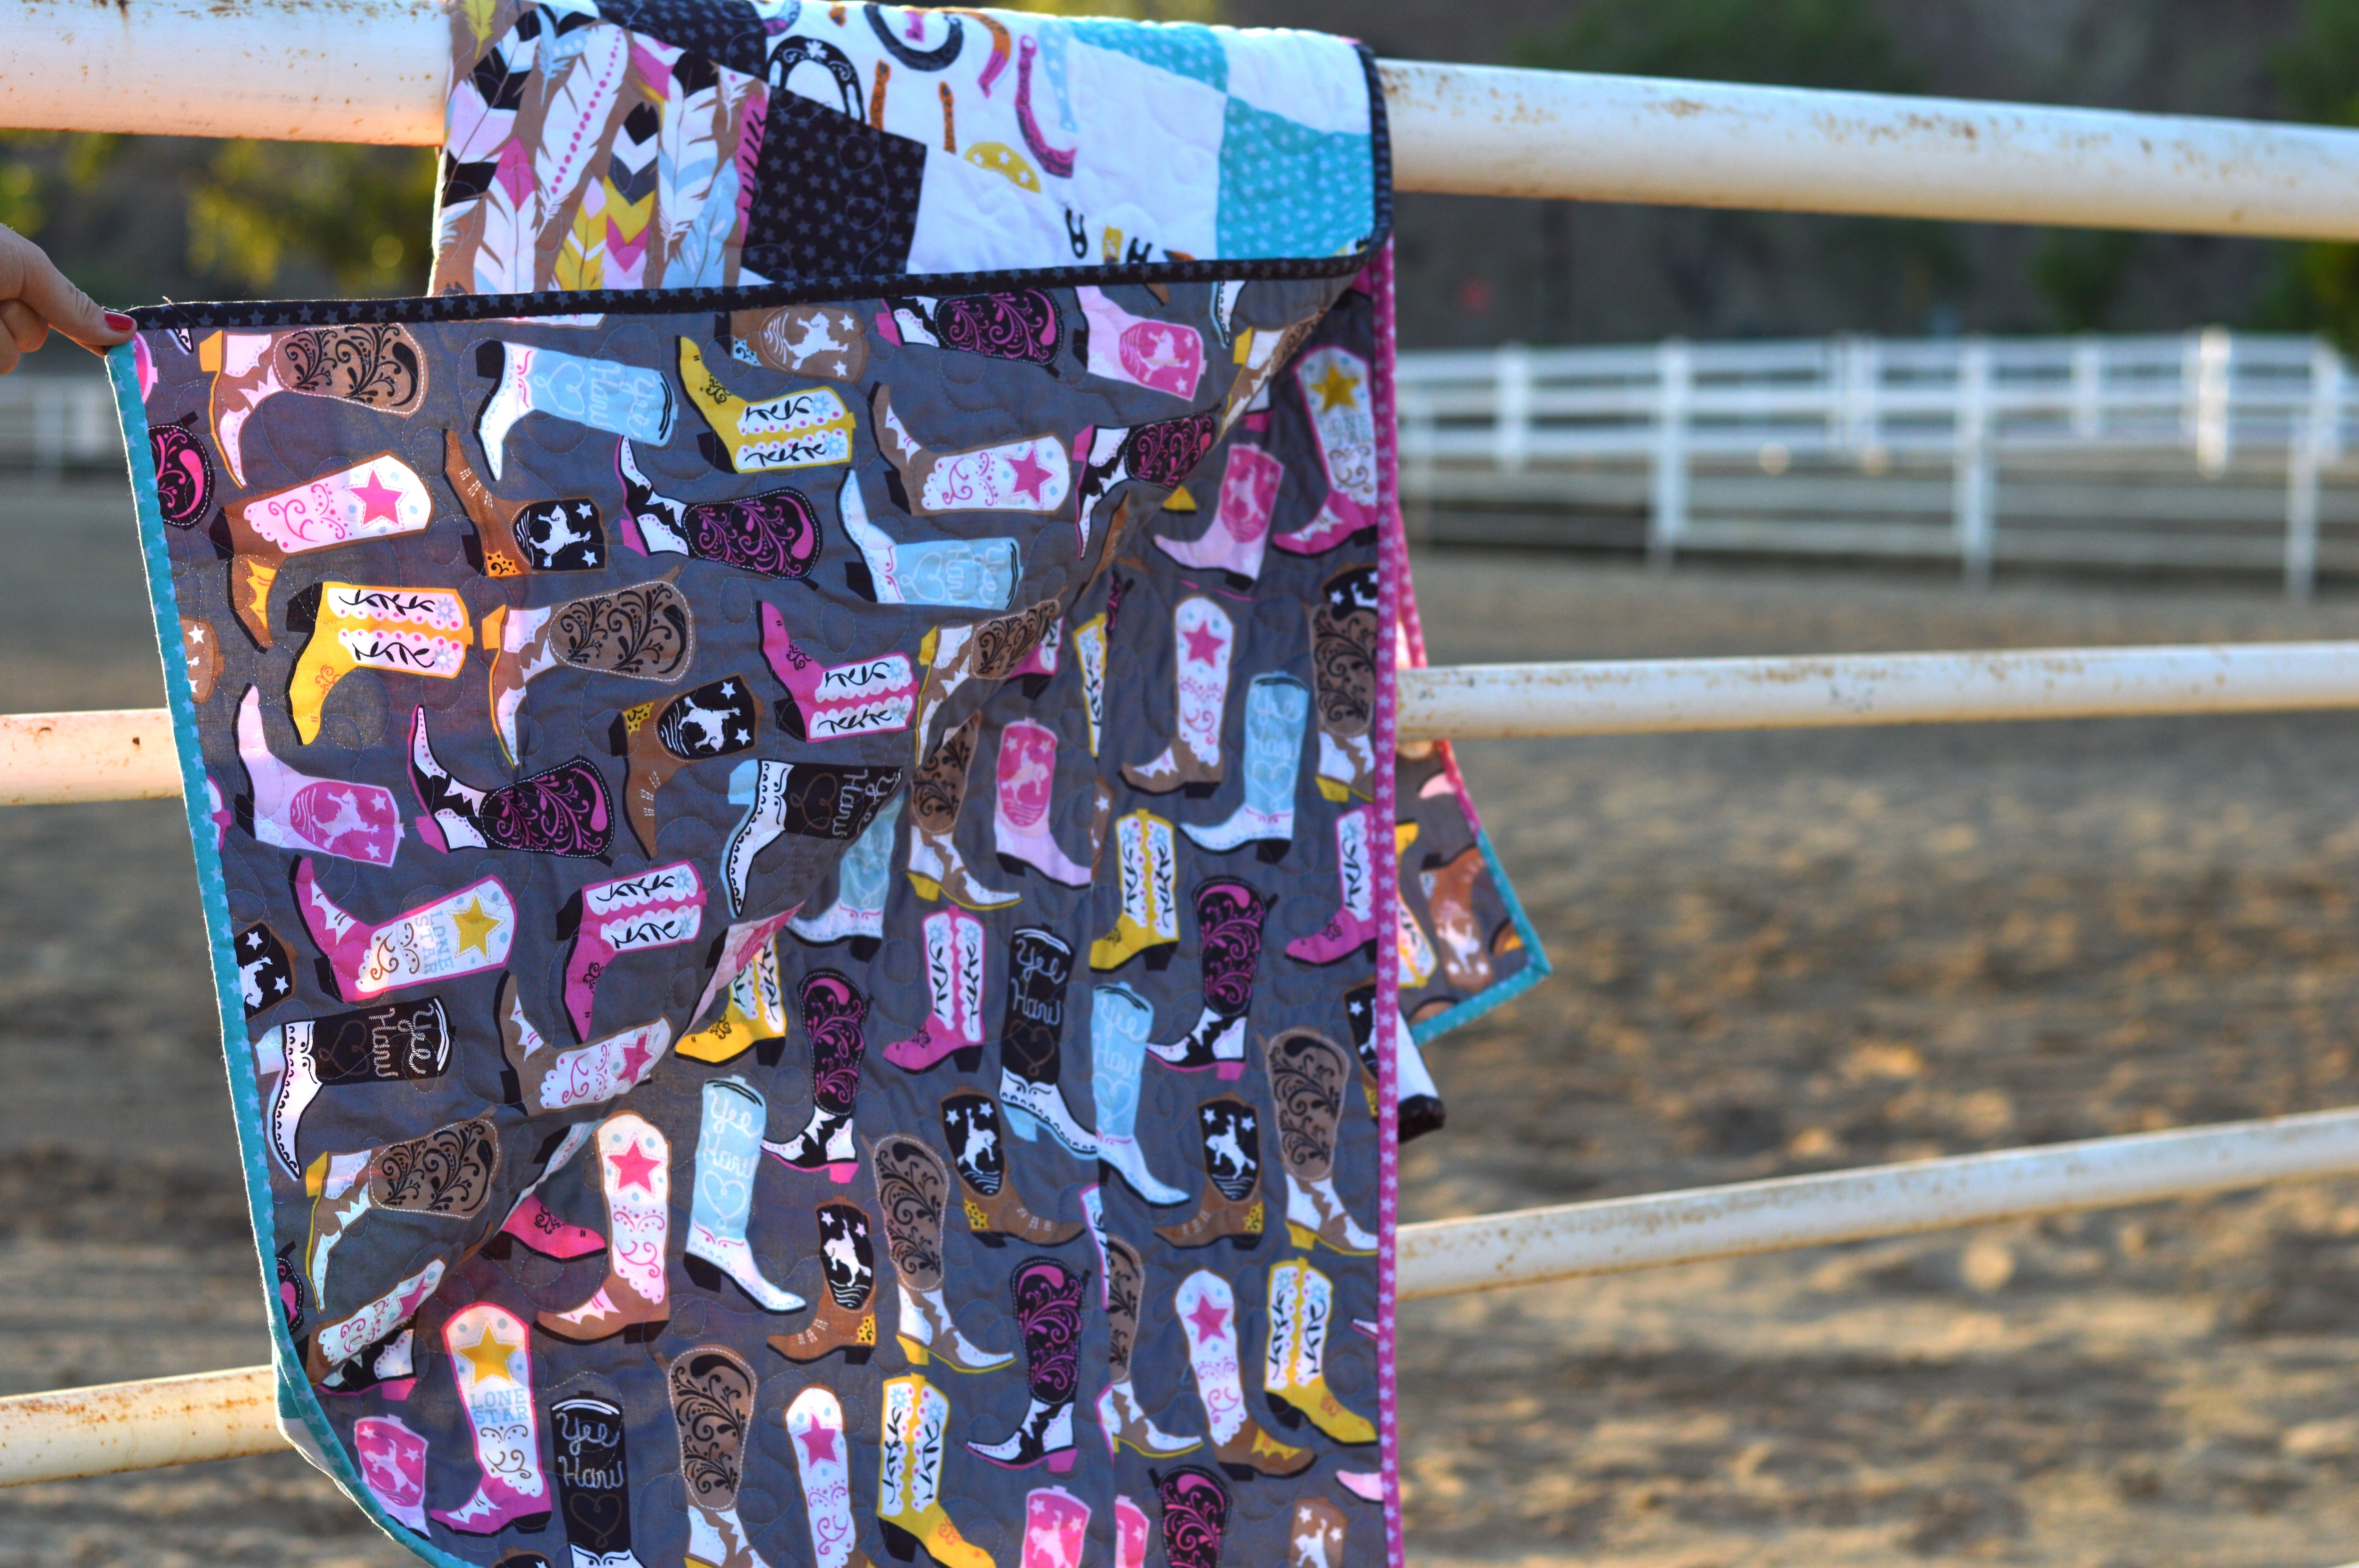
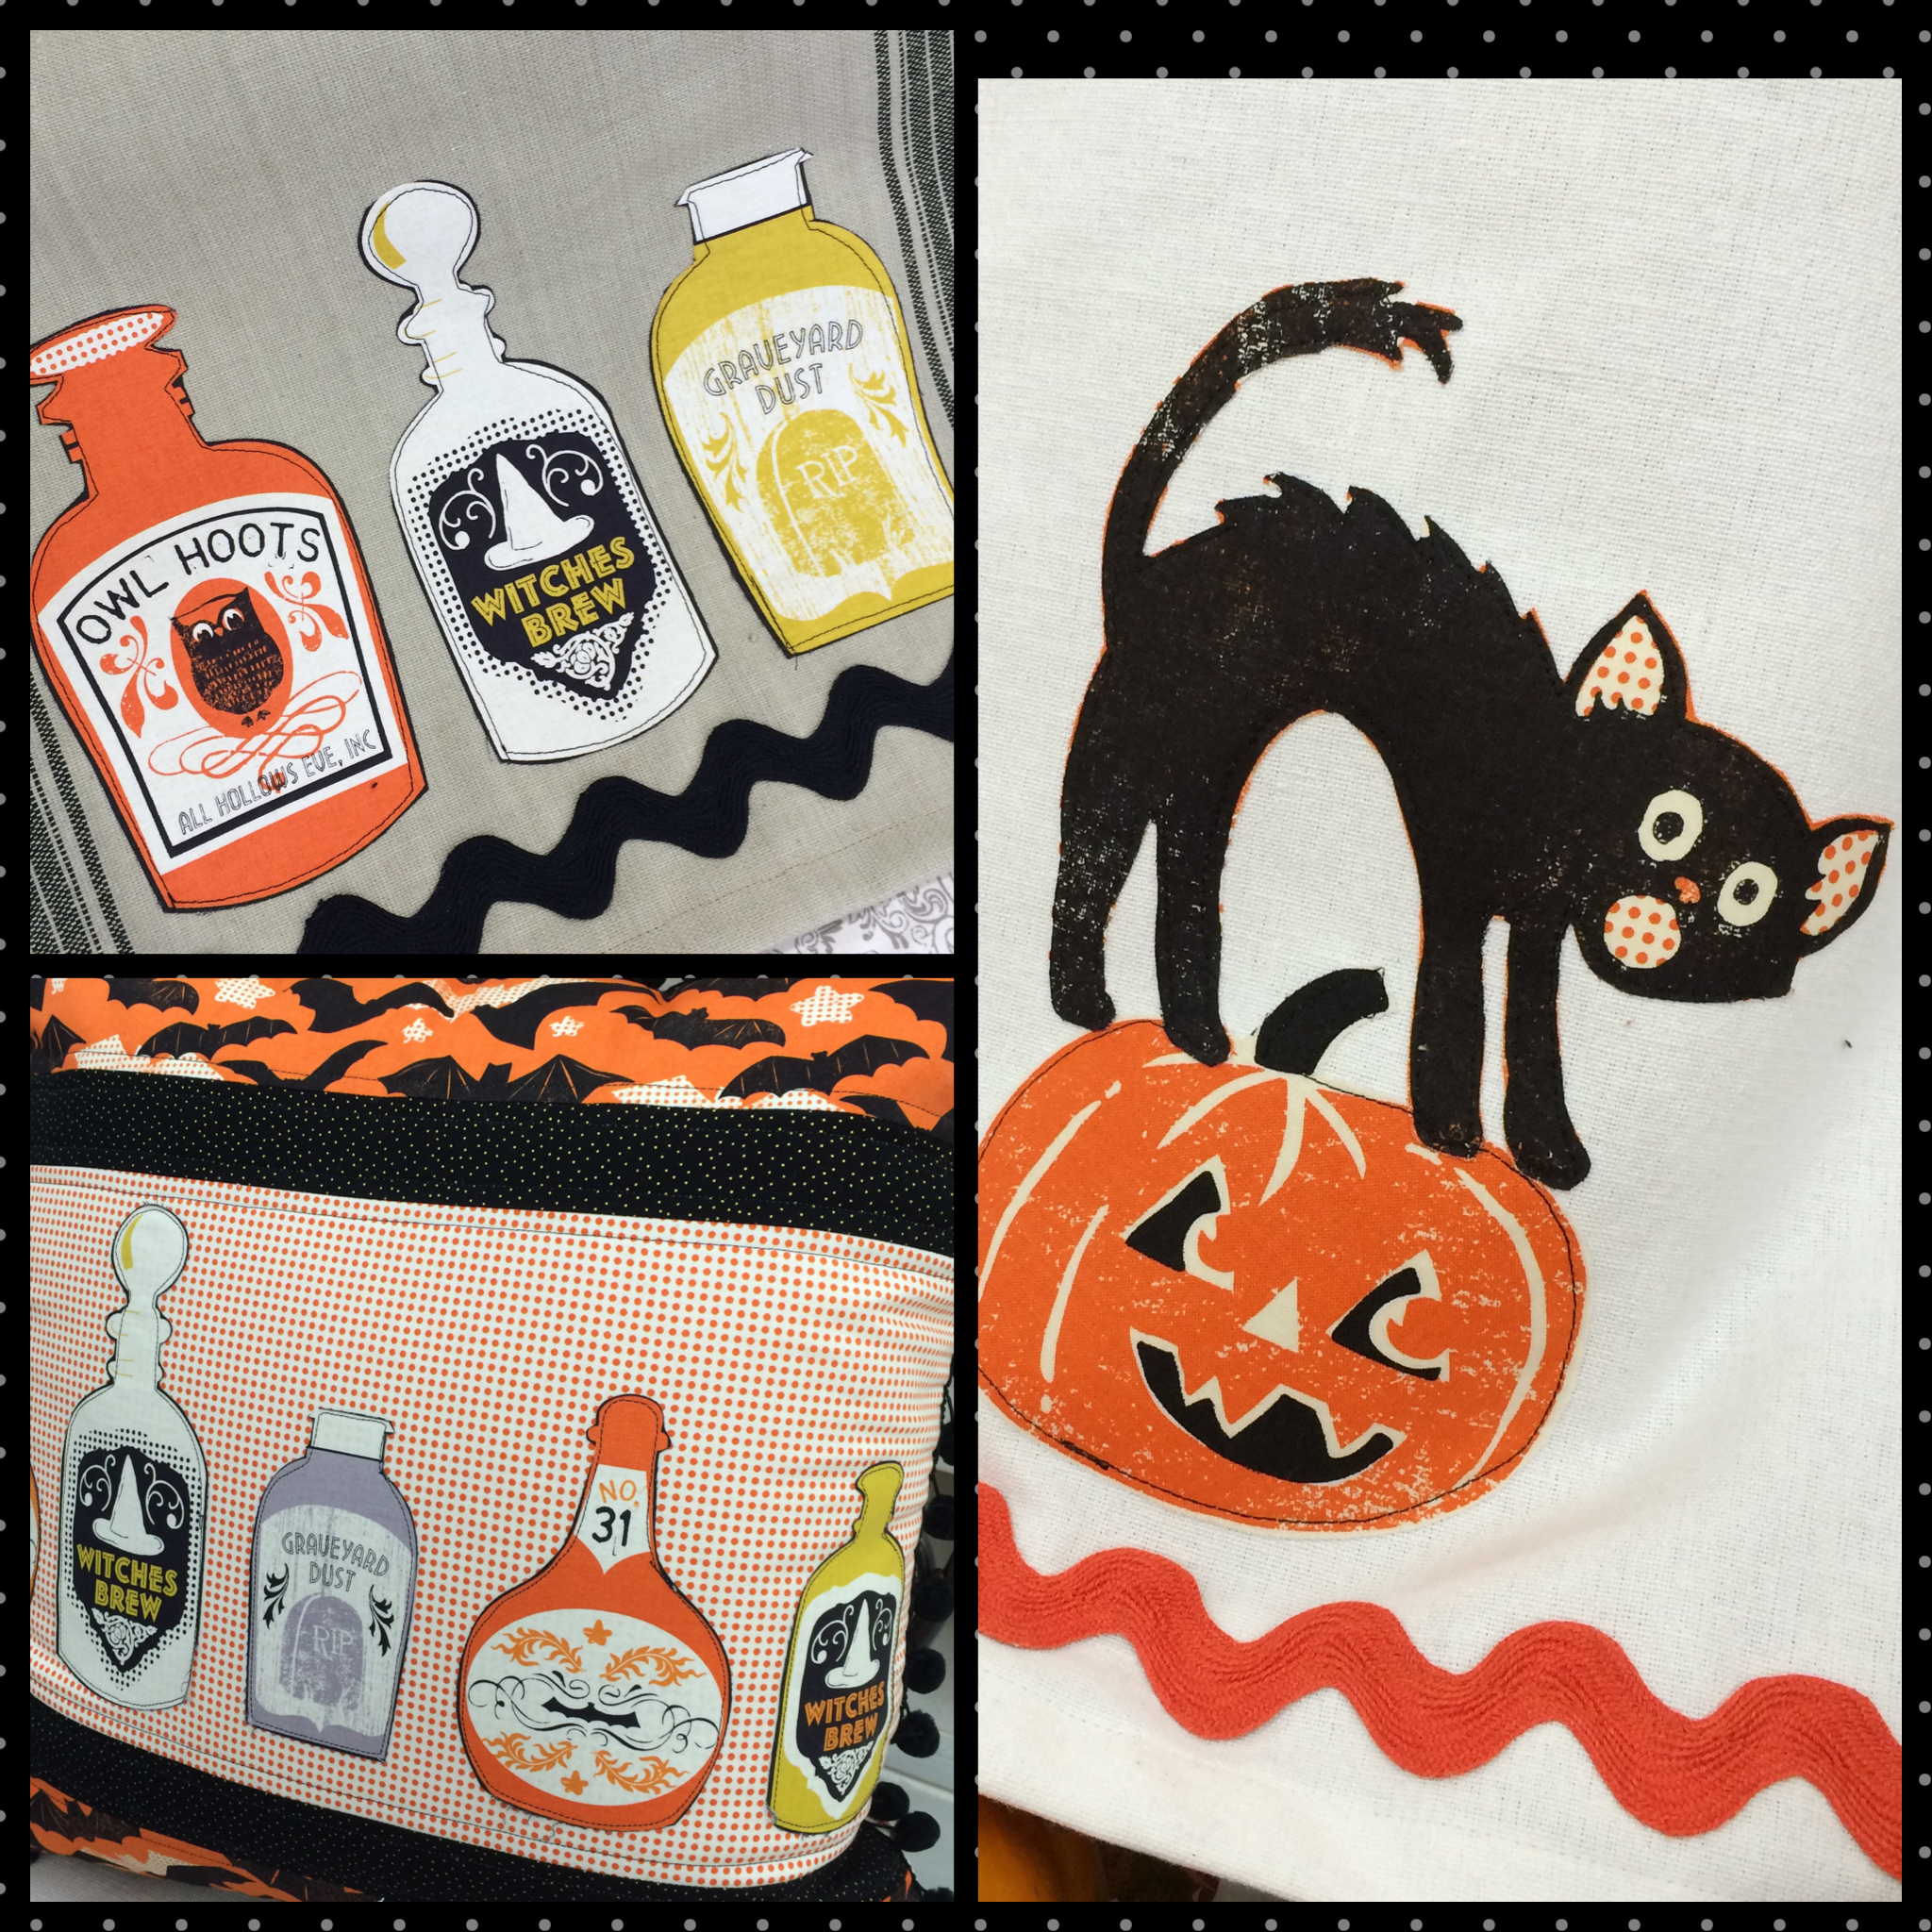
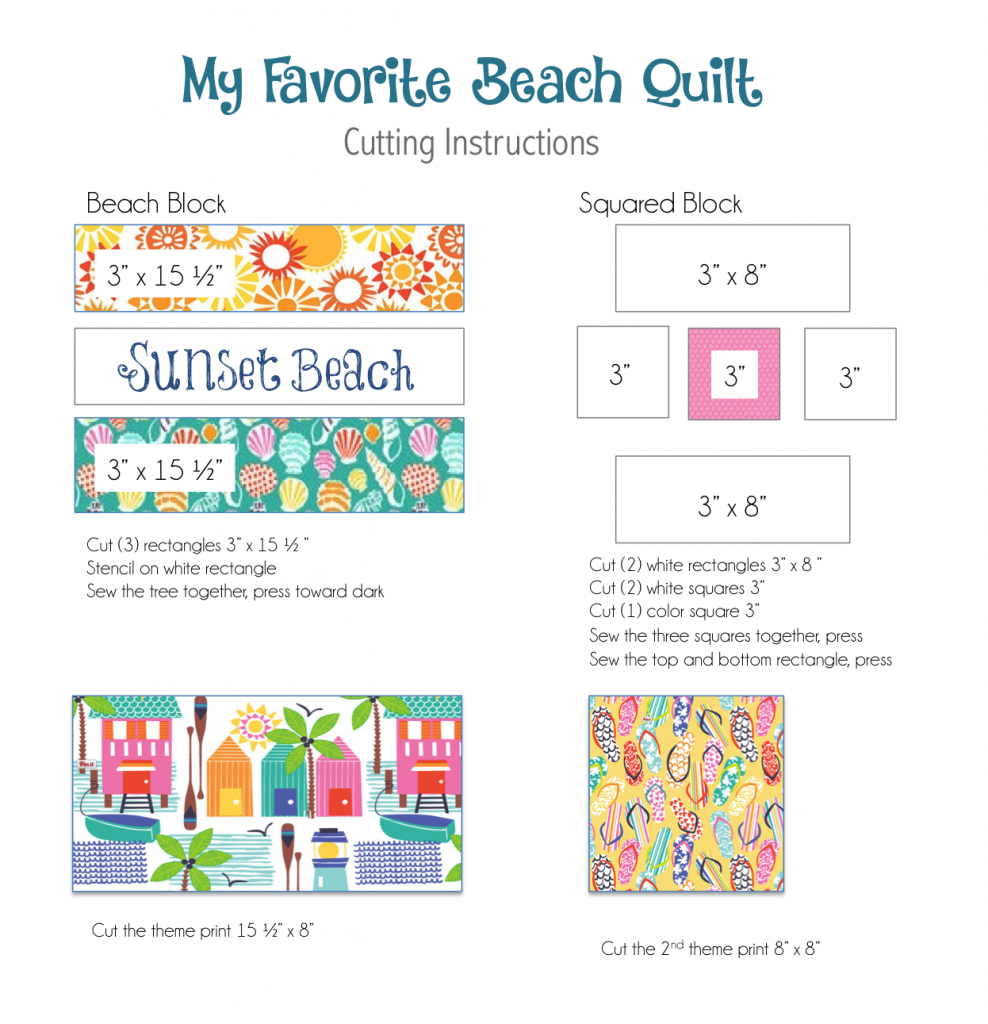
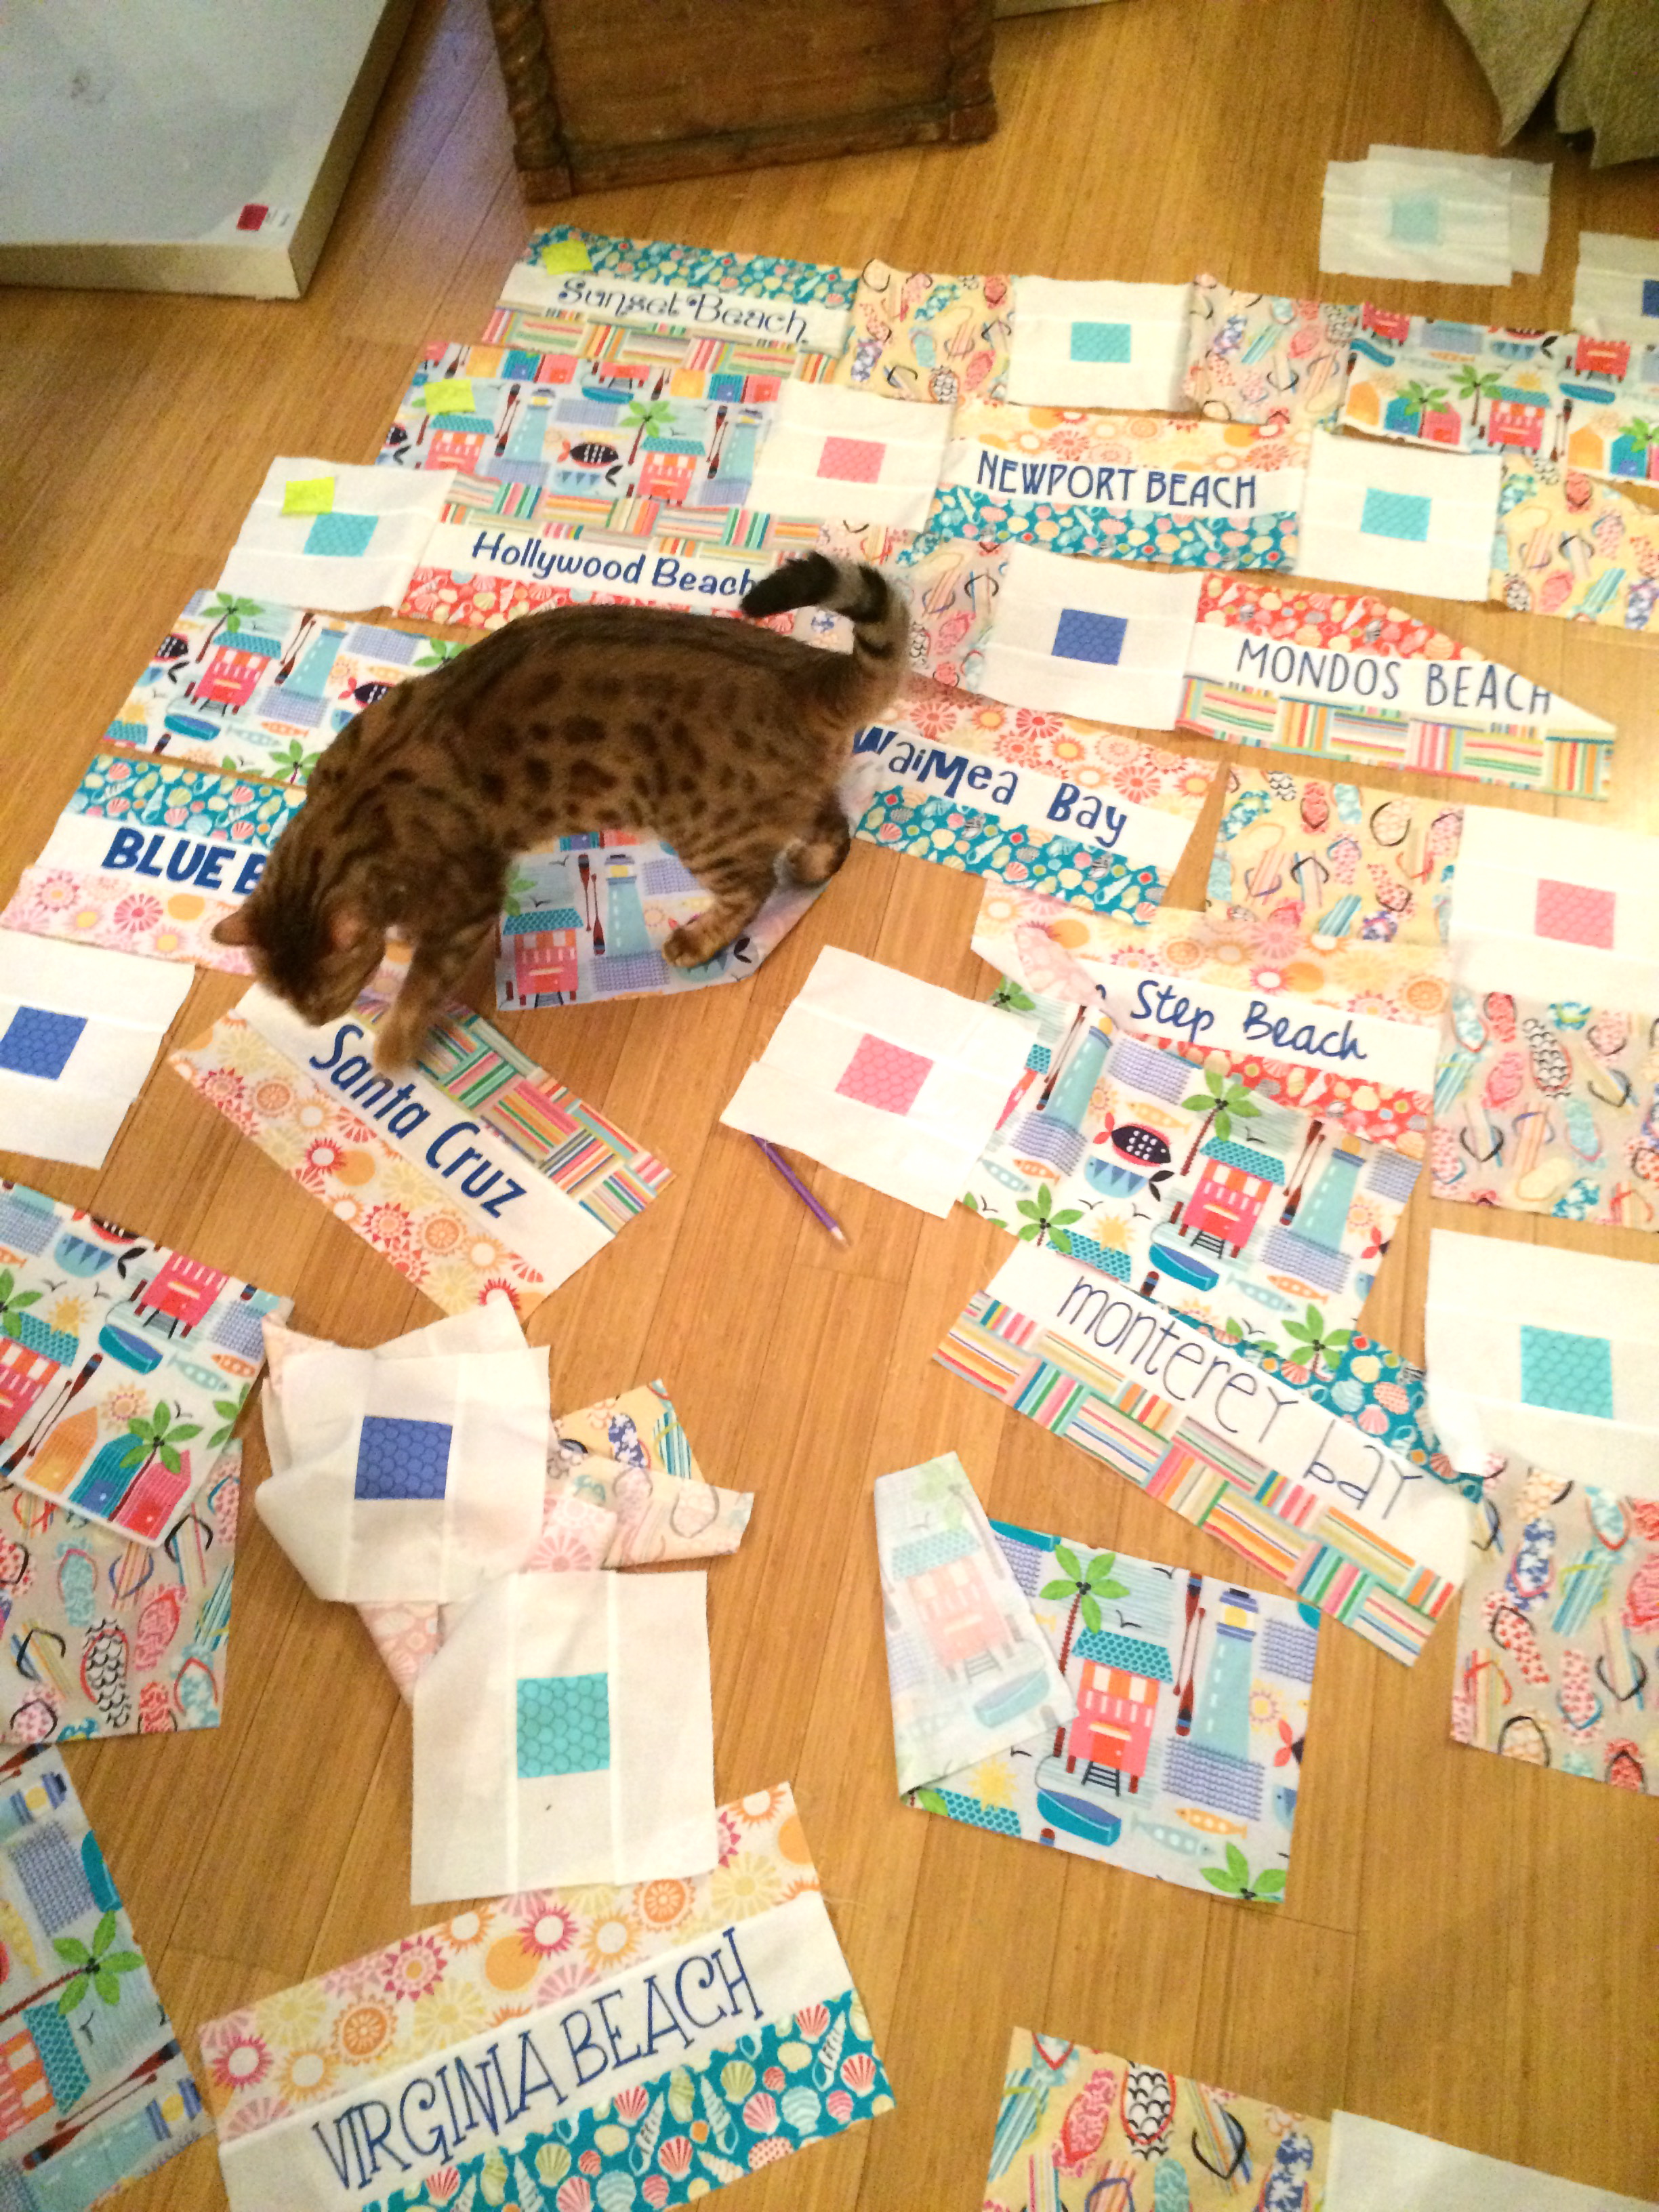
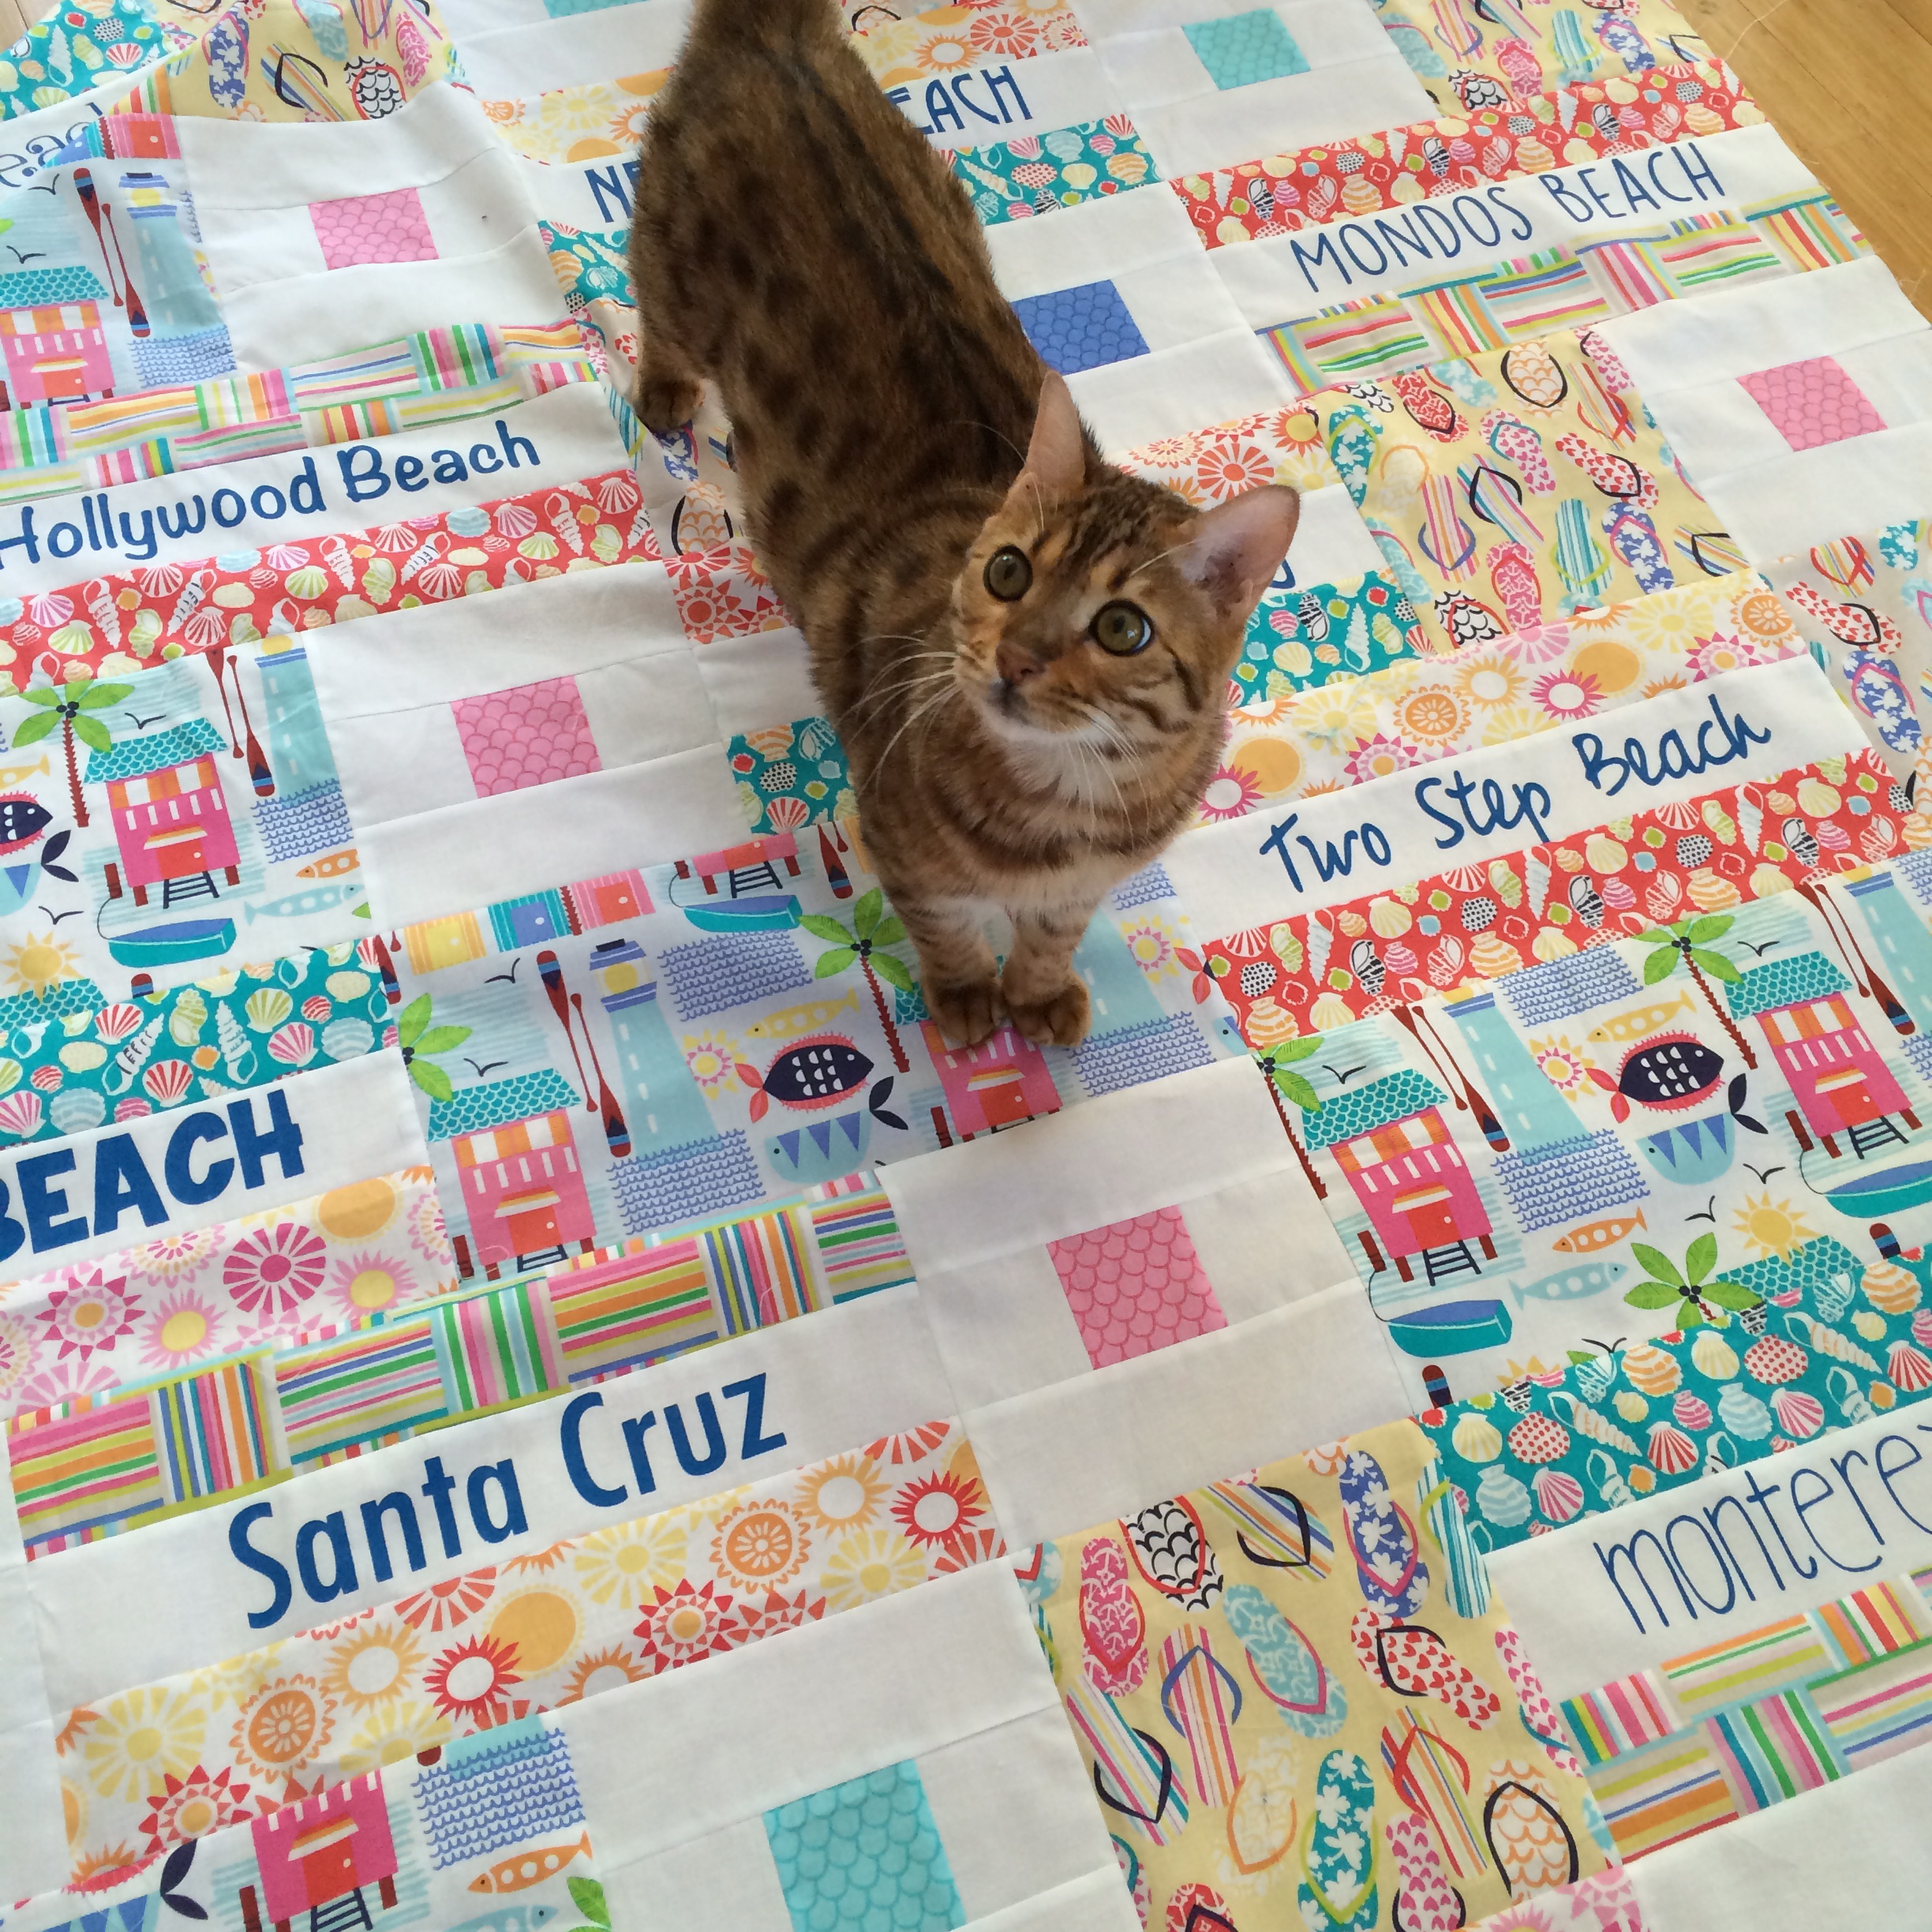
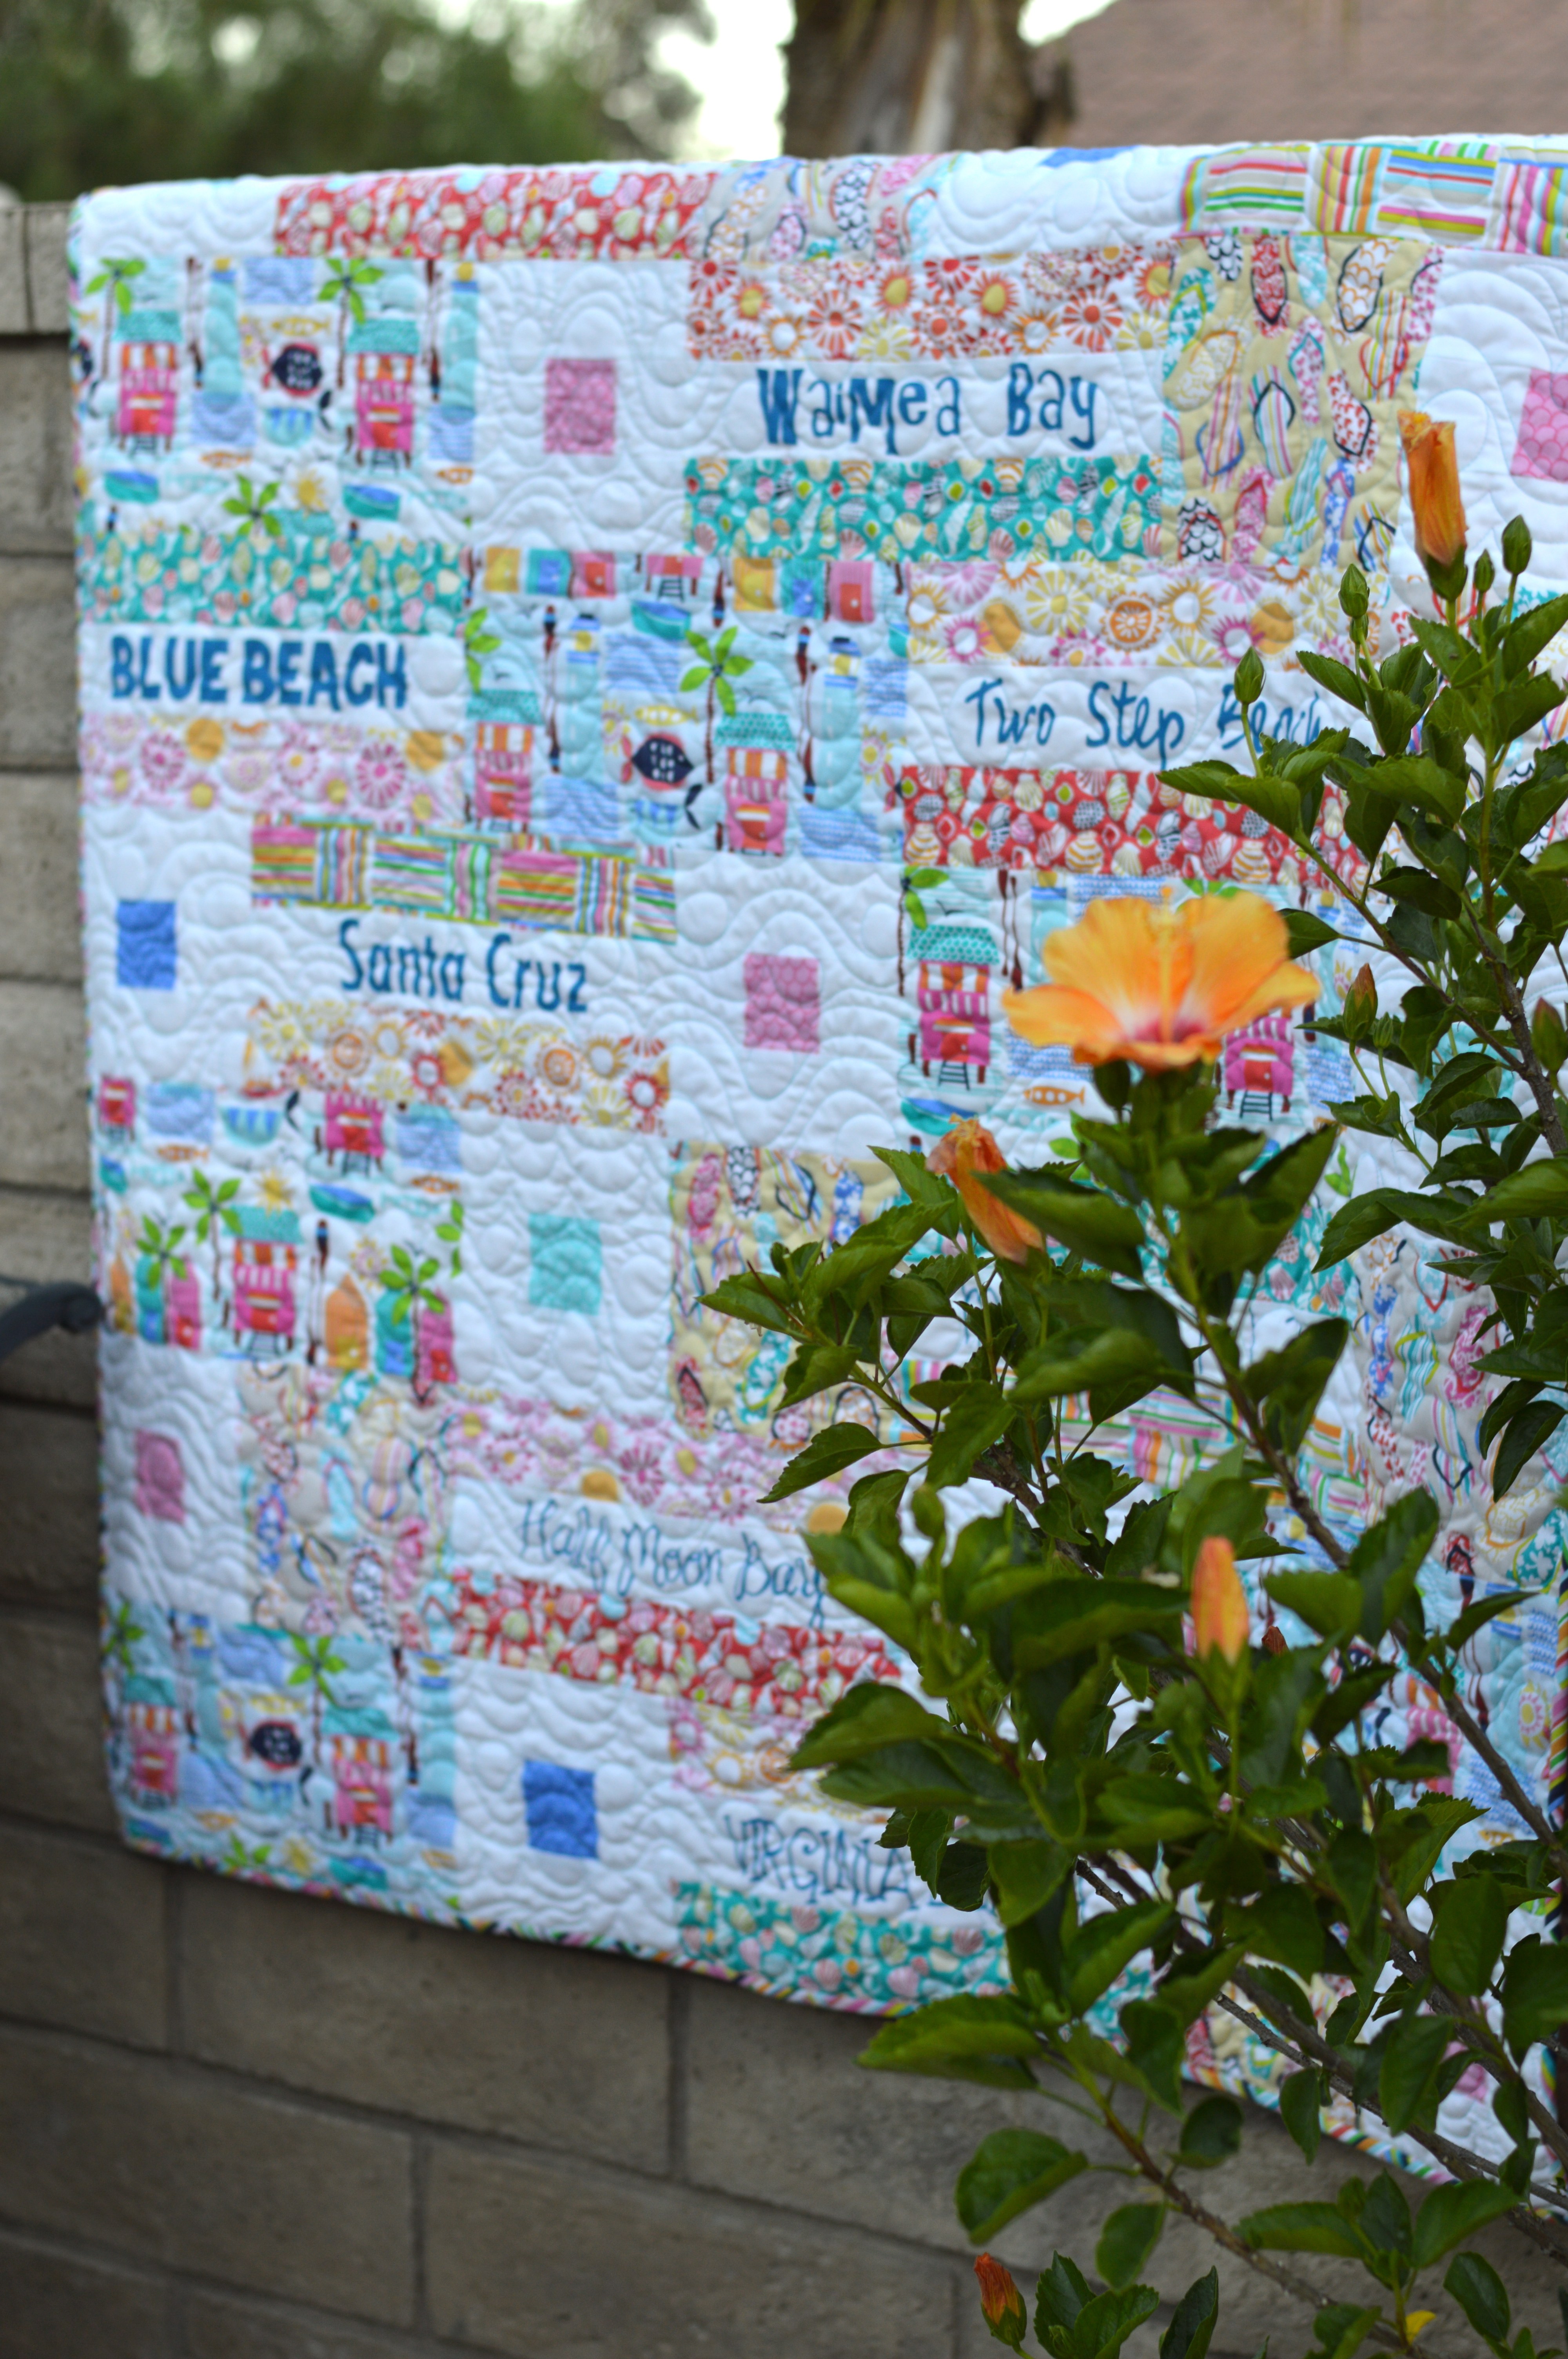
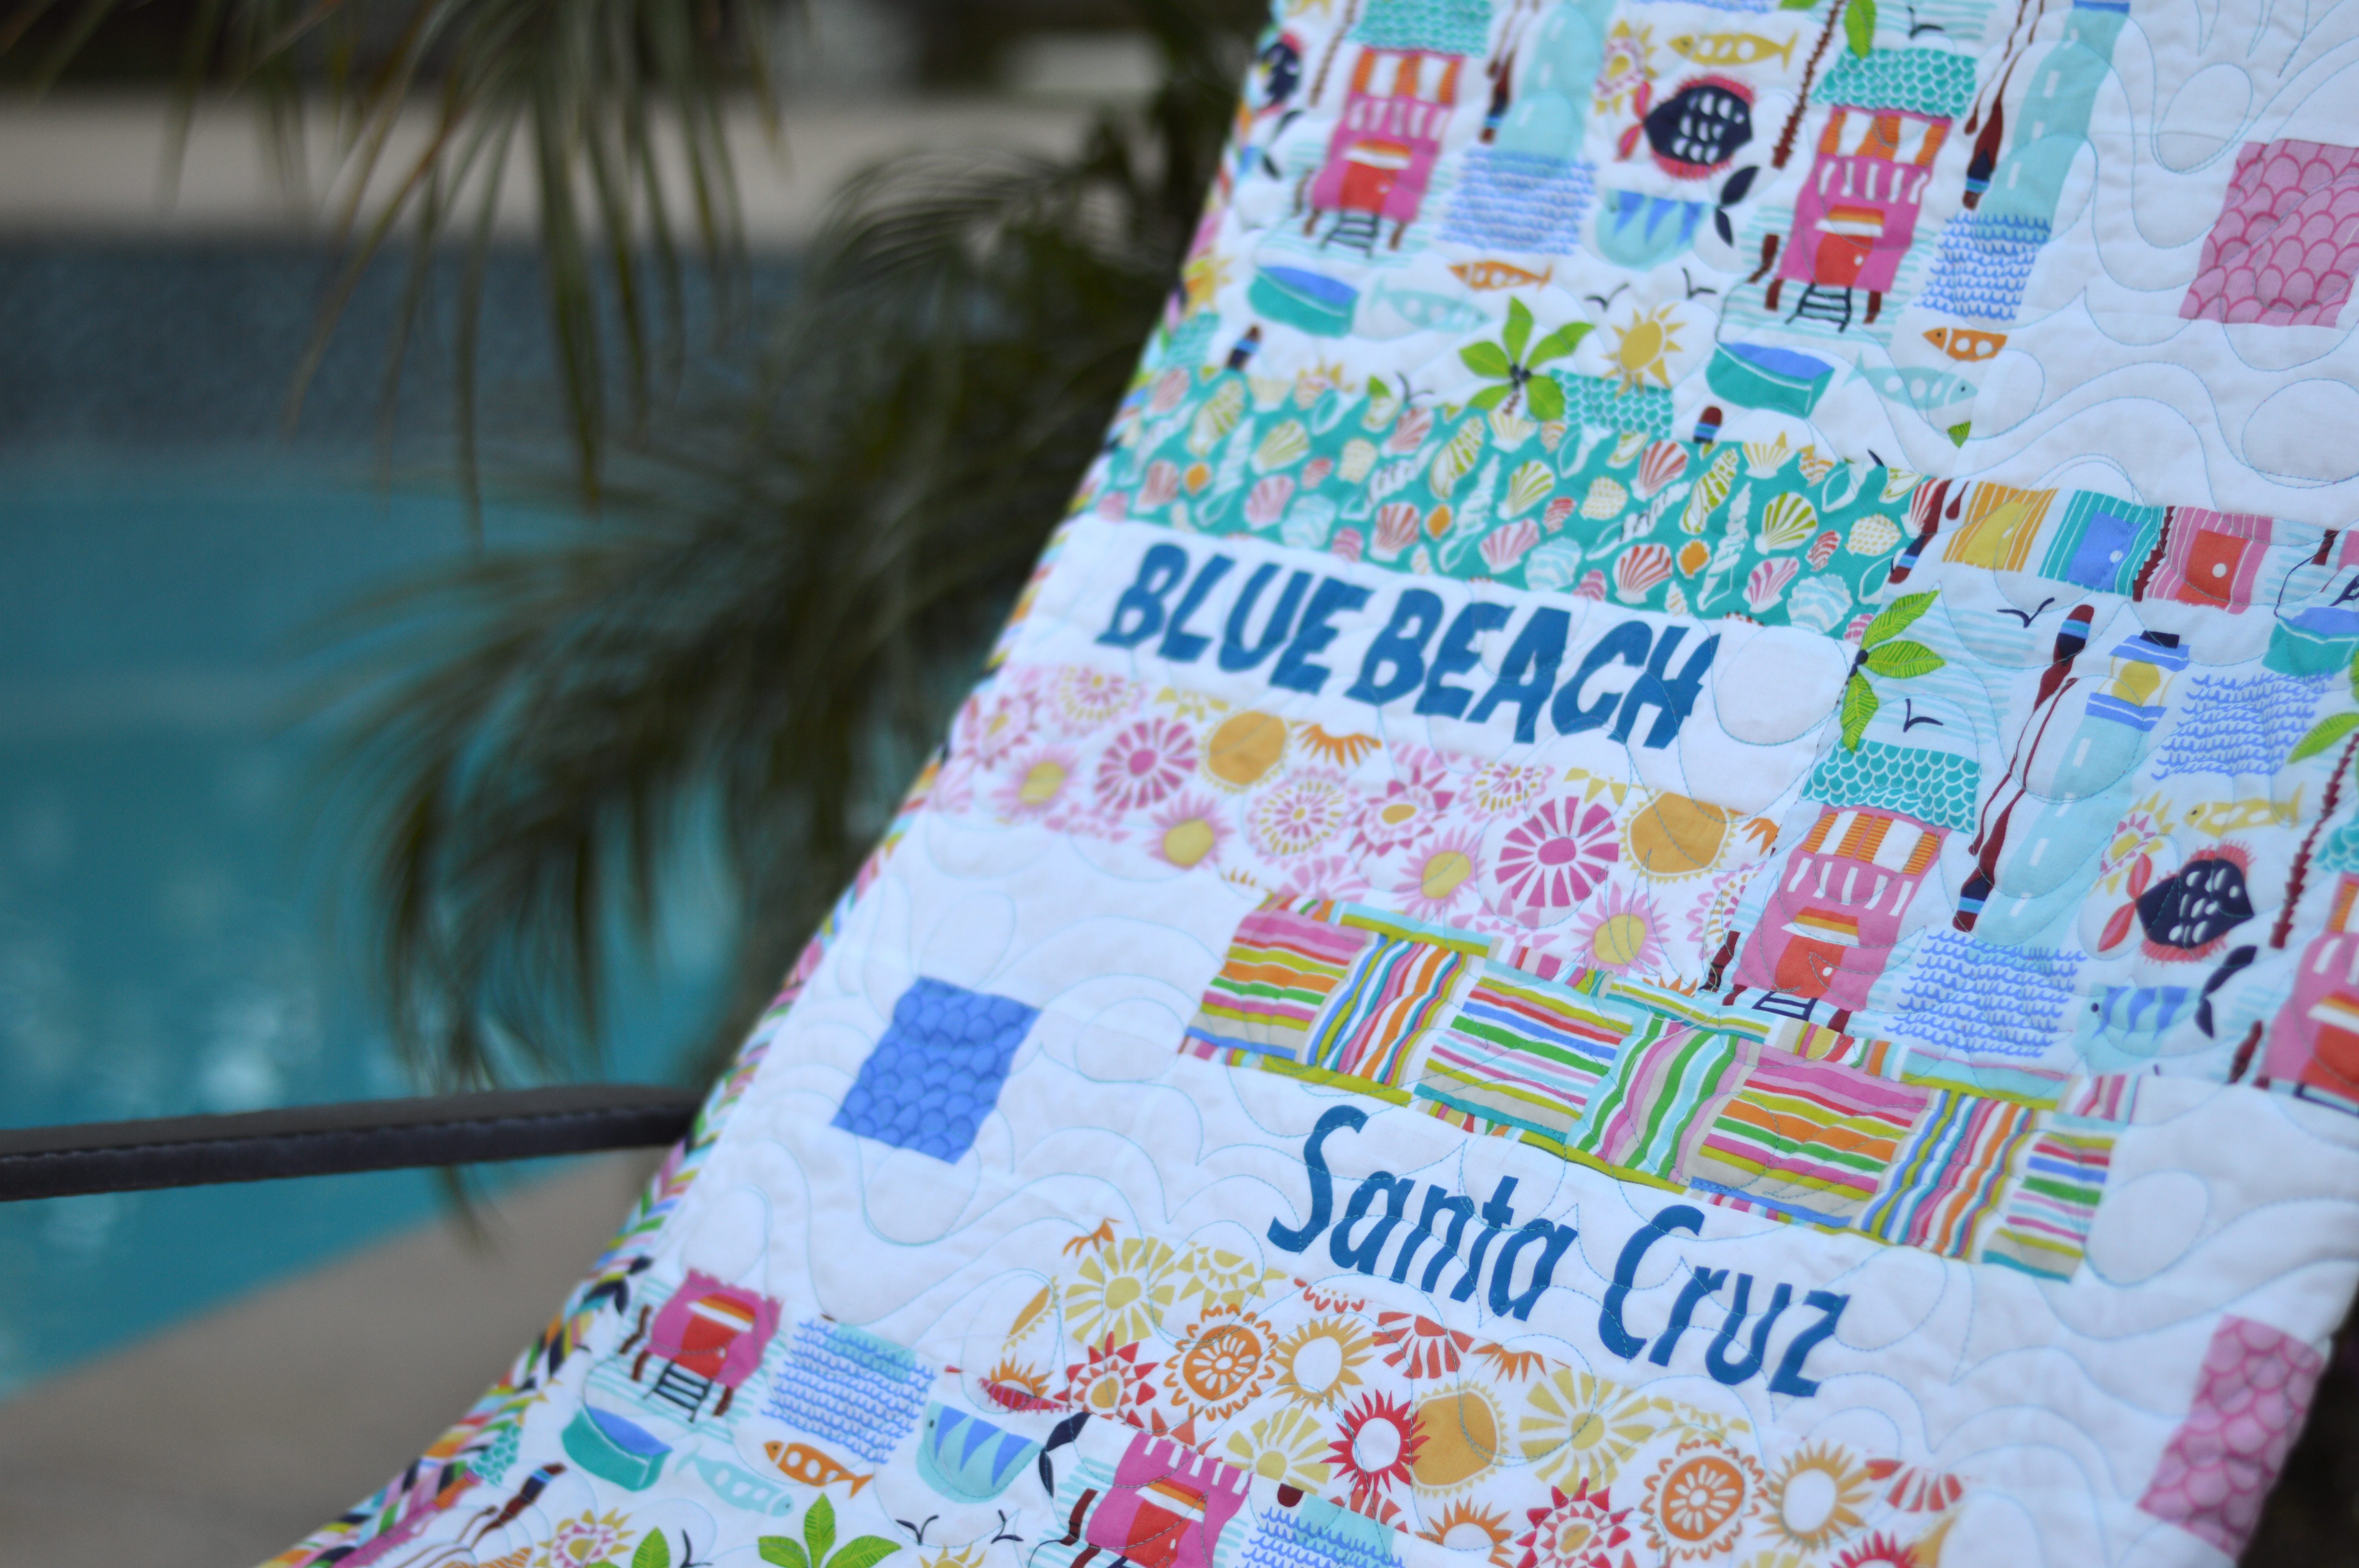
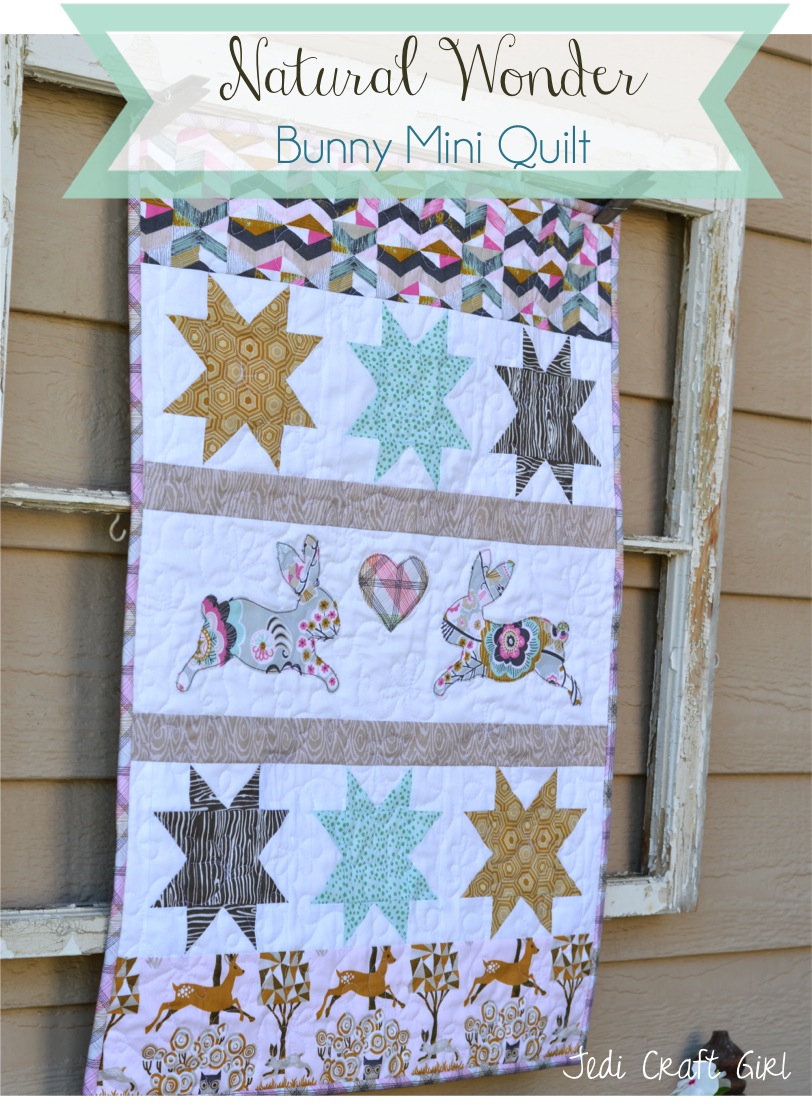
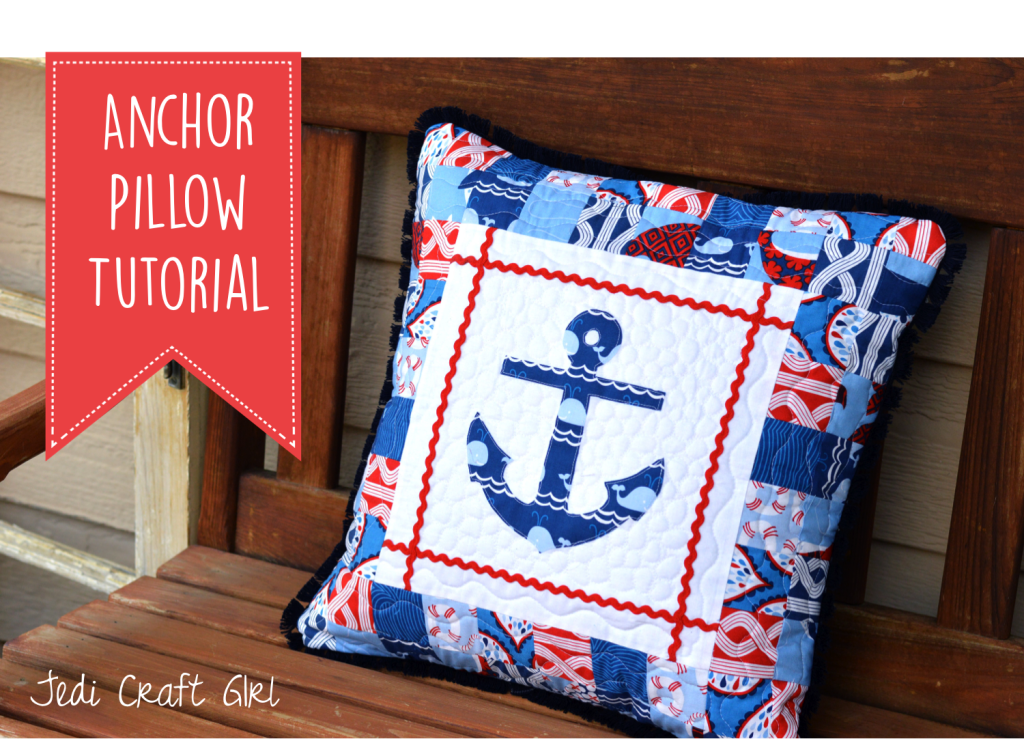
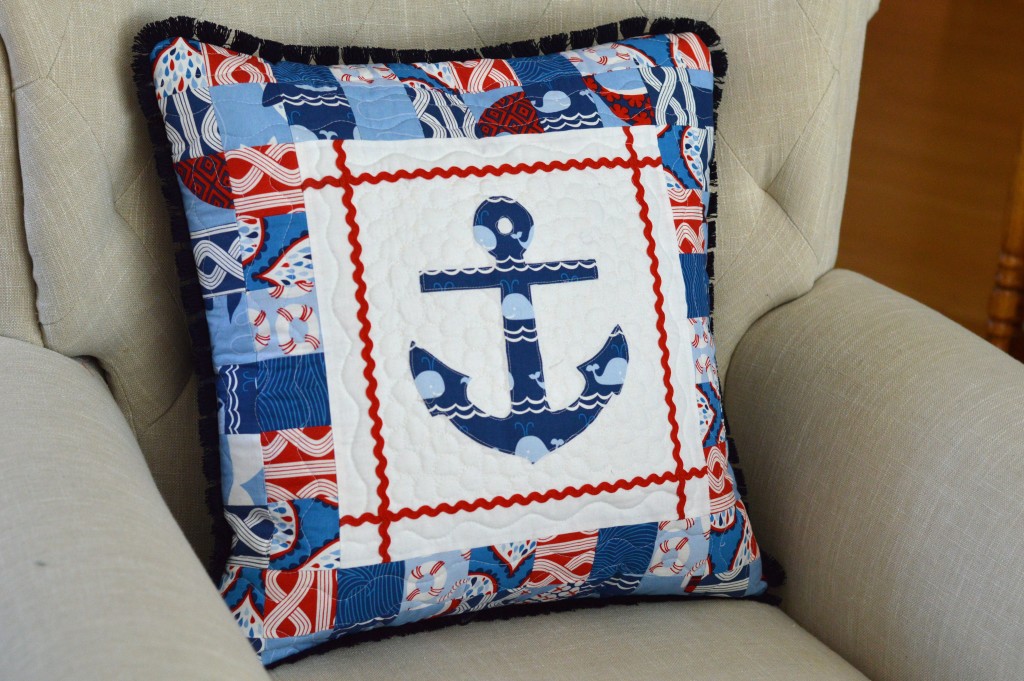
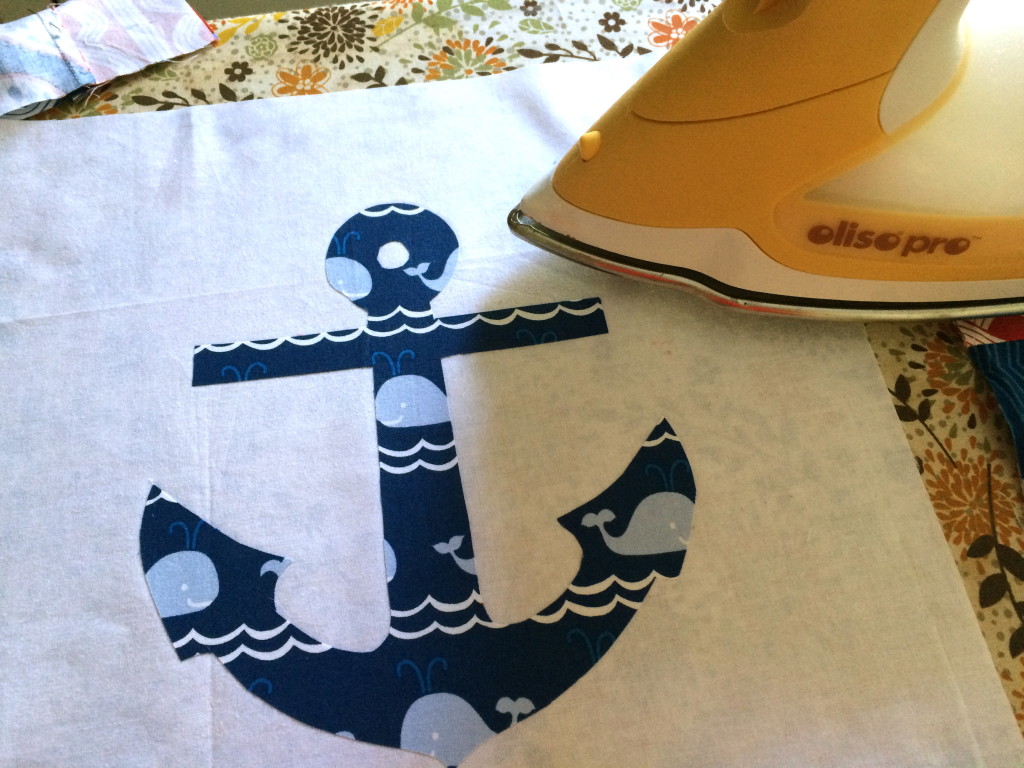
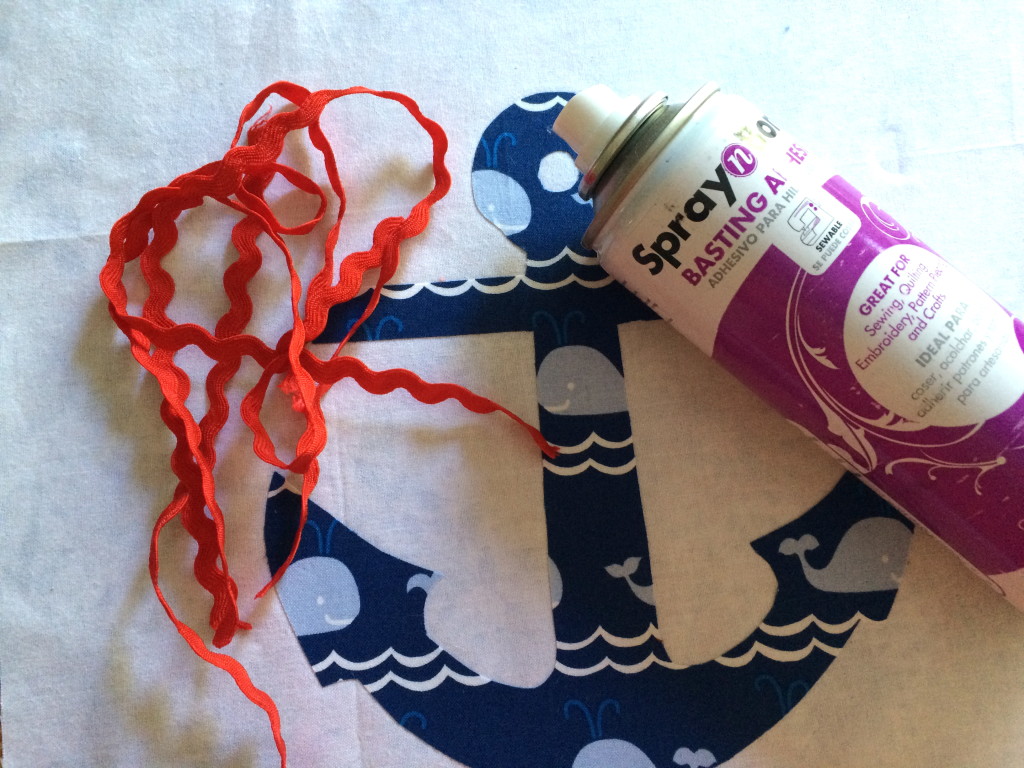
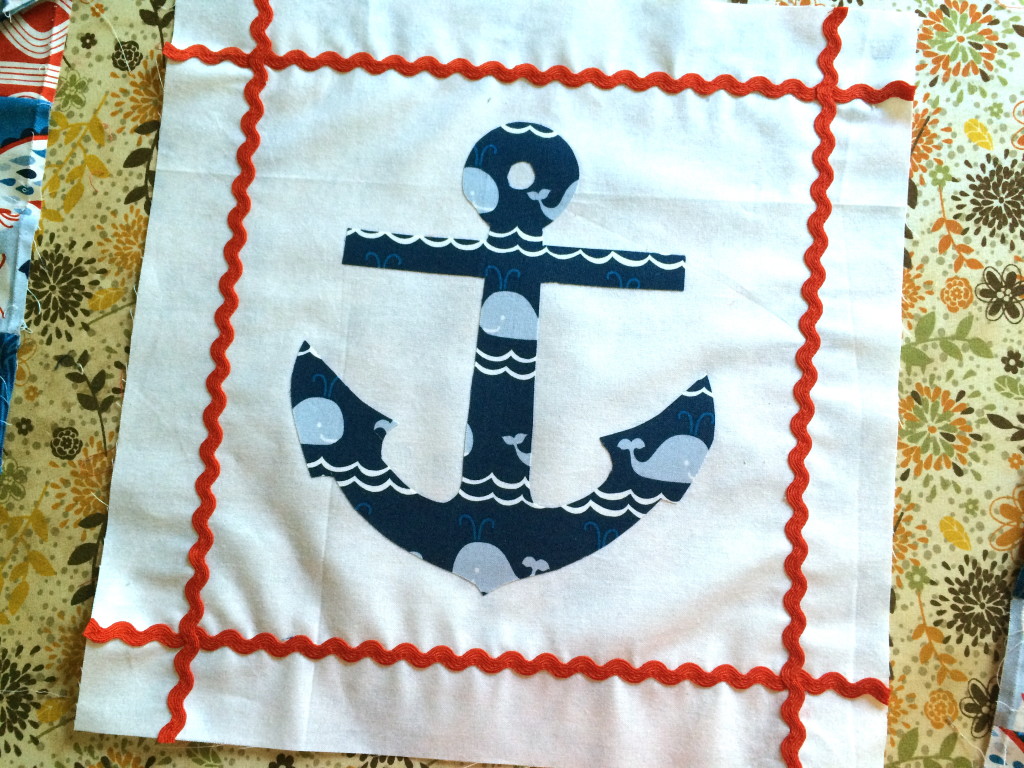
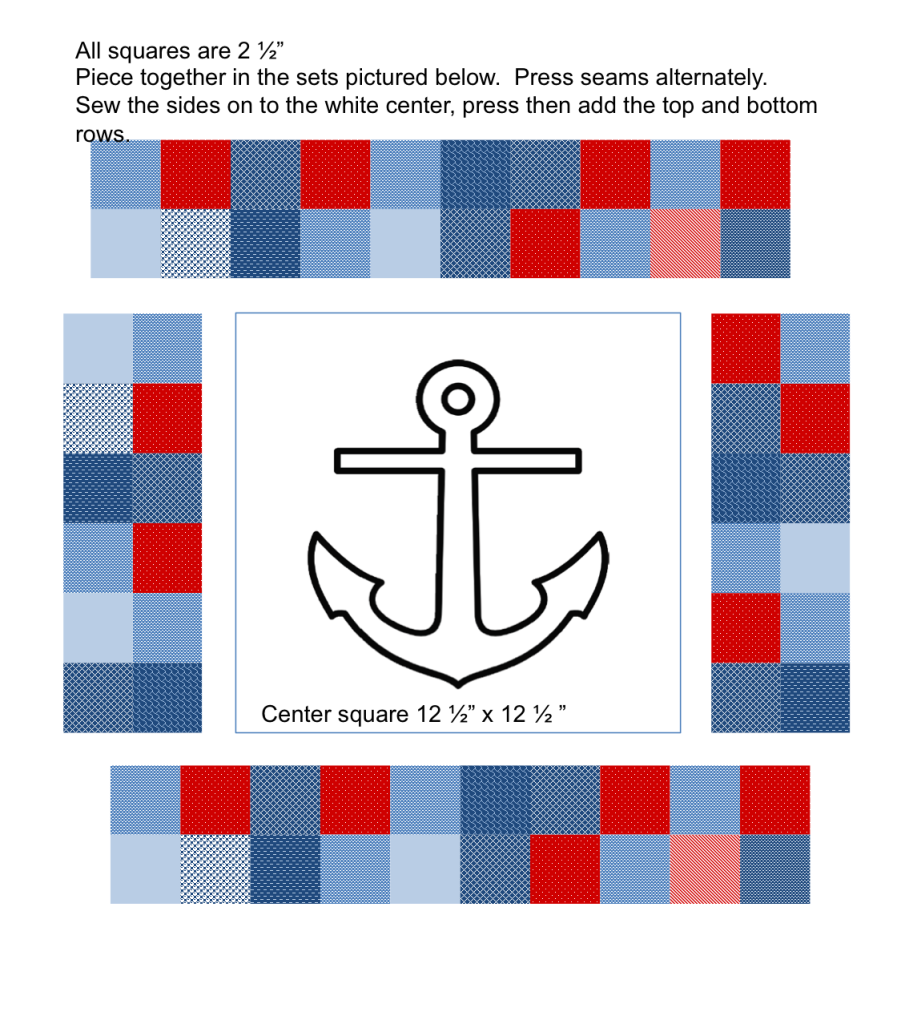
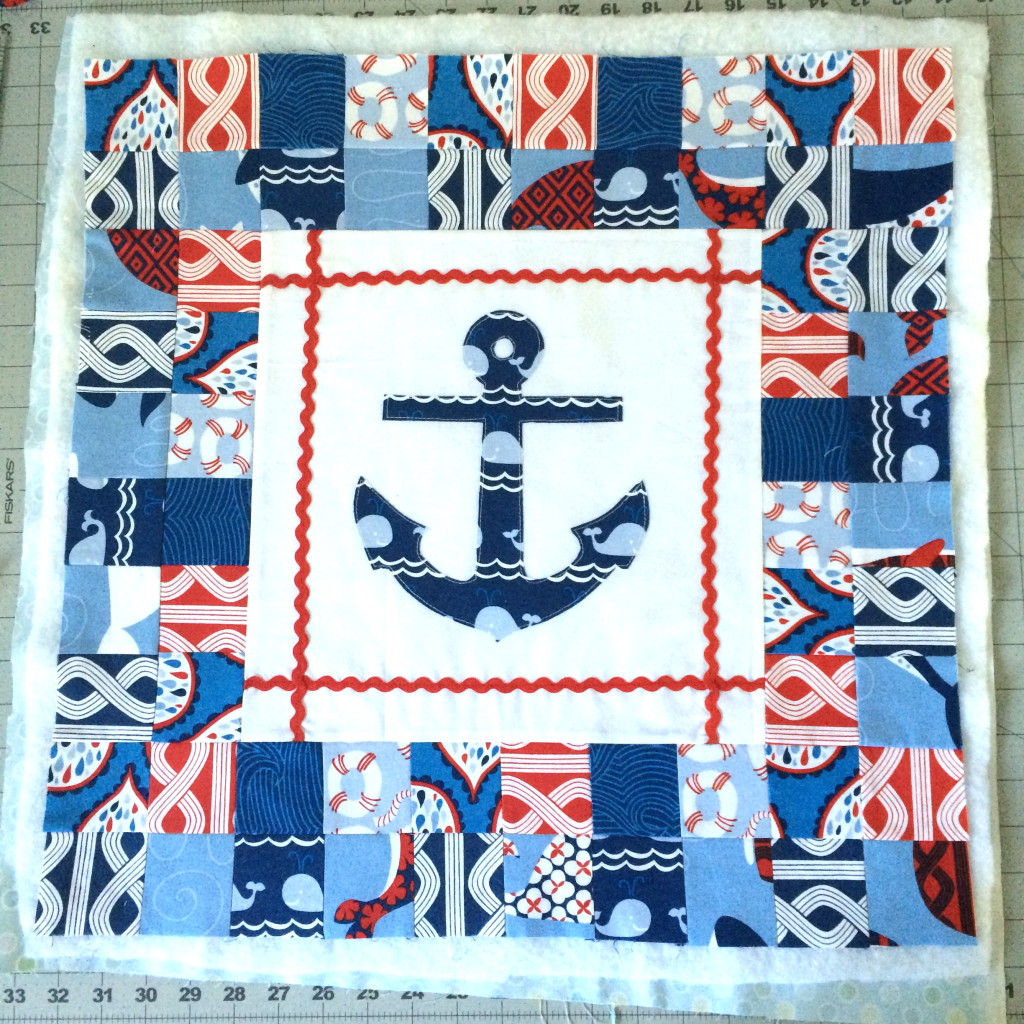
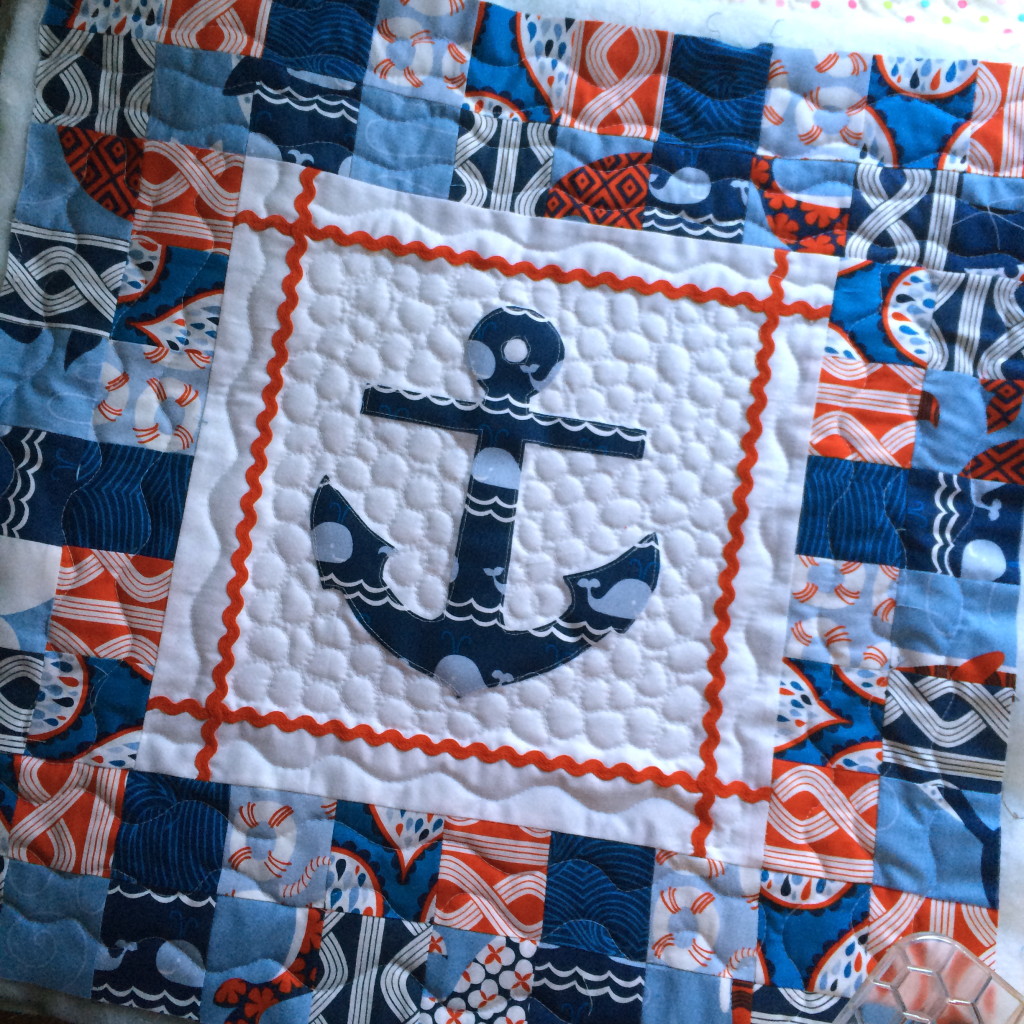
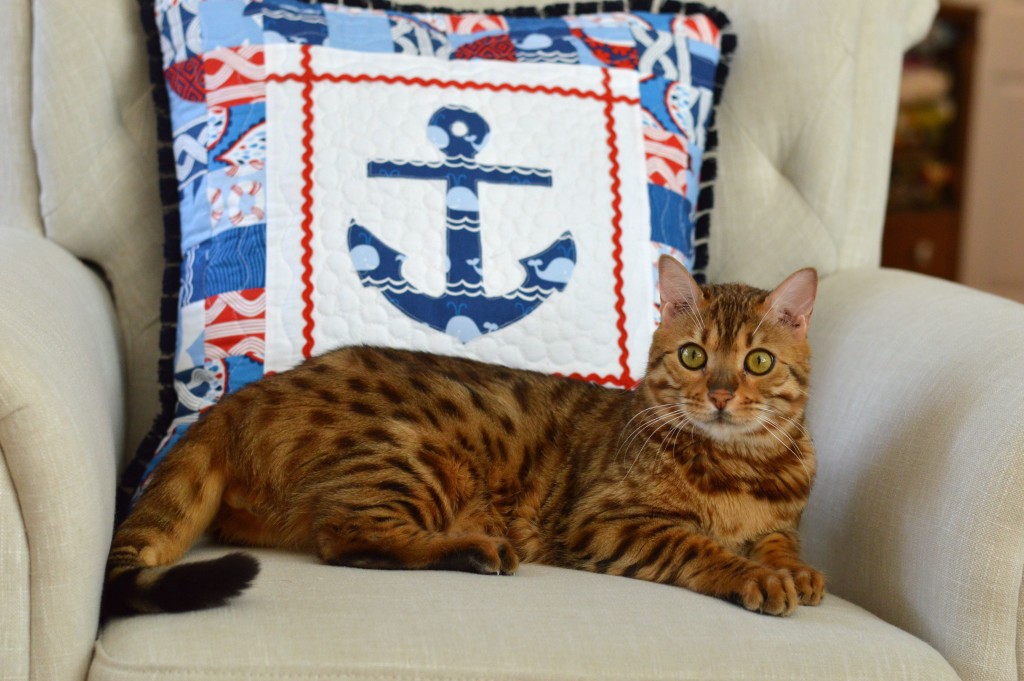
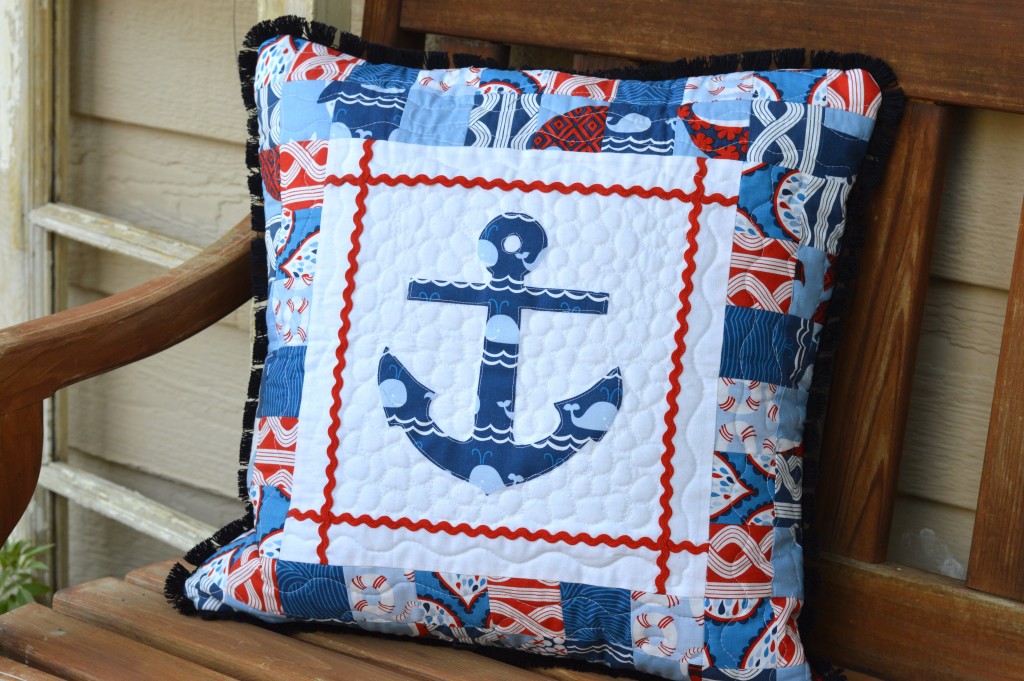
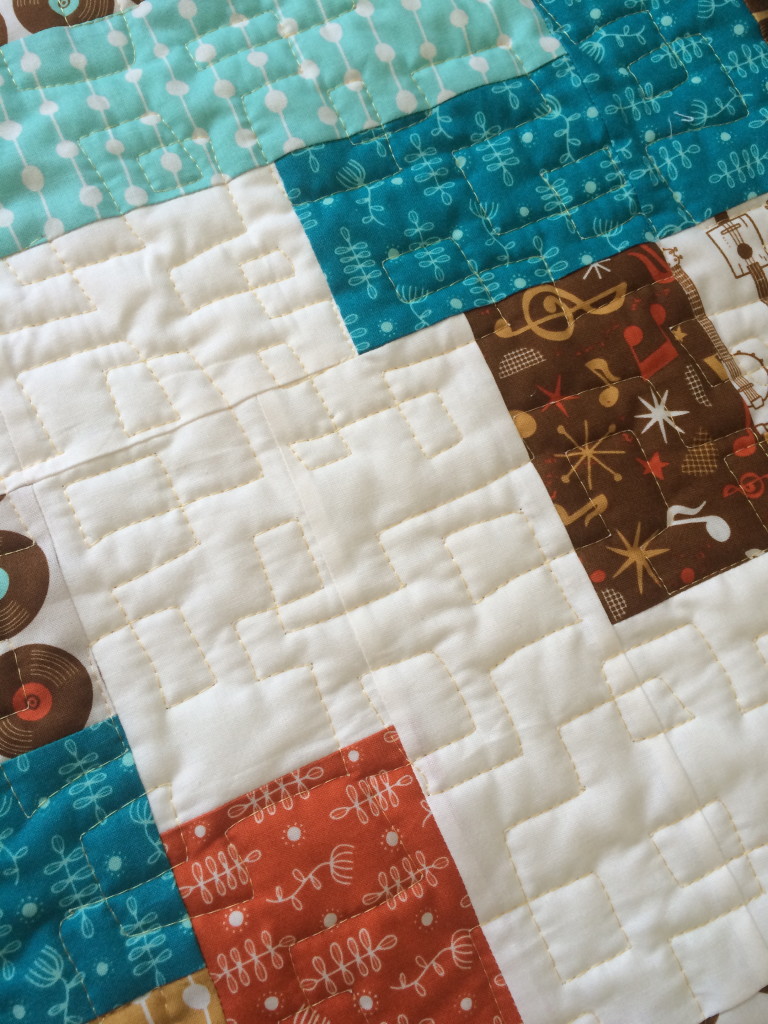
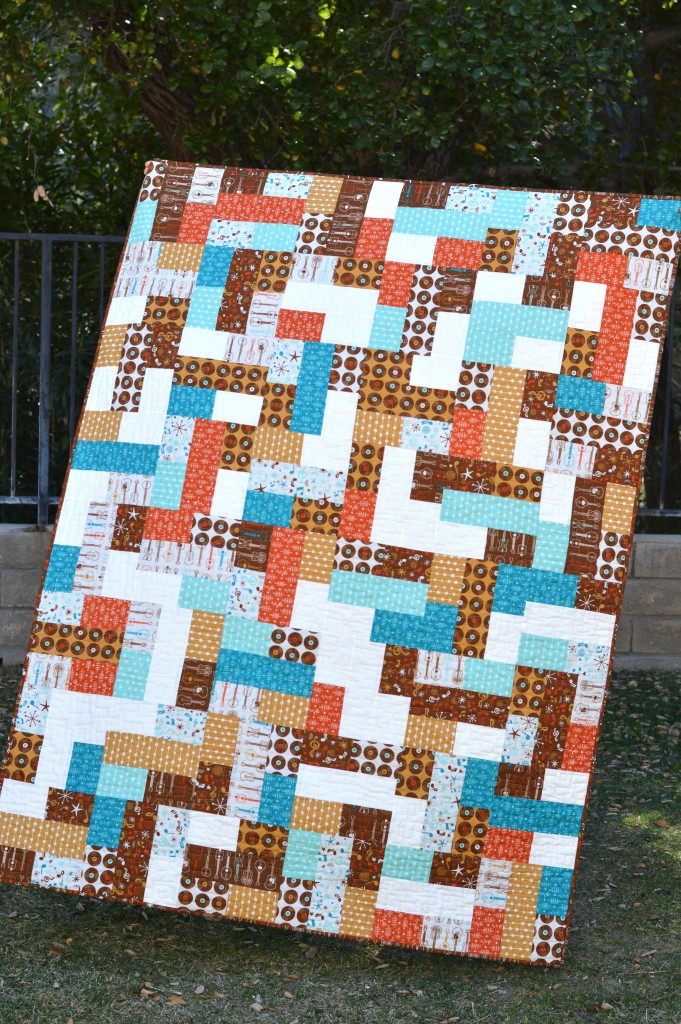
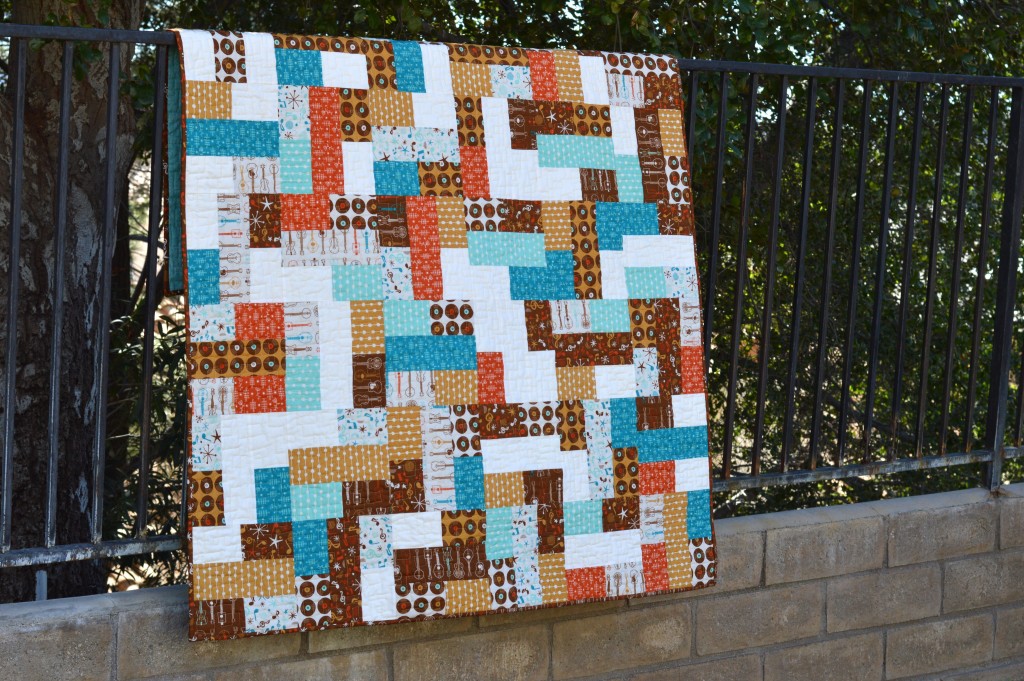
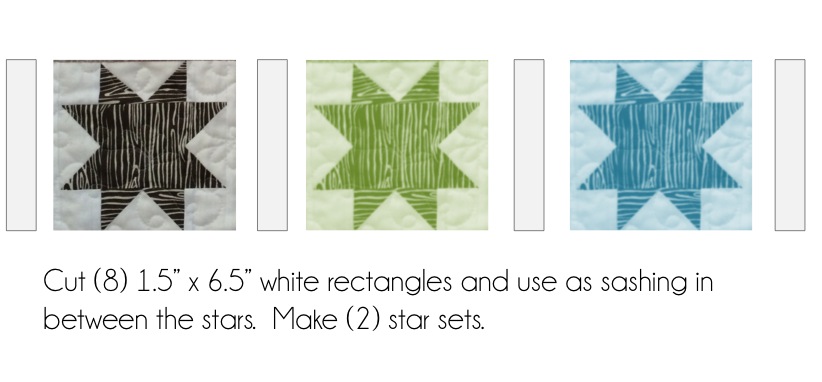
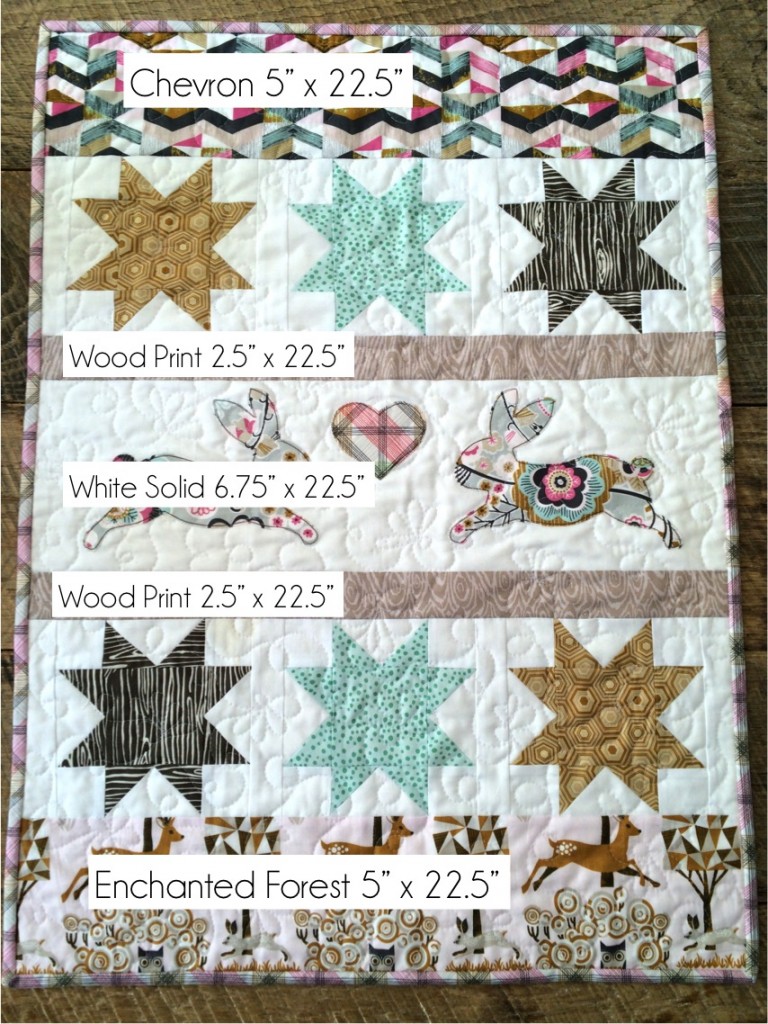
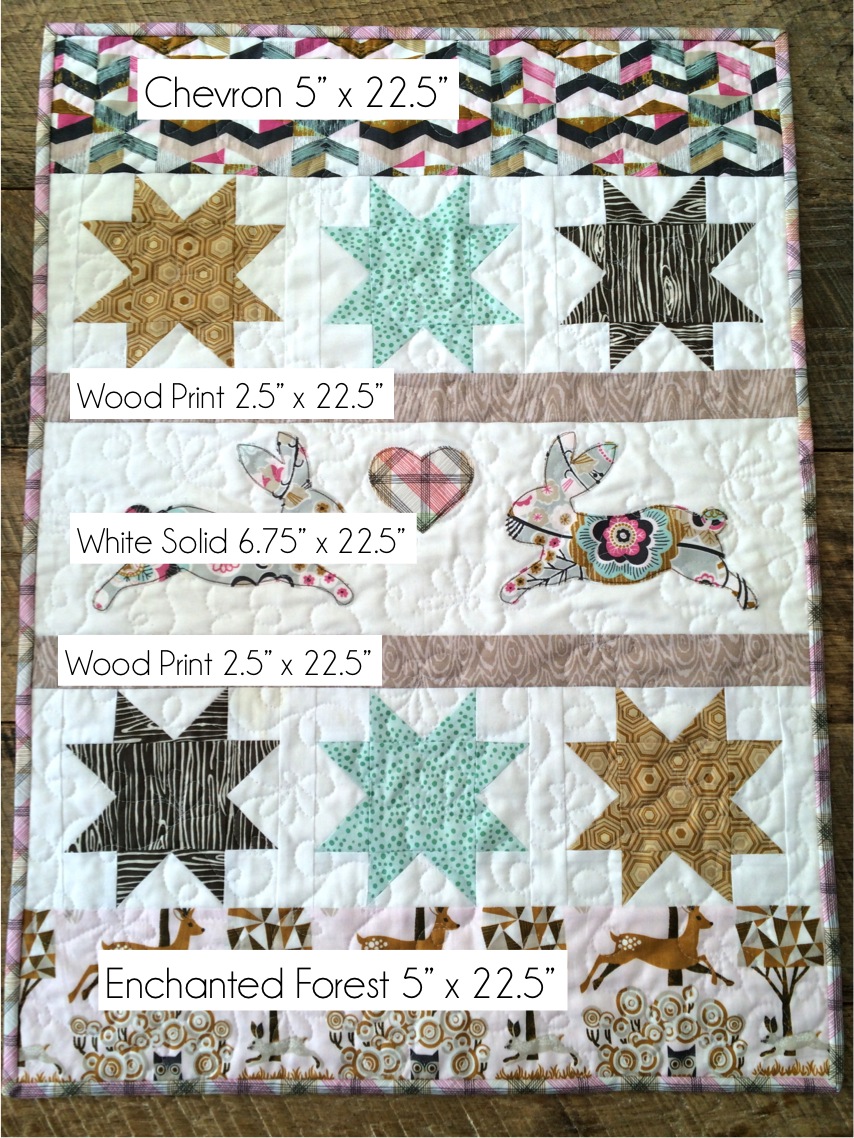
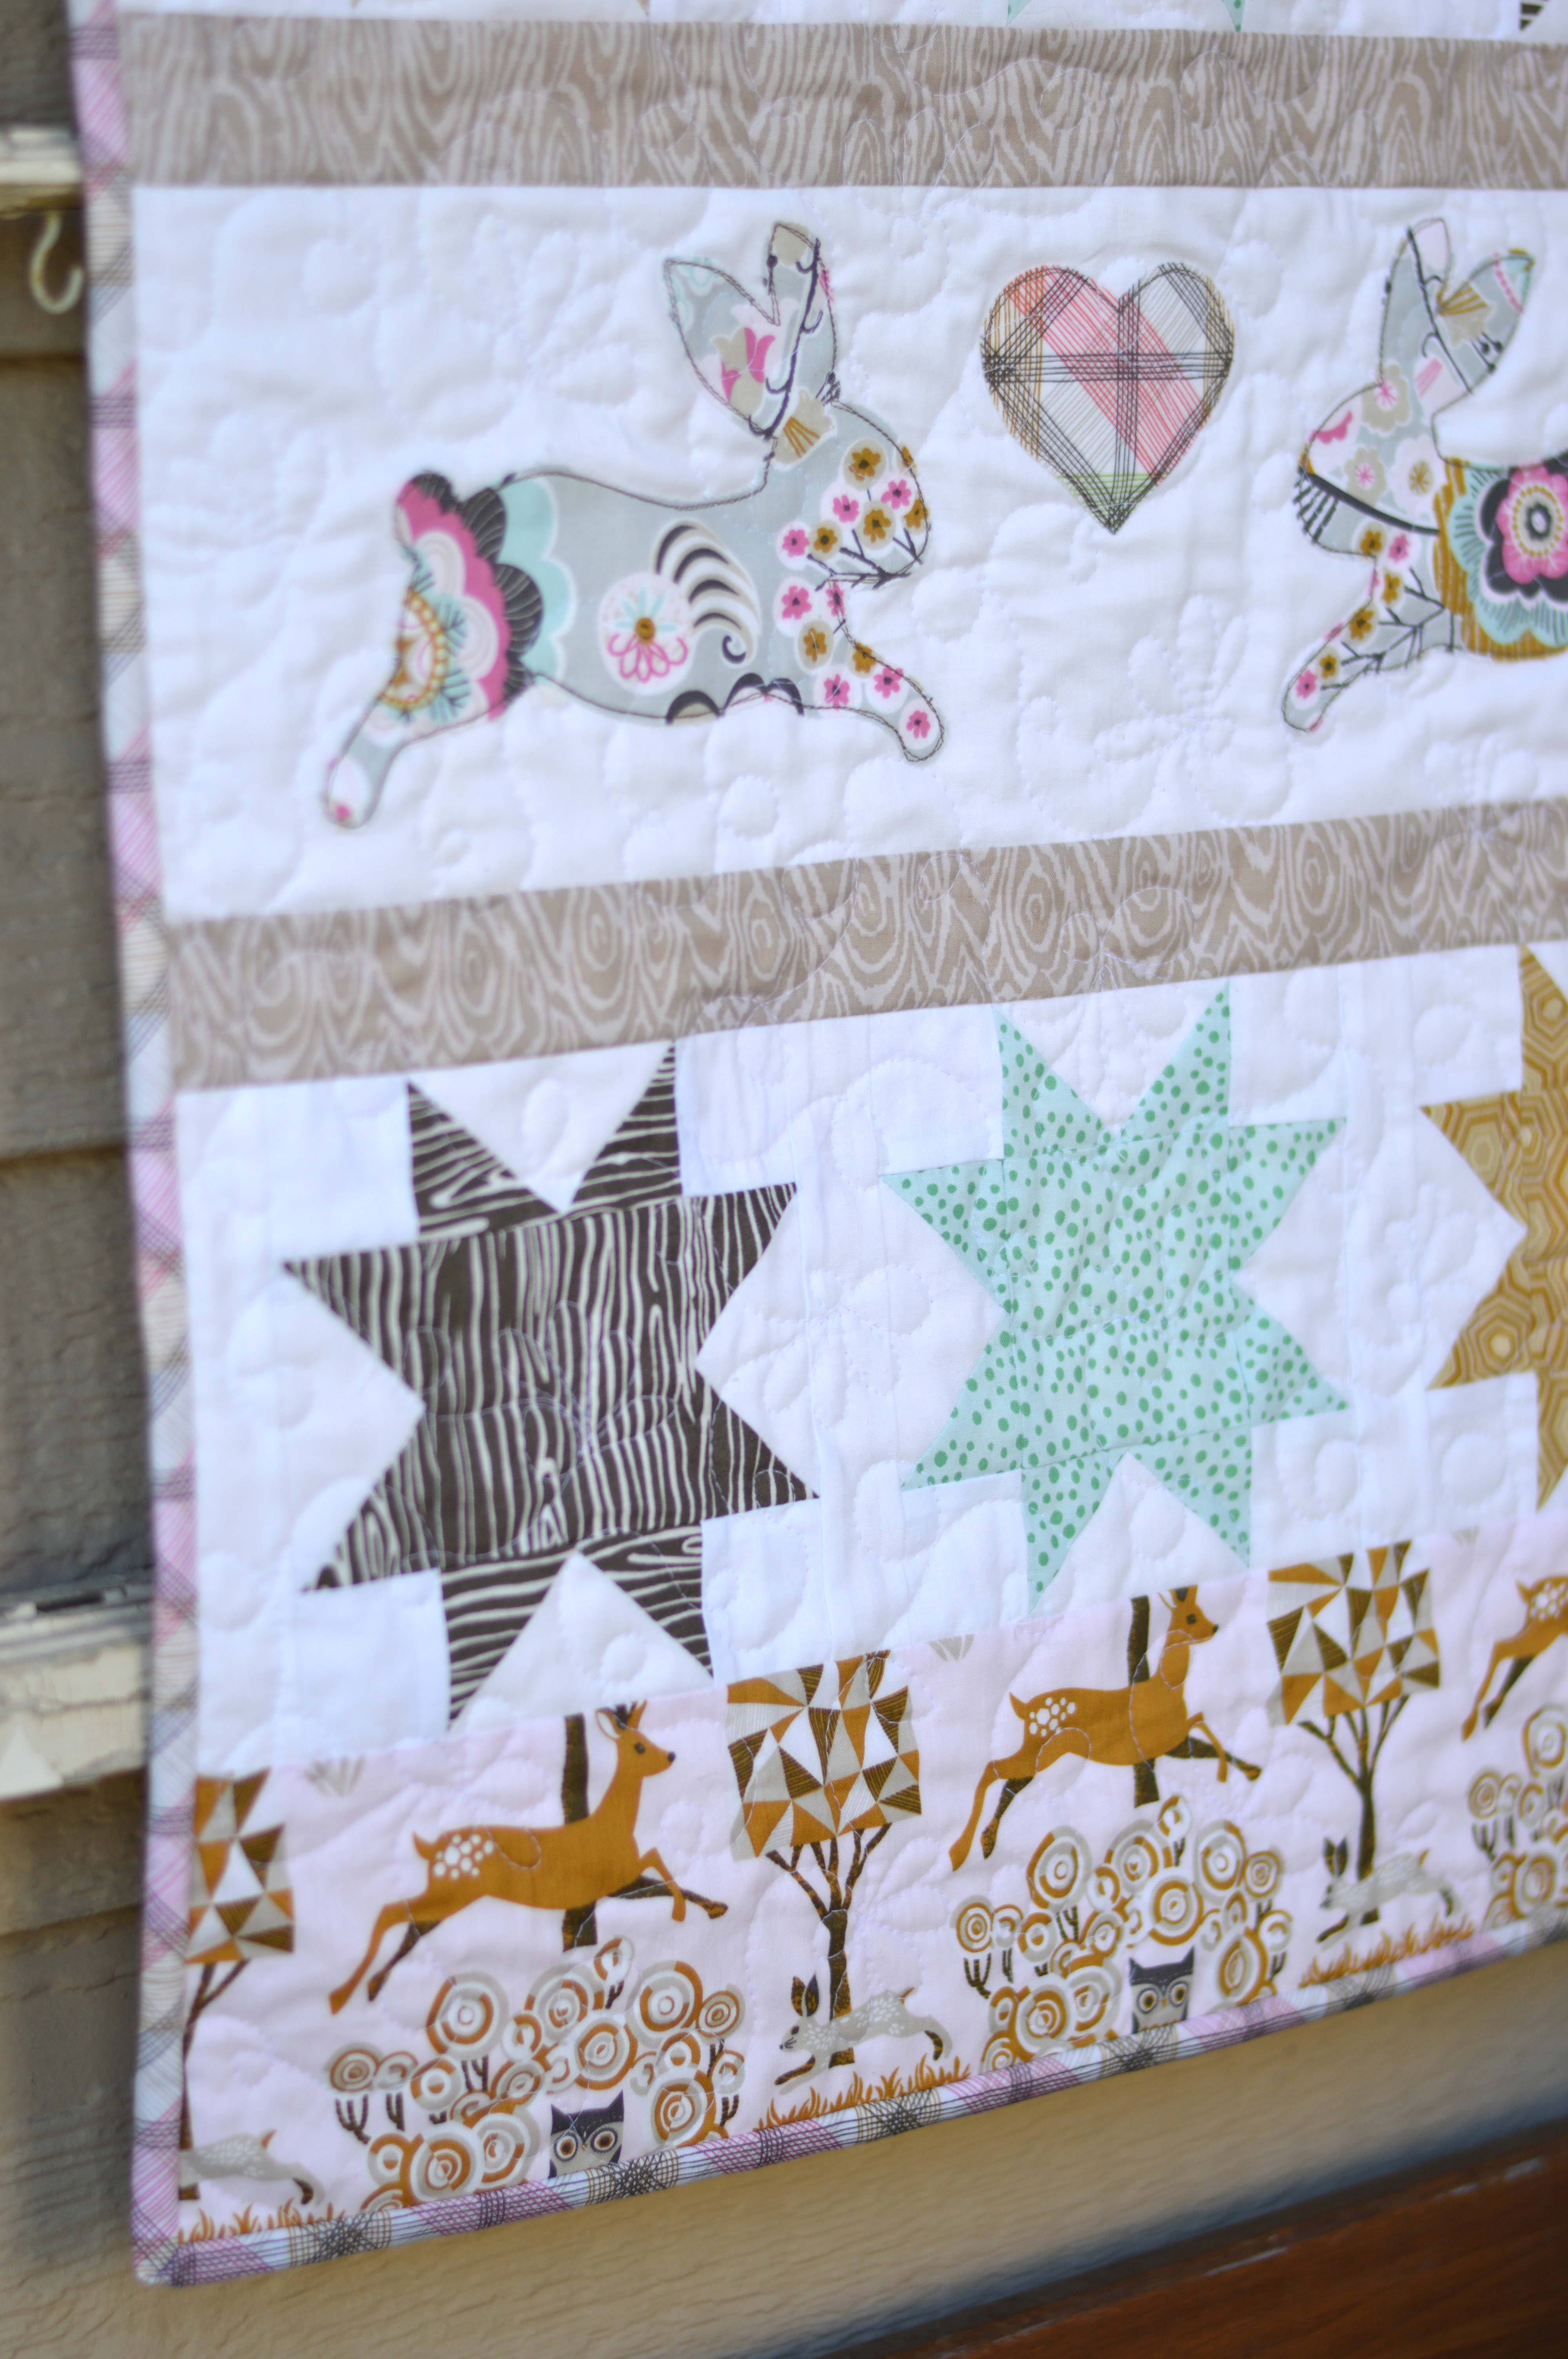
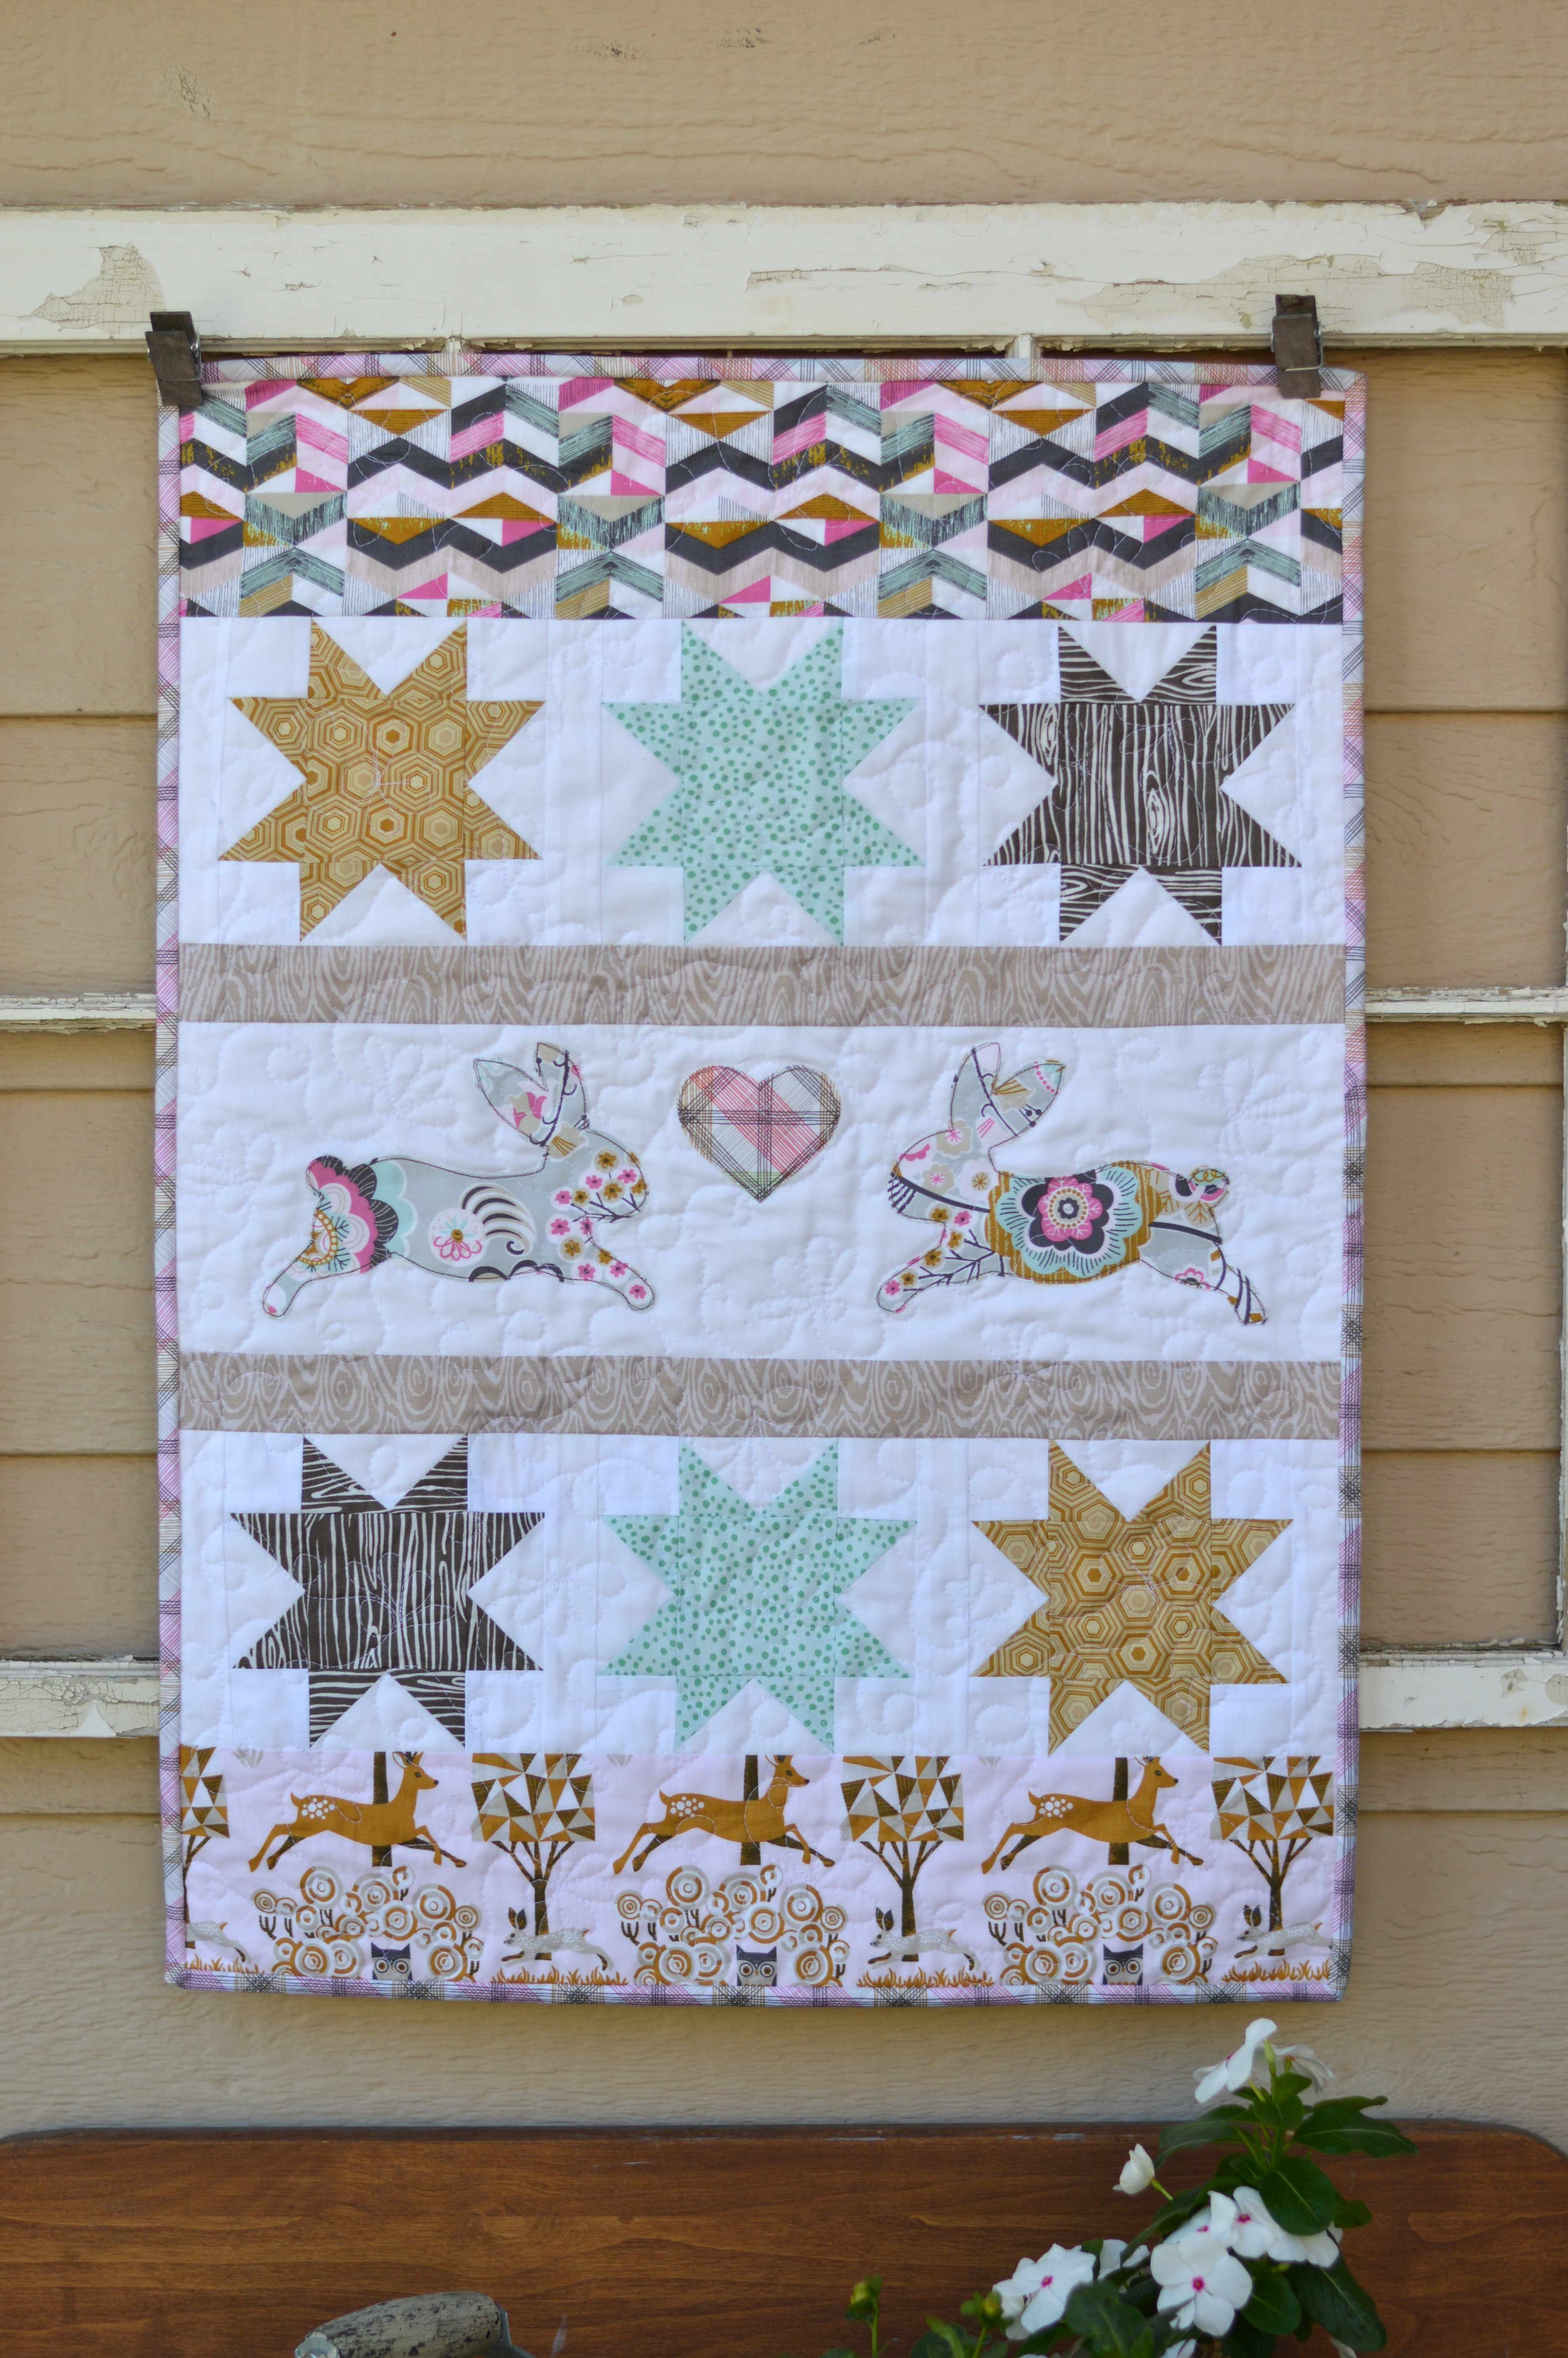
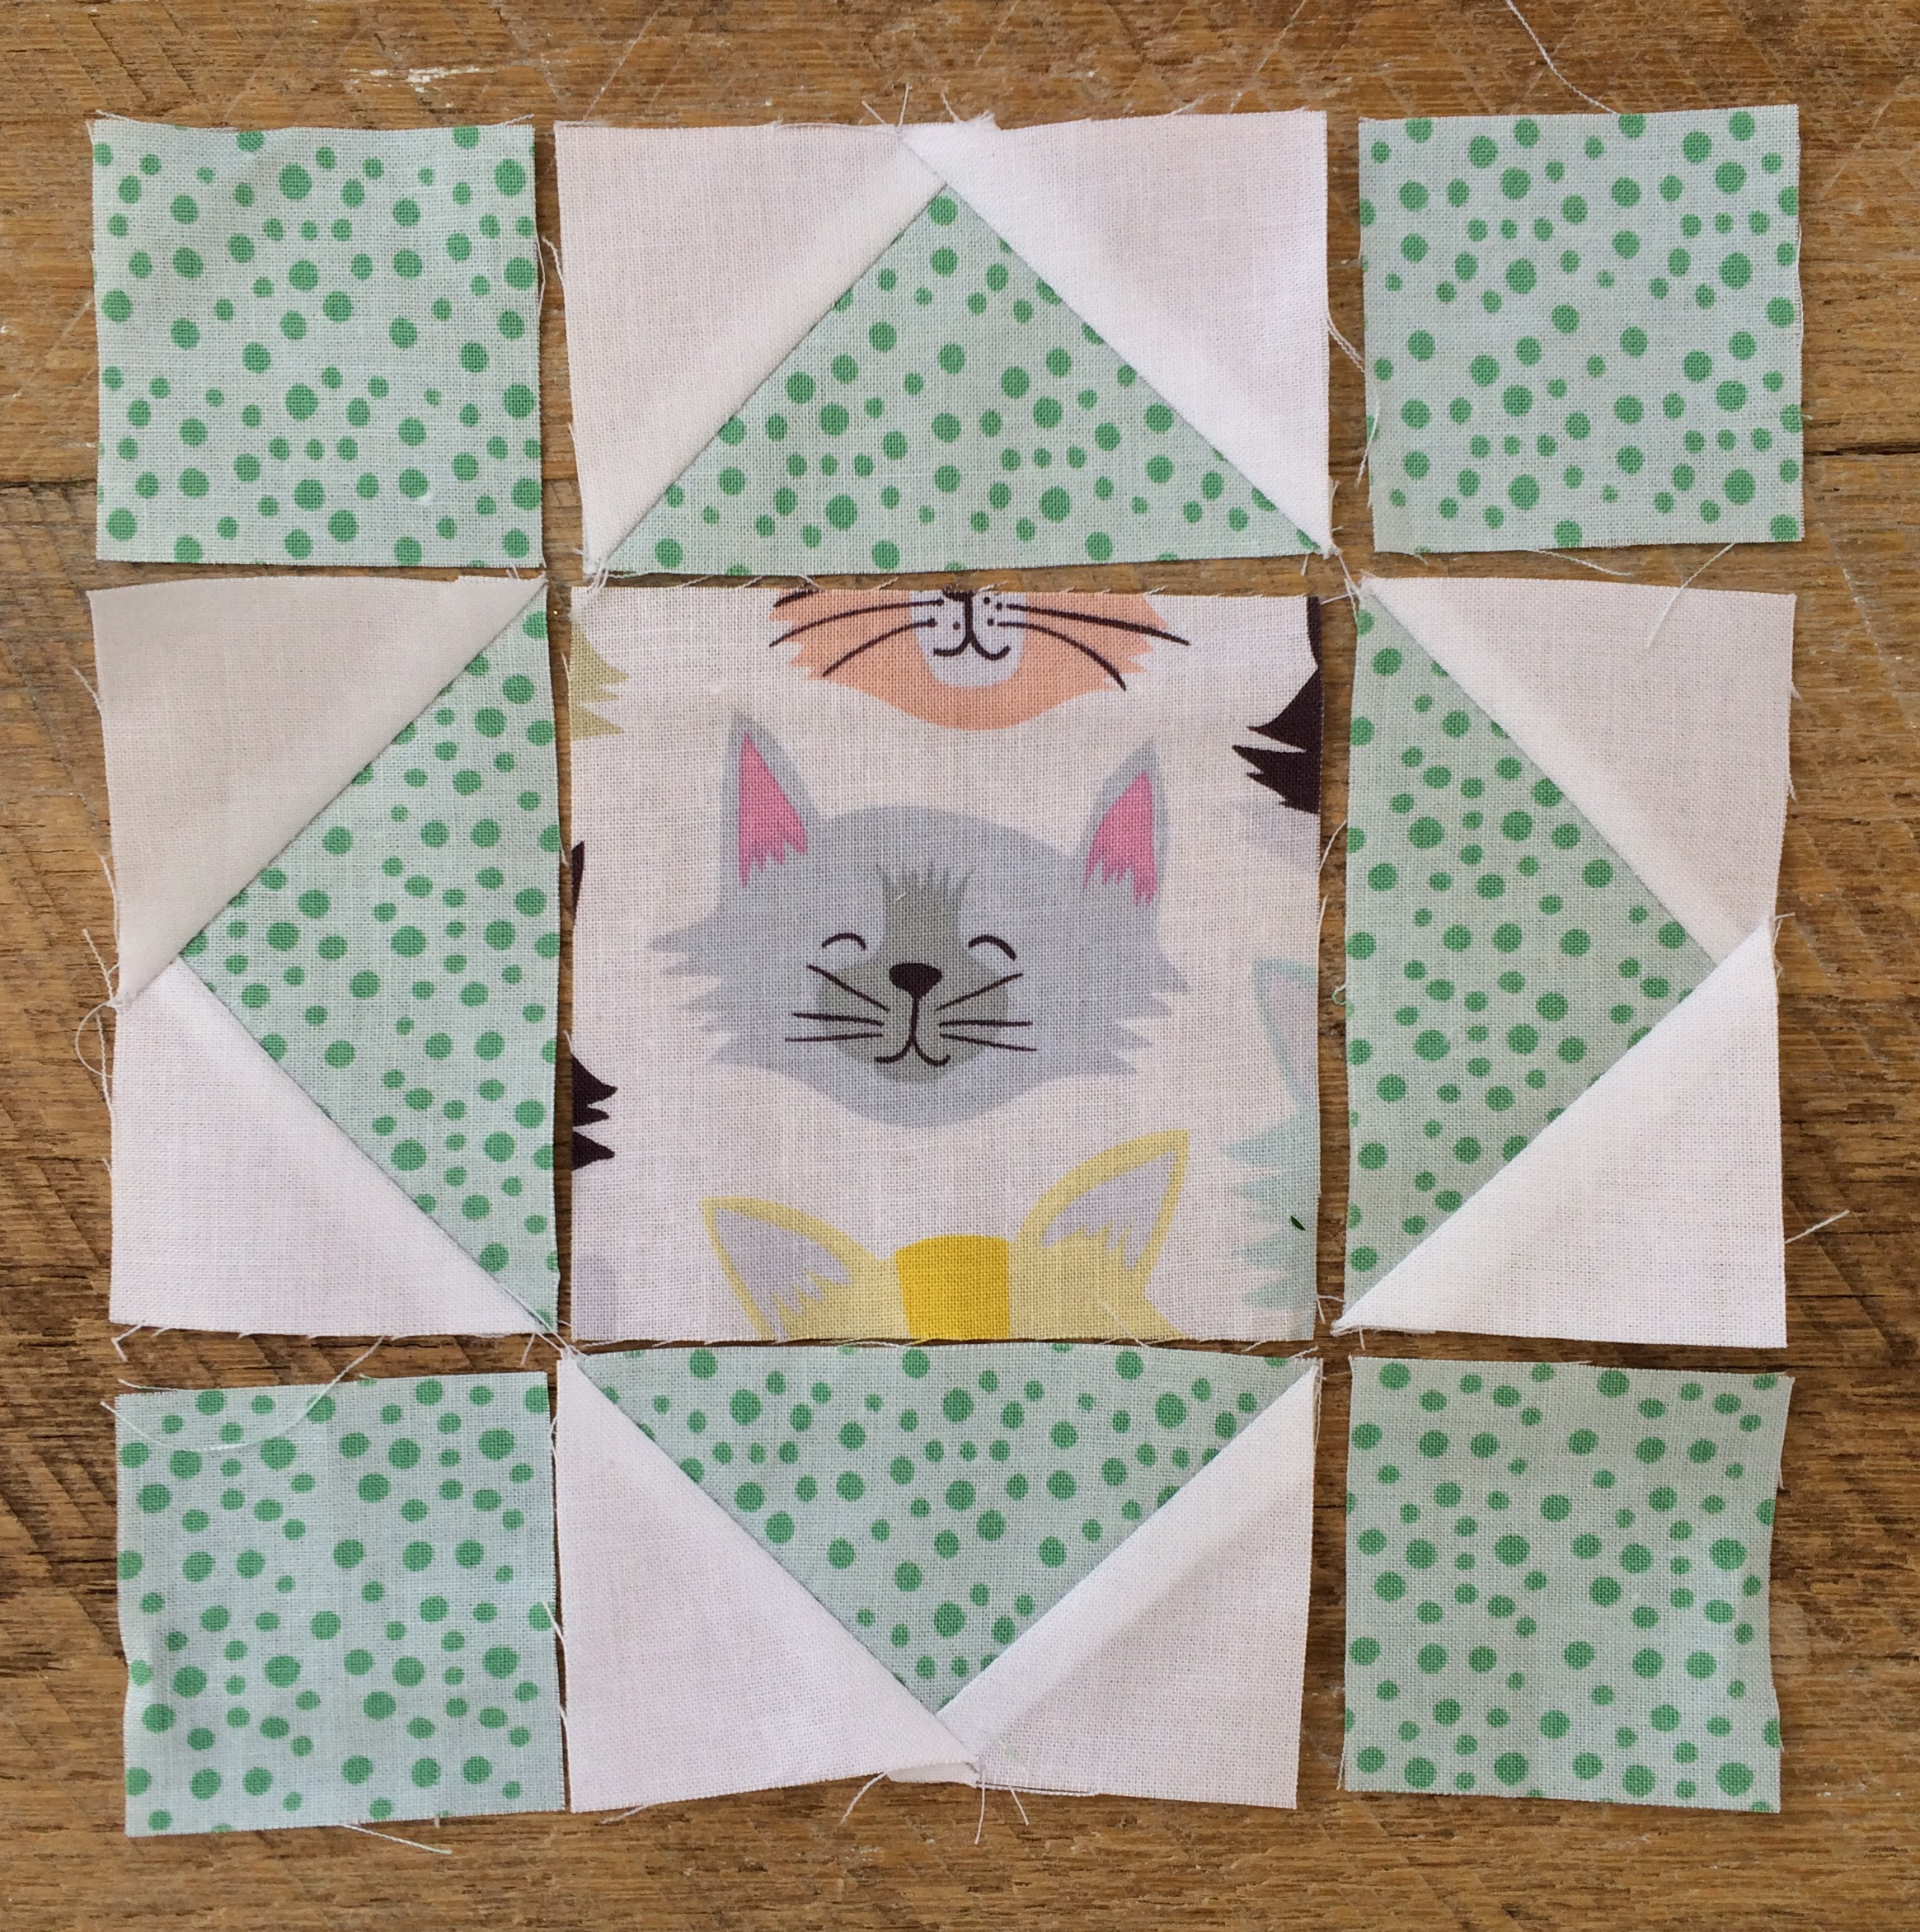
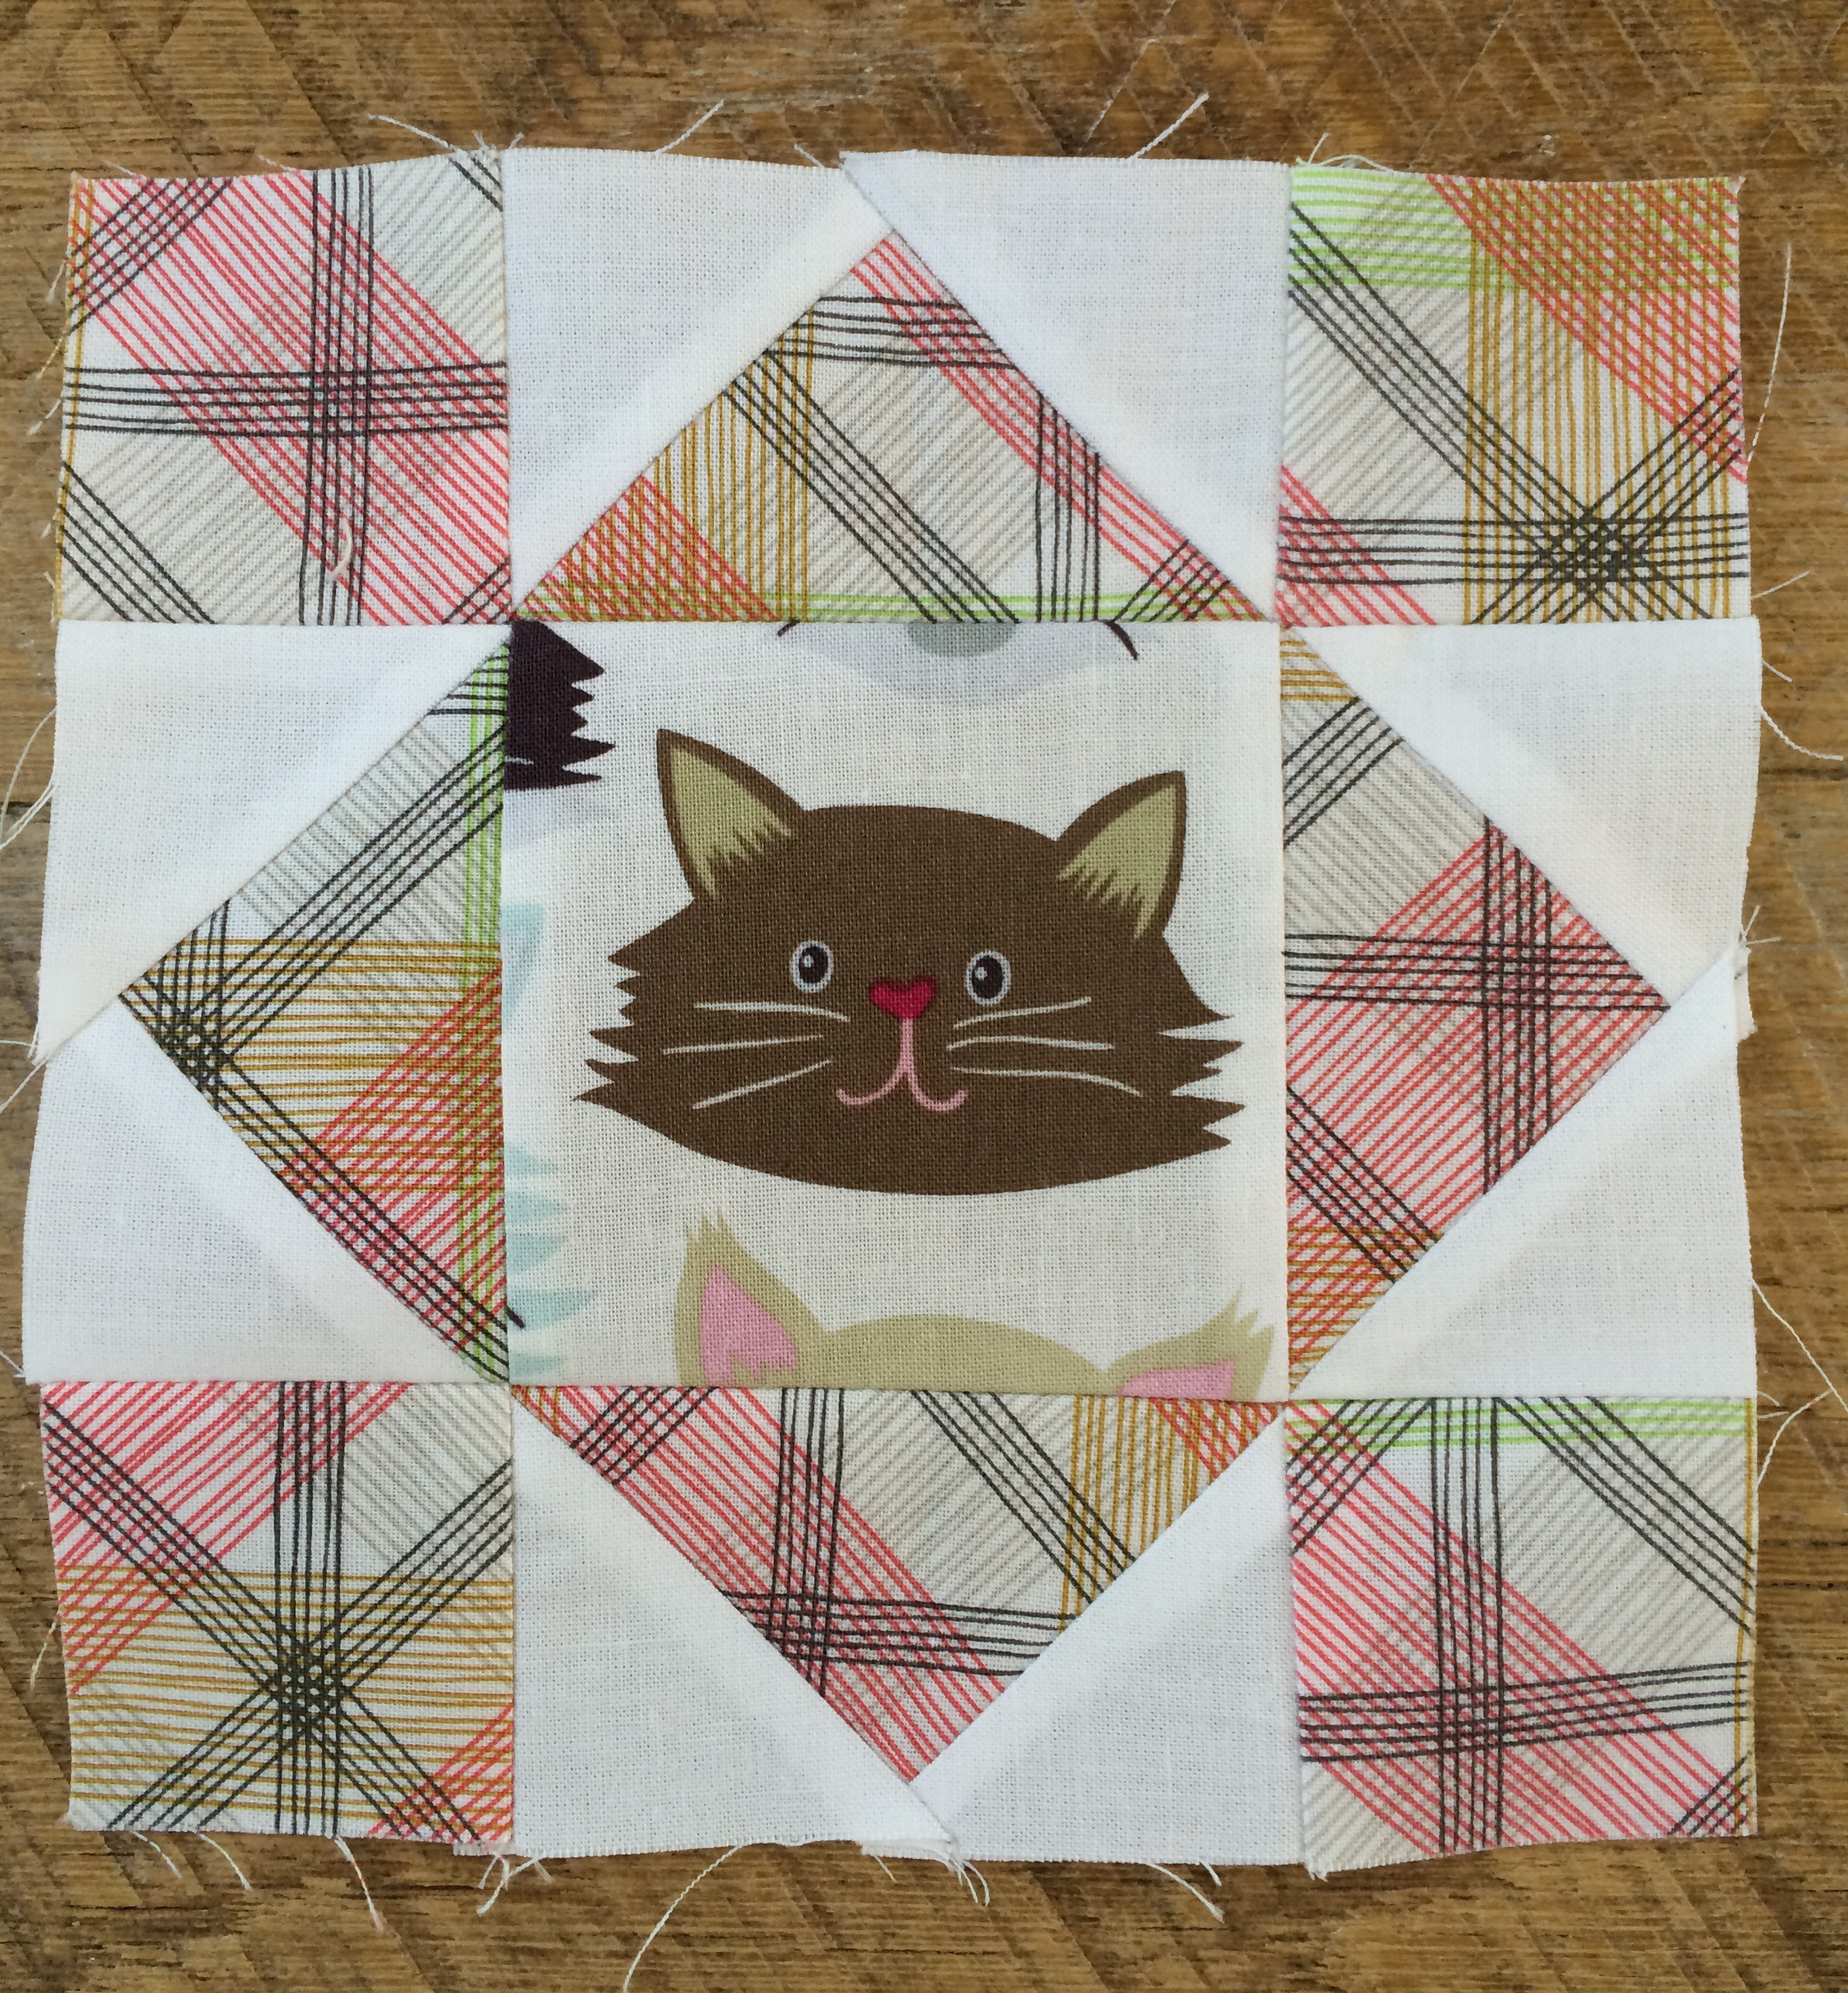
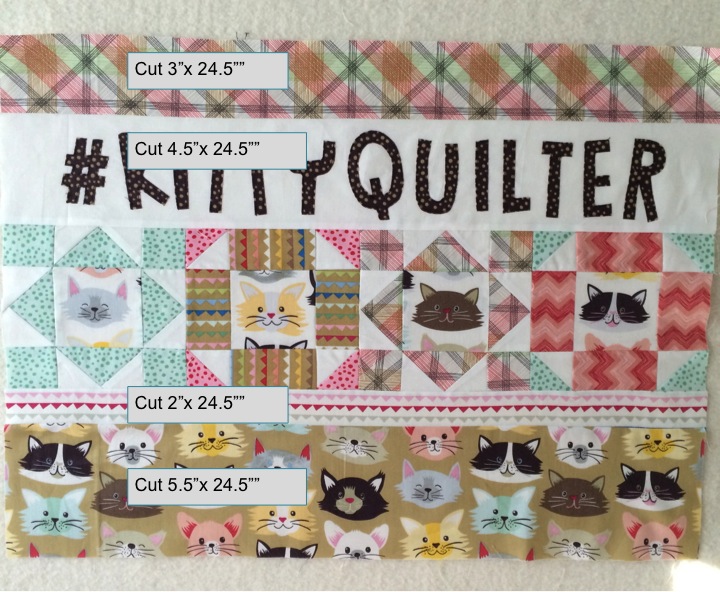
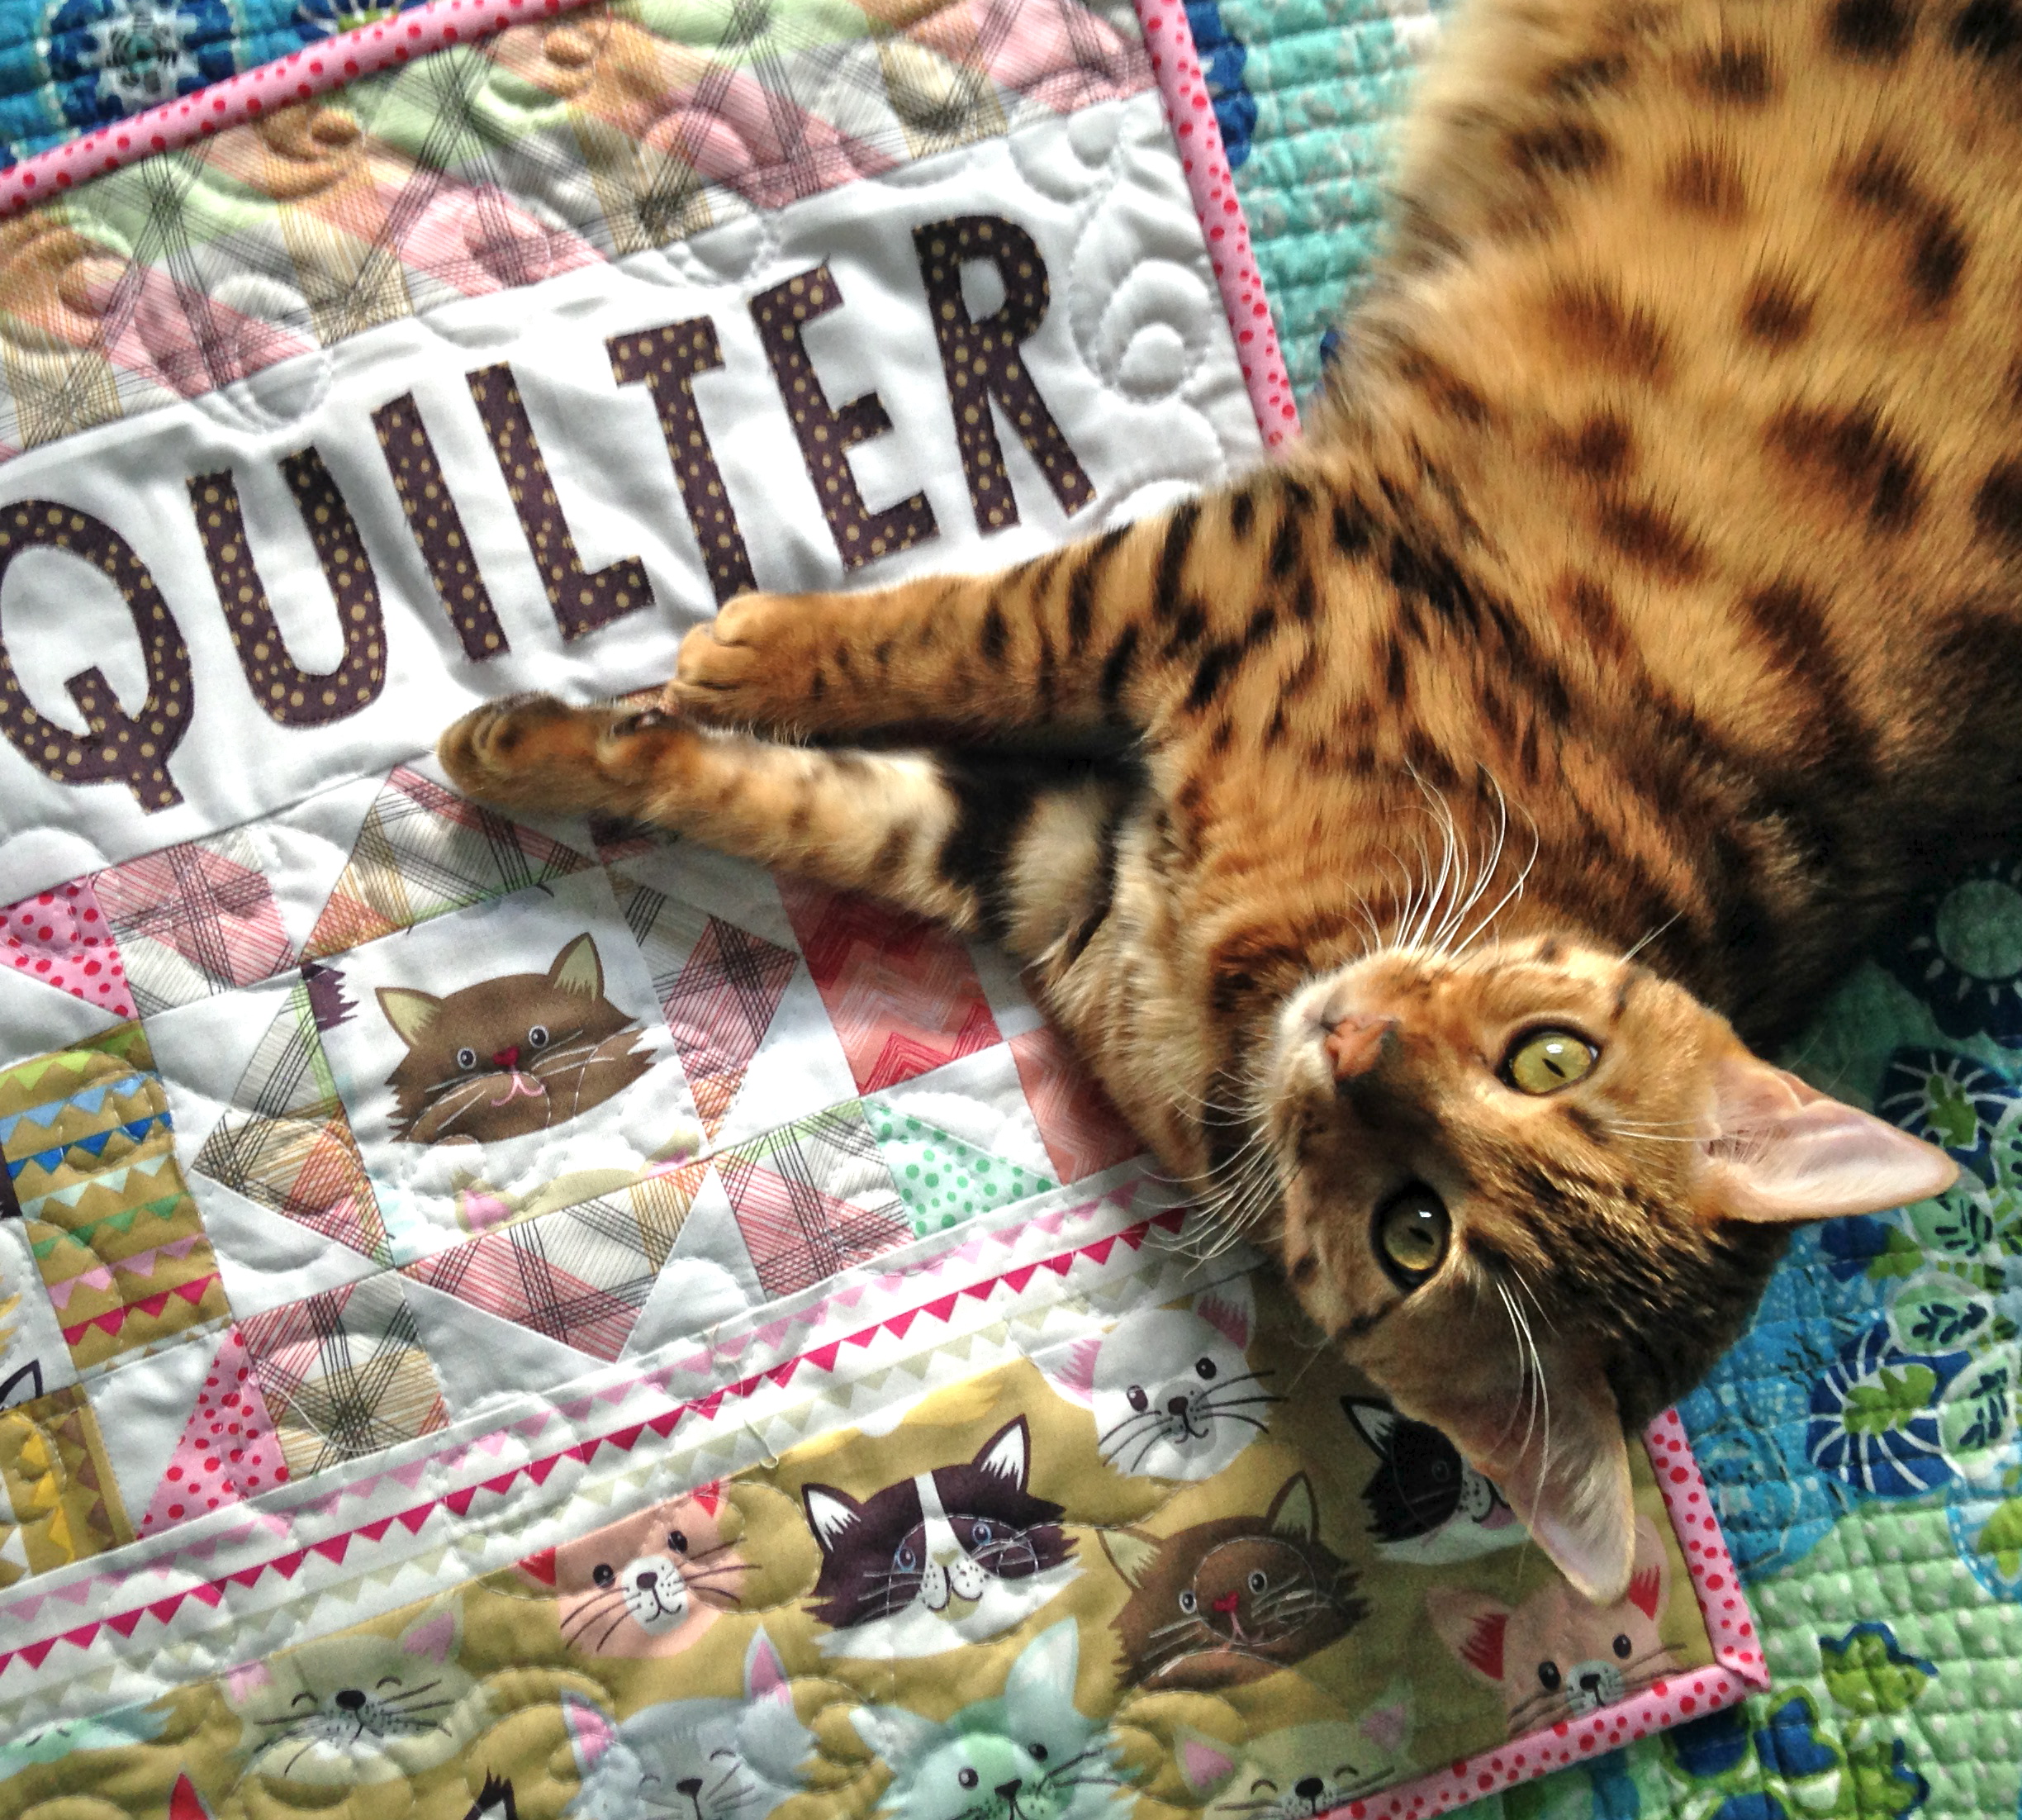
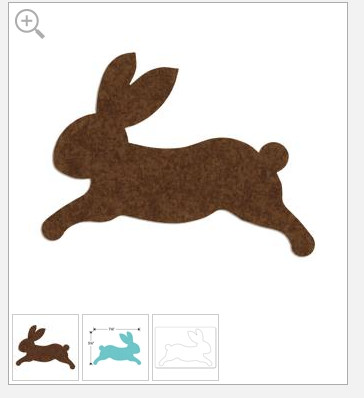
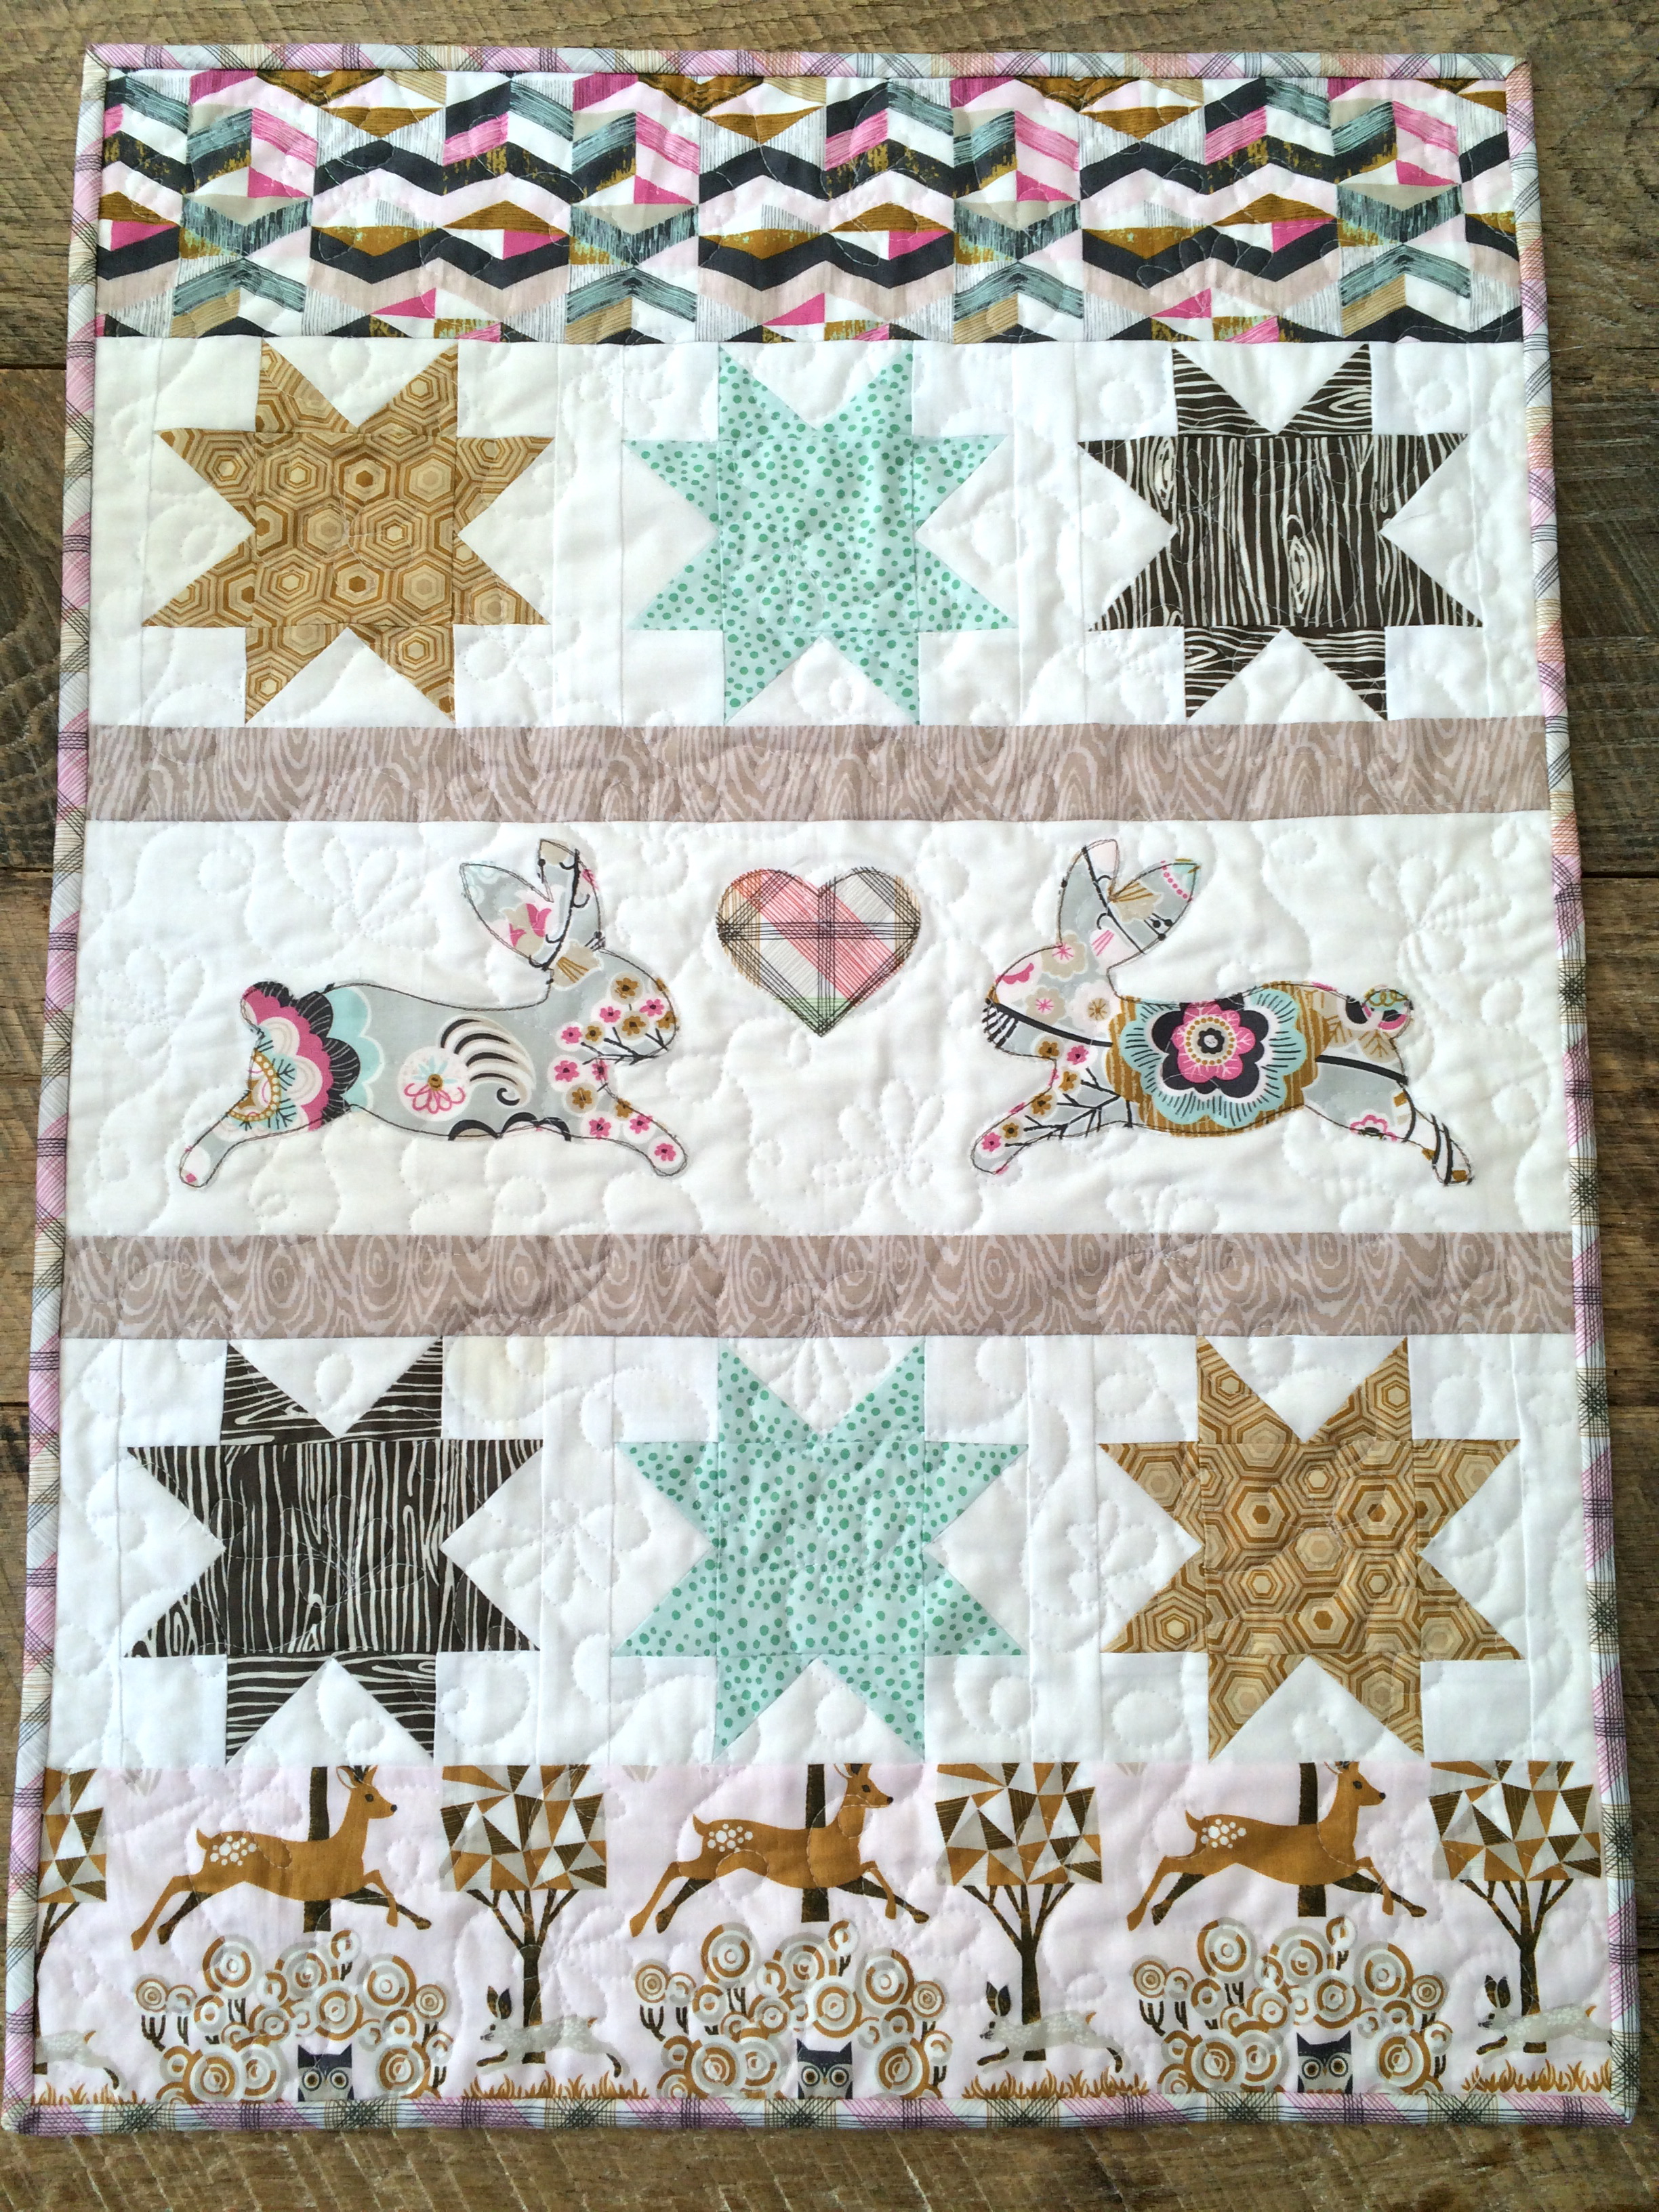
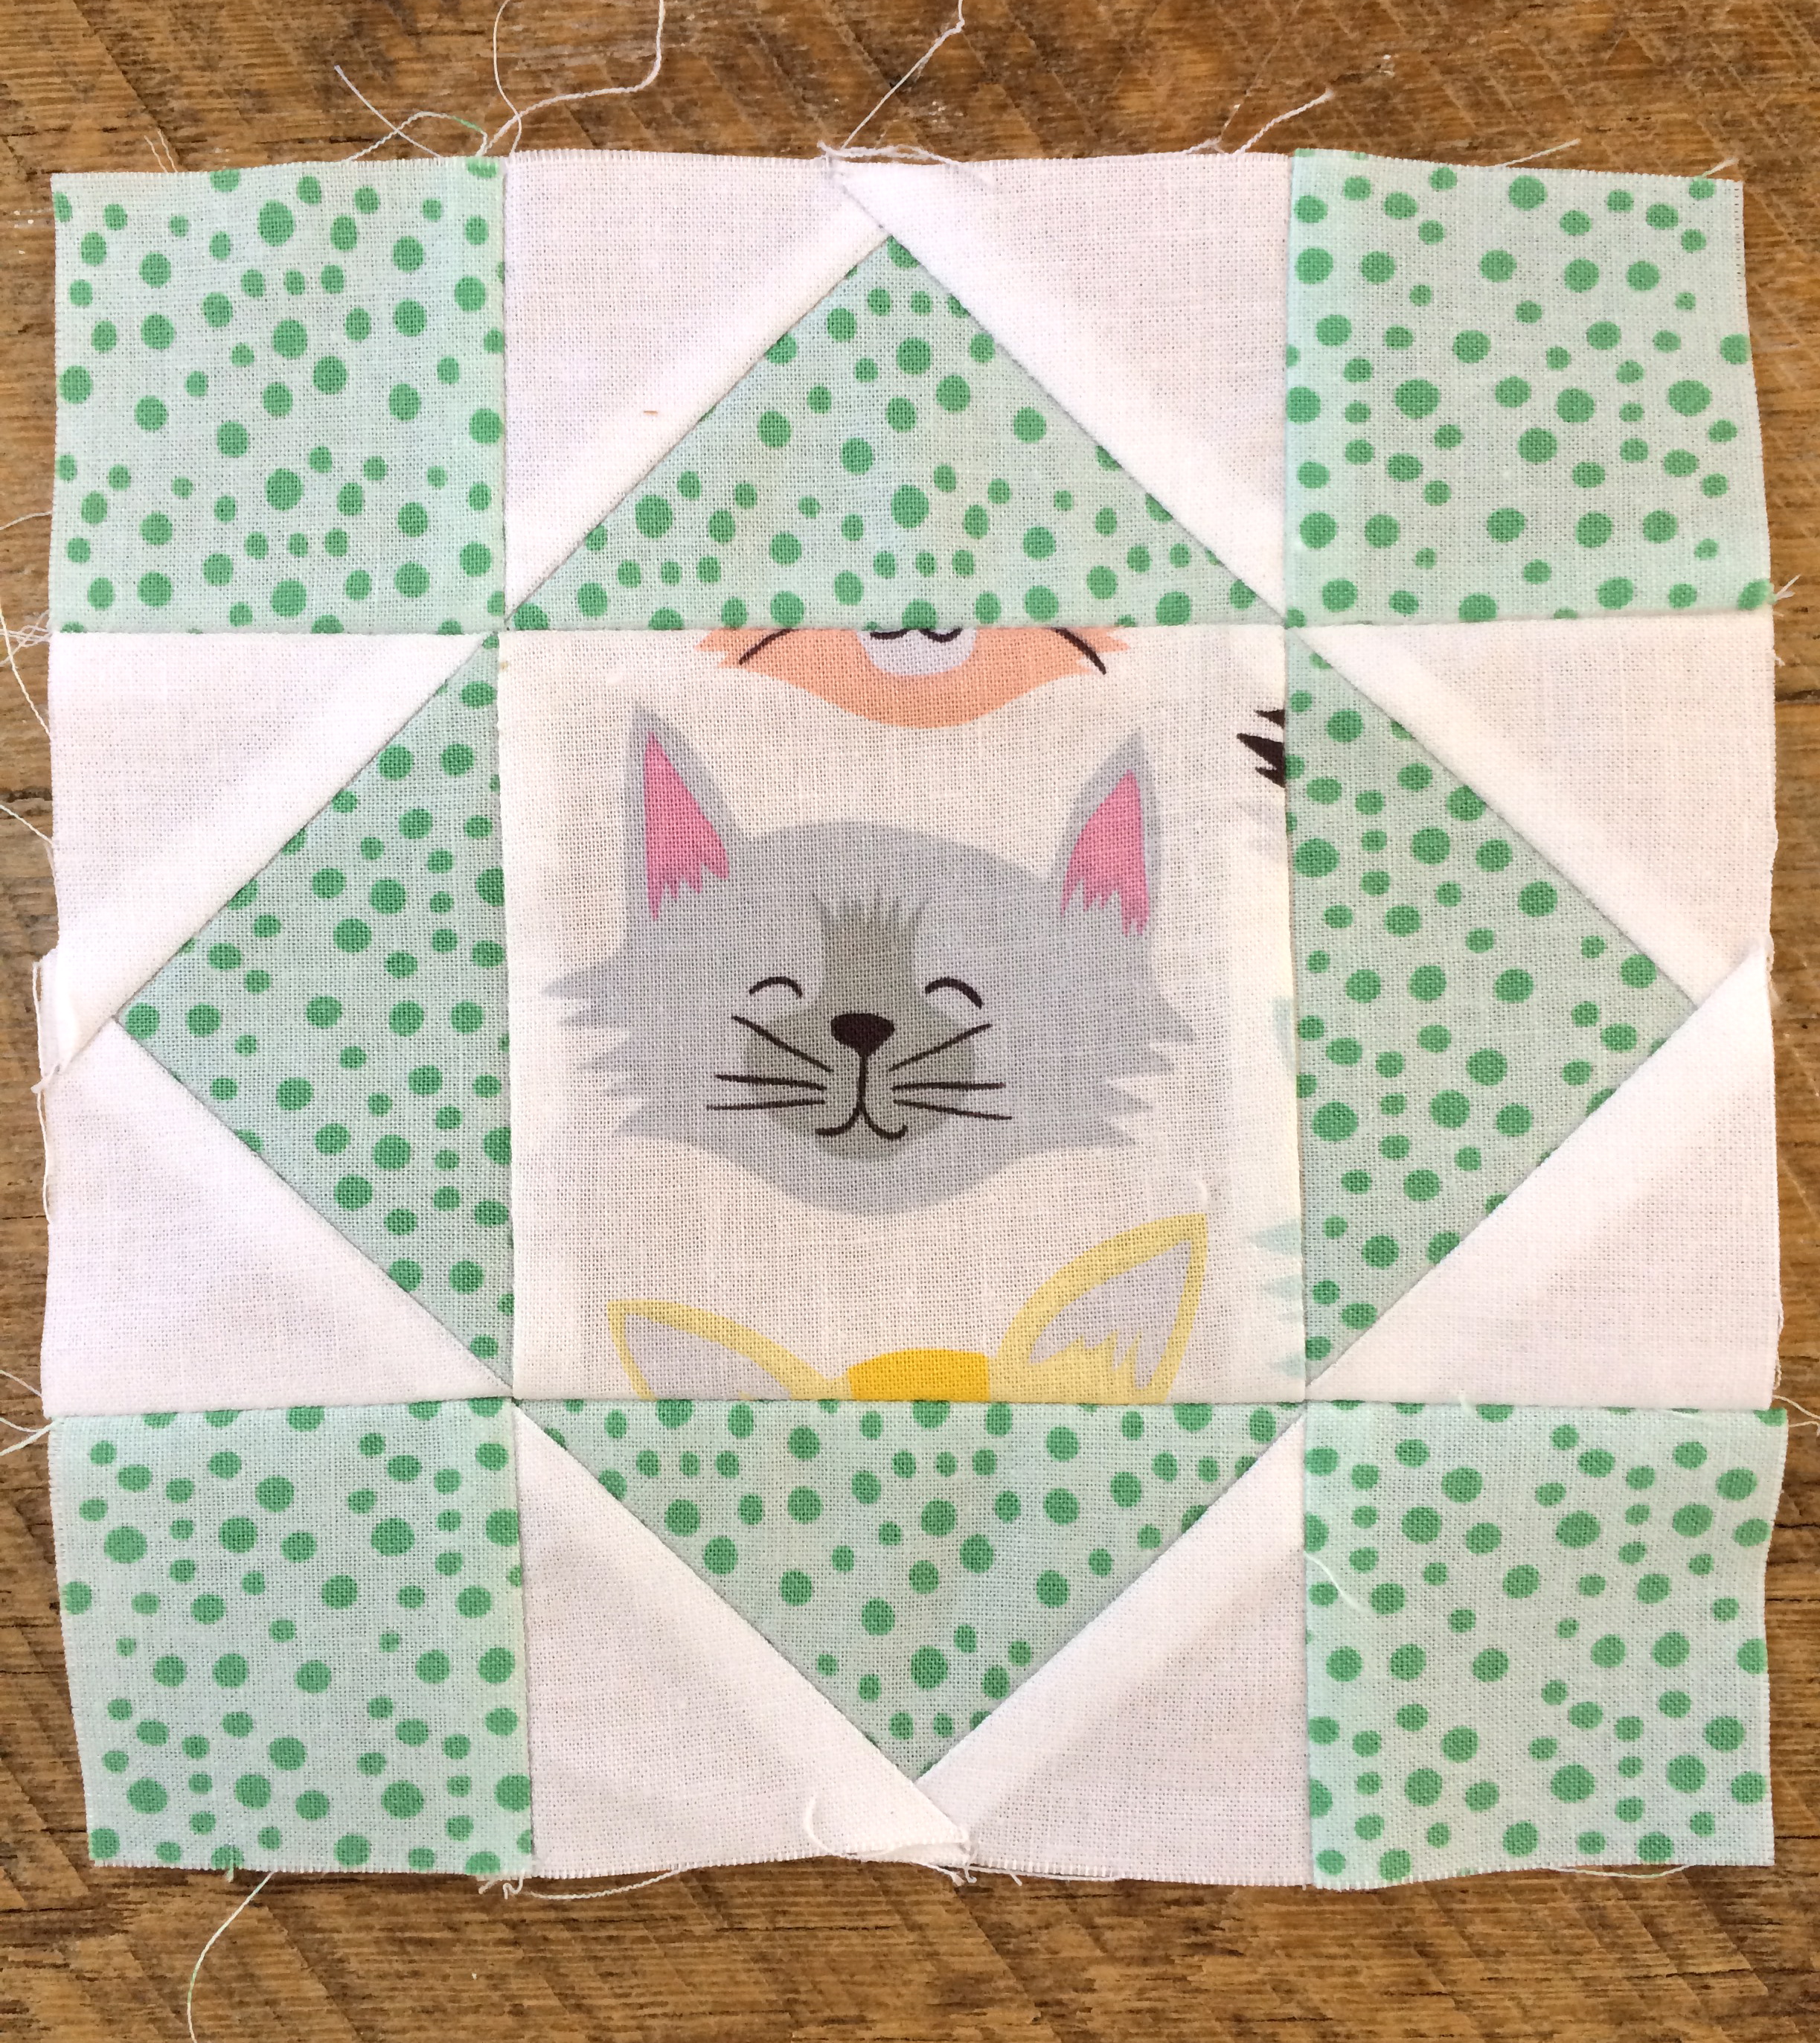
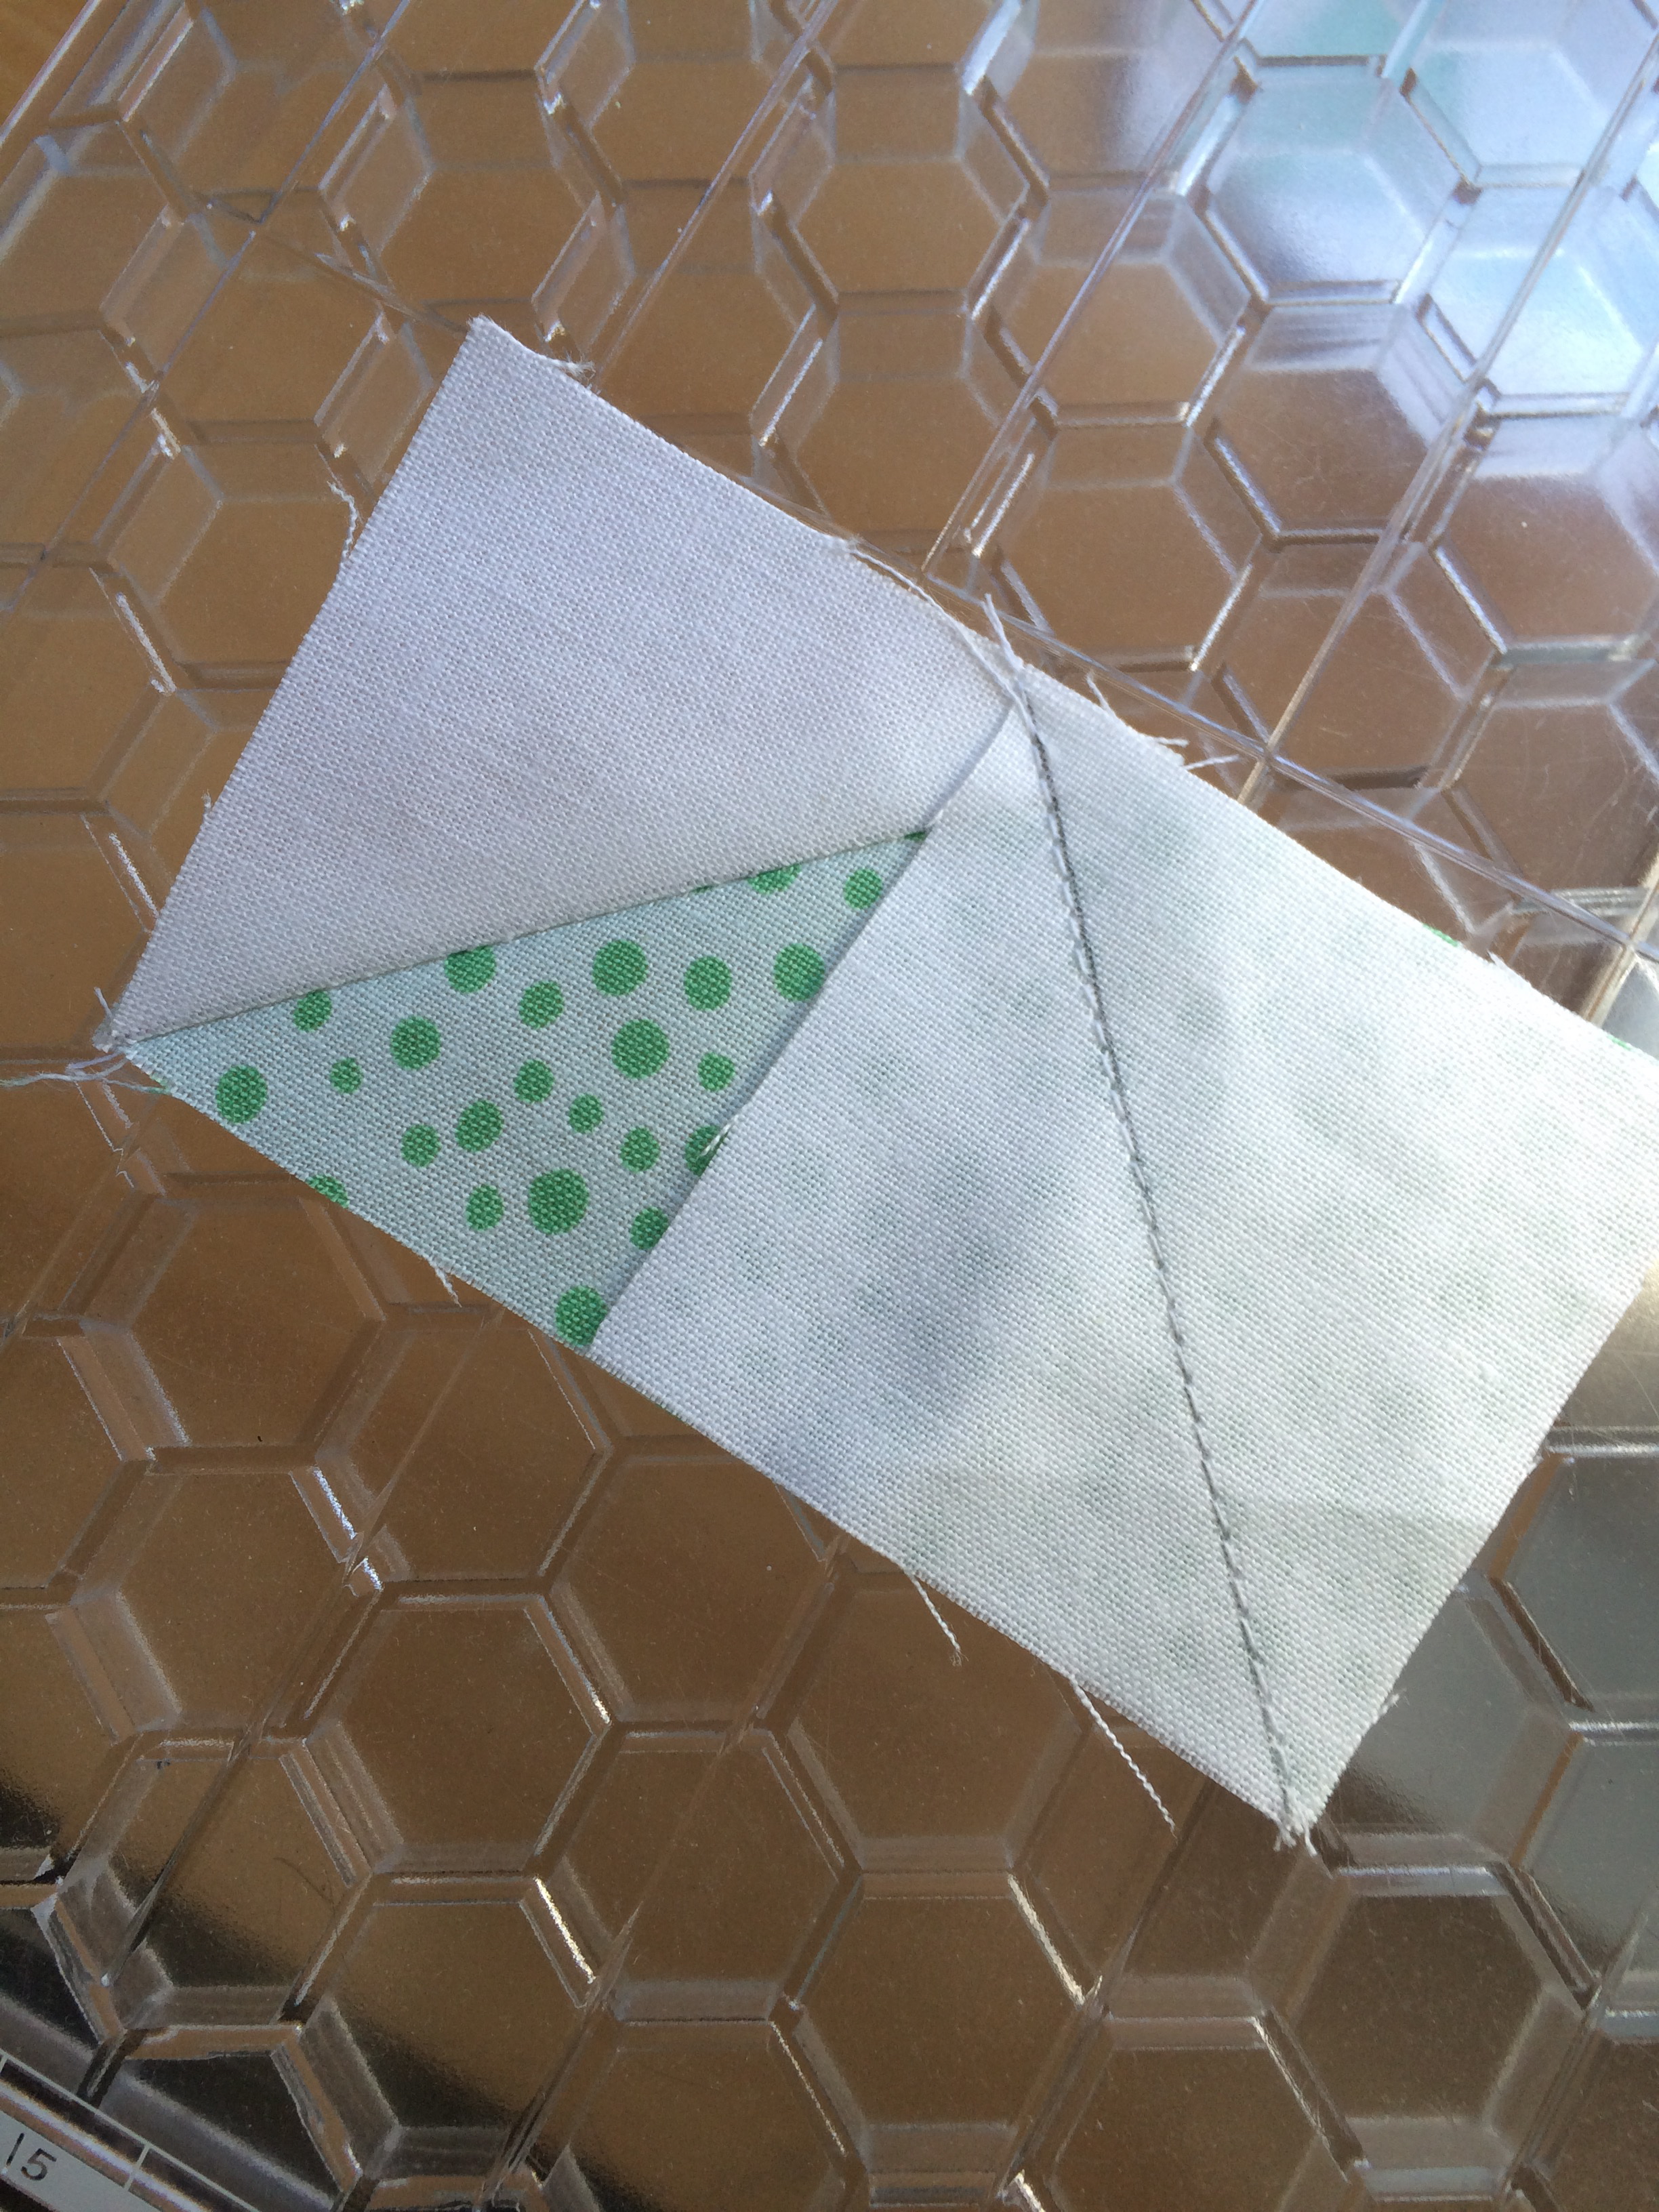
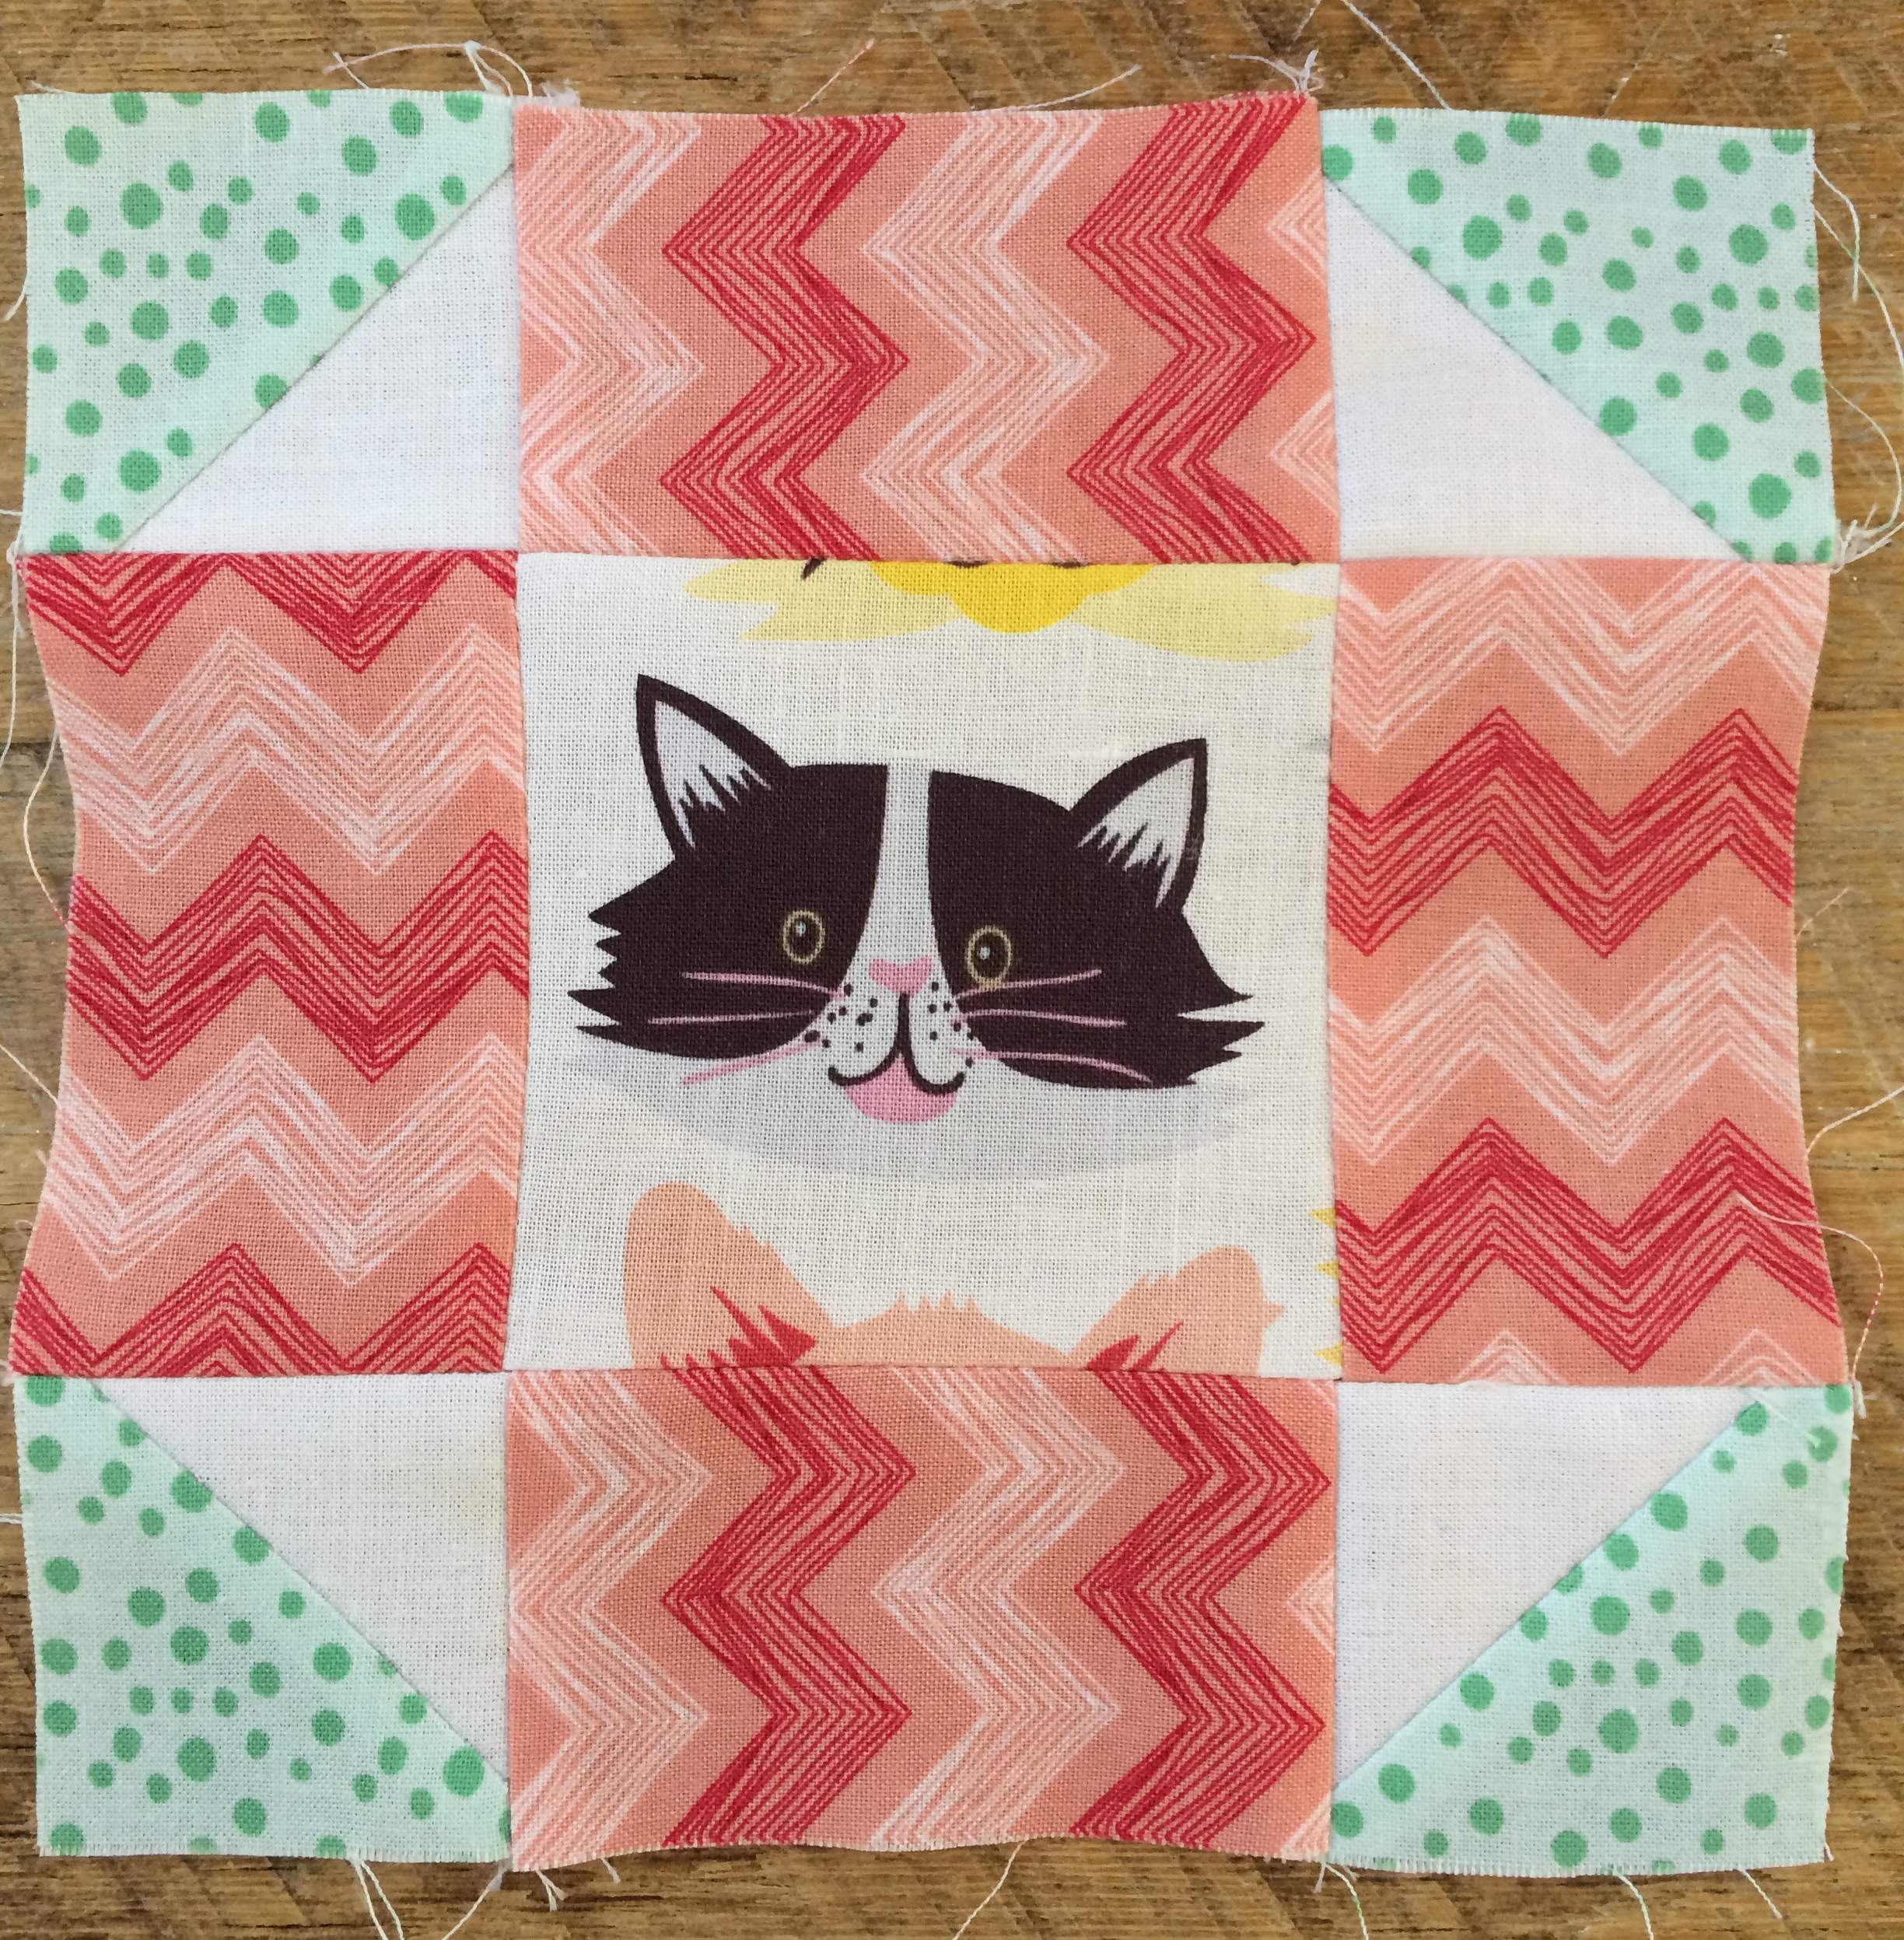
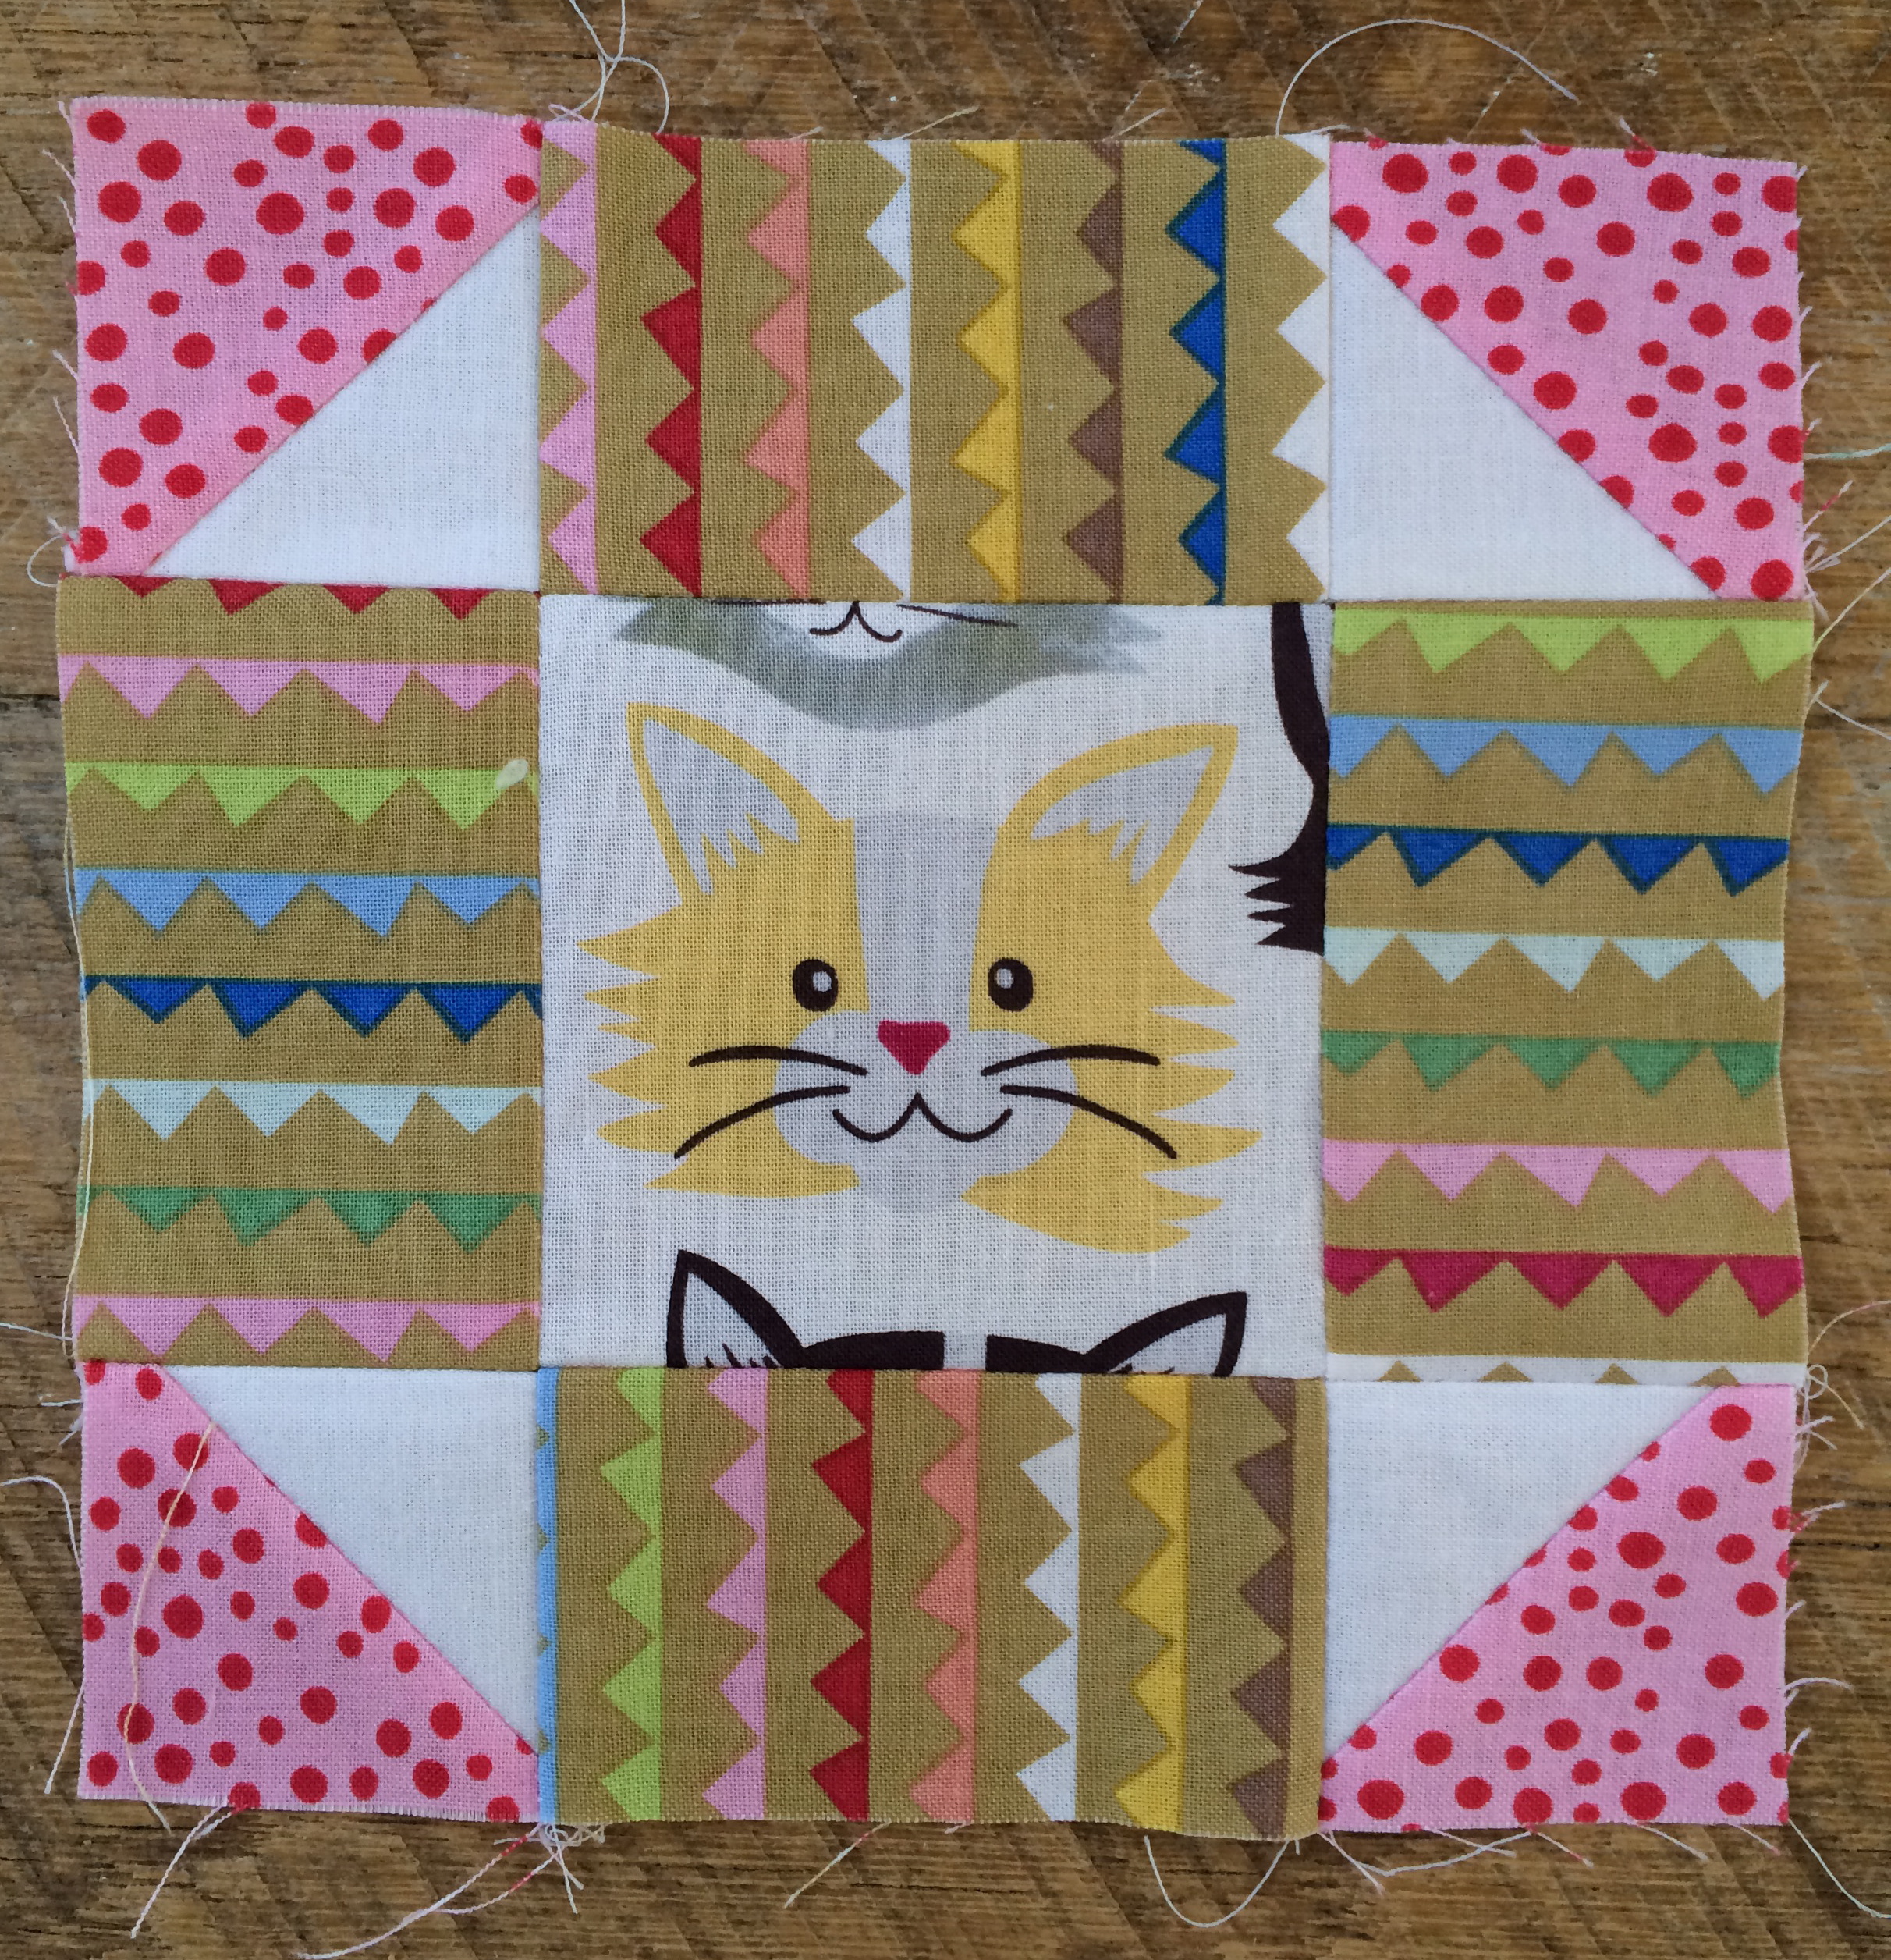
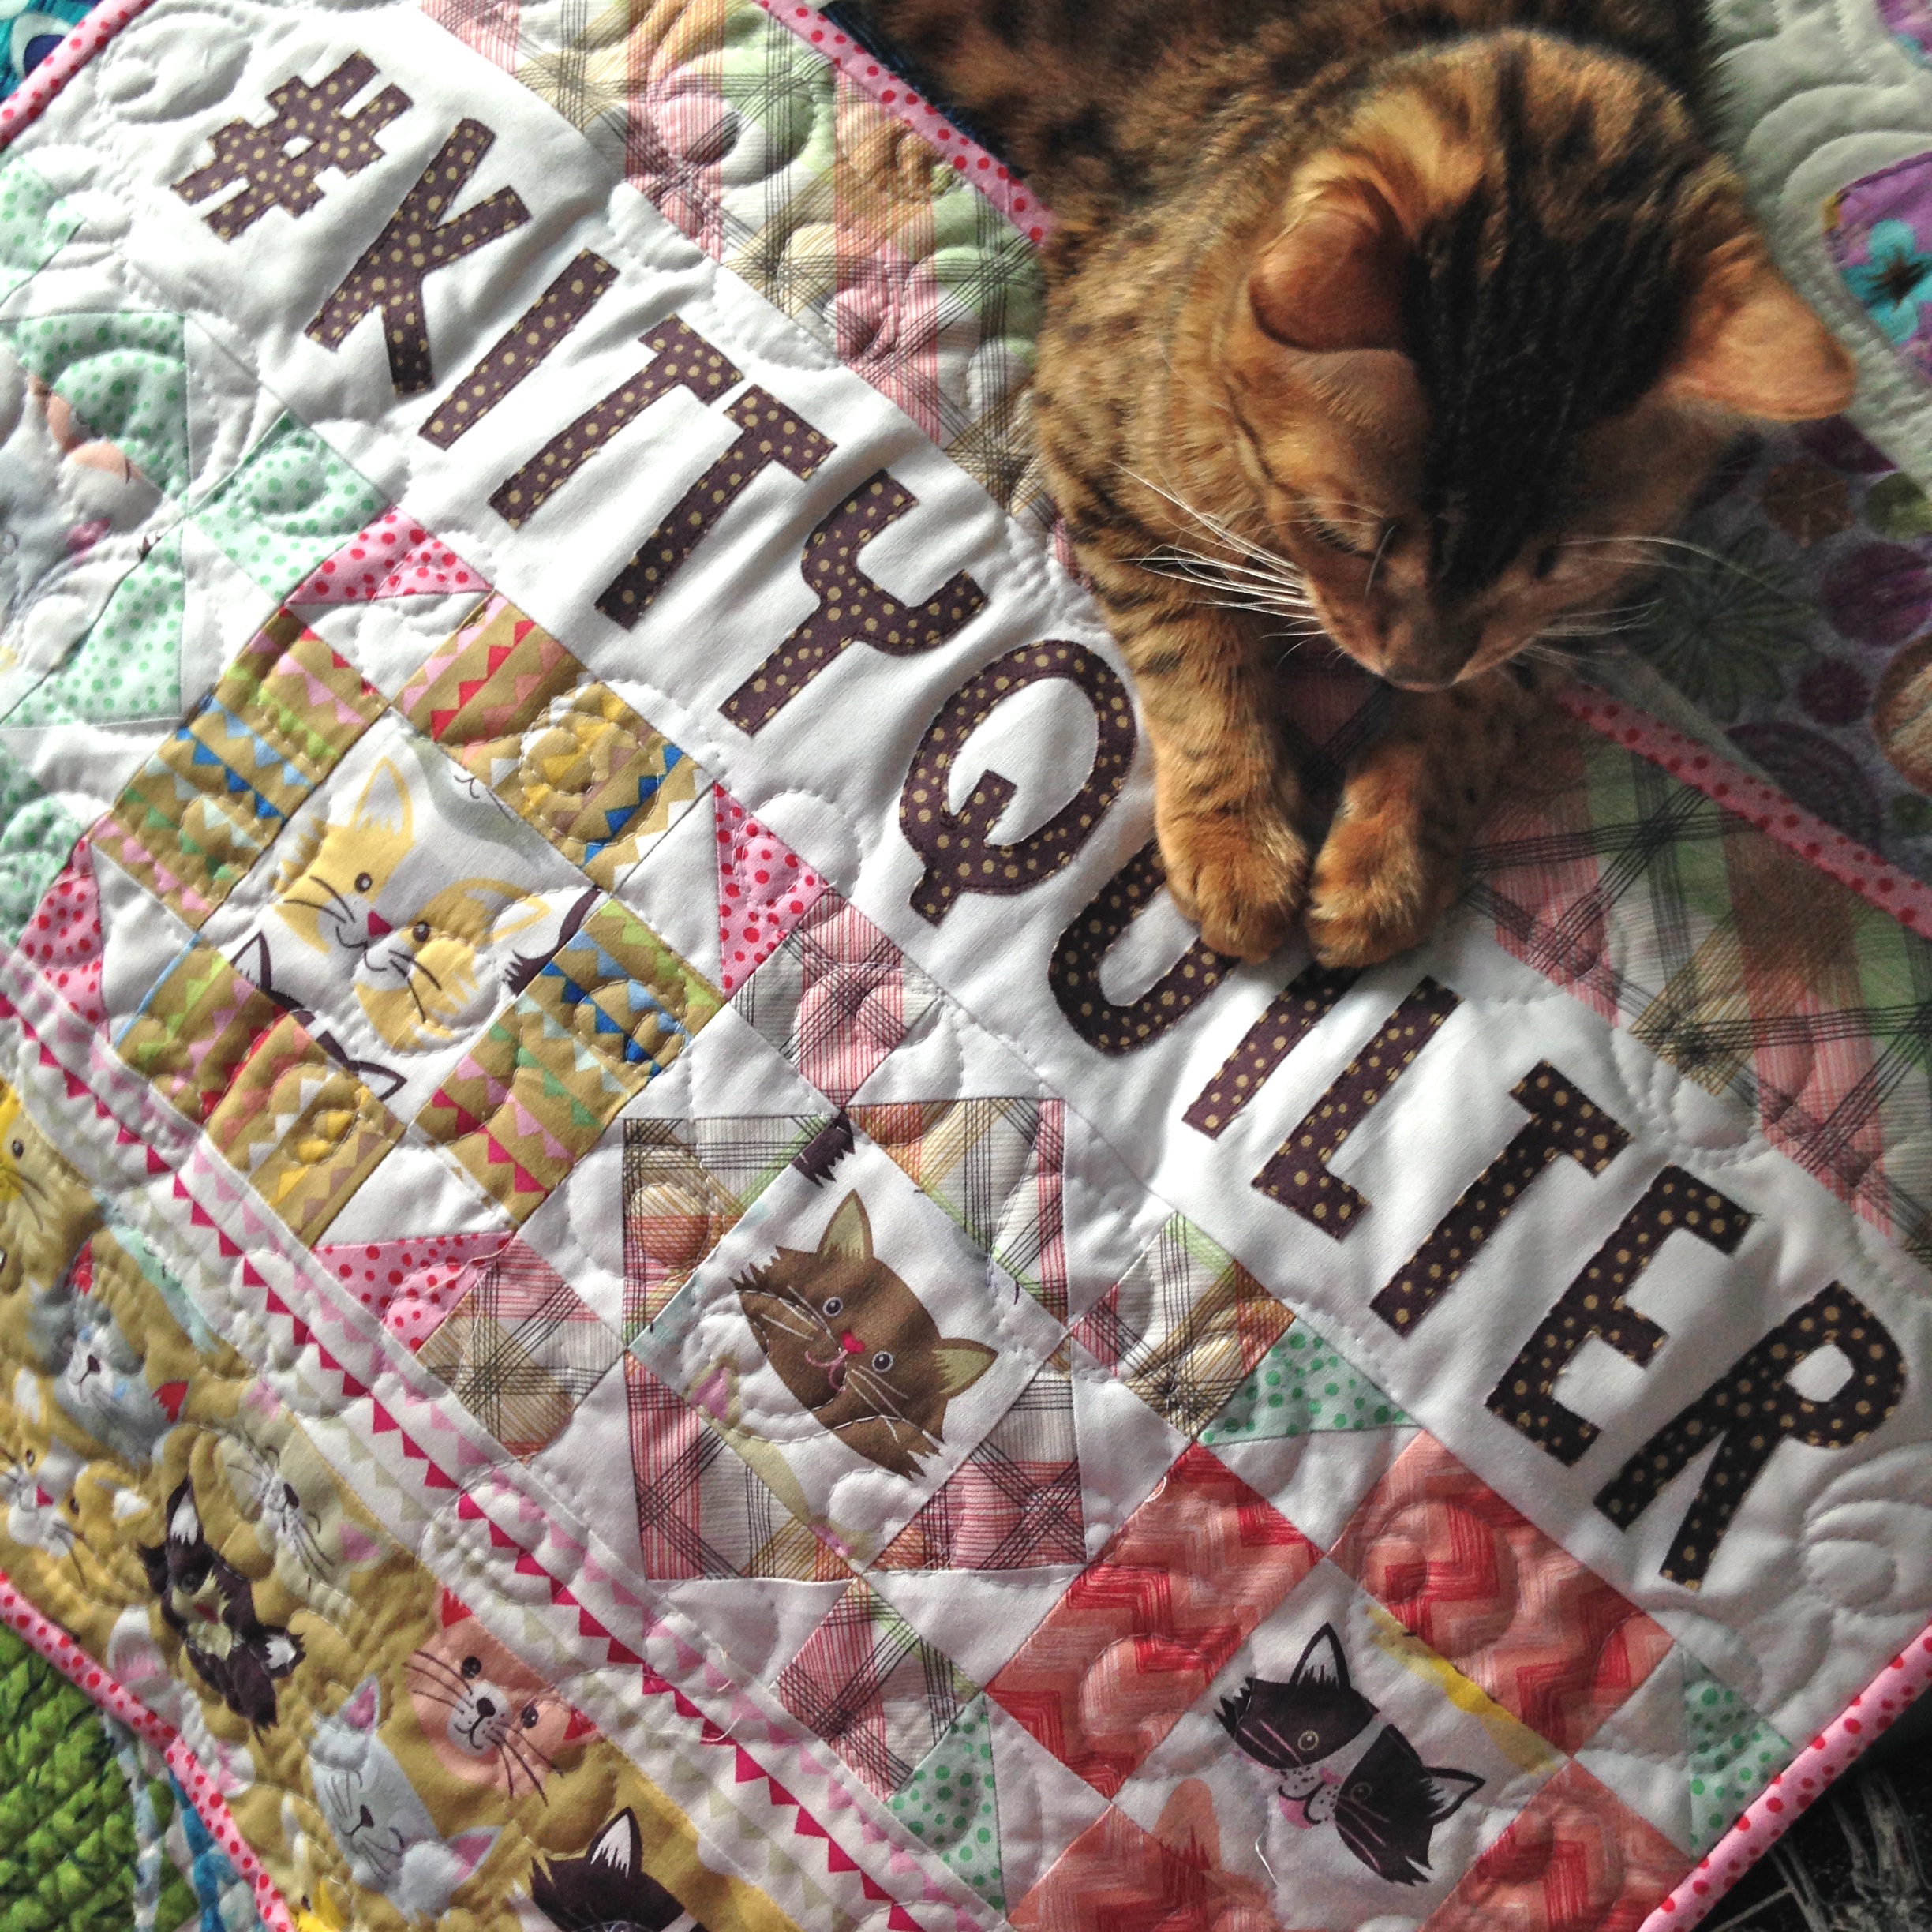
This little quilt features sawtooth blocks and appliqué.  The fabrics are from Blend Fabrics Natural Wonder fabric line.  I love that there are bunnies in the theme fabric.  The colors are soft and natural.  The bunny and hearts are cut with Sizzix dies.  Do you want to make one?  Here’s how!!

sizzix bunny blend natural wonder mini quilt 2
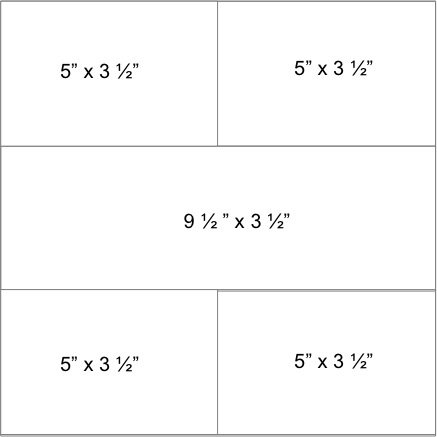
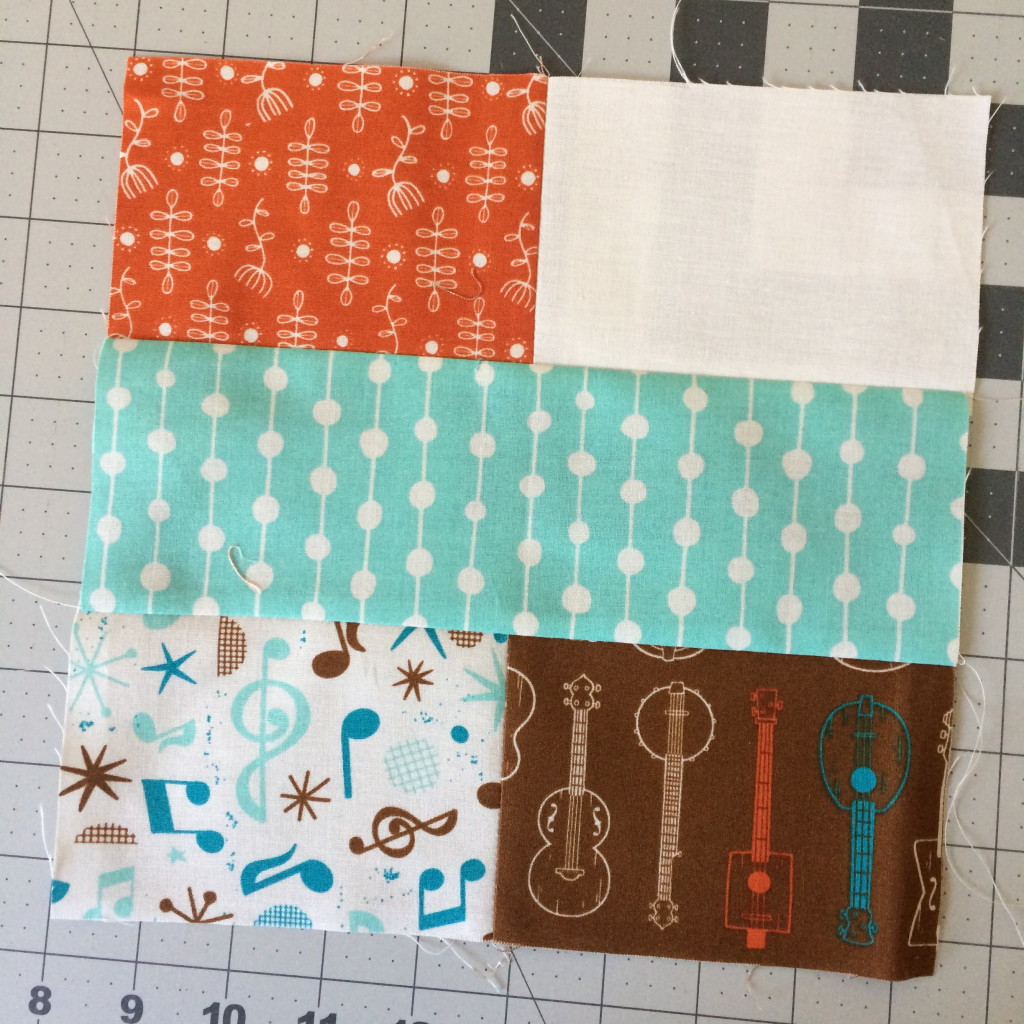
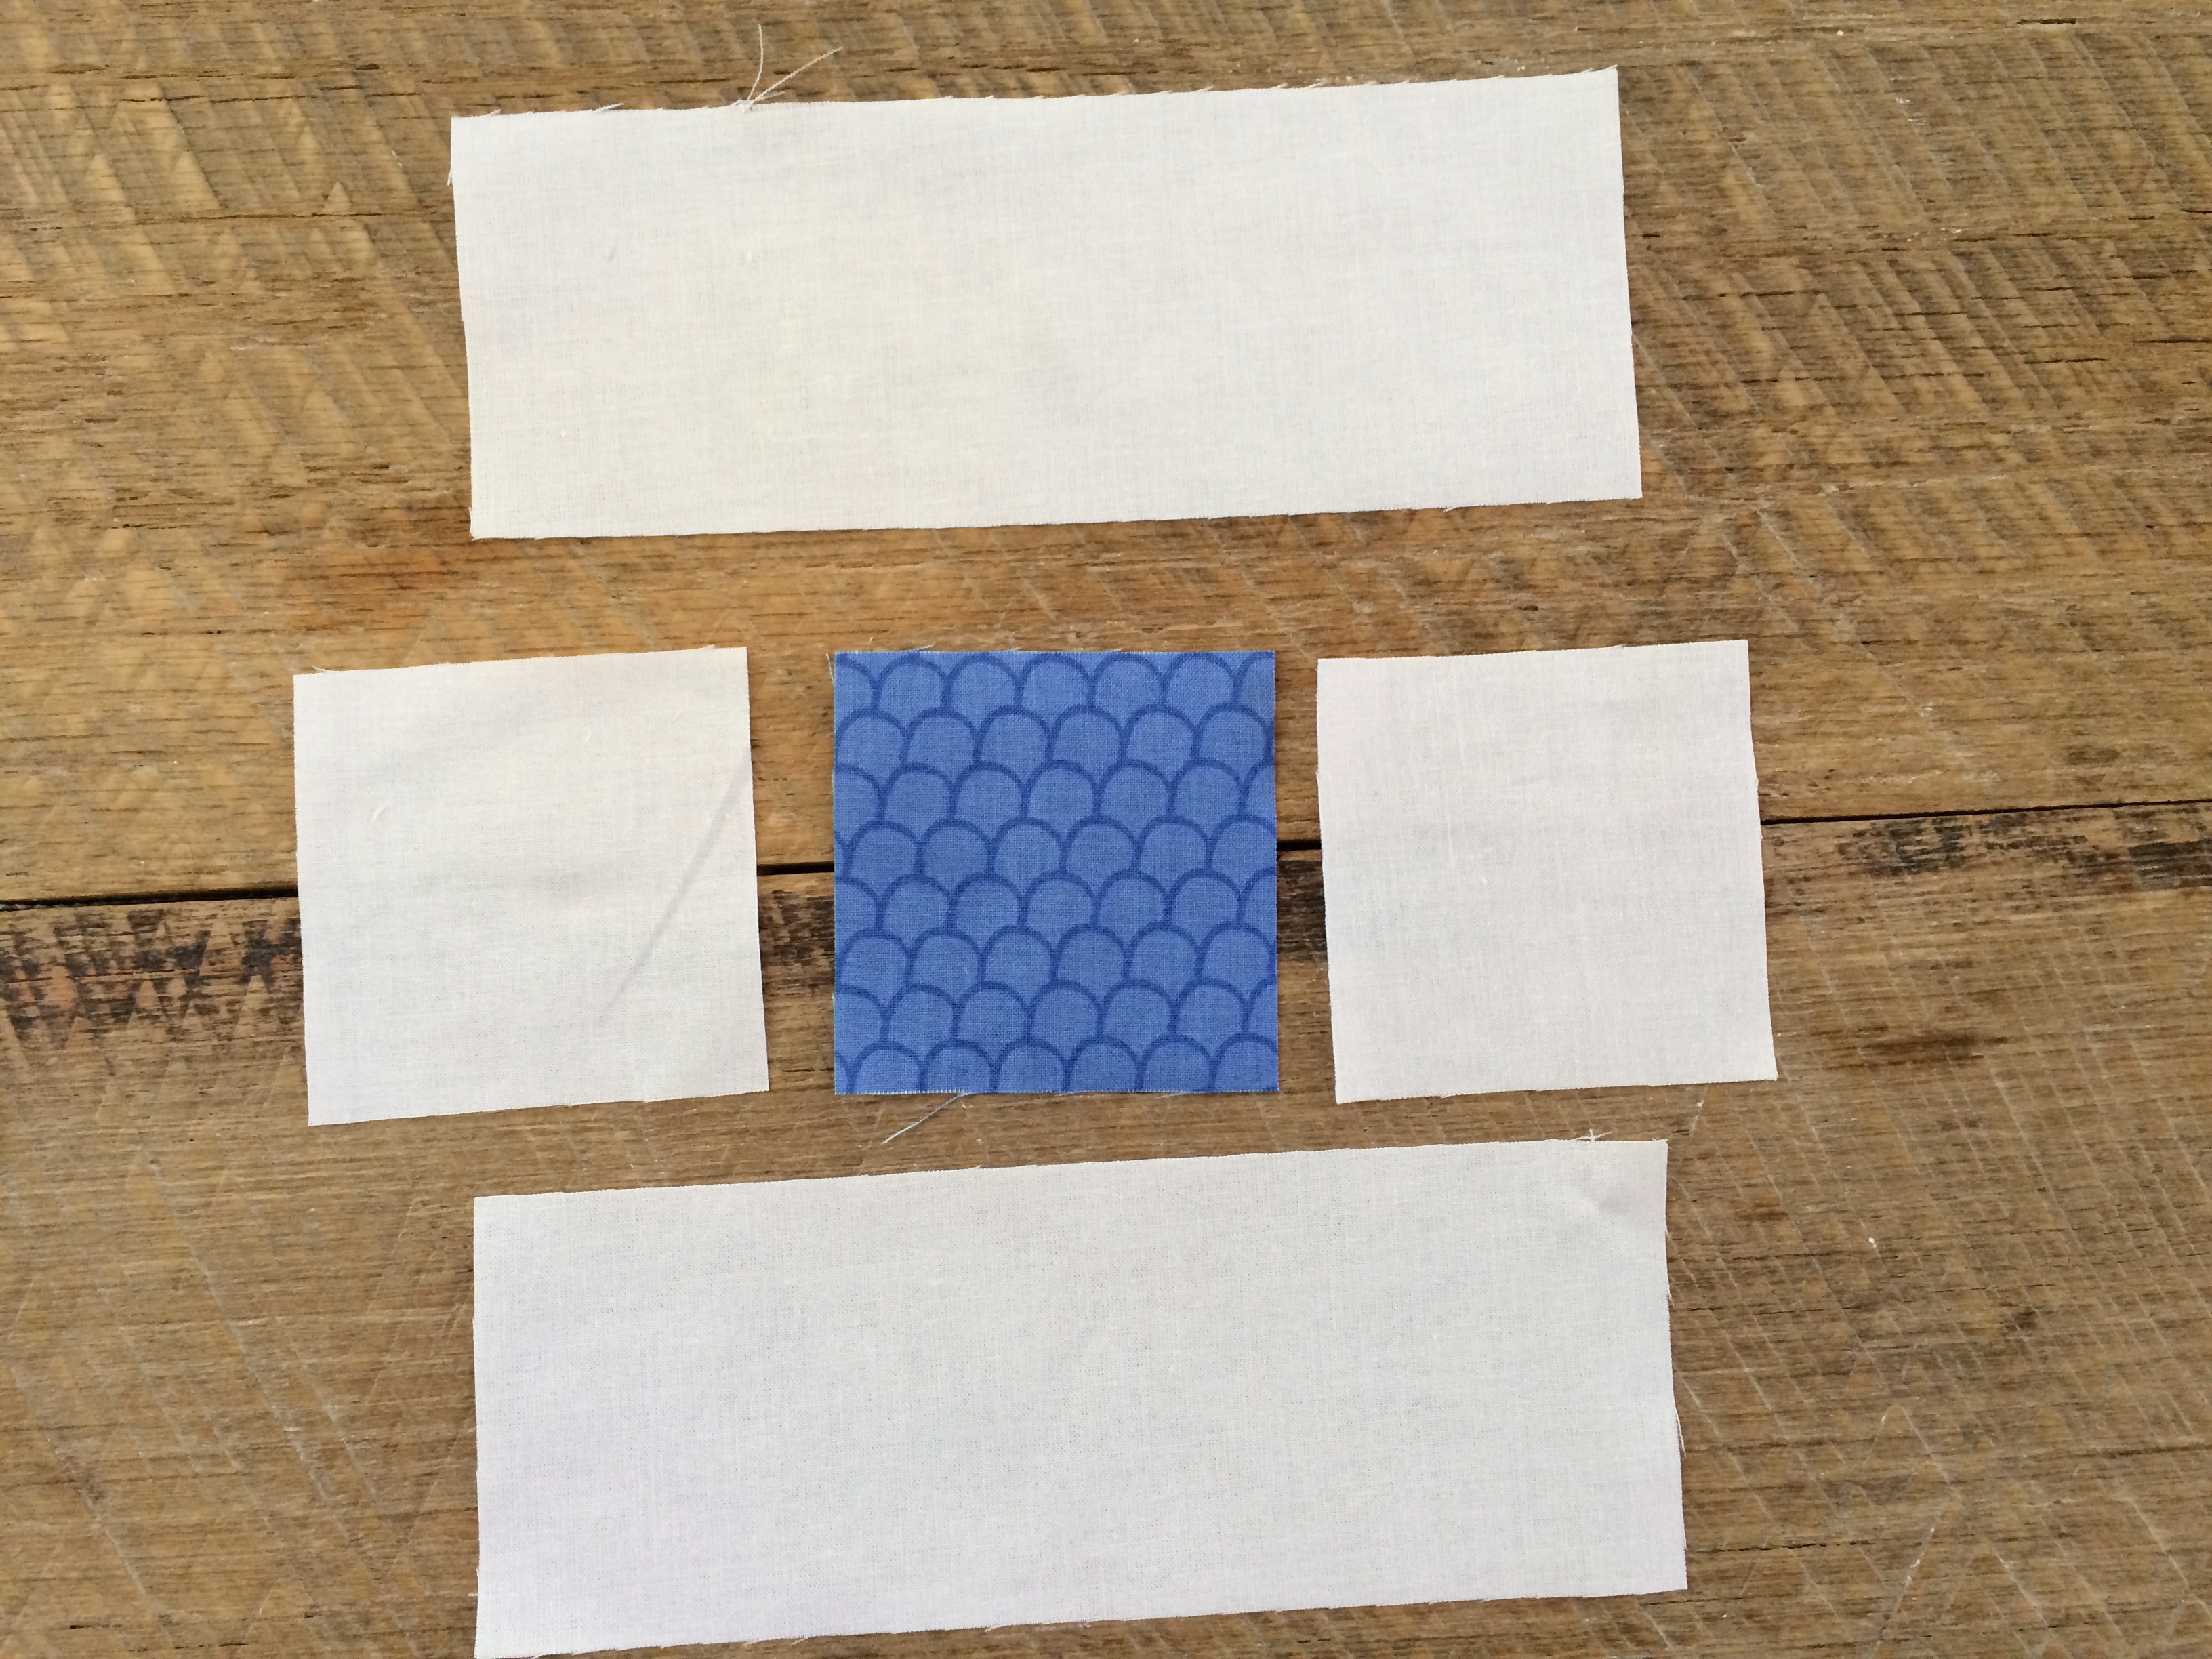
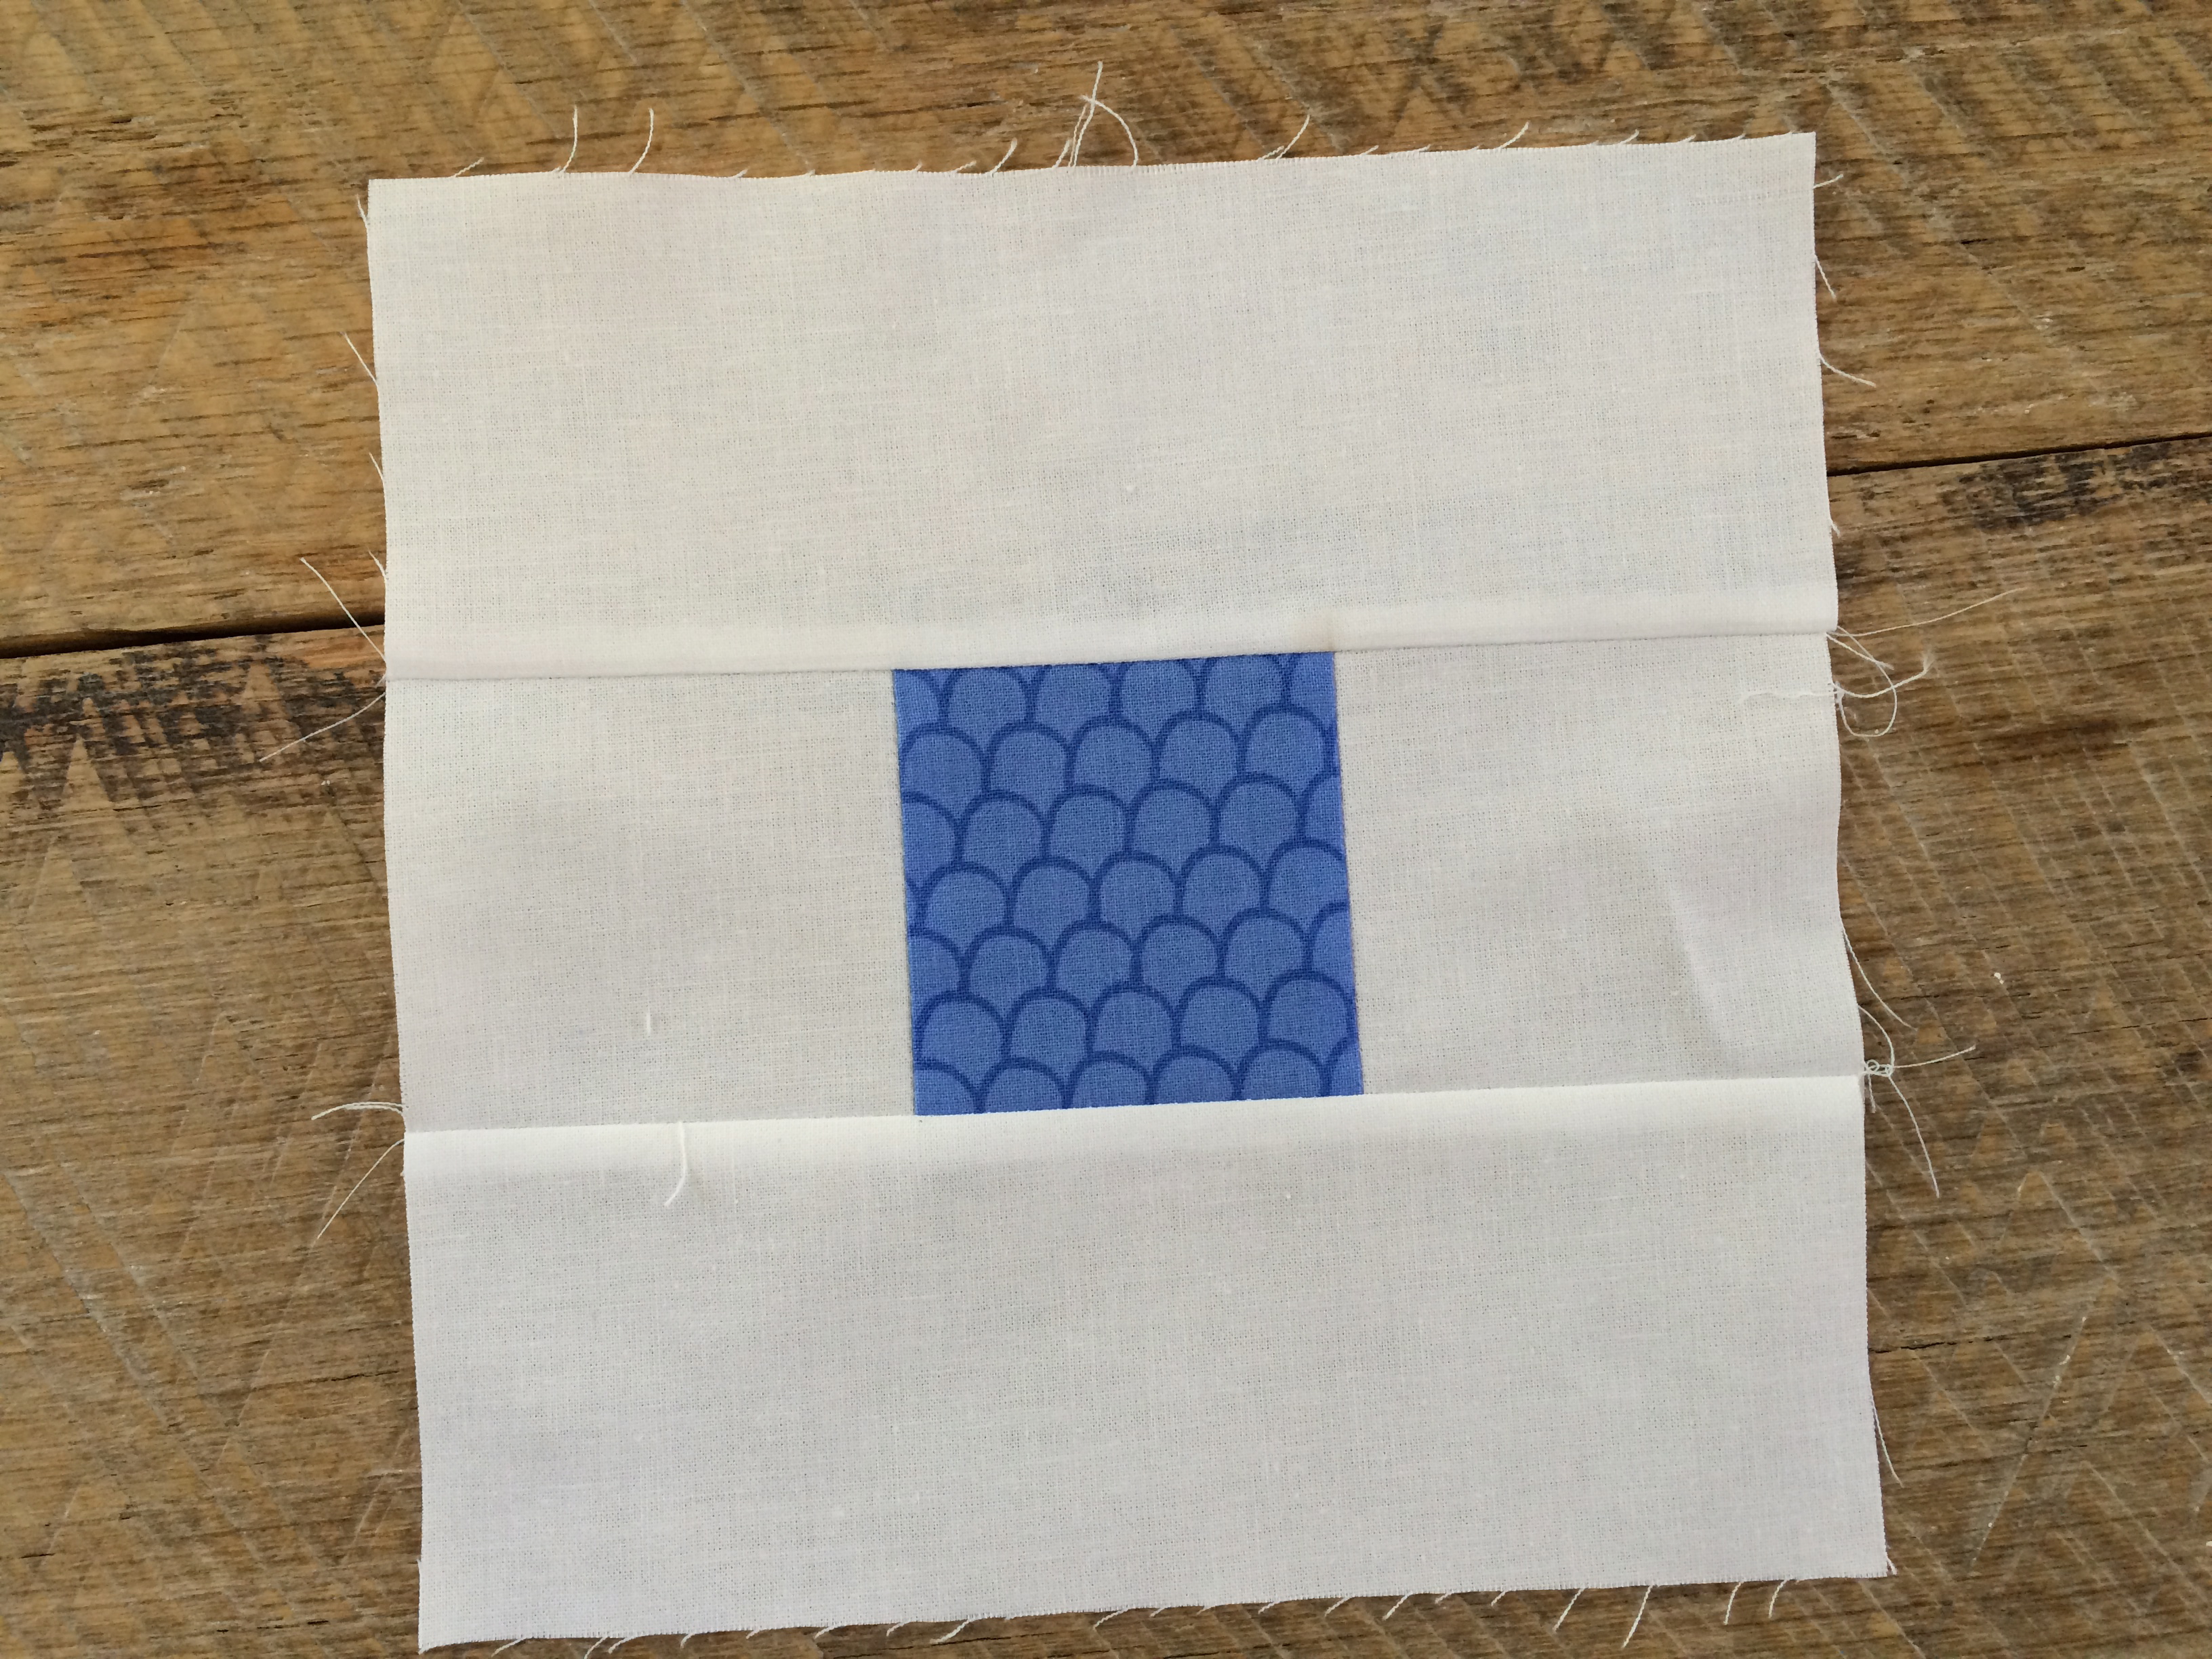
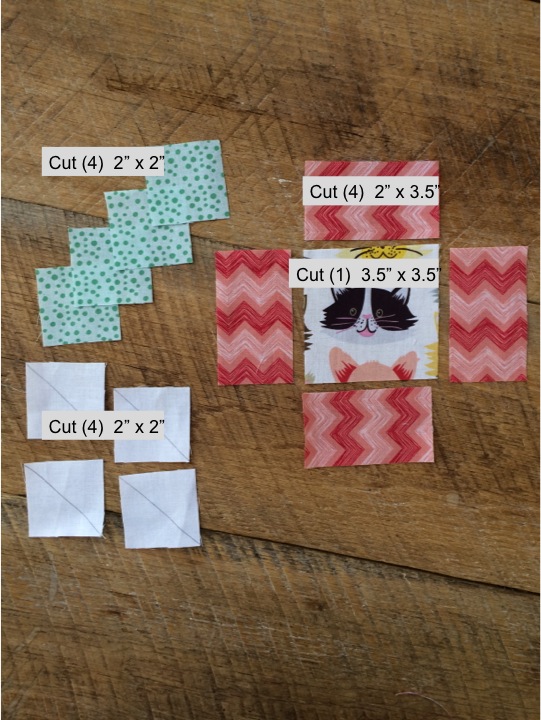
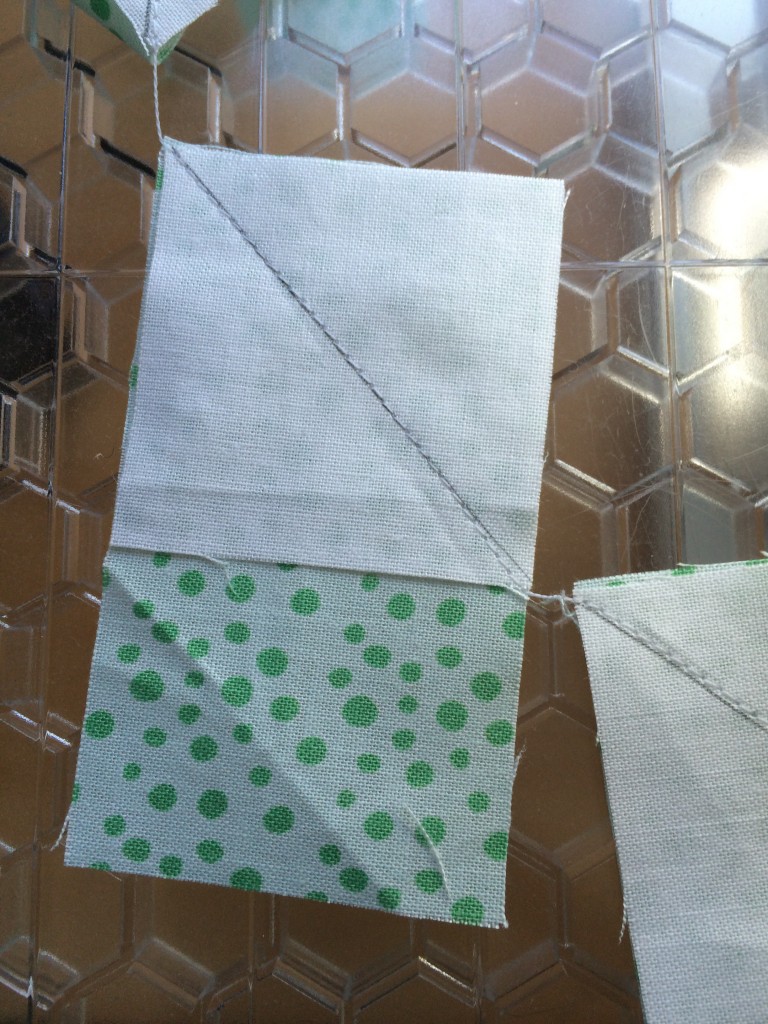
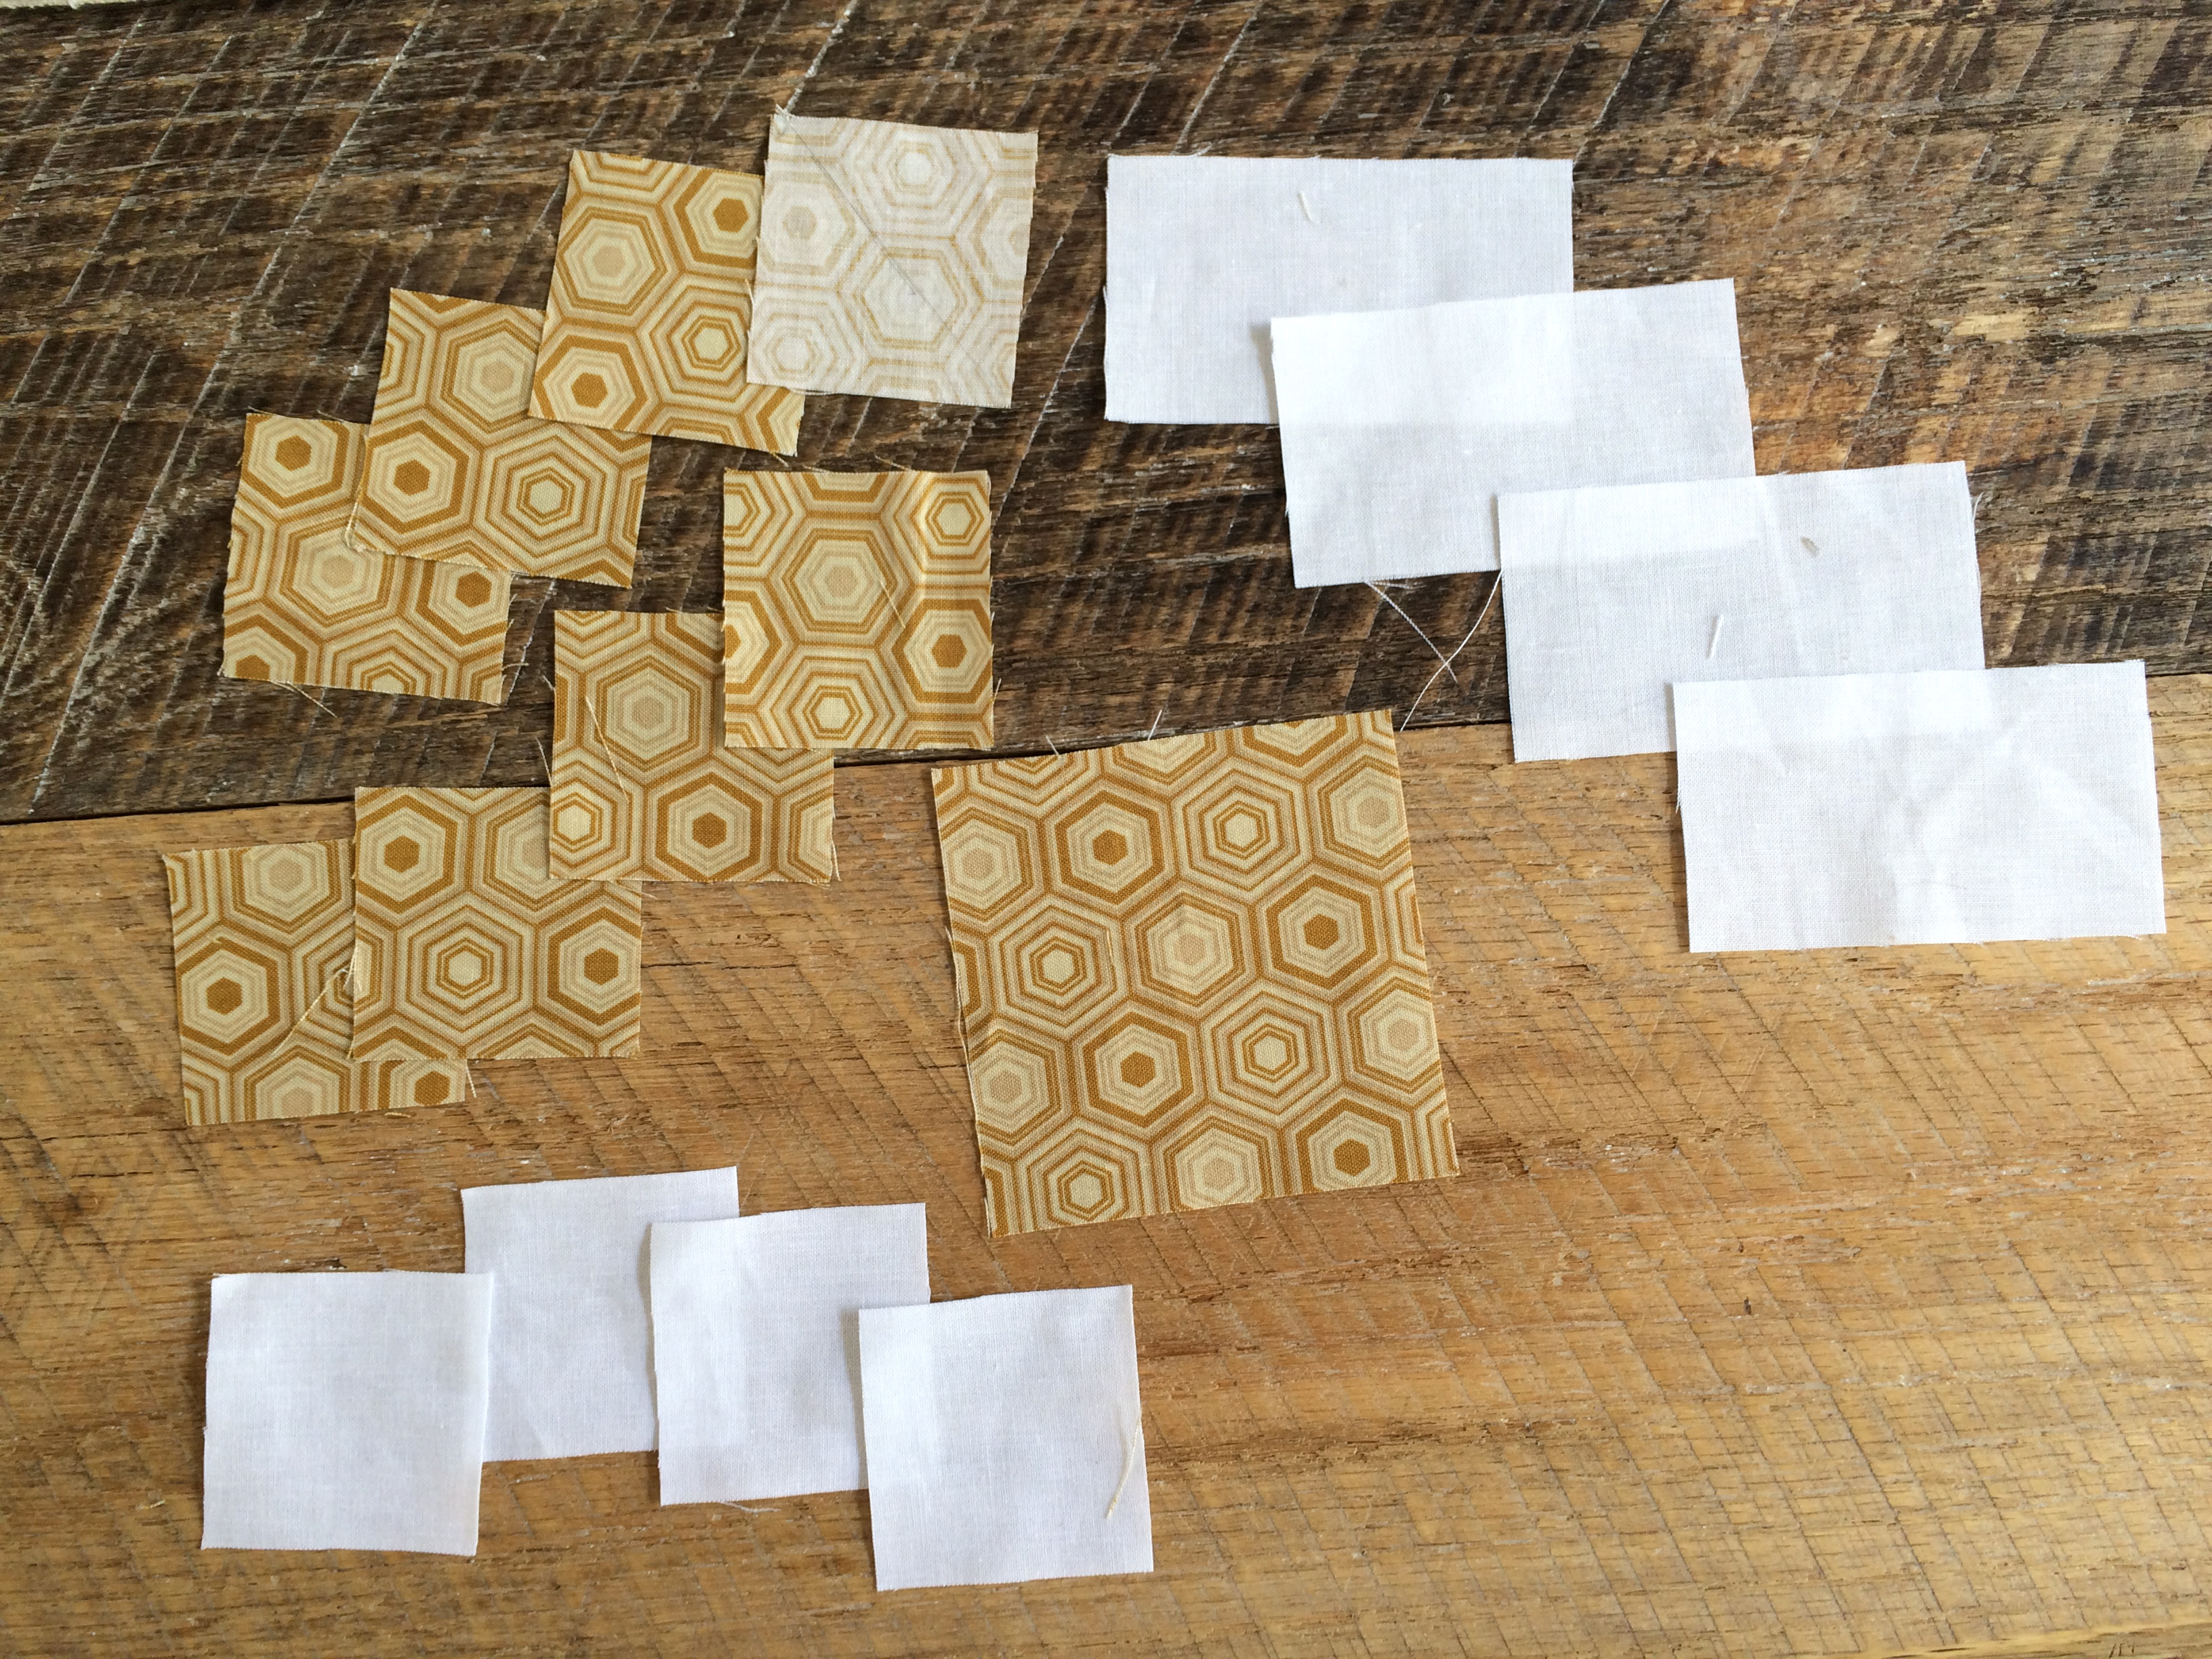
1/4″ seams used throughout 
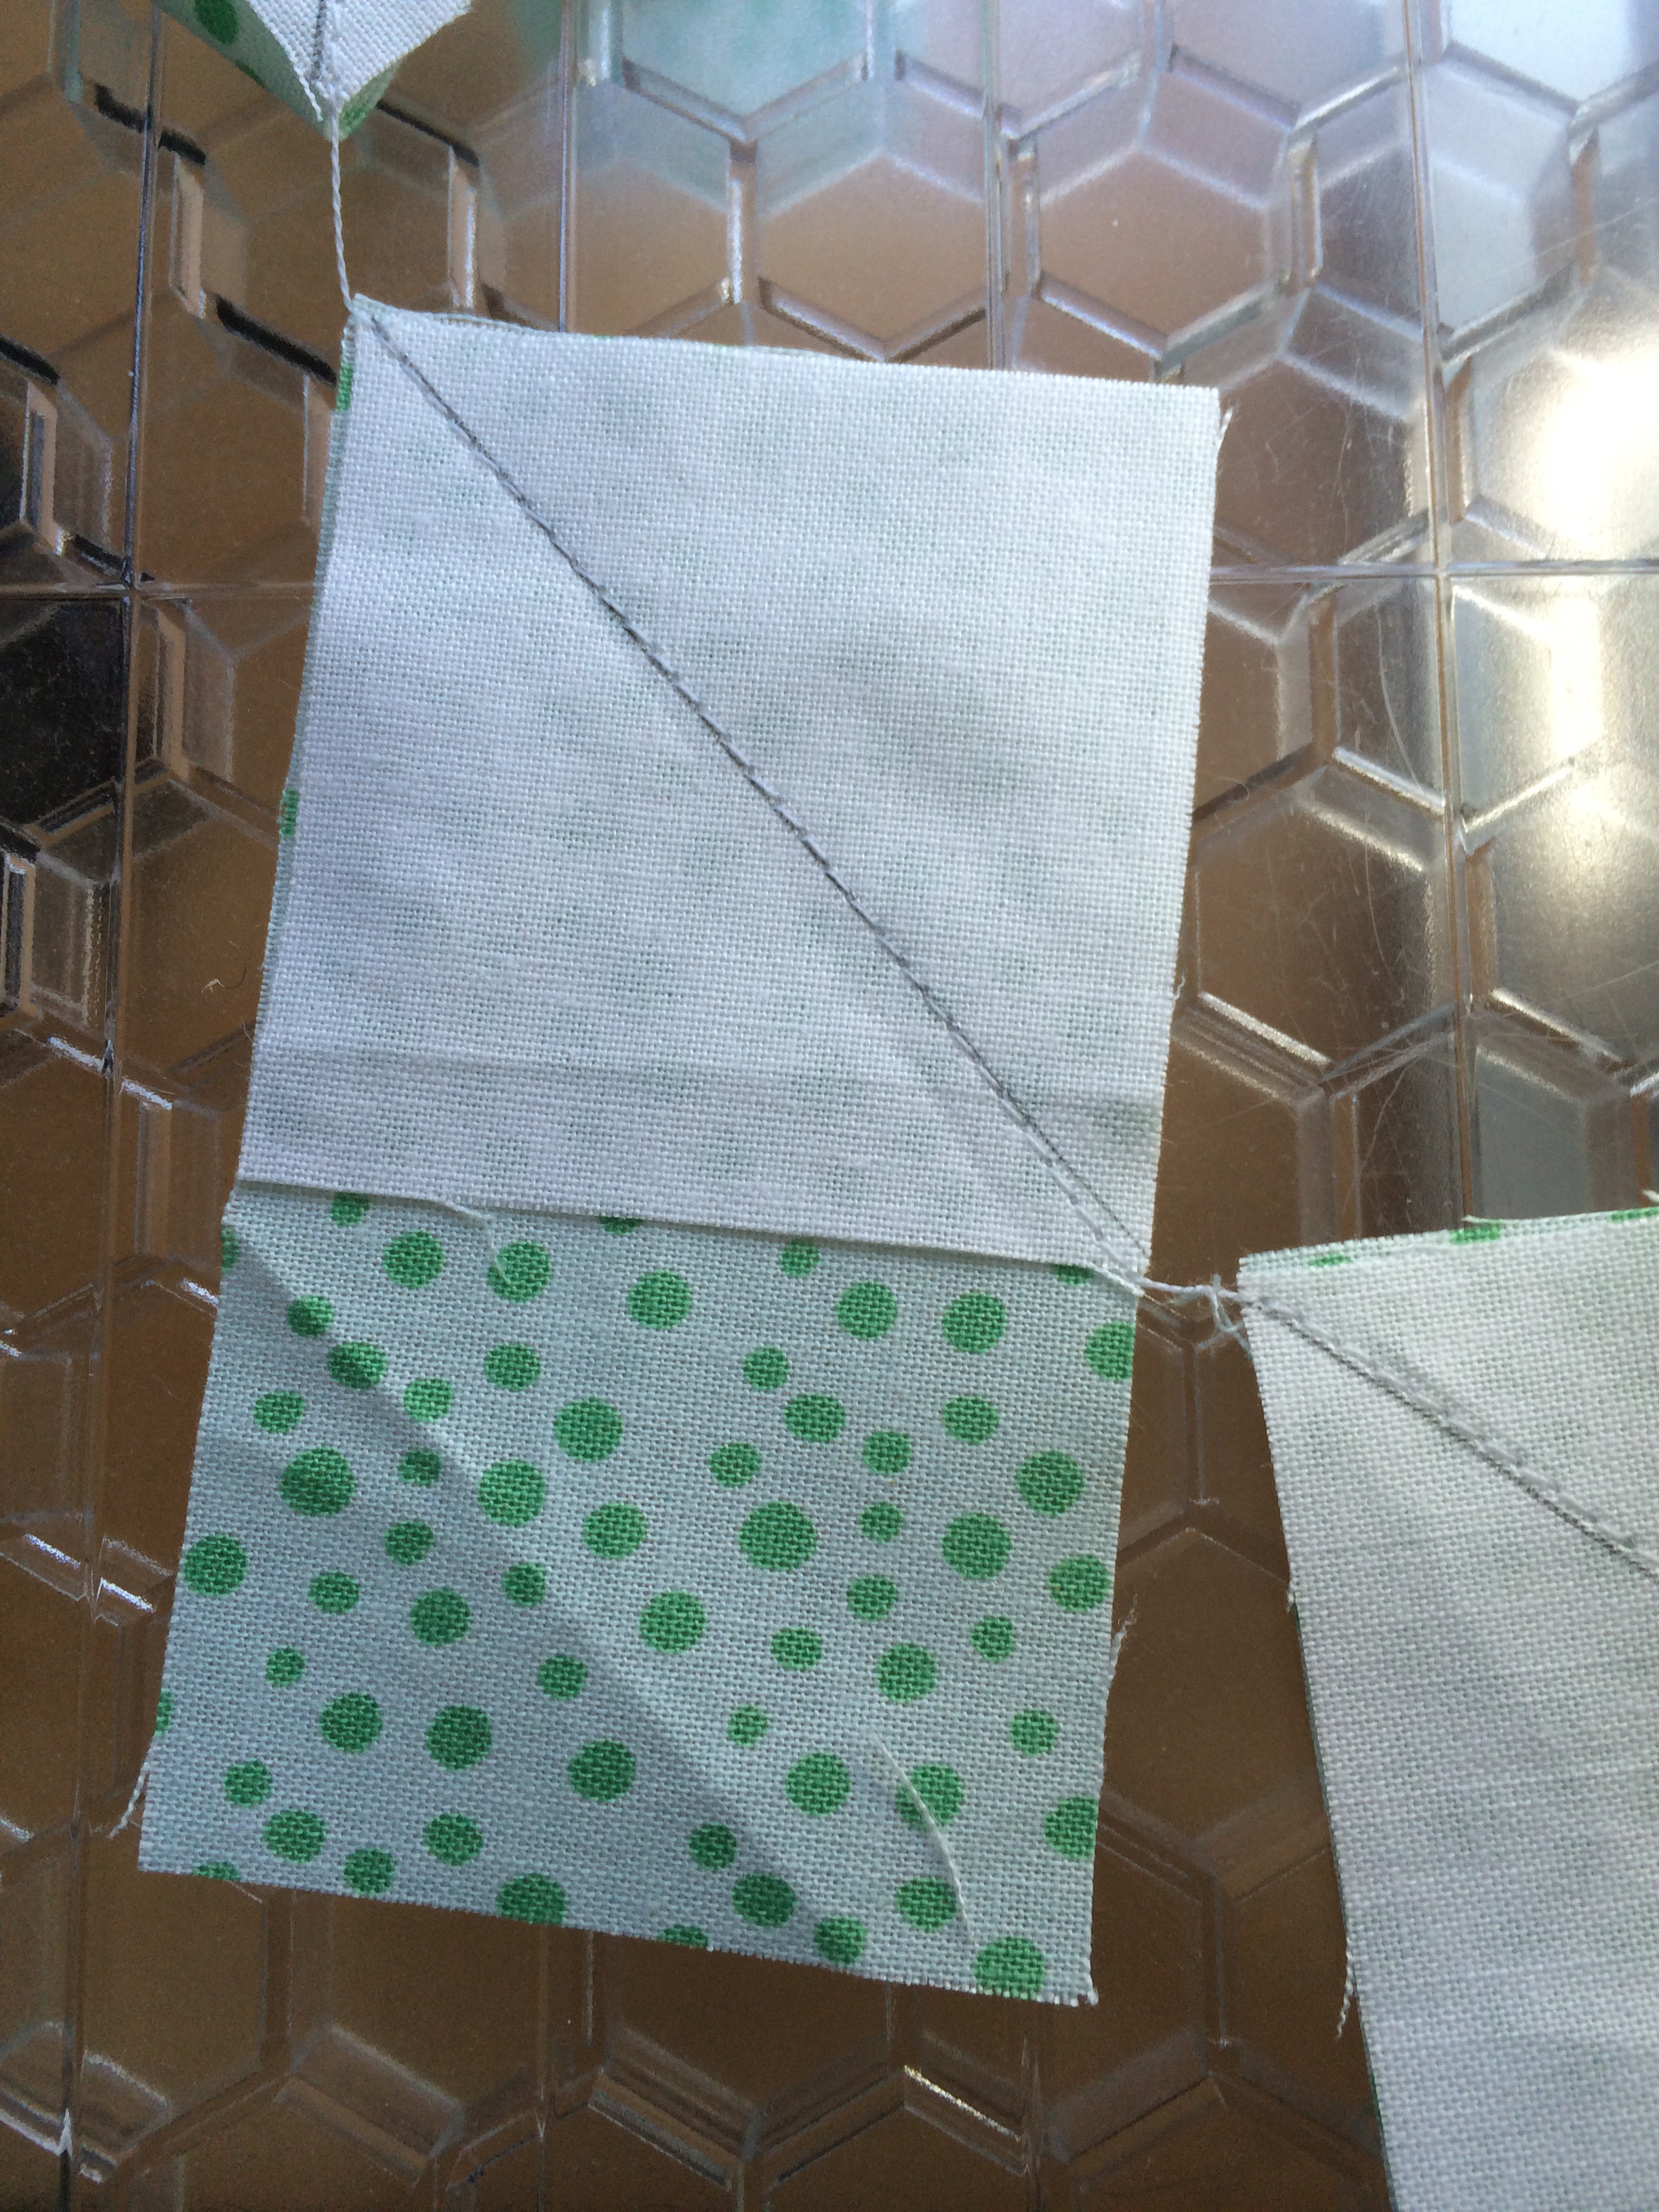
Begin by making (6) Sawtooth Star blocks.  

For each block cut the following measurements:
sawtooth instructionsDraw a diagonal line on the back of each of the 2″ x 2″ star points squares.  Position the 2″ x 2″ square a 2″ x 3.5″ background rectangle right sides together.  Sew along the diagonal line as pictured below:

sizzix bunny blend natural wonder mini quilt 5

Trim leaving 1/4″ seam allowance and press toward the dark.  Repeat the process on the other side of the background rectangle including trimming and pressing.
sizzix bunny blend natural wonder mini quilt 4

Lay the star block out like this:

sizzix bunny blend natural wonder mini quilt 3

Sew the pieces together in rows, and then the rows together.  Press seams open.  The finished sawtooth block is 6.5″

star instructions

Sew the sashing strips creating (2) Star Sets.  Press the seams toward the sashing.

Cut the strips for the quilt following the cutting guide:

blend bunny quilt layout

Bunny Applique

Iron Heat n Bond Lite to the back of the floral print fabric (Deco Park Gray).  Using the Sizzix Fabi and the Bunny Die, cut out two bunnies that face each other.  Using the hearts die, cut the larger heart out of coordinating fabric.


sizzix bunny blend natural wonder mini quilt Screen Shot 2015-07-27 at 11.43.43 AMScreen Shot 2015-07-27 at 11.46.12 AM
Peel off the backing paper and press the bunnies and heart onto the white fabric, centering.  Outline stitch two times in dark gray or taupe thread.  Sew the strips together as shown in the picture.  Press seams and quilt as desired.

sizzix bunny blend natural wonder mini quilt 12

I quilted loop de loos and 4-petal clover flowers in an all-over design.

sizzix bunny blend natural wonder mini quilt 10
sizzix bunny blend natural wonder mini quilt 9

sizzix bunny blend natural wonder mini quilt 8

Make sure your #kittyquilter #kittyhelper approves of the finished quilt before you wrap it up!sizzix bunny blend natural wonder mini quilt 11
sizzix bunny blend natural wonder mini quilt 7

Supplies:

Sizzix Fabi

Sizzix Bunny Die

Sizzix Heart Die

Heat n Bond Lite or Featherweight fusible applique

1/4 yard each of the patterned fabrics from Blend Natural Wonder line

1/3 yard white solid fabric

1 yard backing

1/3 yard binding

cotton batting

#kittyquilter Mini Quilt Tutorial


kitty quilter mini quilt

Hey there all you crazy cat quilter friends!  I have a fun mini quilt for you!!  I love using the hashtag #kittyquilter on Instagram.  There is something about felines and quilting that just go so well together!  Baby Mufasa is involved in every step of the quilting process: choosing fabric, cutting, basting, and binding – he’s right there!

kitty quilter mini quilt 15

This fun little quilt sews up fast.  The fabrics are from Blend Fabrics’ Best in Show fabric line.  I am sew in love with the kitty faces fabric – I ordered more yardage to make a skirt!!!   You could easily make this with your favorite cat theme print fabric.

This quilt has 2 different traditional quilt blocks: Kitty in the Corner and King’s Crown.  I choose kitty in the corner for obvious reasons and I choose King’s Crown because Mufasa means King!  Isn’t that the cutest!!  Let’s get started!  (1/4″ seams throughout)

Supplies:

1/4 yard of a variety of coordinating fabrics including cat theme print

Heat n Bond Lite EZ print Sheets

#kittyquilter letters

batting

1/2 yard backing

1/4 yard binding

Fussy Cut (4) Cats

Choose the cats you want in the center of the blocks and cut them 3.5″ square.

kitty quilter mini quilt 2

Kitty in the Corner Block 6.5″ finished

Make (2) of these

Cut the fabric according to the diagram pictured below.  I don’t know about you, but I love when measurements are shown in pictures and not in a long list of cutting instructions.

kitty in the corner quilt block diagram

Draw a diagonal line on the wrong side of the (4) white squares.  Match a white square and a patterned square right sides together and sew on the pencil line.  Cut 1/4″ away from the seam.  Press to the dark.  Do this with each of the (4) white blocks and (4) patterned blocks.  This makes (4) half square triangle (HST) units.  Arrange them as pictured below and sew as you would a traditional 9-patch.

IMG_7601

Kings Crown Block 6.5″ finished

Cut the fabrics according to the picture below.  Make sure to cut (8) white 2″x2″ squares, I only have 4 in the picture.
kings crown quilt bloock


Draw a diagonal line on the back of the (8) white squares.  Next make (4) flying geese units by laying the white square right sides together with a patterned rectangle, matching up the 3 edges.  Sew on the line as pictured below:

kitty quilter mini quilt 4

Trim 1/4″ next to the seam and press toward the dark.  Place another white square on top of that unit and sew on the line, as pictured below:

kitty quilter mini quilt 9

Cut 1/4″ away from the seam and press again.  The block should look like this:
kitty quilter mini quilt

If you turn the flying geese blocks around it makes a Sawtooth Star pattern.  I love that each of these blocks has the same center measurement and only a variation on the 2″ sides!

Sew the block together and press seams open.

kitty quilter mini quilt 8Happy Cat blocks!!

kitty quilter mini quilt 12

kitty quilter mini quilt 7
Prepare the applique

Print the letters on the EZ print sheets and iron them to the back of the desired fabric.  Cut around each letter and peel off the backing paper.

kitty quilter mini quilt 11

Cut the remaining strips according to this cutting diagram:

#kittyquilter design

Position the letters on the white strip and press in place.  Top stitch around each letter.
kitty quilter mini quilt 13

Sew the (4) blocks together and press seams open.  Sew each of the rows together according to the layout diagram.  Quilt, bind, and let the cat have a nap on it:)

kitty quilter mini quilt 18

Mufasa loves it!  and I hope you do too!!!

kitty quilter mini quilt 14