Through the Woods to Grandma’s House {Quilt Pattern}

through the woodscover-2
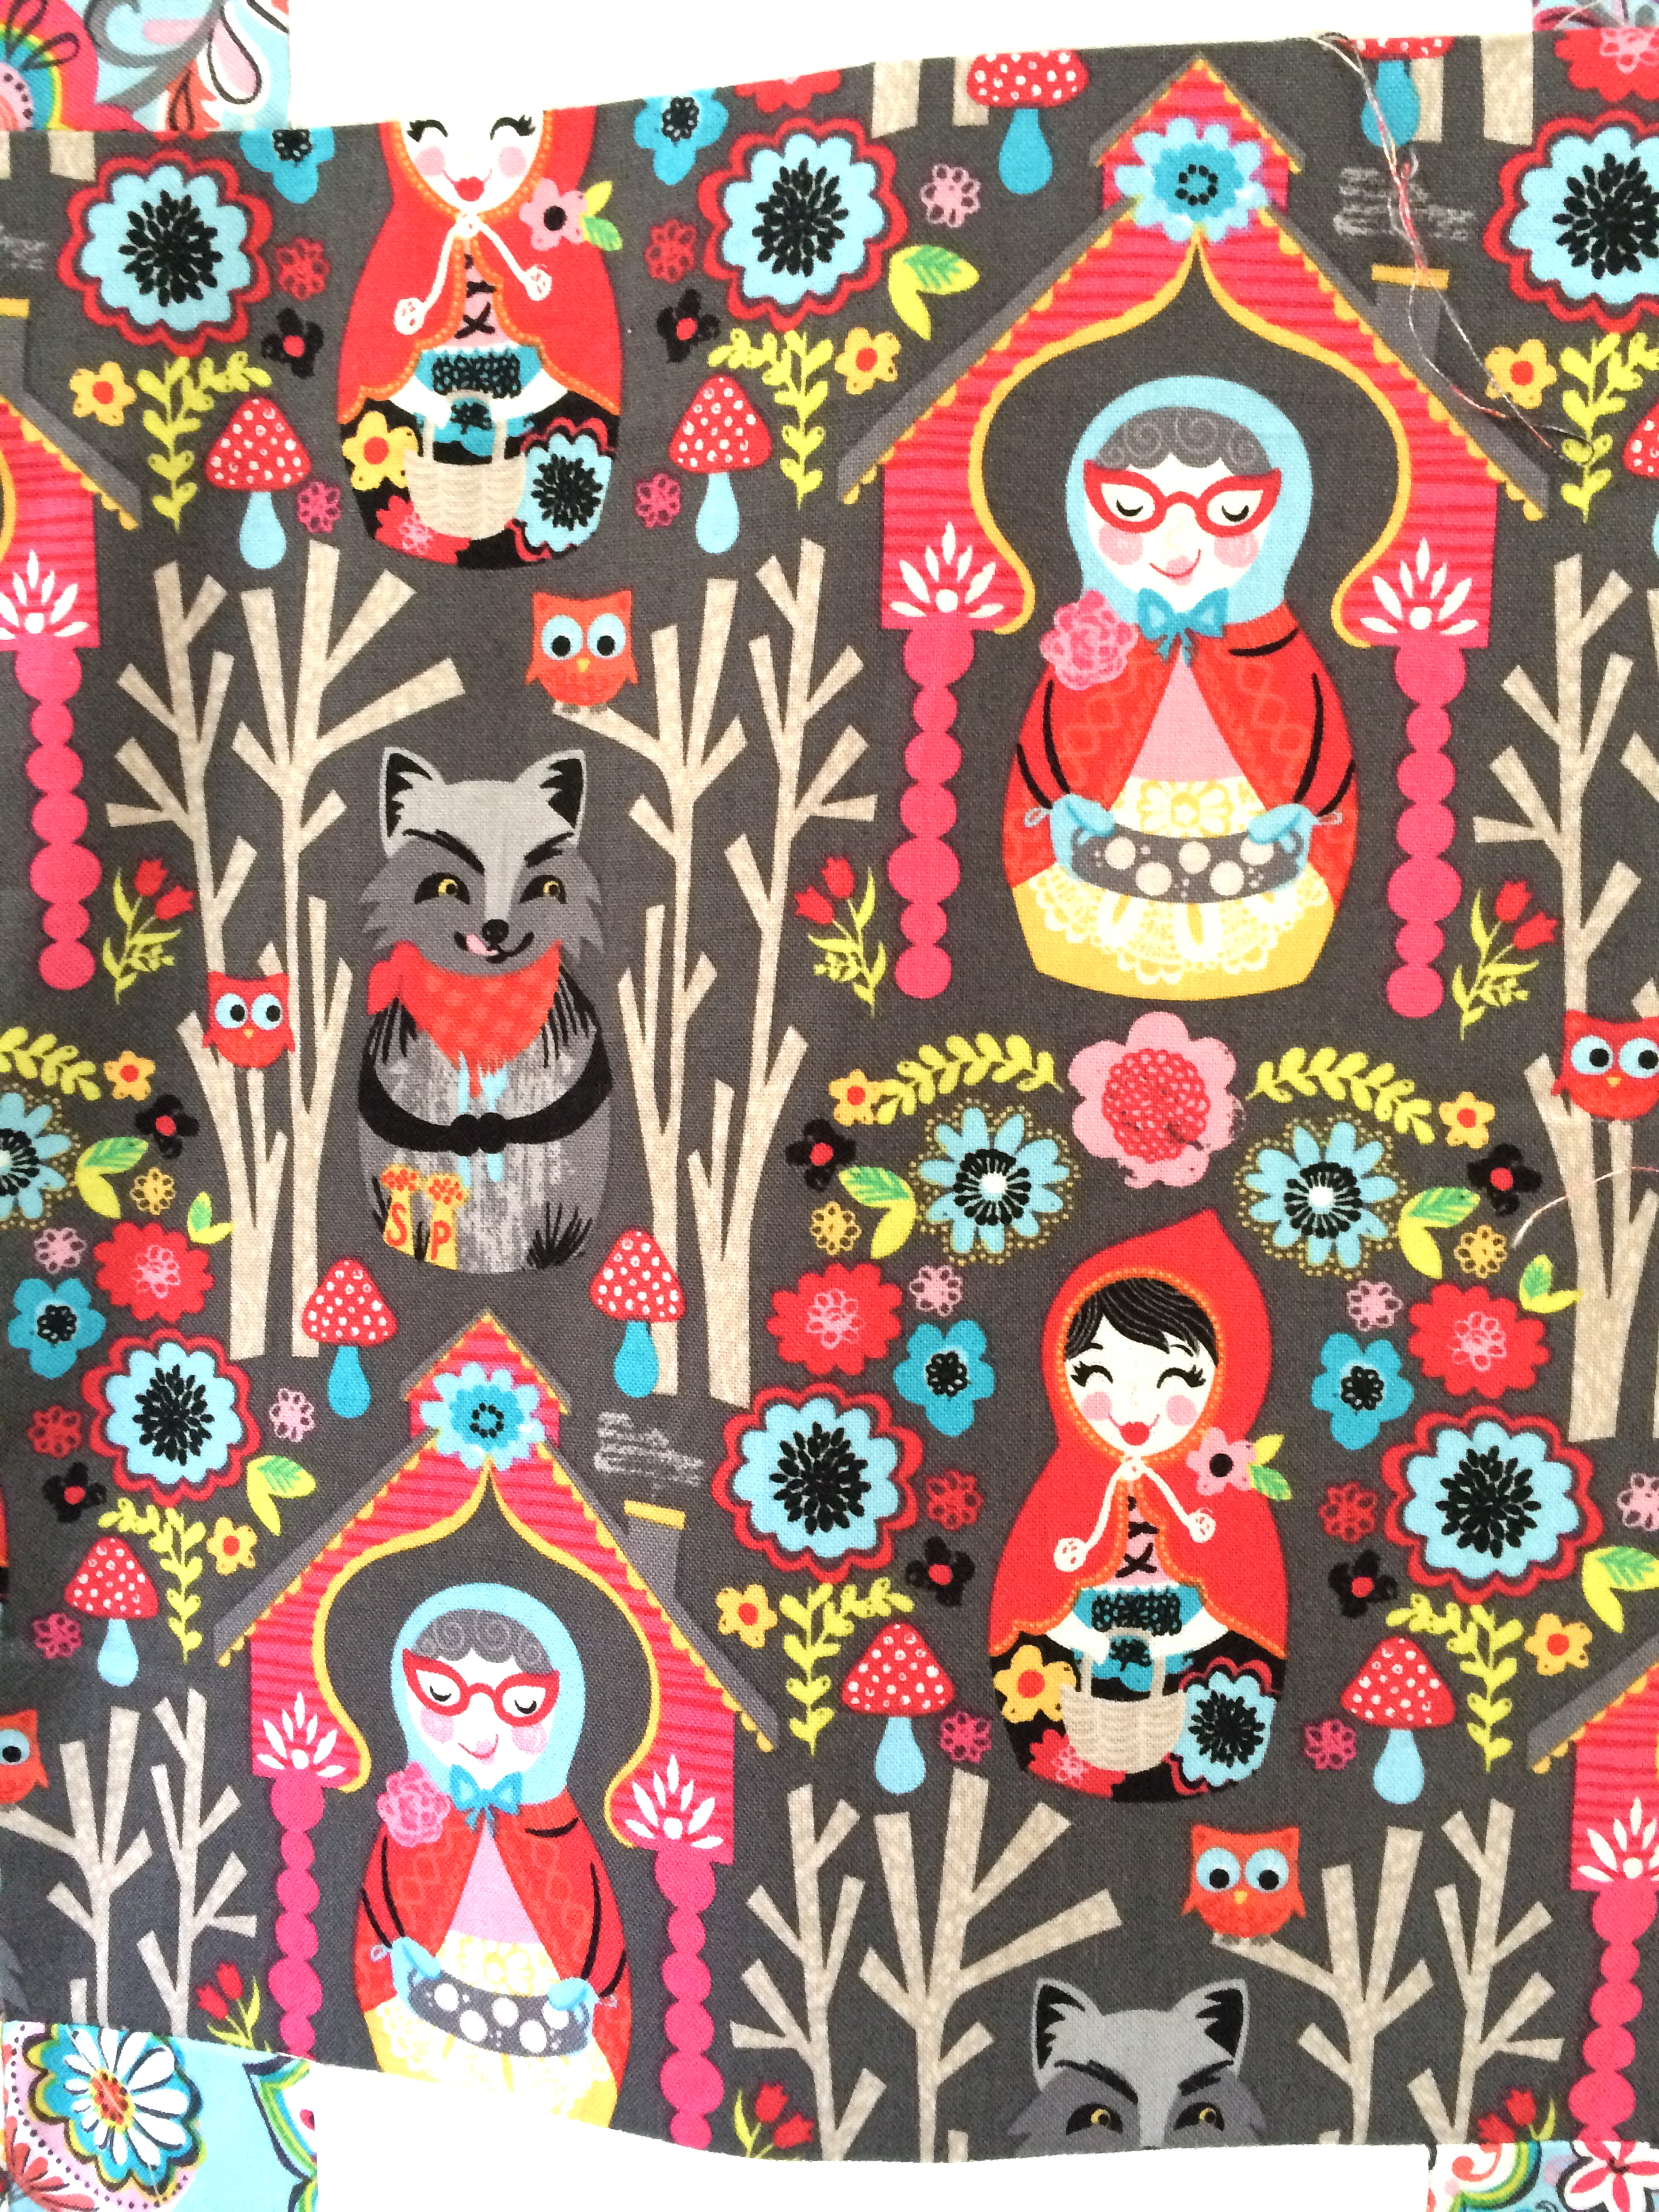
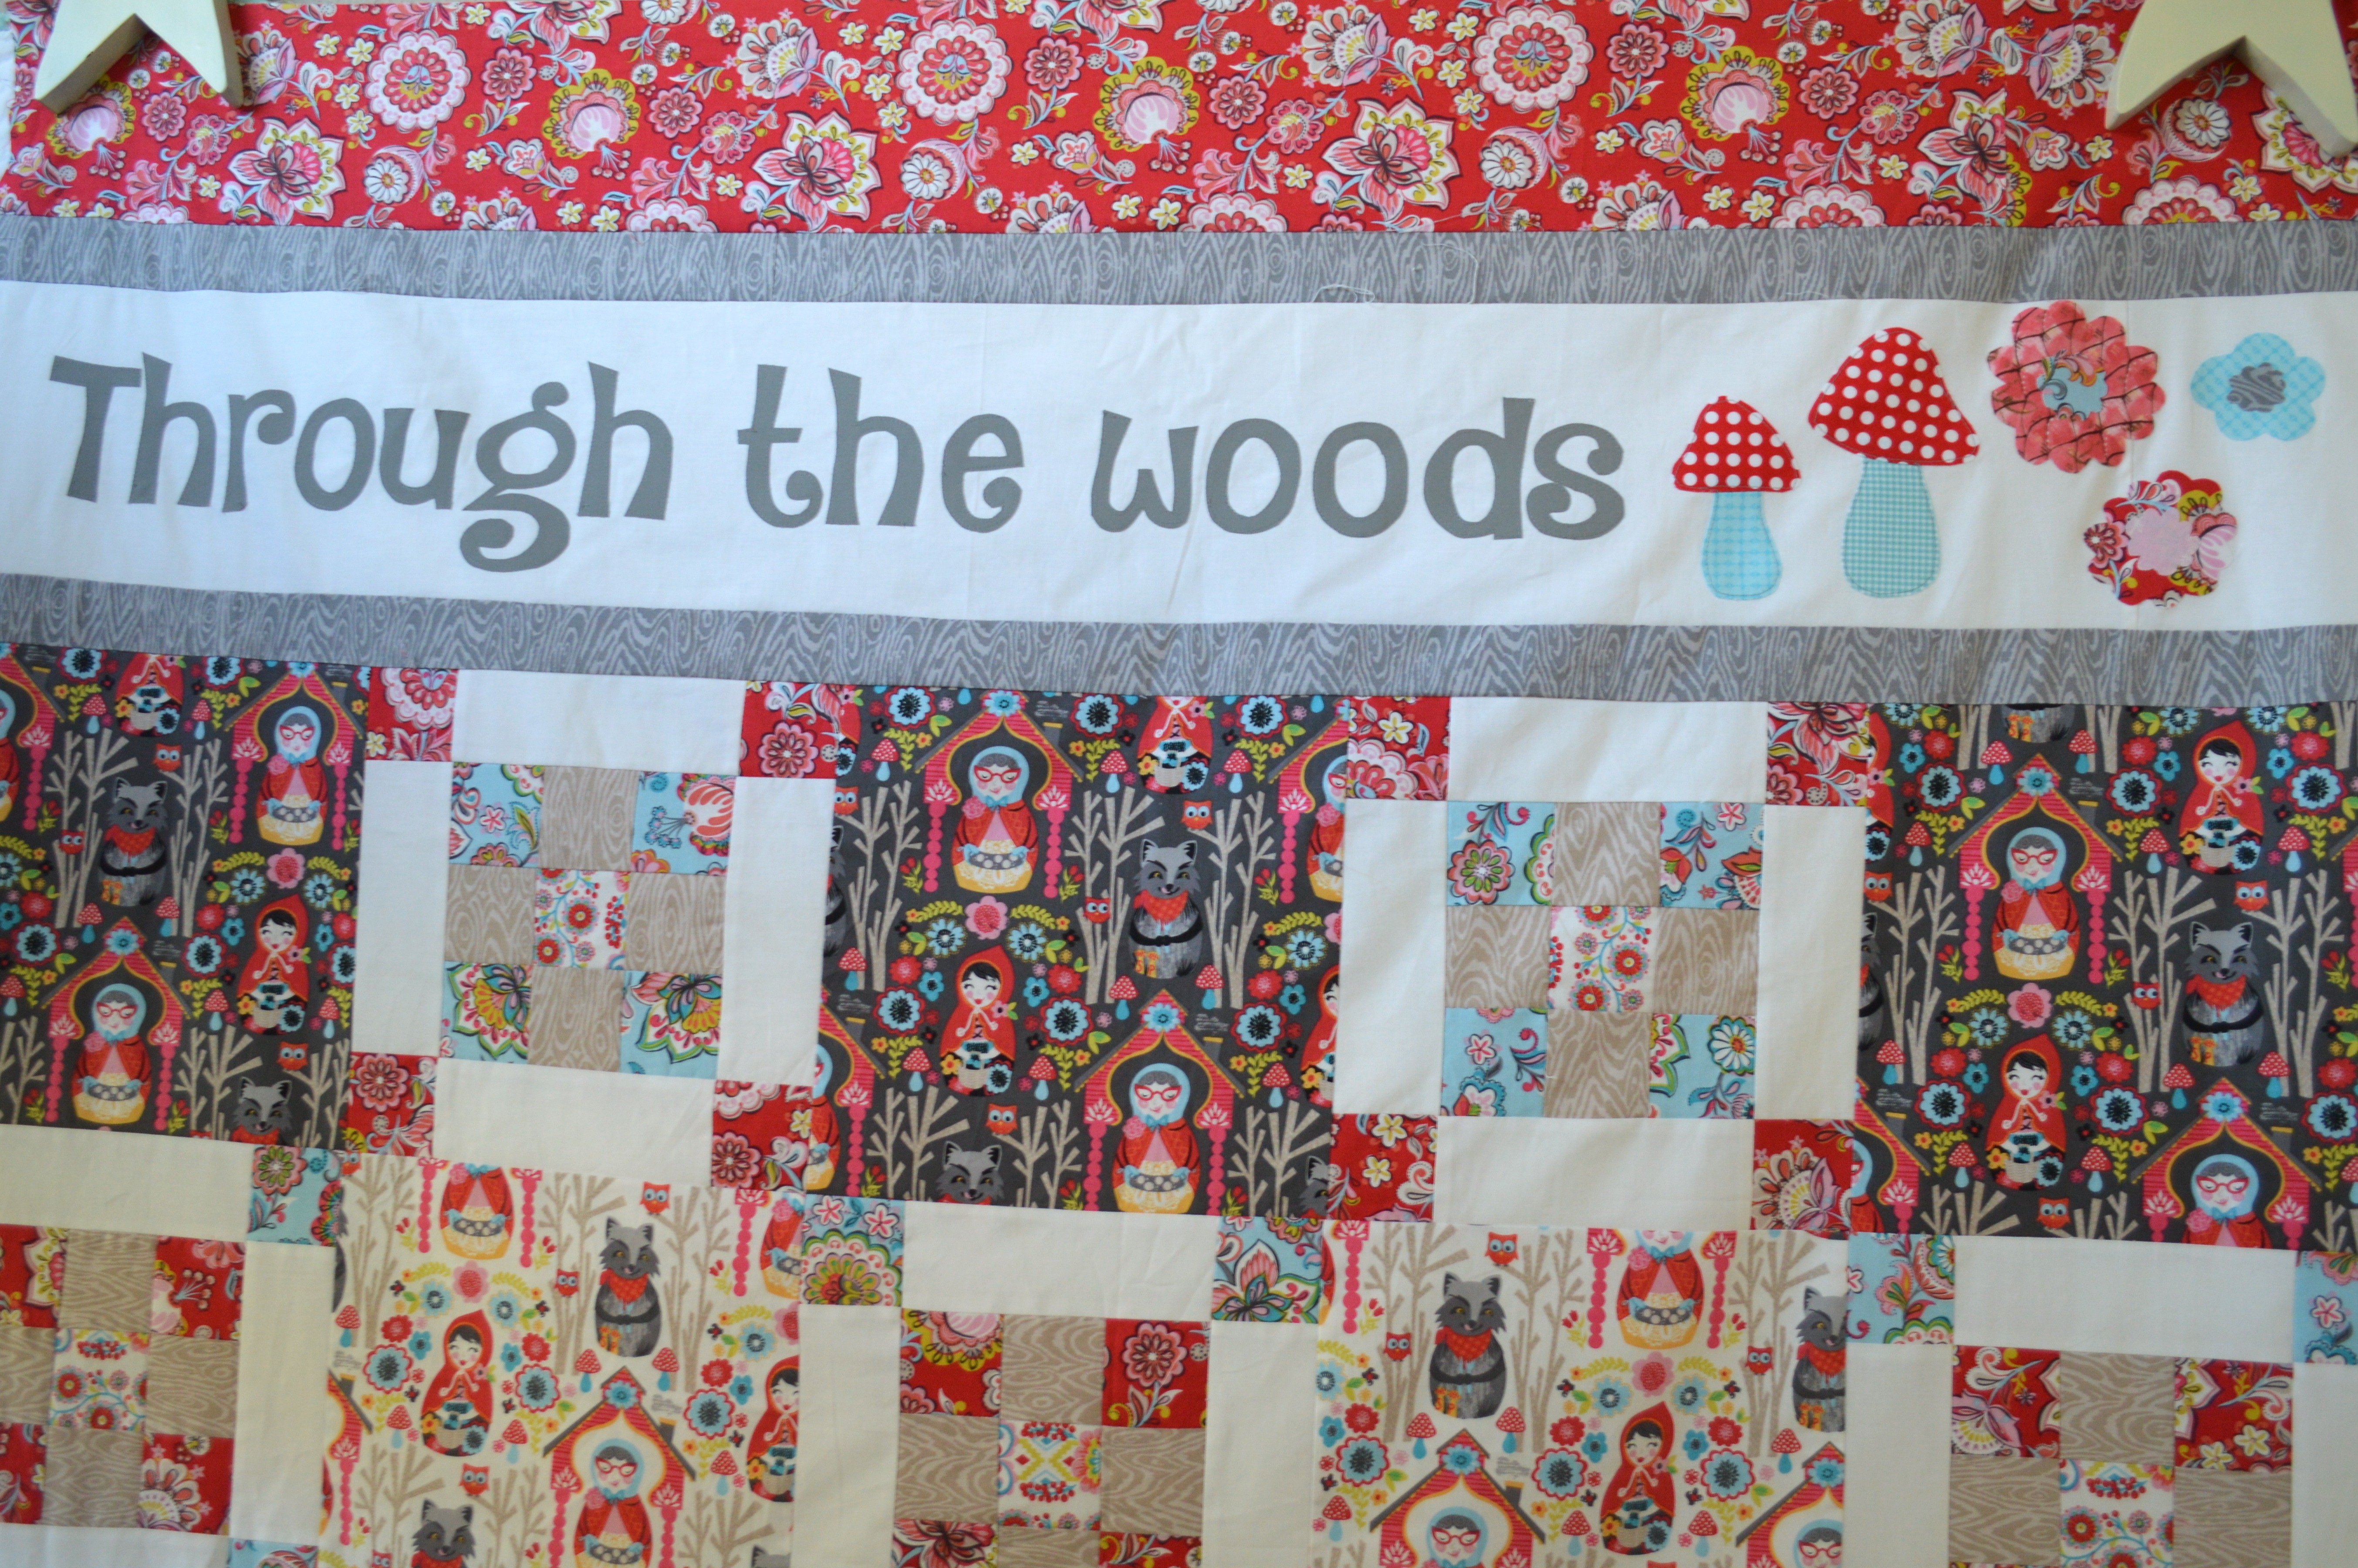
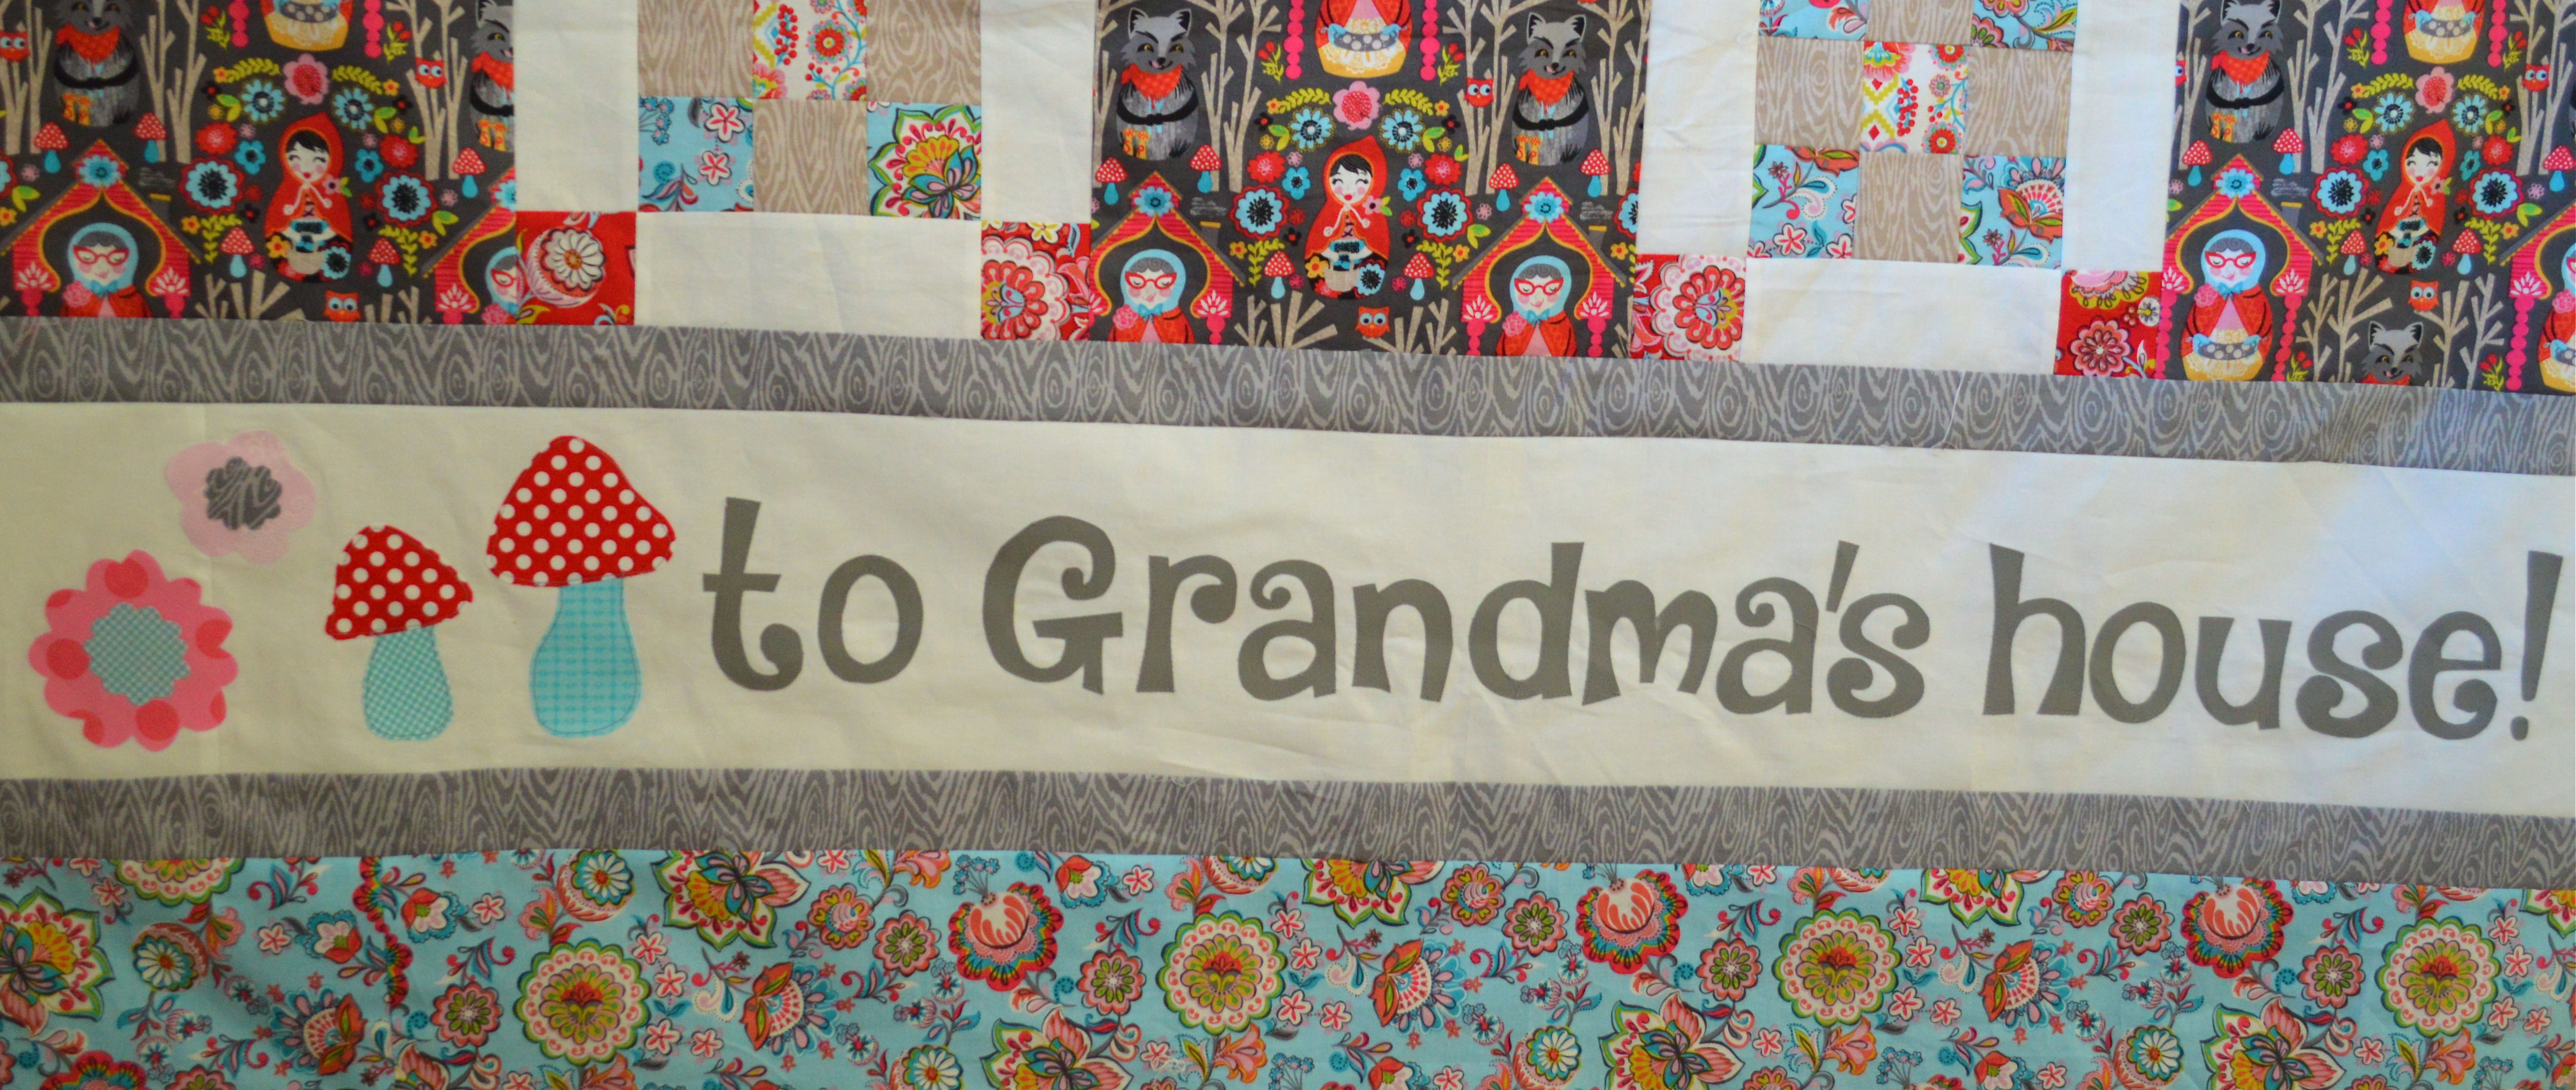
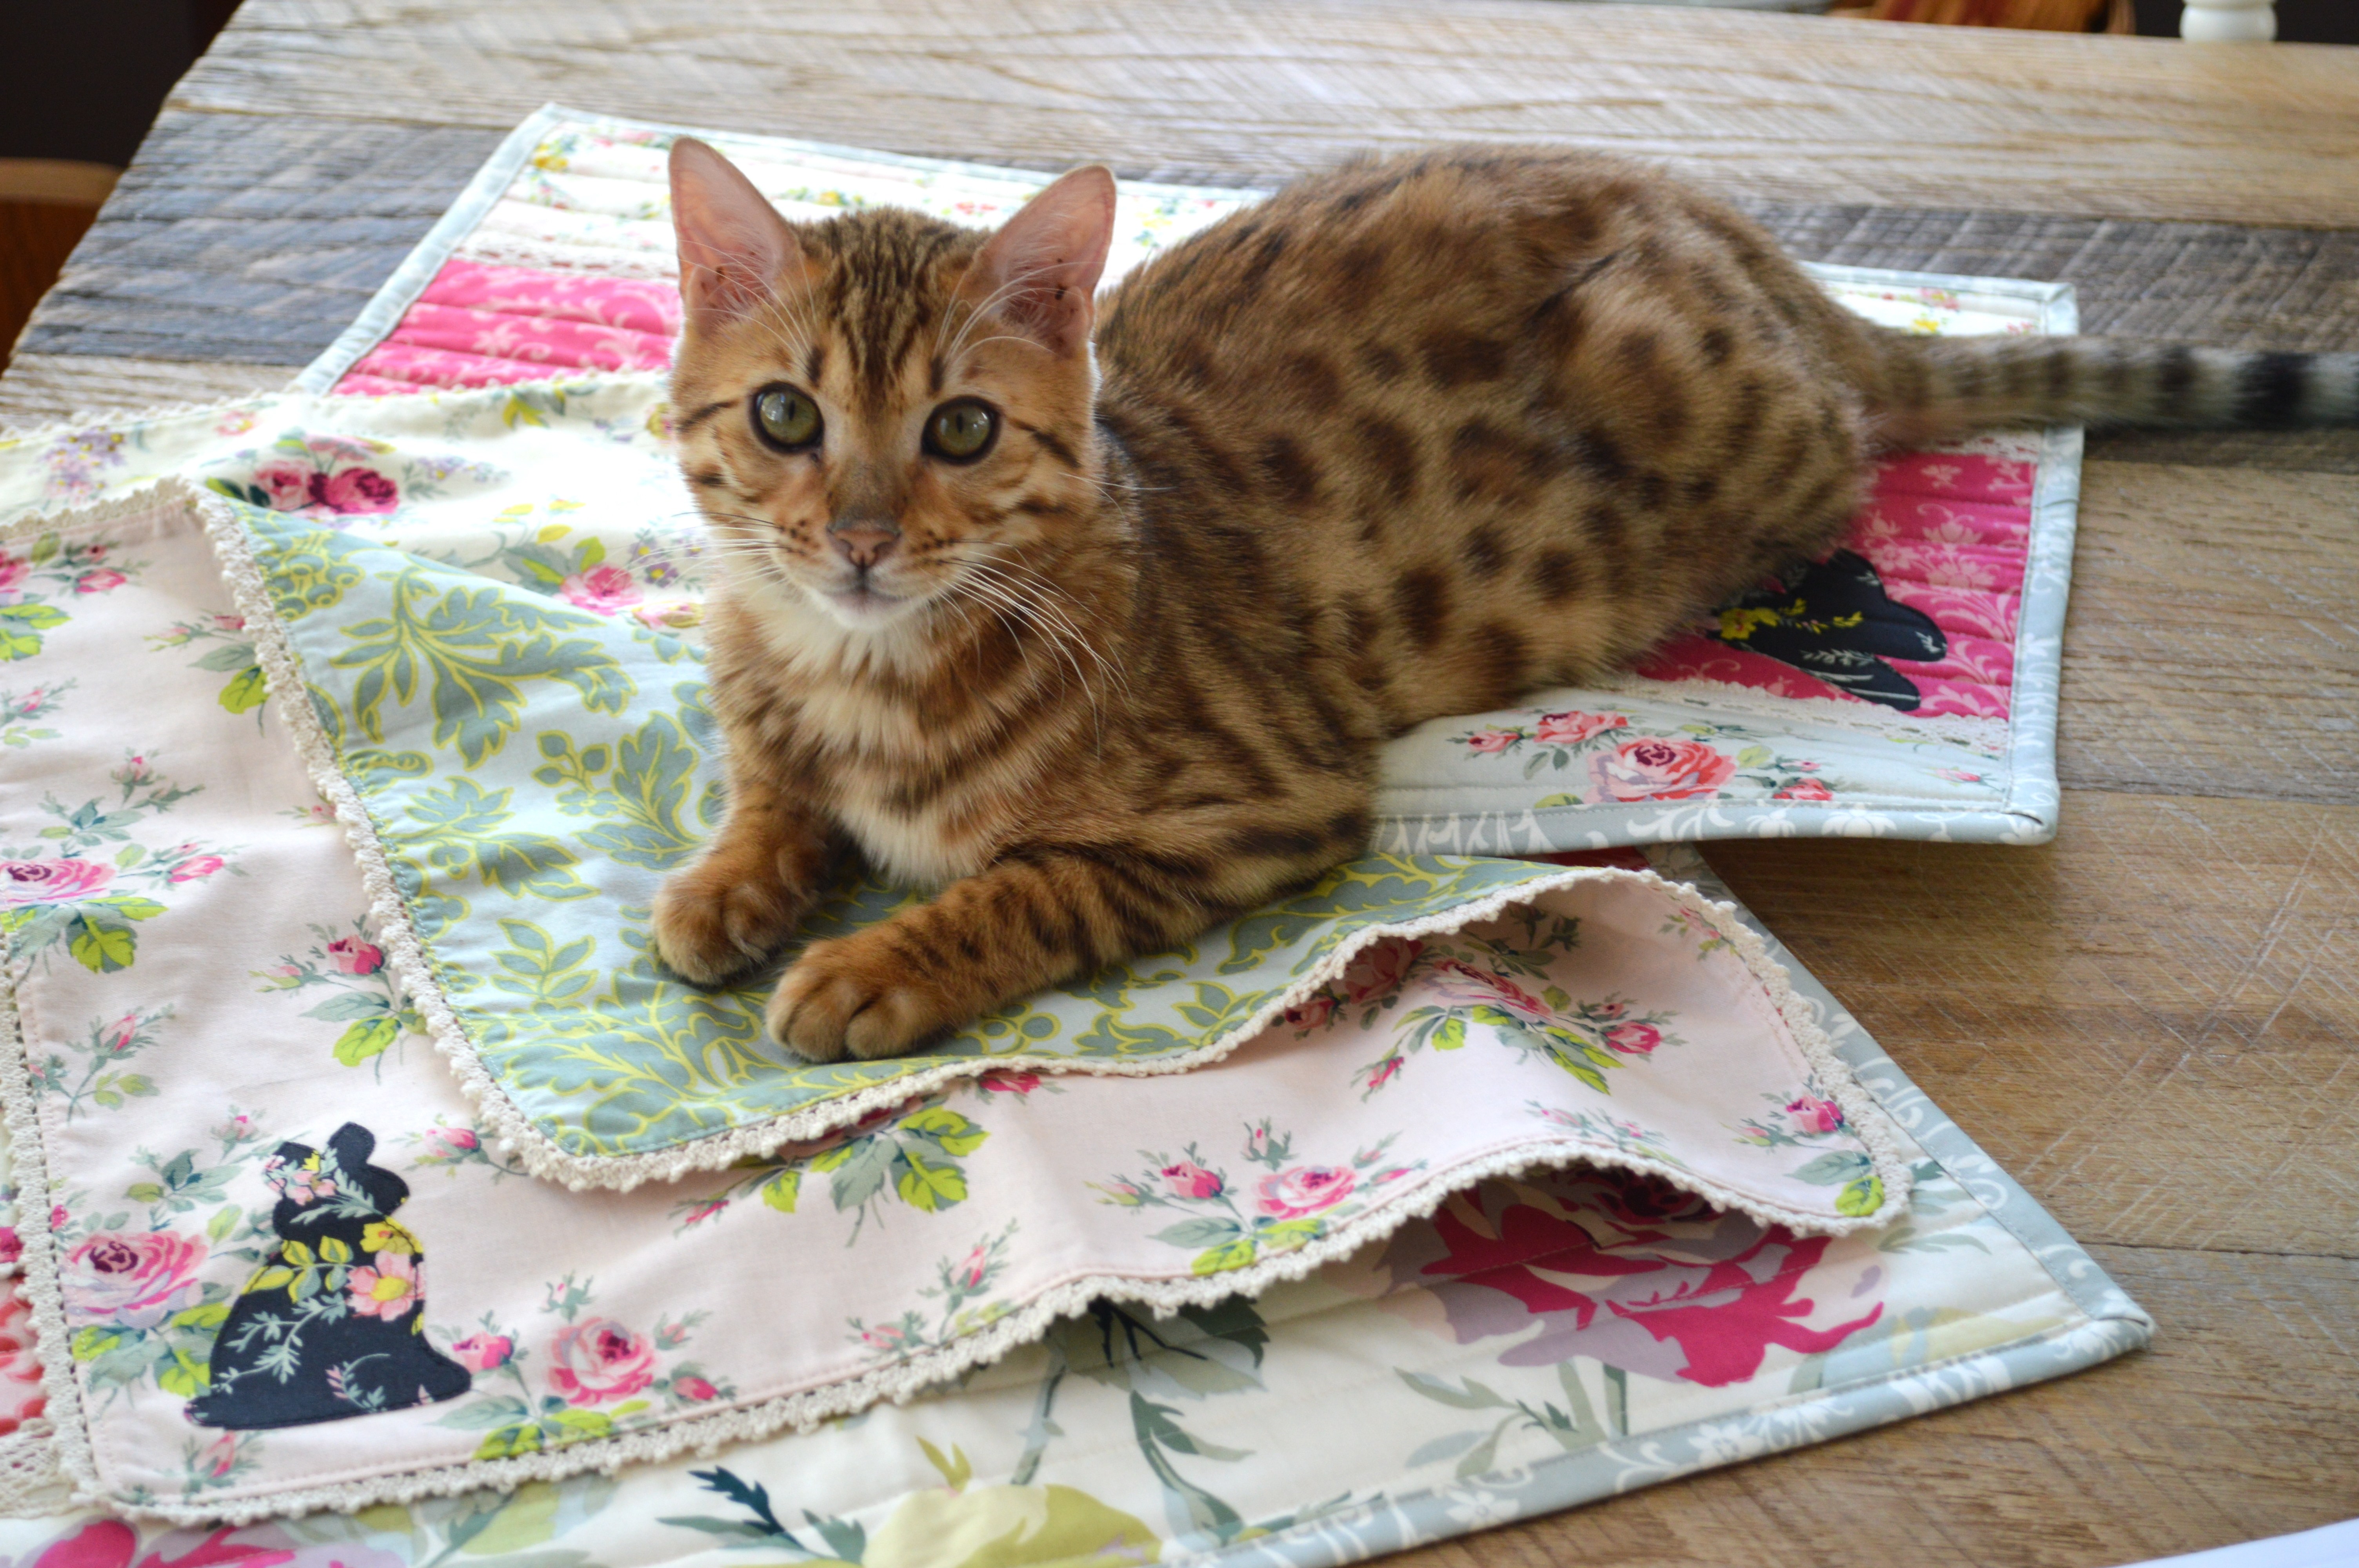
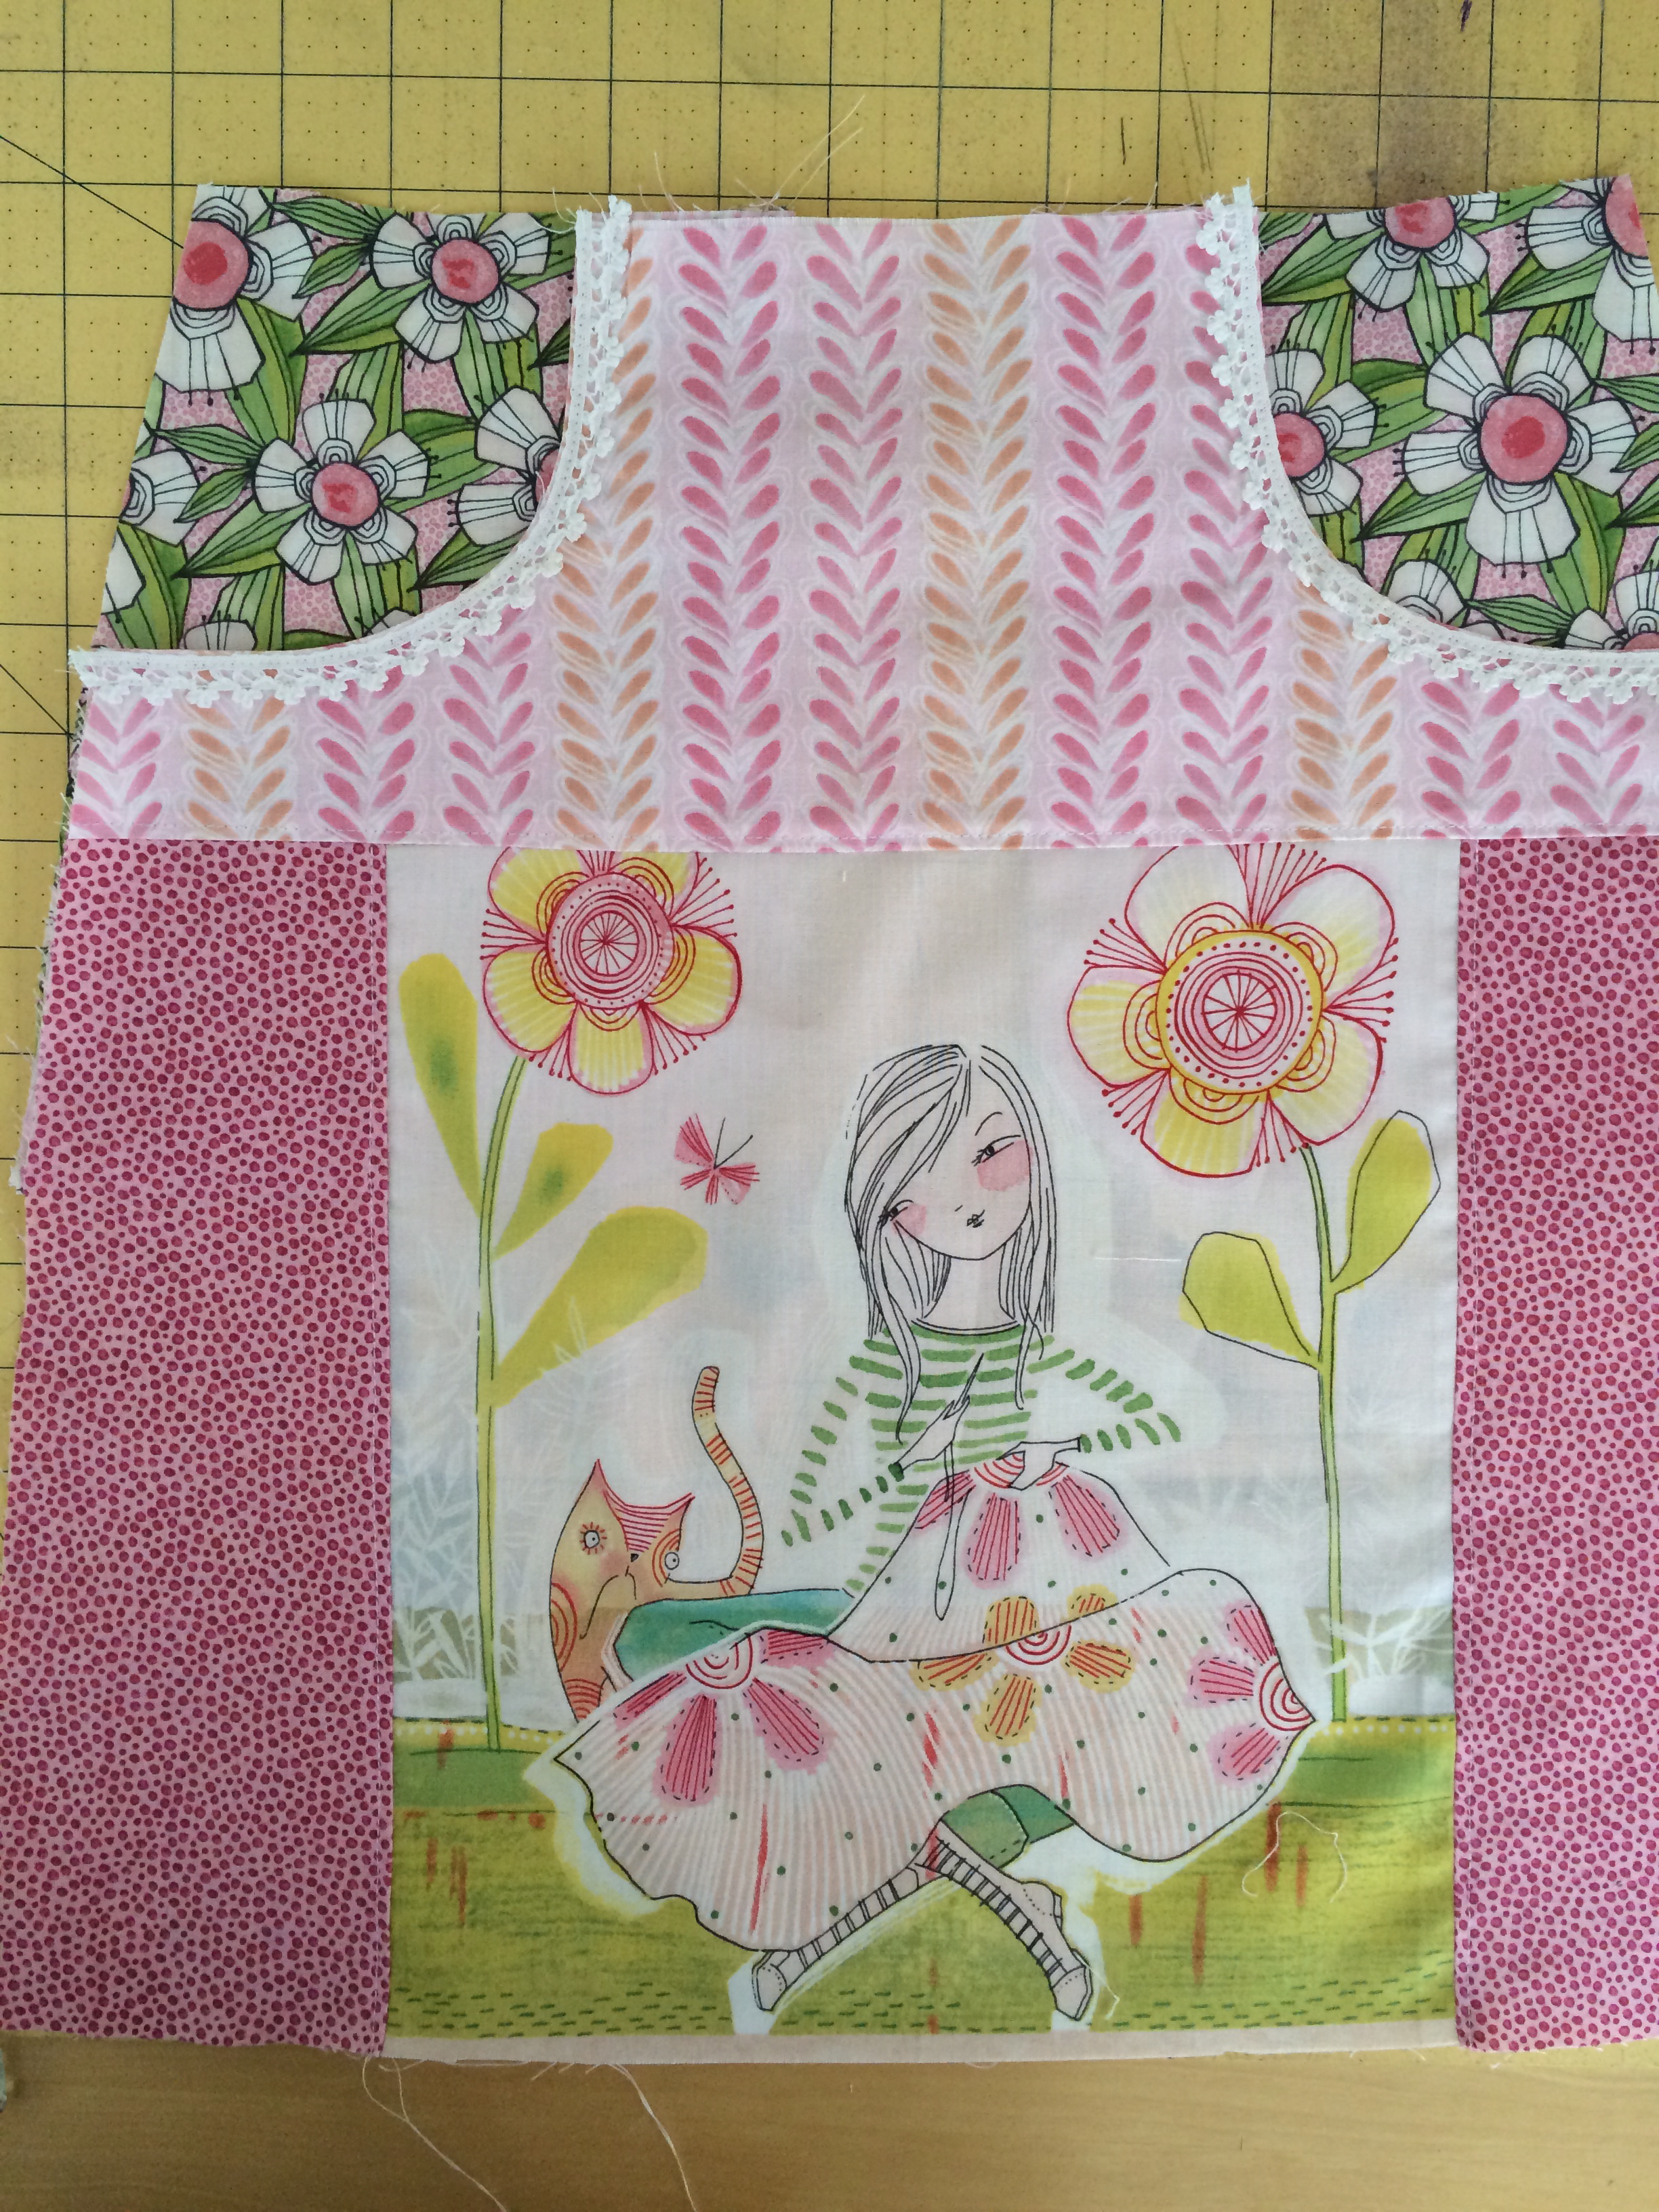
Through the woods to Grandma’s House! This Little Red Riding-hood inspired quilt is perfect the perfect size to take to Grandma’s house or the perfect size to keep at Grandma’s house for special little visitors. With optional “Nana” version, it would also make a lovely gift. Try this pattern with your favorite woodland animal or nature prints. This whimsical quilt features traditional block piecing alternating with a theme print block. Finished block size: 10″ Finished quilt size: 50″ x 78″through the woods quilt

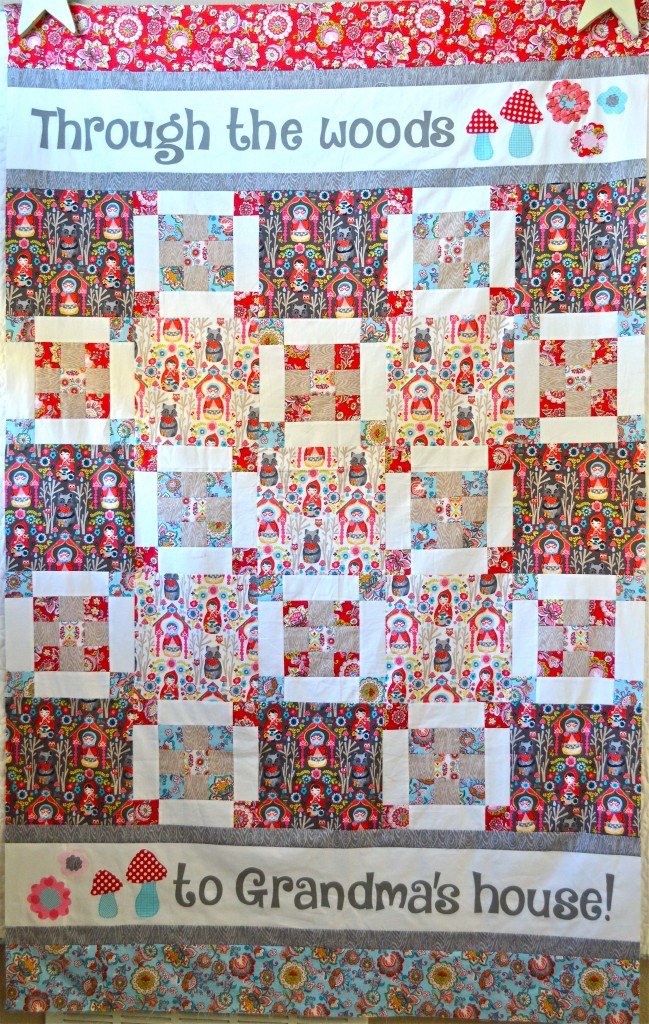
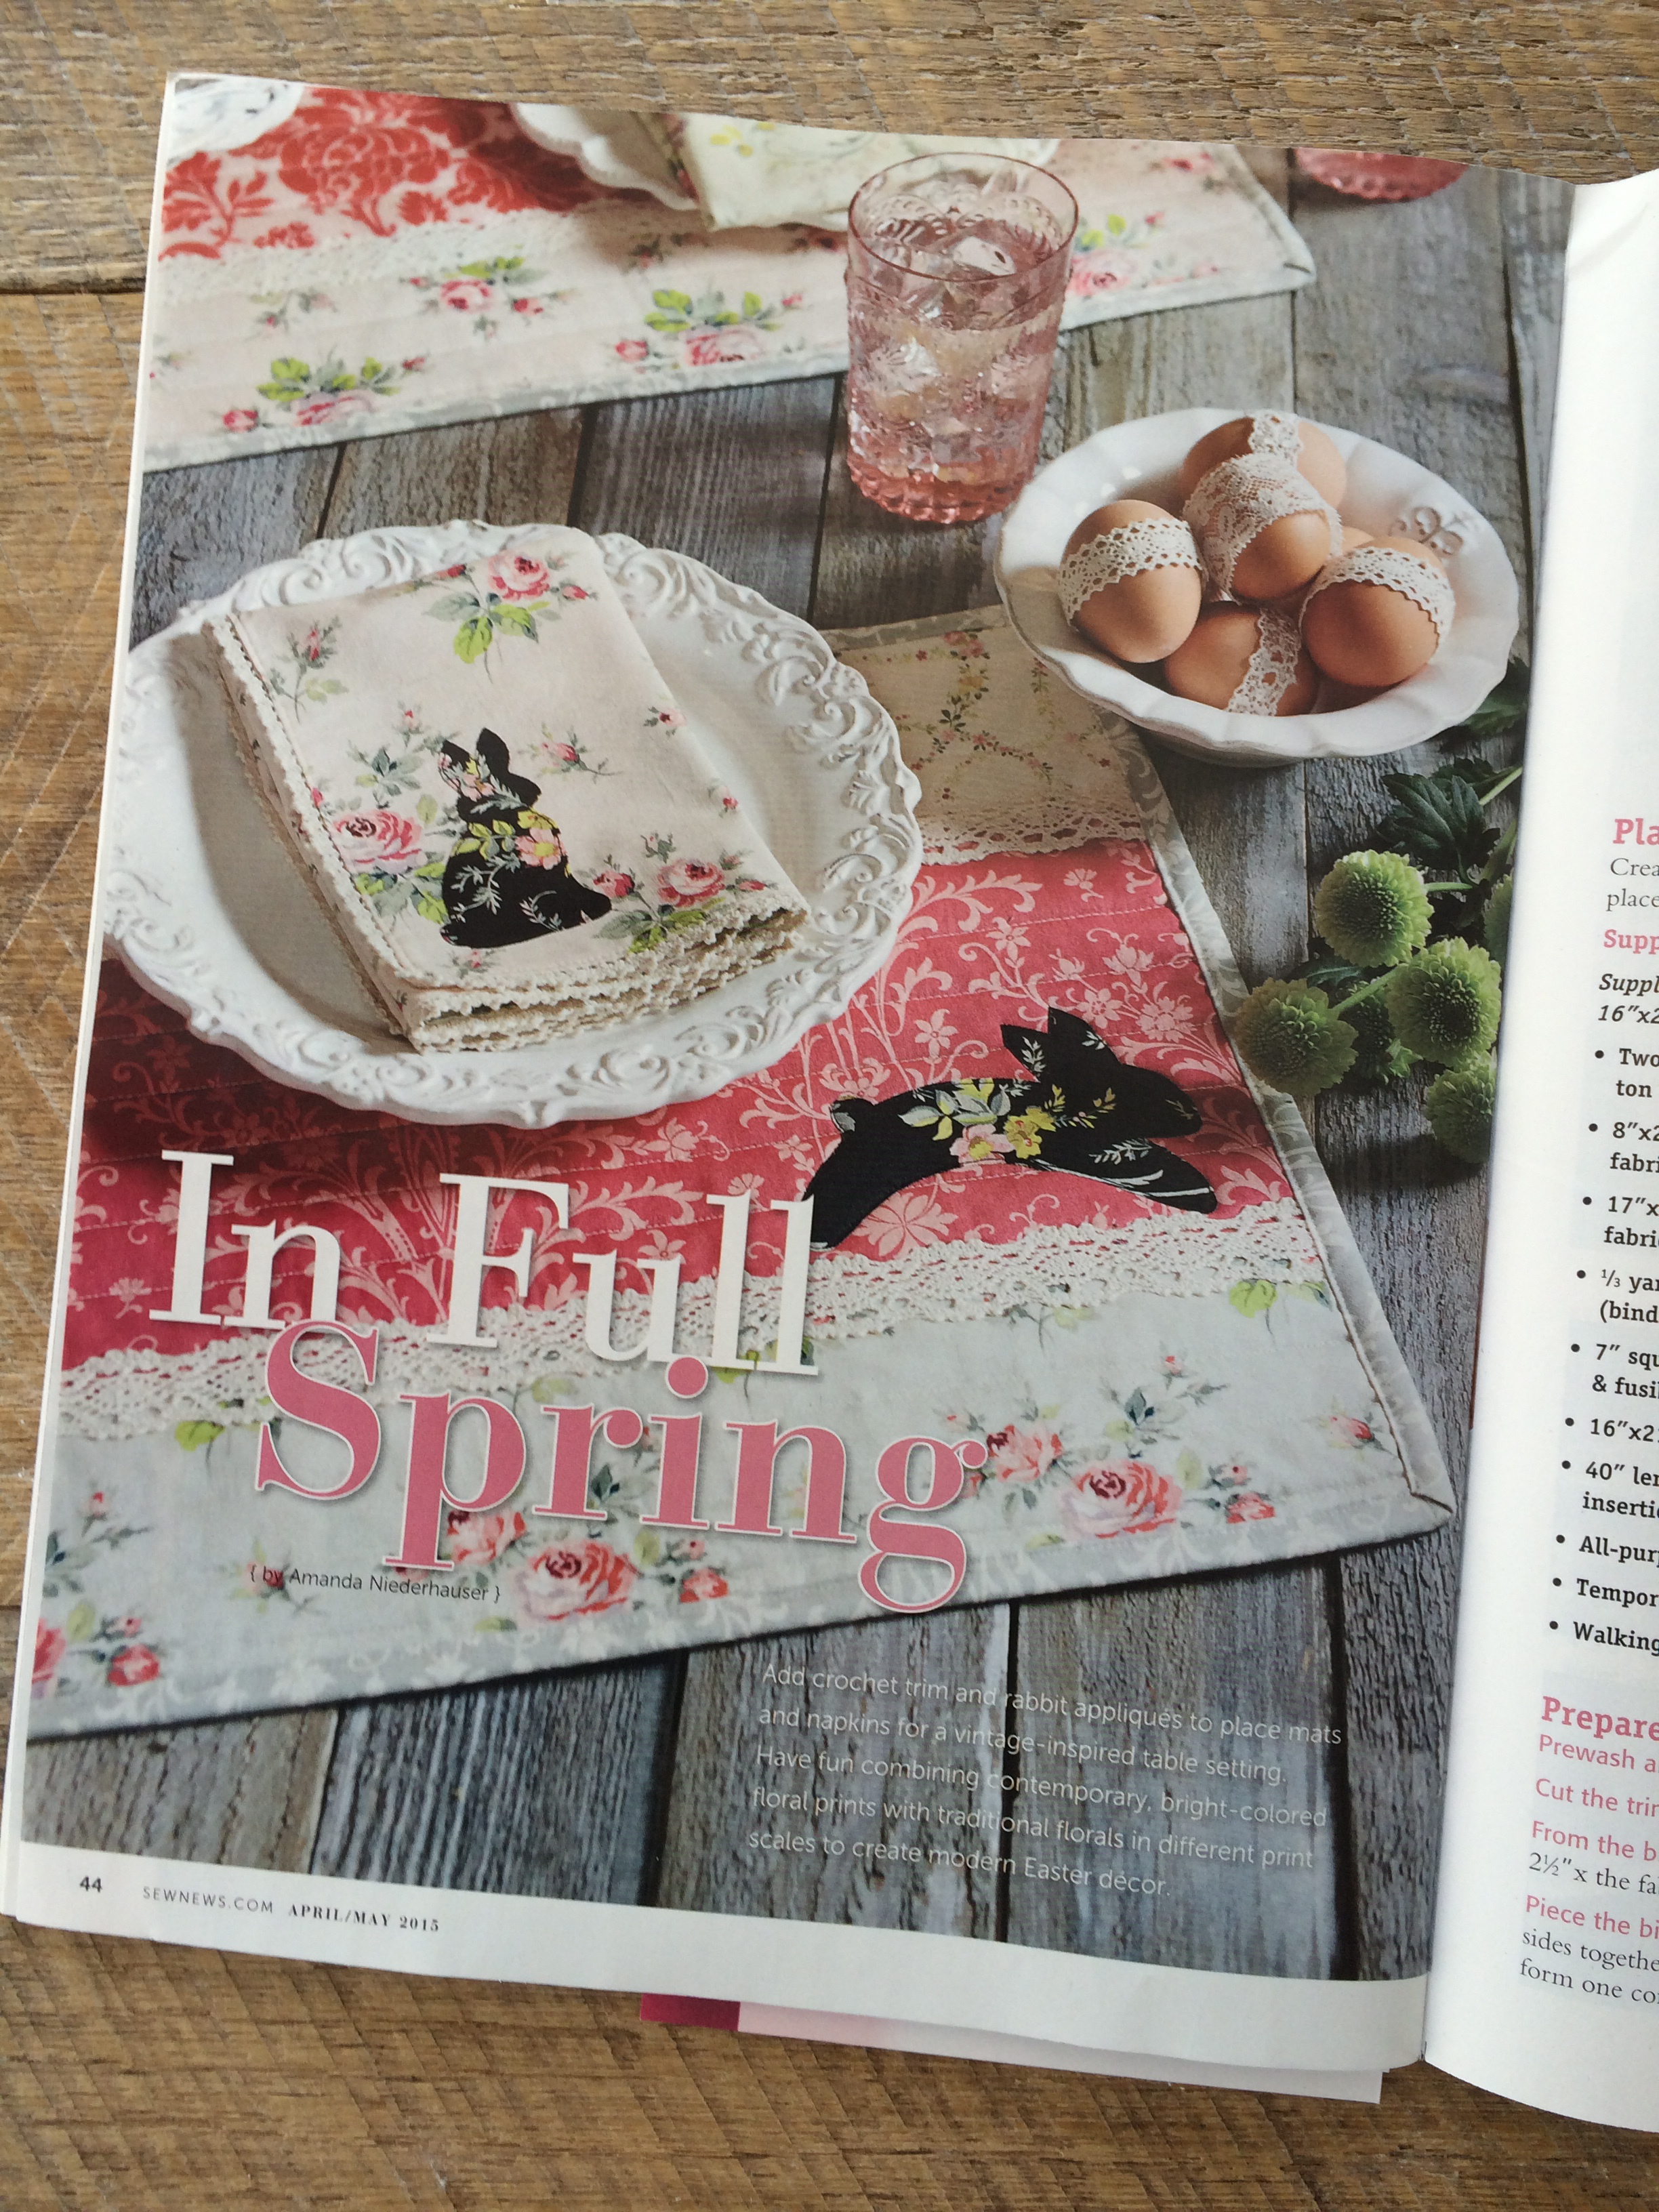
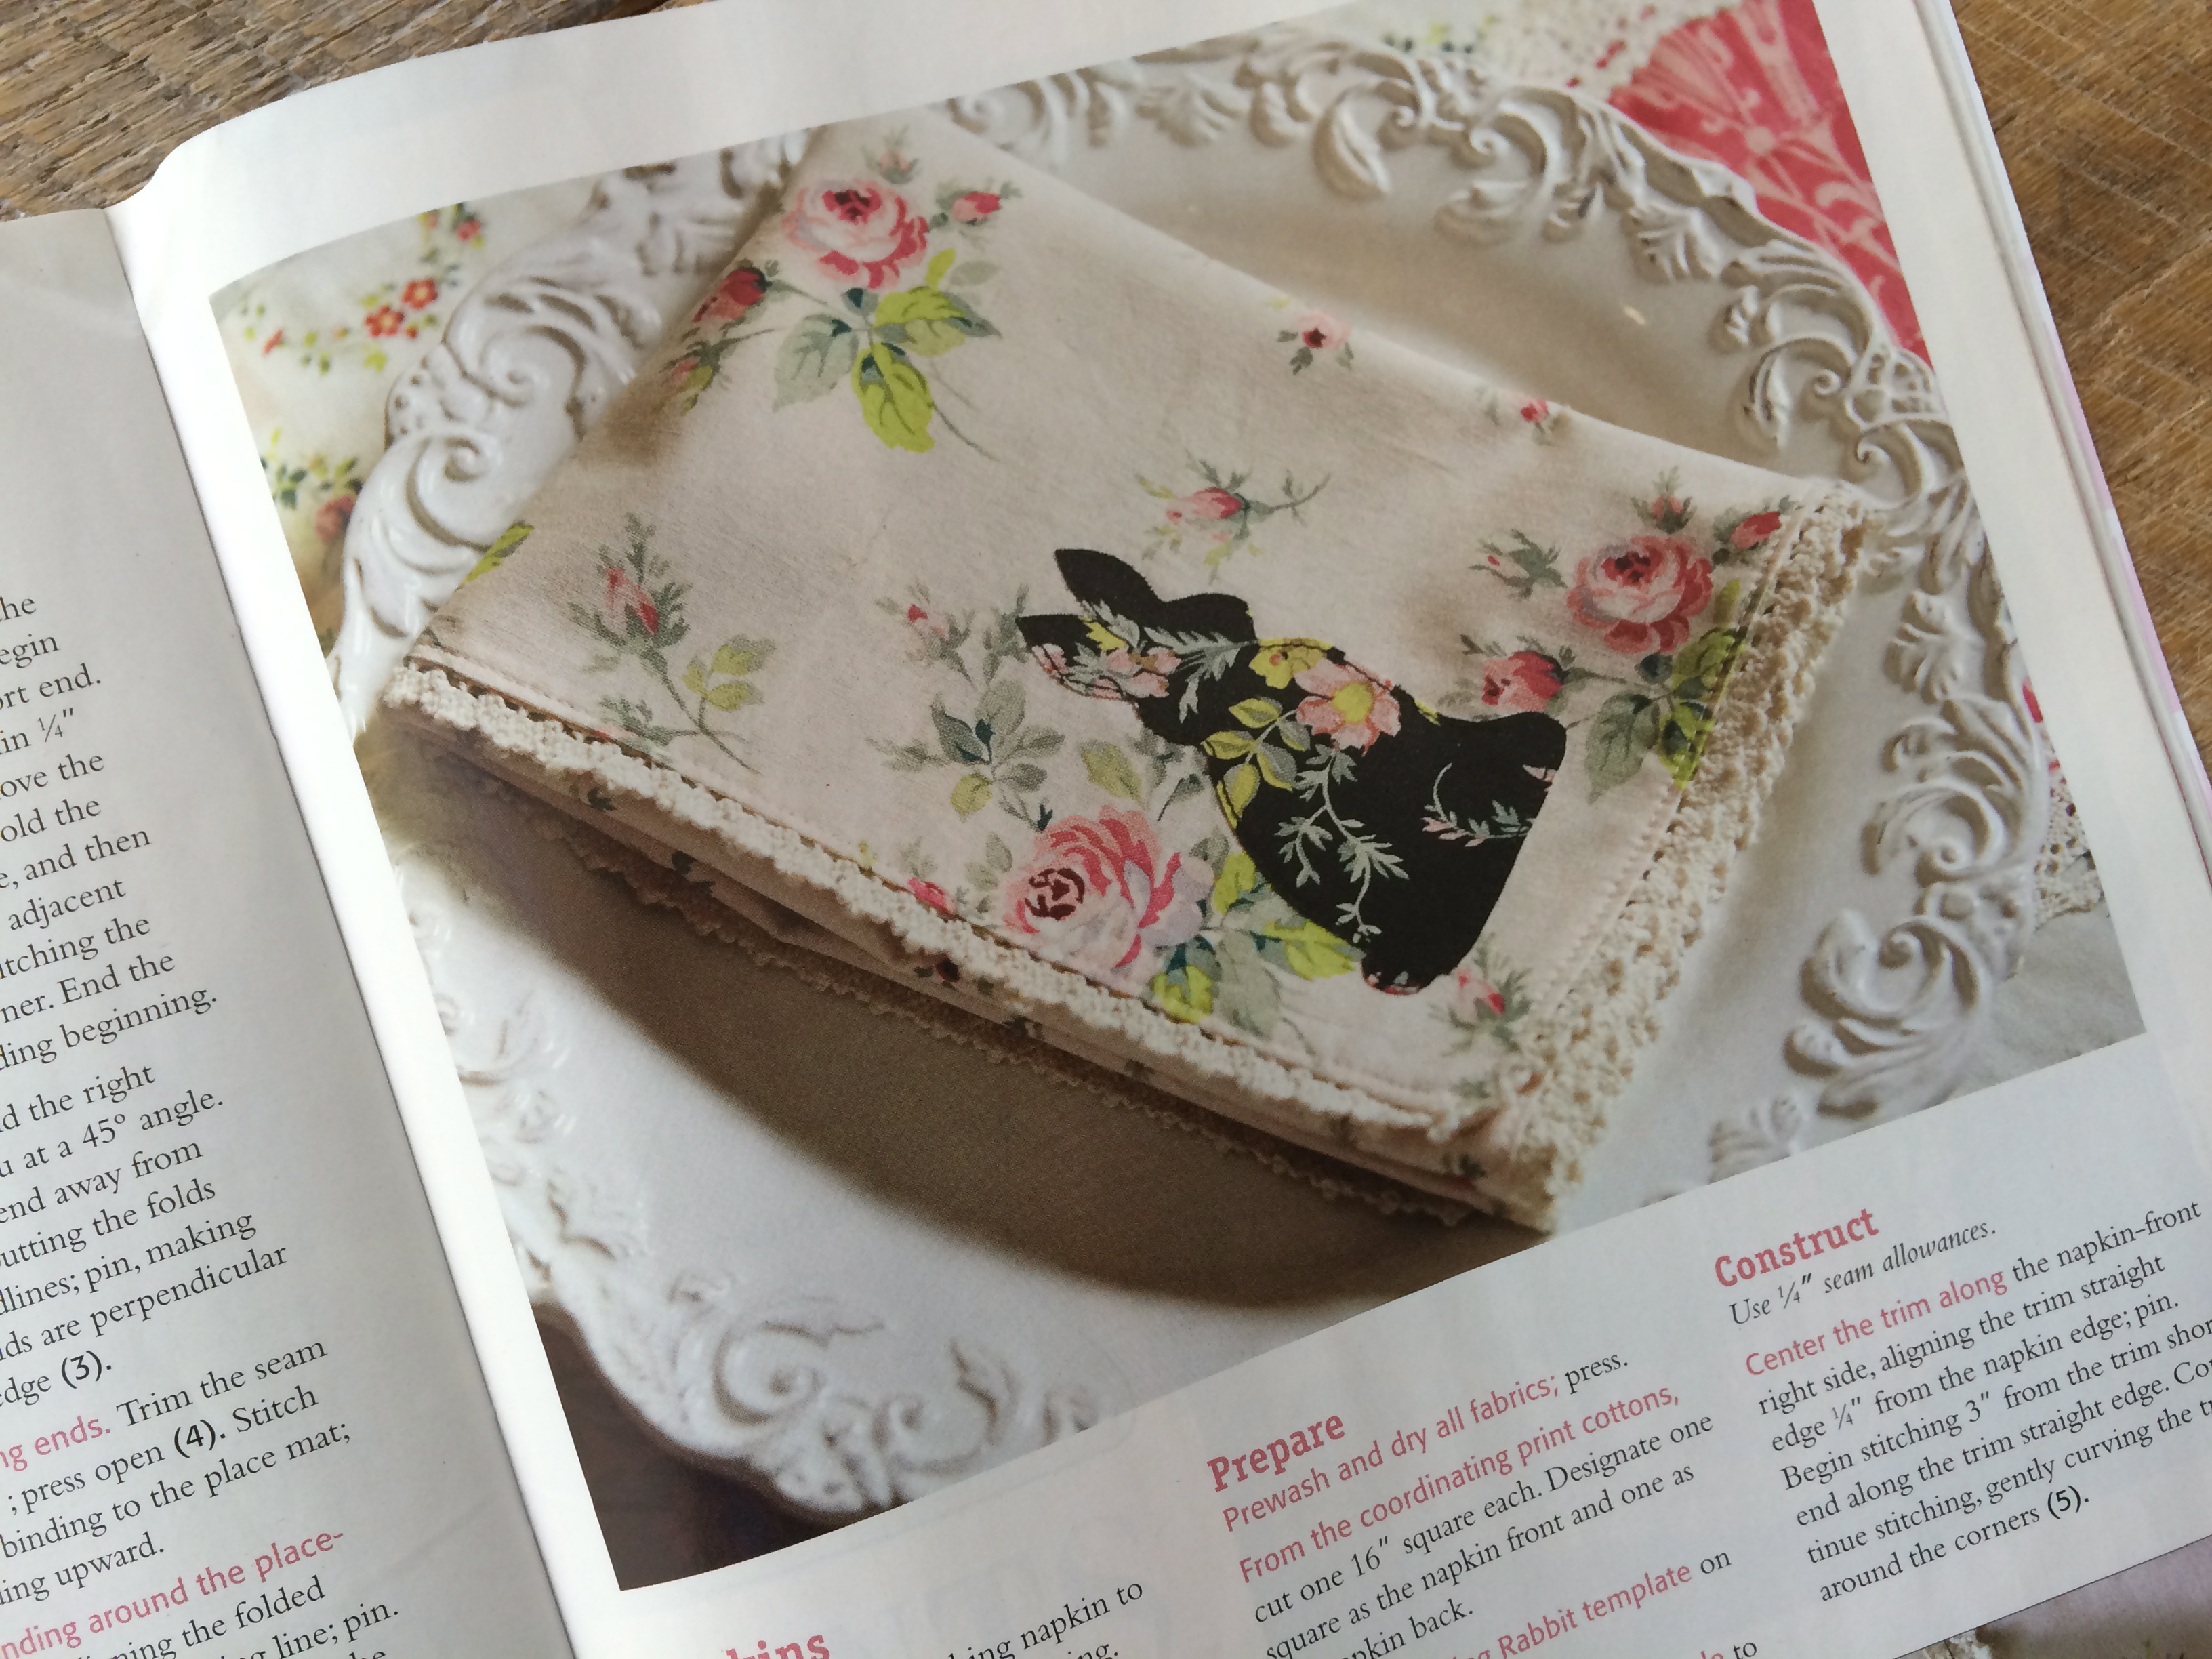
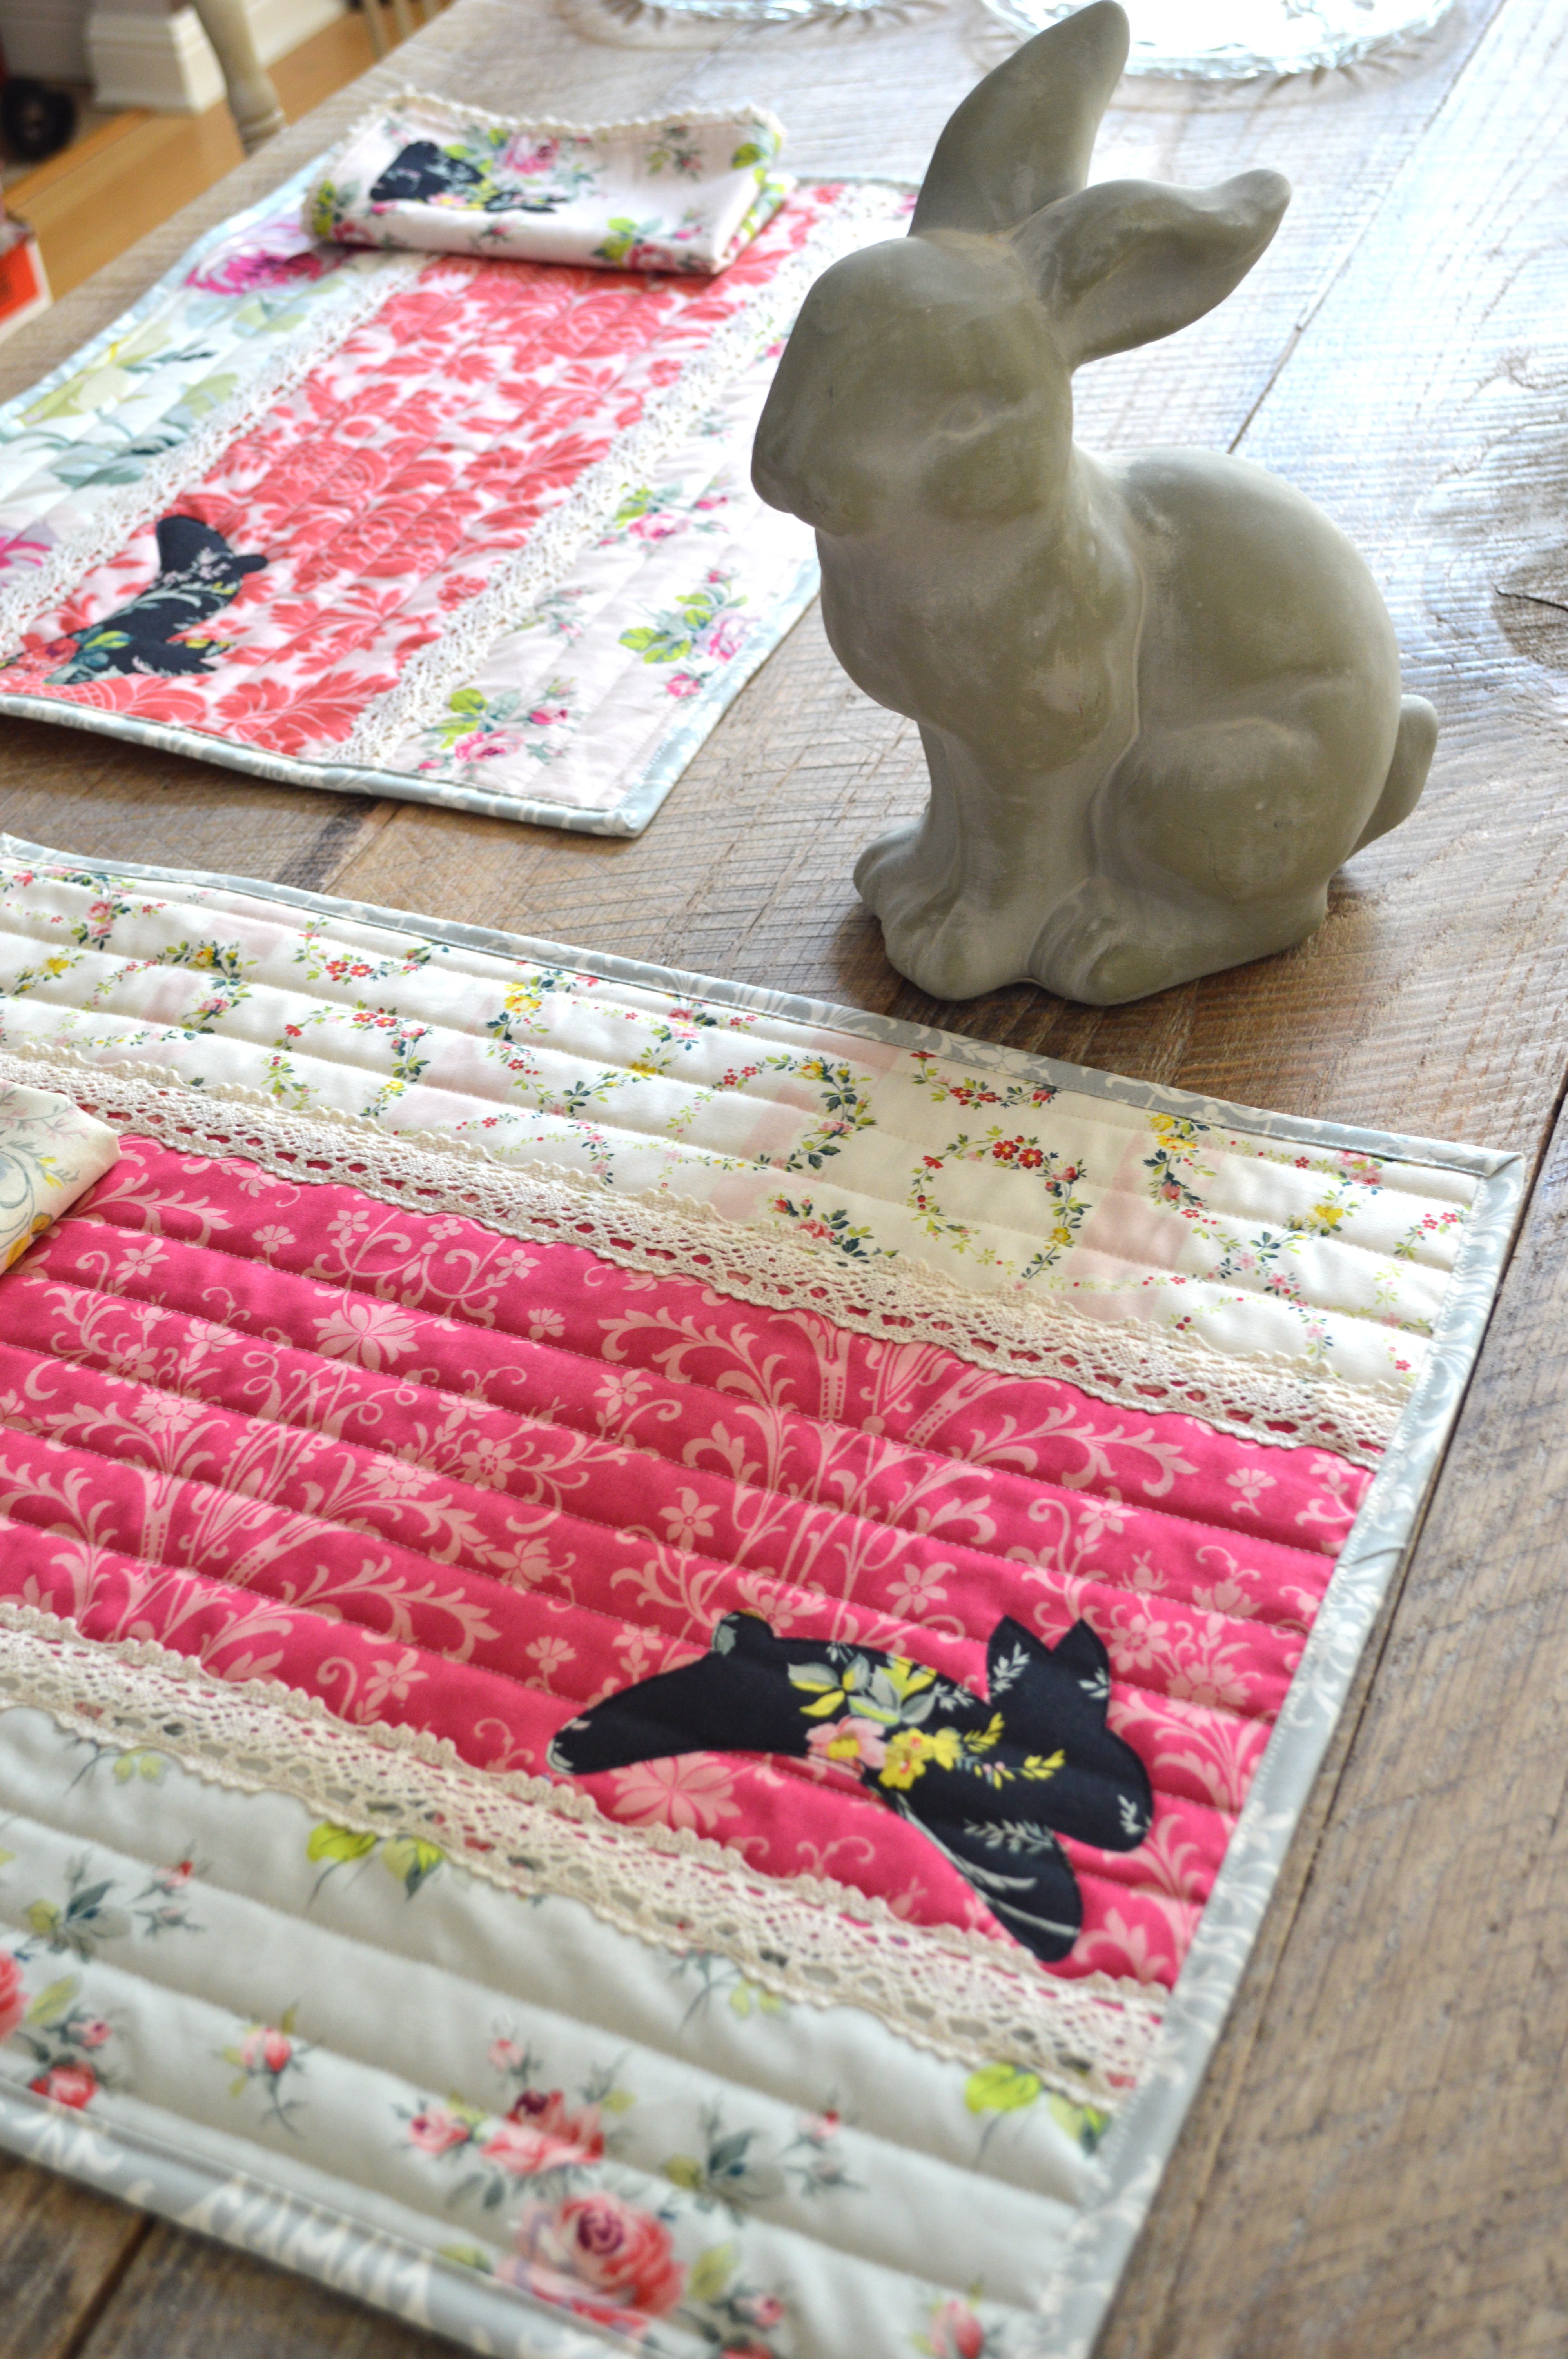
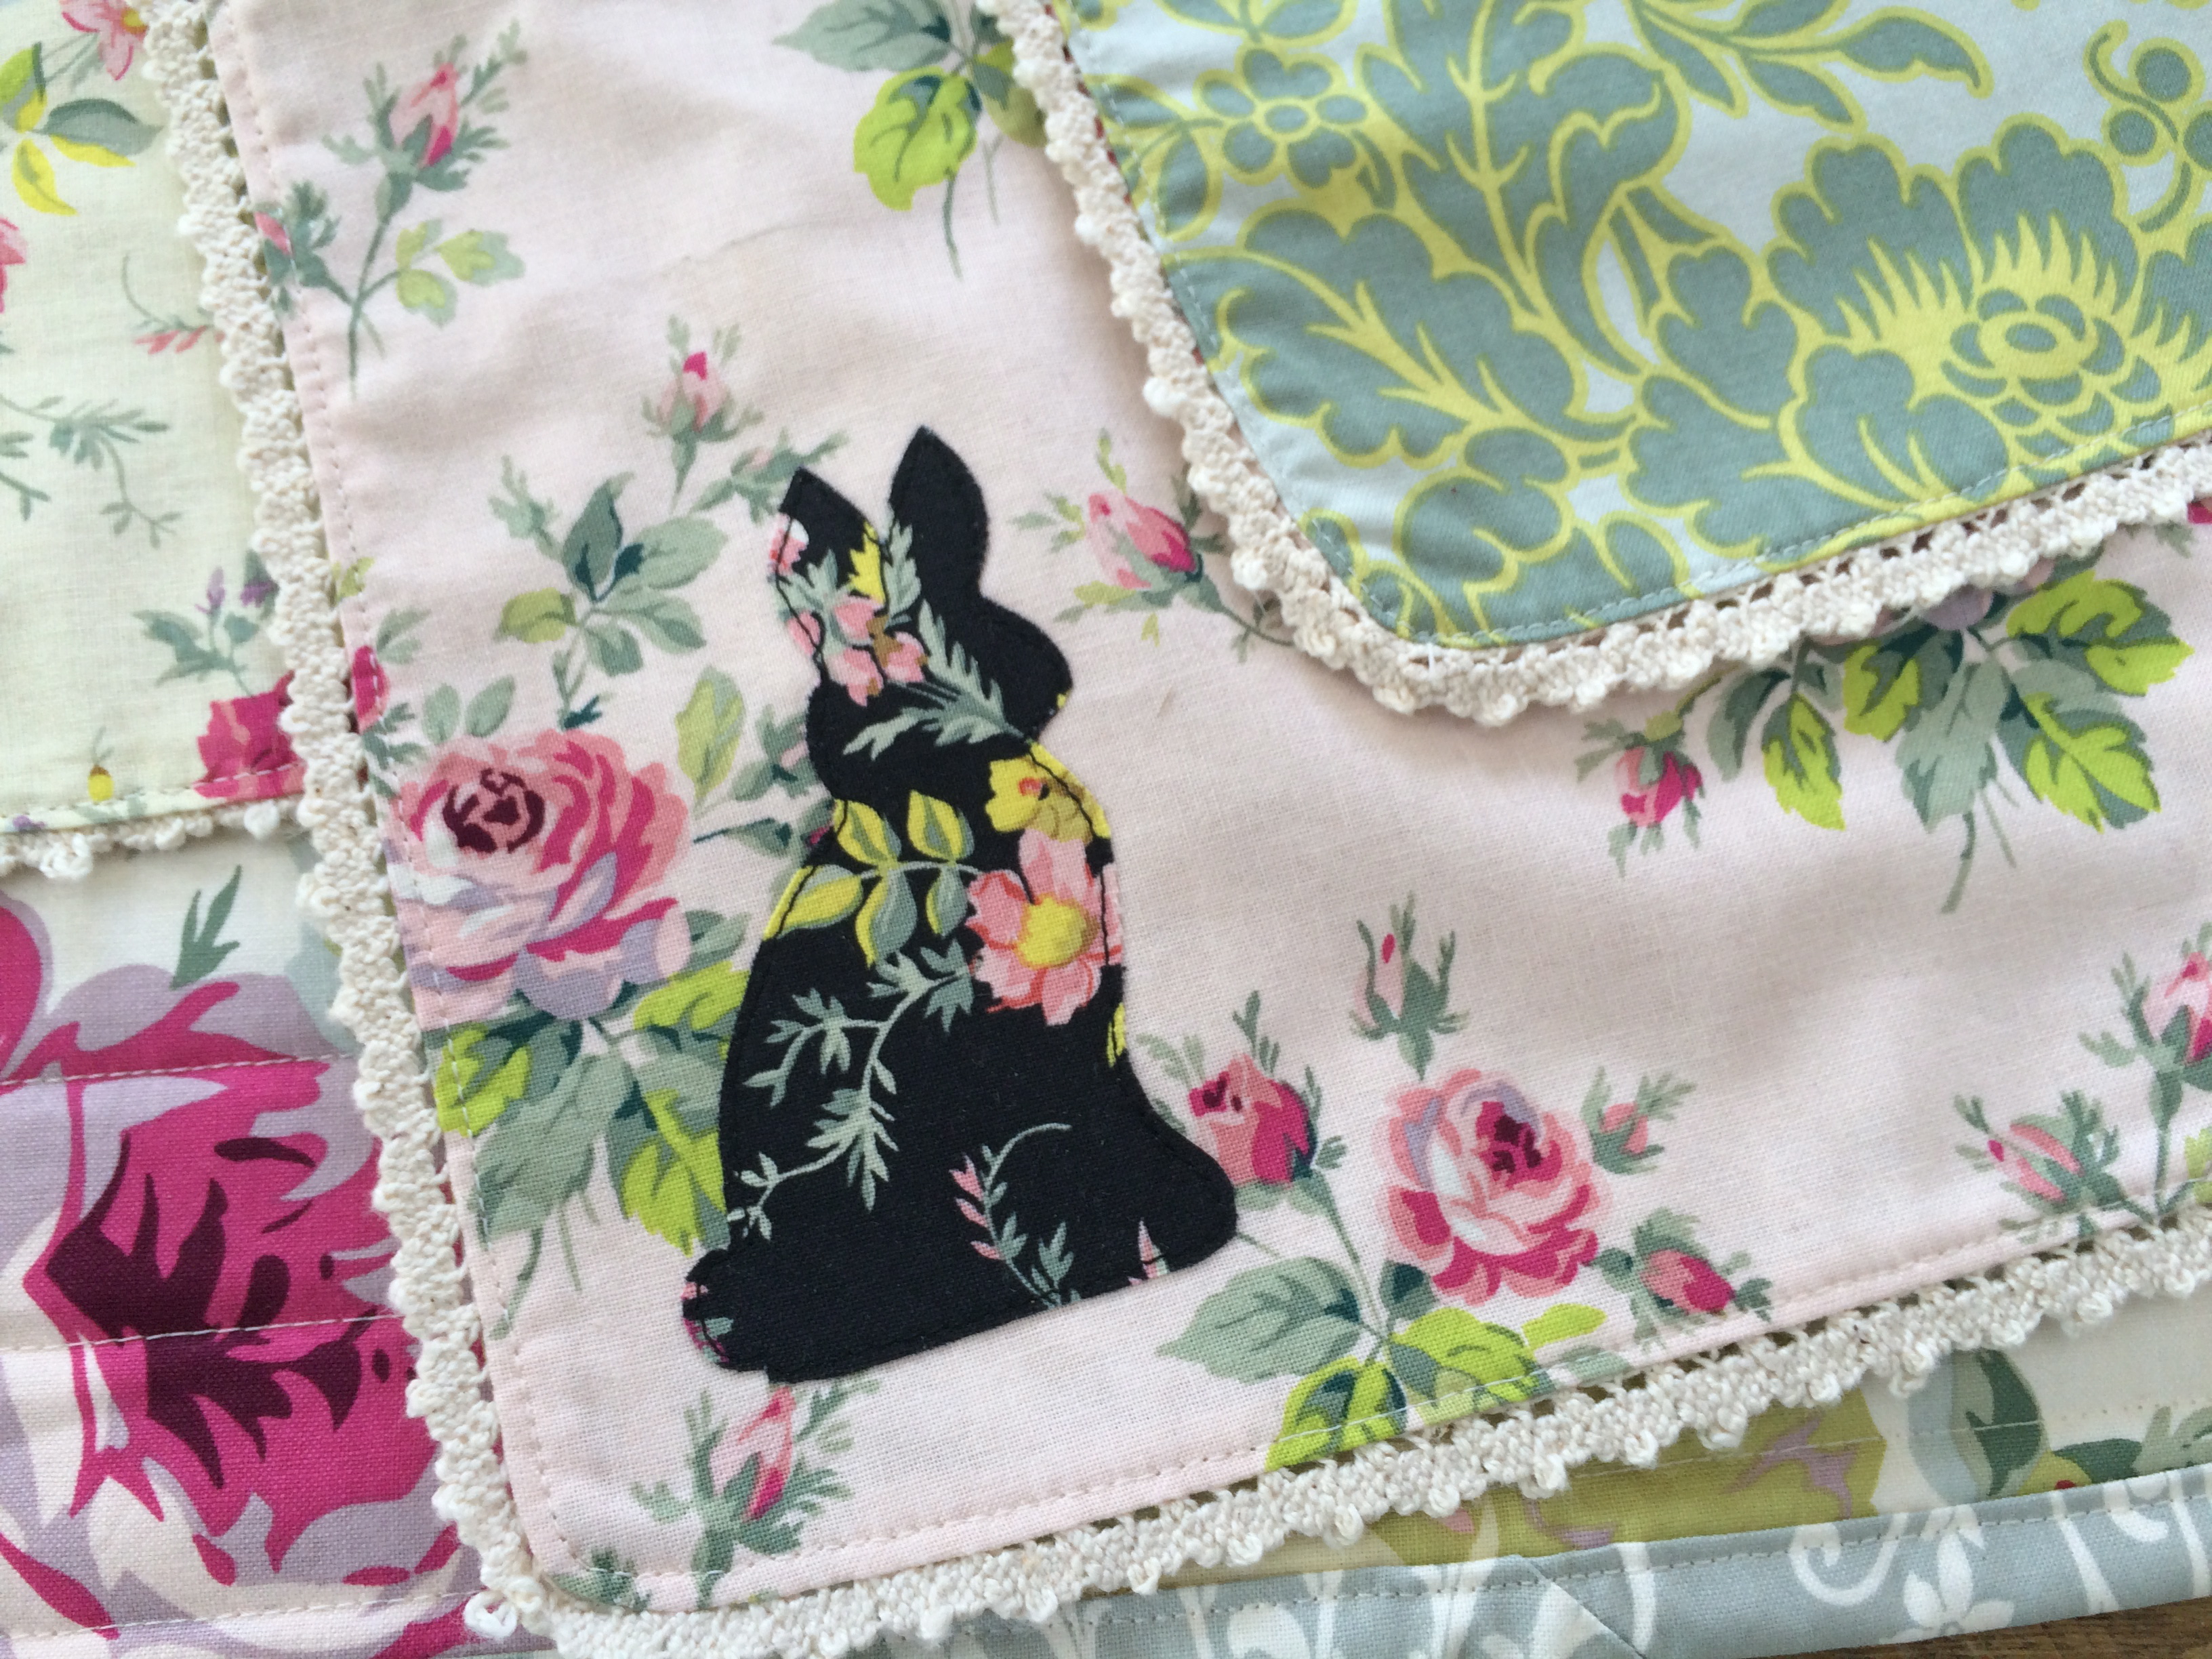
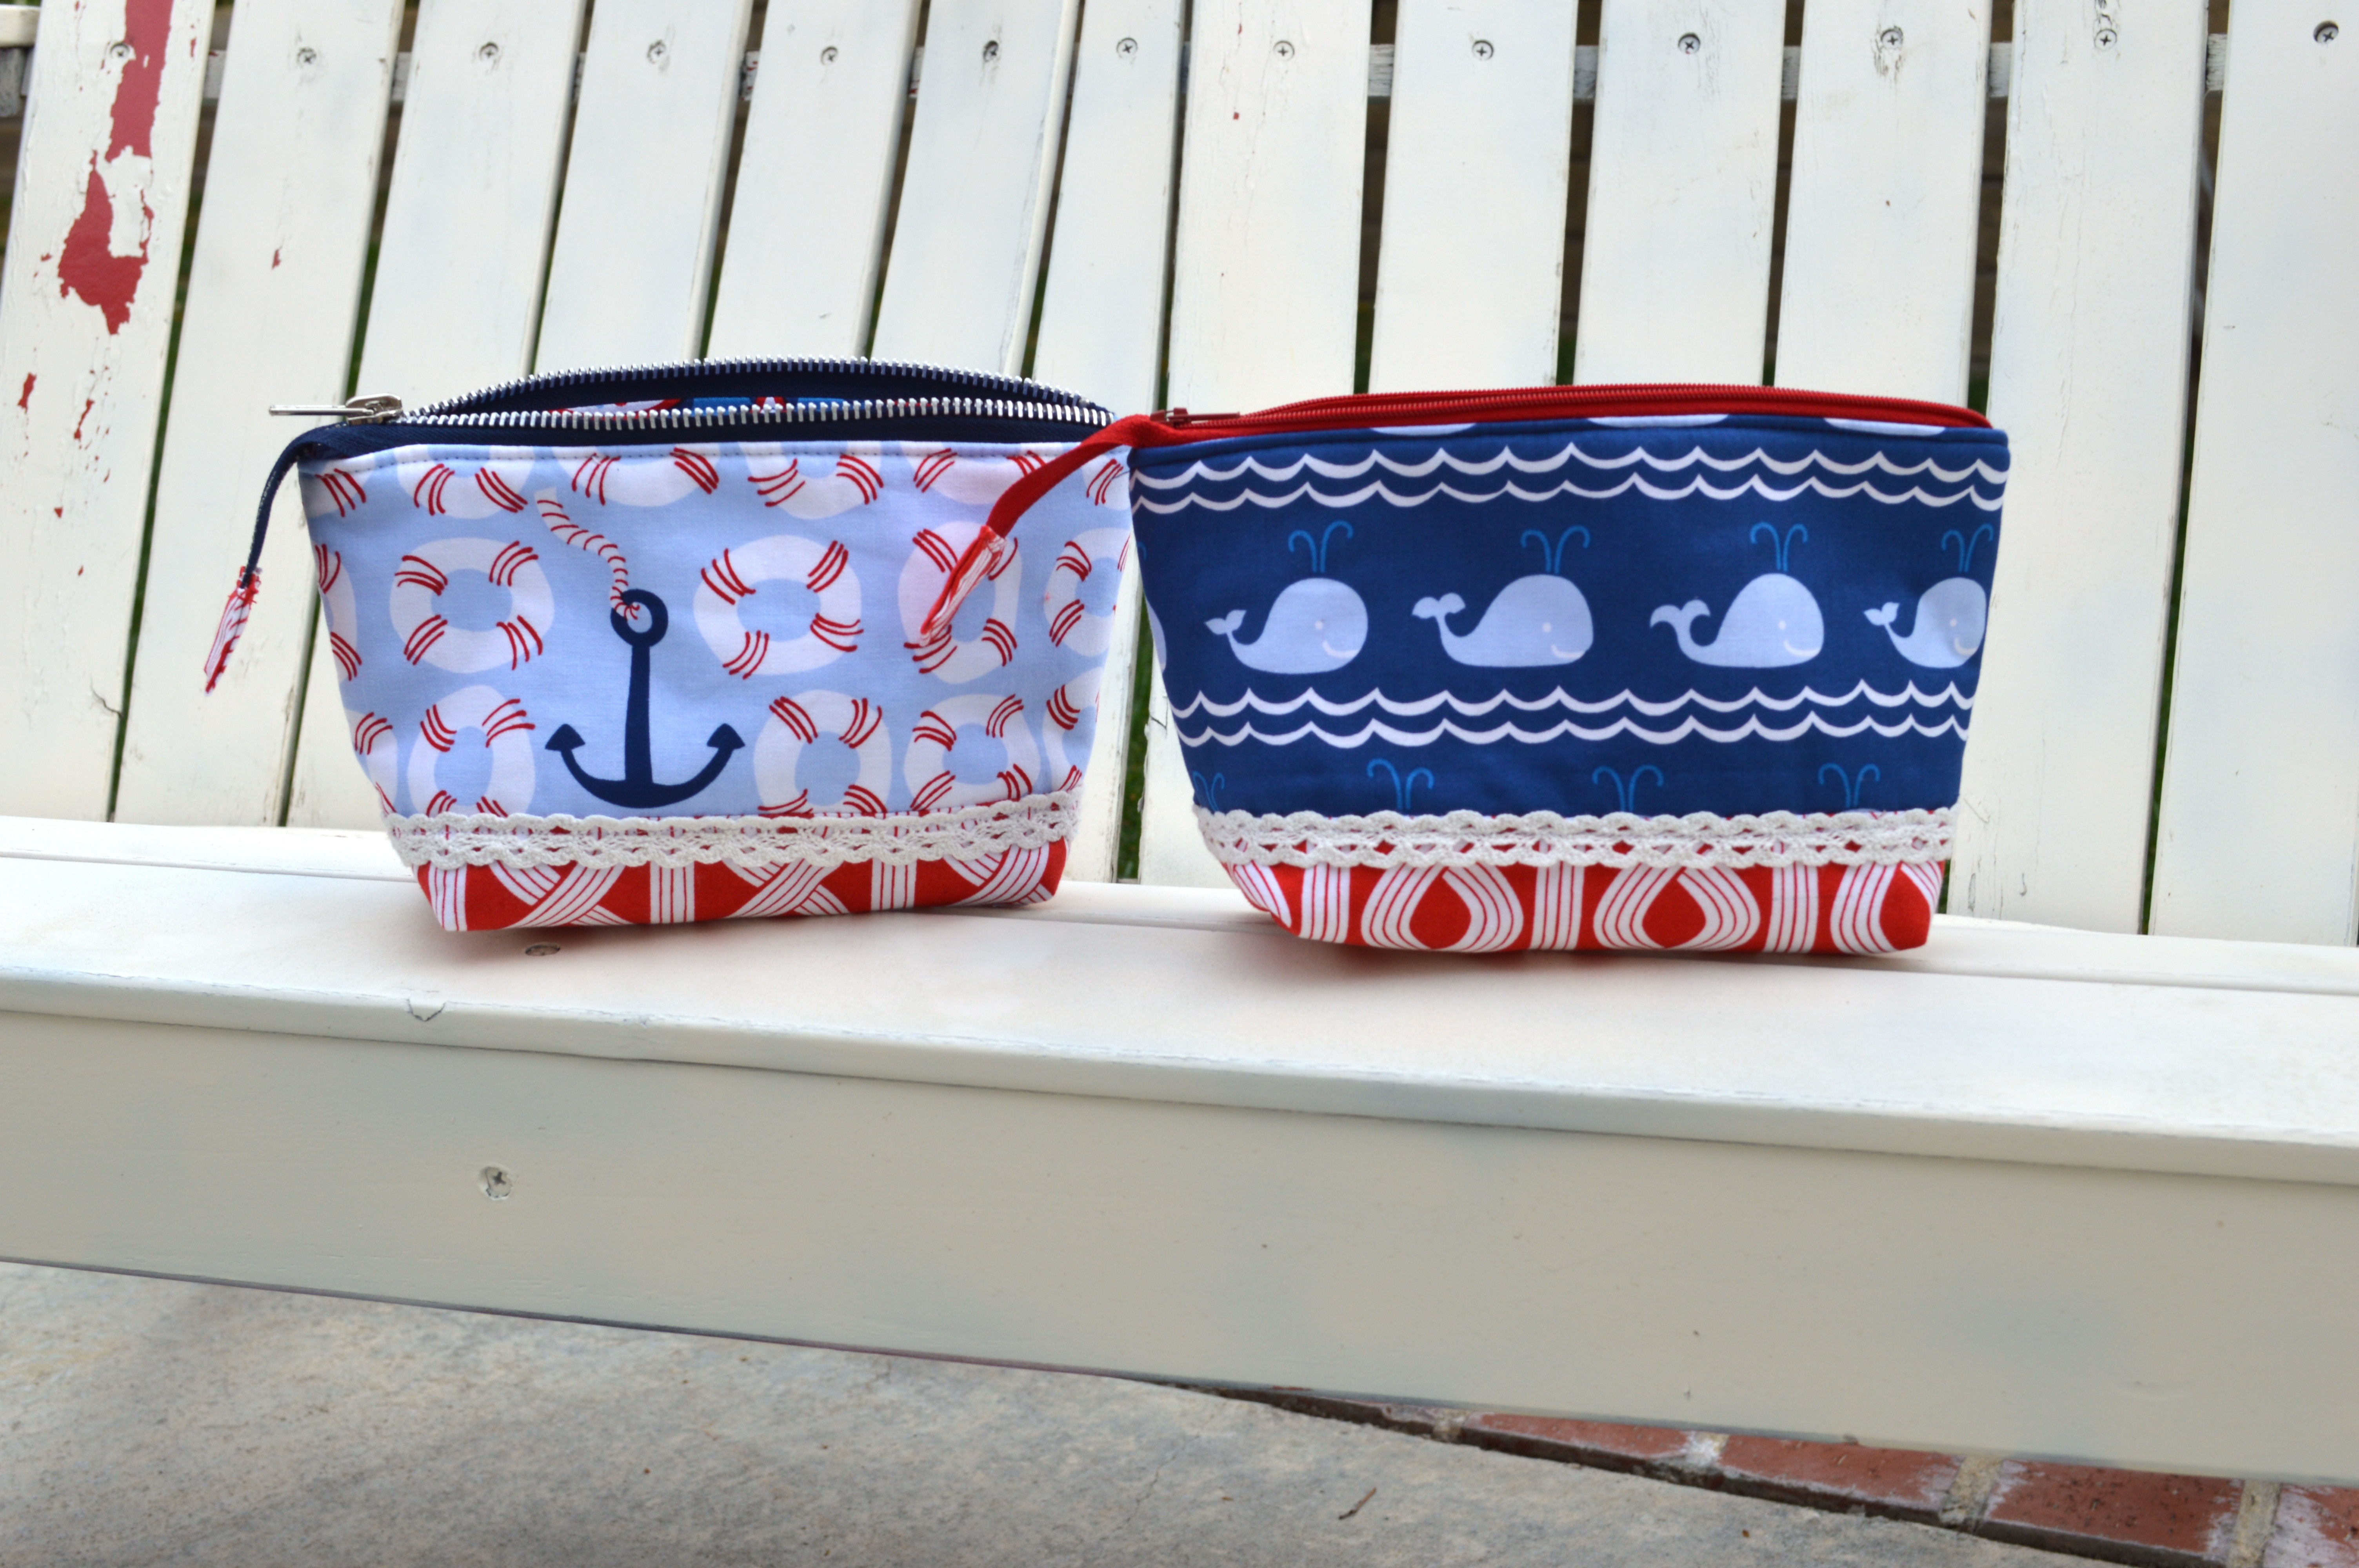
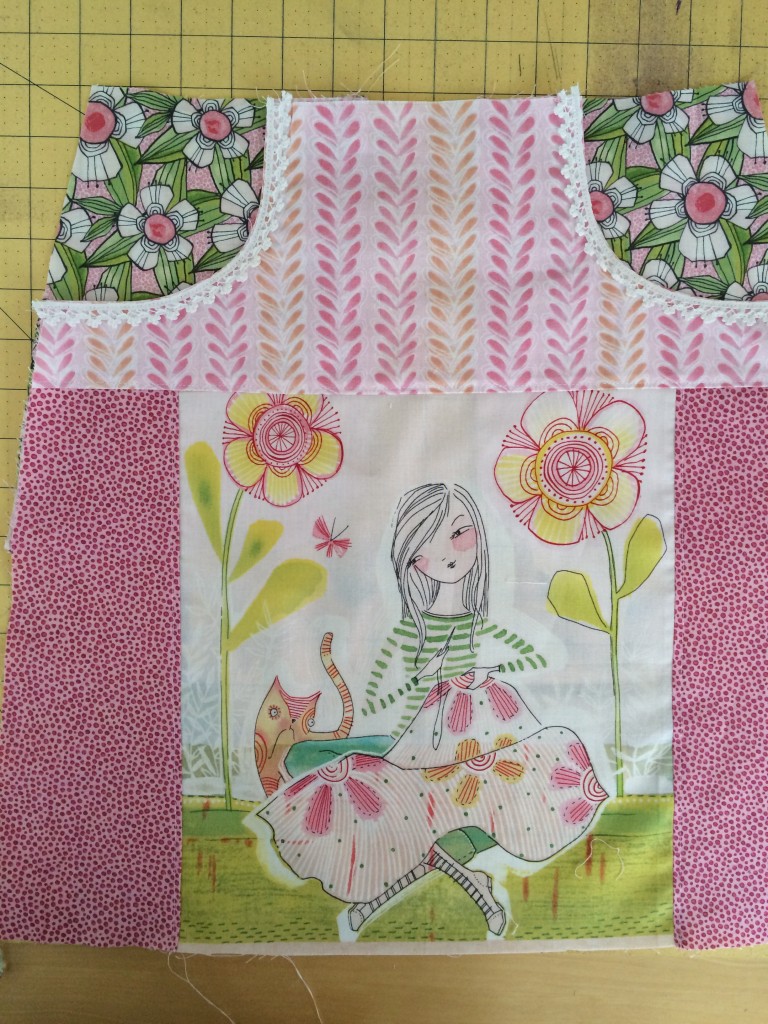
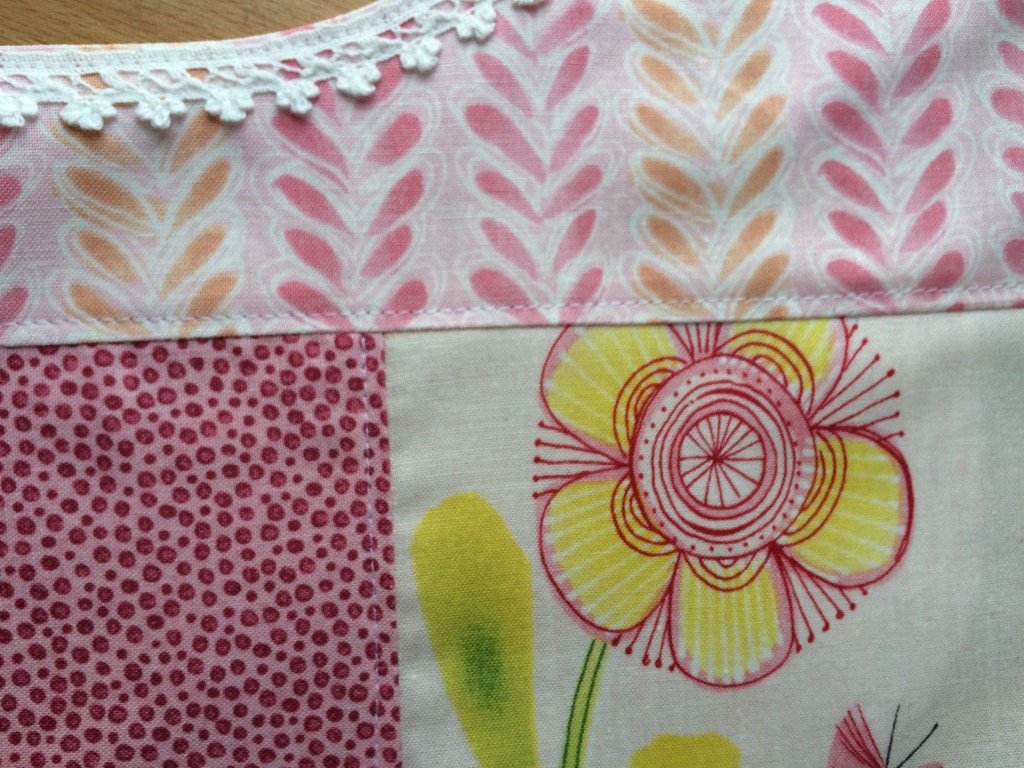
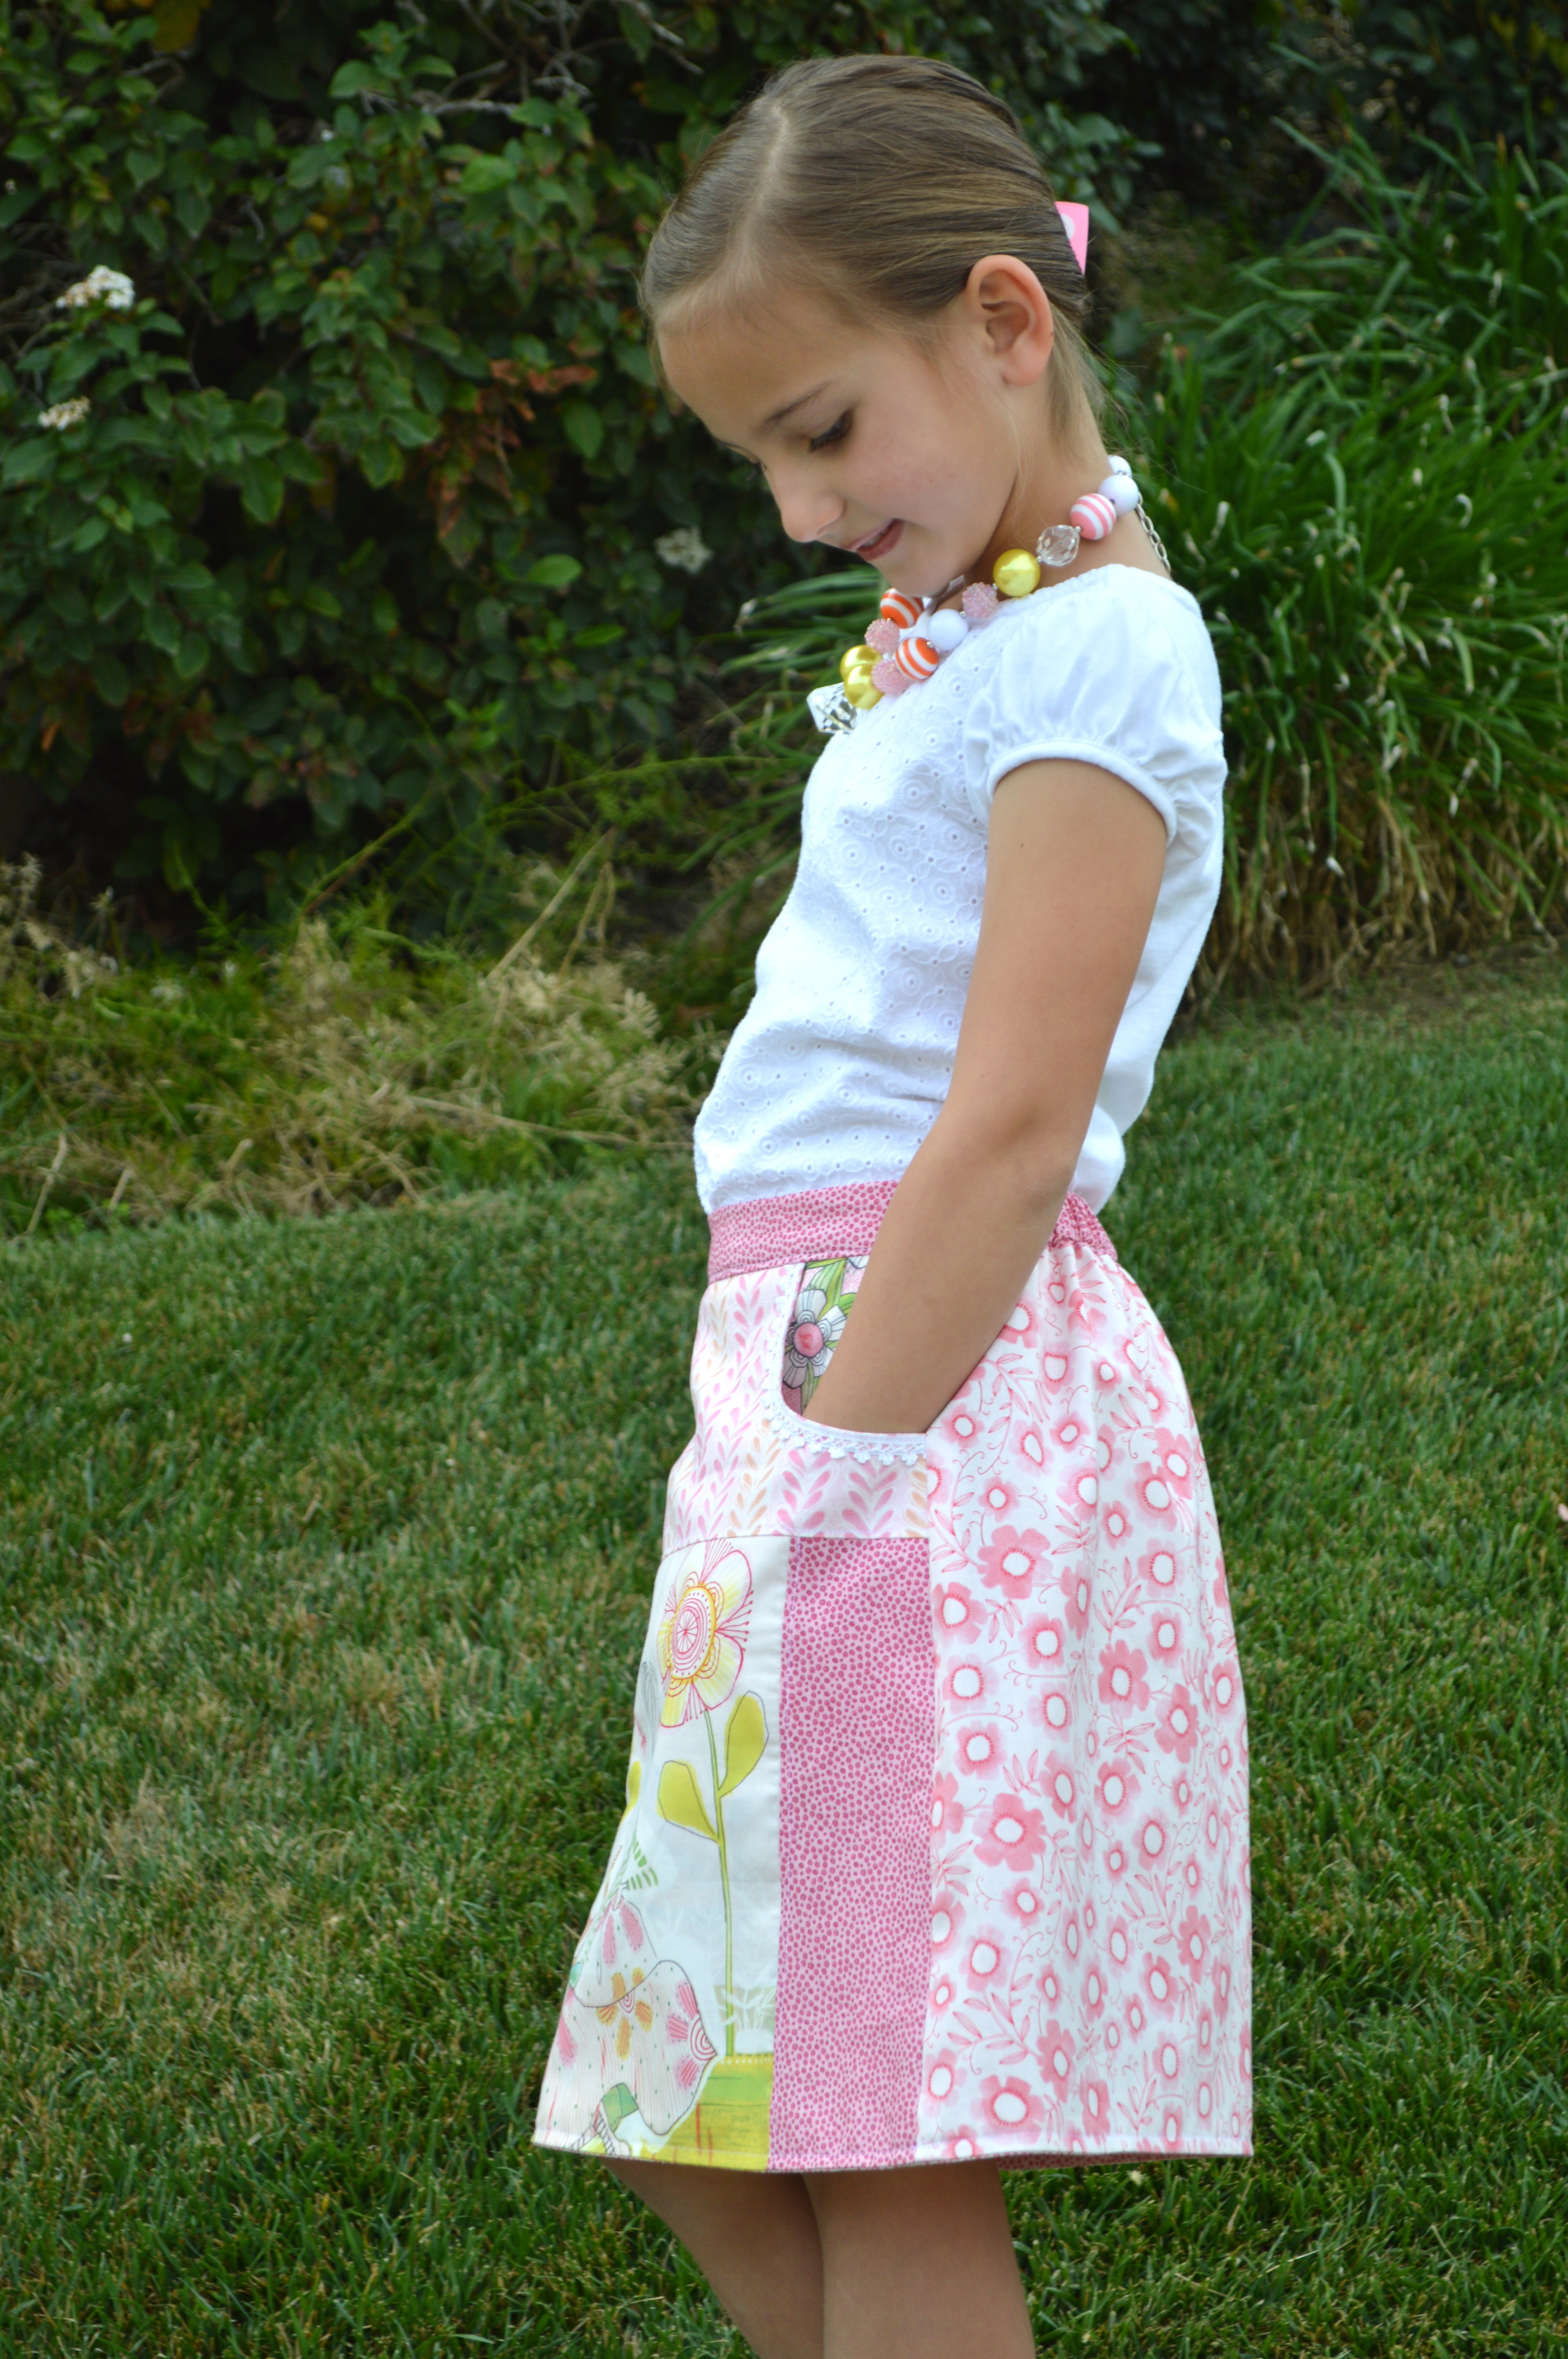
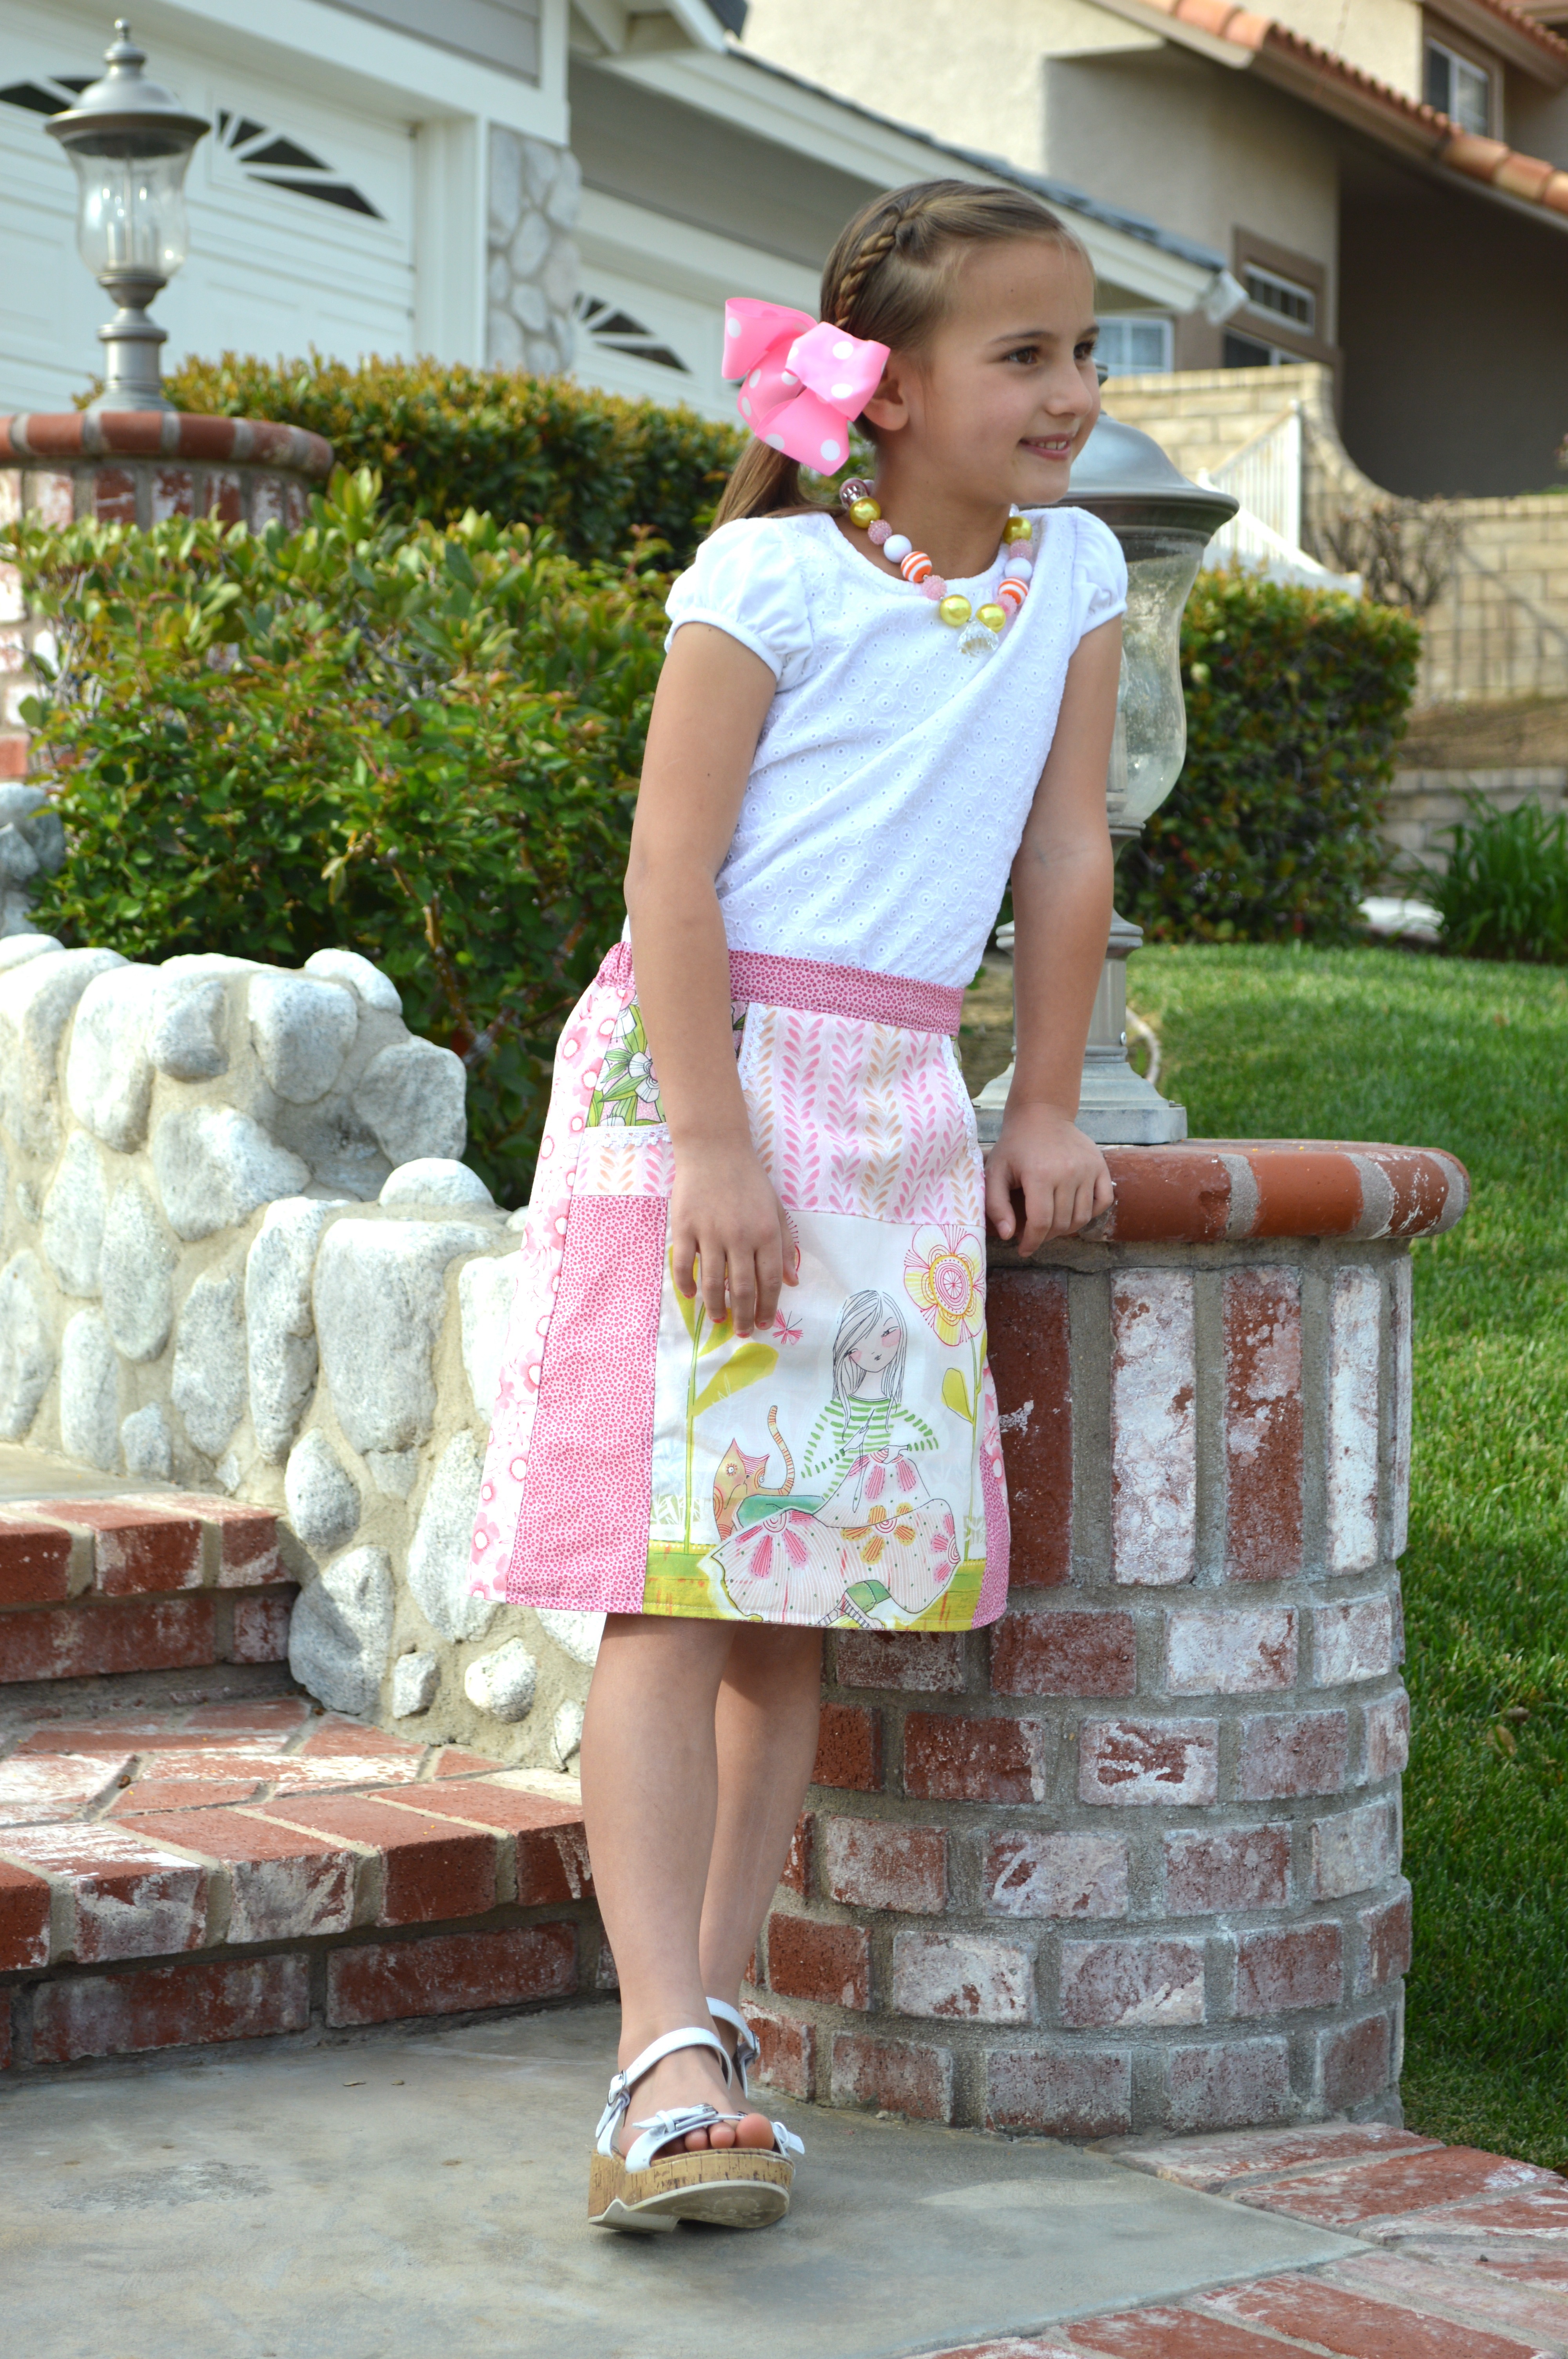
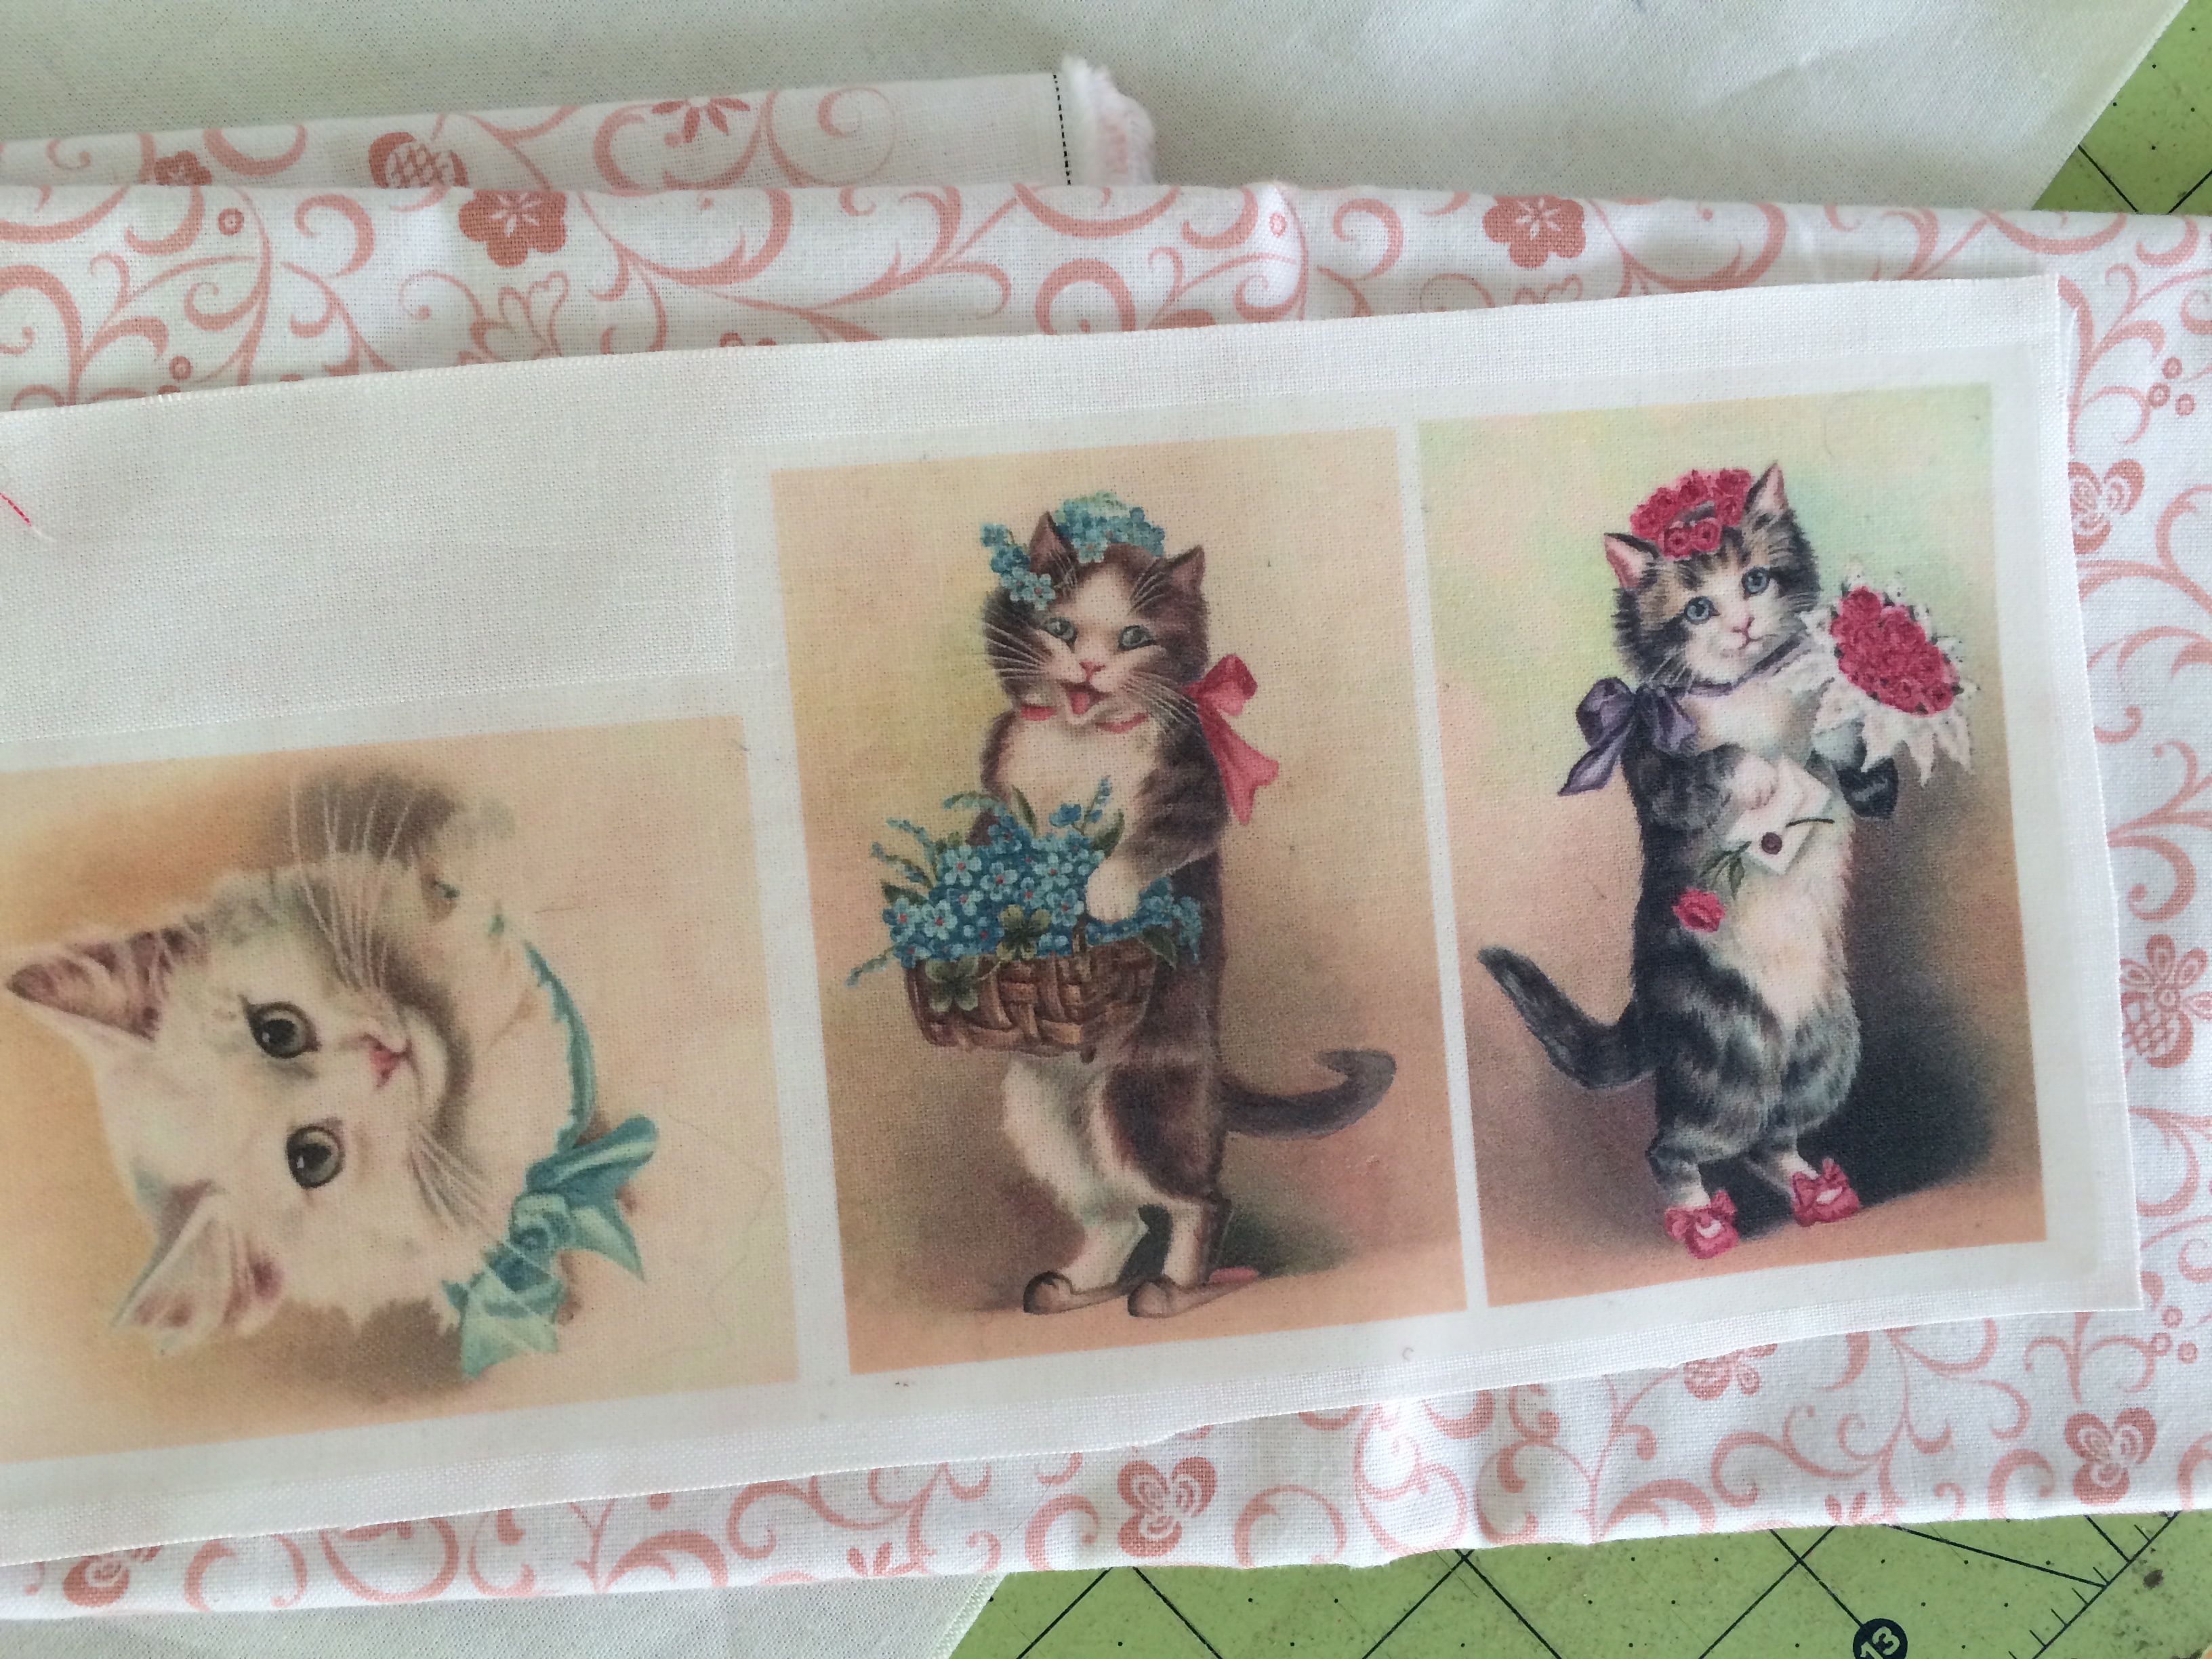
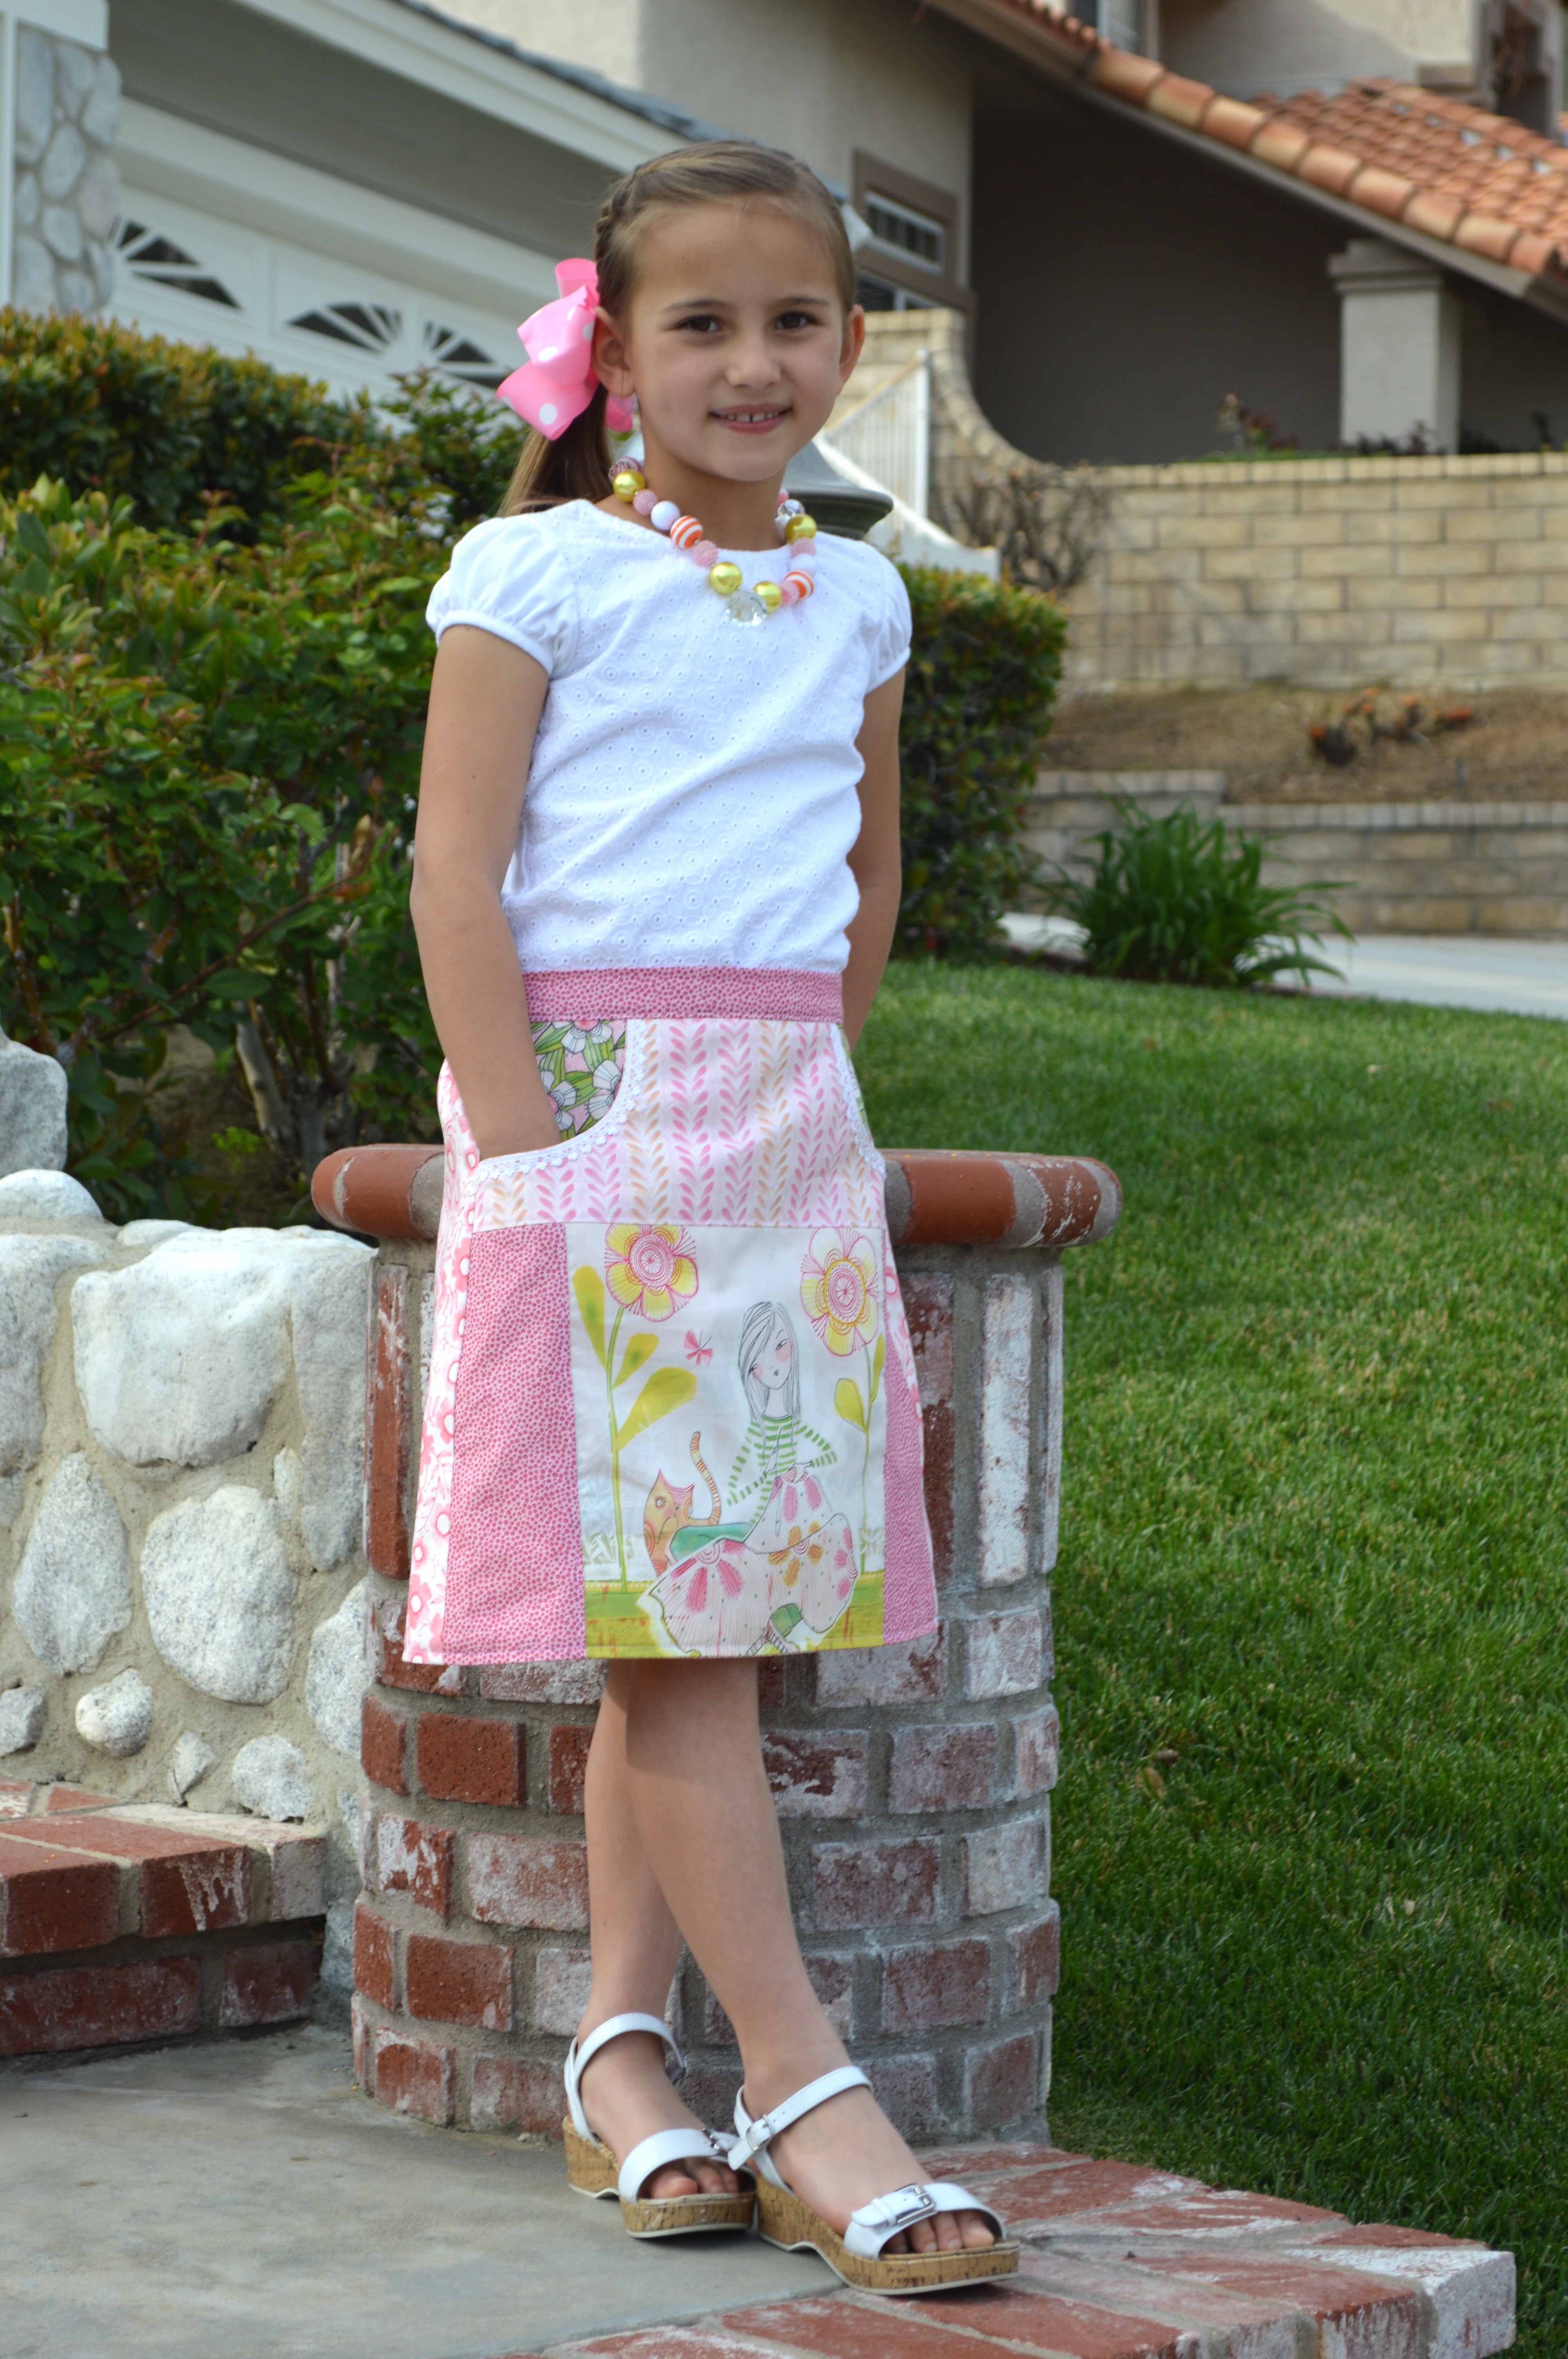
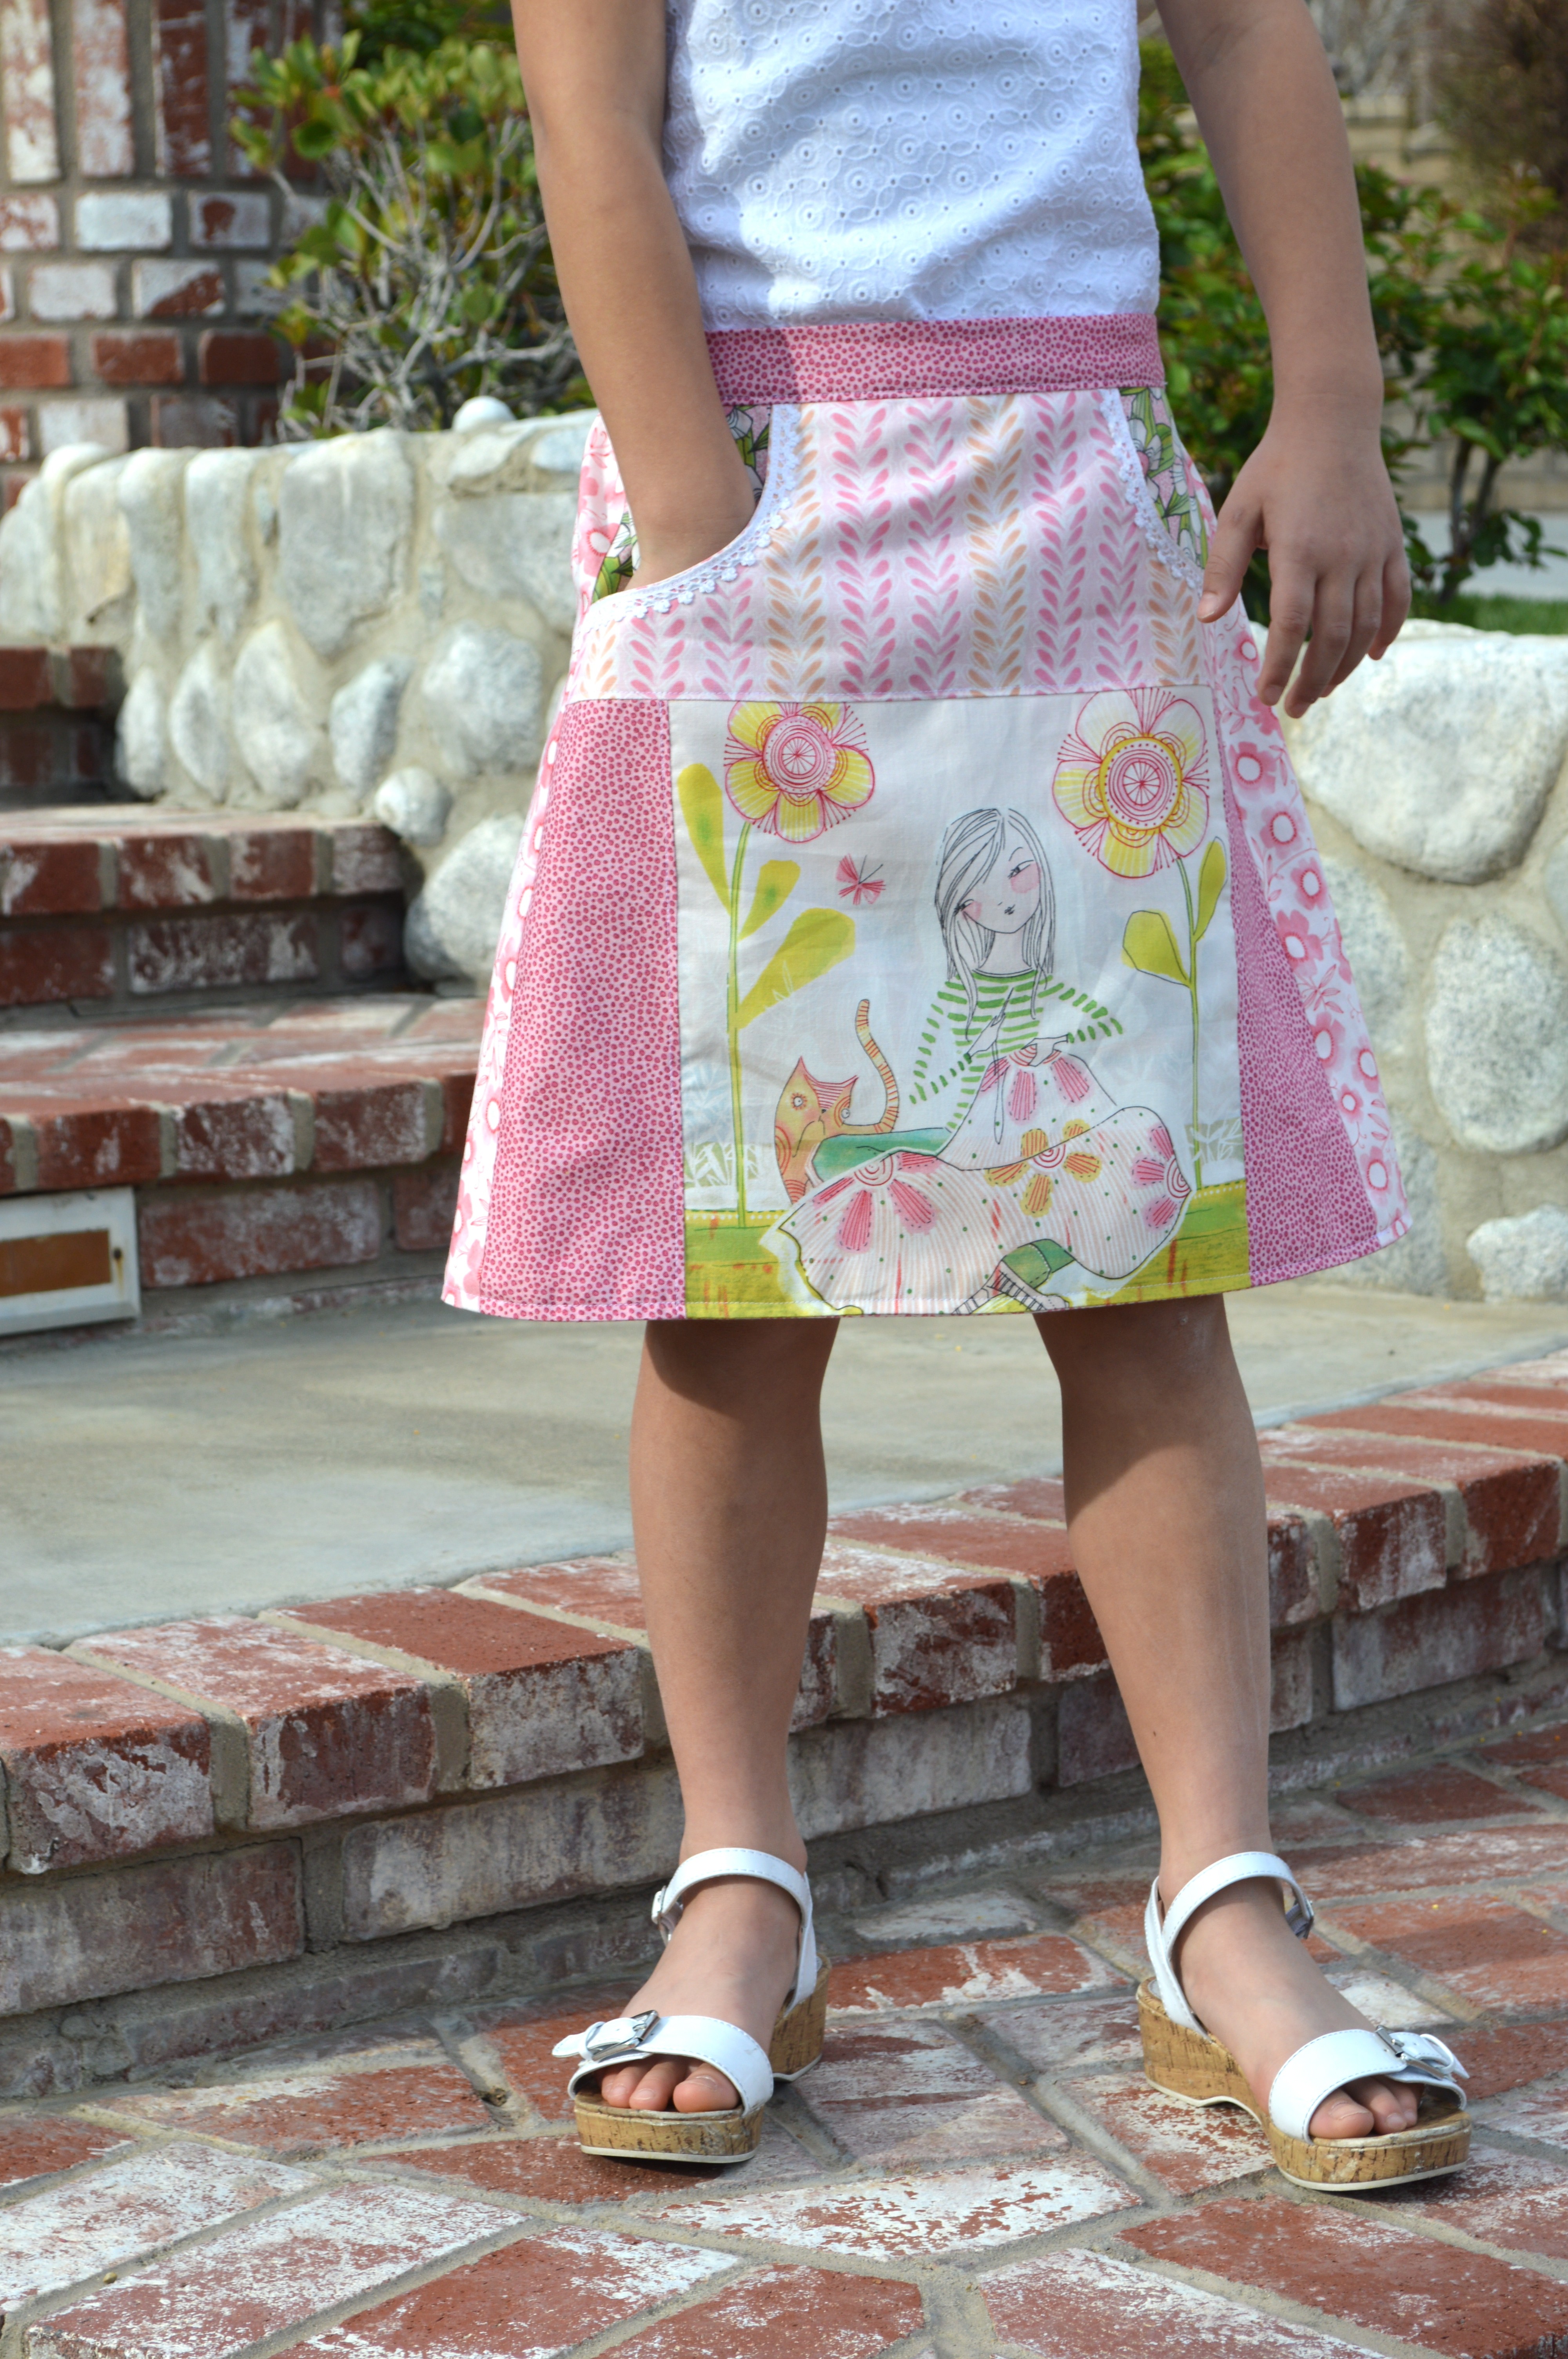
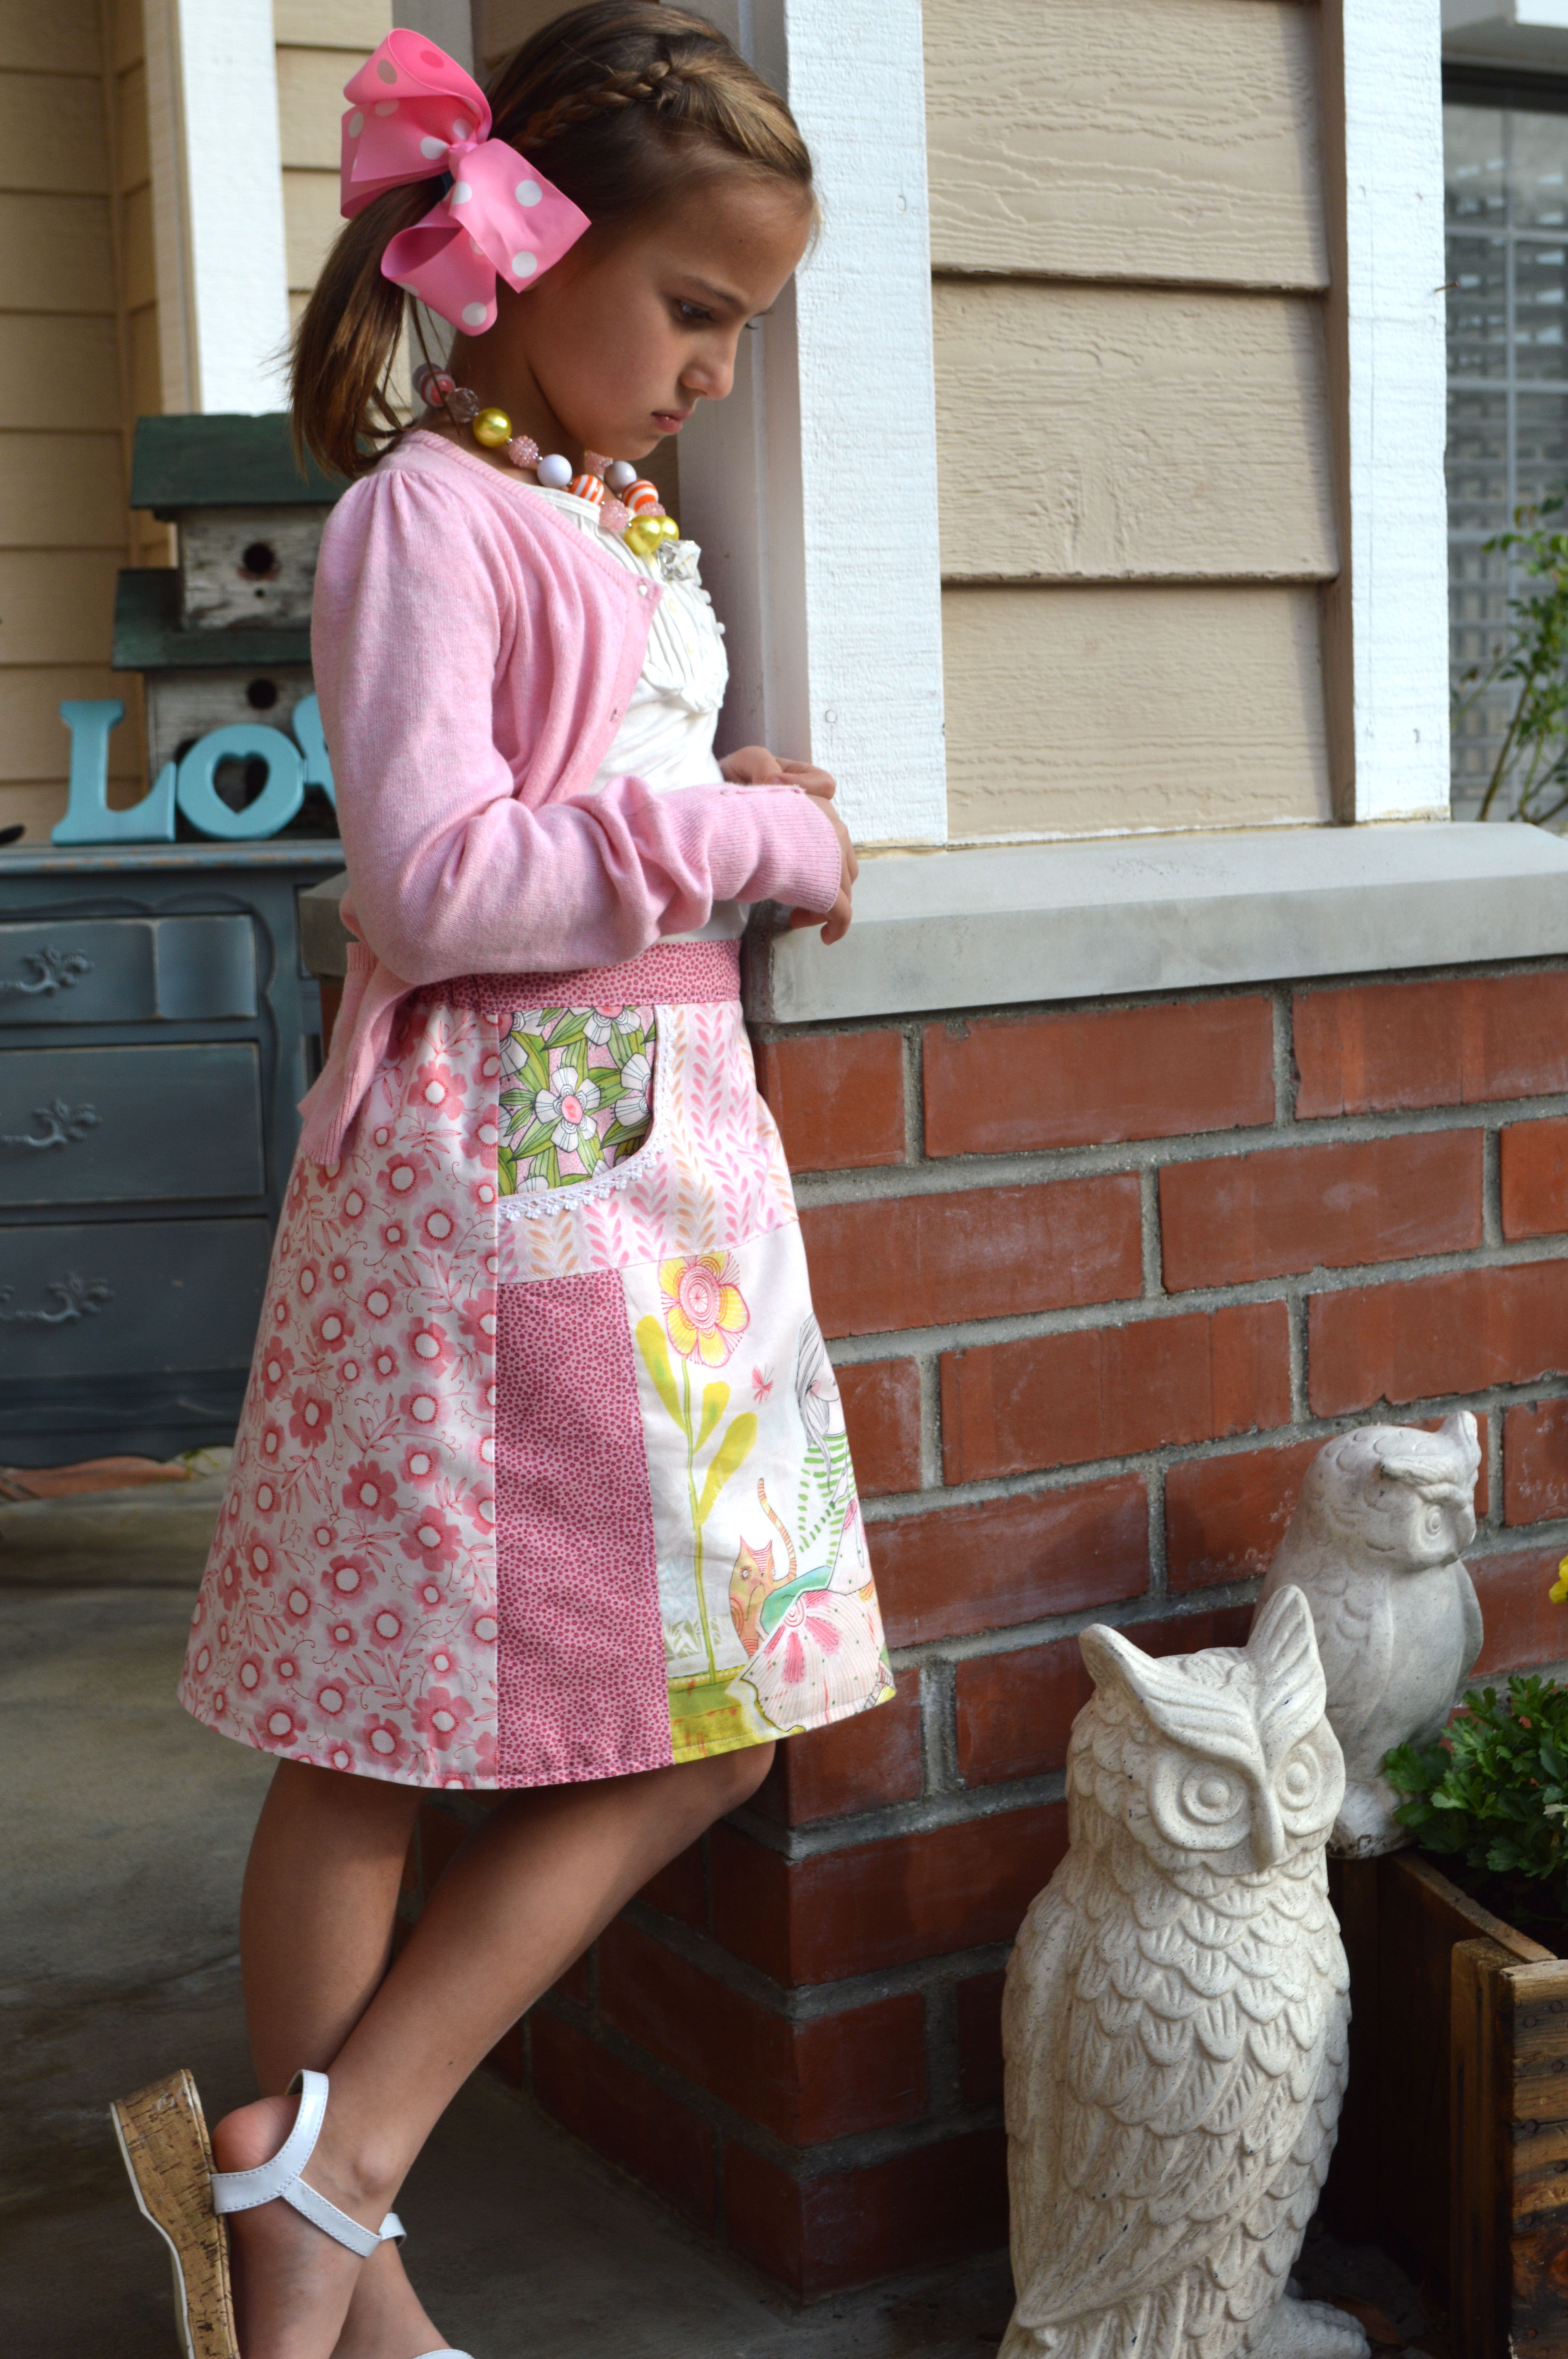
The fabrics are from Blend Fabrics’ “Riding Hood ” line.  Aren’t they the cutest!  You can purchase this quilt pattern PDF from my Craftsy shop or from Emily Ann’s Kloset.IMG_6198

IMG_6199

through the woods quilt 3

Sew News Placemat & Napkin Set

IMG_4974

I I have a hard time keeping secrets!  Especially since August 2014!  My quilted bunny placemats and reversible bunny napkins are in the April/May 2015 issue of Sew News!  I still giggle a little when I see my name in print.  I am very grateful to Sew News for liking my pattern ideas 🙂  The fabrics I choose are from the Grace line from Blend.  They scream Spring to me!!!IMG_4978

IMG_4975

Mufasa thinks they make a nice new napping spot for him!DSC_1765

I love the texture the quilting gives the placemats.  The added lace and the pieced floral fabrics makes it seem a little vintage!bunny placemat

I love the addition of this ecru lace trim to the napkins.  I also love that they are reversible – no exposed seams!  If you like this project, pick up copy of Sew News and read all about it!
IMG_4980

Little Love Bunny Pattern by Jennifer Jangles

It’s officially spring!  Bunnies are popping up all over the place!  
love bunny 5

I LOVE spring bunny projects.  I have had so much fun making these cute little critters!

love bunny 1

The pattern is from the very talented Jennifer Jangles.  Her pattern is available to download from her website.  The instructions are very clear and it’s an easy project to put together.  All the fabrics are from Blend Fabrics.  With so many fun patterns to choose from, I mixed and matched their fabric lines to come up with some fun combinations.

bunnypdf

I went a little crazy and made 10 of them!!

love bunny 6

Instead of hand stitching the nose and mouth, I used the sewing machine.   The nose, heart, and inner ears are all appliquéd with Heat n Bond Lite.  I used black thread and outlined stitched the appliqué pieces 2 to 3 times each.  The black really helps the fabrics pop.

love bunny 22

Baby Mufasa is always helping with the sewing projects.  I was thinking I might fill one of the bunnies with some catnip 🙂

love bunny 24

Once you make one, I bet you have to make more and more!  They each have unique personalities!

bunny collage

bunny Collage 2
love bunny 21

Nautical Zipper Pouch

anchor zipper pouch

You knew it was coming!  Of course I need a Nautical Zipper pouch to go along with my Sailboat skirt!!  I love these fabrics and I am down to only scraps in my stash.  It’s called True Blue by Blend Fabrics.


nautical zipper pouch blend

This is a modified version of my original My Favorite Zipper Pouch Pattern version 1.0 and version 2.0.  If you would like to make your own zipper pouches here are the instructions:

CUT:

Outer bag anchor print (2) 4″ x 9″

Outer bag red accent (2) 3″ x 9″

Lining (2) 6.5″ x 9″

Heat n Bond Fusible Fleece (2) 6.5″ x 9″

(2) pieces of lace 9″ each

nautical zipper pouch blend 6

Sew the red fabric to the anchor fabric using 1/4″ seams.  Press toward the red.  Press these two units to the Heat n Bond Fusible Fleece.  Then sew the lace on.

nautical zipper pouch blend 7

To insert the zipper, follow THIS tutorial.  It is from my friend Jennifer.  I keep thinking I should write my own, but hers is so perfect.  I go to it every time I sew an “open wide” zipper pouch because I can never remember the measurements!  Insert the zipper just like she instructs.  Once you’re done, it should look like this:

nautical zipper pouch blend 9

Open the zipper, and place right sides of the outer bag together, and right sides of the lining together, make sure to tuck the end of the zipper in.  Match the side seams.  Pin all the way around.  Sew all the way around using 1/4″ seams, leaving a 3″ opening at the bottom of the lining.  Notch all the corners with a 1.5″ square:

nautical zipper pouch blend 8

Fold out the corners and match the seams.  Sew using a scant 1/4″ seam.  For more details, visit my post here.  Then turn right side out, and top stitch the opening closed.  Top stitch all the way around the zipper pouch 1/8″ away from the zipper.  To finish the zipper end, cut it at the desired length.  Cut a piece of accent fabric 2.5″ x 3″.  Fold it like this and press:

nautical zipper pouch blend 13

You kind of fold it around the zipper and press.  Then insert the zipper in and sew around the seams.  Careful on the metal zipper!!  Here you can see what it looks like.  I added a little compass zipper pull.  My anchor charms haven’t arrived in the mail yet 🙁

nautical zipper pouch blend 5

nautical zipper pouch blend 2
I just love them!!!
nautical zipper pouch blend 3
Here are a few other of my True Blue Projects:

whale zipper pouch true blue blend fabrics covered composition book tutorial whales true blue blend fabric whale skirt whale skirt whale shirt true blue_9

i love whales pillow tutorialsummer throw pillow tutorial

whale quilt Blend True Blue 21


Lucky Pillow – Version 2.0

lucky pillow tutorial

Since I was already in the St. Patrick’s Day sewing mode after sewing a banner, I thought I would whip up a throw pillow!  I’m sure you know by now that I love throw pillows!  Last year I also made a “Lucky” patchwork pillow, so I am calling this one version 2.0.

St-Patrick-s-Day-Pillow-Tutorial1Here’s how you can make one!

Supplies

Scraps of green fabric – I used fabric from Blend: Tea Garden, Turkish Delight, and the Makers

blackish/grayish denim or other fabric for lettering

Heat n bond Lite

Heat n bond EZ print sheets

Sizzix Shamrock Die

Lucky words, click HERE – print in reverse

20″ square natural canvas

20″ square green print for back, I used Yuletide Greetings by Anna Griffin

22″ zipper

20″ pillow form

Begin by ironing the Heat n Bond Lite to the wrong side of the green fabrics and the “lucky” fabrics.  Run the green fabrics through the Sizzix Big Shot.  If you don’t have a Big Shot machine, you can hand cut the shamrocks.

lucky pillowPrint off the “lucky” letters and iron them to the wrong side of the fabric.  Cut with scissors.  This takes a little bit of patience 🙂 IMG_4173Peel off the backing paper and position the word and shamrocks as desired.  Outline stitch around each shamrock 2 times in black thread.  There was no way I was sewing around the cursive letters more than once!!

lucky pillow 2 3Prepare the back of the pillow by cutting a 20″ square.  Make a cut at the 2″ mark for the zipper.  You can put the zipper where ever you like, or you can insert an invisible zipper.

lucky pillow 2Sew the zipper in just like you were piecing a strip of fabric in between the two pieces – only use a zipper foot.lucky pillow 4
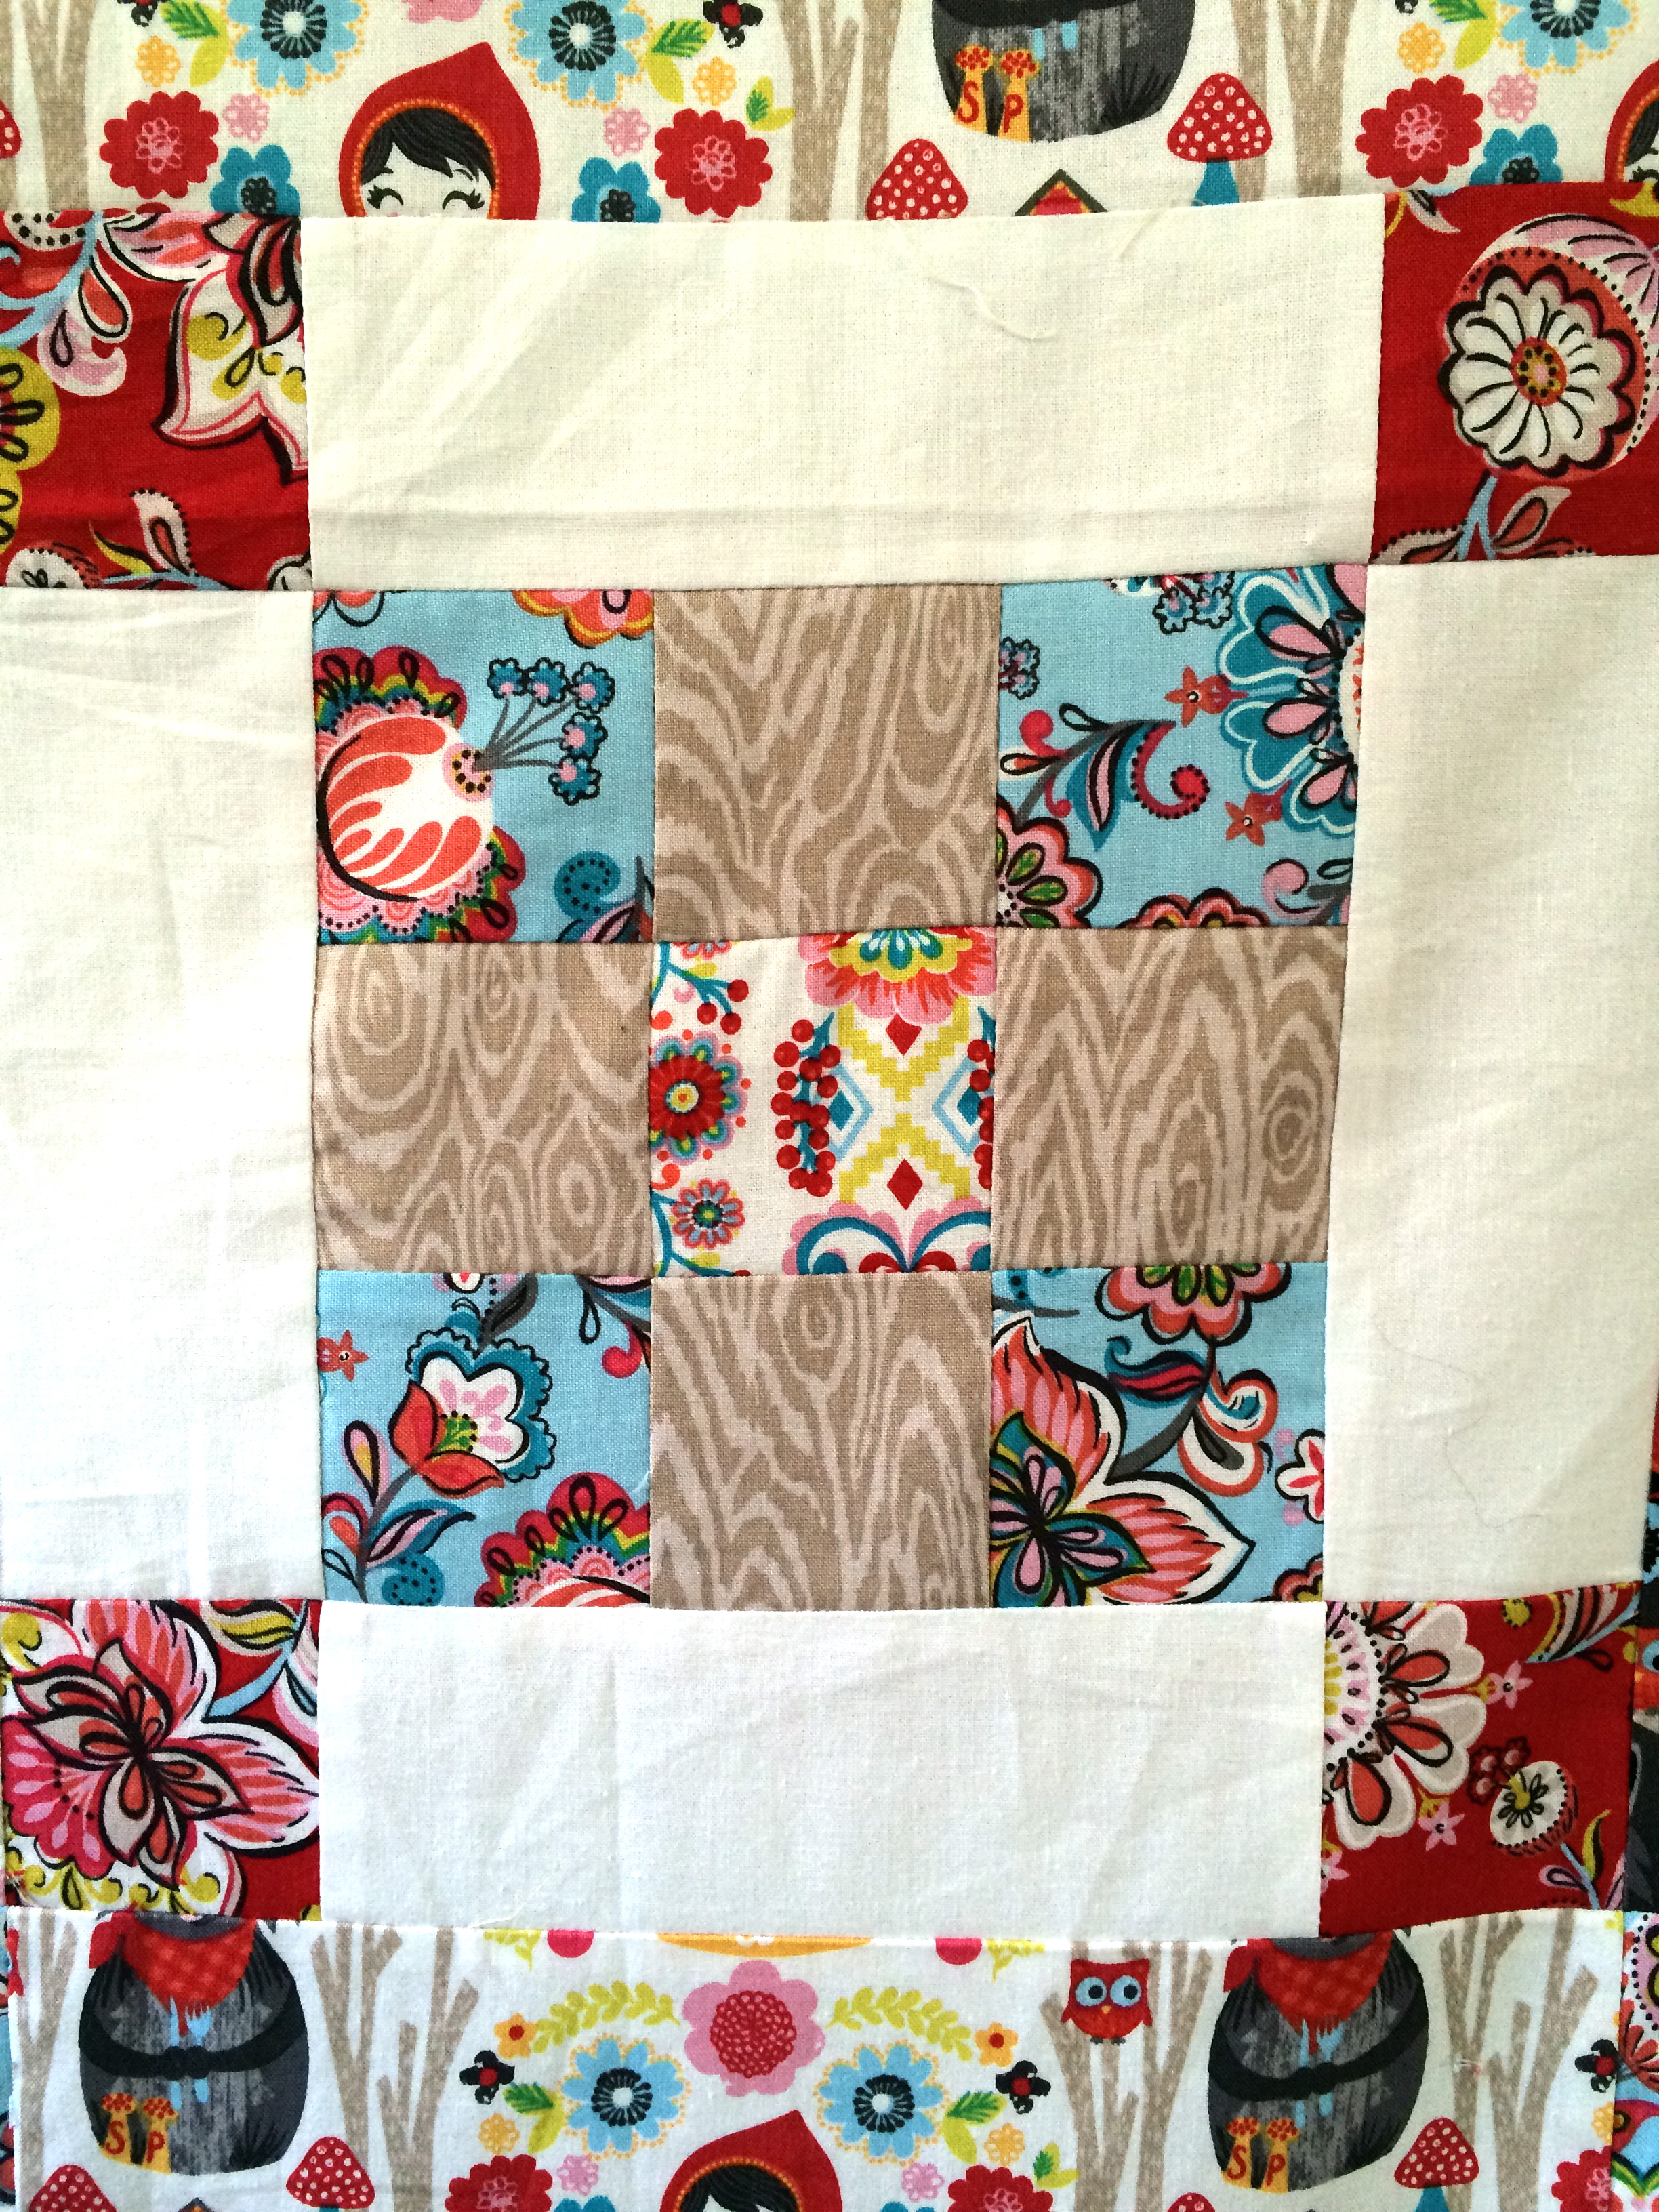
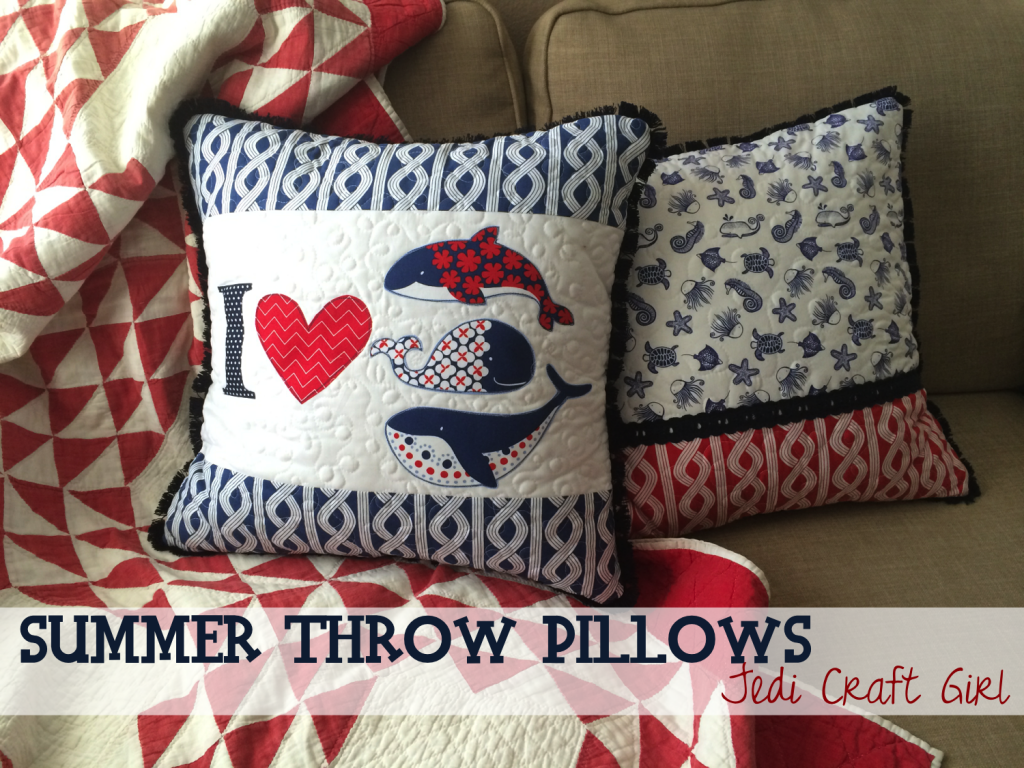
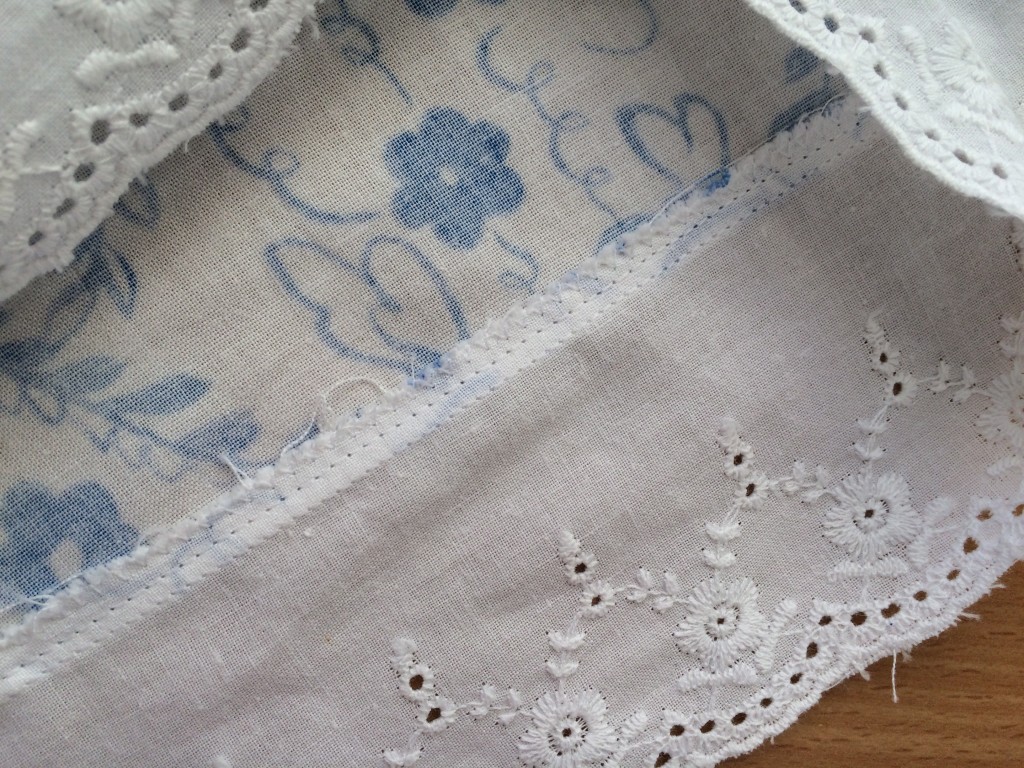
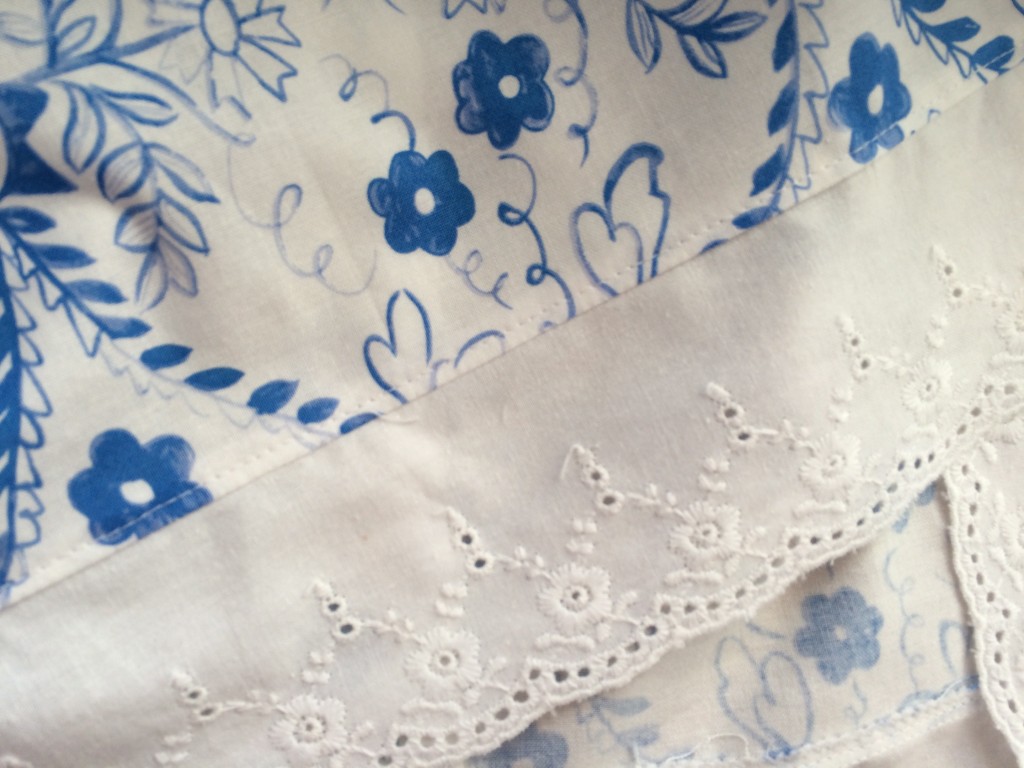
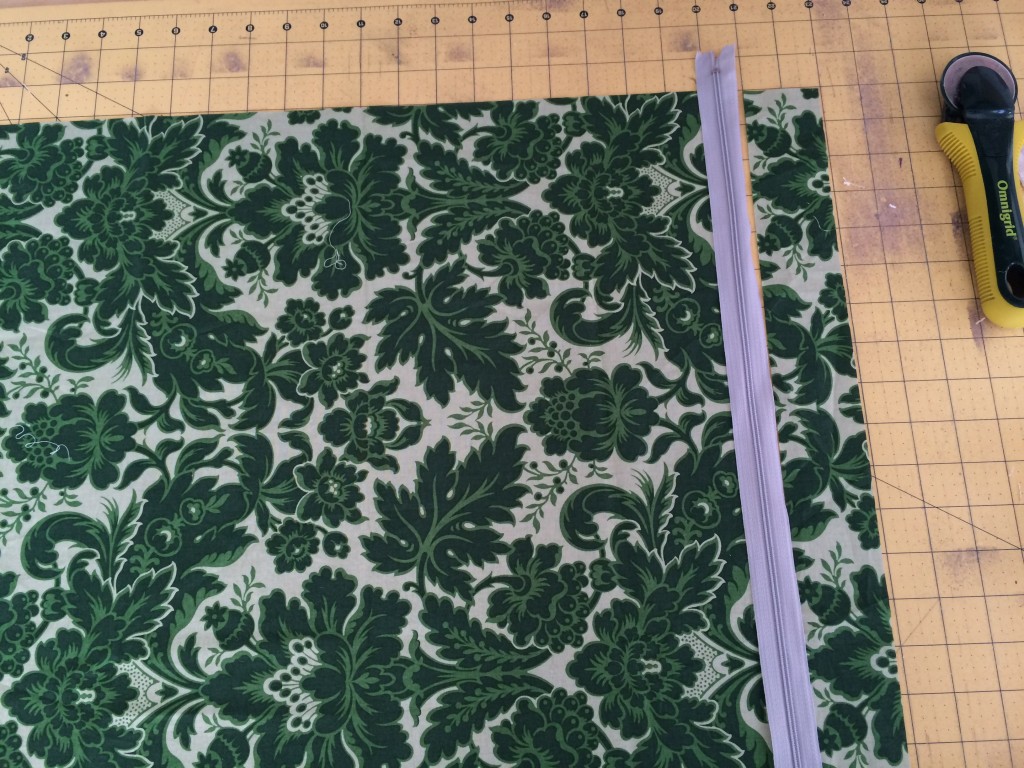
Cut off the excess zipper ends.  Partially open the zipper and place the pillow top and the pillow back, right sides together. matching and pinning all edges.  Sew 1/4″ all the way around the pillow.

lucky pillow 5

Turn the pillow right side out and insert the pillow form.lucky pillow 9
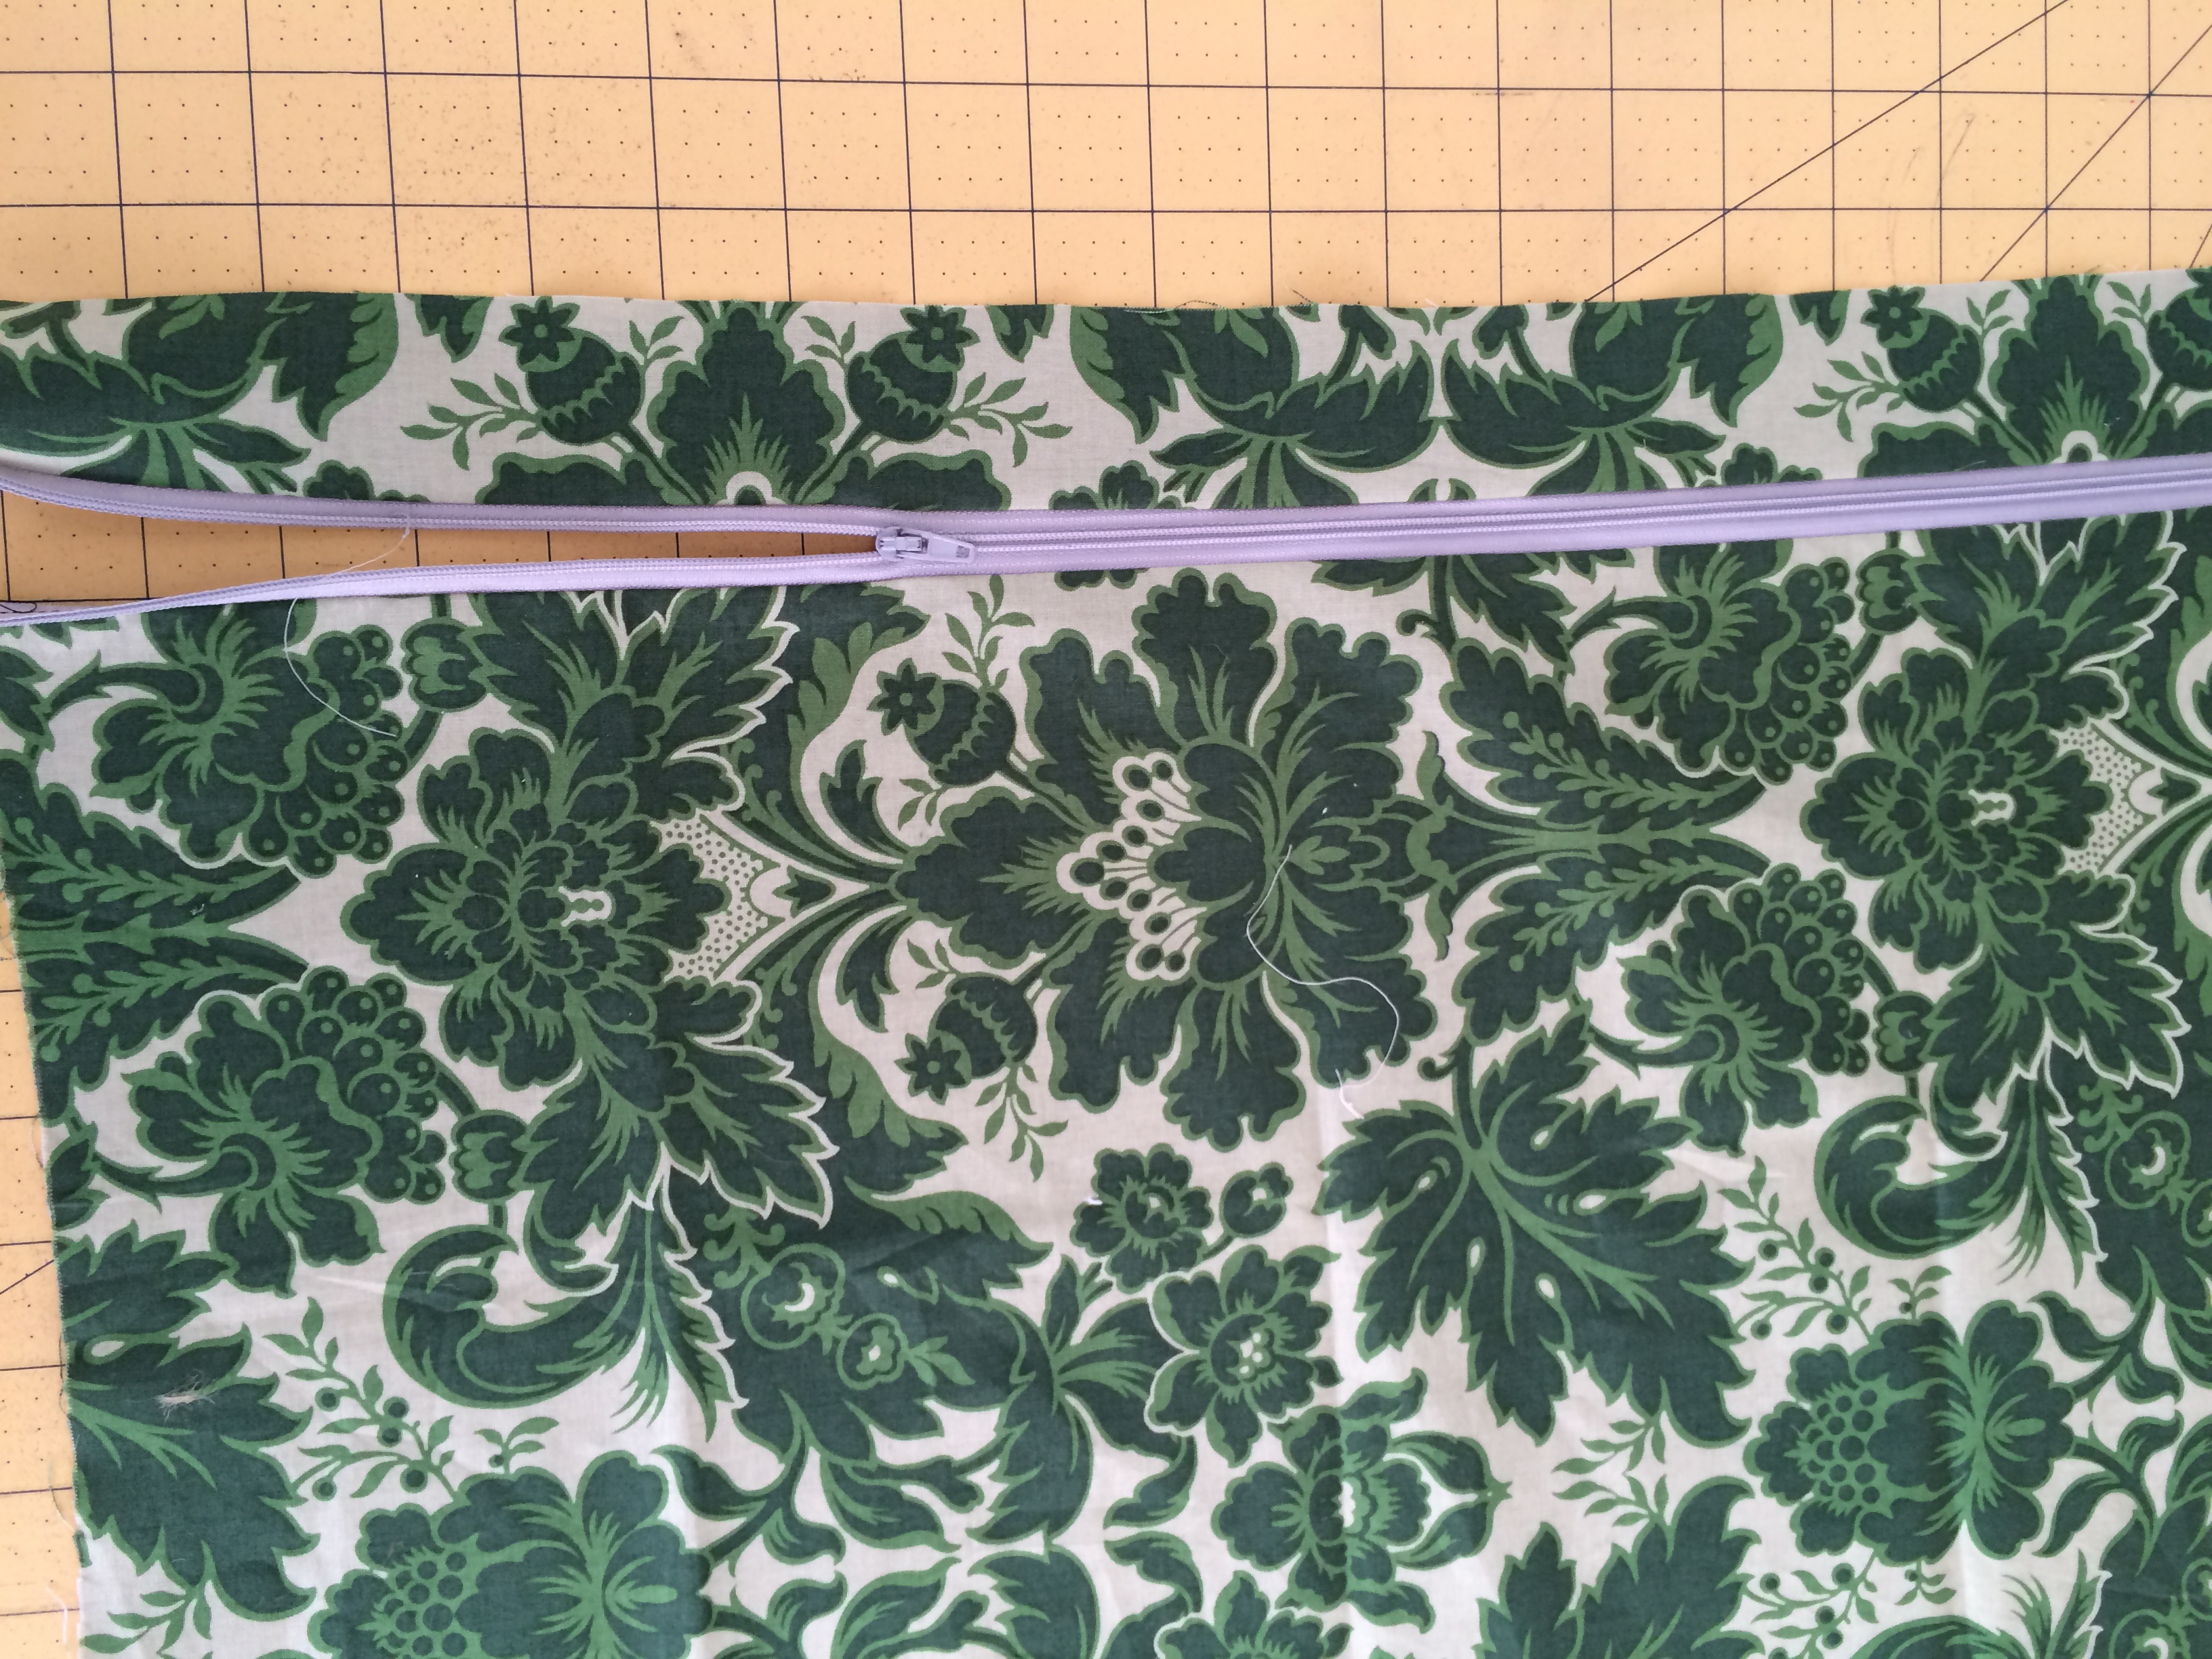
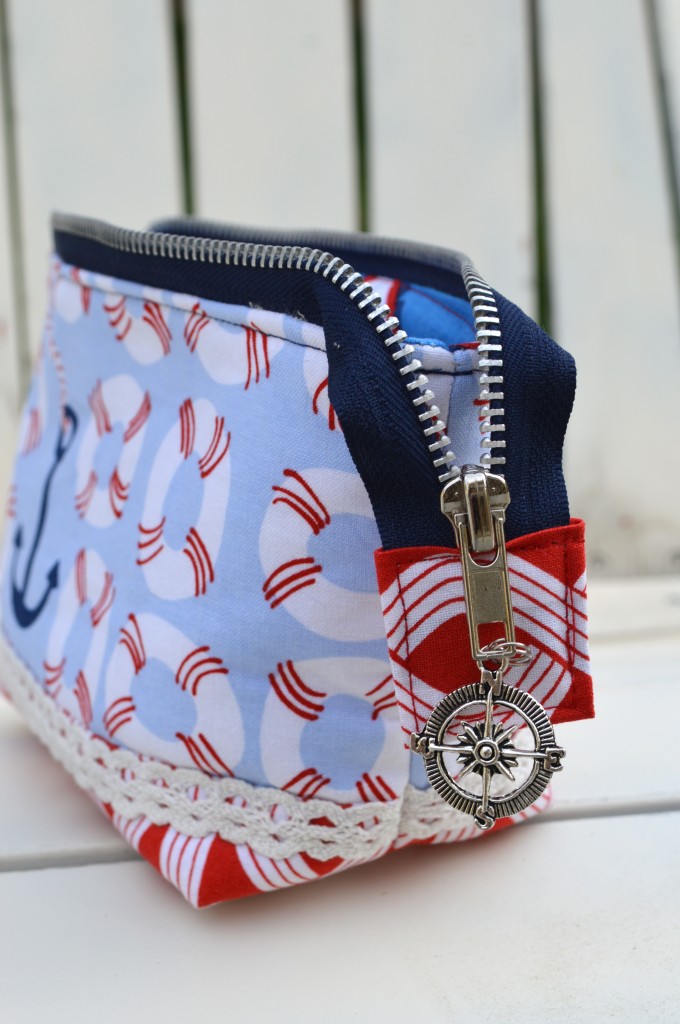
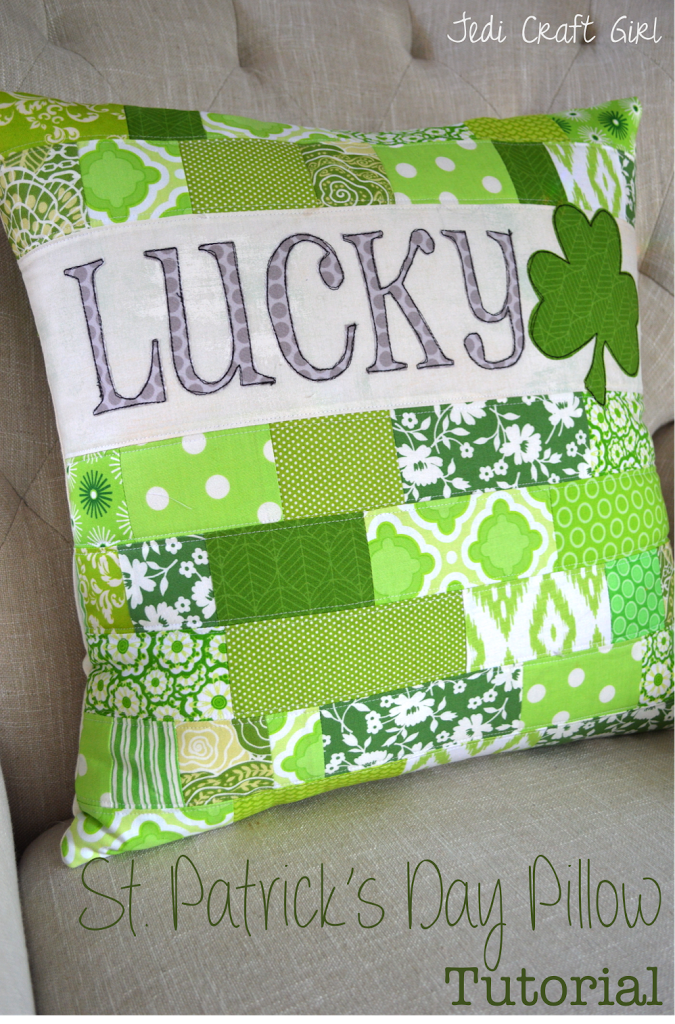
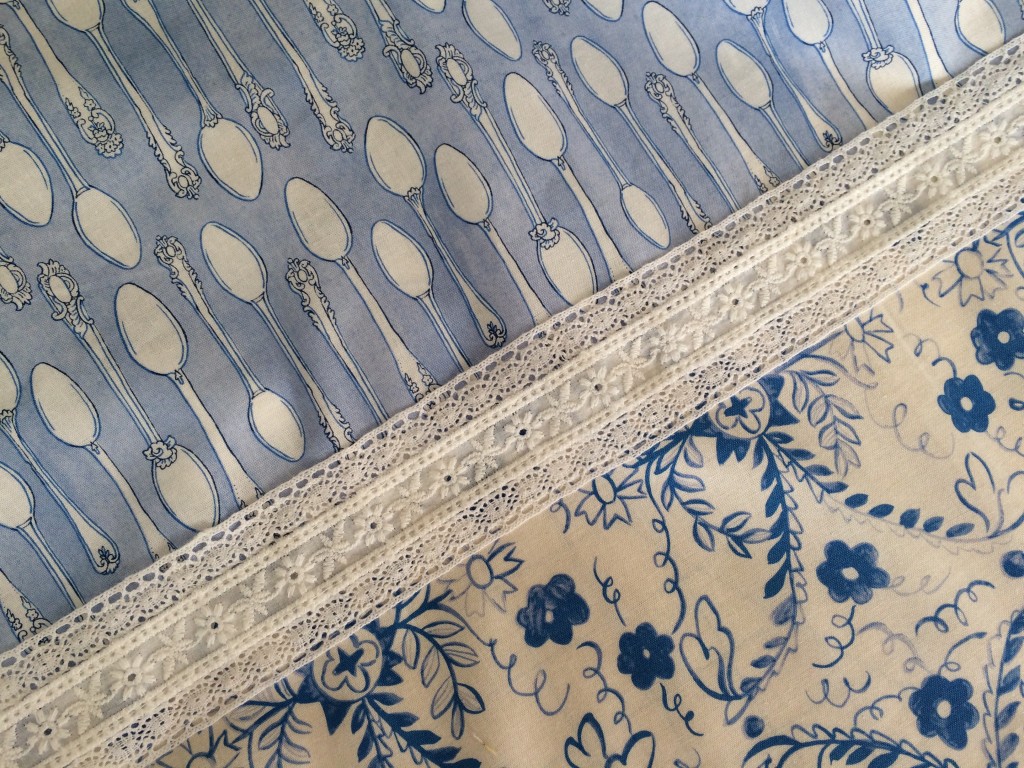
I put the zipper in the bottom portion of the pillow.  I like that you can see the zipper.

lucky pillow 10

You’re done!  Aren’t you LUCKY!!!!!lucky pillow 6

St. Patrick’s Day Banner

st. patricks day bannerI love sewing quick little banners!  This one can be made in 1 hour, or less if you’re speedy!  It’s the perfect size to hang in a window, on a frame, or a chalkboard.  I rummaged through my stash of fabrics and found these darling green prints from 3 different lines of Blend Fabric: Turkish DelightTea Garden, and The Makers.  I ironed Heat n Bond Lite to the back of the fabric and used my Sizzix Big Shot to cut out the shapes. Here’s how you can make one:

Supplies

1/3 yard burlap

1.5 yards green lace

scraps of green fabric for shamrocks

scraps of lace & white/yellow fabric for flowers.

Heat n Bond Lite

Sizzix Shamrock Die , flower die, and Flower Layers Die
shamrock banner st. patricks day


Cut (5) burlap rectangles 8″ x 5.5″shamrock banner st. patricks day 5

Fold the rectangles in half lengthwise and cut a 1.5″ angle off the bottom. 

shamrock banner st. patricks day 6

Iron the Heat n Bond Lite to the back of the appliqué fabric.  Then have your cat run it through the Sizzix Big Shot.

IMG_4084

IMG_4071

Peel off the backing fabric of the shapes and press it to the burlap flags.
shamrock banner st. patricks day 9
Cut the lace out with the flower die cut.  Don’t put Heat n Bond on the lace.  Put the Heat n Bond on the center flower instead.  I was going to put buttons in the center of the flowers but totally forgot!

shamrock banner st. patricks day 8


Sew around each image using a straight stitch.  Then line them up and sew the lace to the tops.shamrock banner st. patricks day 14

shamrock banner st. patricks day 15
It’s done!  Go hang it somewhere fun!!!

shamrock banner st. patricks day 12


Mine is on my front porch 🙂shamrock banner st. patricks day 11


Tea Garden Dress

tea garden dress


I am crazy about tea parties, china dishes, tea pots, tea cups, and silver spoons!!  When I saw this amazing fabric from Blend called Tea Garden I could not contain myself.  I new immediately I wanted to make Sally a Tea Party Dress.  I love the blue and white – it just looks like fine china!120.101.01.1Web


It’s not quite an English Garden, but I do have a few flowers growing!!tea party dress 10

I absolutely love how this dress turned out – and I pretty much made it up as I went along.  It’s a girls size 8 and it is perfect for Sally!  tea party dress

If you would like to make a Tea Garden dress, follow these steps:

Supplies:

Fabric – I only had generous half yard cuts of each of the 4 fabrics.  Make sure you have 20″ or more of each fabric.

2 types of lace trim, 3 yards of each

Heat n Bond fusible stabilizer for the sash

Fabric Fuse

velcro

scrap of felt

Create the peasant bodice.  I am not a pattern designer.  There are so many peasant dress patterns out there.  Find one you like and cut out the size you want.  Cut the bodice out of the Tea Garden Devonshire fabric and the sleeves out of the check.  Follow the instructions until you have a completed bodice.

Assemble the skirt.

Cut (2) 10″ x WOF from the spoon fabric

Cut (2) x 10″ x WOF from the floral fabric.

tea party dress 15

Sew the long ends of the spoon fabric together (1/4″ seam)  joining the two pieces to form one long rectangle.  Do the same with the floral fabric.  Press the seam open.  Next take the spoon fabric and the floral fabric and sew them together long ways using 1/4″ seam.  Press toward the spoons.

tea party dress 16

Top stitch the lace, centering over the seam.

tea party dress 17

For the hem….  Lay the lace on the bottom edge of the floral fabric right sides together.  Stitch along the lace.  Ziz zag the seam.  Press the lace under so it looks like this:
tea party dress 19

Top stitch all the way around 1/8″ away from the edge:

tea party dress 18

Now join the two ends of the skirt with a generous 1/4″ seam.  Zig zag to finish seams, press to one side.  The skirt is finished!  Sew a gathering stitch along the top of the skirt, stopping and starting at each side seam.  Sew one gather 1/2″ and another 1/4″ away from the top of the skirt.  Pull up the threads and evenly distribute the ruffle to match the bodice, matching the side seams.  Sew the skirt to the bodice and remove any gathering threads.  Zig zag to finish the edge.  Press the edge toward the bodice.
tea party dress 2

 For the sash… Cut a piece of fabric 6.25″ x 30″.  Measure your child’s waist to see if this needs to be adjusted.  It will need to overlap a few inches for the velcro closure and for seam allowances.

tea party dress 7

Fuse the stabilizer to the wrong side of the sash fabric.  I had a piece already cut and was slightly narrower, it will be fine 🙂

tea party dress 21

Fold the sash in half, right sides together.  Sew using 1/4″ seams along the edge.  Leave a 3″ opening in the center of the sash for turning.  Clip the corners.  Turn right side out.  Press and top stitch.

tea party dress 22

To make the rosette, cut about 2 yards of lace.  Sew a gathering stitch along the edge.  Pull up the gathers to form a ruffle.

tea party dress 23

Start twirling the gathers around to form a rosette.  Tuck the raw ends under.  I used Fabric Fuse because I was too lazy to hand sew the ruffles.  Hot glue would work, I just didn’t feel like getting burned  🙂  The fabric fuse is great because it is a super strong adhesive designed for fabric.  Cut a piece of felt in a circle.  Add dots of Fabric Fuse to hold the gathers in place and finally to anchor it to the felt circle.  Let dry for a few hours.

tea party dress 25

I added a little pleat in both ends of the sash.  This is totally optional.  Measure the sash to the waist one more time to determine the velcro placement.  Sew the Velcro strips.  Hand sew the rosette in place.

tea party dress 26

I think the sash and the flower give it just the right touch!

tea party dress 6

Whats also is great about this dress?  Sally likes it!!!  It’s super comfortable and she can move around in it.  She didn’t want to take it off!!
tea party dress 8

{Pattern Review} The Potato Chip Skirt by The Tie Dye Diva


potato chip pattern review

This is not a paid review, I purchased the skirt pattern from Tie Dye Diva’s online shop.

I am so excited to be sharing my experience of making this super cute girls skirt called The Potato Chip Skirt by Tie Dye Diva.  I don’t think it’s possible to say how much I love this skirt, how it fits so perfectly and how wonderfully the pattern is written.  Tie Dye Diva has many fabulous patterns and this is my first experience sewing one of them.  You can purchase the pattern and download it immediately.  The pattern was easy to tape together and assemble.  The step by step instructions were very clear and thorough.  I am confident a beginner could tackle this pattern as it is so well written.  This pattern is sized from 12 months to size girls 14.  potato chip skirt 1


Baby Mufasa loves helping with the pattern pieces!  He chewed one of the pieces and I had to tape it back together!DSC_0712
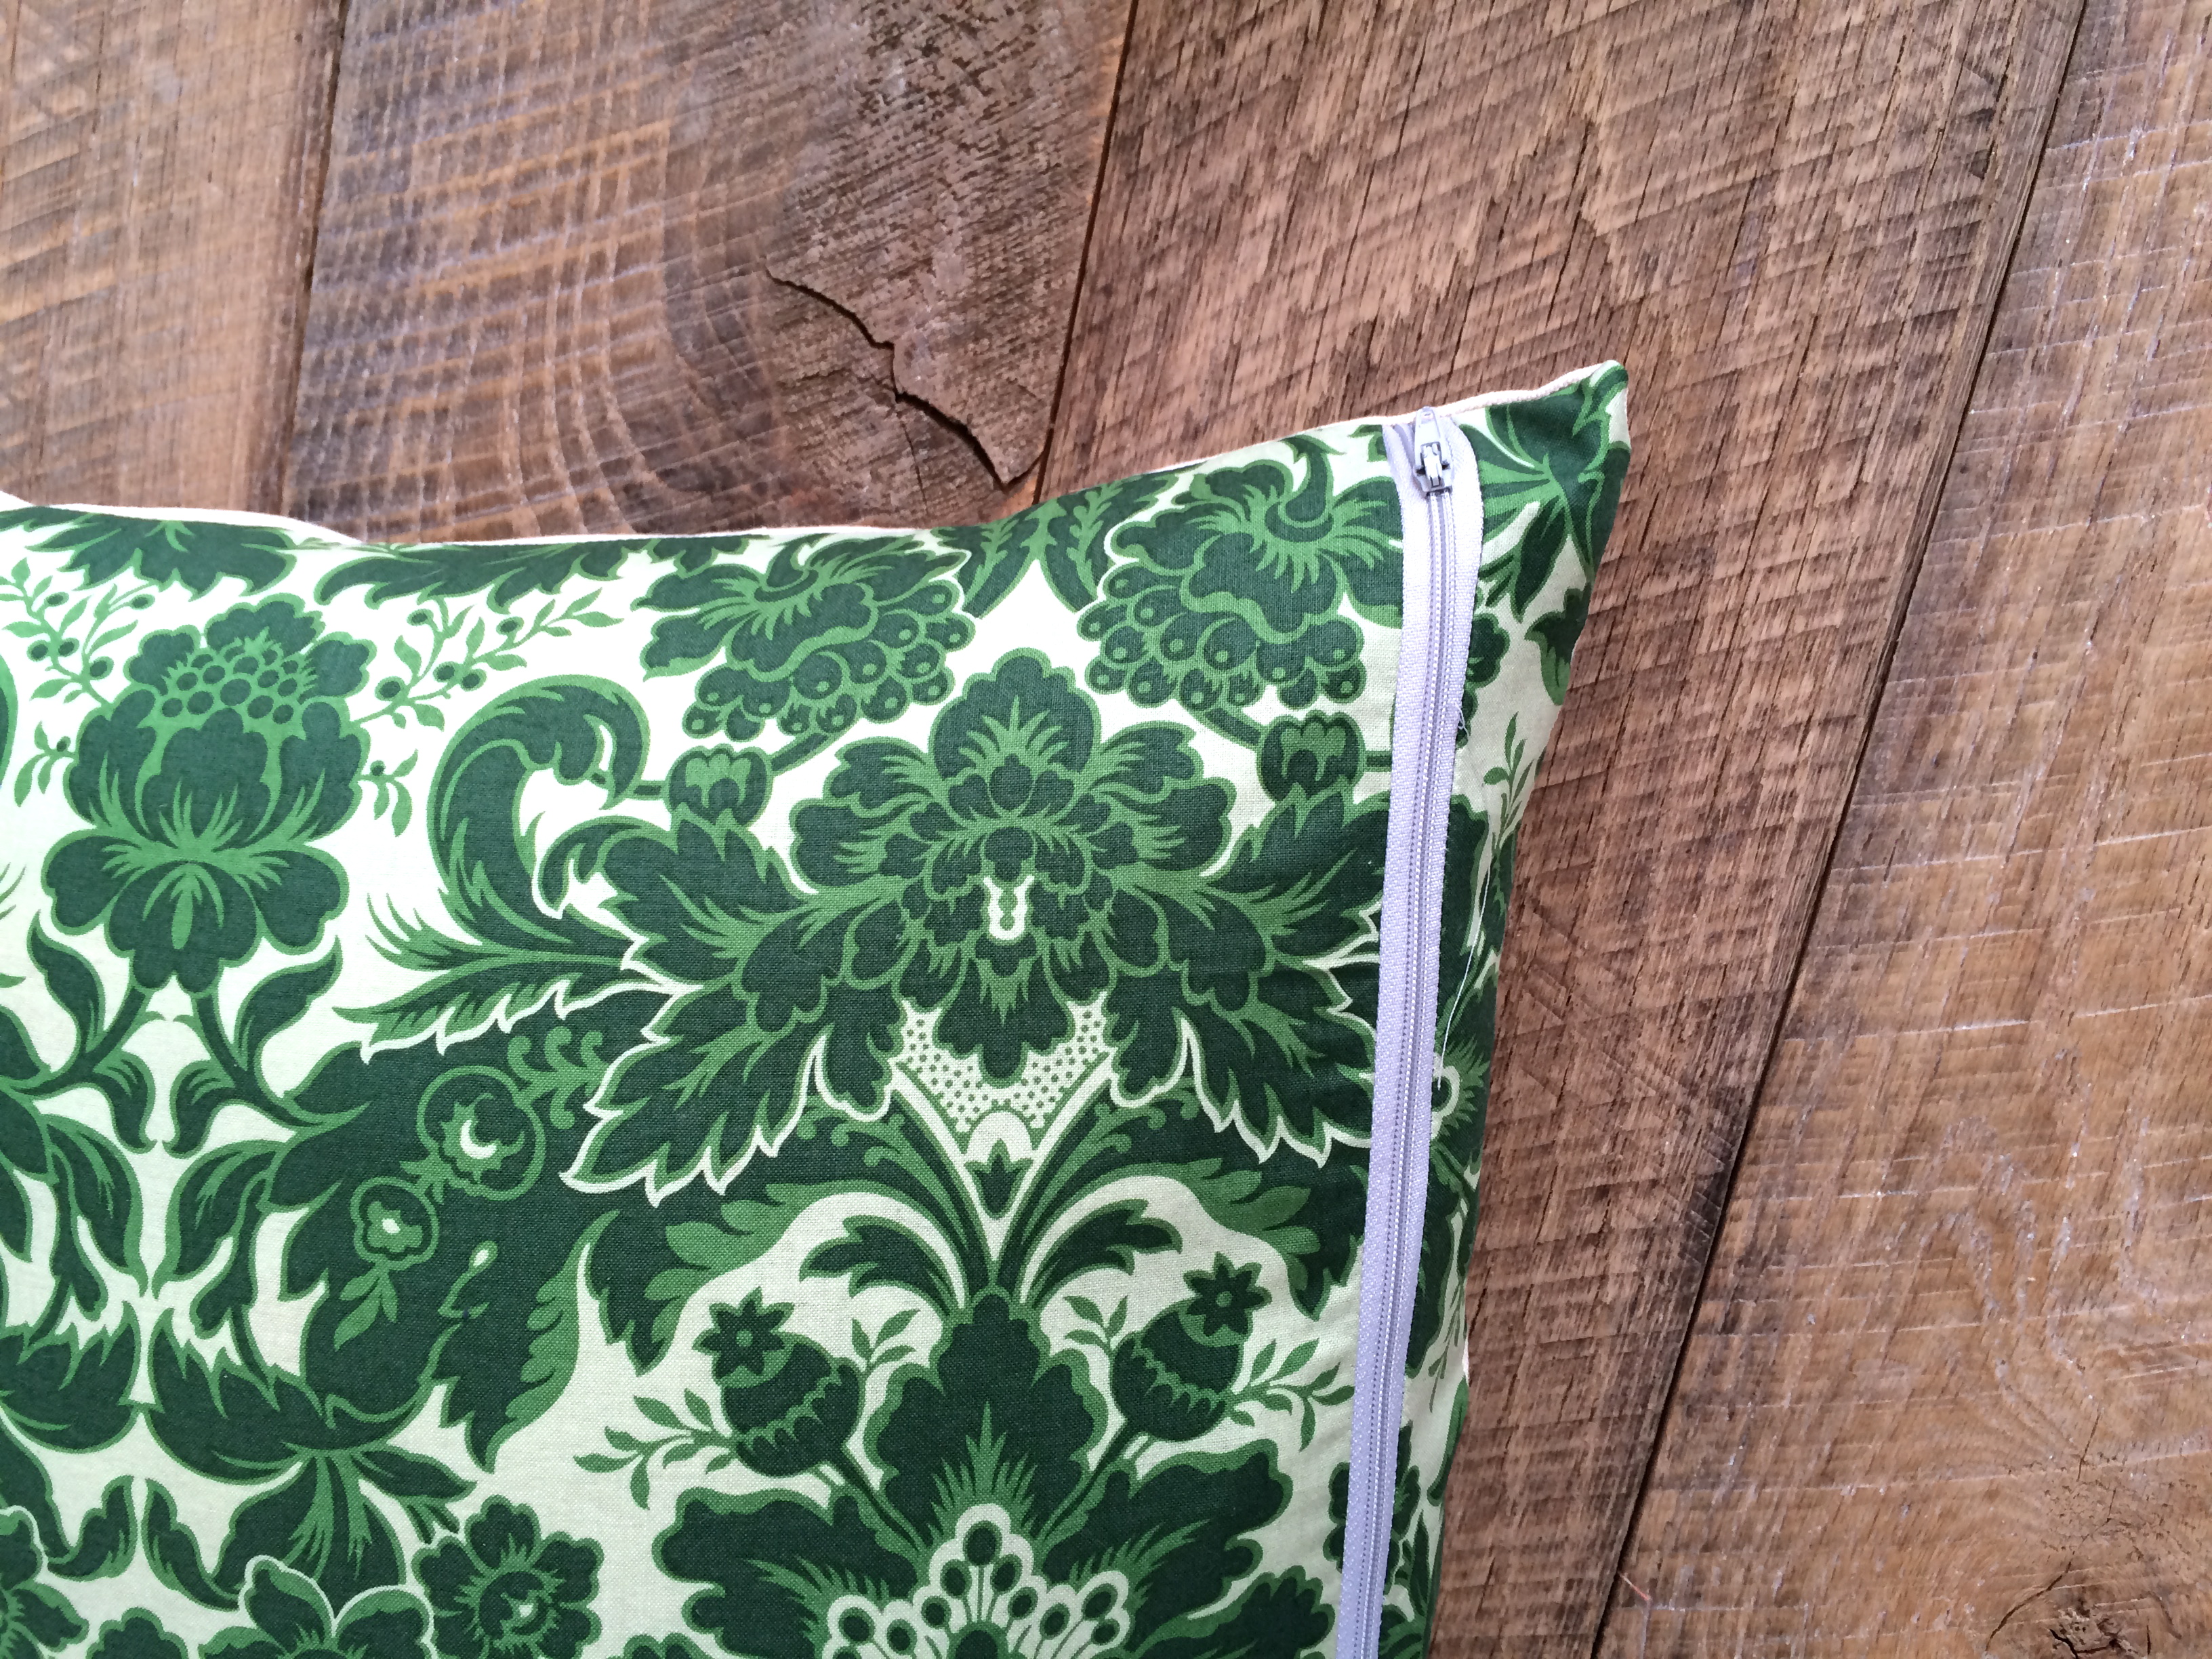
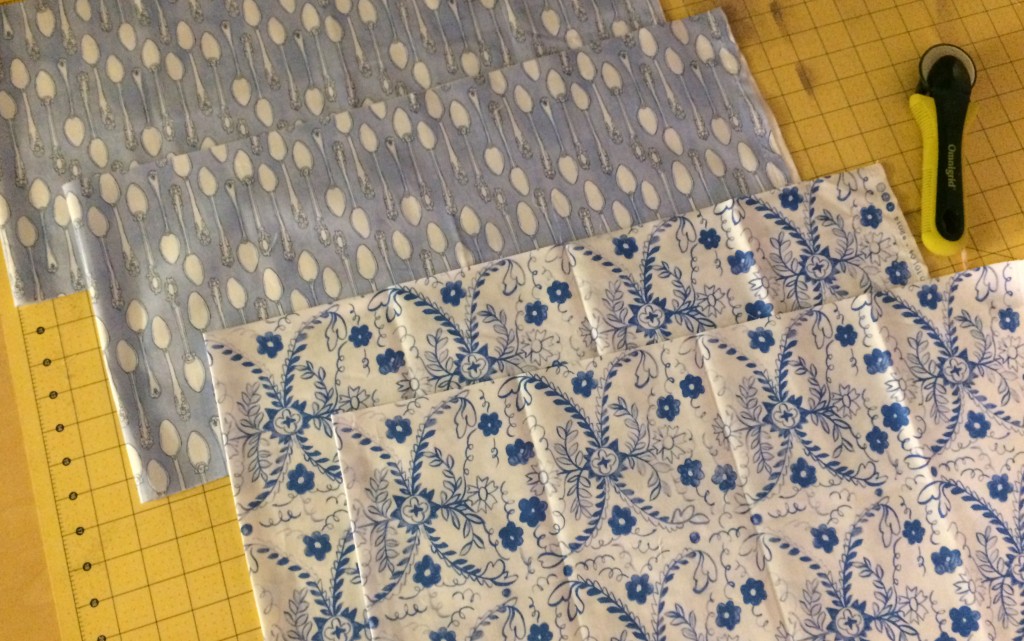
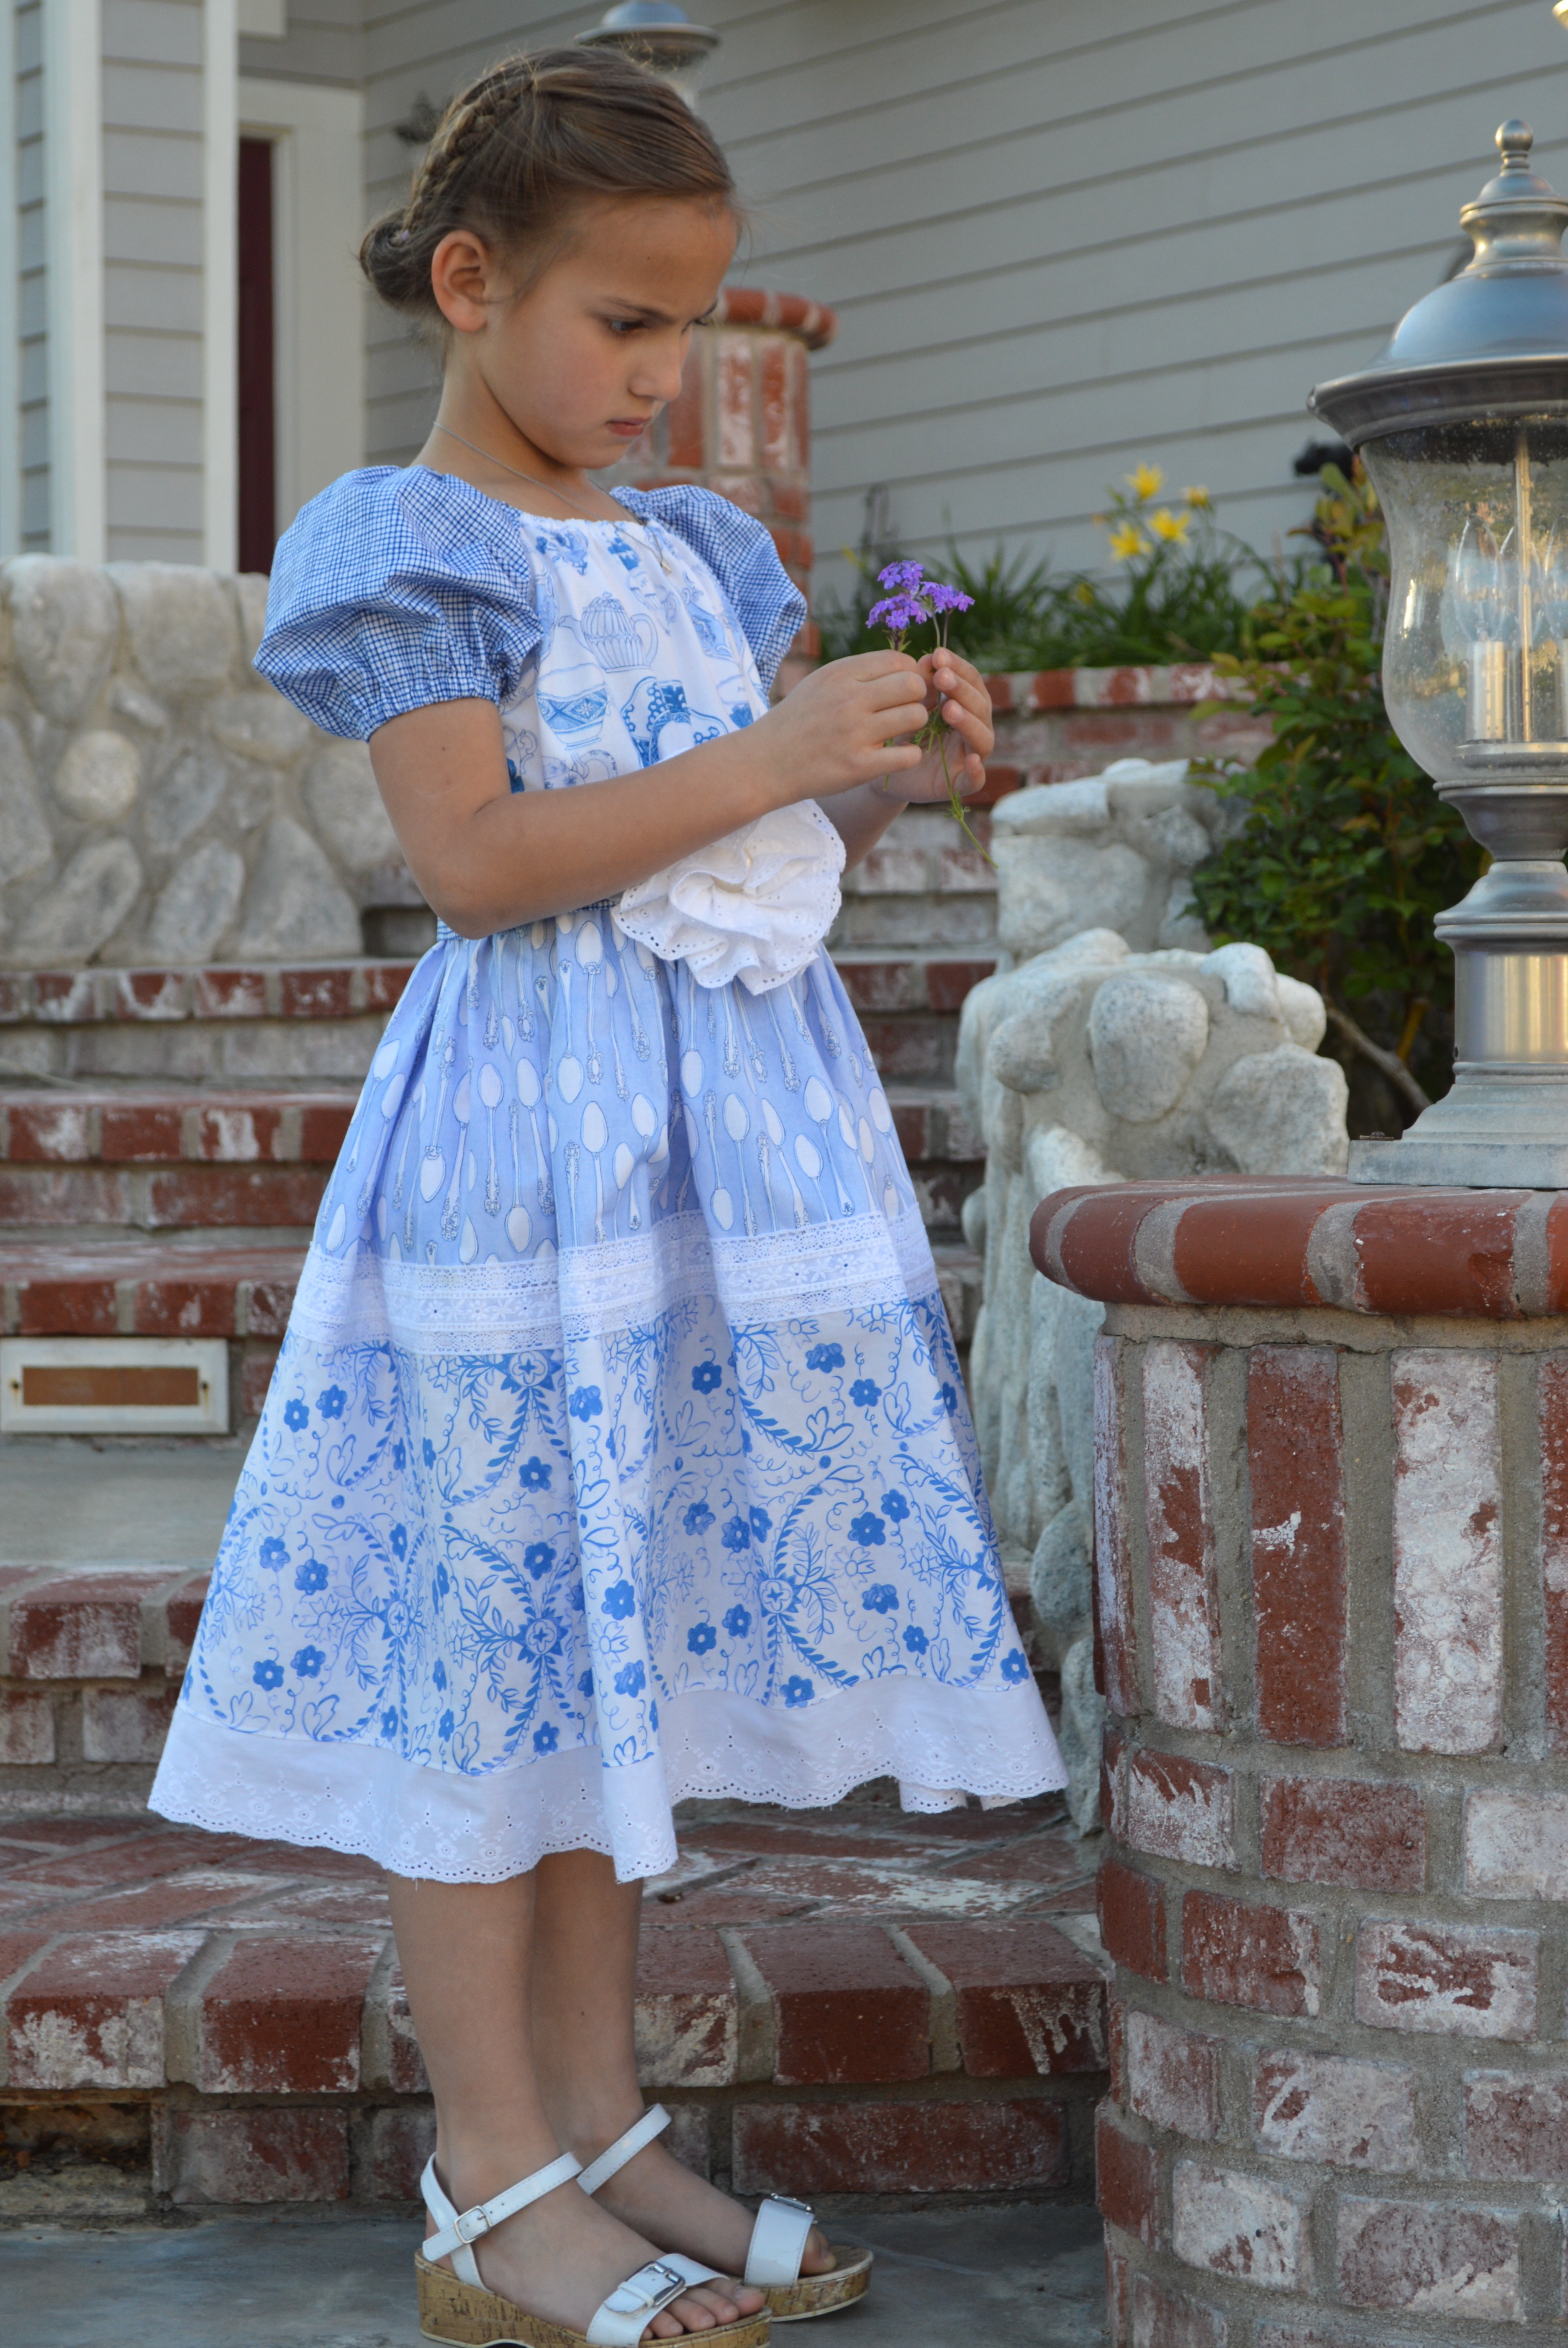
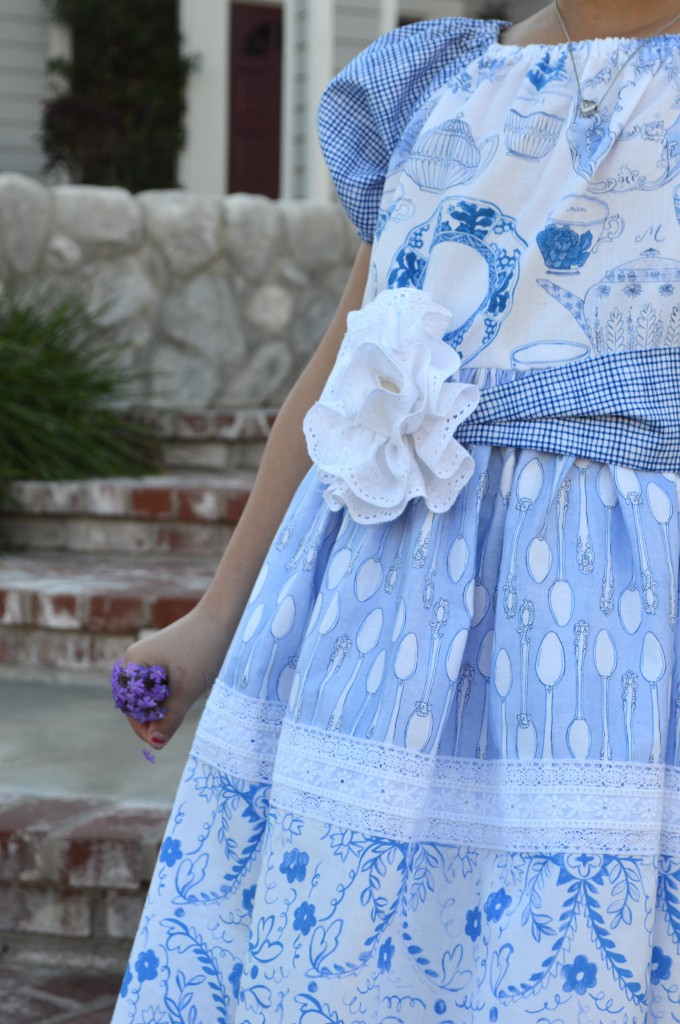
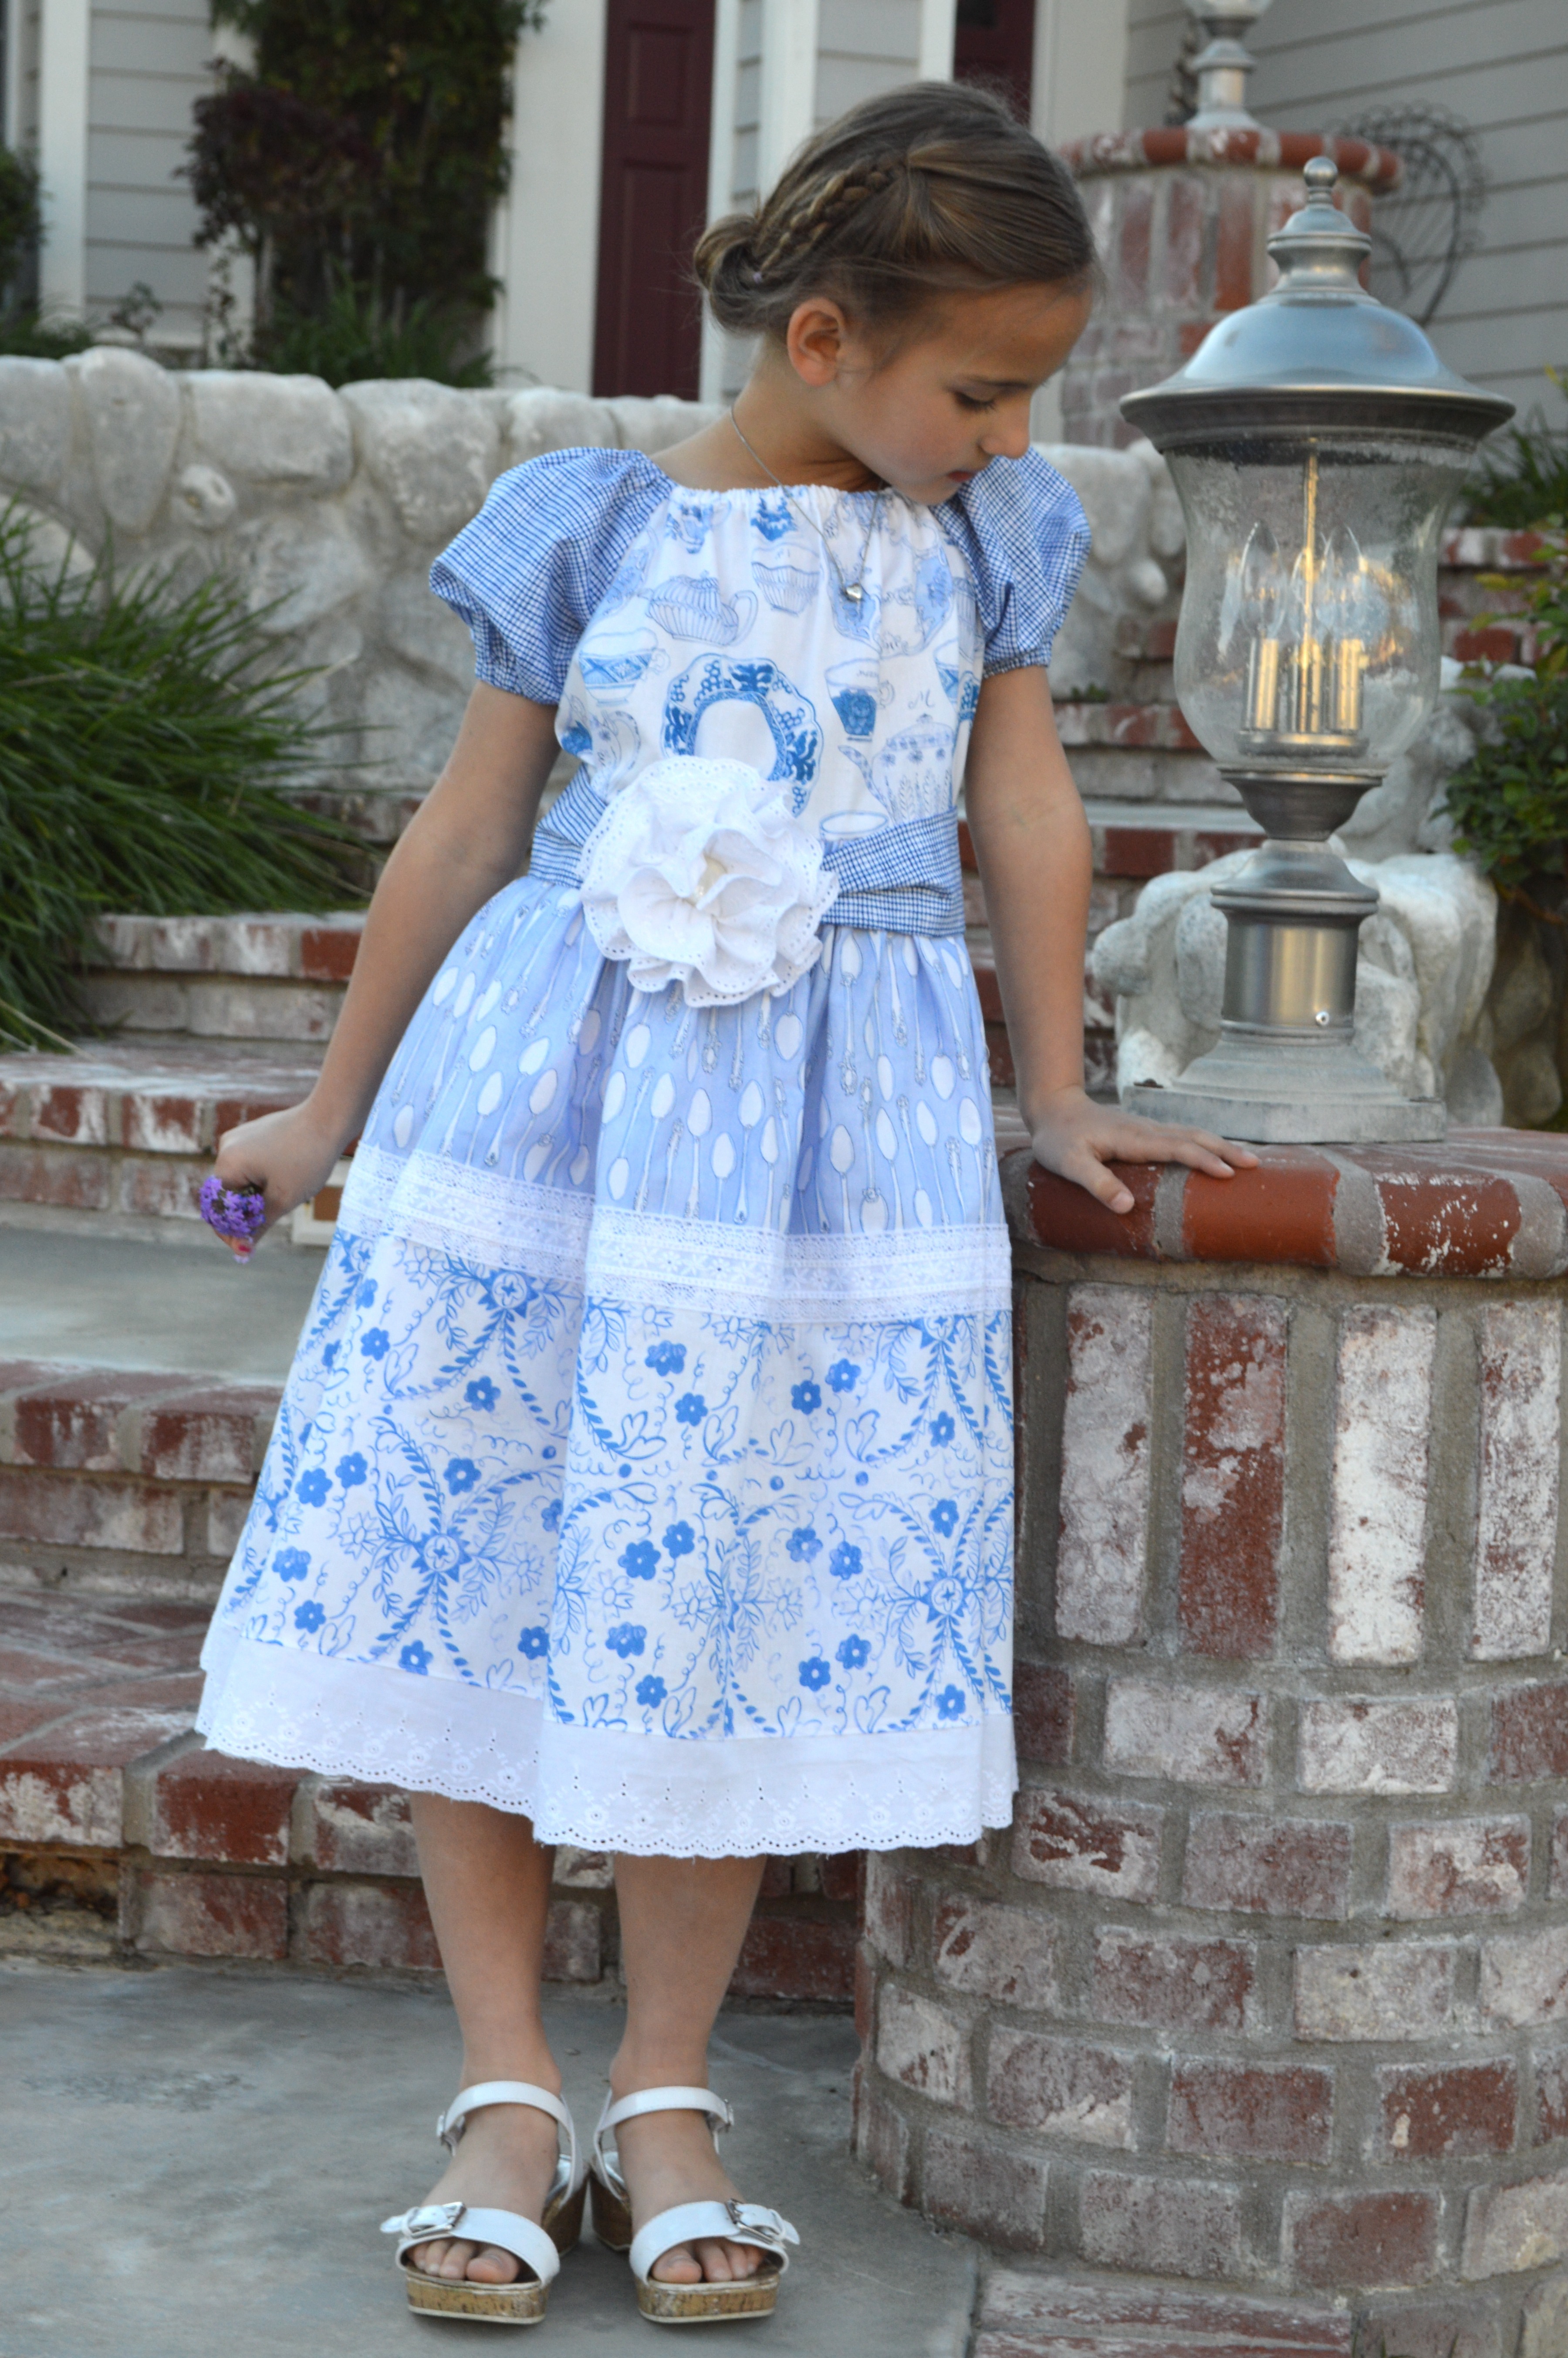
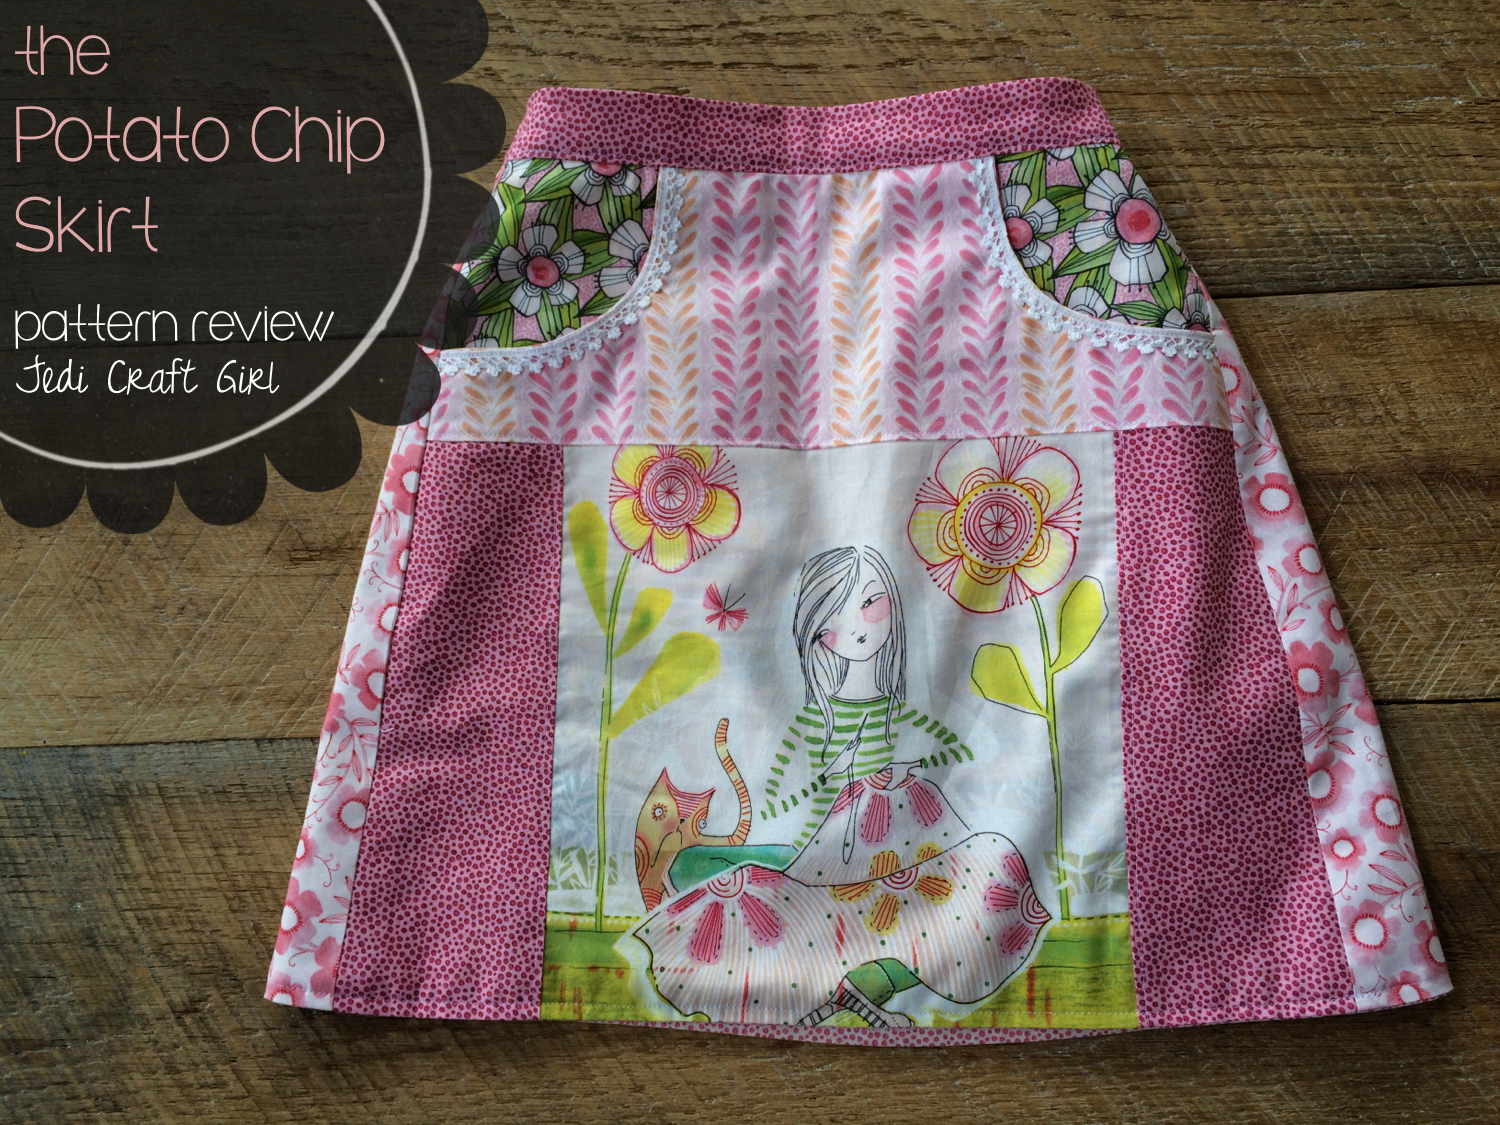
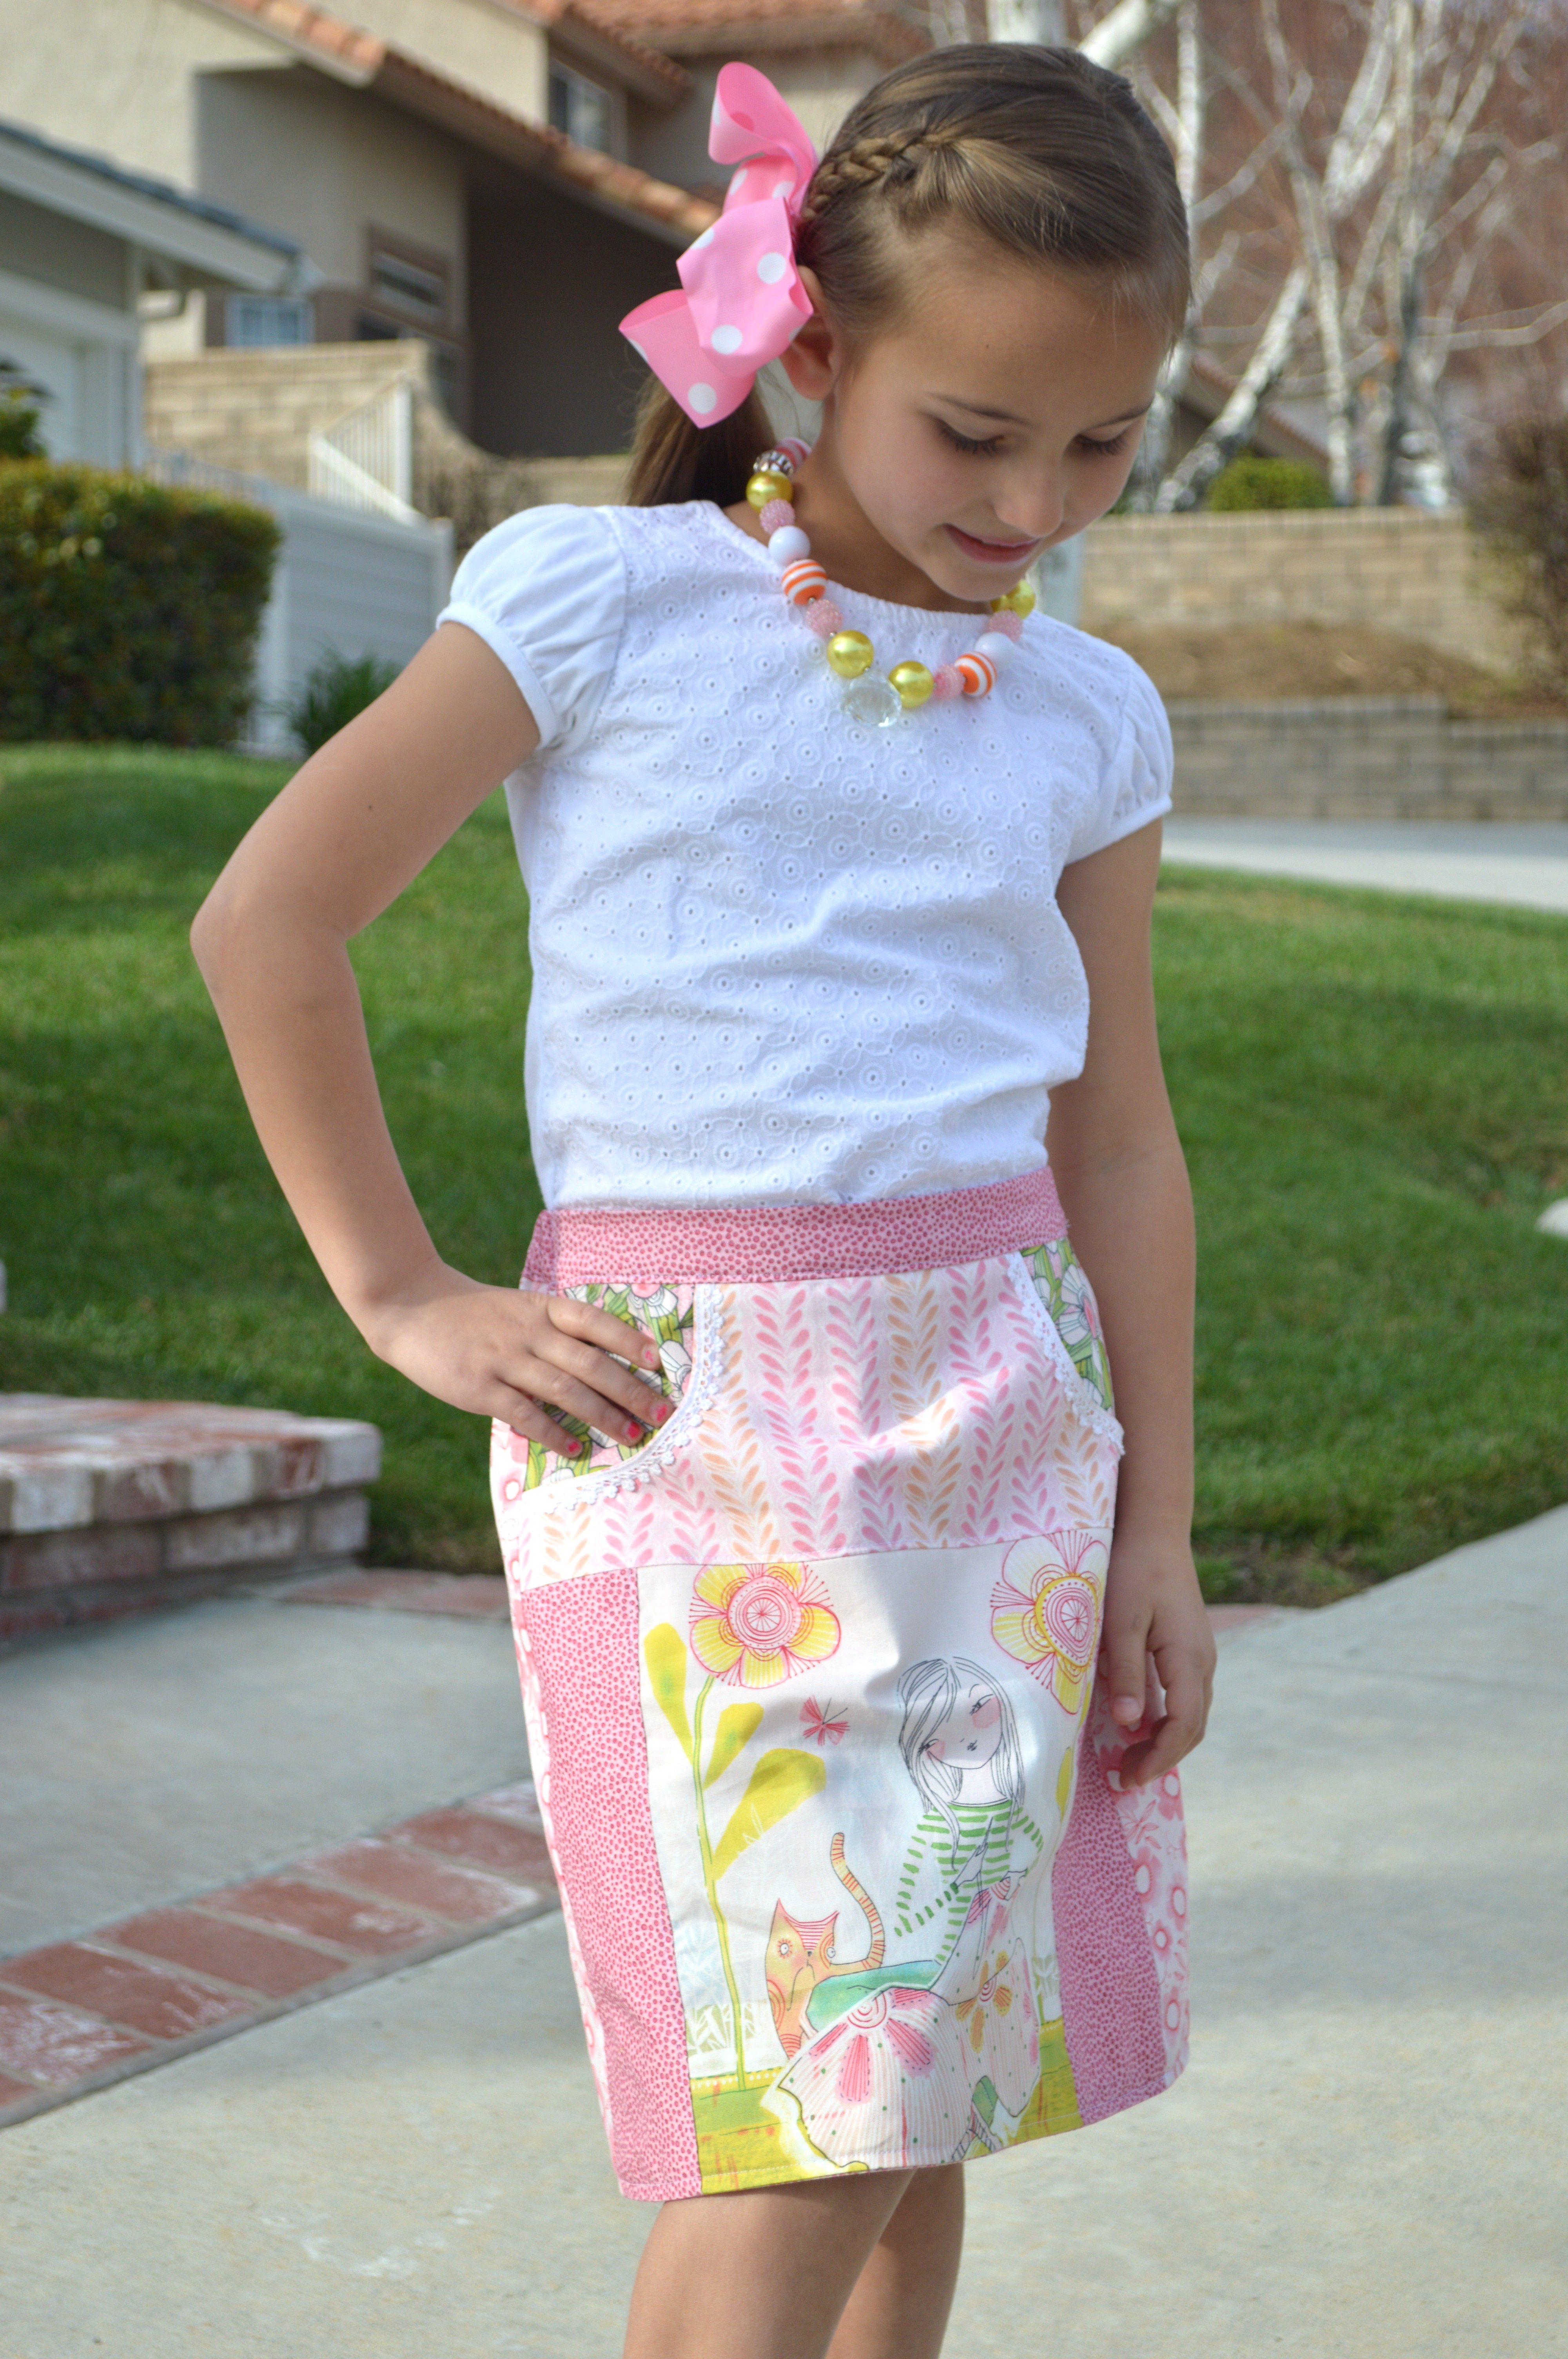
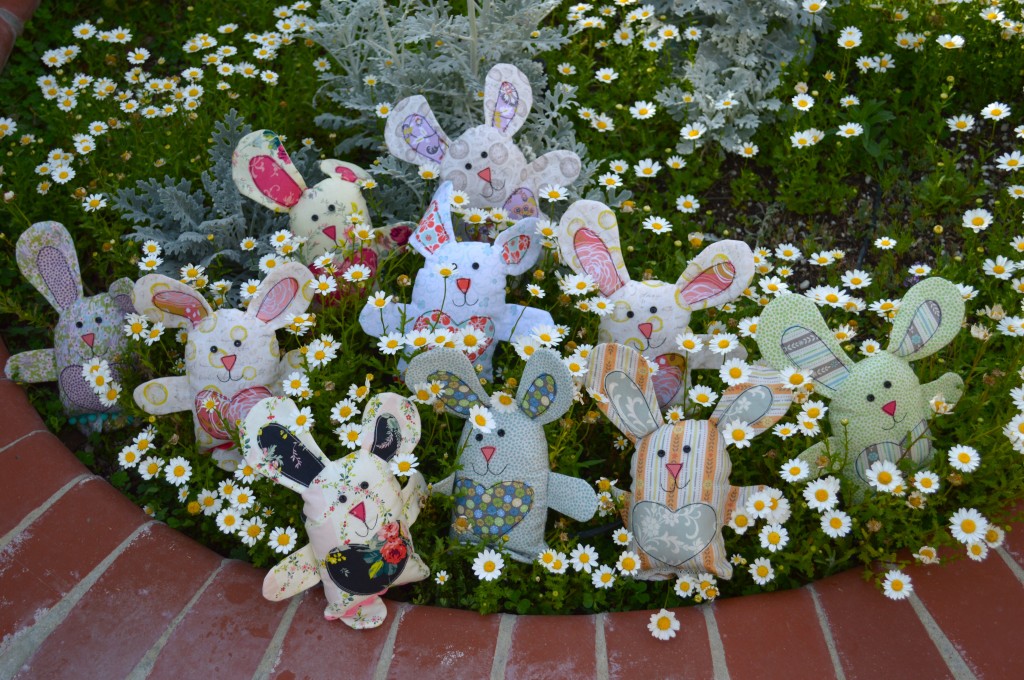
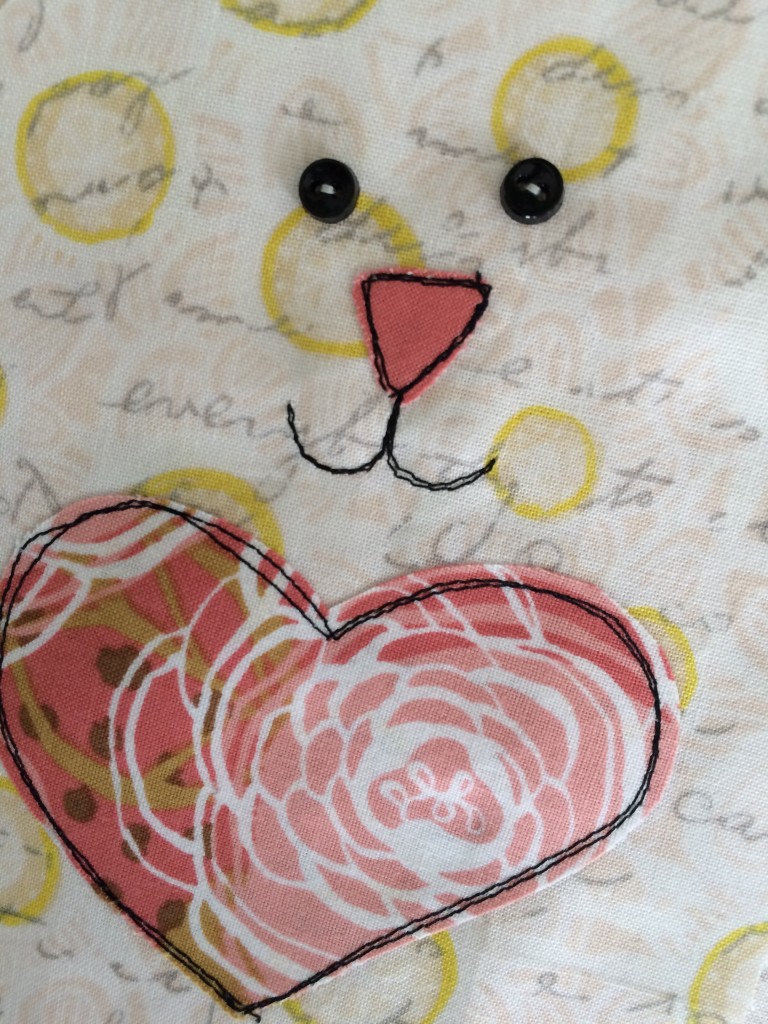
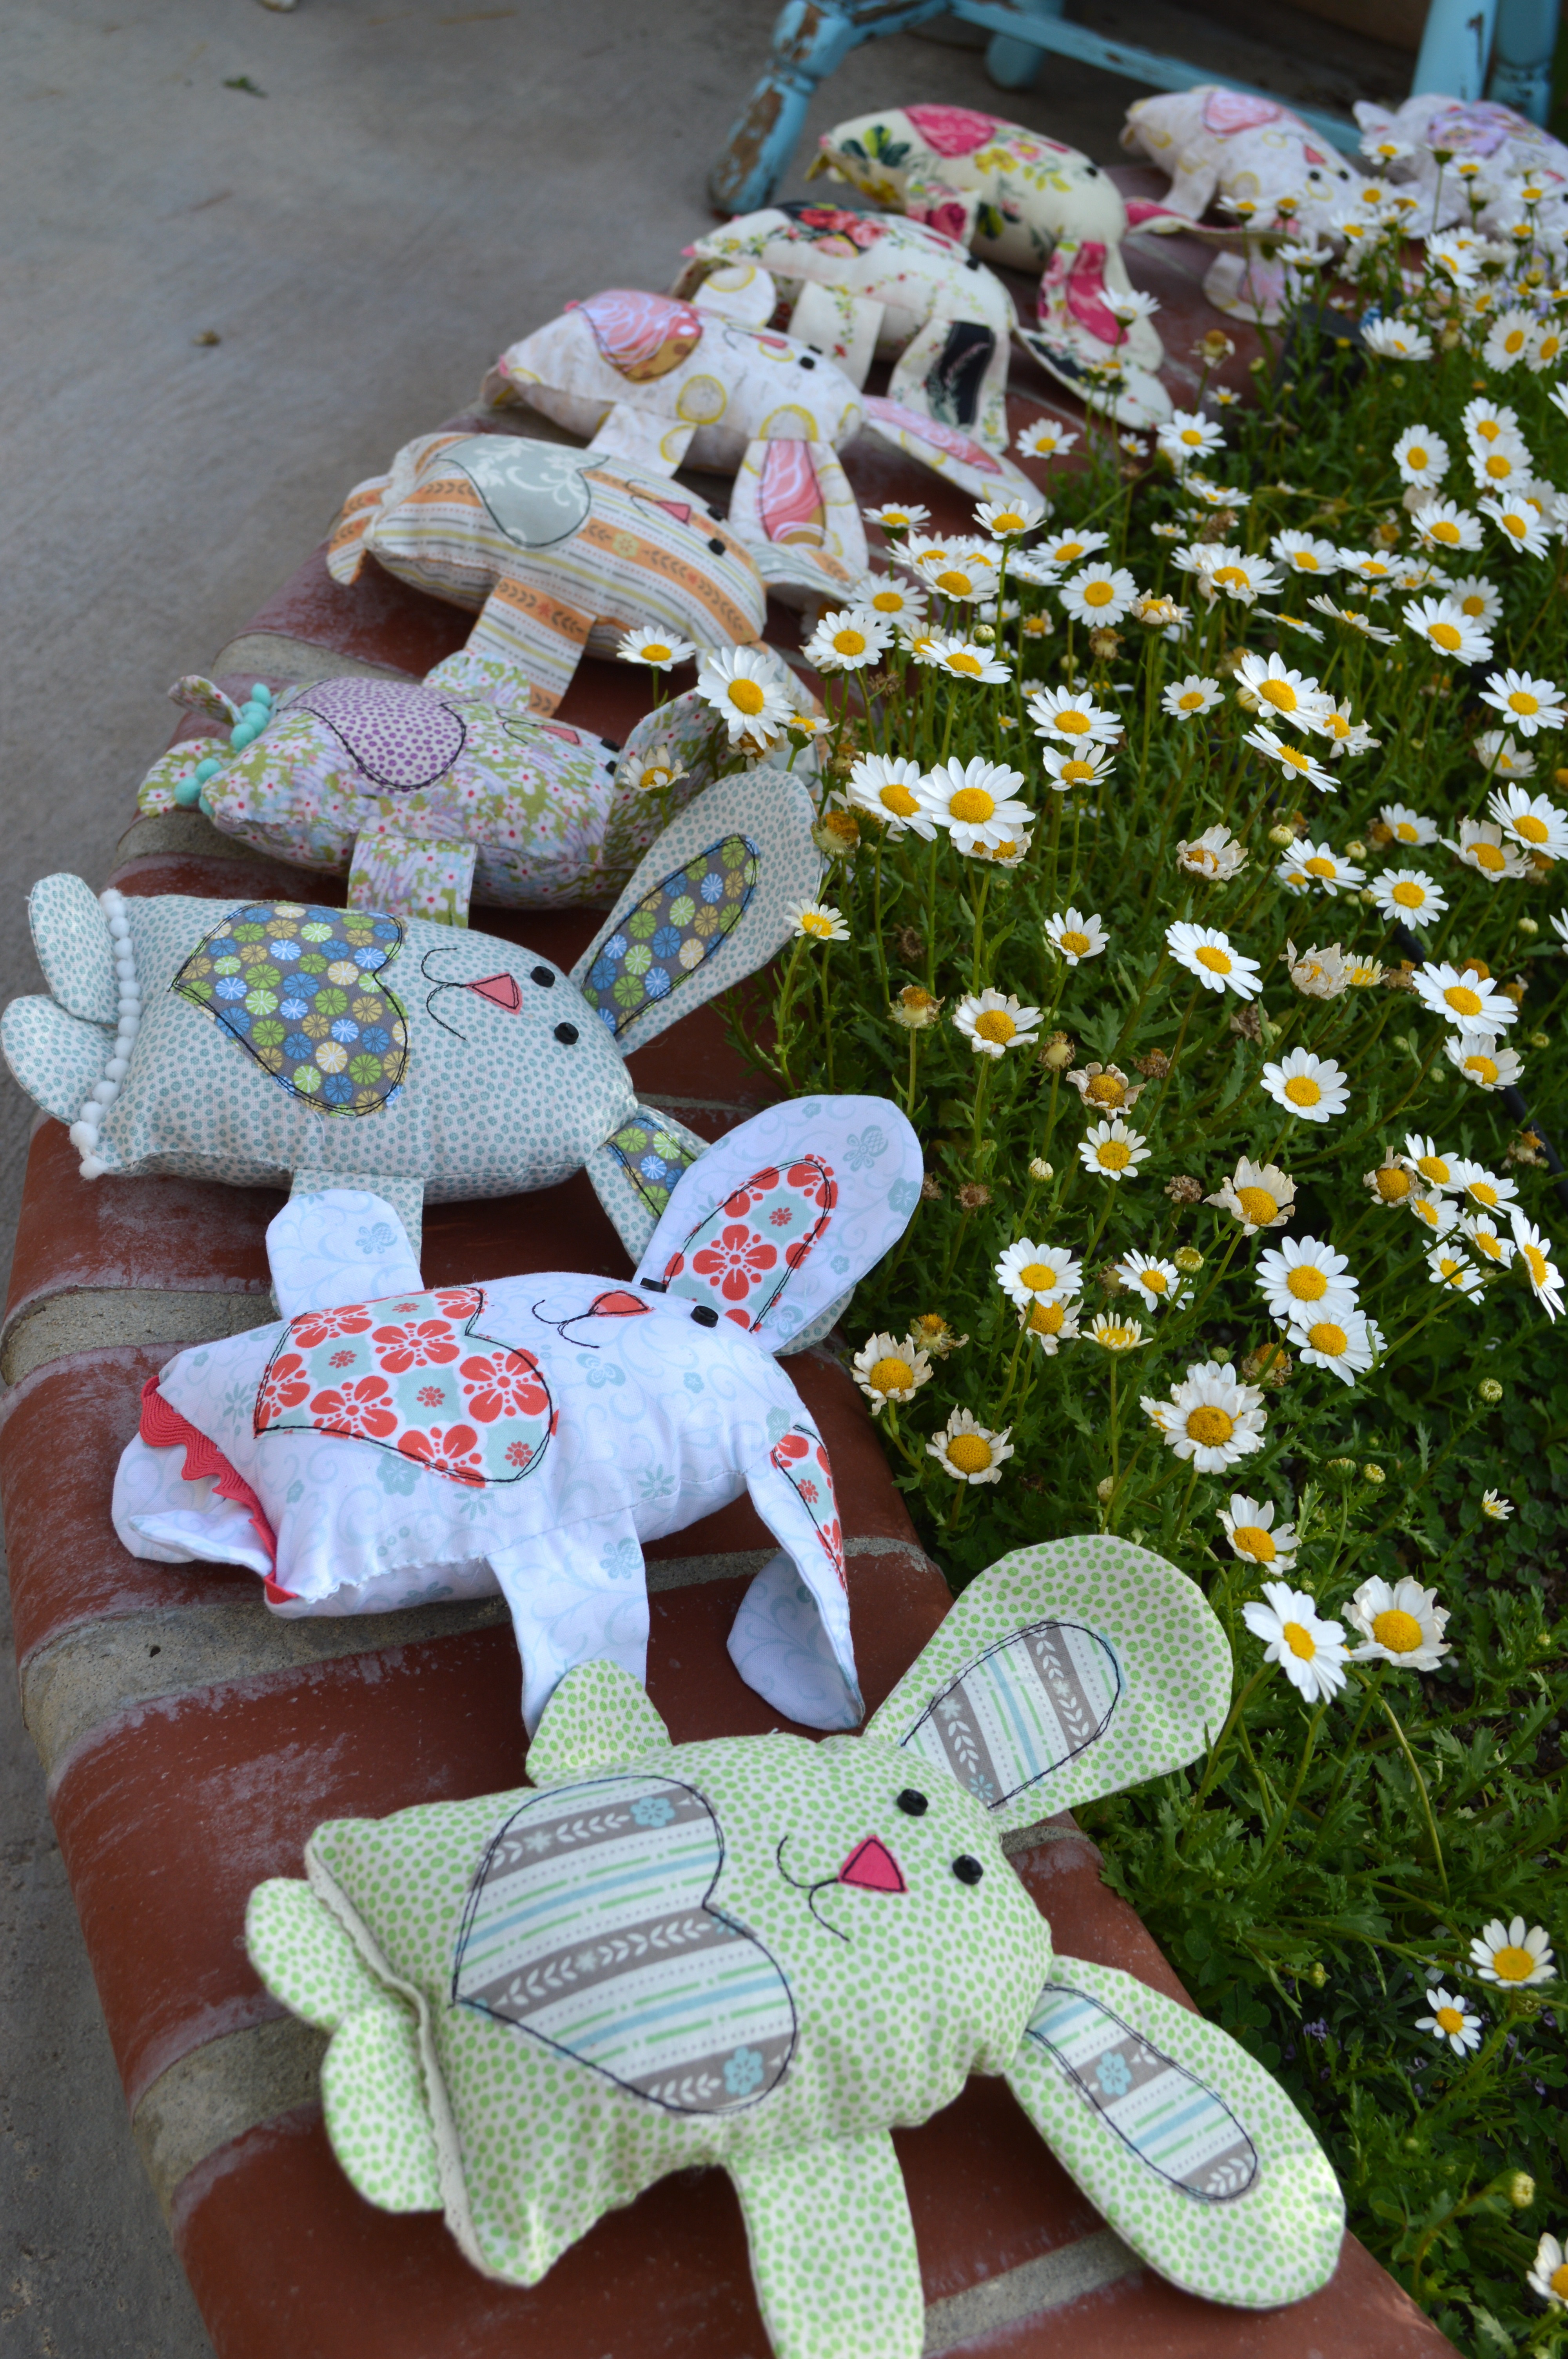
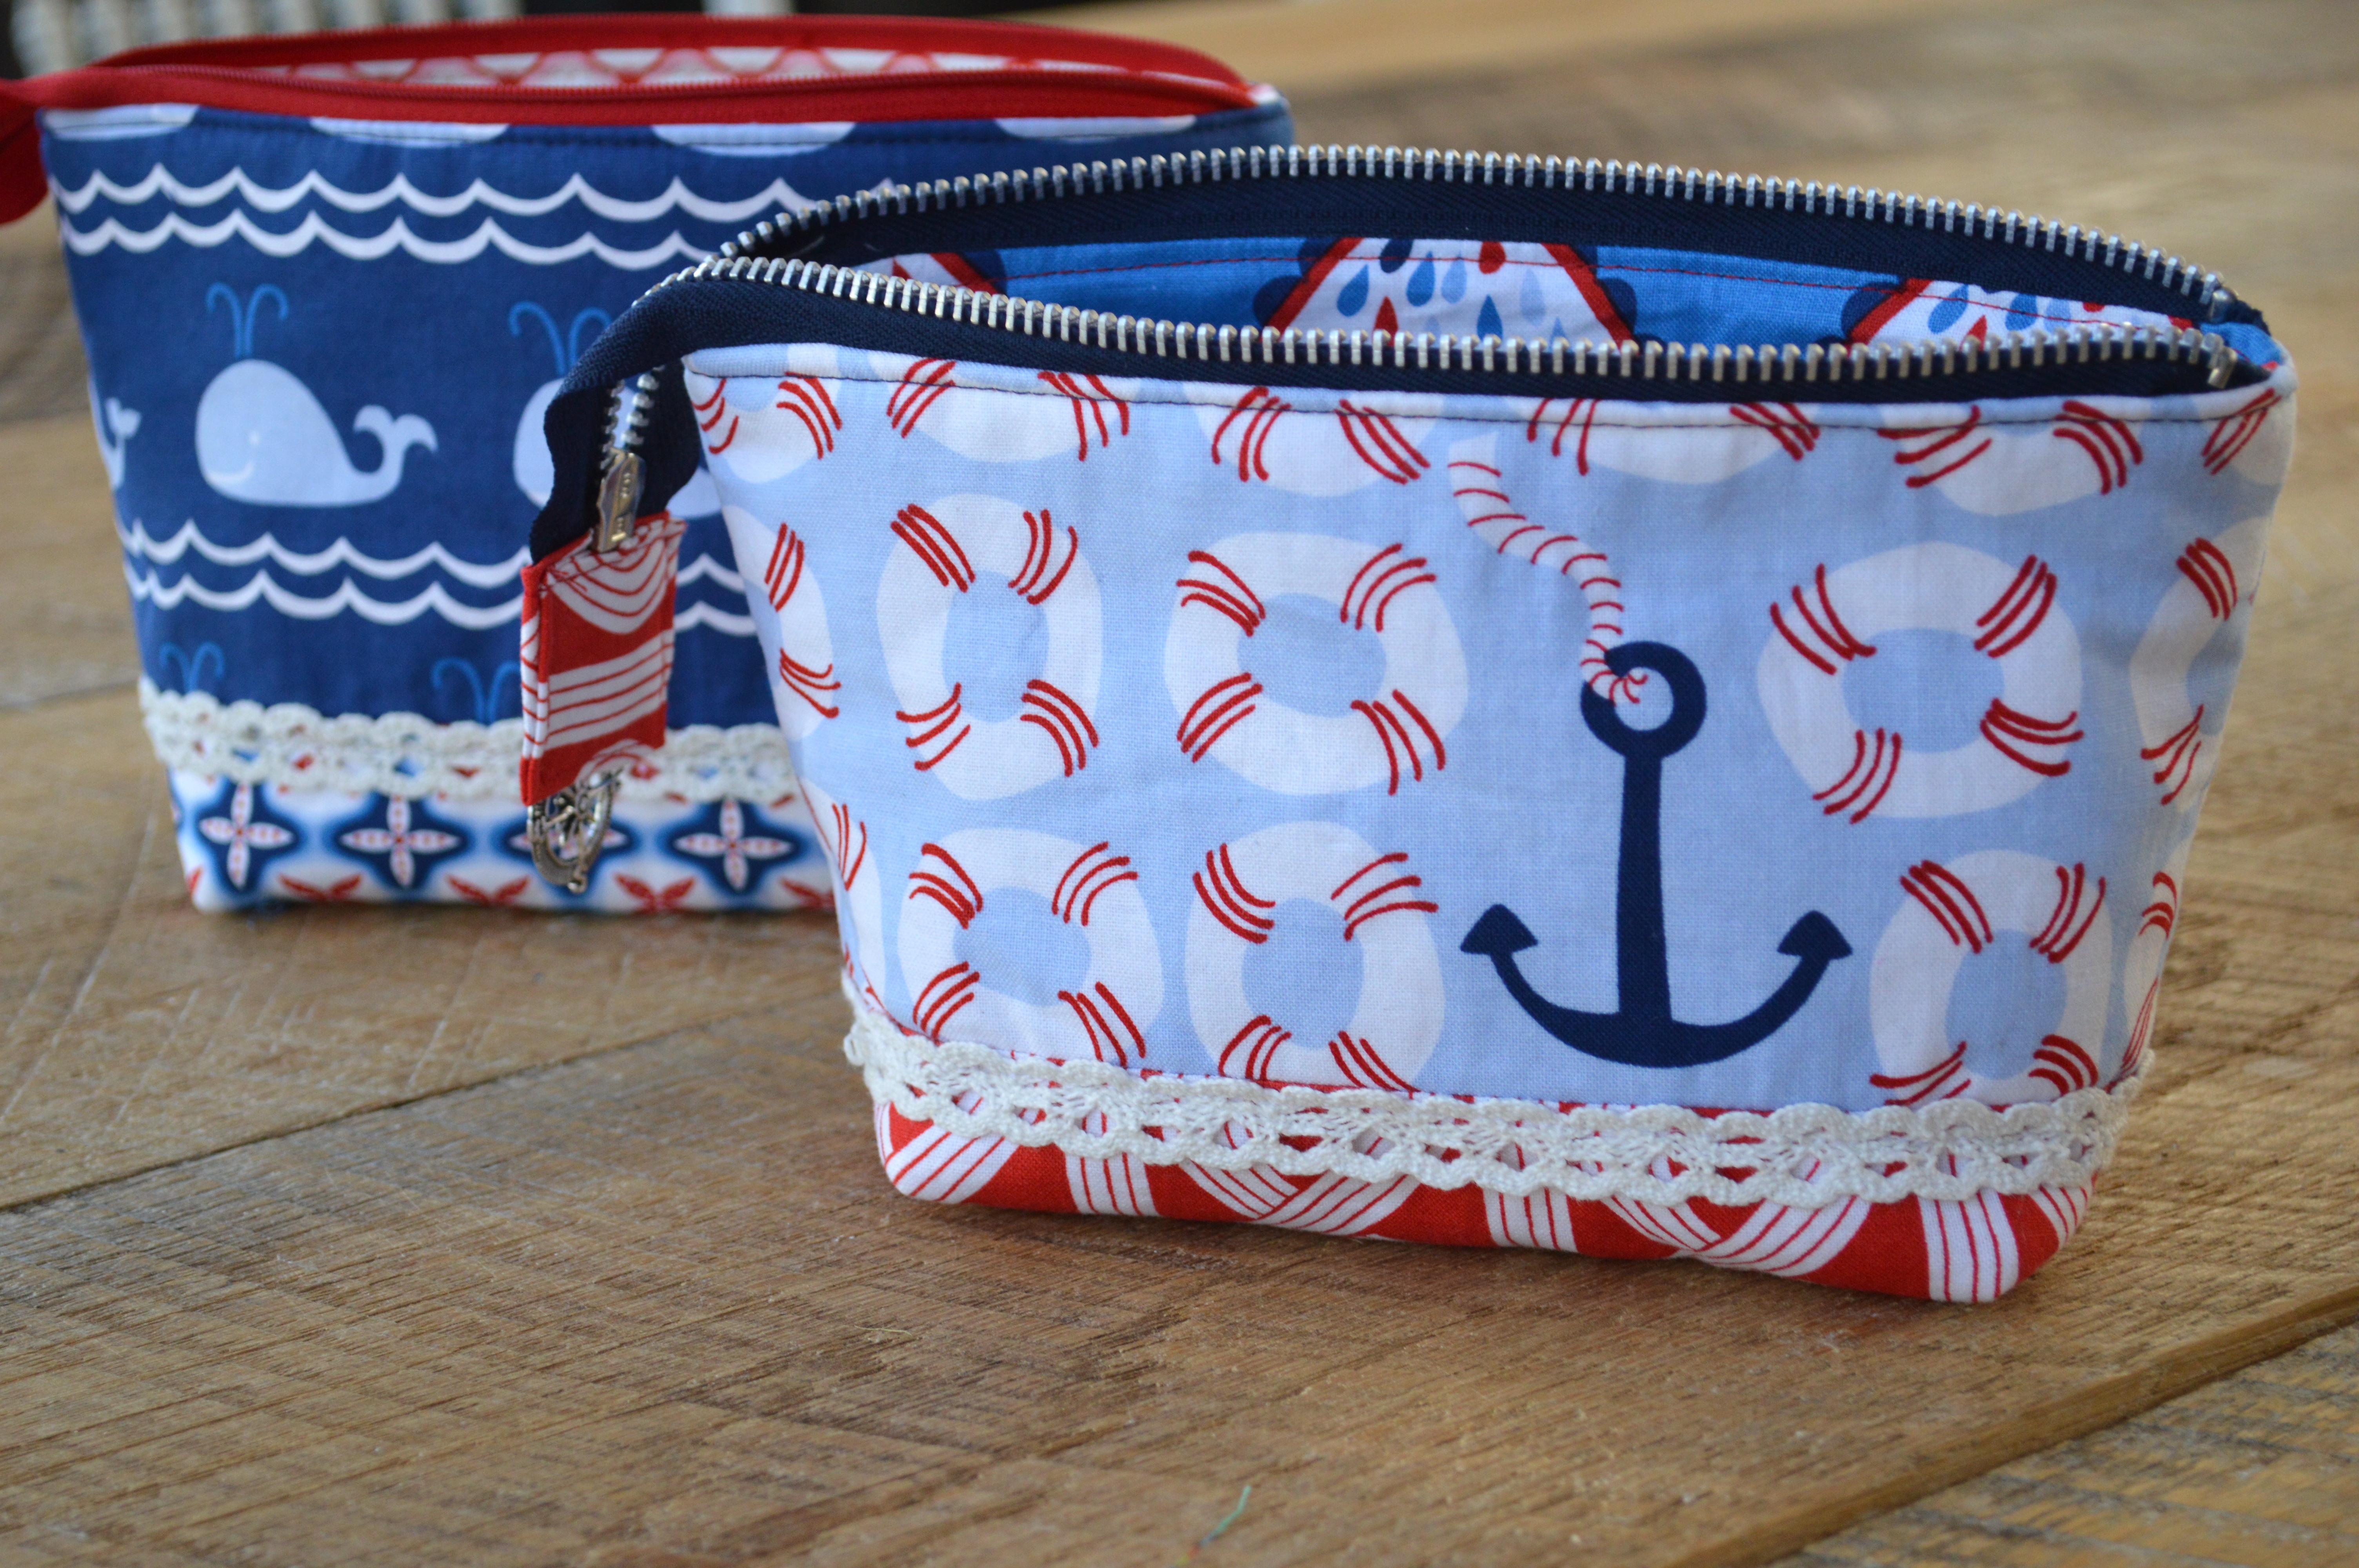
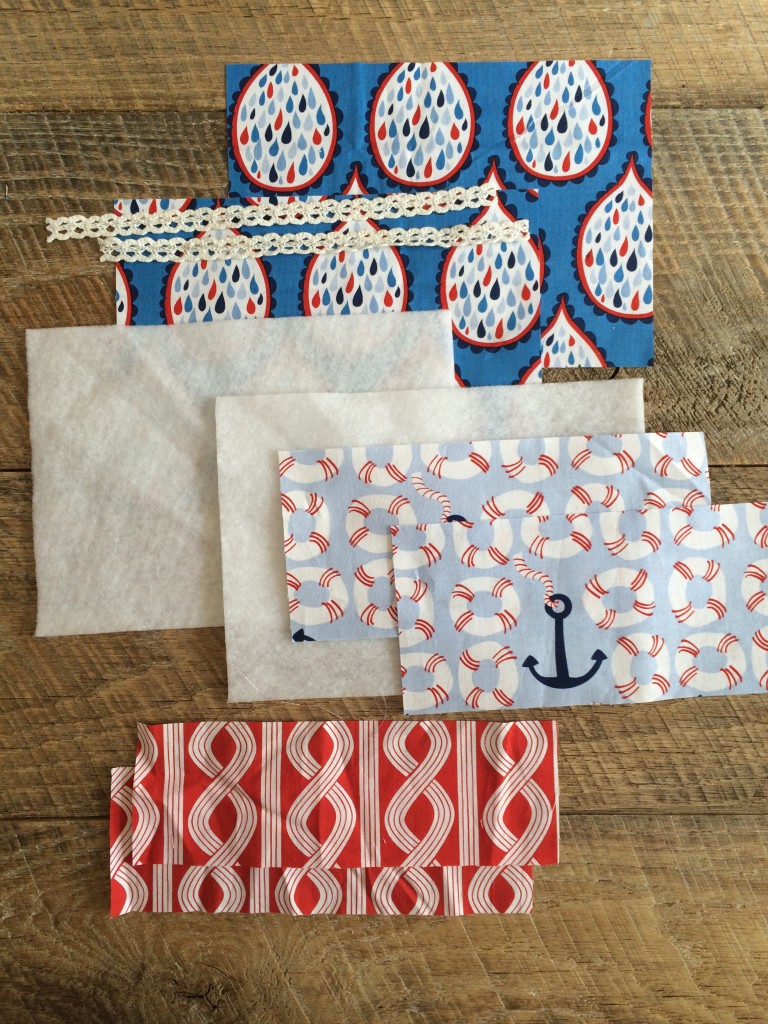
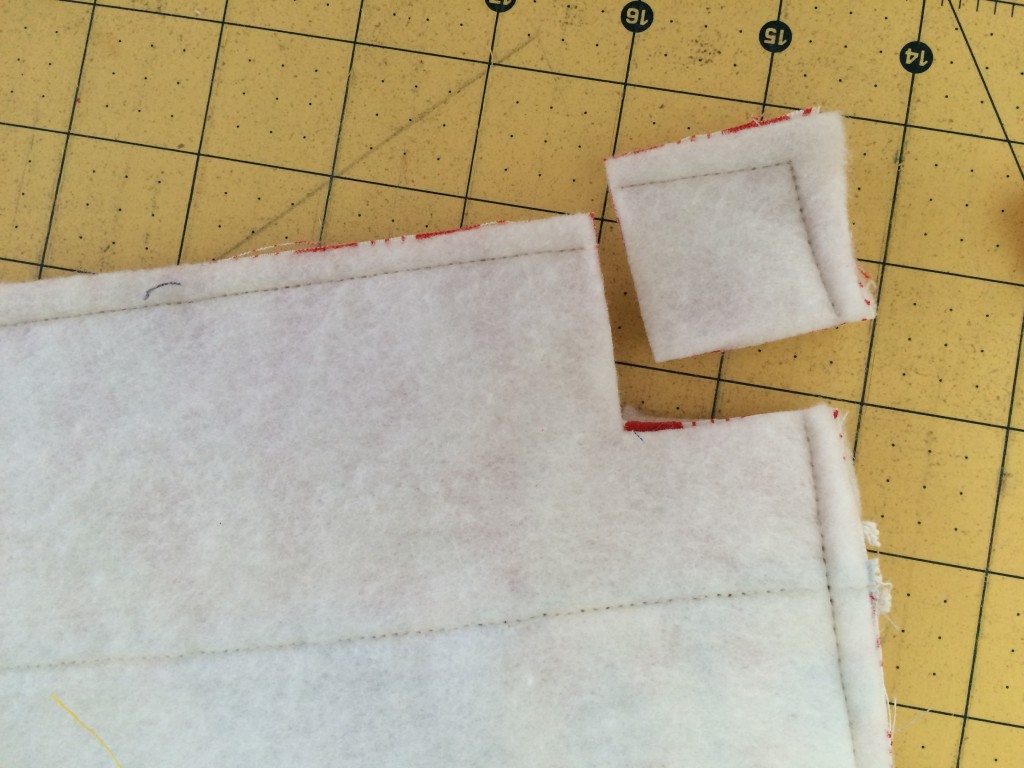
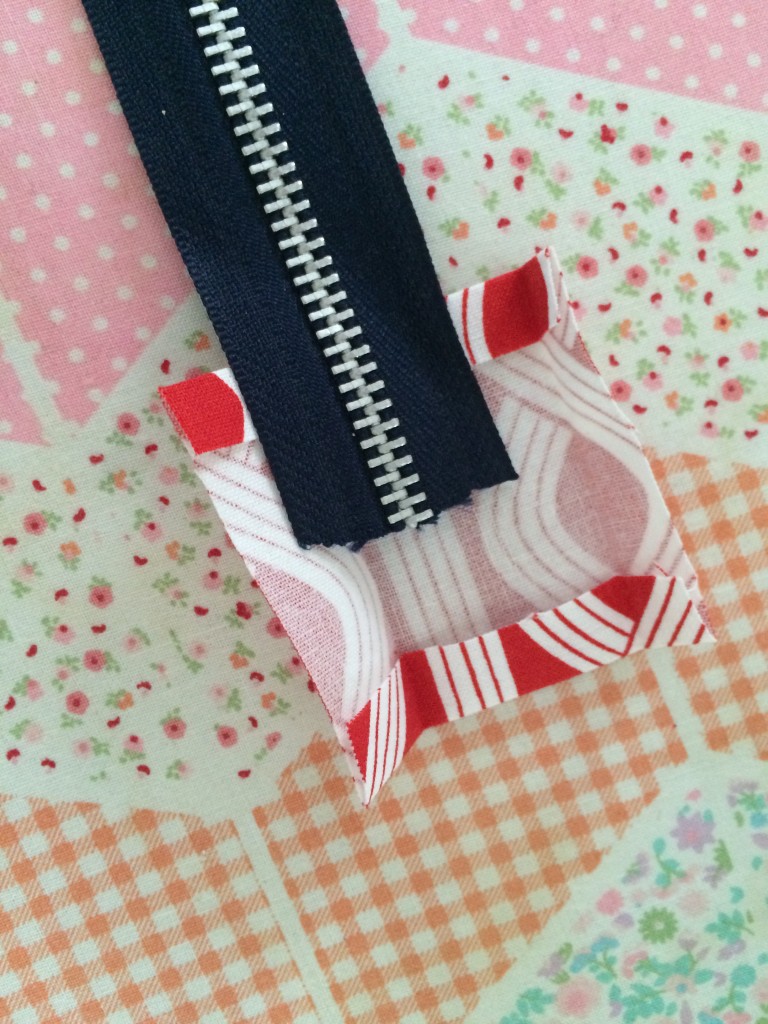
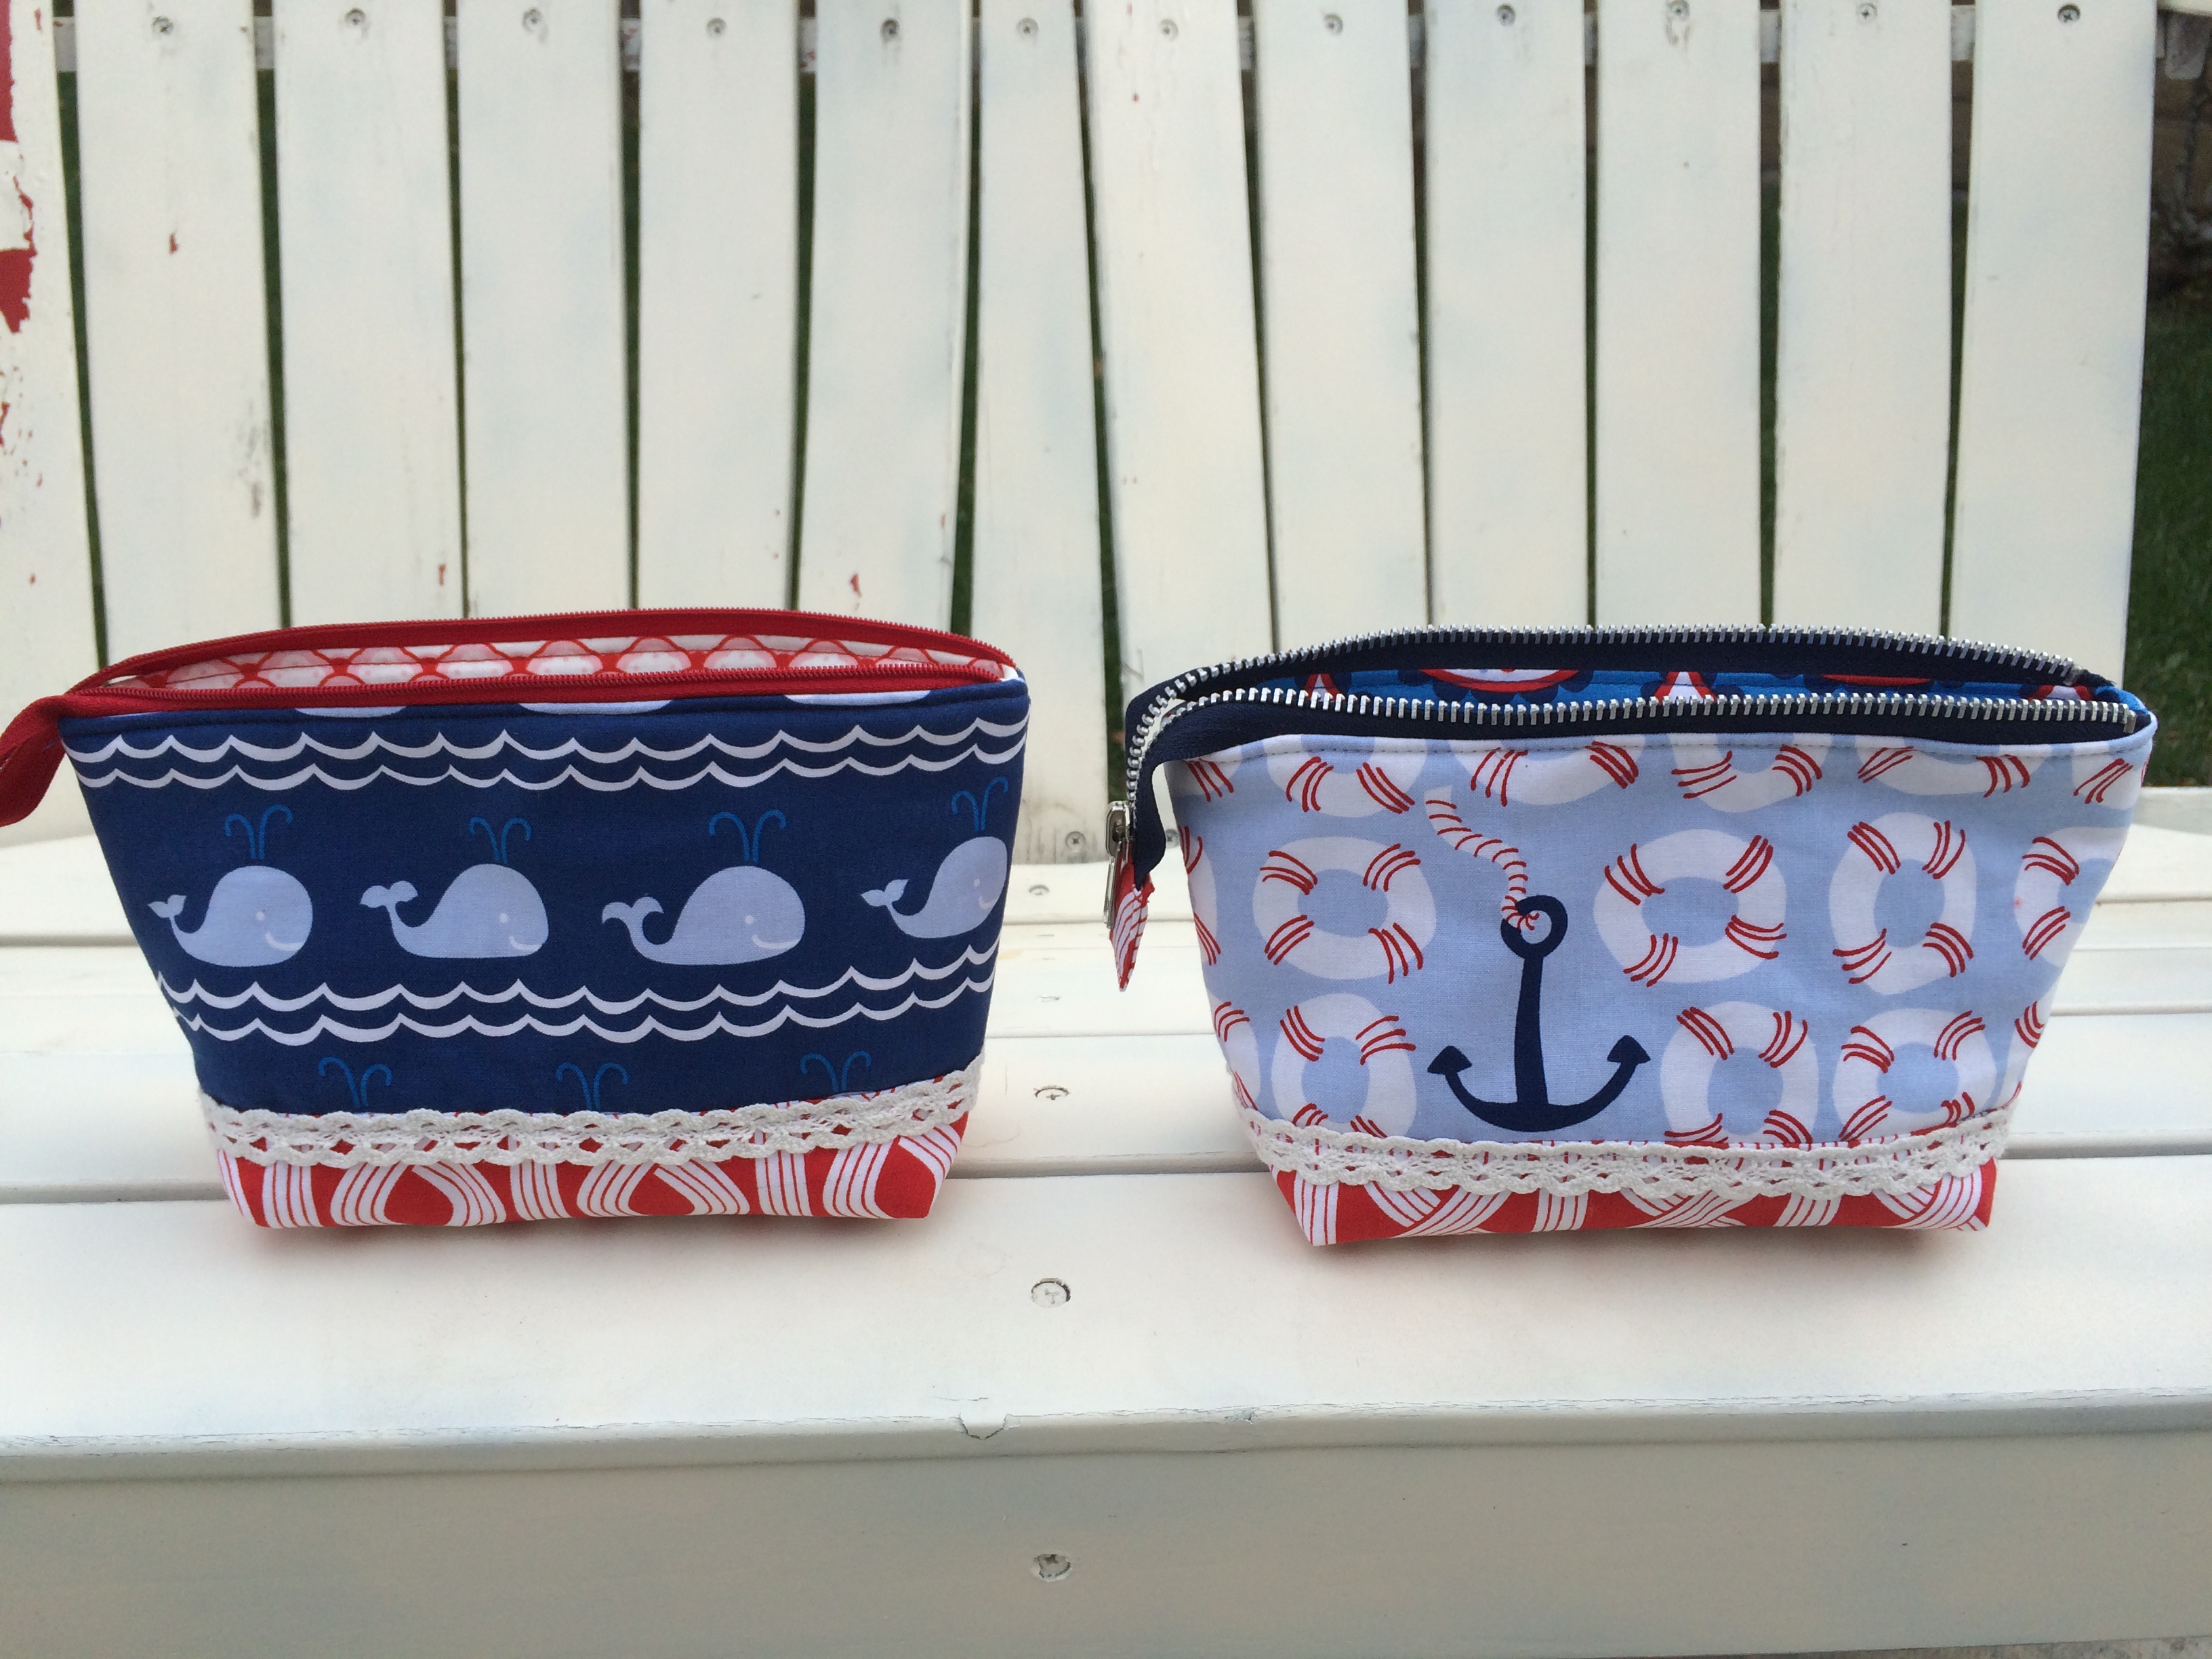
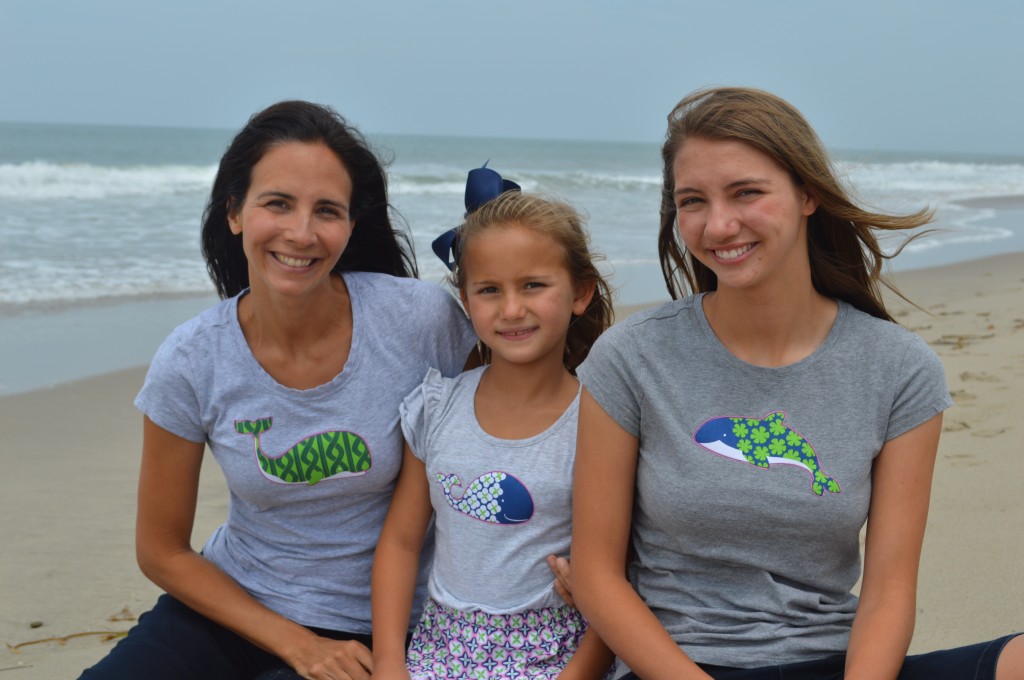
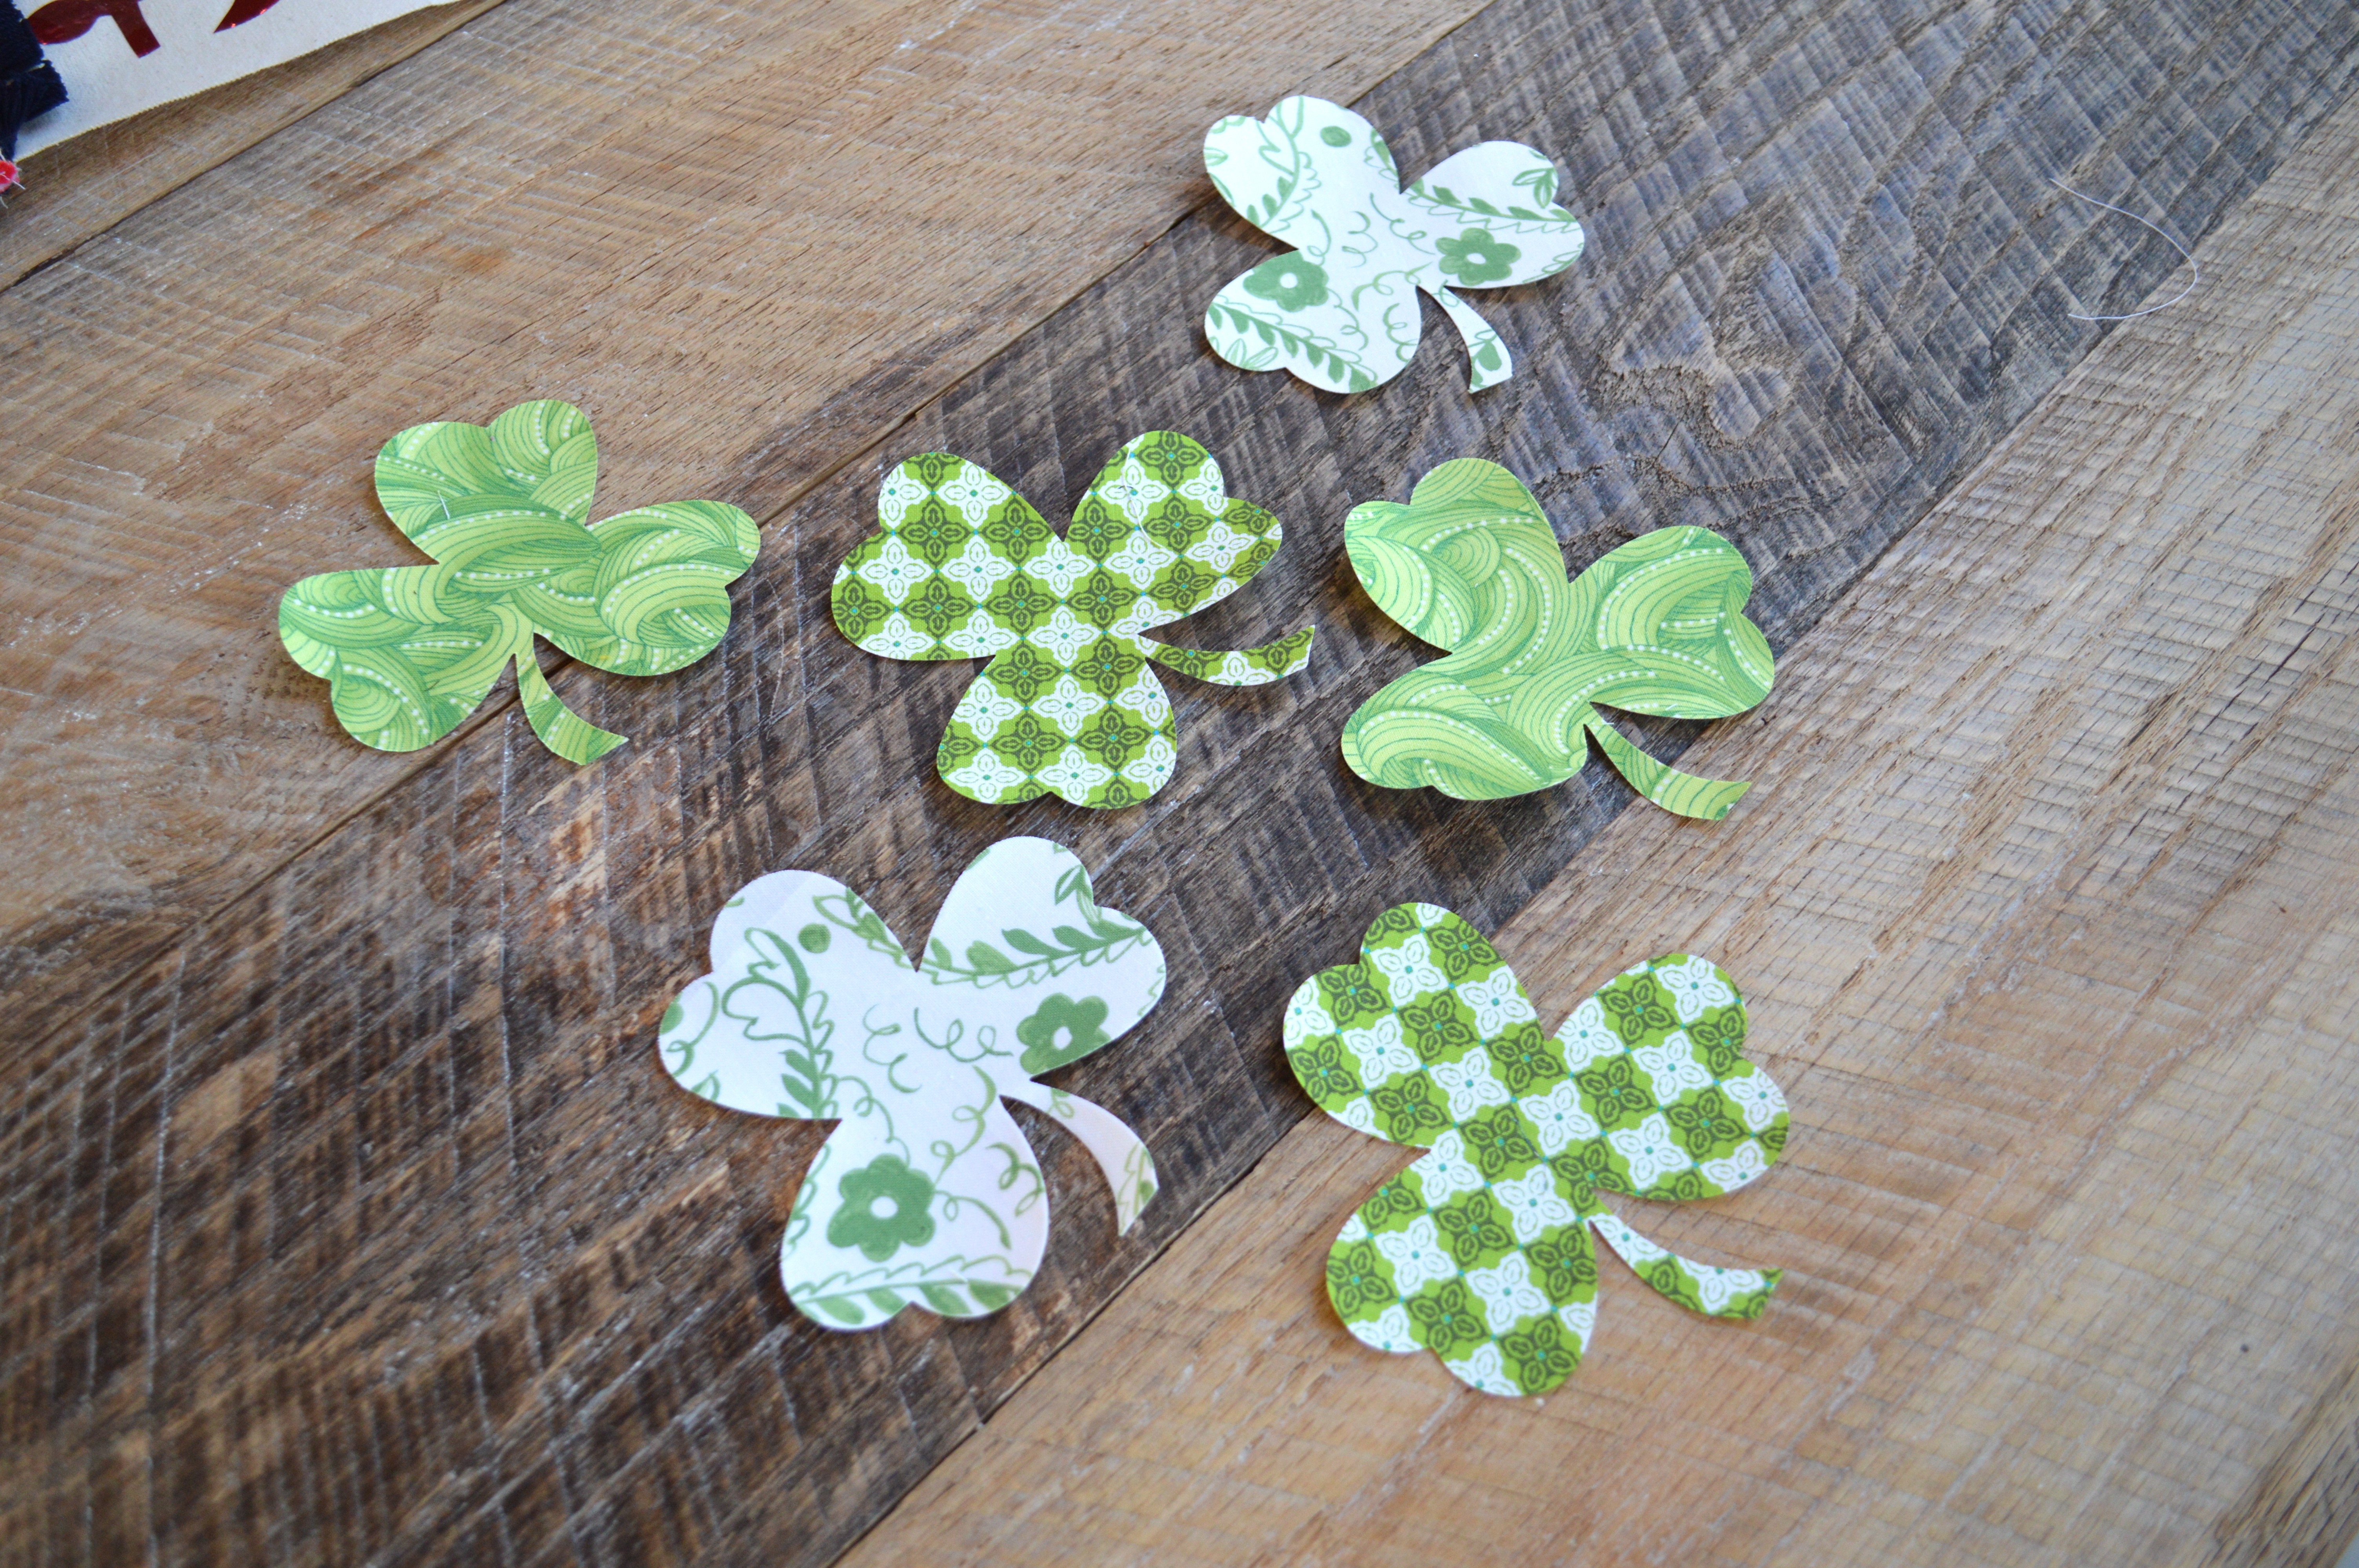
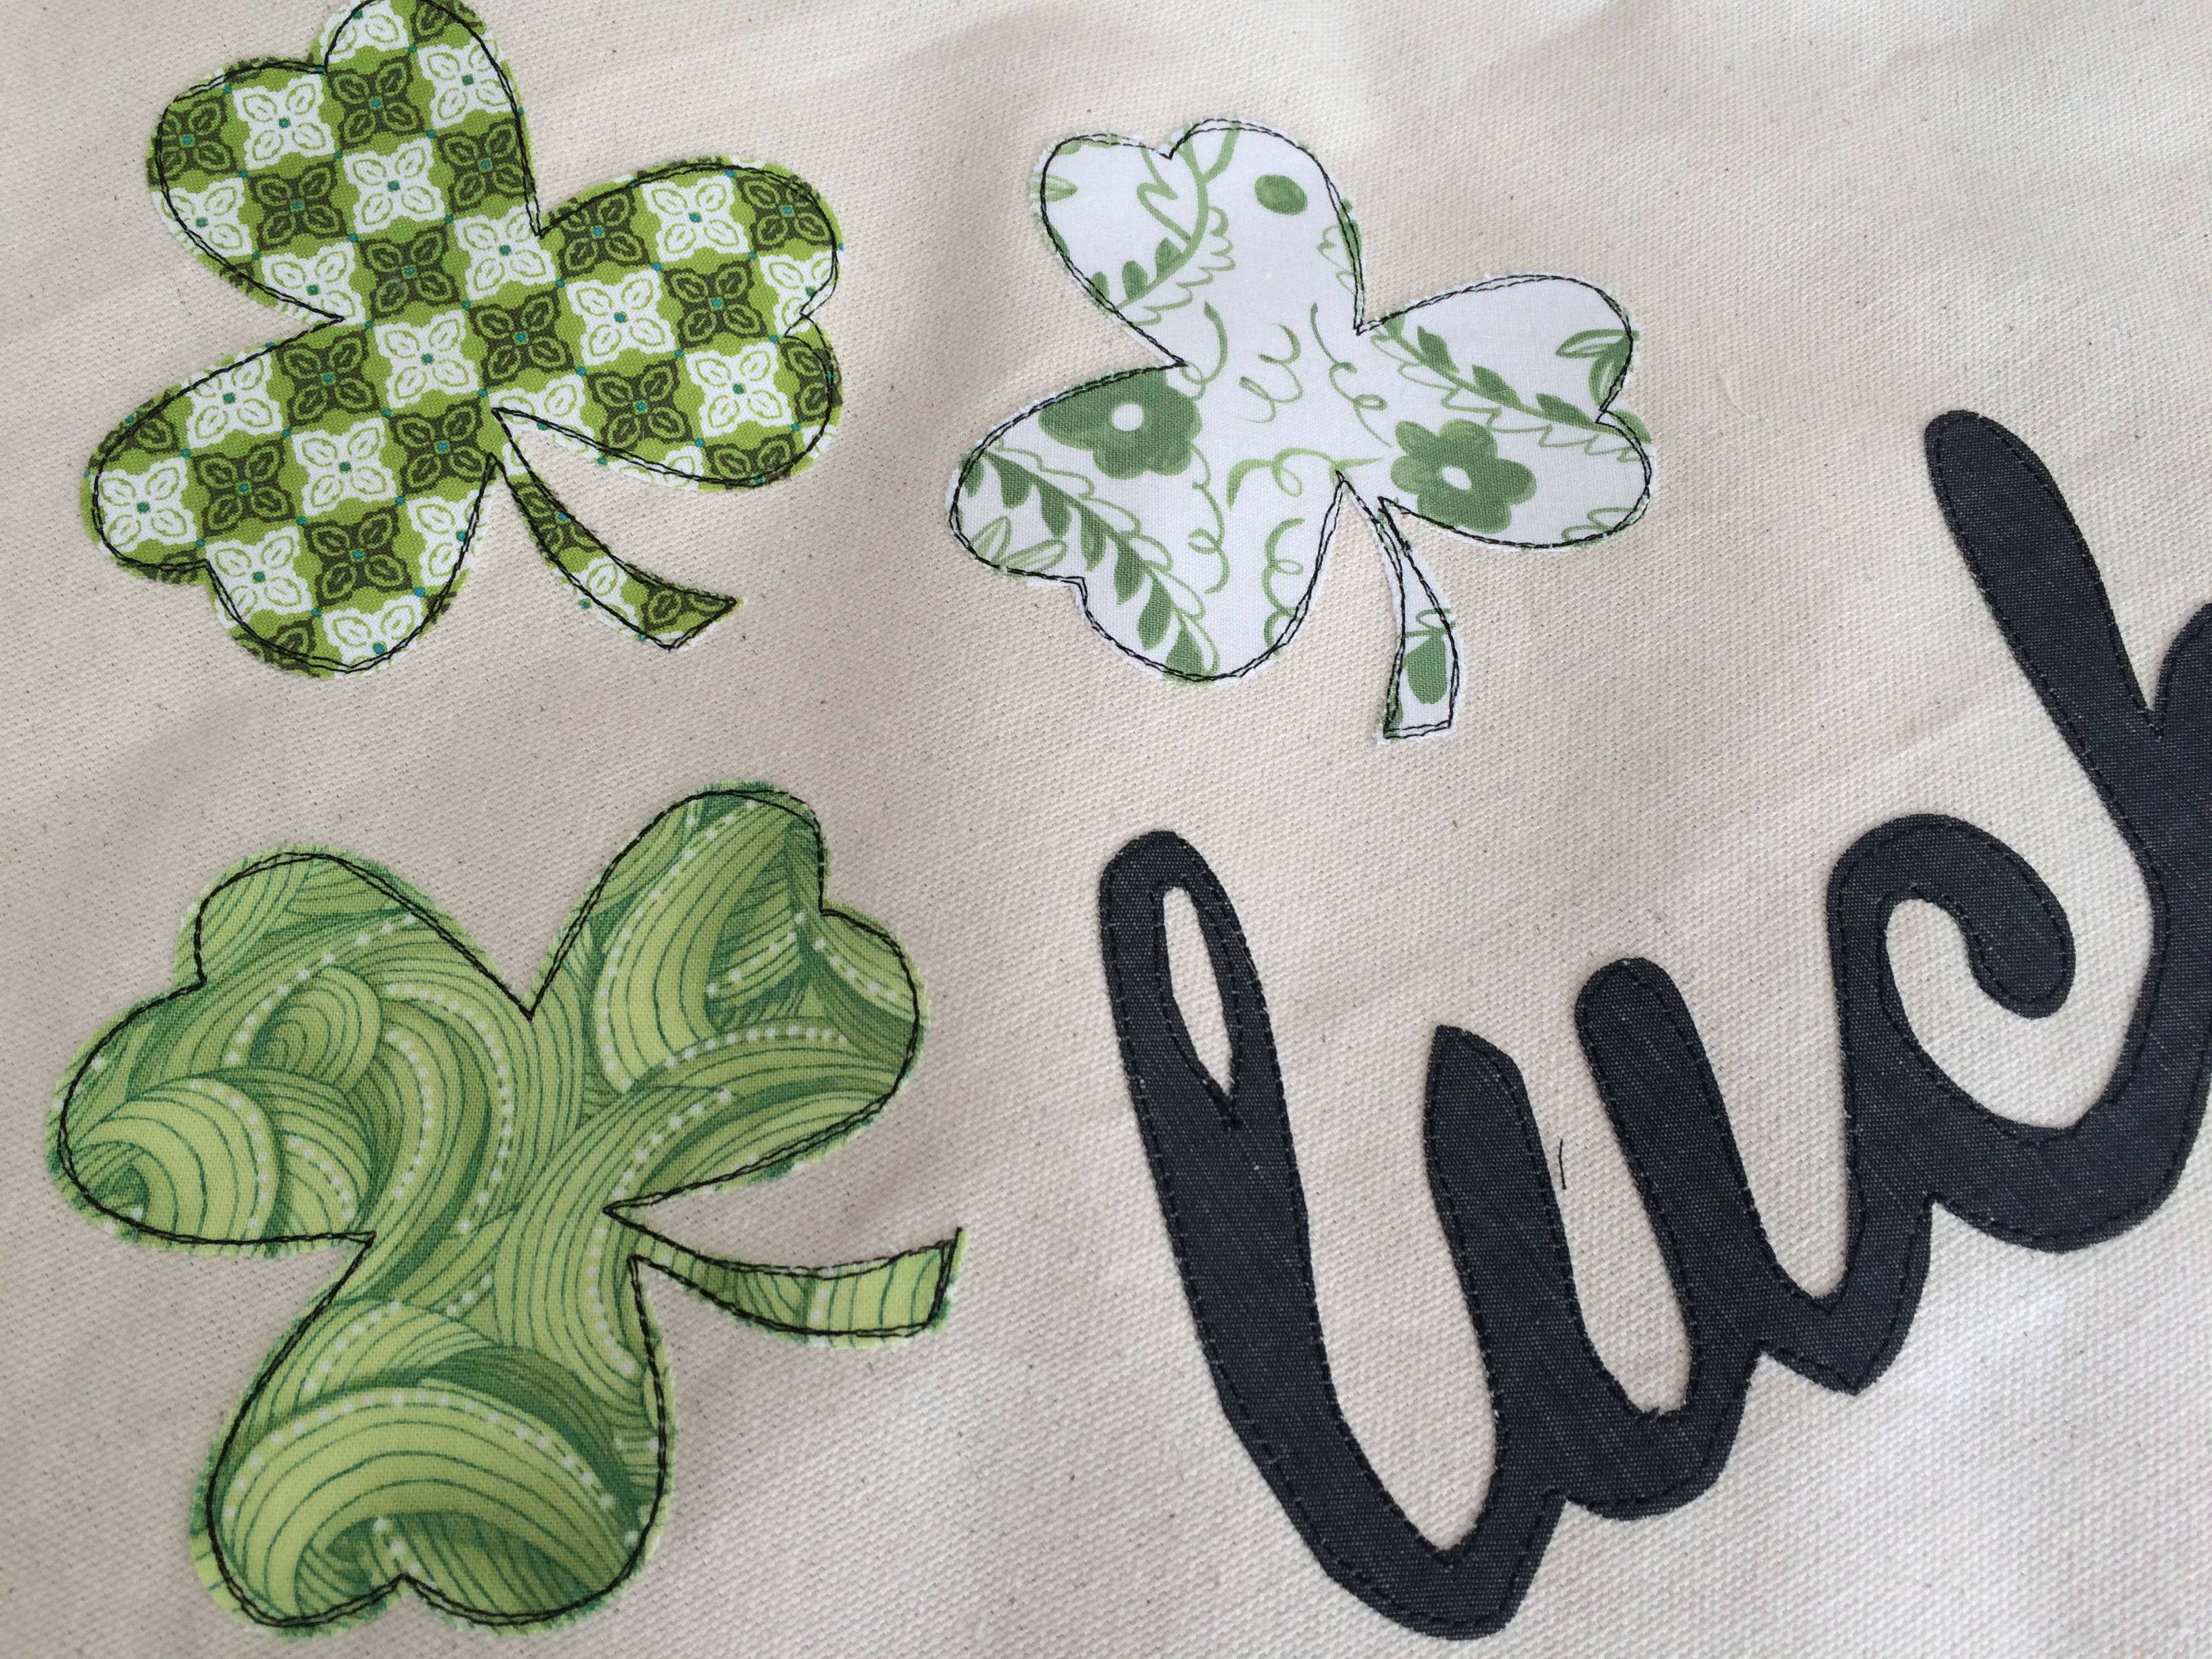
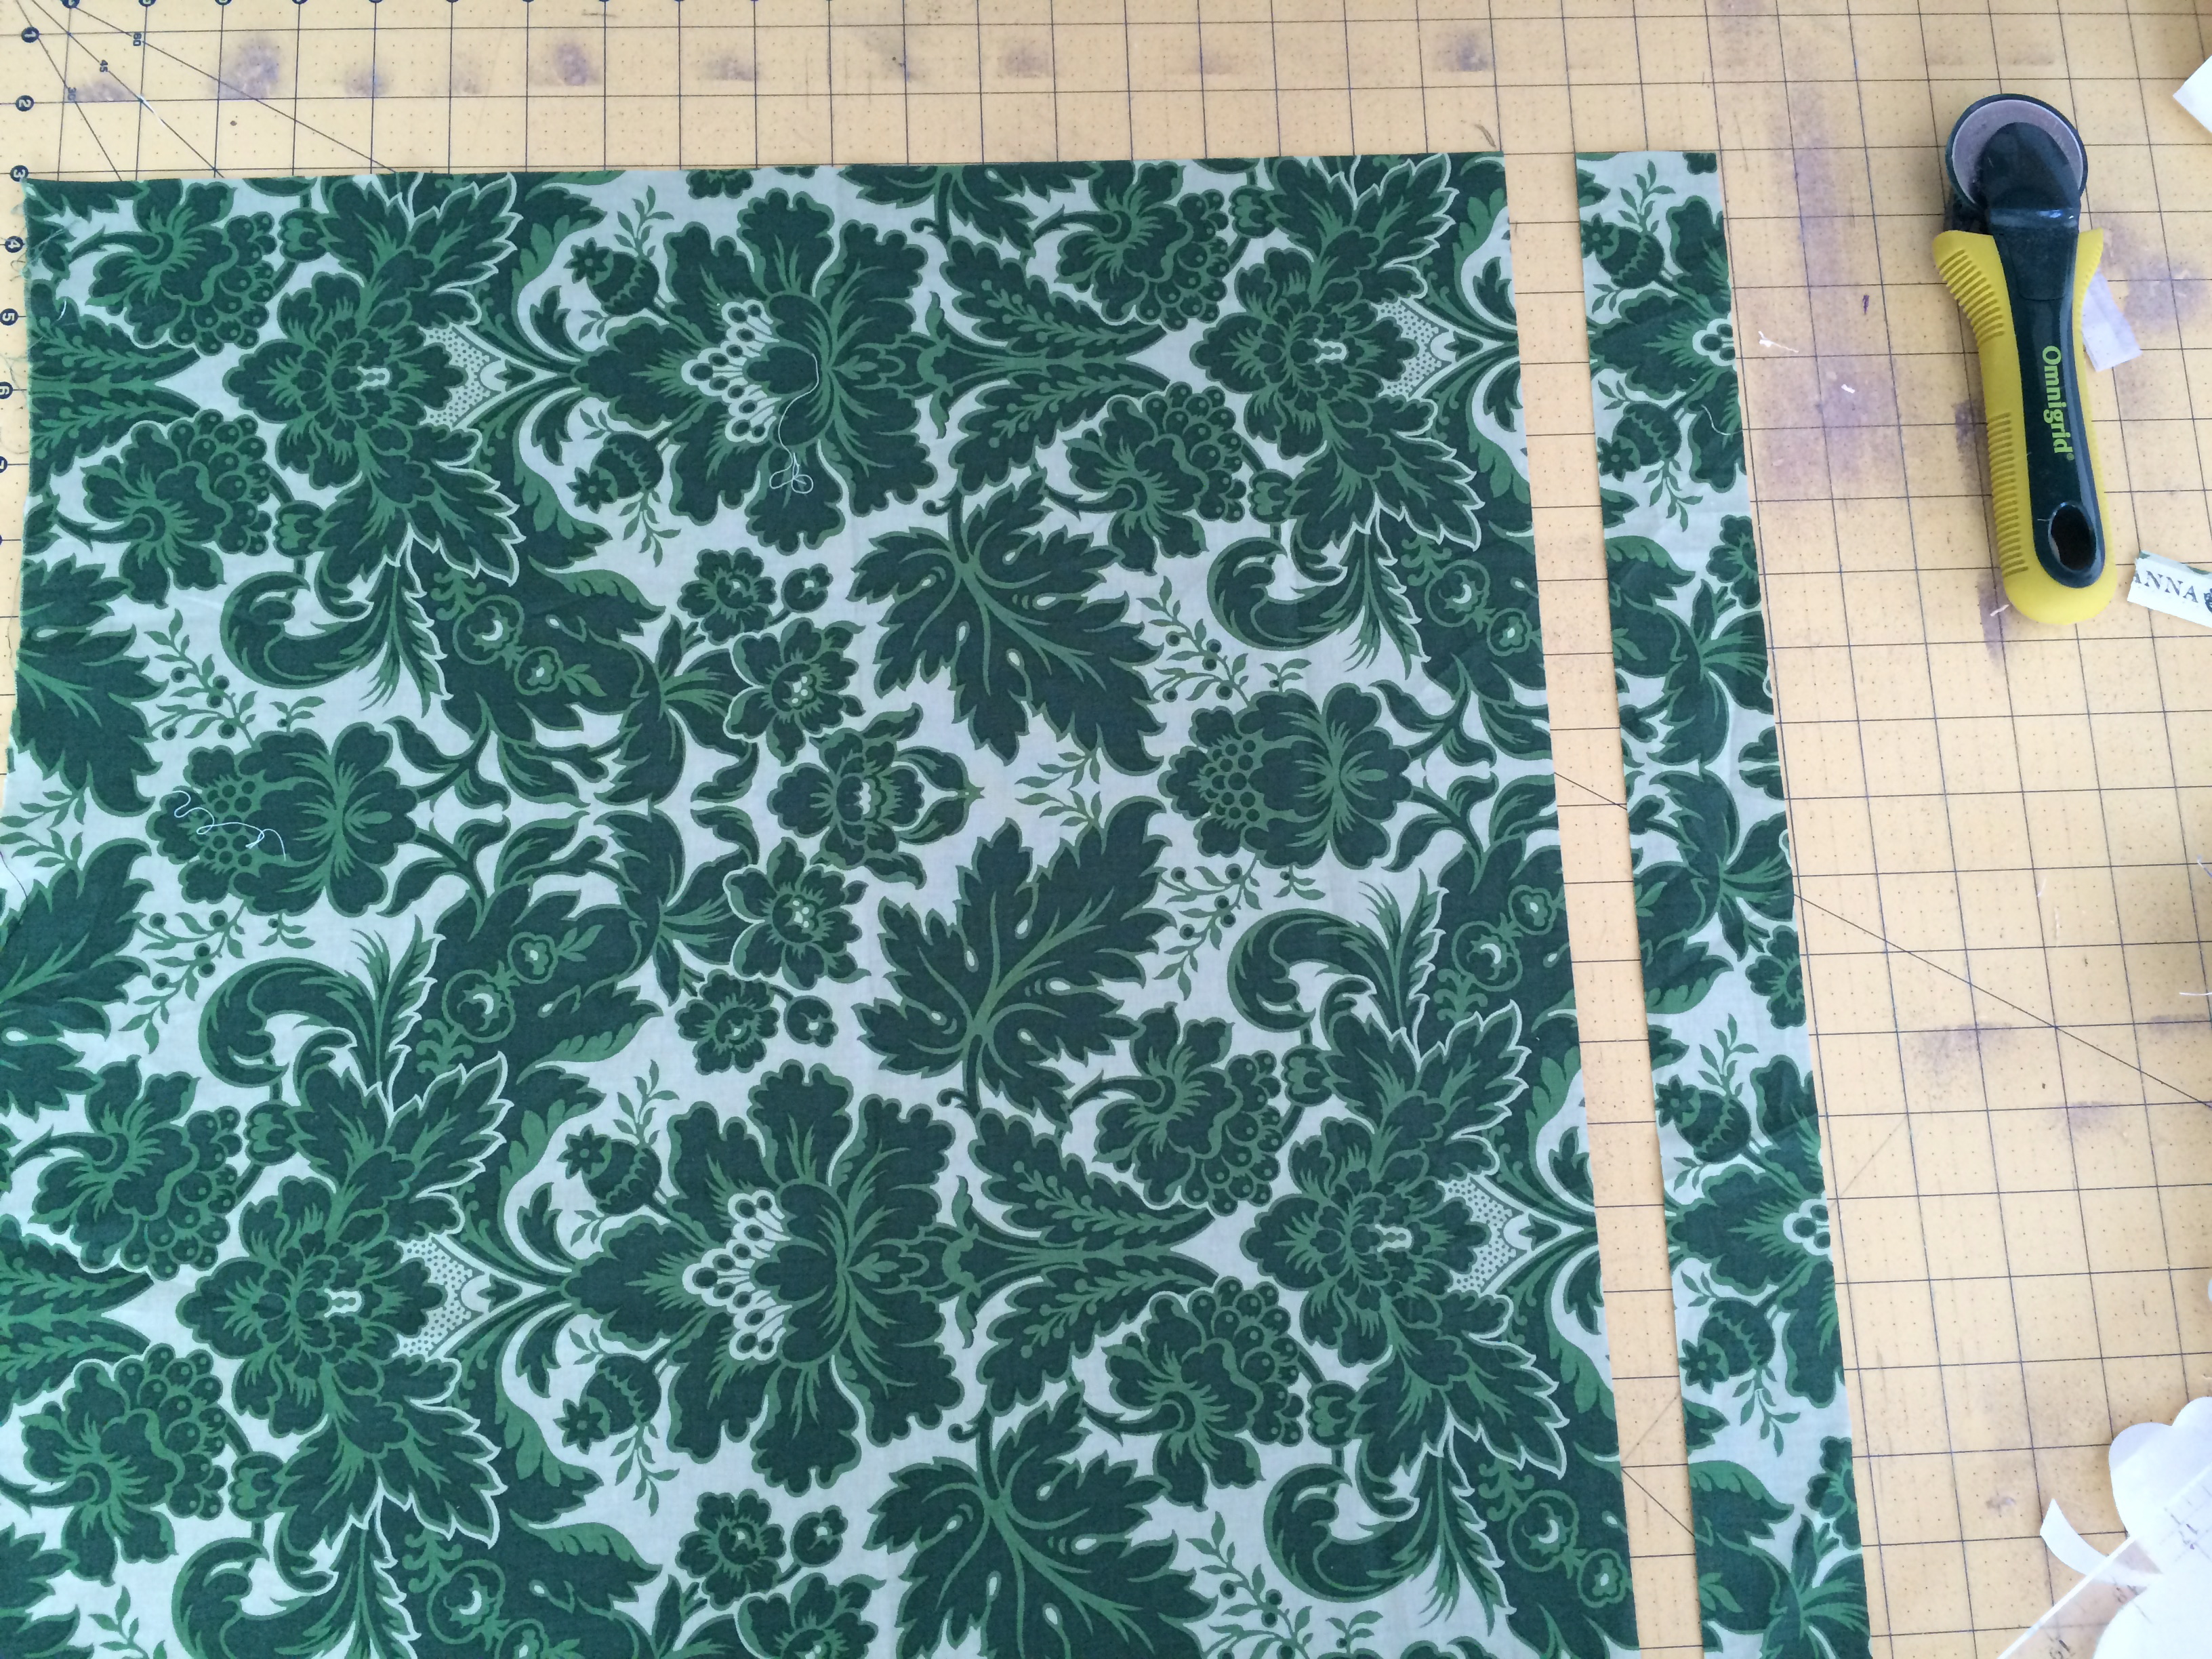
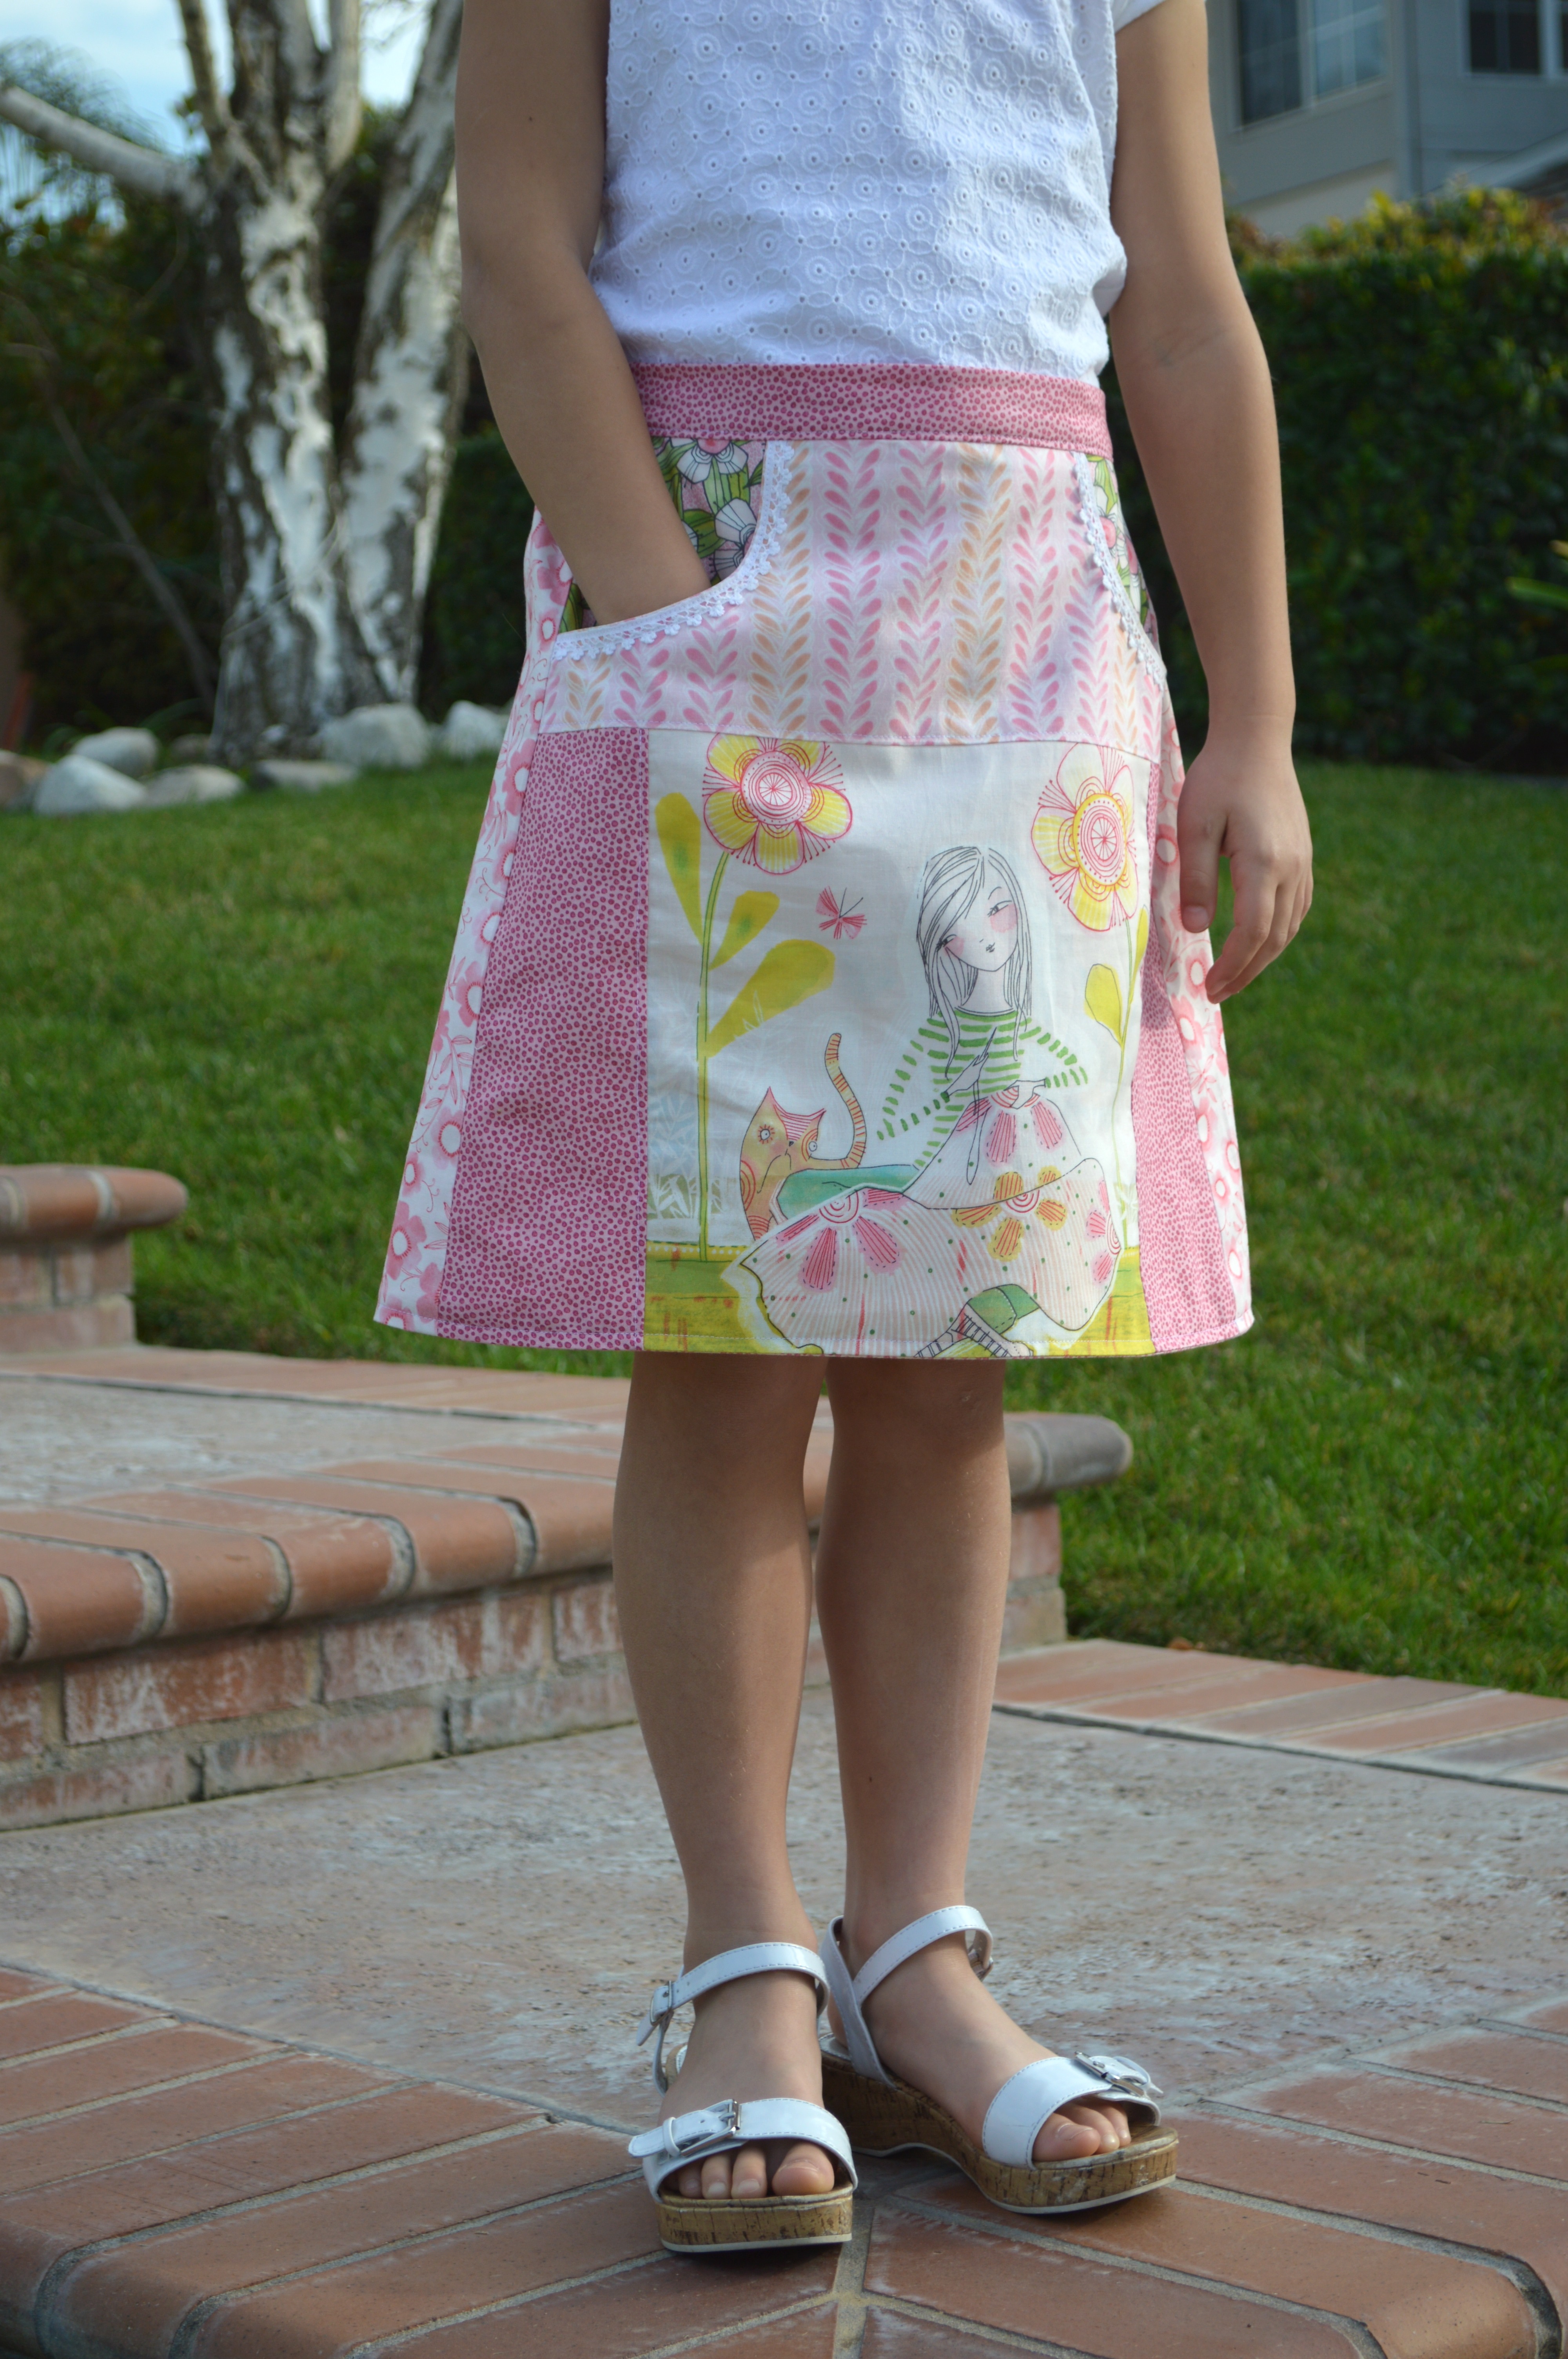
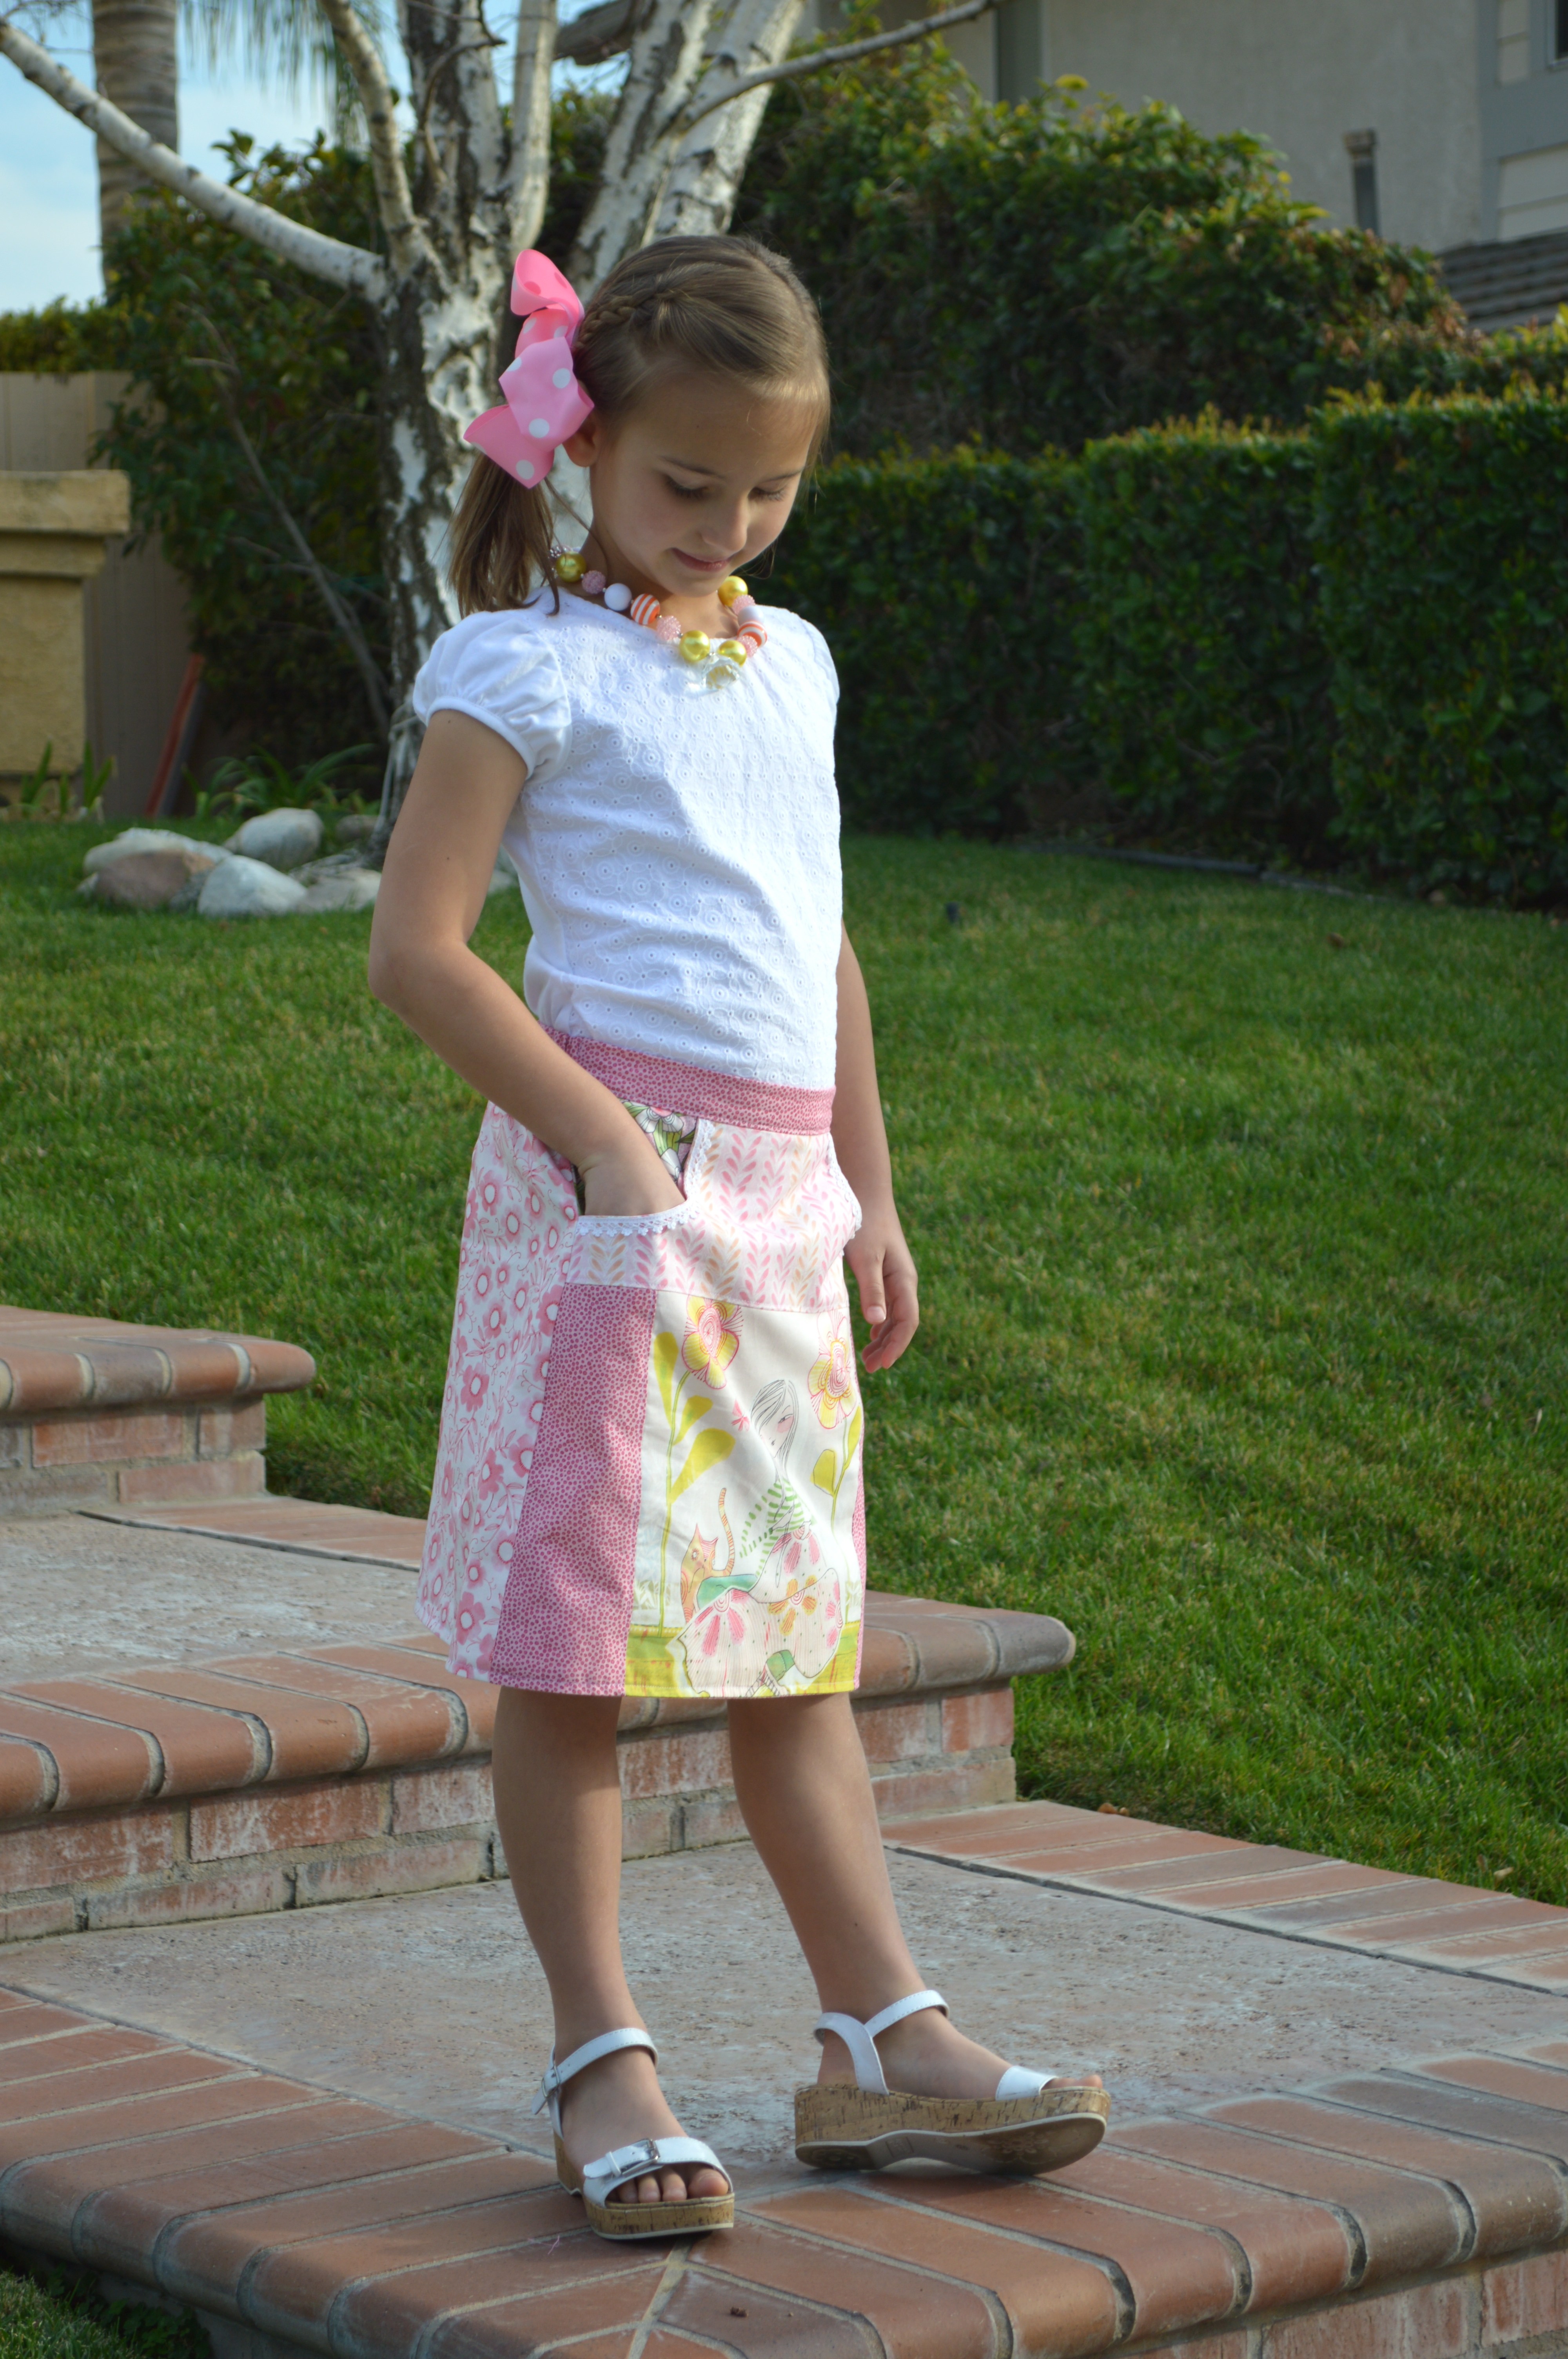
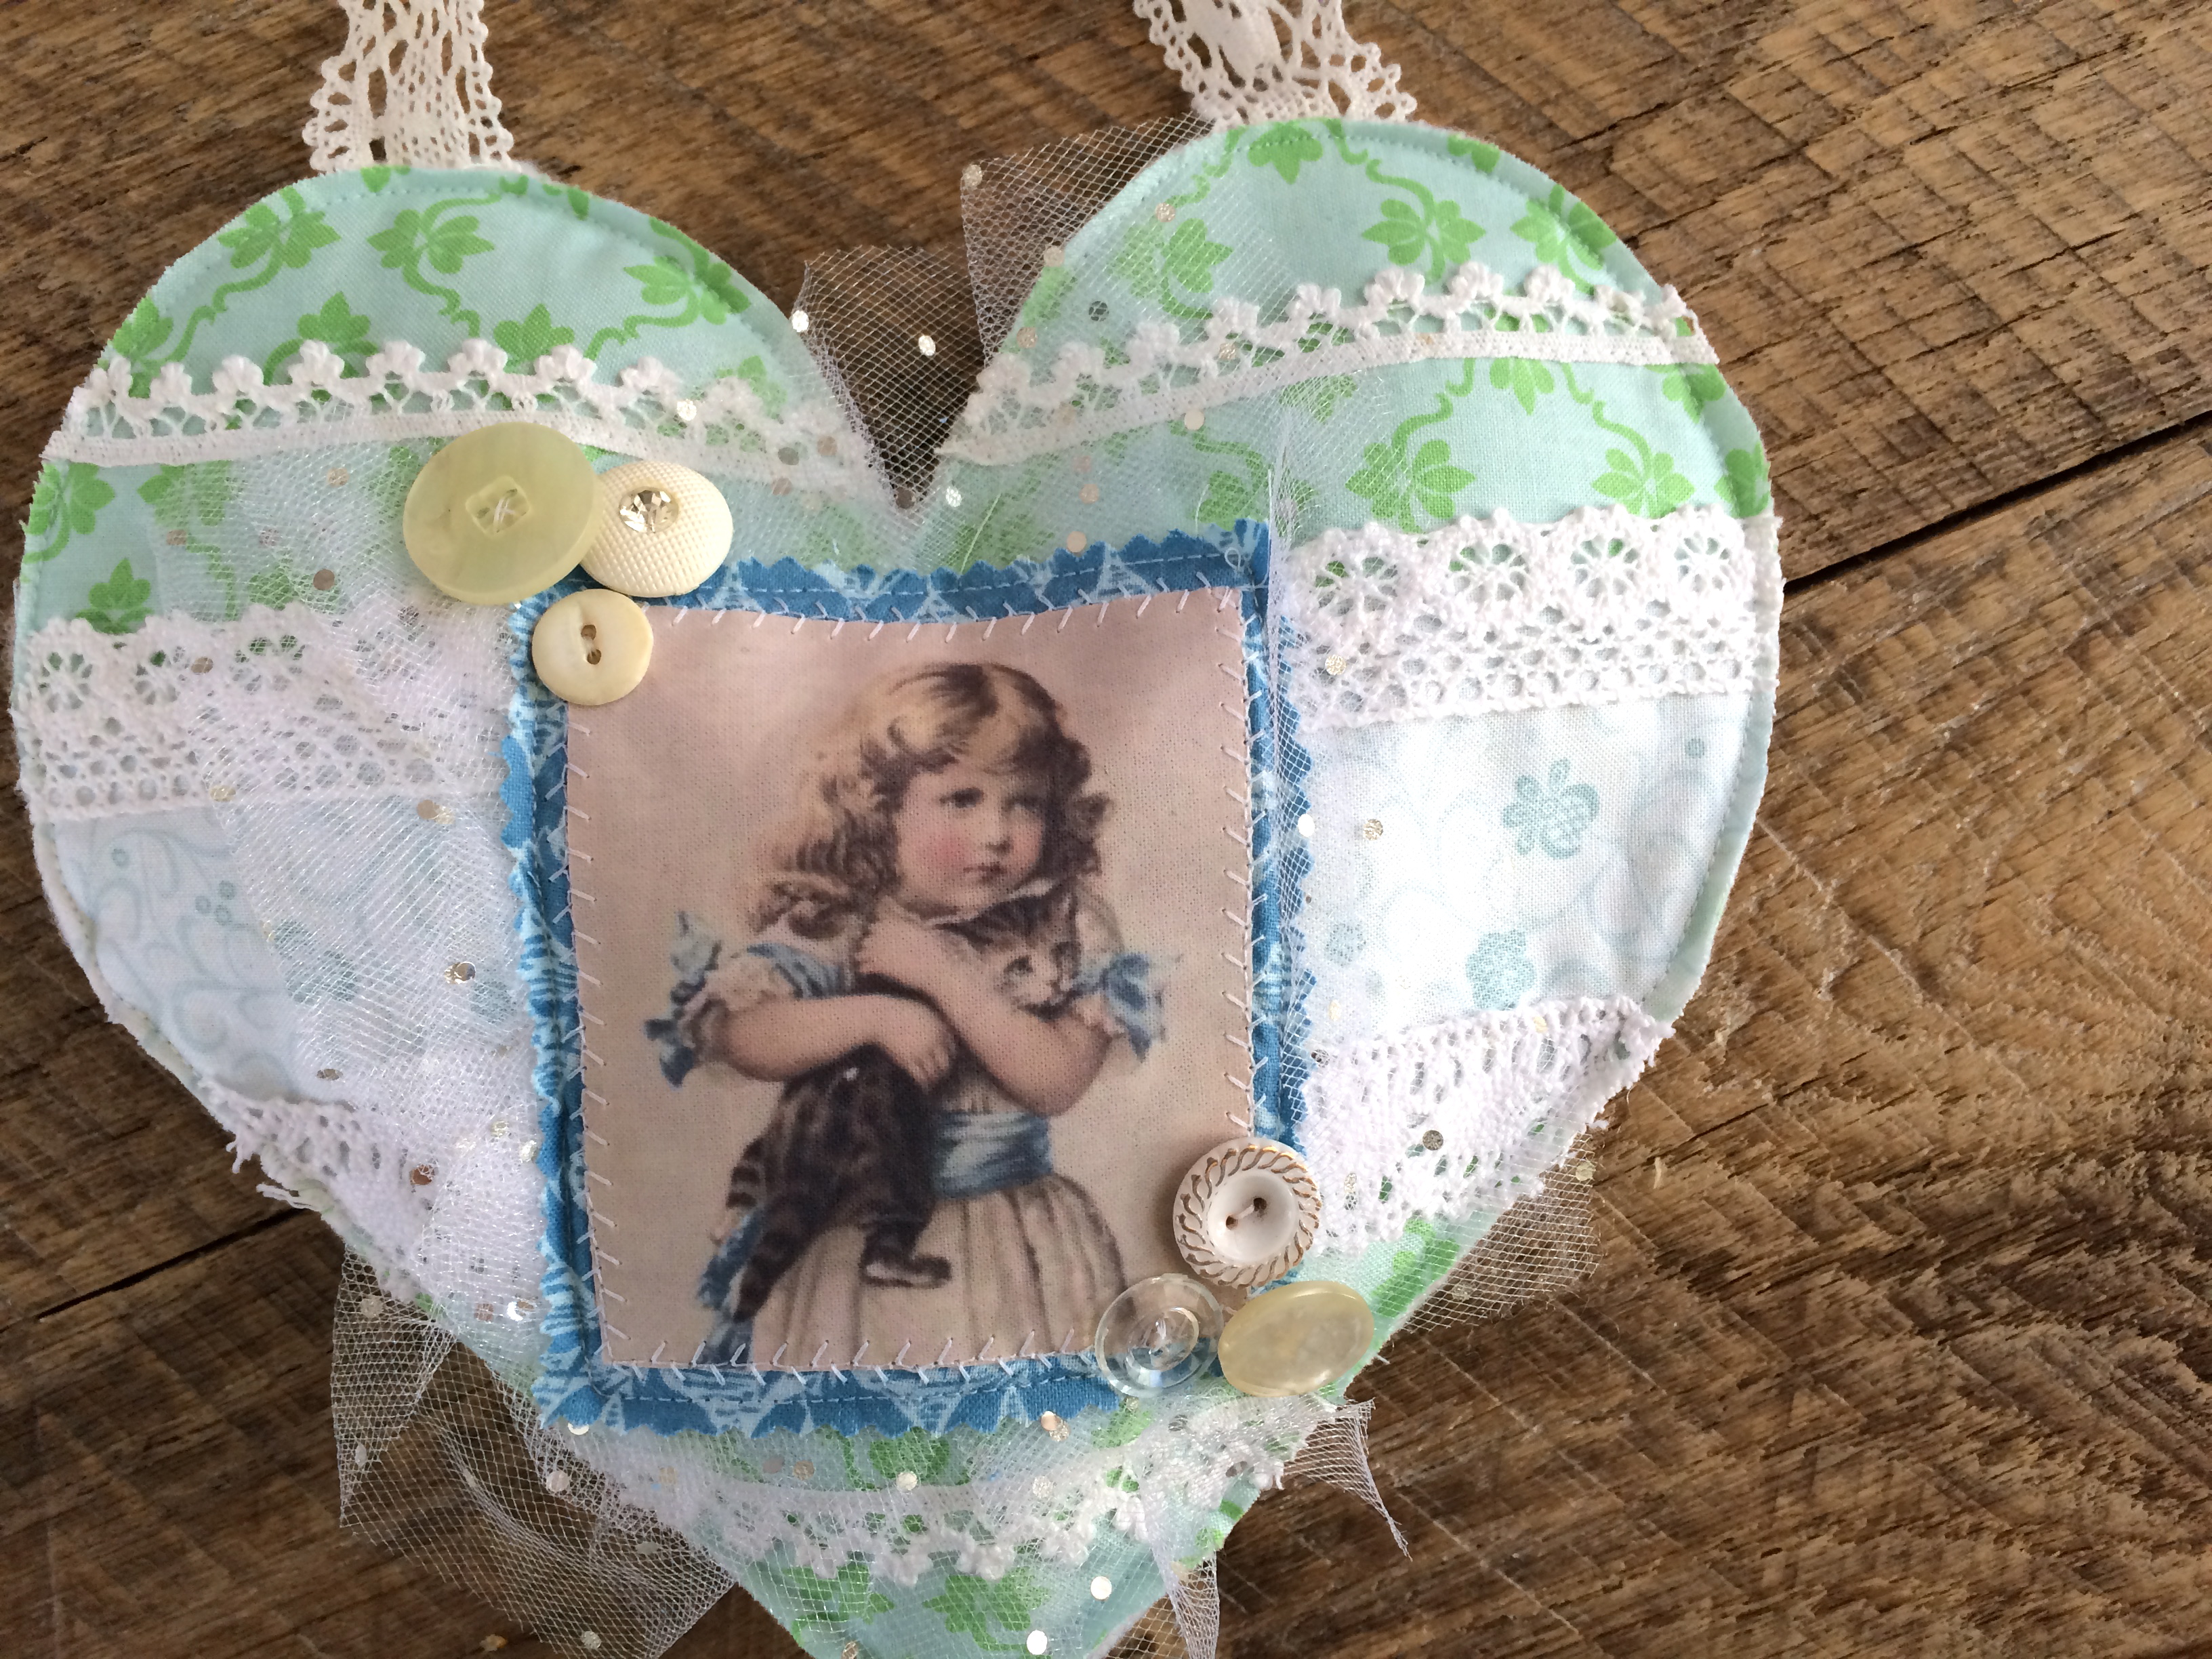
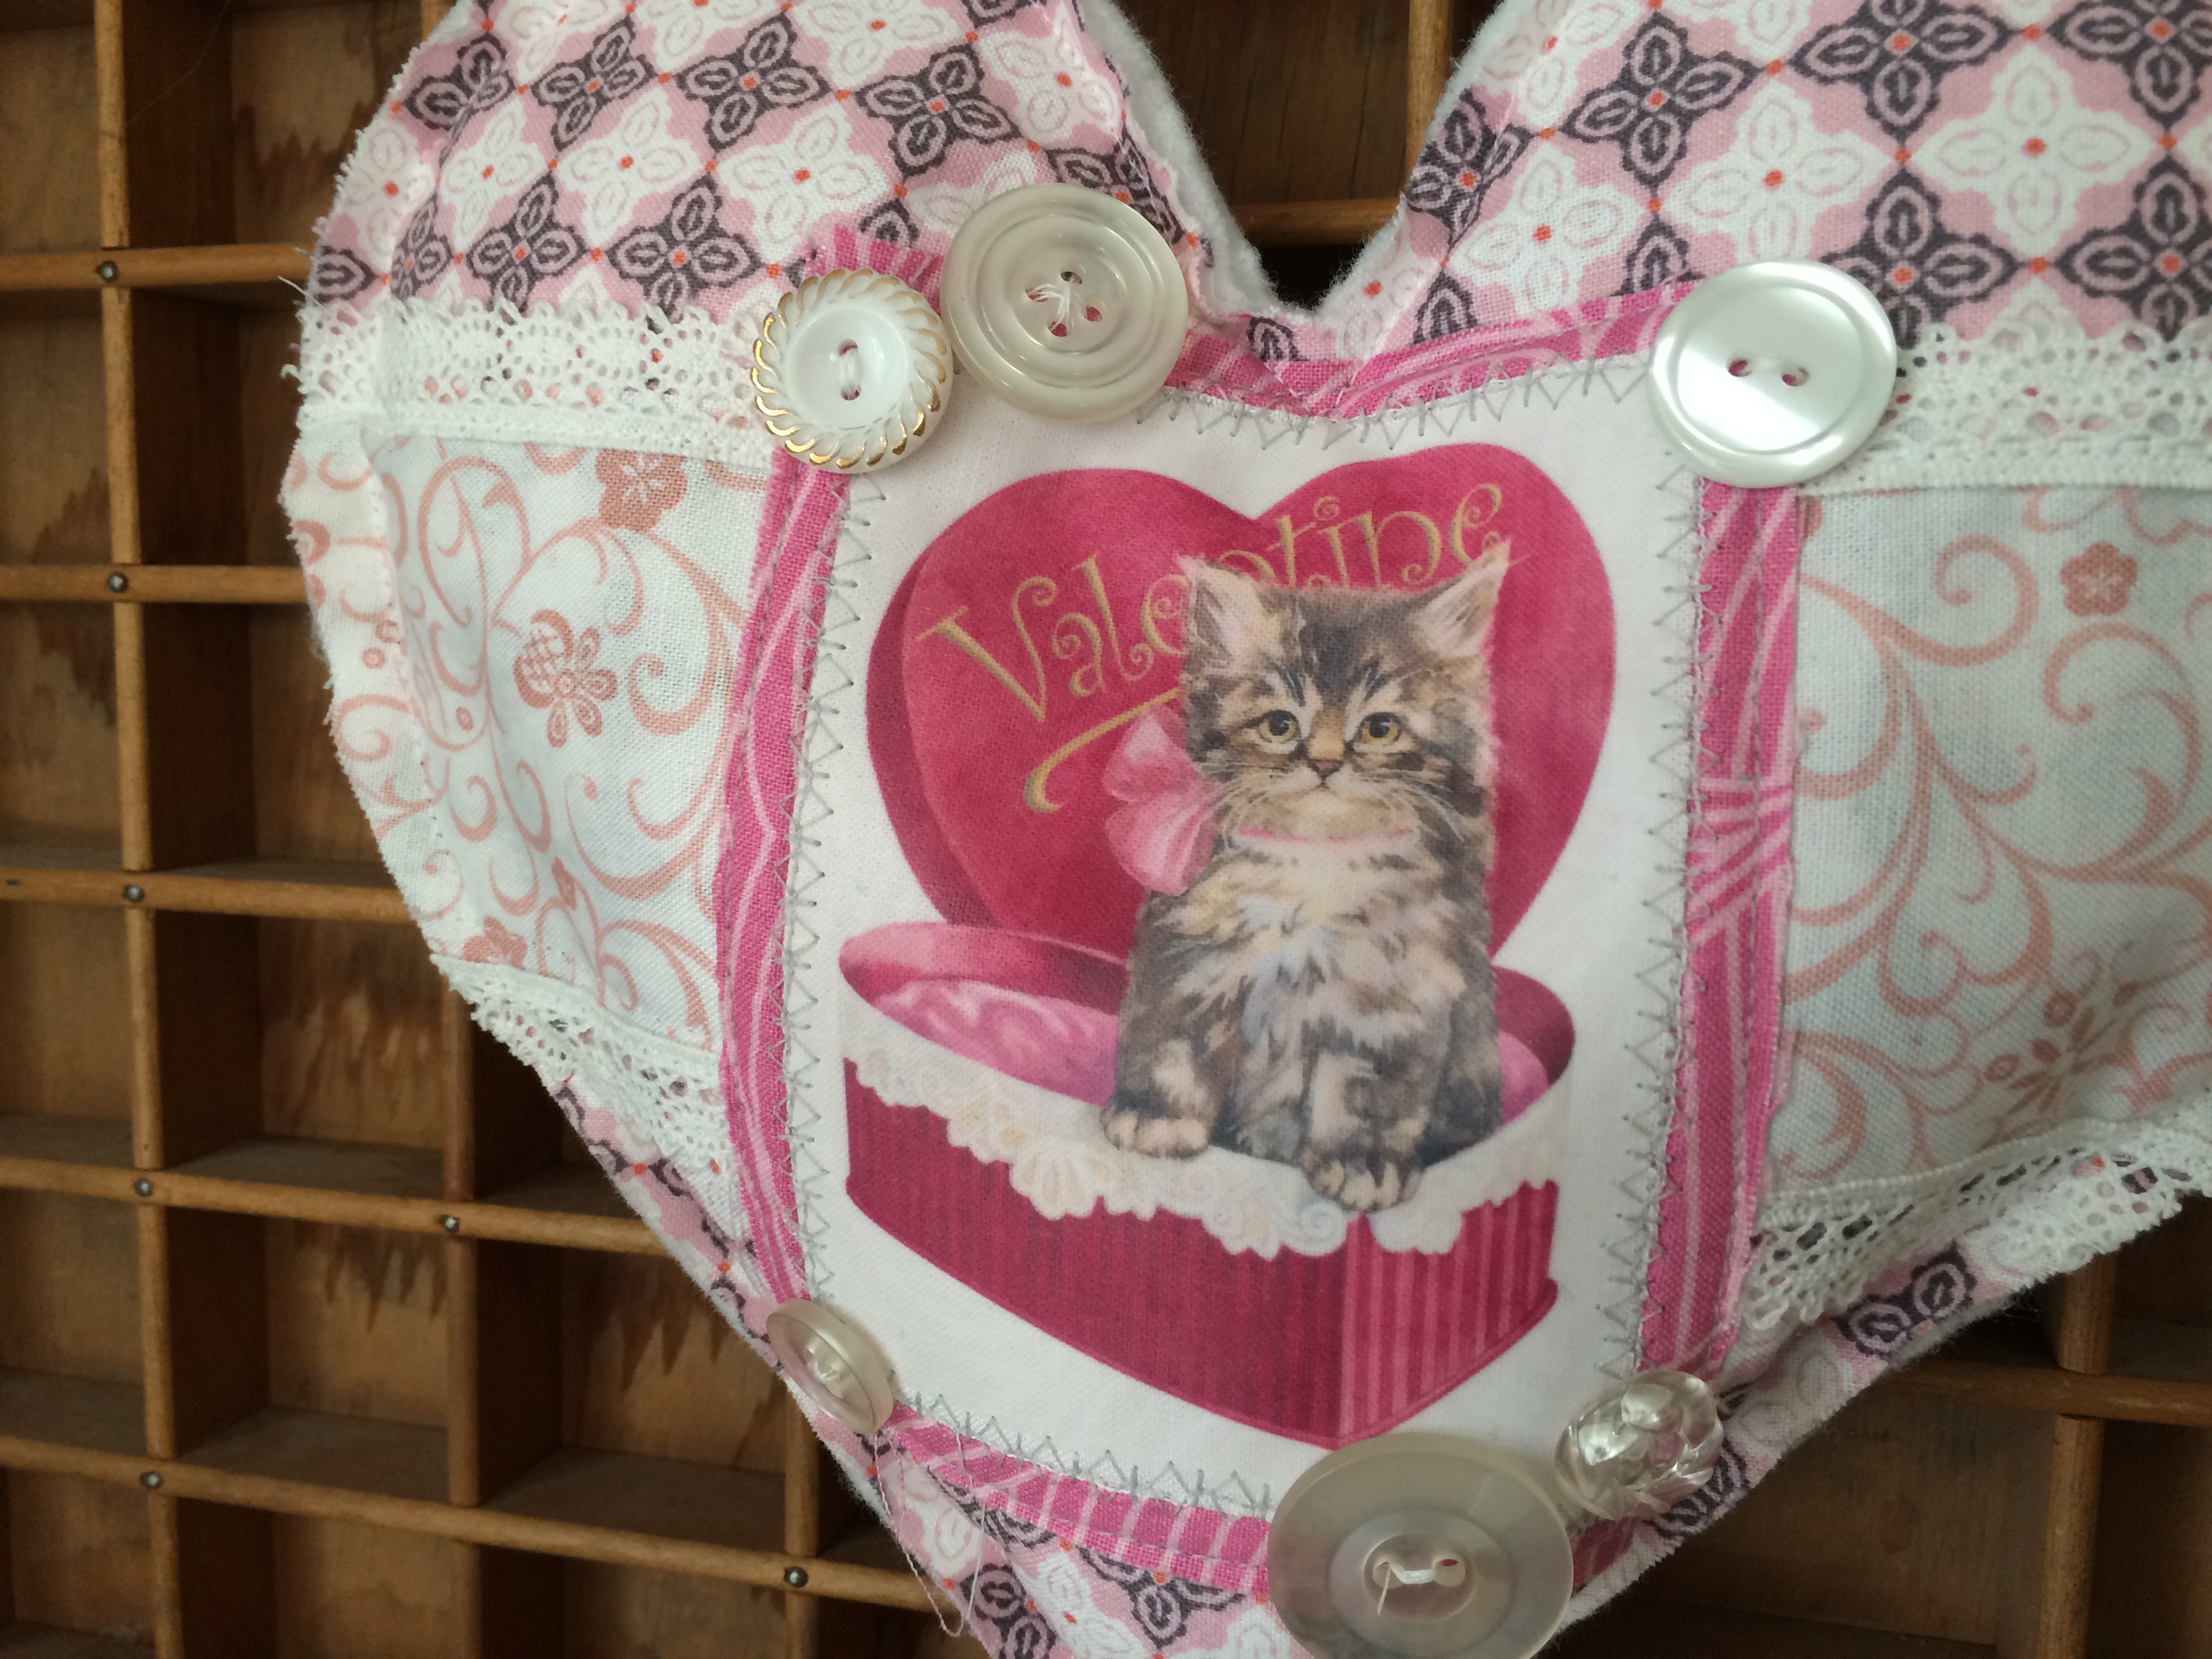
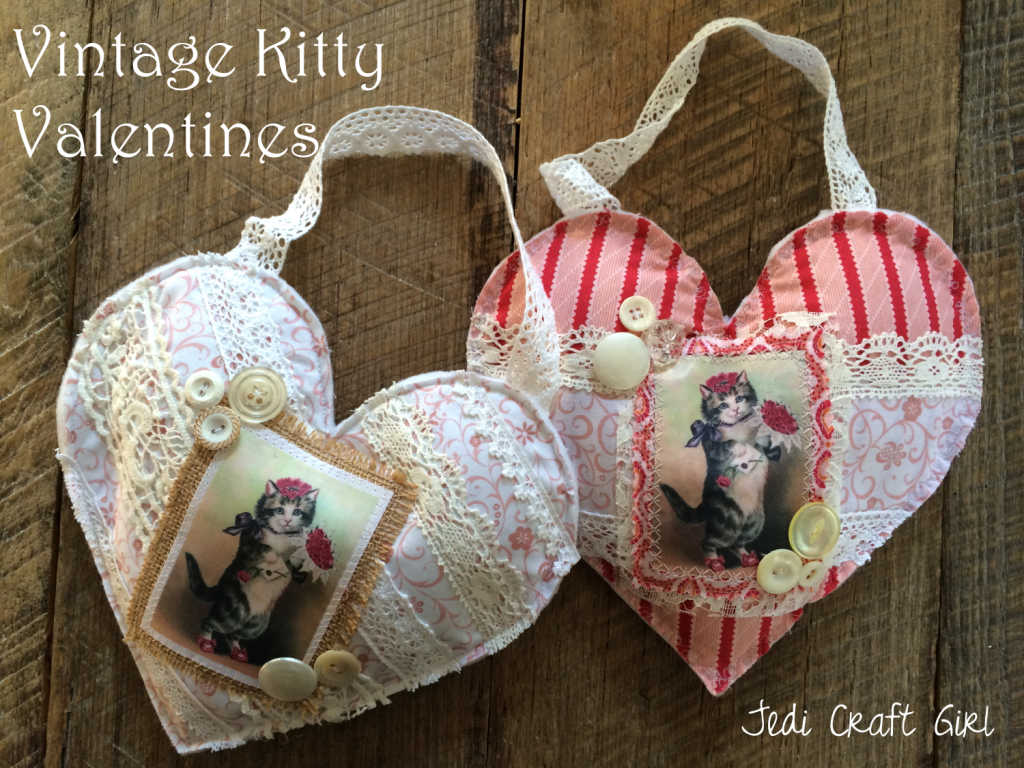
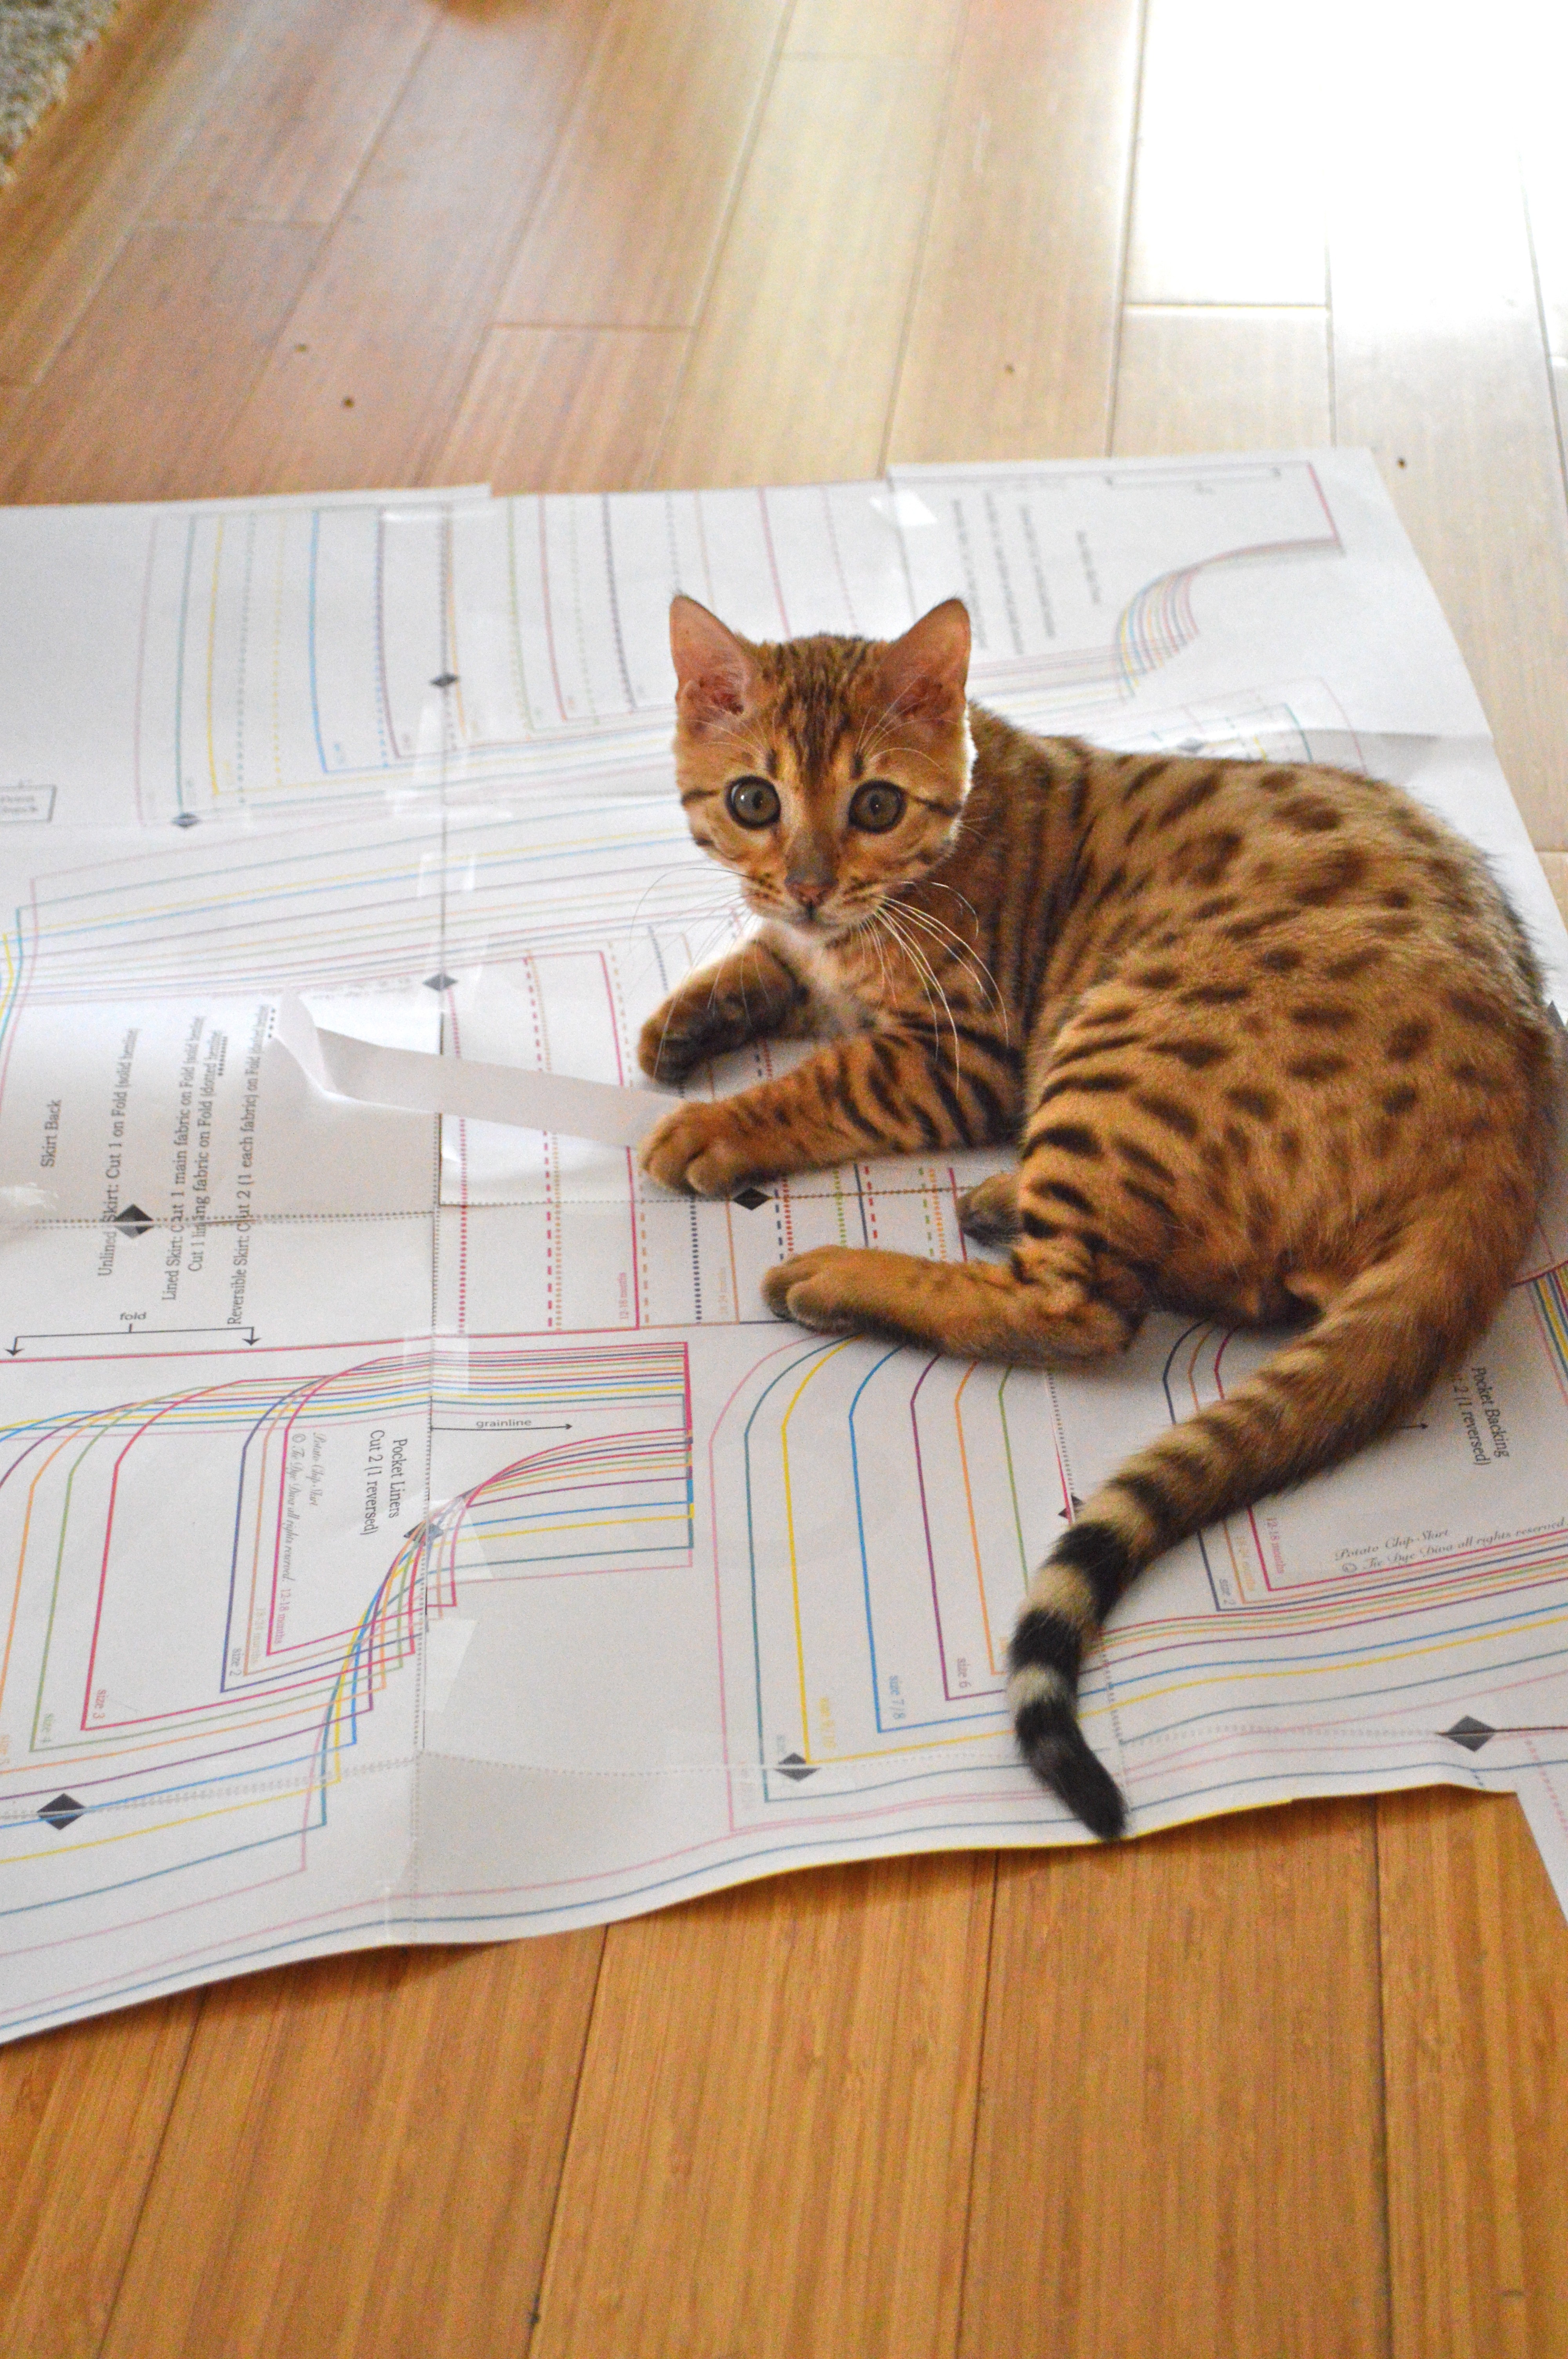
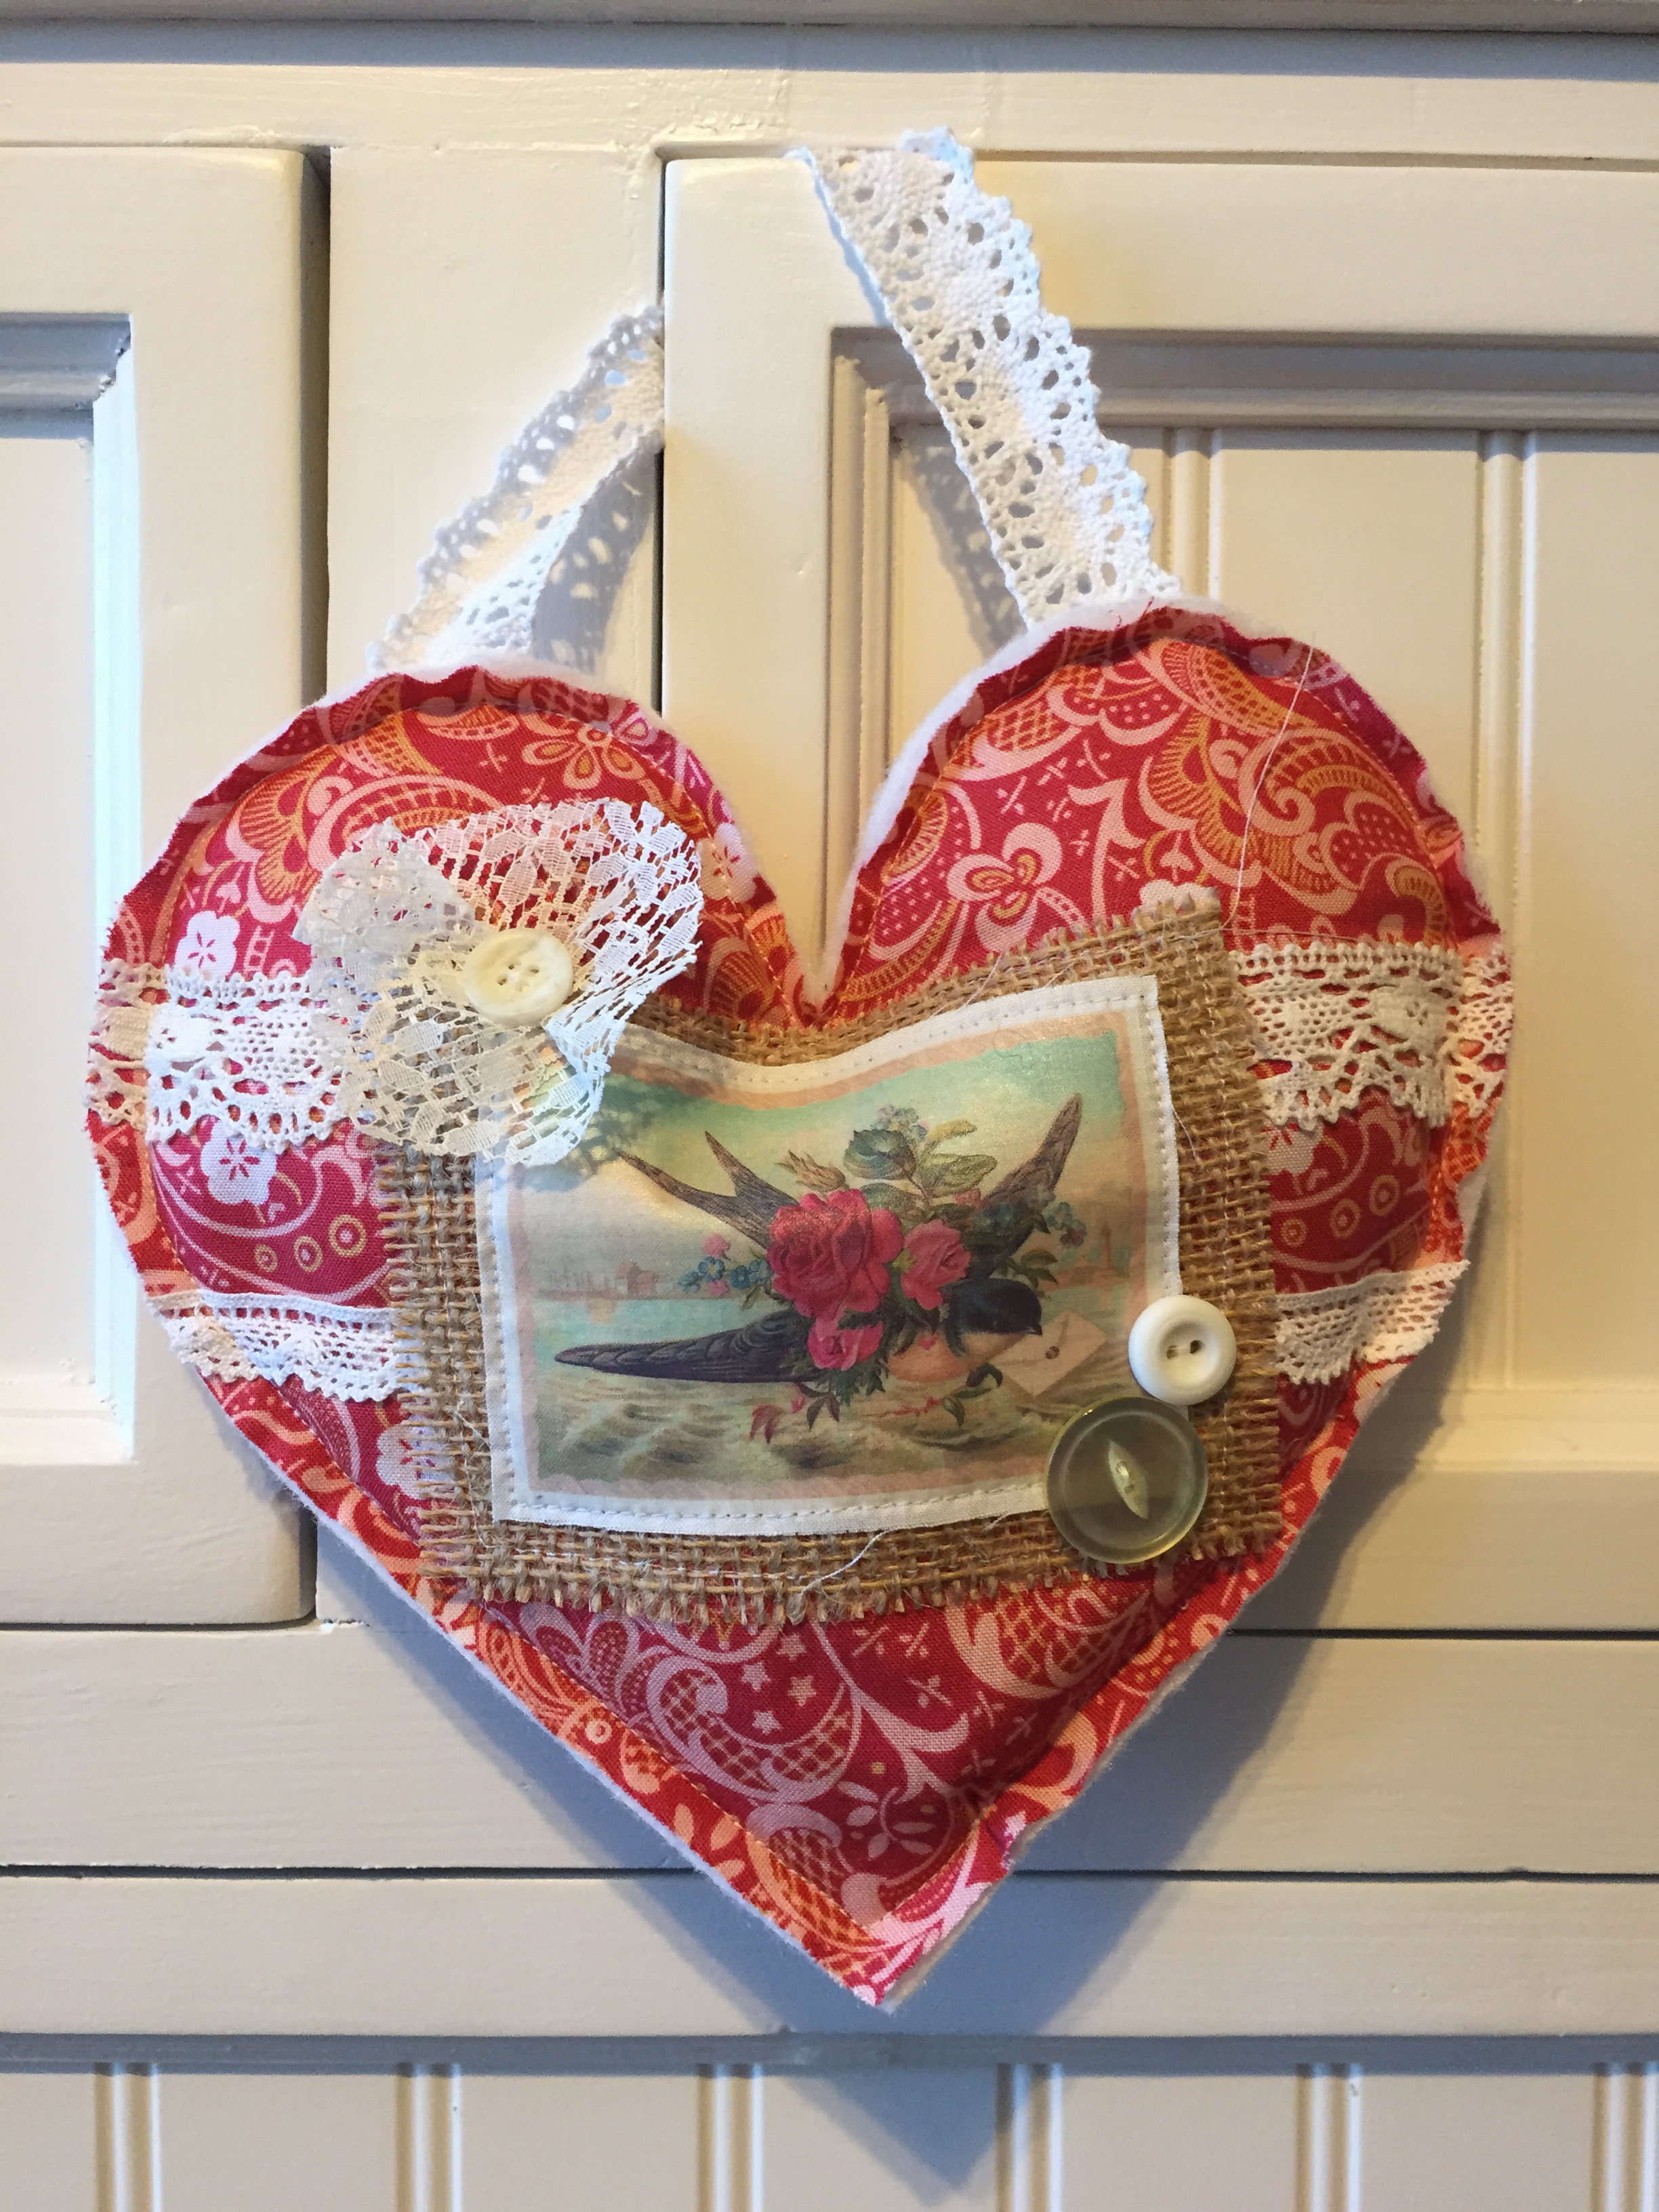
The fabrics are from Blend’s
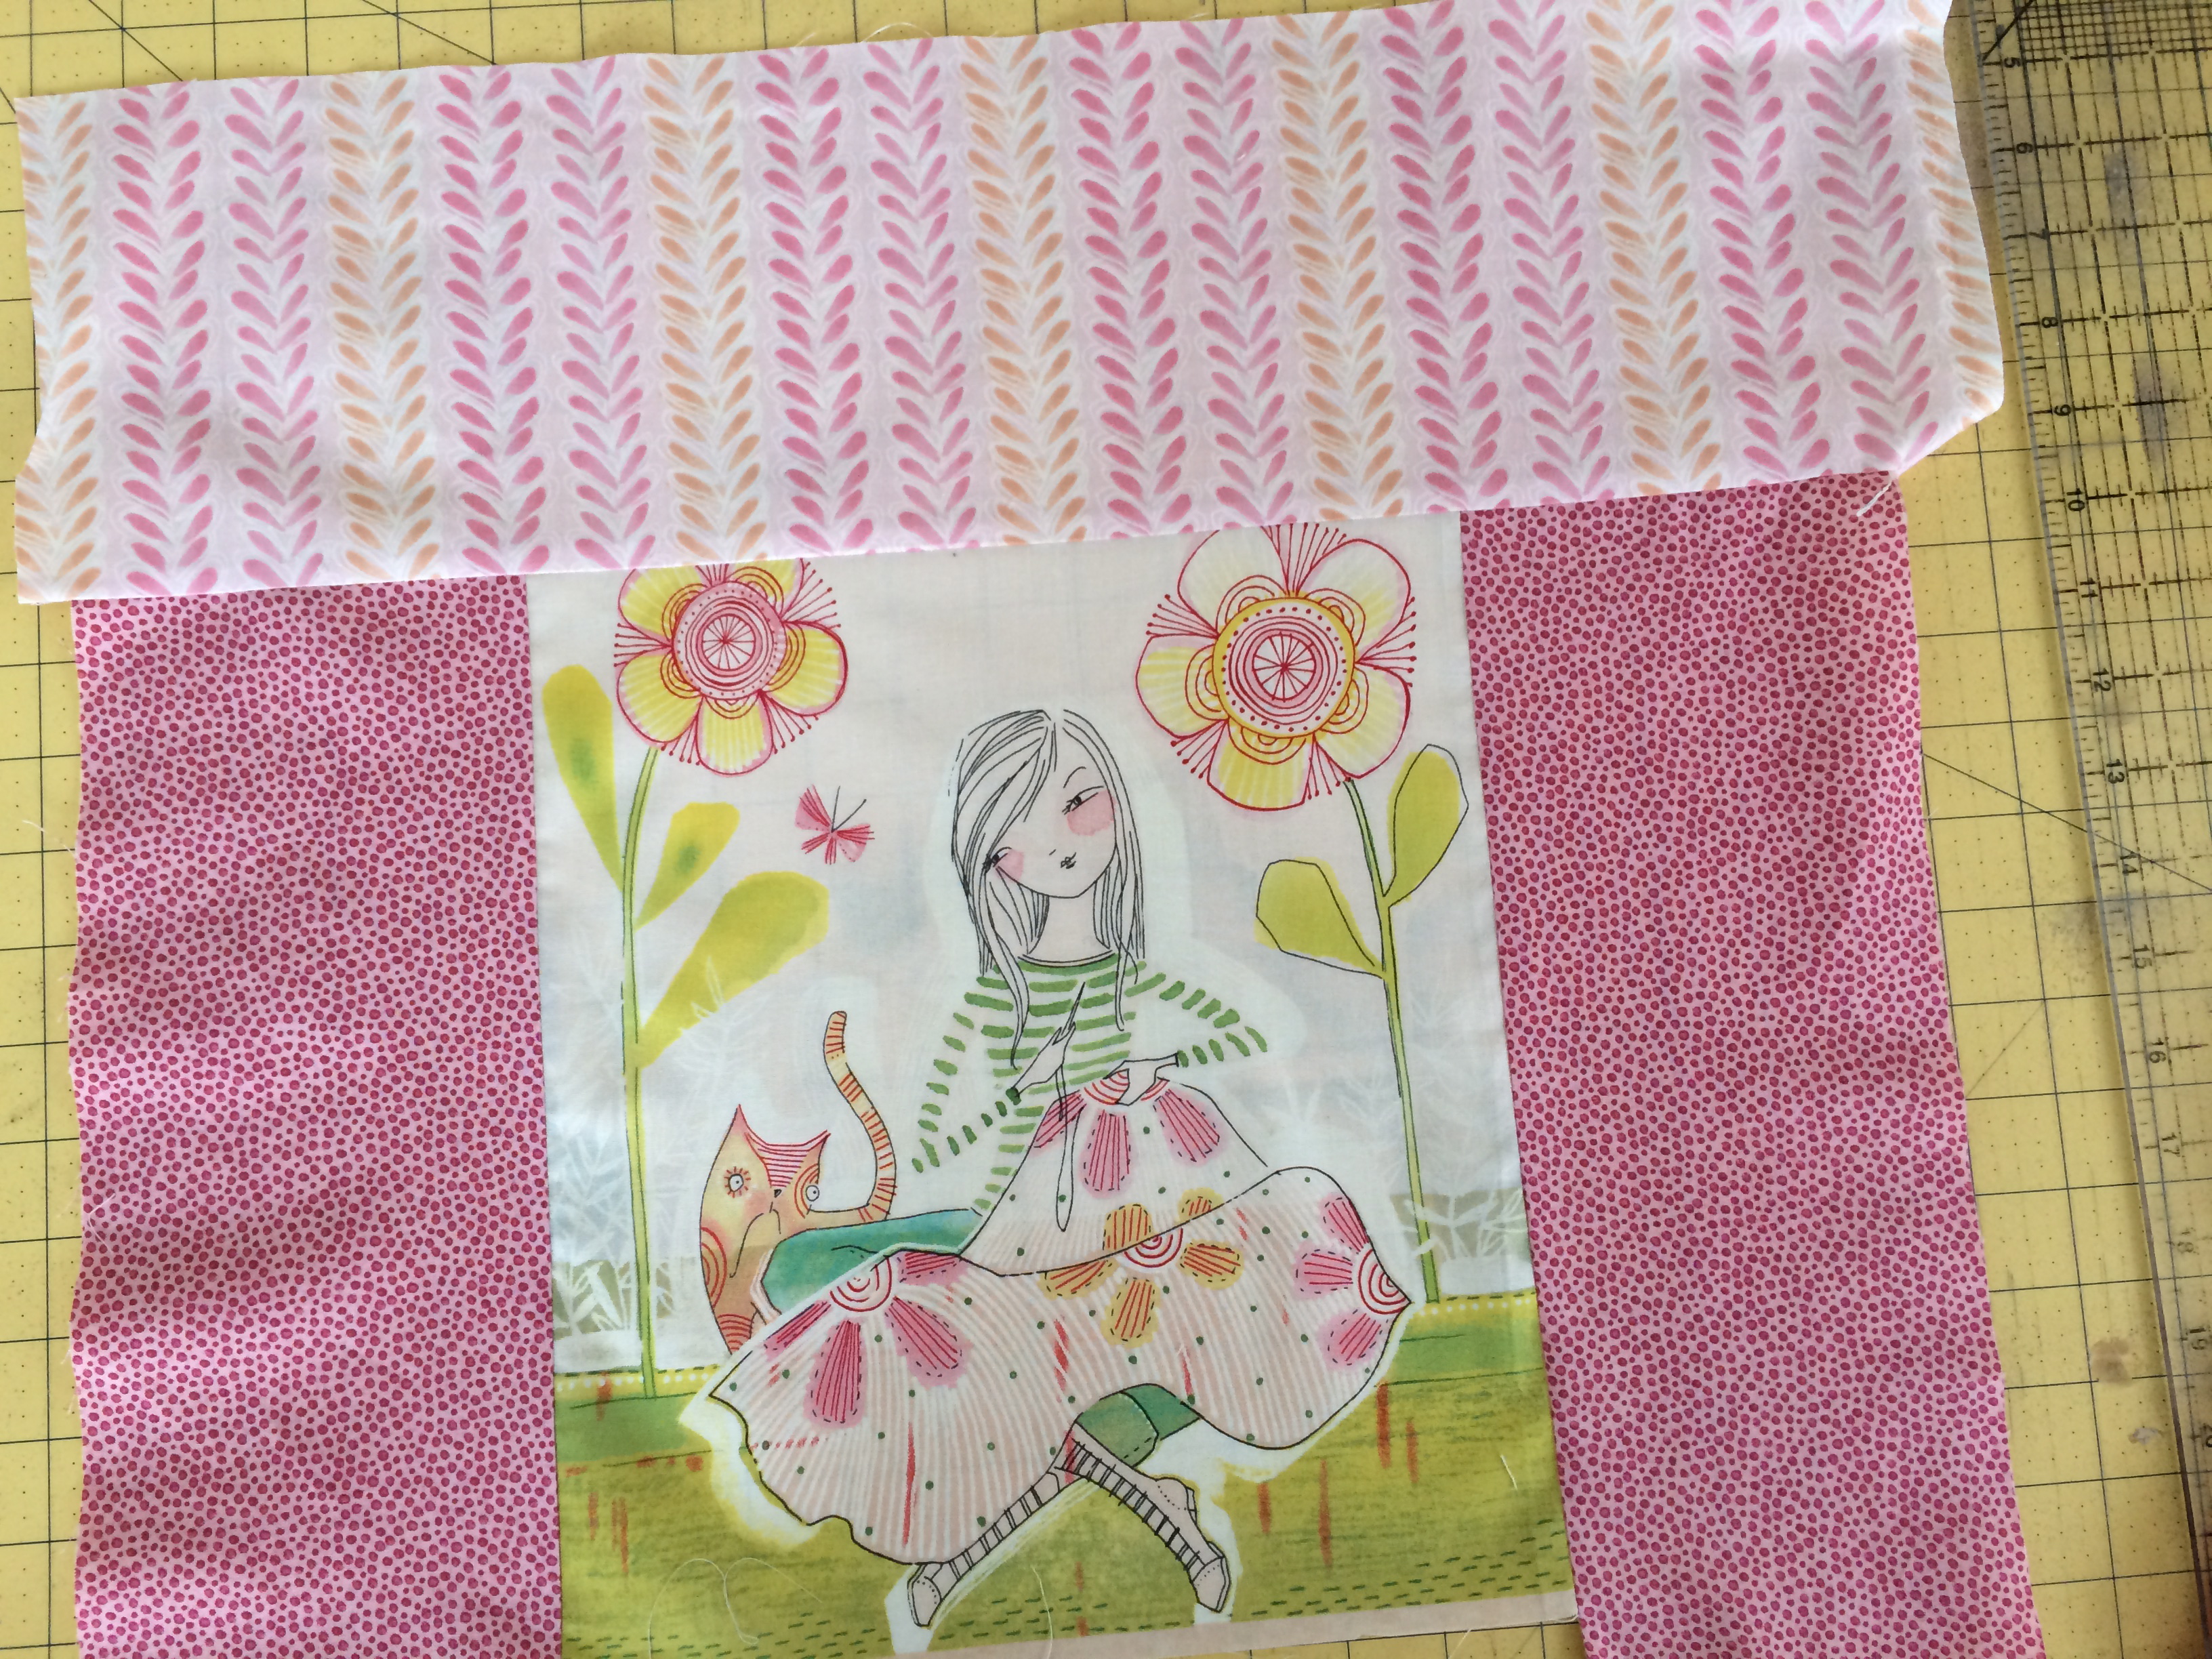
 The Makers line.  The fabrics are a light whimsical feel with several panel prints.  I fell in love with this print of a girl sewing with her kitty!!!  The panel was slightly smaller than the skirt pattern so I added some coordinates: 5″ to each side and 6″ to the top.potato chip skirt 1 10

OK, I really can’t get enough of the girl & the kitty!!  I top stitched a little lace around the pockets.  Sally is so thrilled to have a skirt with pockets!!!!

potato chip skirt 14

I also top stitched along the seams where I pieced the panel so they would stay in place after washing.

potato chip skirt 13

I love the scrappy look of this skirt, with the back having a totally different fabric.  My teenage daughter was begging for one in her size 🙂

potato chip skirt 2

The skirt pattern has 3 options: no lining, lining, and reversible.  I choose to make the reversible version.  I love the weight the skirt has with the lining – it hangs really nice.  The waistband is super simple because it has elastic in the back portion.  I used some Heat n Bond fusible stabilizer in the waistband to give it some strength.

potato chip skirt 3
This skirt can easily be downloaded, printed, cut & sewn in 2 hours.  It’s called the Potato Chip Skirt because you can’t make just one!  That’s true, I already have several more in the works!  Sally is happy because I pay her $1.00 for each modeling session 🙂
potato chip skirt 6


I can’t stop gushing about this pattern.  The length is perfect and the fit is perfect.  Sally is 7 years old, wears a size 10 and I cut out the size 9/10 skirt.  It’s PERFECT!!!!potato chip skirt 8

Happy Valentine’s Day

I thought I would share my favorite Vintage Valentines and wish you all a a very Happy Valentine’s Day – I love that it’s on a Saturday this year!I think this heart is my favorite – made from Blend’s Clementine line – and it’s not even in traditional valentine colors.  I have it hanging in my living room.

vintage valentines 3

This heart is made with Blend’s Modern Lace.  I do recognize that not everyone loves cats as much as me, so I made a few versions with vintage love birds.
vintage valentines 5

vintage valentines 6


This one is also made with the Modern Lace line – which I LOVE!vintage valentines 7

This print is also from Modern Lace.

IMG_3445

I love this one made with the spoon print from the Clementine line.
vintage valentines


My daughter and I made over 30 of these hearts!IMG_2890


A little peek into some Valentine decor in my home 🙂

IMG_3640

vintage valentines 2

vintage valentines 4


Vintage Kitty Valentine


valentine kitty

I’m excited to be sharing my tutorial for these darling Vintage Valentines over on the Therm O Web Blog today!  They are super fun to make and sew up quick!  In fact, my 6 year old daughter even made one all by herself!  All the wonderful fabrics are from Blend’s fabric lines: Equniox, Modern Lace, and Turkish Delight.

I choose some vintage cat images off the internet and printed them onto the EZ Print Transfer Sheets.  You could print any image you want.  The image is then ironed on to white fabric.vintage valentine cat 5

Of course I had to include my kitty in this kitty project!  Mufasa had fun playing in the lace, then he had a nap in the lace!
vintage valentine cat 12
vintage valentine cat 22

Sally loves to sew!!

vintage valentine cat 20

I made this one for Ella to match her room with blues and greens.

vintage valentine cat 19

This one is Sally’s – she choose the fabrics and the buttons and sewed the buttons on herself.

vintage valentine cat 39

I like this one too – it has diagonal rows of lace for the background.  They are so much fun to make and they make great gifts because you can really personalize them!  Now, get sewing 🙂

vintage valentine cat 36

valentine kitty