Ruby Slippers Beaded Key Chains

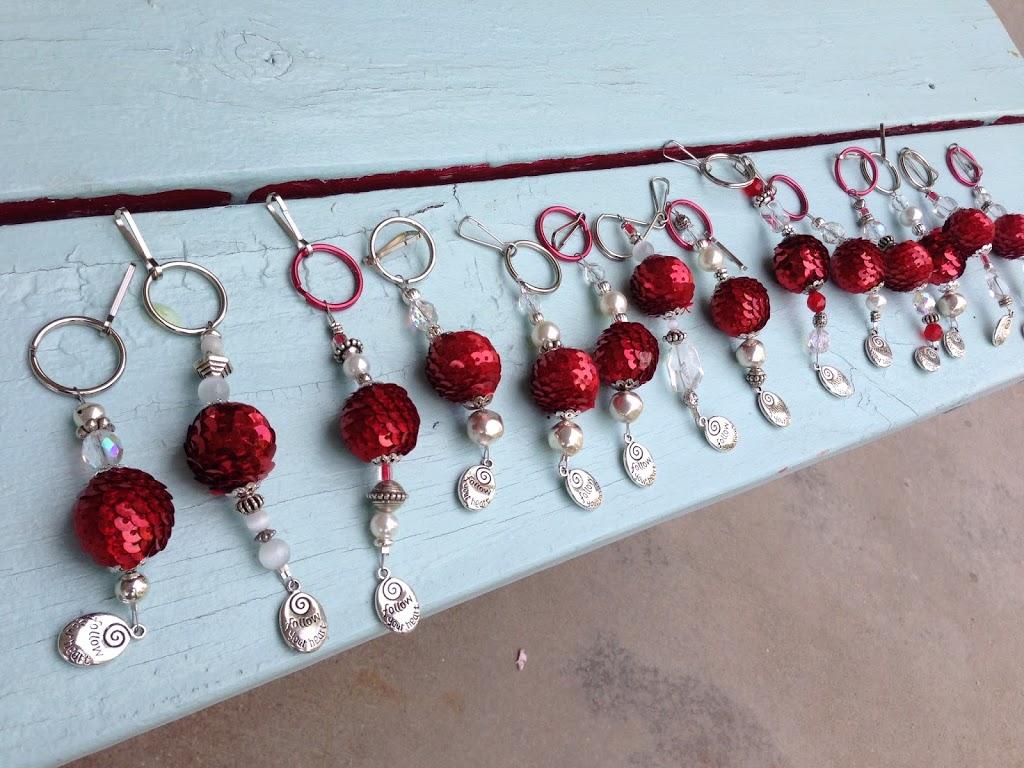
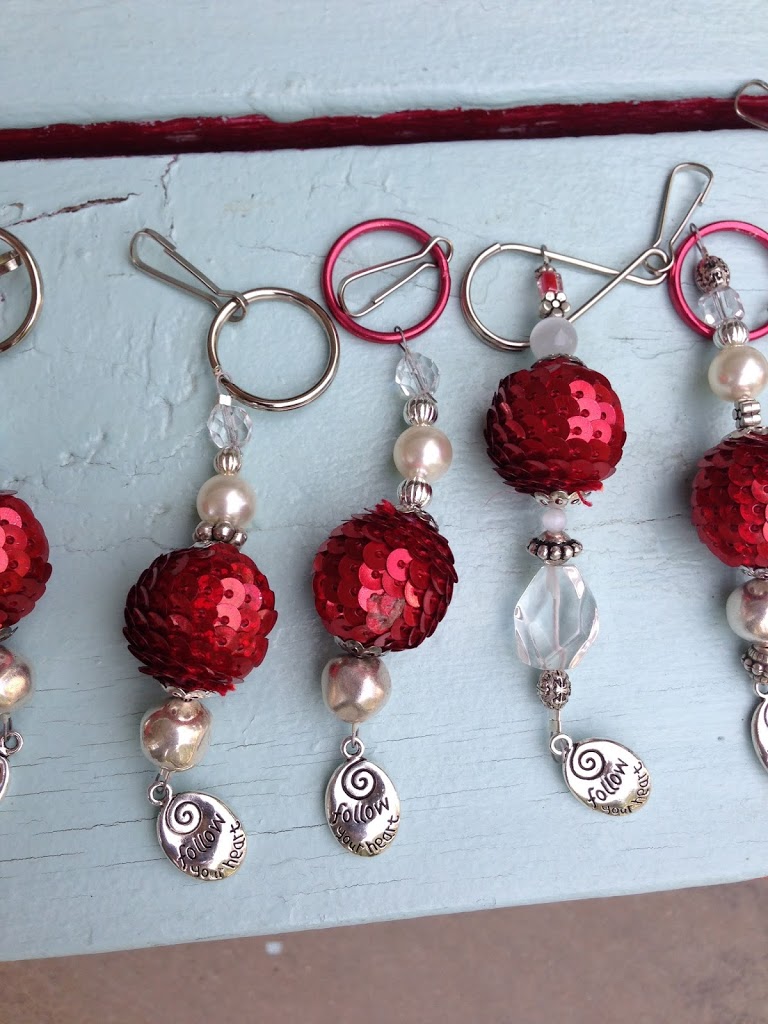
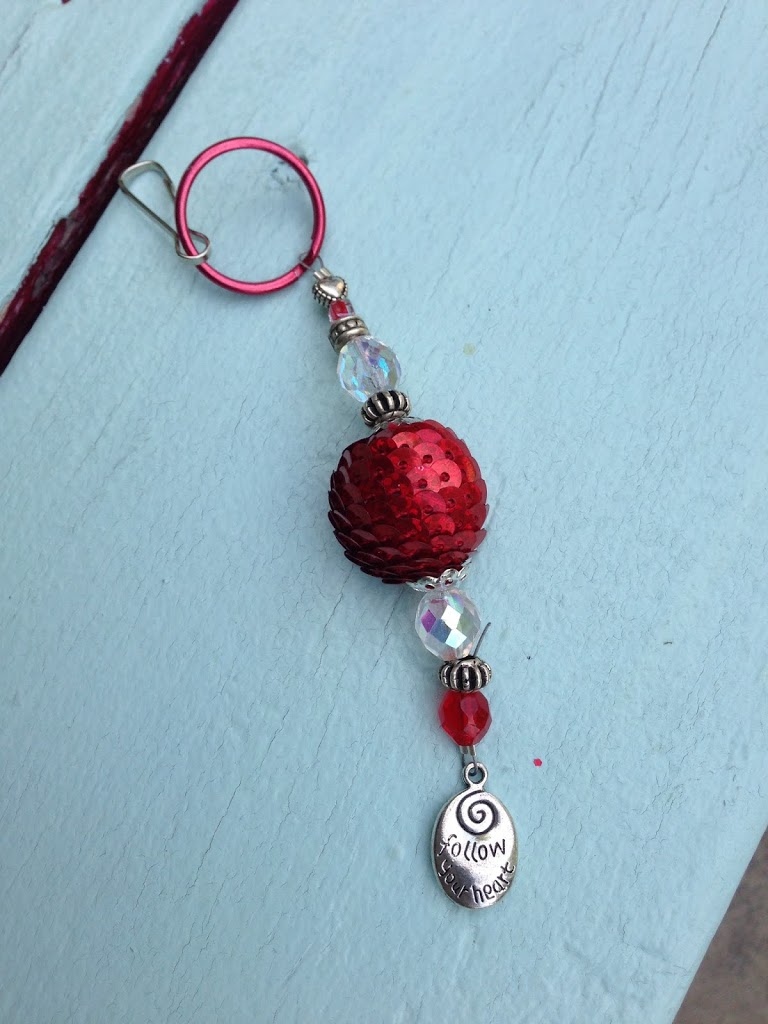
 Today’s Girl’s Camp Handout are these cute beaded “Ruby Slippers” inspired keychains.  I bought these red sequins ball beads in the fabric district in LA.  I wasn’t sure what to do with them.  So, I got out all my beads and we made these!

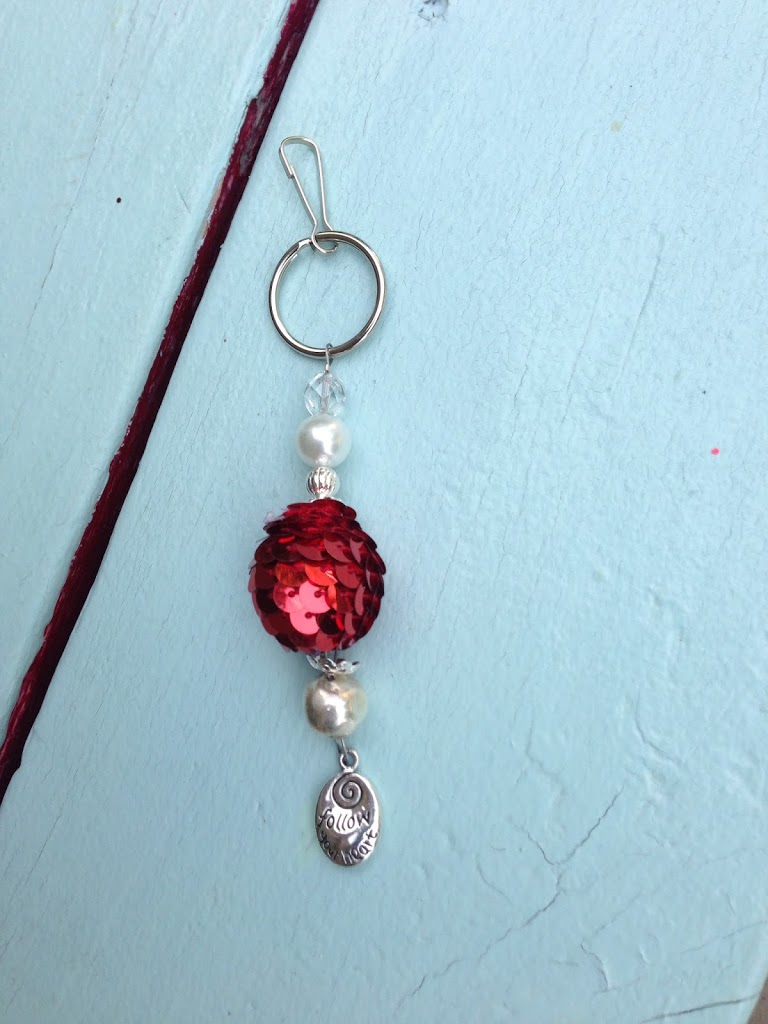
 The charm on the bottoms says “Follow Your Heart” which is exactly what Dorothy did as she followed the Yellow Brick Road!  (I found the charms at JoAnns Fabrics)

I had some little helpers too! 

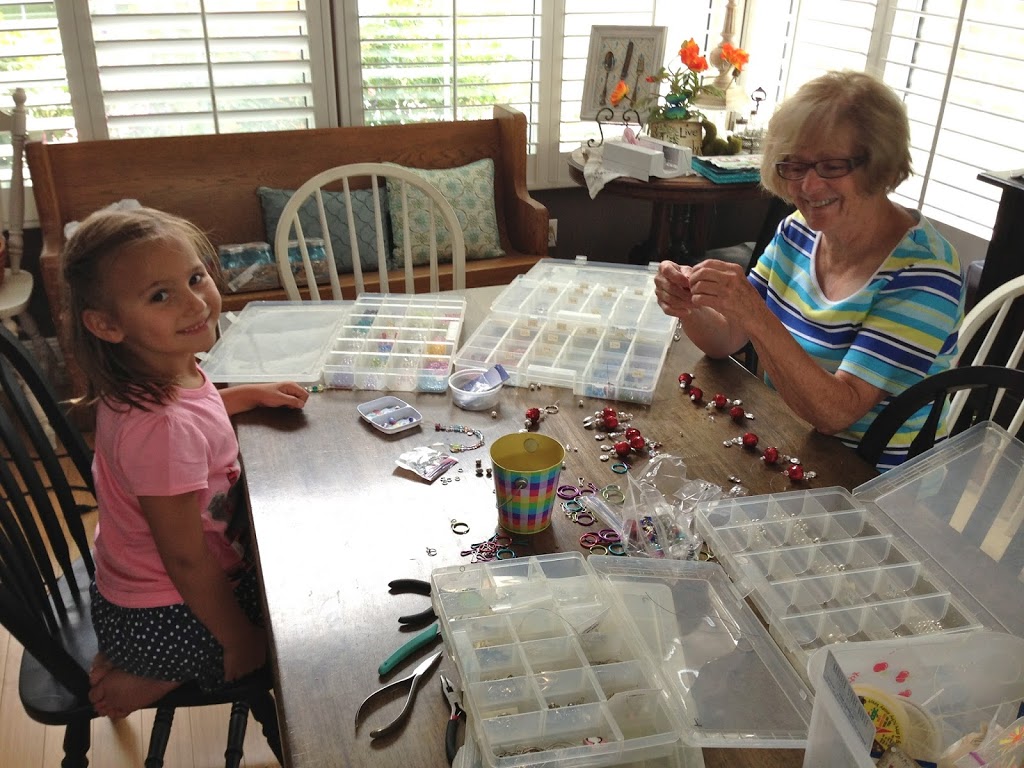
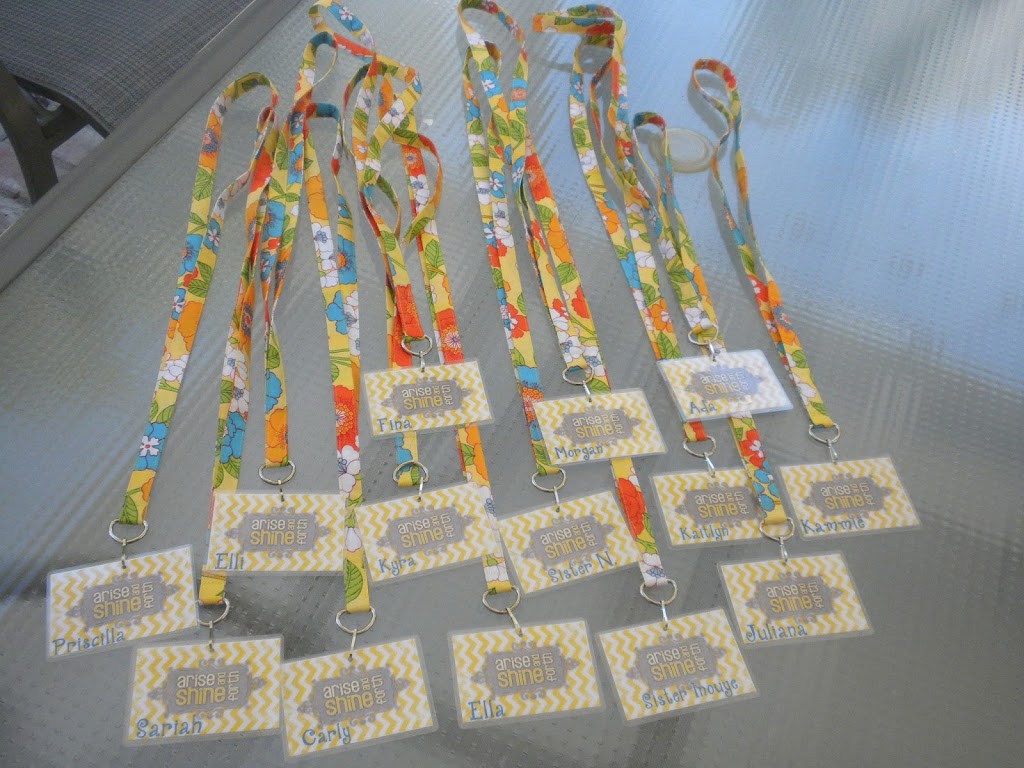
 We made 15 of these – each one is different!

Amanda

Red Glitter Pencils

 Since our theme for Girl’s Camp is Ruby Slippers, I wanted to give the girls a new red scripture marking pencil.  The pencils needed a little pizazz 🙂 I found this red glitter twill tape at JoAnn’s. (I wanted to use Washi tape, but it didn’t look good on the red pencil.  You could also use any kind of ribbon.) I hot glued it to the pencil then trimmed it to look like a little flag.  This would be a cute idea for decorating pencils for a party favor or a back to school gift for a teacher.

Amanda

Wizard of Oz Camp Lanyards

I am attending our church’s Girl’s Camp this week.  Every day I will post the craft or handout I am giving the girls.  The theme for the entire camp is Stand Out.  Each year or level choose a type of shoe to represent their group.  We are the Ruby Slippers!
We are doing an 8 mile hike today.  I sewed all the girls lanyards (tutorial) out of blue gingham.  As we go through the hike (following the yellow brick road), there will be stops along the way and they will receive pins to put on their lanyard.
The first person Dorothy met on her journey was the Scarecrow.  The scarecrow wanted a brain, so we are talking about knowledge.  I am basing our discussion off this talk by Anne Dibb, I know it, I live it, I love it.  After our discussion, each girl will get an owl pin – representing knowledge.
The next person Dorothy meets is the Tin Man. The Tin Man wants a heart so we are talking about love.   Our discussion is based on this talk by Dieter Uchtdorf.  “When our hearts are filled with the love of God, we become “kind one to another, tenderhearted, forgiving.”

I made these little fabric/felt heart pins to go on the lanyards.

The third person Dorothy meets is the lion who needs courage.  We are using the talk, May You Have Courage by Thomas S. Monson. “My earnest prayer is that you will have the courage required to refrain from judging others, the courage to be chaste and virtuous, and the courage to stand firm for truth and righteousness.”  

I made these little badges of courage to pin on the lanyards.  

While Dorothy is on her journey with her 3 new friends, they come across the “Field of Poppies” which poison can cause fatal sleep.  These flowers represent the distractions of the world that will keep us from reaching our destination.

 I glued a pin to the back of these brightly colored flowers.

Amanda

Tie-Dye 101


We are a little Tie-Dye crazy in my family.  Growing up in the bay area, I guess Tie-Dye is in our blood!  Every summer we get together for weeks of swimming, eating, hanging out and Tie-Dye.  Every year gets more and more intense!  So, here’s and invitation to you: put on some hippie music, grab some white T-shirts and fabric Dye and join us in the fun. (the fun turns to crazy really fast!)

Fabrics:
100% cotton shirts and clothing work the best.
95% cotton 5% spandex – these work good as well
50% cotton 50% polyester – Stay away from this combination – colors will be muted, there will be a light fuzz over the dye and they just don’t look good.
The key is to have a good quality cotton.

Prep your clothing:
If your clothes have never been laundered, run them through a light wash or a rinse cycle.  If you have shirts that you want to pre shrink, rinse them and then put them in the dryer, then rinse them again.

Your clothes need to be damp (not wet) to tie…despite what the directions say.
Giant batch of damp shirts!!

It is 106 degrees as we are doing this project – so we are in our swim suits.  We alternated swimming and tying for about 8 hours – almost 200 shirts.

Soda Ash:
You can dye your shirts without soda ash – but we all agree that this helps keep the colors vibrant.  The package instructions say to soak your shirts in the soda ash for 20 minutes.  We have tried this method and found the shirts were too wet and very drippy which makes the colors run.

We developed a new method which will let you maximize your soda ash.  Mix the soda ash according to the instructions (1 package makes 1 gallon).  Place in spray bottles.  We sprayed our shirts with the soda ash before we tied them.  I like this the best.

Prepare your work station:
You need to have a flat work surface to tie your shirts on.  We had 4 adults working at once so we needed a few tables.  Here is our set up:

Spray both sides of your shirt with the soda ash mixture.

It’s best to wear tie-dye and listen to hippie music while doing this!!!

Tying:
This is the fun creative part.  There are so many ways to tie your shirt: classic spiral, double spiral, triple spiral, deep V, stripes, scrunch, etc.  (at the bottom of this post are links different methods of tying.)  You need rubber bands, string, and maybe a needle and thread.  I like to put my tied shirt into a baggie and label it so when it comes to dying I know what I am doing.  This shirt was a crazy tie design:


The Dye:


We used Tulip brand Tie-Dye.  They offer a wide range of colors, it’s not too expensive, and it’s sold at all craft stores and Wal Mart.  We have a lot of dye!

The caps are colored.  Once the caps are removed and the dye is mixed, it’s impossible to tell which color is which.  Using a Sharpie, write the color of the dye on the top of the bottle – this makes it SUPER EASY!

Mix the Dye:
The dye comes in the bottles and you fill the bottle up with water and shake.  The dye is best used within 30 minutes of mixing.  After that the colors can loose intensity.

Dying:
Wear gloves!!!
Work fast but carefully
Consider your color choices before you mix the dye – it saves time – the dye is the most potent during the first 30 minutes so DON‘T mix all the die at once
Set up a rack on top of a bucket or bowl.  The dye will run off an needs somewhere to drip.
Wear old clothes or tie-dye – it can be messy is messy.

Once the dying is done, wrap the shirt in plastic wrap or a baggie. The instructions say to let sit 6-8 hours.  I wait at least 24 hours.  It’s really hard to wait to see how they turn out!

Final Thoughts:
After you have waited about 24 hours, unwrap your shirt and cut off the string or rubber bands.  I like to hang my shirt up and let it dry completely.  Then rinse each shirt in the faucet or the hose and squeeze as much dye out as you can.  Then, put them through the rinse cycle in your washer and dry them.  I rinse like colors together.  Now you are ready to wear your awesome Tie-Dye Shirt!!!

Amanda

Monsters University {MU} Party

We have been waiting for the Monsters University movie to come out since we heard about it last year. Monsters Inc. is one of our favorite movies of all time.  To get everyone excited, we hosted a MU party for all our friend this week.  It was super fun!
First I emailed out “Enrollment Applications” to everyone.  Each “monster” was to fill out an application and submit it to my by a certain date.  There is actually a Monsters University website that totally looks like a real college website!

 Once I received all the applications, I emailed an “Acceptance” letter with all the details:  when Freshman orientation was, a schedule, campus map, and list of items to bring.

 I gathered a team of older girls together to be my:

We even made shirts

We transformed our yard into the MU college campus.  The front yard was set up with a table, banners, balloons, signs for registration.  I had two girls out front “checking” people in.  I totally spaced taking pictures of this.  We had almost 30 kids!  The night before we stayed up till midnight creating a monster for everyone and creating a laminated MU Student ID card.  Disney has a website called Create-A-Monster.  It is so much fun.  You can pick your monster body, skin, fur, hair, eyes, horns, etc.  Then you type in your first name and last initial and it generates a monster last name.  We did this for all 30 kids.

This is me, Amanda Needleman.  Now how do those Disney people know I sew!!!

On the website you can also generate an ID card like this one:
The faculty had these ones:
We laminated each card and placed it in an ID card holder.
The back of the ID looks like this.  I made a fake barcode with a barcode font.  I put 8 circles and when they went to each station they got a little Monster sticker to to put in the circle.  
When the children were all checked in they pinned on their name tag.  They were all totally into this!!
As the children walked along the side of the house to get to the backyard, we made a sign with all the incoming freshman.  I printed out each monster and then after the party, they could take it home (that’s why some are missing.)
We also had a meet the faculty poster and all the faculty members signed it.
We set up the MU campus like this: Cafeteria, Library, Scare Floor, Gym, Student Center,  and Art Club.  This is where you can let your imagination go crazy.  I had so many ideas of what we could do – with this large of a group I had to scale back.
Cafeteria

The cafeteria was fun.  We were just open for snacks.  I made popcorn balls – you can’t tell but they were neon green.   Jell-O brand came out with Monsters University Jell-O & Jell-O molds.  The green was s’lime and the blue was Berry Scary.

 We also had Monsters University fruit snacks.

For the drinks, I got purple and green Hawaiian Punch water bottle mixes and the children could mix their own drinks.
I decorated with a few doors.

 Student Center

 I found this poster at Wal Mart – I love all the monsters!  At the student center the moms hung out and talked.  Towards the end of the party we had a little “School Dance”.  We played scare dance.  It’s like freeze dance, only when you freeze, you have to do a “Scare” pose.

Art Club

 The Art Club was a hit.  I had river rocks, paint & googley eyes.  Yep, we made monster rocks.  They turned out super cute!

The GYM

At the gym we played a version of “Horse” only “Scare”.
The Scare Floor

I think this was the biggest hit!  We turned our shed into the scare floor.  The children sat around and one would go into the shed (which is pretty scary) then come out and try to do their best “scare”.

The Library

 The library was a blanket on the grass.  I bought this cute Monsters University story book at Sam’s Club.  It has about 10 different stories with pictures.  The children sat around while on of our faculty read it to them.  I thought it would be cute to make monster bookmarks – but I ran out of time.

 Most of the children brought plain T-shirts.  During the party I ironed on an MU.  Don’t they all look cute!!  We will all be wearing them to the movies on Friday!!

The hot pink came out cute

I love the green & white stripes too (Target).

It was a really fun party.  Can’t wait to go to the movie now!!!

Amanda

Store-Ad Coupon Pouch {tutorial}

This is my purse.  Cute on the outside…..

 …the inside is a mess!!!  

 It is mostly store-ad coupons like Joann, Michaels, Kohls, Macy’s, etc.  Some of my friends clip the coupons and put them in a little coupon wallet.  For some reason, I like to save the entire ad.  Most of the ads are good for a few weeks and I can’t always remember what is on special.

 Yes, I know I can have all the coupons and ads I ever want on my phone.  Did you know you can use your phone coupons AND your store coupons?  So I will continue to have one foot on the cutting edge of technology and one foot back in ancient history of paper coupons!

For the past several years I have thought everyday, “I should sew something to keep all these papers organized in.”  I woke up this morning and decided today was the day!!  There are a lot of pouch tutorials out there.  Instead of finding one that would work I just created my own.  Here is how you can make one too!!

Materials:
1/3 yard outer fabric
1/3 yard lining fabric
44″ Therm O Web Heat n Bond fusible interfacing – light weight
hair elastic
button
trim (optional)

Begin by cutting your outer fabric and lining fabric 12 1/2″ x 21 1/2″

 I LOVE Therm O Web products!  I go through yards and yards of their fusible fleece.  For this project I decided to use a Heat n Bond fusible interfacing. (For more info on Therm O Web products & how to order click HERE.)  I wanted the pouch to be firmer.  Cut 2 pieces of your fusible interfacing 12 1/2″ x 21 1/2″.  Fuse them to the wrong side of your 2 pieces of fabric.

 Get a small plate or bowl and trace to round the top 2 corners of your main fabric.  Trim along your line.

 You can embellish this pouch any way you want.  You can top stitch fabric, ruffles, ric rac, etc on the main piece.  I choose to be speedy and added a piece of crochet lace to the center.

 Take the pony tail holder and sew it in half like this.  It only needs to stretch about an inch so you don’t need the whole thing.  I sewed it back and forth a few times to make sure it doesn’t pull out.

Trim the excess.  Make sure you trim so it looks like this:

 Now layer right sides together and pin.  I used a generous 1/4″ seam.  leave a 2″-3″ opening on the side to turn.

 Clip the rounded corners and the square corners.  Turn and press.

Fold the bottom half up 7 1/4″ and pin in place.  Top stitch around the pouch.

Sew your button on.

Fill with coupons & now you are ready to shop!!

OK – I really love this!  Can’t believe it took me so long to make one!  You can make this project in under 30 minutes 🙂

Here is a little peek into my purse and all my little pouches:

I also have a first aid kit that I forgot to photograph.  How many pouches do you have in your purse?

Amanda

Lanyard Tutorial

 Over Memorial Day we went backpacking in the Sierras.  This was my first real backpacking trip on over 20 years!  We had a BLAST!!!    I thought it would be fun to make the children lanyards for the trip.  I bought felt stickers at Joann Fabrics and glued pins to them.  Throughout the trip the children earned pins to put on their lanyard.  I also attached a whistle to the end – just in case they got lost or saw a bear 🙂
 

Here is how you can make one – they are super easy!!  (excuse my ironing board cover – I need to get a new one!)


BEFORE YOU SEW THE ENDS TOGETHER…..slide a keychain ring or D-ring onto your lanyard.
Now, unfold the ends and pin them right sides together.  Sew a 1/4″ seam and press the seam.  Then refold the lanyard and give it a final press.
Top stitch all the way around the lanyard on both sides close to the edge.  Making sure the seam is at the back of the neck, s

lide your D-ring or keychain to the opposite end and sew a little square with an “X” to secure.  (See photo below for placement)


 Last year, I sewed all these lanyards for Girl’s Camp.  They are lots of fun to make – you can choose any fabric – you can even piece the fabric if you have time!

Amanda

Mother’s Day Conversation Jar


 Each year I try and do a Mother’s Day craft in my son’s class.  This year he is in 4th grade.  (Click HERE for last year’s project)   This can be a challenge – something for 28 learners to make in about an hour…..hmmmmm.  I came up with this craft: The Mother’s Day Conversation Jar.  It is a little spin off journal jars.  Here’s how we made them:
 First, I punched out different size circles from tissue paper.  Note: we had to layer a regular piece of paper on the top and bottom of the stack of tissue paper so it wouldn’t rip in the paper punch.  The learners applied Mod Podge to the mason jars, arranged the dots how they wanted and Mod Podged over. 
 
 While the jars were drying, the children cut out conversation starters, folded them and put them in the jars.  Click HERE for the list I put together.  We tied this little tag around the jar:

The idea is that each day, or once a week, or when ever, the child and mother pick a paper out of the jar and have a little conversation about something they might not normally think to talk about – and hopefully learn a little more about each other.  I think it is fun!

When they were all done with the jars, we hot glued a flower to the top of the jar. 


Amanda

Painted Mason Jars

I have seen painted mason jars all over the internet.  Google “Painted Mason Jars” and you will find hundreds of different photos!  I am not taking credit for the idea.  But I have been known to spray paint anything & everything!!   I had a lot of jars, a lot of spray paint, and about 5 minutes – that’s all you need!

I used spray paint to paint the outside of my jars.  I first turned them upside down and painted them, then after they were dry, I turned them right side up and painted them.  I lightly sanded the letters – you could really go crazy on the sanding if you wanted to!

I found this cute wood box at the thrift shop and gave it a coat of spray paint as well.  I love that 3 jars fit perfectly in the box!

Since this is to be an indoor decoration,  I didn’t want to plant a real plant….because, well, I am not the best with real plants!!  I found these cute little greenish plants at Joann’s. 

 You should spray paint some jars today!! 

Amanda

Stand in Holy Places Chicken Wire Frame

I bought this rather large frame at a garage sale for a few dollars.  I wanted to make it into some kind of collage/bulletin board.  I love chicken wire and this was the perfect frame for it.  All I did was snip the chicken wire with wire cutters the size of the frame.  Then I used a staple gun to secure the wire to the back of the frame.  Took about 5 minutes!!

For the past 19 years where ever we have traveled we have made it a point to visit the nearest LDS Temple.  I printed out photos from every temple we’ve been too….from Hawaii to New York!  Since this year’s mutual theme is “Stand ye in Holy Places”, I thought it would be fun to gather all the photos and create a memory board.

I found this graphic for free at Hang a Ribbon on The Moon.   I used silver binder clips to attach everything to the chicken wire.  The nice thing about this is it is so easy to switch out. The possibilities are endless!

 I have noticed friends who visit my home enjoy looking at all the different temples and where they are located….friends of our faith and friends of other faiths.  Having this hanging in our home serves a reminder of what is important in our family and what we should be focusing on.


Amanda