70’s Inspired Zipper Pouch

Retor HeatnBond Zipper Pouch

gingham girls zipper pouch 4I am loving Amy Smart’s latest fabric line Gingham Girls by Penny Rose Fabrics!  This 1970’s inspired fabric has my name written all over it and so does this project!  And my name is a total 70’s name so it totally works!!  Here’s how you can make one!

70’s inspired Zipper Pouch with HeatnBond® Fusible Fleece

IMG_1995

Why I use HeatnBond® Fusible Fleece for my Zipper Pouch projects

It doesn’t shrink and holds it’s shape

It fuses to the fabric so quilting is not required

It is soft, yet sturdy

It holds up great in the wash

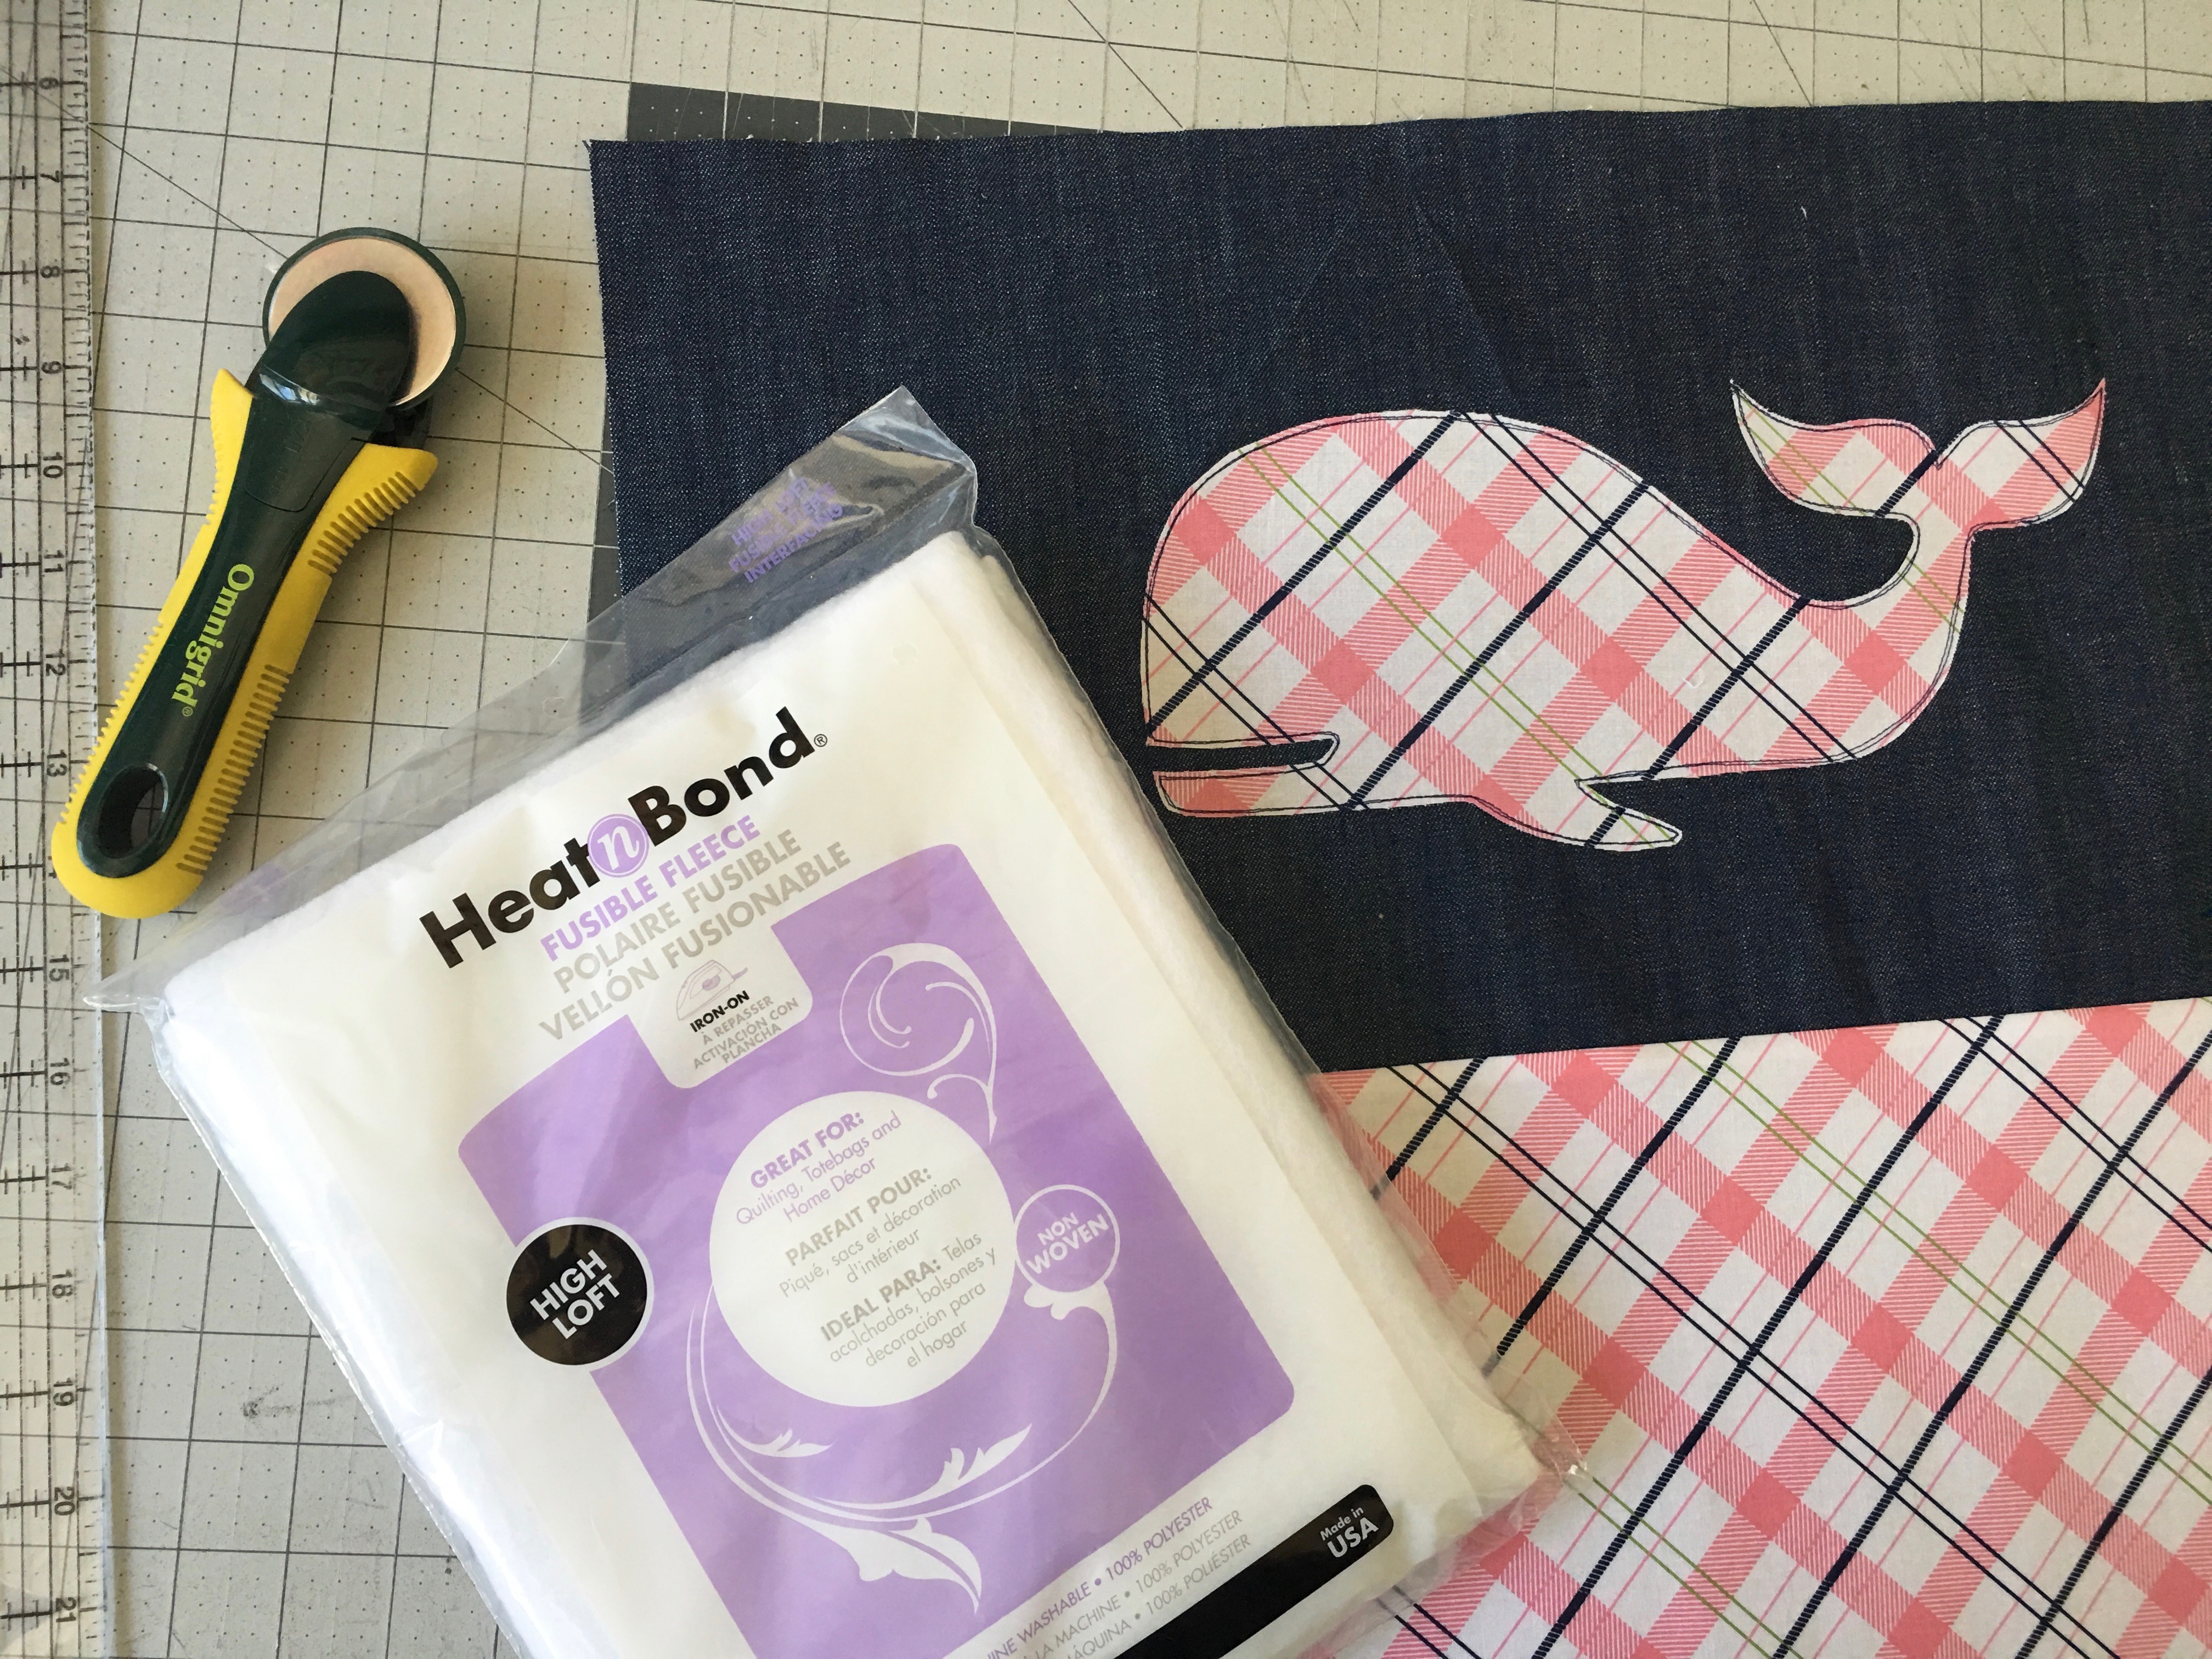
Zipper Pouch Supplies:

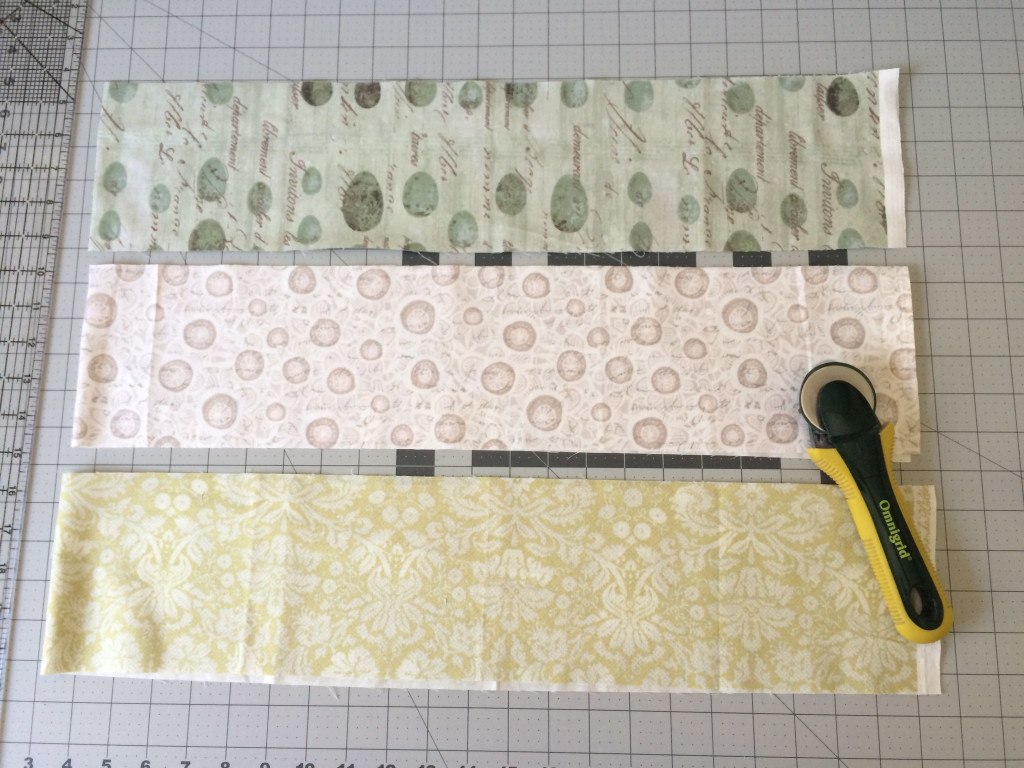
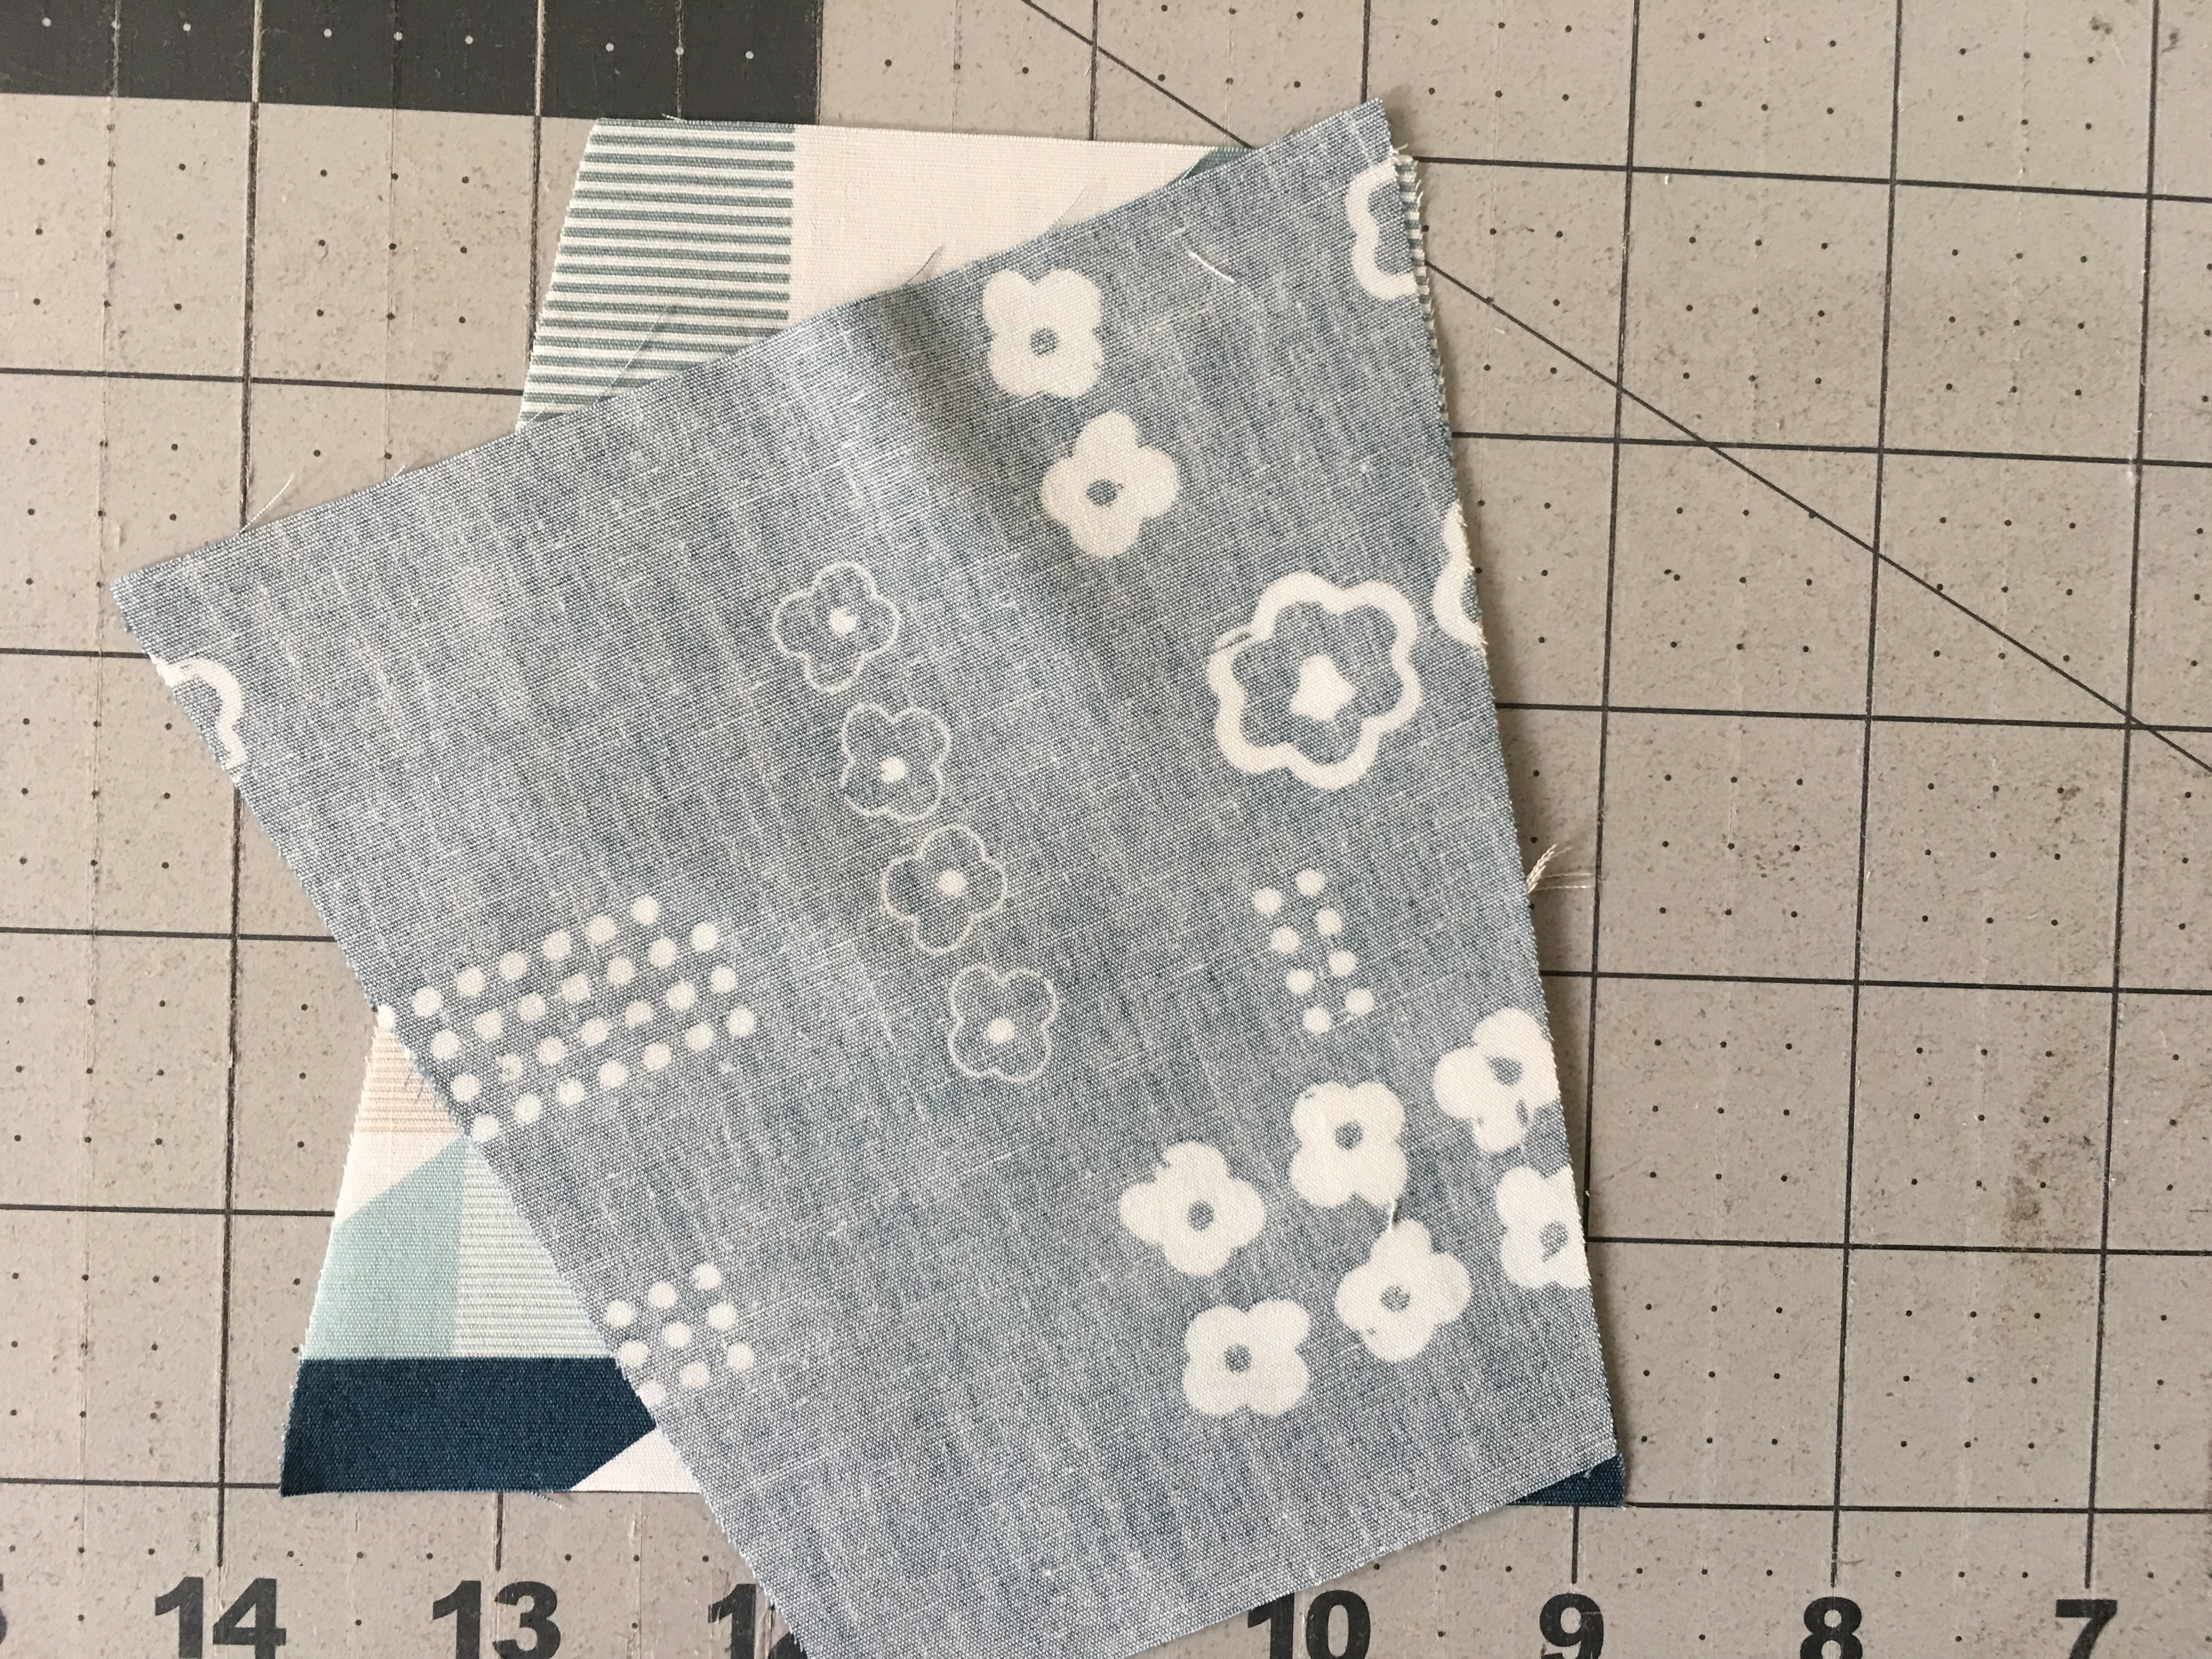
Scraps of fabric yielding (30) 2.5″ squares
Dark chambray 4.5″ x 10.5″
(2) rectangles 8.5″ x 10.5″ lining fabric
(2) rectangles 8.5″ x 10.5″ fusible fleece
HeatnBond® Lite Fusible Adhesive
Scraps for applique
14″ or longer zipper
Scrap for zipper end
All seams 1/4″

IMG_2002

[line]

Zipper Pouch Instructions:

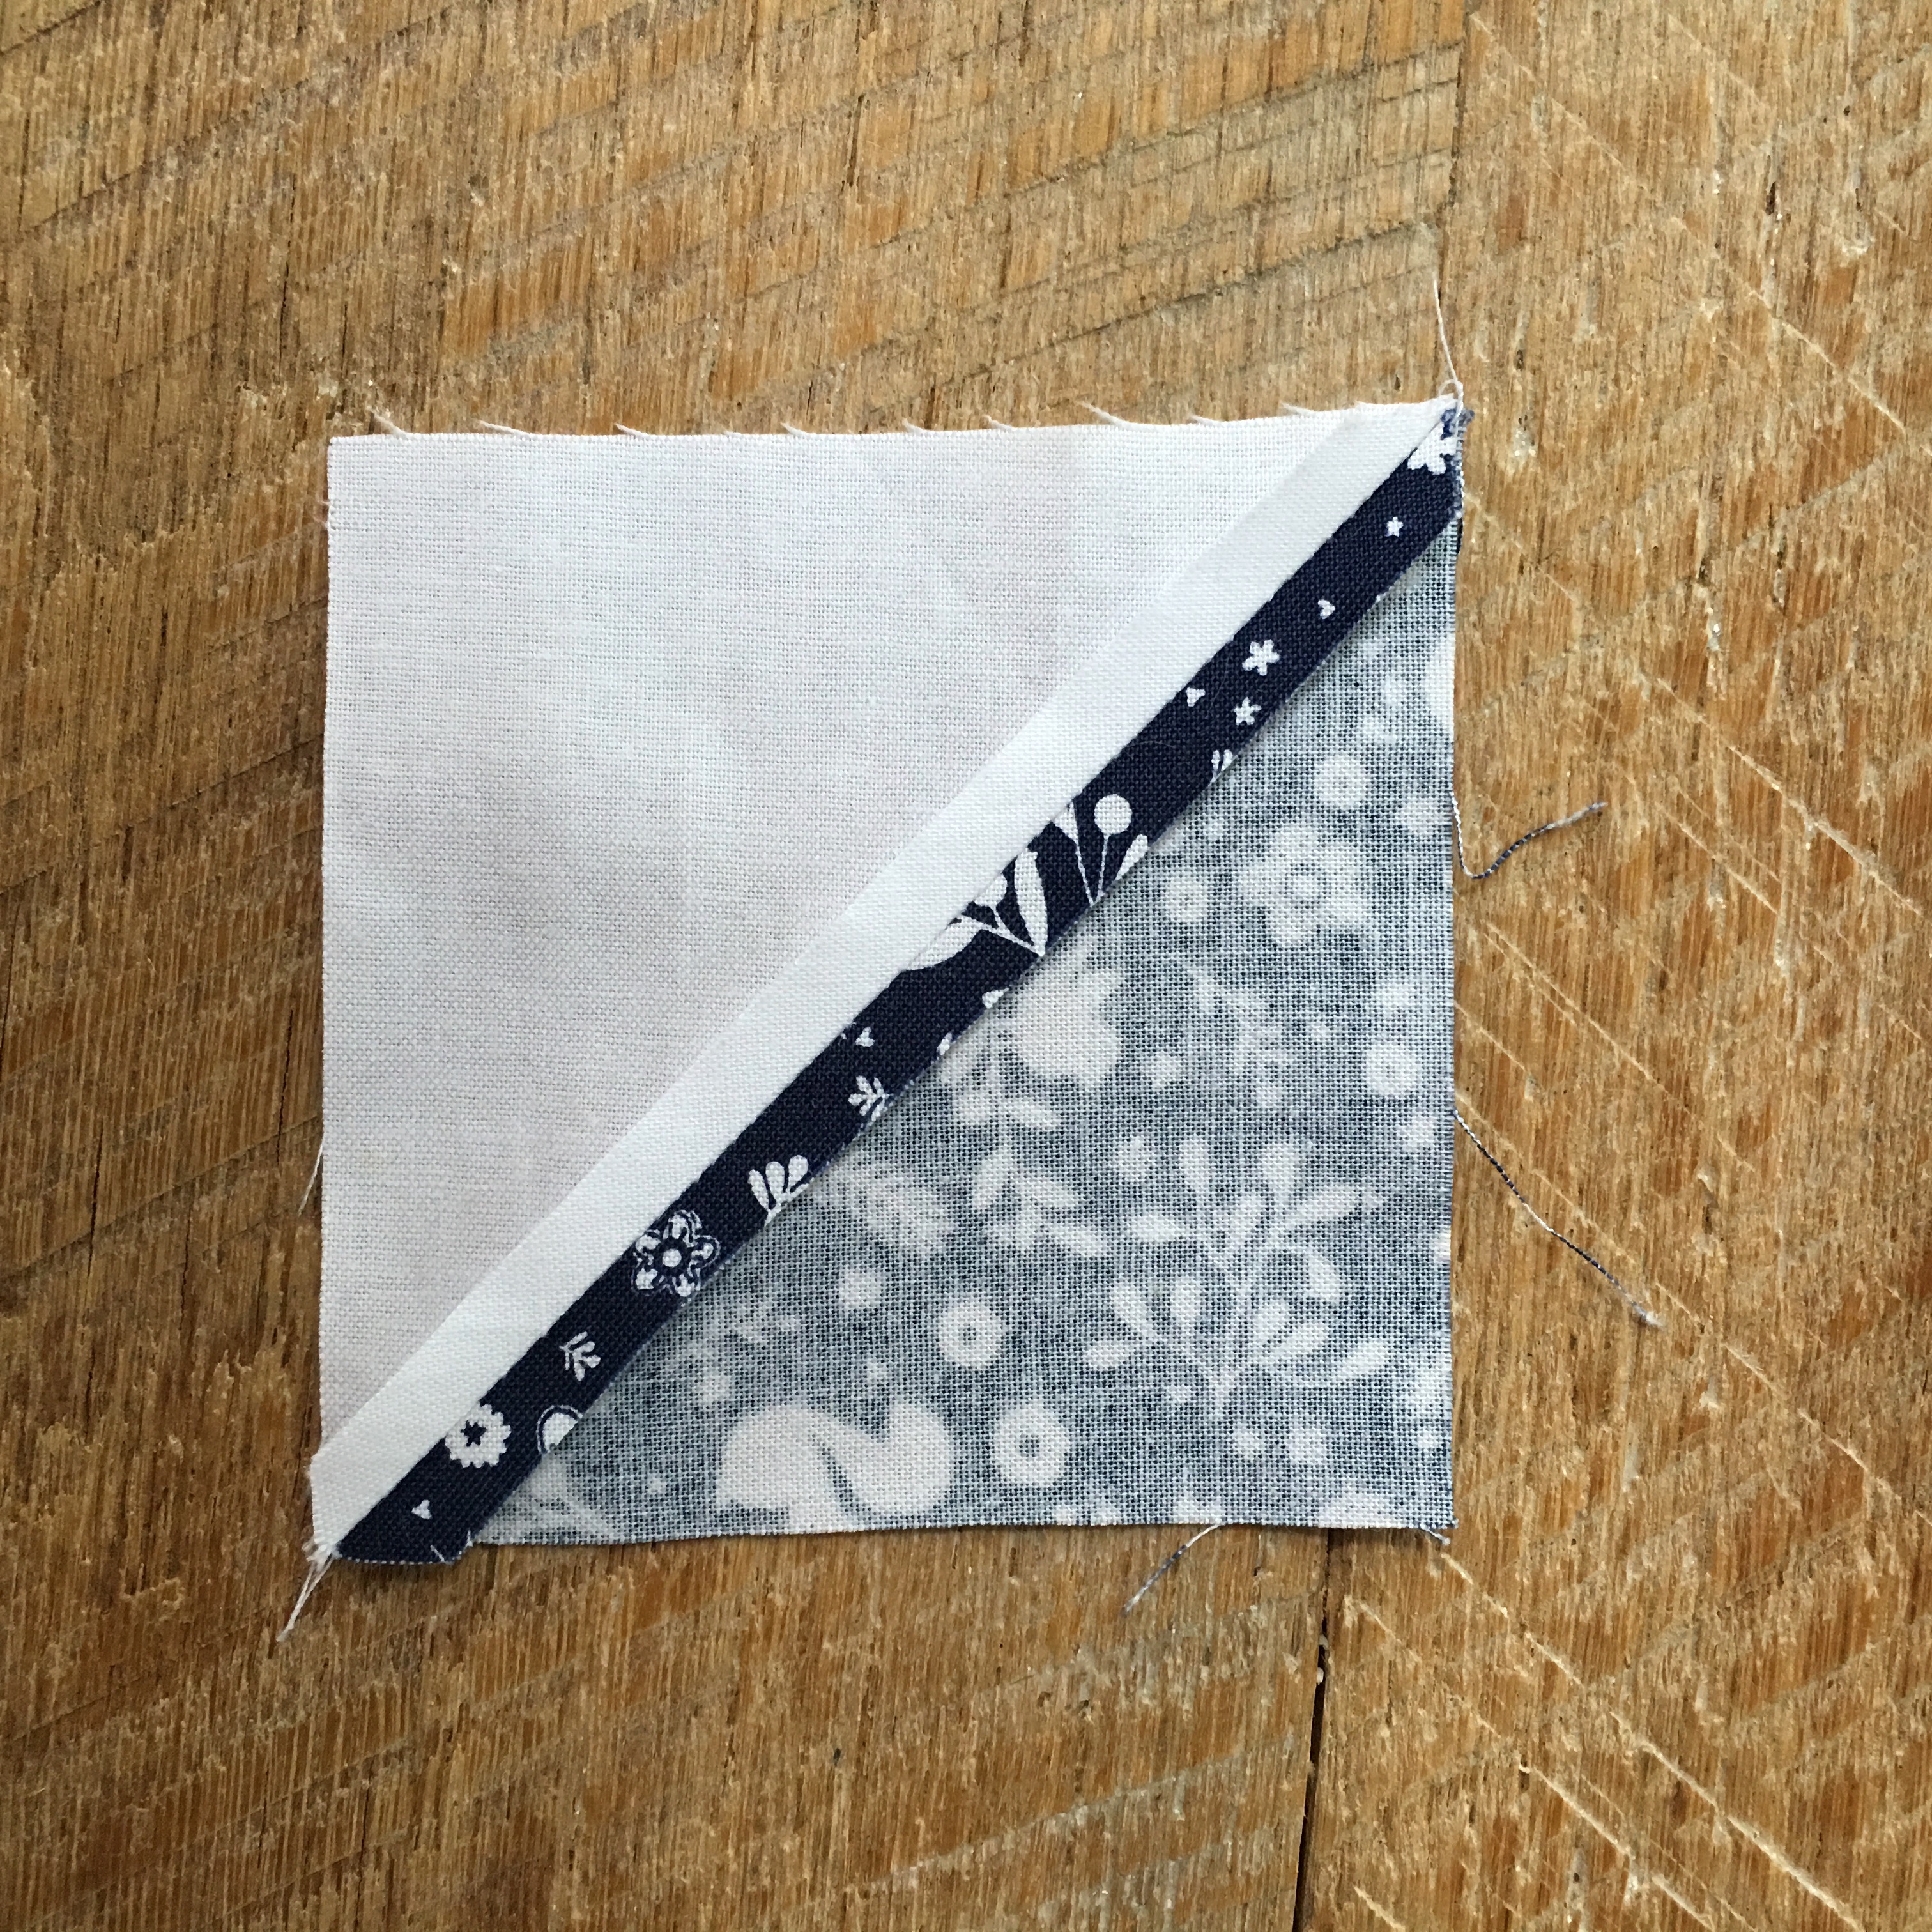
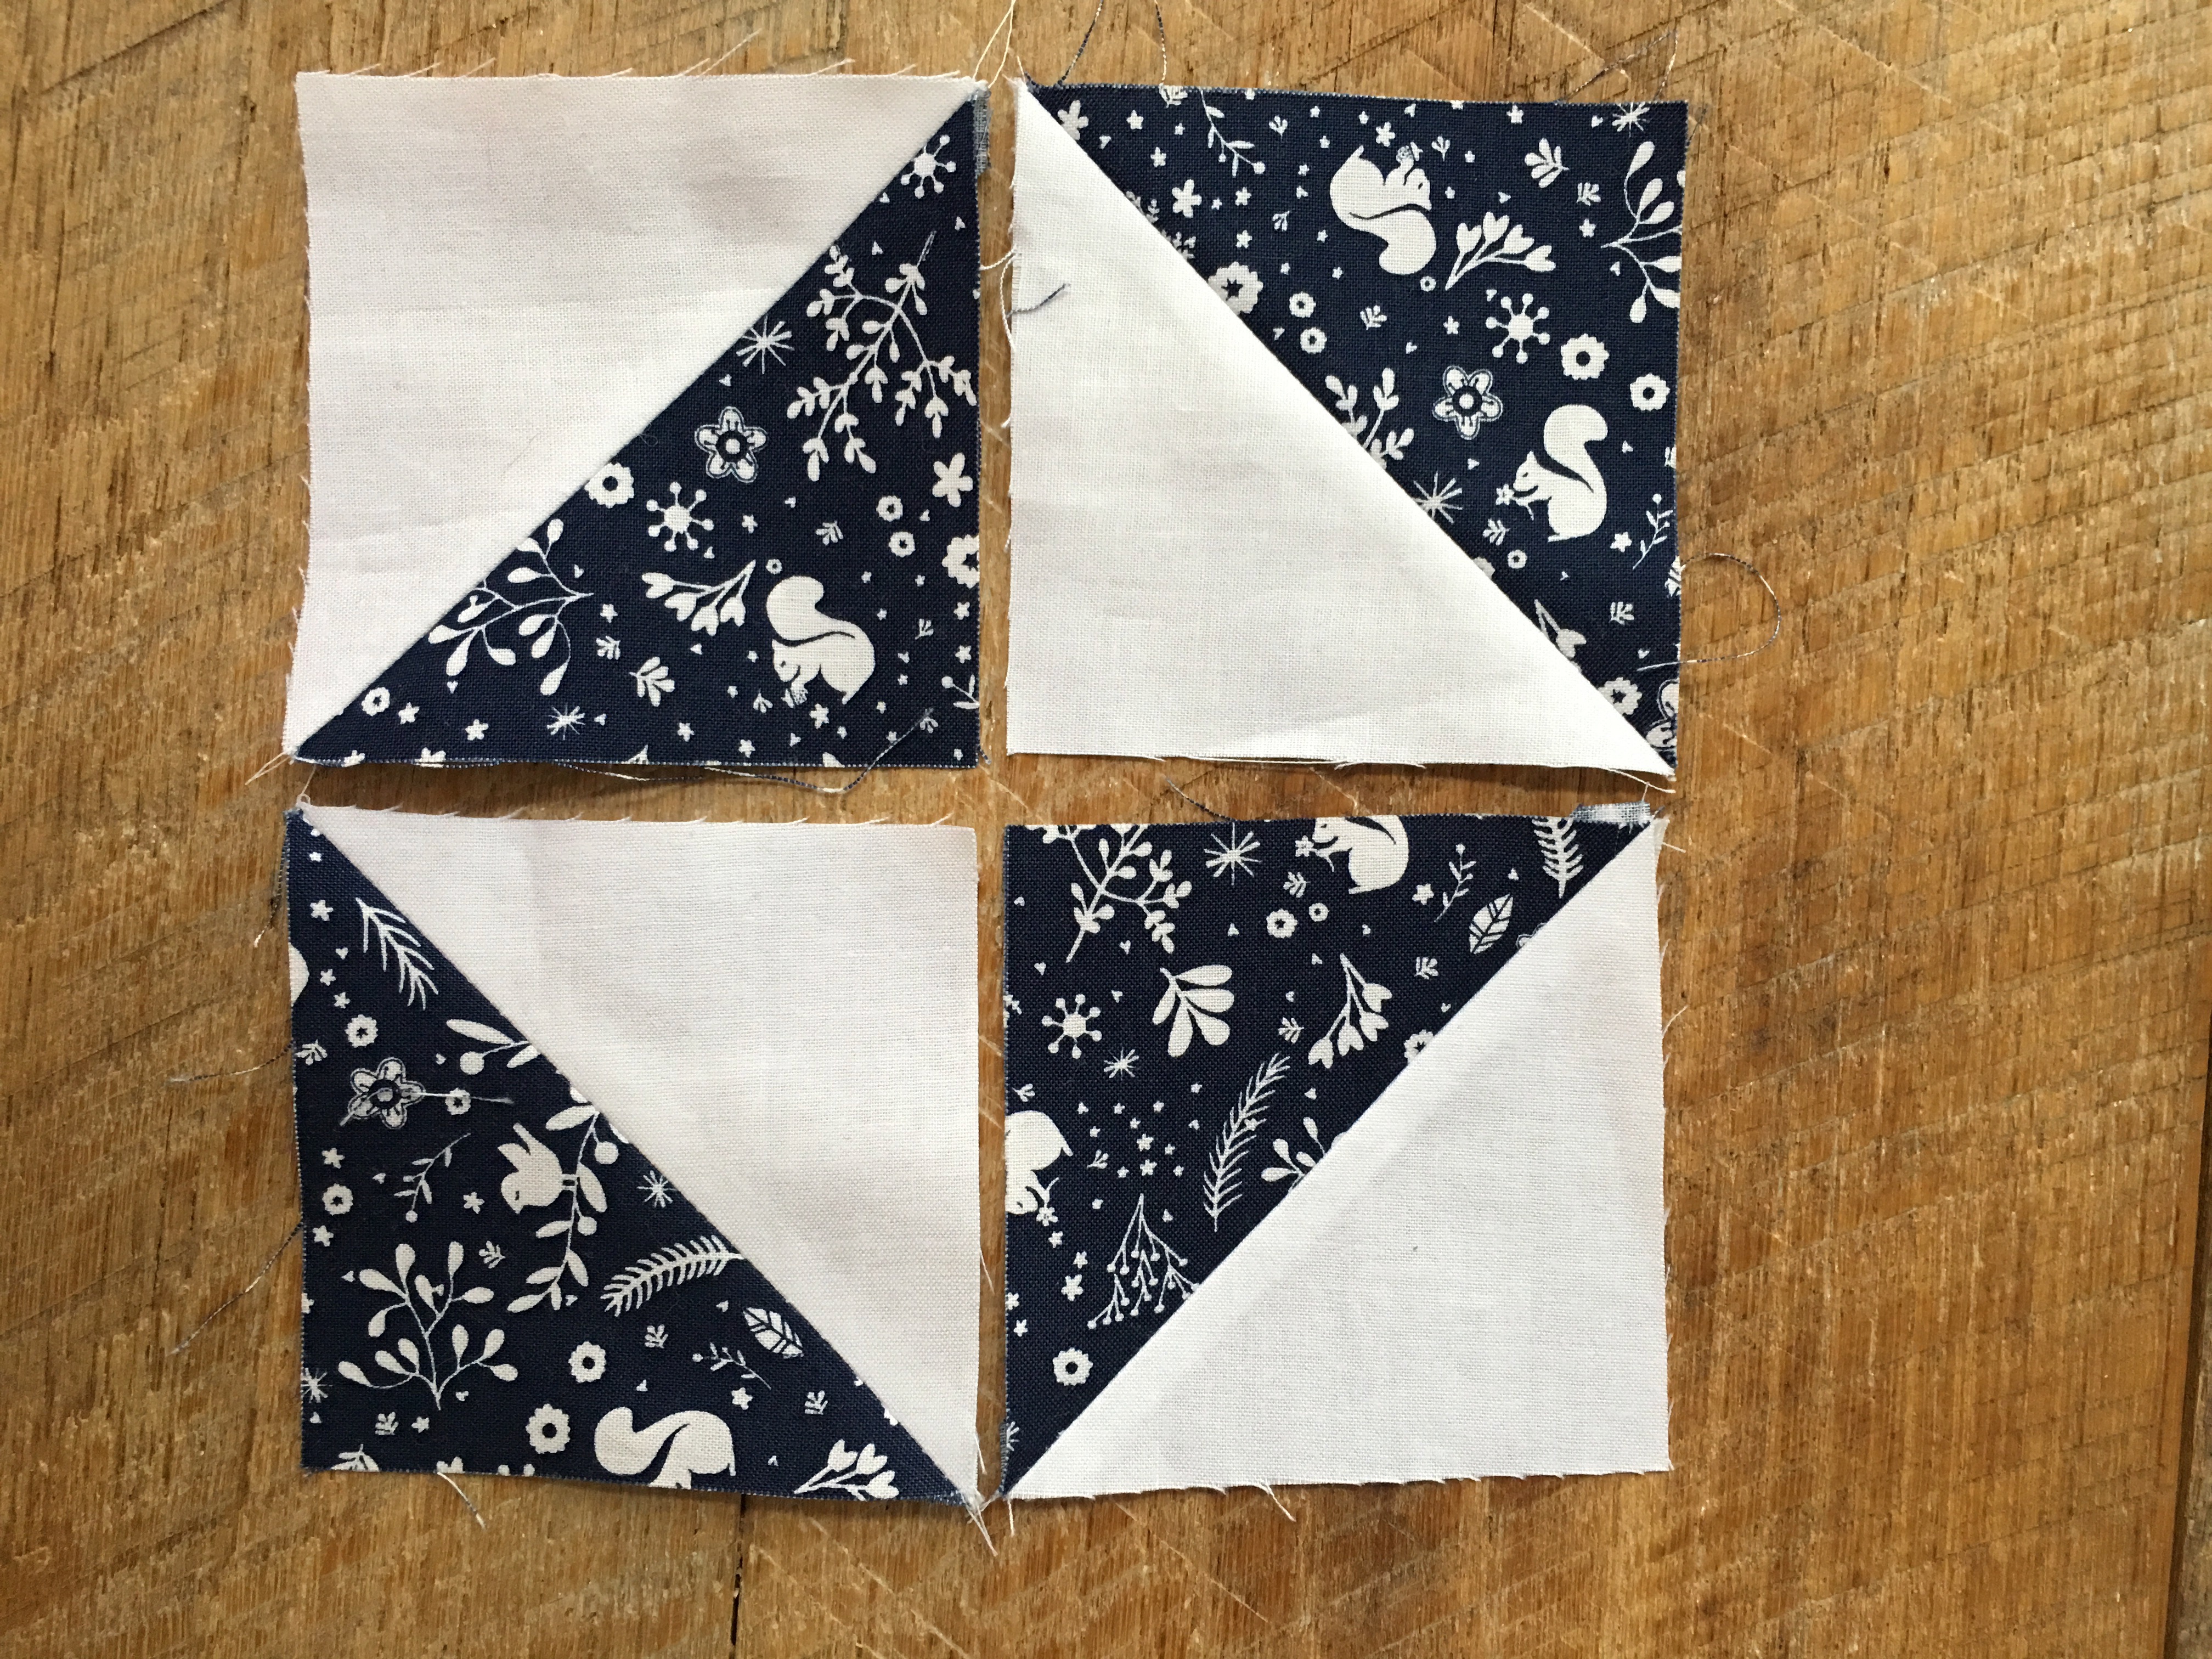
Begin by sewing (20) 2.5″ squares in 4 rows of 5 squares (above) press seams alternately.

IMG_2004

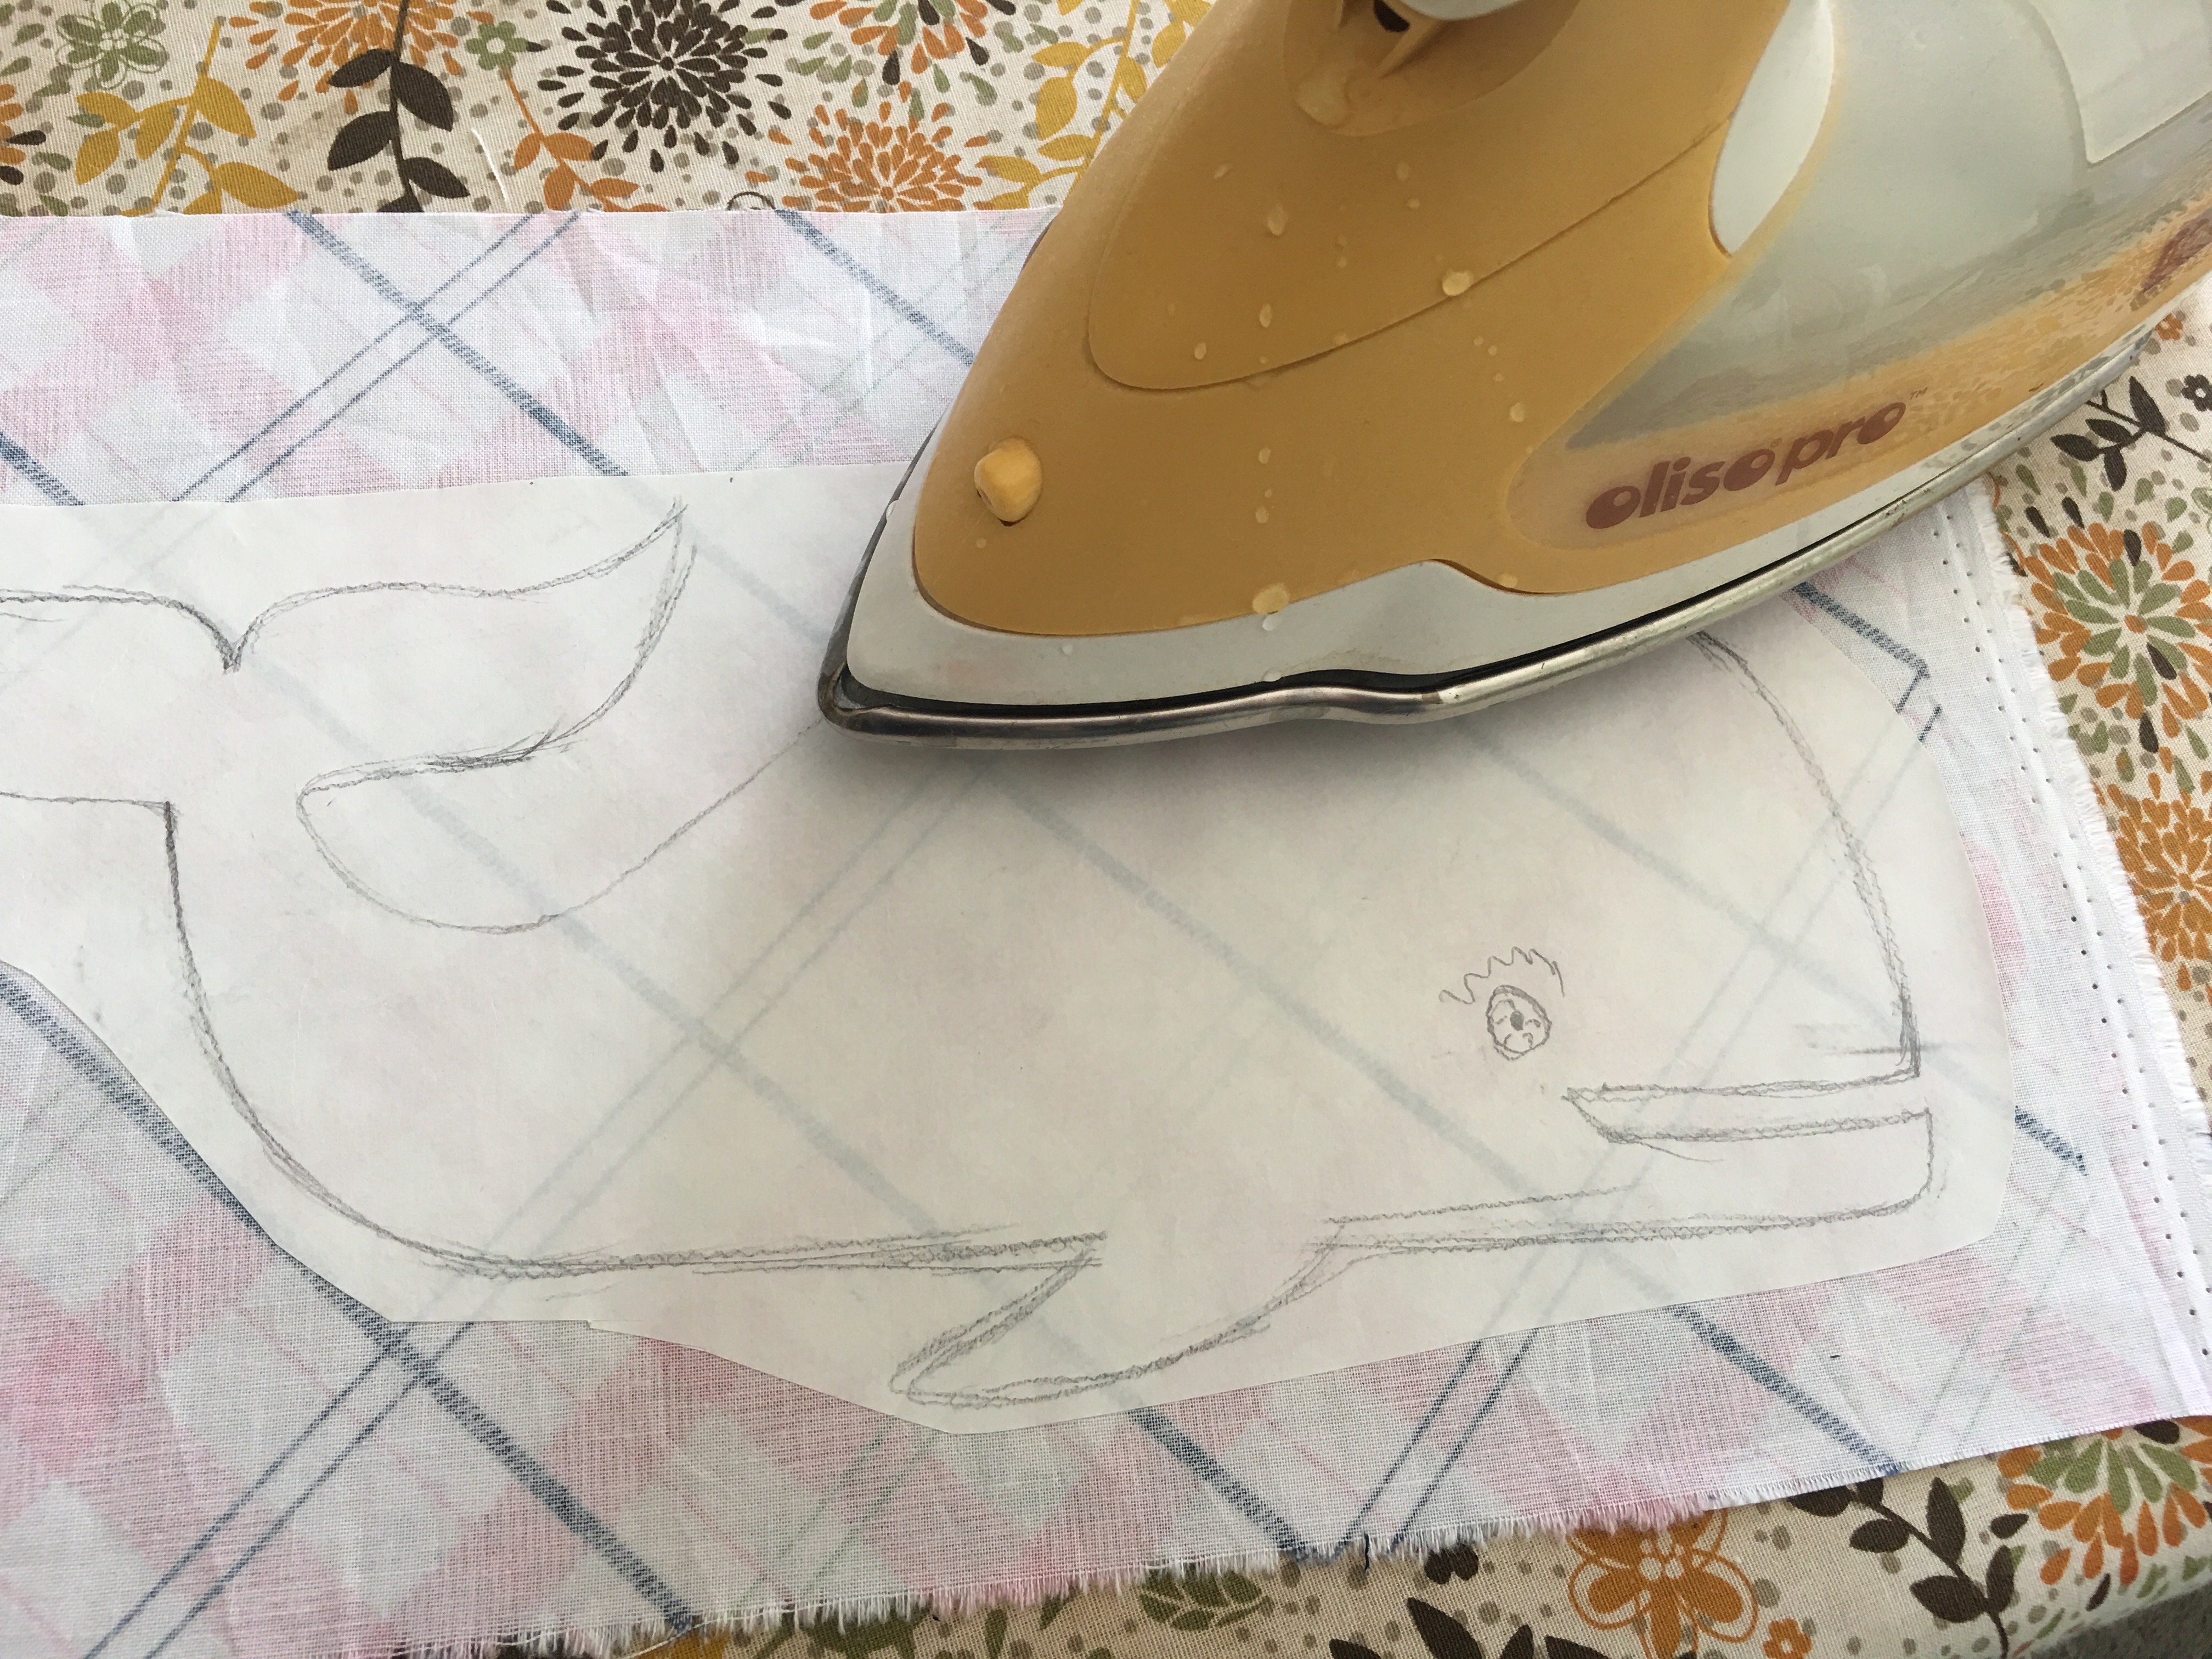
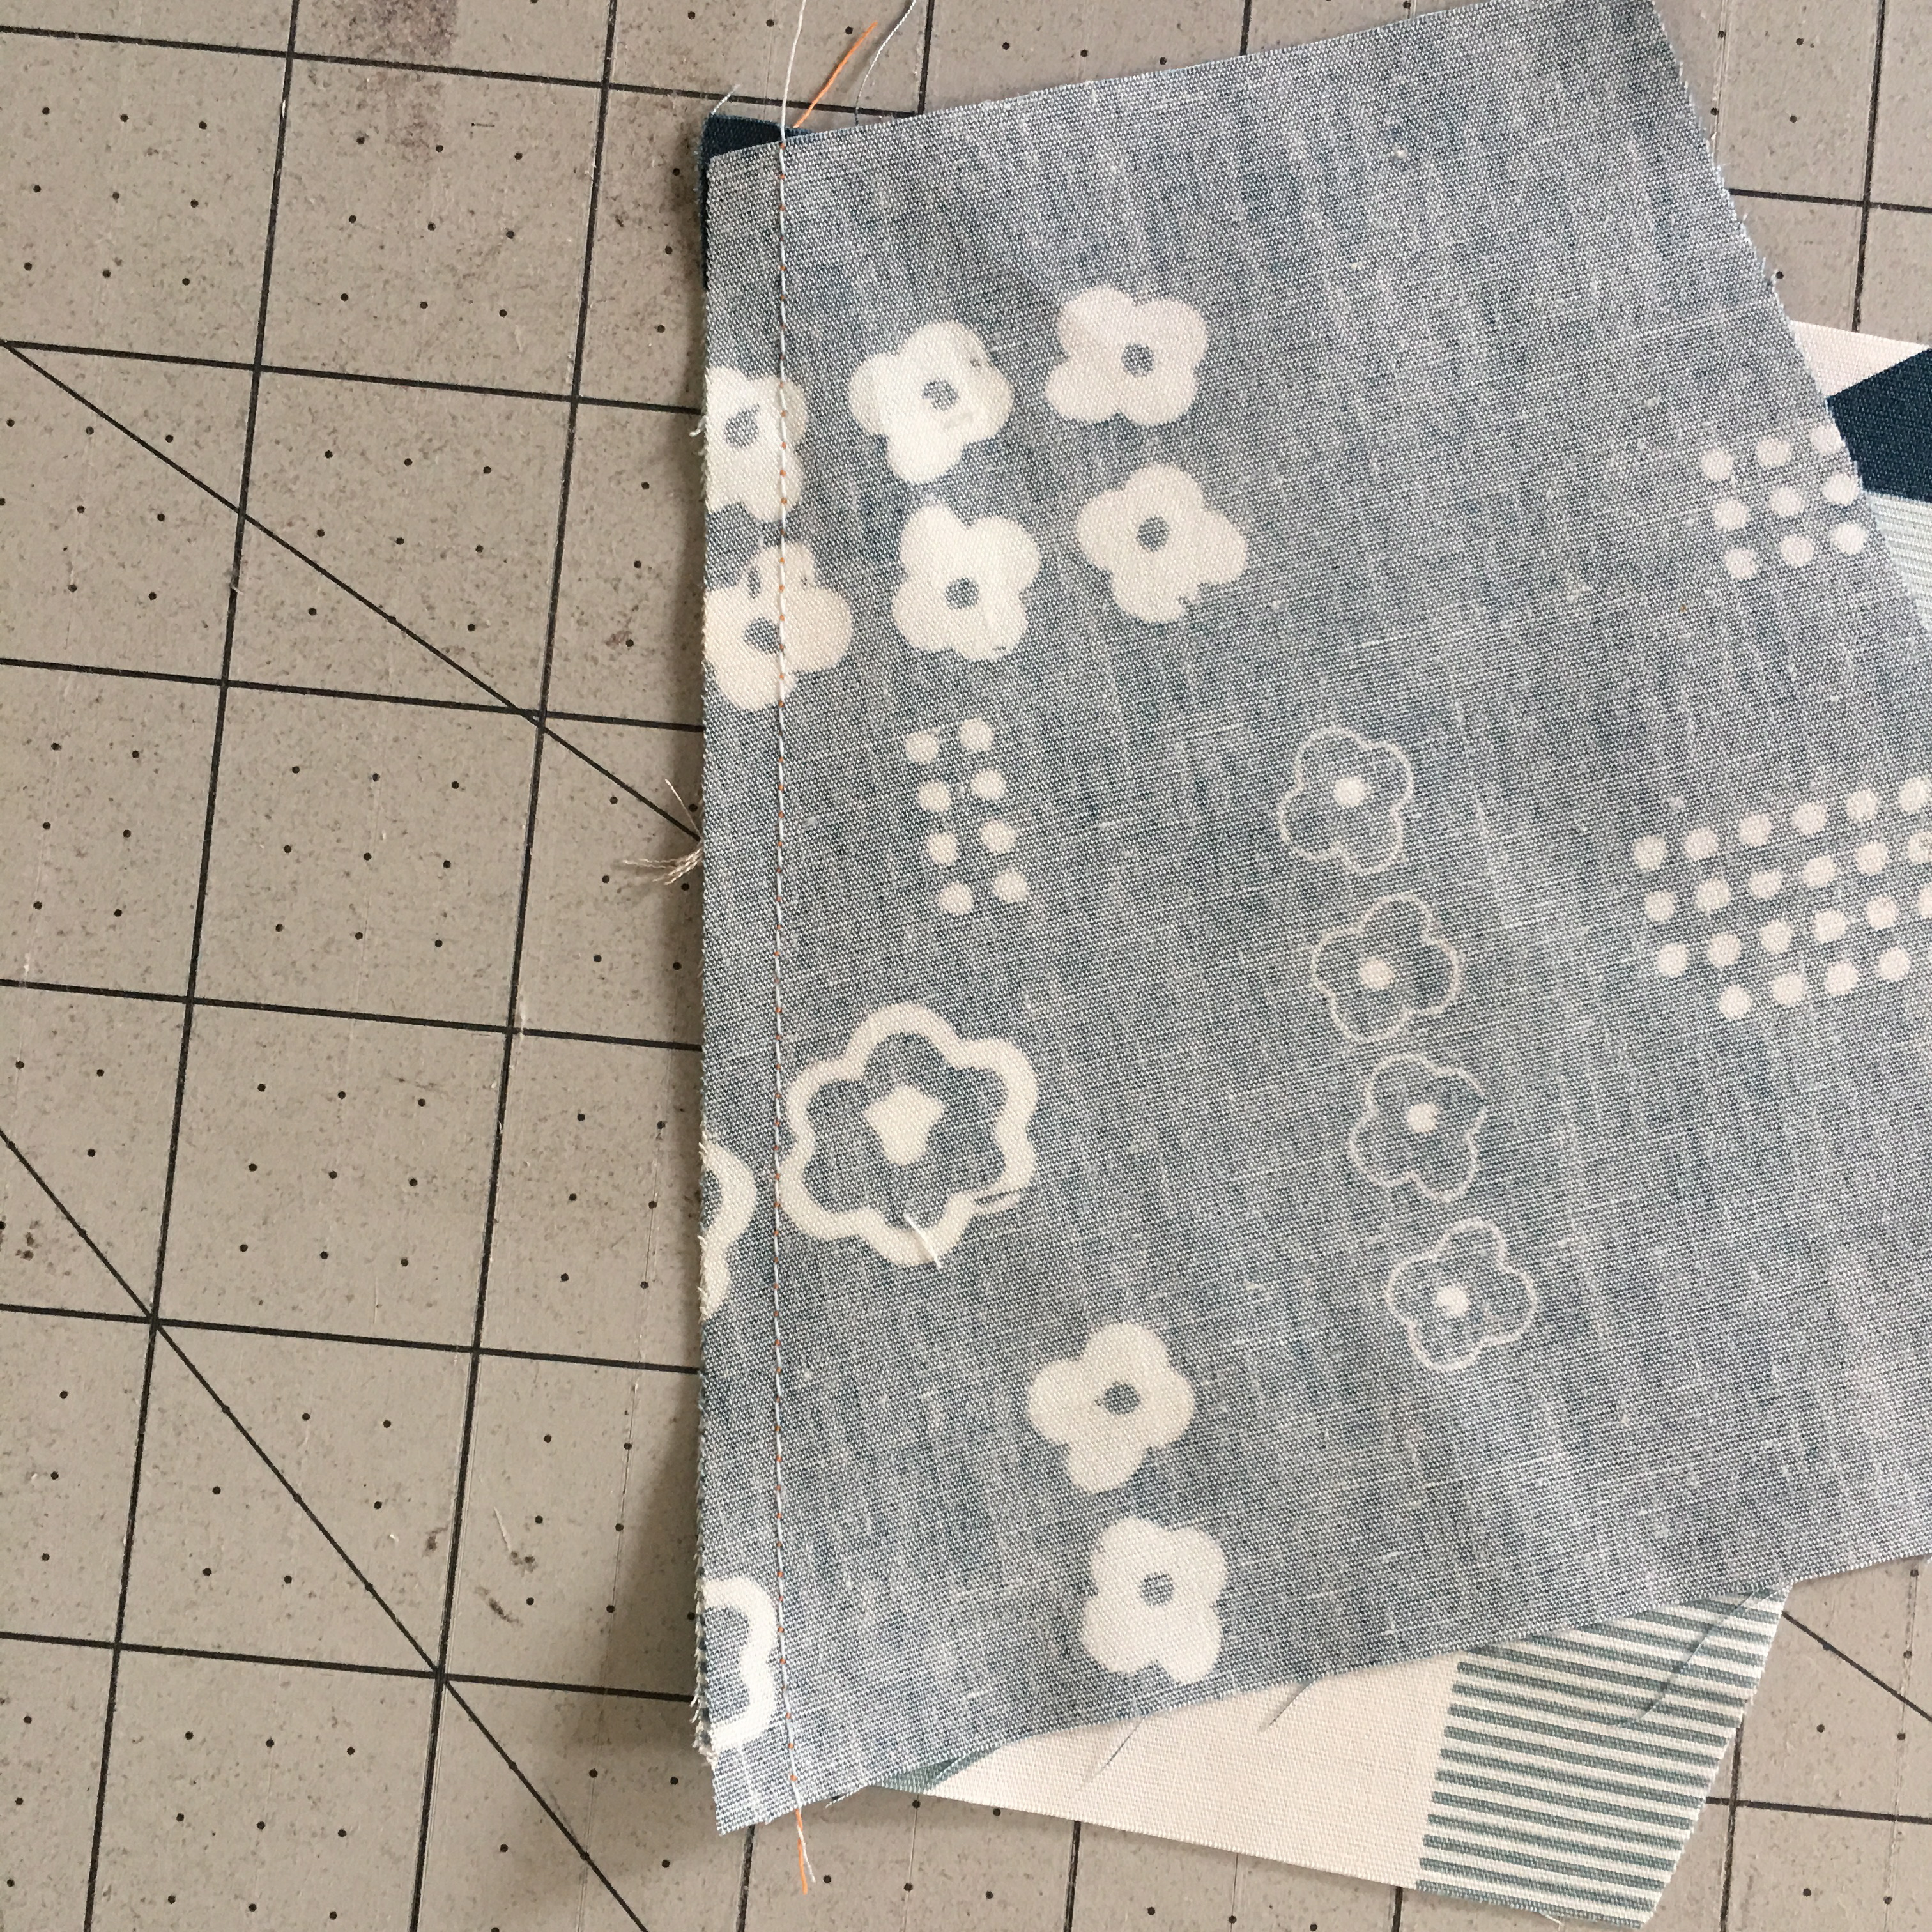
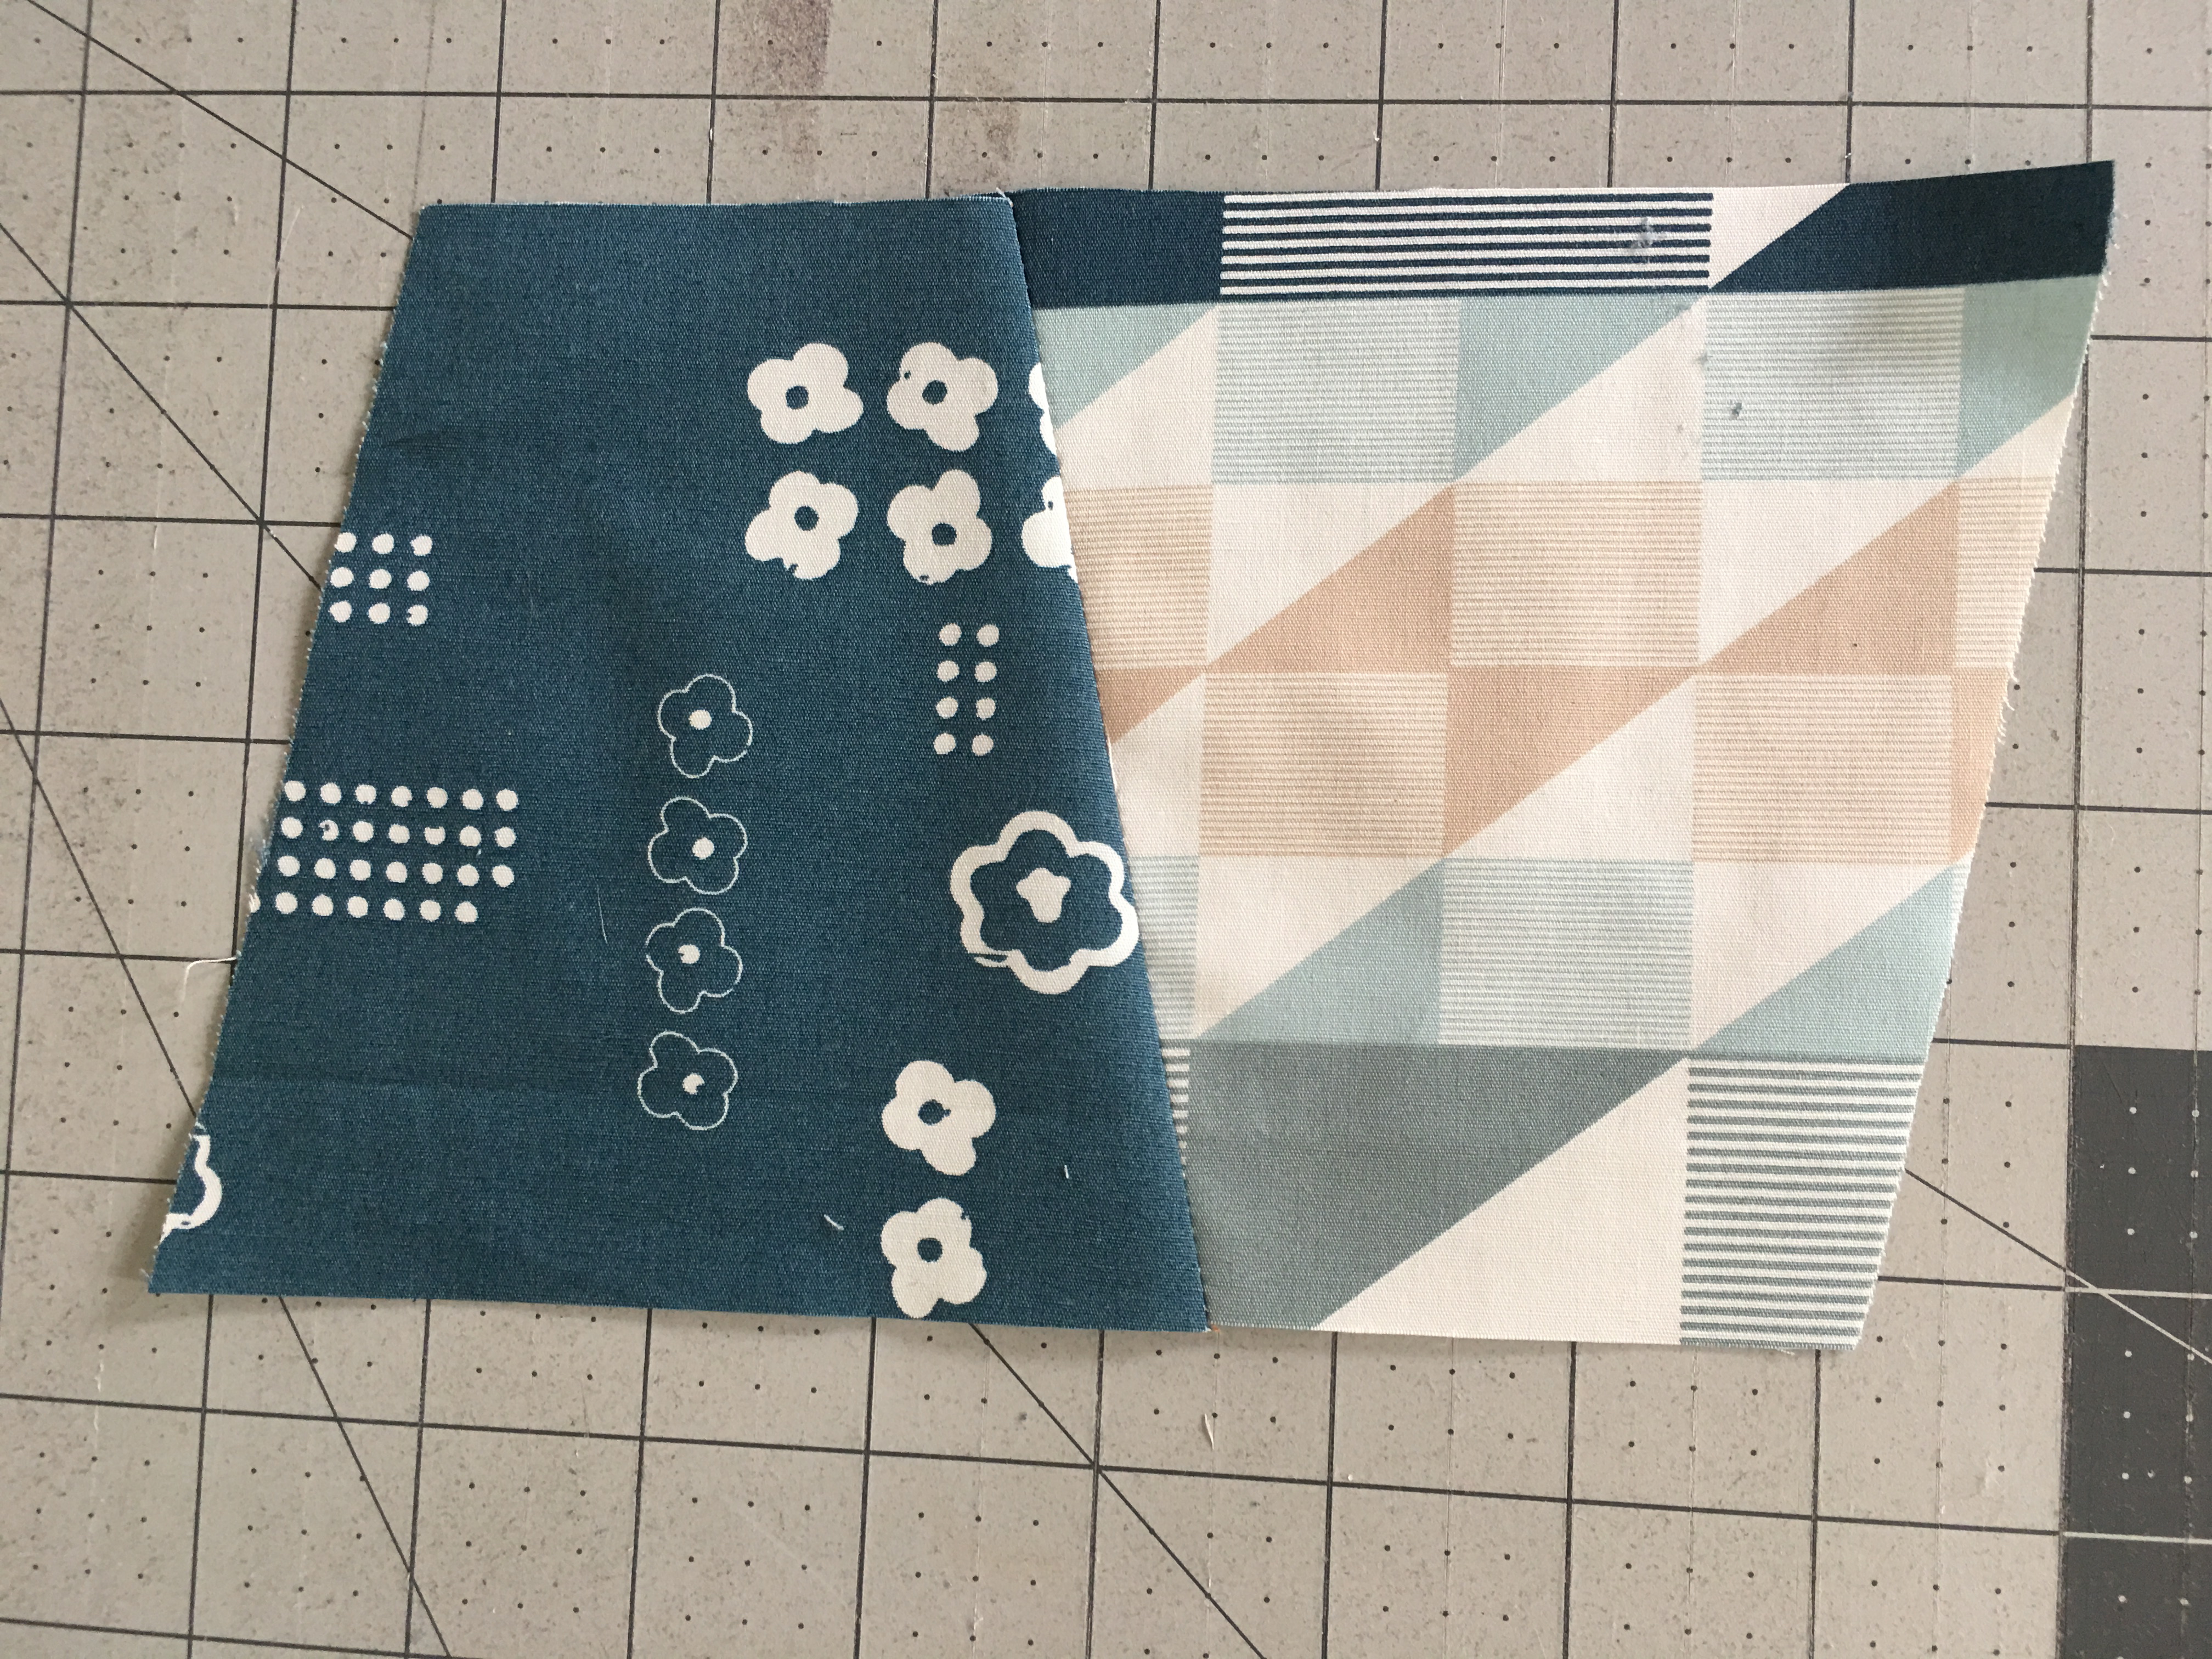
Sew the back unit by sewing (2) rows of 5 squares together.  Before sewing the chambray piece on, appliqué the name first.  Fuse HeatnBond Lite to the wrong side of the name fabric and the daisy fabric.

IMG_1999

Die cut the letters (or cut by hand). Peel off the backing paper and position letters on chambray.

IMG_2005

Heat set in place.

IMG_2006

Outline stitch around each letter and the flower in navy thread.  Sew the appliqué piece to the 2-row patchwork unit.  Press toward chambray.

IMG_2001

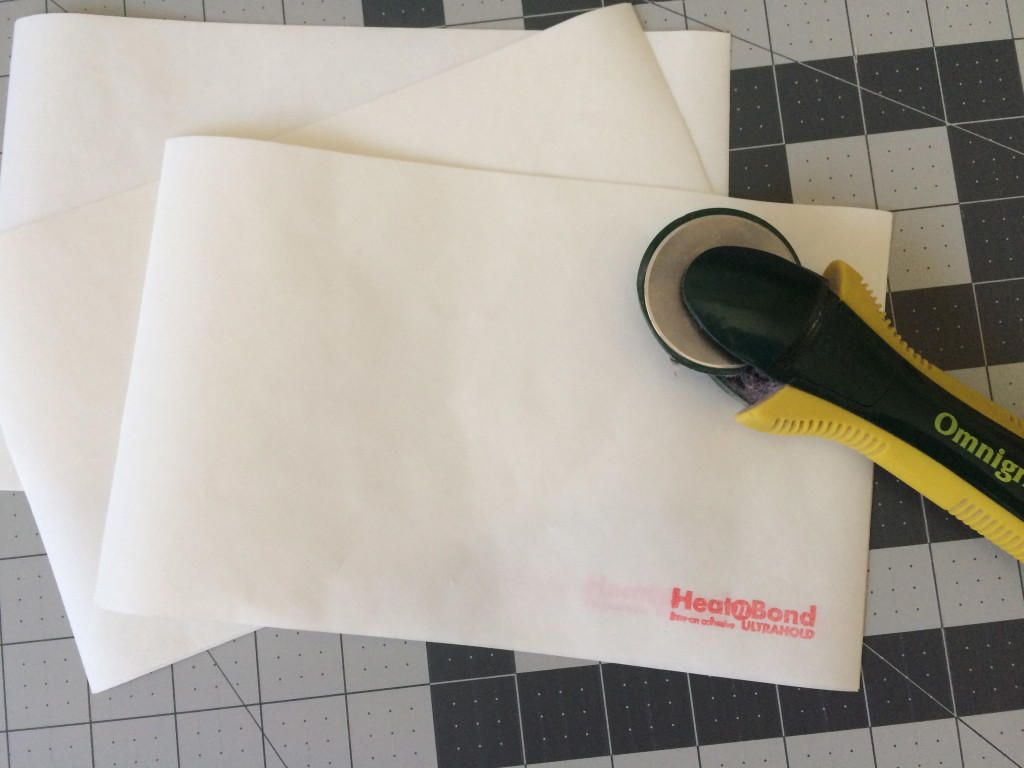
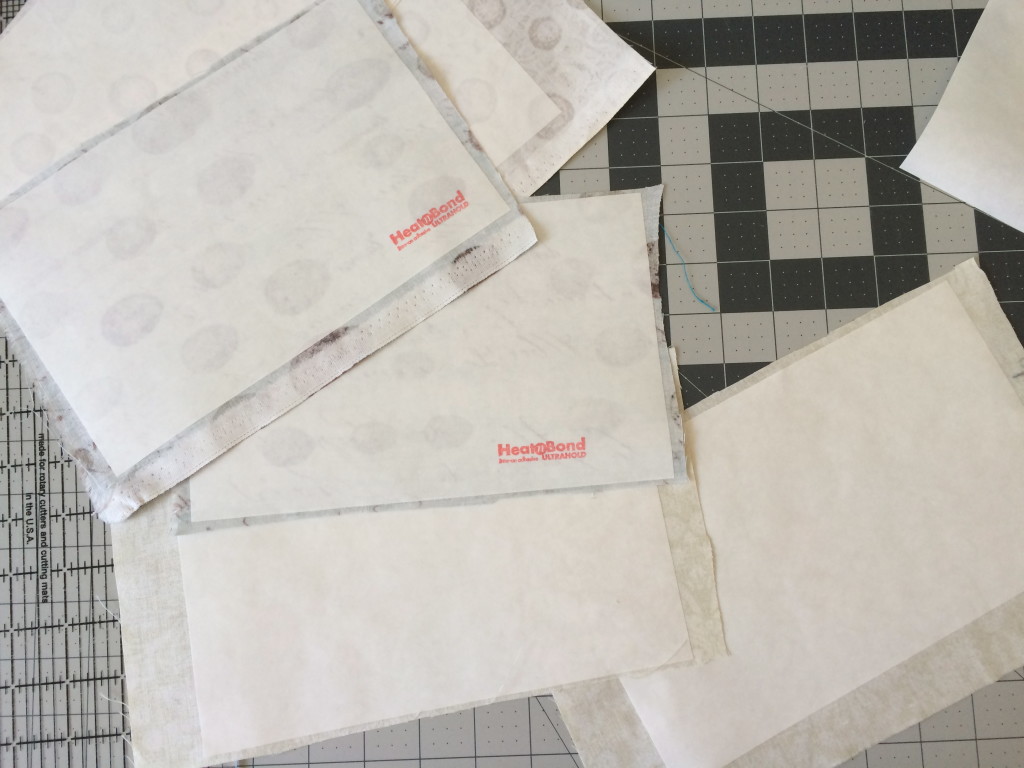
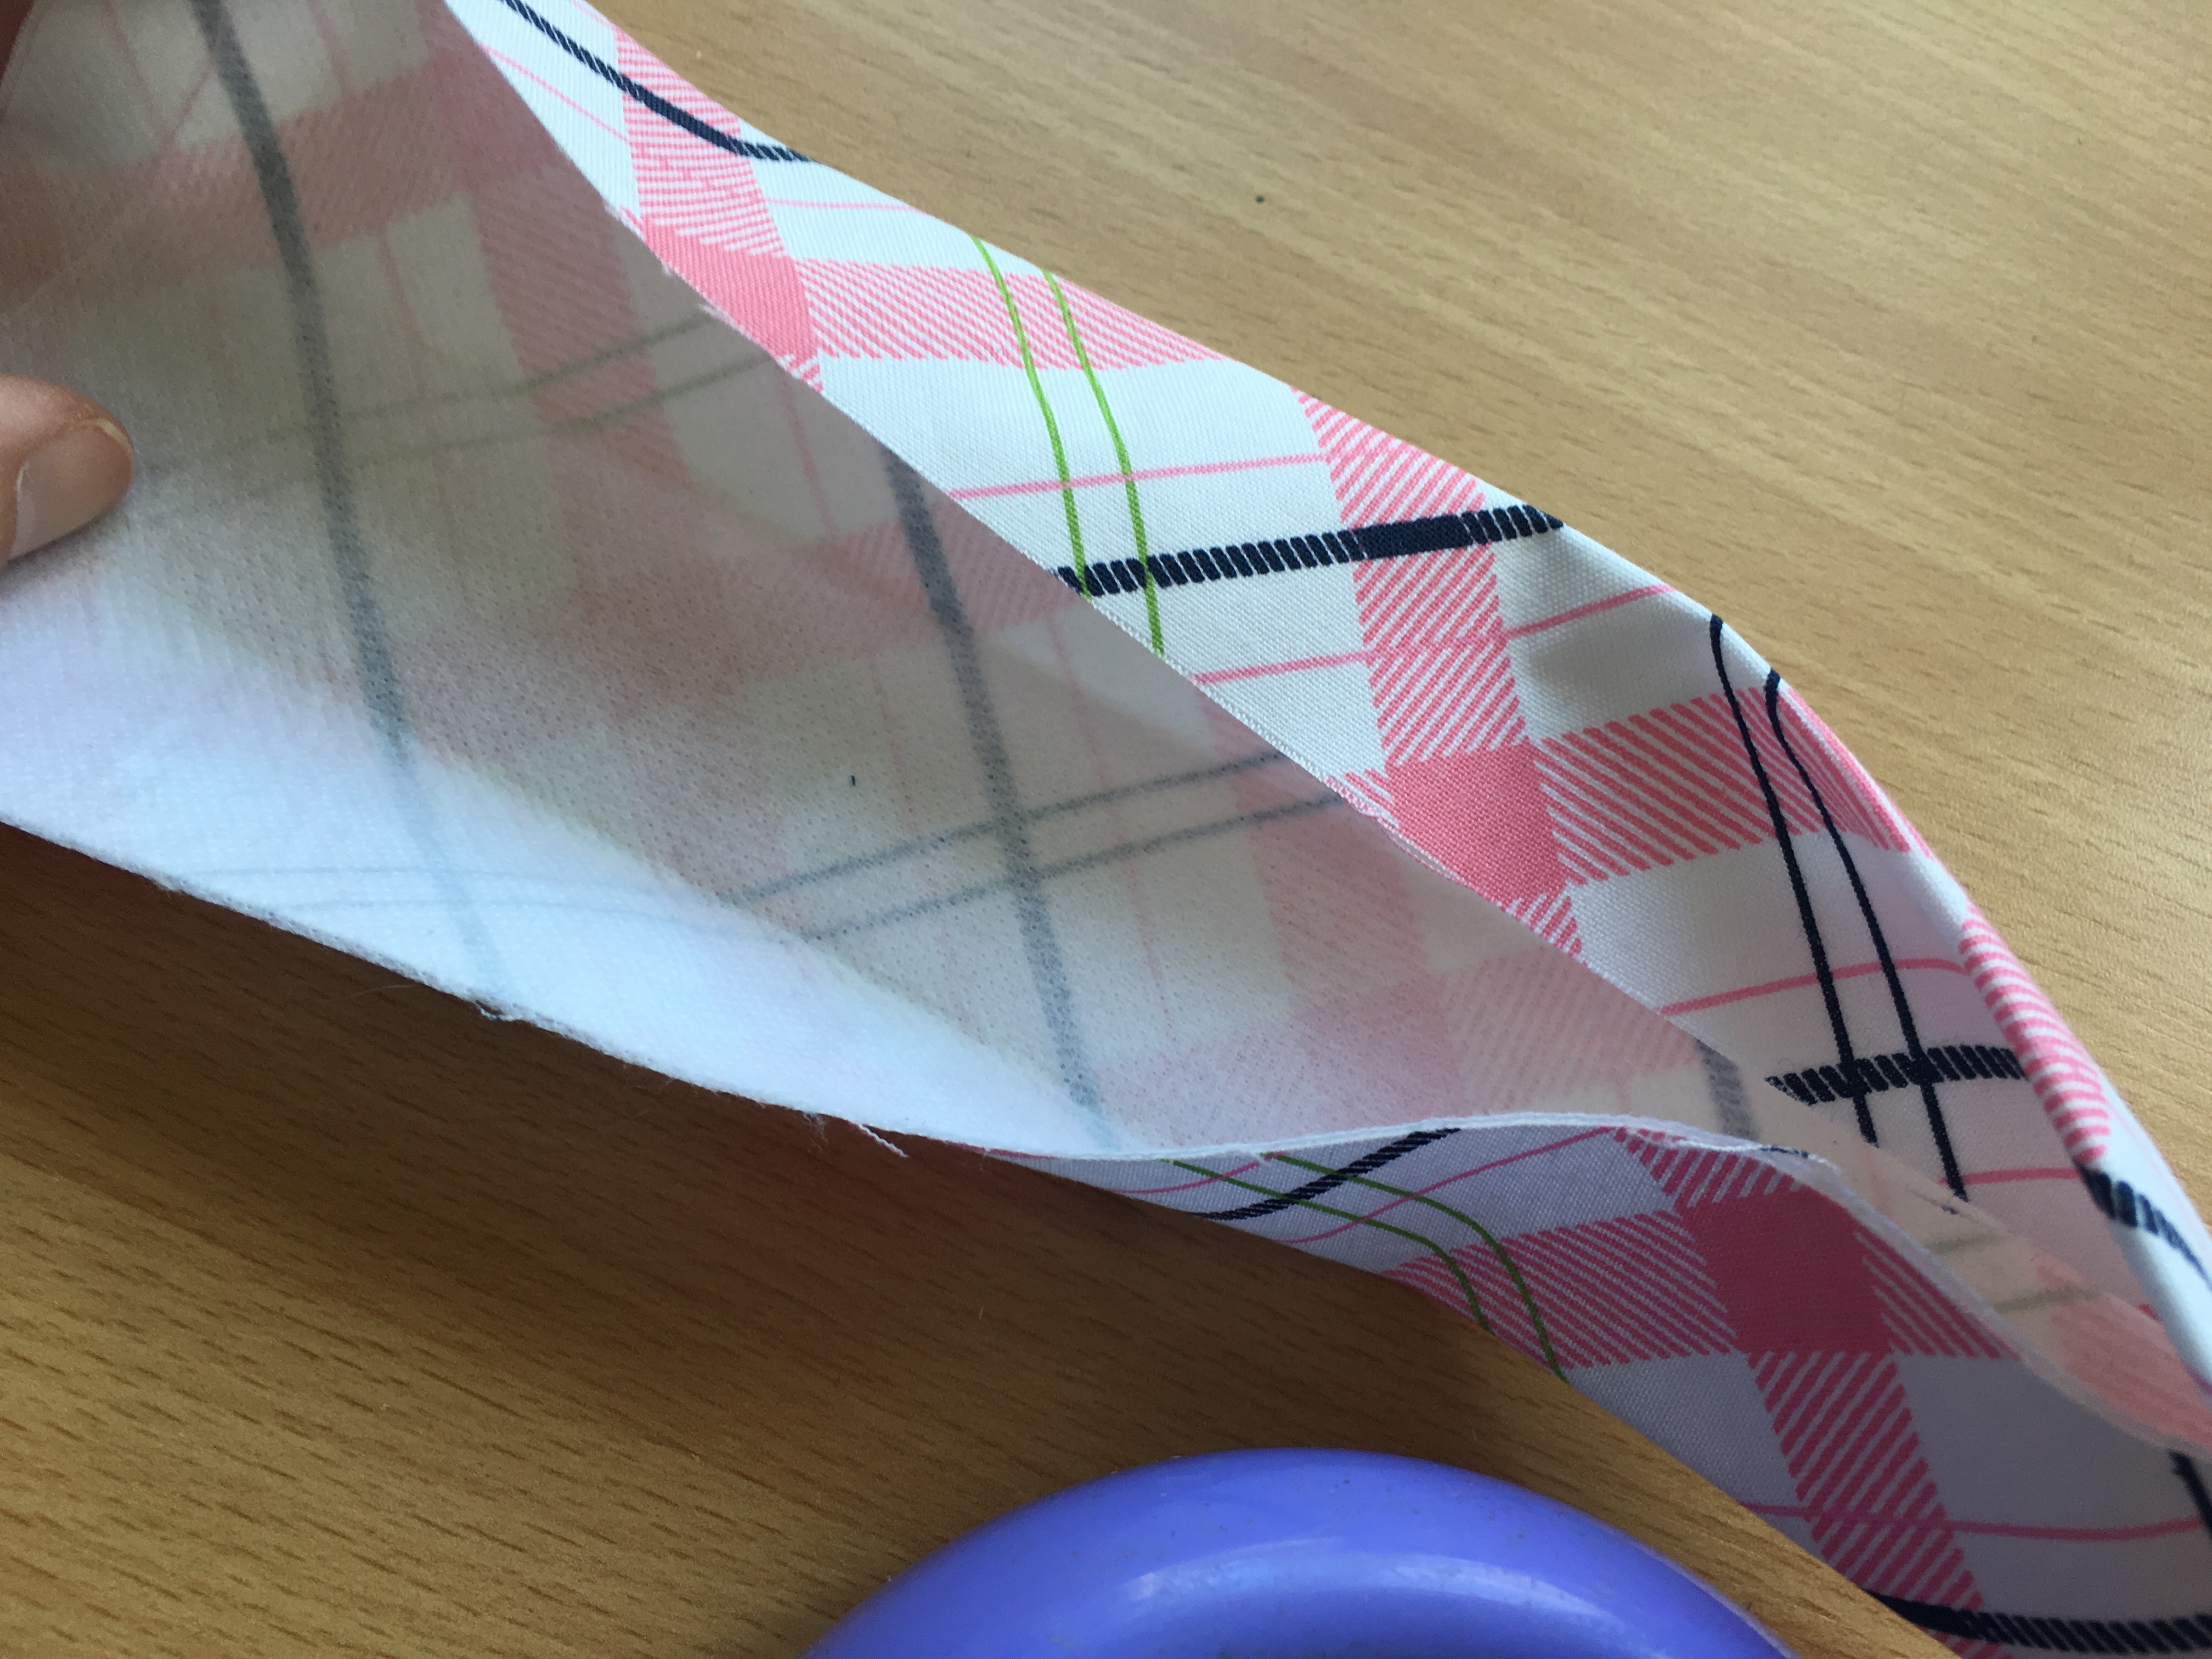
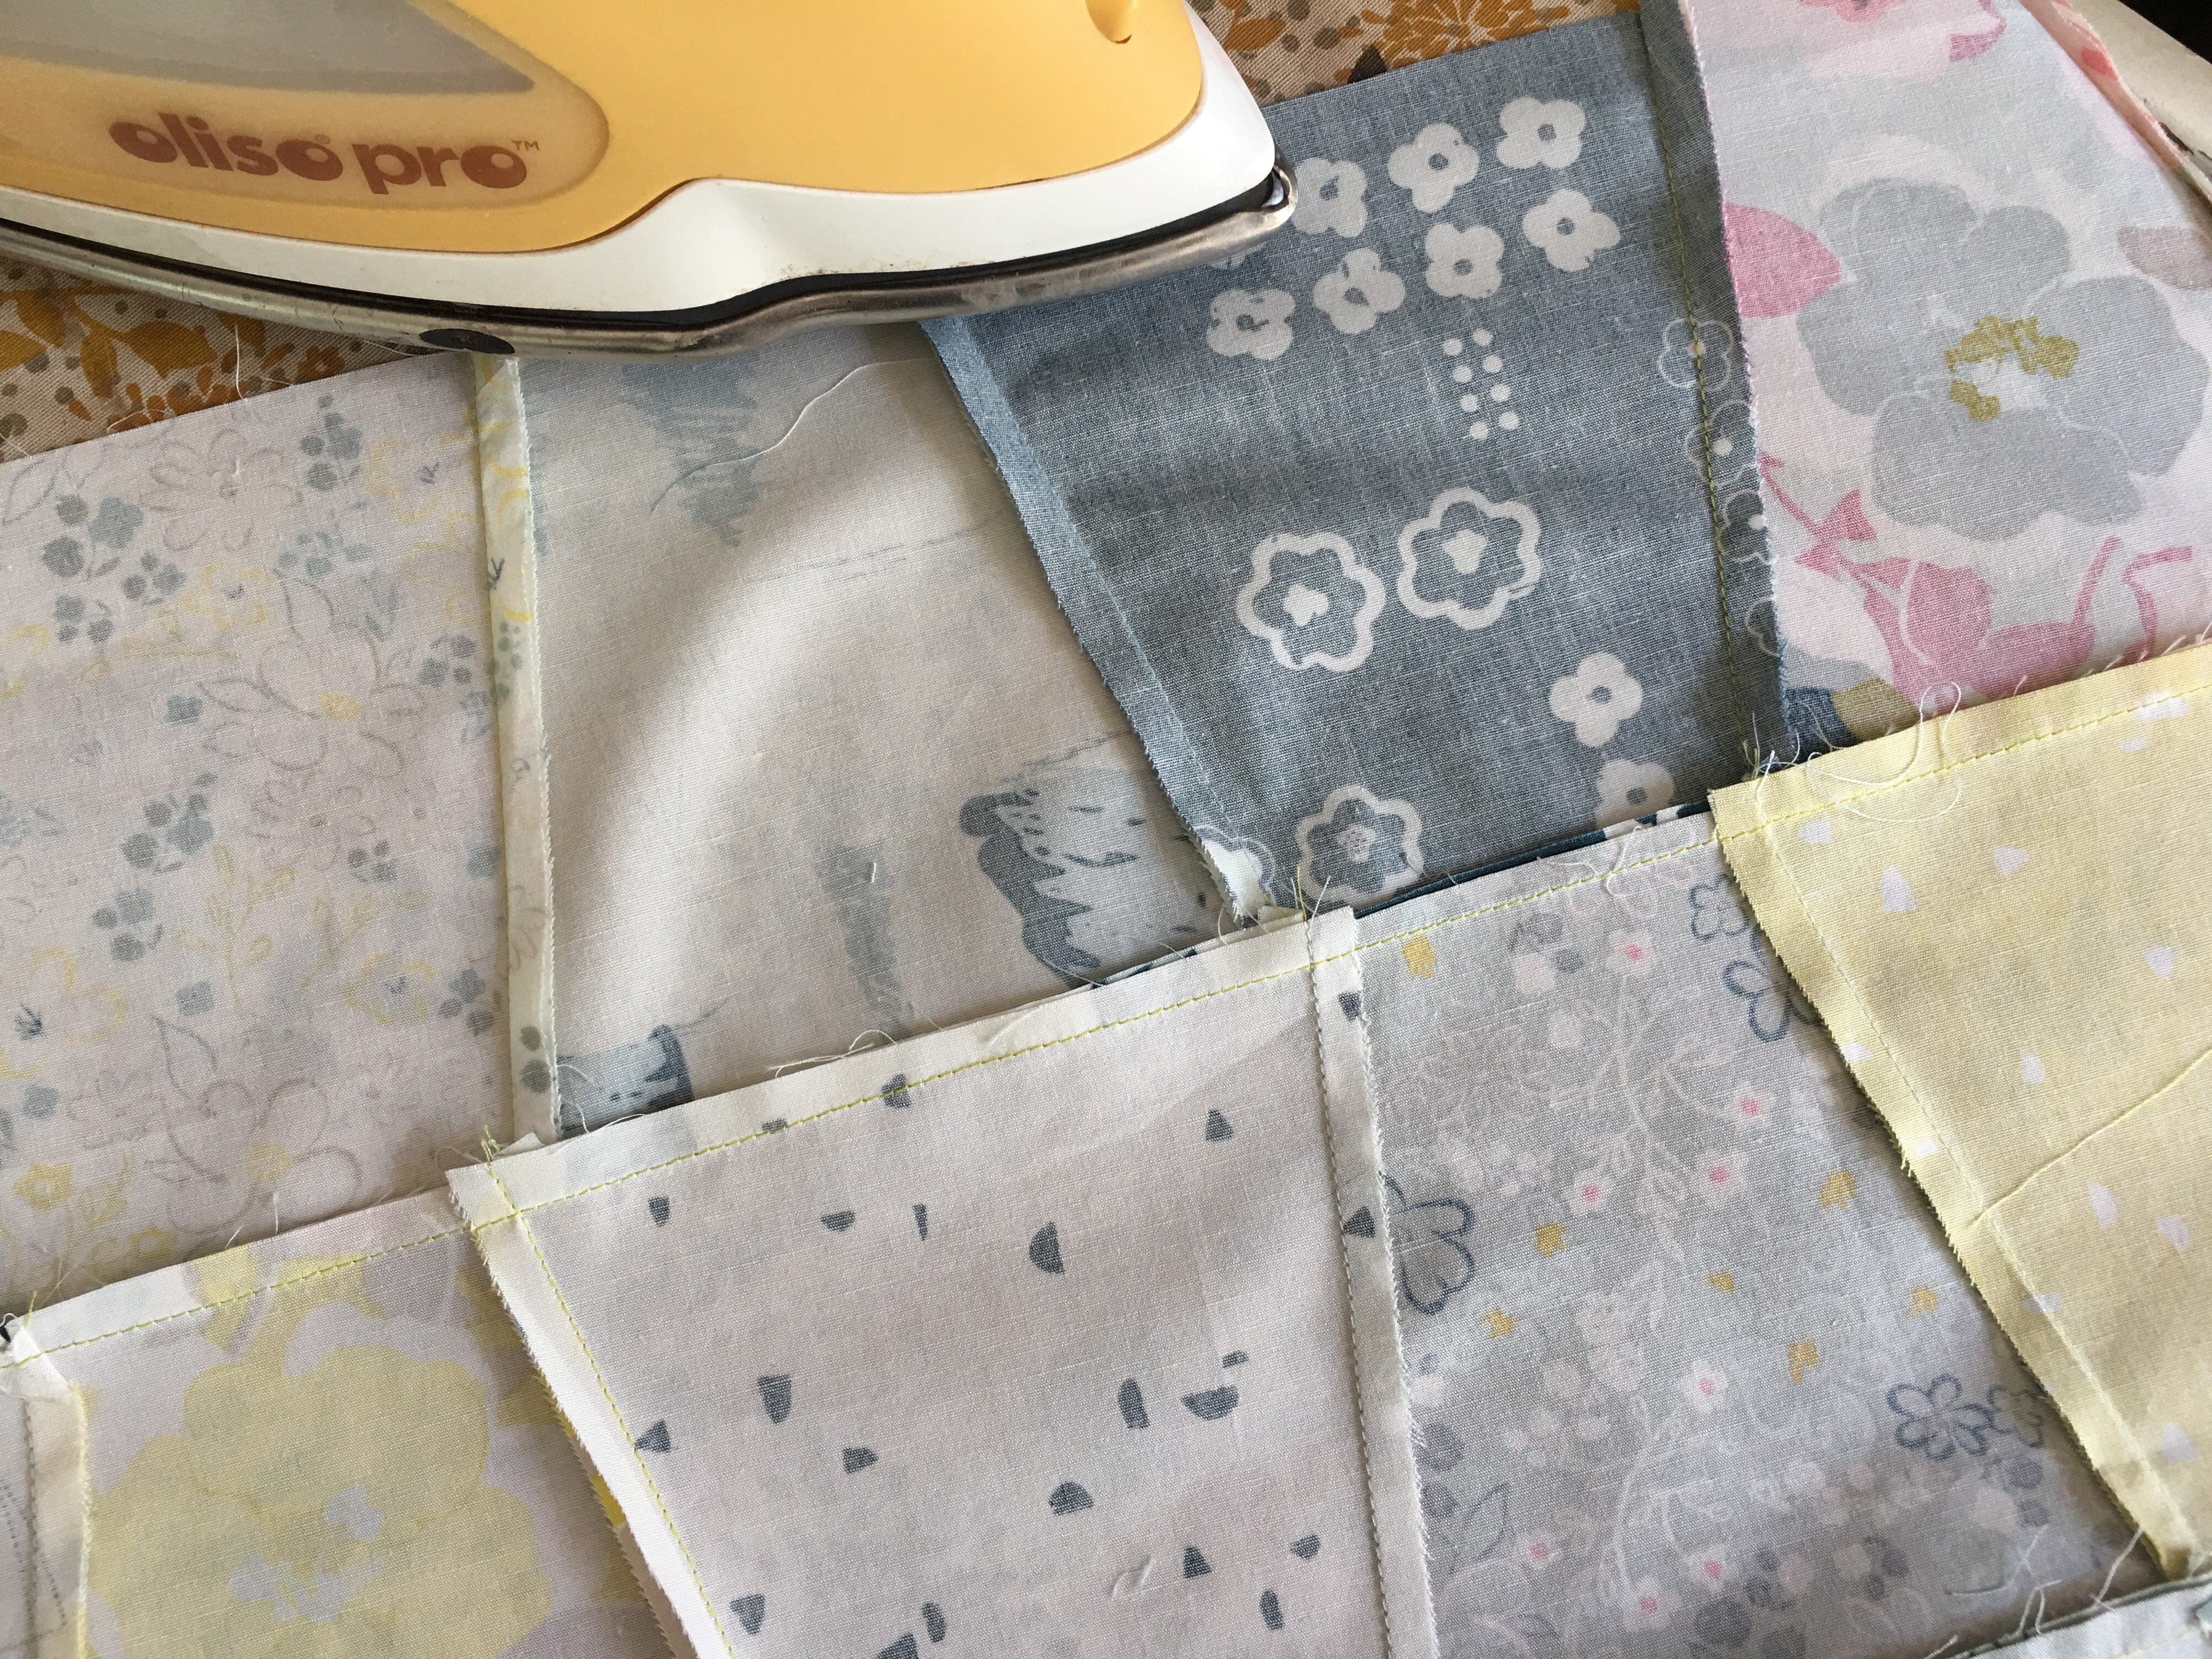
Cut the HeatnBond Fusible Fleece.

IMG_2007

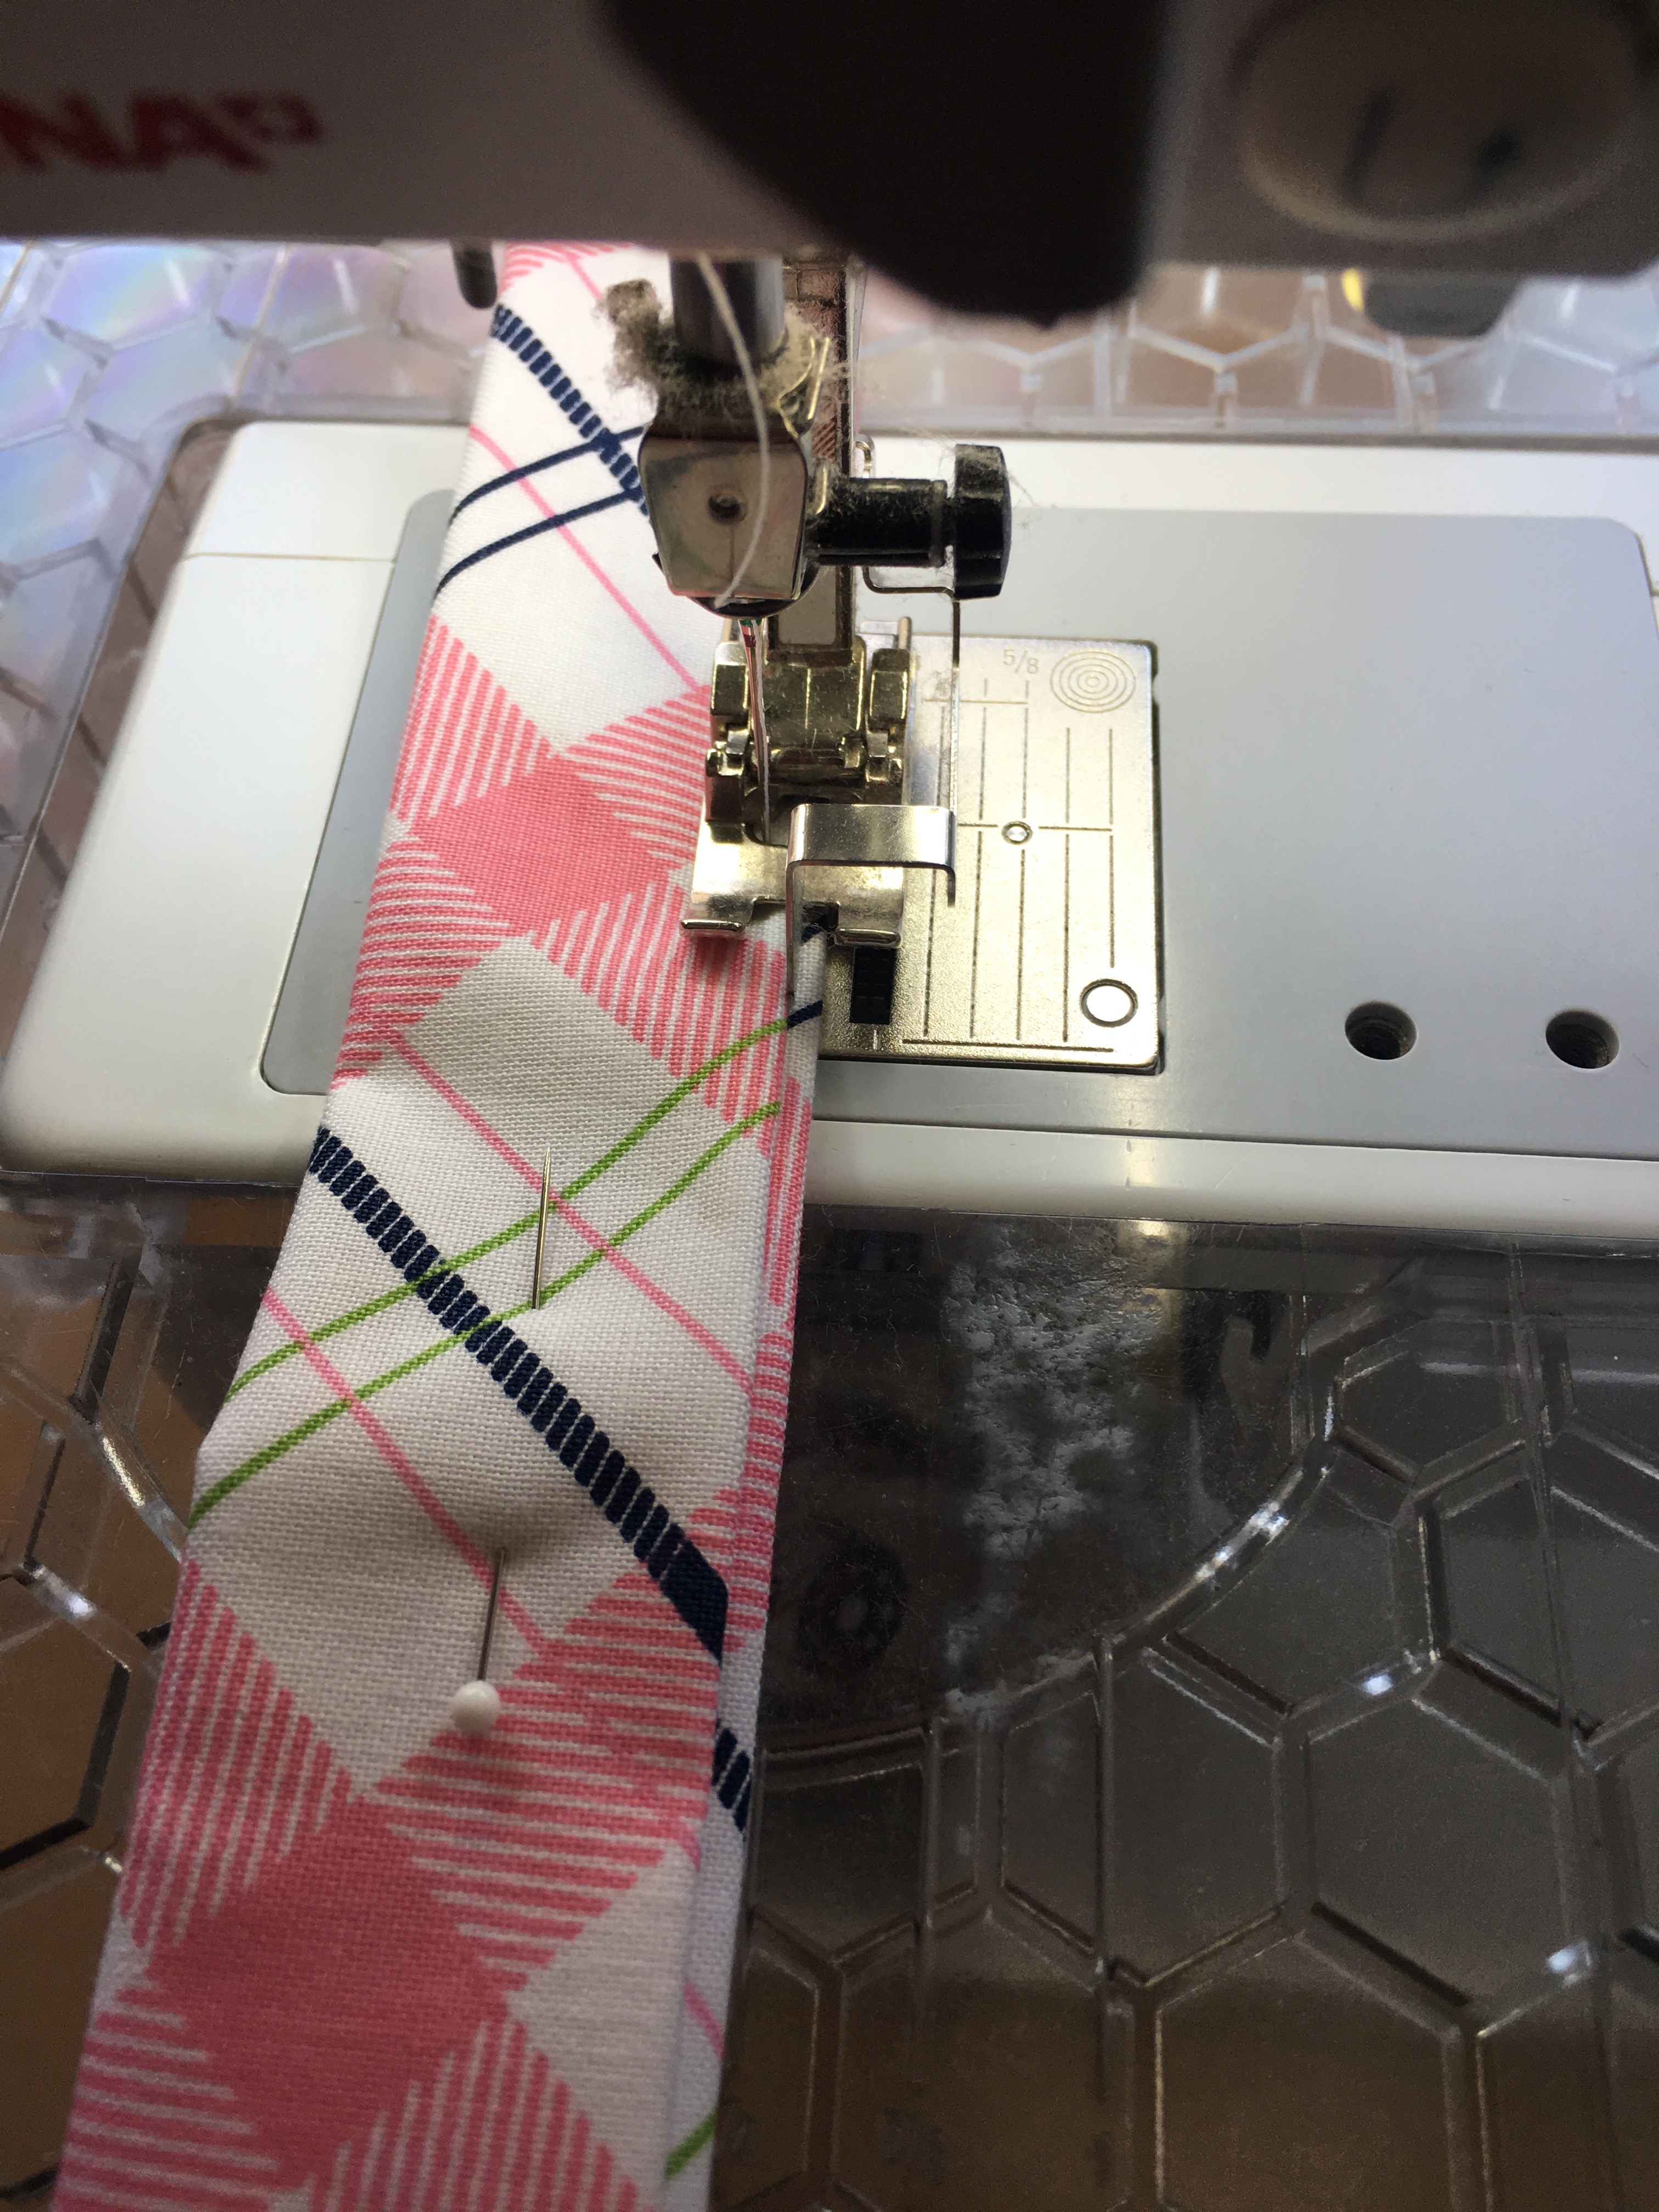
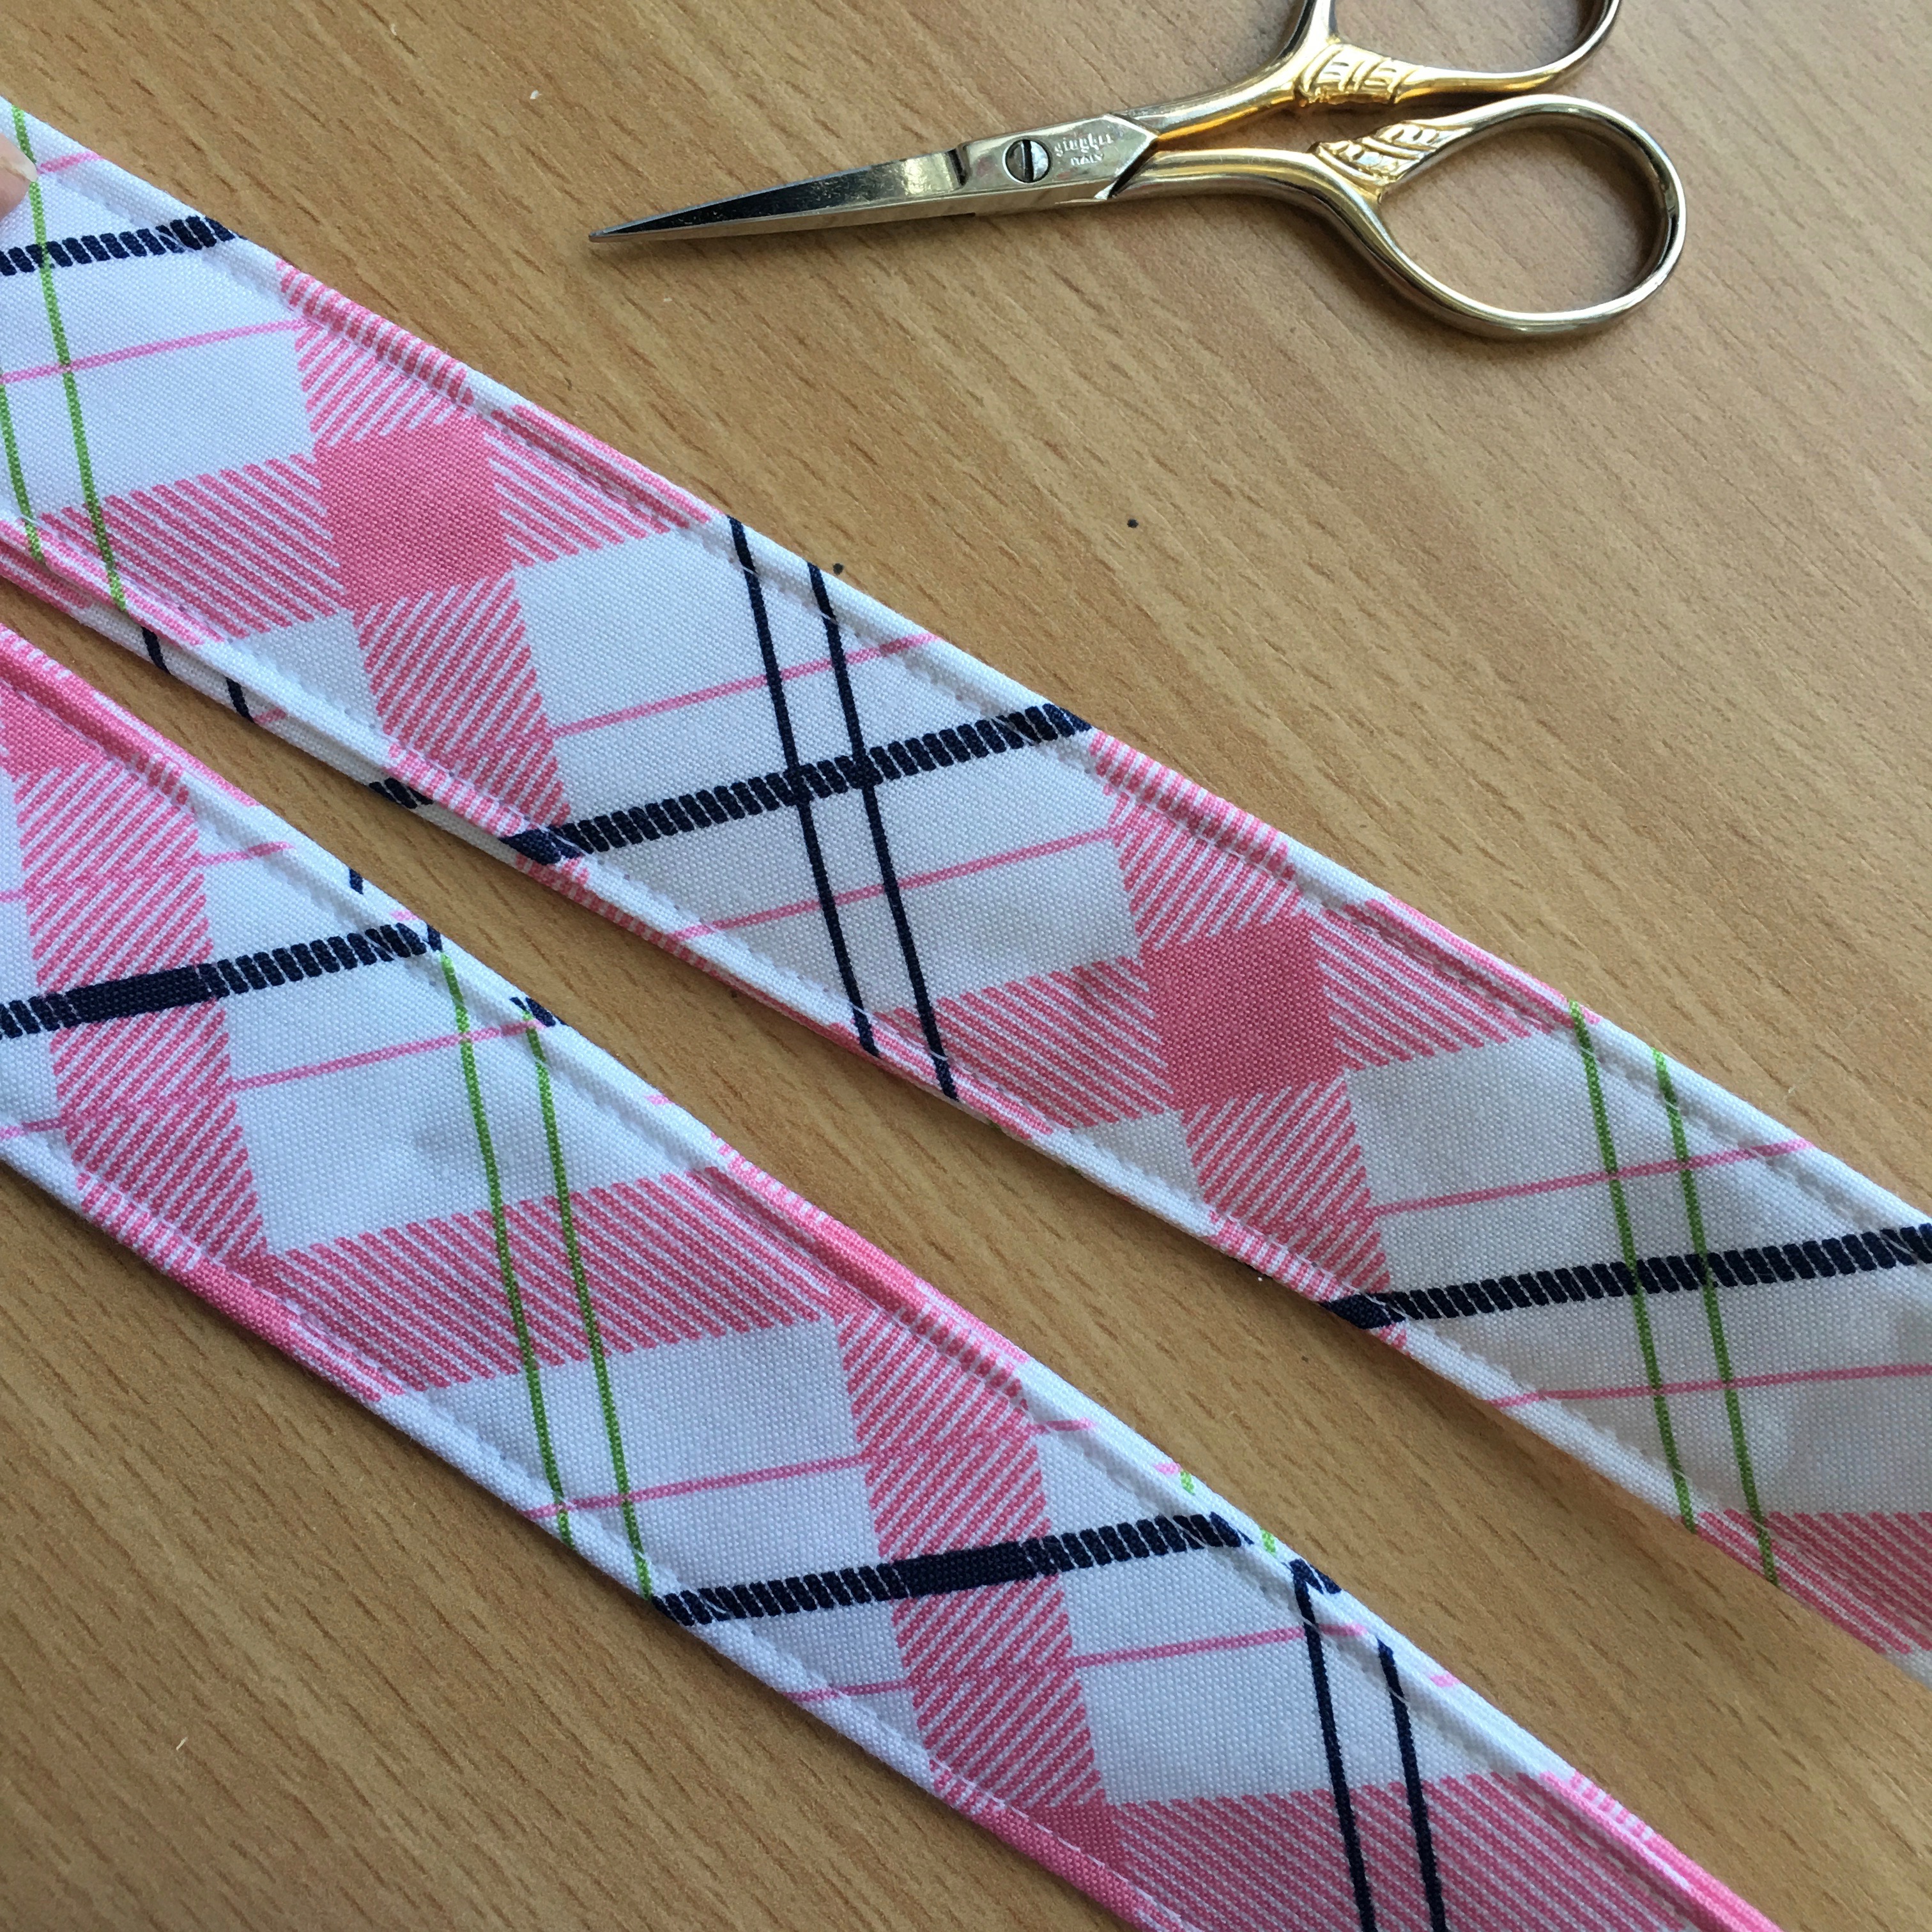
Fuse the fleece to the wrong side of both the patchwork units.  Add some decorative stitching if desired.

IMG_2008

I added a seam along the chambray to give it an accent and I quilted diagonal lines in the patchwork.

IMG_2009

Now that the zipper pouch front and back are ready, you can finish the pouch by following this tutorial for inserting the full access zipper and finishing the bag.

I am so in love and so happy to have a new zipper pouch just for me!!!
gingham girls zipper pouch 2

Perfect to brighten up the inside of my purse and to hold all my cosmetic items.

gingham girls zipper pouch 5gingham girls zipper pouch 6

The back is so scrappy and cute!gingham girls zipper pouch 7I dug out a few of my dresses from when I was little (in the 70’s) – doesn’t this fabric just blend right in!!  So fun!!!

gingham girls zipper pouch

Sizzix Captain America Graduation Cap

IMG_1984

I can’t believe Ella is graduating from High School!!  Where did the time go?  She and her BFF got together to decorate their graduation caps.  Of course they came over to our house and ransacked my Sizzix closet and felt drawer!

image133

They wanted to represent the Winter Solider in their “CAP”-decorating (since they are both fighting over who will be marrying Bucky Barnes!)

We used the Sizzix Fresh Blossoms Alphabet to die cut the letters in white craft felt

The circles are from the 3 1/2″, 5″, and 7″ circle dies.  We had to hand cut the white circle to nest in the shield.

The all of the stars are die cut using the Stacked Stars die.

We used the Sizzix Big Shot Plus for all the die cutting.

IMG_1982

We laid them all out and then used tacky glue to adhere the felt.

IMG_1980

Super cute and super NERDY!!!IMG_1985

Bunny Hop Quilt Pattern {Free}

bunny hop cover
Today I’m sharing my latest pattern for this fun spring wallhanging.  There is just something about hanging a new quilt that makes your house feel all happy!!

bunny quilt 3
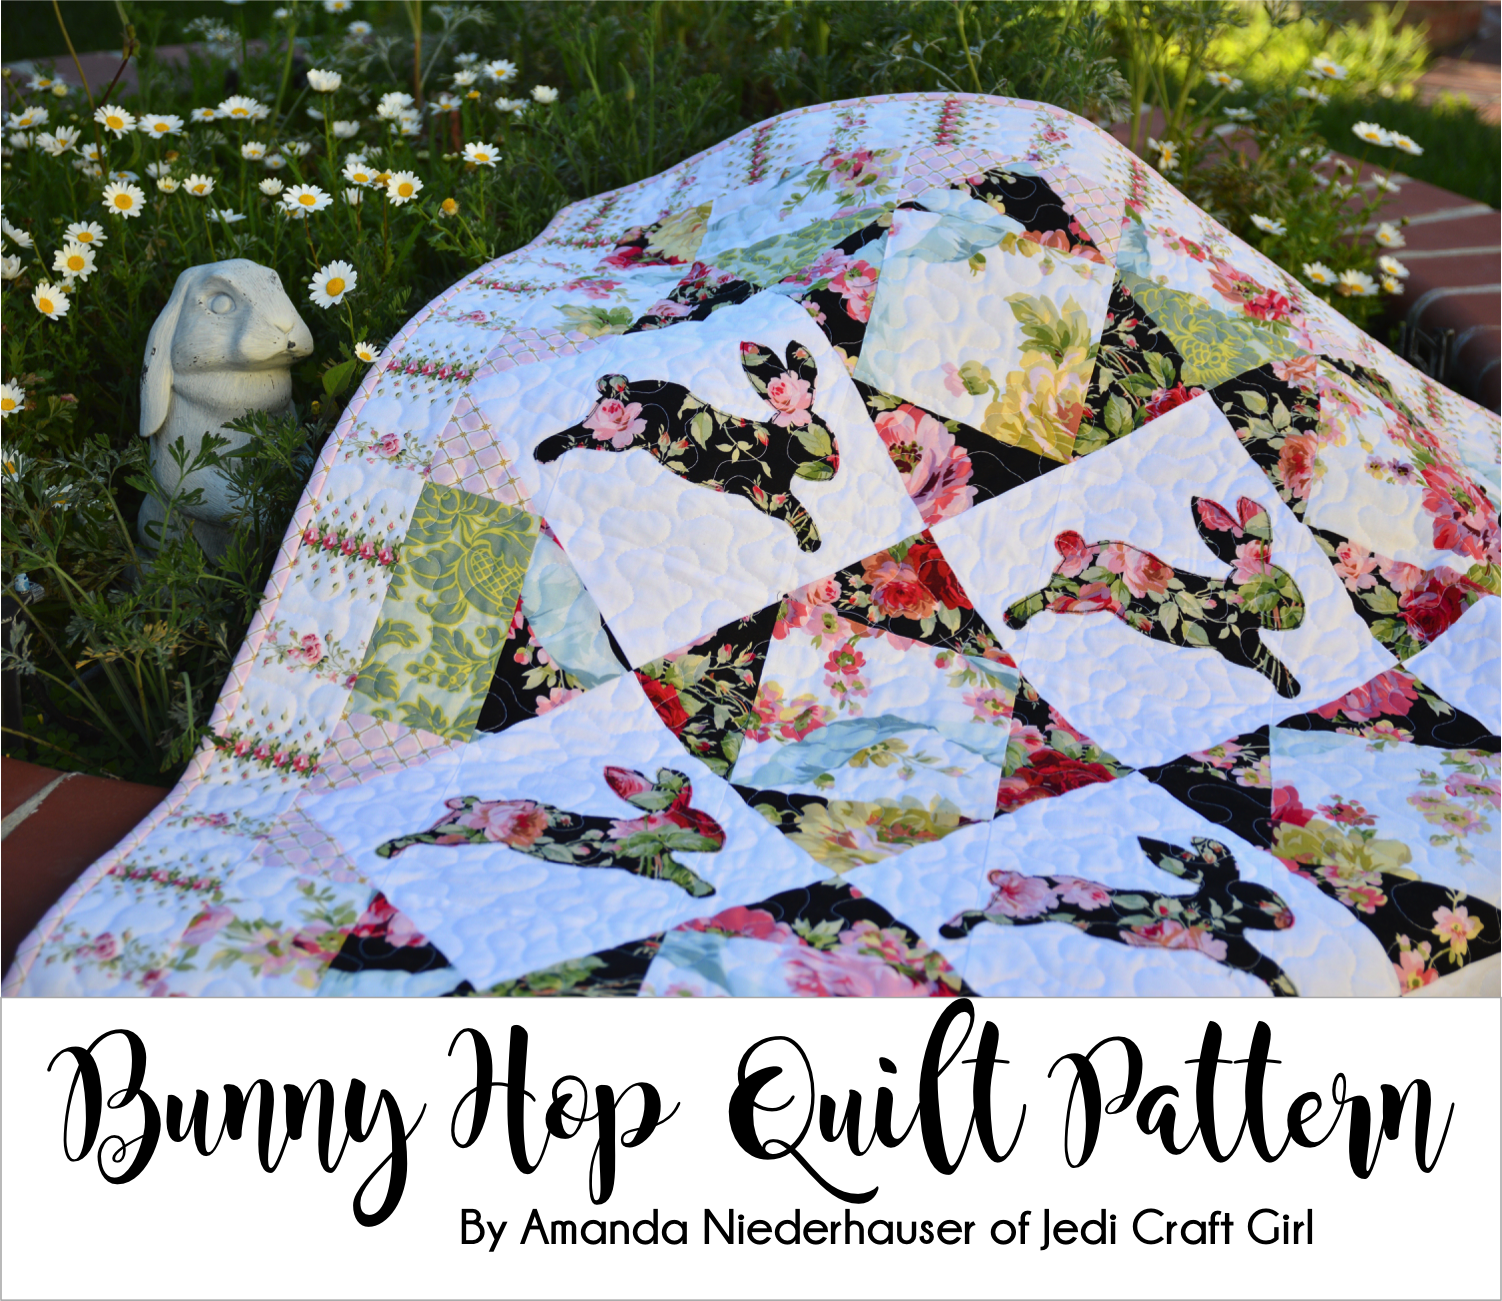
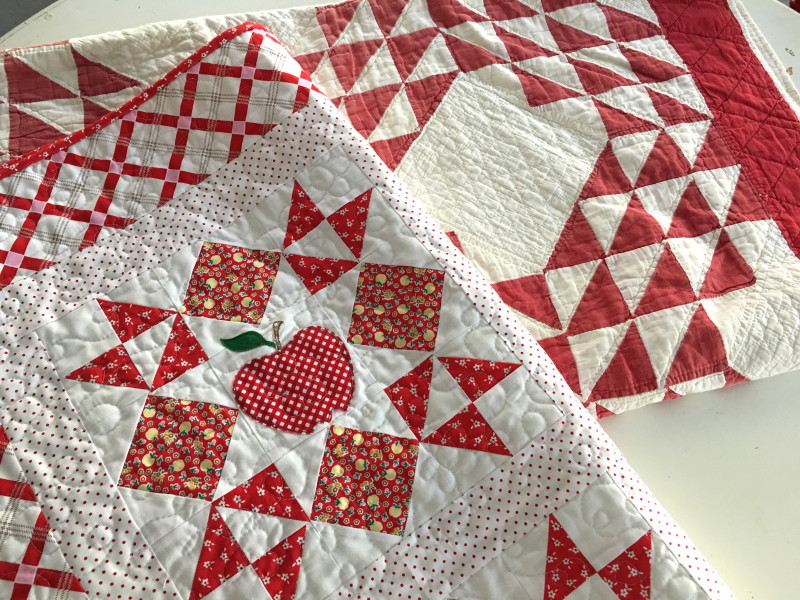
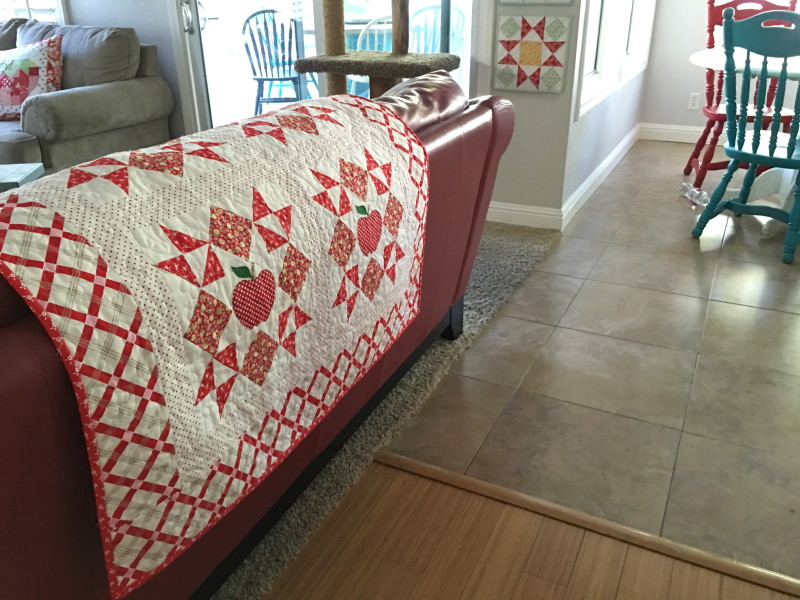
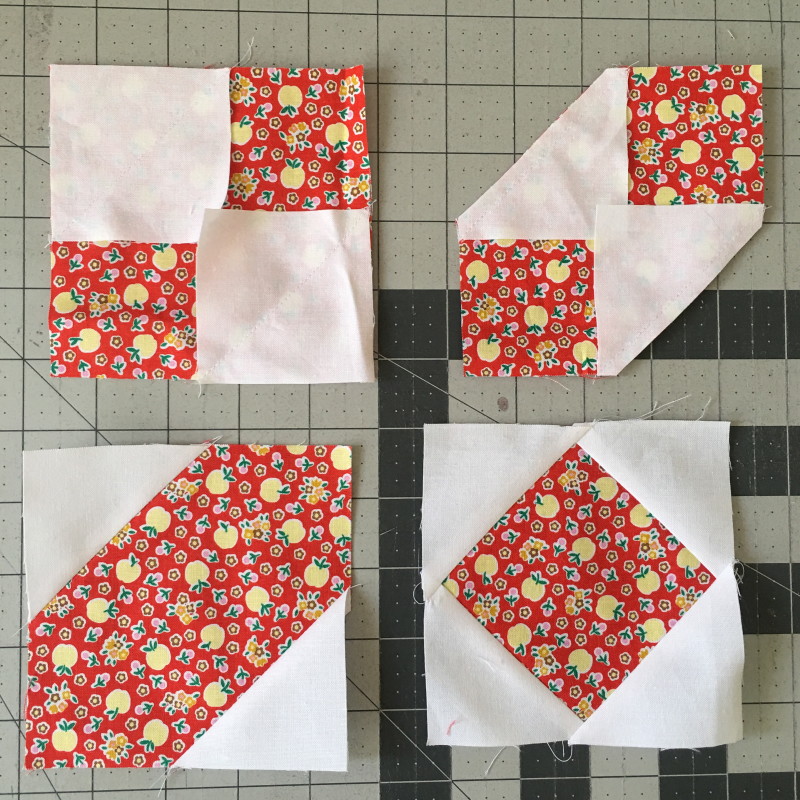
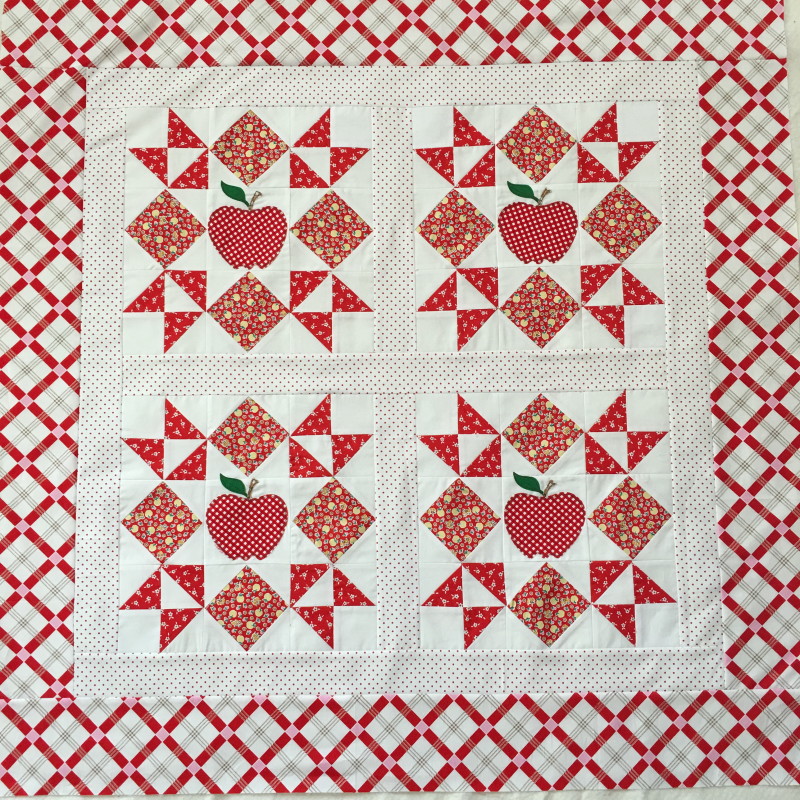
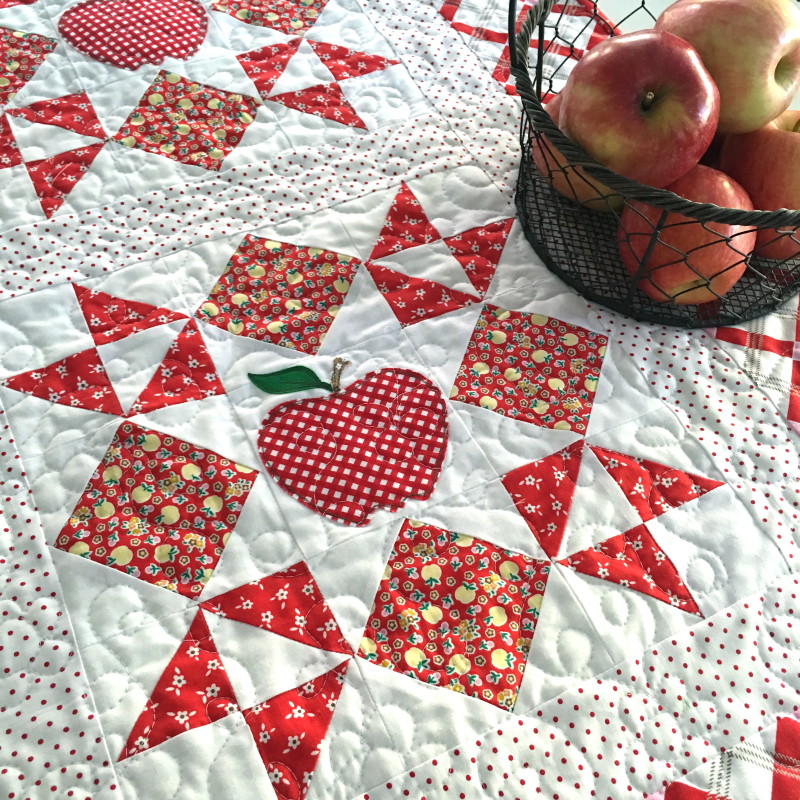
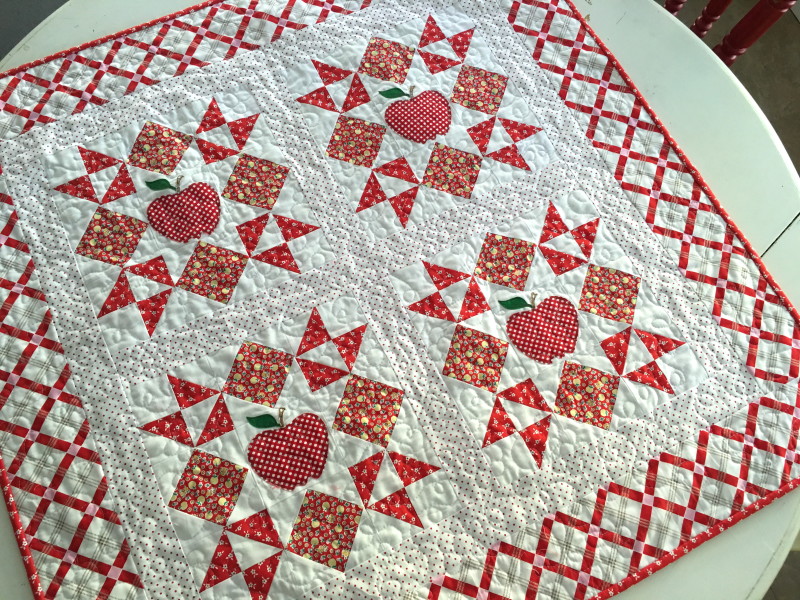
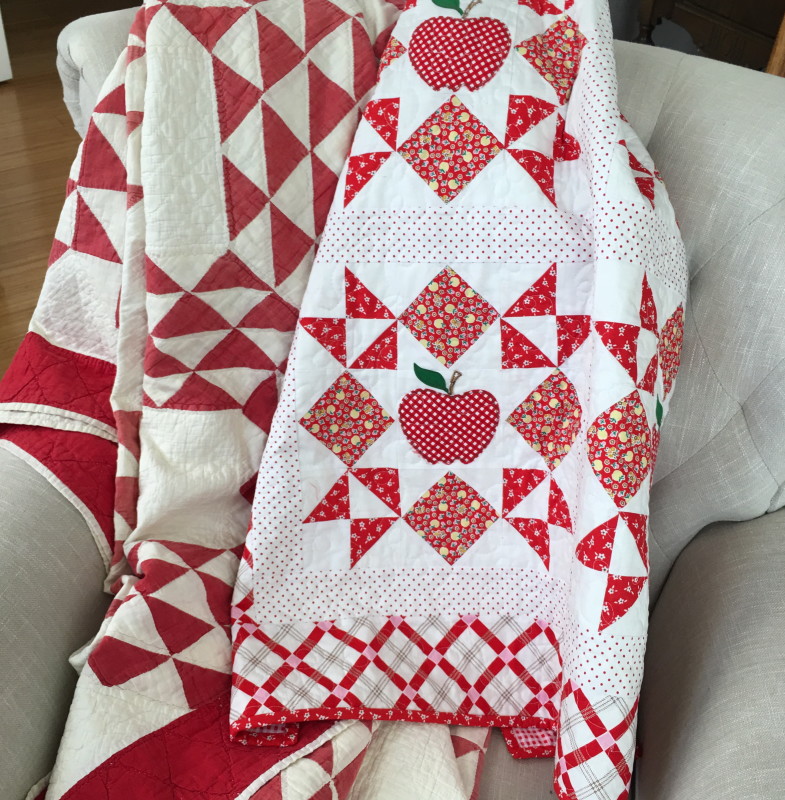
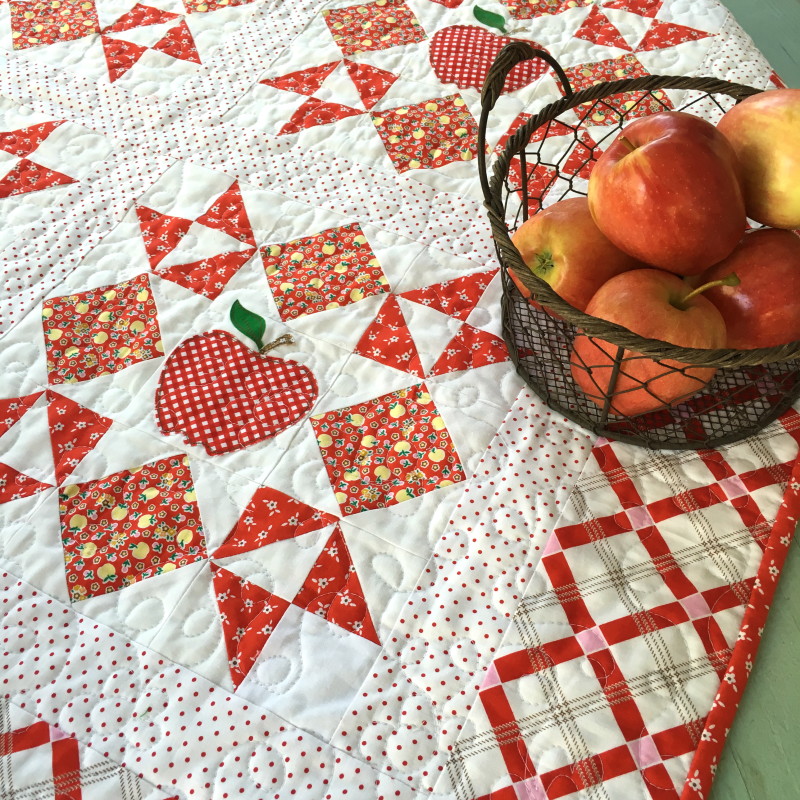
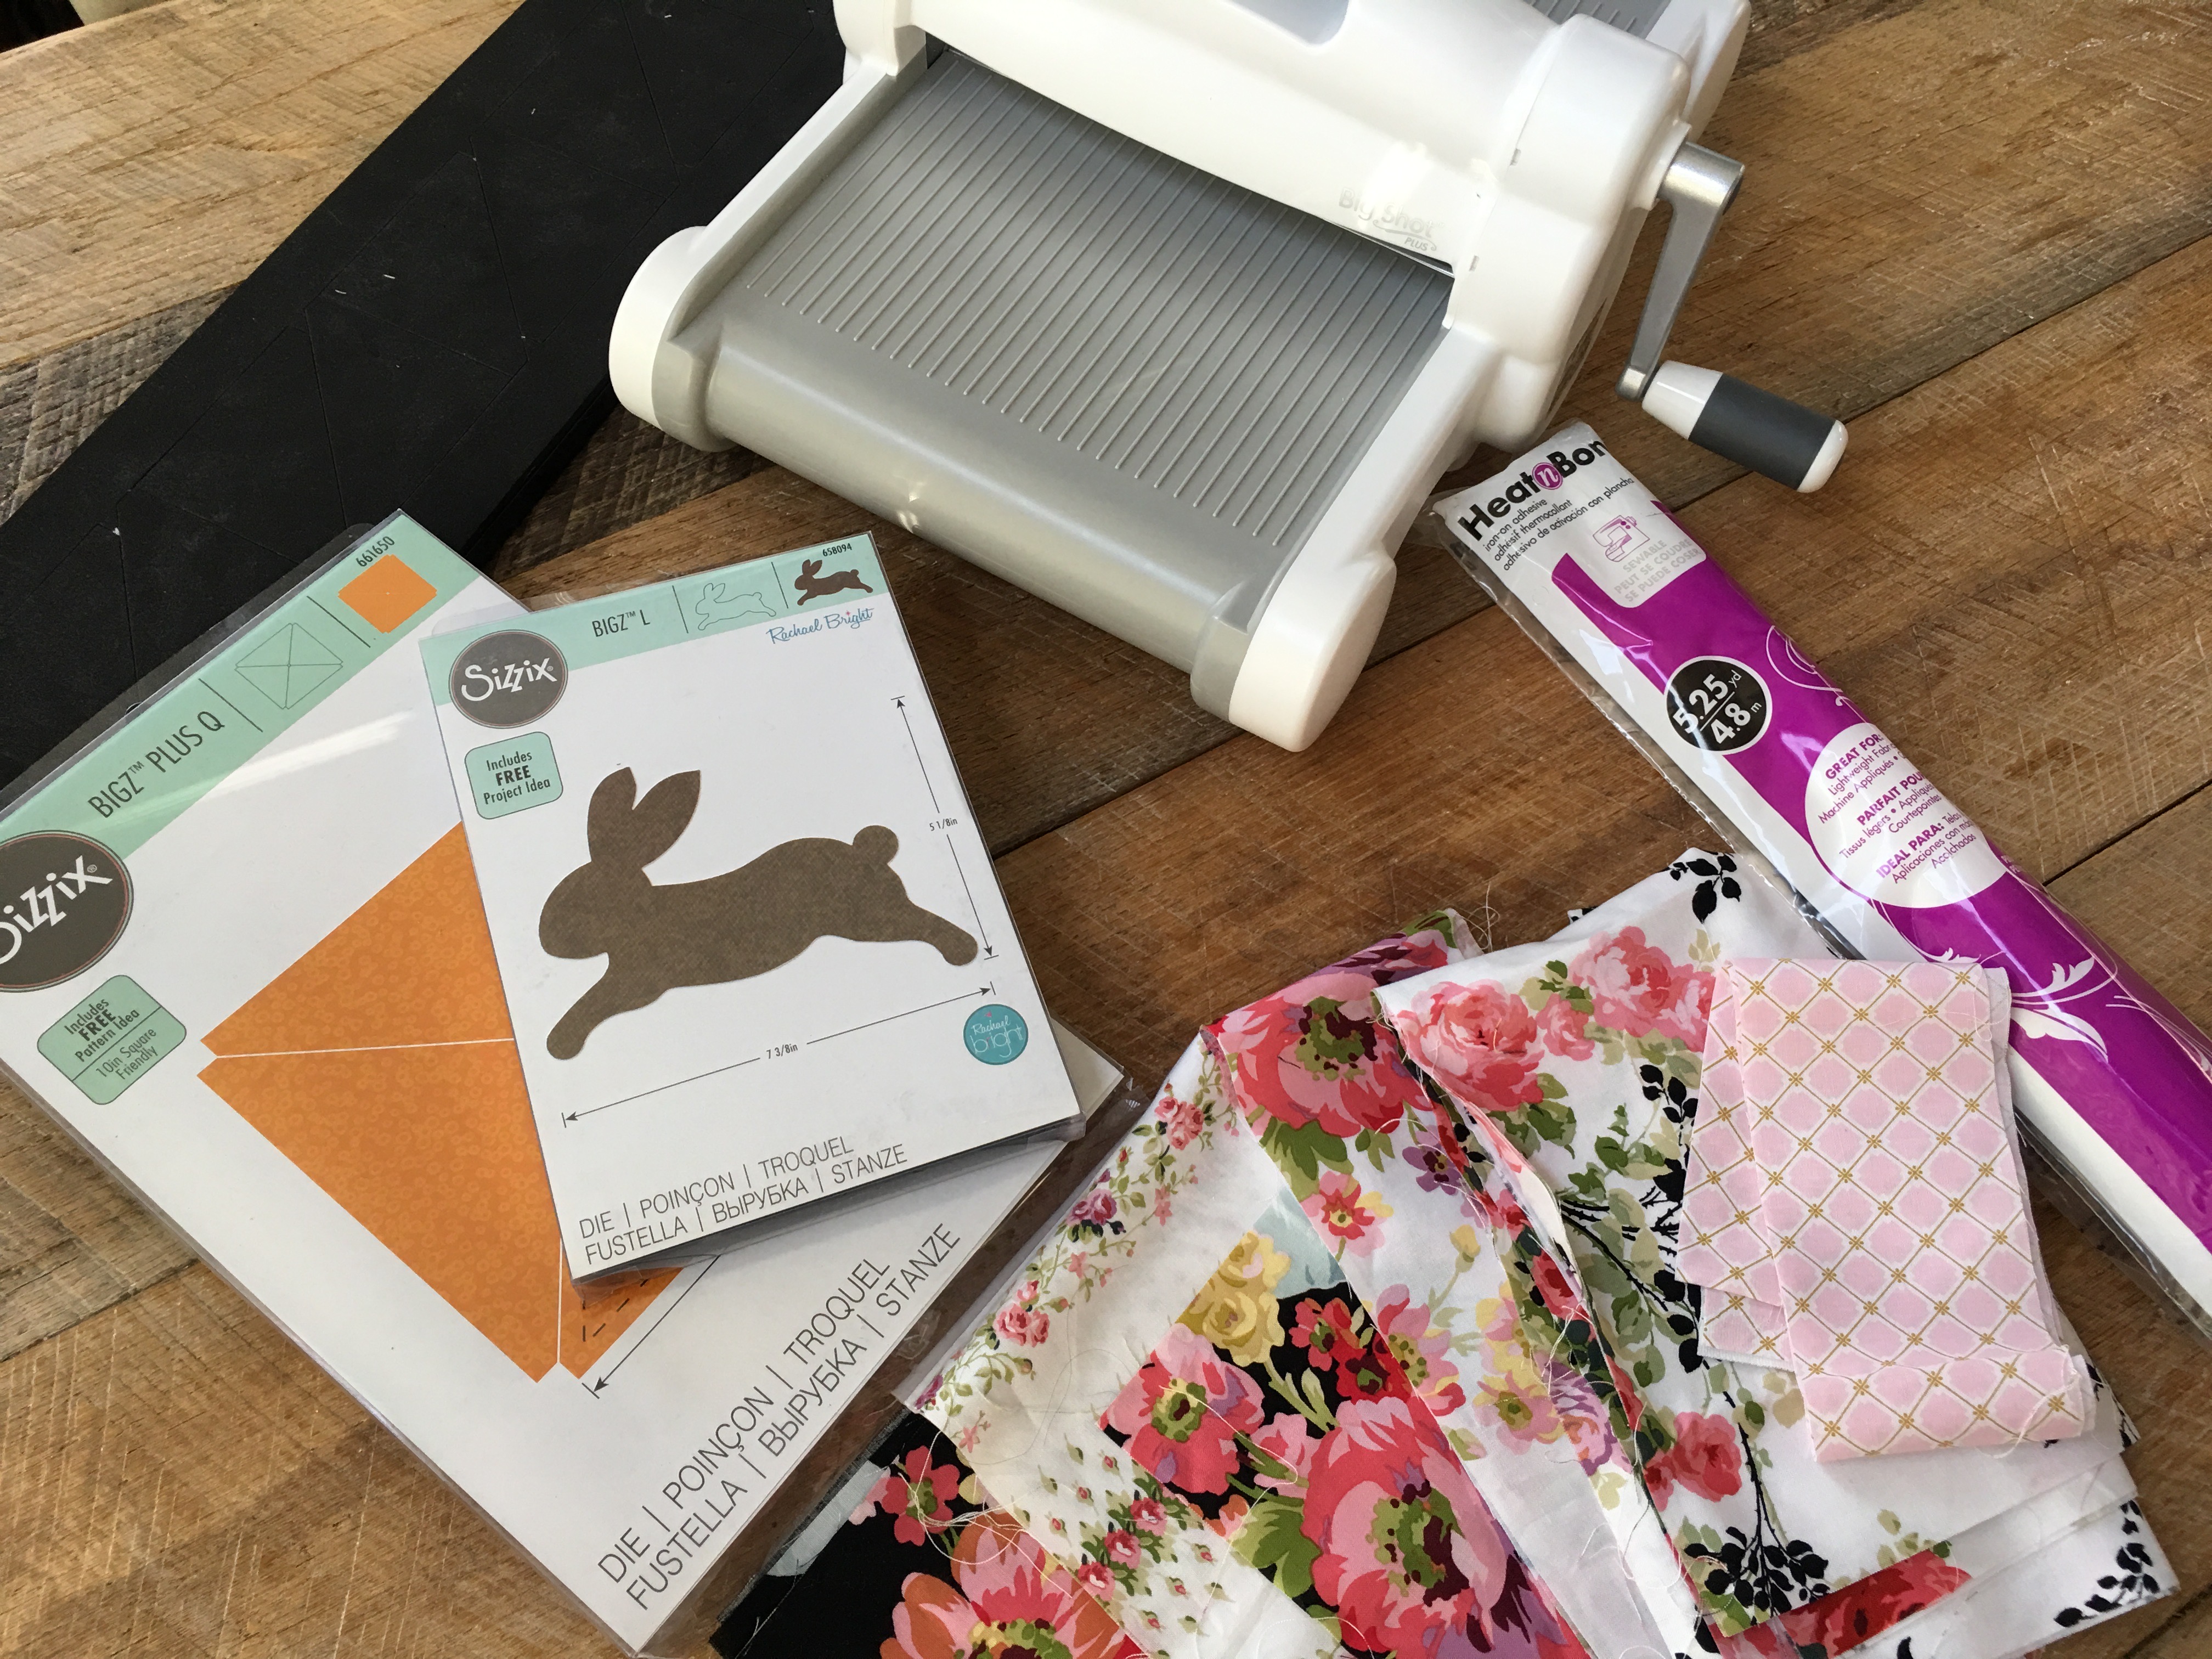
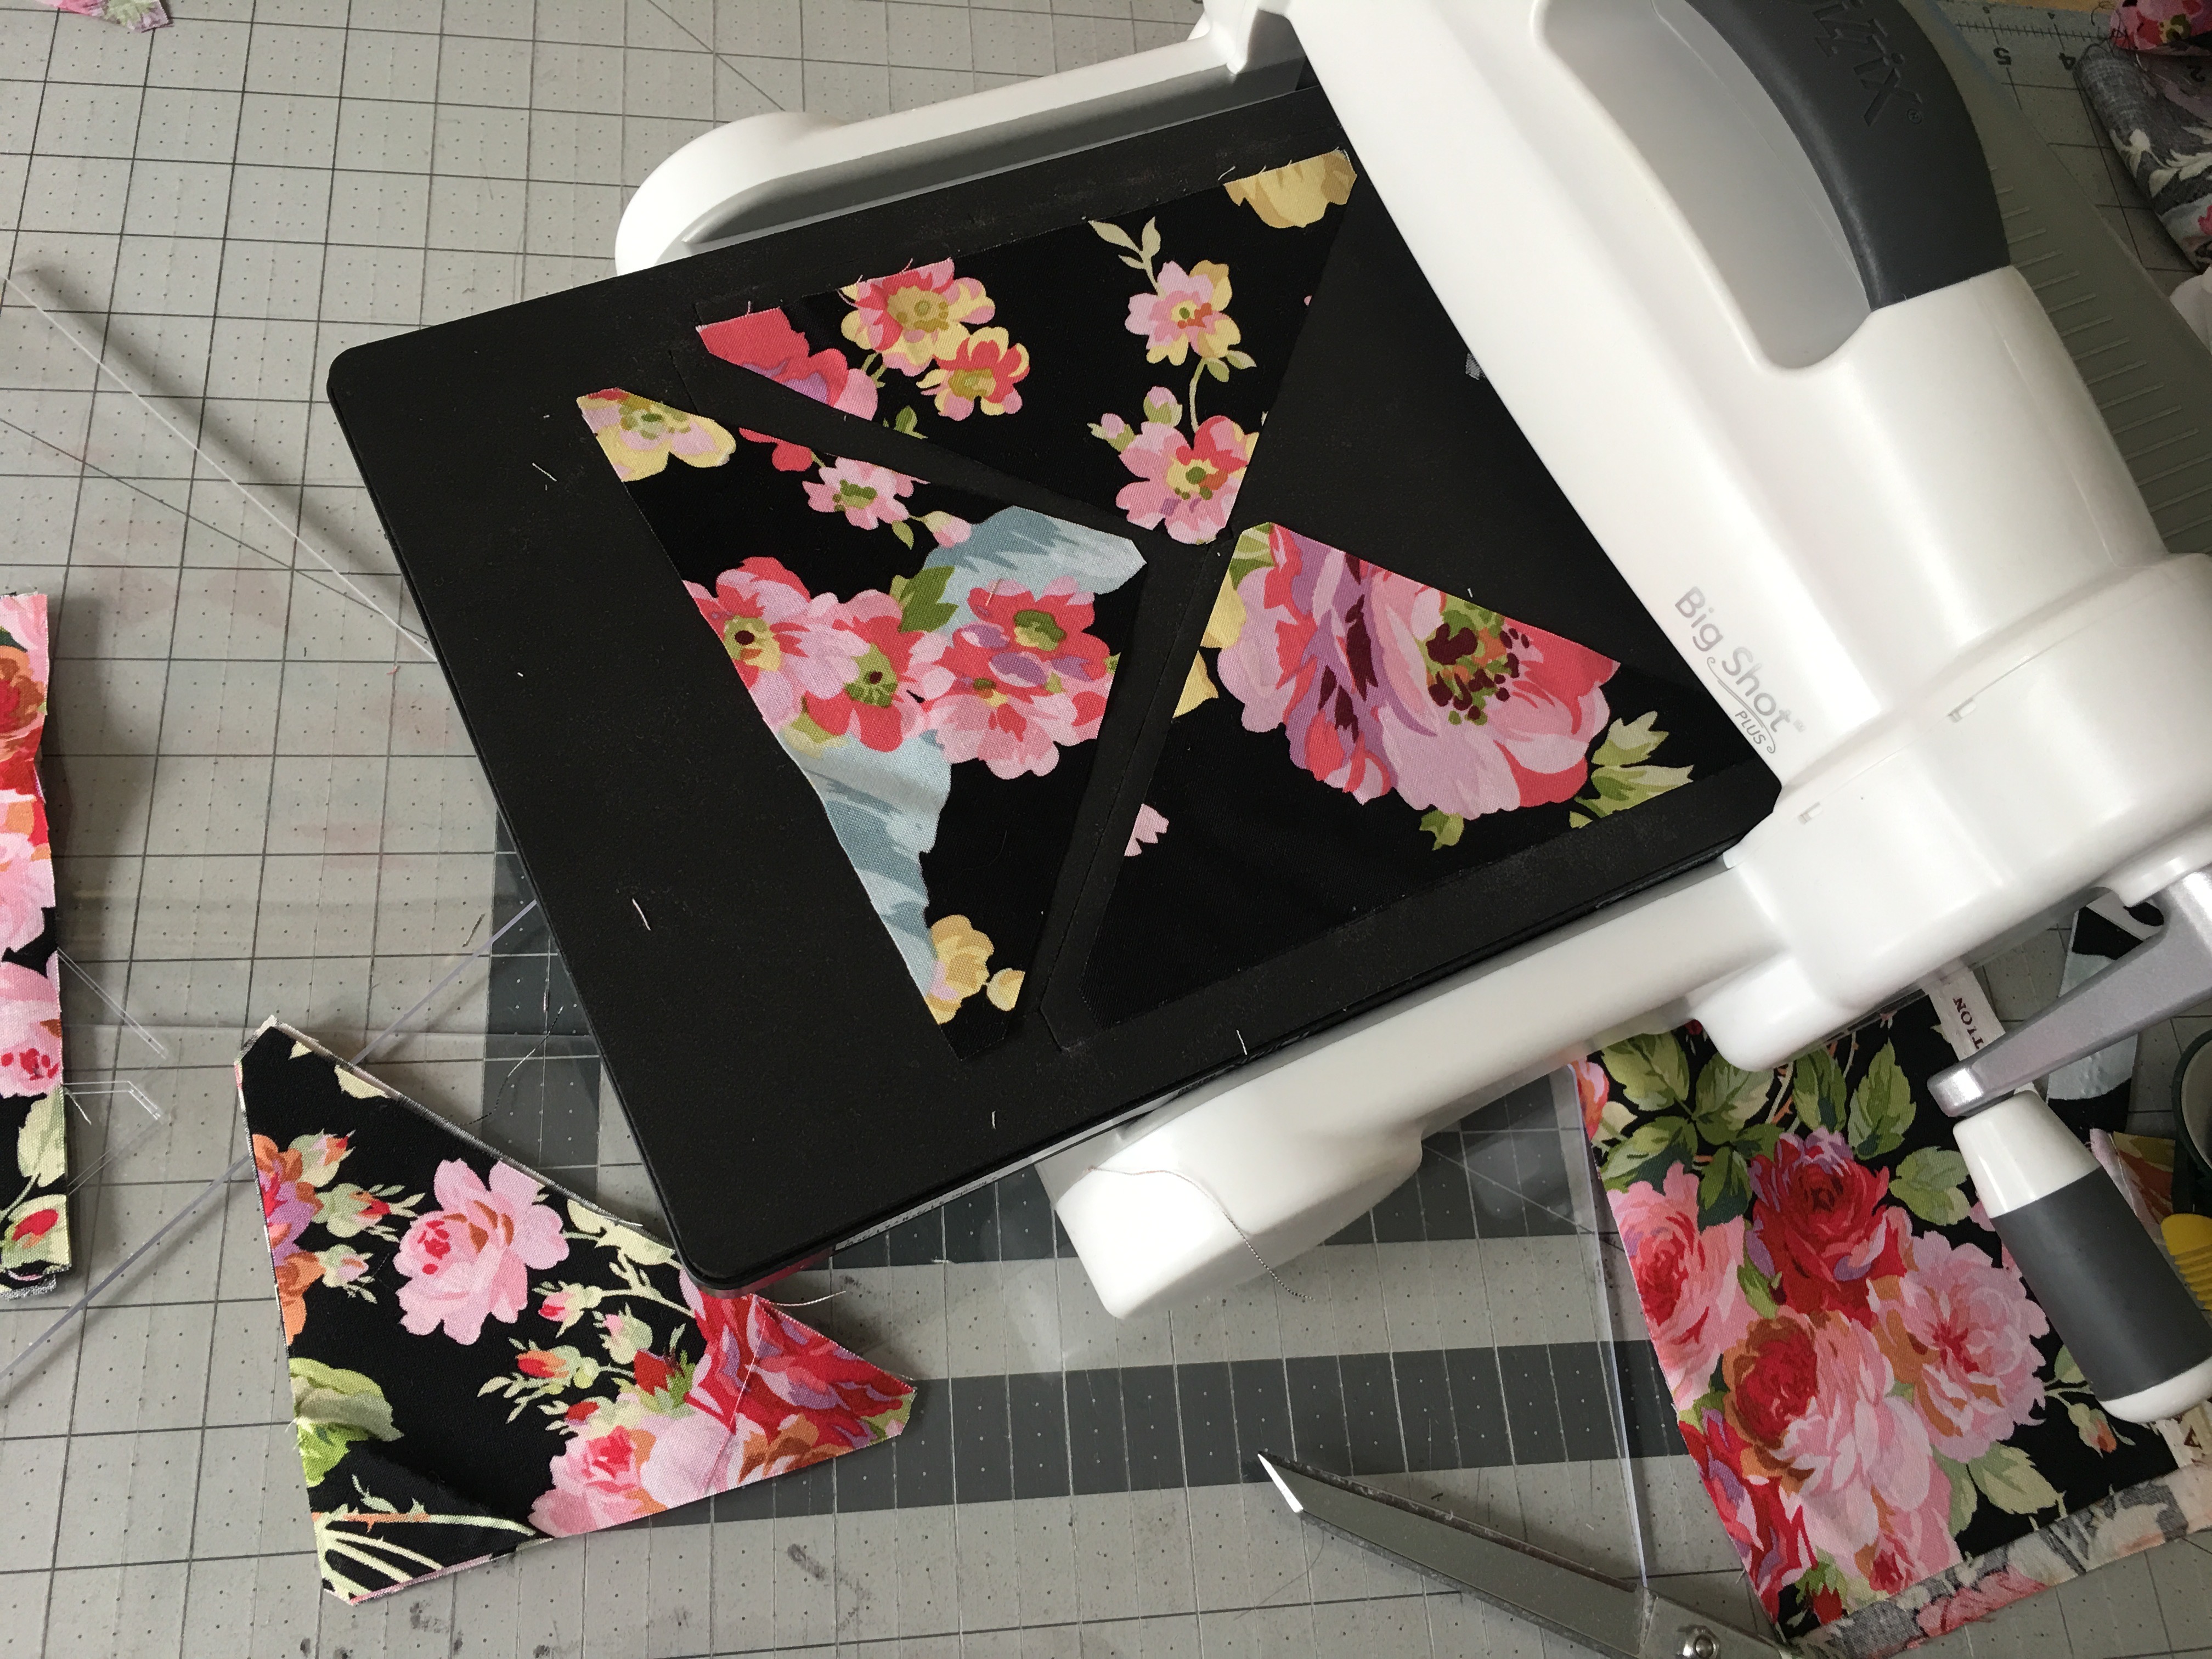
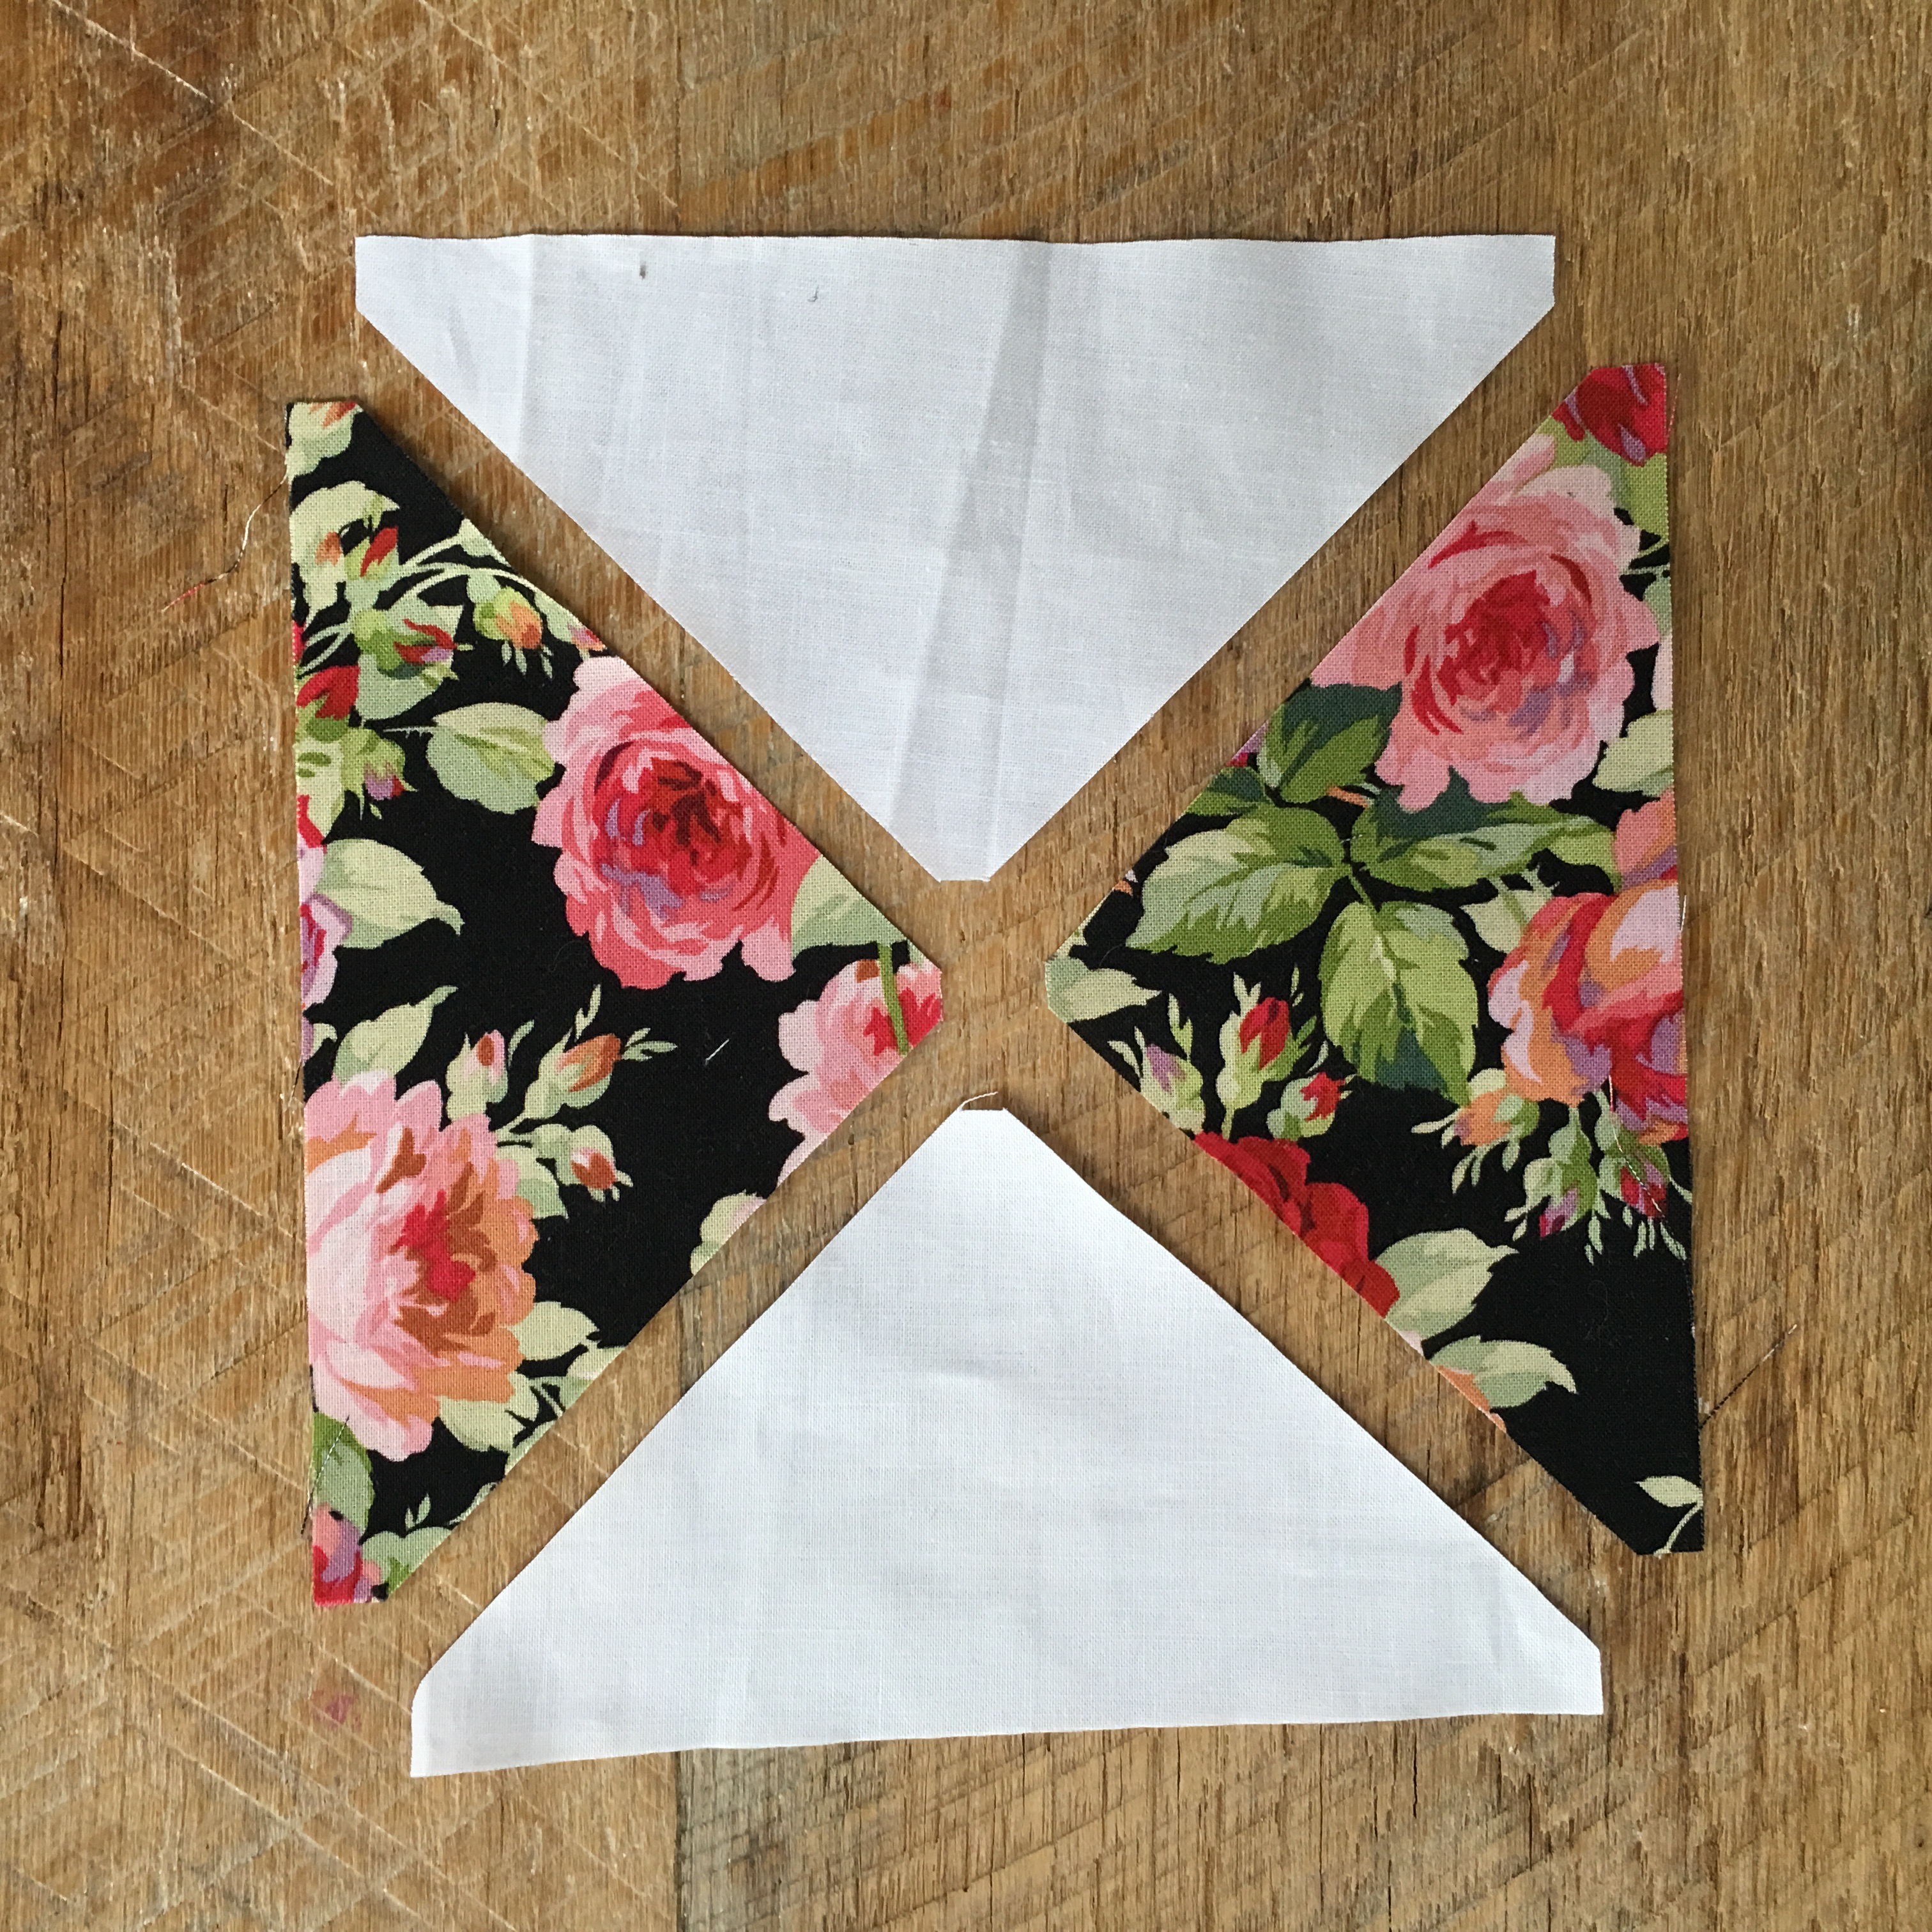
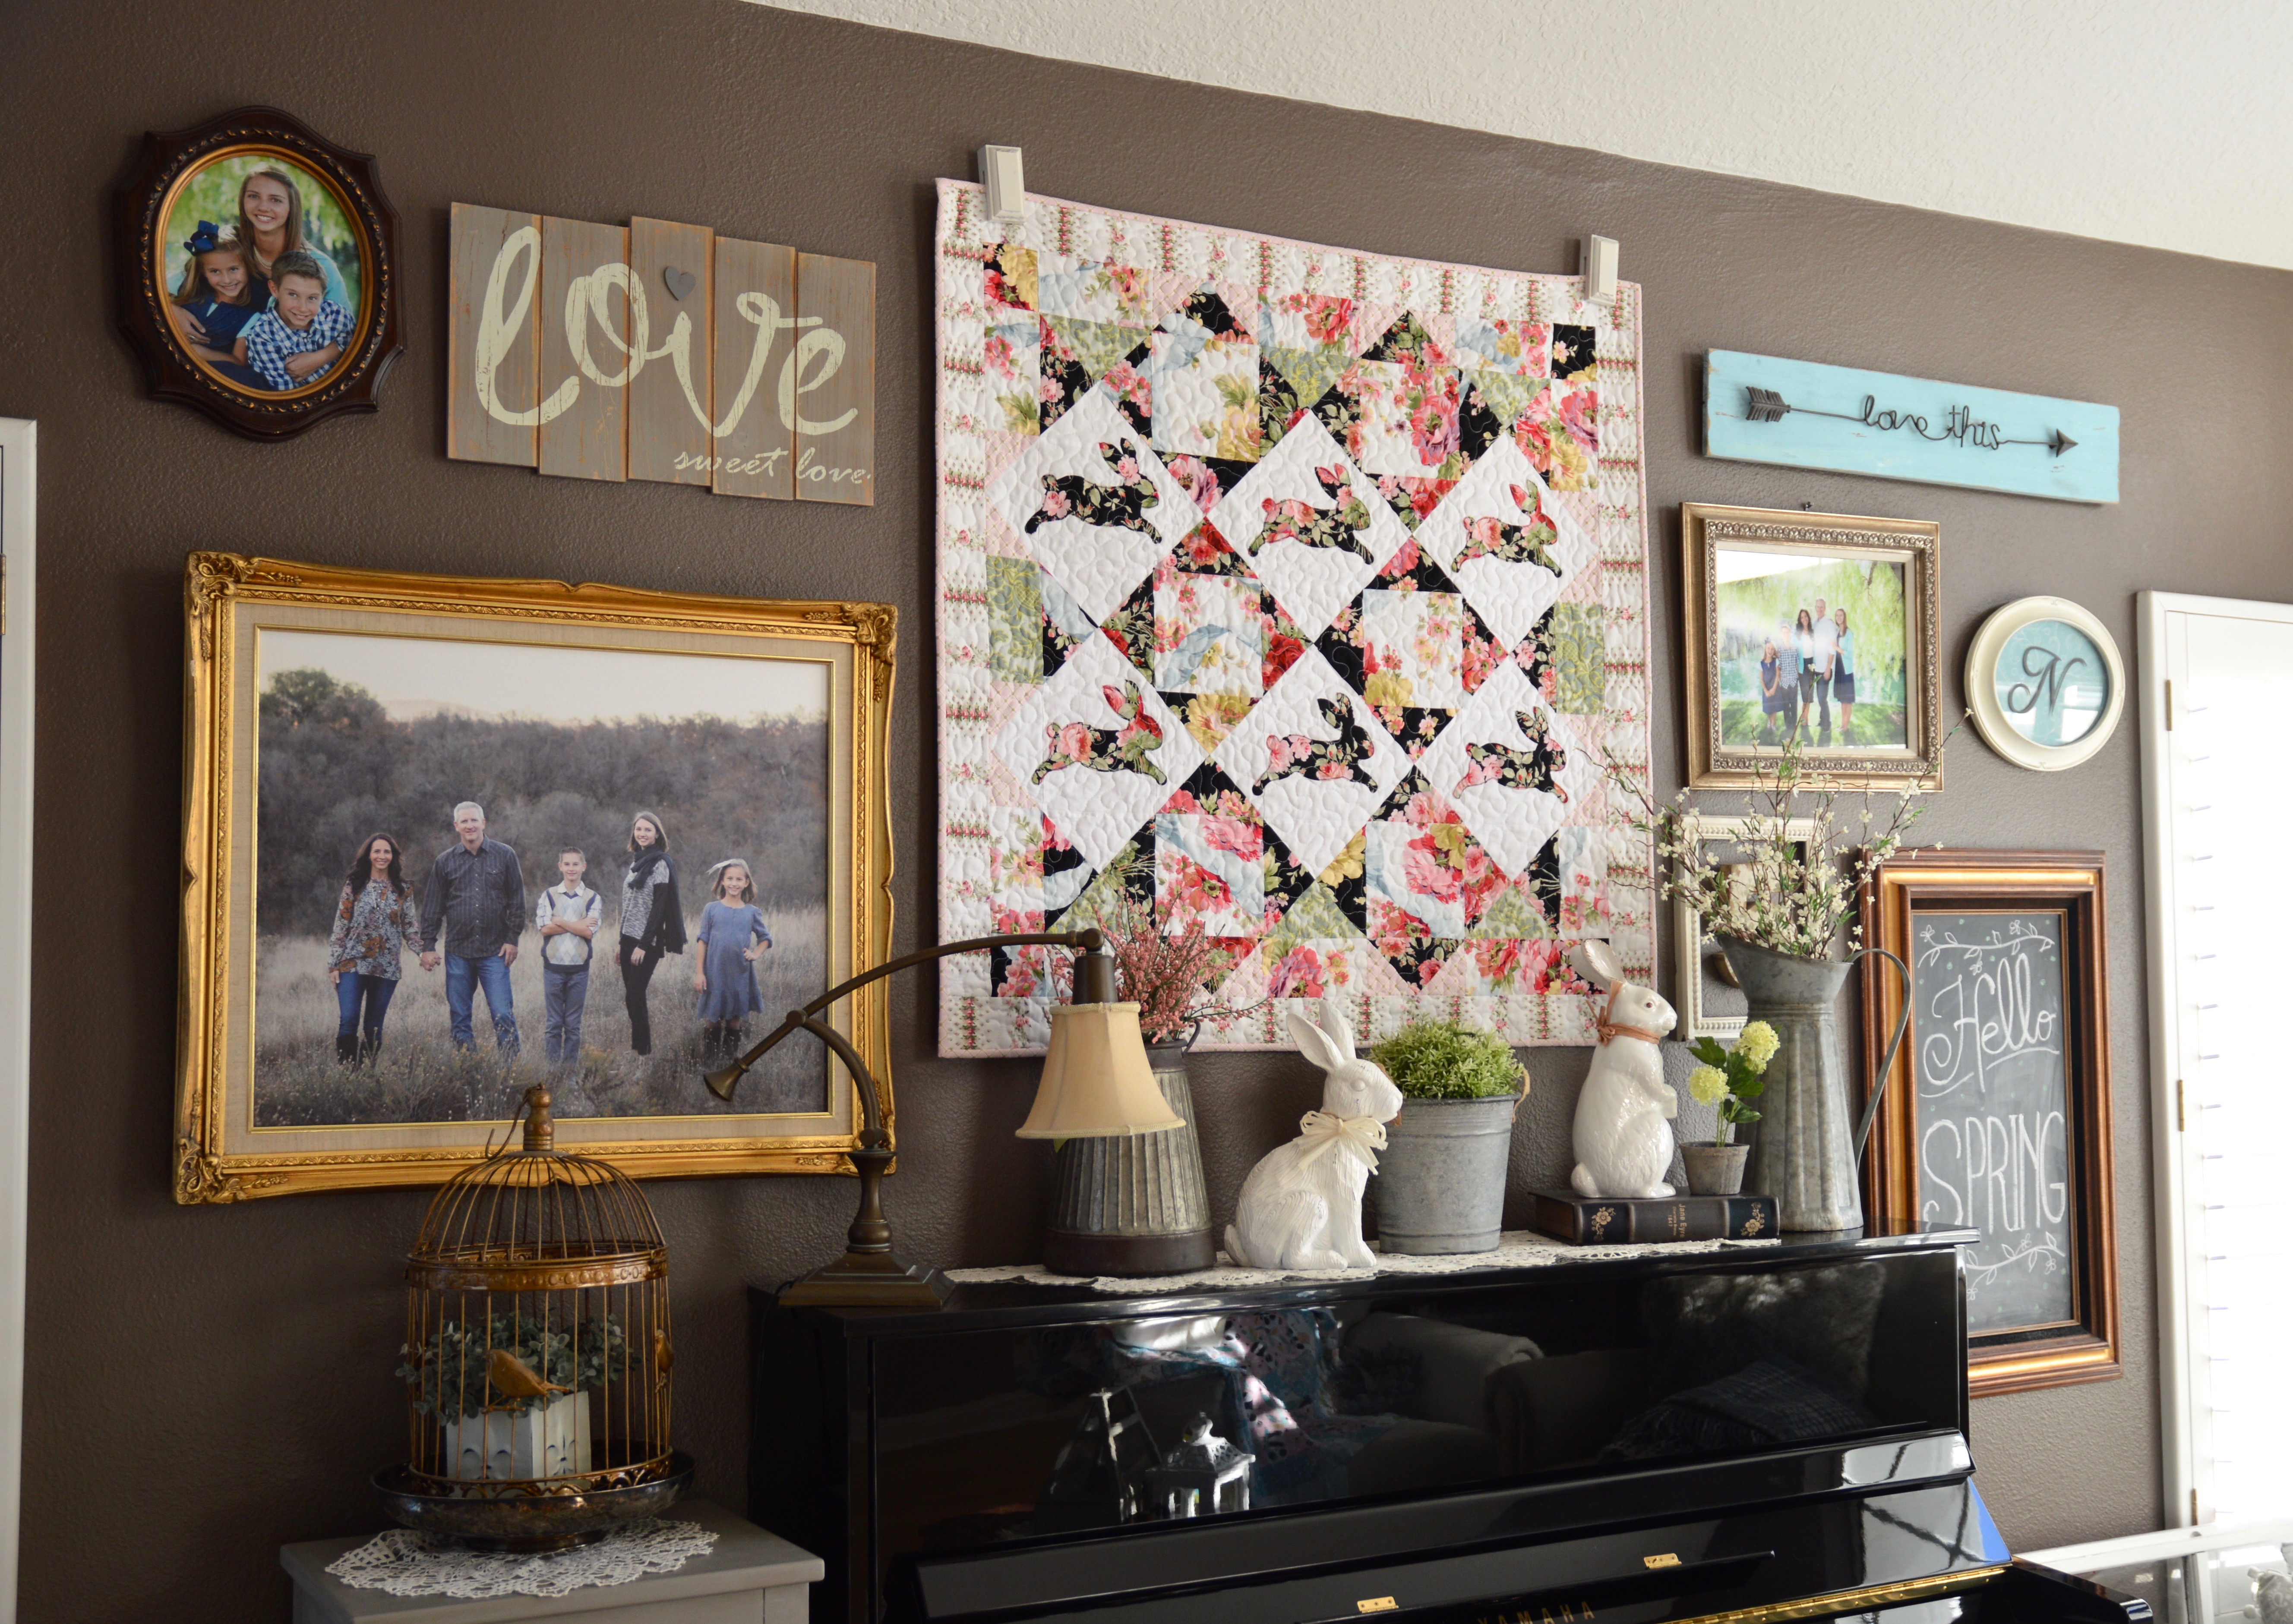
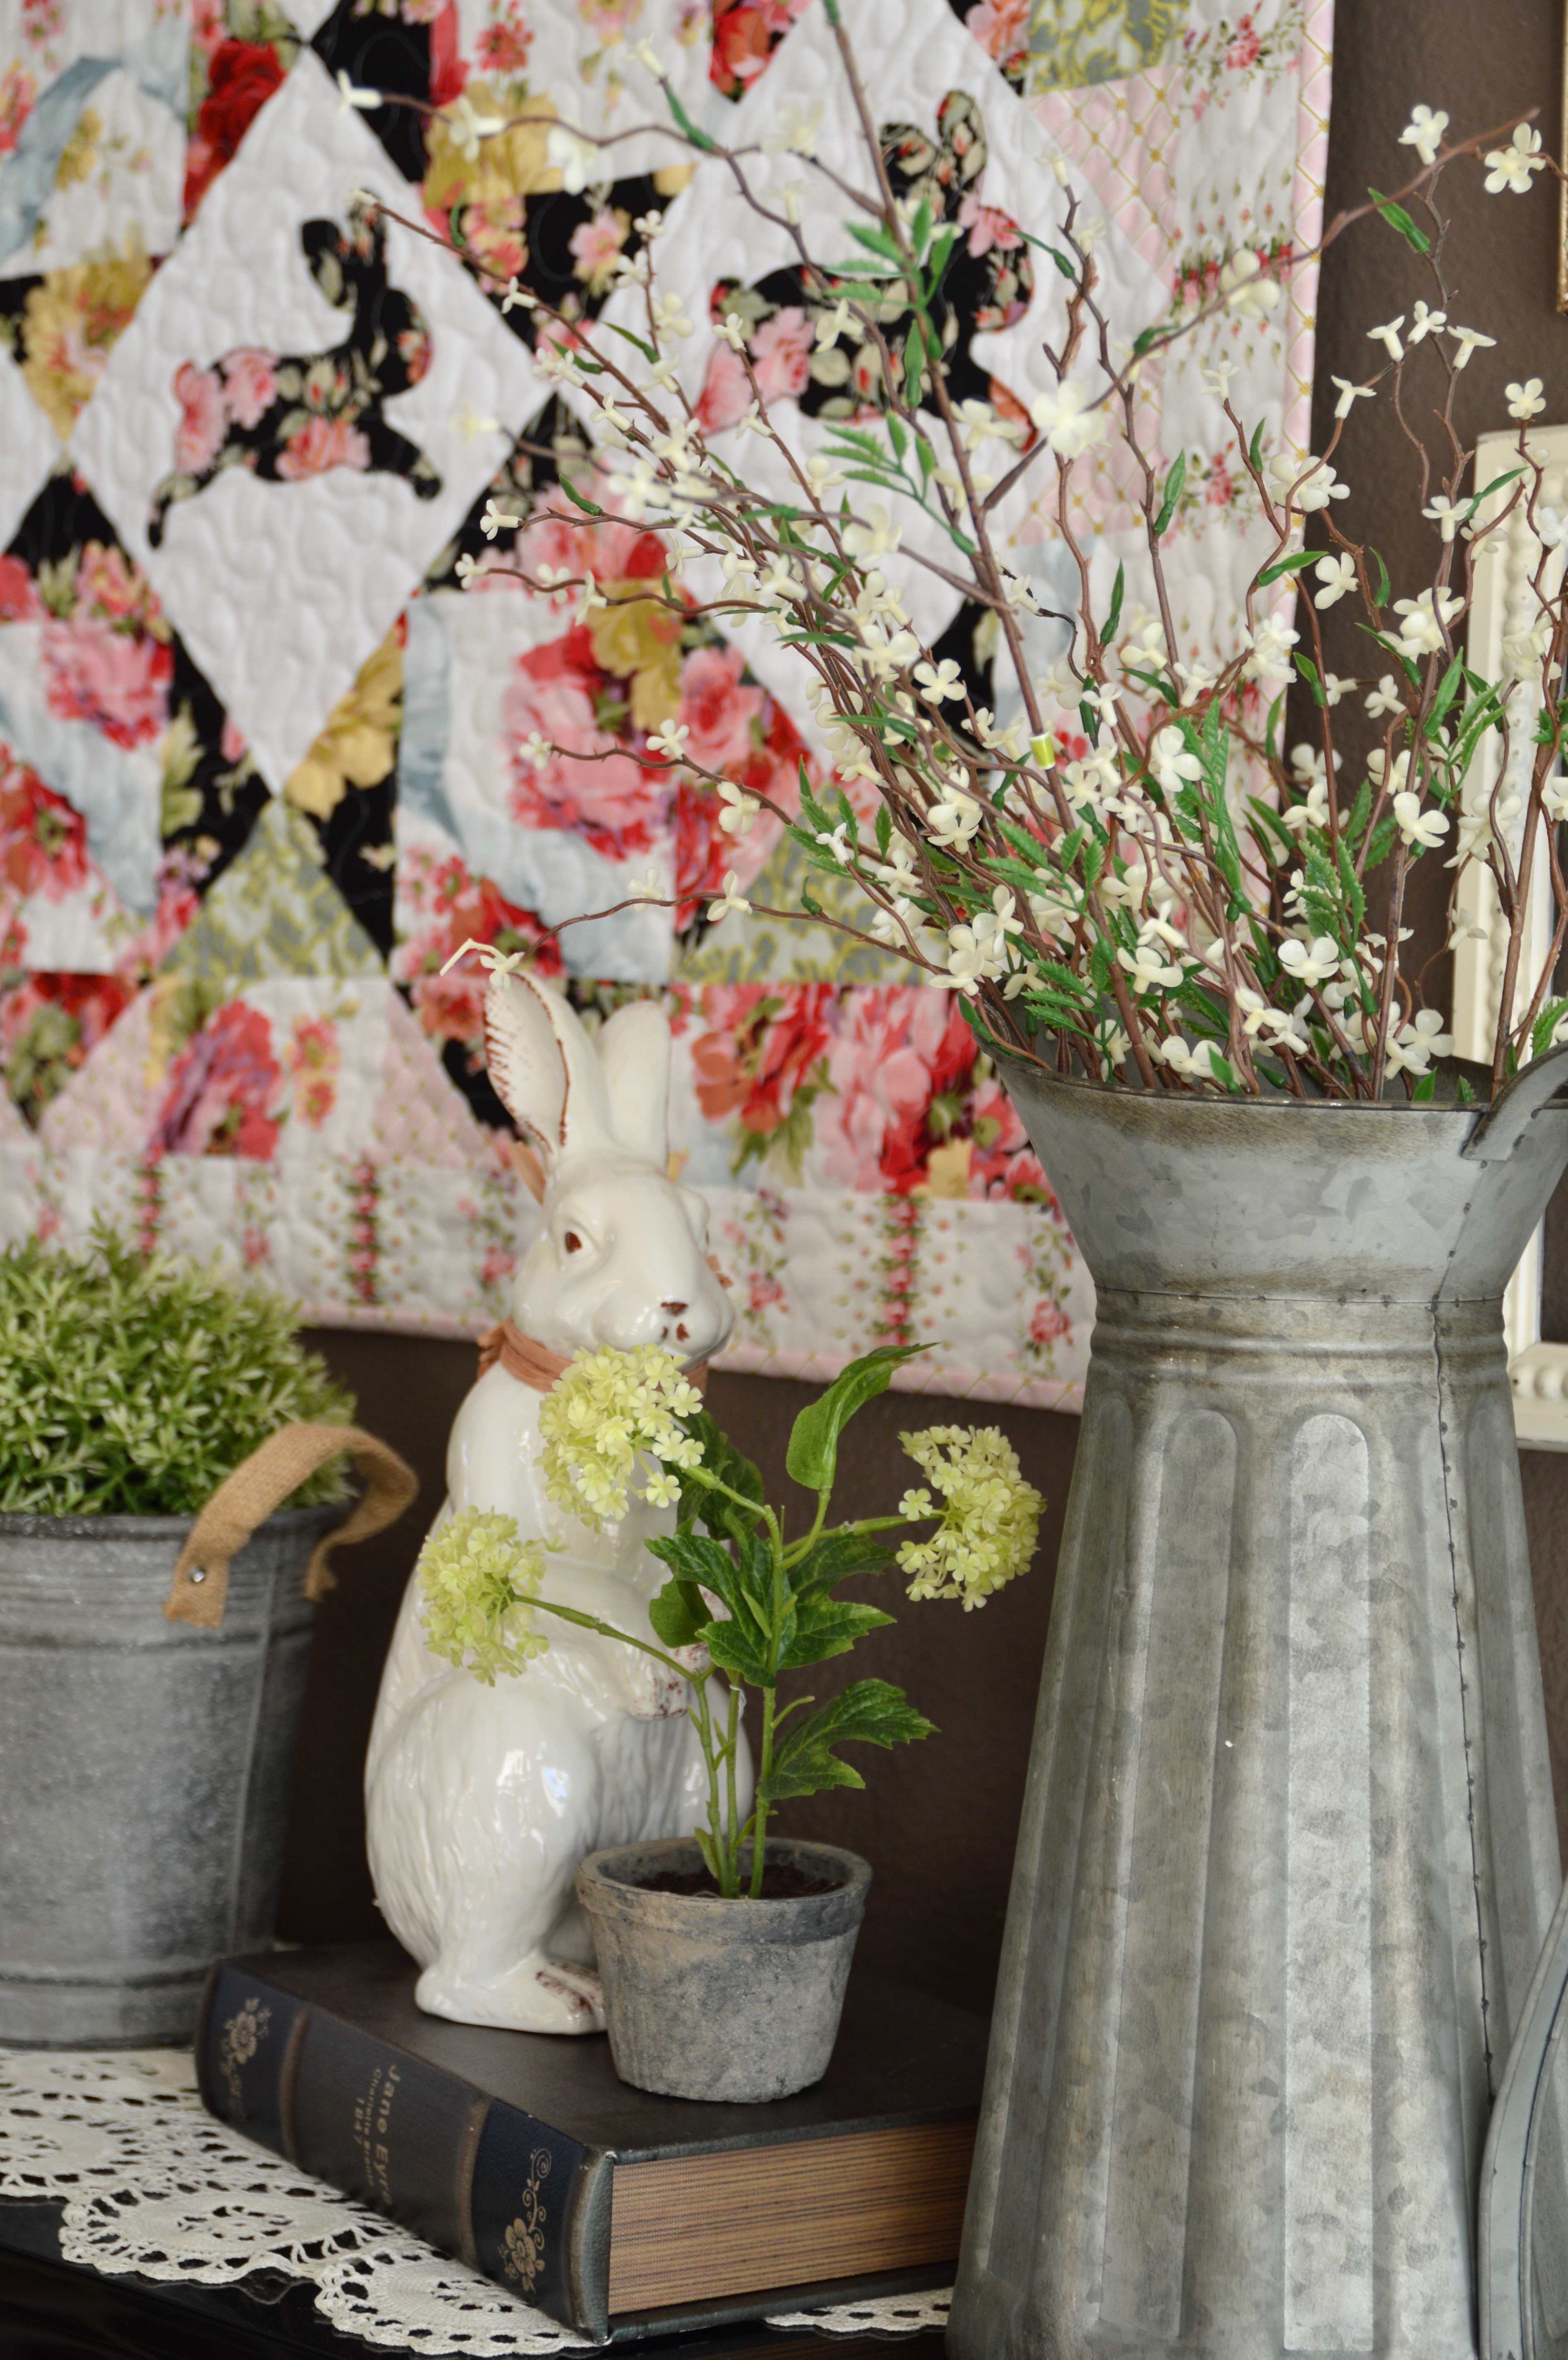
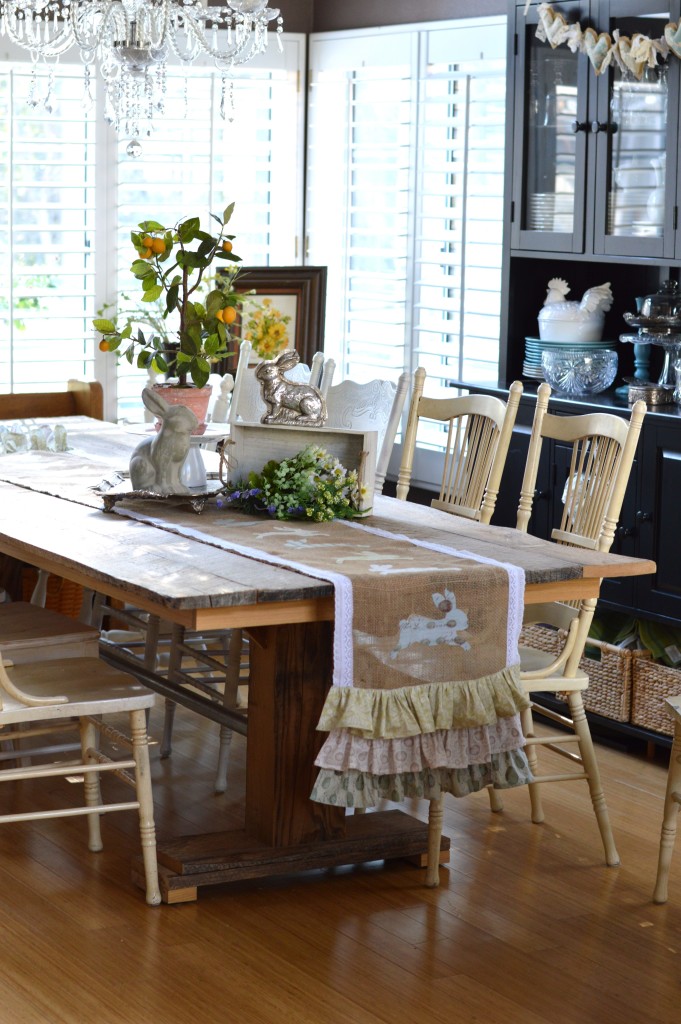
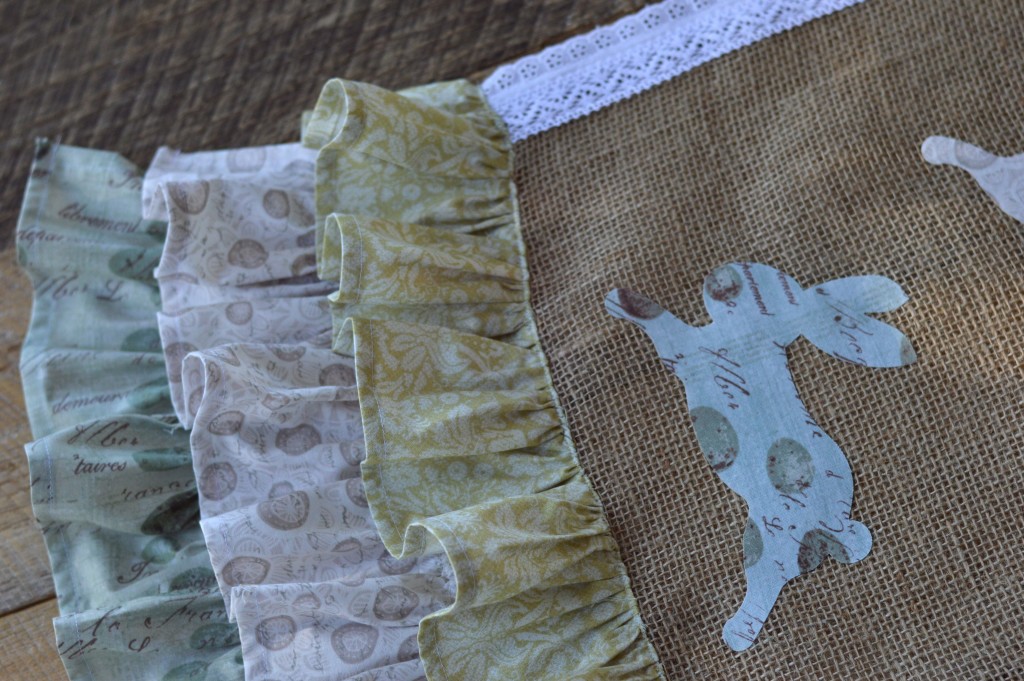
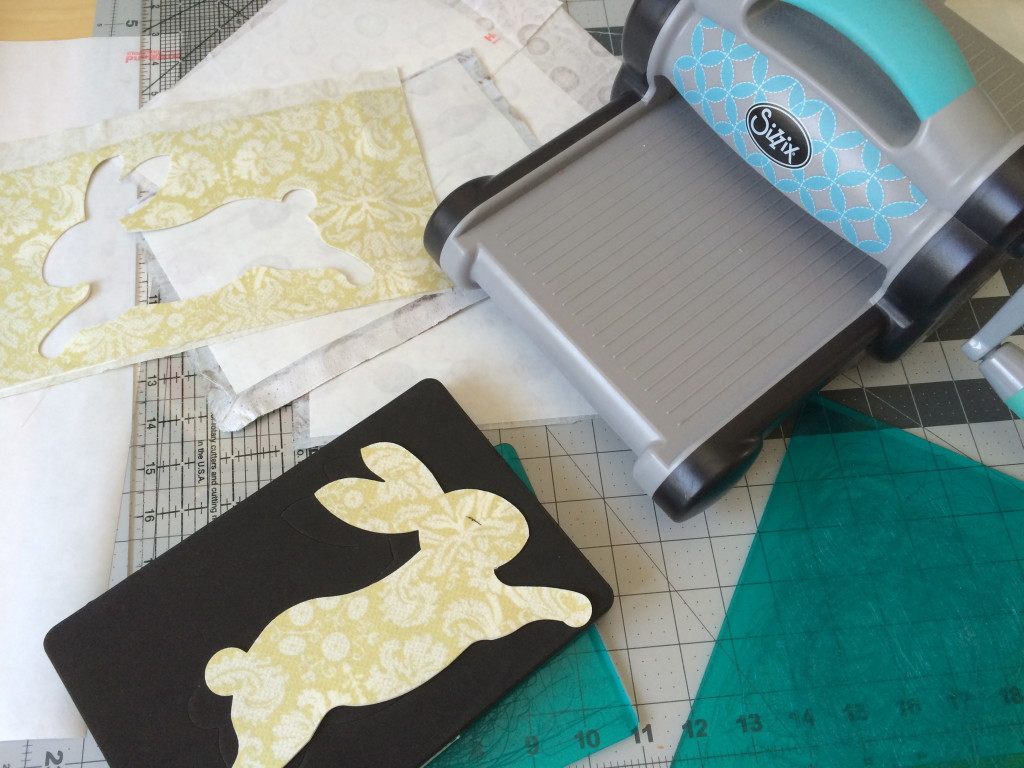
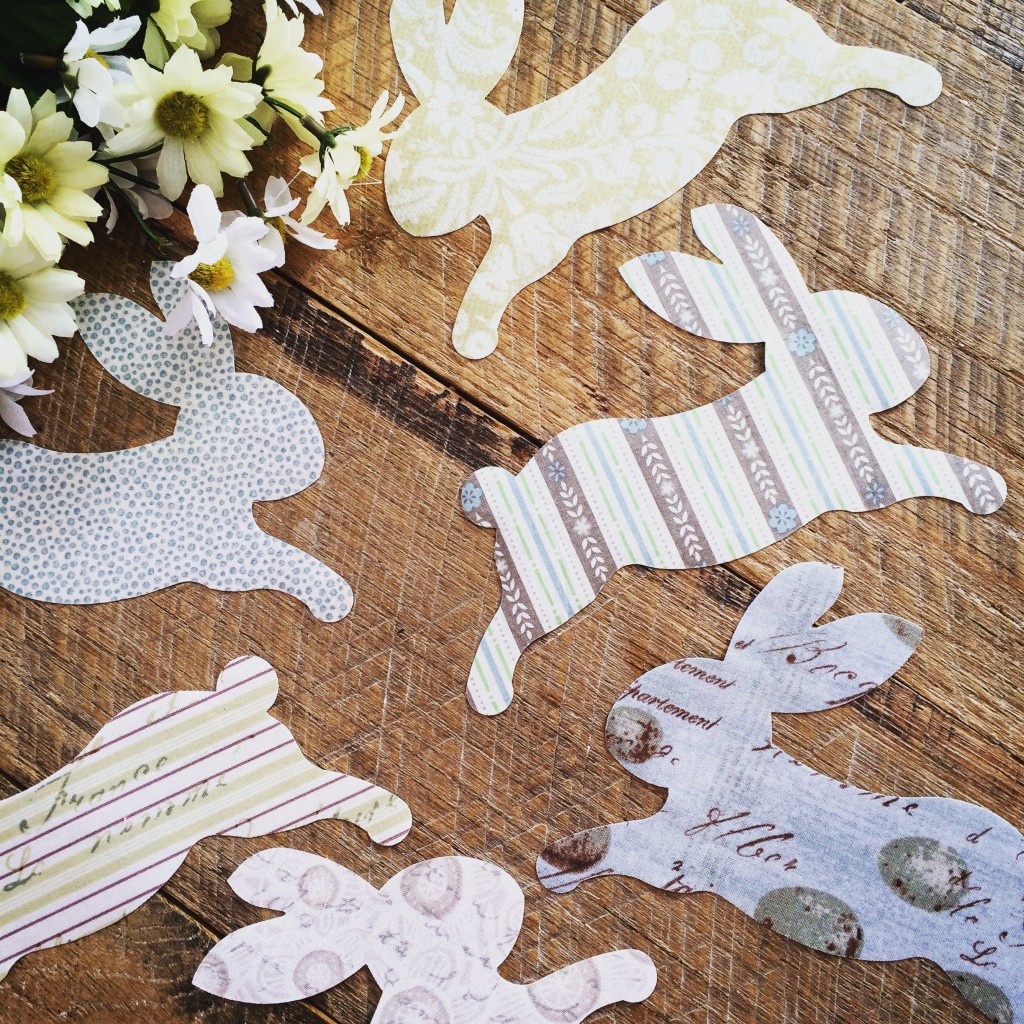
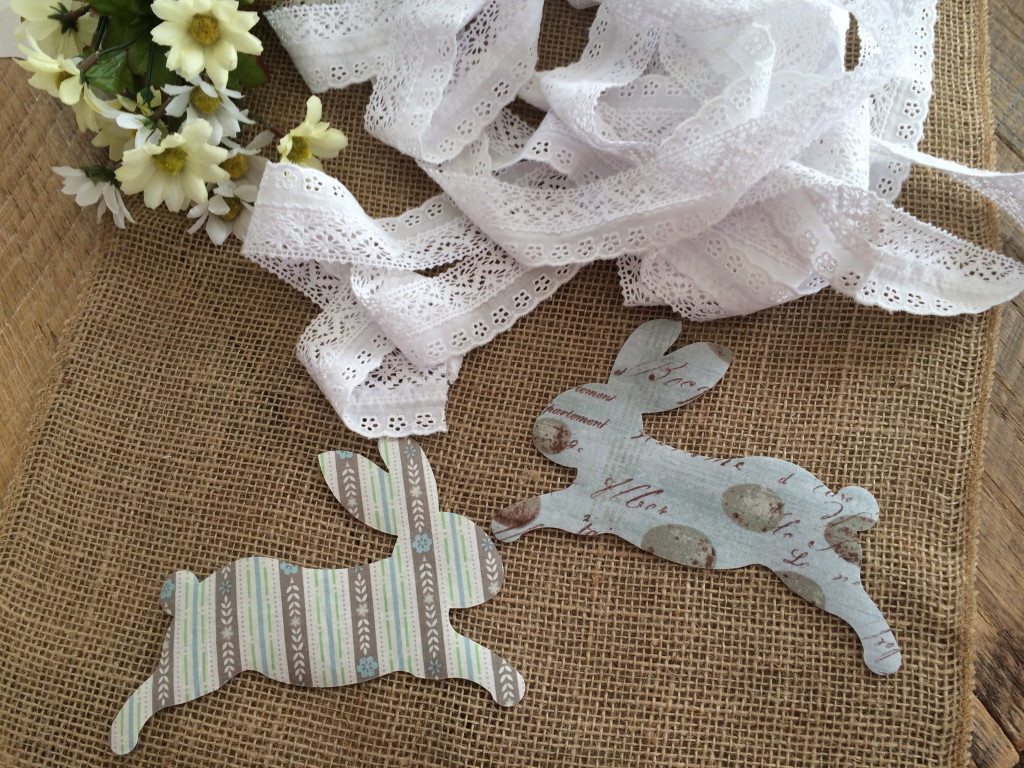
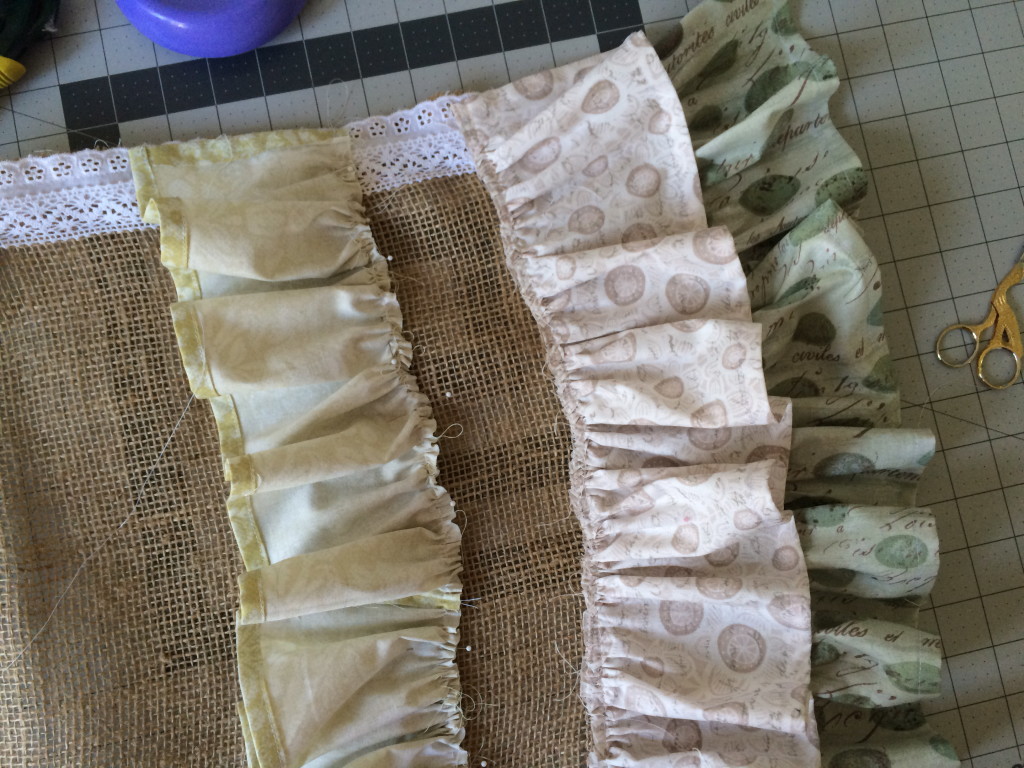
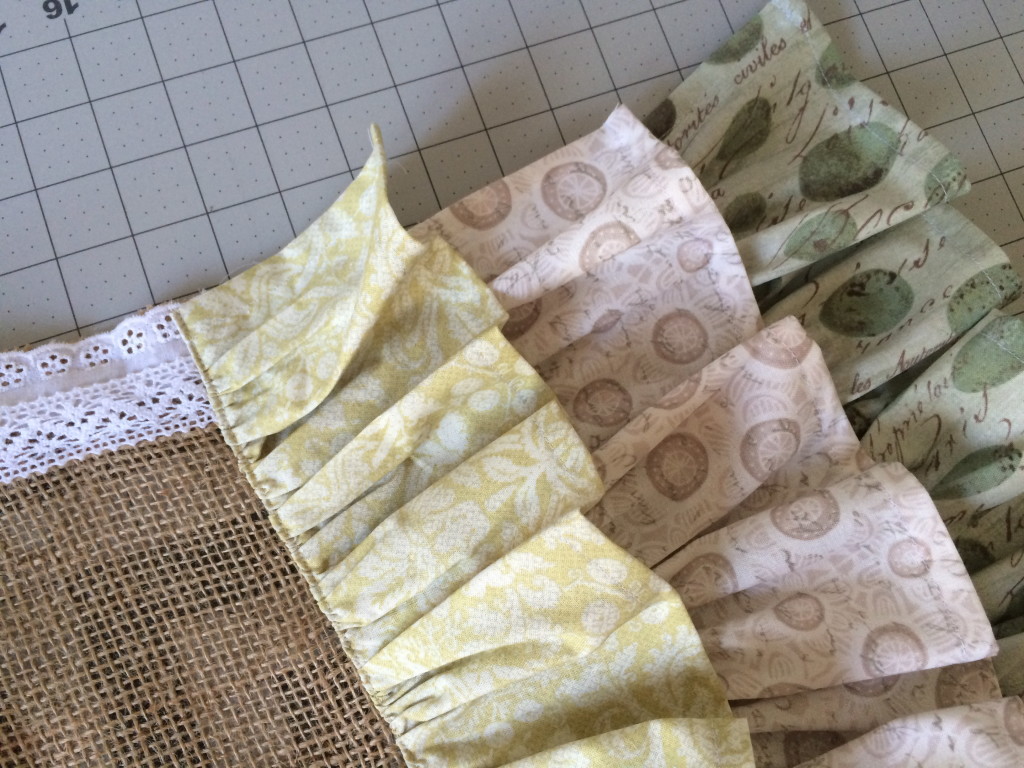
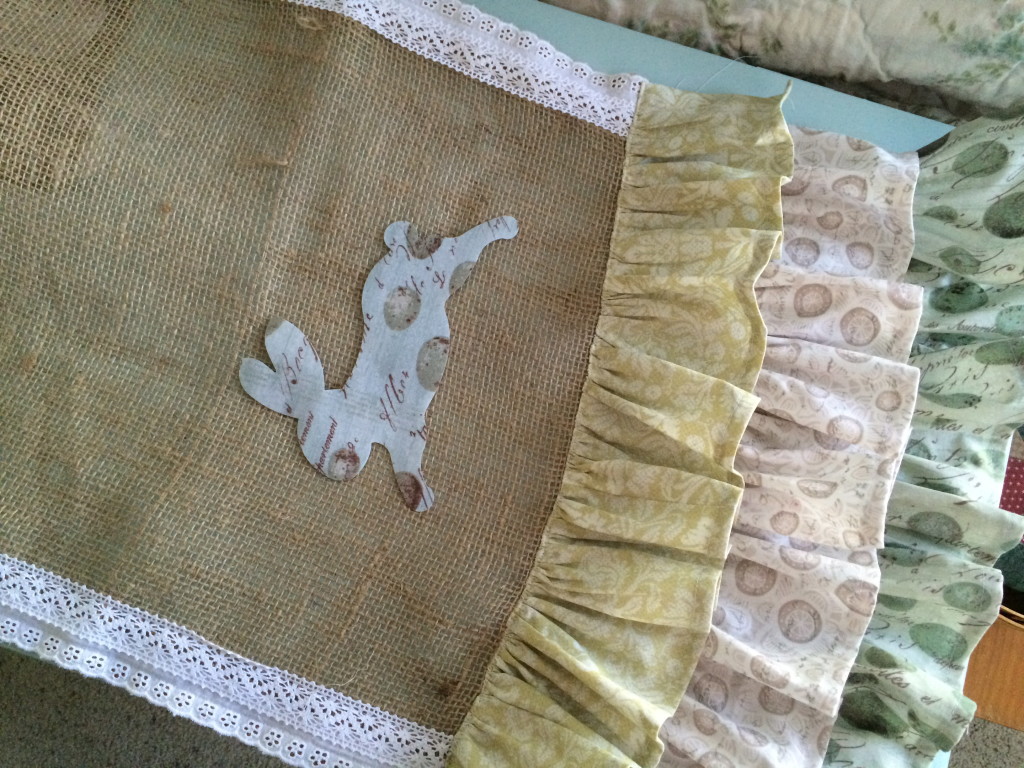
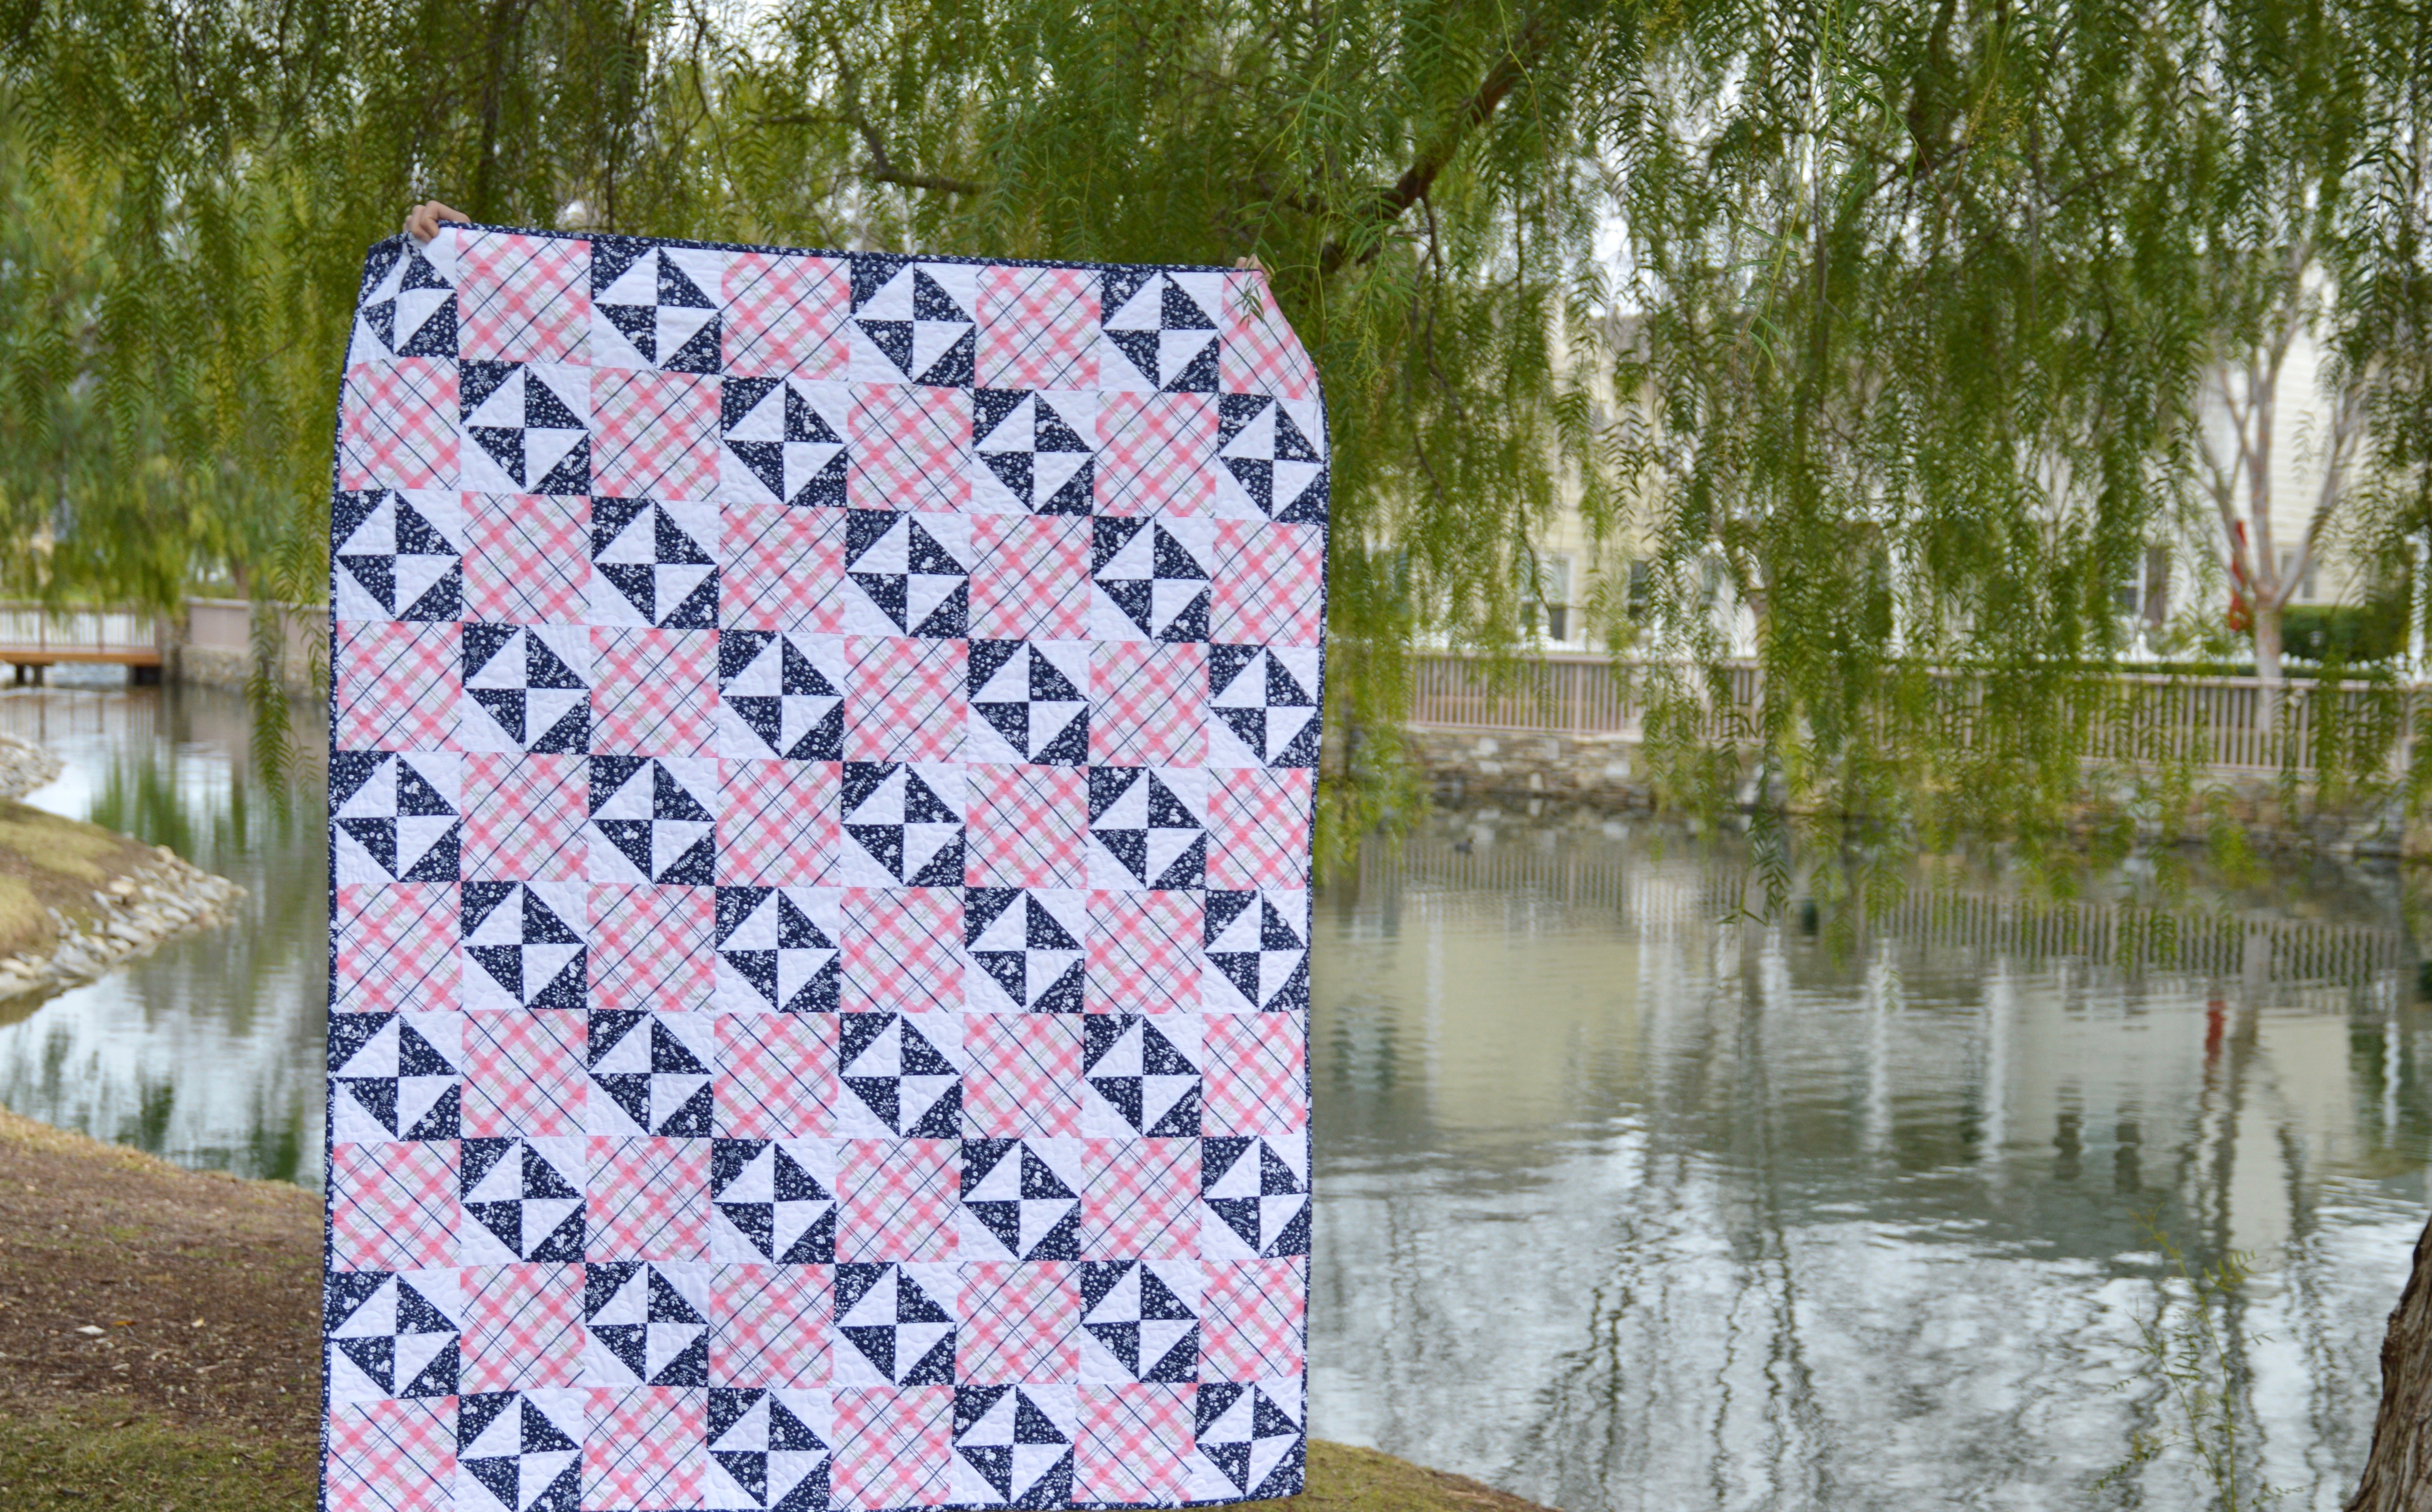
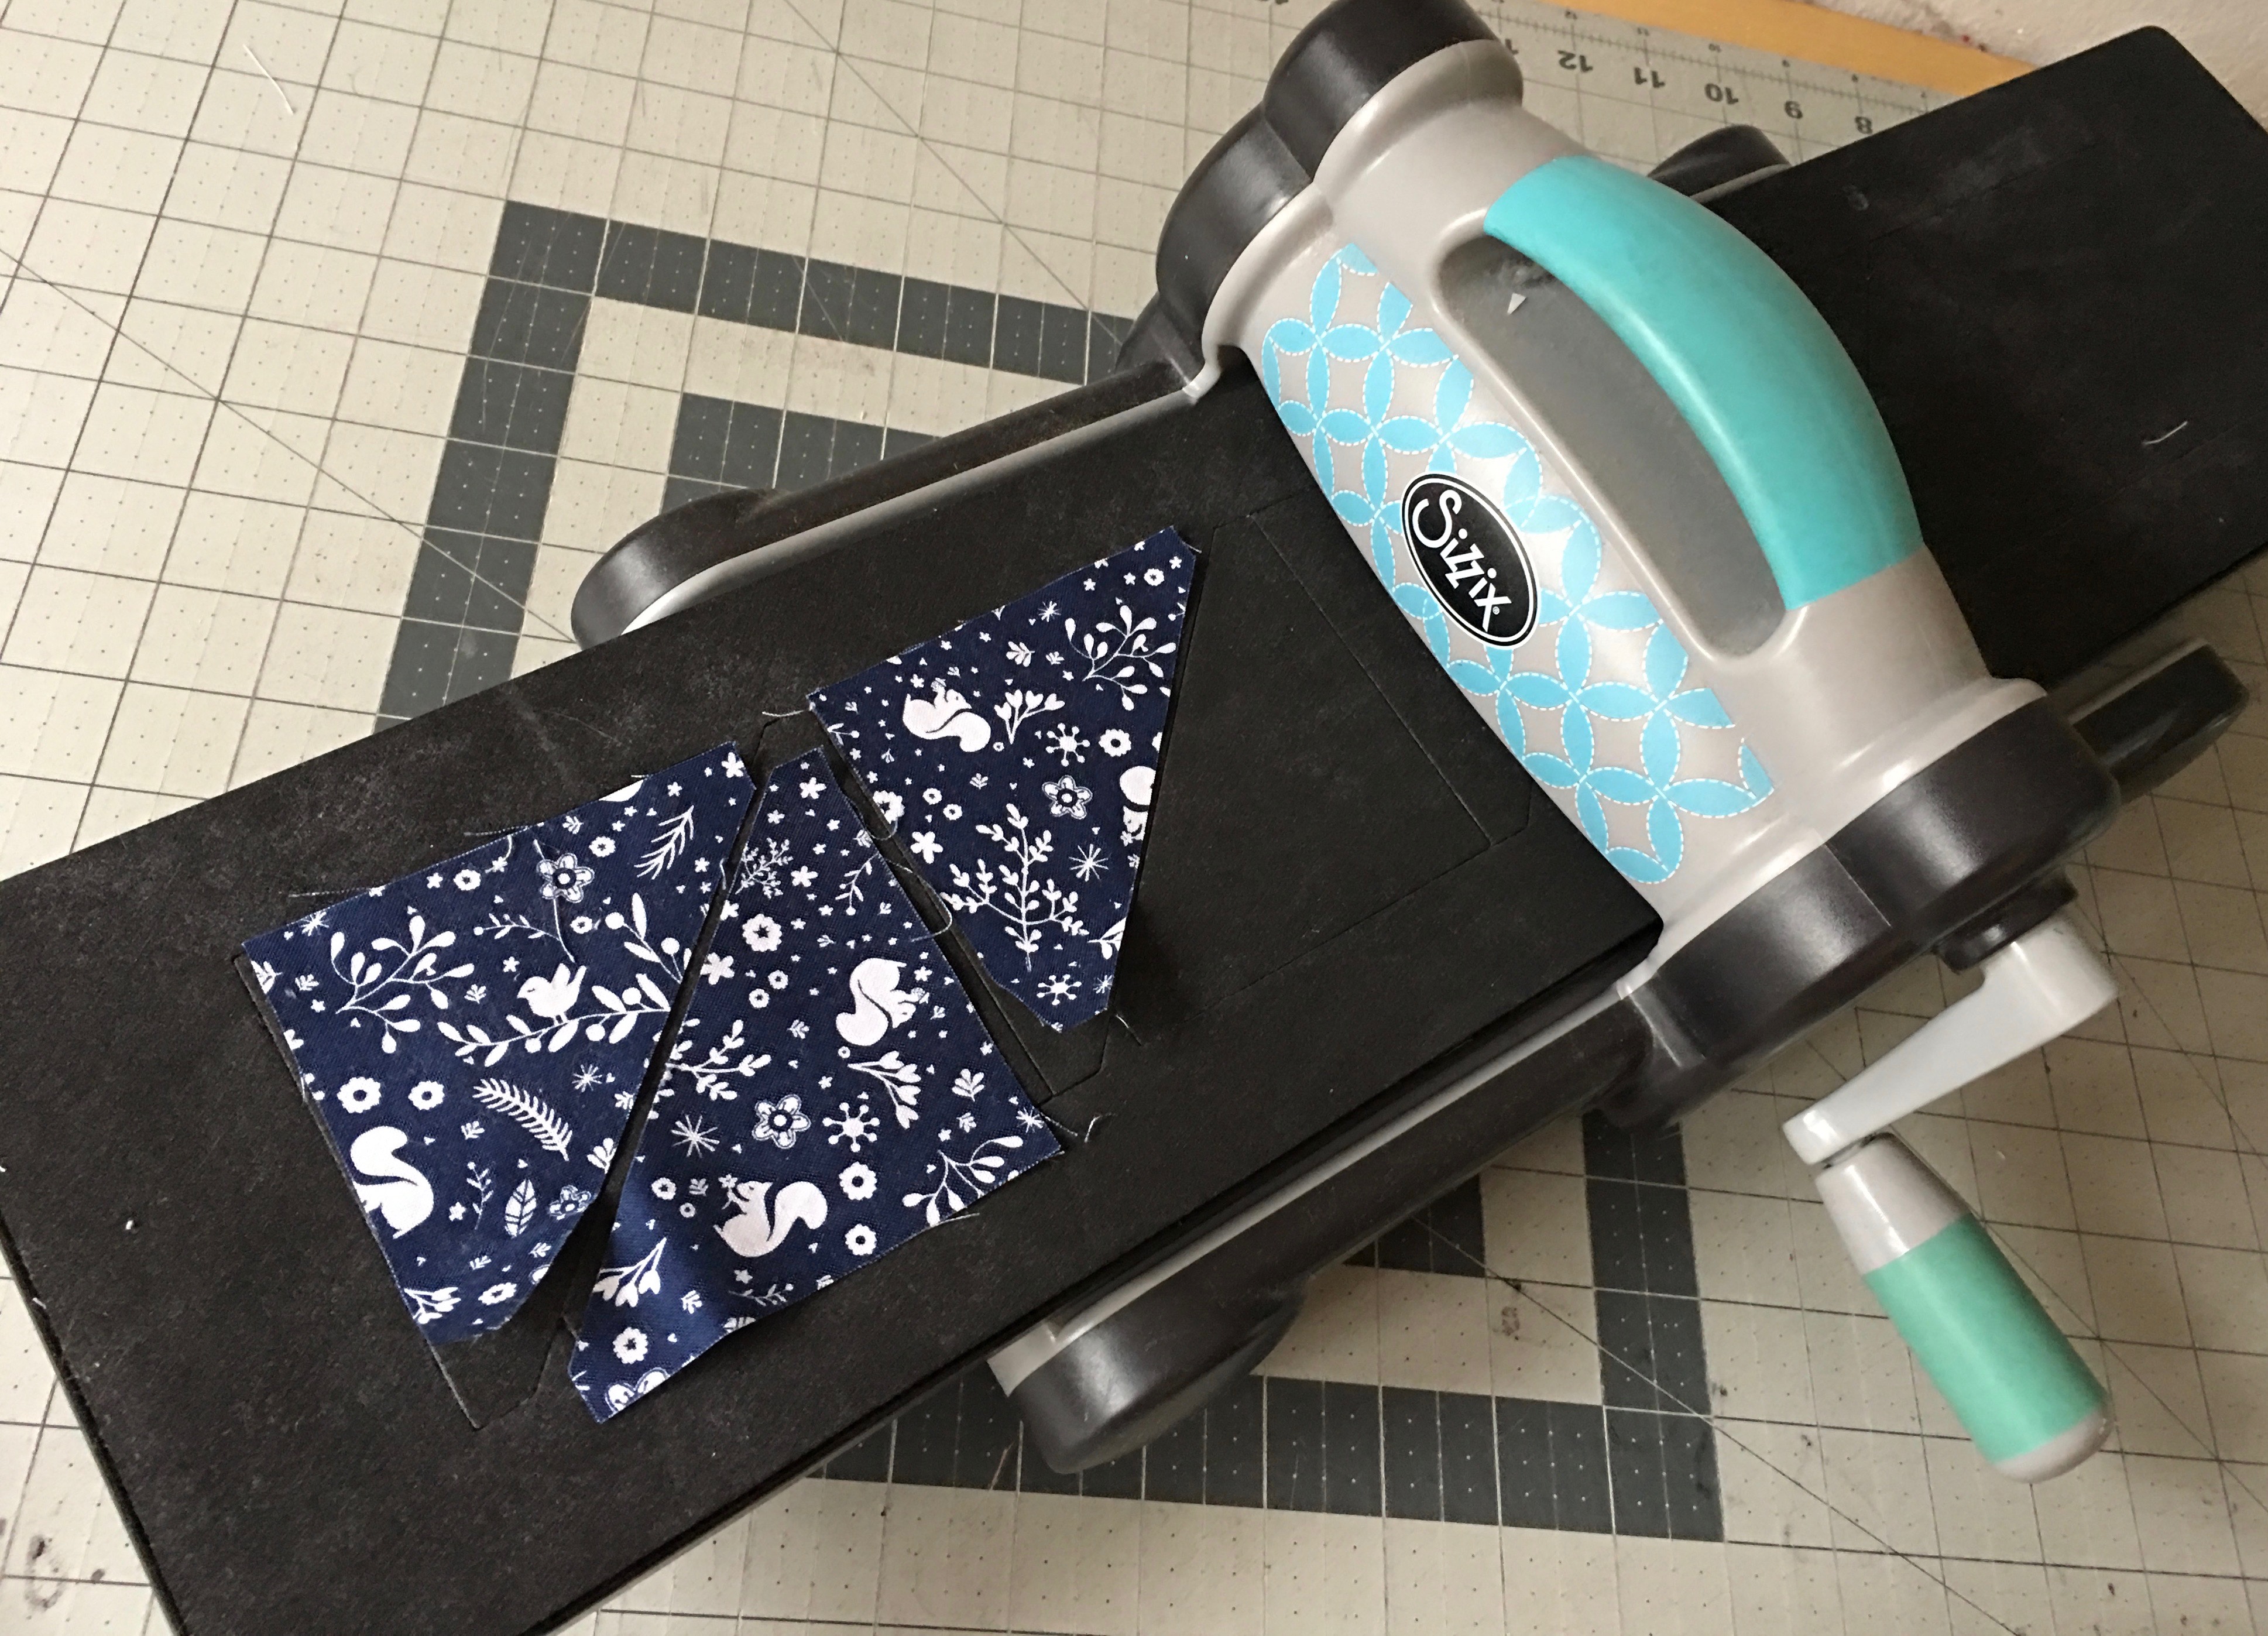
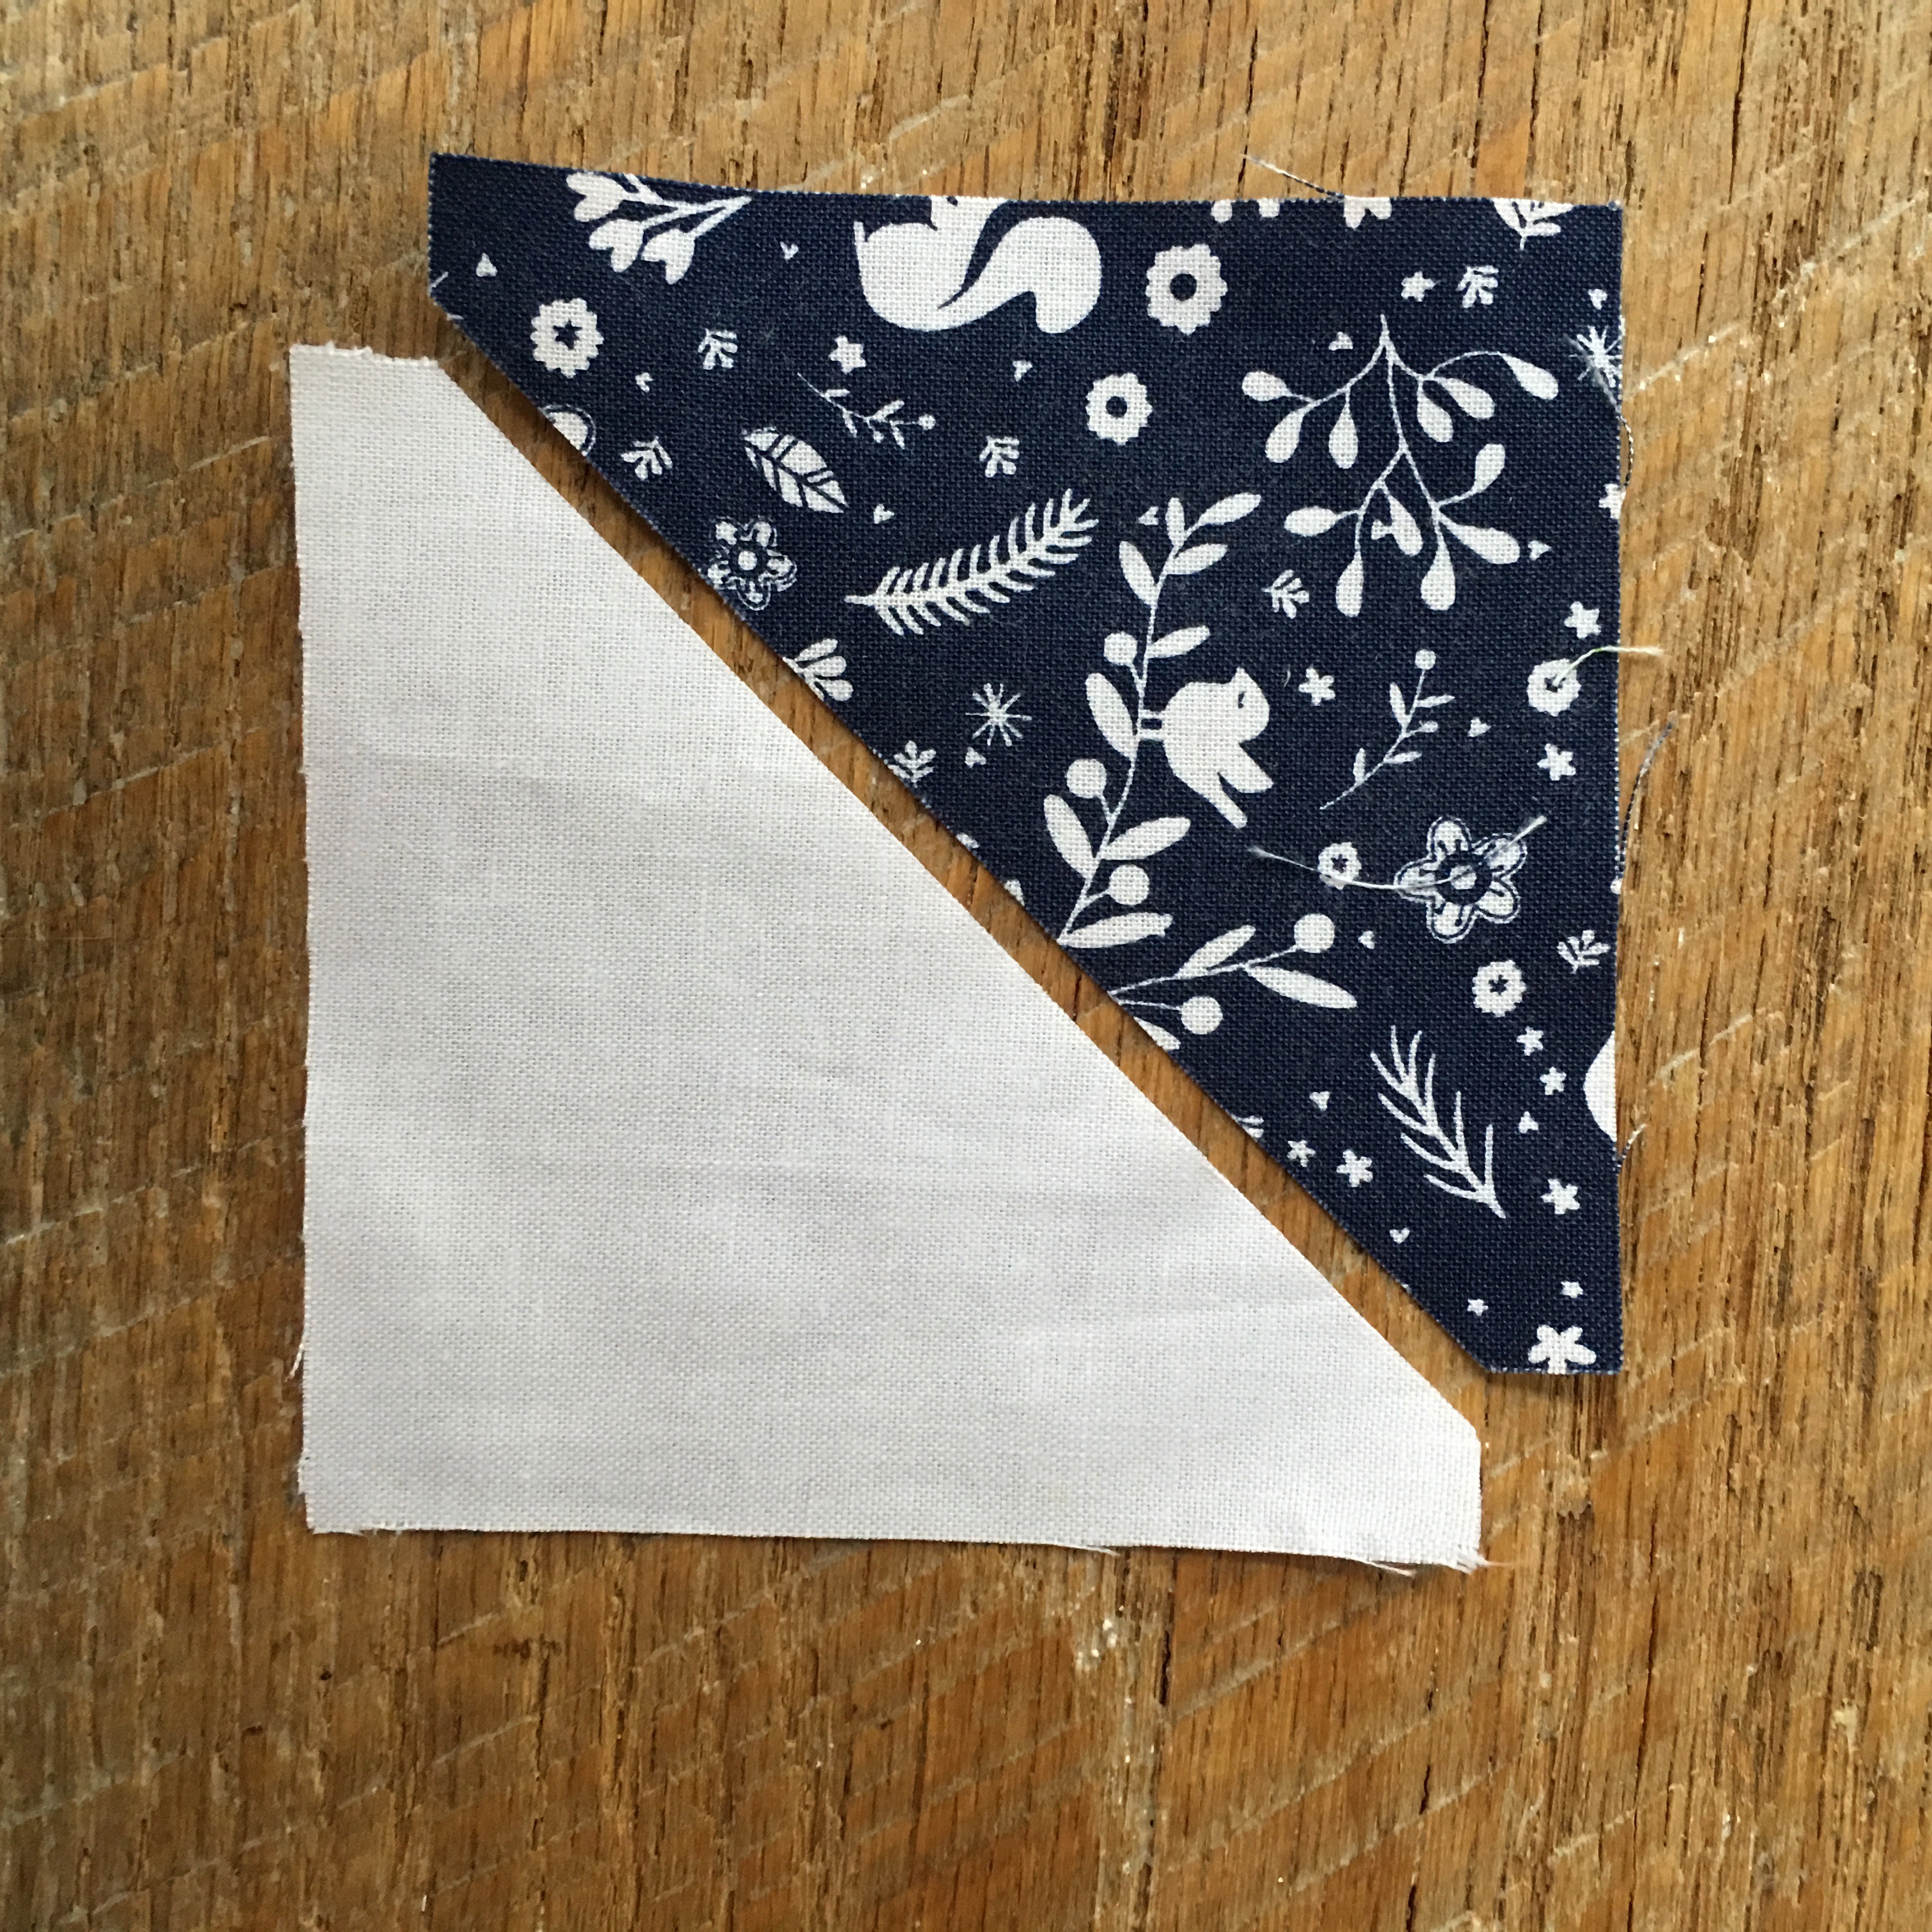
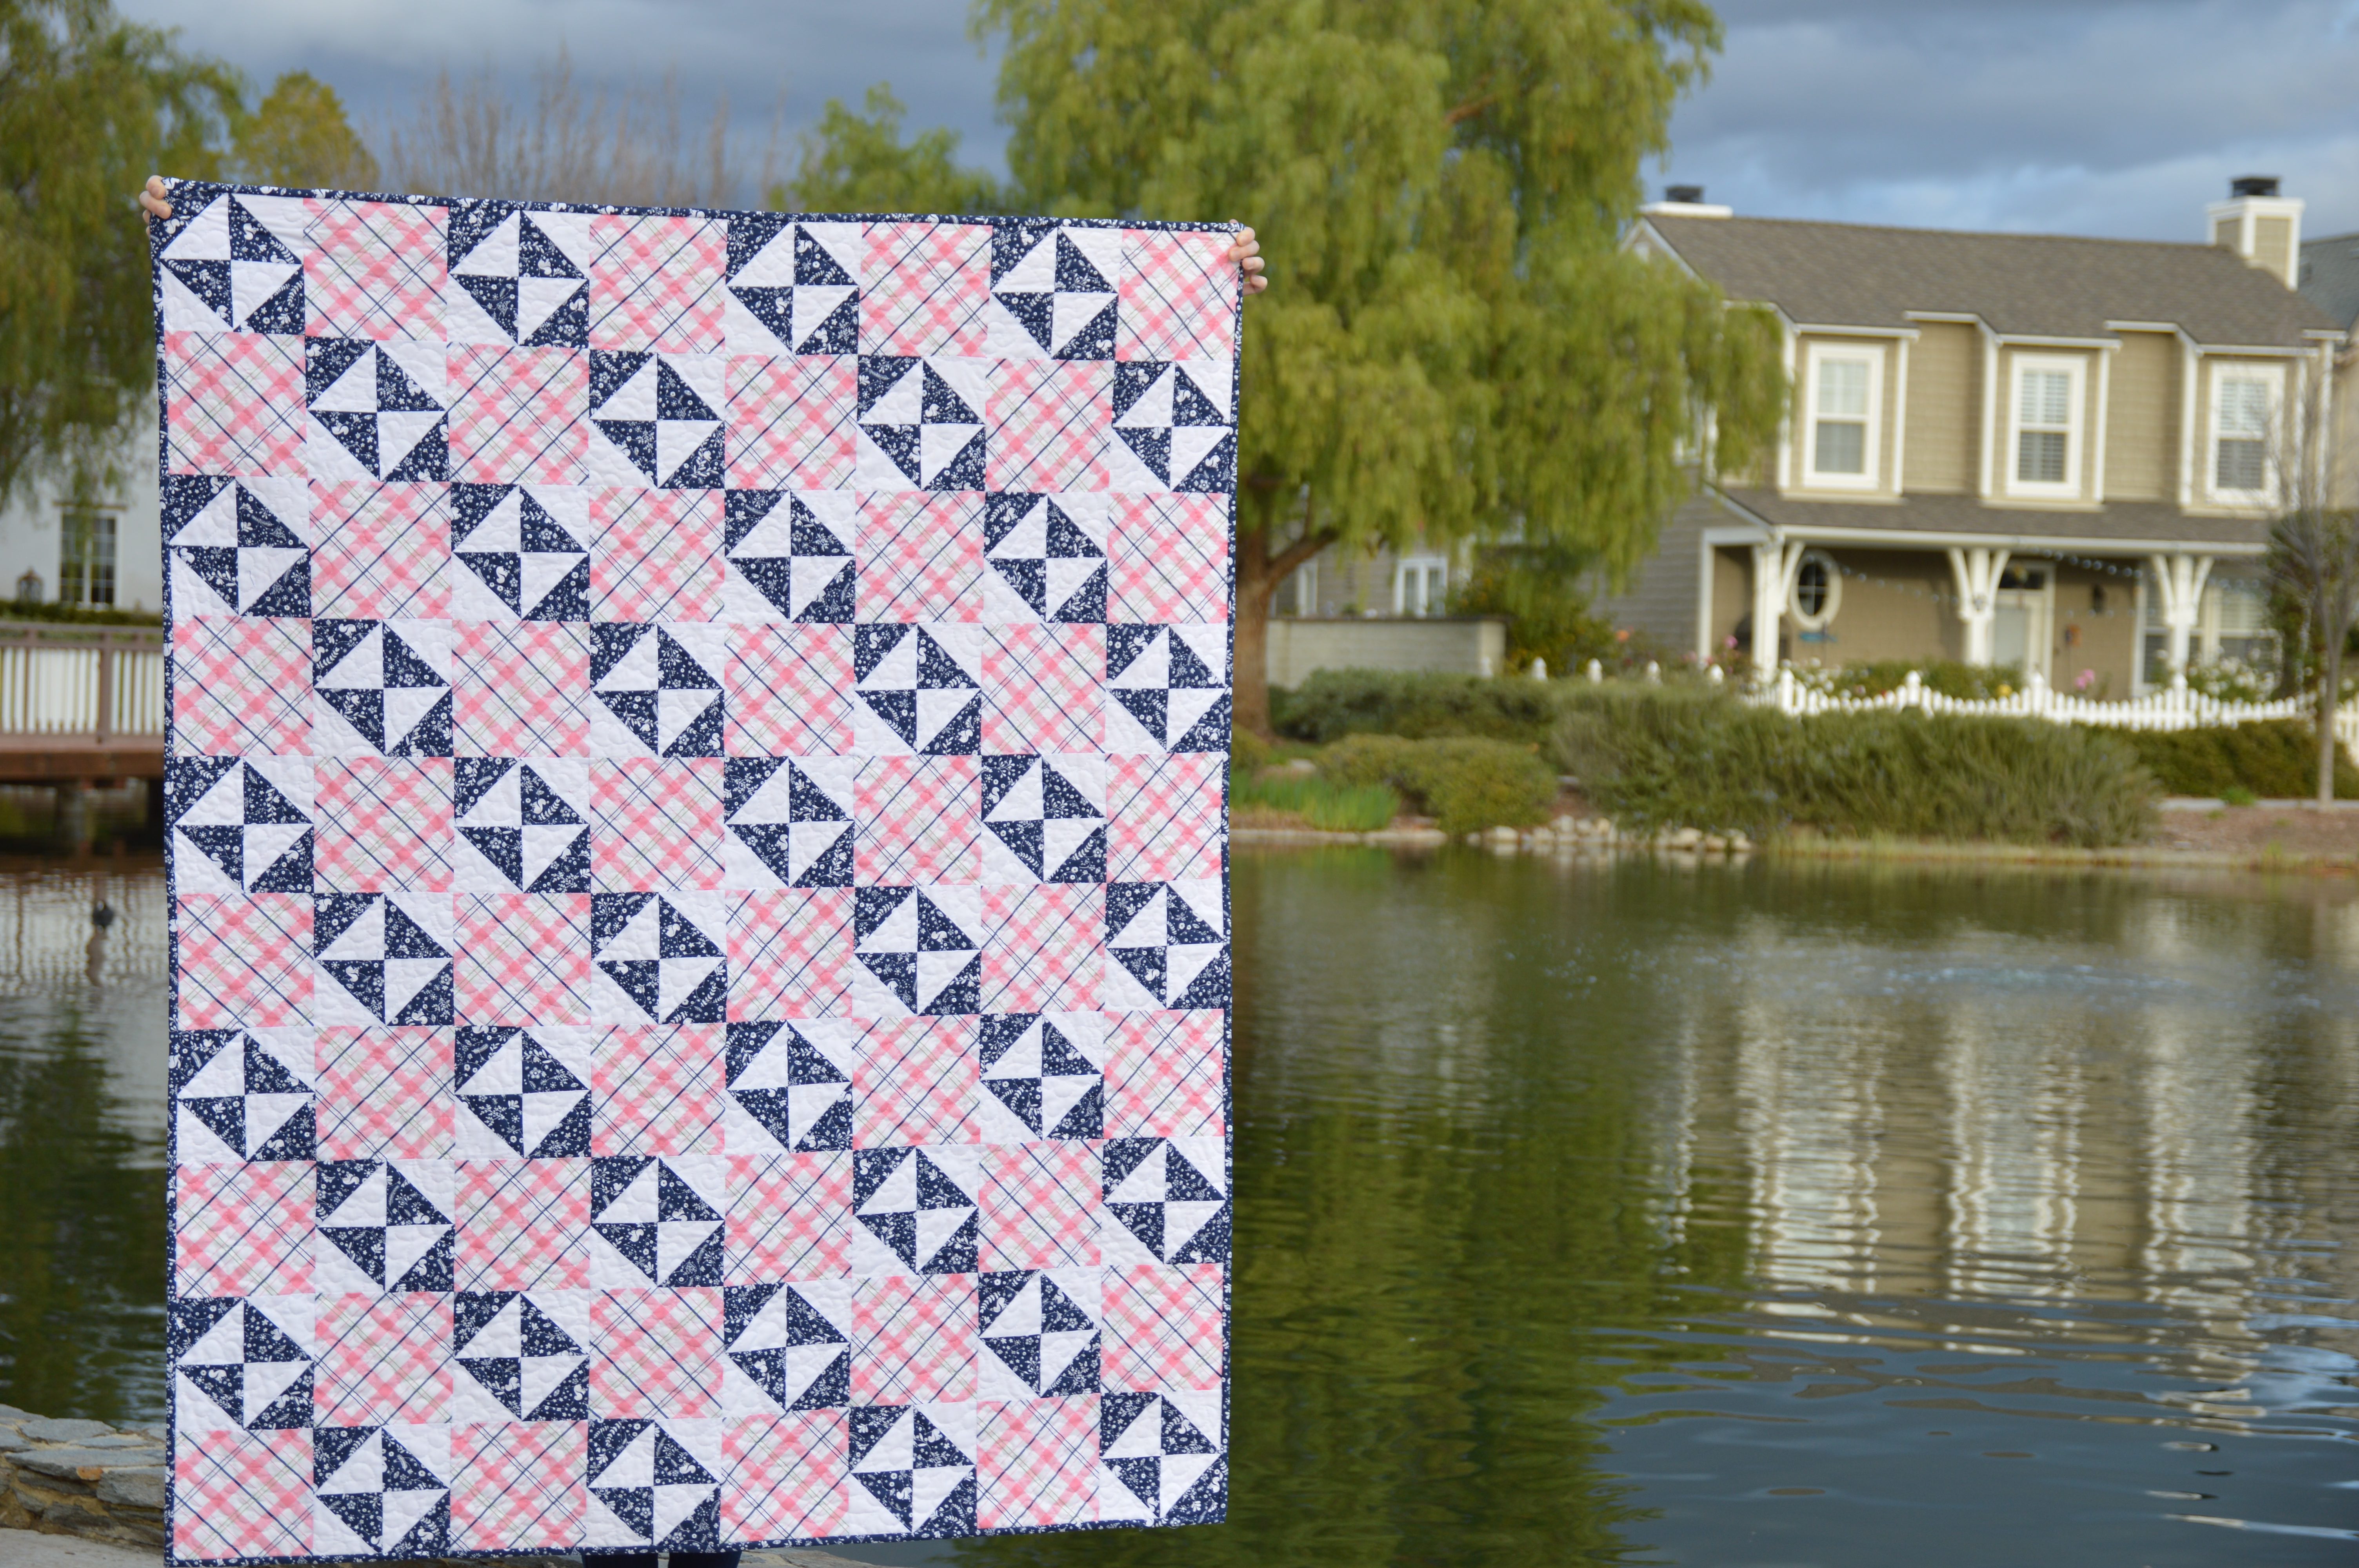
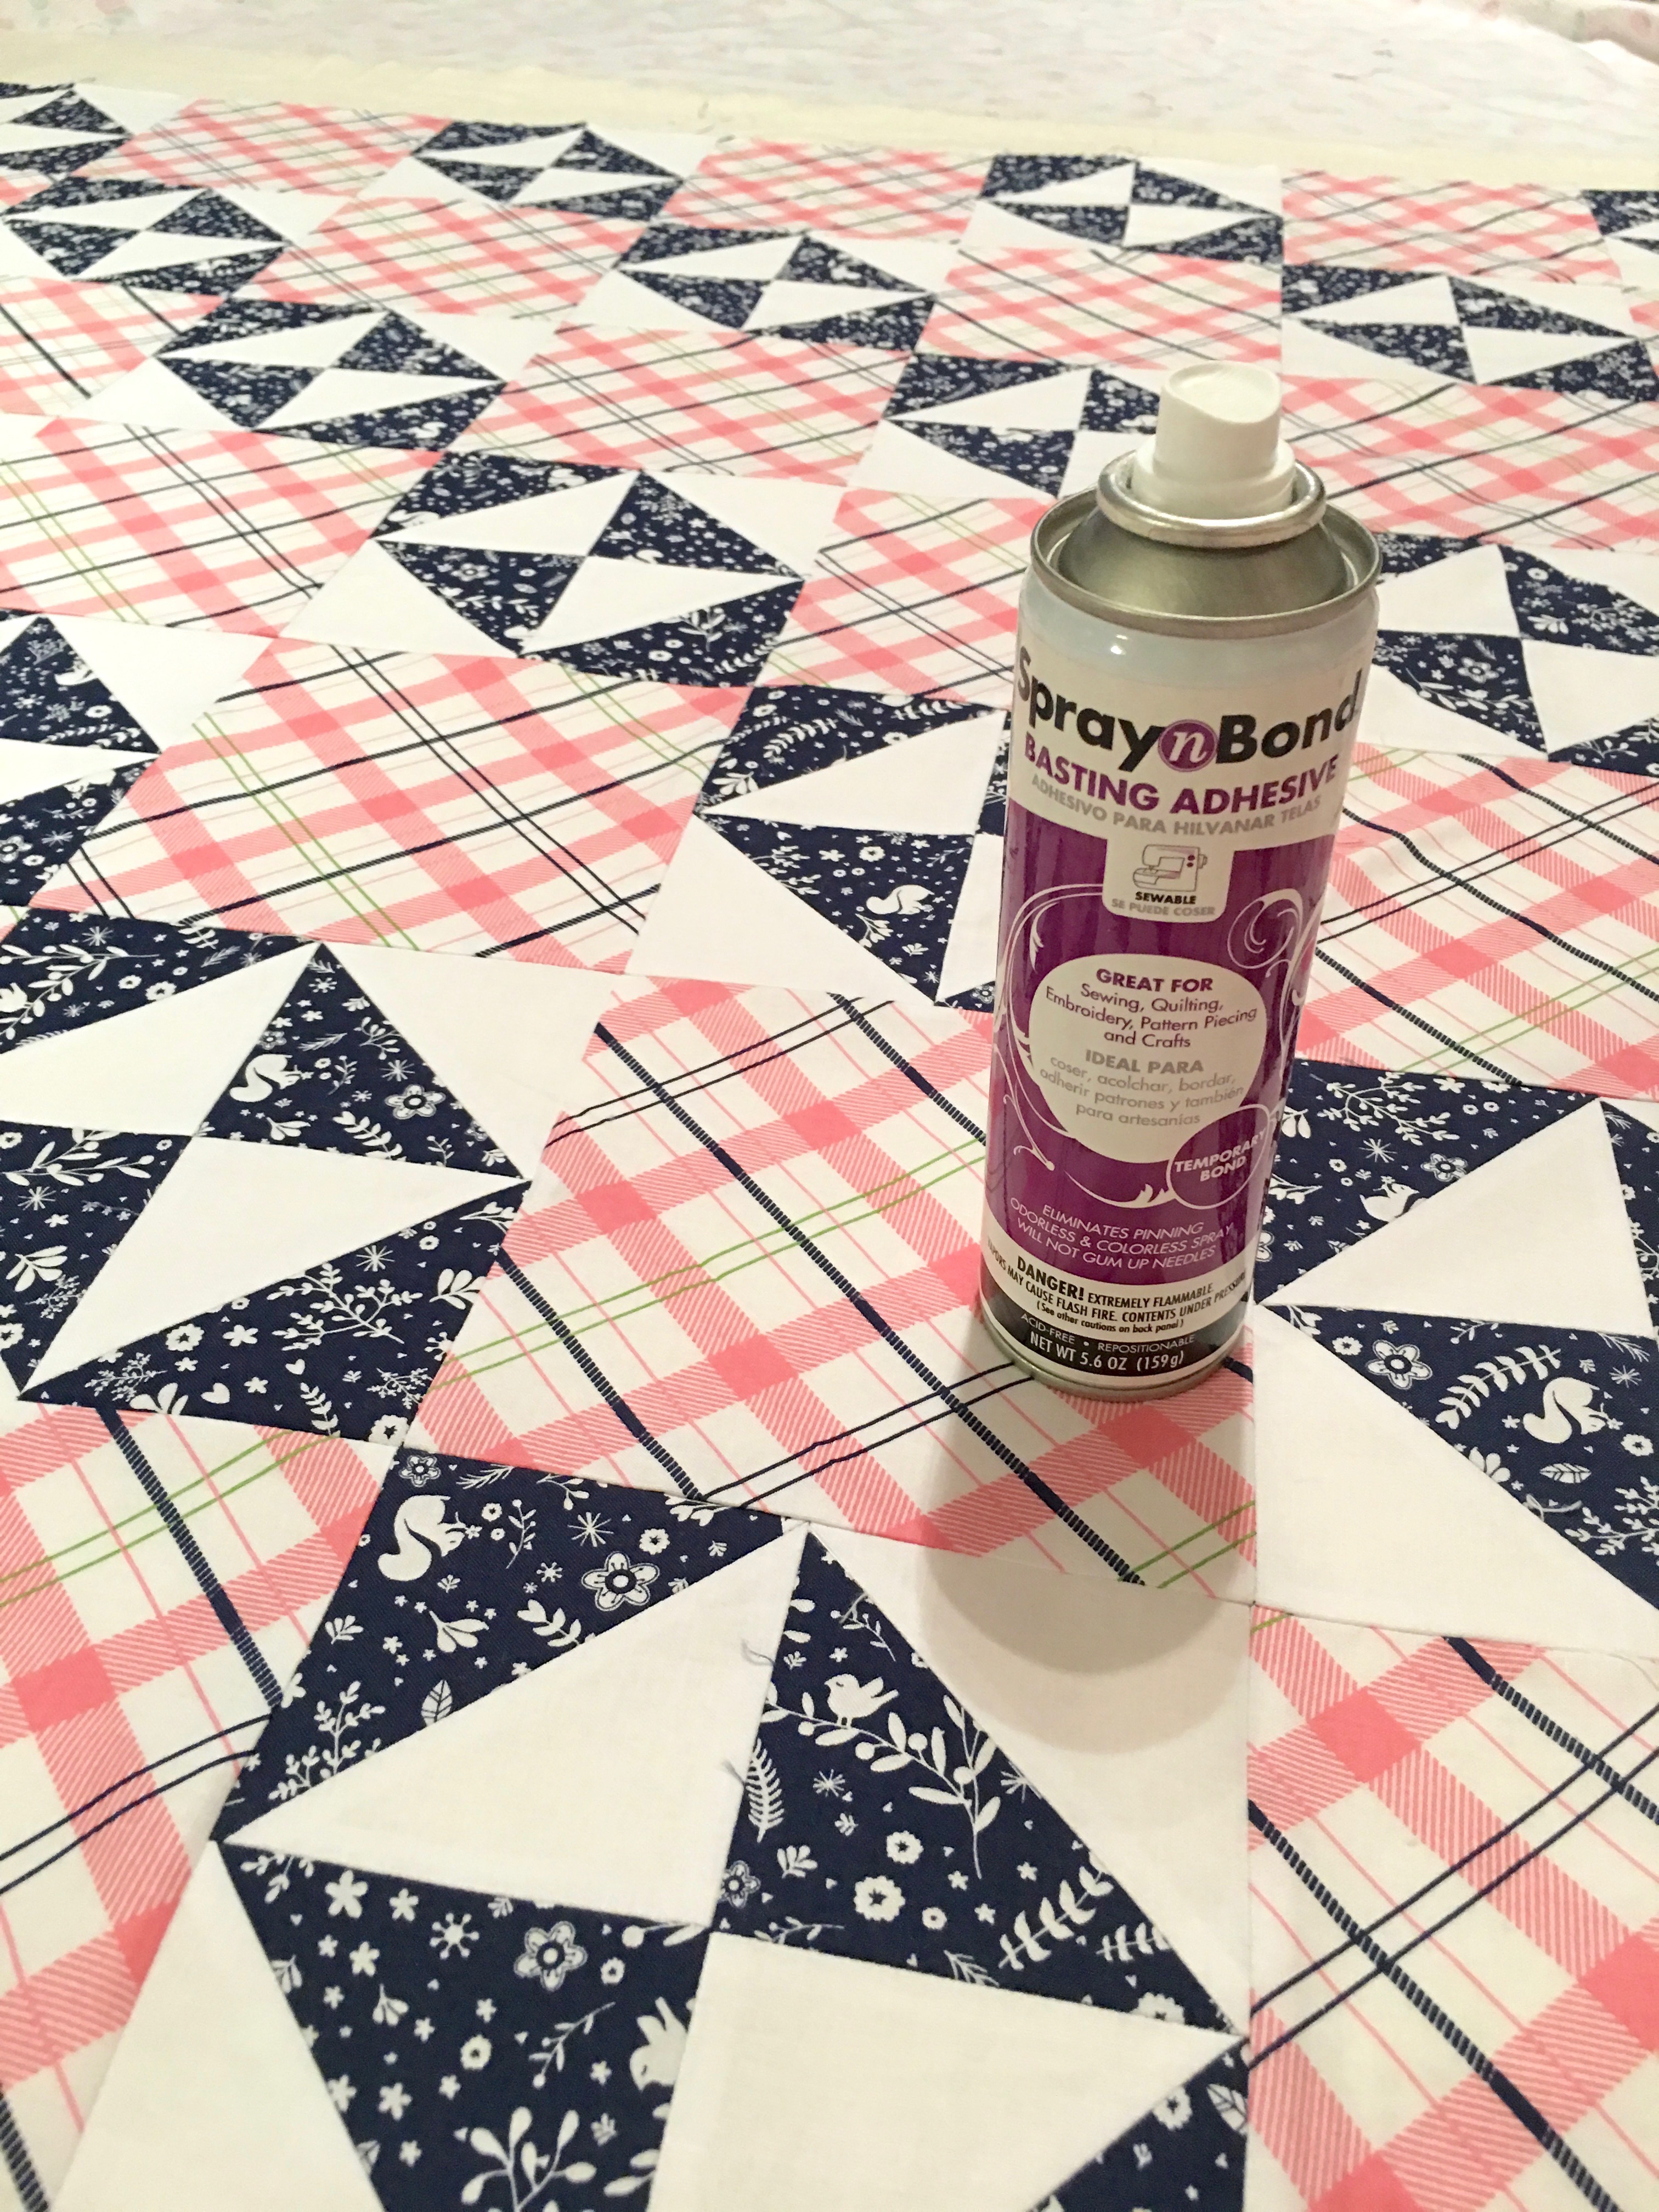
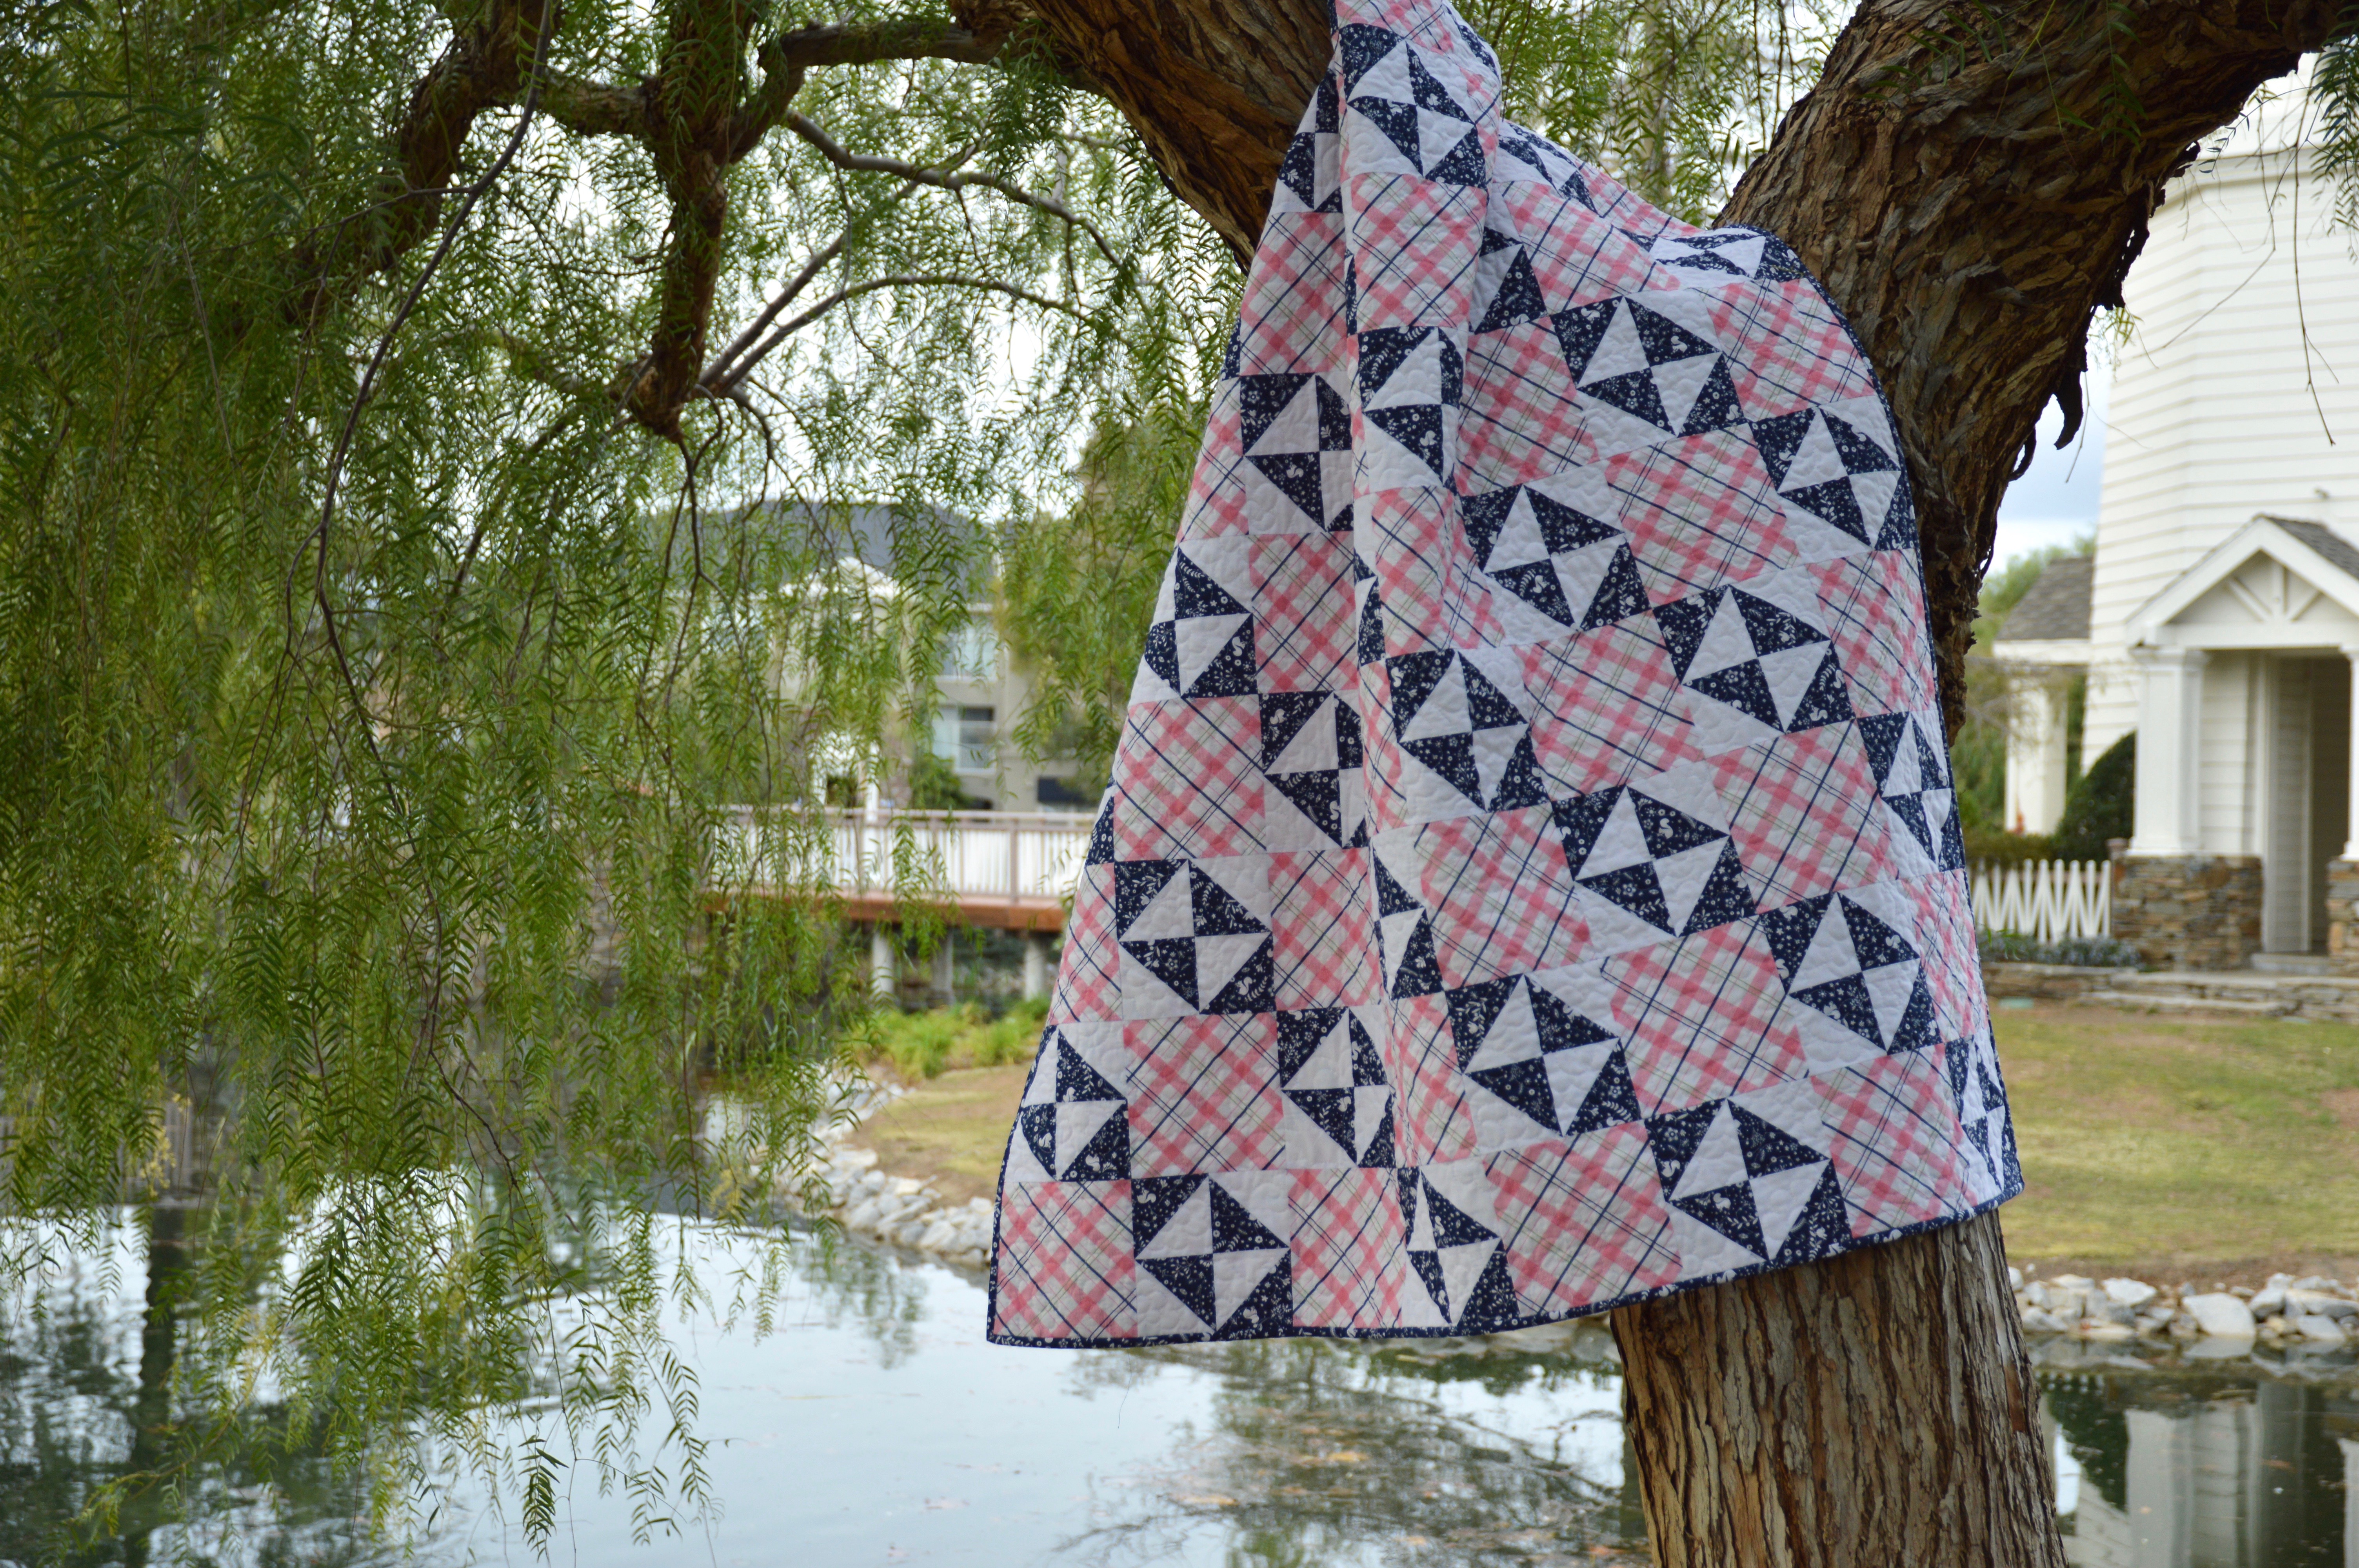
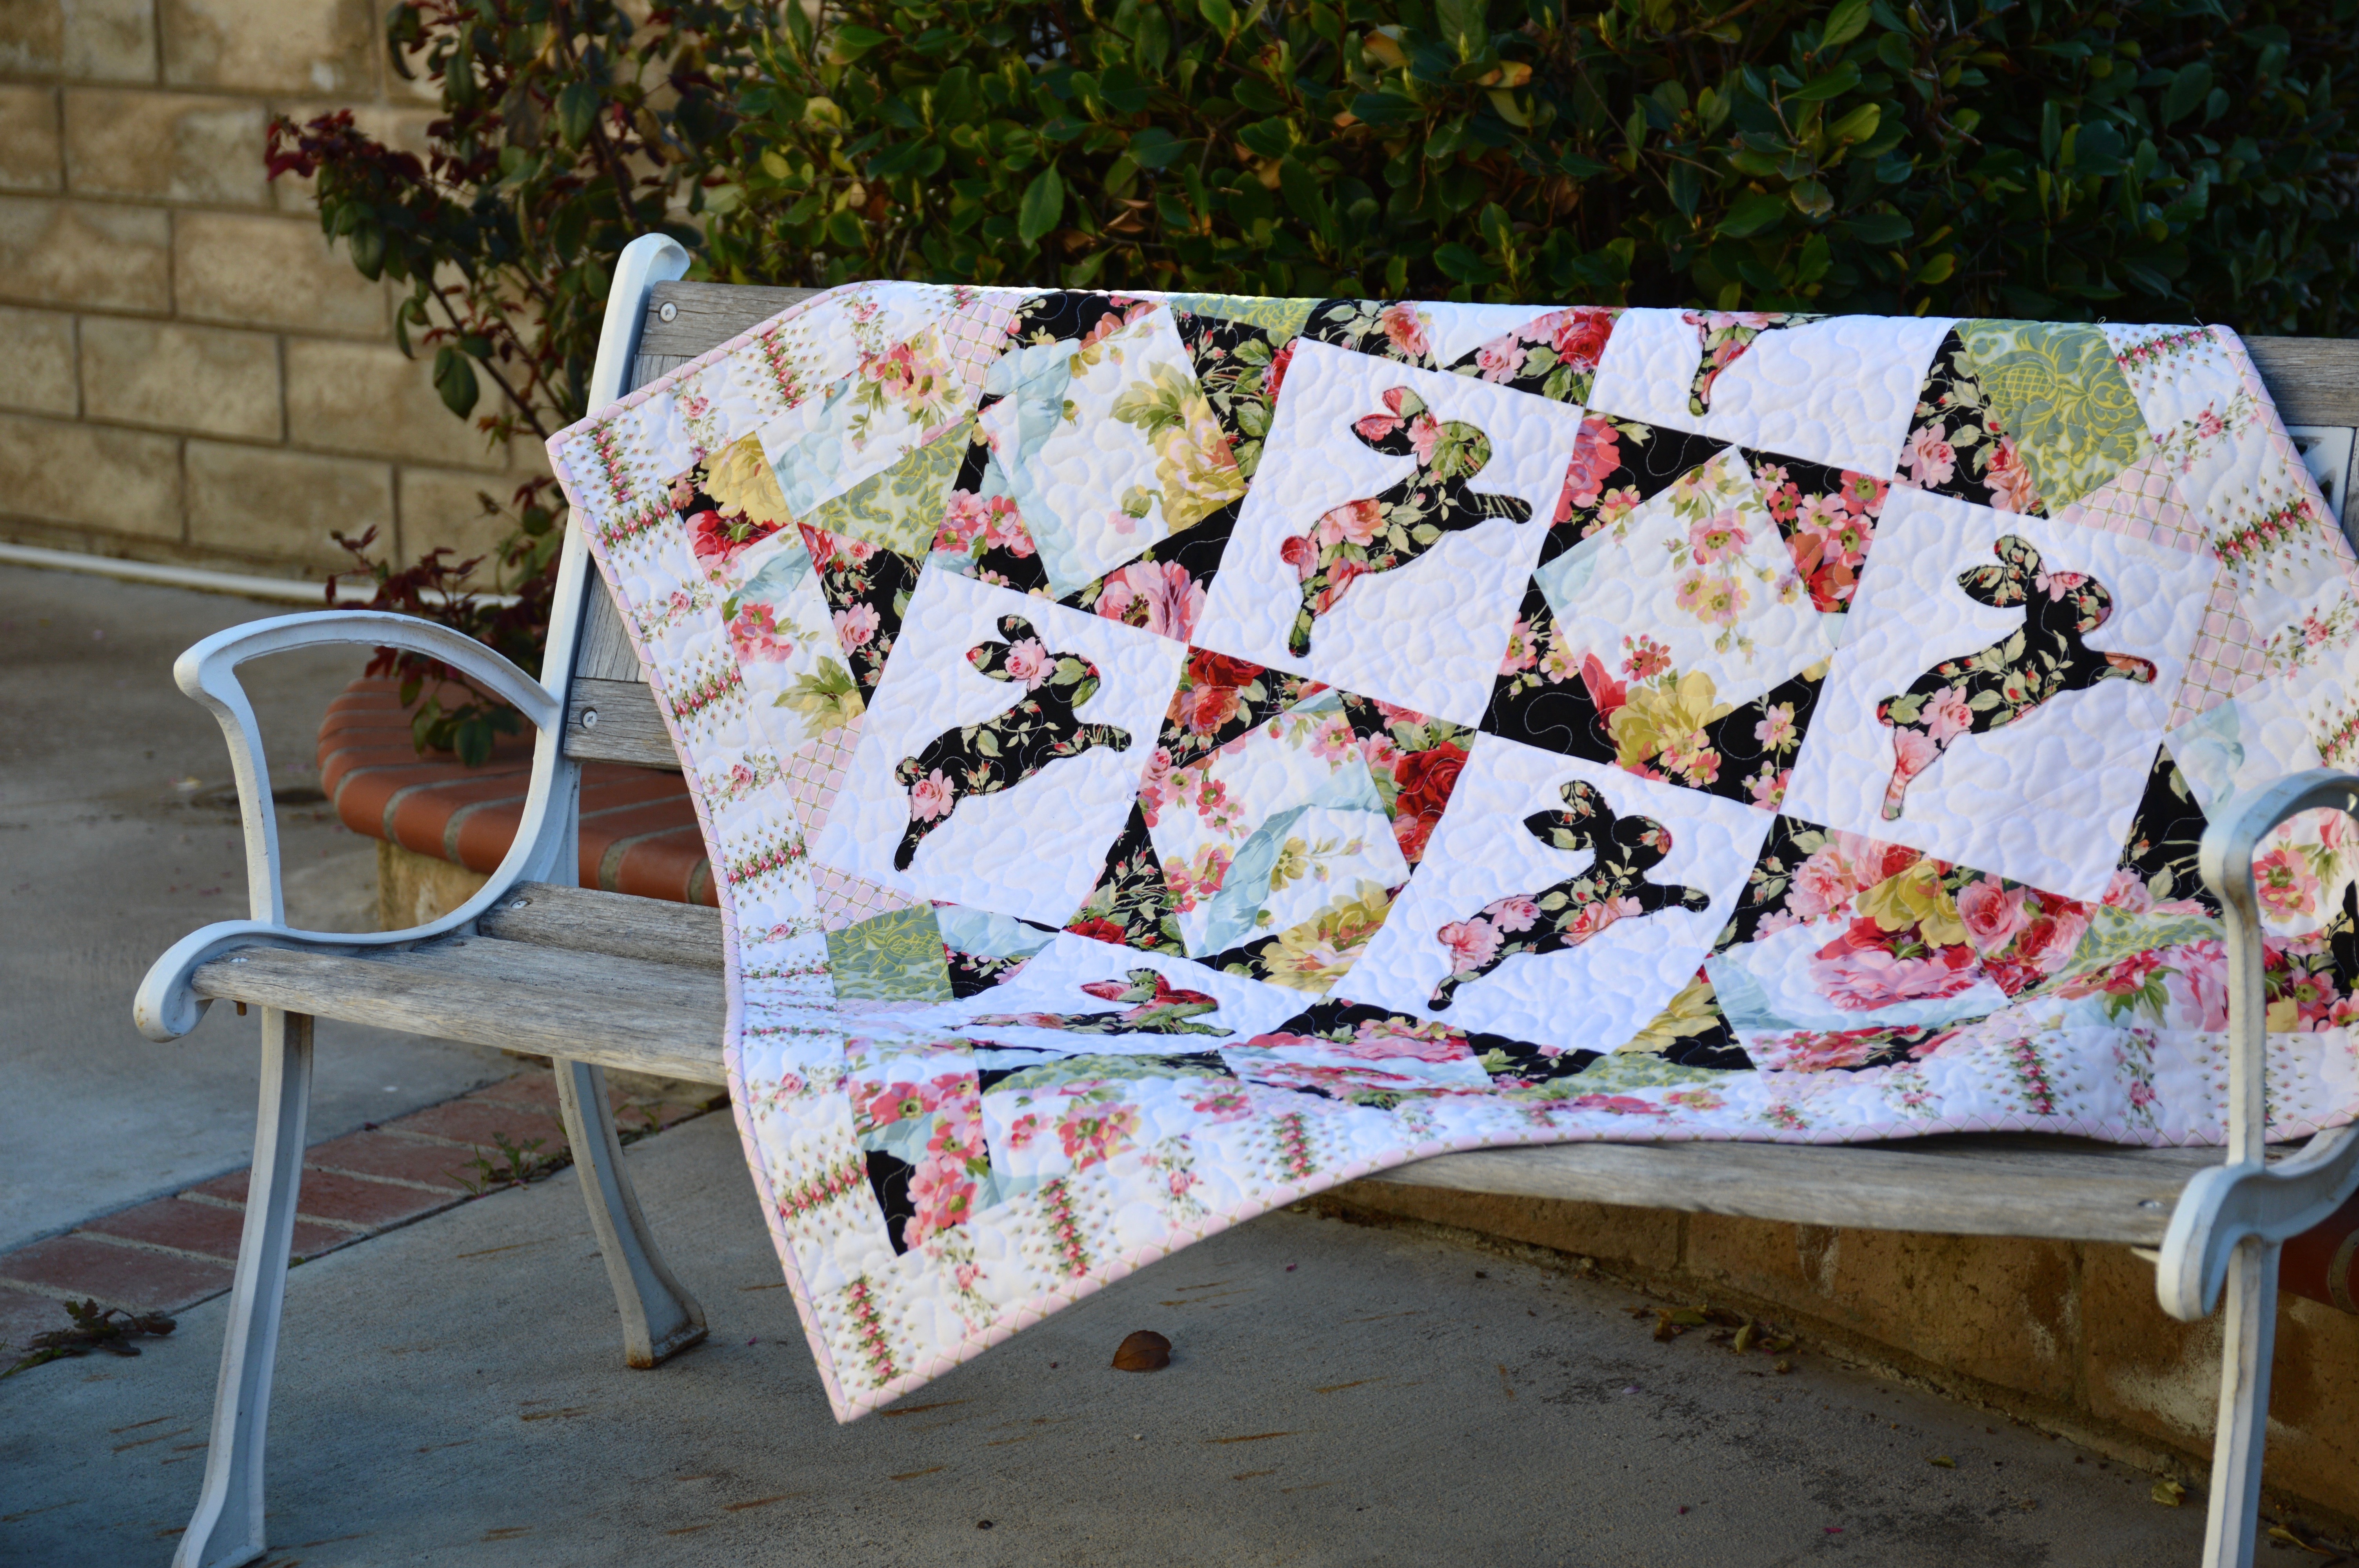
This quilt measures 40″ square and is perfect for hanging, placing on a table or couch.  I used my Sizzix dies for all the triangles and the bunny appliqué!  You can download the pattern by clicking HERE.

bunny quilt

Here’s what you need to get started: (All fabrics from The Rose Collection by Anna Griffin).

bunny quilt 14

Fabric Requirements

½ yard solid white

½ yard white floral

1 yard black floral for blocks and rabbits

¼ yard green floral

¼ yard pink print

½ yard floral stripe (border)

½ yard pink print (binding)

1 yard backing

45” square batting

Heat n Bond Lite fusible applique

Sizzix Bunny Die

Sizzix 6 ½” Hourglass die

Sizzix 3 ½” Half Square Triangle Die


bunny quilt 5

I die cut all the triangles with the Sizzix dies.  It saves on fabric and makes for fast and easy piecing!!

bunny quilt 7

I love how it brightens up my living room!  I’m all ready for spring now!

bunny quilt 2

bunny quilt 1

Spring Burlap Table Runner with Appliqué Bunnies

Table Runner: A Cute Rabbit Burlap MIY

I love spring and I love bunnies and I love this Sizzix Rabbit Die! It is my most favorite Sizzix die of ALL TIME!! It is totally feels like spring here in Southern California! I love it! I’m ready to get all my spring home decor out and I needed a new table runner in my dining room so I came up with this “shabby” inspired bunny runner. I used a ready-made burlap runner that I purchased at the craft store, Heat n Bond Ultra, lace trim, and some yardage. The fabrics are from the line Flora & Fauna by Blend Fabrics.

Table Runner: A Cute Rabbit Burlap MIY

Table Runner: A Cute Rabbit Burlap MIY

Let’s get started!

Begin by cutting the Heat n Bond Ultra into rectangles the size of the Rabbit Die. I choose to use Heat n Bond Ultra because I didn’t want to sew around each rabbit. Burlap is a little stretchy and wiggly and I thought the sewing would cause some funky puckering. The Ultra doesn’t require any sewing!

Table Runner: A Cute Rabbit Burlap MIY

Iron it to the wrong size of the fabrics to be die cut.Table Runner: A Cute Rabbit Burlap MIY

Run the fabrics through the Sizzix Fabi. Make sure to cut half the rabbits going one way and half the rabbits going the other way. I cut 12 rabbits. The number will vary depending on the length of the runner.

Table Runner: A Cute Rabbit Burlap MIY

Aren’t they the cutest! I could have a million of these bunnies!!!!

Table Runner: A Cute Rabbit Burlap MIY

Measure the length of your table runner, mine is 116″. You will need the lace to be double the length of the table runner.

Table Runner: A Cute Rabbit Burlap MIY

Sew the lace to each long edge of the table runner.

Table Runner: A Cute Rabbit Burlap MIY

Choose three fabrics for the ruffles. Cut (2) 5″ x WOF of each of the ruffle fabrics.

Table Runner: A Cute Rabbit Burlap MIY

Sew a rolled hem on the two short sides of each of the 6 ruffle pieces.

Table Runner: A Cute Rabbit Burlap MIY

Then sew a rolled hem on one long edge of the ruffle pieces. Press.

Table Runner: A Cute Rabbit Burlap MIY

Sew a gathering stitch along the length of the ruffle strip, 1/4″ along the raw edge. Gather each ruffle.

Table Runner: A Cute Rabbit Burlap MIY

The first ruffle we sew till be the end ruffle. Align the ruffle and the end of the runner right sides together. Adjust the ruffle to fit the width of the runner. Pin into place. Sew along the gathering stitches. Do this to both ends of the runner.

Table Runner: A Cute Rabbit Burlap MIY

Press the ruffle back and top stitch along the top of the ruffle to keep it laying flat.

Table Runner: A Cute Rabbit Burlap MIY

For the second ruffle pin it wrong side to the runner (above).

Table Runner: A Cute Rabbit Burlap MIY

Align the ruffle so it overlaps about 1″ (pictured above).

Table Runner: A Cute Rabbit Burlap MIY

Sew along the gathering stitch. Then zig zag along the raw edge.

Table Runner: A Cute Rabbit Burlap MIY

For the third ruffle, aligh right sides together (like we did with the first ruffle). Pin it about 2.5″ apart. Make sure when the ruffle is folded back it covers the raw edge. Sew along the gathering seam.

Table Runner: A Cute Rabbit Burlap MIY

Fold ruffle back, press, and top stitch.

Table Runner: A Cute Rabbit Burlap MIY

Peel off the backing paper of the rabbits and press with hot dry iron. Table Runner: A Cute Rabbit Burlap MIY

Having your cat press is not the same thing 🙂

Table Runner: A Cute Rabbit Burlap MIY

Ta Da! It’s done! And I totally LOVE it!!!!

Table Runner: A Cute Rabbit Burlap MIY

It’s the perfect addition to my reclaimed farm table that my husband built me!!!

Table Runner: A Cute Rabbit Burlap MIY

Mufasa loves it too!

Table Runner: A Cute Rabbit Burlap MIY

Thanks for joining me today!

Four-Patch Heart Mini Quilt

I can’t get enough valentine sewing!  I think its just the pick-me-up I need during wintertime!  I created this fun mini quilt that is perfect to hang on a wall, put on a table or give to someone you love.

4 patch heart cover
IMG_9234

The finished quilt measures 26″ square and is made up of 4 quilt blocks that measure 10″.
IMG_9178

These fabrics from Moda are sure to brighten your day!  The line is called Just Another Walk in the Woods – and it’s ADORABLE!!! Don’t you just love cracking open a Jelly Roll!  It’s a little bit magical!

IMG_9177

4-Patch Heart Mini Quilt Featuring Heat n Bond Lite

Here’s what you need to get started:

1/2 a Jelly Roll (or equivalent)
1/3 yard background fabric
Aurifil Threads – 2530 &
Heat n Bond® Lite EZ print sheets
1/2 yard for backing
1/3 yard binding – or you can use left over Jelly Roll Strips

Click Here to download the heart Pattern

All seams 1/4″


IMG_9186

Begin by cutting 15-18 of the jelly roll strips into 2 1/2″ squares.

Cut the background fabric:

  • (4) 6 1/2″ squares
  • (16) 2 1/2″ squares for block corners
  • (32) 2 1/2″ squares for Half Square Triangles (HST)
4-Patch Applique Hearts

Select (4) groups of (4) fabrics for the hearts.  I selected like colors for each heart but you can make it scrappy if you want!  Sew the group of 4 fabrics together in a 4-patch, pressing seams.

IMG_9183

Print (or trace) 4 hearts onto Heat n Bond Lite.

Cut out 1/8″ around each heart.

IMG_9182

Center the heart on the wrong side of each 4-patch.  Heat set.

IMG_9184

Cut out each heart and peel off the backing paper.  Fuse hearts to the center of the (4) white 6 1/2″ squares. Sew 2 times around each heart with a straight stitch.  Set aside.

IMG_9192

HSTs –  Half Square Triangles

You can make the HSTs however you prefer.  I used my Sizzix machine for quick cutting.  They need to measure 2 1/2″ when they are finished.  You will need a total of 32 HST to make the 4 blocks.

(Quick HST instructions: Draw a diagonal line on the wrong side of the (32) 2 1/2″ back ground squares.  Pair right sides together with a 2 1/2″ square cut from the jelly roll fabric.  Sew along the diagonal line.  Trim 1/4″ along the seam and press toward the dark.)

IMG_9189

Follow the chart below to construct the block:

heart block

Use the (16) background 2 1/2″ squares for the block corners and (16) low volume 2 1/2″  squares from the Jelly Roll for the center squares.

Make 4 blocks.  I chose a color for each block, but you could totally mix up the colors and make them all scrappy!!

IMG_9200

Once the blocks are finished, take the remaining 2 1/2″ squares from the Jelly Roll and piece the sashing and borders. Press all seams open.

Sew (2) strips of 5 squares for the short sashing.  Press

Sew (3) strips of 11 squares for the top, middle, and bottom sashing. Press

Sew (2) strips of 13 squares for the side sashing.  Press

heart block sashing

Make sure to match each seam and pin.

IMG_9210

Use Spray n Bond® for quick basting!  I can’t live without it!!!

IMG_9229

Quilt as desired.  Bind.
IMG_9245

IMG_9236I hope you love making this!!
DSC_0302

Preppy Plaid Tote Bag & Quilt Tutorial

Enchanted blog logo

I am so totally excited to be a part of the Enchanted Blog Tour sponsored by Riley Blake Designs!  You can see the entire collection designed by Dodi Poulsen of Two Sisters at Squirrel Hollow by clicking here 🙂
preppy plaid

When I saw this new fabric line from Riley Blake Designs called Enchanted, my heart stopped.  I took one look at this pink, navy and white plaid and immediately I was transported to a Cape Cod dream!  Sailboats, lobsters, quaint homes and preppy boys on vacation from Harvard 🙂

DSC_0188


IMG_9070
Ok Ok, so I’ve never been to the Cape but a girl can dream right?  I knew I wanted to design something that let this preppy plaid be the focus and something that would be perfect for my sailboat (hahaha).

DSC_0167

I came up with a simple quilt pattern that uses plaid, navy and white.  When only two prints arrived in the mail I began to panic wondering if I had made a terrible decision to make a quilt using only two prints!  I decided to go with my instincts and make the quilt……and I am totally in LOVE!!!!

This quilt really lets the plaid shine in and it’s a great pattern to use if you fall in love with a single fabric print.  The accent blocks are made of 4 half square triangle blocks.

DSC_0213

…..and the quilt fits nicely inside this preppy plaid whale tote bag – made with denim, plaid, and Heat n Bond Fusible fleece.  So, are you ready to set sail for the Cape?  Grab your fabrics and lets get sewing!

DSC_0154

Preppy Plaid Quilt

1/4″ seams 

Supplies

2 yards plaid print

1 yard navy print

1 yard white

Begin by cutting the plaid into (40) 6.5″ squares.

Using the navy blue print and white print sew (160) half square triangles (HST) that measure 3.5″.  You can use any method you like.  I use my Sizzix half square triangle dies!  It is super fast, super easy and no squaring up – just perfection!!

IMG_9037

Die cut 160 navy HSTs and 160 white HSTs.

IMG_9038

Sew the navy and white HSTs right sides together using 1/4″ seam.

IMG_9043

Press seams open.  Continue until you have 160 HSTs.  It’s probably a good idea to put on a movie while doing this!

IMG_9042

Lay out 4 HSTs to make the pattern above.  Sew together as you would a 4-patch.  Press seams open.  Finished block will measure 6.5″.  Make 40 of these blocks.

IMG_9045

Cut 40 squares measuring 6.5″ out of the plaid.

DSC_0121

Sew the blocks together (1/4″ seams) as you would a checkerboard, alternating each block.  Make sure the pieced blocks are going the same direction.  Press the seams toward the plaid.  There are 8 blocks across and 10 rows down.

IMG_9046

Baste (I always use Spray n Bond basting spray)

IMG_9056

Quilt.

IMG_9075

Bind.

DSC_0142

Love.

DSC_0089

Mufasa and I love sewing on rainy days!!

DSC_0098

DSC_0220

Tote Bag Instructions

I used my pattern, Quilted Tote Bag, for the measurements.  I followed the pattern pretty closely with the following exceptions:

  • I added an appliqué to the main bag.
  • I used denim.
  • I did not quilt the bag; I stabilized it with fusible fleece.
  • I came up with a new way to sew the handles (continue reading)
  • I omitted the inside pocket
  • I simplified how to make the bag bottom

Supplies

Denim (2) 20″ x 10.5″

Plaid (2) 20″ x 9.5″

Lining (2) 20″ x 19.5″

Plaid for handles (2) 5″ x 28″

Heat n bond medium stabilizer (2) 5″ x 28″

Heat n Bond Fusible Fleece (2) 20″ x 19.5″

Piece of plaid for the whale

Heat n Bond Lite

Appliqué the whale  Click HERE for the whale pattern.

IMG_9093

You can print the whale directly on Heat n Bond Lite EZ print sheets, or trace the whale onto Heat n Bond Lite.

Heat set the whale to the wrong side of the plaid fabric.

Cut out the whale.  Peel off the backing paper.

IMG_9094

Press it onto one of the denim pieces, centering.  Using 1/4″ seams, sew the denim piece to the plaid piece to make the bag front and back.  Press seams.

IMG_9099

Fuse the Heat n Bond Fusible fleece to the wrong side of the bag front and the bag back.  Add some accent stitching along the seam.

Bag Handles

Fuse the stabilizer to the wrong side of each of the handle strips.

Press in half lengthwise.  Open up and press the long ends in to meet the center.  Press.  Then press in half again.  This makes a super sturdy handle!

IMG_9095

Topstitch along both of the long edges of each handle.

IMG_9096

IMG_9097

Continue following the bag instructions from this tutorial to complete the bag.  To make the bag bottom, cut a 3″ notch out of the bottom corners of the bag and the lining.

IMG_9100
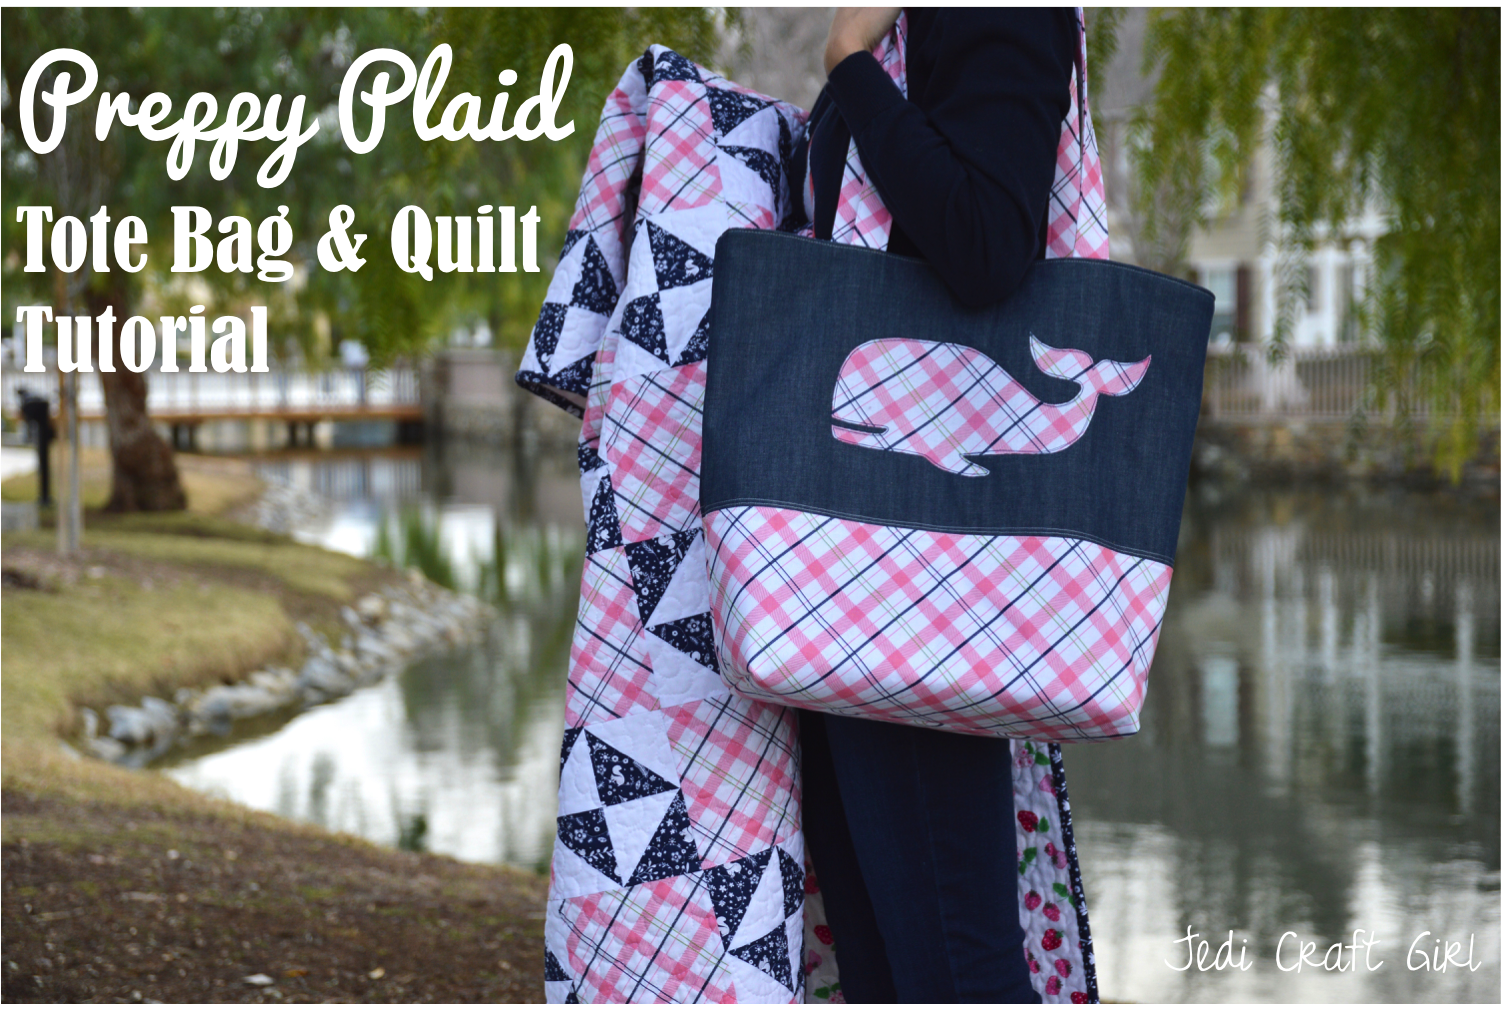
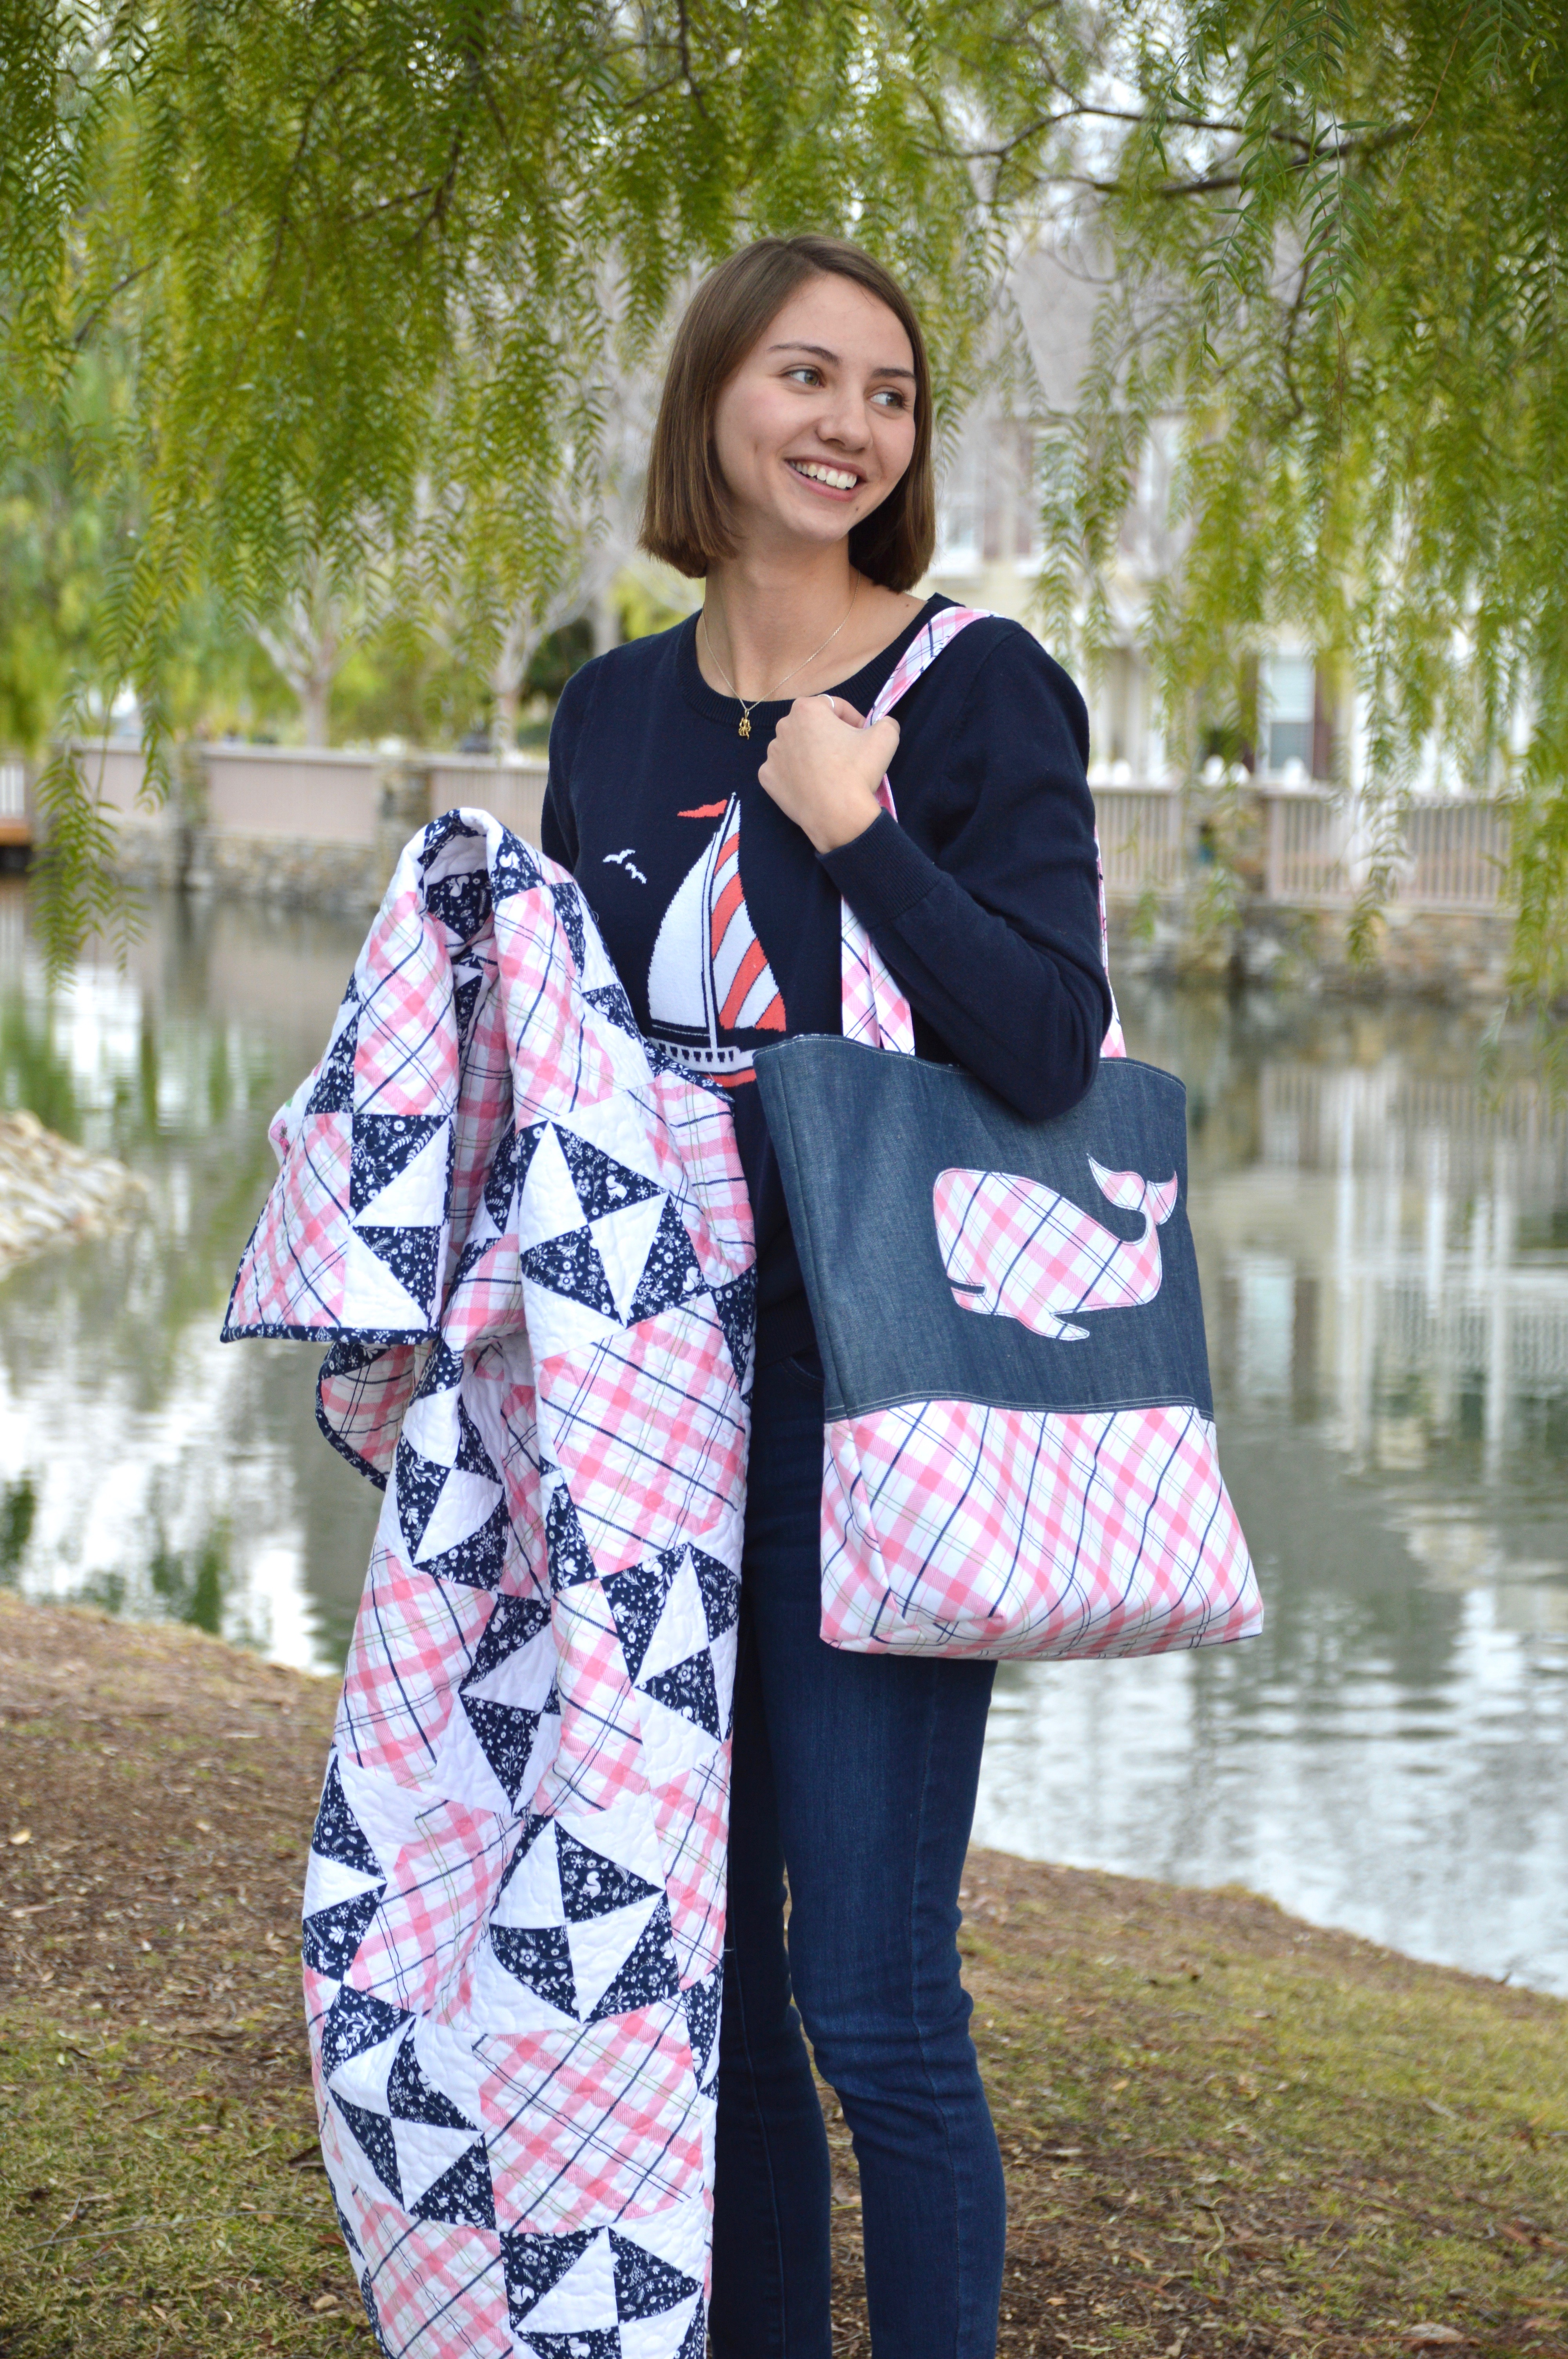
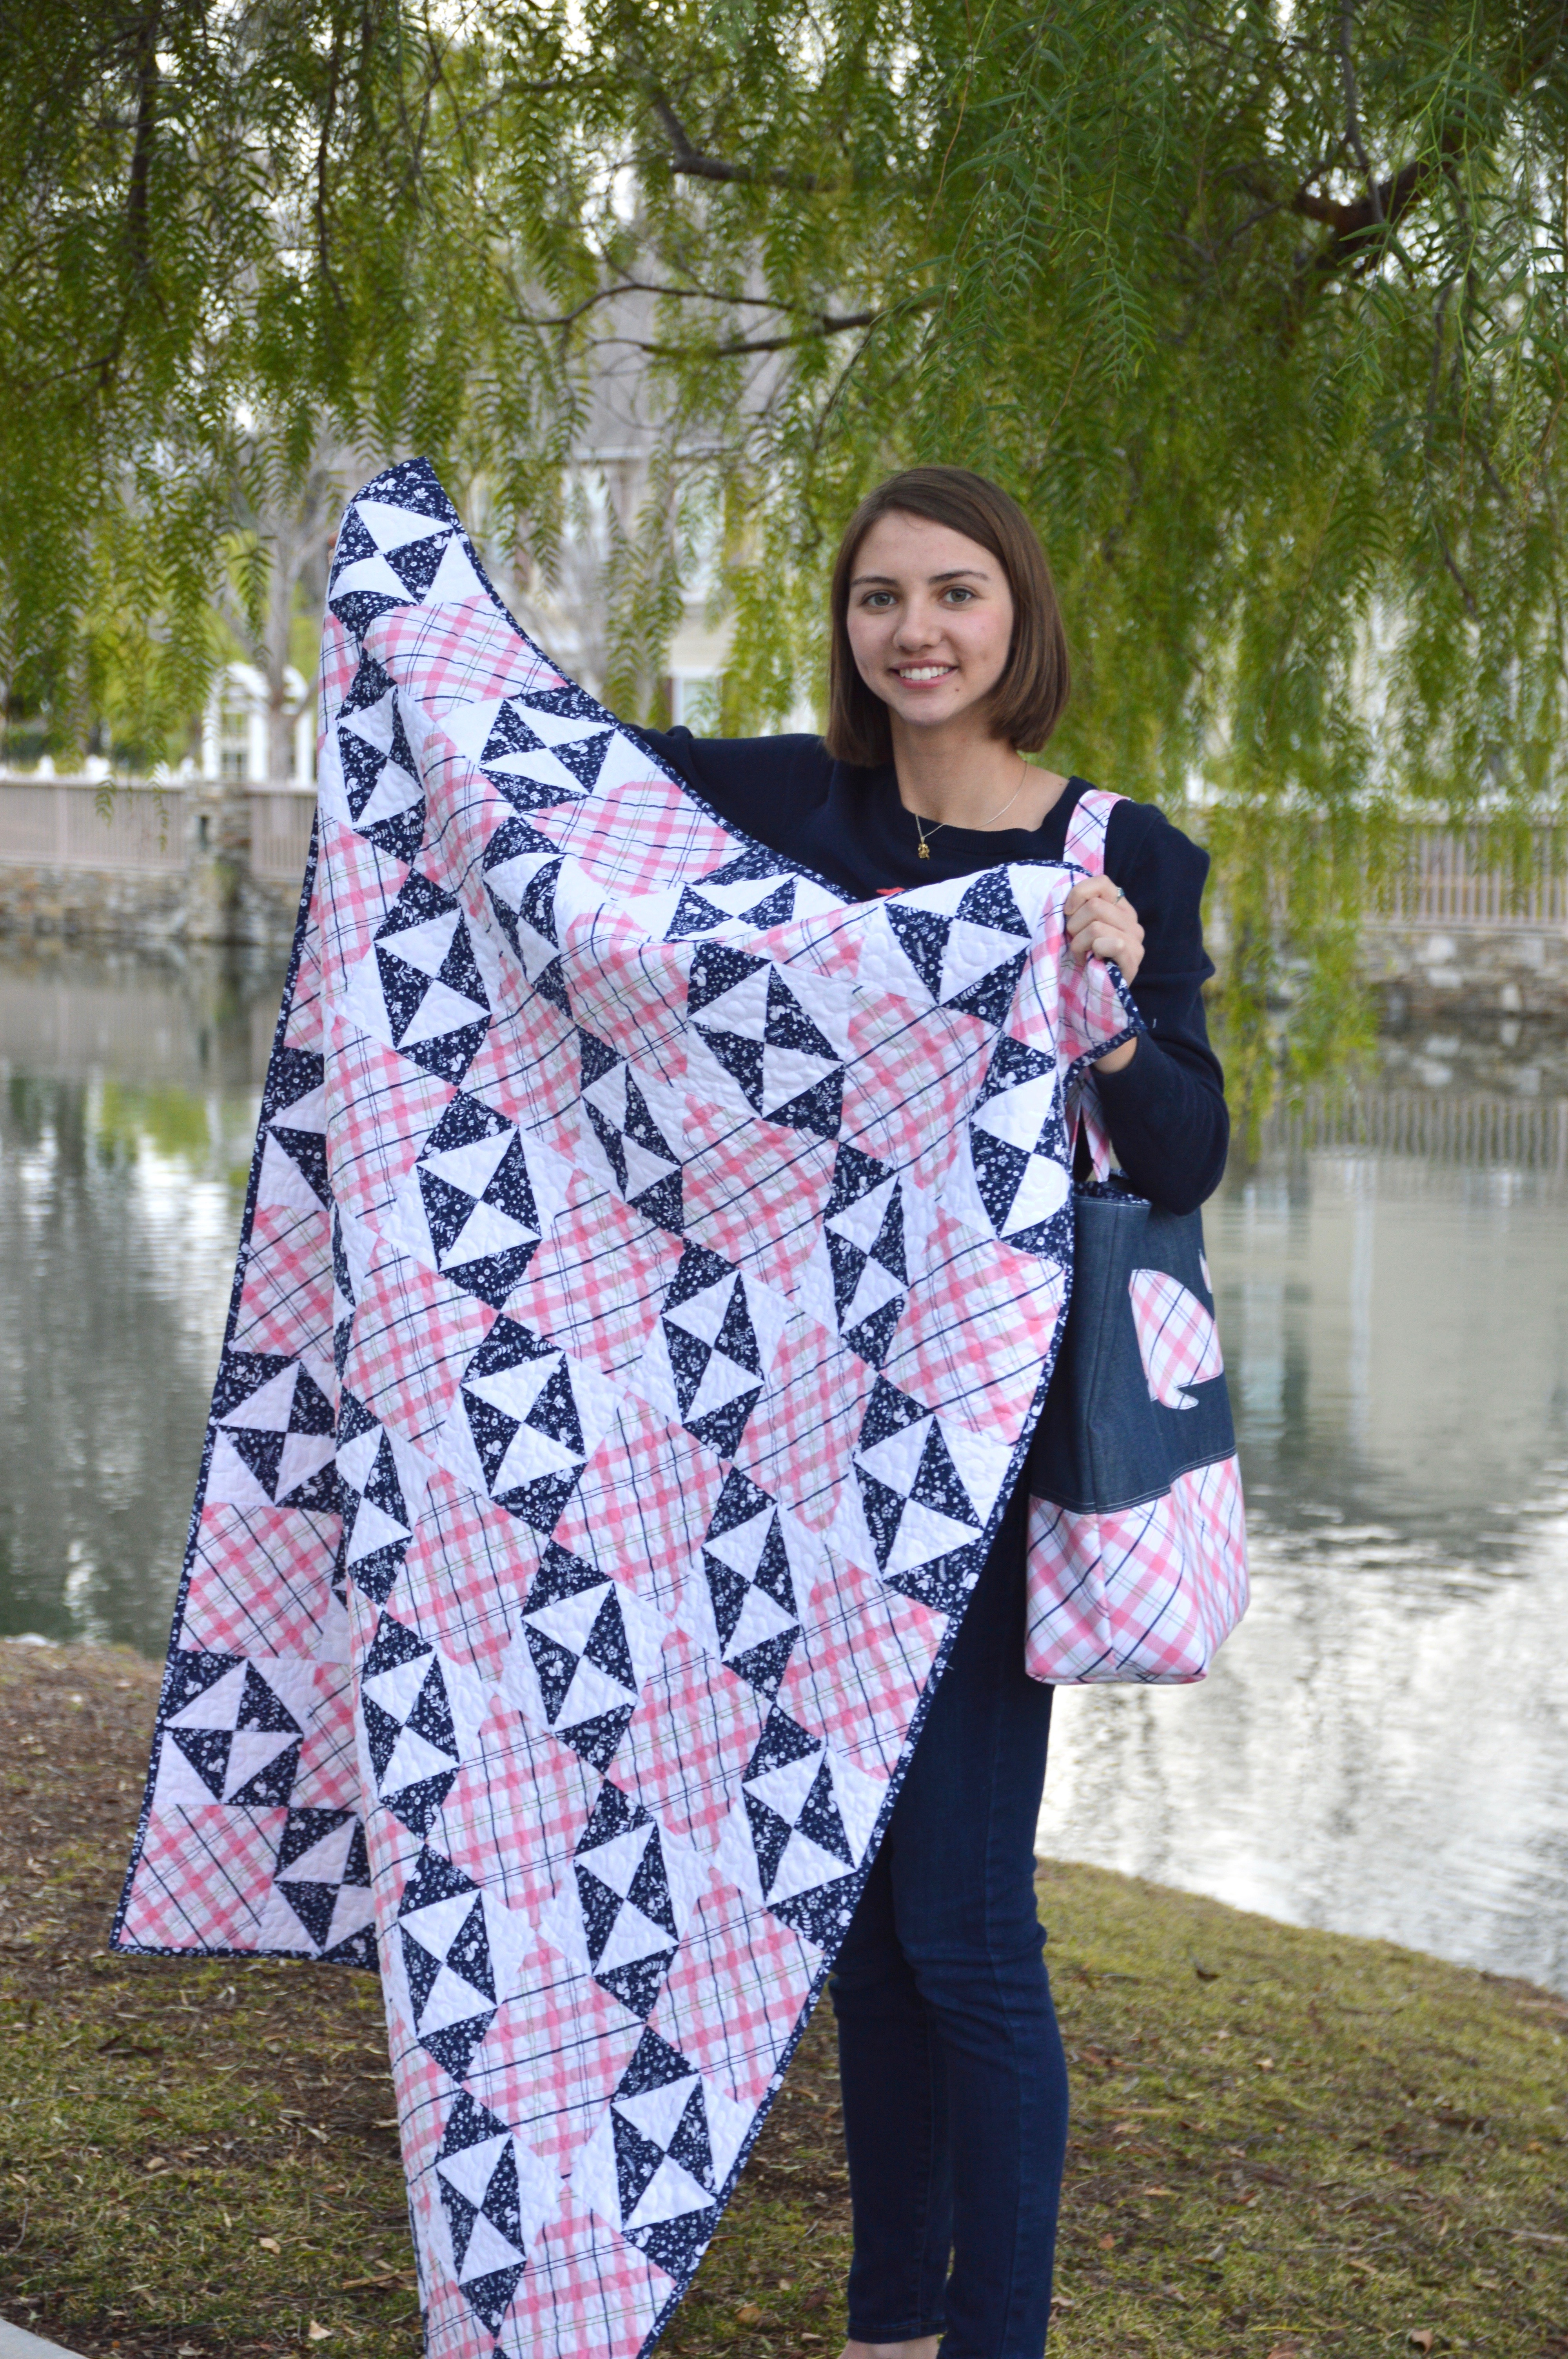
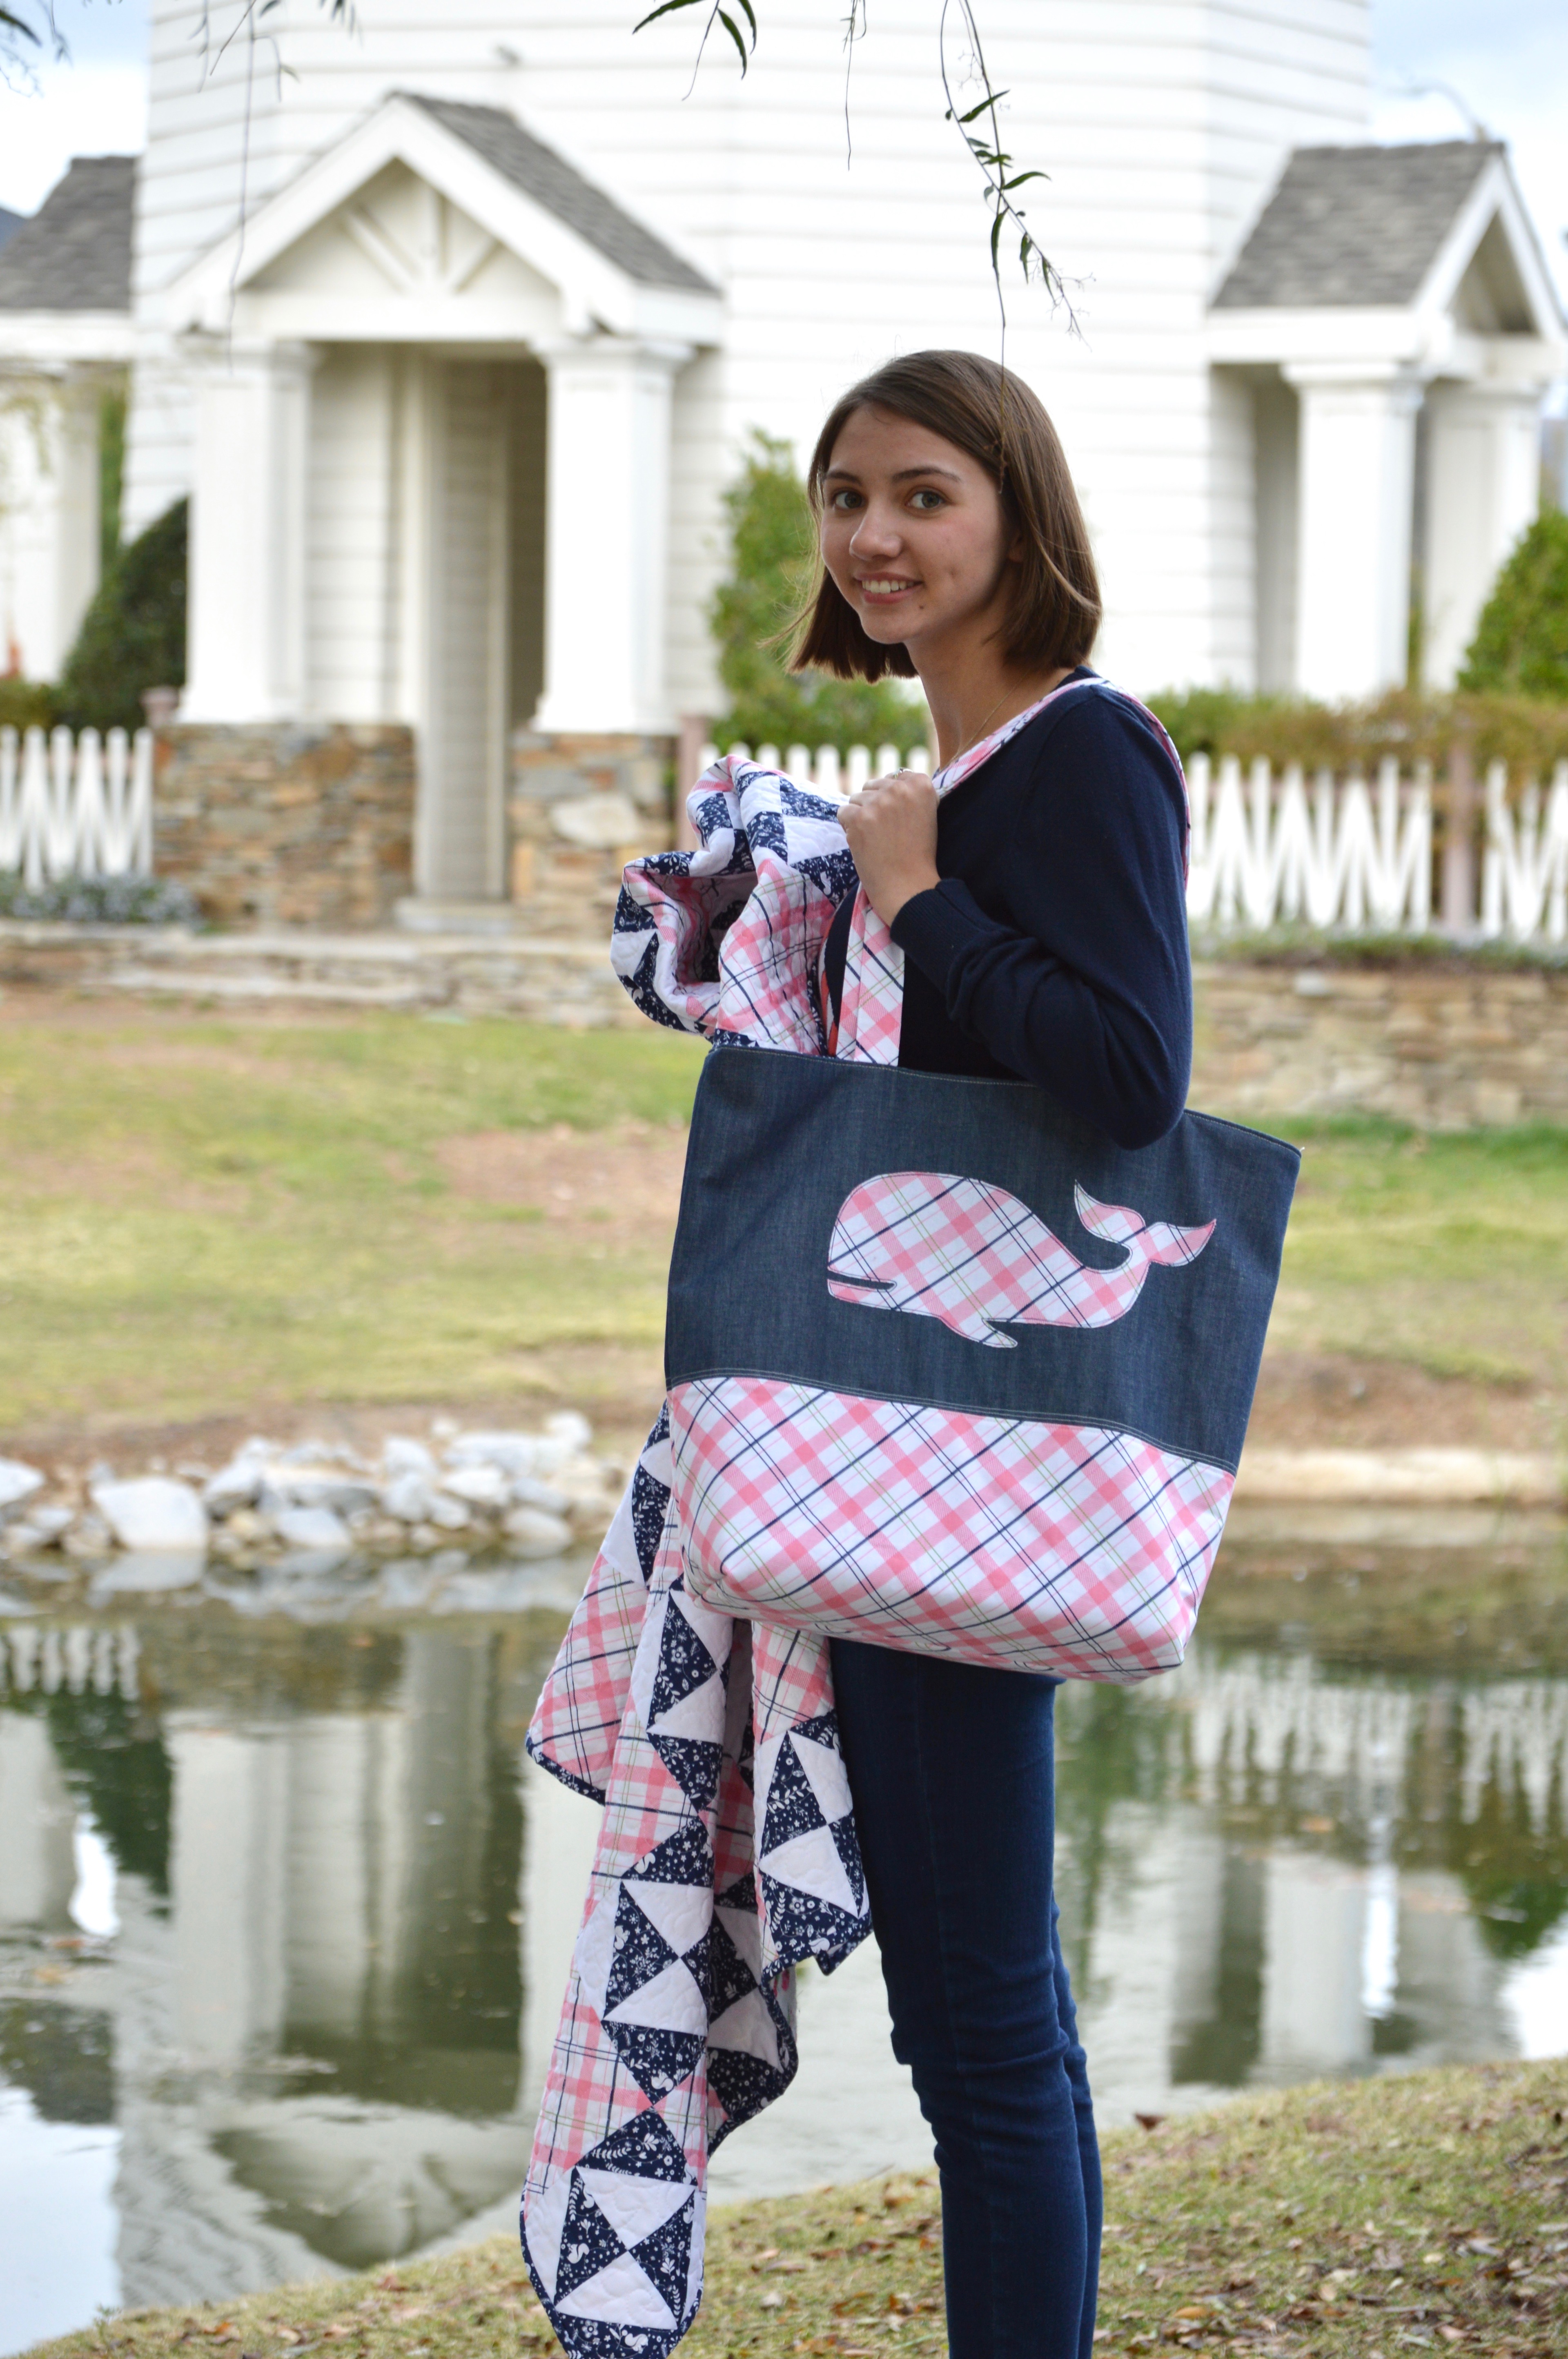
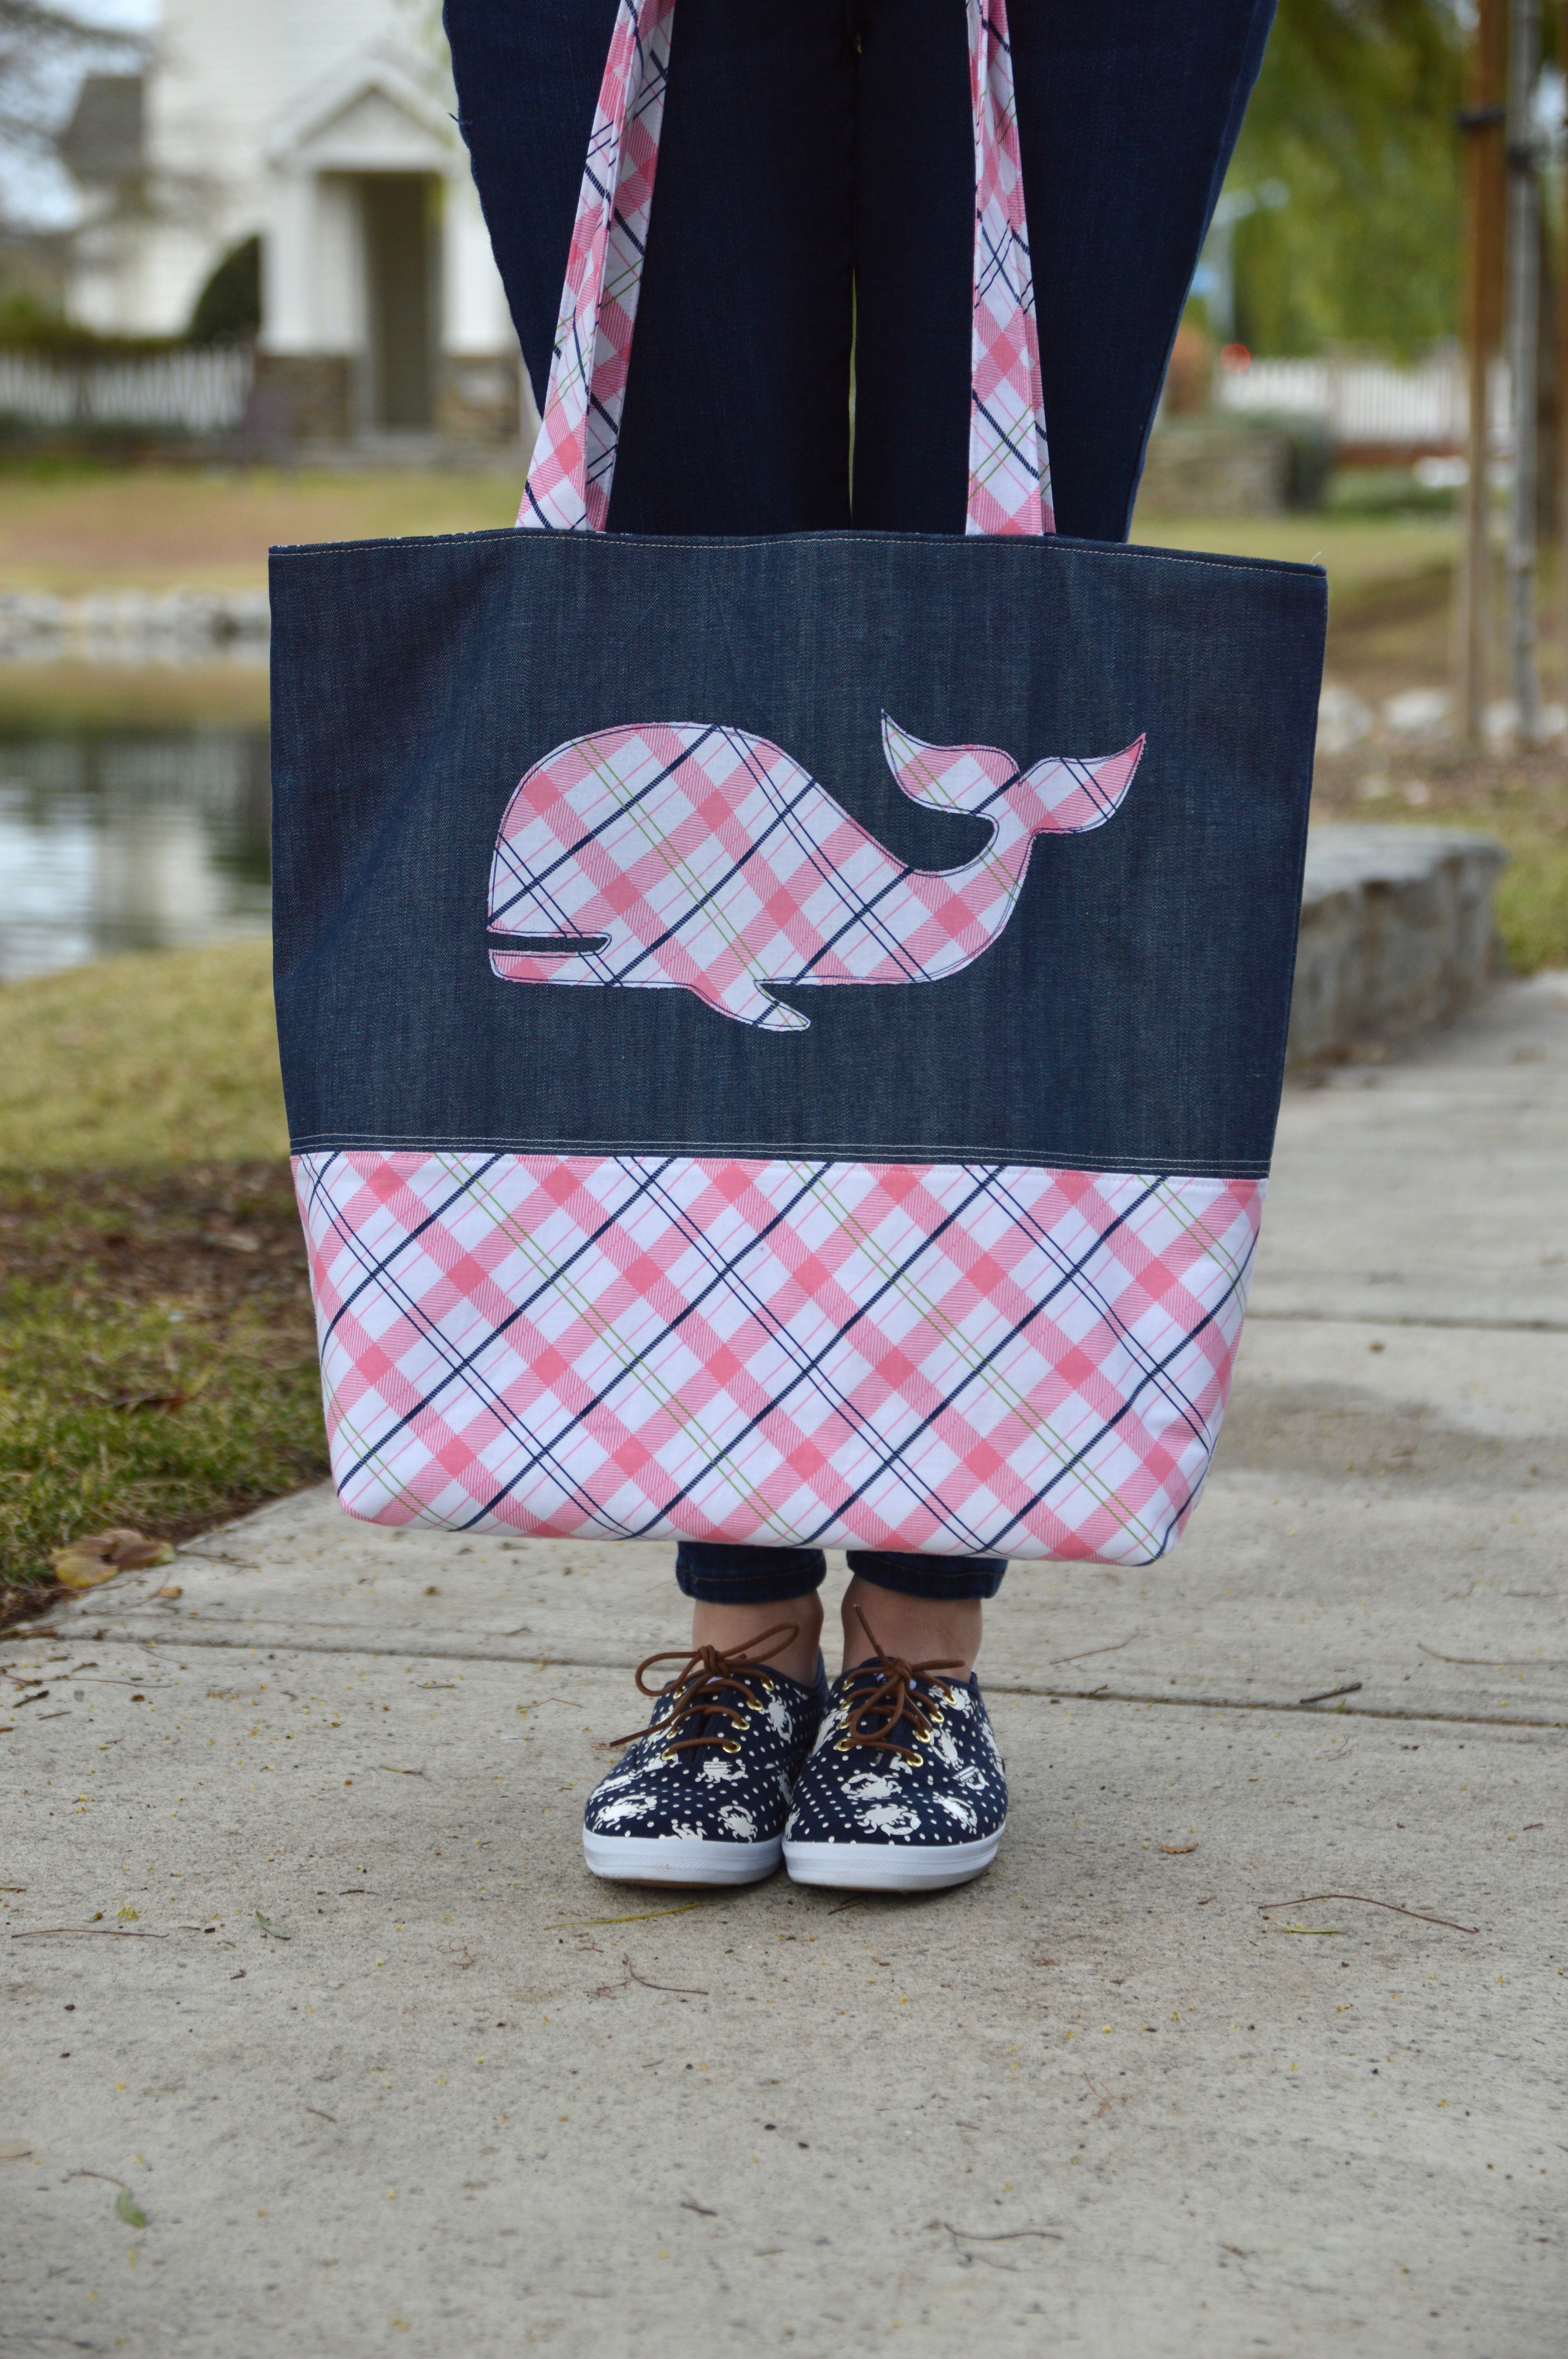
I am so in love with this tote bag!  It is such a great size, and if feels sturdy and it is super preppy plaid cute!!
DSC_0136
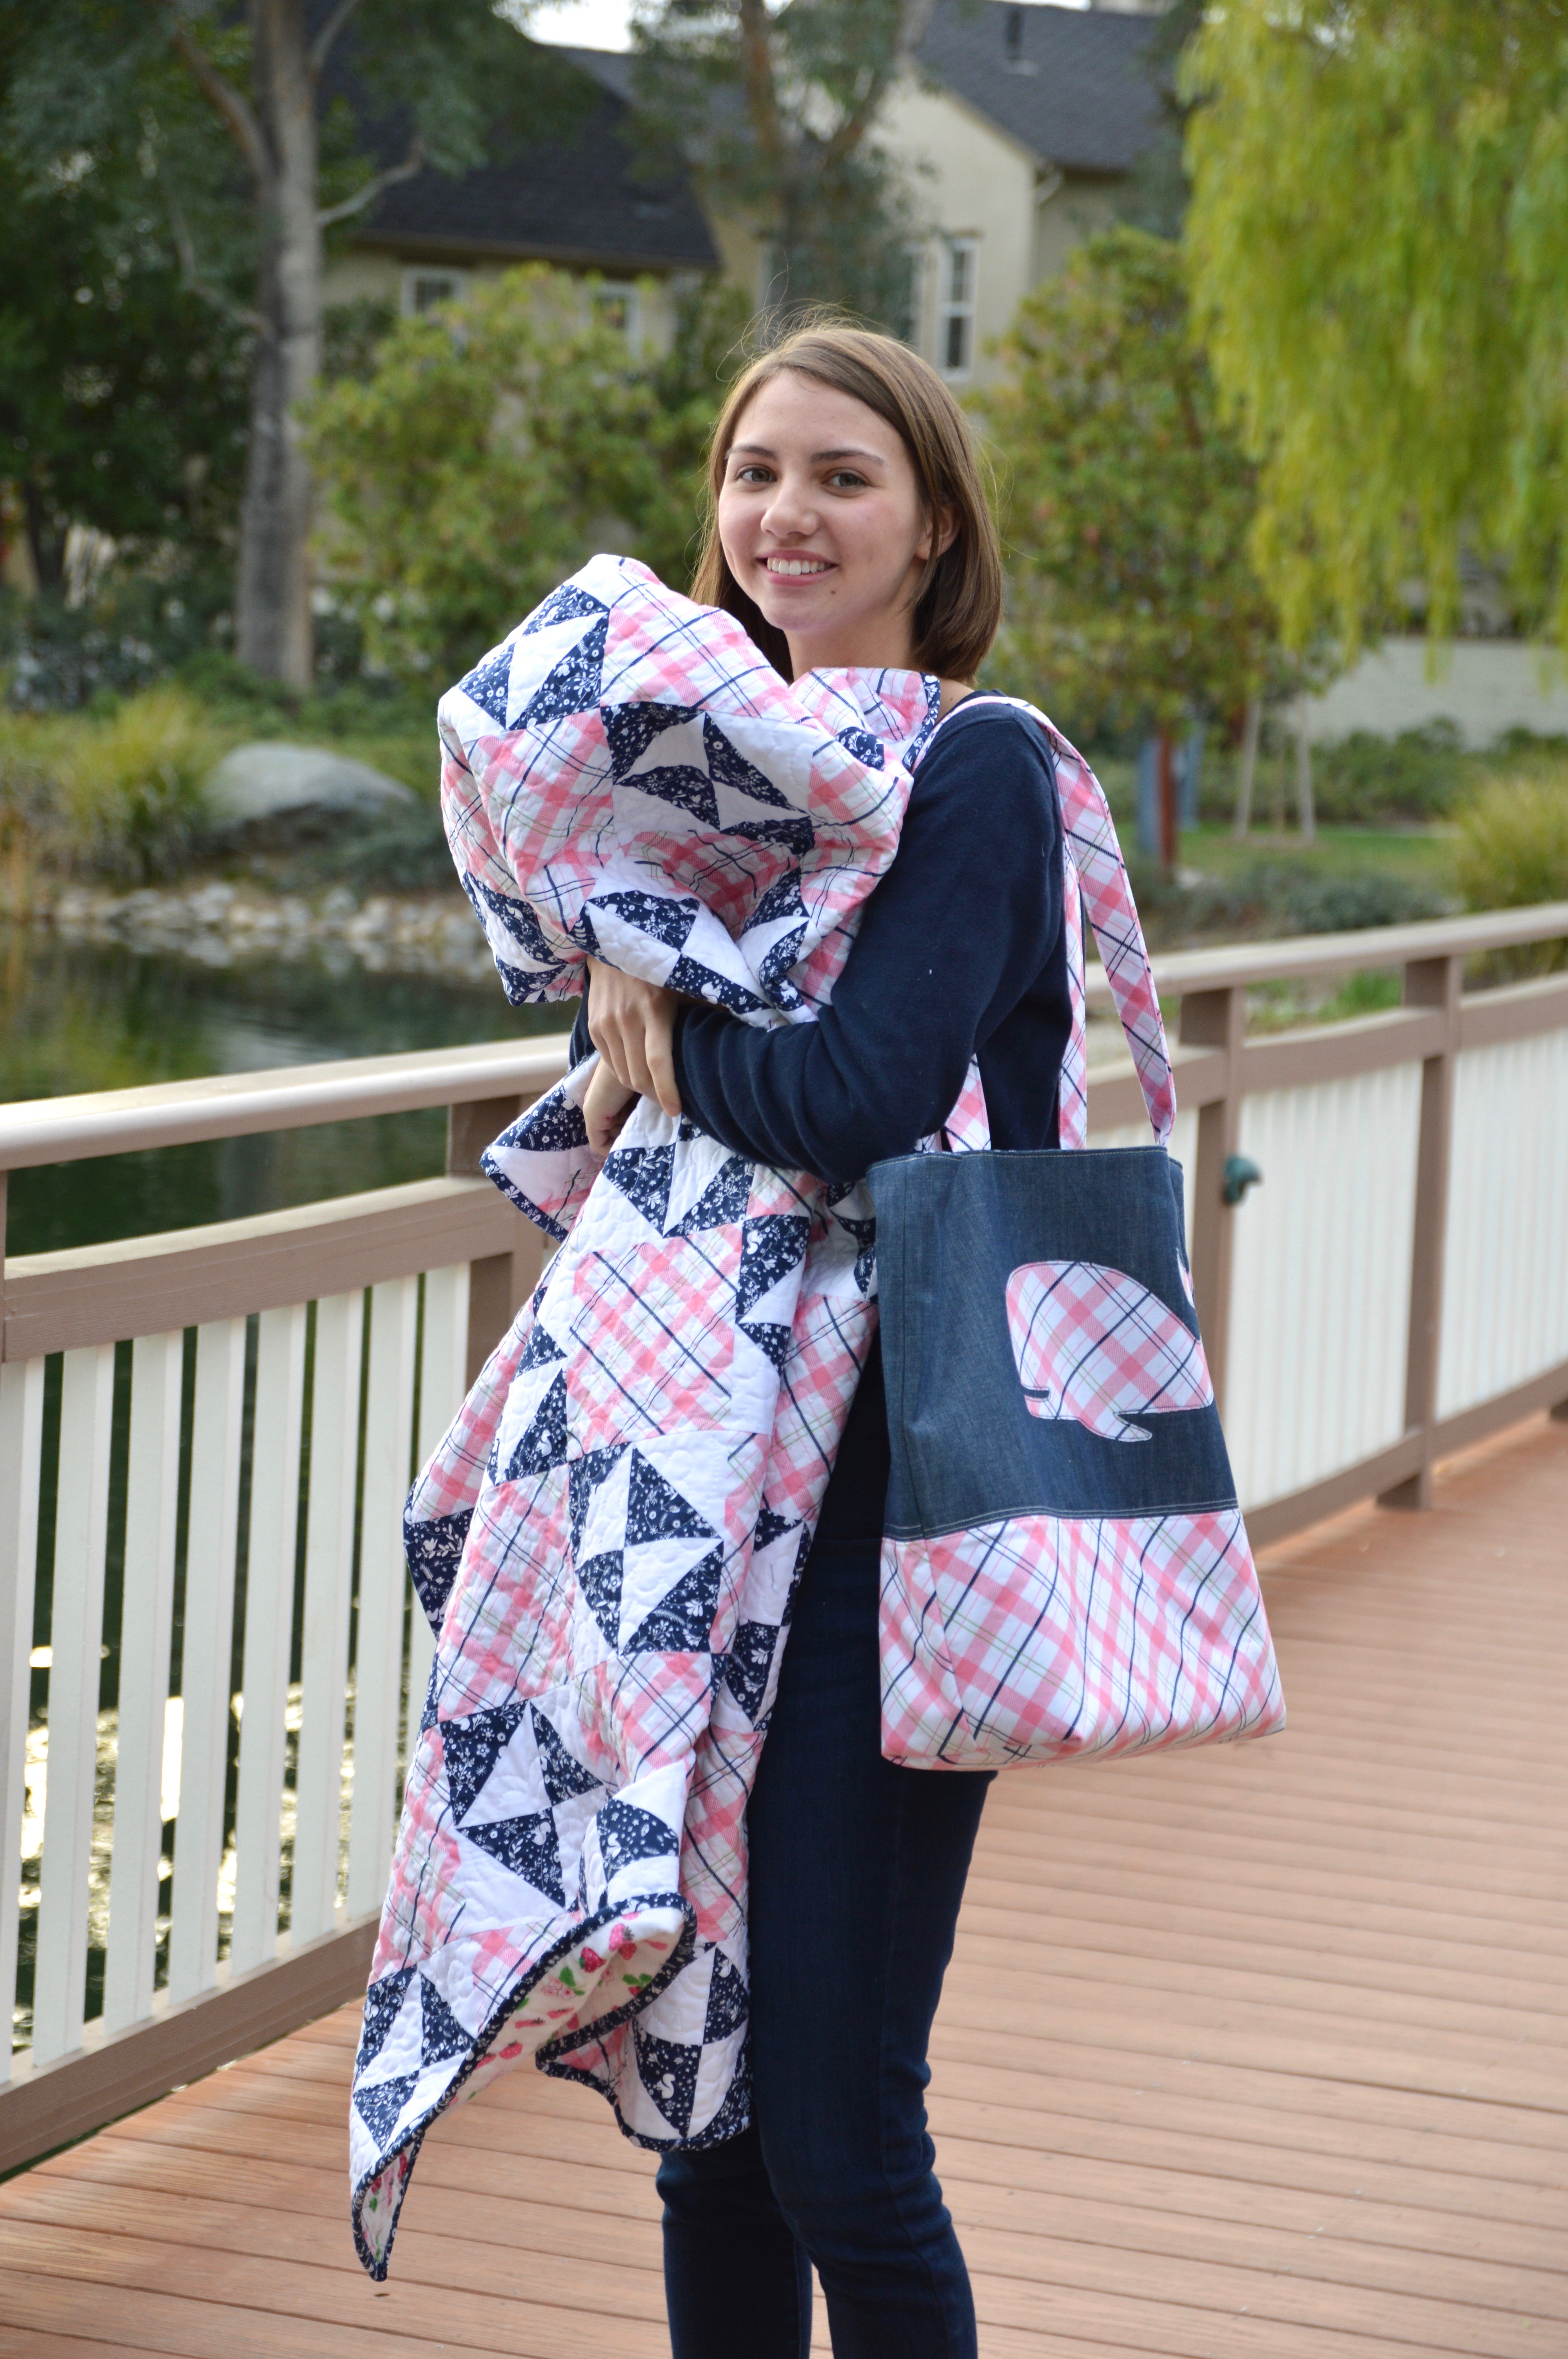
I’m ready for an Eastern Seaboard Vacation!!!
Together they make the Perfect Preppy Plaid Pair!!!!!
DSC_0110

Enchanted logo 2

Be sure to check out these amazing designers to see what they’ve created using Riley Blake’s Enchanted Fabric!!!

Blog Tour Schedule

Monday, Jan 23rd – Little Londyn

Tuesday, Jan 24th – Jedi Craft Girl

Wednesday, Jan 25th – Loose Threads

Thursday, Jan 26th – Meags and Me

Friday, Jan 27th – Pretty by Hand

Monday, Jan 30th – Tie Dye Diva

Tuesday, Jan 31st – Two Sisters as Squirrel Hallow

Wednesday, Feb 1st – Striped Swallow Designs

Thursday, Feb 2nd – Izzy and Ivy

Friday, Feb 3rd – Ellis and Higgs

Monday, Feb 6th – Aurifil

Tuesday, Feb 7th – The Crafy Quilter

Wednesday, Feb 8th – Two Sisters at Squirrel Hallow

Thursday, Feb 9th – Jina Barney Designz

Friday, Feb 10th – Riley Blake

You could win a bundle of Enchanted fabric by visiting Dodi’s blog, Loose Threads (www.sashgals.com) and leaving a comment.

One entry per blog post, per day of the Blog Tour, there on Loose Threads.

Enter every day to increase your chance of winning!!!

Very Merry Wall Quilt {Free Pattern}

very-merry-cover-pic

dsc_0269

Today I’m sharing the pattern for this festive little Very Merry Wall Quilt!  This is such a fun project to whip up!  You can use fat quarters or better yet – just get out the Christmas scrap box!  I appliqued a tree die cut with my Sizzix Fabi machine in the center of the quilt.  You can add your favorite motif to the center!  The quilt is made up of 4 blocks.  I created a PDF pattern that you can download HERE.  These would make great little gifts as well!

img_6796

This is the state of affairs in my sewing room – projects everywhere and not enough time to get it all done by Christmas!!!

img_6798

I love this fabric Little Joys designed by my friend Elea Lutz for Penny Rose Fabrics!!  Such a classic!!

img_6877

Mufasa loves this project too and was super sad when I hung it on the wall where he couldn’t nap on it!img_7326

I collect little vintage Christmas decorations – and I love how this quilt fits in nicely!

dsc_0274

Save

Save

Heartland Fabric Blog Tour and Quilt Tutorial

heartland-tour-blog-banner

heartland-tumbler-quilt
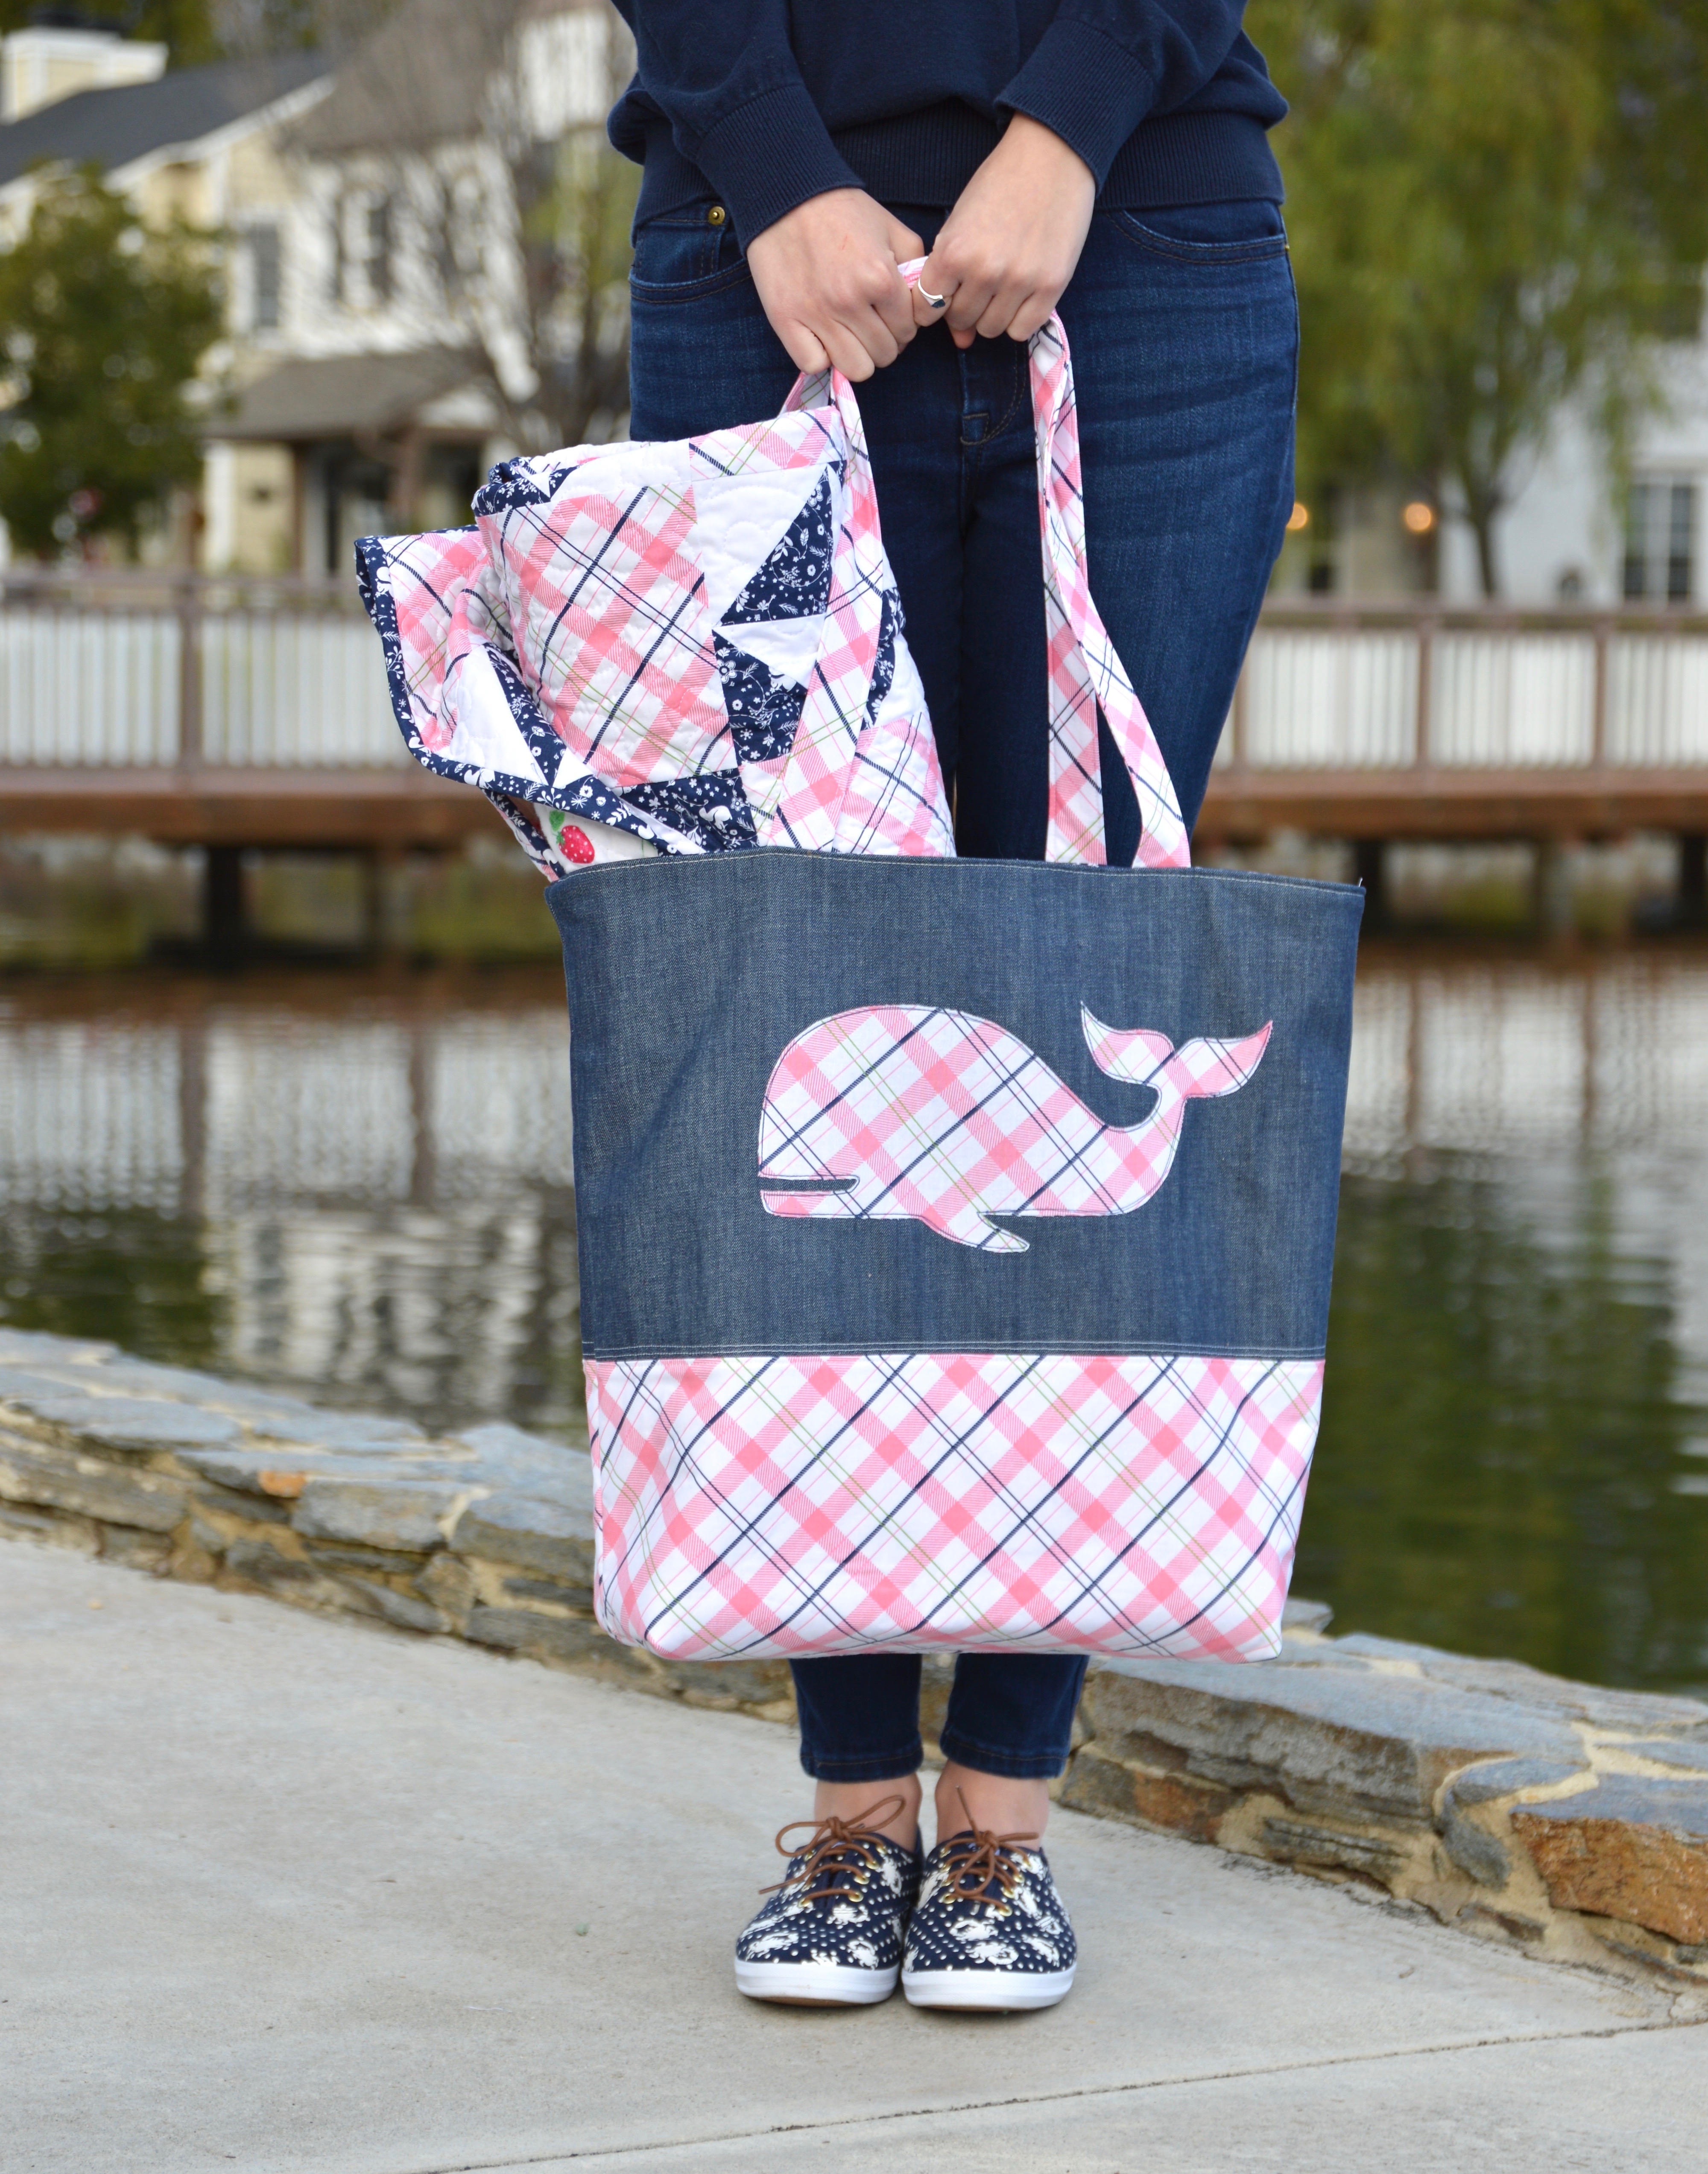
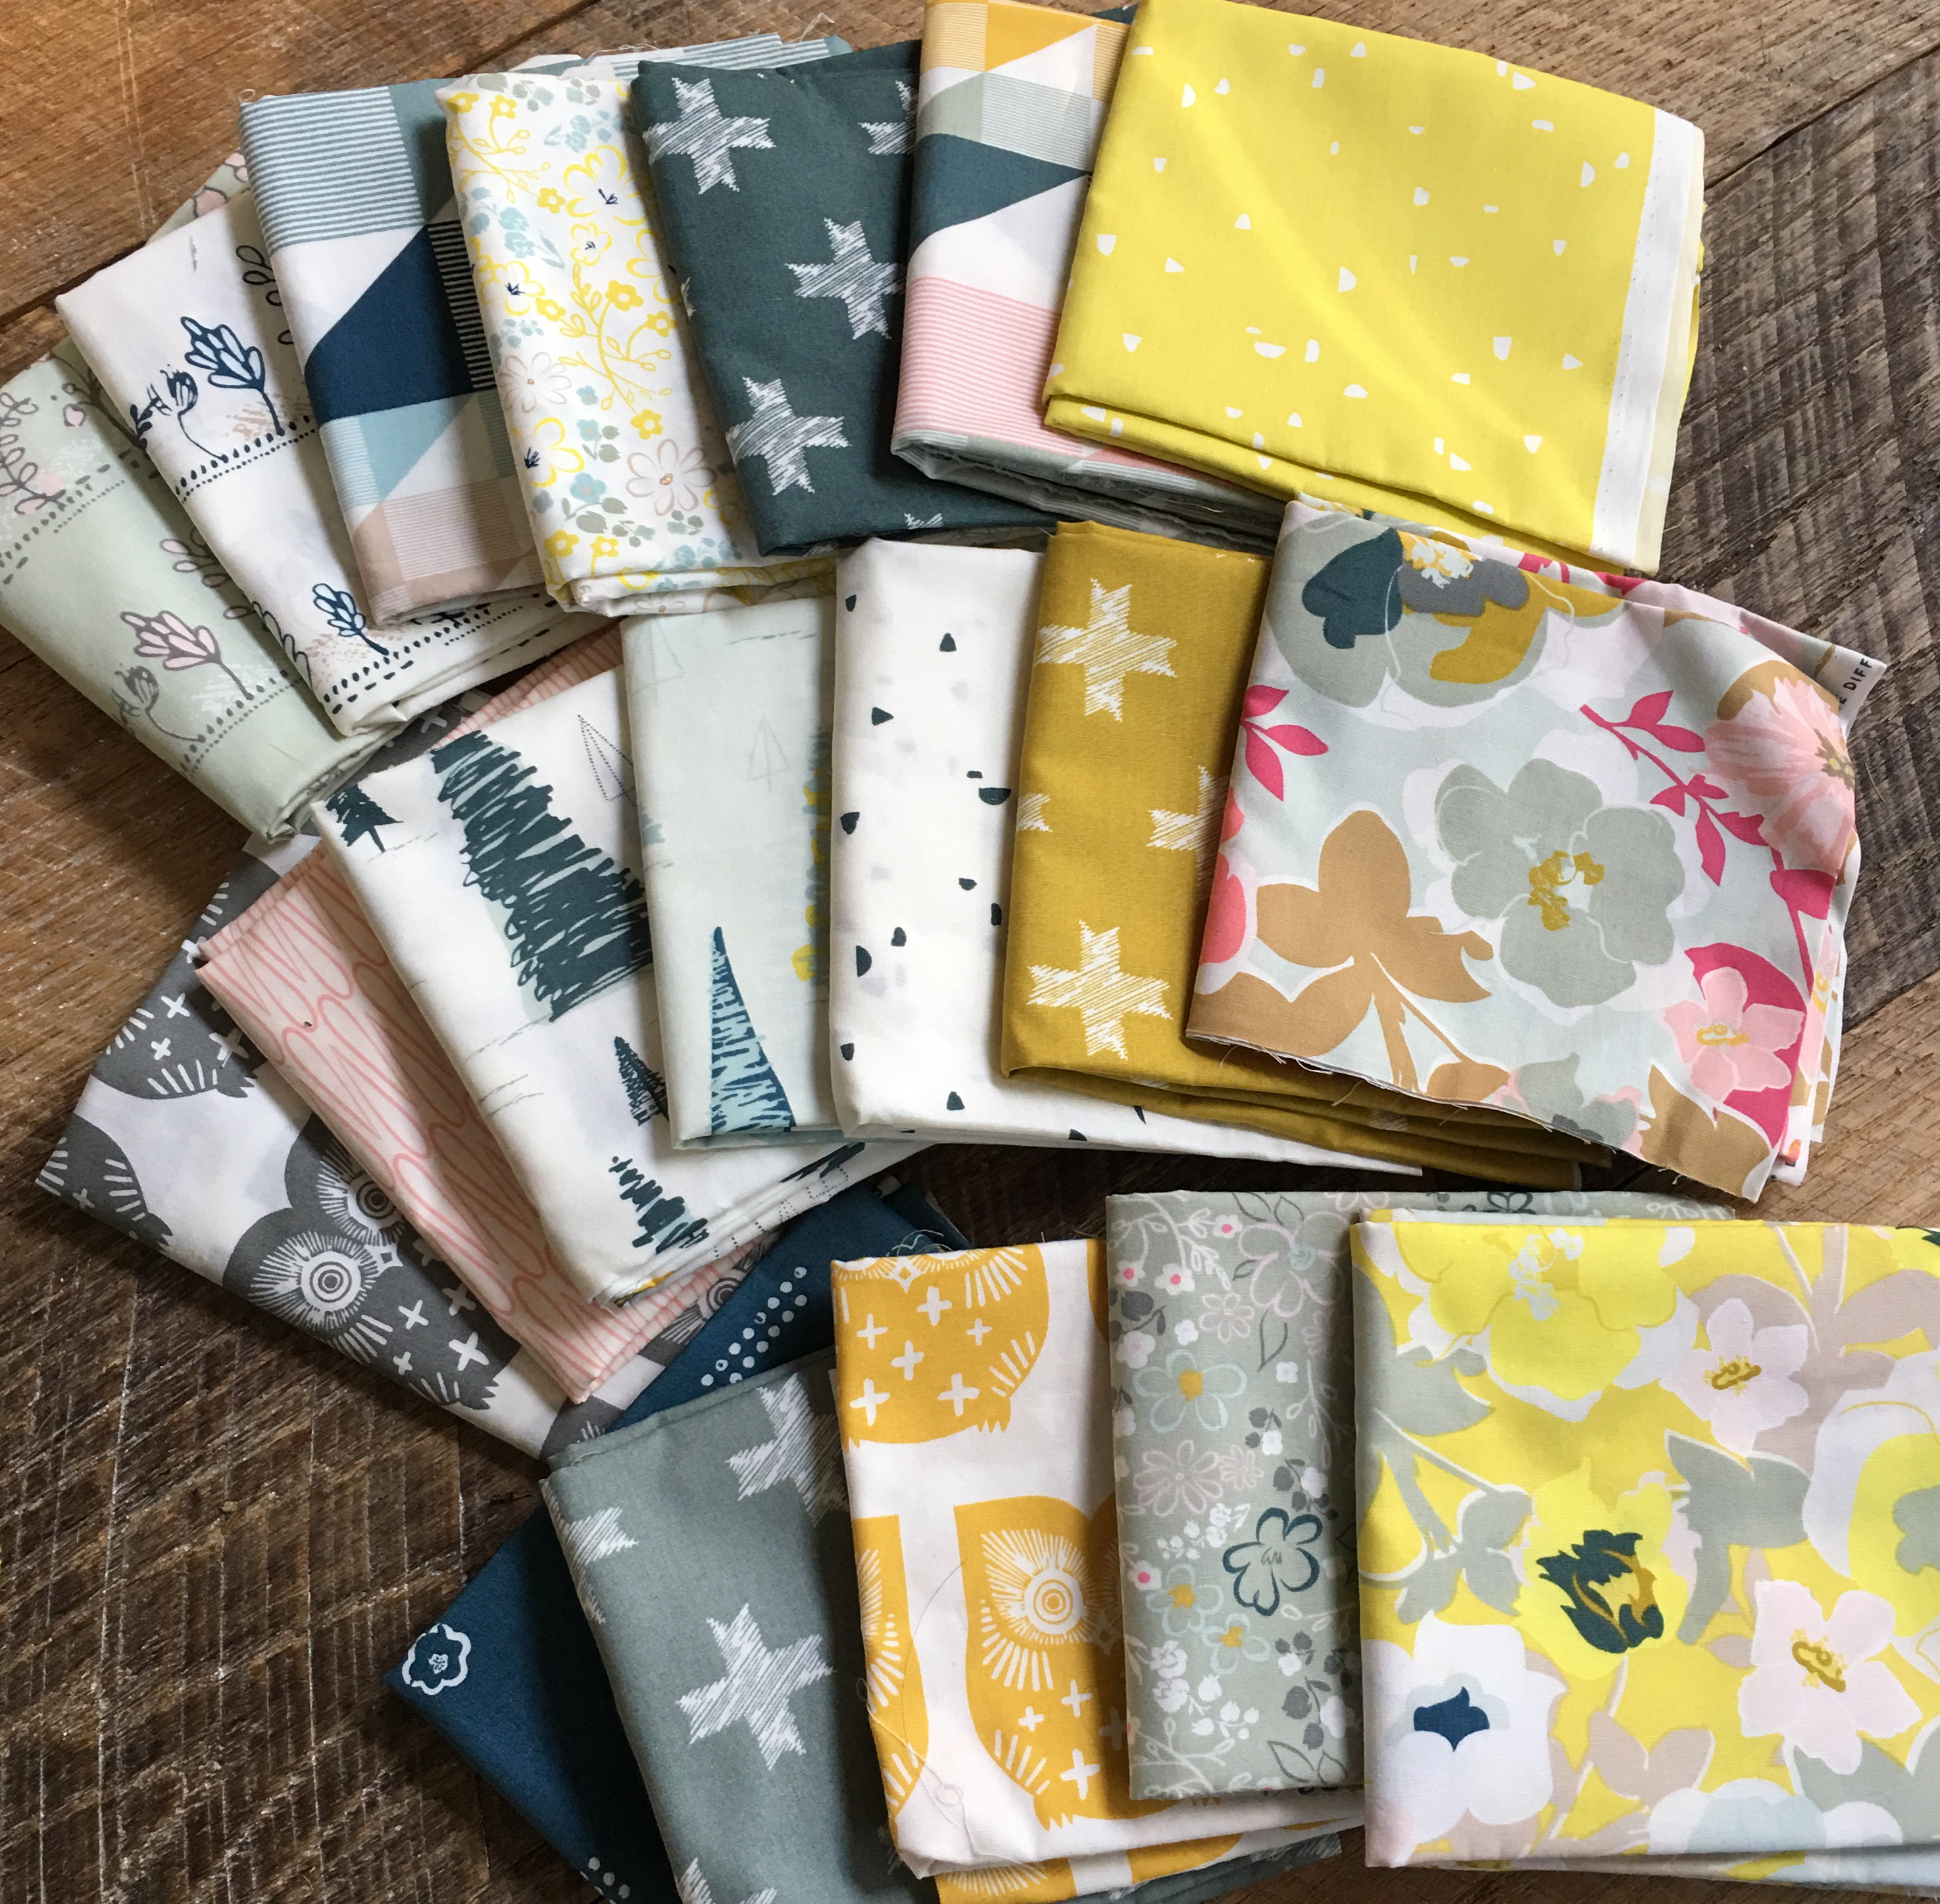
I’m thrilled to be a part of Pat Bravo’s Art Gallery Fabrics Heårtland Blog Tour!!!  And a special thanks to Amy from During Quiet Time for putting it all together!!  These amazing fabrics were so much fun to play with.  When they arrived in the mail I may have squealed!!!screen-shot-2016-11-09-at-4-25-04-pm

img_6138

I love how these fabrics look all together and I knew I wanted each fabric to have an equal part in my quilt and not single any one out.  I love the over all look of them blended together.  I decided to use my Sizzix tumbler die.  This quilt is just as easy as sewing squares together, but has an entirely different look with the tumbler shape.  I also did not place each fabric individually in the quilt.  I wanted a truly random look – and that’s just what I got!  Also, using the tumbler die makes each seam match up perfectly!!!

img_6442

To make this quilt you need a stack of fat quarters or yardage of Heartland fabric and the Sizzix Bigz L Tumbler die.  I used 19 different fabrics.

img_6139

Cut your fabric into 5 1/4″ strips.

img_6140

Lay the fabric strips on the Sizzix Tumbler die.  I layered up to 6 at a time!

img_6141

Die cut each strip and then move the strip down, rotating it, and continue die cutting.  This way you have hardly any waste.

img_6142

Such a fun little stack!  You need a total of 256 tumblers.

img_6168

Once you have all the tumblers die cut, mix them up in a bag and grab and go!  They will be sewn together in an alternating manner.

img_6169

Place the tumblers right side together, there should be 1/4″ overhang at the top and the bottom.  Sew along the edge using a 1/4″ seam.

img_6170

This is how it looks with the seam.

img_6171

Continue sewing tumblers together in rows of 16 (you can totally change up the dimensions).  You will need 15 rows.  Press each of the seams of the rows alternating so the seams look like this:

img_6143

Sew the rows together and press. Mufasa loves the quilt!!!!!

img_6454 
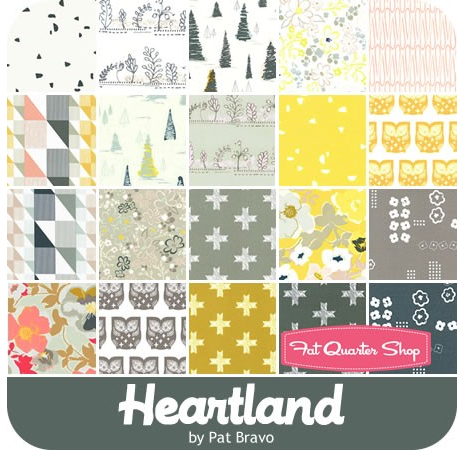
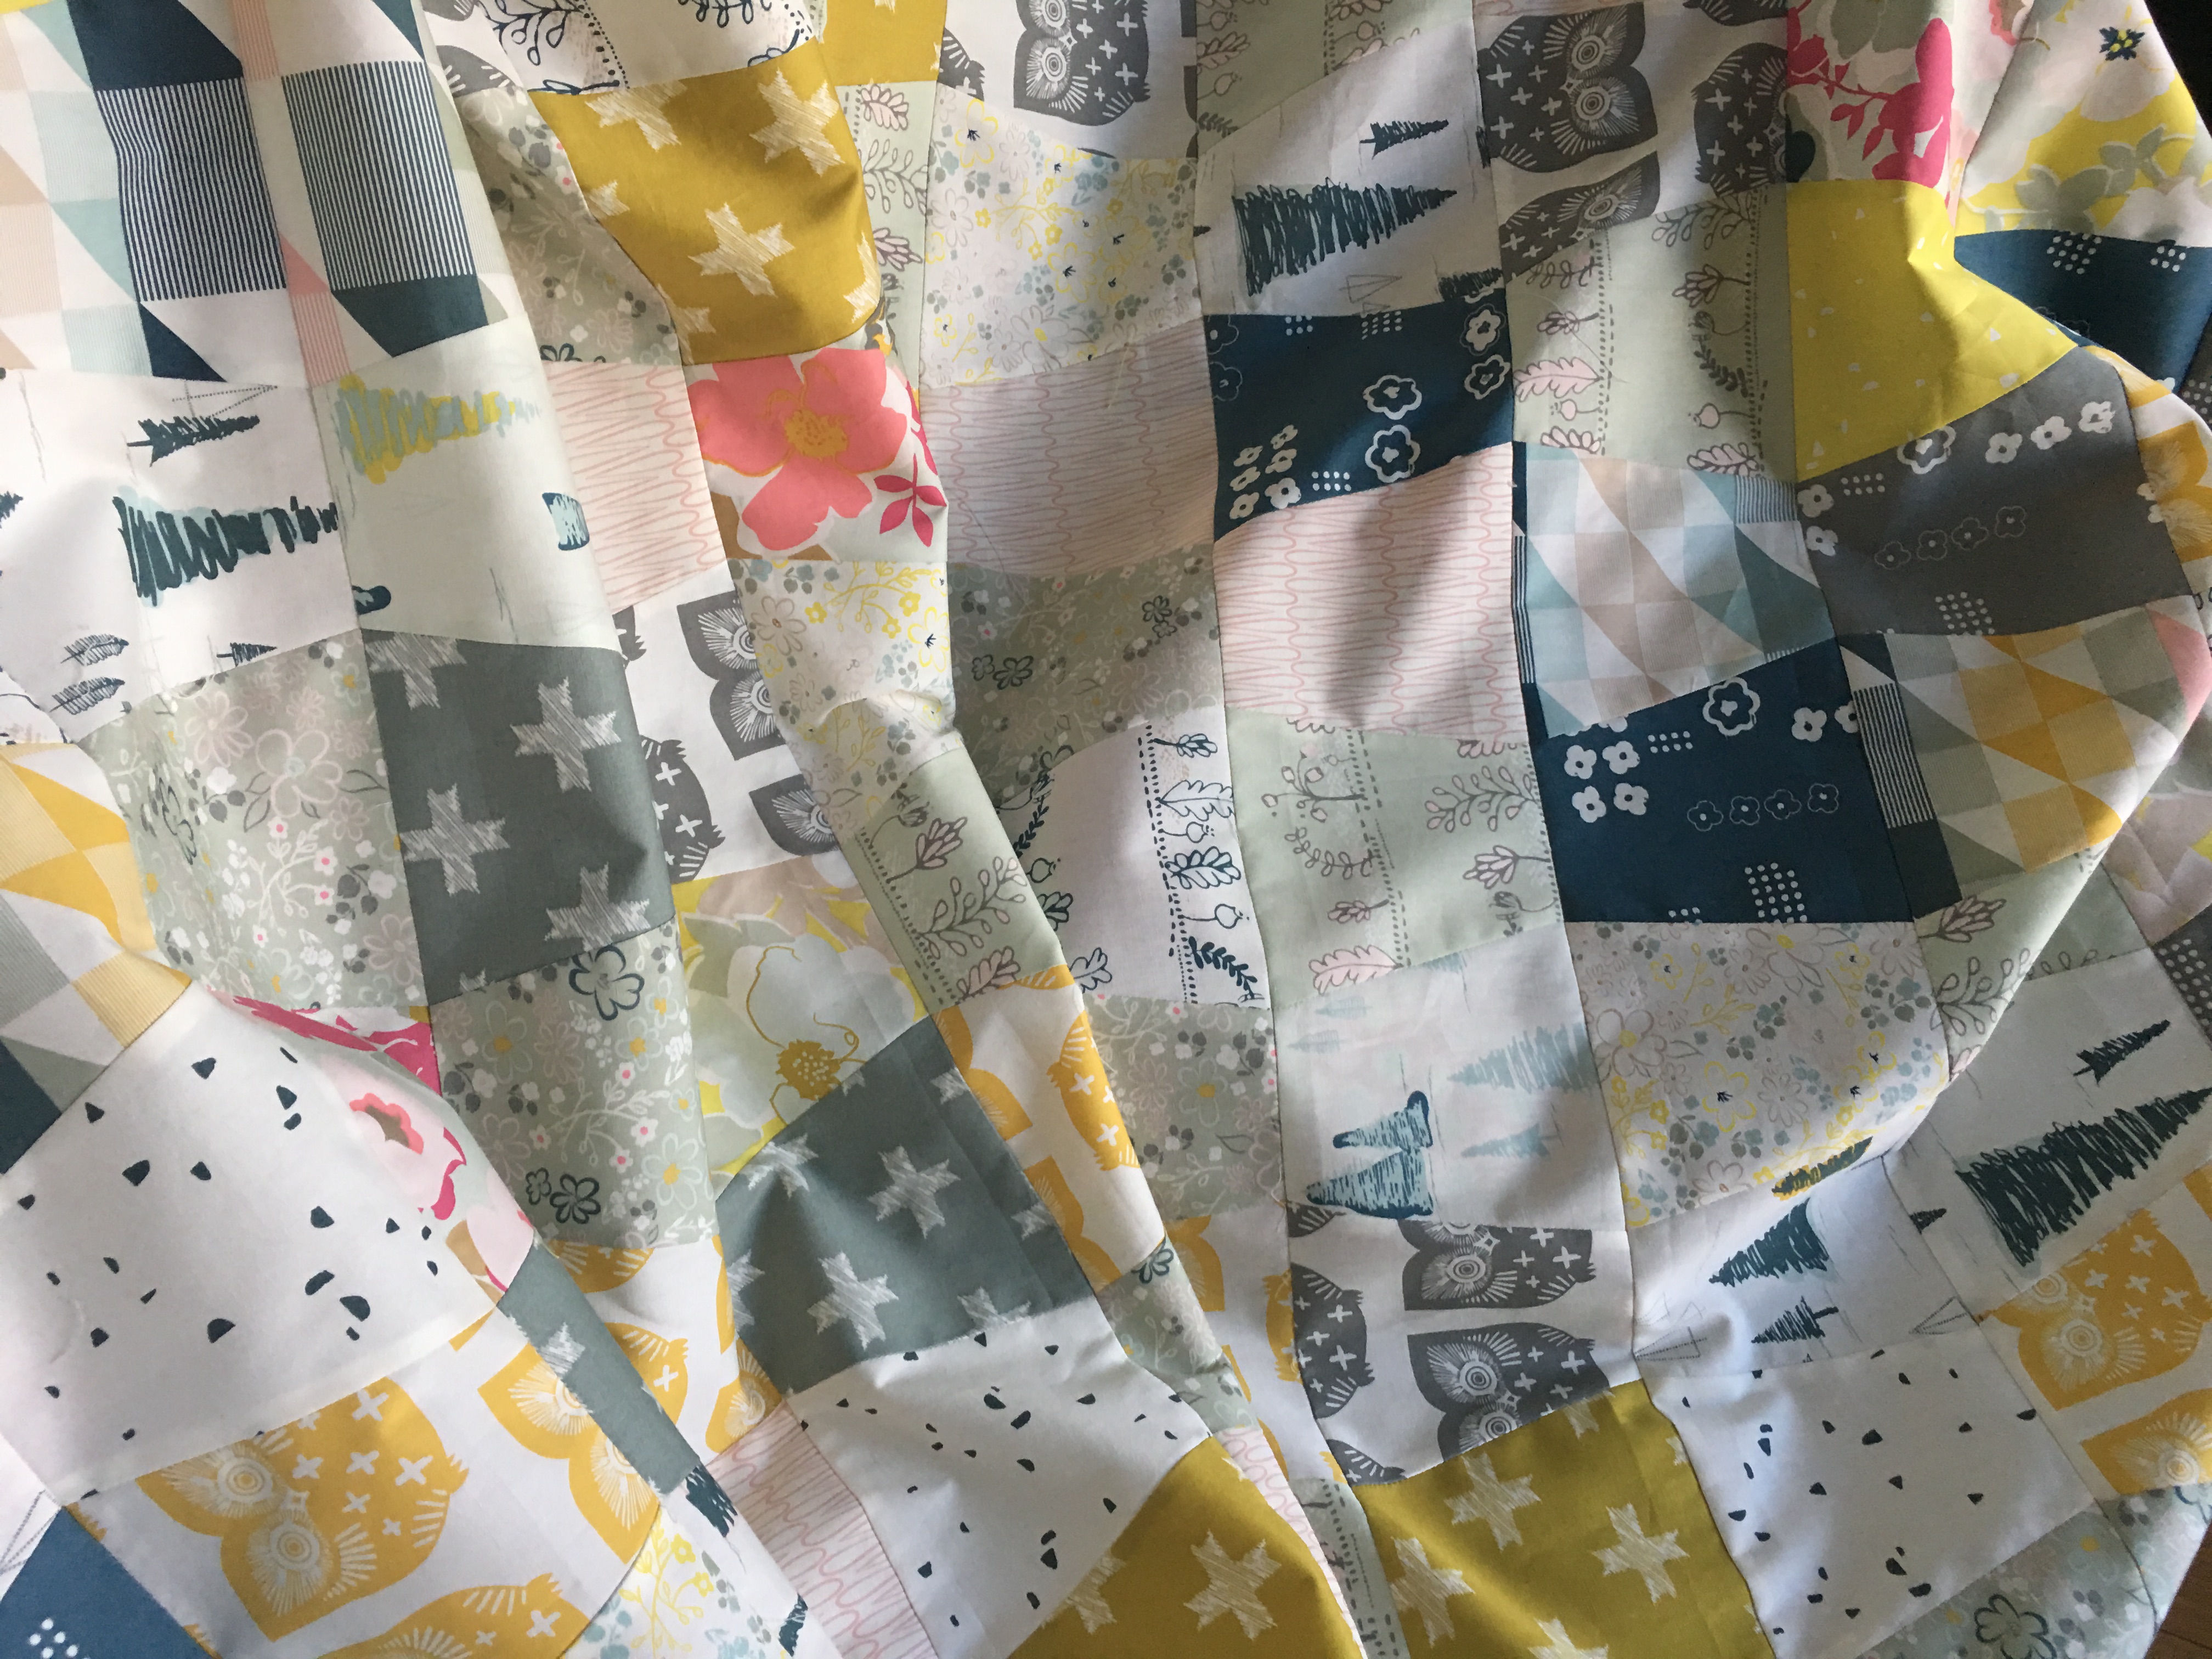
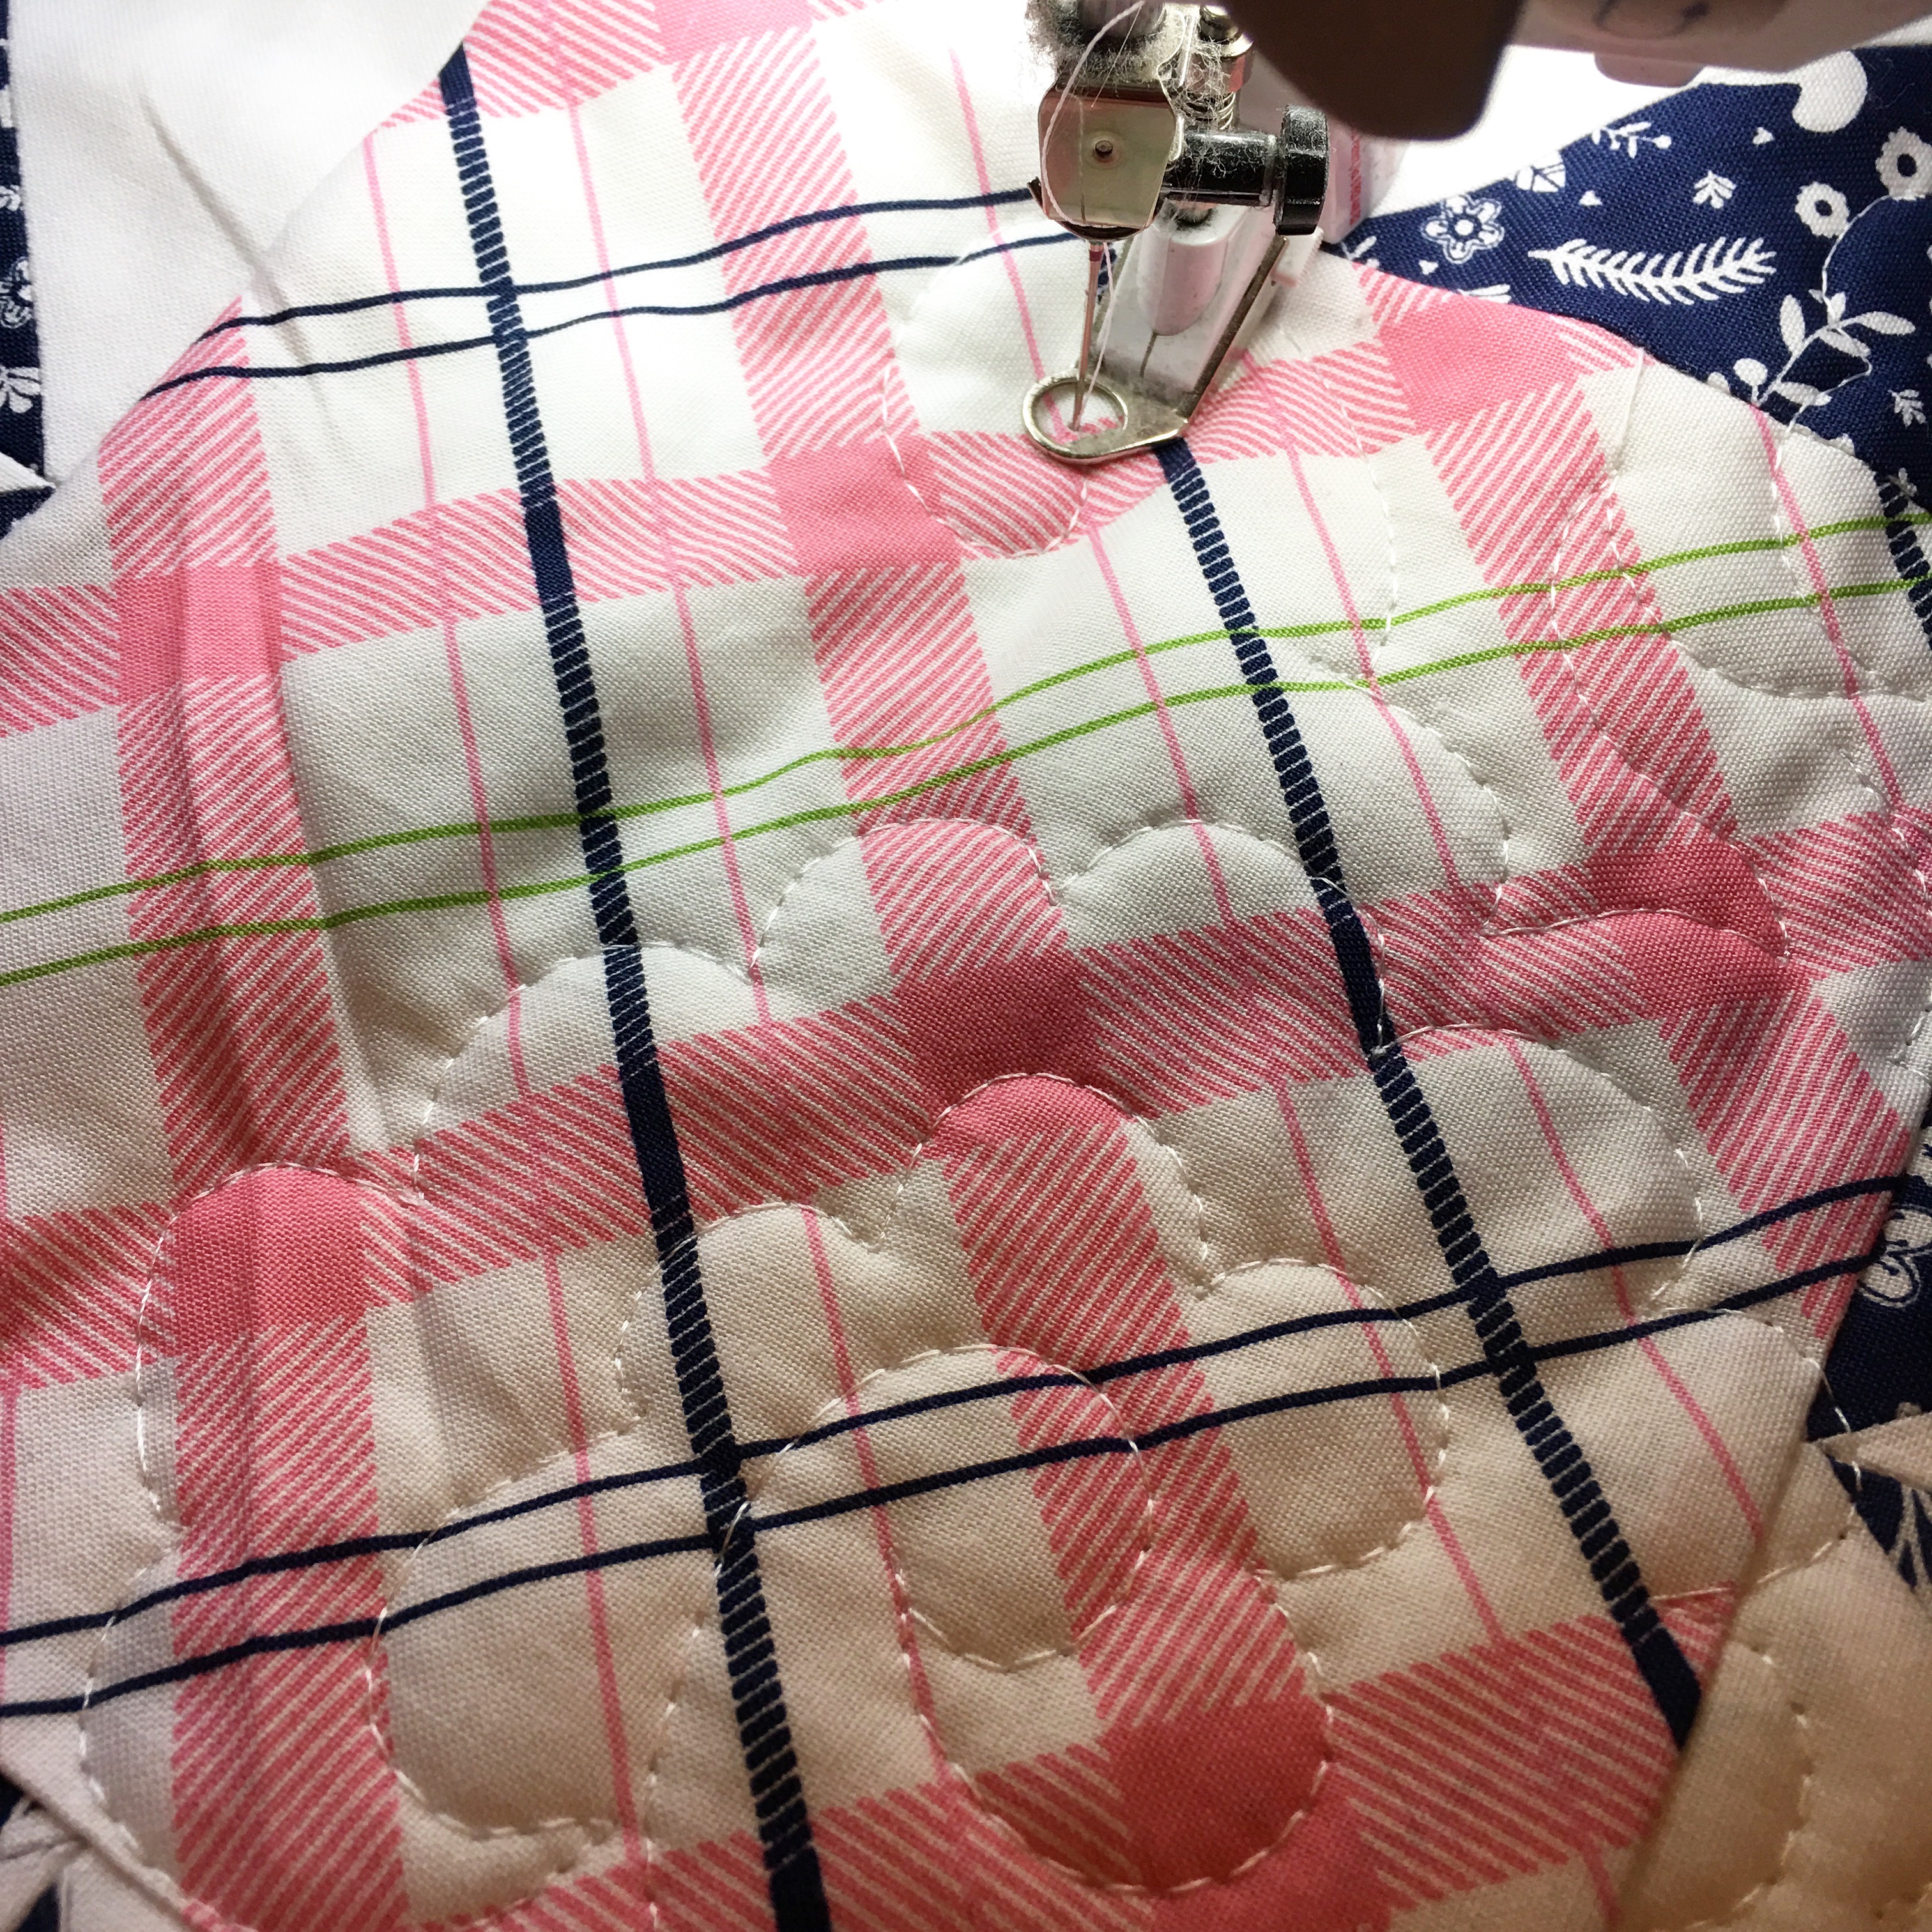
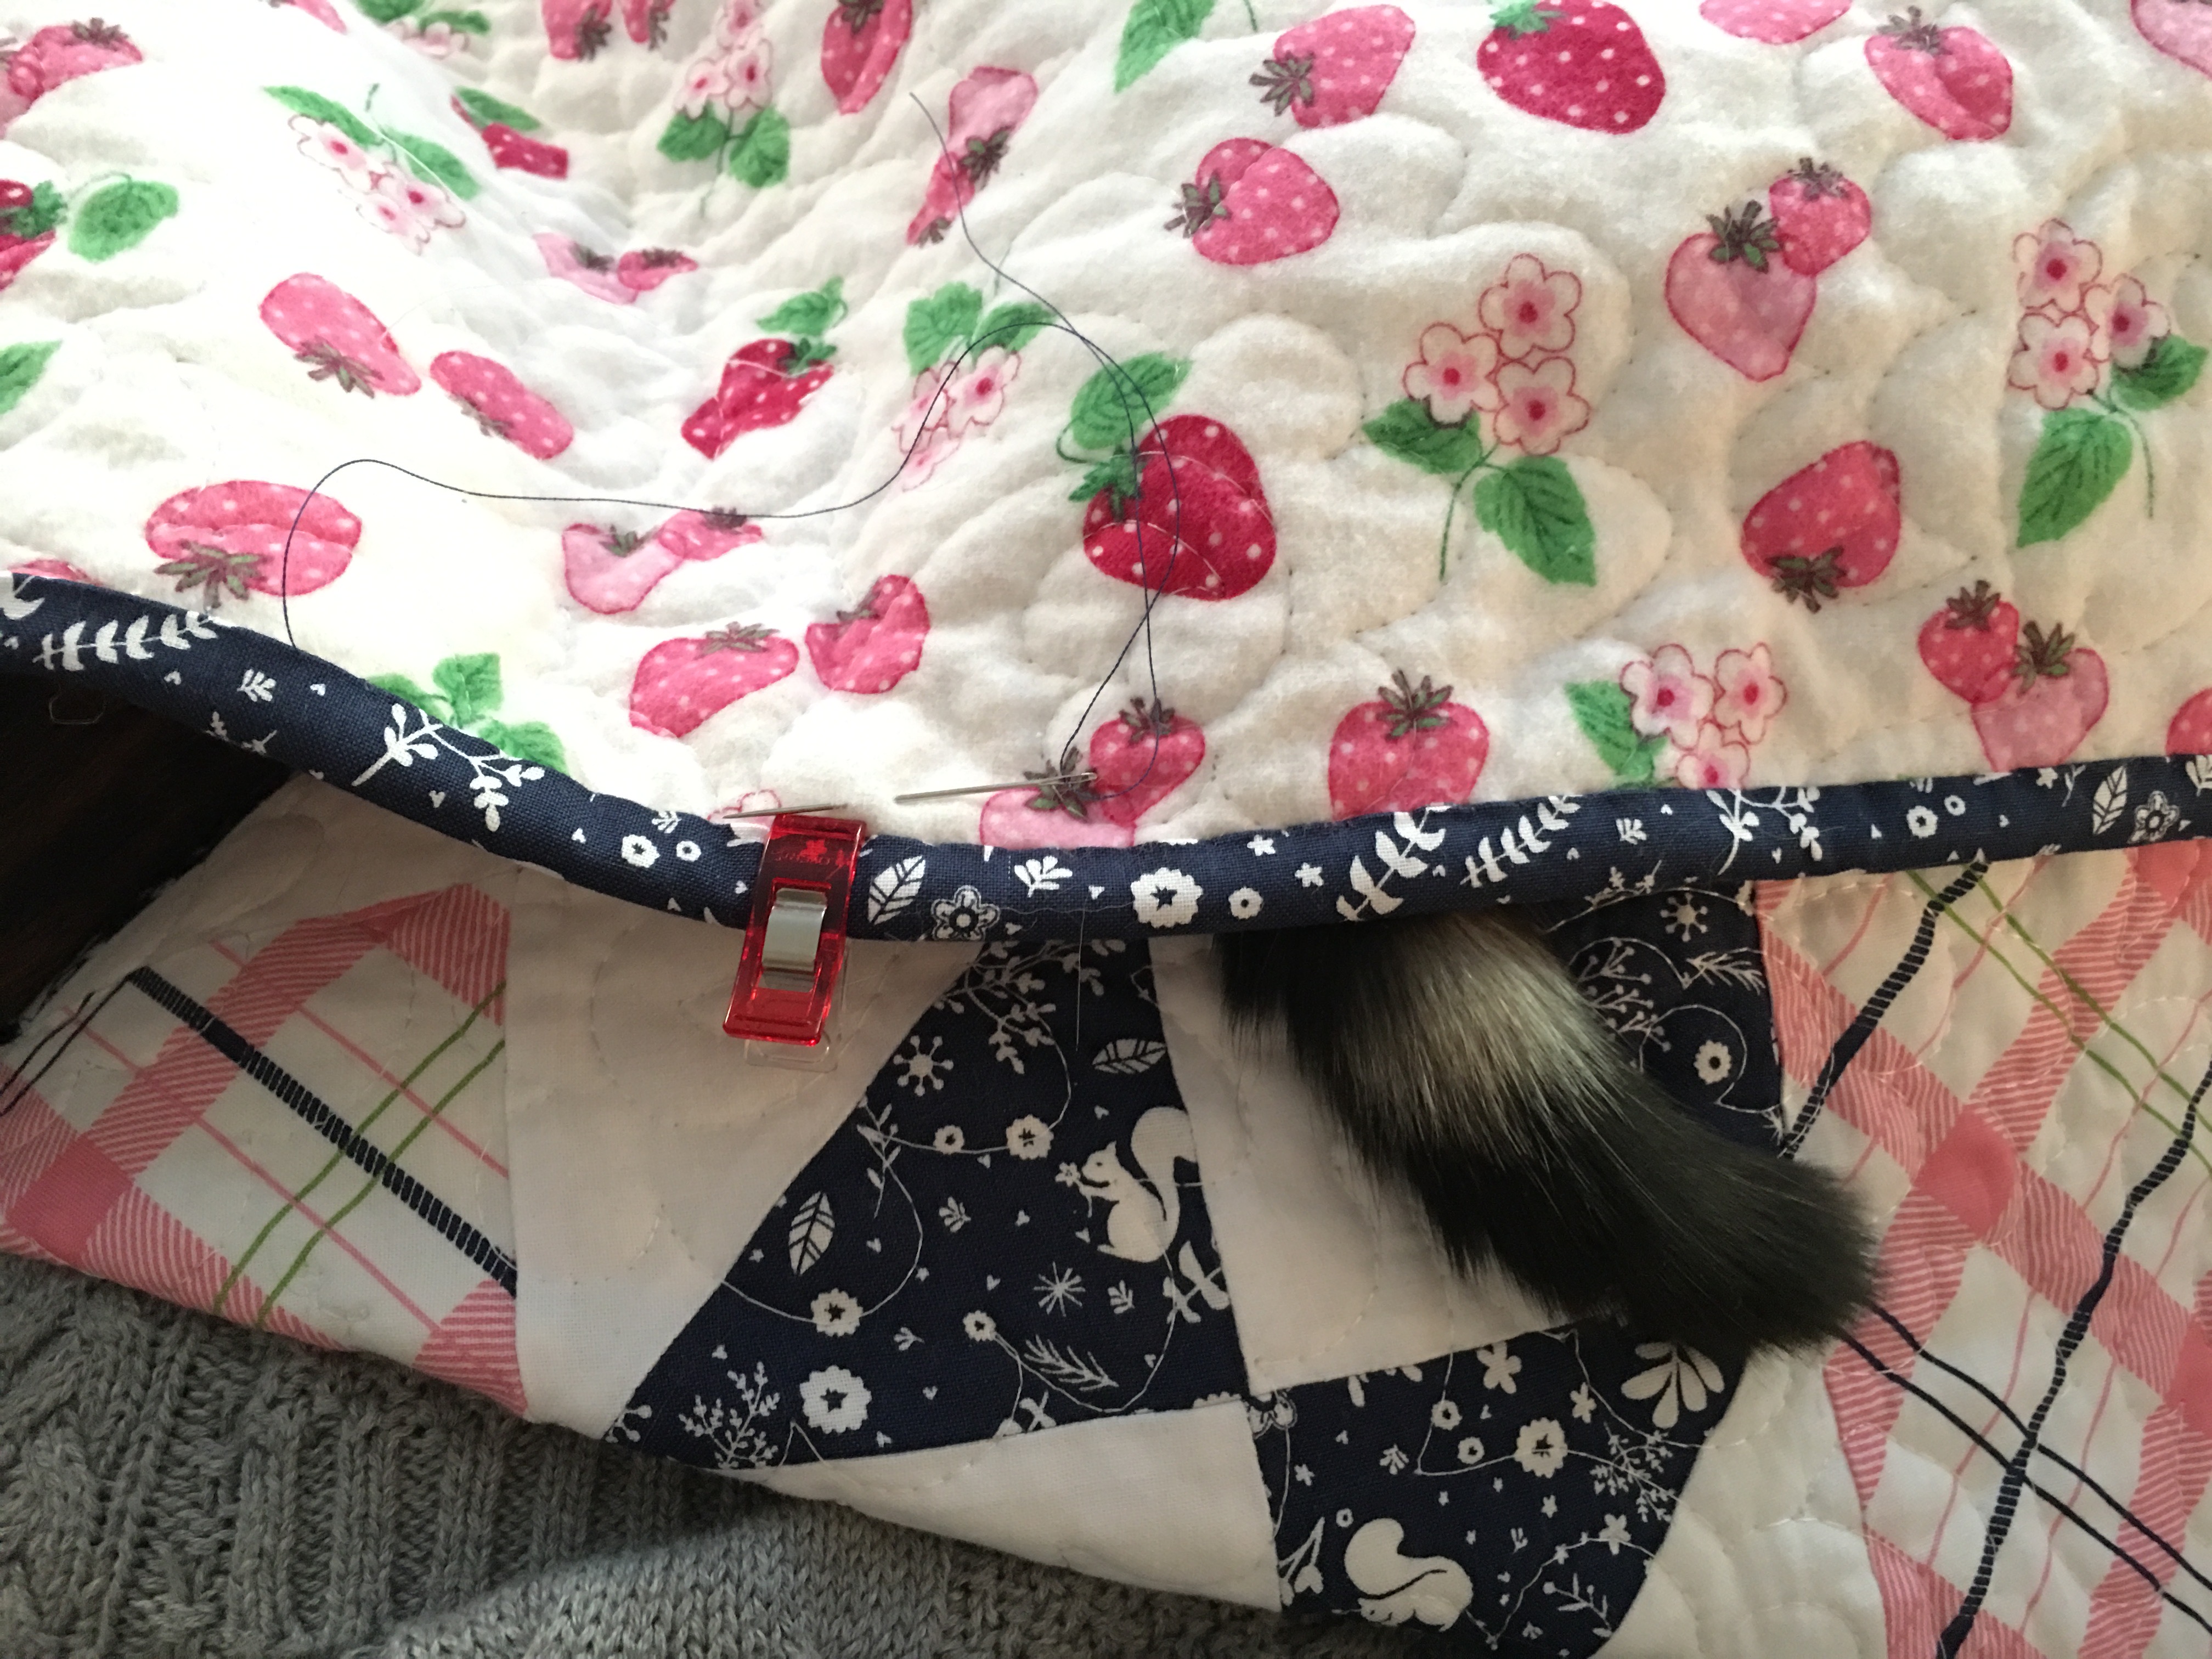
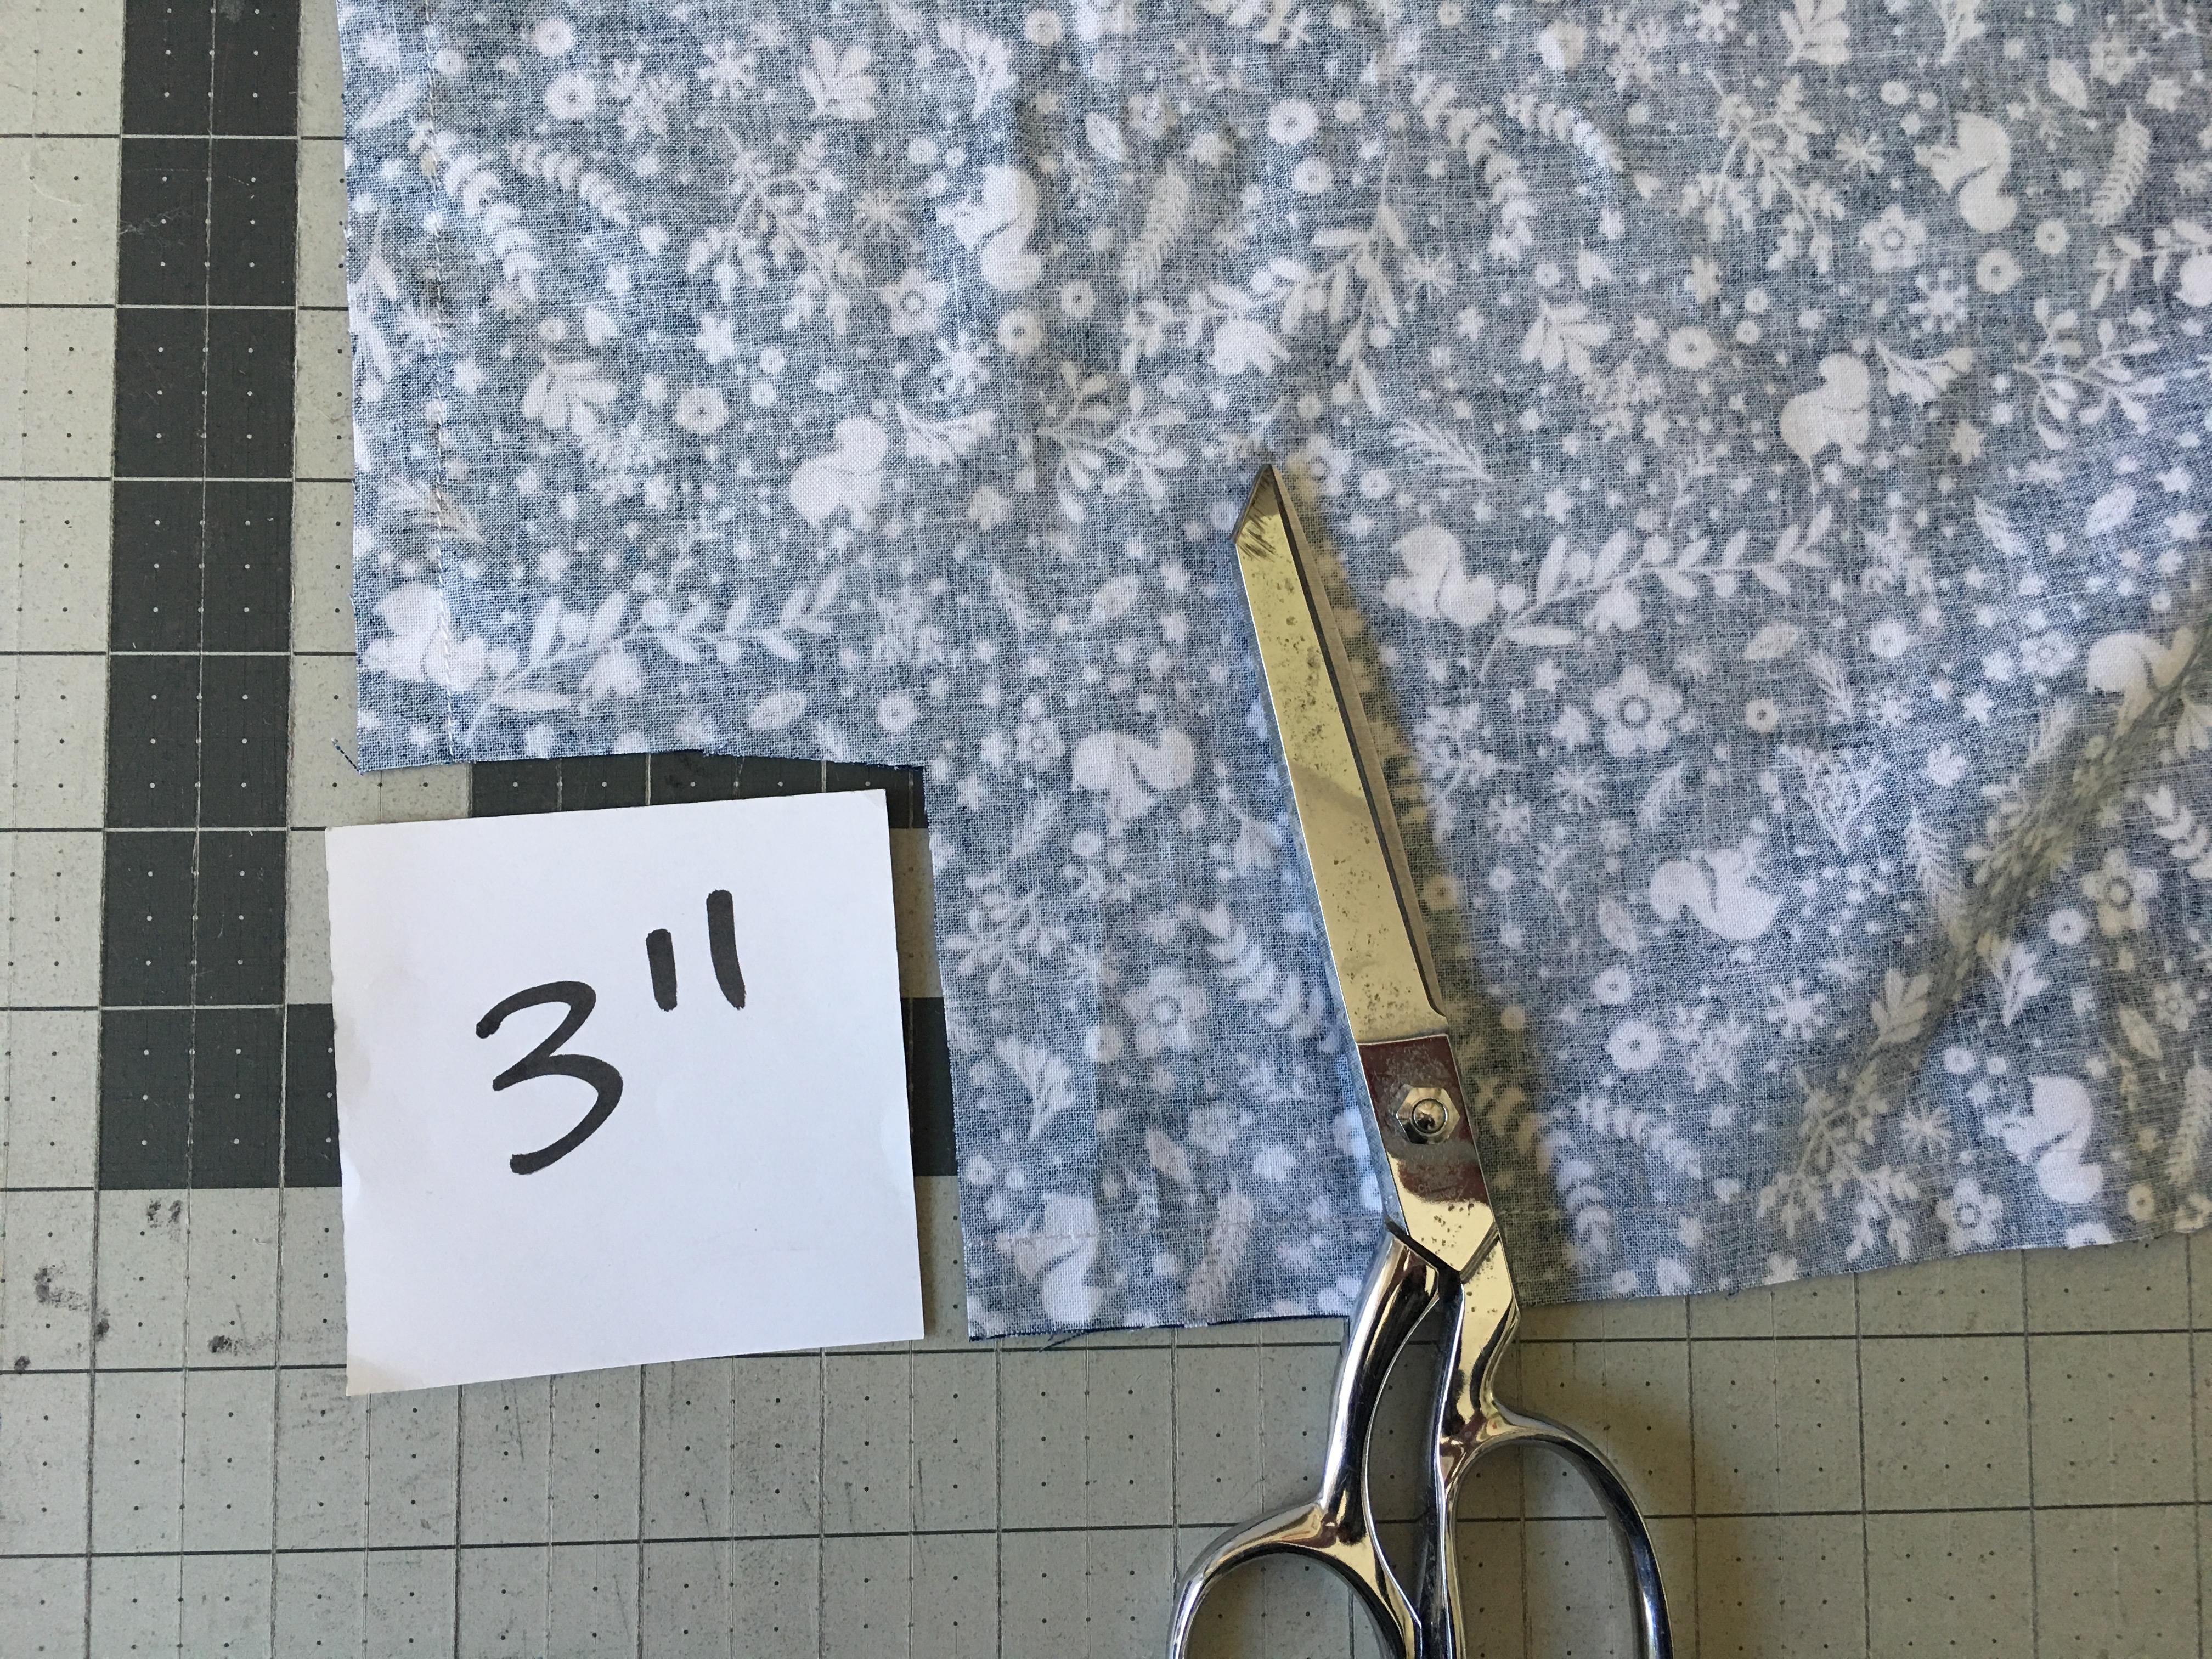
I like to quilt the quilt without squaring up the edges.  After quilting, square up the edges with a rotary cutter and bind.heartland-quilt-2       heartland-quilt  Here’s the rest of the schedule so you don’t miss a thing:

Wednesday, November 9  ~  Jade/Stitch mischief
Thursday, November 10  ~  Amanda/Jedi Craft Girl
Friday, November 11  ~  Kari/Craft happy
Monday, November 14  ~  Stephanie/Spontaneous Threads
Tuesday, November 15  ~  Christopher/The Tattooed Quilter
Wednesday, November 16  ~  Kerry/kid giddy
Thursday, November 17  ~  Nichole/Wildboho
Friday, November 18  ~  Krista/poppyprint

Find Pat @PatBravoDesign on Instagram, and see the hashtags #PatBravoDesign, 
#HeartlandFabrics, and #ArtGalleryFabrics. heartland-tour

Save

Save

Save

Save

Ghost Windows Wallhanging Quilt

ghost-windows-halloween-quilt

I love sewing with traditional orange and black fabrics – don’t you!  This little quilt measures 24″ square and is perfect to hang on a wall or put on a table.  All you need is a little yardage and the Sizzix Ghost Die and you’re set!  I love that each of the ghosts have their own personality!!  All seams 1/4″.img_4255

First press the Heat n Bond Ultra onto the wrong side of the off-white solid fabric.  I choose Ultra because it requires no-sewing.  I didn’t want to spend time sewing around each ghost!img_4258

Die cut 9 sets of ghosts.  Make sure to die cut ghosts going both ways to give more variety to the quilt.  Cut (9) 4 1/2″ solid black squares for the ghost windows.img_4260

Peel off the backing of the ghosts and position them as desired.

ghost-cutting-guide

For the 9 blocks, cut 5 orange fabrics and 4 low volume fabrics according to the above dimensions.  Sew the side portions on, press, then add the top and bottom pieces.img_4265

Make sure to rotate the ghost windows are in a different loceation, it makes the quilt look a little more random.  Sew the blocks together in rows, press, and sew the rows together.  Press.img_4268

Spray baste, quilt, and bind!  img_4279

I really love these cute little Sizzix ghosts!!!!!img_4291

I have the perfect spot to hang it!!img_4293

img_4297

Supplies:

1/4 yard off-white  fabric

1/4 yard solid black fabric

5 fat quarters or quarter yard cuts orange print

4 fat quarters or quarter yard cuts low volume black print

1/4 yard binding

1 yard backing

Heat n Bond Ulatra

Sizzix Fabi

Sizzix Ghost die

Save

Save

Apple Picking Quilt Tutorial


apple cover
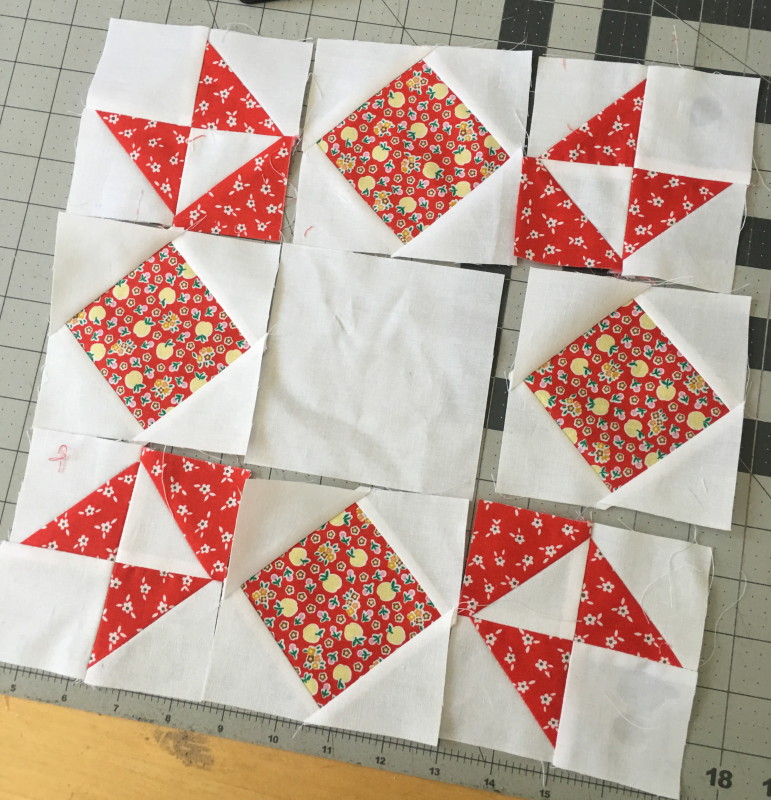
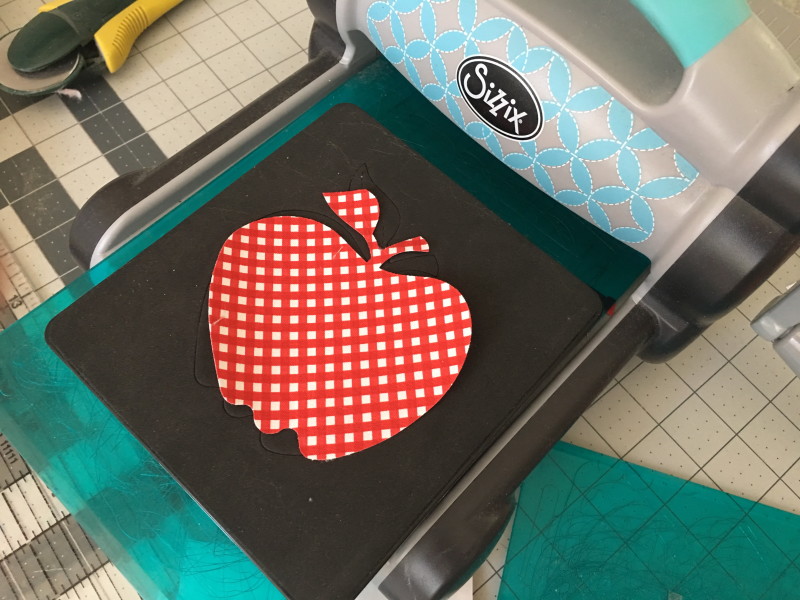
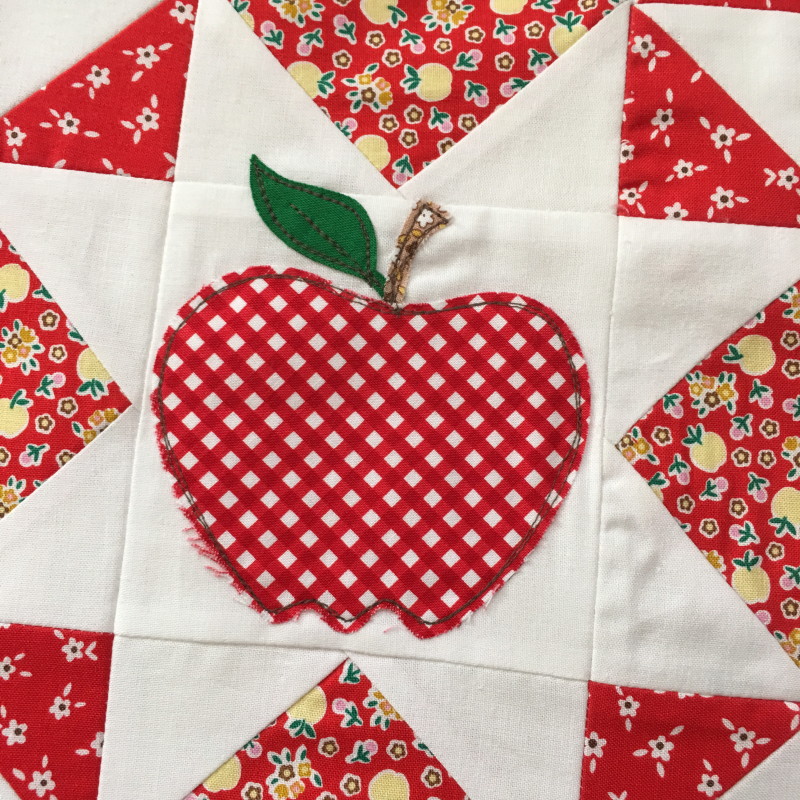
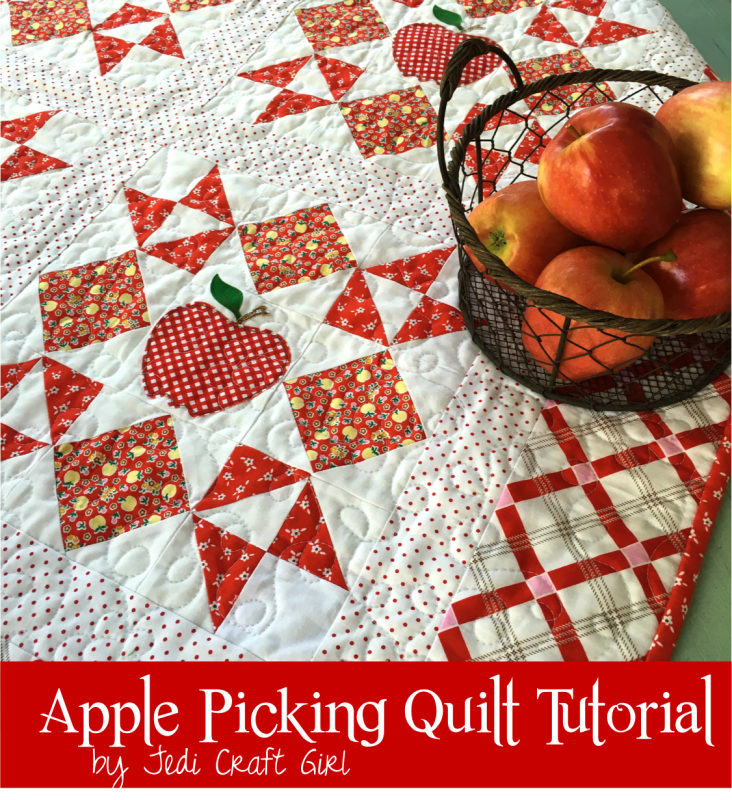
Today is my turn on the Apple Farm blog hop with Elea Lutz and Penny Rose Fabrics!!!!!  I have always been a fan of Elea Lutz’s designs and I was thrilled to meet her in person at Quilt Market!  She is the cutest ever!  IMG_8213

I love Elea’s newest line called Apple Farm.  It has such a fun vintage feel!

Screen Shot 2016-08-18 at 10.02.05 PM
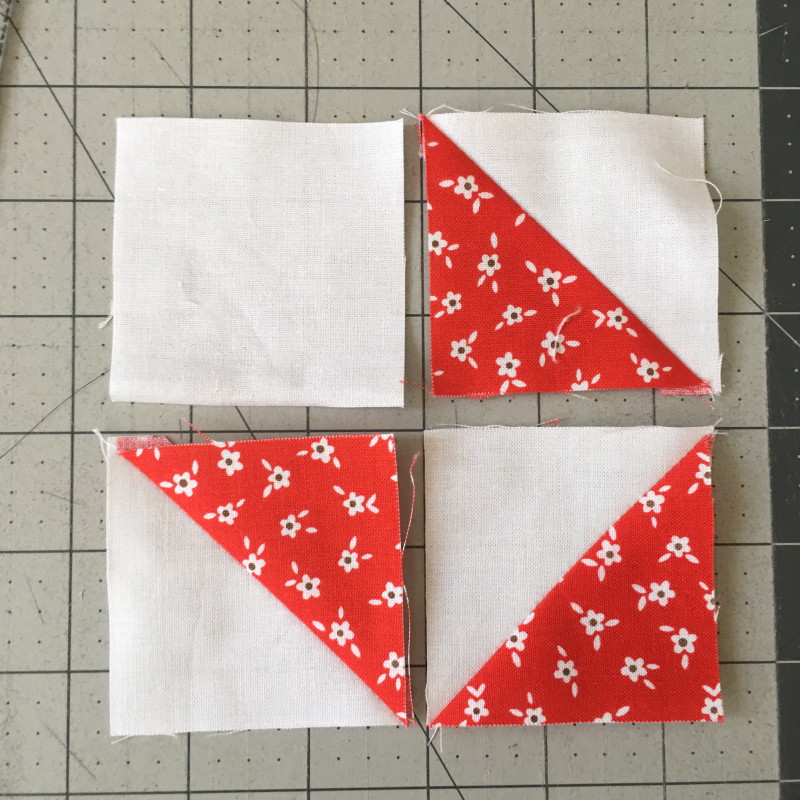
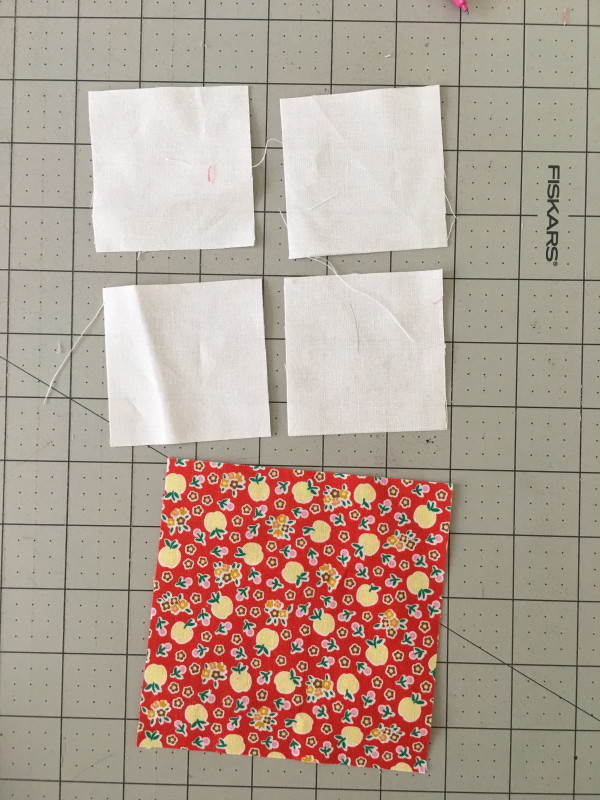
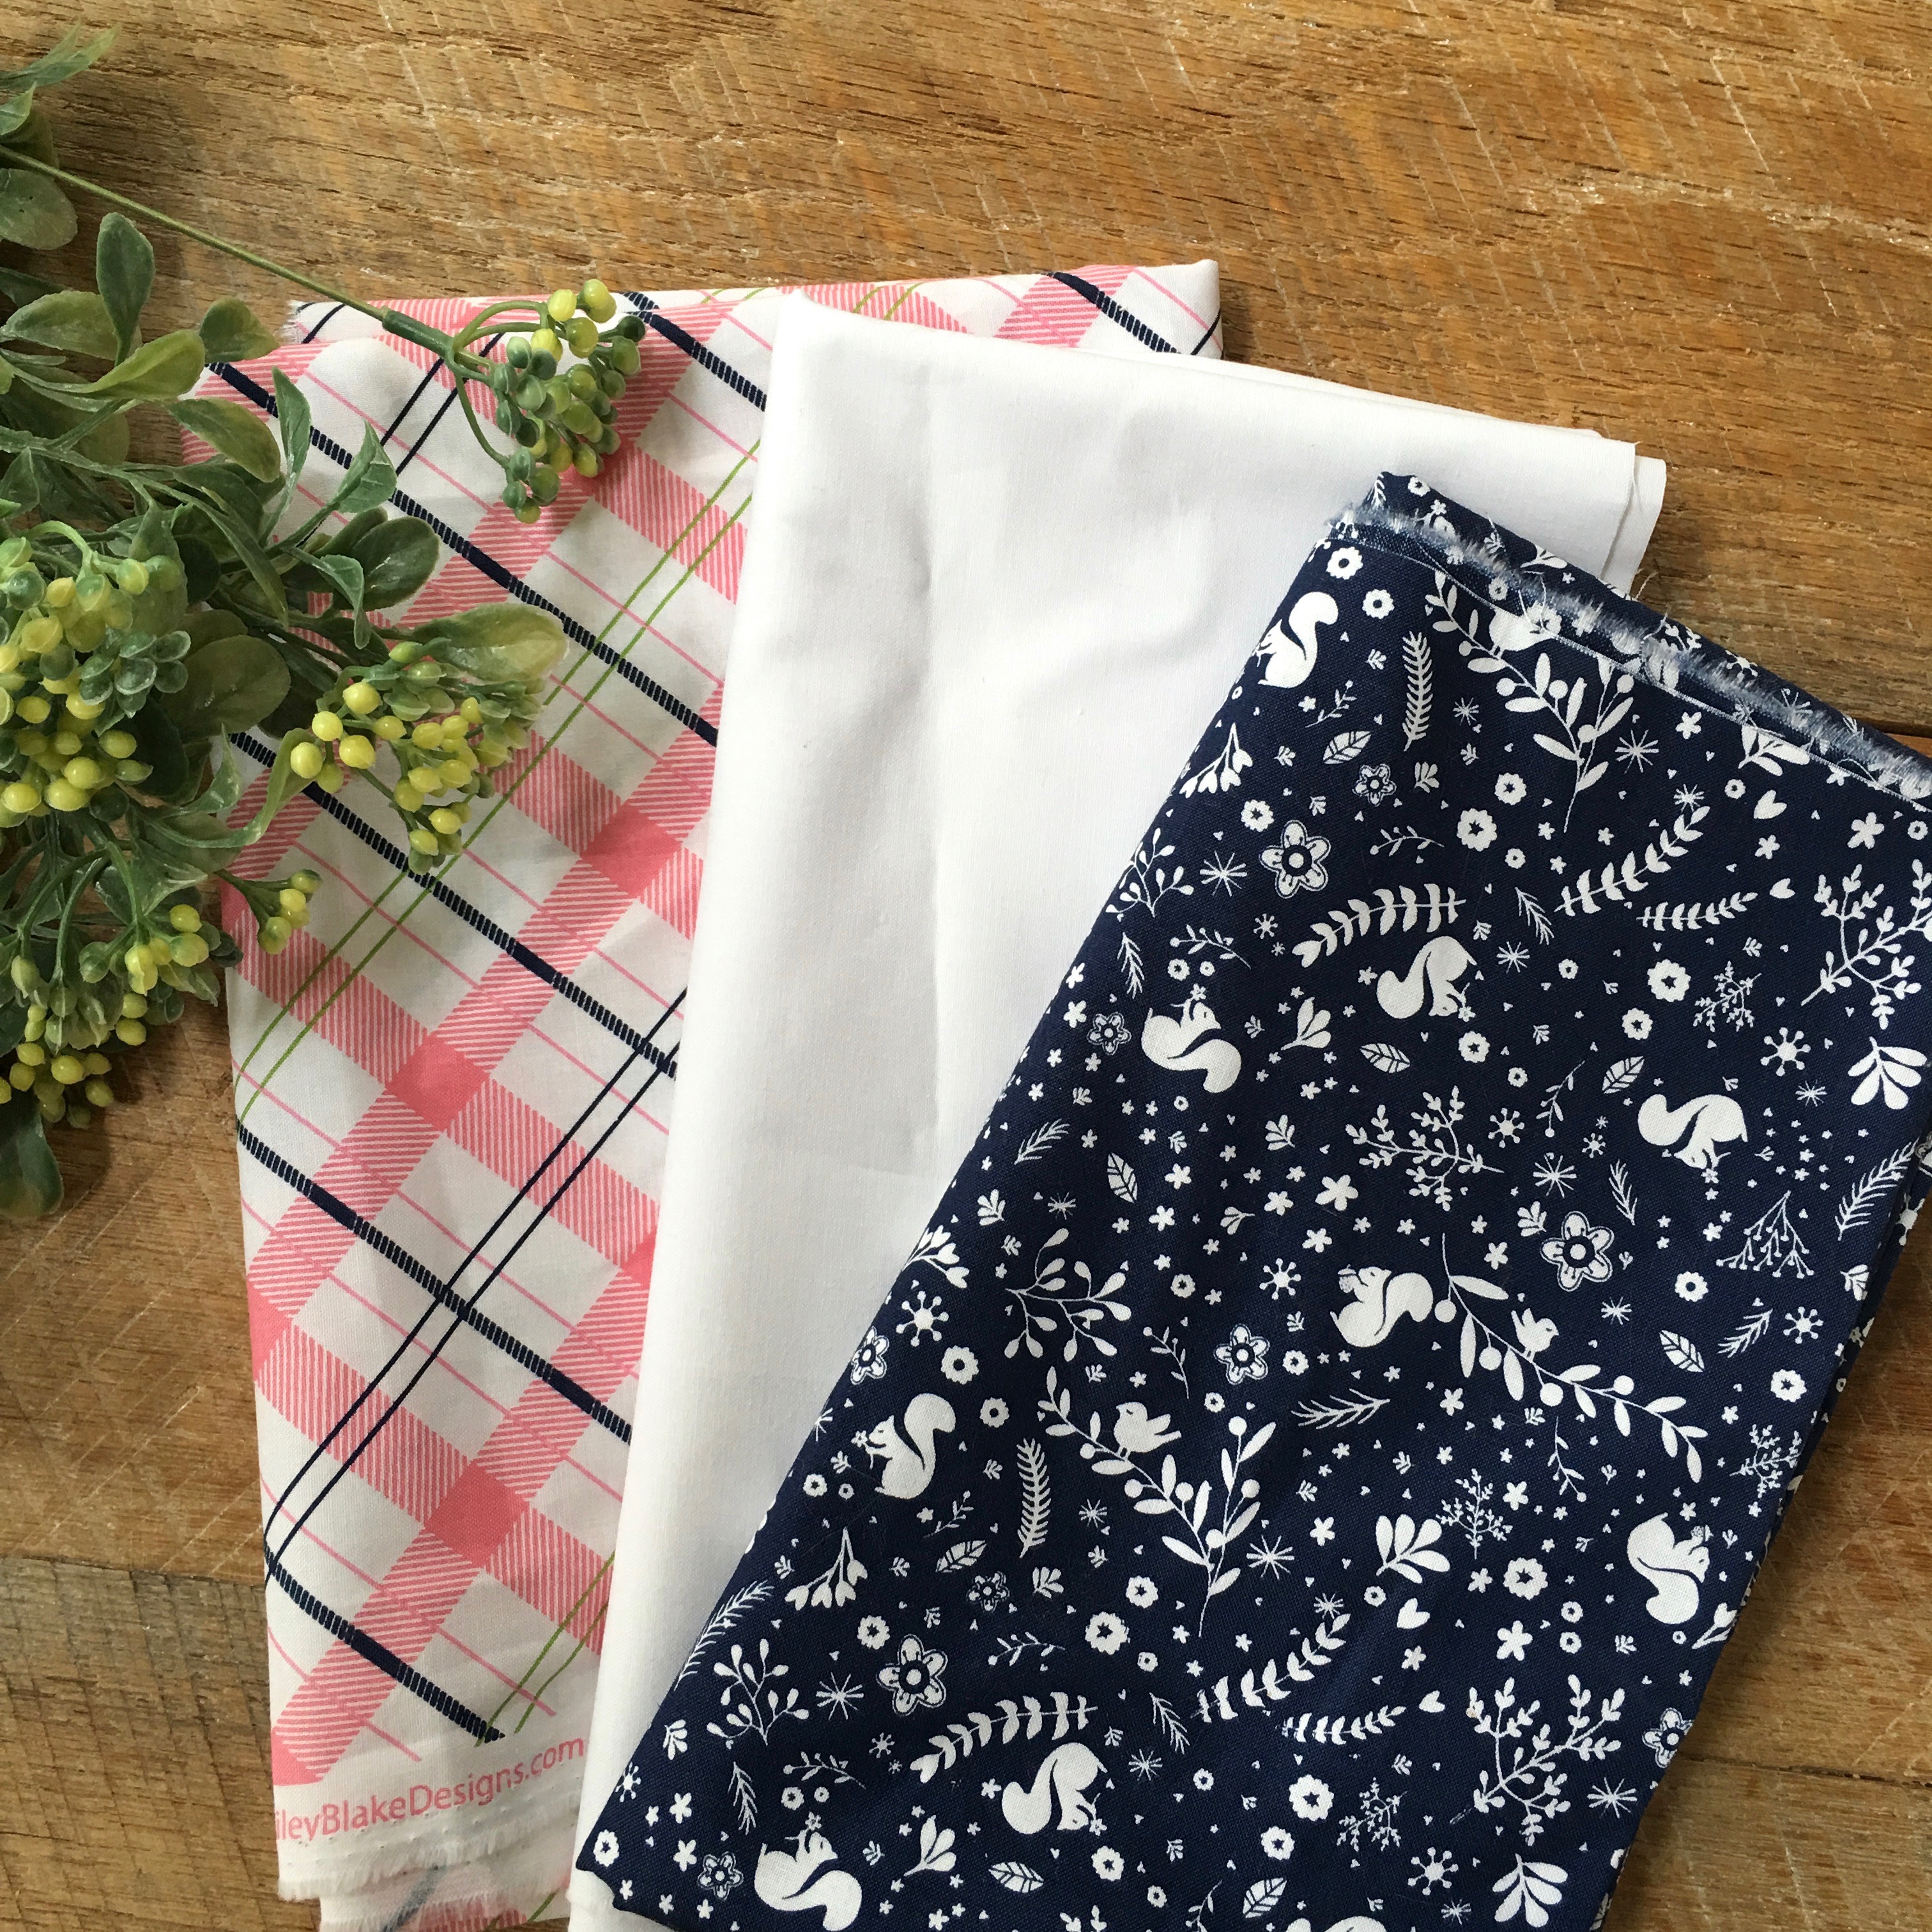
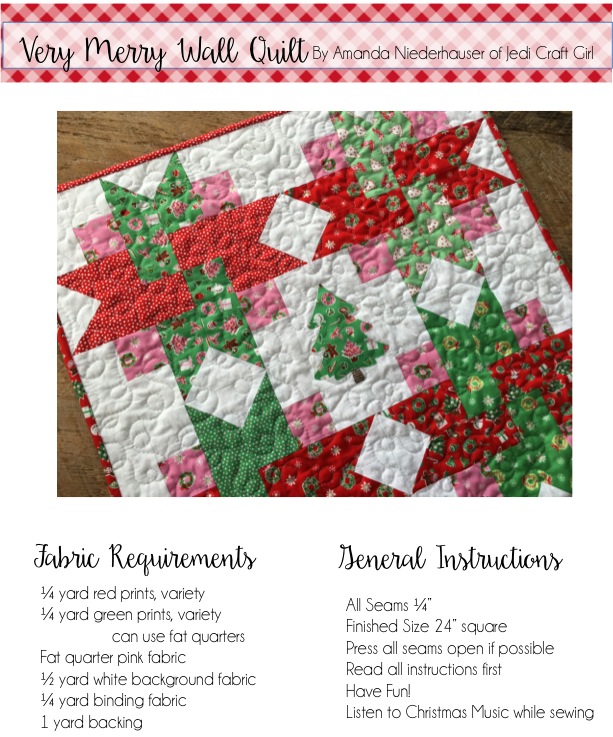
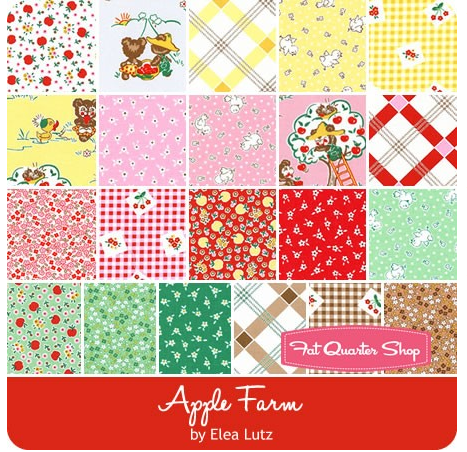
I choose to work with the reds from this collection.  I have a vintage red and white quilt from my Great Grandmother and it was sort of the inspiration for my design.

IMG_2913

The quilt measures 37″ square and it’s perfect to throw over a couch, place on a table, or hang on a wall.

IMG_2920

Let’s get started!!

Supplies:

Fat quarters or quarter yard cuts of 2 red prints

3/4  yard solid white fabric

1/2 yard red swiss dot fabric

fat quarter red gingham

scraps of green and brown

1/2 yard plaid border print

1/3 yard binding

1 1/2 yard backing

Heat n Bond Lite

Sizzix HST die and apple die

The quilt block is made of of 3 parts:  The center block, the “economy block” and the half square triangle (HST)  block.  All seams are 1/4″

For the HST block…

You will need 48 HST consisting of solid white and the darker red print.  I used my 2 1/2″ HST Sizzix Die.  You can literally cut all the HST you need in 30 seconds!  If you don’t have access to this die, just make 48 HST that finish 2 1/2″ square.

I love the Sizzix die because the squares finish perfectly even and no trimming or squaring up!

IMG_2881

Mufasa was very helpful in the chain piecing!IMG_2866

Cut (16) 2 1/2″ squares out of solid white.

Lay the block out like this:

IMG_2882

Sew together as you would a 4-Patch.  It is helpful to press the seams open to reduce bulk.  You need 16 total of these blocks.

For the Economy Block….

Cut (16) 4 1/2″ squares from the lighter red print.

Cut (64) 2 1/2″ squares from the solid white.  Draw a diagonal line on the back of each white square.IMG_2877

Position a 2 1/2″ square in the corner of the 4 1/2″ red square.  Sew along the diagonal line.  Repeat this process for each of the 4 corners.  Trim 1/4″ along the seam, and press.   IMG_2884

For the centers…

Cut (4) 4 1/2″ squares of solid white.  Don’t applique the apple until the block is sewn because it will overlap slightly.

Lay out the block like this:IMG_2885

Sew together in rows.  Press seams open.  Make four of these blocks.

For the apple applique…

IMG_2886

Fuse Heat n Bond Lite to the wrong side of the red gingham.  Position the gingham on the apple die diagonally.  Trim off the stem and the leaf.  Make four of these.  Repeat this process and die cut the leaf and the stem with the appropriate colors of fabric.

IMG_2893

Peel off the backing paper and position in the center of the block.  Heat set in place.  Sew around each piece twice with desired thread color.

For the sashing and borders…

Cut (2) 12 1/2″ x 2 1/2″ pieces for center sashing.

Cut (5) 2 1/2″ x WOF strips for sashing and borders.  I didn’t measure the borders, just sew and cut off the excess.  Press toward the sashing.

IMG_2889

Cut (4) 4 1/2″ x WOF strips of the plaid.  Sew the sides, press, then the top and bottom, trimming off the extra each time.  Quilt as desired.IMG_2890

I love how this quilt turned out and I love the red & white feel of it without it being totally red and white!  I think the plaid border is my favorite!!

IMG_2911

OK – I totally love this pattern!  I’m going to make it again for sure!

IMG_2912

IMG_2914

IMG_2898

Here’s a list of all the other bloggers taking part in the blog hop, pop over to their blogs for more Apple Farm inspiration.

8/8/16 Jemima @tiedwitharibbon www.tiedwitharibbon.com
8/8/16 Anorina @sameliasmum www.sameliasmum.com
8/9/16 Kimberly @fatquartershop www.fatquartershop.blogspot.com/
8/9/16 Bridgette @thefamilyhearth www.thefamilyhearth.com
8/10/16 Taunja @taunjalynn www.carriedawayquilting.com
8/10/16 Nadra @ellisandhiggs www.ellisandhiggs.com
8/11/16 Shari @doohikeydesigns www.doohikeydesigns.com/blog/
8/11/16 Heidi @fabricmutt www.fabricmutt.blogspot.com

8/12/16 Lindsey @fortworthfabricstudio www.fortworthfabricstudio.blogspot.com
8/15/16 Ange @alittlepatchwork www.alittlepatchwork.wordpress.com
8/15/16 Lauren @transientart www.transientart.com
8/16/16 Jessica @euphoria_jessica www.euphoriajessica.blogspot.com
8/16/16 Kristyne @prettybyhand www.prettybyhand.com
8/17/16 Melissa @ohhowsweetco www.ohhowsweet.com
8/17/16 Sedef @downgrapevinelane www.downgrapevinelane.com
8/18/16 Faith @faithessenburg www.saranaave.wordpress.com
8/18/16 Veronica @vividfelicity www.vividFelicity.wordpress.com
8/19/16 Megan @dollyhenryau www.dollyhenry.blogspot.com
8/19/16 Amanda @jedicraftgirl www.jedicraftgirl.com
8/19/16 Elea @elealutz www.elealutzdesign.com