Polyester Flowers

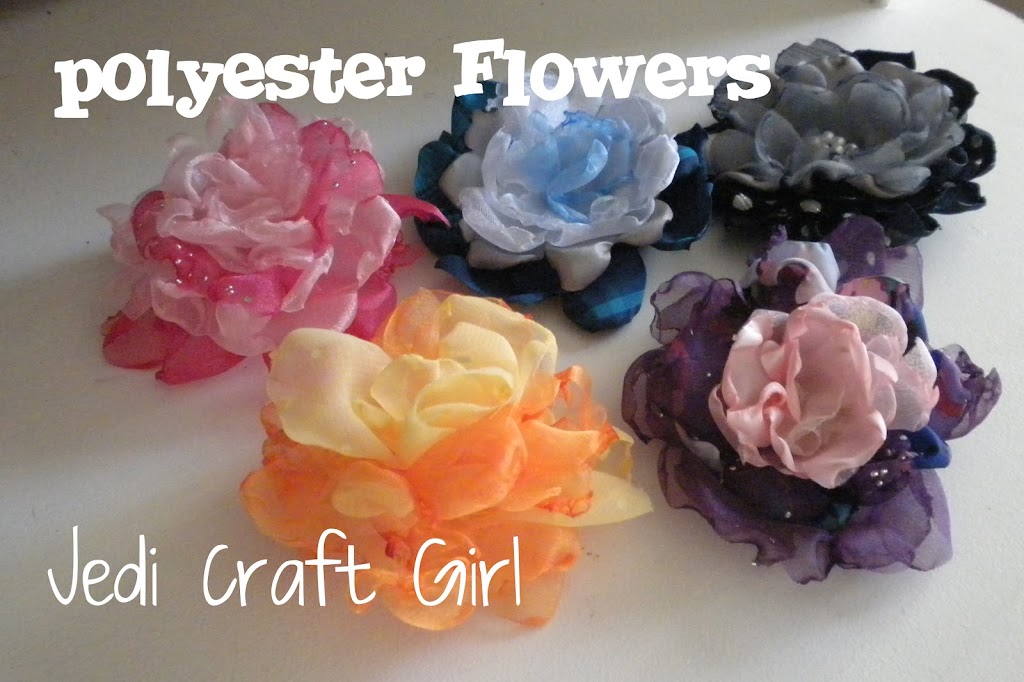
 We made these in Relief Society.  They were really fun and super easy!! 

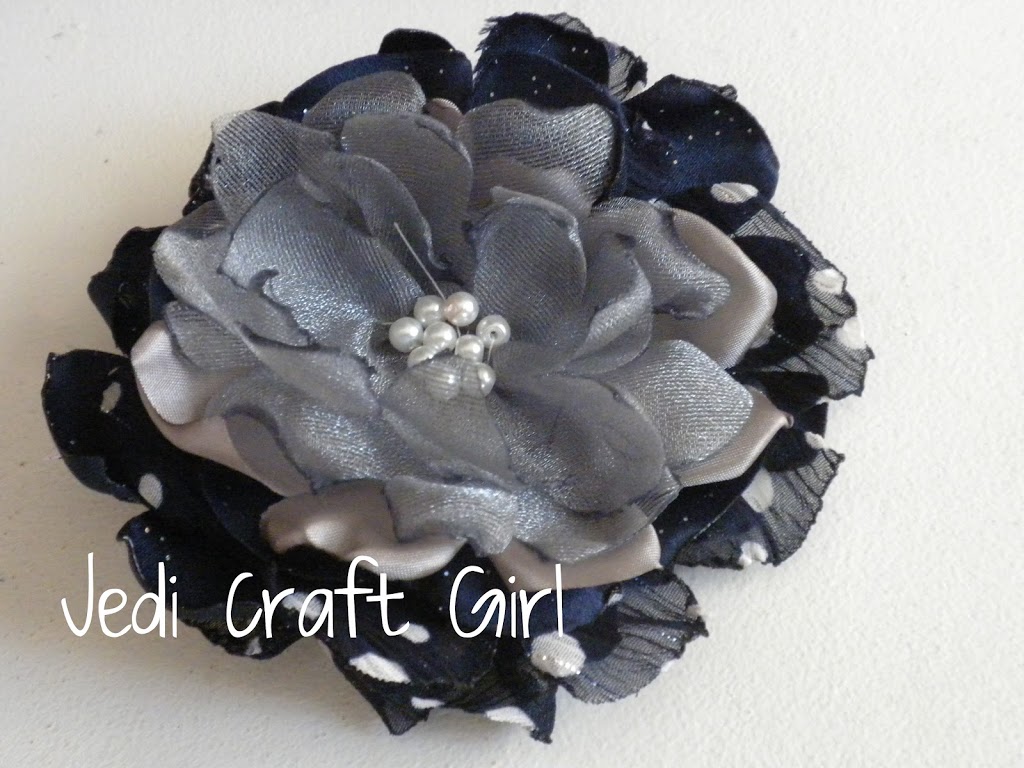
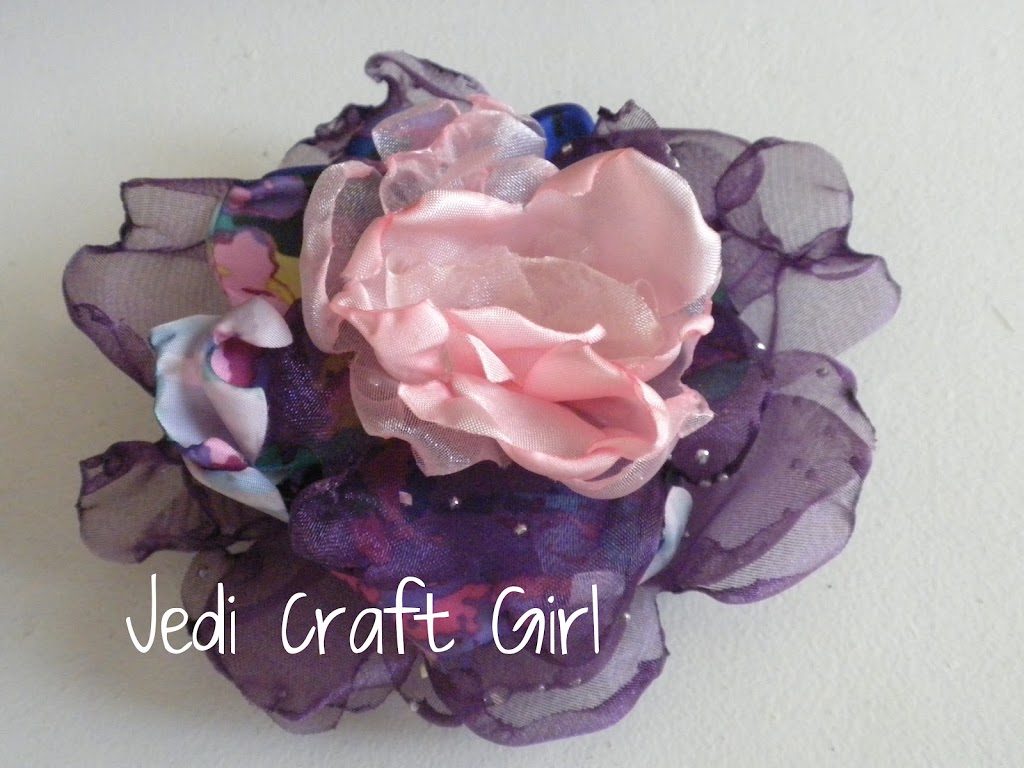
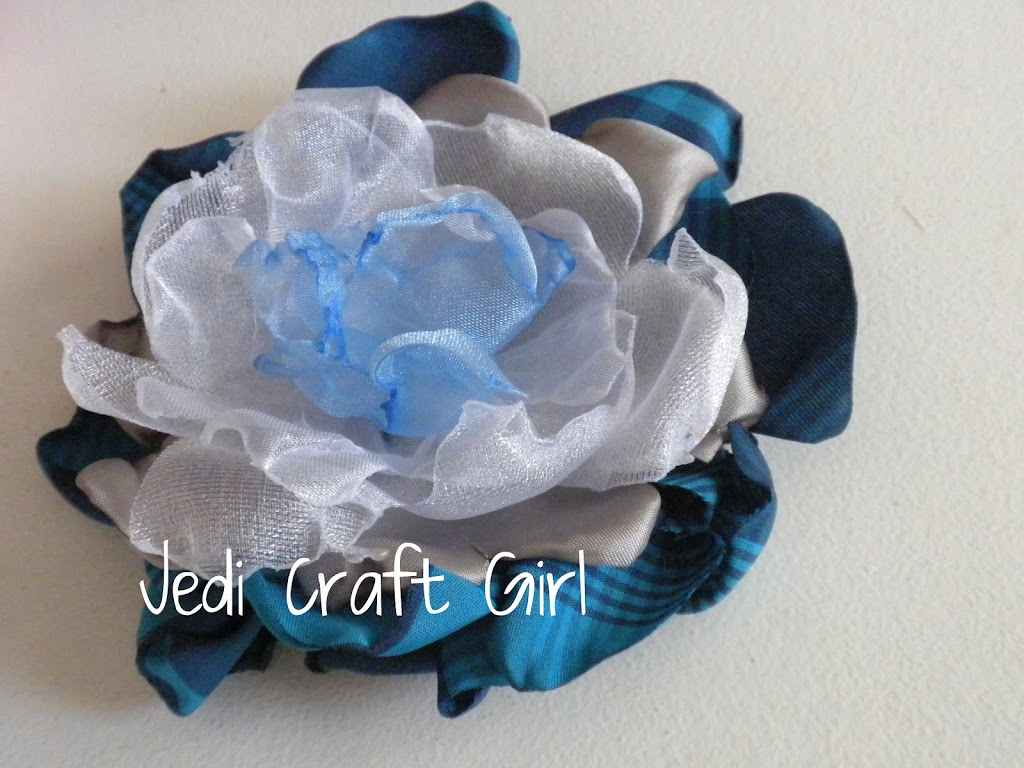
To make these, get your polyester fabric – sheer and thin seemed to work the best.  Cut out circles – lots of variety in the sizes.  I played with mine – but a 5 or 6 inch circle worked the best for the largest pieces. 

Next cut slits like in the diagram below.  The deeper the slits the deeper the petals.  The more slits the more petals.  Again, it was fun to play around to get the look I wanted.

Then take a candle and hold the edges of the fabric above the flame so the fabric singes & melts.  This creates the ruffelly petally look.  And who doesn’t love to play with fire while crafting!!

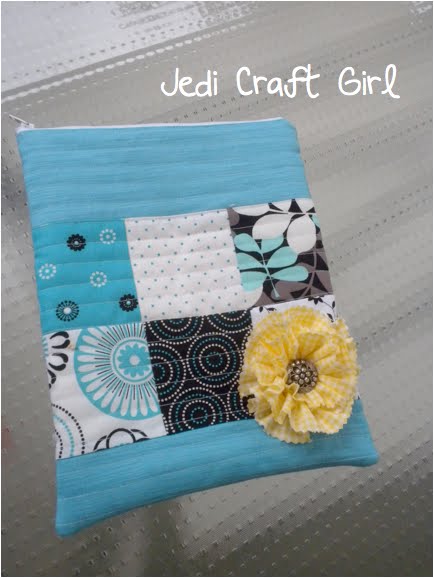
Finally I pinched the centers of the flowers and hand sewed them all together.  You can add buttons, beads, rhinestones, or anything to the centers – the possibilities are endless!  I hot glued an alligator clip to the back so Sally (or mommy) can wear!!

Lined, Draw-String Fish Bag

 My daughter is going to Hawaii and she wanted a little bag to keep her mask in so it wouldn’t get scratched by all the sand in her beach bag.  I found this tutorial on In Color Order blog.  It is the best tutorial & and the bags come out darling!  I love that they are fully lined.  My daughter choose the tropical fish fabric.  I would have sewn the ties out of fabric – but I ran out of time so we just used ribbon.  Now I must make a dozen of these for me!!

3rd Grade Mother’s Day Craft

I needed a quick & low-cost Mother’s Day craft for 3rd grade.  Here is what I came up with.  It was fun & crazy at the same time.  I forget how long it takes younger people to craft – but everyone finished their project.


To make these pom pom pens & holder you need:
fabric 2.5″ x 20″
fabric 1″ x12″
ballpoint pens
can without a sharp edge
scrapbook paper
glue & hot glue

There are many ways to make a fabric pom poms – I have seen many tutorials.  This is what I came up with.  I think if I was making it myself I would have sewed them.  It’s too hard to sew with 46 3rd graders!  So glue it is!  Take your 2.5″ piece of fabric and snip it almost all the way through – making a sort of fringe.


Next, run a bead of glue along the bottom of the fringe.  I glued this one to the wrong side.  Glue it to the “right side” of fabric.  Then start rolling up your fringe into a tight tube.
When you are done the pom pom should look like this.  Next take your 1″ piece of fabric and wrap it around the pen, gluing to secure.

Don’t they look cute?


All we did to make the “Pencil Holder” was glue a strip of scrapbook paper around the can.  Of course you can get super cute with die cuts, vinyl, ribbon, buttons, and ric rac – but we are keeping it simple for 3rd graders!!!


Next we needed to wrap the gift.  Wrapping 46 gifts can add up – so I went the brown paper bag route!  I bought doilies and cut them in half.  The learners glued the doily to the front, placed the gift inside & wrapped the outside with variegated pink cotton yarn!  Done!

I was exhausted when I came home from making this craft at school.  I don’t know how teachers do it.  They are amazing people!!


Snappy Bag

I found this tutorial for these “Snappy Bags” at Just Another Hang Up . They are the cutest things ever! And such great instructions. You use a cut up tape measure inside the bags so they “snap” together! Ella and I made 38 of them for Valentine’s Day Gifts.


Snappy Bag

I found this tutorial for these “Snappy Bags” at Just Another Hang Up . They are the cutest things ever! And such great instructions. You use a cut up tape measure inside the bags so they “snap” together! Ella and I made 38 of them for Valentine’s Day Gifts.


Just Made This Tote Bag!


I just made this tote bag from Bijou Lovely Designs. It is a great tutorial with easy to follow instructions. That bag is a perfect size for the beach. Wait till you see the fabric I choose! It’s for a gift.

Just Made This Tote Bag!


I just made this tote bag from Bijou Lovely Designs. It is a great tutorial with easy to follow instructions. That bag is a perfect size for the beach. Wait till you see the fabric I choose! It’s for a gift.

Homemade Pretzels


These homemade pretzels are more like crafting than cooking….right? It is a fun project for an after school snack. I mixed up the dough then let it rise while I was picking up the kids.

Step One: Mix the Dough
1 1/2 cups warm water
2 Tablespoons Brown Sugar
2 1/4 teaspoons yeast
6 Tablespoons butter, melted
2 1/2 teaspoons salt
4 1/2 cups flour

Mix the warm water, sugar, yeast, and butter in a bowl and let stand for a few minutes (I just use the bowl from my Kitchen Aid)

In your Kitchen Aid or other mixer combine the wet mixture and add the flour and salt. Mix with the dough hook attachment for about 5 minutes until a nice dough forms. If dough is sticky, add a little flour at a time. The dough should be smooth. (Sometimes I have to hand kneed the dough if the mixer is not doing a good job.)

Put the dough in an oiled bowl, cover, and let rise for 1 hour.

Step 2 Roll out the dough.
Take little pieces and make the equivalent of play dough snakes! The longer and thinner the better. We made all sorts of shapes, pretzels, knots, twists, and blobs that were supposed to look like Rapunzel!

Step 3 – Boiling
(prepare the water during the rolling out process)
Fill a stock pot with hot water and add add 3/4 cup baking soda. Bring this to a boil.
After you have made your shapes, put them in the boiling soda water for 30 seconds. They will drop to the bottom then float up to the top.

Step 4 – the Egg Wash
I put a rack on top of a baking sheet and put the boiled pretzels on this. Brush them with a beaten egg. (The rack helps the egg to run off so you don’t get baked egg pretzels)

Step 5 – Salt
Transfer the pretzels to a parchment lined baking sheet. (If you don’t use parchment you will ruin your baking sheets….trust me I know) Sprinkle course sea salt over the tops.

Step 6 – Bake
Bake the pretzels at 425 degrees for about 15 minutes or until done to your liking. Now get ready for the carb rush of your life! My kids alone can eat an entire batch!

ipad case tutorial


I found this darling tutorial from Freckled Whimsy. I want an ipad just so I can make a case for it! I followed the instructions and sewed this one for my sister.