Four-Patch Heart Mini Quilt

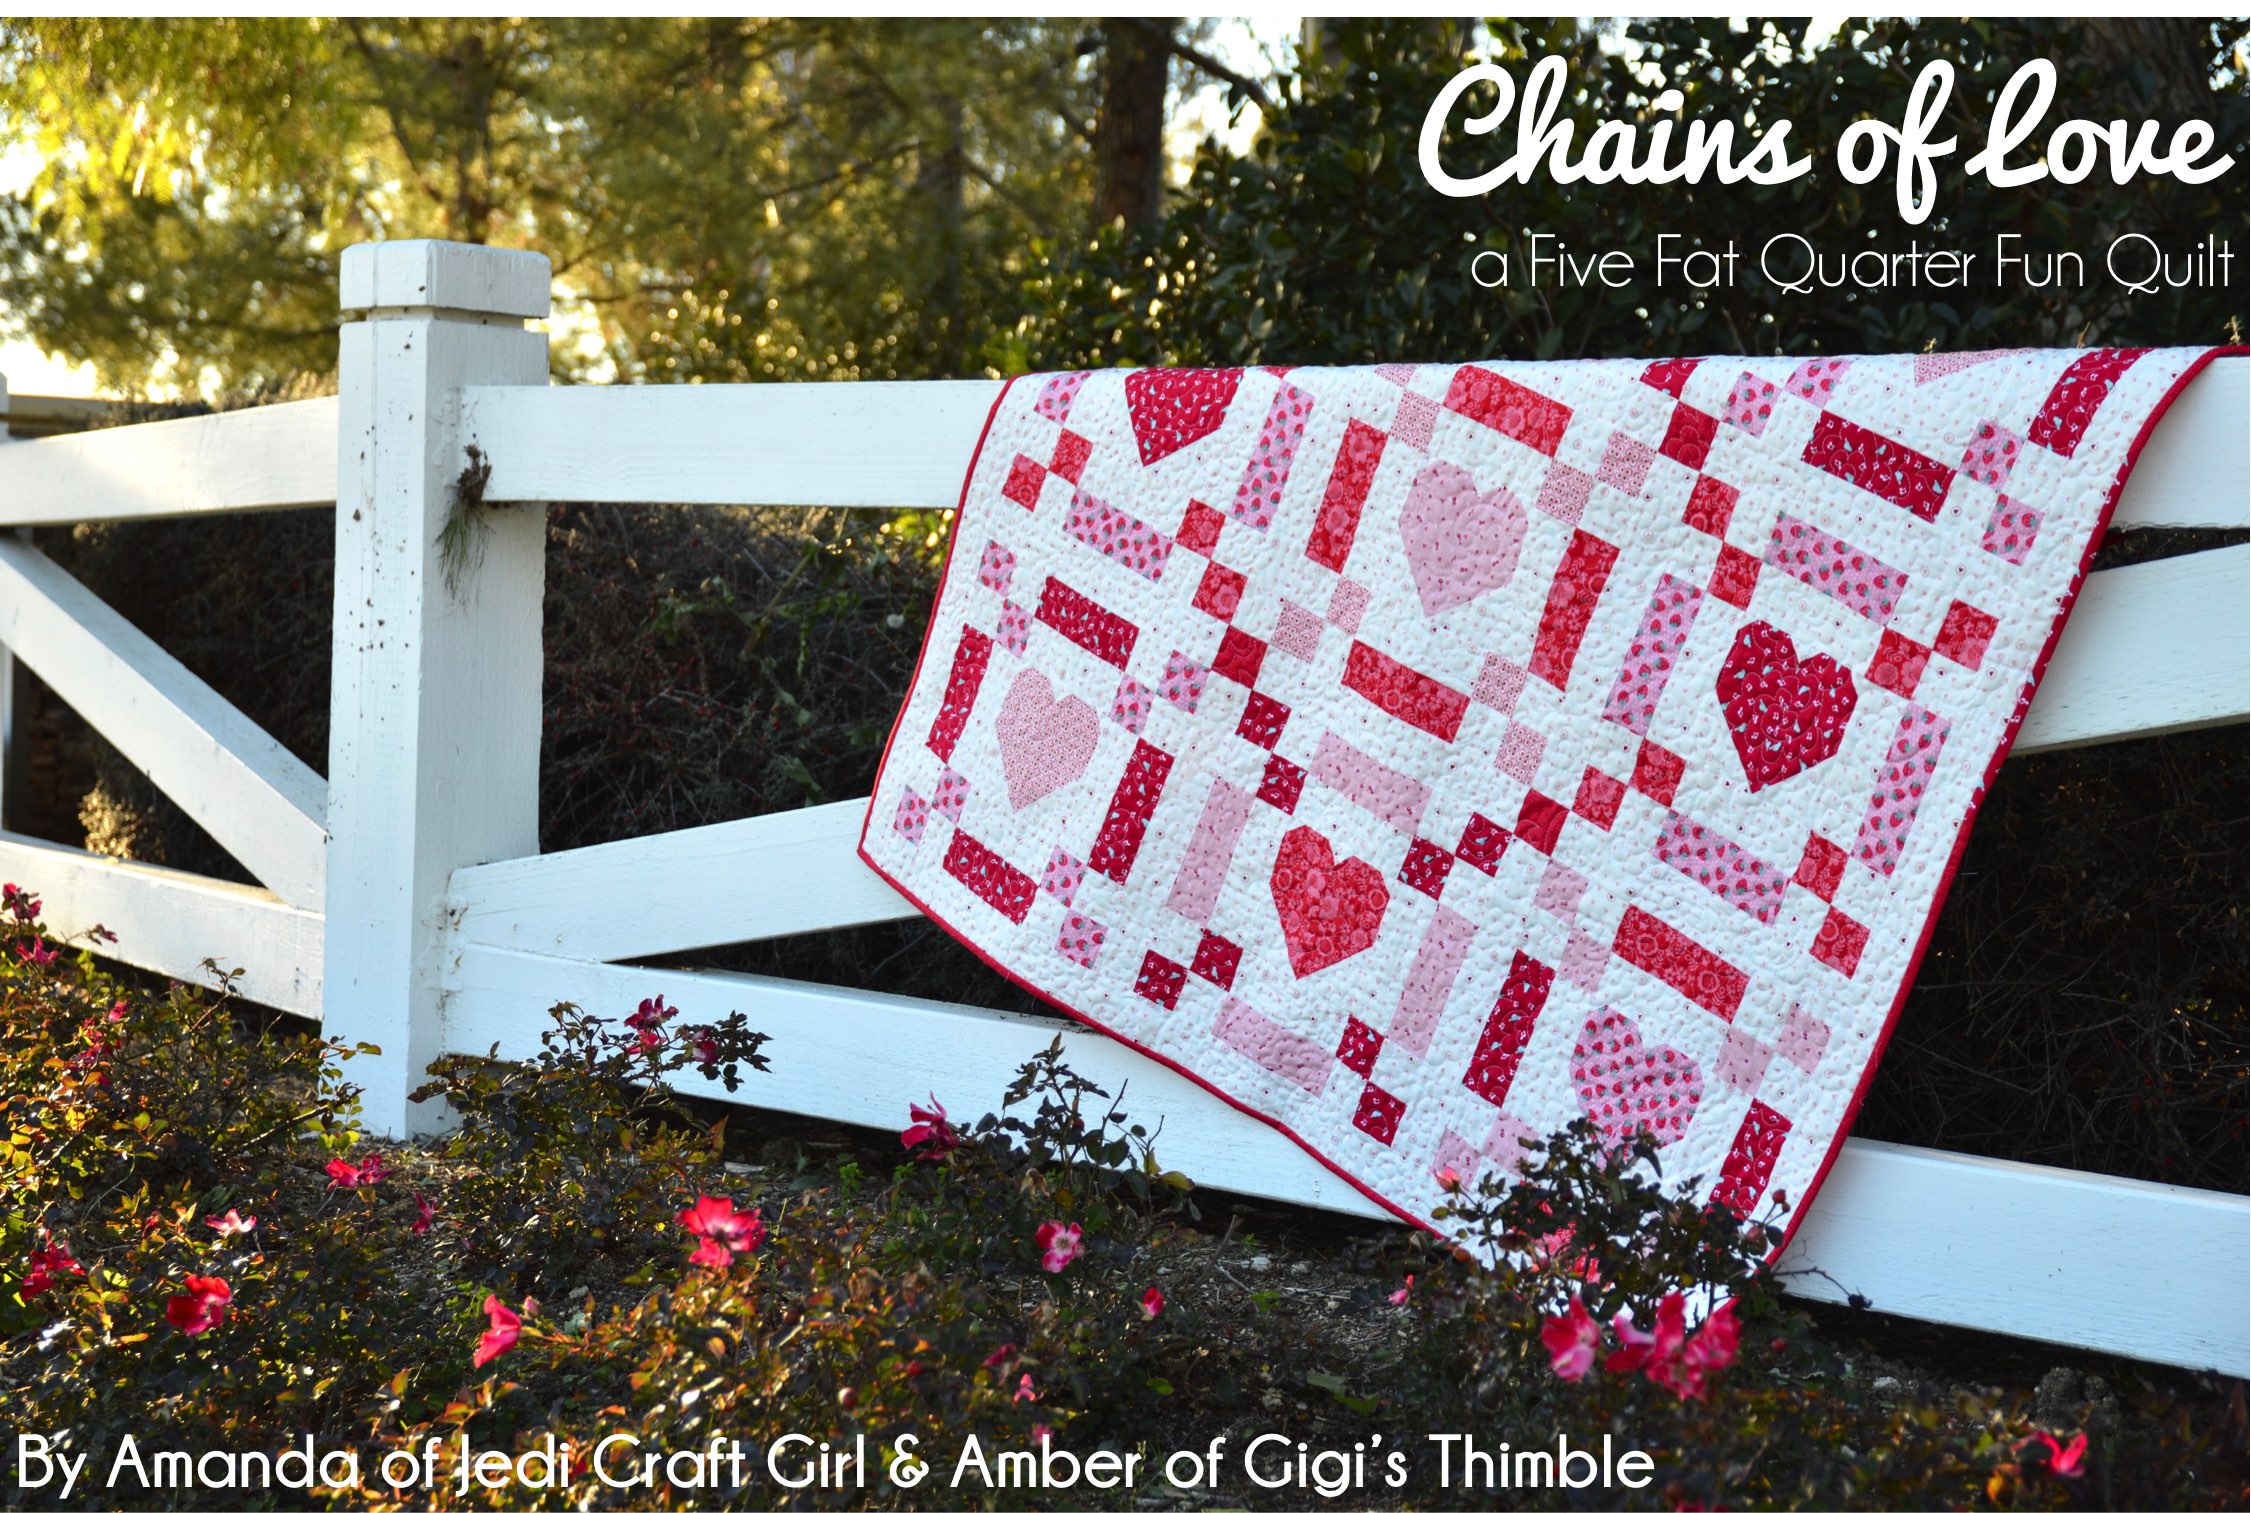
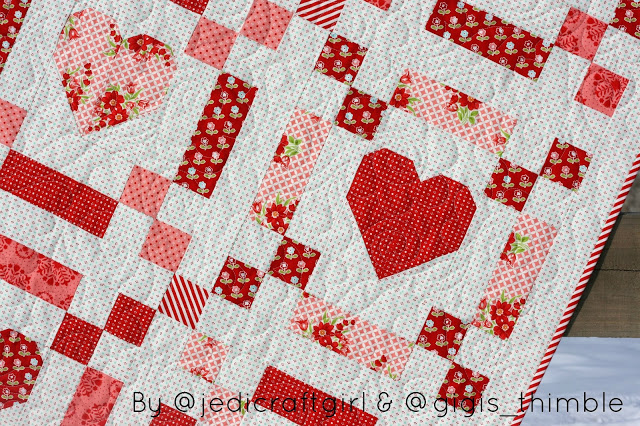
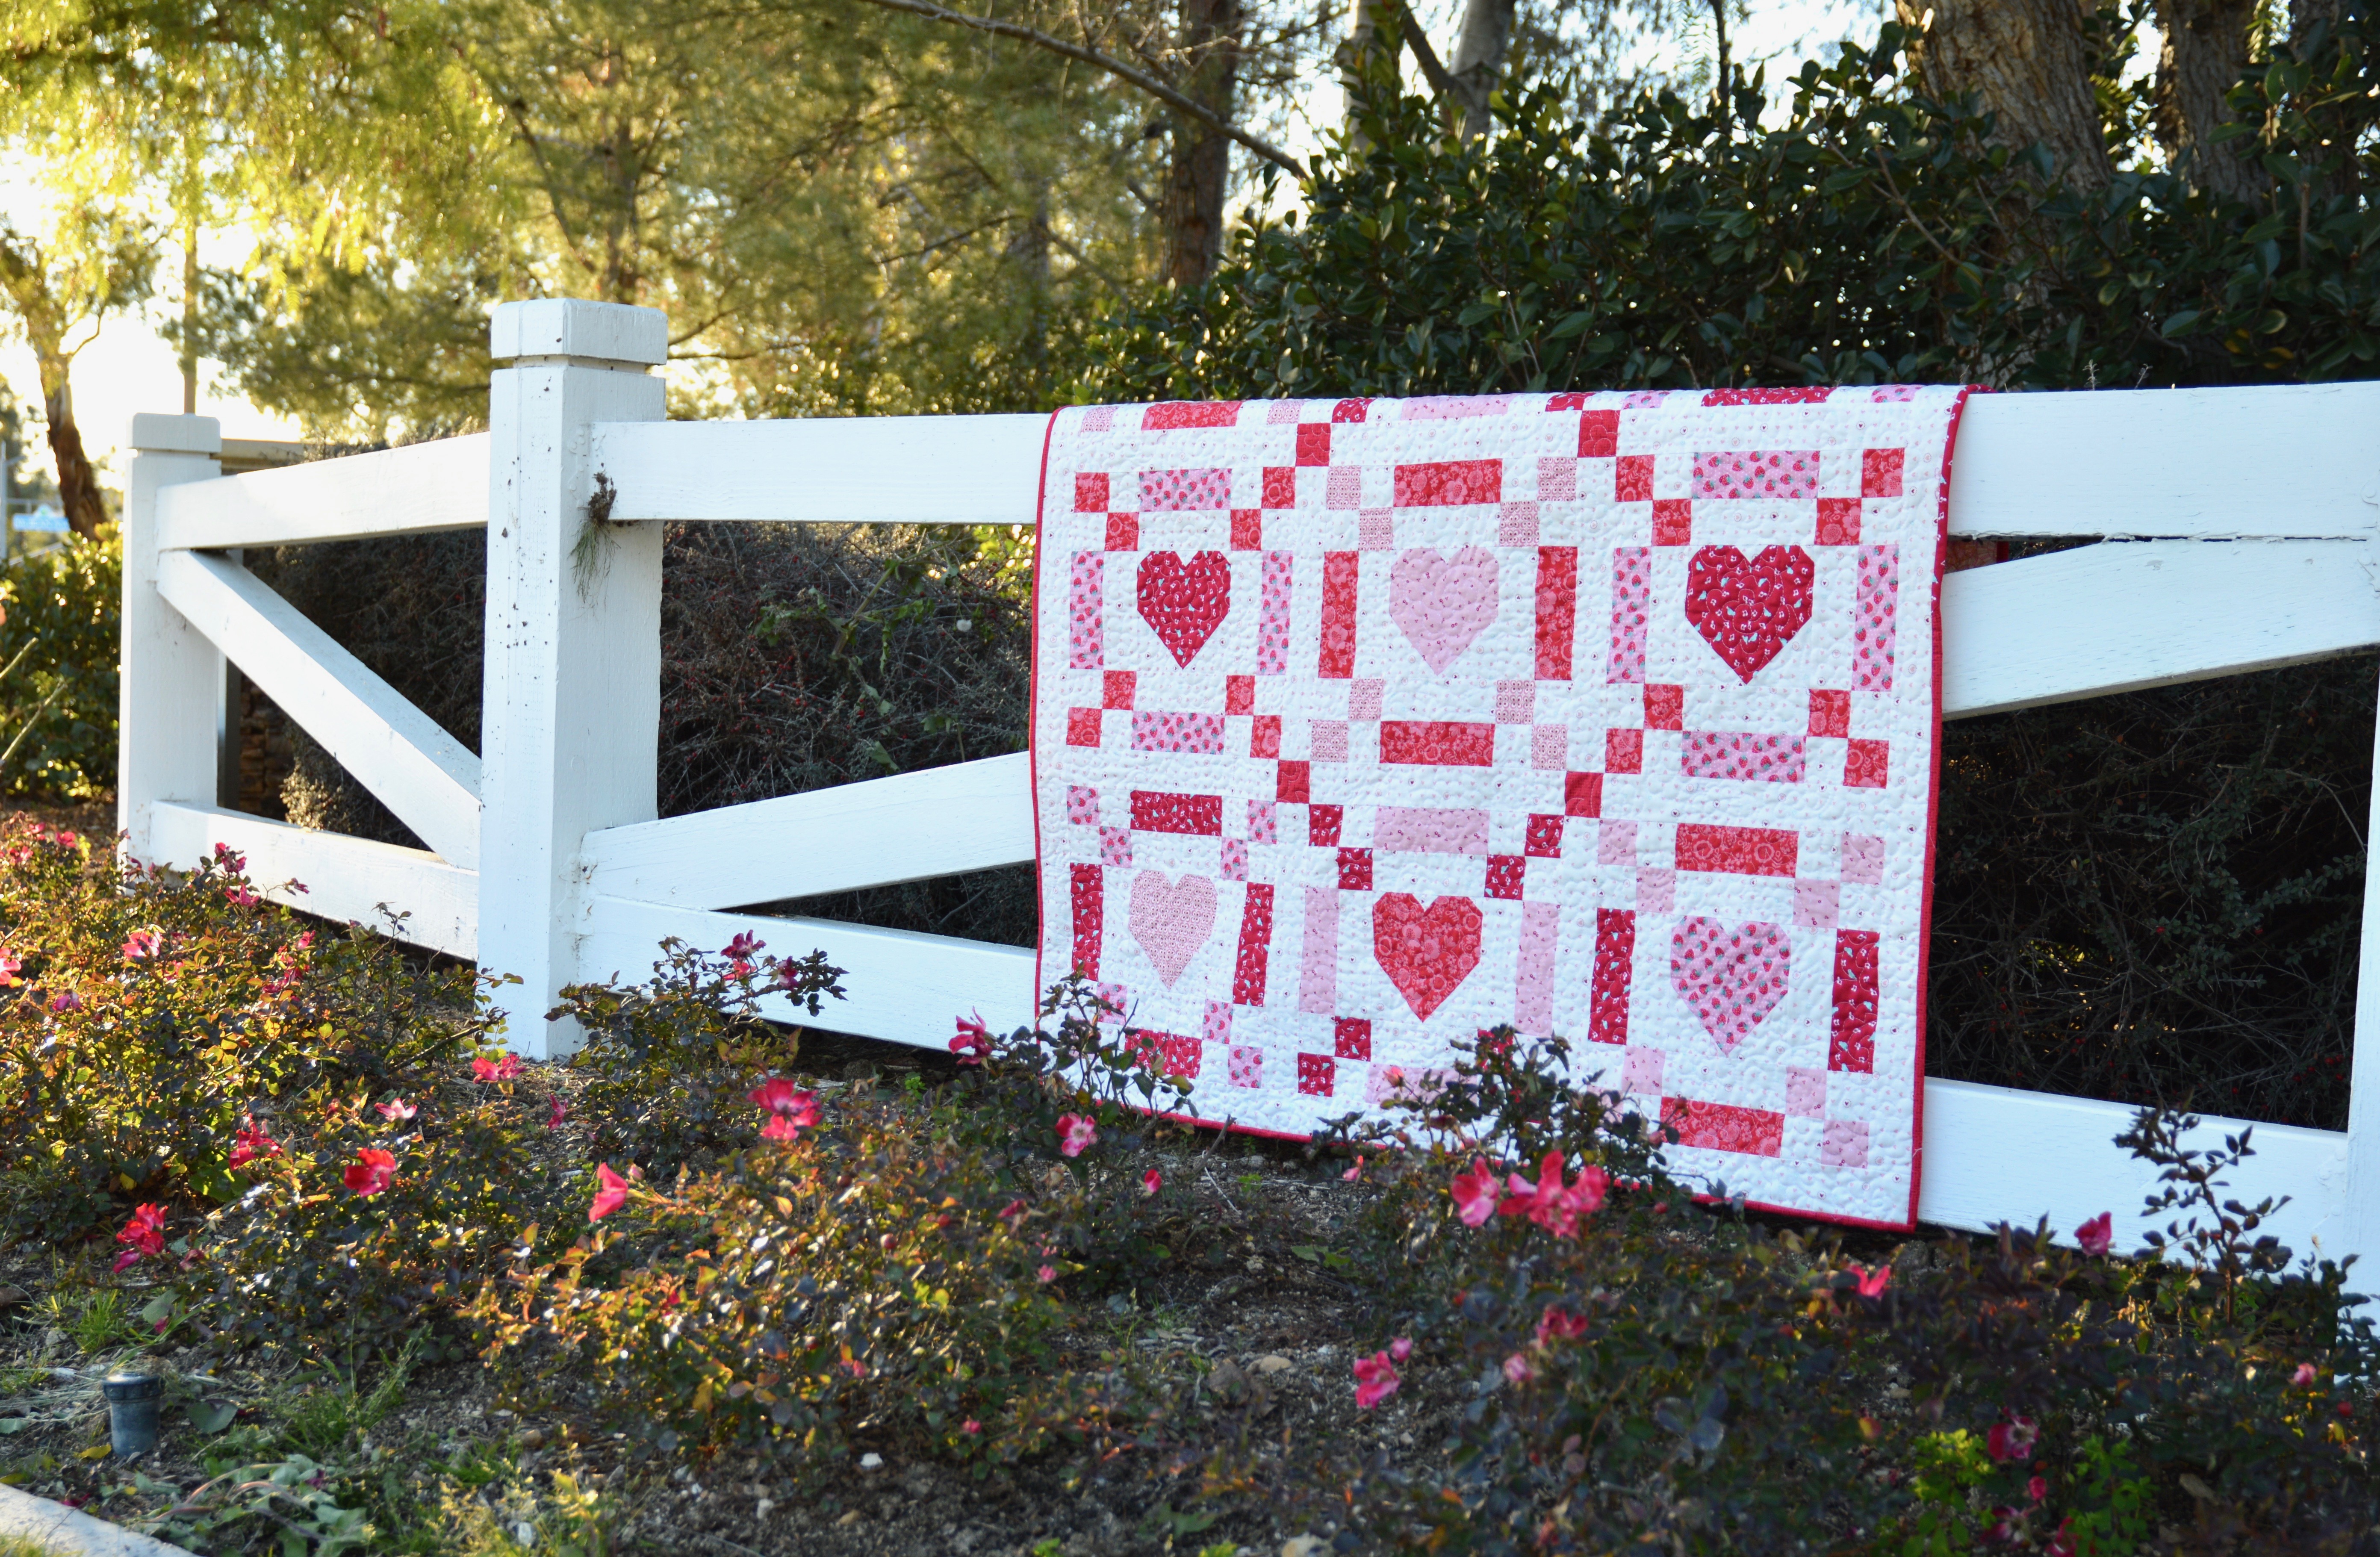
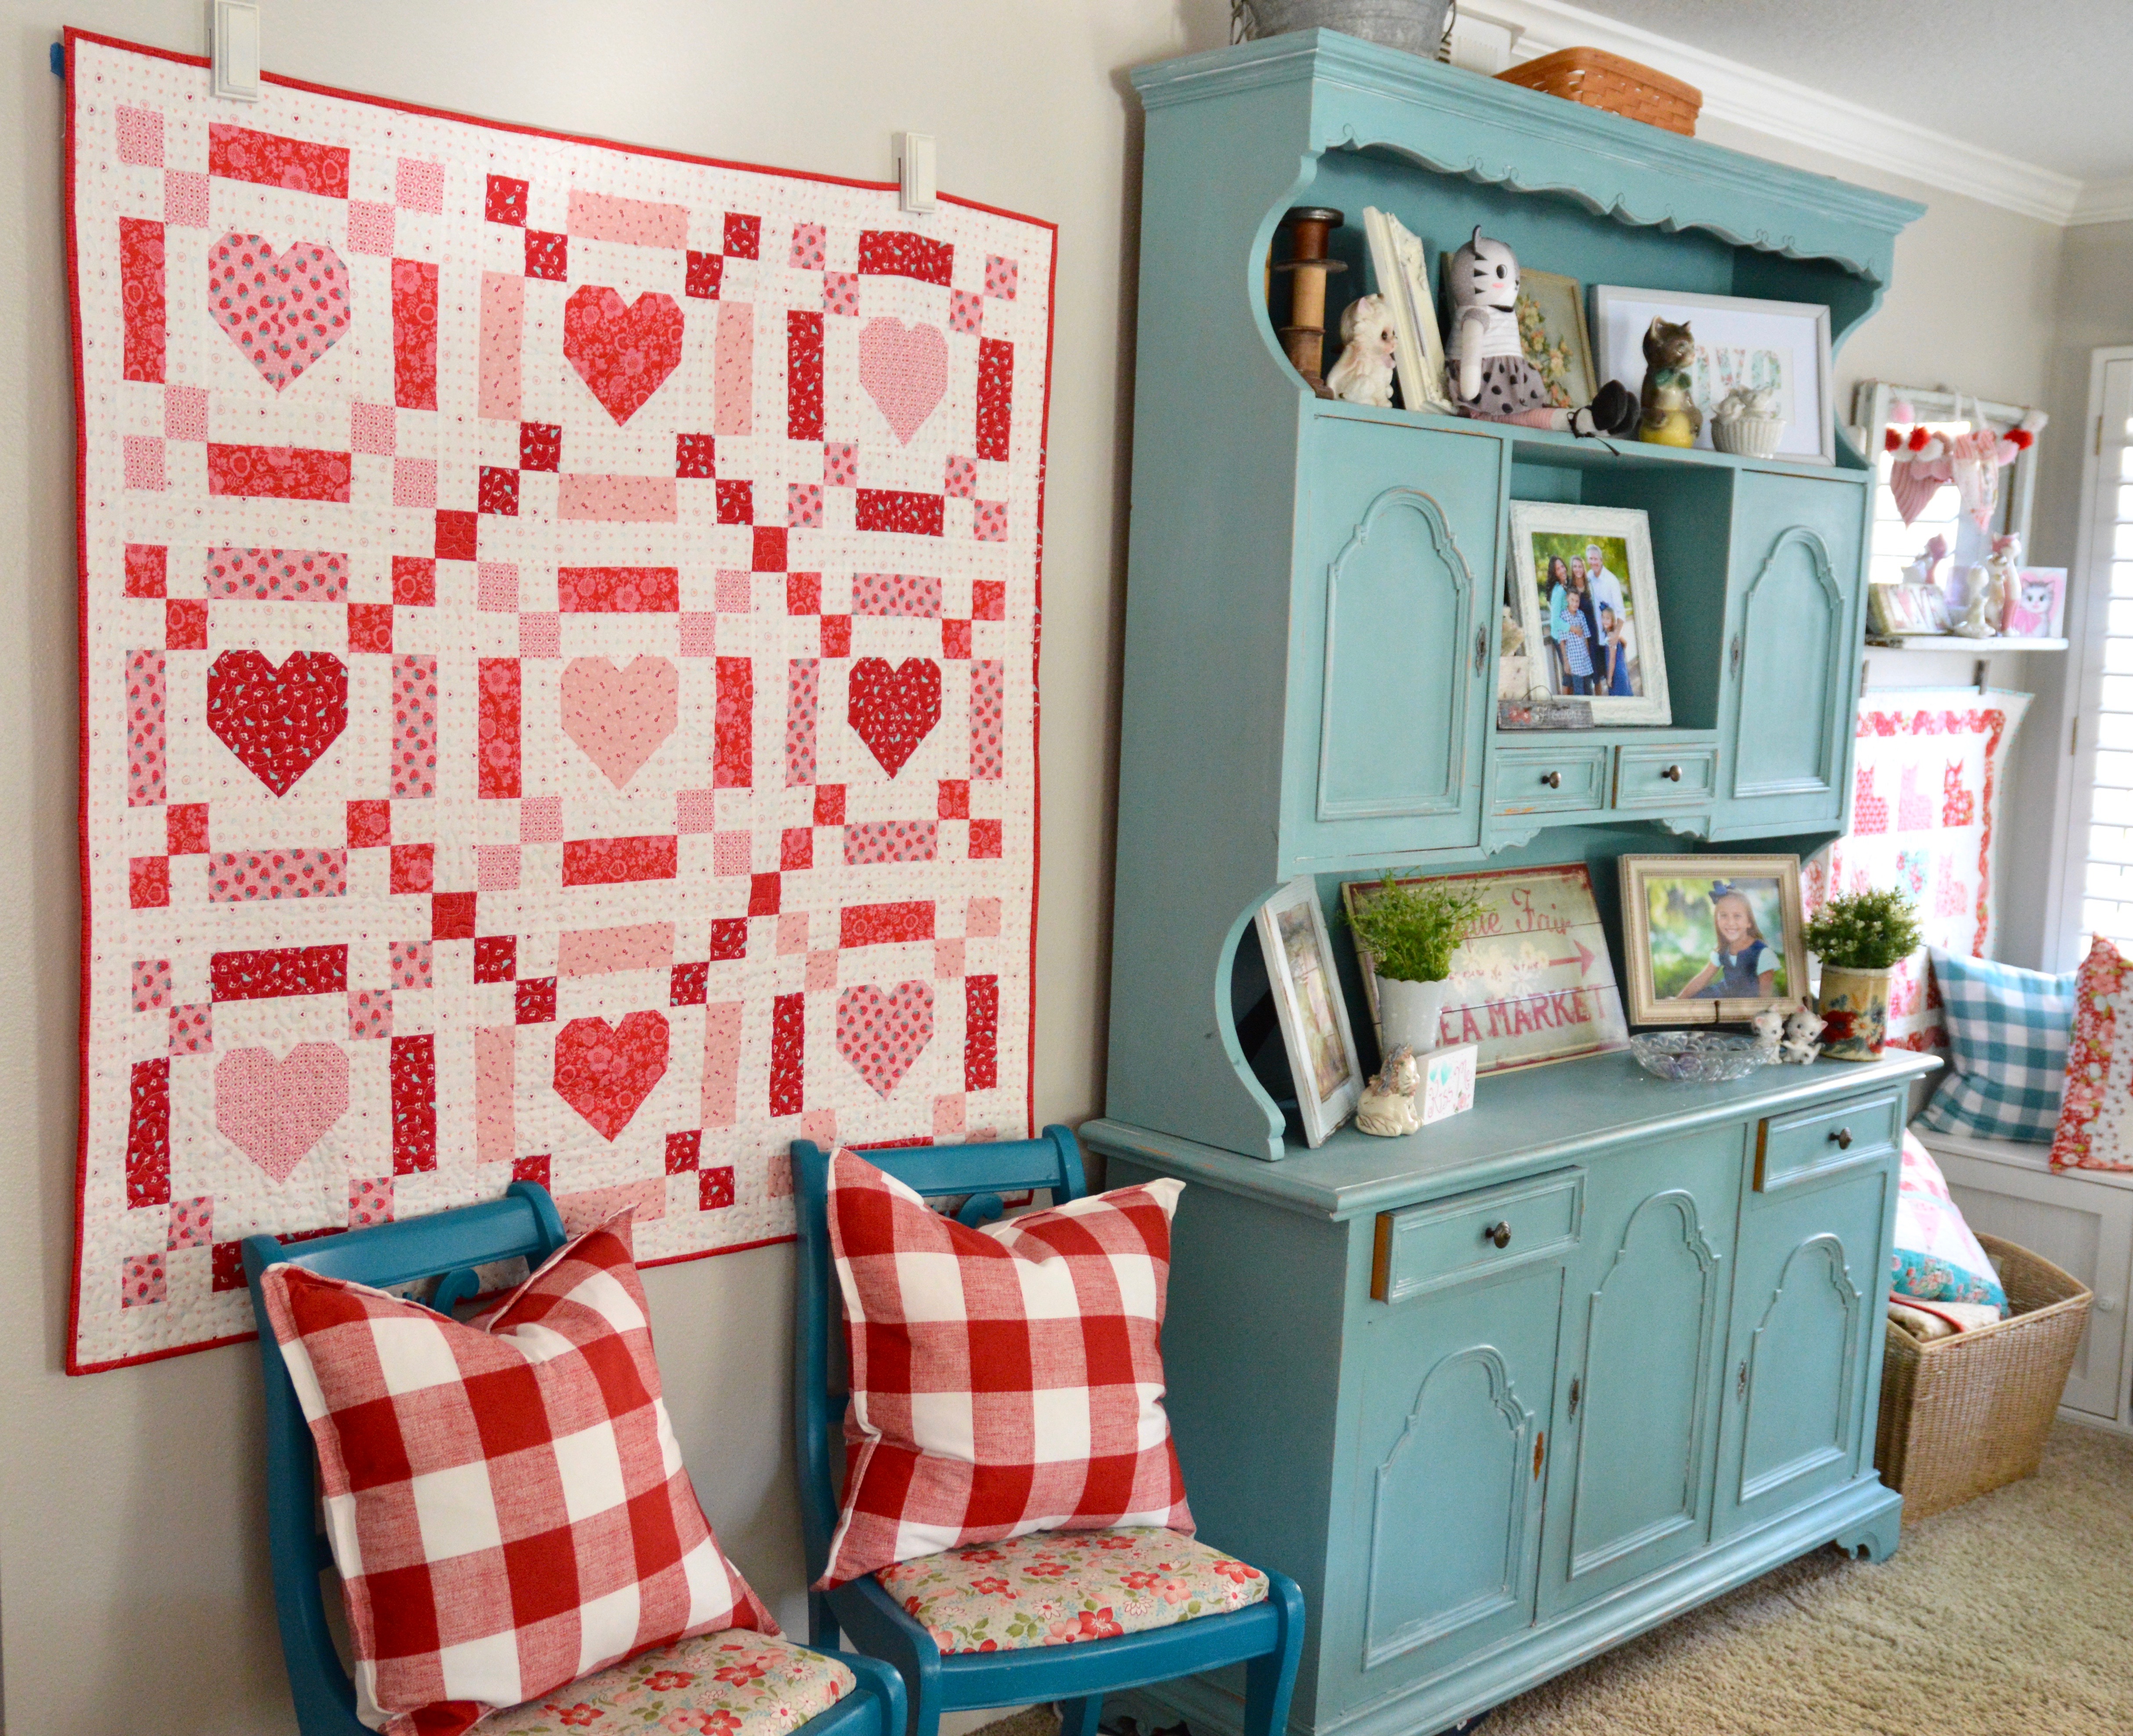
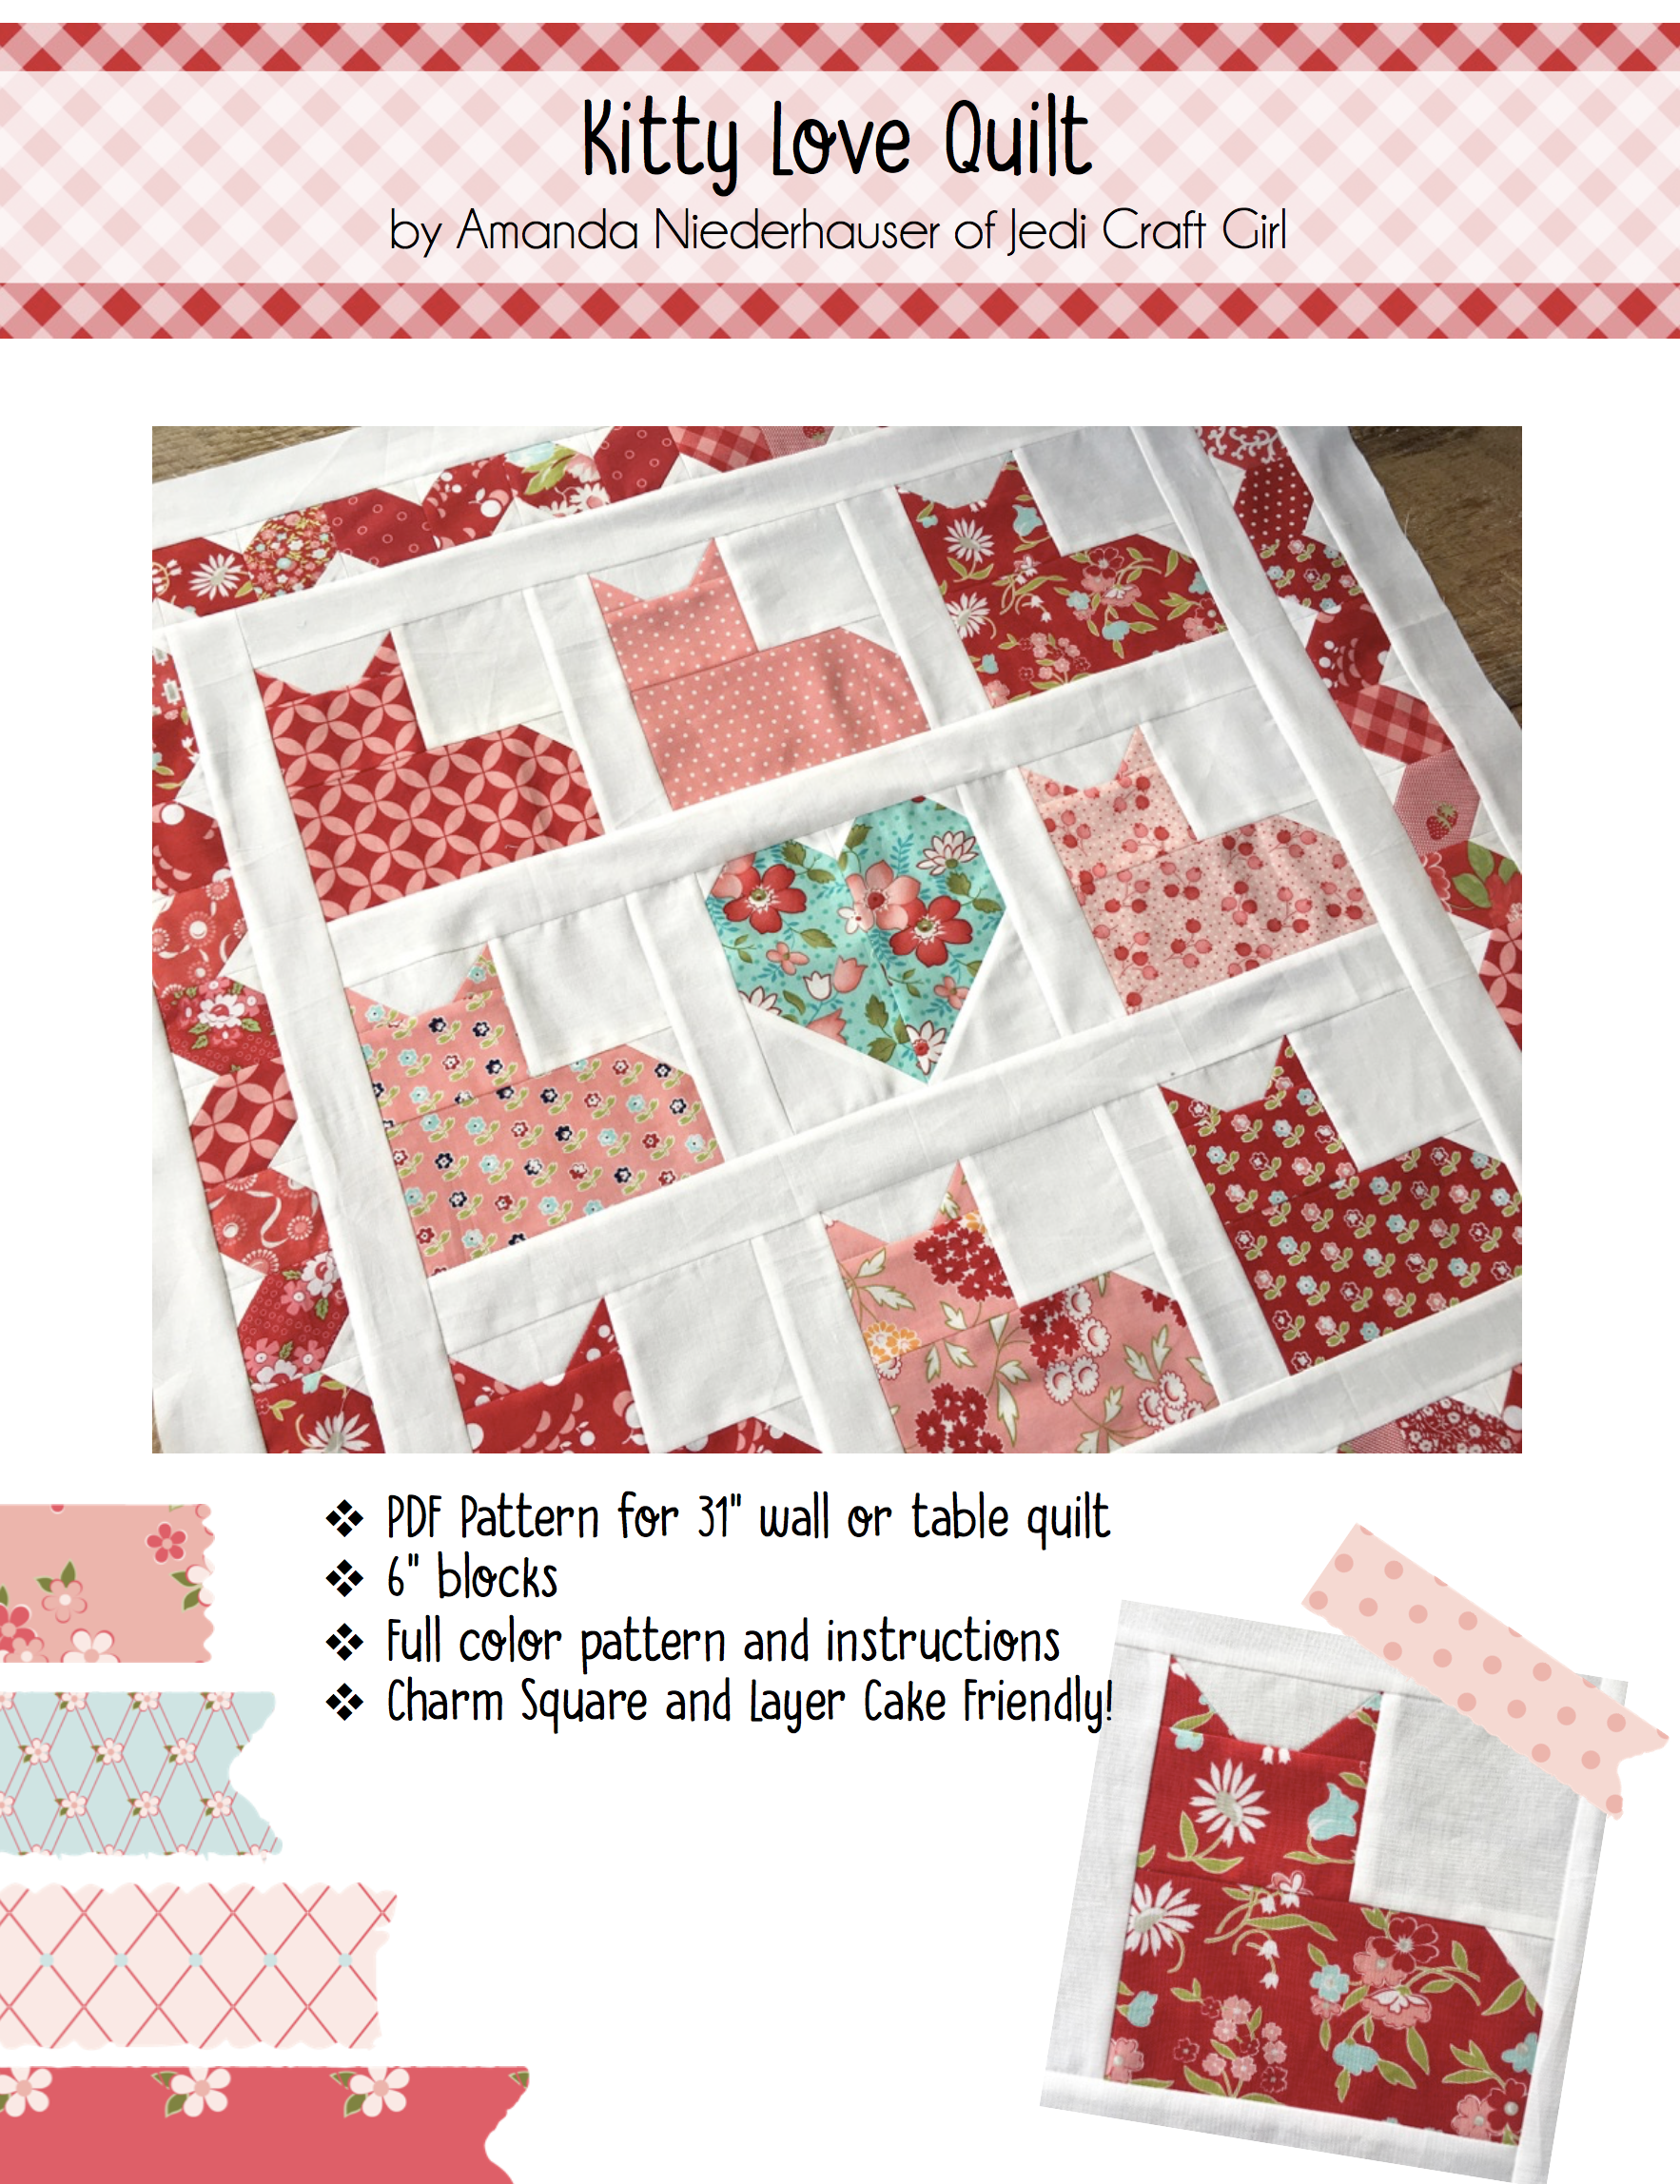
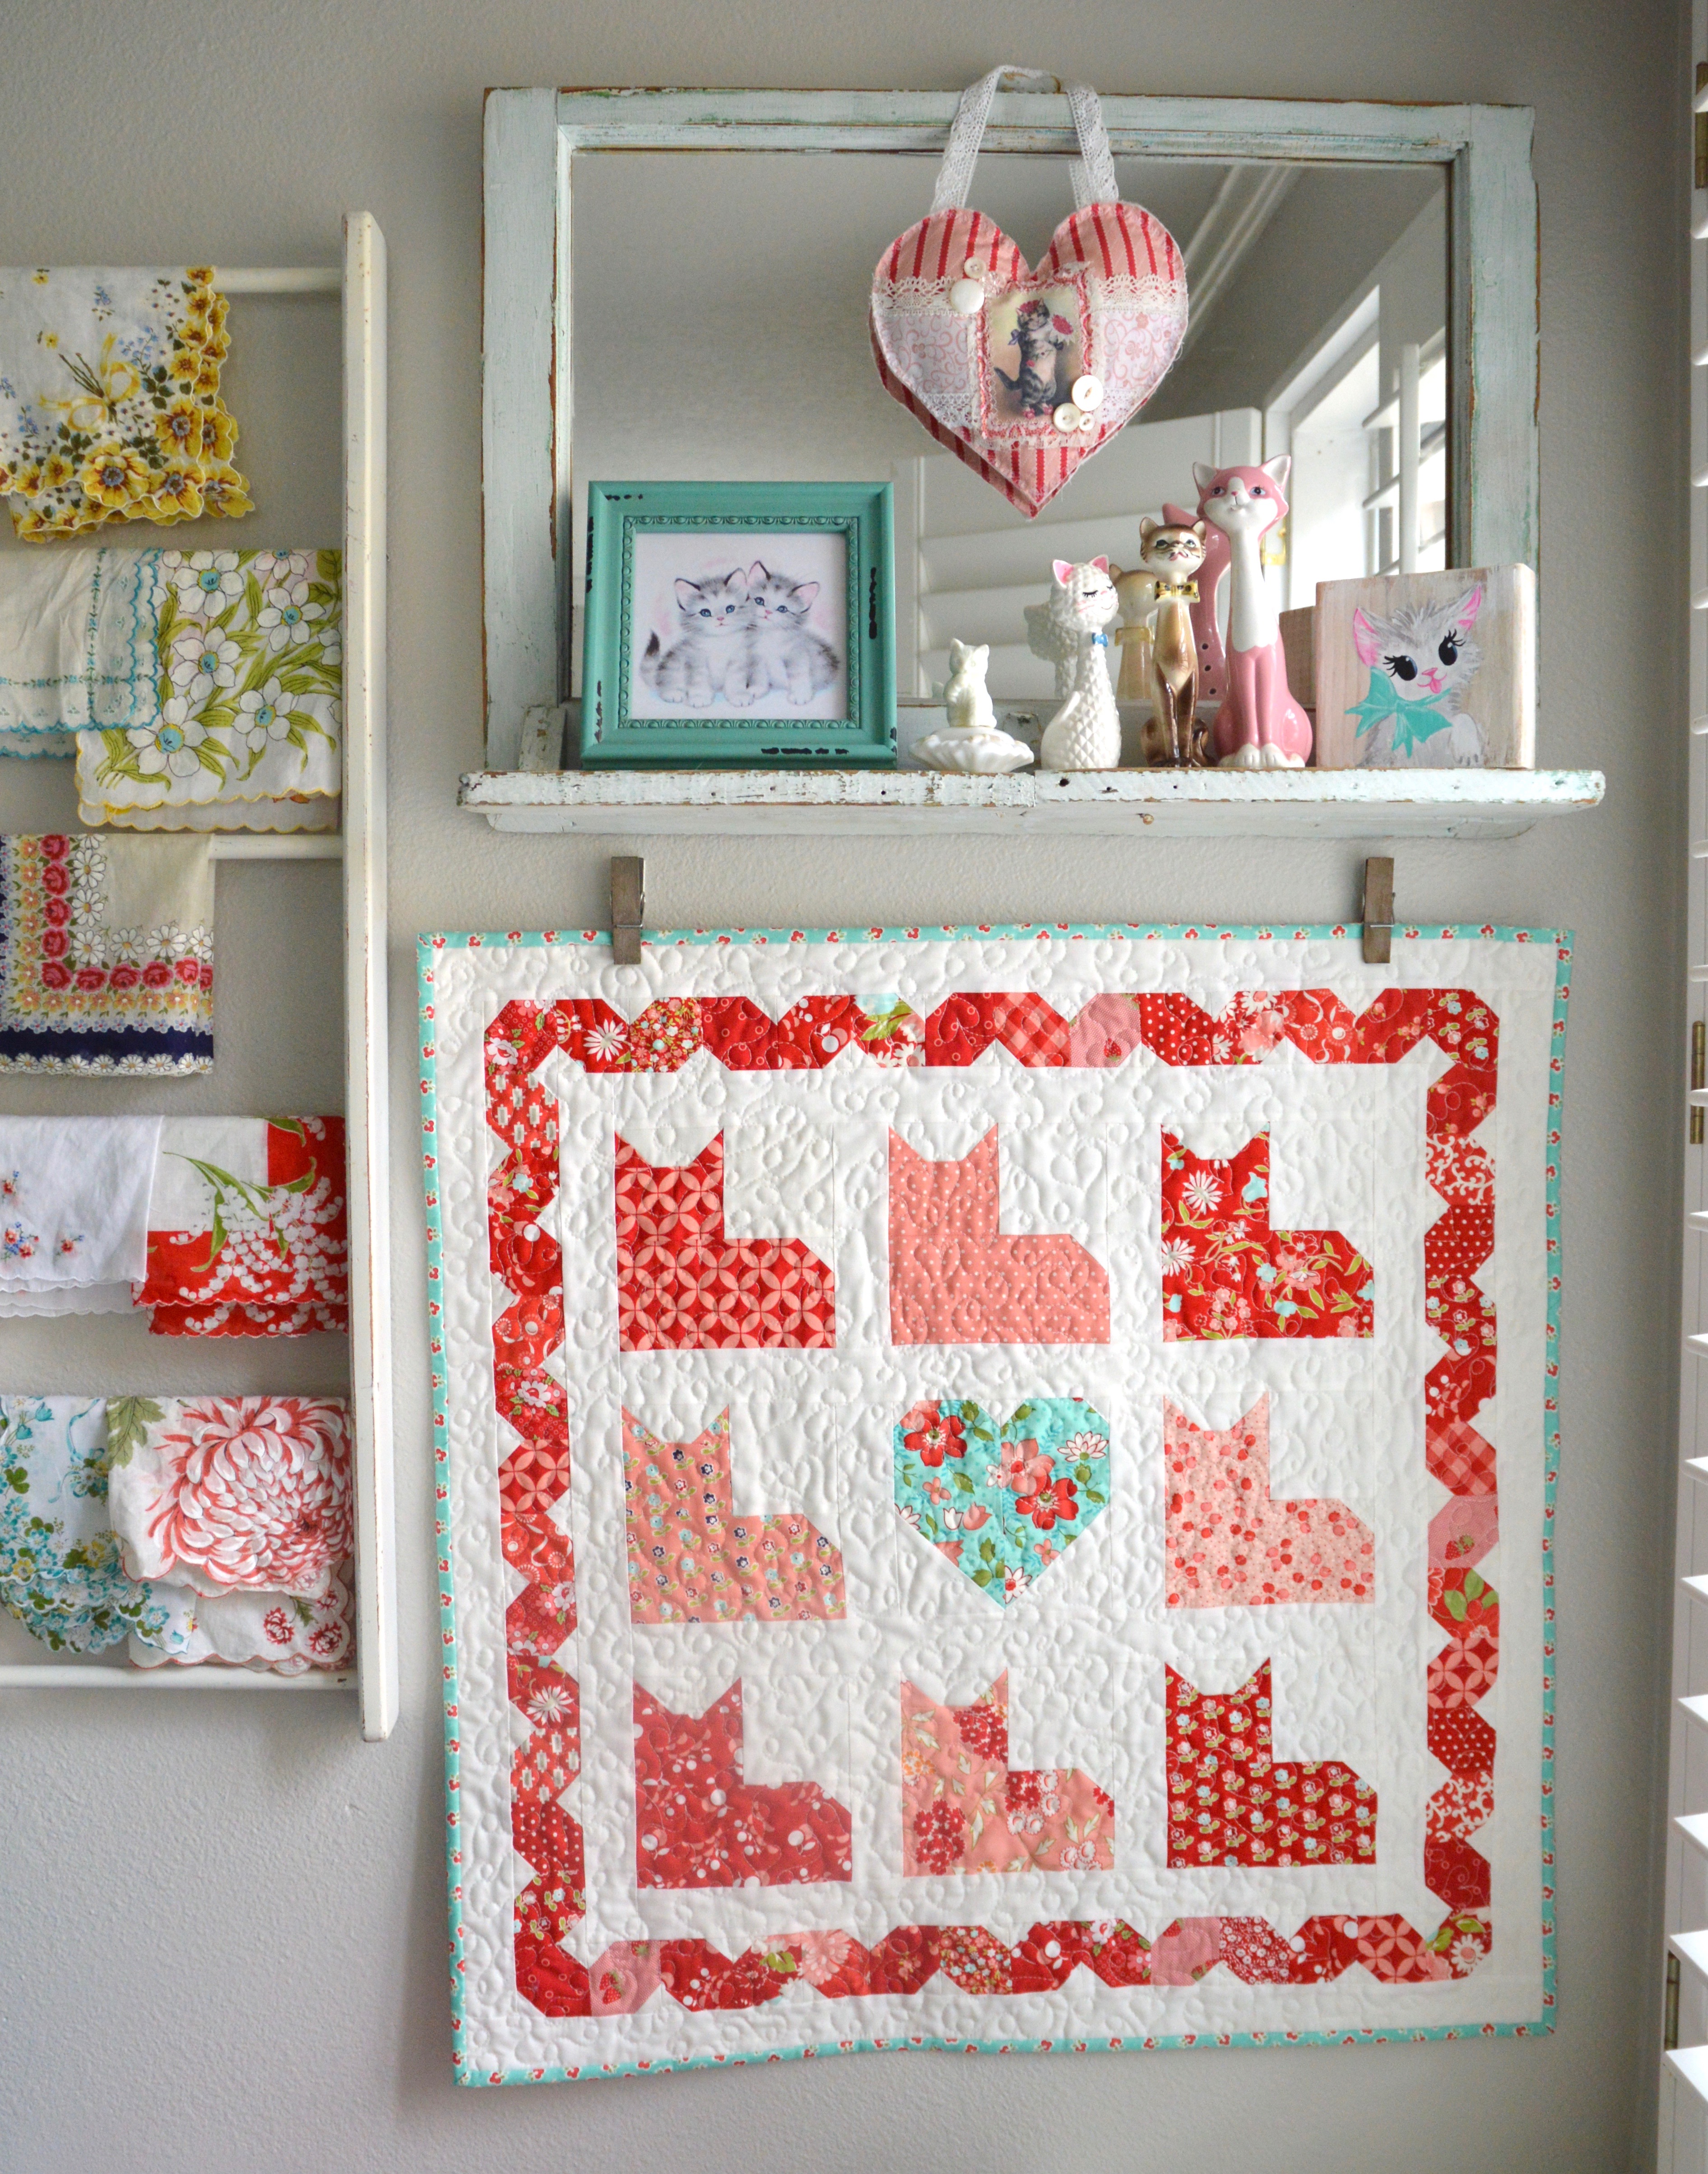
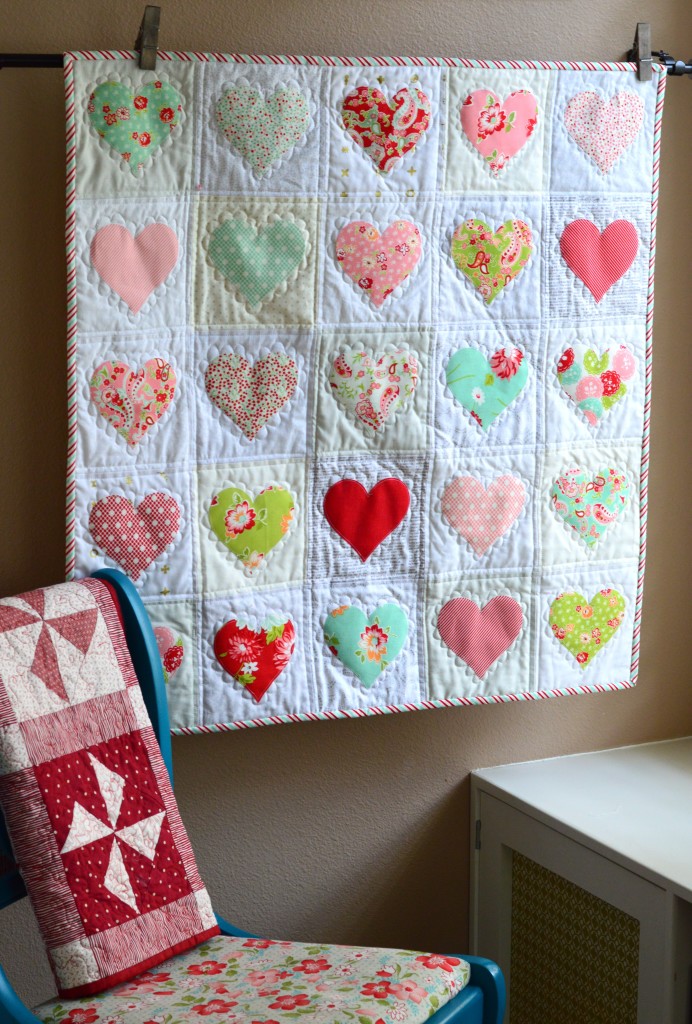
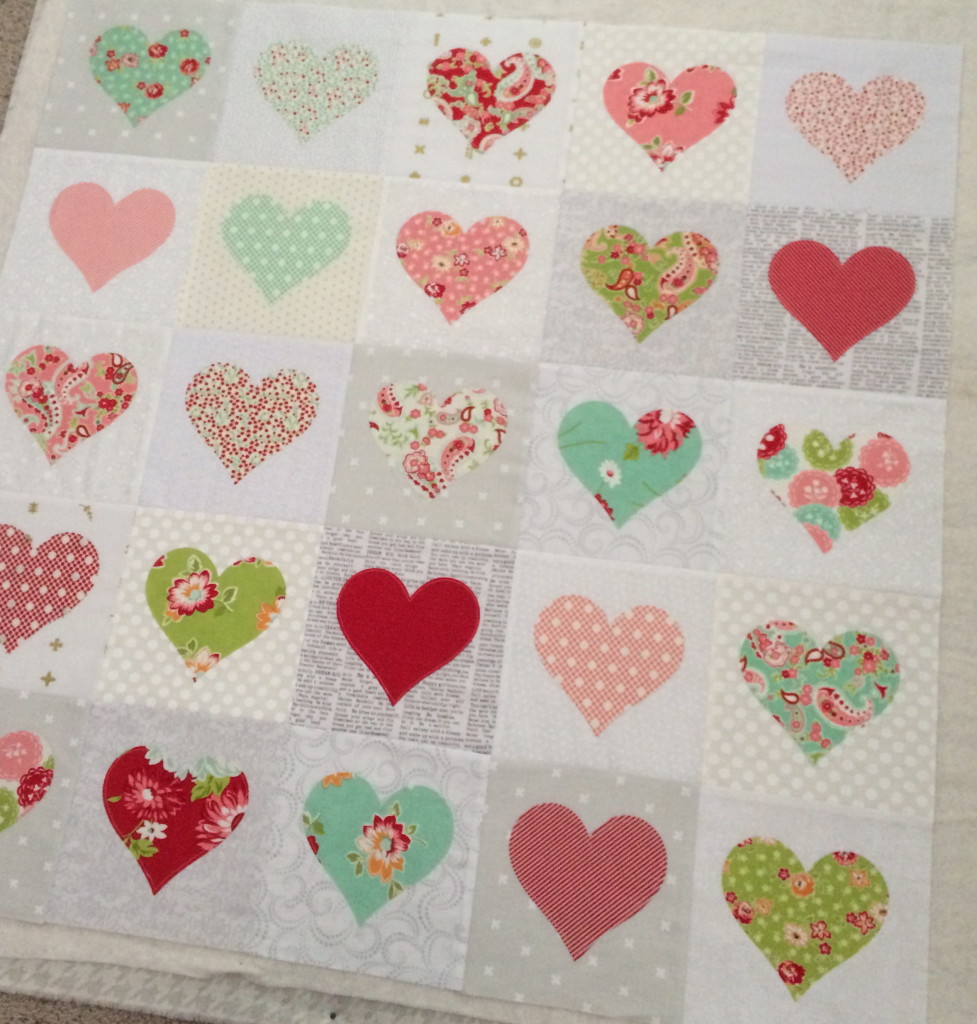
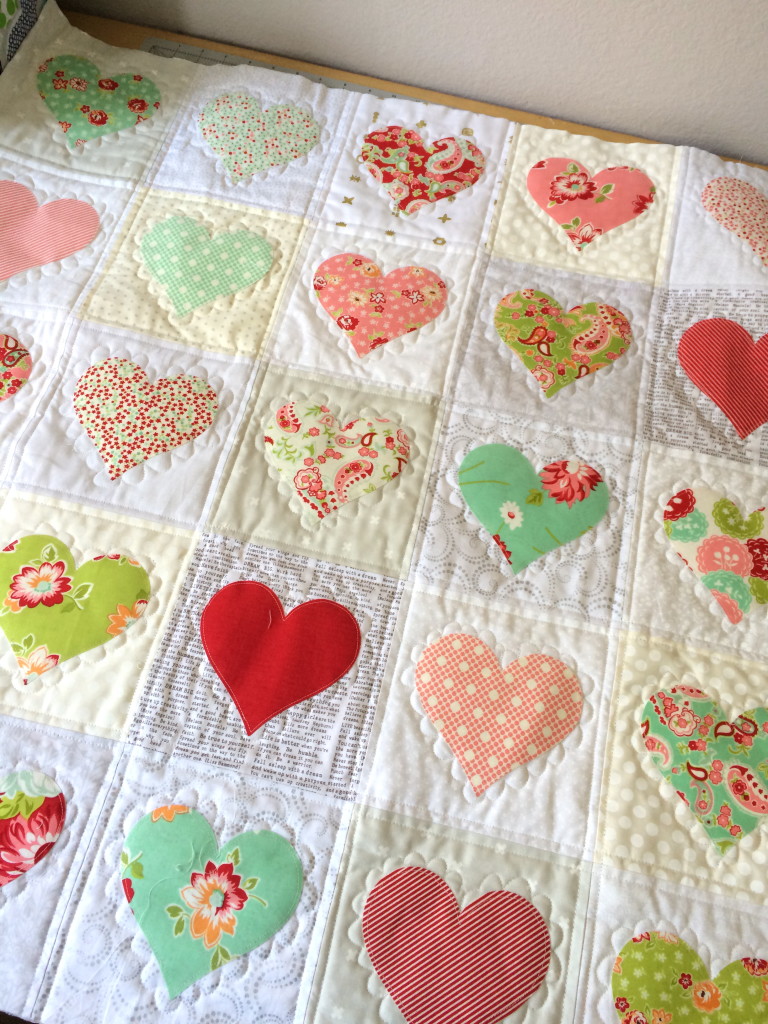
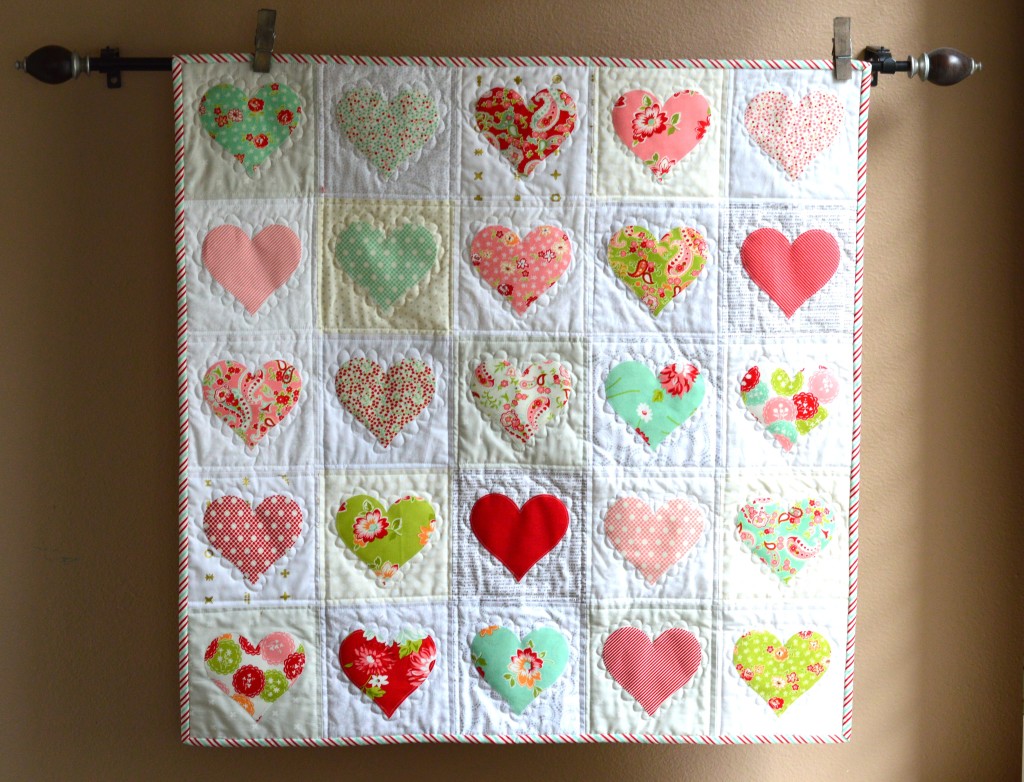
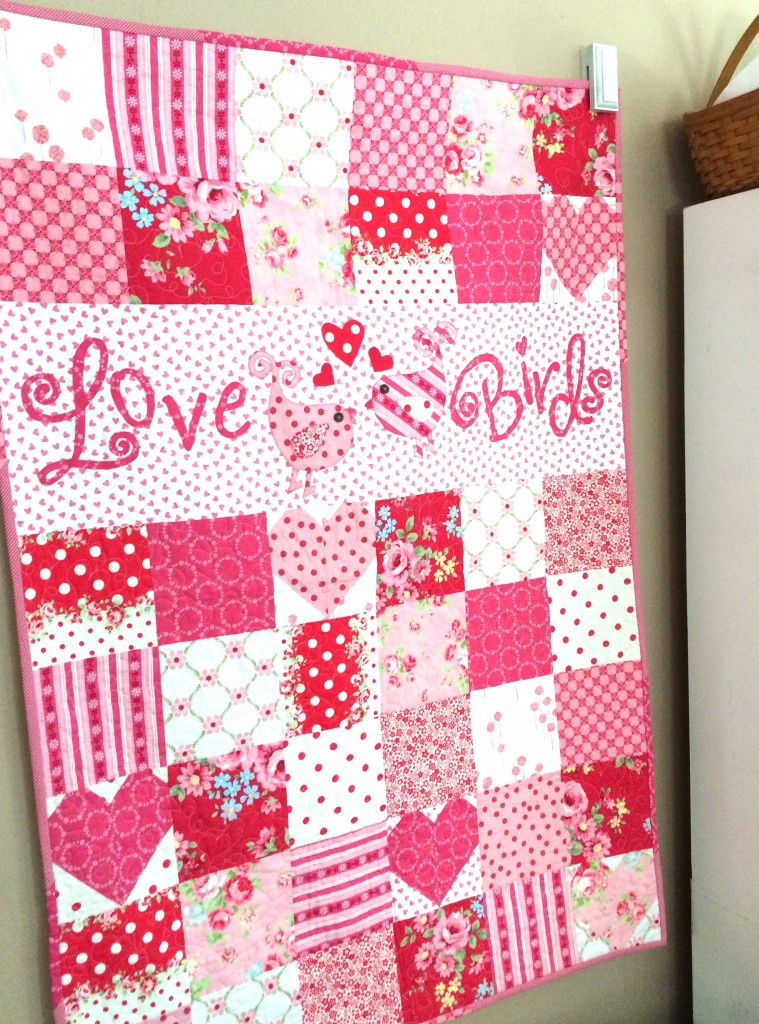
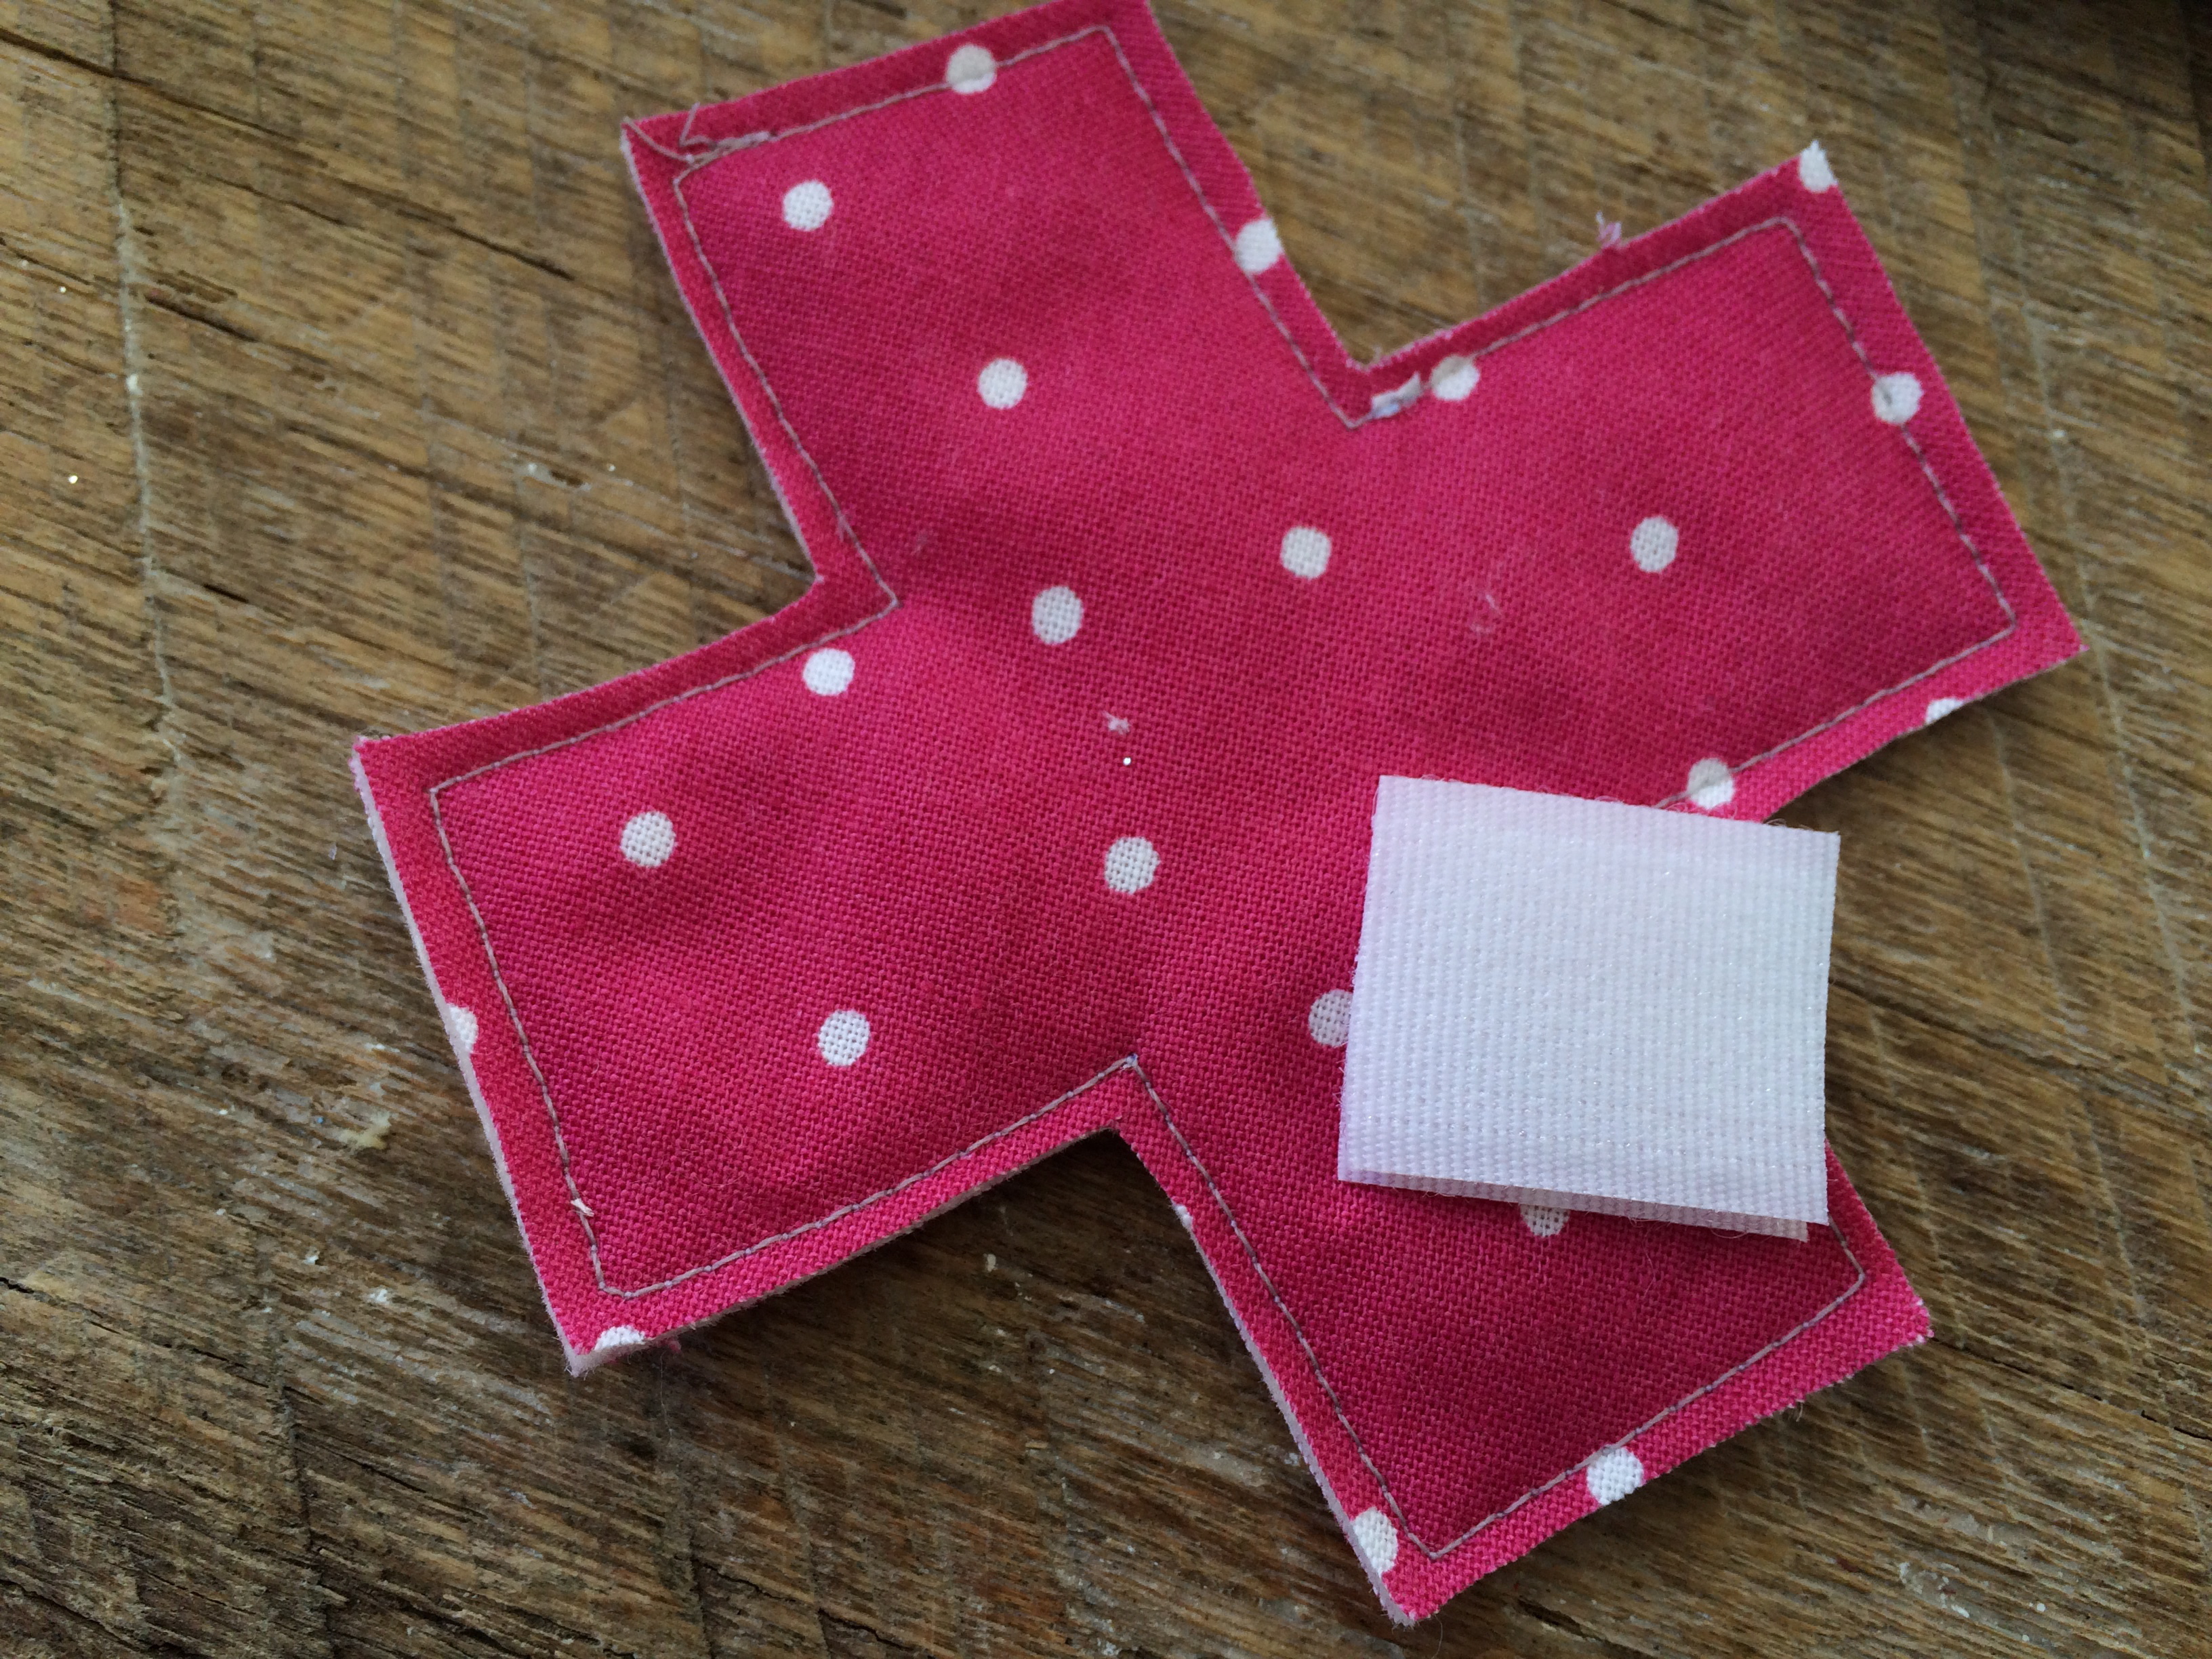
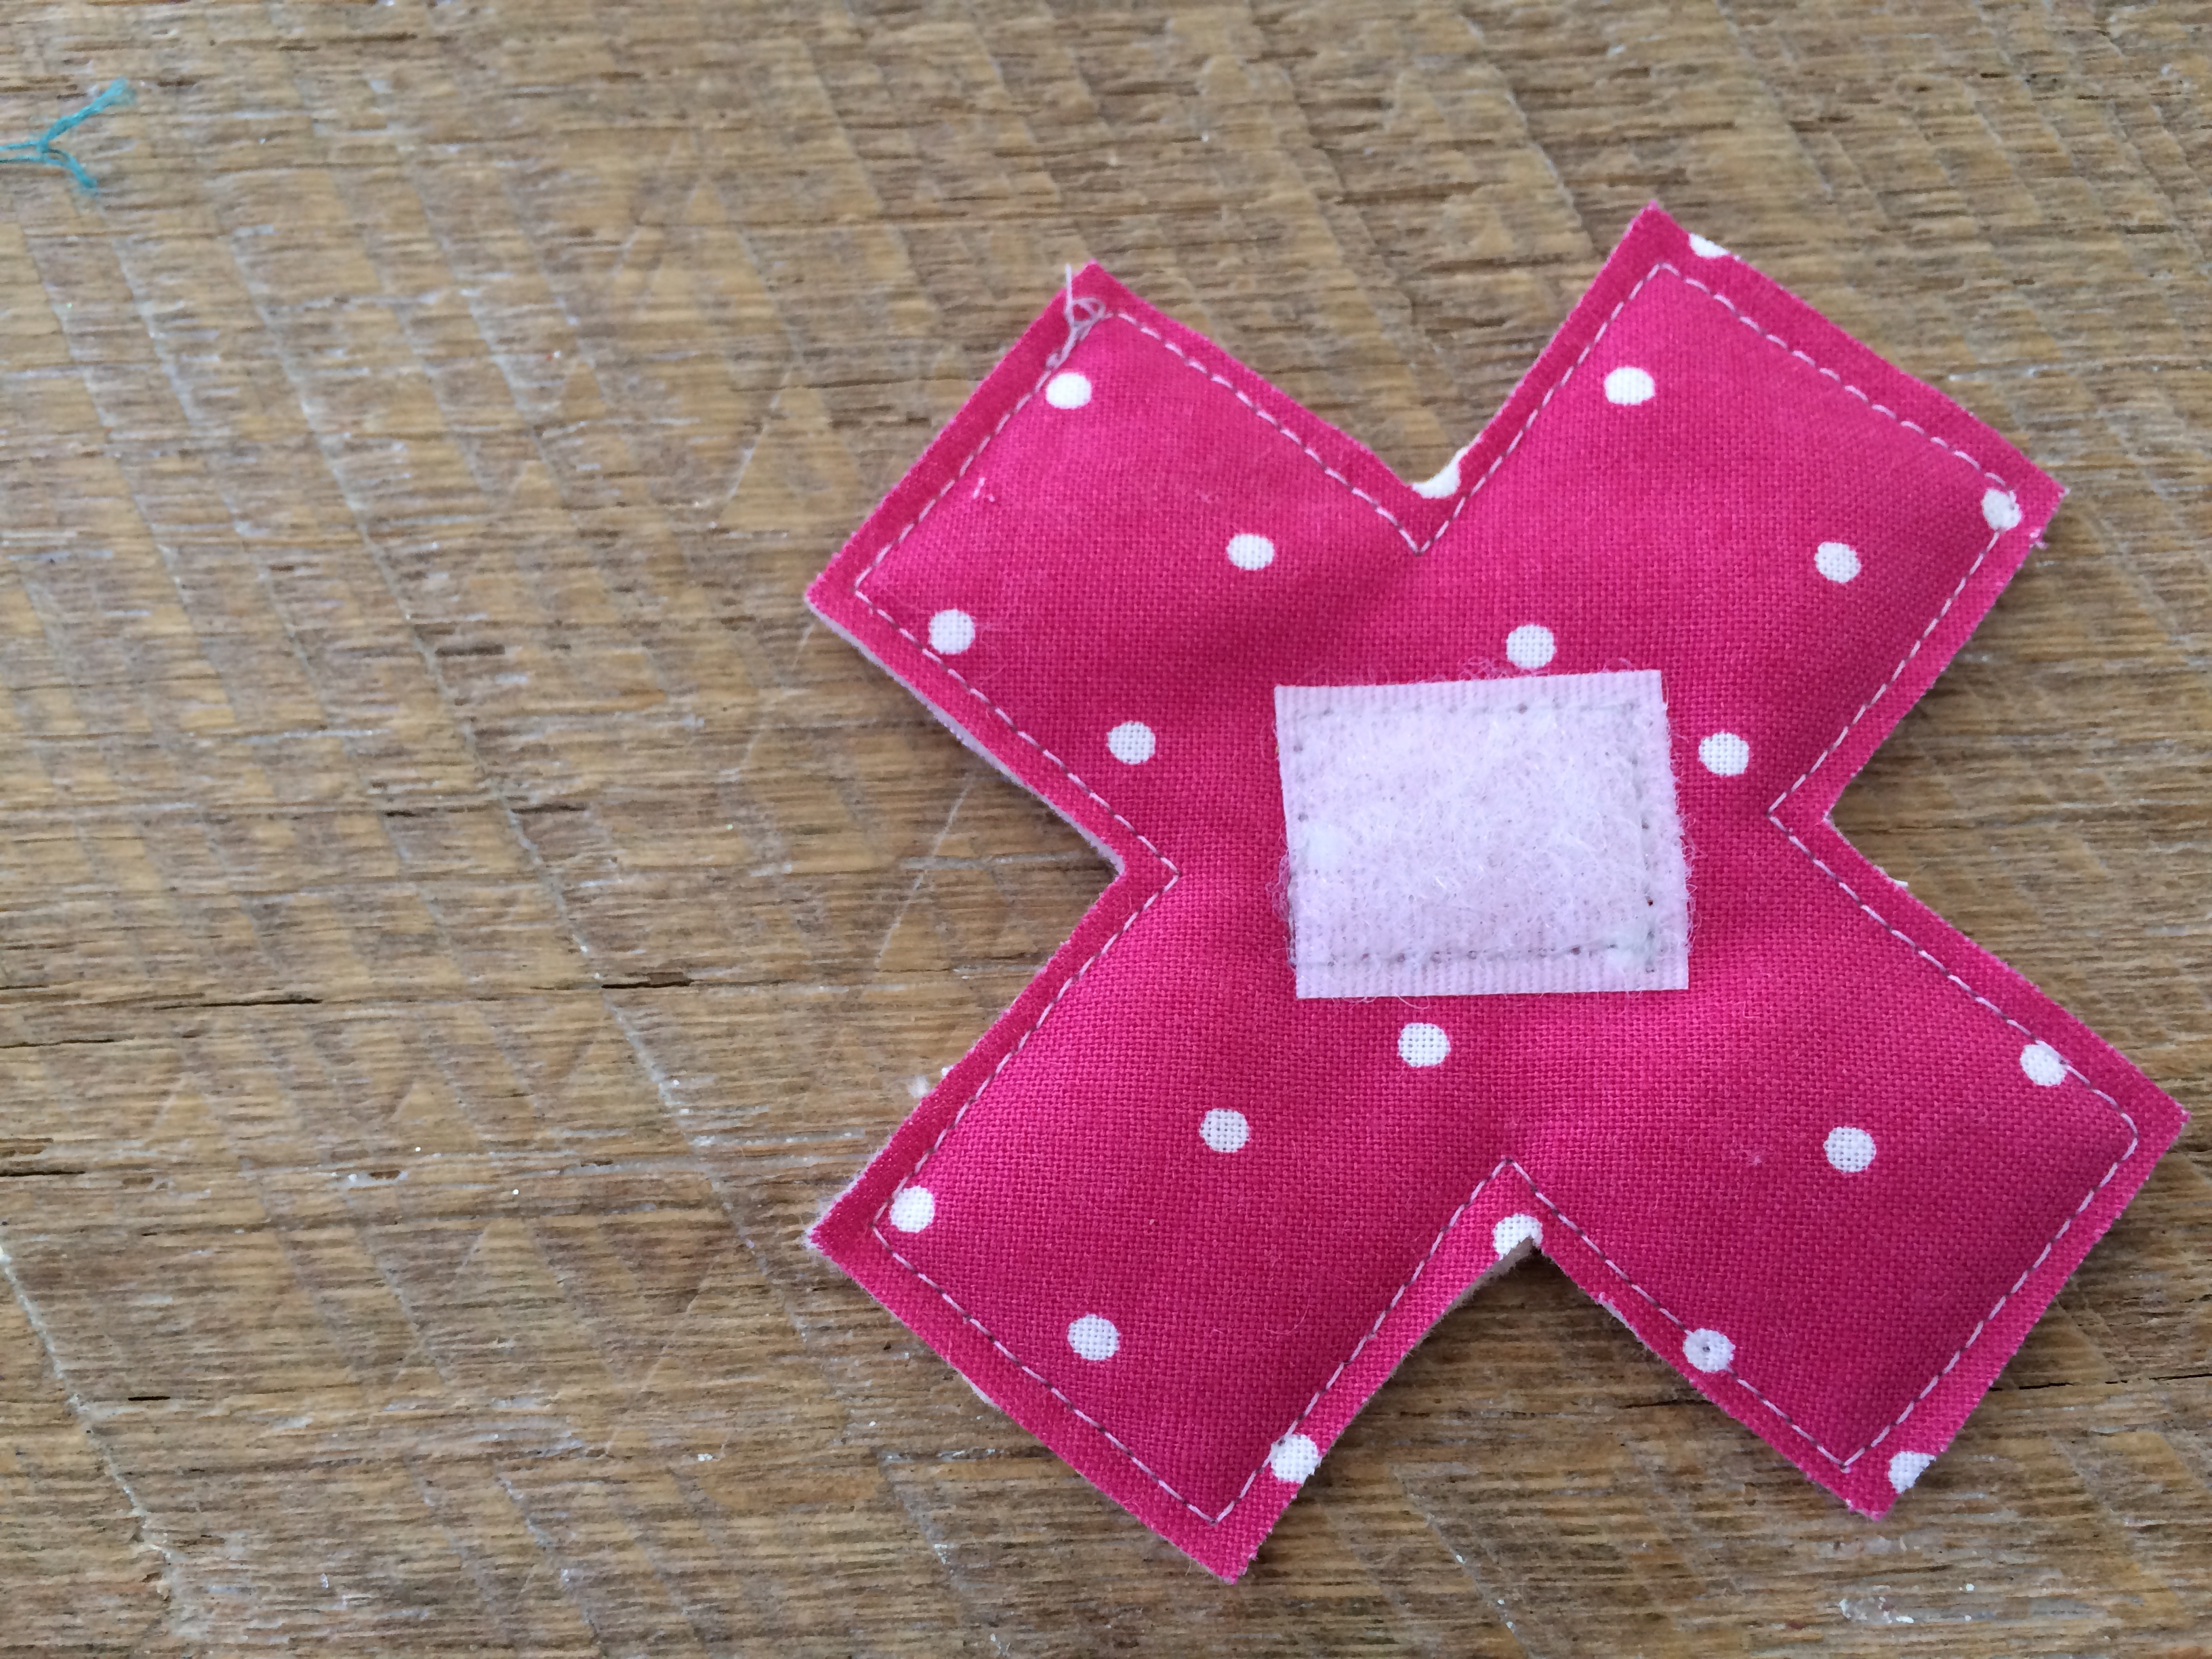
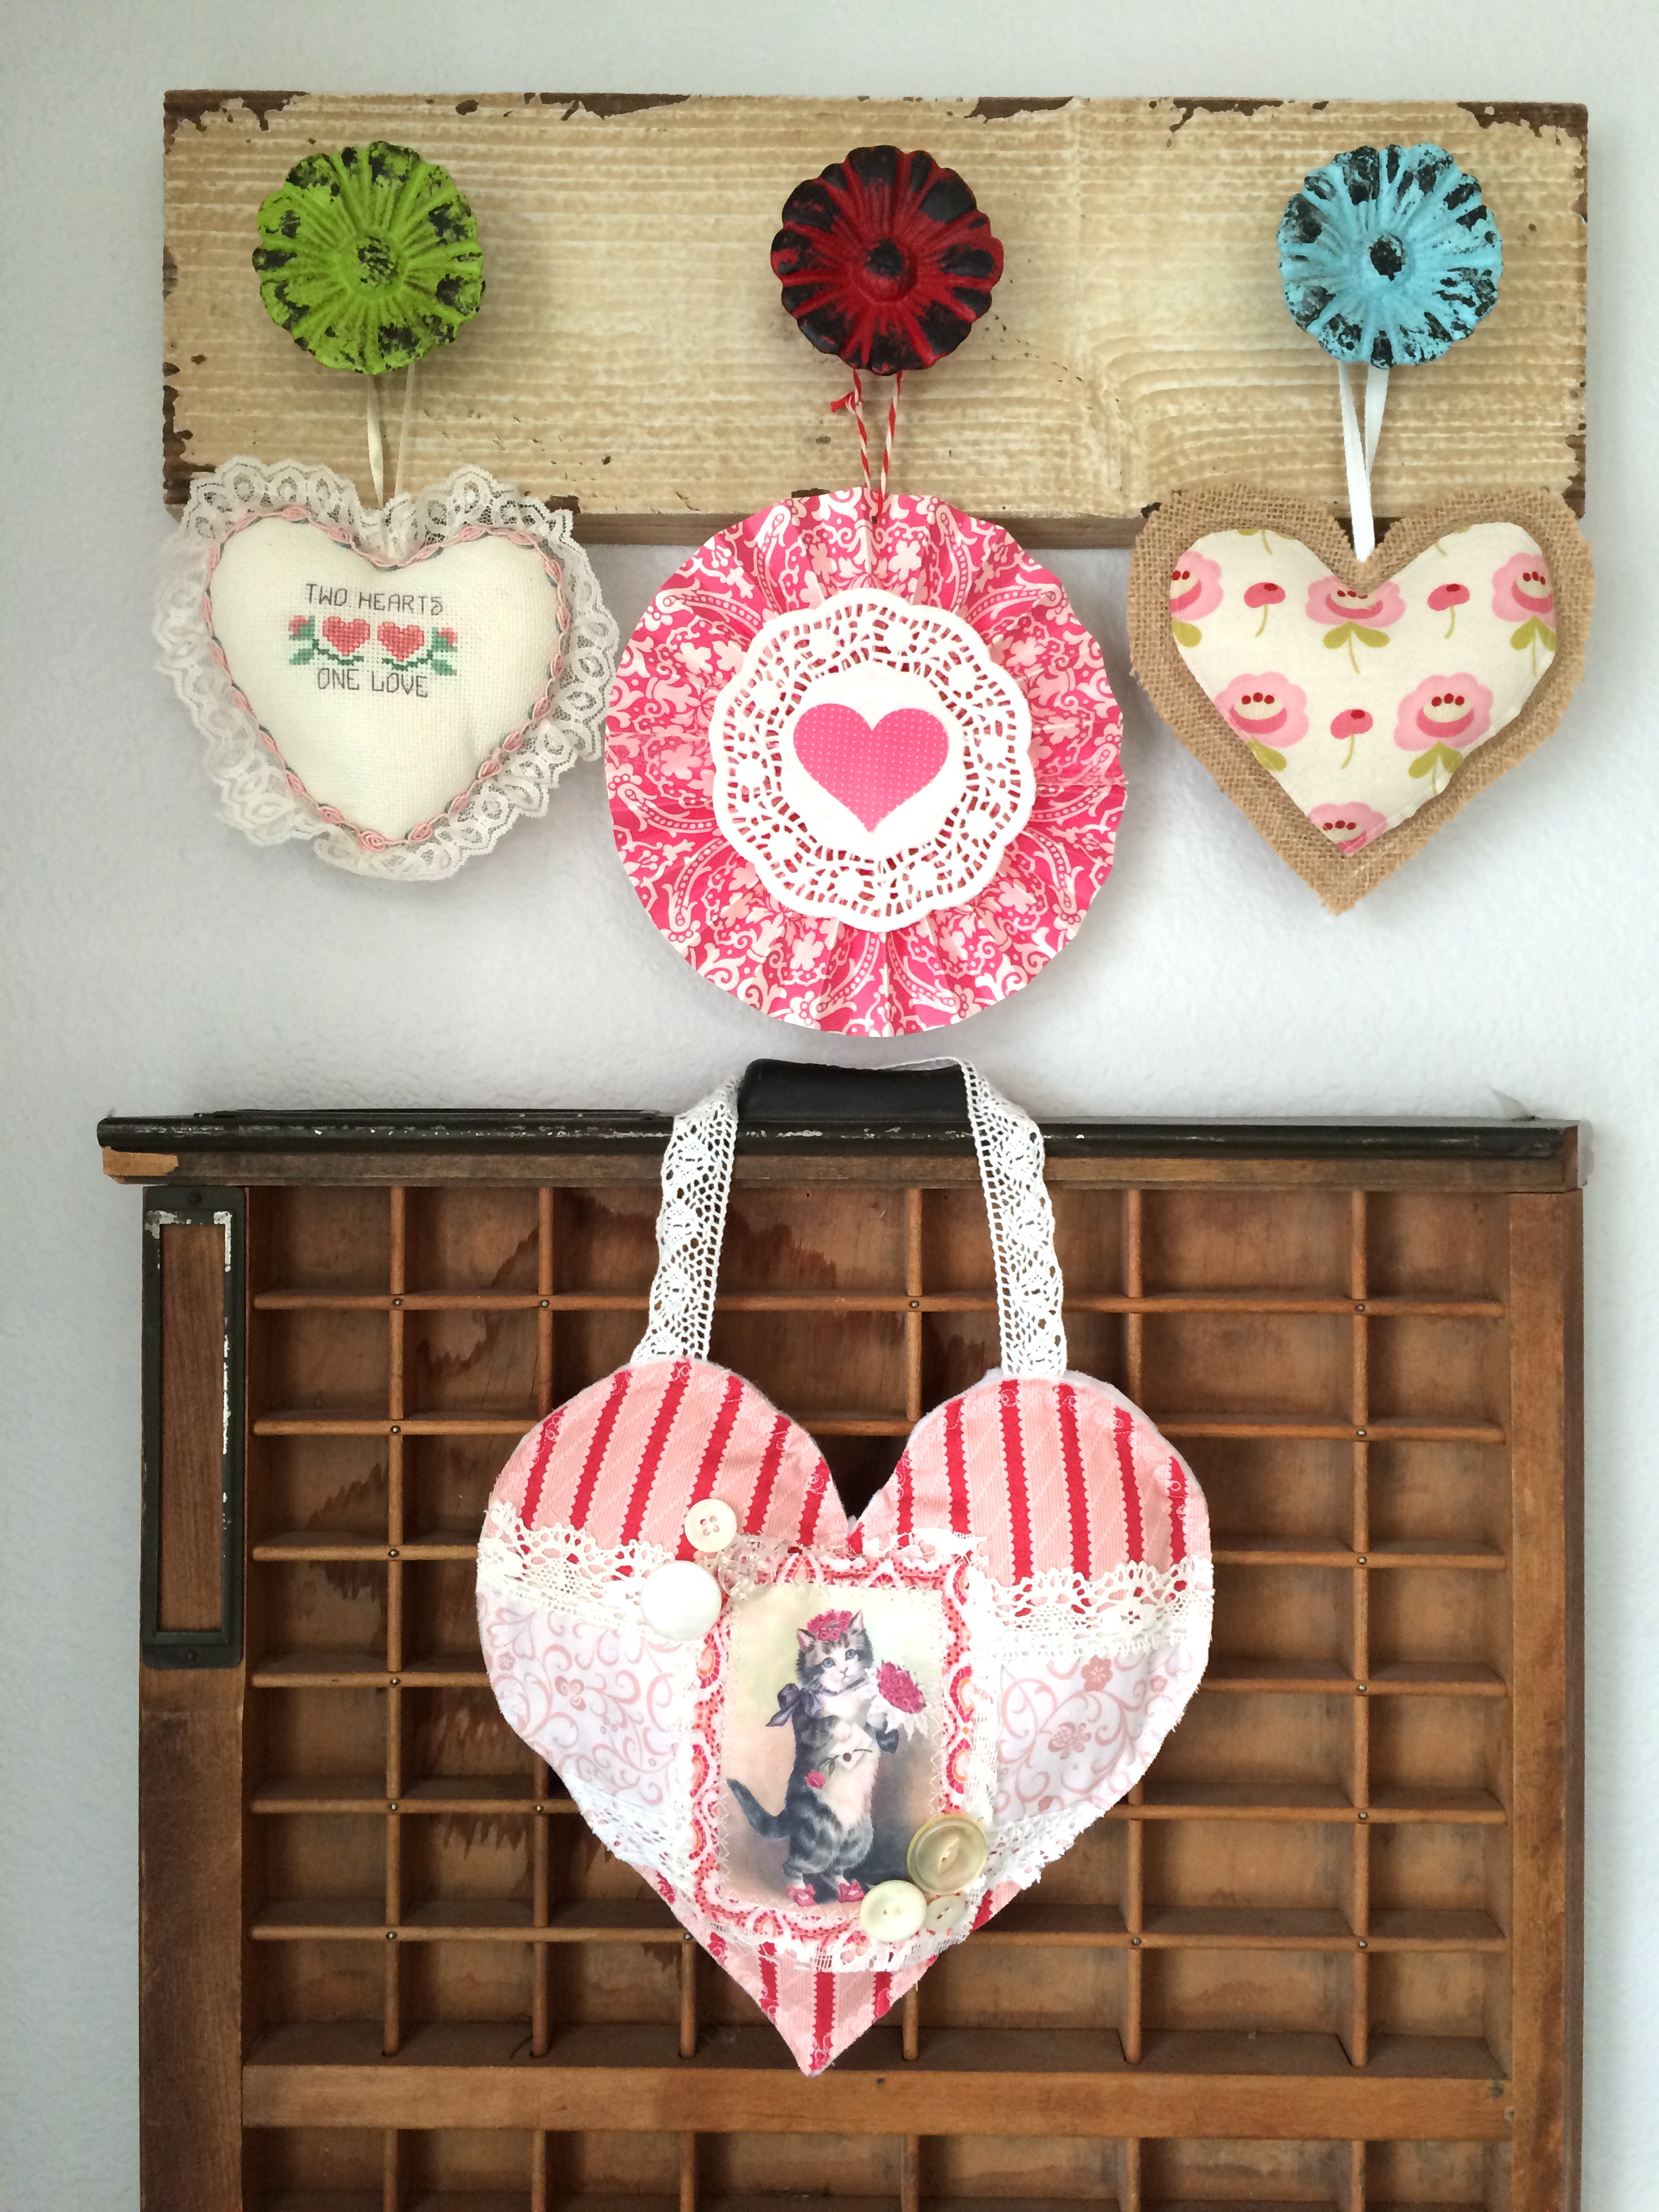
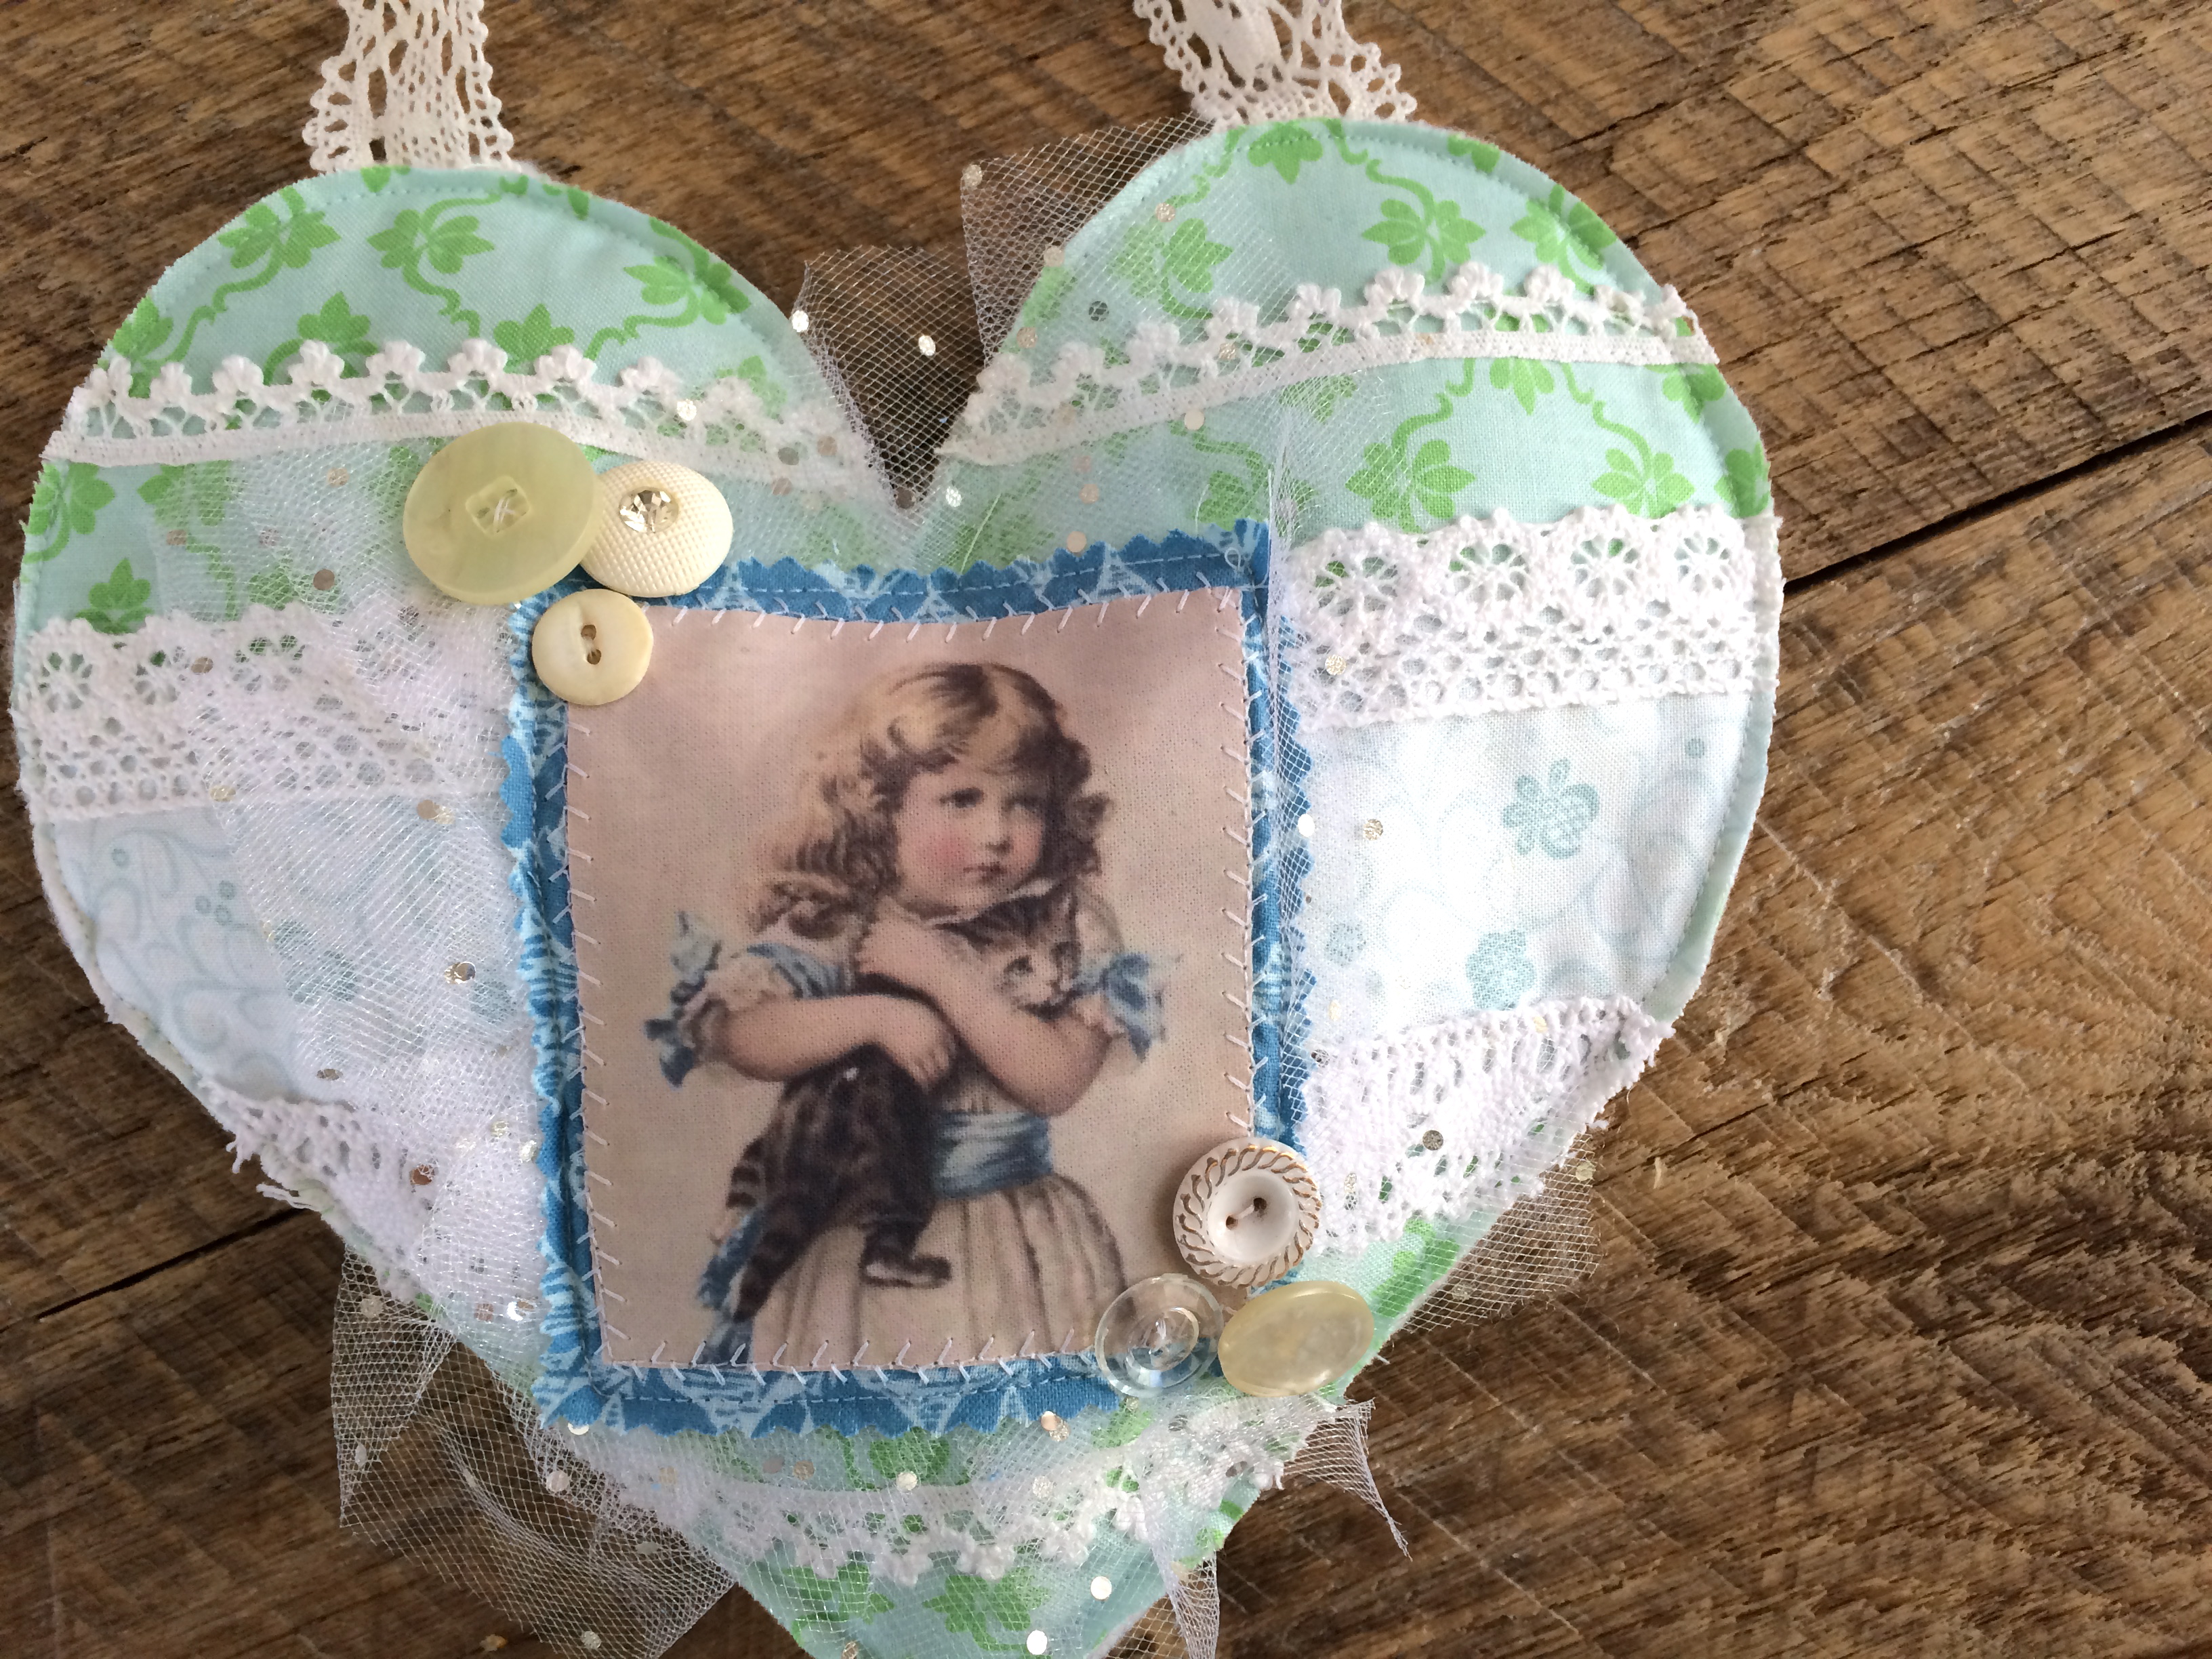
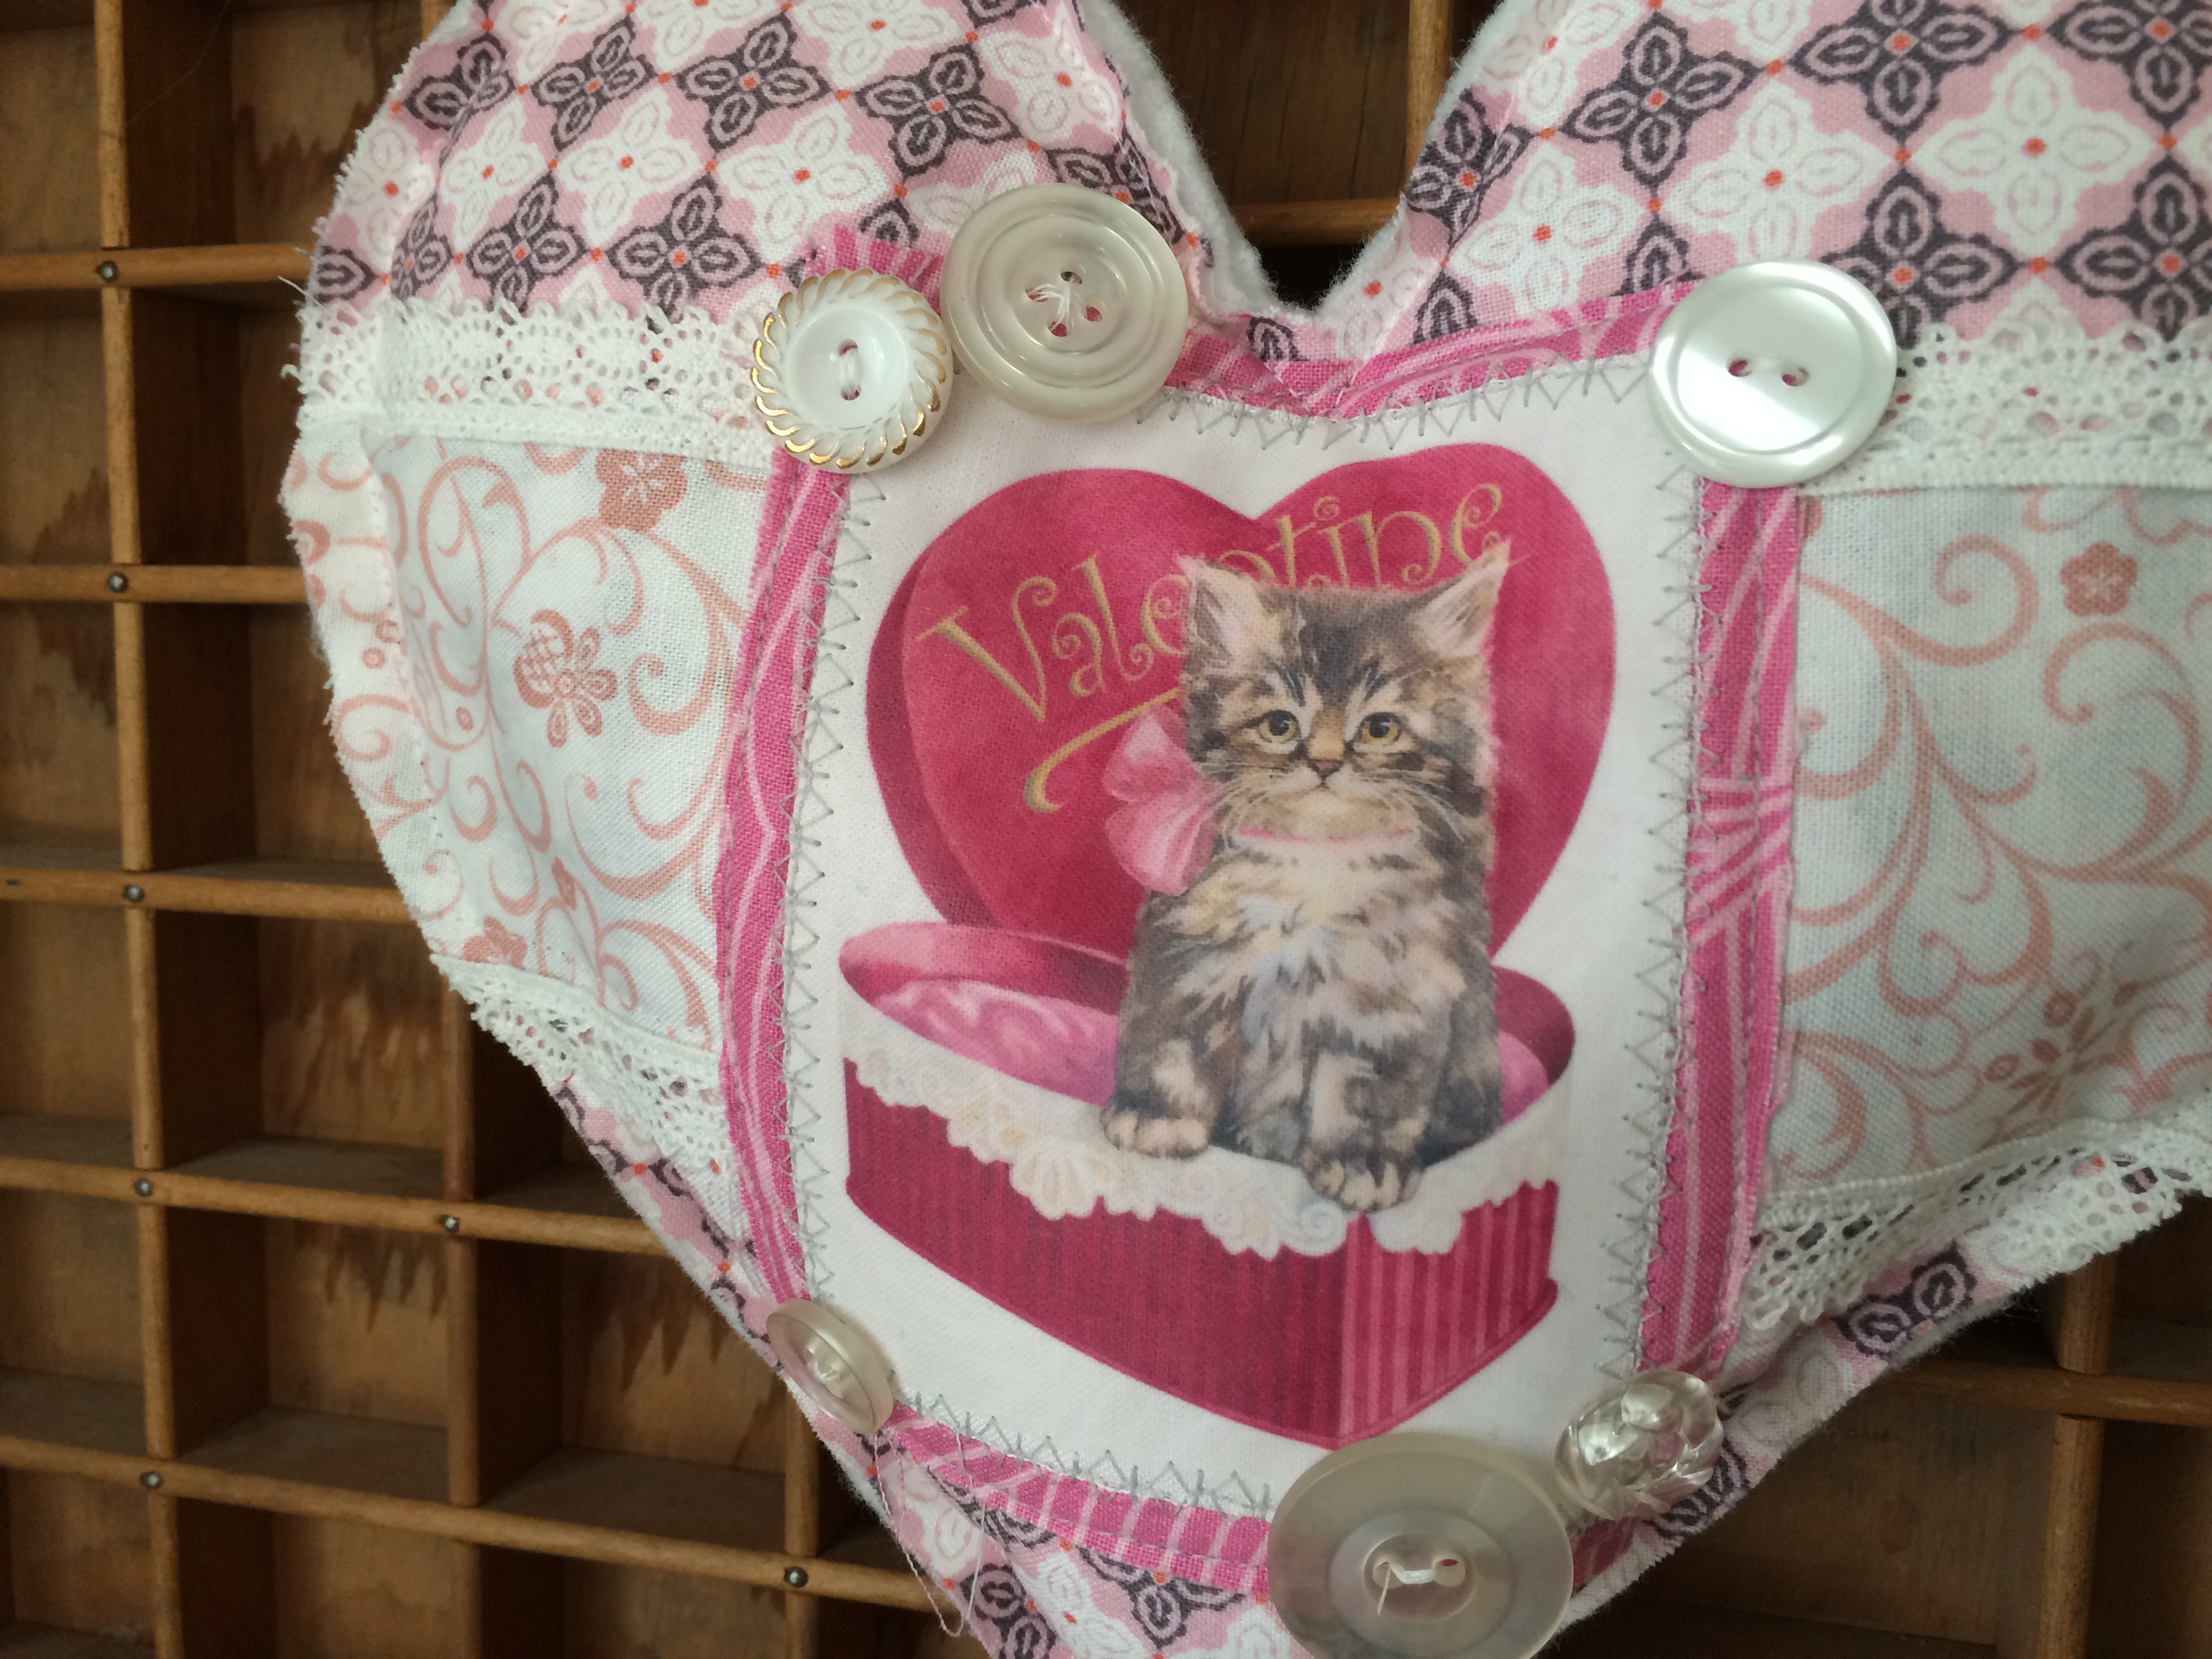
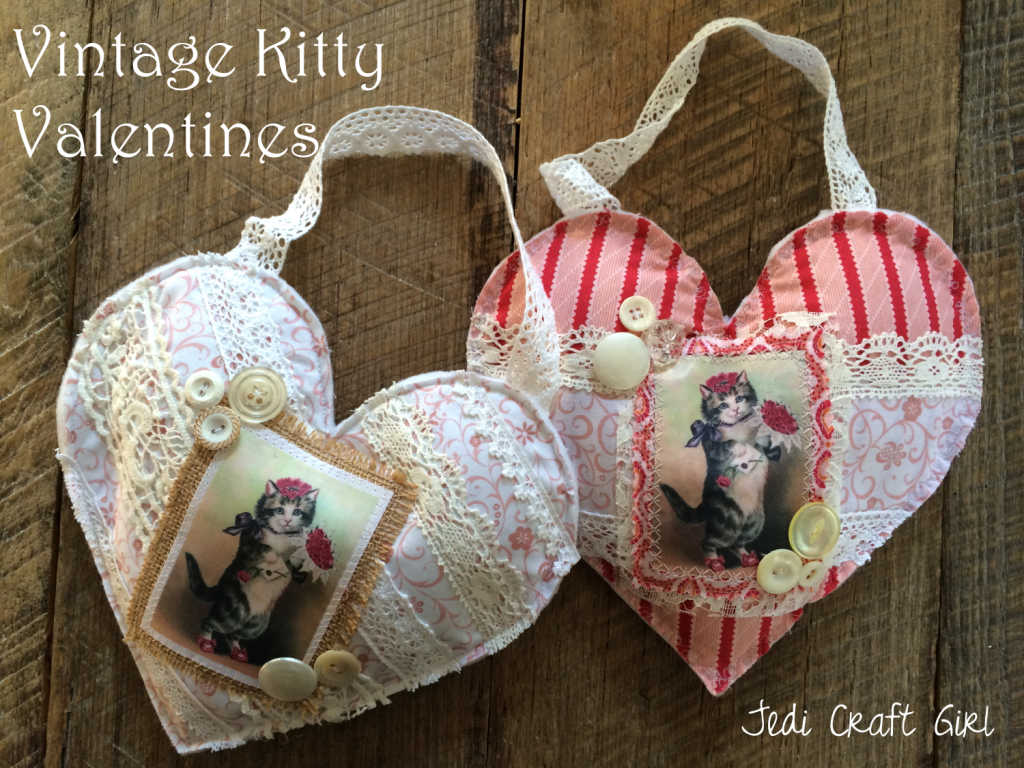
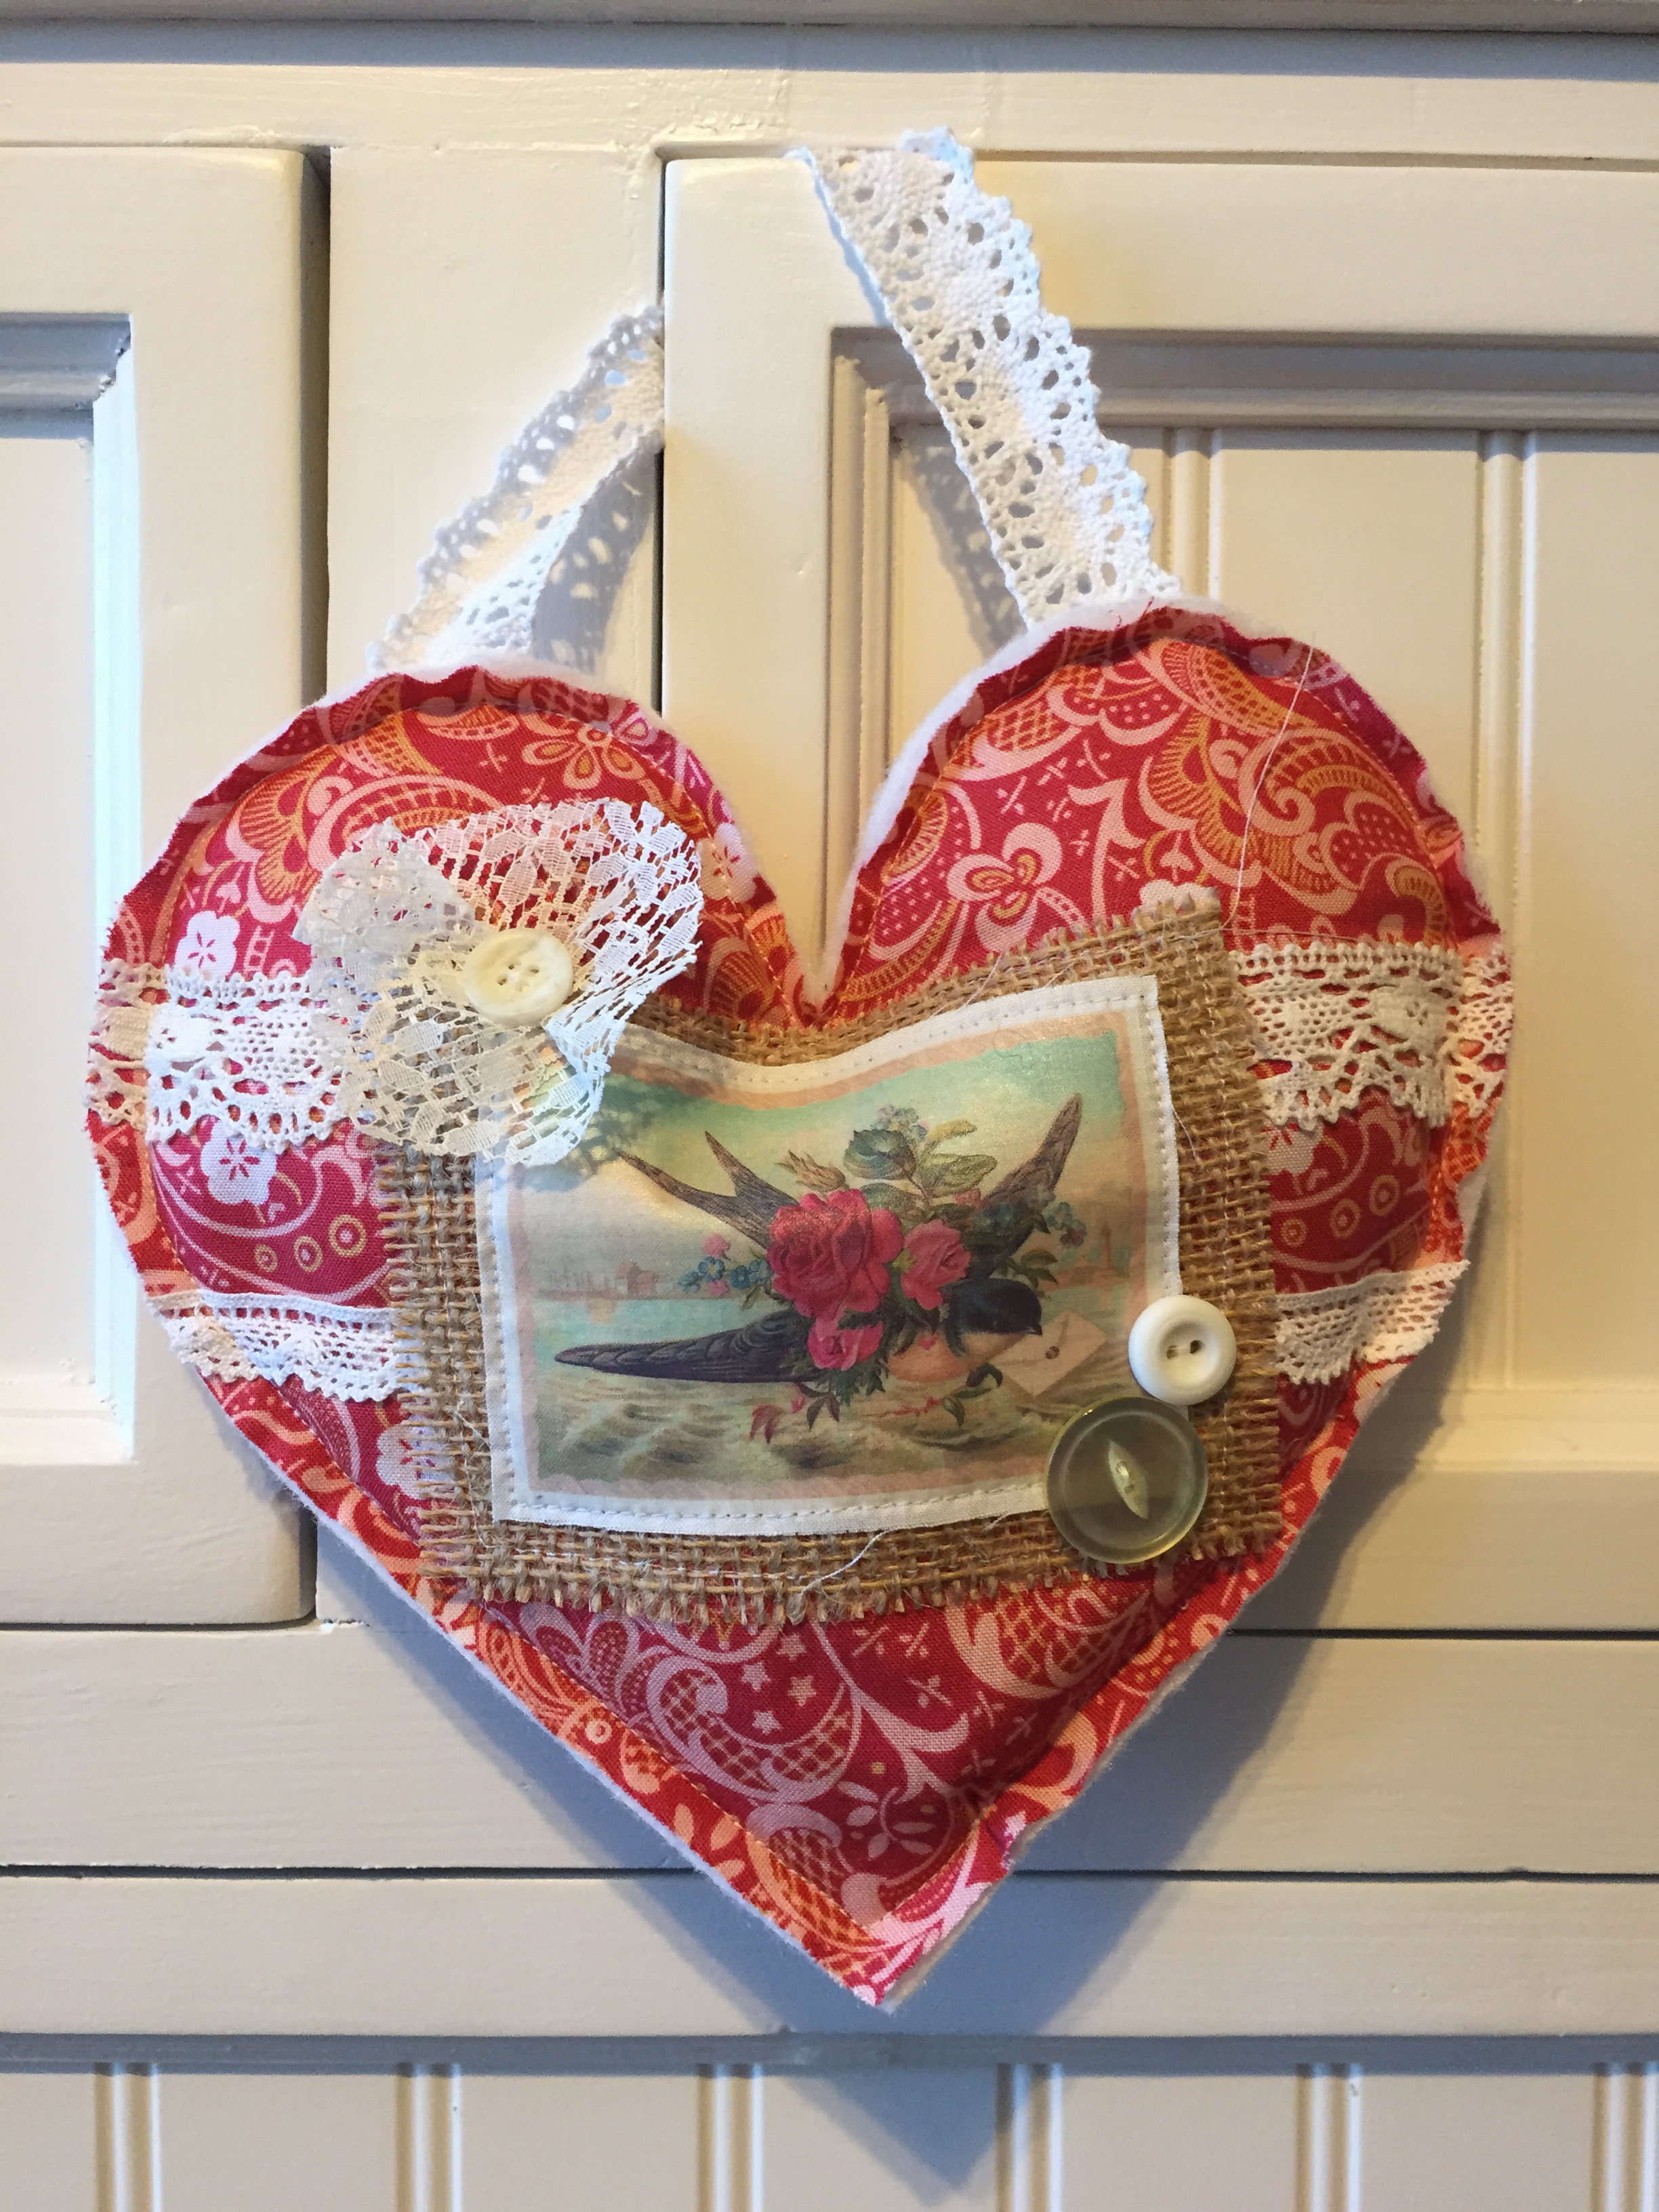
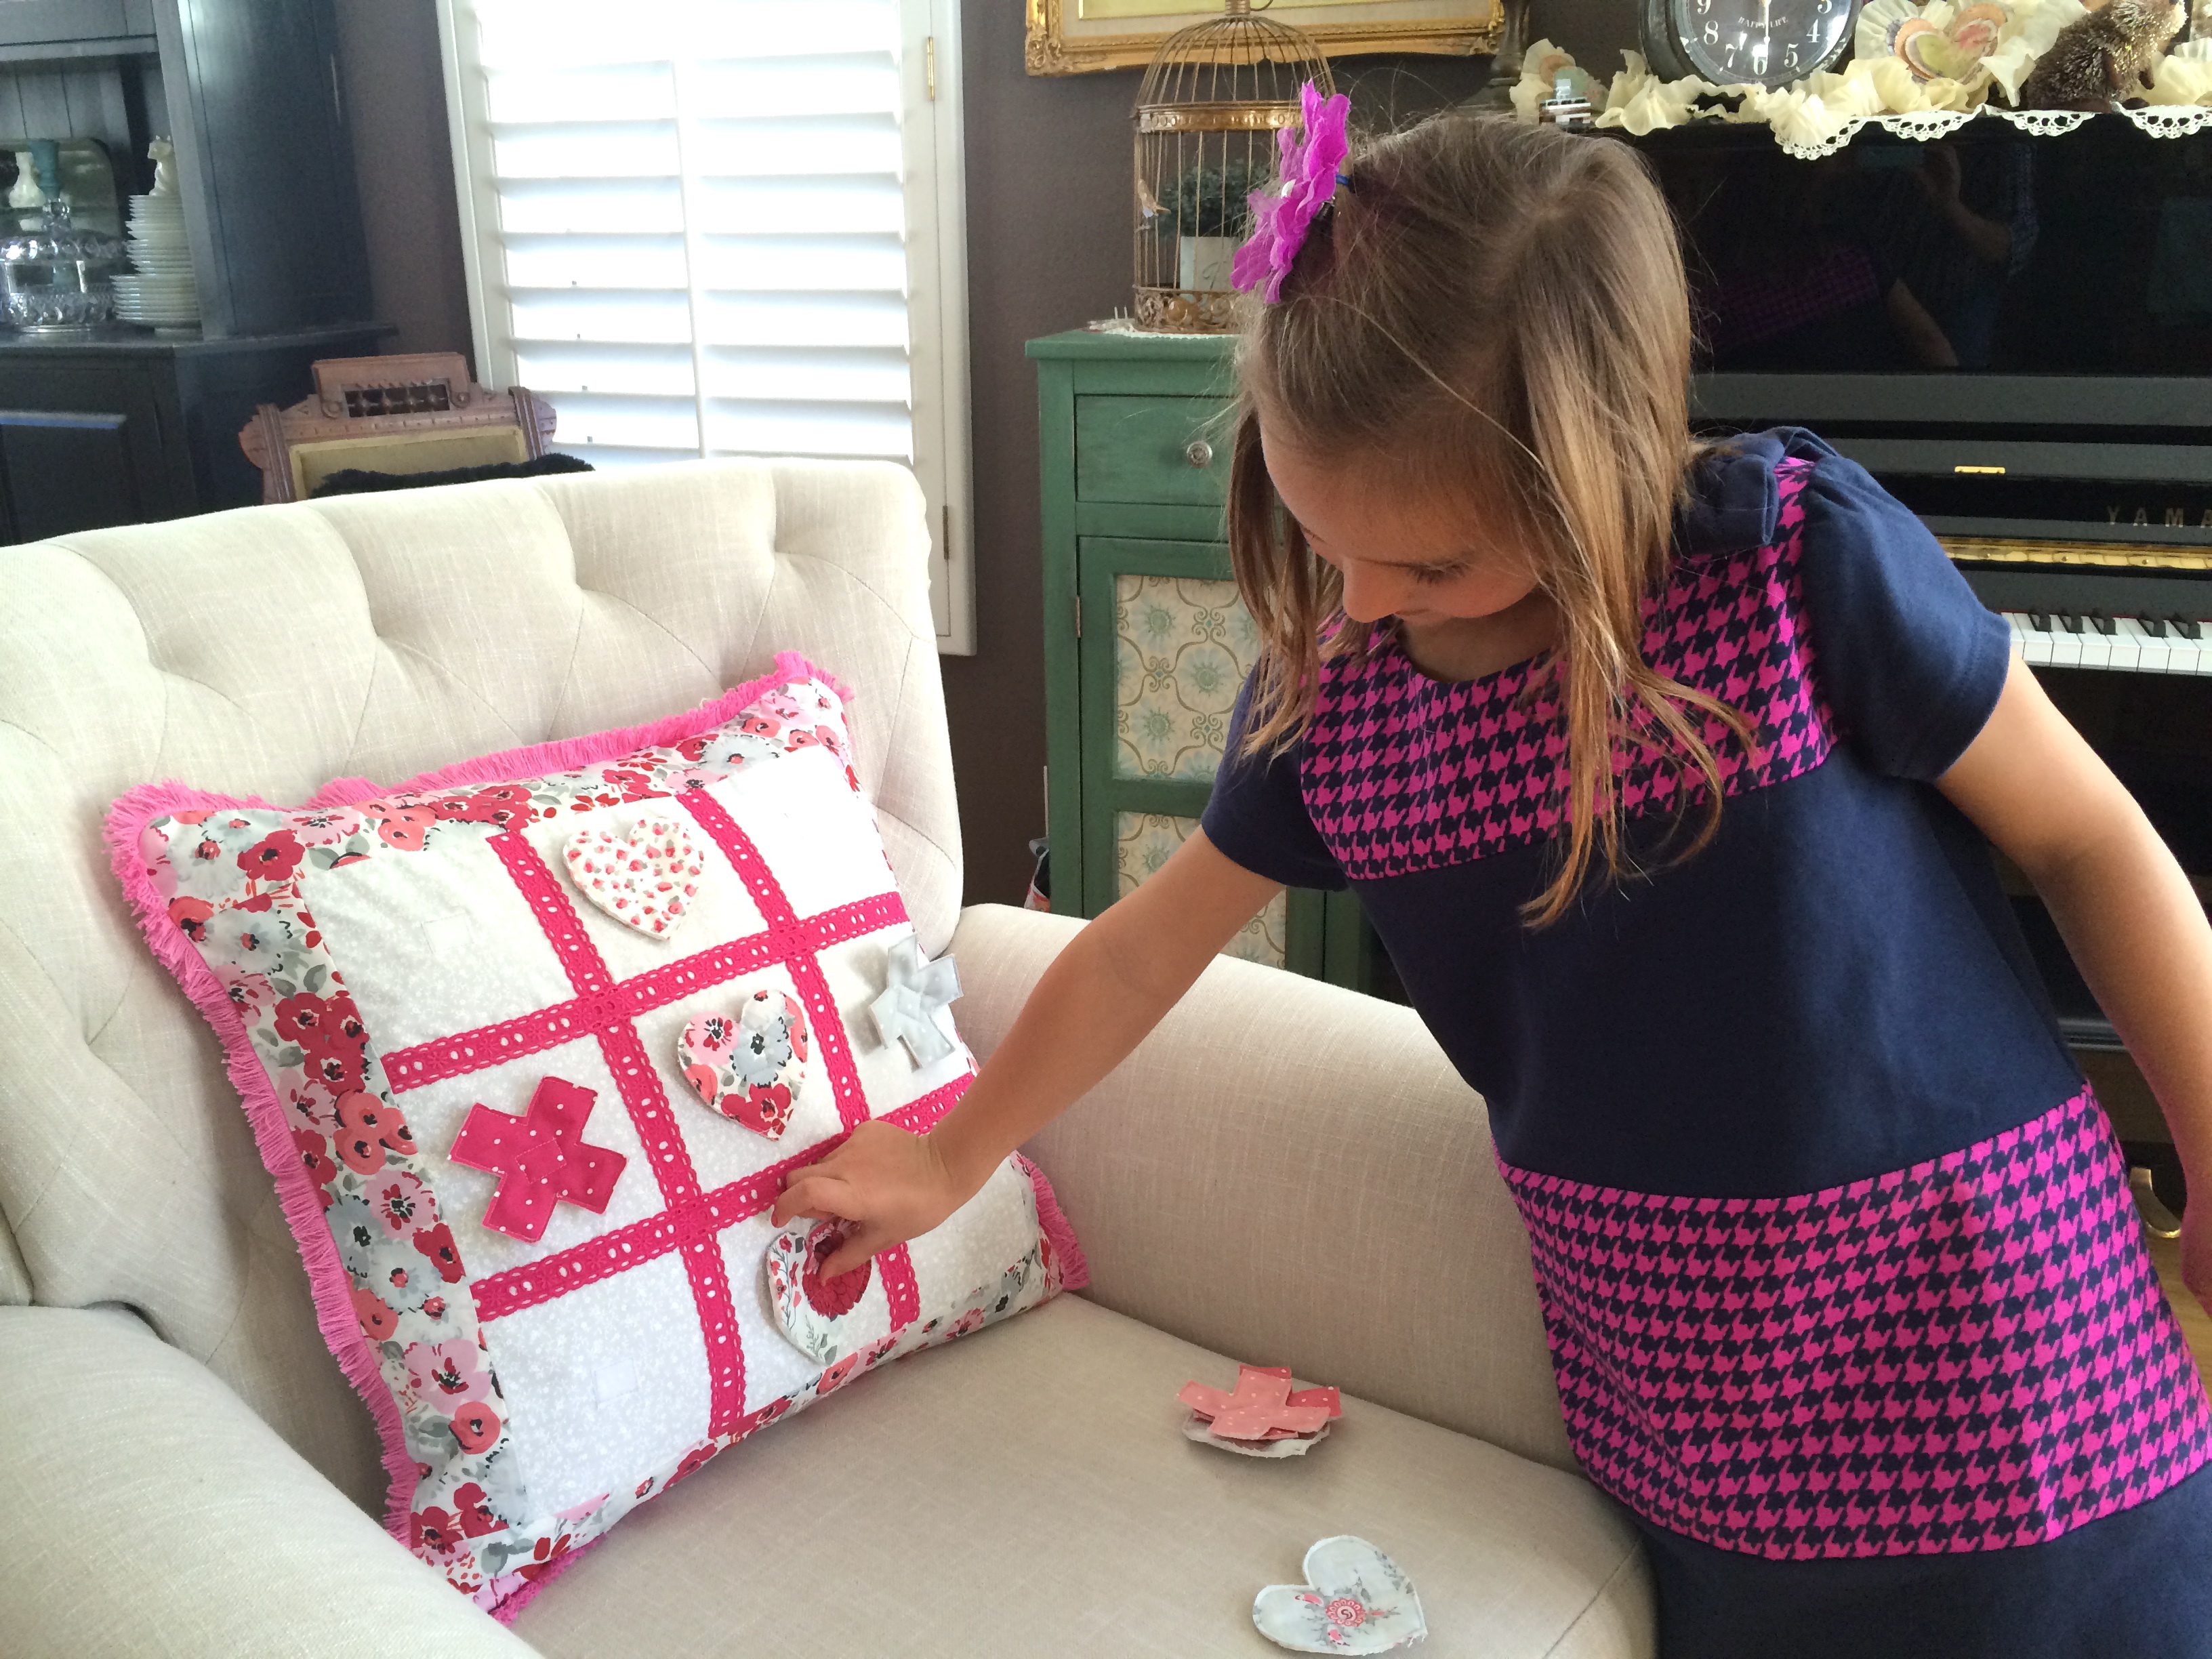
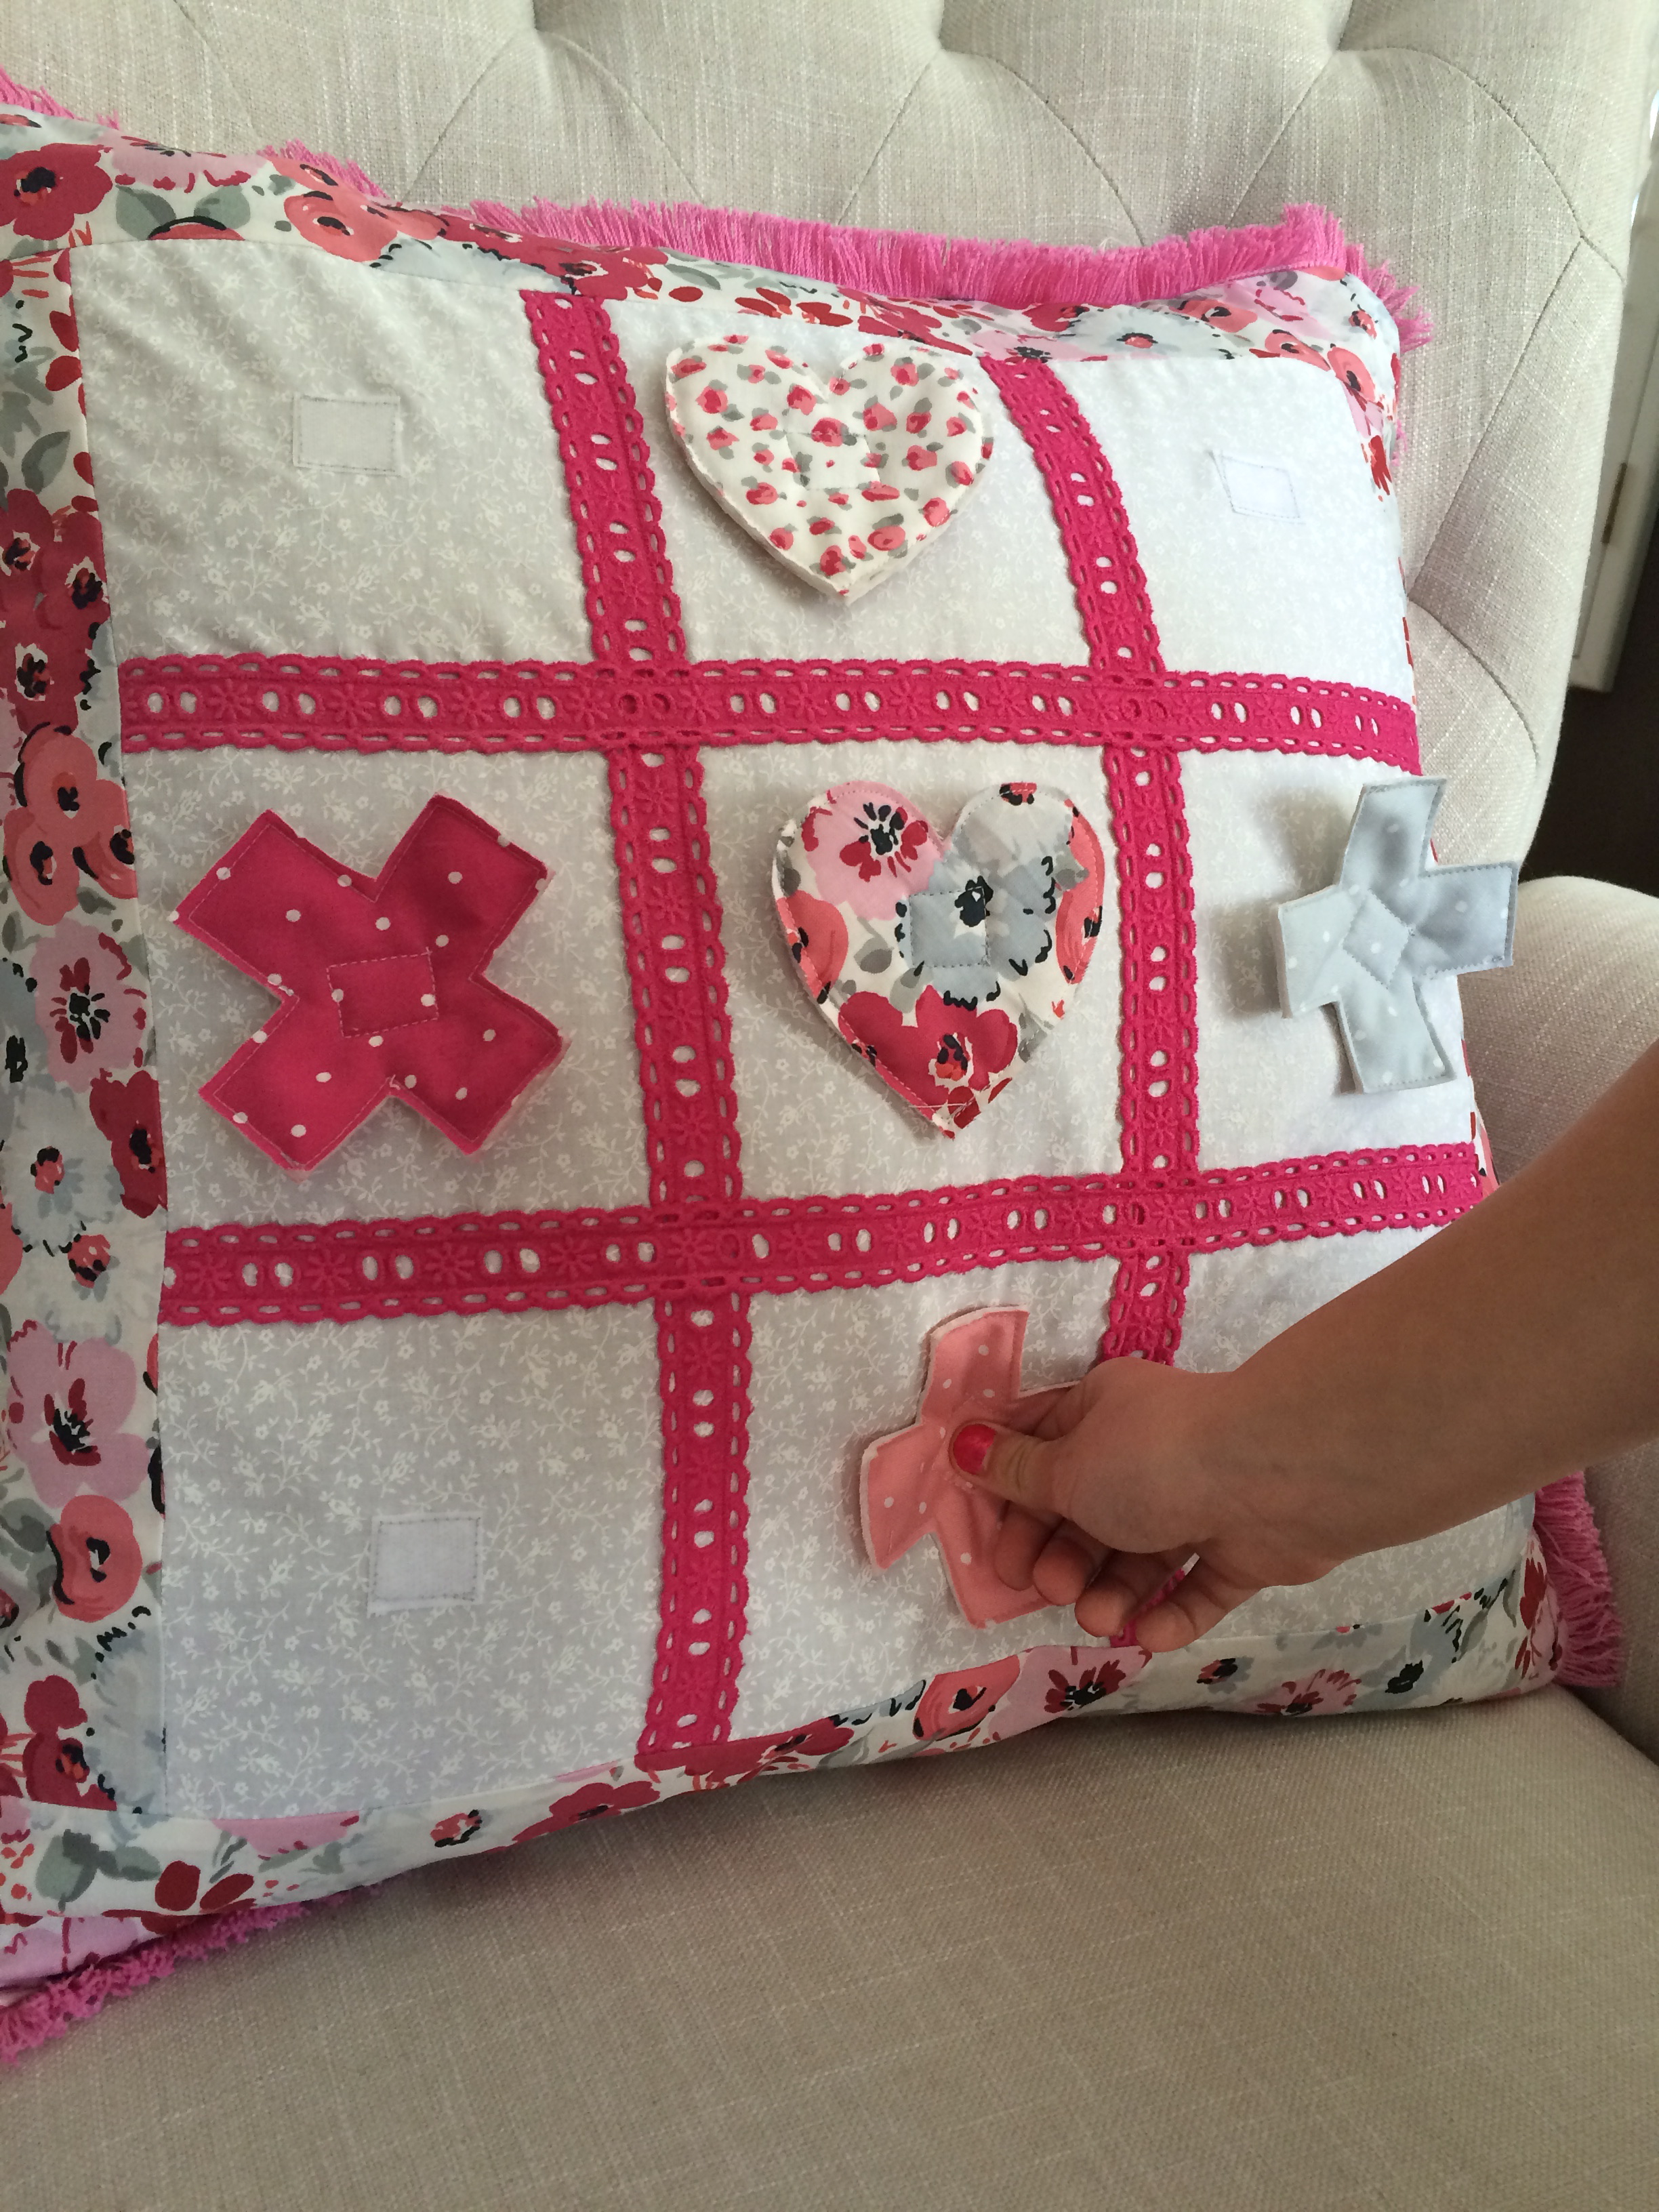
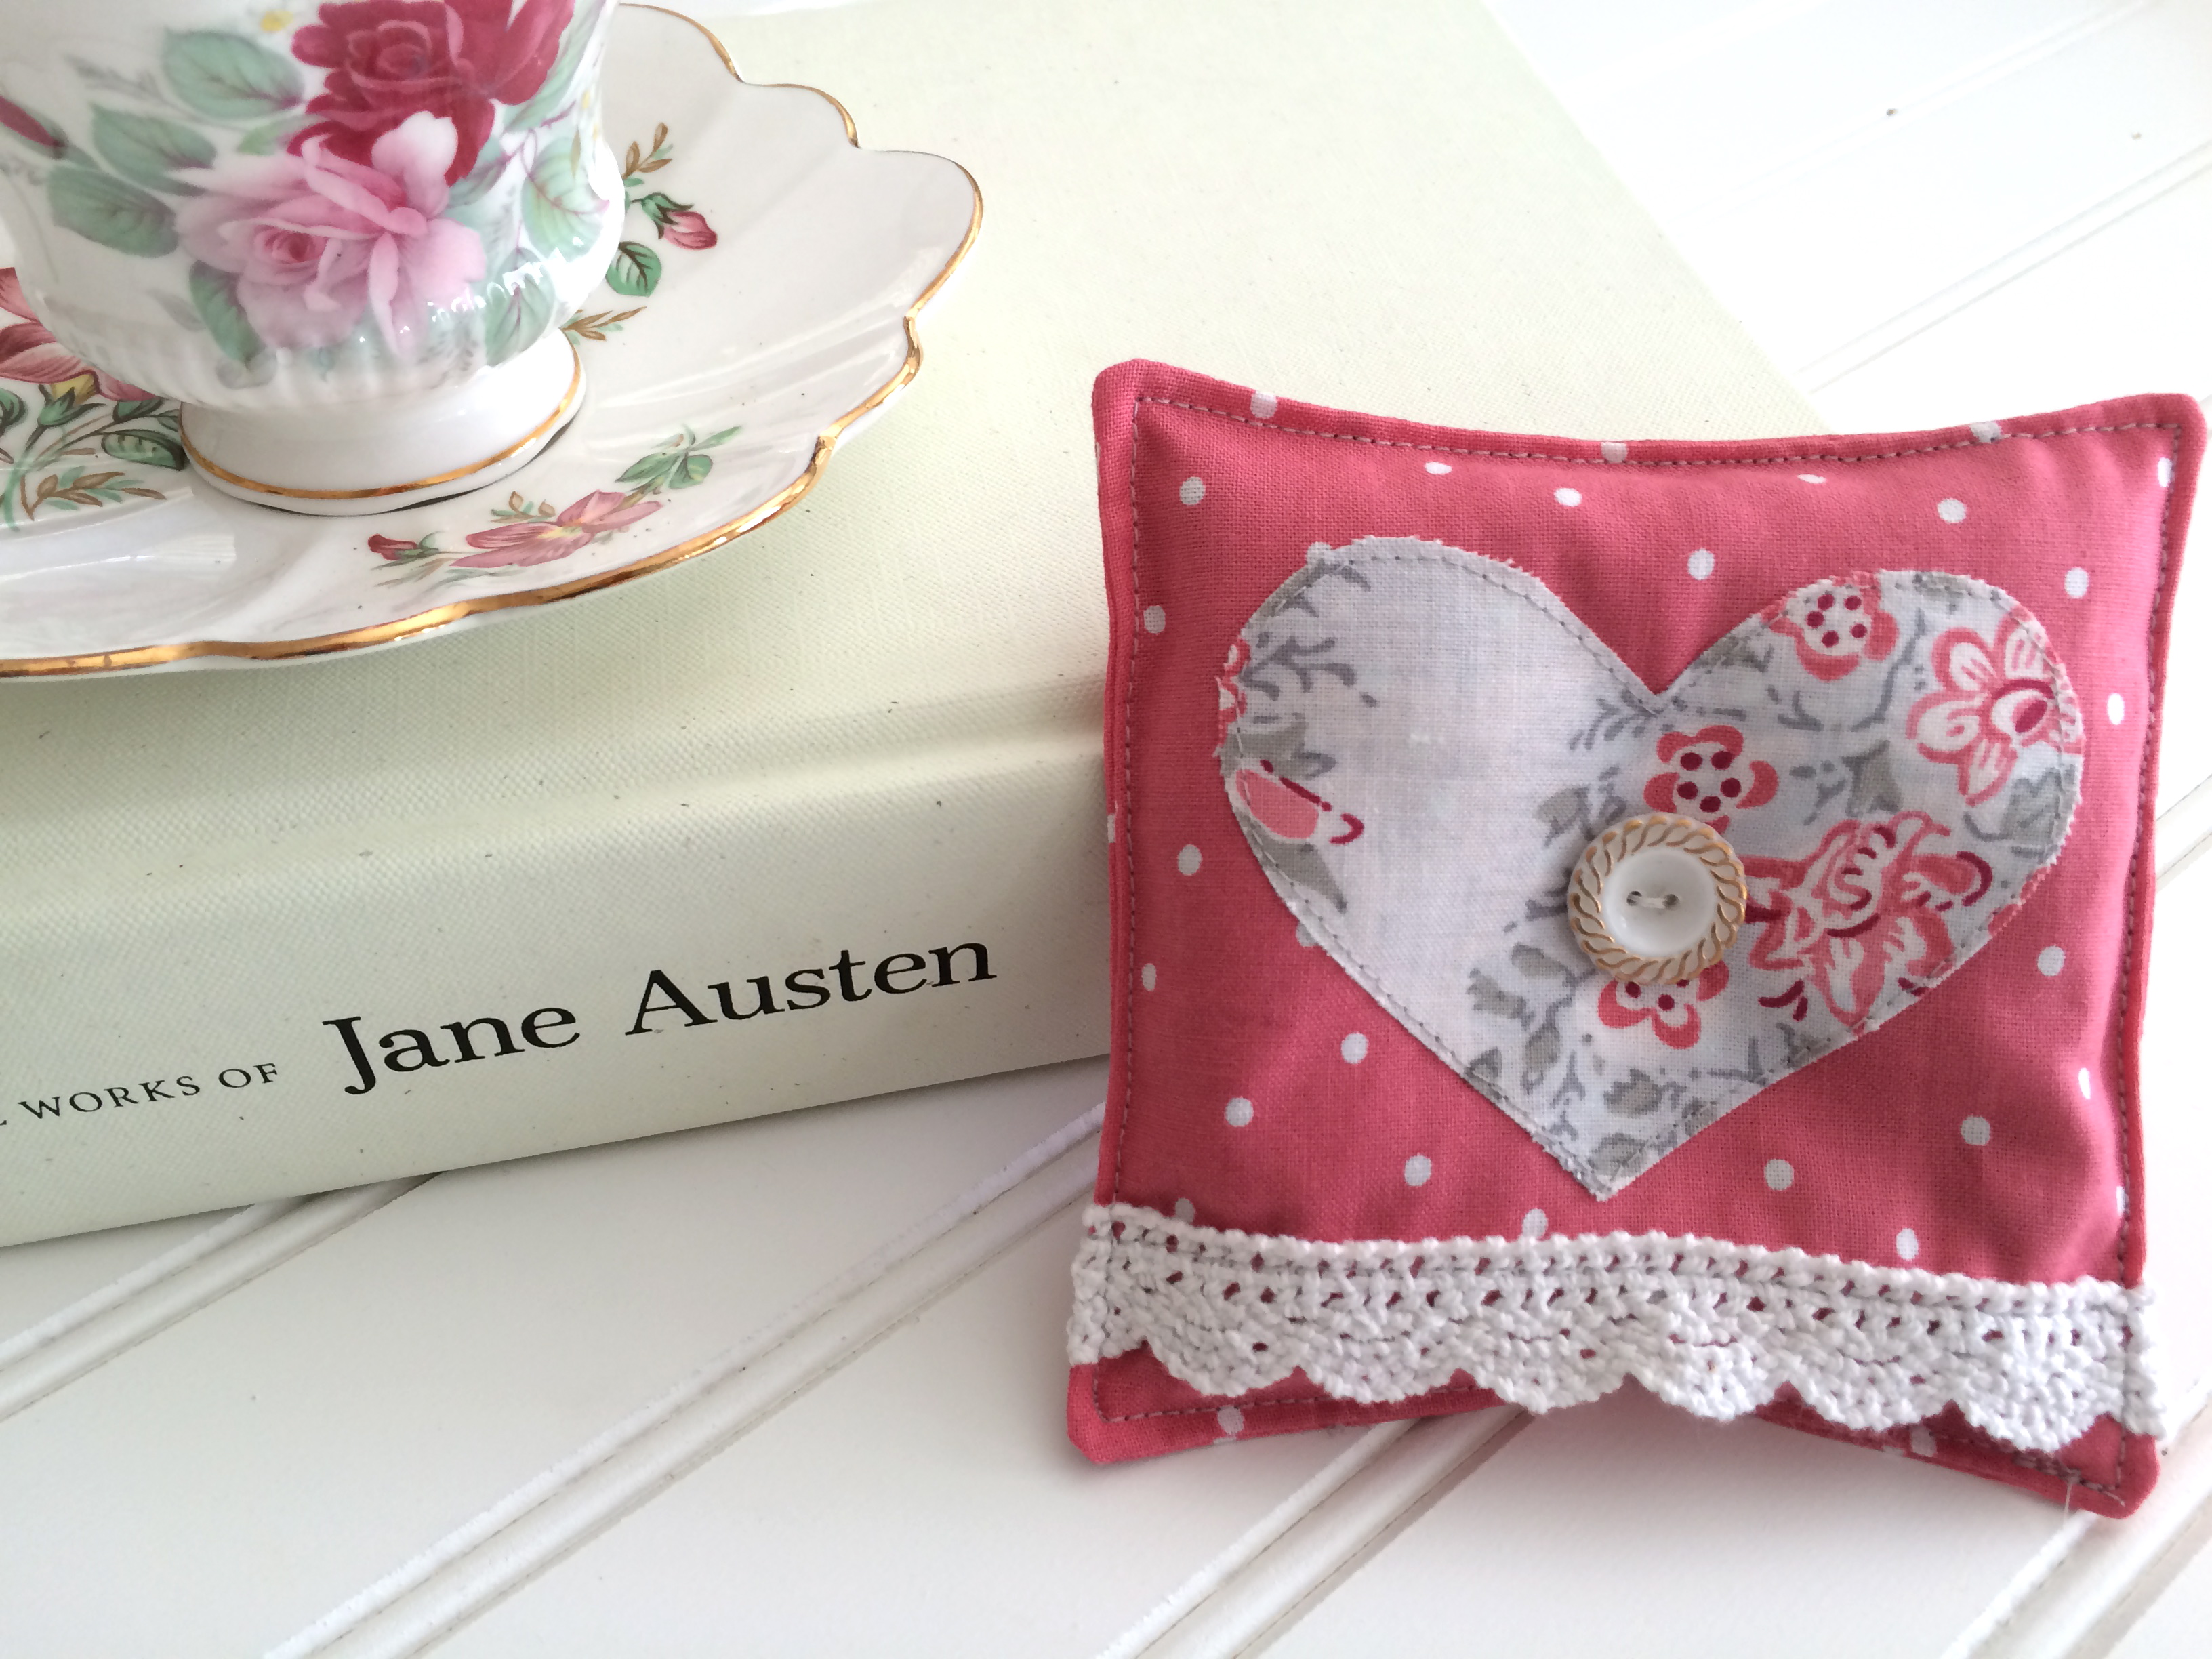
I can’t get enough valentine sewing!  I think its just the pick-me-up I need during wintertime!  I created this fun mini quilt that is perfect to hang on a wall, put on a table or give to someone you love.

4 patch heart cover
IMG_9234

The finished quilt measures 26″ square and is made up of 4 quilt blocks that measure 10″.
IMG_9178

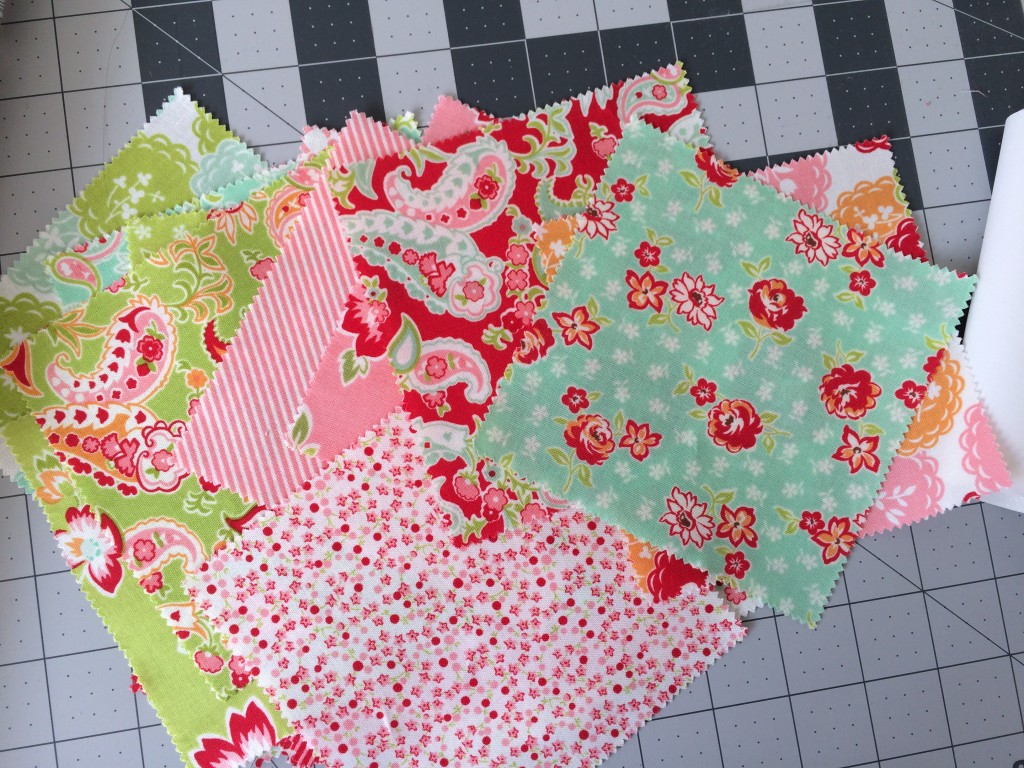
These fabrics from Moda are sure to brighten your day!  The line is called Just Another Walk in the Woods – and it’s ADORABLE!!! Don’t you just love cracking open a Jelly Roll!  It’s a little bit magical!

IMG_9177

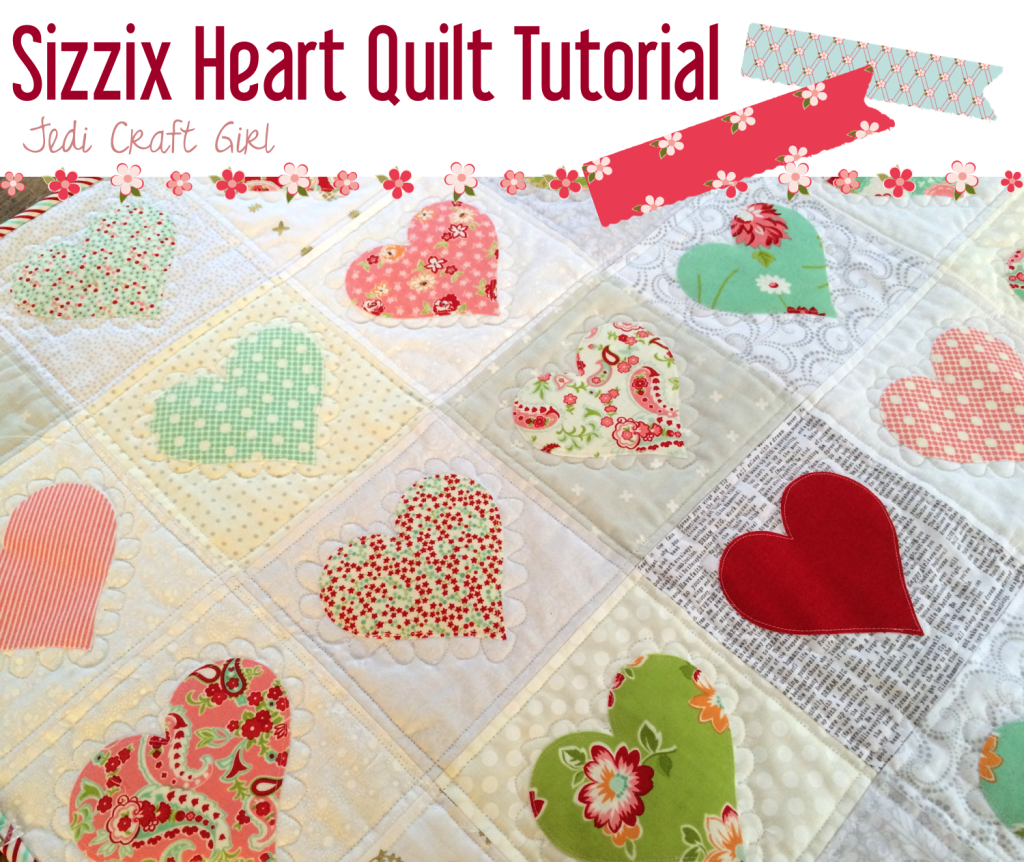
4-Patch Heart Mini Quilt Featuring Heat n Bond Lite

Here’s what you need to get started:

1/2 a Jelly Roll (or equivalent)
1/3 yard background fabric
Aurifil Threads – 2530 &
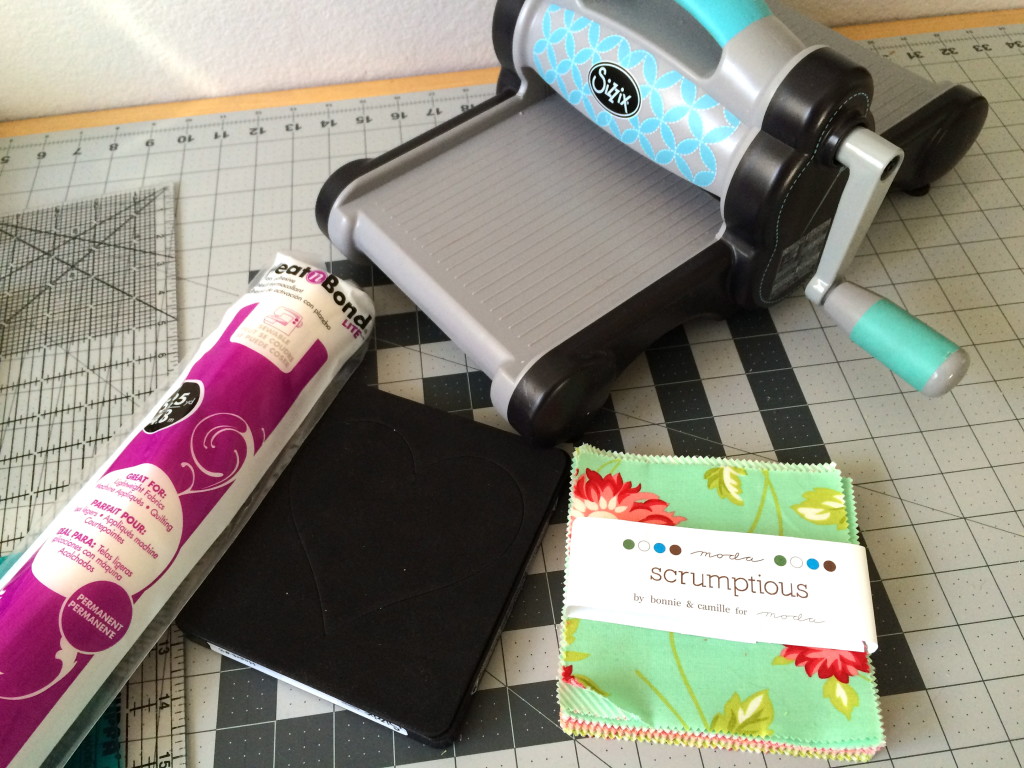
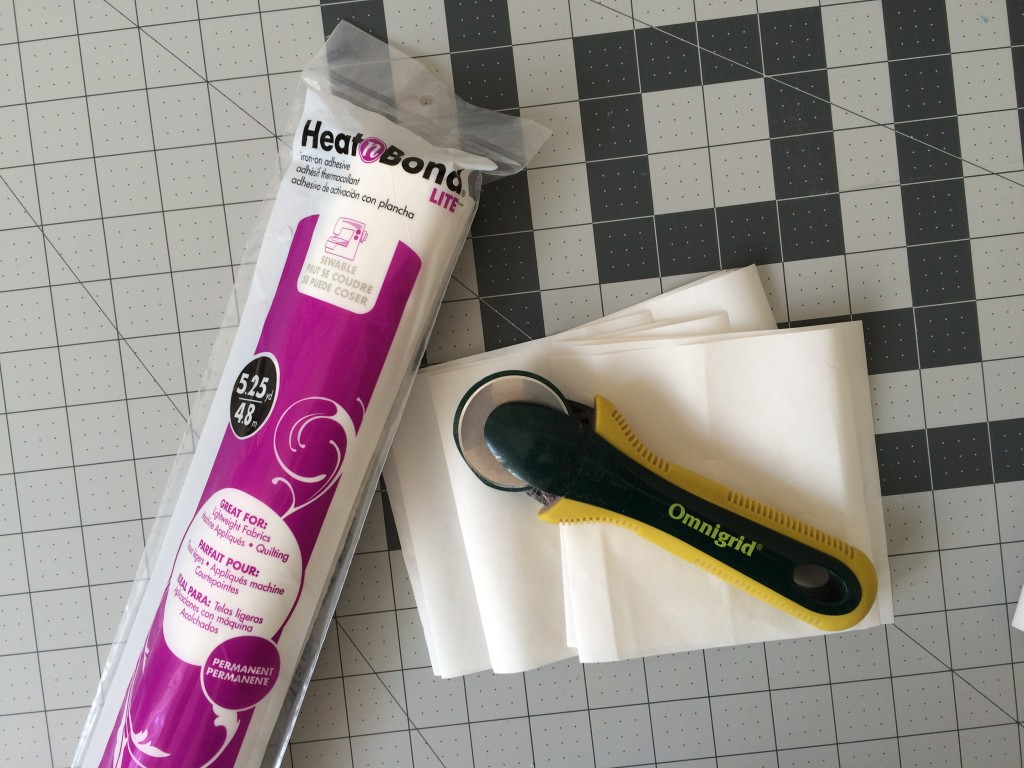
Heat n Bond® Lite EZ print sheets
1/2 yard for backing
1/3 yard binding – or you can use left over Jelly Roll Strips

Click Here to download the heart Pattern

All seams 1/4″


IMG_9186

Begin by cutting 15-18 of the jelly roll strips into 2 1/2″ squares.

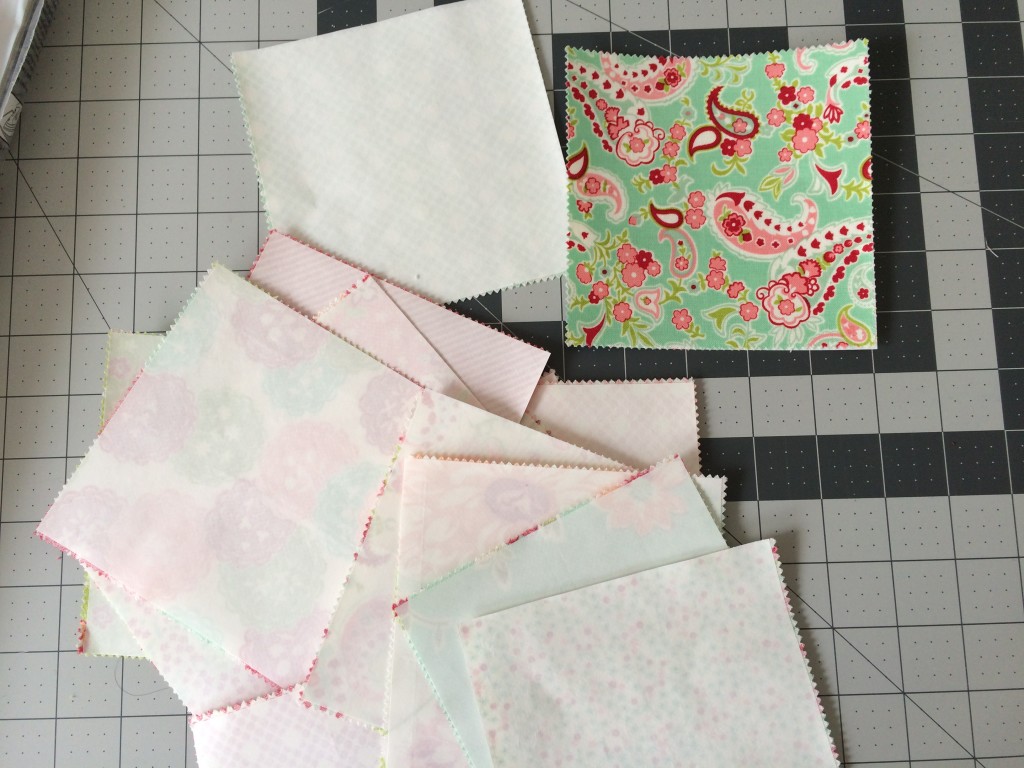
Cut the background fabric:

  • (4) 6 1/2″ squares
  • (16) 2 1/2″ squares for block corners
  • (32) 2 1/2″ squares for Half Square Triangles (HST)
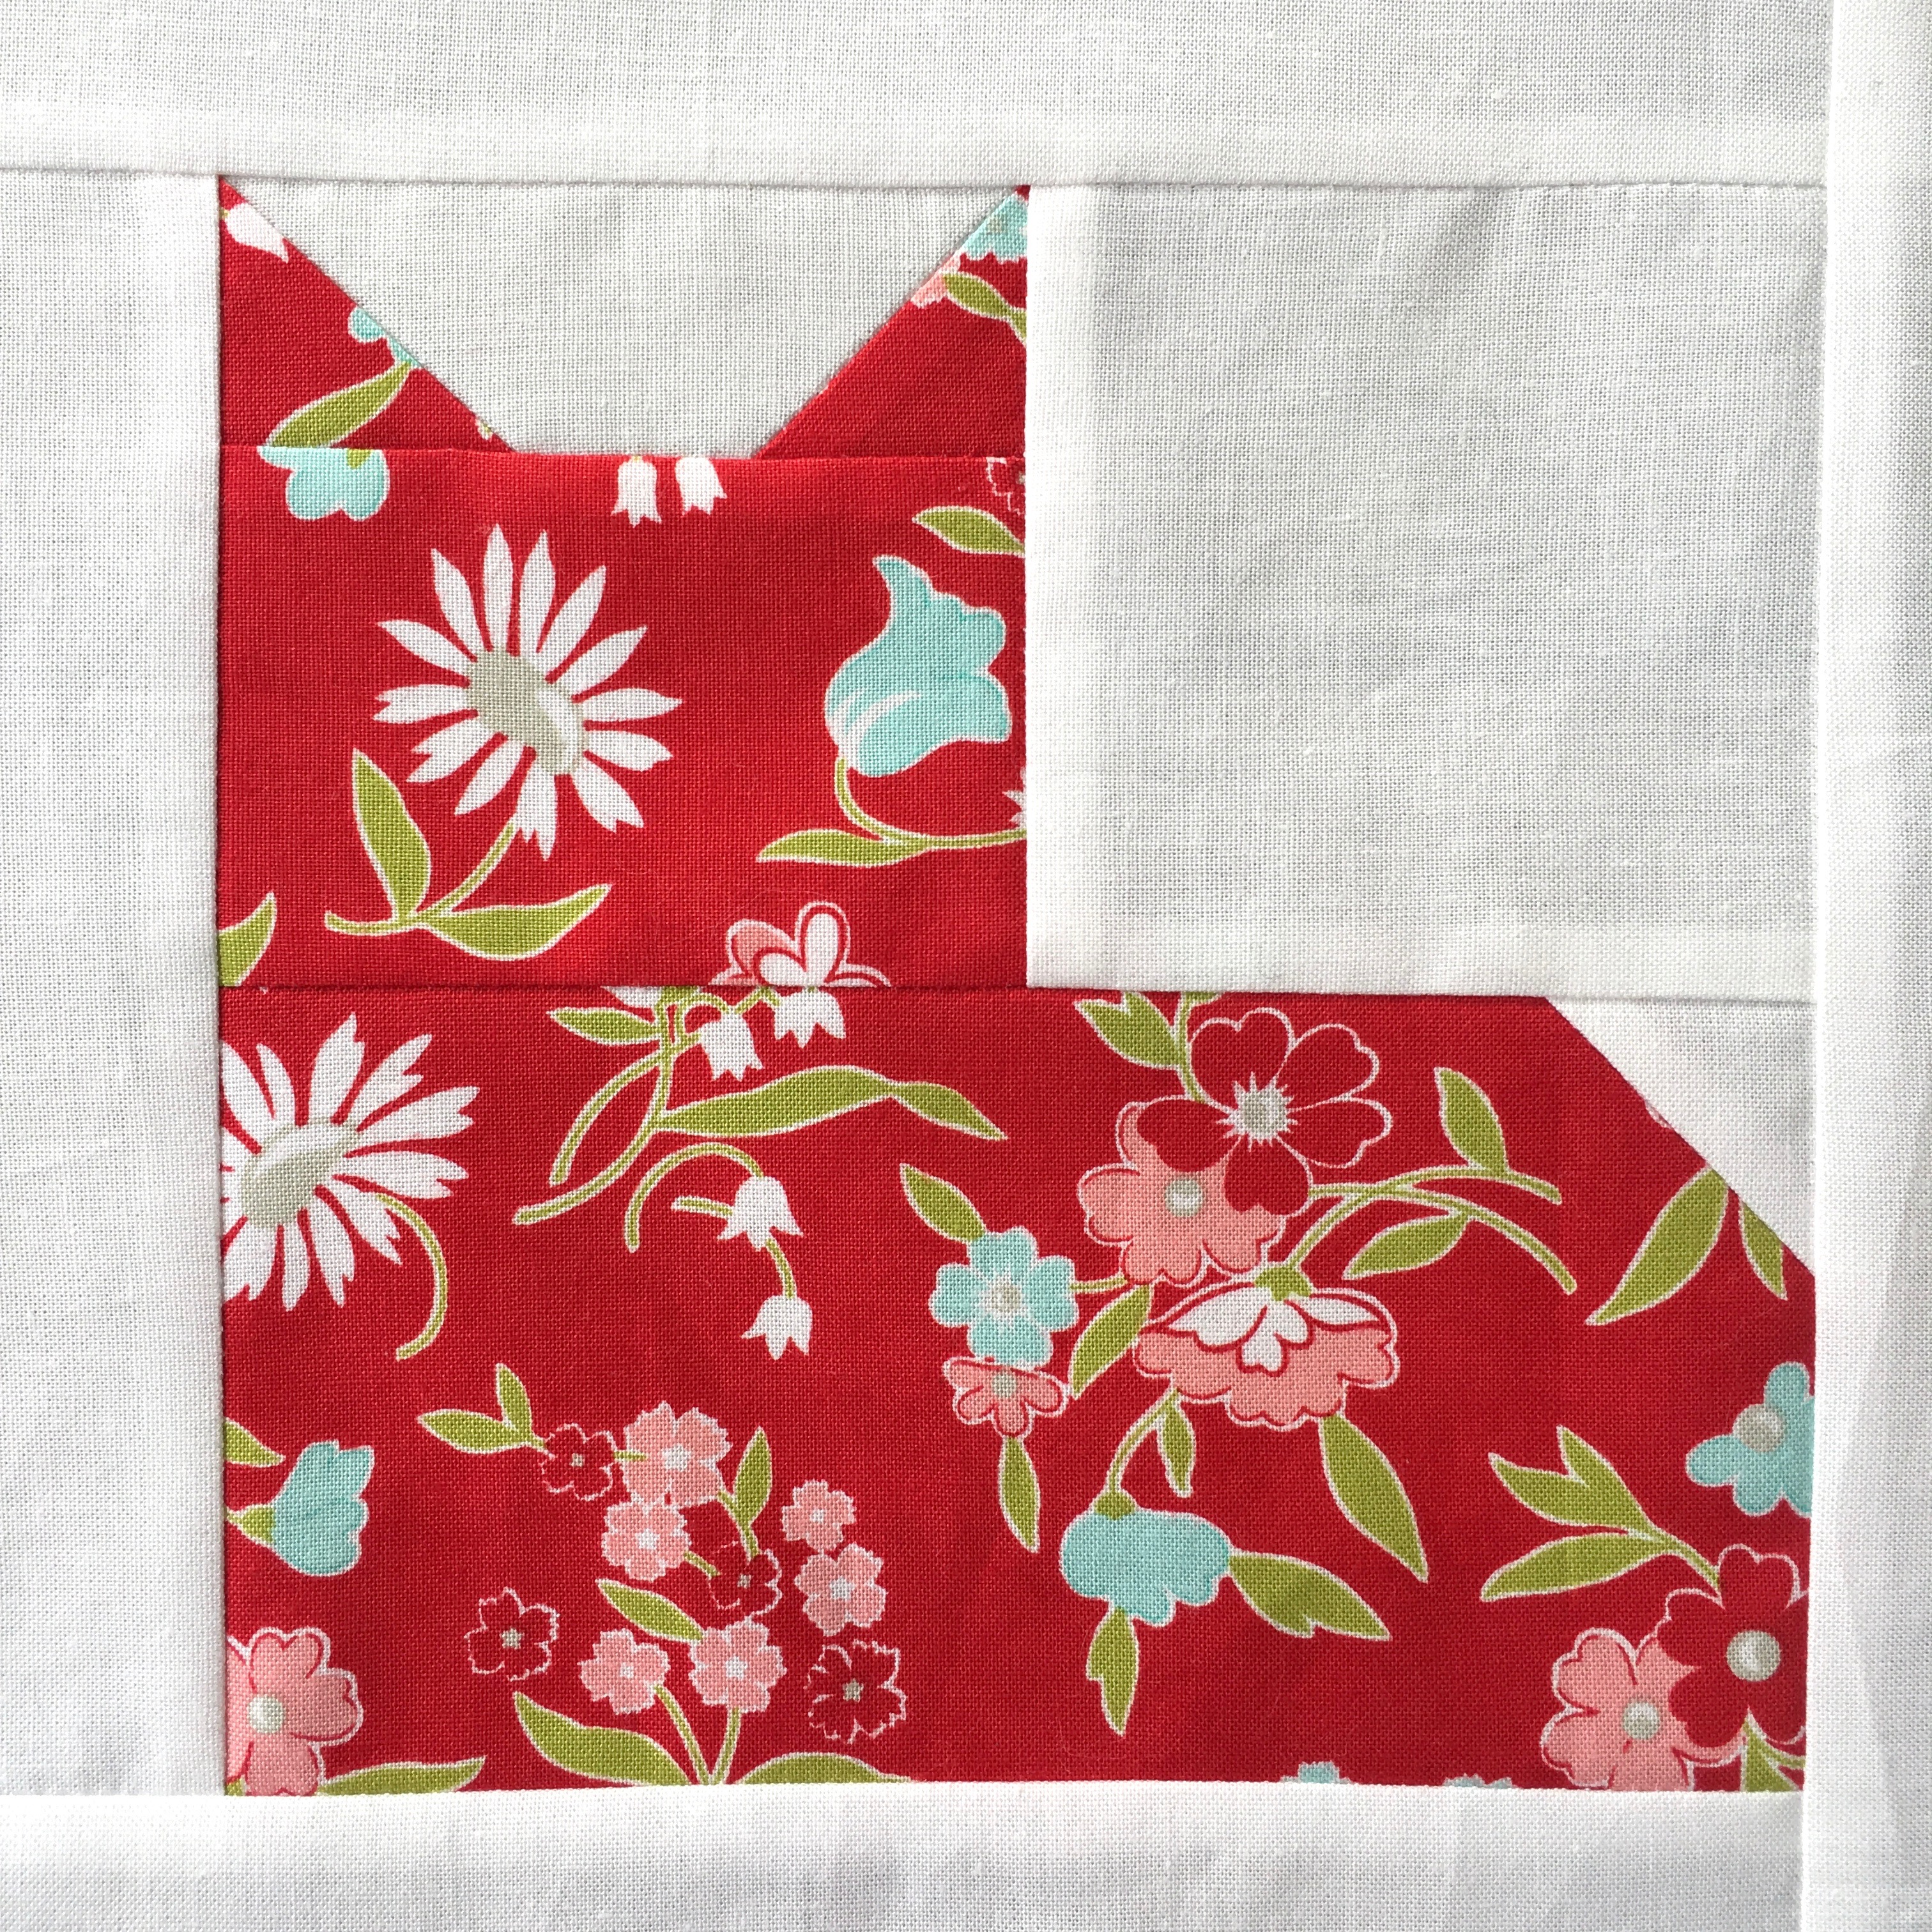
4-Patch Applique Hearts

Select (4) groups of (4) fabrics for the hearts.  I selected like colors for each heart but you can make it scrappy if you want!  Sew the group of 4 fabrics together in a 4-patch, pressing seams.

IMG_9183

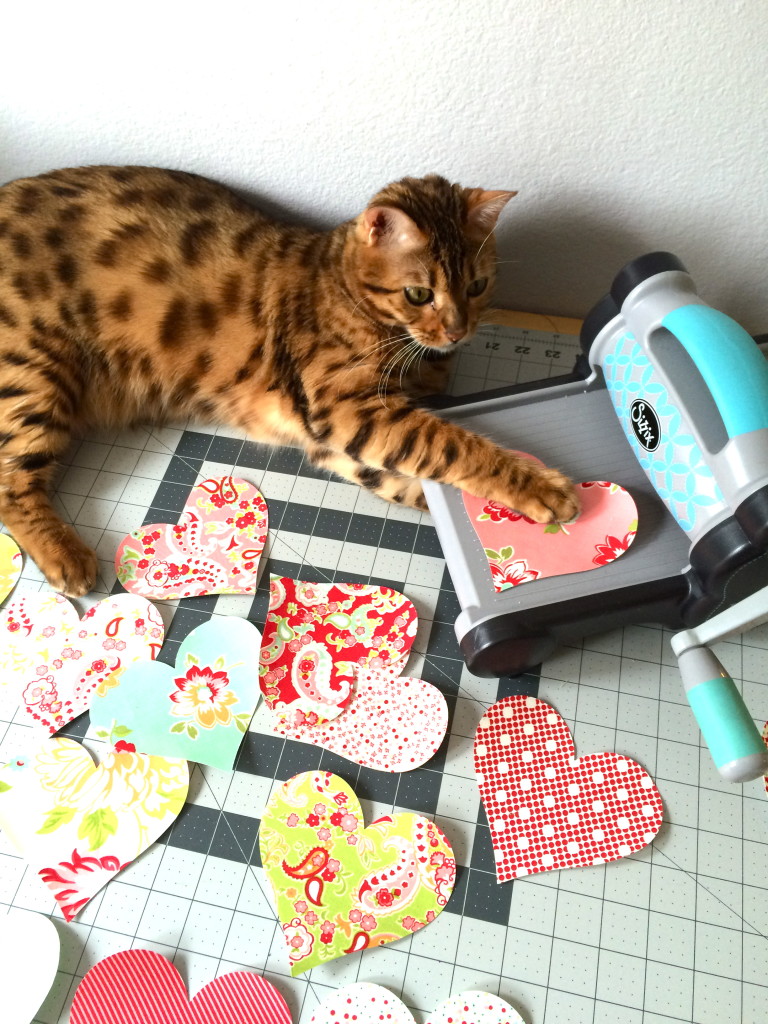
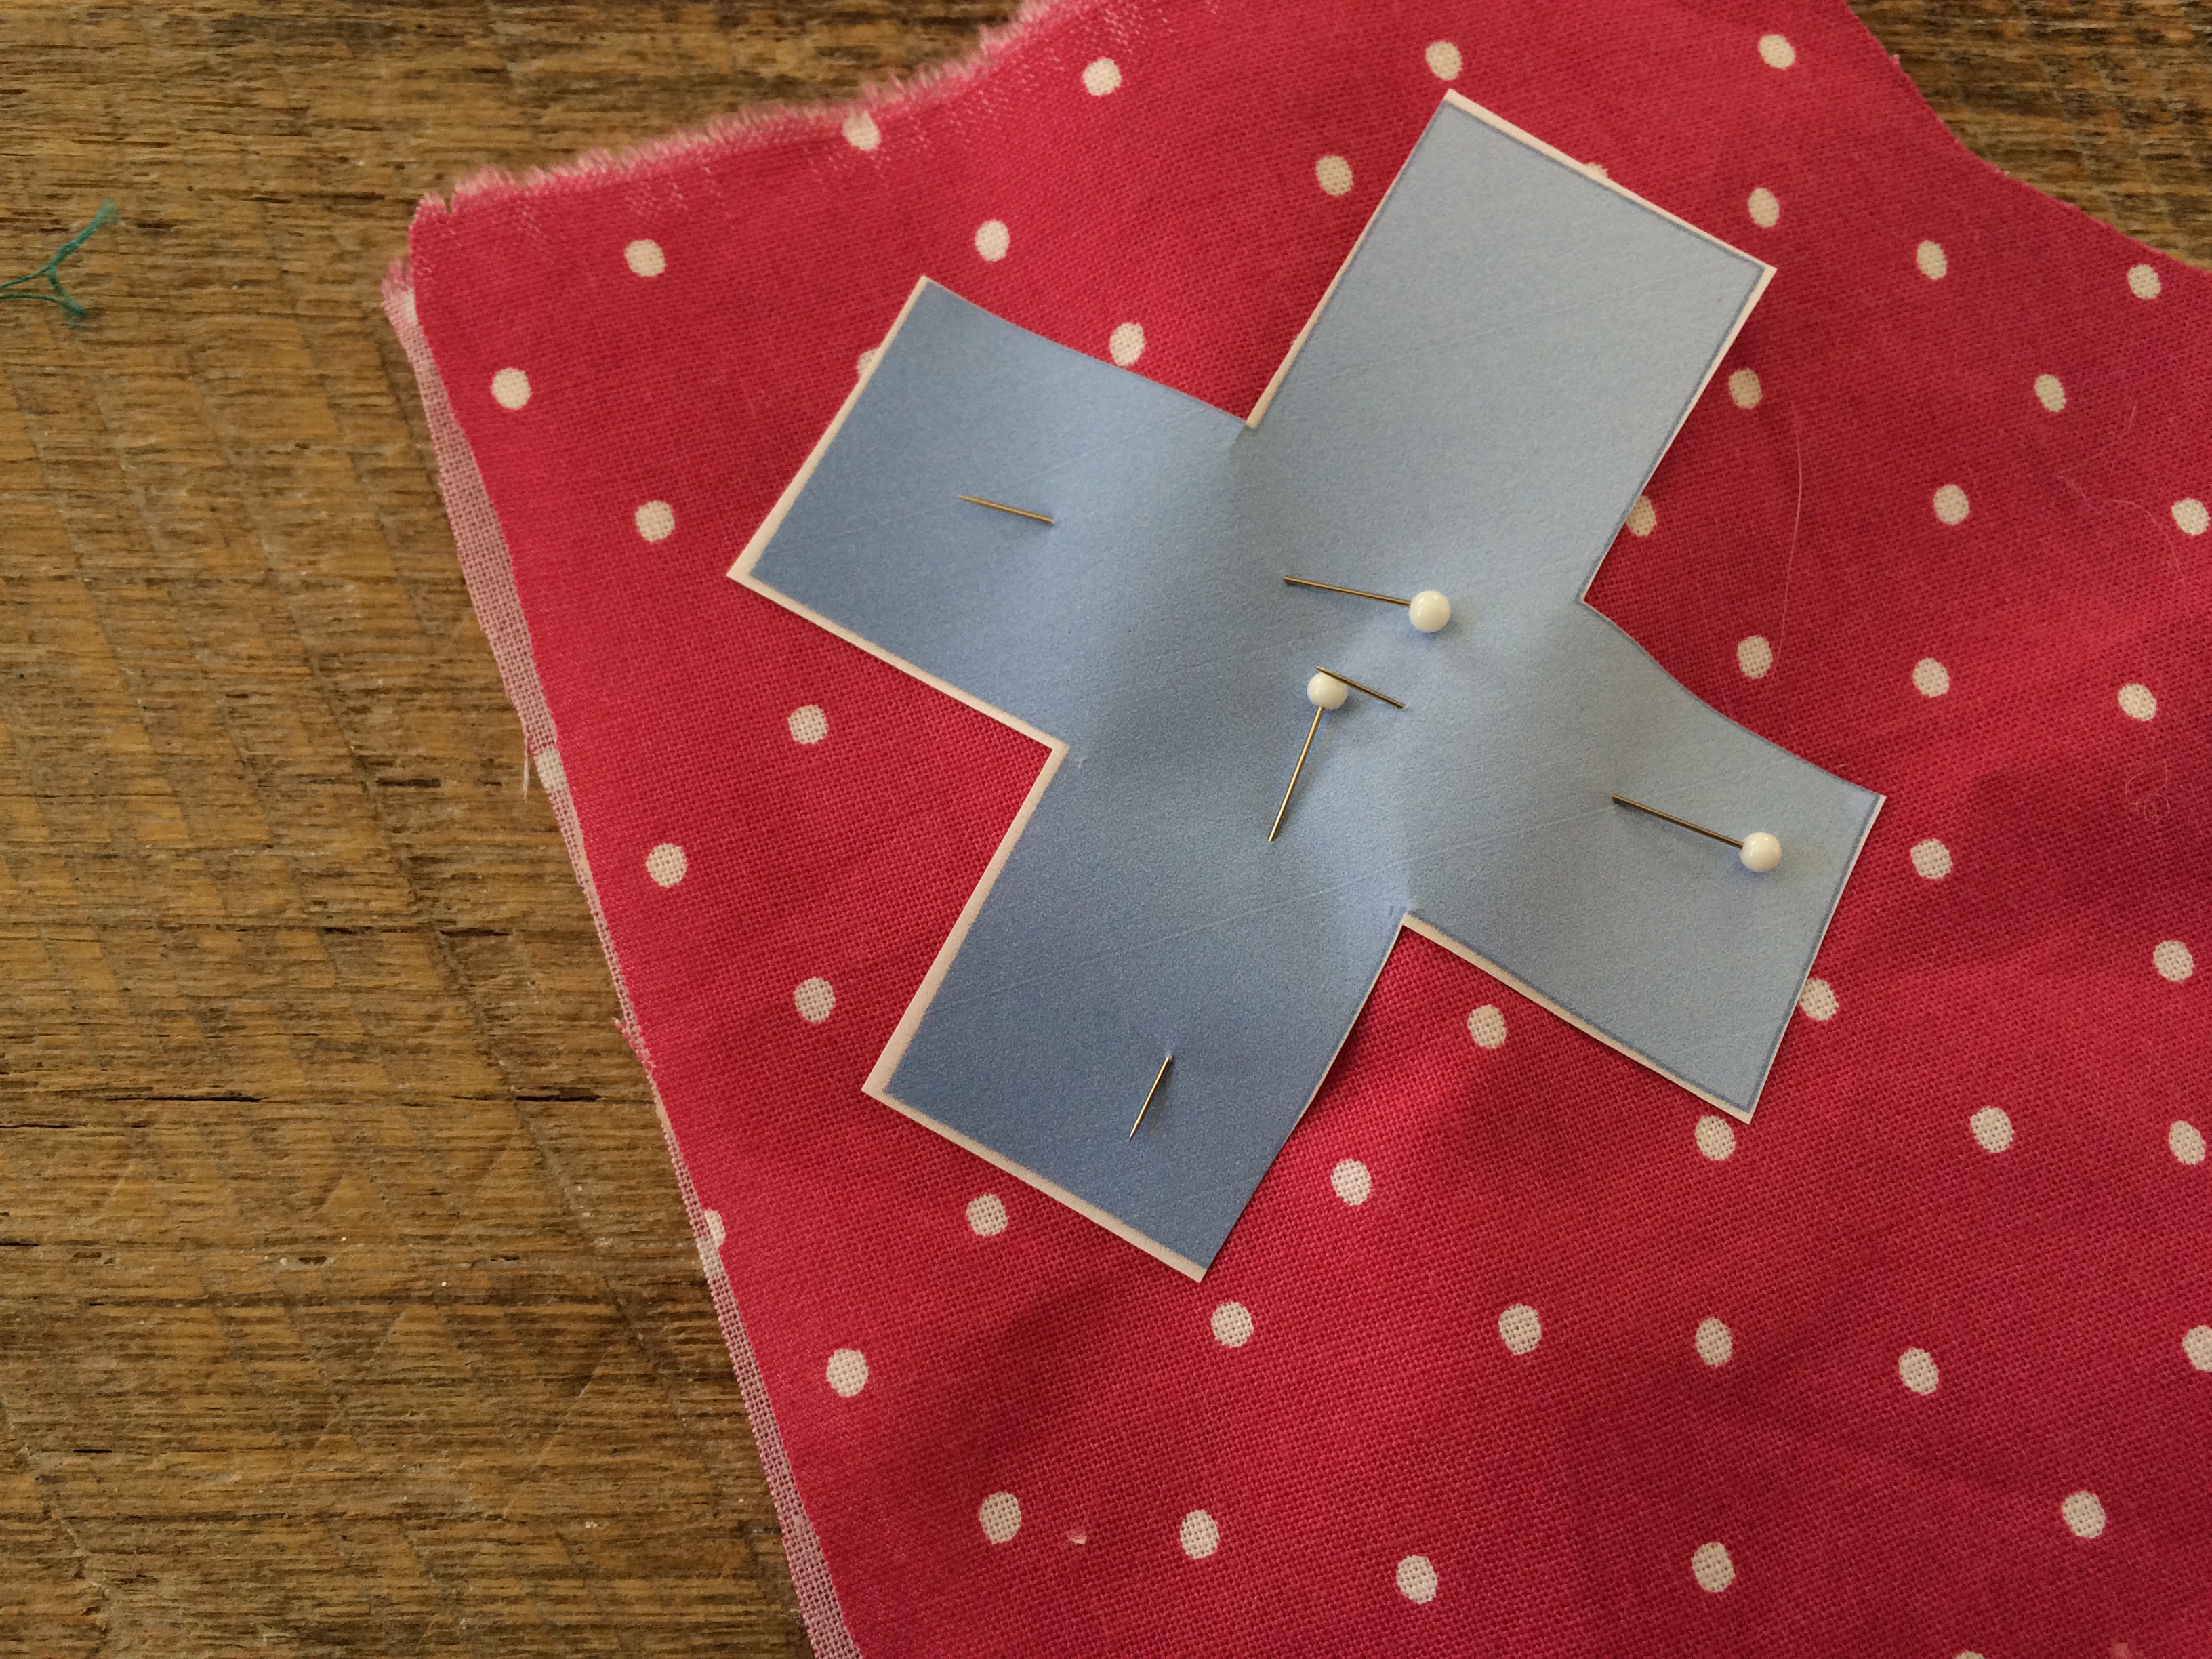
Print (or trace) 4 hearts onto Heat n Bond Lite.

Cut out 1/8″ around each heart.

IMG_9182

Center the heart on the wrong side of each 4-patch.  Heat set.

IMG_9184

Cut out each heart and peel off the backing paper.  Fuse hearts to the center of the (4) white 6 1/2″ squares. Sew 2 times around each heart with a straight stitch.  Set aside.

IMG_9192

HSTs –  Half Square Triangles

You can make the HSTs however you prefer.  I used my Sizzix machine for quick cutting.  They need to measure 2 1/2″ when they are finished.  You will need a total of 32 HST to make the 4 blocks.

(Quick HST instructions: Draw a diagonal line on the wrong side of the (32) 2 1/2″ back ground squares.  Pair right sides together with a 2 1/2″ square cut from the jelly roll fabric.  Sew along the diagonal line.  Trim 1/4″ along the seam and press toward the dark.)

IMG_9189

Follow the chart below to construct the block:

heart block

Use the (16) background 2 1/2″ squares for the block corners and (16) low volume 2 1/2″  squares from the Jelly Roll for the center squares.

Make 4 blocks.  I chose a color for each block, but you could totally mix up the colors and make them all scrappy!!

IMG_9200

Once the blocks are finished, take the remaining 2 1/2″ squares from the Jelly Roll and piece the sashing and borders. Press all seams open.

Sew (2) strips of 5 squares for the short sashing.  Press

Sew (3) strips of 11 squares for the top, middle, and bottom sashing. Press

Sew (2) strips of 13 squares for the side sashing.  Press

heart block sashing

Make sure to match each seam and pin.

IMG_9210

Use Spray n Bond® for quick basting!  I can’t live without it!!!

IMG_9229

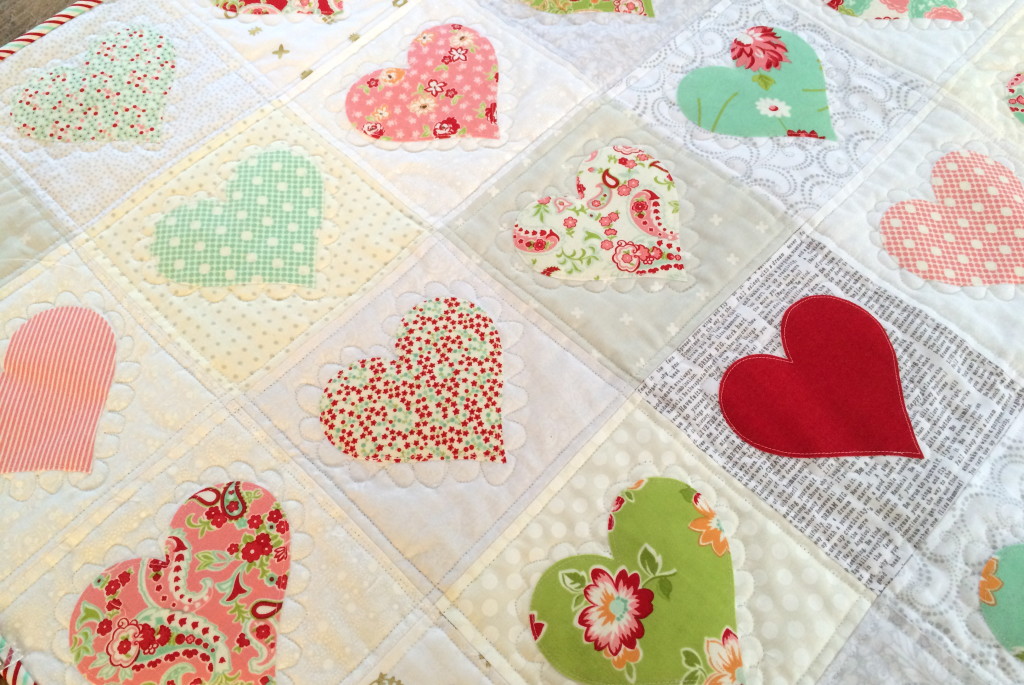
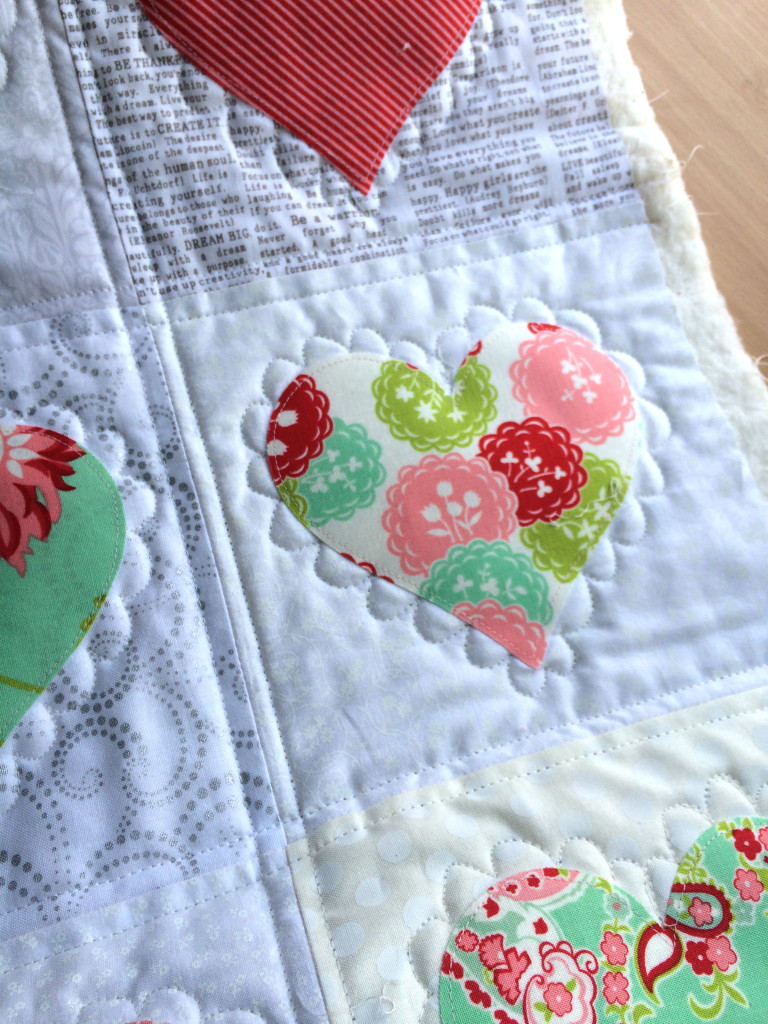
Quilt as desired.  Bind.
IMG_9245

IMG_9236I hope you love making this!!
DSC_0302

Chains of Love {5 Fat Quarter Fun Quilt}

5 fat quarter fun logo

chains of love cover 2

Amber and I are SUPER EXCITED to bring you our 3rd 5 Fat Quarter Fun Quilt – and this one is our Valentine’s edition!!!!  We can’t get enough of red and pink and hearts so we pushed the limits on our 5 fat quarters and came up with this!!!!  It’s a 50″ square quilt with an Irish Chain style and pieced hearts in the center.  And of course we were listening to Erasure the whole time we were sewing!!! hahahah 🙂

Here is Amber’s version, you can read all about it on her blog.  I love her Moda fabric choice!!!

IMG_7681a

IMG_7684a

DSC_0318

I am so thrilled to have a new quilt to hang in the family room!  And it fits perfectly!!!

DSC_0285

Fabric Requirements

2 red fat quarters (non directional)

3 pink fat quarters (non directional)

2 yards background fabric

3 ½ yards backing fabric

½ yard binding fabric

(4) Additional red 2 ½” squares for sashing – can cut from your binding fabric if it matches

NOTE:  Make sure your fat quarter measure 21″ in length.  You need every inch possible out of the fat quarters and they have to be cut a certain way.  

So be sure to read all instructions first.  Don’t square up the fat quarters and only cut one at a time.  

You can download the pattern HERE.

DSC_0290

We hope you join in the fun!  We would love to connect with you on Instagram!  Post photos of your fabric selections, progress, and finished quilt!  Don’t forget to tag @jedicraftgirl and @gigis_thimble and #fivefatquarterfun #chainsoflovequilt

IMG_9144
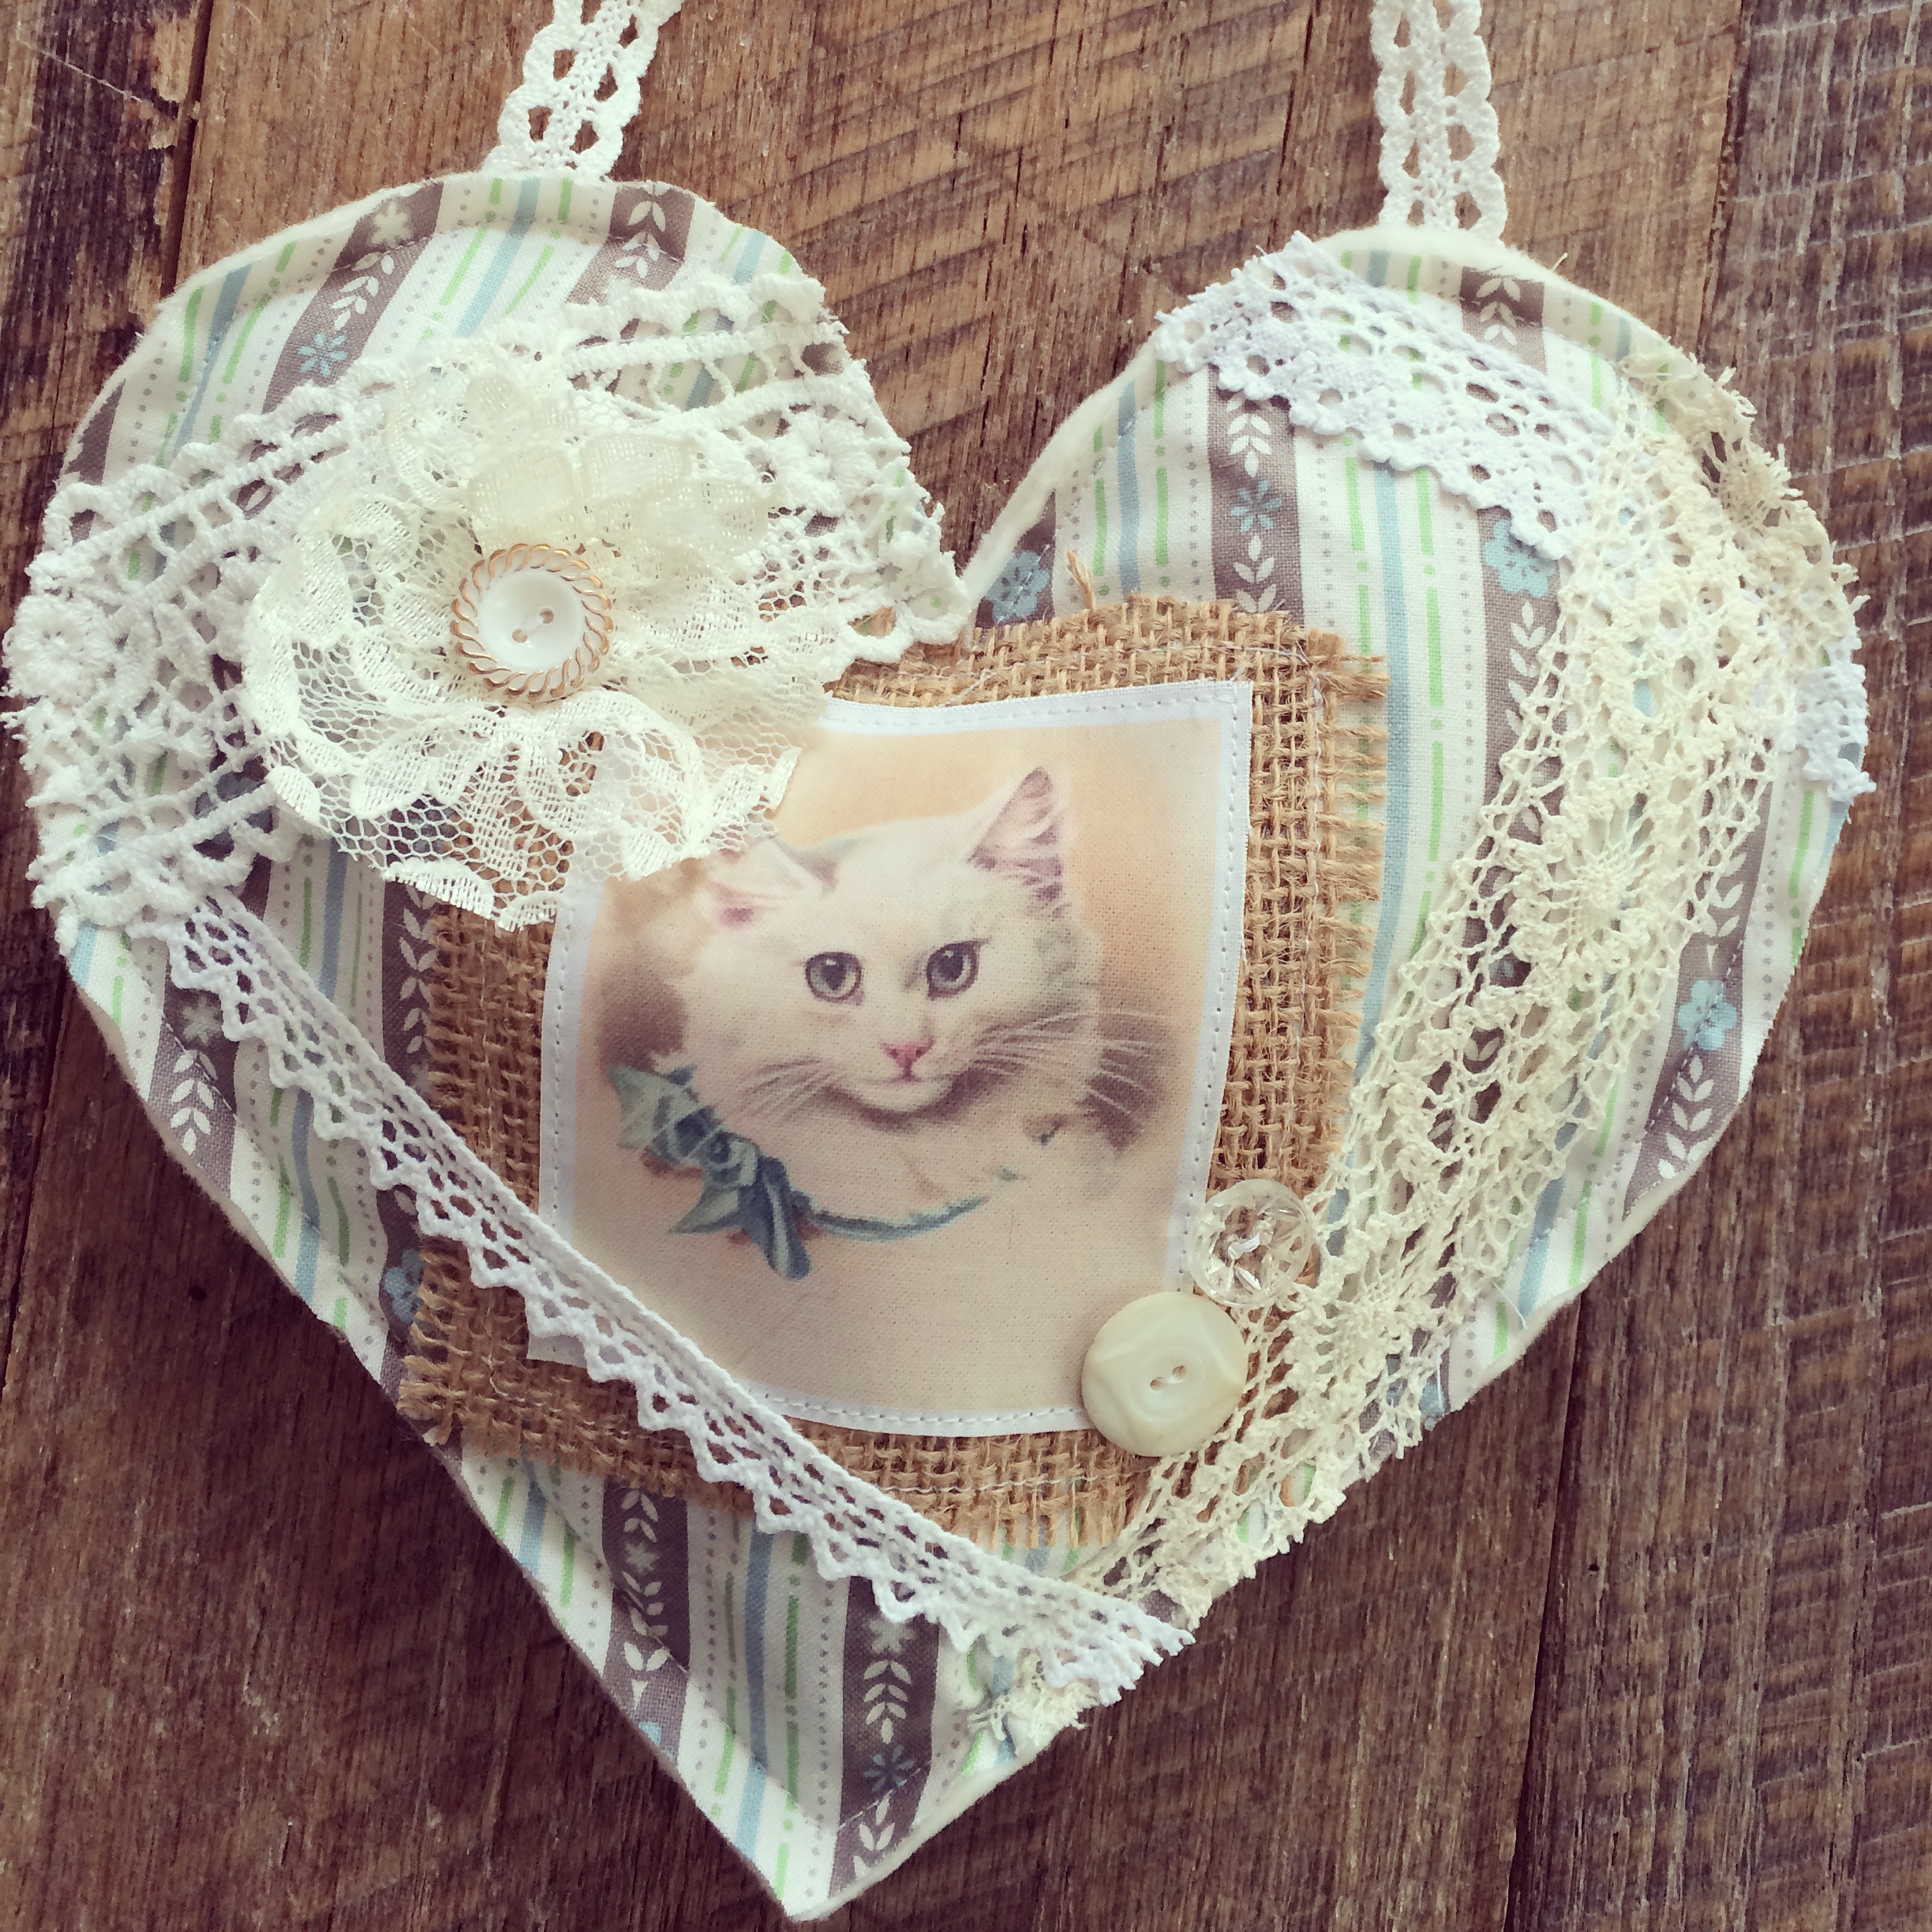
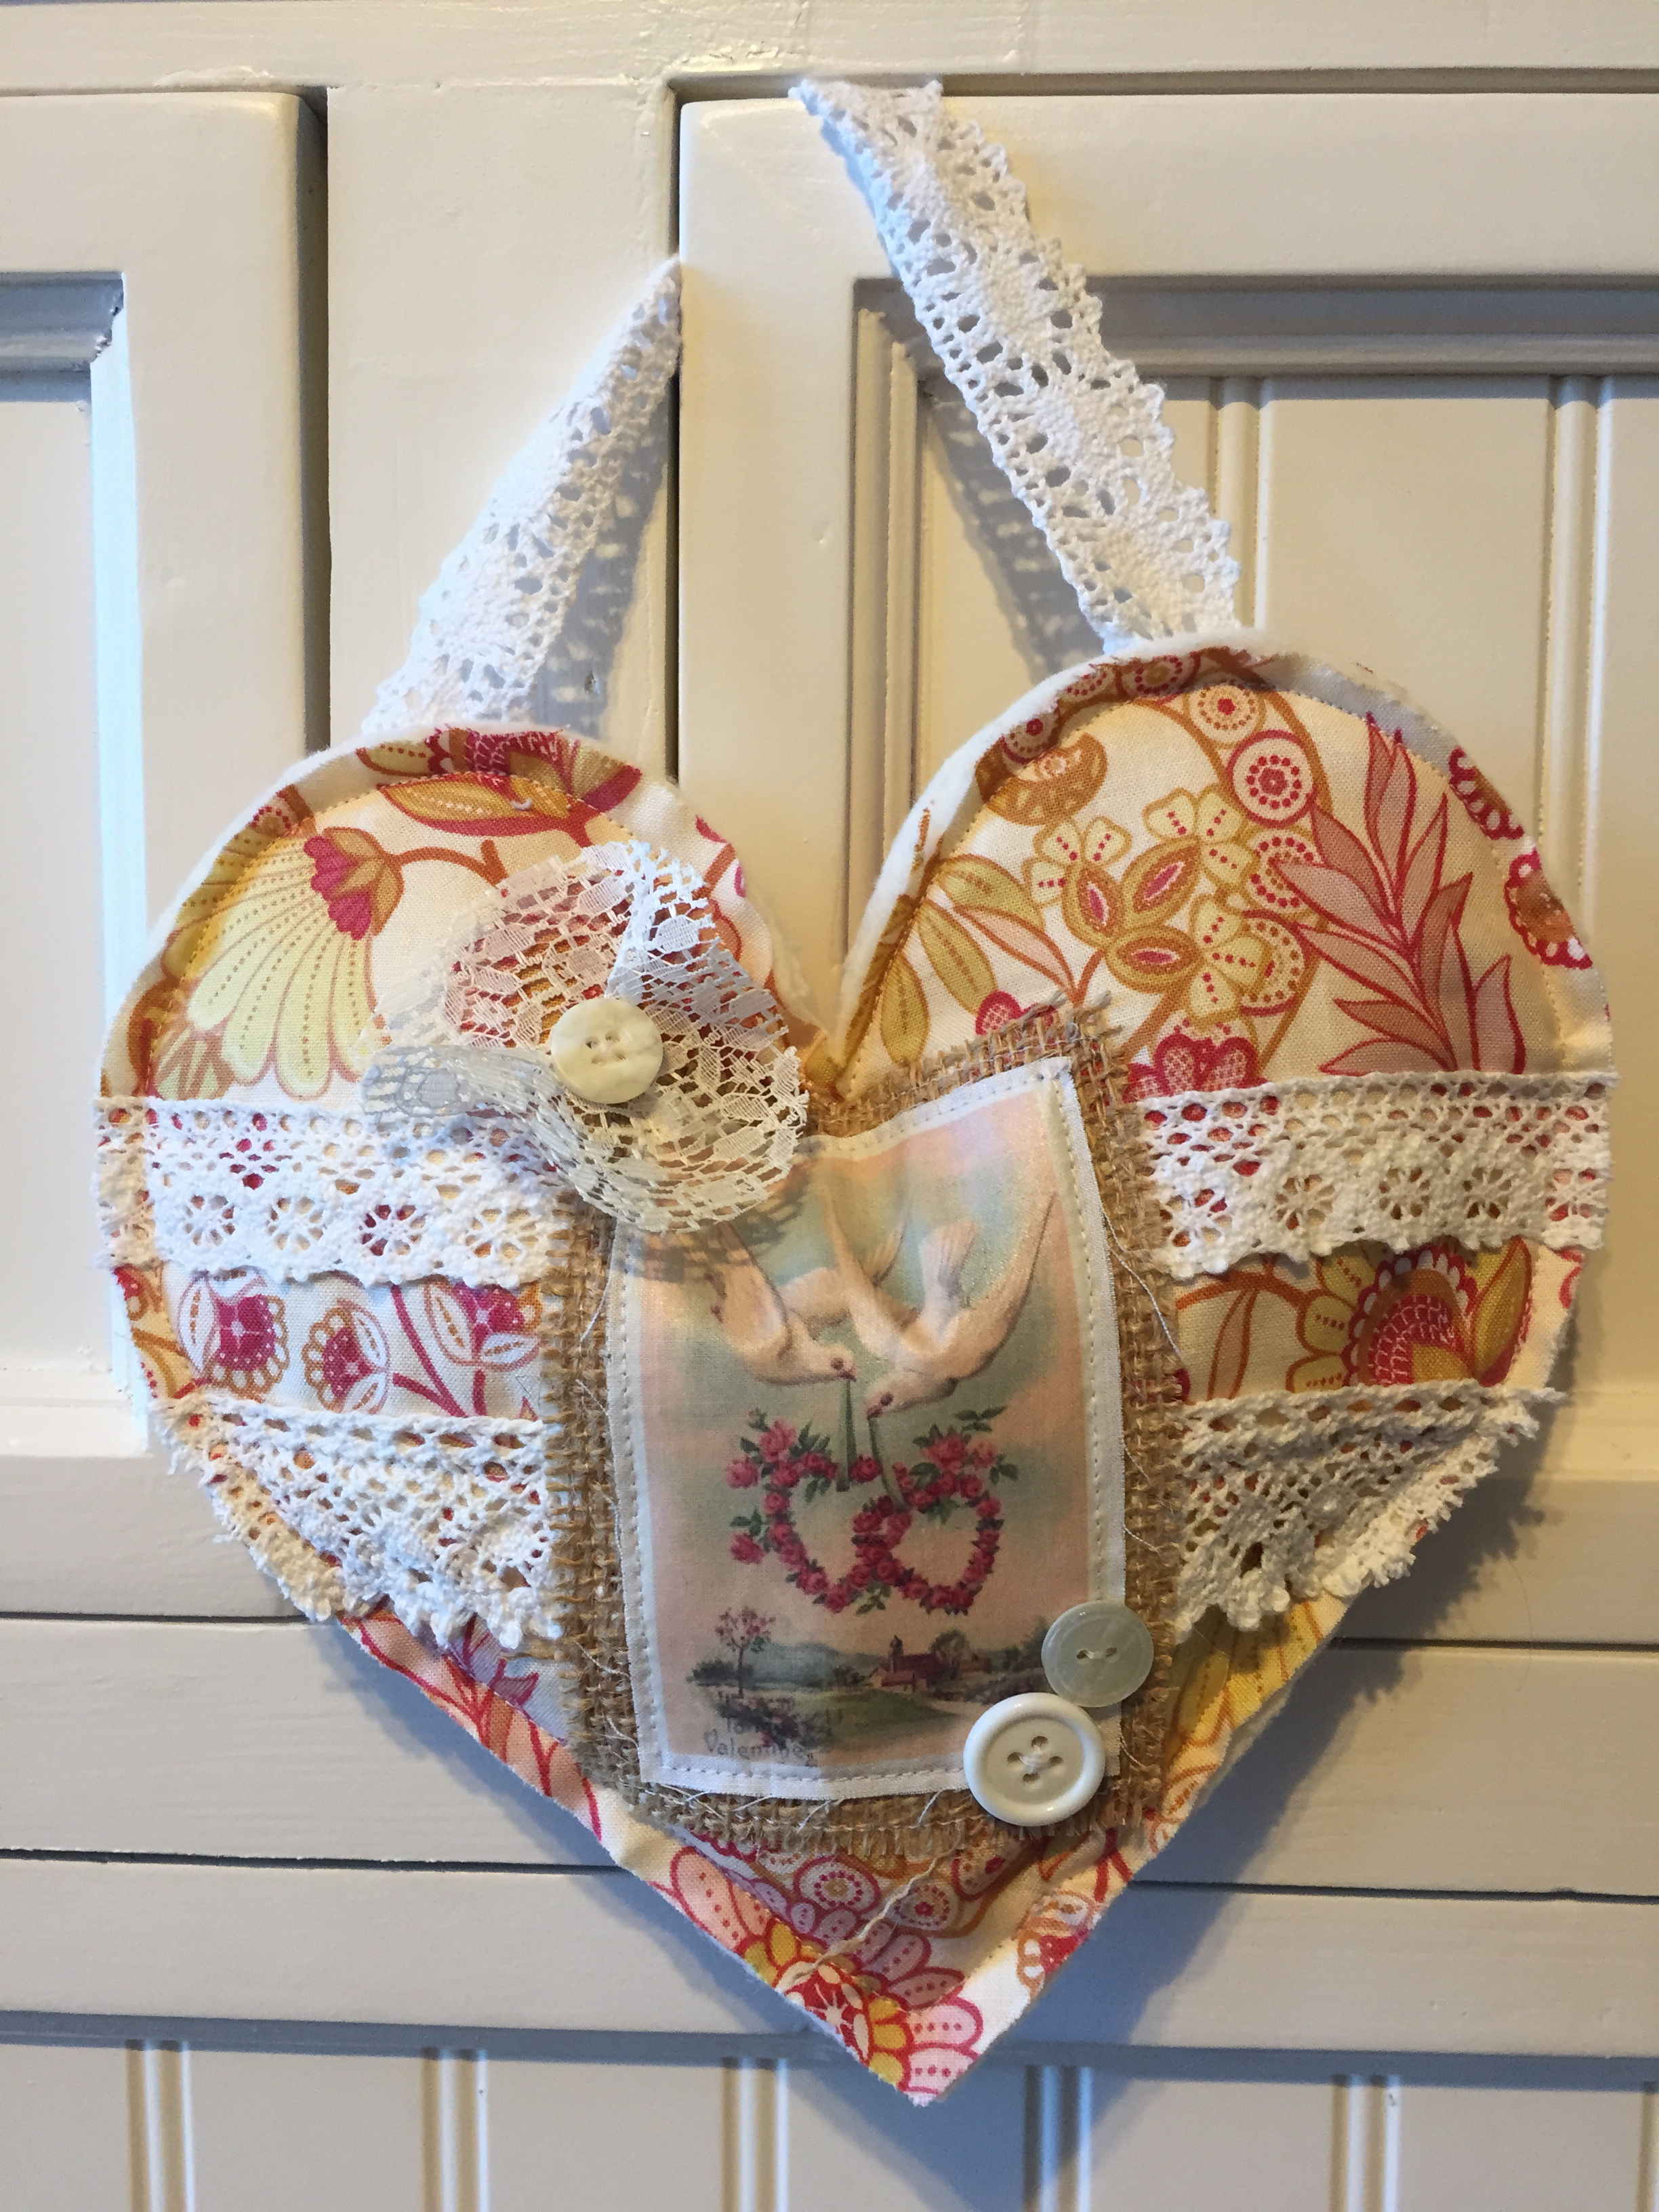
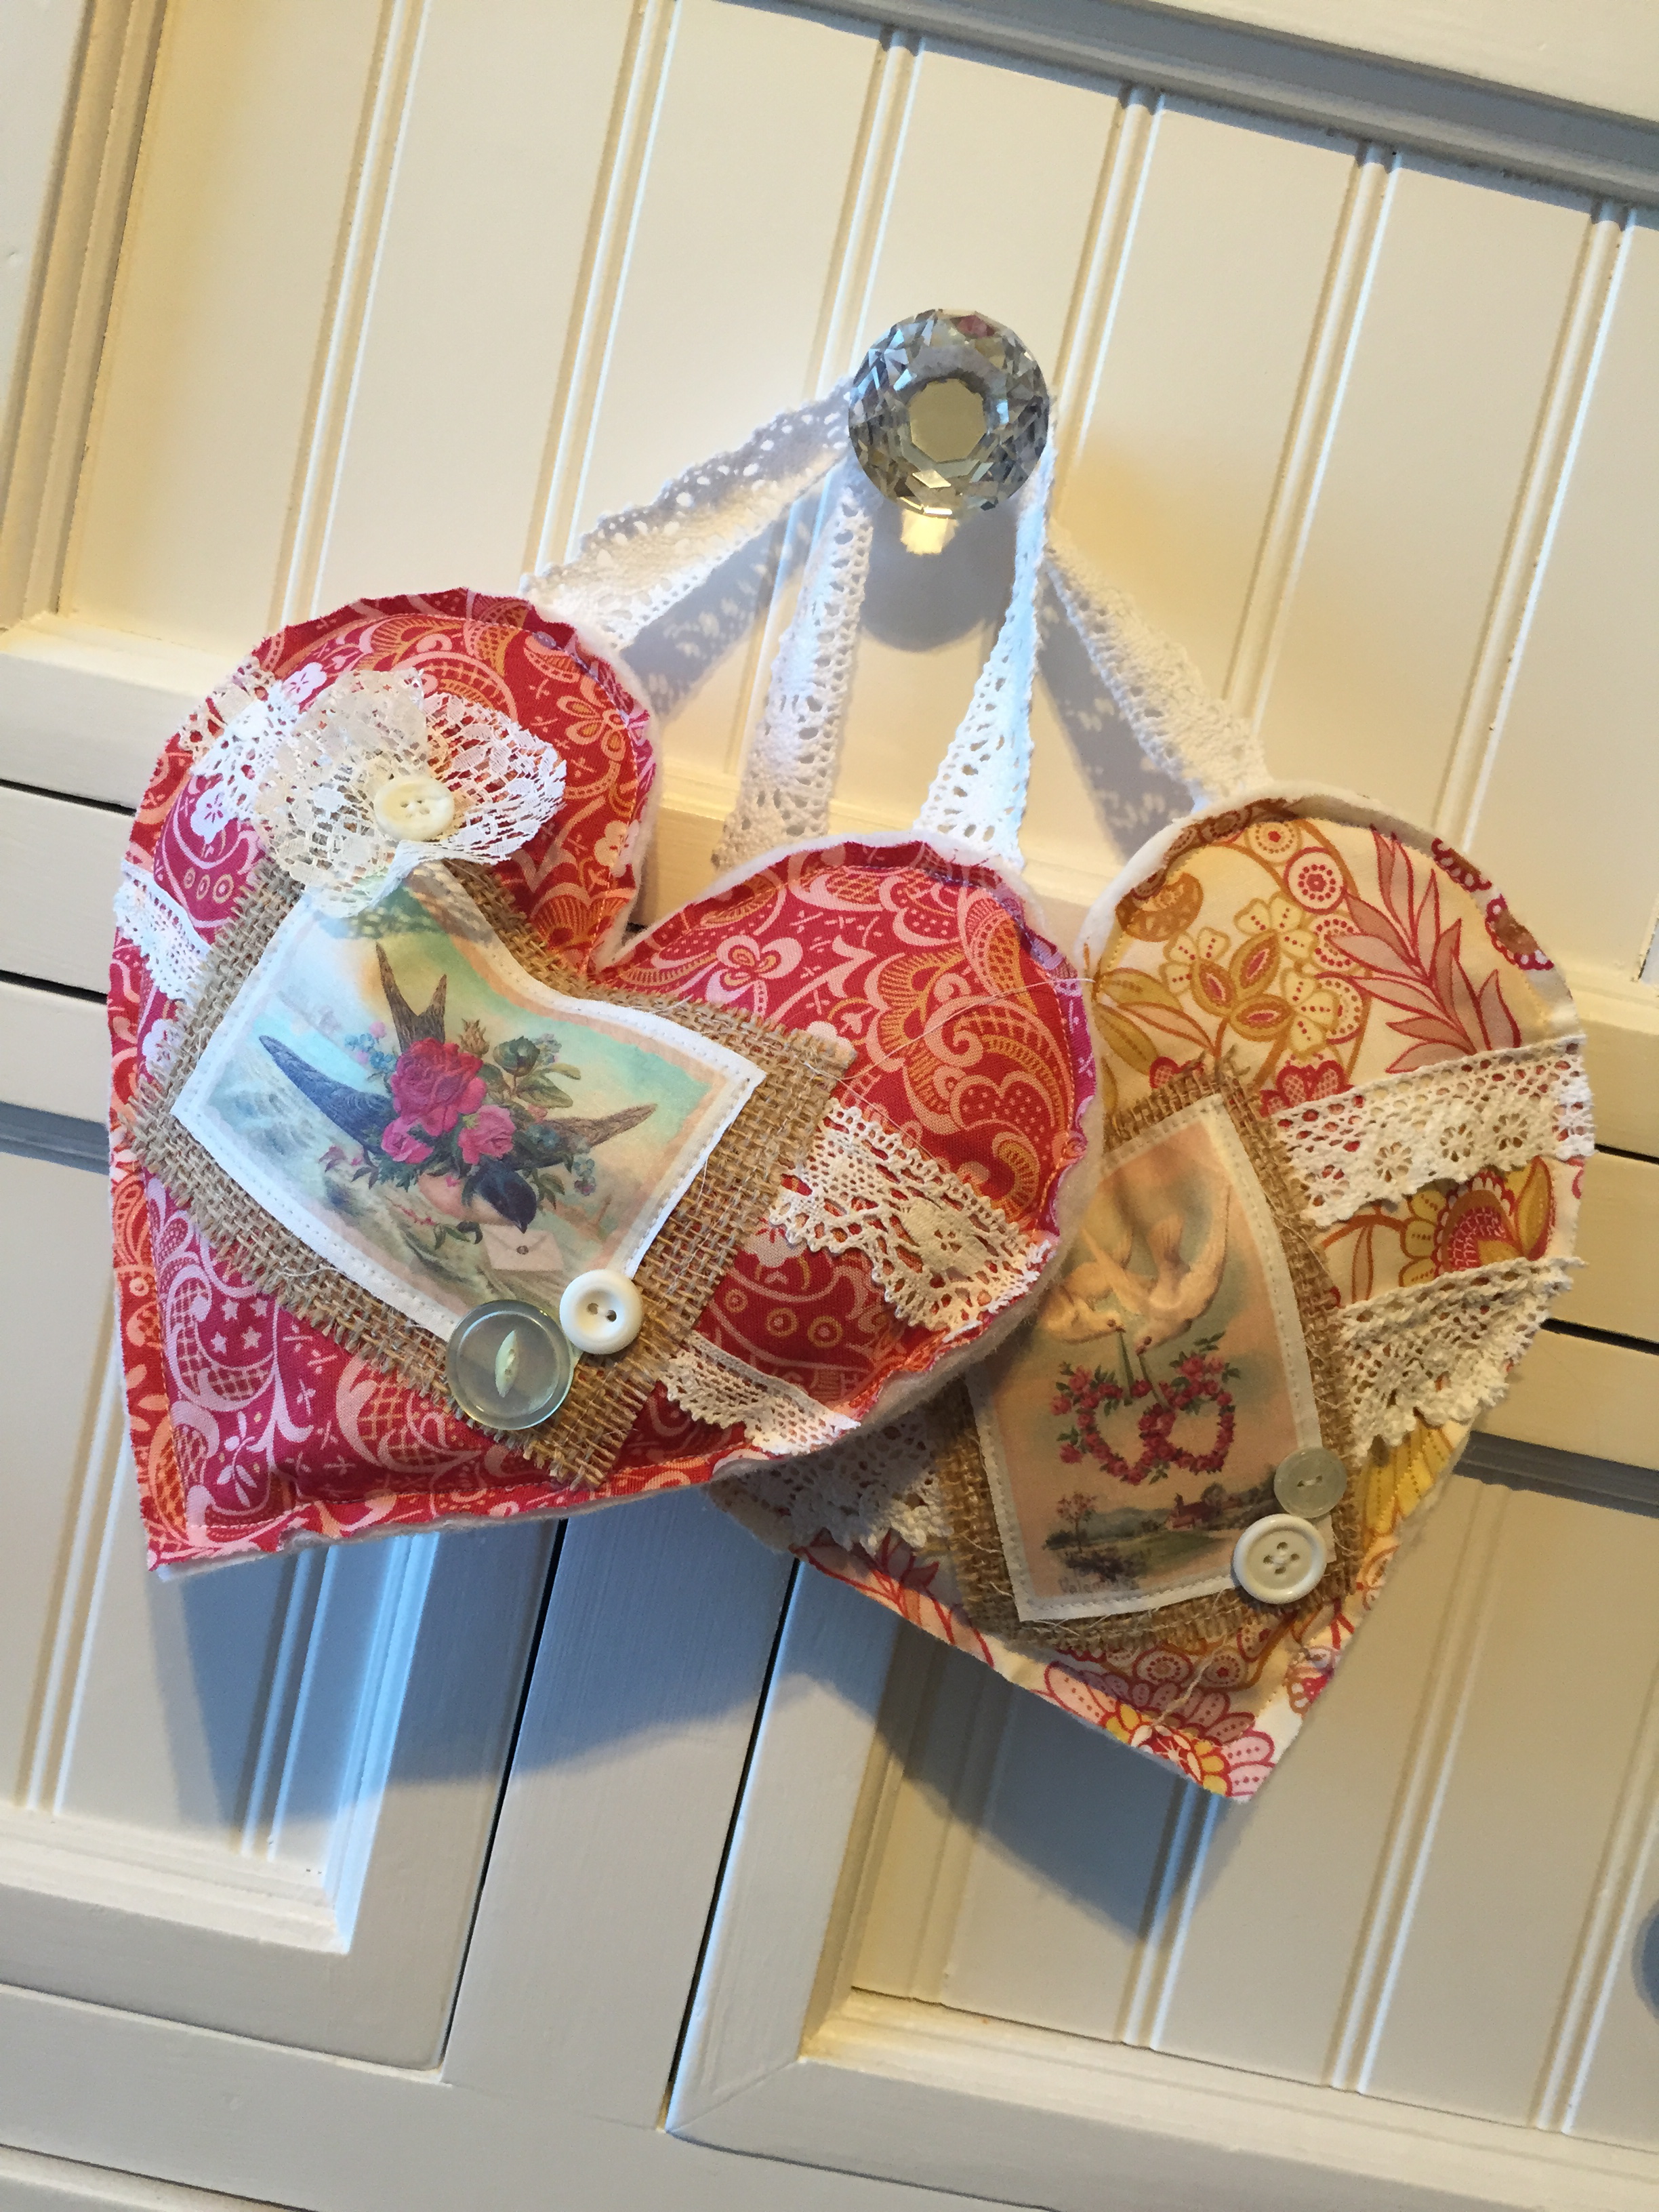
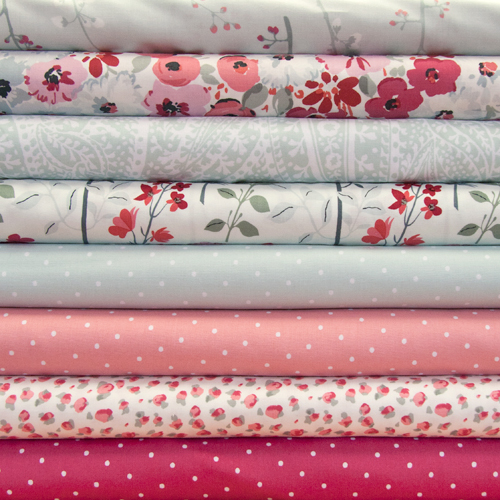
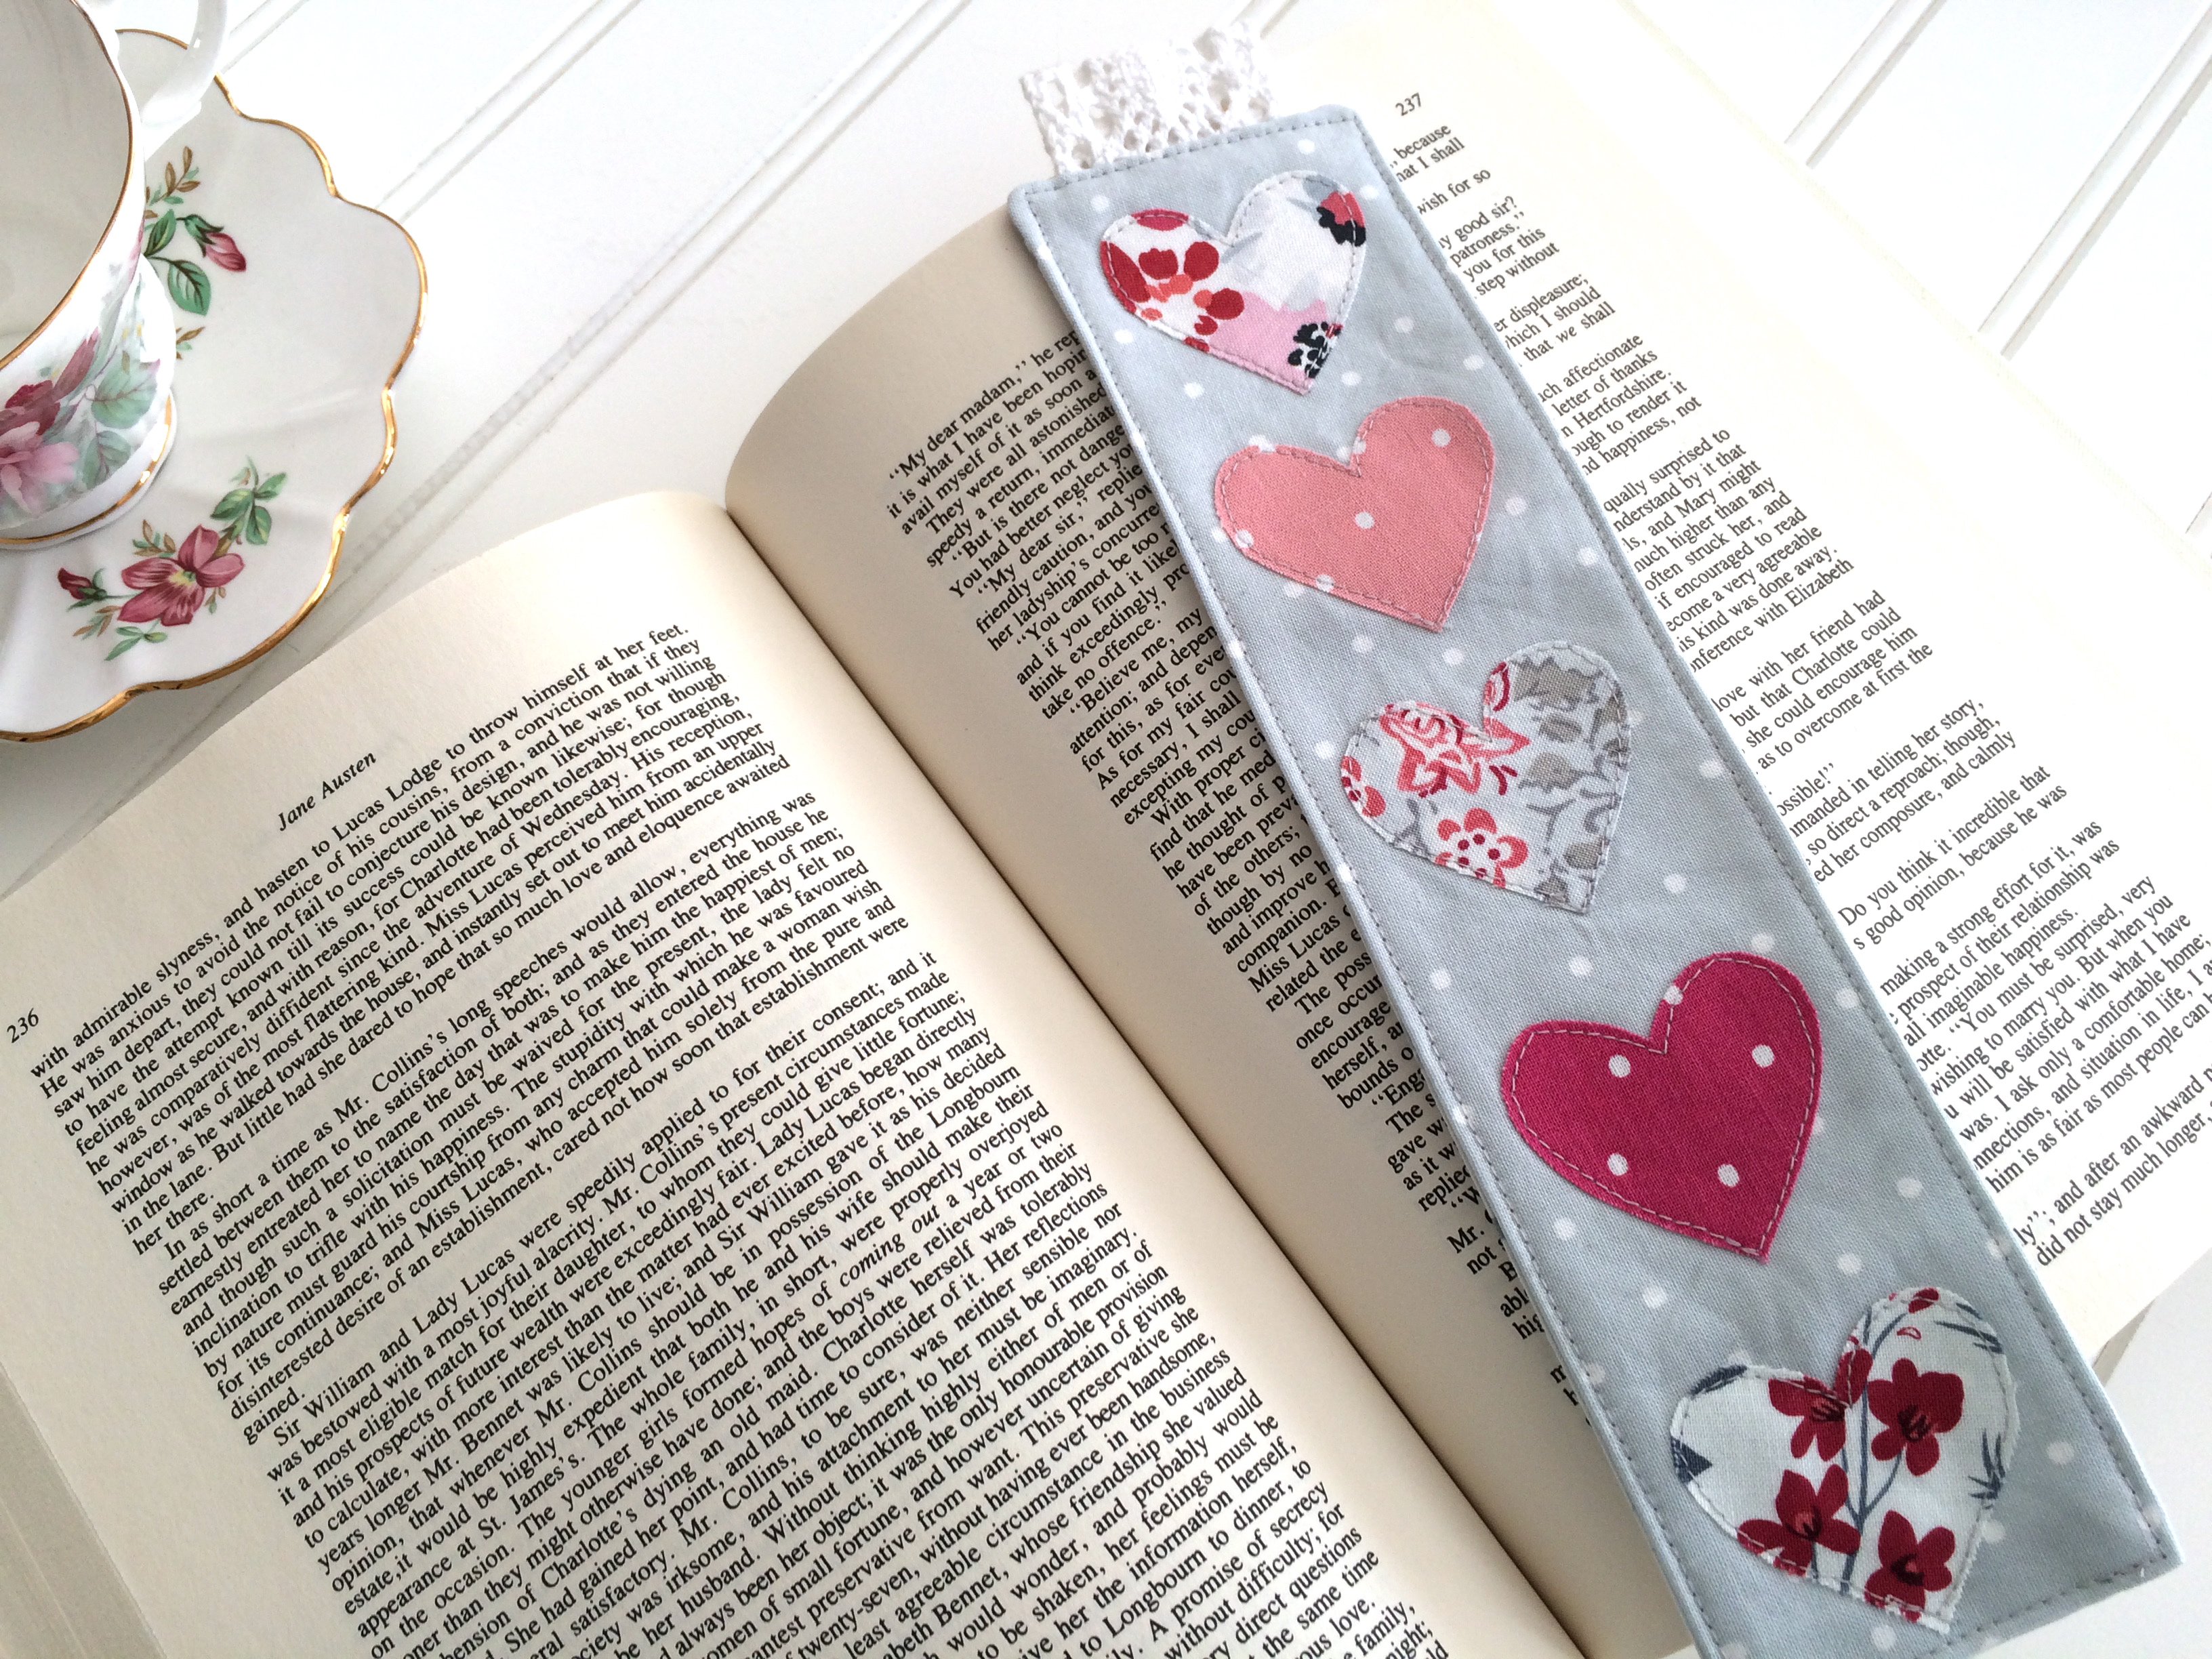
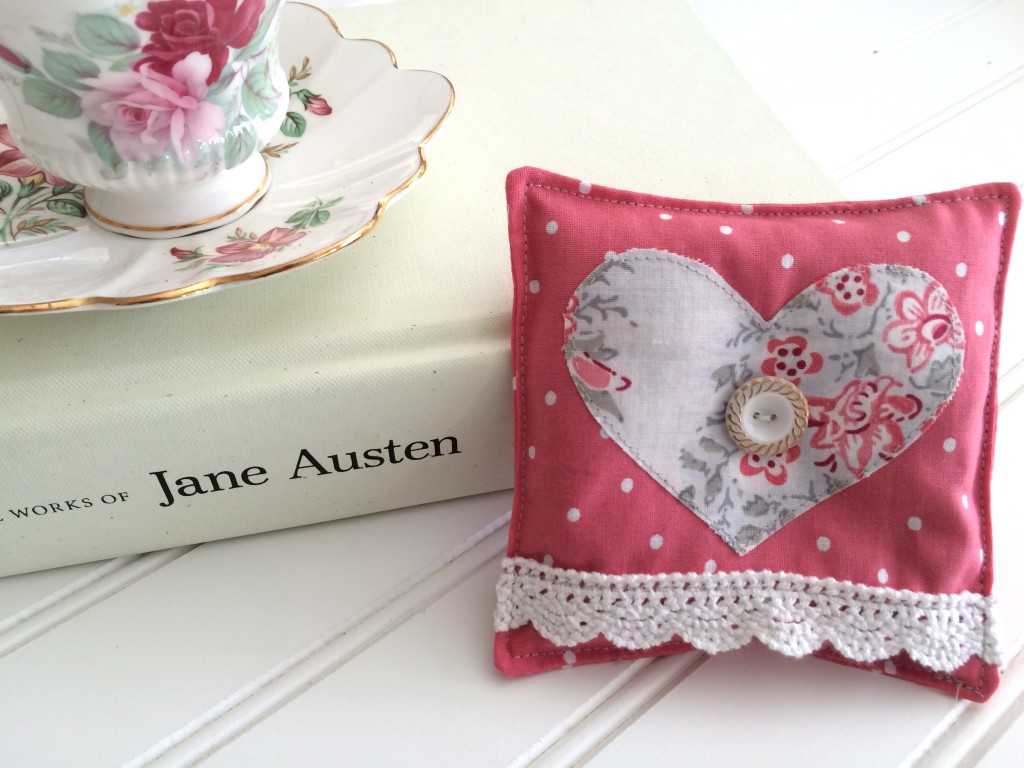
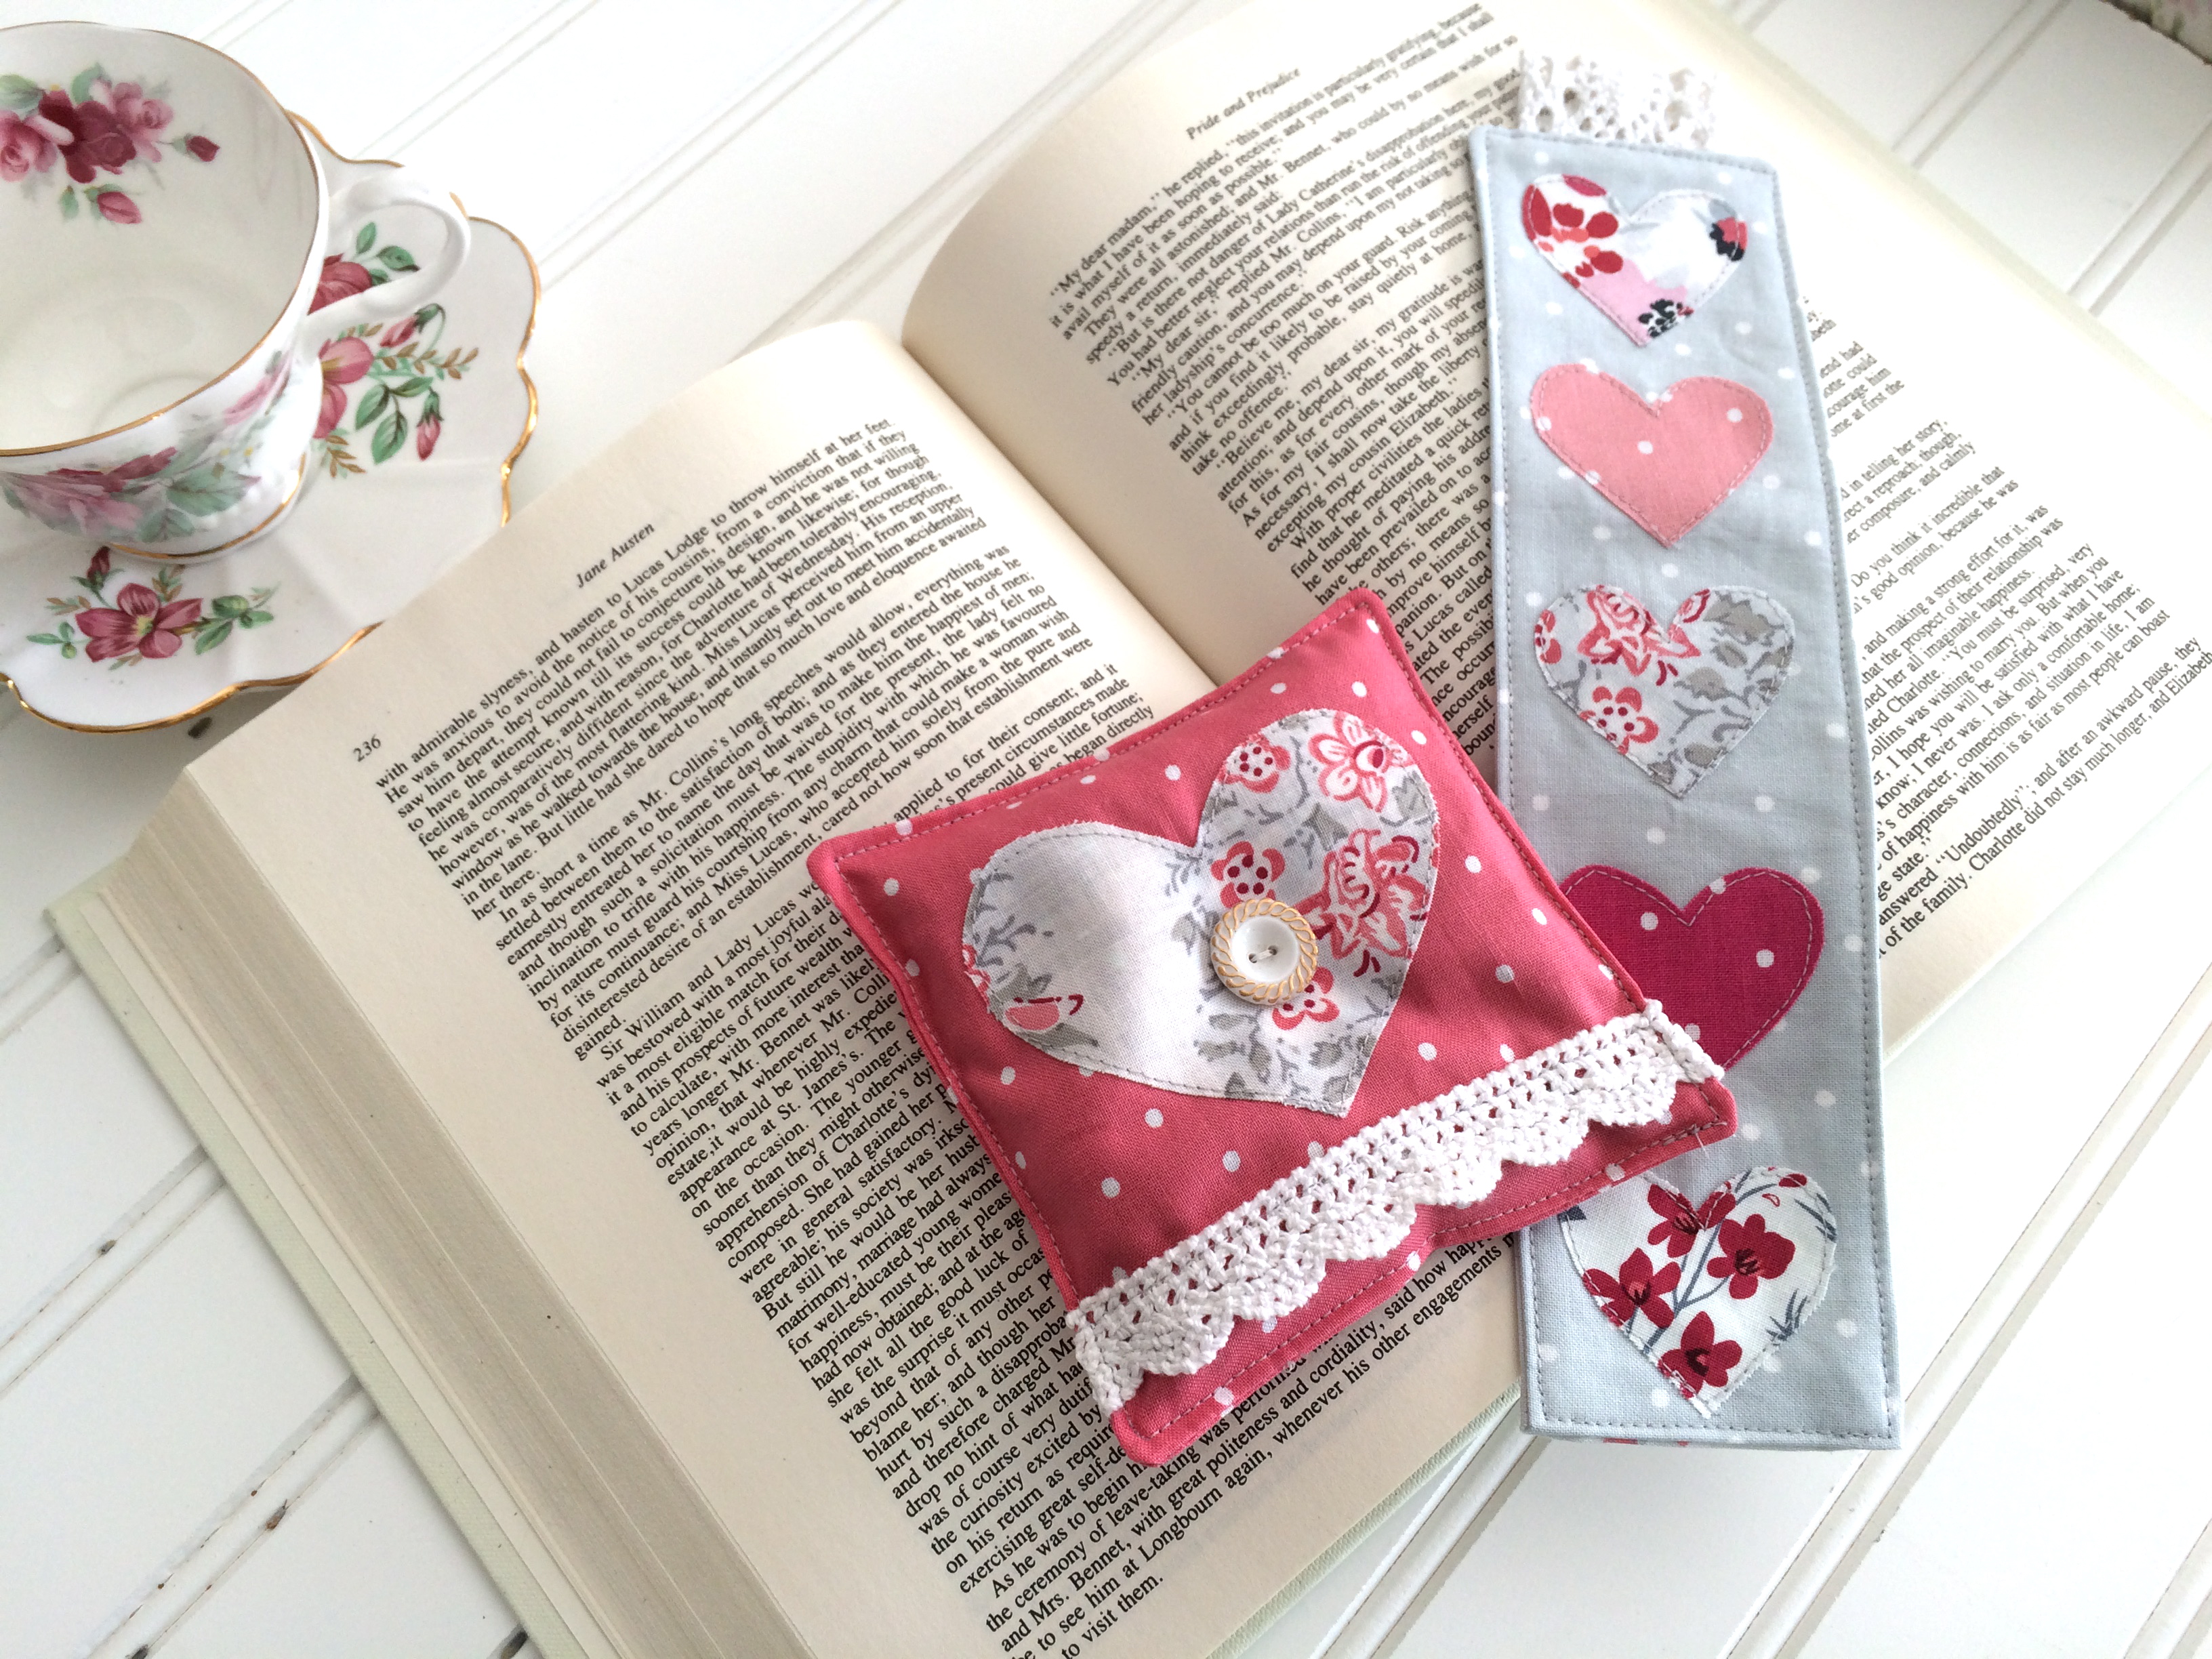
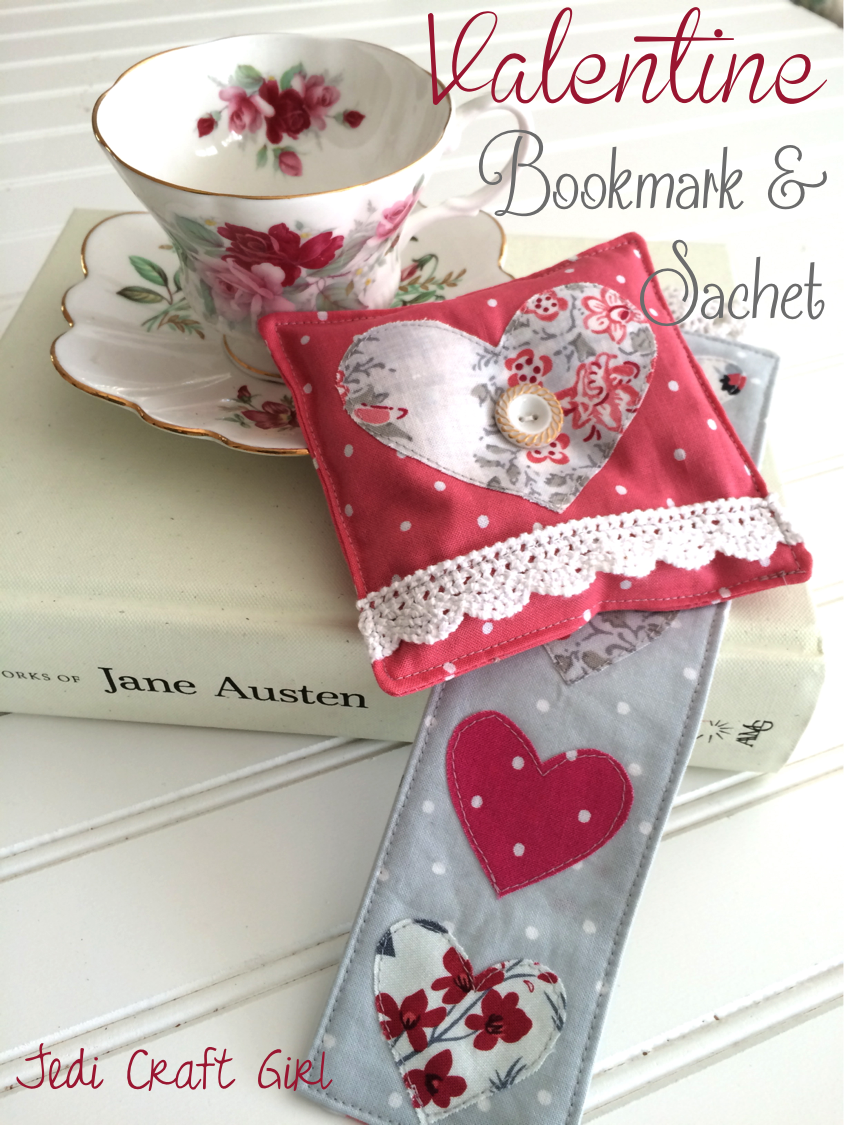
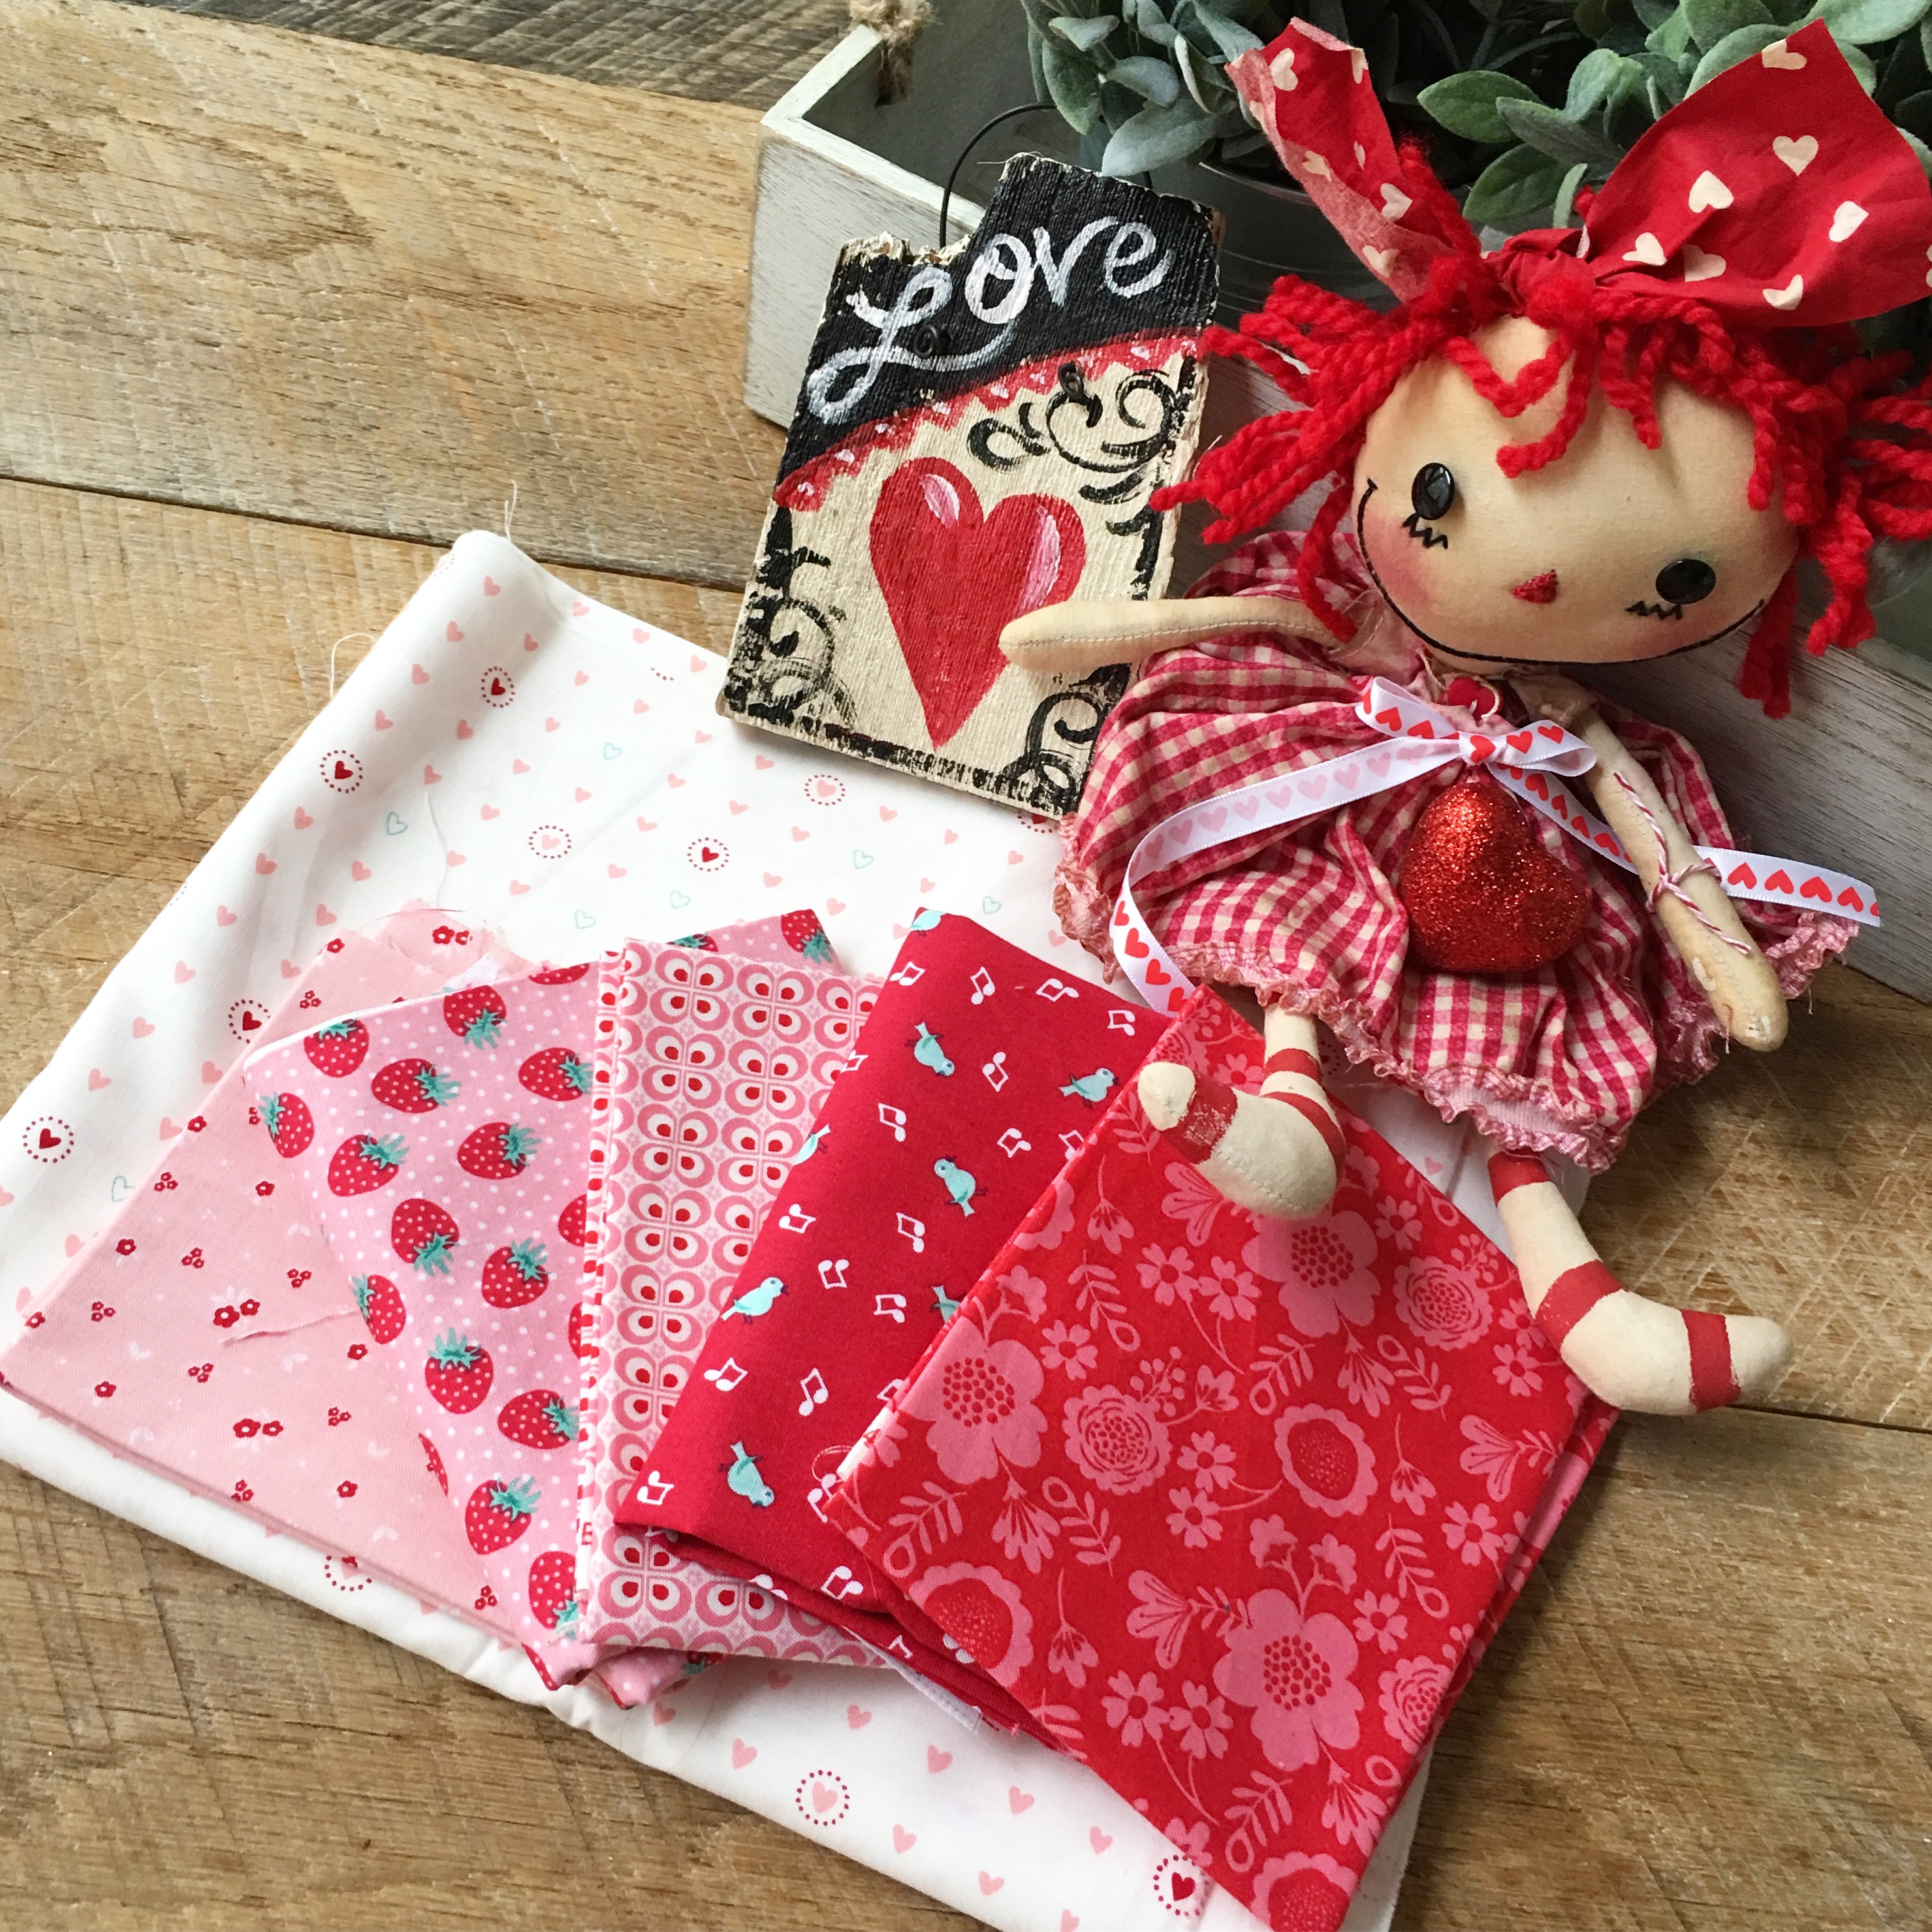
The fabrics I used are a selection of fat quarters from Riley Blake Designs and background fabric ‘Lil Red by Moda.
DSC_0317
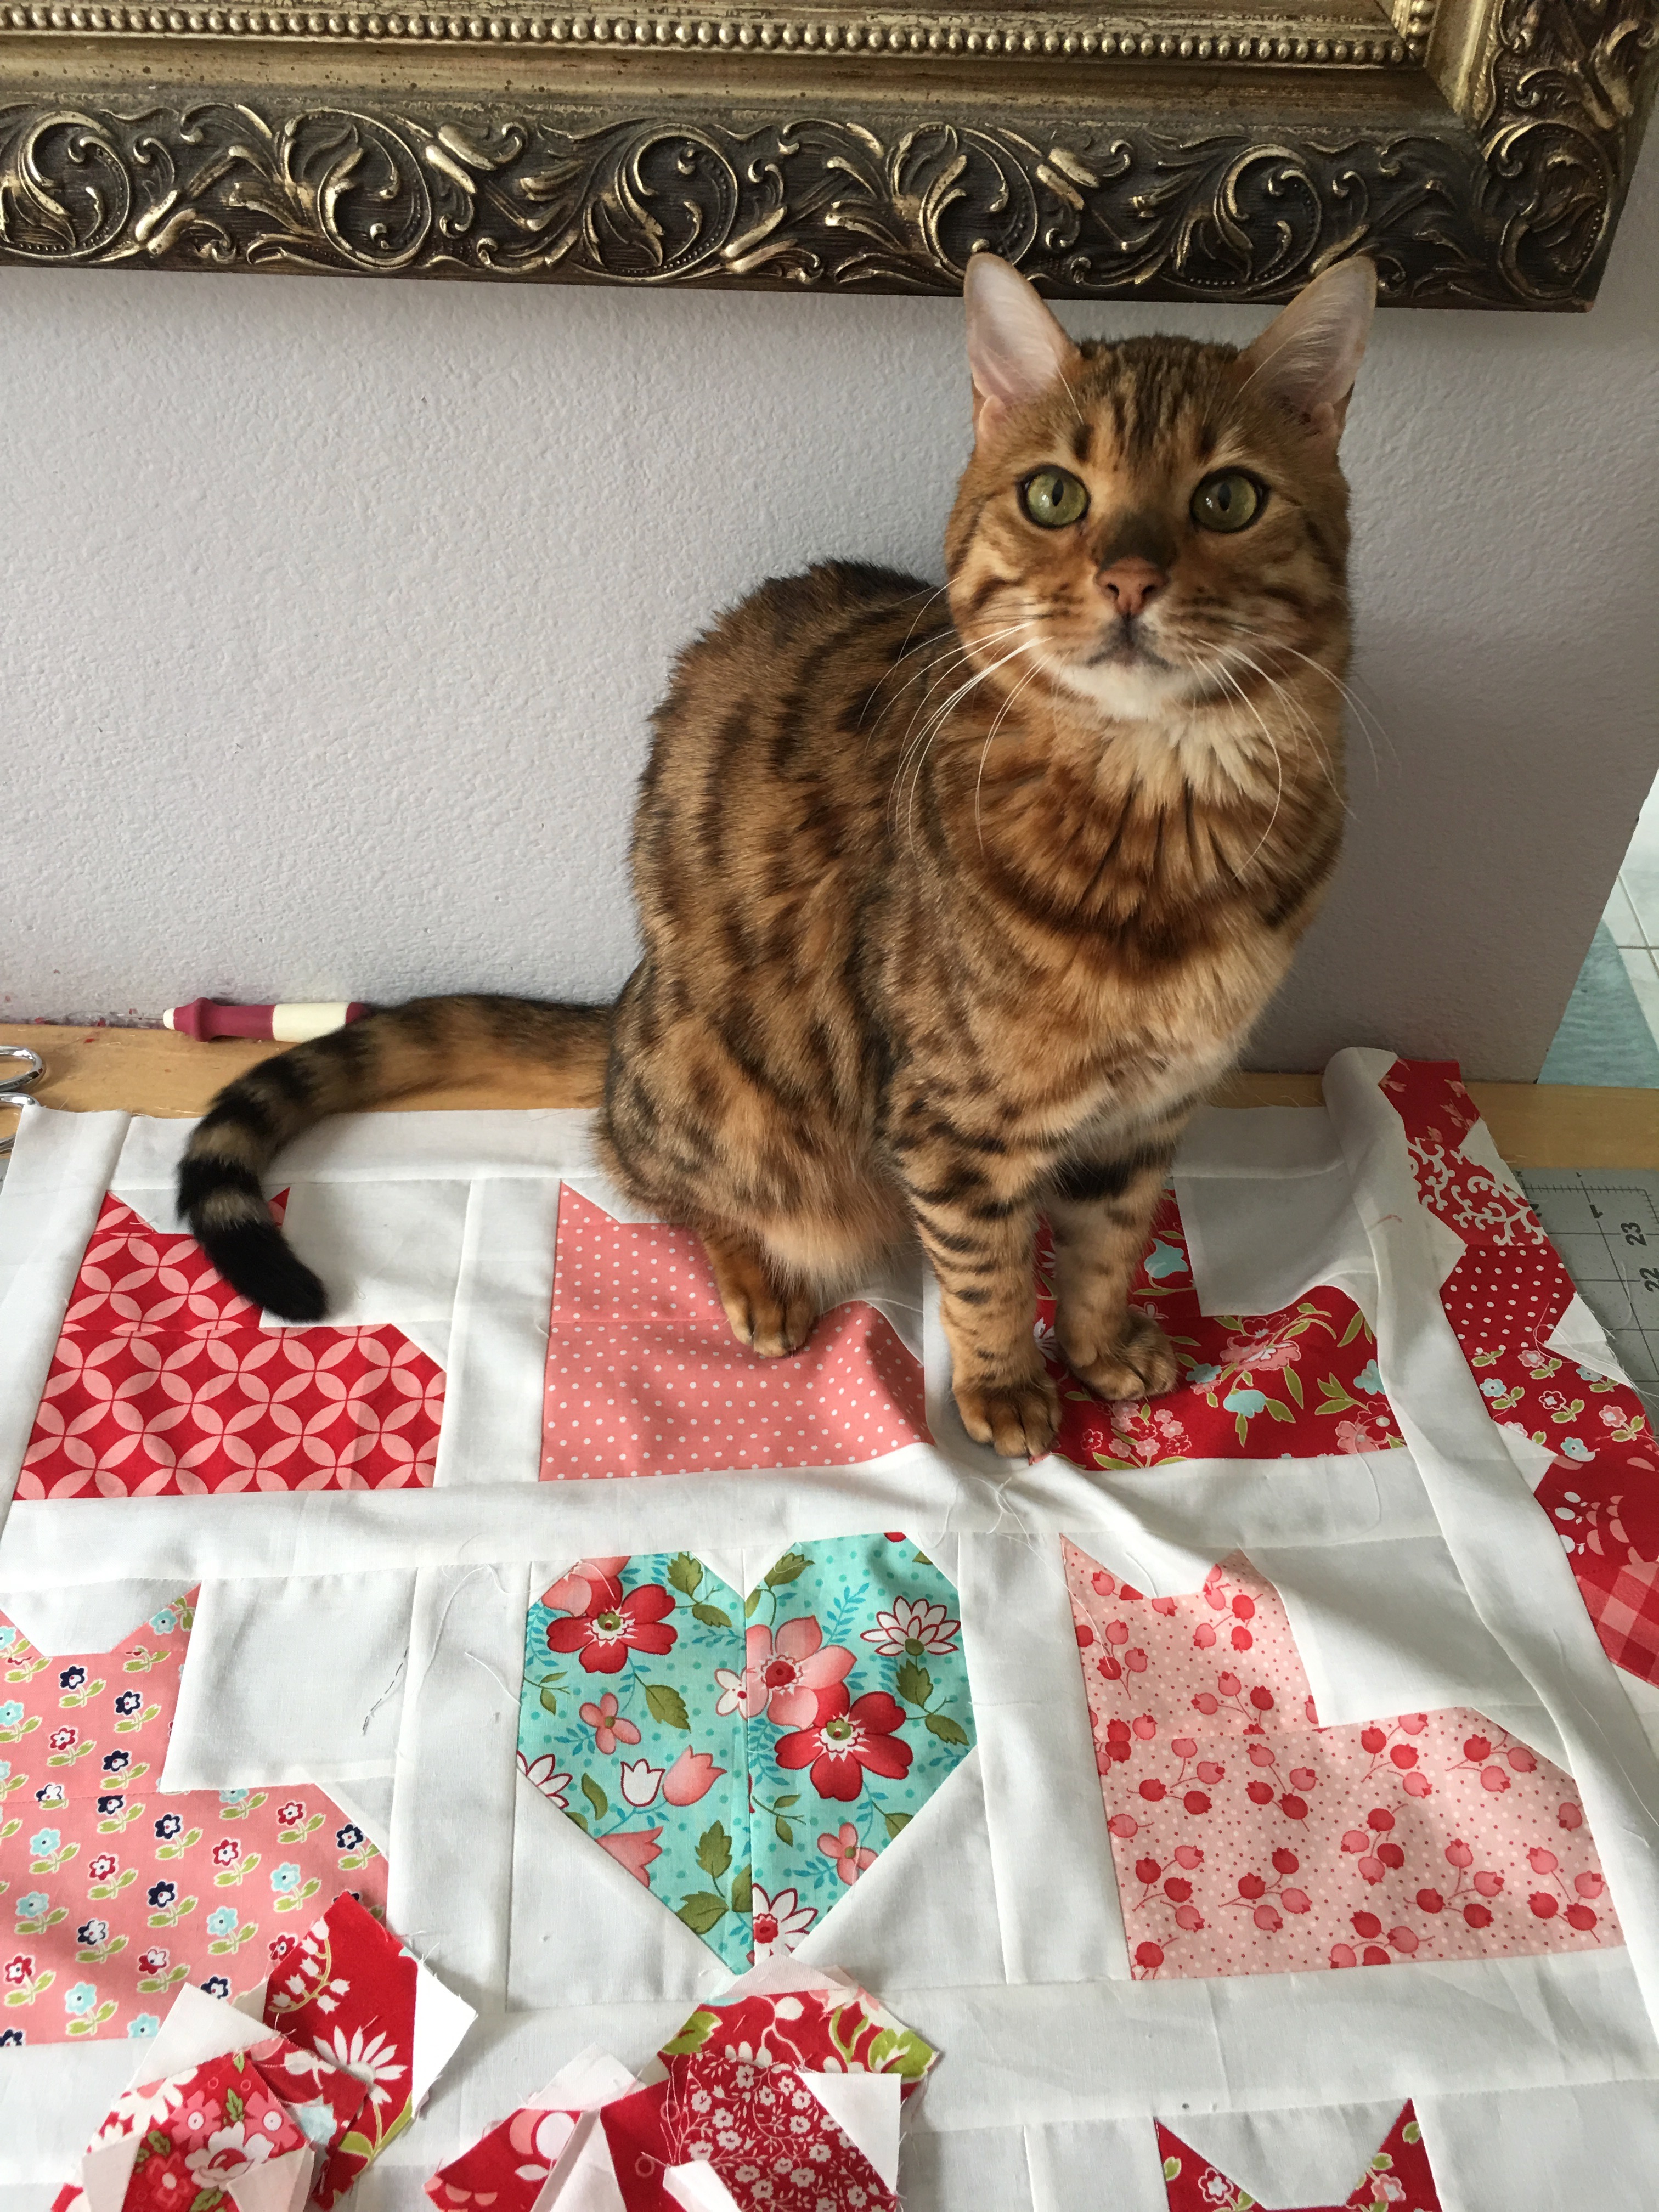
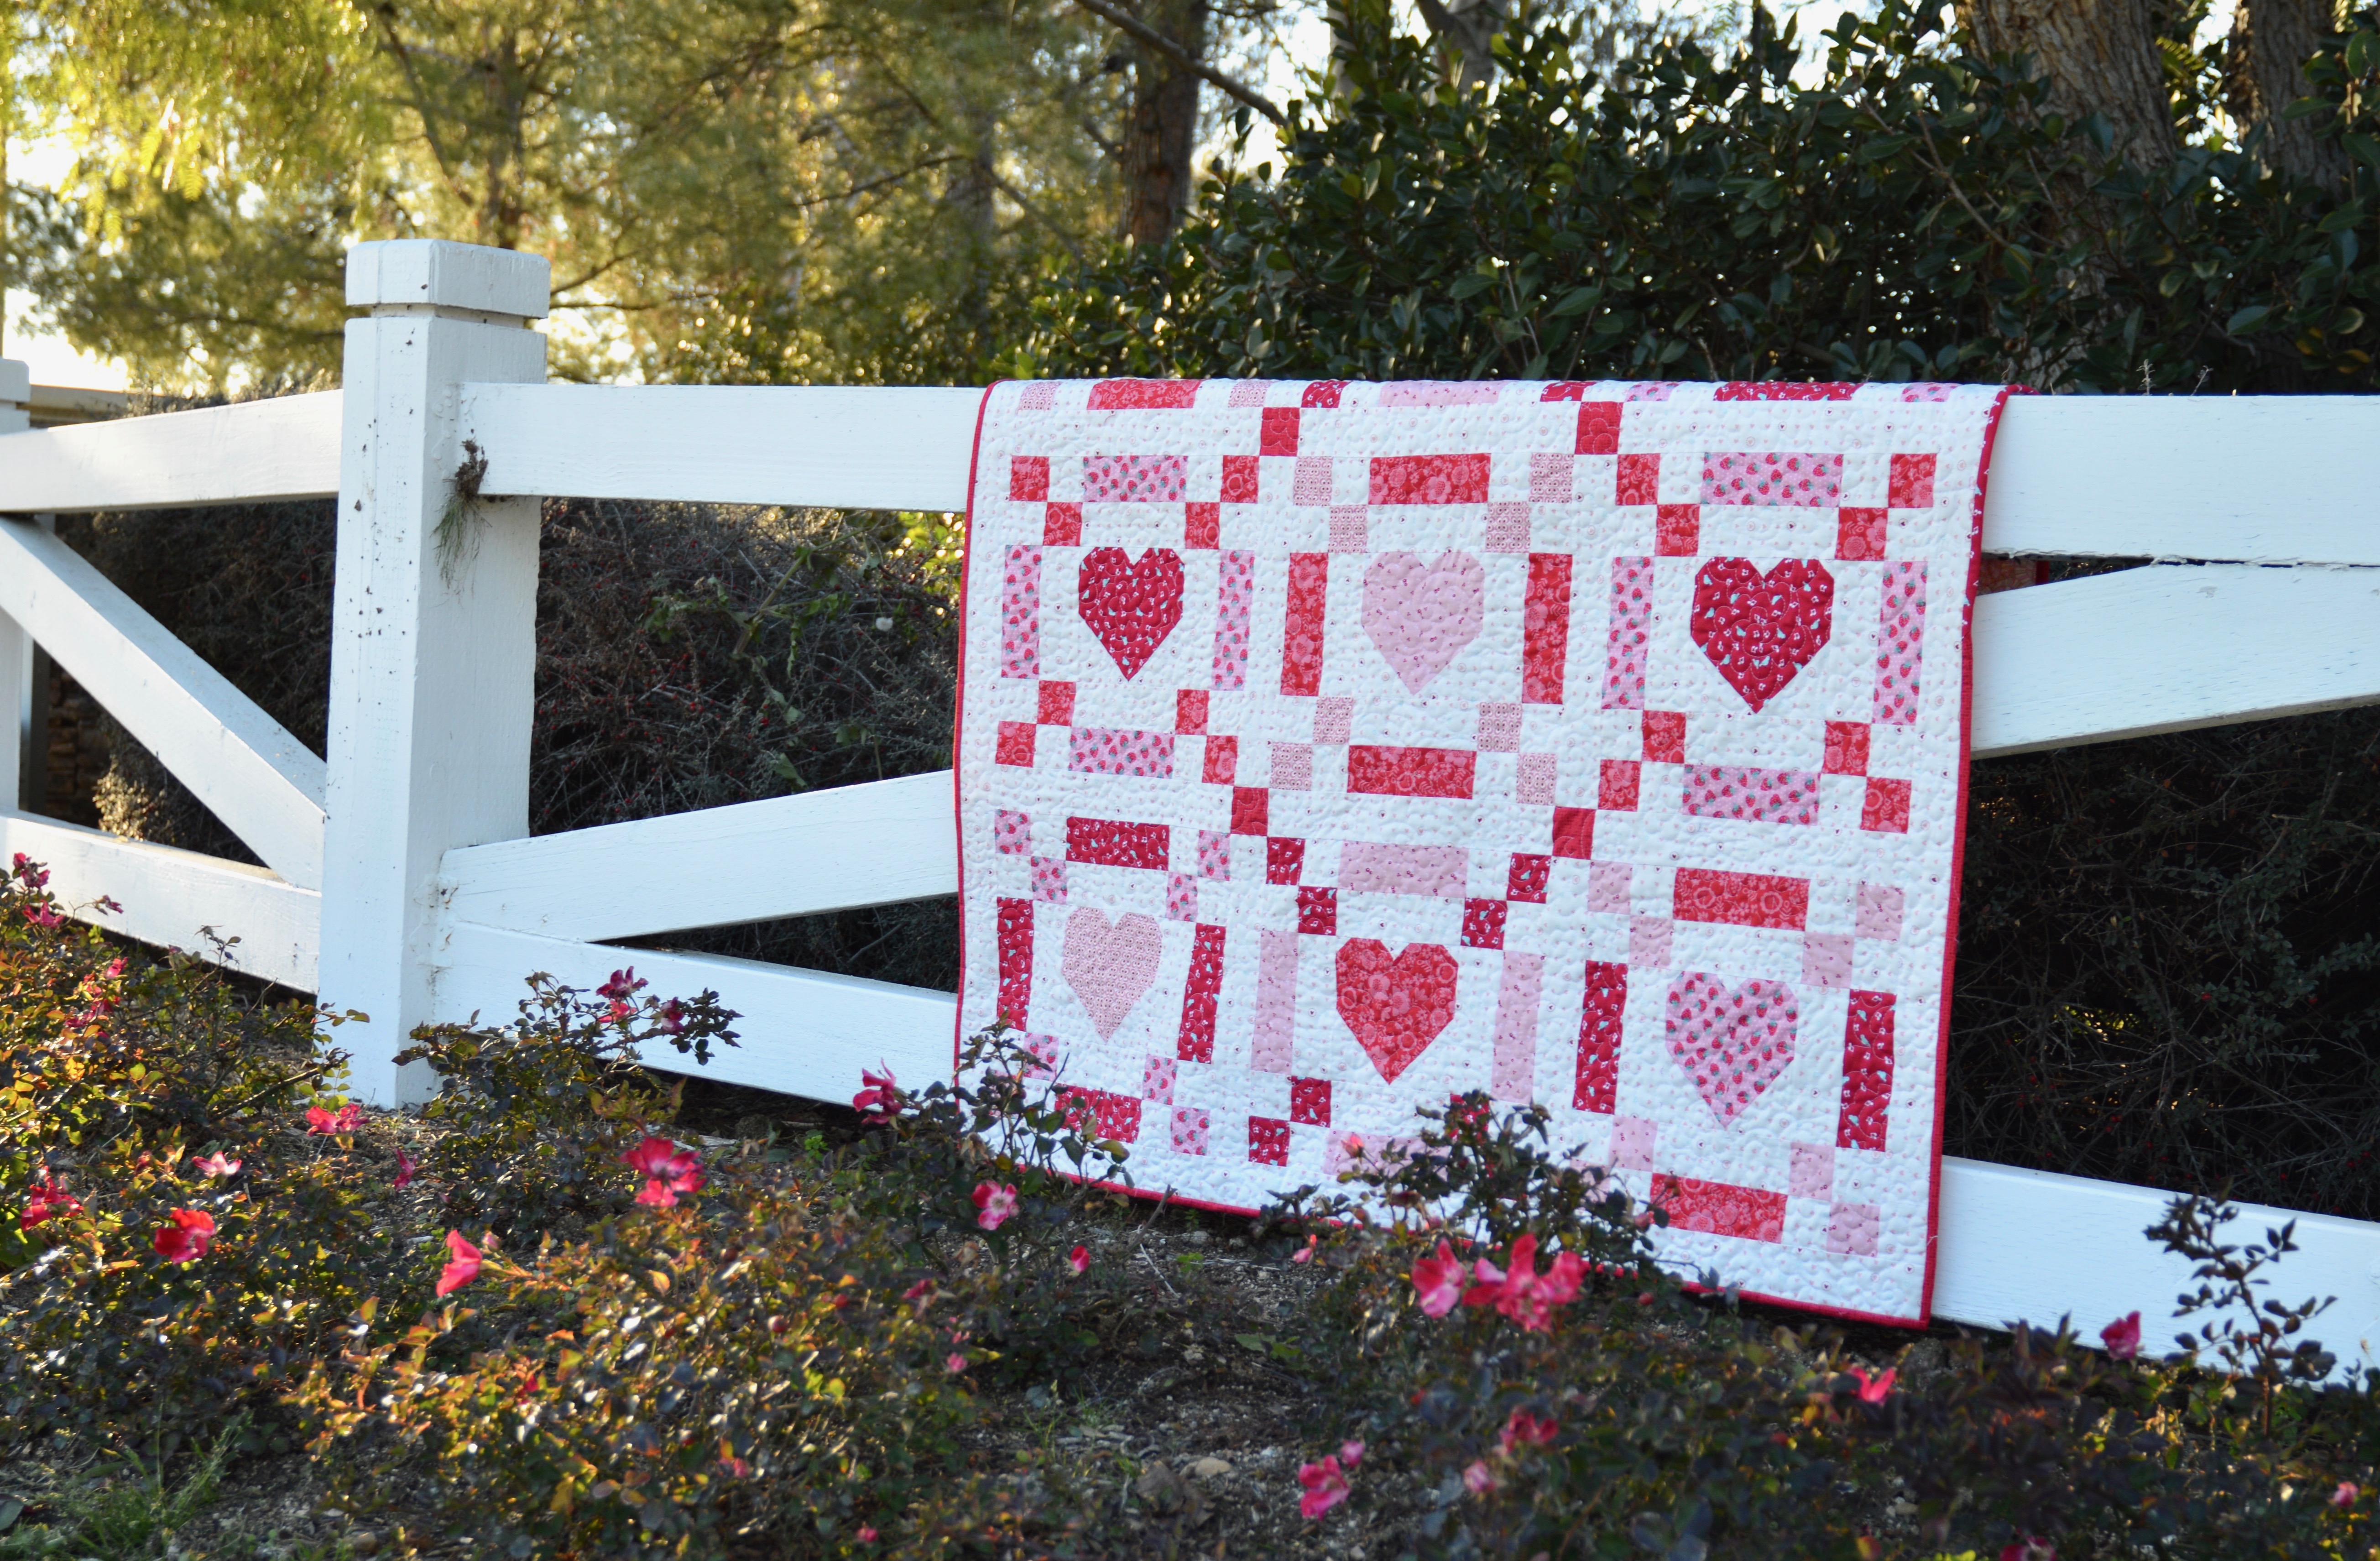
And Happy Valentine’s Day from me and Mufasa!!!
IMG_9149

Valentine’s Day Art

IMG_8898

I’m giving my daughter a little shout out today on my blog!  She has just finished stocking her Etsy shop with these adorable vintage-inspired wood signs.  I’m hoping she will make me a set if she’s not too busy!  You can check out her art by visiting her Etsy shop, EllaSketchArt.  All the items are hand painted by her and all the money she earns is going toward her first year of college next year!!  Thanks for being supportive!!!!IMG_8928

Kiss me and Be Mine signs are 6″ x 3.5″ and stand on their own.

IMG_8920

This gingham love sign is painted on a rustic cedar fence post and measures 10″ x 5″.IMG_8924

These three conversation heart pieces are cute by themselves or as a set.  Each measures 5.5″ square.  I love each different design!!IMG_8923

She also takes custom orders if you have something specific in mind 🙂

IMG_8925

Kitty Love Quilt Pattern is Here!!

screen-shot-2017-01-10-at-12-07-43-pm

It’s here!  It’s here!  My latest quilt pattern, Kitty Love!!!   January is feeling quite dreary!!!  I created this cheery Valentine pattern to brighten things up around here!  It is available for purchase in my Etsy shop.  The pattern is a PDF and has full color instructions and diagrams.  dsc_0861

I made this quilt with a variety of Bonnie & Camille fabrics by Moda: Vintage Picnic, Hello Darling, Vintage Modern and Day Sail.

img_8676

This quilt measures 31″ square and is perfect to hang on a wall or put on a table.  What I love about this pattern is that it is super versatile!  I have included instructions to sew the quilt with charm packs and background fabric!  I love my friend,  Tina’s version – she made 5 heart blocks and 4 heart blocks all with charm squares!!

img_8693

img_8691

Also included in the pattern is a pumpkin block so you can make balck cats and orange pumpkins for Halloween!!

img_8610

Mufasa is totally thrilled with this fun quilt and I know you will be too!!!

img_8638

Valentine Tote Bag

valentine tote

I am so in love with Milk Sugar Flower fabric from Penny Rose for Valentine’s Day!  It just screams vintage valentine!  I thought Sally needed a cute tote bag to carry her valentines in when she has her Valentine Party!  This tote bag is the perfect size for so many things!  Library books, piano books, car trips, stuffed animals, and dolls!  Sally will be using it as her piano book bag when Valentine’s Day is over.  The bag gets its stability from Therm o Web Fusible Medium Weight Stabilizer.  You can totally sew it in an hour!  Yippee!!

valentine tote bag 5

I have to pay her to model you know 🙂valentine tote bag


valentine tote bag 35

valentine tote bagNote: The seam allowances very as noted in the directions

Supplies for project:

1/3 yard main fabric

1/4 yard white accent

1/3 yard blue accent & handles

1/3 yard lining

HeatnBond® Lite Fusible Adhesive

2 yards HeatnBond® medium weight fusible stabilizer

valentine tote bag 8

Cut the following:

White (2) 4.5″ x 16″ accent strip main bag

Blue (2) 2″ x 16″ accent strip main bag

Pink (2) 10.5″ x 16″ main bag

Blue handles 6″ x WOF

Lining (2) 16″ squares

Sew the strips together in that order using 1/4″ seam allowances.  You should have (2) 16″ squares for the outer bag.

valentine tote bag 12Draw a heart on the Heat n Bond® Lite and iron it to the wrong side of the red fabric.

valentine tote bag 10 Cut around the heart and peel off the backing paper.  Position the heart as pictured above.  Make sure to leave plenty of room for the bag bottom.  Press into place and top stitch around the heart.

valentine tote bag 13Cut the HeatnBond® Interfacing/stabilizer into (4) 16″ squares.

valentine tote bag 14Cut the lining pieces (2) 16″ squares.

Fuse the HeatnBond® interfacing onto the wrong side of both the outer bag pieces and both of the lining pieces.

valentine tote bag 16Match both outer bag pieces right sides together and pin all the way around.  Do the same for the lining pieces.  Sew around the sides and the bottom using 1/2″ seam.  Leave a 3″ opening (for turning) on one of the sides of the lining.

valentine tote bag 20Cut a 2″ square notch out of the bottom corners of the outer bag and the lining.

valentine tote bag 21
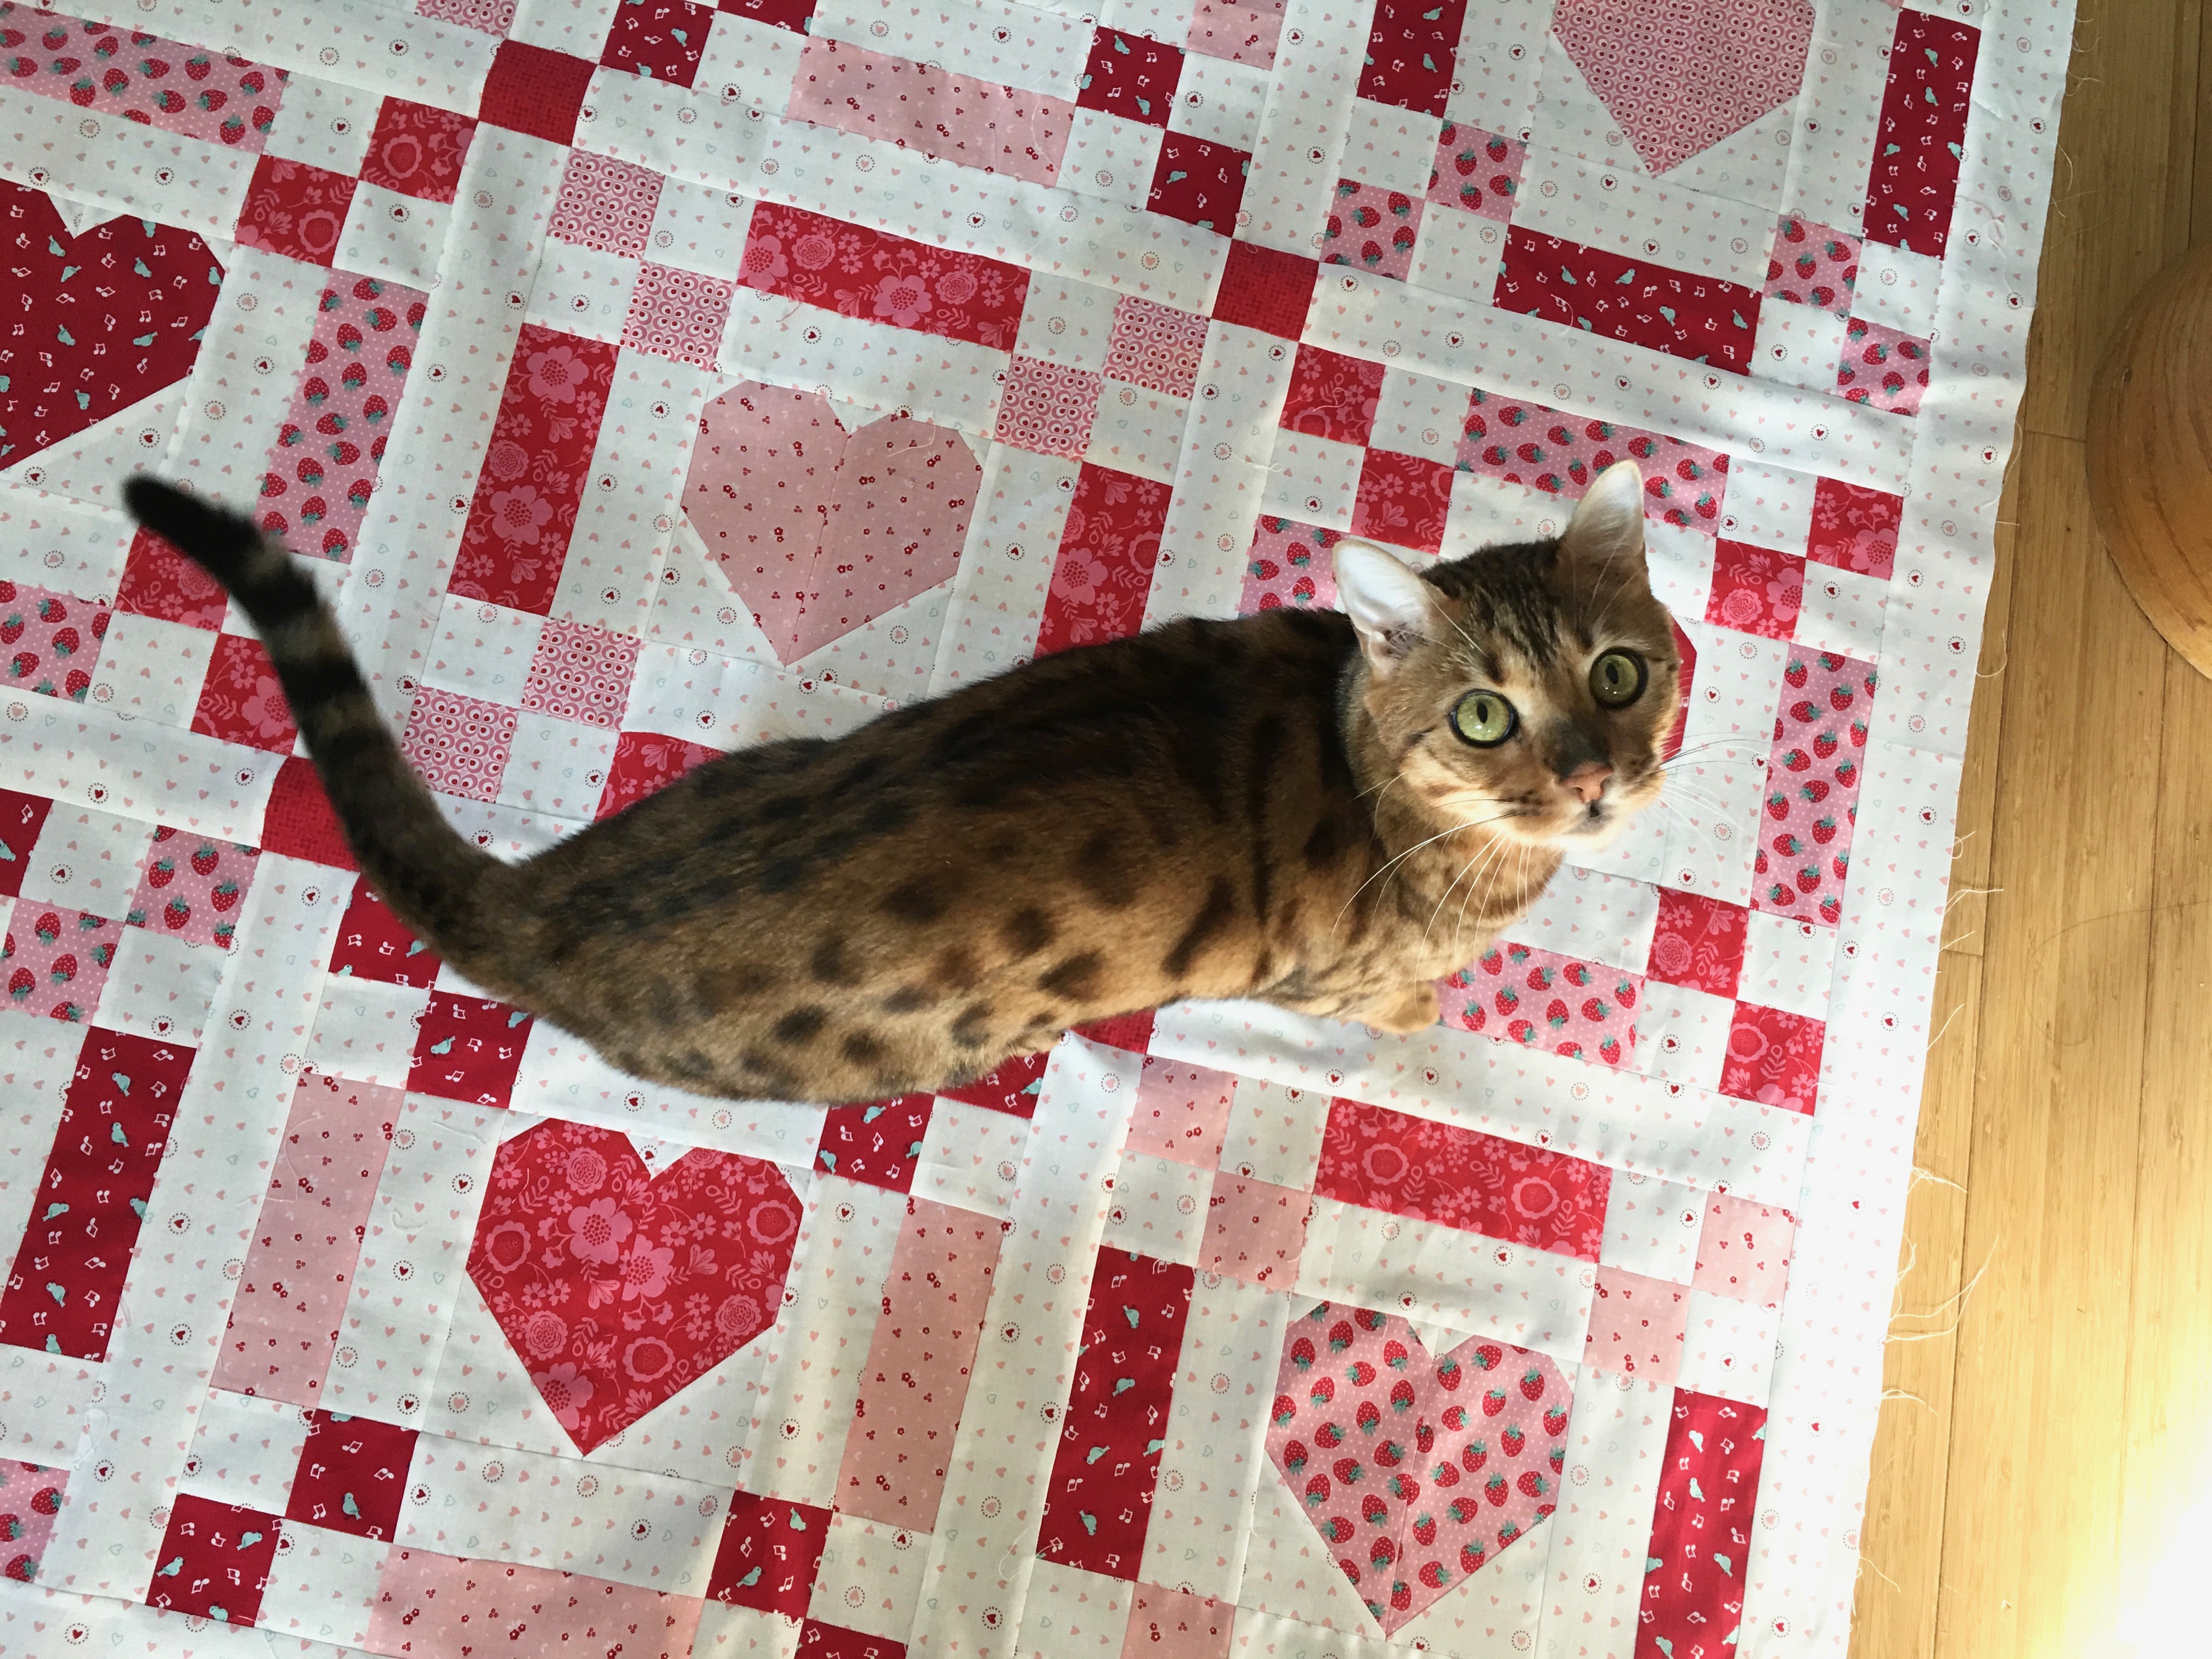
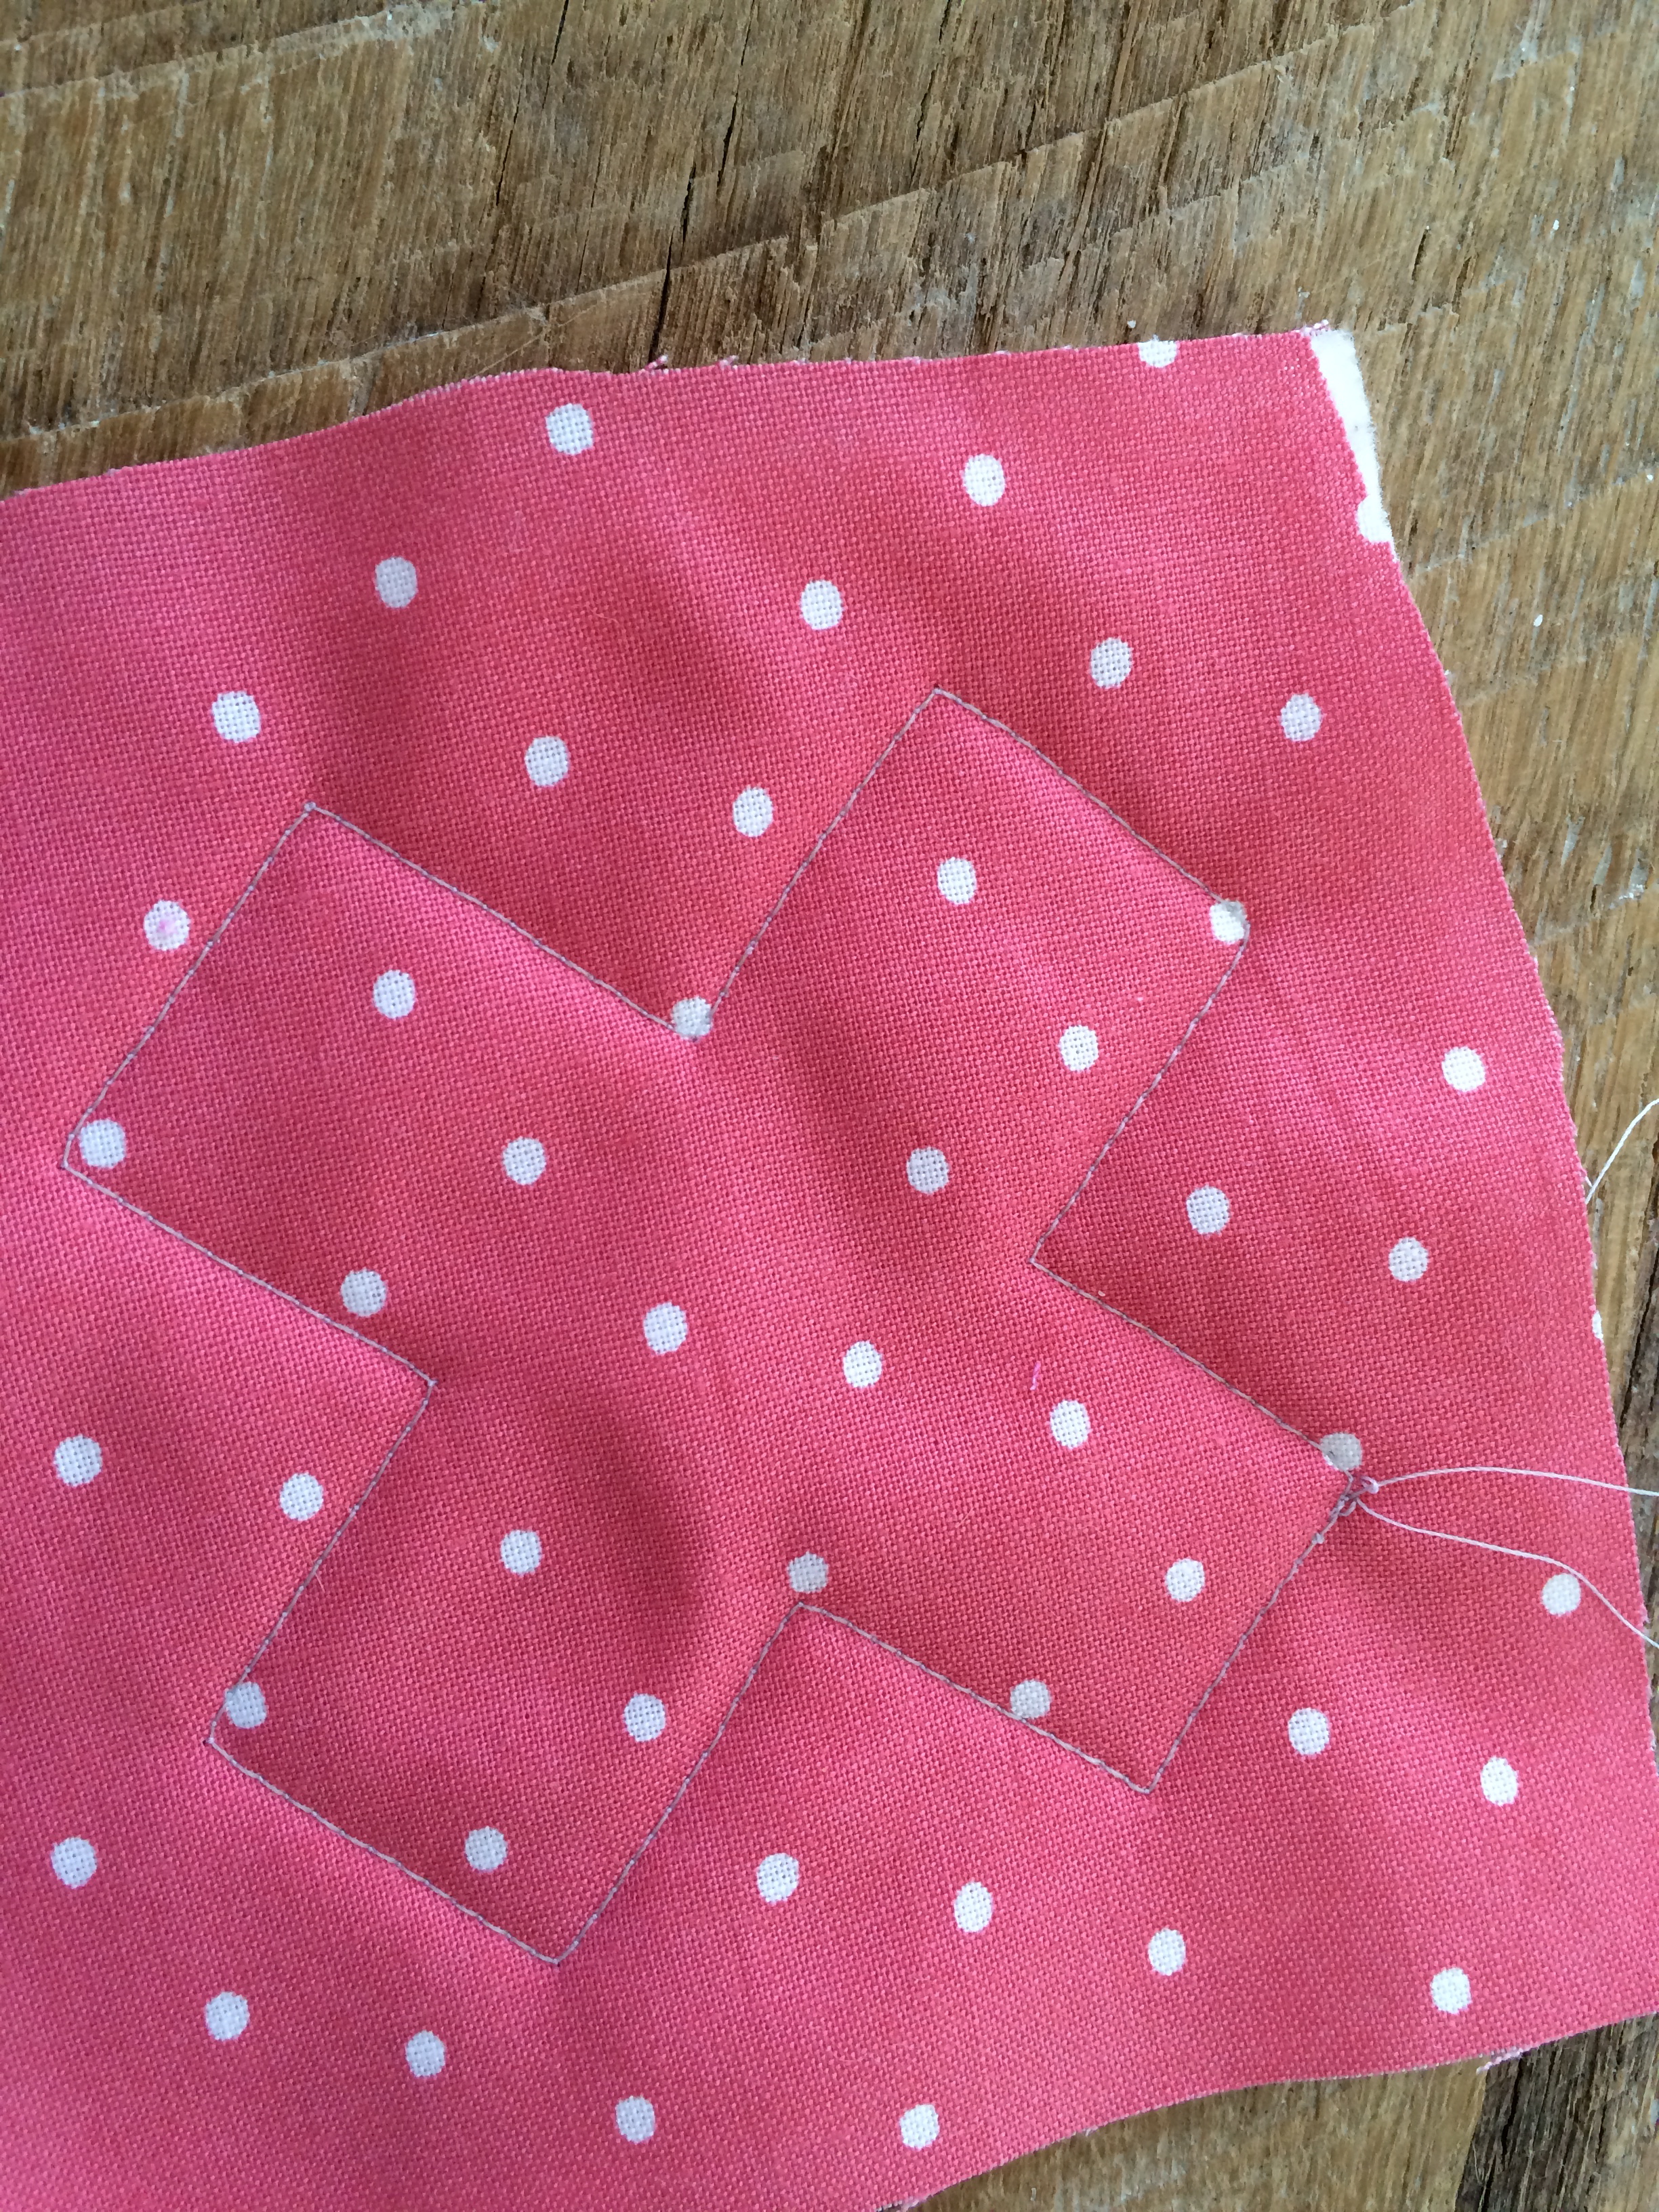
Open the notch and match the side seam and the bottom seam.  Pin.  Do this to each of the notched corners.

valentine tote bag 25Sew along this edge using 1/4″ seam.

valentine tote bag 23It’s starting to look like a bag!

valentine tote bag 29Press the 6″ handle strip in half lengthwise, then fold the edges into the center, the handle strip should be pressed into equal sections of four.

valentine tote bag 30Press the handles and top stitch along both long sides.  Trim off selvage.  Cut the handle strip in half creating 2 handles.

valentine tote bag 31Turn the outer bag right side out and pin the handles into place.  Measure 3.5″ from the side of the bag to position the handle.  Baste the edge of each handle 1/8″ from the edge.

valentine tote bag 32Place the right side out outer bag inside the inside out lining (that wasn’t confusing at all!)  The above picture is how it should look.  Essentially the lining and the outer bag are right sides together.  Match the side seams.  Pin all the way around the bag.  Sew 1/4″ along the edge all the way around the bag.  Turn the bag right side out through the opening of the lining.  Top stitch the opening closed.  Press the lining of the bag so you can’t see any lining on the front of the bag.  Top stitch 1/8″ seam all the way around the top of the bag.

valentine tote bag 34I love how it turned out and so does Sally!  It just screams Sweet Valentine!

valentine tote bag 33Time to get working on our valentines!

valentine tote bag 5

Sizzix Heart Quilt

sizzix heart quilt

I think I love Valentine’s Day so much because it pulls me out of the “After Christmas Blues”.  It’s bright, and happy!  I love the simplicity of this quilt – a simple heart applique.  What makes it feel special is that no two hearts are the same and the backgrounds are a variety of low volume prints.  When ever I go to a quilt shop and I’m not sure what to buy, I end up purchasing charm packs.  I had this “Scrumptious” charm pack by Moda tucked away and it was perfect for this project.  sizzix heart quilt 3

DIY Heart Quilt: A Cozy and Sweet Make for Valentine's Day
Heat n Bond Lite by Therm O Web is my go to for any Sizzix applique projects. I love it because it’s light weight, it fuses fast, and peels easy. Cut the Heat n Bond Lite into (25) 5″ squares.
DIY Heart Quilt: A Cozy and Sweet Make for Valentine's Day
Select 25 of your favorite squares from the charm pack.
DIY Heart Quilt: A Cozy and Sweet Make for Valentine's Day
Fuse the Heat n Bond Lite to the wrong side of each of the 25 charm squares. Let cool.
DIY Heart Quilt: A Cozy and Sweet Make for Valentine's Day
Make sure your cat helps with all the die cutting! Die cut each of the 25 squares using the Fabi heart. The squares are just big enough to cover the whole heart.
DIY Heart Quilt: A Cozy and Sweet Make for Valentine's Day
Cut a variety of low volume prints into 7″ squares. You will need 25 total. Peel off the backing paper and position the heart in the center of each of the 7″ squares. Heat set into place. Top stitch around each heart, I used light pink thread.
DIY Heart Quilt: A Cozy and Sweet Make for Valentine's Day
Lay out the blocks as desired. You could easily turn this into a table runner or add more blocks for a baby quilt or throw quilt. Sew each block together in rows using 1/4″ seams. Press each row alternately so it makes it easy to match seams. Sew the rows together and press in one direction. Quilt.
DIY Heart Quilt: A Cozy and Sweet Make for Valentine's Day
I quilted a scallop boarder around each heart to give it a “Valentine” feel. Then 1/4″ straight line seams. Add the binding and you’re done!
DIY Heart Quilt: A Cozy and Sweet Make for Valentine's Day


Happy Valentine’s Day

I thought I would share my favorite Vintage Valentines and wish you all a a very Happy Valentine’s Day – I love that it’s on a Saturday this year!I think this heart is my favorite – made from Blend’s Clementine line – and it’s not even in traditional valentine colors.  I have it hanging in my living room.

vintage valentines 3

This heart is made with Blend’s Modern Lace.  I do recognize that not everyone loves cats as much as me, so I made a few versions with vintage love birds.
vintage valentines 5

vintage valentines 6


This one is also made with the Modern Lace line – which I LOVE!vintage valentines 7

This print is also from Modern Lace.

IMG_3445

I love this one made with the spoon print from the Clementine line.
vintage valentines


My daughter and I made over 30 of these hearts!IMG_2890


A little peek into some Valentine decor in my home 🙂

IMG_3640

vintage valentines 2

vintage valentines 4


Tic Tac Toe Valentine Pillow Tutorial

valentine pillow tic tac toe
February is just flying by!  I needed a little pick-me-up today and throw pillows always do just the trick!  A friend of mine came over and we spent the afternoon sewing.  I came up with the idea of this interactive pillow after sitting next to my little girl at church yesterday.  We brought along the quiet book (circa 1980) and one of the pages is a tic tac toe game.  I thought this would be super fun to incorporate into a Valentine’s Day pillow!

tic tac toe valentine pillow

I love how it turned out and my kids LOVE it!  They couldn’t believe I made something fun!!  I think the fabrics make it – it’s the Flirt line by Dear Stella.  I had some left over from my Valentine Bookmark & Sachet project.

tic tac toe valentine pillow 17

Here’s how you can make one

Supplies:

fat quarter white fabric

small pieces of fabric for hearts and Xs – can use charm squares

cotton batting scraps

fat quarter for the pillow back

20″ pillow form

22″ or longer zipper

3 yards pink trim

2 yards pink lace

1/4 yard border fabric

10″ of velcro

Spray n Bond

X and Heart pattern, click here

Begin by cutting the white background fabric 15″ square
tic tac toe valentine pillow 2

Measure and position the pink lace so it creates equal sections, taking into account 1/4″ seam allowances around the outside of the square.  Using Spray n Bond basting spray makes positioning lace a snap.  If you don’t have this, you can pin.  Sew with matching thread.  Next, position the next 2 pieces of lace to create the grid.  Sew into place.
tic tac toe valentine pillow 3

Print and cut out the X and the heart.tic tac toe valentine pillow 4

Layer a piece of fabric, cotton batting, and another piece of fabric like this with right sides facing out.  You are making a mini quilt sandwich.  These don’t have to look pretty.  I cut mine with scissors and did not measure.  Using basting spray, spray the layers so they stay together.tic tac toe valentine pillow 5

Pin and X or a Heart on the fabric.

tic tac toe valentine pillow 6

Stitch all the way around the pattern piece.

tic tac toe valentine pillow 9

Cut out the X close to the seam.  Cut 1″ piece of velcro and position the soft piece in the center of the X.  Make sure you use the same side of the velcro for each piece or they won’t be interchangeable 🙂  I had to use the seam ripper on one of mine 🙁tic tac toe valentine pillow 7

Sew around the velcro square. Do this to each heart and X.  I made 5 hearts and 4 Xs.  Sew the opposite sides to each velcro piece in the middle of the tic tac toe squares.tic tac toe valentine pillow 8

Prepare the boarders by cutting (2) 15″ x 3″ strips and (2) 20″ x 3″ strips.
tic tac toe valentine pillow 10Sew the 15″ long strips to each side using 1/4″ seams.  Press toward the boarder.

tic tac toe valentine pillow 11

Sew the 20″ pieces on in the same manner.  Press.  Sew the decorative trim around the pillow front, rounding the corners.
tic tac toe valentine pillow 12

Prepare the back of the pillow.  Cut a 21″ x 20″ piece of fabric (I add 1″ to the length just in case the zipper or the zipper seam differs).  Cut at the 4″ mark.  Insert the zipper.  Trim off the excess zipper.  With the zipper partially open, place the pillow front to the pillow back, matching the top edge and the side edge.  There should be about 1″ extra at the bottom of the back piece.  Cut this off after sewing all the way around the pillow.  Sew all the way around the pillow using the trim seam as you guide.  I like to sew just a little larger seam then the seam I created when sewing the trim on.  Turn right side out.tic tac toe valentine pillow 13

Insert the 20″ pillow form and then place the game pieces on the velcro squares – whose ready to play!!tic tac toe valentine pillow 14

This is the back of the pillow – you can make it how you want – this is just a super fast & easy way to finish a pillow.

tic tac toe valentine pillow 123

The fabrics are amazing!!!

tic tac toe valentine pillow 15
tic tac toe valentine pillow 18
tic tac toe valentine pillow 20

Sally was being silly 🙂

tic tac toe valentine pillow 21

tic tac toe valentine pillow 22

Valentine Bookmark and Sachet Tutorial

valentine bookmark and sachet


Don’t you just LOVE February!!  I love all the cheerful colors, flowers, fabrics, and blossoms!  It’s even been 80 degrees around here in the daytime!  I’m super happy!!!IMG_3280

These fabrics from the Dear Stella Flirt line just scream Valentine’s Day.  They make me want to throw a Jane Austen inspired Tea Party…..maybe I will!!dear-stella-flirt-fabrics

I love giving little gifts on Valentine’s Day and these sweet projects can be sewn up quickly.  I love using fabric bookmarks in my books, this bookmark is flat and thin so it won’t damage your book.
valentine bookmark 2


This lovely lavender sachet is perfect to toss in a drawer or even in your car!
valentine sachet. 2

They make a lovely pair.  I can’t wait to sew more of these!  My full instructions are on the Therm O Web Blog.  This project uses Heat n Bond Lite for the appliqué which makes it a snap.  There is also a little Heat n Bond medium weight stabilizer in the bookmark to give it stability.  I can’t wait to sew a few more!!
valentine gift set 3

Vintage Kitty Valentine


valentine kitty

I’m excited to be sharing my tutorial for these darling Vintage Valentines over on the Therm O Web Blog today!  They are super fun to make and sew up quick!  In fact, my 6 year old daughter even made one all by herself!  All the wonderful fabrics are from Blend’s fabric lines: Equniox, Modern Lace, and Turkish Delight.

I choose some vintage cat images off the internet and printed them onto the EZ Print Transfer Sheets.  You could print any image you want.  The image is then ironed on to white fabric.vintage valentine cat 5

Of course I had to include my kitty in this kitty project!  Mufasa had fun playing in the lace, then he had a nap in the lace!
vintage valentine cat 12
vintage valentine cat 22

Sally loves to sew!!

vintage valentine cat 20

I made this one for Ella to match her room with blues and greens.

vintage valentine cat 19

This one is Sally’s – she choose the fabrics and the buttons and sewed the buttons on herself.

vintage valentine cat 39

I like this one too – it has diagonal rows of lace for the background.  They are so much fun to make and they make great gifts because you can really personalize them!  Now, get sewing 🙂

vintage valentine cat 36

valentine kitty