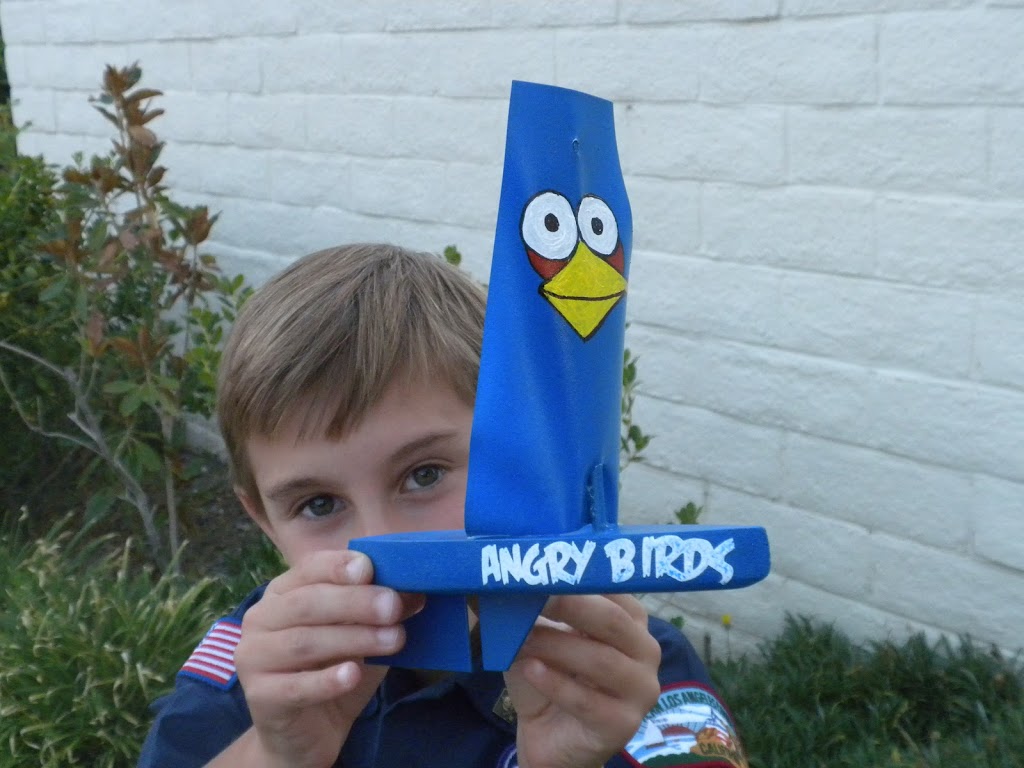
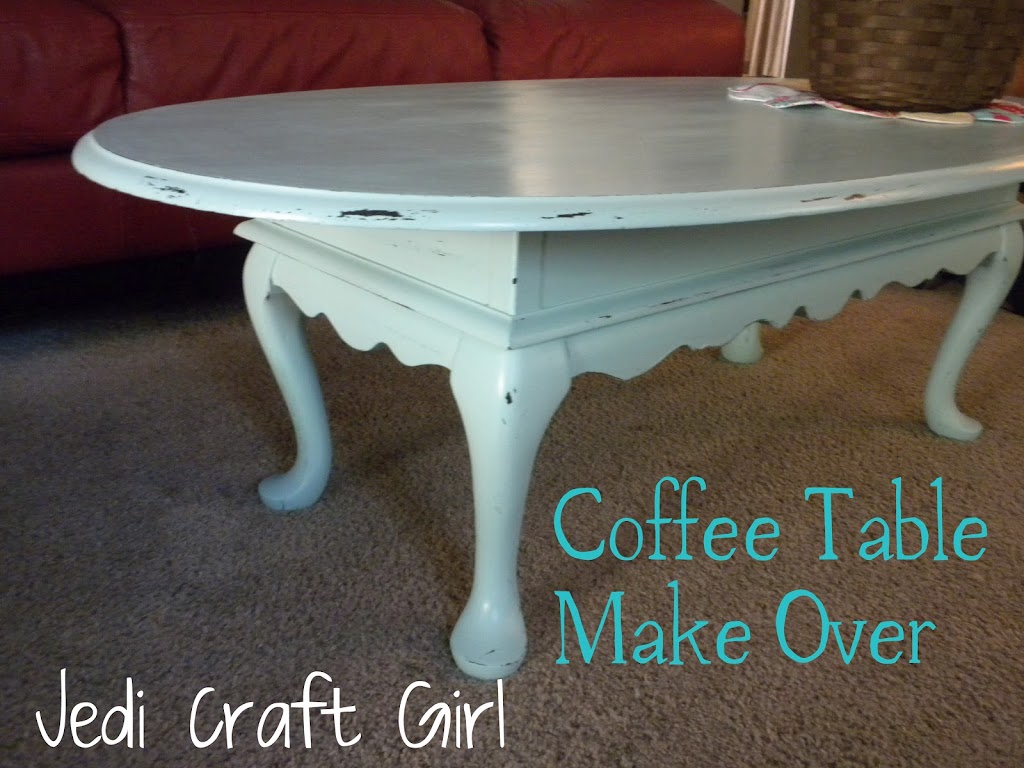
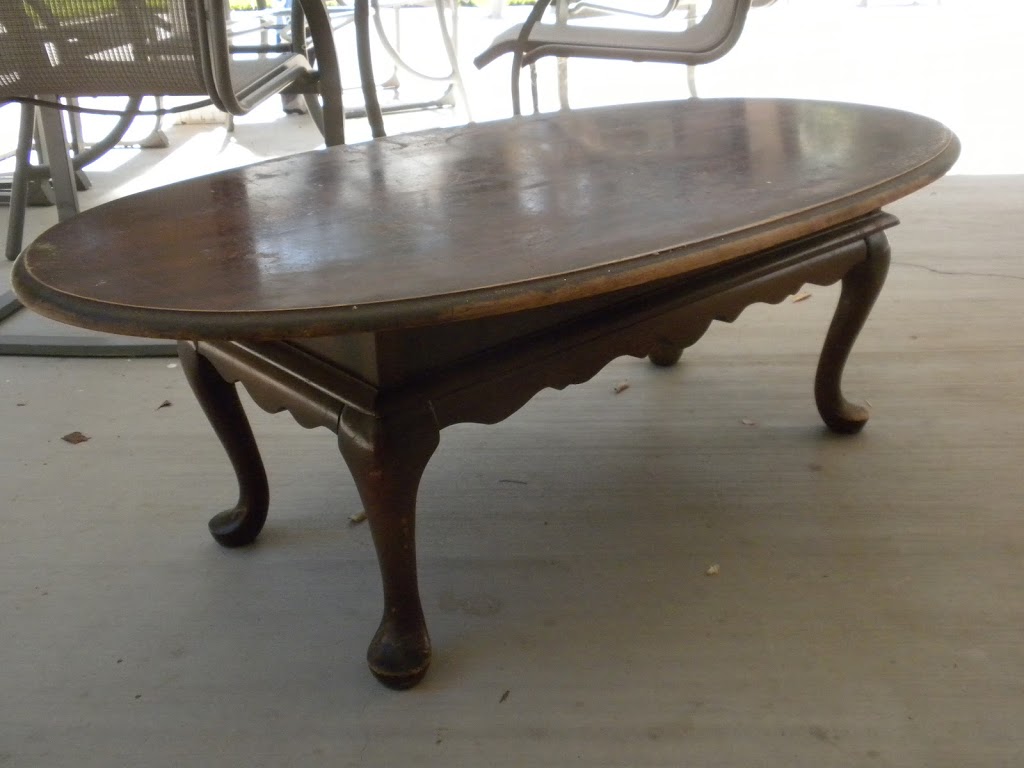
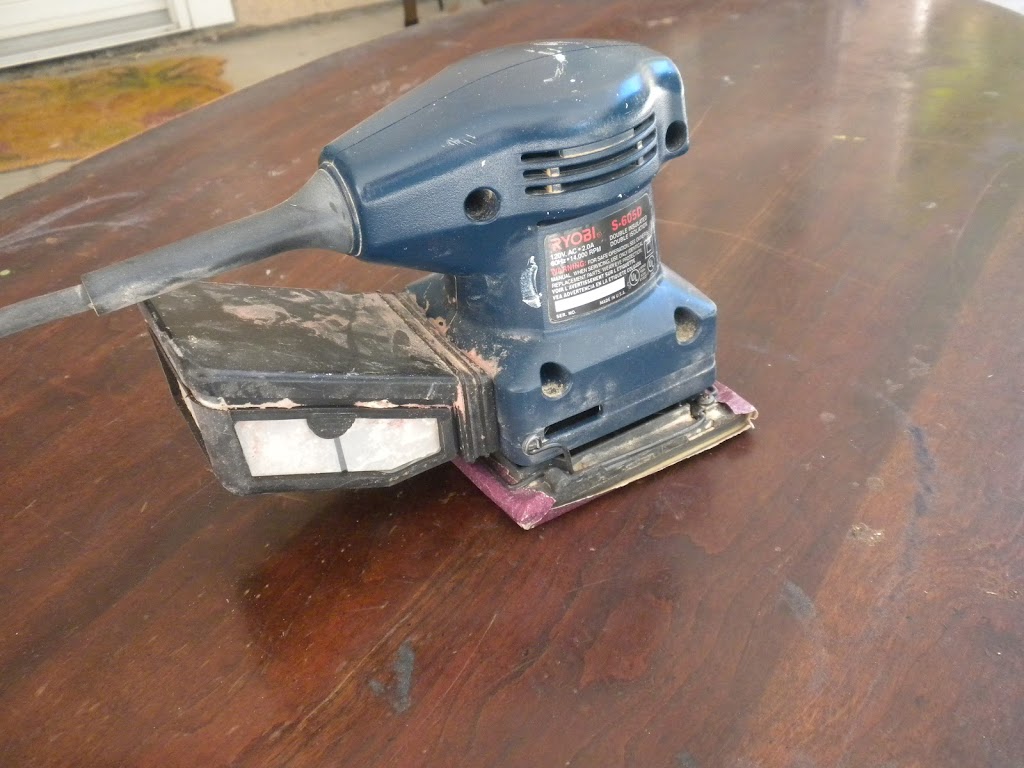
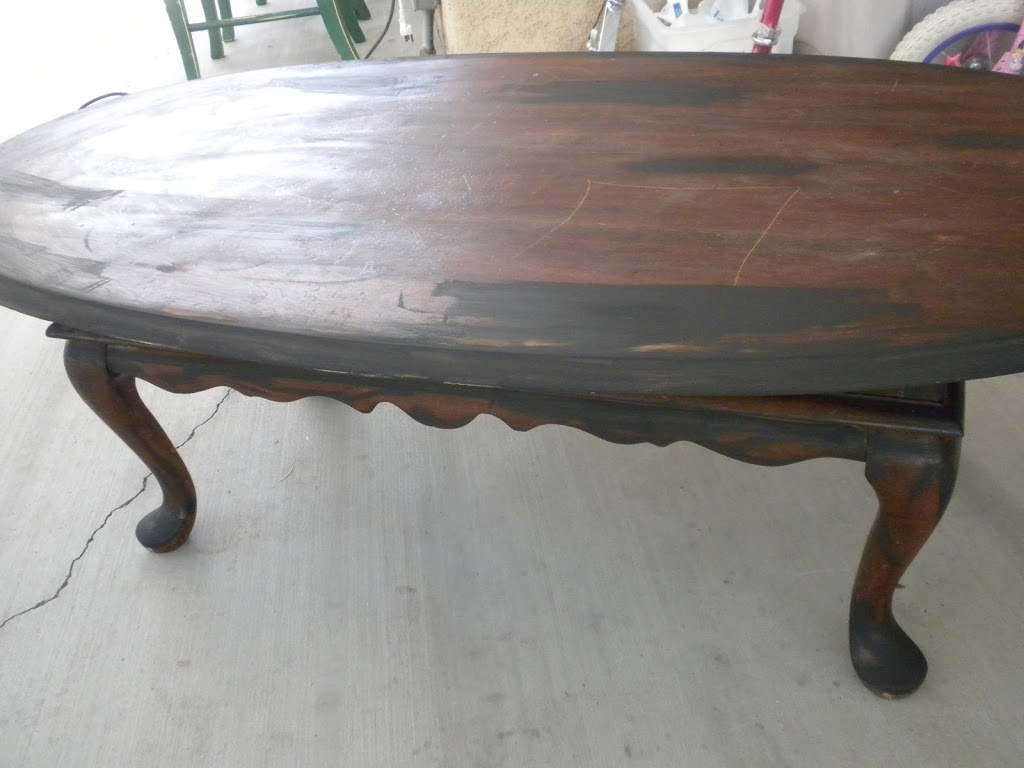
We had the boy scout Rain-gutter Regatta tonight. We had a fun time painting our boat to look like Angry Birds. We spray painted the whole thing blue then hand painted the face, outlining it with a sharpie. I cut the “Angry Birds” writing out on the cricut using the font Feast of Flesh from dafont.com. We didn’t win, but it looked really cute!!
Archives for August 2012
Only 2 more cat photos – I promise!
A blanket for Marbles
New Couch, New Pillows
So I sewed new ones! They are really big – much larger than a throw pillow. I essentially made a mini quilt and put 2 flaps on the back to make an envelope. This one is a Moda print and all I did was quilt it – swirls in the circles and then just 1/8 inch from the lines straight stitching.
Back to School
Thrift Shopping at DI
I love going to Utah because I get to shop at the Deseret Industries!! It is so much cheaper than thrift shopping in California – and there is so much to rummage through. David took these pictures of me “negotiating” with the cashier!! (I didn’t know I was being photographed!) So funny. I got all these cute luncheon plates & little glass cups to add to my collection – now I can have 100 people for lunch & they can all have their own glass plate!!
Quilt Shops in St. George, Utah
On our way up to Logan, I made David and the kids stop in St. George while I “ran” into 2 quilt shops. They literally sat in the running car (107 degrees outside) while I tried to browse through 2 quilt shops I had never been to! That takes talent! The first shop was Scrap Apple Quilts.
So cute! I bought the pattern and am determined to make one!!
They had so many cute things to look at – I could have spent at least an hour there! I quick grabbed a Halloween Panel by Henry Glass and some fat quarters & left.
Then we headed over to Quilted Works – also super cute and inspiring. They have a blog! Check it out!
Again, I had only a few minutes. So I bought a few patterns, some yardage and fat quarters. I have so many projects in my head!! These are a few photos I took of their shop. I wish I had a quilt shop in my area!!
So much fun! I wish I had more time!!
Antiquing in Utah!
I just got back from spending a week in Utah with my husband’s family. It was a jam-packed week for sure! I managed to squeeze in a few minutes of antique shopping looking for vintage Pyrex. I am excited about my finds!! I have been looking for a pink piece for my collection & I was so excited to find this pink gooseberry bowl! The red & blue bowls are actually ones my Mother-in-law gave me from her collection!
I love these two divided casserole dishes with lids – they are my first pieces with decorative lids! I got the yellow one for $5 and the green one for $6!!
I came across this vintage metal bread box and I fell IN LOVE!! It will be perfect on top of my fridge – looks so cute in my kitchen!!
A Quilt Gift
Wanted to share this quilt I made. I sent this quilt to a friend who has suffered a terrible loss in her family. I think quilts have special powers to lift, brighten, and comfort. I used the pattern from Diary of a Quilter found Here – only I made it larger to be a throw size for an adult. I love how it turned out!!
Coffee Table Re-Do!
I bought this coffee table at a garage sale over 6 months ago – I paid $2 for it! I didn’t really know what I wanted to do with it – I figured I would paint it or something. So, it sat in the backyard for months and months. After reading I Heart Naptime’s post on DIY Chalk Paint, I was inspired to paint something. This coffee table was the perfect candidate!
Step #1
Have your husband kill the black widow spider that is living in the underside of the table. YIKES!!!
I loved the tutorial from I Heart Naptime. She does an amazing job of explaining each step and her piece of furniture came out fabulous. You should check it out!! I followed her steps pretty closely.
This table had spots of glitter glue all over it from it’s previous owner. I felt that a good sanding would help my table get off to a good start. I didn’t sand down to the grain – just till it was smooth.
#3 Base Color
My goal in this piece was to distress it. I wanted a black color showing through (you can use any color – or even have the wood show through) I used some black paint and painted the edges and spots on the surface. Looking back, I would have given the entire table a coat of black because I couldn’t remember where I put my spots on the top!!
This is a technique to help the base color show through the top color. I have also seen it done with candle wax. Rub the Vaseline along the edges and parts where you want the black to show through – this will give it a shabby chic or rustic look depending on how much sanding you do.
This is where we will get that worn, vintage feel to our paint. I went to Lowe’s and purchased latex paint in a light aqua color. I asked for Satin finish and when I got home I noticed it was semi-gloss. I was a little miffed, but it worked fine anyway.
Mix 5 Tablespoons of Plaster of Paris with 2 to 3 Tablespoons water in a small container
Then measure 2 cups of paint in a separate container and stir the plaster mixture into the paint until it’s smooth. This was the right amount for the size of table I was painting.
I gave my table 3 coats of paint with a paint brush, letting it dry completely between coats. Some items may only need 2 coats of paint.
#9 Finishing Wax
This is my favorite part of the project! Use Minwax Paste Finishing Wax. Get a rag and rub it all over your piece of furniture. Then let it sit for 20-30 minutes. Take another cloth and buff or polish the wax. The wax gives it a vintage look as it is not glossy or too shiny, yet not flat. It’s the perfect finish for this project. If you are finishing a piece that needs to be durable, such as a kitchen table, I suggest polyurethane or polycrylic – it will be more durable. You can get those in satin finish so they aren’t too glossy.
Ta Da!!!!
It’s done & I LOVE it so much!!!
I would totally paint furniture using this technique again. When I bought the $2 table I was thinking $4 of spray paint and it’s done. This process was lots more $$ but still cheaper than buying real chalk paint. Plus I have plenty of Plaster of Paris and finishing wax to do several more projects – YEA!!!