Search Results for: halloween craft day

Halloween Craft Day

Thanks for stopping by!  I have received many questions about this project.  For more information and an updated tutorial on this project click HERE.


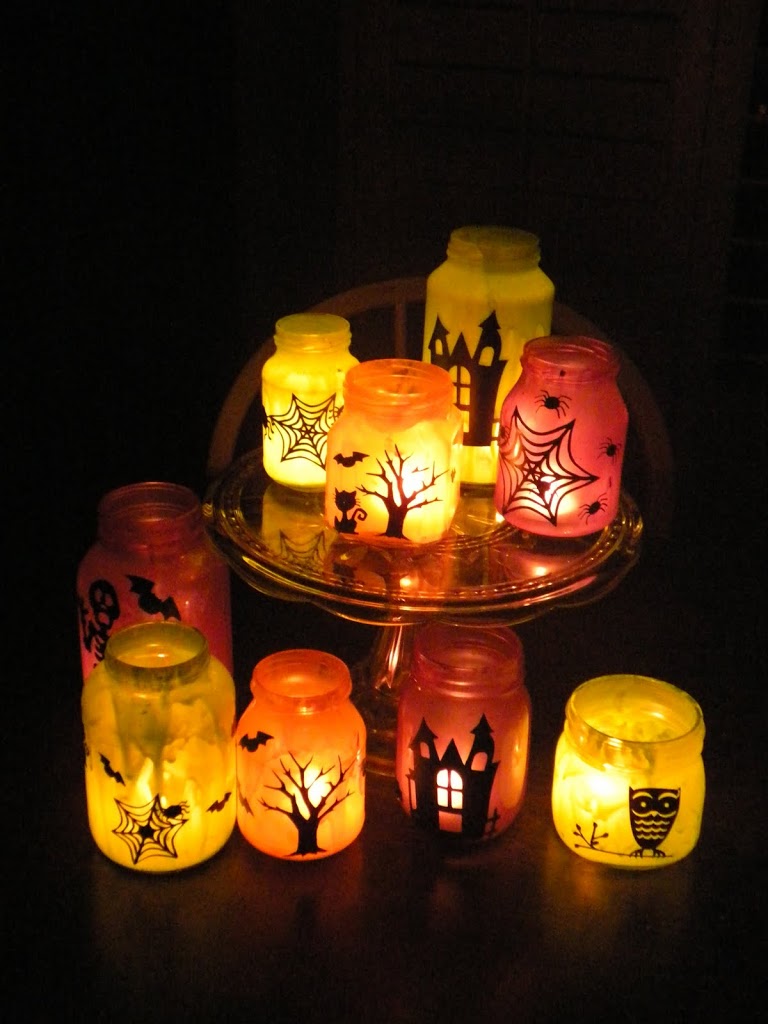
Today we got together and made Halloween luminaries – so fun!
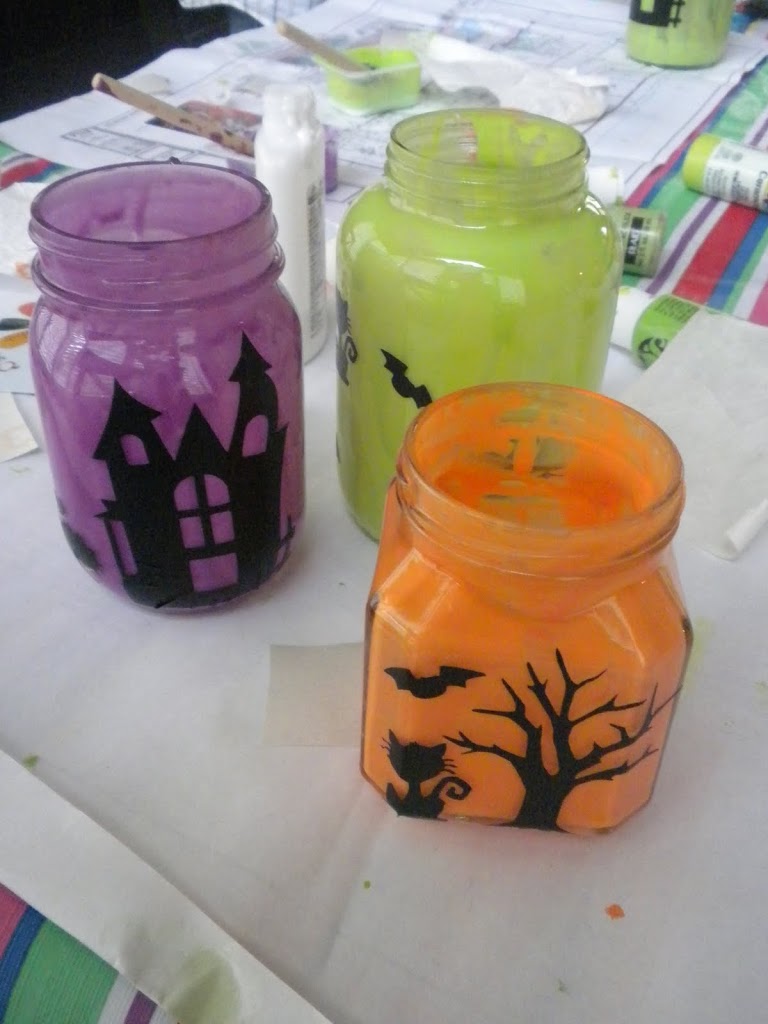
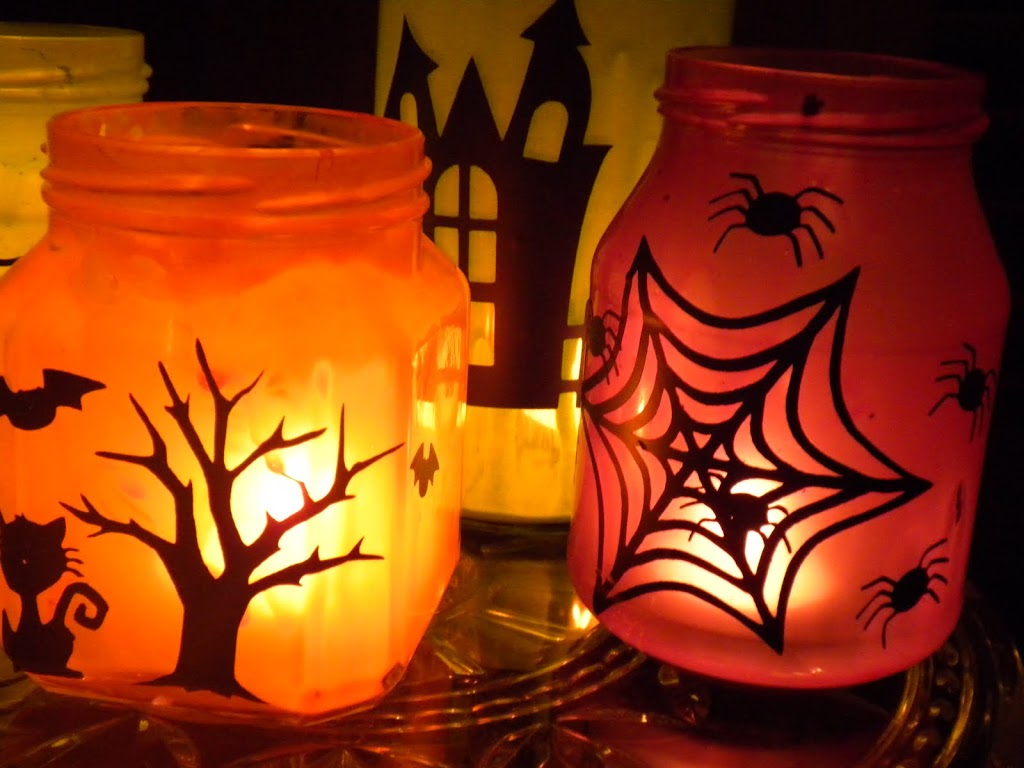
First we mixed white glue and colored craft paint and painted the inside of glass jars.

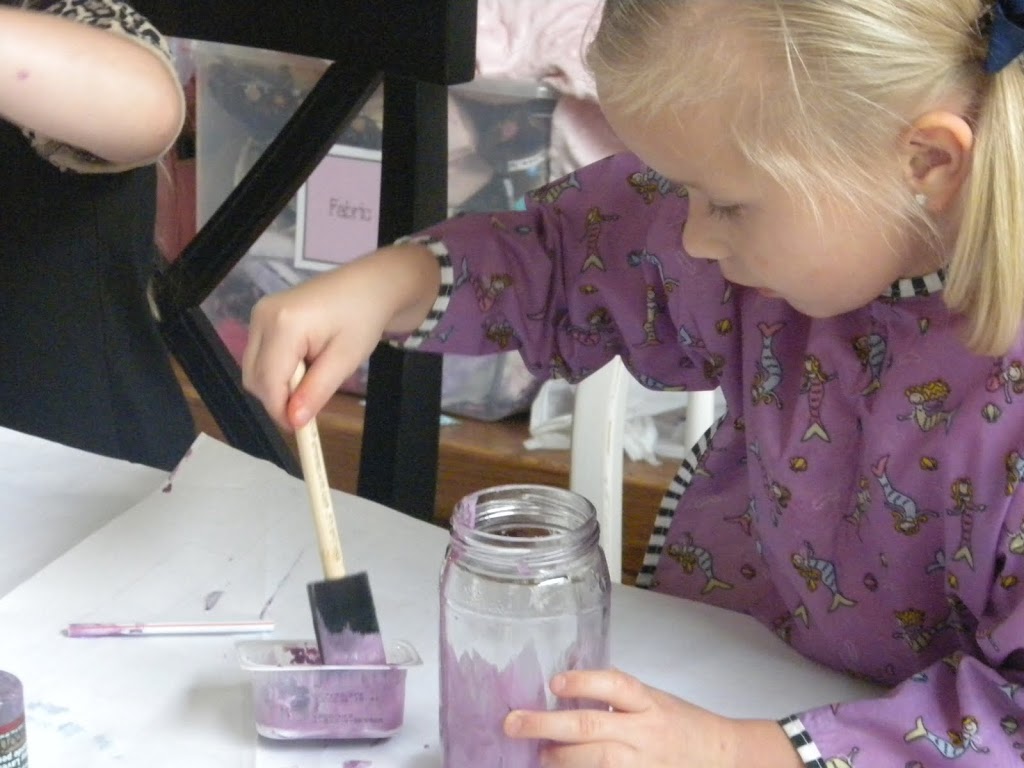
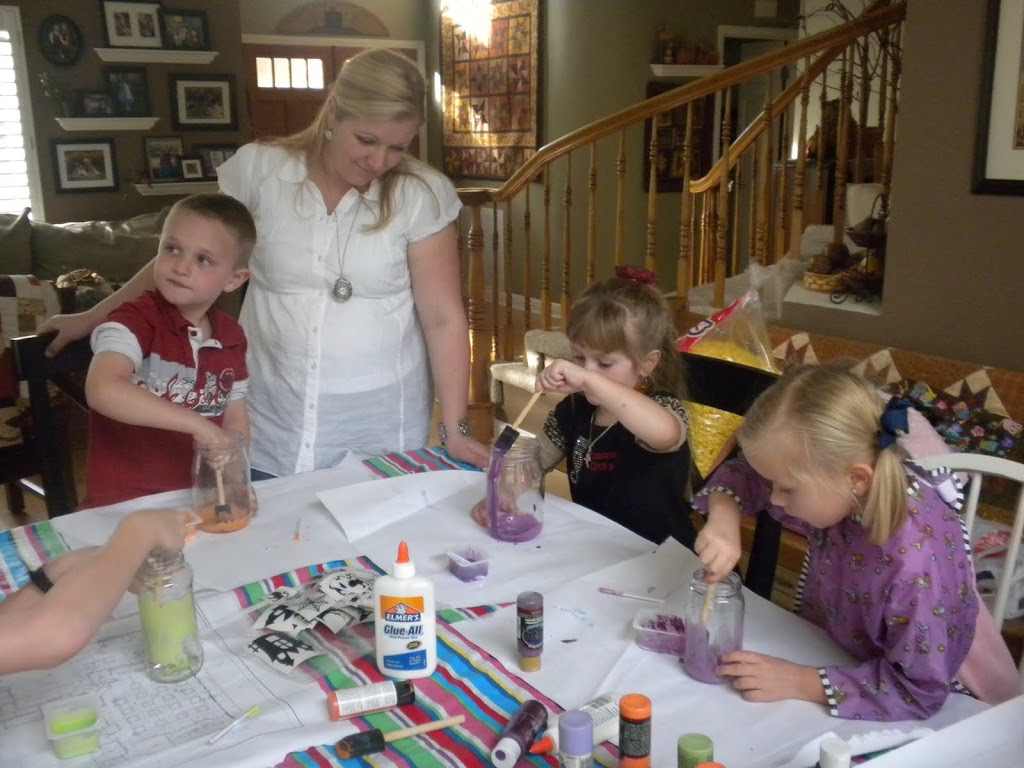
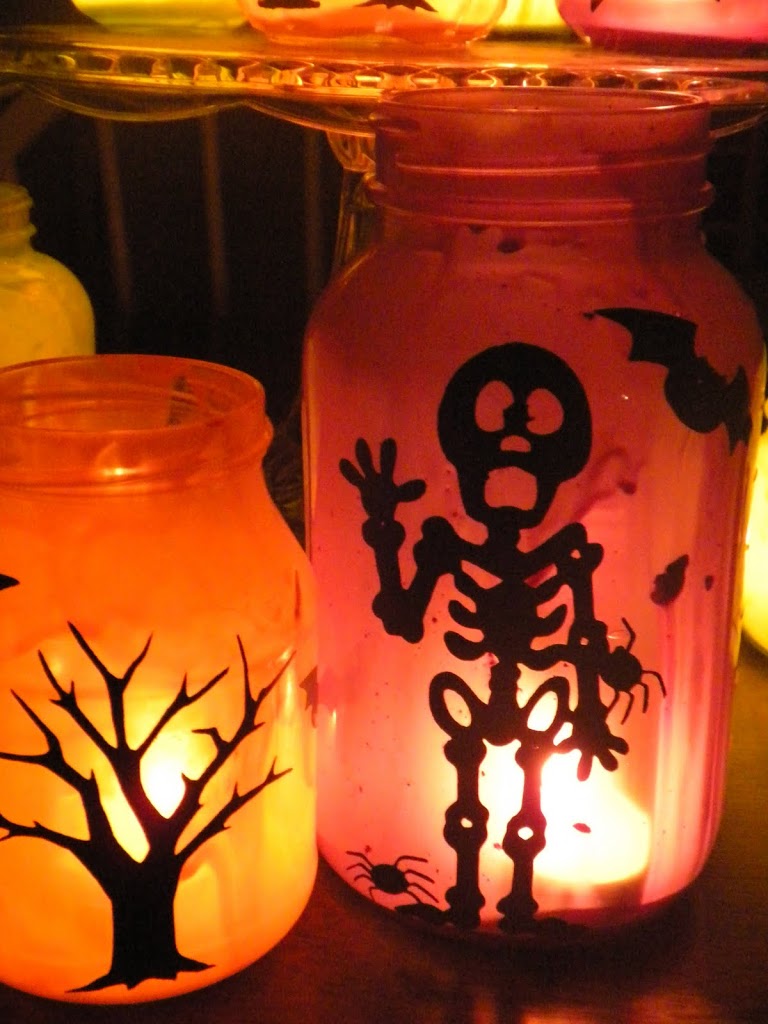
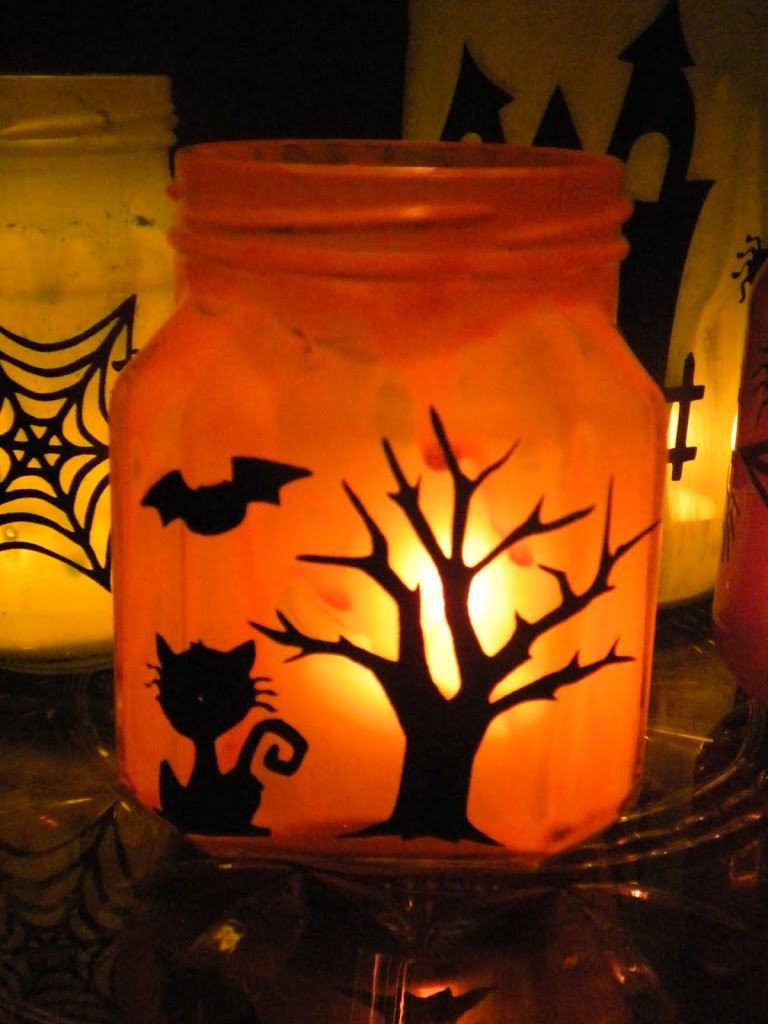
Then we decorated the outside of the jars with black vinyl Halloween motifs cut on the Cricut….they are starting to look spooky!Then we put candles in them and…….
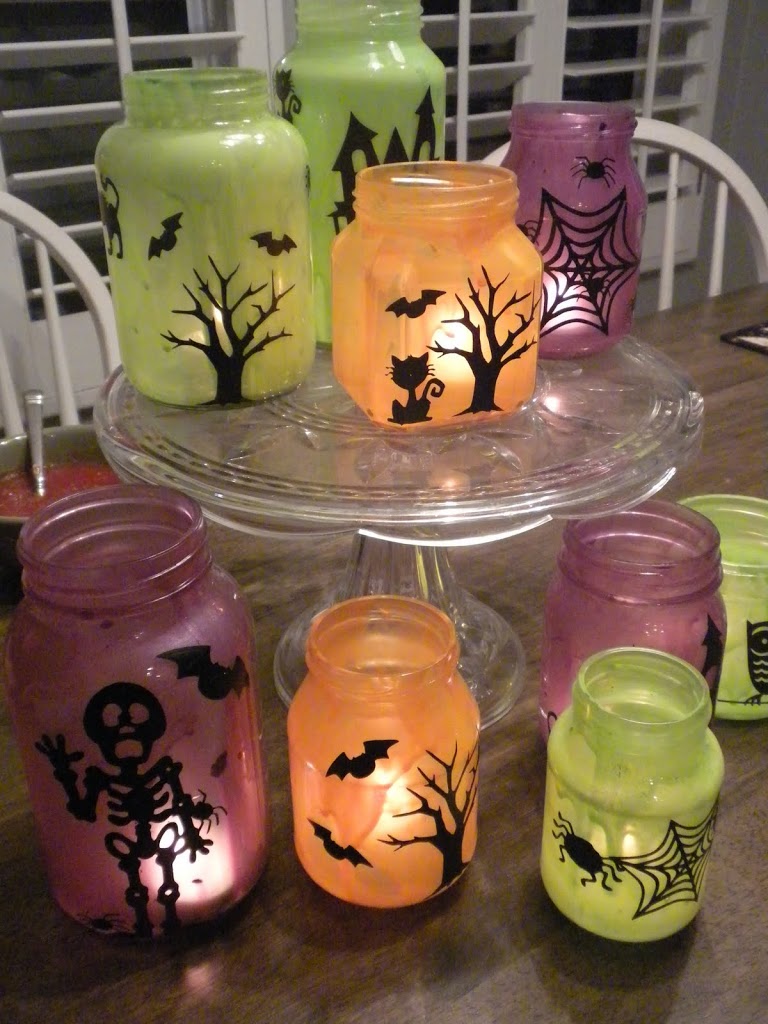
…turned out the lights! They are so cute and very spooky!!


My Favorite Halloween Sewing Projects

my-favorite-halloween-quilts

I Love looking back at the fun Halloween projects I’ve made – I think it’s my favorite holiday to sew for!  I’ve collected my most popular and put them in this post for quick viewing.  Click a picture to be taken to the pattern.

halloween_quilt_disappearing_nine_patch

ghost-windows-halloween-quiltspooky mini quilt tutorial

spooky halloween pillow

october-stars-cover

img_3710

halloween

IMG_3433

spooktacular eve halloween quilt

IMG_9978

Halloween Towels and Pillow

treats-bag-tutorial-600x800

Halloween-skirt-and-shirt-tutorial

halloween_applique_pumpkin_tutorial_7

halloween-table-square-tutorial1


Save

Save

Save

Save

Save

Save

Happy Haunting Halloween Quilt

happy haunting halloween quilt coverIsn’t Halloween the best time of year for quilting?  I get so excited over orange and black and cats and bats!  I can’t have enough quilts!  I am so in love with this line from Deena Rutter called Happy Haunting by Riley Blake Designs.  It is everything Halloween should be!

happy haunting halloween quilt 2This quilt sews together fast and YOU get to pick the layout of each block.

happy haunting halloween quilt 21This quilt is also best put together with a friend.  Tina from @emilyannskloset and I got together this summer for a Coast to Coast Kitty Quilter Retreat where we sewed about 15 hours each day for 4 days!

happy haunting halloween quilt 26  Let’s get started!

Finished Quilt 55″ x 55″

Supplies:

fat quarters or quarter yard cuts of Halloween prints

1 yard sashing

3/4 yard outer boarder

fat quarters for applique

1/3 yard for background blocks for applique

Heat n Bond Lite or Heat n Bond Lite EZ Print Sheets

Applique pattern, click HERE

1/2 yard binding

3 yards backing

FOR THE BLOCKS

Begin by cutting the fabric into the following categories:

2.5″ squares

2.5″ x 4.5″ rectangles

4.5″ squares

4.5″ x 8.5″ rectangles

just keep cutting from a variety of fabrics until you have a sizable amount.

happy haunting halloween quilt 24Now the fun begins – don’t lay it out!  Just be totally random!  The goal here is to create 8.5″ blocks by using a combination of 4 patches, strip sets, and larger rectangles.  Below are a few examples, the combinations are endless!  Just be creative!

happy haunting halloween quilt 30

Each time we finished a block we hung it up on a clothes line and said “No, THIS is the cutest block!”

happy haunting halloween quilt 25For the finished quilt you will need 20 total pieced blocks and 5 applique blocks.  We even made a block that was all 2.5″ squares!

happy haunting halloween quilt 3 APPLIQUE

For the applique background squares, cut (5) 8.5″ white squares.  Trace the applique onto heat n bond lite or use the Heat n Bond EZ print sheets.  Iron the heat n bond to the wrong side of the fabrics and cut out the shapes.  Peel off the backing paper then press in place on the white squares.  The spiders have ric rac stitched onto the block and the legs are stitched with black thread. Top stitch around each image.happy haunting halloween quilt 29

Once all the blocks are finished it’s time to sash.  I love that Tina choose black and white gingham to sash her quilt – it gives it a cozy country look!

FOR THE SASHING

Cut (20) 2″ x 8.5″ strips

you will need to piece the next sashing strips to give you the following measurements

(6) 2″ x 46.5″ strips for the horizontal rows

(2) 2″x 49.5 strips for the sides

Sew the 8.5″ sashing strips in between the blocks forming horizontal rows.  Then add the horizontal strips along the top, middle rows, and bottom.  Press.  Finish by adding the 2 side strips.

happy haunting halloween quilt 28

OUTER BOARDER
After sashing add the outer boarder.  I don’t measure at this point – do you?  Cut (6) 3.5″ x WOF strips for the outer boarder.  You will need to sew them together end to end to have enough length.  Sew the side strips on, square up, press and then sew the top and bottom strips on.

happy haunting halloween quilt 10I had my friend use her long arm quilter to sew swirls all over the quilt, even through the applique.  I LOVE it!happy haunting halloween quilt 8   I am totally in love with this quilt.  I cut the striped fabric on the bias for the binding.  Striped binding is my absolute FAVORITE!!!!happy haunting halloween quilt 4   happy haunting halloween quiltI had such a wonderful time putting this quilt together with my friend Tina.  Isn’t it fun to sew with friends and family!!!

IMG_1088

Caturday Sew Along October

caturday octoberWelcome to the Caturday Sew Along!  I love cats and sewing!!!  I know a lot of you love sewing with your fur babies too!    Each month I will post a cat themed quilting project that we can sew together.  Post your progress on Instagram and tag it with #caturdaysewalong.  For October choose any variation of these three projects that use a cat silhouette and SPOOKY applique.  Click the links for the patterns.

spooky mini quilt tutorialThis Spooky mini quilt measures 20″ square and uses 2.5″ squares to complete.  It’s such a fun way to use up those Halloween scraps you’ve been saving!!  Click HERE for the tutorial.

spooky_quilt_tutorialThis larger version measures 44″ x 60″ and it uses 5″ charm squares for the center.  It’s my favorite Halloween quilt.  Click HERE for the tutorial.

Halloween_quilt_tutorial_1

spooky Halloween pillow_10If you find yourself pressed for time but still want to sew something SPOOKY, try this quick pillow tutorial!  Click HERE

Jedi Craft Girl Tutorials


quilted placemat
monogram throw pillow


Fancy Halloween Soiree

I just finished helping with my church’s annual Halloween Party.  It is such a big undertaking – but so much fun!!!!  The theme was “Frightfully Fancy”.  Here are the invitations – I printed them on burlap colored paper:
This is the finished cultural hall – it turned out amazing especially considering we didn’t really have a decorations budget!!

This is a little vignette by the front entrenace
Groups of paper bats guiding people down the hall – spooky!!
A spooky collection of old art and vintage frames.
(A little before picture of putting up all the lights)
My friends and I emptied our houses and pulled all our decor accents together.  It was a little shocking to see all we had – this is just a sampling!
One morning my friend and I were at an estate sale and the estate’s owner had an intense doll-making hobby.  They were selling all her doll-head molds.  They wanted $10 a mold, then they said $8, then said $5 if we bought a bunch of them.  When we went to leave I offered $3 a head and they took it!  I am now the proud owner of 10 spooky doll-head molds.  They were absolutely perfect accents to the centerpieces on the tables!
Each table was decorated differently – vases, candle sticks, crows, birdcages, owls, clocks, vintage pictures, black pumpkins, etc.  Then we put a spider web treatment on it all and it looked amazing!  Everyone kept asking where we got all the decorations!  It was a little embarrassing admitting that we owned it all!!  You should see my garage!!
During dinner we had all the piano students play halloween piano pieces for the background music. 
This is the long serving table where we served the food.
And the food was AMAZING!!!  This guy spent the entire day smoking ribs in a smoker he built just for the party.  He also made his famous BBQ chicken.
Best ribs EVER!!!!

We had a photo booth where families could get their pictures taken.  We also had 6 different carnival-type games, a cake walk, and trunk-or-treat!

Our annual pie contest:

My daughter made this key lime pie and won an award!

Then we had a spook alley – and not just any spook alley.  Our Young Men age 12-18 arrived at the church at 8am with lumber and tools and began constructing walls for the spook alley.  They stayed and worked the entire day – best spook alley ever!

 They framed walls then attached black plastic.  There was an outer maze for older kids and an inside maze that was less scary for the younger kids.

I think the boys had a little too much fun!  It was too hard to photograph when it was finished because it was pretty dark!
 It was ALOT of work but so worth it.  Everyone had such a great time!!!  

Amanda

Halloween Applique Art

Today my Halloween Appliqué Art Tutorial is over on the Therm O Web Blog!  This project was super fast and super easy!  This would also be a fun project to let your children design!

Amanda

Halloween Table Square Tutorial

 Today I am a guest blogger over at Ginger Snap Crafts.  I am sharing this quick and easy tutorial for a cute Halloween table accent.  I can’t get enough of orange chevron!!!

Amanda

Halloween Pillow Tutorial

When the calendar turned September, I was wishing so badly that it was still July.  How I love the summer!  Today is October 1st and I have decided to deal with the fact that time is moving super fast!  Bring on the Halloween!  Pumpkins, owls, candy, costumes, bats, black cats and everything else!
My summertime throw pillows were not matching my Halloween decor.  I decided to make Halloween covers for my current pillows.  This one only took about 30 minutes start to finish.  Here’s how you can make one:
Supplies:
Iron- on transfer paper (purchase at Michaels, Wal Mart, etc. in the computer paper section)
Graphic to print
(2) 17″ squares of light colored canvas, duck cloth or other heavy fabric
1 yard of super jumbo ric rac
16″ pillow form
To begin, you need a graphic to print on the iron-on transfer paper.  If you are artsy you can make your own.  I went to Etsy and searched “Halloween pillow iron-on” and 19 pages of vintage style Halloween graphics came up.  Most of them are only $1.00 and download instantly.  Super fast & cheep – yea!
Size the graphic to take up as much of the 8.5″ x 11″ paper.  Make sure to tell the printer to “Flip” the image or “Mirror”.  It needs to print out backwards 🙂

Trim about 1/8″ around the graphic

Follow the manufactures instructions.  Essentially use a dry, hot iron and press into place.  It takes a few minutes.  Then when it’s cooled, peel off the paper backing.  I love it already!!

I thought a little trim would be fun and still keep the pillow somewhat simple.  Pin the super jumbo ric rac into place.

When sewing normal ric rac, you just sew a straight line down the center.  I did this with the super jumbo ric rac and the points were still floppy.  With matching thread, follow the zig zag of the ric rac and sew into place like this:
You can finish the pillow using your favorite method.  I put an invisible zipper in the bottom.  Click HERE for the tutorial.  You could easily sew, turn and stuff the pillow or sew an envelope back.  I love how it turned out!!  It’s super spooky!!!

Amanda

Busy day of Sewing!


 My sister-in-law is here and we are sewing up a storm!  We are making baby quilts for gifts.  Yesterday we got 3 tops sewn! Look at my dining room!!!  Two sewing machines and fabric everywhere! 

 Like my newest Pyrex find?  It makes for the perfect “sewing trash” bin on the table.

 This one is my favorite – the pattern is so much fun!

This is the pattern – its from the Fall 2011 issue of Simple Quilts & Sewing.  I don’t like the Halloween version – but I love ours!!

 When we get them finished today, I will post more photos!  Now on to pinning and quilting!

Amanda