Anchor Pillow Tutorial

anchor pillow tutorial

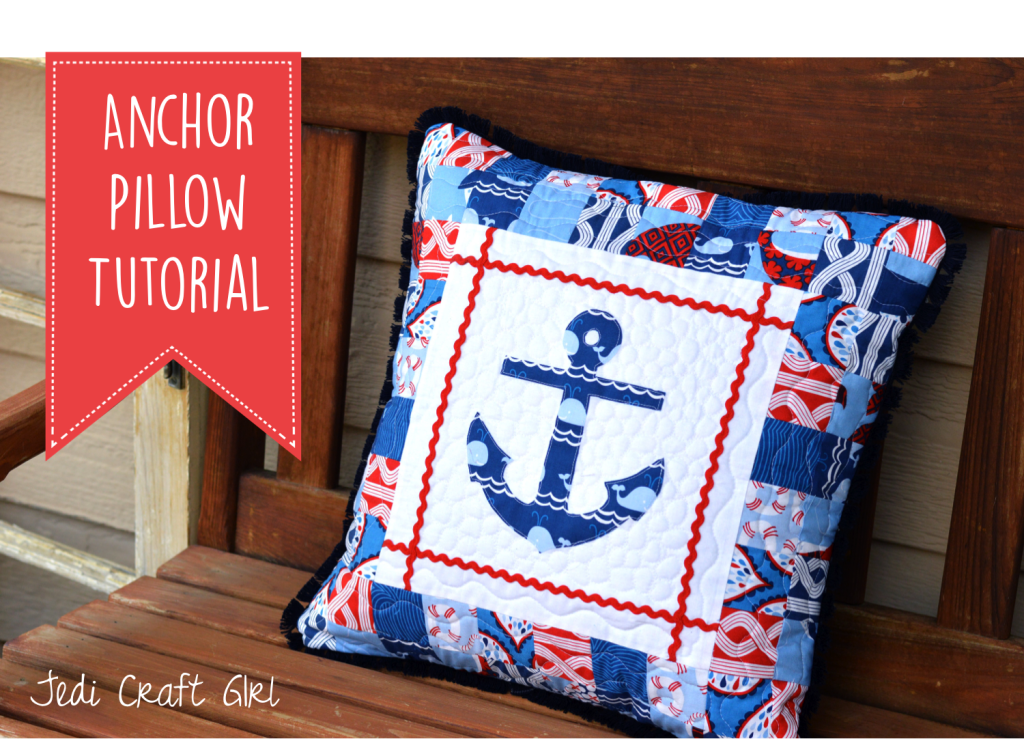
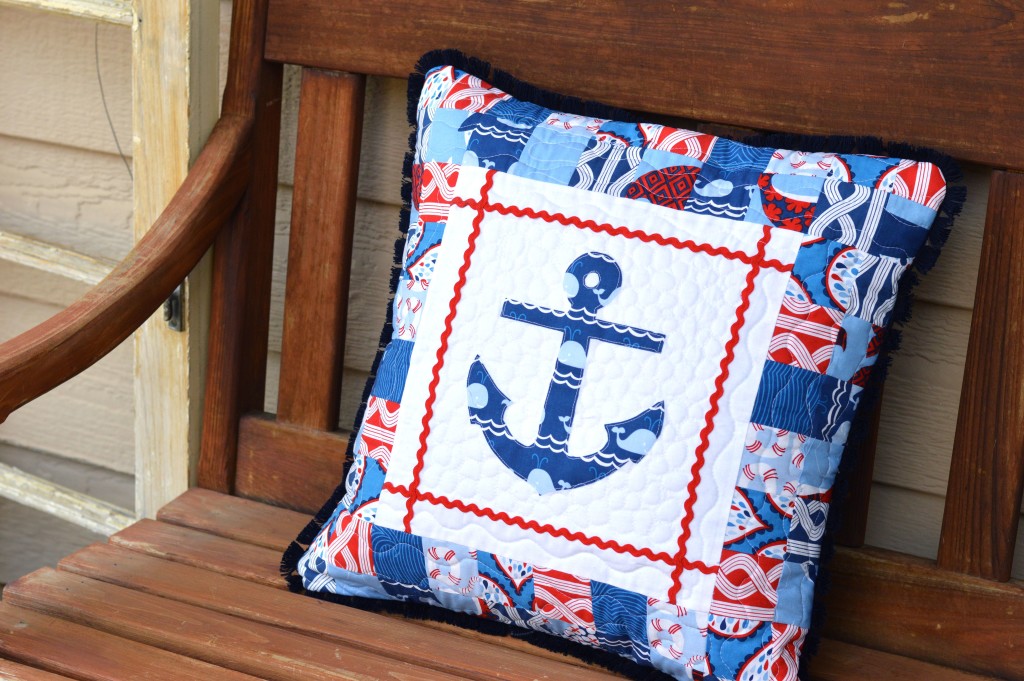
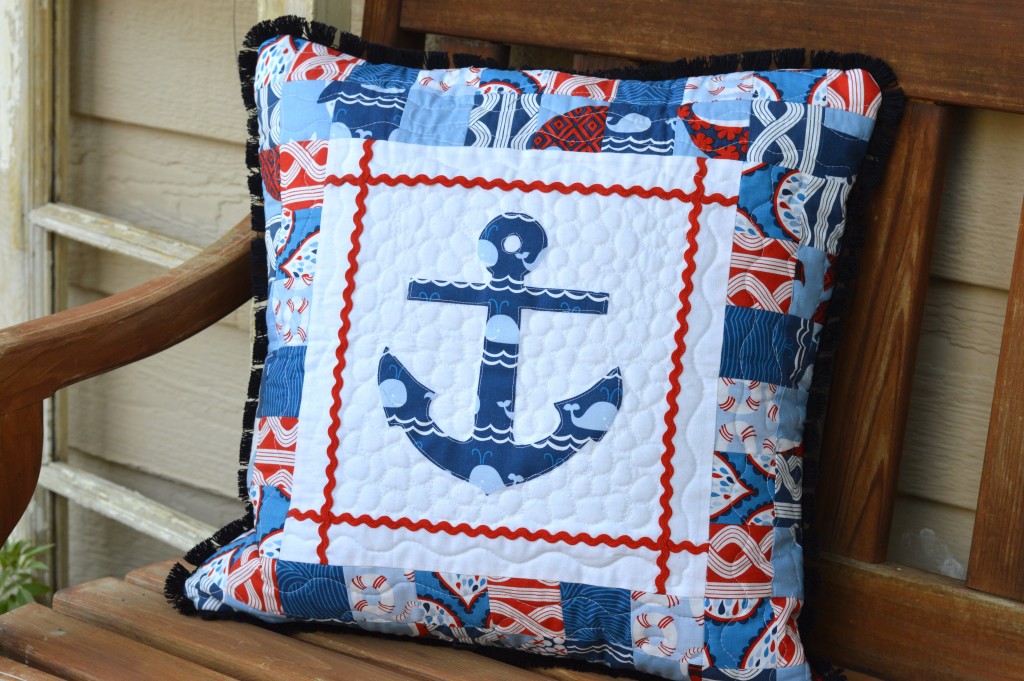
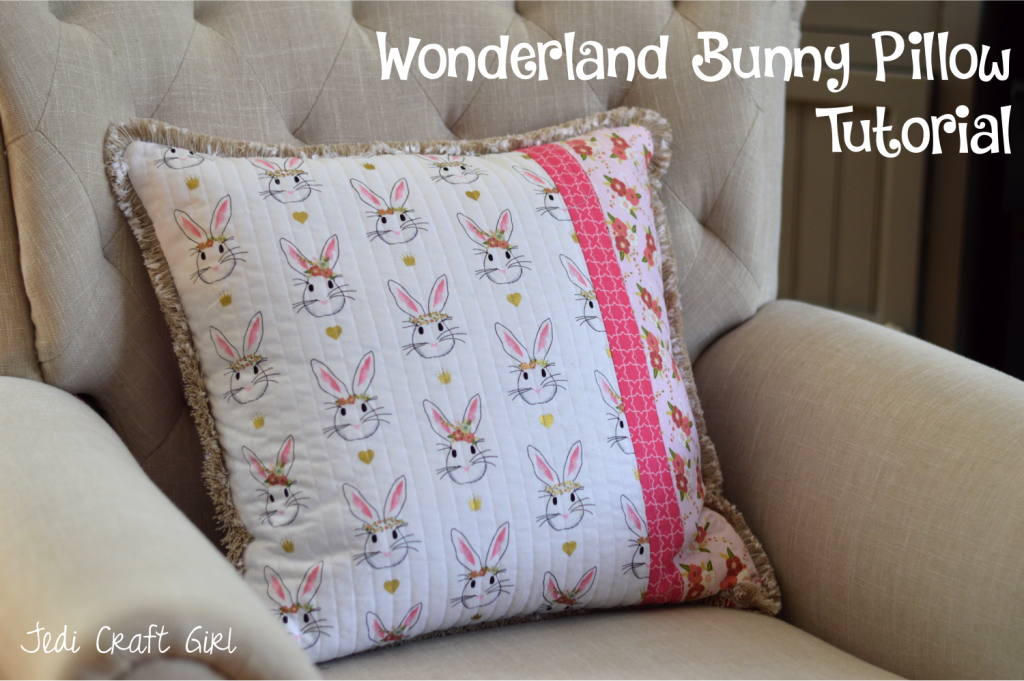
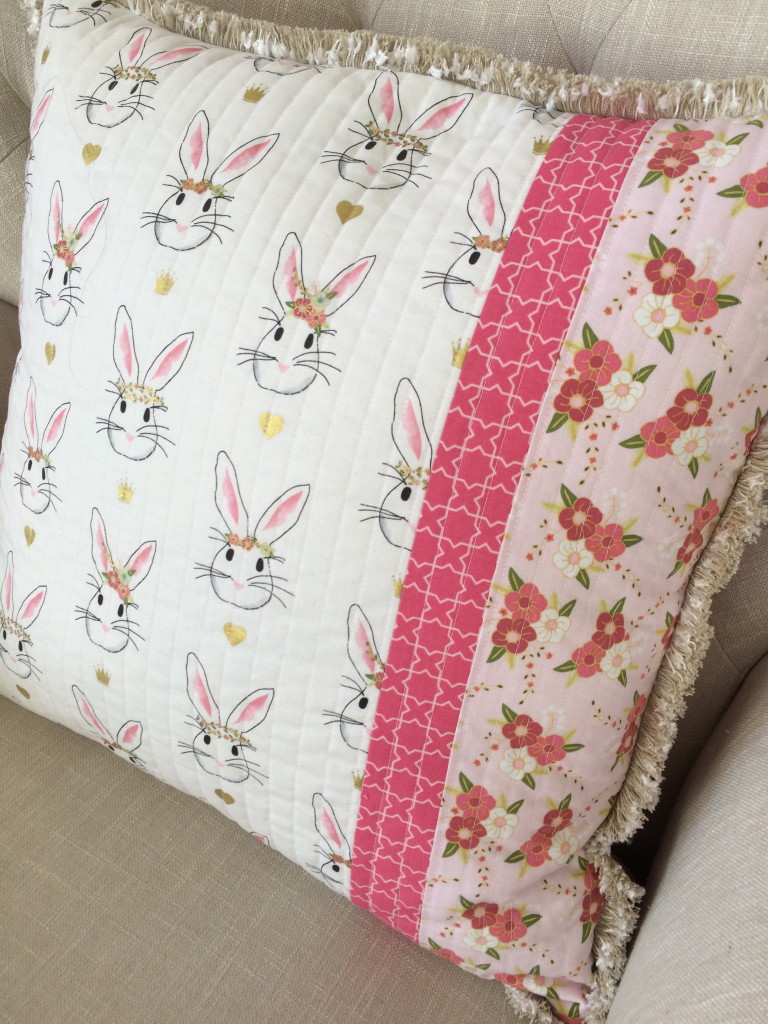
It’s feeling like summer here in Southern California with temperatures reaching up to 90 degrees!  Let the fun begin!  I’m such a summer girl – I hate to be cold!  In celebration of the wonderful warm weather we’re having I thought I would share this fun nautical pillow with you.  The fabrics are from Blend’s True Blue line which is in reproduction since it was so popular!  Which is great news because it’s one of my favorites!!

anchor pillow 1

Let’s get started!

Supplies:

Fat Quarters or quarter yard cuts of a variety of the True Blue Fabrics

fat quarter or 1/2 yard white fabric for center

2/3 yard backing

2 yards ric rac

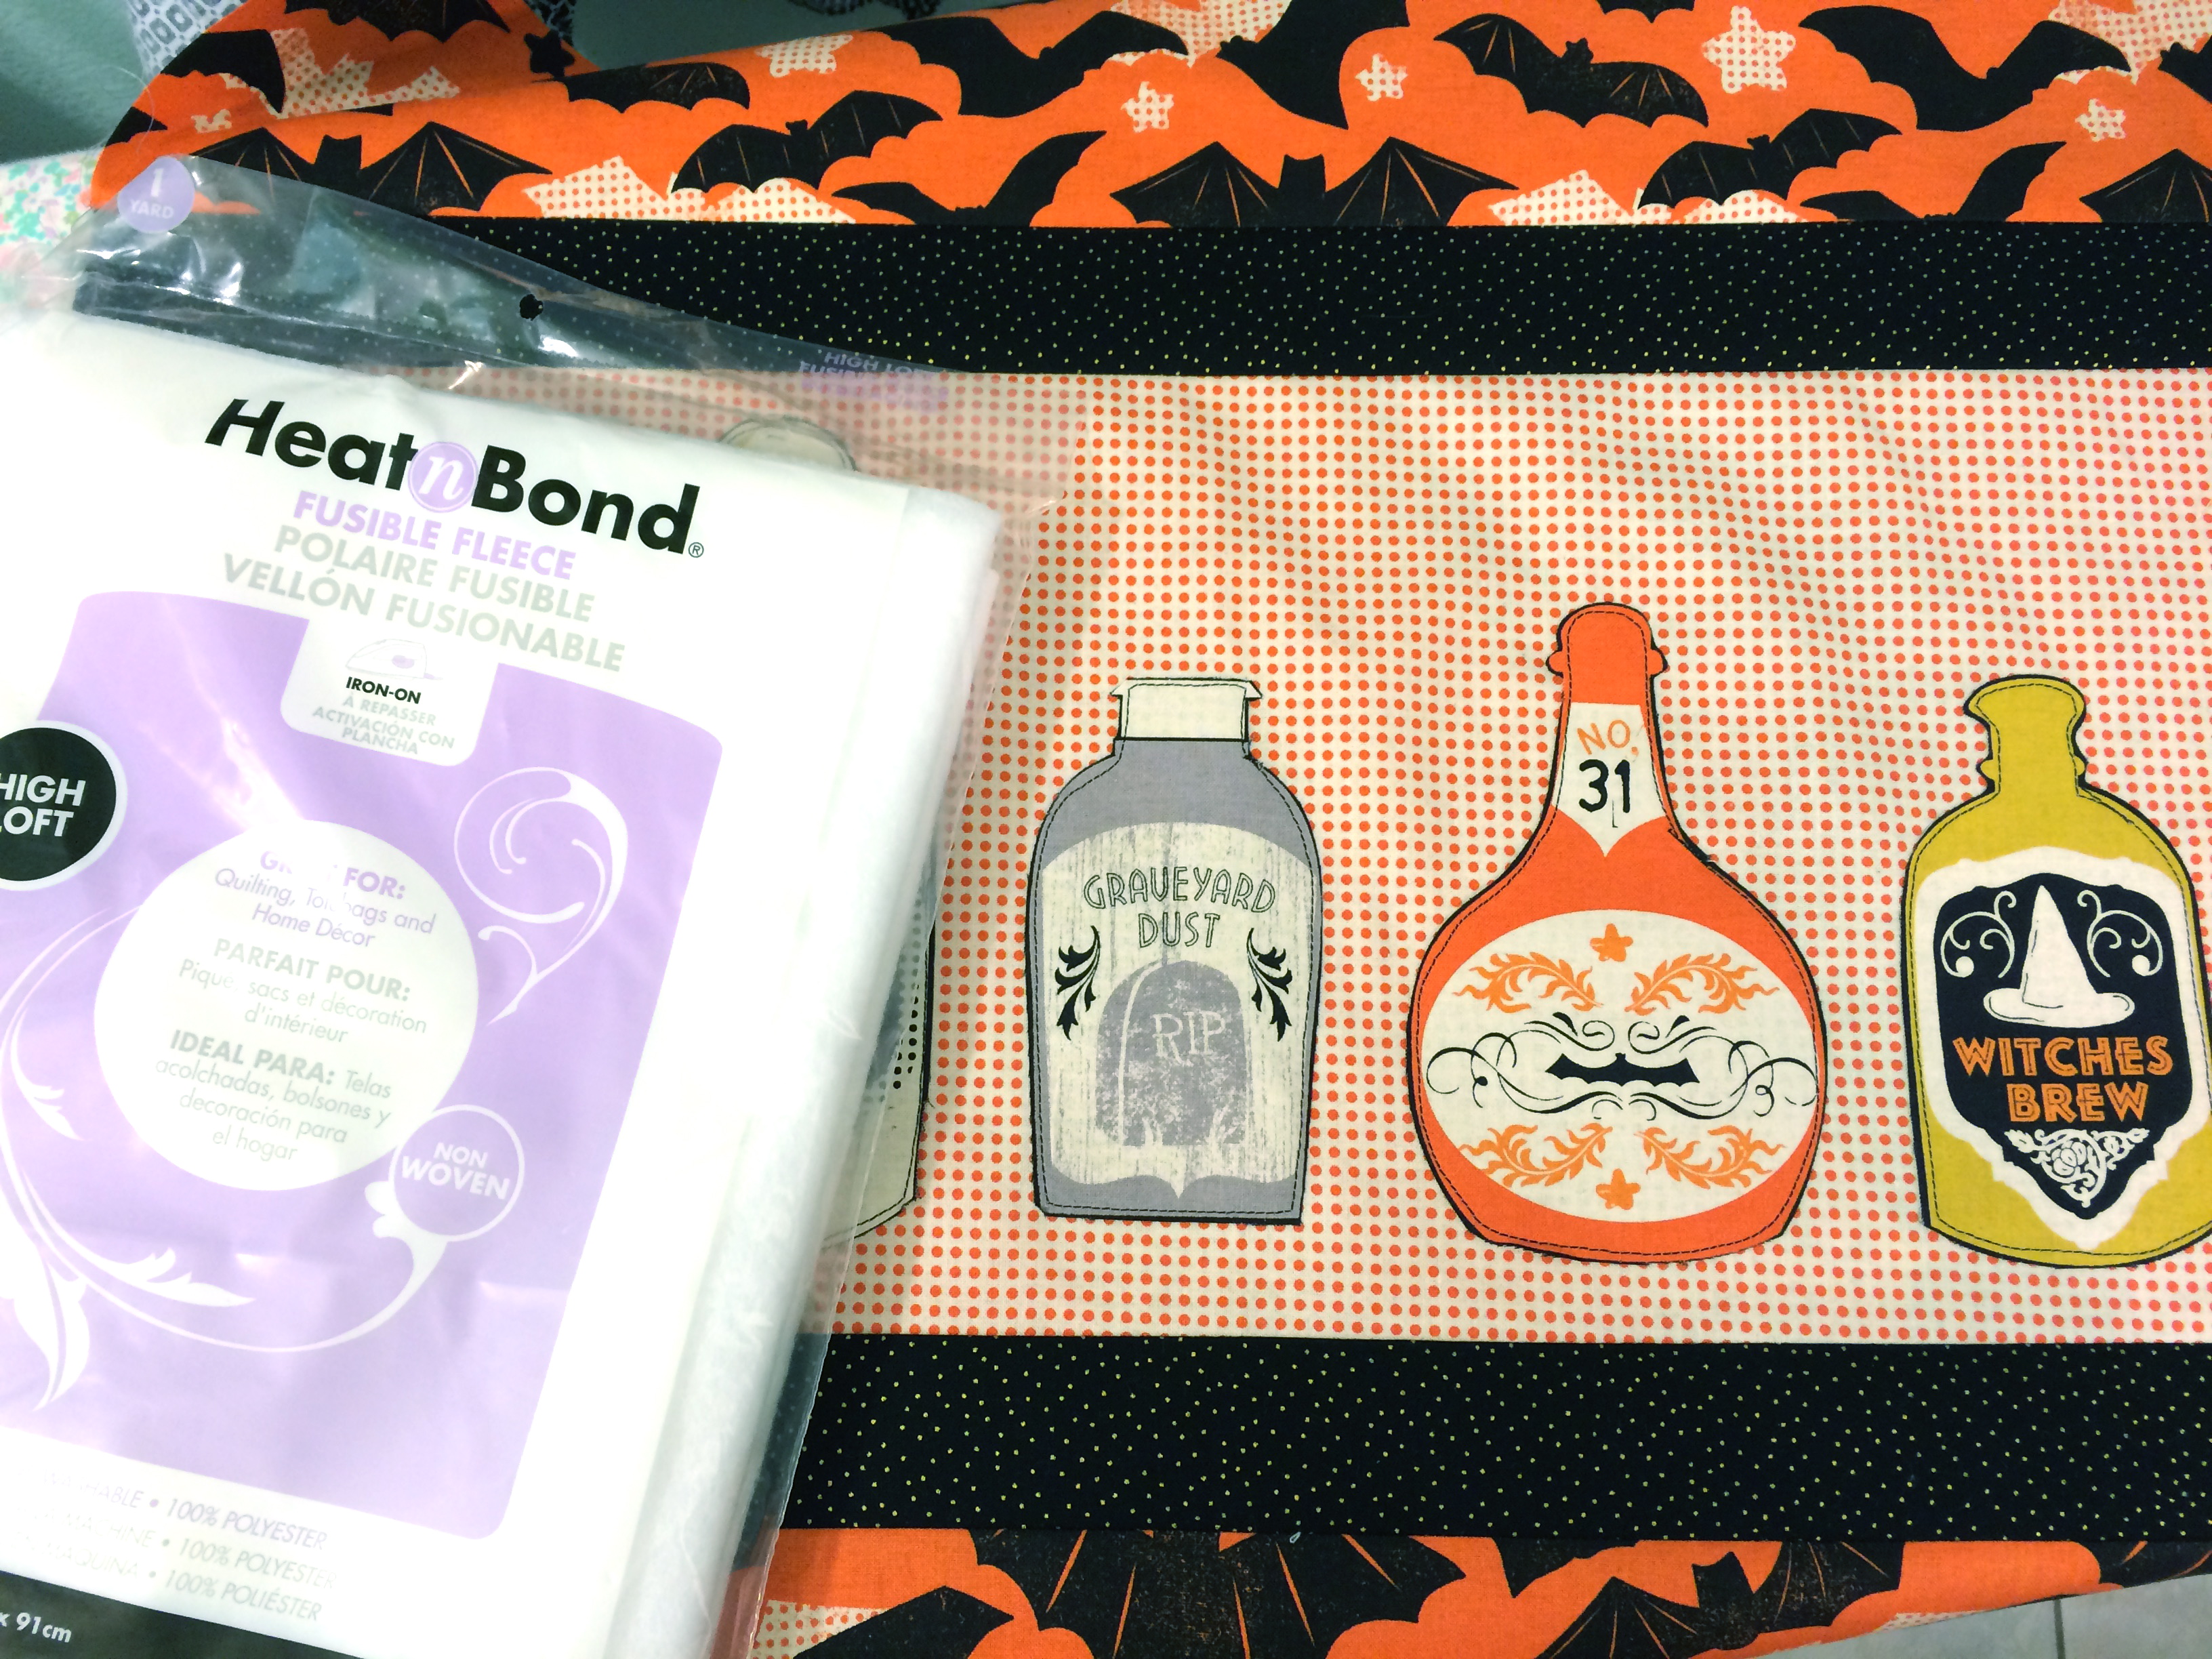
Heat n Bond Lite EZ Print Sheets

20″ pillow insert

2.5 yards pillow trim

Anchor Pattern, Click HERE

IMG_6370

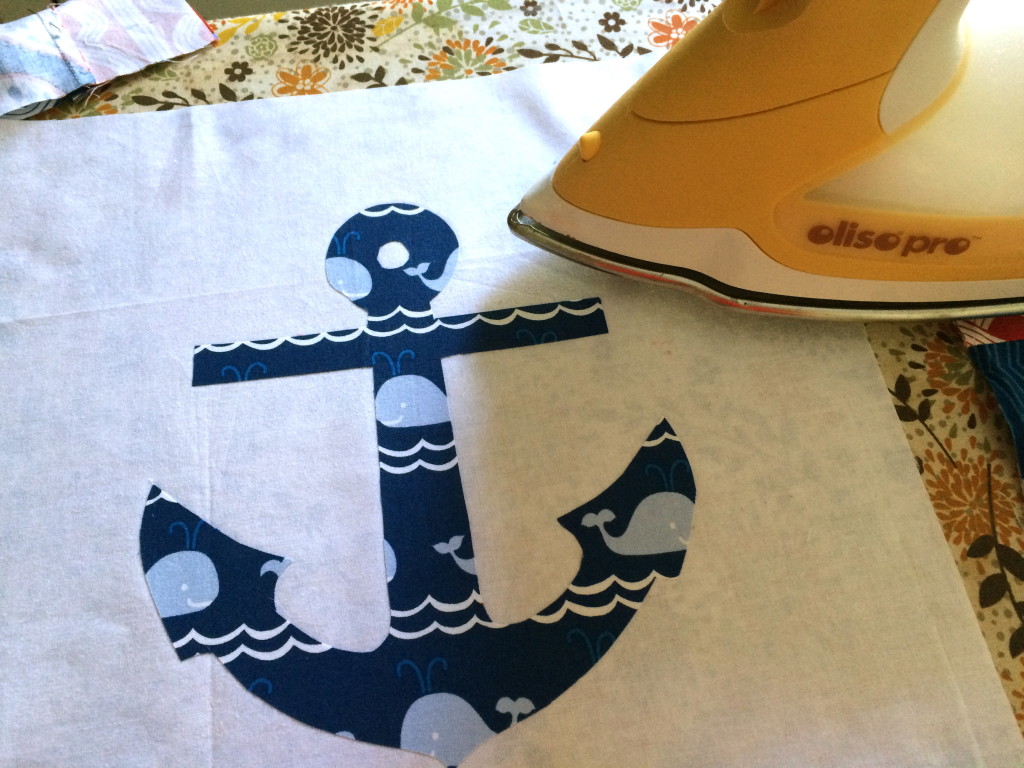
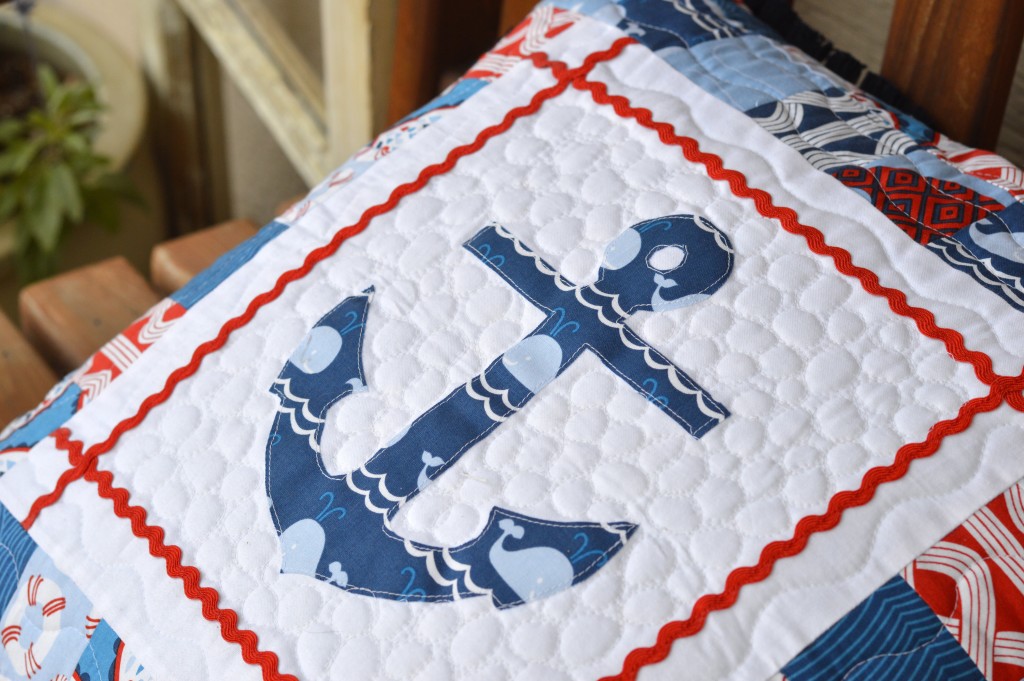
Cut the center white fabric 12.5″ x 12.5″.  Print out the anchor on the Heat n Bond Lite EZ print sheets or trace the anchor onto Heat n Bond Lite.  Press the Heat n Bond to the wrong side of the anchor fabric.  Cut the anchor out and peel off the backing paper.  Press the anchor in the center of the white fabric.  Top stitch around the anchor.

IMG_6371

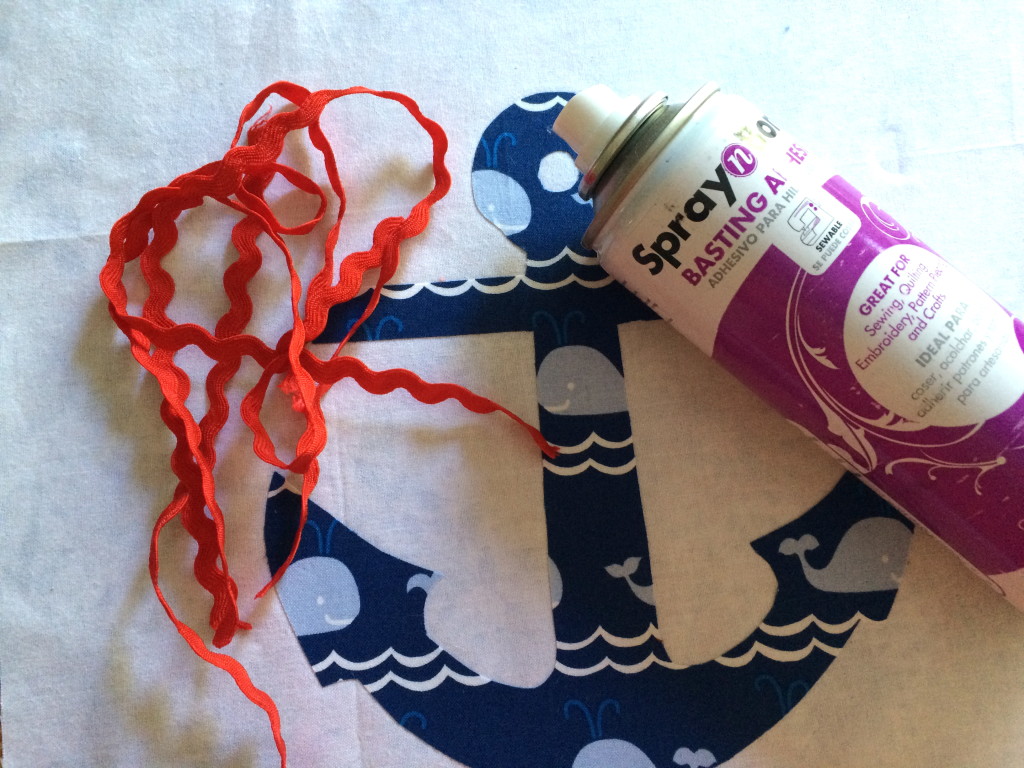
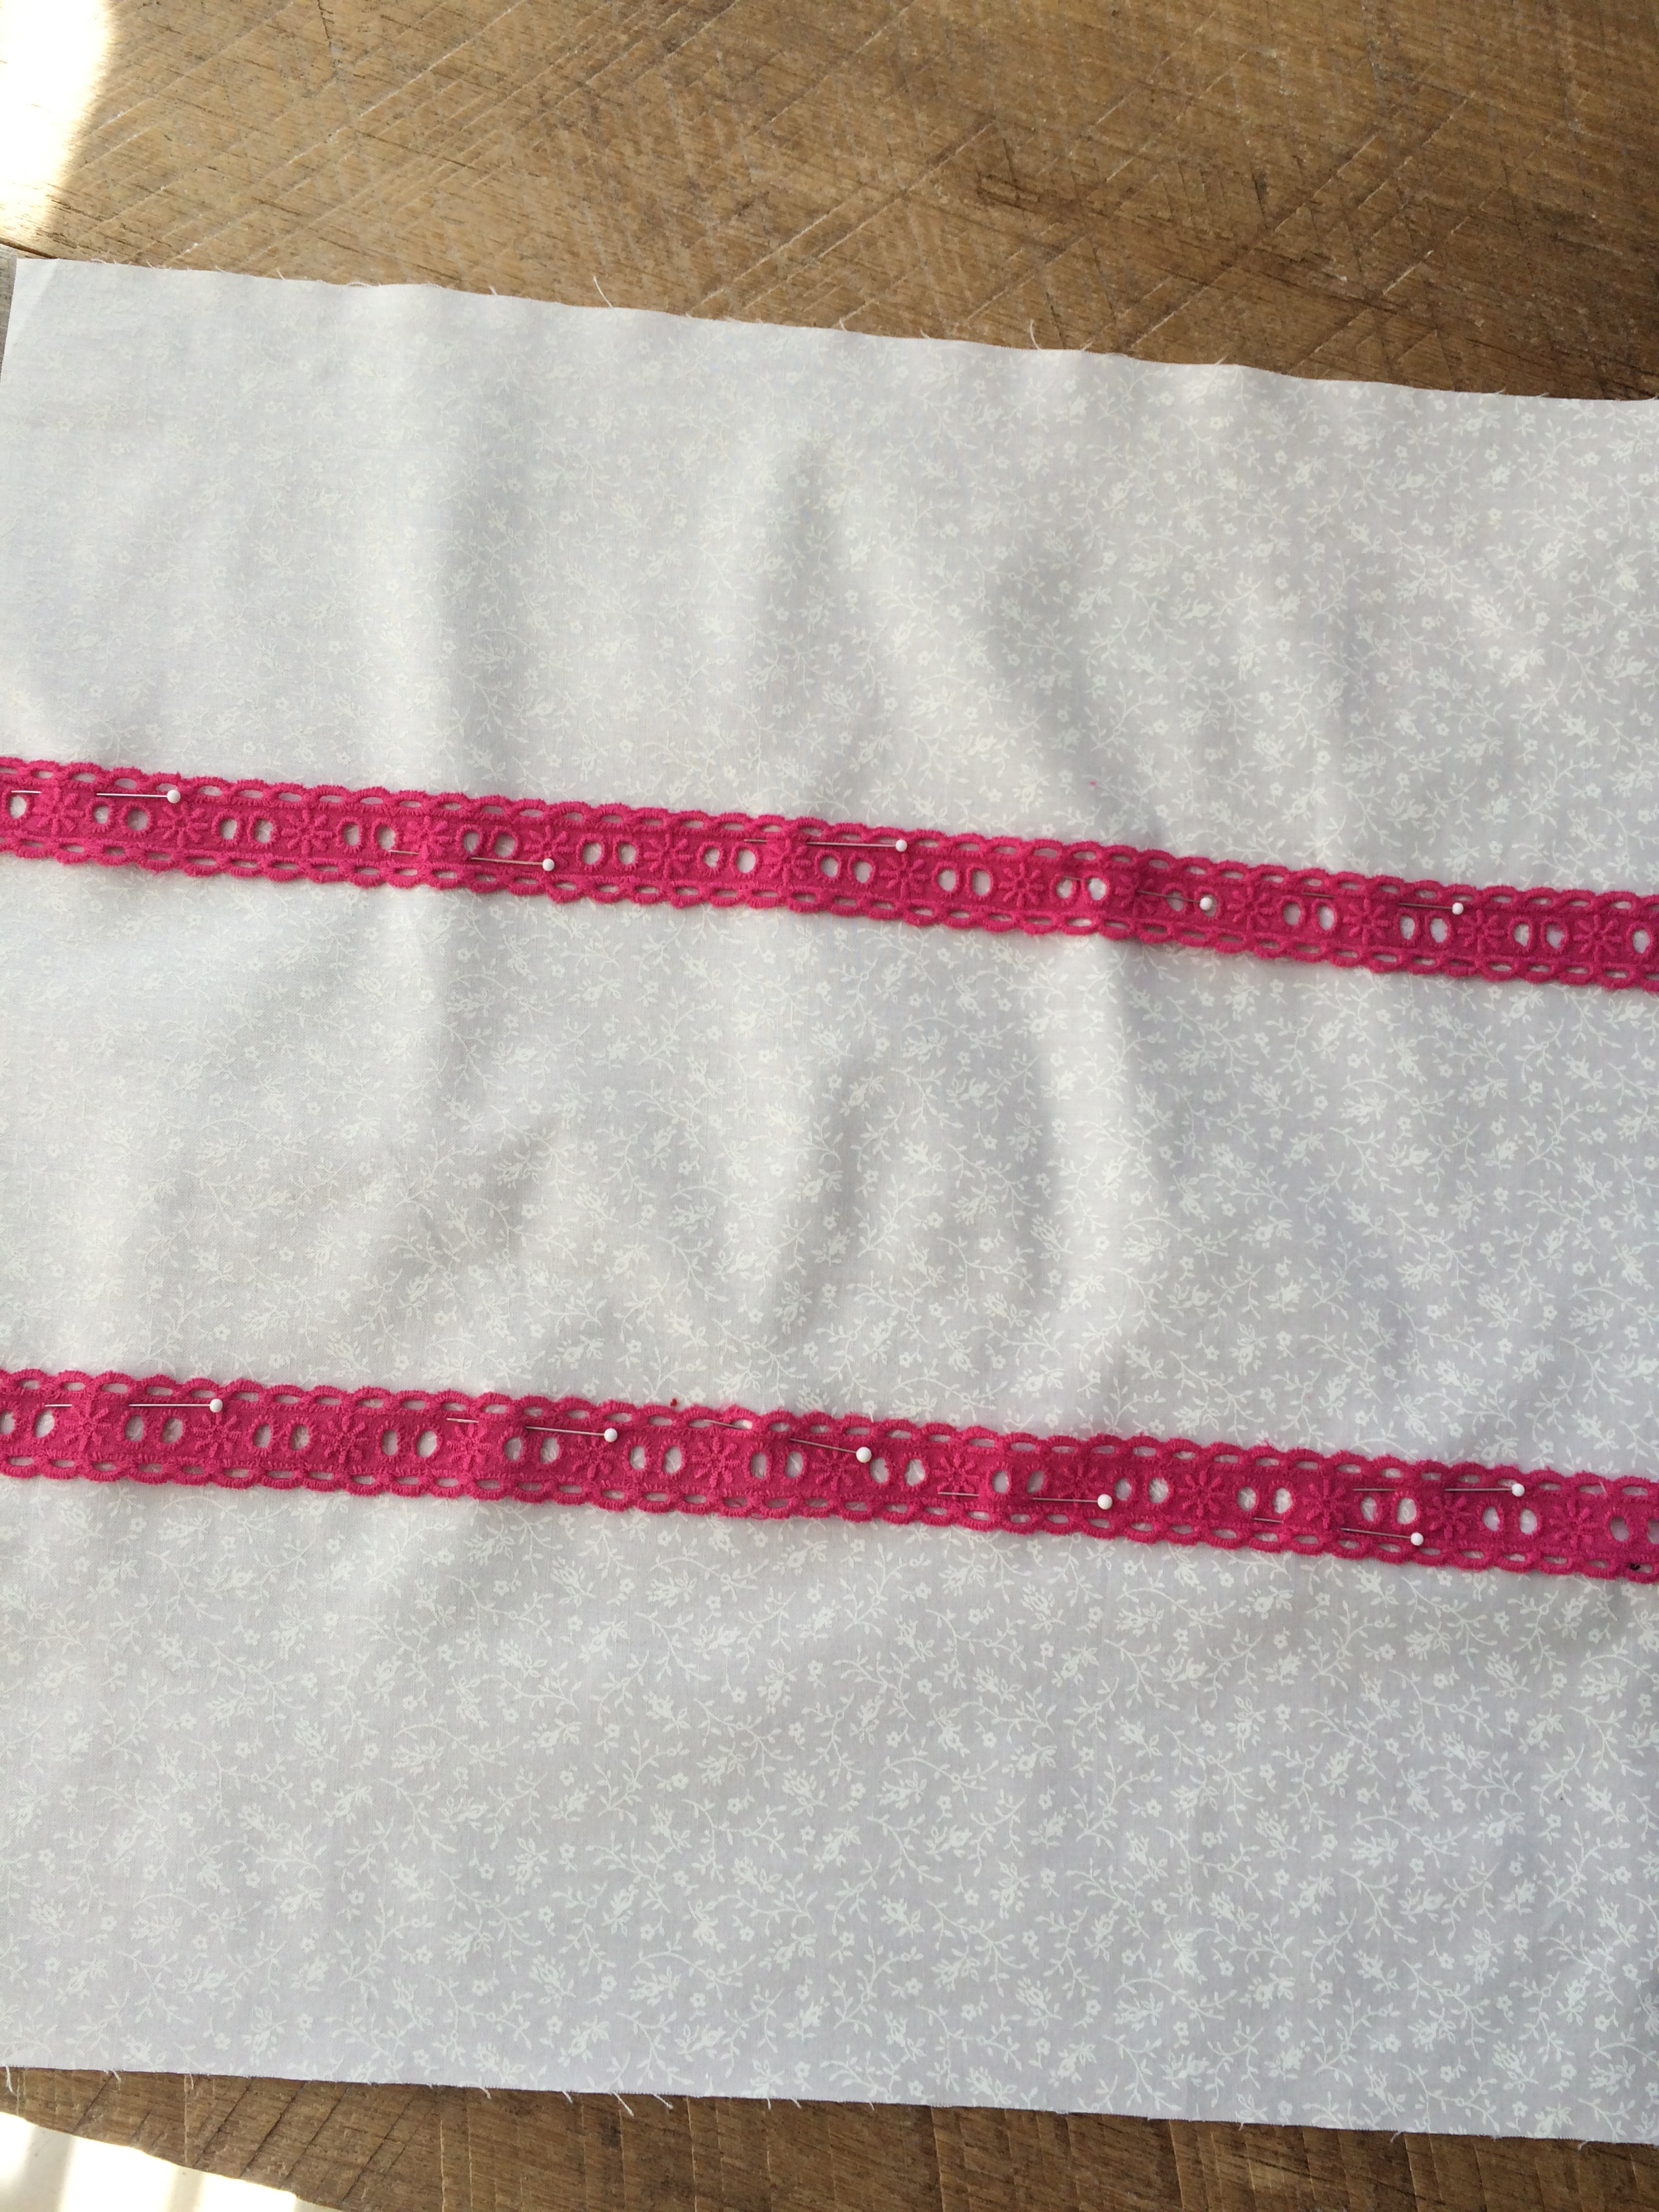
Position the ric rac as picture:

IMG_6372

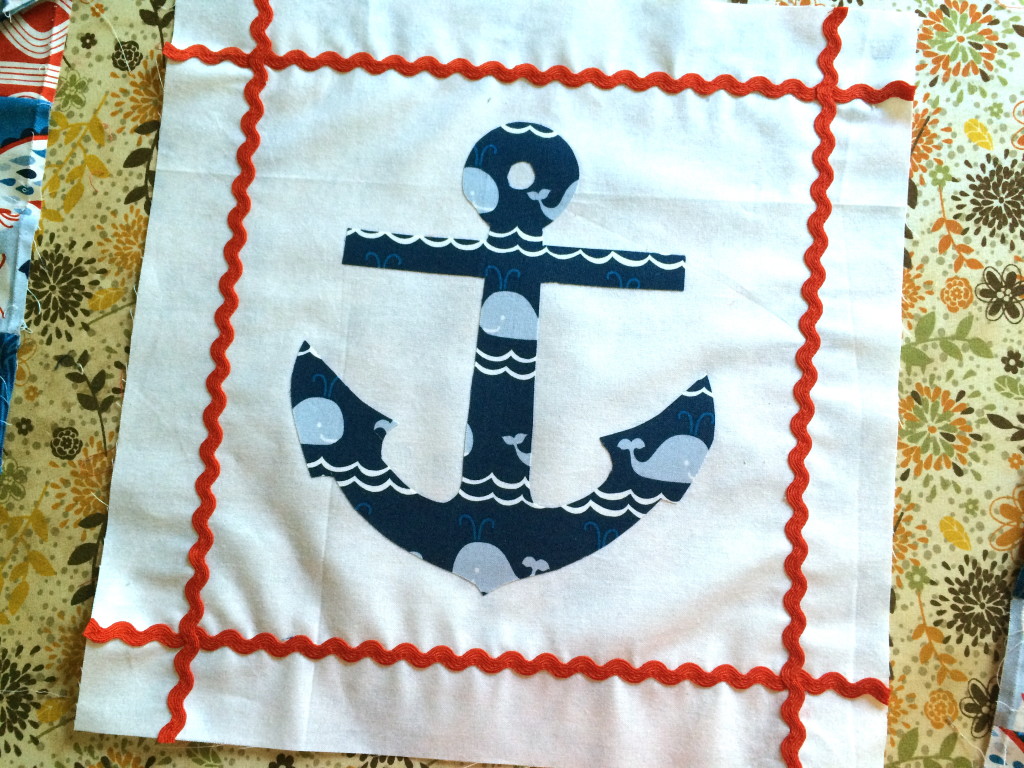
I used Spray n Bond to hold it in place while I sewed.  You can also use pins.  Sew the ric rac on with matching thread.

anchor pillow diagram

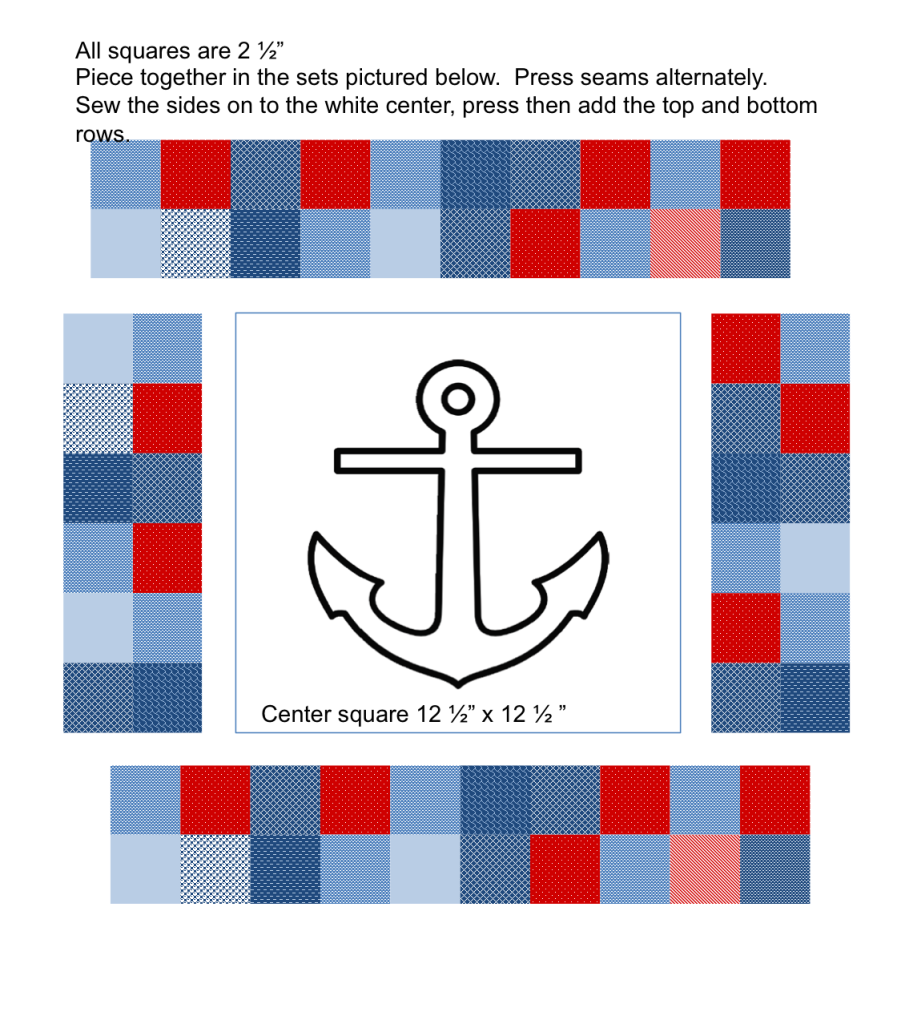
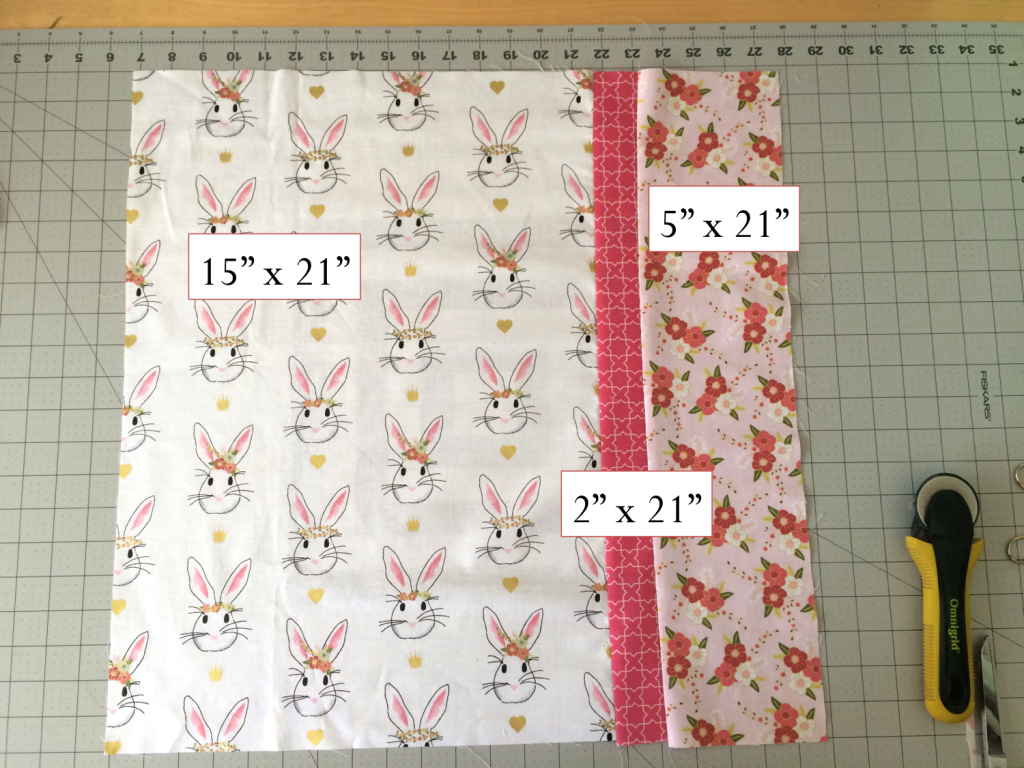
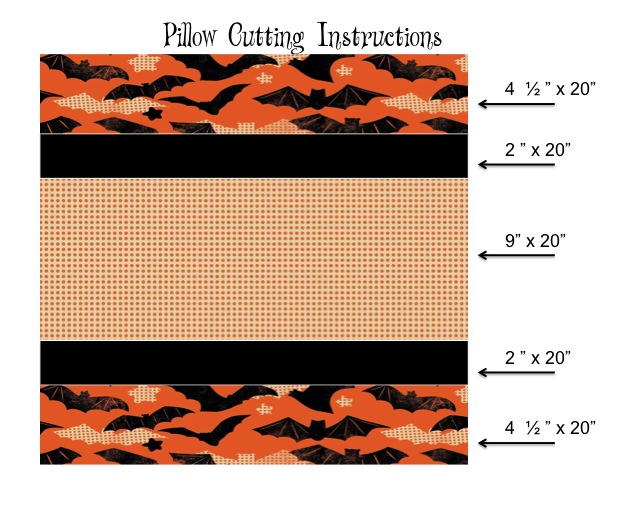
Refer to the above diagram for sewing the patchy boarder.  All squares are 2.5″ and all seams are 1/4″.

IMG_6375

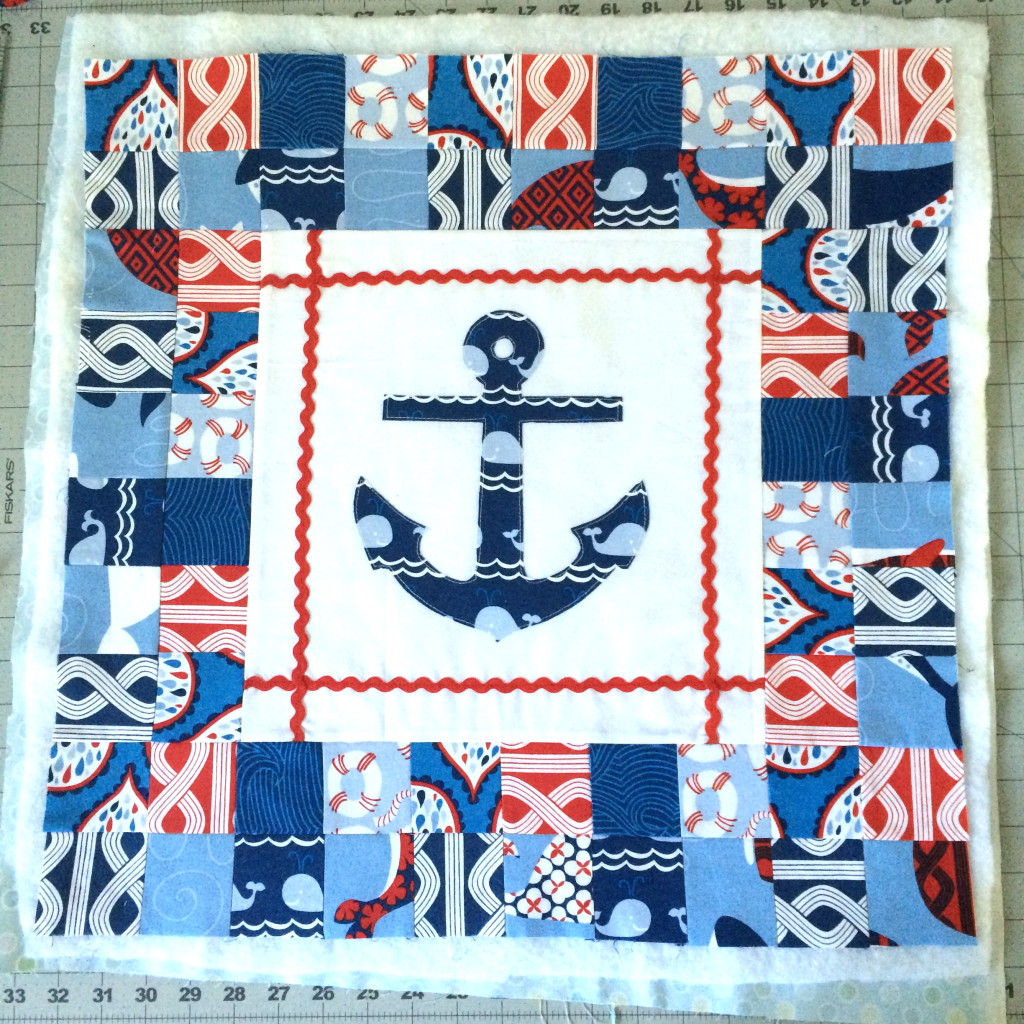
Once the pillow top is complete, spray baste it to the batting and then to a backing.  The backing fabric won’t be seen, it just gives the pillow added stability.  Quilt as desired.

IMG_6376

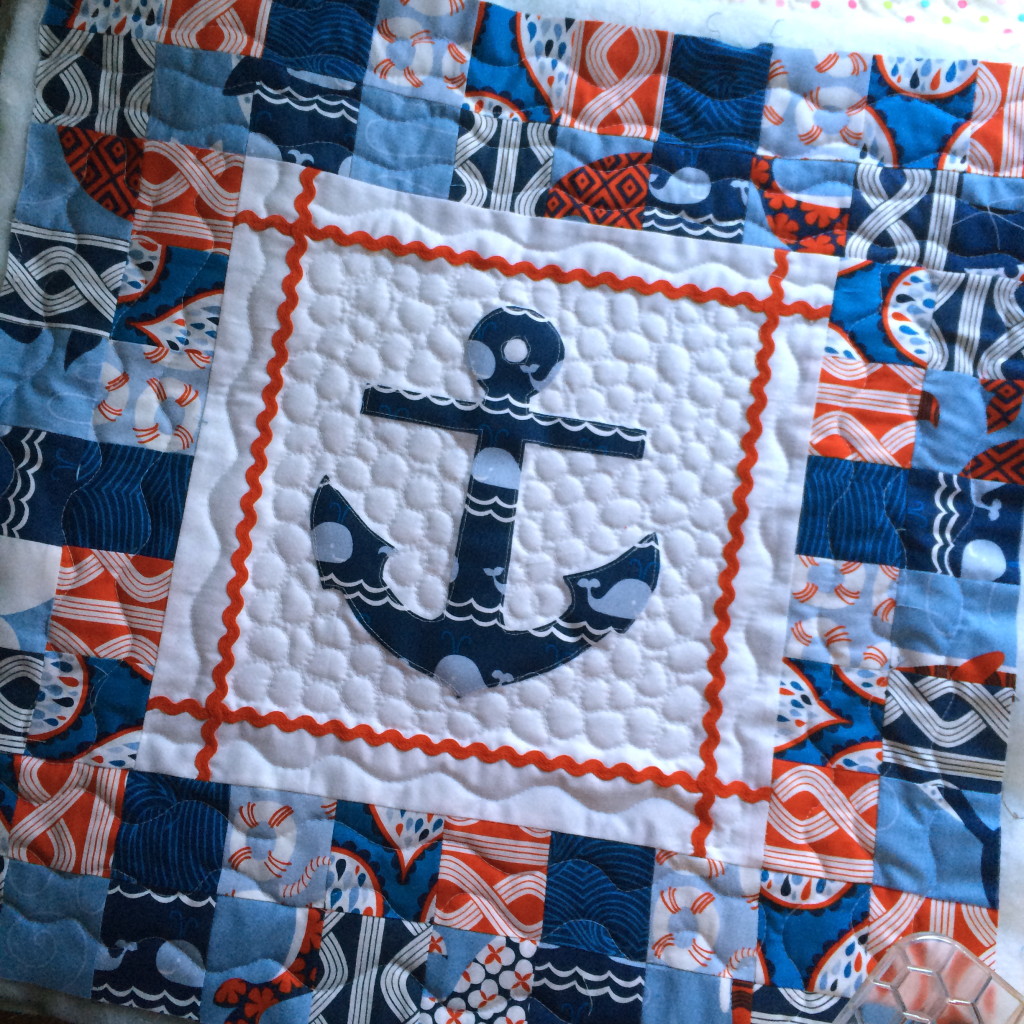
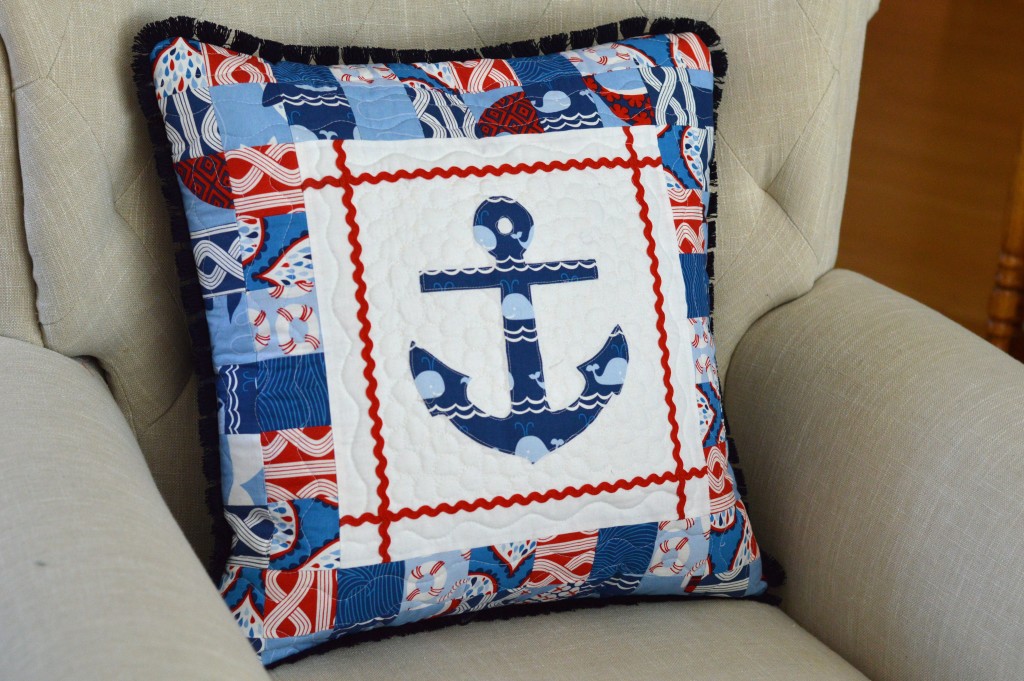
I quilted mine with wavy lines and then “pebbles” in the center.  After quilting square up each side.  The final measurement should be pretty close to 20″.  You loose a little with the quilting.

Baste the pillow trim onto the pillow top.  Finish the quilt as desired.  I always put a zipper in the back of my pillow and you can follow the instructions in this tutorial.

anchor pillow 4

I love how this pillow turned out and it goes great with all my other nautical sewing projects!  For more nautical projects, click HERE.

anchor pillow 9

anchor pillow 6

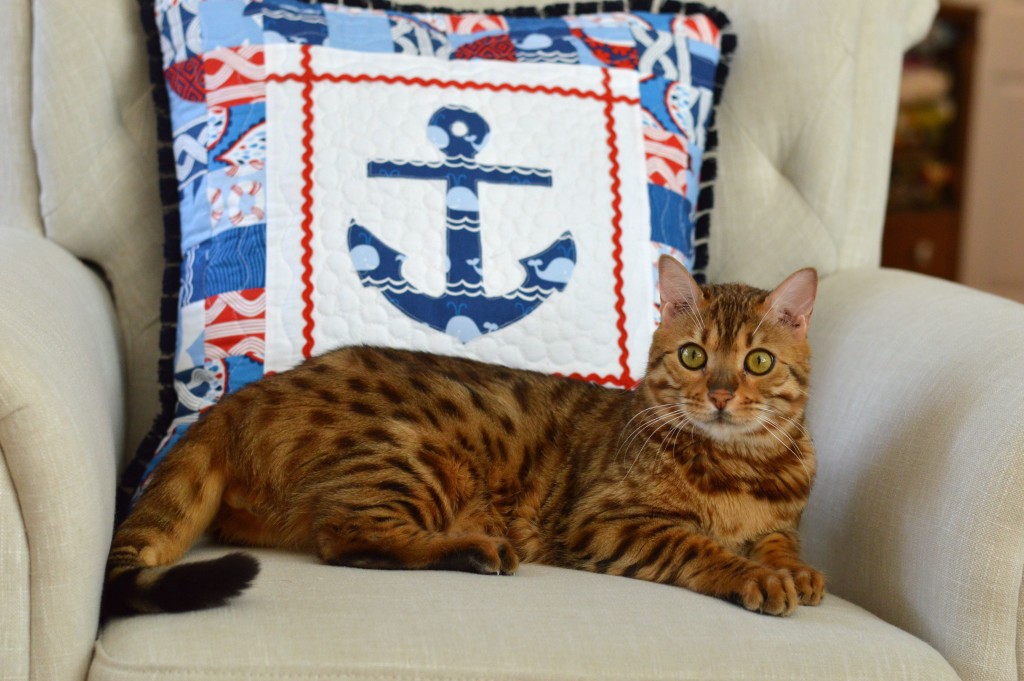
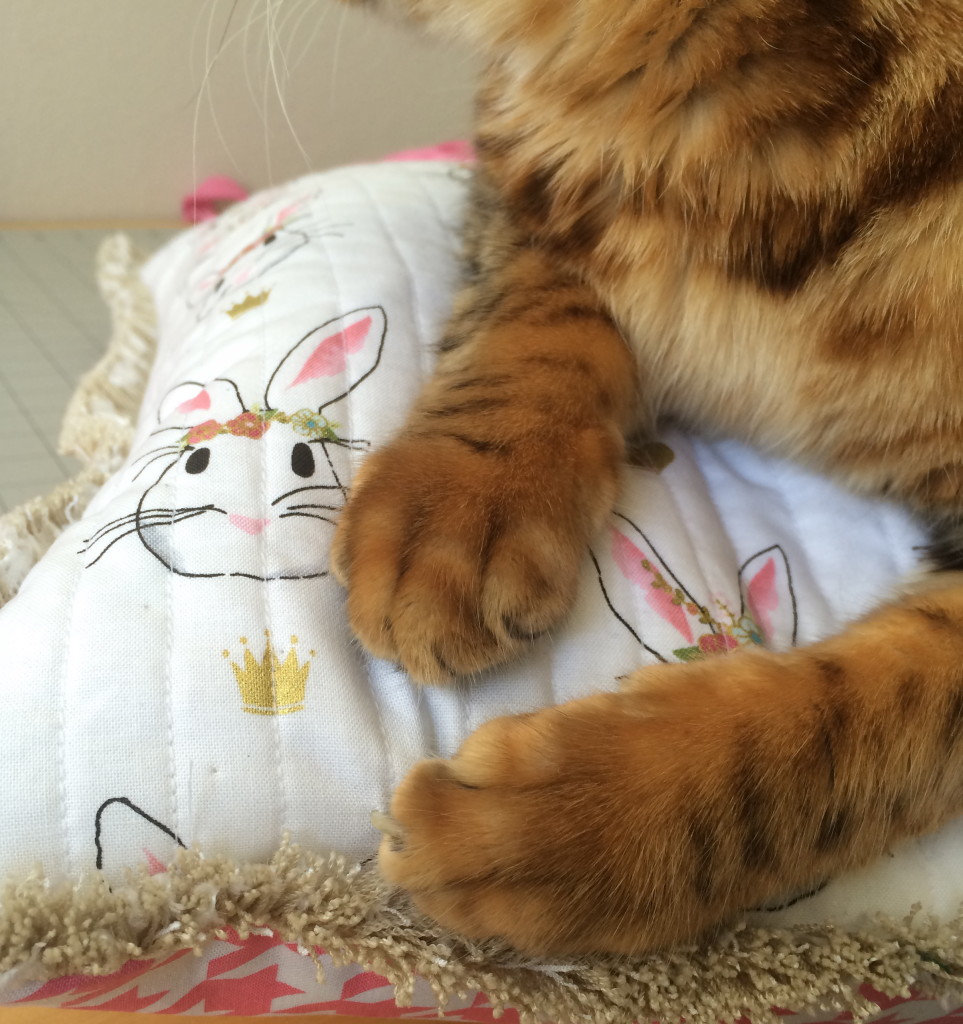
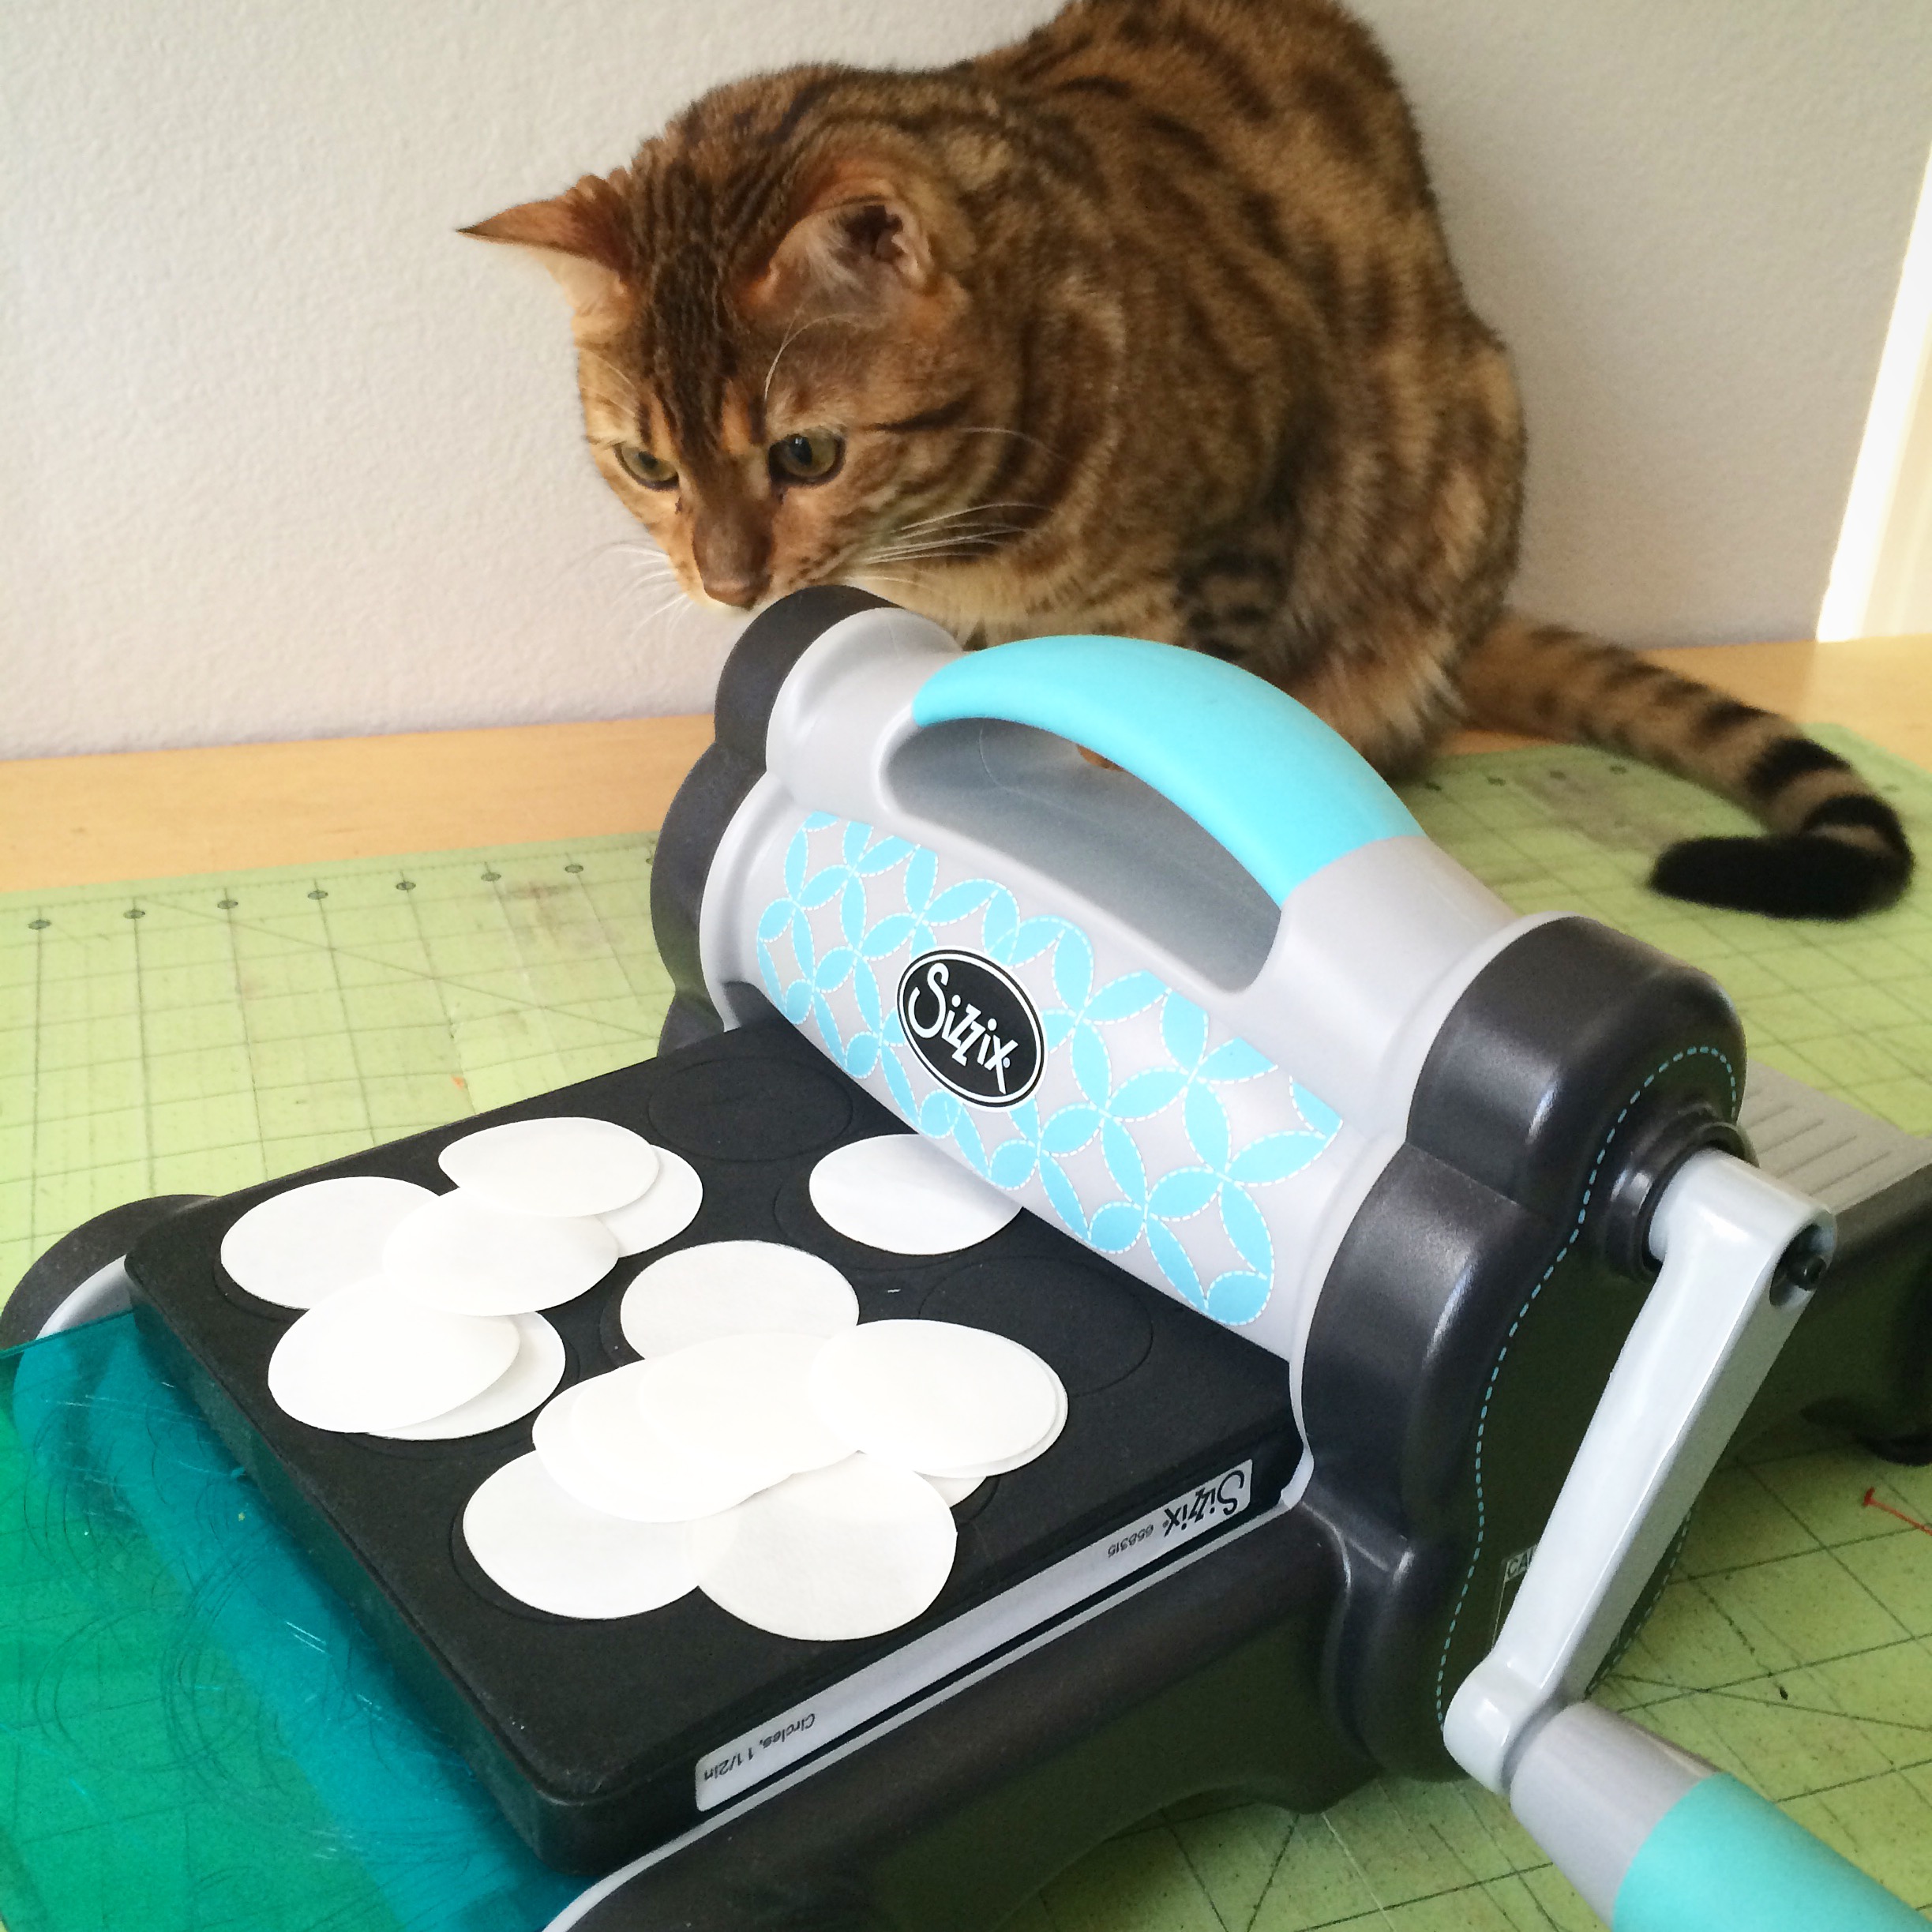
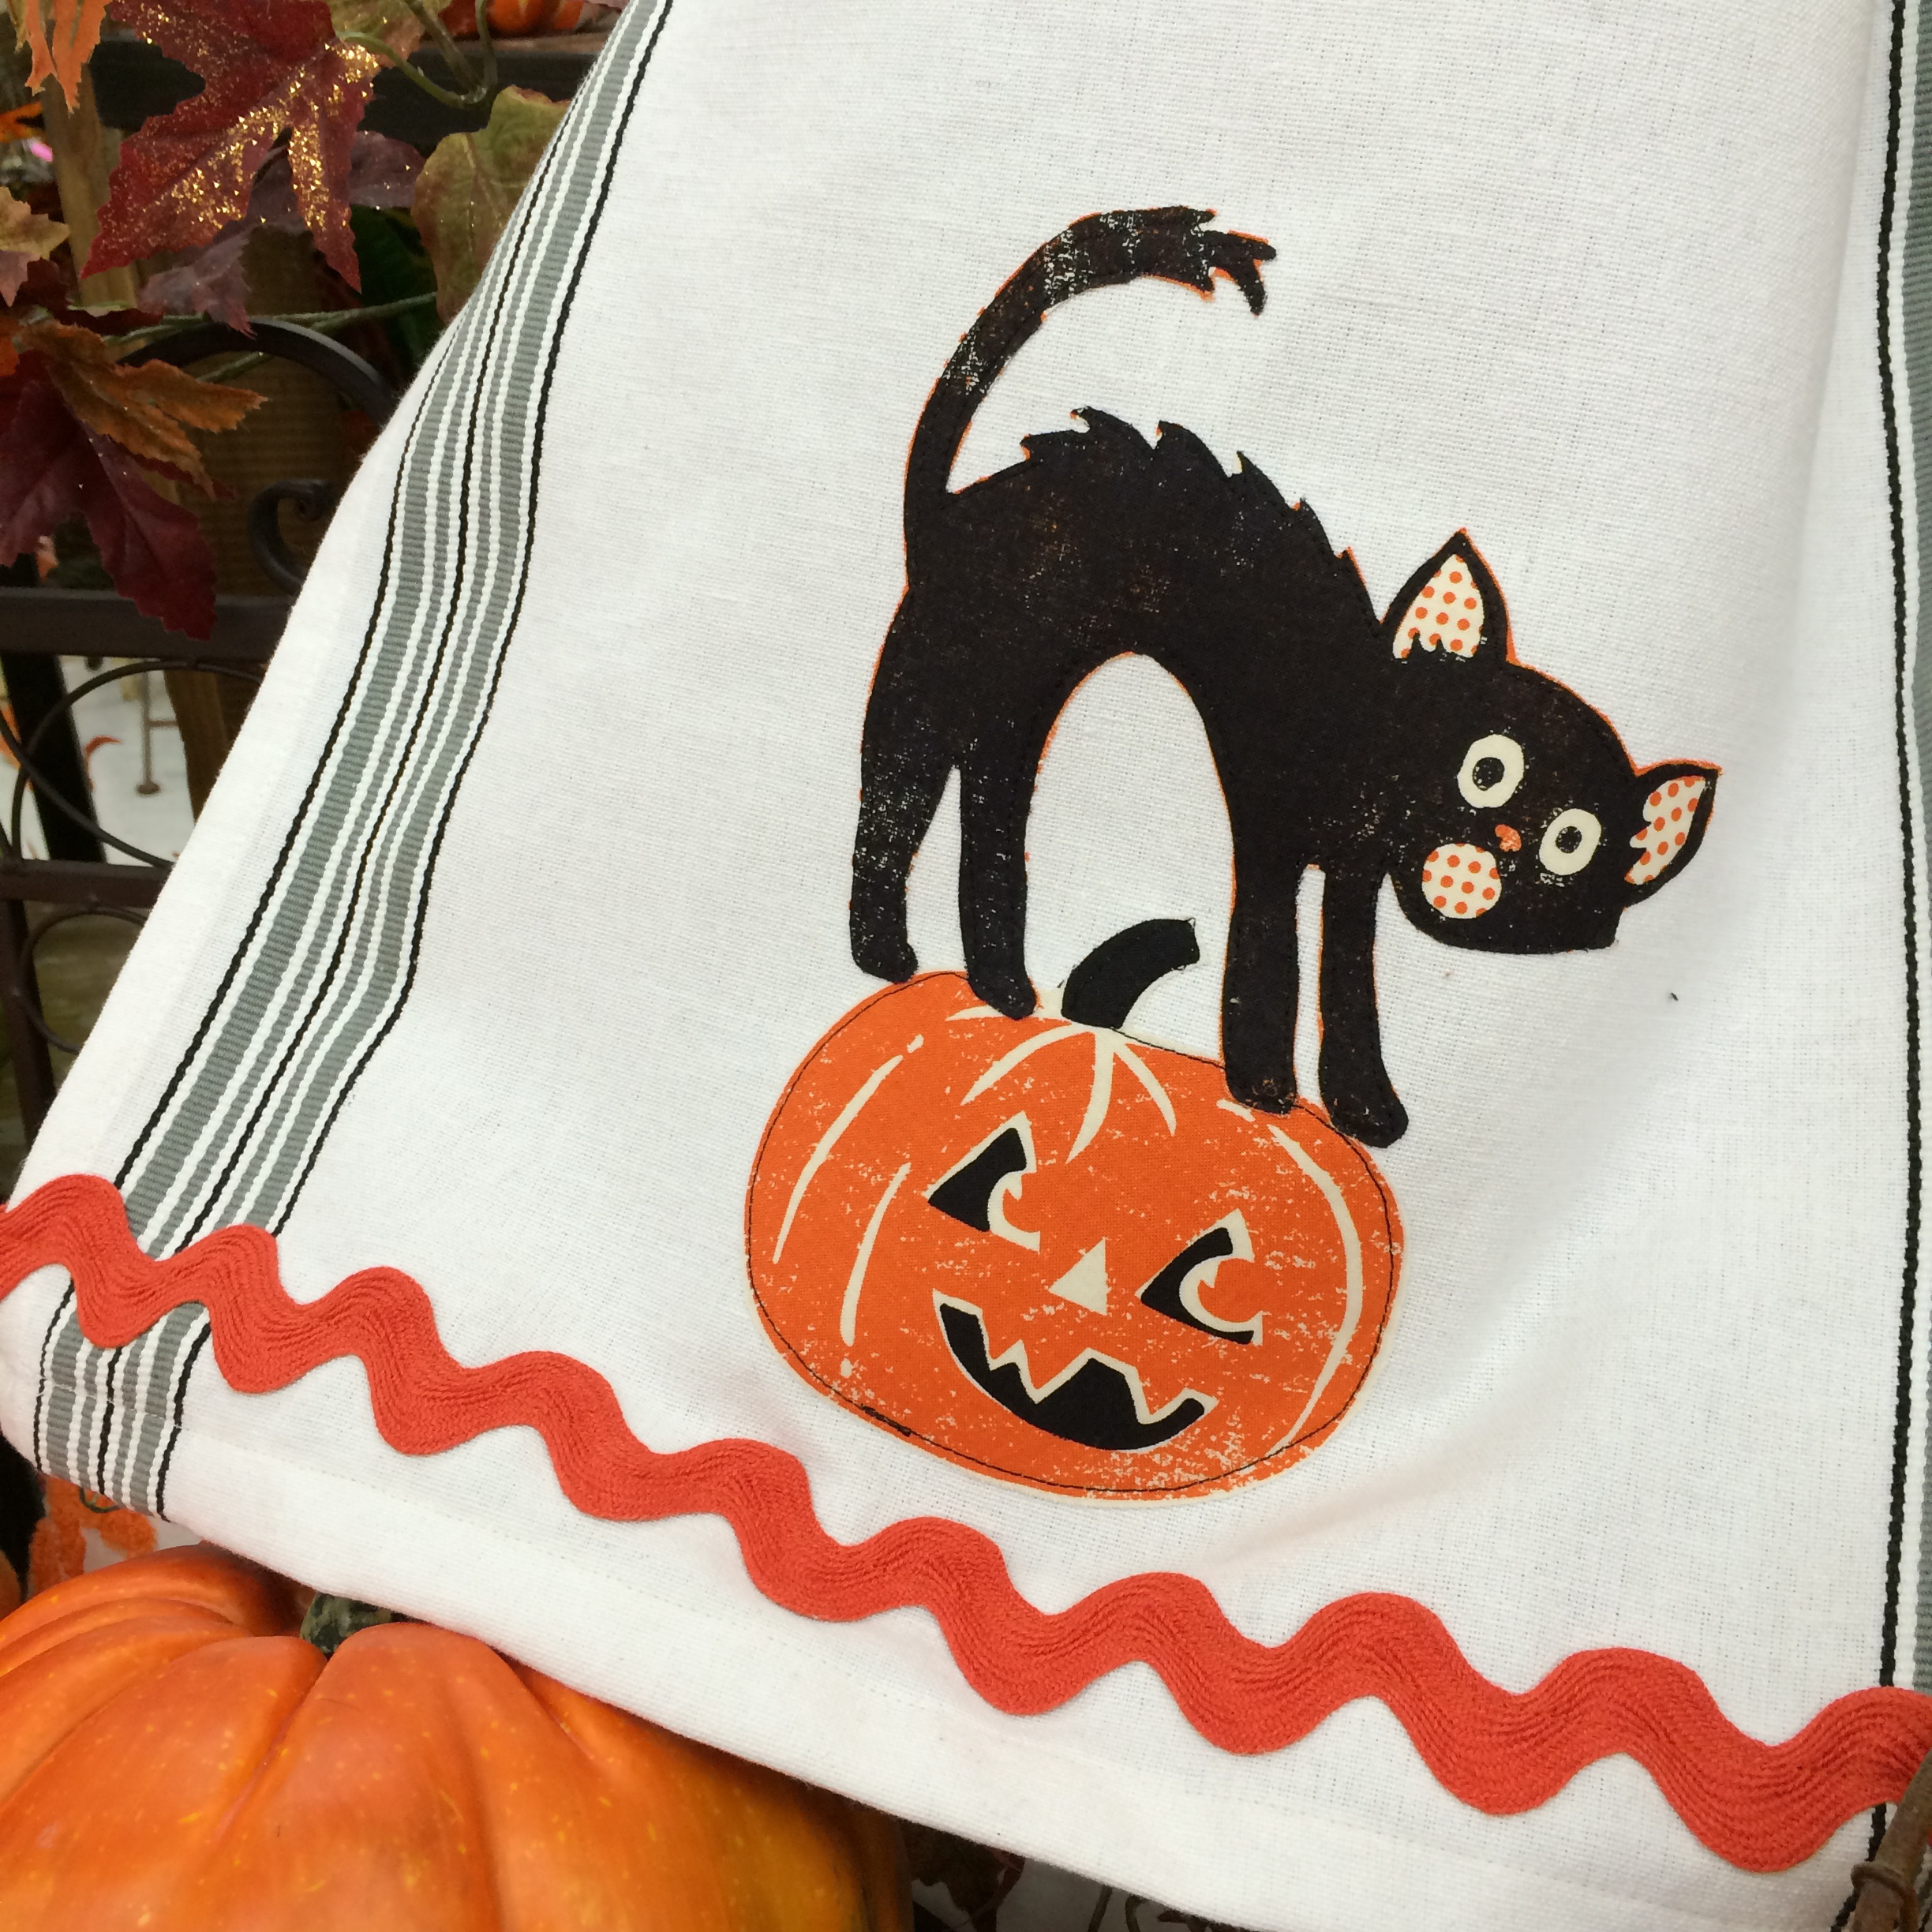
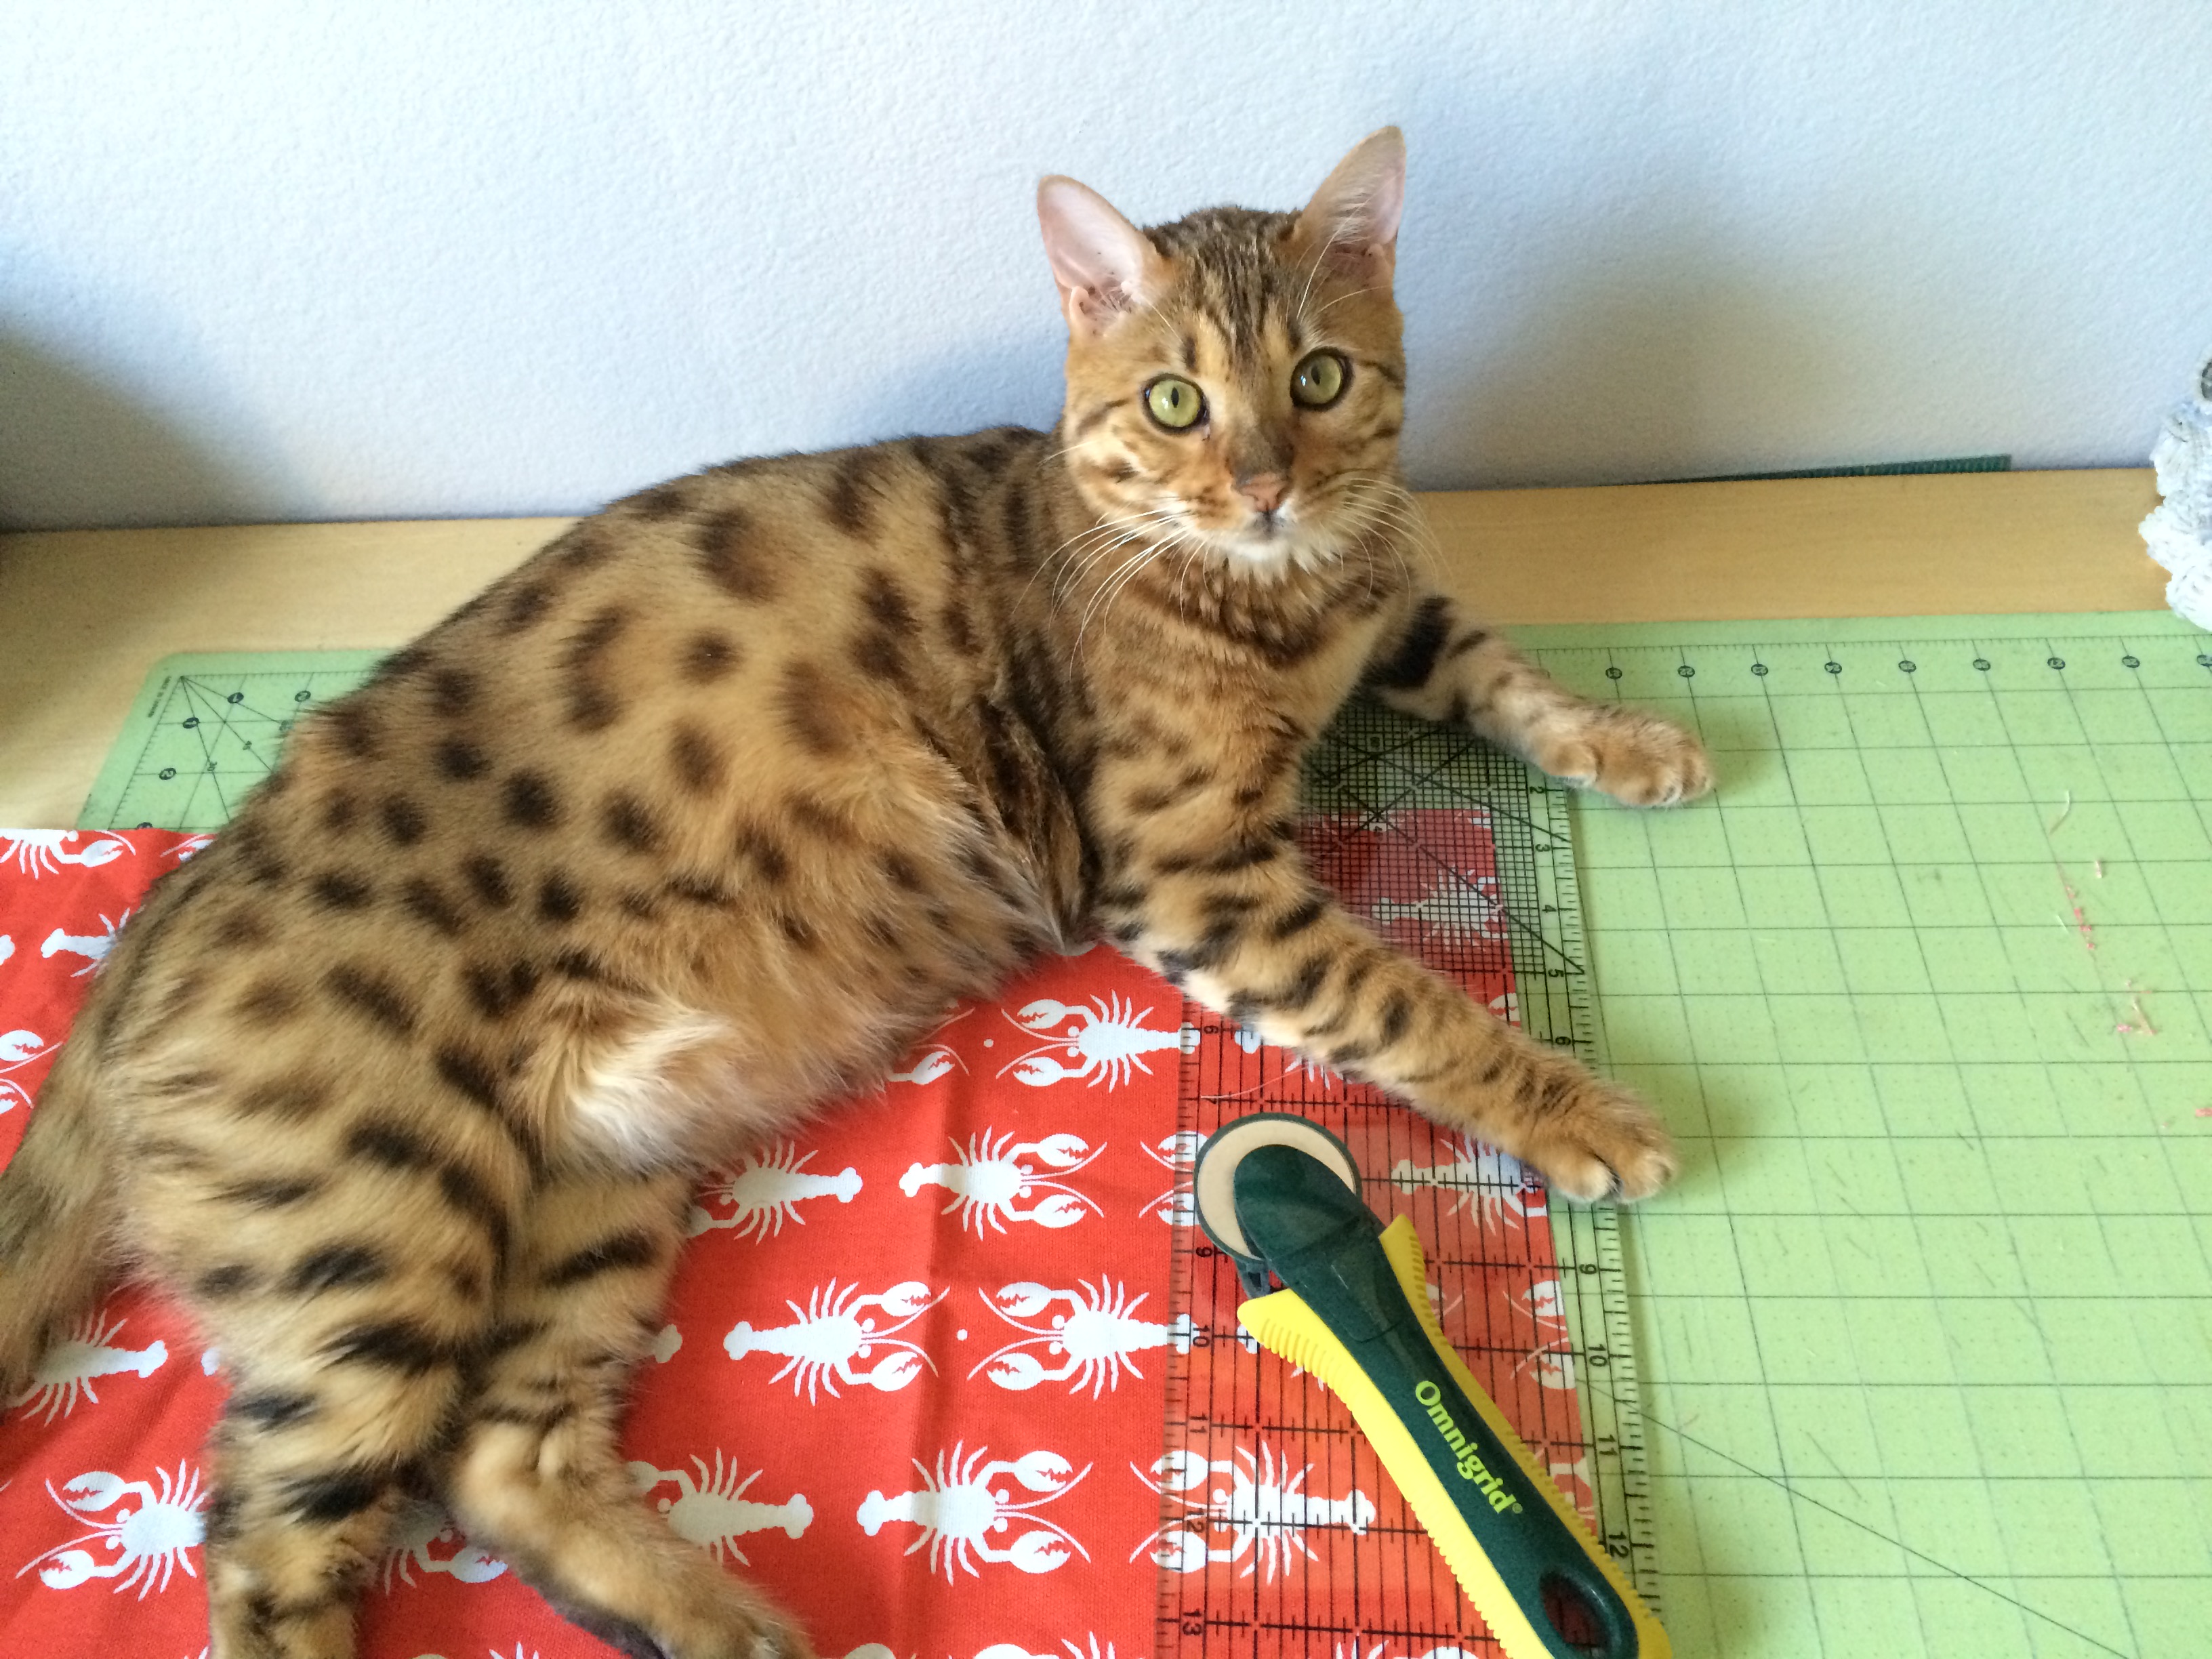
Mufasa was especially impressed with this project 🙂
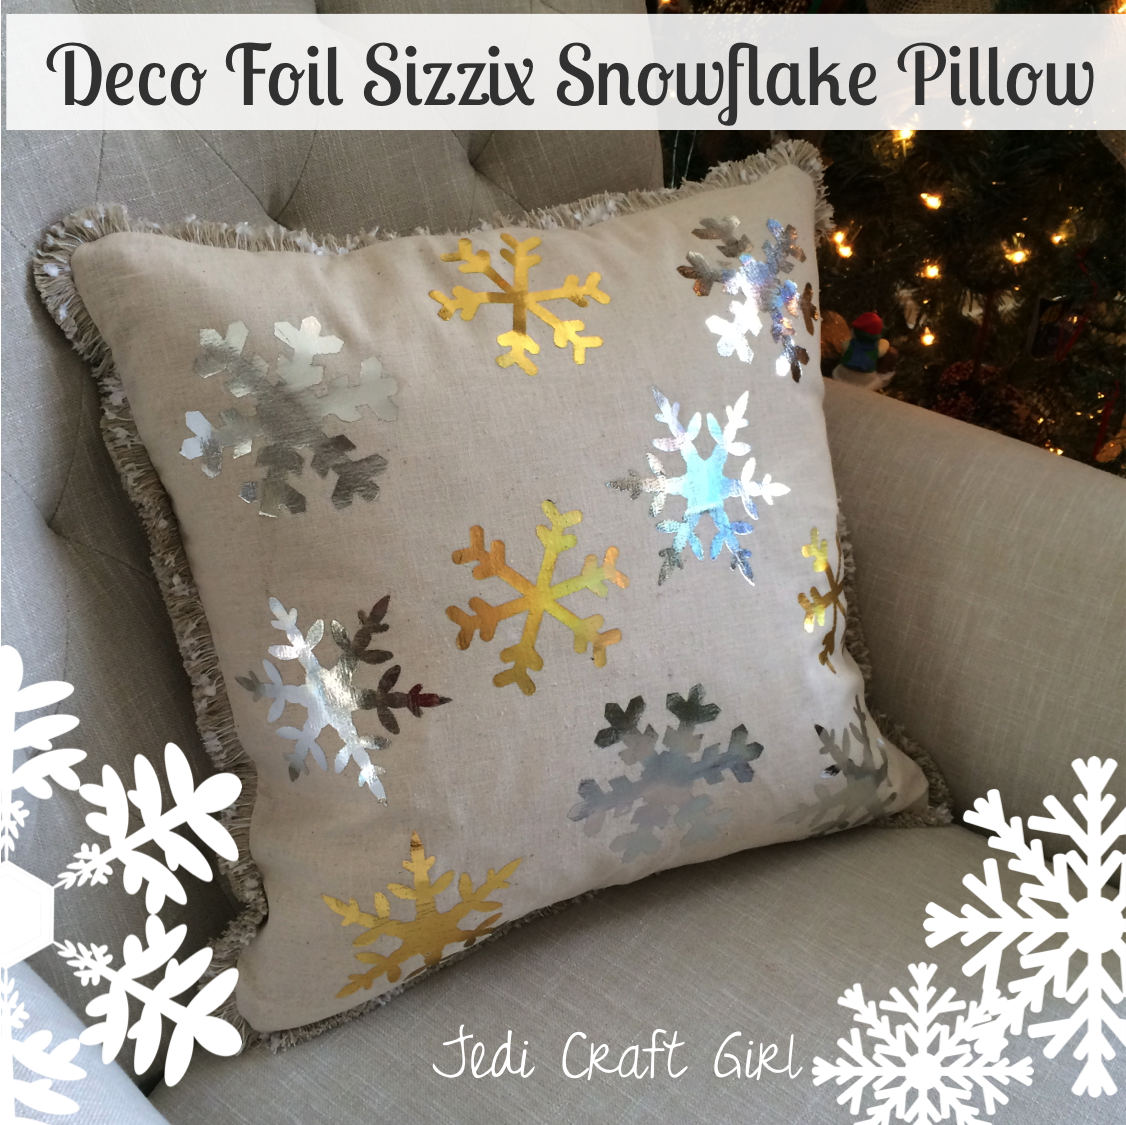
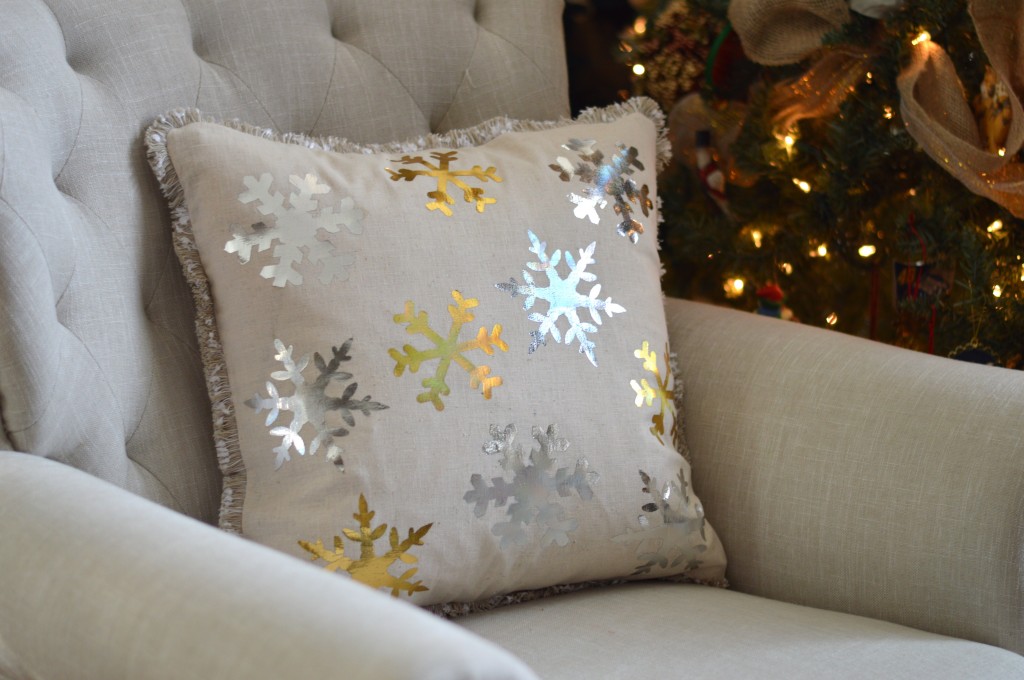
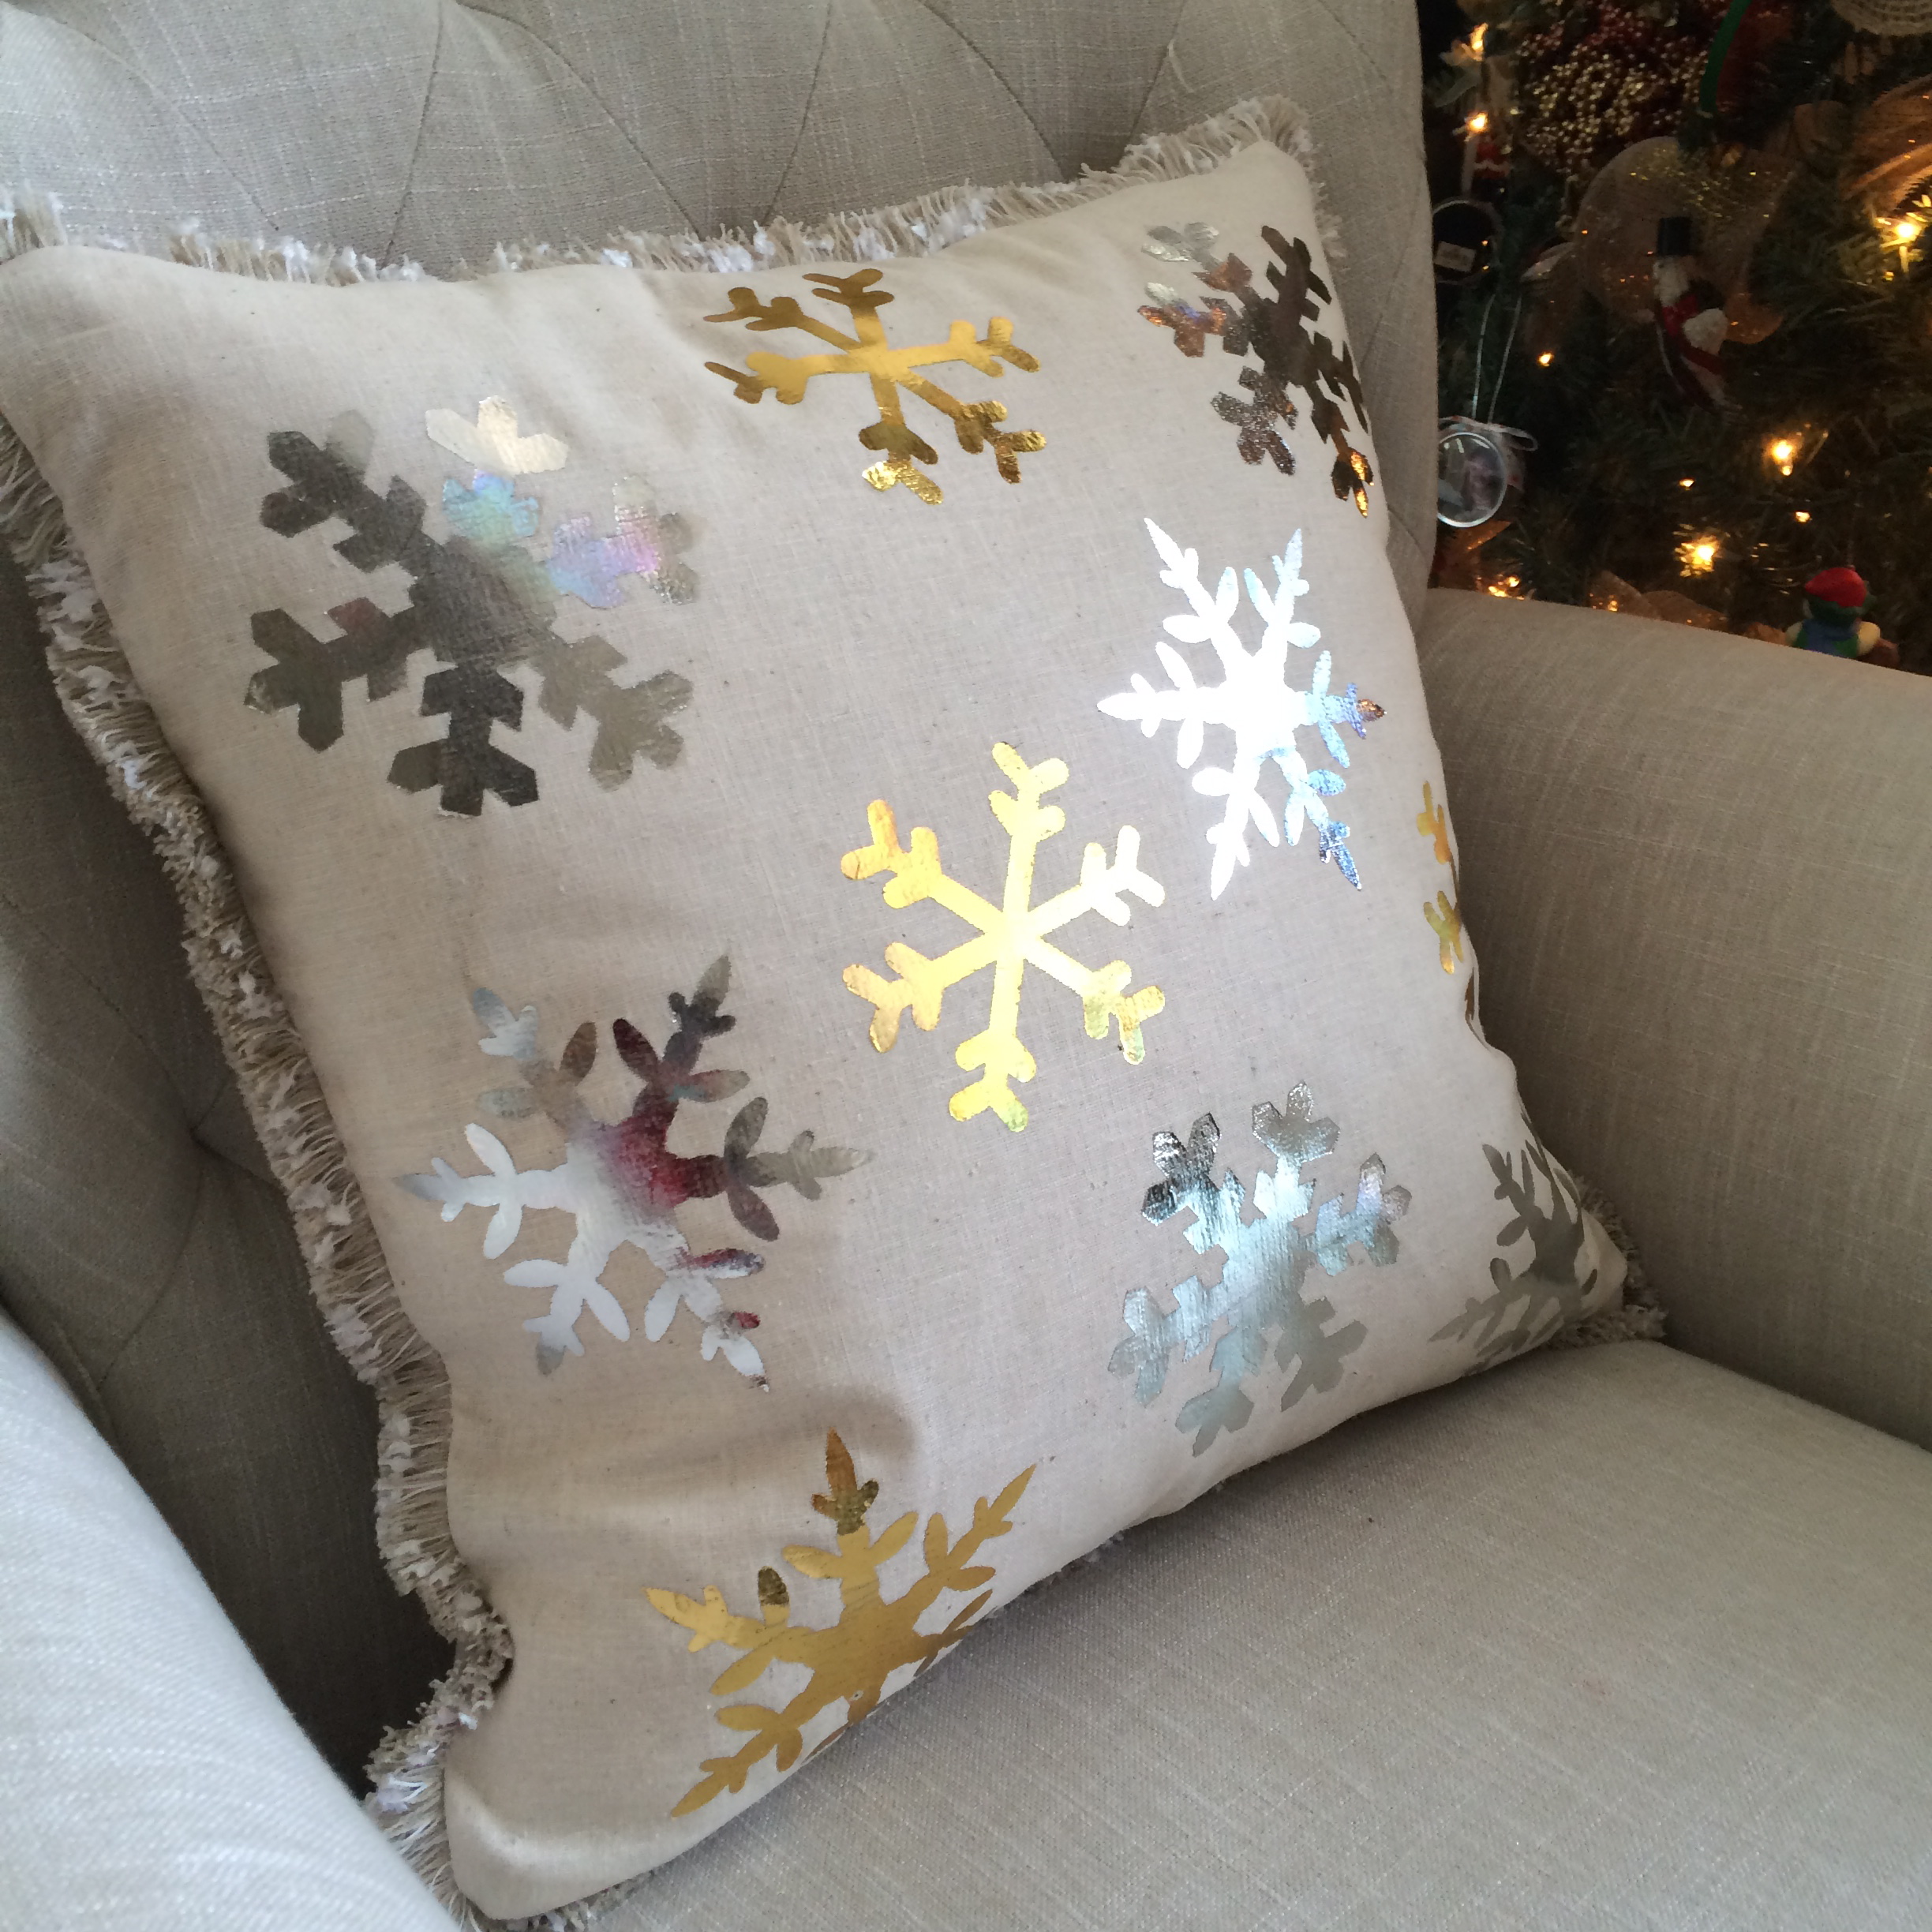
anchor pillow 3

anchor pillow 5


Bunny Mini Quilt and Pillow Featuring EZ Print Sheets

bunny applique pillow and quilt 2

I am so in love with bunnies and springtime!  My whole house is starting to look like a rabbit hutch!  (hahaha!!) I am sharing this pattern over on the Therm O Web blog today!  You can choose to make a mini quilt or a pillow!  The fabrics are from Penny Rose Fabrics designed by Elea Lutz called Milk, Sugar, Flower.bunny applique pillow and quilt 4

The pillow is made just like you would a quilt, only you add a zippered pillow back before you sew the binding!bunny applique pillow and quilt 8

See the zipper?  It’s hiding under an accent strip of cute fabric!

bunny applique pillow and quilt 9

I’m keeping the pillow for myself and giving this mini quilt to a sweet friend!

DSC_0572

Both the quilt and the pillow are 20″ square.bunny applique pillow and quilt 16

Hop over to the Therm o Web blog and you can download the applique pieces and print them directly onto Heat n Bond Lite EZ Print sheets!

bunny applique pillow and quilt 14

bunny applique pillow and quilt 11

Wonderland Bunny Pillow

wonderland bunny pillow tutorial

I’m pretty sure every spring I make a new bunny pillow!  Throw pillows are such a fun way to get your fabric fix!  I can’t get enough of these adorable bunny faces!  This new fabric line designed by Melissa Mortensen of the Polka Dot Chair is called Wonderland from Riley Blake Designs.

IMG_5019

I kept the pillow design simple so the bunnies would be the focal point!  If you have about 30 minutes, you can make one too!

Supplies:

1/2 yard Bunny Main Print

1/8 yard accent strip

1/4 yard second accent strip

20″ x 20″ piece of fabric for the back

20″ pillow form

accent trim, optional

cotton batting

22″ zipper

IMG_4992

First get out your fabrics and have your cat roll all over them 🙂

bunny pillow measurements

Next, cut the fabrics according to the above measurements.  Using 1/4″ seams, sew the pieces together and press seams in one direction.

IMG_4984

Baste the pillow top to a piece of batting and quilt straight lines every 3/4″.  After it is quilted, trim the pillow front so it measures 20″x20″.  The reason we made it 21″ to begin with is because it can shrink a little when quilting.  This way we get an exact 20″ square.  From this point you can finish the pillow how ever you want.  I basted some neutral color trim onto the pillow front.

IMG_5018

I always finish my pillows by inserting a zipper in the back of the pillow.  You can choose the invisible zipper method (here)  or the exposed yet covered up zipper method (here).  I added a piece of lace to cover the zipper.  I love the pink hounds-tooth on the back.

IMG_5001

Guess who also loves this pillow?

wonderland bunny pillow 5


wonderland bunny pillow 2

The back of the pillow is almost cute enough to stand on its own!     IMG_5011

I love the texture the straight line quilting gives the pillow!wonderland bunny pillow 6

I love bunnies and I love spring!!!   IMG_5003

Deco Foil Sizzix Snowflake Pillow

sizzix snowflake pillow

Merry Christmas!  I can’t believe how fast December flew by!  I still have a stack of projects I was hoping to get to!  There is still time to whip up this quick snowflake pillow before Christmas.   I used 3 different Sizzix snowflake dies and Deco Foil in Silver and Gold – just like the song!

deco foil snowflake sizzix pillowGather your supplies and let’s get started!

deco foil snowflake sizzix pillow 2The Hot Melt Sheets are what allow the Deco Foil to adhere to the fabric.  Cut the Hot Melt Sheets the size of the Siizix die.

Use only one layer of the Hot Melt Sheets at a time.  I tried cutting multiple and it cuts great but the hot melt sheets end up sticking together.

deco foil snowflake sizzix pillow 6Cut (2) squares the size of your pillow.  I always use 20″ pillow so I can swap pillow covers out in a jiffy.  I used a heavy natural muslin.  Mine is cut 20″ square.  Have your cat help you position the snowflakes randomly all over the pillow front.  You can also position in three rows for a linear look.  Once you have the snowflakes placed just so, press them into place using a medium-hot dry iron.  Let cool completely.

deco foil snowflake sizzix pillow 7Don’t peel the backing paper off all the snowflakes at once.  Begin in the center and peel off as you add foil to protect the adhesive from the iron.  Peel off the center snowflake’s paper and place a piece of Deco Foil over.  Place the pressing sheet (it comes with the Hot Melt Sheets) over the foil.  USING A MEDIUM HEAT DRY IRON press for about 20 seconds.  I found that if my iron was set on the cotton/linen setting it would scorch the foil.  If this is your first time, test this on a piece of scrap fabric to make sure it works.  Once you’ve pressed the foil let it cool completely.

IMG_3286Once the foil has cooled, gently peel away the foil sheet.  It will leave a perfect snowflake!  Continue this process.

deco foil snowflake sizzix pillow 8 Be mindful not to touch the iron to the completed snowflakes.

deco foil snowflake sizzix pillow 9They are so shiny and pretty!!  Once all the snowflakes are finished you can turn it into a pillow!  I always put a zipper in my pillow back.  I also added some decorative fringe.  For more instructions on how to finish the pillow, you can check out this tutorial.

deco foil snowflake sizzix pillow 3

I love how this pillow looks in my sparkly living room!          deco foil snowflake sizzix pillow 11 Supplies:

2/3 yard heavy muslin for pillow

Sizzix Snowflake Dies

Therm O Web Hot Melt Sheets

Therm O Web Deco Foil in silver and gold

2.5 yards decorative fringe

22″ zipper, optional

Sizzix Quilted Deco Foil Pumpkin Pillow

sizzix pumpkin pillow deco foil 2I am in love with gold polka dot pumpkins!  I created a smaller version of this pillow on the Therm O Web blog.  This version is a 20″ pillow and it’s actually quilted!  Have you used Deco Foils before?  They are a great way to add a little pop and pizzaz to a project.  To get perfect polka dots I used my Sizzix Fabi and a circle die.  Of course I needed a little help from Mufasa who is totally obsessed with the Sizzix Fabi!

sizzix pumpkin pillow deco foil 4

Using the Fabi you can cut circles in a snap!  I used the Therm O Web Hot Melt Sheets and die cut them.IMG_1595

Draw a pumpkin on a white piece of fabric using a disappearing ink pen.  Position the circles all over the pumpkin including partially off the edge of the pumpkin.  You can use this pumpkin pattern, I enlarged it a bit so it fit the 20″ pillow.  Press using medium heat.  Let cool completely.  Peel off papers.IMG_1607
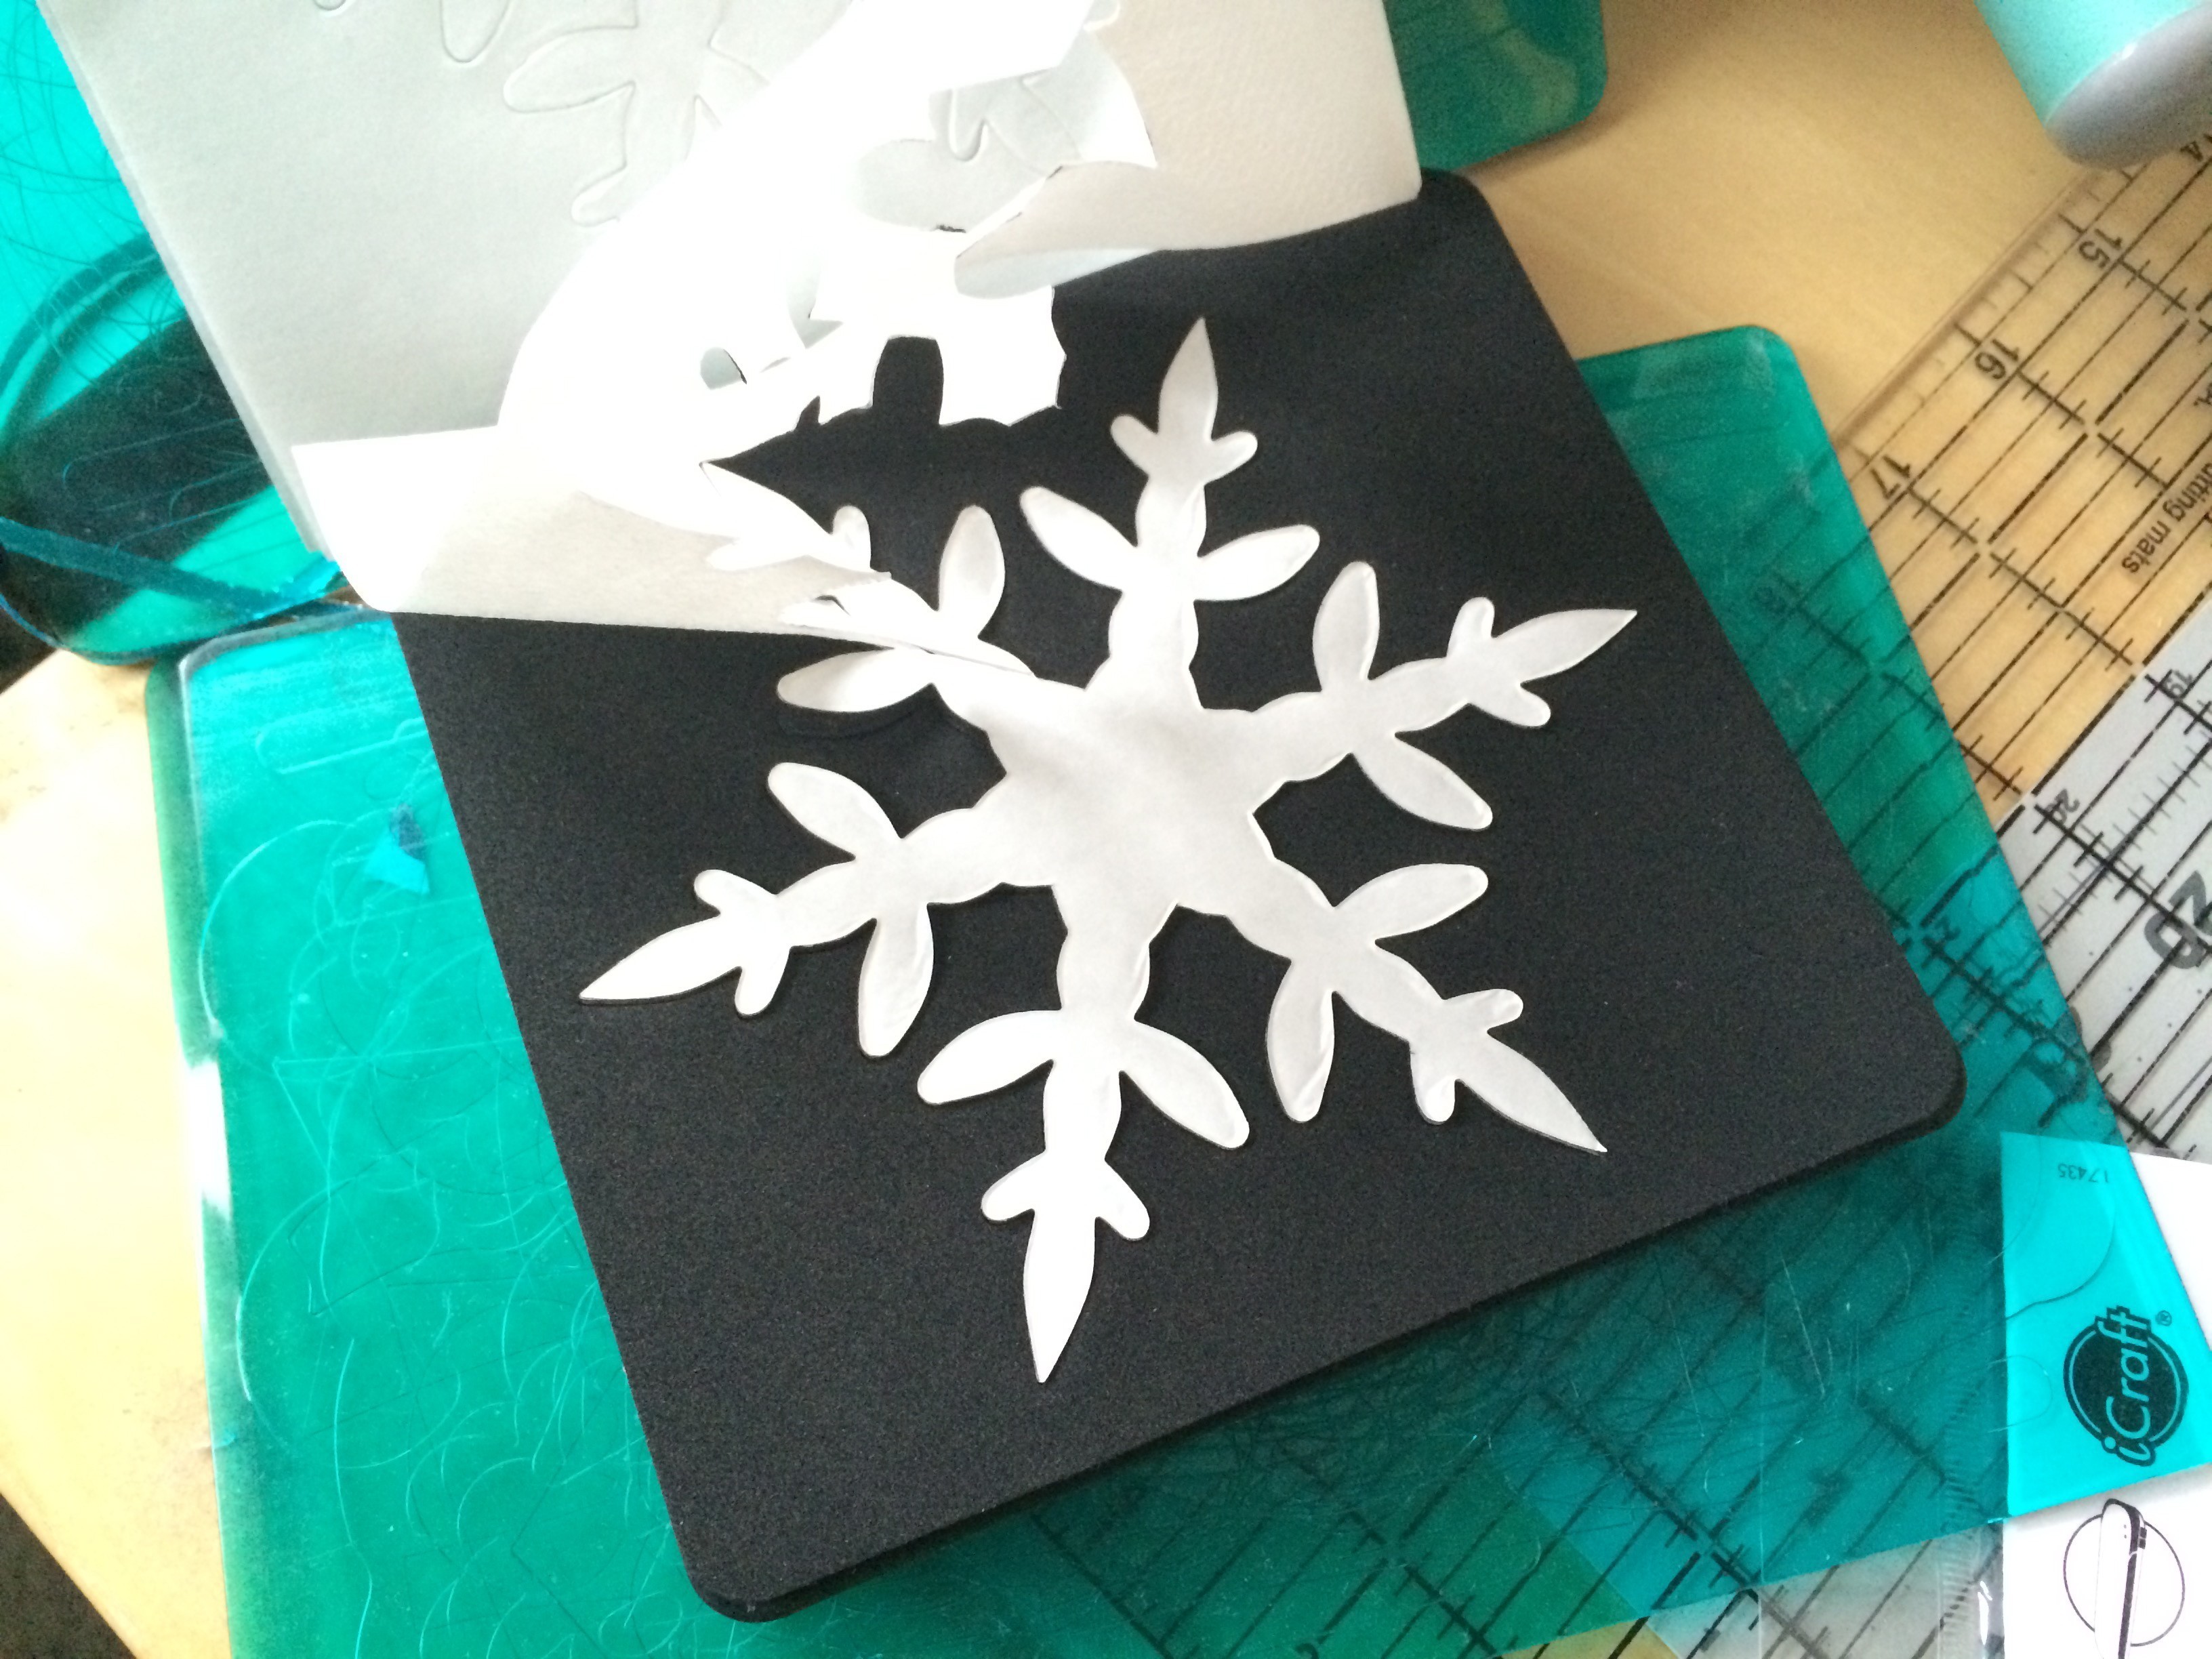
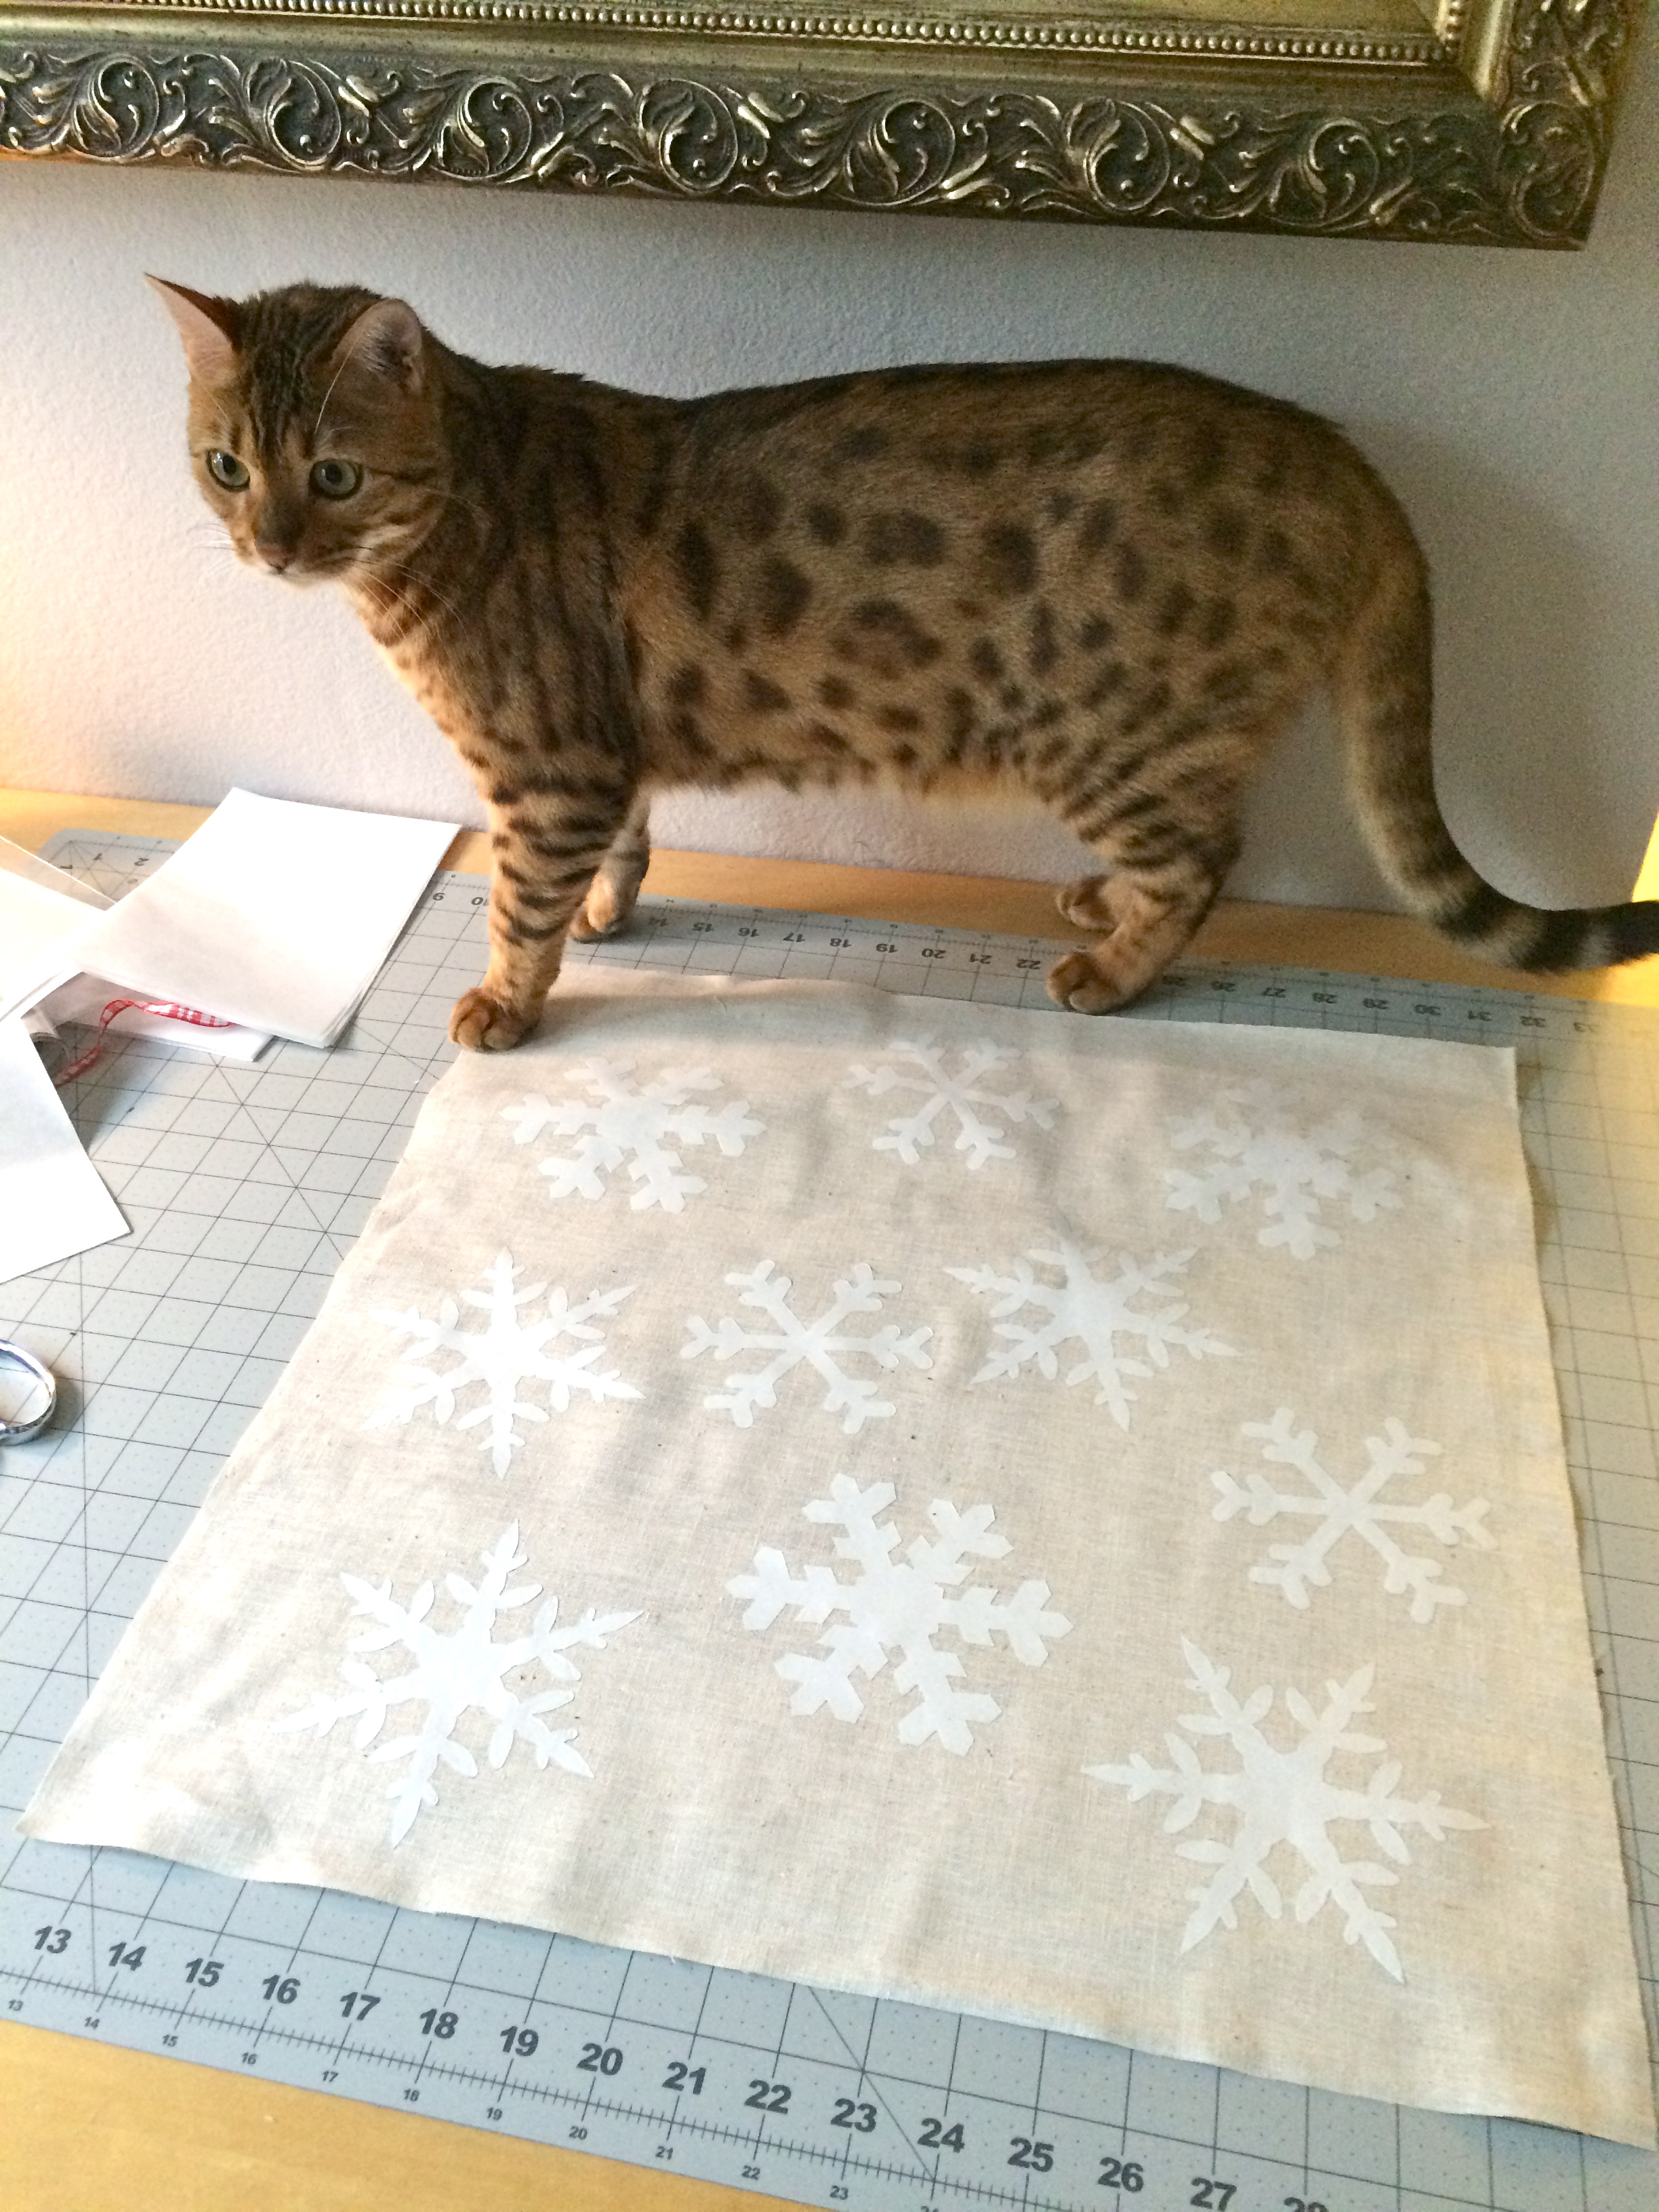
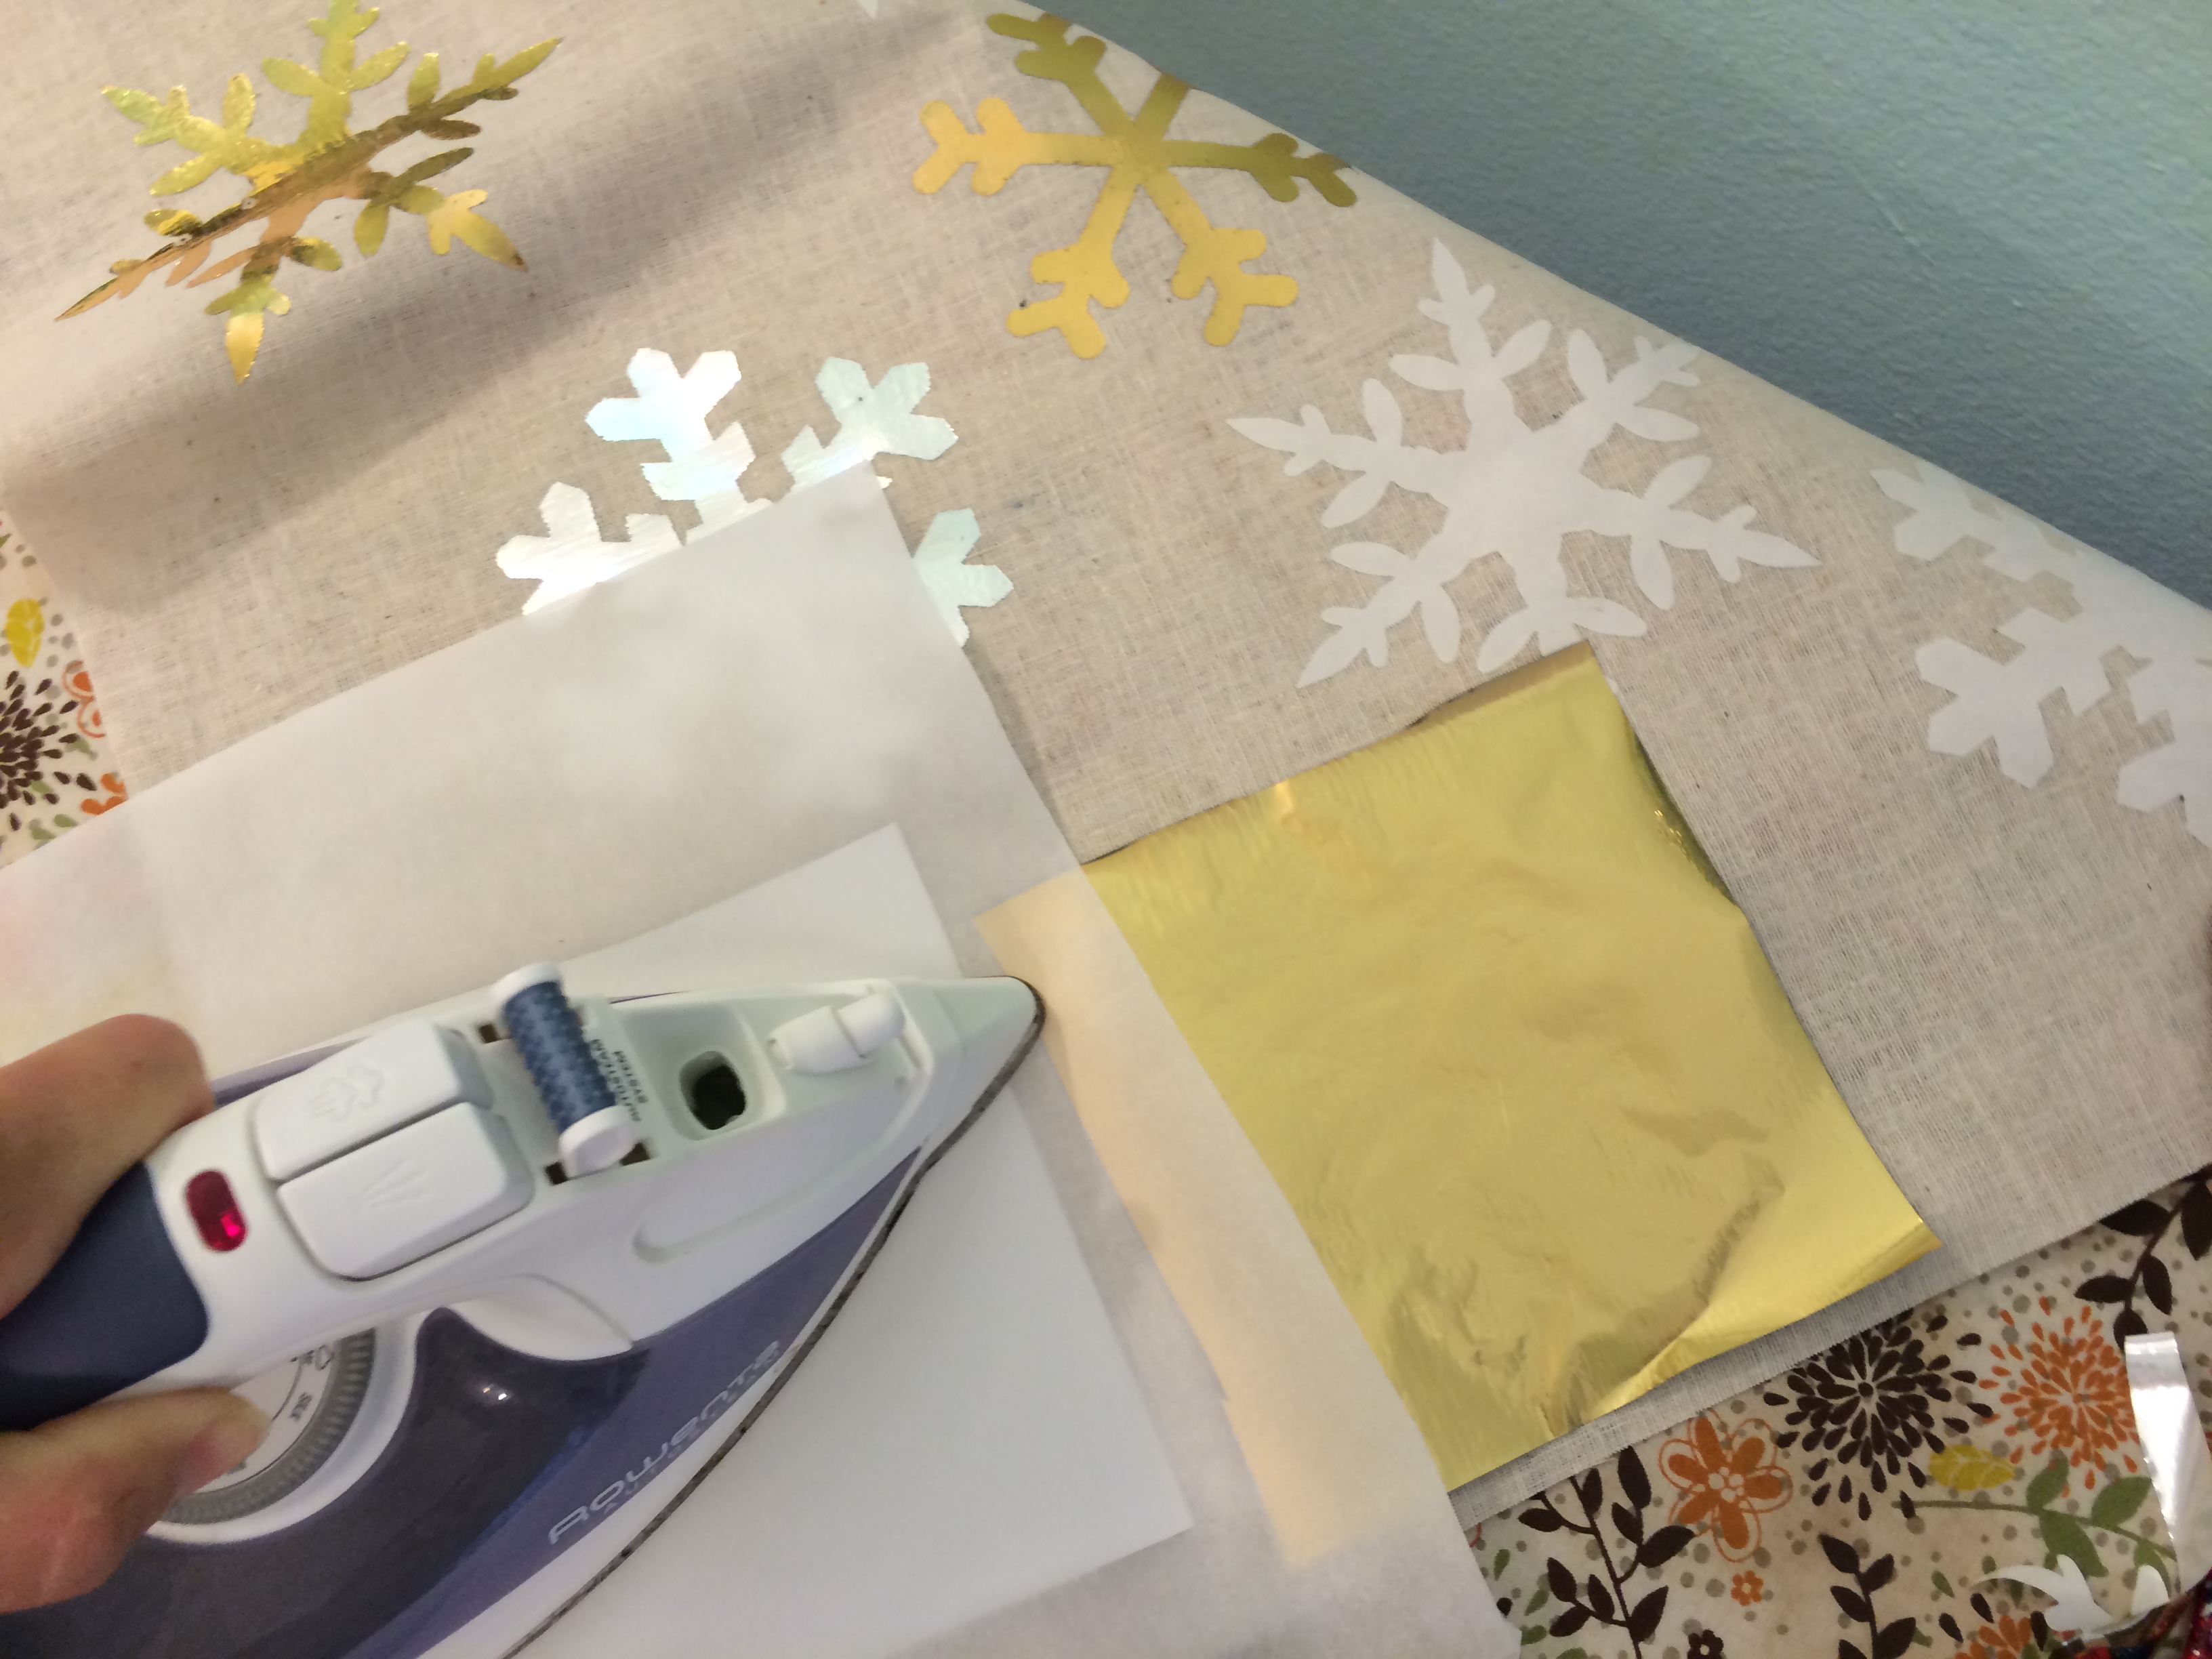
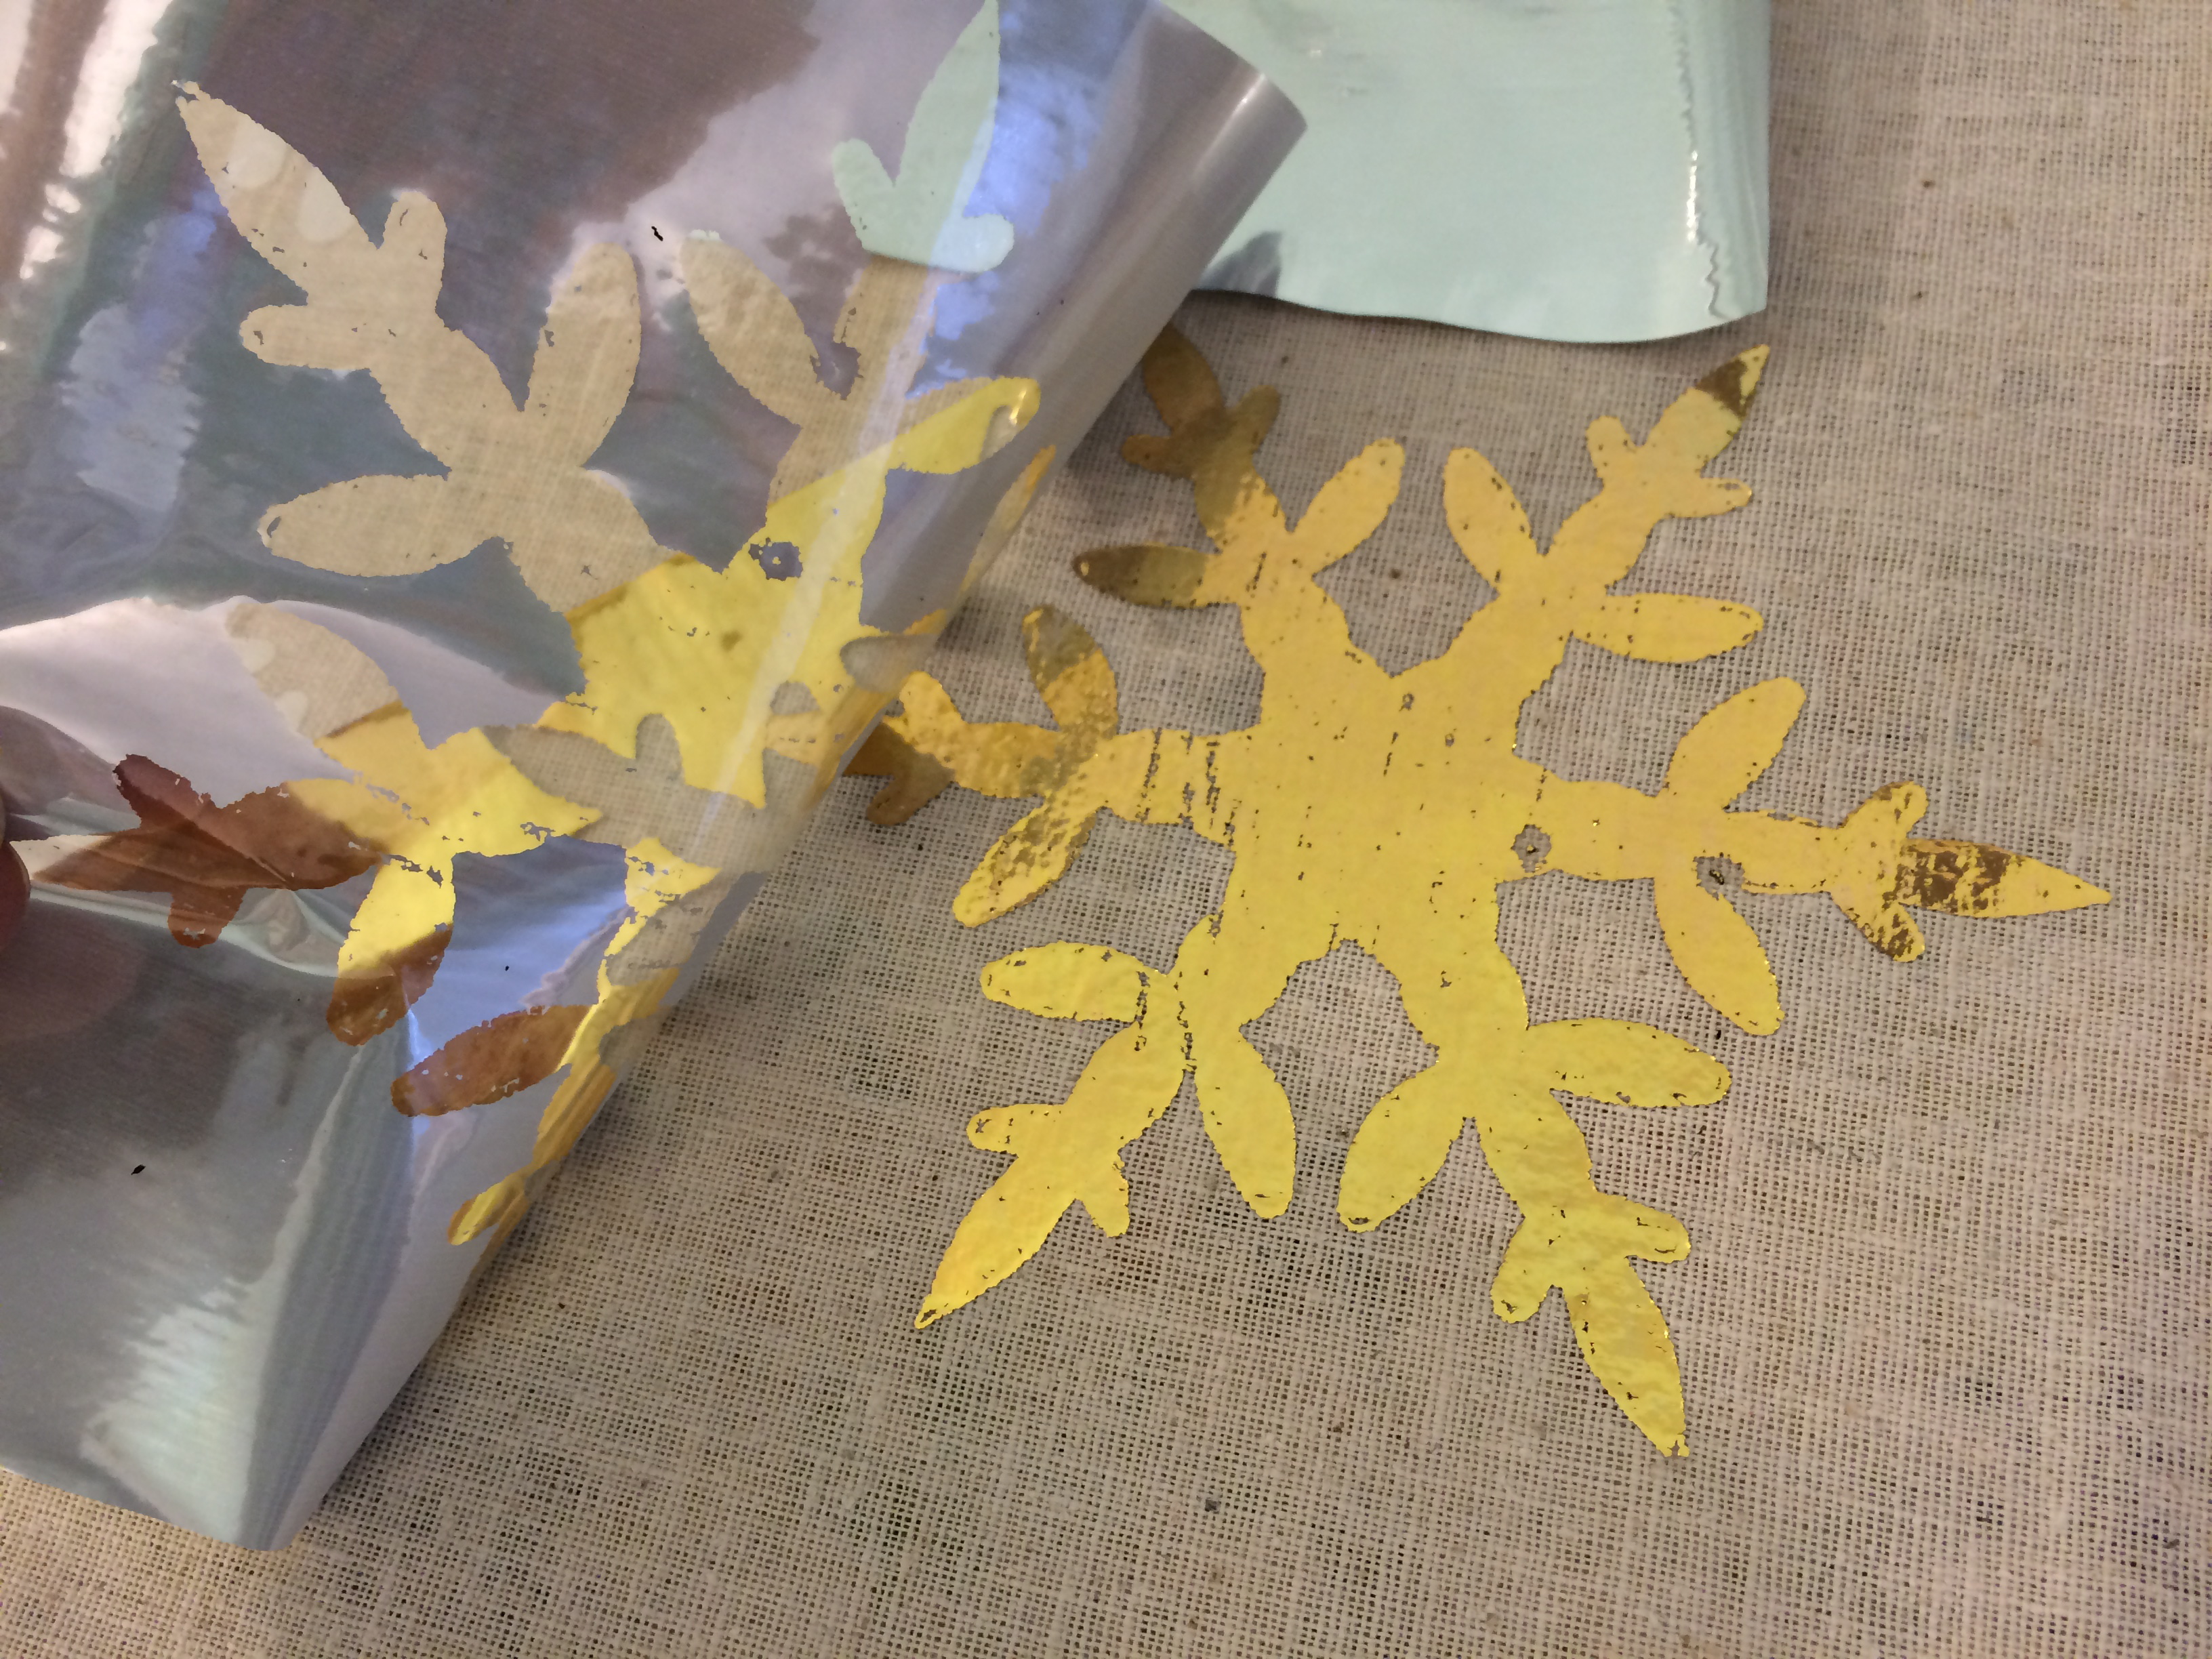
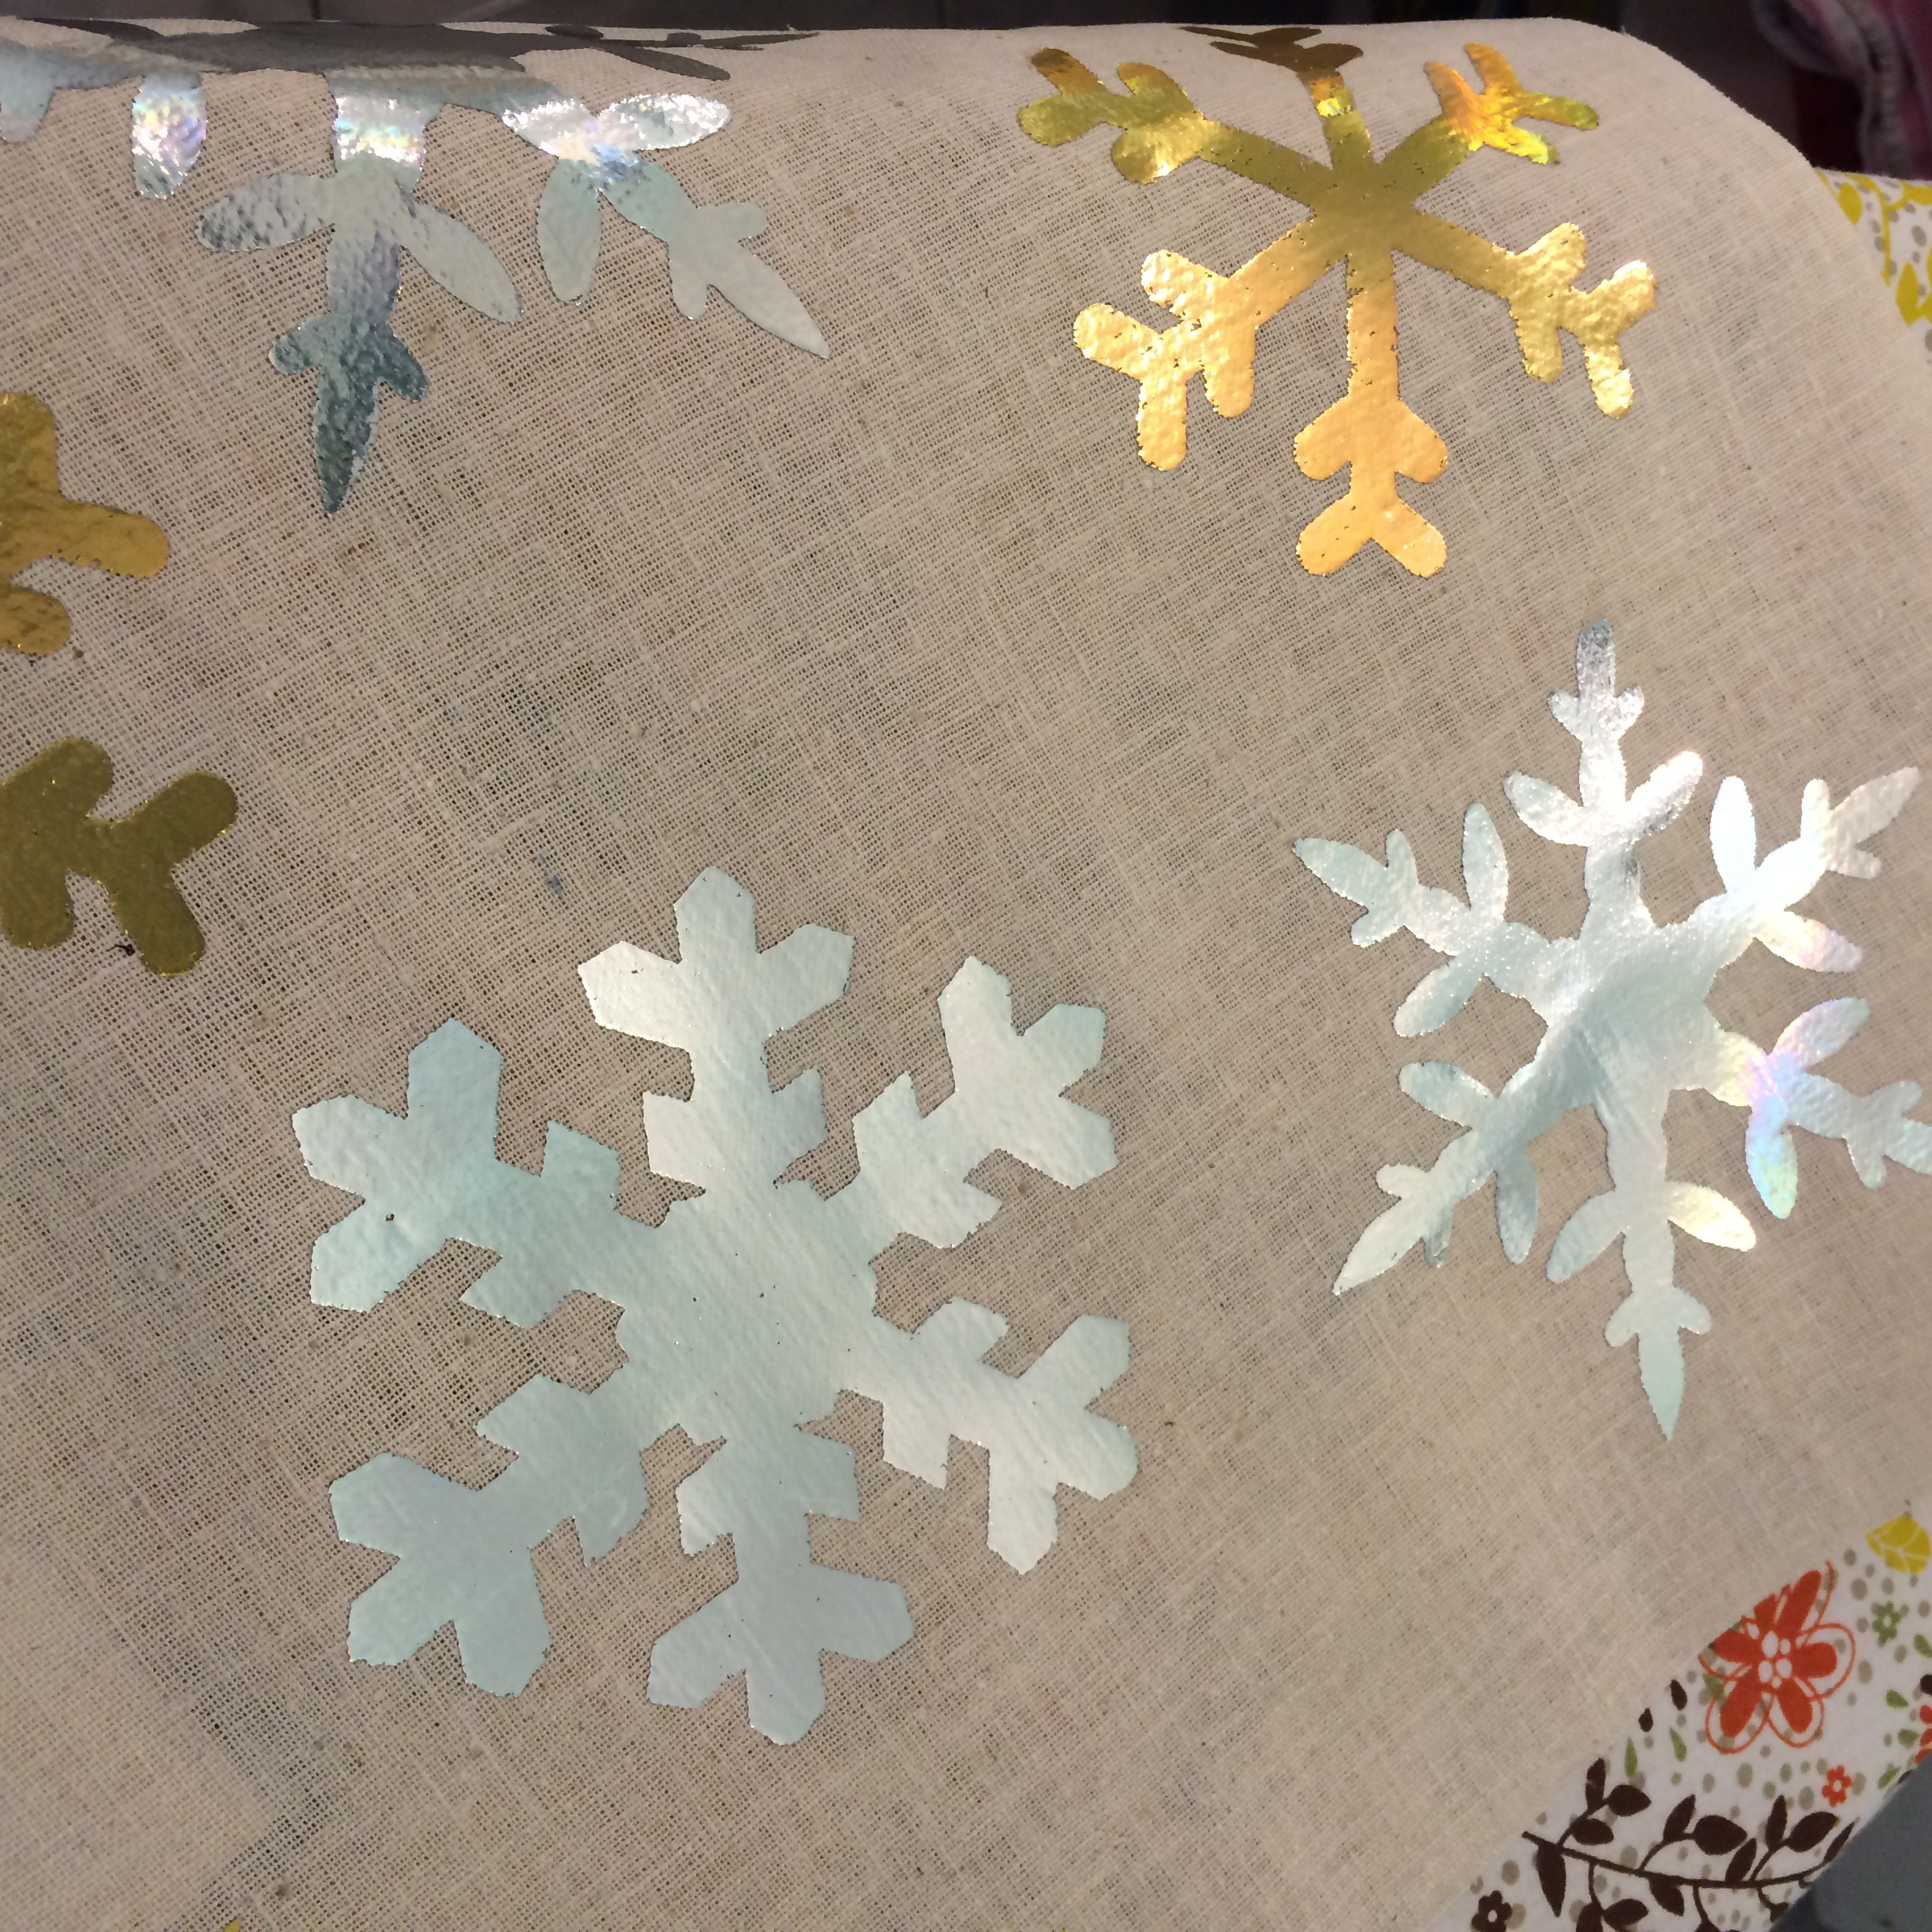
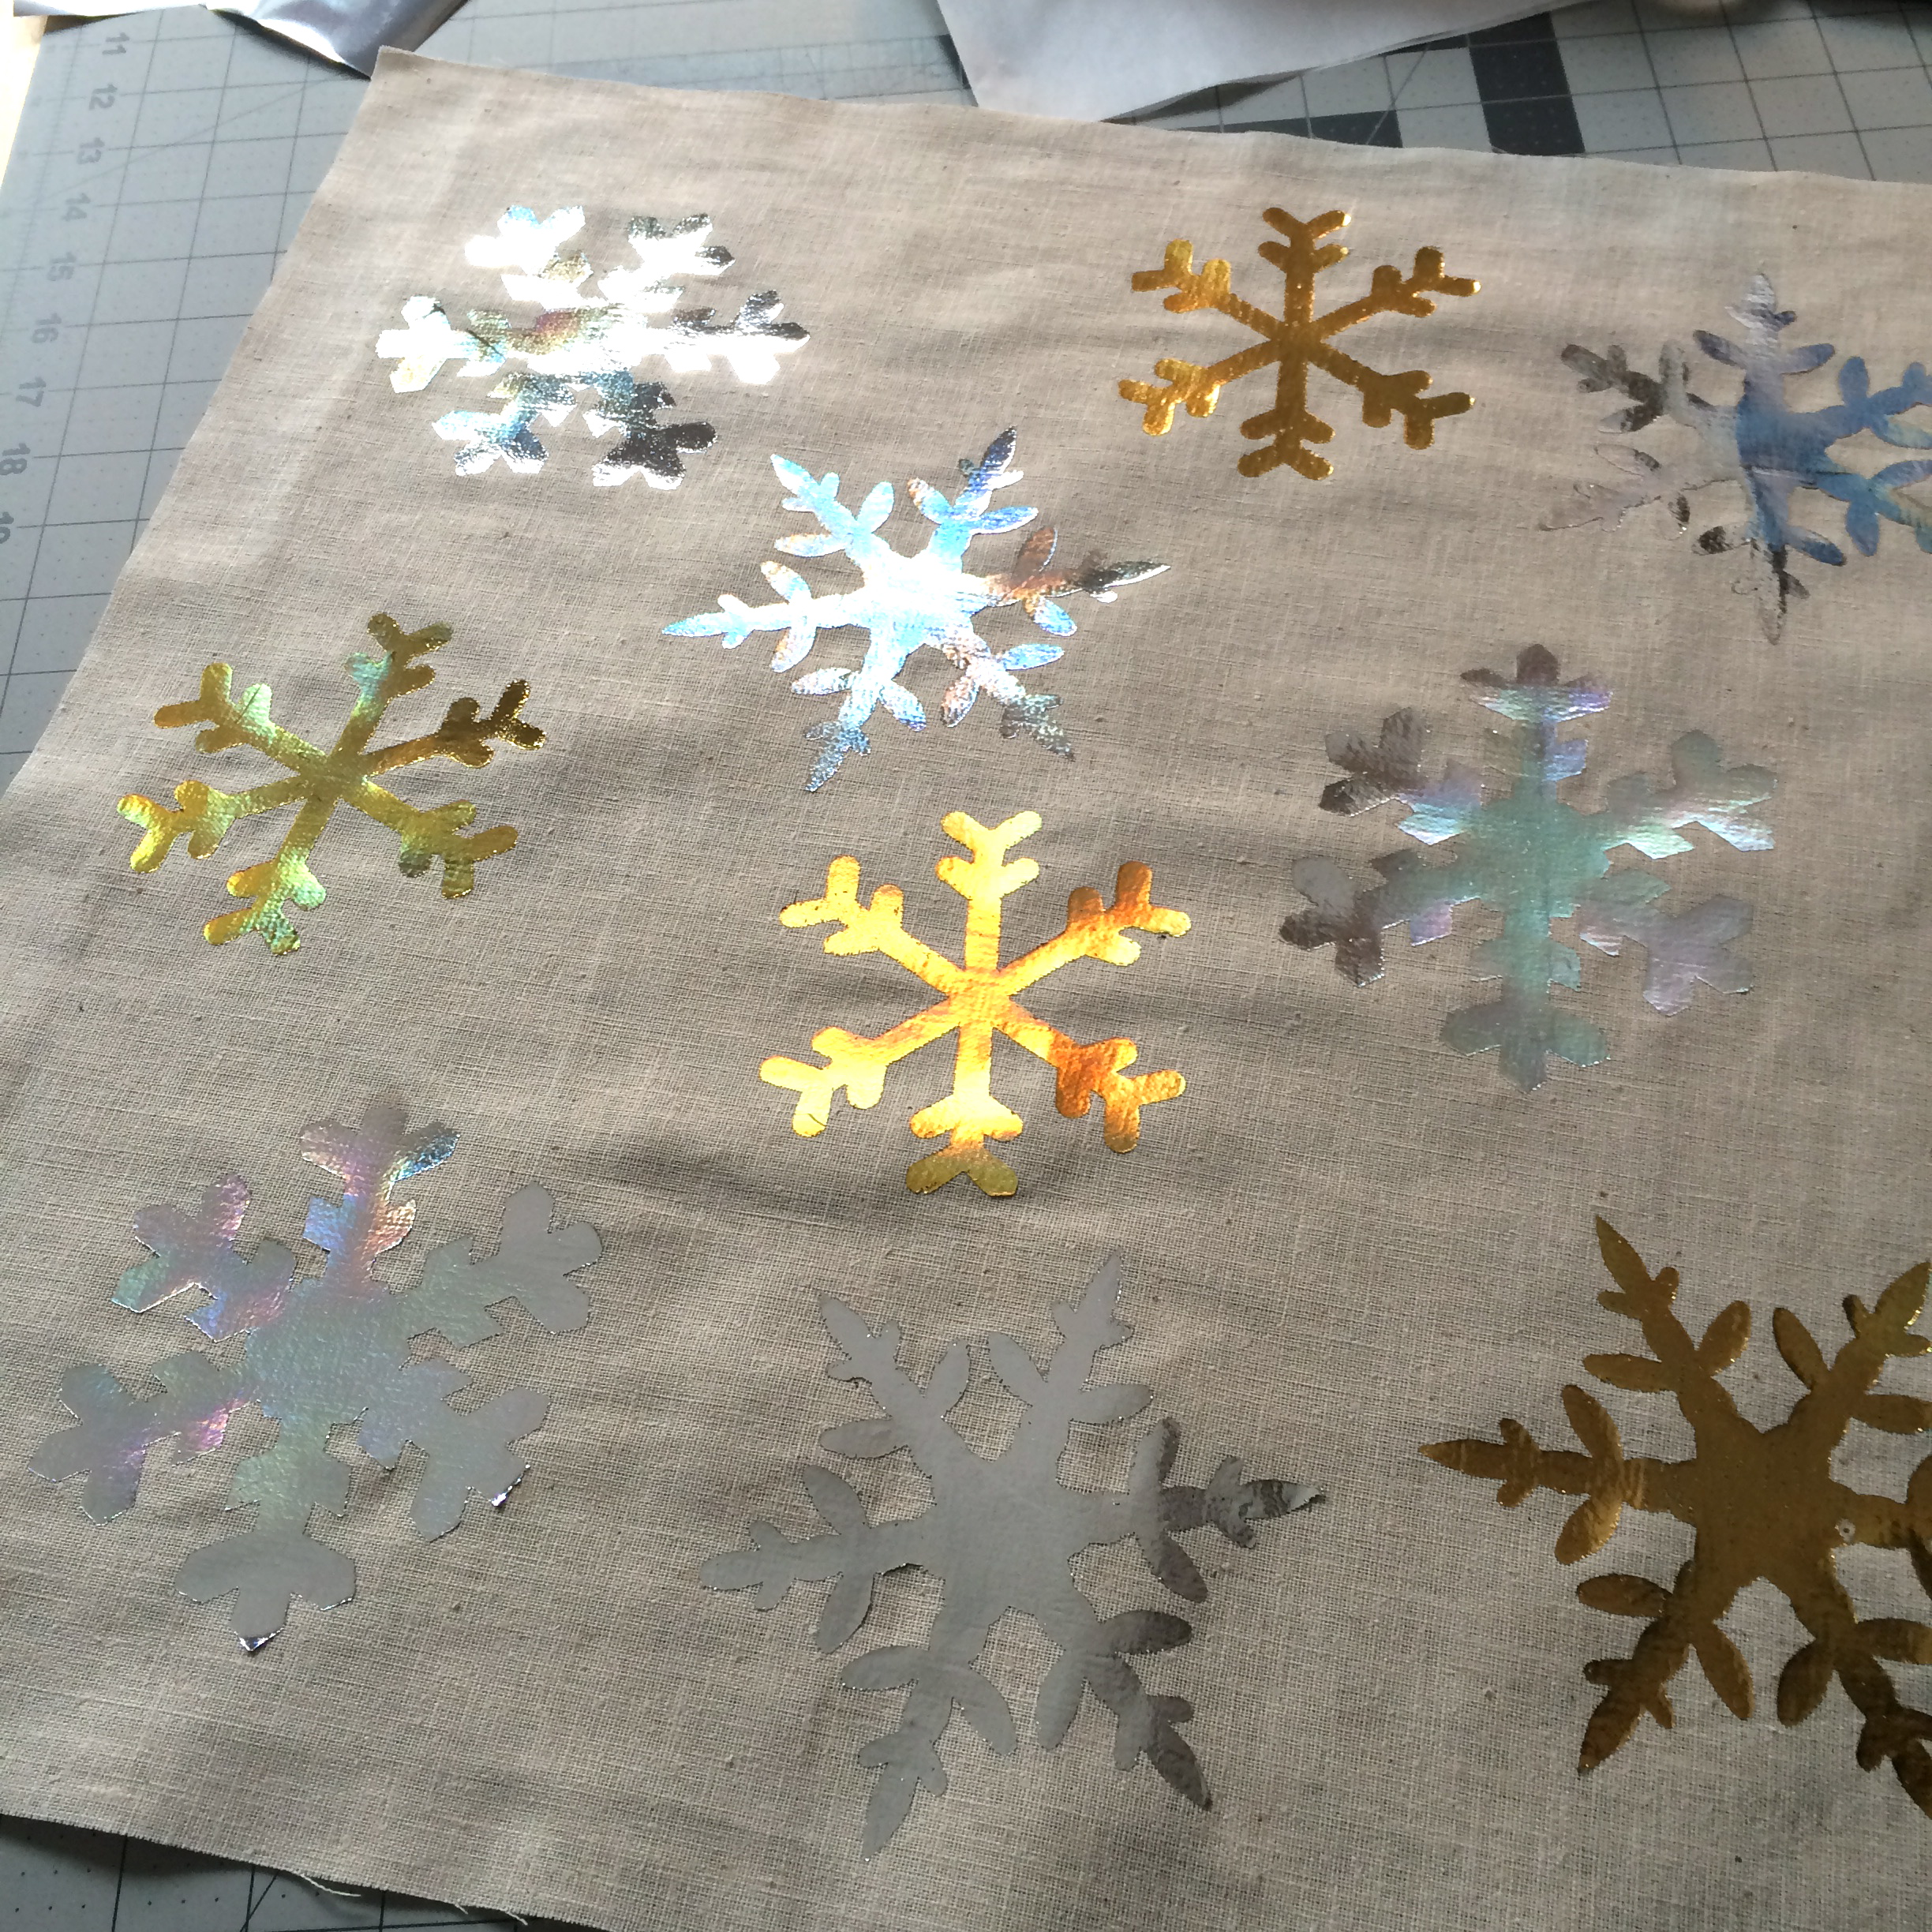
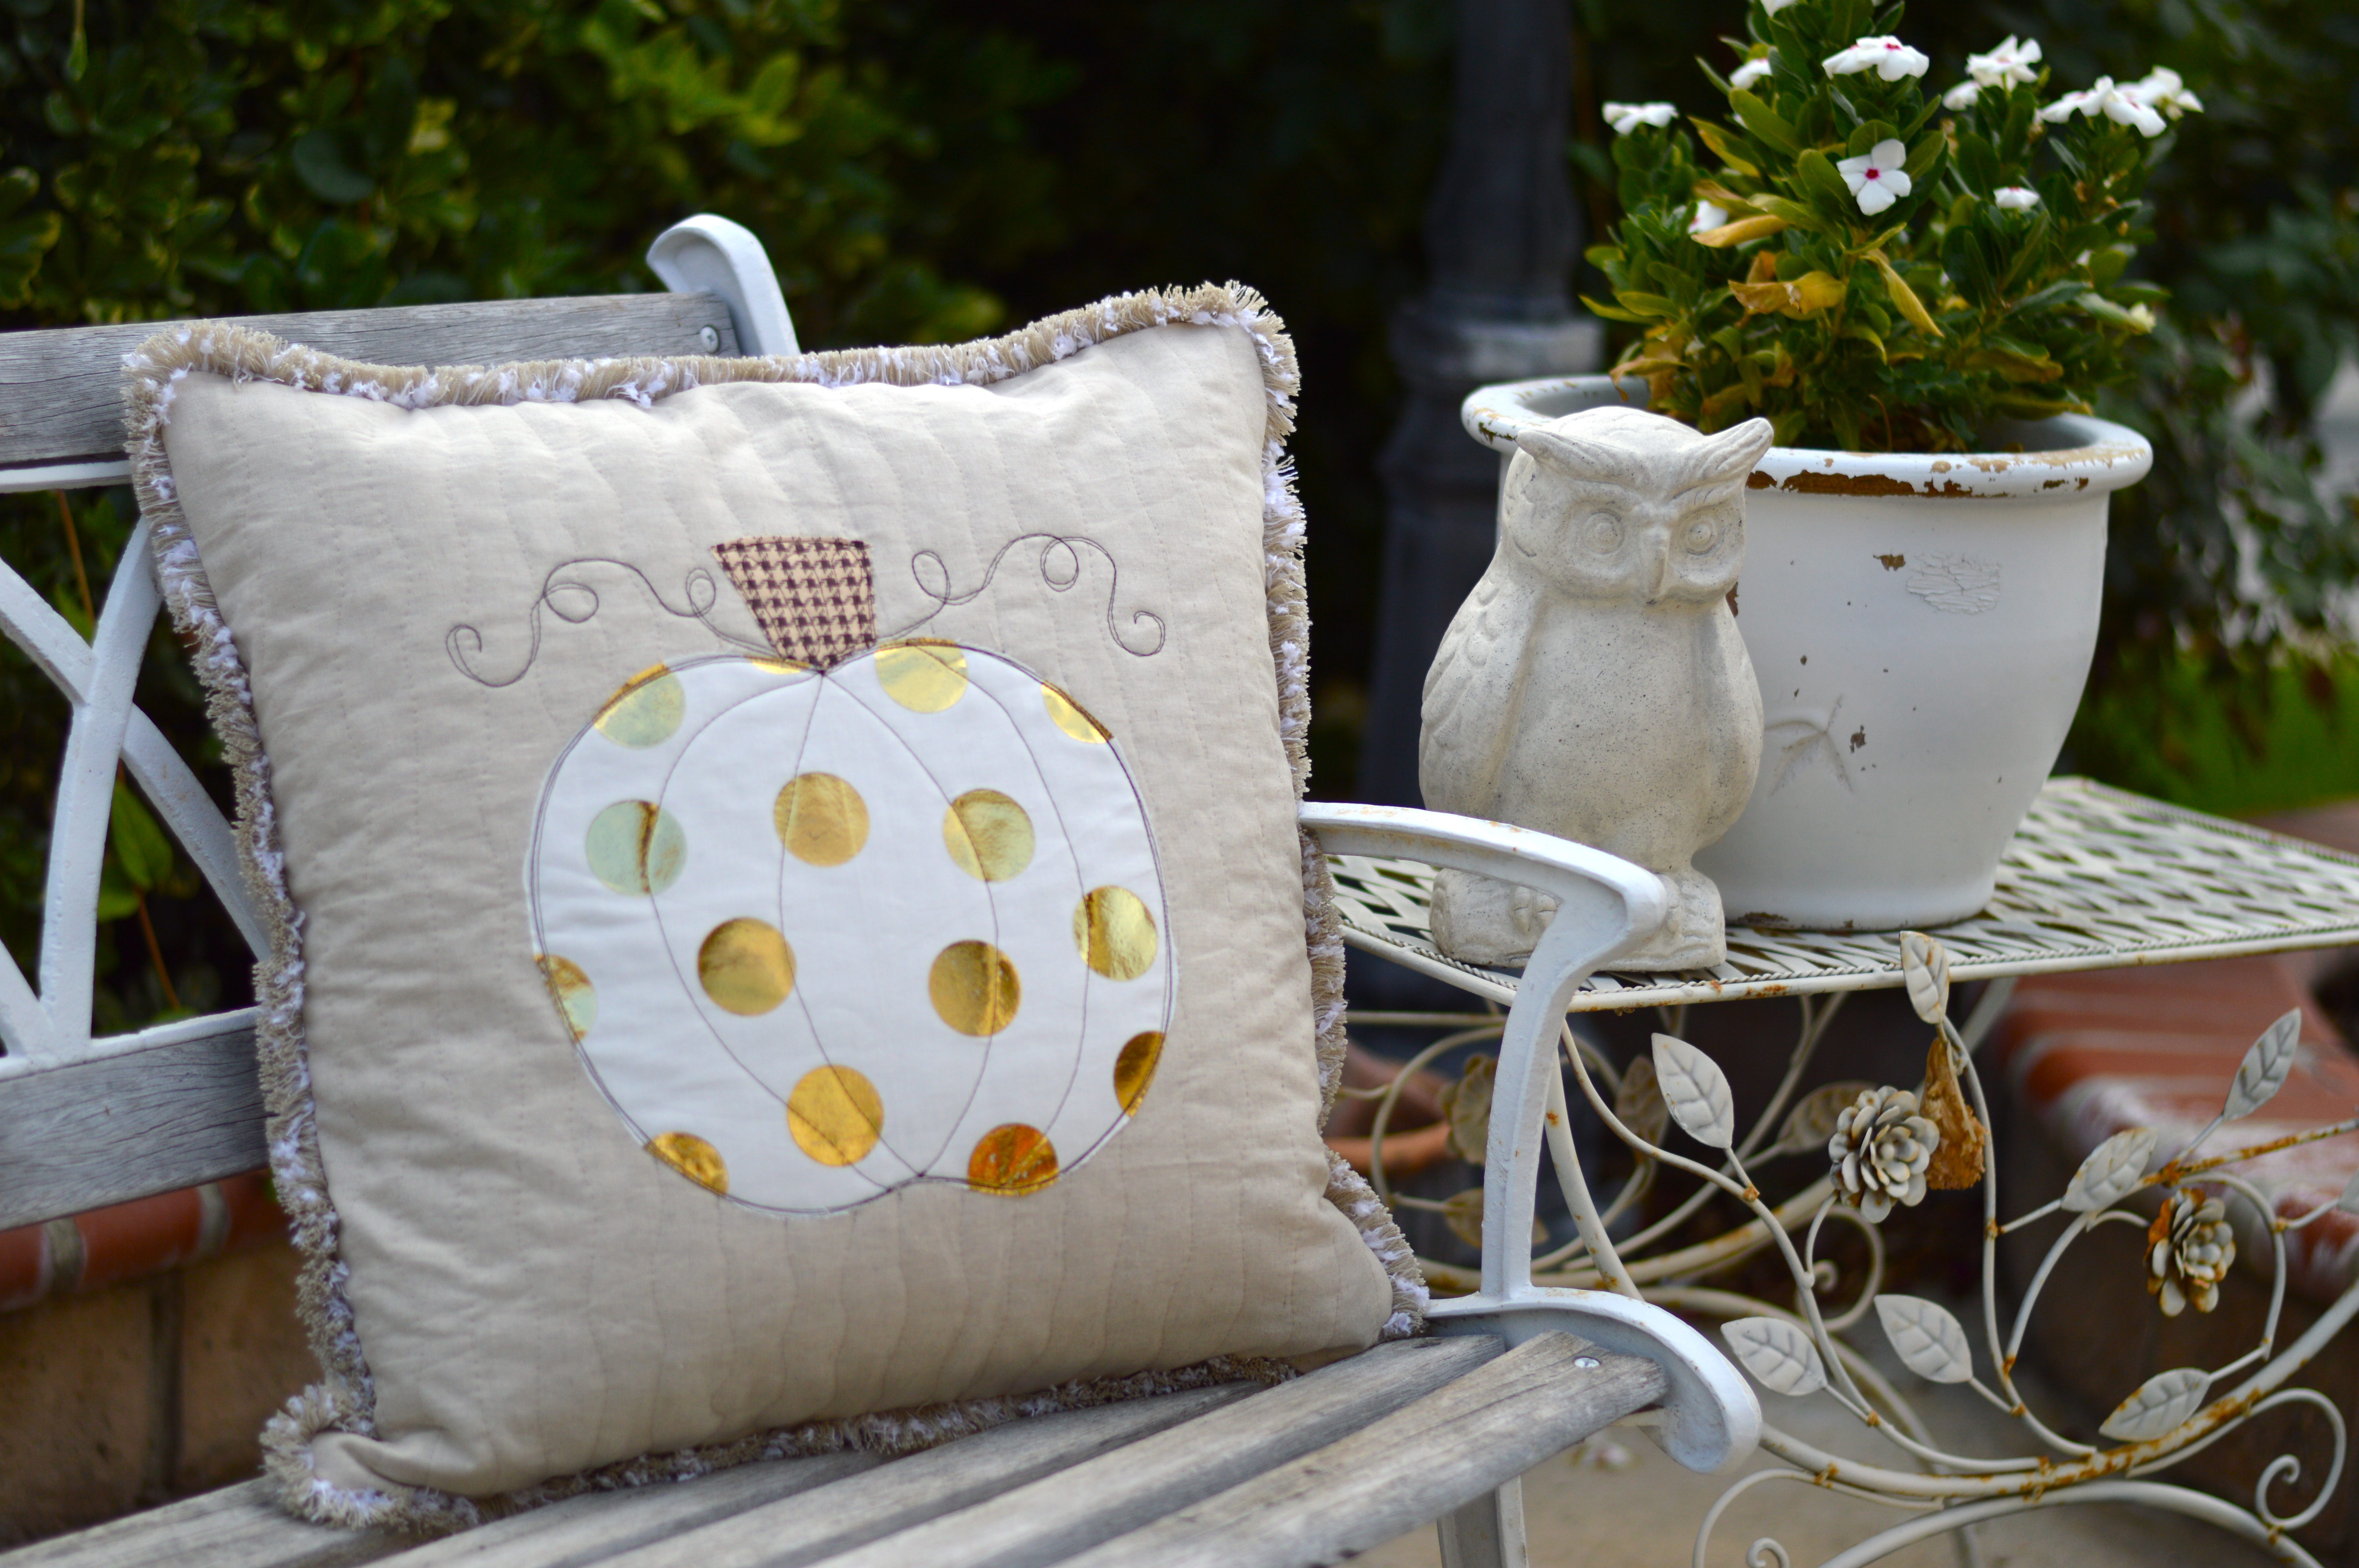
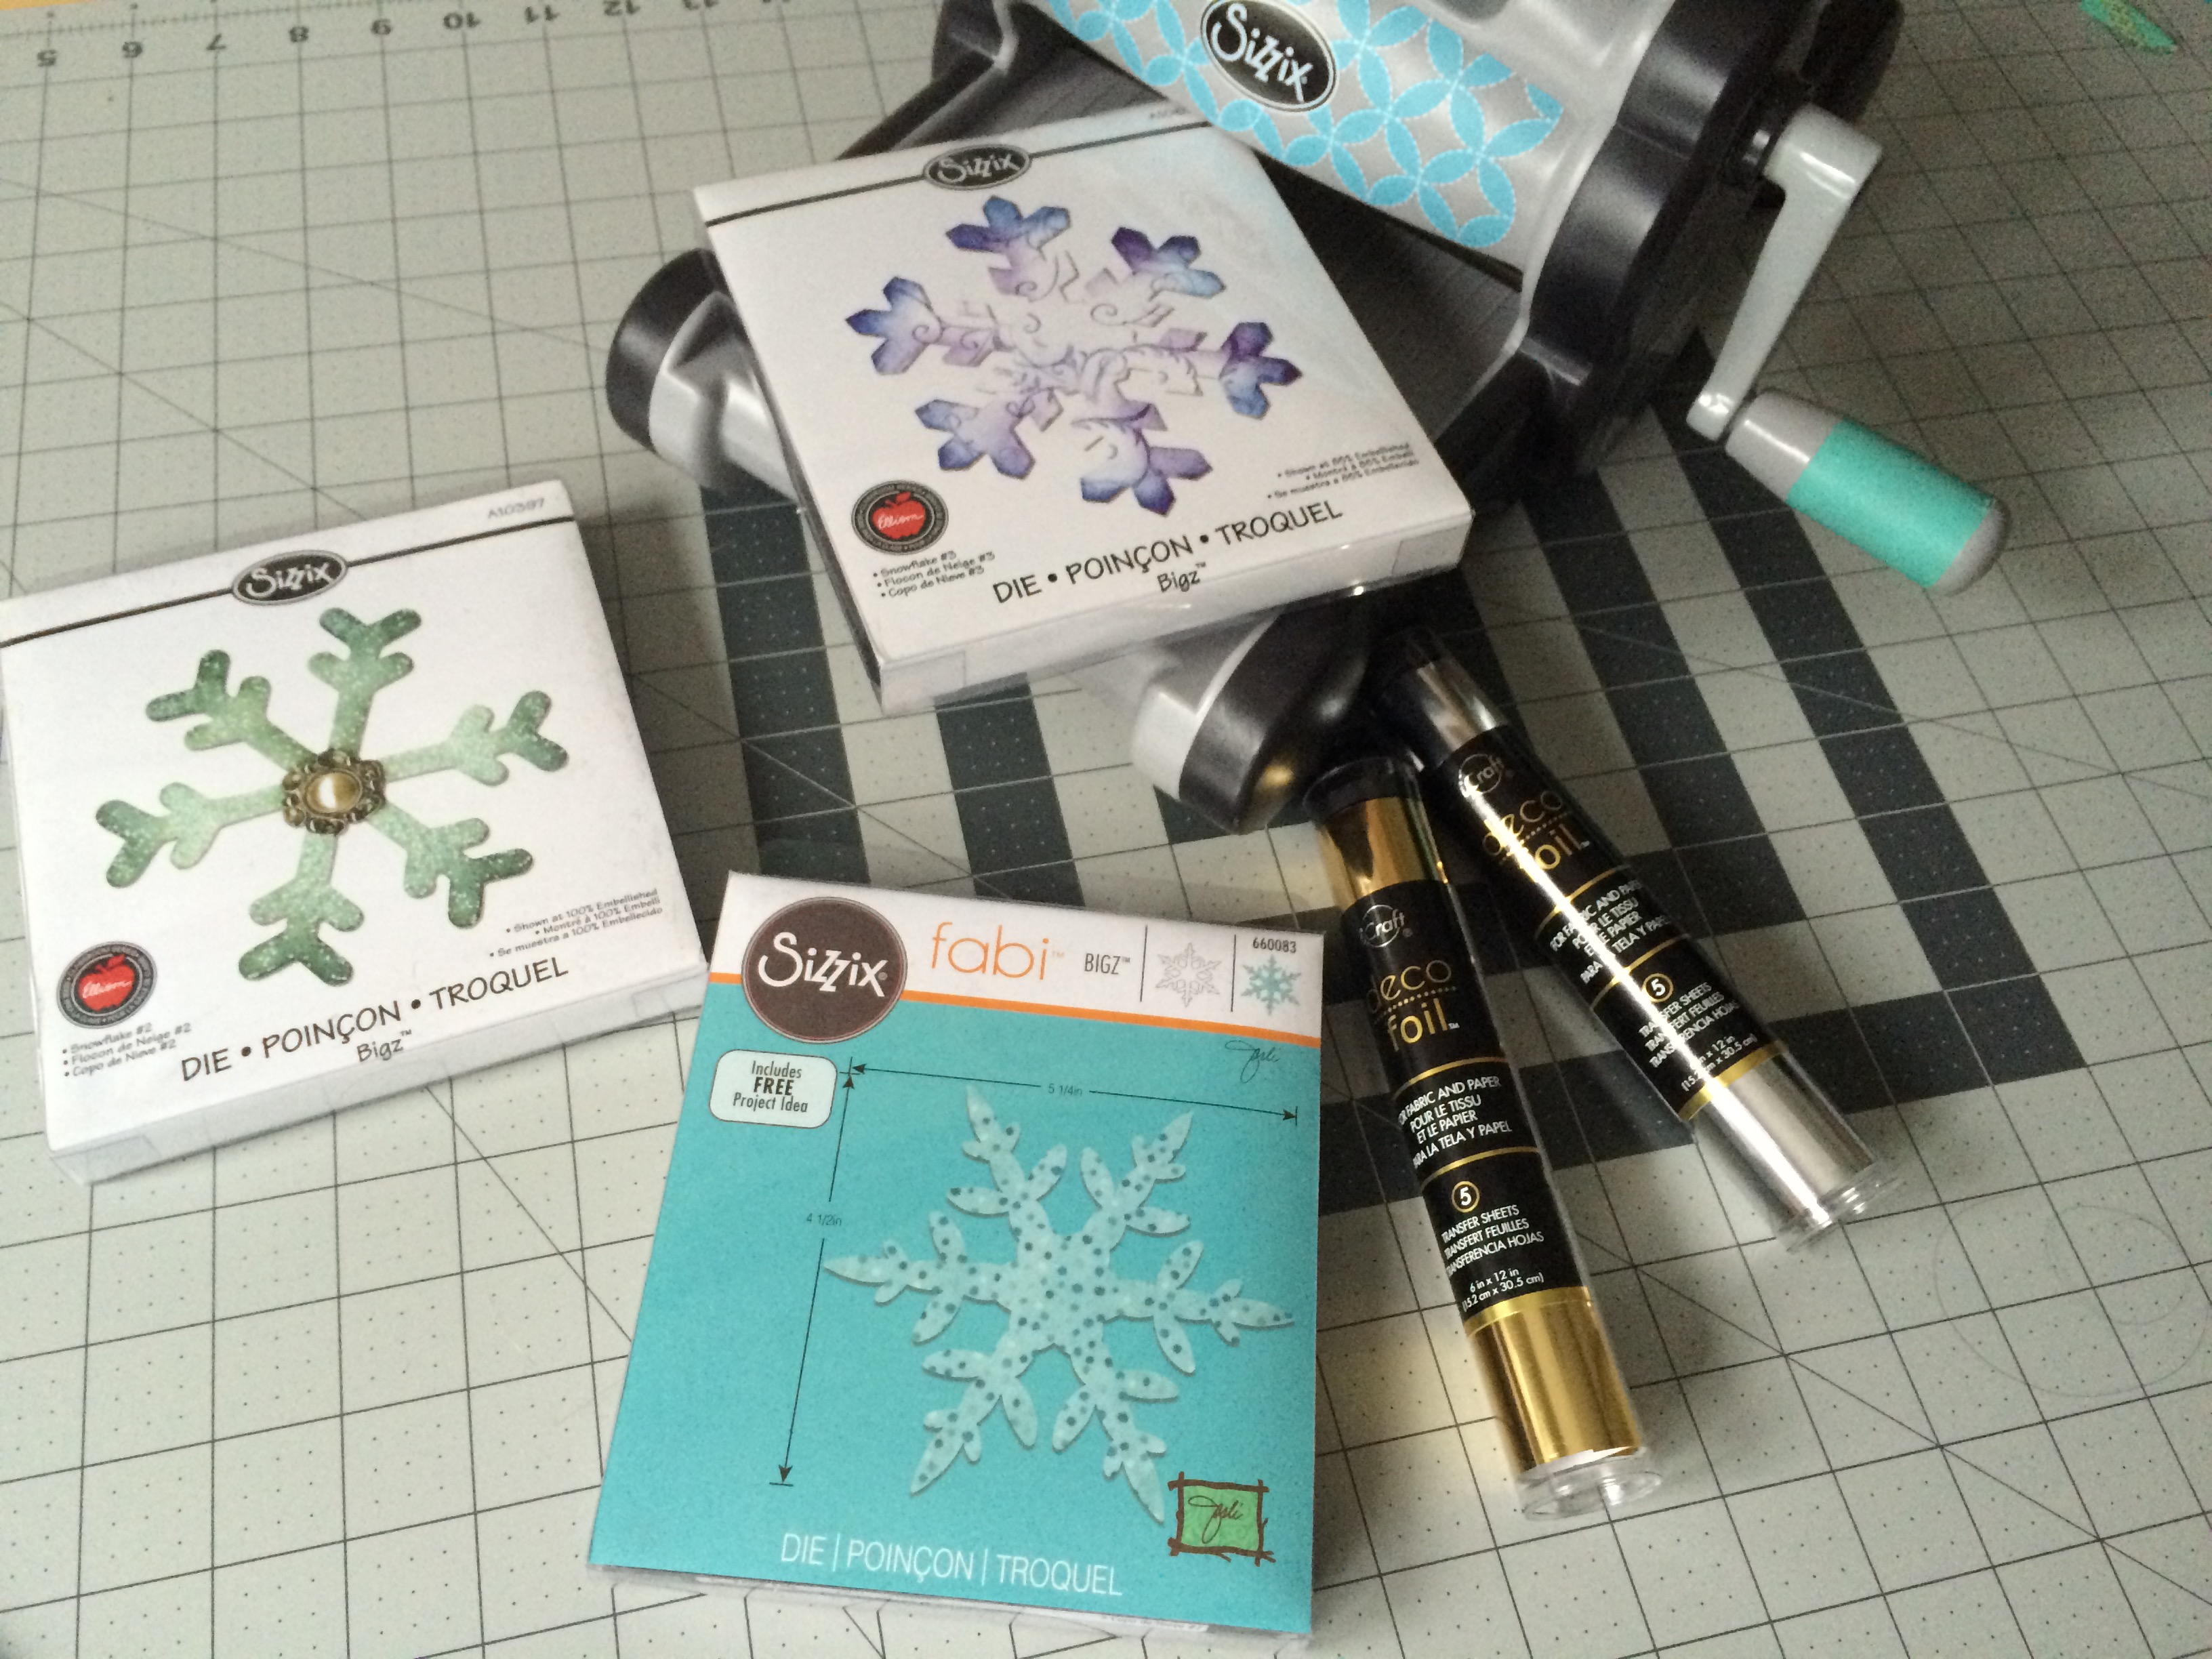
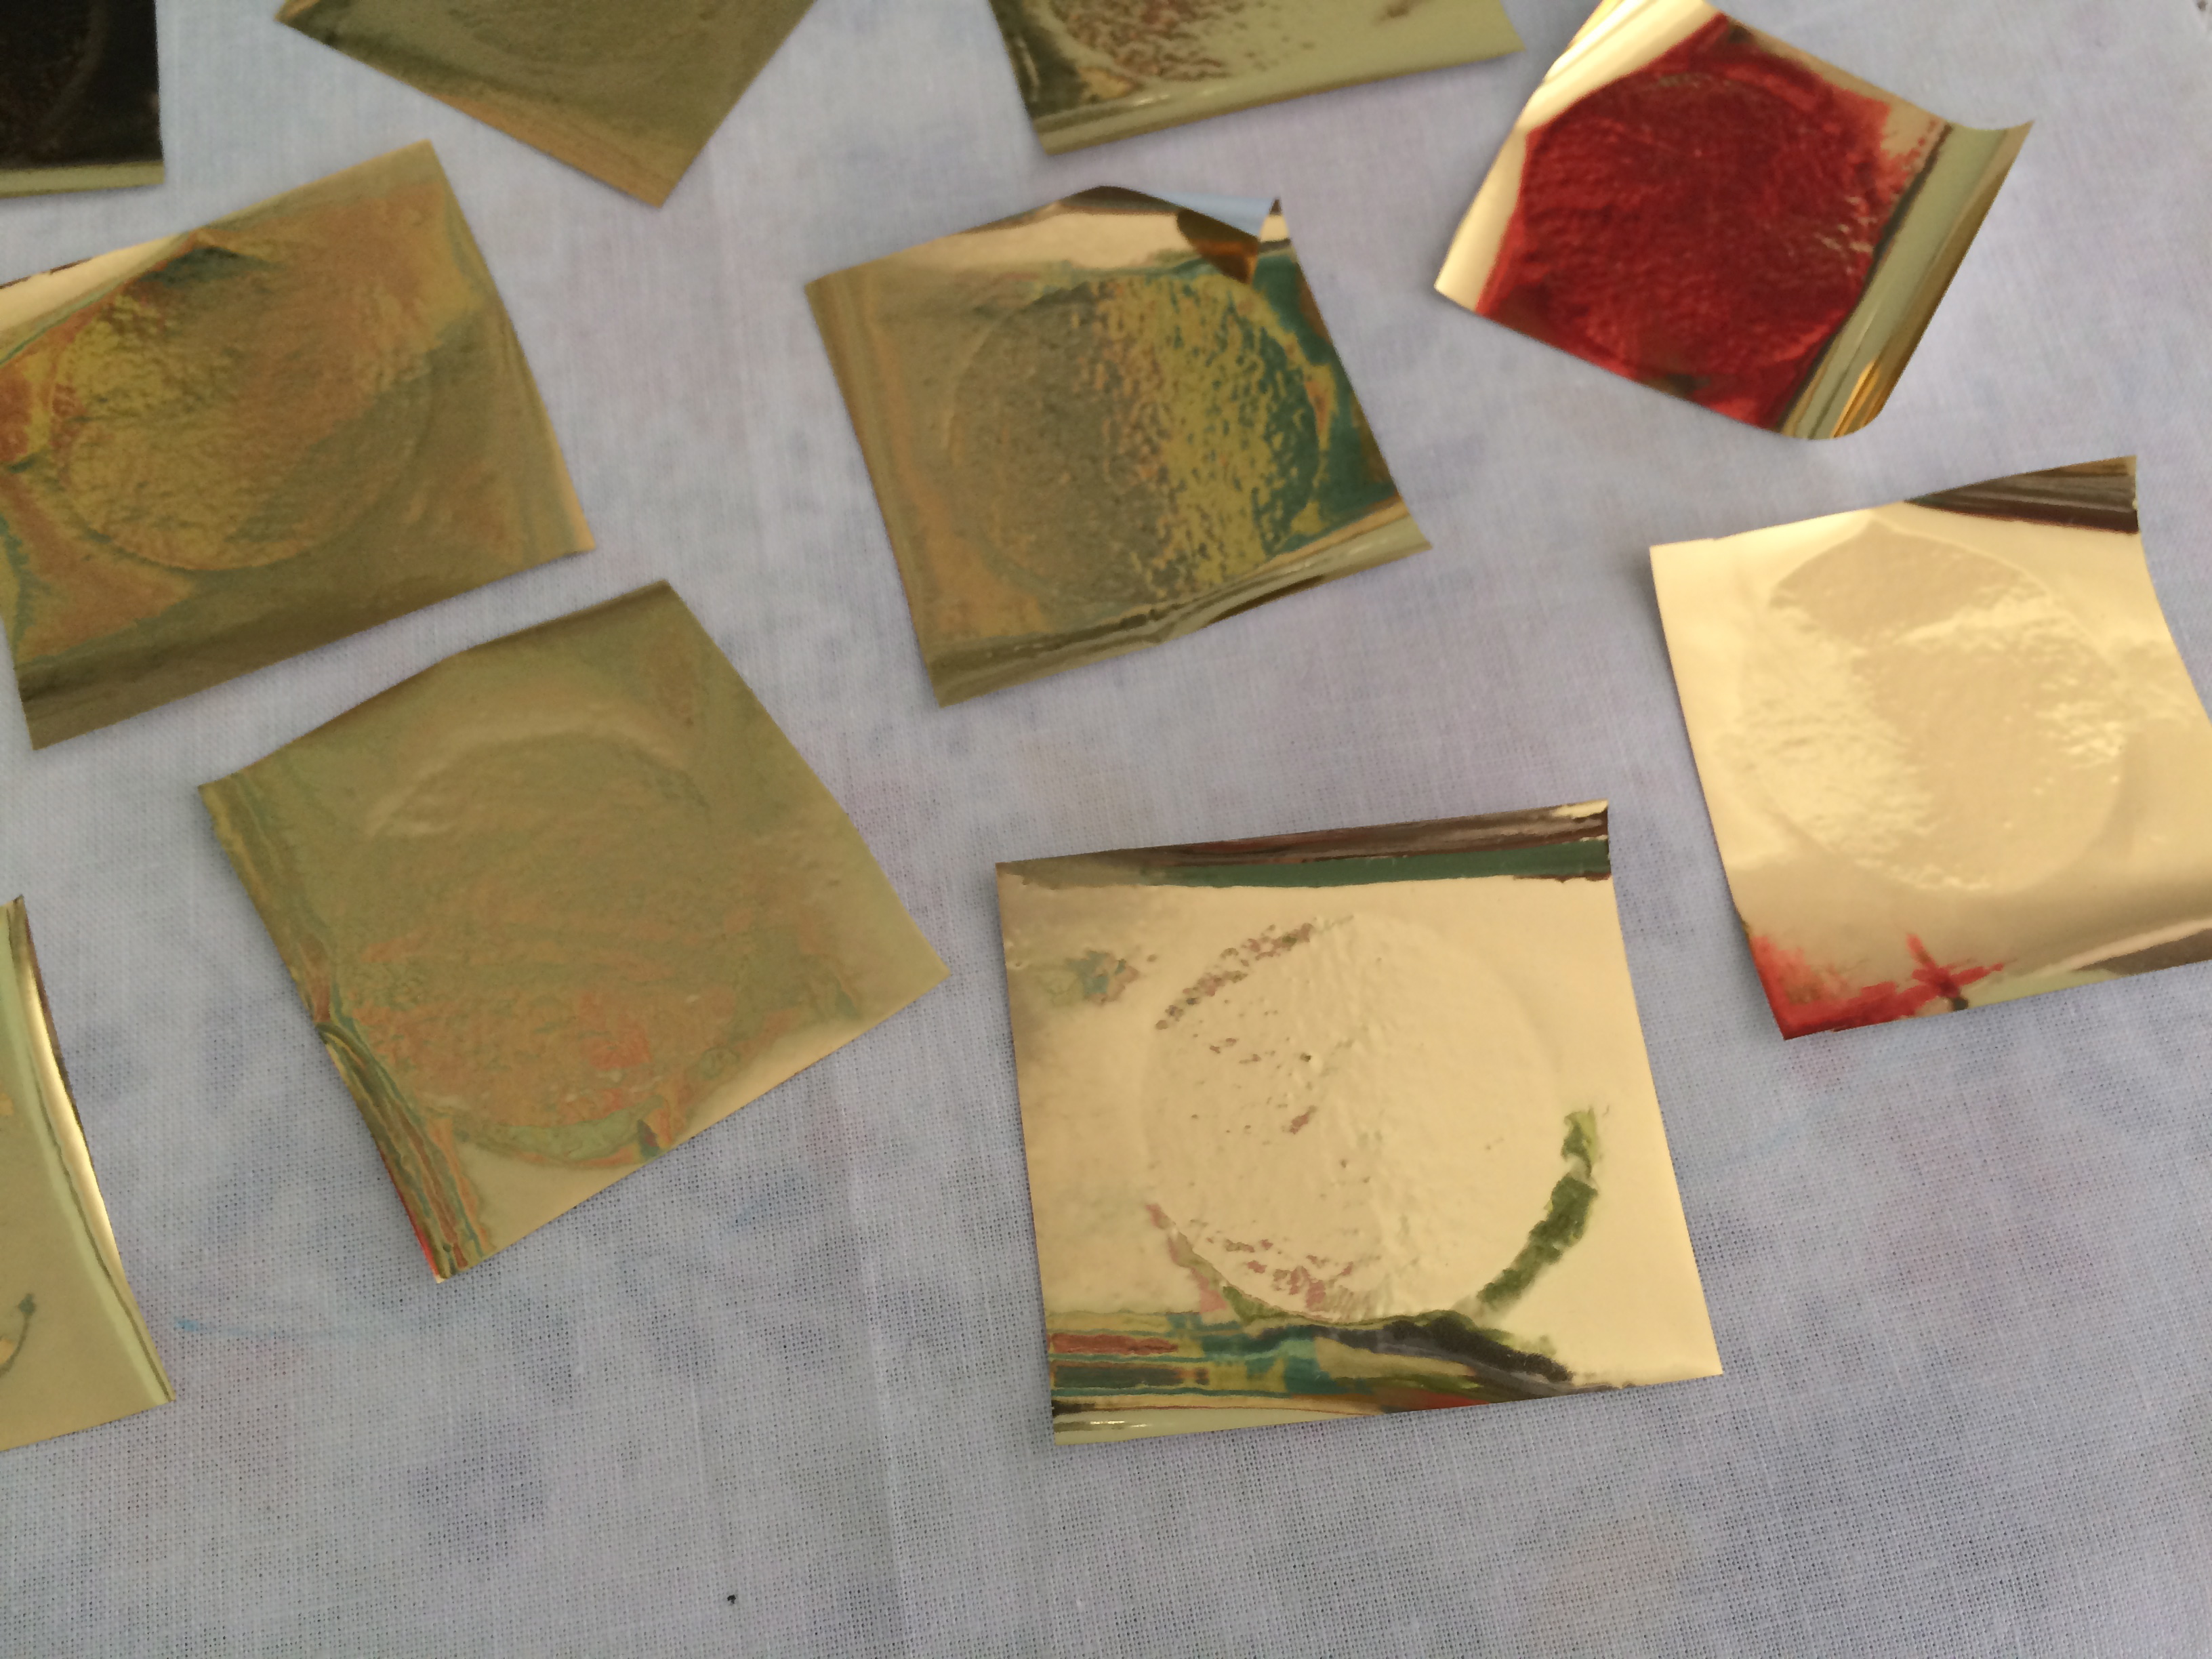
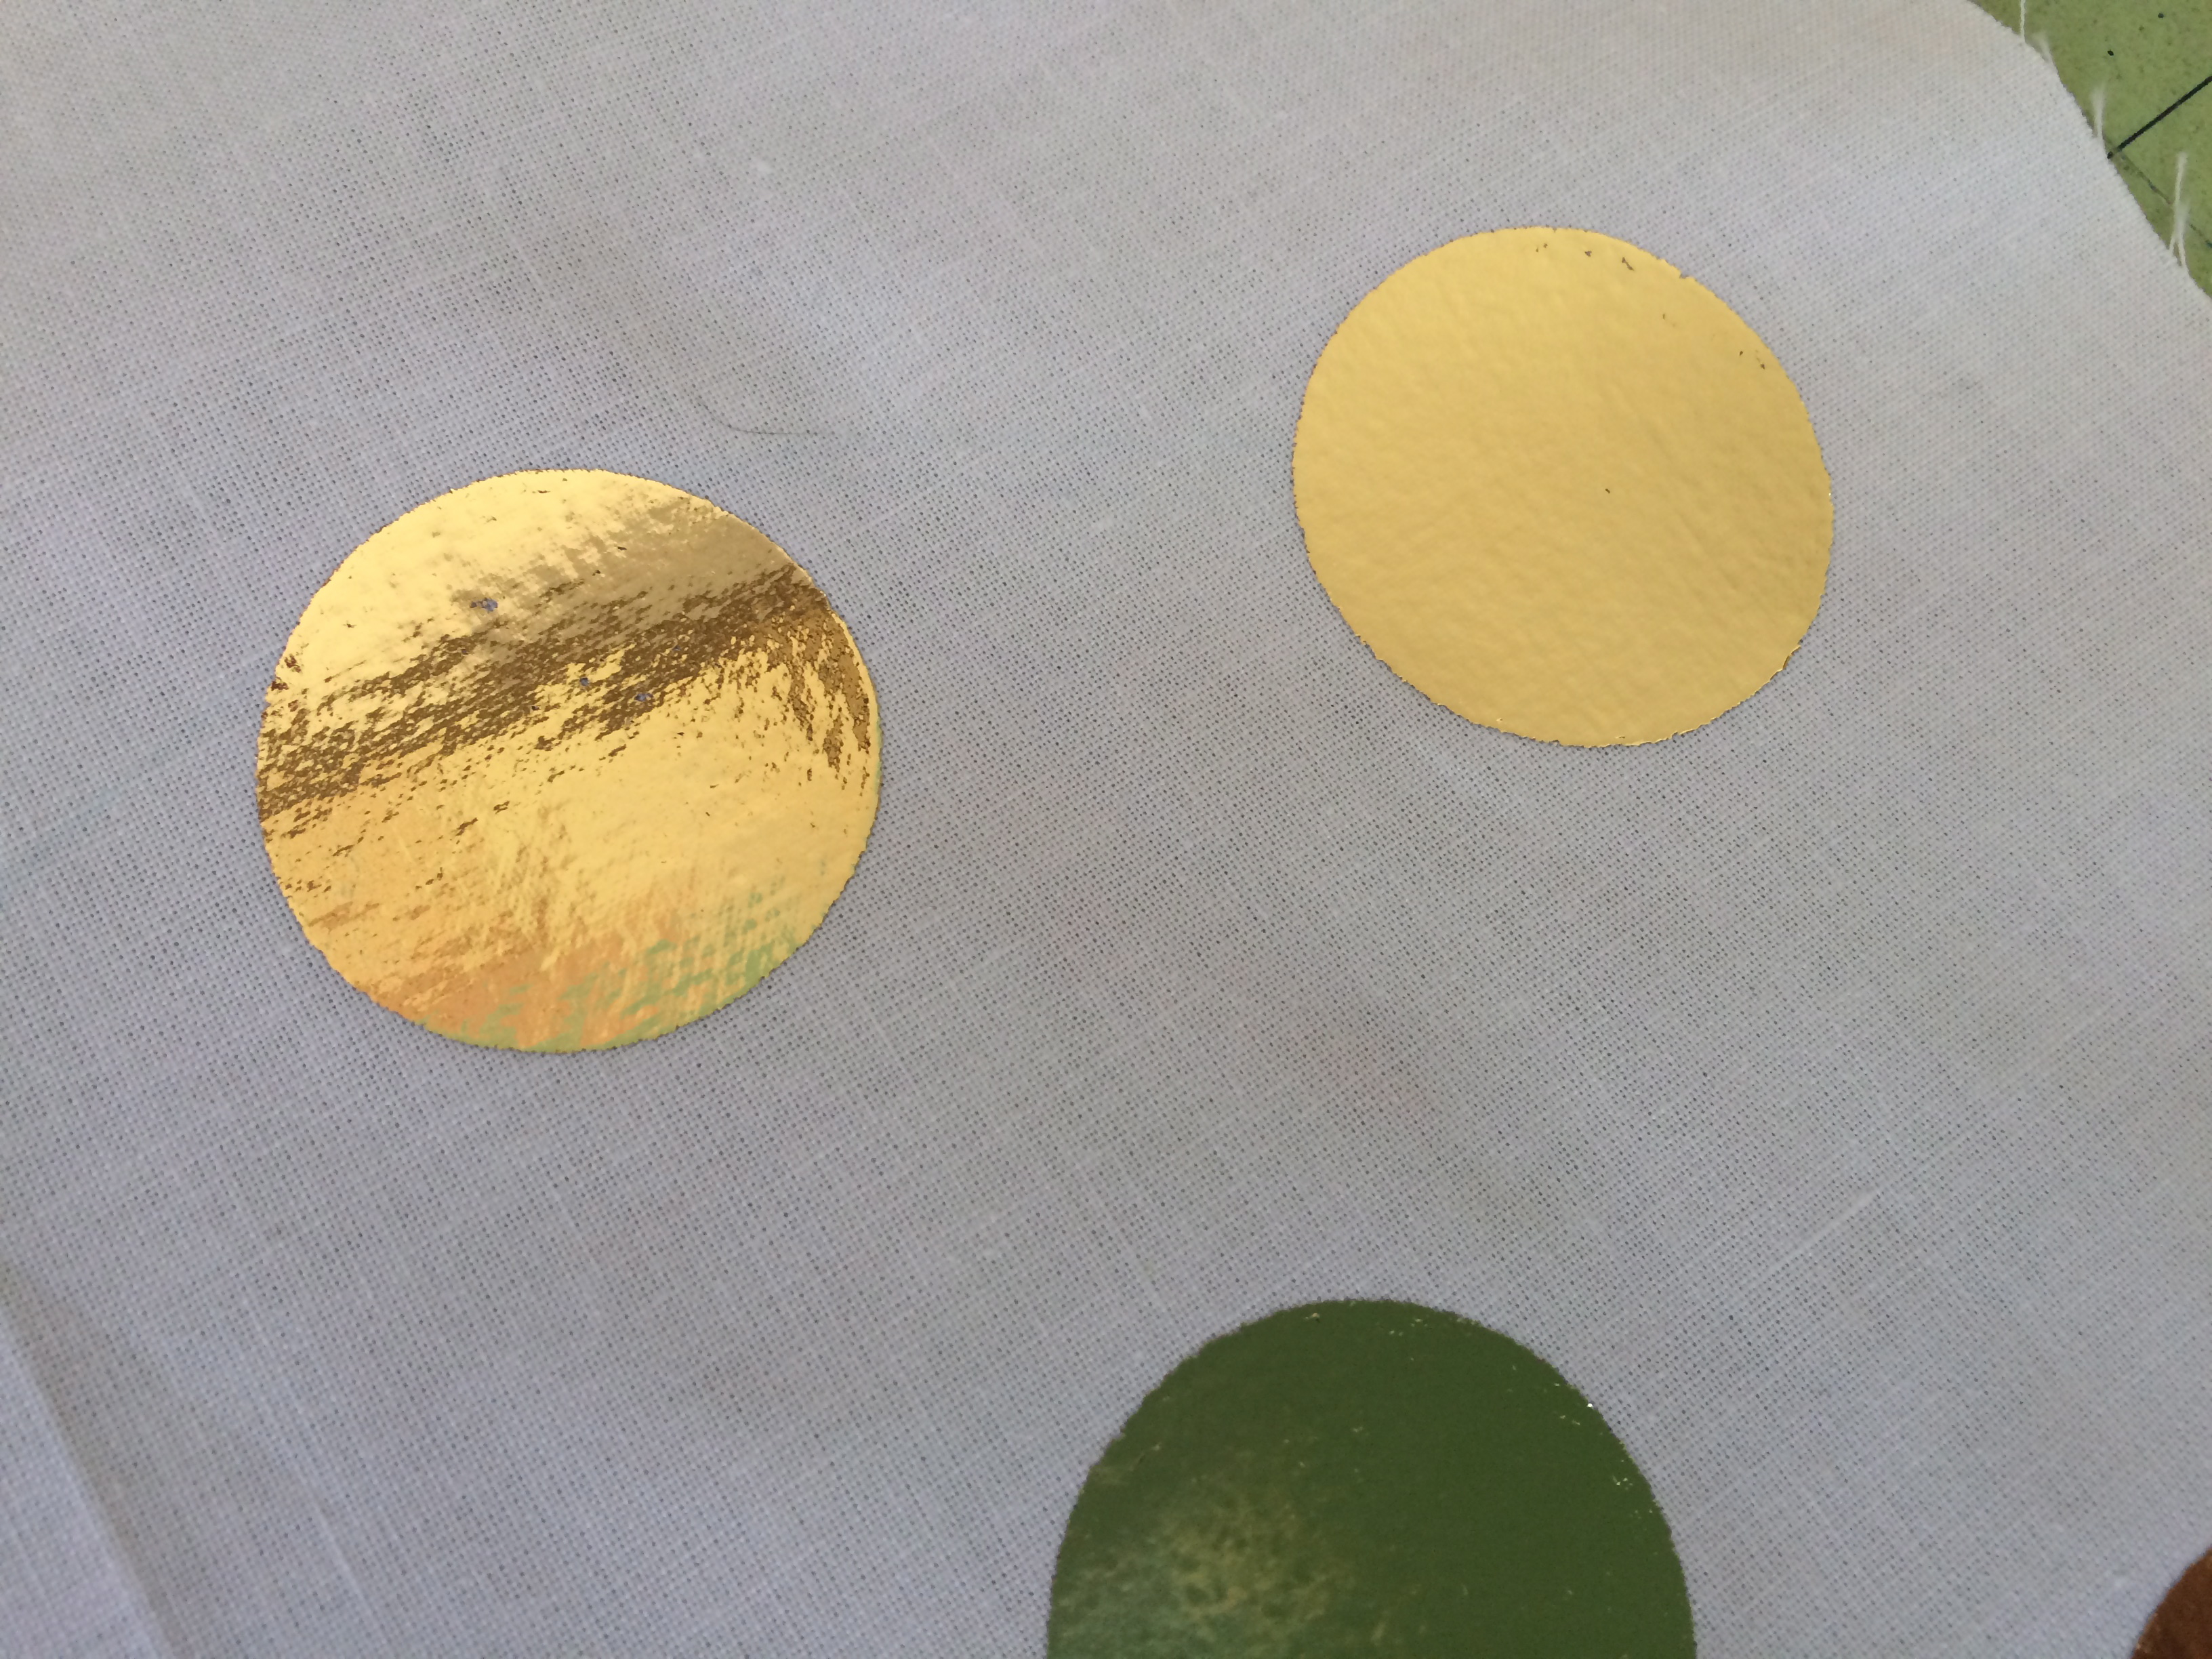
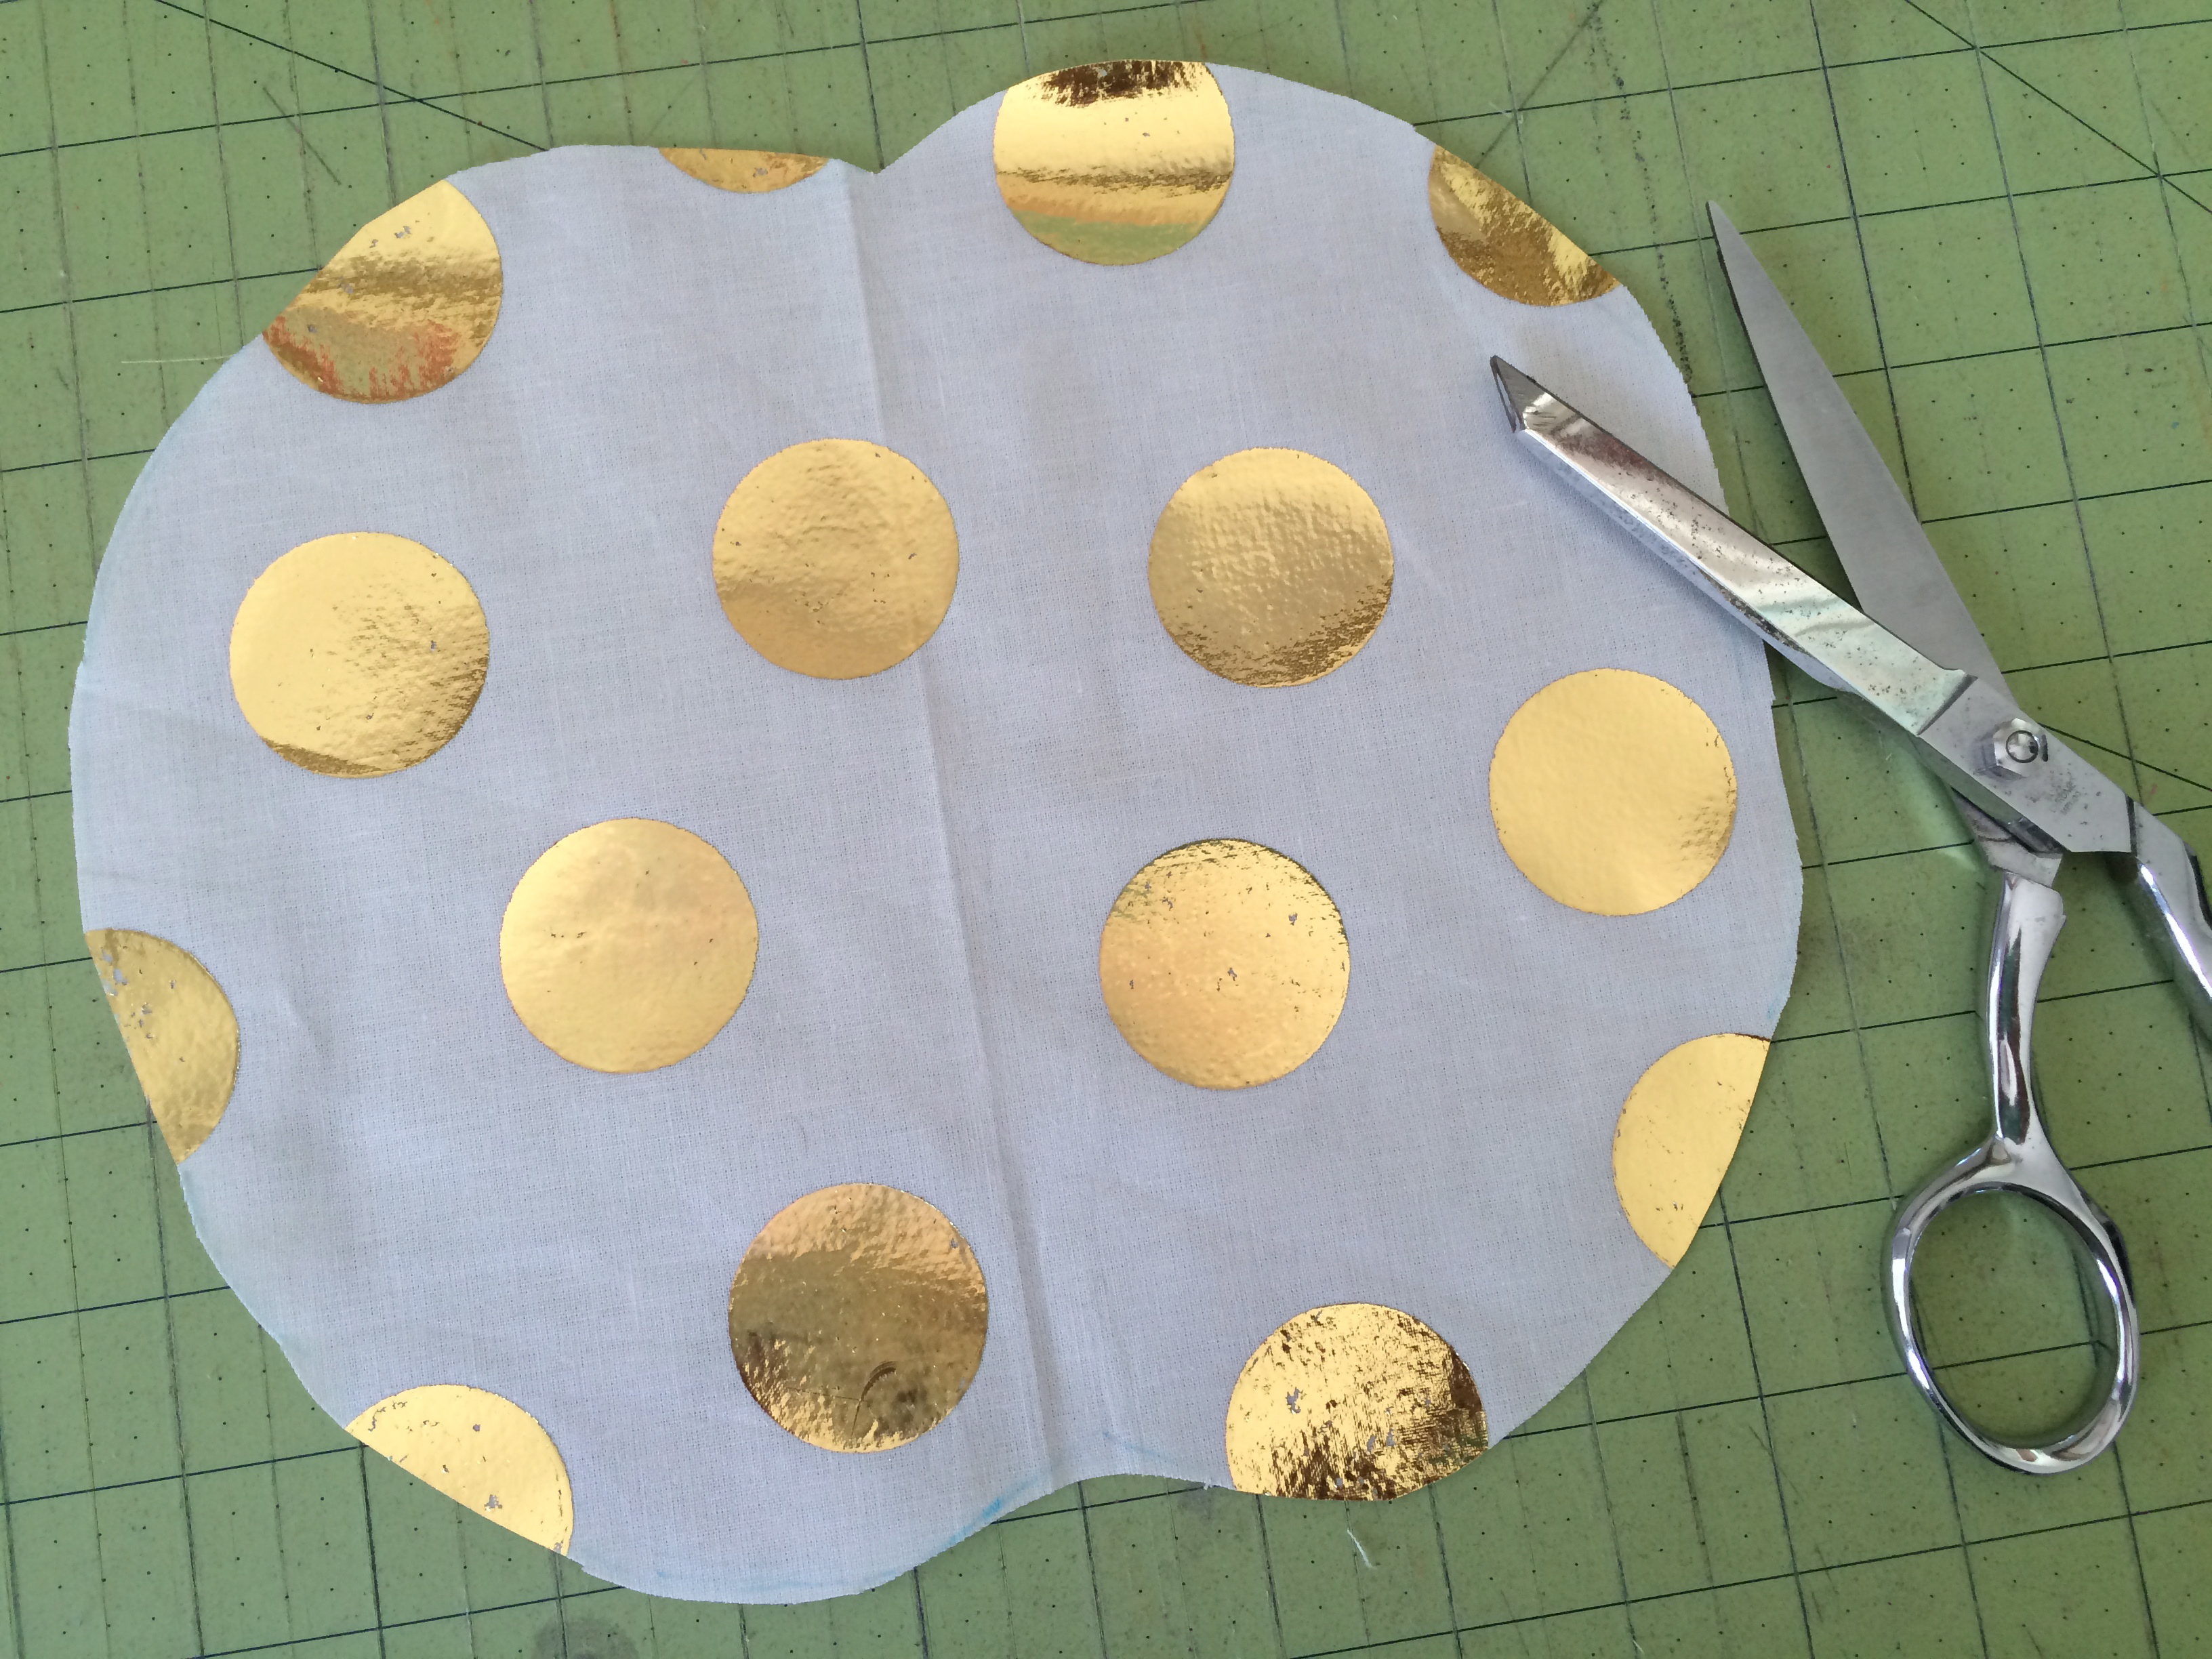
Cut the Deco Foil into squares that are slightly larger than the circles.  Place on top of each hot melt circle.  Cover with a pressing paper and press for about 15-25 seconds using medium heat.  If I use the highest heat setting it singes the foil.

sizzix pumpkin pillow deco foil 7

sizzix pumpkin pillow deco foil 8Let cool completely.

sizzix pumpkin pillow deco foil 10Carefully peel off excess foil leaving gold circles!  Yes!  It’s magical!!!

sizzix pumpkin pillow deco foil 12Cut the pumpkin out.  Cut the stem out.

sizzix pumpkin pillow deco foil 13Cut (2) natural linen/cotton squares for the pillow.  Using Spray n Bond basting spray, adhere the pumpkin and stem to the square.

sizzix pumpkin pillow deco foil 14Using more basting spray, baste the square onto a piece of batting.

sizzix pumpkin pillow deco foil 15Sew around the stem and the pumpking 3 times in dark brown thread.  Add some swirly vines.  Then have some fun with the quilting!  I added detail to the pumpkin.  I also quilted wavy lines in the background.  I really like how it turned out.

sizzix pumpkin pillow deco foil 18
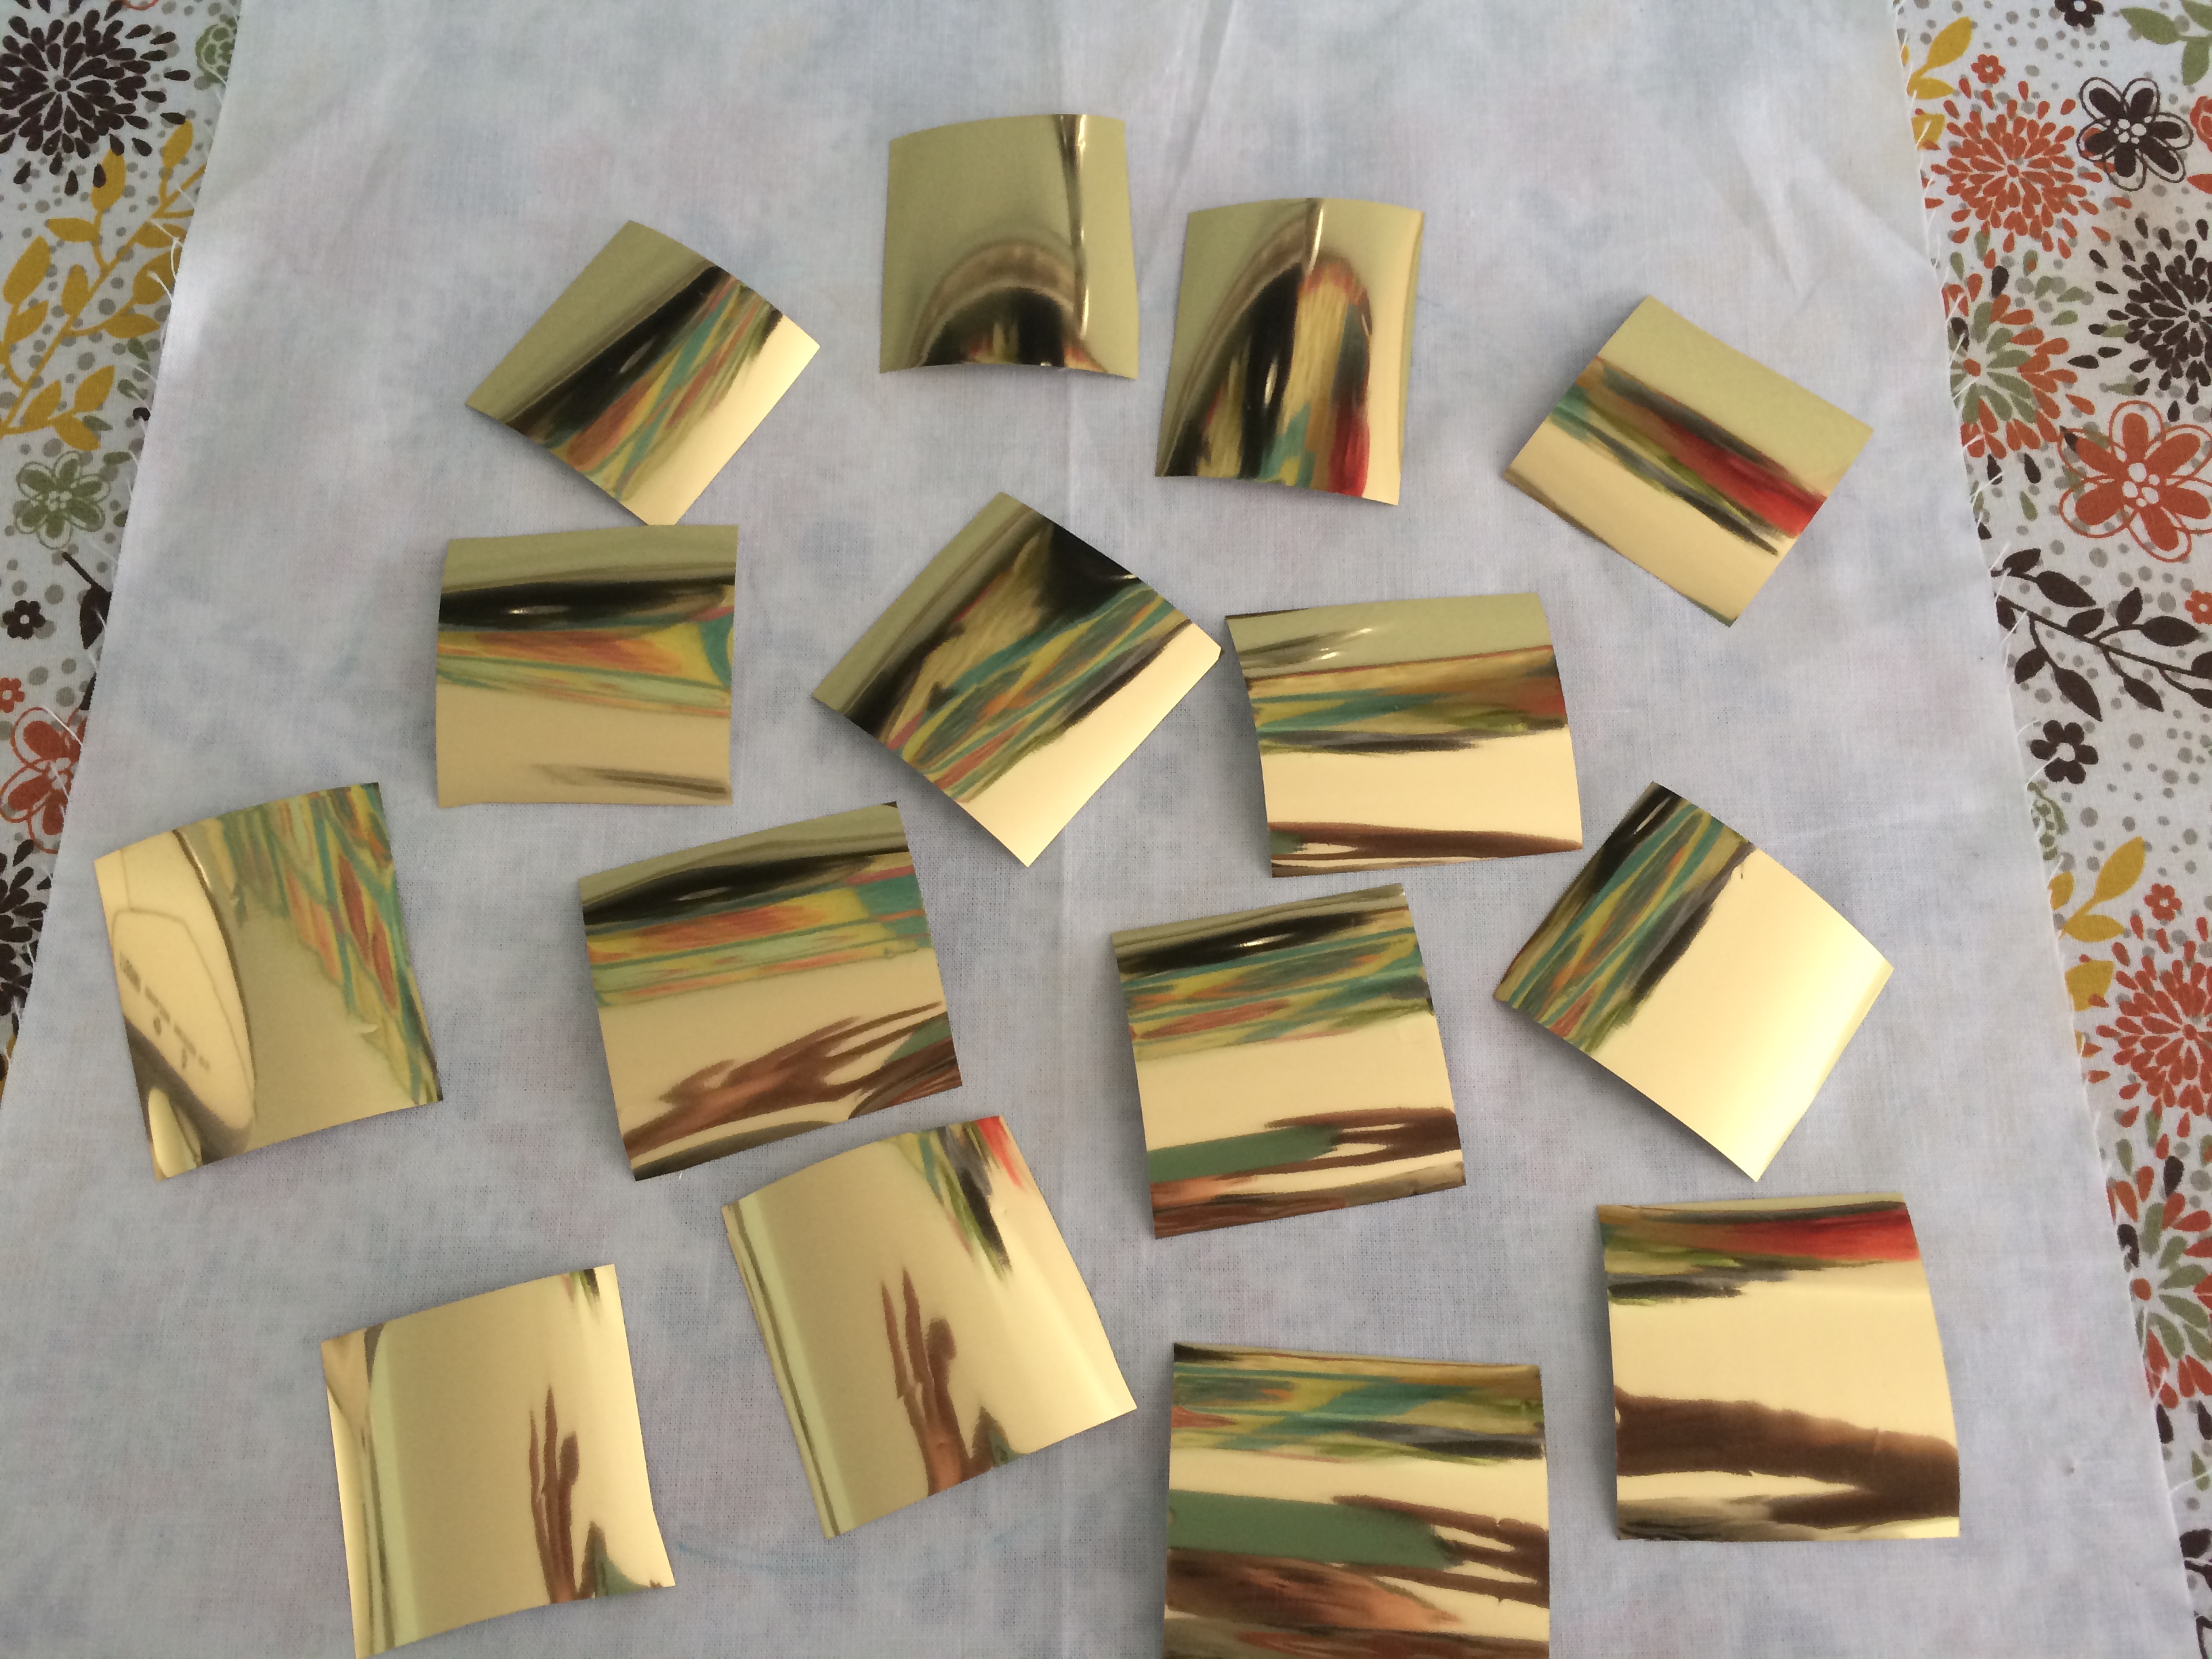
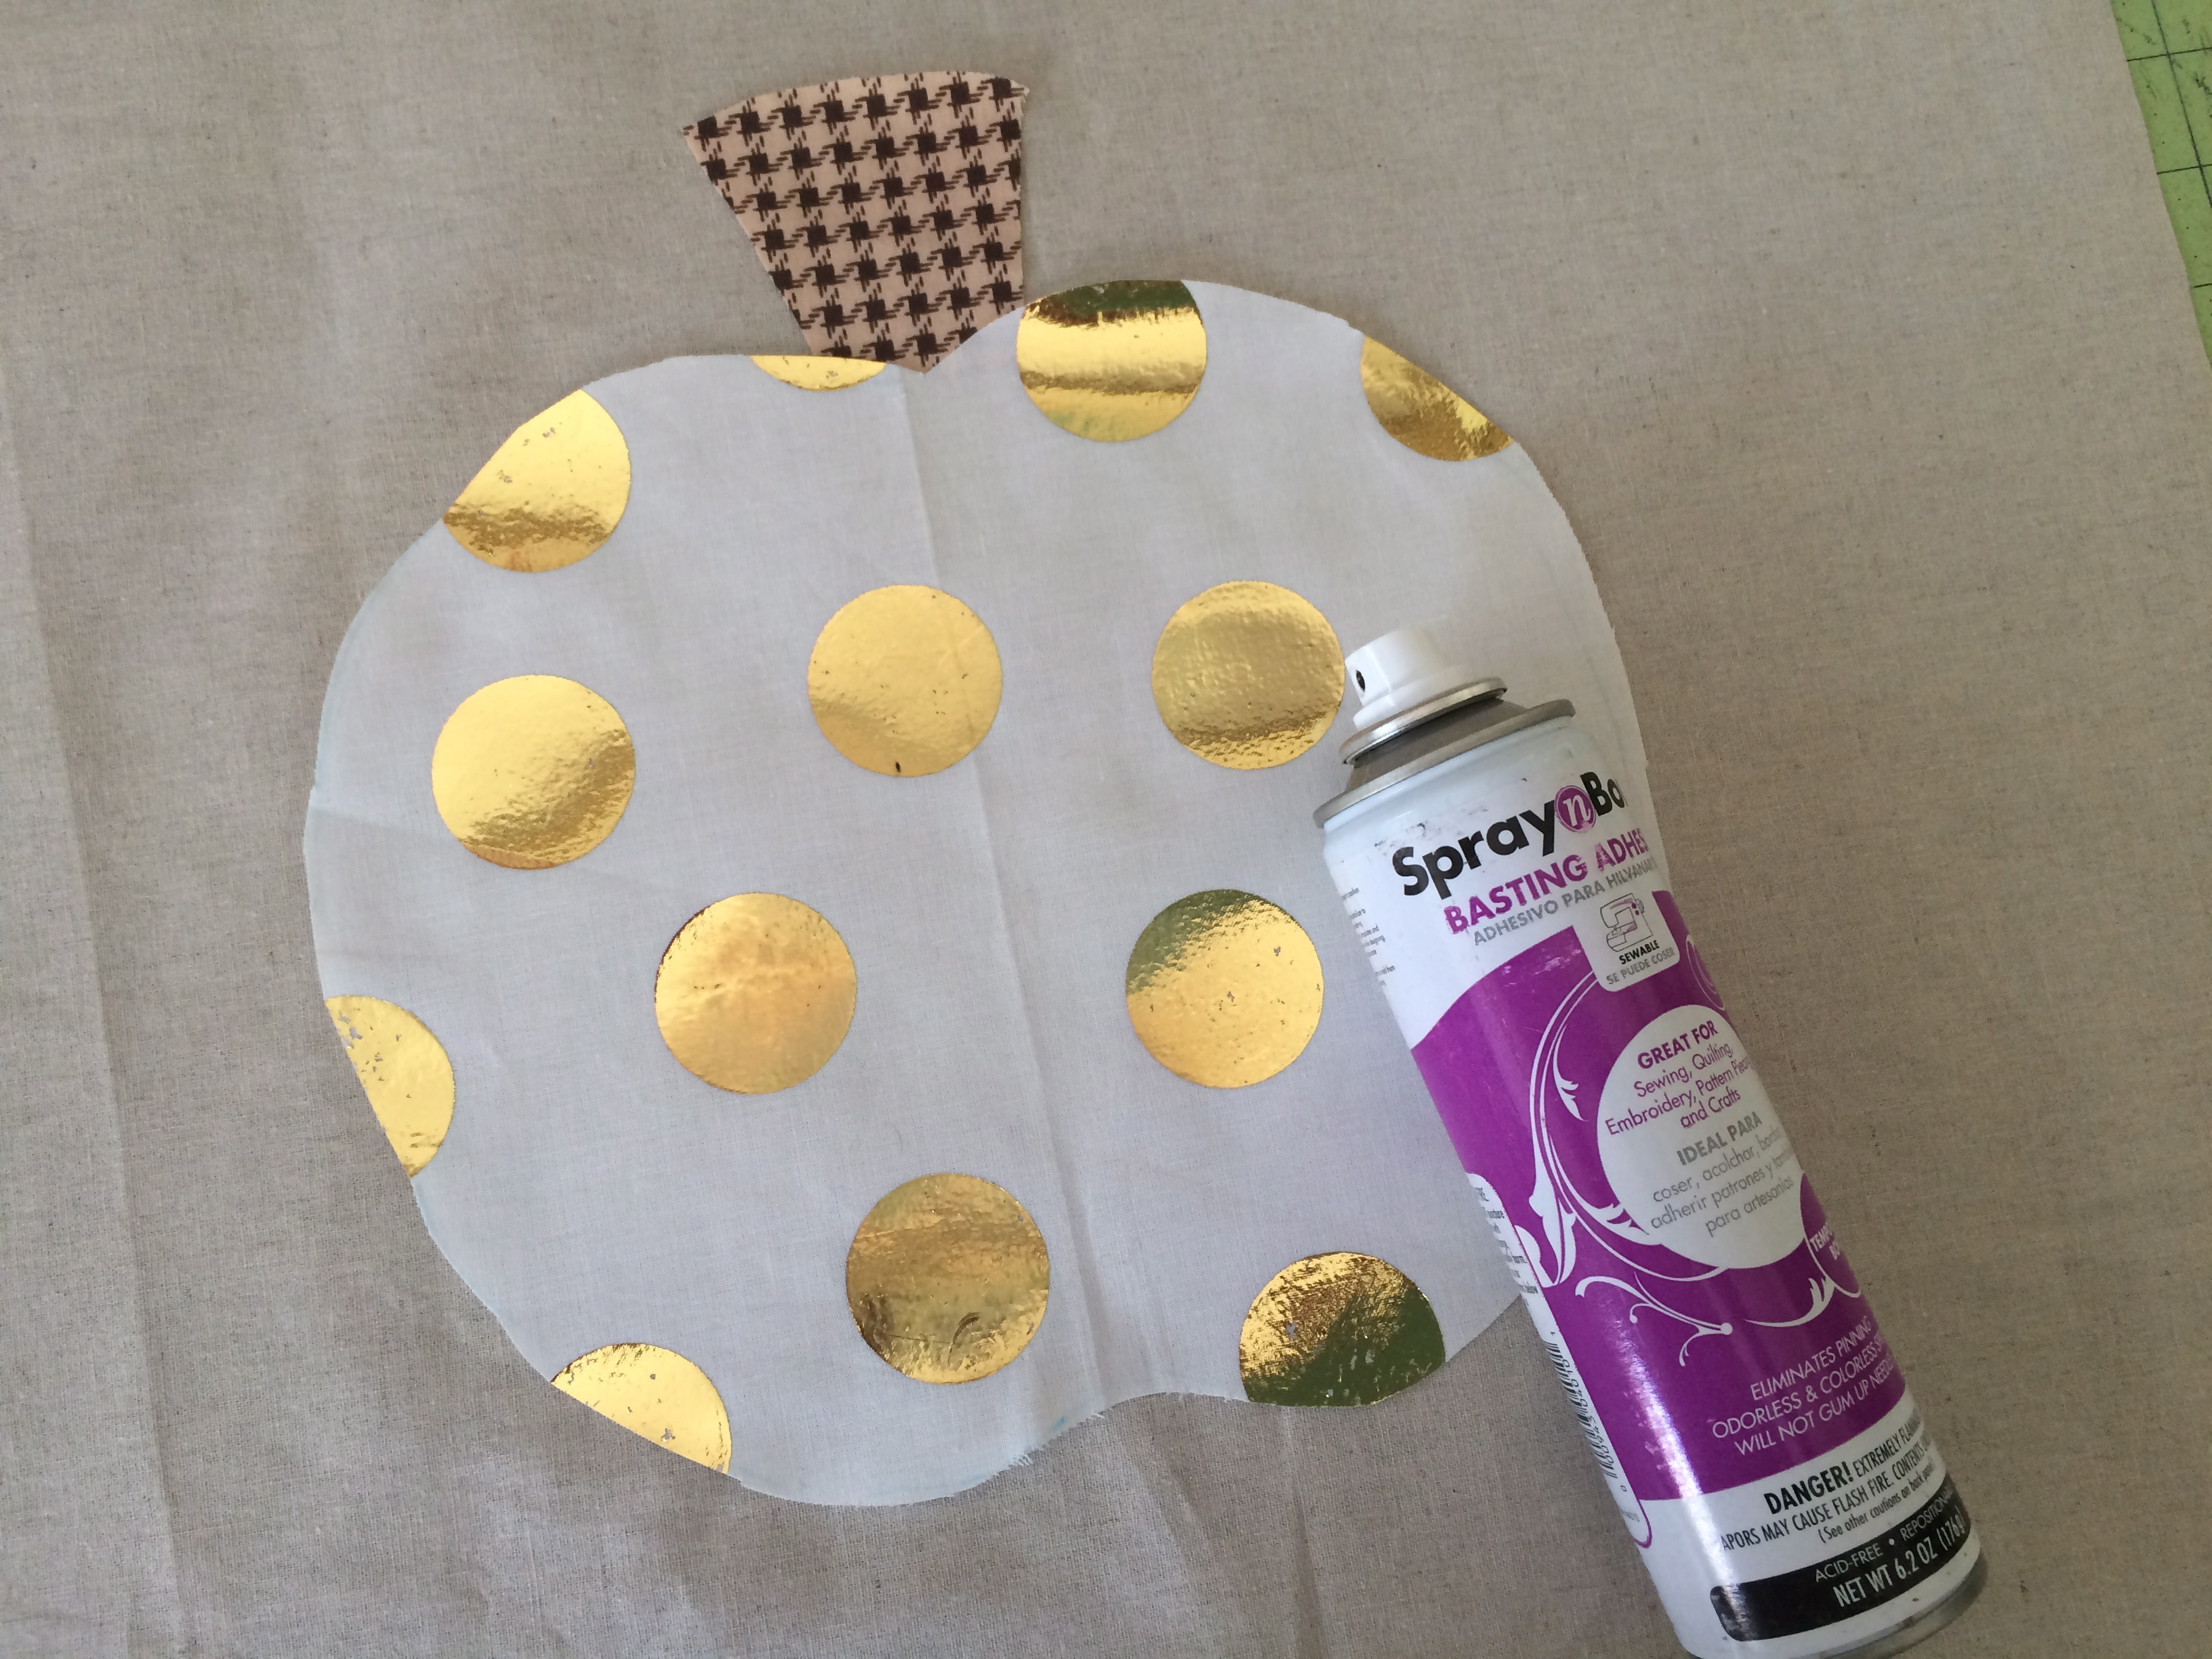
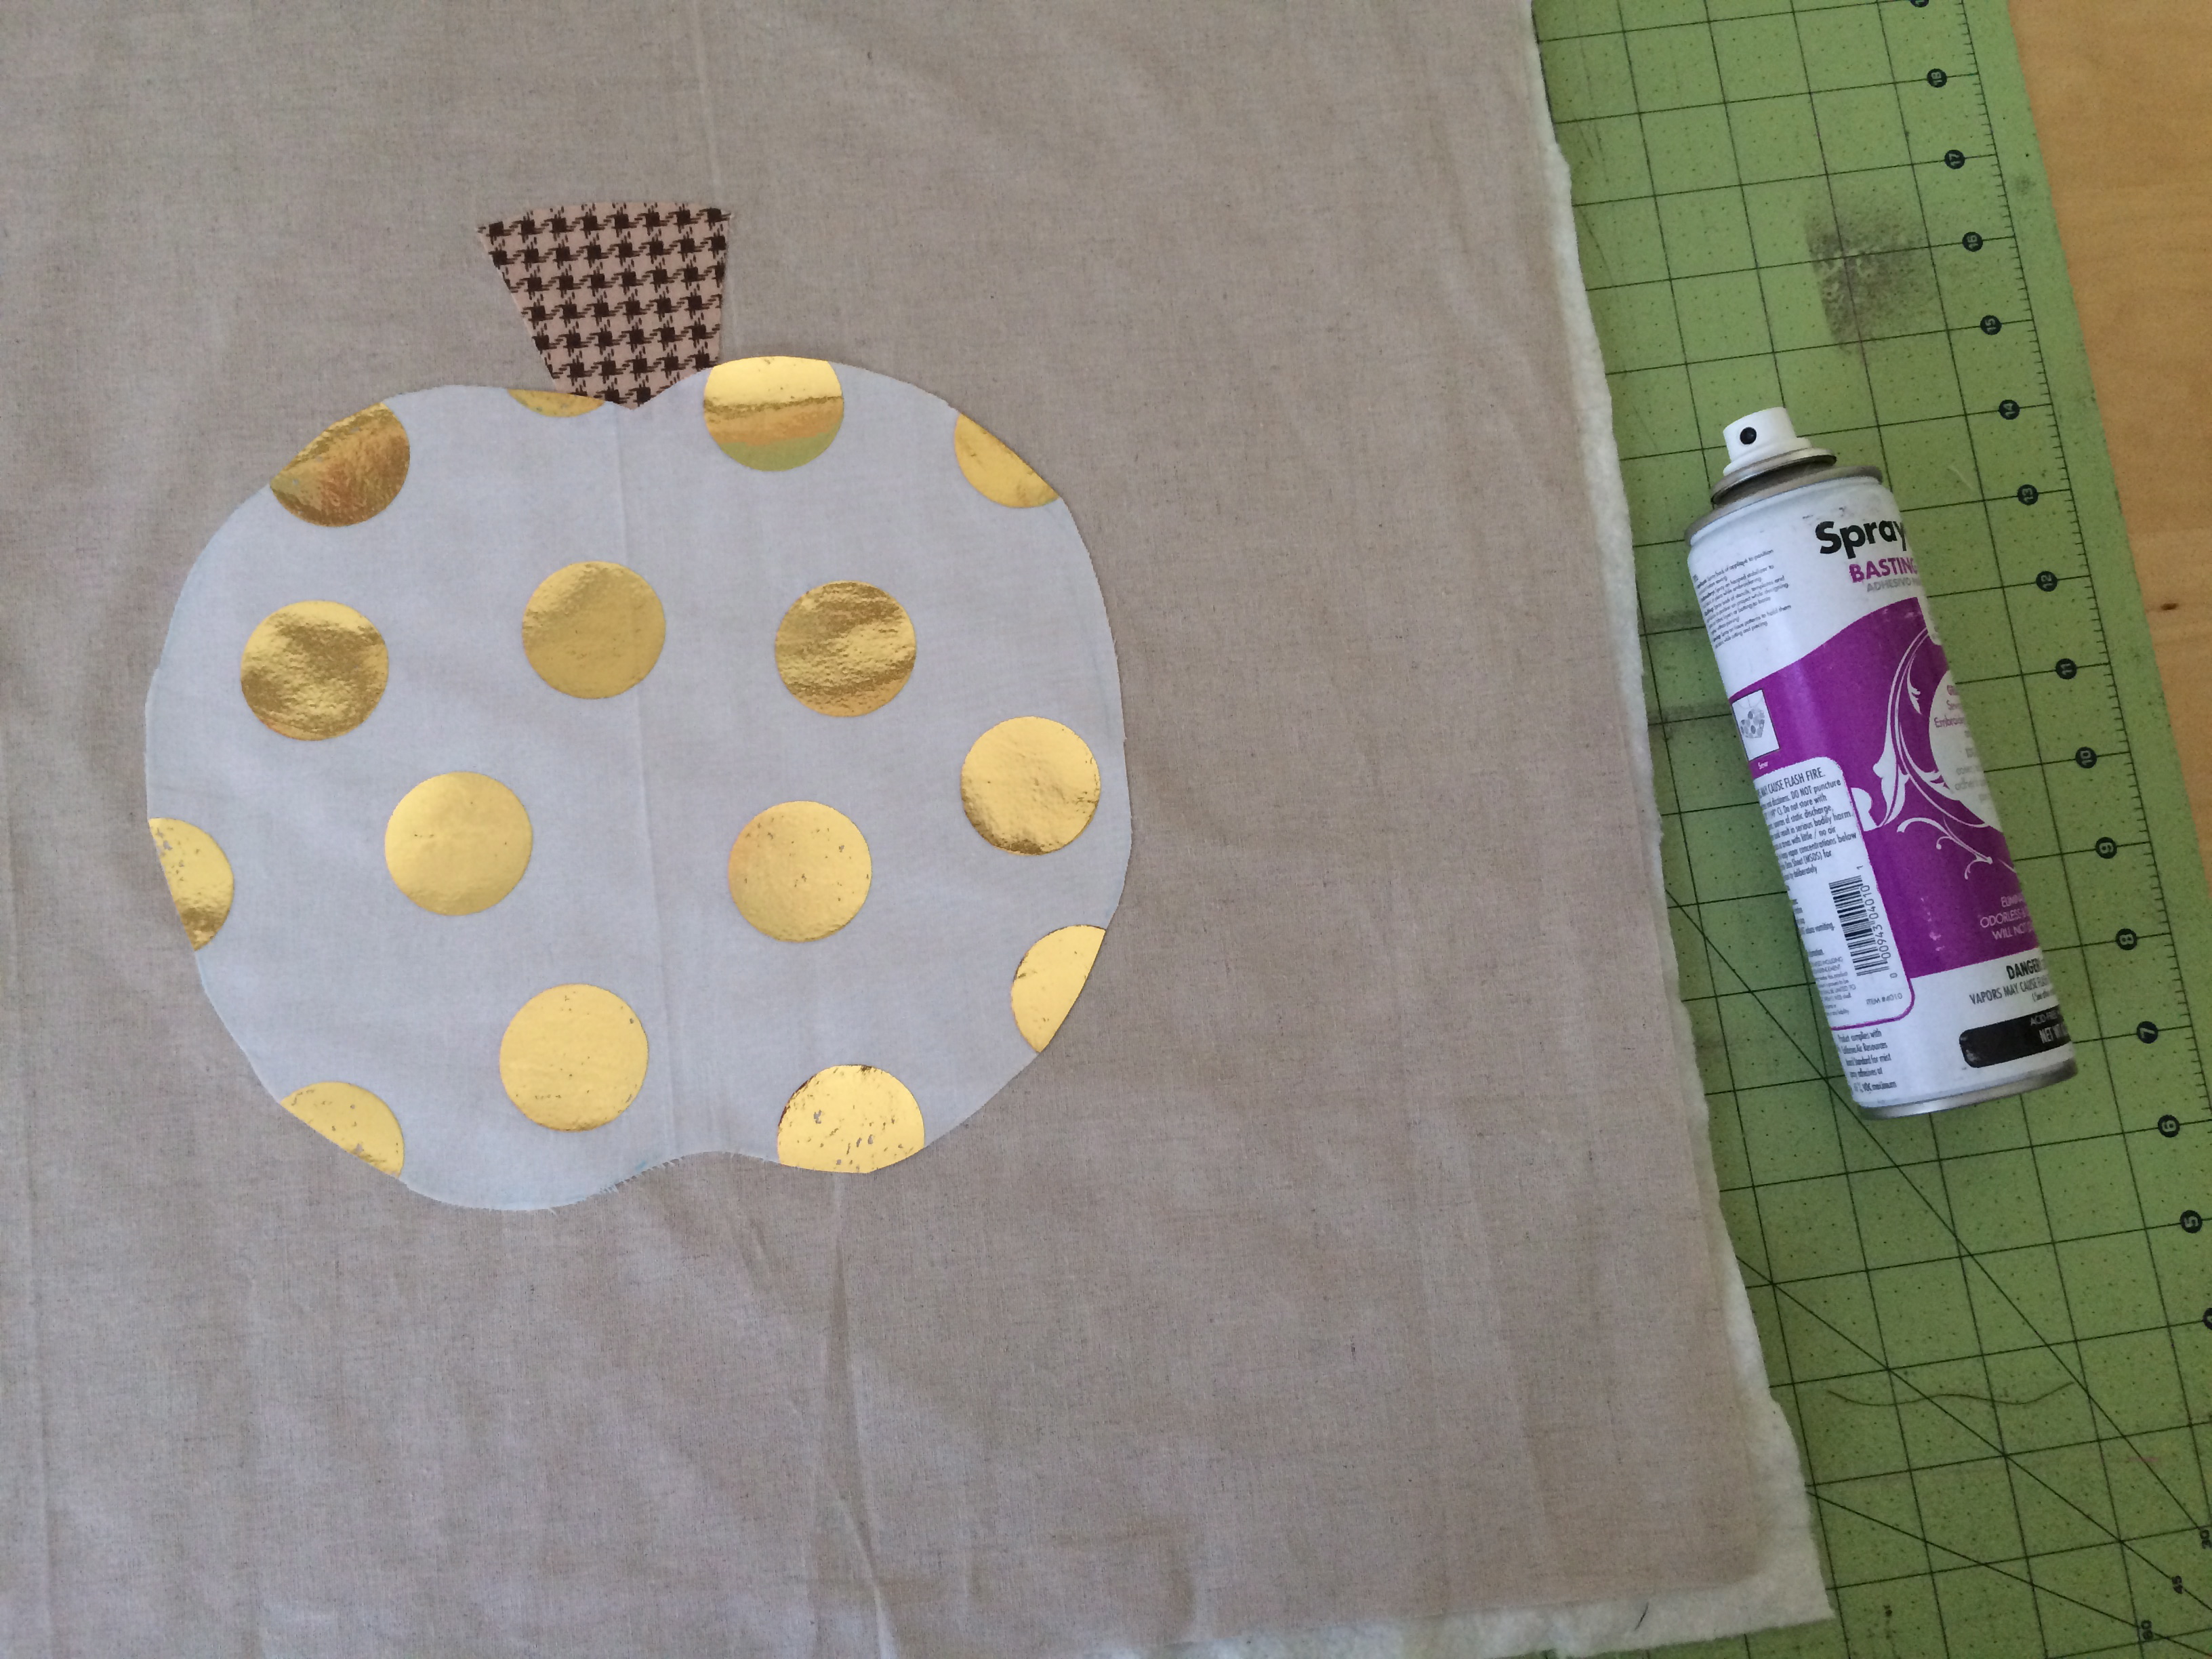
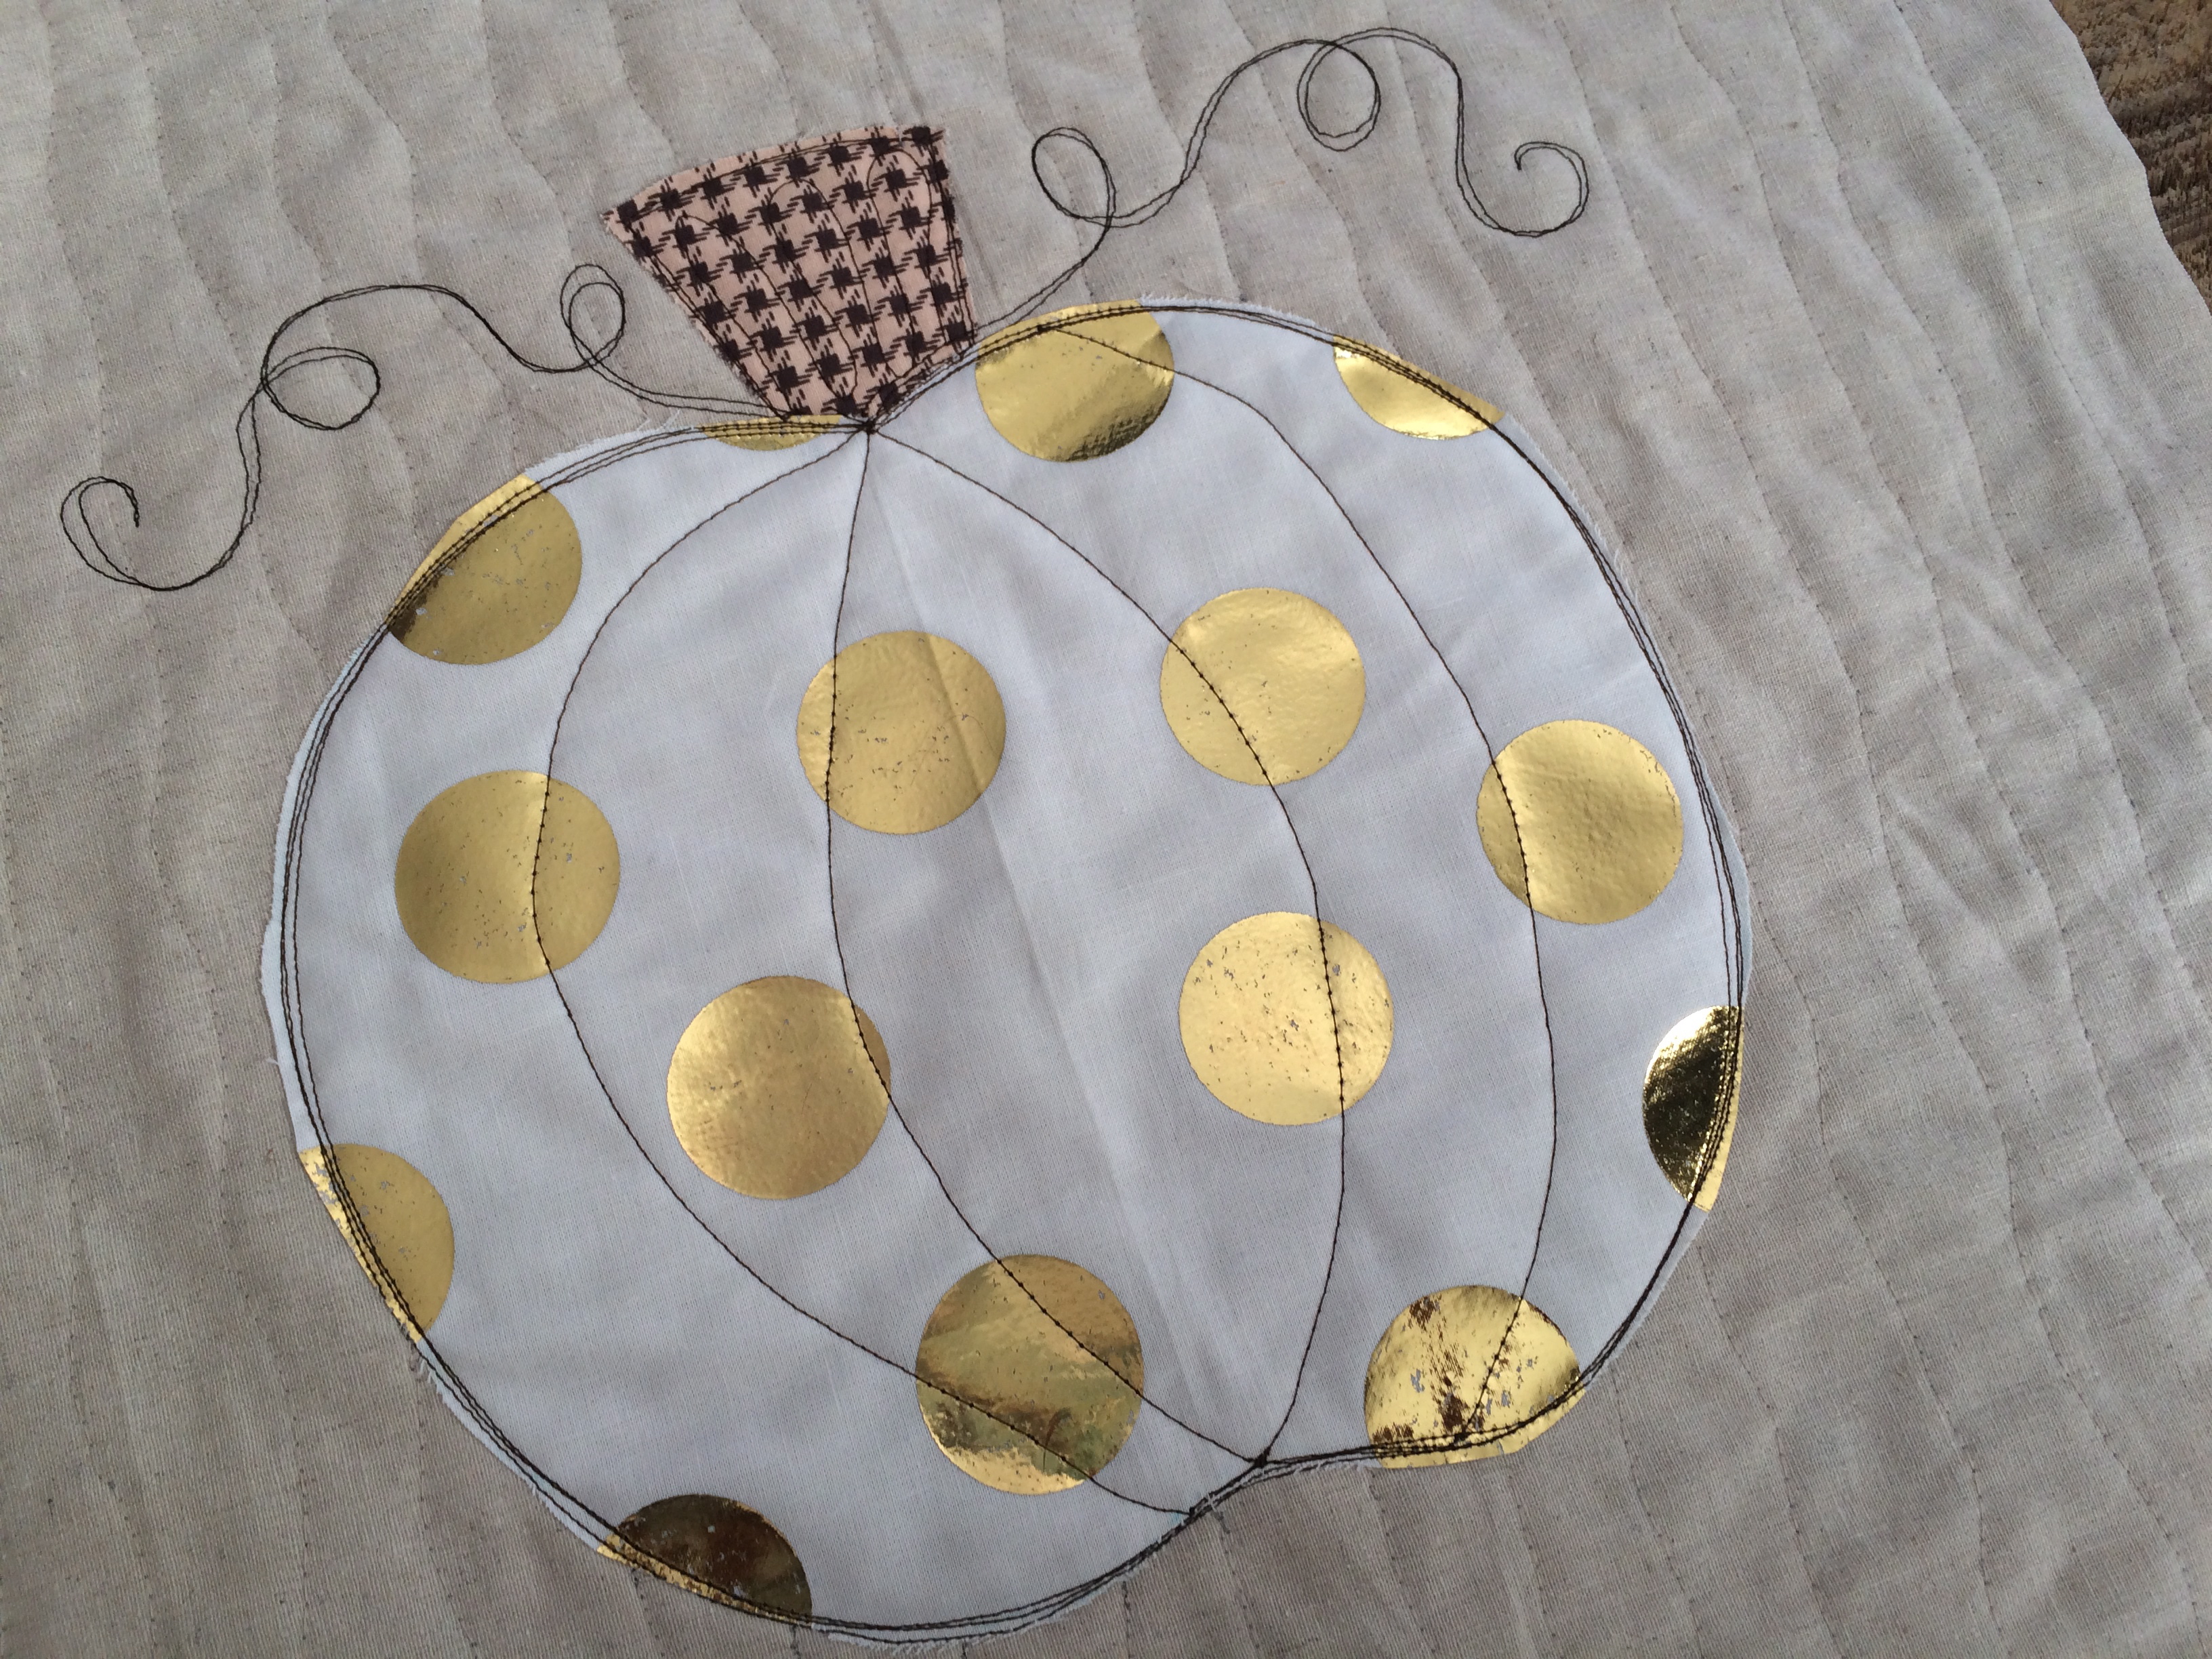
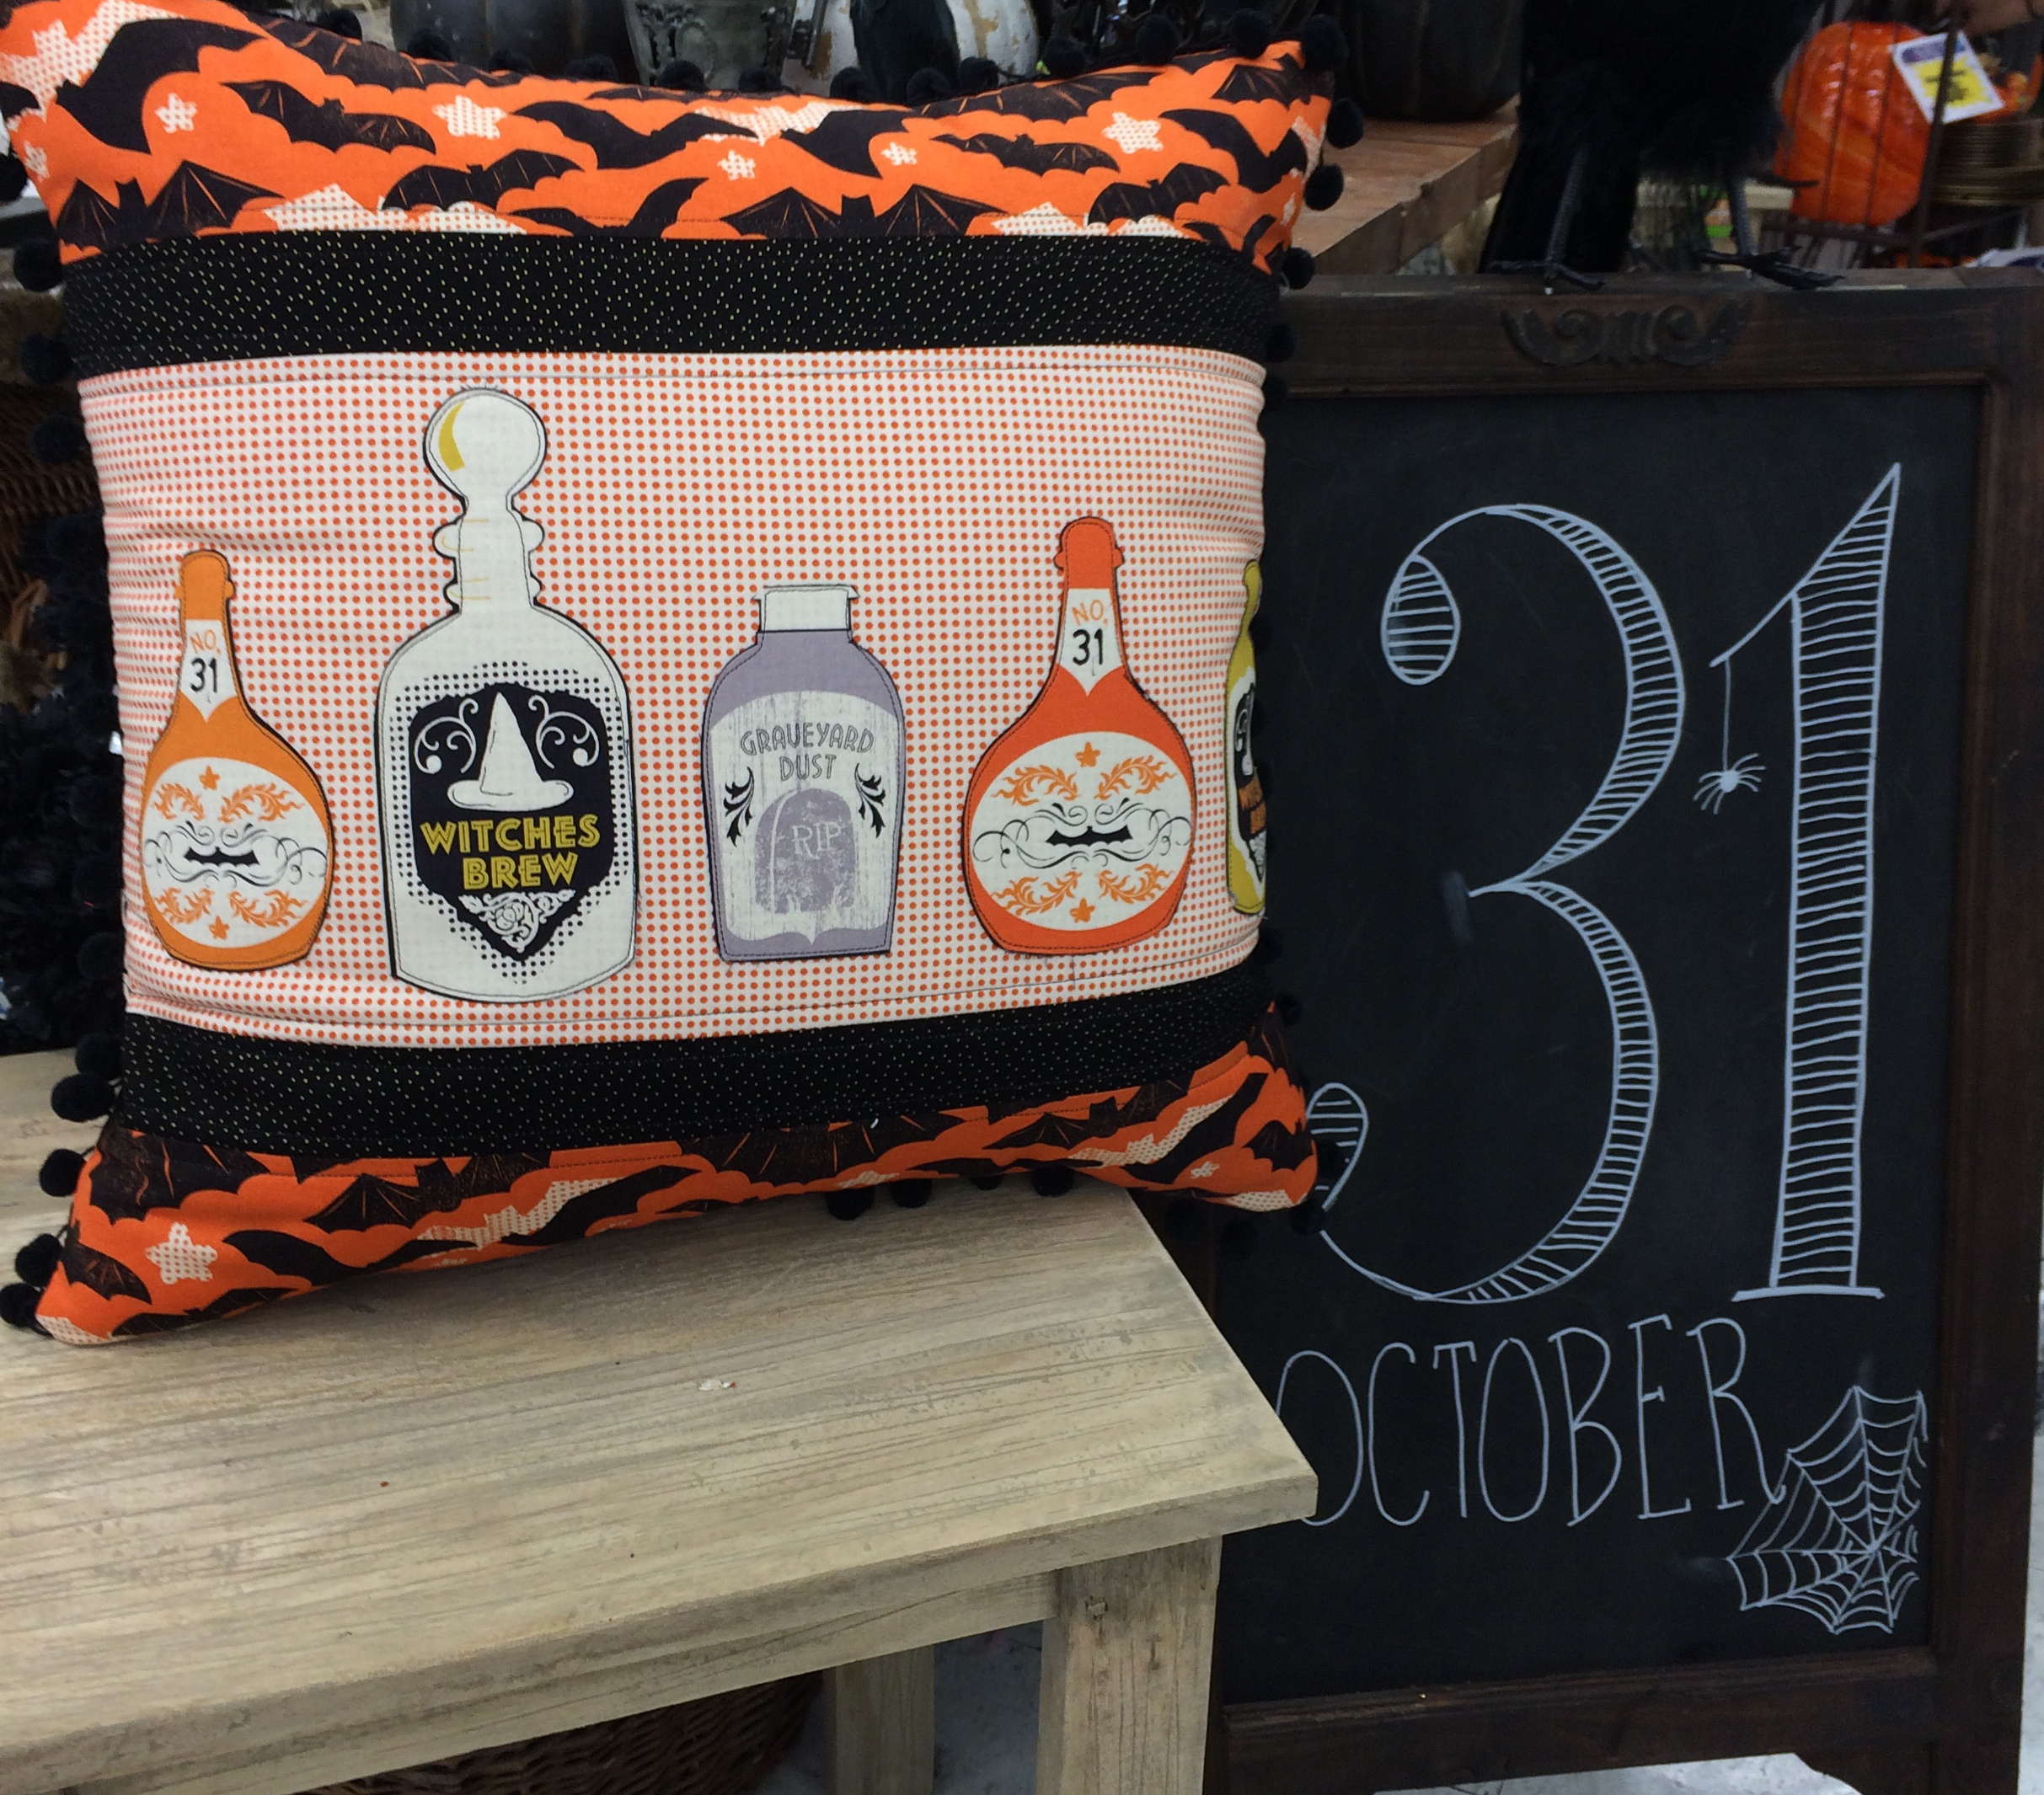
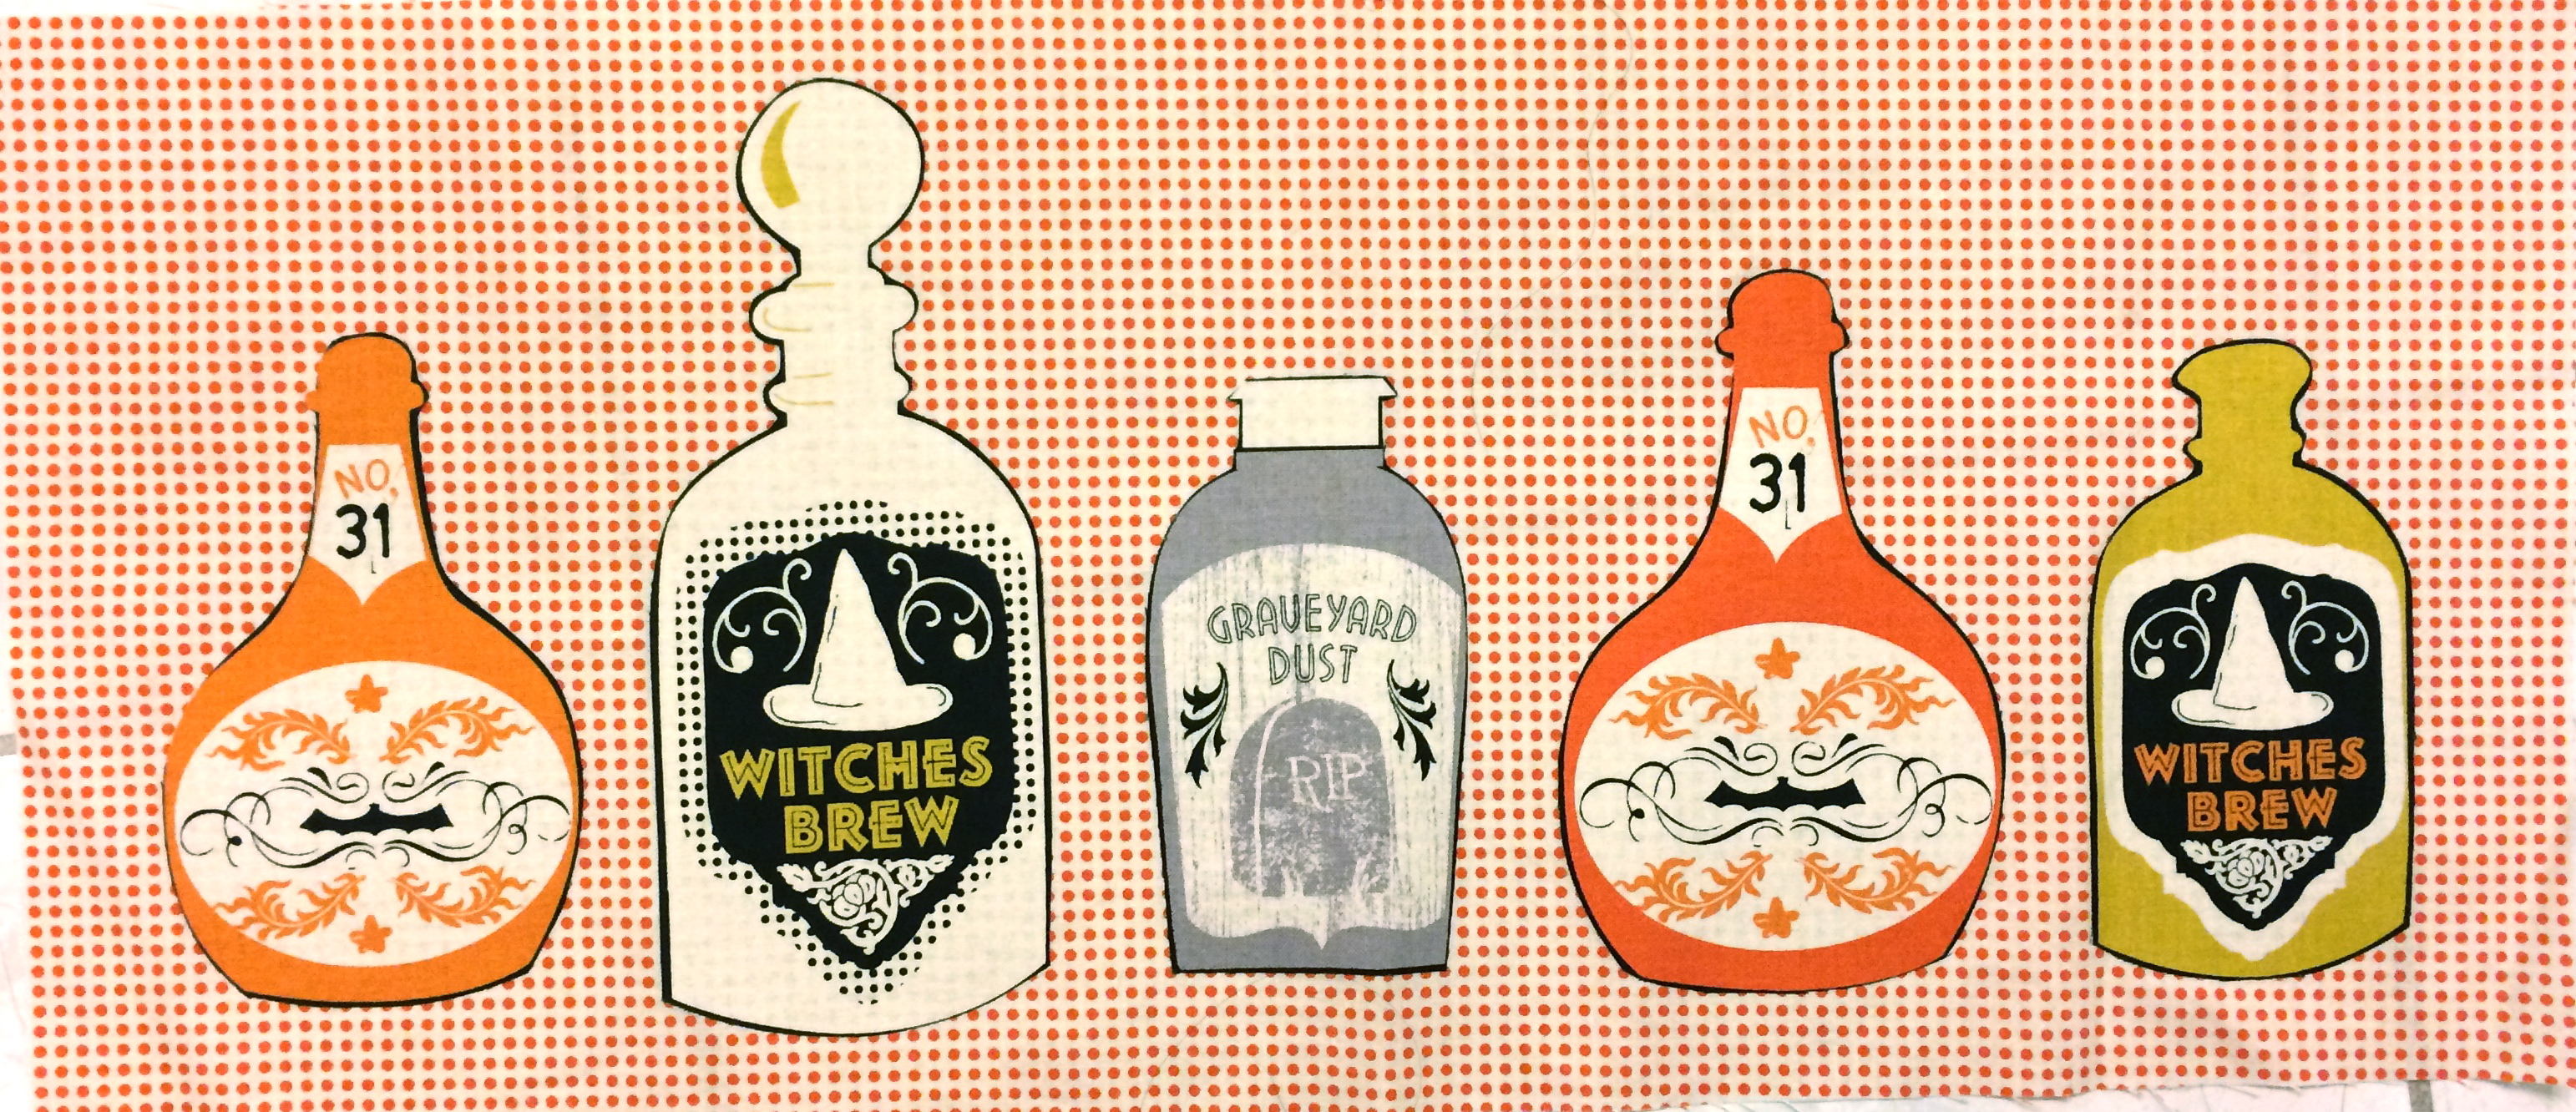
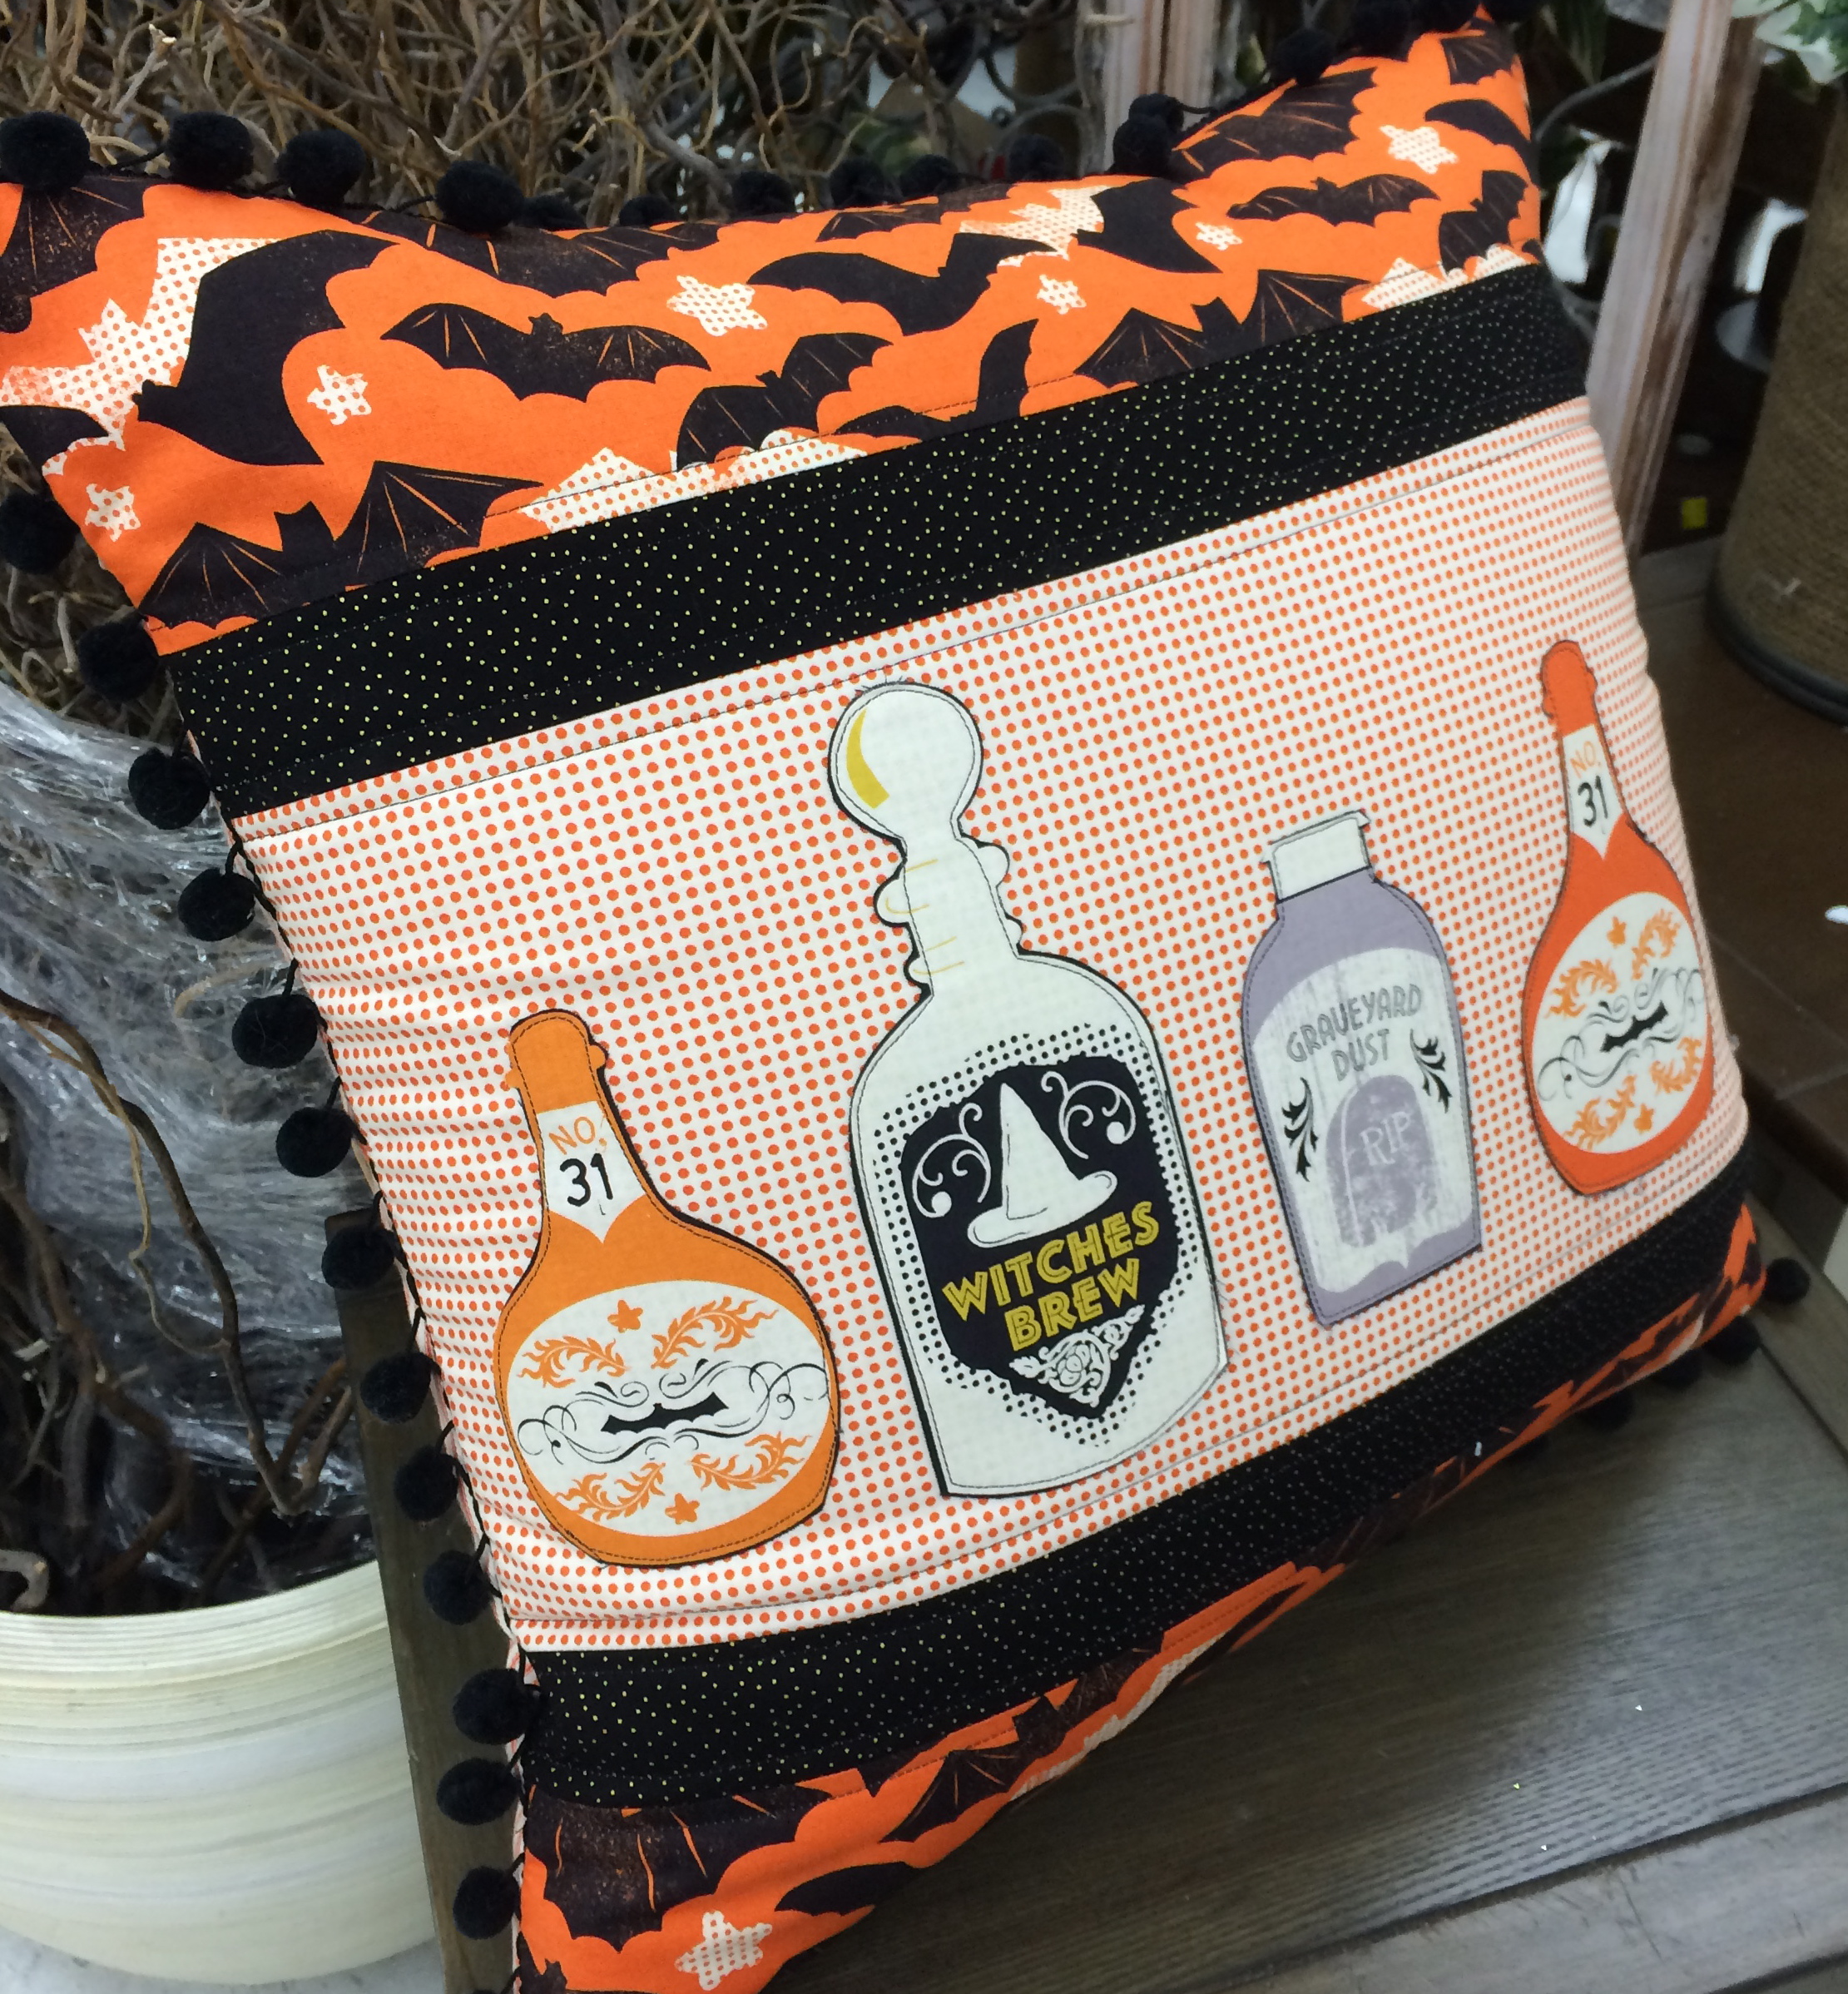
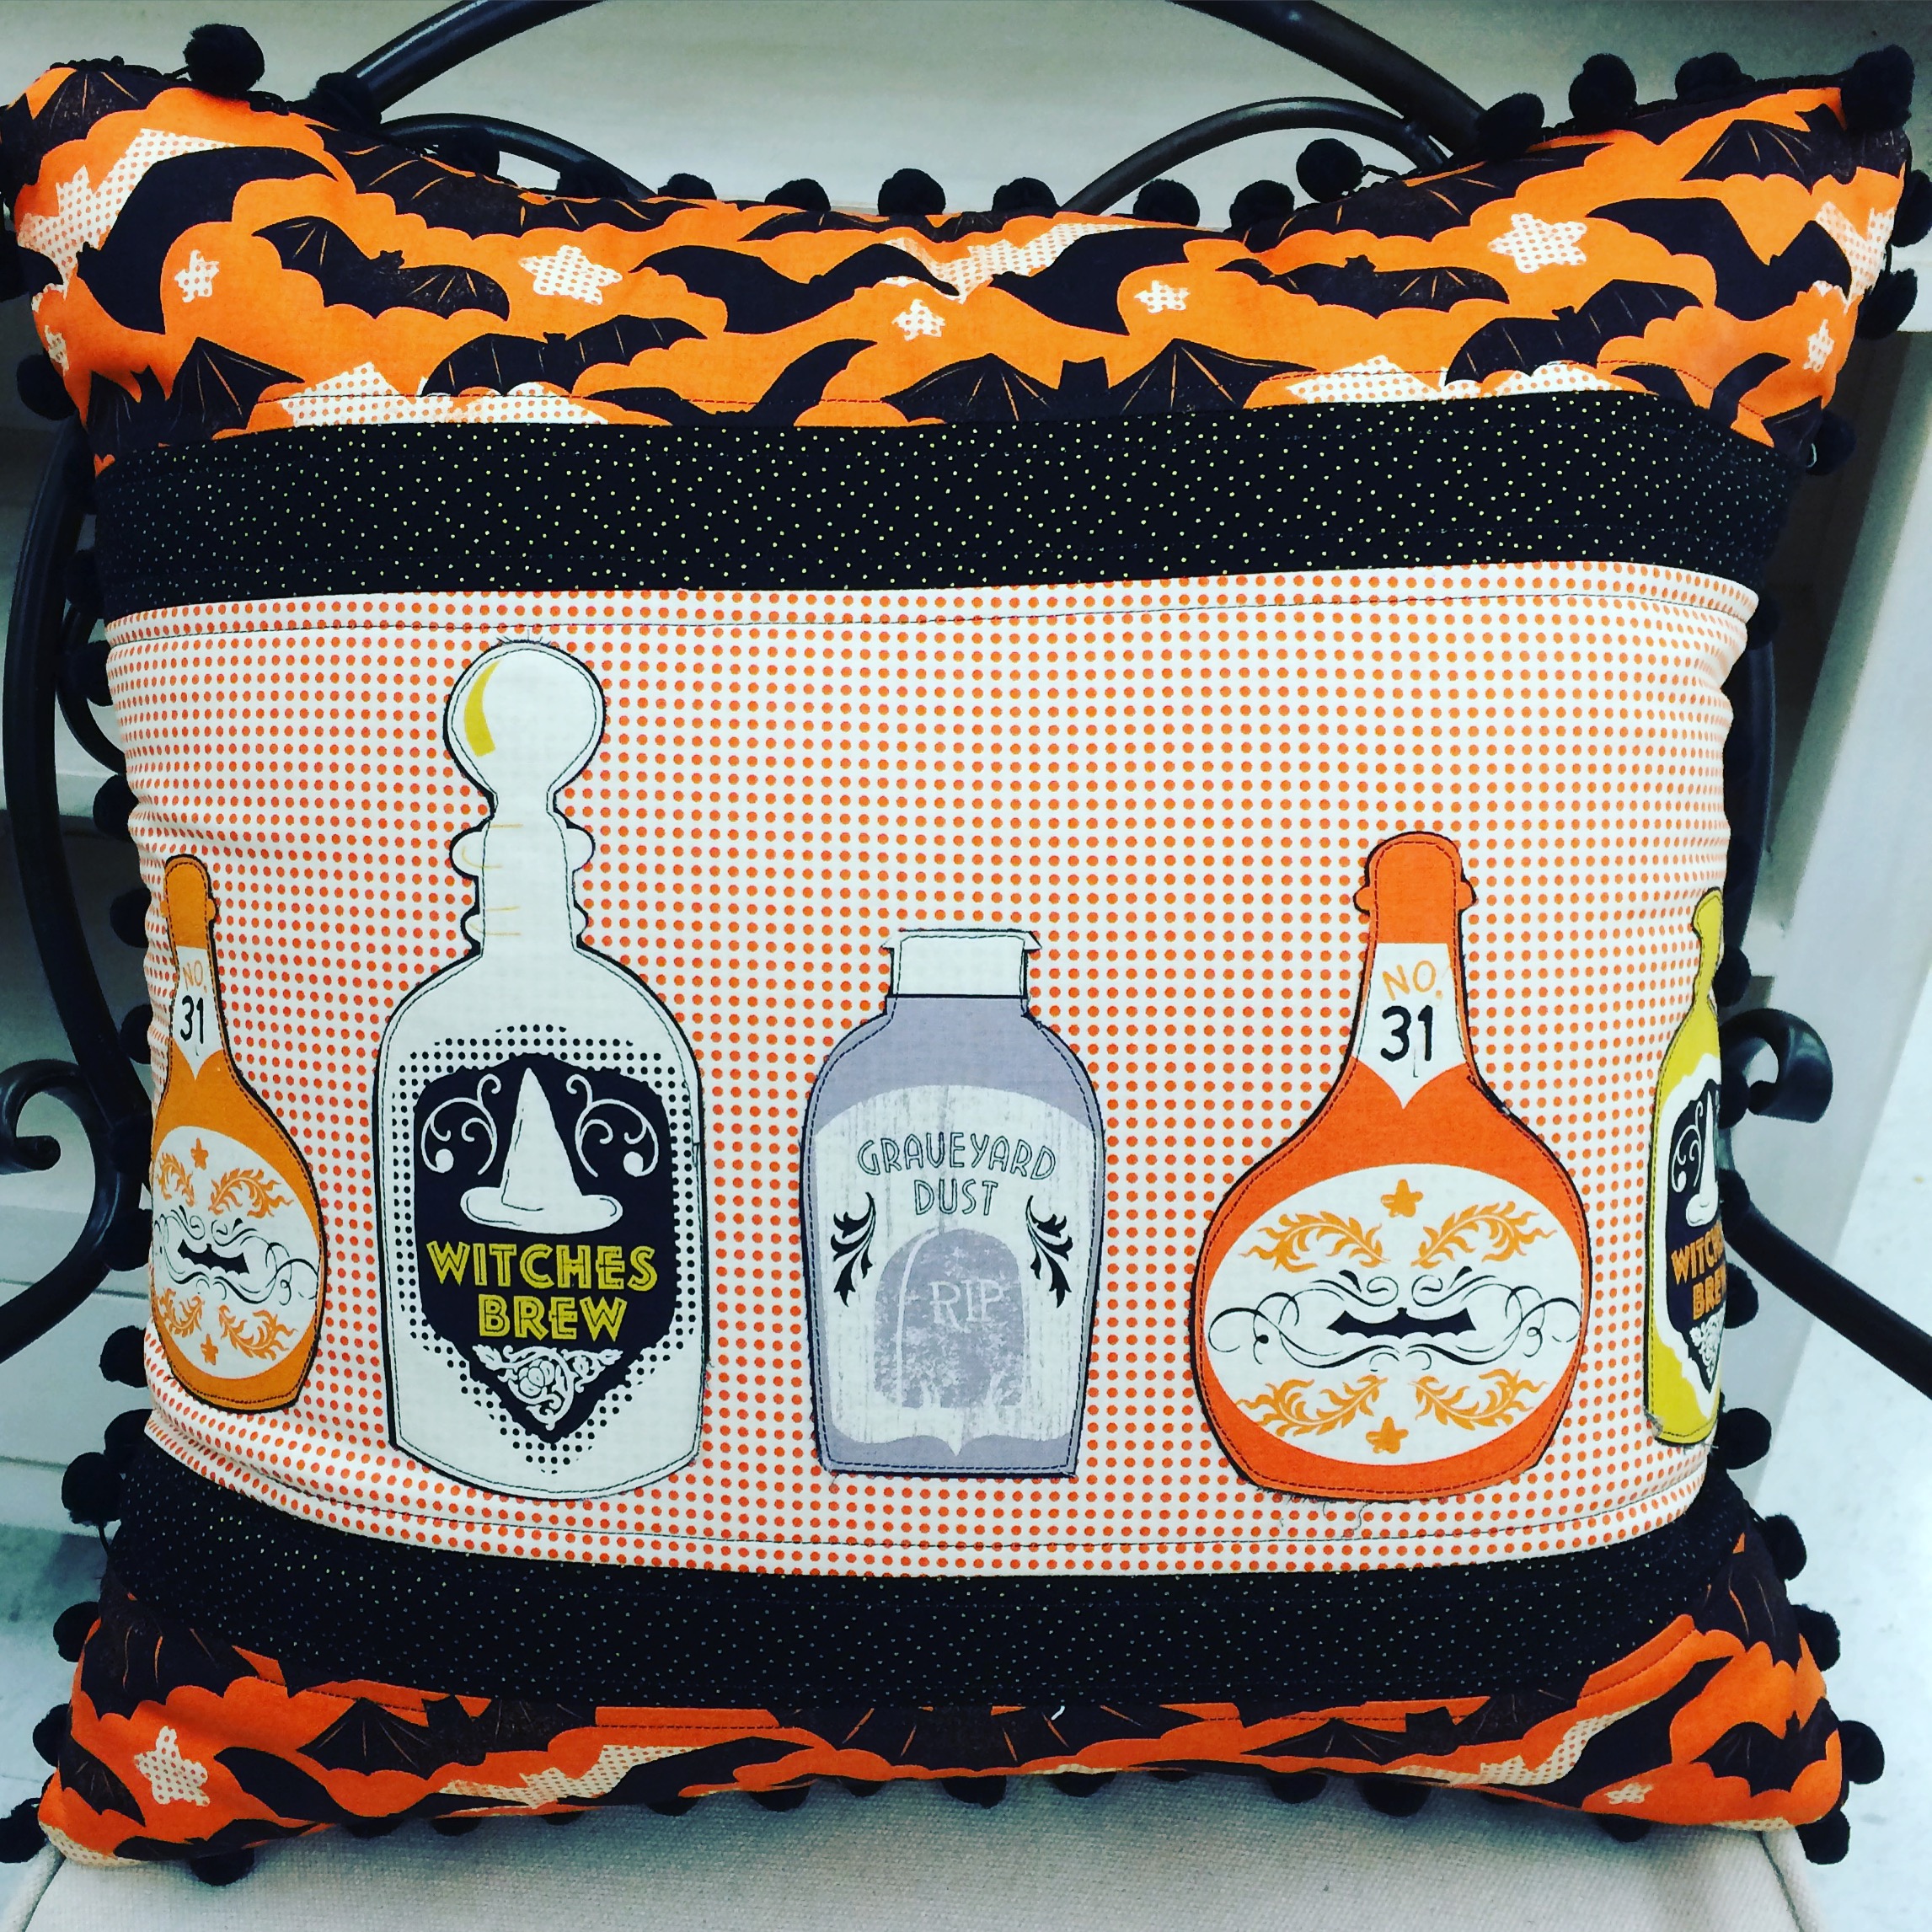
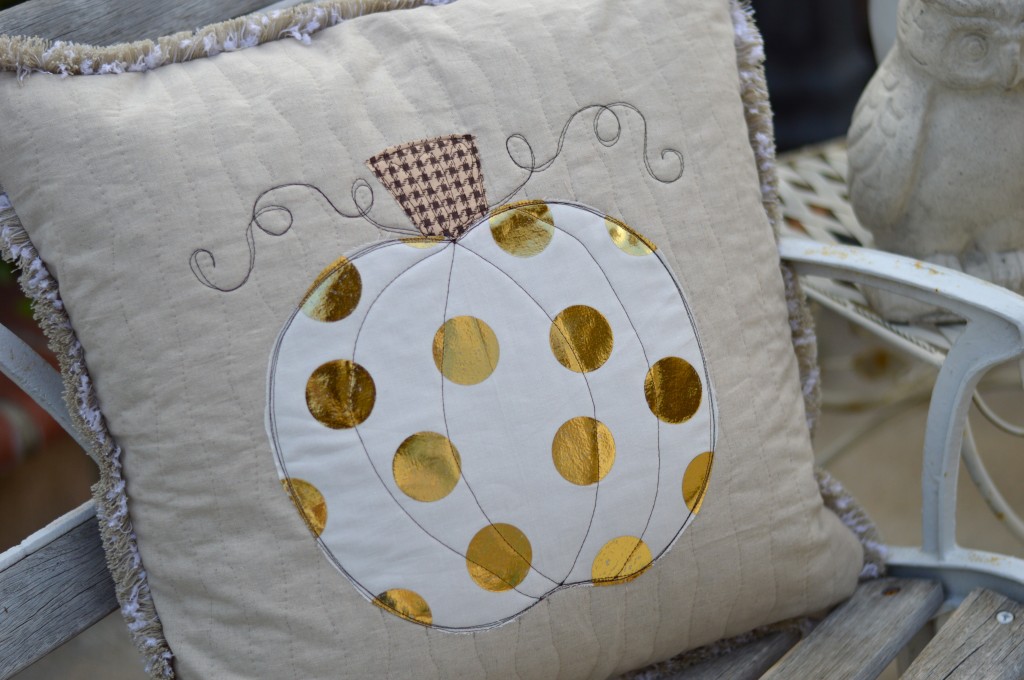
To finish the pumpkin, add a zipper in the back 20″ square.  Baste in trim, and sew the pillow using 1/2″ seams.

sizzix pumpkin pillow deco foil 16

sizzix pumpkin pillow deco foil 3Mufasa needs to be a Sizzix model 🙂


Spooktacular Halloween Towels and Pillow

IMG_9978Kids are in school, mornings are cool and crisp, and I can’t get enough Halloween sewing!!  These projects are super quick and easy.  The images used for the applique are fussy cut from Blend Fabrics Spooktacular fabric line.  I love these big bold Halloween designs!

For the towels…

Supplies

1 yard toweling for each towel, or a finished tea towel

1/2 yard ric rac

Heat n Bond Feather Lite

Desired fabric

spooktacular applique towel 2

Begin by selecting the image you want to applique on the towel.  Cut a piece of Heat n Bond slightly larger than the image.  Iron it to the wrong side of the fabric.

spooktacular applique towel 3Cut out the image.

spooktacular applique towelEven up the toweling and sew a rolled hem on both edges.spooktacular applique towel 4Peel off the backing paper and press into place.  Top stitch around each applique piece.  Add ric rac or other decorative trim.

spooktacular applique towel 5These would make great gifts for friends or teachers!!!

spooktacular applique towel 6 For the pillow….

spooktacular halloween pillow 3

Supplies

quarter yard cuts of the 3 fabrics

1/2 yard ticking for back

Heat n Bond fusible fleece

Zipper

Applique pieces

Heat n Bond Feather Lite

2 .5 yards black pom pom trim

20″ Pillow Form

spooktacular halloween pillow 2Begin by using the method explained above to fussy cut each of the potion bottles.  Use the cutting guide below to cut each of the 3 fabrics.

spooktacular pillow cutting guideApplique the bottles to the center piece

spooktacular halloween pillowNext, sew the strips together using 1/4″seam allowance.  Press seams to one direction.

Cut a 20″ square of fusible fleece and iron it to the wrong side of the pillow front.  You can quilt the pillow at this point.  I added some straight line stitches along both sides of the seams.

Baste the pom pom trim around the pillow, starting and stopping at the bottom center of the pillow and curving the corners.

I like to put zippers in my pillow backs.  For instructions on how to do this, click here.

Sew the pillow front to the pillow back, right sides together. making sure to leave the zipper partially open.  Turn right side out and insert pillow form.

spooktacular halloween pillow 4

spooktacular halloween pillow 5
spooktacular halloween pillow 6

Riley Blake Designs Lobster Pillows

riley blake lobster pillowsDSC_0456

lobster pillow riley blake 6

lobster summer pillow riley blake

Home-Dec-Love-AD-01-731x1024
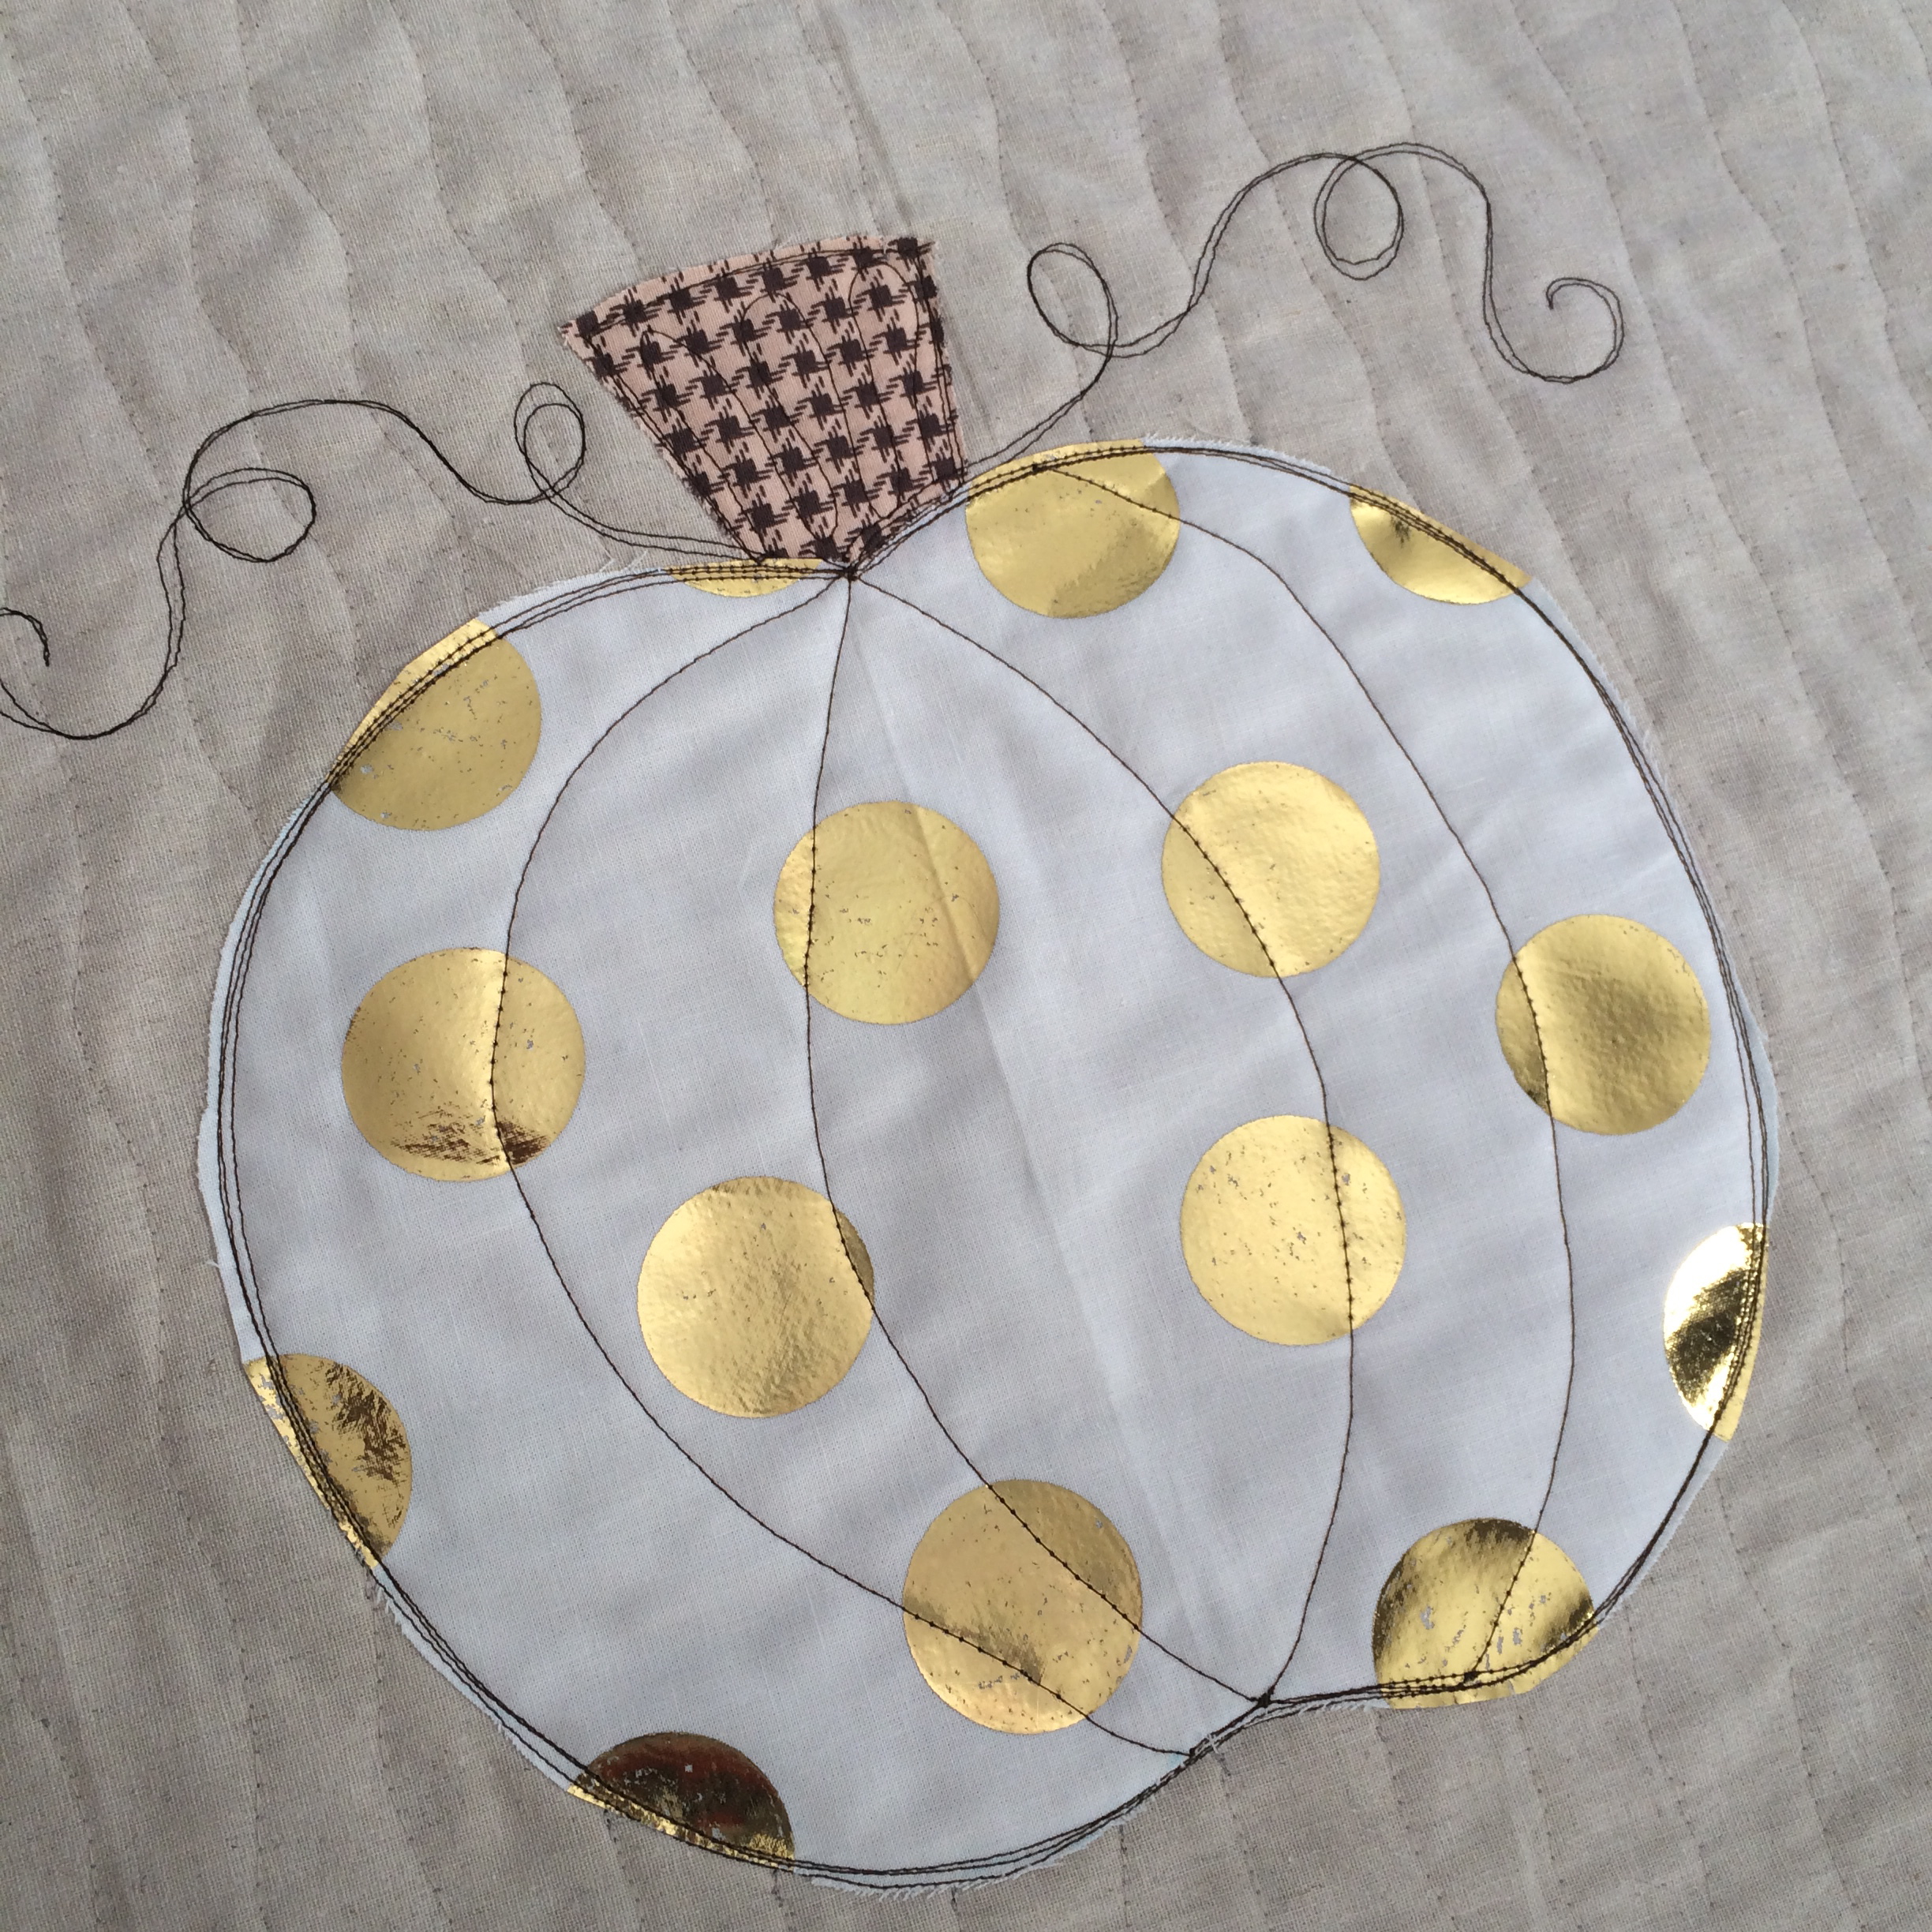
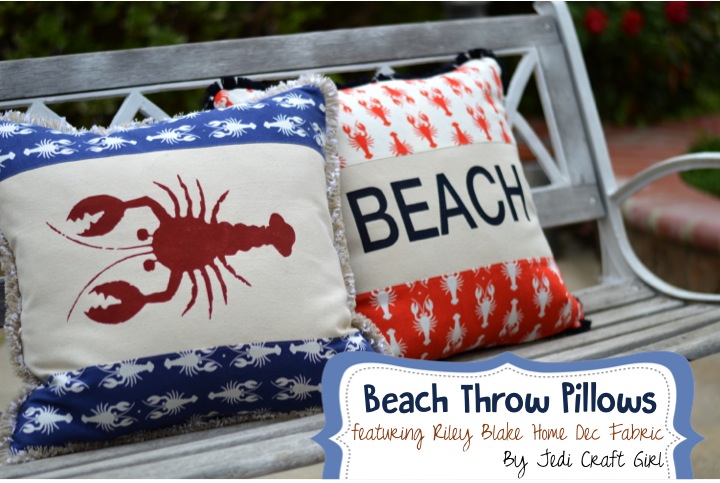
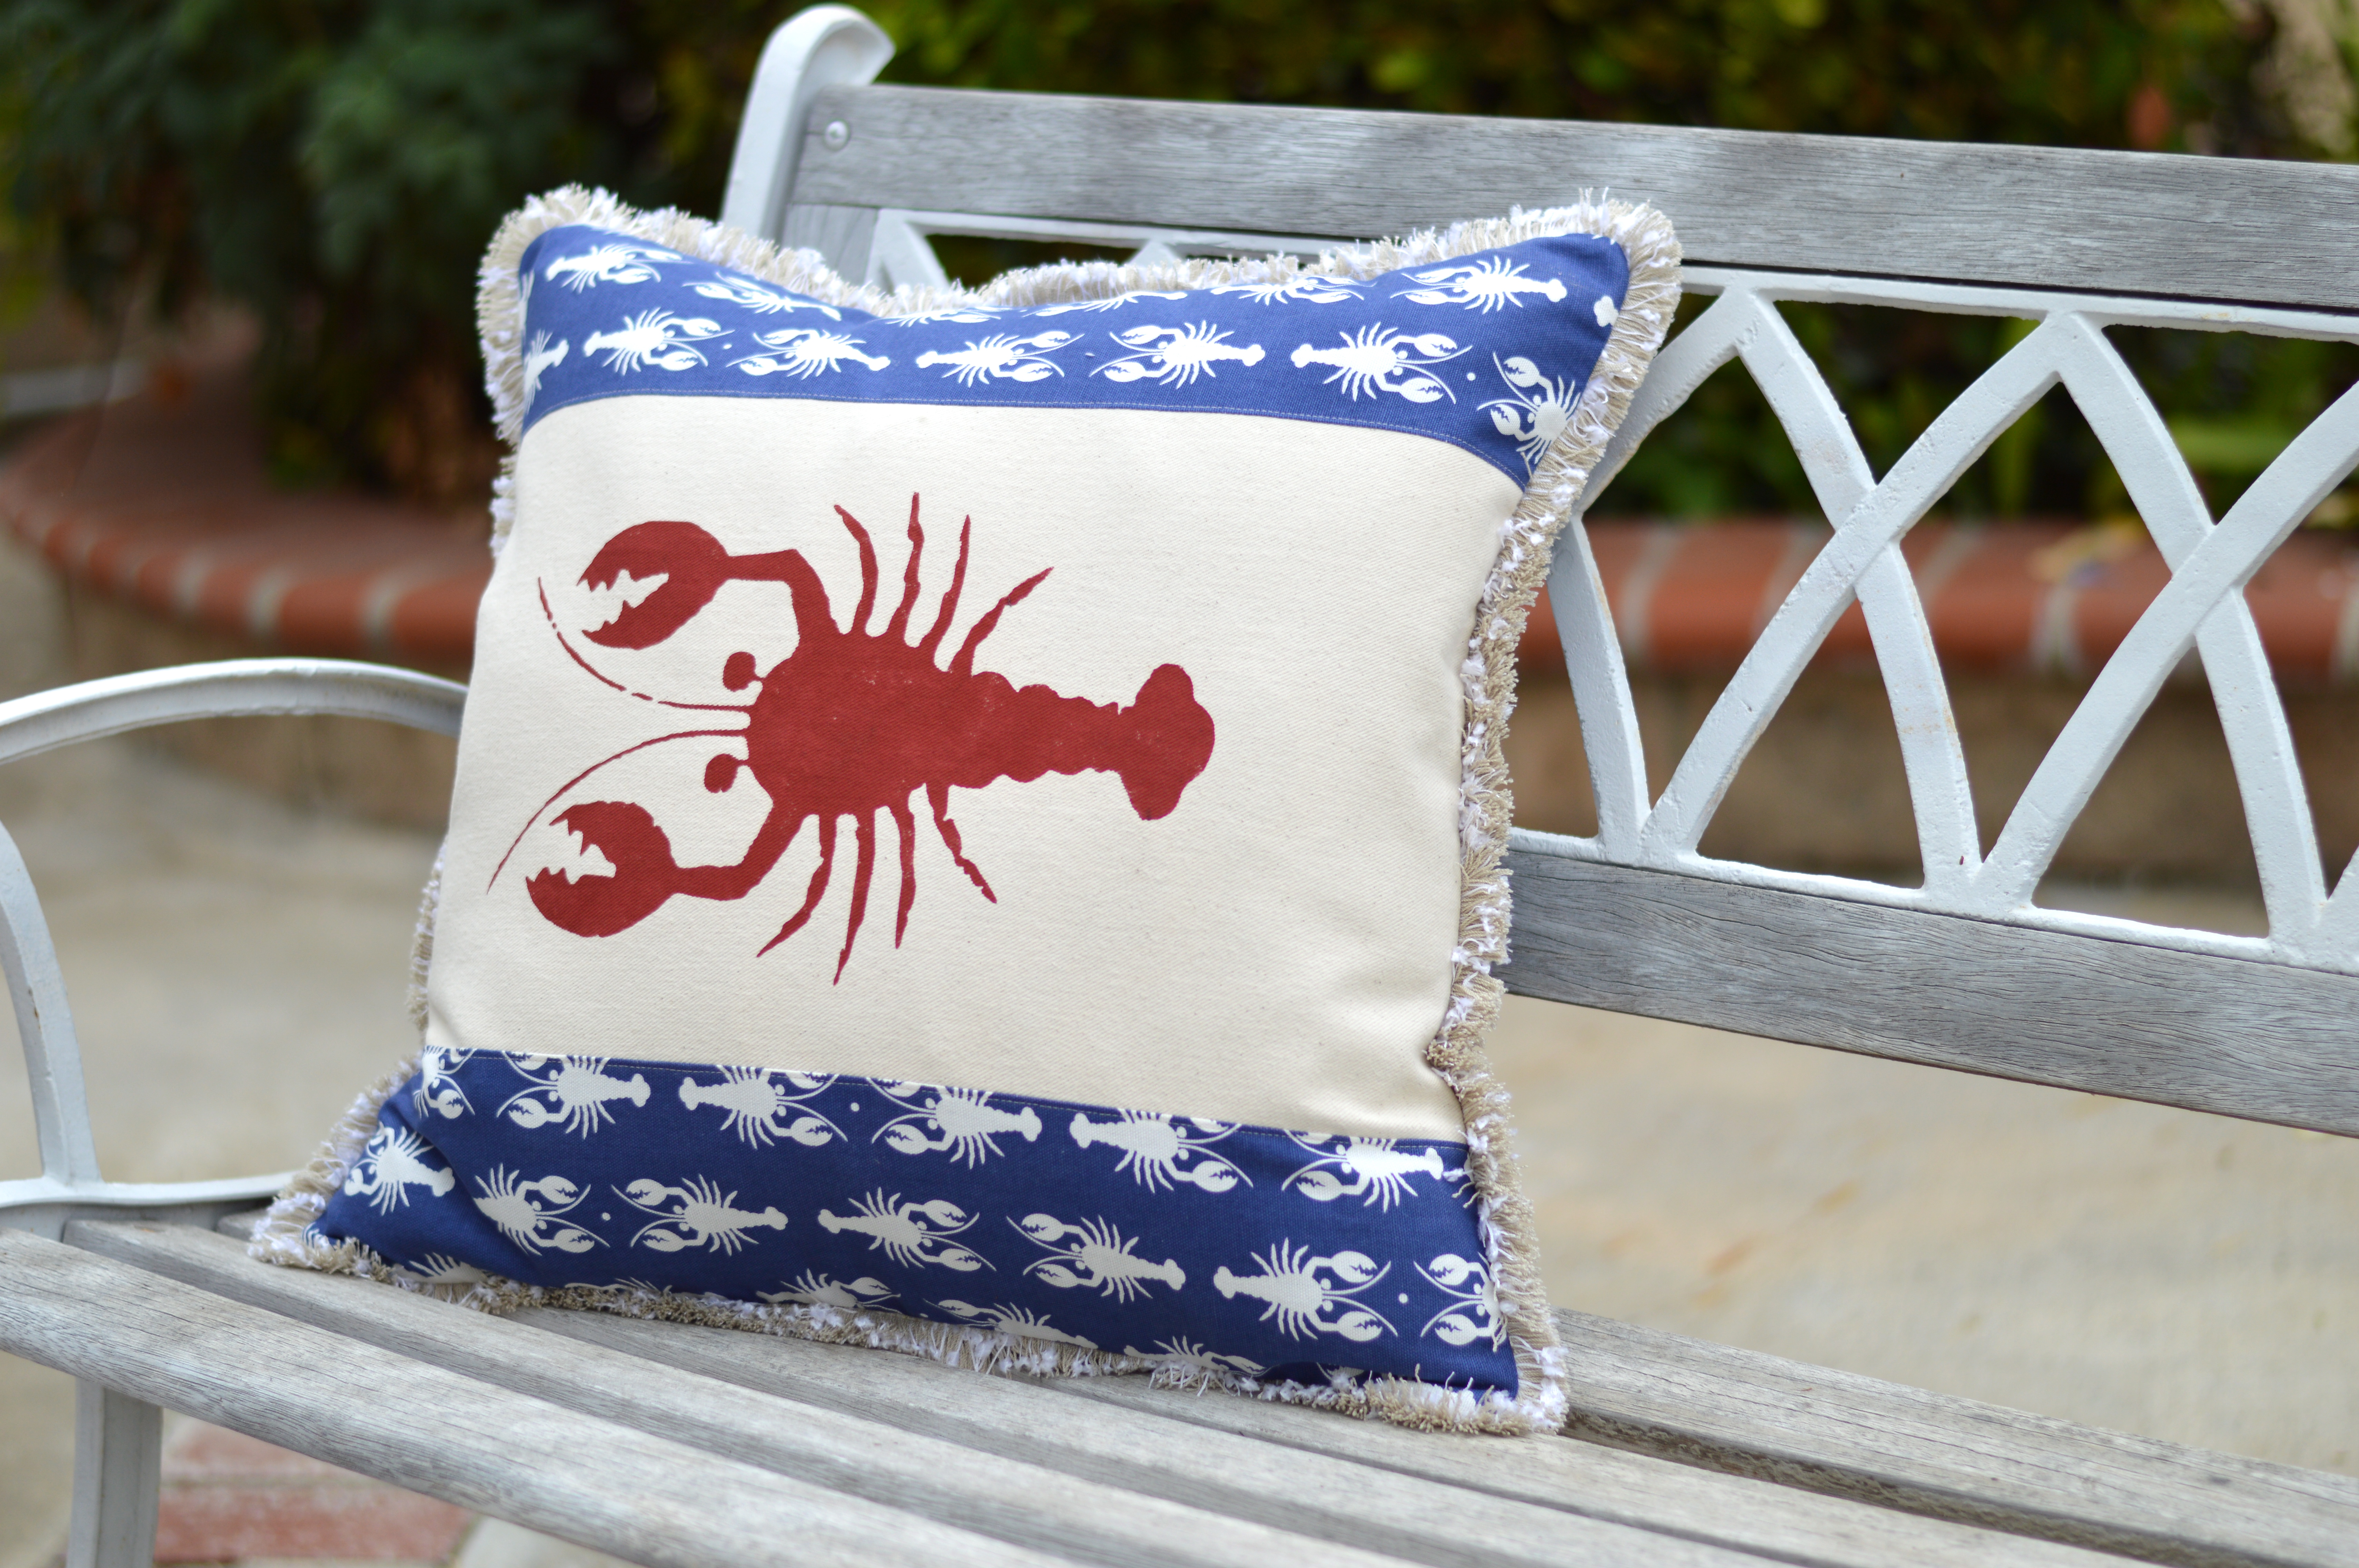
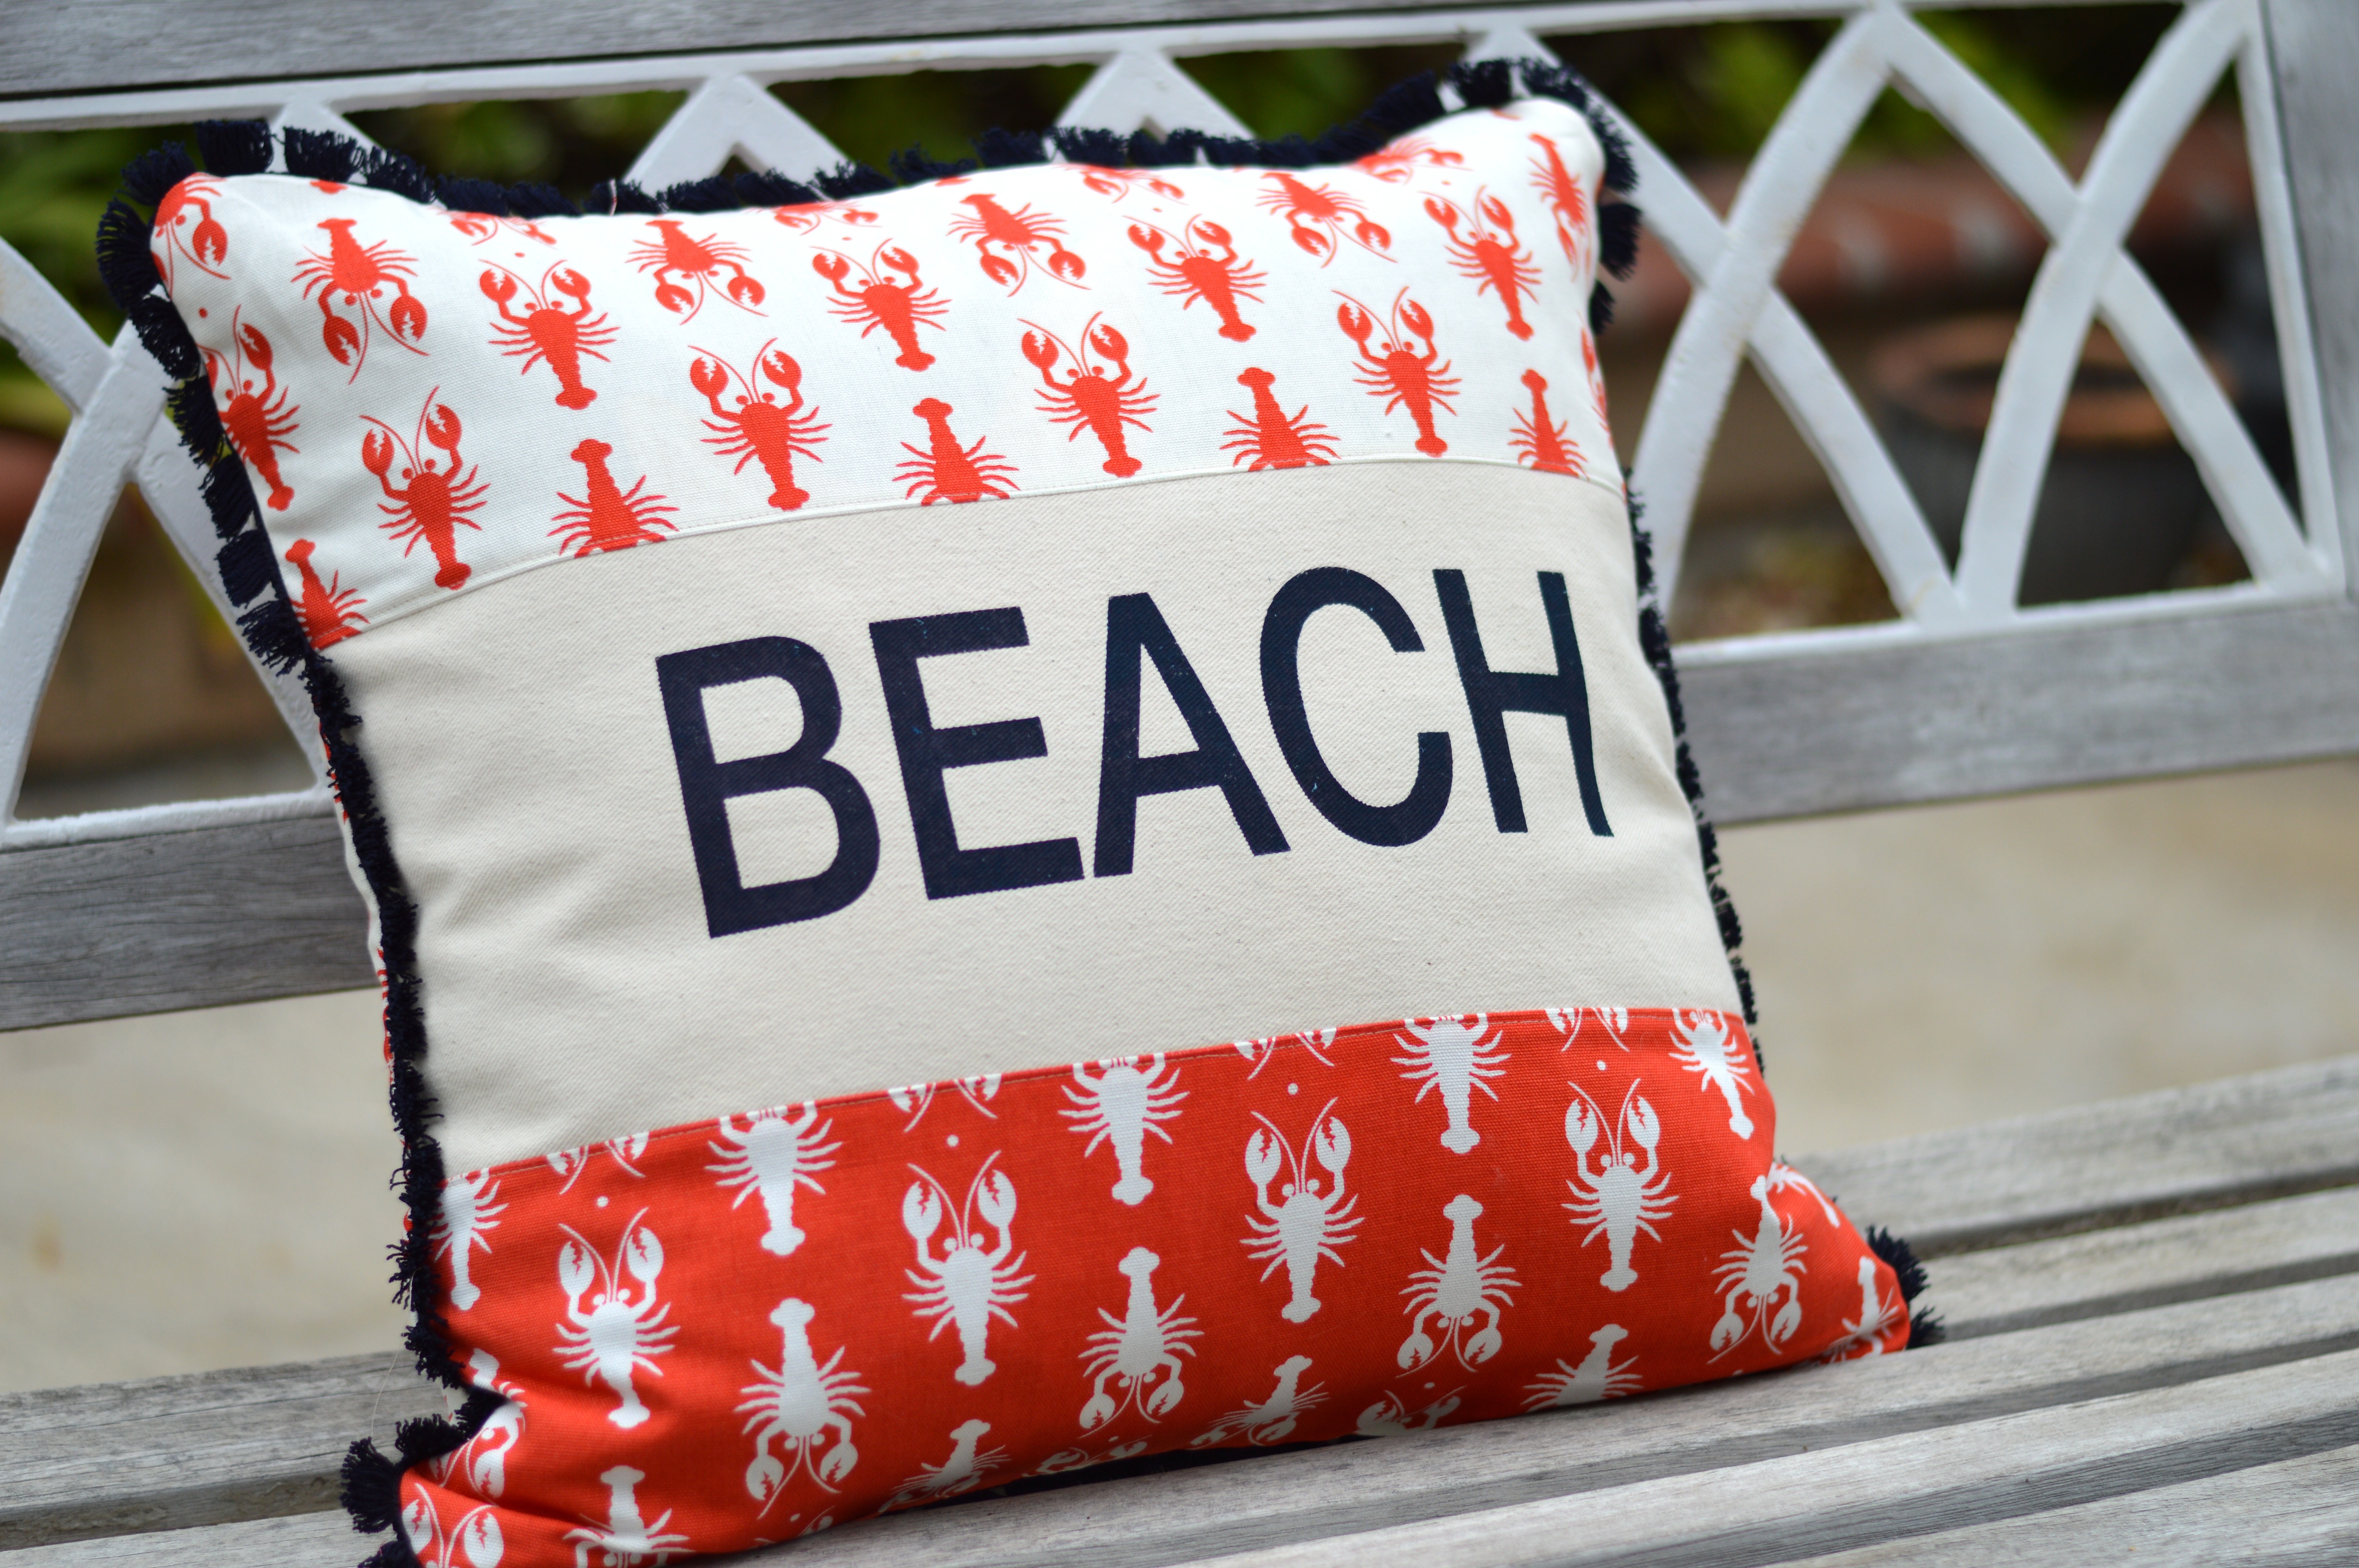
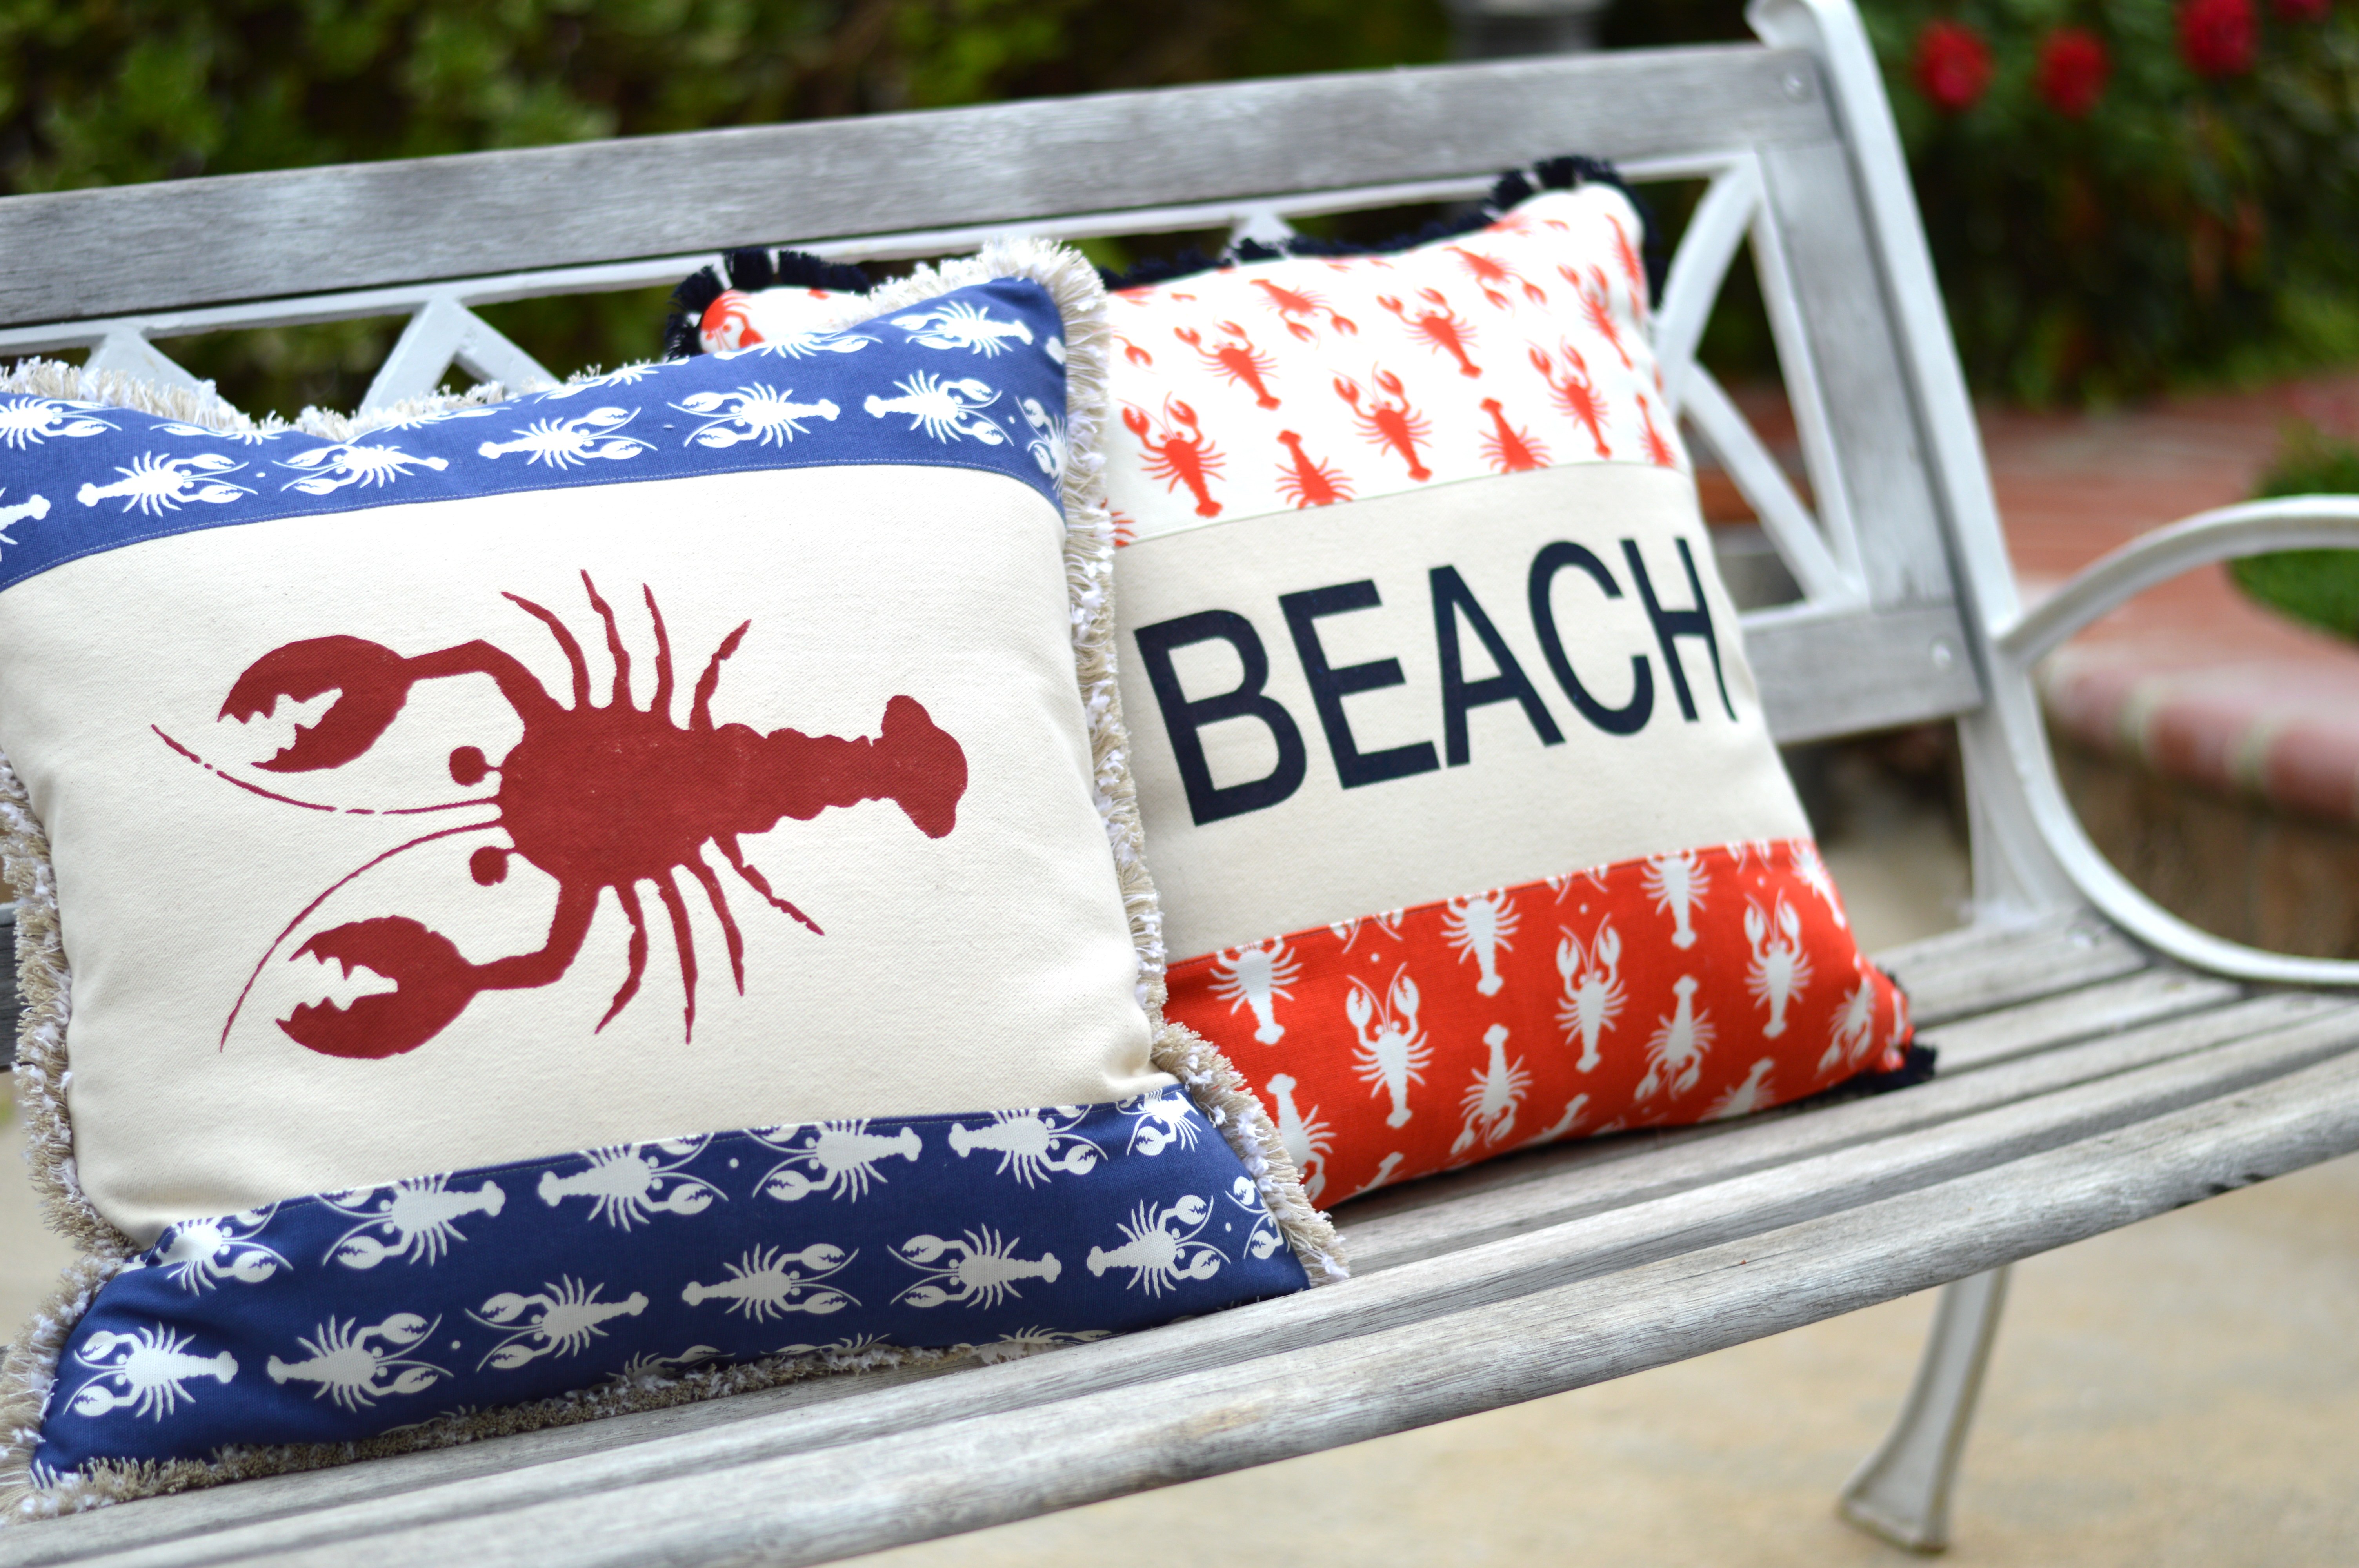
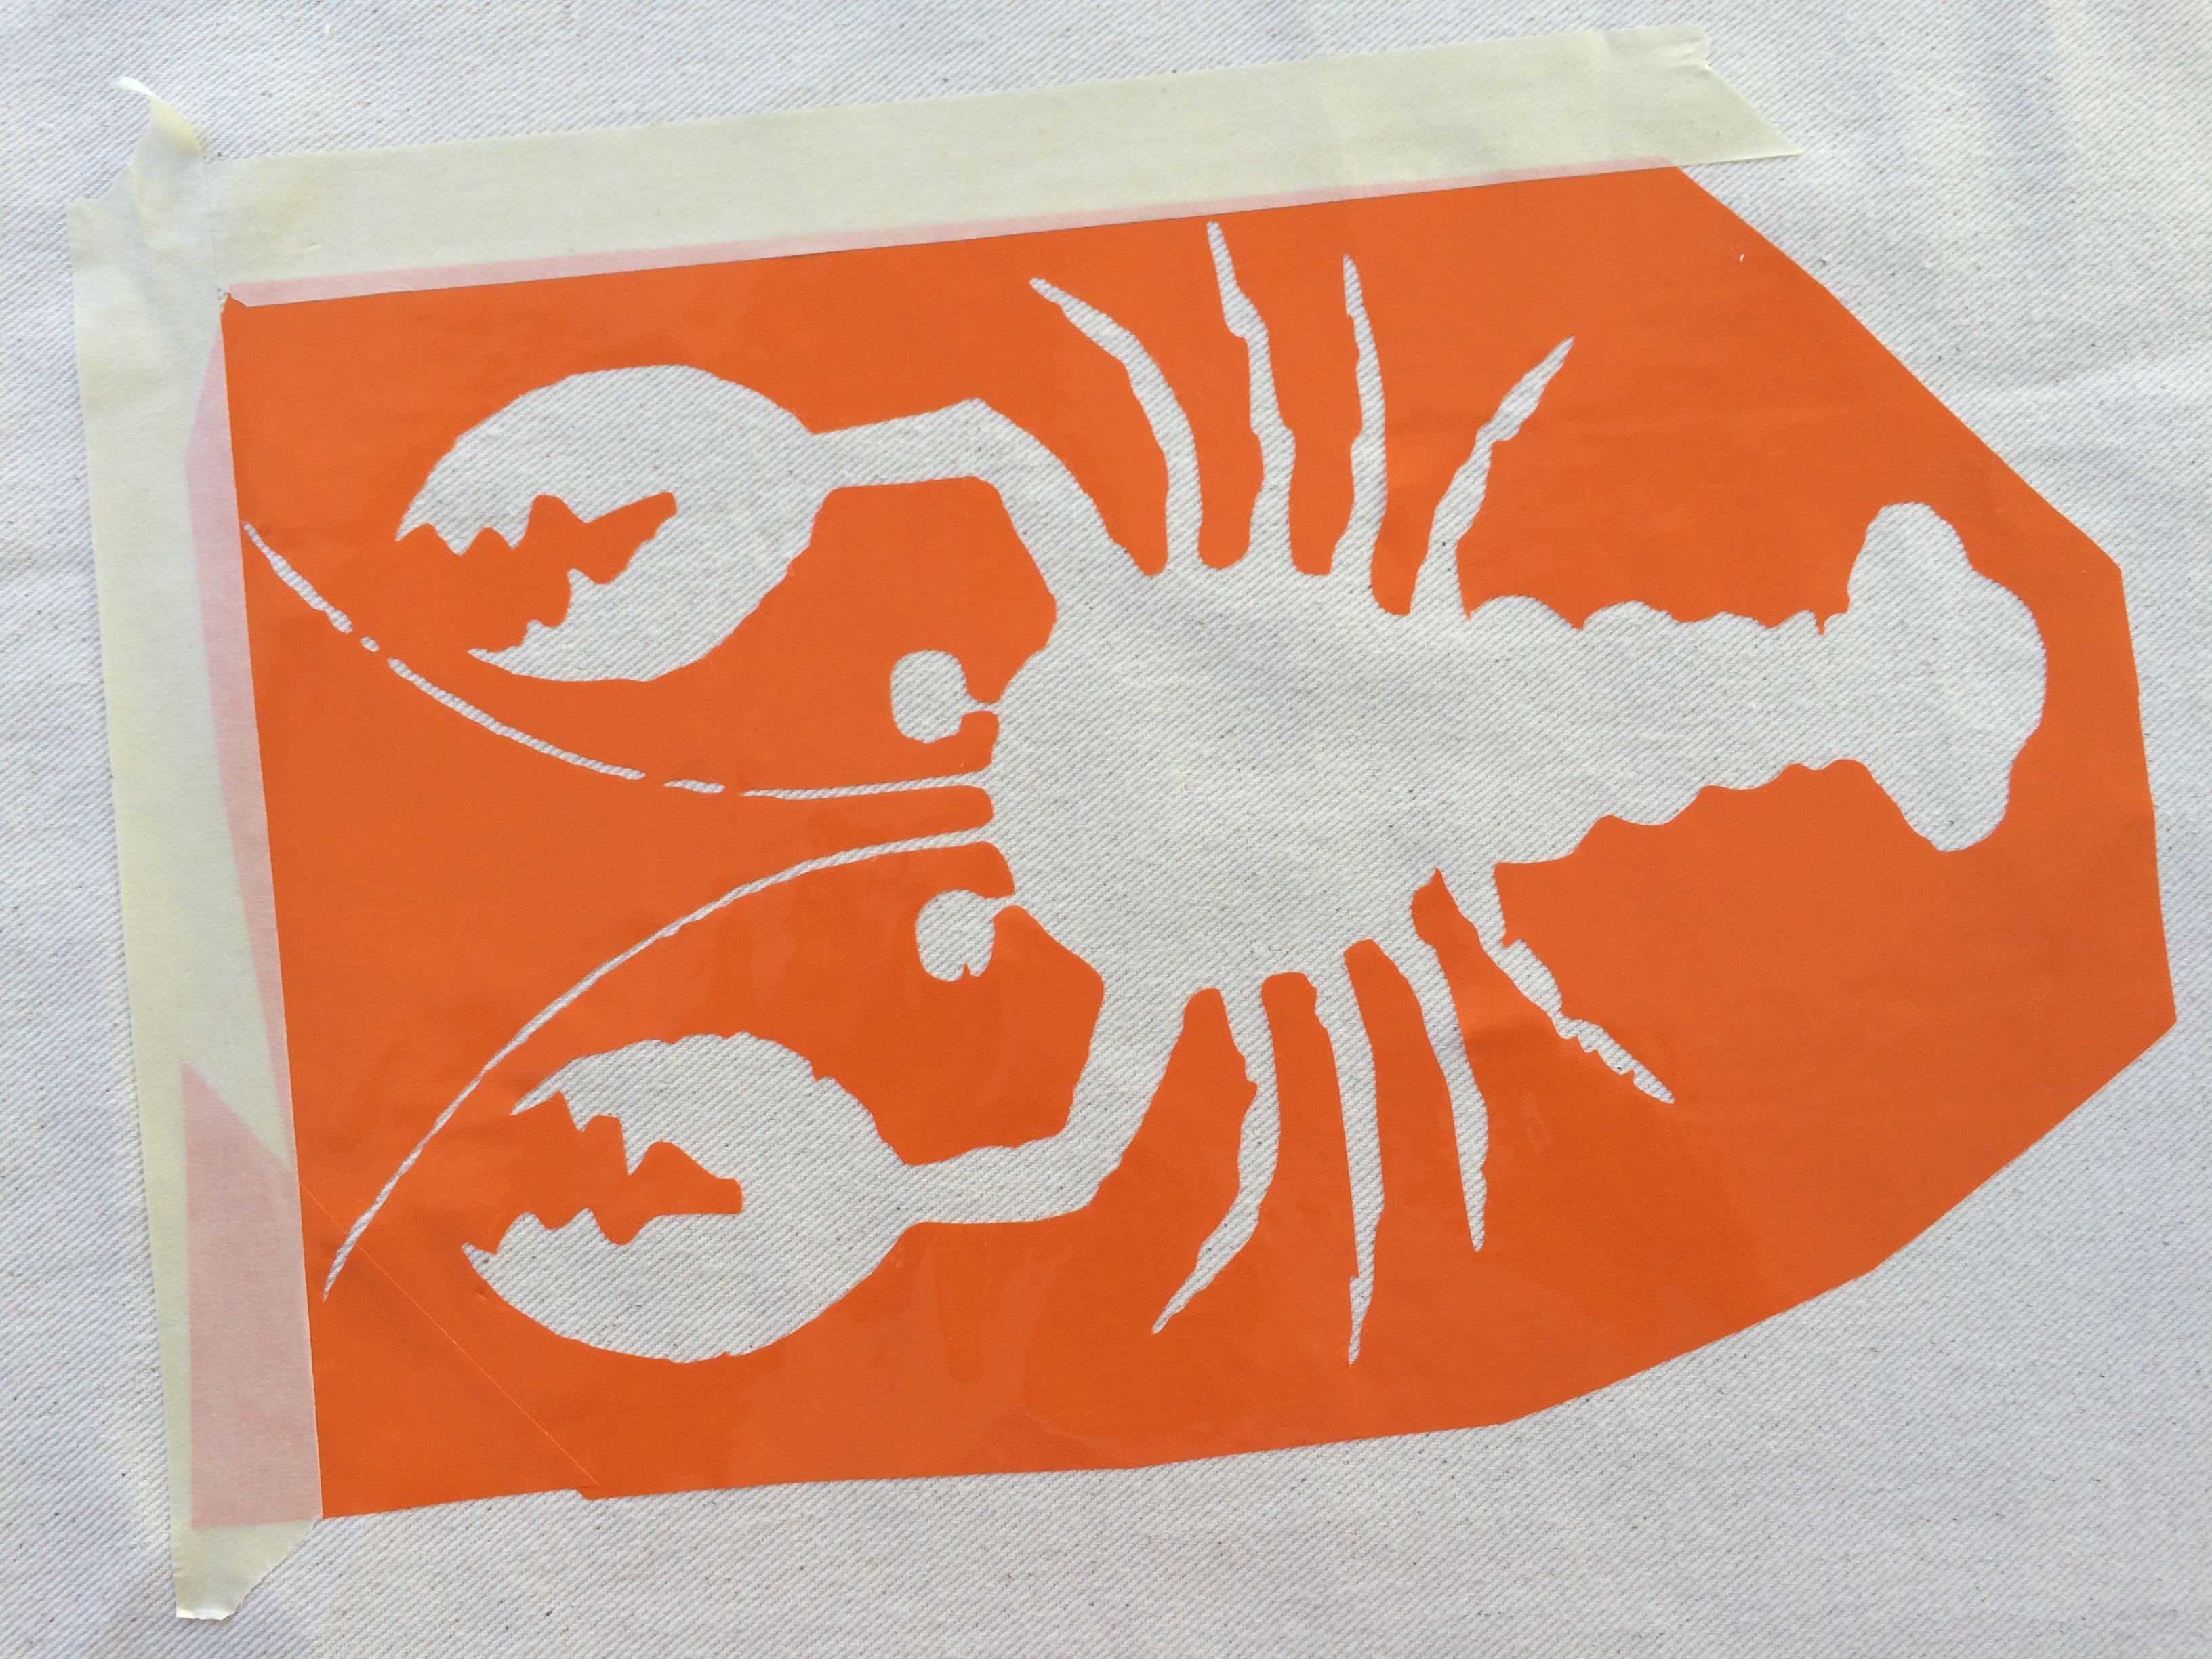
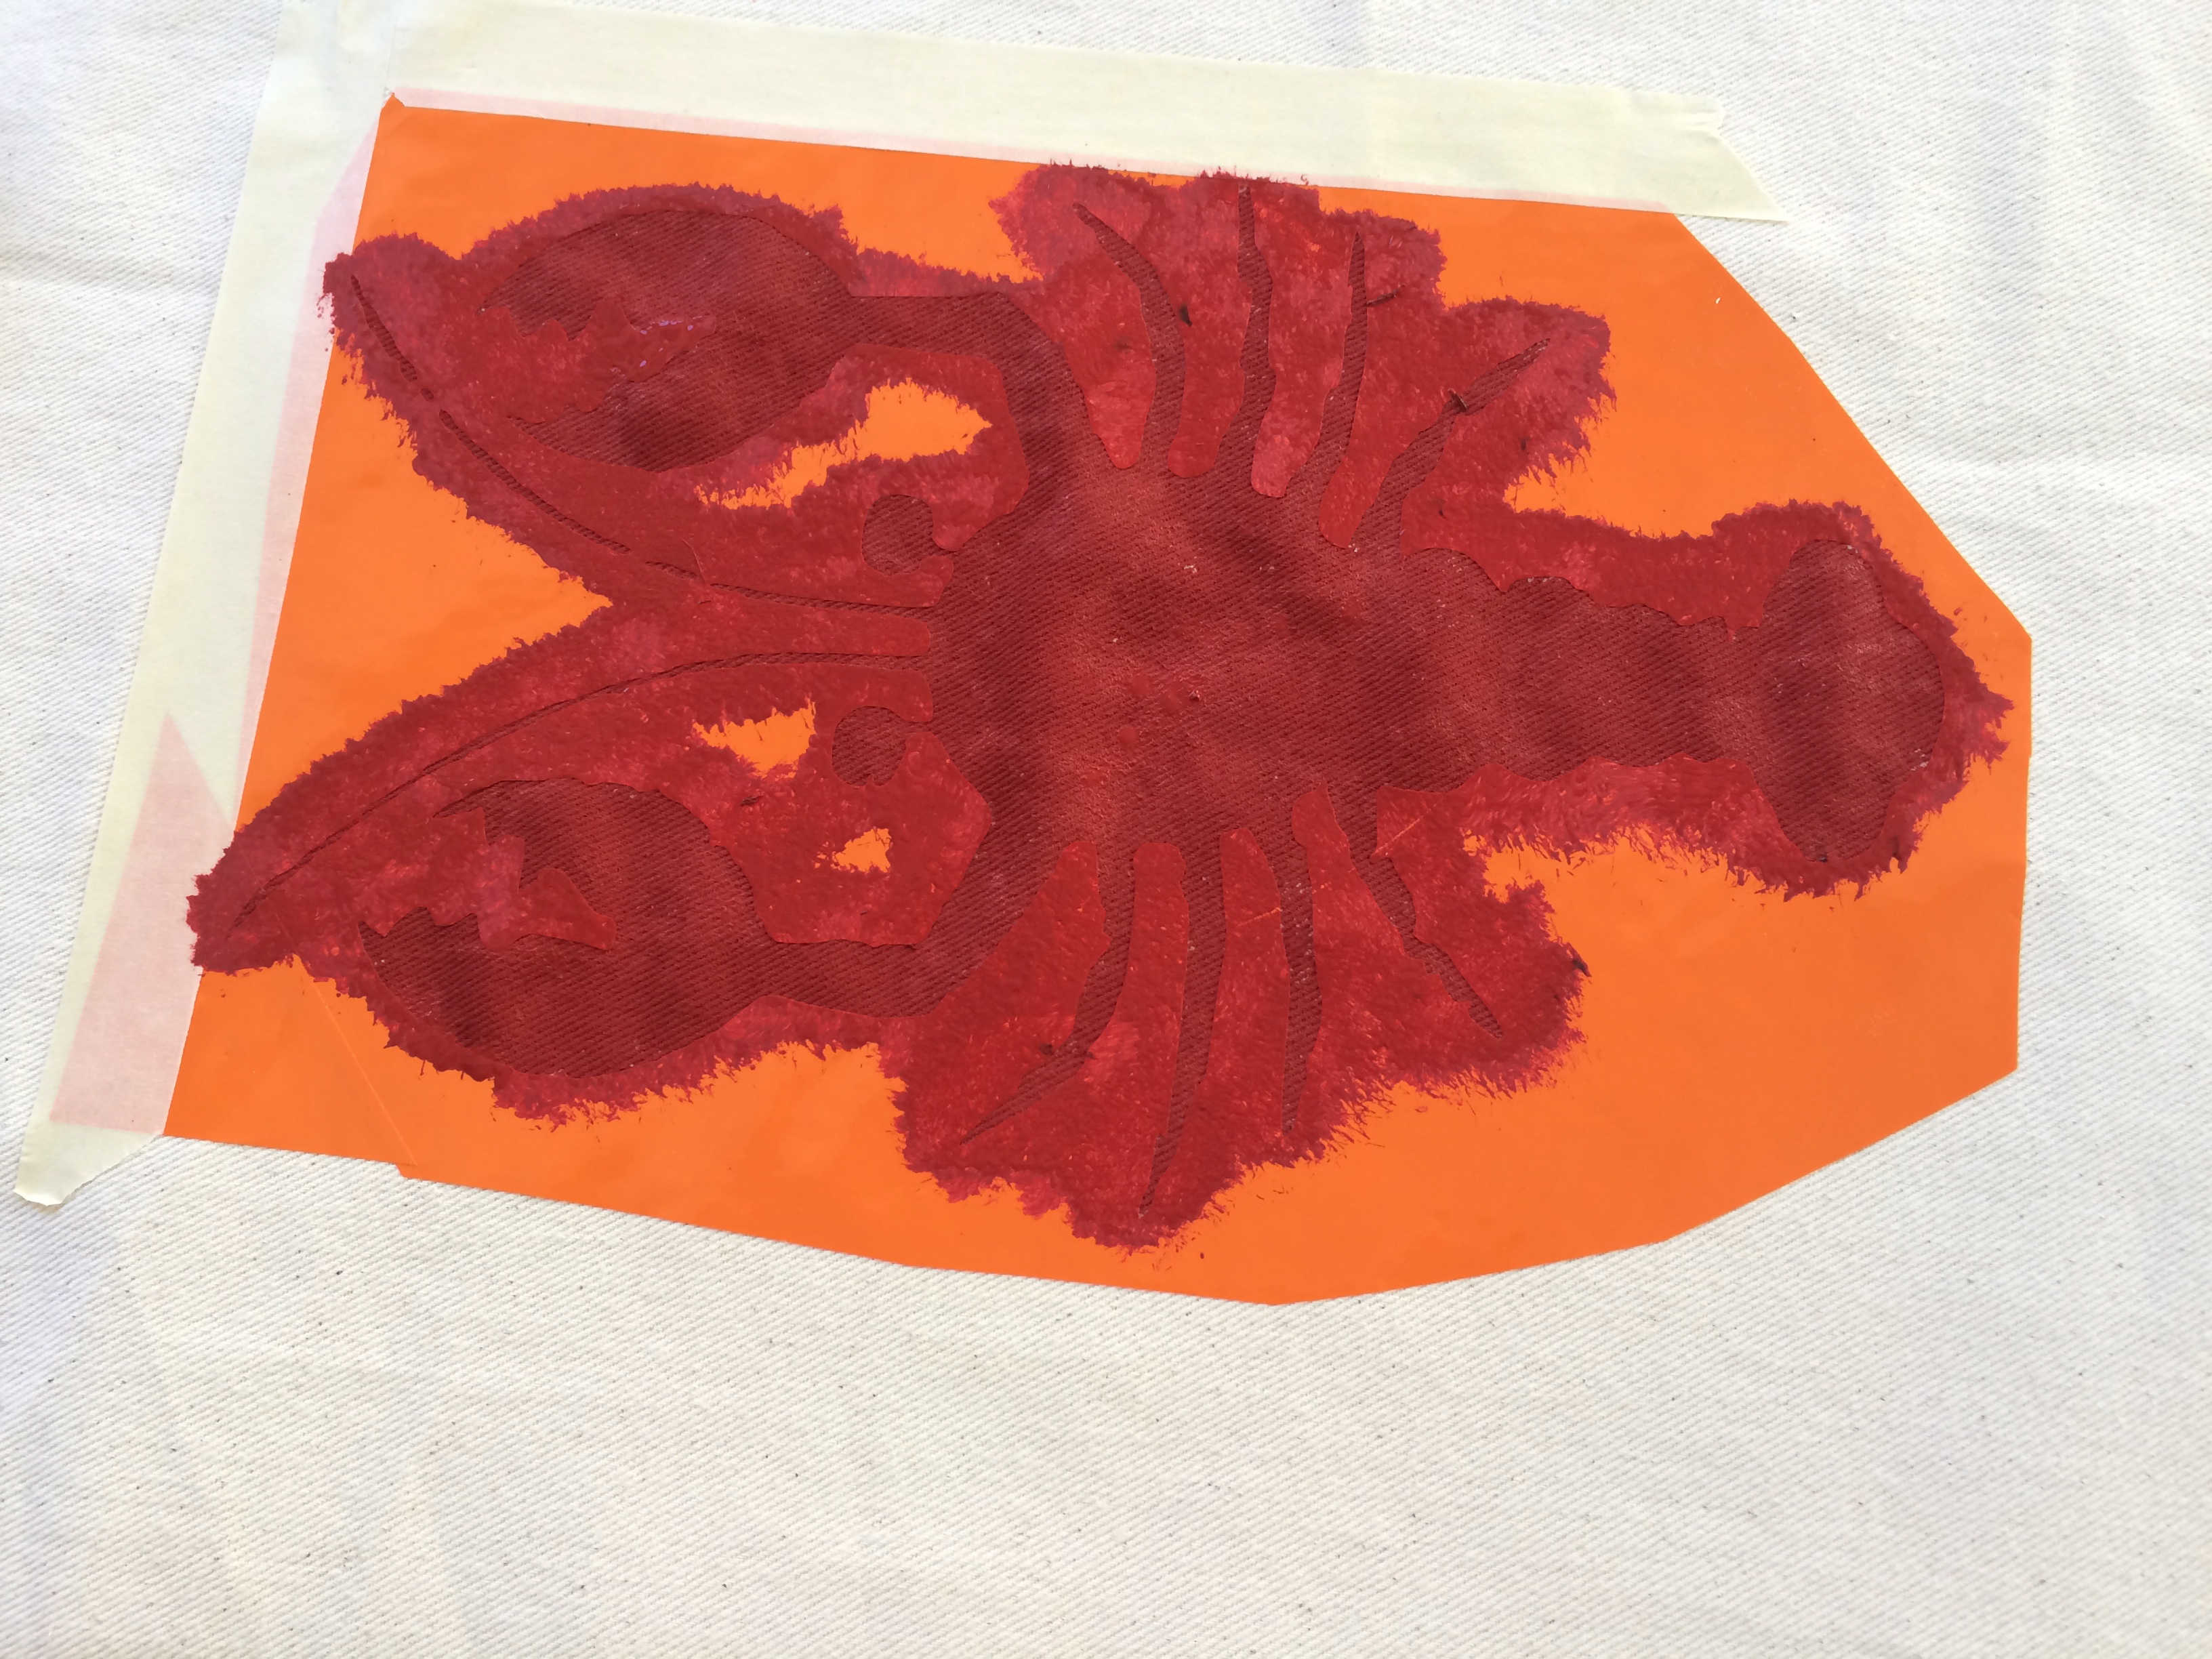
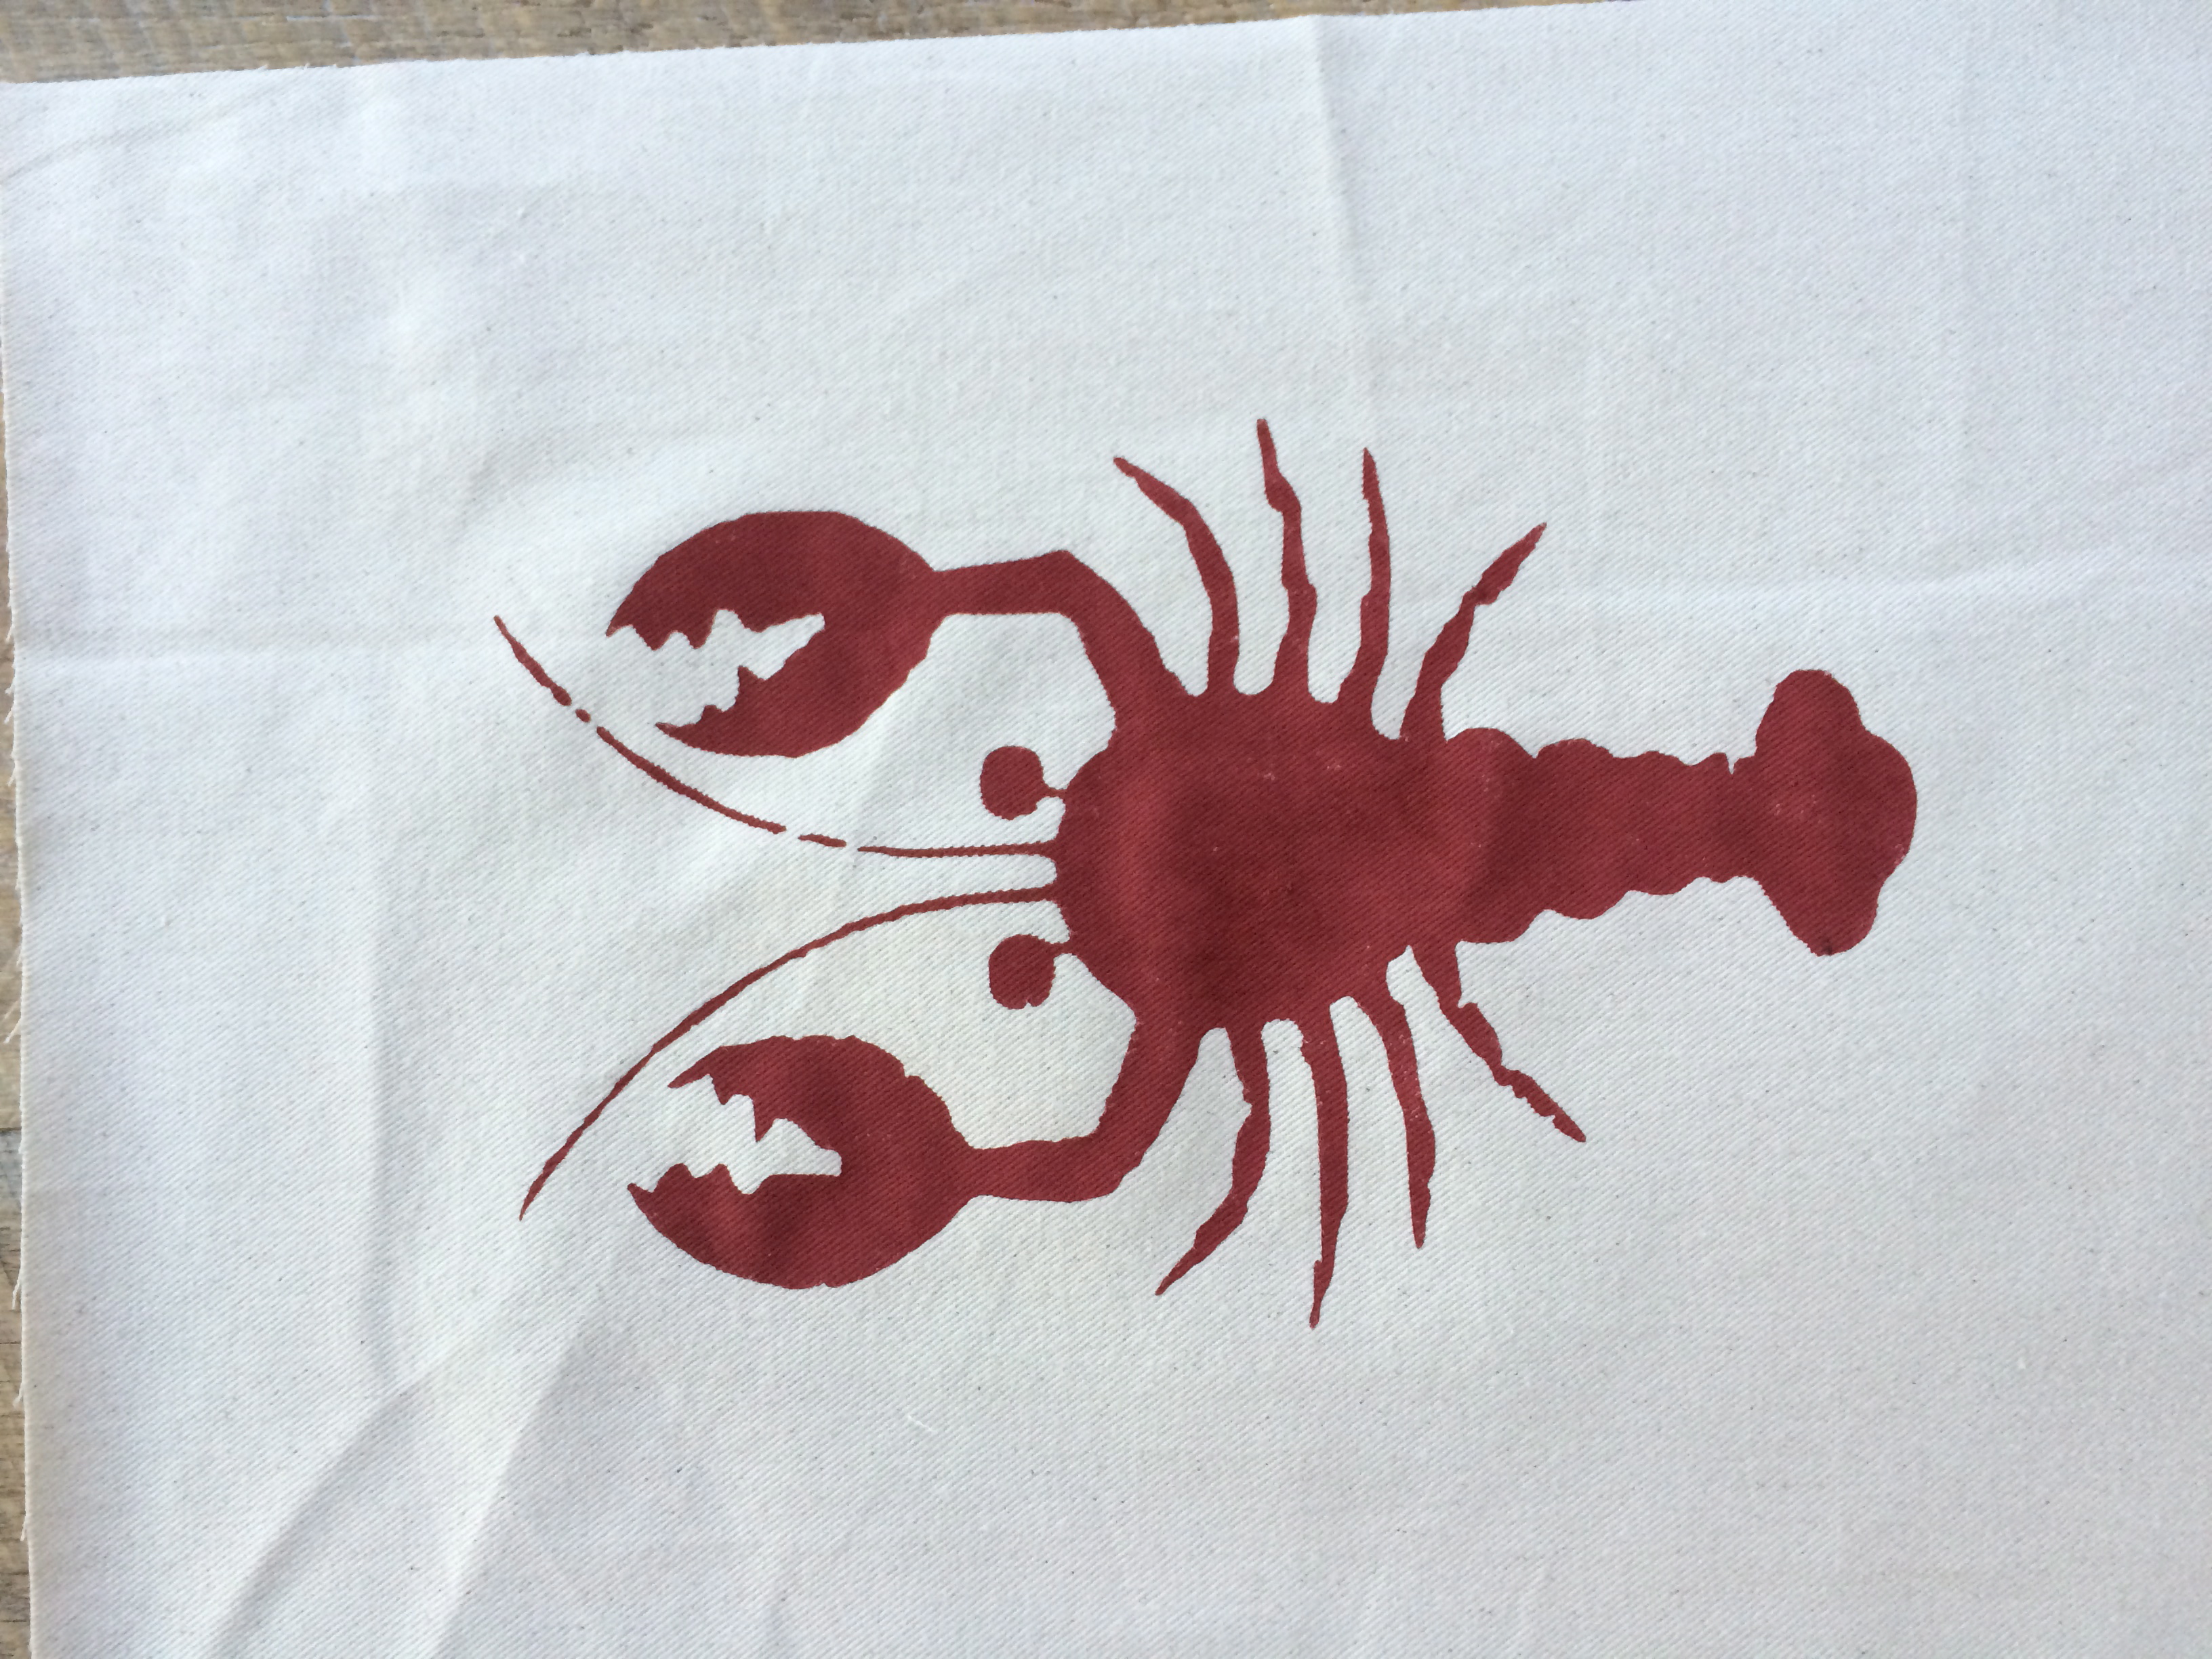
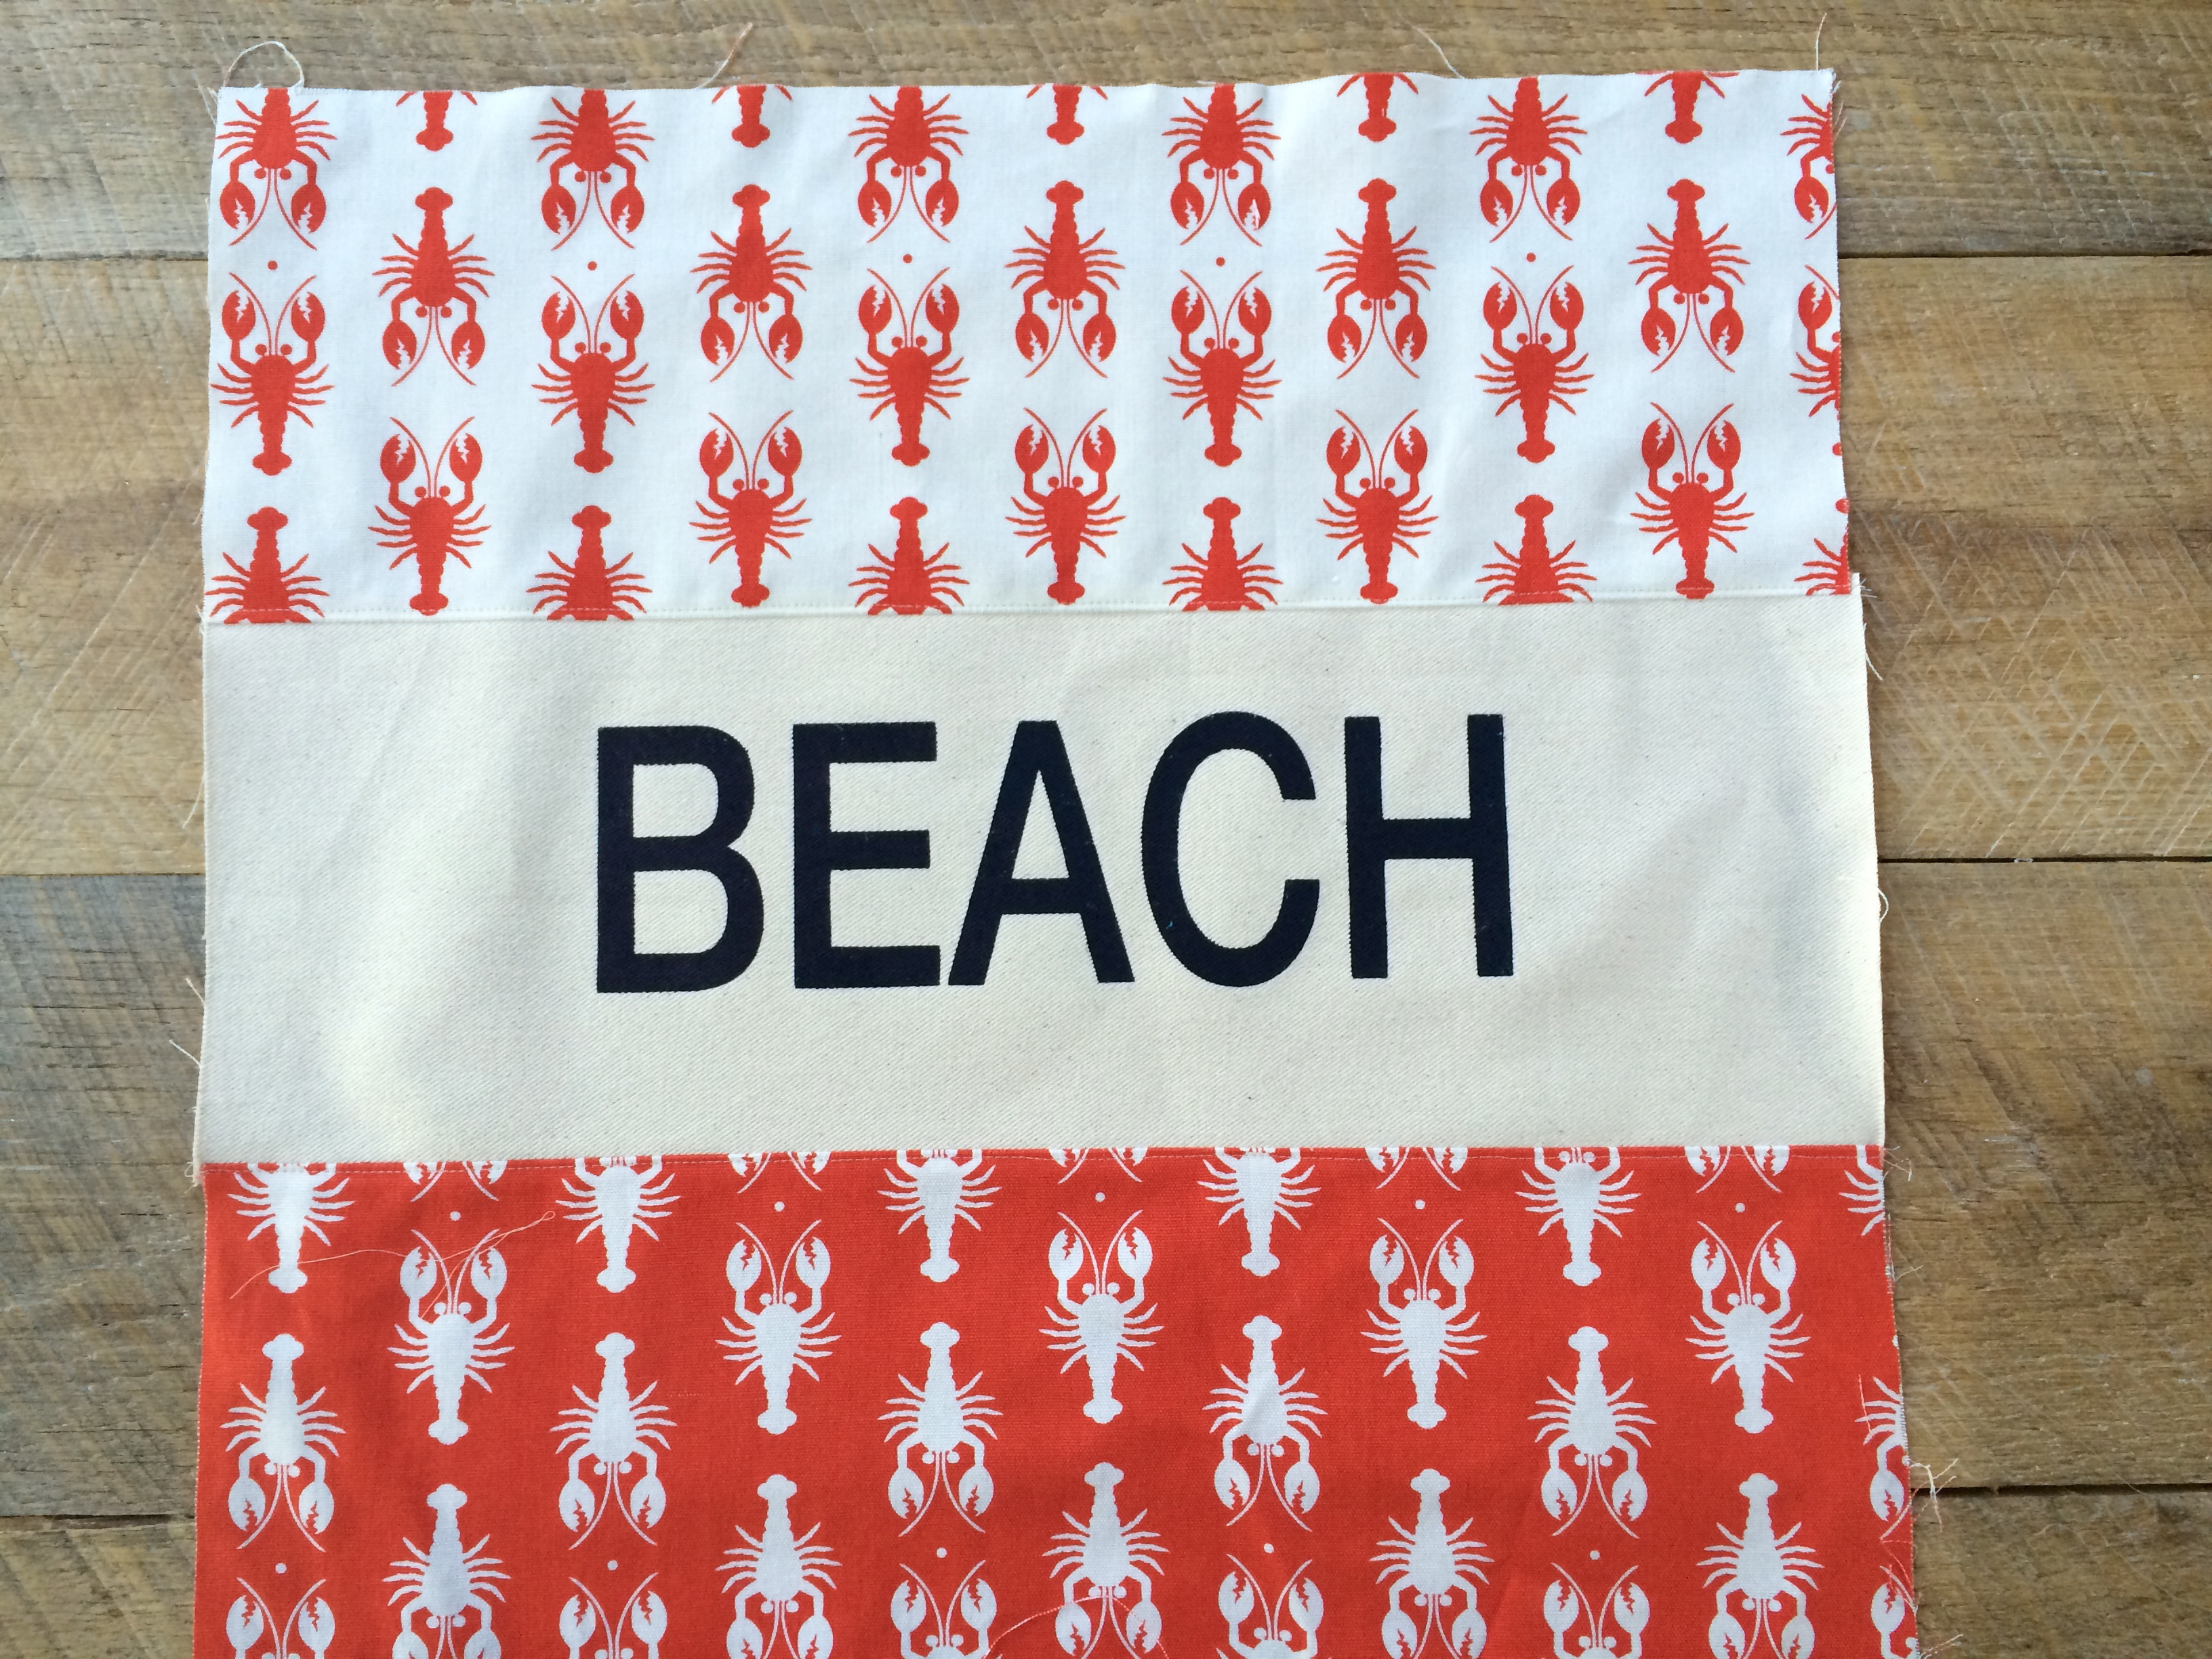
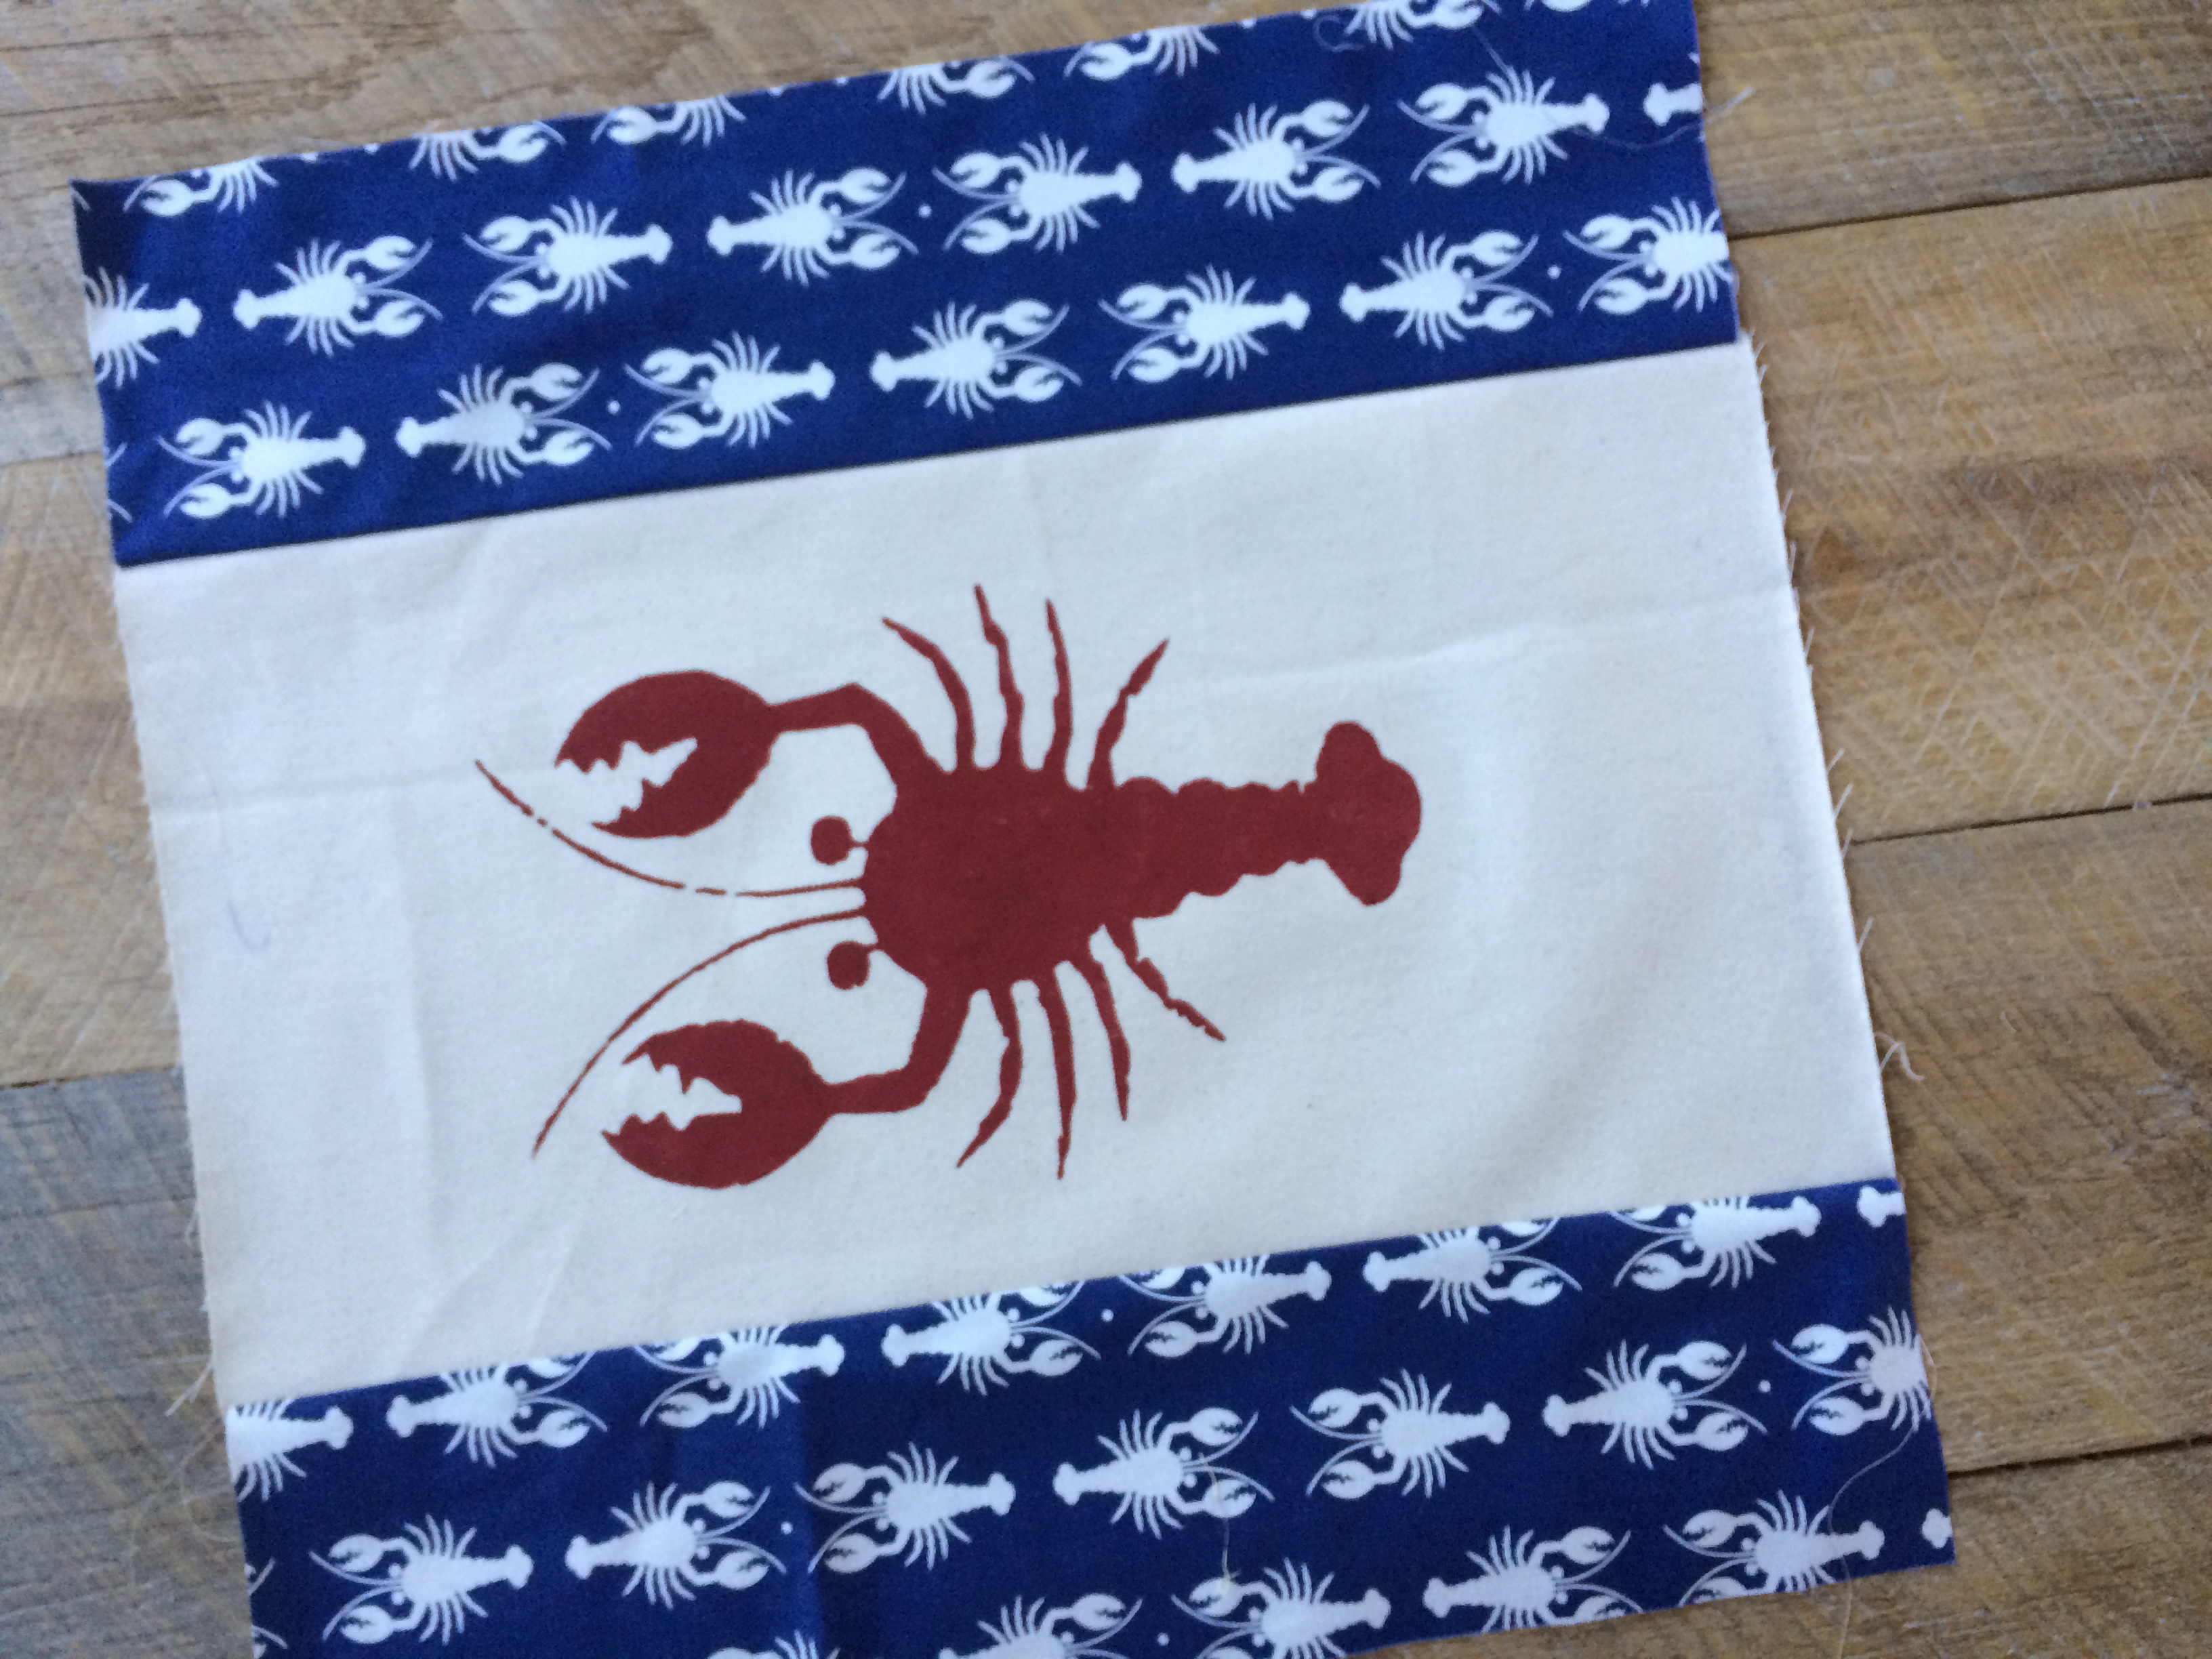
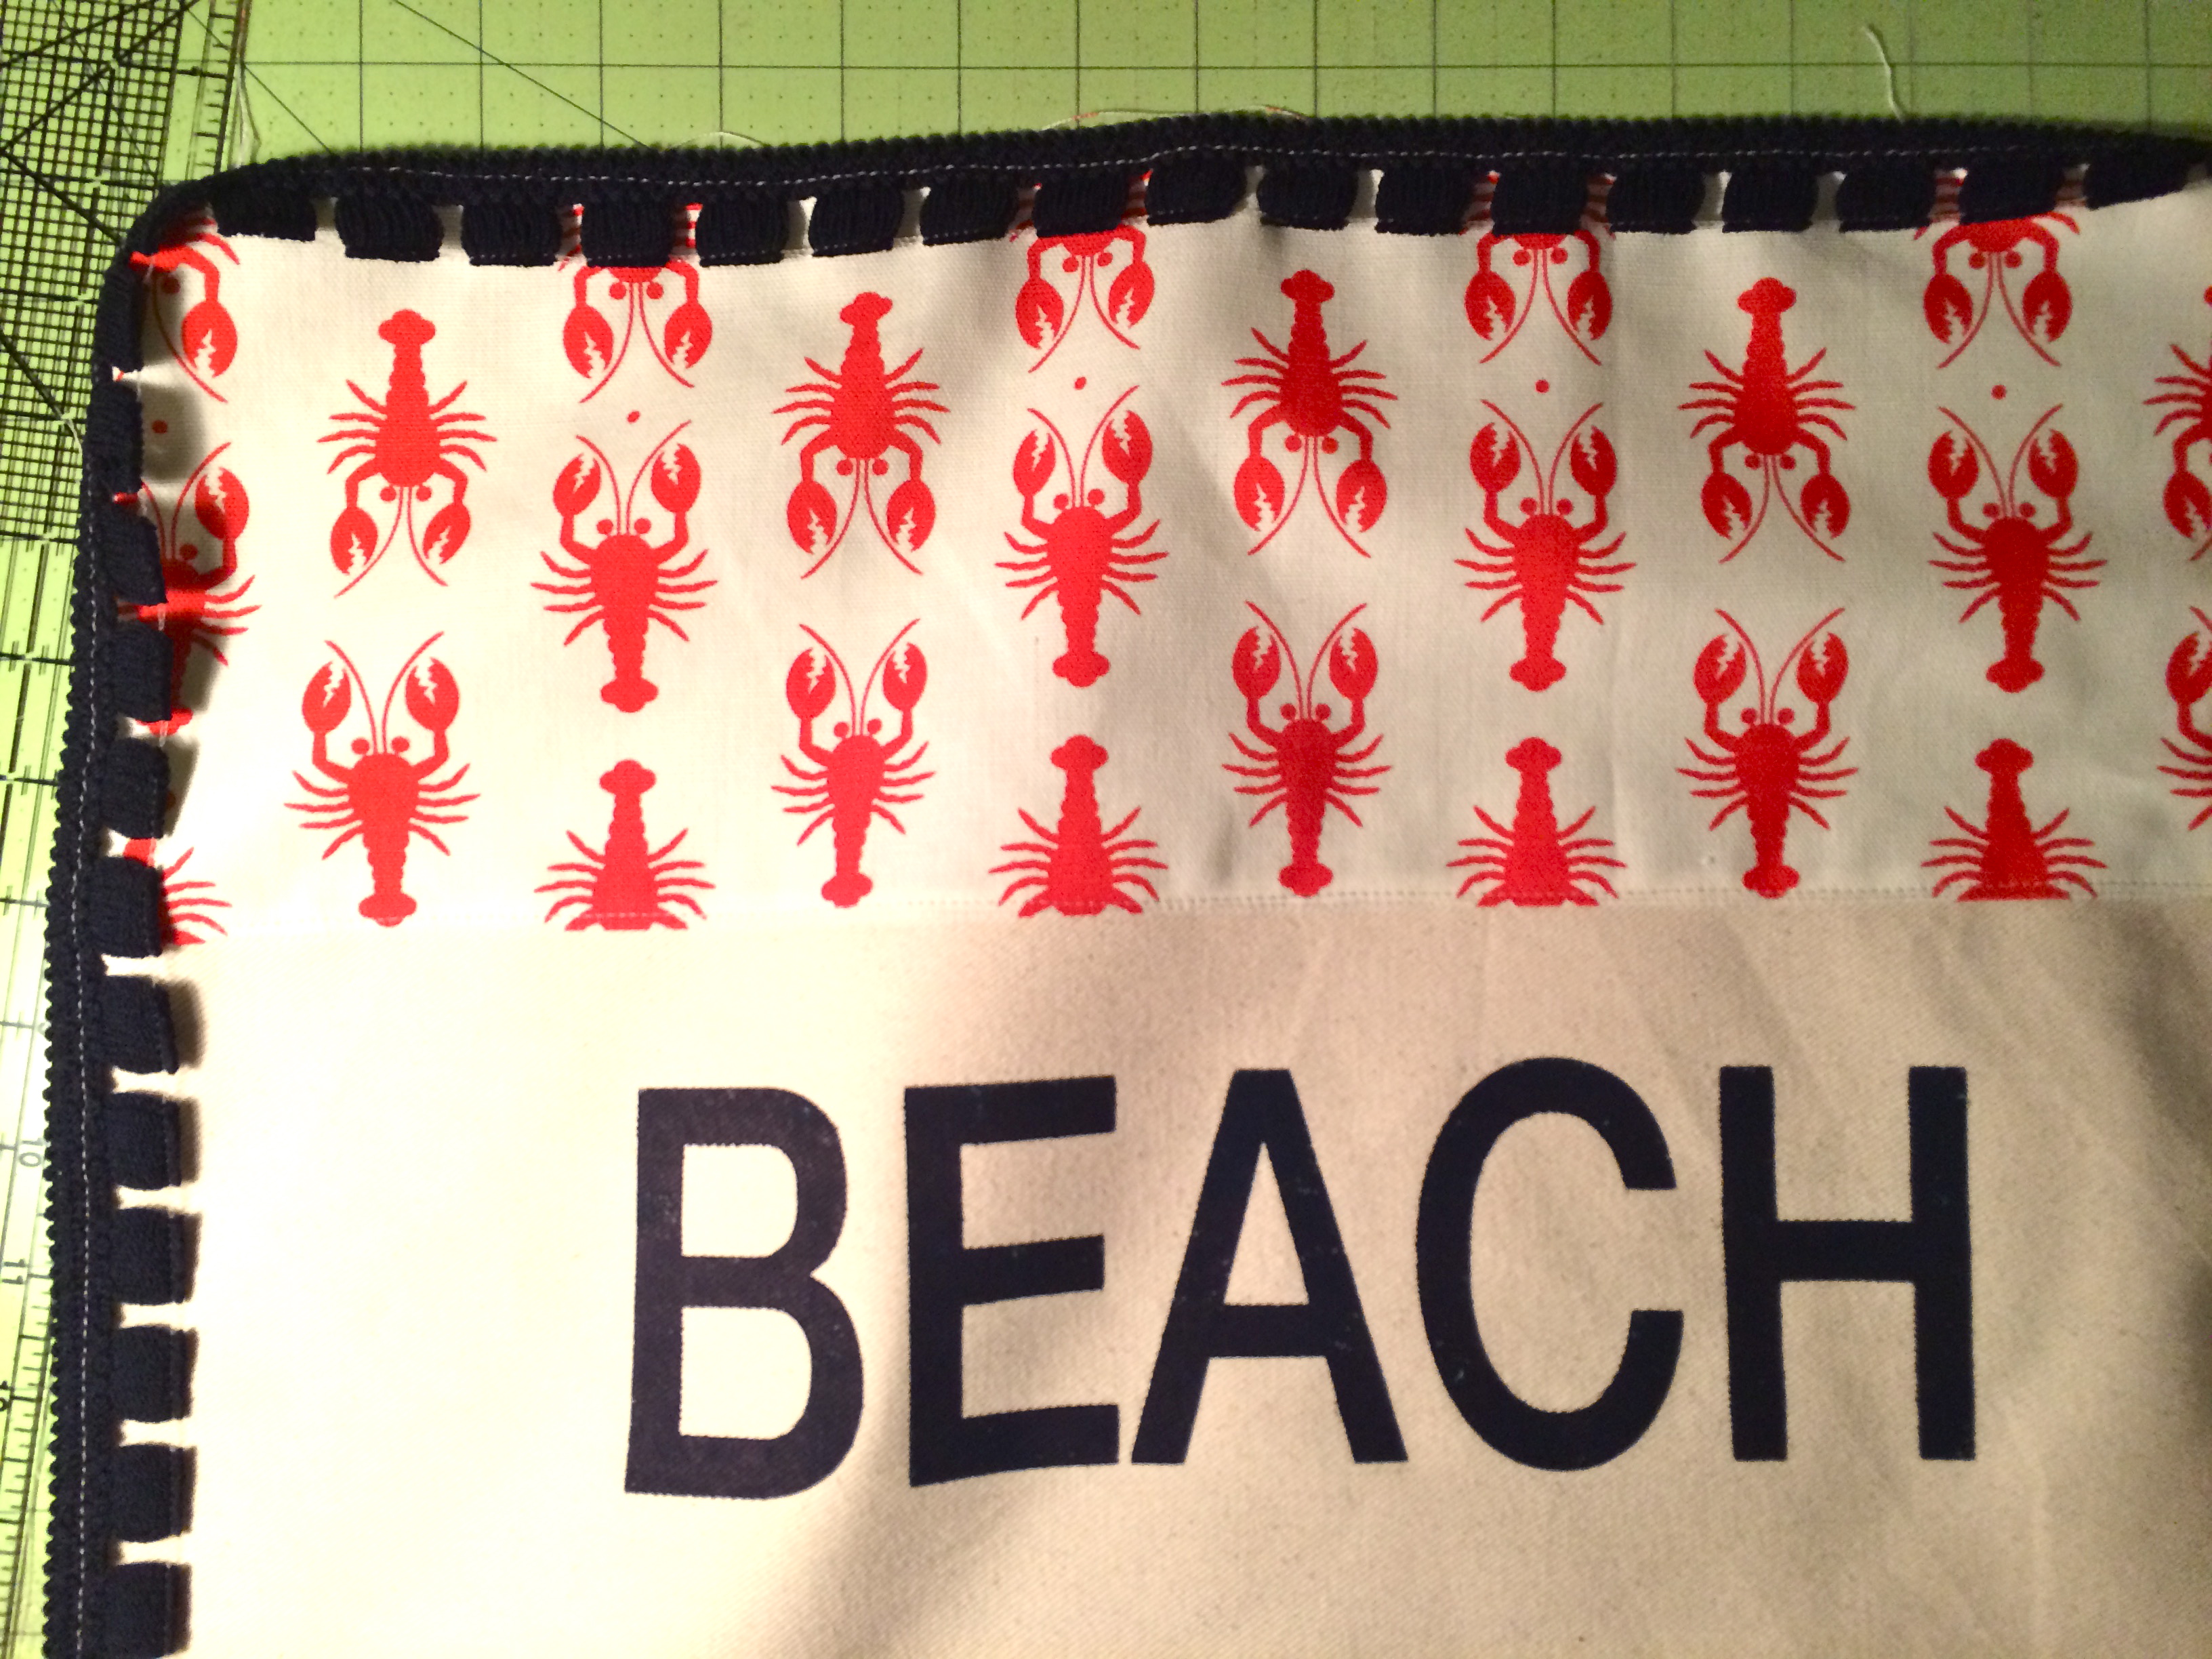
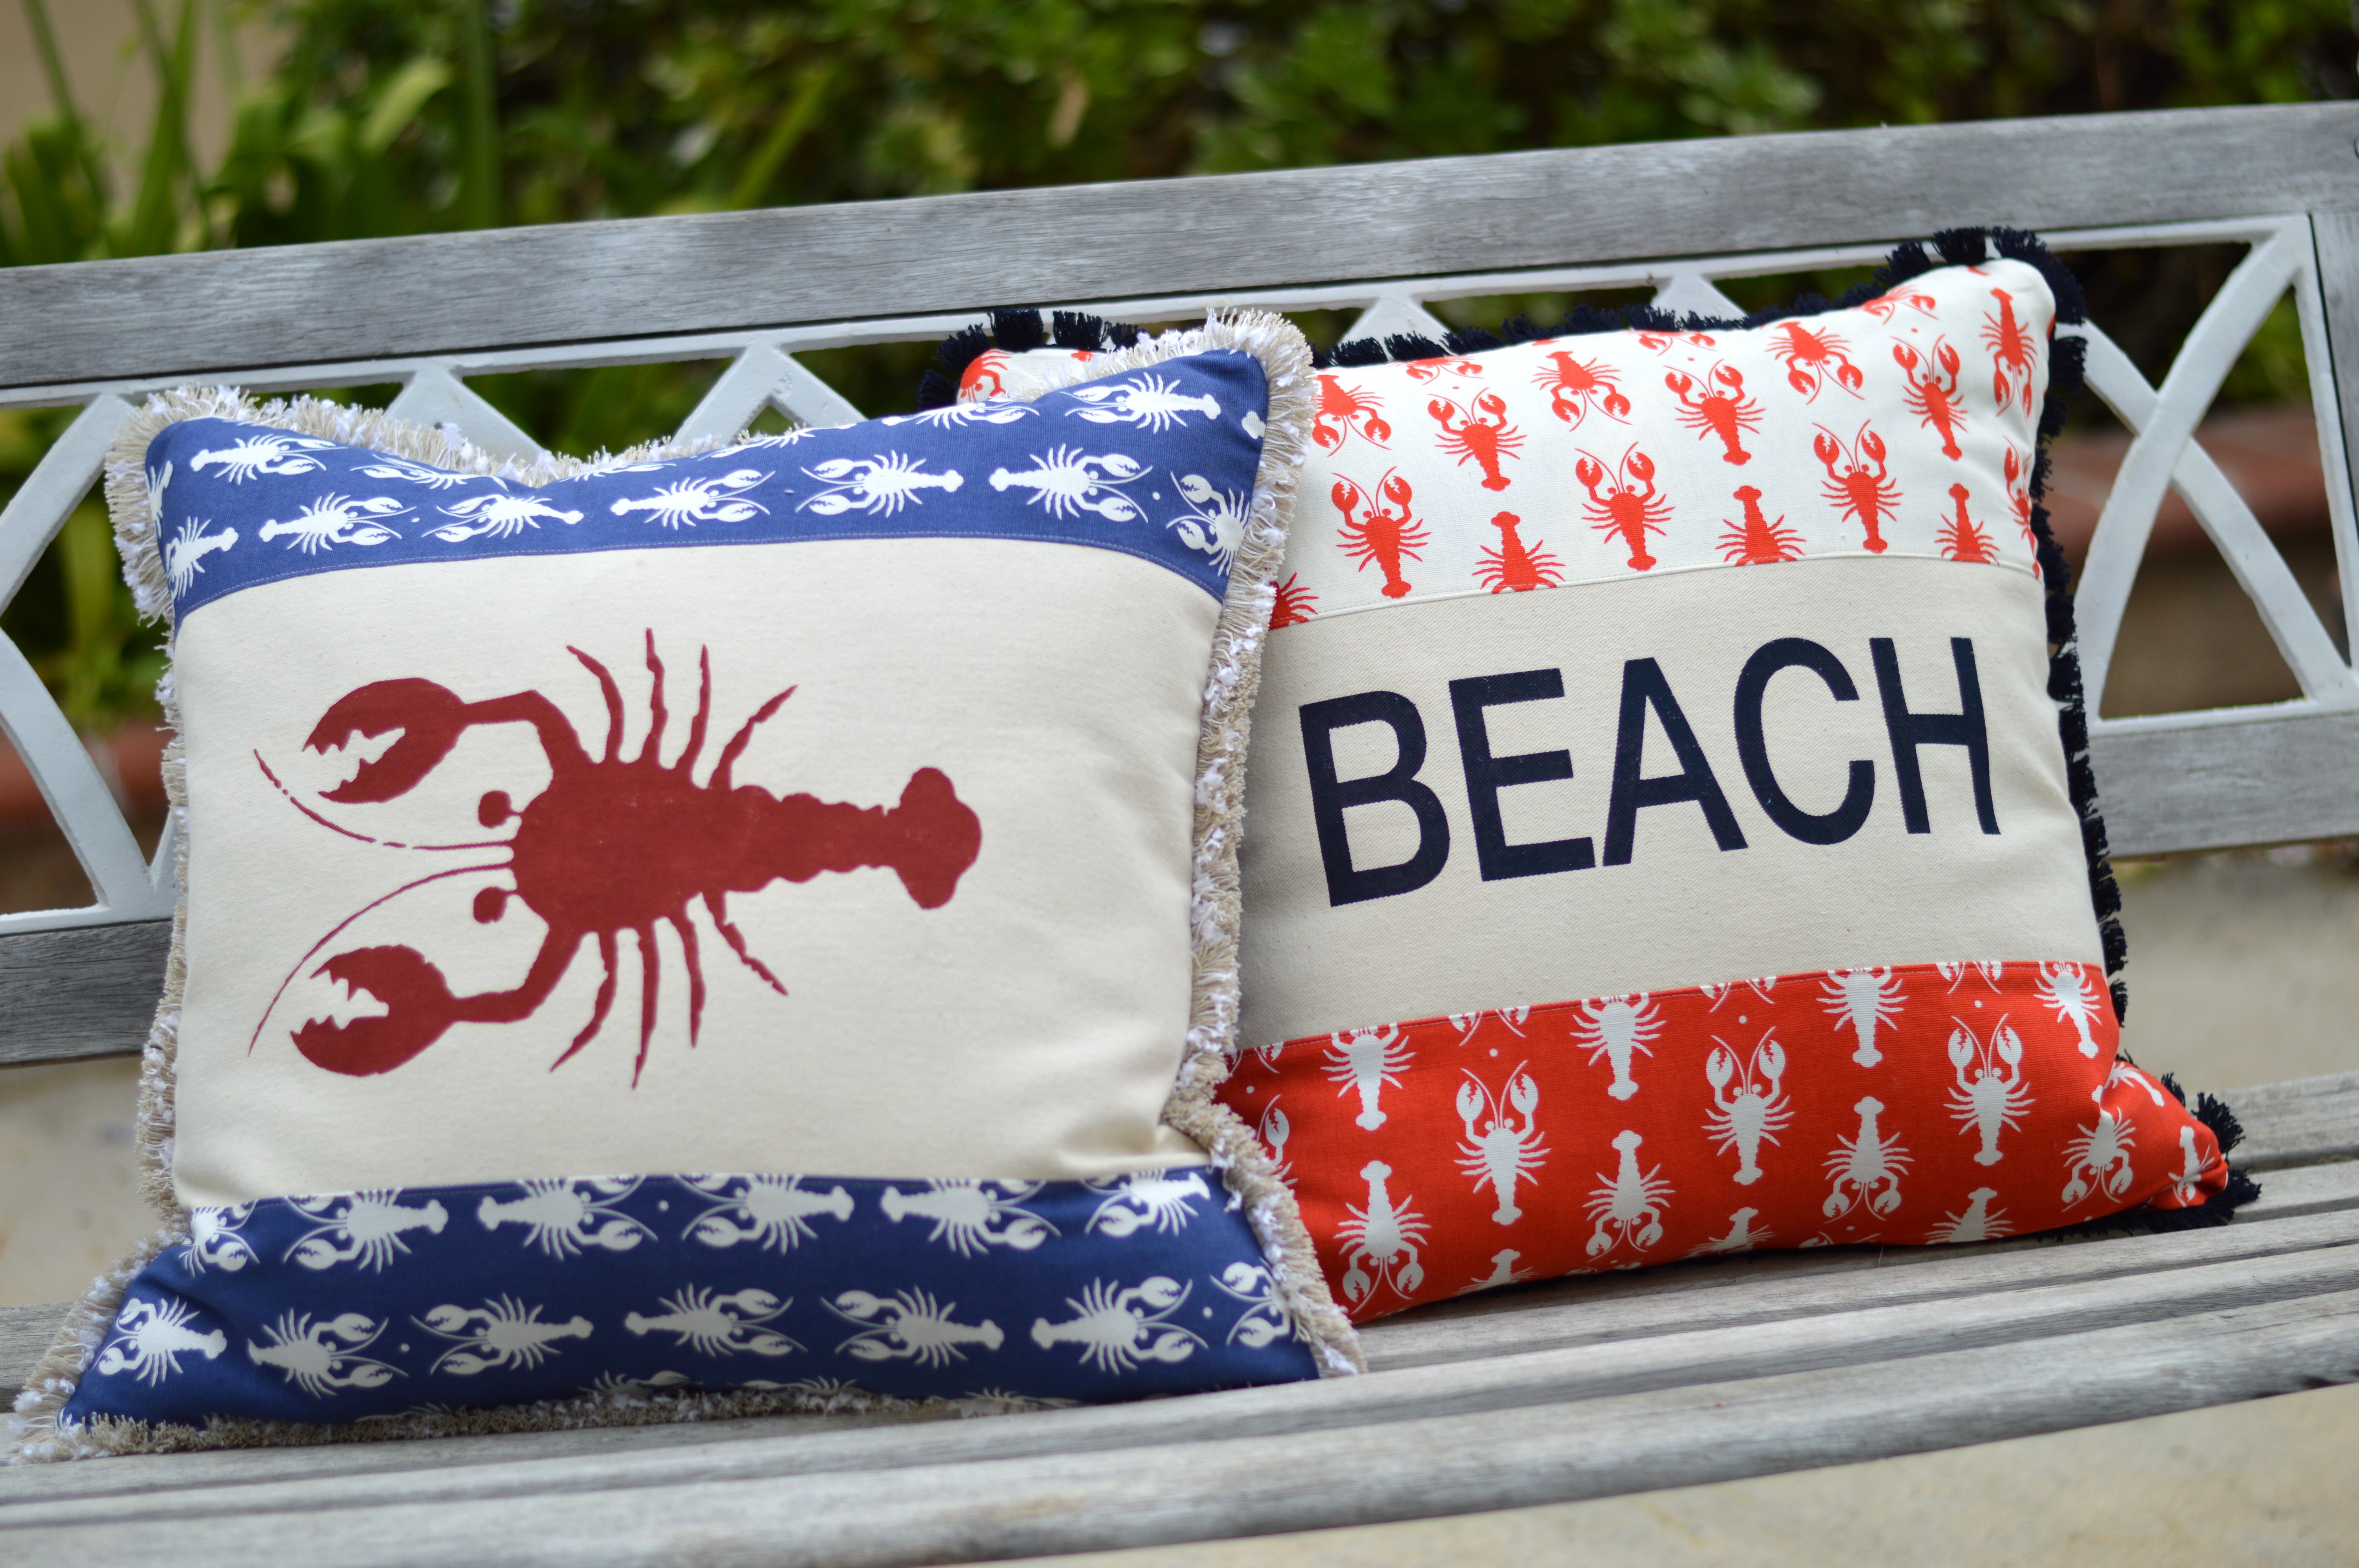
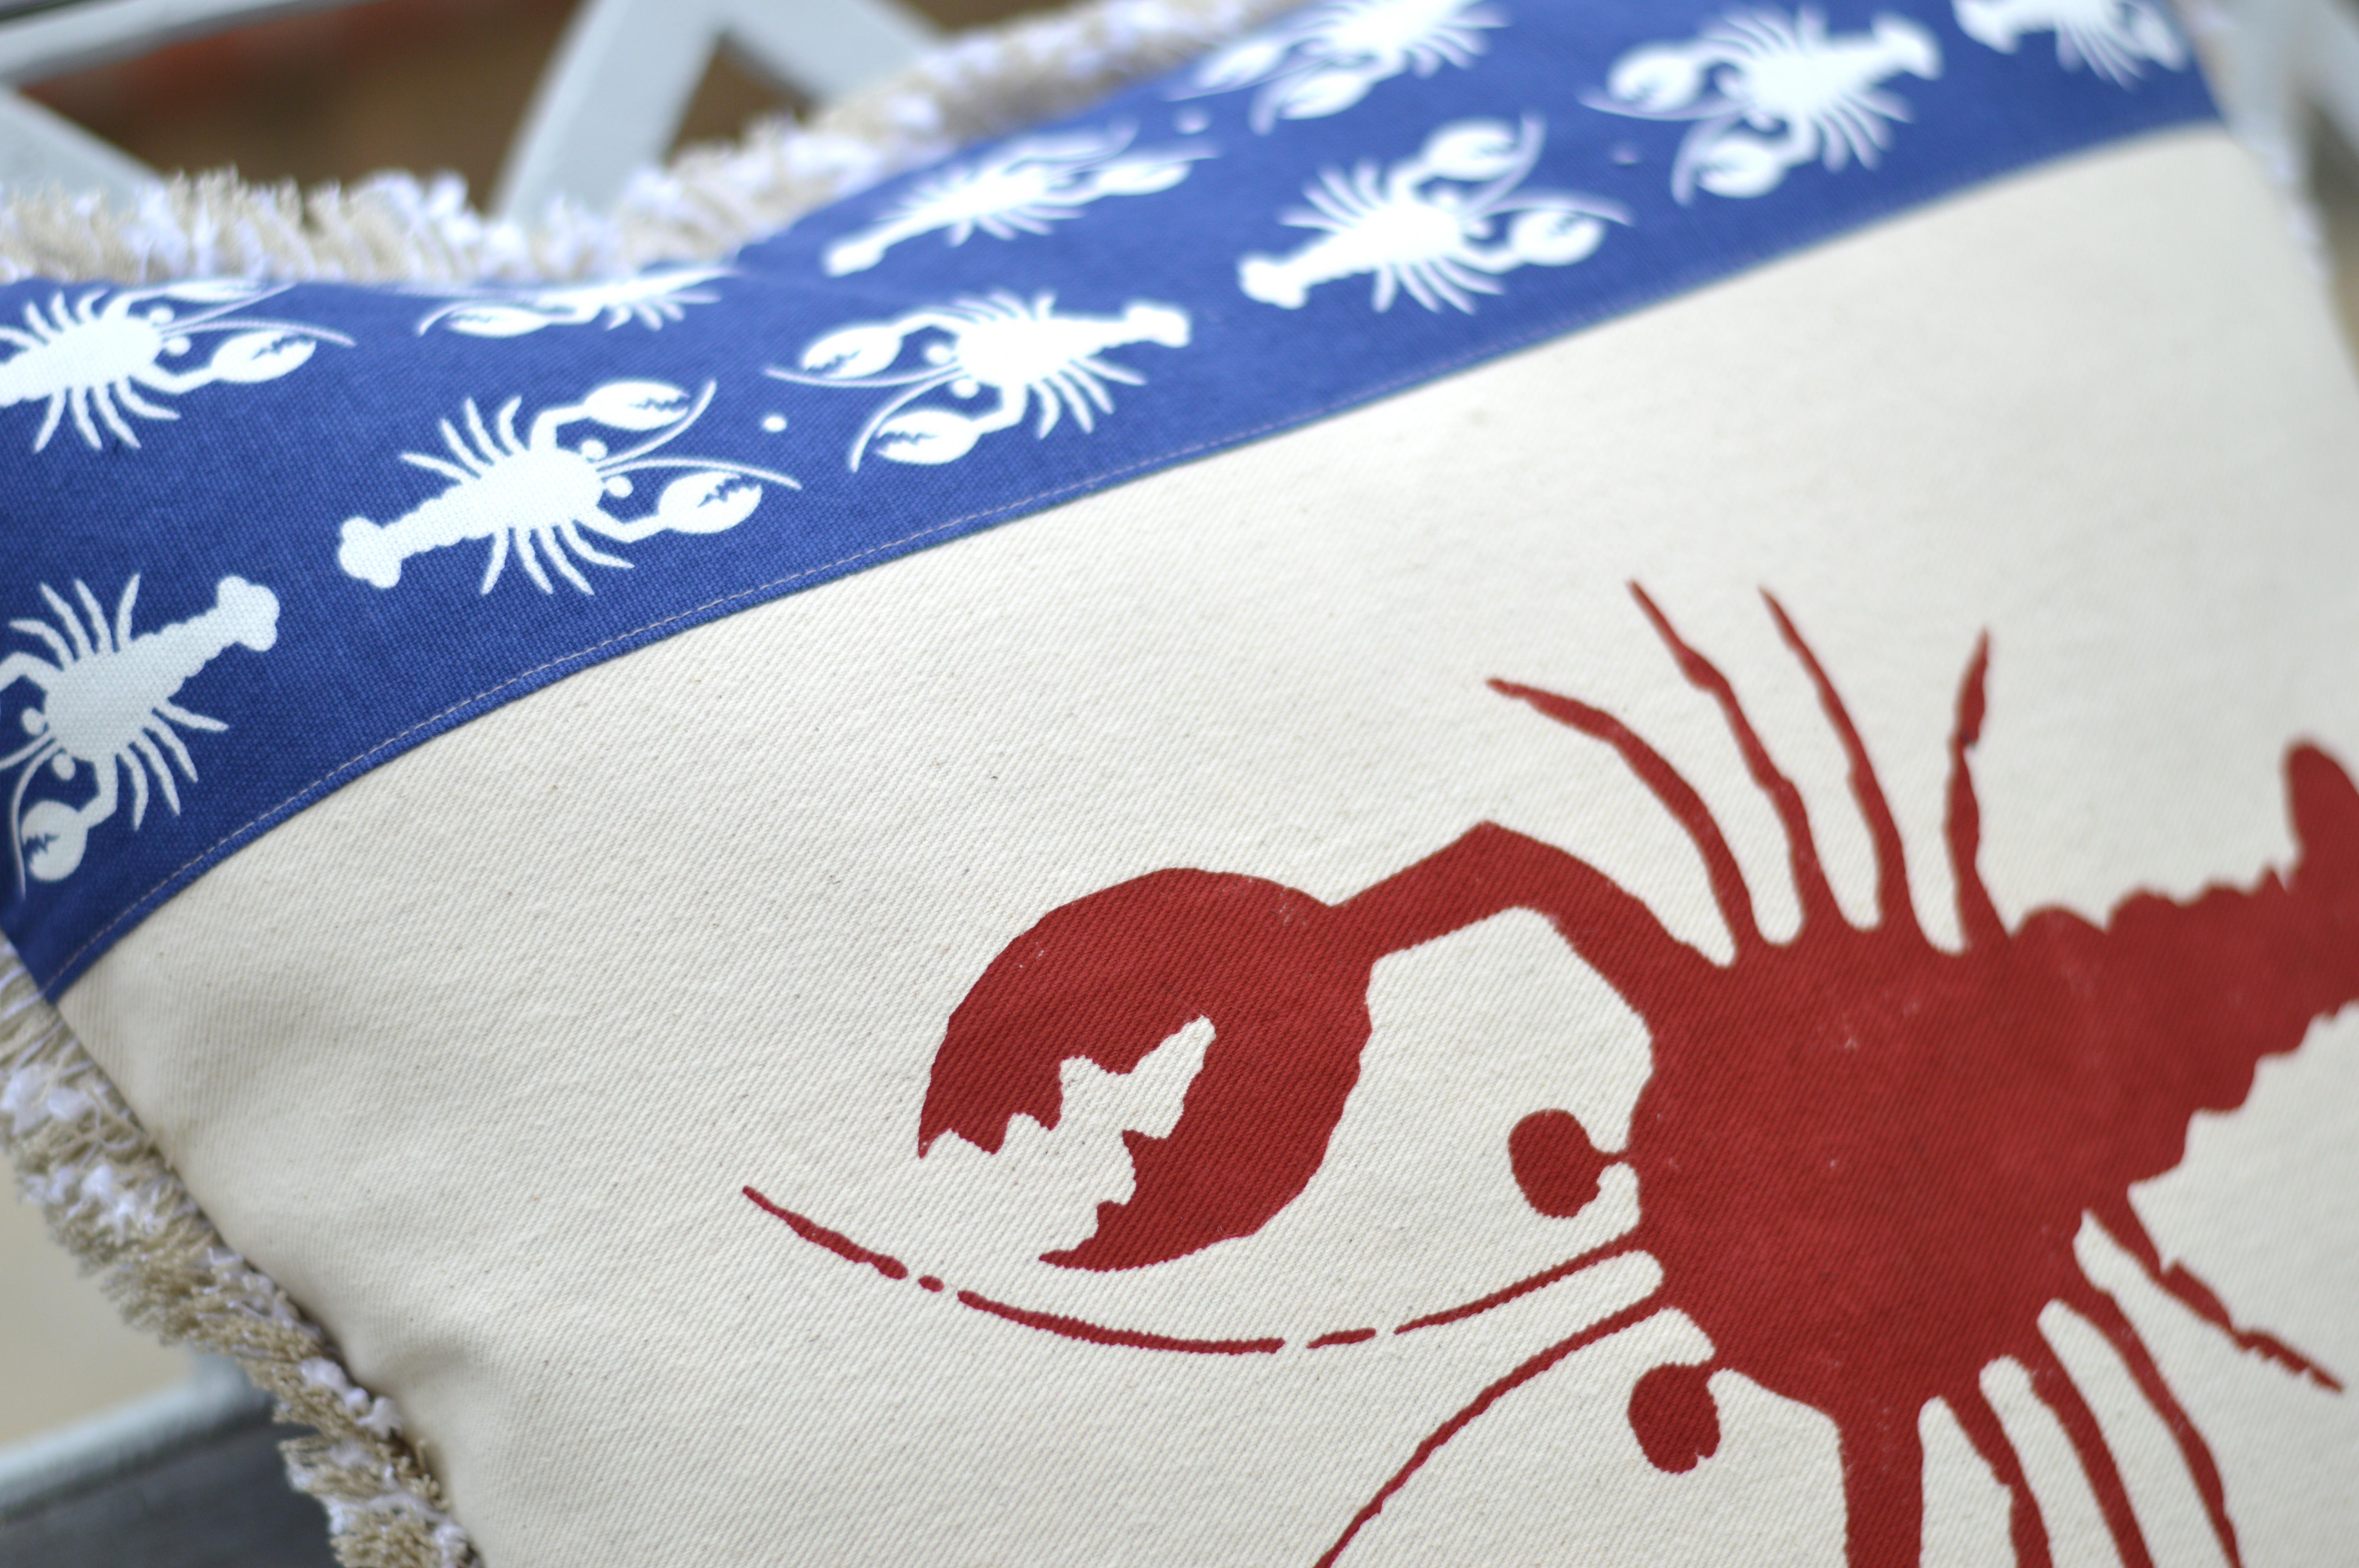
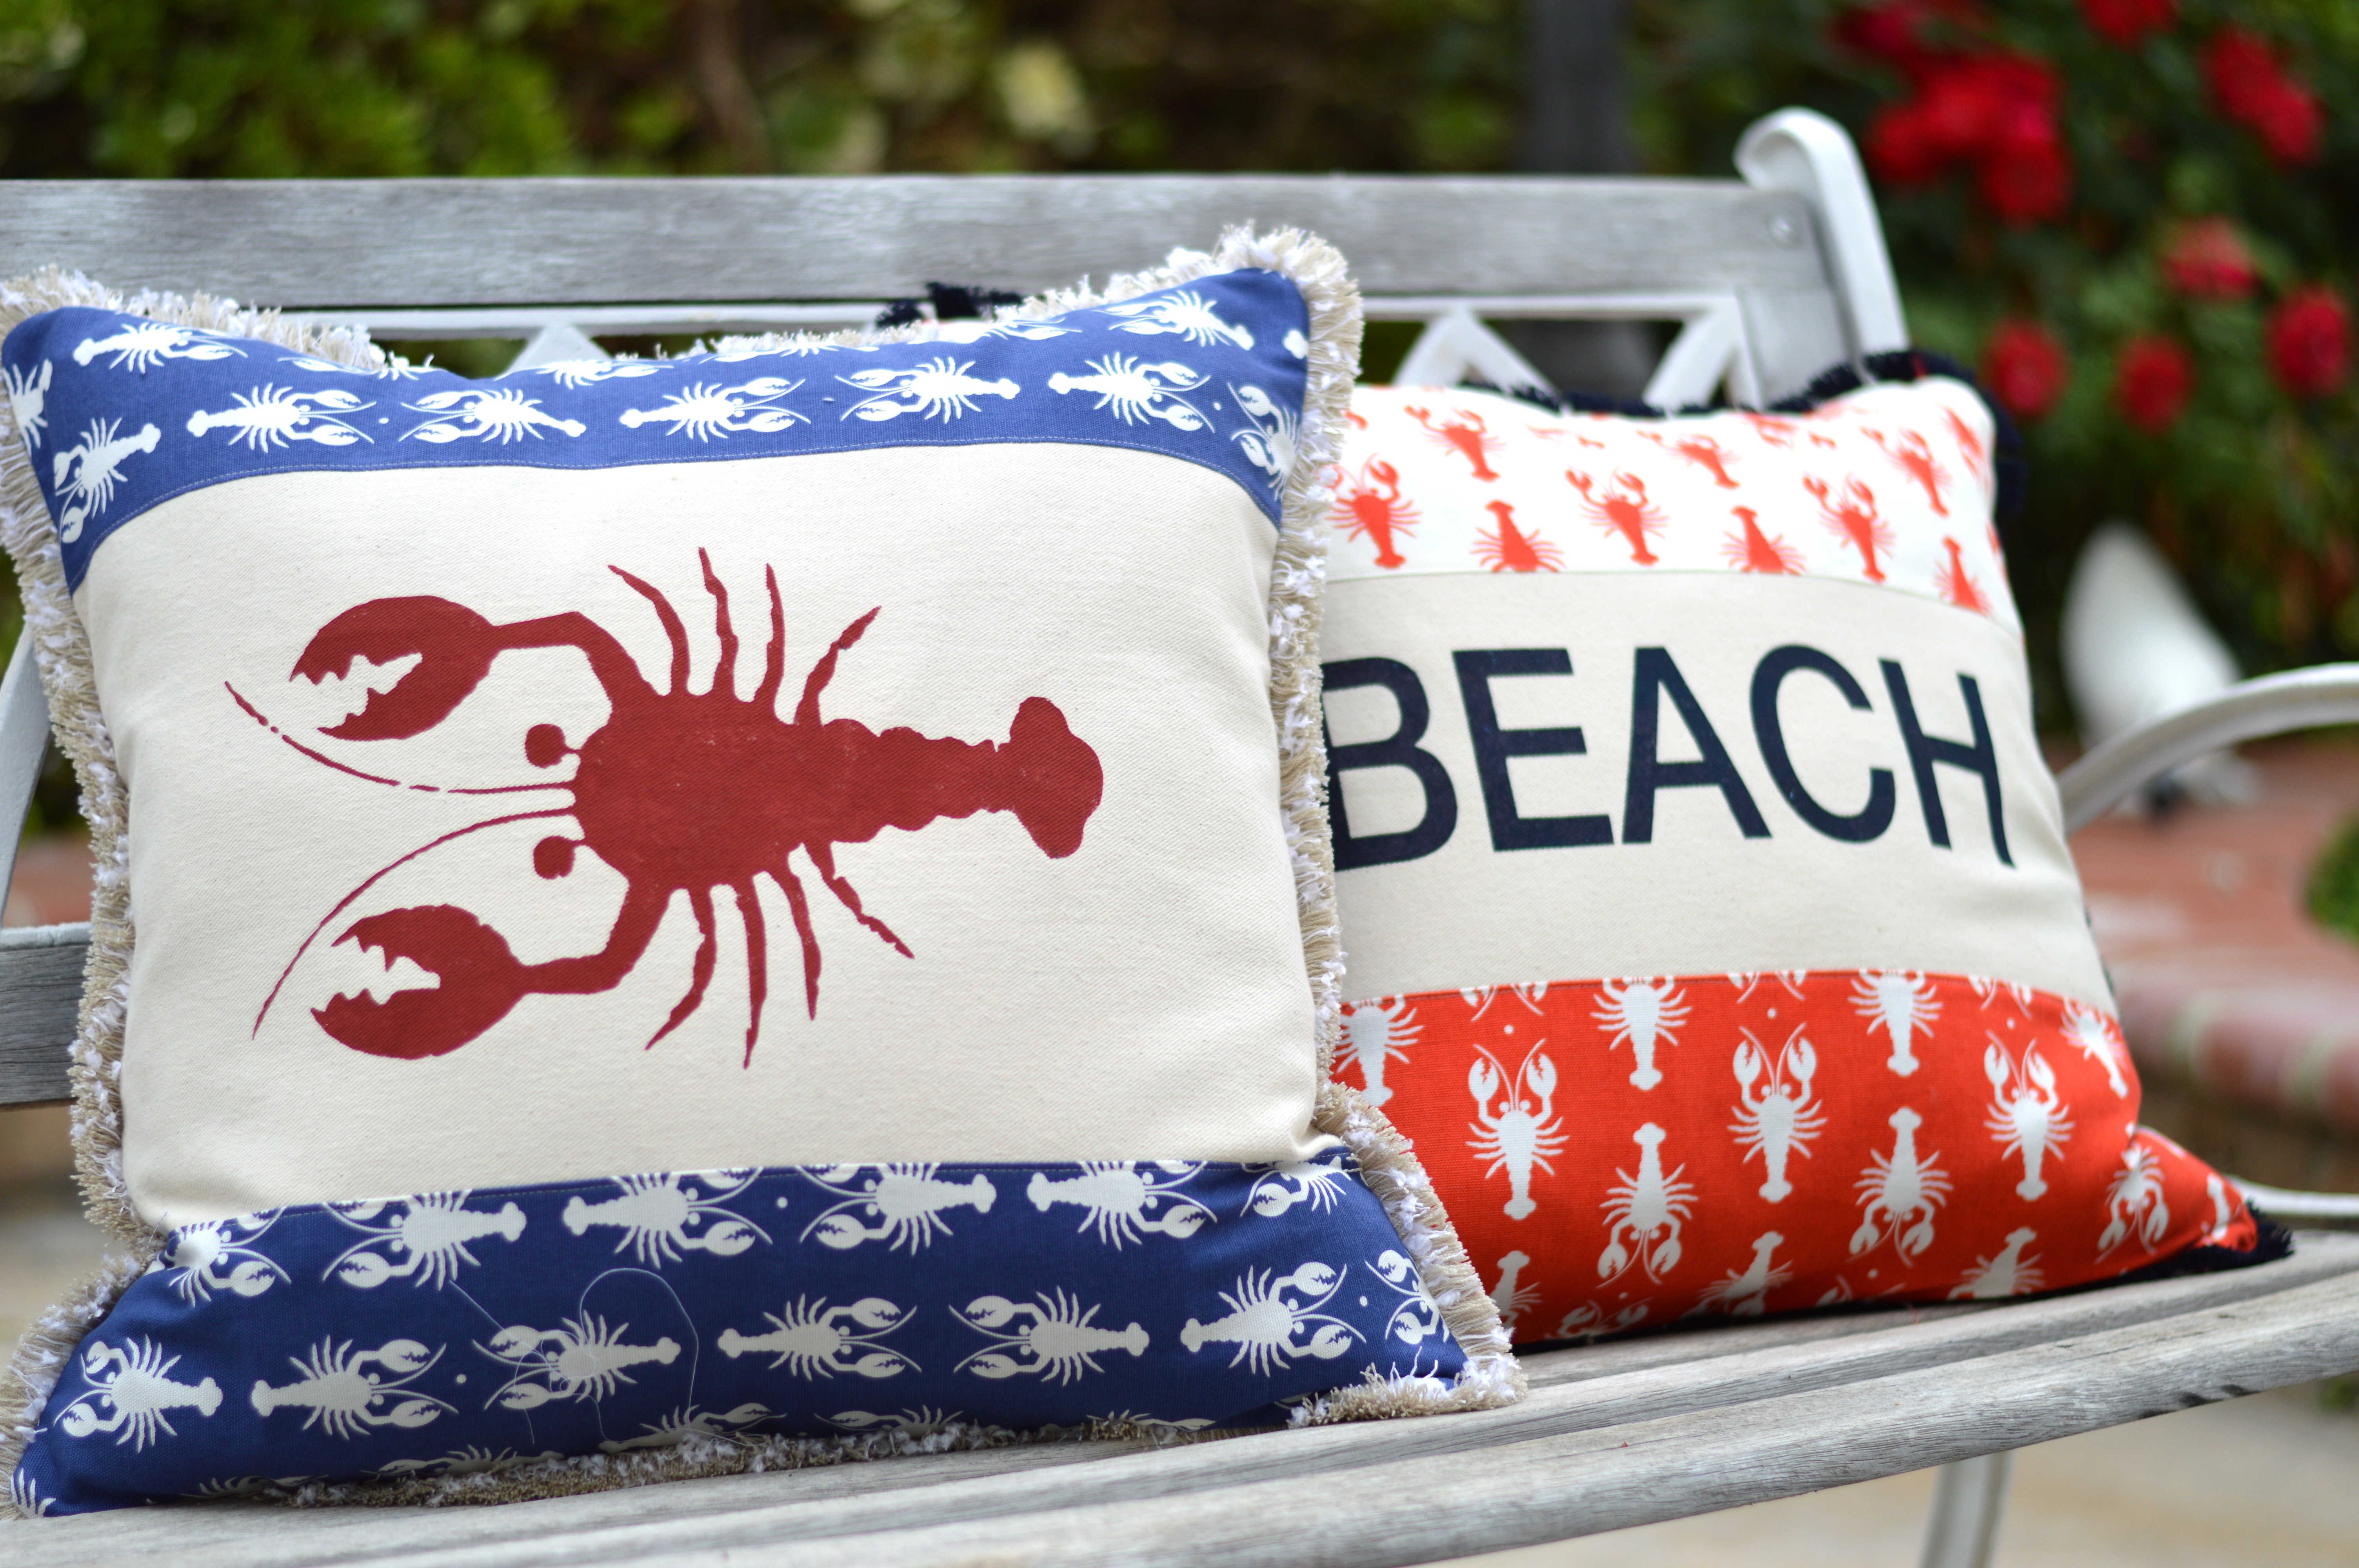
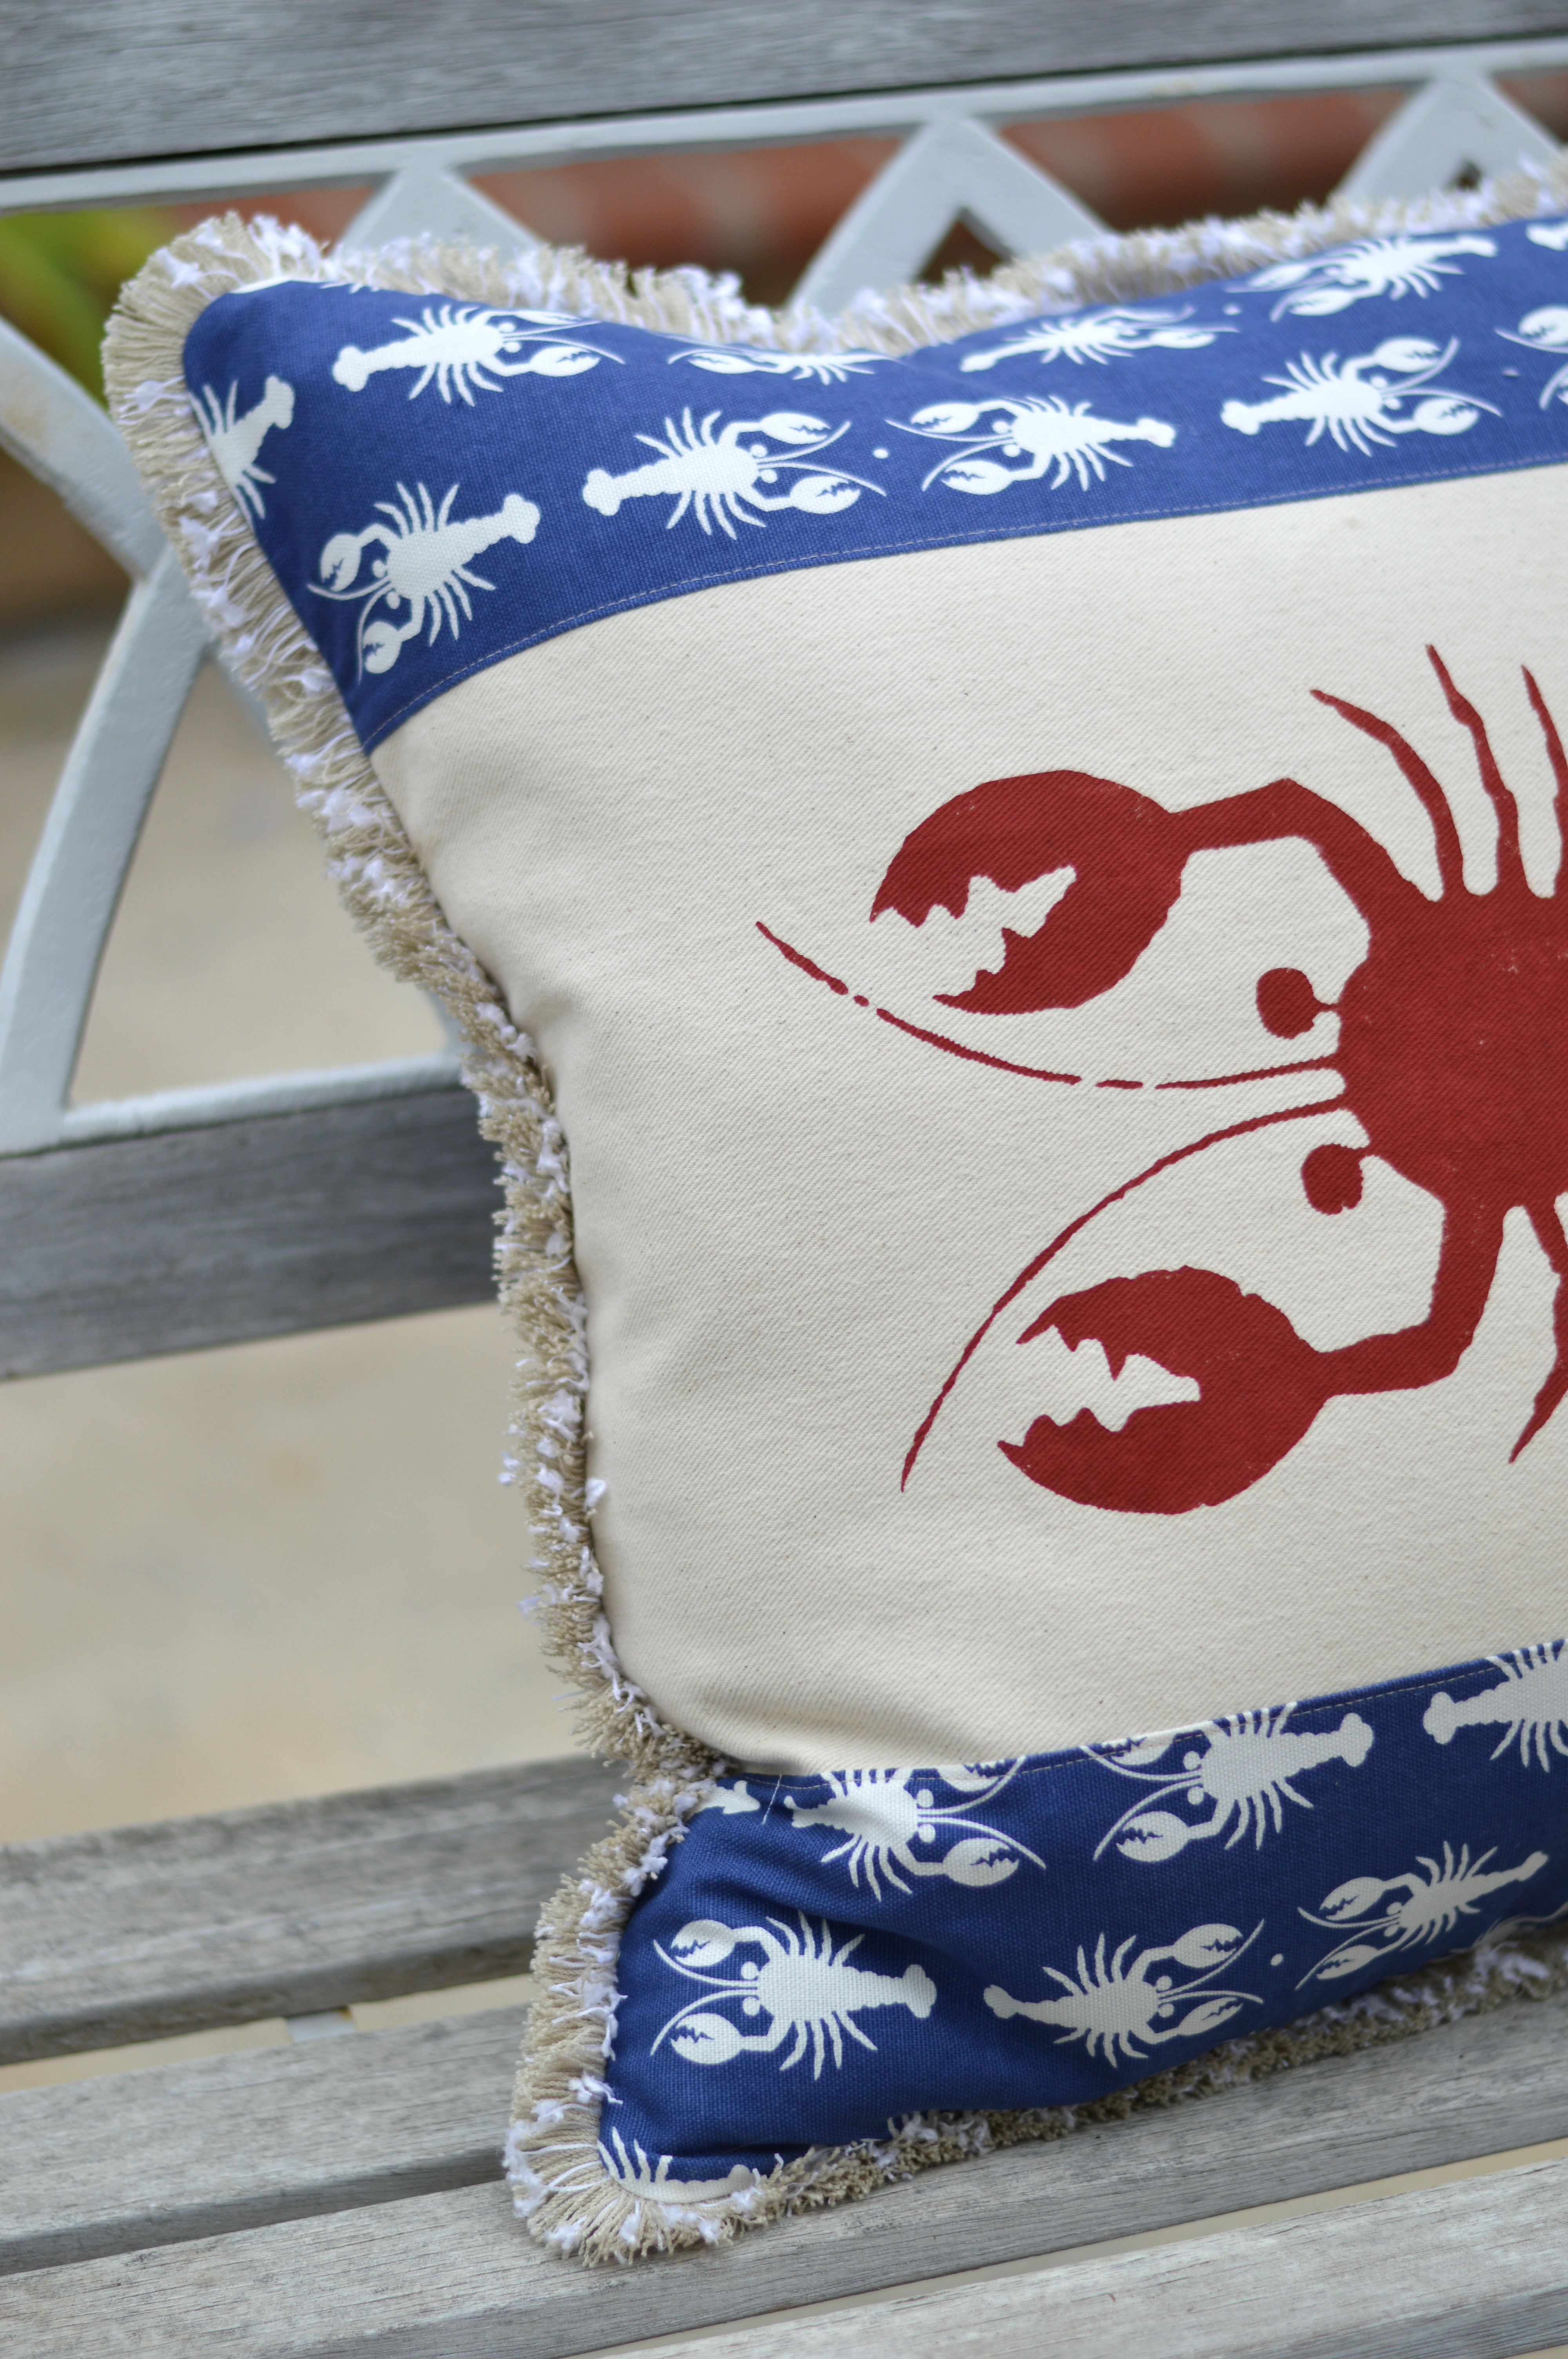
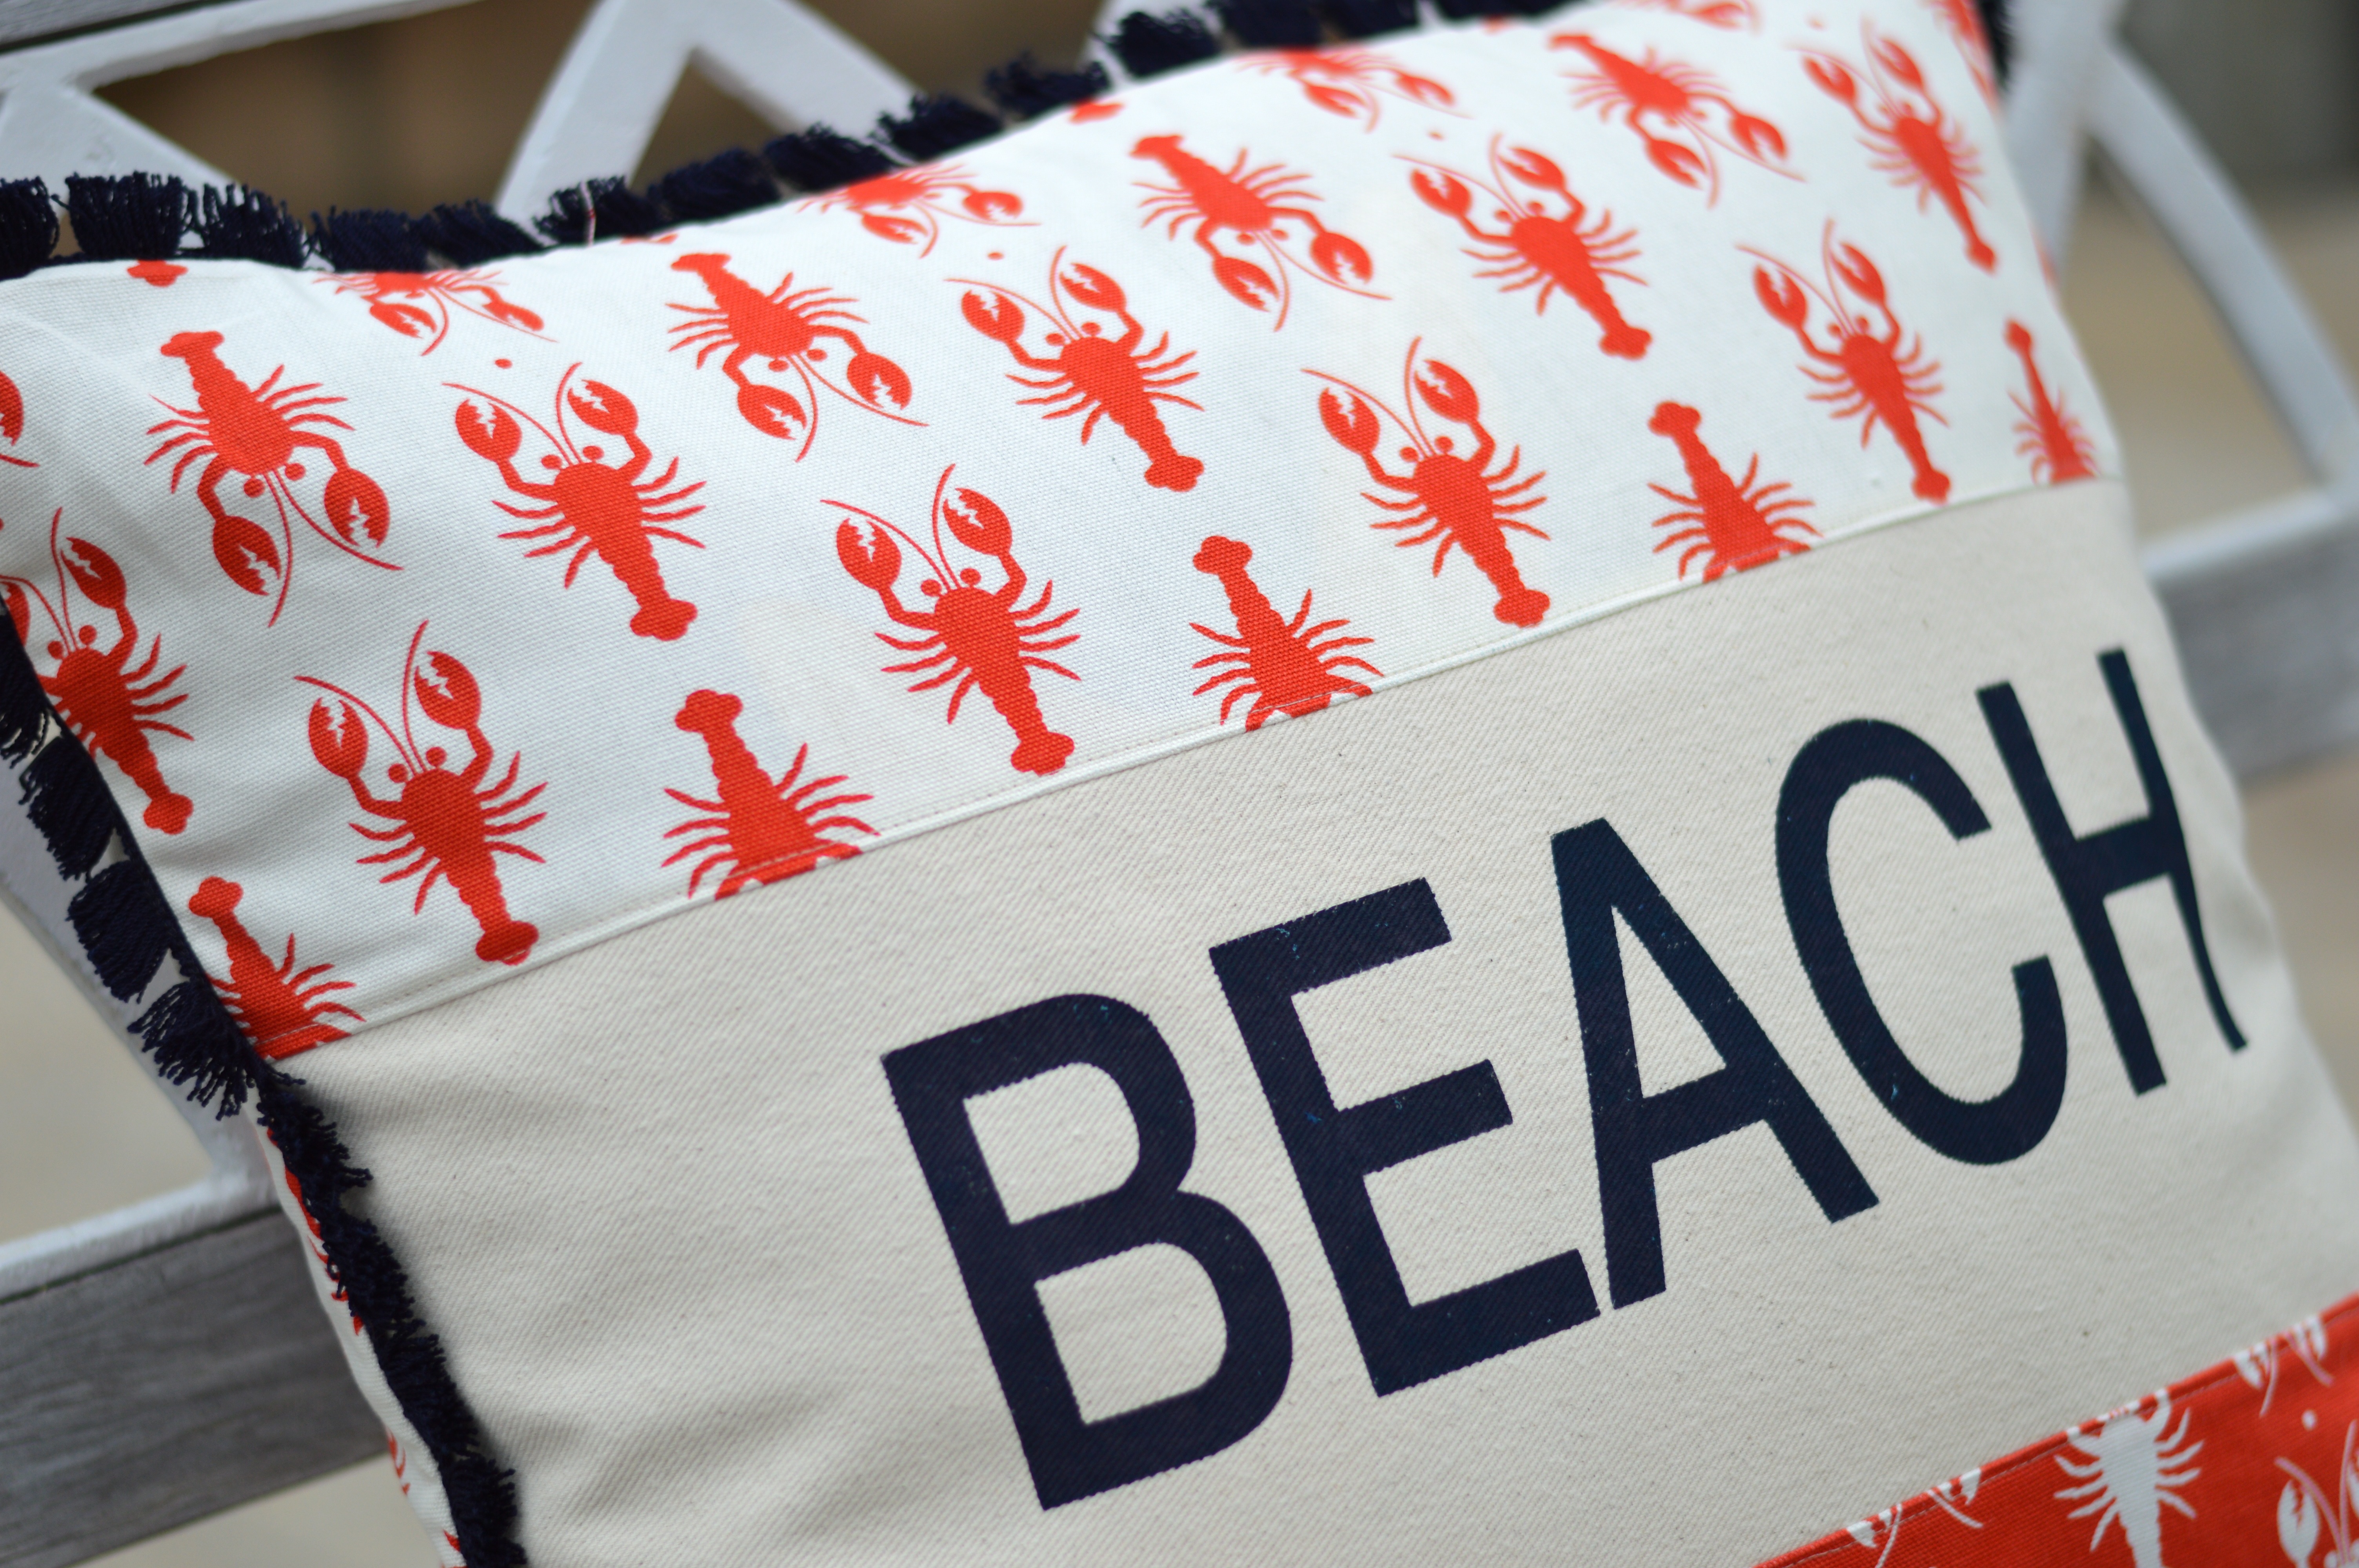
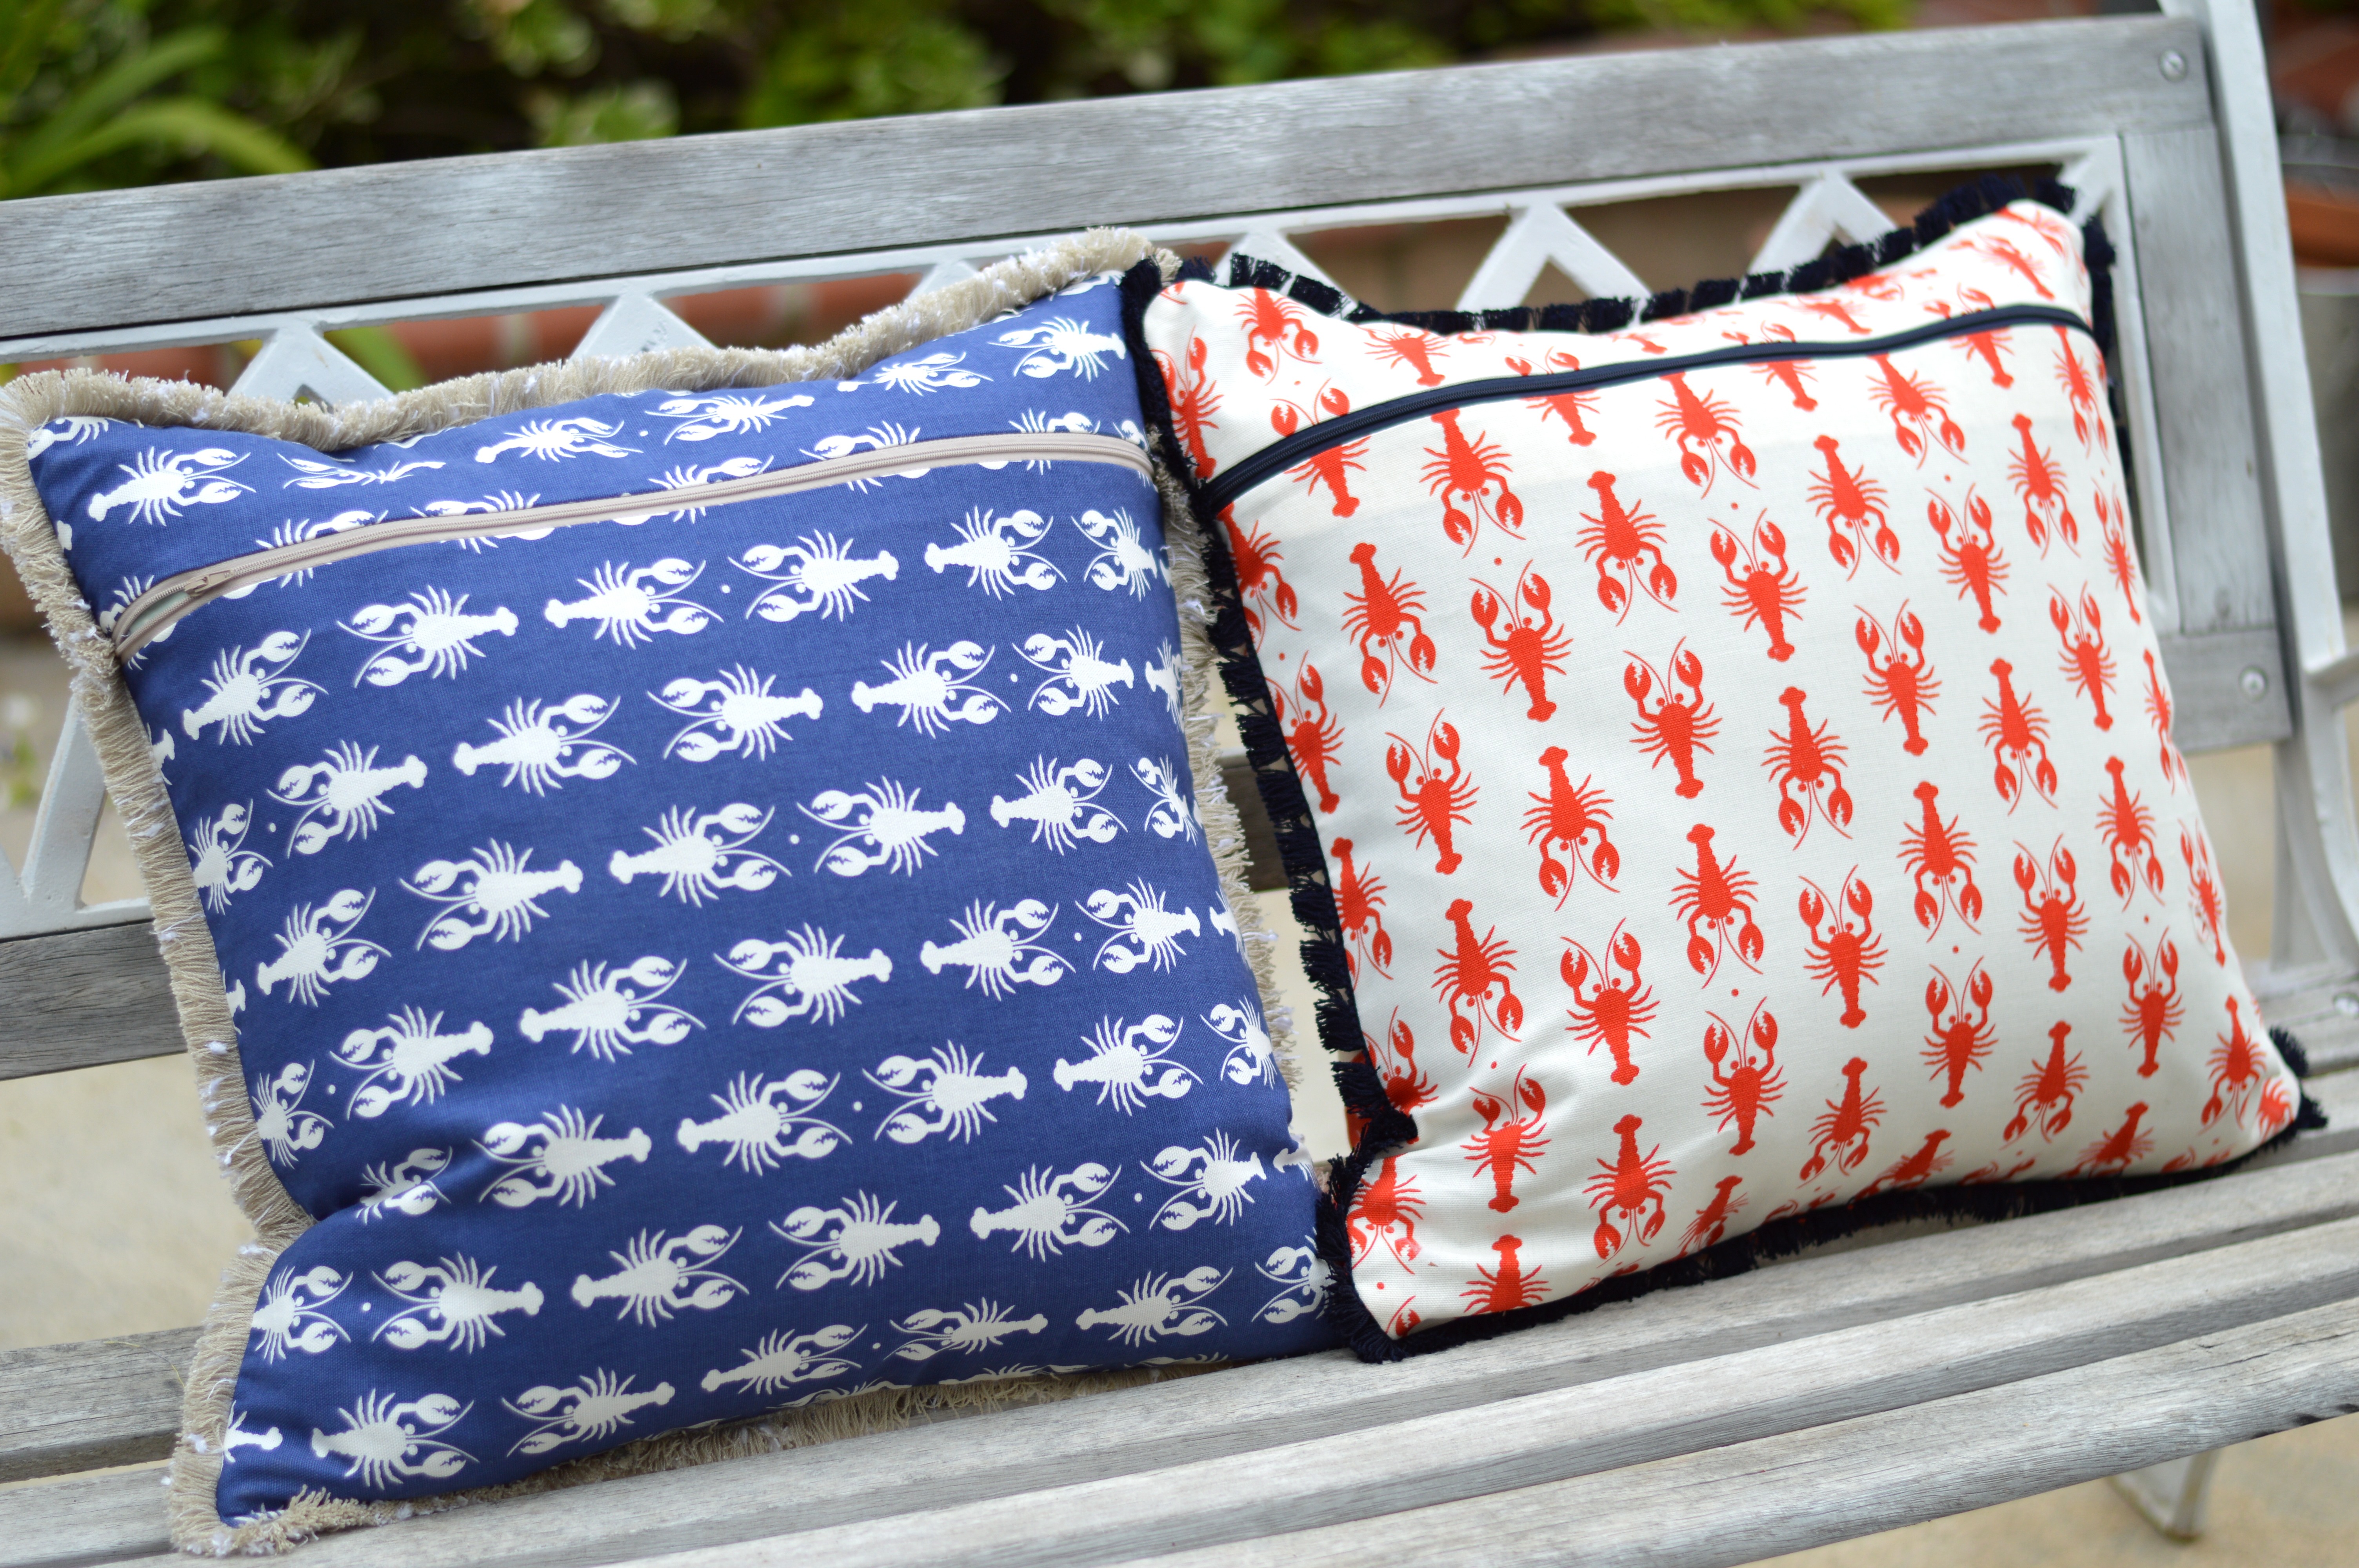
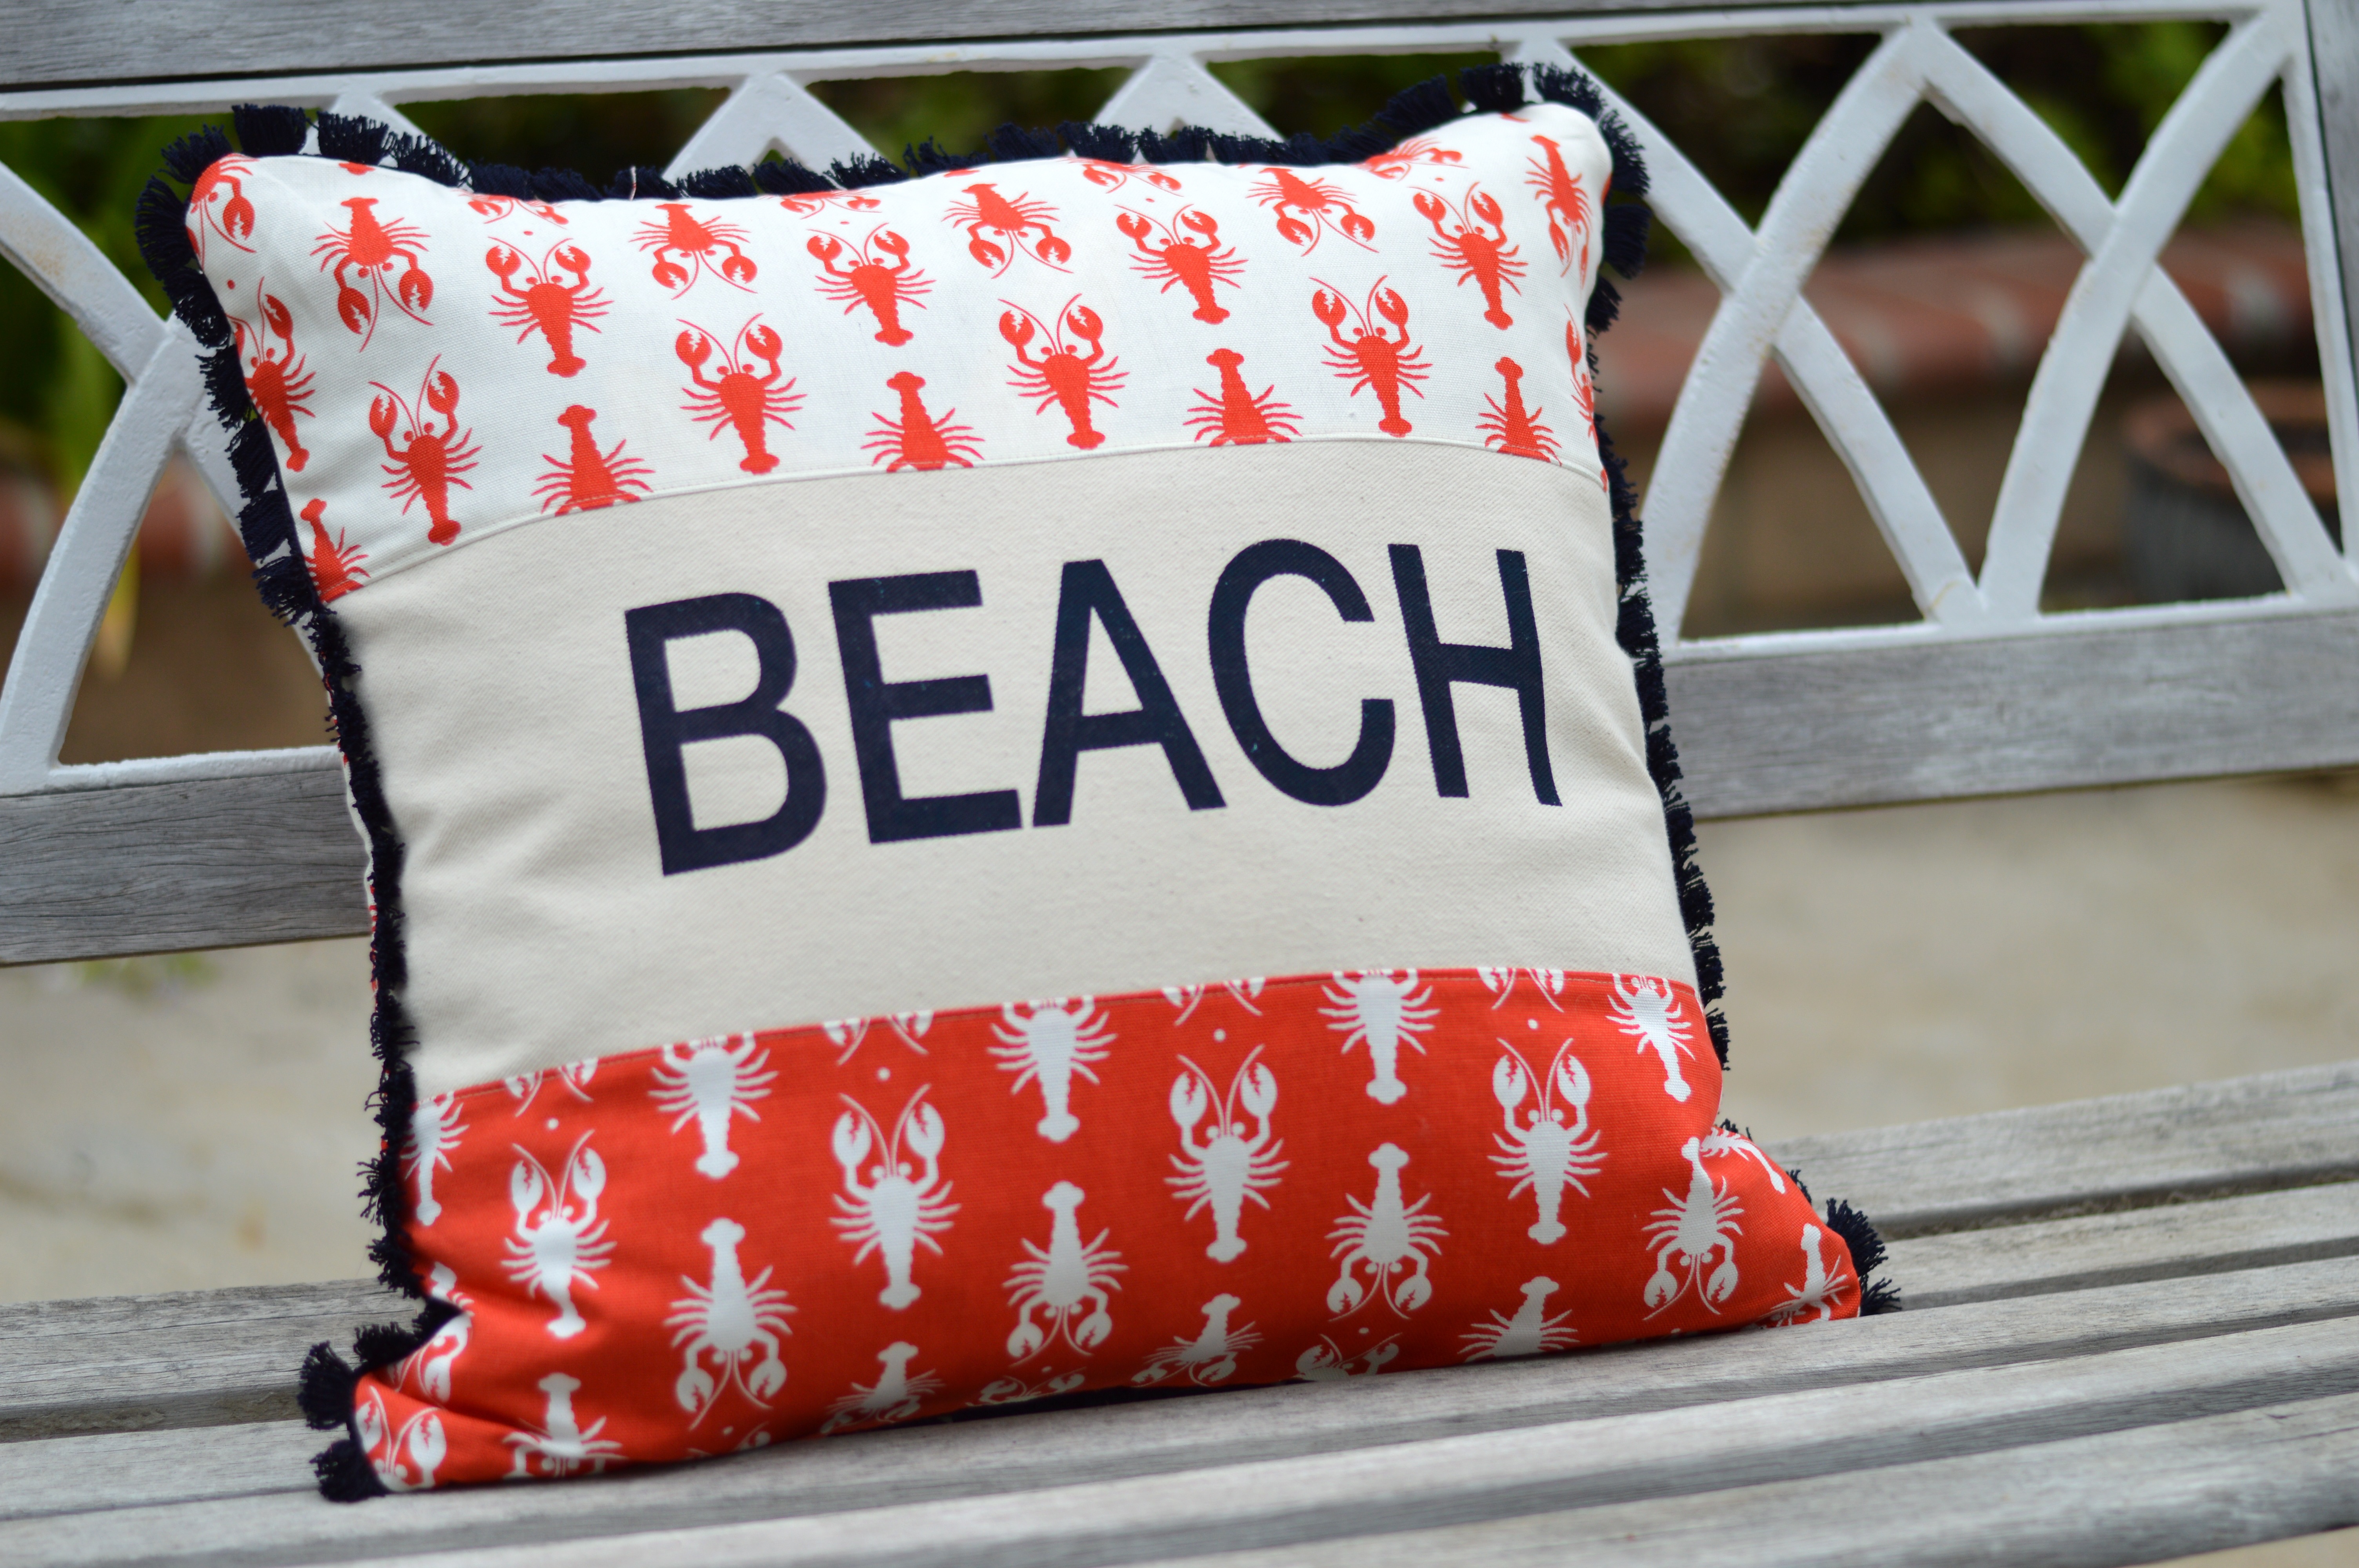
I am so happy to be a part of the Riley Blake Designs Home Dec Love Blog Tour!  If you are new to my blog WELCOME!!!!  I love all things nautical and when I saw this RBD Lobster fabric it was love at first sight!  These lobster pillows are the perfect addition to your indoor or outdoor summer decorating.  I like to pretend I have a sailboat and these are the perfect pillows for a relaxing cruise around the bay 🙂  You can find the Lobster fabrics on RBD website.  Let’s get started!

Supplies:

3/4 yard each blue, cream, and red lobster print

1/2 yard natural canvas or denim

2.5 yards trim per pillow

20″ pillow form

22″ zipper

Craft paint

stencil patterns, Click HERE and HERE for Lobster.  Click HERE and HERE for BEACH letters

Begin by creating a stencil.  There are 2 methods I like to use.  The first is to upload the graphic to my cutting program for my vinyl cutter and cut the image in vinyl and peel out the inside leaving a single-use stencil.  The second way is to trace the image on plastic binder dividers and cut it out with and craft knife.  This way you can use the stencil over and over.  For this project I cut the images on my cutting machine.

Cut the fabrics according to the cutting guide below:

pillow cutting instructionsProceed to stencil the letters and the lobster on the corresponding cuts of fabric.

riley blake lobster pillow

riley blake lobster pillow 3

riley blake lobster pillow 5

riley blake lobster pillow 4  riley blake lobster pillow 6

riley blake lobster pillow 15Once the paint has dried, heat set the image with a hot iron.  Piece the strips together as shown in the picture.  Press seams and top stitch along seams.

riley blake lobster pillow 11

riley blake lobster pillow 12Now prepare the back.  Make sure to have your cat inspect and sit on all fabrics!!

riley blake lobster pillow 7

Cut the back pieces 20″ x 20″riley blake lobster pillow 8

Make a cut at the 4″ mark.  This is where the zipper will go.riley blake lobster pillow 9

Sew the zipper in and press the zipper open.  Trim off excess zipper.riley blake lobster pillow 10   Baste the trim all the way around the pillow, beginning and ending at the bottom center of the pillow.  I rounded the corners as I basted the trim in place.  Place the pillow front to the pillow back right sides together.  MAKE SURE ZIPPER IS OPEN PARTIALLY.  Pin, matching edges all the way around the pillow.  Sew using a generous 1/4″ seam allowance.  Clip excess corners and turn right side out.  Insert pillow formriley blake lobster pillow 13

lobster summer pillow riley blake 2 lobster pillow riley blake 4

lobster pillow riley blake

lobster pillow riley blake 3

lobster pillow riley blake 7

lobster pillow riley blake designs

lobster pillow riley blake 9Check out all these amazing projects featuring Riley Blake Designs Home Decorating Fabric!


Sizzix Fish Bubbles Pillow

fish bubbles intro

I am super excited to share my Fish Bubbles Pillow Tutorial – It’s over on the Sizzix Blog today!  Did you know I love all things Nautical?  (hee hee)fish bubbles pillow

I choose to use Day Sail from Moda – I love this fabric line!!!  Add some Therm O Web Heat n Bond and run it though the Sizzix Fabi and you’ve got yourself a cute fish pillow!
fish bubbles pillow 4

I love that I can cut so many perfect circles at once!!!  Now more hand cutting circles – yippie!!!!daysail fish bubbles pillow 18

This pillow makes me think of Summer!  I wish it was July!!!!daysail fish bubbles pillow 20

The back is even cute 🙂  Hop on over to the Sizzix Blog for the full set of instructions so you can make one for YOU!!!!

Lucky Pillow – Version 2.0

lucky pillow tutorial

Since I was already in the St. Patrick’s Day sewing mode after sewing a banner, I thought I would whip up a throw pillow!  I’m sure you know by now that I love throw pillows!  Last year I also made a “Lucky” patchwork pillow, so I am calling this one version 2.0.

St-Patrick-s-Day-Pillow-Tutorial1Here’s how you can make one!

Supplies

Scraps of green fabric – I used fabric from Blend: Tea Garden, Turkish Delight, and the Makers

blackish/grayish denim or other fabric for lettering

Heat n bond Lite

Heat n bond EZ print sheets

Sizzix Shamrock Die

Lucky words, click HERE – print in reverse

20″ square natural canvas

20″ square green print for back, I used Yuletide Greetings by Anna Griffin

22″ zipper

20″ pillow form

Begin by ironing the Heat n Bond Lite to the wrong side of the green fabrics and the “lucky” fabrics.  Run the green fabrics through the Sizzix Big Shot.  If you don’t have a Big Shot machine, you can hand cut the shamrocks.

lucky pillowPrint off the “lucky” letters and iron them to the wrong side of the fabric.  Cut with scissors.  This takes a little bit of patience 🙂 IMG_4173Peel off the backing paper and position the word and shamrocks as desired.  Outline stitch around each shamrock 2 times in black thread.  There was no way I was sewing around the cursive letters more than once!!

lucky pillow 2 3Prepare the back of the pillow by cutting a 20″ square.  Make a cut at the 2″ mark for the zipper.  You can put the zipper where ever you like, or you can insert an invisible zipper.

lucky pillow 2Sew the zipper in just like you were piecing a strip of fabric in between the two pieces – only use a zipper foot.lucky pillow 4
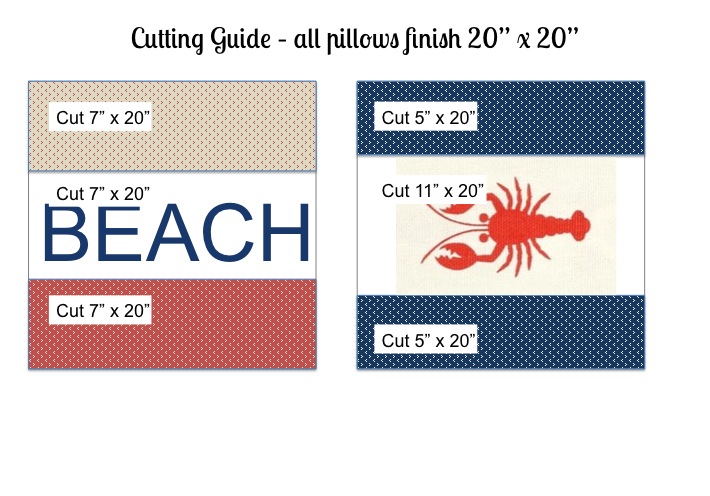
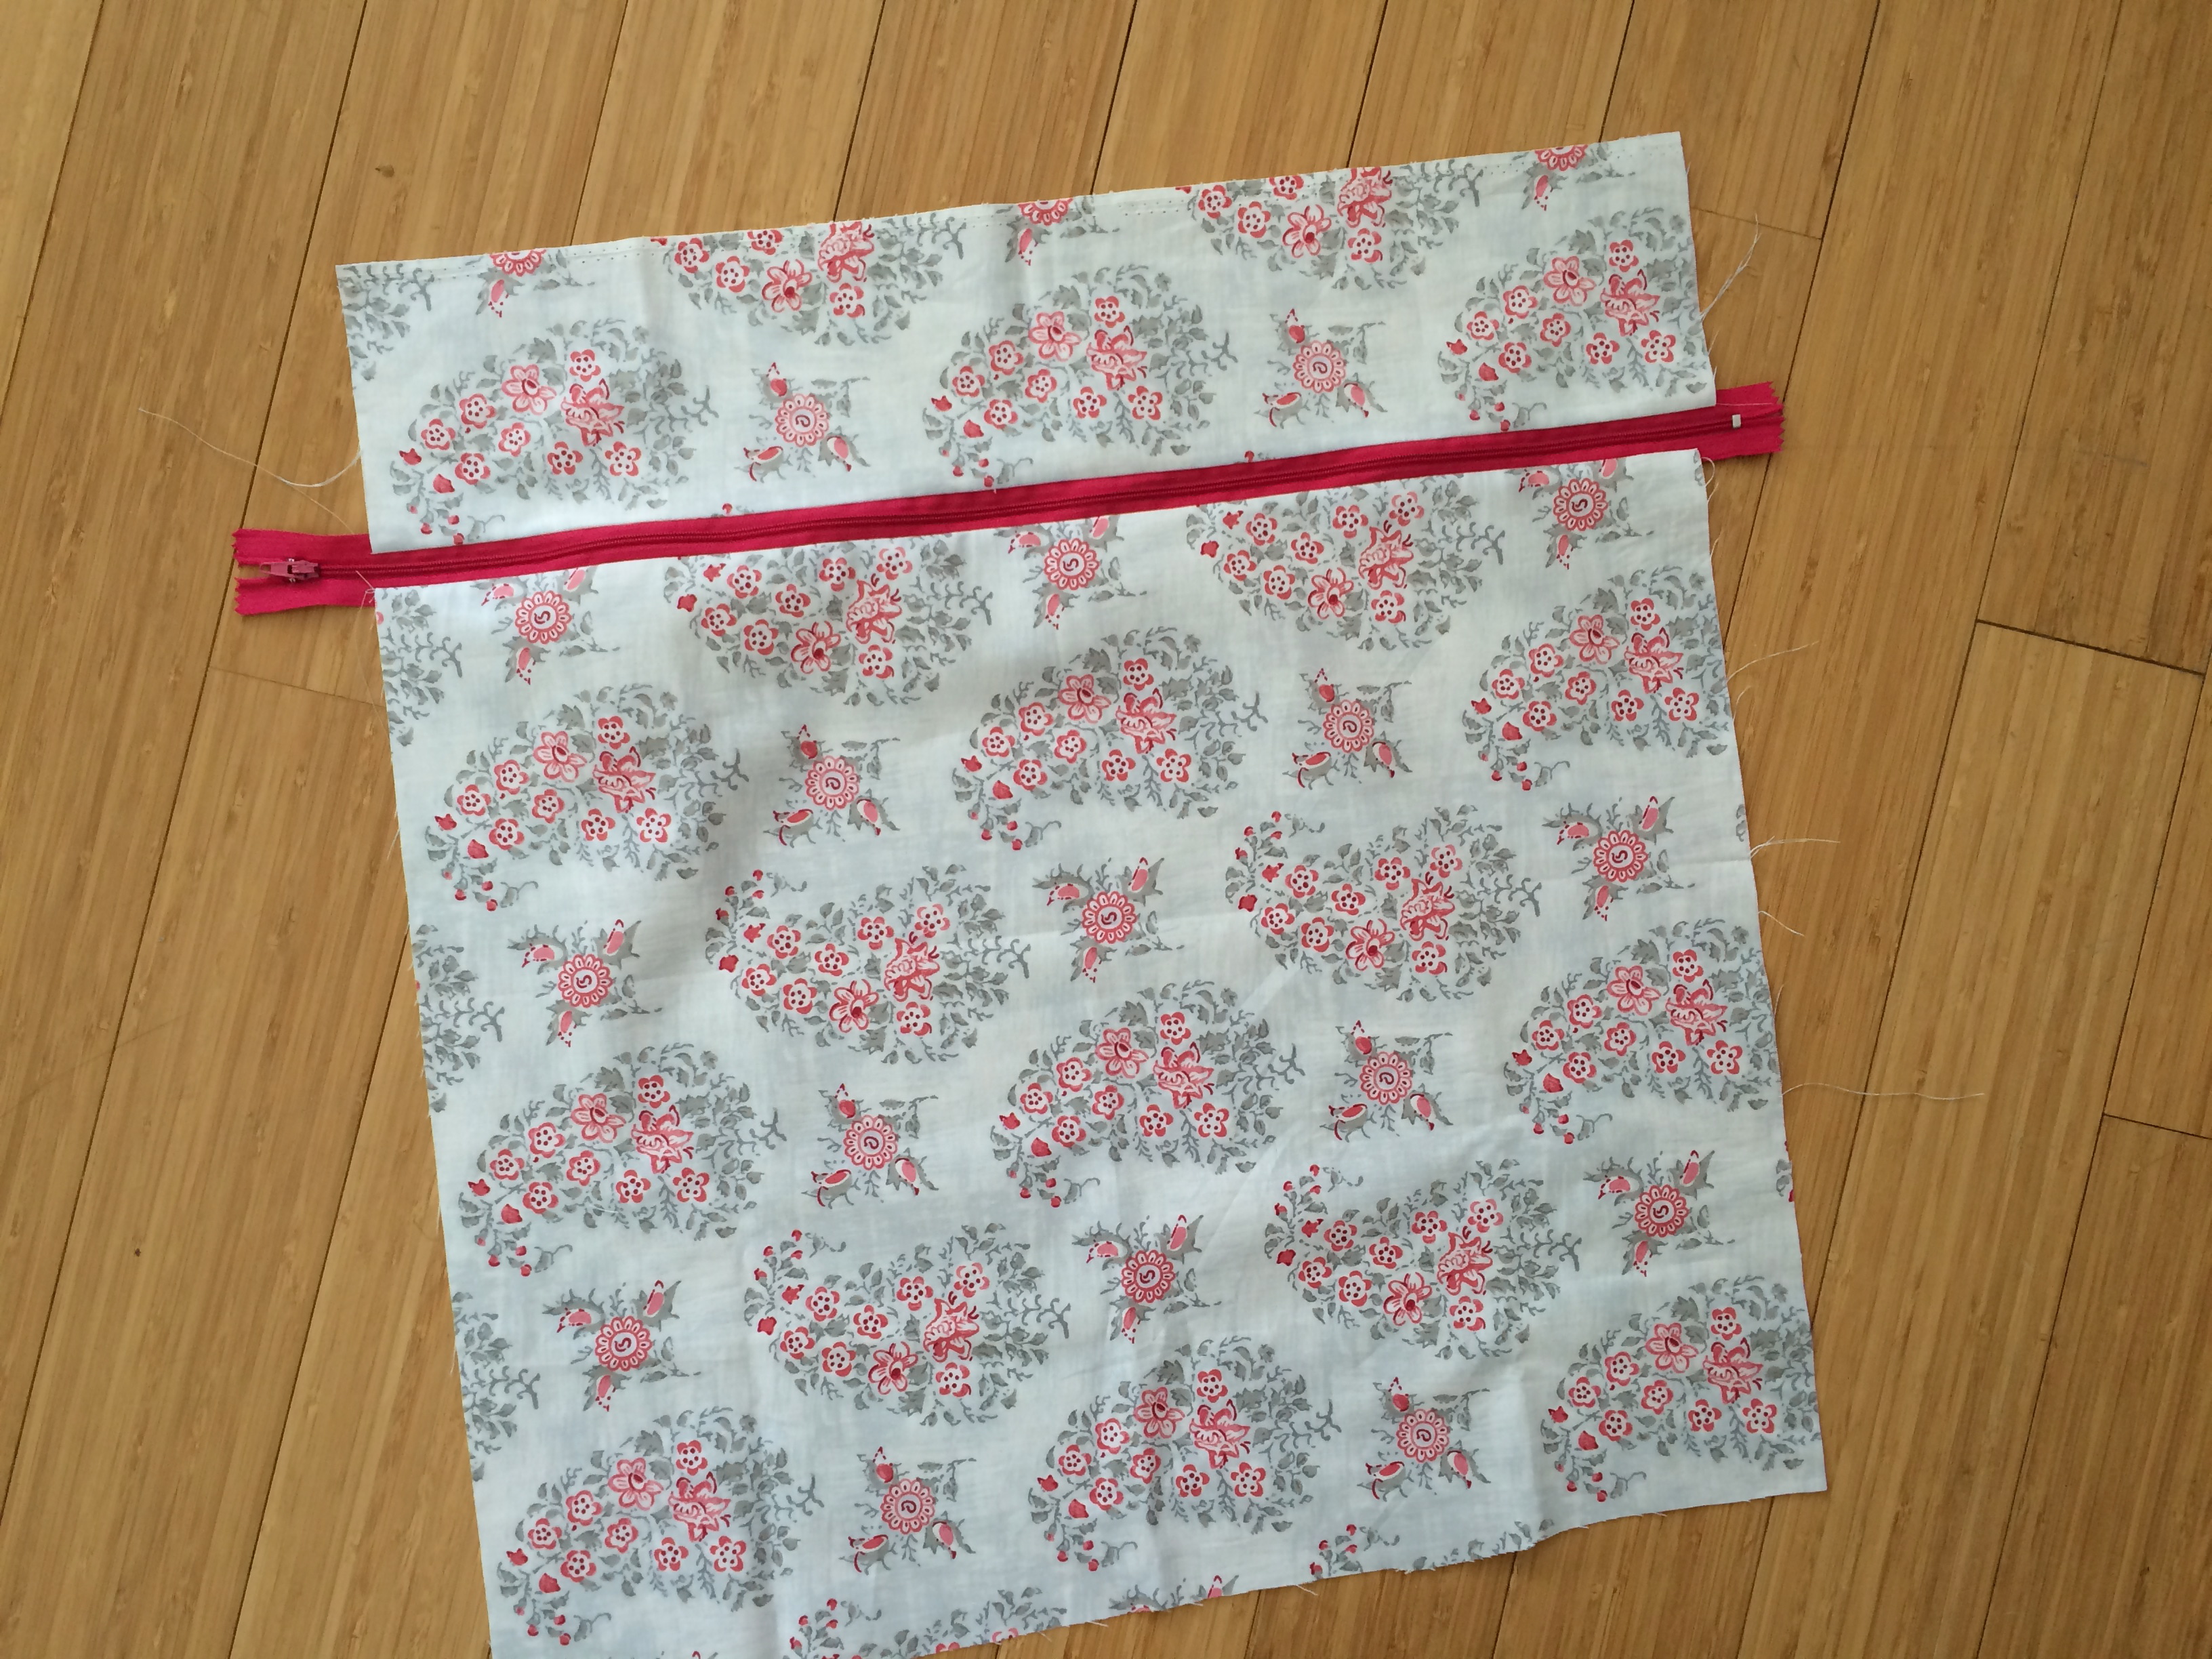
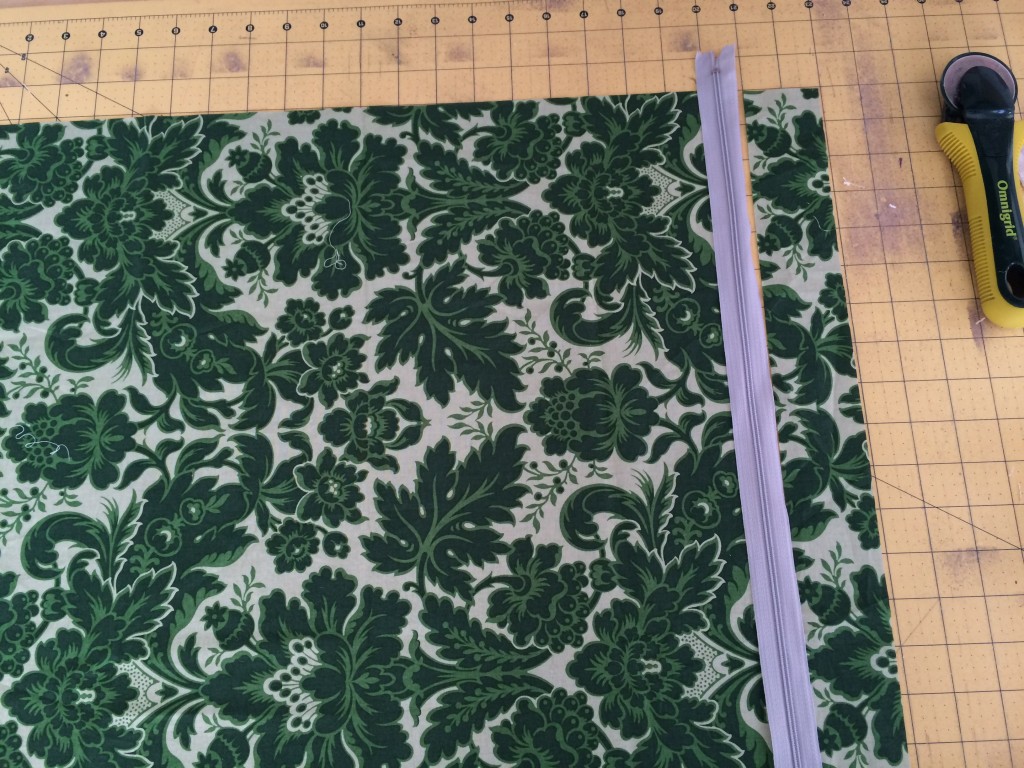
Cut off the excess zipper ends.  Partially open the zipper and place the pillow top and the pillow back, right sides together. matching and pinning all edges.  Sew 1/4″ all the way around the pillow.

lucky pillow 5

Turn the pillow right side out and insert the pillow form.lucky pillow 9
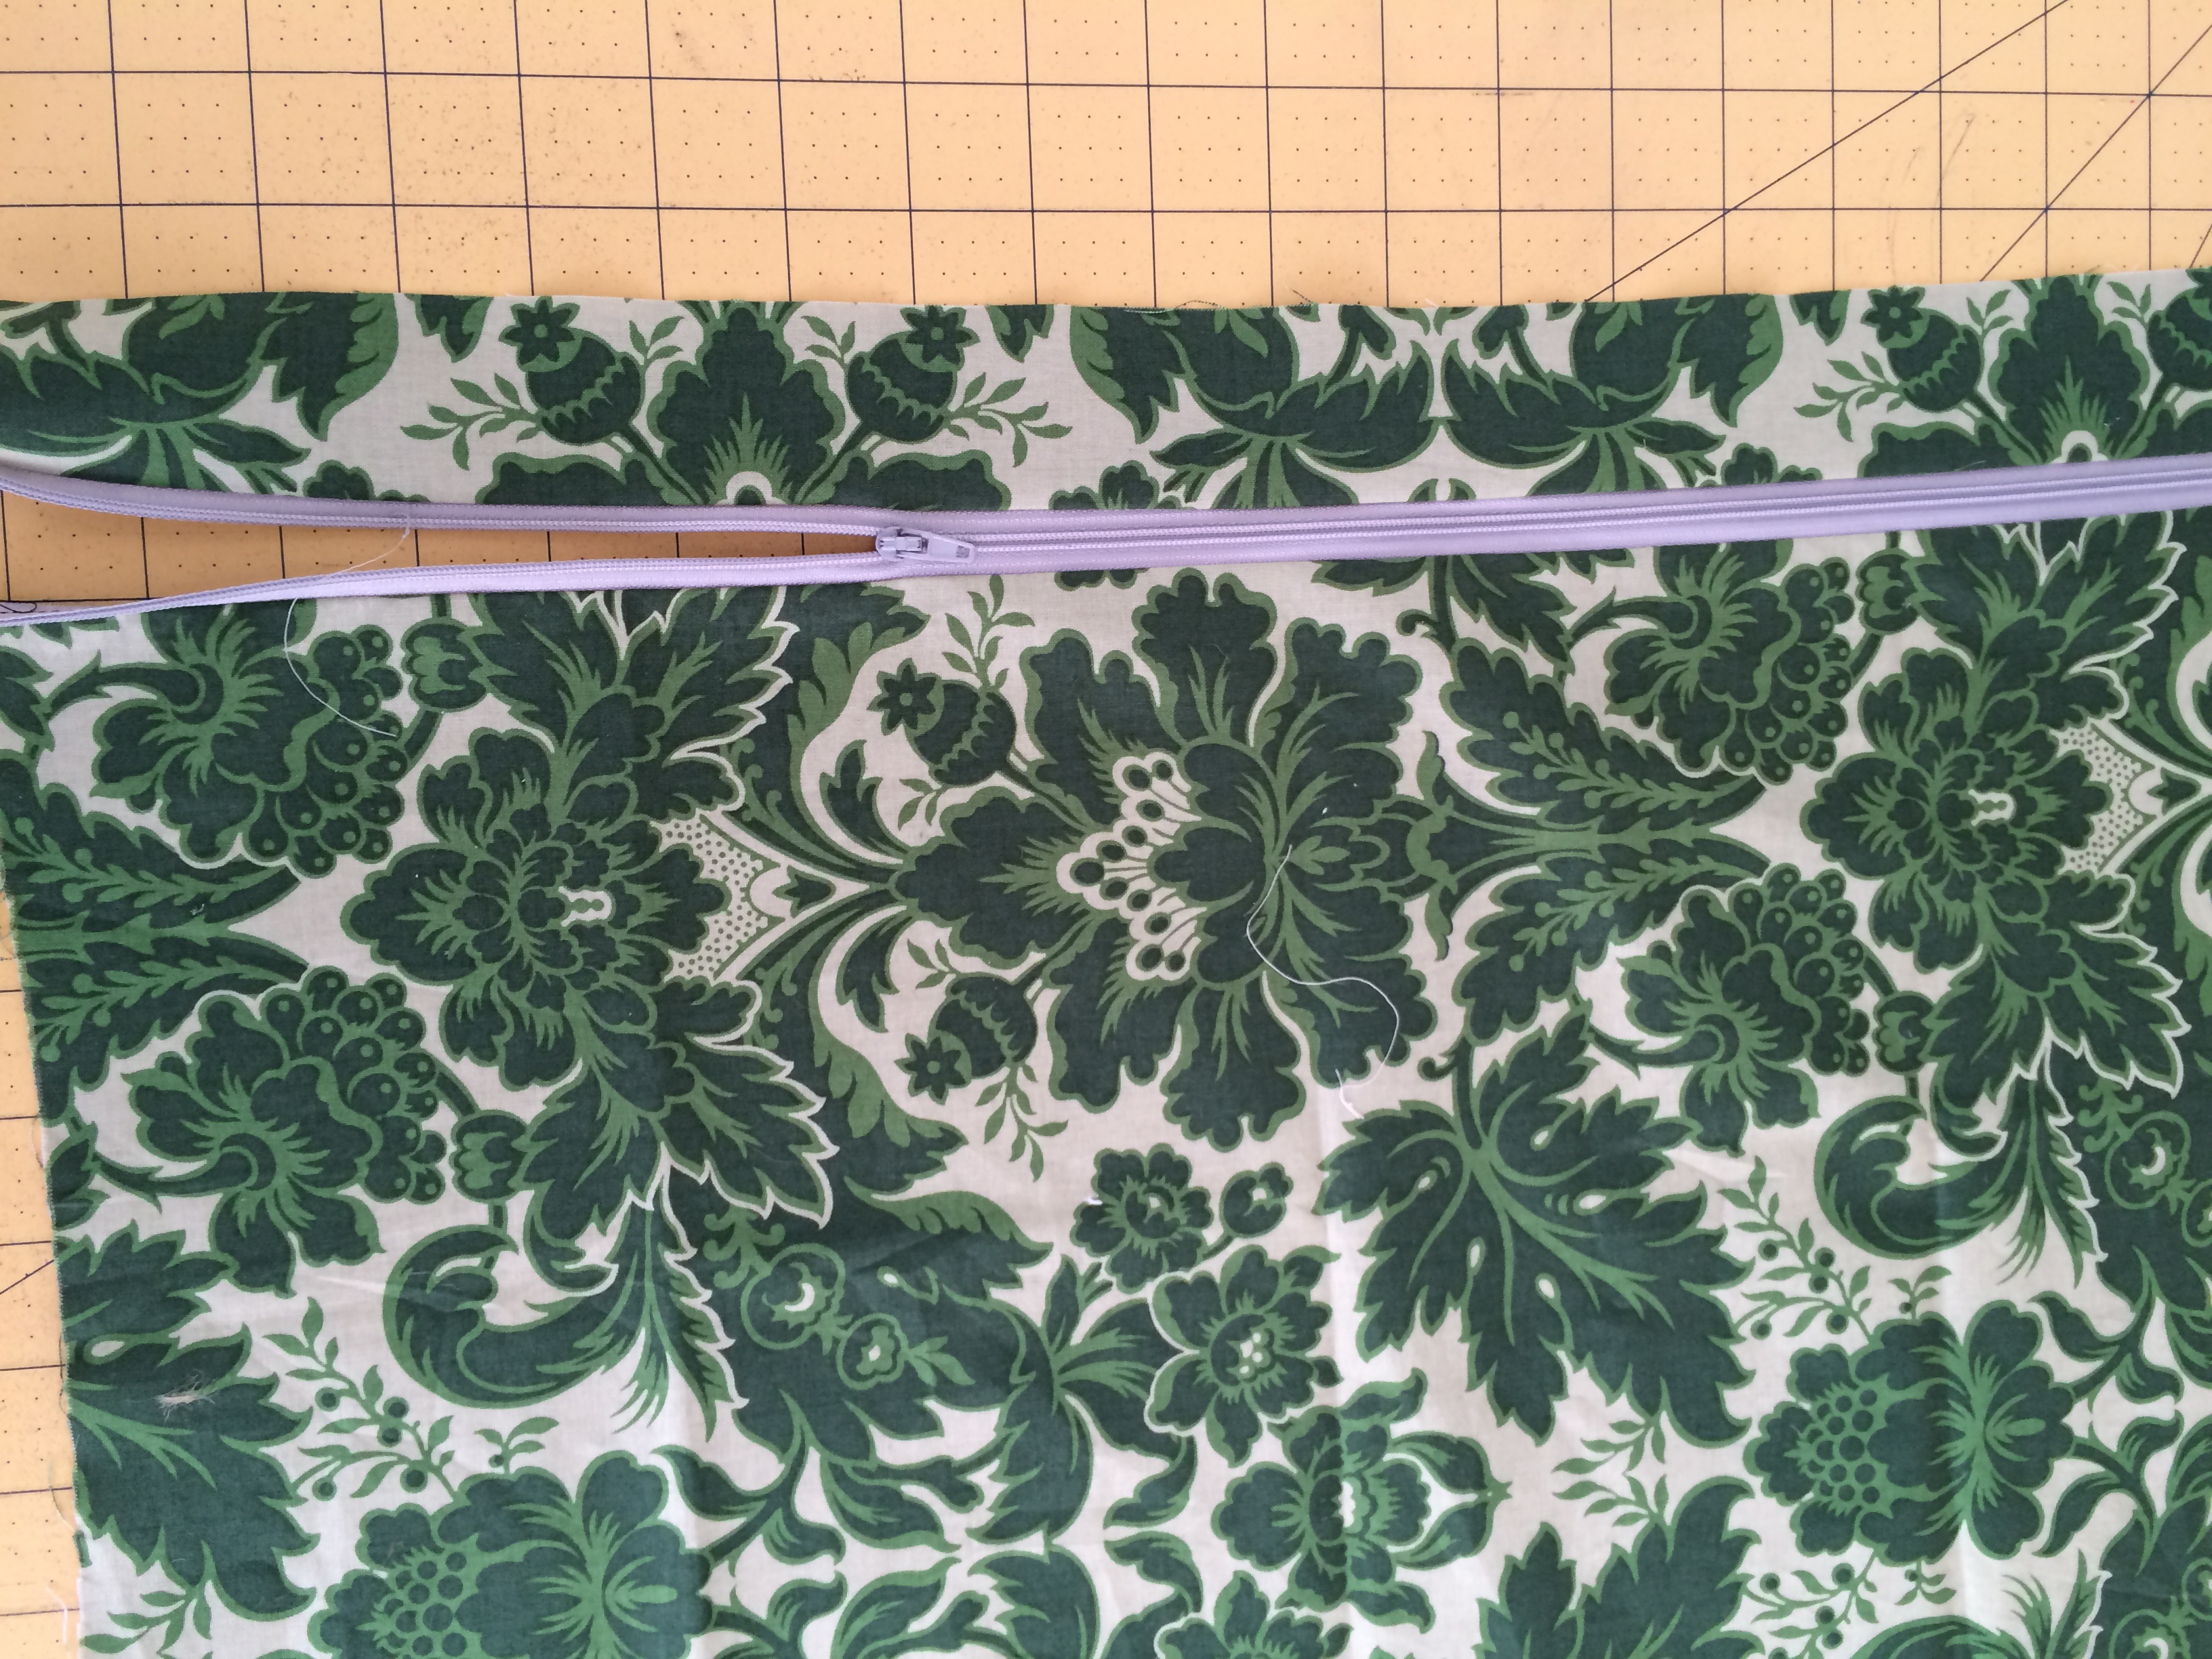
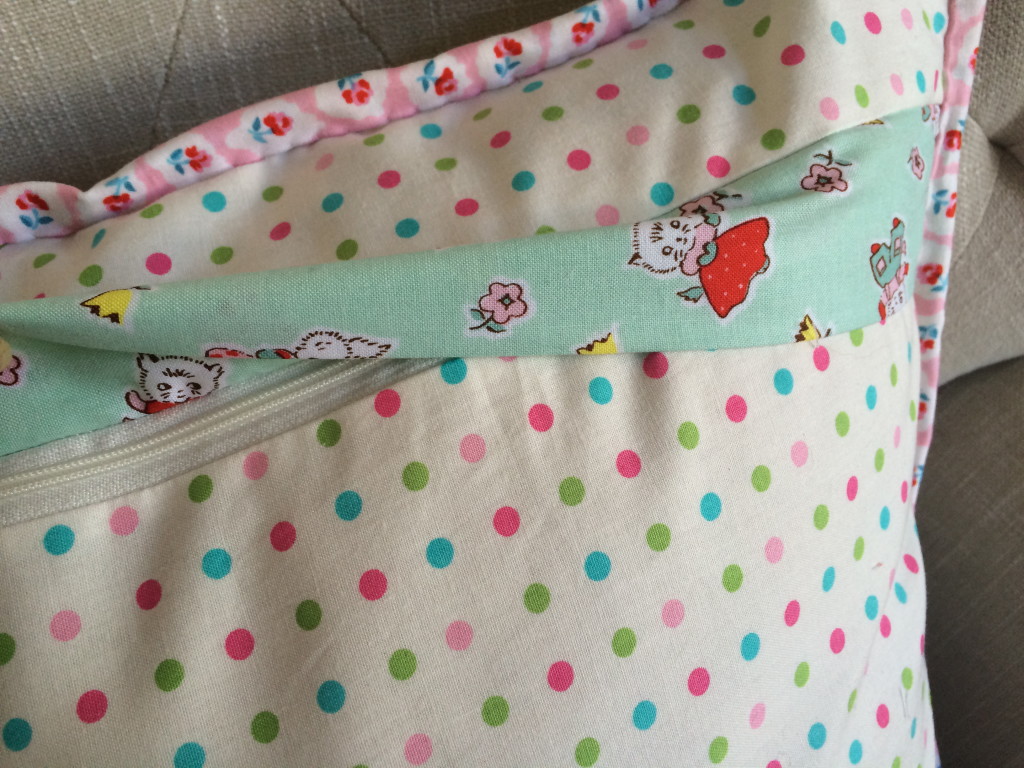
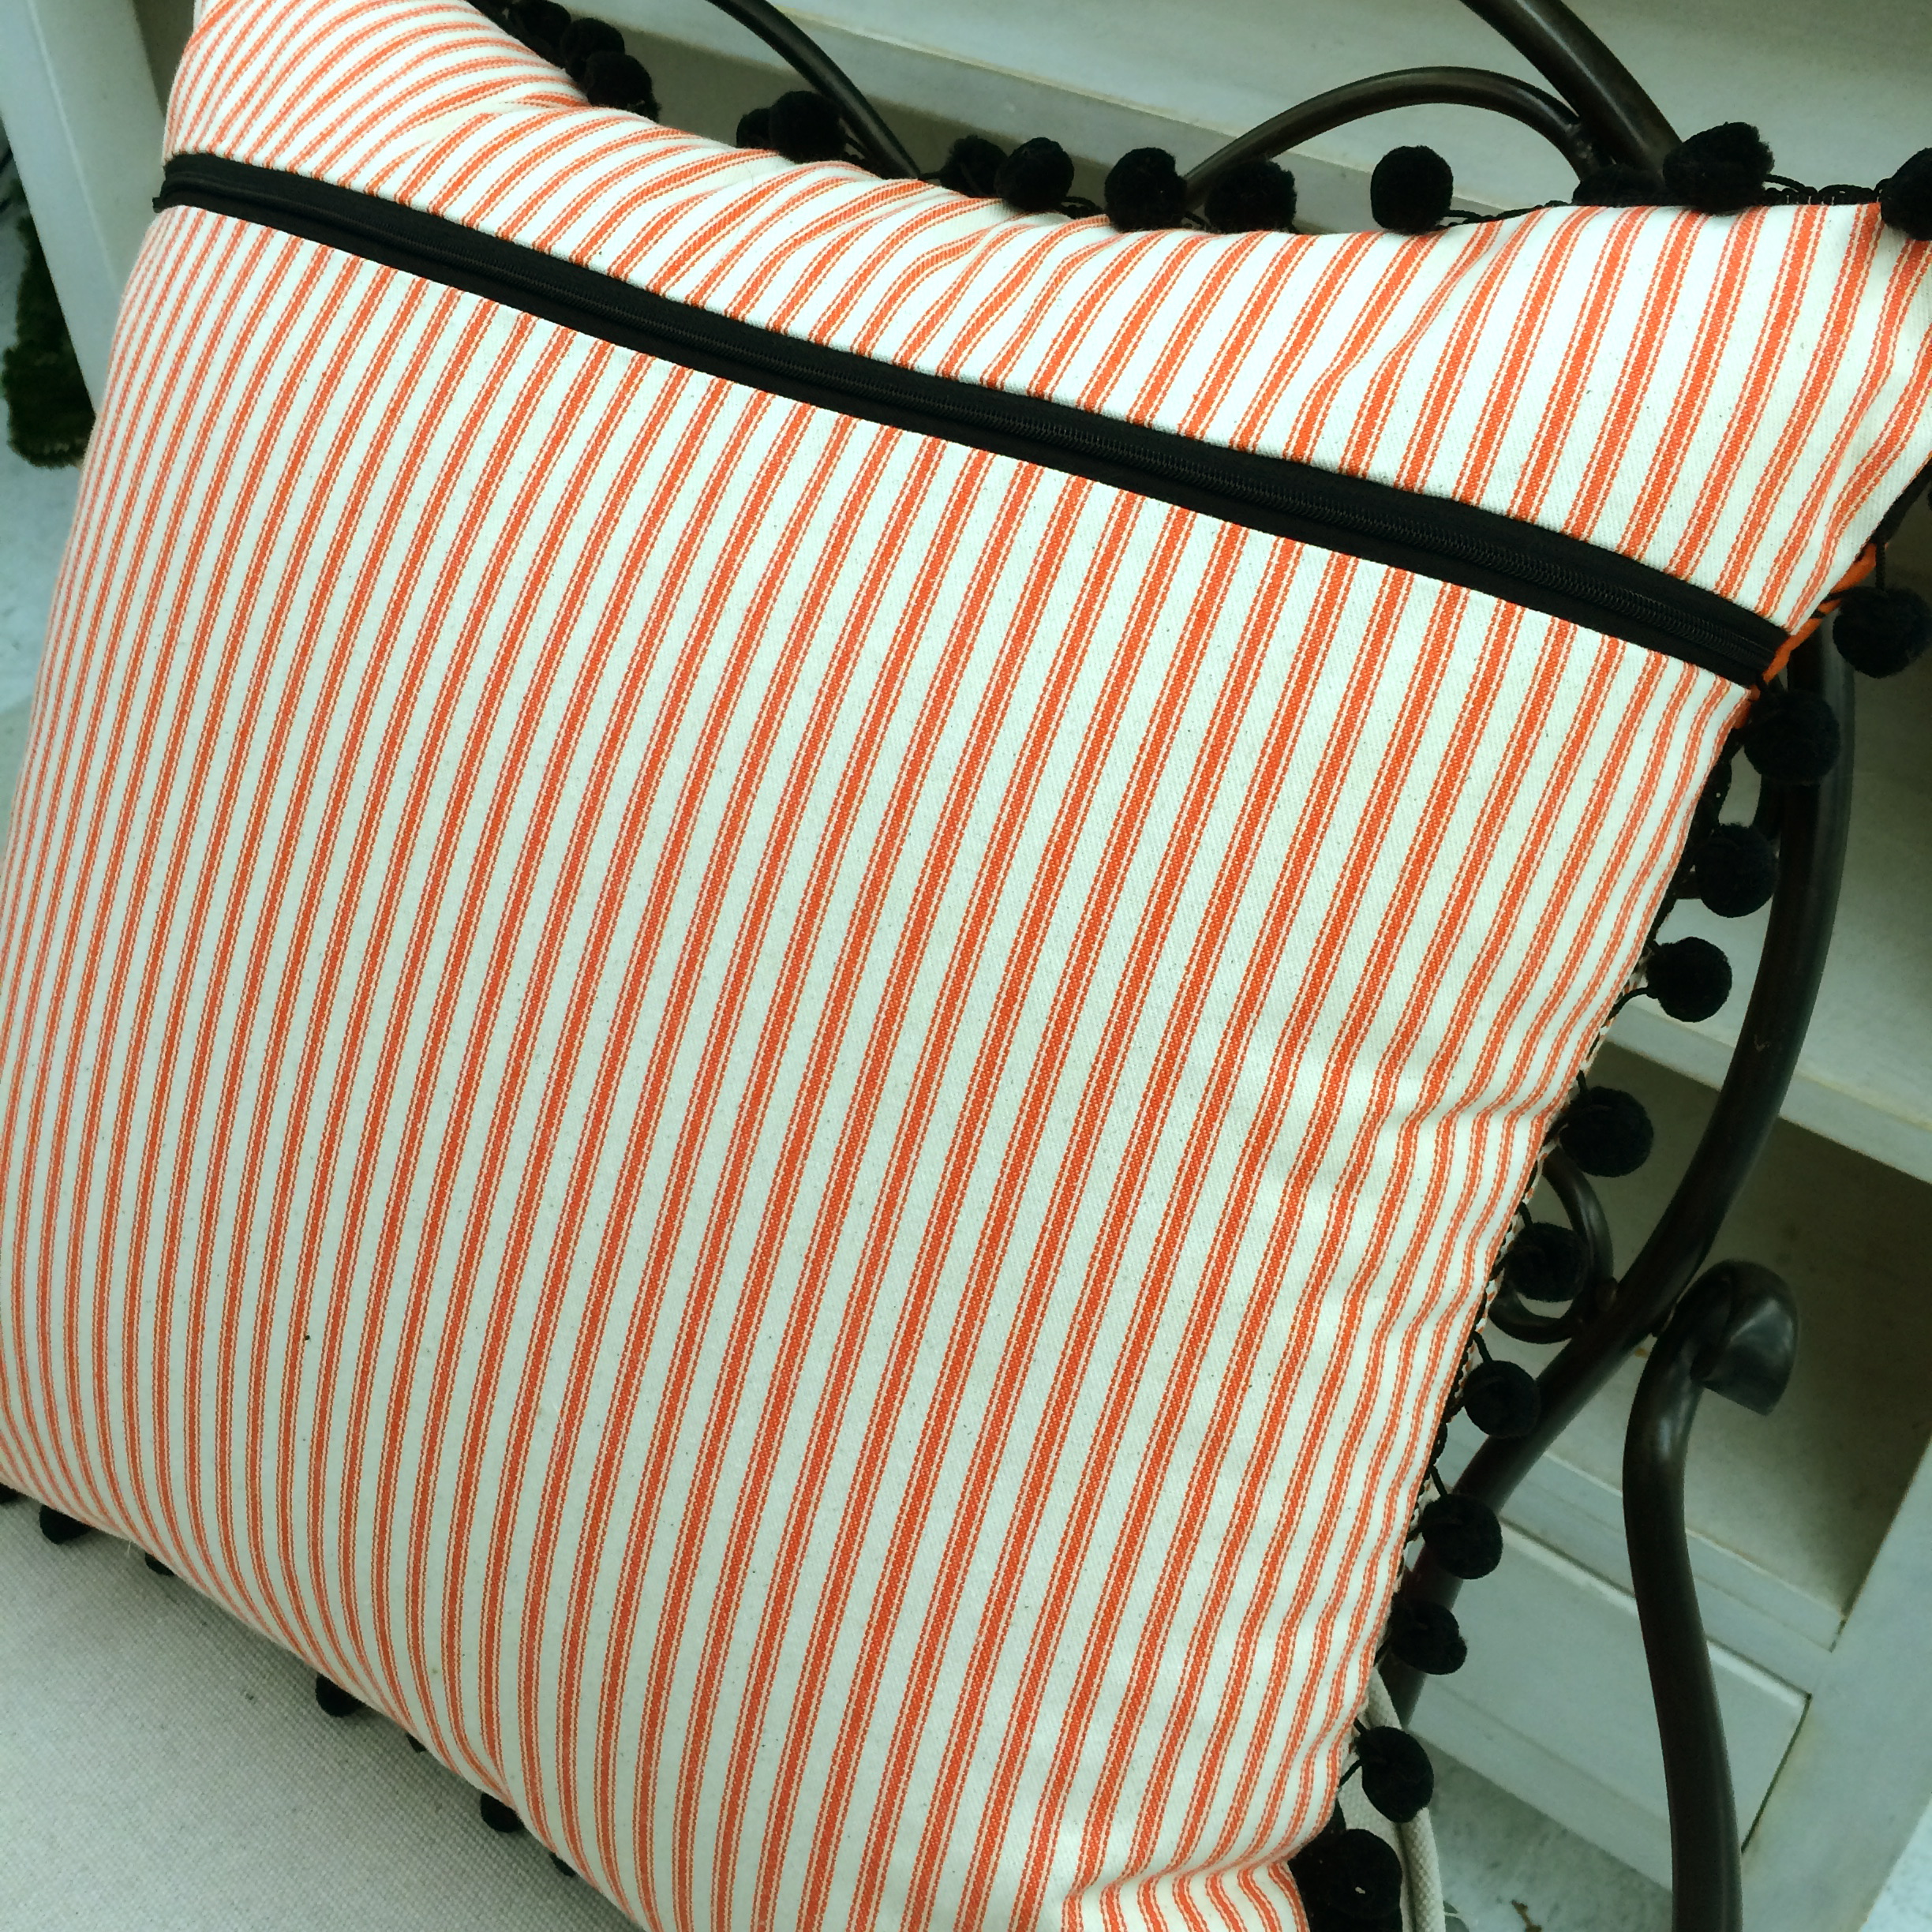
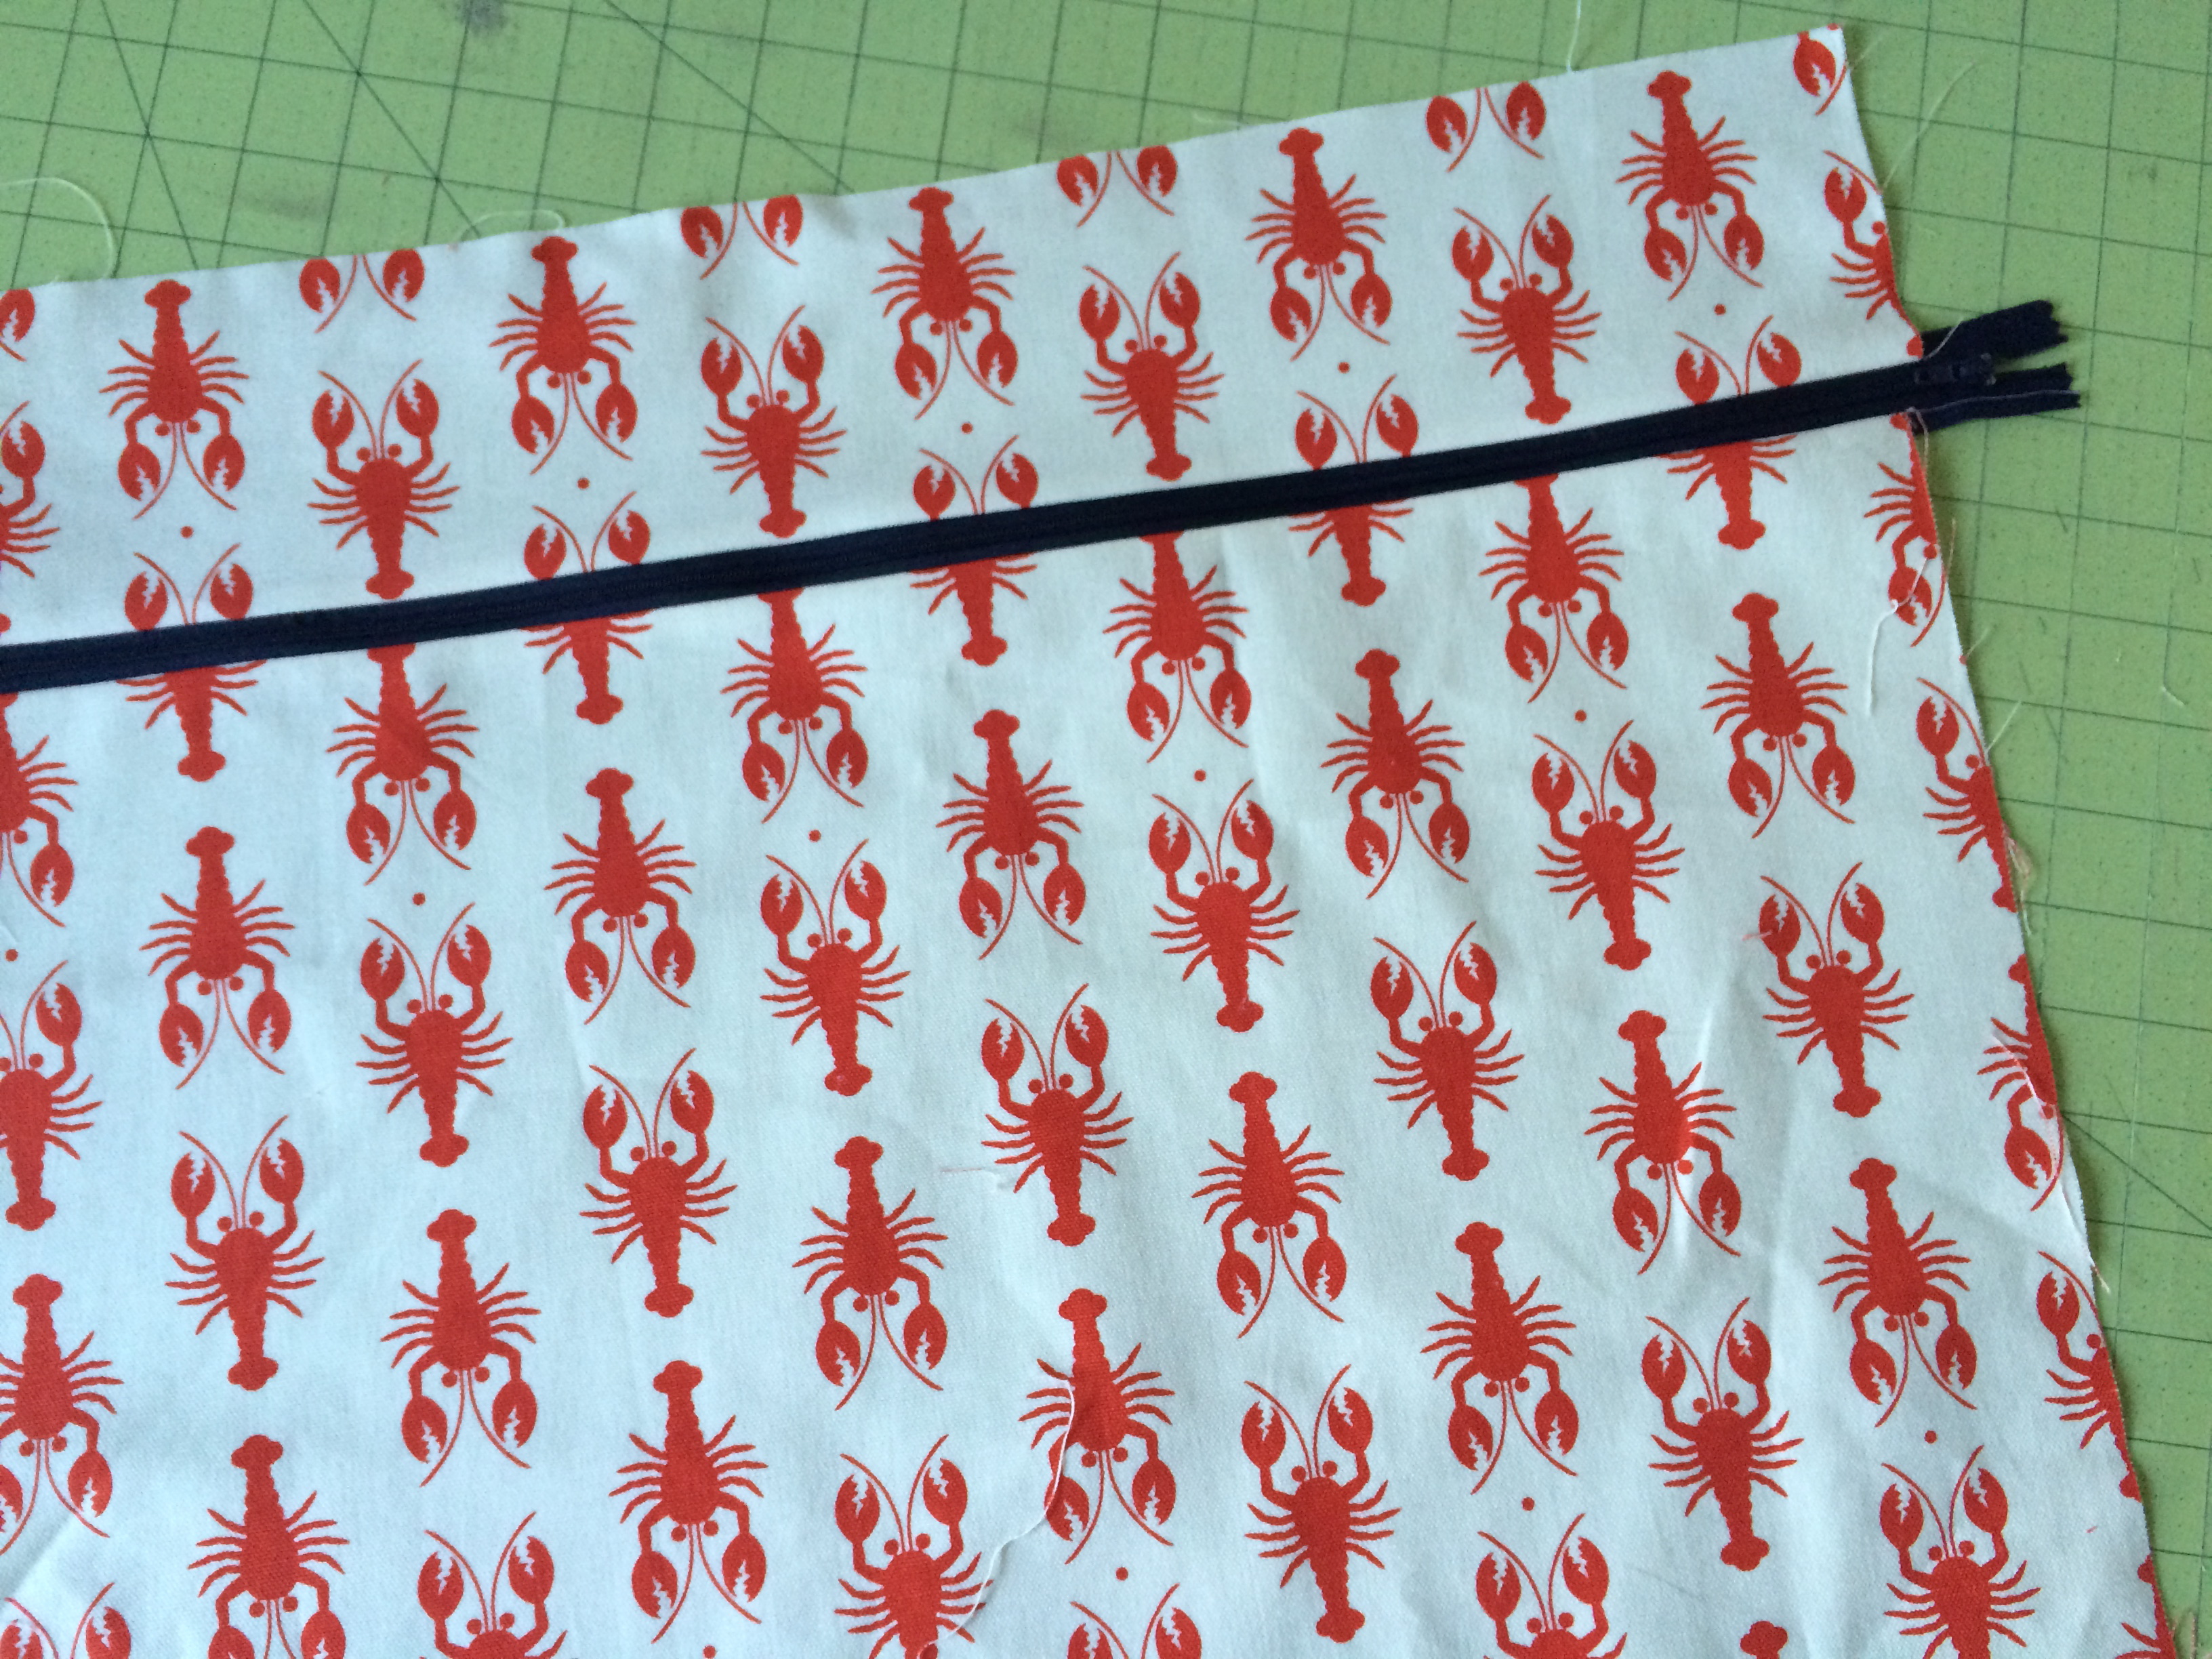
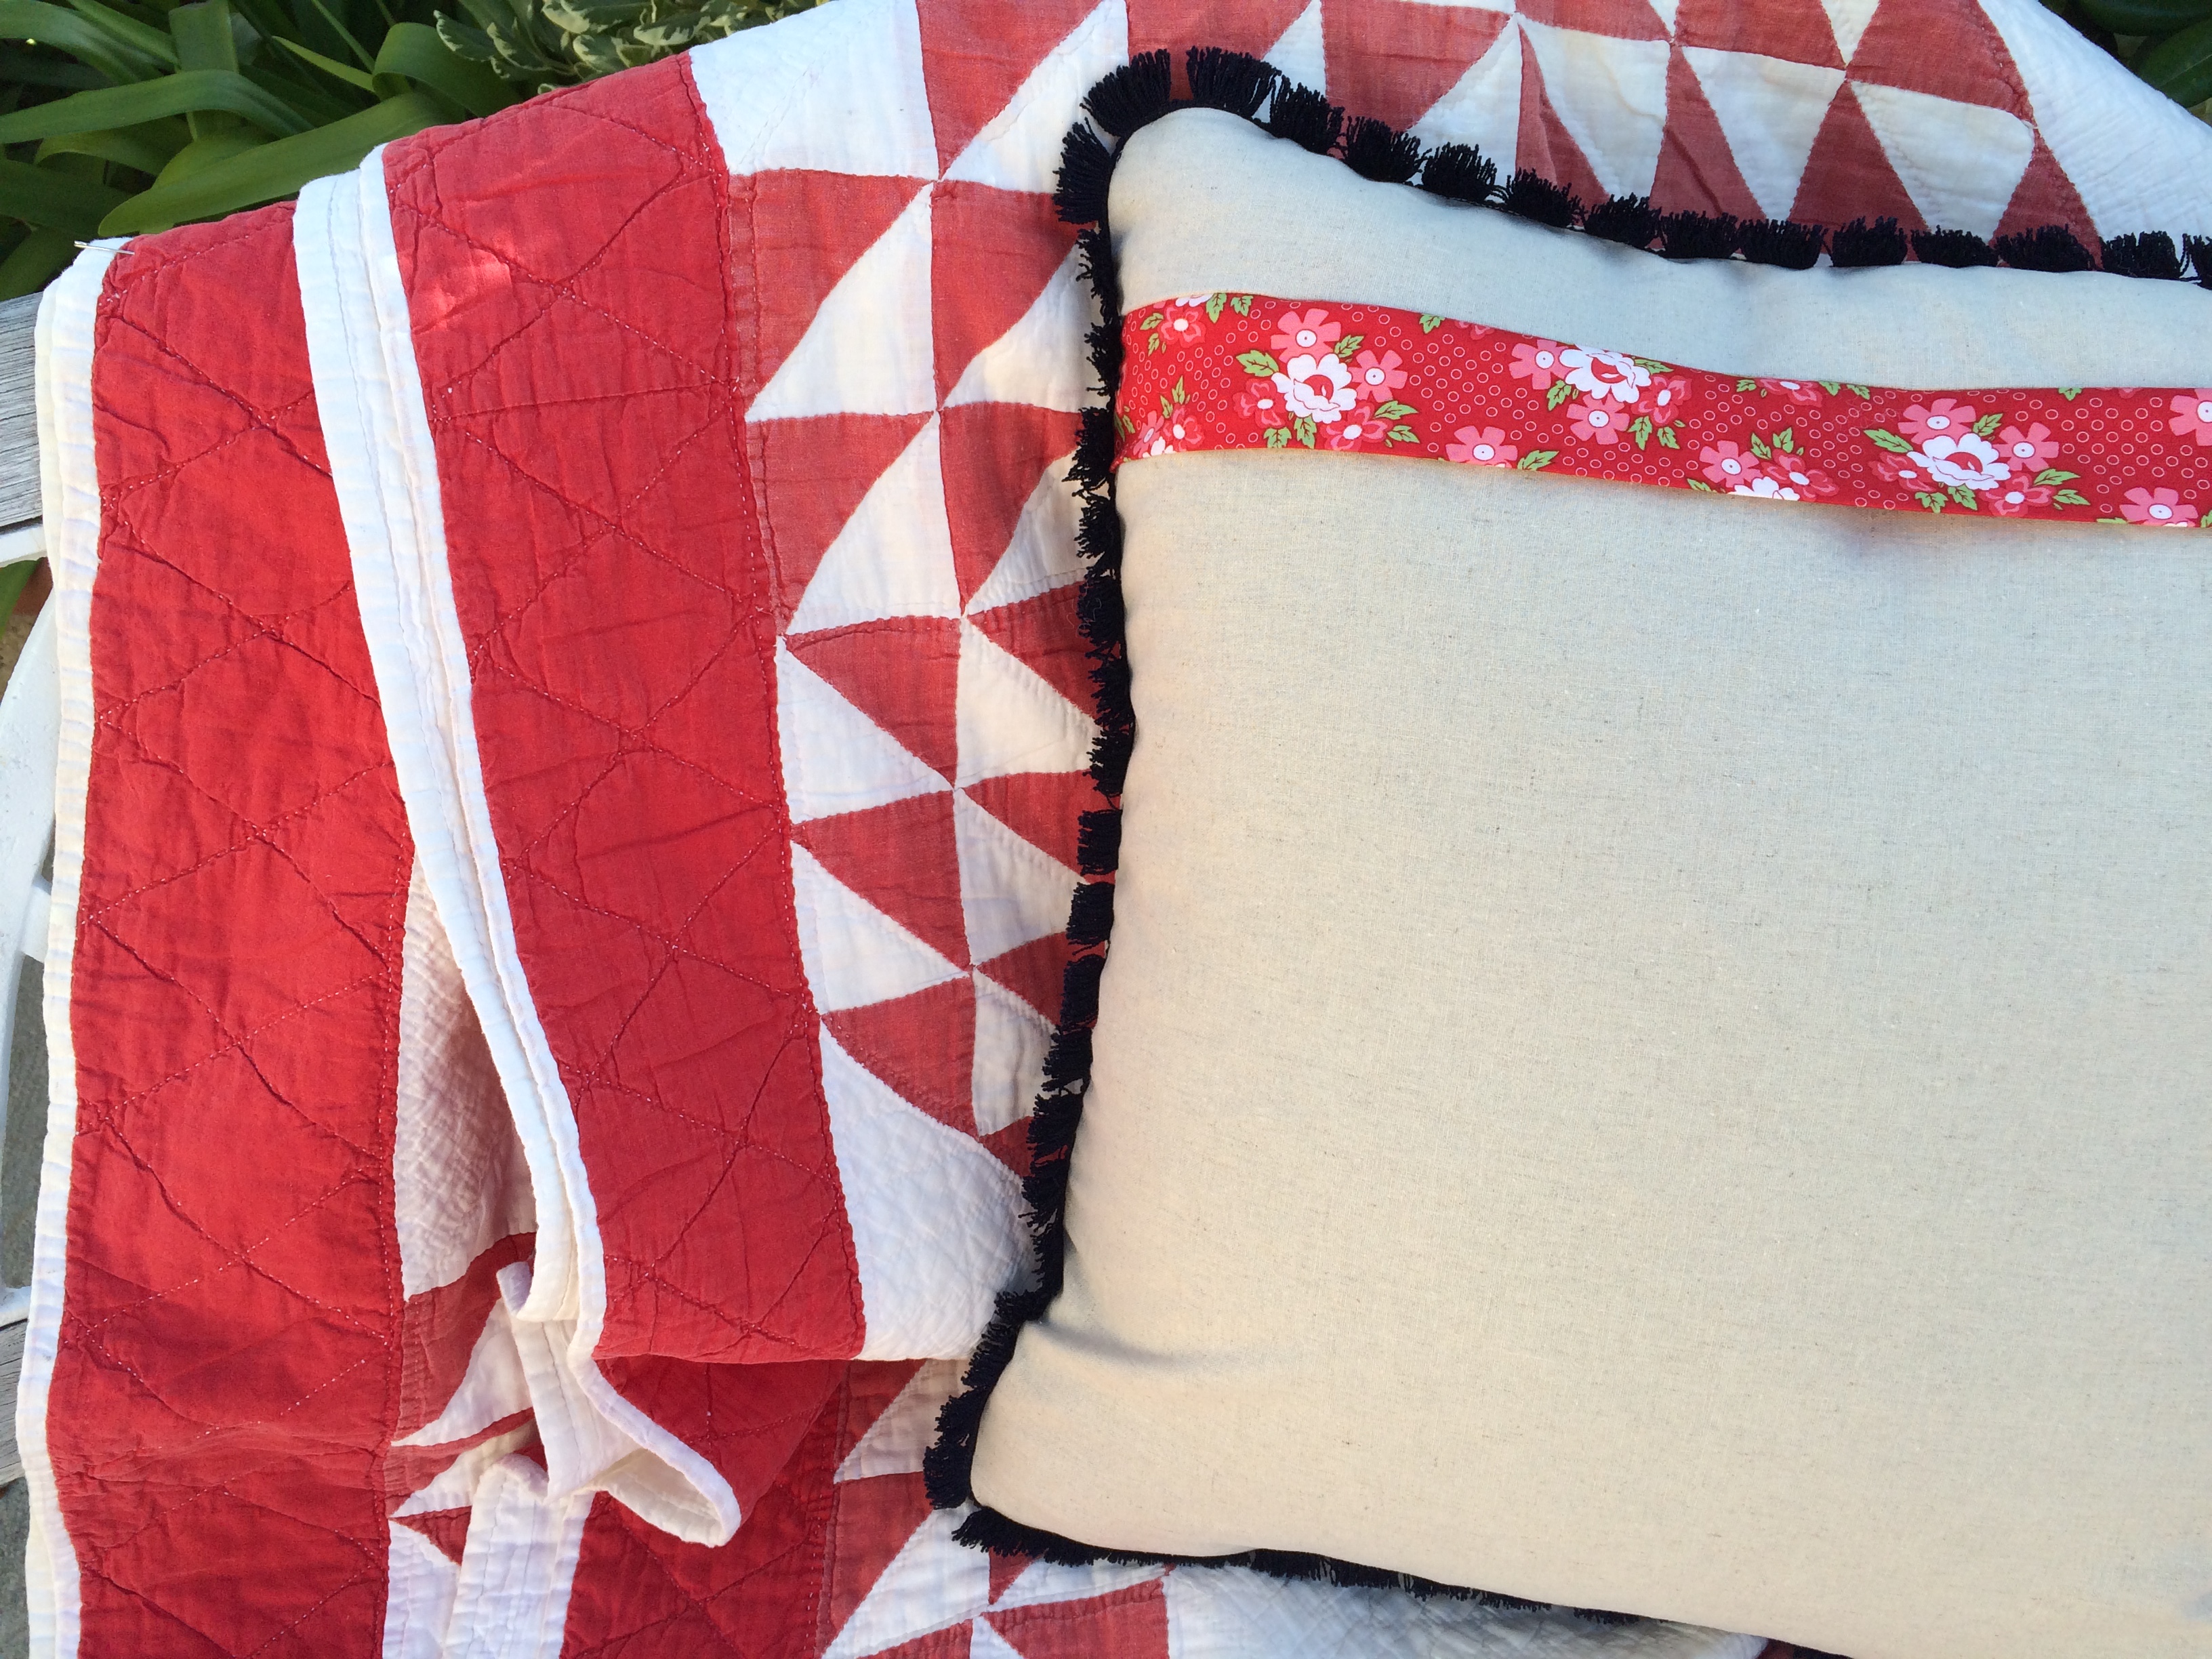
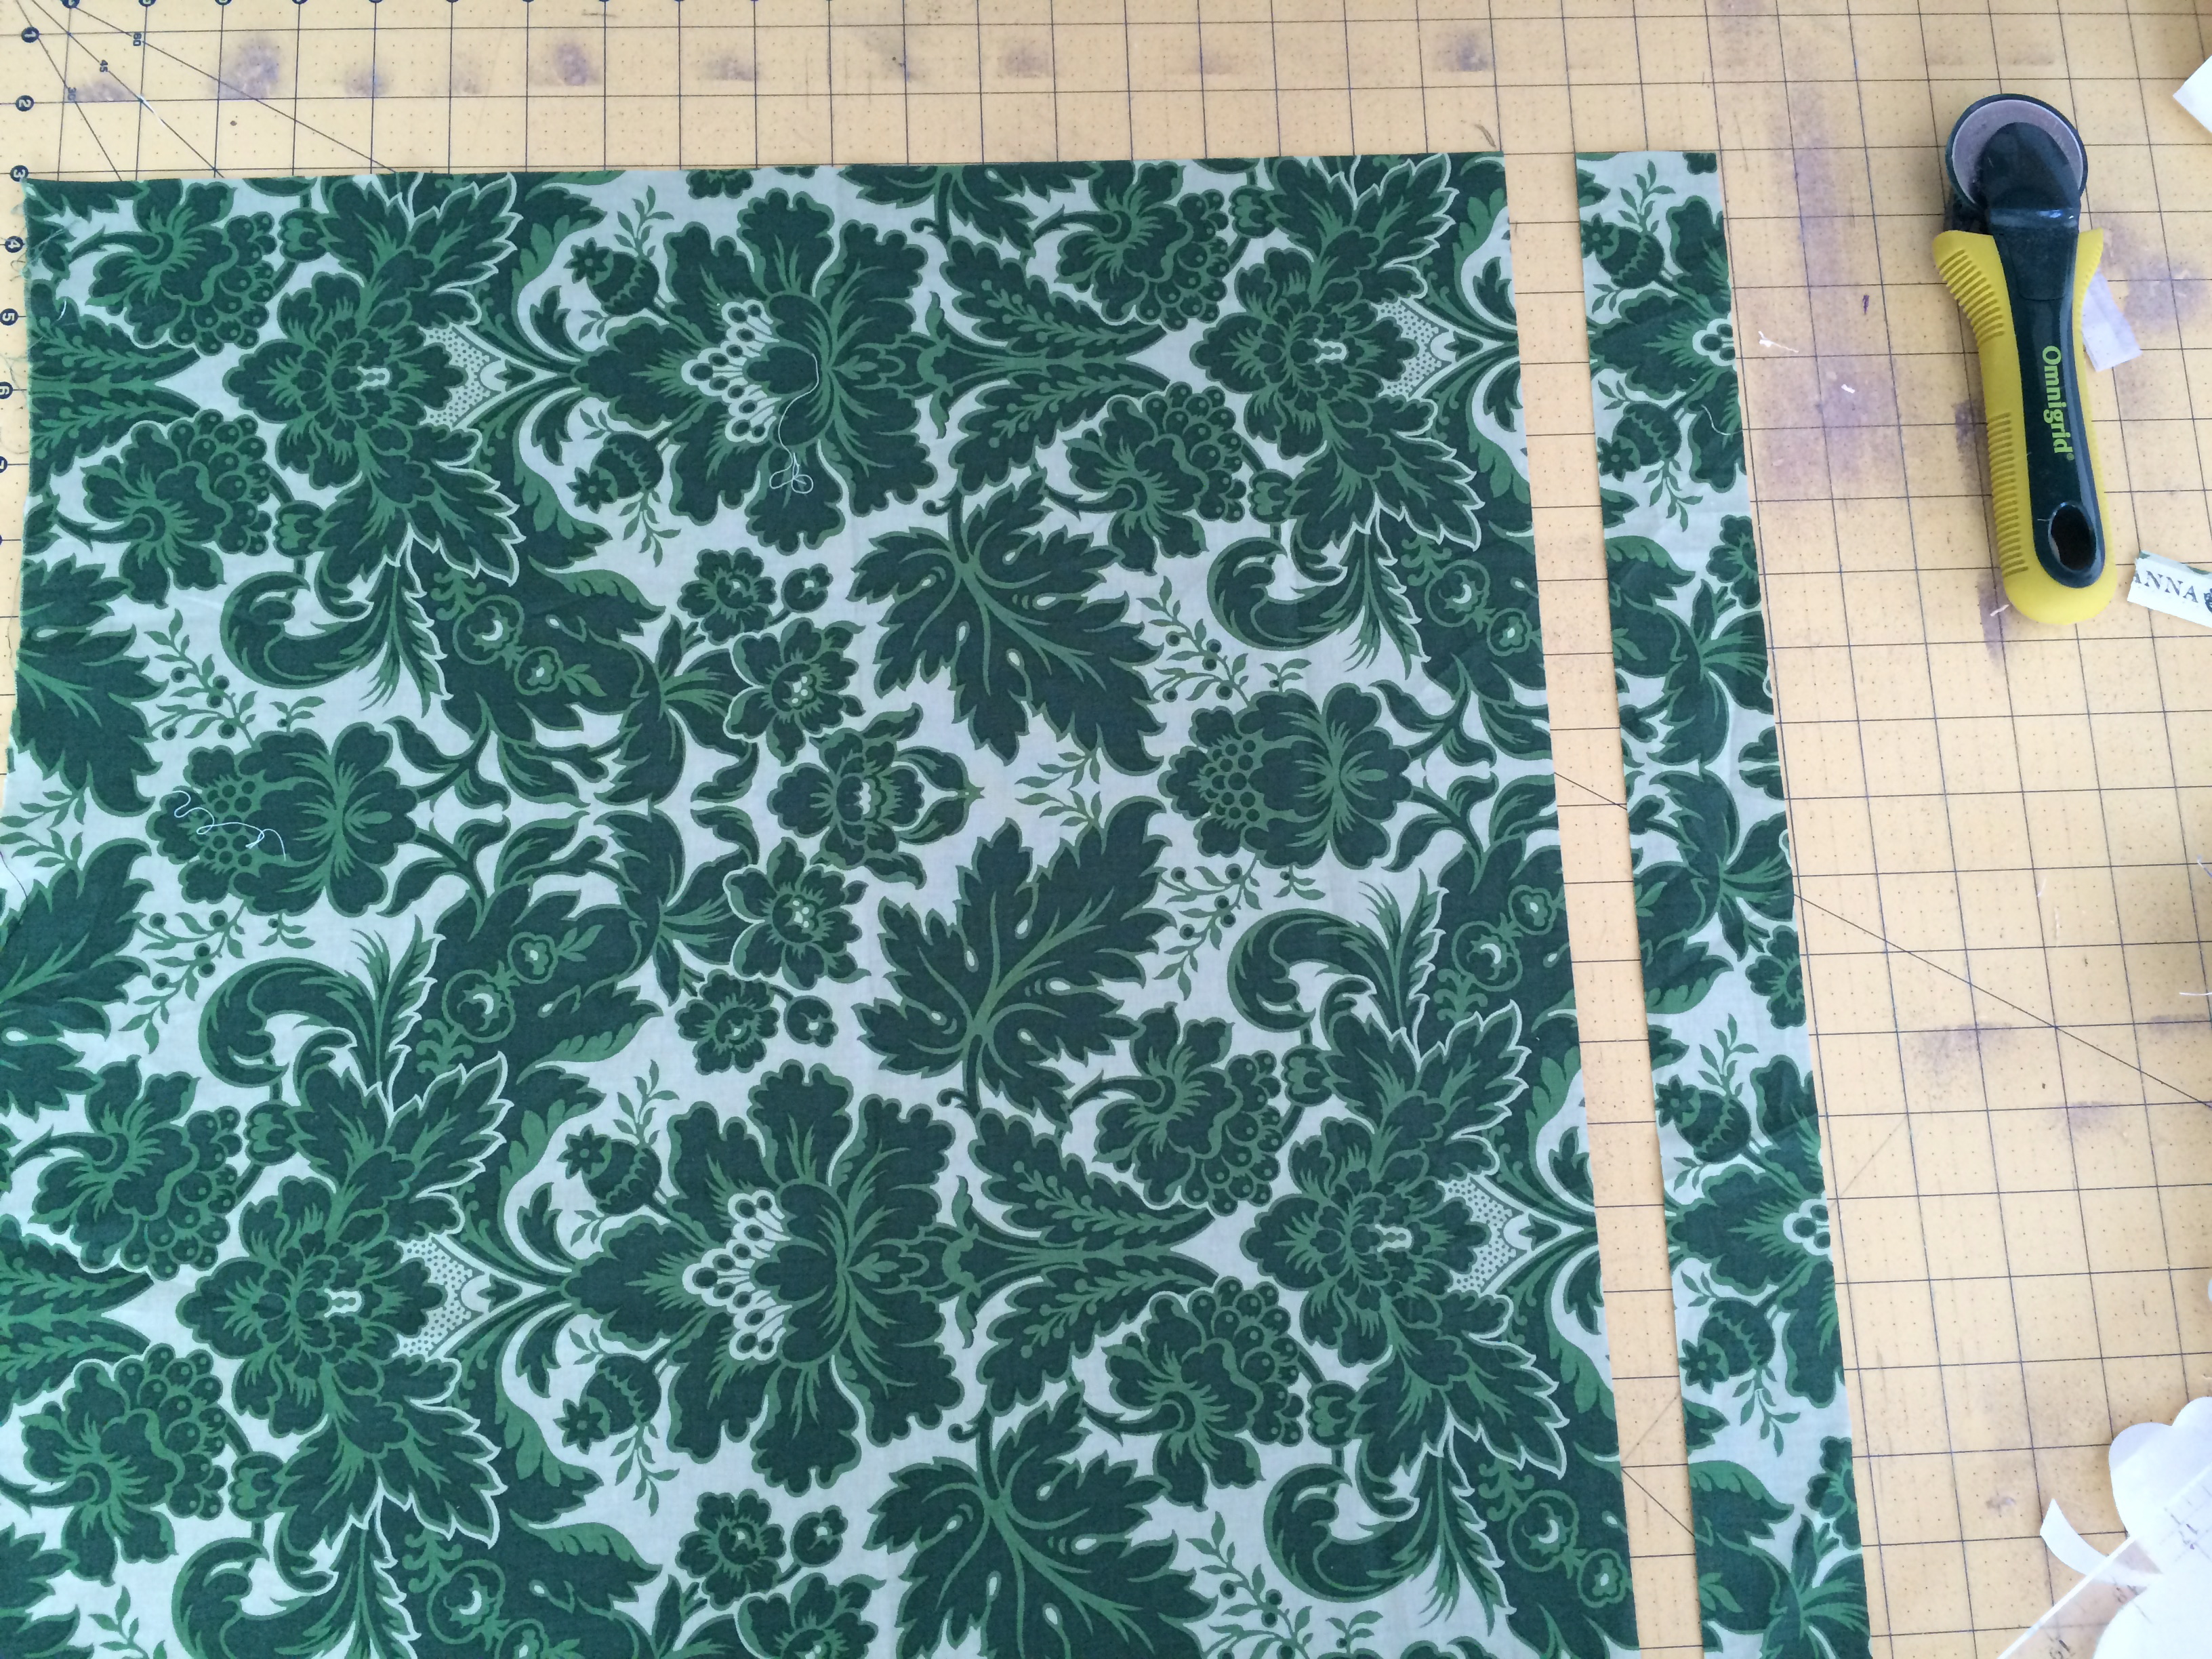
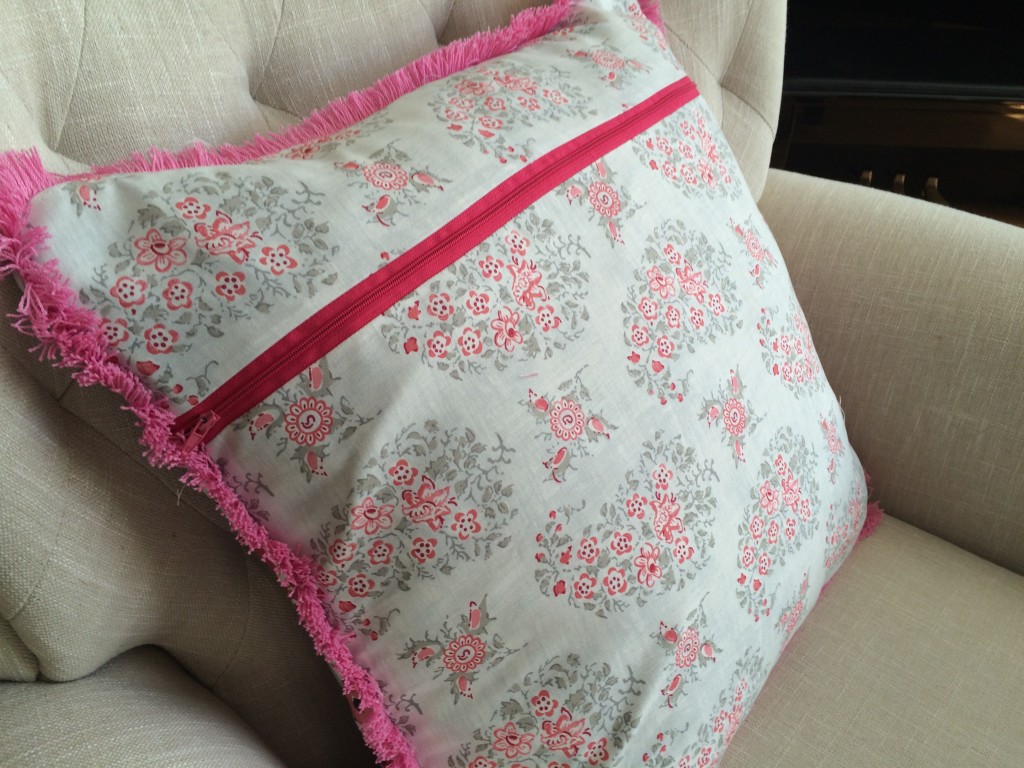
I put the zipper in the bottom portion of the pillow.  I like that you can see the zipper.
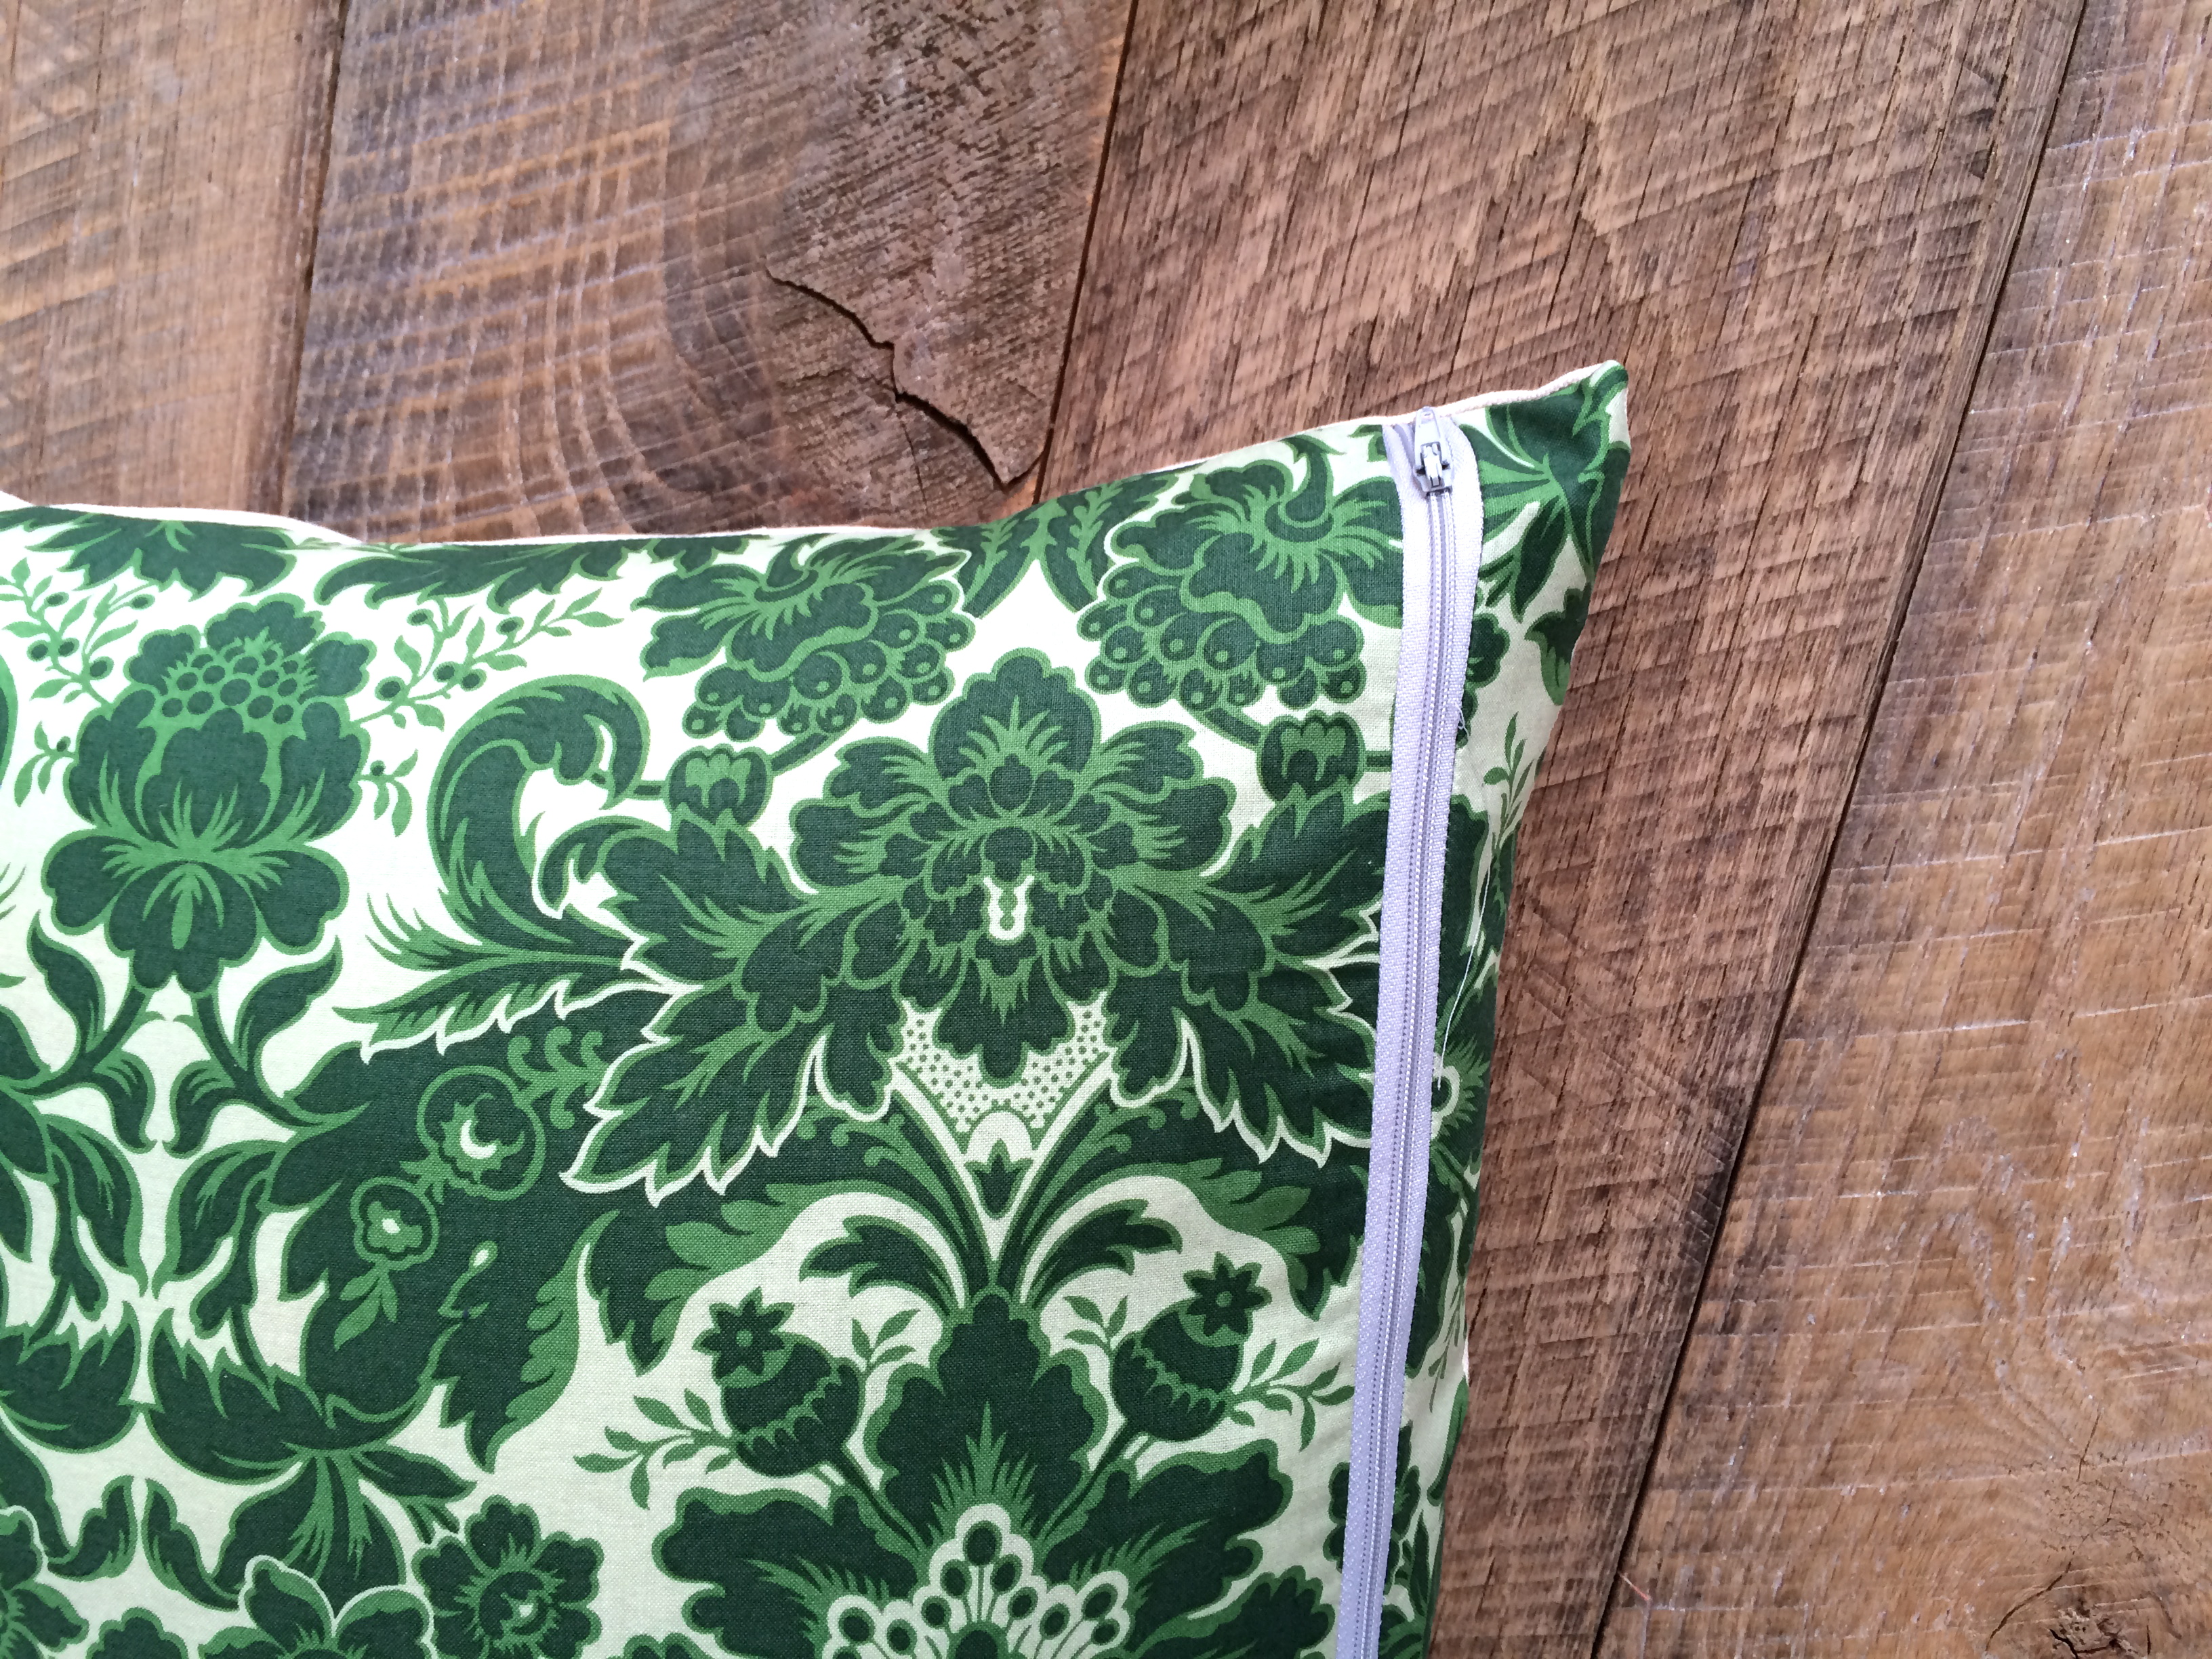
lucky pillow 10

You’re done!  Aren’t you LUCKY!!!!!lucky pillow 6

Tic Tac Toe Valentine Pillow Tutorial

valentine pillow tic tac toe
February is just flying by!  I needed a little pick-me-up today and throw pillows always do just the trick!  A friend of mine came over and we spent the afternoon sewing.  I came up with the idea of this interactive pillow after sitting next to my little girl at church yesterday.  We brought along the quiet book (circa 1980) and one of the pages is a tic tac toe game.  I thought this would be super fun to incorporate into a Valentine’s Day pillow!

tic tac toe valentine pillow

I love how it turned out and my kids LOVE it!  They couldn’t believe I made something fun!!  I think the fabrics make it – it’s the Flirt line by Dear Stella.  I had some left over from my Valentine Bookmark & Sachet project.

tic tac toe valentine pillow 17

Here’s how you can make one

Supplies:

fat quarter white fabric

small pieces of fabric for hearts and Xs – can use charm squares

cotton batting scraps

fat quarter for the pillow back

20″ pillow form

22″ or longer zipper

3 yards pink trim

2 yards pink lace

1/4 yard border fabric

10″ of velcro

Spray n Bond

X and Heart pattern, click here

Begin by cutting the white background fabric 15″ square
tic tac toe valentine pillow 2

Measure and position the pink lace so it creates equal sections, taking into account 1/4″ seam allowances around the outside of the square.  Using Spray n Bond basting spray makes positioning lace a snap.  If you don’t have this, you can pin.  Sew with matching thread.  Next, position the next 2 pieces of lace to create the grid.  Sew into place.
tic tac toe valentine pillow 3

Print and cut out the X and the heart.tic tac toe valentine pillow 4

Layer a piece of fabric, cotton batting, and another piece of fabric like this with right sides facing out.  You are making a mini quilt sandwich.  These don’t have to look pretty.  I cut mine with scissors and did not measure.  Using basting spray, spray the layers so they stay together.tic tac toe valentine pillow 5

Pin and X or a Heart on the fabric.

tic tac toe valentine pillow 6

Stitch all the way around the pattern piece.

tic tac toe valentine pillow 9

Cut out the X close to the seam.  Cut 1″ piece of velcro and position the soft piece in the center of the X.  Make sure you use the same side of the velcro for each piece or they won’t be interchangeable 🙂  I had to use the seam ripper on one of mine 🙁tic tac toe valentine pillow 7

Sew around the velcro square. Do this to each heart and X.  I made 5 hearts and 4 Xs.  Sew the opposite sides to each velcro piece in the middle of the tic tac toe squares.tic tac toe valentine pillow 8

Prepare the boarders by cutting (2) 15″ x 3″ strips and (2) 20″ x 3″ strips.
tic tac toe valentine pillow 10Sew the 15″ long strips to each side using 1/4″ seams.  Press toward the boarder.

tic tac toe valentine pillow 11

Sew the 20″ pieces on in the same manner.  Press.  Sew the decorative trim around the pillow front, rounding the corners.
tic tac toe valentine pillow 12

Prepare the back of the pillow.  Cut a 21″ x 20″ piece of fabric (I add 1″ to the length just in case the zipper or the zipper seam differs).  Cut at the 4″ mark.  Insert the zipper.  Trim off the excess zipper.  With the zipper partially open, place the pillow front to the pillow back, matching the top edge and the side edge.  There should be about 1″ extra at the bottom of the back piece.  Cut this off after sewing all the way around the pillow.  Sew all the way around the pillow using the trim seam as you guide.  I like to sew just a little larger seam then the seam I created when sewing the trim on.  Turn right side out.tic tac toe valentine pillow 13

Insert the 20″ pillow form and then place the game pieces on the velcro squares – whose ready to play!!tic tac toe valentine pillow 14

This is the back of the pillow – you can make it how you want – this is just a super fast & easy way to finish a pillow.

tic tac toe valentine pillow 123

The fabrics are amazing!!!

tic tac toe valentine pillow 15
tic tac toe valentine pillow 18
tic tac toe valentine pillow 20

Sally was being silly 🙂

tic tac toe valentine pillow 21

tic tac toe valentine pillow 22