SPOOKY CAT Pillow

spooky halloween pillow

Can you believe how fast October is flying by?????  It’s crazy!  Here is a quick Halloween project – with a black cat of course – that you can sew in about 30 minutes.   By using their Heat n Bond EZ print sheets, you can print the pattern pieces onto the appliqué paper in your own printer!


Supplies

20″ x WOF duck cloth or neutral light weight canvas
fat quarter or similar black fabric
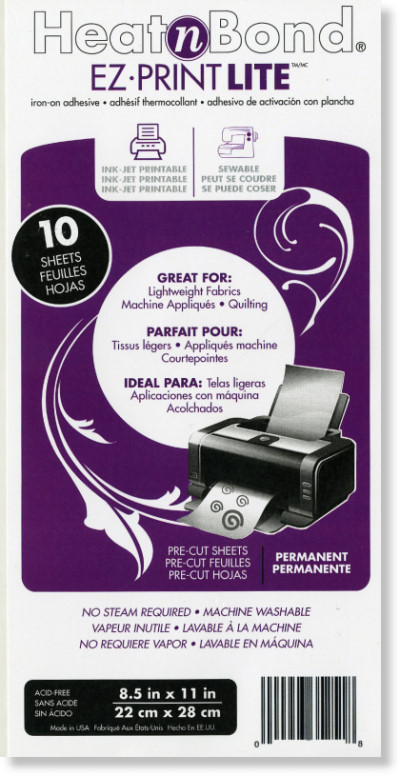
Heat n Bond® Lite EZ print sheets
22″ or longer zipper
20″ pillow form

Instructions

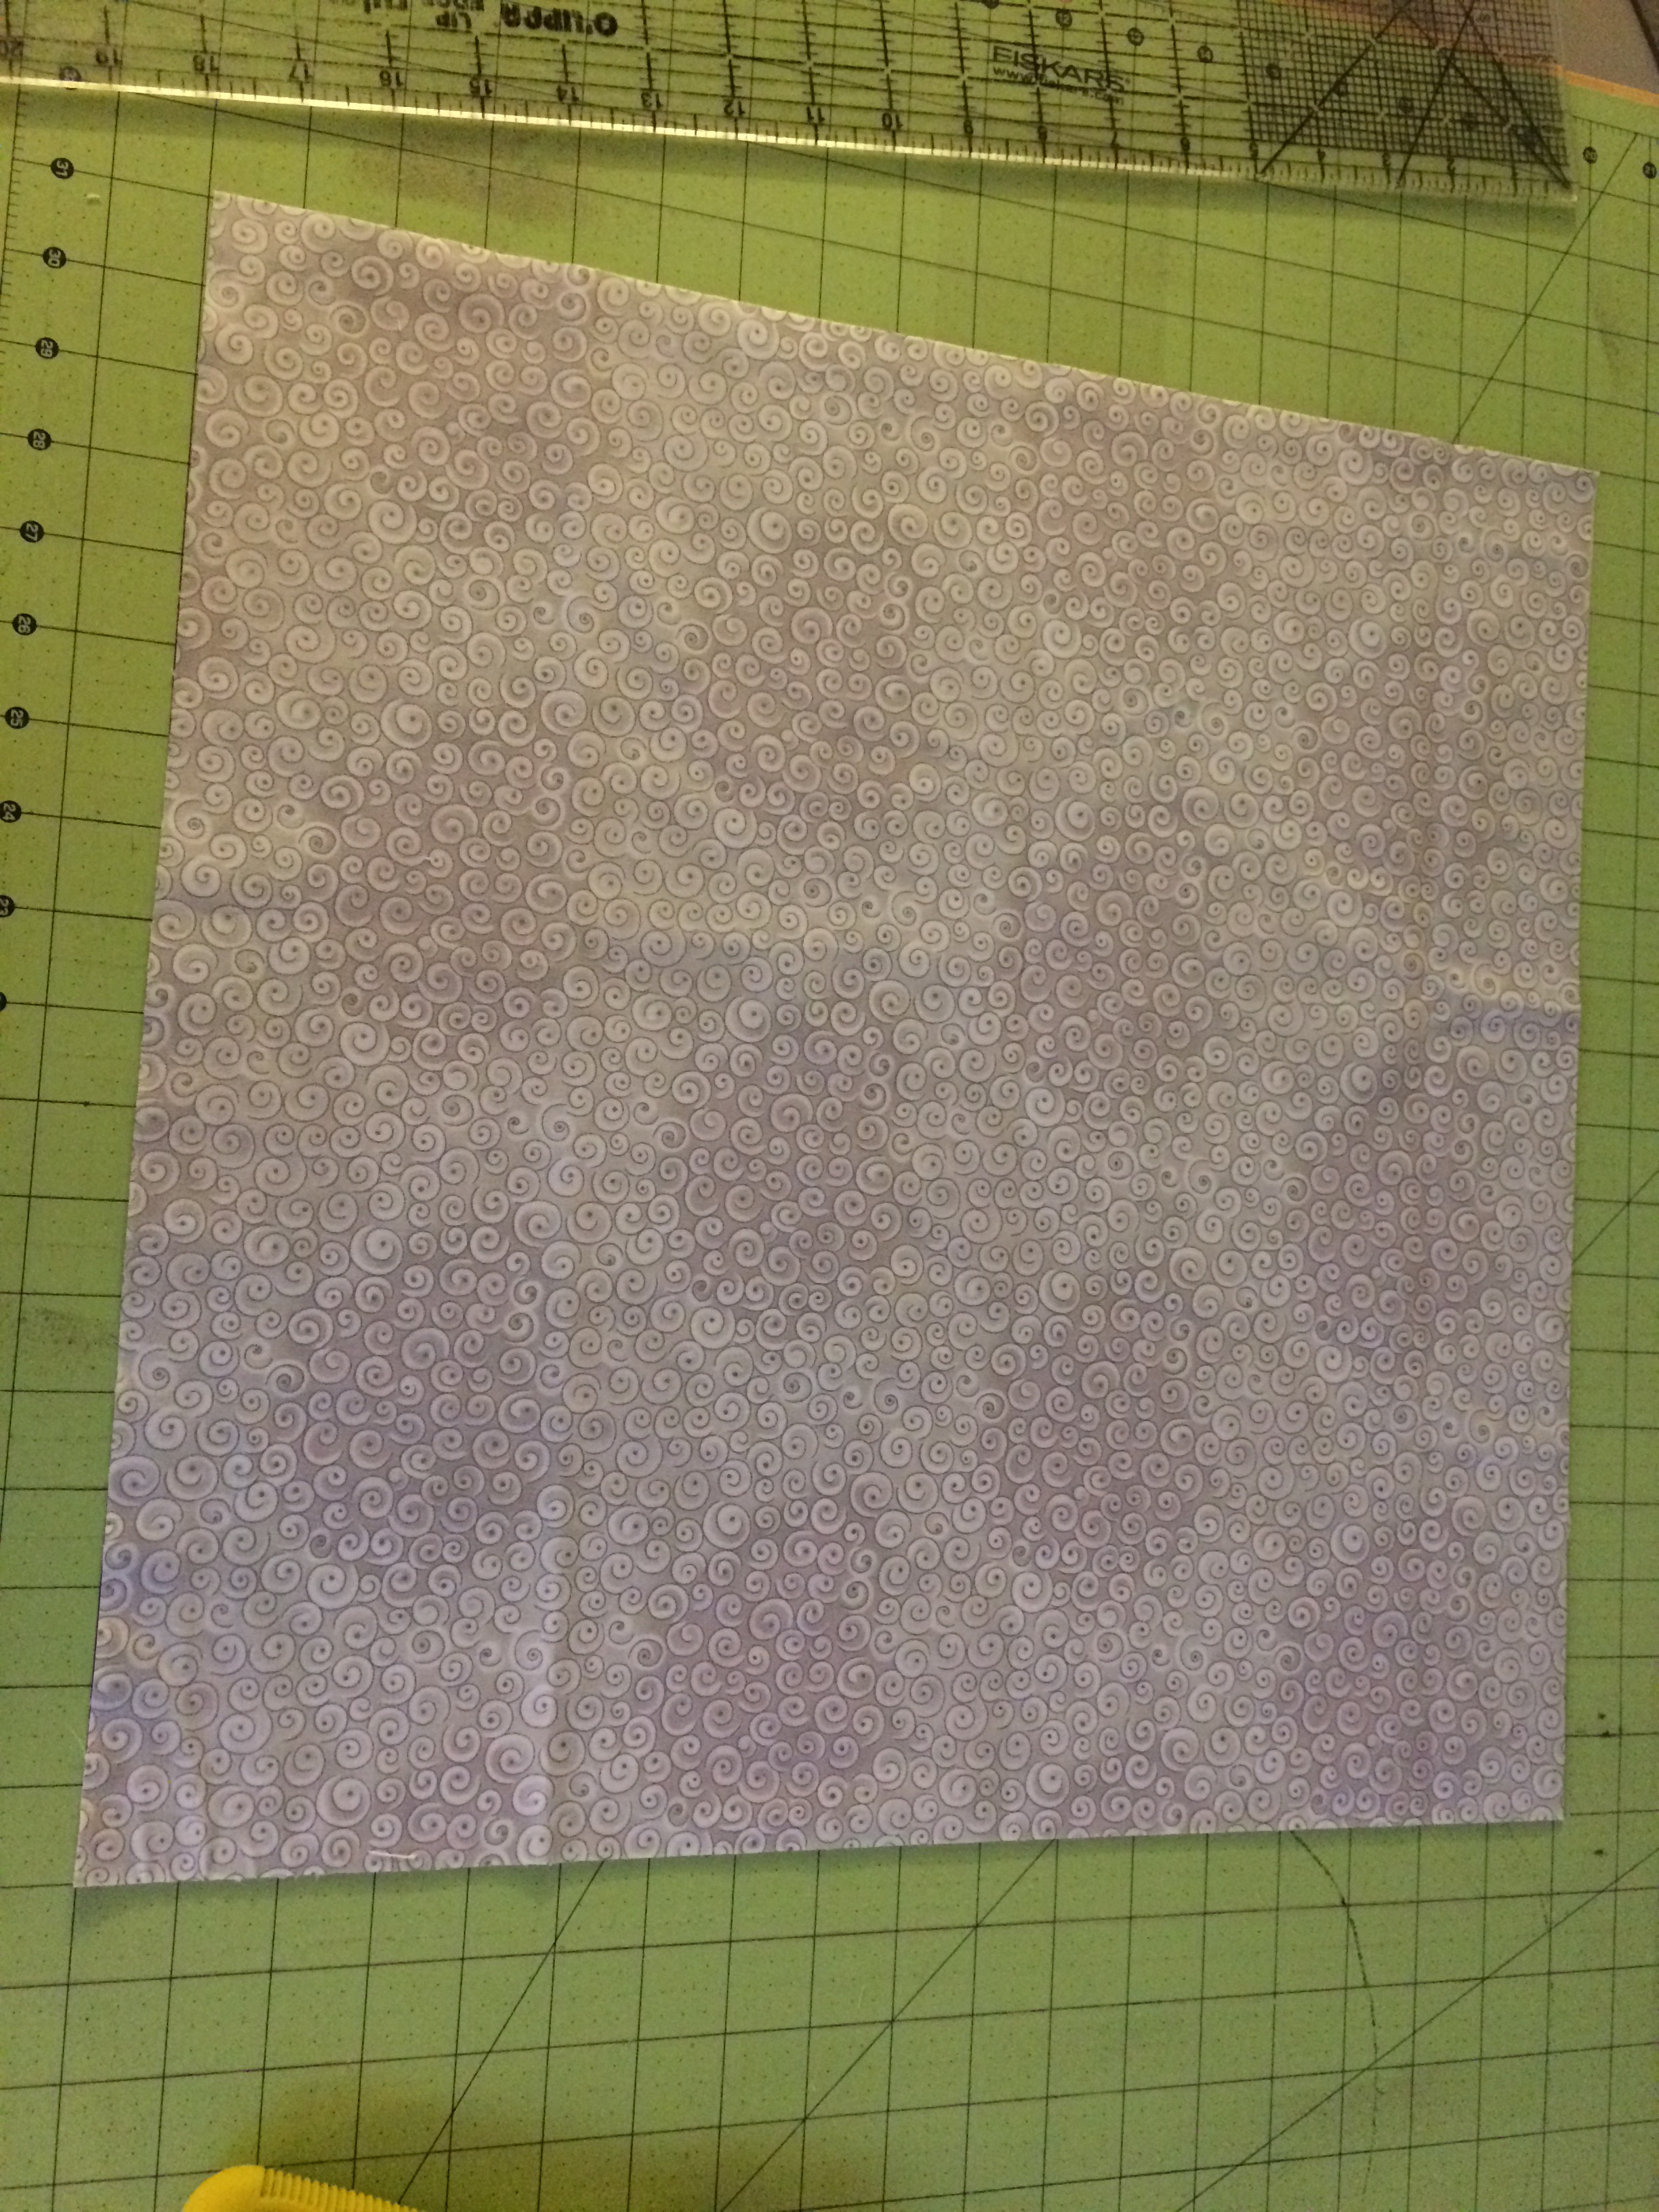
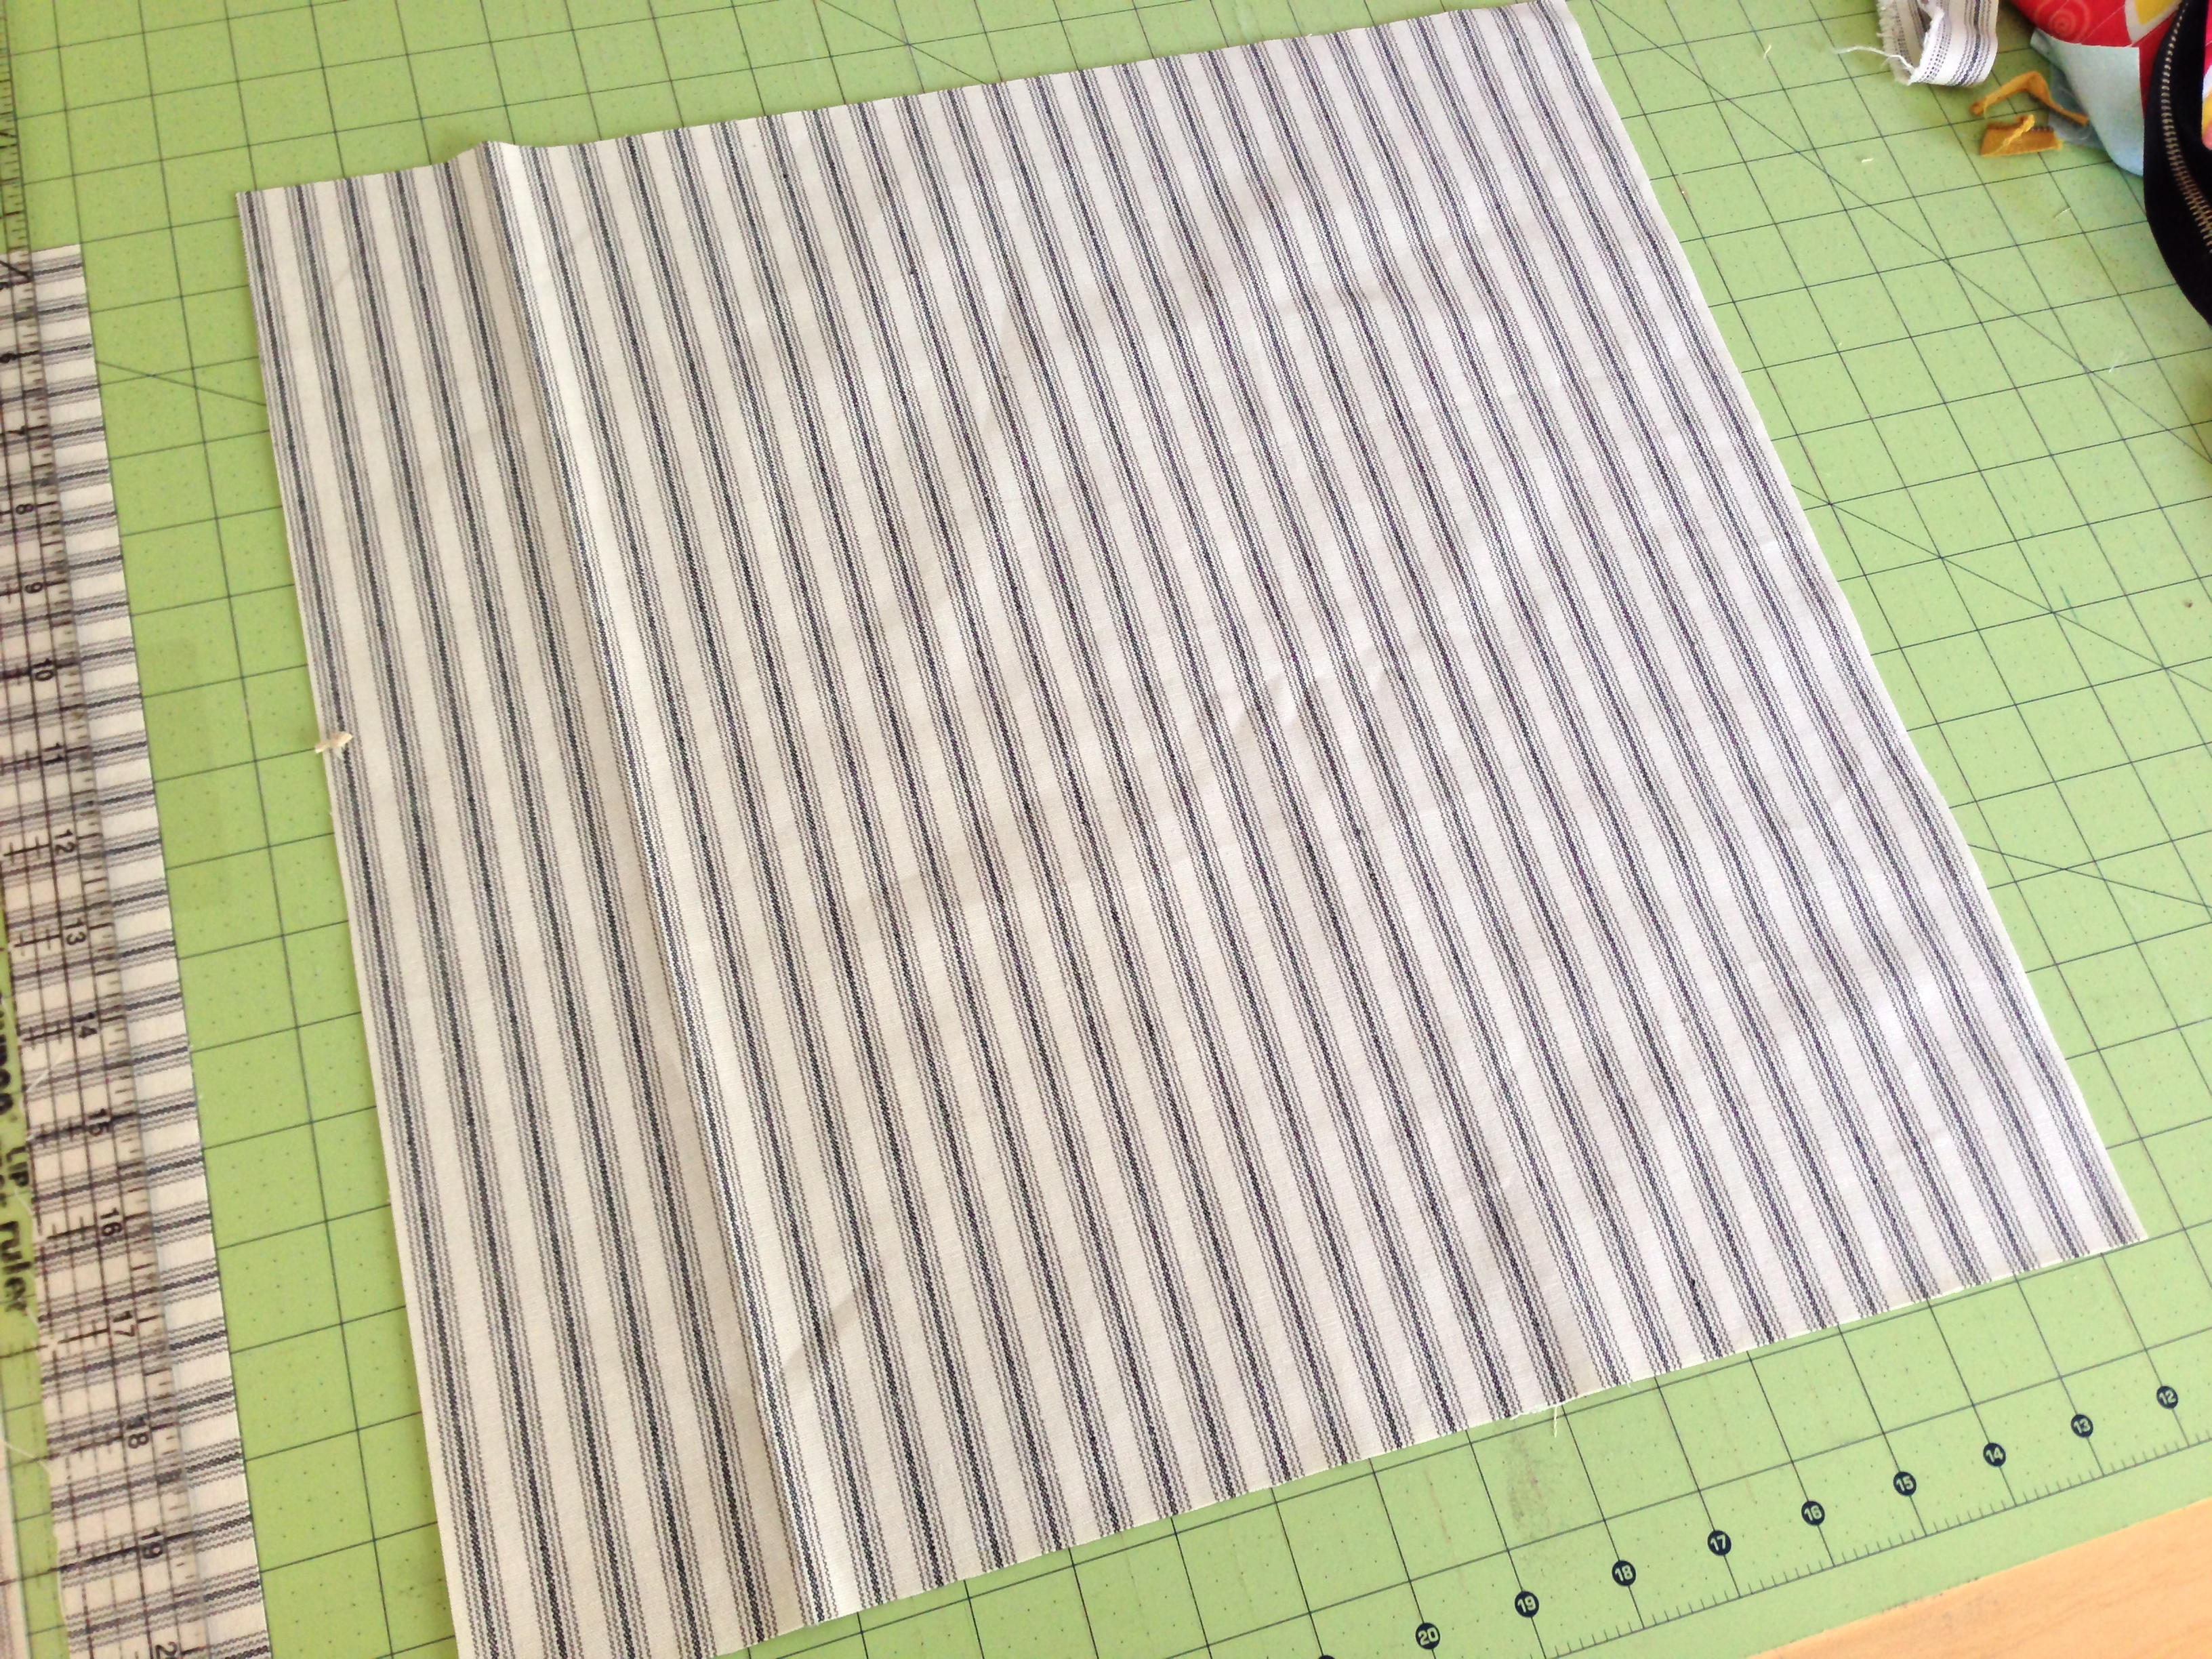
Begin by cutting (2) 20″ squares from the neutral fabric

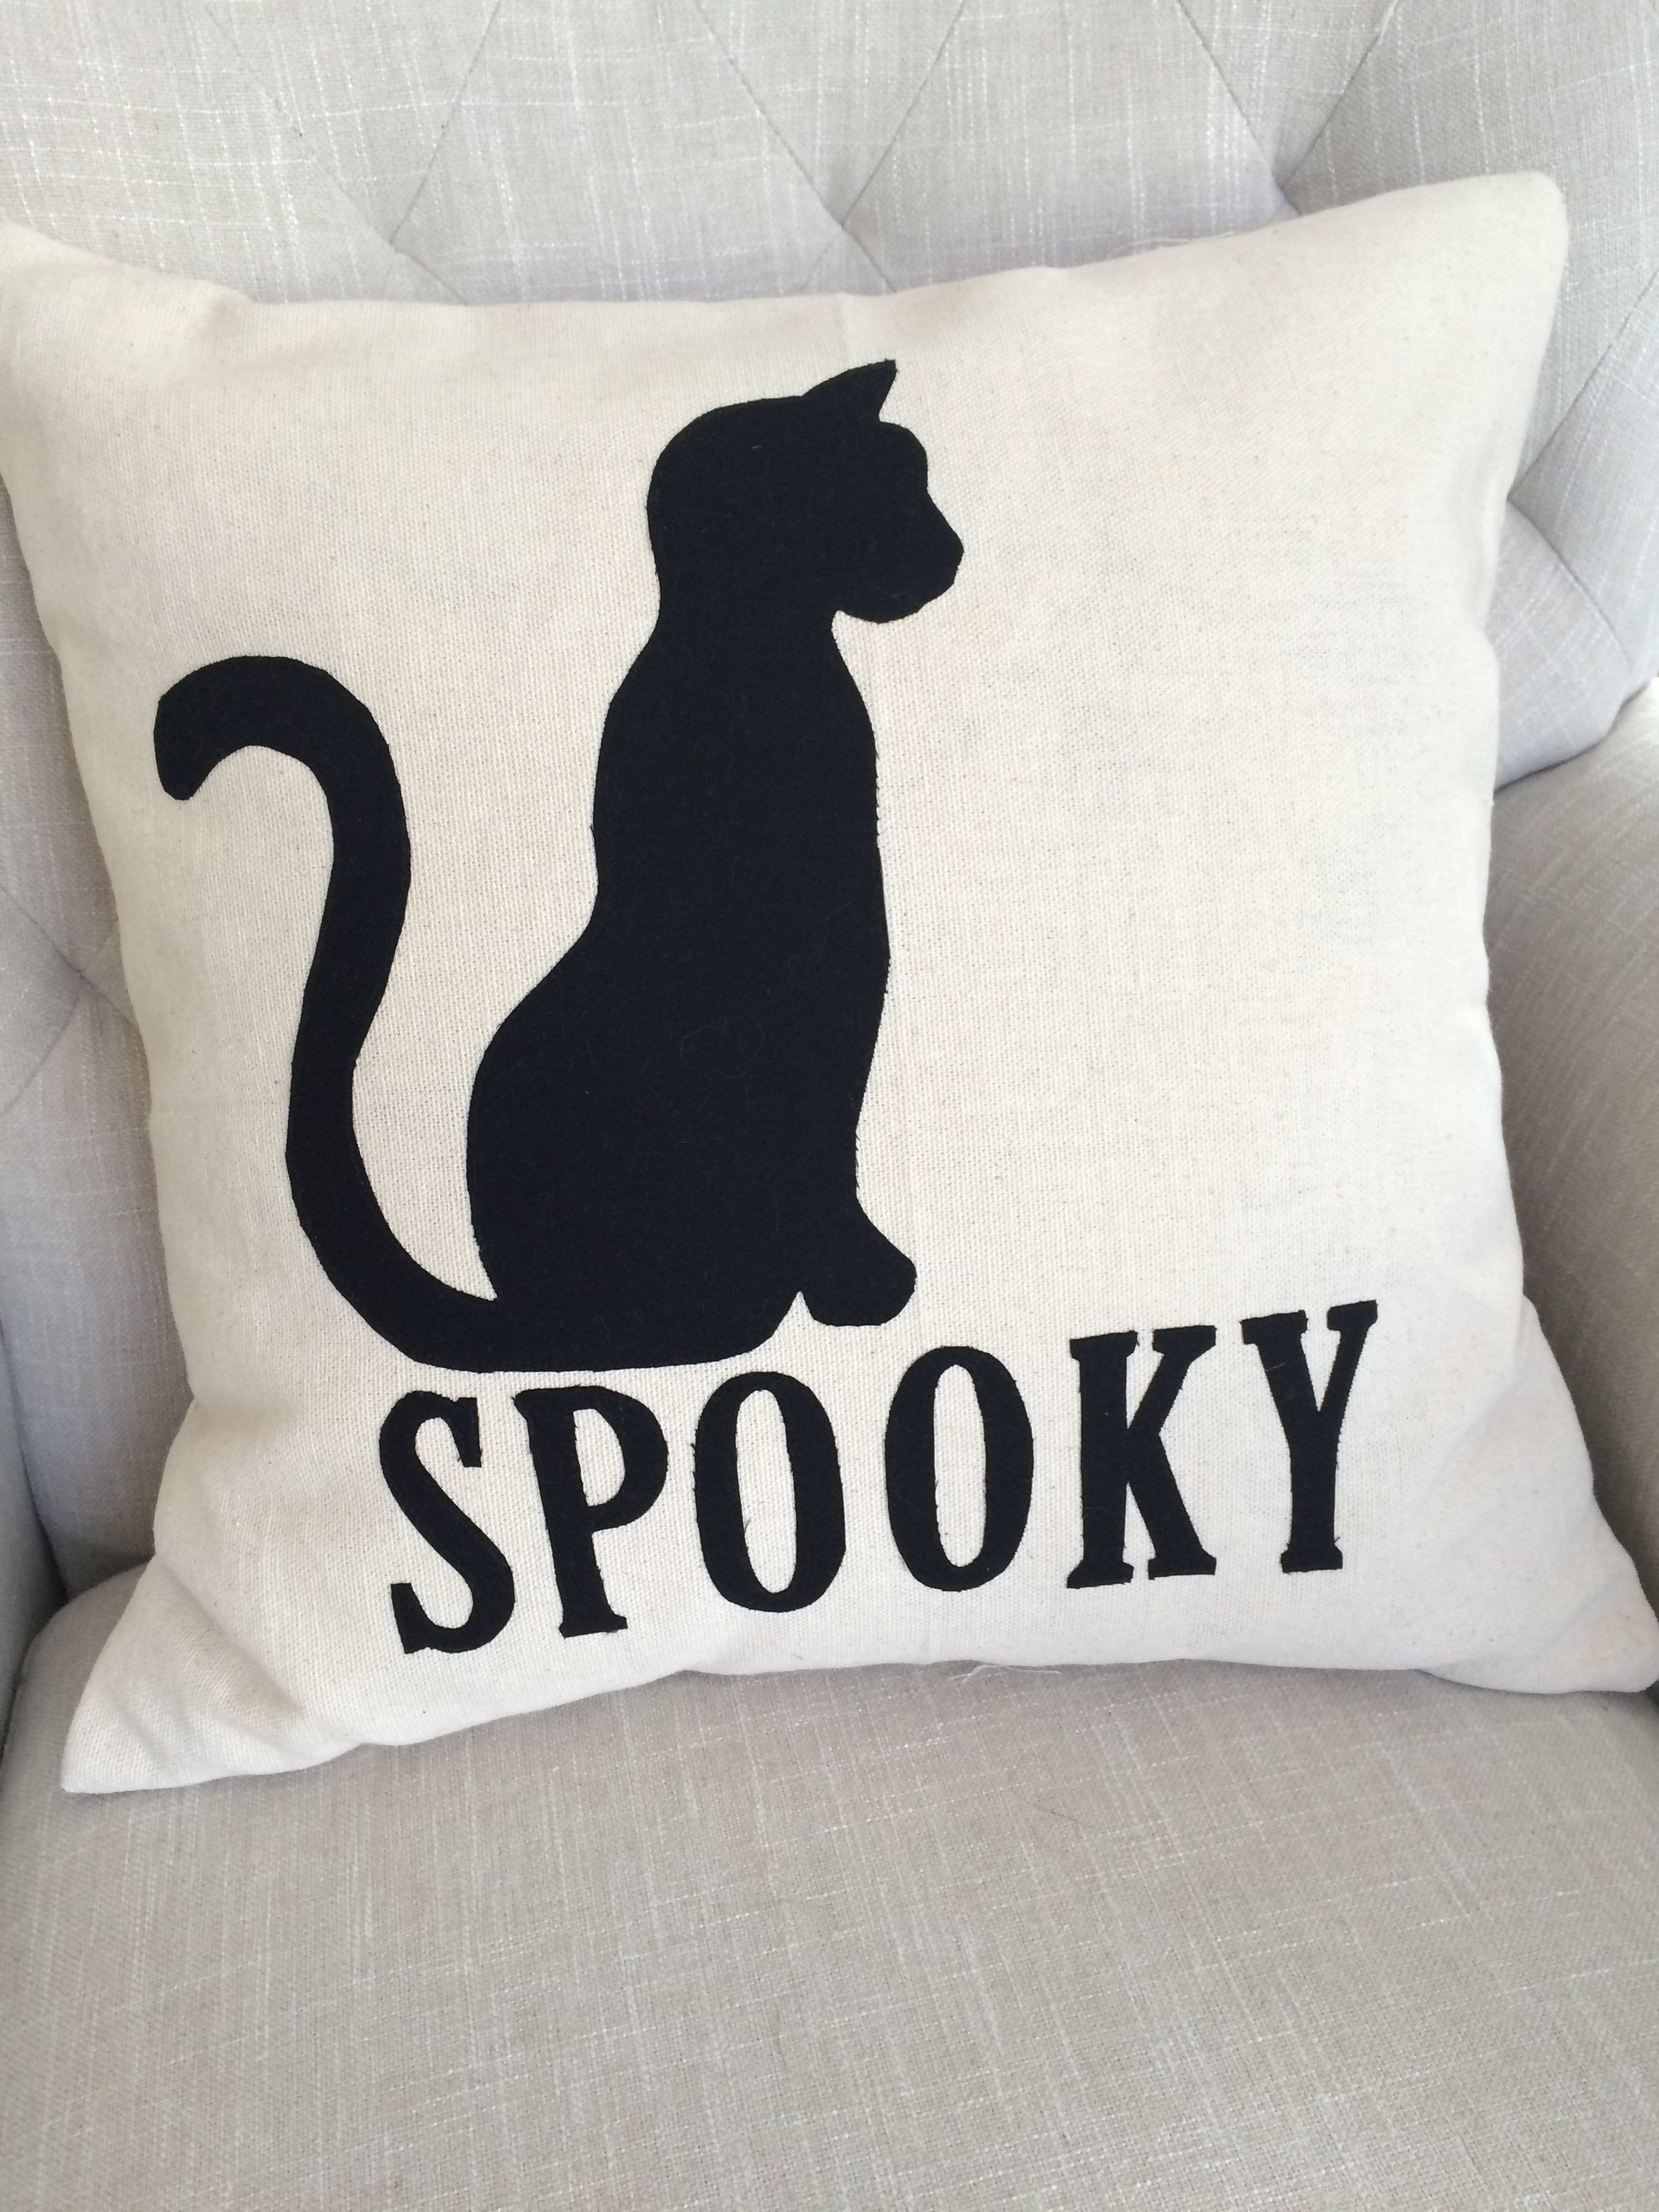
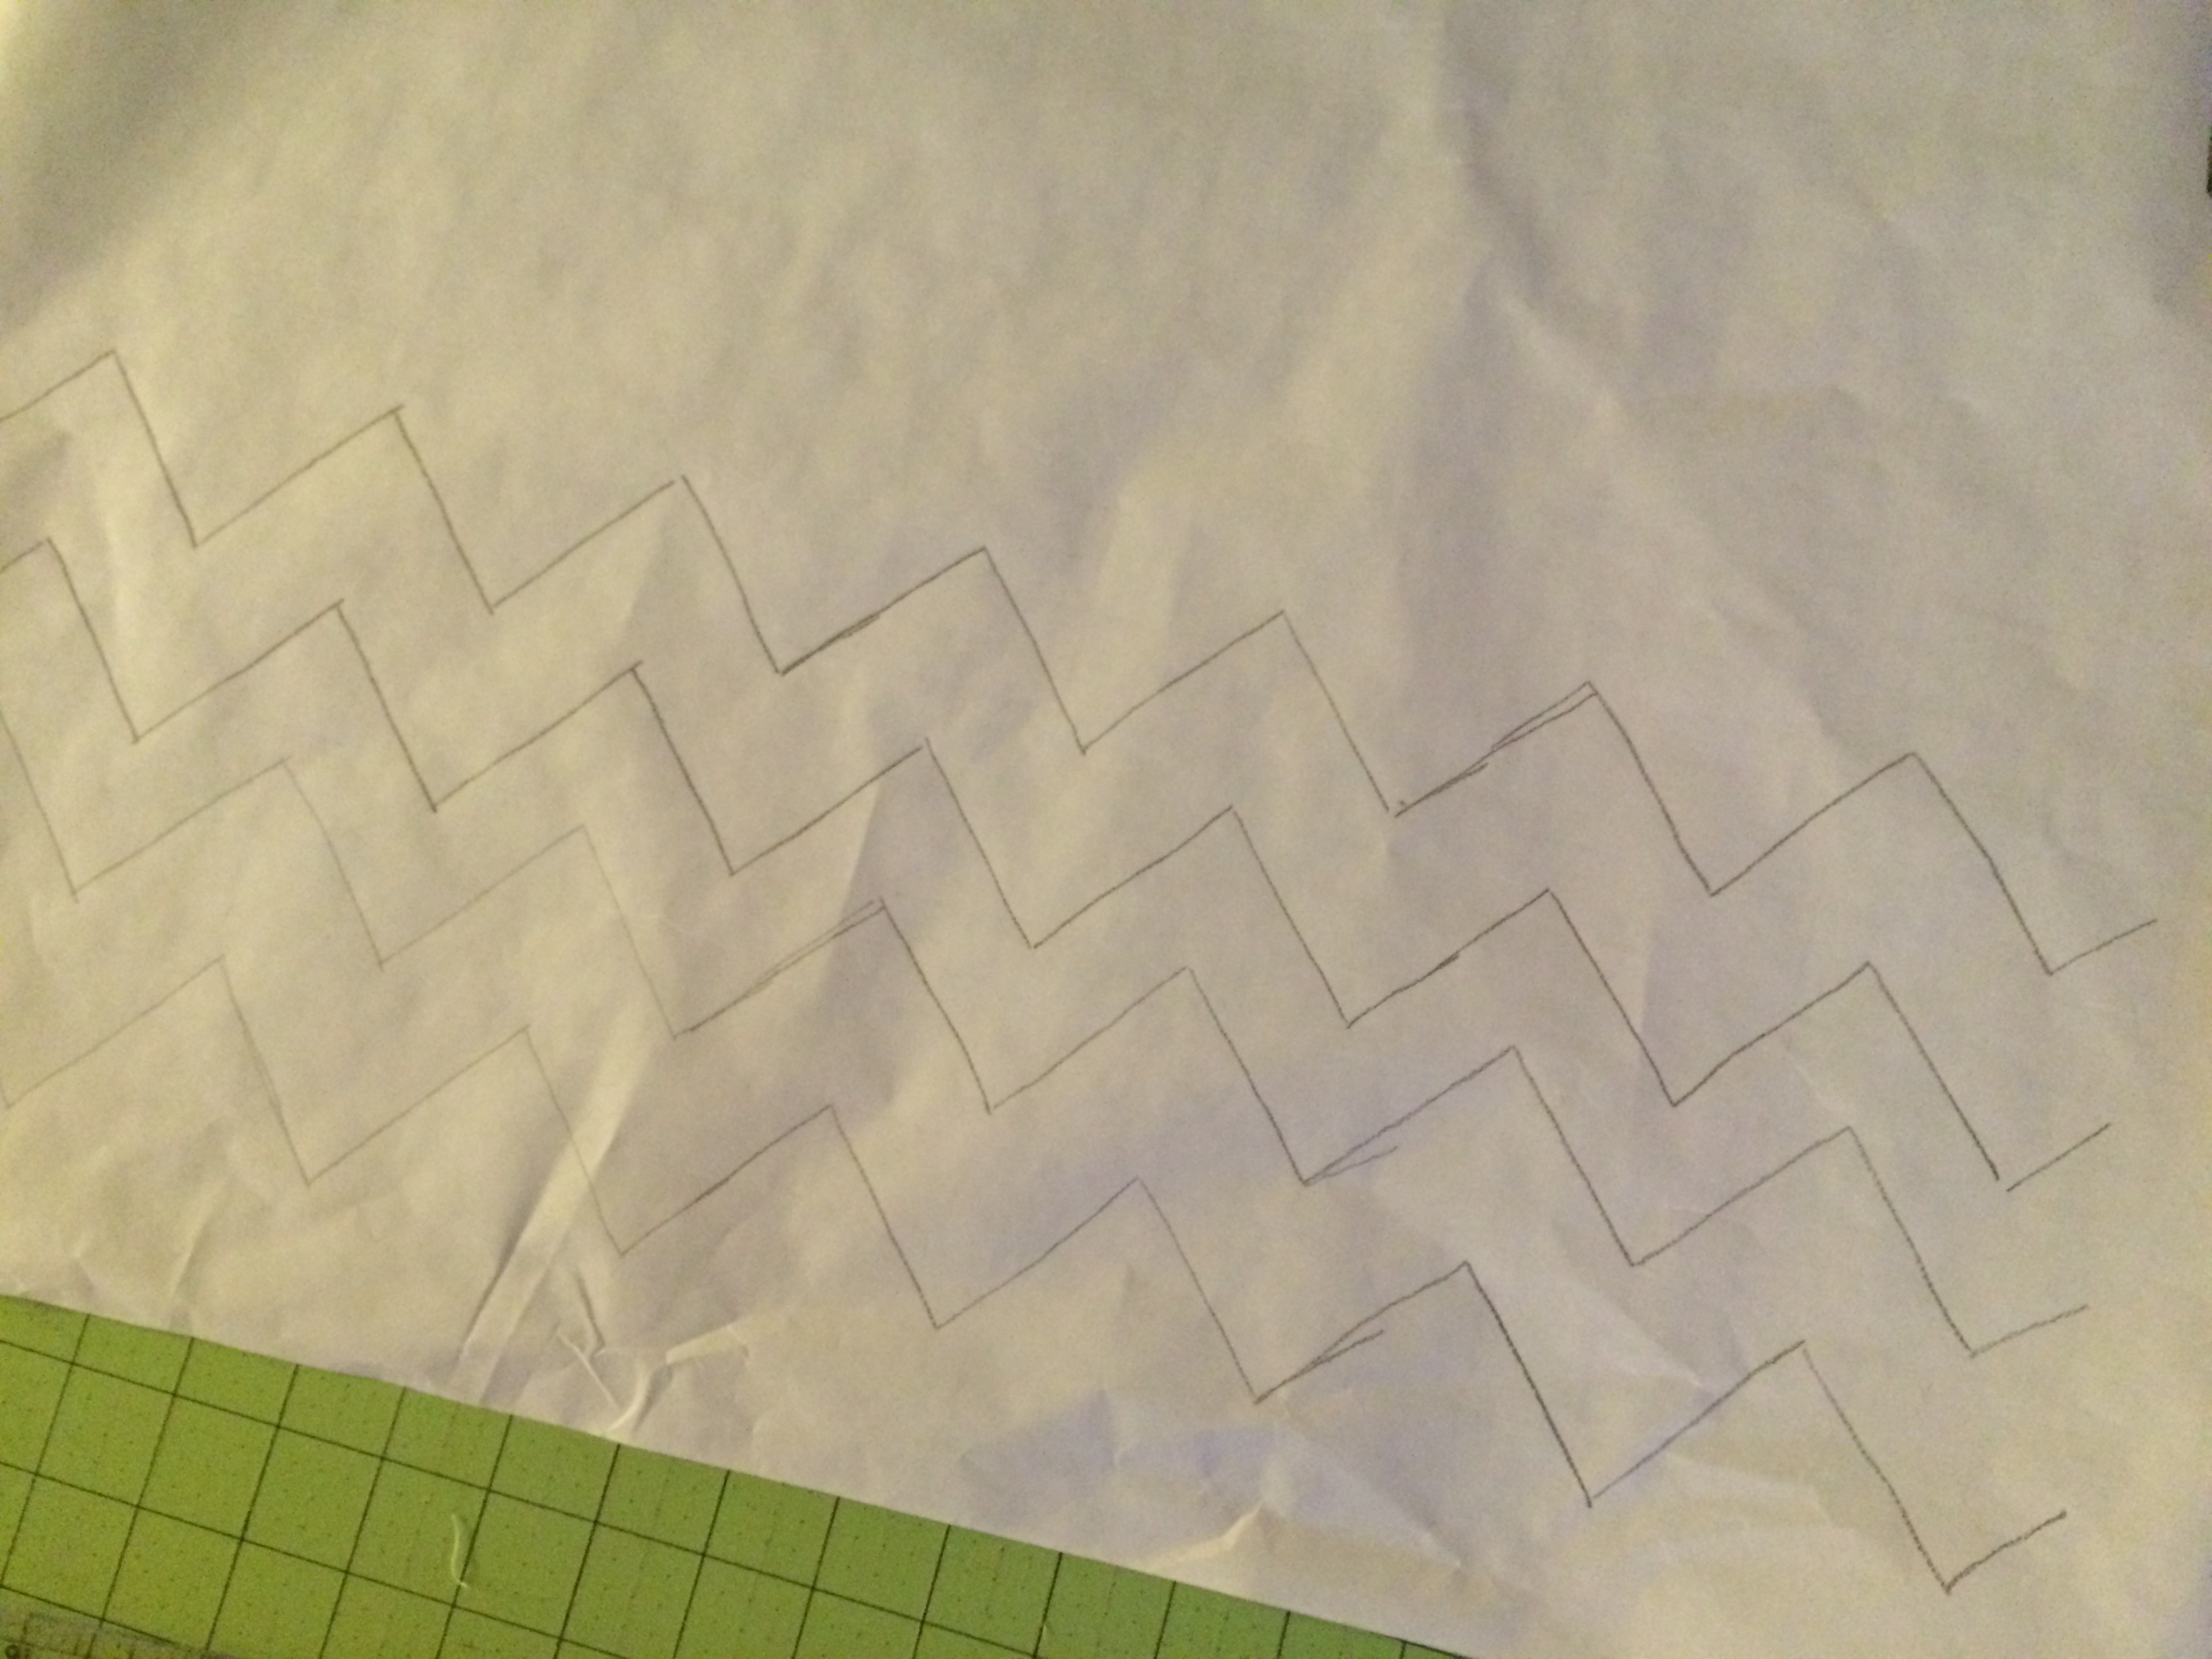
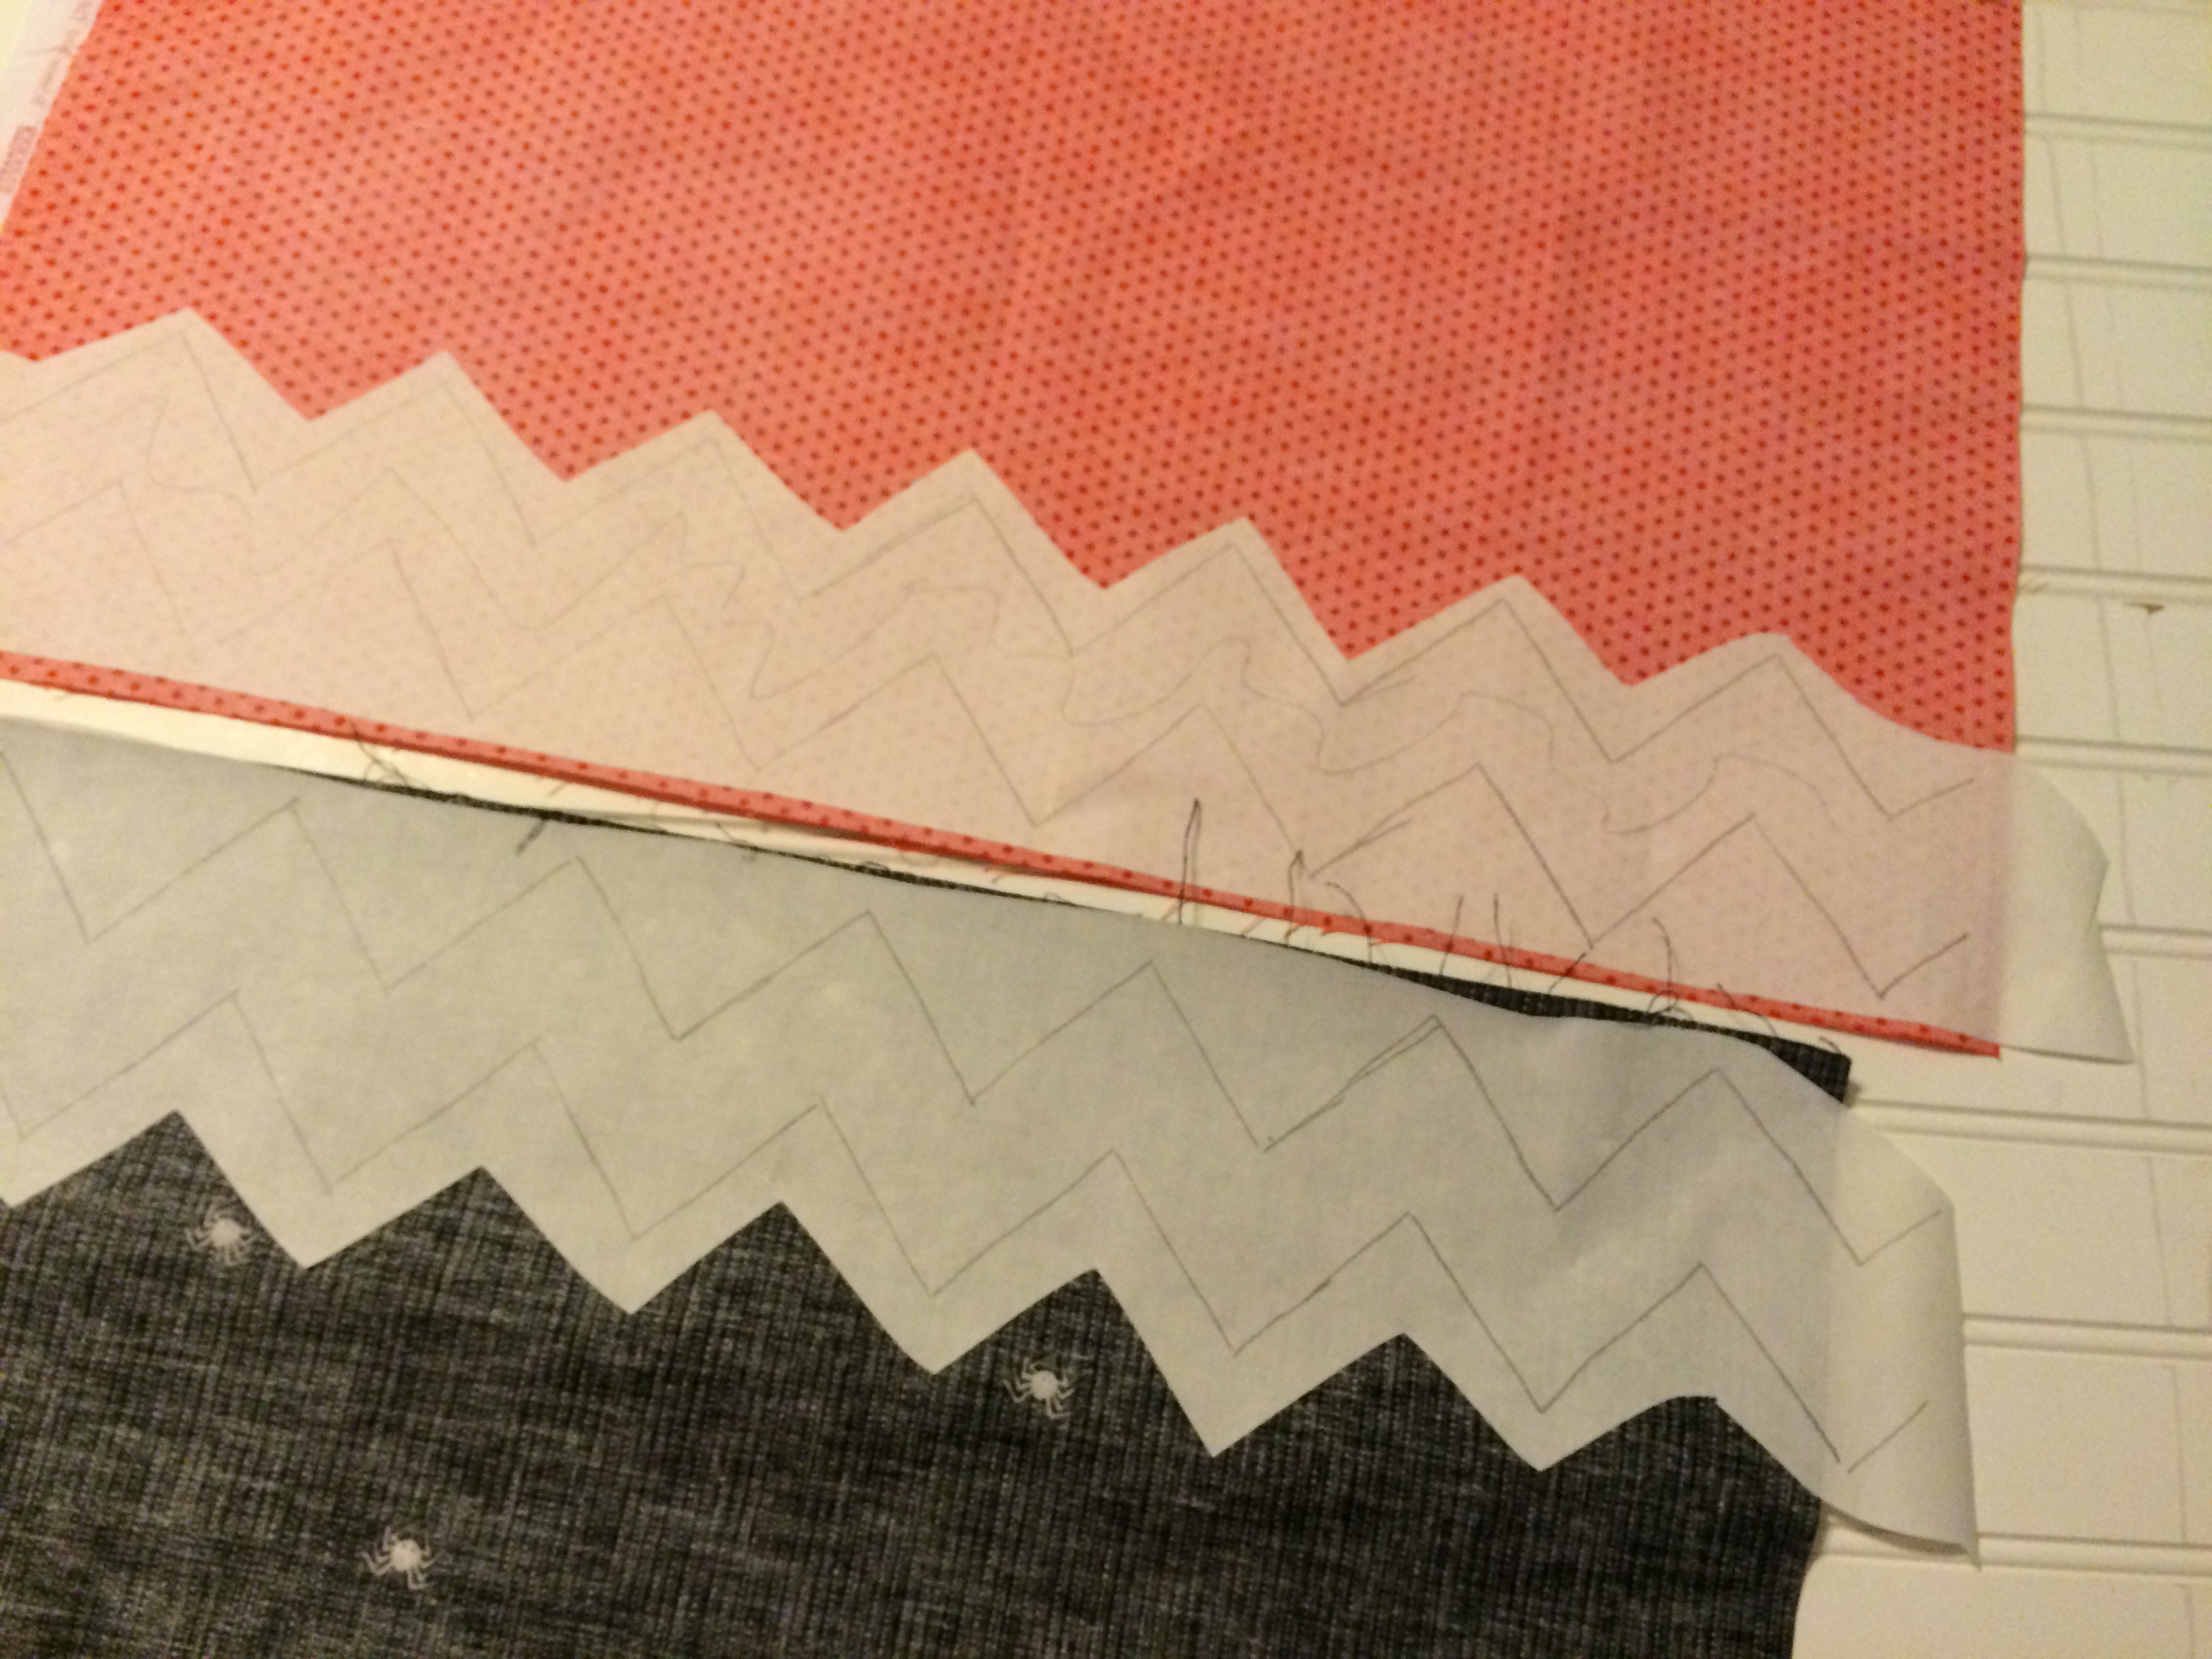
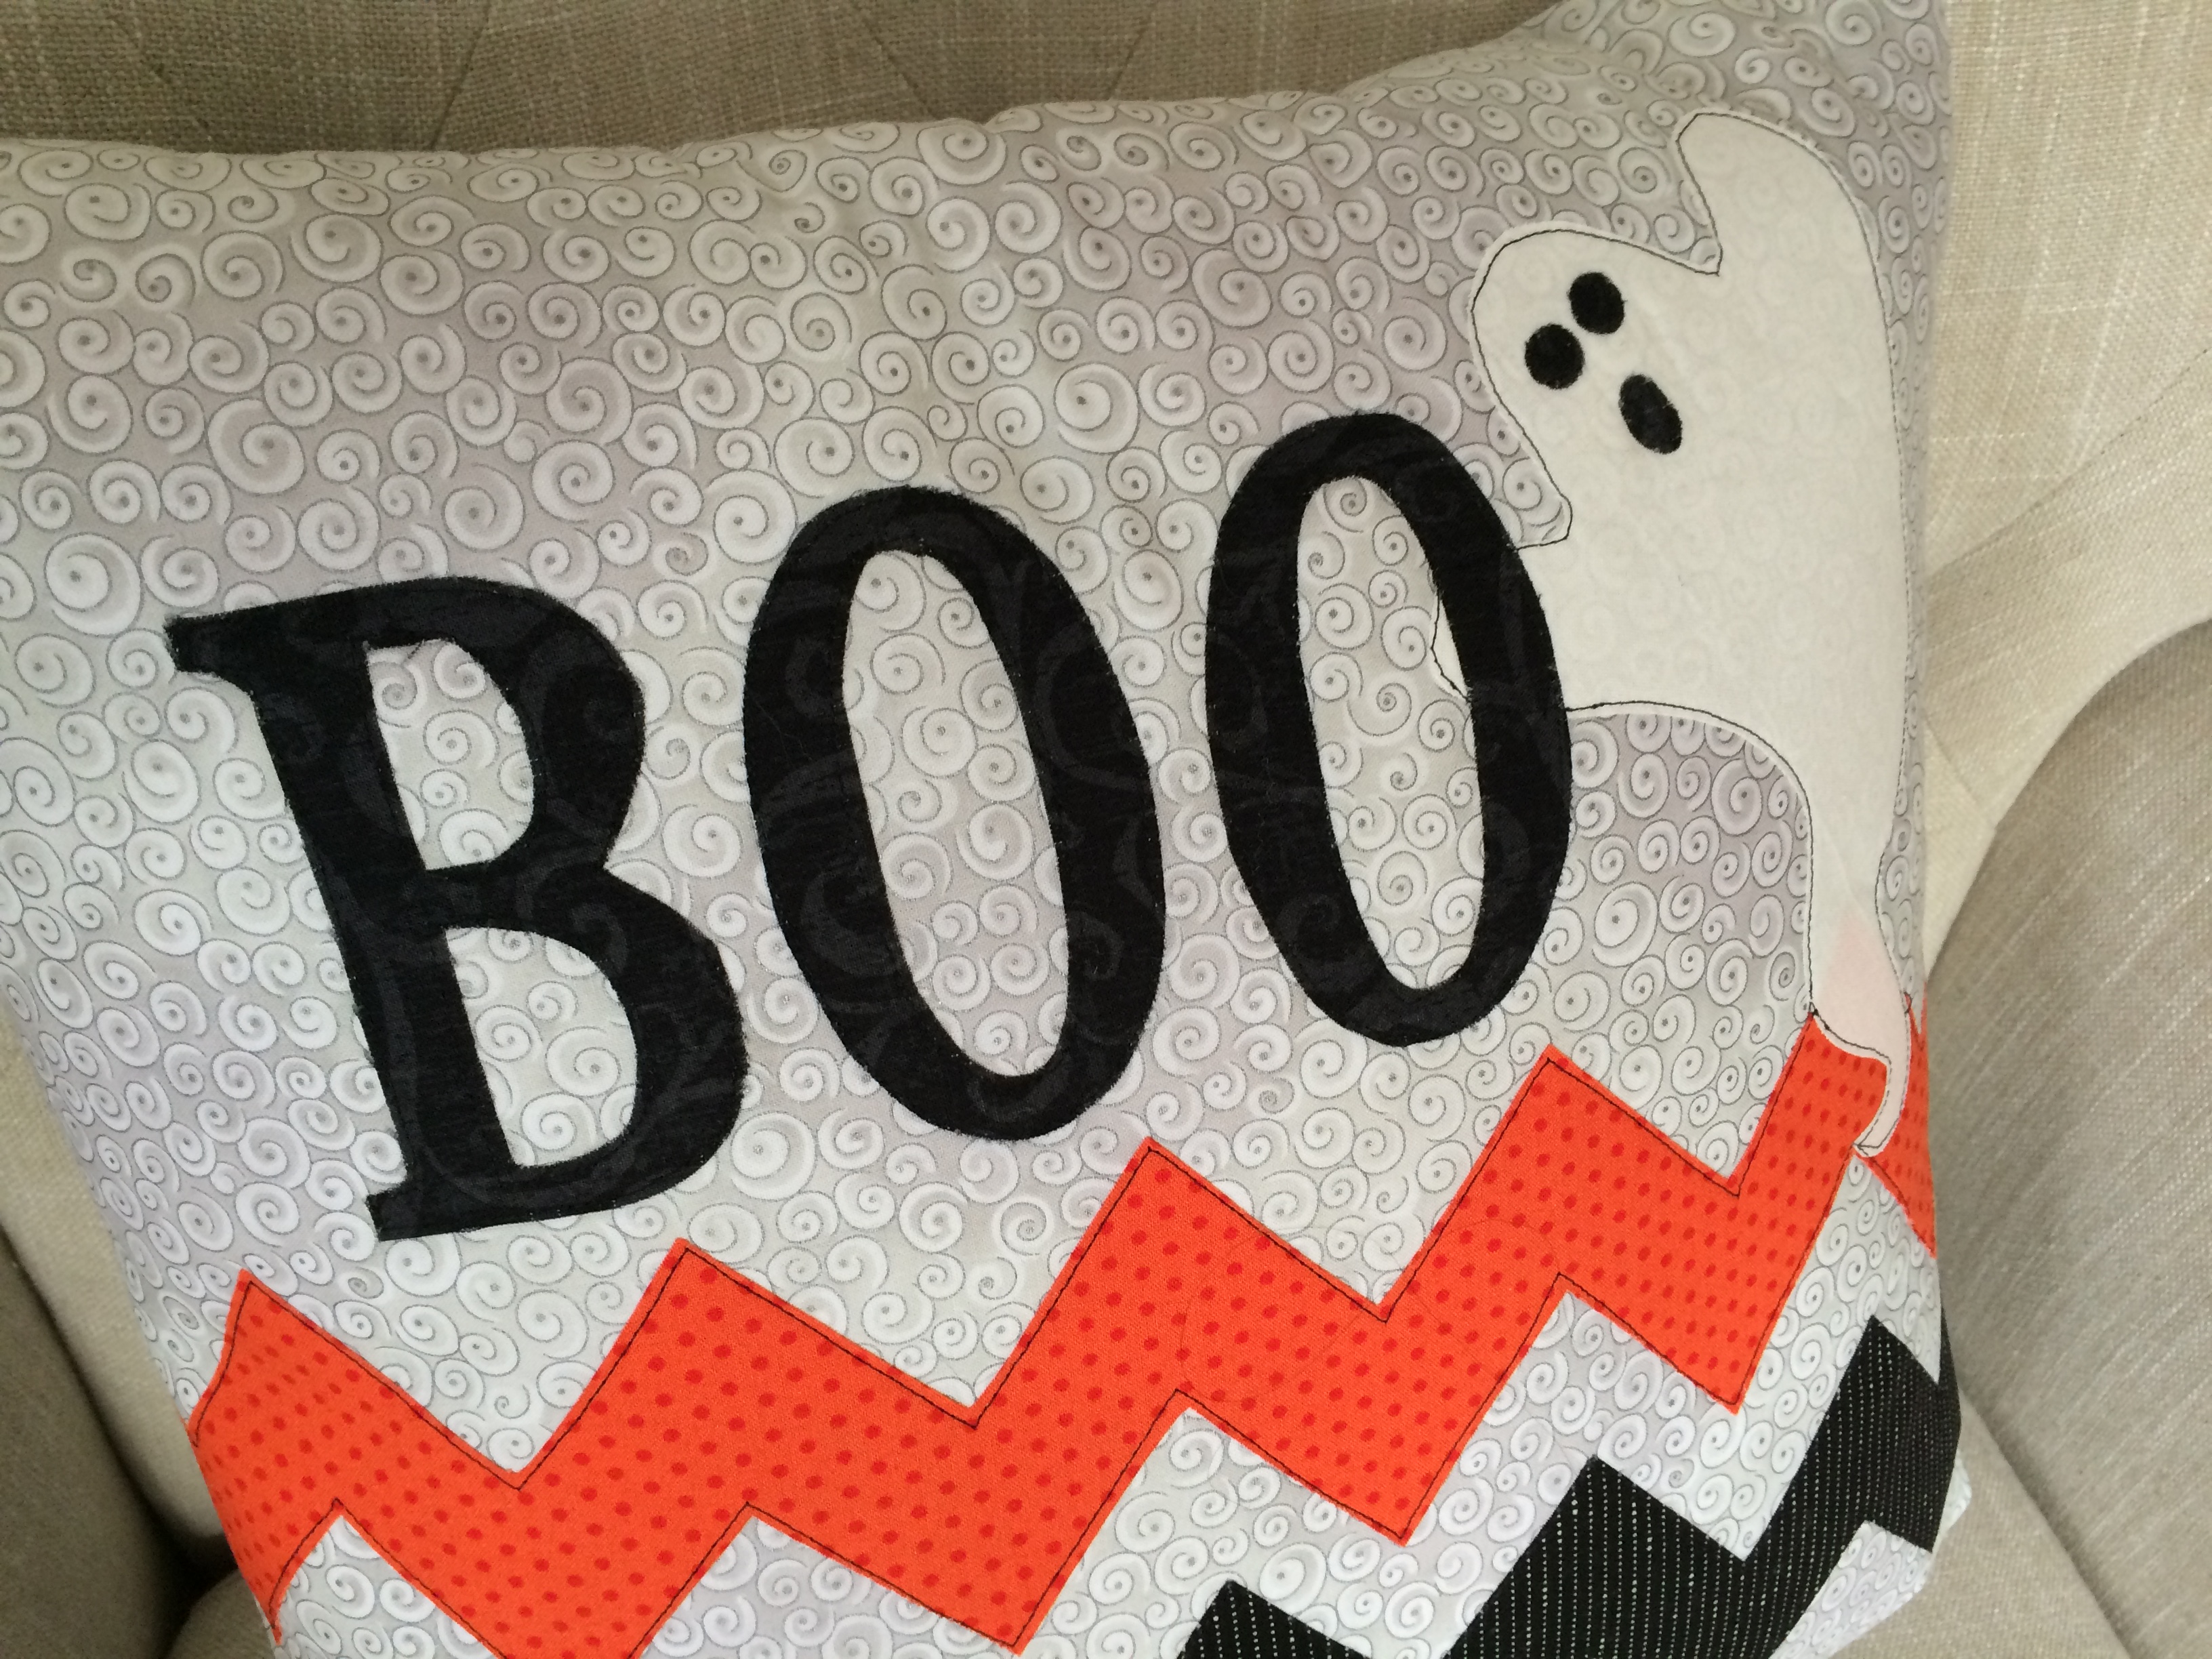
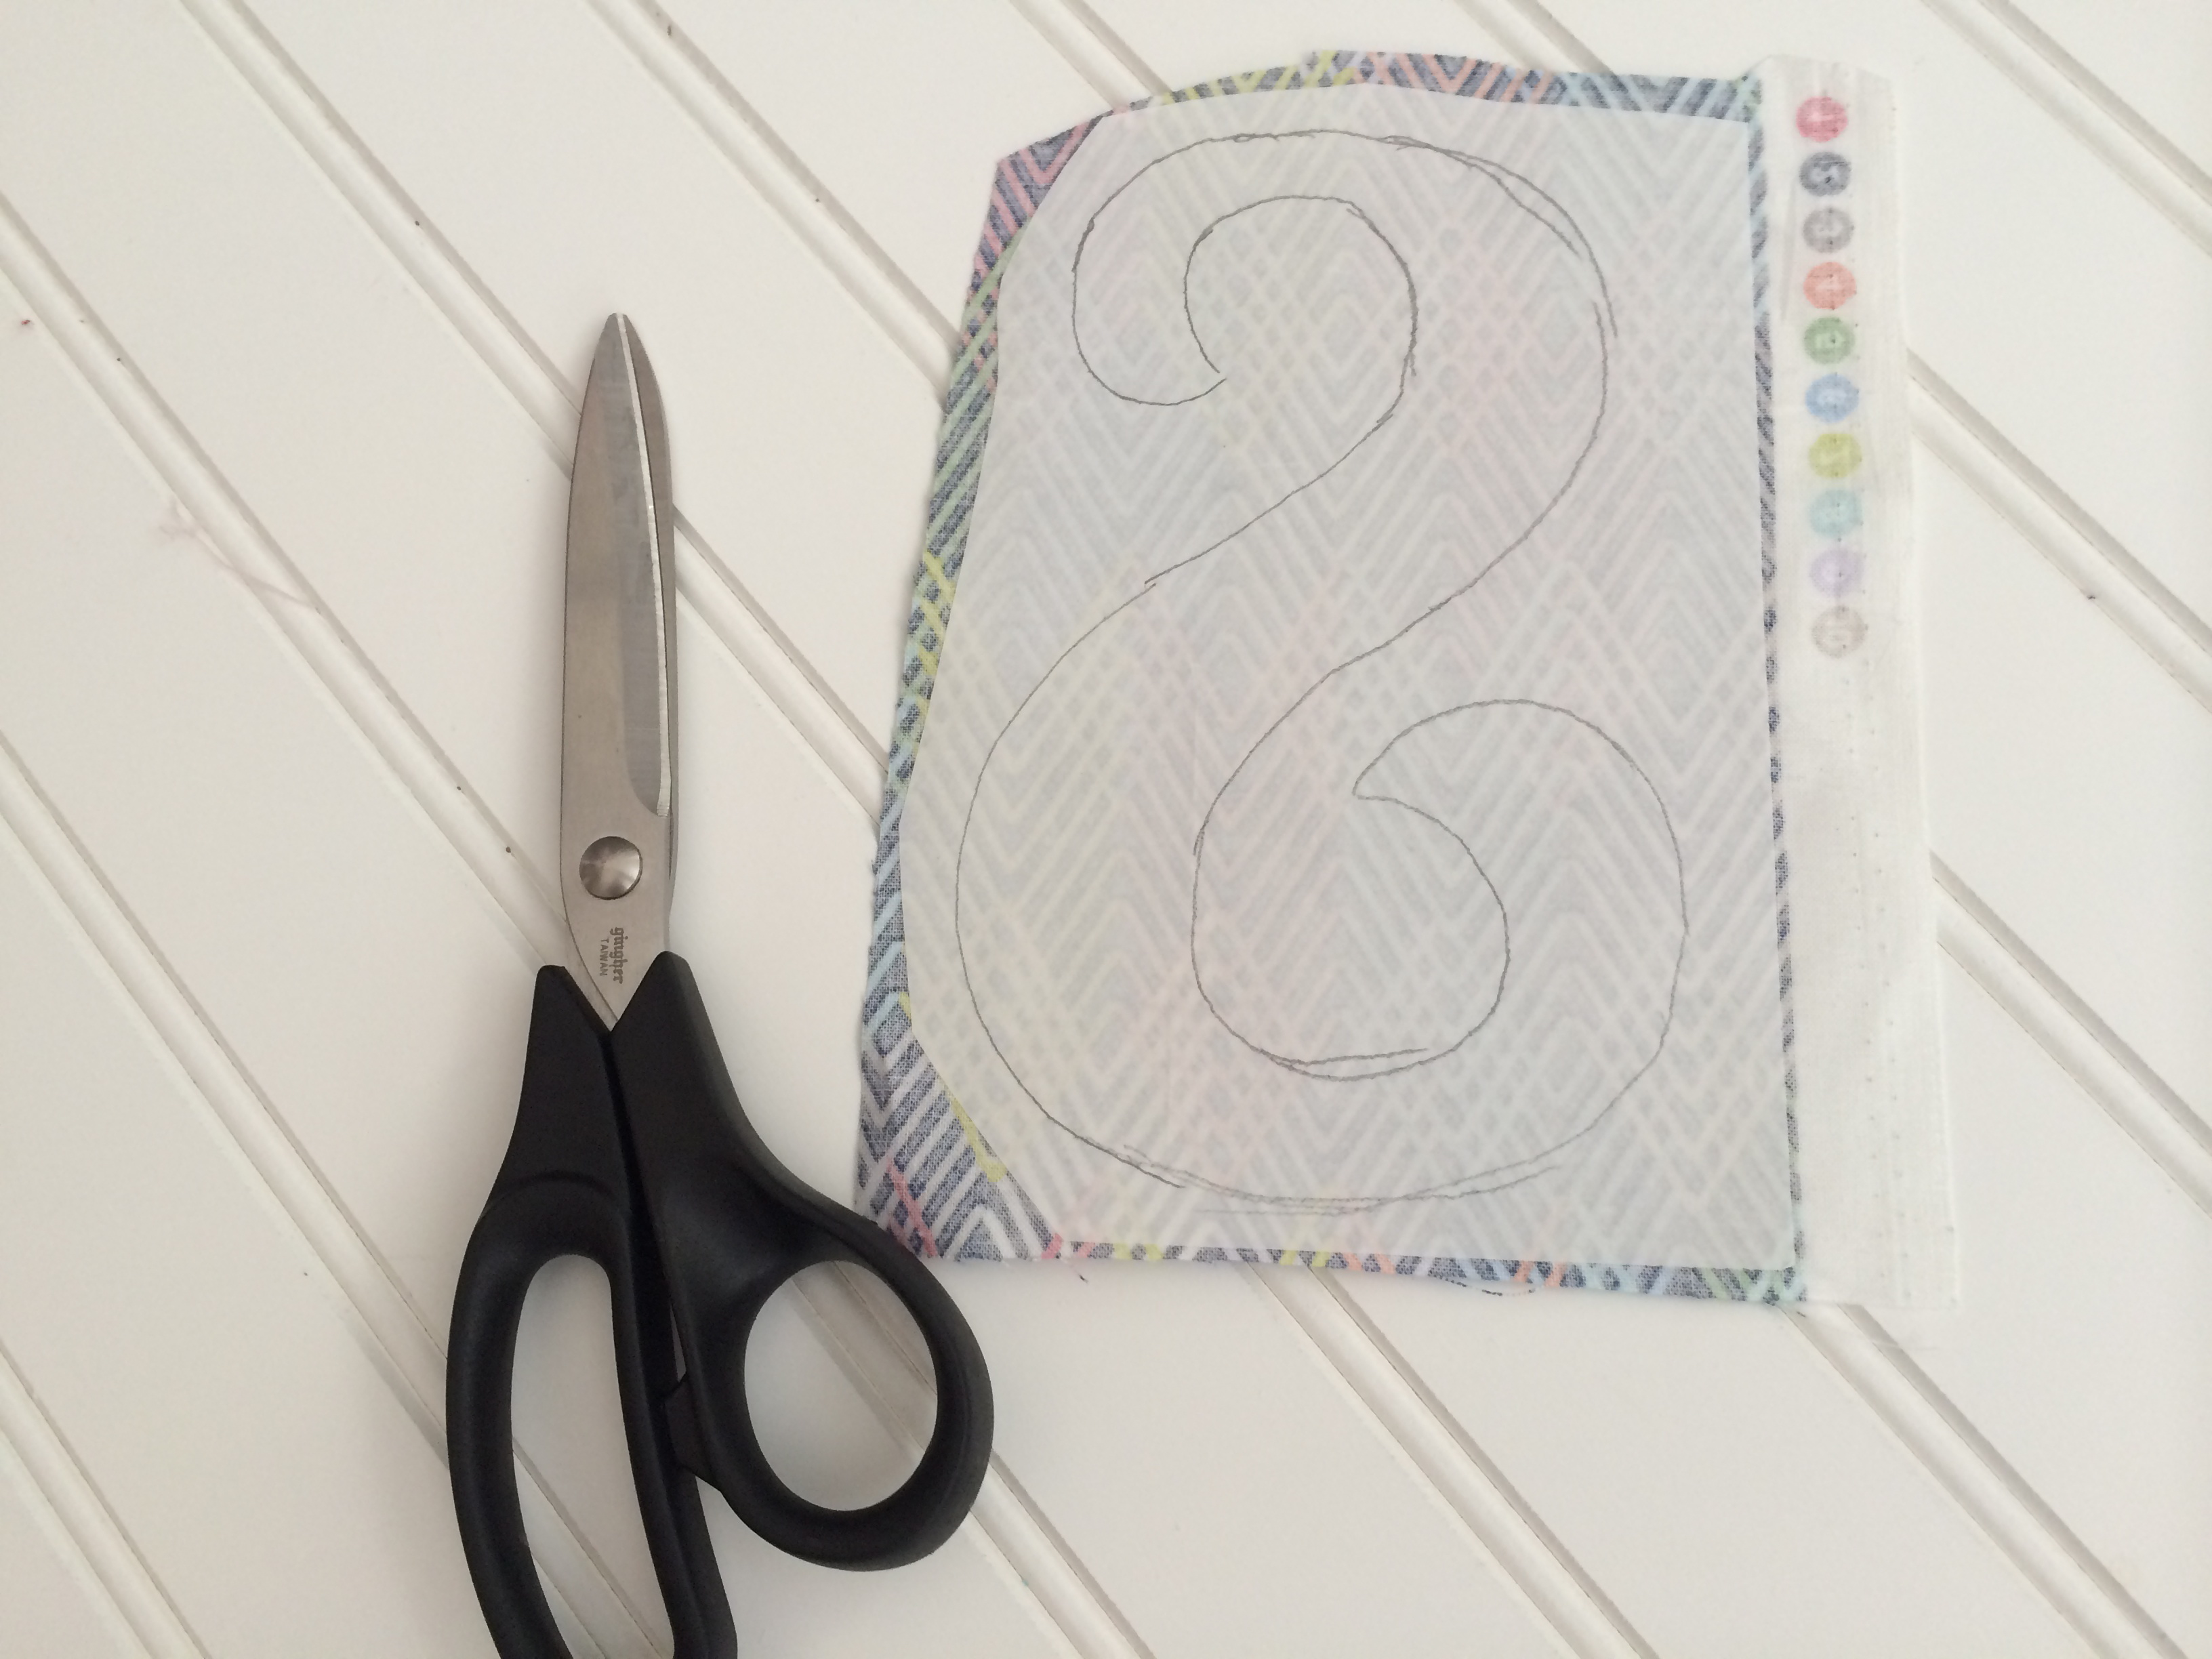
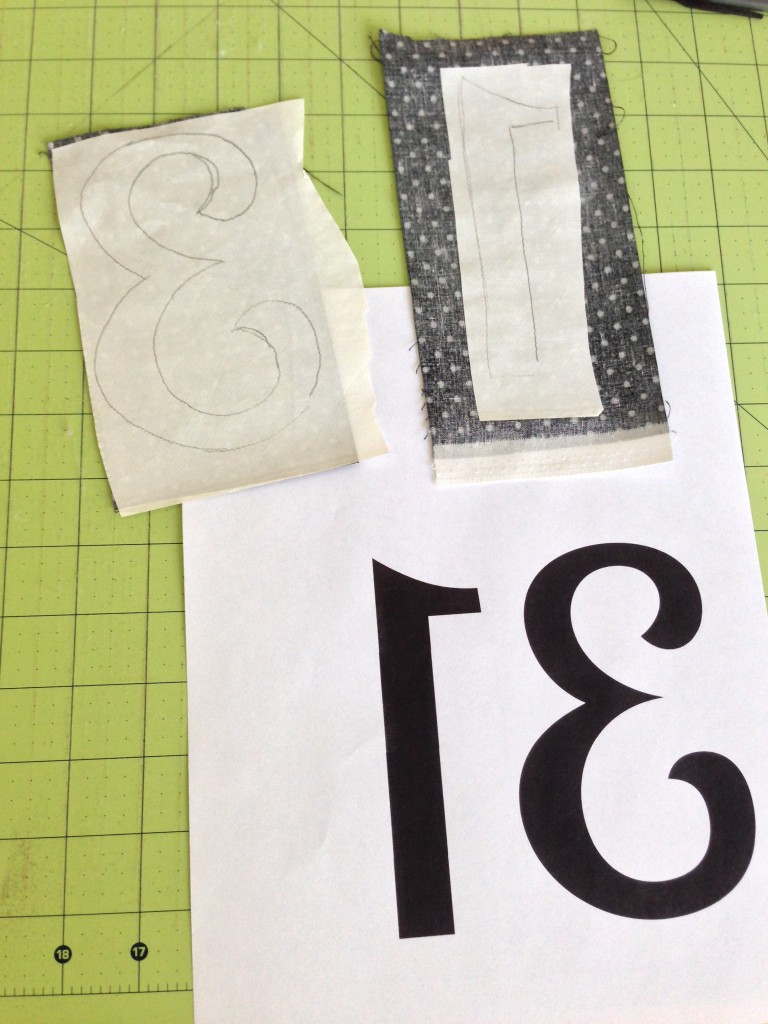
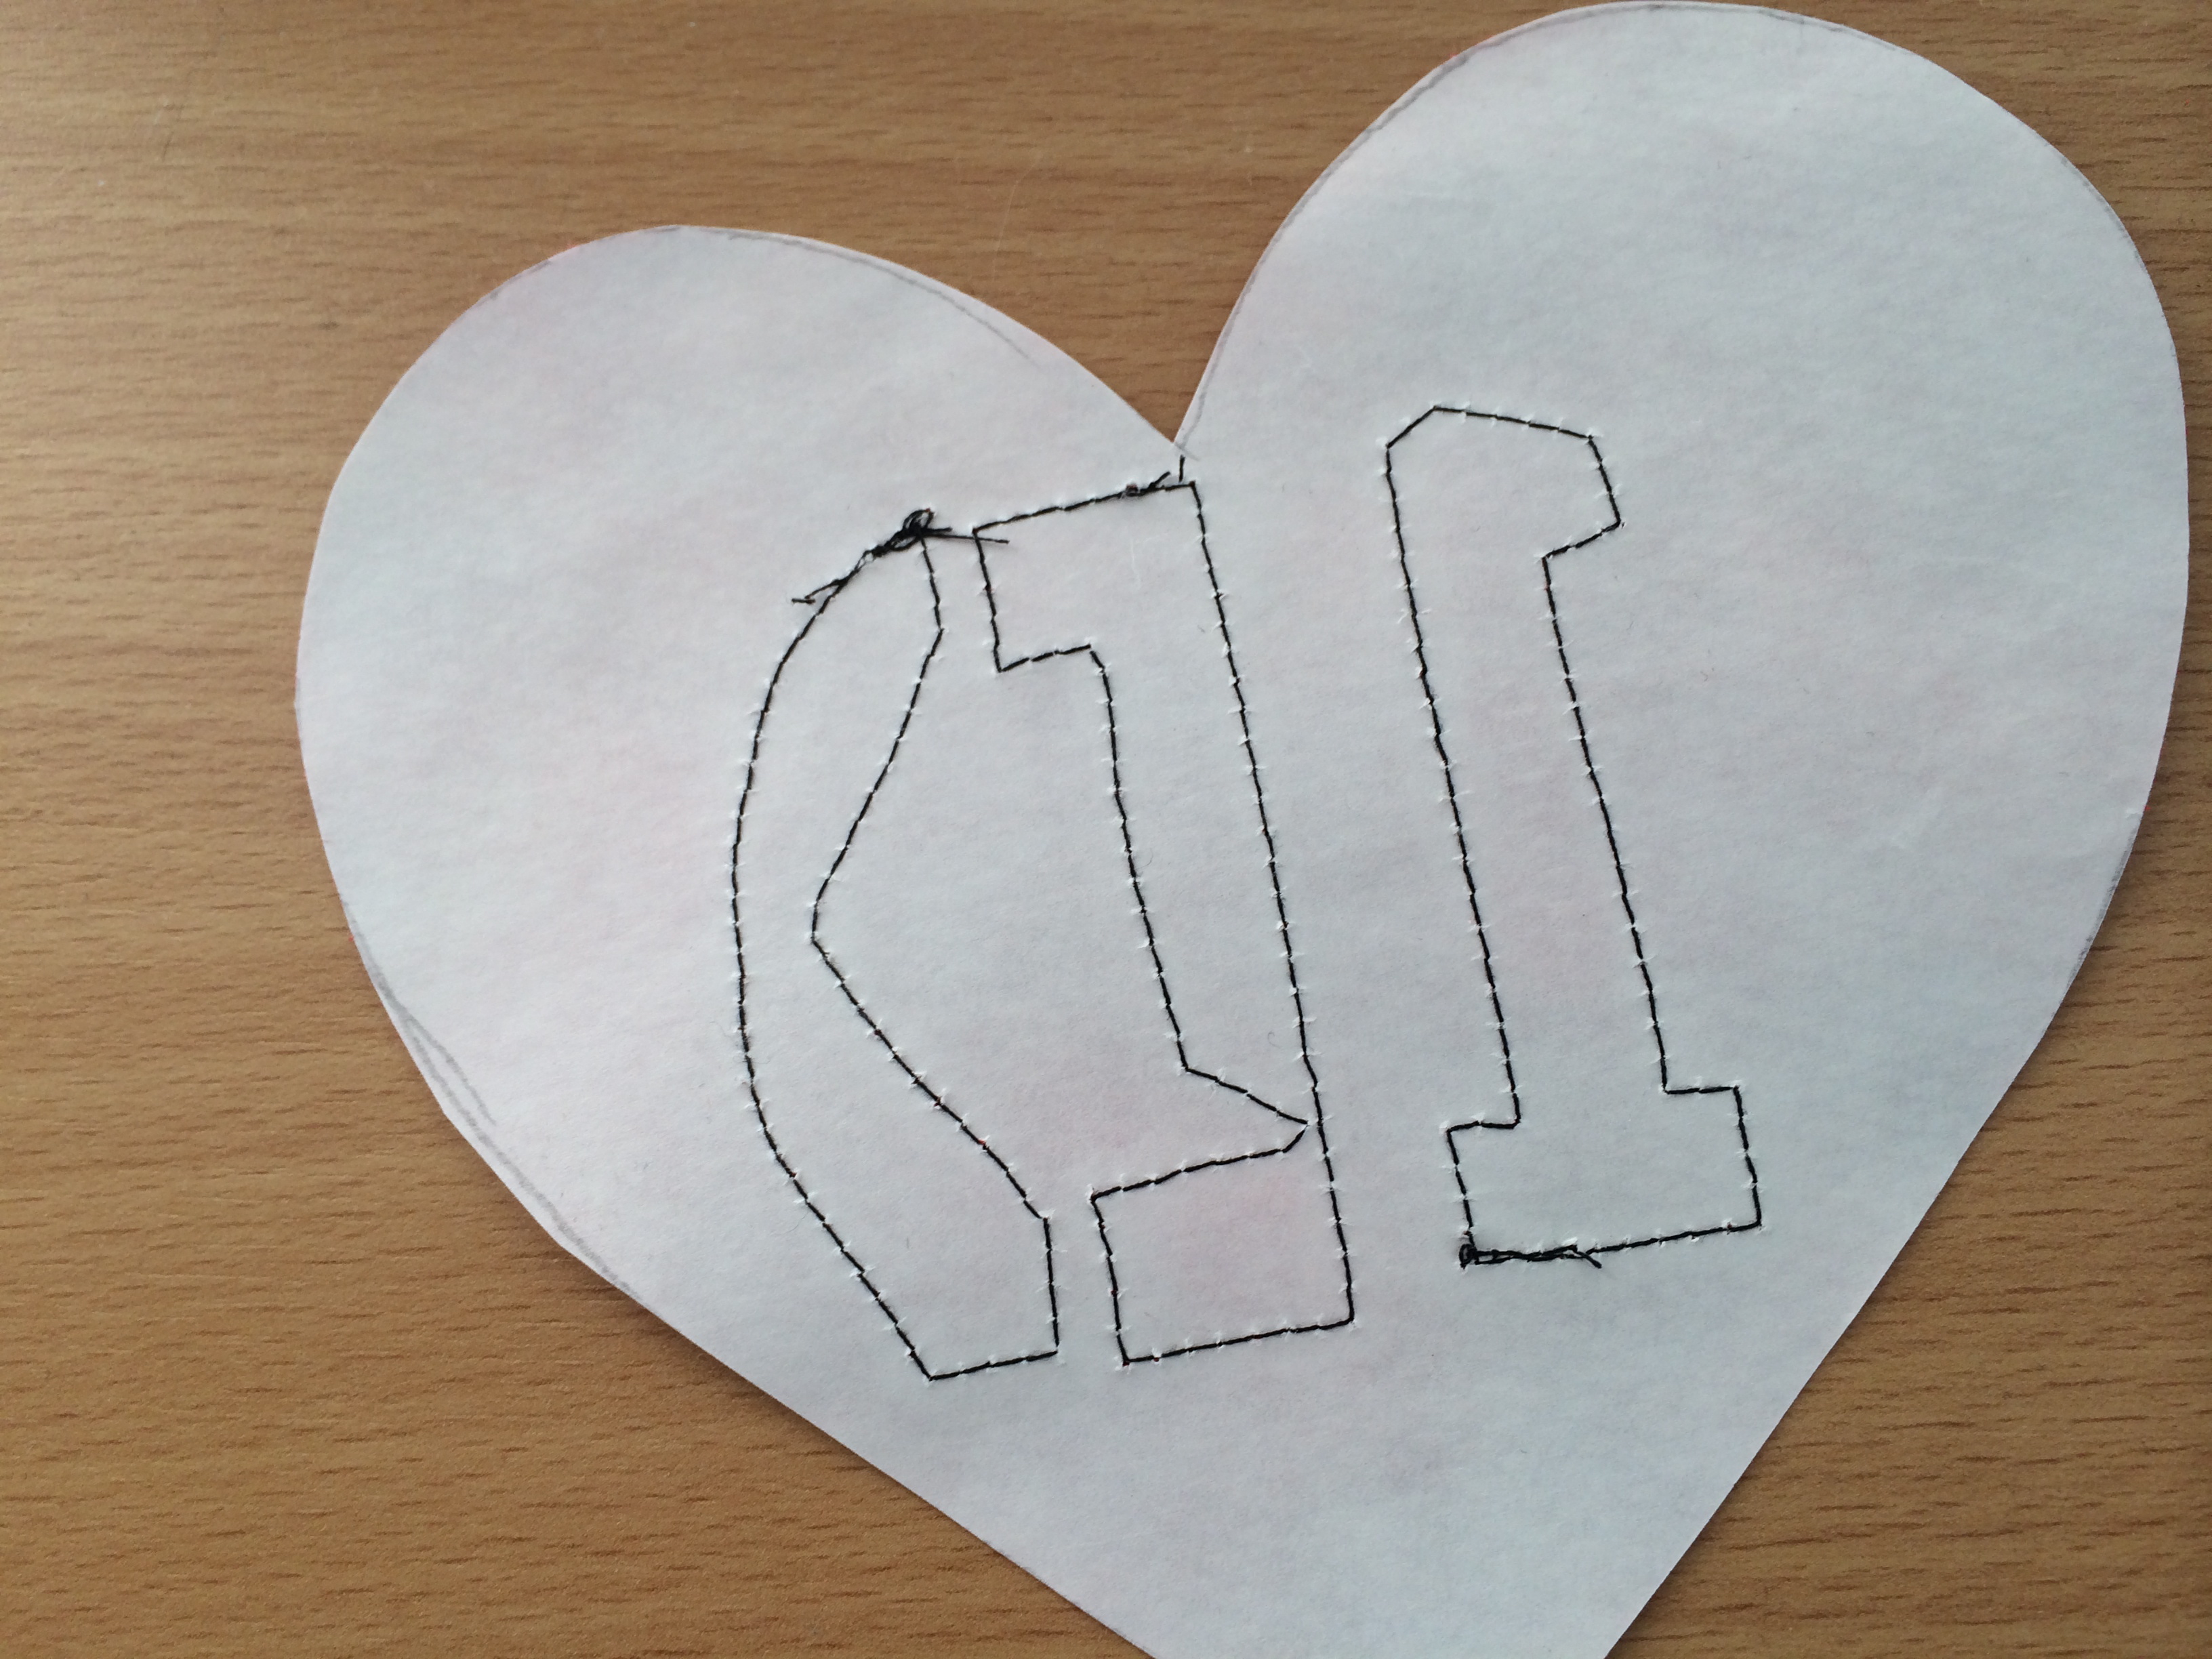
Print the cat pattern (here) and SPOOKY pattern (here) then iron them to the wrong side of the black fabric.  Cut out on the pattern line and peel off backing.

spooky Halloween pillow

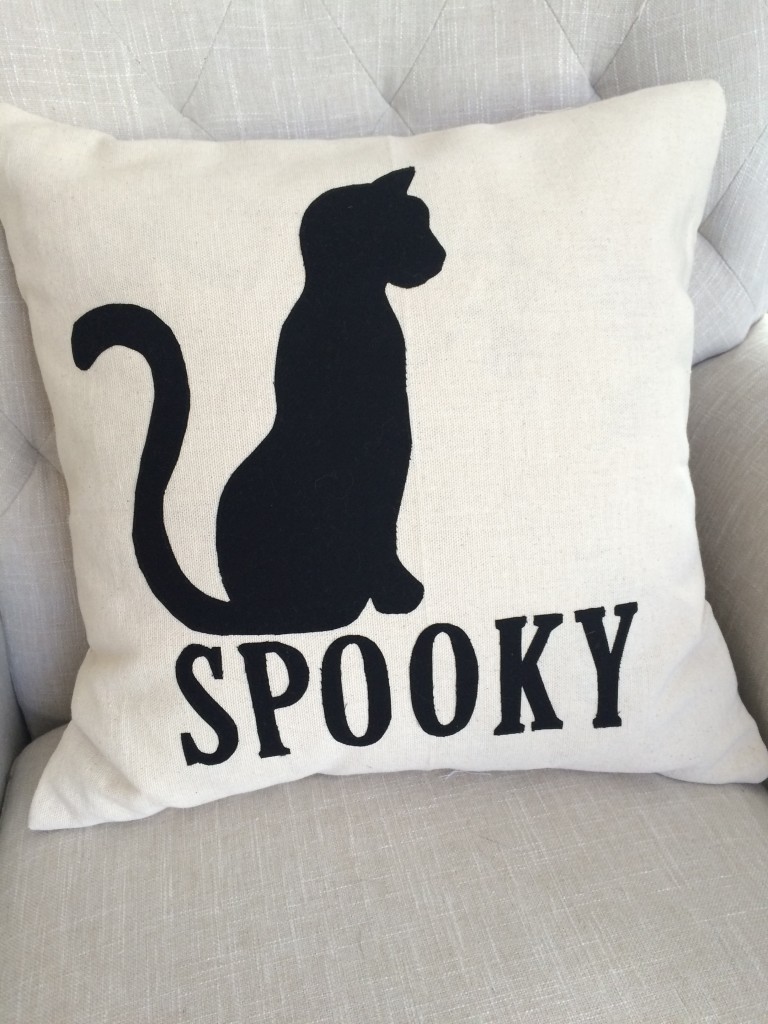
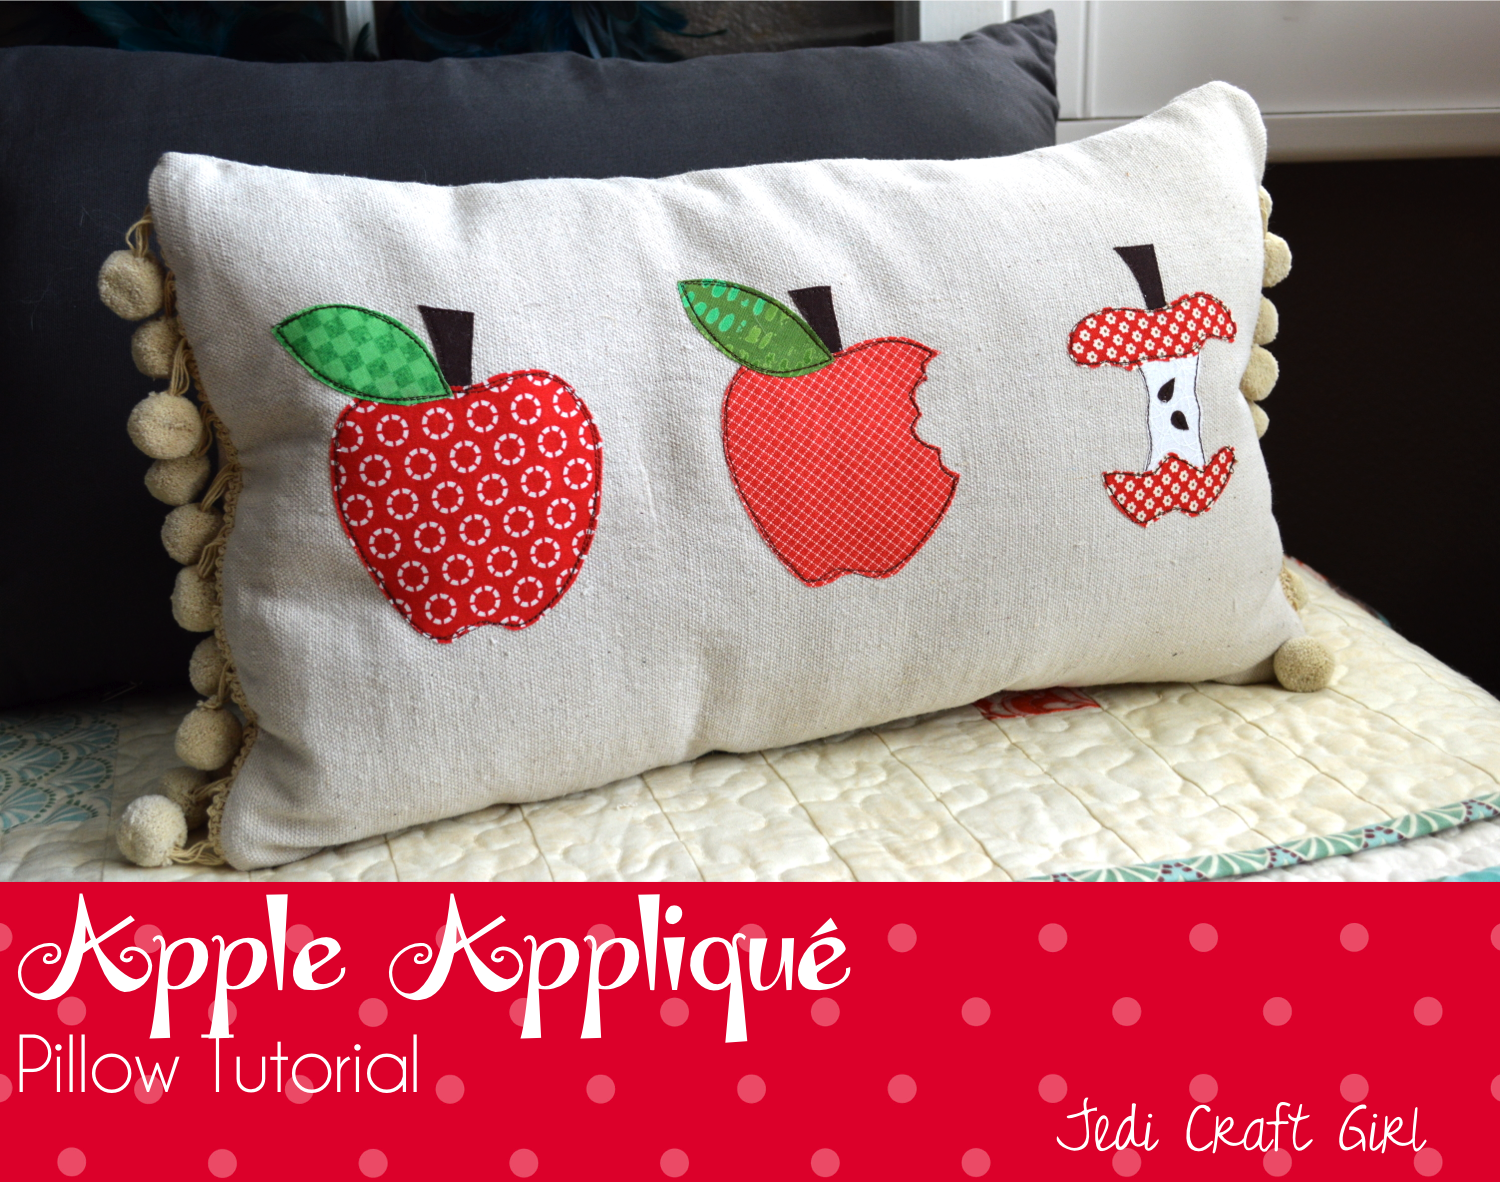
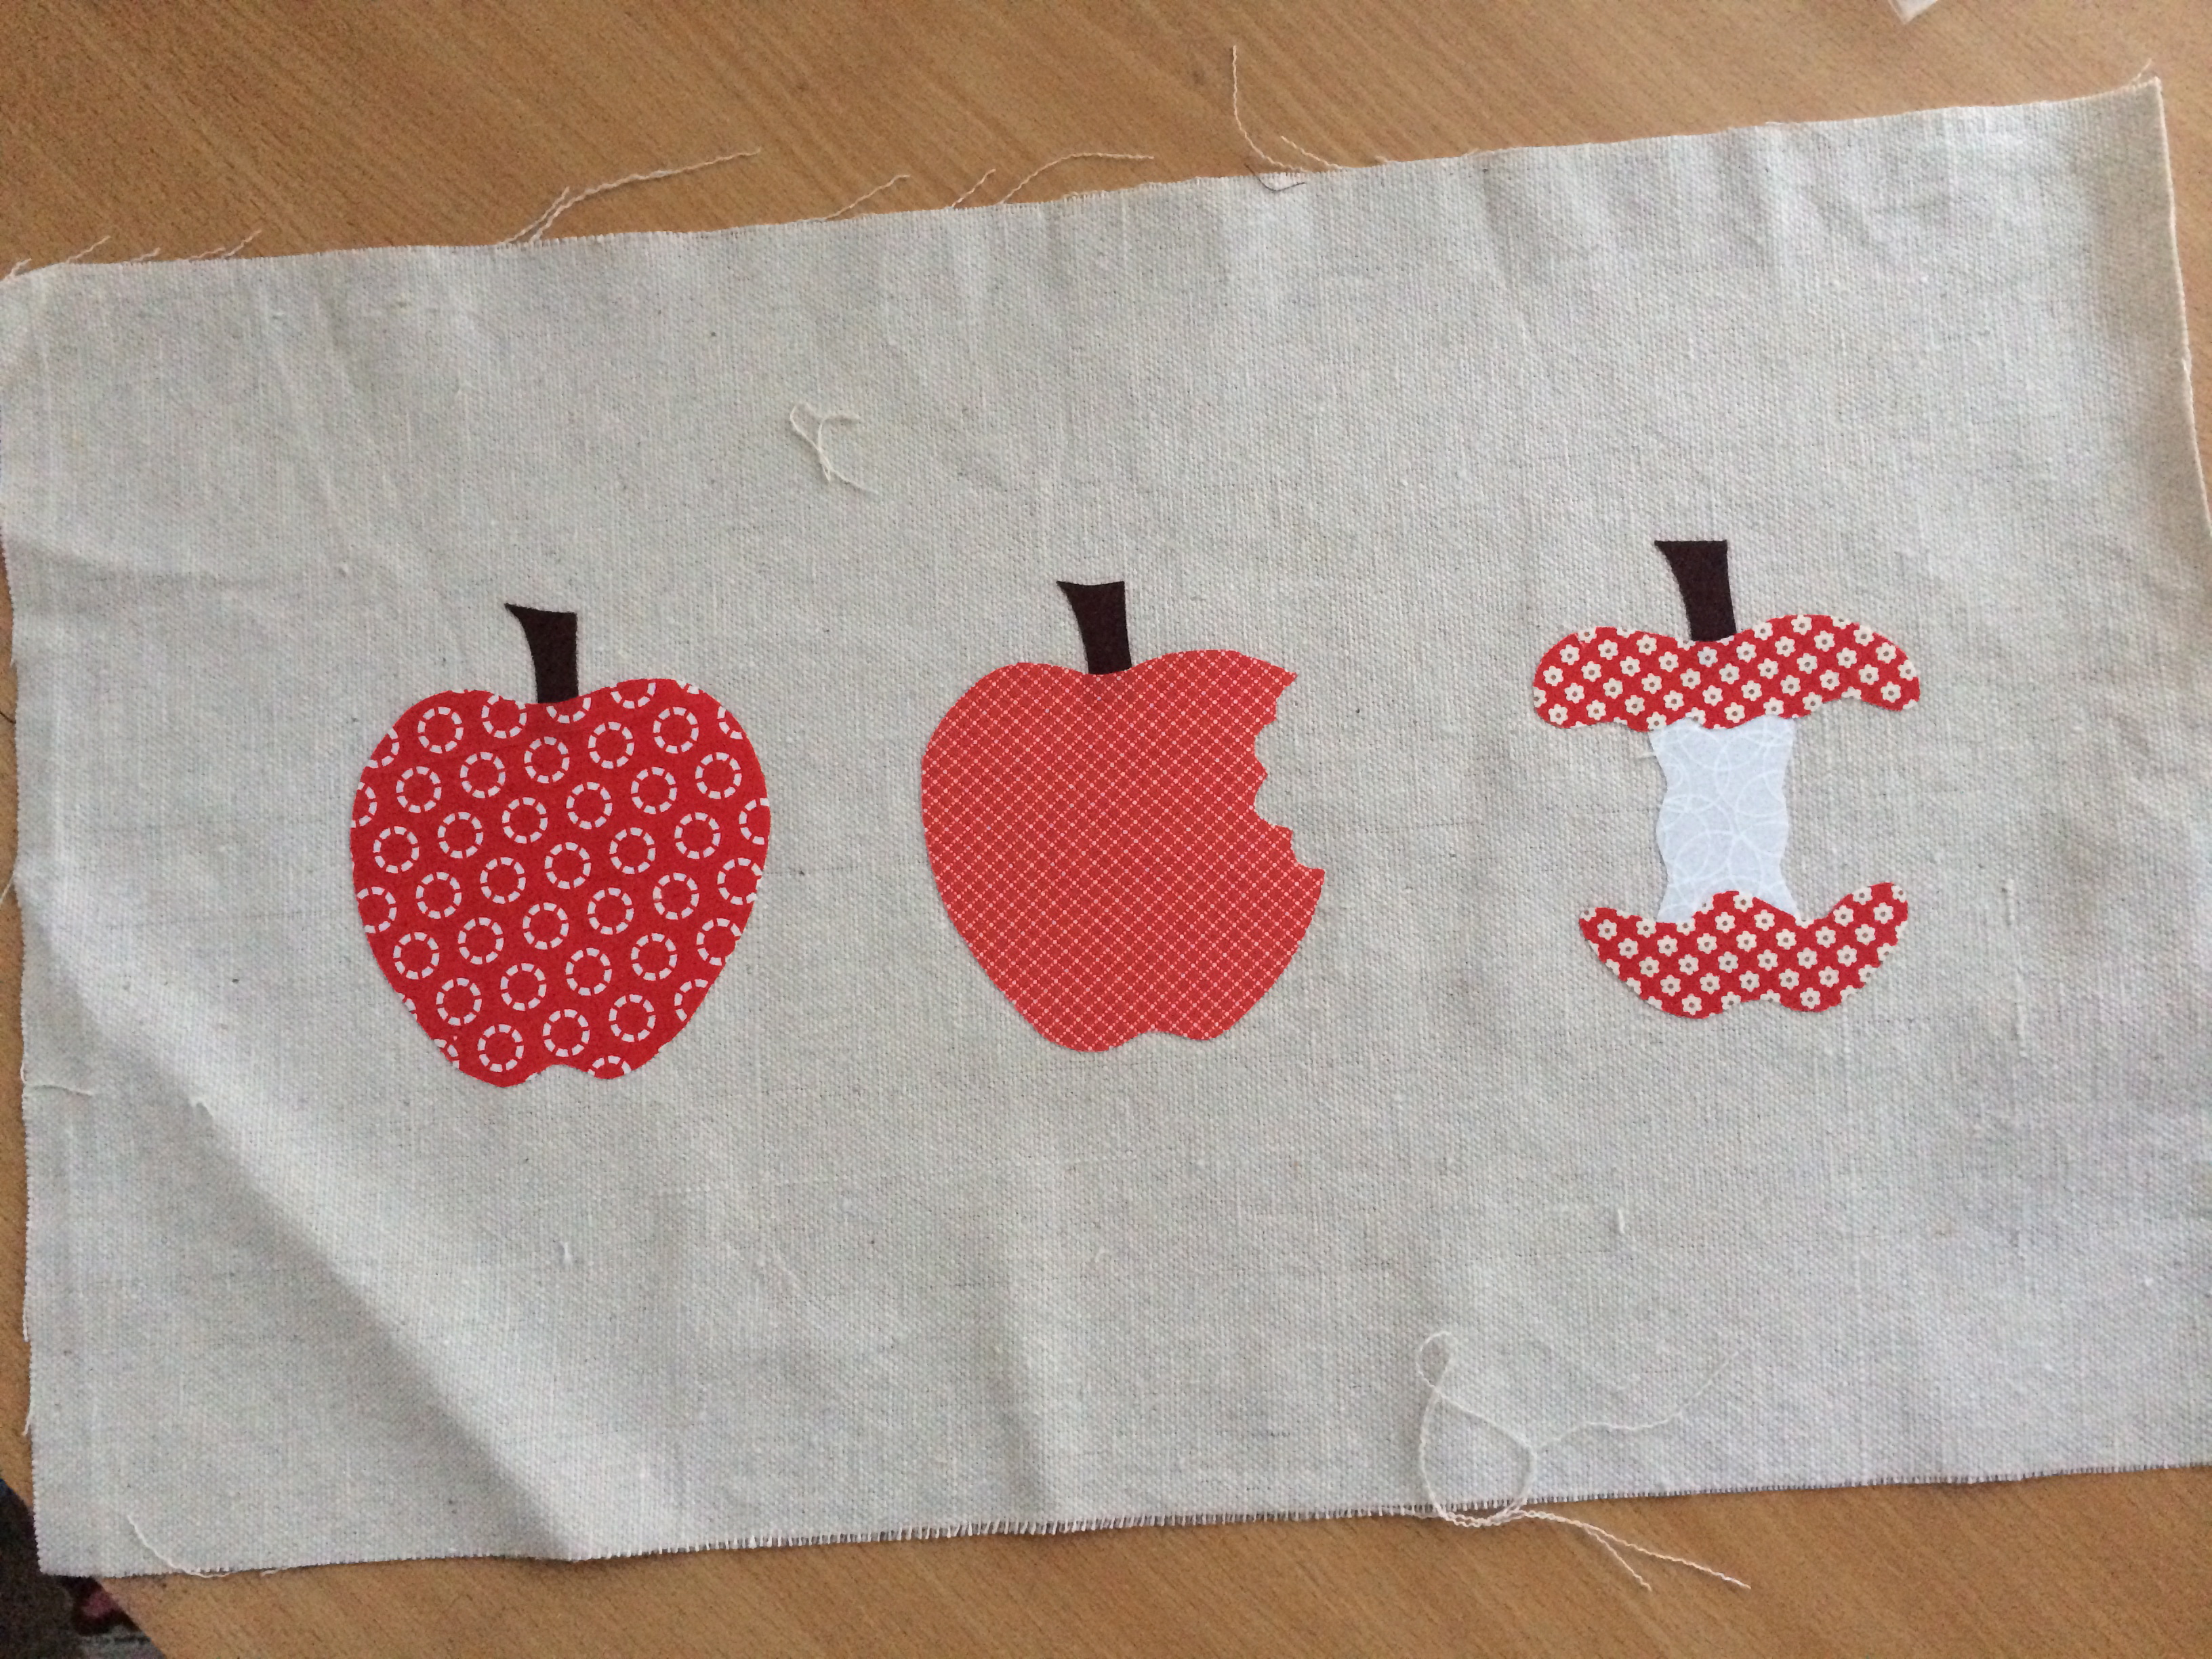
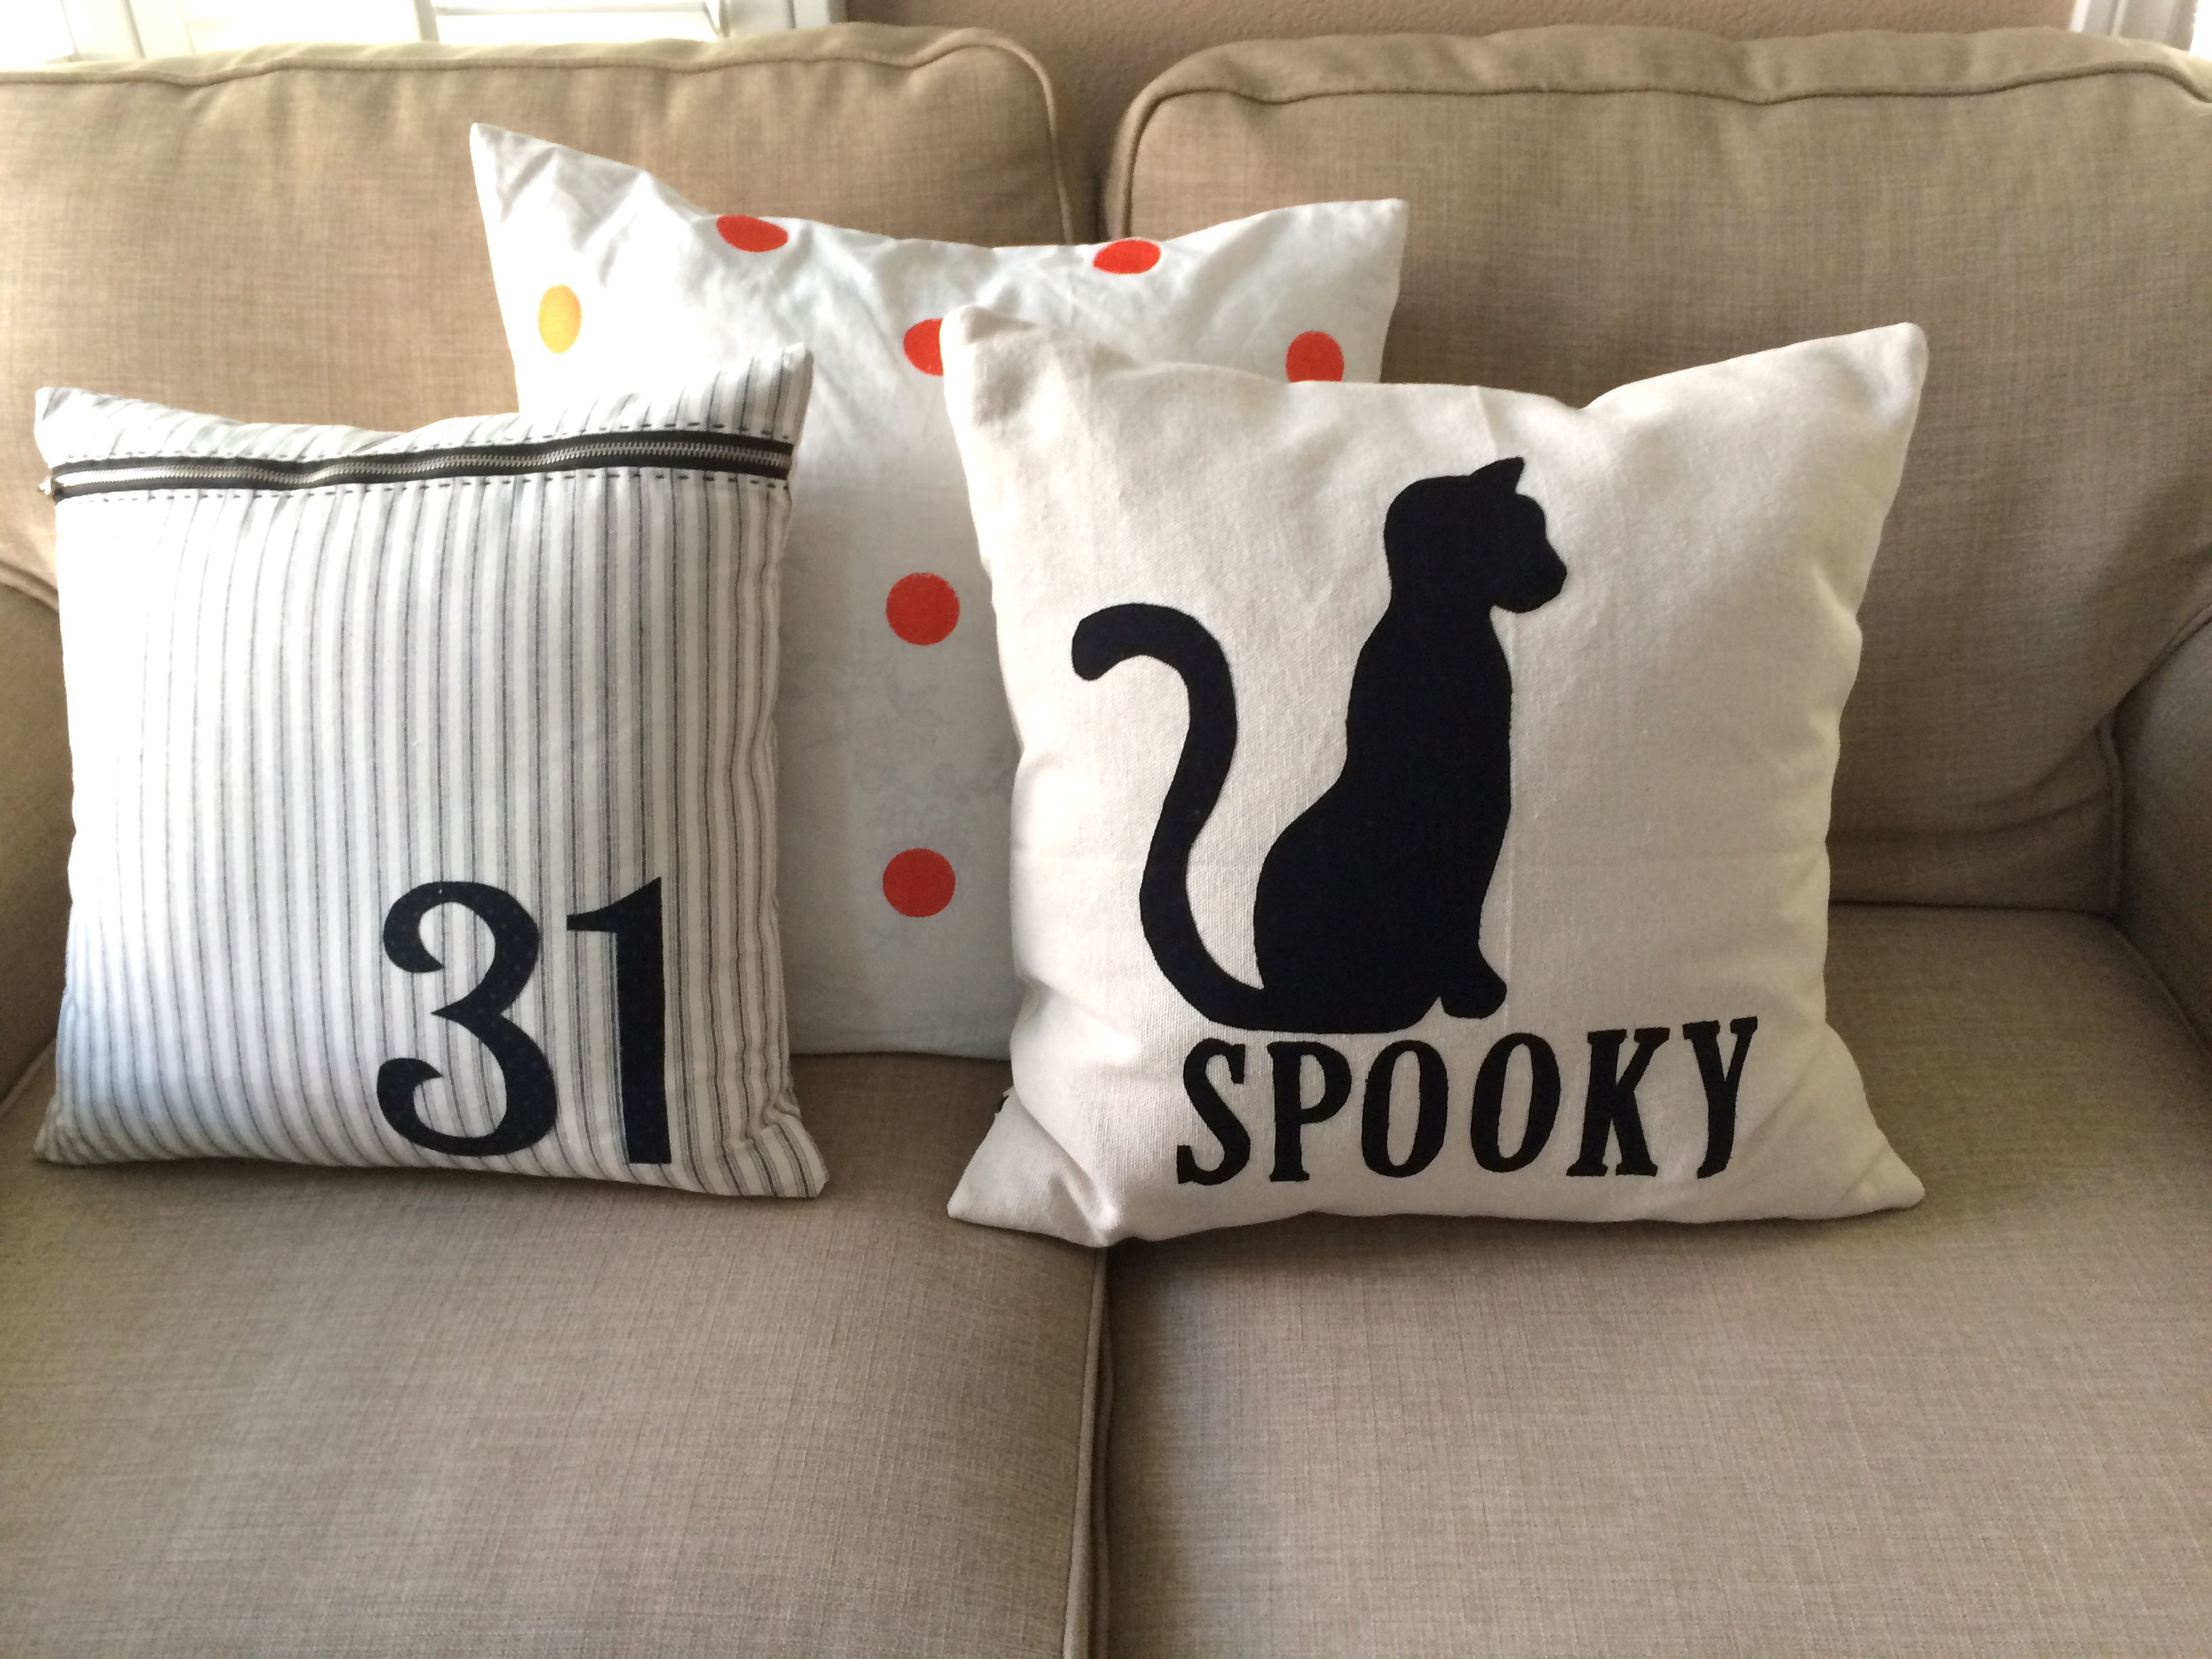
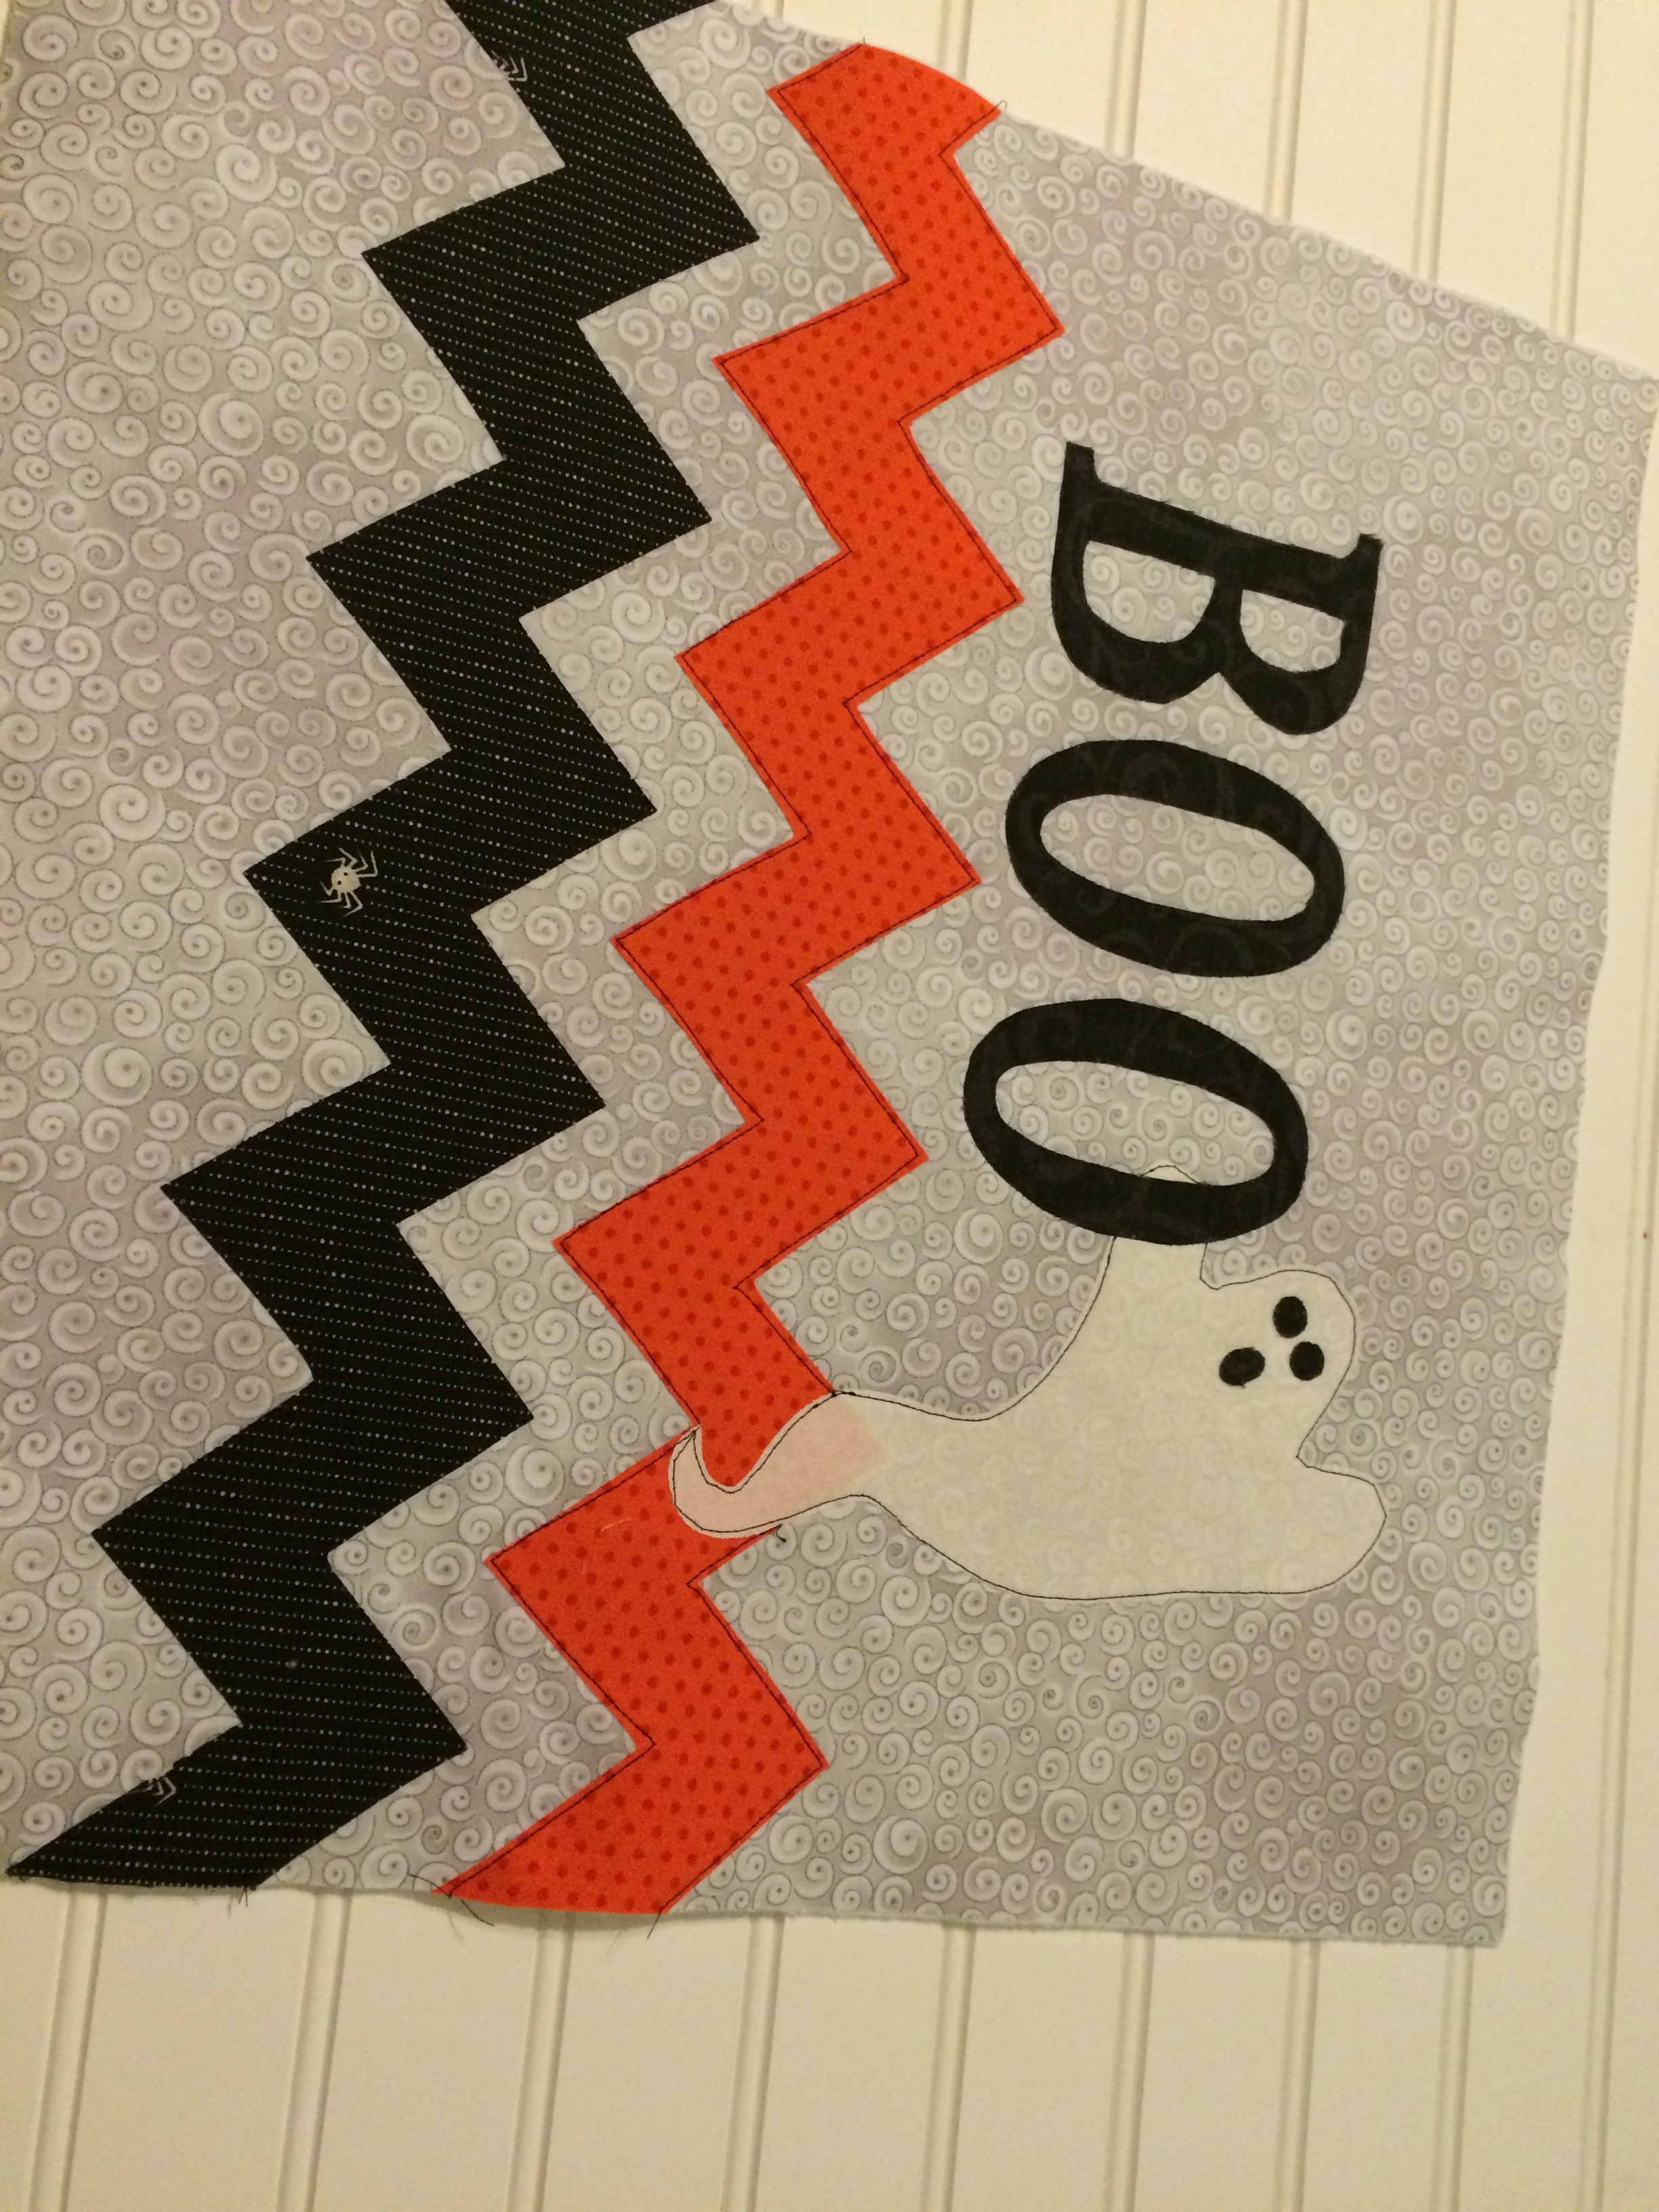
Position the pattern pieces as desired or as pictured below on the 20″ square and press into place.  Using black thread, stitch around each appliqué piece.
spooky Halloween pillow_2

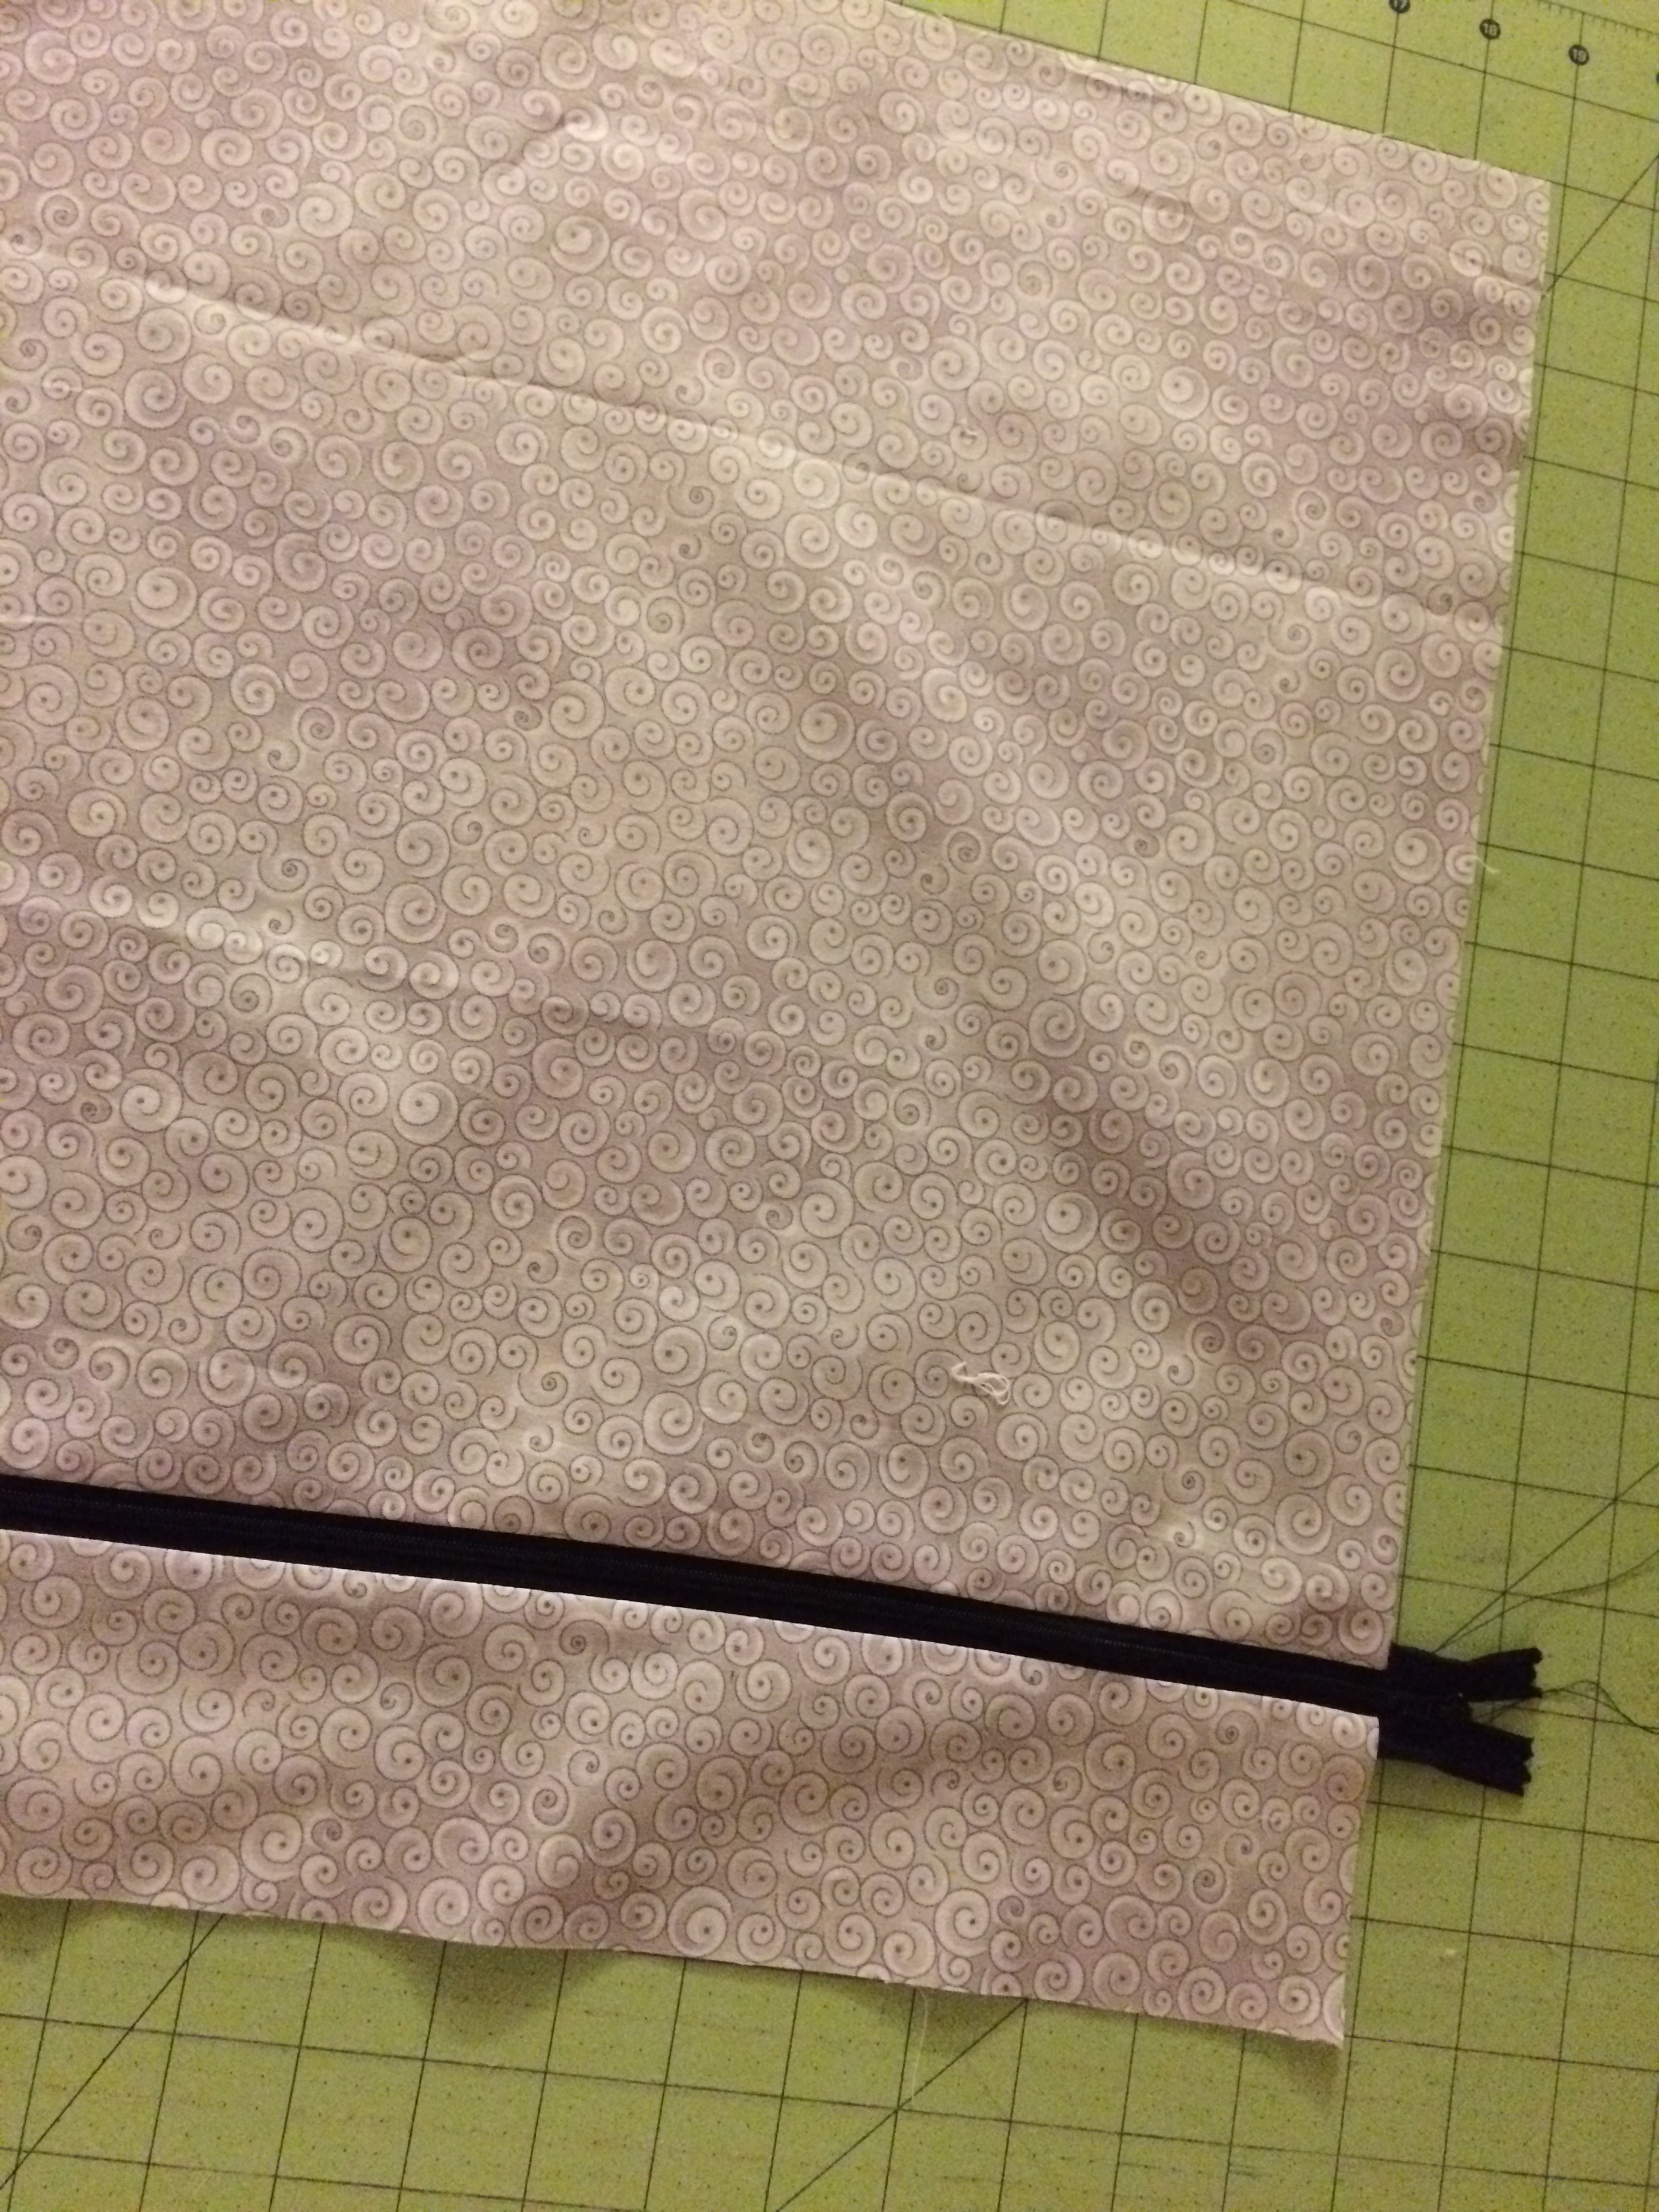
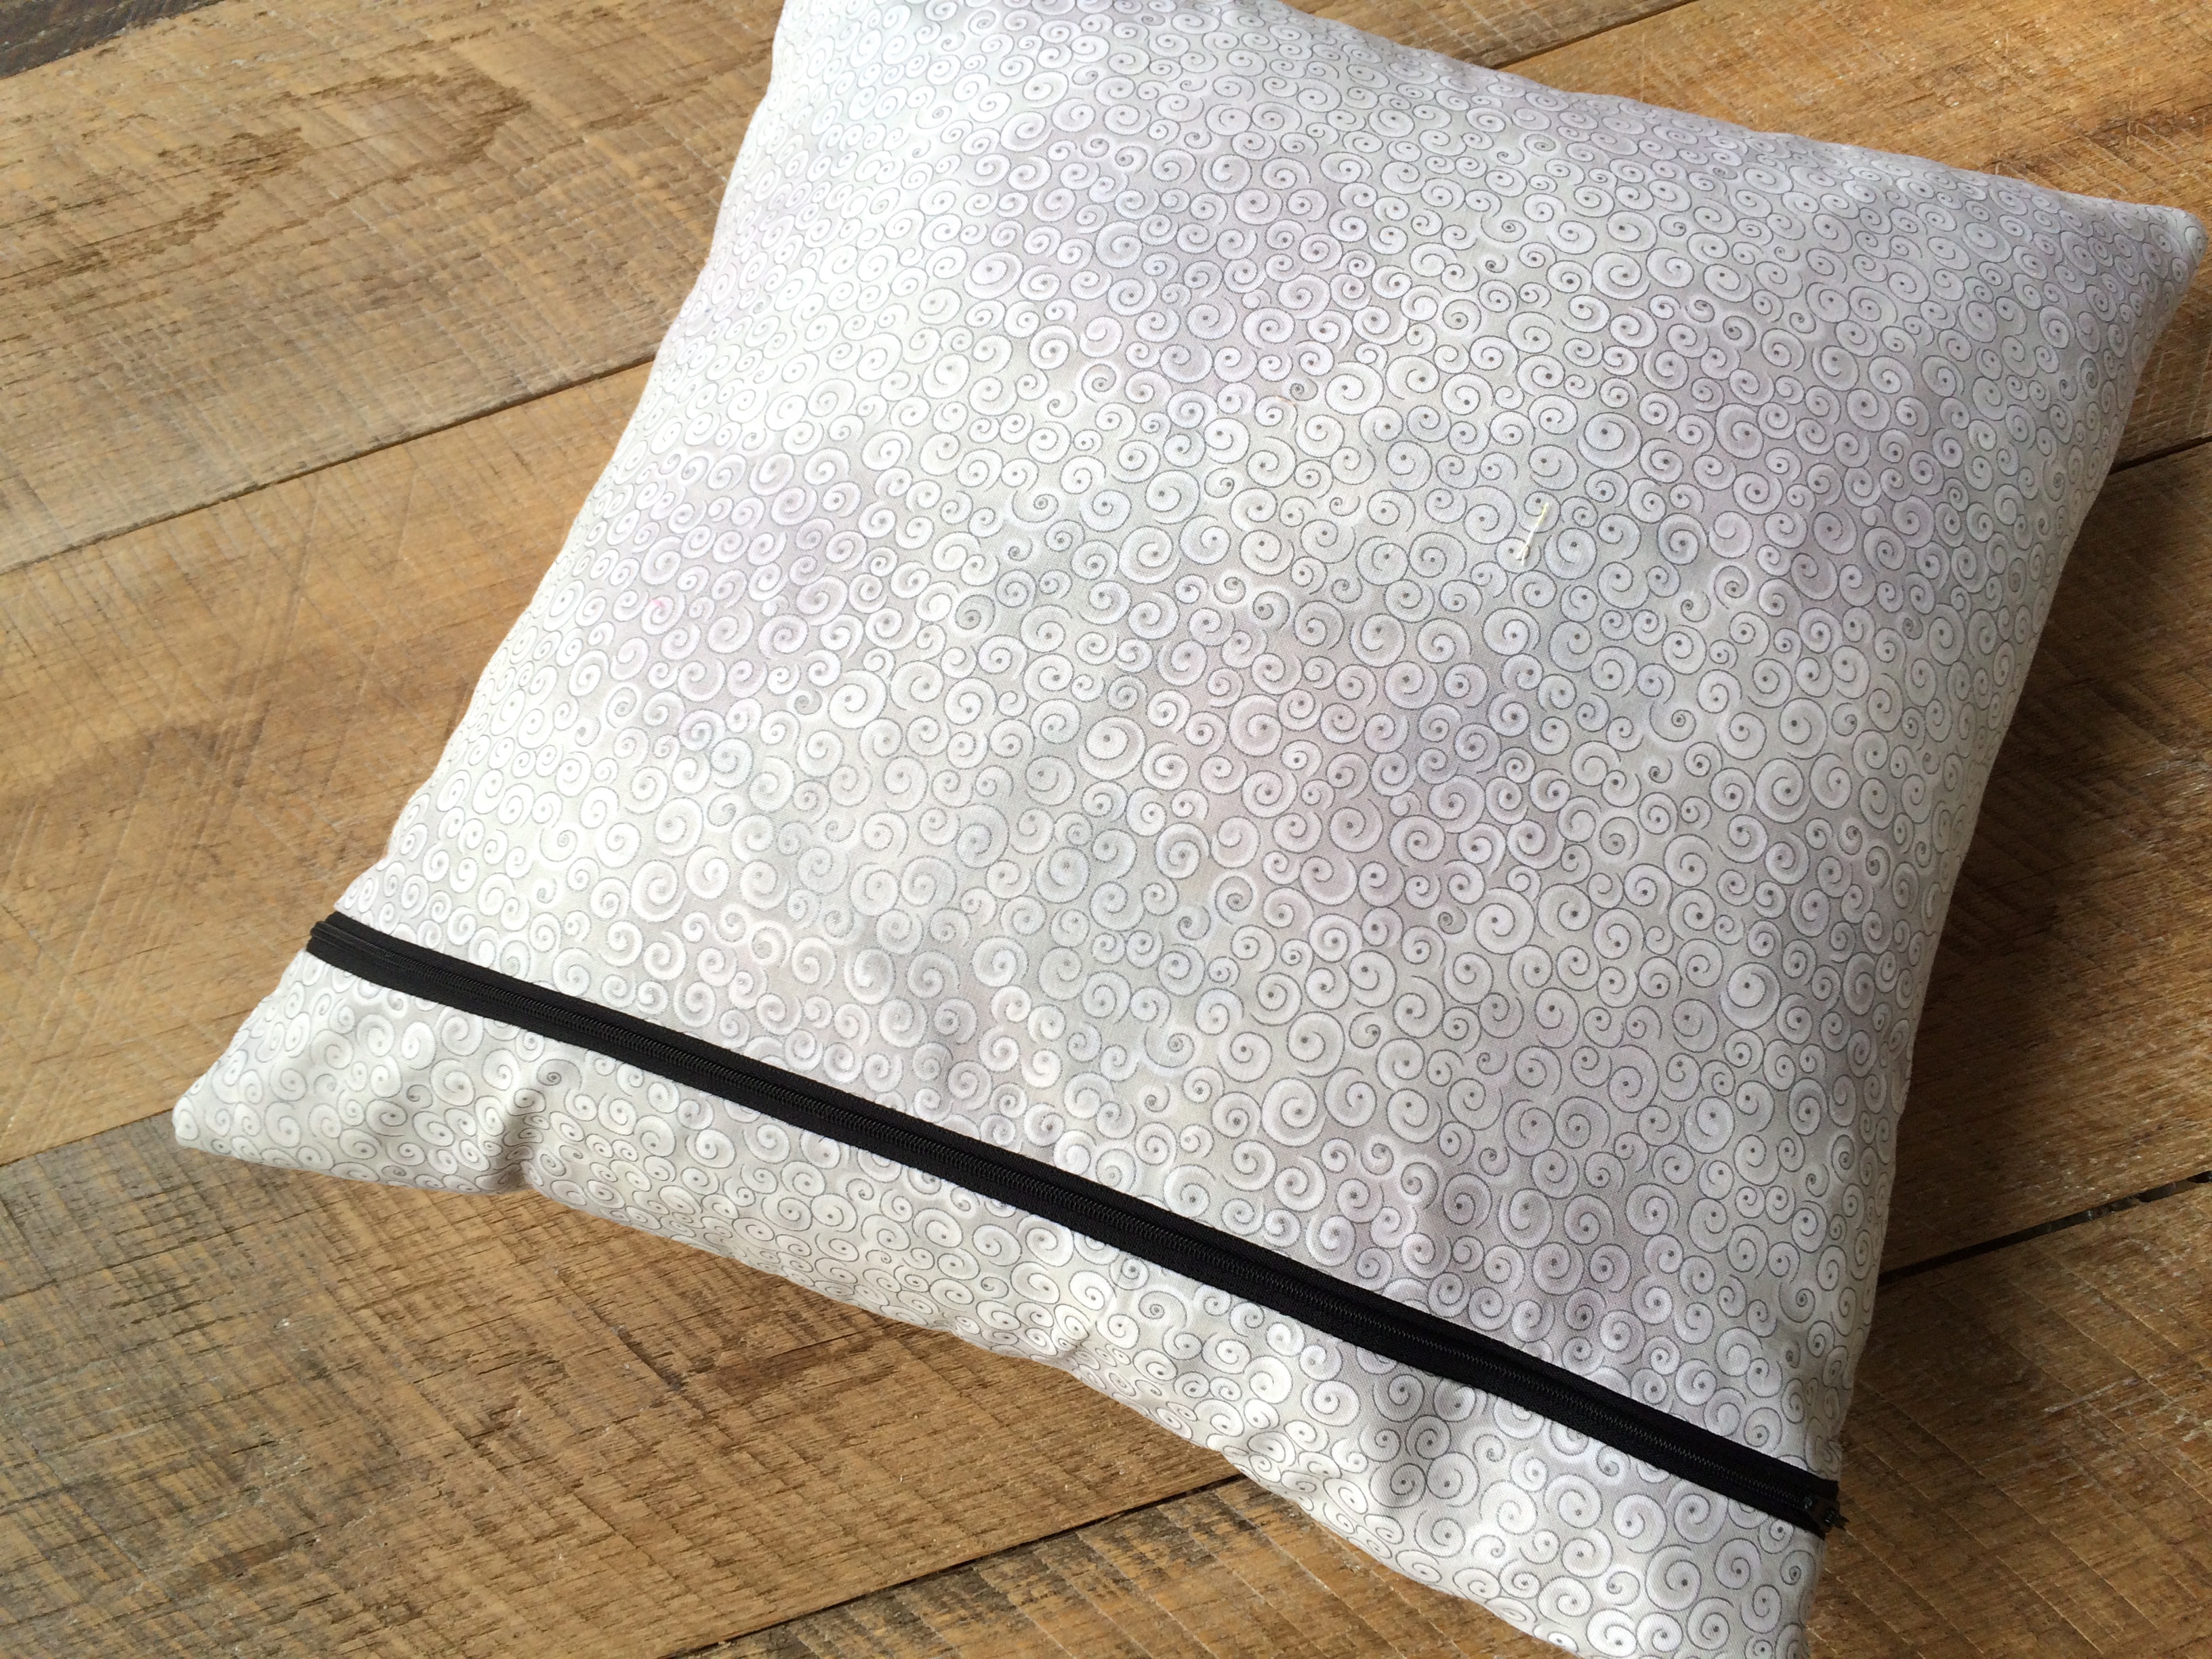
To finish the pillow take the second 20″ square (pillow back) and cut 3″ off:
spooky Halloween pillow_4


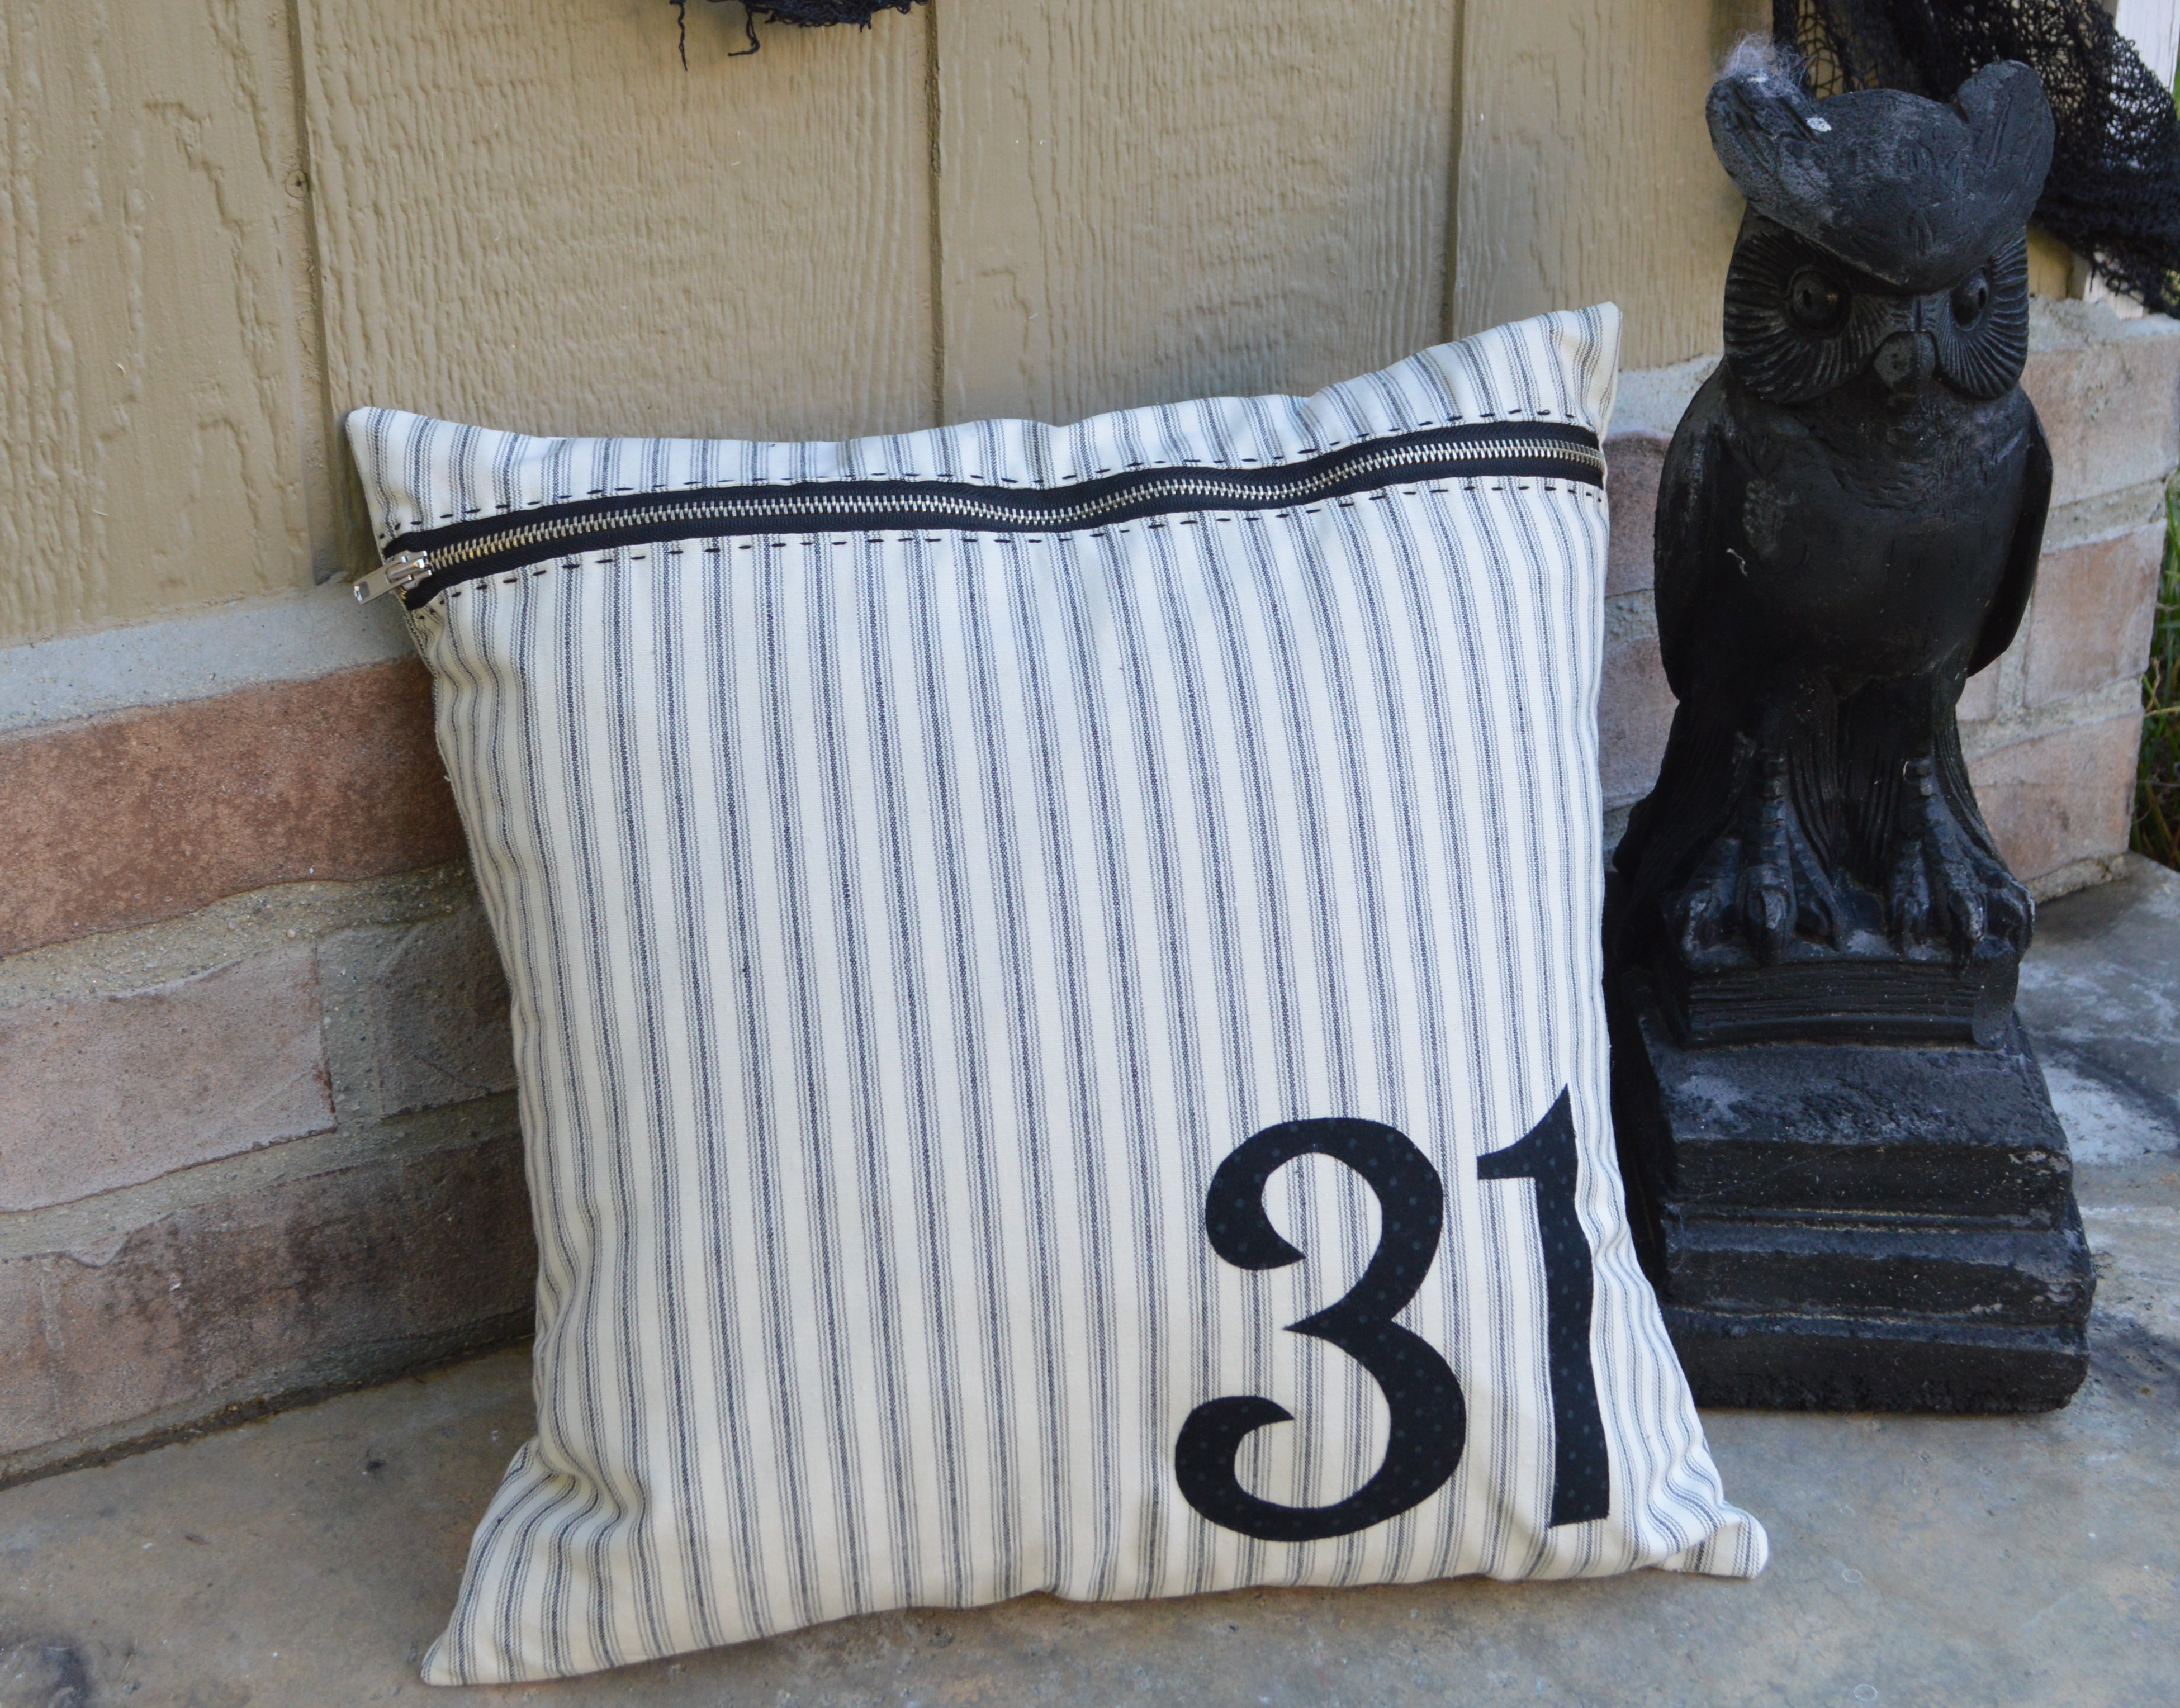
Insert the zipper and press.  Trim off excess zipper.spooky Halloween pillow_5

With zipper pull positioned in the center of the pillow, pin the pillow front and the pillow back right sides together.  Sew all the way around the pillow using a 1/2″ seam.spooky Halloween pillow_6

Turn right side out and insert pillow.

spooky Halloween pillow_7

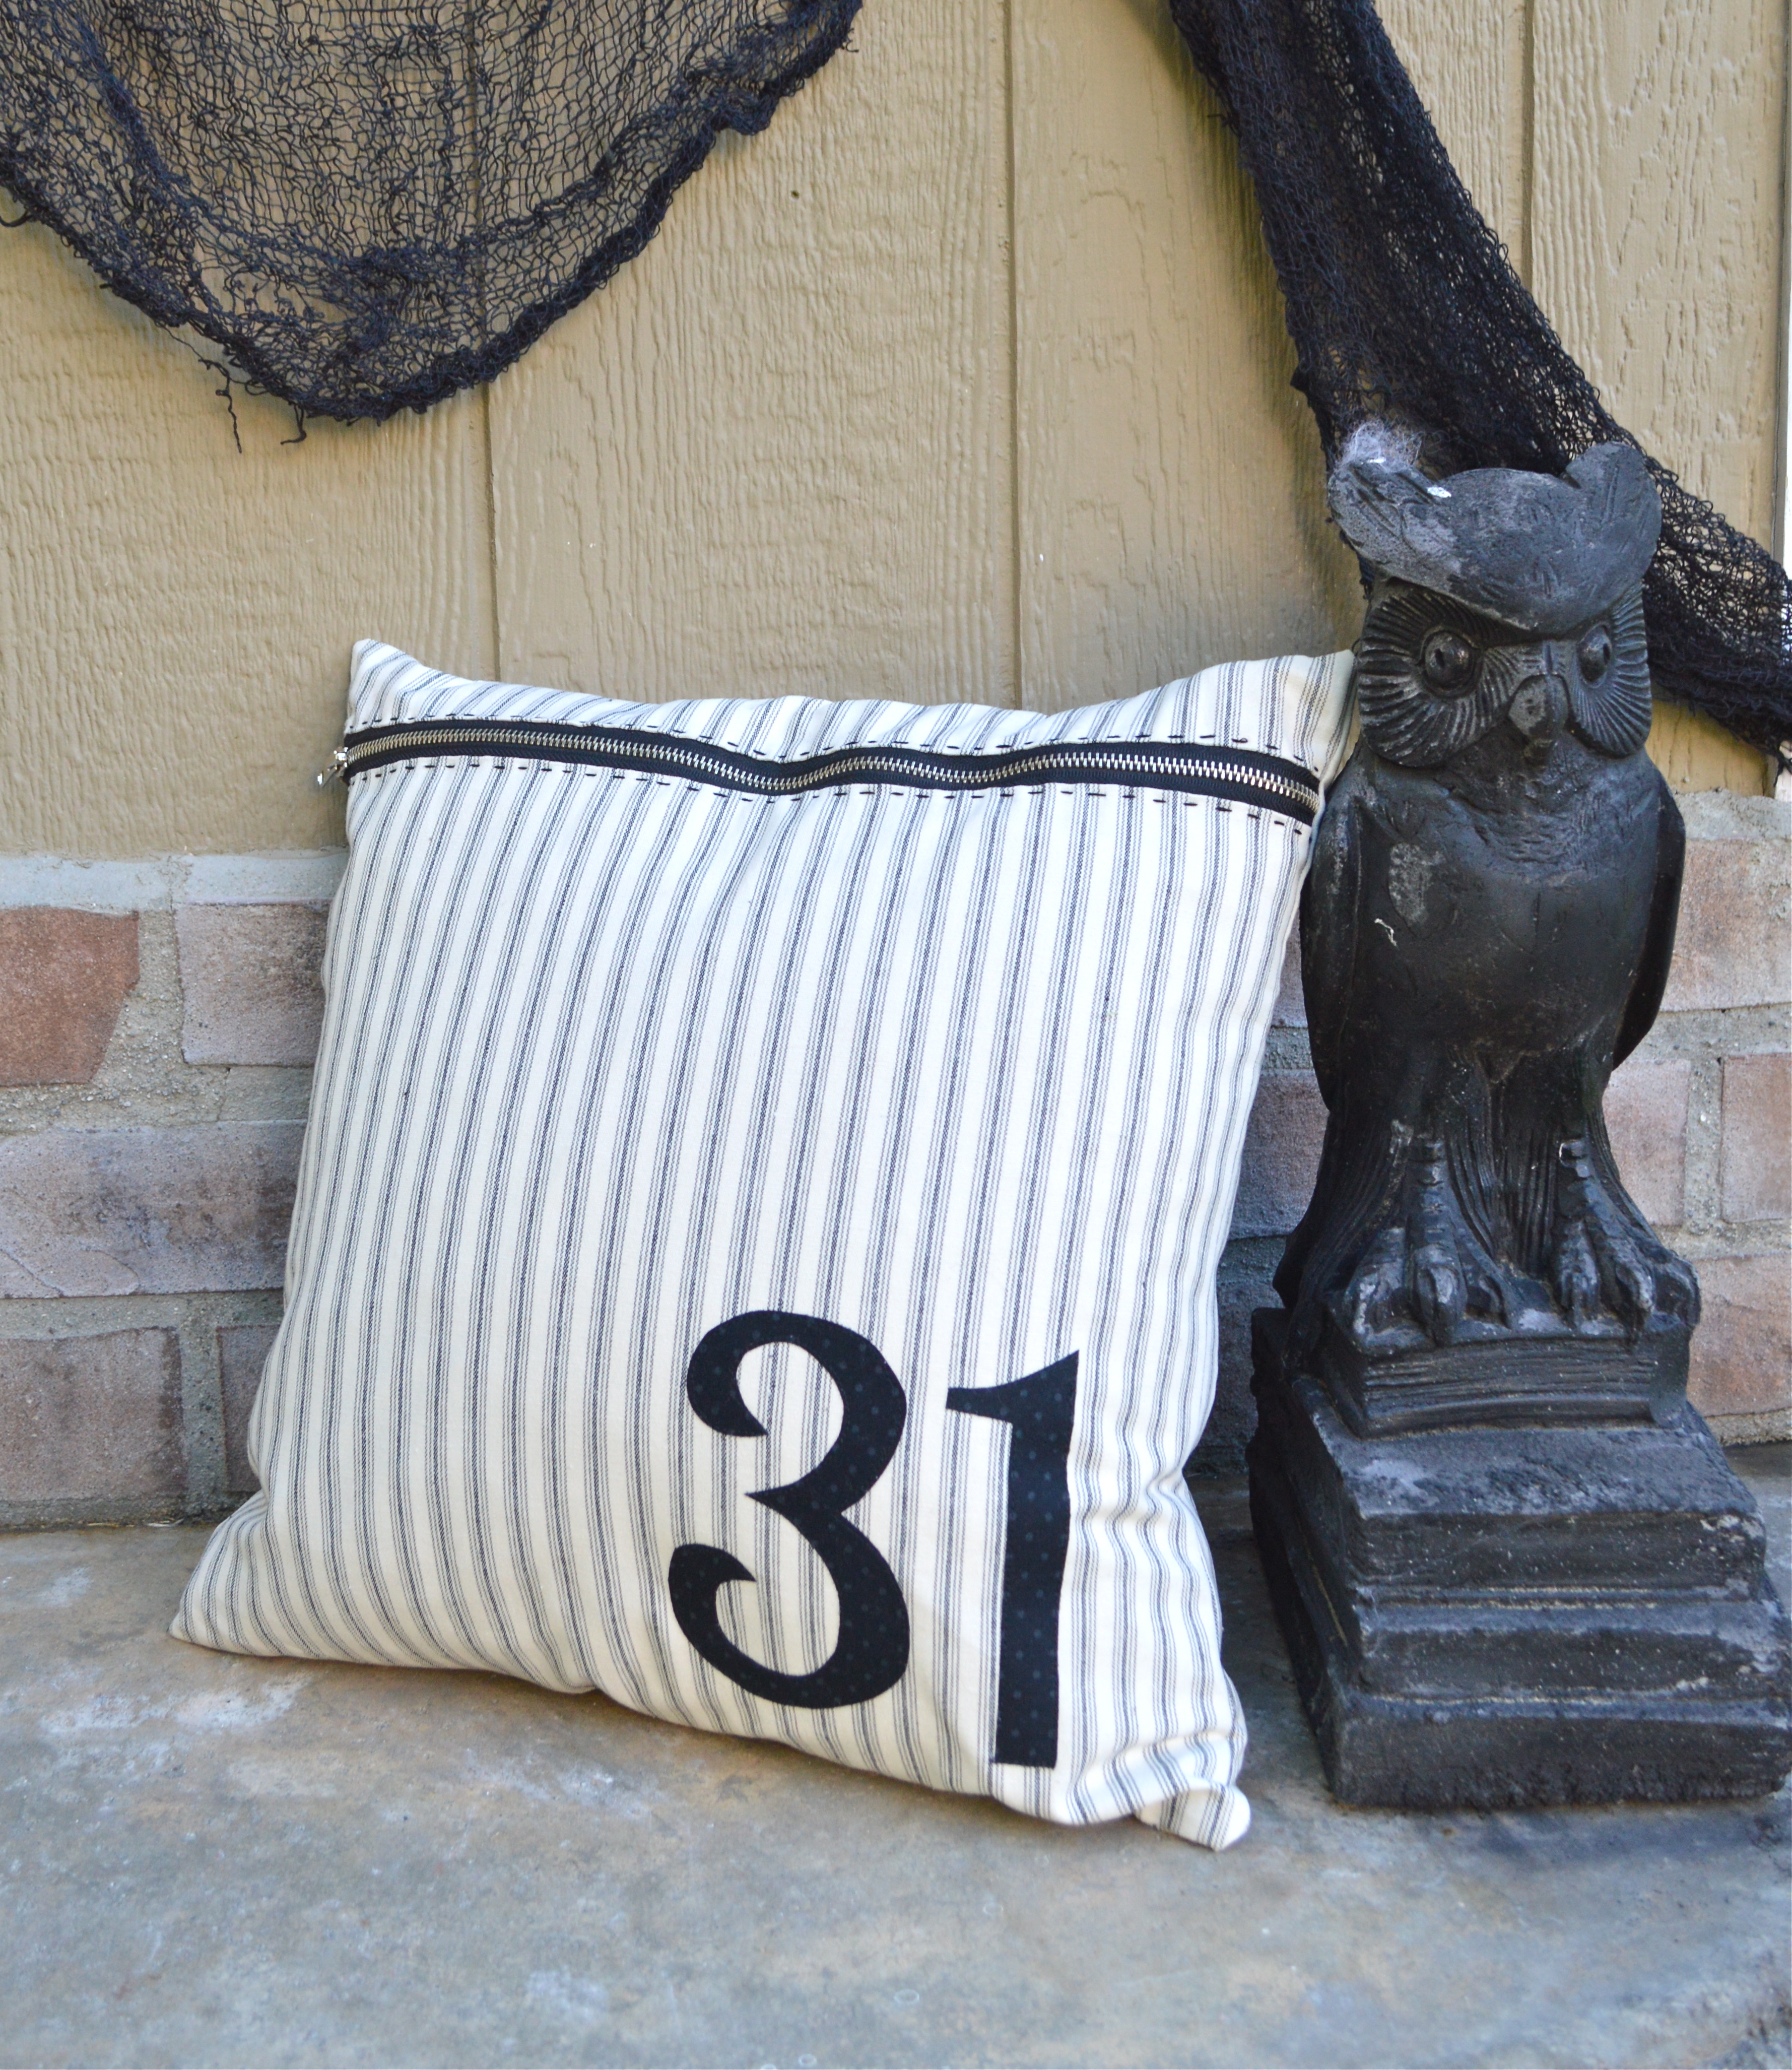
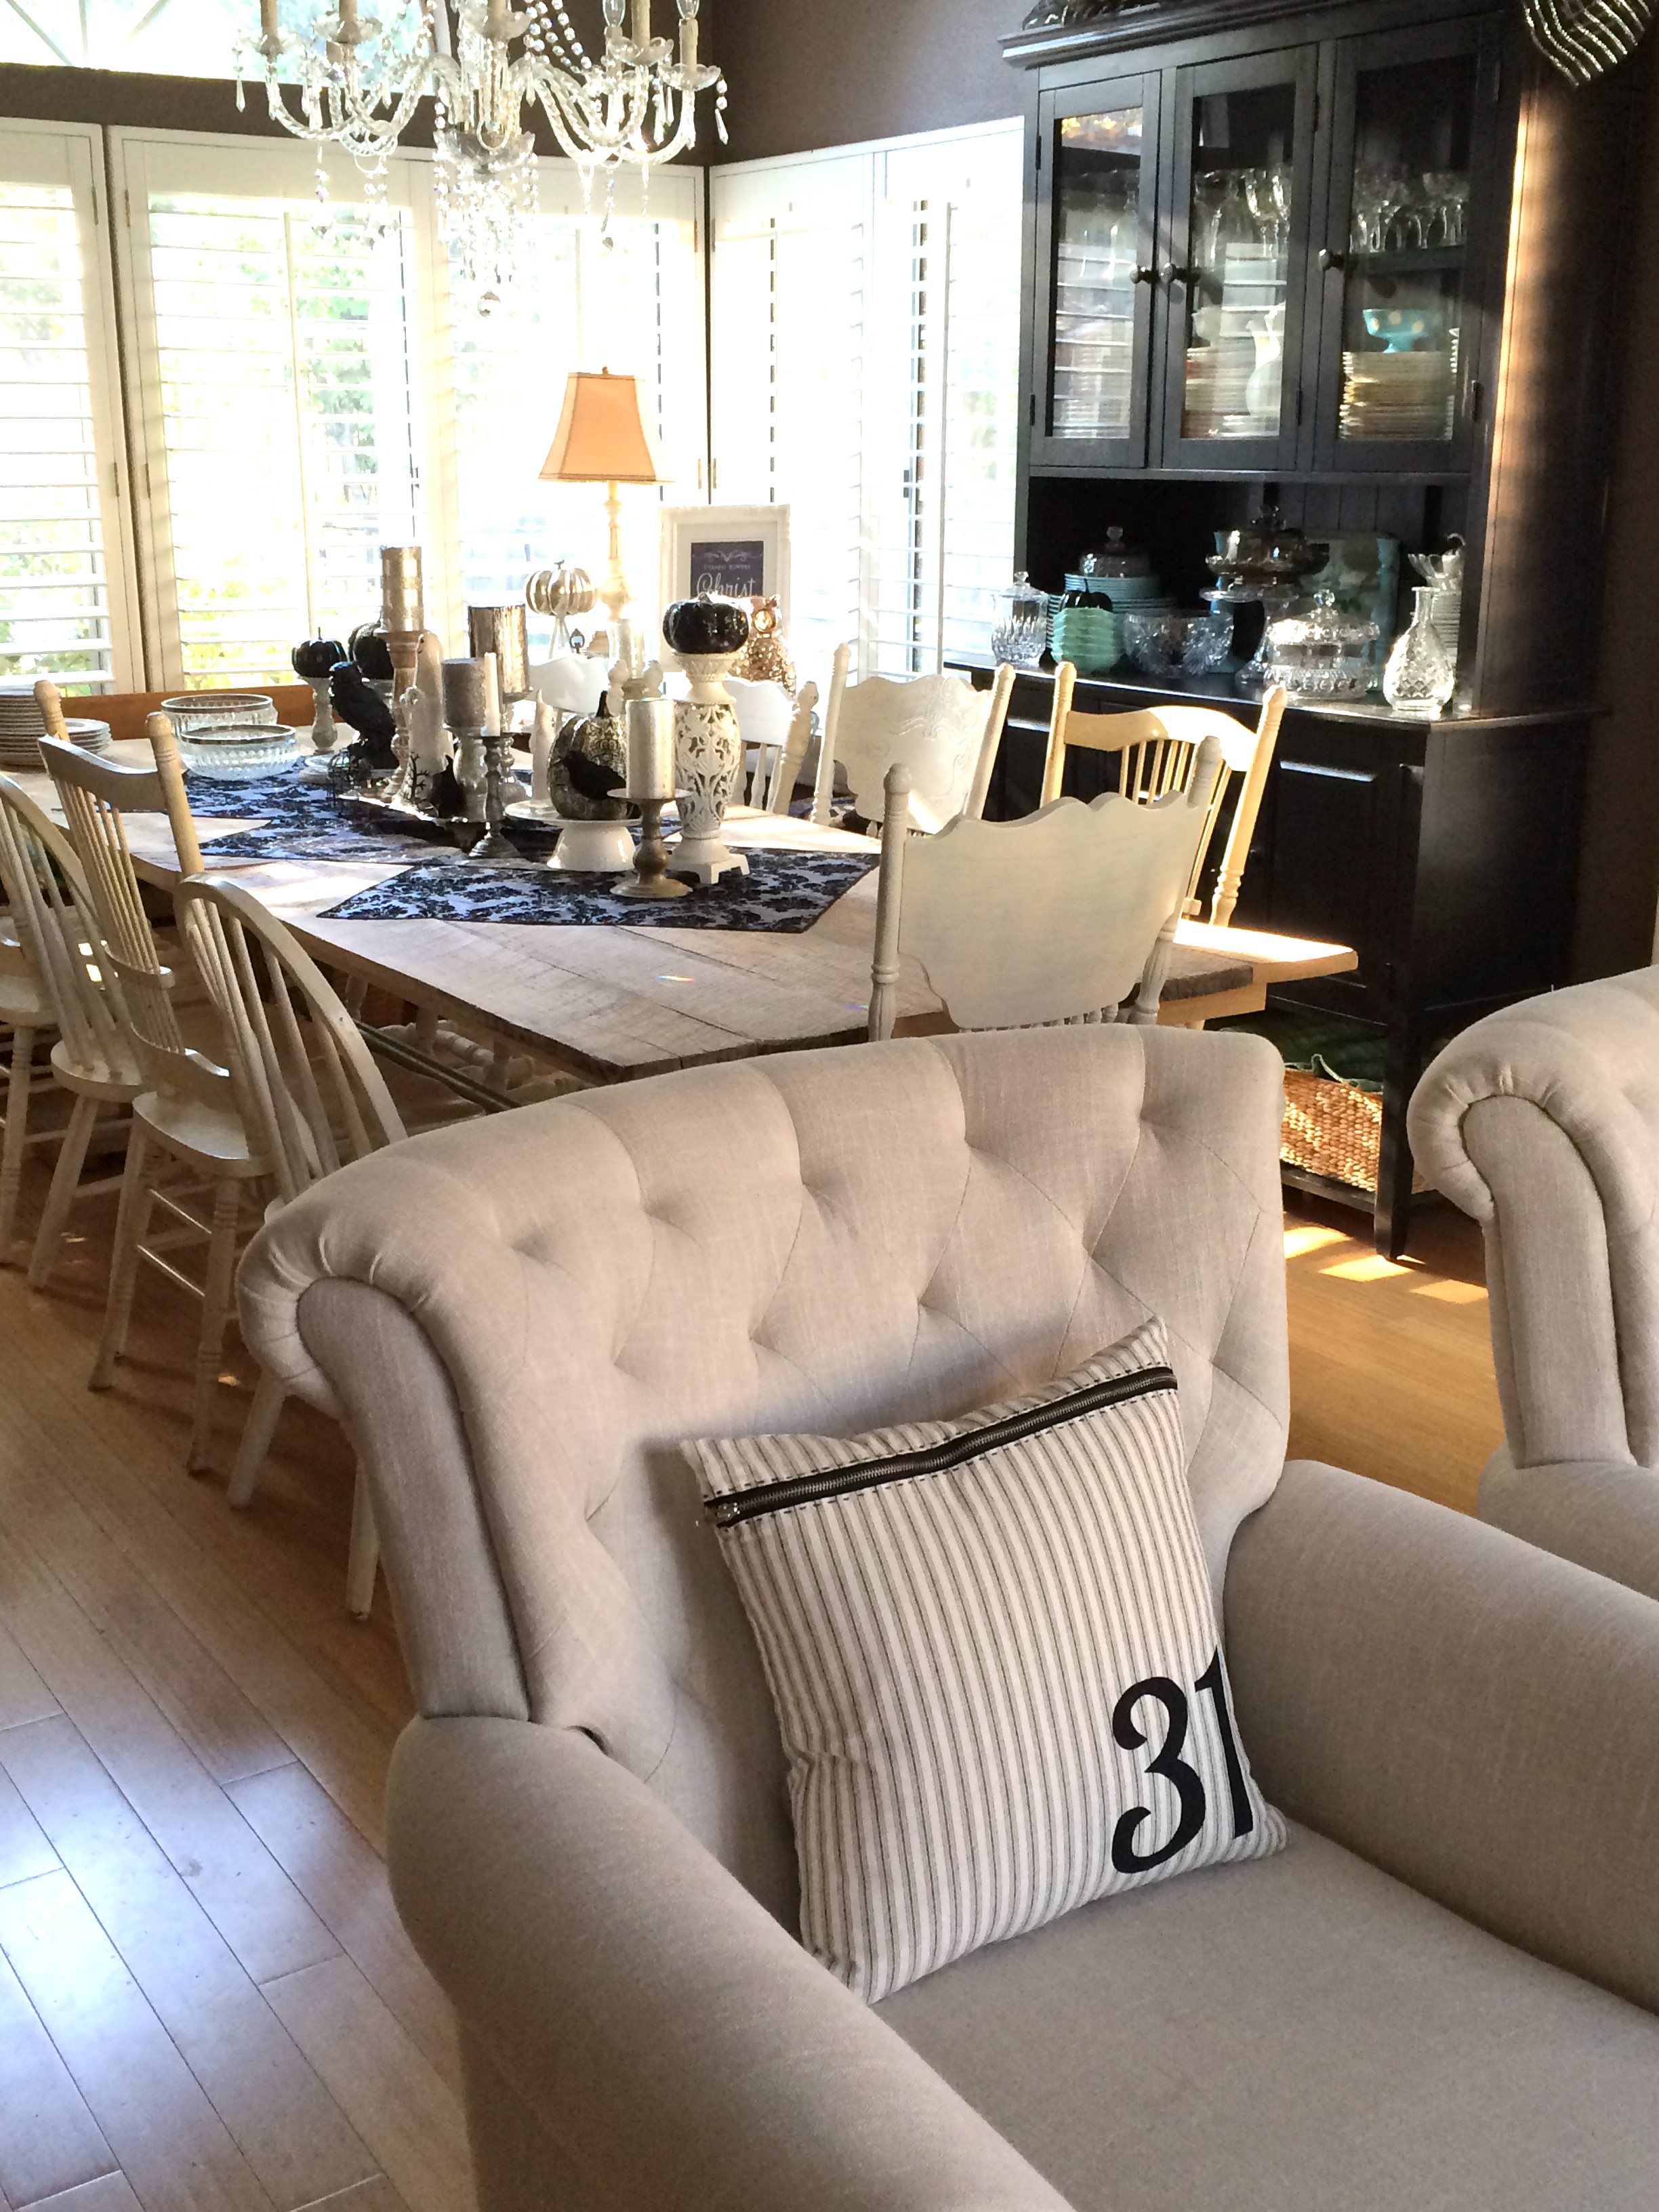
In my dining/living room I like to decorate only with black, white, neutrals, and metallics.  I love how the pillow looks on the neutral chair – a perfect compliment to the “31” pillow!!

spooky Halloween pillow_8

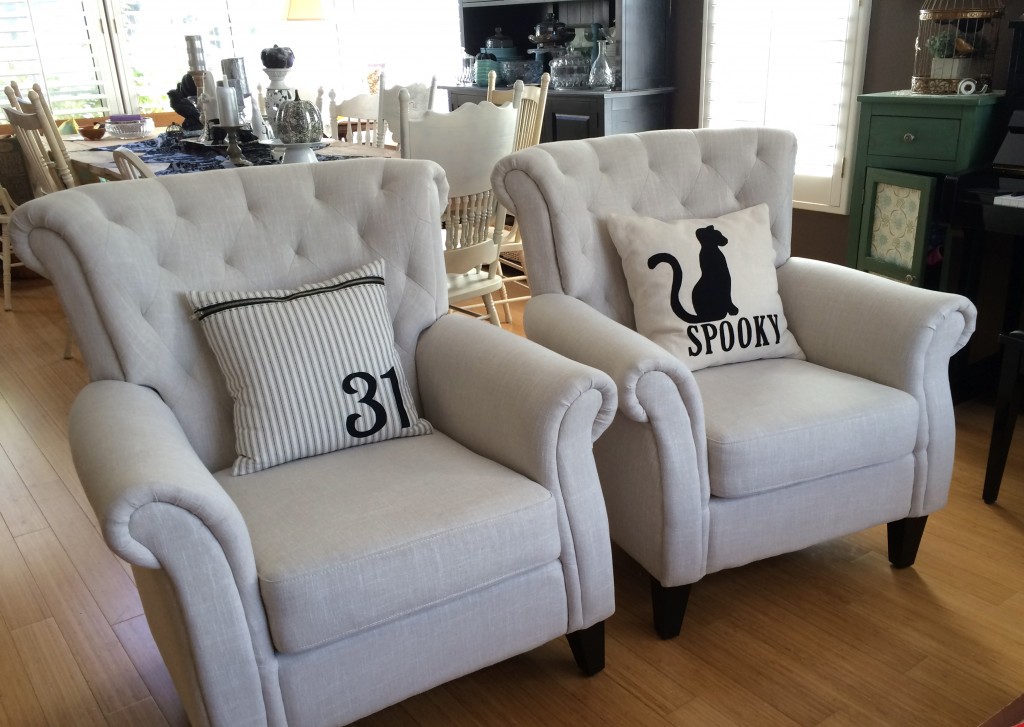
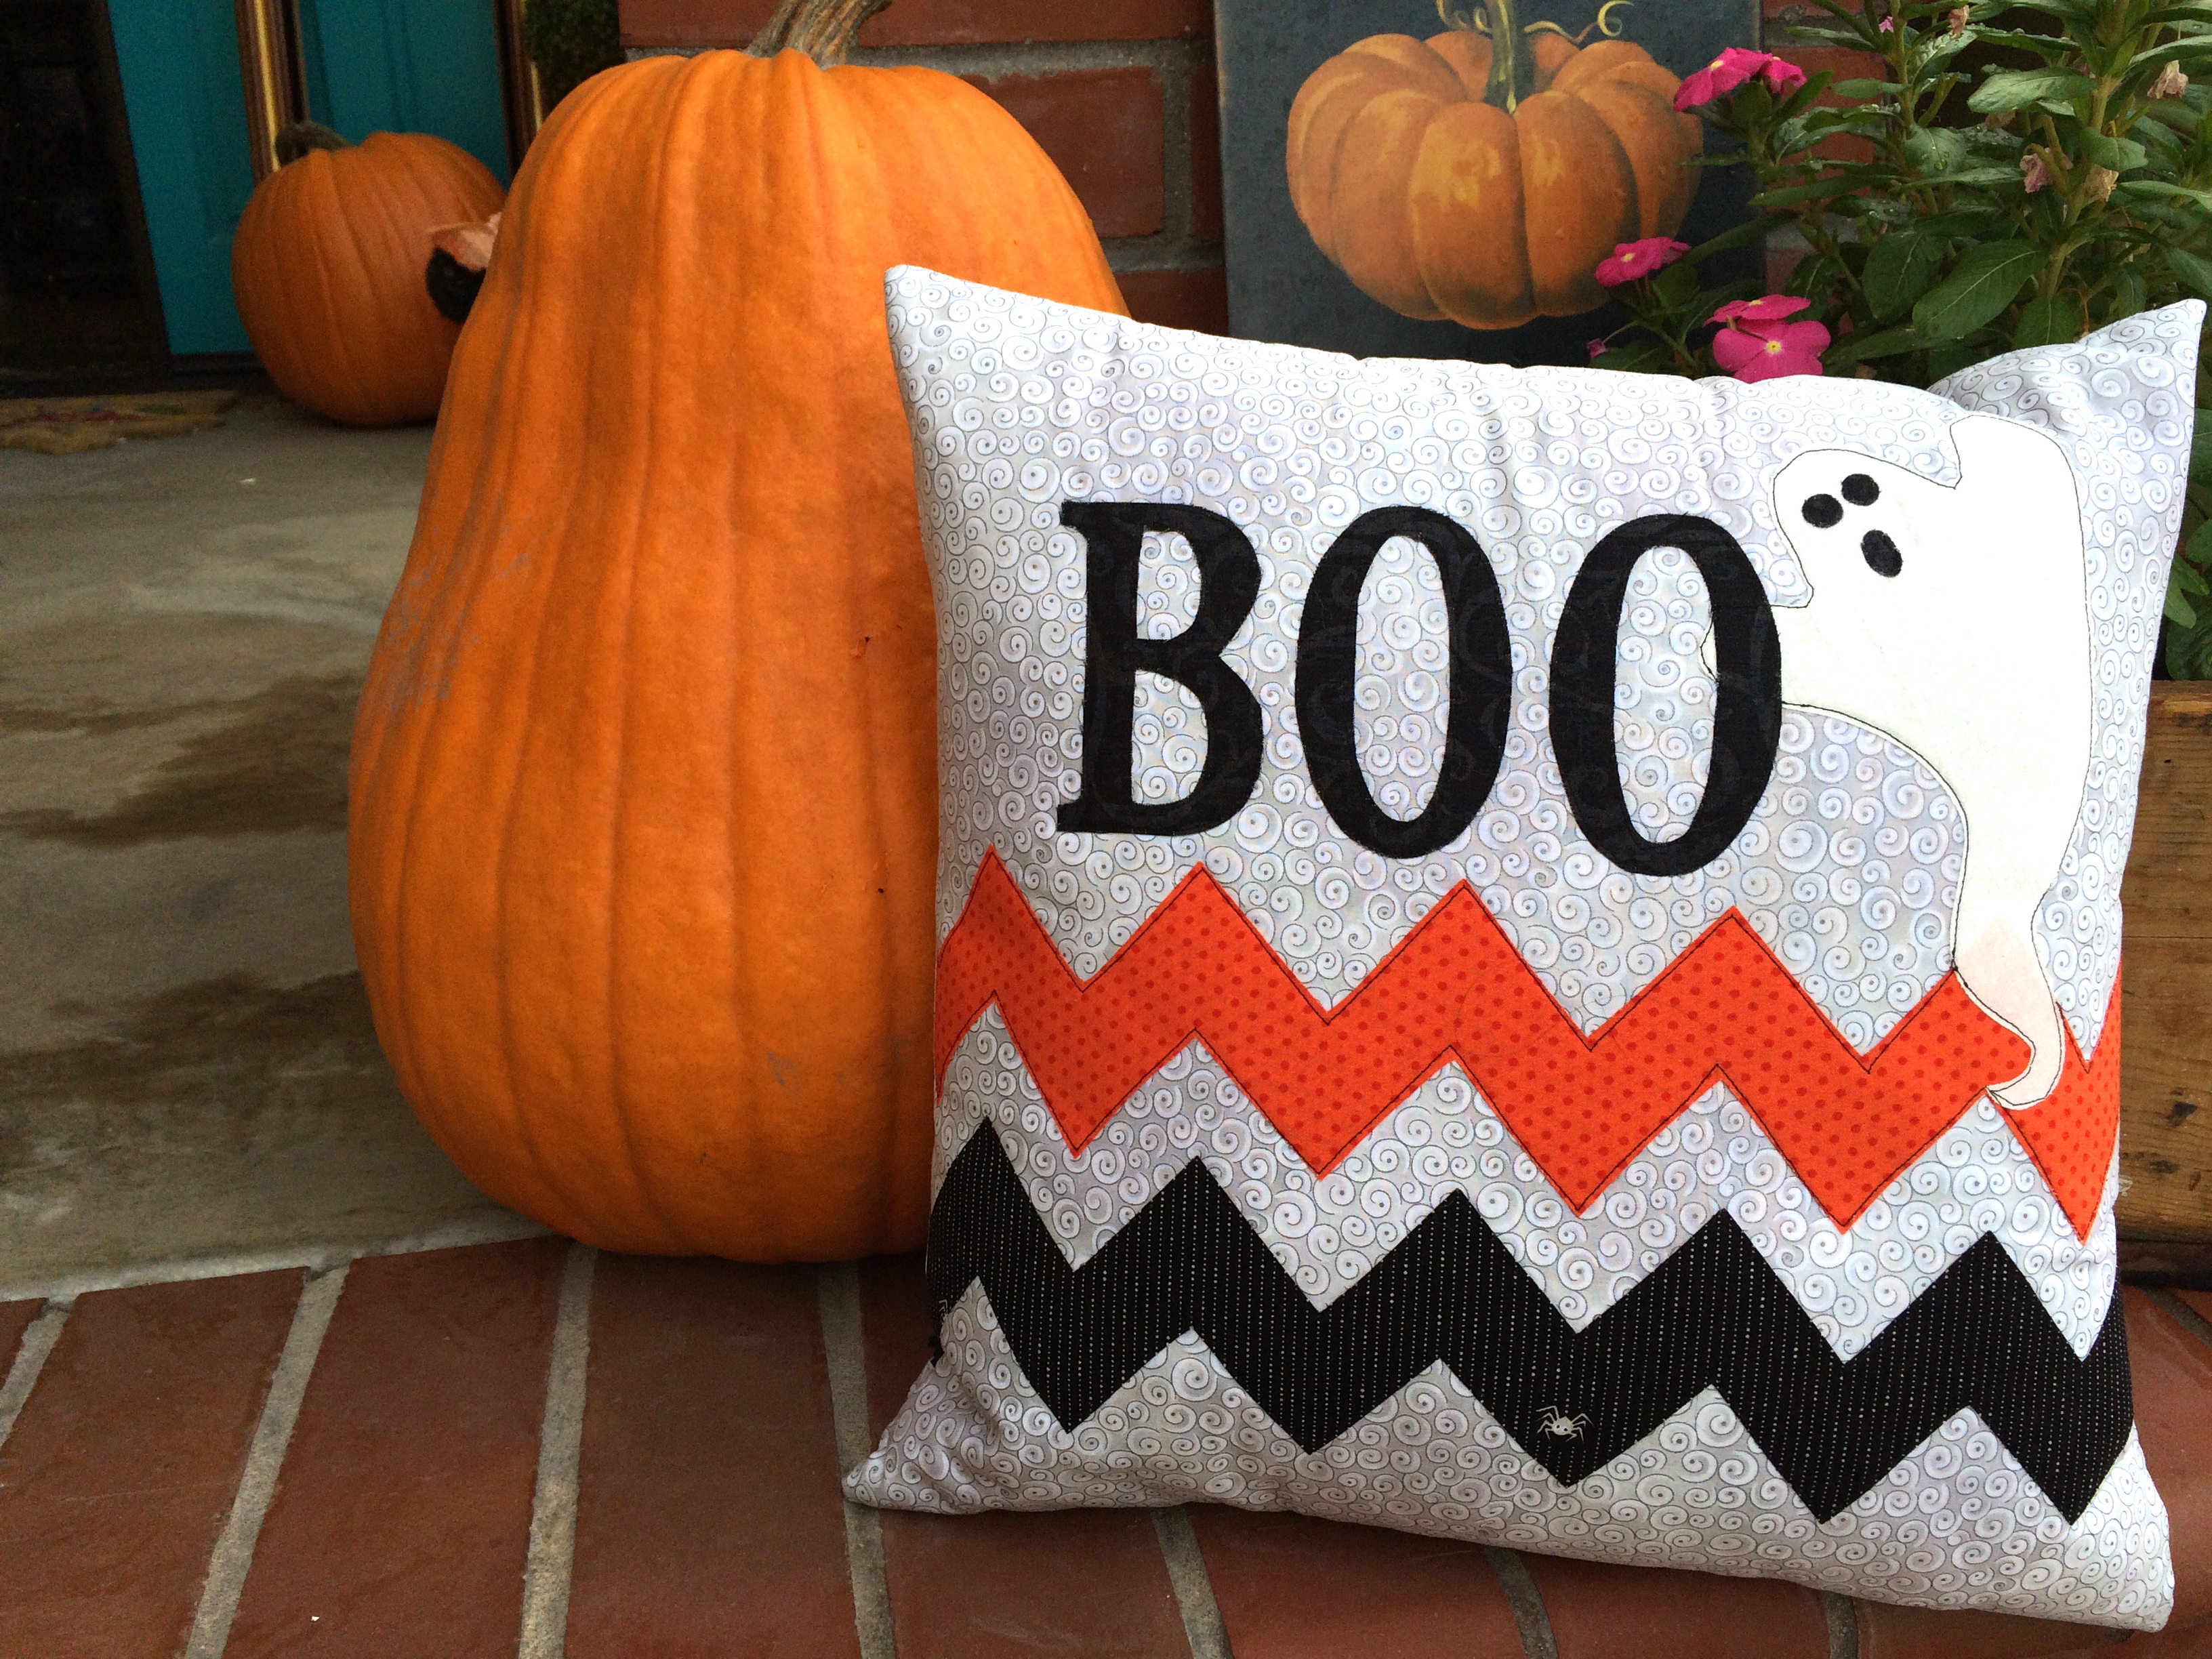
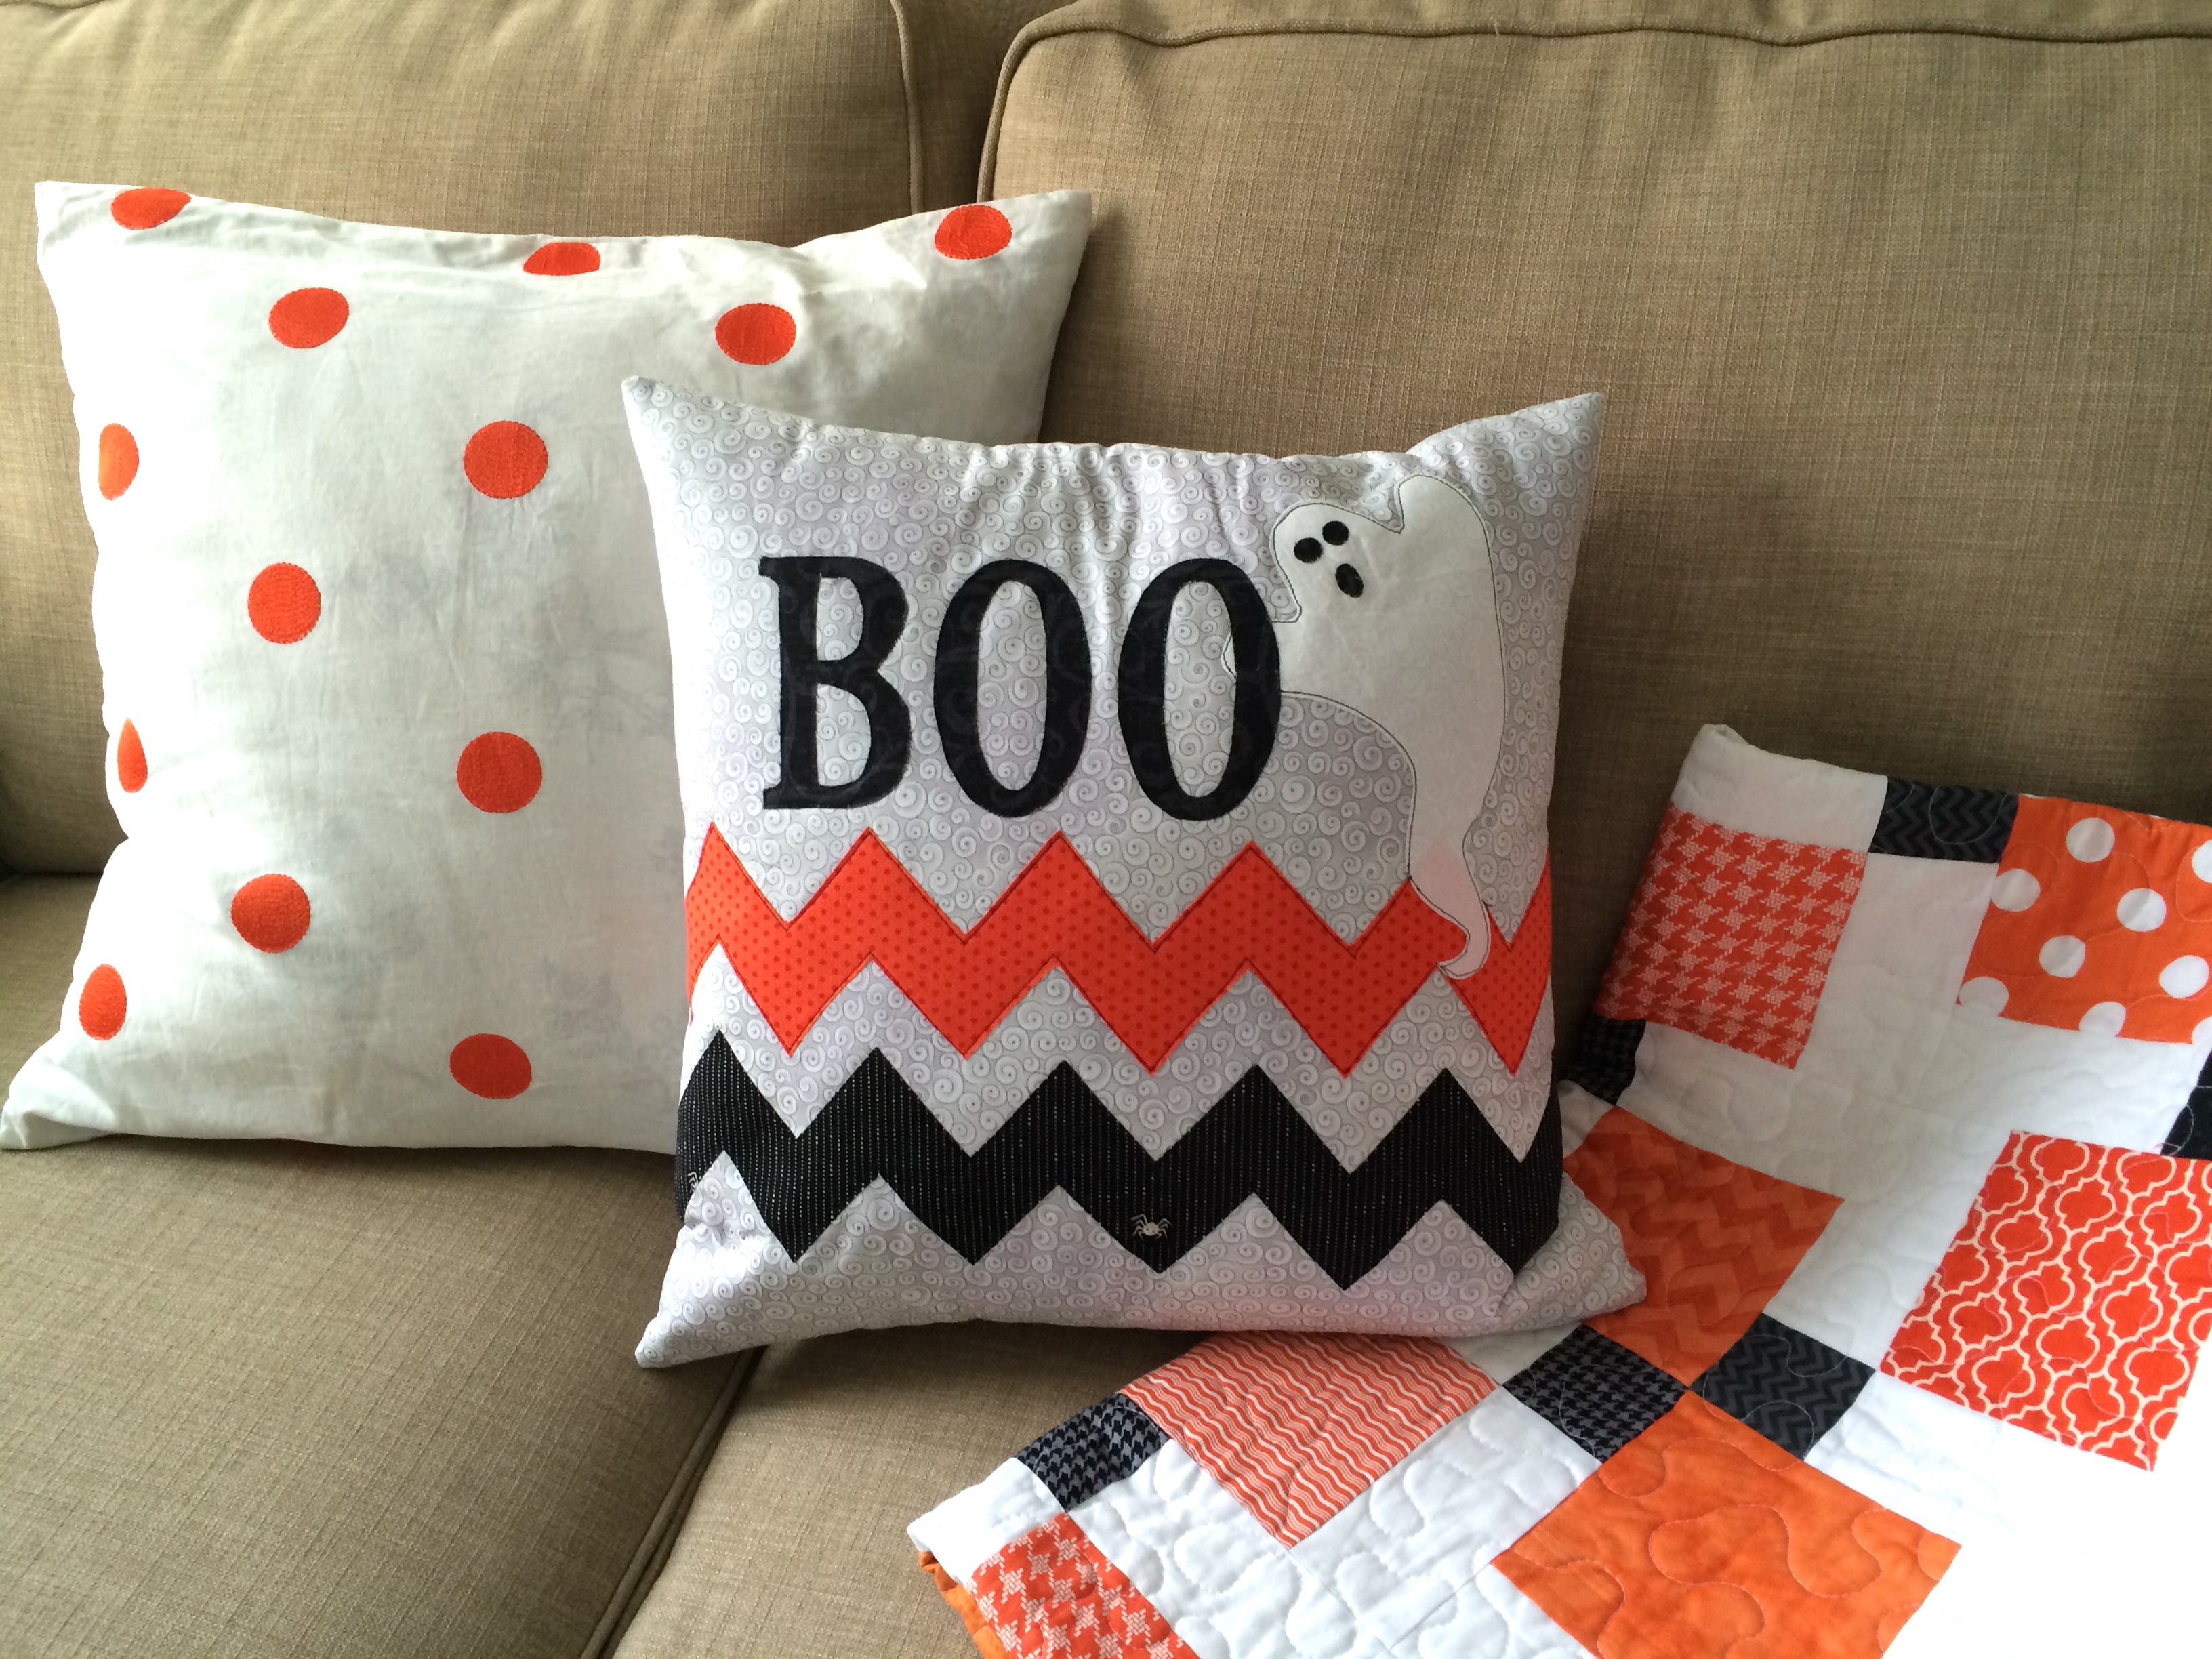
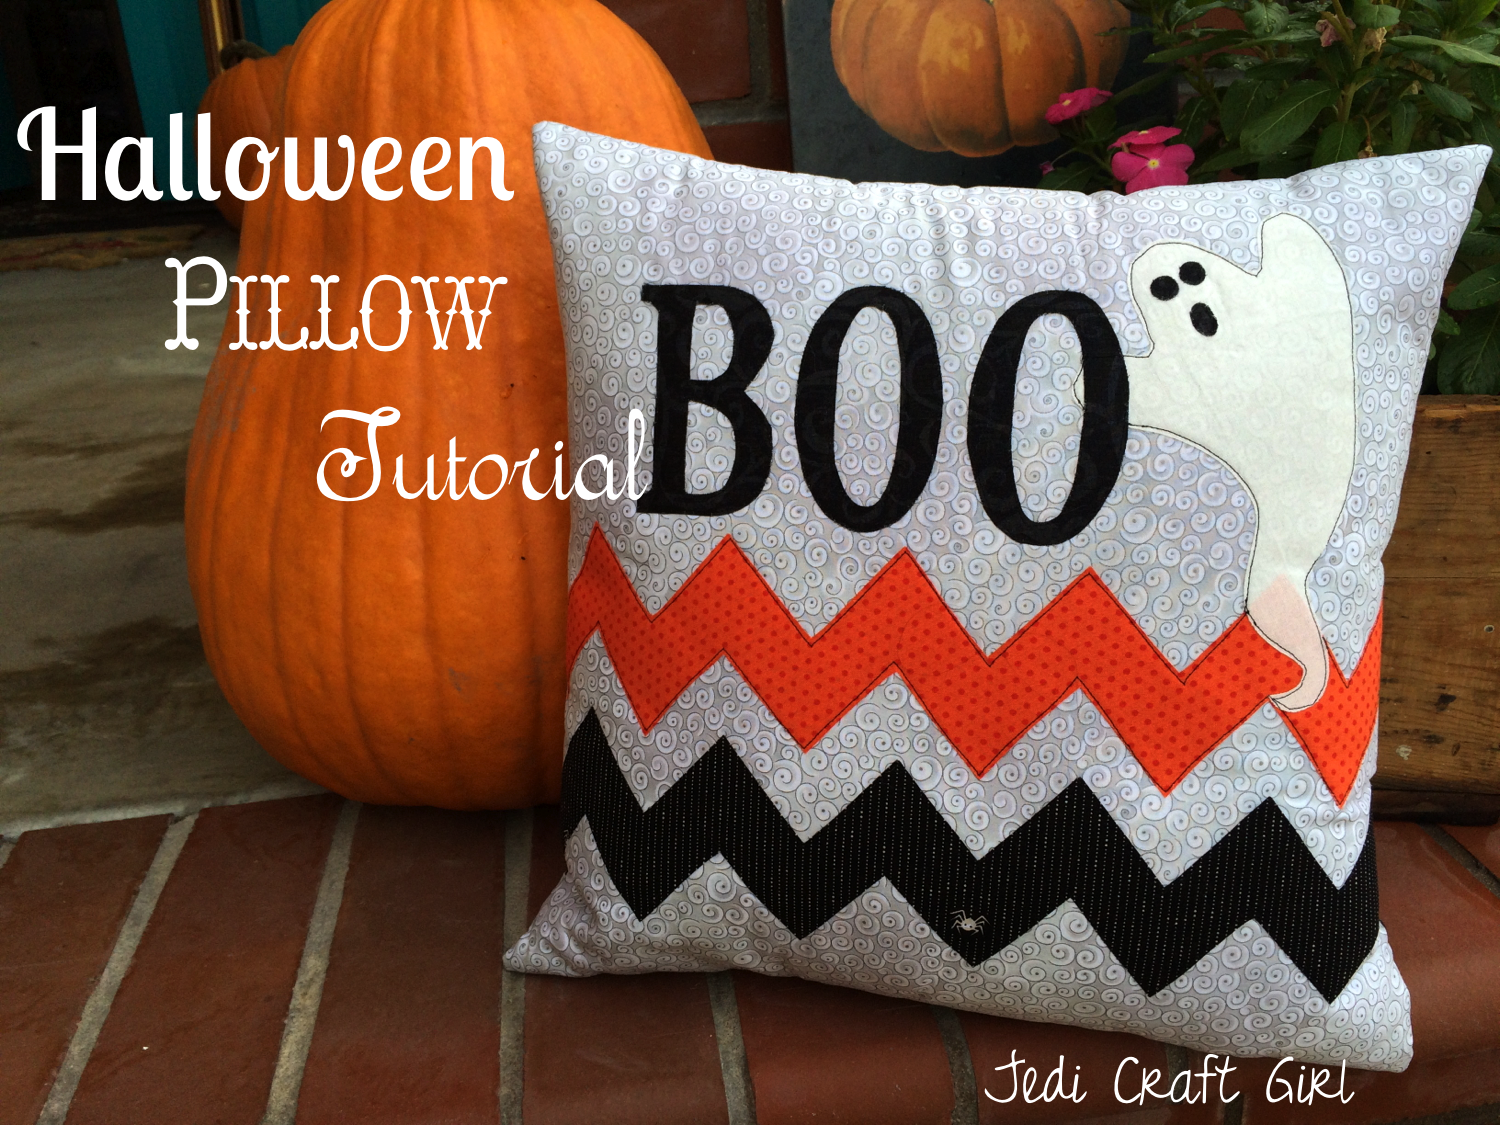
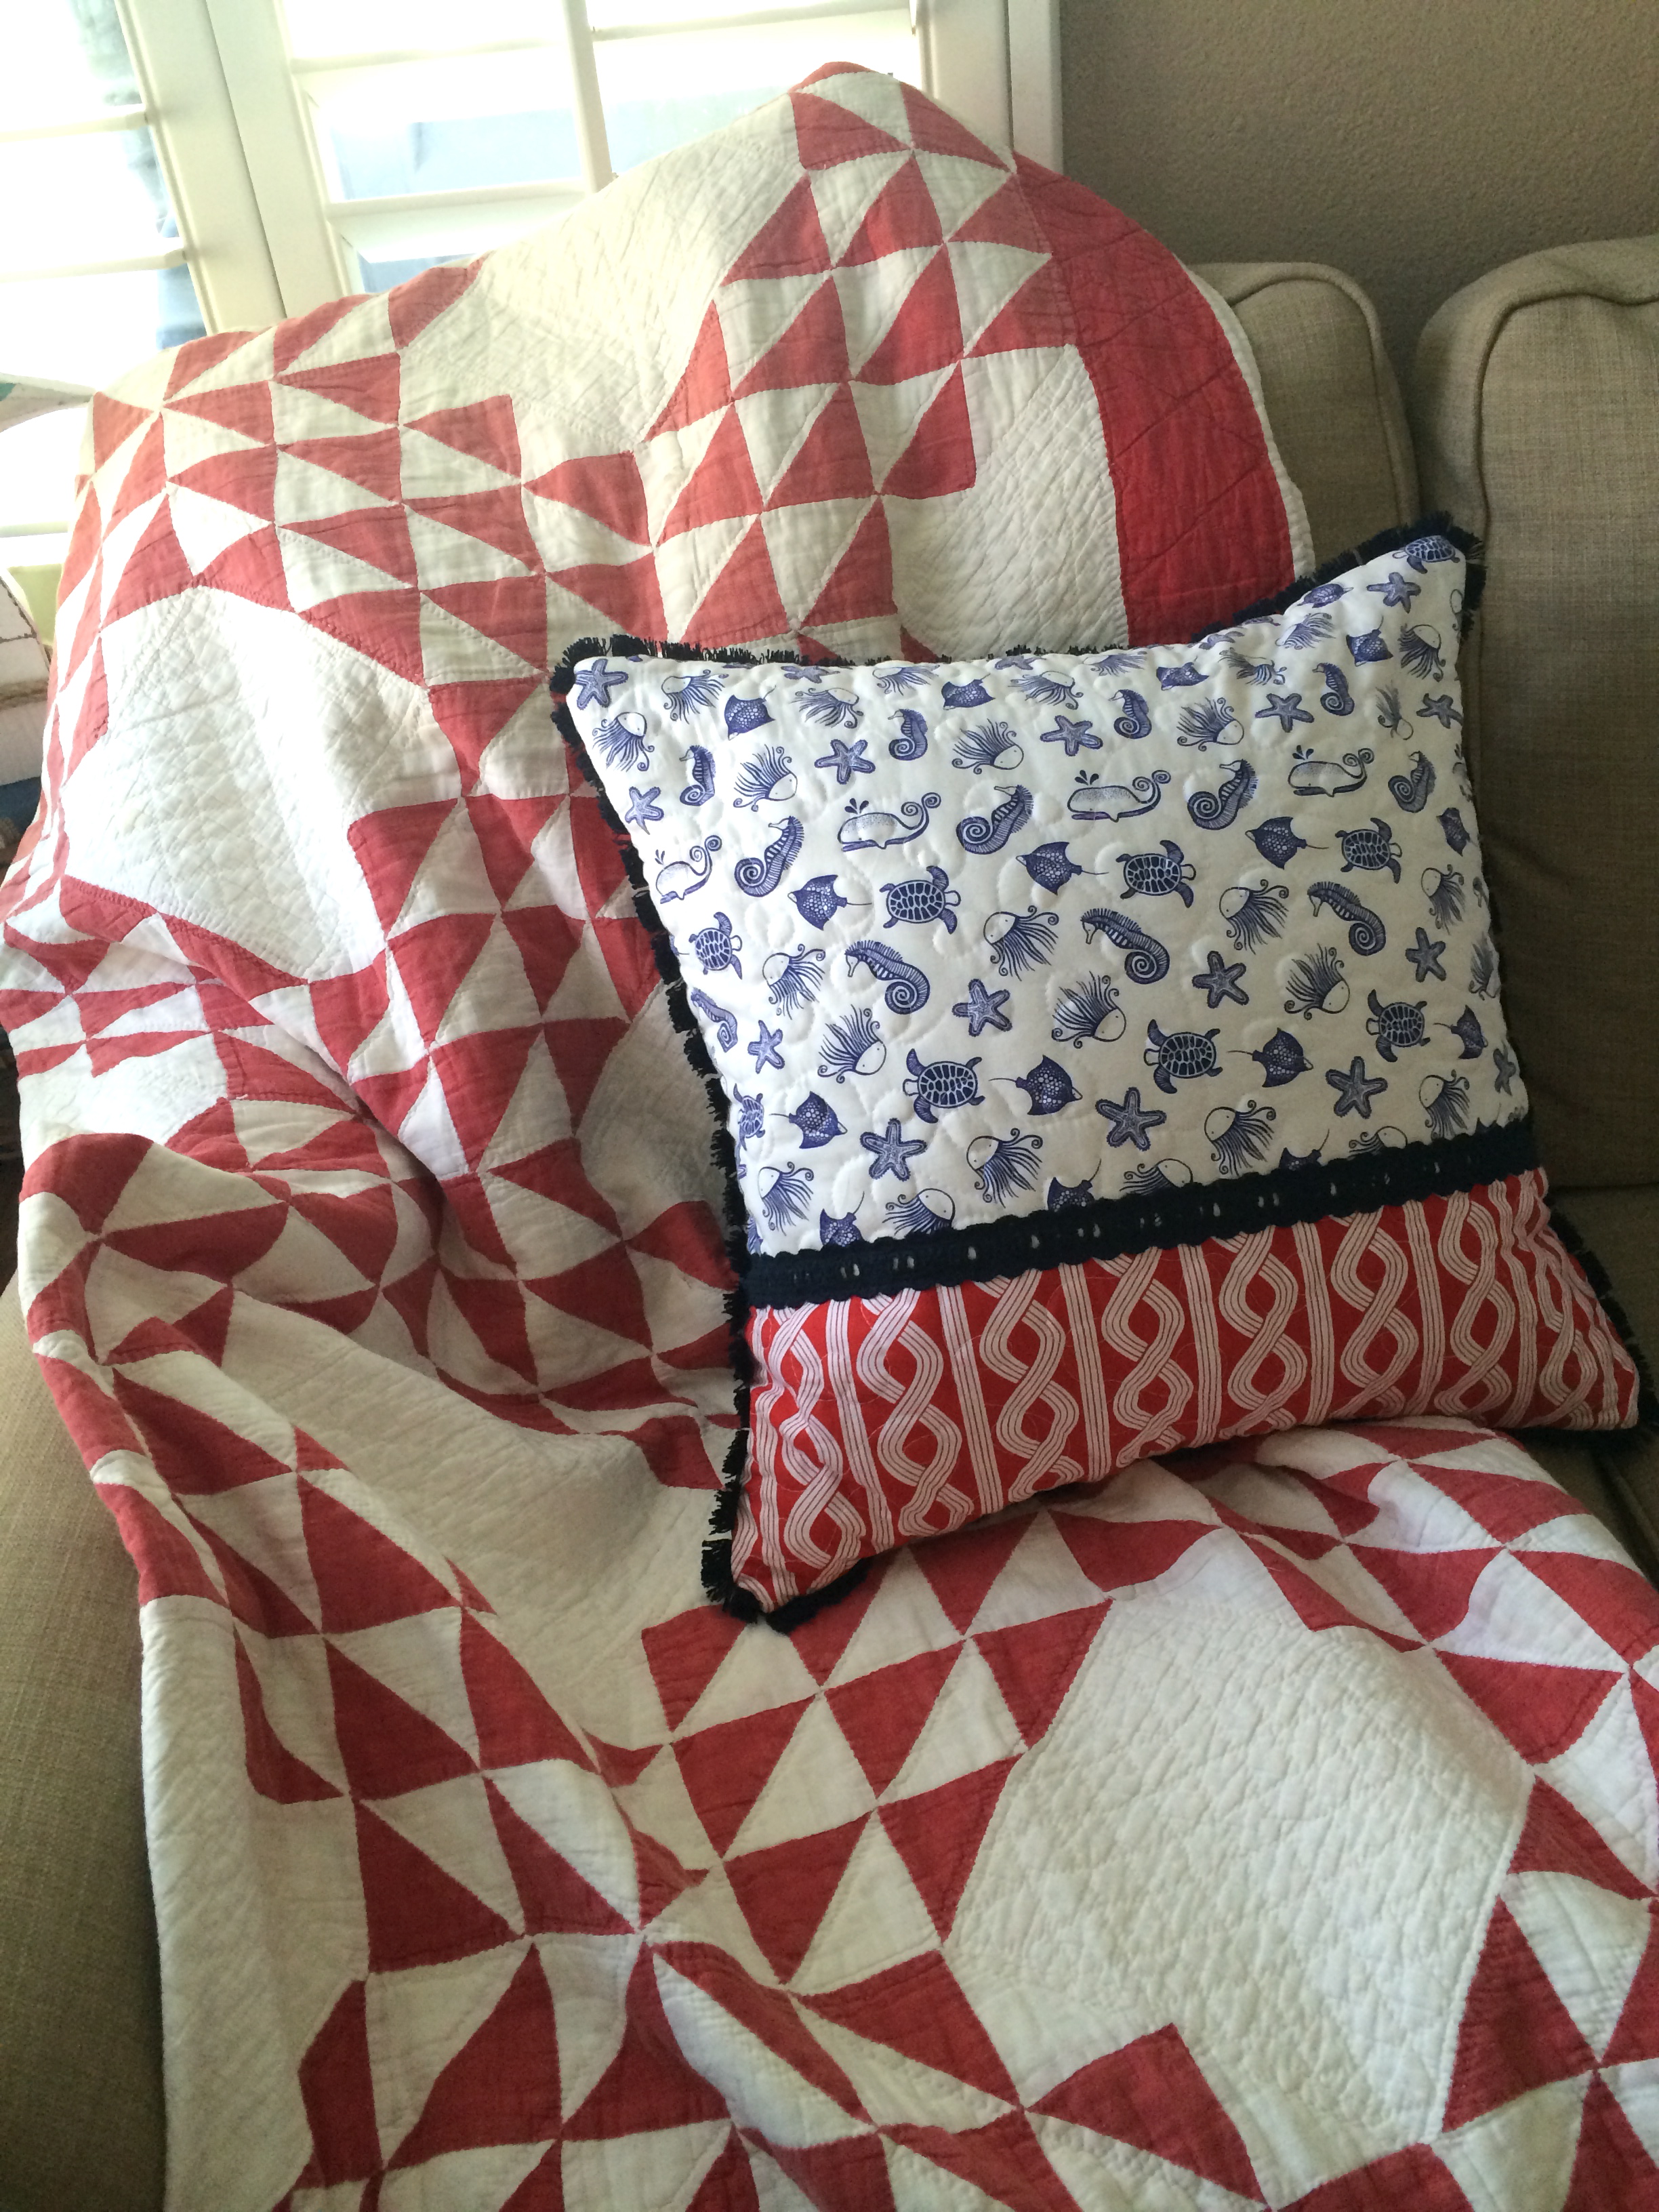
It also looks cute in the family room with some pops of orange!!spooky Halloween pillow_9


Halloween Pillow Tutorial

halloween_pillow_tutorial

I can’t believe how fast October is flying by!!  I made this festive pillow for a friend for her October pillow.  Here’s how you can make one:


Supplies:

20″ x WOF background pillow fabric

1/4 yard orange fabric

1/4 yard black fabric

scrap of white fabric

Therm O Web Heat n Bond Lite

20″ pillow form

22″ or longer zipper

Pattern, Click HERE

Begin by cutting (2) 20″ squares of the background pillow fabric

Halloween_Pillow_1


Trace the chevron print on the Heat n Bond Lite.  You will need (2) 20″ sections of chevron

Halloween_Pillow_2

Roughly cut the chevron strips out and press them to the wrong side of the orange and the black fabric.  Then cut along the chevron pattern lines.Halloween_Pillow_3


Trace the BOO onto the Heat n Bond Lite or print on the Heat n Bond EZ Sheets.  Iron it to the back of the black fabric.  Do the same with the ghost pattern and iron it on the back of the white fabric.  Peel the paper back off the Heat n Bond and position as pictured below.  Press into place.  Outline stitch with black fabric.  Cut 3 small circles/ovals for the ghost eyes and nose out of the scraps of the black fabric with heat n bond on the back.  Add to the ghost.
halloween applique

For the pillow back, cut a 3″ strip off of the 20″ pillow back.  This is where the zipper will go.
Halloween_Pillow_5

Sew the zipper joining the 2 pieces of the pillow back.  Press.Halloween_Pillow_6

Trim the excess zipper off and position the zipper pull in the center of the pillow.  Place the pillow front and the pillow back right sides together, aligning the edges.  Pin.  Sew, using a 1/2″ seam all the way around the pillow.  Then turn right side out.  Insert pillow form.Halloween_Pillow_7

Halloween_Pillow_8


It’s so cute – I may need to keep it 🙂Halloween_Pillow_9


It looks so perfect with my Halloween Disappearing 9-Patch quilt!!Halloween_Pillow_10
owee

Heat & Bond One Direction Concert T-Shirts

one direction concert t-shirt_7

In celebration of One Direction’s  release of their new song, Steal My Girl, I thought I would share how to make your own 1D concert T-shirt.  I love going to concerts and we always make some kind of fun T-Shirt to celebrate the occasion.  (click HERE and HERE for Taylor Swift Concert T-shirt ideas) A few weeks ago One Direction was playing at the Rose Bowl so my husband and I took our 6 year old daughter.  To quote her, “This is my dream come true!”

Then the following night I took some cute girls (so their moms wouldn’t have to go) and we rocked out!  Yes – I am officially a One Direction Groupie!

DIY one direction concert t-shirt 2

Here is how you can make your own shirt!!

Supplies:

Small piece of red fabric

Small piece of white fabric

Heat n Bond Lite EZ print sheets

Black T-Shirt

Begin by printing a heart and 1D logo in reverse onto the EZ Print Lite sheets.  These sheets are great because you can run them through your printer and not have to draw the pattern.  I created the heart in MS Word and googled the 1D logo – easy peasy!  Once you print the images, roughly cut out the heart about 1/4″ away from the heart.  Press the heart to the wrong side of the red fabric.  Do the same with the 1D.  Cut out the heart and 1D on the pattern lines.

HeatNBond_EZPrintLite

Next peel off the backing on the 1D and press onto the heart.  Leave the backing on the heart for now.
one direction concert t-shirt

I thought it would be easier to sew the 1D and then iron the heart onto the T-shirt – it’s hard to maneuver a T-shirt in a sewing machine – especially a small, child’s t-shirt.  Sew around the 1D in black thread.

one direction concert t-shirt_3

This is how the back should look:
one direction concert t-shirt._2

Now, peel off the backing paper on the heart.  It may take a little time to peel off all the paper in-between the letters.  Now, press the 1D heart onto the black T-shirt.  Sew around the heart twice in black thread.one direction concert t-shirt._3


I love to personalize my concert T-shirts with the date of the concert.  I cut out the words on my cricut in vinyl.  Then I removed the letters to leave a “stencil”.  I put the vinyl stencil on the T-shirt and using a stencil brush and craft paint I stenciled the letters.  Let the paint dry completely then remove the vinyl.  It looks pretty good!!
one direction concert t-shirt diy

one direction concert t-shirt_5

DIY one direction concert t-shirt
one direction concert t-shirt_8
We had too much fun!  Here is a little video clip!!

1D Concert Clip
 

Monogram Peasant Top, a modified tutorial

Geofabulous_Peasant_Top_monogram_8

I am still loving Geofabulous from Blend fabrics!  Here is outfit #3 for Sally!  I followed the peasant shirt pattern in this McCall’s pattern:Geofabulous_Peasant_Top_monogram_9

The front and back pieces are cut out of solid pink cotton and the sleeves are the Stained Glass Navy print.Geofabulous_Peasant_Top_monogram_4

I printed the letter “S” on my computer and traced it to Heat n Bond Lite in reverse.  Iron it to the wrong side of the monogram fabric.  Cut out the letter, peel the back off and press to the front of the peasant top piece.  Top stitch in matching thread.

Geofabulous_Peasant_Top_monogram_2

Follow the instructions in the pattern to complete the top.  I added a ruffle to the bottom.  To do this, cut (2) 5″ x WOF pieces of coordinating fabric, I used Symmetry Pink.

IMG_0738

Sew the (2) strips end to end, forming a big loop.  Sew a rolled hem by folding the bottom edge up 1/4″ and then another 1/4″ and stitch close to the fold.  Gather the top of the ruffle pieces by lengthening the stitch length to the maximum.  Pull up threads and gather by hand.  Match the seams on the ruffle with the side seams on the peasant top.  Pin into place, distributing the ruffles.  Sew along gathering stitching.  Press the seam and top stitch if desired.
Geofabulous_Peasant_Top_monogram_5


Geofabulous_Peasant_Top_monogram_7


Geofabulous_Peasant_Top_monogram_6

Geofabulous Girls Peasant Top

geofabulous_peasant_top_3

I am the world’s most impatient sewer.  It’s a problem of mine I’ve been working on for some time – there are just too many things I want to sew!  I love being able to sew for my daughter and what I love even more is being able to sew her a peasant top in about 30 minutes!!  The fabrics for this top are from Blend’s Geofabulous line – and the fabrics just happen to have every one of Sally’s favorite colors!!  I wish I had a brand new peasant top pattern you can just download for free – but 99 cent patterns at JoAnn Fabrics are the next best thing!  I picked this pattern up not loving it but thinking for 99 cents I can do something with it.  You wouldn’t know it from the picture but there is a pattern for a peasant top and peasant dress (the white clothing worn underneath the jumpers)!!  I followed the pattern, using different fabrics on the sleeves then on the main body, I added lace trim to the bottom and a fabric bow for some detail.  Super quick and easy!!!!!geofabulous_peasant_top_2

…and we do need a nice cool, breezy shirt as it is 110 degrees today!!!  I think I might sew one more of these while I have all the fabric and pattern pieces all over, I mean neatly folded on my cutting table 🙂
geofabulous_peasant_top_4

geofabulous_peasant_top

Blend Geofabulous Skirt & Shirt

No matter how much fall baking or decorating I do it doesn’t change the fact that it’s still over 100 degrees here!  Everything in the stores is long pants, long sleeves and sweaters. I decided to make this fun girl’s outfit – perfect for a HOT September day.  The fabrics are from Blend’s Geofabulous fabric line.  The colors are amazing!

geofabulous_skirt_shirt_4

The tiered skirt pattern is from the Sassy Skirts book, my go-to skirt book for girls.  Super quick & easy!
IMG_0709
sassy skirts

The matching shirt needed a little embellishing.  I decided to try something beyond my standard quick appliqué shirt.  To make a ruffle for a shirt, cut a 3.5″ strip by 2 times the length of the neck from shoulder seam to shoulder seam.  Sew a rolled hem on both lengths of the ruffle.  Then hem the 2 ends.  Sew a gathering stitch down the center and gather.  Fit the ruffle around the neck, pinning as you go.  Then sew along the gathering stitch.  I had plans to add a flower, but I ran out of time.
geofabulous_skirt_shirt_1


Super quick an easy – and better than getting in a hot car and driving to the store to look for a new skirt.  It’s 108 today!
geofabulous_skirt_shirt_2
For some other fun projects using the Gefabulous line, check out these links!

Rail Fence Quilt by Sew Can She

1409374309656

Gathered Pouch Pocket by Tie Die Diva
IMG_0175


Modern 31 Halloween Pillow


modern_halloween_pillow_tutorial
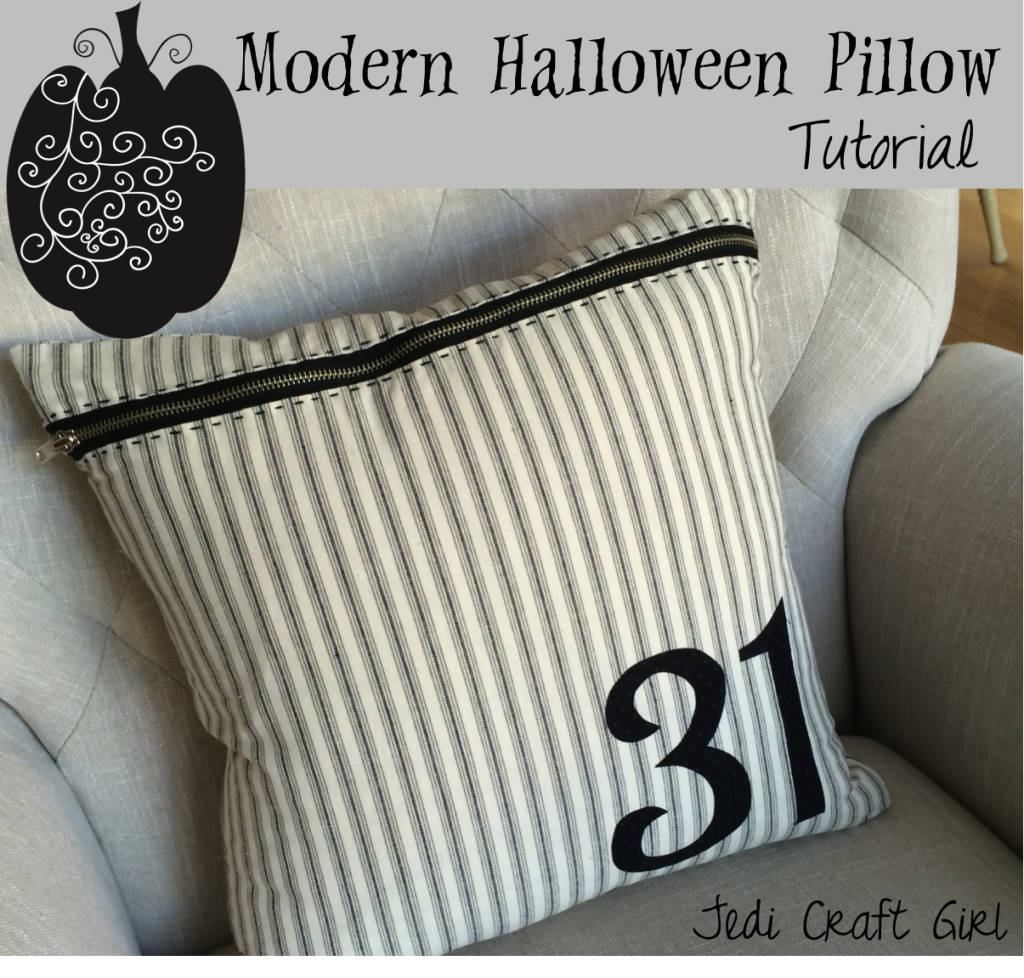
It’s September which means my house is decorated for Halloween and I’m gearing up for a super crazy fall family schedule!!  Don’t you feel like time just flies between now and Christmas?  We better get the Halloween sewing done!!
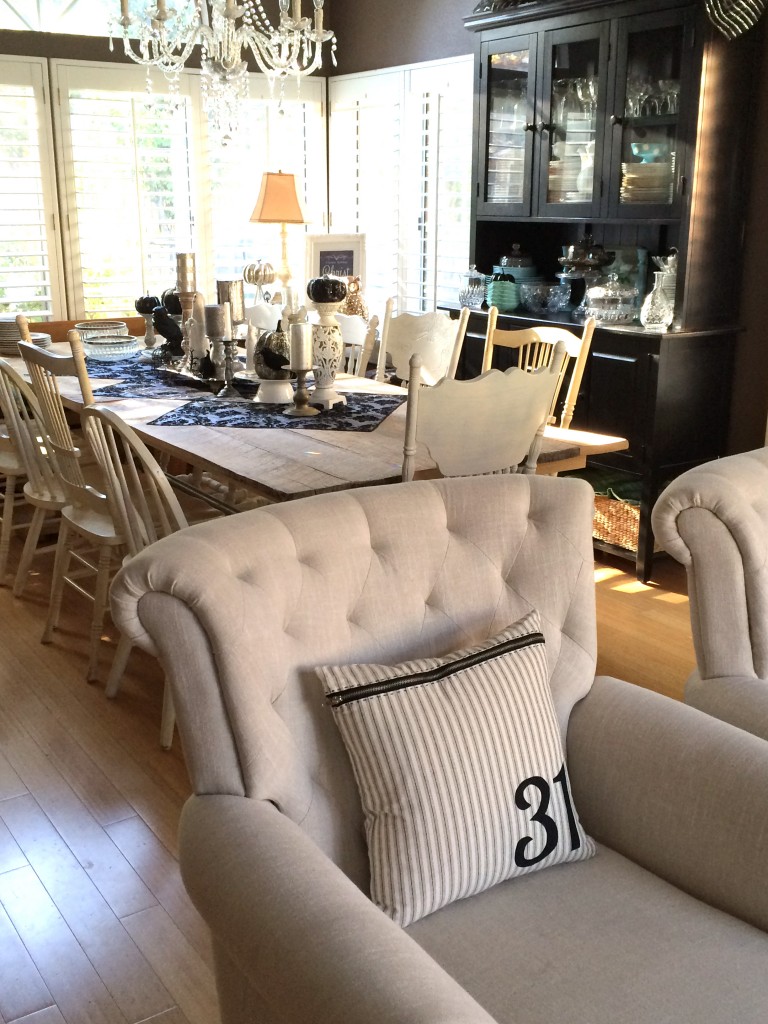
 

halloween house

I decorate my dining and living room for Halloween in Black and White and silver.  I like how this pillow is slightly understated for Halloween.  Here’s how you can make one…


Supplies:

16″ pillow form

1/2 yard black and white ticking

scraps of black fabric for numbers

Heat n Bond EZ print sheets or Heat n Bond Lite

Black metal zipper

31 pattern HERE


Begin by cutting (2) 17″ squares from the black and white ticking, set one aside for the pillow back.31_halloween_pillow_3


Cut a 3″ strip off the top:31_halloween_pillow_4


Lay out the pieces like this with the chunky zipper between:31_halloween_pillow_5


Place the small strip right sides together with the zipper and using a zipper foot sew along the length:31_halloween_pillow_6


Repeat with the other side:31_halloween_pillow_9


Once the zipper is sewn in, press the seams.  Prepare the appliqué by printing 31 on Heat n Bond EZ sheets or tracing on to Heat n Bond Lite.  Iron the numbers to the wrong side of the black fabric.  Cut out and press onto the pillow front.  Top stitch around the numbers in black thread.

31_halloween_pillow_11

Using scissors you are not fond of, cut off the excess zipper on both ends.

31_halloween_pillow_12


Add a hand stitched detail by sewing a running stitch along both sides of the zipper with black embroidery floss.31_halloween_pillow_13


Place the pillow back and pillow front right sides together and pin around the entire pillow.  Make sure the zipper is open.  31_halloween_pillow_14


I cut 2 small strips of fabric and added them to both sides of the zipper where the seam would be to give it strength.  Otherwise the only thing holding the zipper is a seam of thread.  I also like to back stitch a few times over the zipper.  With the metal zipper it is best to slow down the sewing speed and even manually move the needle so it can find its way around the zipper teeth.  Sew around the entire pillow using 1/4″ seams31_halloween_pillow_15

Turn right side out and add the pillow, it’s done!


31_halloween_pillo2


Click the button for or more Halloween Projects


Apple Appliqué Pillow Tutorial

apple applique

We are getting ready to start school next week.  I thought this pillow would be a fun back to school decoration or even a thoughtful gift for a teacher.  My tutorial is over on the Therm O Web Blog!  I used Heat n Bond Lite which made the appliqué a snap!  apple_pillow_tutorial


I think I could add pom poms to ever project I make 🙂apple_pillow_tutorial_1

Summer Nautical Pillows

summer throw pillow tutorialI know most of the stores have their fall and even Christmas decorations out on the shelves,  but we still have one more week of summer vacation left and I am embracing every minute of it!  Summer is my favorite!  I love being with my children all day and just being FREE!!!!!  I had to get in one more summer sewing project.  I decorated my family room with a few nautical pops here and there and my couch was begging for some nautical pillows!  These sew up in a snap!


Sea Critters Pillow (20″):

Don’t you just love this fabric from Dear Stella?  We love sea critters at our house!

Cut the sea critters fabric 13.5″ x 20″

Seersucker Twist Red from Blend fabric 7″ x 20″

cotton batting 21″ or larger

20″ navy blue lace trim

2 yards navy fringe trim

20″ square Denim for the back

20″ or longer Zipper

accent fabric 4.5″ x 20″

20″ pillow form

Spray n Bond for basting
nautical pillow tutorial


Sew them together using 1/4″ seams.  Using Spray n Bond basting spray, baste the pillow top to the batting.nautical_pillow_tutorial_1

With the two pieces basted you can quilt as desired.  Straight lines would be cute, I was impatient and free motion is faster for me 🙂nautical_pillow_tutorial_2


Trim off the excess batting
nautical_pillow_tutorial_3


Add the navy blue lace trimnautical_pillow_tutorial_4

Sew the navy blue fringe to the right side of the pillow.  I found it easier to use my walking foot.  Curve the corners.
nautical_pillow_tutorial_6

Prepare the back of the pillow.  I have found this is the fastest way to finish a pillow.  For the tutorial on how to do this, click HERE.  I cut the back 20″ and then cut 3″ from the top for the zipper placement.  The chevron piece is cut 4.5″ and then folded in half.

nautical_pillow_tutorial_5

Now that the back is ready, place the right sided together, with the zipper open, and sew all the way round the pillow using 1/4″ seams.  Turn and insert the pillow form.
nautical_pillow_tutorial_7

I Heart Whales Pillow (20″)

This is very similar to my pink I Heart Whales pillow found HERE.  Follow those directions for the Heat n Bond Applique.

nautical_pillow_tutorial_10

Cut the solid white 10.5″ x 20″

Cut (2) Seersucker Twist Blue from Blend fabric 5.25″ x 20″

“I Heart” pattern click HERE

Whales from Blend’s True Blue fabric line

Prepare the appliqué pieces (directions HERE).  Iron the pieces to the solid white fabric.  Sew the blue fabrics to the white fabric using 1/4″ seams.
nautical_pillow_tutorial_9

Using Spray n Bond, baste the pillow top to the cotton batting and quilt.  Instead of appliquéing the images on before quilting, I sewed around each image in navy thread during the quilting process to give the pieces a little pop.

nautical_pillow_tutorial_11


I finished this pillow the same way as the Sea Critters pillow with the same navy trim.

I love the backs of the pillows!nautical_pillow_tutorial_12

nautical_pillow_tutorial_13


Sew News Composition Book

The August/September 2014 edition of Sew News is out – check out page 70 🙂


IMG_0117


My zippered composition notebook cover pattern is inside!  I came up with a way to combine my 2 favorite sewing projects: zipper pouch + composition book cover!!  I love being able to tuck my pens and small items inside my book cover so nothing gets lost!!IMG_0118


These would make great back-to-school gifts as well……I better whip up a few more 🙂
completed projects

zipper book