Captain America Inspired Quilt {a patriotic quilt}

captain america cover

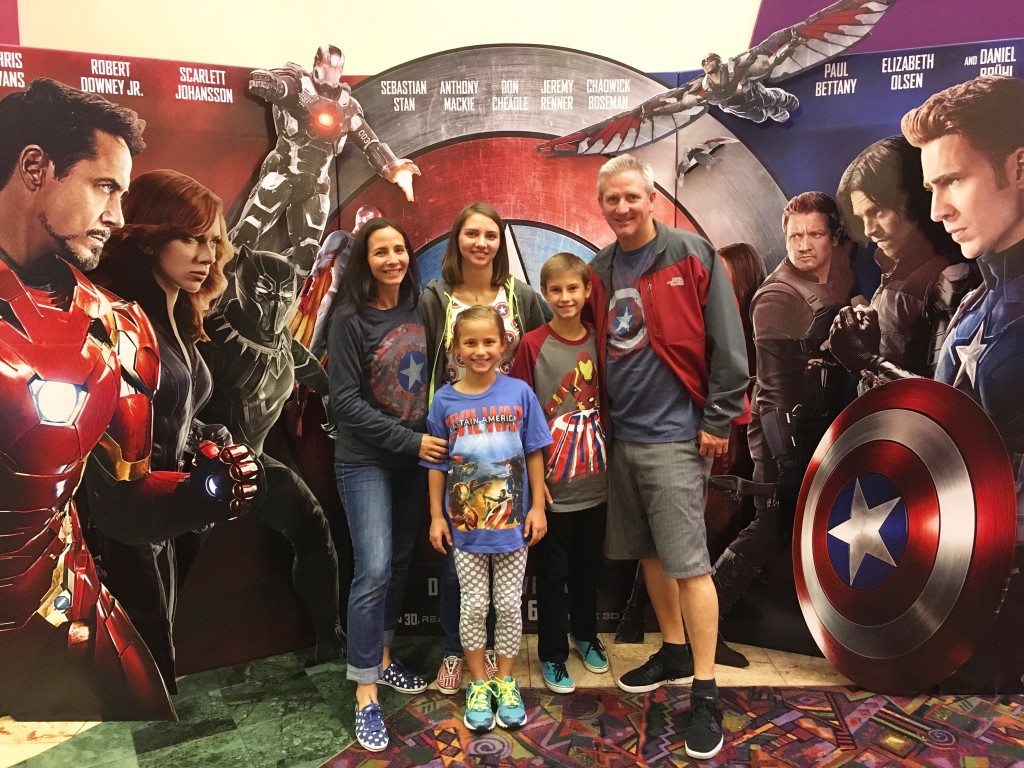
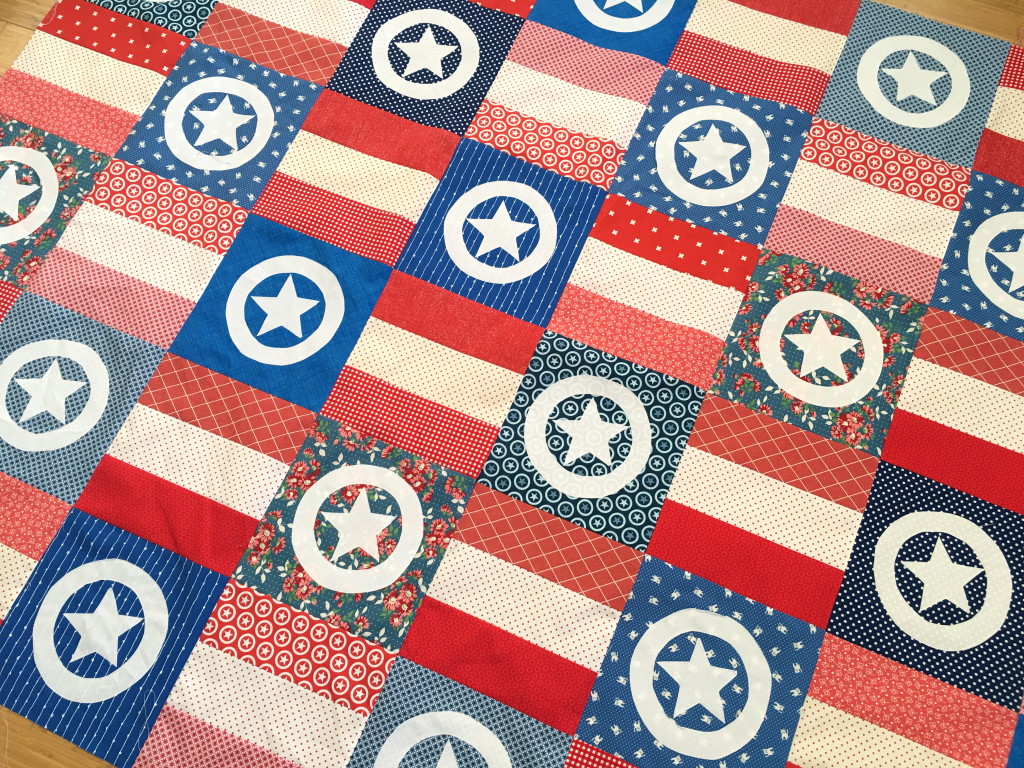
I couldn’t resist putting this quilt together.  My family is totally obsessed with the Avengers, especially  Captain America and Iron Man.  We were so excited for the movie to come out!!!  We went to the first showing at 9:30 pm last night!  I was so much fun.  I love going to movies when the theater is packed with fans who cheer and clap together!

captain america quilt 11

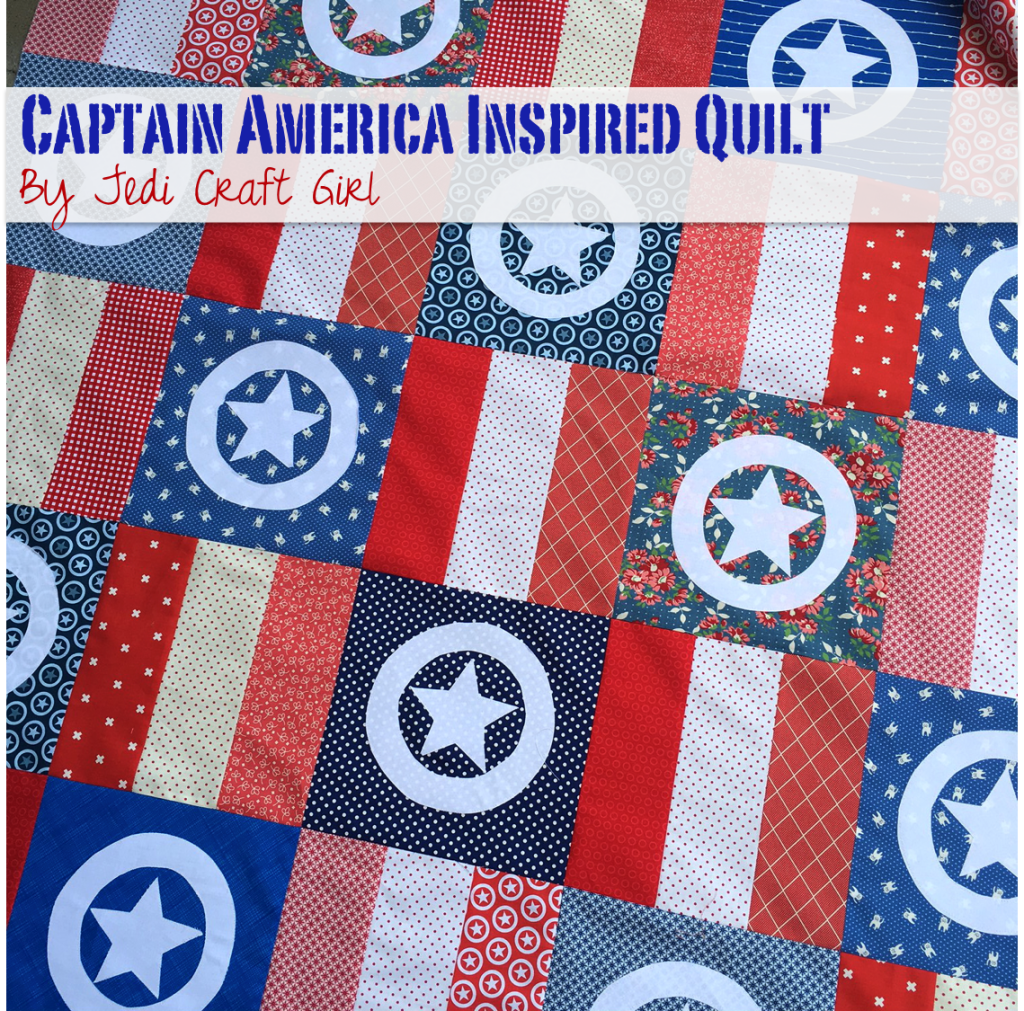
To celebrate this milestone in Marvel history, I created this quilt inspired by Captain America.  My 8 year old daughter is totally in love with him.  I guess we will be fighting over the quilt!

captain america quilt 15

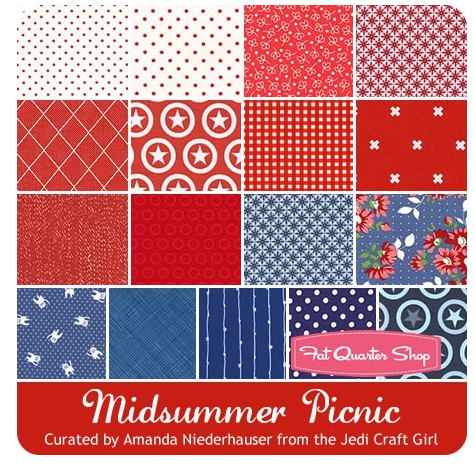
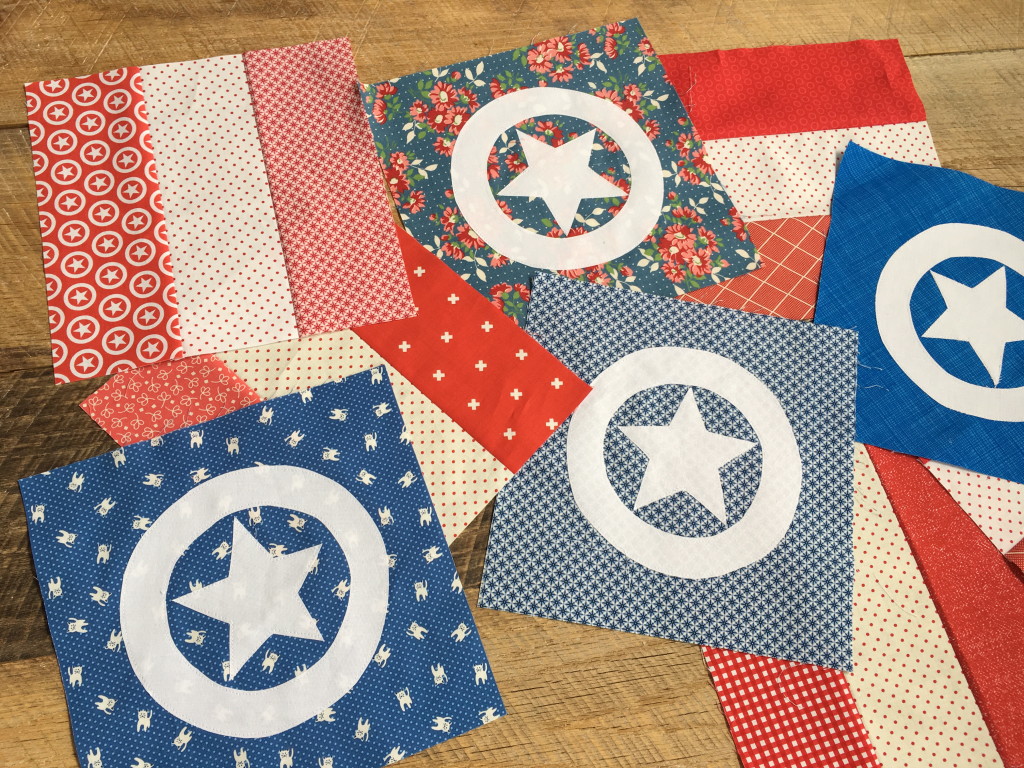
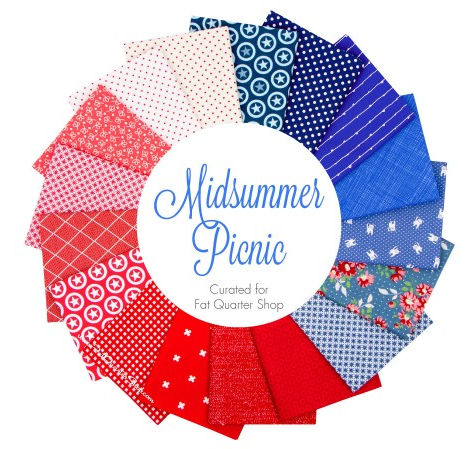
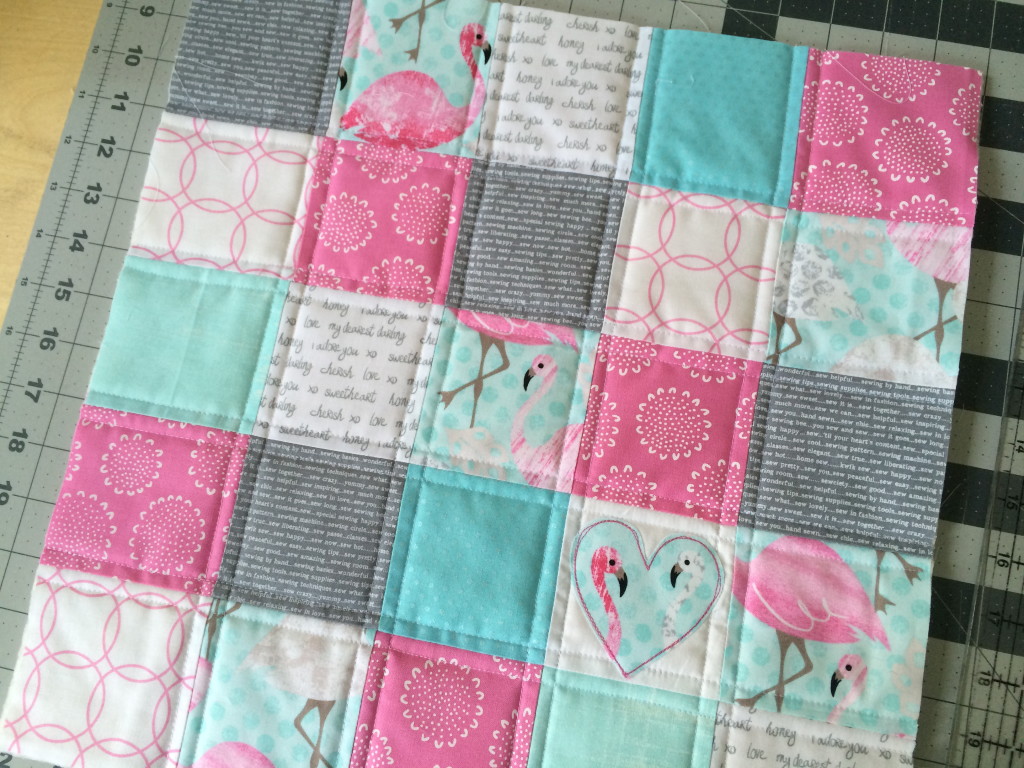
I curated this selection of Fat Quarters from Fat Quarter Shop just for this project.  You can view it here.  I wanted a fun mix of red, white, and blue fabrics.  This quilt totally works for a summer patriotic quilt if you’re not into #teamCap.

Screen Shot 2016-05-06 at 11.30.10 AM

Lets Get Started

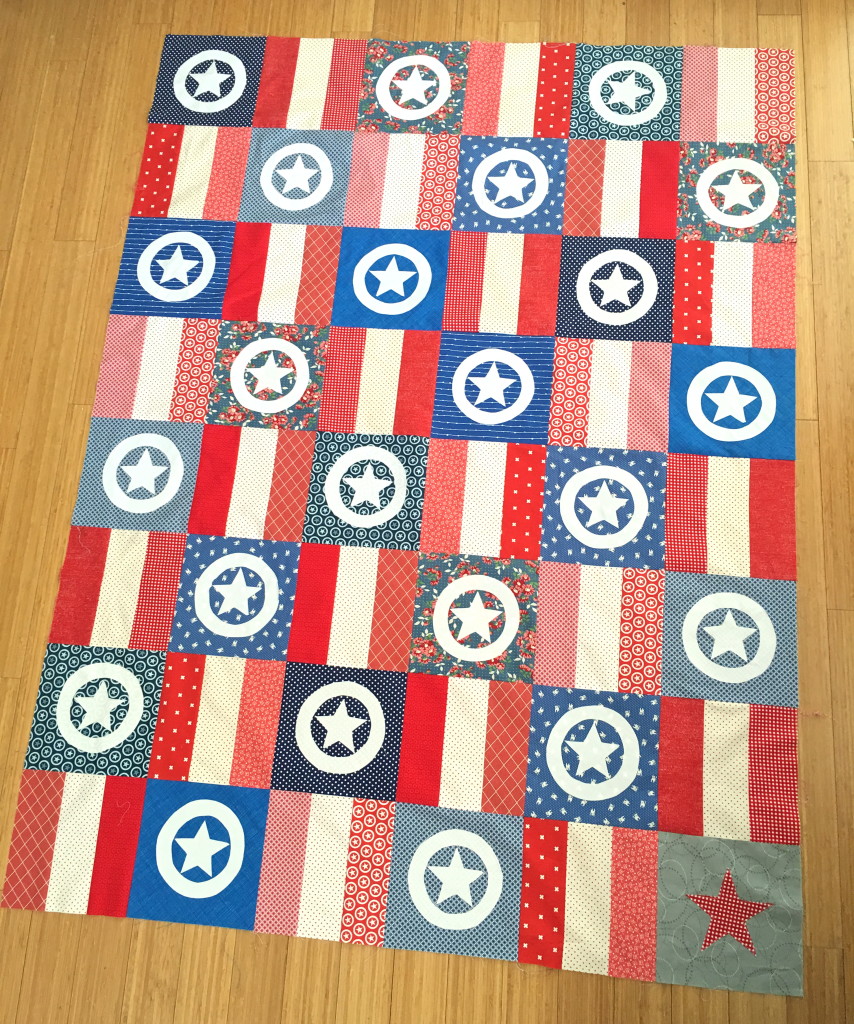
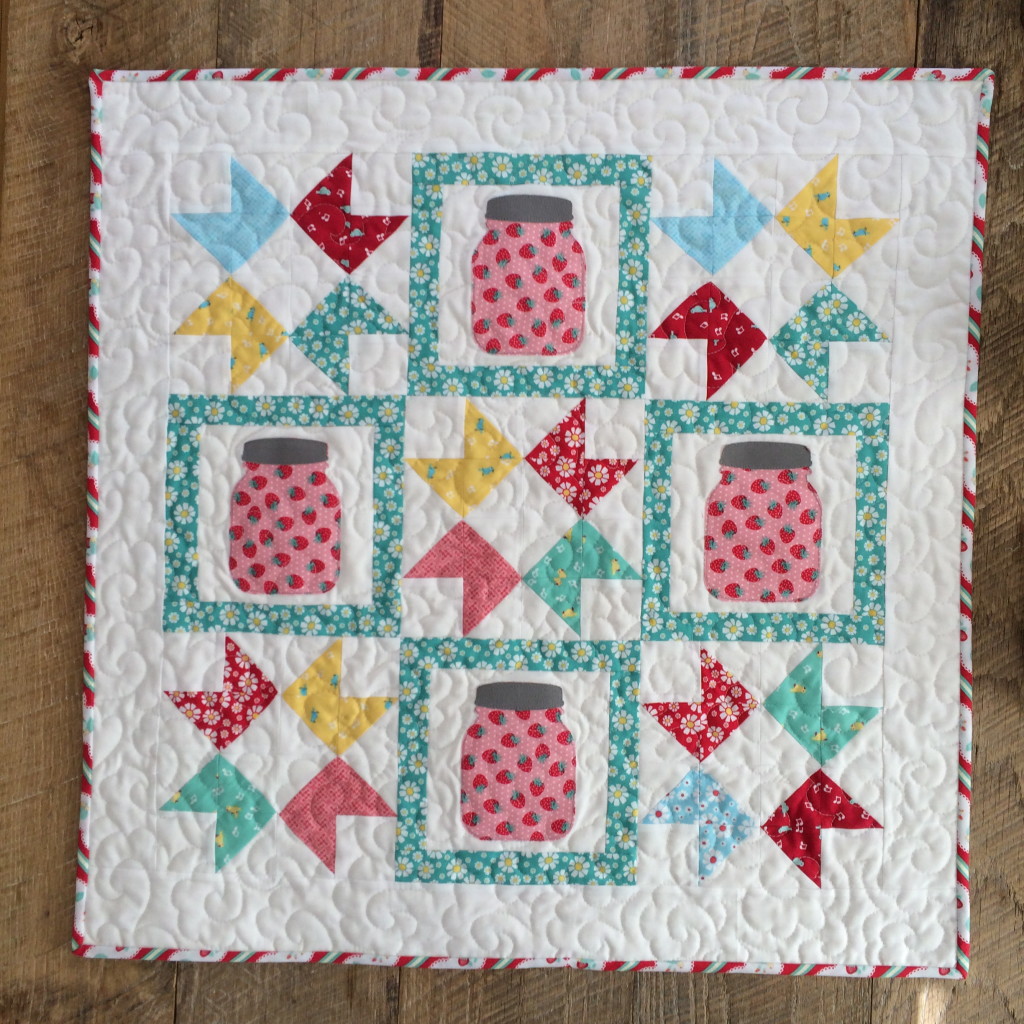
Finished block 9″, Finished Quilt 54″x72″

All Seams 1/4″

Supplies:

18 Fat Quarters (I used each one pictured above)

1.5 yards solid white

3 yards Heat n Bond Feather Lite Fusible Applique

Pattern, click HERE

captain america quilt

Make the Stripe Block

Cut the red prints and white prints into 3.5″ strips.  (Since we are using Fat Quarters, they will be half the WOF long)

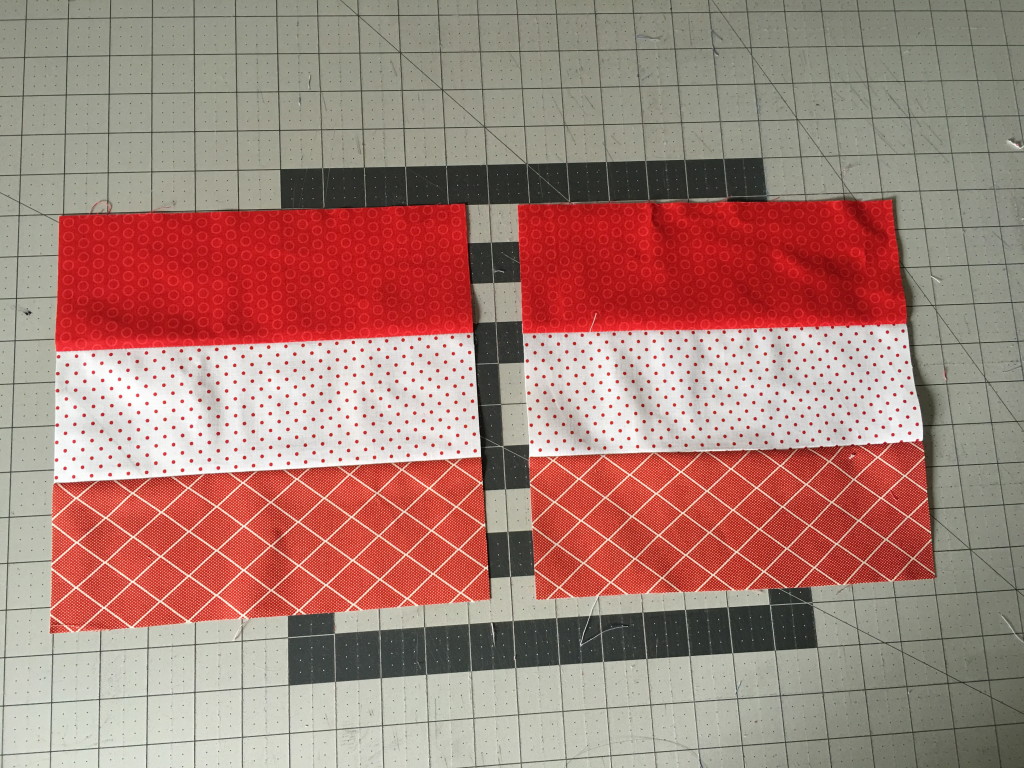
Sew in strip sets of red, white red.  Press toward the dark.

captain america quilt 3

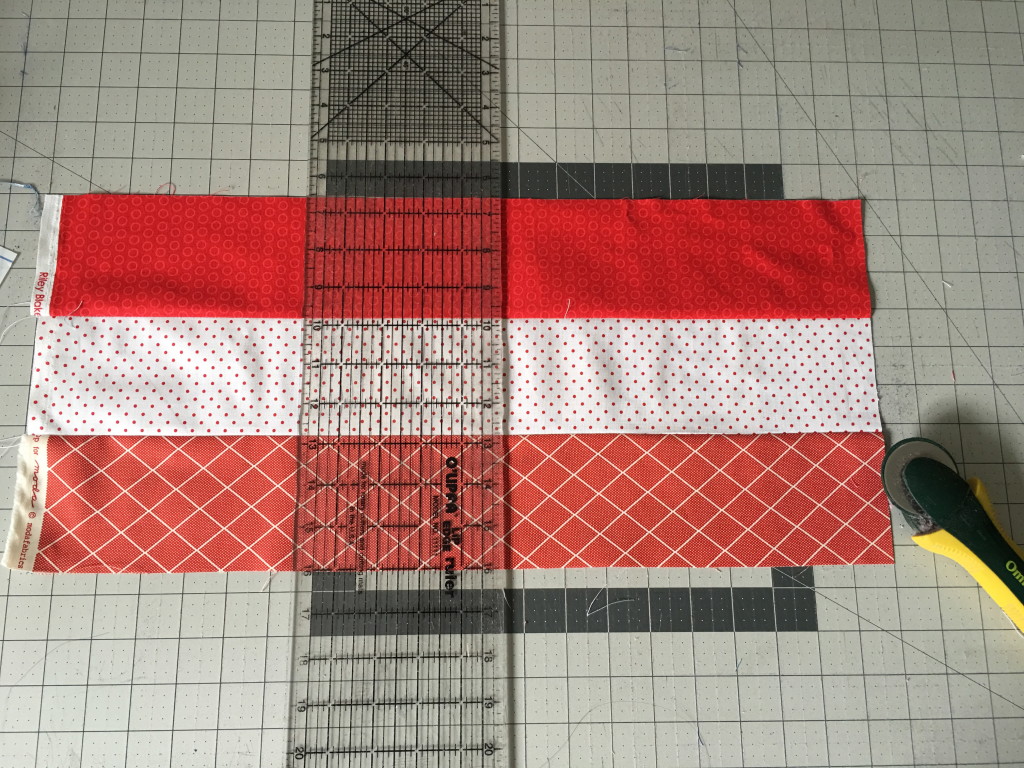
Cut each strip set in increments of 9.5″.  Each block should measure 9.5″ square.

captain america quilt 4

For the applique block…

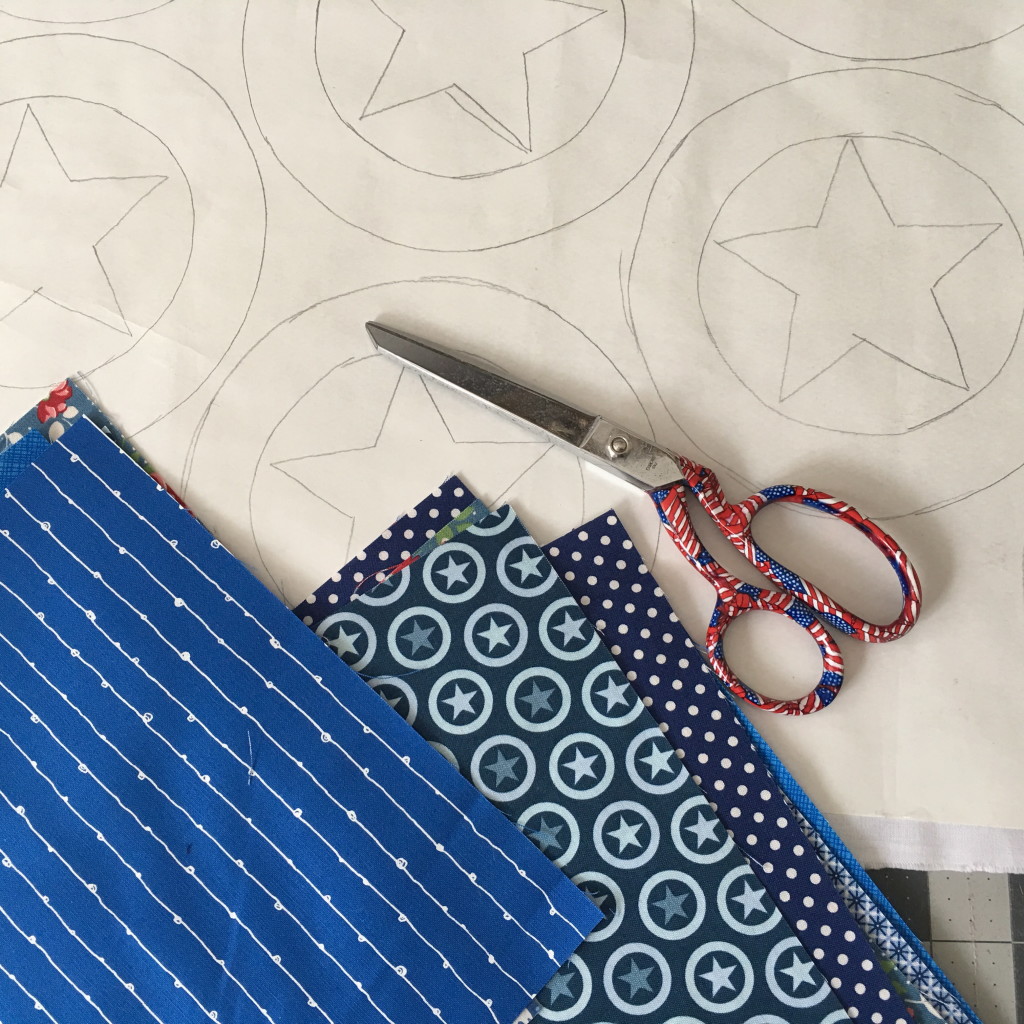
Cut 24 blue squares 9.5″

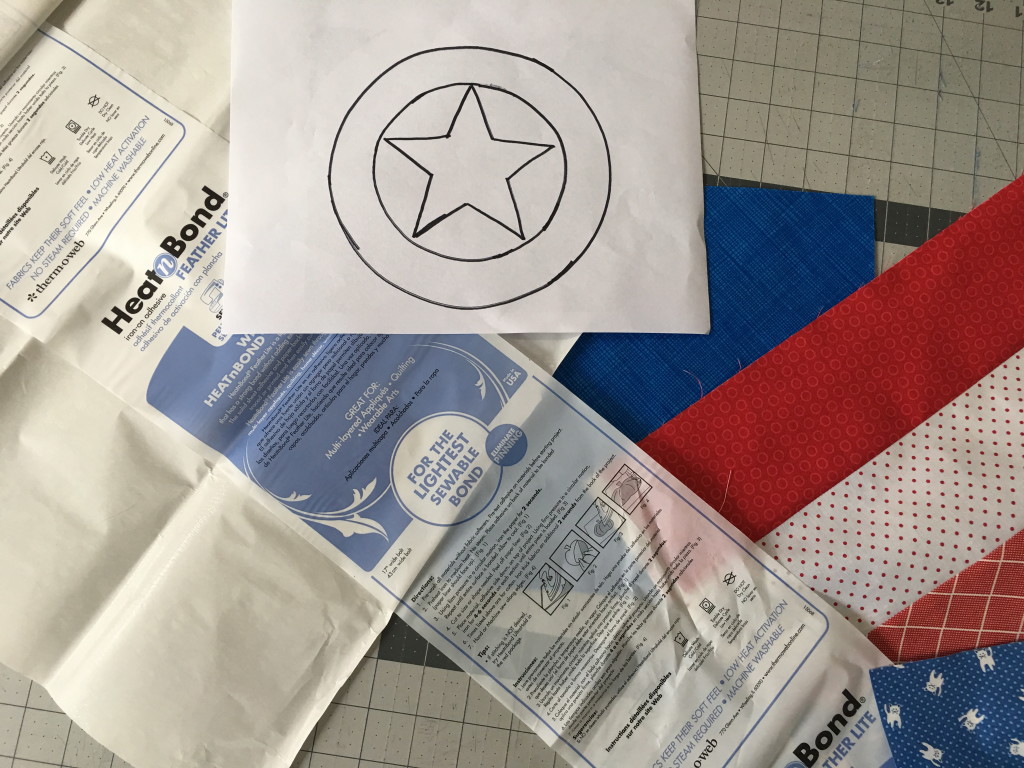
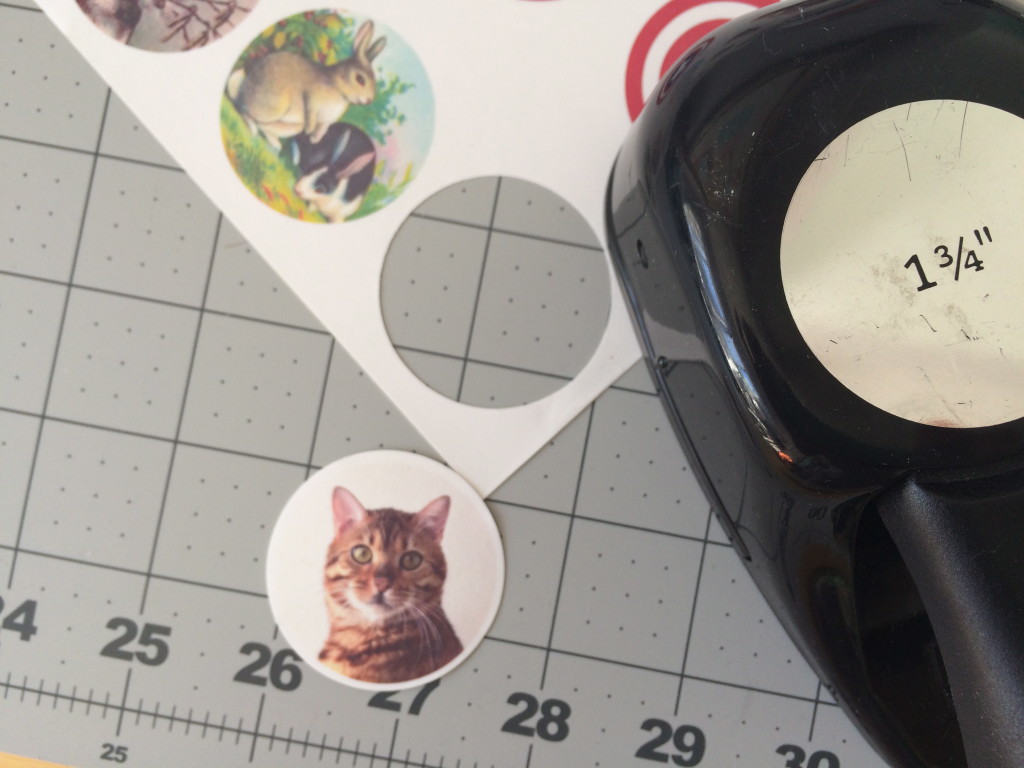
Draw the pattern onto the Heat n Bond Feather Lite.  You will need 24.  I like to used the Feather Lite because it doesn’t add any weight or stiffness to your quilt.  It holds it in place just long enough to cut and sew it.

captain america quilt 9

Press the heat n bond to the wrong side of the white solid fabric.

captain america quilt 2

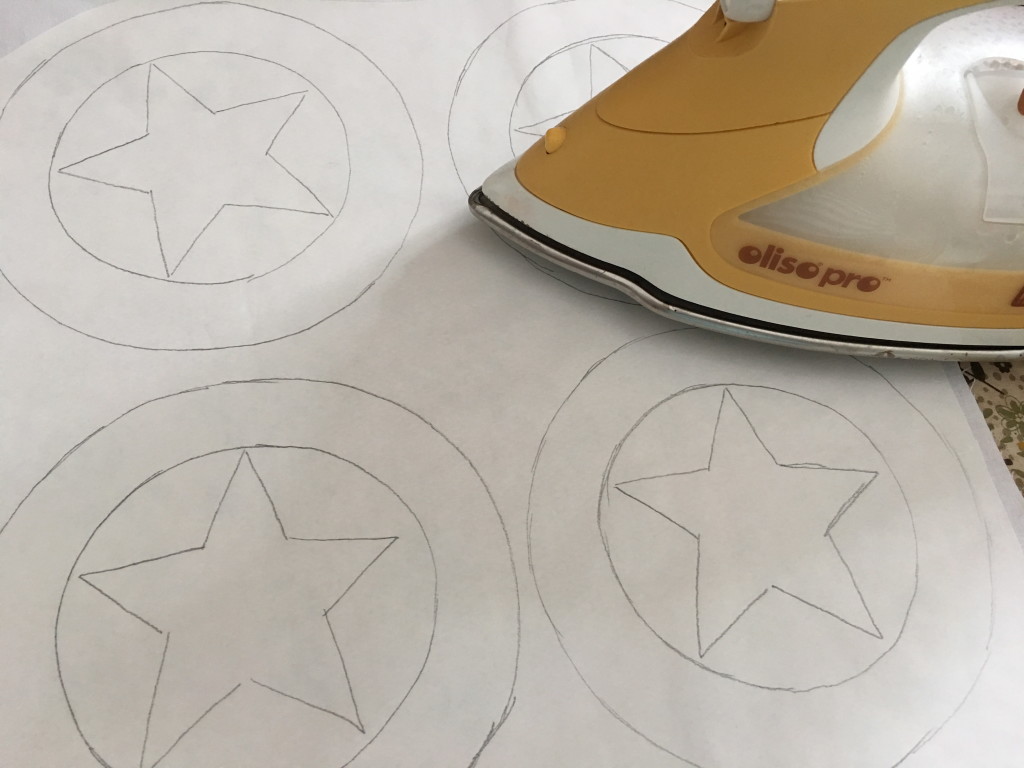
Put on Captain America I and II and cut out all the circles and stars following the pattern line.

captain america quilt 5

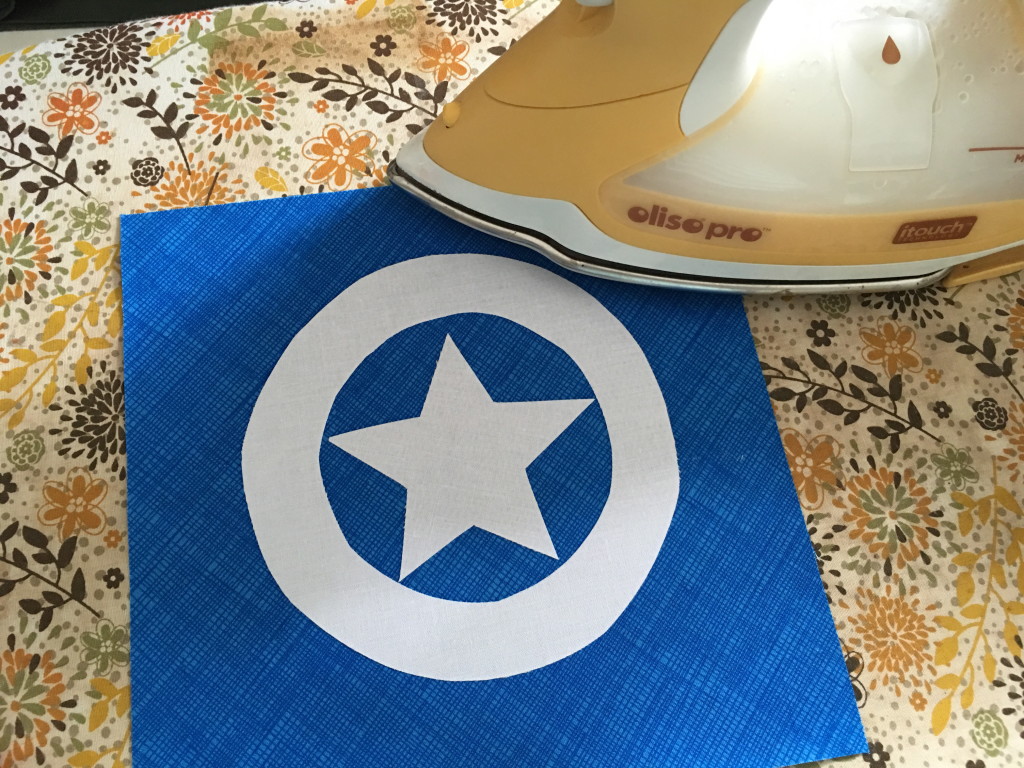
Position the circle and star in the center of each blue block and heat set in place.

captain america quilt 8

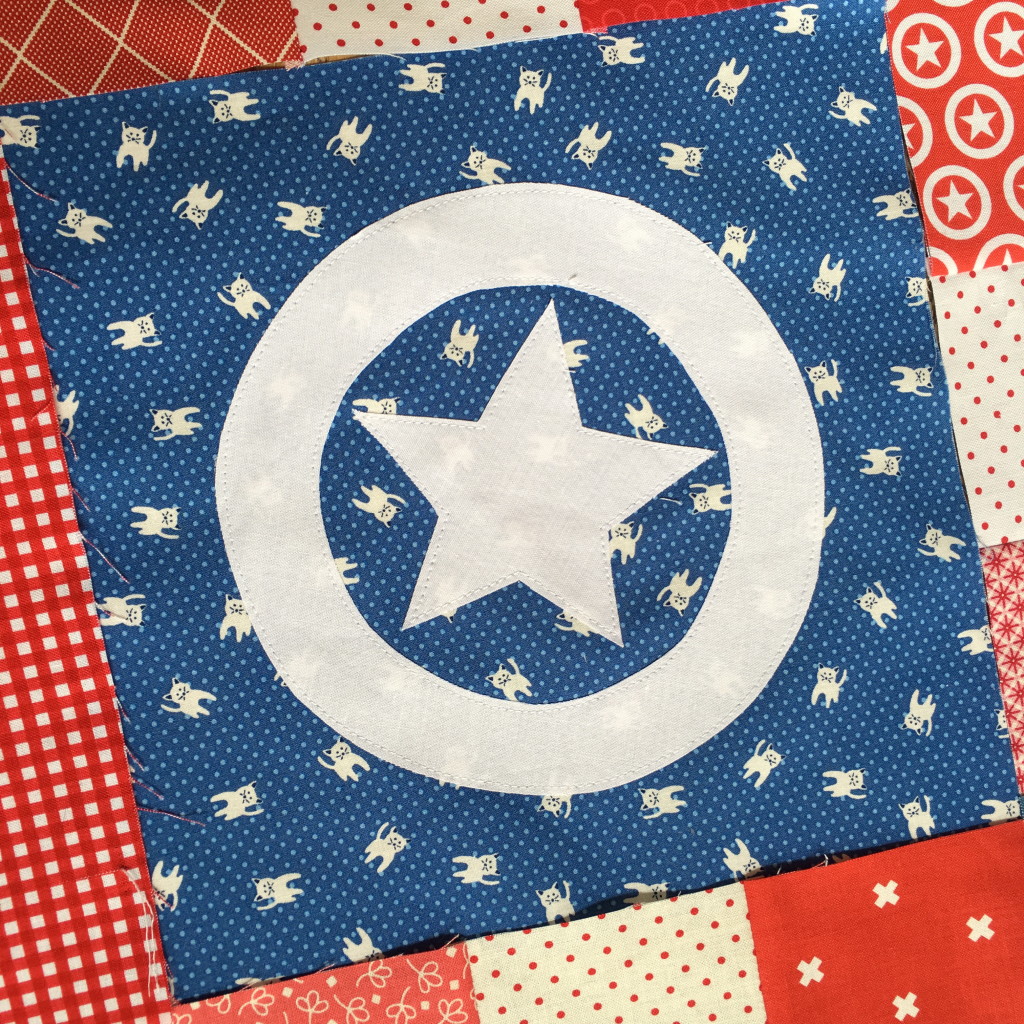
Top stitch around each piece with white thread.

***Optional **  “Winter Solider” Block.  My teenage daughter is in love with Bucky the Winter Solider so she insisted we represent him in the quilt.  We switched out one of the blue blocks for a gray block with red star applique.

captain america quilt 13

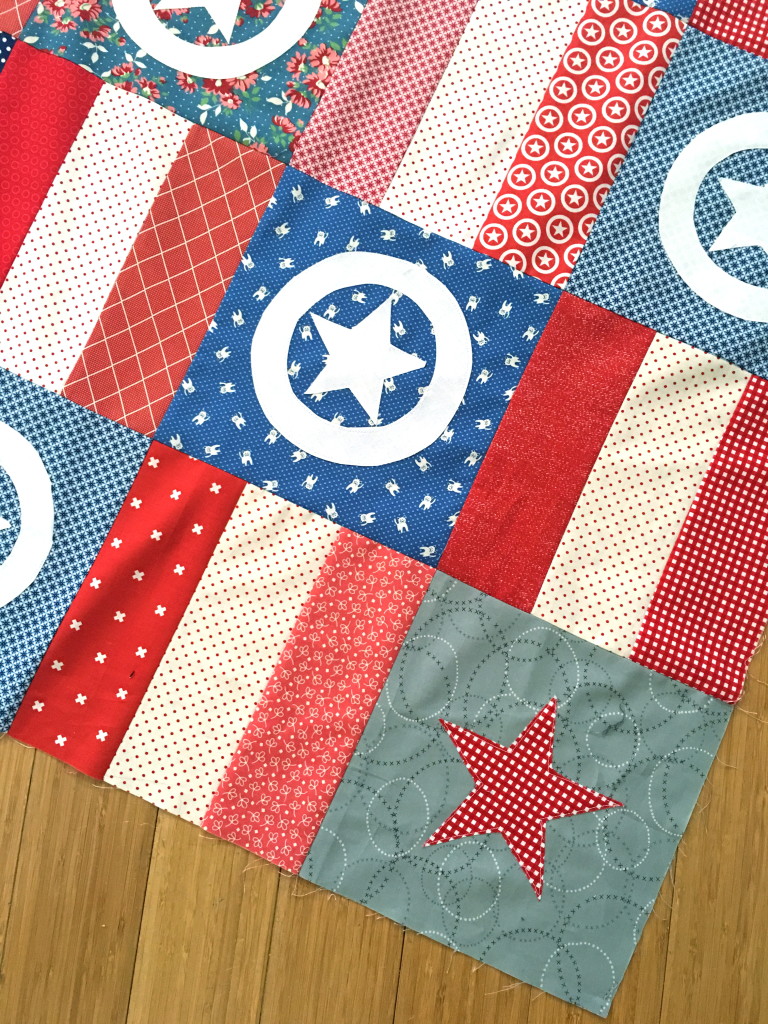
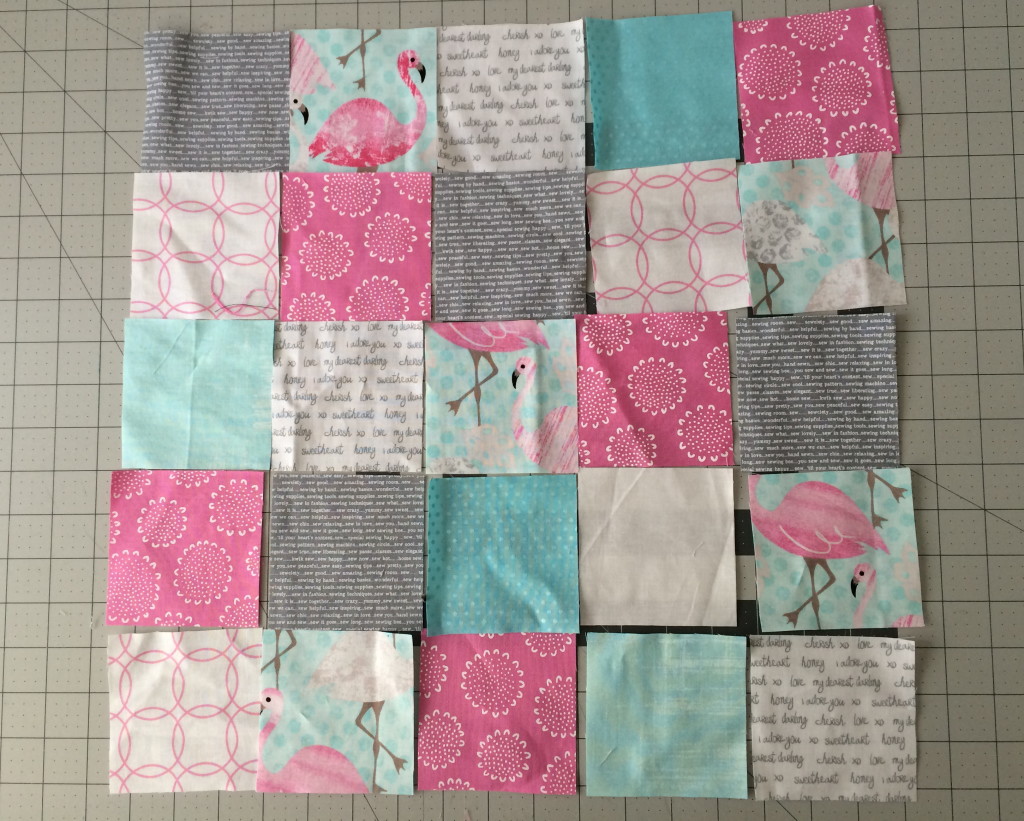
Now it’s time to have some fun with all the blocks!  I hand them all to my daughter and she lays out the quilt for me.

captain america quilt 7

Sew the quilt together in rows, pressing after each and matching each seam intersection.

captain america quilt 20

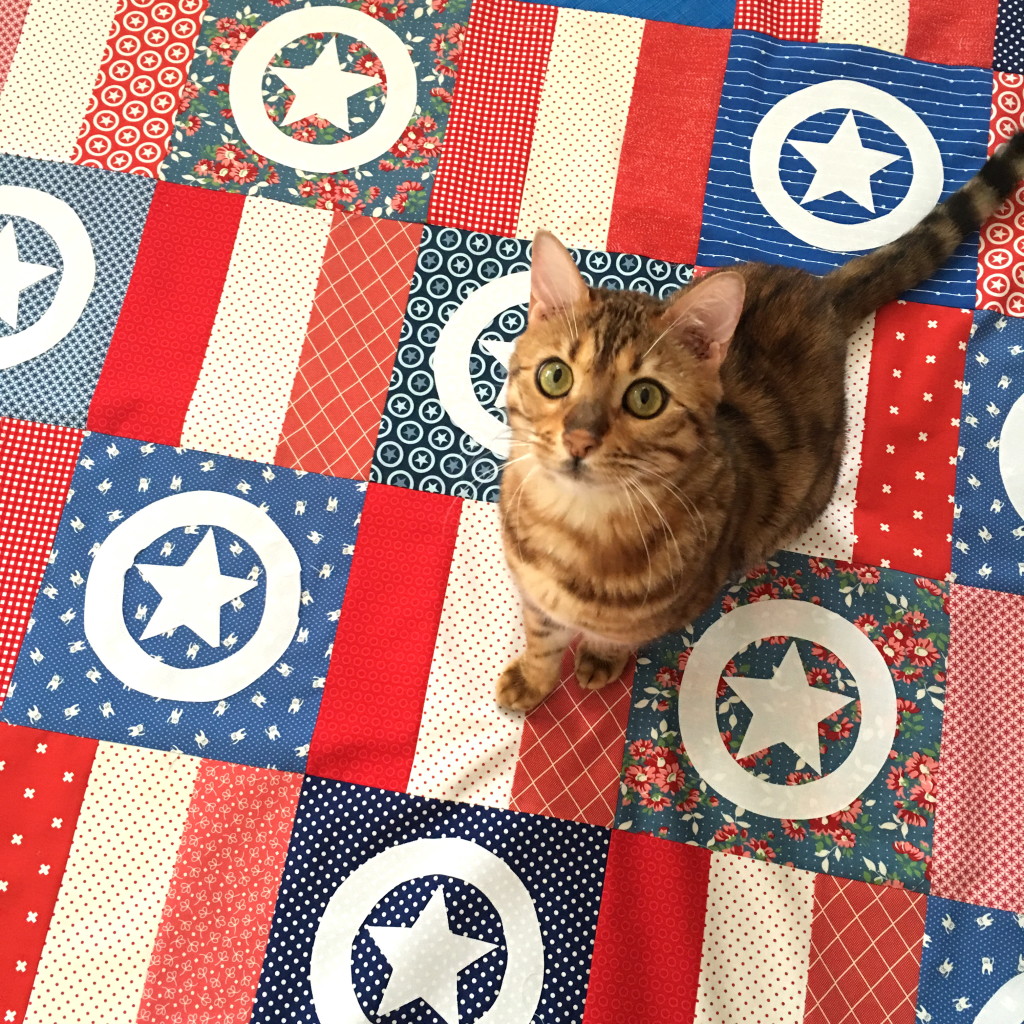
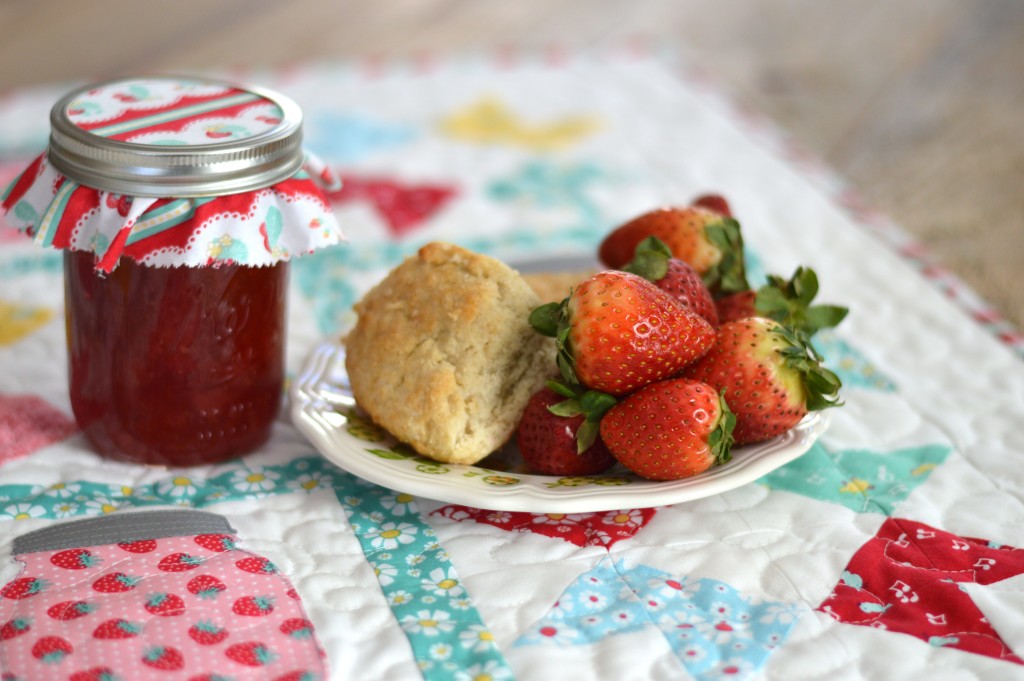
This quilt is totally Mufassa approved!

captain america quilt 12

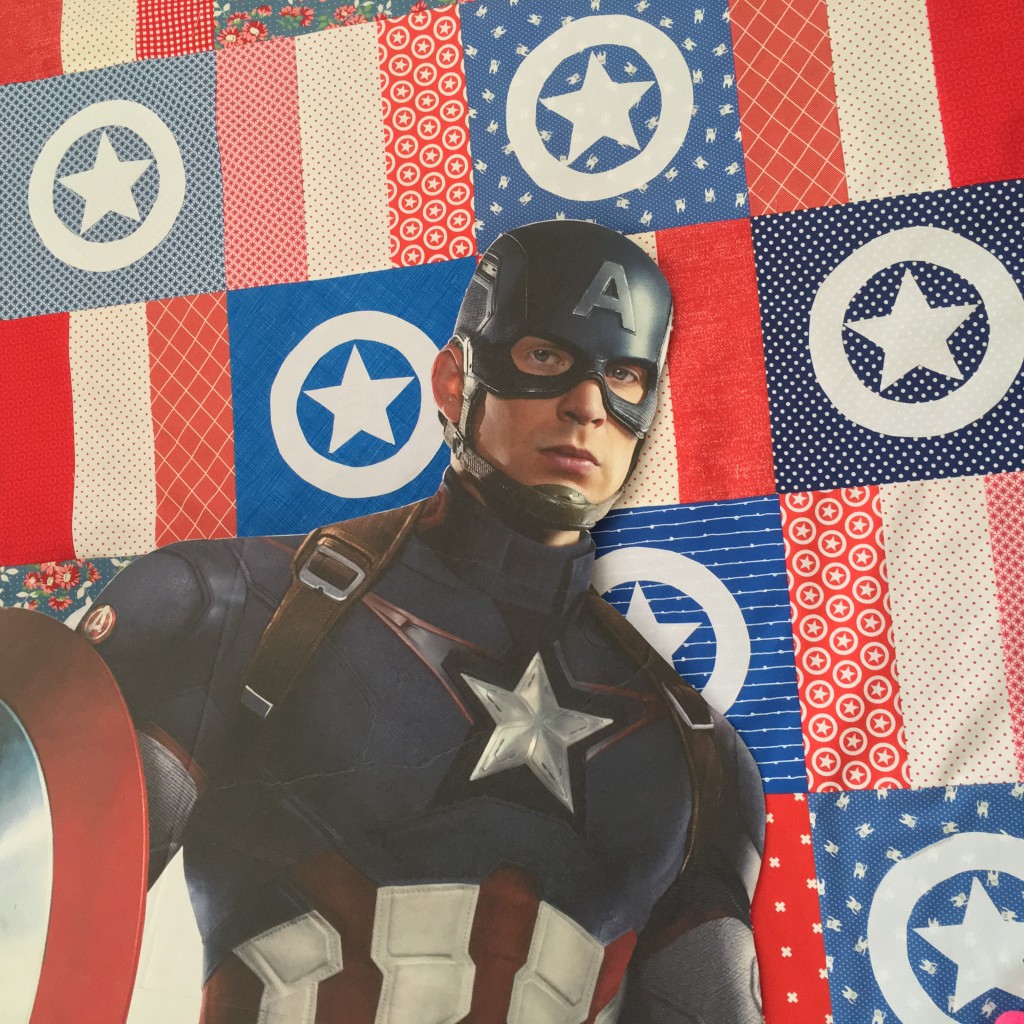
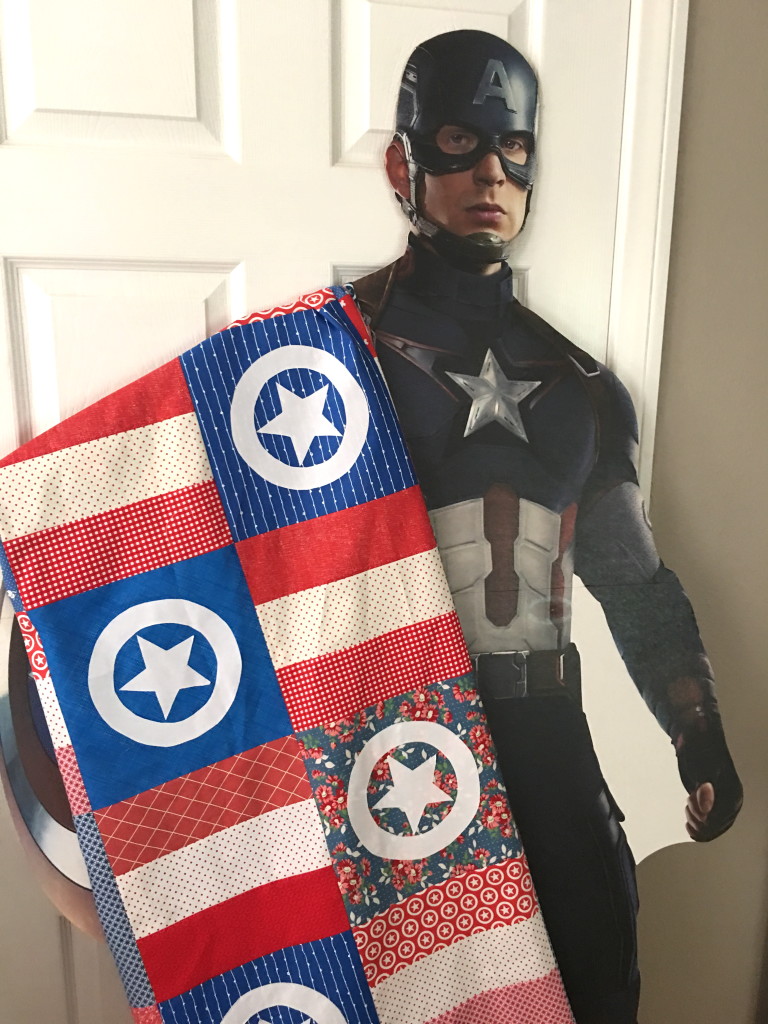
And approved by The Captain himself!  (Yes we have a giant cardboard cut out of Captain Rodgers!!!)

captain america quilt 18

OK, I am seriously in love with it!  It screams summer picnic!!!!

captain america quilt 19                  Screen Shot 2016-05-06 at 11.29.54 AM

Strawberry Festival Pillow Tutorial

pennant pillow

It feels like summer here in Southern California and that means fresh strawberries!  We always pick up a flat of juicy ripe berries on the way home from the beach.  This new fabric from Jennifer Jangles called Strawberry Festival totally reminds me of summer days eating strawberries and making strawberry jam!  This cheerful pillow is sure easy to make.  I used Heat n Bond® Feather Lite to applique the pennant shapes.  I love the Lite version of Heat n Bond® especially in quilting because it makes the fabric easy to cut and applique yet is super soft and you almost can’t tell it’s there.  The pennants are cut with the Sizzix Fabi which makes perfect cuts every time.  I’m sharing all the details and measurements over on the Therm O Web Blog!

DSC_0328

This Sizzix die is called Rocking the House.  It’s actually a quilt block but one of the shapes makes a perfect pennant!

IMG_6477

DSC_0314

DSC_0295

True Blue Summer Satchel


summer satchel
I love summer! Isn’t it the best!!!! In our family we have lots of outdoor actives and camps scheduled. Sometimes I need to carry a few items around that I can have quick access too, like my clipboard, water, bug spray and flashlight. I came up with this pattern for a cross-body satchel. It’s not complicated and sews up quick – it would be fun to make one for the whole family – you can match at your family reunion!IMG_8140_2

I used Heat n Bond® Medium Weight Fusible Stabilizer to give the bag more stability. Don’t you just love these whales by Blend Fabrics!!!
IMG_8136_2


Here is how you can make one:

Supplies:

1/2 yard outer bag
1/2 yard lining
1/3 yard bag strap
1 yard Heat n Bond® Fusible staibilizer

Cut:

(2) outer bag 15″wide x 16″ tall
(2) lining 15″wide x 16″ tall
(2) stabilizer 15″wide x 16″ tall
(2) Strap 5″ x WOF


IMG_8108_2

Fuse the HeatnBond® stabilizer to the wrong side of the (2) outer bag pieces.IMG_8109_2

With right sides together, pin all the way around the outer bag, leaving the top open. Do the same with the lining pieces. Sew using 1/3″ seam all the way around leaving the top open. You should have (2) bags, one outer and one lining.IMG_8110_2

To form a pleate in the bottom, cut a 1″ notch out of the bottom corners of the outer bag and the lining.IMG_8111

Match seams, pin, and sew 1/4″ seam, backstitching to start and stop.IMG_8112

Sew the (2) 5″ strap pieces together end to end. Press the seams open. Measure how long you want your strap. Mine was 48″. Cut at the desired length. Fold in half, right sides together and sew 1/3″ seam all the way down.
IMG_8113

Turn right side out, press and top stitch.IMG_8114

Baste (1/8″) the ends of the strap centering on the side seams on the right side of the outer bag.IMG_8115

Place the lining inside the bag so that right sides are facing each other. Match side seams and pin all the way around.IMG_8116Sew 1/4″ seam all the way around the top of the bag leaving a 3″ opening. Turn bag right side out and press. Sew a 1/8″ top stitch around the bag top, sewing the opening closed.
IMG_8117_2

IMG_8130

IMG_8122

To add a little detail to the fabric, I used Deco Foil™ Transfer Adhesive and followed the loops on the fabric. After it dried I rubbed the Deco Foils™ on the adhesive. You can add a little shine to any project this way!!

IMG_8142

Patchwork Tote Bag Tutorial

patchwork tote bag tutorial

I love sewing for Sally!  And I love that she loves everything I make for her!  I was thrilled to receive this bundle of fat quarters from Ft. Worth Fabric Studio.  Every Friday they feature a fun Friday bundle!  This is the perfect project to make with a handful of fat quarters and a few cuts of yardage. patchwork tote bag 3
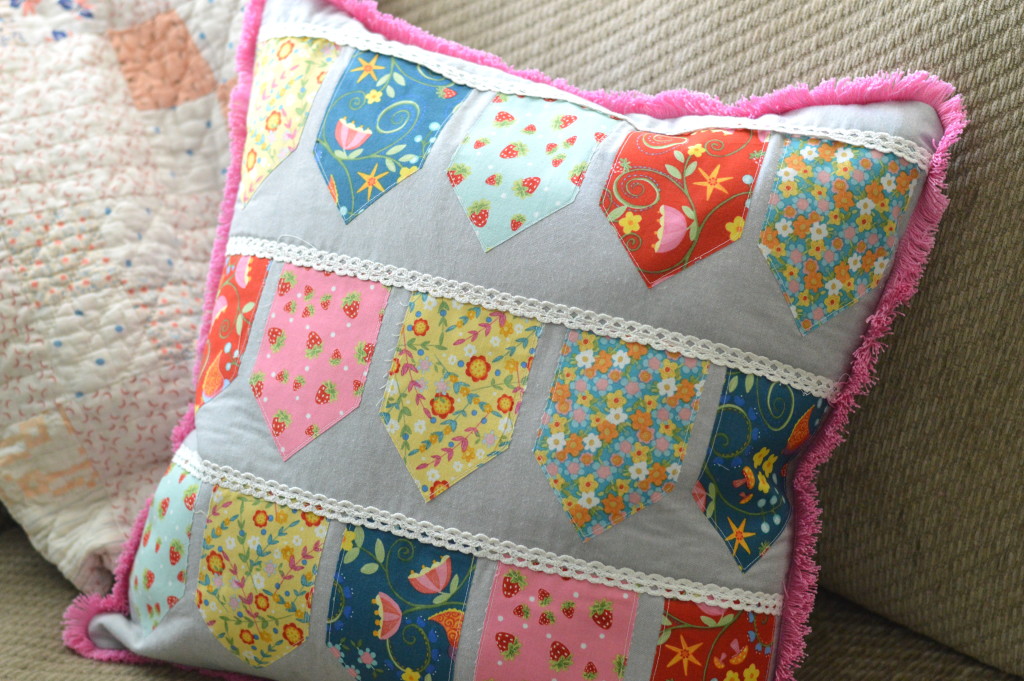
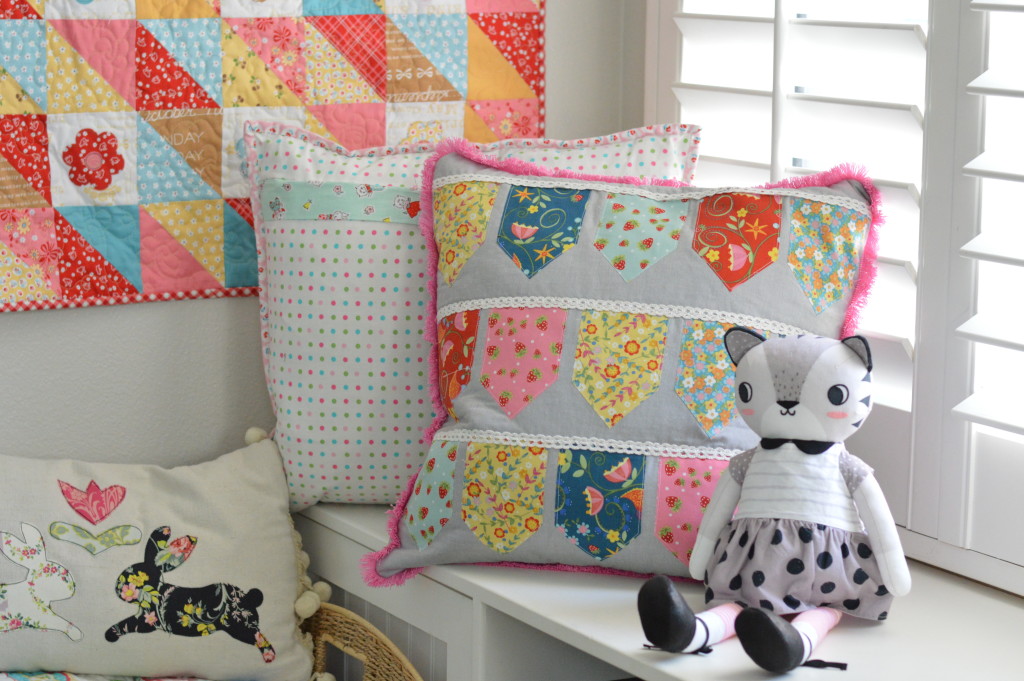
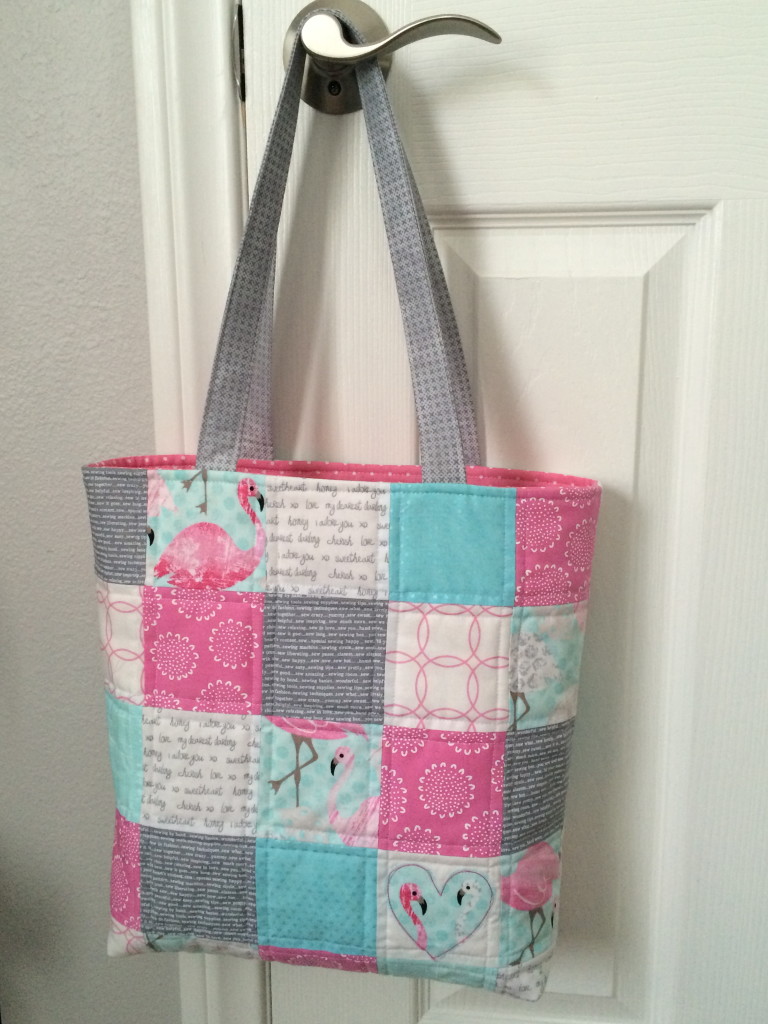
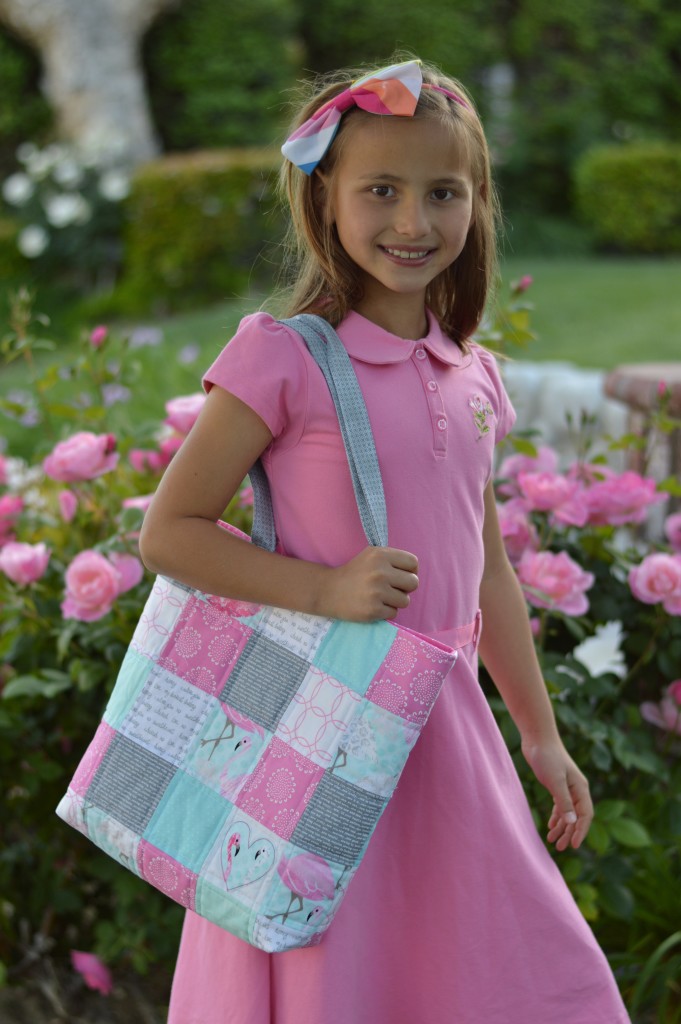
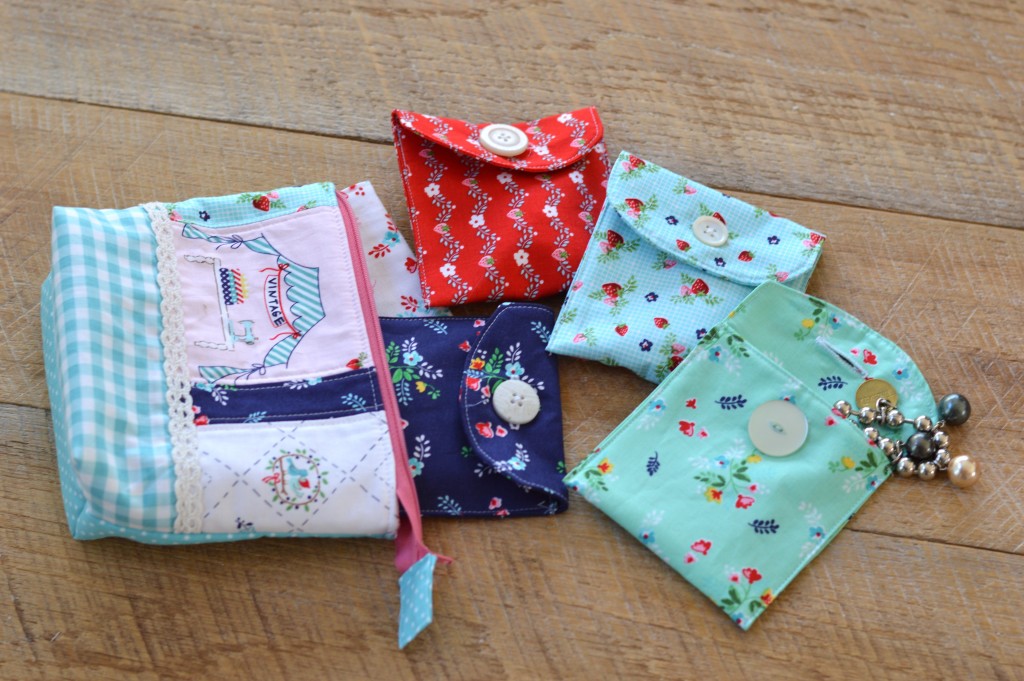
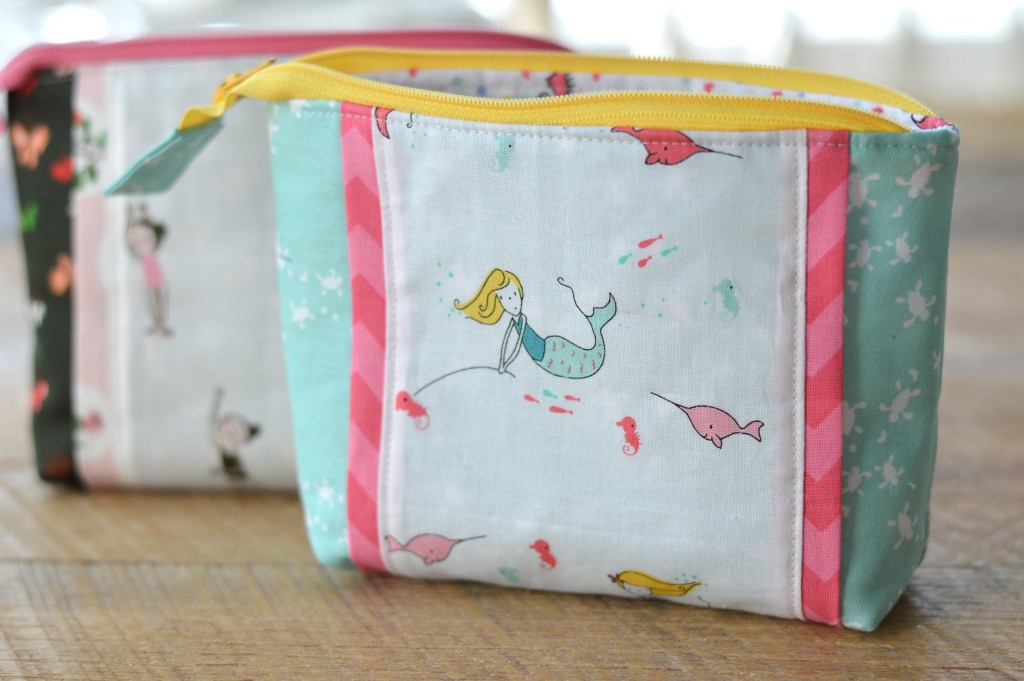
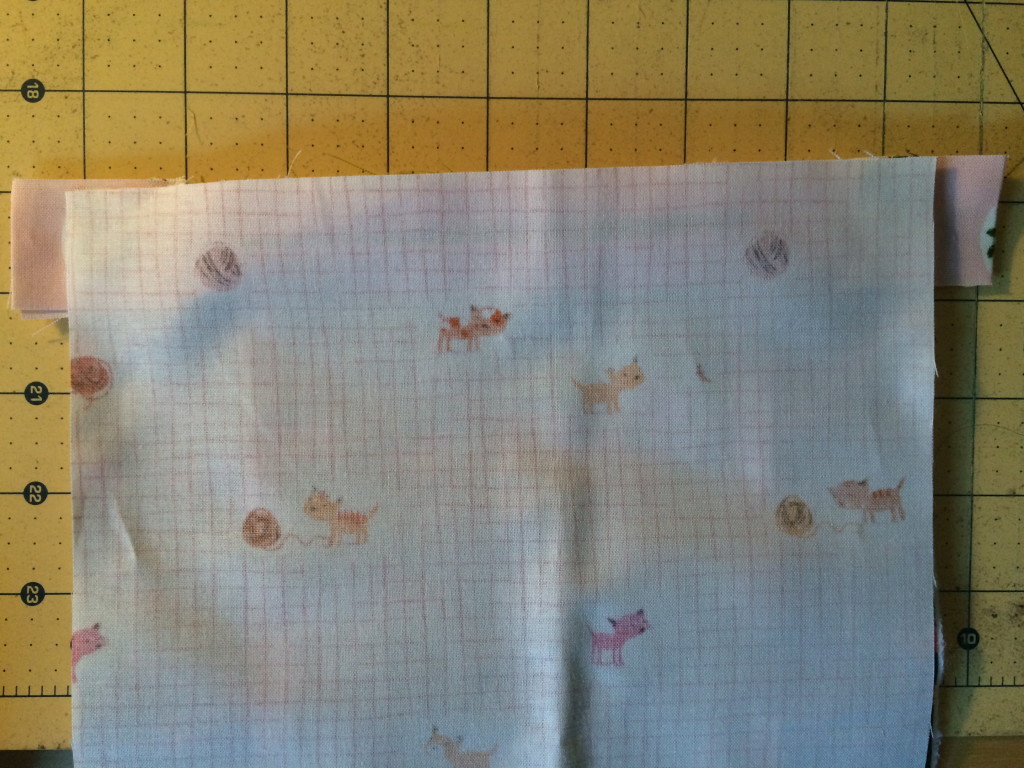
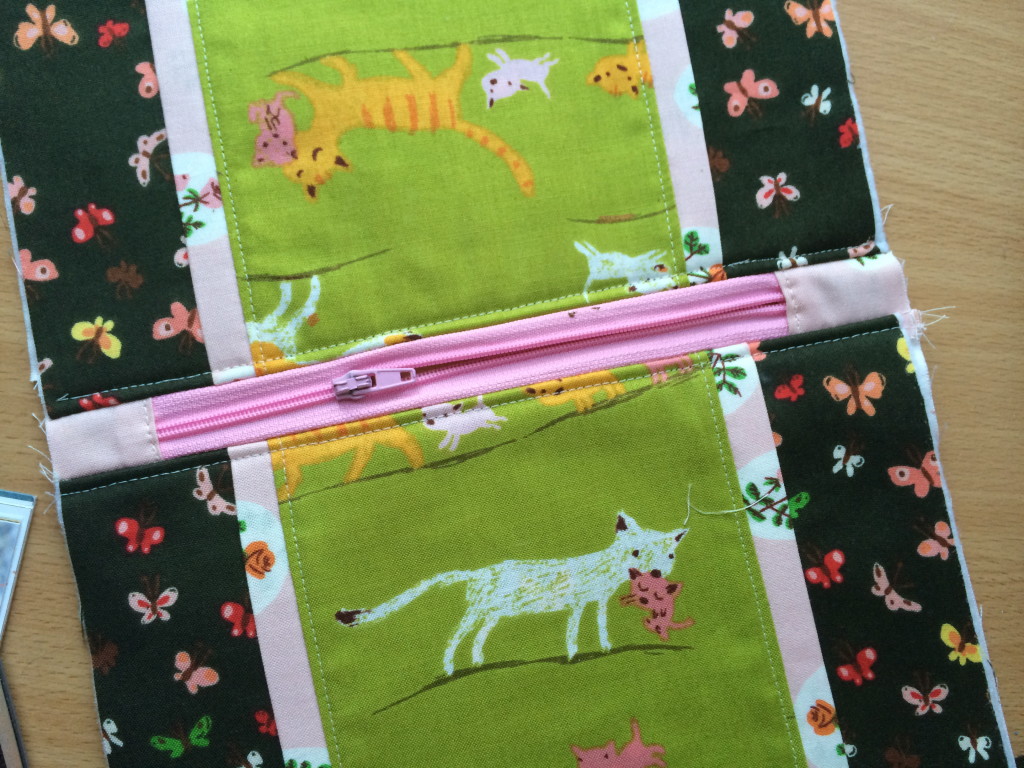
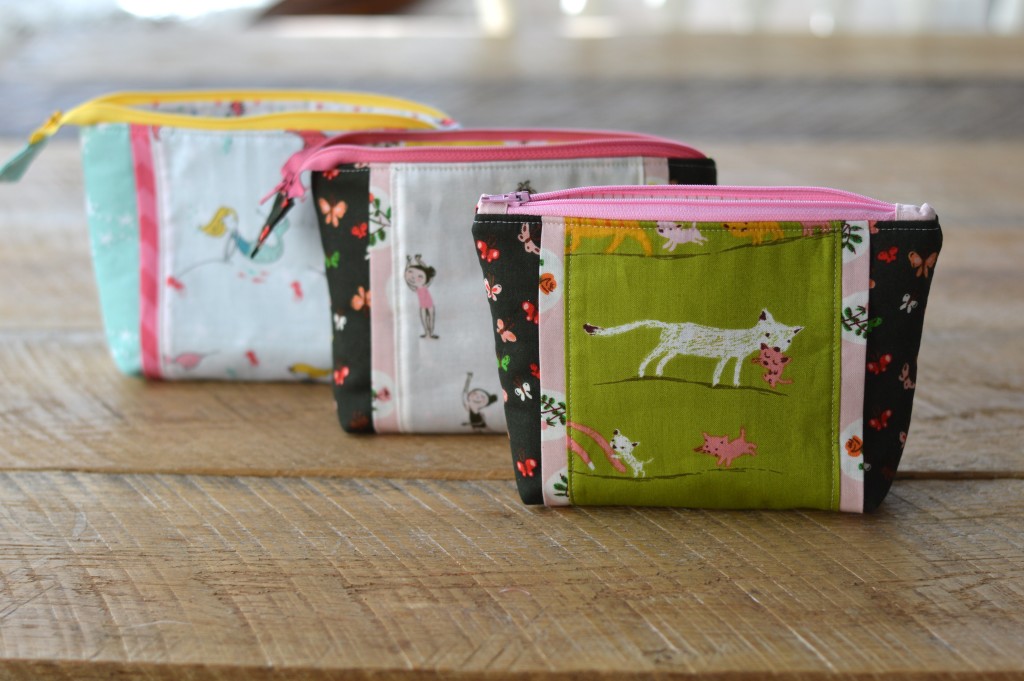
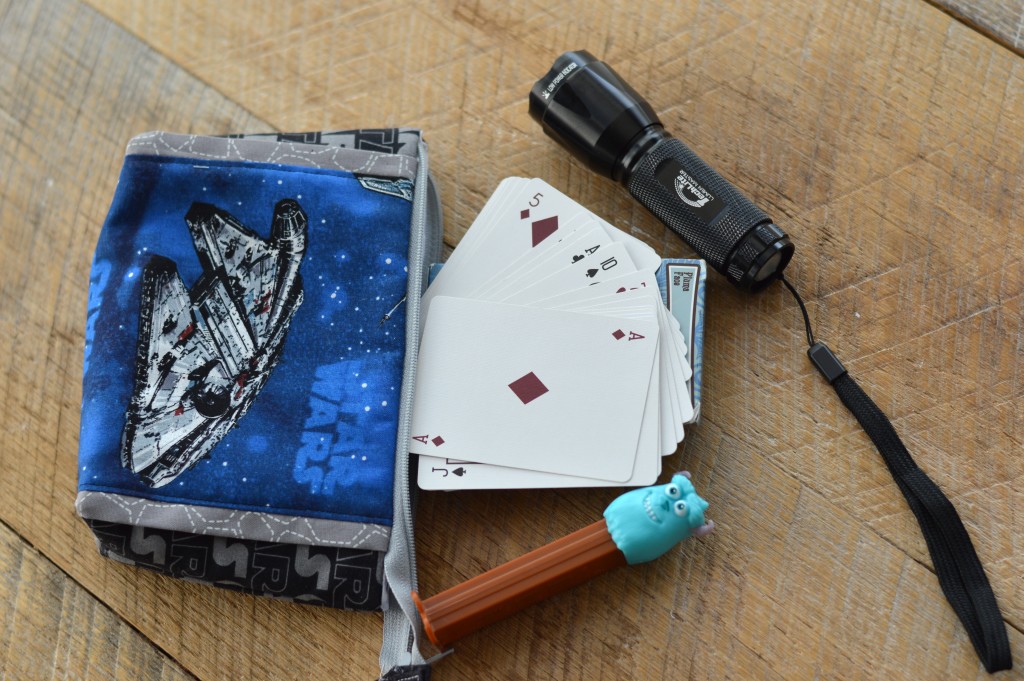
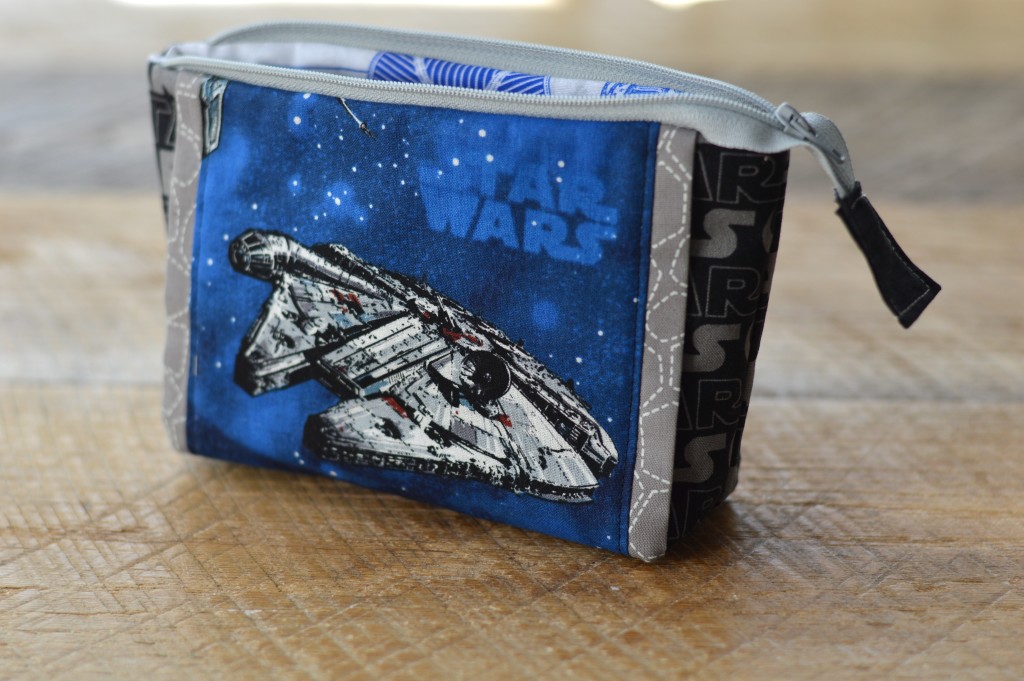
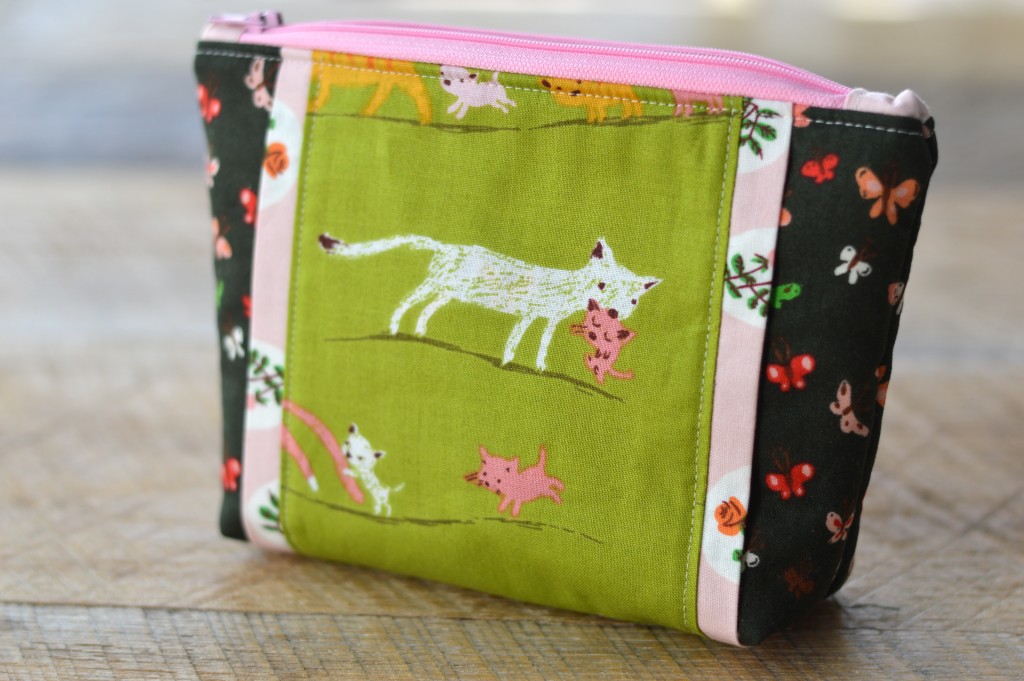
This is such a versatile size of bag!  And the fabrics are so perfect for a little girl 🙂

Let’s get started!

Supplies:

7 Fat Quarters assorted prints

1/2 yard lining

1/4 yard handles

quilt batting

patchwork tote bag 9

Press all your fat quarters so they are nice and smooth.

patchwork tote bag 12

And by “press” I don’t mean let your cat lay on the fabrics!

The bag is made up of 2 outer pieces and 2 lining pieces.  For the outer bag, cut 3.5″ blocks.  You will need 25 for the front and 25 for the back.  I added in 1 solid white square to applique a heart on.

patchwork tote bag 10

For the applique, draw a heart onto Heat n Bond Lite.  Cut the heart out 1/4″ larger than the drawn heart.  Iron it to the wrong side of the flaming fabric.  Press.  Then cut out on the heart line.  Peel off backing paper and press the heart onto the white fabric.

Top stitch around the heart a few times in an accent color.

patchwork tote bag 14

Once you have all the blocks cut and arranged, sew them together using 1/4″ seams, just like you would a quilt.  Press each row in opposite direction so the seams match up nicely.  Make 2 of these.  This should measure 15 1/2″ square.

patchwork tote bag 16

Next we will be making a quilt.  Baste each patchwork outer bag piece onto the quilt batting.  Then baste onto plain fabric for the backing.  This backing will NOT be seen.  I used some fabric I didn’t like very much 🙂  This extra layer will give the bag a bit more weight and stability.

patchwork tote bag 17

Basting spray is the greatest invention ever!!!

patchwork tote bag 19

Here you can see my “junky” fabric on the back.

Quilt as desired.  I quilted 1/4″ away from each of the seams.  The quilting will shrink the up the quilt a little bit.  Measure the size of the patchwork piece, mine measured about 15.25″

patchwork tote bag 21

Once each of the 2 pieces is quilted, trim off any excess batting.  Pin right sides together, matching at all side seams, leaving the top open.  Sew around the sides and the bottom using 1/4″ seam allowance.

Cut (2) lining pieces 15.25″.  This should be the exact measurement as the patchwork outer bag.  Place the two lining pieces right sides together, and sew around the sides and bottom, leaving the top open.  I like to take a slightly larger seam on the lining, so a generous 1/4″ seam allowance.

patchwork tote bag 23

Cut a 1 3/4″ notch out of the bottom of each corner.

patchwork tote bag 25

Open each notch, and match the seams, pinning.  Sew a 1/4″ seams across.  The picture below is slightly confusing because I used 2 different fabrics on my quilt back.

patchwork tote bag 27

Once each of the corners are sewn, it’s time to make the handles.

Cut (2) 4″ x 23″ strips.  Press in half lengthwise.  Then fold each side up to the center.  Then fold again, giving you a 1″ wide handle.

patchwork tote bag 31

Top stitch each handle 1/8″ from the edge.  Position the handle 4″ from the side seam.  Pin in place.  Baste in place.

patchwork tote bag 32

Place the outer bag and the lining right sides together, matching side seams, and pinning all the way around.  Sew all the way around the top of the bag using a 1/4″ seam.

patchwork tote bag 30

Unstitch a little section on the side of the lining and turn the bag right side out.

patchwork tote bag 34

Top stitch the opening closed.  Tuck the lining down inside and press the top edge of the bag.  Pin along the edge so the lining stays down.  Top stitch all the way around the bag using a 1/4″ seams allowance.

patchwork tote bag 33

It’s all done!!!  And it’s oh so sweet!!

patchwork tote bag 35

patchwork tote bag 8


Jewelry Pouch Travel Set

jewelry pouch

I am so excited to share this project with you!!  I LOVE jewelry!  (Especially Twisted Silver Jewelry) This is the perfect way to store your jewelry when you travel so it doesn’t get tangled or damaged.  You can sew as many of these little pouches as you want and they all fit in this zipper bag.  This would make such a great gift for Mother’s Day, Birthday, or Graduation.  The full tutorial is over on the Therm O Web Blog.jewelry zipper pouch 21

All the fabrics are from Riley Blake Designs Vintage Market Fabric Line by Tasha Noel.  I used Heat n Bond Fusible Fleece in the zipper bag and then a medium weight fusible stabilizer in the little pouches.

jewelry zipper pouch 9

Each little pouch has a button closure.

jewelry zipper pouch 13


Printable Image Fabric Key Chains

keychain

We are huge “Fan Art” people in my family!  My daughter spends her days painting and drawing fan art of Star Wars and Marvel characters.  I think everything we own has a Star Wars or Super Hero (or cat) on it!  I created these fun keychains that you can customize to any theme!  I even made one with Mufasa’s picture on it.

sizzix fabric keychain 13

Supplies

Sizzix 2 1/2″ circle die

1 3/4″ paper punch

Heat n Bond Ultra

Heat n Bond EZ Print transfer sheets

white fabric

scraps of fabric

scraps of cotton batting

twill tape

key ring

sizzix fabric keychain

Begin by designing your image on your computer.  I’m not Photoshop savvy so I like to use Microsoft Power Point.  You can use photos or clip art.  I love buying cute clip art from Etsy!  Crop them to a circle shape and size them so they will fit in the 1 3/4″ circle punch.  Print a test run on plain paper to make sure they are how you want them.  Then choose “Mirror or Reverse Image” in printing and select a high print quality as you would for photos.  Print them on the Heat n Bond EZ print transfer sheets.

sizzix fabric keychain 4

These transfer sheets are a great way to get any digital image onto fabric!  I use them all the time!

sizzix fabric keychain 2

Once they are printed, use the 1 3/4″ paper punch to punch out each image.sizzix fabric keychain 3 
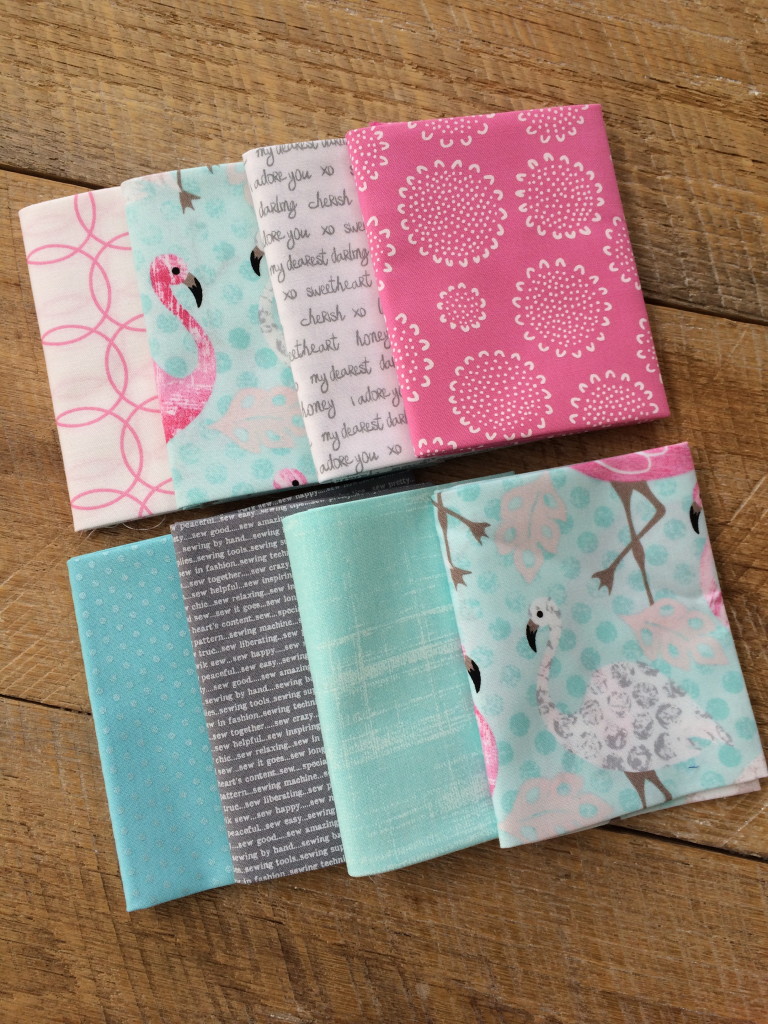
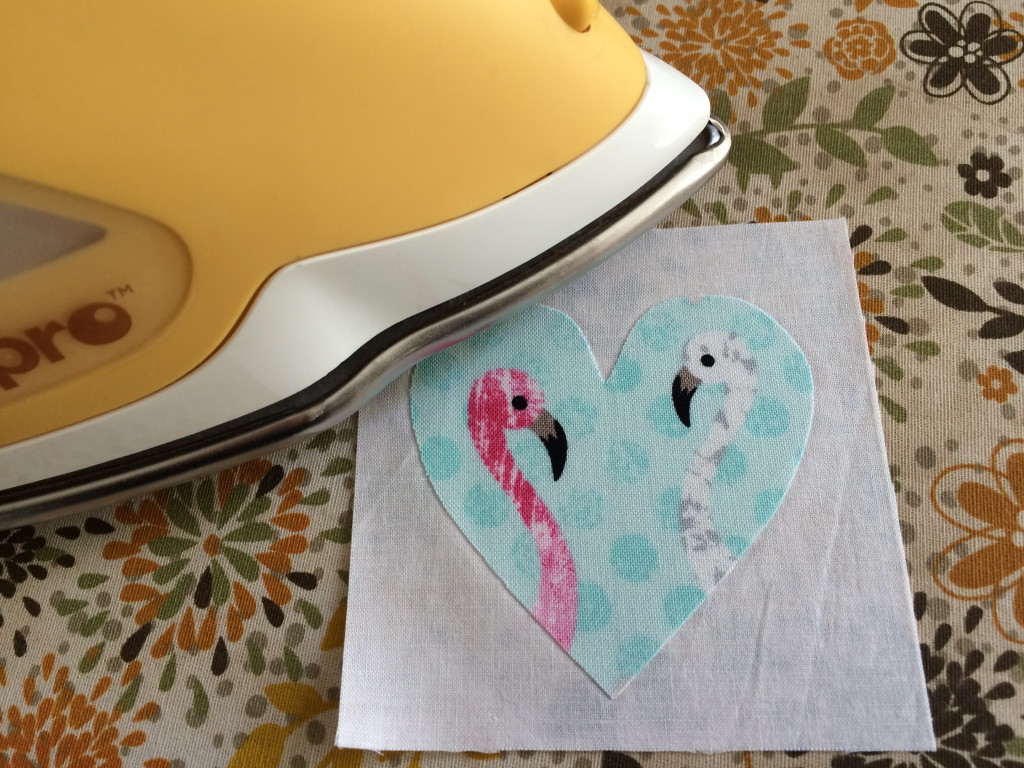
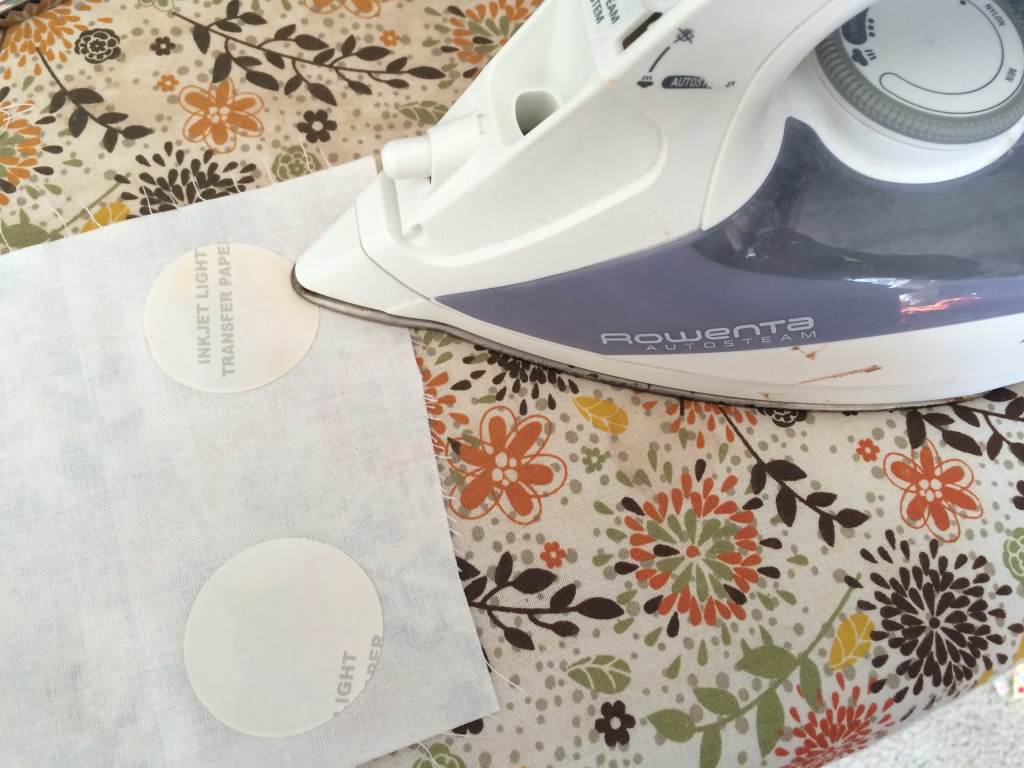
With a dry, hot iron, place the image face side down on the right side of a solid white fabric.  Heat set for about 10 seconds applying firm, constant pressure.  Let cool completely.

sizzix fabric keychain 6

Peel off the backing paper and cut around the image using pinking shears.

sizzix fabric keychain 5

Cut 2 pieces of Heat n Bond Ultra slightly larger than the 2 1/2″ circle.  Iron them to the wrong side of the desired fabric.  Let cool.  sizzix fabric keychain 7

Cut a piece of batting roughly the same size as the fabric – these are super rough cuts, no measuring required.  Peel off the backing paper of both of the fabrics and press the fabric pieces onto both sides of the batting.  Let cool.  This makes a fabric sandwich 🙂sizzix fabric keychain 8

Run the fabric sandwich through the Sizzix Fabi using the 2 1/2″ die.  It cuts a perfect circle.  Since we used the Heat n Bond Ultra, the edges of the fabric won’t fray!sizzix fabric keychain 9

Cut a 2″ piece of twill tape and loop it through the key ring.  Using a zig zag stitch, stitch all the way around the circle, catching the edge of the twill tape.sizzix fabric keychain 10

Turn the keychain over so the raw edge of the twill tape is on the back.  Position the image on the front (add a little Spray n Bond basting spray so it doesn’t move) and straight stitch around the image.sizzix fabric keychain 12

These make great little gifts and they are fun for kids to help with!

sizzix fabric keychain 17  
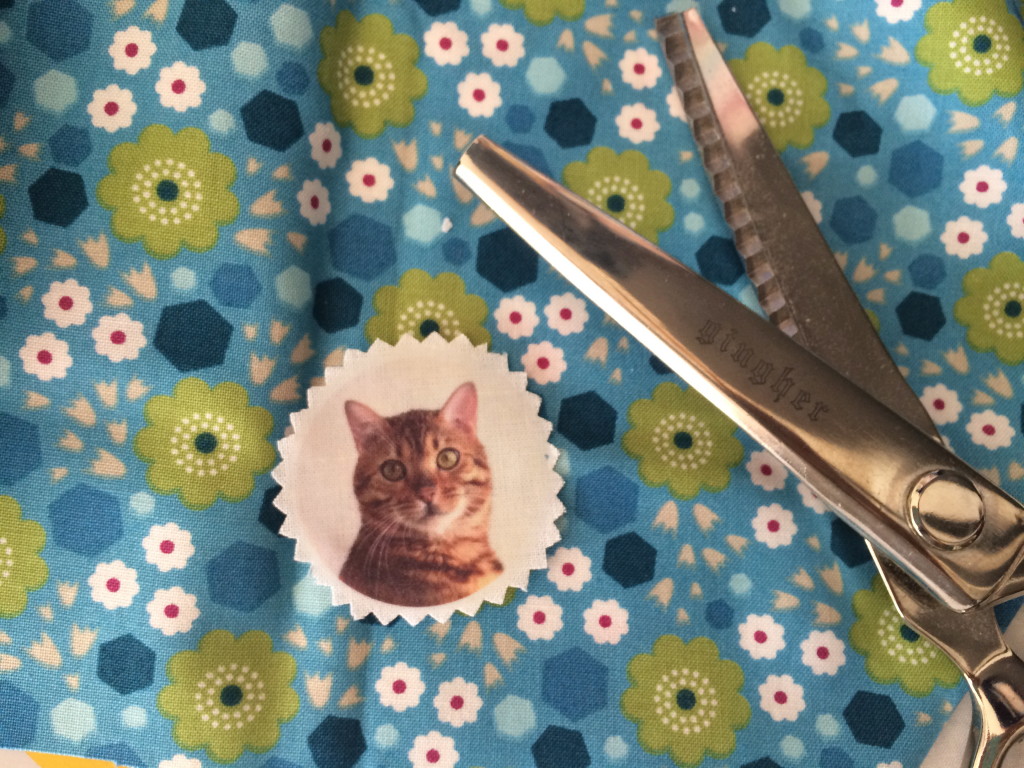
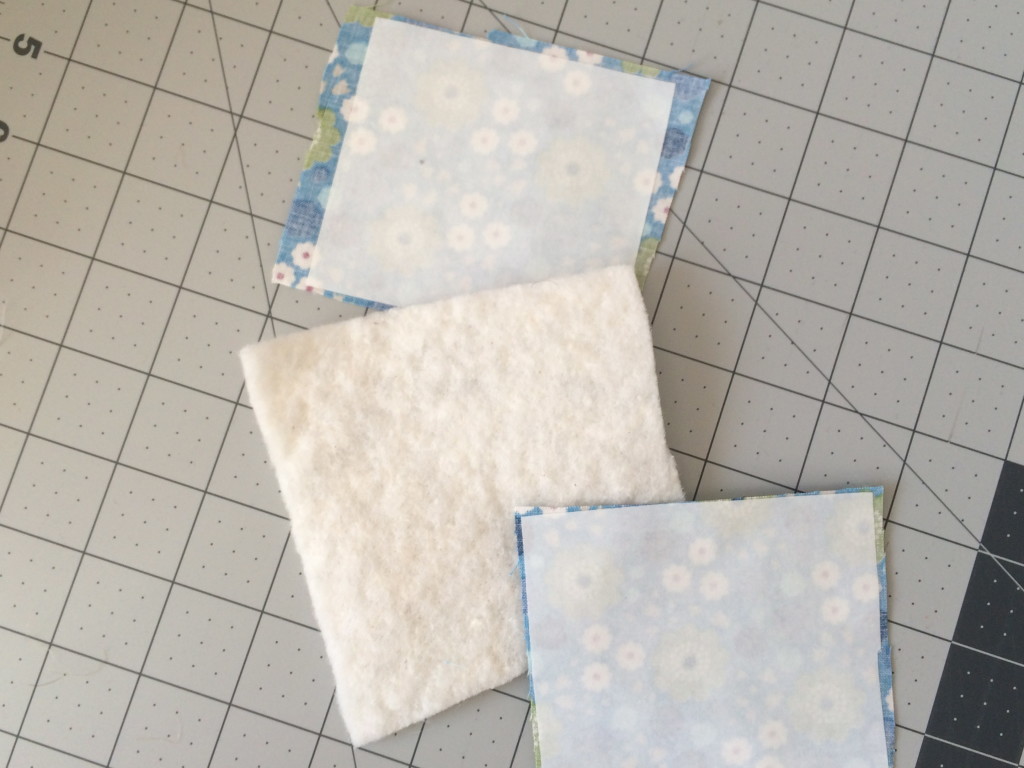
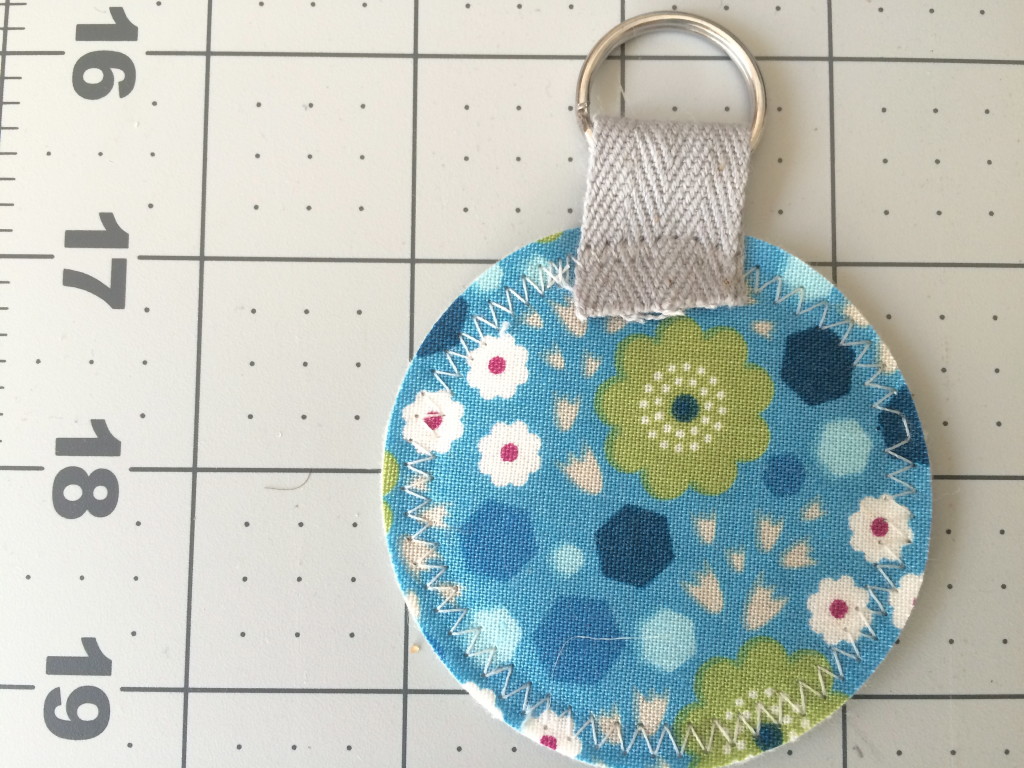
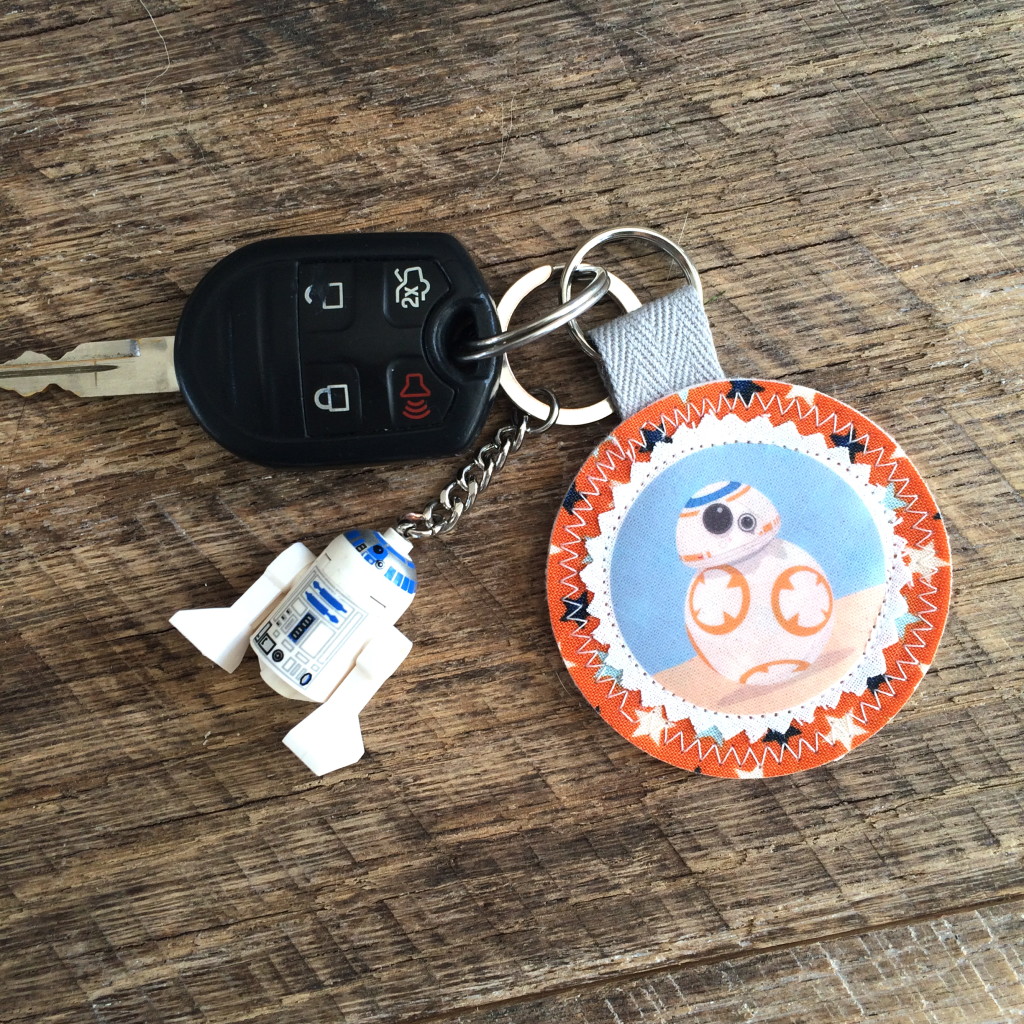
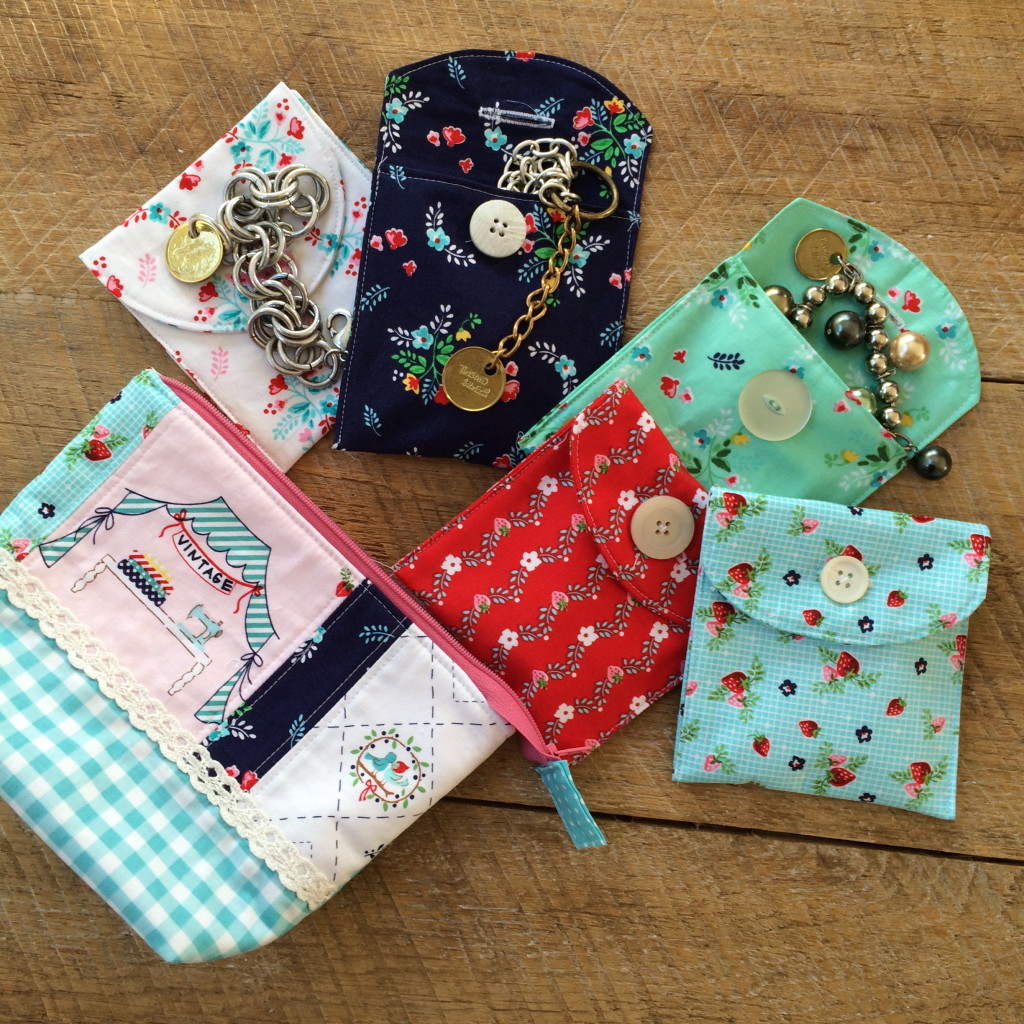
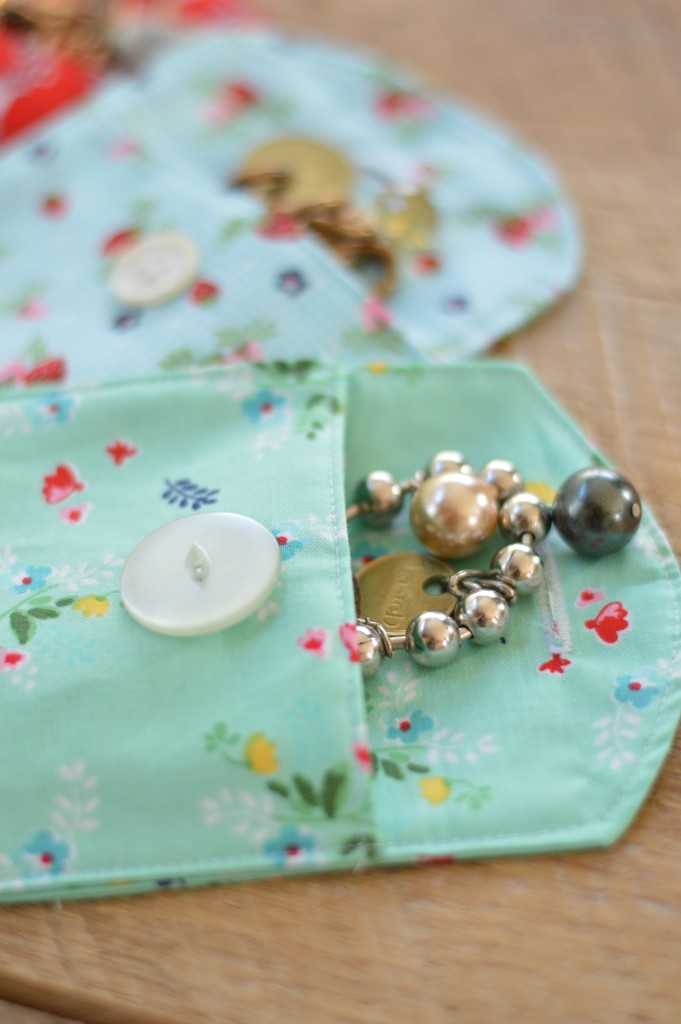
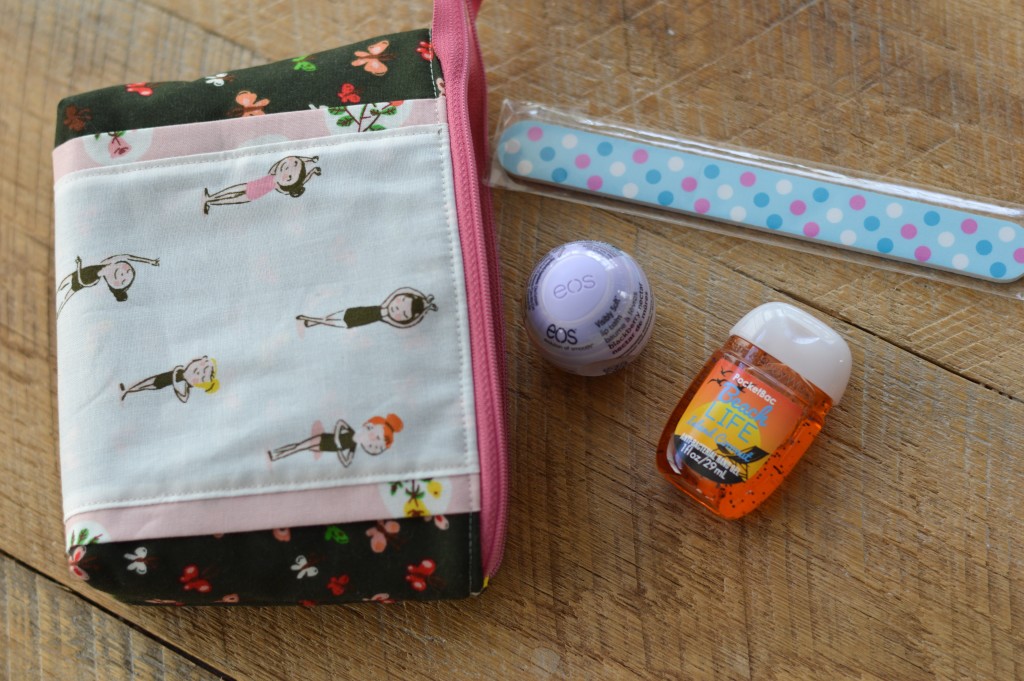
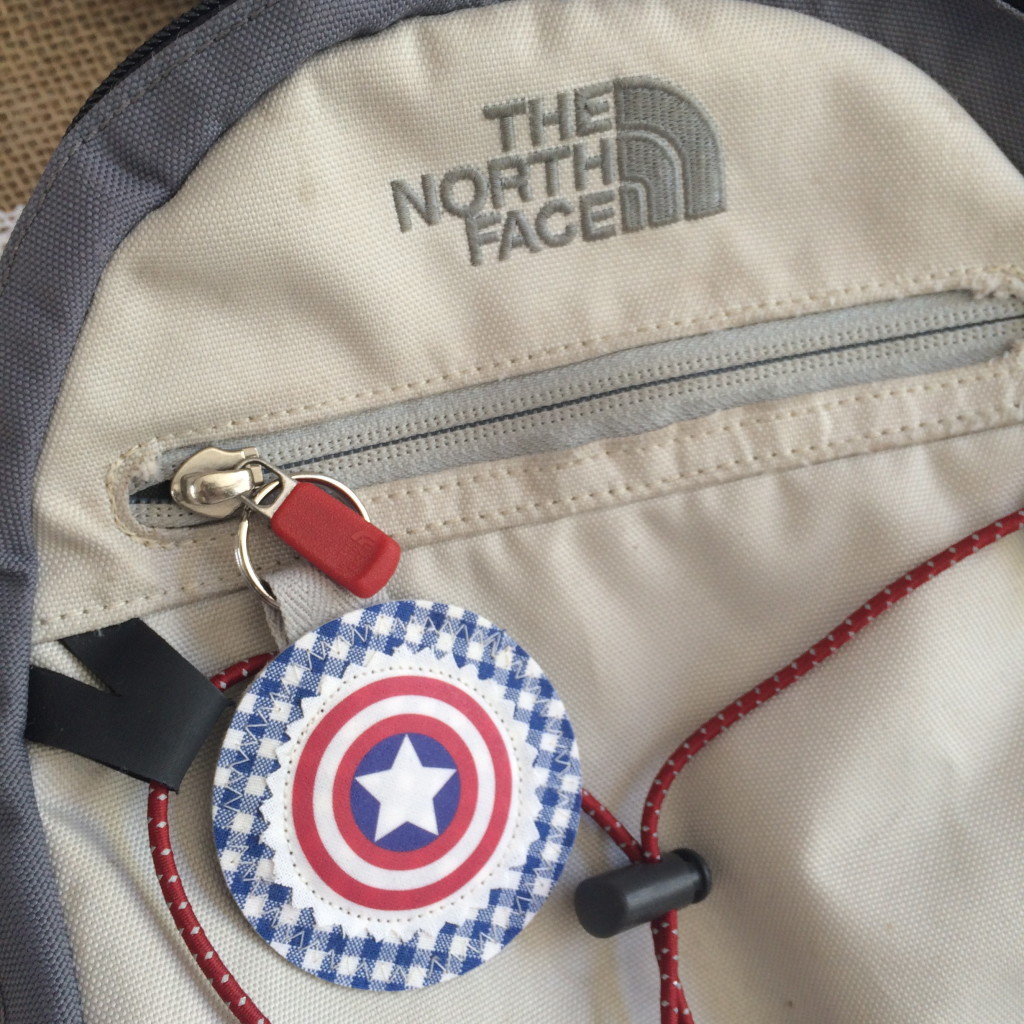
They also make great zipper pulls for back packs!!sizzix fabric keychain11

And who doesn’t love having their pet on their key ring!

Come Sail Away With Me Nautical Quilt

sail away with me quilt 4

I LOVE this quilt!  I had the quilt top finished AND quilted and it has been waiting for binding for a long time.  This weekend was cold and rainy and it was the perfect time to finish up a little work in progress.  Today the sun came out and I was able to take a few pictures of the final quilt!  I am so ready for spring and MORE nautical quilts!!!

IMG_7534

I love the fabrics in this quilt: Day Sail by Moda.  They have such a fun feminine-nautical feel.  The pattern is available HERE with a bonus wall hanging pattern as well.

sail away with me quilt 10

Since I don’t own a sail boat (which this quilt would be perfect for) it will be a great size for the beach or a picnic or maybe I will just hang it on the wall so it doesn’t get dirty 🙂

sail away with me quilt 6

sail away with me quilt 2

sail away with me quilt 7

I have the best quilt “modelers”.  So cute and helpful!!!

sail away with me quilt 8    sail away with me quilt 3

Let me know if you get a chance to make this by tagging me on Instagram!sail away with me quilt
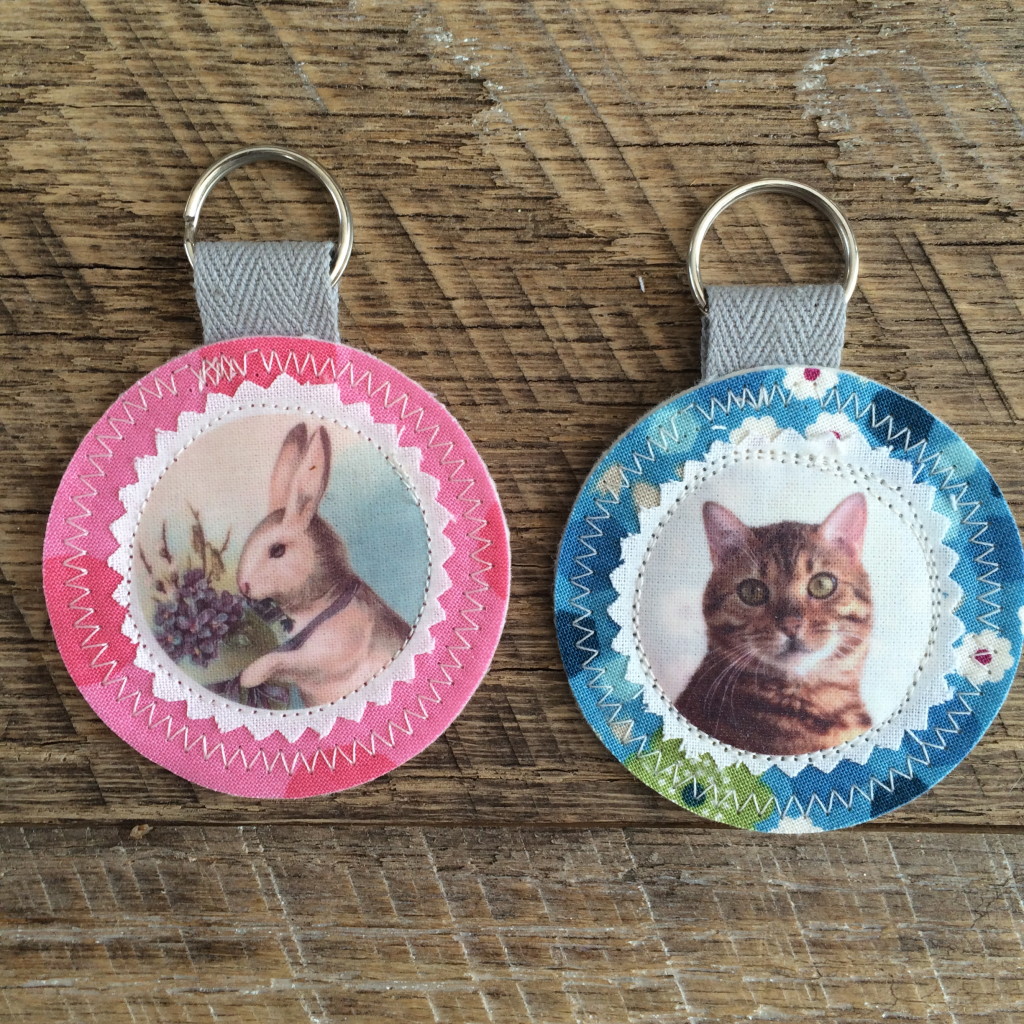
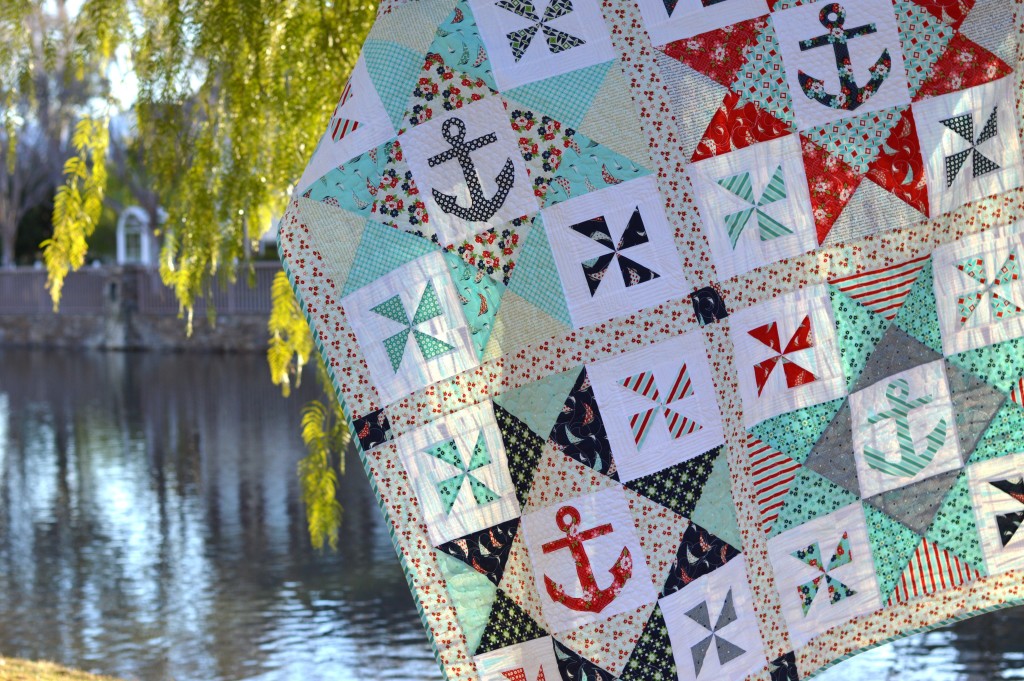
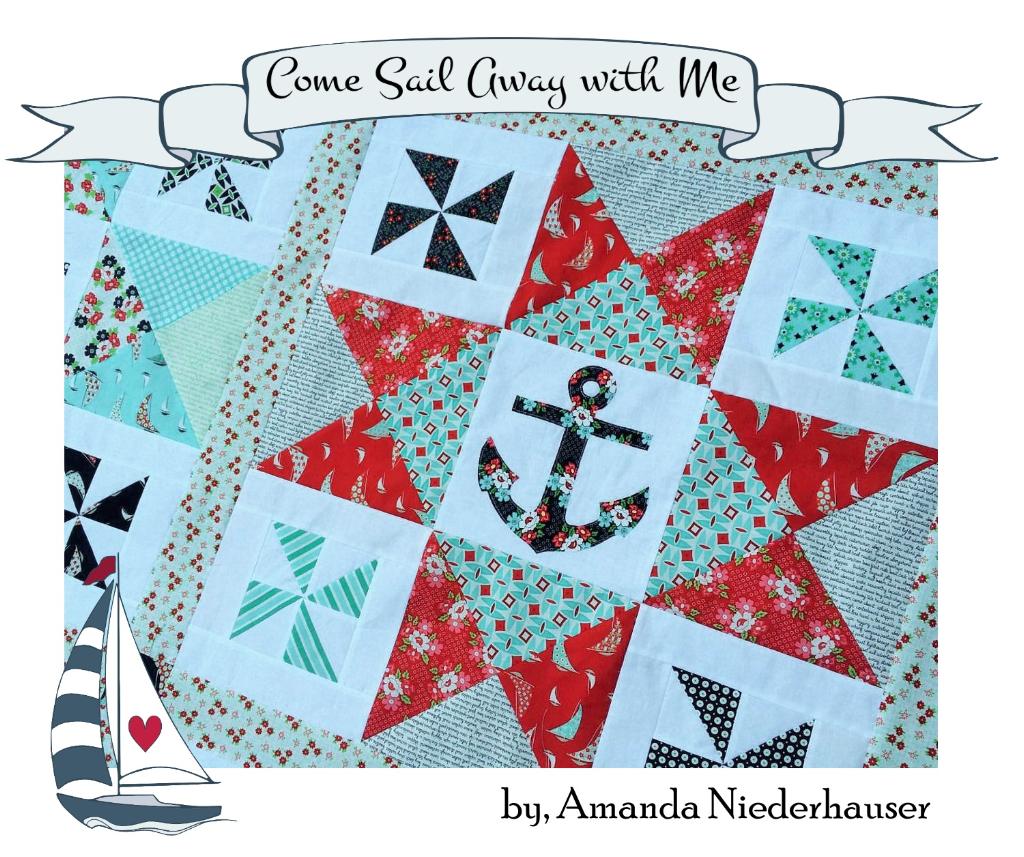
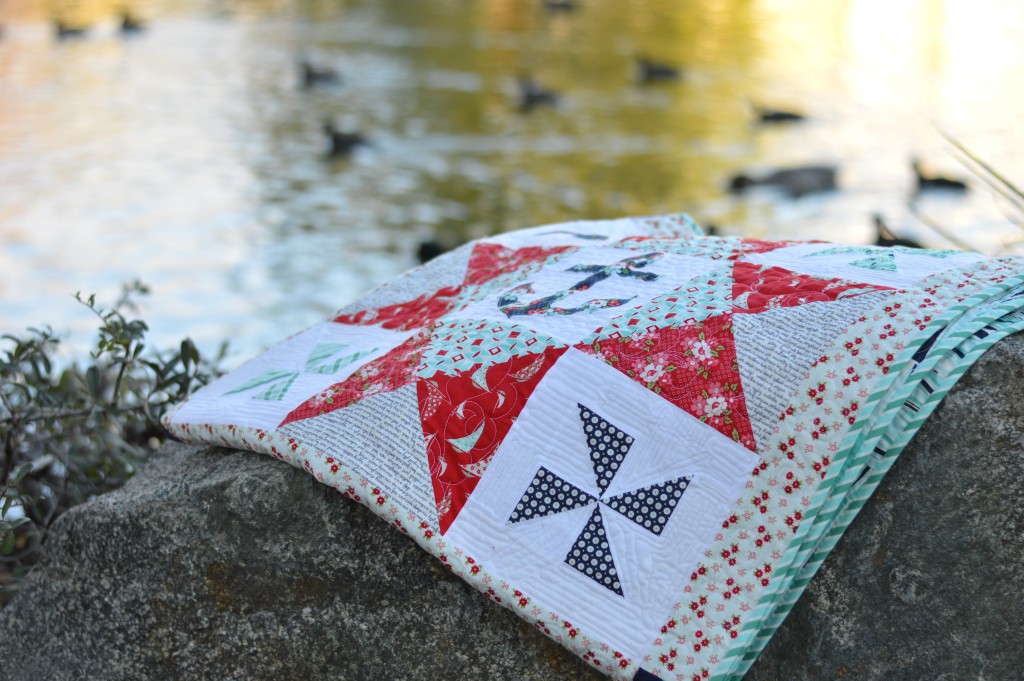
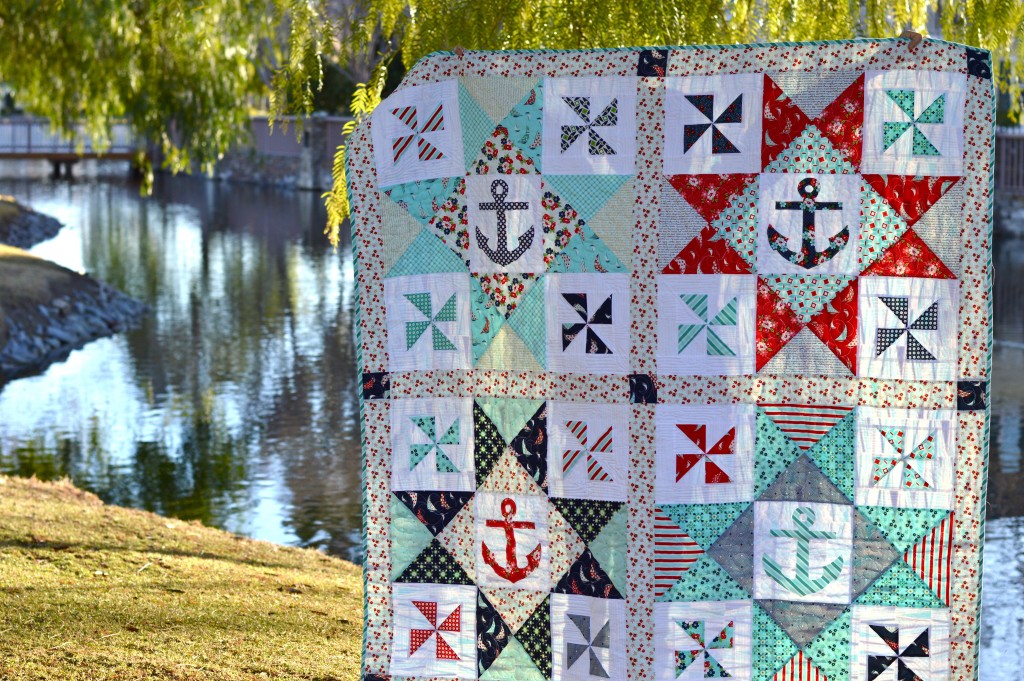
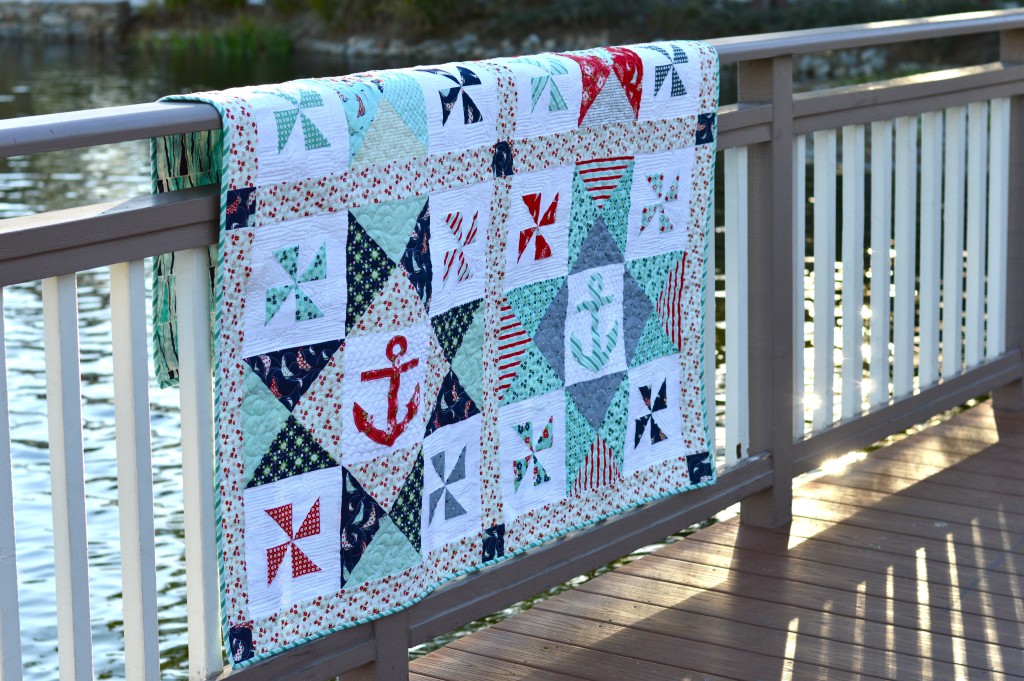
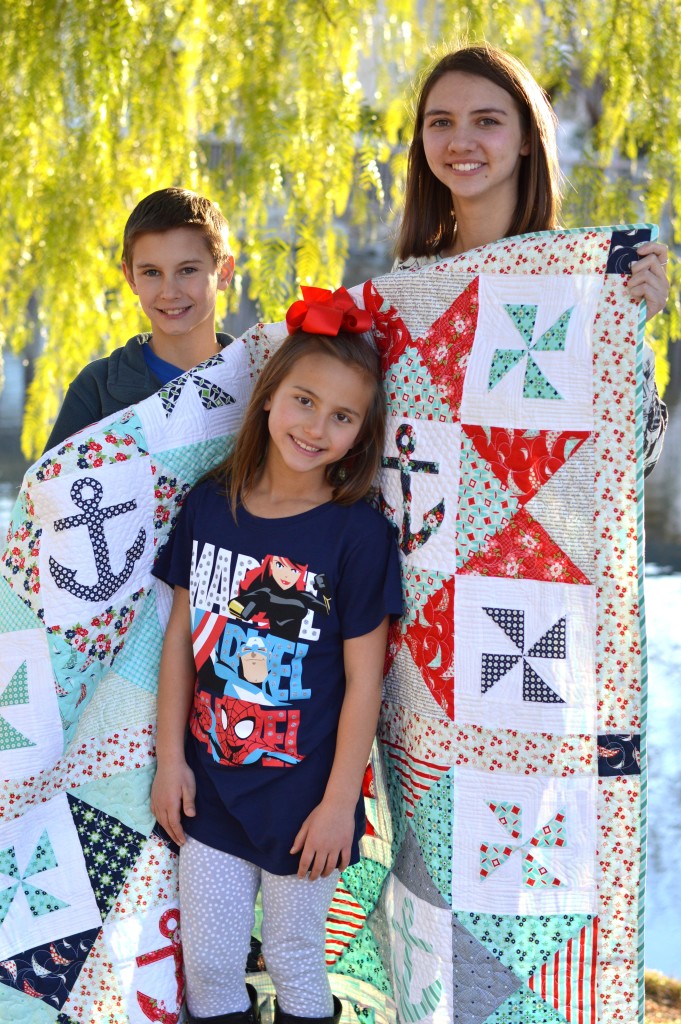
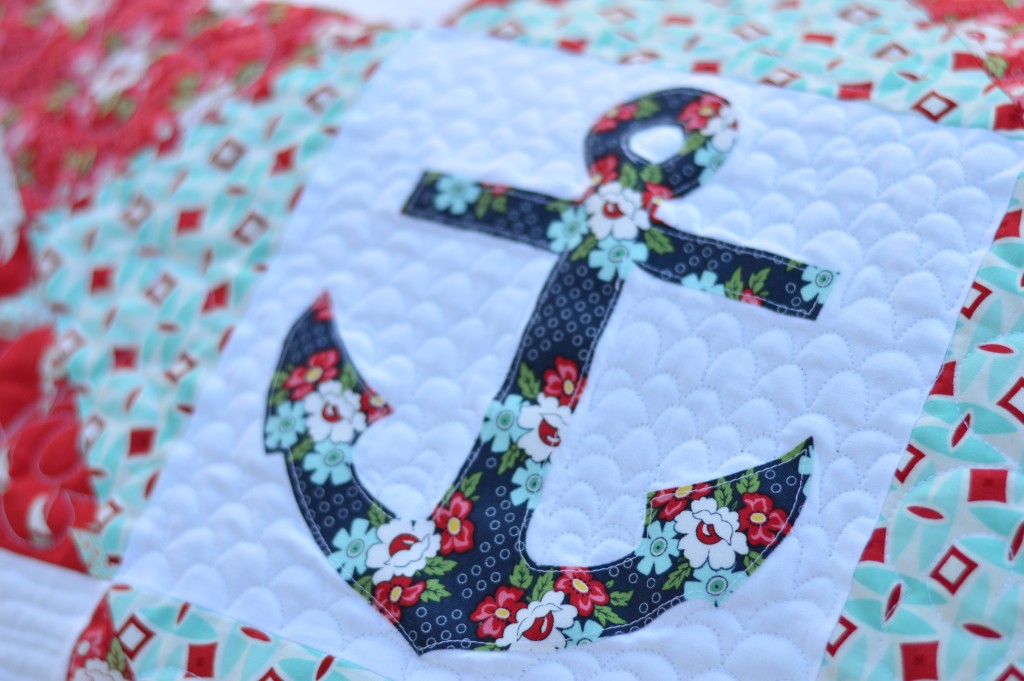
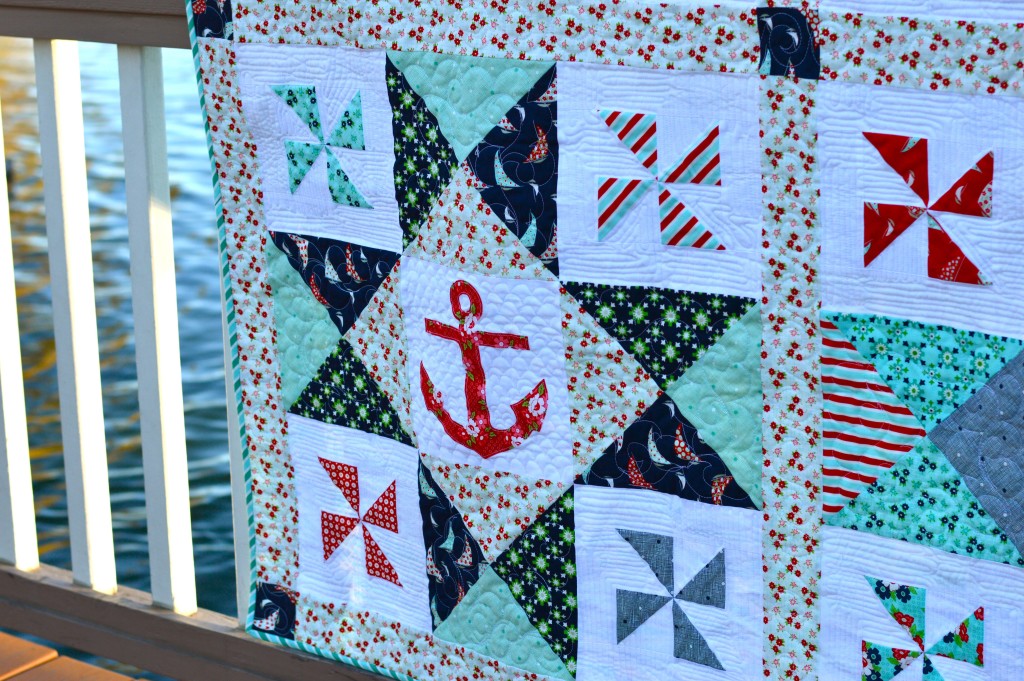
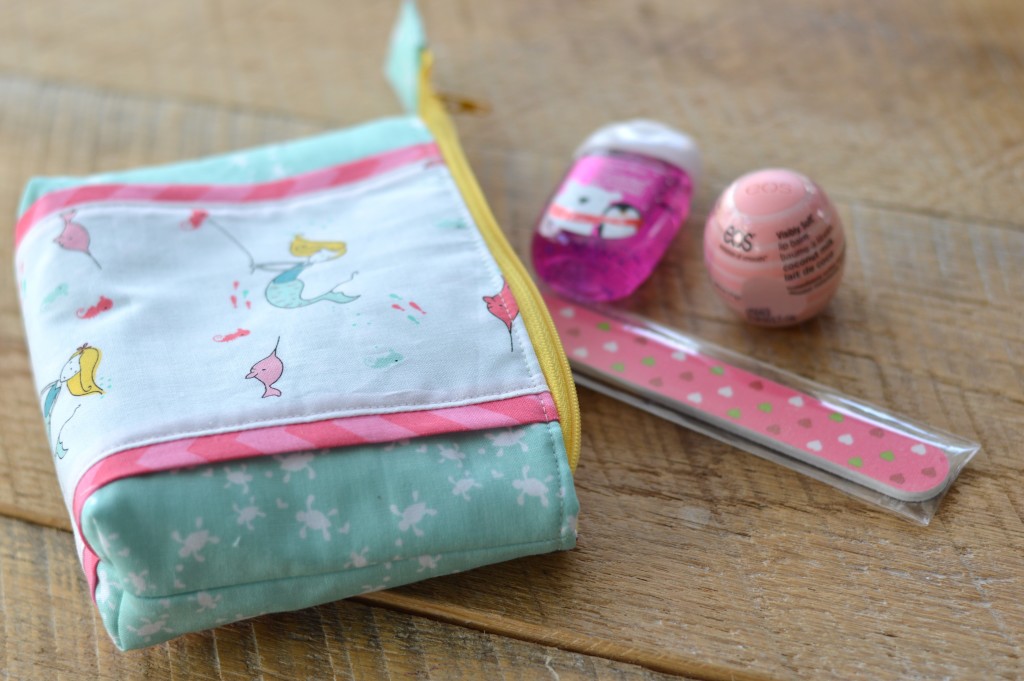
Come Sail Away With Me!!!
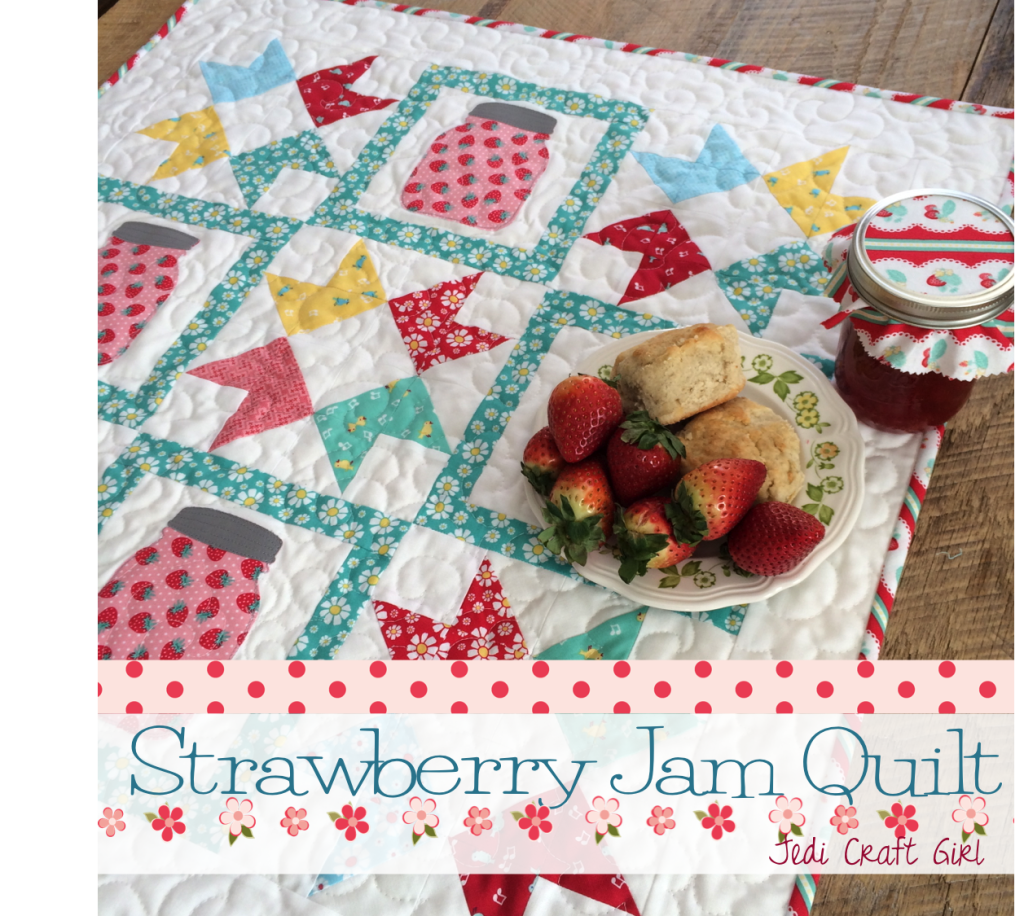
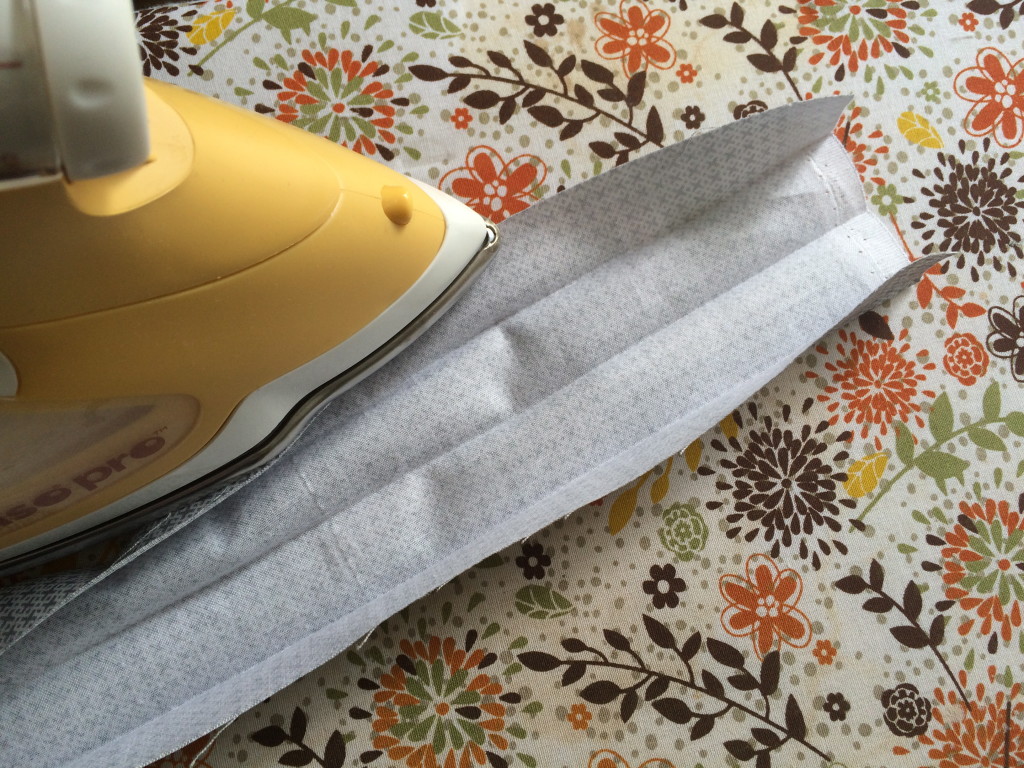
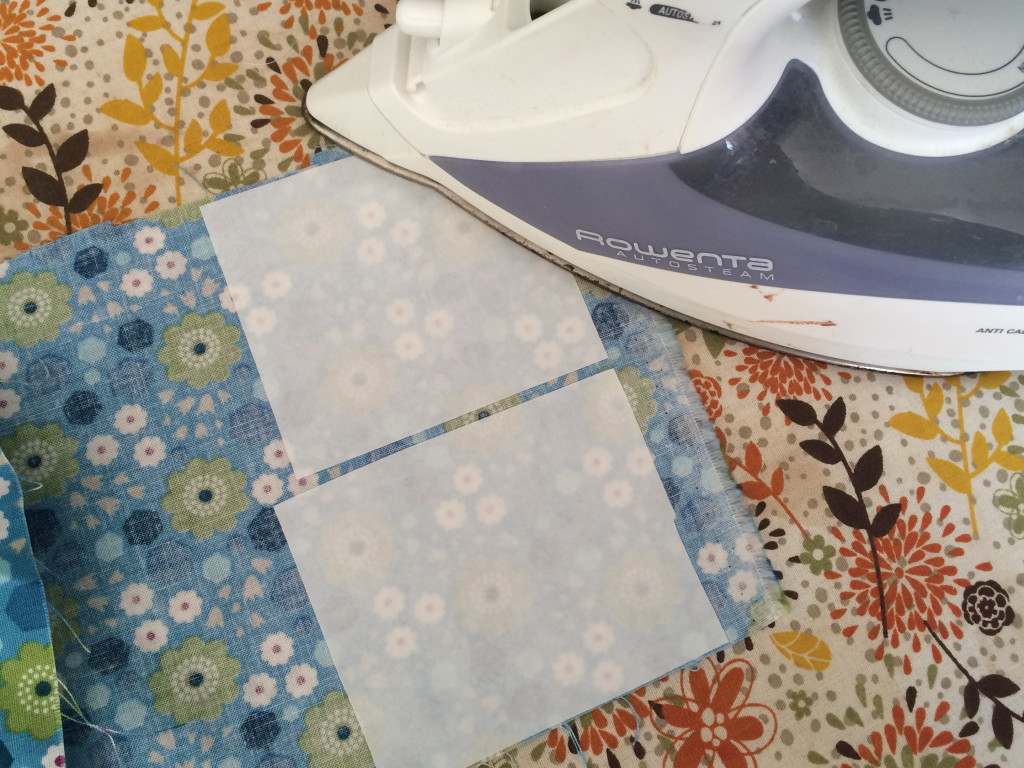
Penny Rose Strawberry Jam Quilt

strawberry jam quilt. 9

I’m happy to share this delicious little quilt called Strawberry Jam. Living in Southern California, it’s strawberry season all year round! This quilt reminds me of fun times spent in the kitchen making popovers, biscuits, rolls, and anything else we could bake to hold our fresh strawberry jam on! YUMMY!! The Shabby Strawberry fabric line is brand new from Penny Rose. Let’s get started!

strawberry jam quilt 24

First make sure you have some hot buttermilk biscuits and fresh strawberry jam to keep you going while you make the quilt 🙂  For the full instructions hop on over to the Penny Rose Blog!!

strawberry jam quilt. 7

I used my Sizzix Fabi machine to die cut the jam jar. This die is called Jar #2 by Lori Whitlock. It’s the cutest!

Screen Shot 2016-01-26 at 9.50.40 PMIron  Heat n Bond Lite to the back of the strawberry fabric. Then run it through the Sizzix Fabi with the jar die. Peel off the backing and heat set it into place. I did the same thing with the jar lid, it’s part of the die. strawberry jam quilt. 16

Stitch around the jar and lid with gray thread.

strawberry jam quilt. 26

I love how SWEET it turned out! strawberry jam quilt. 22

Strawberry Zipper Pouch Tutorial

strawberry zipper pouch tutorial deco foil

There is something about strawberries that makes it feel like summer!  This fun zipper pouch is the perfect addition to your warm weather outings!  Pack it with little snacks for the kids, keep sunscreen and chapstick in it, or keep emergency items like sewing kit and first aid kit handy in the car.  If you know me, you know I love zipper pouches!

IMG_7063

Supplies:

Scraps of fabric for front of bag – I used Briar Rose, one of my favorite fabric lines ever
1/4 yard natural cotton/linen blend for outer bag
1/4 yard lining
Heat n Bond® Fusible Fleece
Heat n Bond® Ultra
Heat n Bond® Lite
Pressing Sheet
iCraft® Deco Foil™ Pink Melon Transfer Sheets
11″ lace trim
14″ or longer zipper
Strawberry Pattern

Begin by cutting the fabrics according to this cutting guide: (you will also use this diagram for piecing guide)

strawberry zipper pouch

Trace the strawberry and stem on the Heat n Bond® Ultra. (We also recommend using our NEW iCraft® Deco Foil™ Hot Melt Transfer Adhesive Sheets)

IMG_6817

Cut out the strawberry and iron it to the white 5″ square according to the instructions.  Let cool completely.  Peel off the backing paper.  Next take the Pink Melon Deco Foil and place it over the Heat n Bond® strawberry.  Place a pressing sheet on top of the foil.  WITH A MEDIUM HOT IRON (HOT ULTRA HOT) press for about 15-20 seconds.  I wanted a slightly vintage look so I pressed for a shorter amount of time. (for a full Deco Foil™ look…press for 30 to 40 seconds and then allow to completely cool before removing the liner.)

This makes it so some of the foil peels off.  Let it cool then gently peel off the remaining Deco Foil.  The picture below is the same technique but with a different project:

IMG_7037

Trace the stem on the Heat n Bond® Lite.  Cut 1/4 ” around the stem.  Iron it to the wrong side of the green fabric.  Then cut around the stem pattern.  Peel off the backing paper. Position the stem.  Place the pressing paper over the strawberry to protect the Deco Foil.  Heat set the stem in place.  Top stitch around the stem.

IMG_6822

Once the strawberry is complete, sew the fabric pieces together in the layout diagram.  Press the seams – DO NOT press the Deco Foil strawberry.  The bag front should measure 8″ x 11″.  Iron the HeatnBond® Fusible Fleece to the wrong side of the bag front and the bag back.  Again, put a pressing paper over the strawberry to protect while fusing the fleece.  You can quilt the bag pieces or leave them as is.  Add the accent lace along the bottom seam.

IMG_7078

To insert the zipper, follow THIS tutorial.  It’s my friend’s and it’s the easiest to follow, and it comes out perfect every time!     IMG_7066

Wouldn’t this made a super cute gift?

Theme Print Zipper Pouch Tutorial

theme print zipper pouch tiger lily

Today I am sharing something I LOVE!!!  Zipper Pouches!  I can’t have enough of them and I love to give them as gifts.  In fact, the ones pictured in this tutorial is actually what I gave my nieces and nephew for Christmas.

zipper pouch tutorial 21 
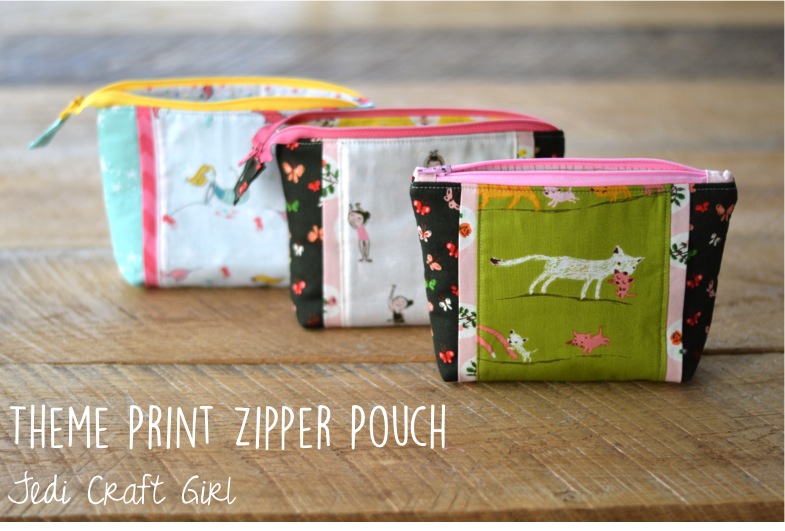
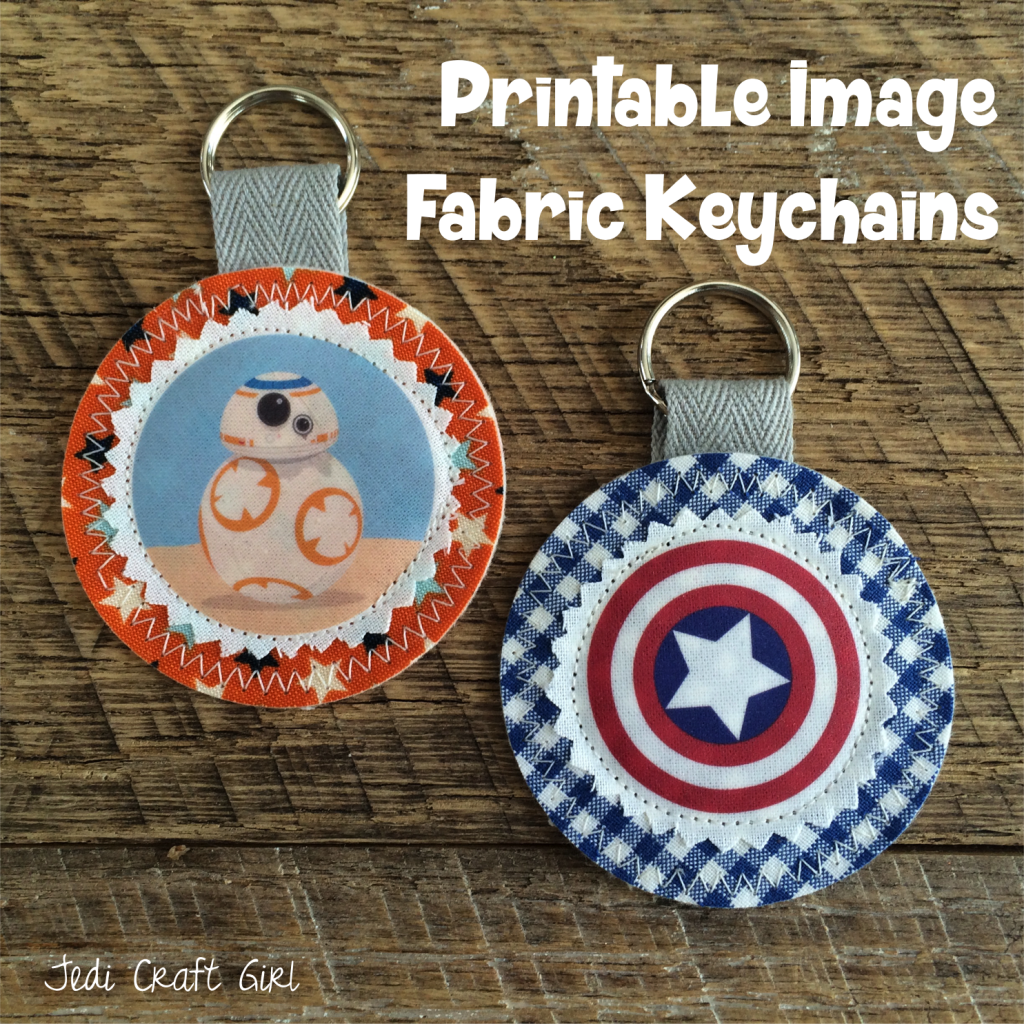
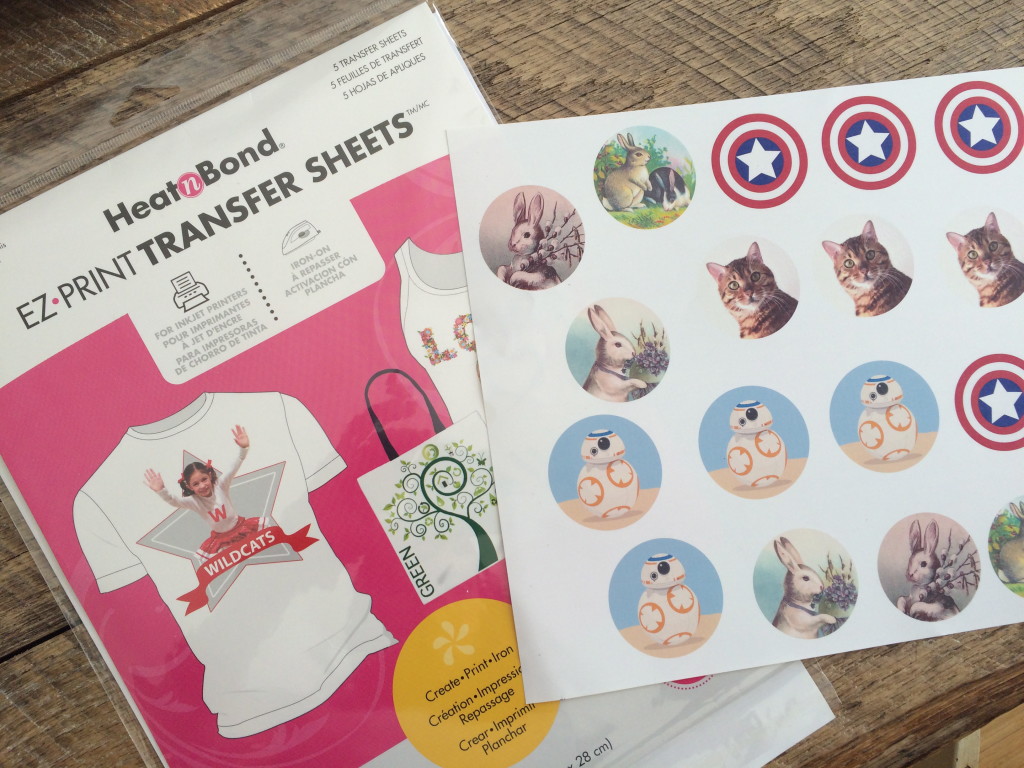
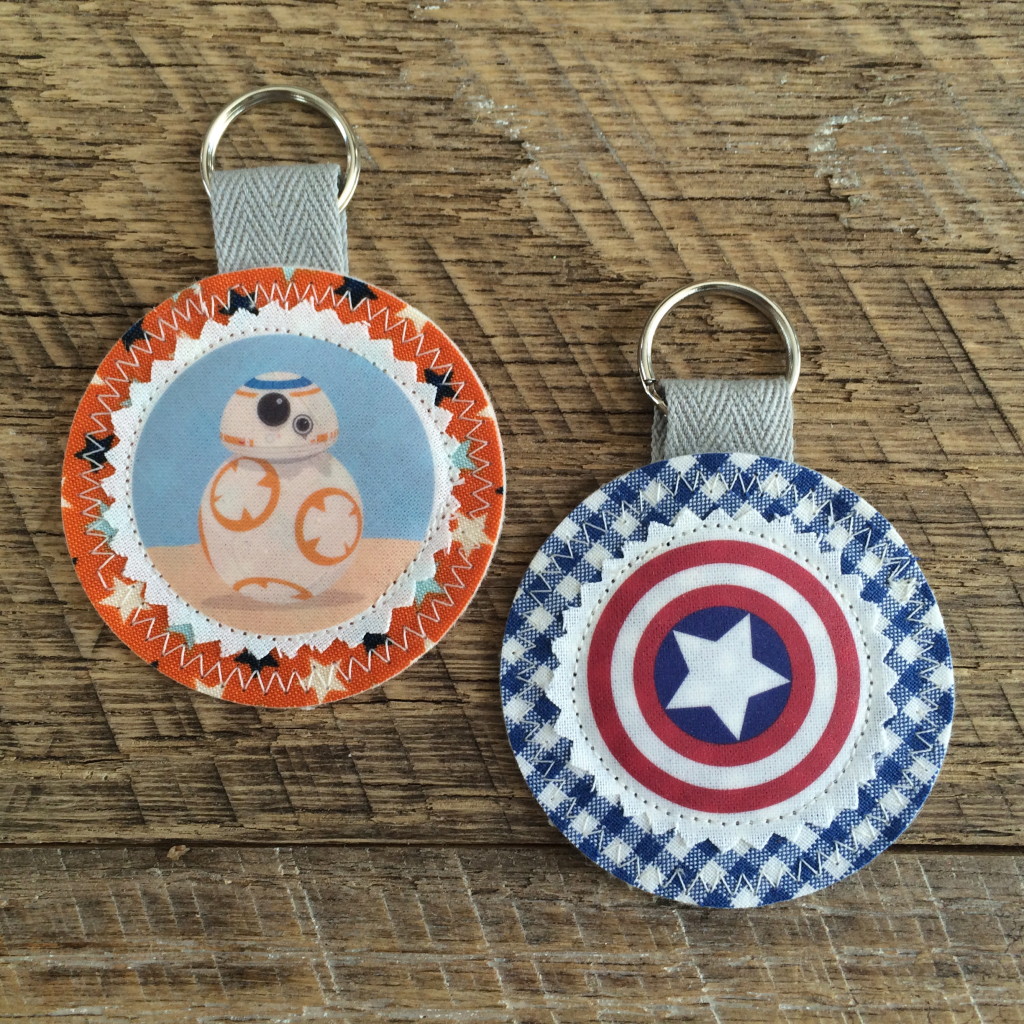
I have created this pattern so you can use your favorite theme print fabric and tailor it to who you are giving it to.   I even have Star Wars version!!  Let’s get started!!

IMG_2115-1024x768

Supplies

1/4 yard outer bag fabric

1/4 yard lining fabric

1/8 yard accent strips

small scraps for theme print 5″ x 6 1/2″

Heat n Bond fusible fleece

Spray n bond

12″ or longer zipper

cutting instructions
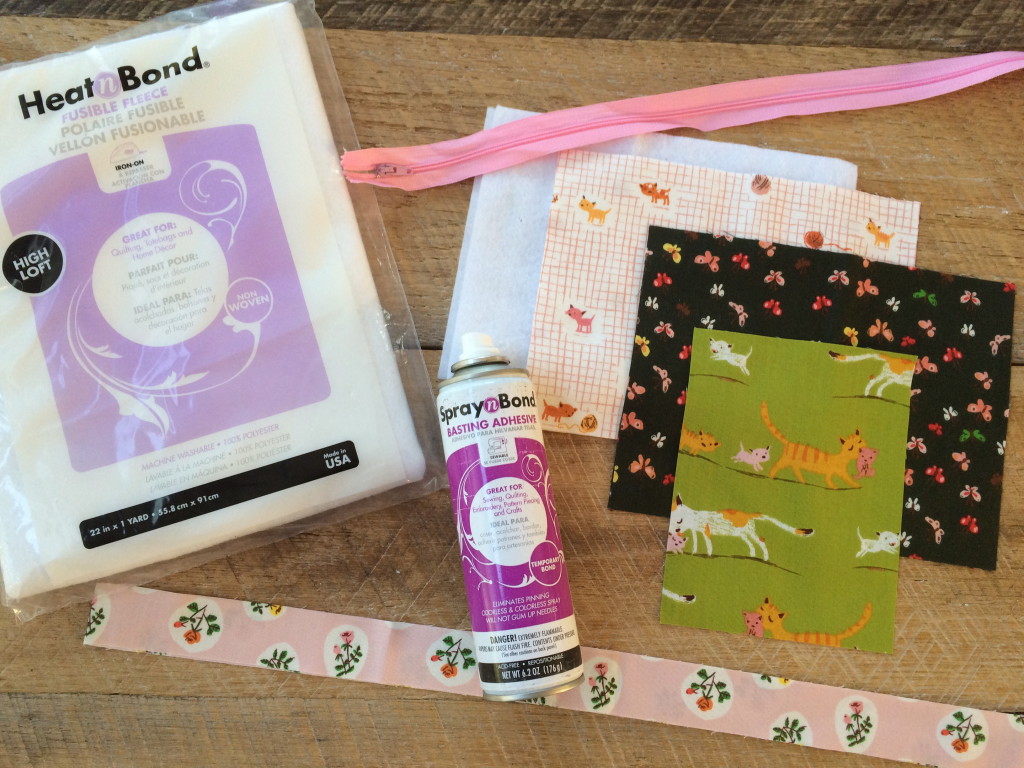
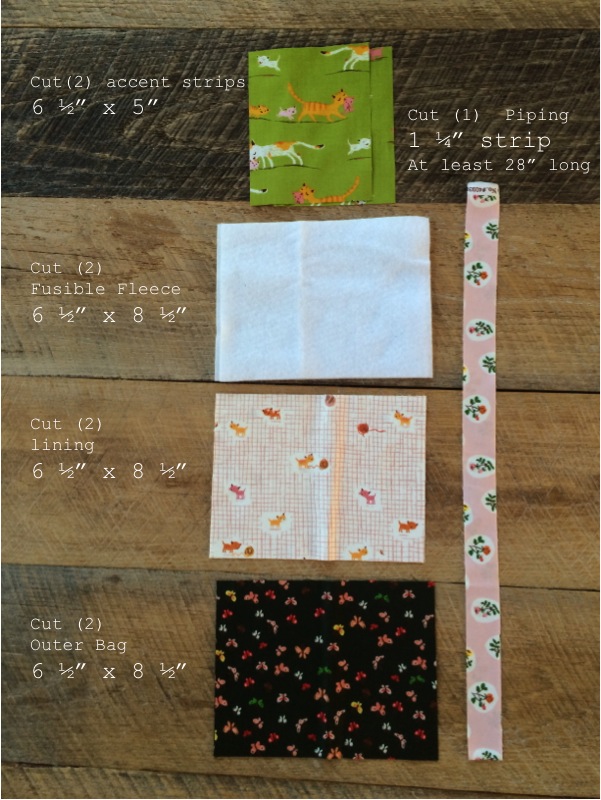
Cut the pieces according to the above cutting guide.

IMG_2123

Fuse the heat n Bond Fusible Fleece to the wrong side of the (2) outer bag pieces.

IMG_2119

Cut the 1.25″ accent strip into (4) 6.5″ x 1.25″ strips. IMG_2122

Press the accent strips in half lengthwise.
  IMG_2124
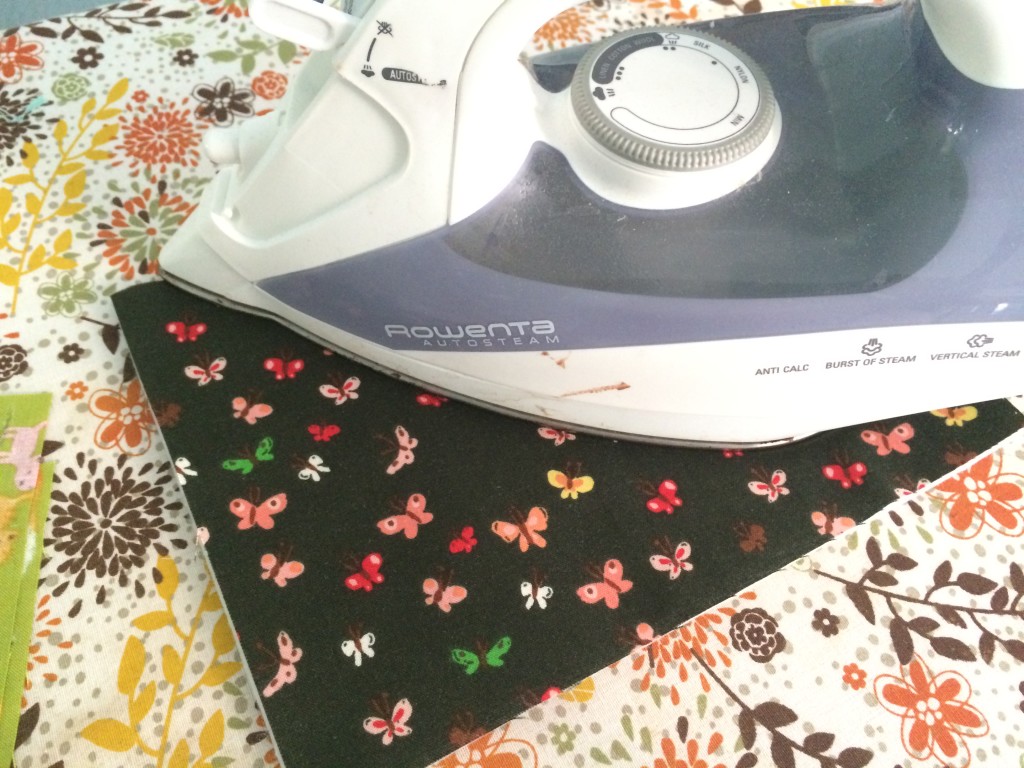
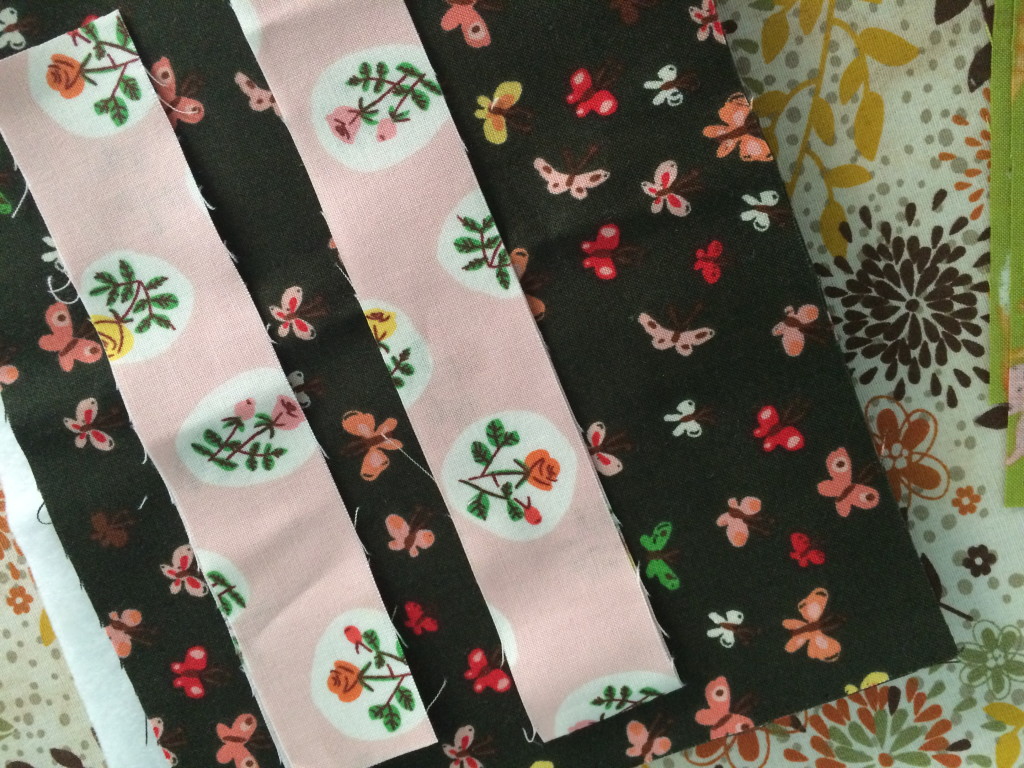
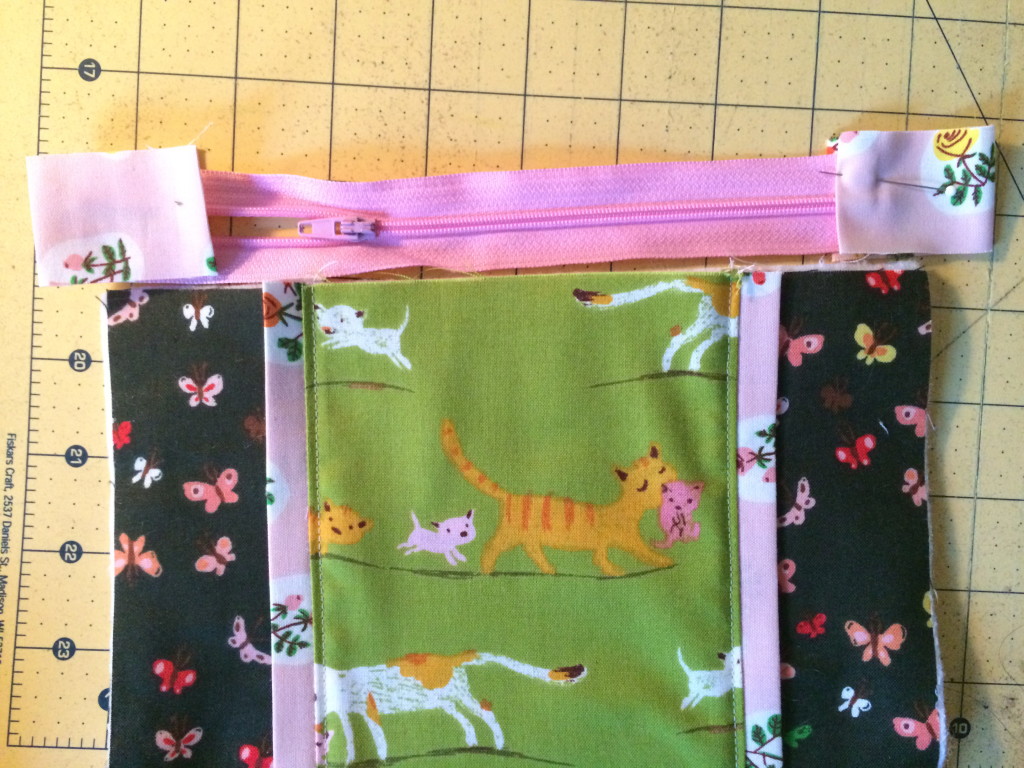
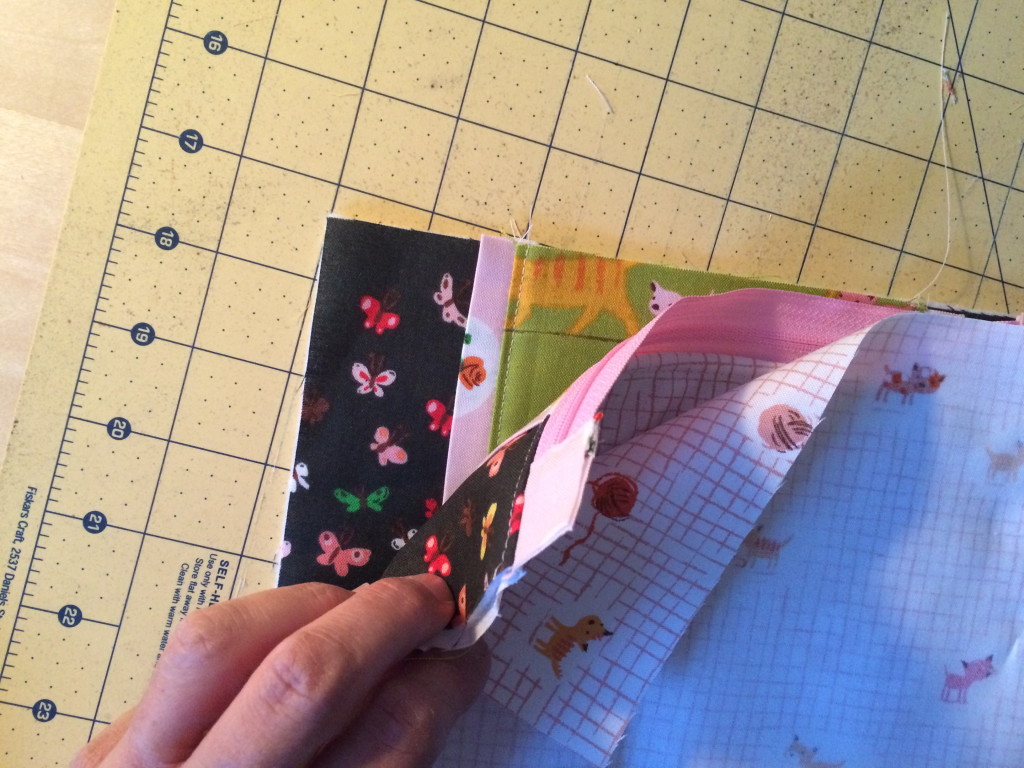
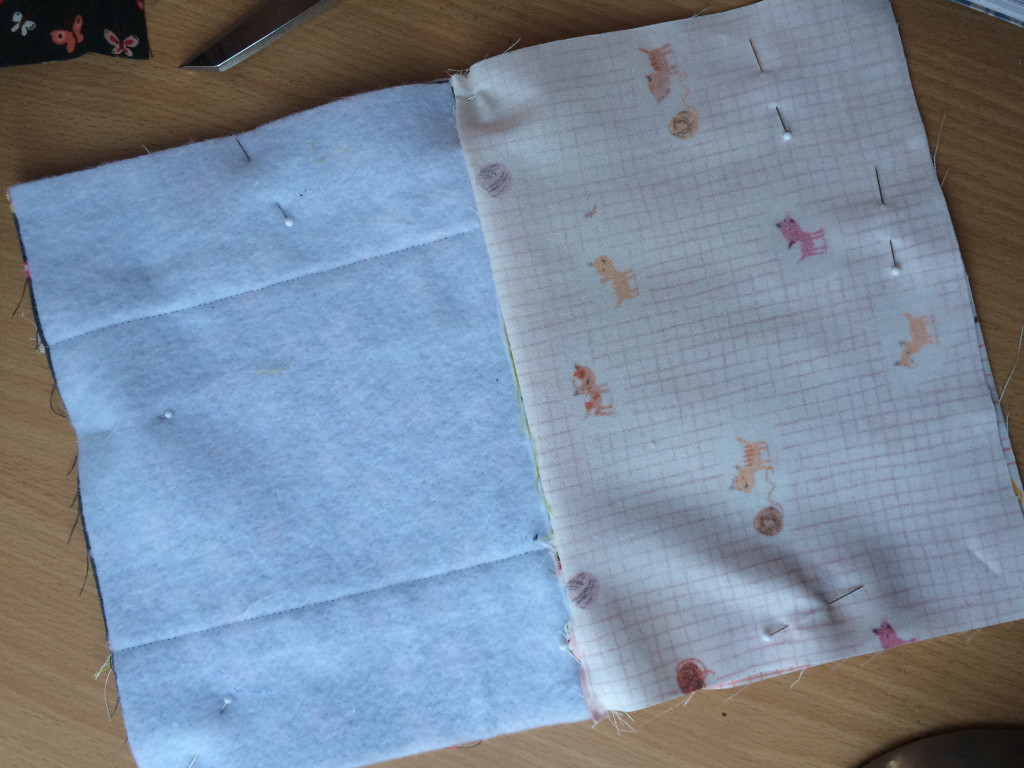
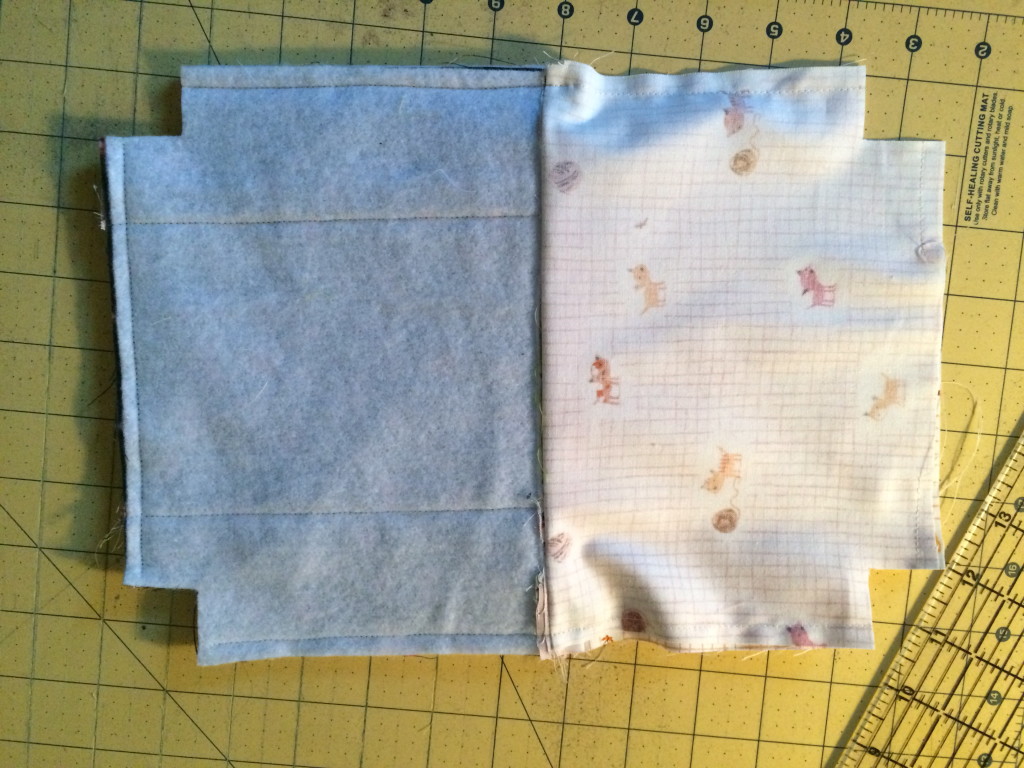
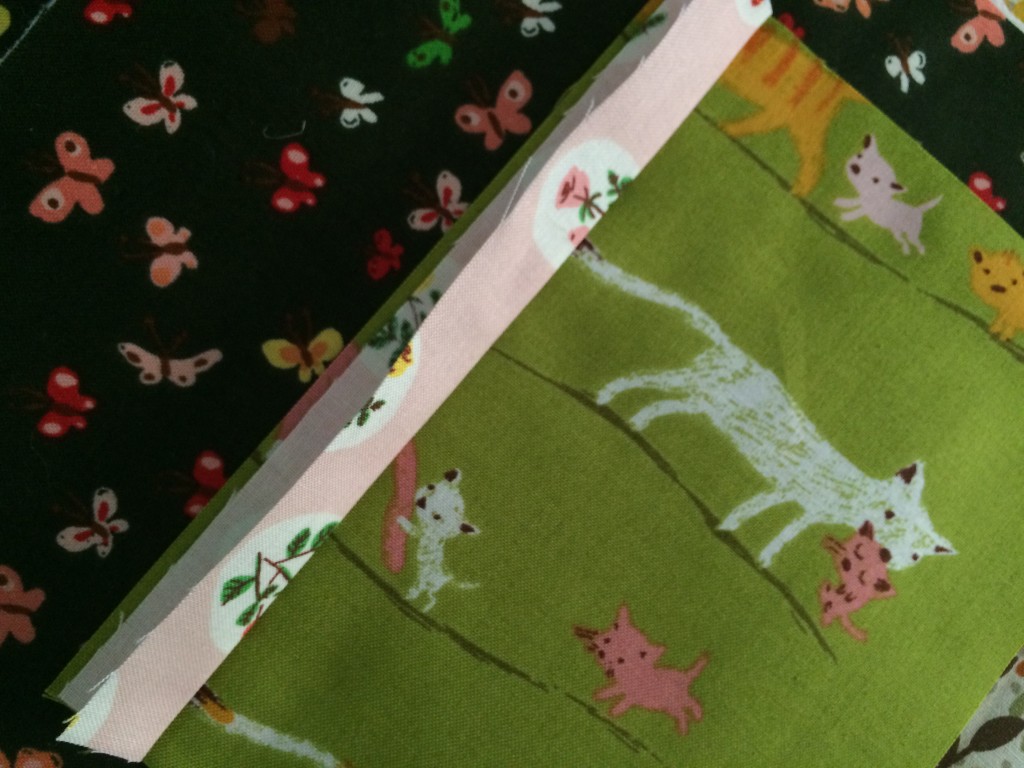
Align the raw edges with the edge of the theme print fabric and sew a 1/4″ seam.  Do this to all (4) sides of the (2) theme print pieces. IMG_2125
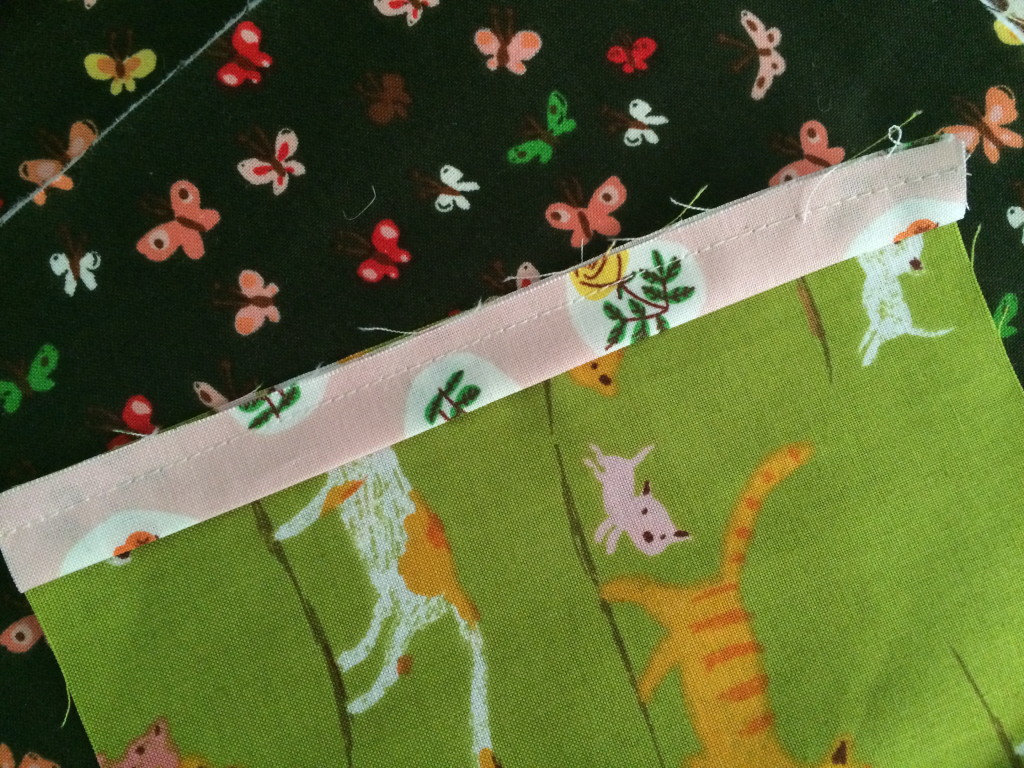
Press the accent strips so the seam allowance is toward the theme print. IMG_2126

Using the Spray n Bond (temporary basting spray) spray the theme print piece and position it on the outer bag, centering.  Topsitich along the seam to finish.

Inserting the Zipper

Note: This tutorial is for a zipper with zipper tabs. You can find more instructions HERE if you need a little extra help.  You can also use the”Open Wide” zipper method by clicking HERE .  I used both.

IMG_2127

Using the extra from the 1.25″ strip, cut (2) pieces 1.25″ x 5″.  Press them in half, and then press the raw edges under 1/4″. IMG_2128

Lay the zipper out positioning it on top of one of the outer bag pieces.  Position the tabs so they overlap each side of the bag 1″.  Cut the zipper to fit inside each tab.  Pin in place. IMG_2129

Sew 2 times along the edge of the tabs as pictured above. IMG_2130
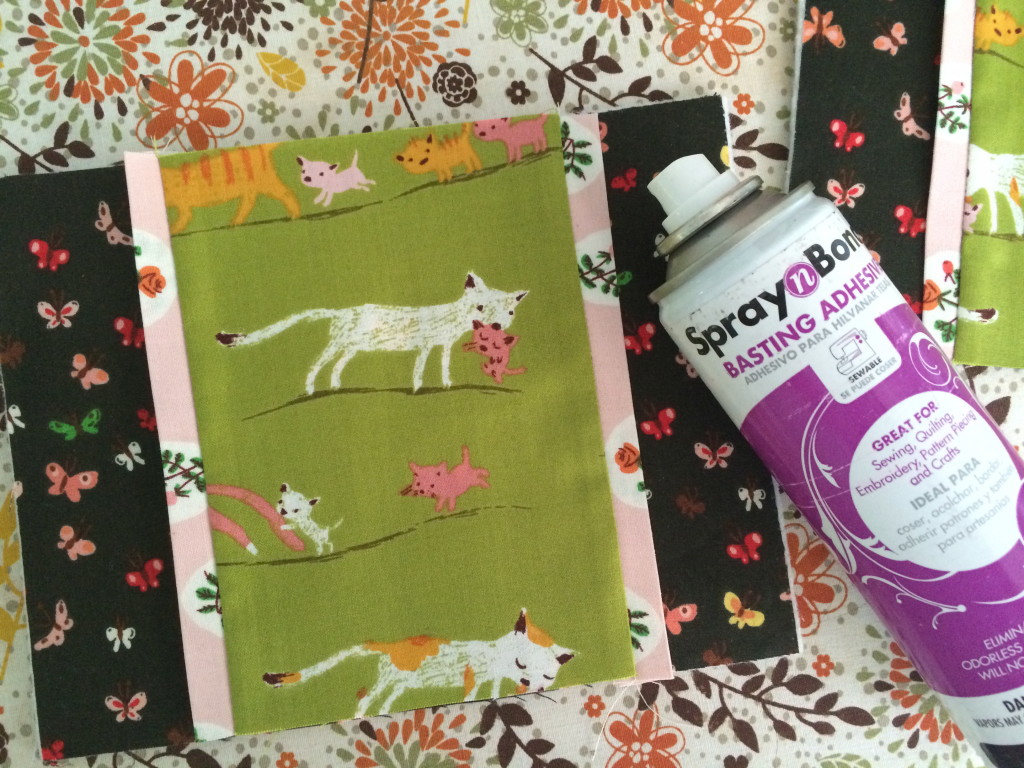
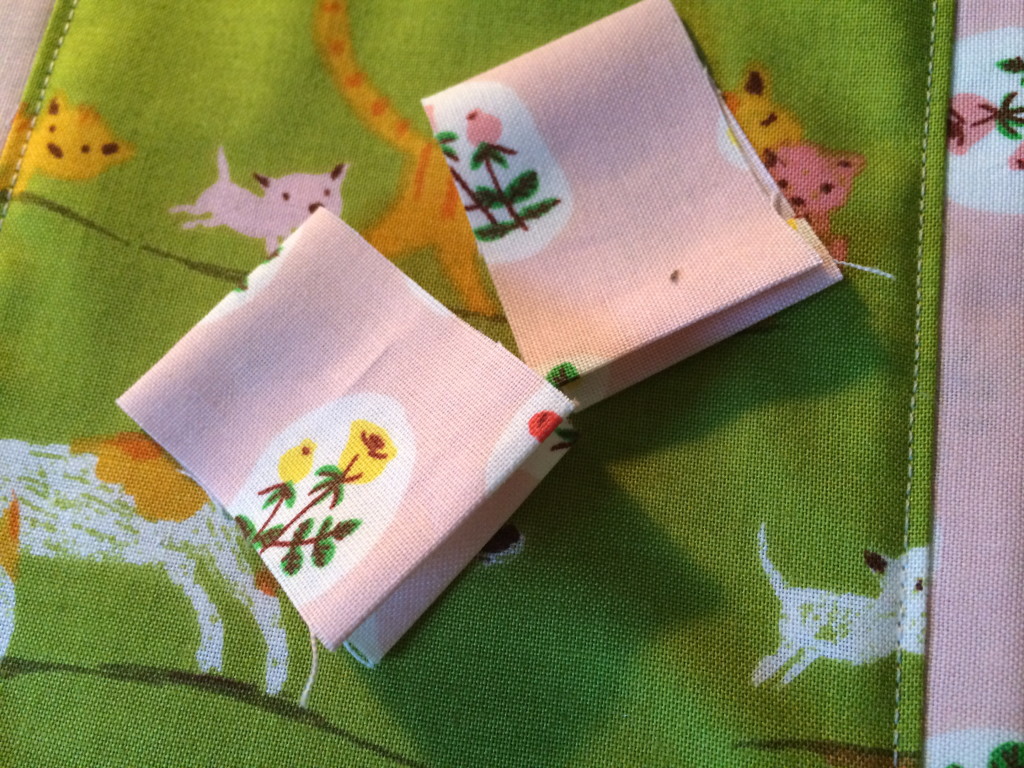
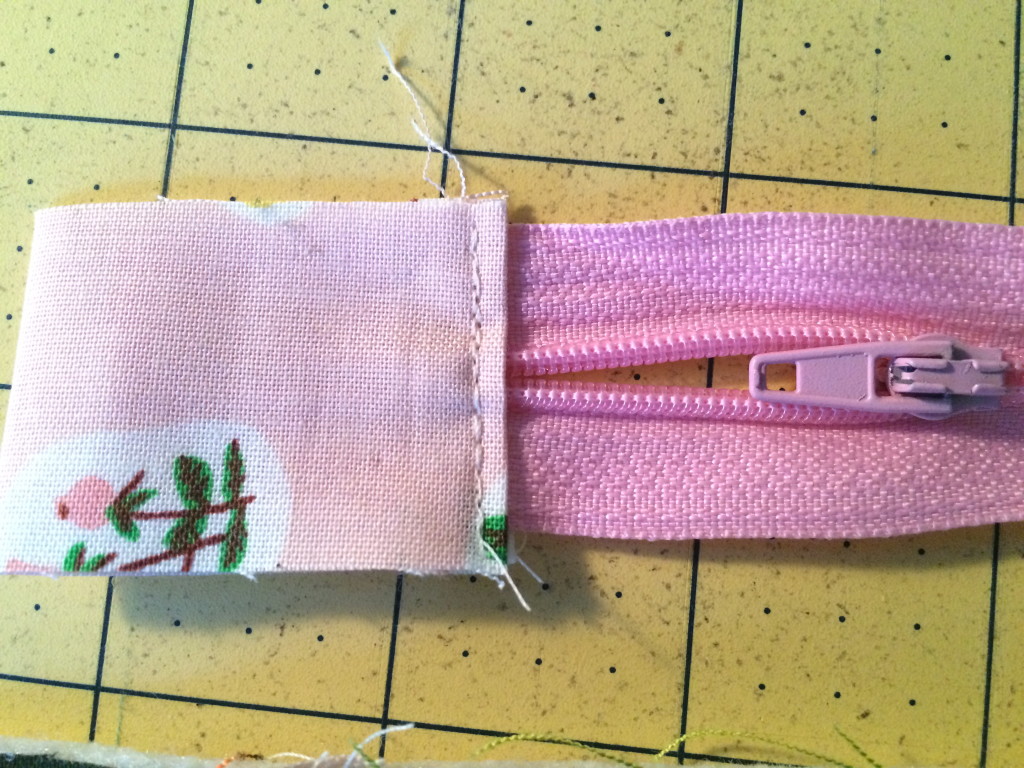
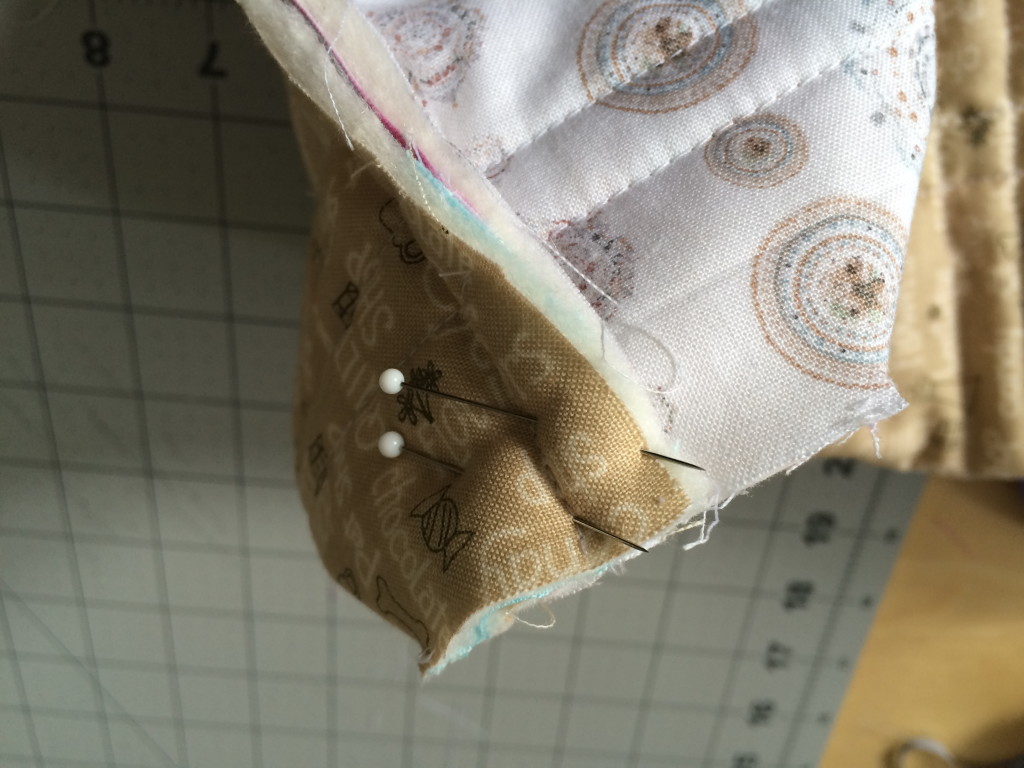
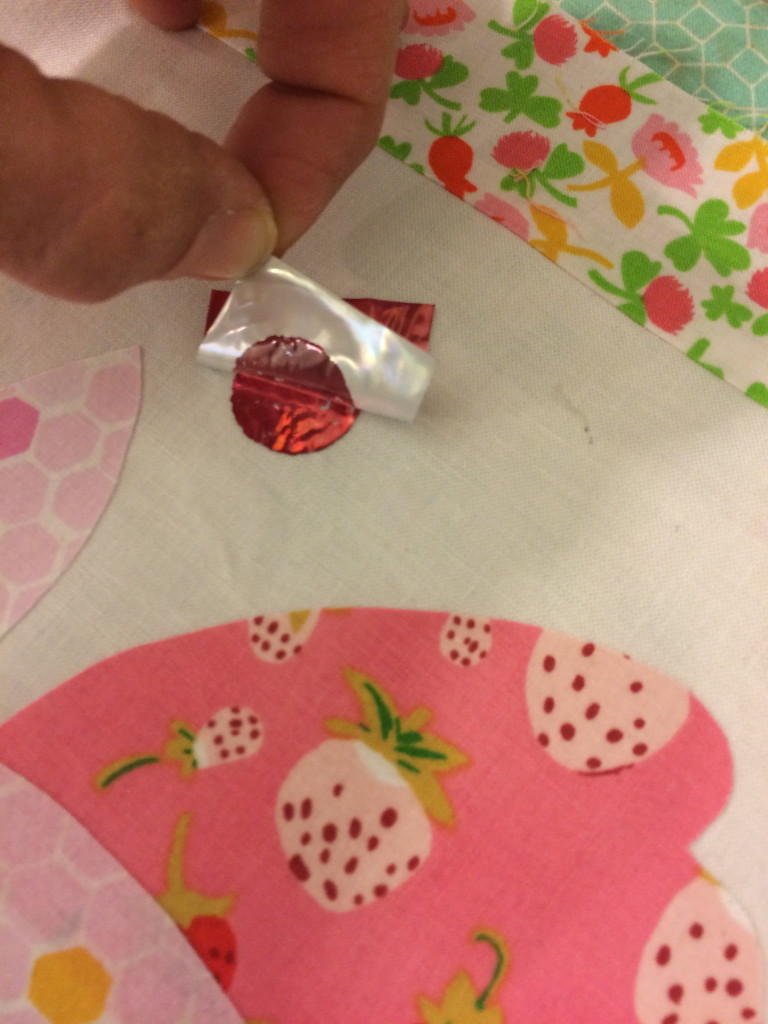
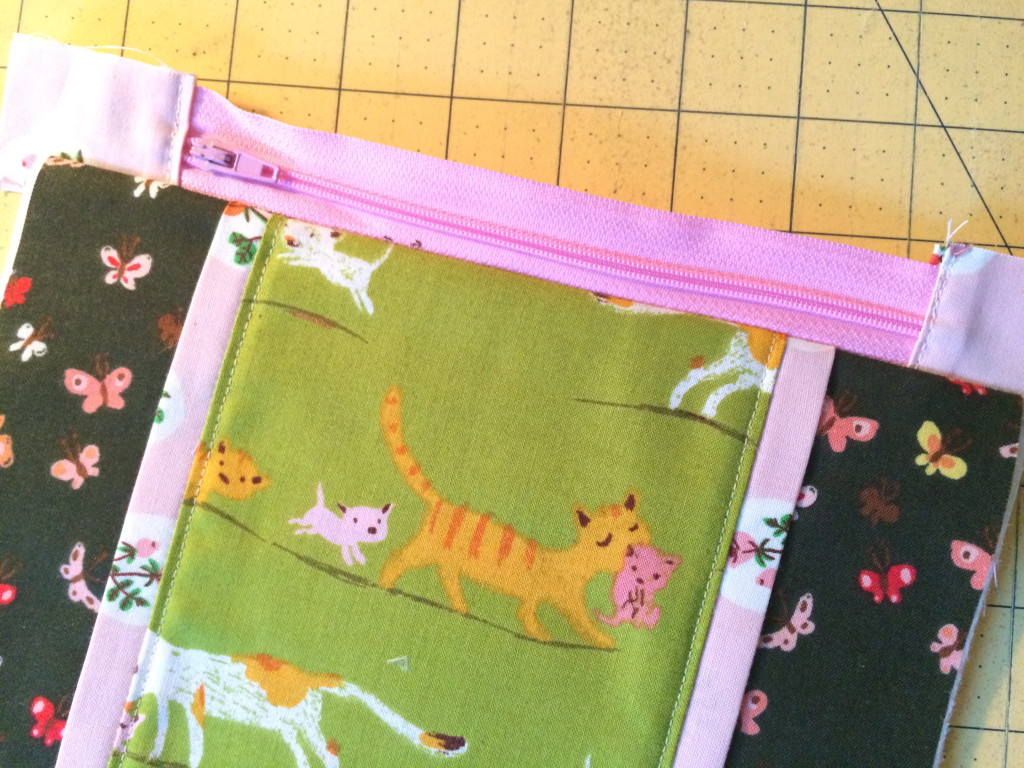
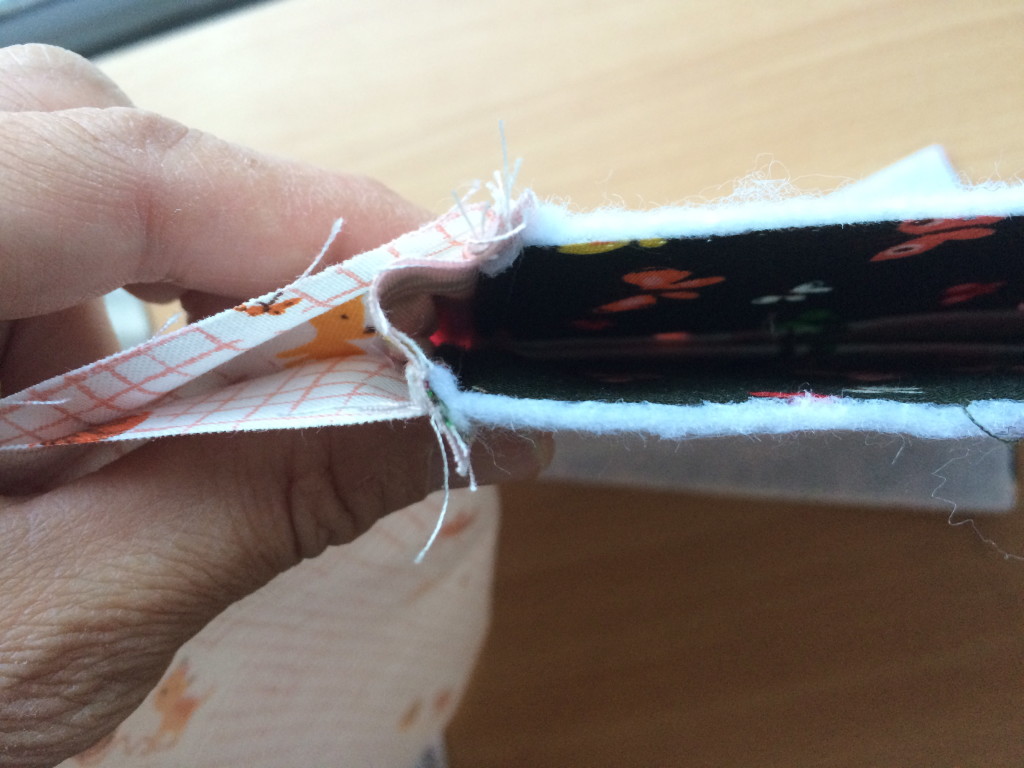
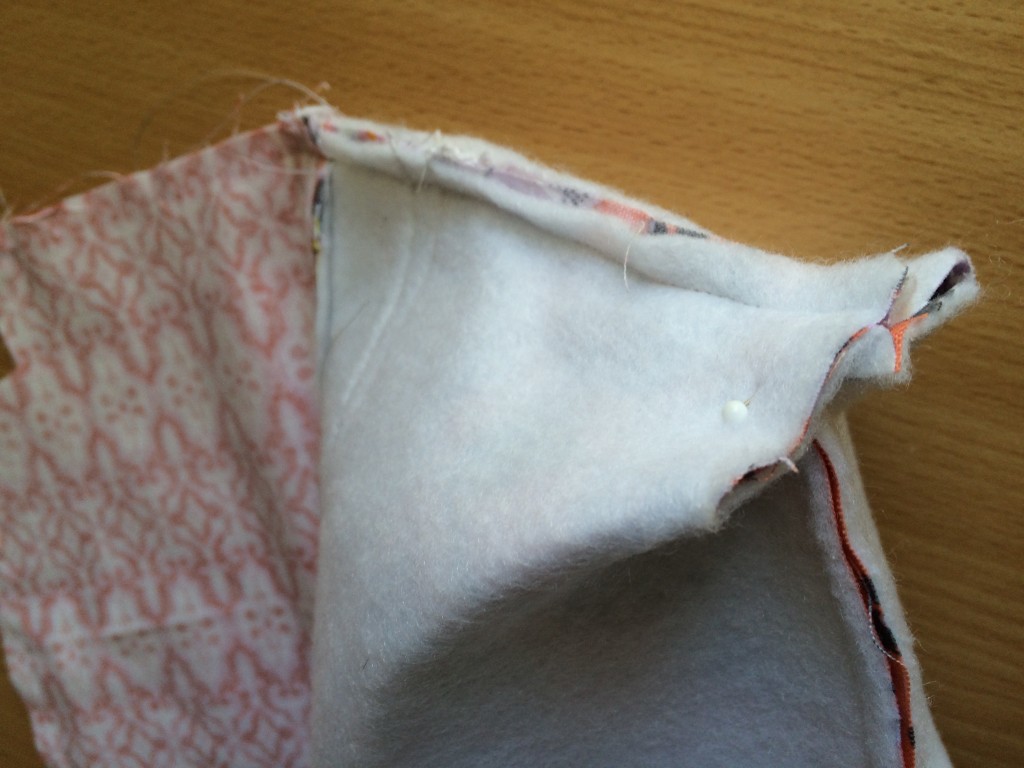
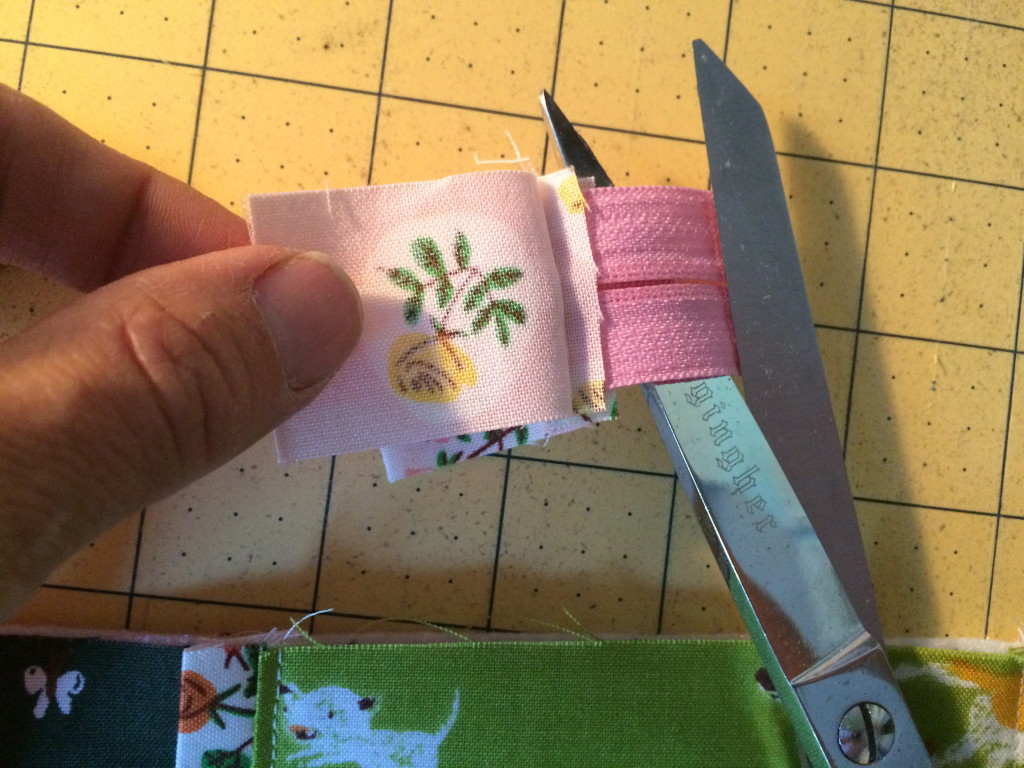
http://www.jedicraftgirl.com/wp-admin/post-new.phpCut along the fold of the zipper tab and cut away the excess zipper, leaving about 1/8″ of zipper.  This makes it so there is no bulky zipper in the side seam of the zipper pouch.
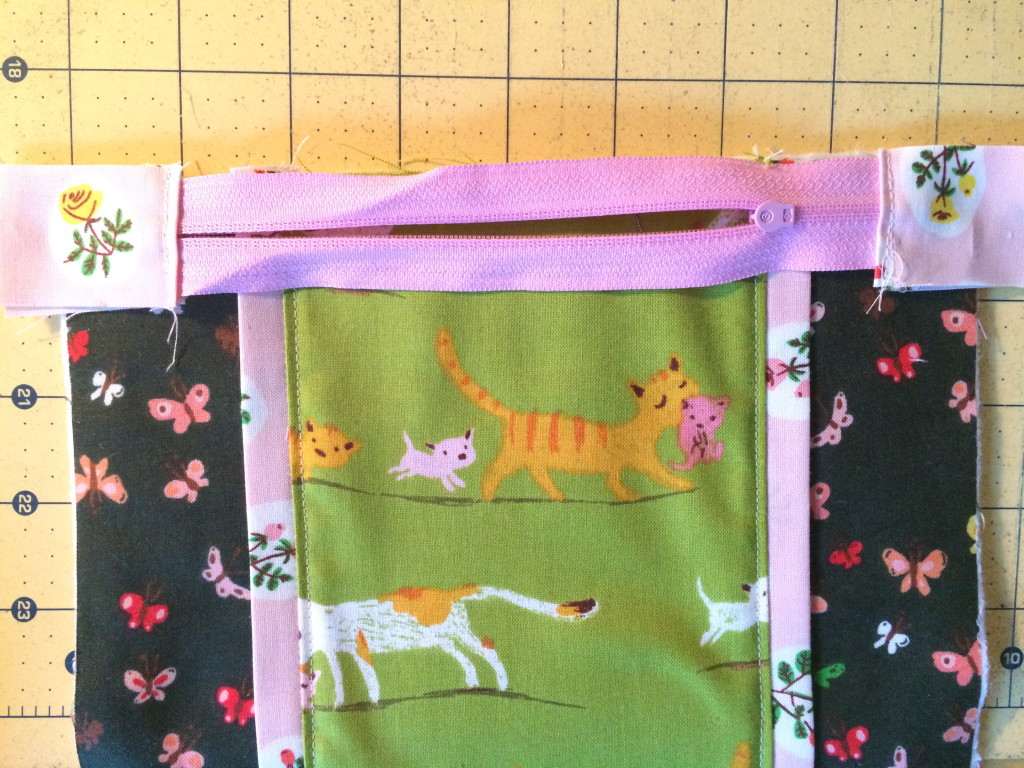
 IMG_2131

Position the zipper right sides together with the outer bag piece.  Notice the zipper tabs are hanging over, not to worry, we will square up in a minute. IMG_2132

Next position one of the lining pieces right side down on top of the outer bag with zipper in between.

IMG_2135

It should be layered together like the picture above.  Pin and sew 1/4″ seam along the top edge using a zipper foot.  Trim off the excess zipper tab so it is square with the outer bag.IMG_2133

Press the outer bag and lining piece so it looks like the above picture.

IMG_2134

Topstitch along the edge (above).  Then repeat with the other side of the zipper, aligning the pieces just like we did above.
IMG_2137

This is how it should look once the zipper is inserted (above).

Finishing the Bag

IMG_2141

Making sure the zipper is open, match the lining pieces together and the outer bag pieces together and pin all the way around.  IMG_2138

Make sure to push the zipper tab toward the lining piece and pin, matching the zipper seams.  Sew all the way around the zipper pouch using 1/4″ seam.  Leave a 3″ opening at the bottom of the bag for turning.  IMG_2144

Cut a 1″ square notch out each corner.  Openzipper-pouch-tutorial-27-1024x768

Open each notched corner and match seams.  Sew a 1/4″ seam, backstitching to start and stop.  Turn right side out and topstitch the opening closed.

zipper pouch tutorial

Your done!  You can see from the photo that I used a zipper tab on one and then the open wide zipper method on the others.  It’s just preference.

zipper pouch tutorial 9

For my nieces I am including a cute nail file, an EOS, and some yummy smelling hand sanitizer.  You could also include a small perfume, lotion, gum, notebook and pen.  One of my nieces is a ballerina and I know she’s going to love this darling fabric by Heather Ross!

zipper pouch tutorial 2

My other niece loves the ocean and fish so this Saltwater fabric by Riley Blake will be just perfect!.

zipper pouch tutorial 3

For the boys (which are always harder for me to buy for) you can include a small flashlight, deck of cards or other small game, PEZ dispenser or candy, small action figure or car.  I also purchased a whoopee cushion to include, just to drive my sister crazy!!

zipper pouch tutorial 5

zipper pouch tutorial 8