Tricks and Treats Halloween Tote Bags

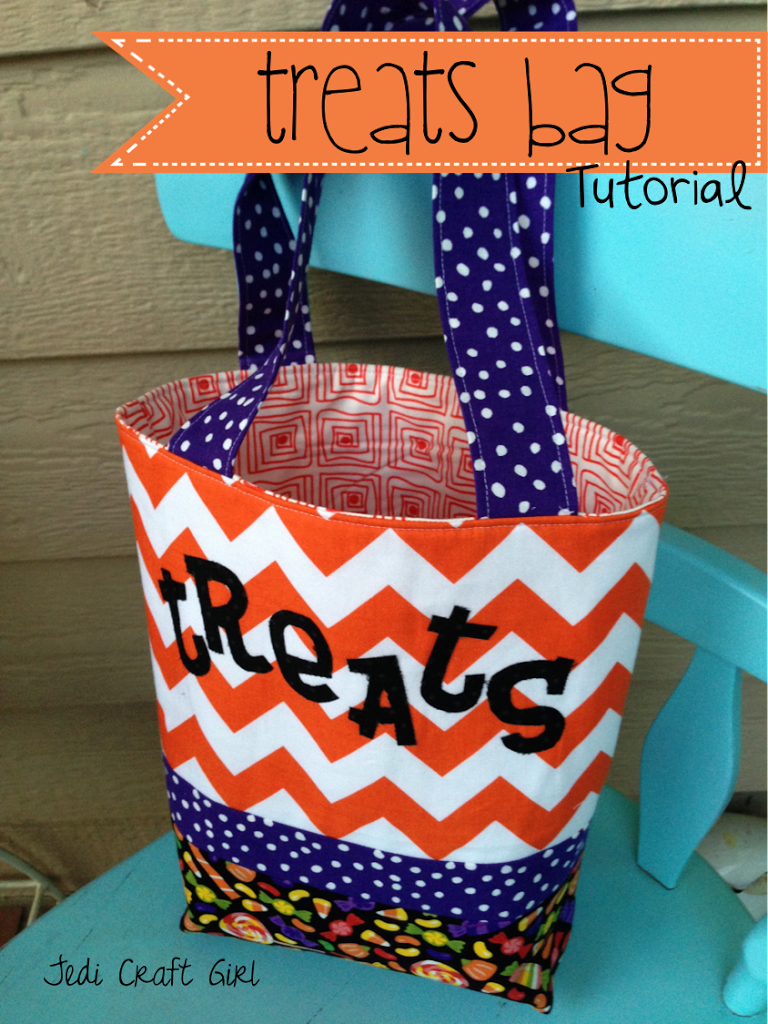
I love sewing for Halloween and can’t seem to get enough Halloween fabrics!  My tutorial for these fun bags is over at the Therm O Web Blog.   I used Fusible Fleece to make these bags – it is quick and easy and it makes the bags soft.  I love that the bags can stand up on their own and don’t flop over.  They are perfect for carrying LOTS of CANDY!!!
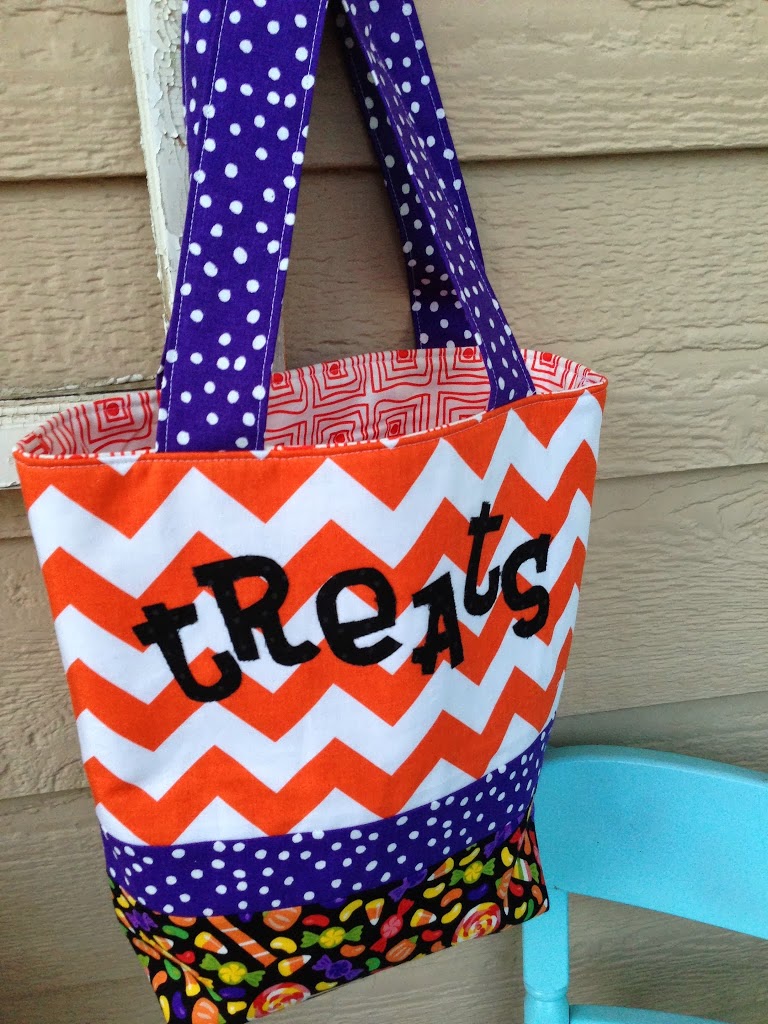
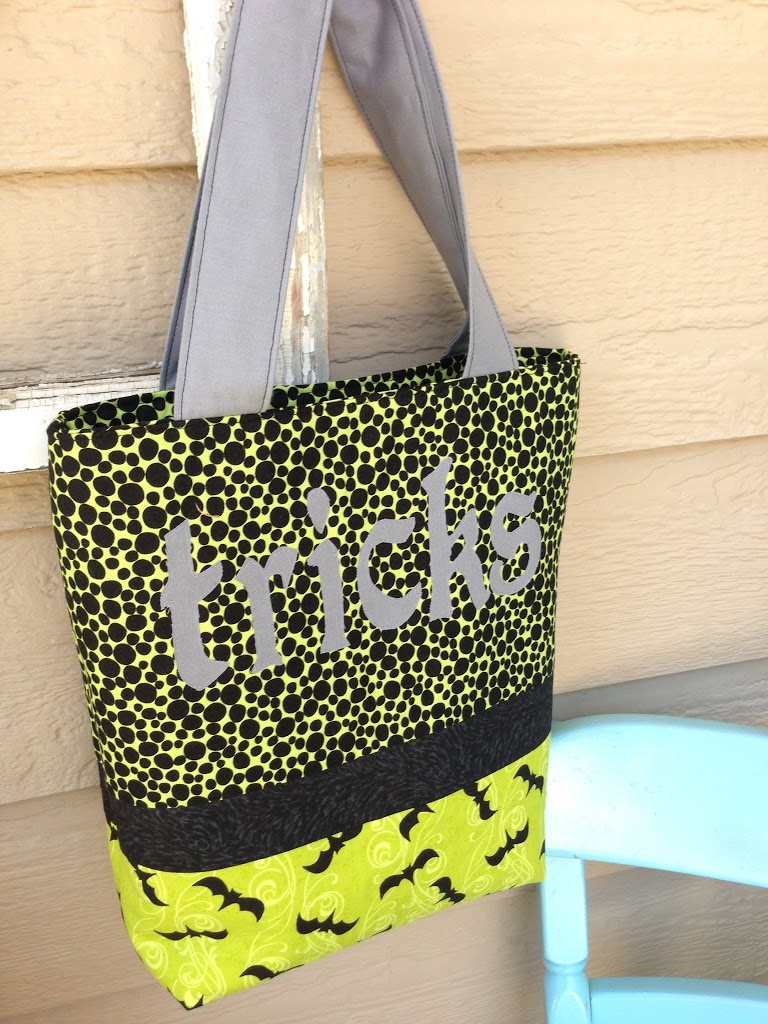
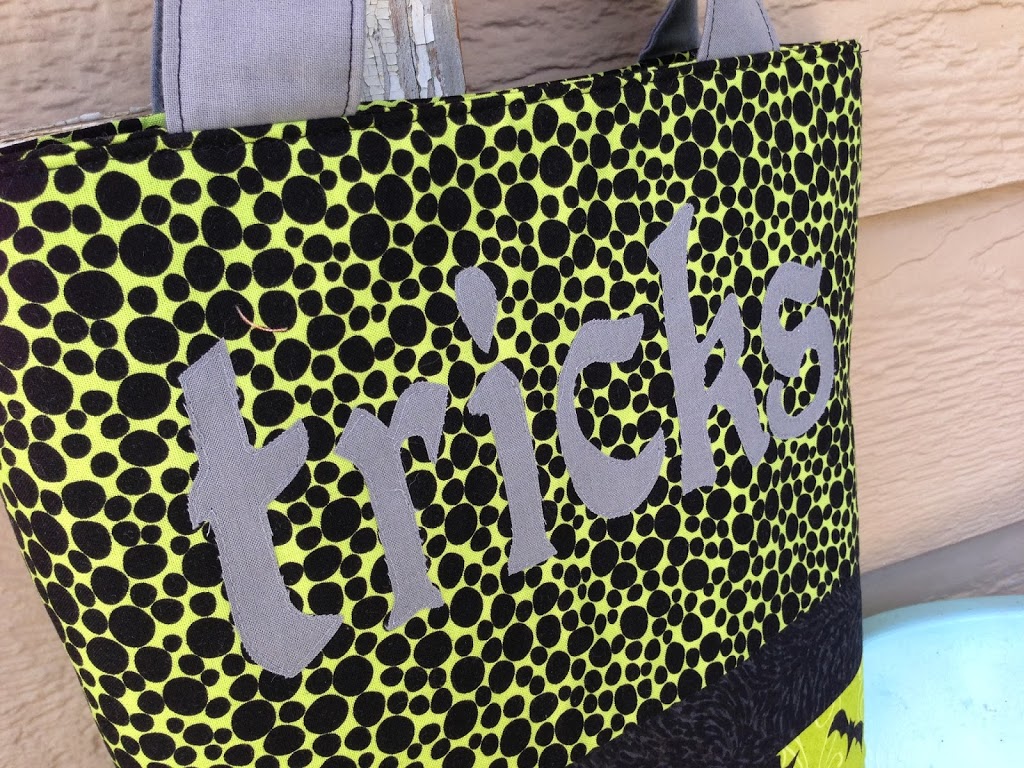
I designed these “Tricks” and “Treats” bags for the Therm O Web fall advertising campaign!  I am pretty excited!!!  
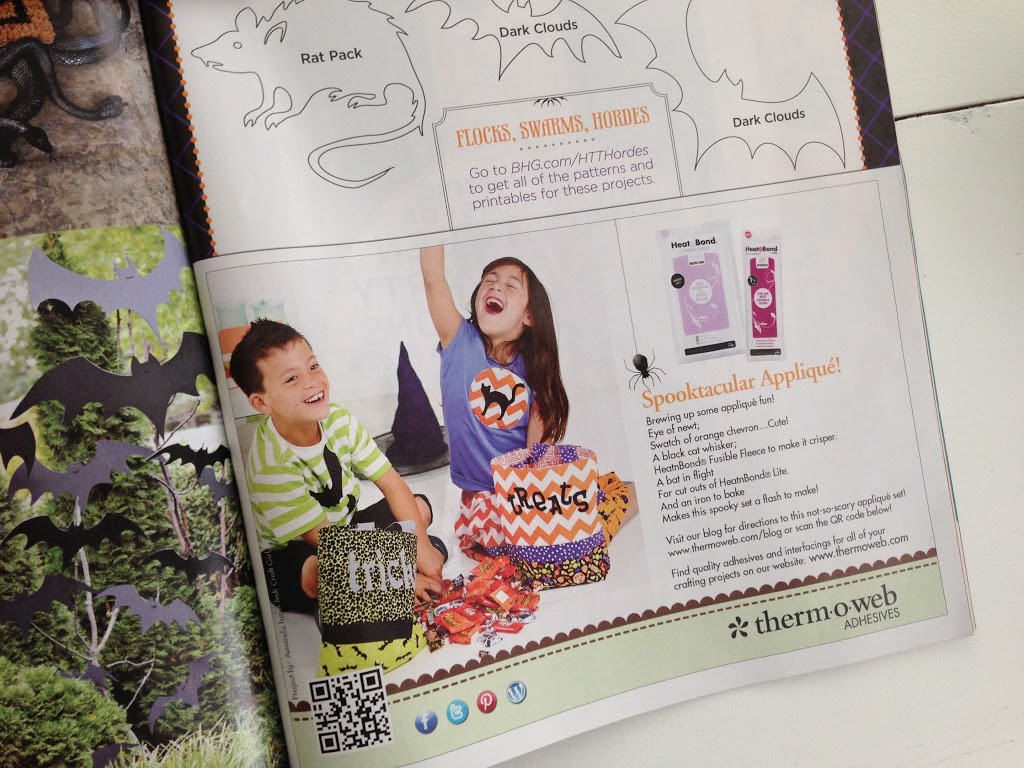
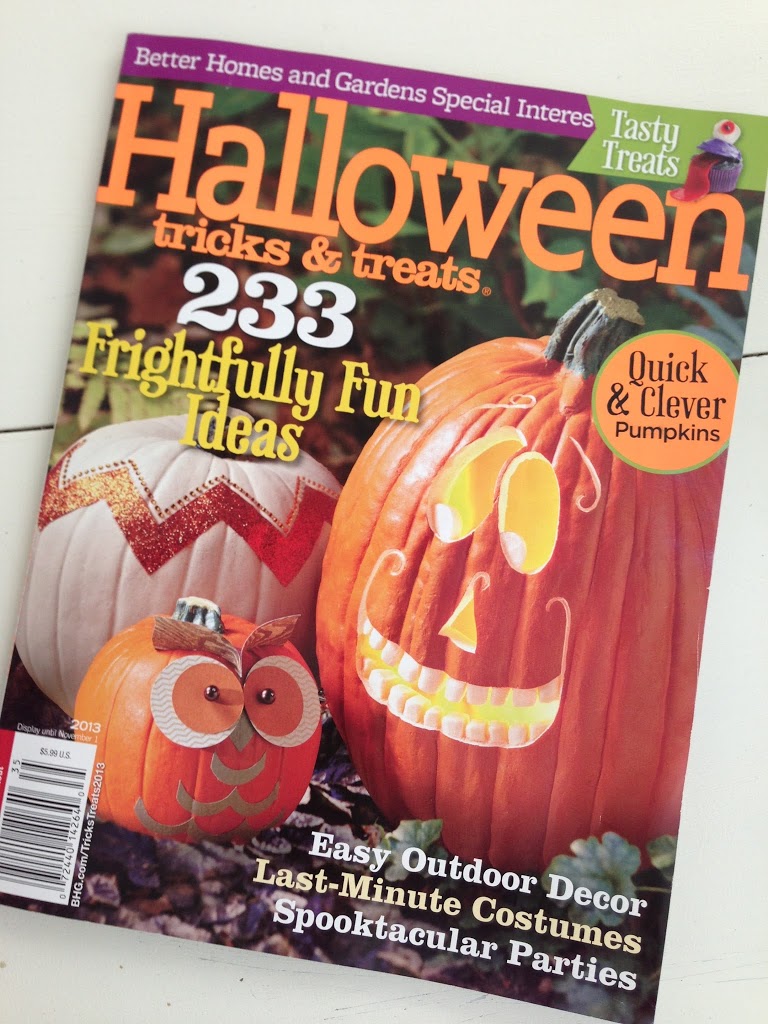
 I found the ad in this magazine – it has such cute ideas!!!
For more Halloween Tutorials click :

Amanda

Spooky Potion Throw Pillow

I can’t believe how fast October is flying by!  There are so many projects I want to make, and so little time!  I thought this pillow was super fun.  The spooky bottles are from Blend’s Spooktacular line of fabric.  The tutorial is over on the Therm O Web blog today!

Amanda

Halloween Applique Art

Today my Halloween Appliqué Art Tutorial is over on the Therm O Web Blog!  This project was super fast and super easy!  This would also be a fun project to let your children design!

Amanda

Halloween Table Square Tutorial

 Today I am a guest blogger over at Ginger Snap Crafts.  I am sharing this quick and easy tutorial for a cute Halloween table accent.  I can’t get enough of orange chevron!!!

Amanda

Halloween Pillow Tutorial

When the calendar turned September, I was wishing so badly that it was still July.  How I love the summer!  Today is October 1st and I have decided to deal with the fact that time is moving super fast!  Bring on the Halloween!  Pumpkins, owls, candy, costumes, bats, black cats and everything else!
My summertime throw pillows were not matching my Halloween decor.  I decided to make Halloween covers for my current pillows.  This one only took about 30 minutes start to finish.  Here’s how you can make one:
Supplies:
Iron- on transfer paper (purchase at Michaels, Wal Mart, etc. in the computer paper section)
Graphic to print
(2) 17″ squares of light colored canvas, duck cloth or other heavy fabric
1 yard of super jumbo ric rac
16″ pillow form
To begin, you need a graphic to print on the iron-on transfer paper.  If you are artsy you can make your own.  I went to Etsy and searched “Halloween pillow iron-on” and 19 pages of vintage style Halloween graphics came up.  Most of them are only $1.00 and download instantly.  Super fast & cheep – yea!
Size the graphic to take up as much of the 8.5″ x 11″ paper.  Make sure to tell the printer to “Flip” the image or “Mirror”.  It needs to print out backwards 🙂

Trim about 1/8″ around the graphic

Follow the manufactures instructions.  Essentially use a dry, hot iron and press into place.  It takes a few minutes.  Then when it’s cooled, peel off the paper backing.  I love it already!!

I thought a little trim would be fun and still keep the pillow somewhat simple.  Pin the super jumbo ric rac into place.

When sewing normal ric rac, you just sew a straight line down the center.  I did this with the super jumbo ric rac and the points were still floppy.  With matching thread, follow the zig zag of the ric rac and sew into place like this:
You can finish the pillow using your favorite method.  I put an invisible zipper in the bottom.  Click HERE for the tutorial.  You could easily sew, turn and stuff the pillow or sew an envelope back.  I love how it turned out!!  It’s super spooky!!!

Amanda

Totally Boy Crazy Quilt Riley Blake Tutorial

My quilt pattern is on the Riley Blake Cutting Corners Blog today!  I had so much fun making this quilt.  The Boy Crazy line is soooo cute!!!  I love the retro cars, rocket ships, and submarines in the theme print.  This fabric is great for little boys AND big boys! 

I couldn’t resist doing a little appliqué.  You gotta love the yellow submarine!

With the leftover scraps I made a few zipper pouches,  because I always need more zipper pouches!  This one is for my son to keep in his backpack.  It holds his Epi-Pen, inhaler, and tissues.  (Poor guy)

 This one is for me.  I am a big Beatles fan 🙂

Amanda

Modern Pumpkin Pillow Tutorial

I love pumpkins, I love turquoise & orange, and I love houndstooth & chevron!  This pillow is all the things I love!!   Are you ready for fall?  We’ve had a HOT summer in Southern California!  Making this pillow totally got me totally excited for fall.   This pillow is quick and easy.  It’s being featured on the Therm O Web blog, click HERE for the tutorial.  I hope you enjoy it!!!

 I love the back of the pillow!  A spooky spider!

Amanda

DIY Soccer Banner Tutorial

This is my first soccer banner ever!  I had no idea what I was doing and I was determined to use only materials I had on hand.  This is what I came up with! We are the Daisies (white) and there are 5 girls on our team.  So – 5 daisies on the banner!  Not too hard!!

Start with canvas or duck cloth.  I was happy I had bought this in the fabric district for $2 a yard!  Only it was a tan/cream color – not very 5 year old!  Luckily I had just purchased NEON pink spray paint!  I hemmed the edge of the canvas then spray painted it with the neon pink.

Neon pink does not photograph very well in bright sun.  I like how it finished kind of patchy, I have quilting fabric like this.  (it’s nice to know you can spray paint anything!!)

I got out my Therm O Web Heat n Bond and traced the block letters and daisies.

Iron the Heat n Bond to the wrong side of the fabric and cut out on the line.

Peel off the paper and lay out the words.

I was afraid to iron directly on the spray paint so I grabbed an old piece of fabric and laid it on top.  It took a few seconds to get the Heat n Bond to melt.

I put an old towel on the tile floor then laid out the rest of the banner.  I ironed it on the floor – I didn’t want to move it to the ironing board.

I sewed around all of the appliqué pieces in black thread.  On the daisies I sewed around 3 times.

If I would have time, I would have hand stitched the names, but I had 10 minutes left before team pictures, so a sharpie did the trick in putting the girls names on the flowers.

I love it!!!  The neon really makes it!

 My husband assembled a PVC pipe stand and we took it to our first game on Saturday!!

Amanda

DIY Lego Minifigure Storage Shelves Tutorial

 
Do you have little person living with you that is obsessed with Legos?  I do!!  We love the Lego Minifigures at our house!!!  I wanted to find a way to display and store them.  I think this works well and it has lots of room so we can buy more Legos!!!!
Supplies:
3/4″ wood (pine, MDF, etc.)
Lego building board (available at Lego store or Lego online)
utility knife
paint
Quick Hold E-6000 glue (or similar)
nail gun
Begin by cutting the 3/4″ wood into 1 1/4″ strips.  You can make as long you want.  Mine are 23 3/4″ long because that is what looked best on the wall.
Next cut the Lego board.  Using a utility knife, cut the Lego board every “3 circles”. 
Once they are cut, bend them a little bit to break them apart.
Paint the boards.
Glue the Lego strips down.  I used one and a half of the Lego strips on each board.

 Once everything is dry, measure the wall for placement.  Using a nail gun, nail the boards into the wall, making sure to hit studs.  Patch the nail holes and touch up the paint where the patches are.

My son made me this “Keith Urban” minifigure.

We just bought our series 11 Lego Minifigures today.  These are mine!  50″s girl and pretzel girl!!

Amanda

Tricks & Treats Bag Tutorial

I designed these “Tricks” and “Treats” bags for Therm O Web and the photographs are being used as part of Therm O Web’s advertising for fall!  I found the ad in this magazine:

I am pretty excited!!!  The tutorial is on the Therm O Web blog.  (Click HERE.)  The tutorial for the appliqué shirts and Halloween skirt will be available soon!  
 

Amanda