Clownfish iPad Case Tutorial

ipad case clownfish sizzix

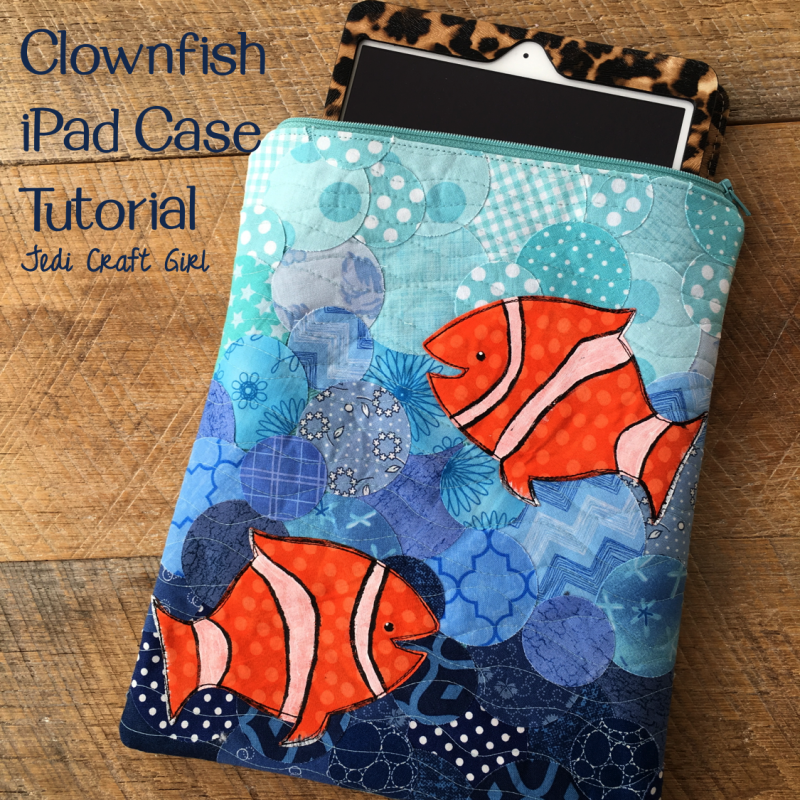
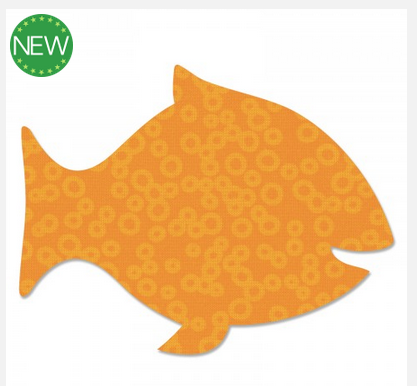
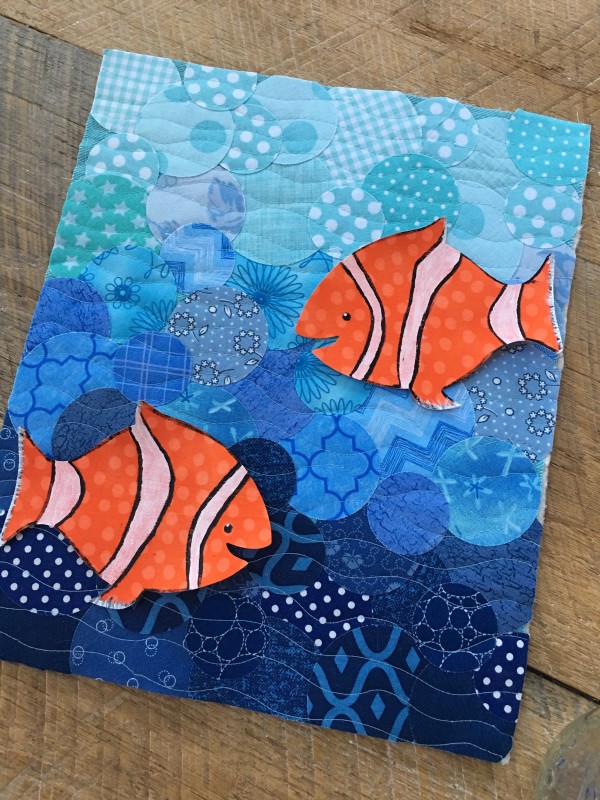
My family LOVES the Finding Dorey movie!!  When Sizzix released this new fish die at Quilt Market I knew it was for me!

Screen Shot 2016-05-27 at 10.12.26 AMUsing this new die and the circle die you can create this fun pouch.  I wanted a case that would fit my iPad.  Then my daughter decided she wanted it 🙂

IMG_8457

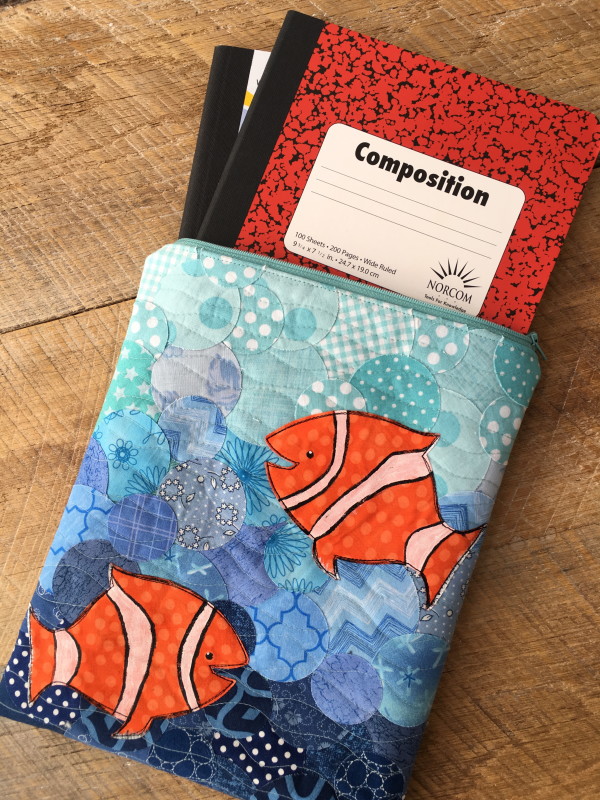
It also fits a few composition books or the medium size coloring or sketch book.  If you would rather a different size, simply change up the measurements to fit your needs!  Lets get started!

IMG_8410

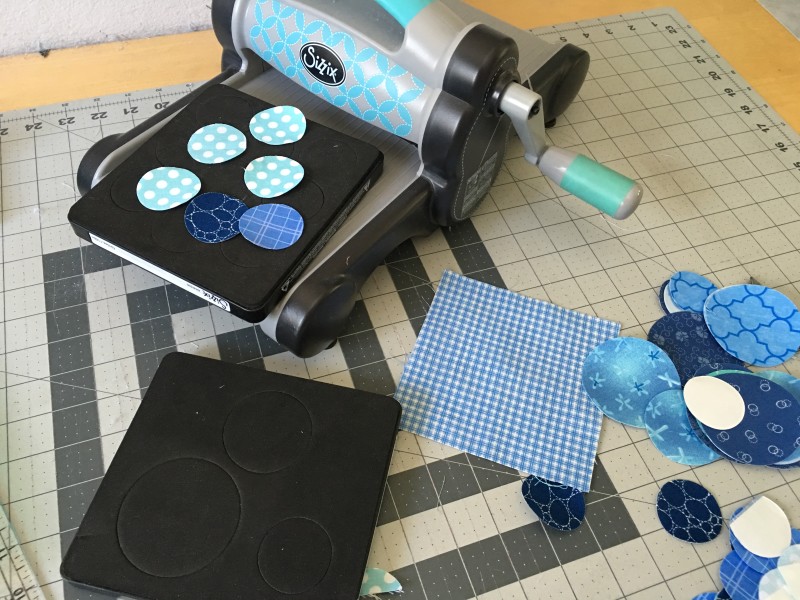
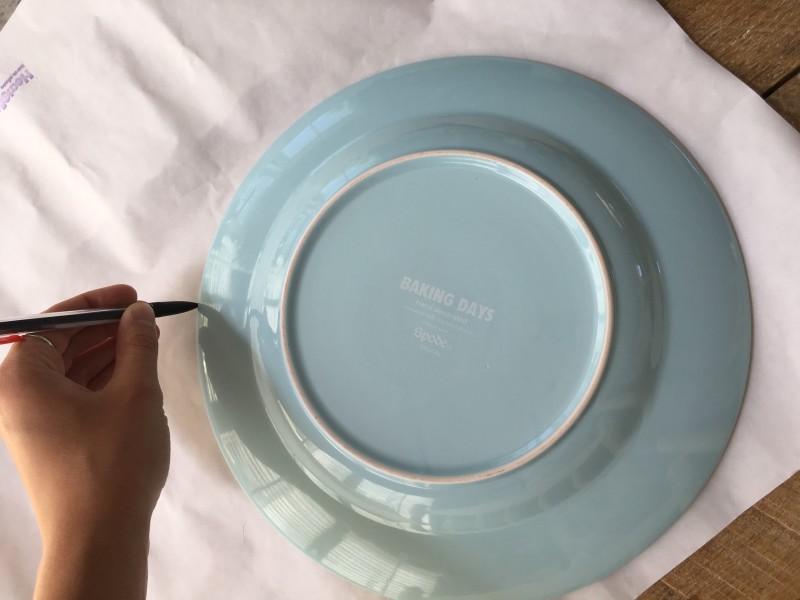
Being by choosing a variety of blue fabrics from dark to light.  Fuse Heat n Bond lite to the back of each fabric (I cut mine in 5″ squares for easy die cutting).  Die cut the circles.  I used the circle die that has 1.5″, 2″, and 2.5″ circles.IMG_8412

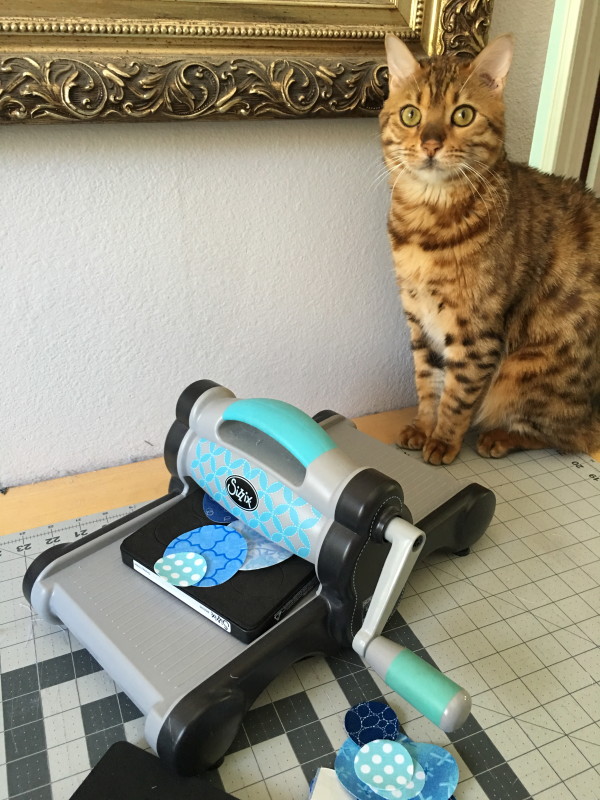
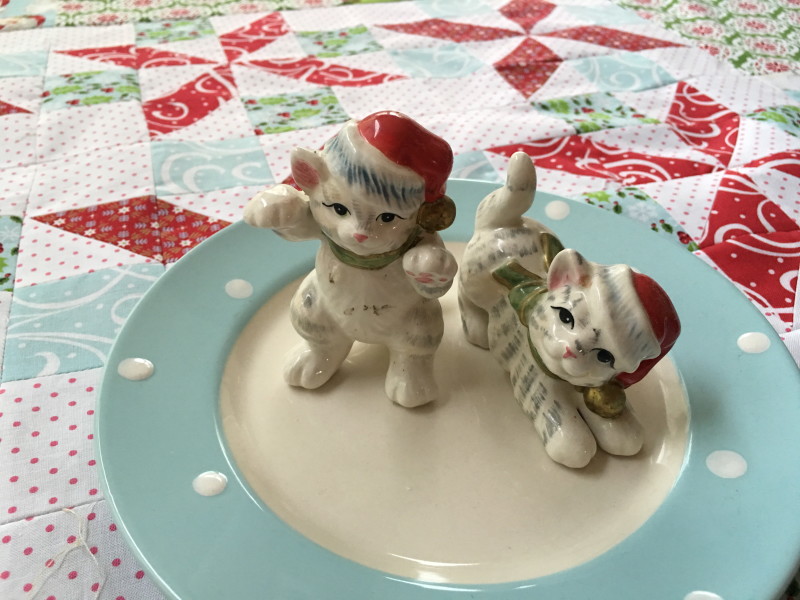
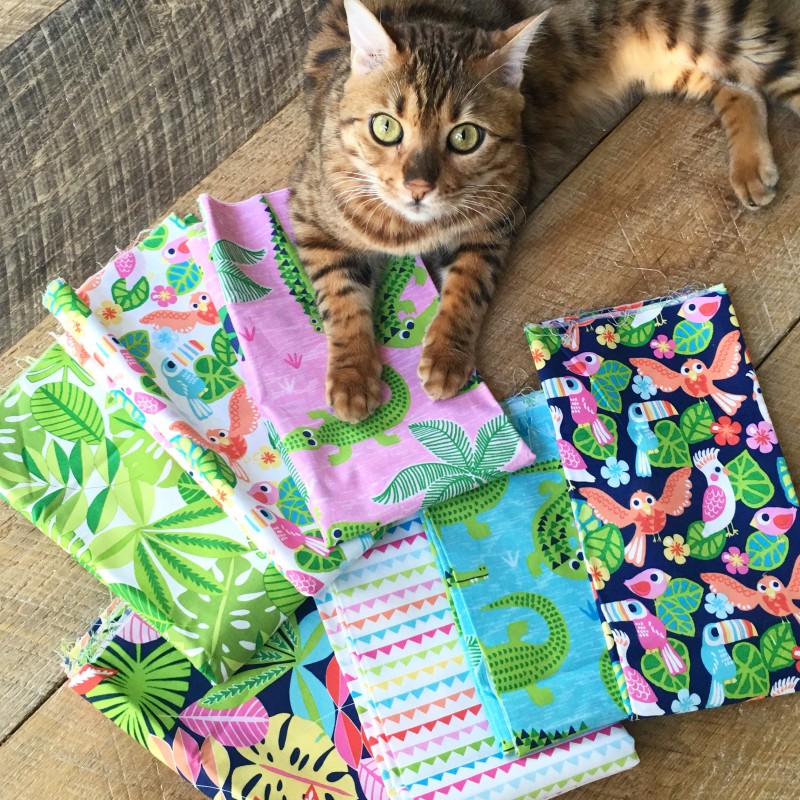
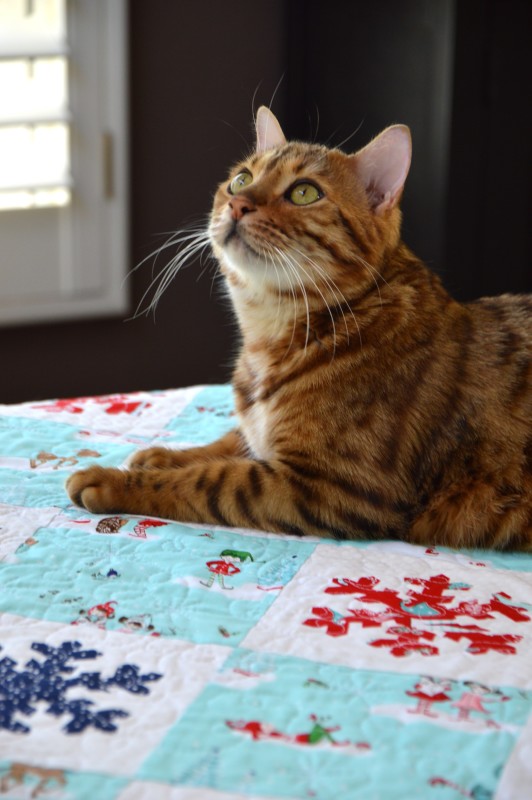
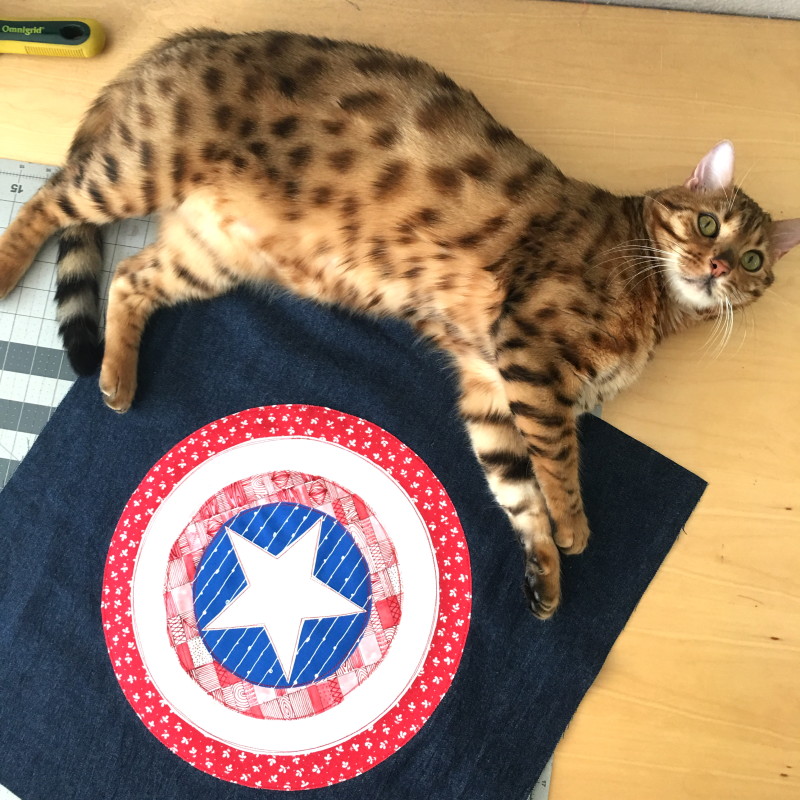
Make sure your Sizzix obsessed cat is nearby to assist 🙂

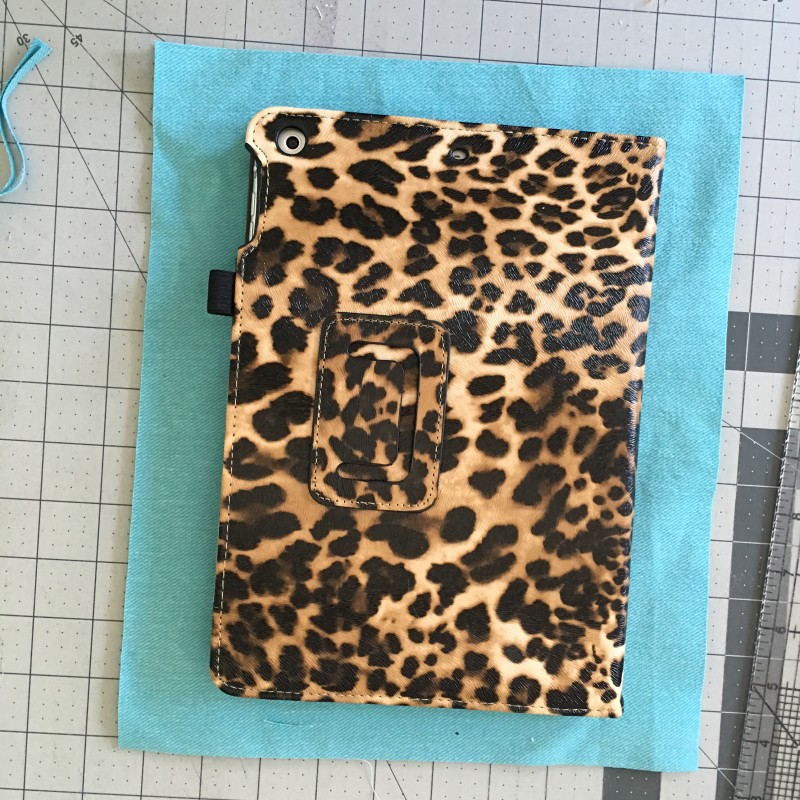
Cut (2) 10″ x 12″ pieces of denimn weight fabric.  I used Crossroads Denim.  Here is where you can change the measurements if you want.  This is a generous size for the iPad. I wanted it to fit with my sweet leopard print case 🙂IMG_8415

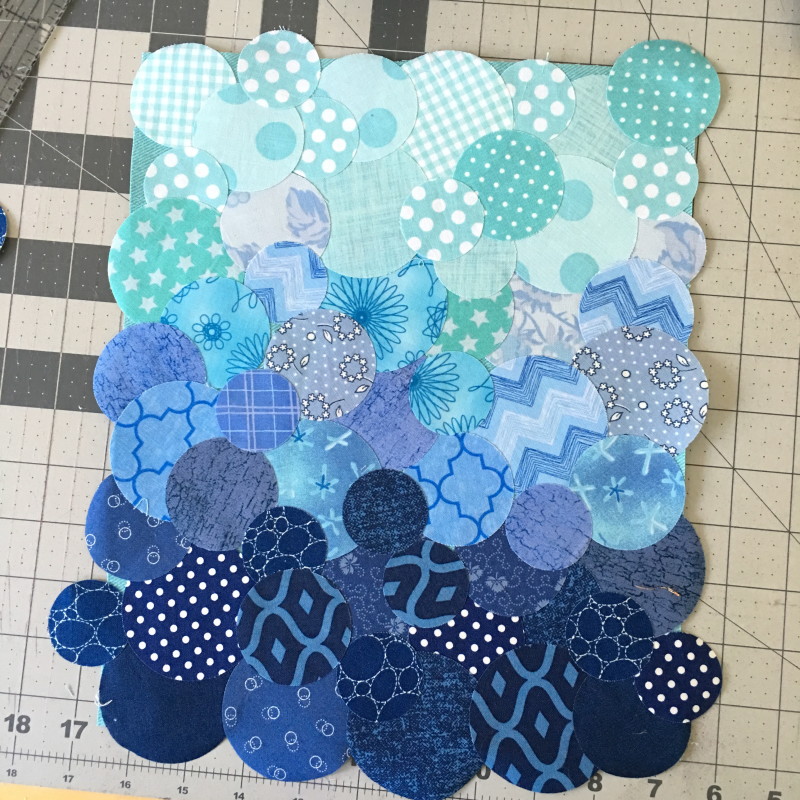
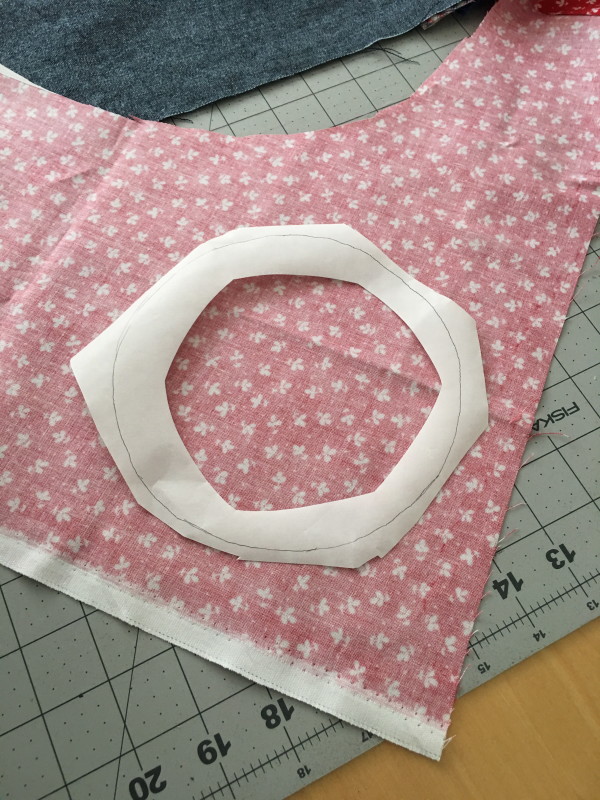
Peel off all the backing papers and begin arranging the circles, overlapping so no background fabric is showing.  I started at the bottom with the dark blues.  IMG_8417

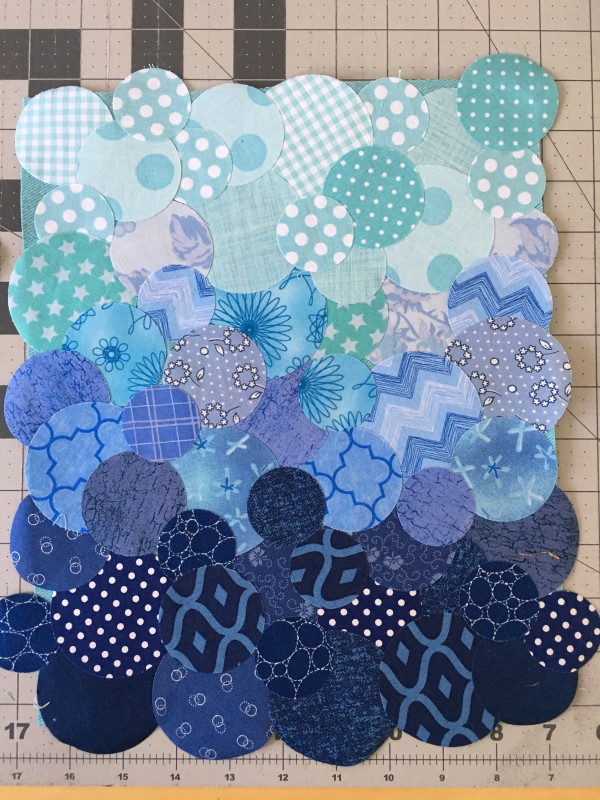
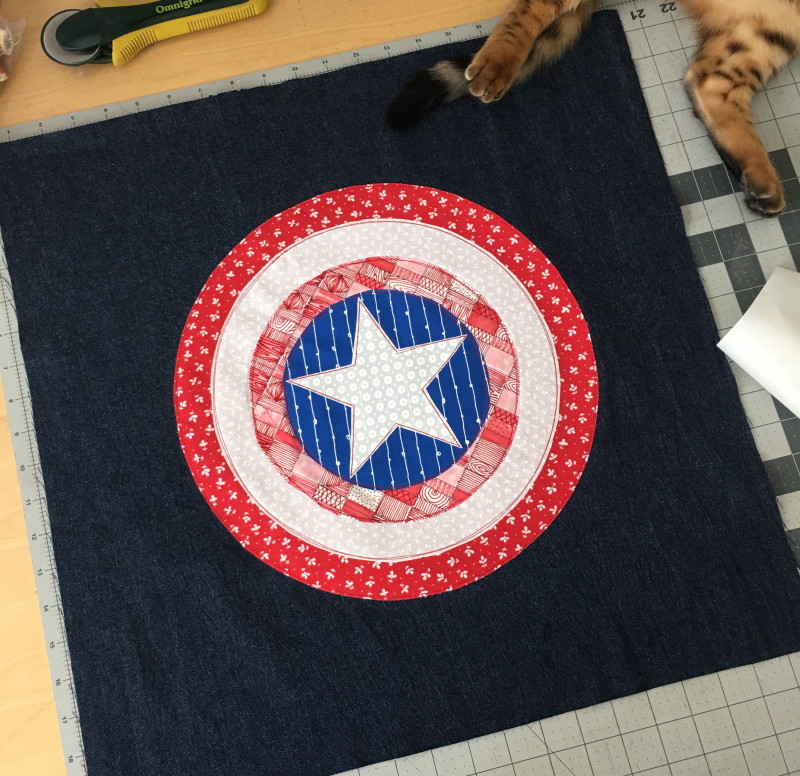
Once it is how you like, press with a hot dry iron.IMG_8424

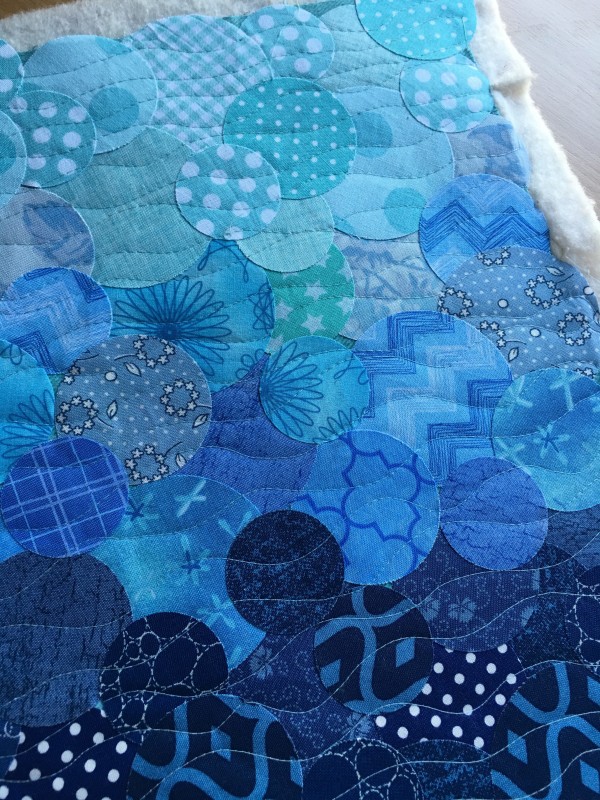
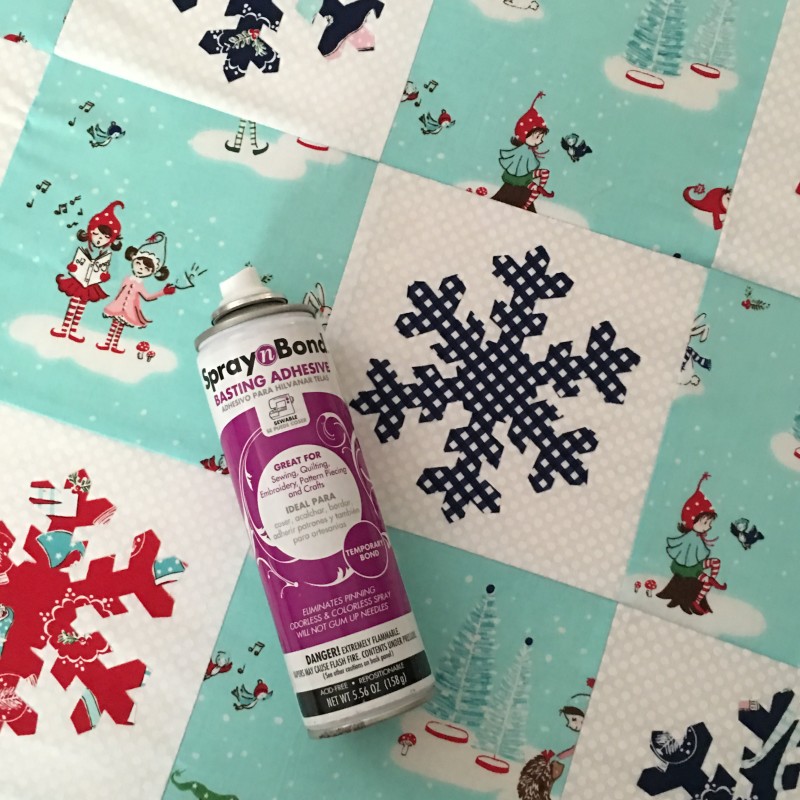
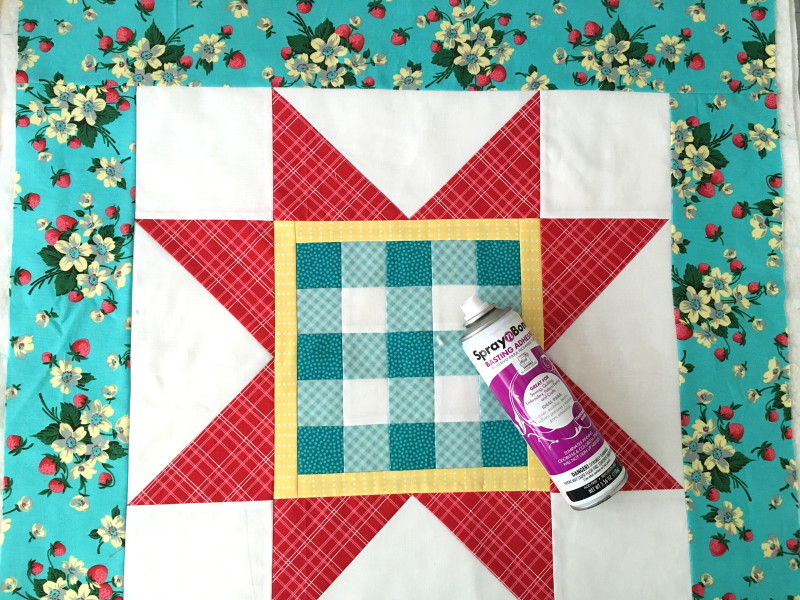
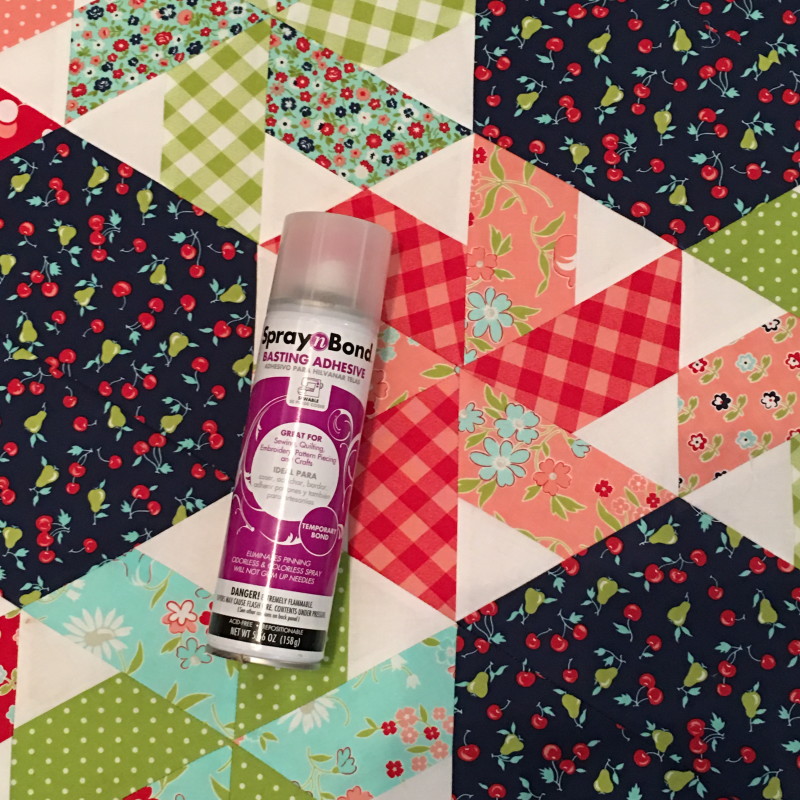
Spray baste this to the cotton batting and quilt as desired.  I quilted random wavy lines throughout.  I am so in love with this!!!IMG_8426

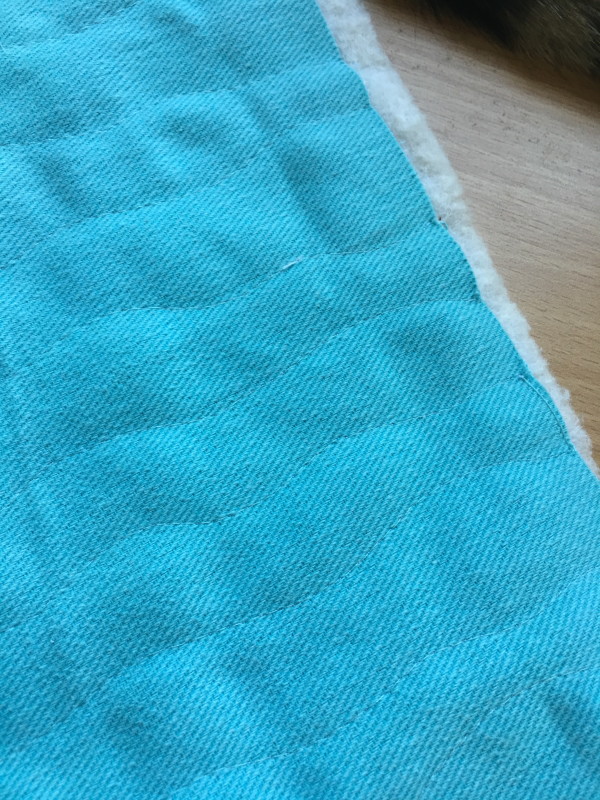
Do the same with the back piece.IMG_8435

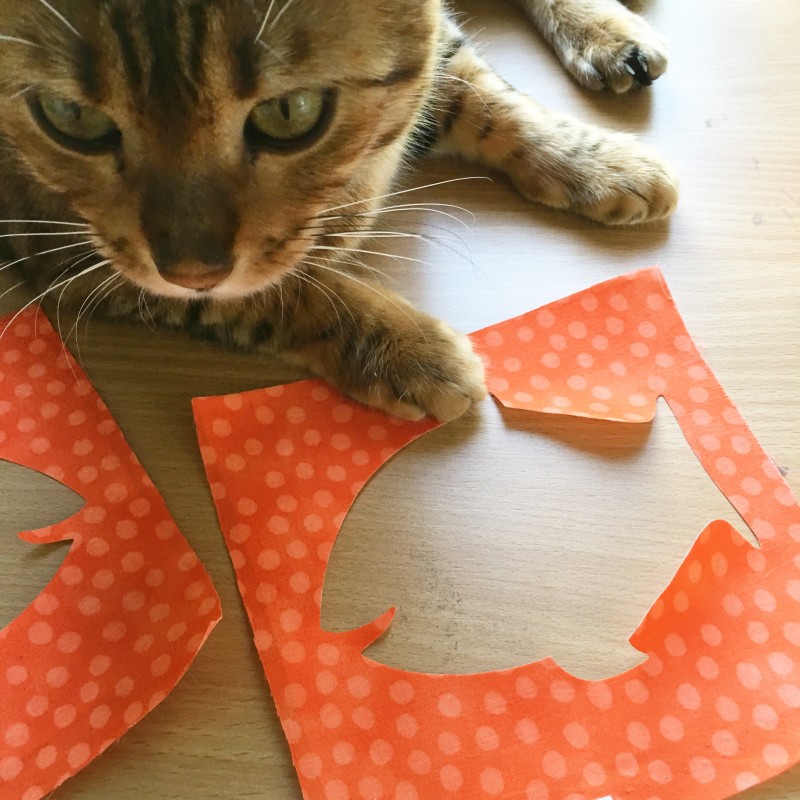
Die cut 2 fish going opposite directions, again, using Heat n Bond Lite.

IMG_8438
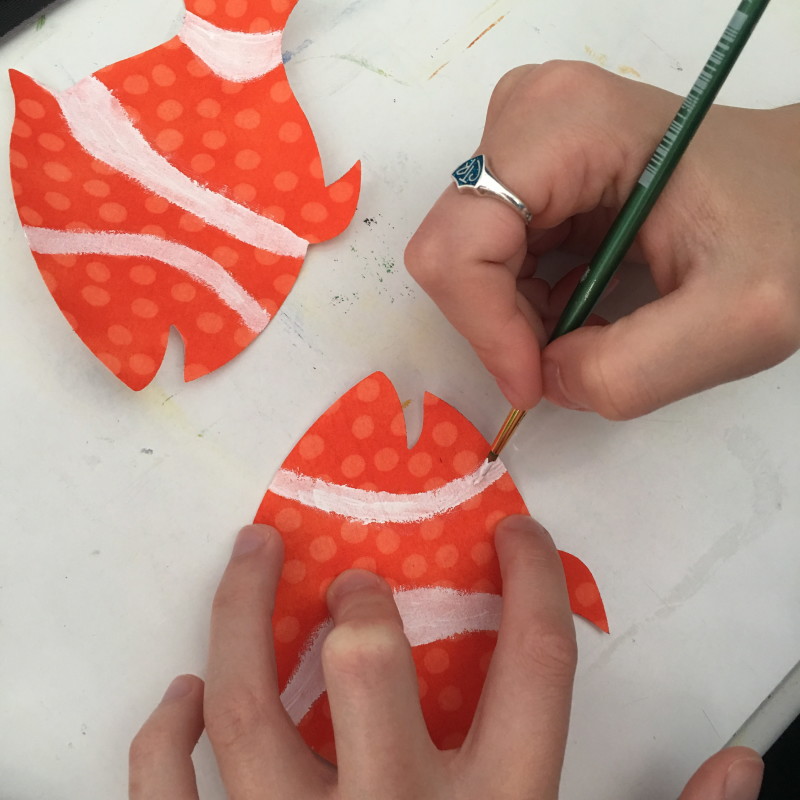
If you want you can paint a little detail on the fish.  We used regular acrylic paint.

IMG_8442

Position the fish and heat set into place.  Stitch around each fish 2 times.IMG_8436

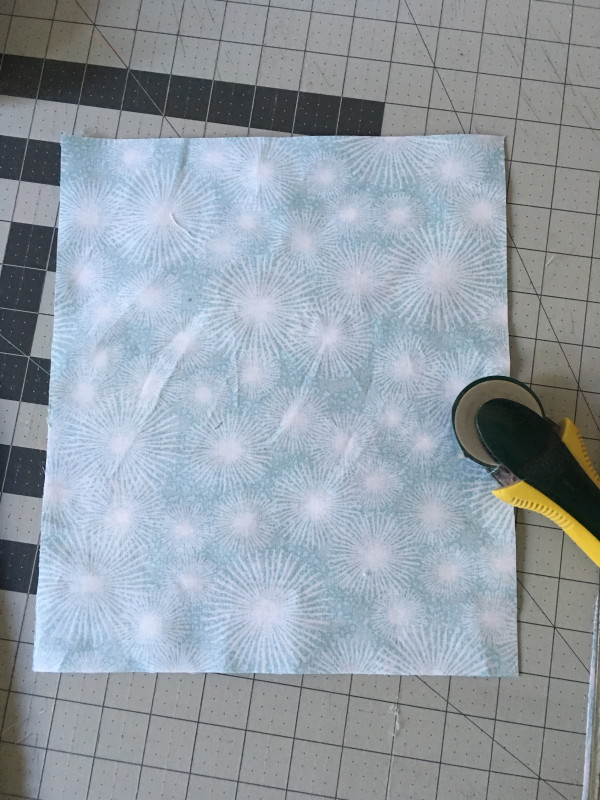
Cut 2 pieces of the backing fabric the same size as the outer bag fabric.  I always remeasure the outer bag pieces after quilting because it will shrink a little.   IMG_8447

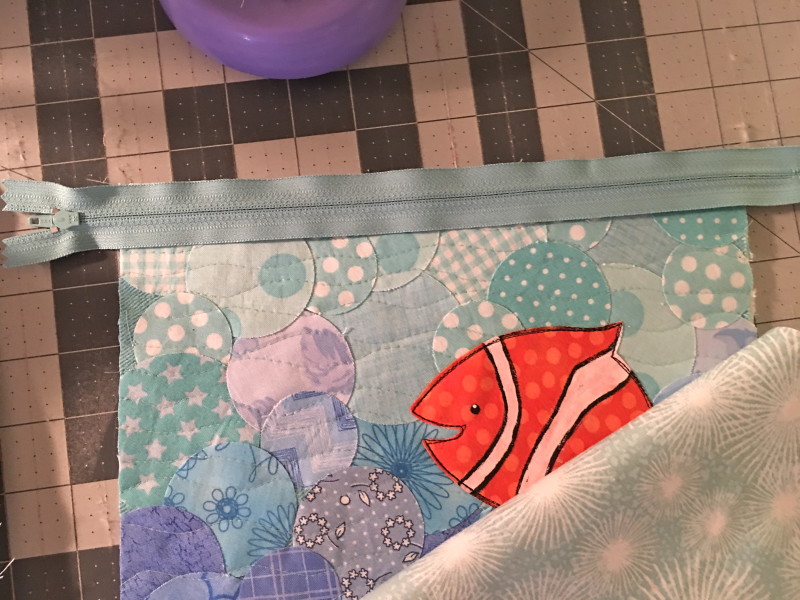
Sew a zipper in the top.  You can use this tutorial for inserting a zipper into a zipper pouch and finishing the bag.IMG_8454

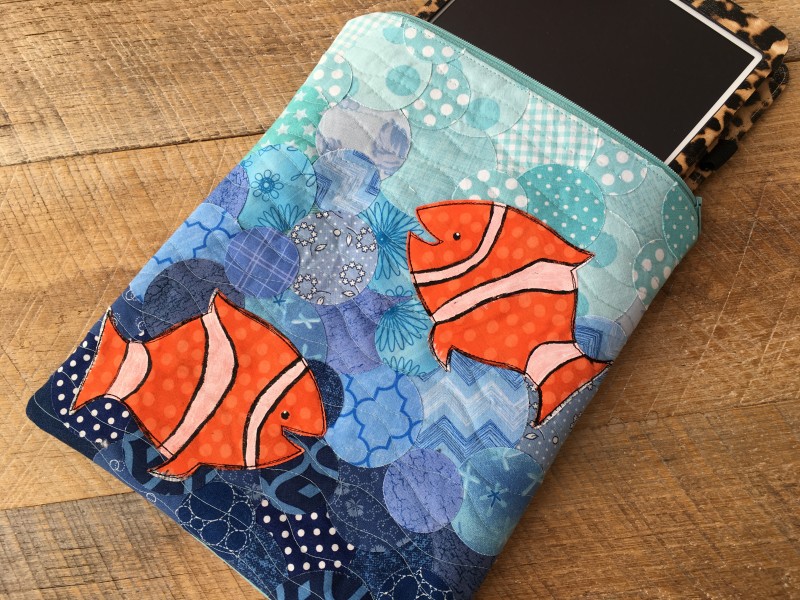
I love how it turned out.  I can’t wait to use this circle background technique on a mini quilt!!IMG_8456

Later Alligator {Free Quilt Pattern}

later alligator cover

Sometimes you find a fabric and you just have to drop everything you’re doing and sew something with it!  That’s how I felt about this new line of fabric from Blend Fabrics called See You Later.IMG_0010

Mufasa was even smitten with the fabric and appeared to be guarding it!!

IMG_0060

The colors are bright and the patterns are whimsical.  They would be perfect for a boy or a girl!

see you later quilt

I created a pattern for you to download for FREE.  This is one of my favorite ways to show off big prints.  Click HERE to download the 3-page pattern.

pattern overview

IMG_0090

The pattern looks like I used solid navy and solid green, but actually I used a navy and white dot and a green and white print.  The quilt is made up of only 1 block made from 2 different color ways.

IMG_0048

It sews up really fast and is the perfect project if you want to sew a quilt top in an afternoon.  That’s usually all the time I’ve got!

IMG_0096

Mufasa thinks the quilt is his and my 16 year old daughter also claimed it for her own!   see you later quilt 2

Pixie Noel Blog Tour – Snowflake Quilt Tutorial

snowflake quilt tutorial

It’s my turn on the Pixie Noel Blog Tour!  Yay!  I have been in love with this fabric as soon as I saw Tasha Noel post a few sneak peeks months and months ago!  I love how whimsical her art is and I love her choice of colors!

Screen Shot 2016-07-24 at 1.33.33 PM 
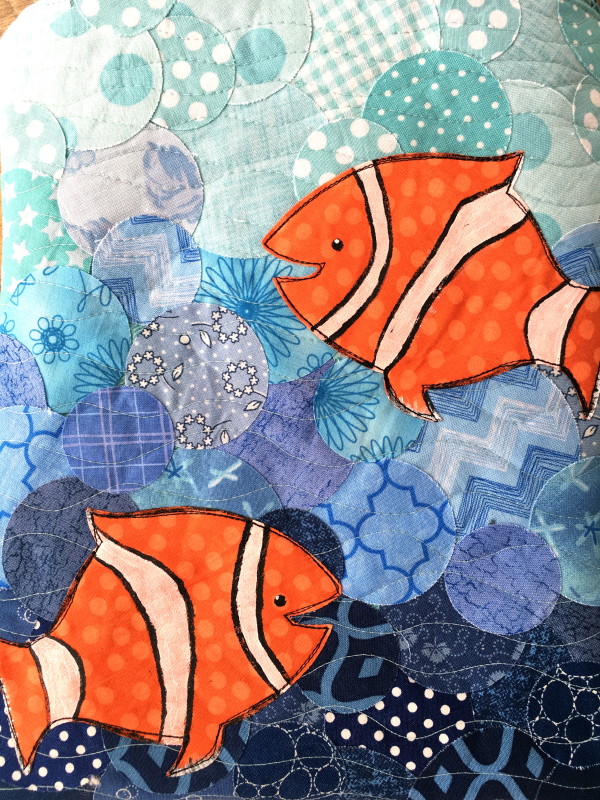
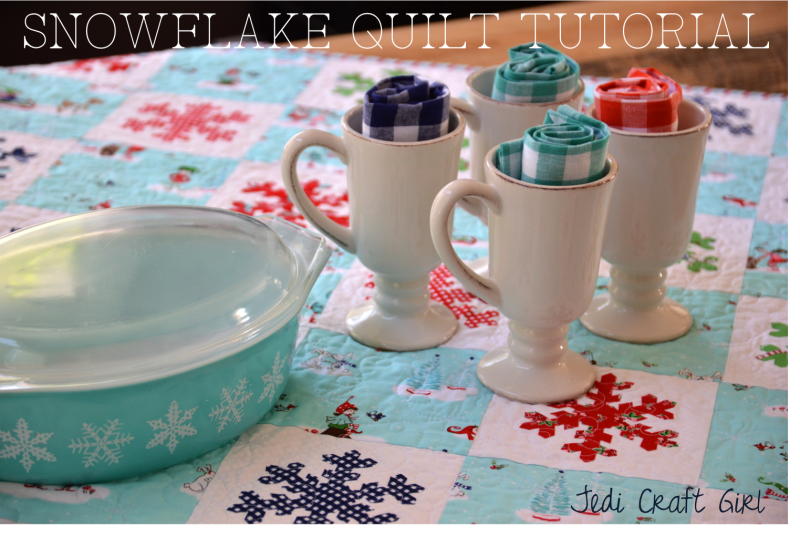
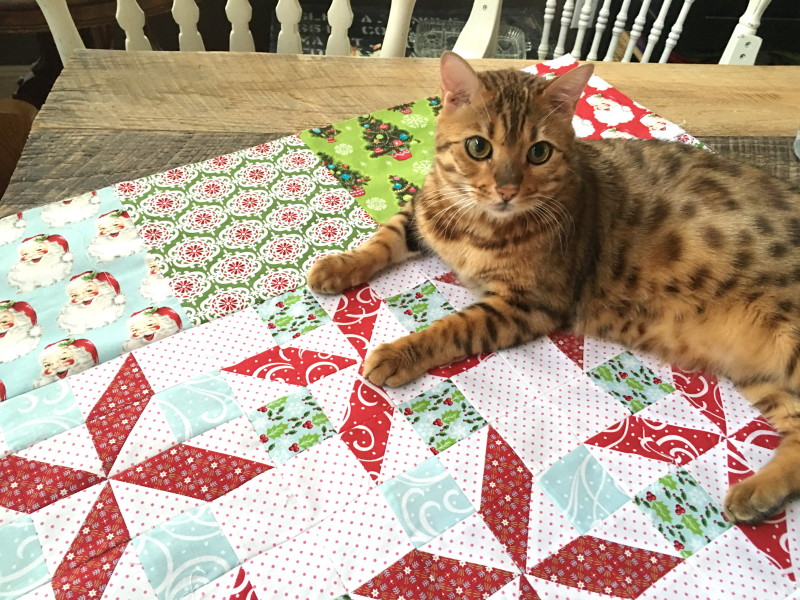
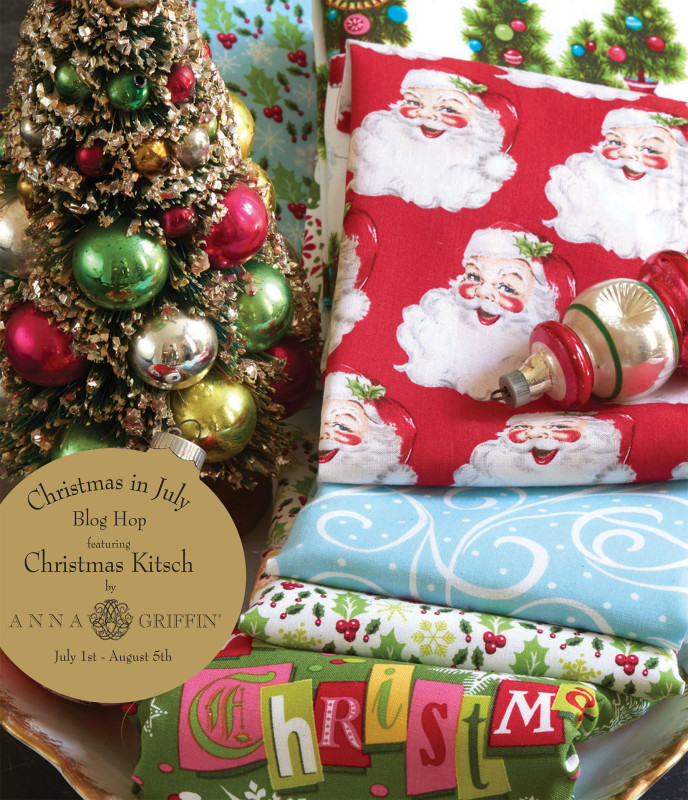
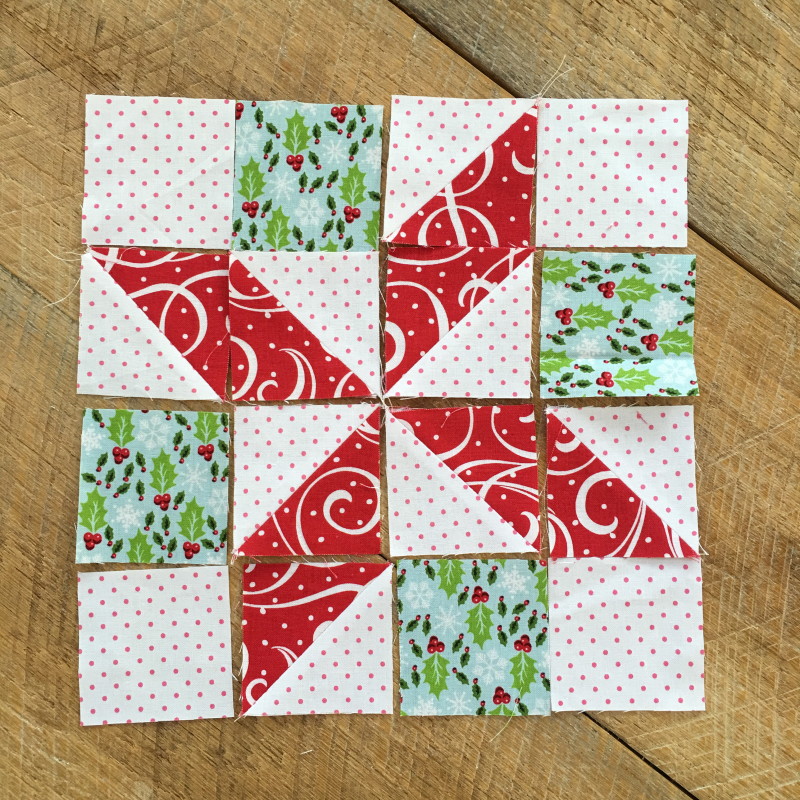
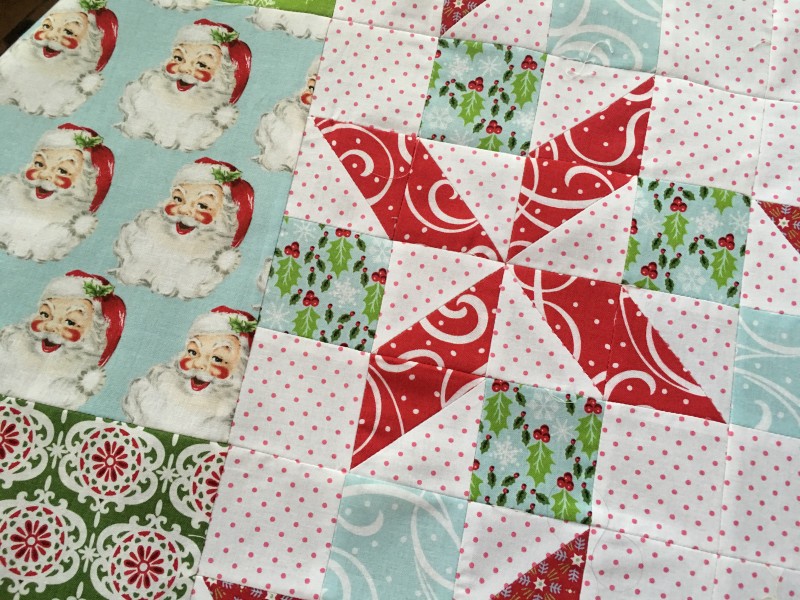
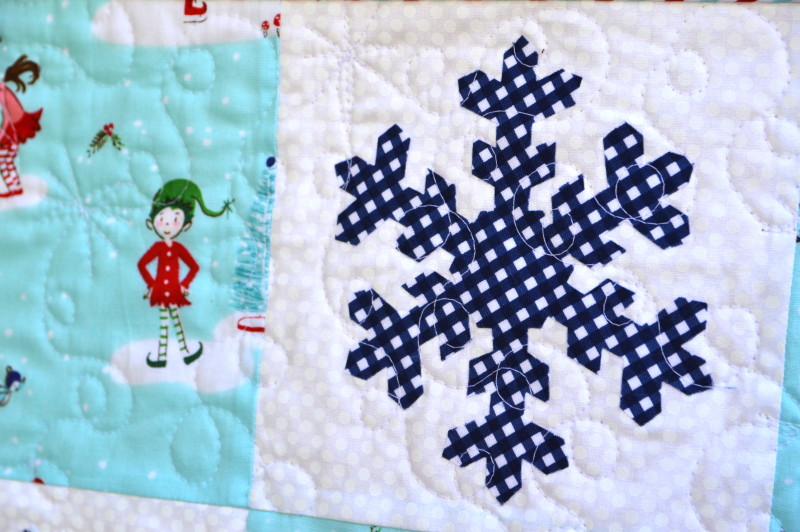
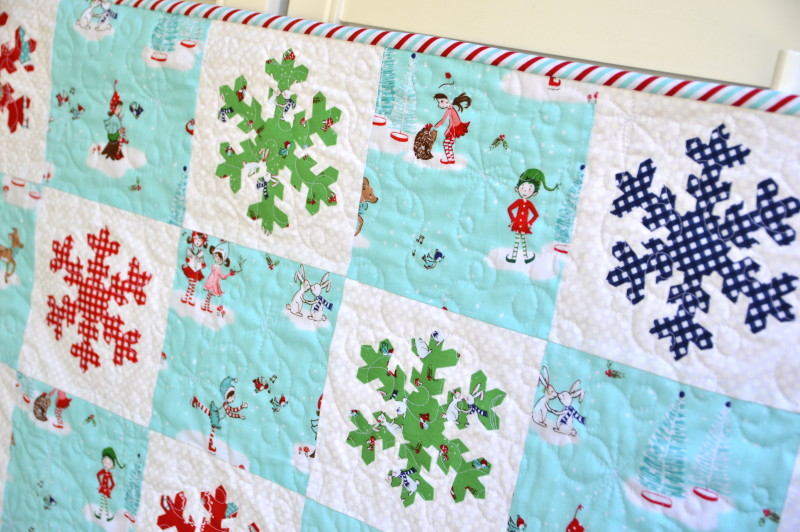
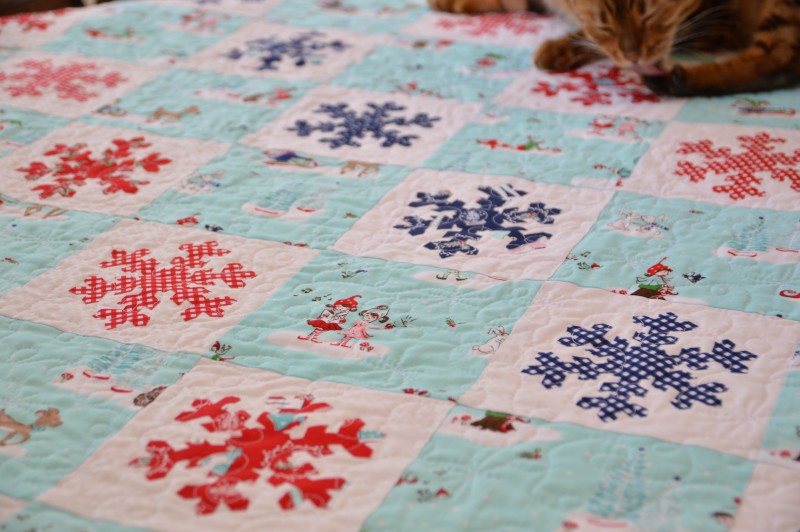
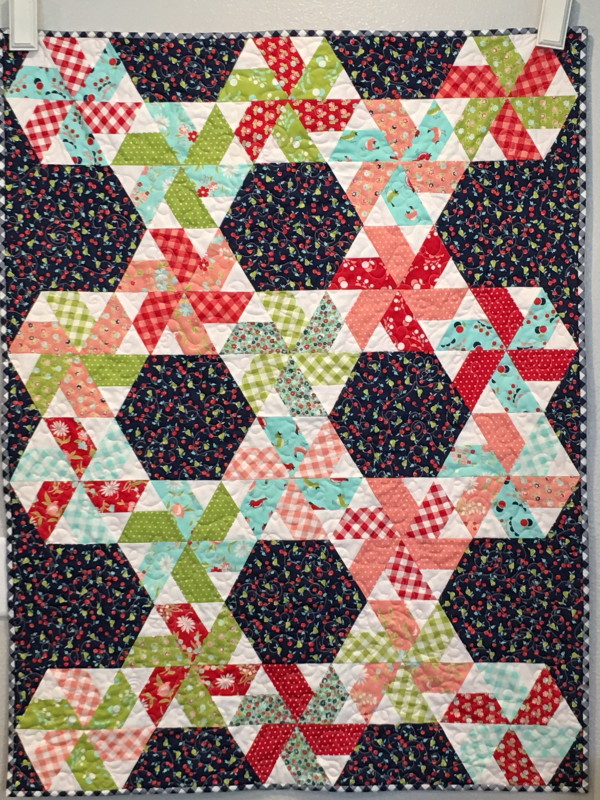
It was a little bit challenging to sew with winter fabric when the temperatures here in Southern California have been in the 110’s and our town is literally ablaze!   I decided to beat the heat by creating this whimsical snowflake quilt.

I don’t know about you, but cutting snowflakes and sewing snowflakes is not on my top 10 list of favorite things to do.  Super time consuming!  This quilt has 2 amazing shortcuts that will have you whipping one up in an afternoon.

First, all the snowflakes were die cut on my Sizzix Fabi – 3 at a time!

Second, the snowflakes are appliqued using Heat n Bond Ultra which means no tedious applique top stitching necessary!  Heat n Bond Ultra is heavier than Heat n Bond Lite which I normally use for applique.  The Ultra requires no sewing.   Just cut, press, and go!  The snowflakes get sewn over during the quilting process – which helps incorporate them into the quilt and makes it even more durable.

DSC_0547

Here’s how you can make one:

Supplies:

55″ Heat n Bond Ultra

Sizzix snowflake die

1 yard white fabric

1 yard aqua main fabric (or additional if you want to fussy cut)

fat quarters for applique, red, navy, green

IMG_0231

Instructions:

Cut (32) 6.5″ squares of white fabric

Cut (32) 6.5″ squares of the aqua Pixie Noel theme print

Cut the Heat n Bond Ultra into 5″ strips.  Fuse to the wrong side of the snowflake fat quarters.

IMG_0232

Make sure your cat helps you die cut the snowflakes.

IMG_0235

We cut 3 at a time.

IMG_0234
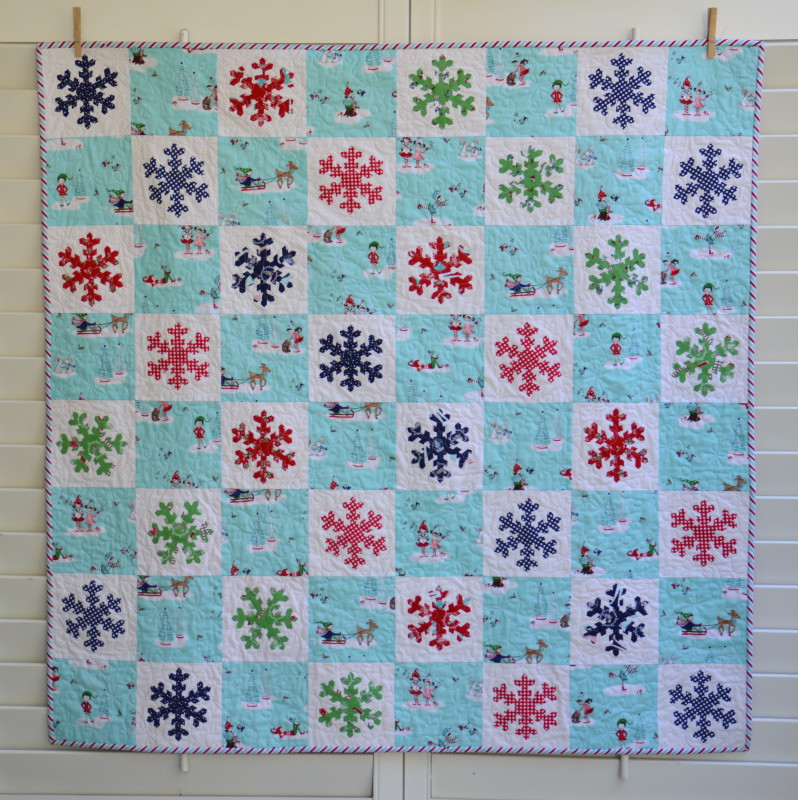
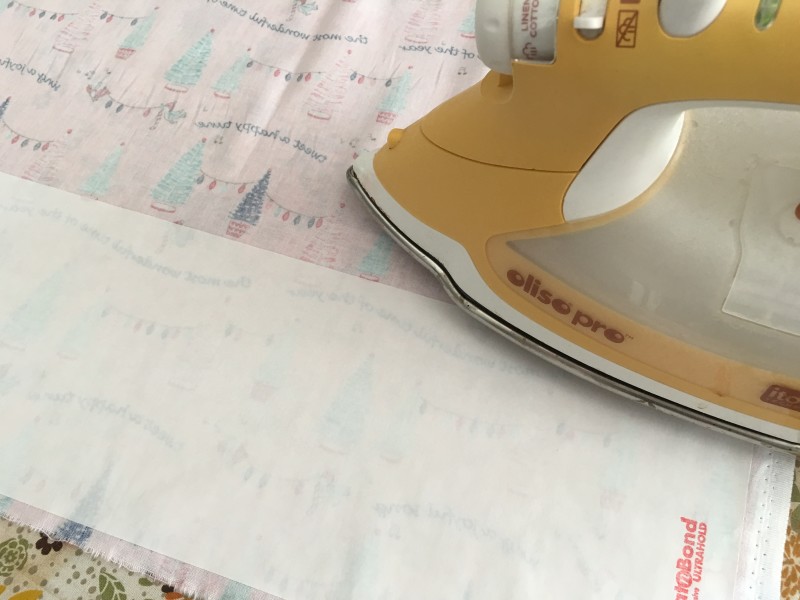
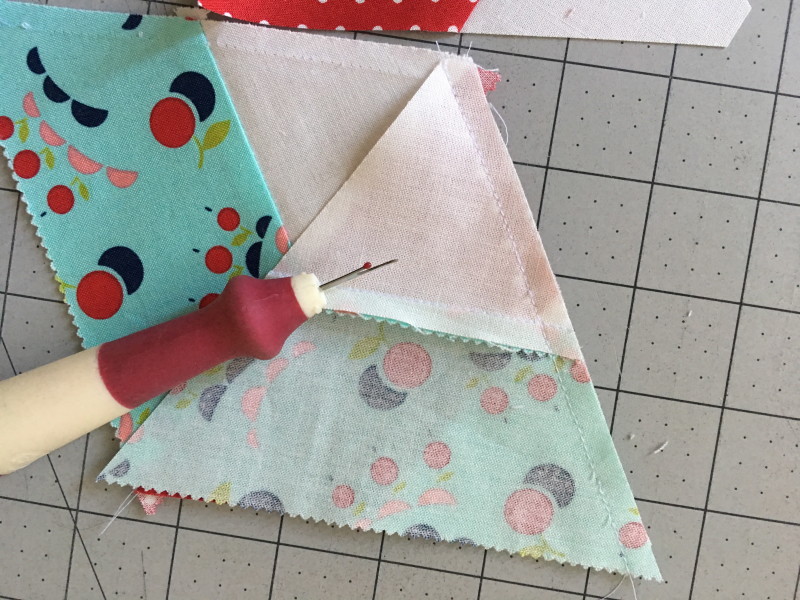
Peel off the backing.

Center the snowflakes on the white squares and heat set with hot dry iron.

IMG_0252

Die cut 6 green snowflakes, 12 navy snowflakes, and 12 red snowflakes.

Lay out the quilt according to the diagram below:

IMG_0259

Sew the squares together in rows using 1/4″ seams.  Press each row alternately.  Sew rows together pinning at each intersection.

IMG_0256

I always use Spray n Bond to baste my quilts – its fast, secure, and no pinning!  Seriously this quilt can be made in a matter of hours!!

I quilted loops and stars.  I sewed right over the snowflakes.  It helps to make them feel like part of the quilt and not puff out.

DSC_0559

I love that there are 3 stripe colors to choose from in Pixie Noel.  Even better, they are printed on the bias which makes cutting bias striped binding a snap!!!

DSC_0561

DSC_0516

Mufasa loves the quilt!  Don’t tell him it’s not for him 🙂

pixie noel quilt 5

Thanks for stopping by!!!!  Happy Christmas in July 🙂  pixie noel quilt

Pandalicious Quilt {Art Gallery + Fat Quarter Shop}

Palisades-Header

Isn’t this the cutest fabric from Art Gallery!!  It’s called Pandalicious and it makes me want to go to the zoo and see some pandas!  Cherry blossoms, bamboo teepees and cuddly pandas!

Screen Shot 2016-07-11 at 10.50.50 AM

image003

I had so much fun putting this quilt together.  It looks complicated but its really rather simple.  It consists of lots of these blocks:IMG_9695

and a center block:

IMG_9693

Once all the blocks are sewn together the assembly of the quilt is as easy as sewing squares together!

IMG_9709

Just make sure to follow the placement carefully as shown in the pattern.  It is so cool when it comes together!  I will totally make this again.  I’m even thinking just the center portion of this quilt would make a fun table quilt or wall hanging!

IMG_9710

The colors are amazing in person and the pandas are just the cutest!  I hope you get a chance to make this quilt!!

IMG_9712

Check out the other designers who have put together a Palisades Quilt!!!

Tina from Emily Ann’s Kloset

Amy from Diary of a Quilter

Maureen from Maureen Cracknell Handmade

Erica from Kitchen Table Quilting

Melissa from Happy Quilting

Karin from Leigh Laurel Studios

Rachael from The Floral Suitcase

Amanda from Jedi Craft Girl

Megan from Quilt Story

Heather from Quilt Story

Melanie from Mostly Crafty

Brooke from Silly Mama Quilts

Afton from Quilting Mod

Holiday Wishes Blog Tour


Holiday-Wishes-Header

I am totally loving this new book by Sherri Falls called Holiday Wishes!  The patterns are so inspiring and they make you want to sew!  I choose the gingham star block from her book and made some much needed throw pillows for my family room.

Holiday Wishes Book


gingham star pillow 3

I always write about only using 20″ pillows in my home.  However, my family loves Euro pillows in the family room.  The old ones were headed to the trash and I was so thrilled to make some new ones!

IMG_9629

I bought these 24″ square Euro pillows.  They were a little too full so I made a small opening in the pillow and took out some stuffing.

IMG_9631

I had purchased this Fruta y Flor fabric by Free Spirit and have been waiting to use it in my family room!!  I am so in love with it!

IMG_9624

I followed the pattern exactly and then added a border so the pillow top would be 24″ square.  I can’t wait to make an entire quilt with these blocks!!  I’m so in love!!!!!

IMG_9628

I used Spray n Bond to baste my pillow fronts – it makes quilting so easy!IMG_9621

I quilted all-over swirls on both of the pillow tops.    If you want more info on how to finish the pillow read this tutorial and this tutorial.IMG_9650

I love how they turned out – and yes they are pretty big!!IMG_9651

gingham star pillow 2

IMG_9684   IMG_9687


From Porto With Love Pillows

from porto with love 8

I am thrilled to be part of The Summer Sewing Series by Melissa from PolkadotChair.  For me summer sewing is about catching up on all the little projects I can’t get to during the school year.  This last week I sewed 13 new pillow covers for throw pillows around my house.  Today I am sharing my latest pillow covers with you 🙂summer-sewing-series

Screen Shot 2016-07-11 at 10.31.01 AM

Meet From Porto With Love by Cotton + Steel.  Only my NEW FAVORITE FABRIC!!!  These large scale cats have my heart swooning!  I knew I needed some pillows!  I love the heavy weight of this canvas print – perfect for home decorating!  I kept the design super simple because I wanted the cats to be the focal point.  I used Crossroads denim for the accent strips and the pillow back.  This is the softest denim in the whole world!!from porto with love 2
Mufasa was very helpful in making the pillows.  Follow the diagrams below for cutting instructions.  All seams are 1/4″

cat pillow

Sew the side strips on, press.  Then sew the top and bottom strips on, press.

cat pillow 2

Sew each strip together and press.

Each pillow top finishes 20″ square, the exact size of my down throw pillows. (I like to use all the same size pillows so I can switch them out easily….I learned this the hard way!)

To finish the pillows, cut a 20″ square for the pillow back and insert an invisible zipper along the bottom seam of the pillow.  Click HERE to learn how to sew an invisible zipper in a pillow.

from porto with love 4

I am so in love with these!!!!!  They are soft and slouchy!!from porto with love 3

I love how they look with my gingham pillows!!!  from porto with love 6  
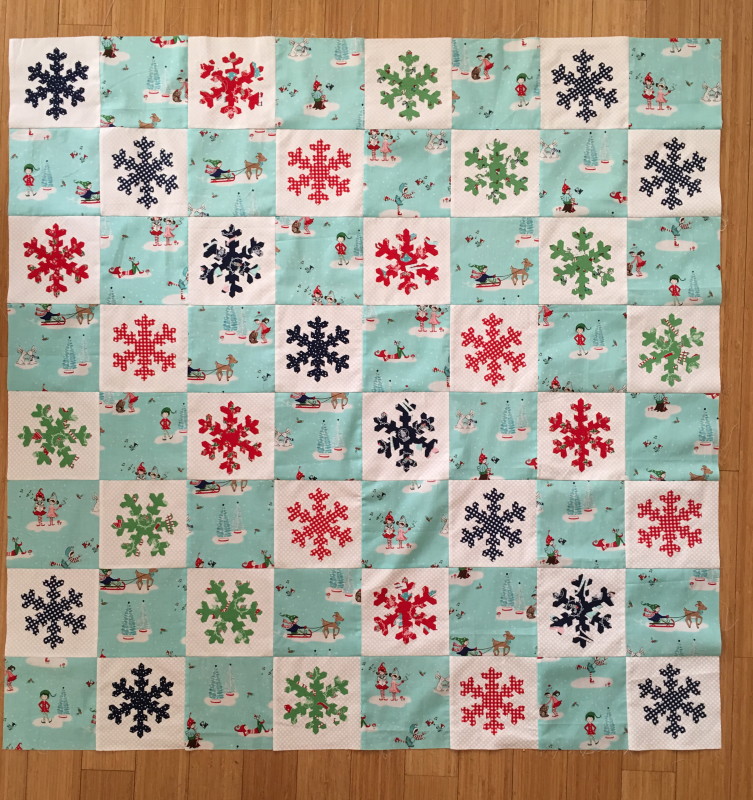
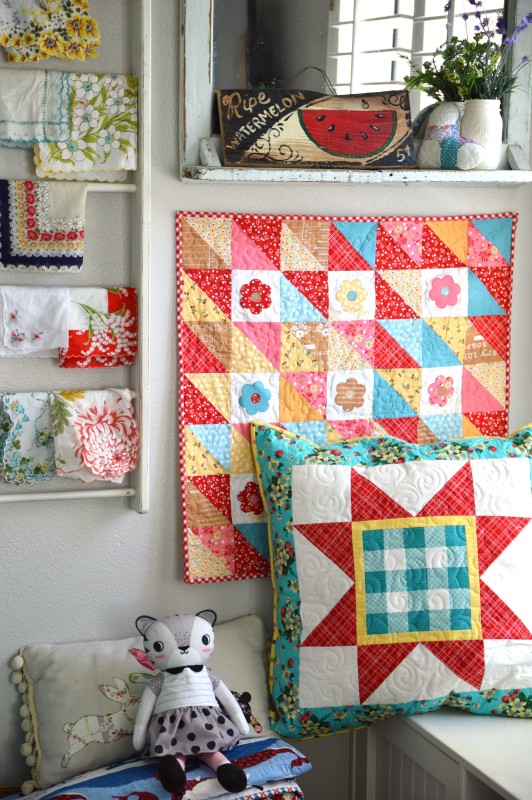
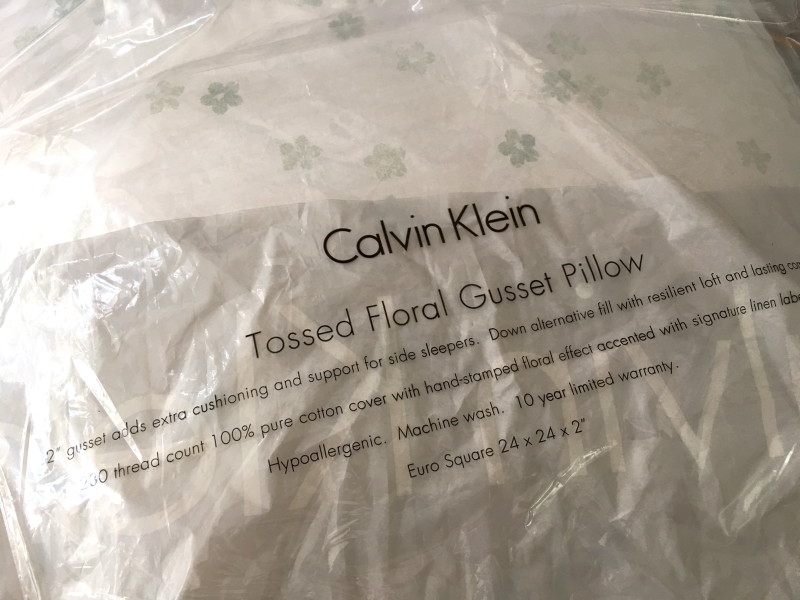
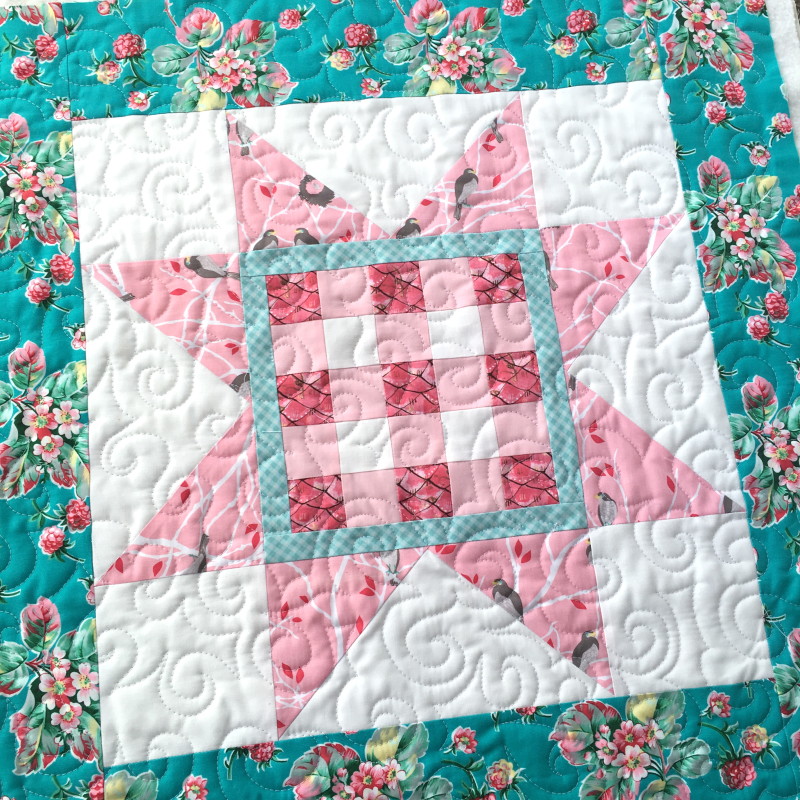
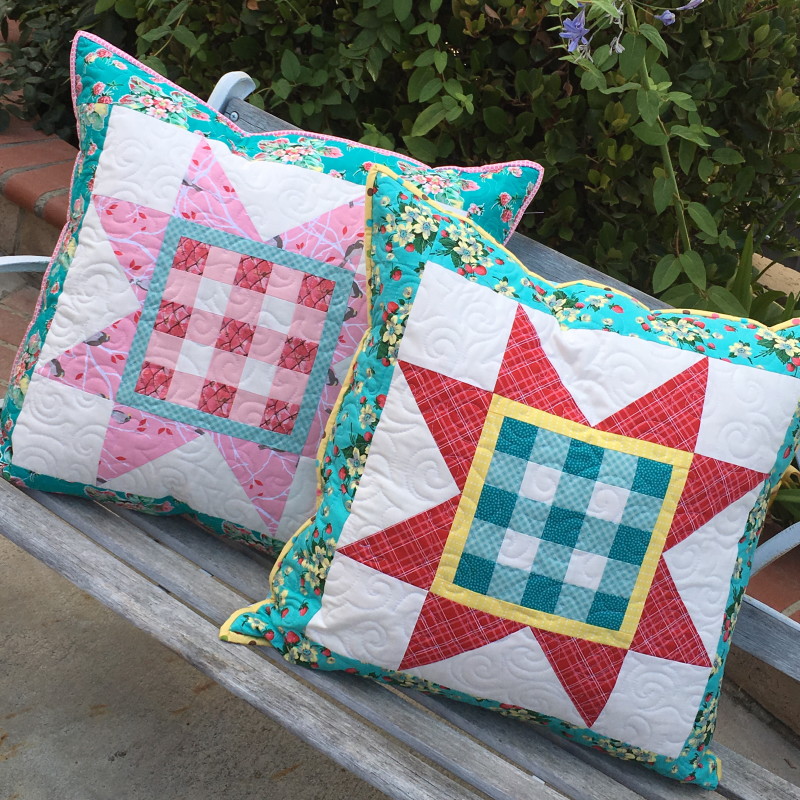
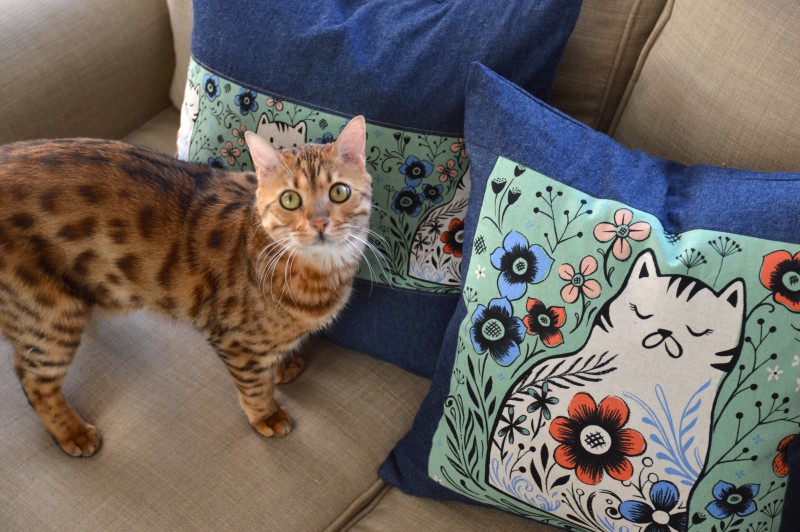
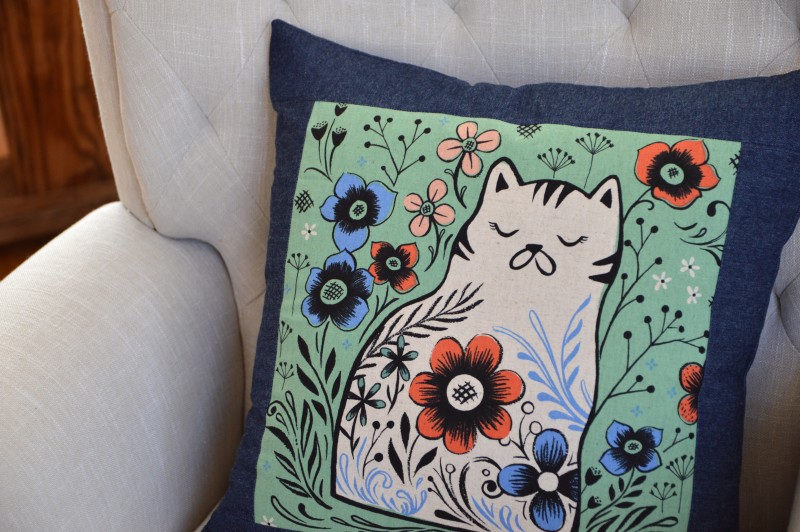
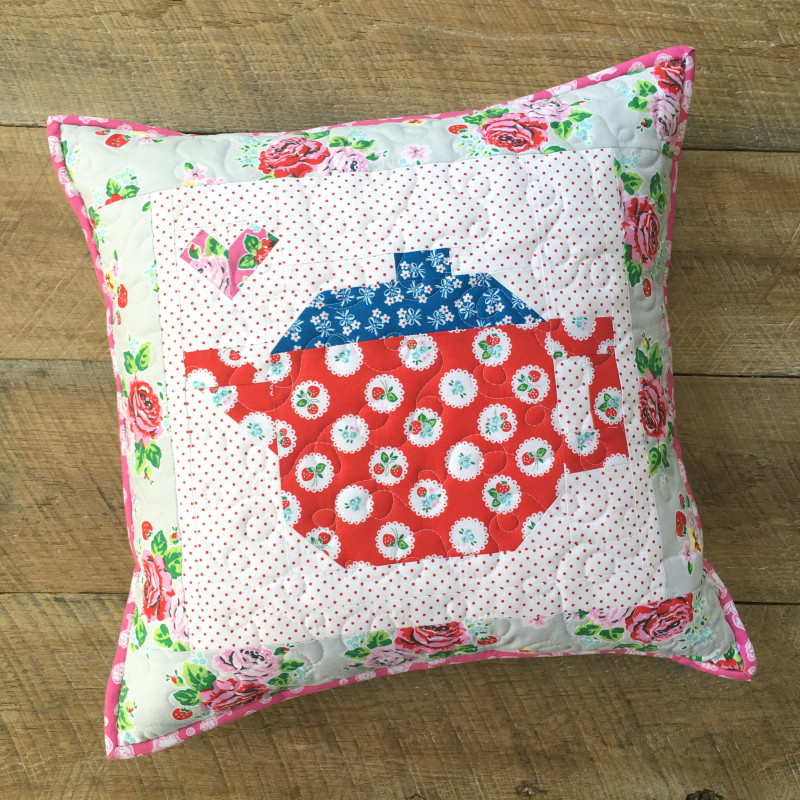
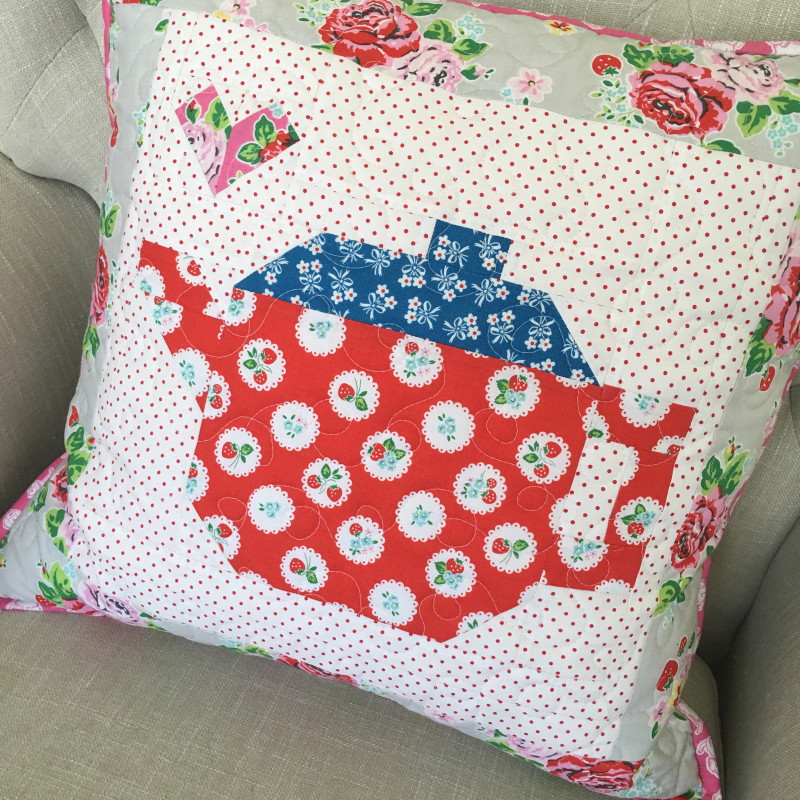
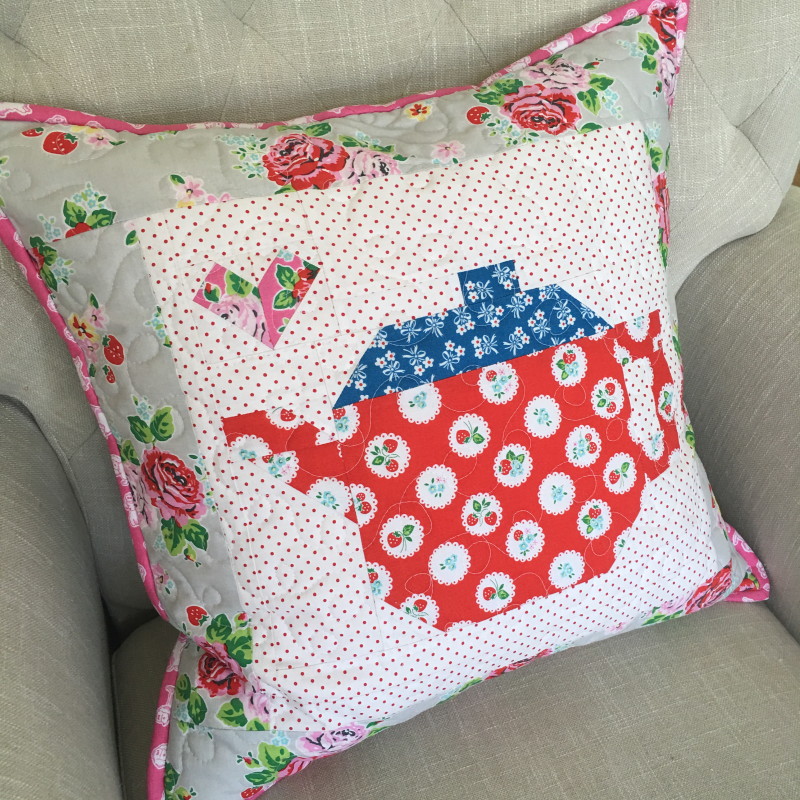
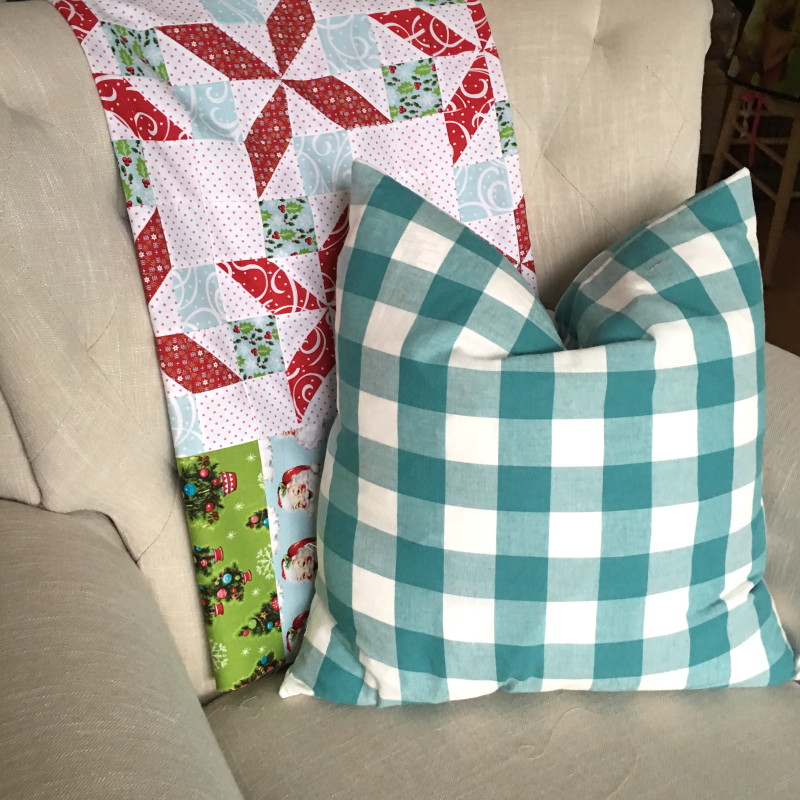
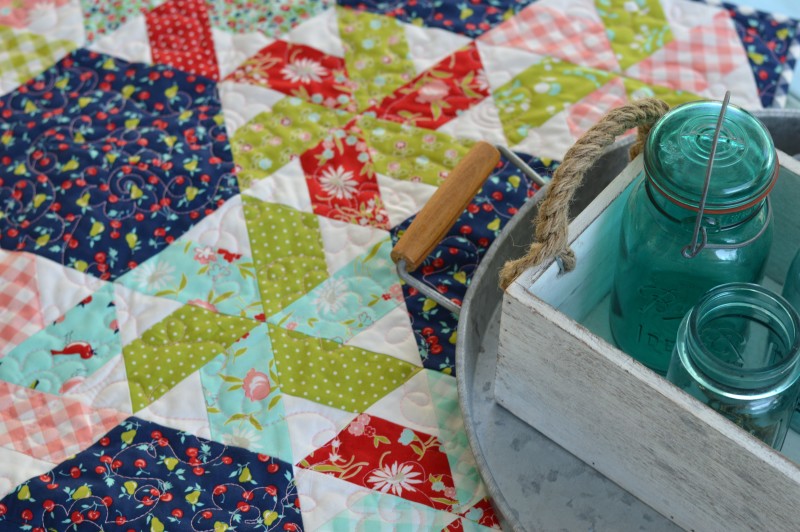
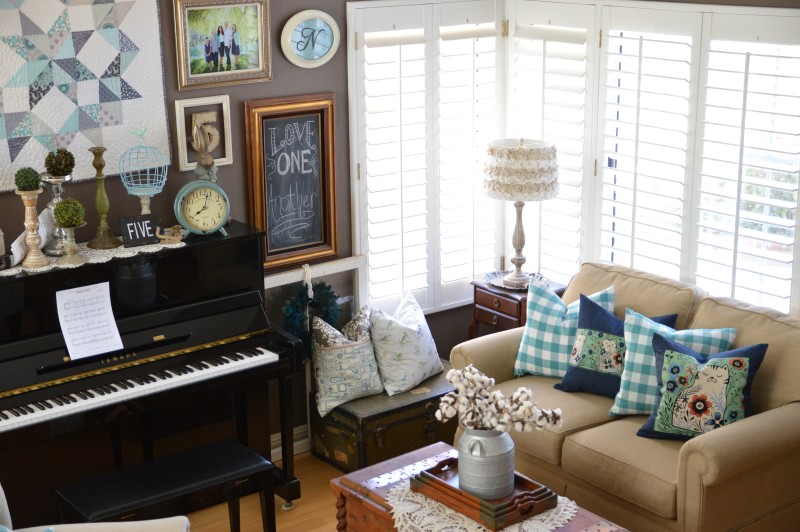
Freshening up your pillow decor is such a great summer activity – it doesn’t take very long but it makes you feel so happy to have something new in your home.

Little Ruby Quilt Along – Finished Quilt

LittleRuby-Quilt

This has been such a fun quilt along from Fat Quarter Shop!  You’re not too late if you want to make this quilt!  I’ve attached each of the videos below if you would like to make one.  If I’m being honest, this kind of quilt (one that requires special rulers and templates) is so NOT my style.  BUT I have to say I have TOTALLY LOVED making this quilt!

IMG_9641 
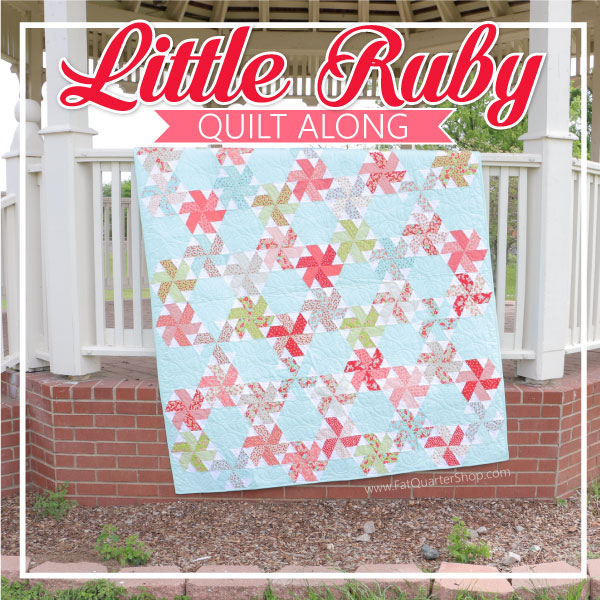
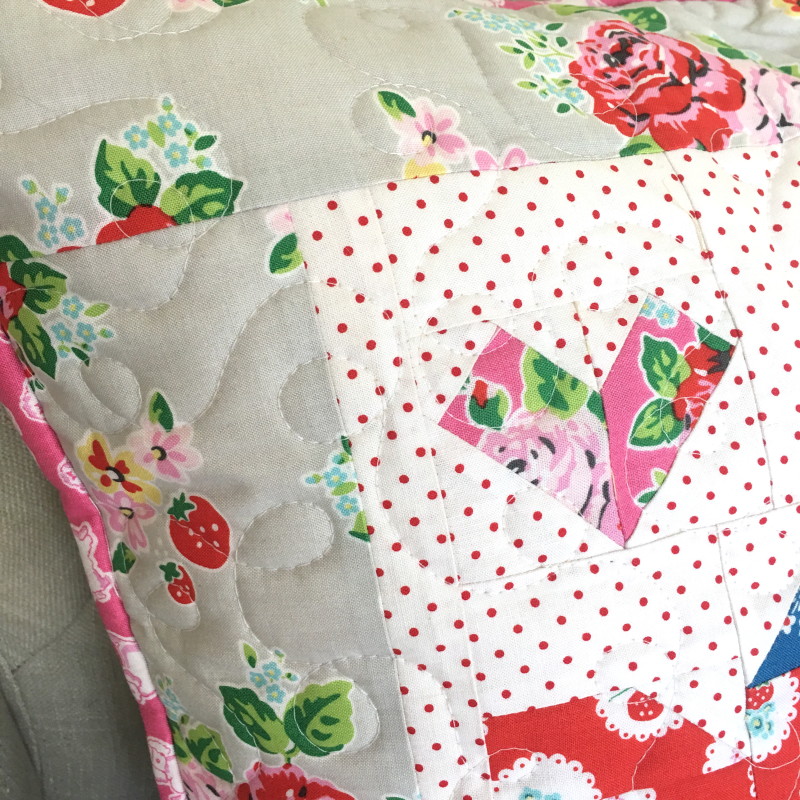
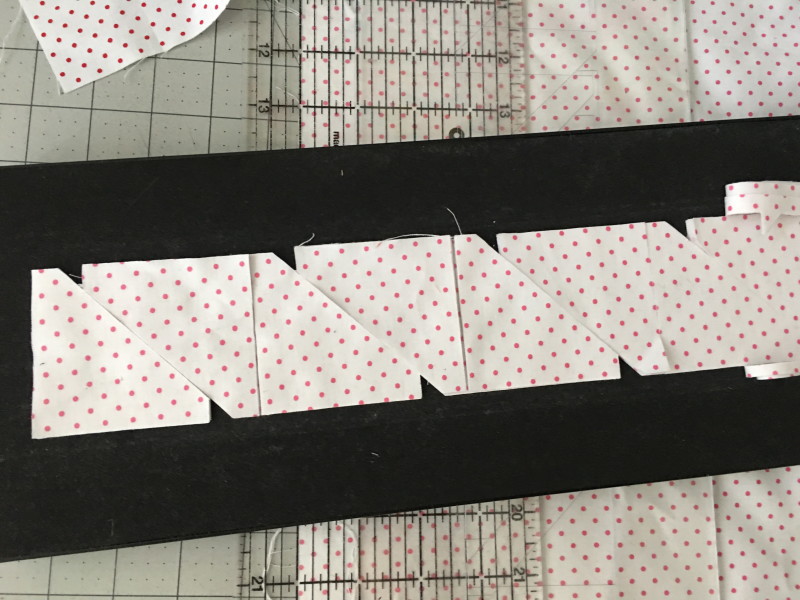
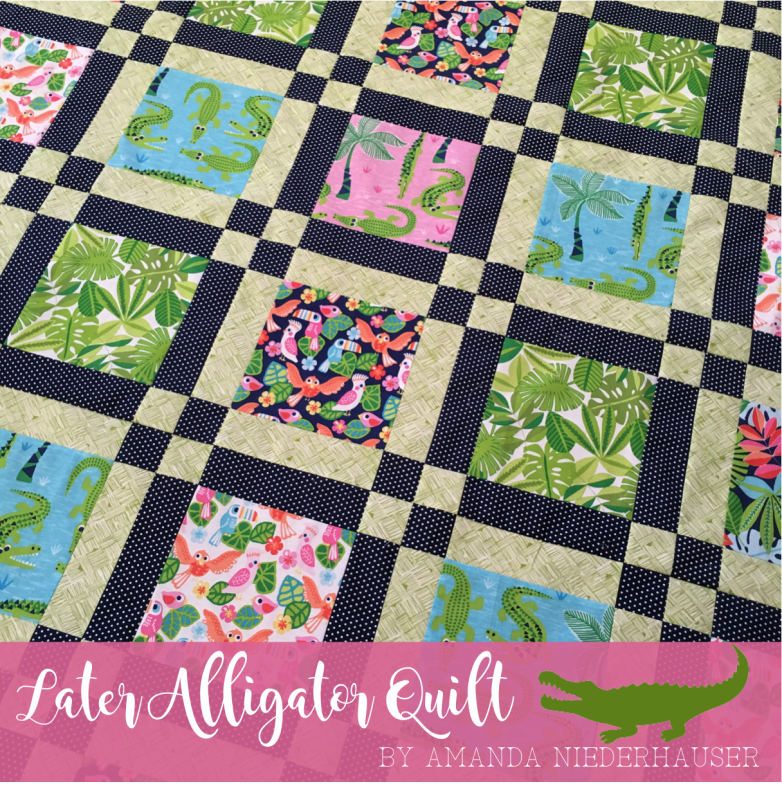
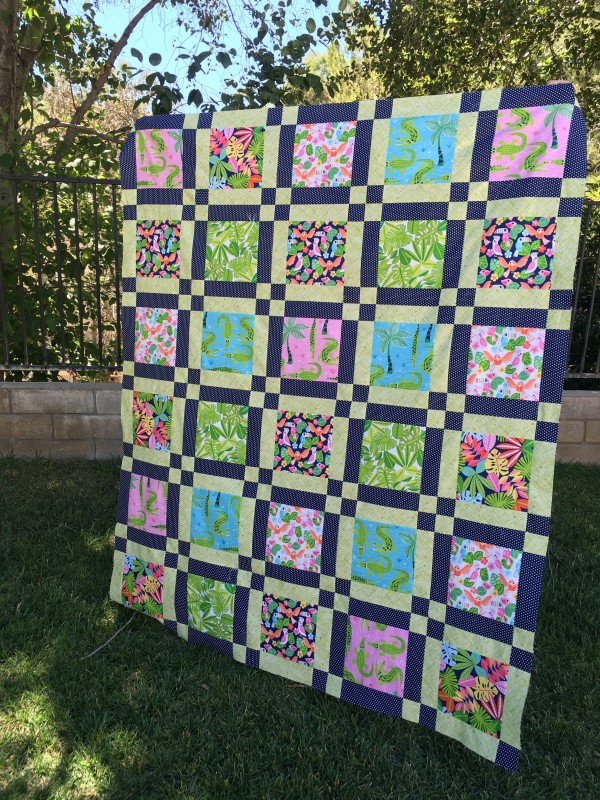
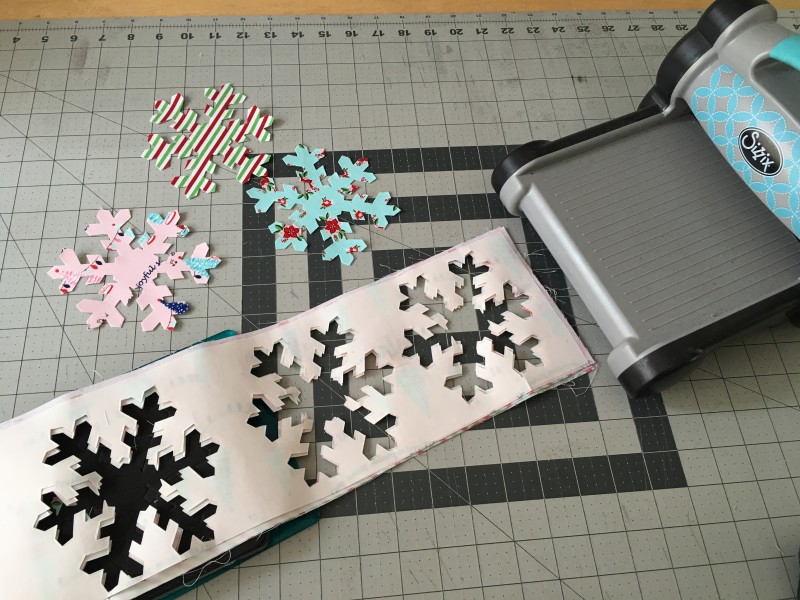
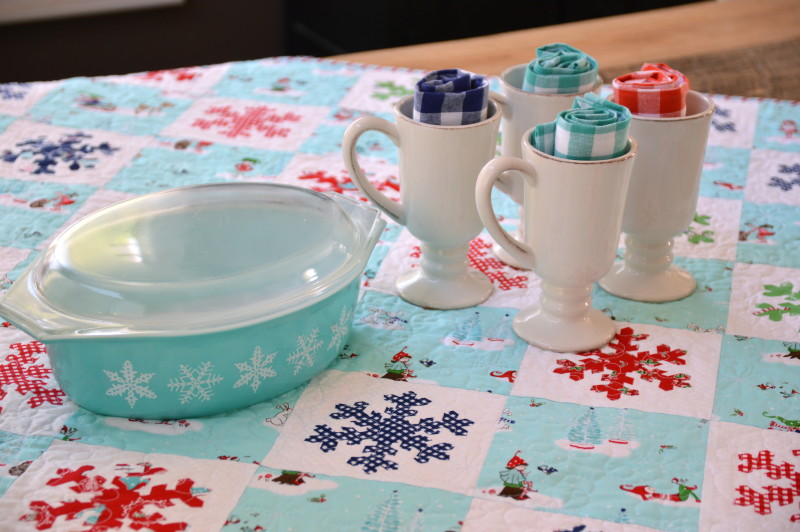
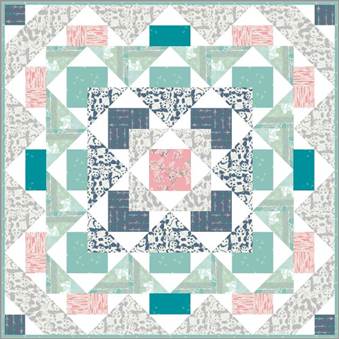
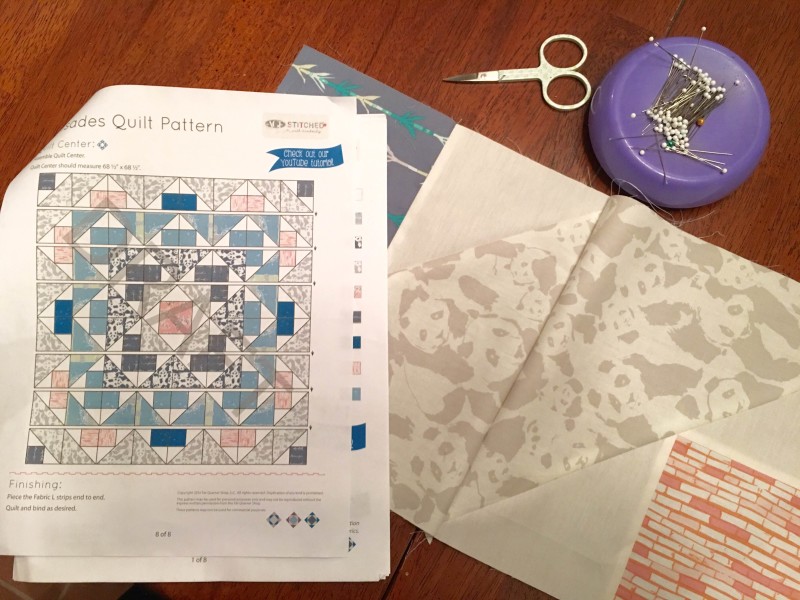
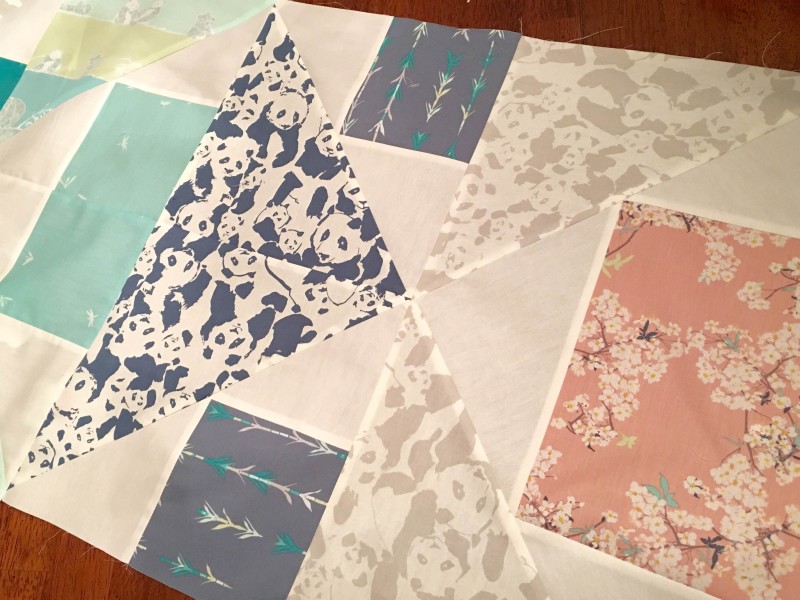
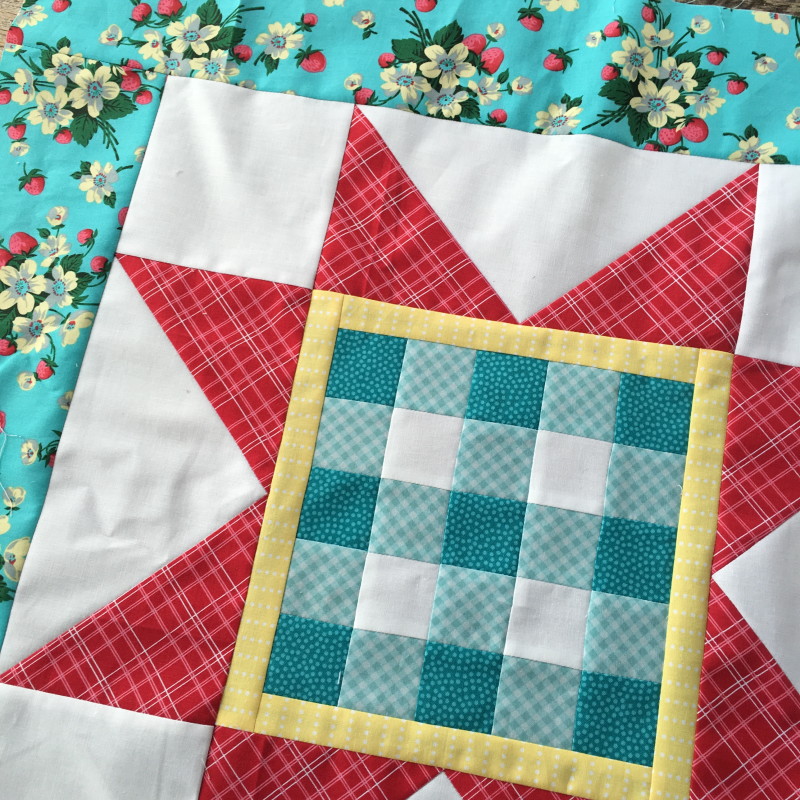
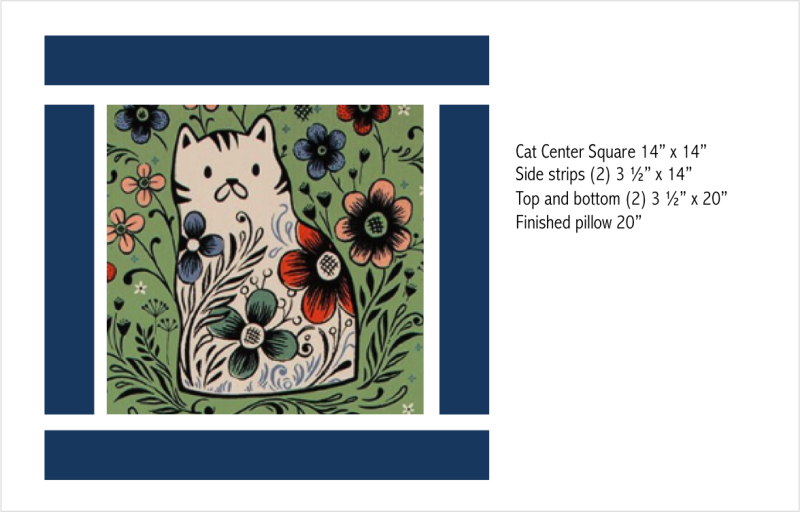
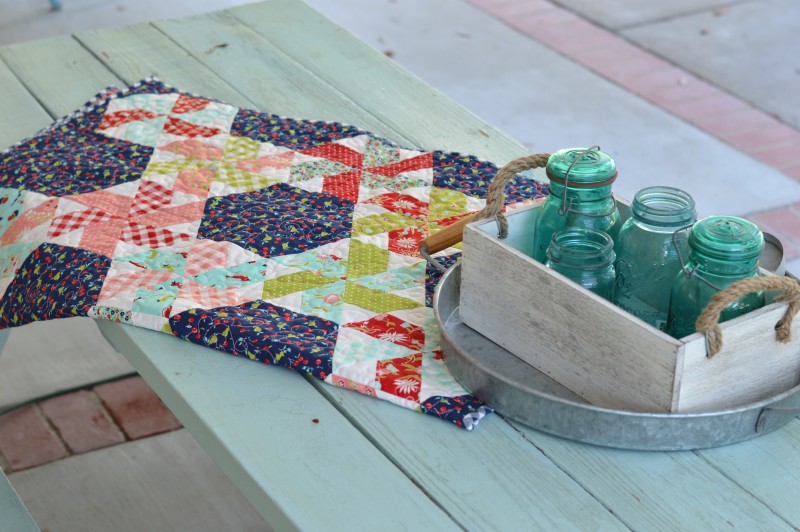
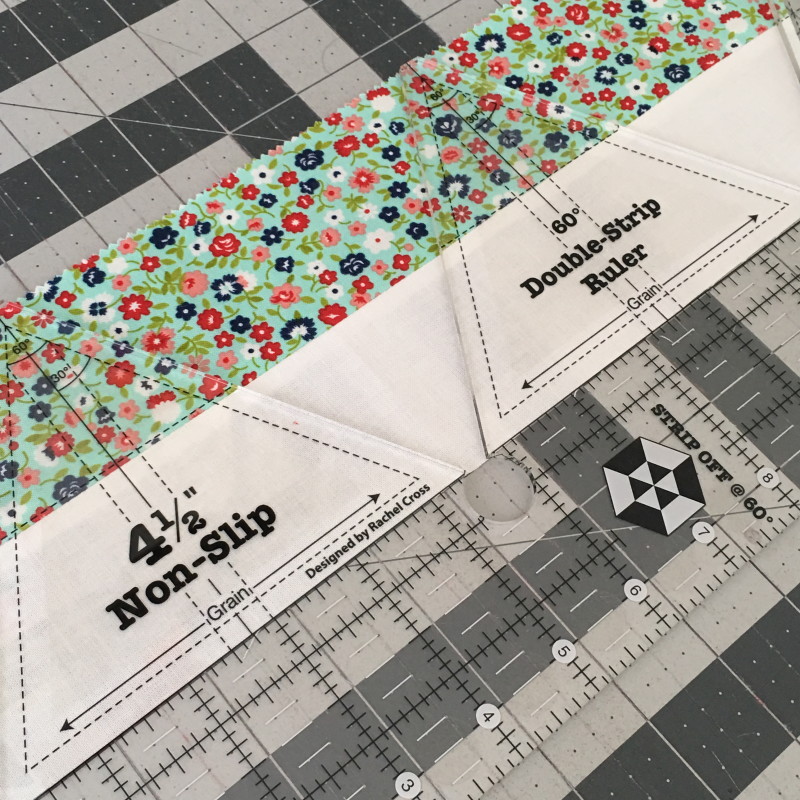
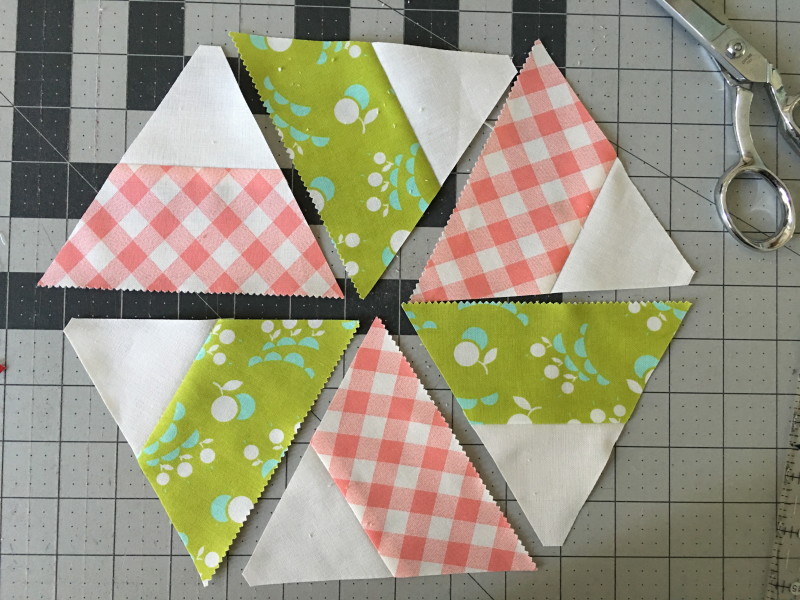
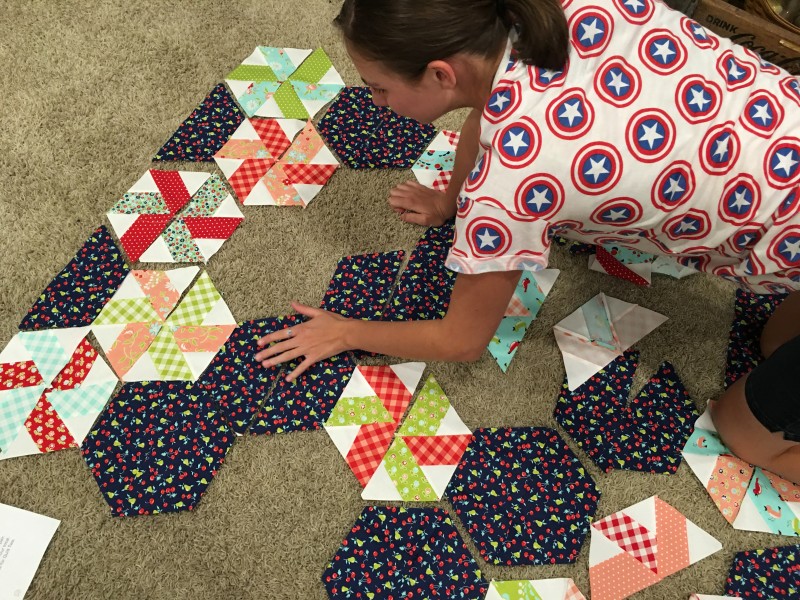
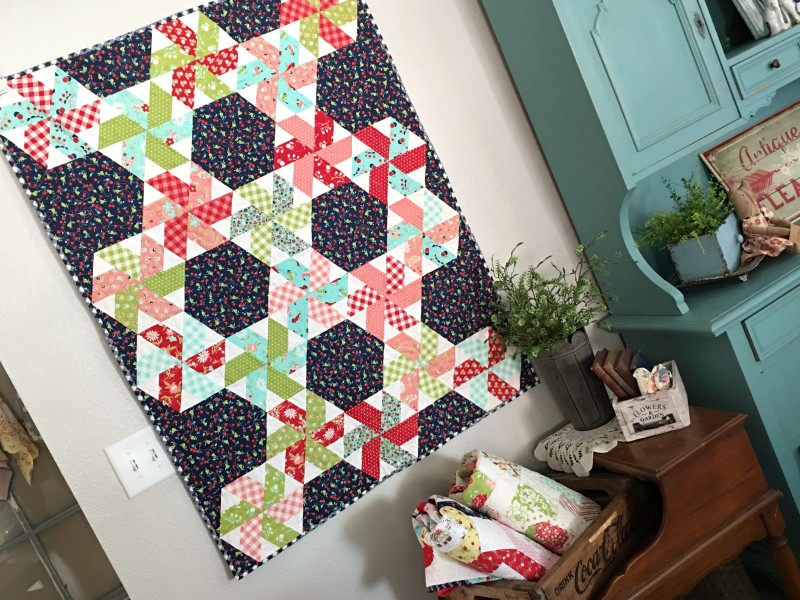
It’s so good to jump out of your comfort zone and try something totally new!  You will love how fun this quilt is – the templates make everything fit together perfectly.

little ruby quilt vintage picnic moda fabric

Click for Fabric requirements 🙂

vintage picnic little ruby quilt 4

Here’s a little overview of the pattern.IMG_8848

The pattern calls for 2 1/2″ strips.  You sew them together and use this cook ruler to cut the exact size triangle.  vintage picnic little ruby quilt 6

The triangles spin around to form a pinwheel type pattern – cool huh 🙂vintage picnic little ruby quilt 7

I read all the instructions and watched the videos and still managed to sew my first 2 triangles together the wrong way – 3 times – YIKES!  Once I got that out of my system it was smooth sailing!vintage picnic little ruby quilt 8

I love having Ella around because I hand her a stack of blocks and she puts them together for me.  We did a little experimenting with the pattern for fun.

The blocks sewed together like a dream.  I just love this fabric!vintage picnic little ruby quilt 10

I used my Spray n Bond basting spray to baste the quilt and then machine quilted myself using a loopy floral design.

vintage picnic little ruby quilt 3

I love bias gingham binding!  The great thing about Vintage Picnic is that the gingham is printed on the bias so it saves fabric and is easy to cut!

vintage picnic little ruby quilt 13

I am thrilled with my Vintage Picnic fabric choice.  I will be keeping this quilt out all summer long!  I did modify my quilt slightly in that I made it a touch smaller.

vintage picnic little ruby quilt 11

vintage picnic little ruby quilt 5 
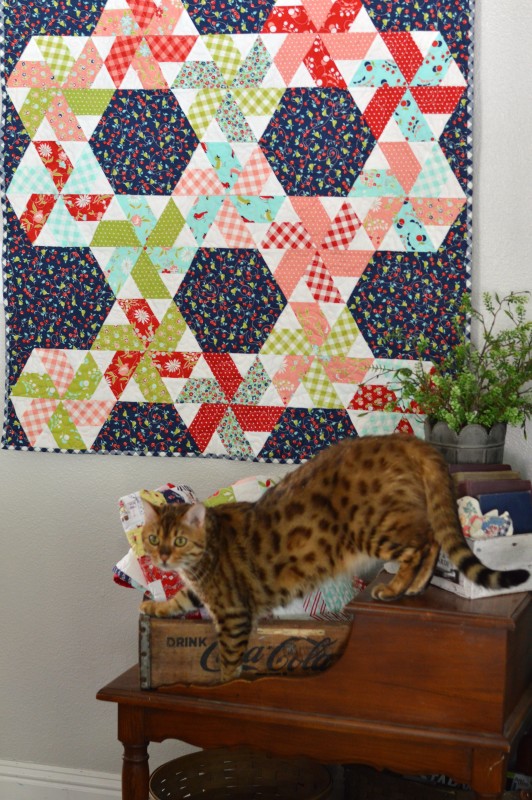
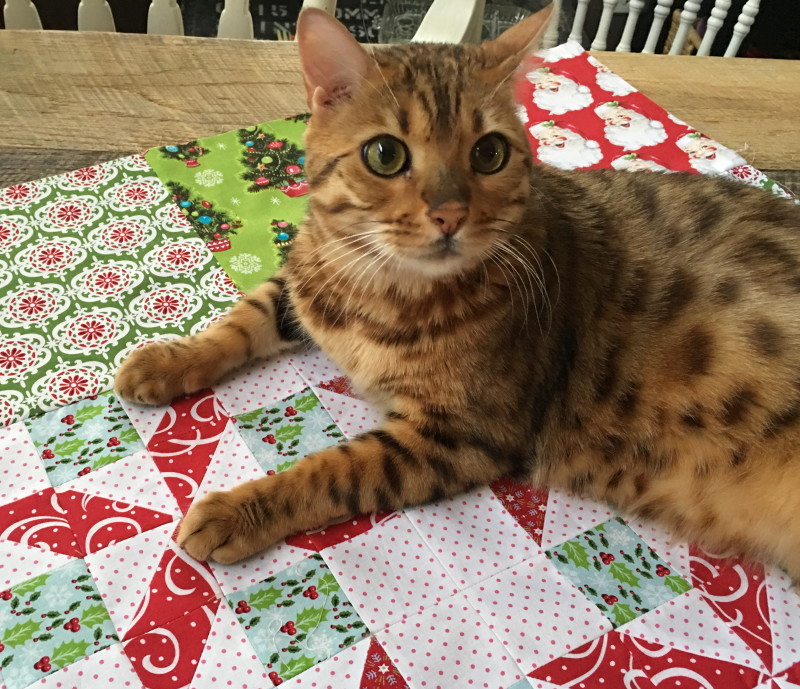
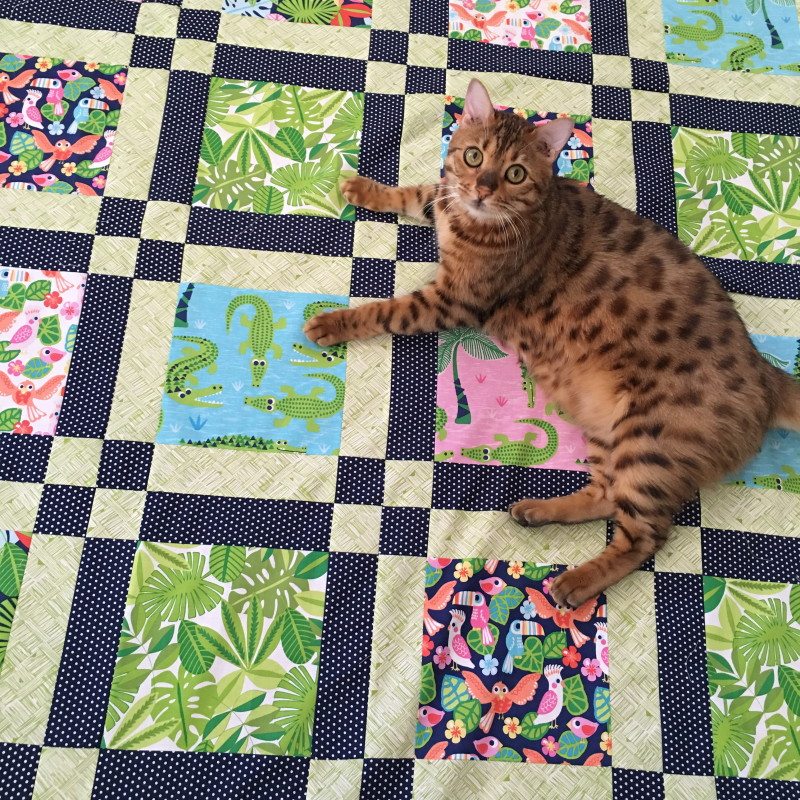
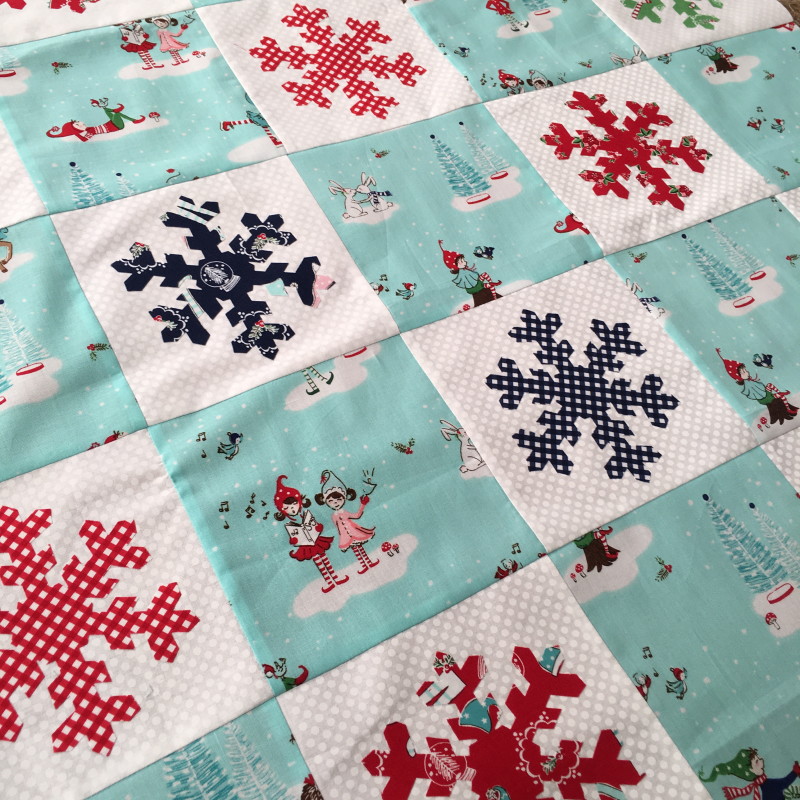
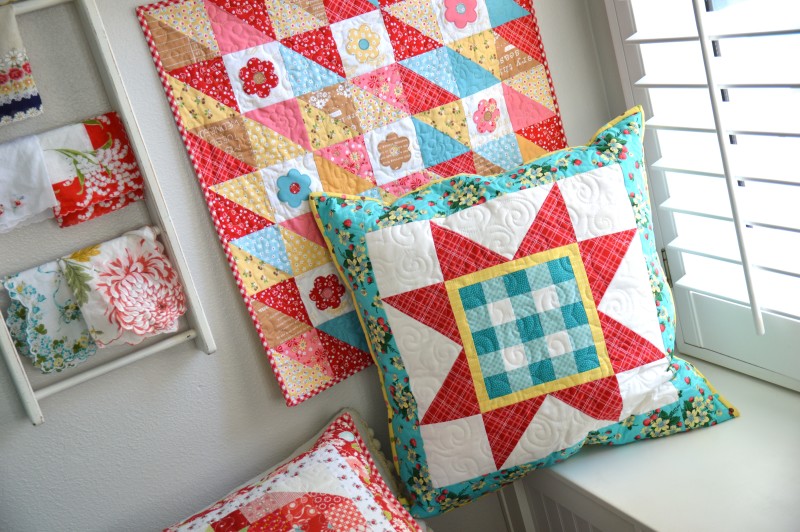
Mufasa seems pretty comfy on the new quilt!

vintage picnic little ruby quilt 14


Be sure to check out the completed quilts from these amazing bloggers!

Melissa from Happy Quilting
Angie from Gnome Angel
Erin Cox from Why Not Sew
Andy from A Bright Corner
Heidi from Buttons & Butterflies
Pat from Pat Sloan
Peta from She Quilts a Lot
Heather from Quilt Story
Megan from Quilt Story
Amanda from Jedi Craft Girl
Gerri from Planted Seed Designs
Sherri from A Quilting Life
Rebecca from Bryan House Quilts
Sherri from This & That Patterns
Jemima from Tied with a Ribbon
Alyce from Blossom Heart Quilts
Stephanie from Modern Sewciety
Brooke from Silly Mama Quilts
Carrie from Moda’s United Notions

Captain America Throw Pillow Tutorial

captain american pillow 8

What does your daughter give her Captain America loving friend for her birthday?  After realizing the friend owns everything Captain America we created this fun pillow with the Captain America shield appliqued on it.  I used Crossroads Denim so it’s super soft, Heat n Bond Lite and some fabric scraps.  Do you want to make one too?  Here’s how!!


Supplies:

(2) 20″ pieces of Crossroads Denim

2 fat quarters red prints

2 fat quarters white prints

1 fat quarter blue print

1 yard Heat n Bond Lite or Feather Lite

20″ pillow (I like down pillows)

22″ zipper

4″ x 20″ strip for zipper flap

captain america shield cutting

Begin by tracing the circles onto the Heat n Bond Lite.  We ran around the house measuring everything to find a 12″ circle and a 10″ circle because they are too large to print.  We found a cake plate and a dinner plate did the trick.

captain american pillow 3
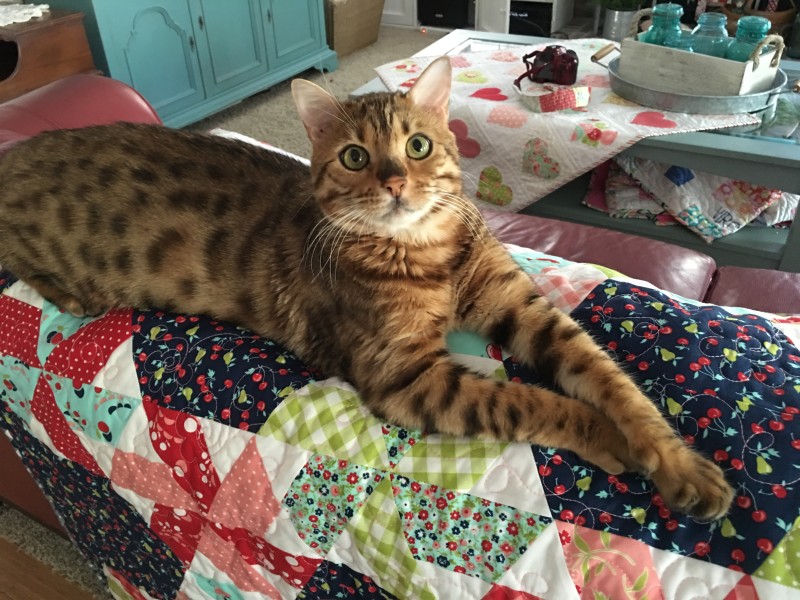
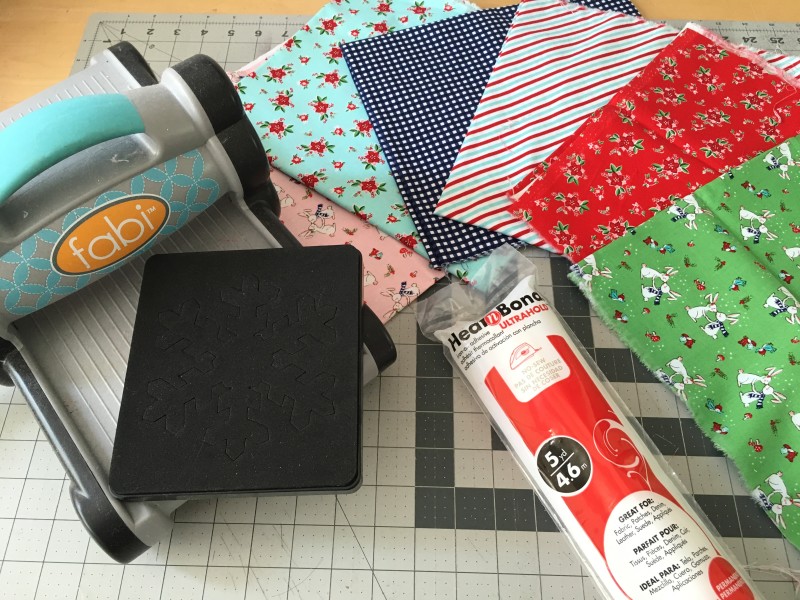
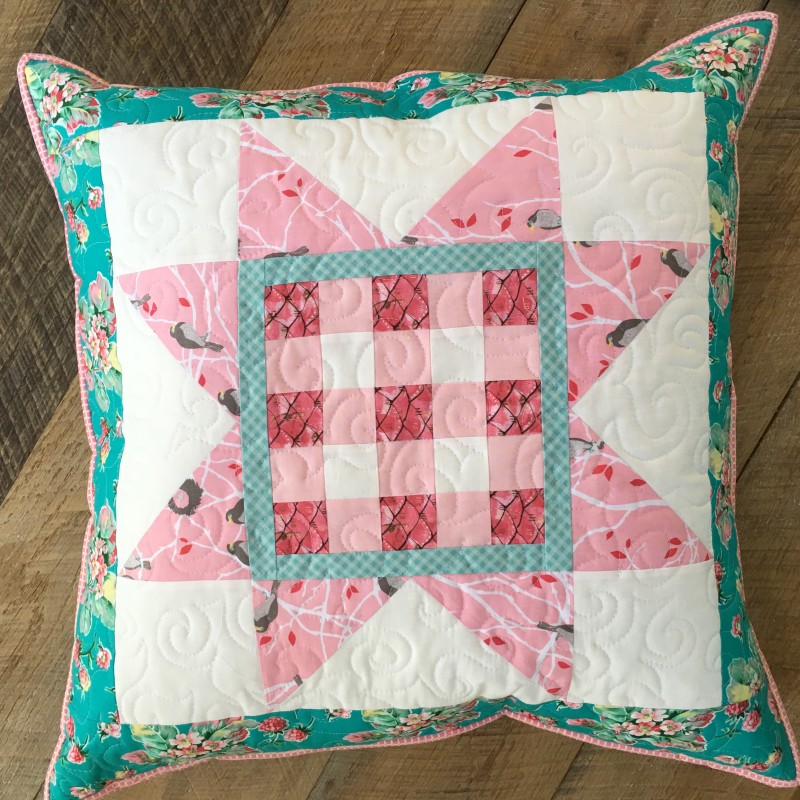
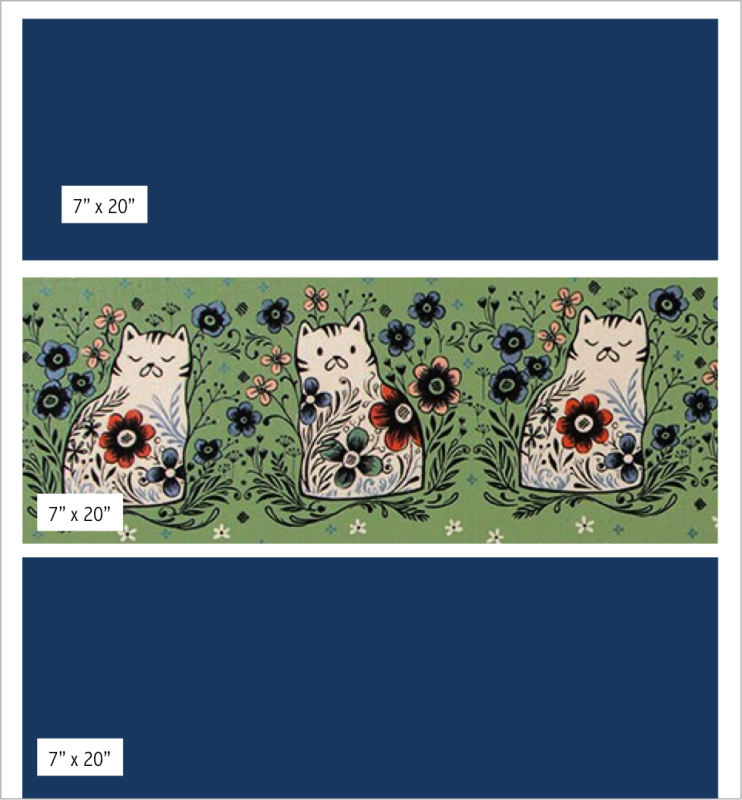
For the 8″, 6″, and star shape you can click HERE to download.  Cut around each circle about 1/4″ away from the pencil line.

captain american pillow 5

A little trick for layerd applique to prevent too much bulk:  Cut the inside of the circle about 1″ away.  It will look like this:

captain american pillow 6

You really only need the Heat n Bond to hold down the edges.  The circles will be layered on top of each other and it will keep everything secure.  Continue doing this with each of the circles.

captain american pillow 2

Position the circles as shown above.  Straight stitch around each circle and star 2 times.  I used red thread.  captain american pillow 4

Make sure your cat approves 🙂   To finish the pillow you can follow this tutorial for inserting a zipper and zipper flap to a pillow back.

captain american pillow 10
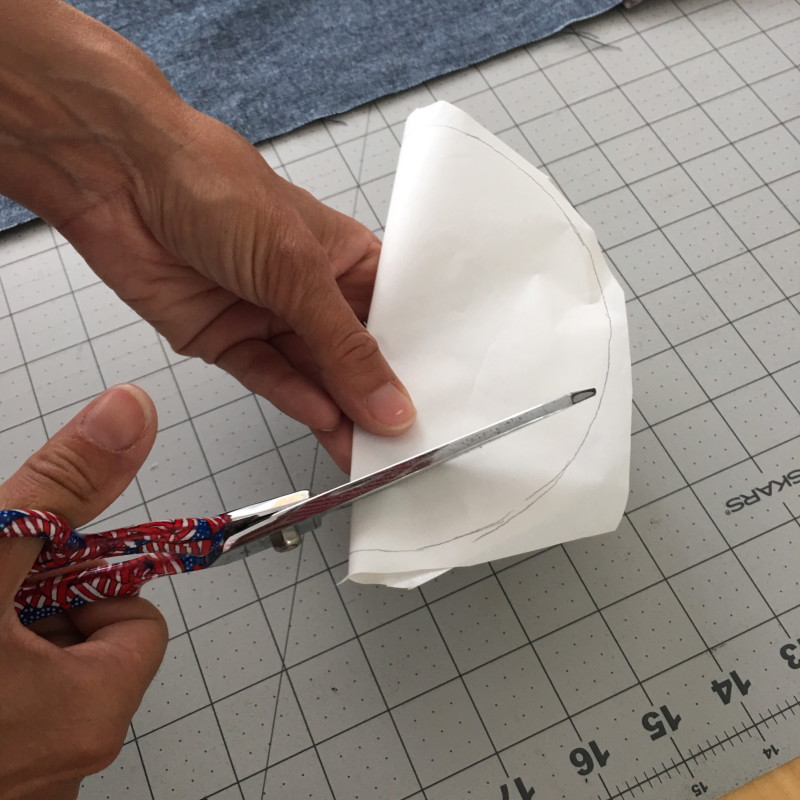
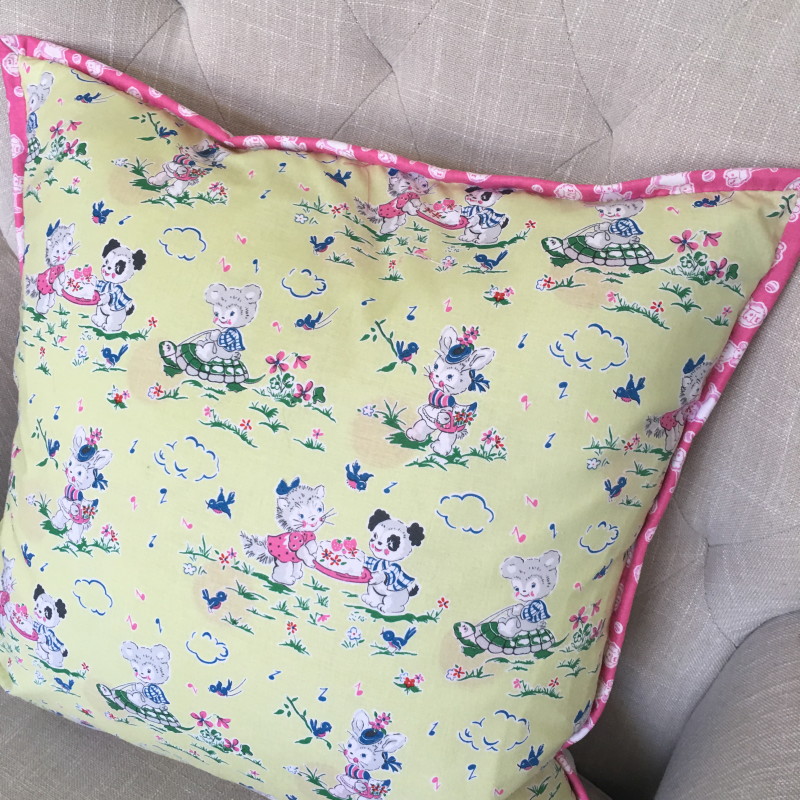
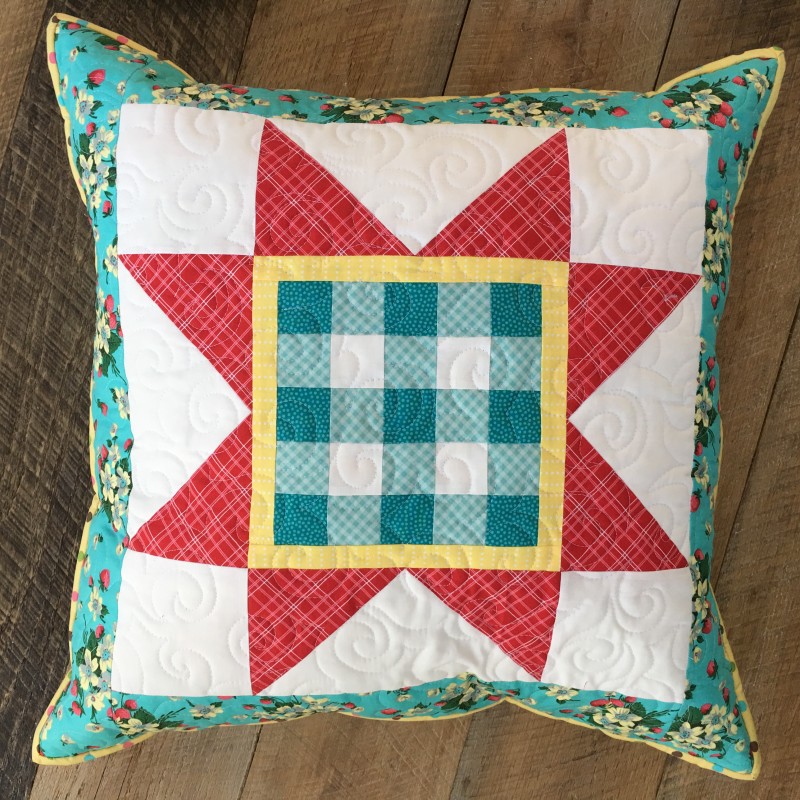
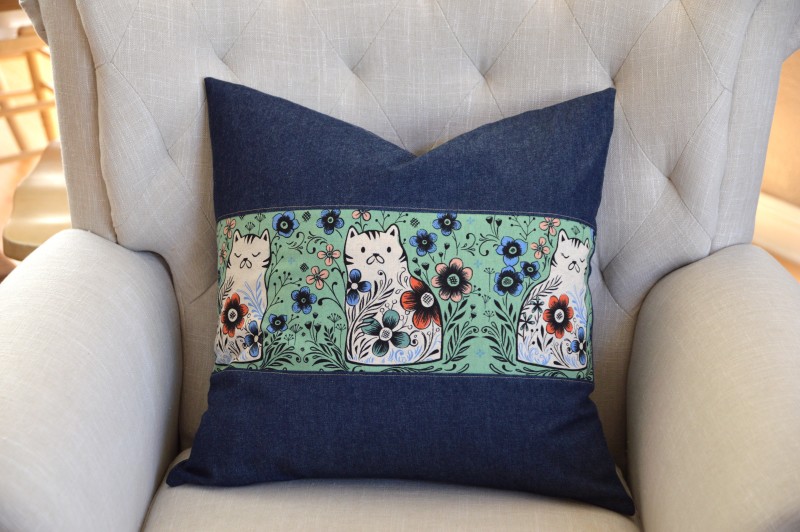
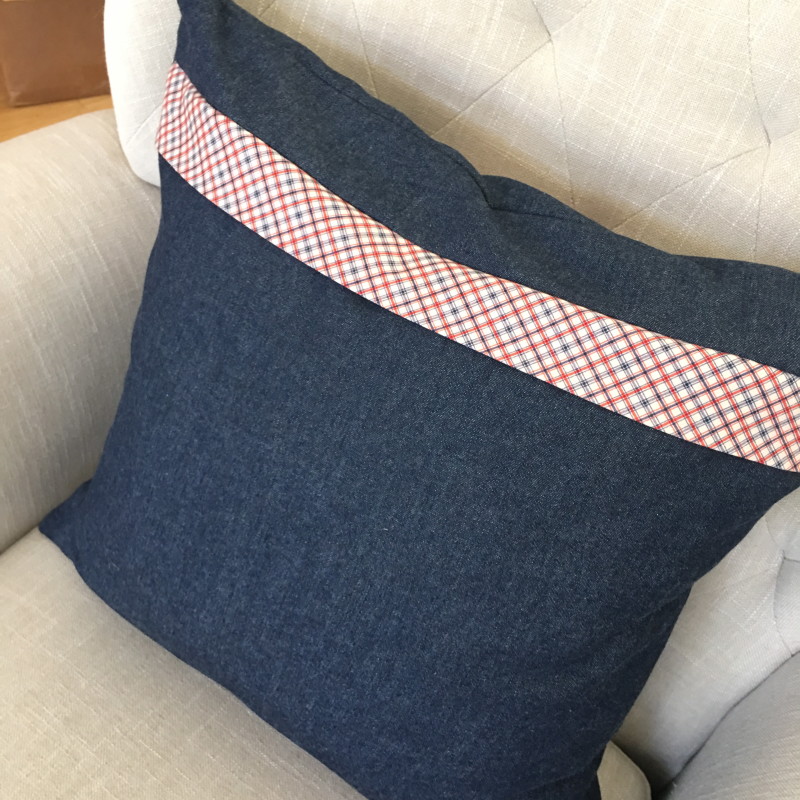
Insert the pillow form and you’re done!  Ready to wrap and head to the party!!  captain american pillow 9

Pretty Playtime Quilts Teapot Block Pillow

Blog-Header

Today is my turn on the Pretty Playtime Quilt Blog Tour!  I love this sweet pattern book by Elea Lutz!  (Juicy tidbit…..Elea and I once spent a wild night together at an 80’s dance club!!!)  The patterns for this entire quilt are in the spiral bound book available from Fat Quarter Shop.  You can make the sampler quilt or you can get creative with the blocks!Screen Shot 2016-07-03 at 10.00.13 PM
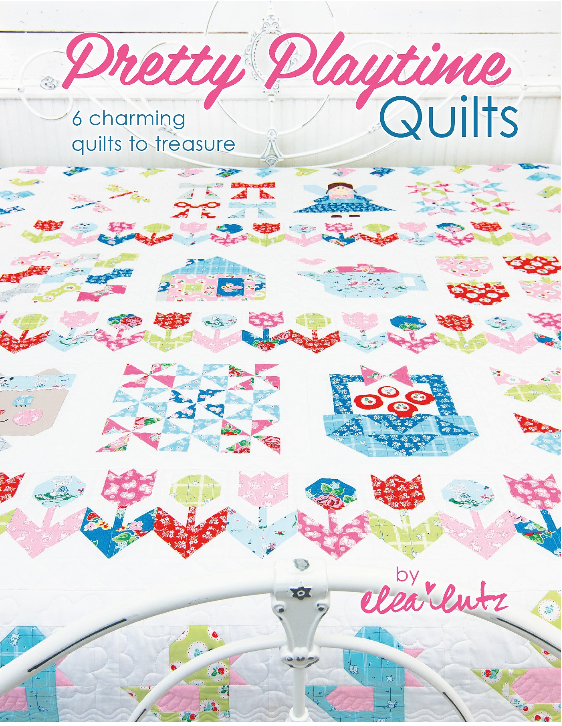
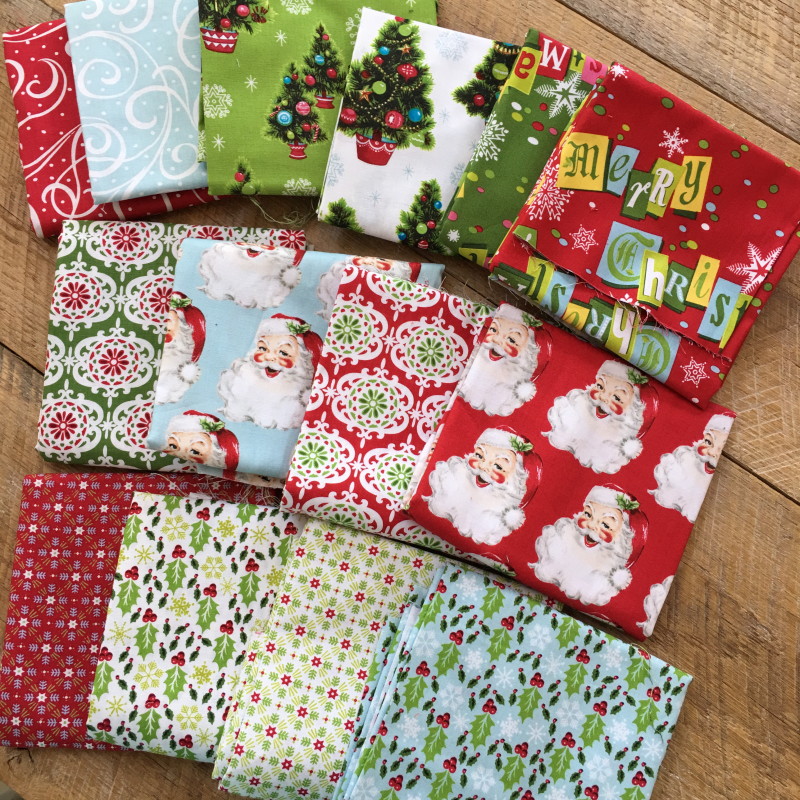
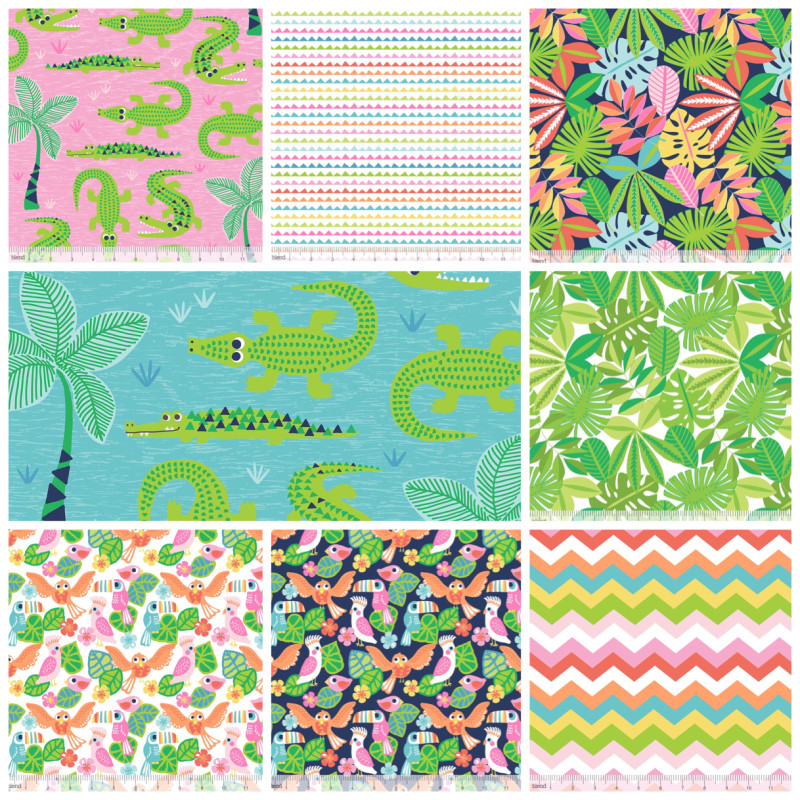
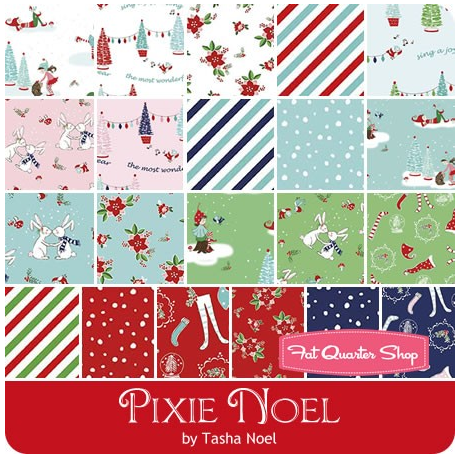
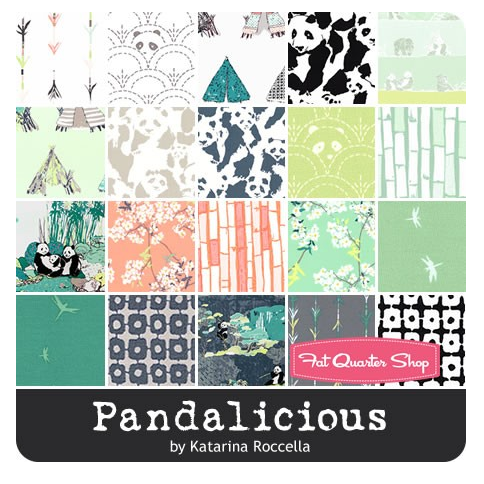
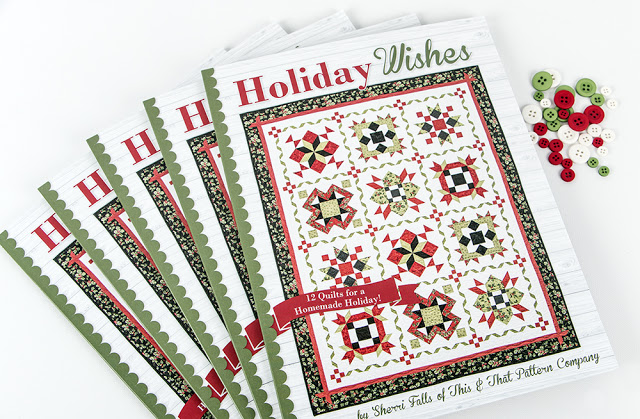
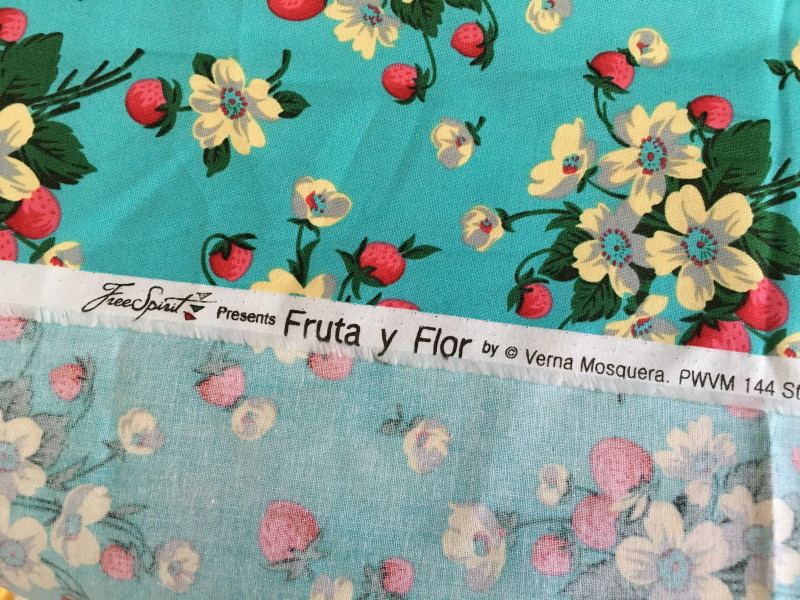
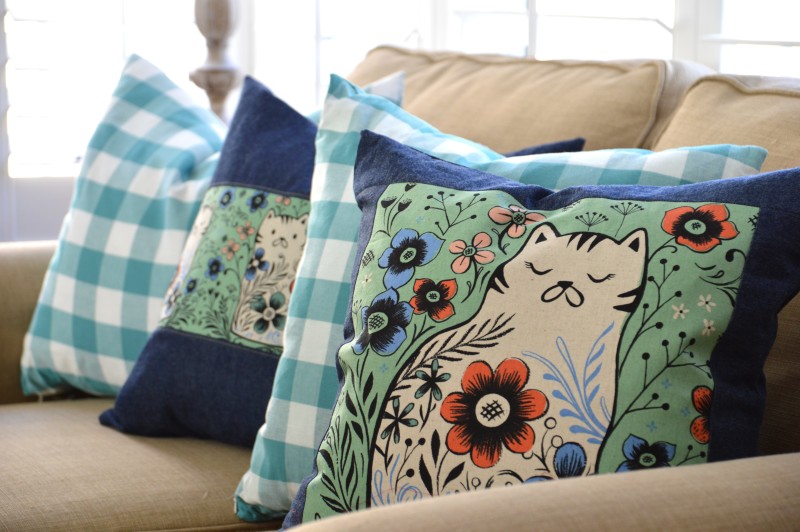
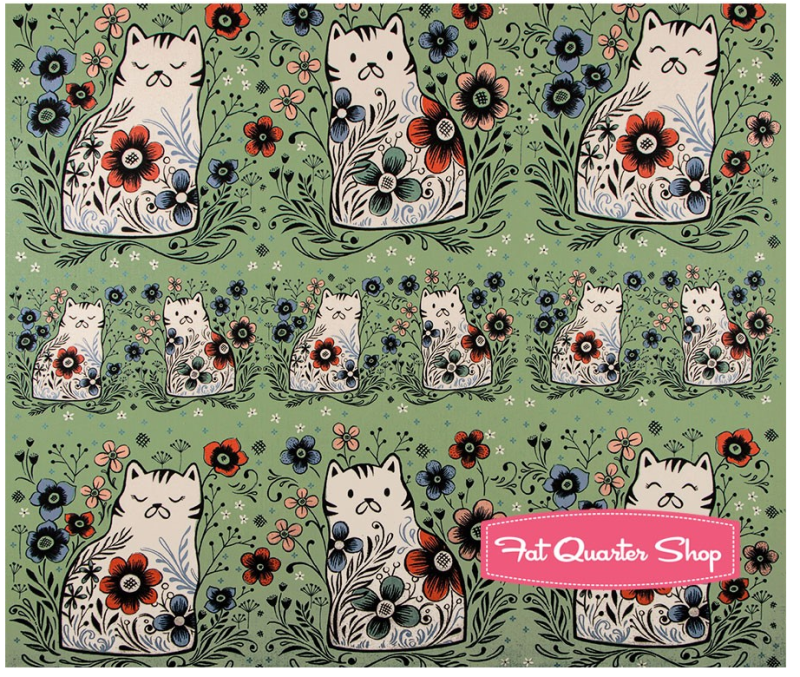
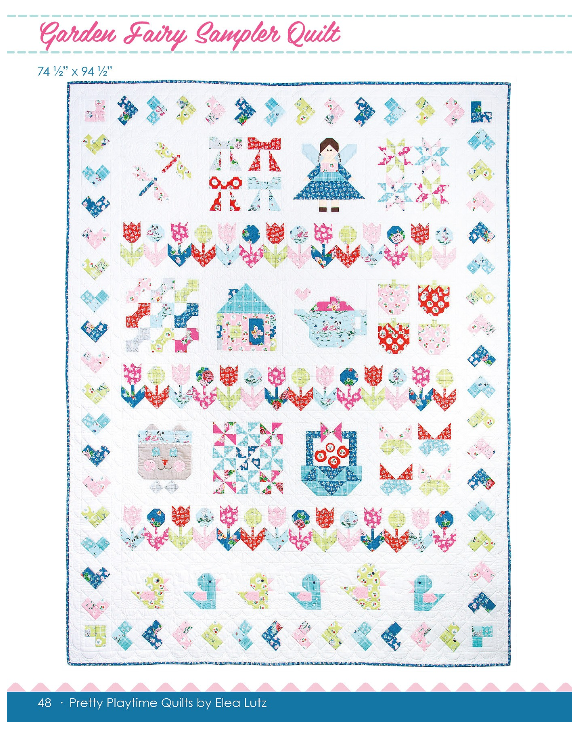
The fabrics used in the pattern book are from Elea’s fabric line Strawberry Biscuit.Screen Shot 2016-07-03 at 9.59.54 PM

I choose to make a throw pillow out of the teapot block.IMG_9424

I sewed the block exactly like the pattern instructed.  I love how the instructions are super easy to read and the diagrams make sewing the block a snap.  I added a 1.5″ border around the teapot followed by a 3.5″ floral border.  IMG_9416

I quilted the entire block like you would a mini quilt.  I trimmed it down to measure 20″ square.  Before adding the binding I sewed a 20″ x 20″ back with a zipper.  IMG_9412

I basted the quilted front to the pillow back wrong sides together with a 1/8″ seam all the way around.  Then I added the binding just like you would a quilt.IMG_9409

I inserted a 20″ down pillow form.  It’s super soft and perfect for propping your head while reading or watching a movie 🙂IMG_9414

Be sure to check out a new block from a new designer each week!  You will love all the inspiration!

Week 2 – Erin from Why Not Sew?
Week 3 – Wynn from Zakka Art
Week 4 – Anorian from Samelia’s Mum
Week 5 – Amy from Diary of a Quilter
Week 6 – Renee from Sewn with Grace
Week 7 – Jemima from Tied with a Ribbon
Week 8 – Amanda from Jedi Craft Girl
Week 9 – Debbie from Happy Little Cottage
Week 10 – Tina from Emily Ann’s Kloset
Week 11 – Erica from Kitchen Table Quilting
Week 12 – Kristyne from Pretty by Hand
Week 13 – Heidi from Fabric Mutt
Week 14 – Brigitte from The Family Hearth
Week 15 – Lorrie from Sew Mod Designs
Week 16 – Kristin from They Grow Up Too Fast

Christmas Kitsch Blog Hop {Christmas Quilt Tutorial}


ChristamsKitschHeader
IMG_9355
I’m kicking off the Christmas Kitsch Blog Hop today!  For the next 6 weeks, each of the Blend Fabrics Design Team Members will be sewing up a fantastic holiday project with this retro-inspired fabric line!  Christmas in July here we come!
ChristamsKitschBeauty
Immediately I fell in love with these fabrics!  My kids call the santas “the scary Santas!”  I love them because they remind me of all the Christmas decorations my mom had when I was a little girl.  This fabric is available at Fat Quarter Shop.
 IMG_9349
For my project I made a table size quilt.  I love this size quilt because it’s perfect to whip up in a day, give as a gift, throw over a chair, or hang on the wall.  This quilt consists of only 2 sizes of squares: 2.5″ and 8.5″.
IMG_9348
I also love this pattern because you can show off the larger prints on the border, and then do a little half square triangle (HST) piecing on the center.  Lets get started!
Press all seams open
1/4″ seams throughout
Finished block 8″, finished quilt 40″ square
IMG_9333
Fabric Requirements
Assortment of at least 10 fat quarters
1 yard of low volume background.
IMG_9339
The star block is made up of 2.5″ squares.
For each block you need:
4 low volume 2.5″ squares
4 blue tone 2.5″ squares
8 half square triangle blocks: red and low volume.
I choose to make my HSTs with my Sizzix Fabi.  I love this extra long die that cuts perfect triangles that when sewn together measure 2.5″ square.
IMG_9335
If you don’t have this die you can make the HSTs using your favorite method.  Just make sure they finish 2.5″ square.
Piece the star block together in rows, pressing seams open.
Make 9 star blocks
 IMG_9358
For the border, cut (18) 8.5″ squares from an assortment of the darker prints.
IMG_9346
Lay out the quilt and sew together in rows, pressing seams open.
Quilt as desired.
IMG_9356
IMG_9364
This is such a fun quilt to sew!  You could easily make it larger or make it rectangle.
Be sure to check out the other designers during the next 6 weeks!  I can’t wait to see what they have.
Amanda – Jedi Craft Girl – July 1
Tina – Emily Ann’s Kloset – July 8
Jen – Tie Dye Diva – July 15
Caroline – Sew Can She – July 22
Bev – Flamingo Toes – July 29
Andy – A Bright Corner – August 5
      BlendButton