Tea Garden Dress

tea garden dress


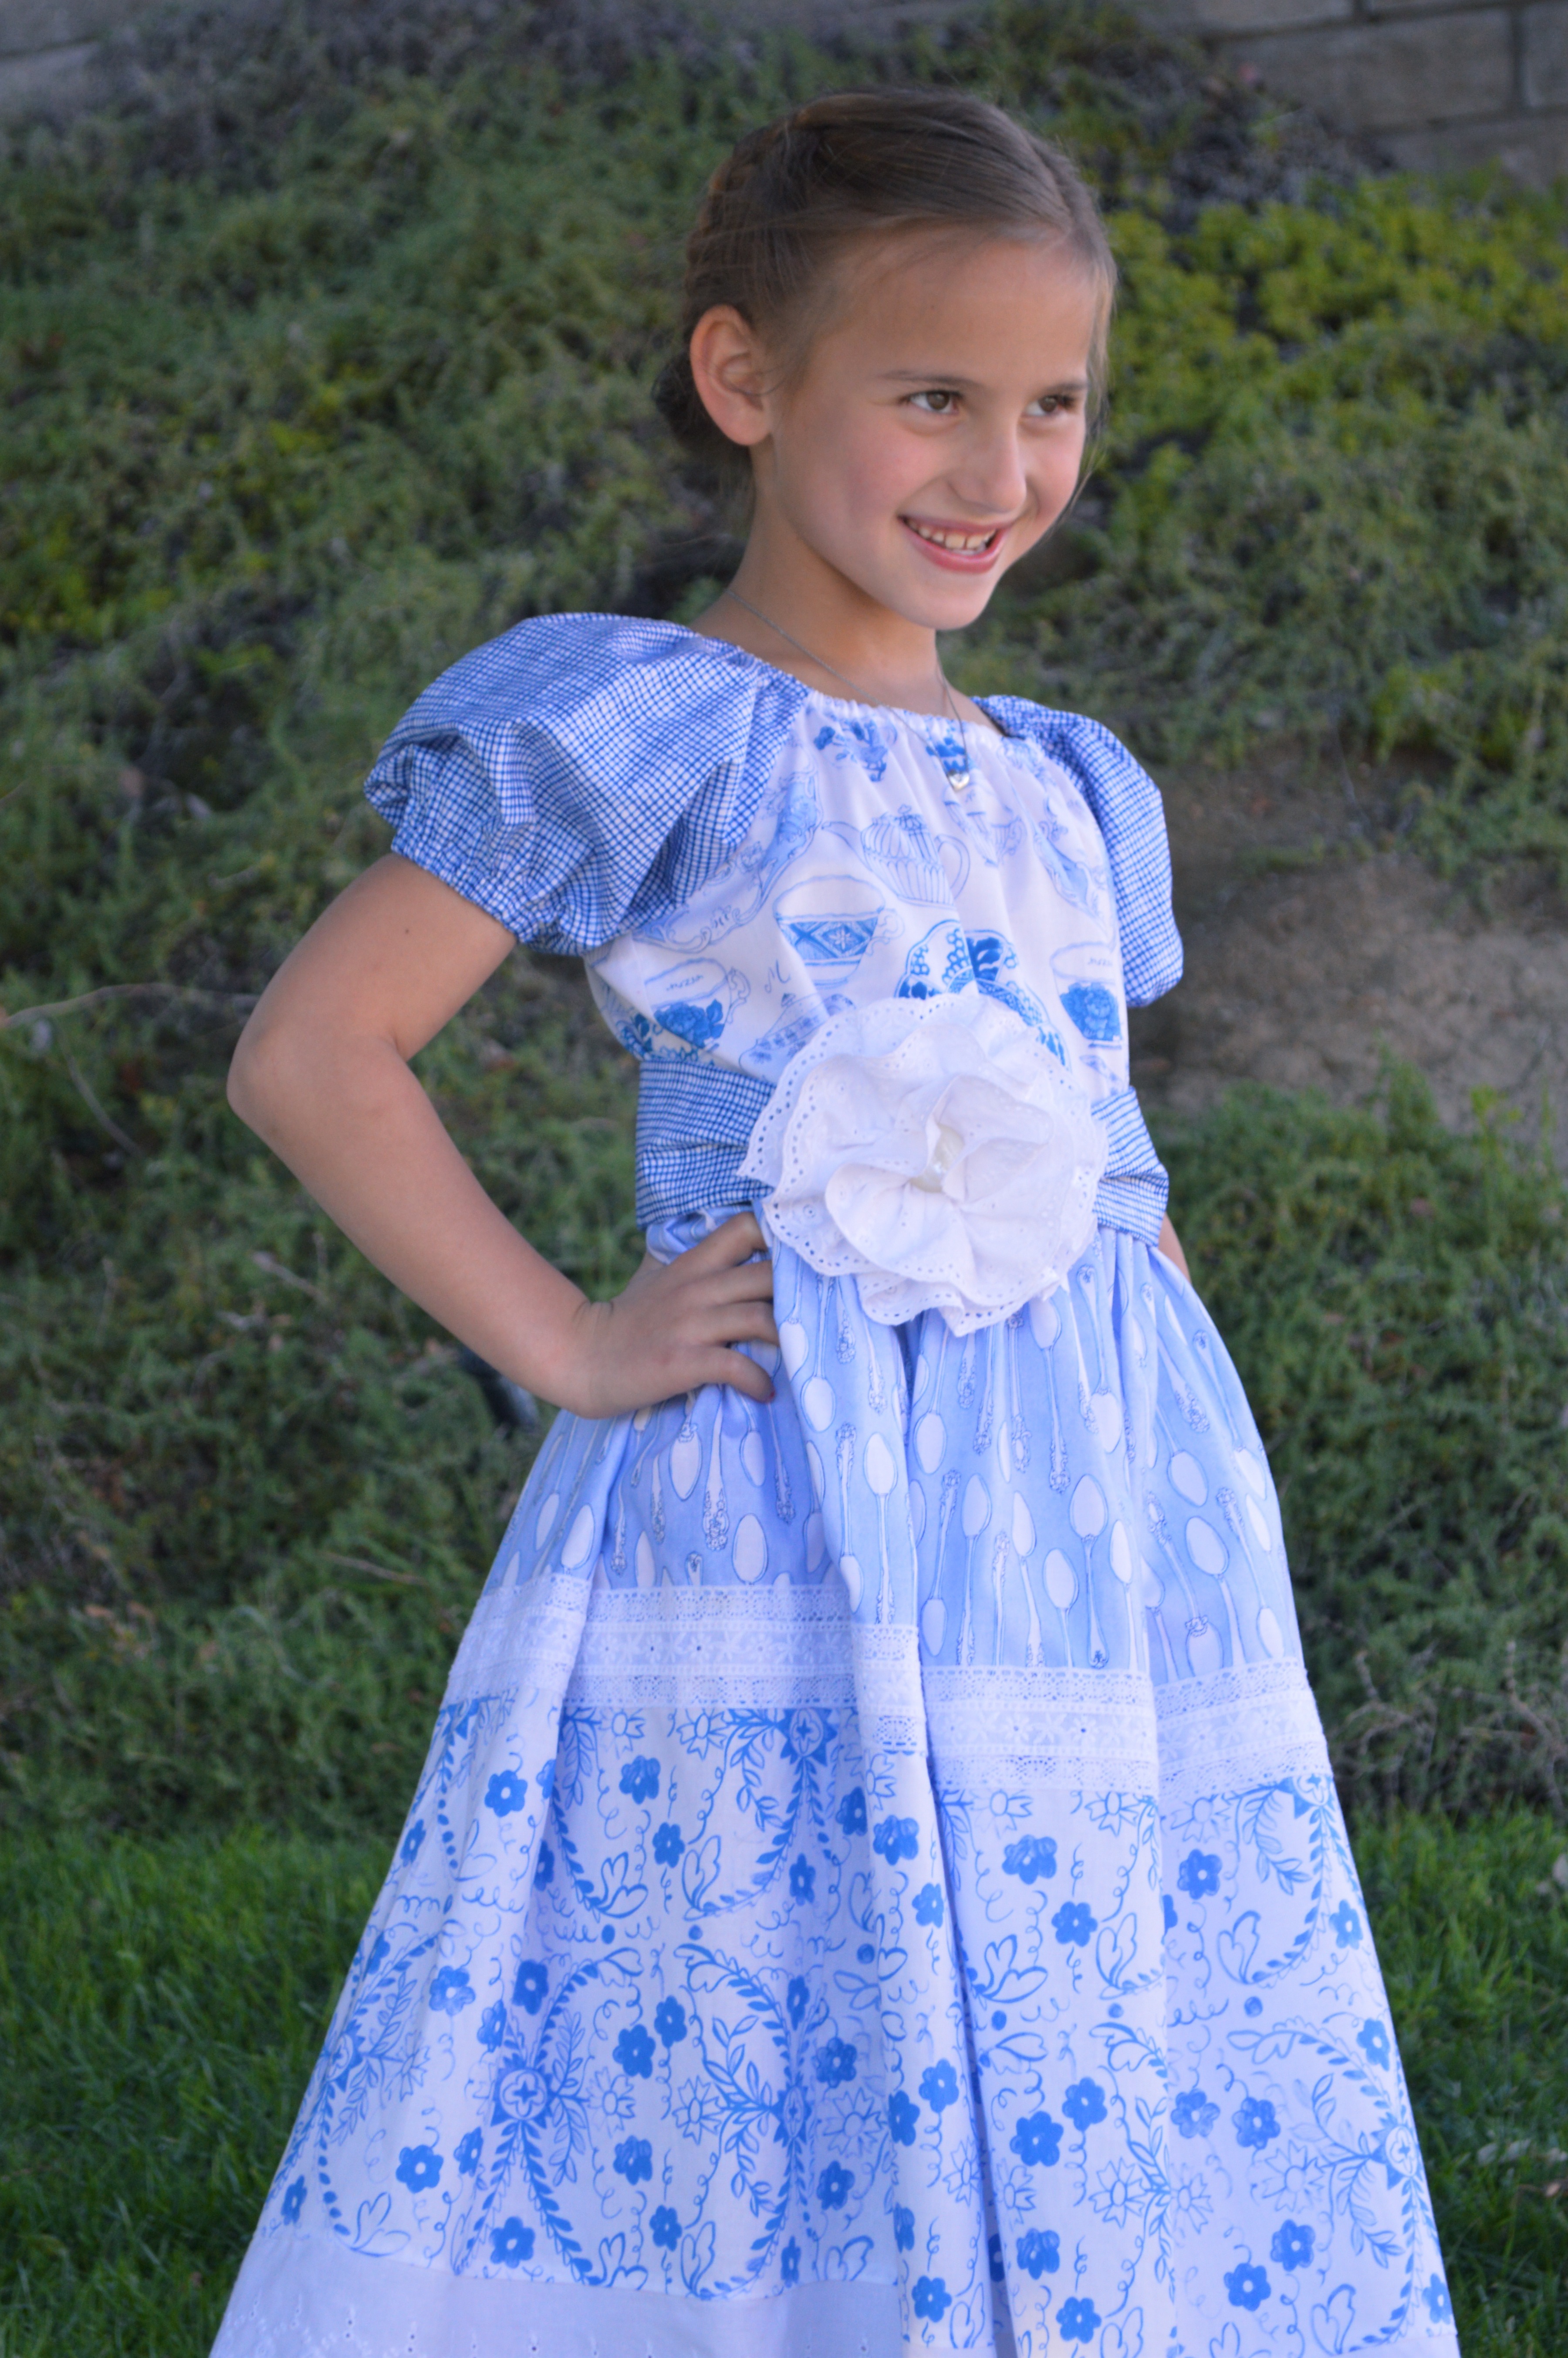
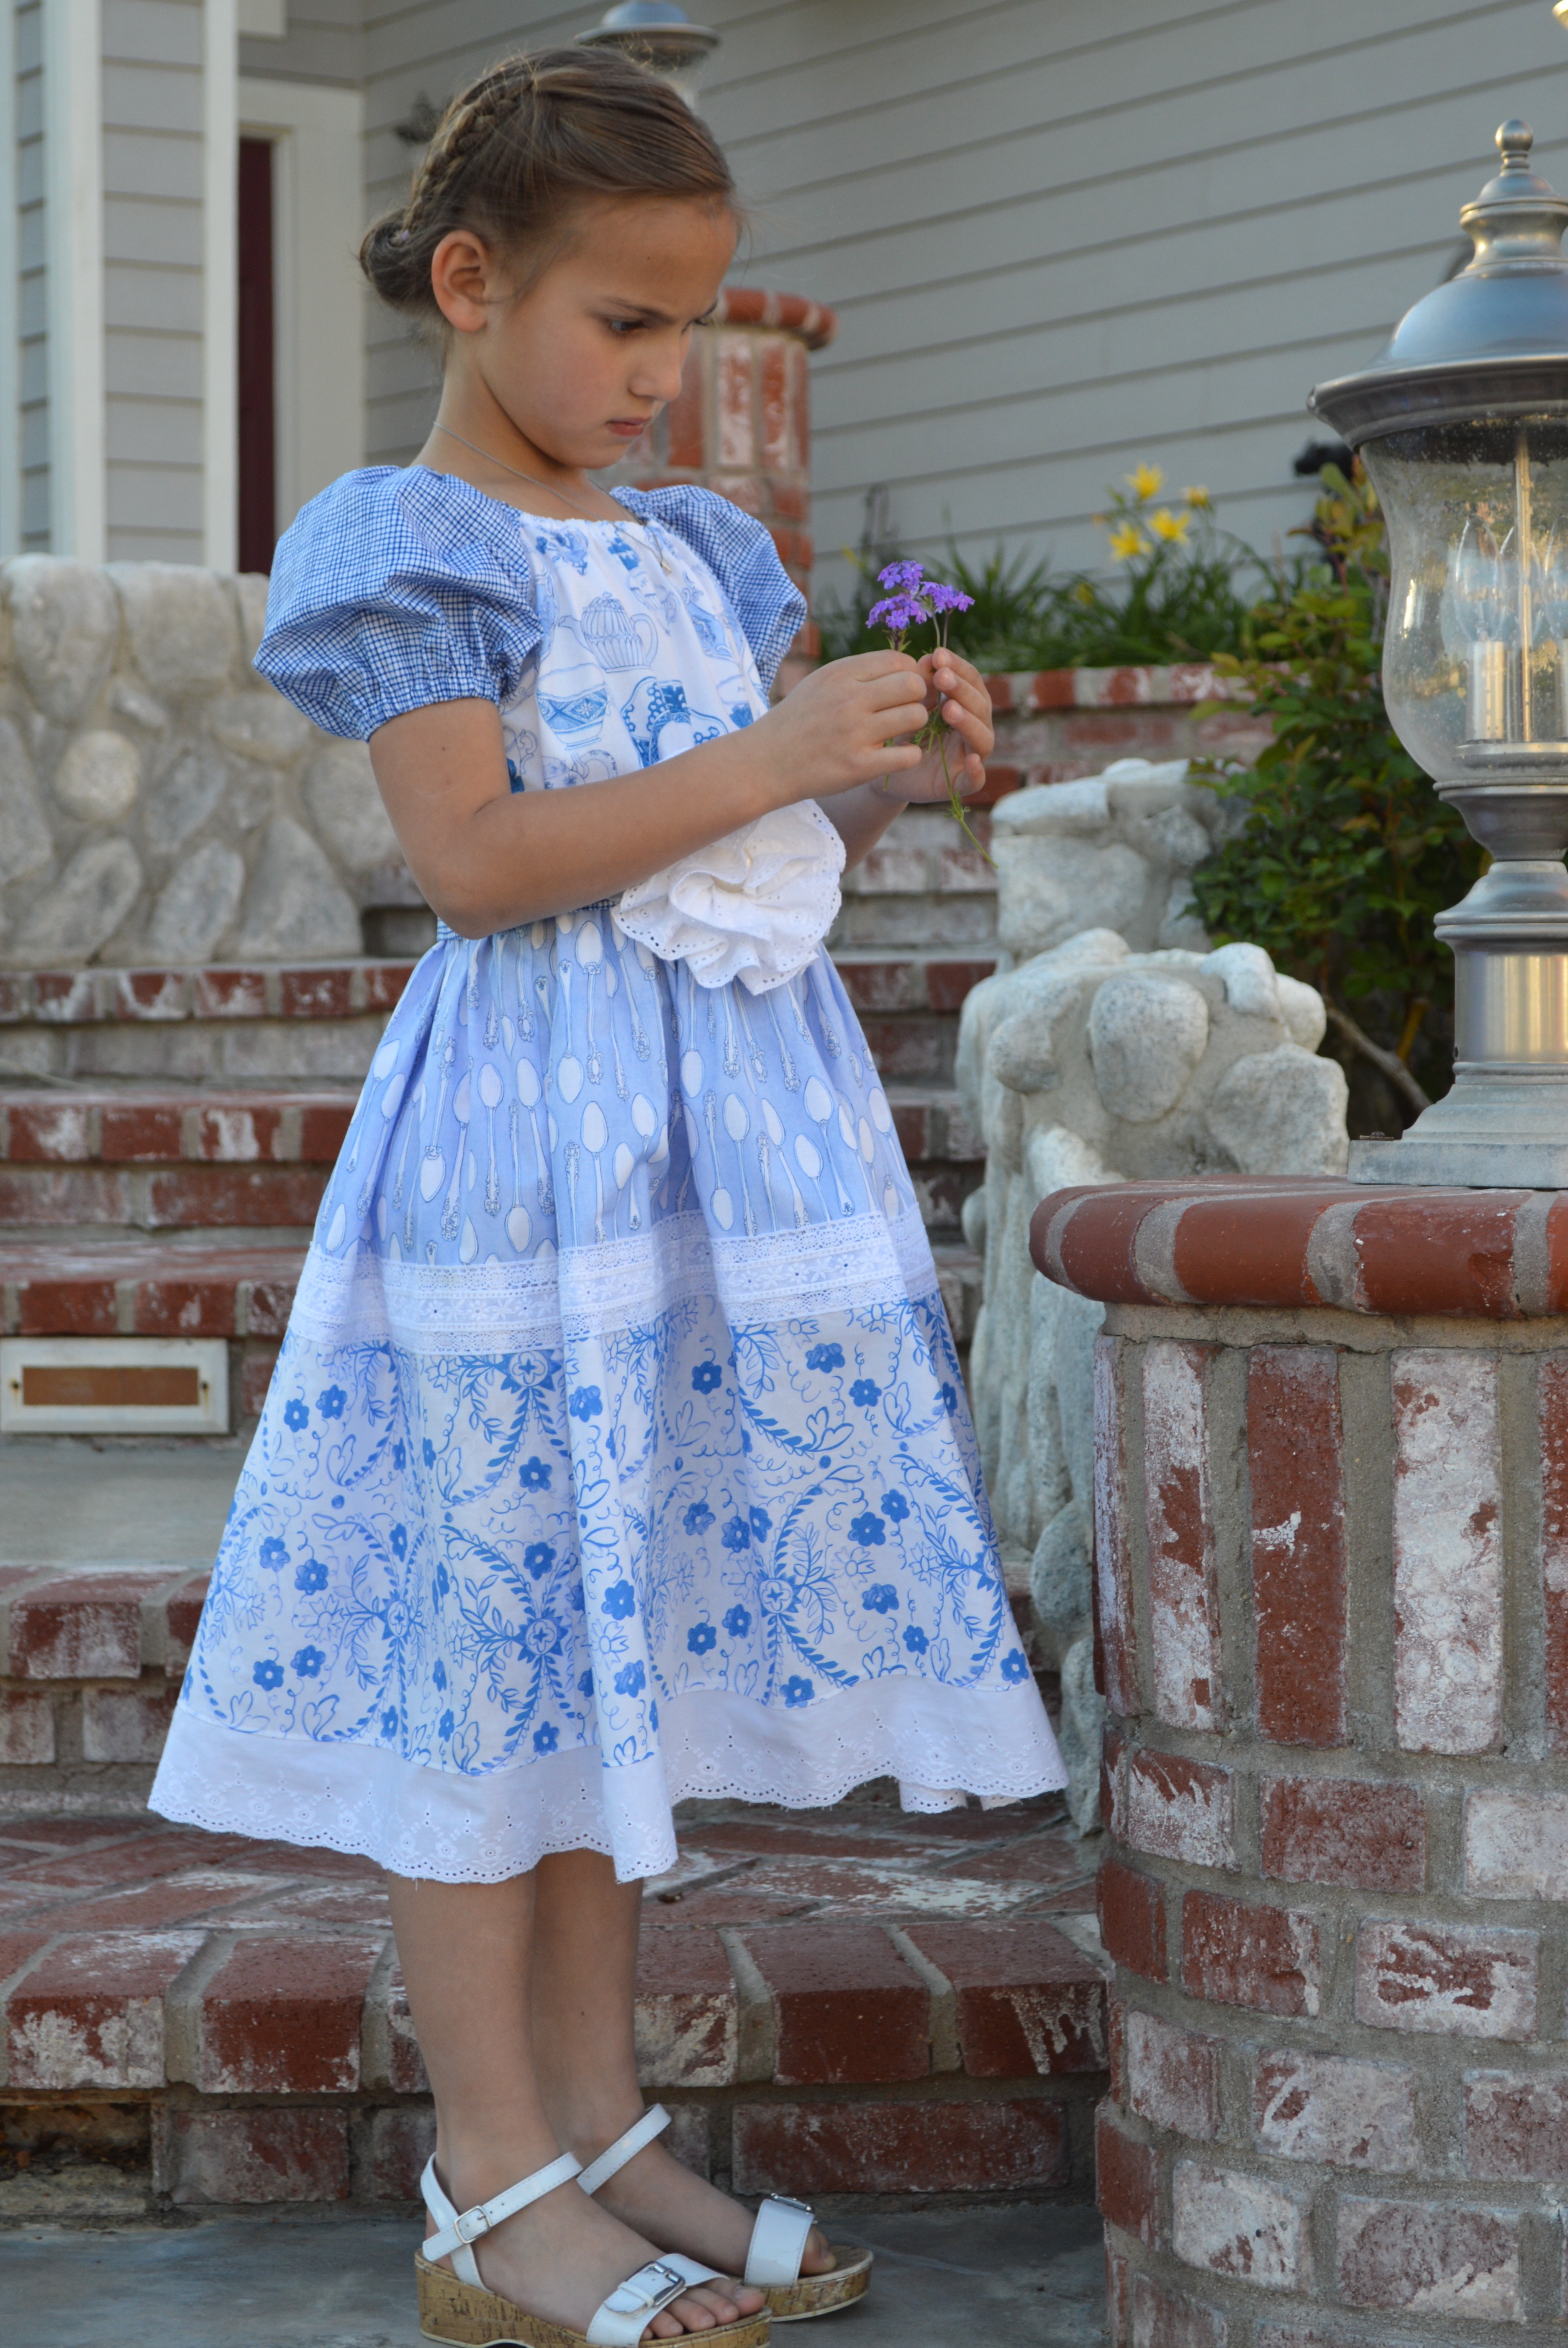
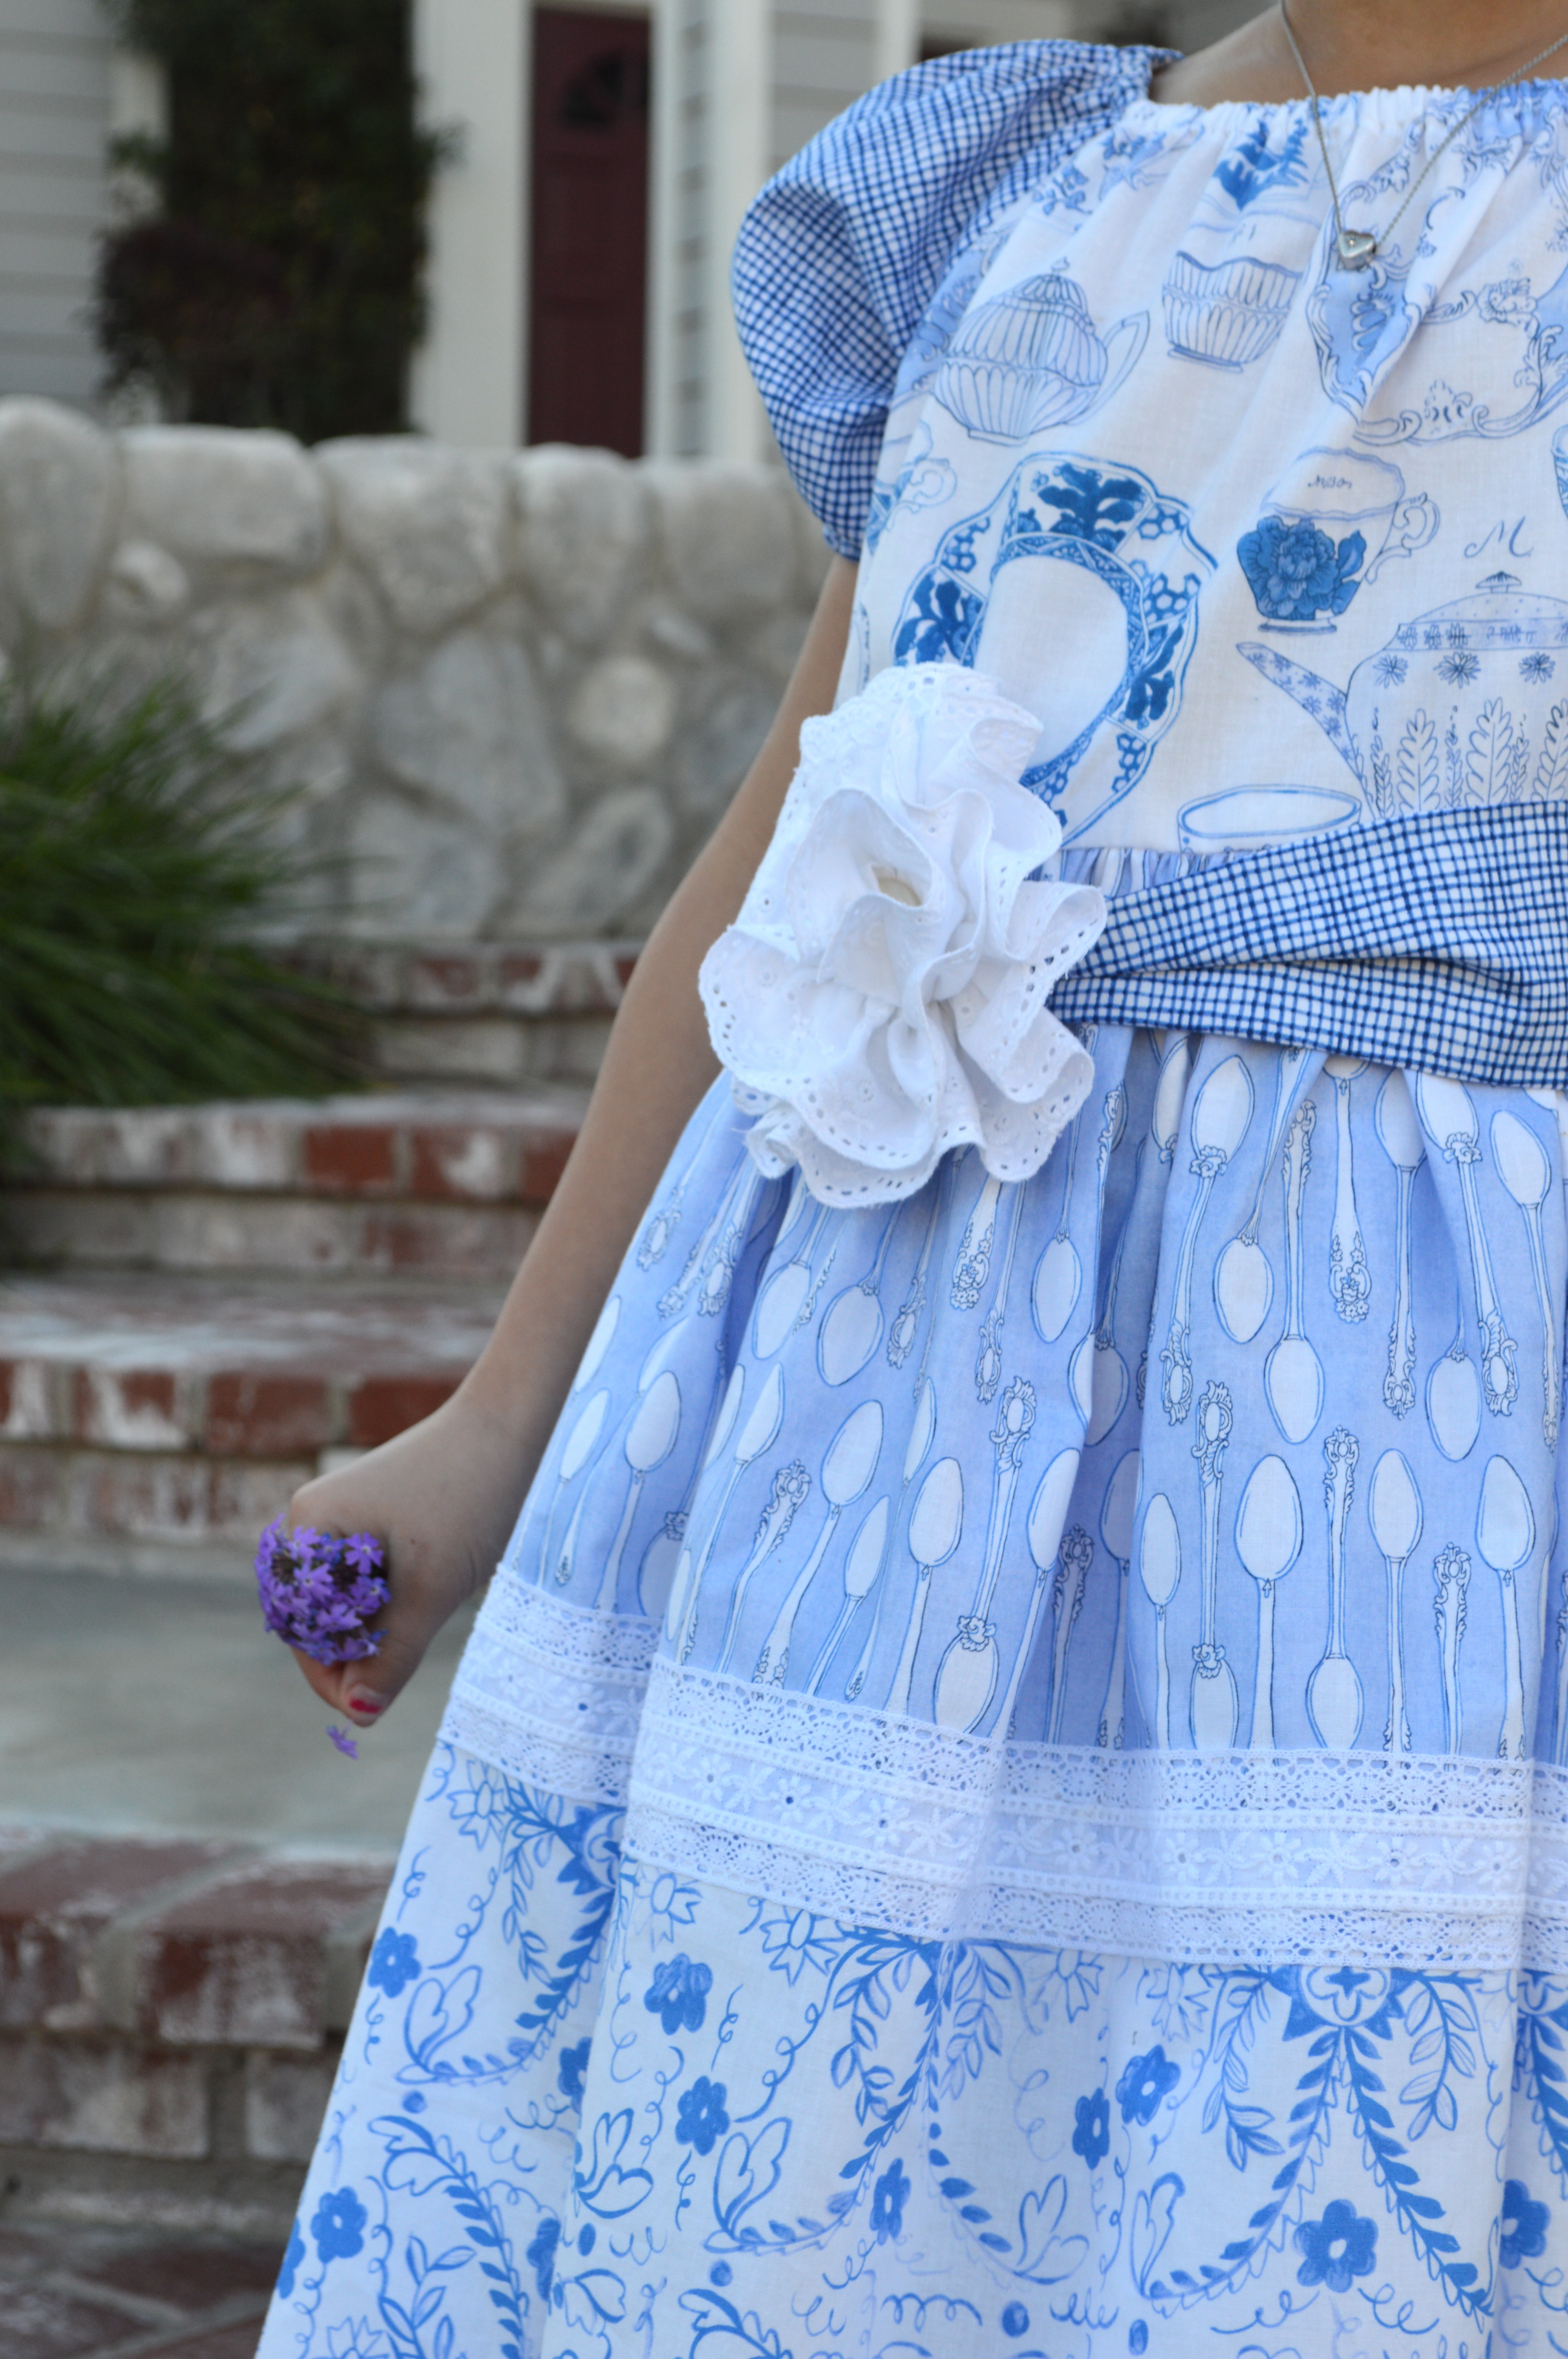
I am crazy about tea parties, china dishes, tea pots, tea cups, and silver spoons!!  When I saw this amazing fabric from Blend called Tea Garden I could not contain myself.  I new immediately I wanted to make Sally a Tea Party Dress.  I love the blue and white – it just looks like fine china!120.101.01.1Web


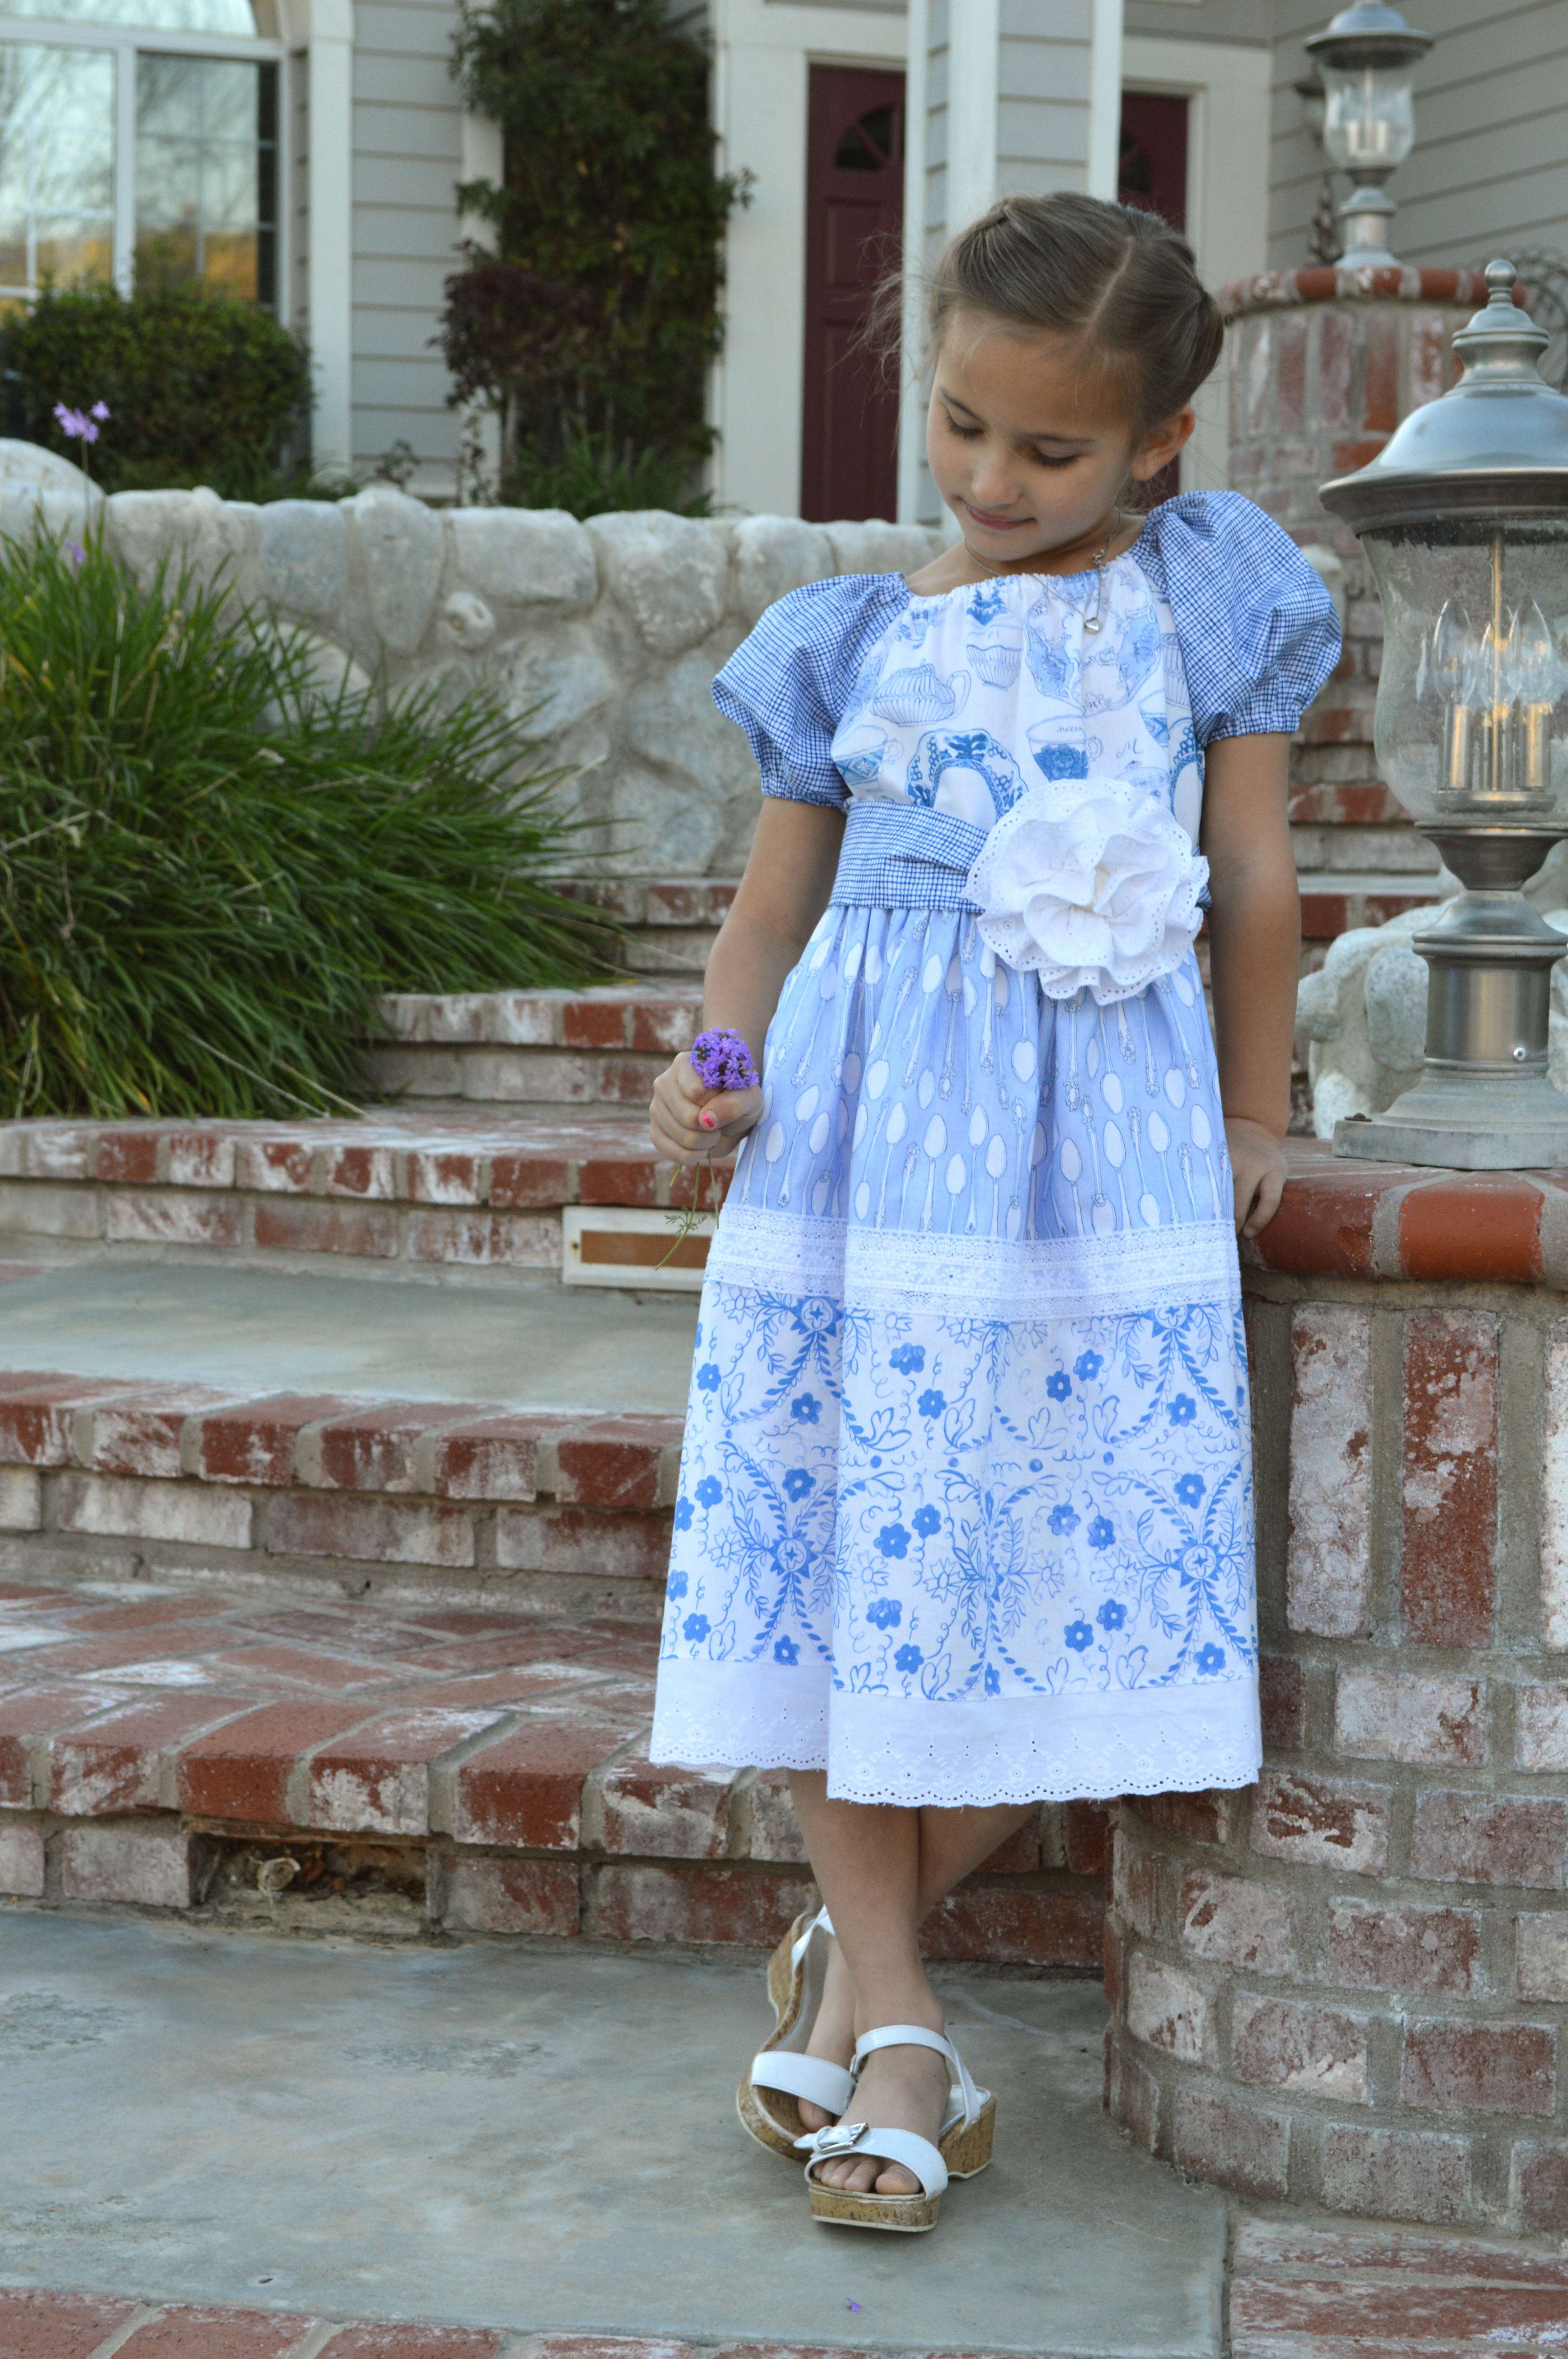
It’s not quite an English Garden, but I do have a few flowers growing!!tea party dress 10

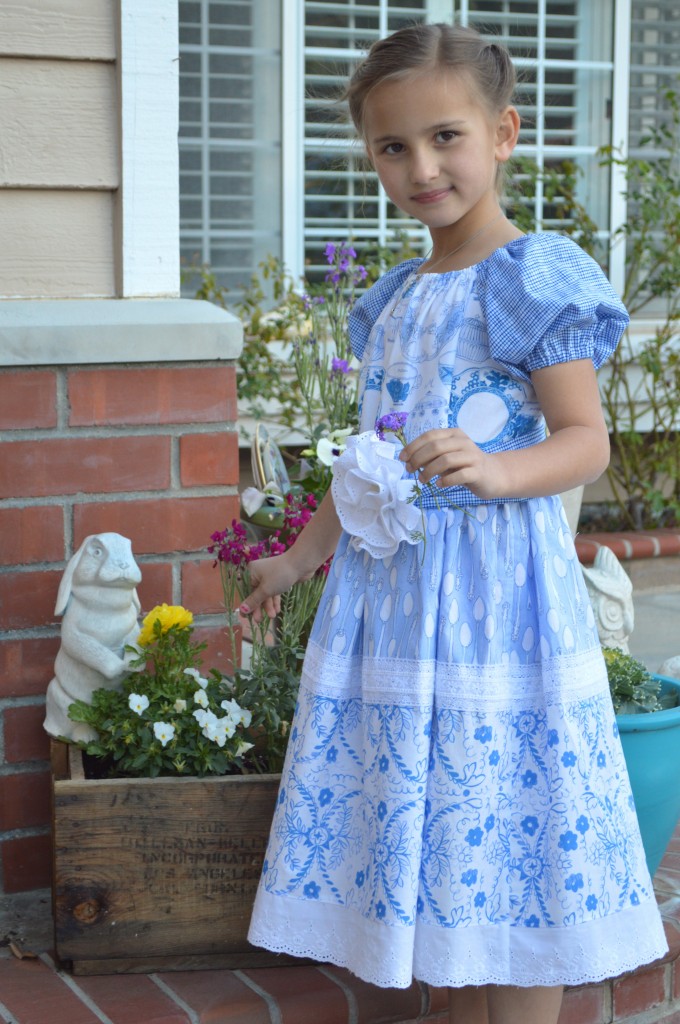
I absolutely love how this dress turned out – and I pretty much made it up as I went along.  It’s a girls size 8 and it is perfect for Sally!  tea party dress

If you would like to make a Tea Garden dress, follow these steps:

Supplies:

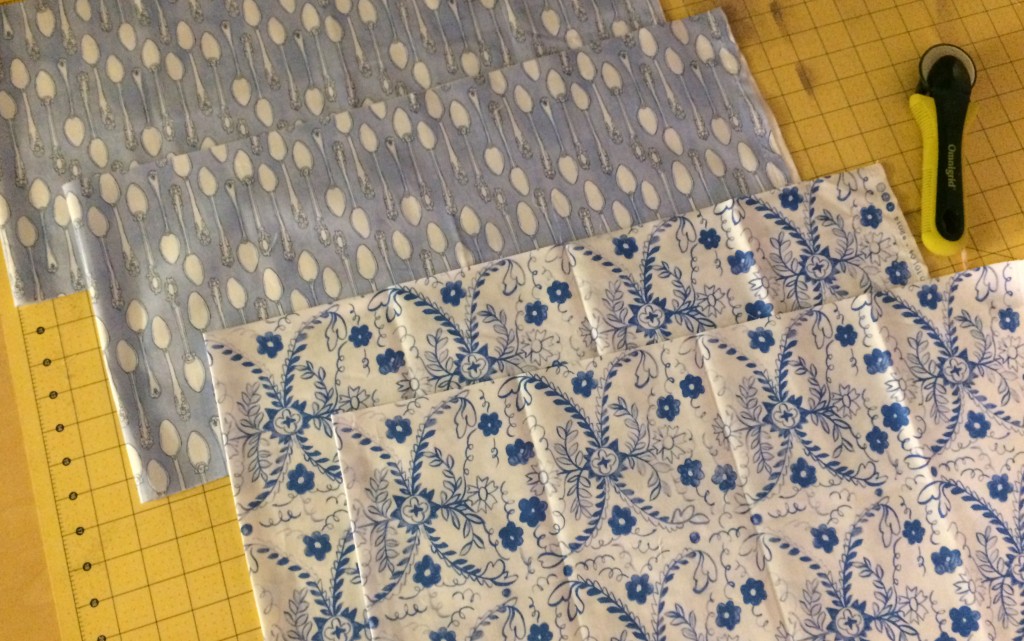
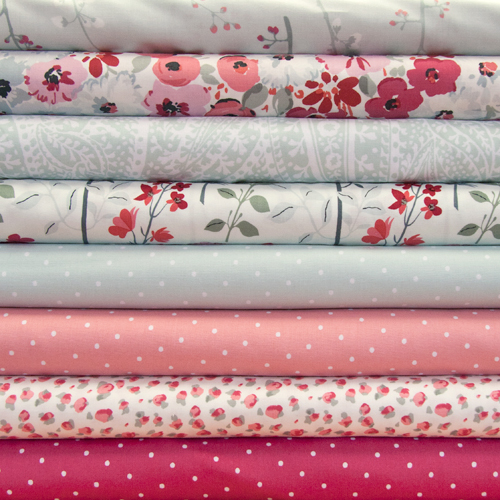
Fabric – I only had generous half yard cuts of each of the 4 fabrics.  Make sure you have 20″ or more of each fabric.

2 types of lace trim, 3 yards of each

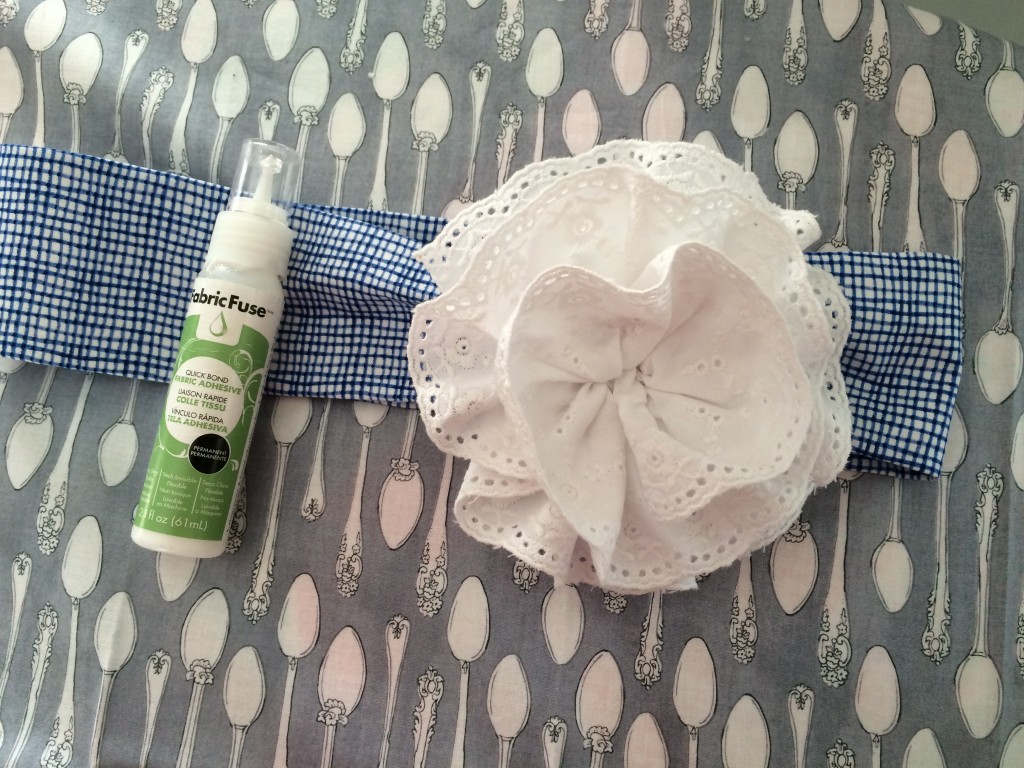
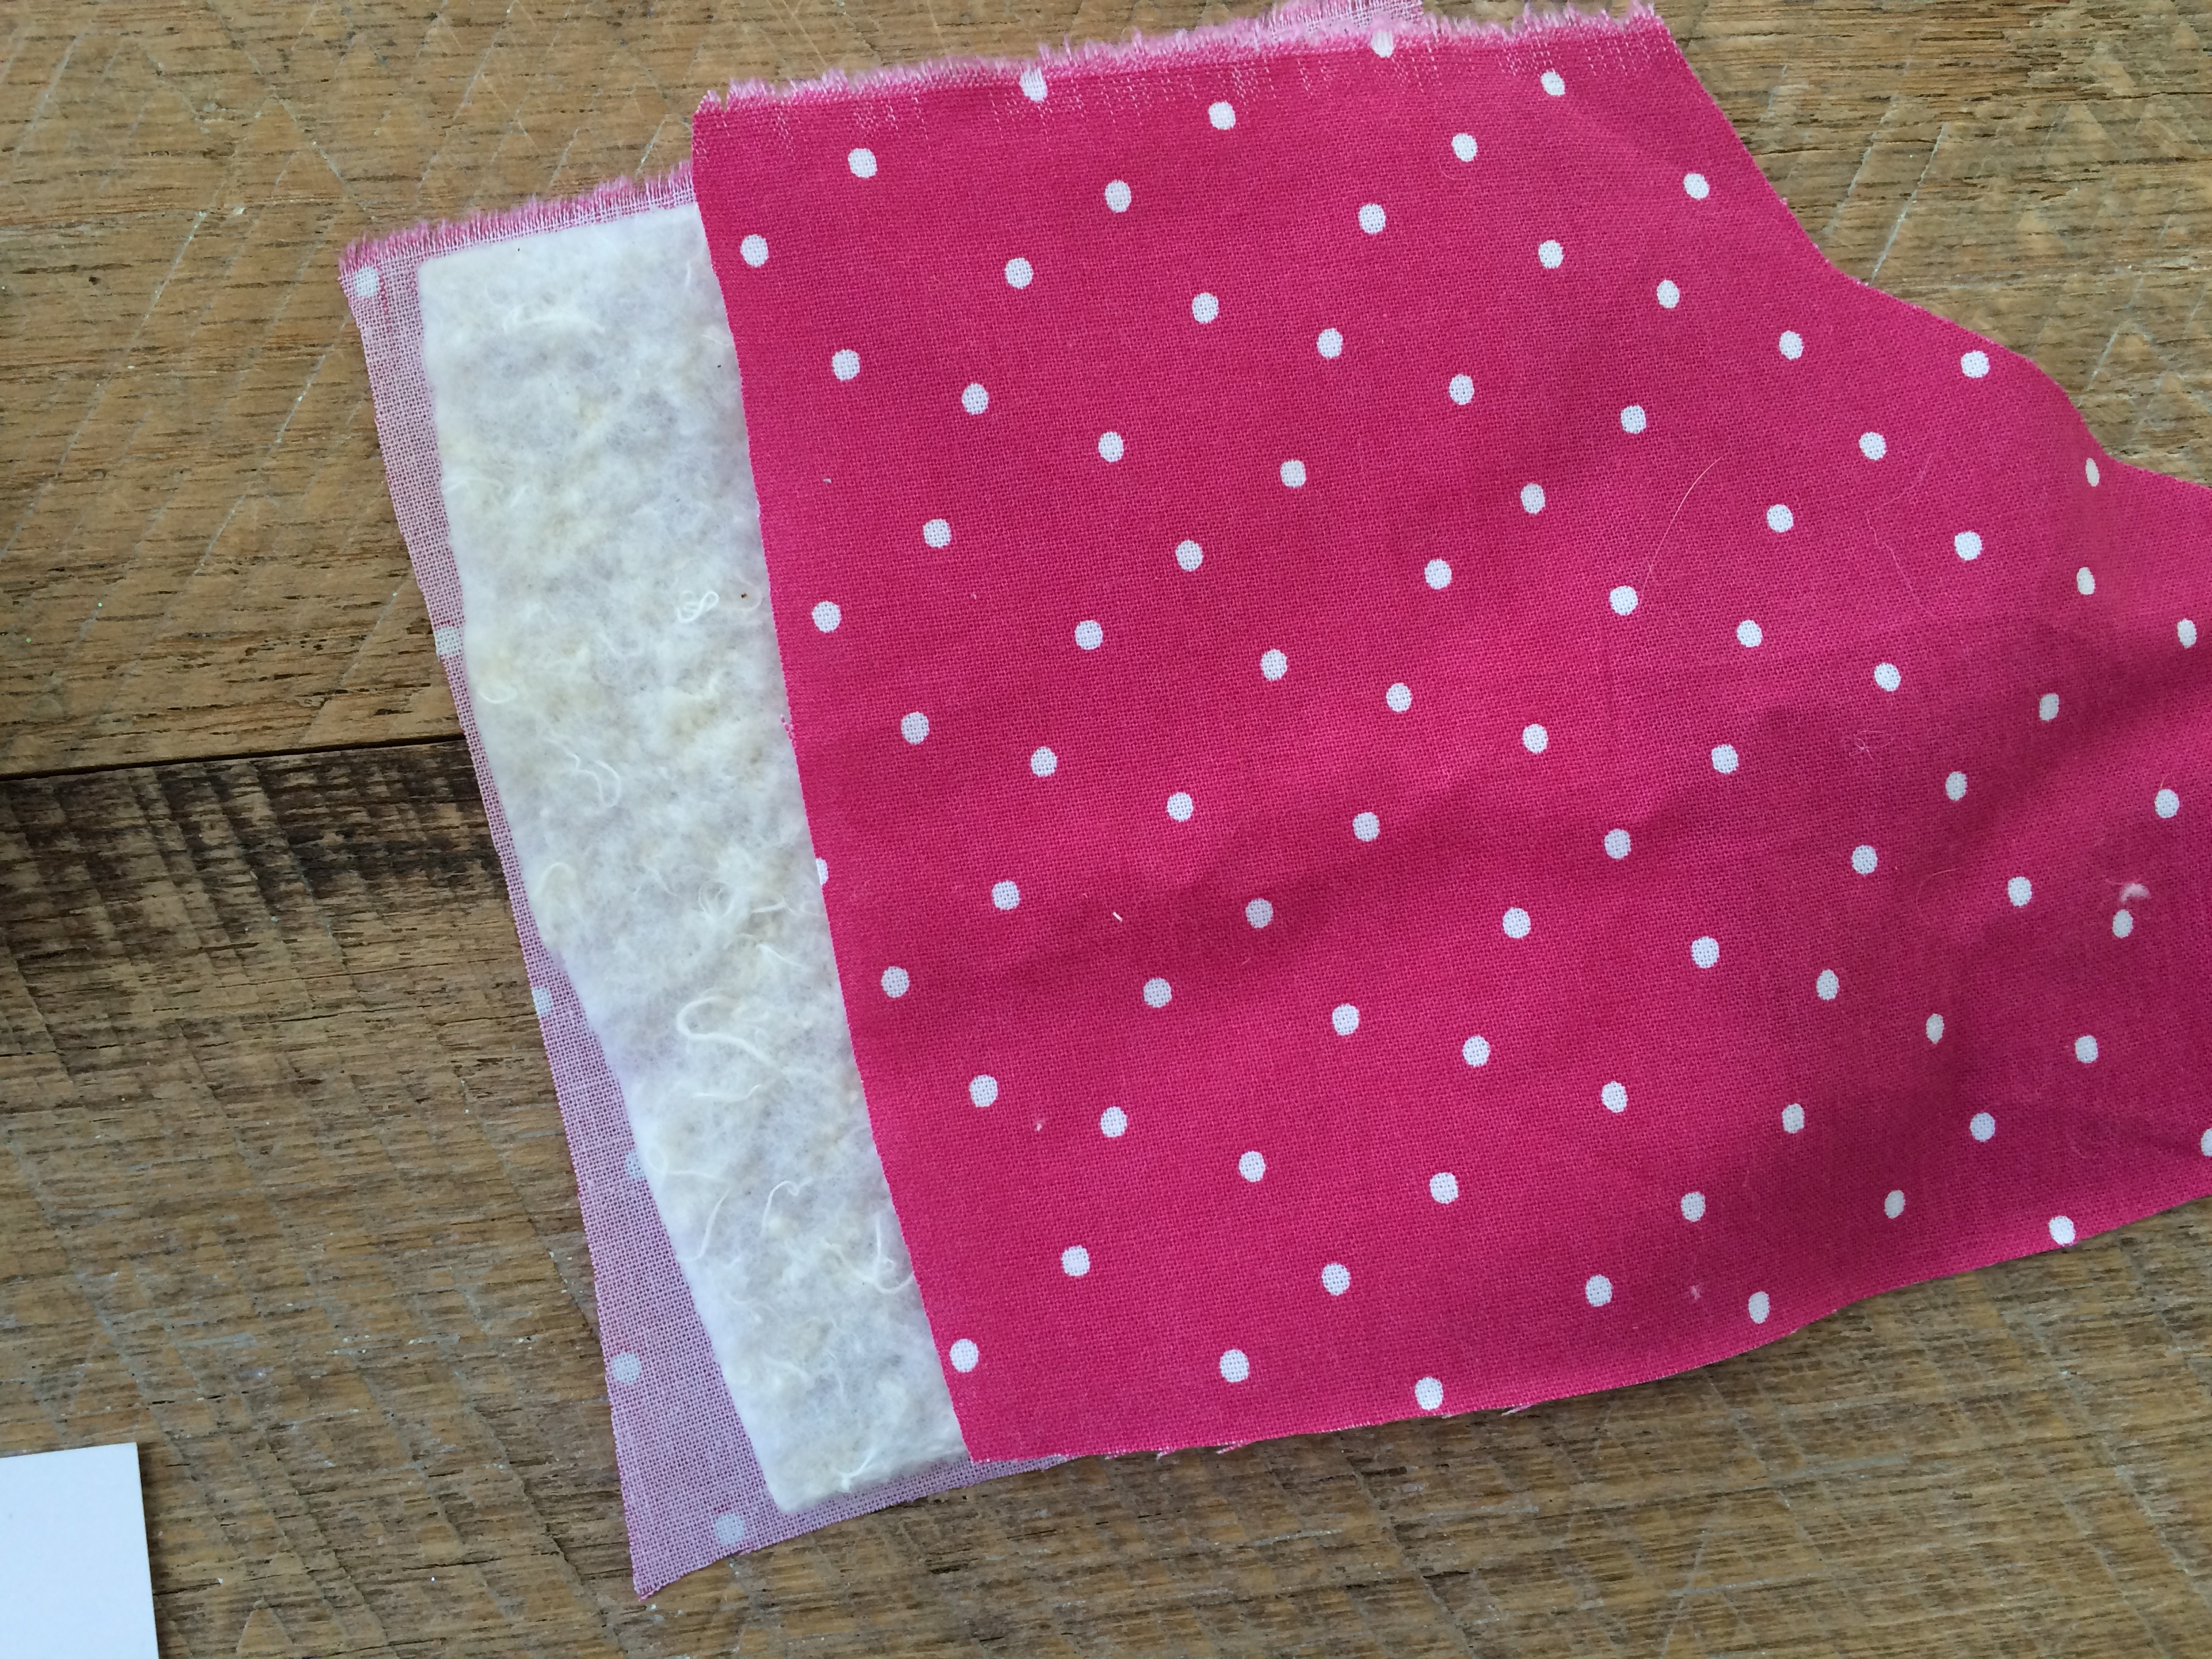
Heat n Bond fusible stabilizer for the sash

Fabric Fuse

velcro

scrap of felt

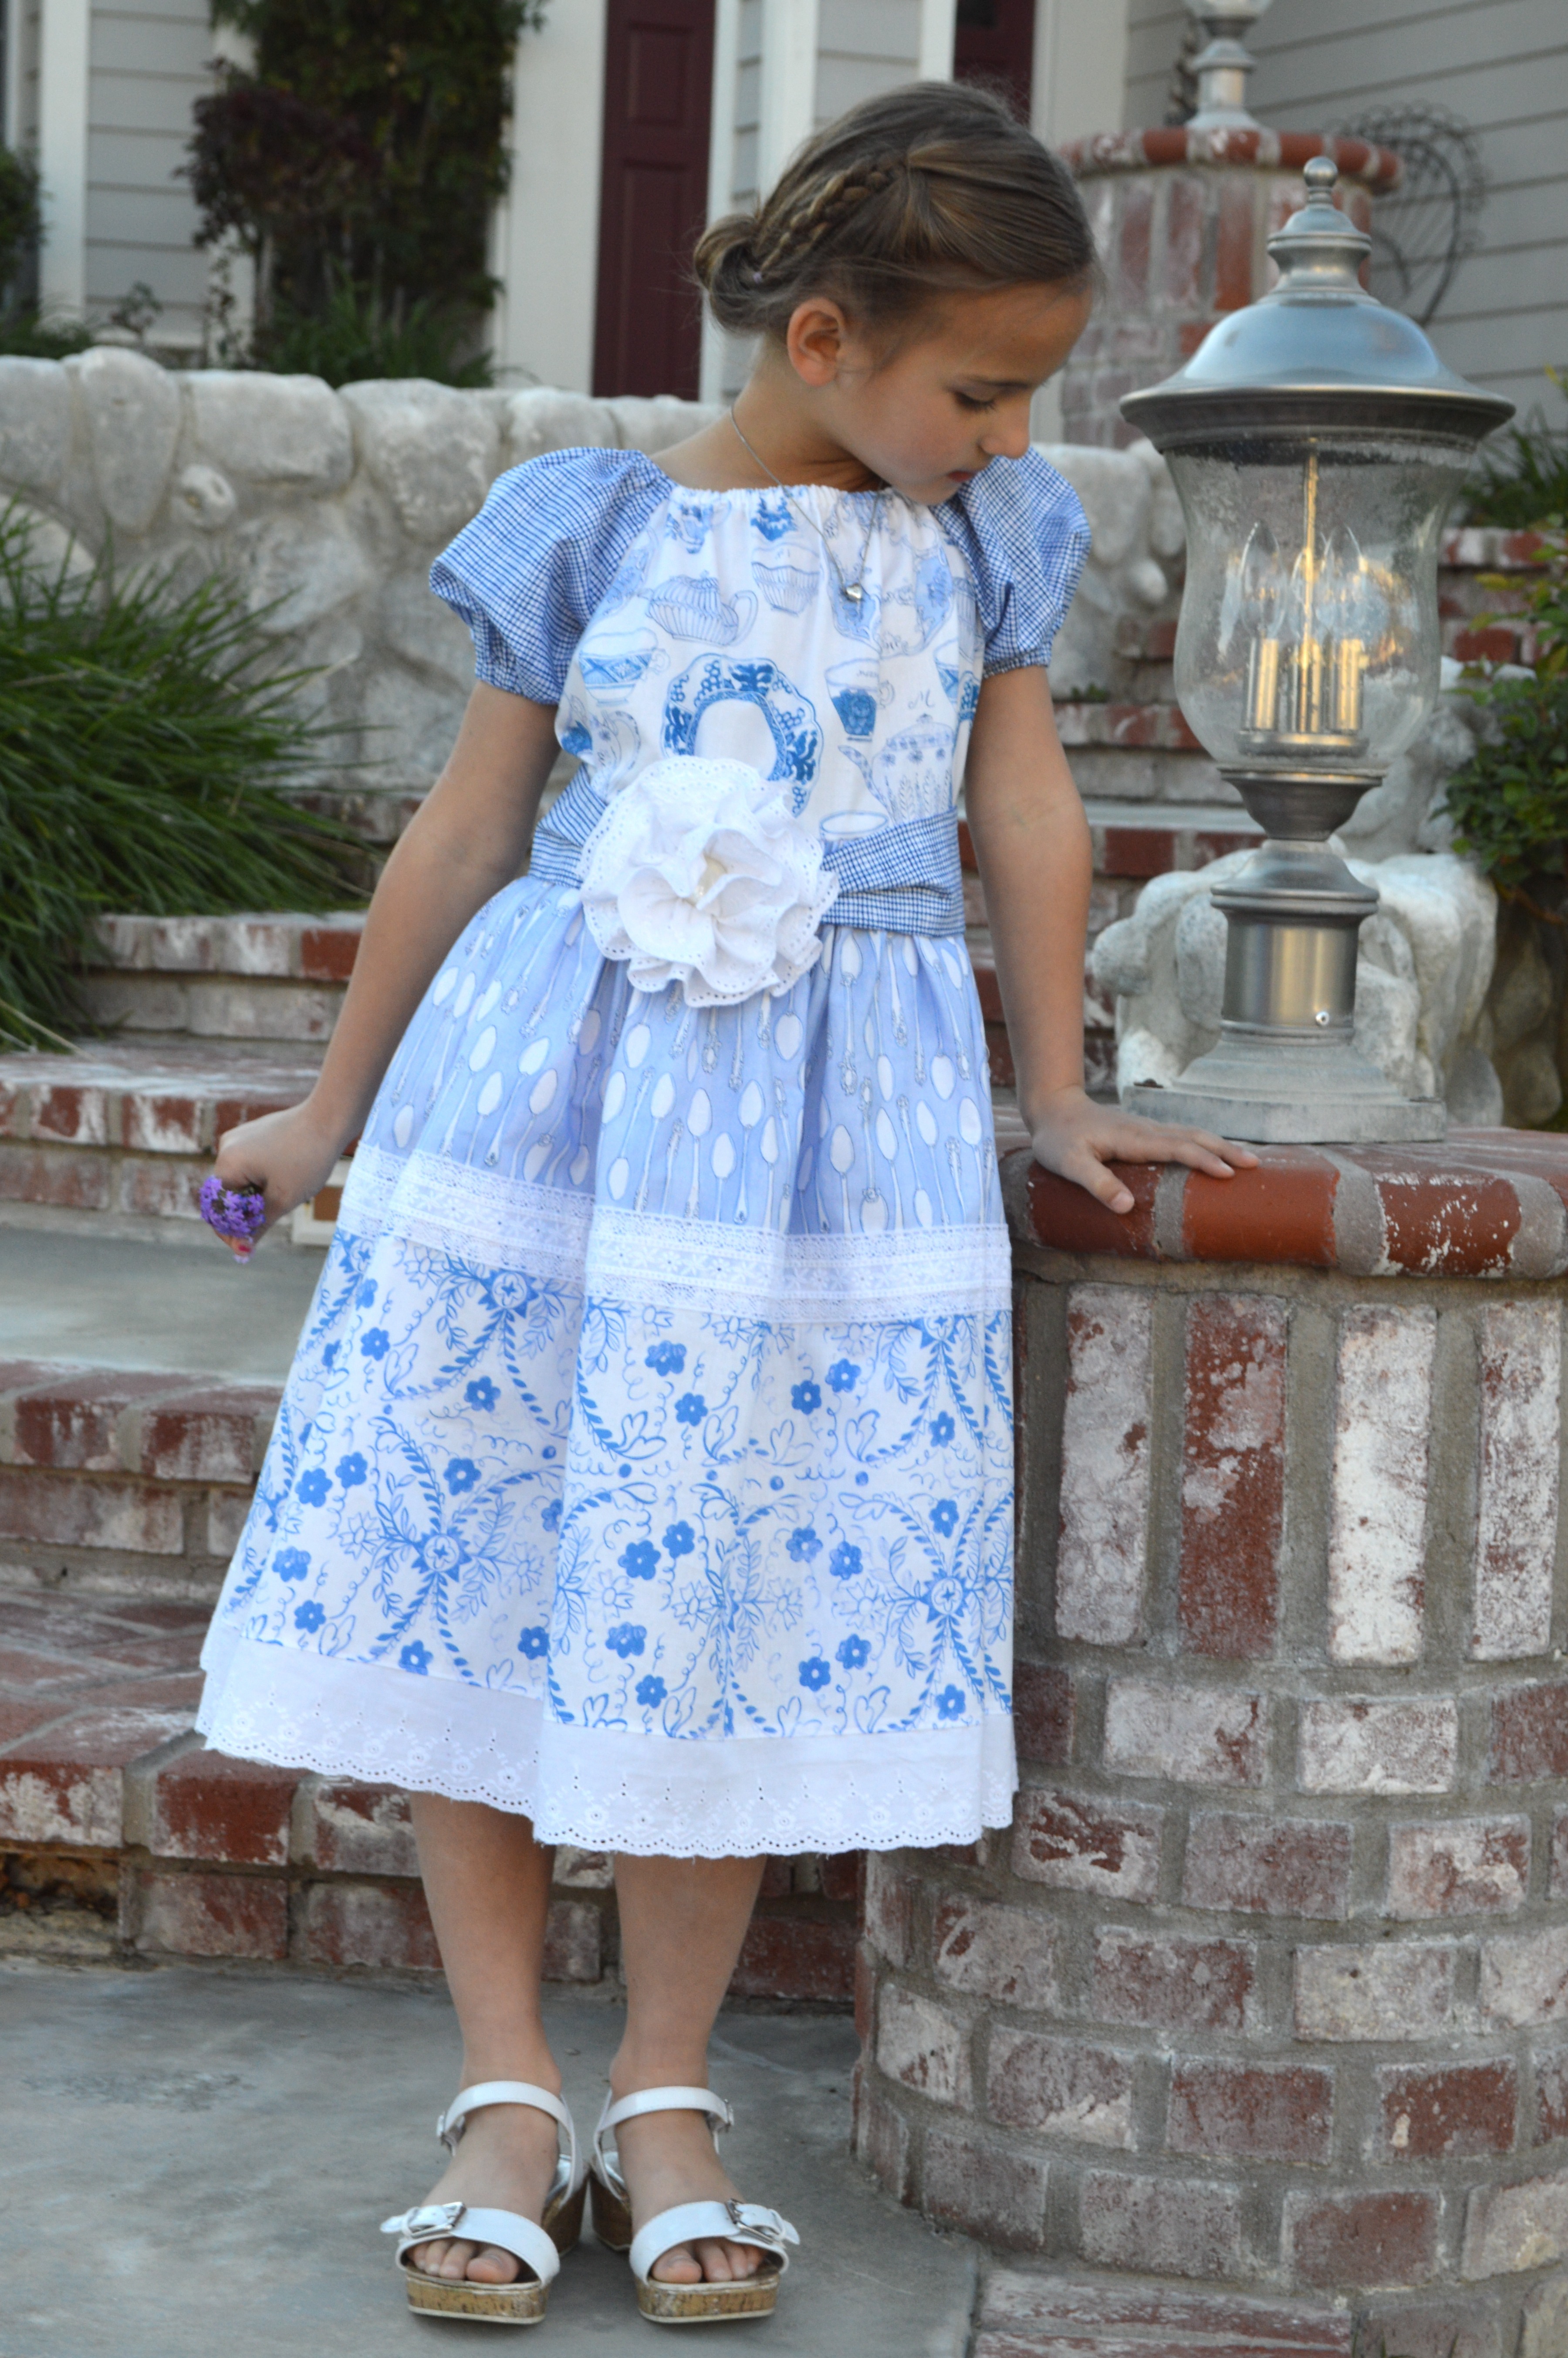
Create the peasant bodice.  I am not a pattern designer.  There are so many peasant dress patterns out there.  Find one you like and cut out the size you want.  Cut the bodice out of the Tea Garden Devonshire fabric and the sleeves out of the check.  Follow the instructions until you have a completed bodice.

Assemble the skirt.

Cut (2) 10″ x WOF from the spoon fabric

Cut (2) x 10″ x WOF from the floral fabric.

tea party dress 15

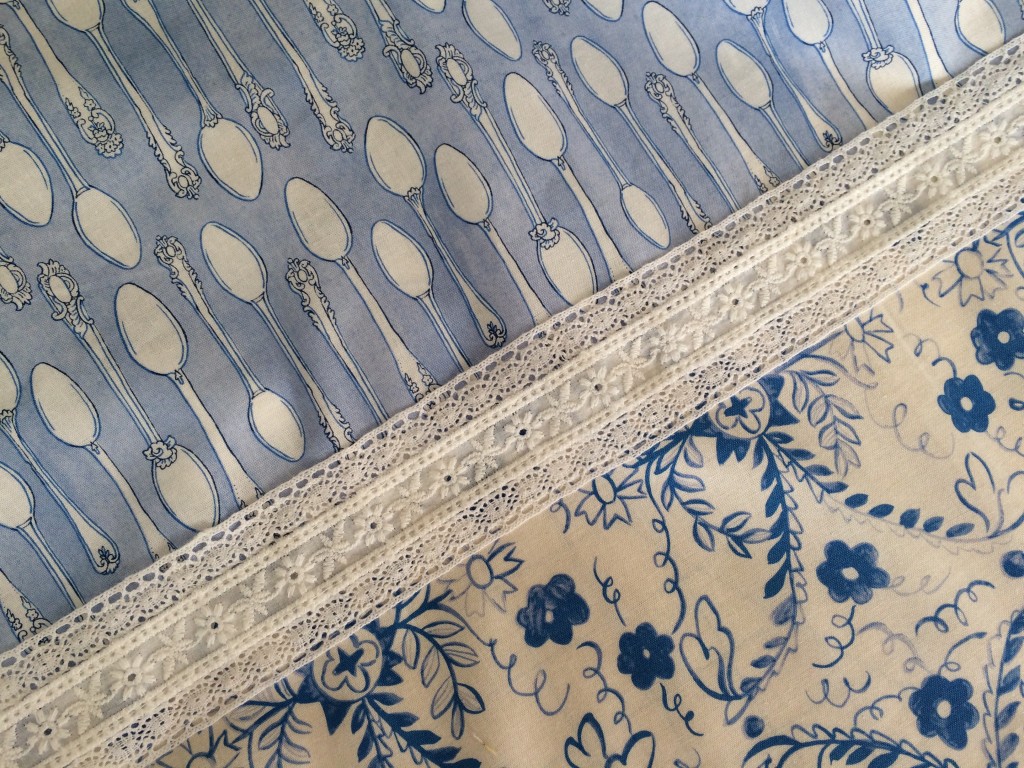
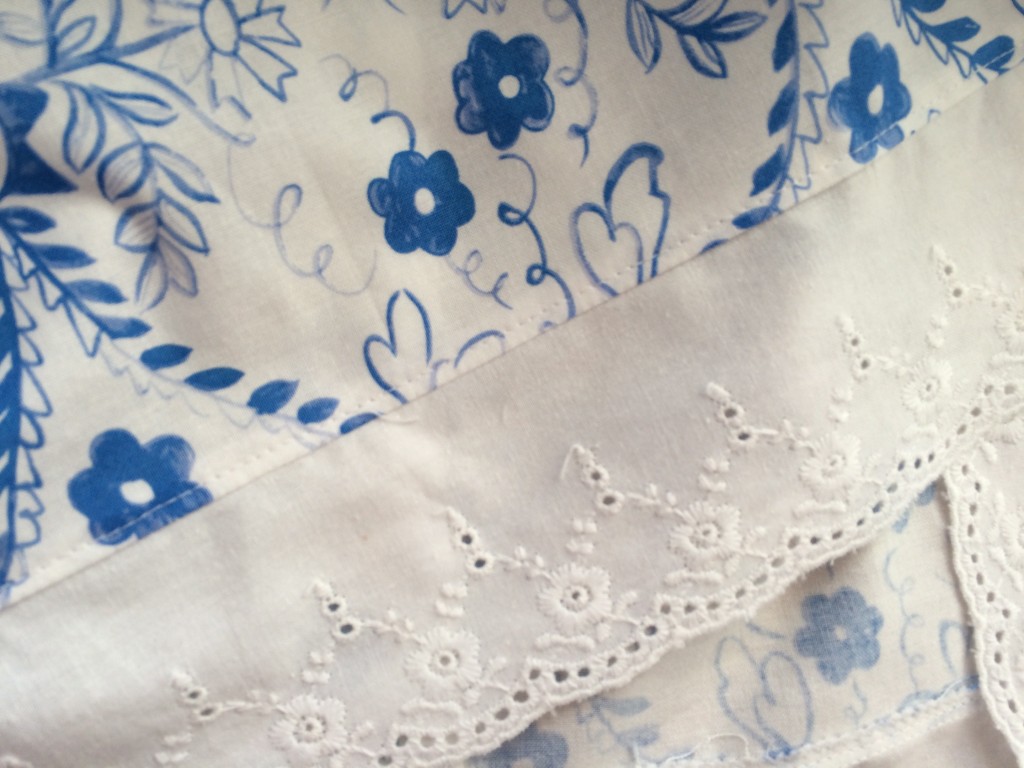
Sew the long ends of the spoon fabric together (1/4″ seam)  joining the two pieces to form one long rectangle.  Do the same with the floral fabric.  Press the seam open.  Next take the spoon fabric and the floral fabric and sew them together long ways using 1/4″ seam.  Press toward the spoons.

tea party dress 16

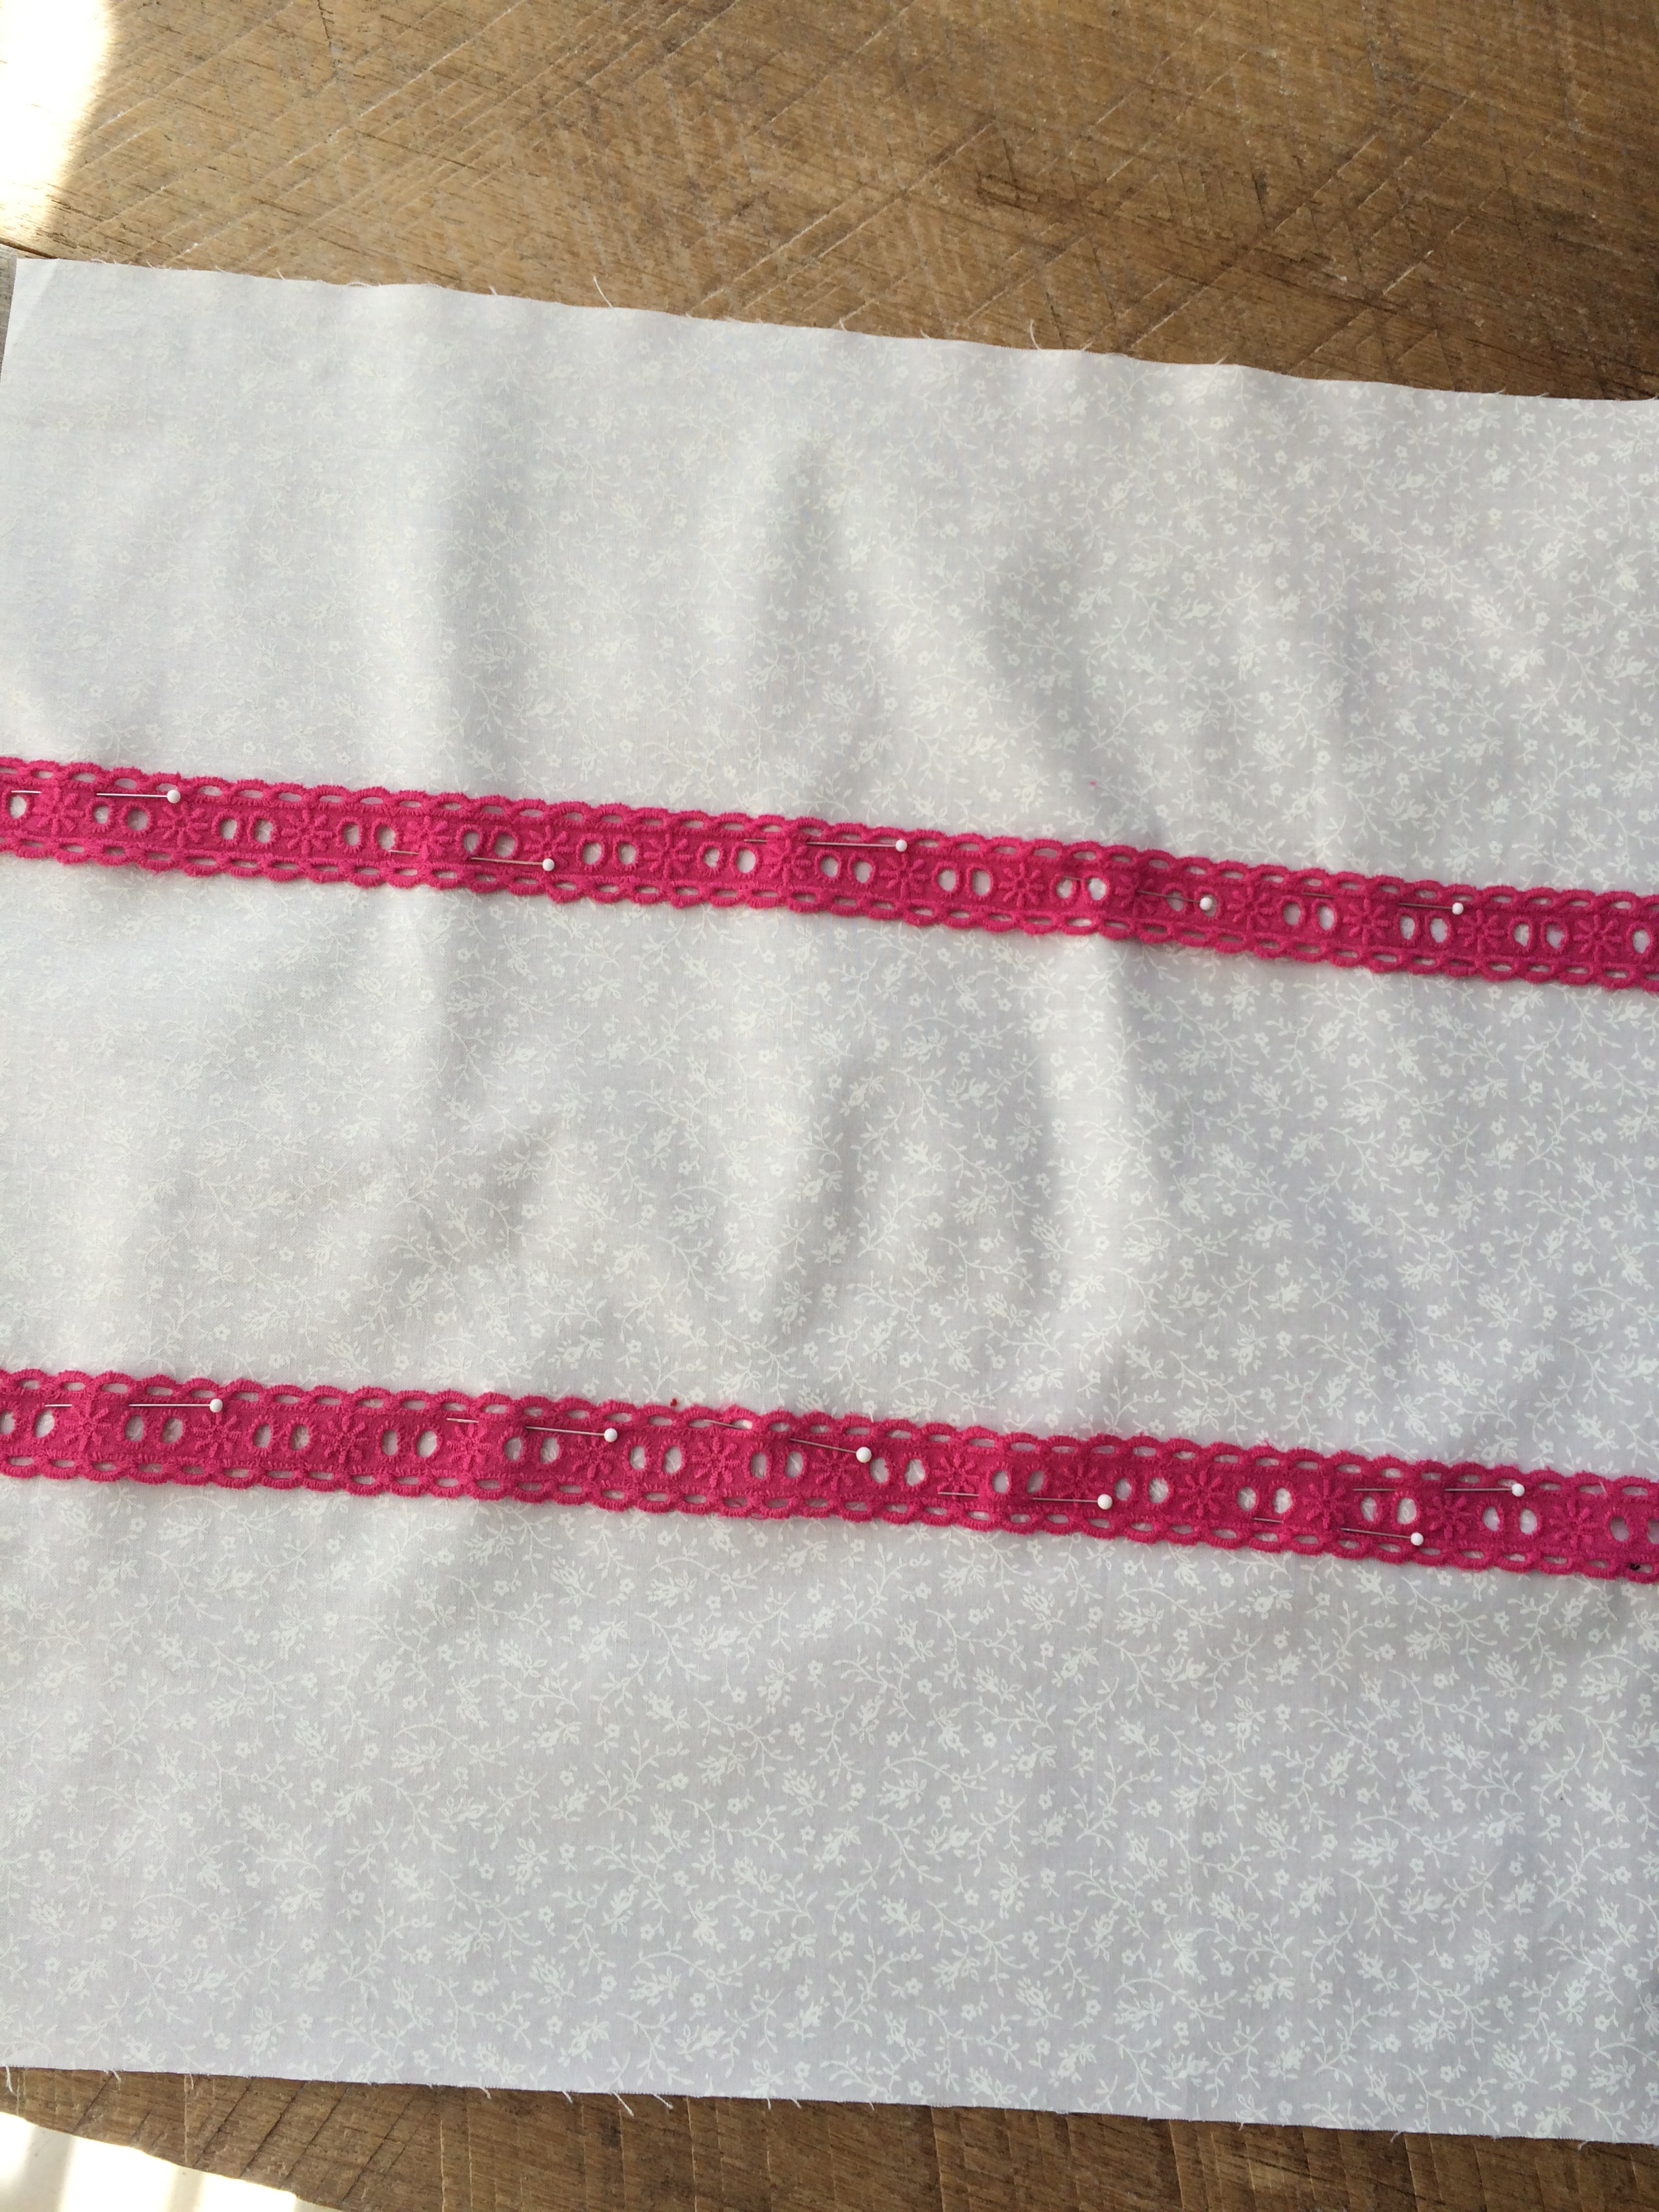
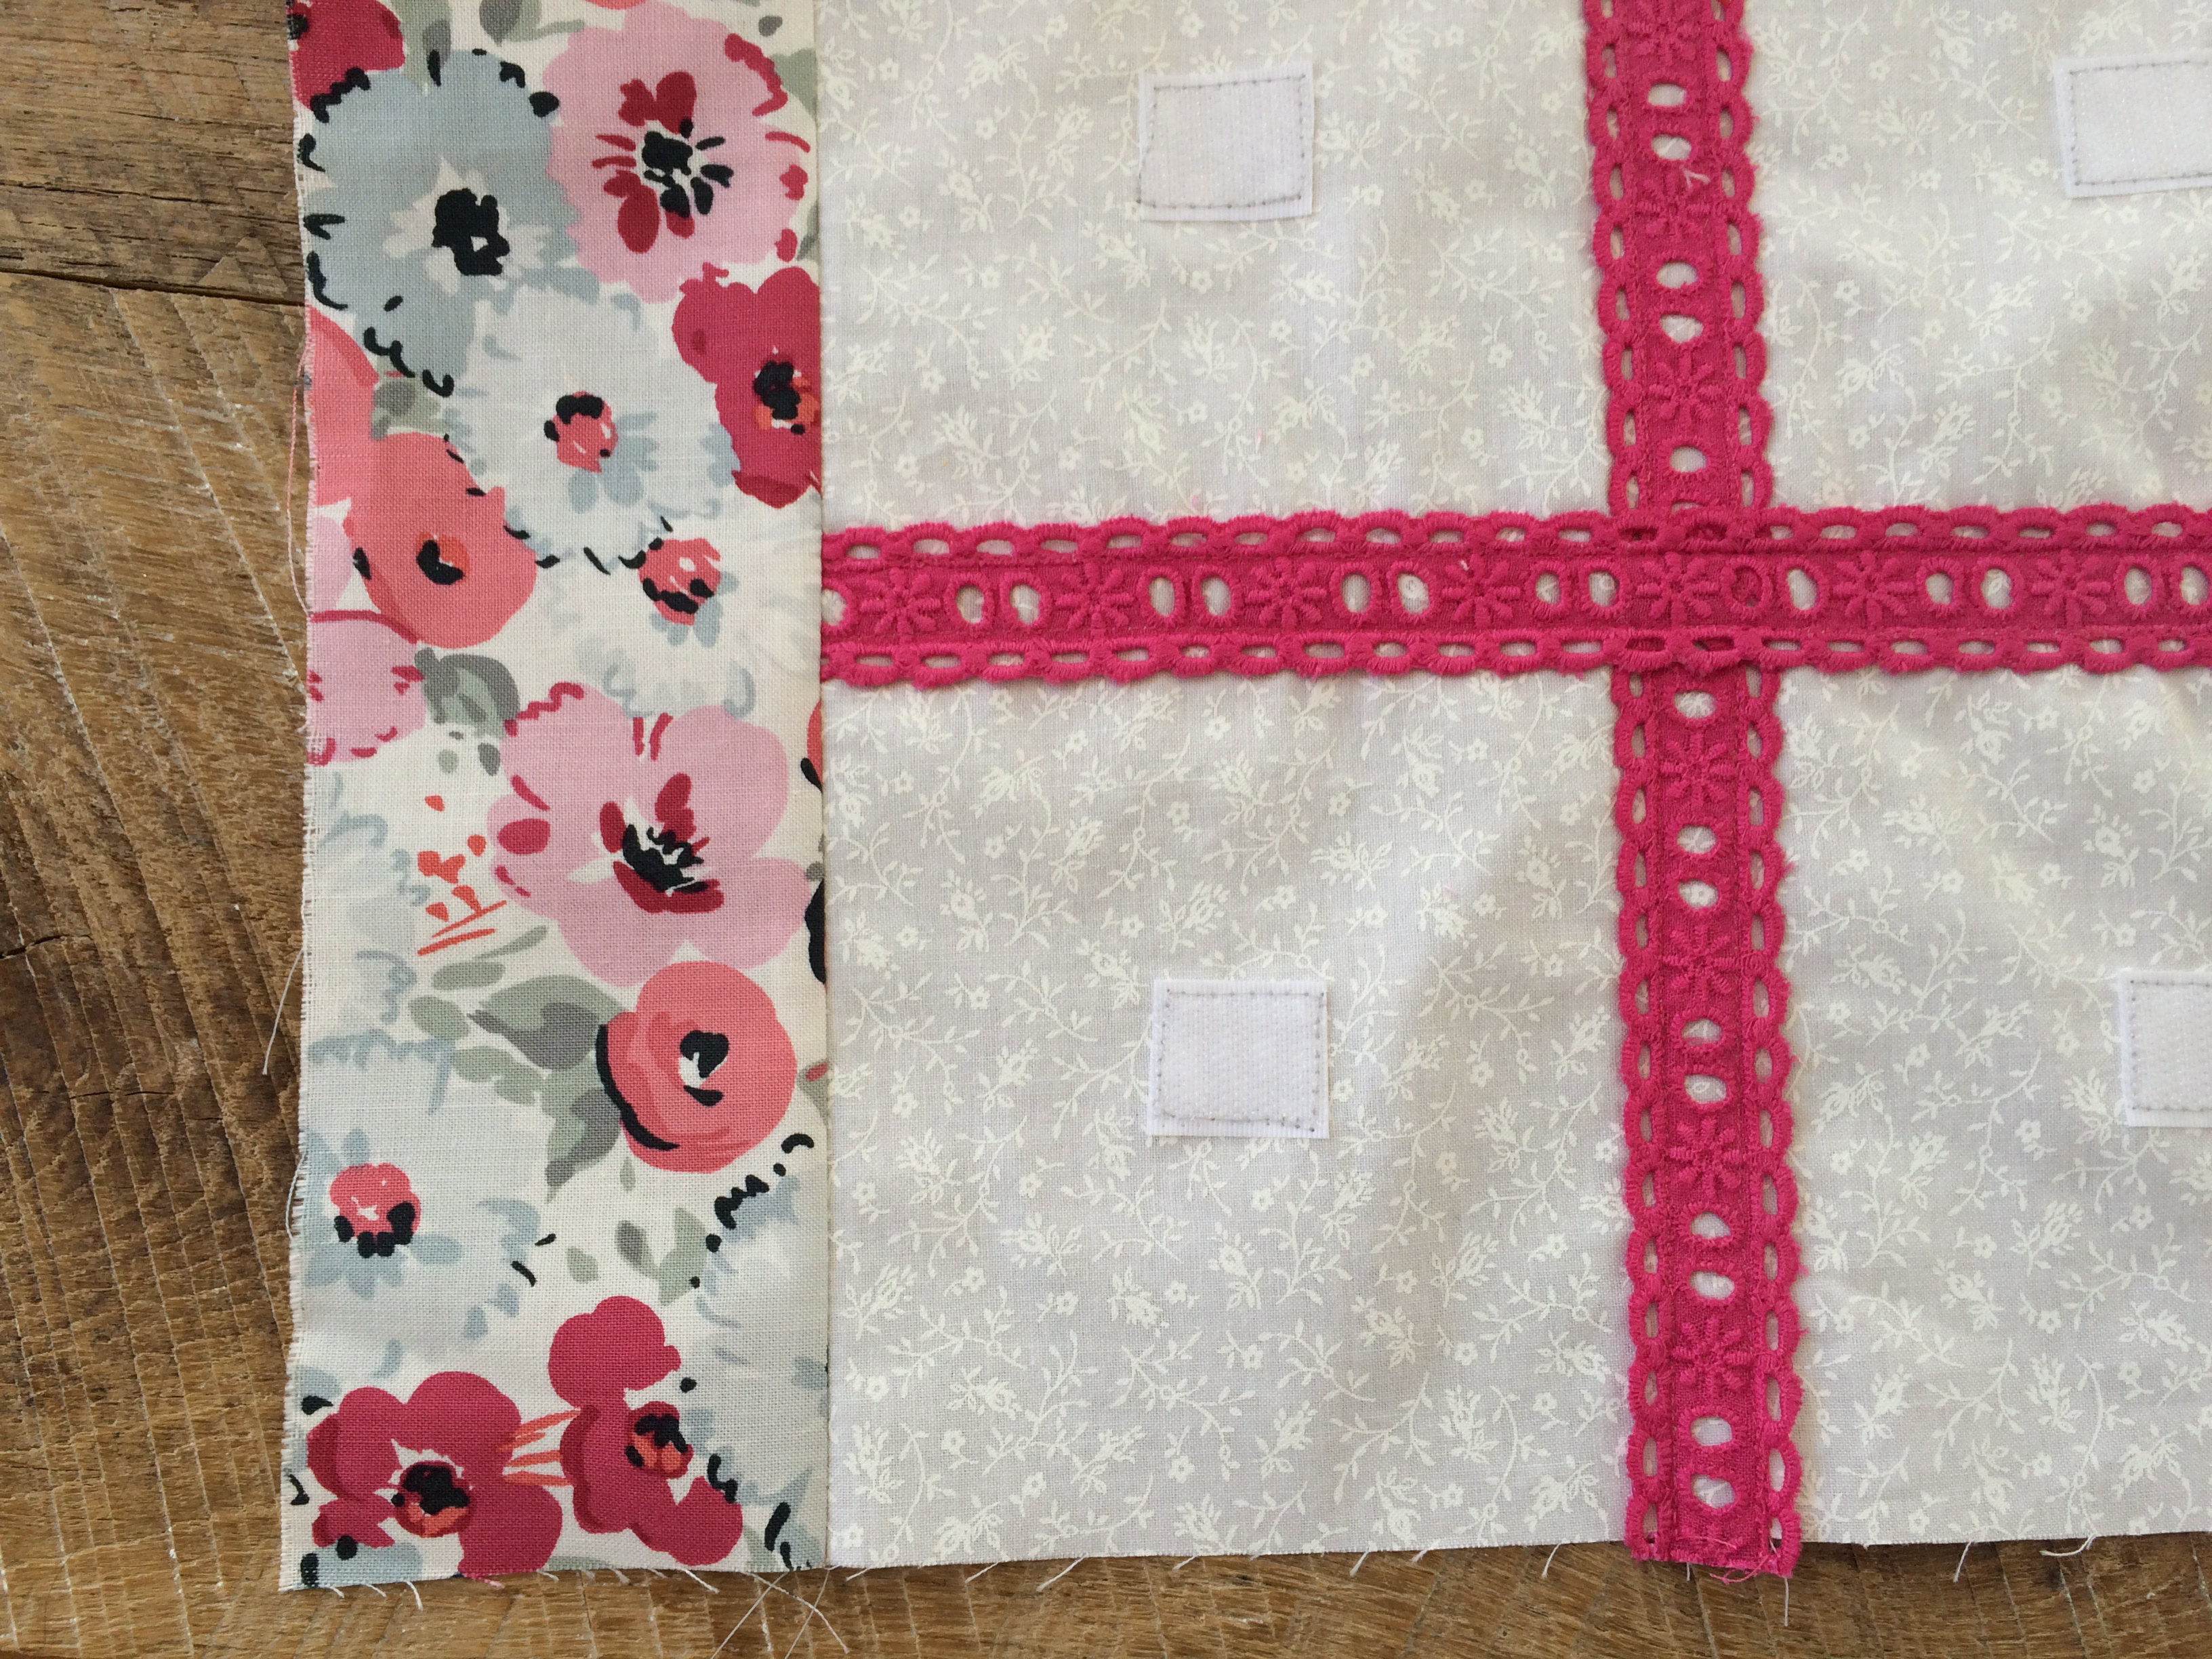
Top stitch the lace, centering over the seam.

tea party dress 17

For the hem….  Lay the lace on the bottom edge of the floral fabric right sides together.  Stitch along the lace.  Ziz zag the seam.  Press the lace under so it looks like this:
tea party dress 19

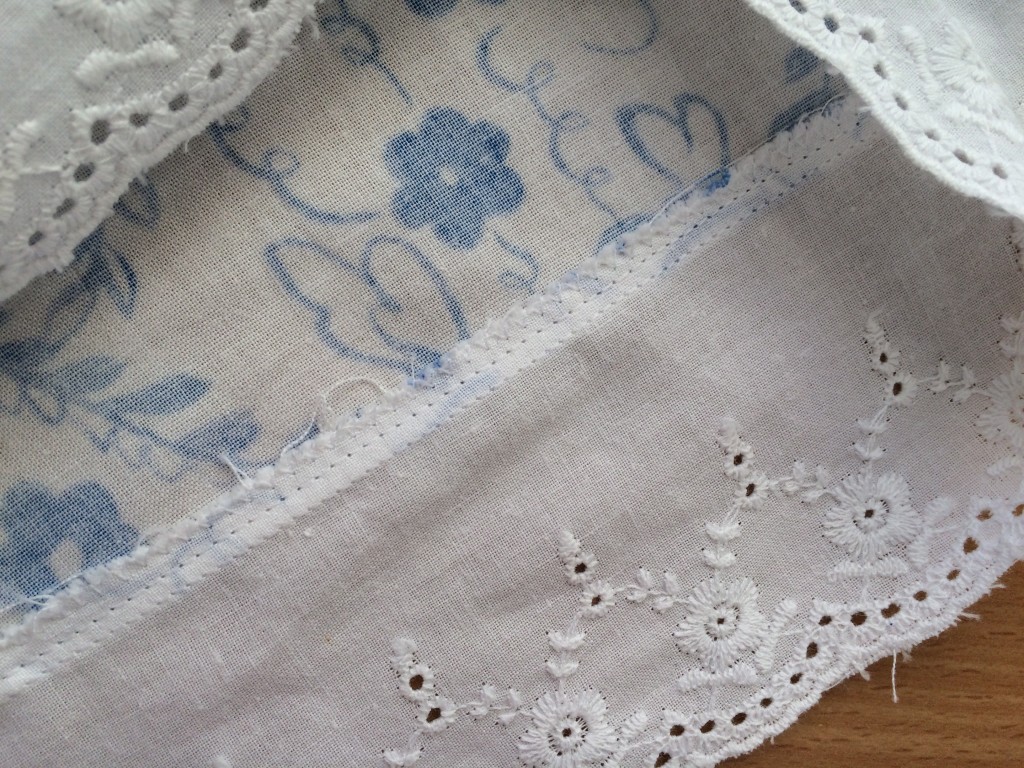
Top stitch all the way around 1/8″ away from the edge:

tea party dress 18

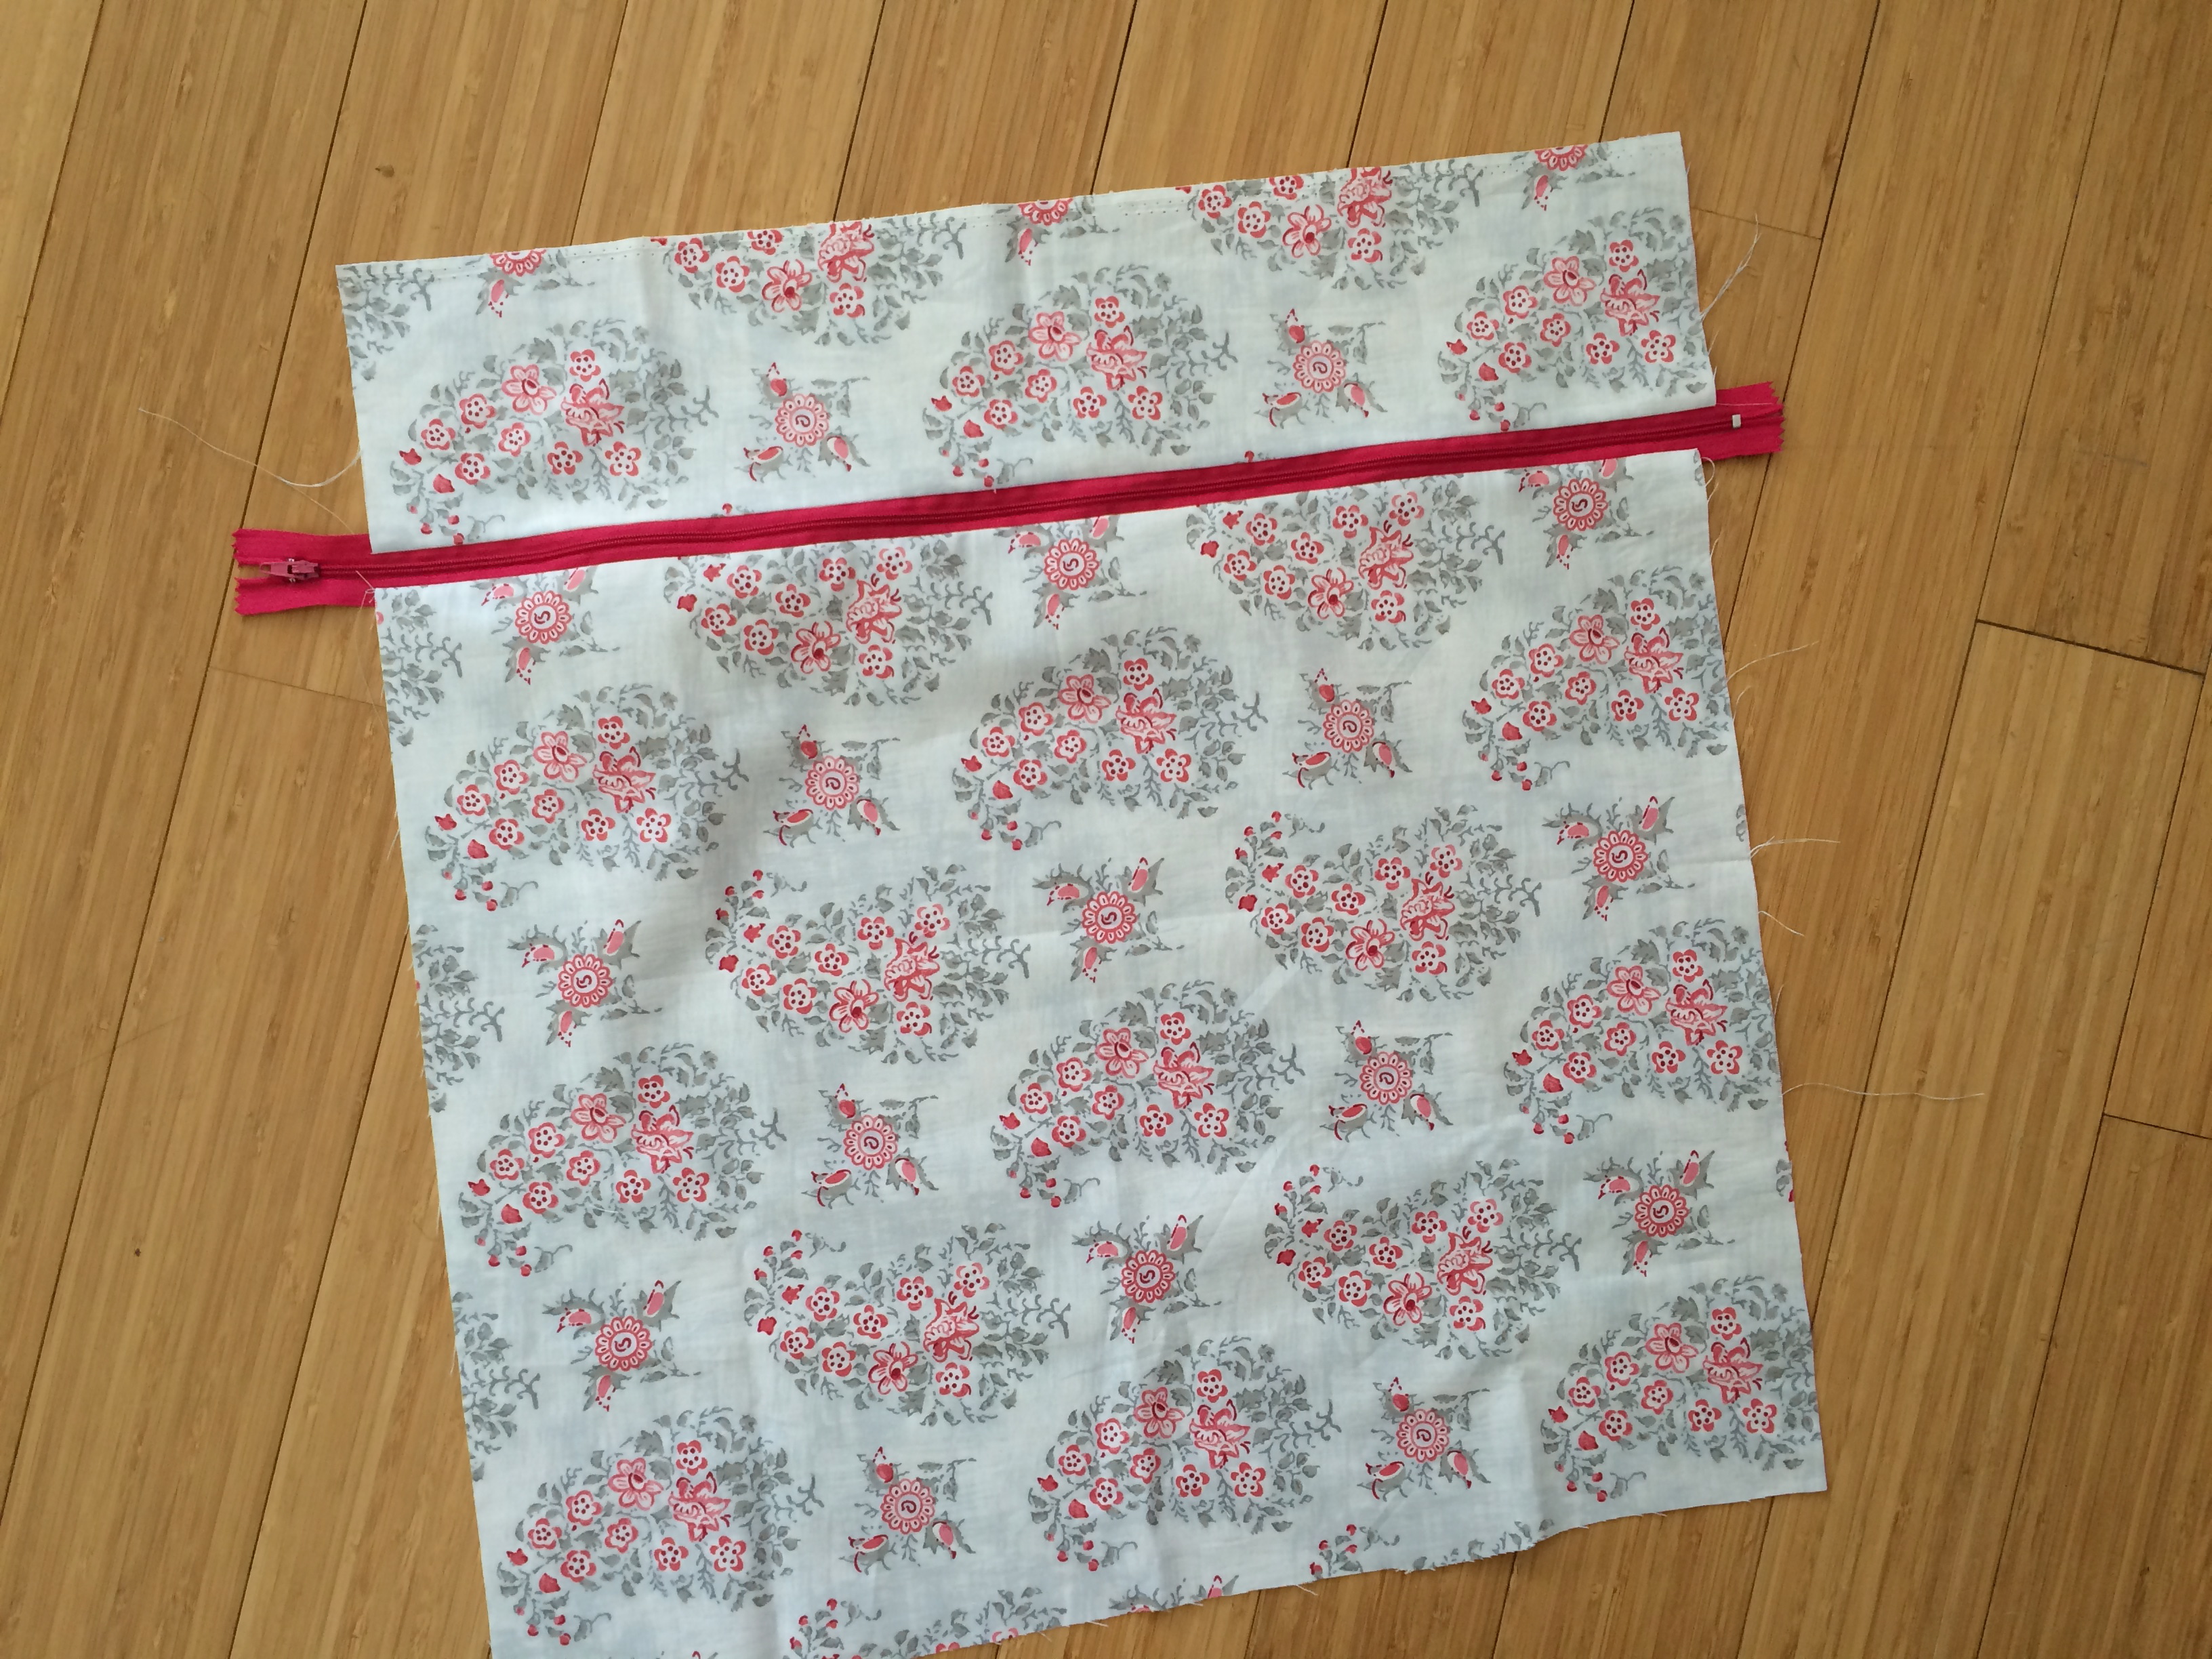
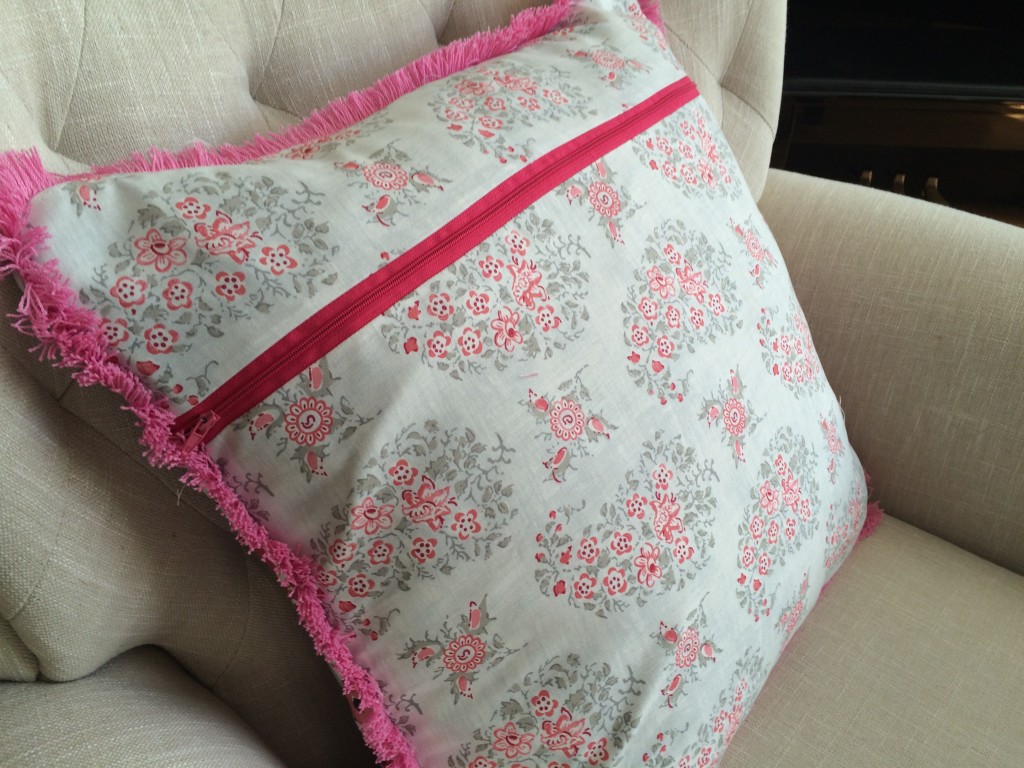
Now join the two ends of the skirt with a generous 1/4″ seam.  Zig zag to finish seams, press to one side.  The skirt is finished!  Sew a gathering stitch along the top of the skirt, stopping and starting at each side seam.  Sew one gather 1/2″ and another 1/4″ away from the top of the skirt.  Pull up the threads and evenly distribute the ruffle to match the bodice, matching the side seams.  Sew the skirt to the bodice and remove any gathering threads.  Zig zag to finish the edge.  Press the edge toward the bodice.
tea party dress 2

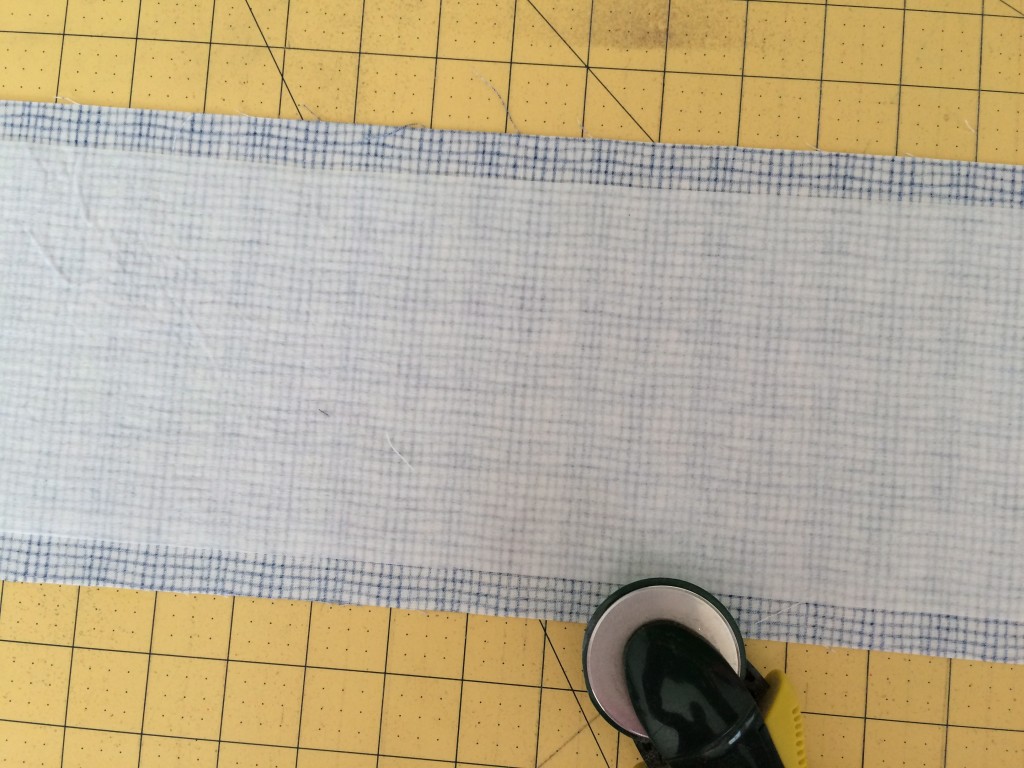
 For the sash… Cut a piece of fabric 6.25″ x 30″.  Measure your child’s waist to see if this needs to be adjusted.  It will need to overlap a few inches for the velcro closure and for seam allowances.

tea party dress 7

Fuse the stabilizer to the wrong side of the sash fabric.  I had a piece already cut and was slightly narrower, it will be fine 🙂

tea party dress 21

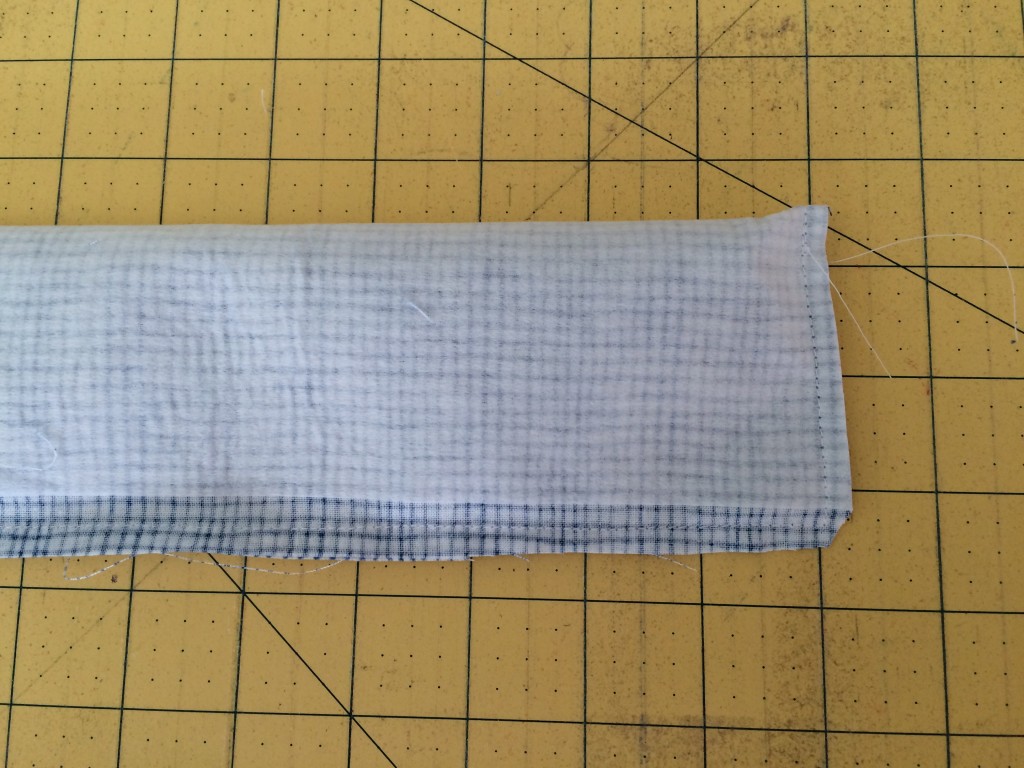
Fold the sash in half, right sides together.  Sew using 1/4″ seams along the edge.  Leave a 3″ opening in the center of the sash for turning.  Clip the corners.  Turn right side out.  Press and top stitch.

tea party dress 22

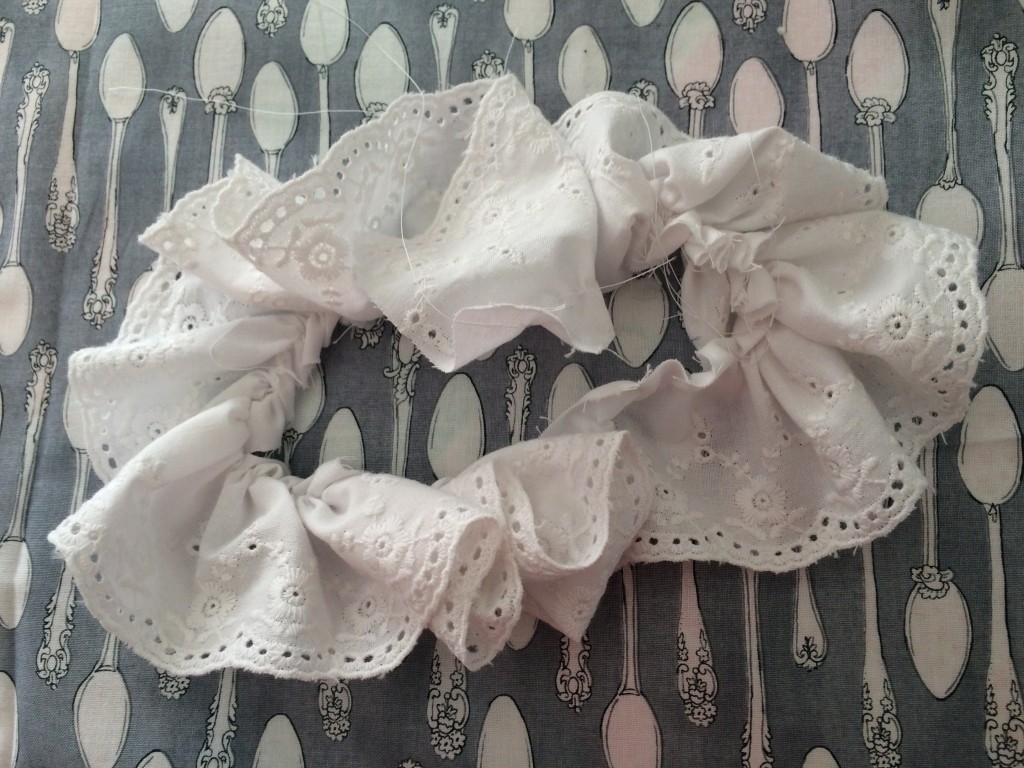
To make the rosette, cut about 2 yards of lace.  Sew a gathering stitch along the edge.  Pull up the gathers to form a ruffle.

tea party dress 23

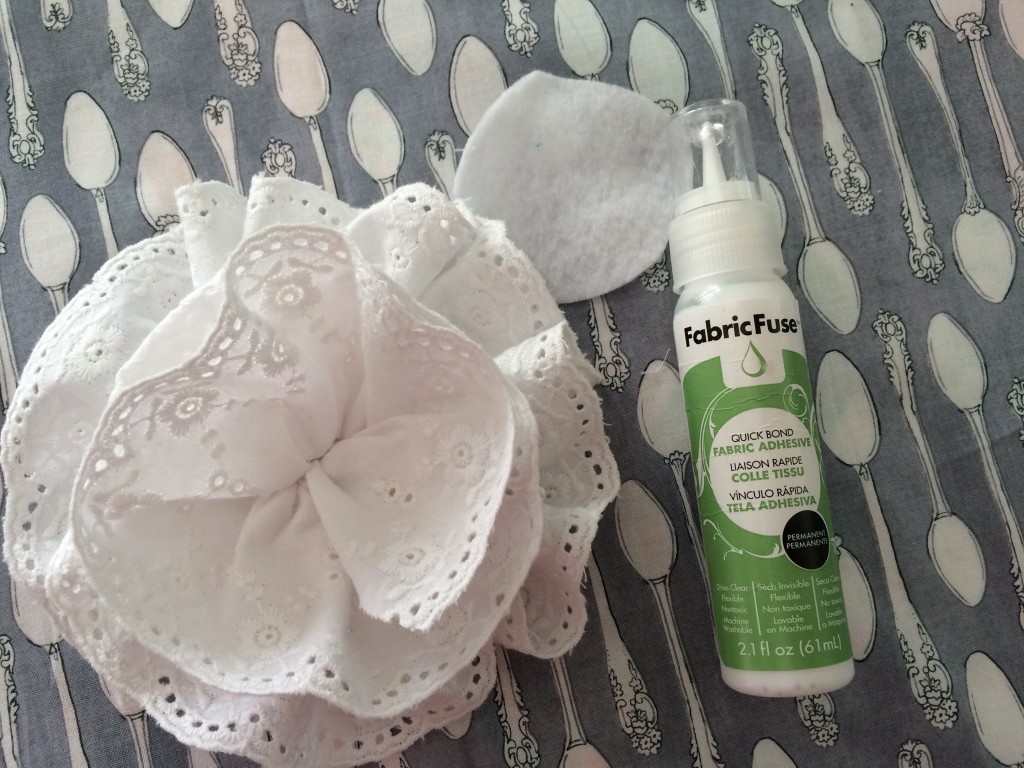
Start twirling the gathers around to form a rosette.  Tuck the raw ends under.  I used Fabric Fuse because I was too lazy to hand sew the ruffles.  Hot glue would work, I just didn’t feel like getting burned  🙂  The fabric fuse is great because it is a super strong adhesive designed for fabric.  Cut a piece of felt in a circle.  Add dots of Fabric Fuse to hold the gathers in place and finally to anchor it to the felt circle.  Let dry for a few hours.

tea party dress 25

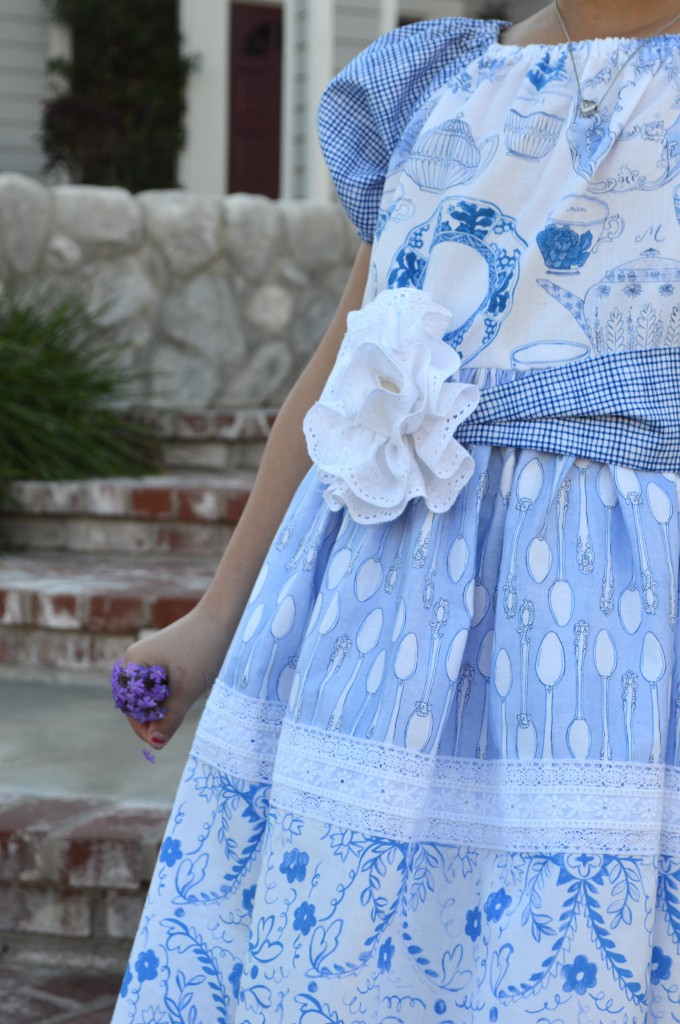
I added a little pleat in both ends of the sash.  This is totally optional.  Measure the sash to the waist one more time to determine the velcro placement.  Sew the Velcro strips.  Hand sew the rosette in place.

tea party dress 26

I think the sash and the flower give it just the right touch!

tea party dress 6

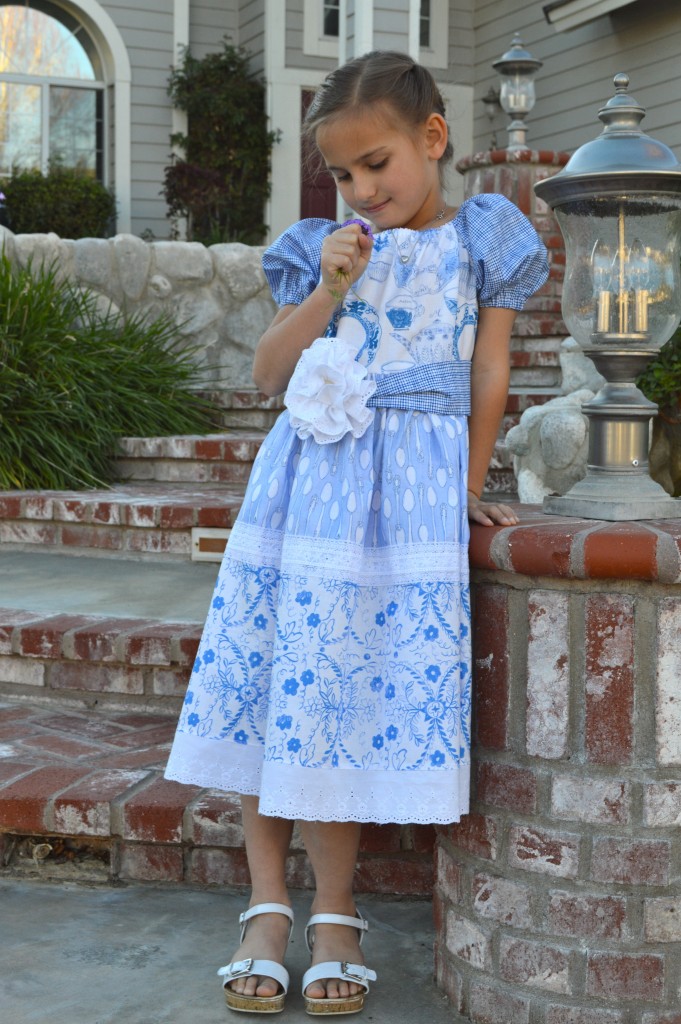
Whats also is great about this dress?  Sally likes it!!!  It’s super comfortable and she can move around in it.  She didn’t want to take it off!!
tea party dress 8

The Blythe Skirt – Magic Pattern Review

magic pattern skirt

Today I am sharing my thoughts about this super cute pattern from Amy Barickman’s The Magic Pattern Book over on the Therm O Web Blog today.Magic-large

This book is amazing with such cute patterns and styles.  There are 6 basic patterns and then variations on each pattern which give 36 different styles!  The CD has all the patterns included.  I love skirts and I especial love this A-Line pleated front skirt.  There is no zipper, not buttons, no hooks – super easy, right?

Magic Pattern Skirt 10

Magic Pattern Skirt 6

I love the two front pockets and I also love the length of this skirt.  I can’t wait to sew up a few more!
Magic Pattern Skirt.3

Magic Pattern Skirt.4

Happy Valentine’s Day

I thought I would share my favorite Vintage Valentines and wish you all a a very Happy Valentine’s Day – I love that it’s on a Saturday this year!I think this heart is my favorite – made from Blend’s Clementine line – and it’s not even in traditional valentine colors.  I have it hanging in my living room.

vintage valentines 3

This heart is made with Blend’s Modern Lace.  I do recognize that not everyone loves cats as much as me, so I made a few versions with vintage love birds.
vintage valentines 5

vintage valentines 6


This one is also made with the Modern Lace line – which I LOVE!vintage valentines 7

This print is also from Modern Lace.

IMG_3445

I love this one made with the spoon print from the Clementine line.
vintage valentines


My daughter and I made over 30 of these hearts!IMG_2890


A little peek into some Valentine decor in my home 🙂

IMG_3640

vintage valentines 2

vintage valentines 4


Tic Tac Toe Valentine Pillow Tutorial

valentine pillow tic tac toe
February is just flying by!  I needed a little pick-me-up today and throw pillows always do just the trick!  A friend of mine came over and we spent the afternoon sewing.  I came up with the idea of this interactive pillow after sitting next to my little girl at church yesterday.  We brought along the quiet book (circa 1980) and one of the pages is a tic tac toe game.  I thought this would be super fun to incorporate into a Valentine’s Day pillow!

tic tac toe valentine pillow

I love how it turned out and my kids LOVE it!  They couldn’t believe I made something fun!!  I think the fabrics make it – it’s the Flirt line by Dear Stella.  I had some left over from my Valentine Bookmark & Sachet project.

tic tac toe valentine pillow 17

Here’s how you can make one

Supplies:

fat quarter white fabric

small pieces of fabric for hearts and Xs – can use charm squares

cotton batting scraps

fat quarter for the pillow back

20″ pillow form

22″ or longer zipper

3 yards pink trim

2 yards pink lace

1/4 yard border fabric

10″ of velcro

Spray n Bond

X and Heart pattern, click here

Begin by cutting the white background fabric 15″ square
tic tac toe valentine pillow 2

Measure and position the pink lace so it creates equal sections, taking into account 1/4″ seam allowances around the outside of the square.  Using Spray n Bond basting spray makes positioning lace a snap.  If you don’t have this, you can pin.  Sew with matching thread.  Next, position the next 2 pieces of lace to create the grid.  Sew into place.
tic tac toe valentine pillow 3

Print and cut out the X and the heart.tic tac toe valentine pillow 4

Layer a piece of fabric, cotton batting, and another piece of fabric like this with right sides facing out.  You are making a mini quilt sandwich.  These don’t have to look pretty.  I cut mine with scissors and did not measure.  Using basting spray, spray the layers so they stay together.tic tac toe valentine pillow 5

Pin and X or a Heart on the fabric.

tic tac toe valentine pillow 6

Stitch all the way around the pattern piece.

tic tac toe valentine pillow 9

Cut out the X close to the seam.  Cut 1″ piece of velcro and position the soft piece in the center of the X.  Make sure you use the same side of the velcro for each piece or they won’t be interchangeable 🙂  I had to use the seam ripper on one of mine 🙁tic tac toe valentine pillow 7

Sew around the velcro square. Do this to each heart and X.  I made 5 hearts and 4 Xs.  Sew the opposite sides to each velcro piece in the middle of the tic tac toe squares.tic tac toe valentine pillow 8

Prepare the boarders by cutting (2) 15″ x 3″ strips and (2) 20″ x 3″ strips.
tic tac toe valentine pillow 10Sew the 15″ long strips to each side using 1/4″ seams.  Press toward the boarder.

tic tac toe valentine pillow 11

Sew the 20″ pieces on in the same manner.  Press.  Sew the decorative trim around the pillow front, rounding the corners.
tic tac toe valentine pillow 12

Prepare the back of the pillow.  Cut a 21″ x 20″ piece of fabric (I add 1″ to the length just in case the zipper or the zipper seam differs).  Cut at the 4″ mark.  Insert the zipper.  Trim off the excess zipper.  With the zipper partially open, place the pillow front to the pillow back, matching the top edge and the side edge.  There should be about 1″ extra at the bottom of the back piece.  Cut this off after sewing all the way around the pillow.  Sew all the way around the pillow using the trim seam as you guide.  I like to sew just a little larger seam then the seam I created when sewing the trim on.  Turn right side out.tic tac toe valentine pillow 13

Insert the 20″ pillow form and then place the game pieces on the velcro squares – whose ready to play!!tic tac toe valentine pillow 14

This is the back of the pillow – you can make it how you want – this is just a super fast & easy way to finish a pillow.

tic tac toe valentine pillow 123

The fabrics are amazing!!!

tic tac toe valentine pillow 15
tic tac toe valentine pillow 18
tic tac toe valentine pillow 20

Sally was being silly 🙂

tic tac toe valentine pillow 21

tic tac toe valentine pillow 22

Valentine Bookmark and Sachet Tutorial

valentine bookmark and sachet


Don’t you just LOVE February!!  I love all the cheerful colors, flowers, fabrics, and blossoms!  It’s even been 80 degrees around here in the daytime!  I’m super happy!!!IMG_3280

These fabrics from the Dear Stella Flirt line just scream Valentine’s Day.  They make me want to throw a Jane Austen inspired Tea Party…..maybe I will!!dear-stella-flirt-fabrics

I love giving little gifts on Valentine’s Day and these sweet projects can be sewn up quickly.  I love using fabric bookmarks in my books, this bookmark is flat and thin so it won’t damage your book.
valentine bookmark 2


This lovely lavender sachet is perfect to toss in a drawer or even in your car!
valentine sachet. 2

They make a lovely pair.  I can’t wait to sew more of these!  My full instructions are on the Therm O Web Blog.  This project uses Heat n Bond Lite for the appliqué which makes it a snap.  There is also a little Heat n Bond medium weight stabilizer in the bookmark to give it stability.  I can’t wait to sew a few more!!
valentine gift set 3

Deco Foil Hanging Heart {DIY project}


deco foil hanging heart valentine
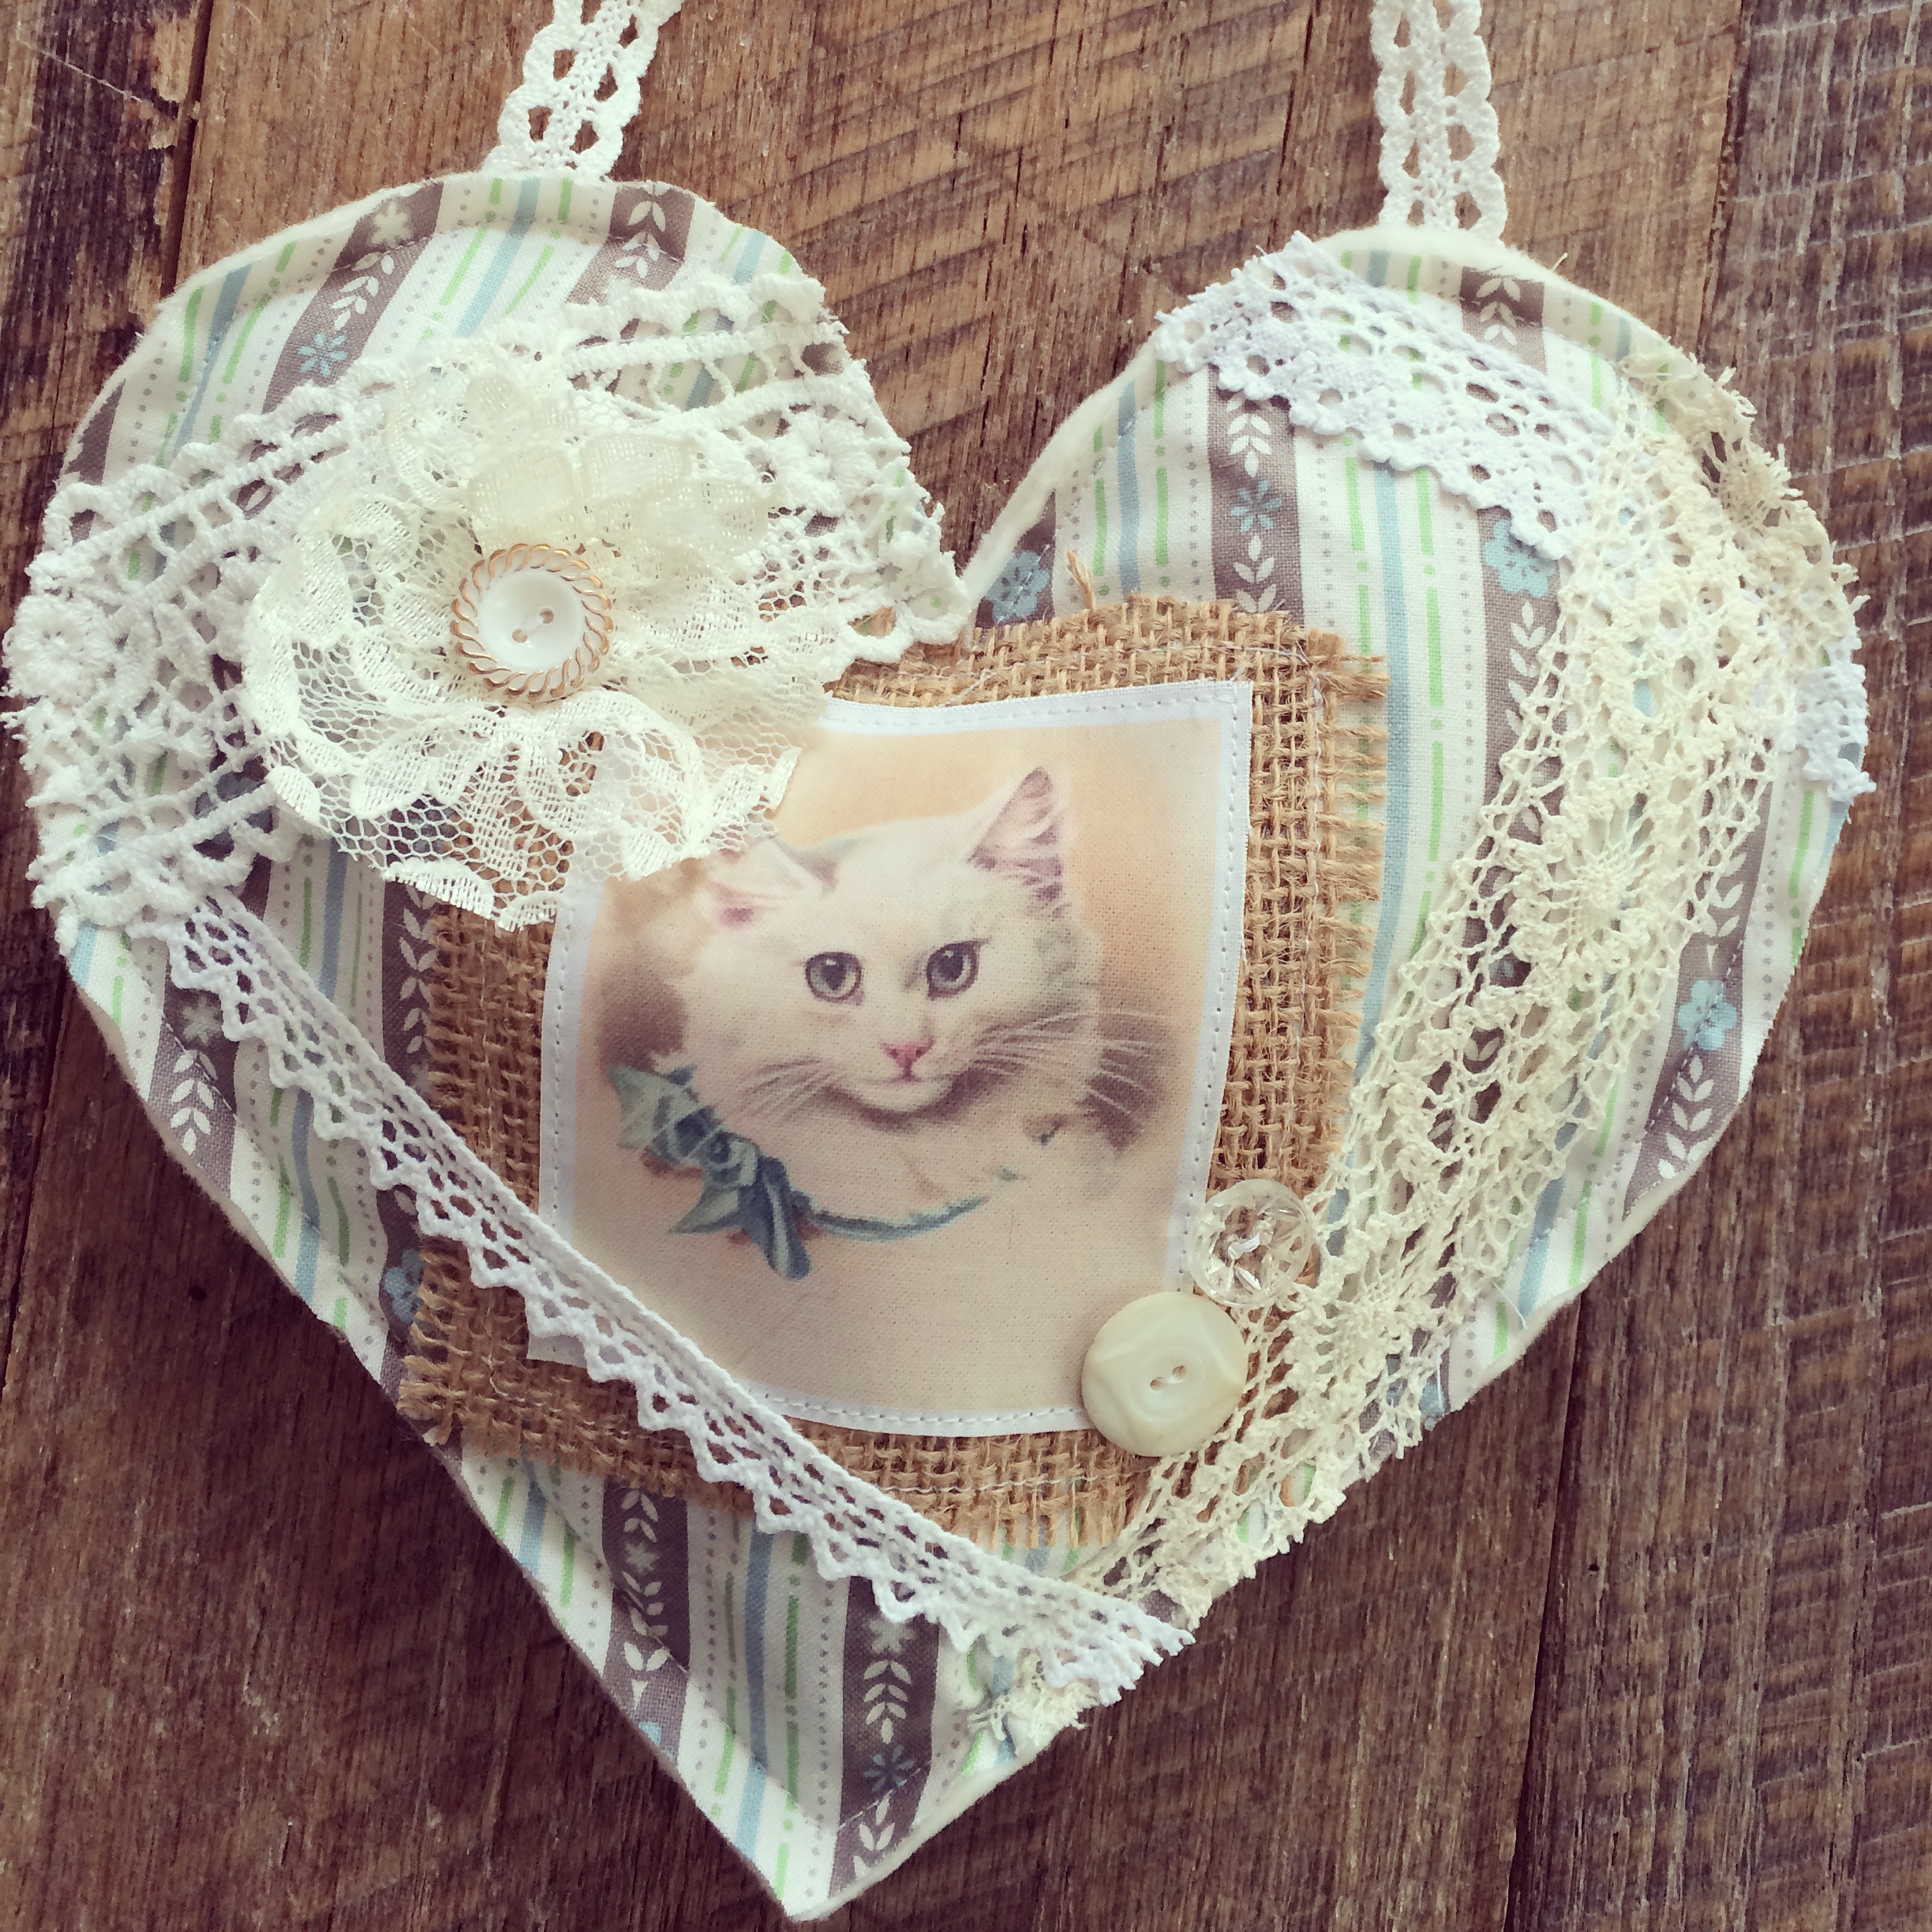
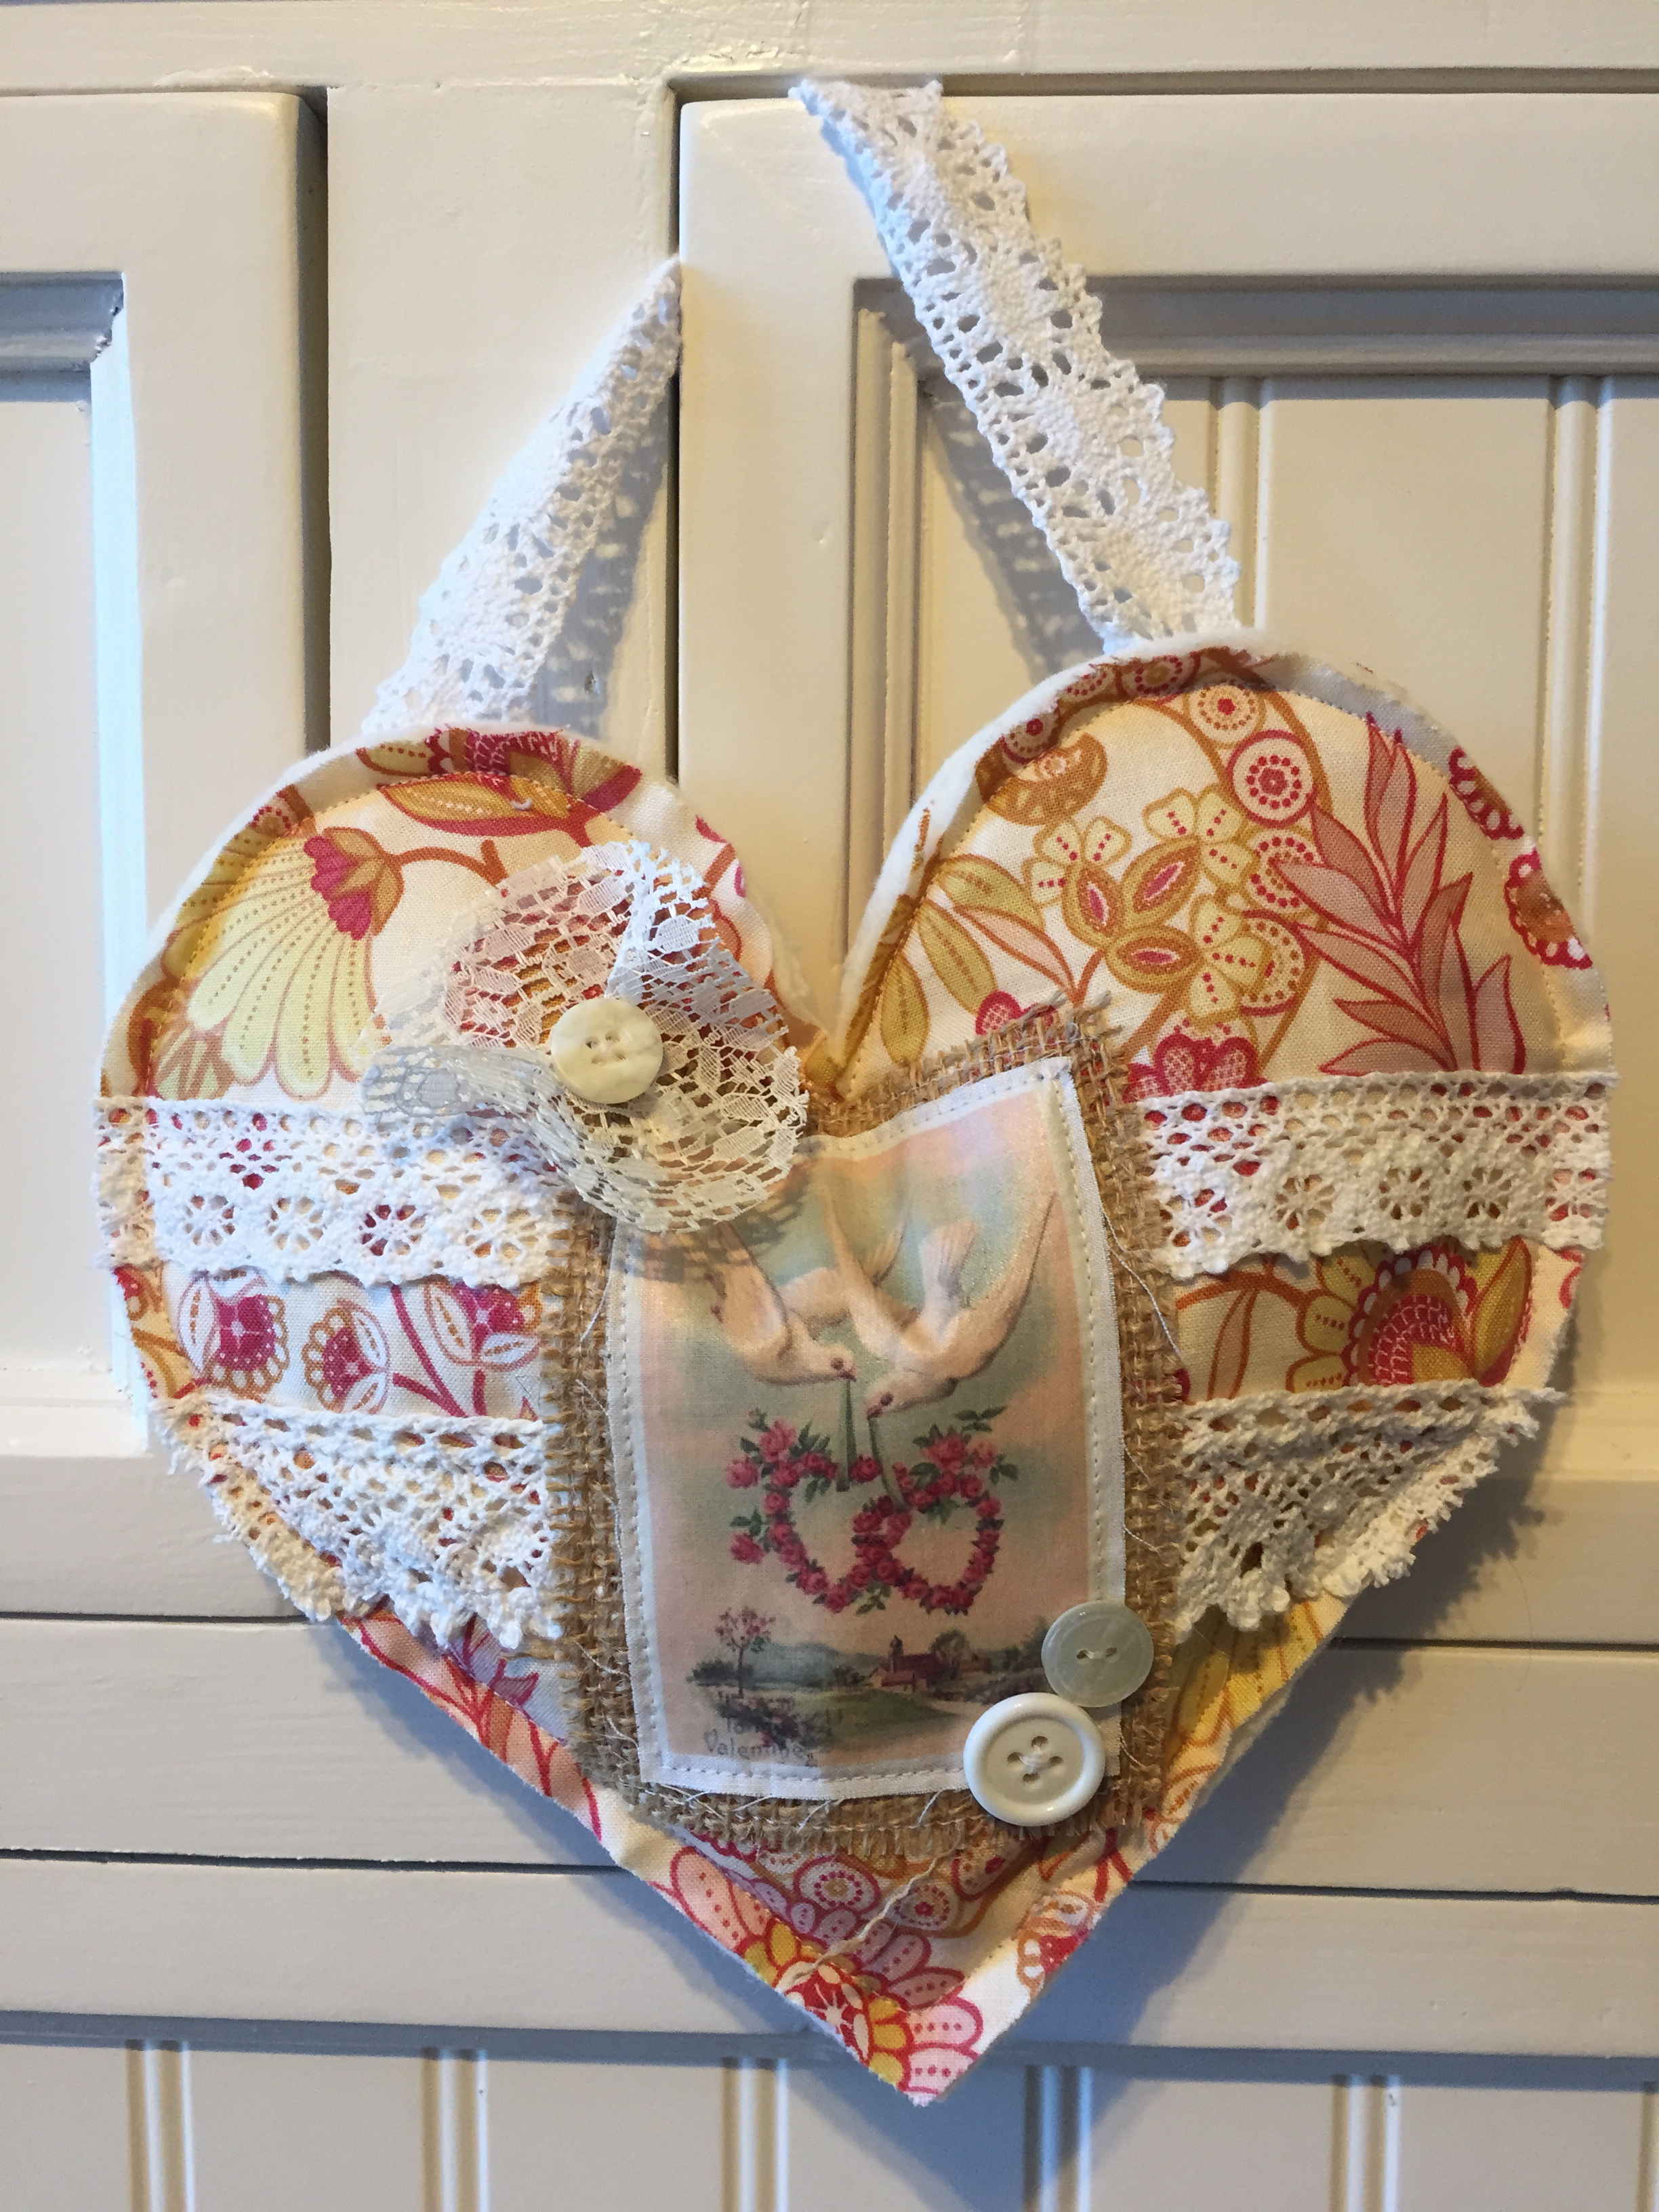
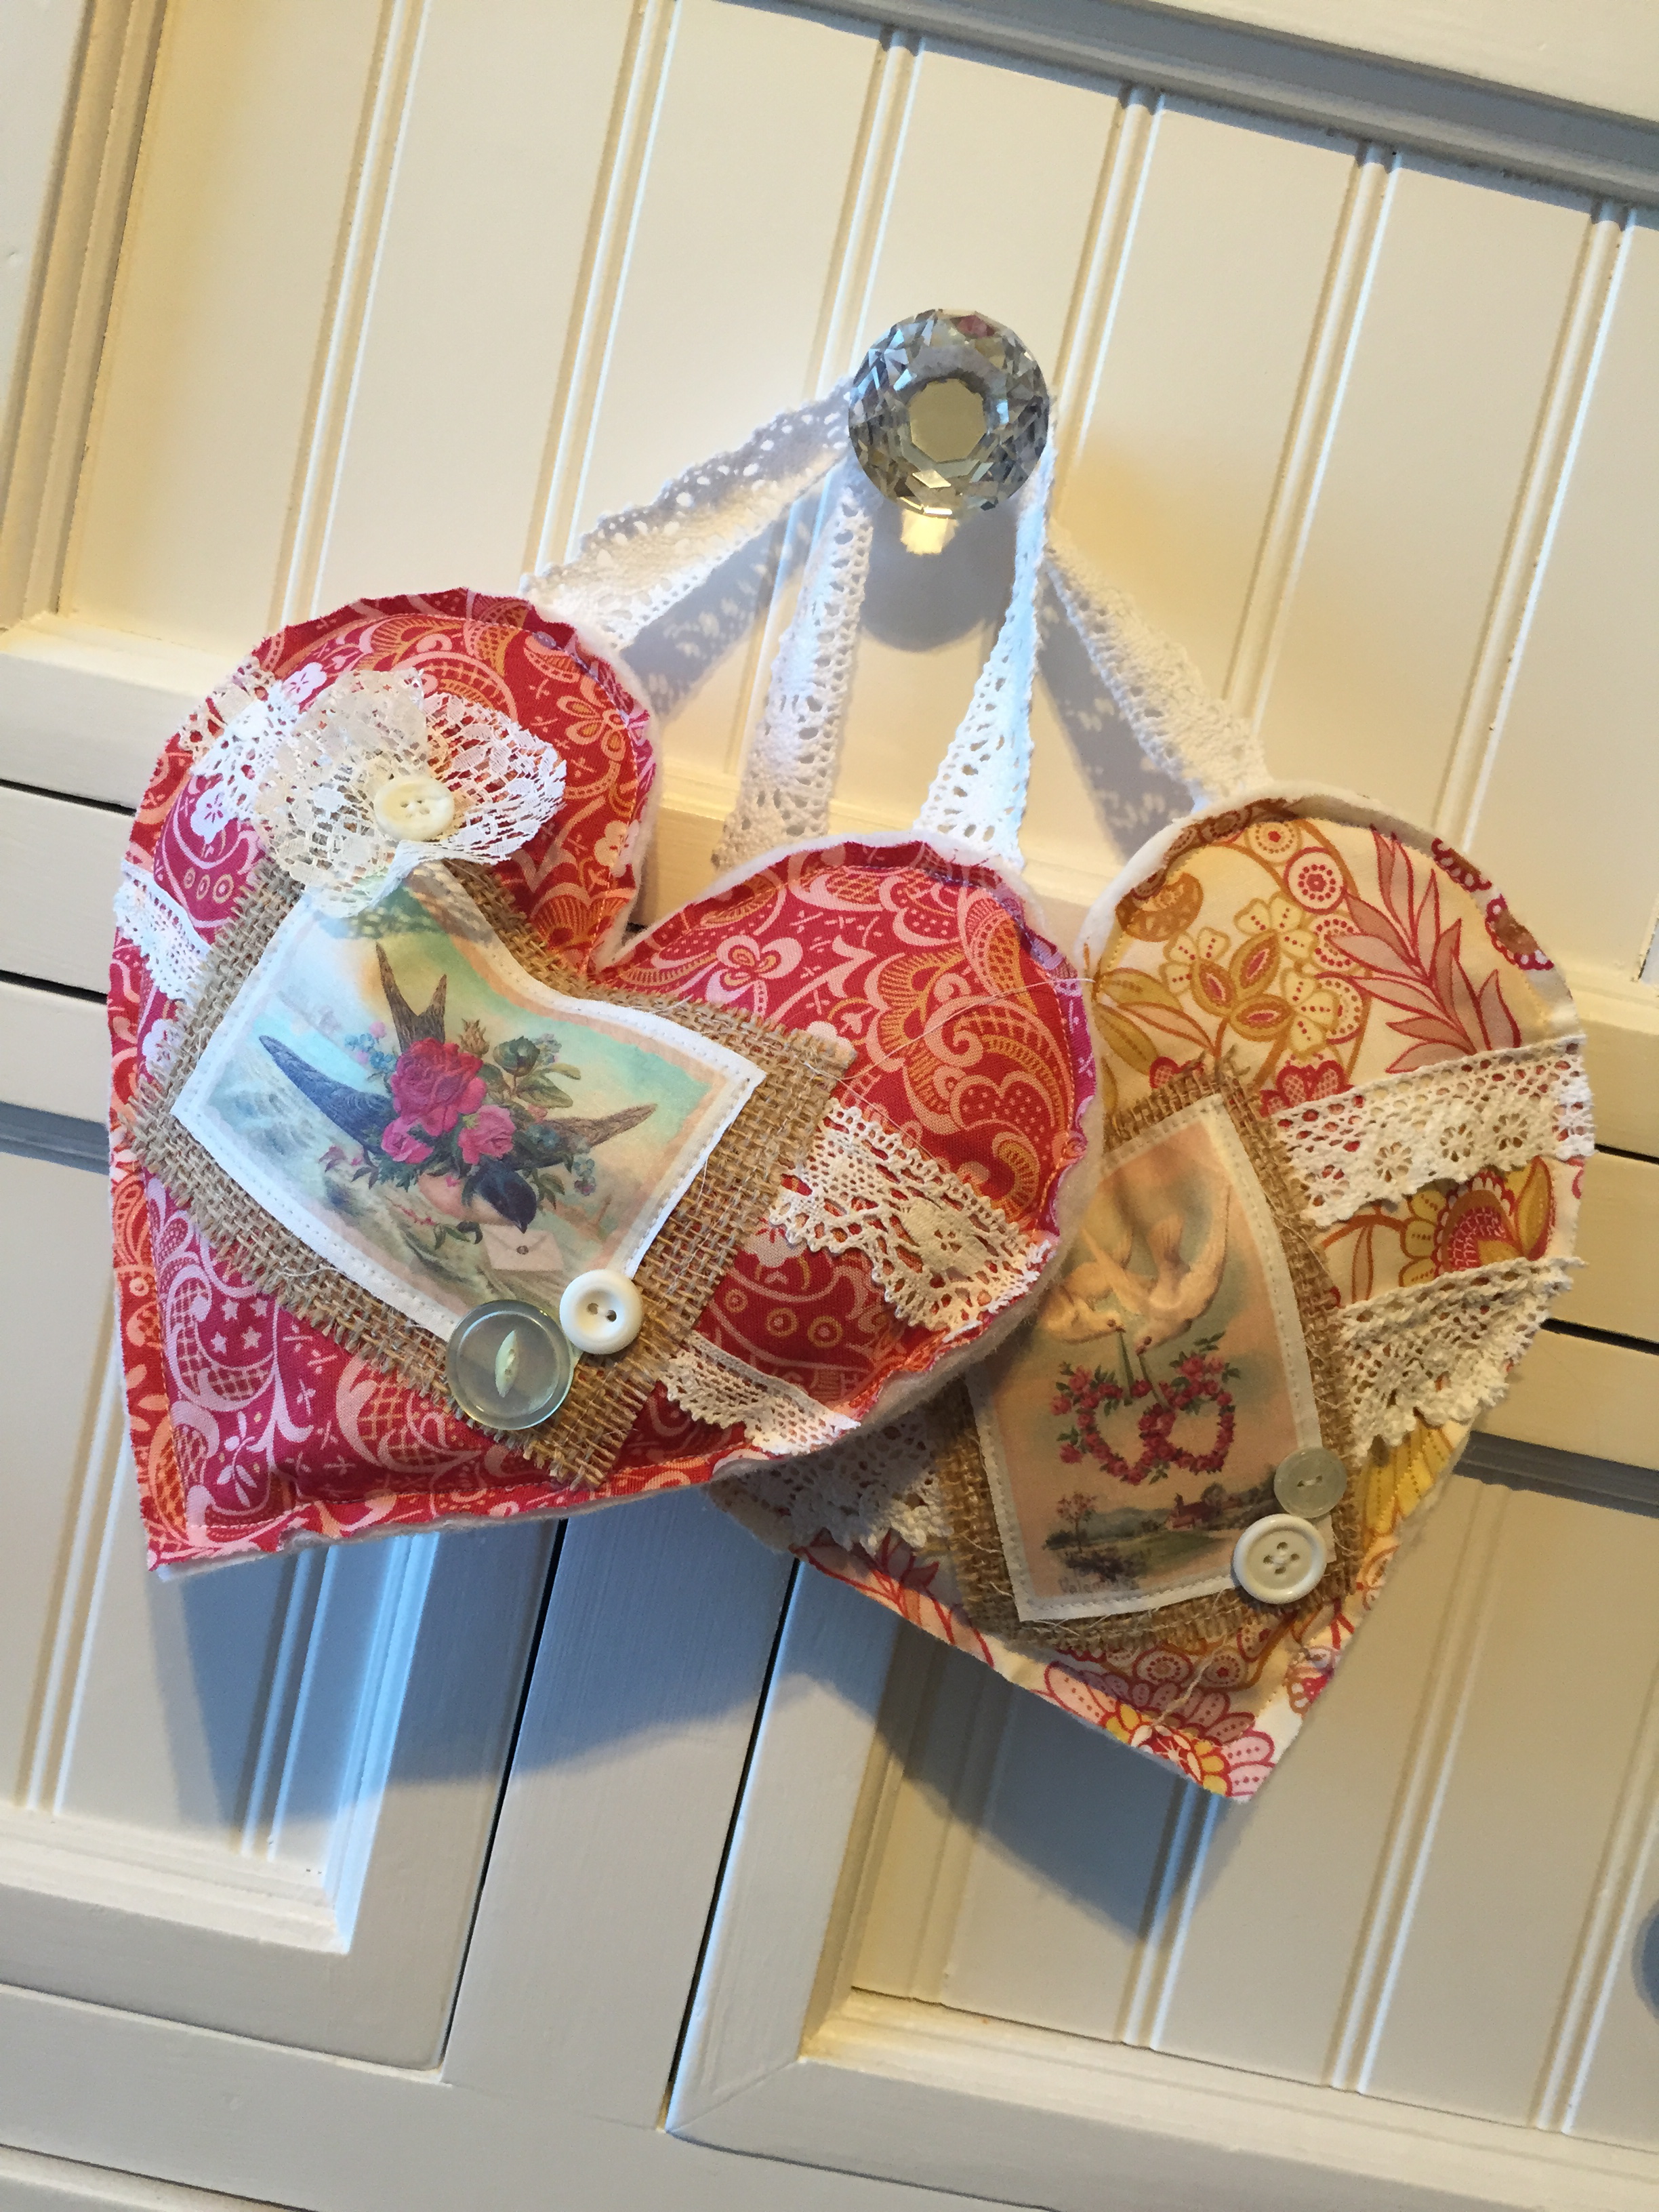
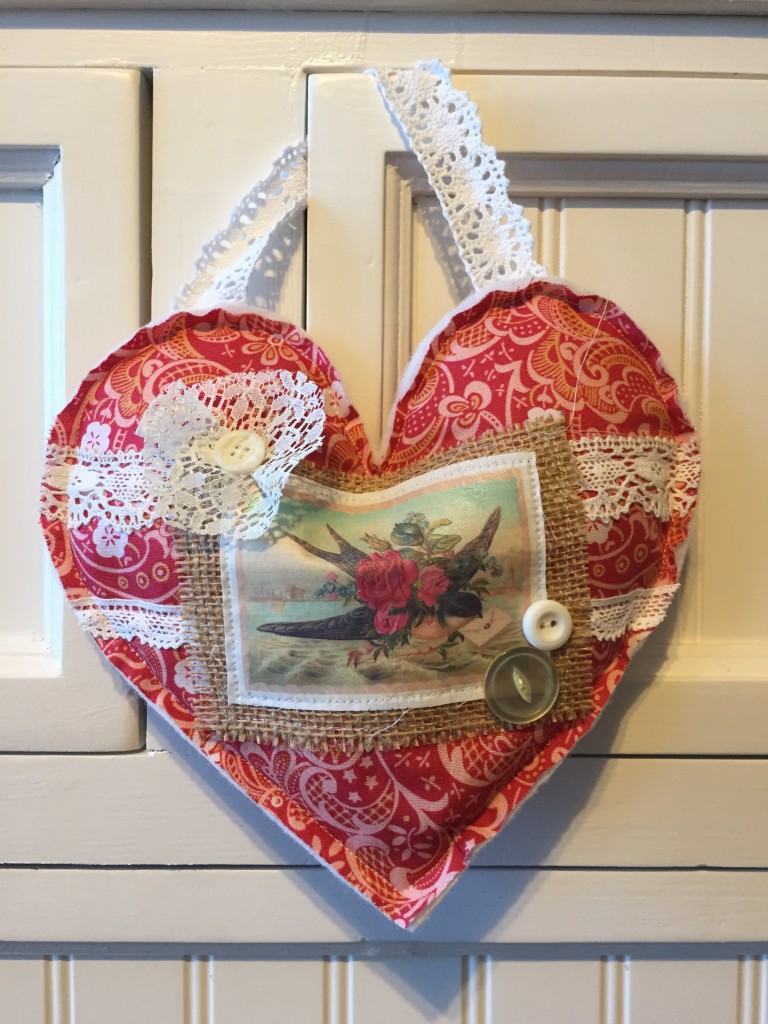
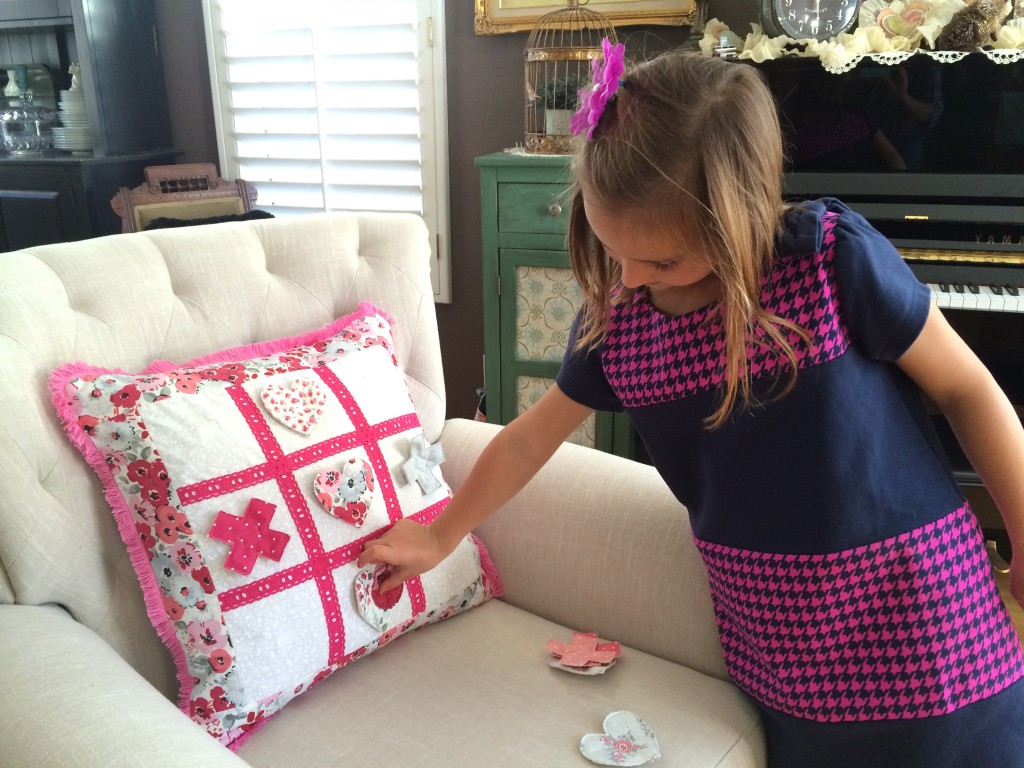
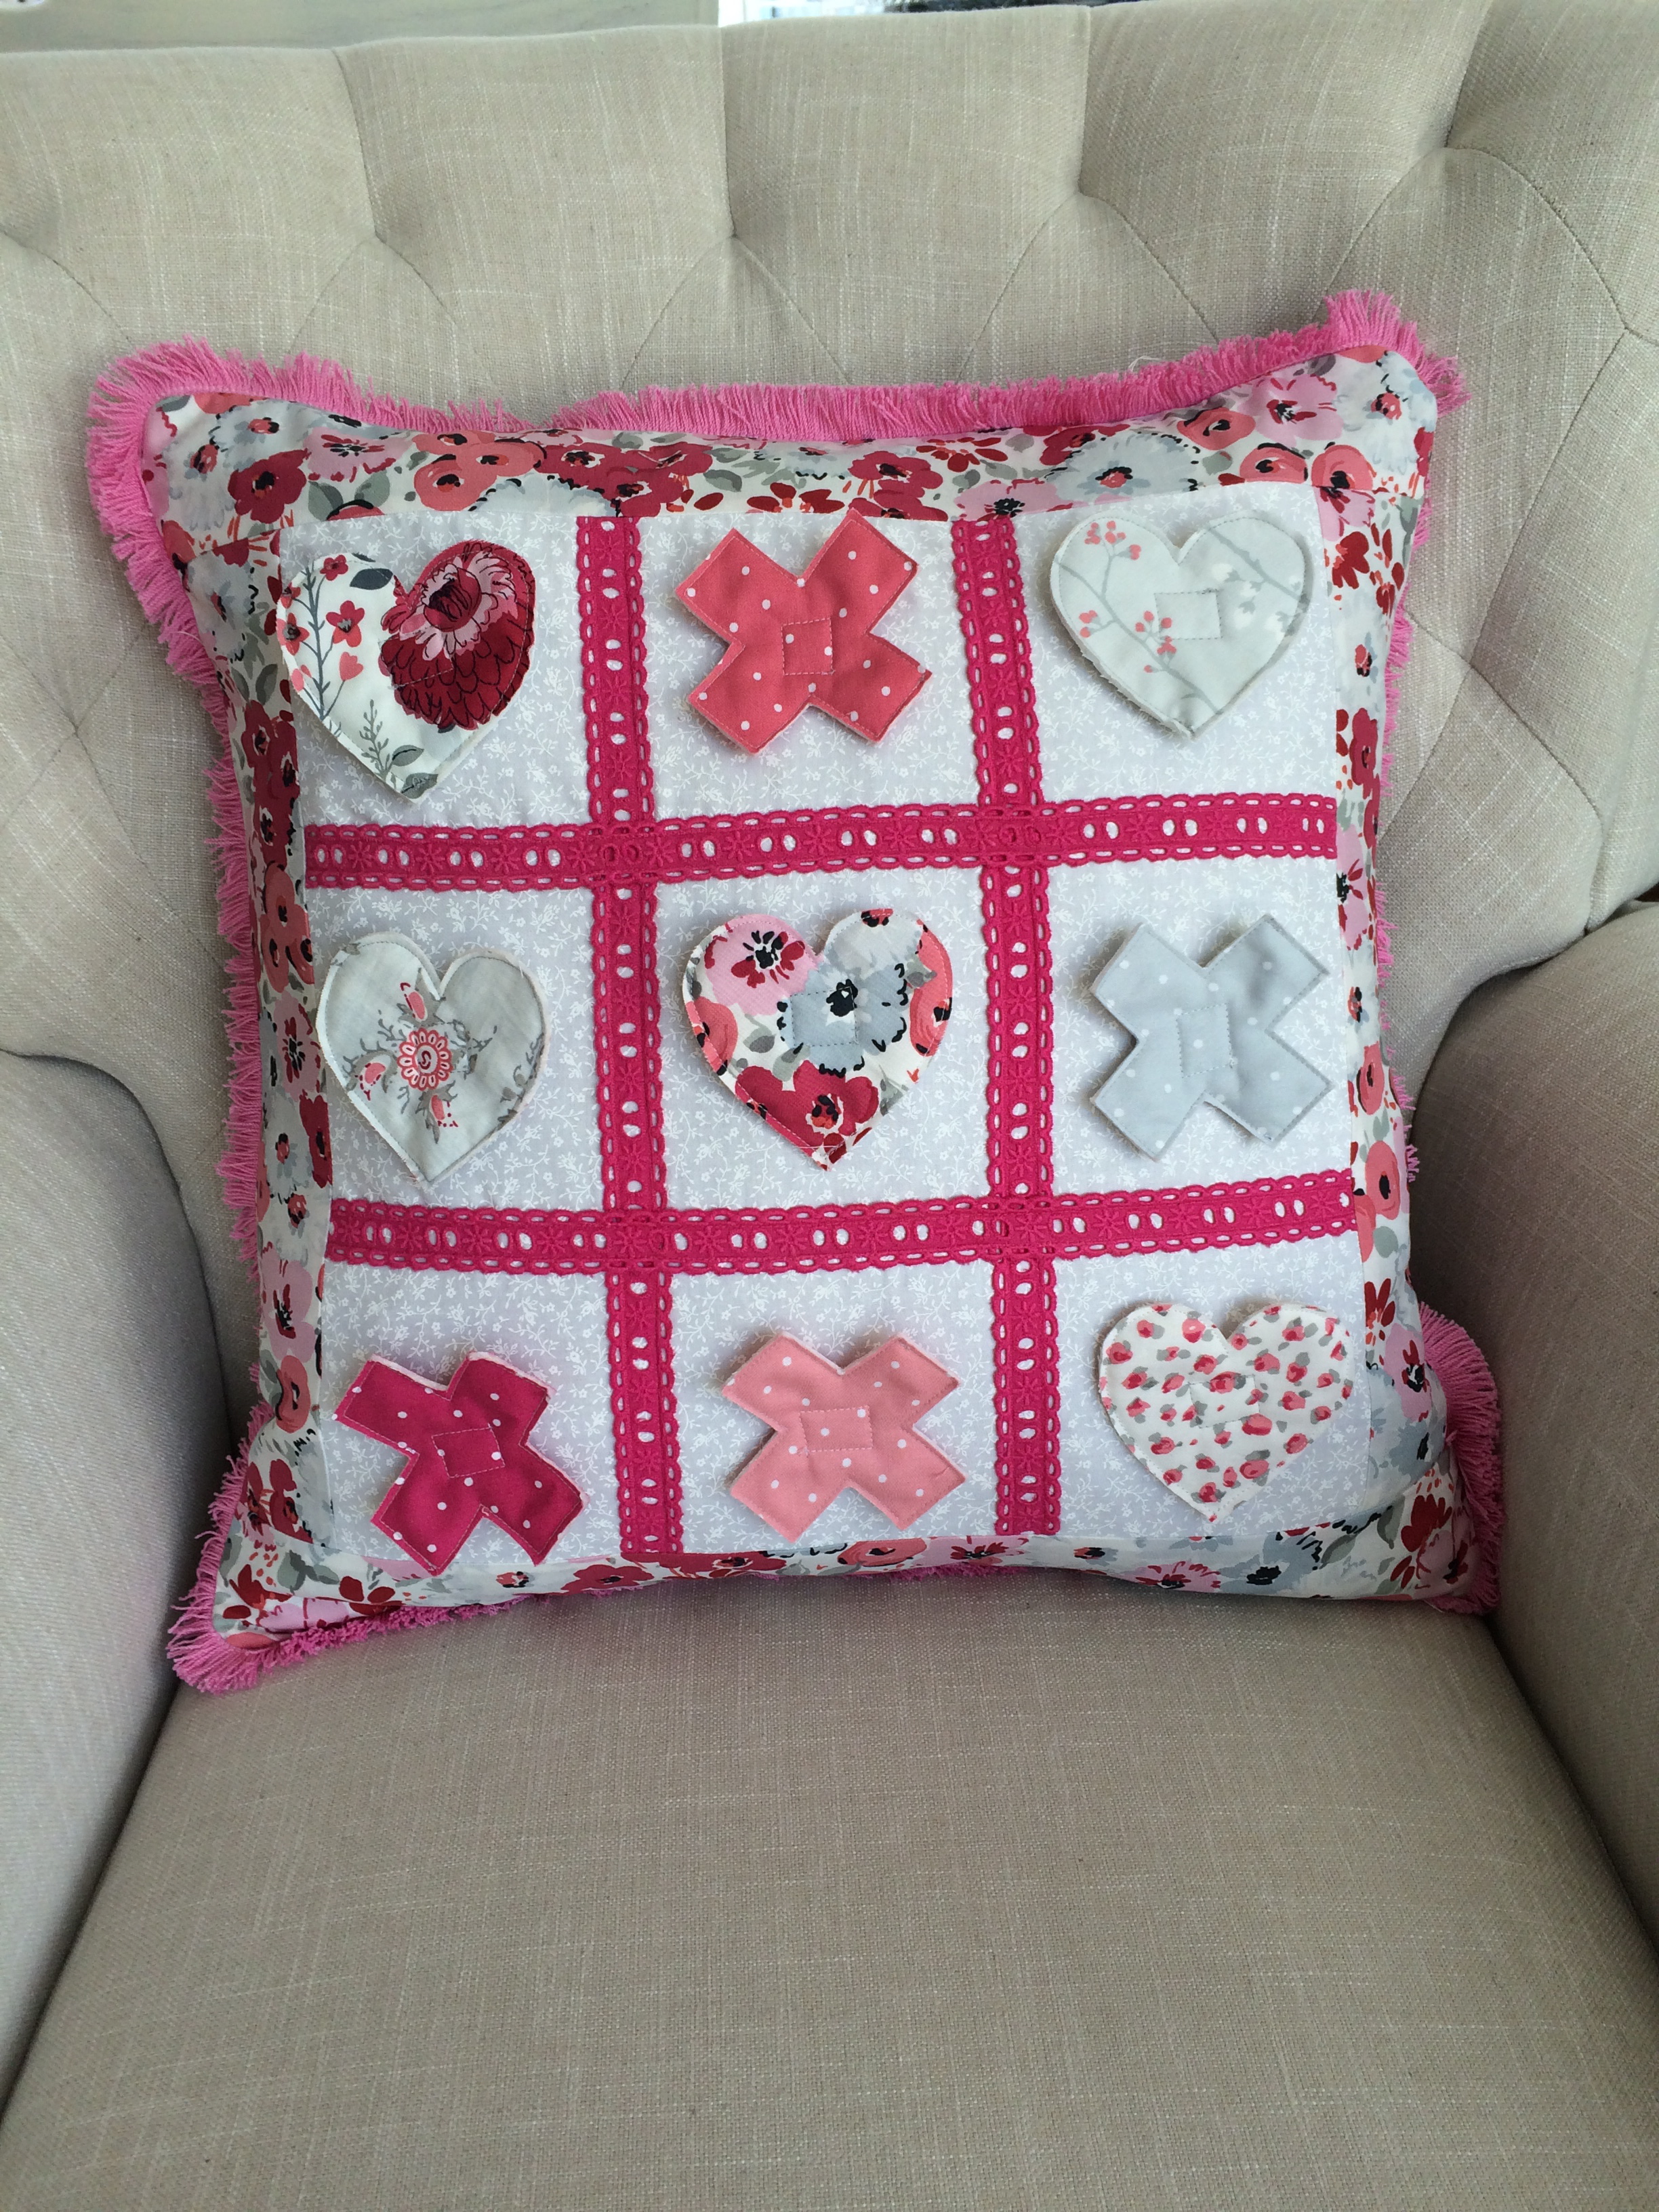
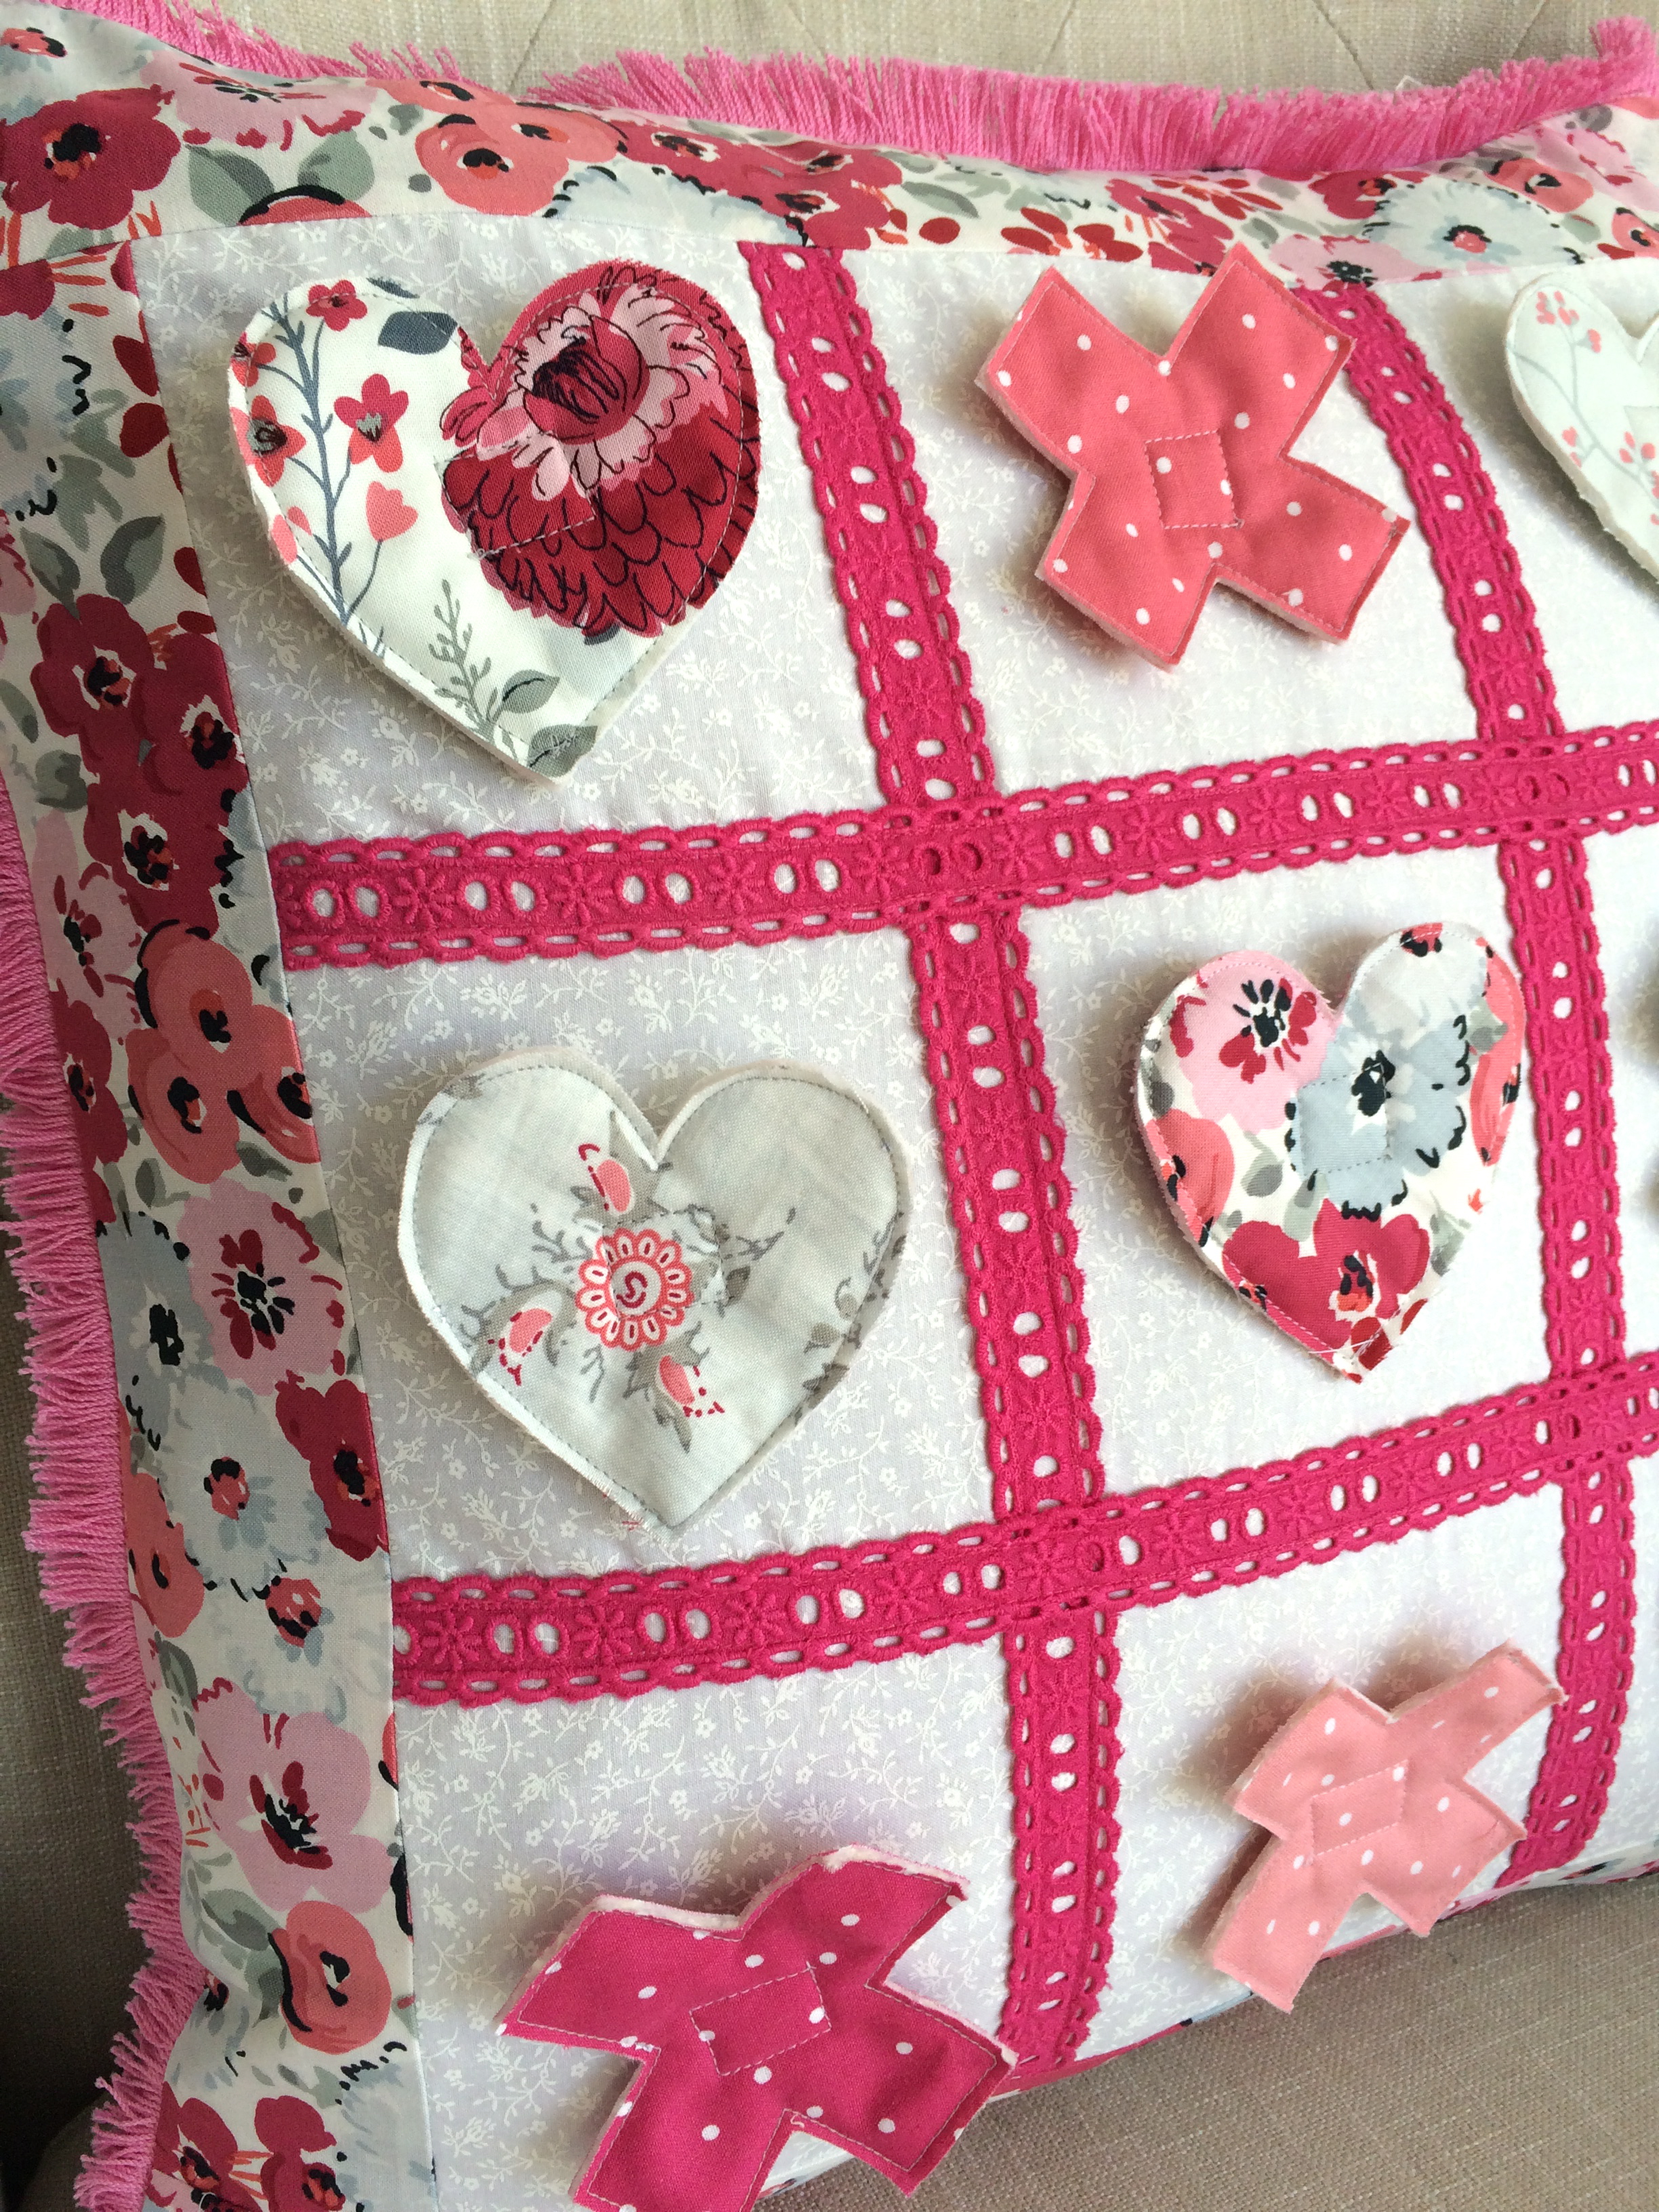
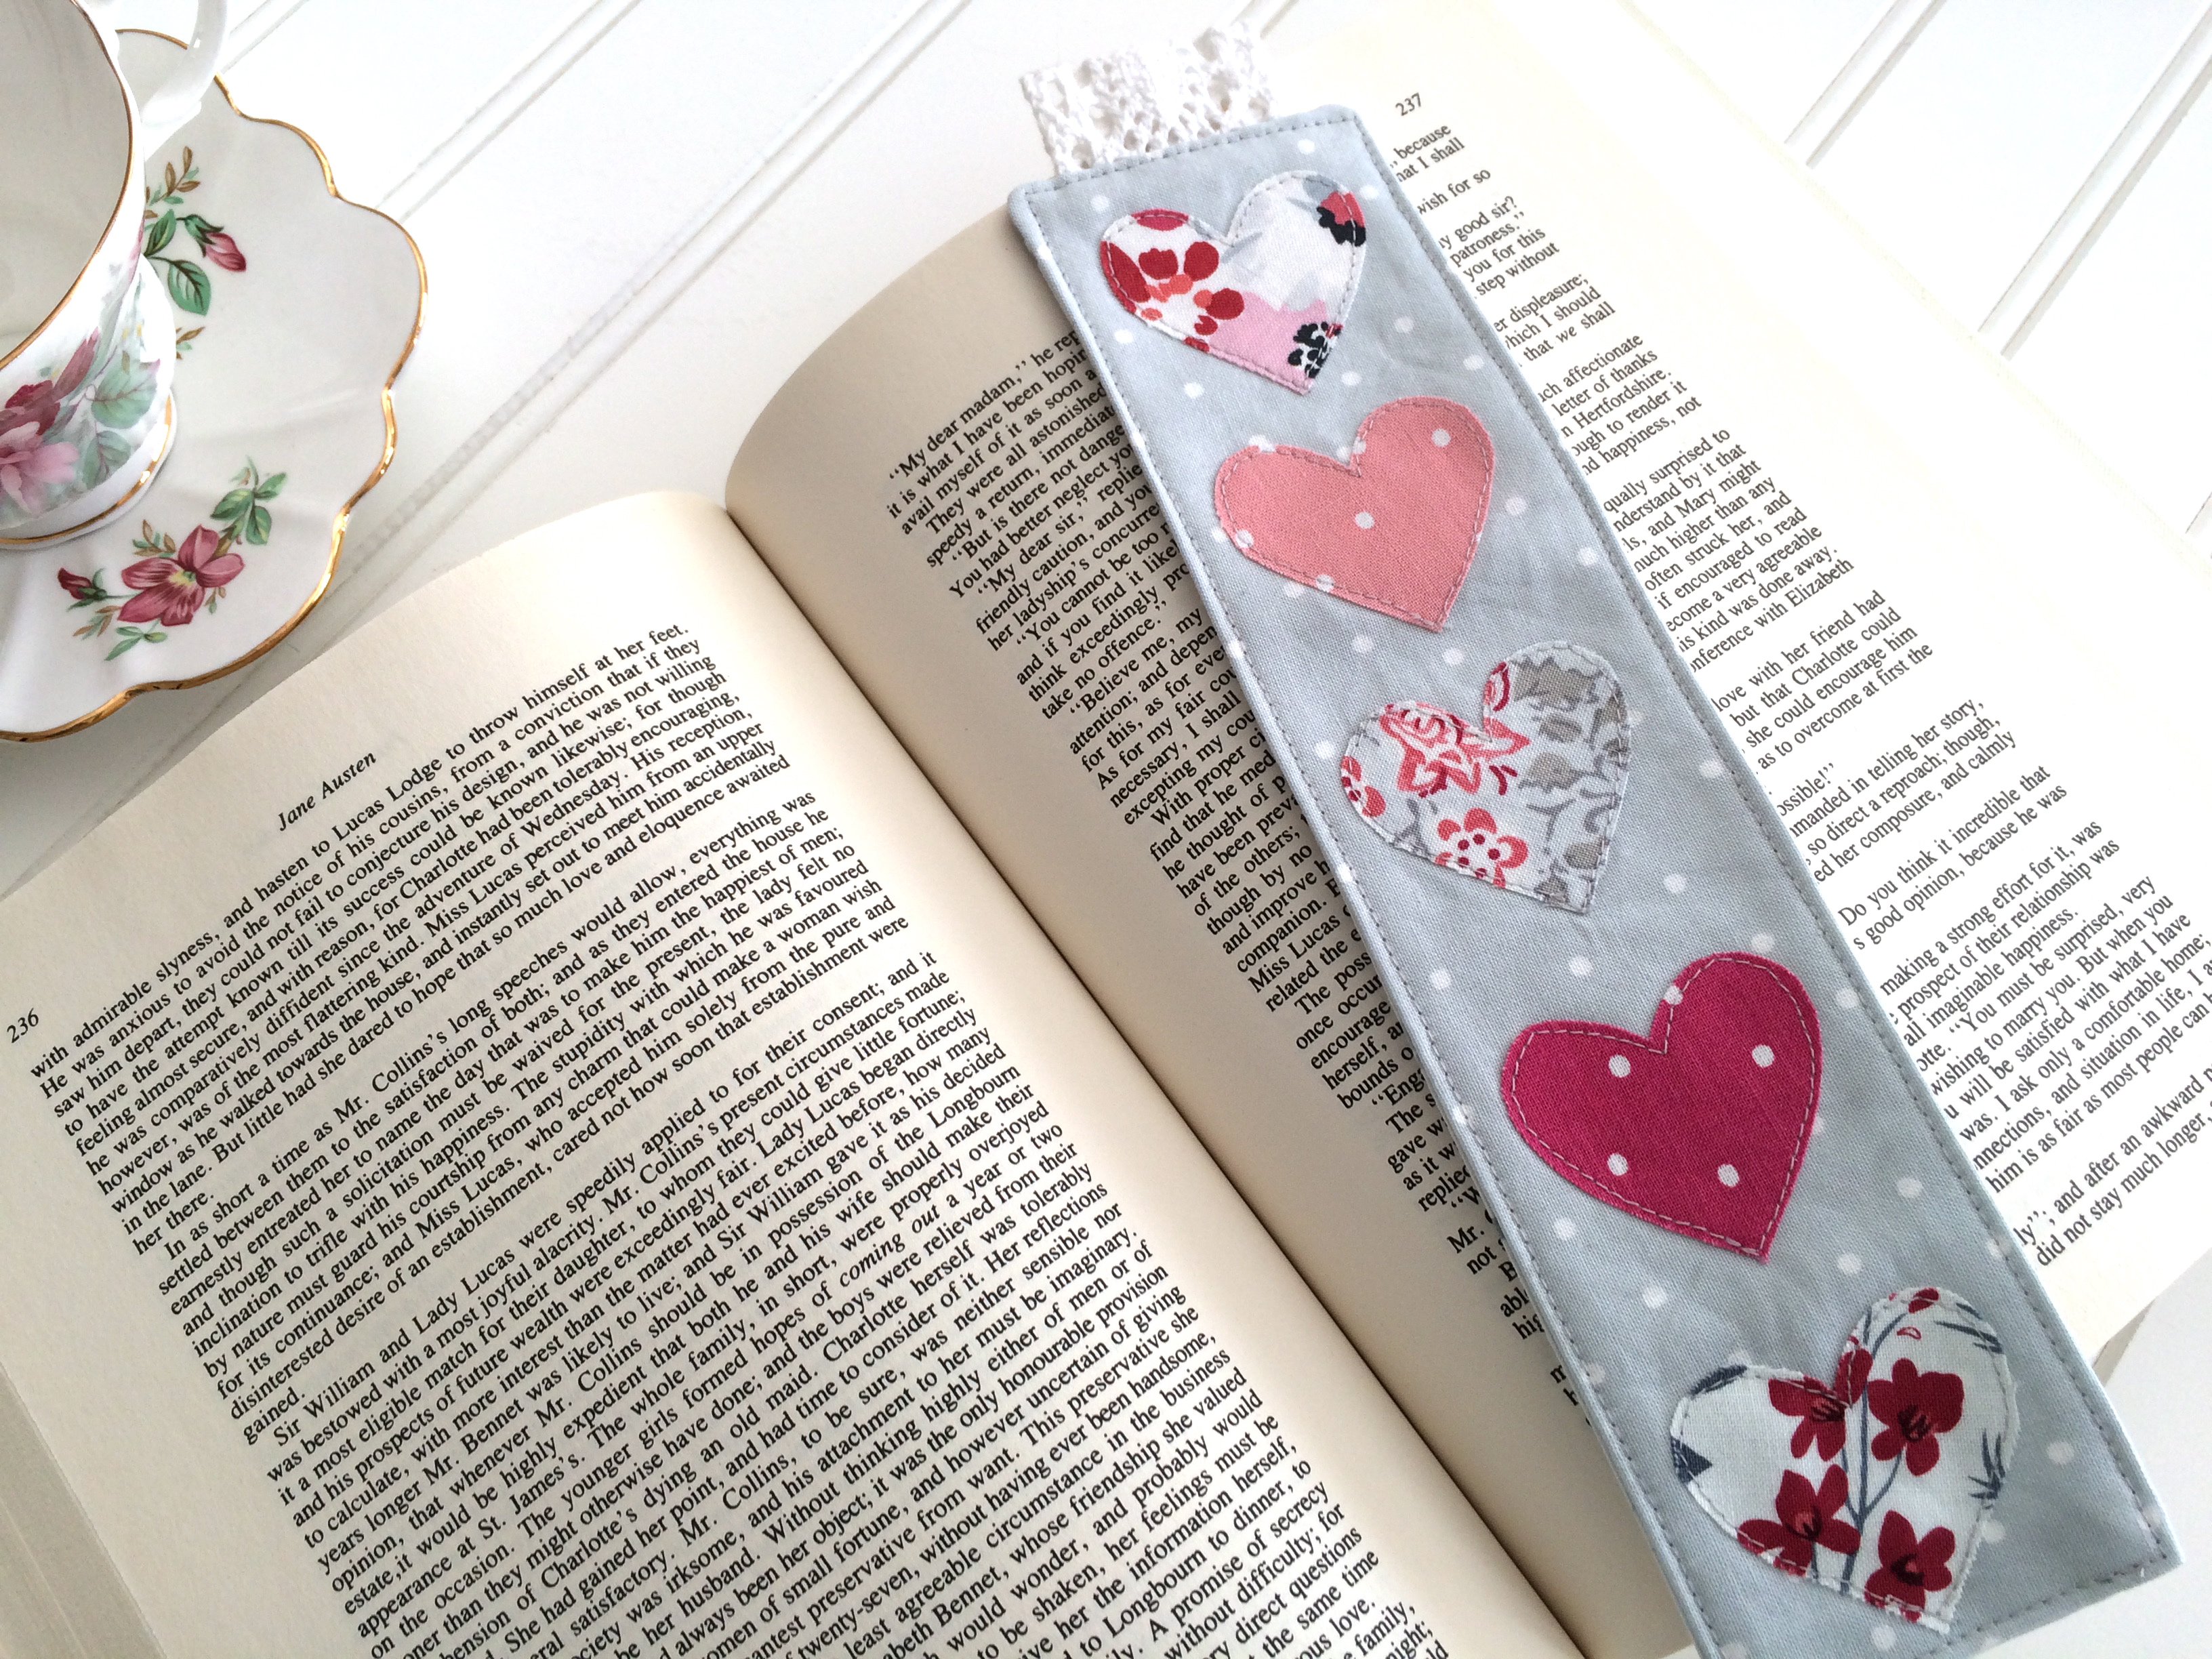
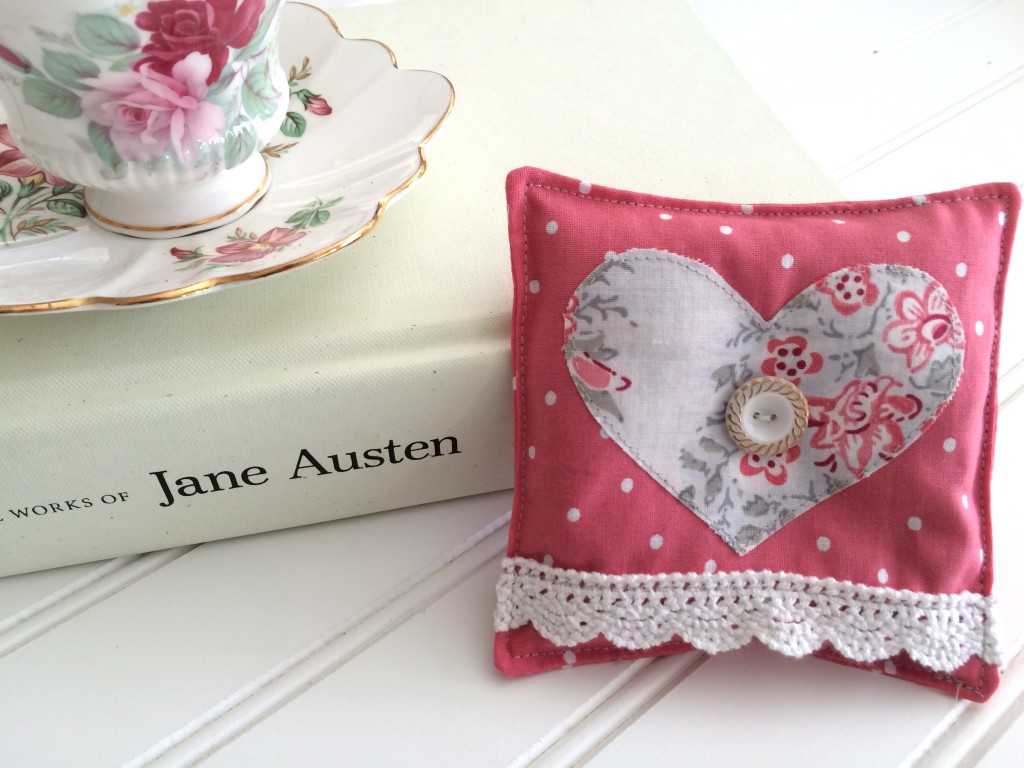
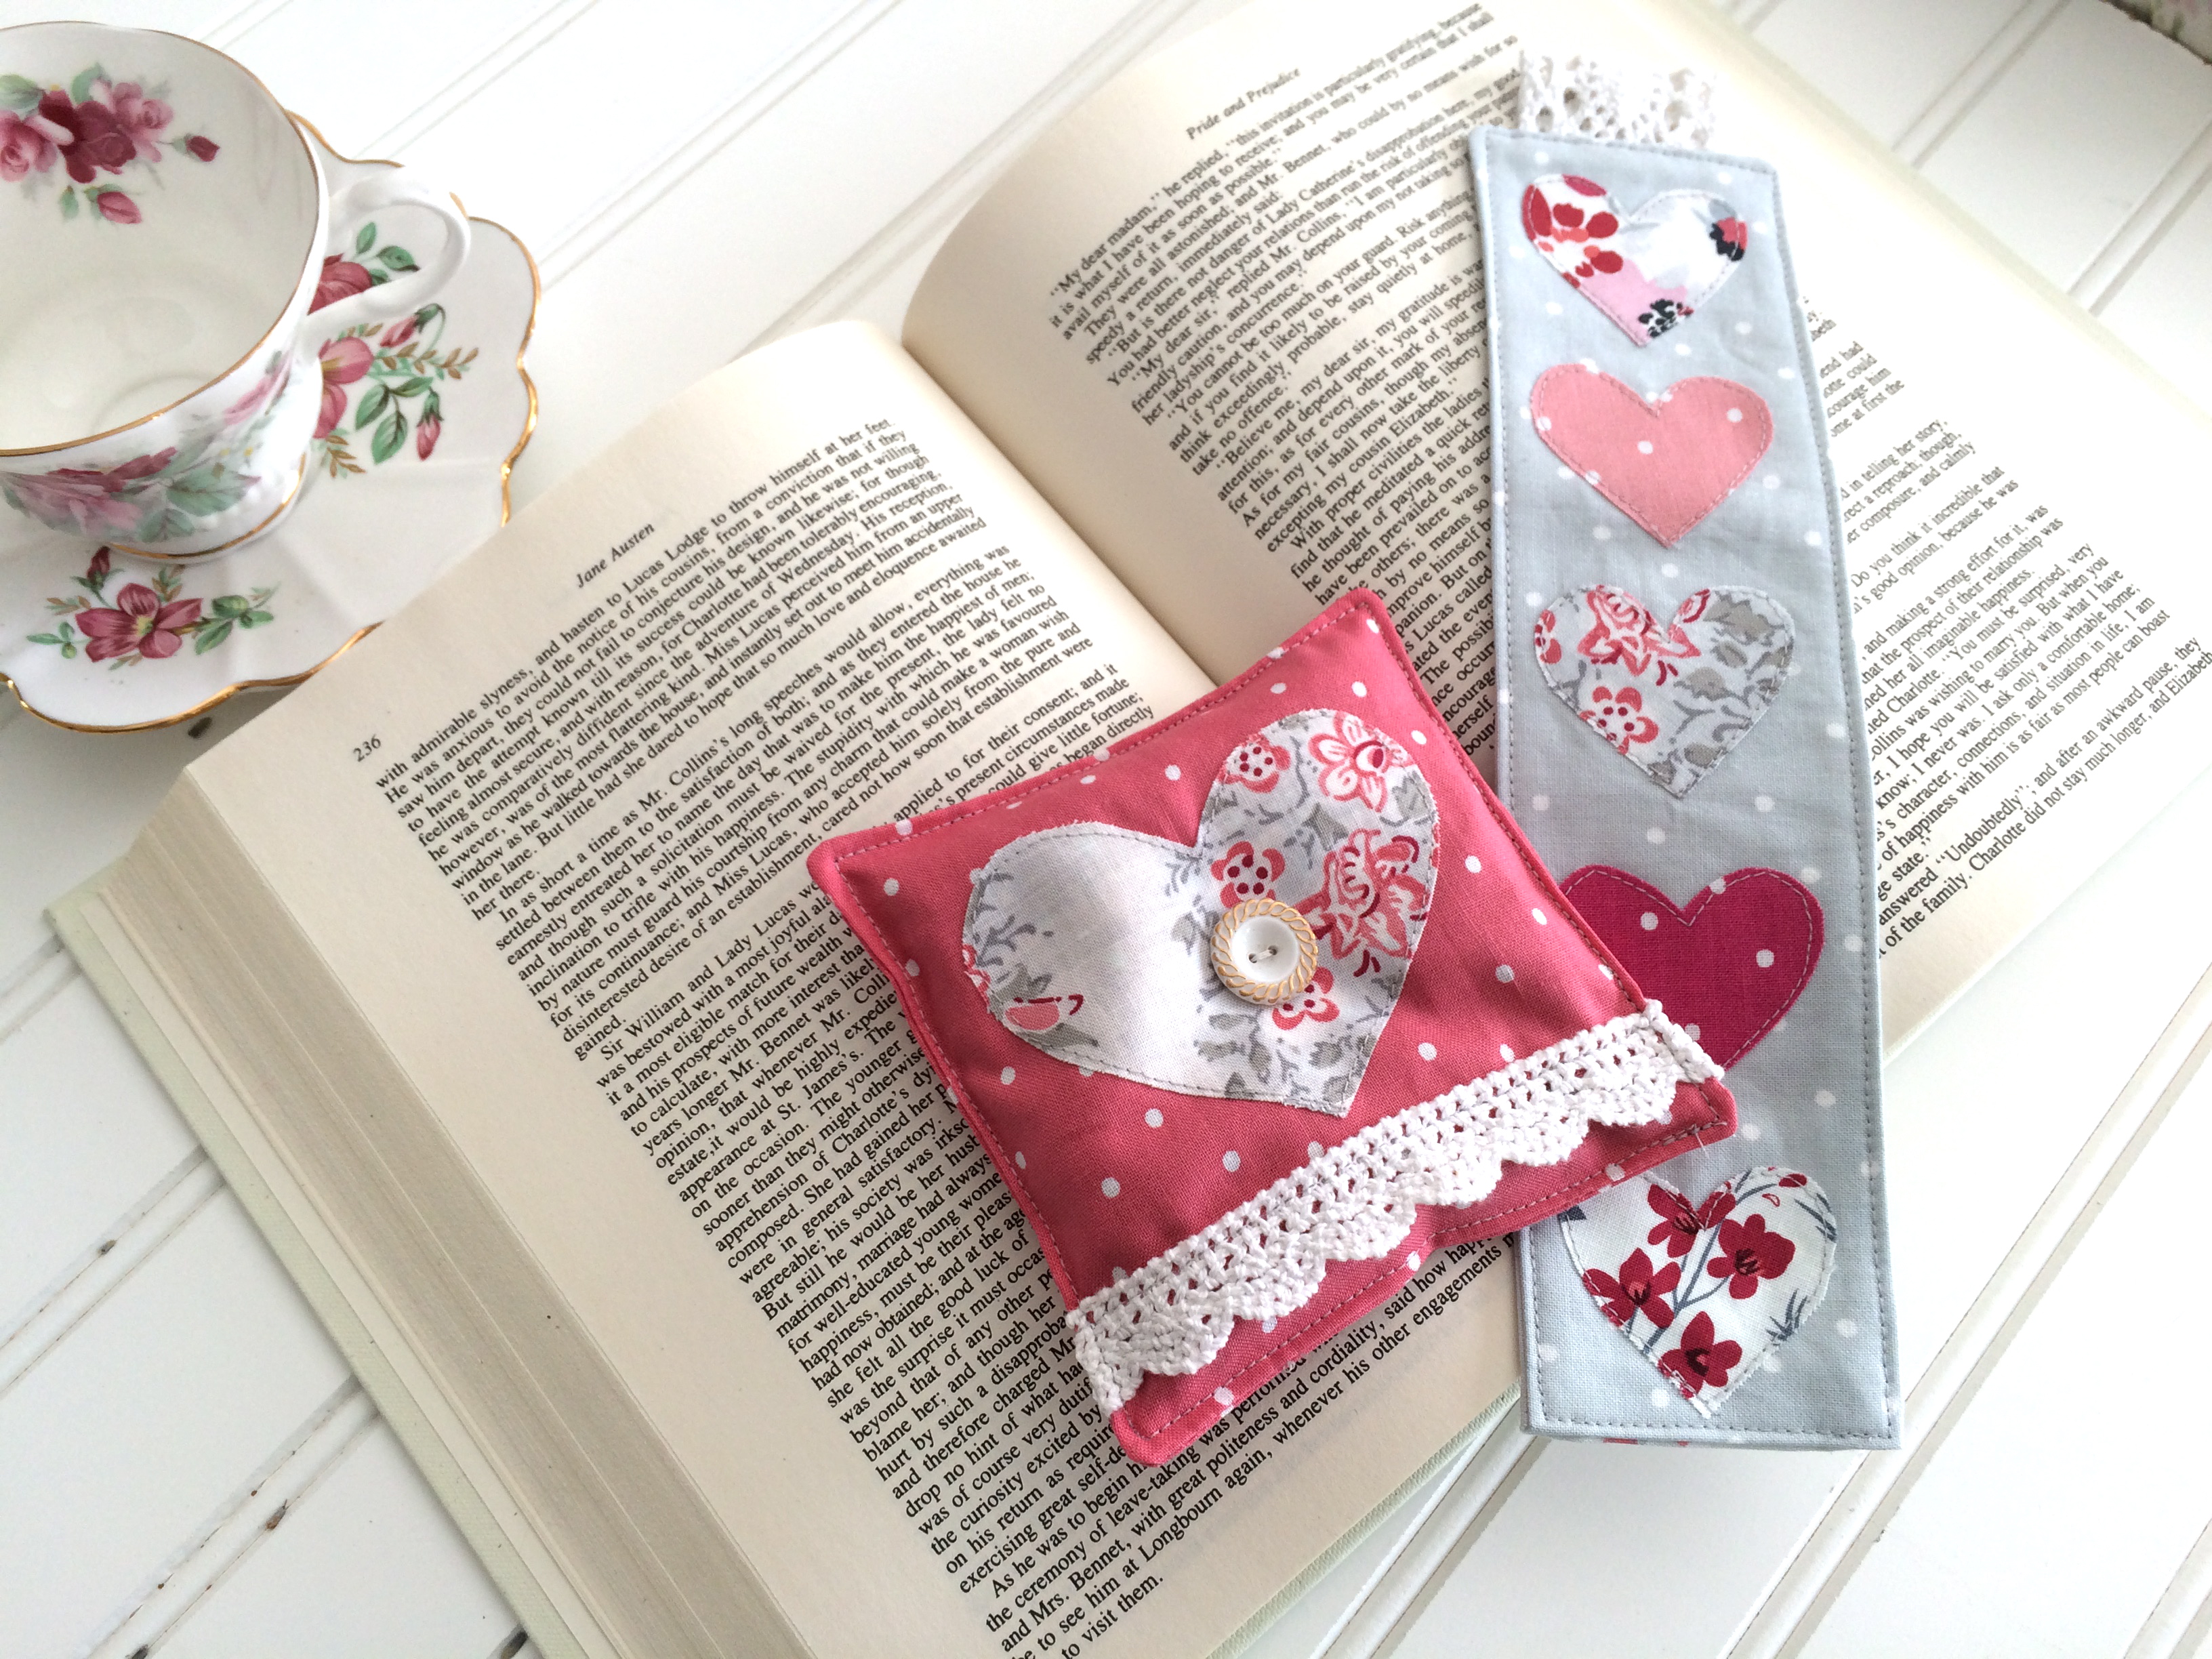
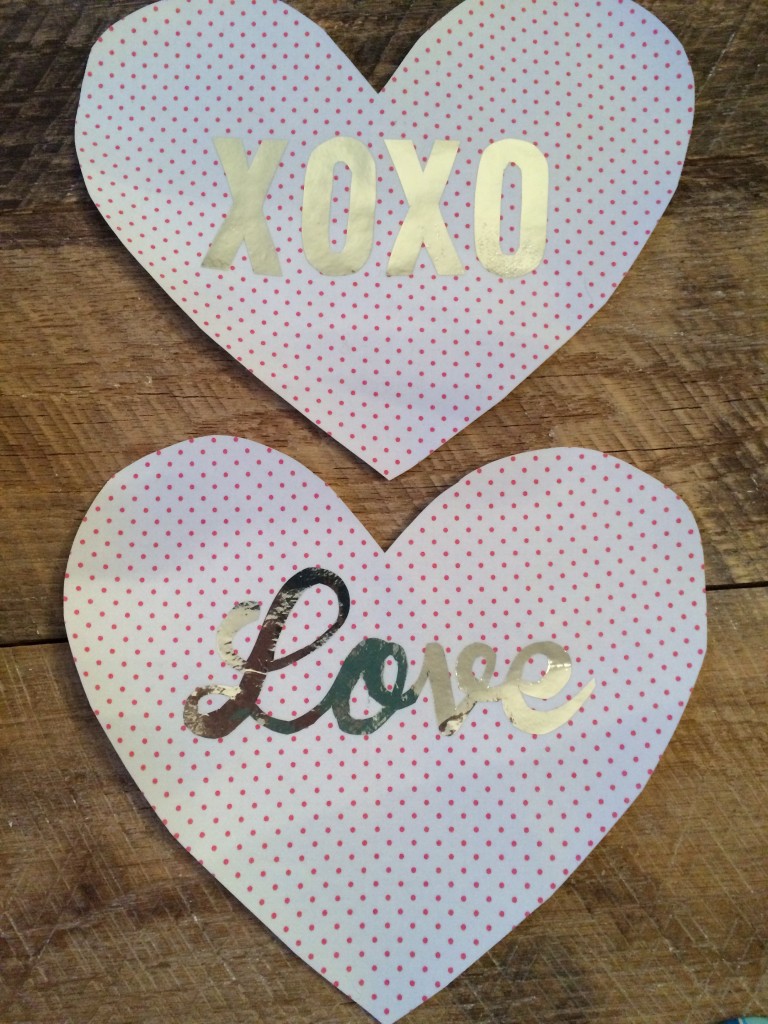
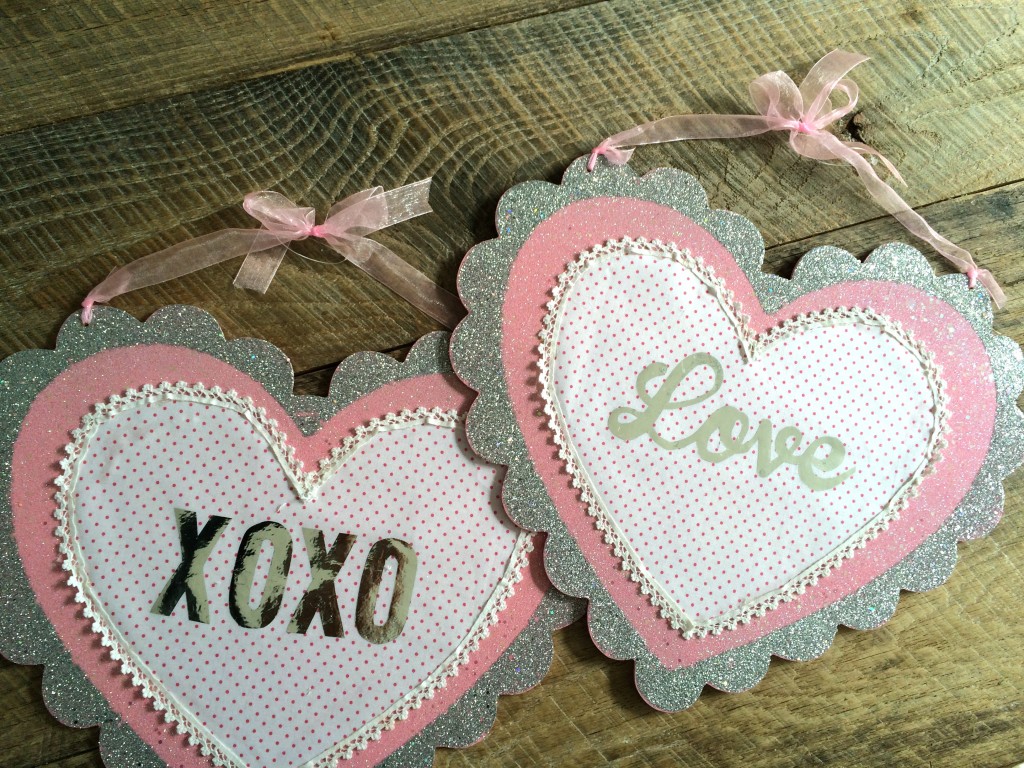
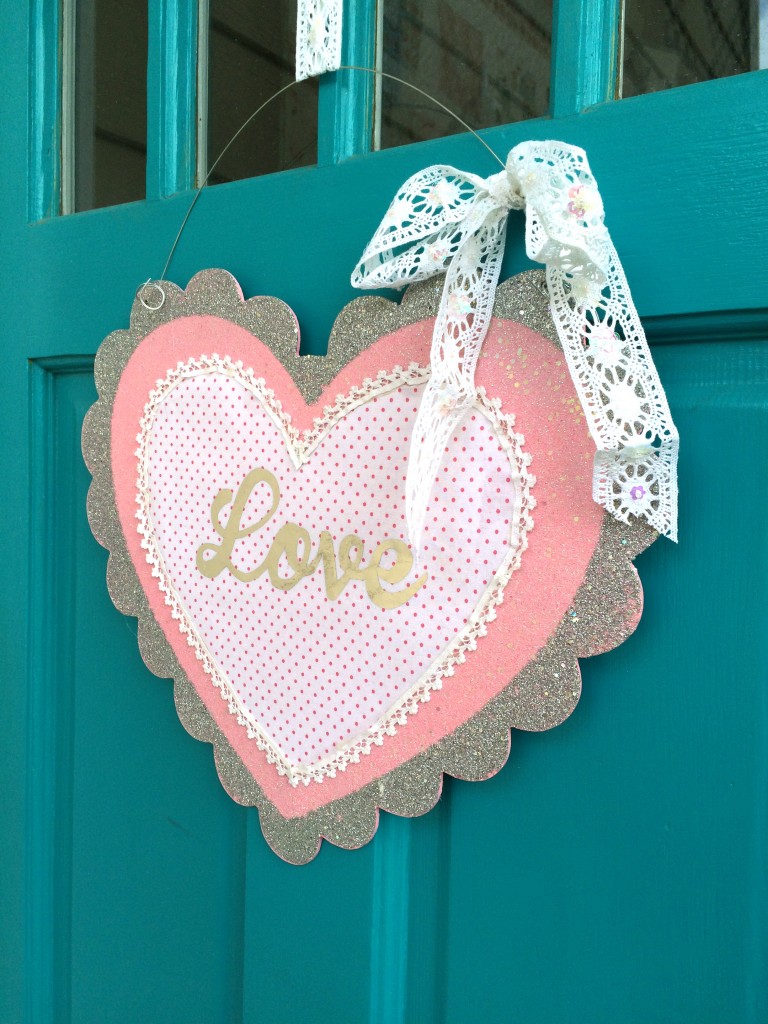
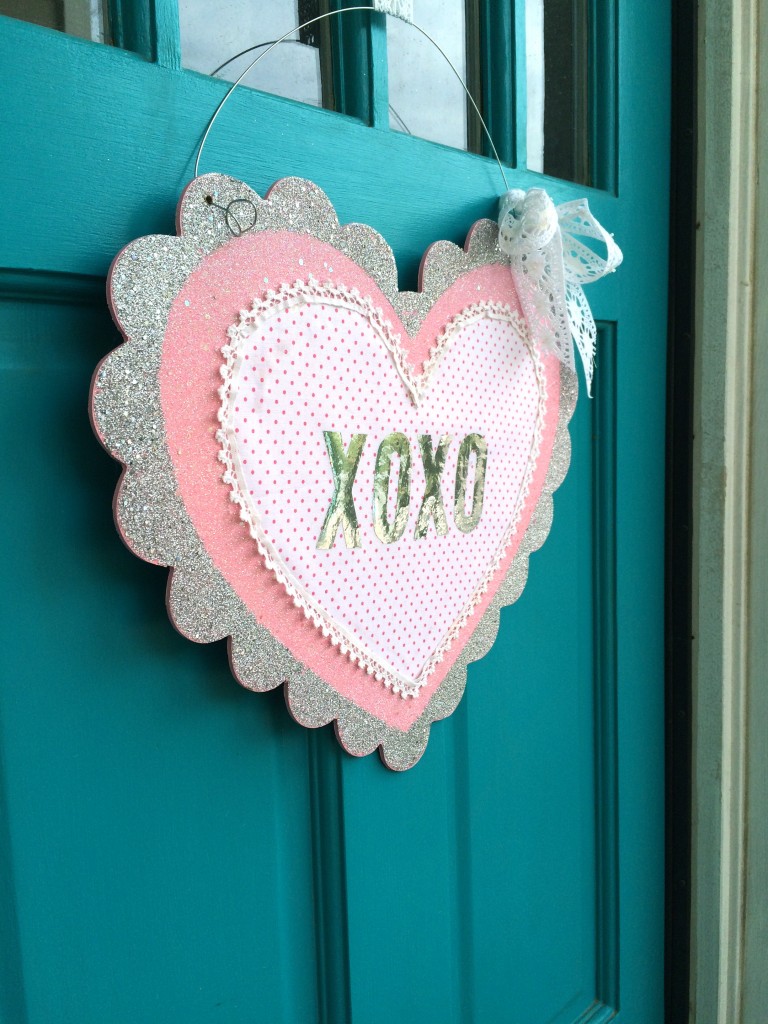
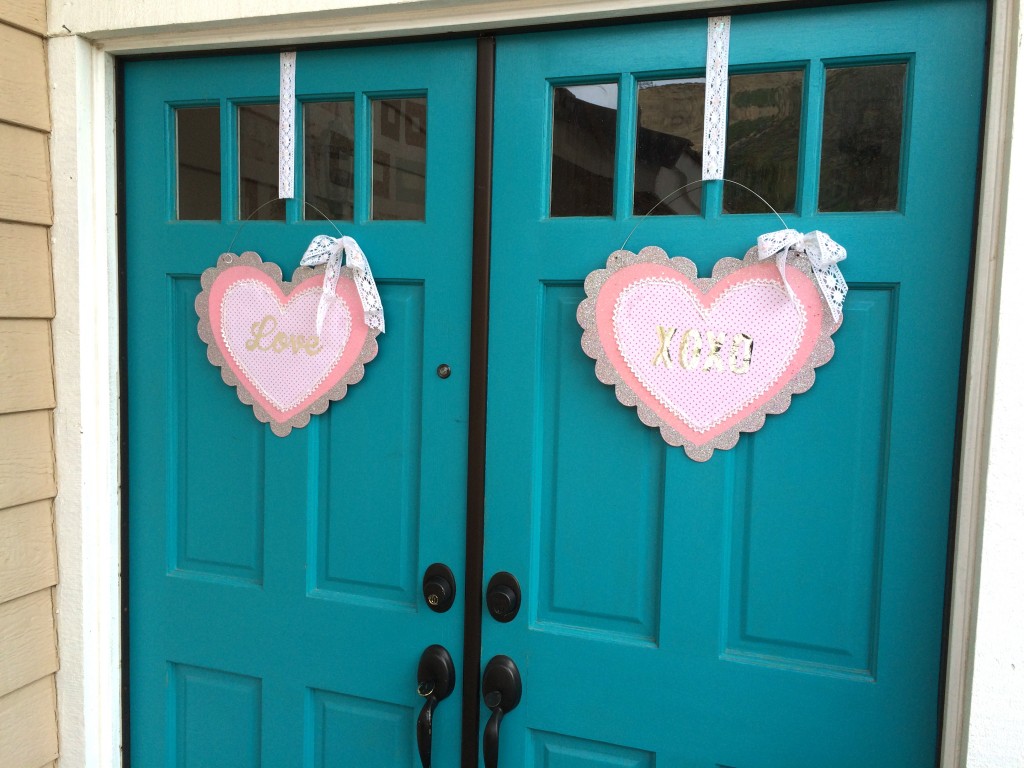
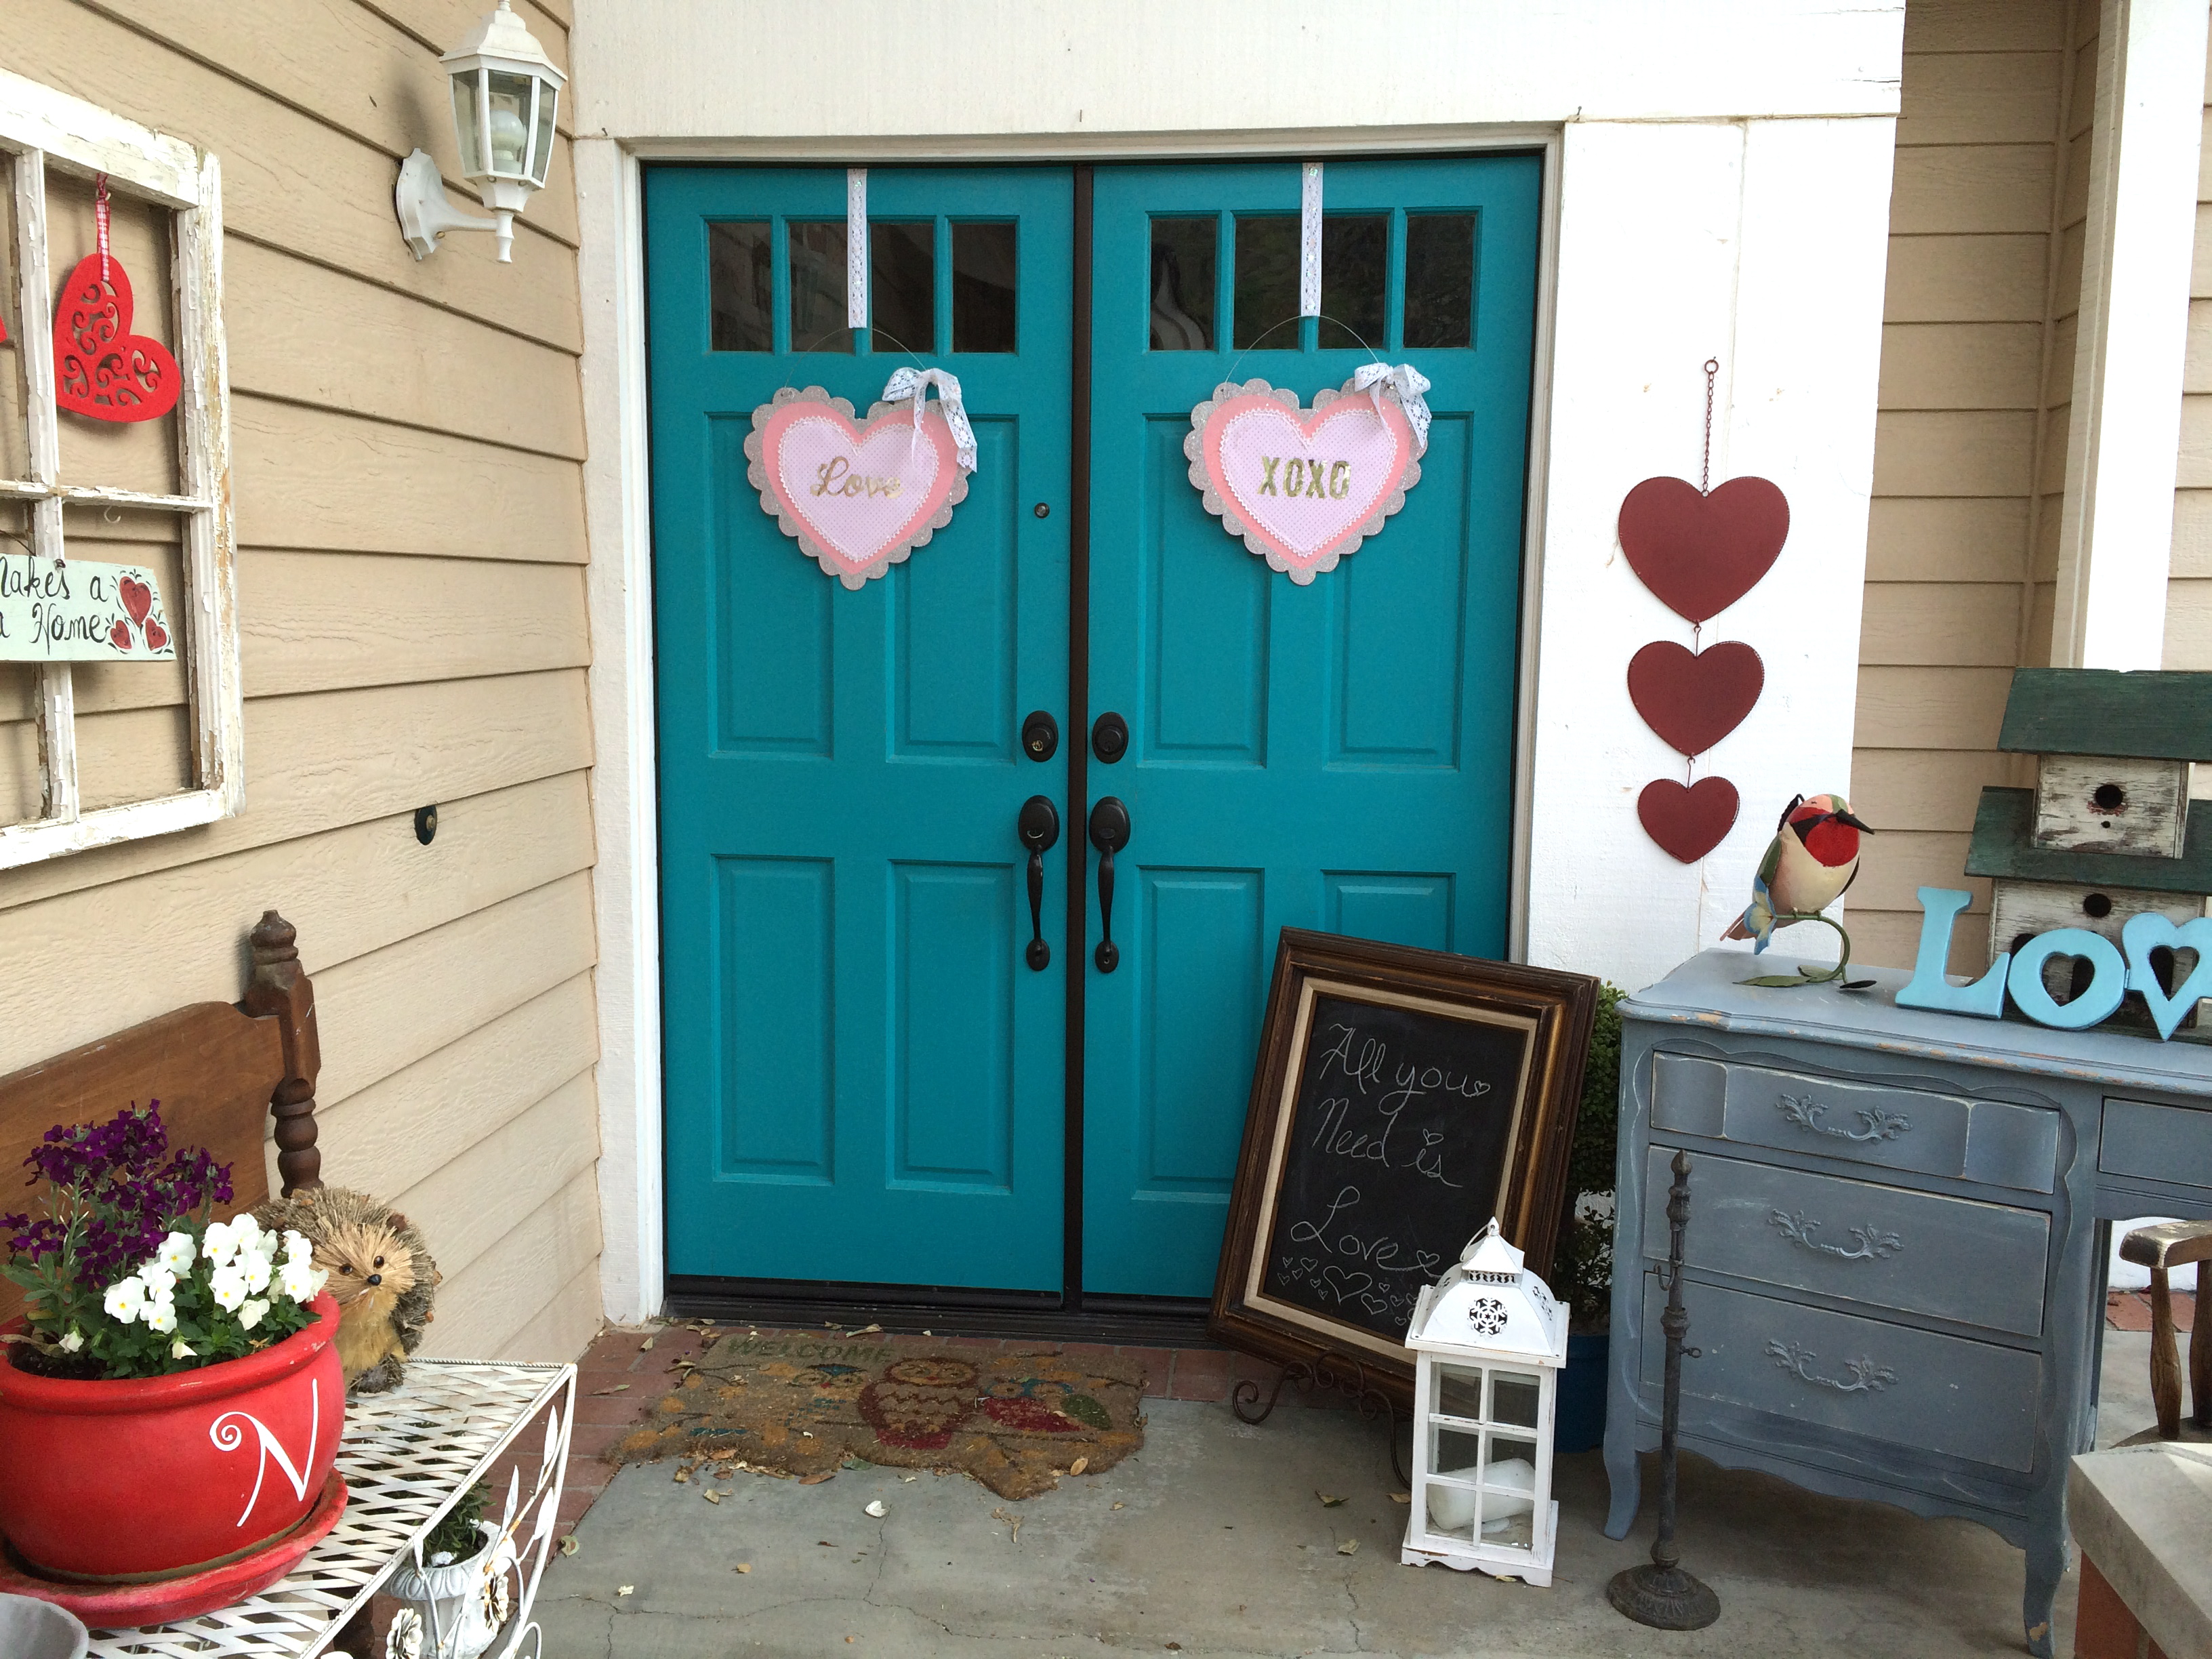
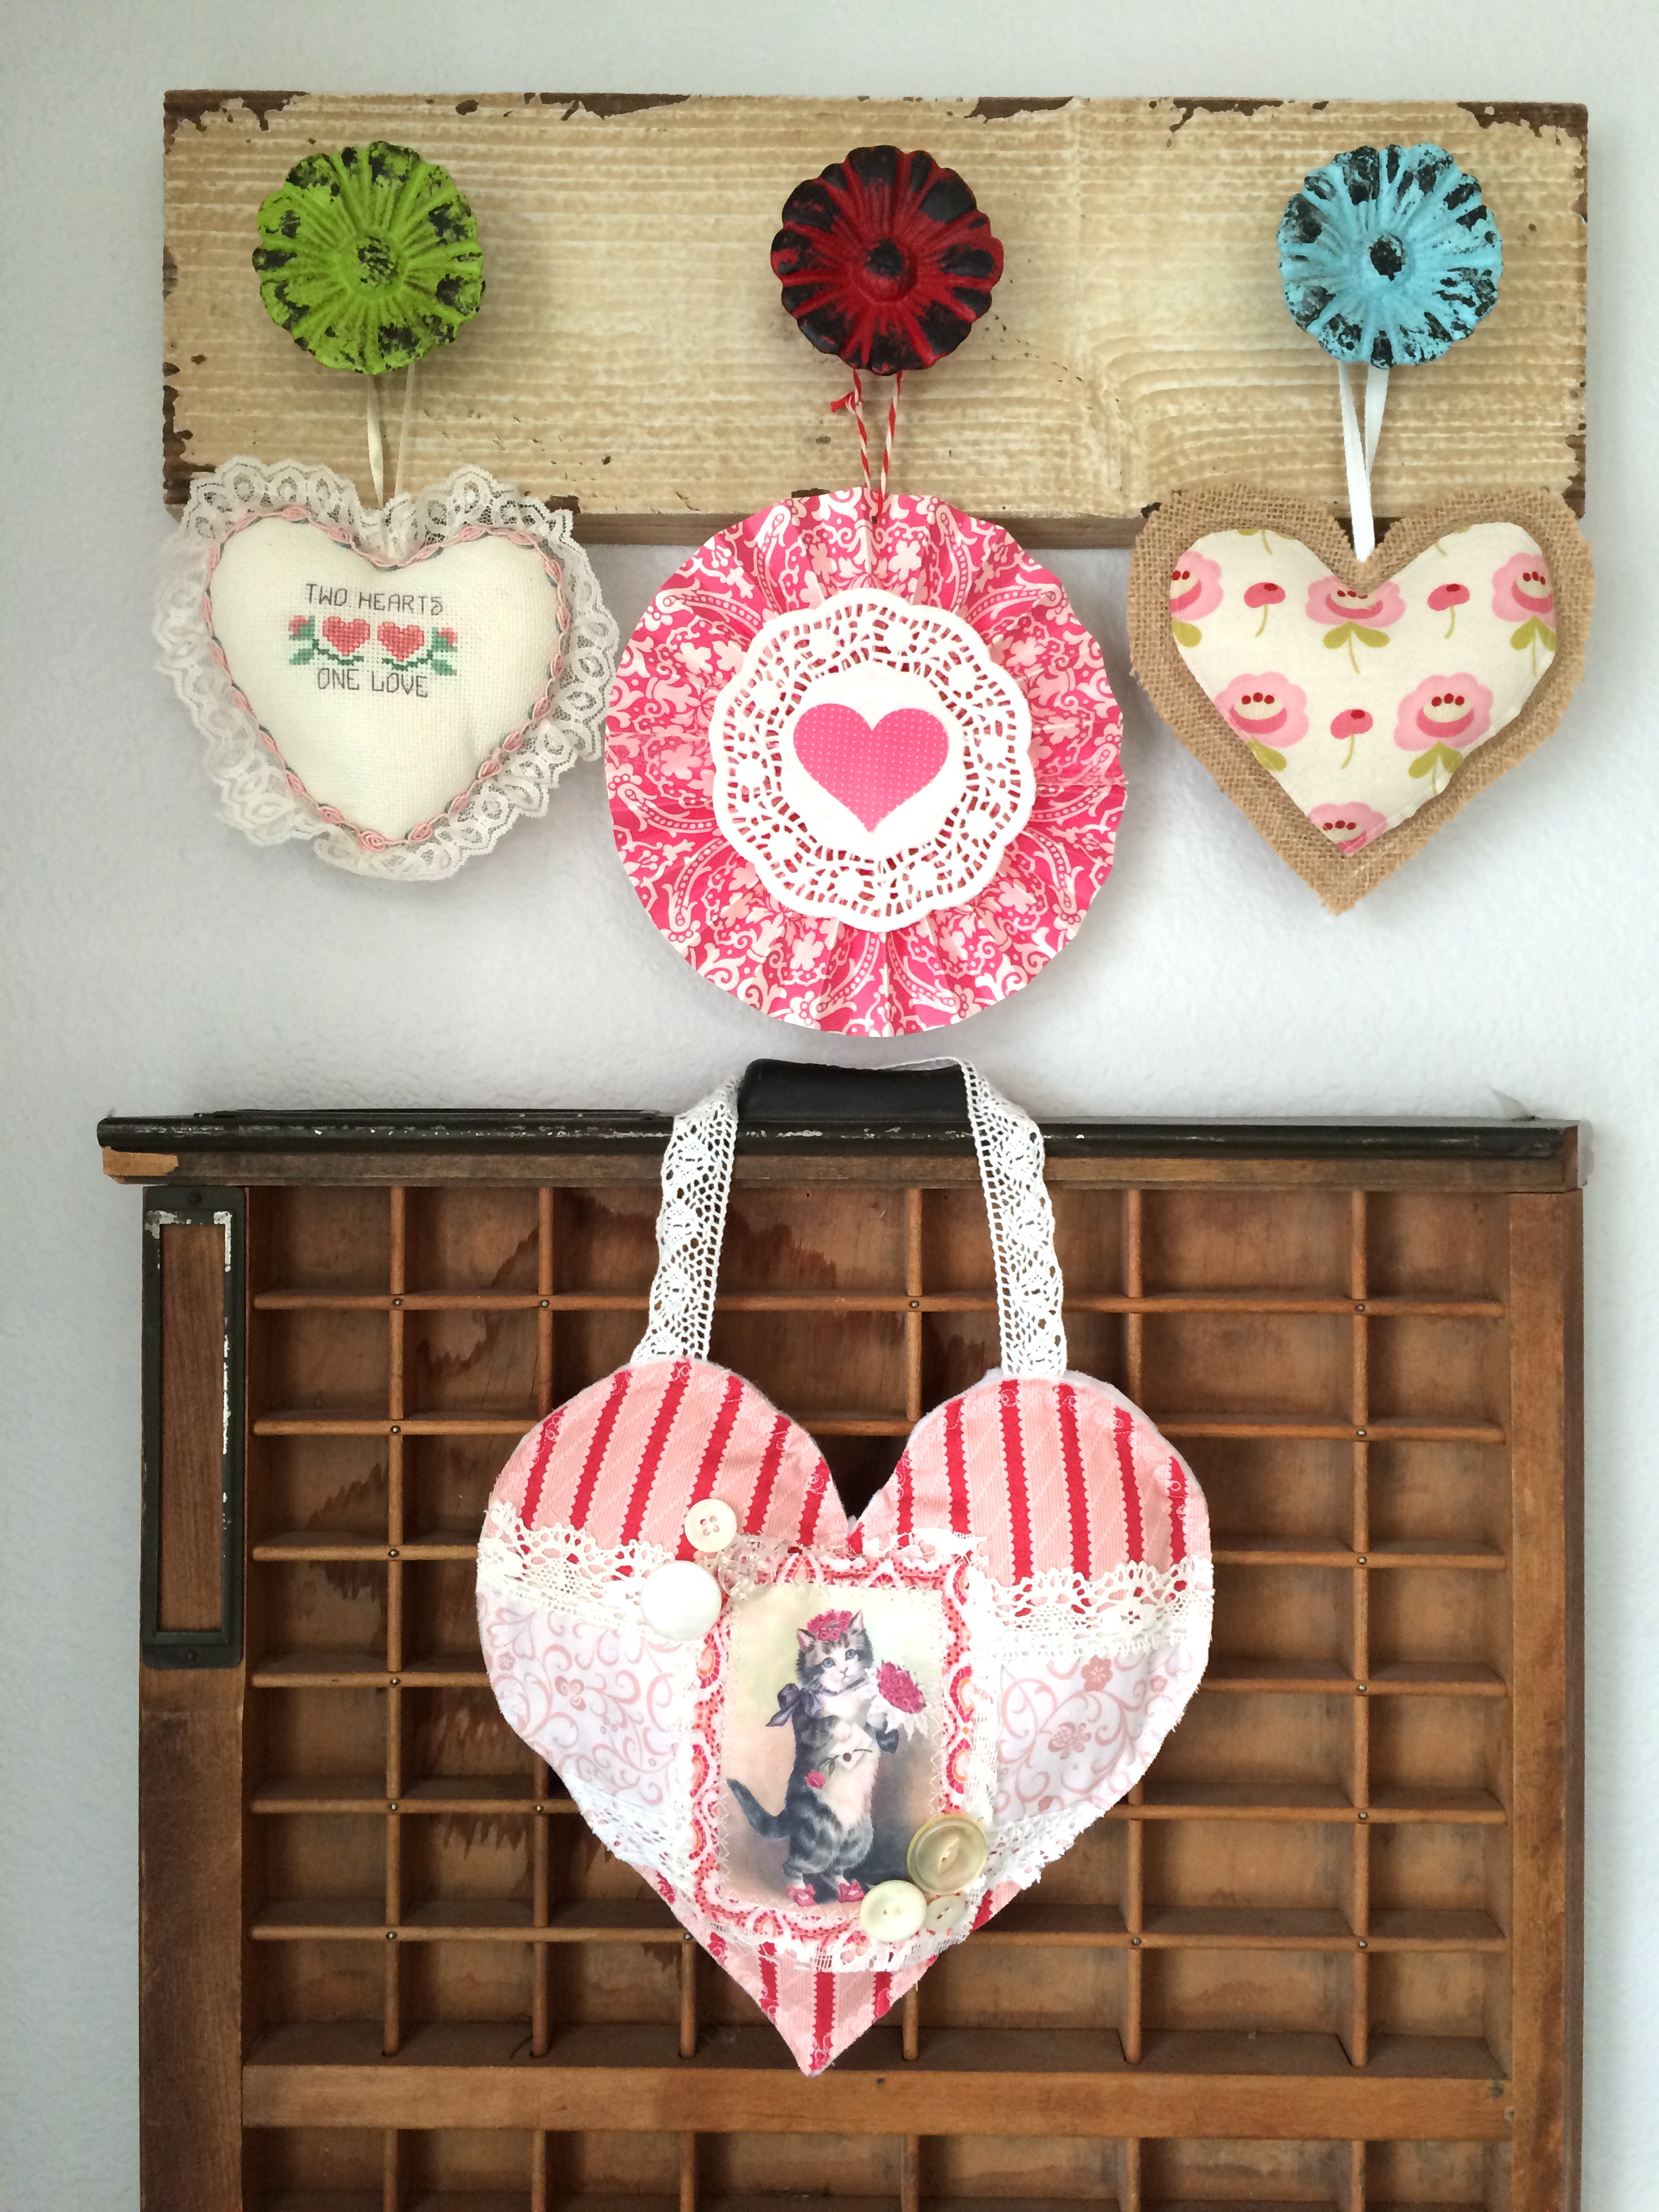
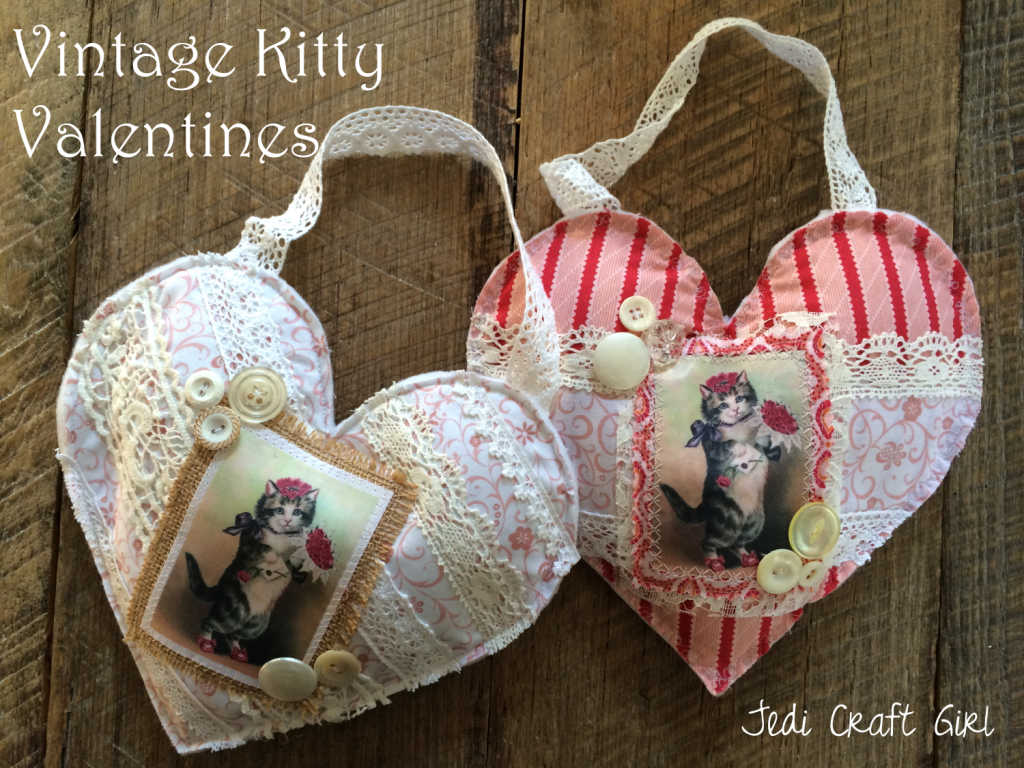
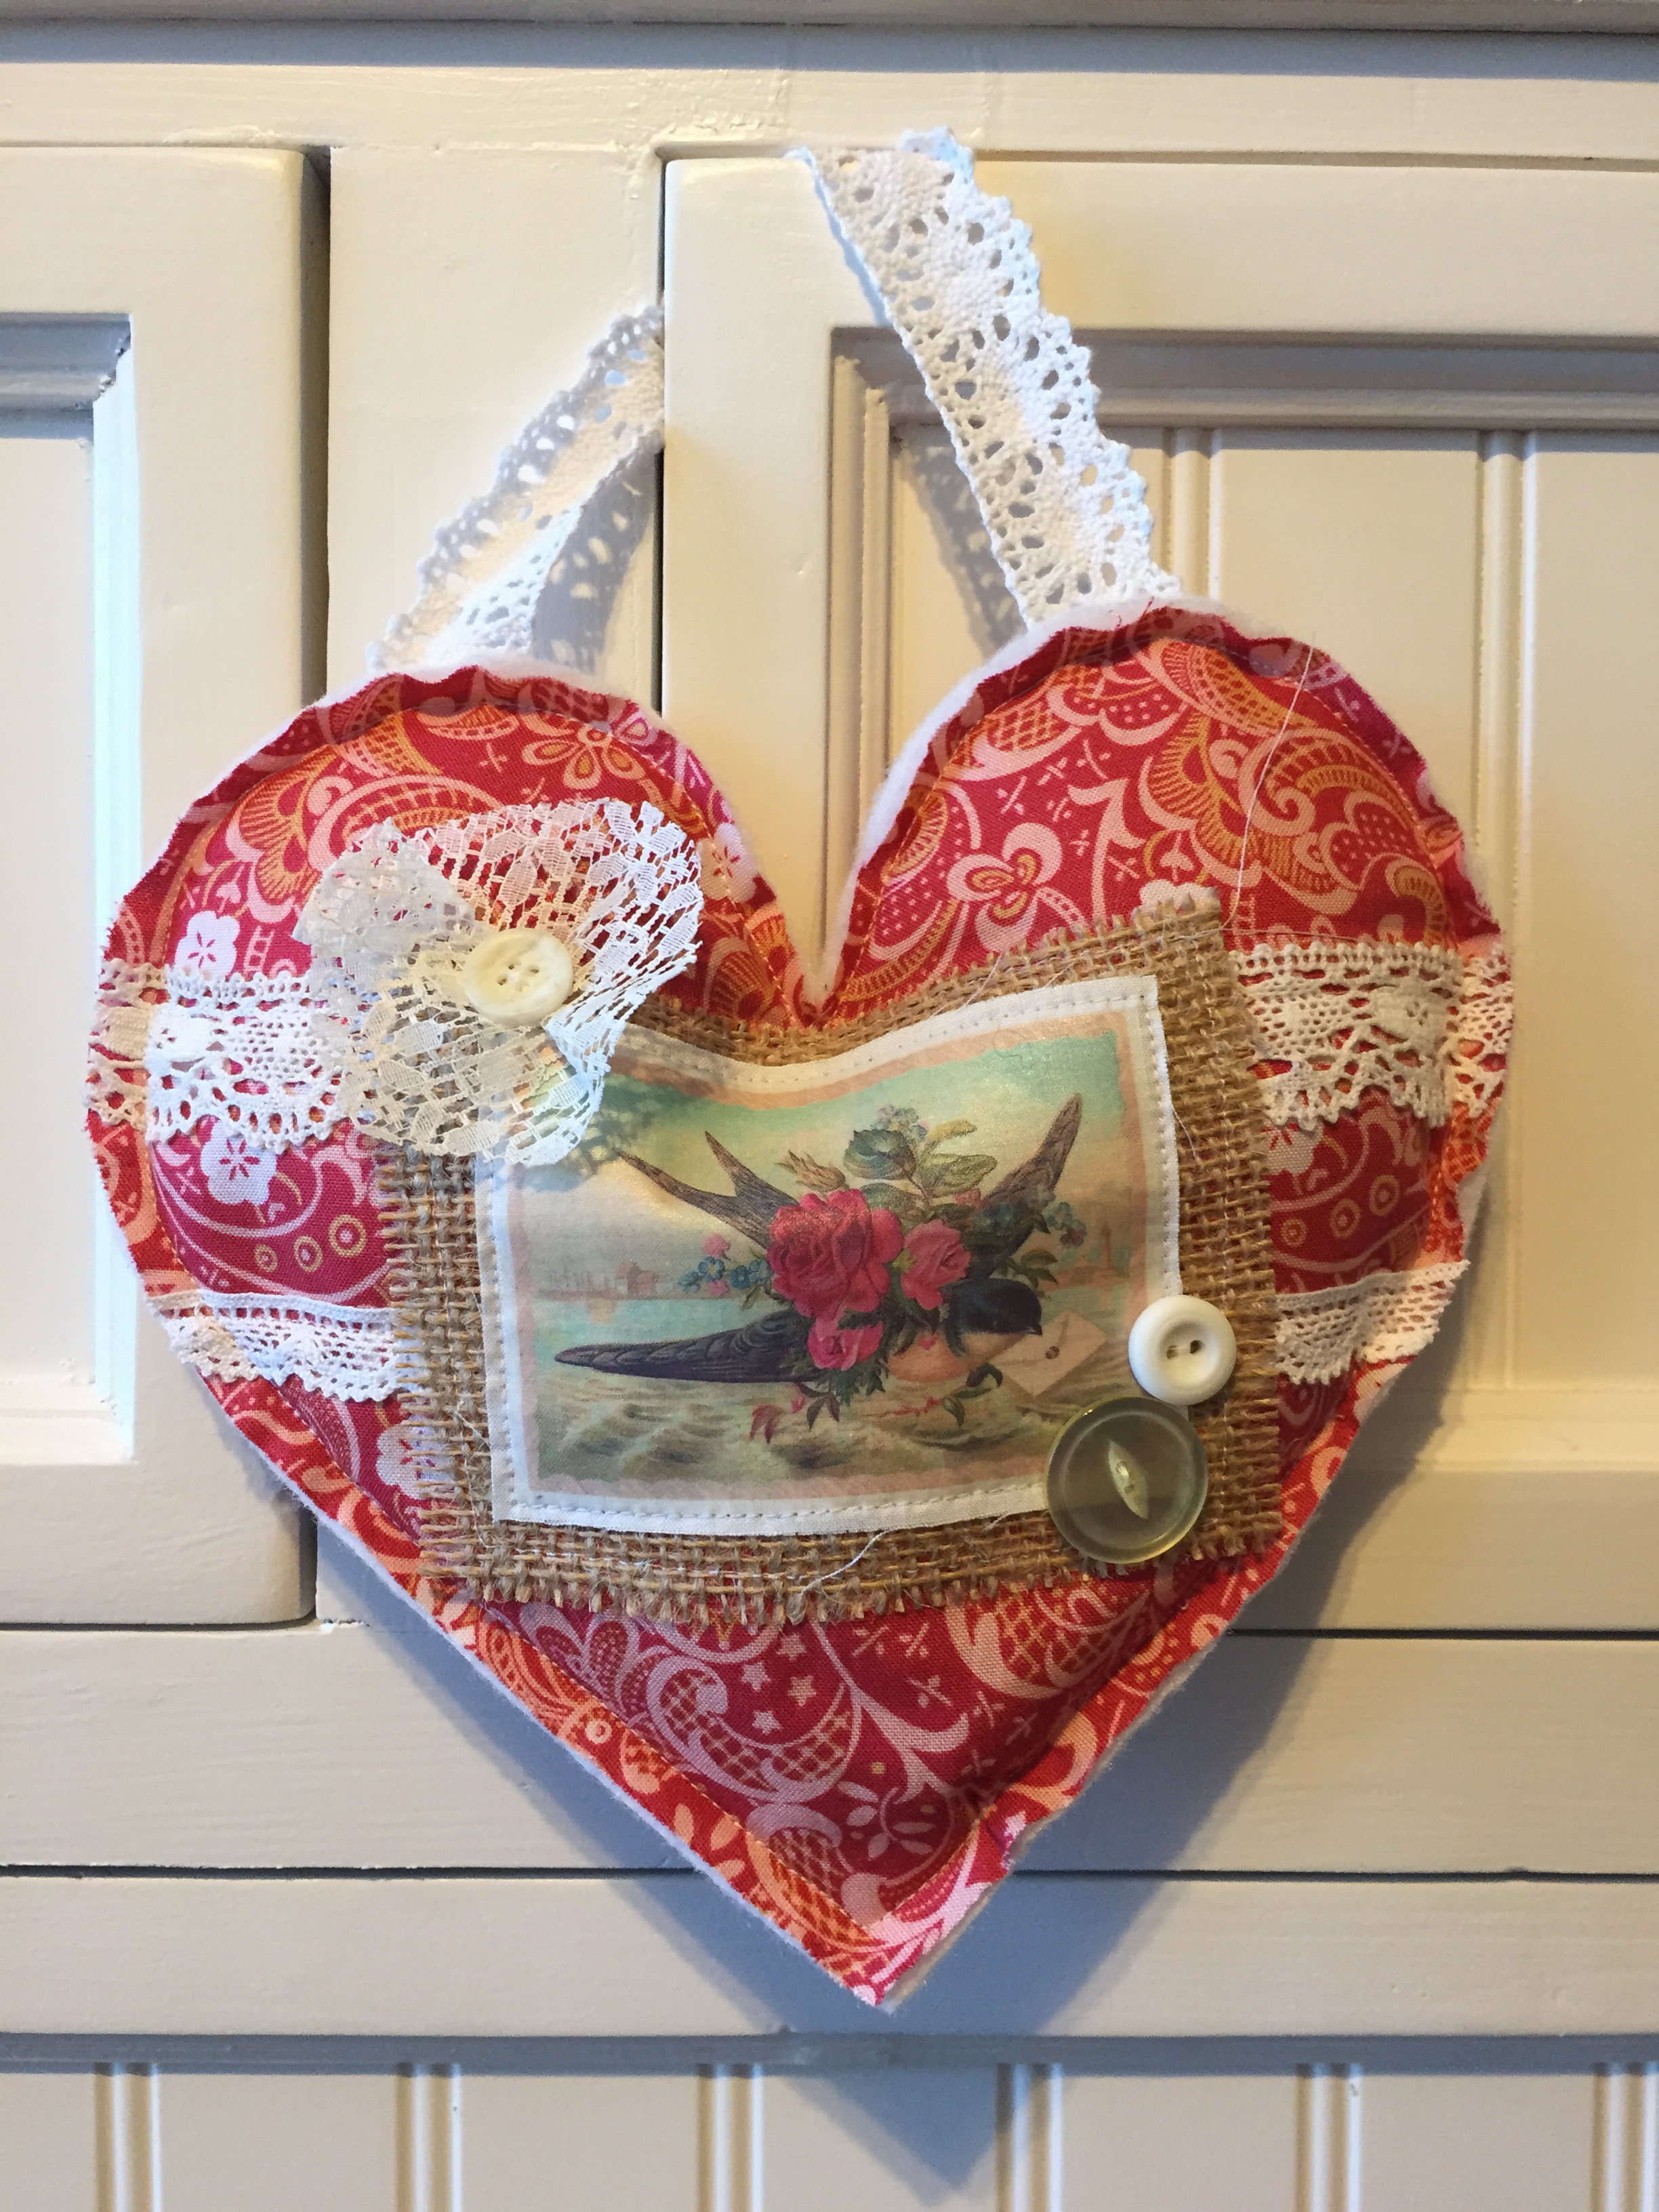
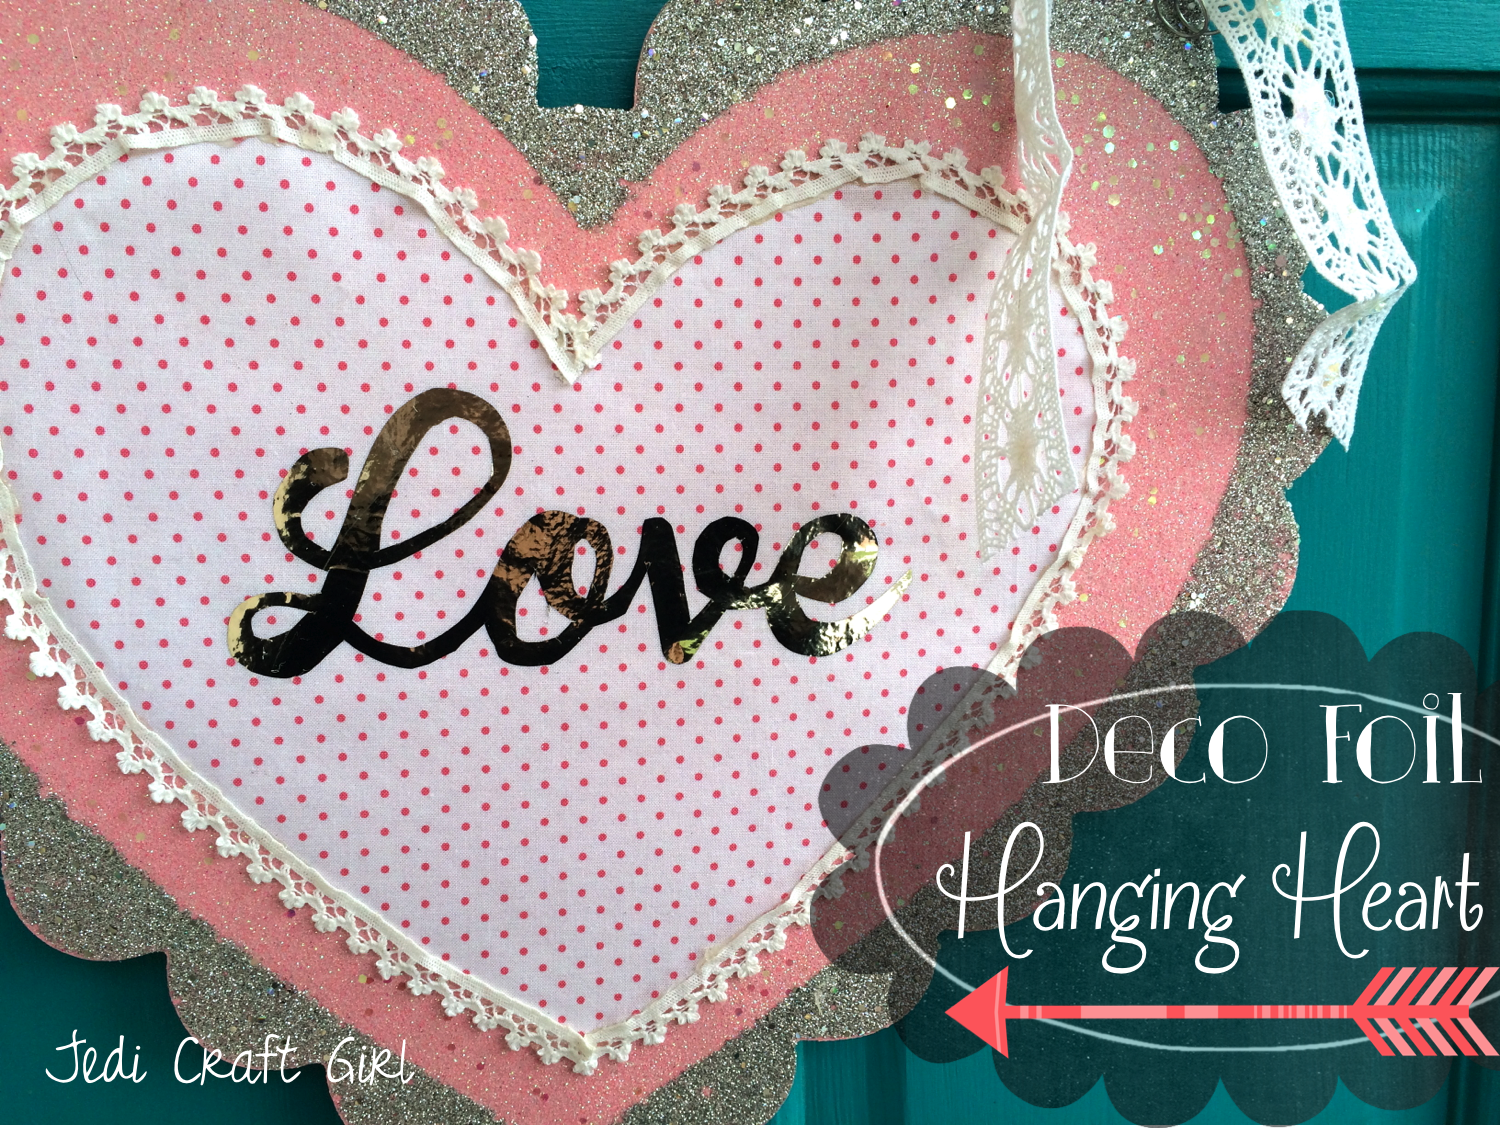
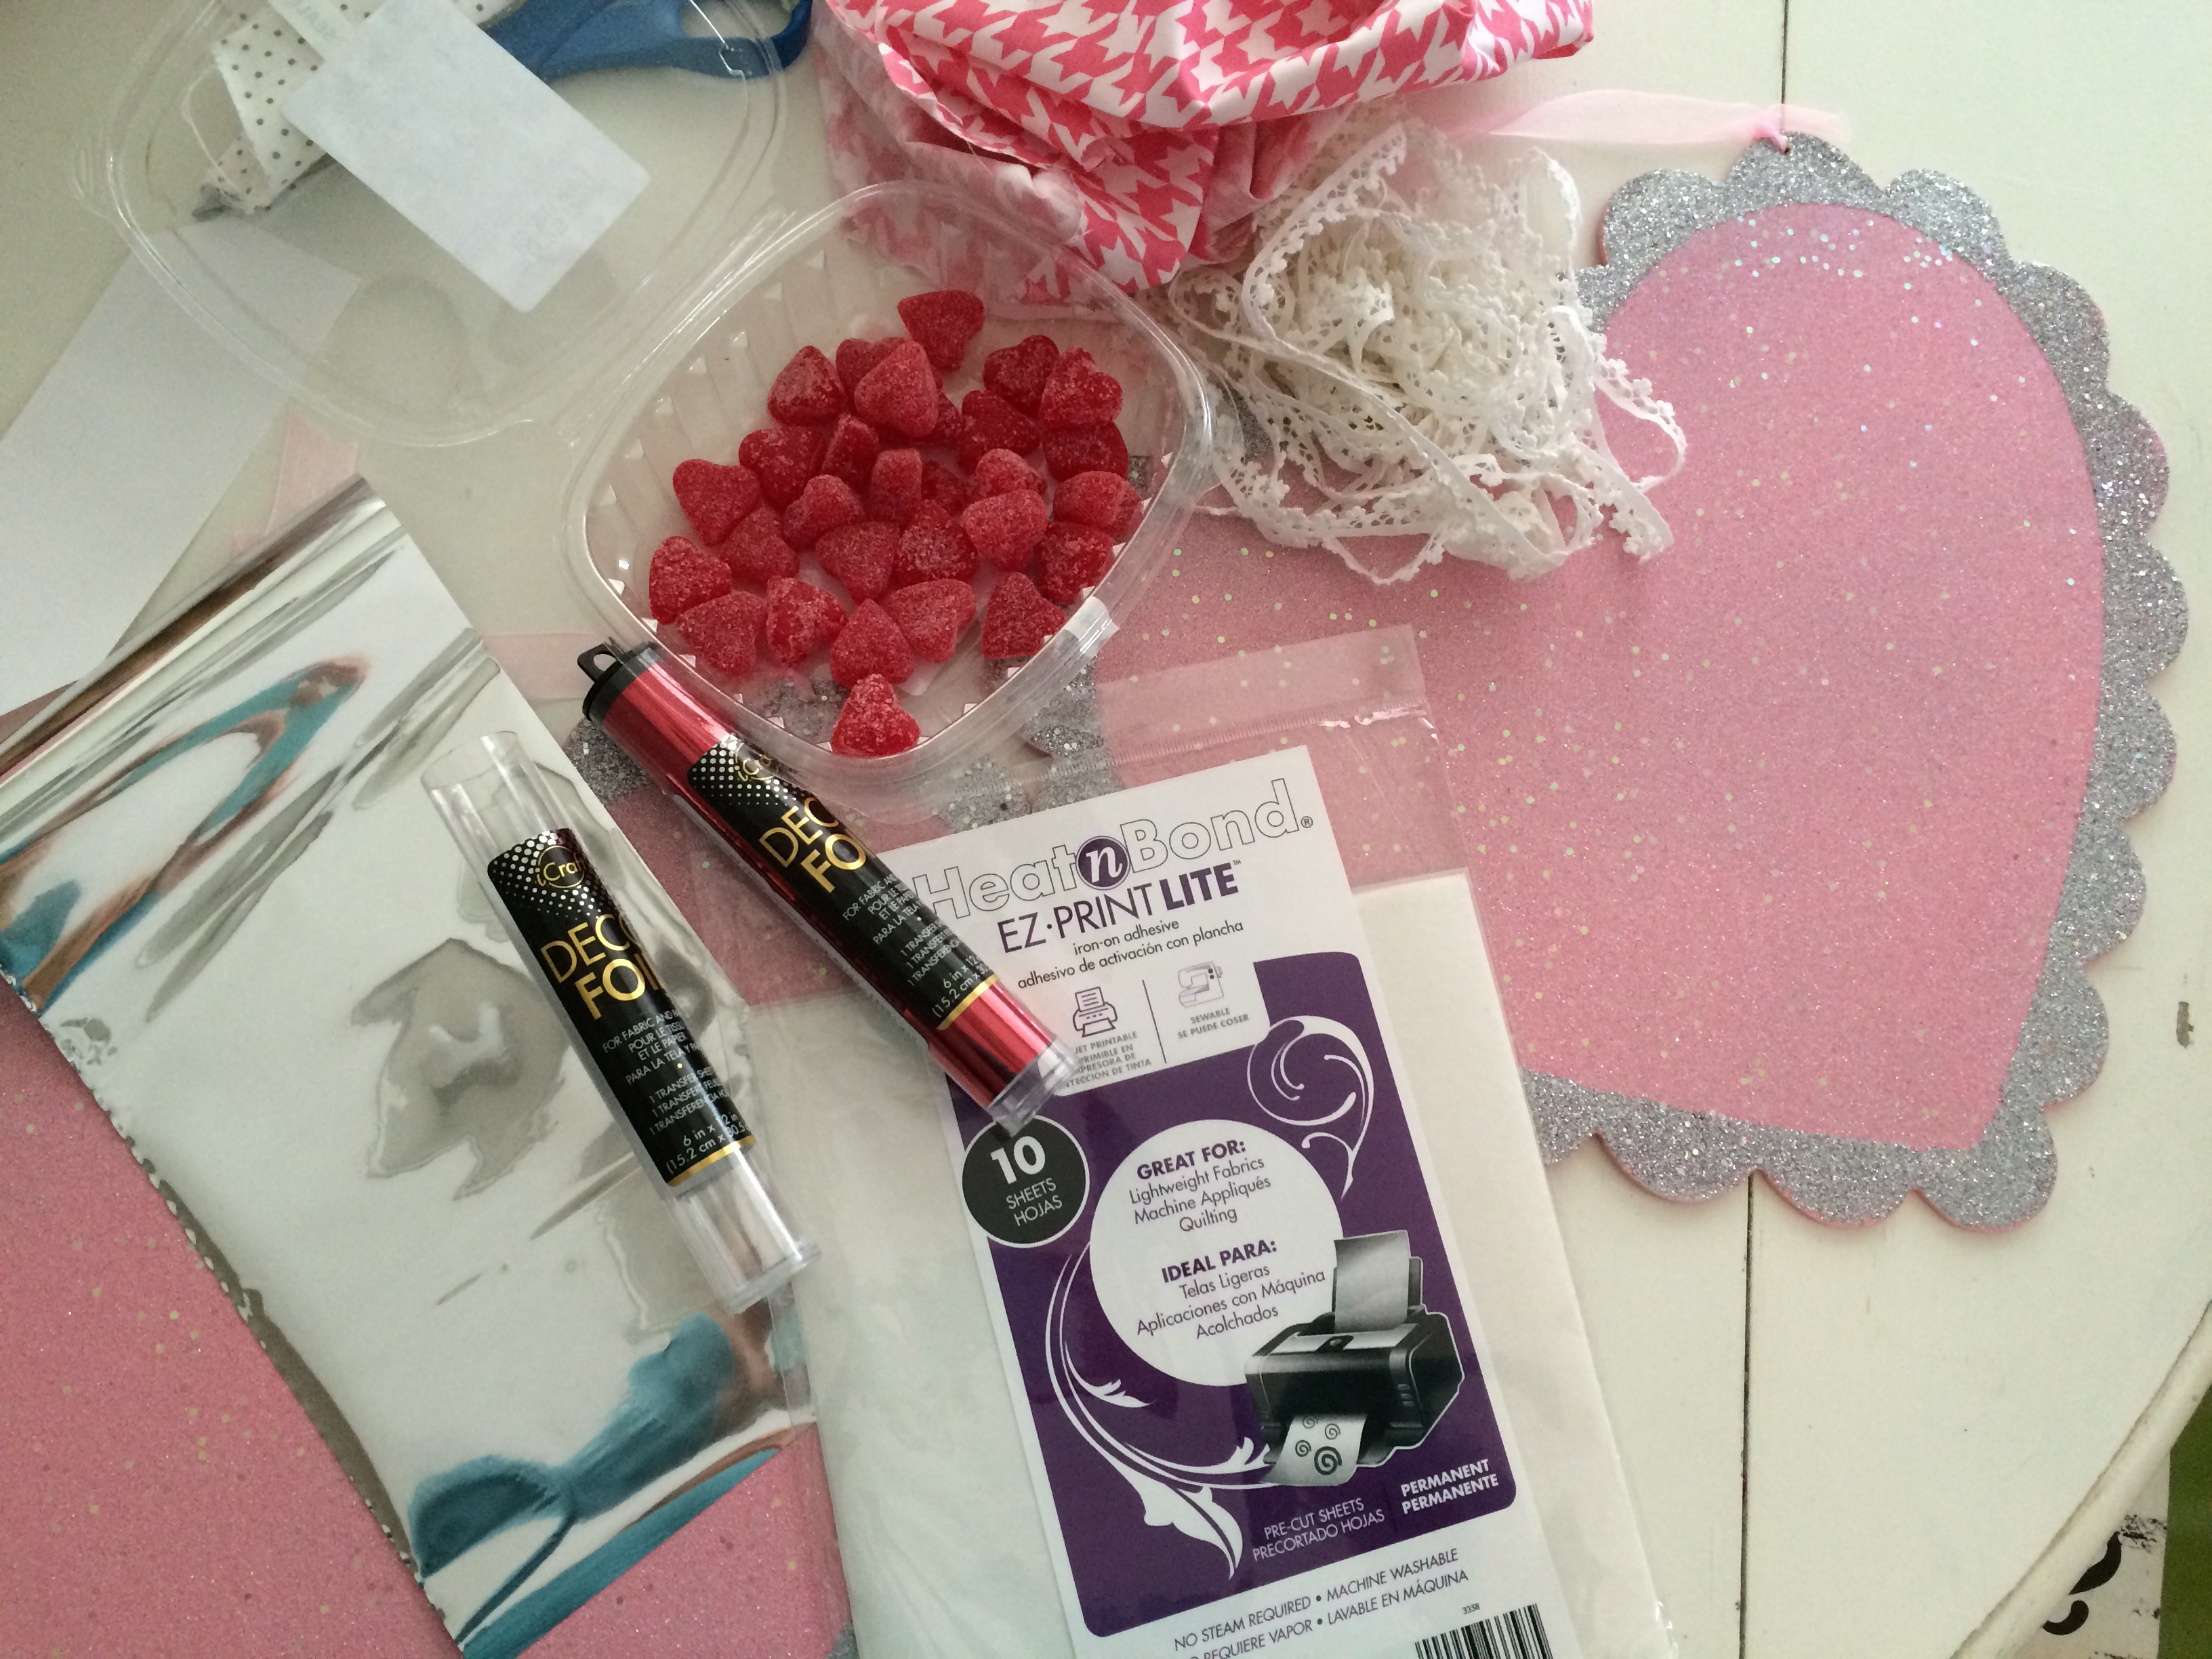
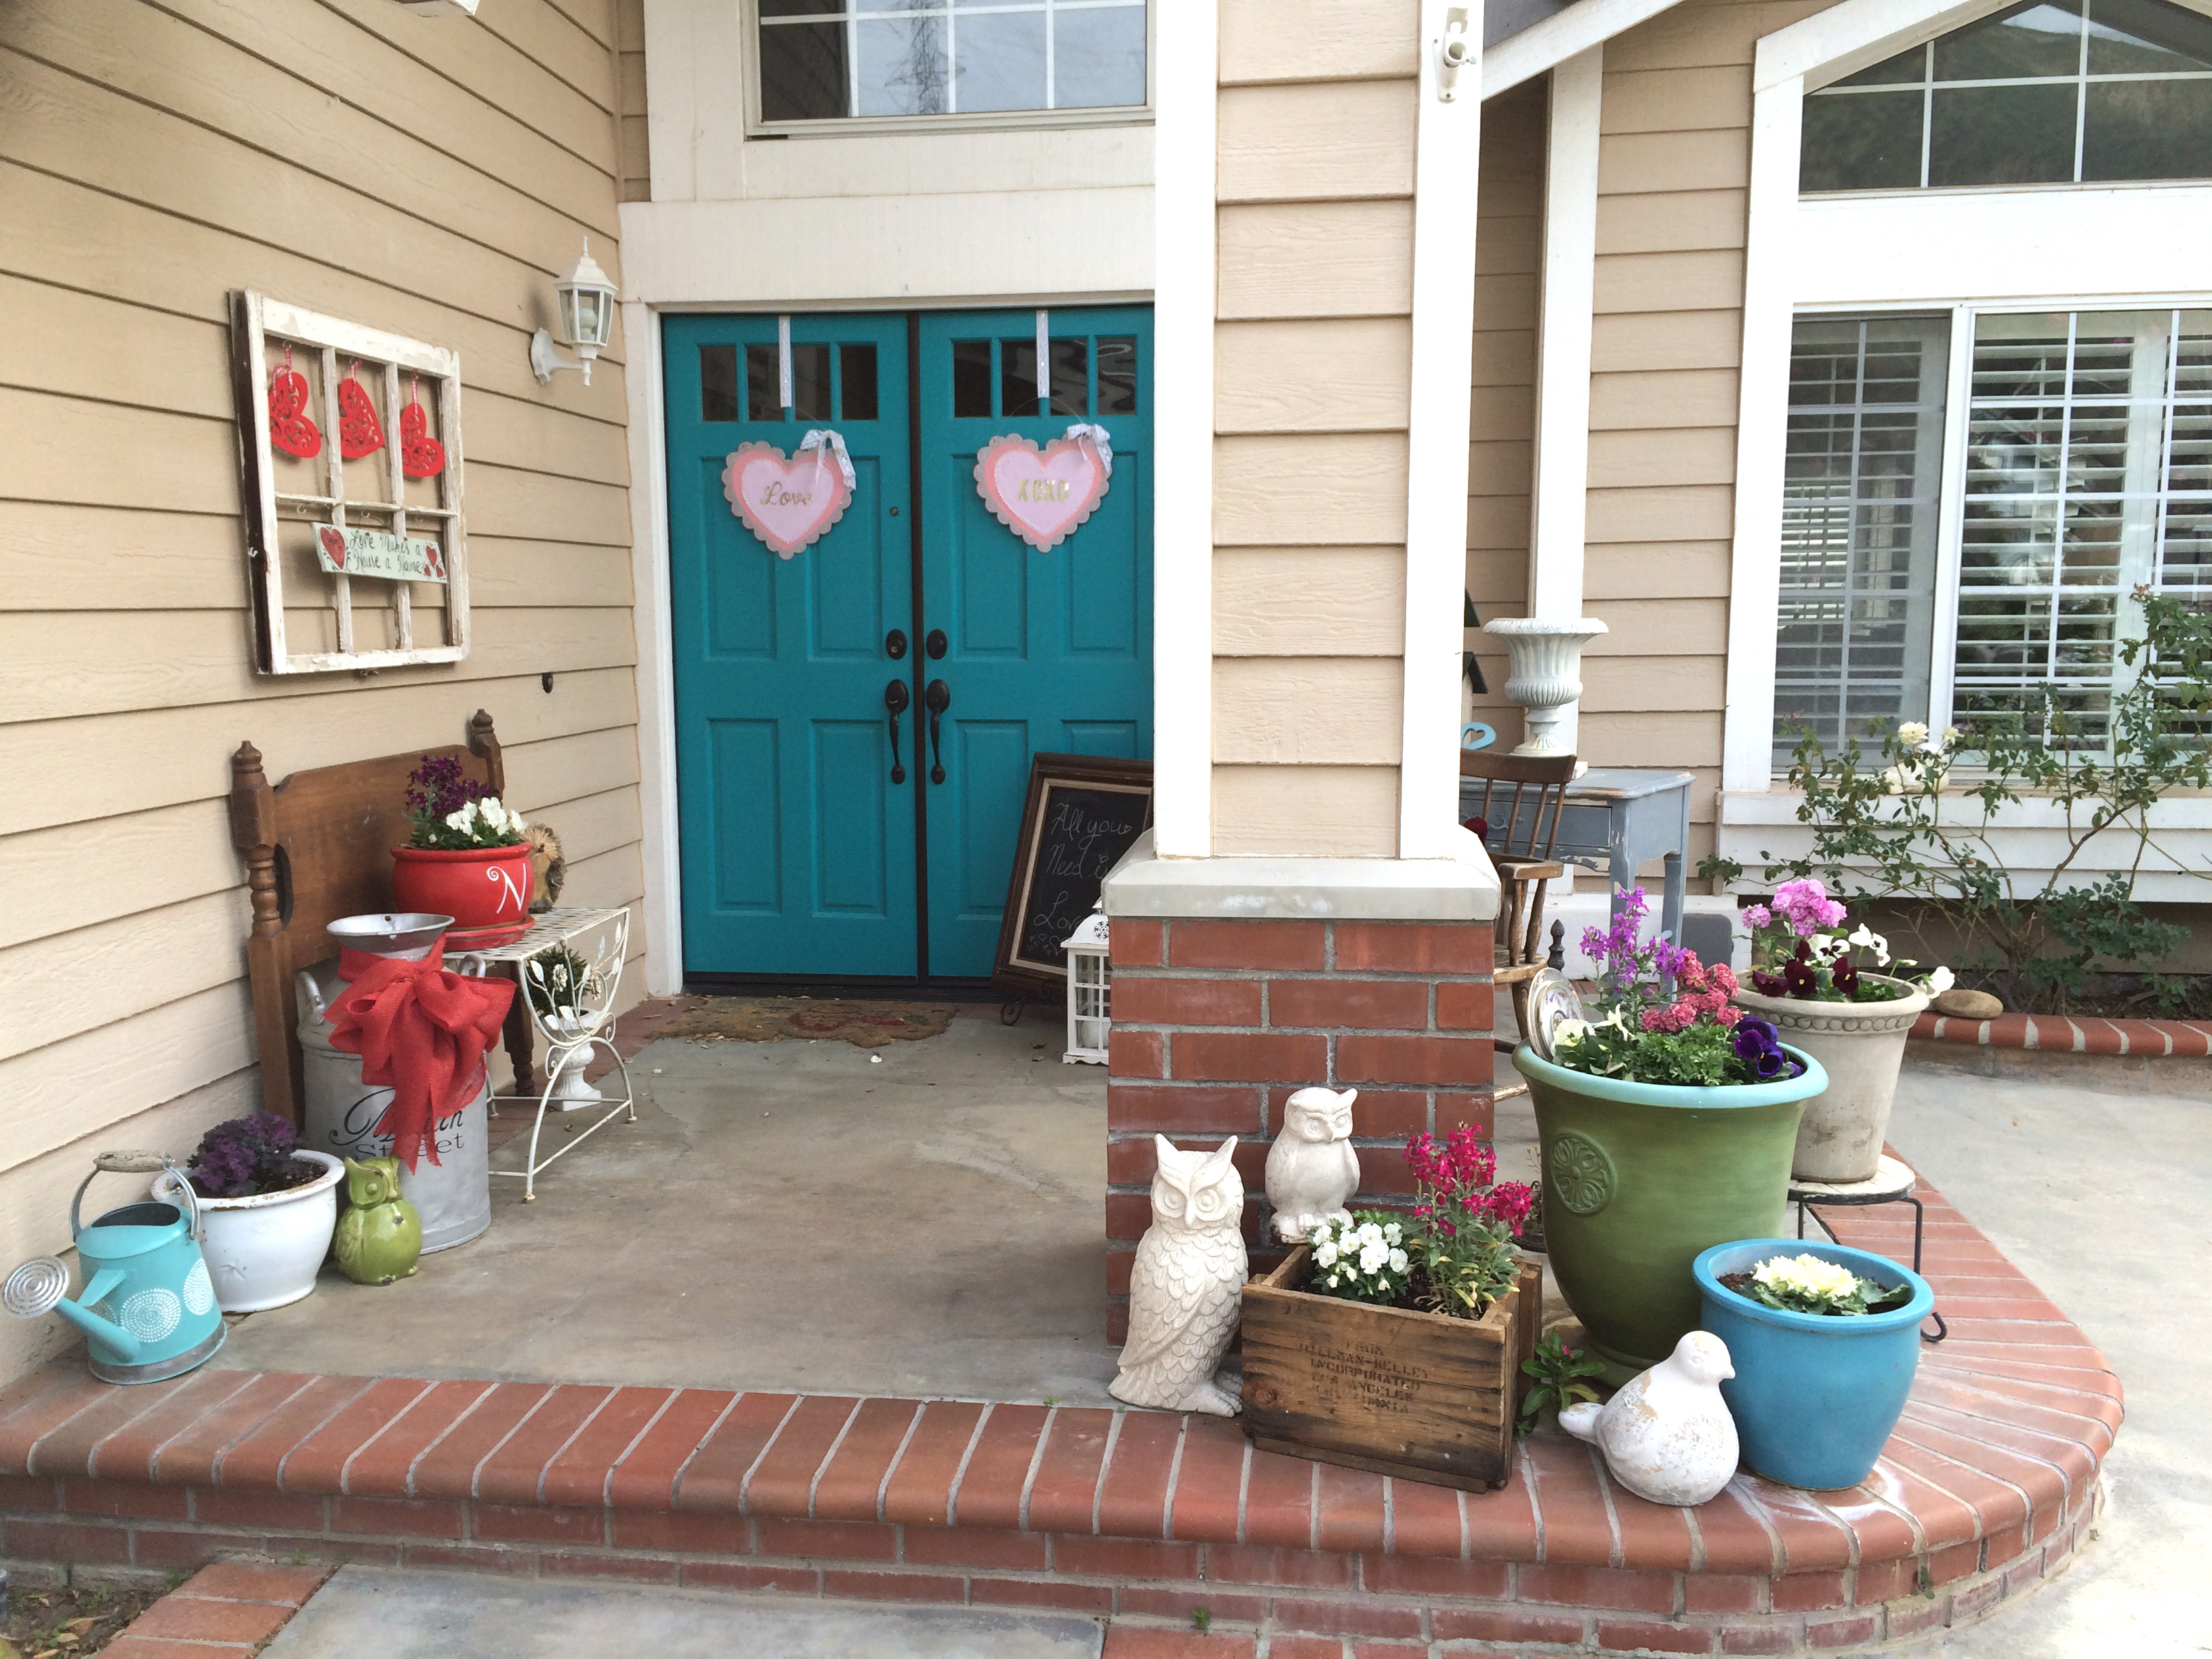
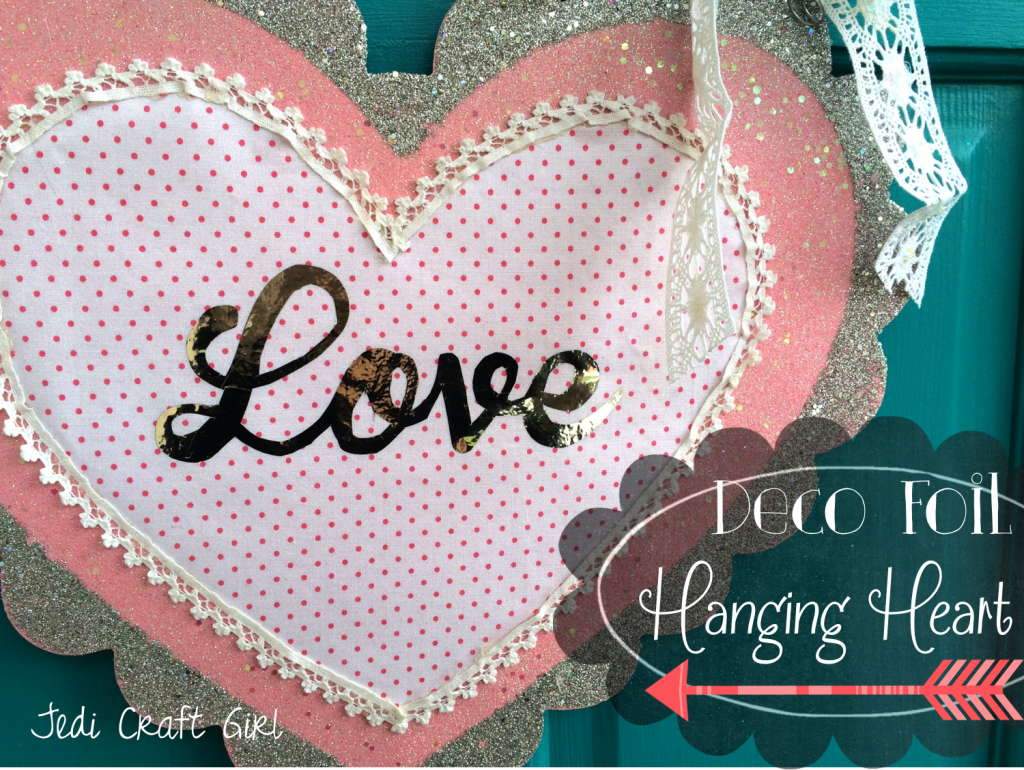
I didn’t quite know what to hang on my front doors this Valentine’s Day season.  Do any of you have the problem of having 2 front doors?  It’s always a delllama, do I hang just one item on the door we use, leaving the other one bare?  Do I hang two of the same thing?  Two different things?  If I hang 2 wreaths, does it look like my doors have eyes?  I came across these sparkly scalloped wood heart hangers at the craft store and I thought they might solve my front door problem.  They were just screaming for some embellishment, don’t you think?  I ran around the house, gathering items that might be cute all while eating cinnamon gummy hearts (highly addictive).  If you don’t have wood heart hangers like these, you can add this heart to a pillow, a frame, or pretty much anything!  Here goes!!foil valentine craft

Supplies:

fabric scraps for the hearts, I used Riley Blake Designs small dots, pink & white

a few yards of small lace and larger lace to hang

Heat n Bond Lite EZ Print sheets

Heat n Bond Lite

Deco Foil silver
10942962_10205726136972927_6418707949747214144_o


Don’t you just love all the colors this Deco Foil comes in?  This was my first time using it, I was a little intimidated; now it’s my new favorite product!

Begin by drawing your desired heart shape onto the paper side of the Heat n Bond Lite.  Roughly cut around the heart and iron it to the wrong side of the fabric.  I choose to use Heat n Bond Lite rather than fusible stabilizer because I like the texture it creates when applied.  Leave the backing paper on.foil valentine craft 2

Print out the words in reverse onto the EZ print sheets.  You can download the words like I used or make up your own.

foil valentine craft 1


Press the words to the wrong side of the Deco Foil.  Then cut out with scissors.  The XOXO were easy to cut, the Love was a little intense, I might not choose such an intricate word to cut with scissors next time 🙂  But I like how it looks.
foil valentine craft 7

Once the letters are cut out, peel off the backing paper and place the words as desired.  I covered my letters with tissue paper because I was afraid to put the iron directly on the foil.  Press into place.

foil valentine craft 9

I LOVE the foil!  I can’t wait to try it on more projects!  To finish the heart, peel off the backing paper of the heart.  Center it on the wood heart.  Using hot glue, glue the lace all the way around the heart.  You will burn your fingers many times while doing so 🙁  If you have another favorite glue, you might try that.  I was in a hurry 🙂  You could also use any kind of trim: ric rac, small tinsel, pom poms, ruffles, etc.  I wasn’t in love with the cheap ribbon hanger the hearts came with, so I snipped them off and added some wire.

valentine foli craft

I added a lace bow and also hung it with lace.  I don’t have a wreath hanger, so I tack the lace with a tiny nail to the top of my door.  Maybe that’s not a good idea?

foil valentine craft 4

foil valentine craft 5

foil valentine craft 3

A little peak at my front porch….

valentine front porch 2

chalkboard frame front porchMy teenage daughter is in charge of all the chalkboard writing in our home.  It’s too nerve racking for me!

I found this desk literally on the side of the road.  I spray painted it grey and made it look rustic and it lives on my front porch.  In the spring I have flowers growing out of the drawers!!  I also found the chair on the side of the road.  People probably think my porch looks junky – I like it!!


repurposed desk diy

valentine front porch

Vintage Kitty Valentine


valentine kitty

I’m excited to be sharing my tutorial for these darling Vintage Valentines over on the Therm O Web Blog today!  They are super fun to make and sew up quick!  In fact, my 6 year old daughter even made one all by herself!  All the wonderful fabrics are from Blend’s fabric lines: Equniox, Modern Lace, and Turkish Delight.

I choose some vintage cat images off the internet and printed them onto the EZ Print Transfer Sheets.  You could print any image you want.  The image is then ironed on to white fabric.vintage valentine cat 5

Of course I had to include my kitty in this kitty project!  Mufasa had fun playing in the lace, then he had a nap in the lace!
vintage valentine cat 12
vintage valentine cat 22

Sally loves to sew!!

vintage valentine cat 20

I made this one for Ella to match her room with blues and greens.

vintage valentine cat 19

This one is Sally’s – she choose the fabrics and the buttons and sewed the buttons on herself.

vintage valentine cat 39

I like this one too – it has diagonal rows of lace for the background.  They are so much fun to make and they make great gifts because you can really personalize them!  Now, get sewing 🙂

vintage valentine cat 36

valentine kitty

Salt Air Quilt with Lucy’s Crab Shack Beach Blanket Pattern

beach blanket quilt


I purchased this pattern Sweetwater’s Lucy’s Crab Shack Beach Blanket over a year ago.  Along with it I picked up some pre cuts and yardage of Moda’s Salt Air line.  I love this line of fabric and I knew it would be perfect in my parent’s home.  beachblanketp189

I hoped to sew it for my parent’s anniversary, then Christmas, and then time just went to fast.  So, finally, this past summer, I finally put it together and had it quilted.  I wrapped it up and gave it to them for Christmas.  It’s the cutest!beach blanket quilt salt air6

This pattern is super fun to sew and fairly easy.  The half circles are drawn on Heat n Bond Lite appliqué paper and then ironed on and top stitched.  I changed the pattern a little bit by omitting the inner boarder and adding a few more half circles so my quilt was a larger throw size.
beach blanket quilt 2


My quilter, Janika from Springville, Utah did and AMAZING job on the quilting!  When she gave it back to me, thoughts of keeping it for myself entered into my head 🙂beach blanket quilt salt air 3

It’s extra cozy with this soft gray minky on the back.

beach blanket quilt salt air 2


beach blanket quilt salt air 4


My favorite print in this collection is the whale’s tails…..see if you can spot them!!beach blanket quilt salt air


The Harper Stocking Tutorial

christmas stocking quiltedWhen I was little, my mom made everyone in our family “quilted” stockings with appliqué motifs on them.  To me, all stockings must be quilted 🙂  I made my husband and children these quilted stockings many years ago.

stocking
The fabrics are a little dated but we still love them!  Here are a few more peeks at stockings I have made over the years with this same pattern.

IMG_2199

DSCN5264

DSCN5180


There are so many wonderful fabrics out there to make stockings with.  I love this line from Blend called Treelicious.  I’ve made a few other projects with it, here and here.  Below is the pattern and instructions for making this “Harper” stocking which I made my friend’s baby’s first Christmas.  You can change the fabric piecing to be more intricate or you can use a plain piece of fabric and quilt it.  It’s fun to customize each stocking to your children’s personalities.

Supplies:

fat quarters of 3 fabrics for stocking and stocking tab

1/2 yard for the stocking lining

piece of lace

1/4 yard faux fur, fleece, or I used a type of cloud fleece with a diamond pattern…anything soft and white

Heat n Bond EZ print appliqué sheets or heat n bond appliqué transfer paper

quilt batting

Stocking Pattern, Click HERE

Note – the length of the cutting measurements are approximates, you just need enough to fit the stocking pattern on

Begin by cutting the pink trees 9″ x 12″

Gray deer 5″ x 12″

Pink 8″ x 20″

Piece together using 1/4″ seams, press

Try to place the pieces like this – it’s just rough background to quilt then cut the stocking from.


quilted christmas stocking 2


Using Spray n Bond spray basting (or pins) baste the fabric on a scrap of cotton batting – I love projects like this that use batting scraps!

quilted christmas stocking 4


Quilt as desired – I sewed loop de loos.

Print the pattern out (here).  It’s in 4 pieces.  Assemble them together like this.  I added some dotted lines to help with matching up each piece.  Don’t laugh at how rough my pattern is, it’s the middle of December and who has time for perfection!!  Cut out the pattern.

IMG_2299_2

Next, pin the stocking pattern to the quilted piece and cut out.  If you want the stocking a little larger, cut out 1/4″ away from the pattern and the finished stocking will be the size of the pattern.  Just make sure to cut the same for the lining.quilted christmas stocking 5


You can add some lace embellishment if you want.  Choose a font you like and print it in reverse on the EZ print sheets, or print in reverse and draw onto the Heat n Bond appliqué paper.  Press the letters to the wrong side of the white fabric.  Cut out each letter.  Peel off the backing and press into place.  It’s always a trick to get the letters to fit – I like to make them as big as I possibly can.  Top stitch in gray thread.
quilted christmas stocking 6


Here is a close up of the letters.  You can see my white fabric has a little silver detail in it!quilted christmas stocking 18

Now do the same process with the back of the stocking.  Only remember the stocking will be opposite.

quilted christmas stocking 7


Instead of cutting the stocking out again and trying to match it, I pinned the appliquéd part to the newly quilted piece, matching the seams along the sides.  Sew using 1/4″ seams all the way around the stocking leaving the top open.  Cut around the seam.quilted christmas stocking 8


For the lining of the stocking, cut the same pattern out of a coordinating cotton (2).  Sew right sides together all the way around the stocking.quilted christmas stocking 9


Prepare the fur cuff.  Cut the fur 18.5″ x 11″quilted christmas stocking 10


Fold it in half fat ways, right sides together and sew about 1/2″seam along the side:quilted christmas stocking 11


Turn the cuff right side out like this:
quilted christmas stocking 14


For the stocking holder, cut a strip of fabric 10″ x 3″.  Folding in half lengthwise with right sides together, sew 1/4″ seam and turn right side out.  Press the seam in the center like this:quilted christmas stocking 13


This is how it will look from the outside:quilted christmas stocking 12


Place the stocking lining inside the stocking, just how you want it to look, with the right side of the lining facing out.

Baste the stocking holder by bringing both raw edge ends together and pin it inside the stocking centering on the seam.  Sew about 1/8″ to keep it in place.quilted christmas stocking 16

Next, place the cuff inside the stocking & lining, aligning all raw edges:

quilted christmas stocking 17


Pin all the way around matching the seam in the cuff with the side seam in the stocking.  Sew 1/4″ to 1/2″ seam all the way around using a walking foot – it gets pretty thick by the seams but it will work.  Turn the cuff right side out and it’s done!  Kind of magical!!quilted christmas stocking 23

quilted christmas stocking 21

quilted christmas stocking 20

quilted christmas stocking 1

Jar Lid Applique Christmas Ornaments

tree ornaments

I love Christmas ornaments and every year I try and come up with a new ornament to make.  These are my favorite so far!!   These make great little gifts and they can be personalized! Using the Therm o Web Iron-On Transfer sheets you can print any word you want and iron it onto the ornaments. 

christmas tree applique ornament 9

christmas tree applique ornament 7

christmas tree applique ornament 8


On this one I added some clear glitter to the jar lid by painting it with Mod Podge and dusting it with glitter.  I LOVE clear glitter!  I could clear glitter my entire home!  It gives such a warm yet sparkly feel!IMG_2055_2


Supplies:

Wide mouth mason jar lids

5″ square background fabric

5″ square Therm o Web HeatnBond® Fusible Fleece

Small pieces of green fabrics and brown fabrics

spool of ribbon

button

Heat n Bond® EZ print Transfer Sheets

Heat n Bond® EZ Pressing paper

Tree Pattern, click HERE

Words, click HERE

Piece of Christmas card stock cut into a circle the exact size of the jar lid

Begin by cutting a 5″ square of background fabric and fusible fleece.  Fuse the fleece to the wrong side of the background fabric.  This gives the fabric a little stability and softness.

christmas tree applique ornament

Print out the tree patterns and roughly cut them out and iron them to the wrong side of the tree and trunk fabrics.  Cut on the pattern line, peel off backing paper.

christmas tree ornament 1

Center the tree on the background fabric and press into place.

christmas tree applique ornament1

Top stitch around the tree and trunk three times in black thread.  I like the stitching to look “sketchy” but it’s hard to not sew along the same line each time – you need to purposefully not follow the pattern.

christmas tree applique ornament2

Print out the words in REVERSE on the EZ Print Transfer Sheets for light fabric.  Cut around the words and heat set in place.  Let cool then peel off the paper.

christmas tree applique ornament 3

christmas tree applique ornament 4

Punch 2 holes in the mason jar ring – I used a crop-a-dile.christmas tree applique ornament 5

Thread the ribbon through and knot it in a loop.  Cut a second piece of ribbon and tie a bow.  Center the design and push through the mason jar ring.  Trim off excess and hot blue into place.  Hot clue excess fabric down and glue all the way around the inside as pictured below:christmas tree applique ornament 6

Place the card stock circle in the back to cover the mess!

christmas tree applique ornament 8

Hot glue the bow to cover the holes.  Finished!  Now go make one for all your friends!!!
I sewed a button to the top of this tree.  You could easily sew buttons to each tree or add other embellishments.  I love being able to add a word to a fabric craft!  I’m off to make more – think cats, owls, gingerbread men, and birds!


christmas tree applique ornament 10